
J11
-
Posts
519 -
Joined
-
Last visited
Content Type
Profiles
Forums
Gallery
Events
Everything posted by J11
-
 Nice progress on her.
 -
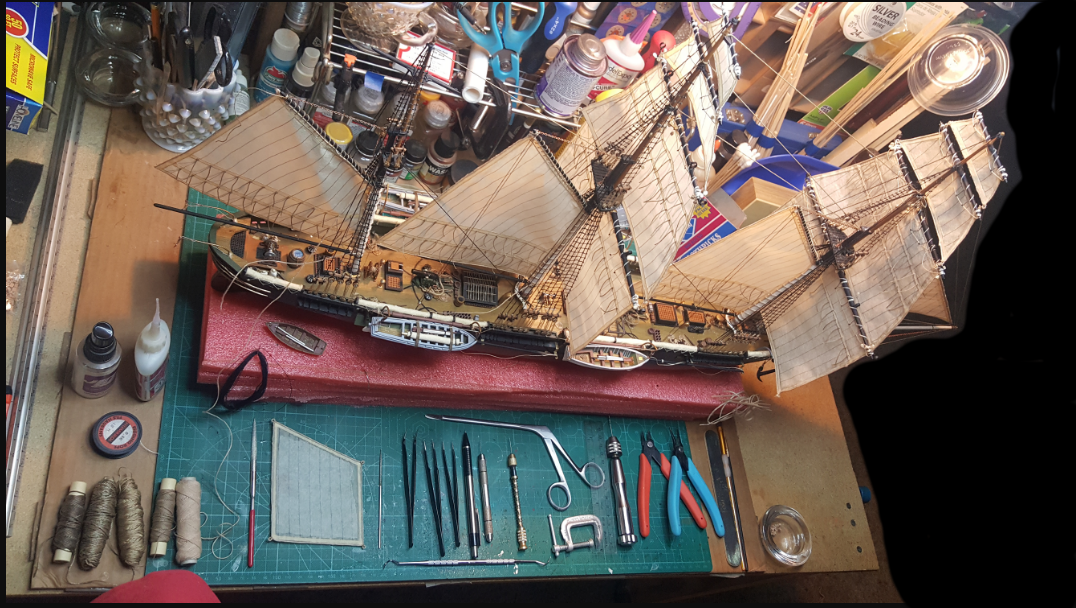
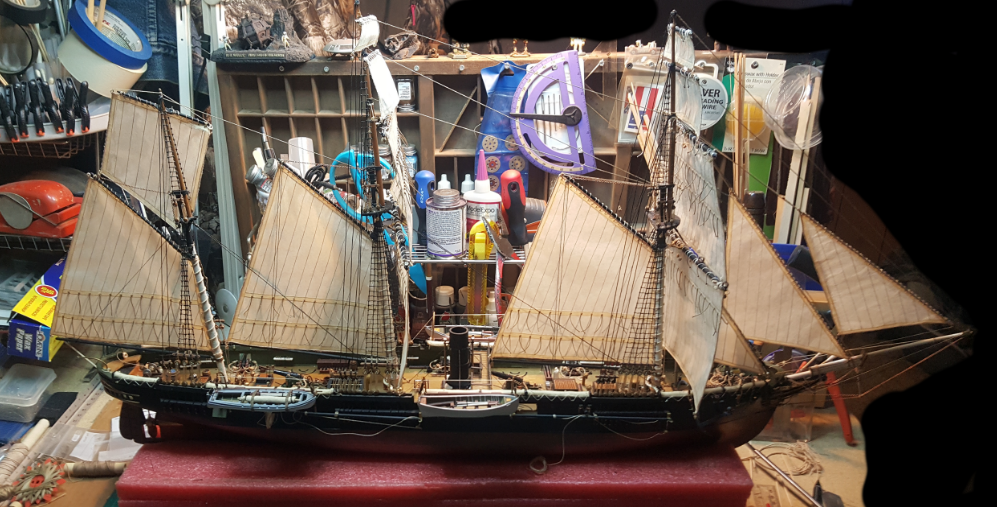
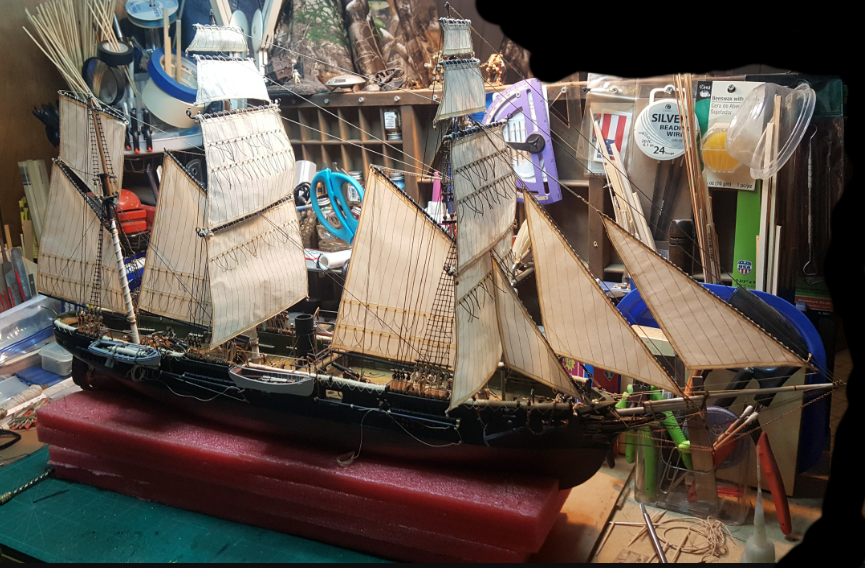
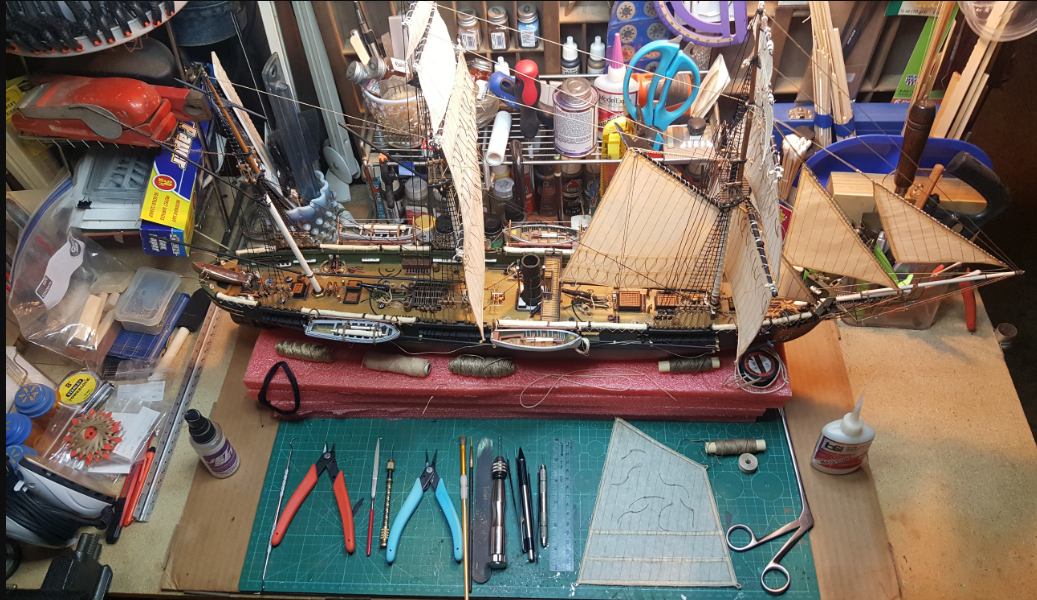
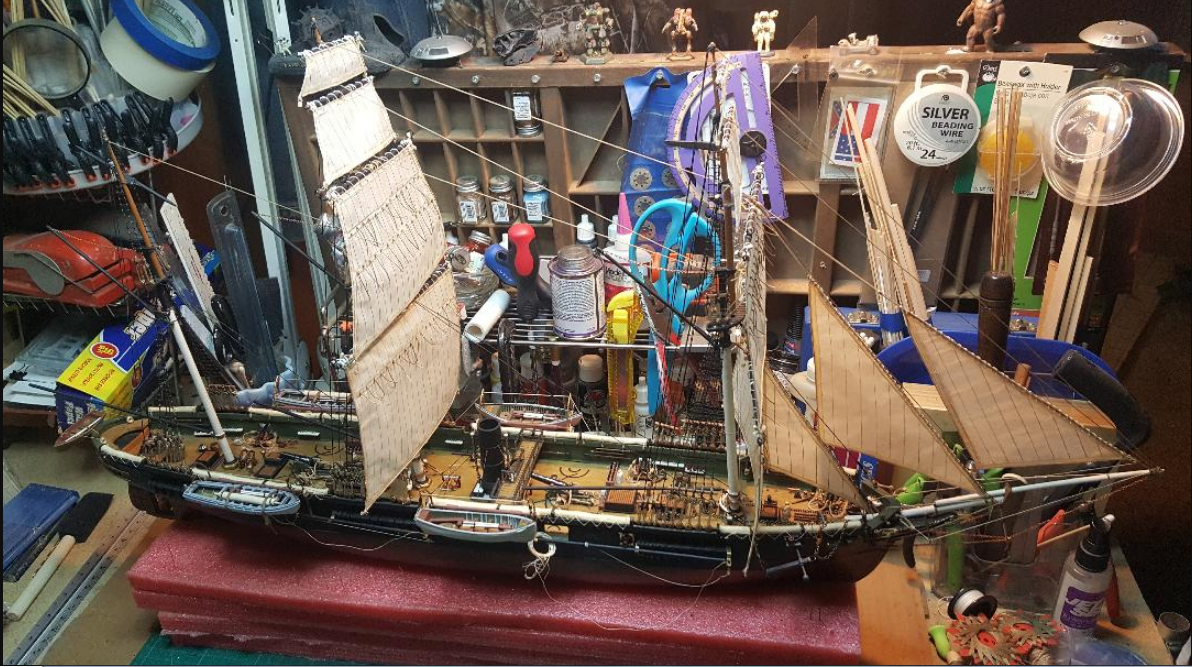
Good morning, More progress images, will be rigging for the next week or two. I'll start the boom sail work probably next week for the drafting table and individual sail builds. I have to finish all inside rigging completely so I can work the boom sail rigging threw them for placement. This rigging process will be a little slow as not to damage any more parts or piece's, plus I will be using different color rigging for enhancement. I'll post more images when I'm close to completing the rigging, so far she's looking like a civil war ship! I'll also be ordering special printed flags for her, possible five of them but I need a little bit more research to determine.
- 383 replies
-
- 12
-

-
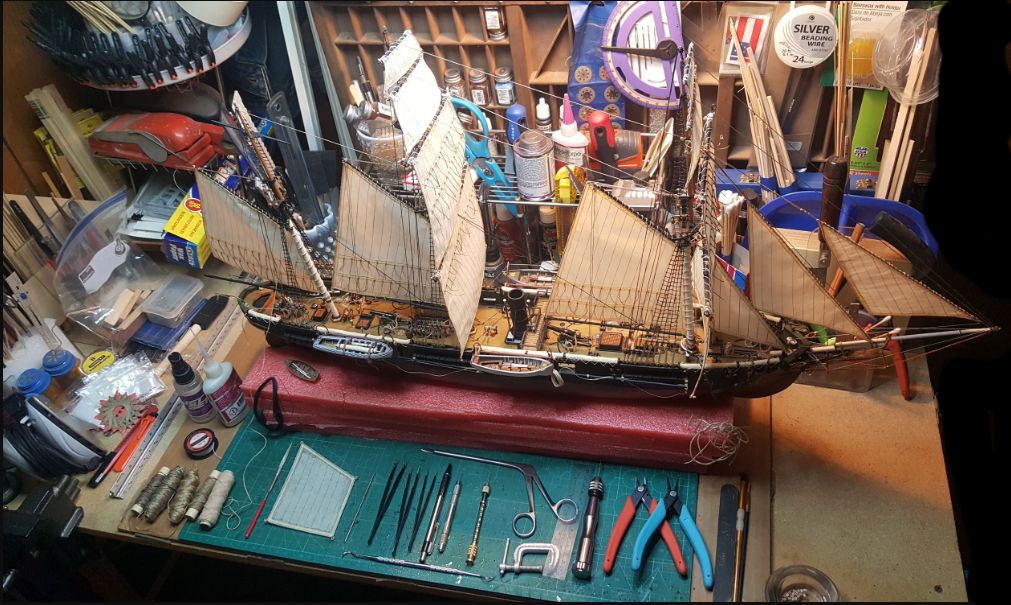
@EJ_L, @DanielD, @popeye the sailor, thanks for all the compliments and likes gentlemen. So far she is holding together with; believe it or not, a tighter torque on the front mainstay. Was pleasantly surprised at the mainstay tightening which also straightened out the mainstay yard better when I worked to fix another breakage. But that's the max I can do on utilizing the rigging as a stronger support base and any more and she will explode in many piece's. I'll have some images tonight later on as my camera is a charging. I'll finish up on the sails I have made by tomorrow and then start all the other rigging with tweezers and rigging tools and watching my hands as I weave threw all the yards, masts and detail piece's in the way for tie downs. One decision on the rigging is the color for definition and enhancement of colors for her. Either white to really accent the rigging or tan to golden brown or possibility of using them all. Been pondering for awhile on it and am open to suggestions. Once the rigging is in place it will stay , no turning back or redo's as would be a dangerous operation for this fragile model. Then to work on the boom sails a making, heading into the final completion phase of this rascal and immediately put on the mount board then under glass. Then image's of final finished model and on the model shelve she goes ...woo hoo! I'll be drunk finishing night so no phone call's please. So I am almost there. One interesting item is the rigging placement as I am using three to four different sets of plans to finish the rigging off. Bluejackets plans, Revell's plans, and also older Alabama plan's from A.J Fisher; ( Michigan) along with builder, Captain, and plans book by Summersell; to rig this baby out right. Plus some historical wood cut images for reference and paint finish detailing. Pictures soon.
-
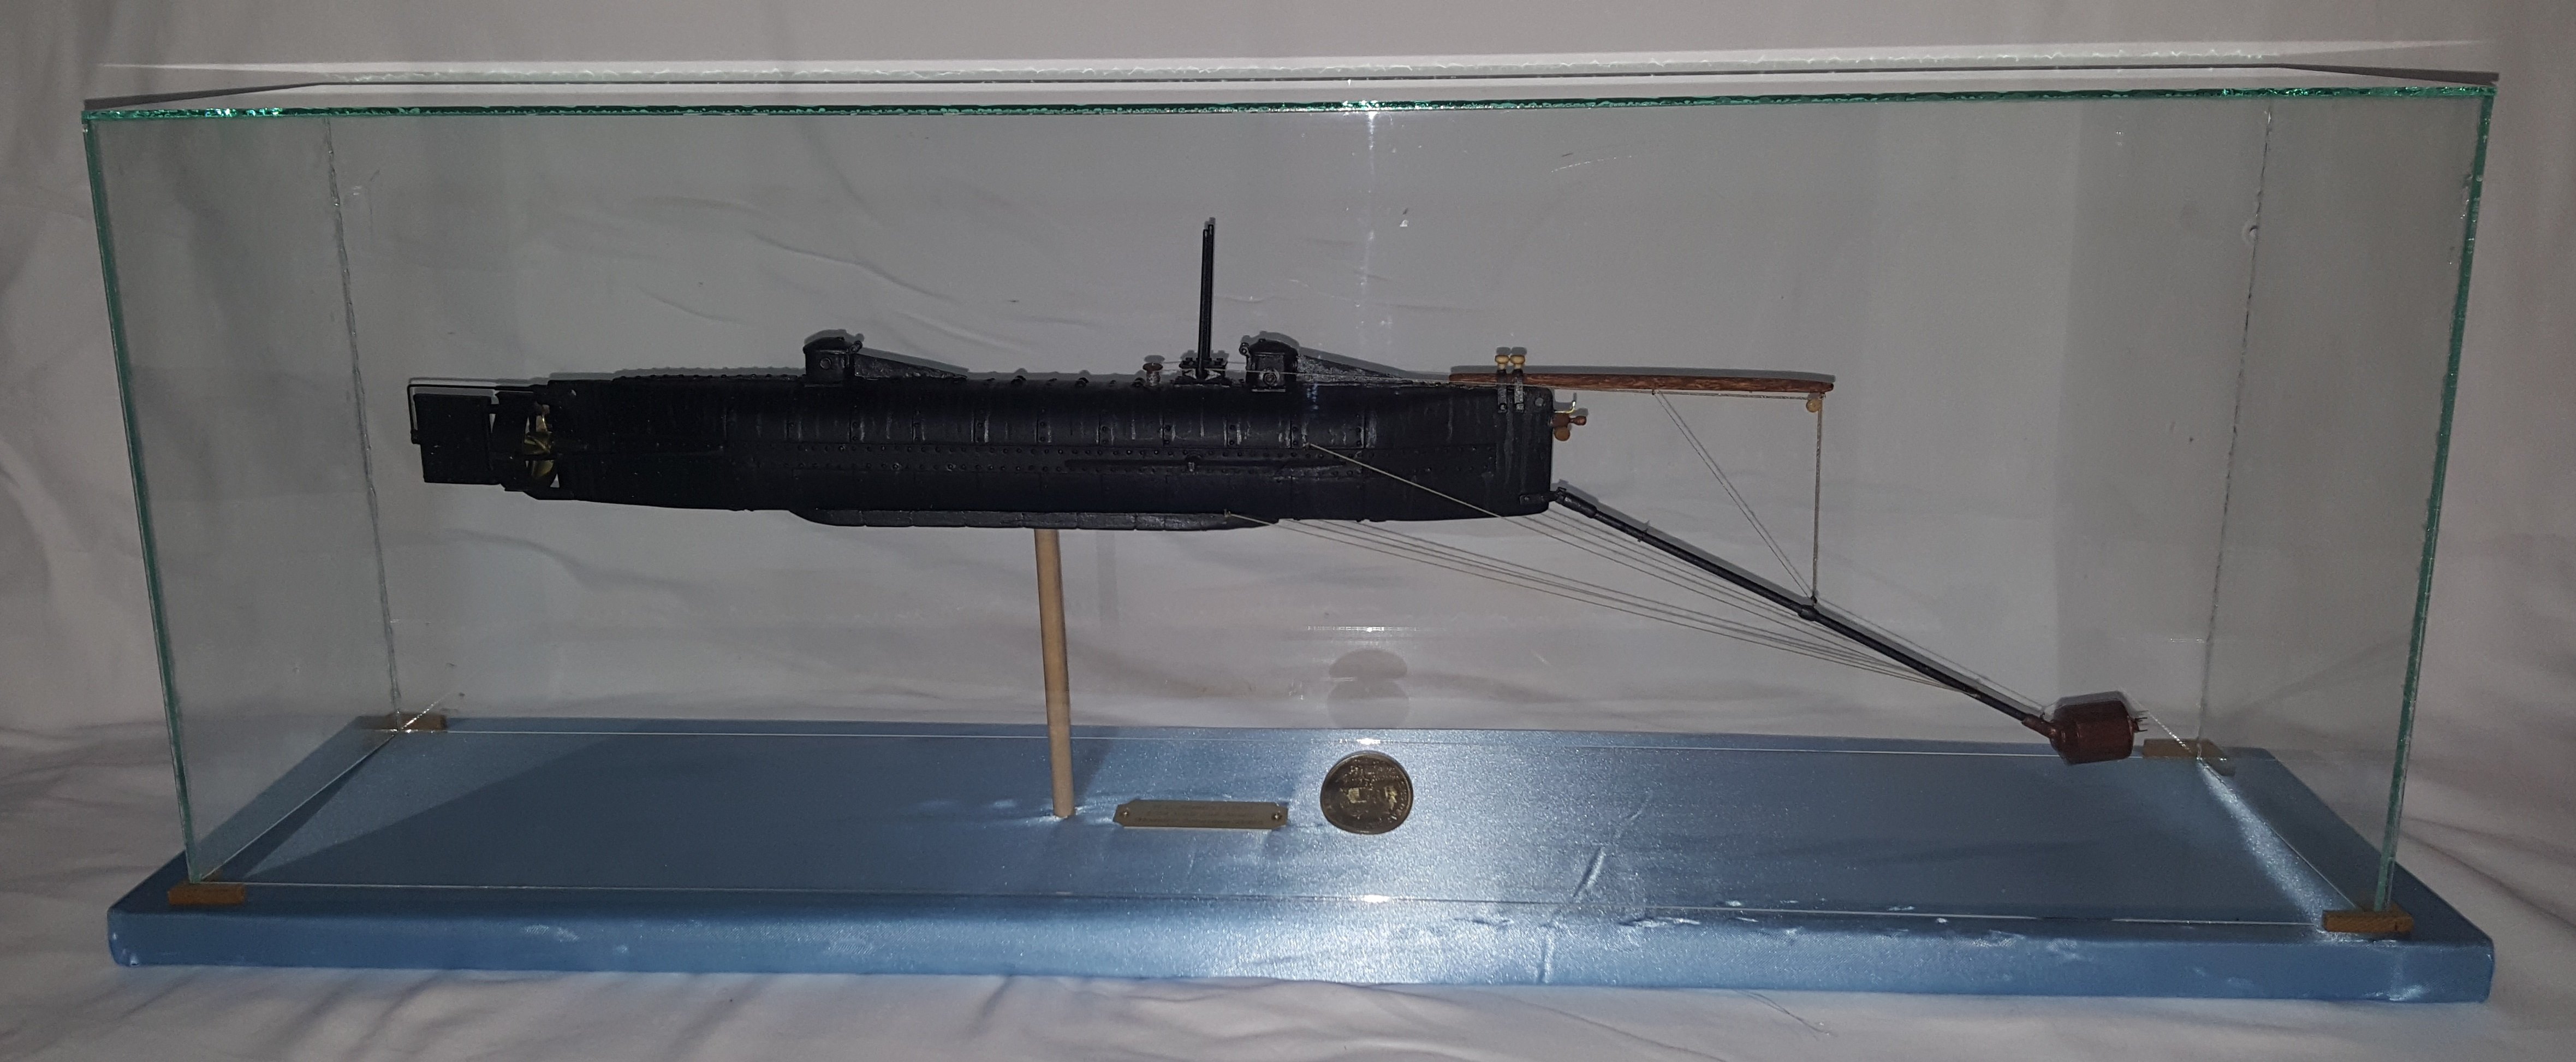
Yves: an inspiration to us all to detail our sub models! Congratulations! Maybe one day we might see you build out a US Gato sub the same way. Really enjoyed you're historical research along with implementation in detailing work.
-
Hello BeeWee, welcome on board to MSW! Your choice in air brushes kinda depends on your budget, there are many to choose from. Look around in "Painting, finishing and weathering products and techniques" blog and post your question there. Many on board will help along with quality answers. Post your build on a new blog also, so we all can see your craftsmanship and follow along. Look forward to seeing your build.
-
tomwiberg, I would be very interested in the Kearsarge model. My personal email is POA@tutanota.com, holler at me and let me know what you would like for her?
I am now doing the CSS Alabama at a highly detailed level and have been thinking of finding the Kearsarge and do the same. I going to assume the kit is in a good condition, not really worried about the box just contents.
Thanks for your time and offer!
Jonathan

-
Looking for plans or possible models of Magellan's ships.
J11 replied to J11's topic in Nautical/Naval History
@Louie da fly, wow that's some hunting down information. I first thought along the same lines as the ship being much larger also. Then going over the video and it's information as how they used historical barrel measurements of the time to compute the basic dimensions of the ship I understood it was a smaller size ship. But I would love to one day build a huge Super-Carrack style ship as some of the historical paintings and line drawings show. What a masterpiece that would be! Now to talk my sweetie into a thousand dollars worth of specific modeling wood. :-) -
Welcome Randy, great to have another modeler come on board!
-
Looking for plans or possible models of Magellan's ships.
J11 replied to J11's topic in Nautical/Naval History
@Louie da fly, appreciate your input on the Museo Naval model. Here's a closeup of the rear of the model, and if I am following you right it would still need to be more rounded than what is shown? Then here's the S.M. model: Which has a small amount of difference. Using the two I still am leaning toward this model for a reference guide incorporating the Museo Naval model. Basically using the hull design as a template below. Your two points as illustrated help in understanding the differences around the forecastle. I have contacted the Museum and have gotten back an application wanting some very personal information which I will not be sending them for security reasons. But thanks to @Peregrino and his flicker images of the model I feel I have enough data to start a preliminary set of plans in the future. Plus the video he posted also provided some excellent reference's on how they determined their model representation. Plus @woodrat work from his blog (Thanks for posting) gives an excellent reference on how to tackle this new model representation and get it a little closer to historically accurate as possible from today's information. Those rounded hull's are very unique and beautiful in design during that time period; I can see how they would hold up to long ocean voyages for such a journey as Magellan had accomplished. So in the future I'll start drafting out the hull plan a section at a time then post them when I have a fairly accurate workable plan. It will be awhile and in the meantime I'll continue to look for more references also. Many thanks to all whom have contributed to my request.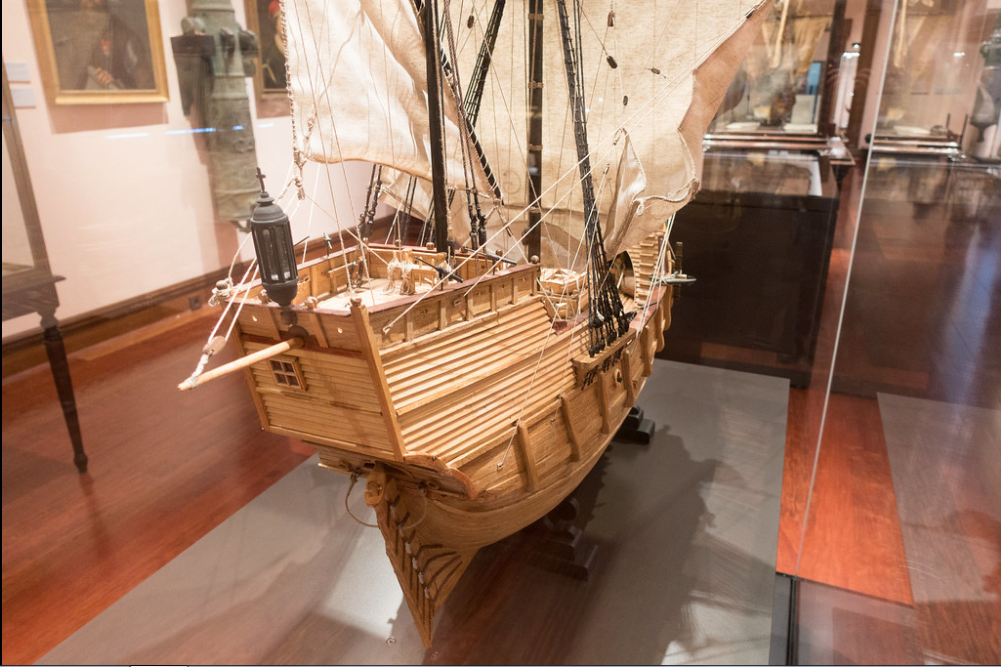
-
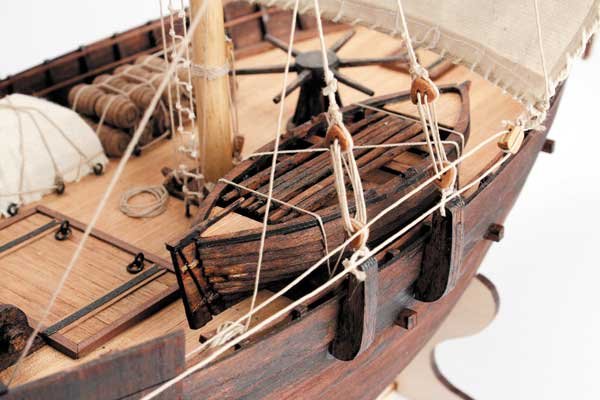
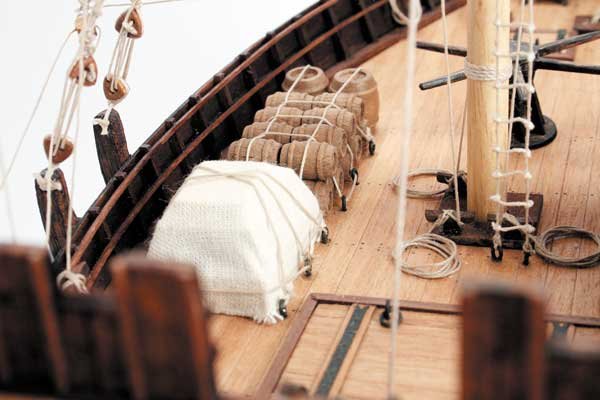
Here's a couple of reference images for barrel tie downs: You've done a wonderful build, been enjoying the blog.

-
Many thanks, yep with this one it's 1 step forward 5 steps back. As we all know precise work with big hands does cause problems sometimes and that's my main problem along with weak old plastic. I was encouraged with the rigging at first as all went well and tight, now I'll definitely have to be real gentle with the future rigging. I'm also concerned about the boom sails as the yard mounts don't seen to be strong enough for me to mount them so I'm thinking of beefing up those mounts when they are added, just have to see how the rigging with the mounts will work in strengthening. I should have just made all the booms and masts out of wood and probably wouldn't have had this problem. Oh well that's what you get sometimes with a antique kit from the 70's.
-
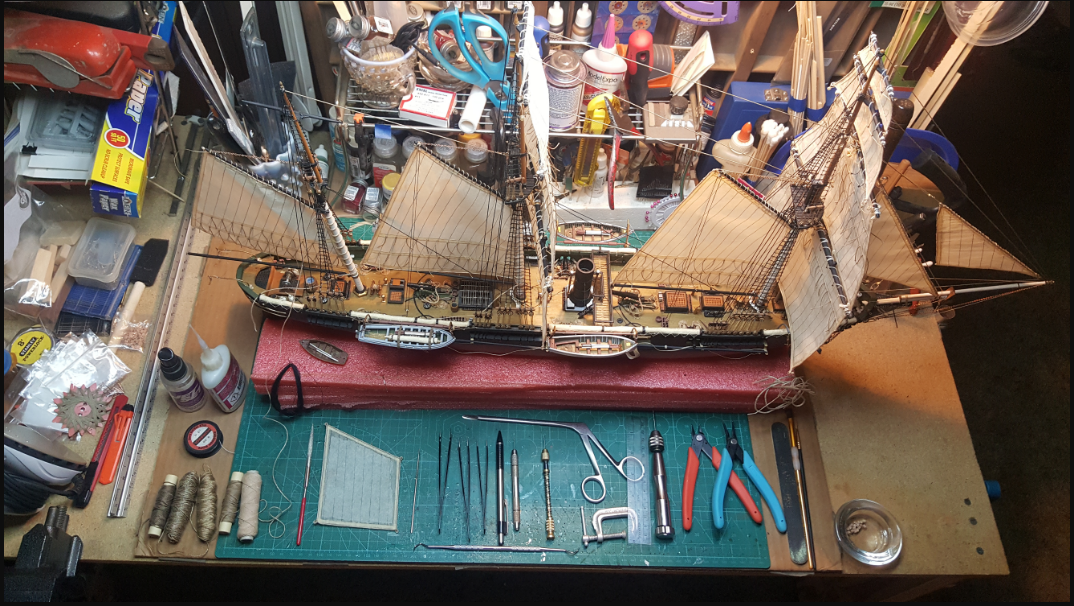
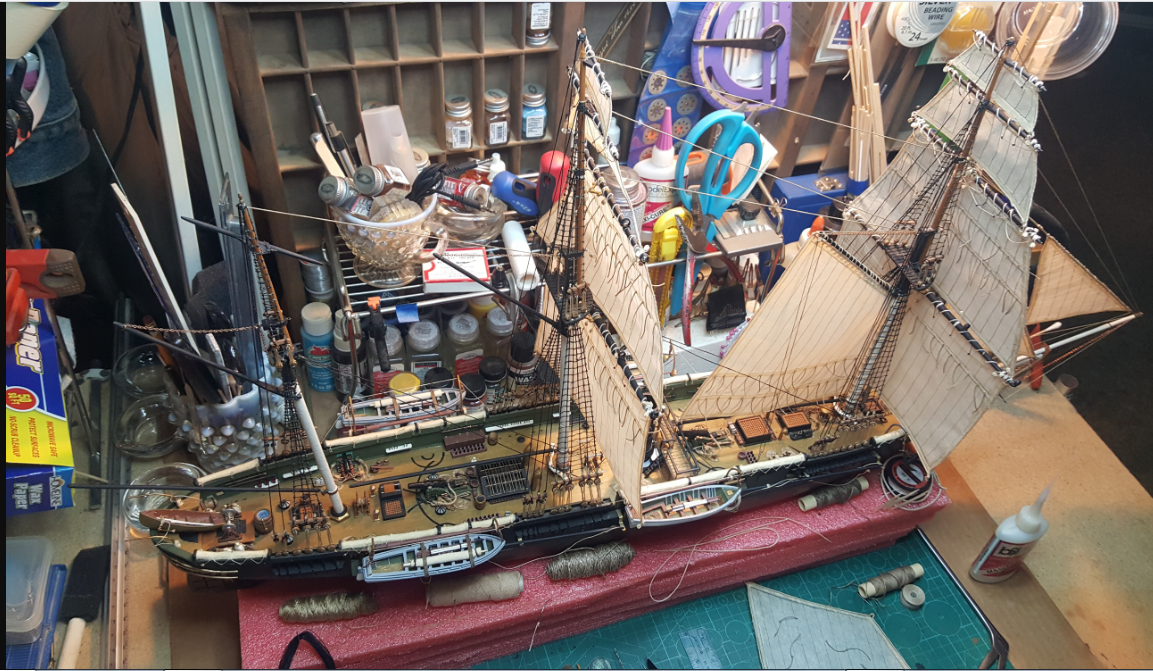
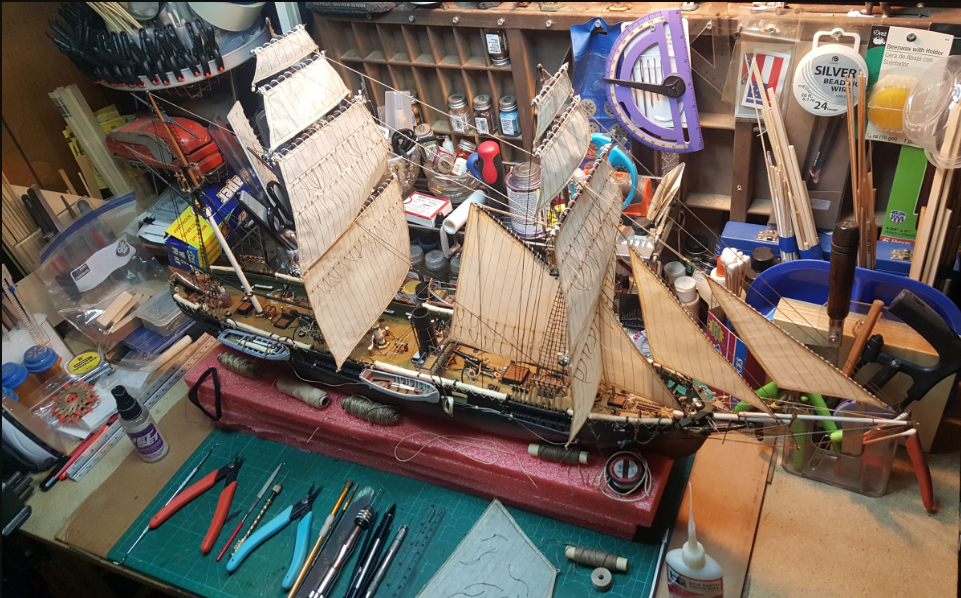
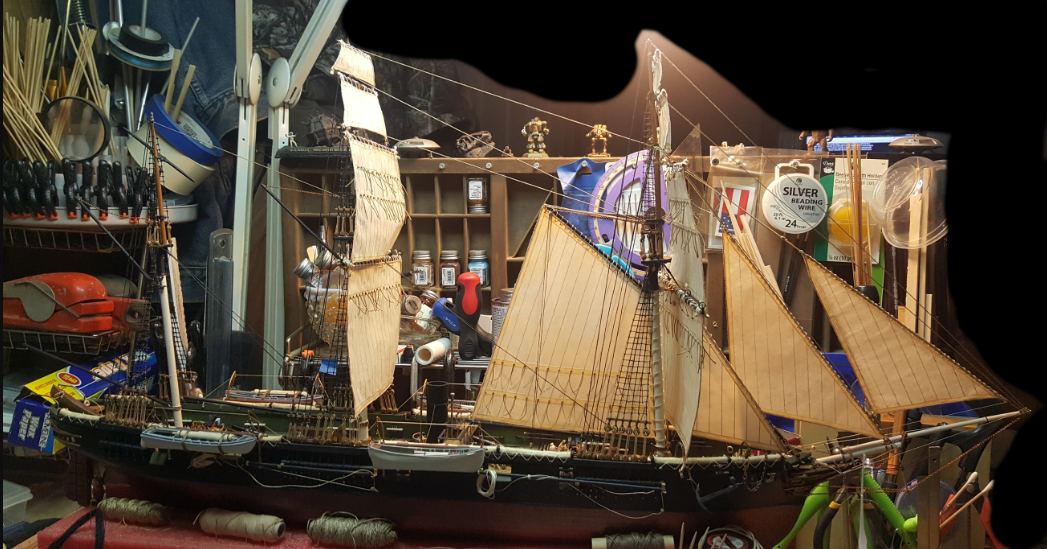
I have a success in repairing and will have to be very careful with the boom sail installs to make sure I don't break anymore parts. A couple of small repairs need to be finished but the central fore mast boom gaff sail is finally installed. Here's some images after repairs and another sail installed. I'll be working on the main mast gaff sail today also and might have some images by tomorrow. Plus doing some minor repairs, glad I have the Maxi cure glue as this is whats really helping in repairs, I'll have to do touch up paint after awhile to hide some repairs, and blend them in.
-
Sadly, what I am trying to do with this older plastic kit is almost impossible. The fragile plastic pieces incorporated with wooden pieces held together fairly well with just a few mishaps. But when sewing the sails onto the yards and masts it has broken in three major places along the mast and the yards. If someone in the future want's to do this to the plastic kit as I have done, I don't recommend it at all. Work with a wooden CSS Alabama kit which will be much stronger to work with than older fragile plastic piece's. I won't give up on this assembly, as I am now working very carefully to repair the broken parts and will have some images of the completed sail which has caused the breakage, but it will take many more hours of careful assembly to get this section done. Hence why I have not uploaded anymore images in the past few days. I have completed one major repair and waiting for other piece's and parts to dry before I attempt to repair the broken yard and mast attachment areas again. So
-
Looking for plans or possible models of Magellan's ships.
J11 replied to J11's topic in Nautical/Naval History
Alejandro, great post and very informative video. Again, thanks for posting this information which give's an excellent insight to the ship along with how they were able to surmise construction of the model. Can be easily converted to English subtitles for those interested and I highly recommend the part 1 video on Magellan's ship model. -
Looking for plans or possible models of Magellan's ships.
J11 replied to J11's topic in Nautical/Naval History
@Peregrino, many thanks for posting the flicker link. Fantastic you imaged so many pictures of her and help tremendously! Do you know of any plans there at the museum for Magellan's ship?? -
WOW!!! Extraordinaire!! Congratulations on a job well done.
-
Looking for plans or possible models of Magellan's ships.
J11 replied to J11's topic in Nautical/Naval History
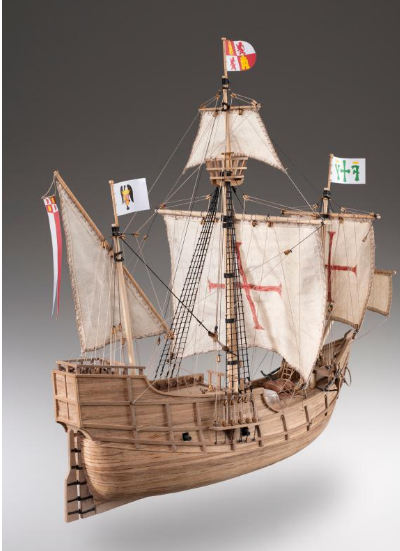
Here's a complete image of the model: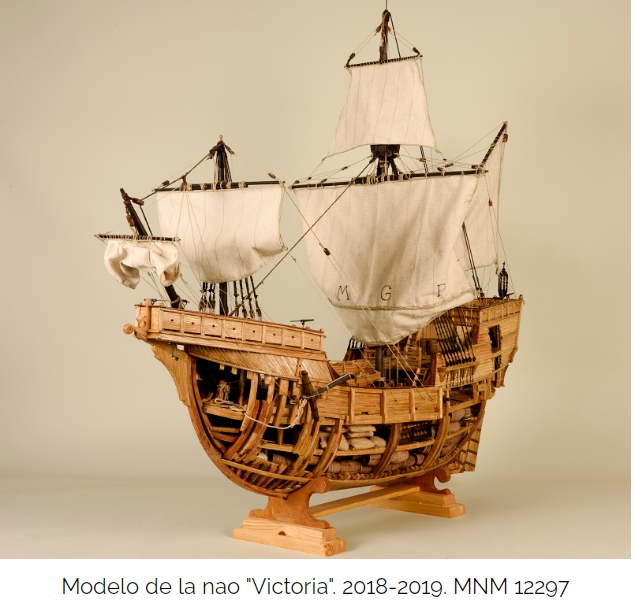
-
Looking for plans or possible models of Magellan's ships.
J11 replied to J11's topic in Nautical/Naval History
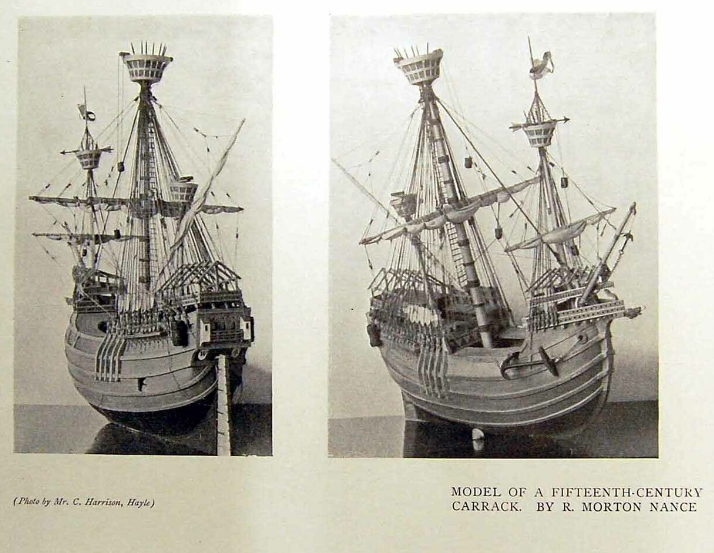
I have found this image from: https://armada.defensa.gob.es/html/estatico/HISTORIA_DE_LA_ARMADA_WEB.pdf From what Spanish I know it seems to say a actual model of Magellan's ship. Can someone translate the complete image?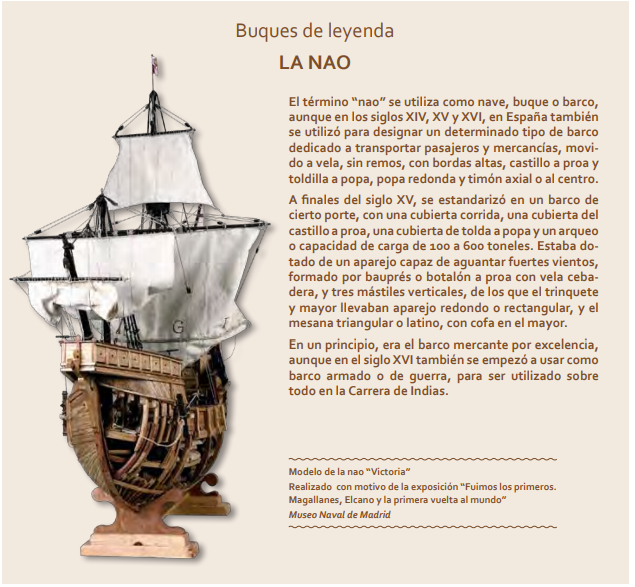
-
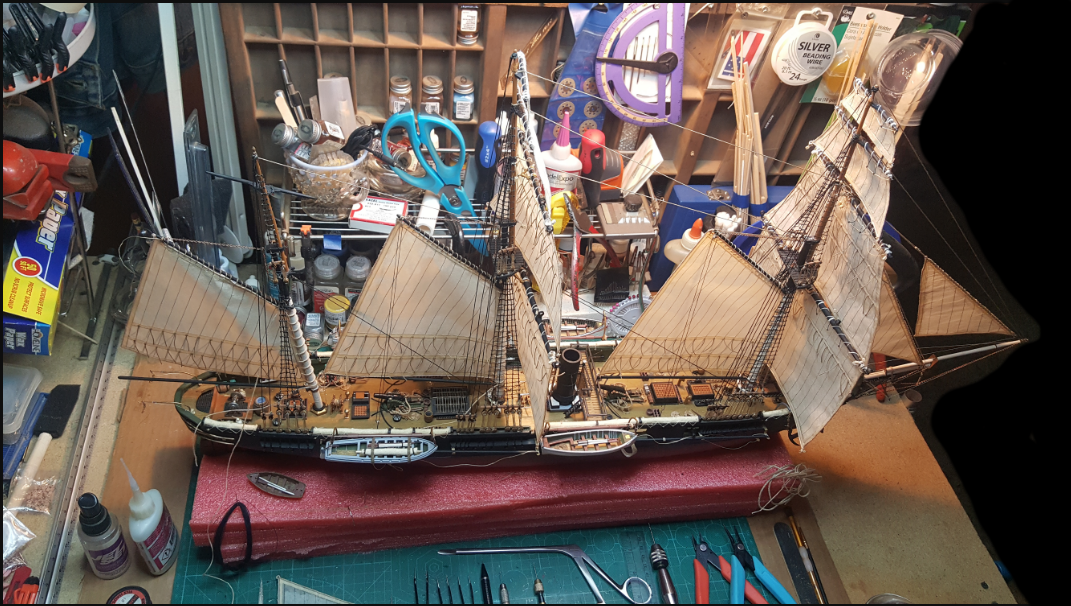
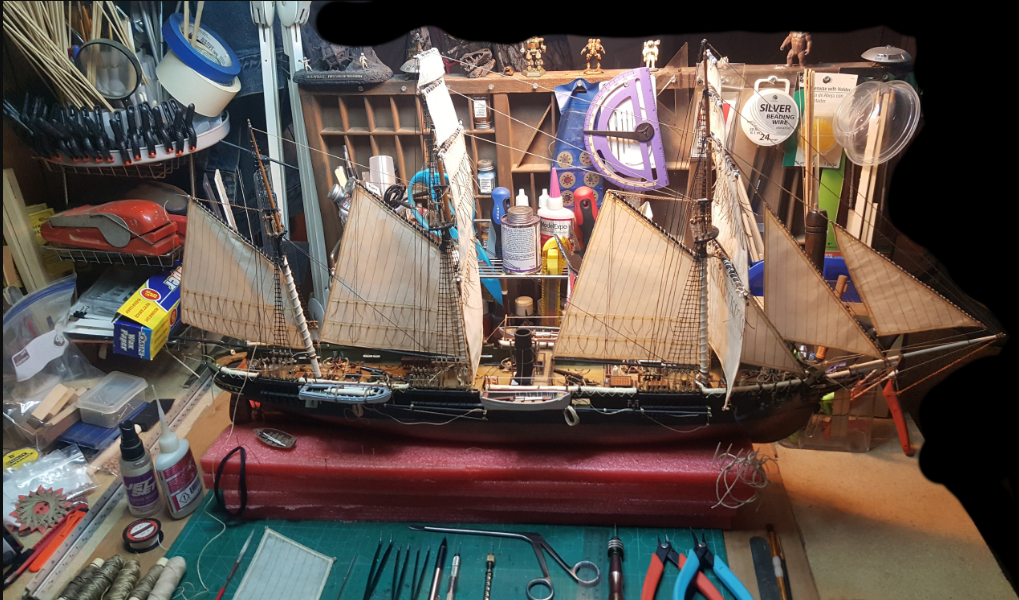
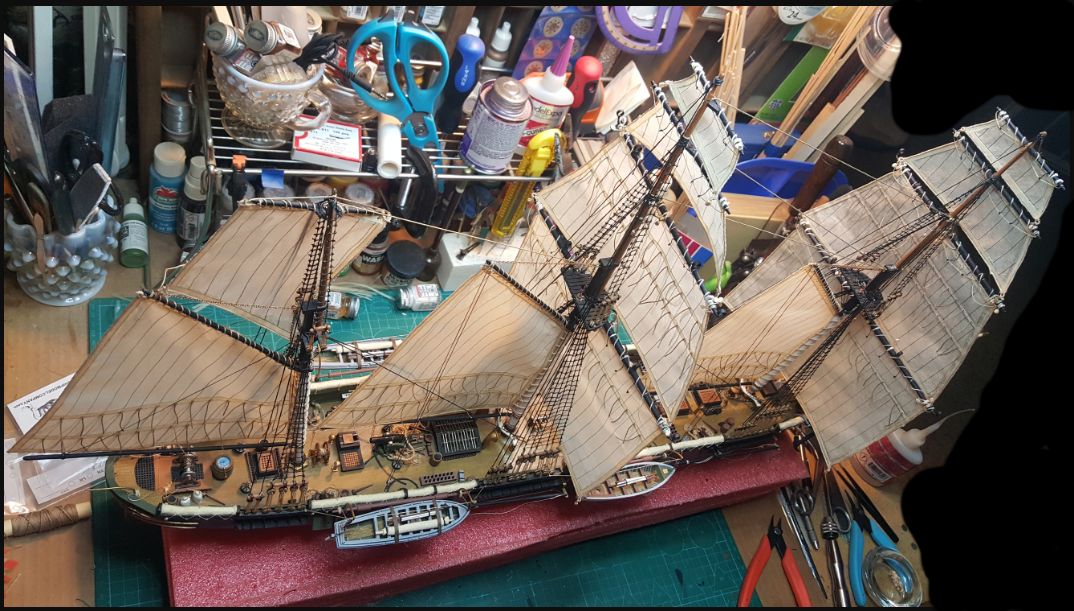
Been having trouble with personal emails but have gotten around the problem for now. These images were suppose to be posted last night but failed coming threw my files on emails. So a couple more images of the front sails installed with better detail:

-
@Gahm, thanks glad you like them. Not to shabby for a first timer. Many hours have gone into putting them together along with research to try to get them as historically correct as possible. The trick is going for the rigging placements as this will be a surgical operation to intertwine proper placement along with block mounting threw all the tiny block holes without damaging the model. Will probably slow down to a crawl to get these right when I start. Luckily I feel I have all the tools I need to get er done. Might have some more images later on today. Thanks for all the likes and interest everyone!