HOLIDAY DONATION DRIVE - SUPPORT MSW - DO YOUR PART TO KEEP THIS GREAT FORUM GOING! (Only 20 donations so far - C'mon guys!)
×

J11
-
Posts
519 -
Joined
-
Last visited
Content Type
Profiles
Forums
Gallery
Events
Everything posted by J11
-
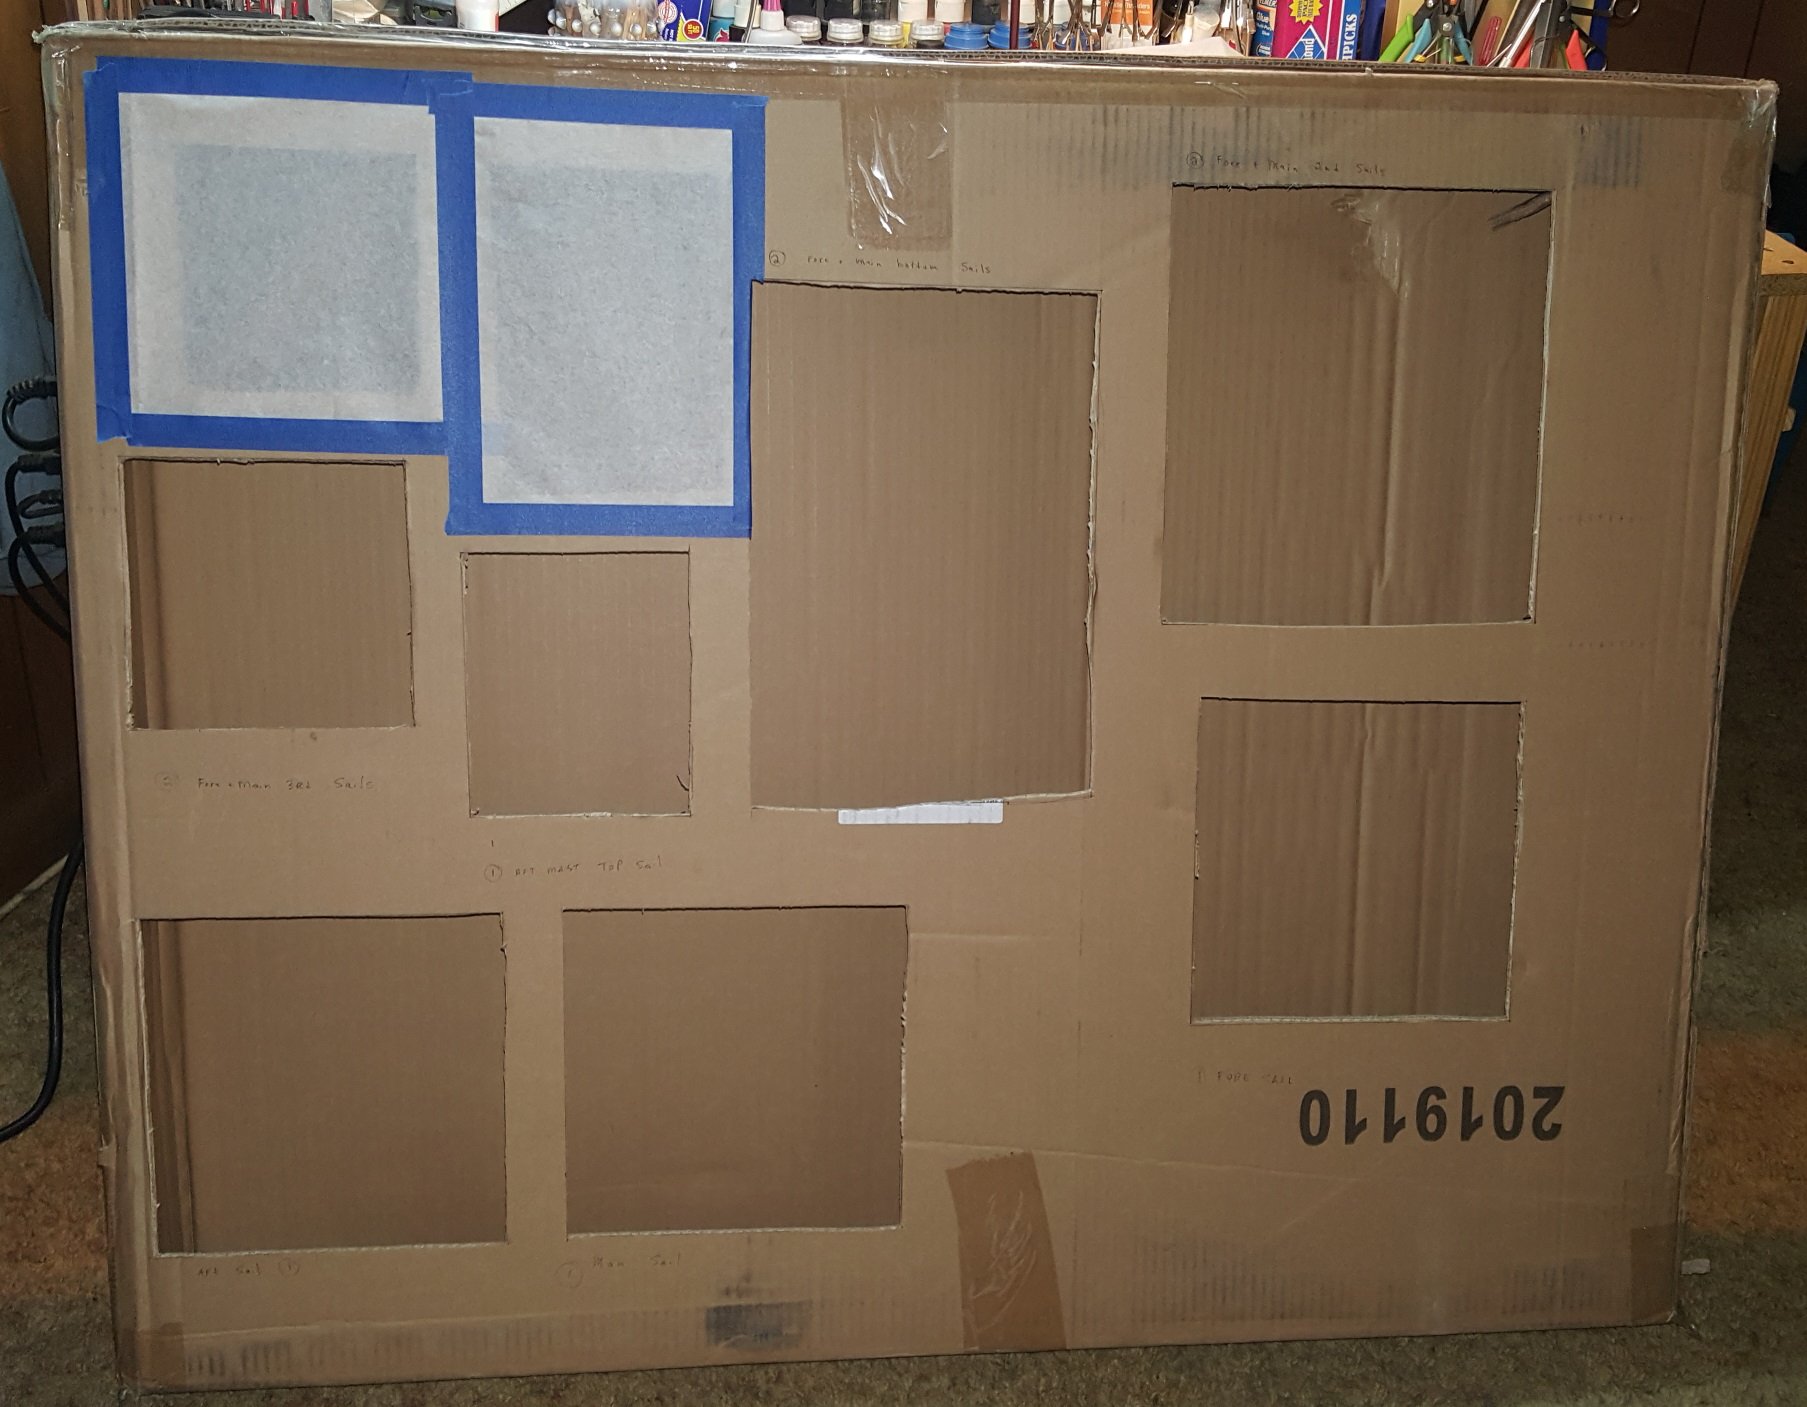
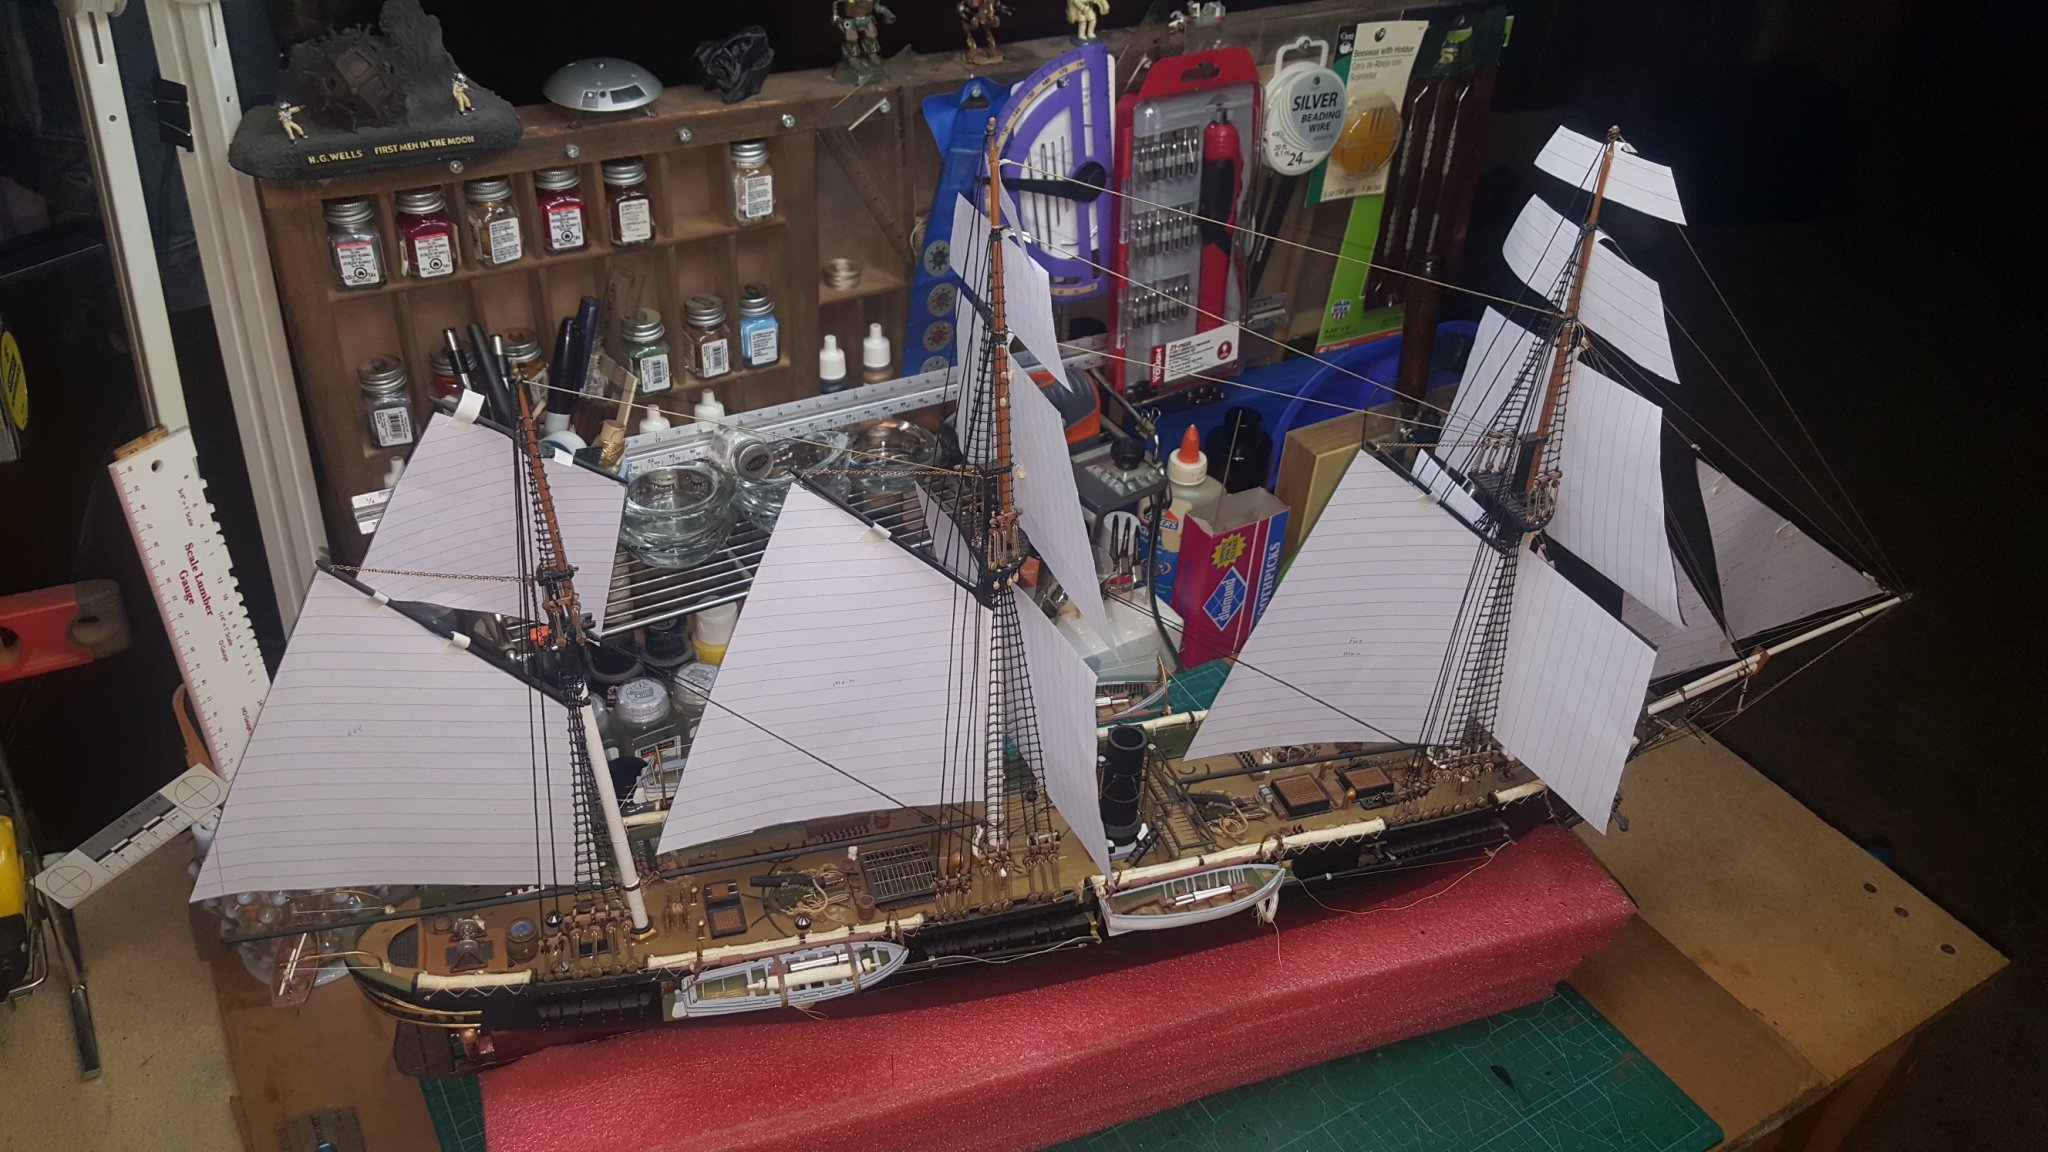
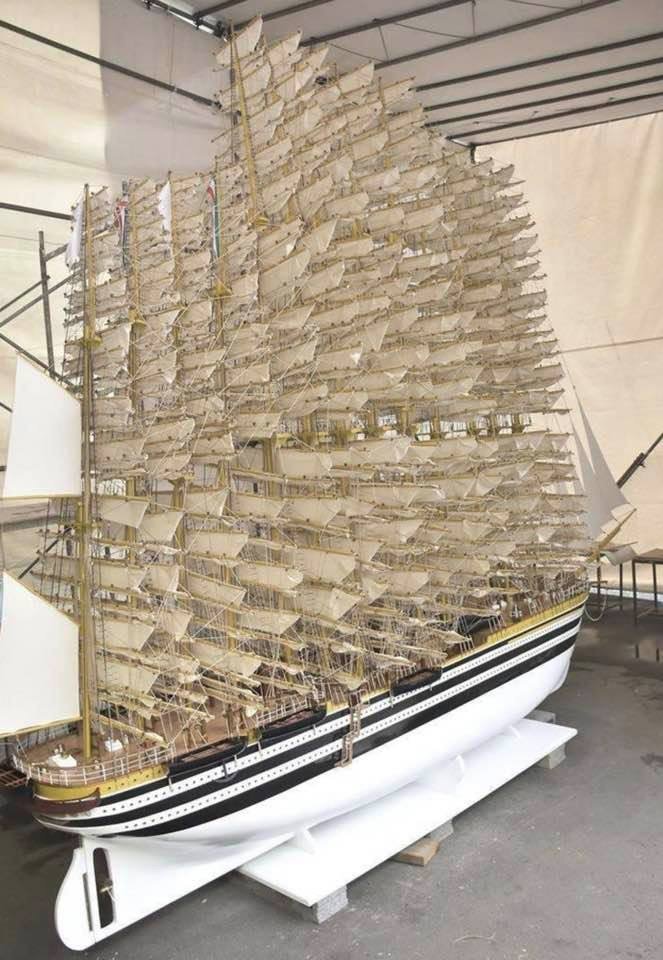
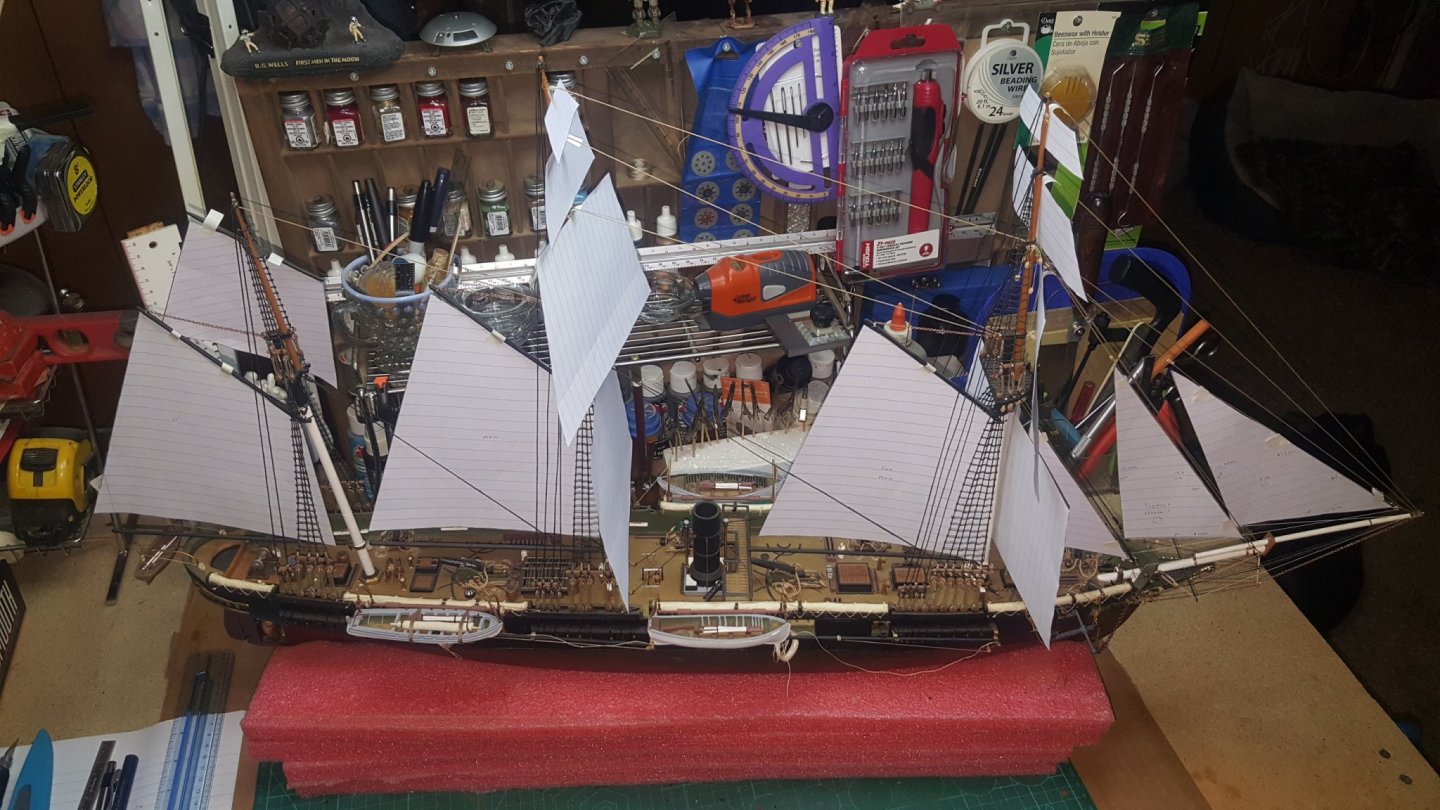
 Working on sail prep so I can paint up to fifteen at a time to save time. Had a large cardboard box and was able to fit fifteen of the sails onto it. A few double up and triple up for sails when I cut out the shapes per my templates. I'll post a couple more image when I have all the holes prepped, then when finished painting. The video below is the way I will assemble them, seems the easiest and fastest way to do them since I have twenty-five to complete. Here's the prep box: Nic with Bluejacket posted this on their blog and represents how I feel putting all of these sails together: (Satire image) So it begins.....Stay tuned more coming soon.
- 383 replies
-
- 10
-

-
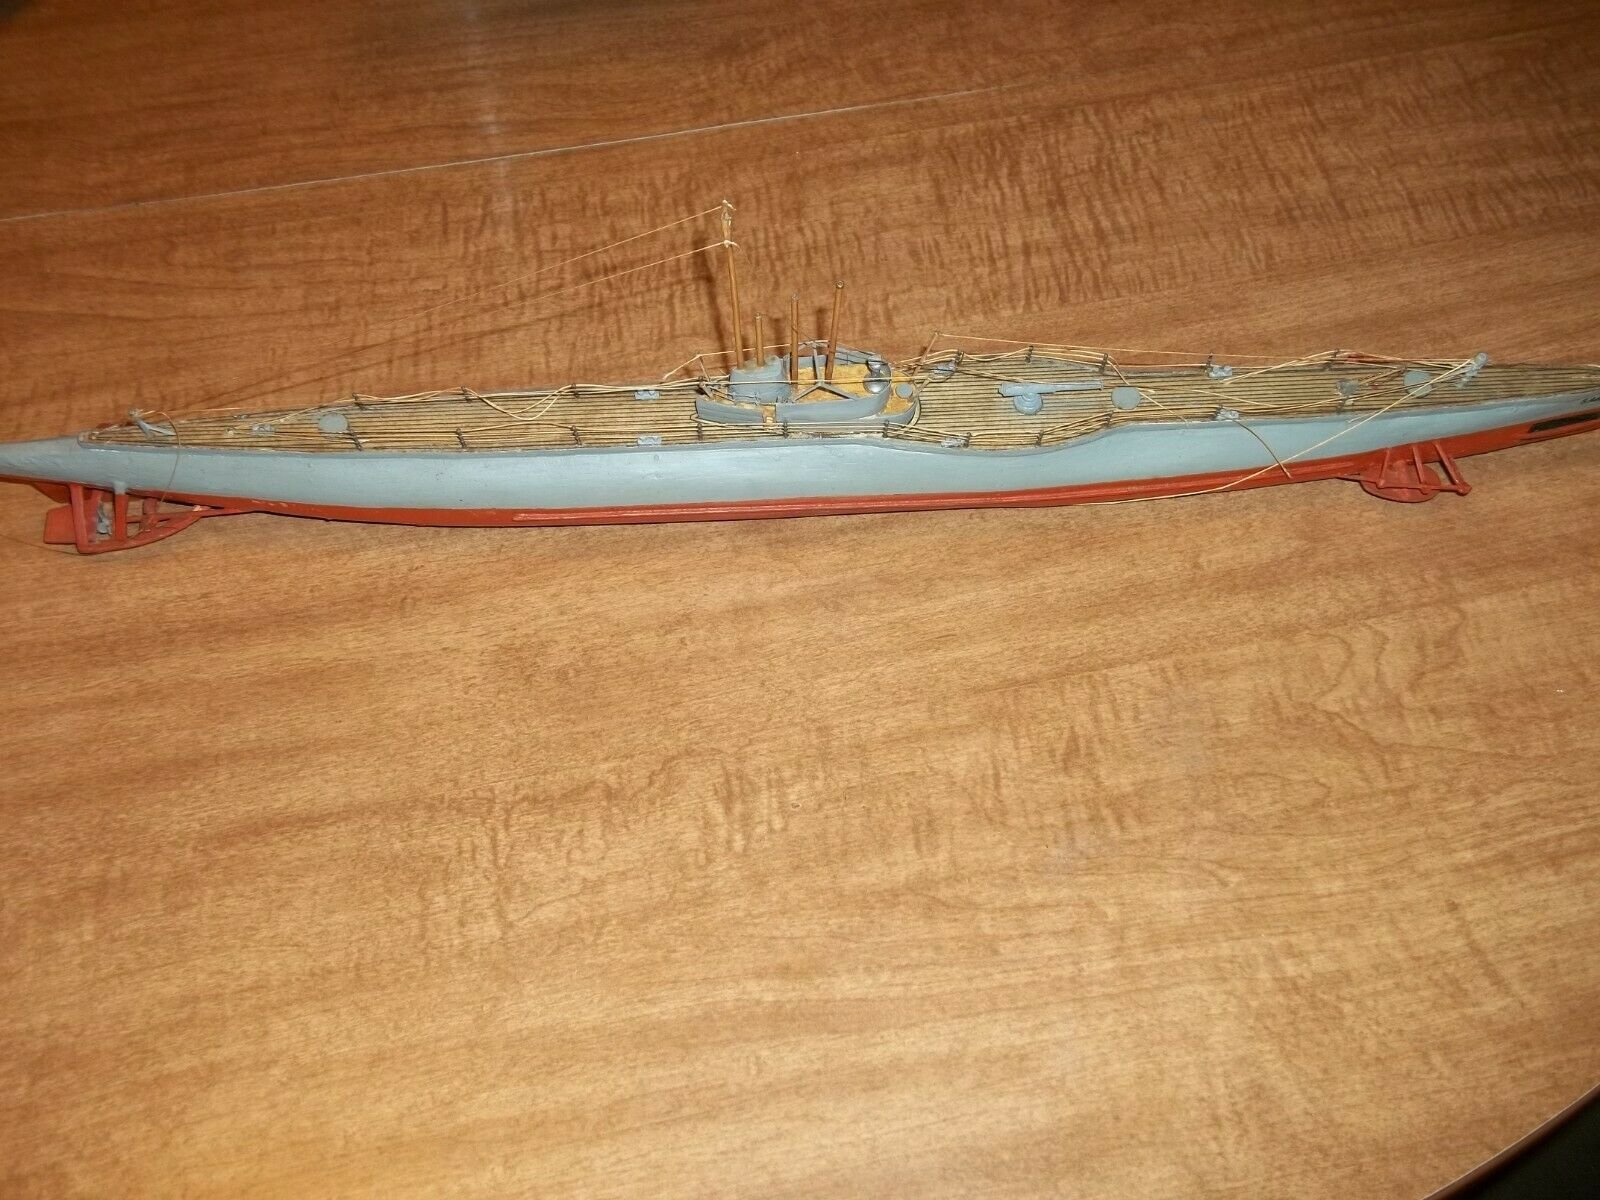
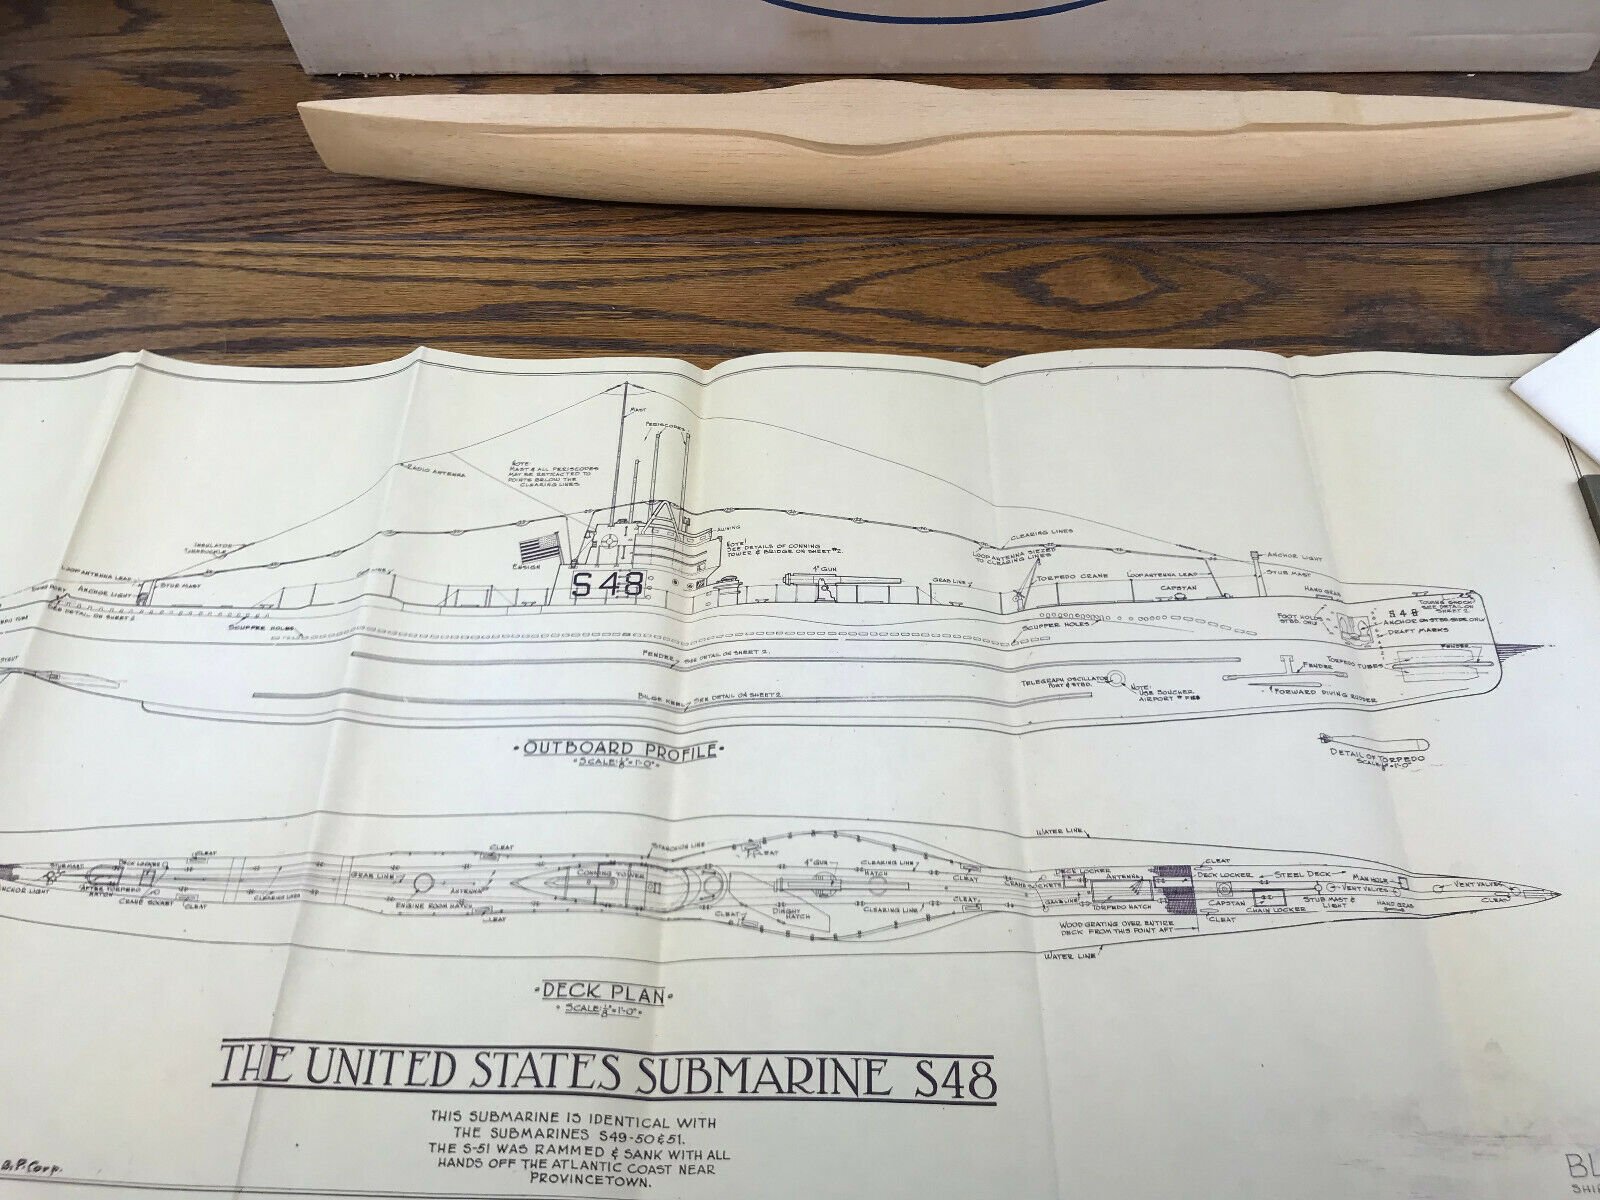
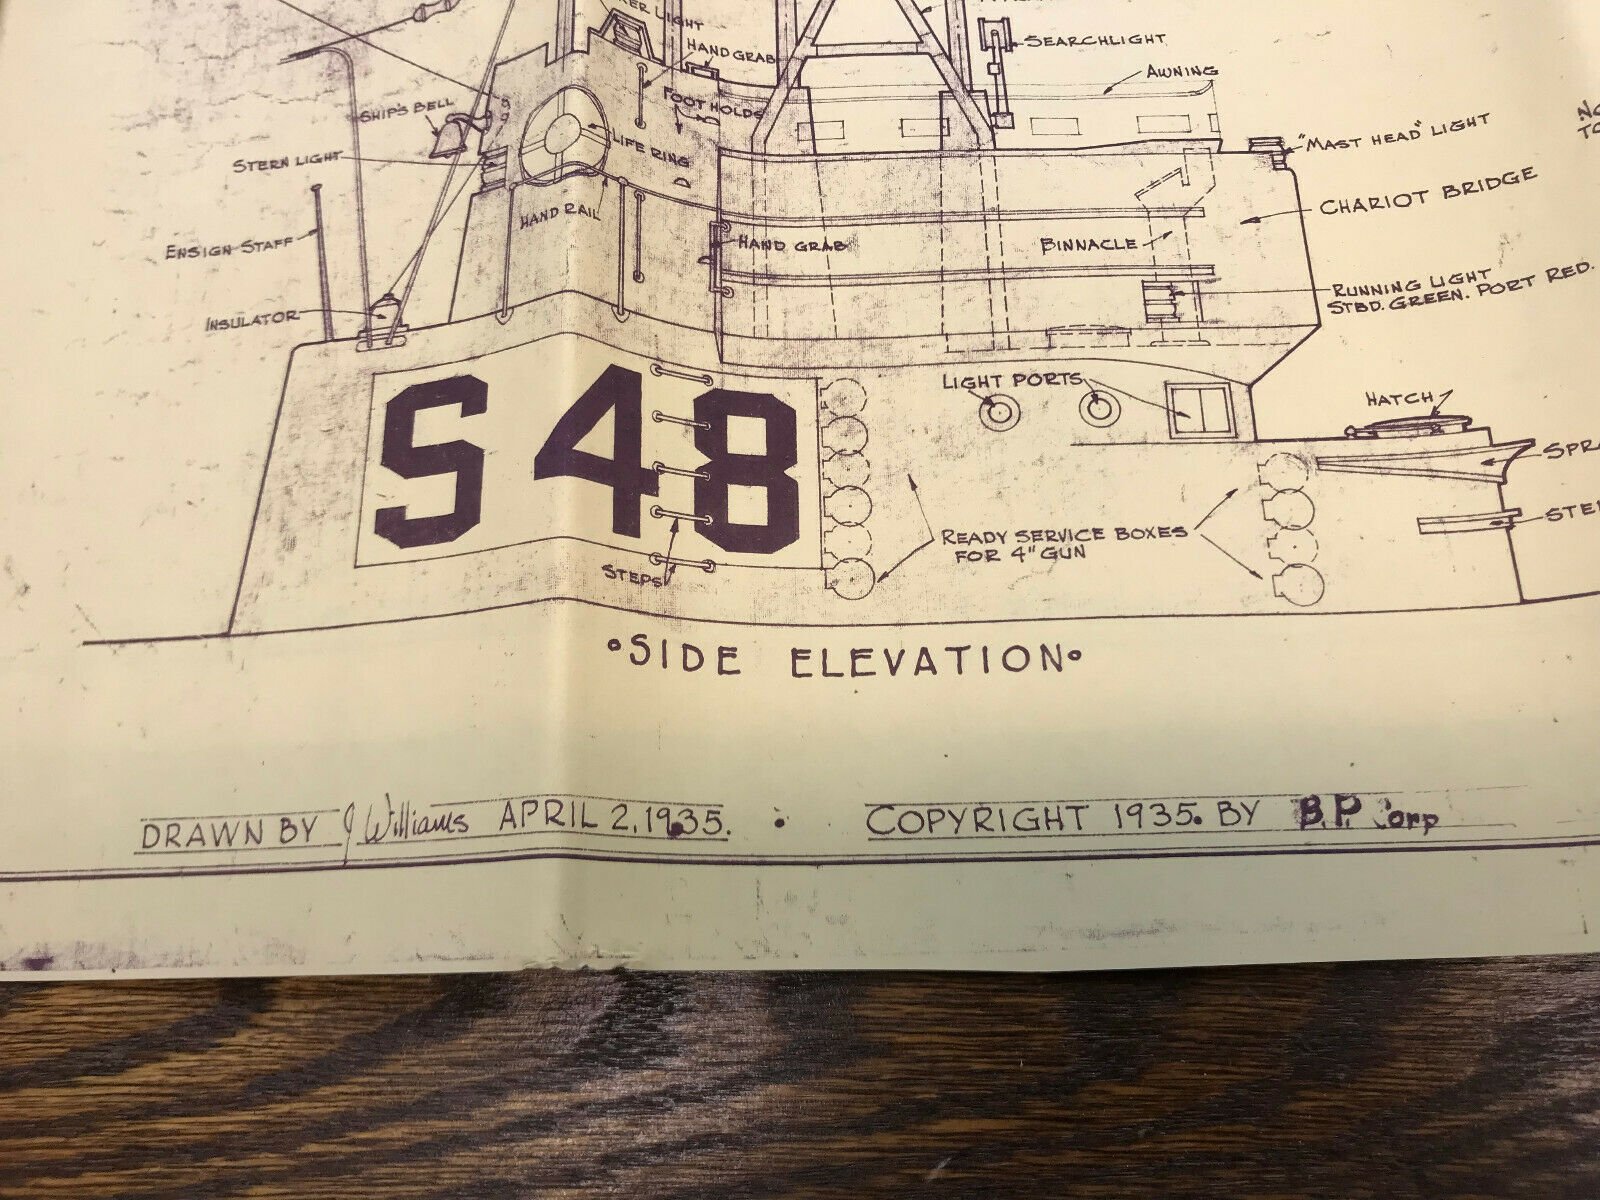
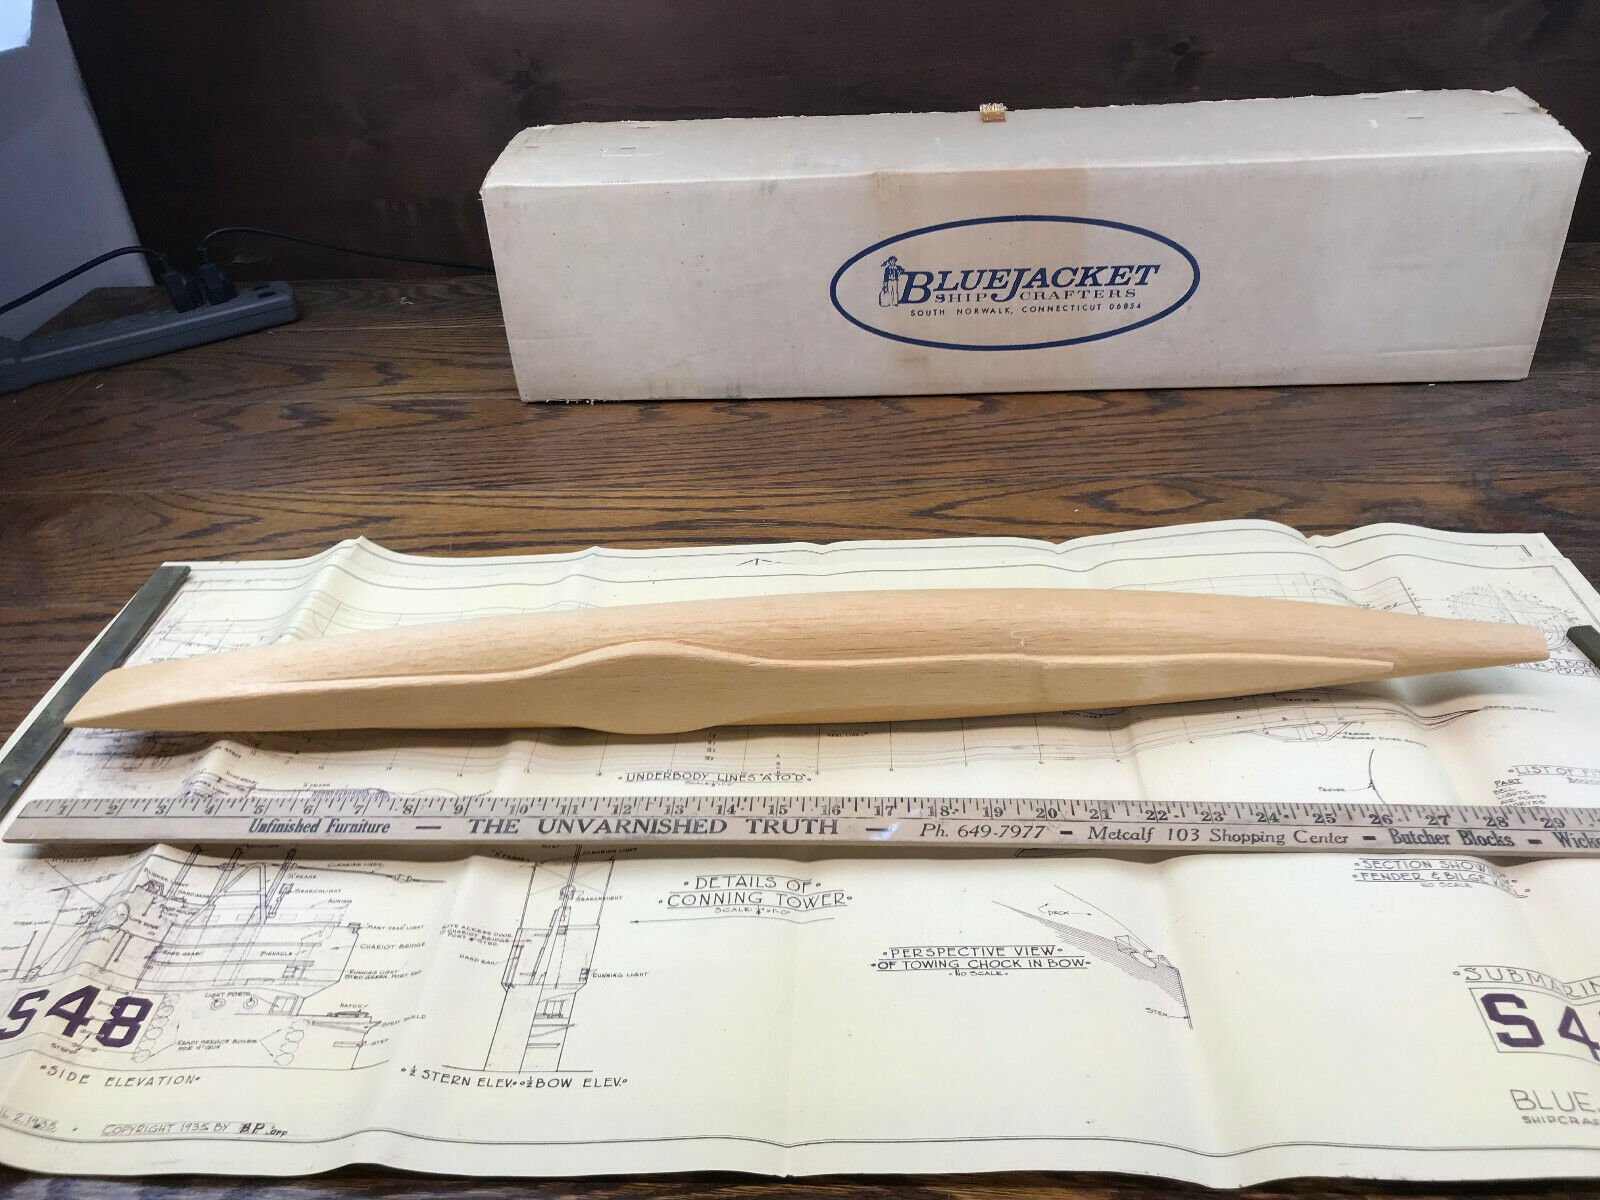
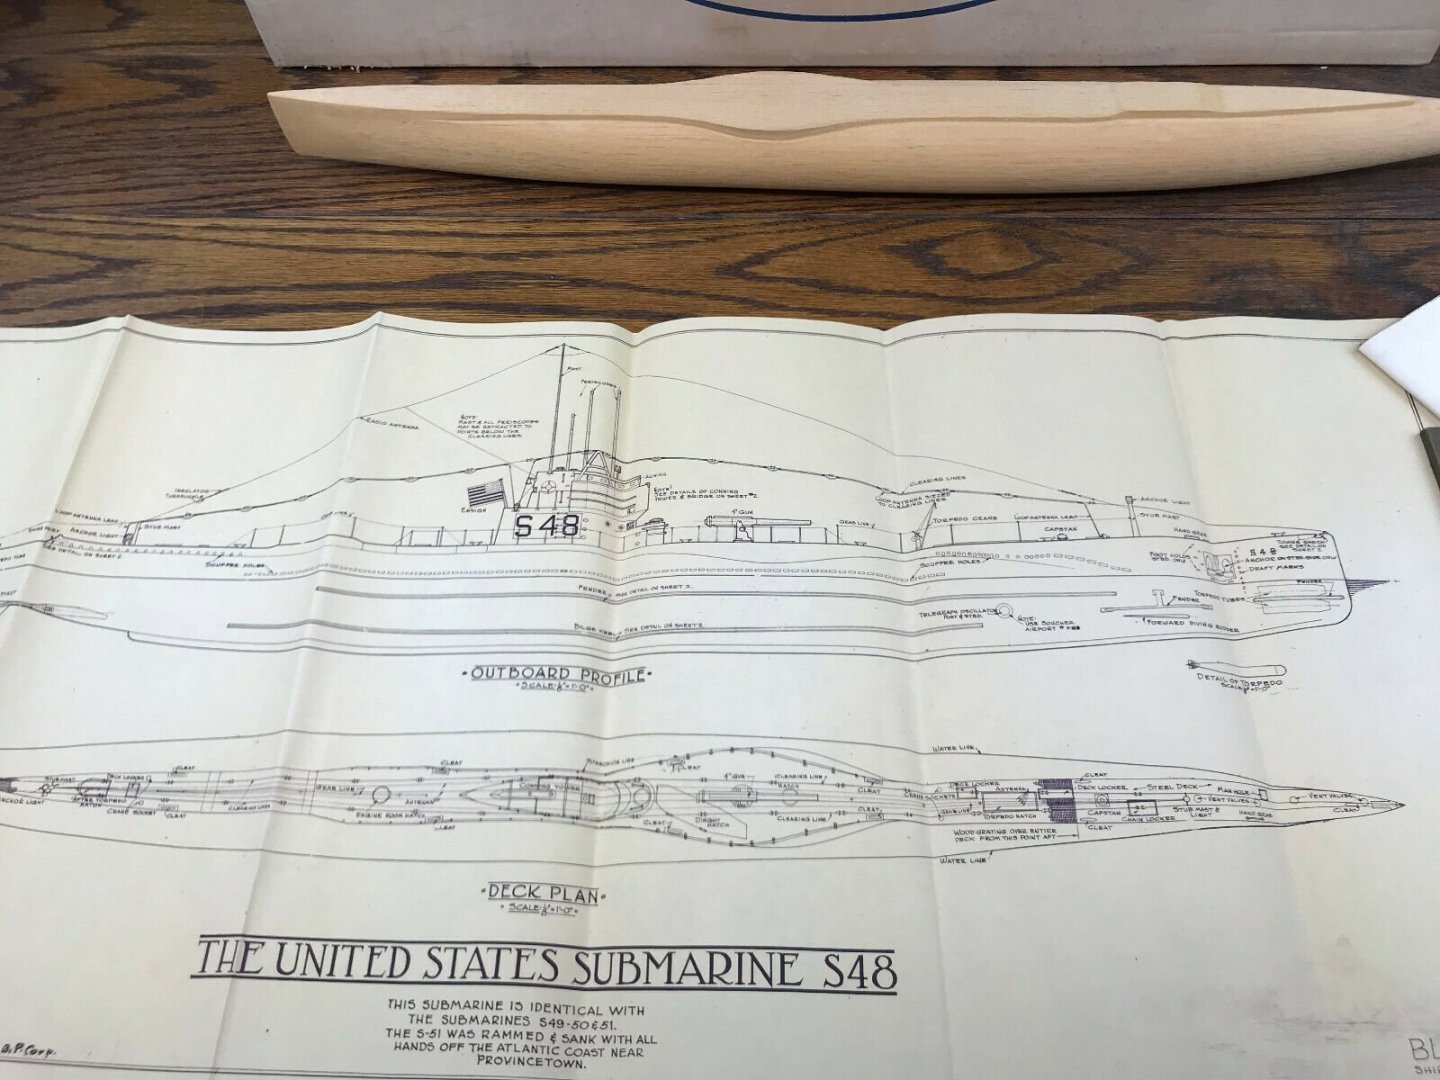
Submariner's question for older S-48 kit model (BlueJacket Shipcrafters)
J11 replied to J11's topic in Wood ship model kits
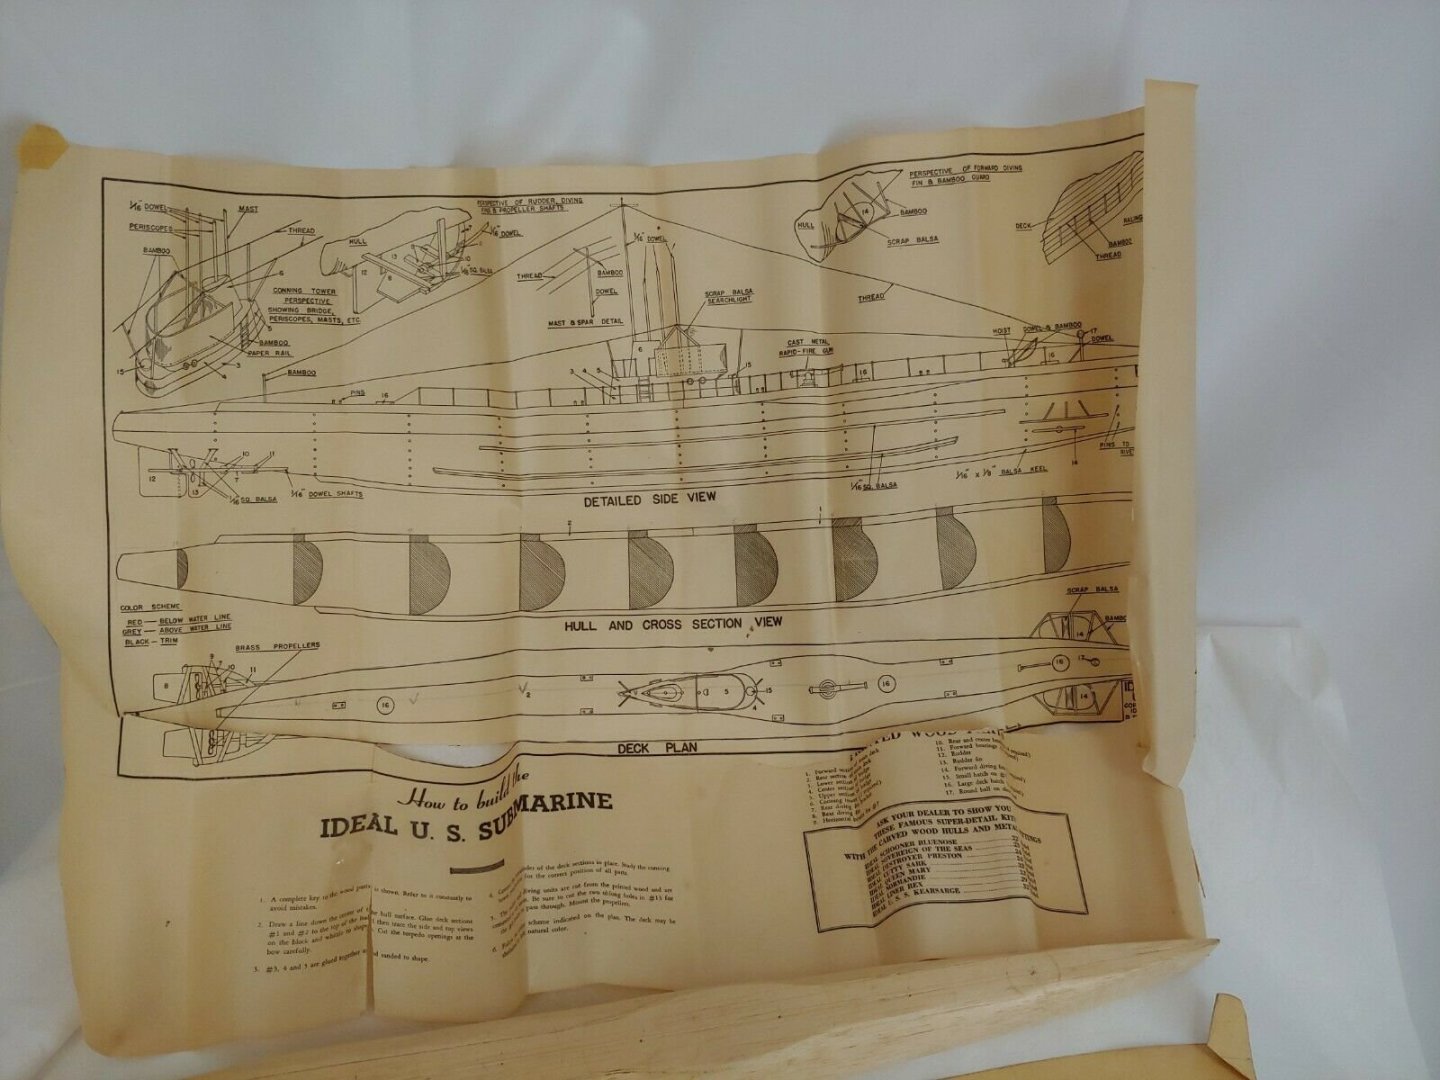
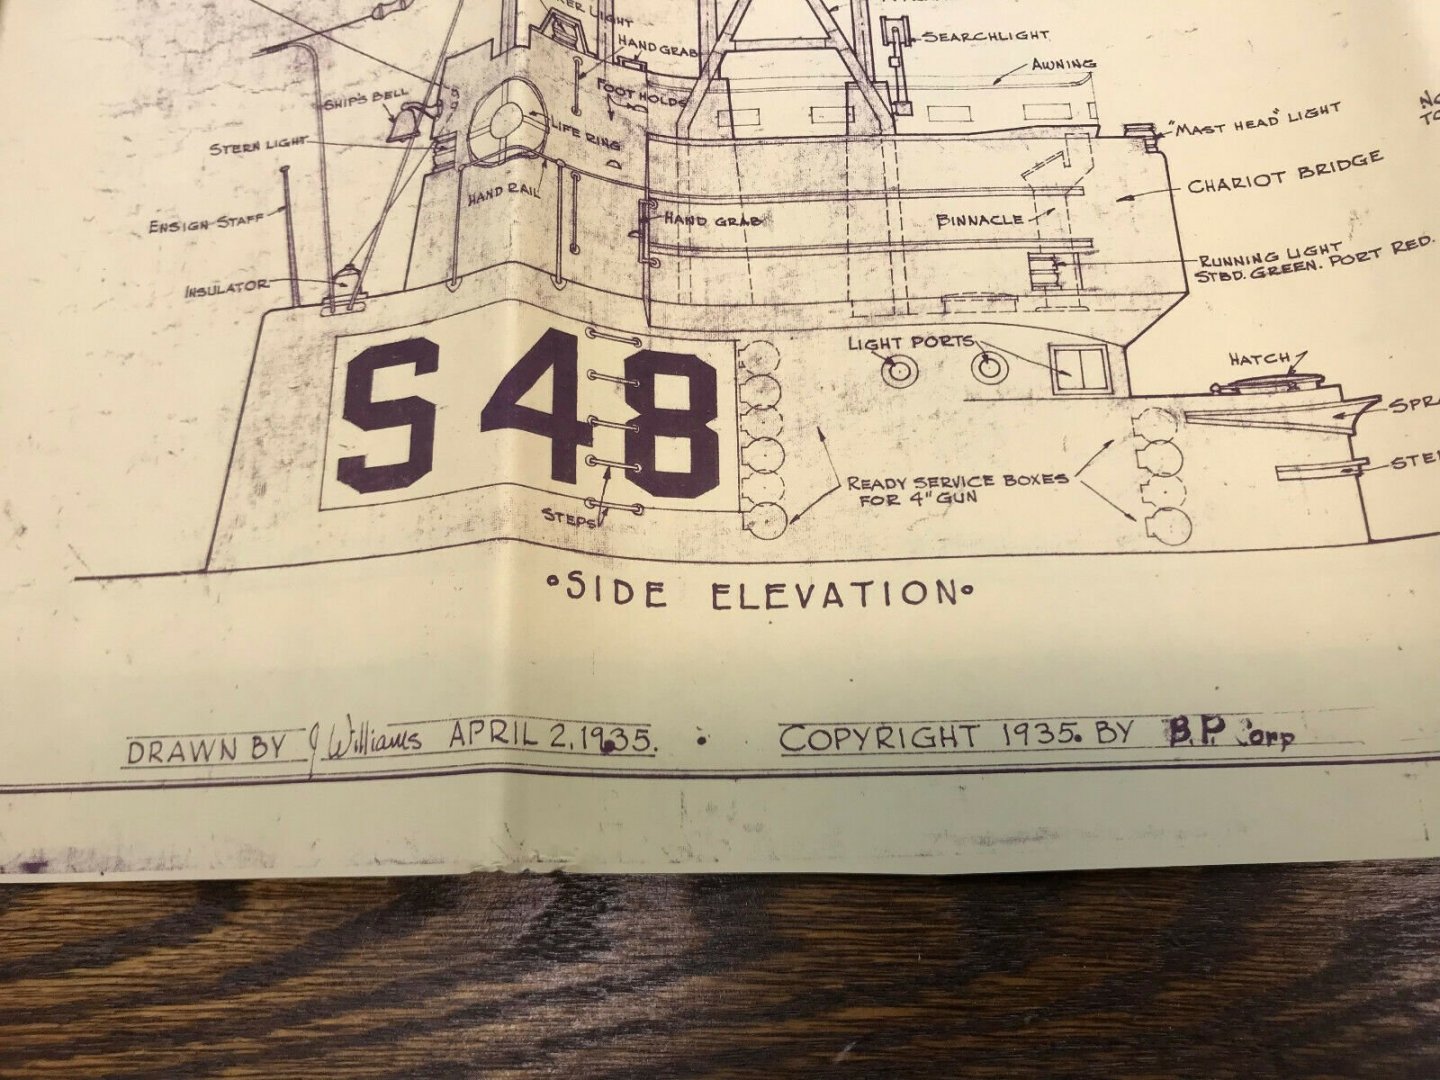
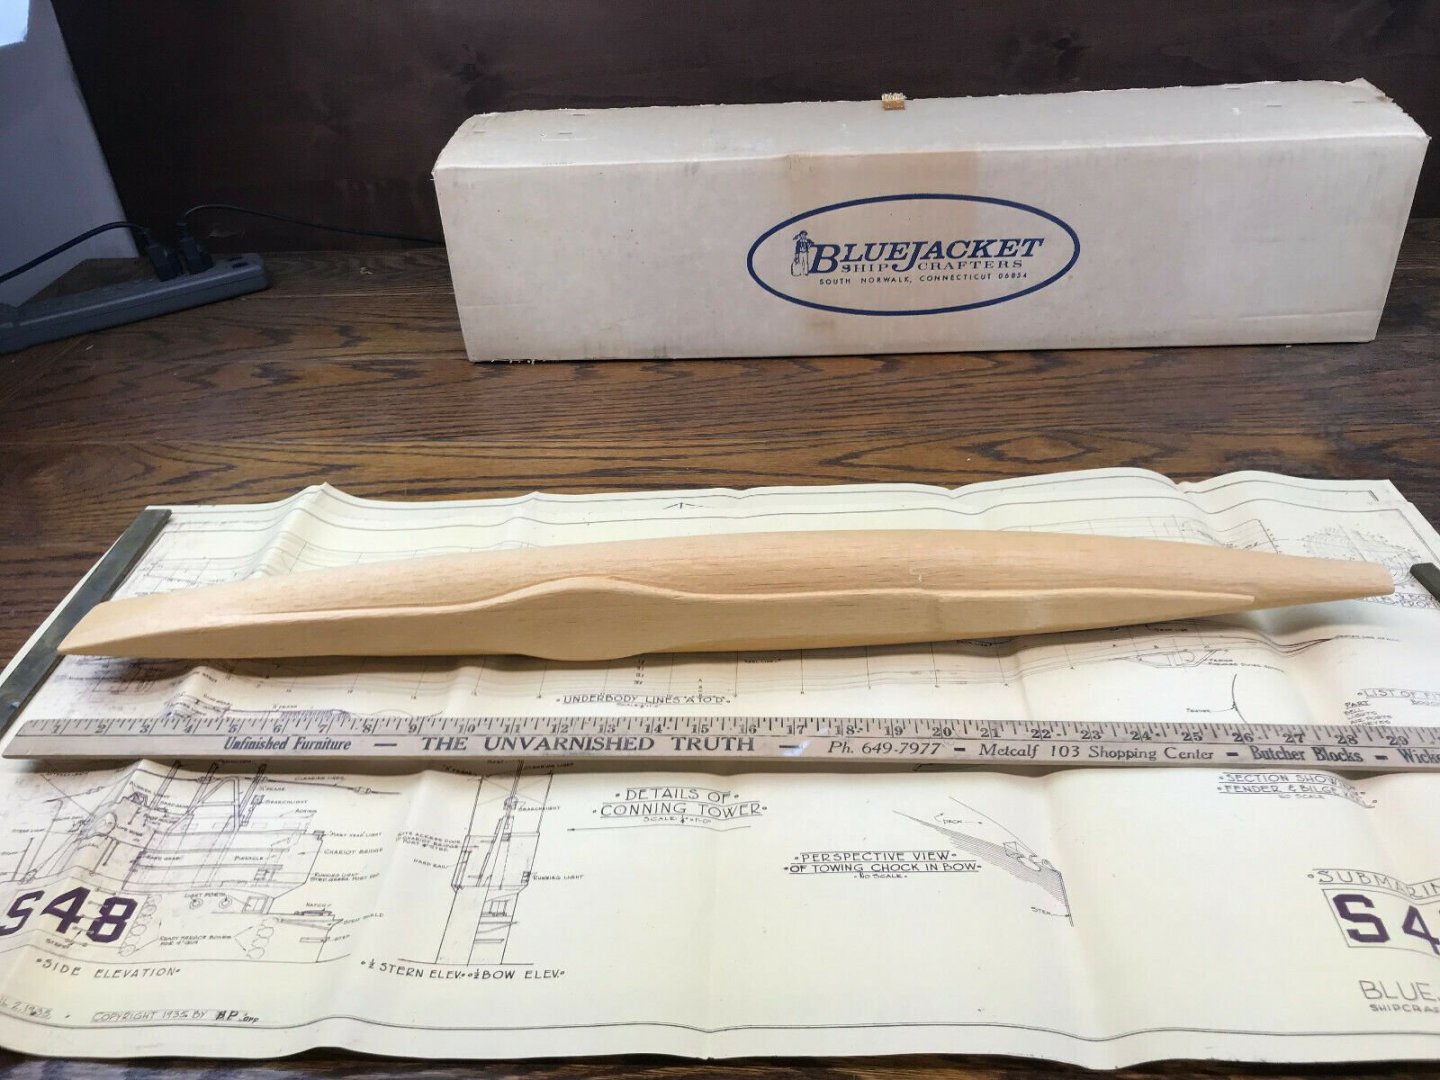
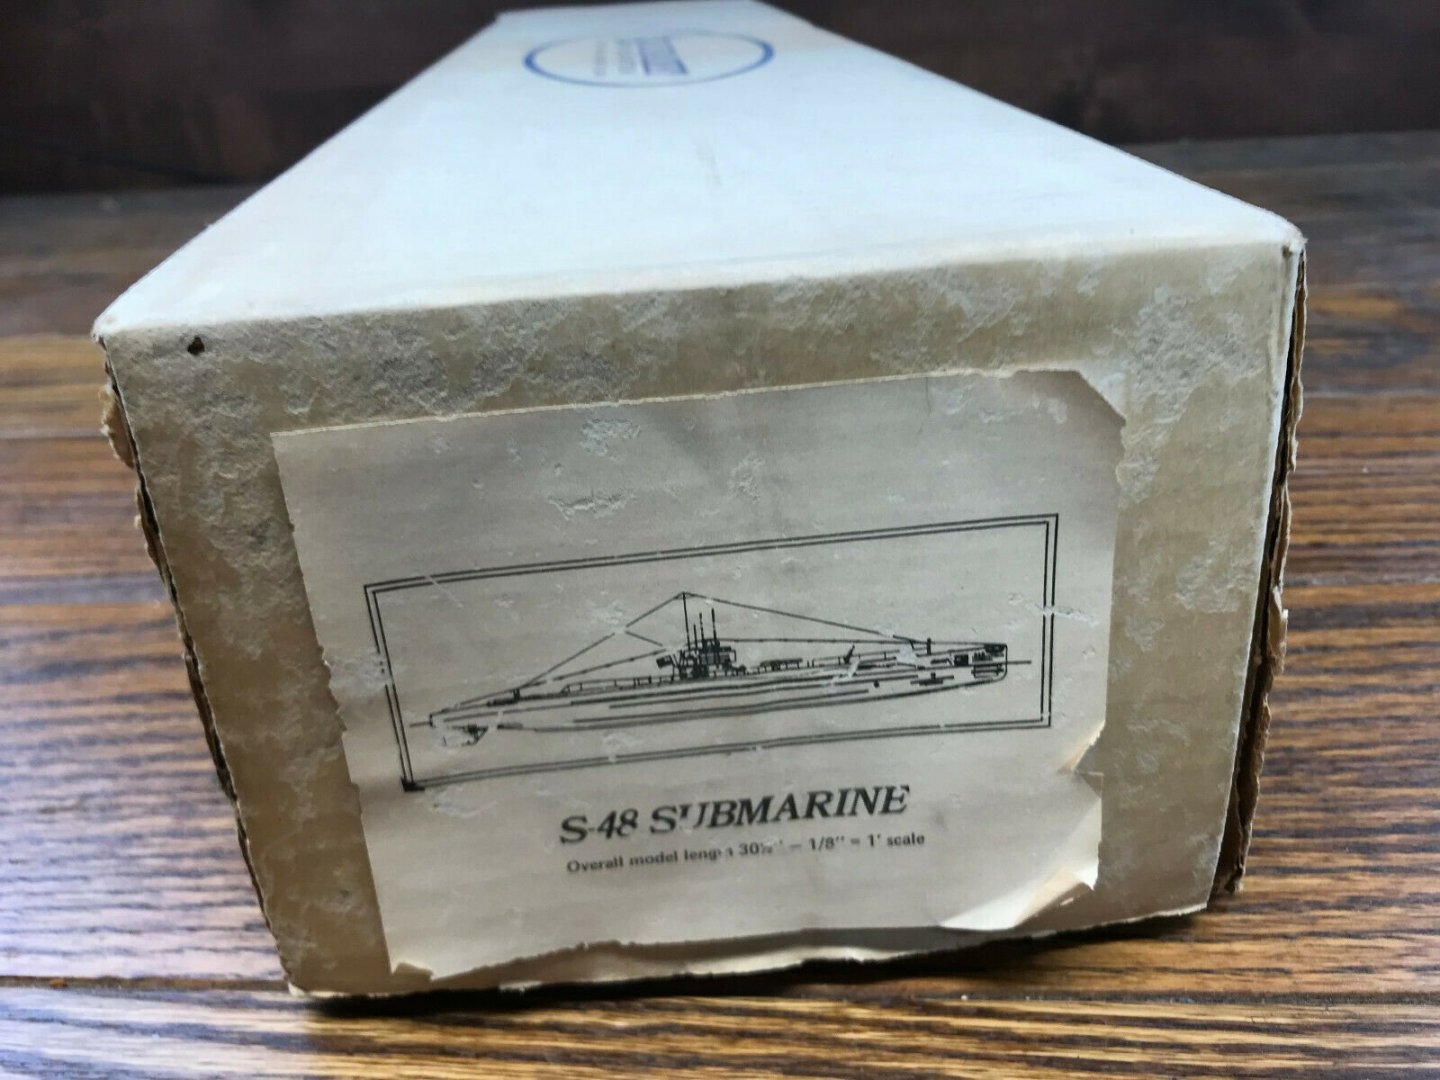
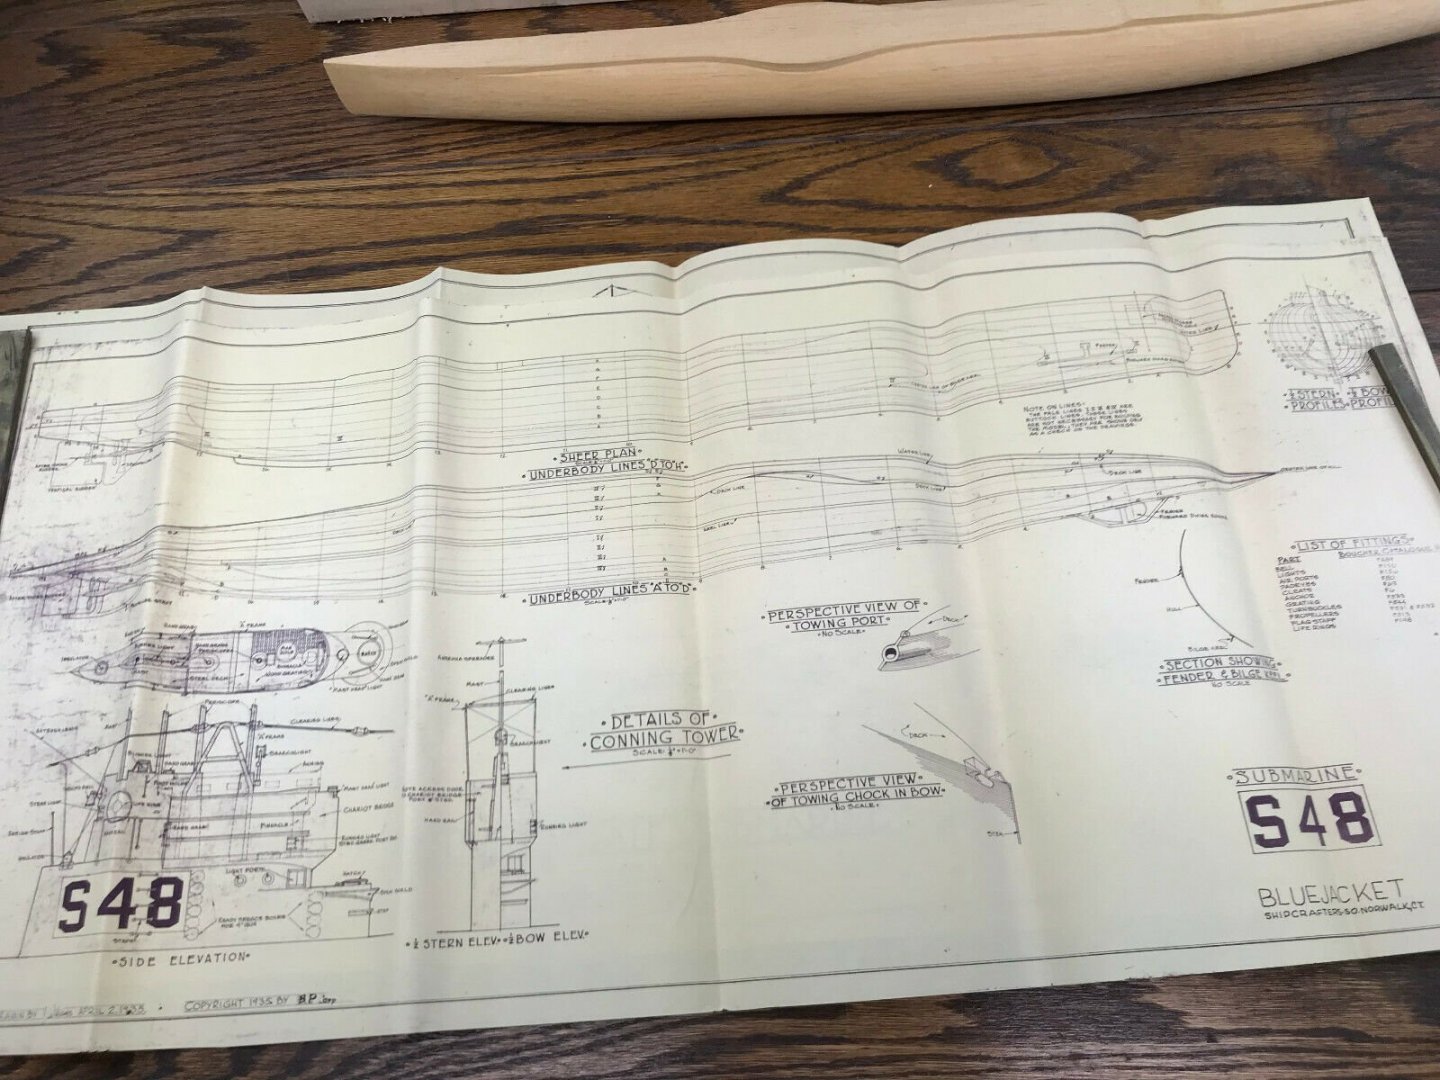
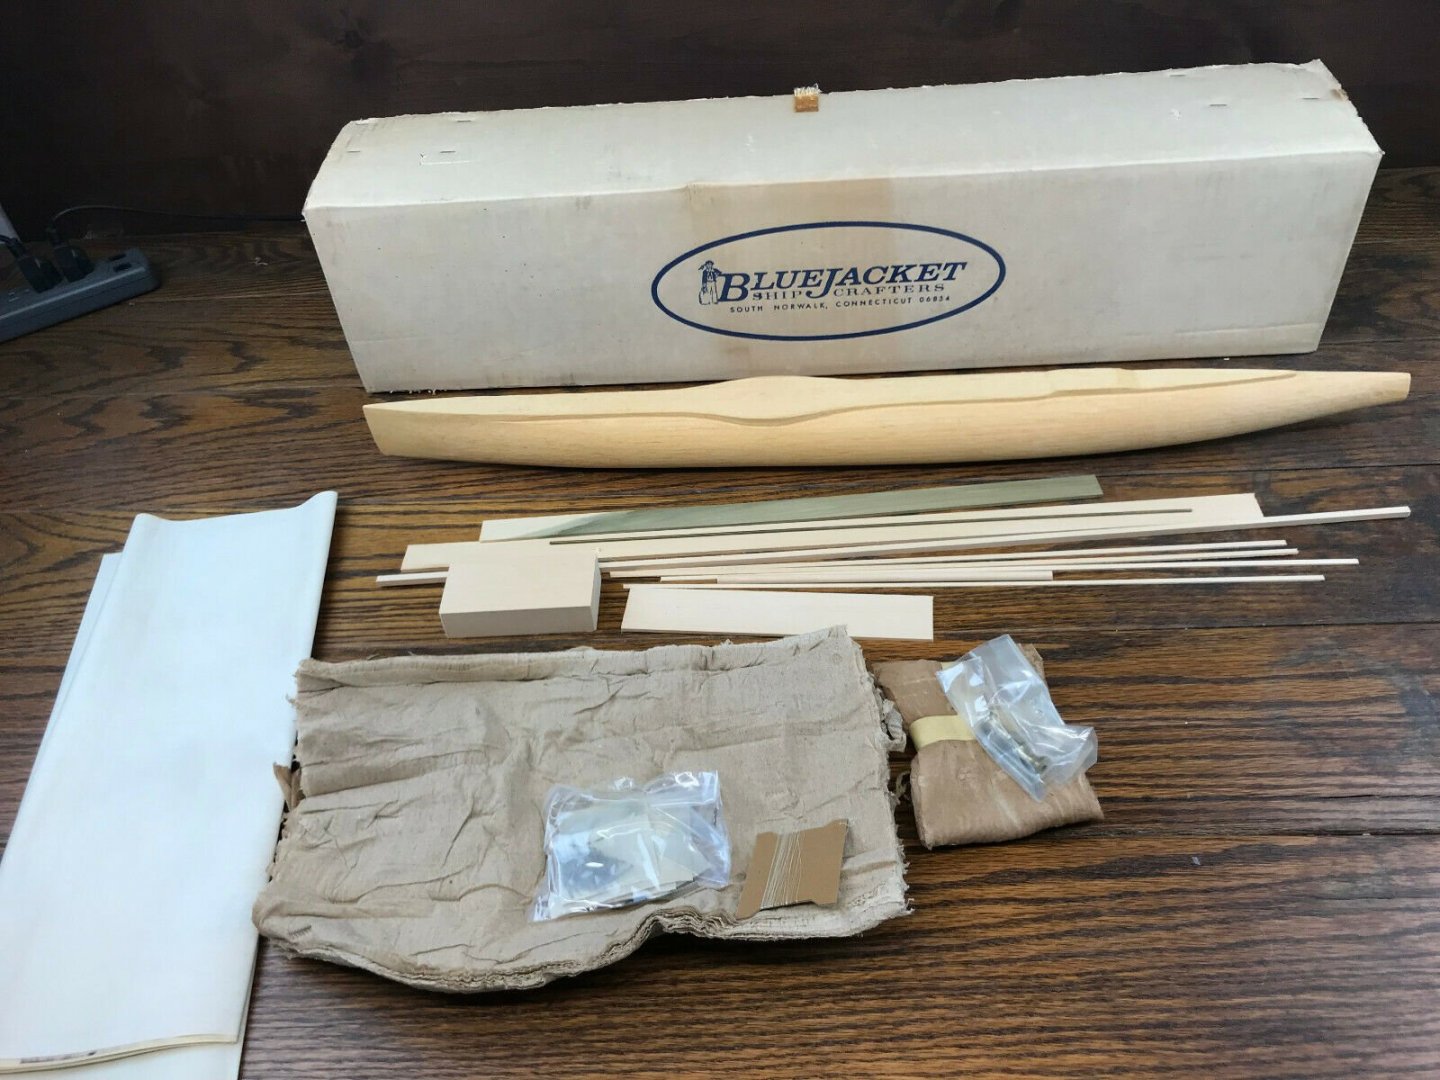
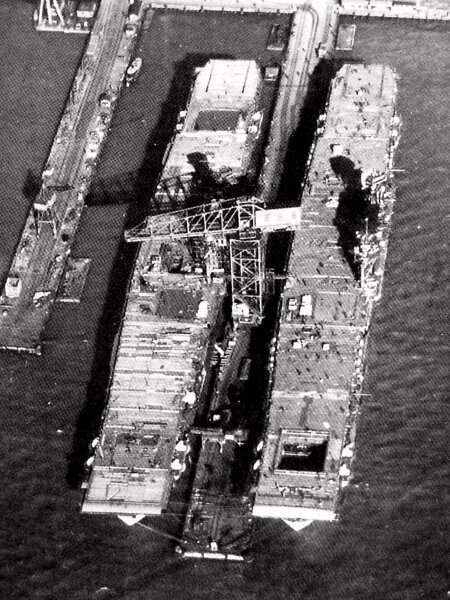
I agree wholeheartedly. The interesting thing is I have never seen this kit ever before, like it just pop up from nowhere. Nic seems to have very little information on it also, which I do find strange. Seems that there has only been three (kits) of them sold in the past 5 years then there's no information, I know of three out there including mine. Threw thorough research I have come up with a possible associated model from Ideal offered for $2.50. Here's the images for comparison: So just possible Bluejacket picked up the model rights of it and then used a original 1935 blueprint for the kits build authenticity. Seems this is plausible, but not confirmed and will be as close to the history of the kit and draftsman I can come up with.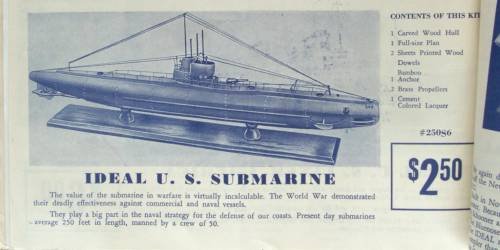

- 10 replies
-
- 4
-
-
- s-class
- bluejacket shipcrafters
- (and 1 more)
-
I had contacted Bluejacket about the kit S-48, which Nic was kind enough to respond telling me FYI, the kit has to be from later than 1972. That's when Boucher became BlueJacket. I don't doubt that the plans are from 1935, however. Was wondering if anyone else has information on this kit along with the author of the plans? Wondering if there was a model back in 1935 that was produced with these plans and if so; whom put the kit out? From my research I haven't found the original source of the plans in regards to a much older original kit, any info would be appreciated. Thanks, and here's some reference images:


- 10 replies
-
- 2
-
-
- s-class
- bluejacket shipcrafters
- (and 1 more)
-
Outstanding craftsmanship all the way around! Beautiful ship with exquisite detailing. Congrats!!
- 648 replies
-
- 2
-
-
- niagara
- model shipways
- (and 1 more)
-
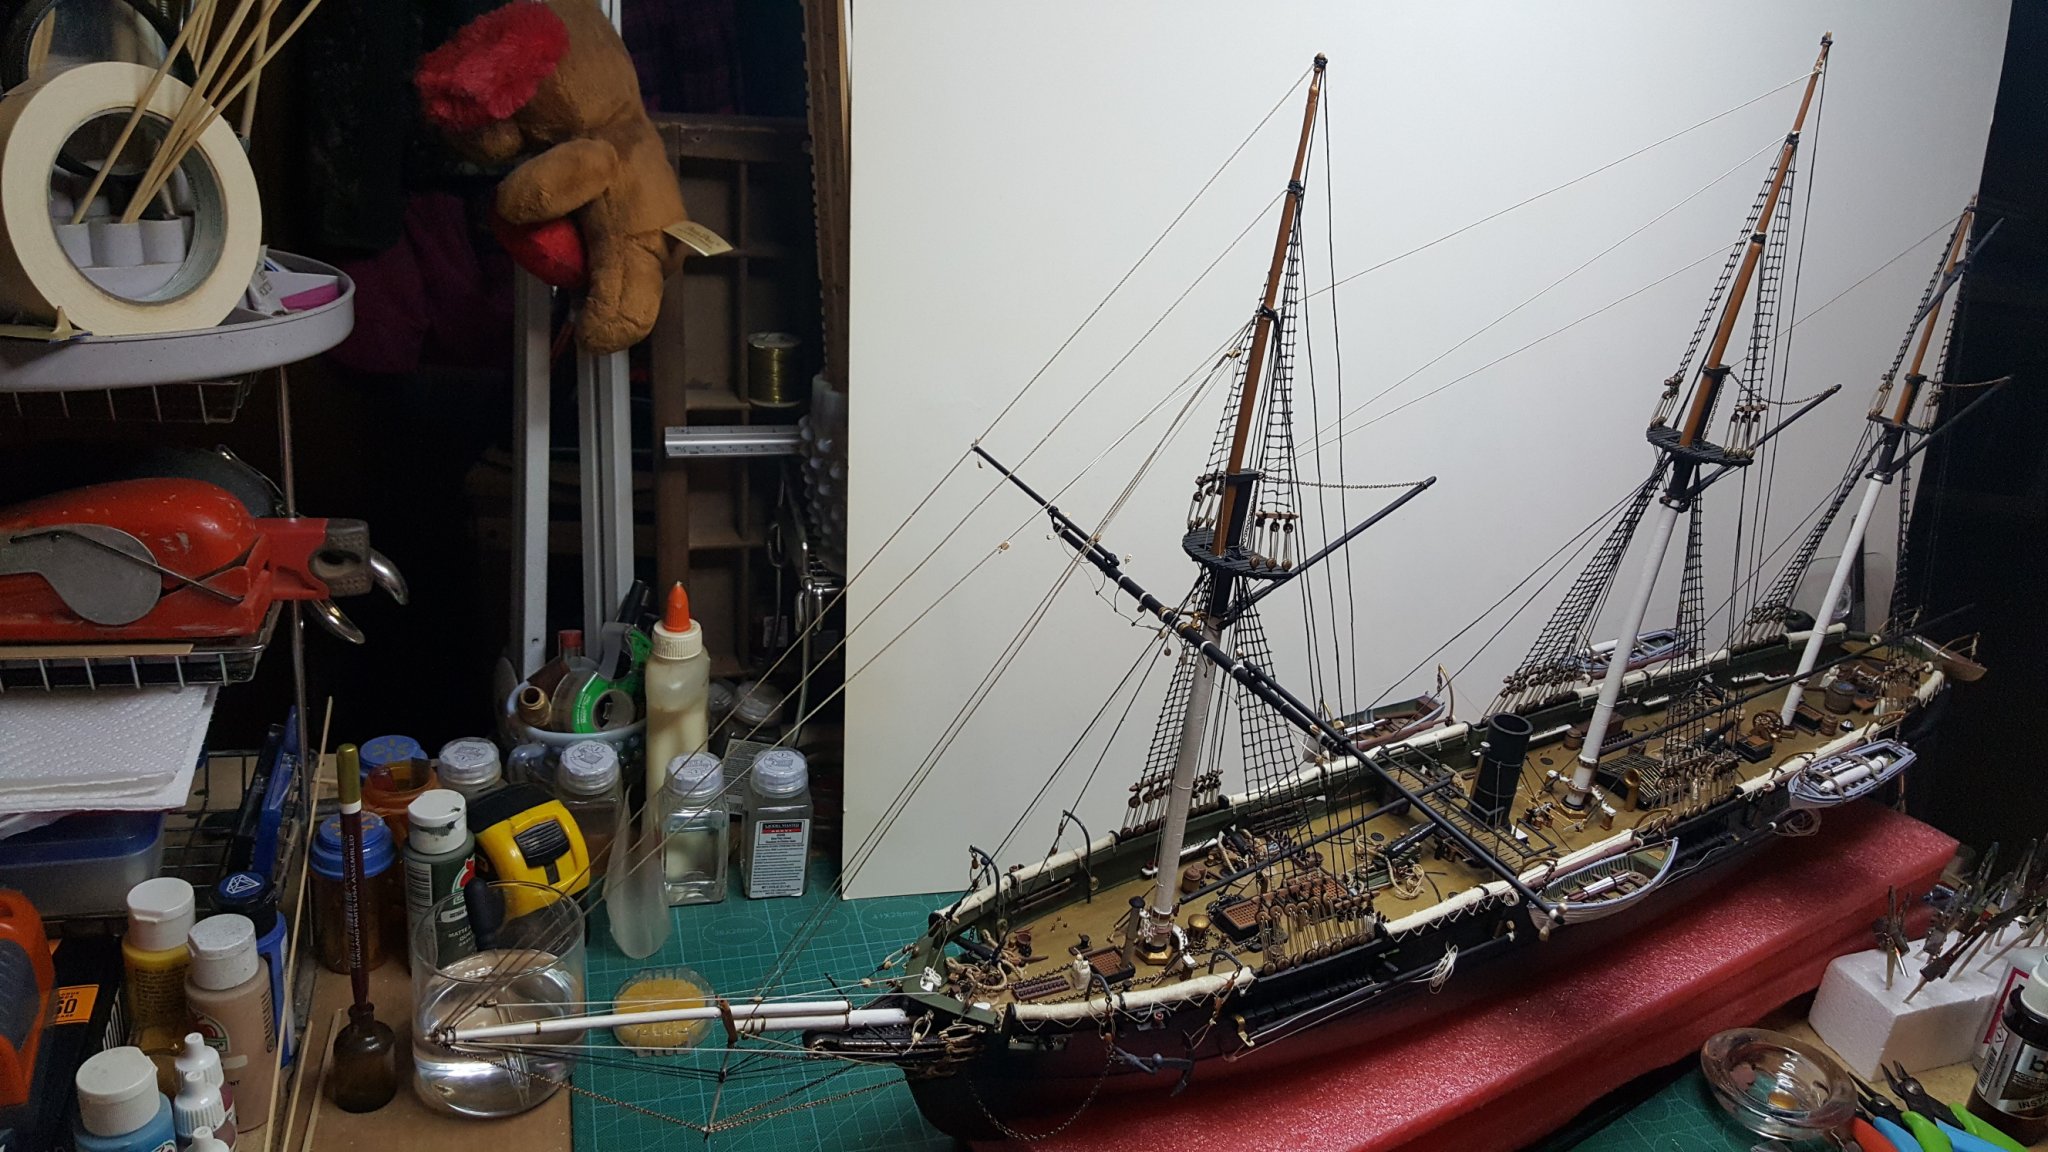
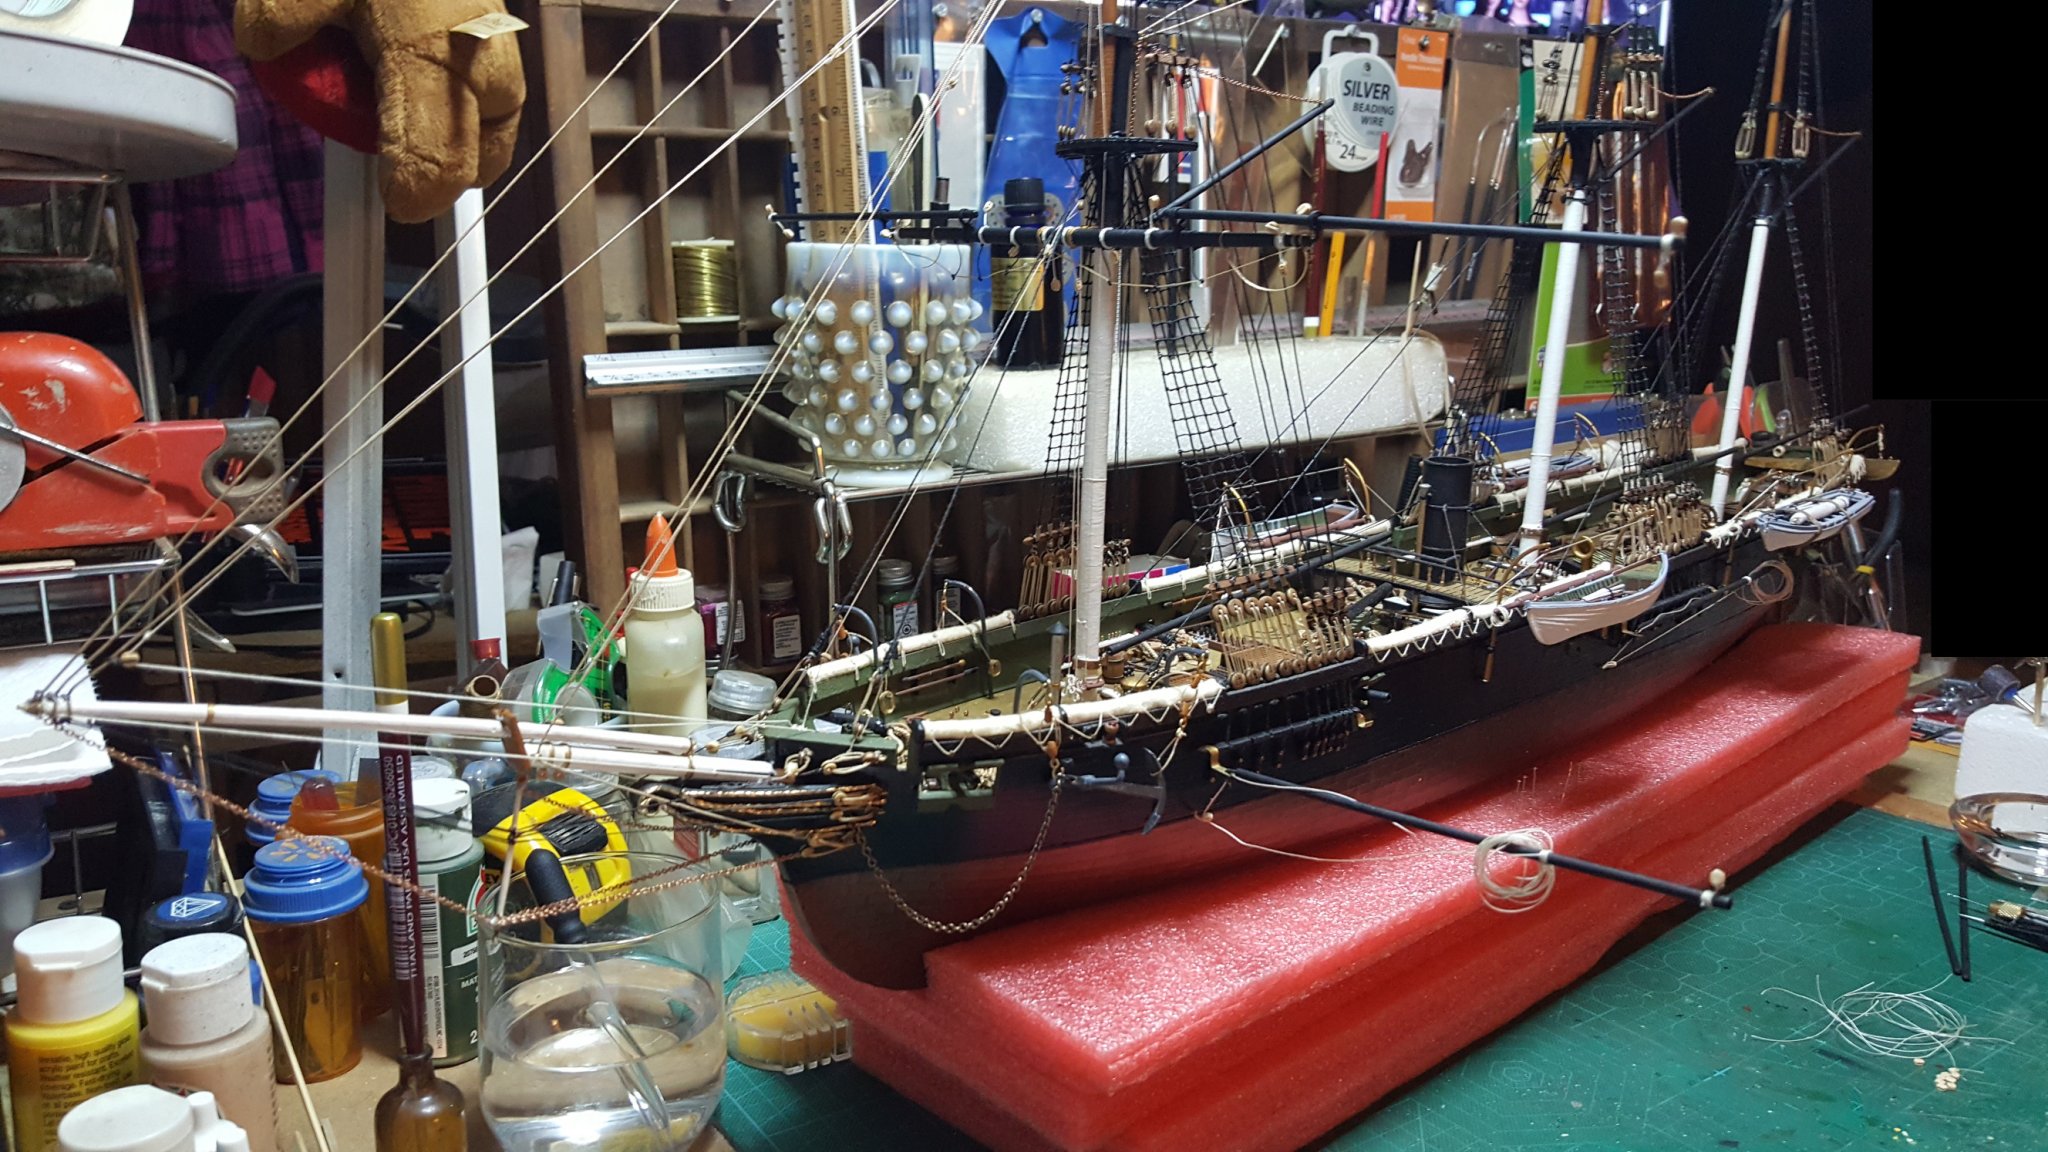
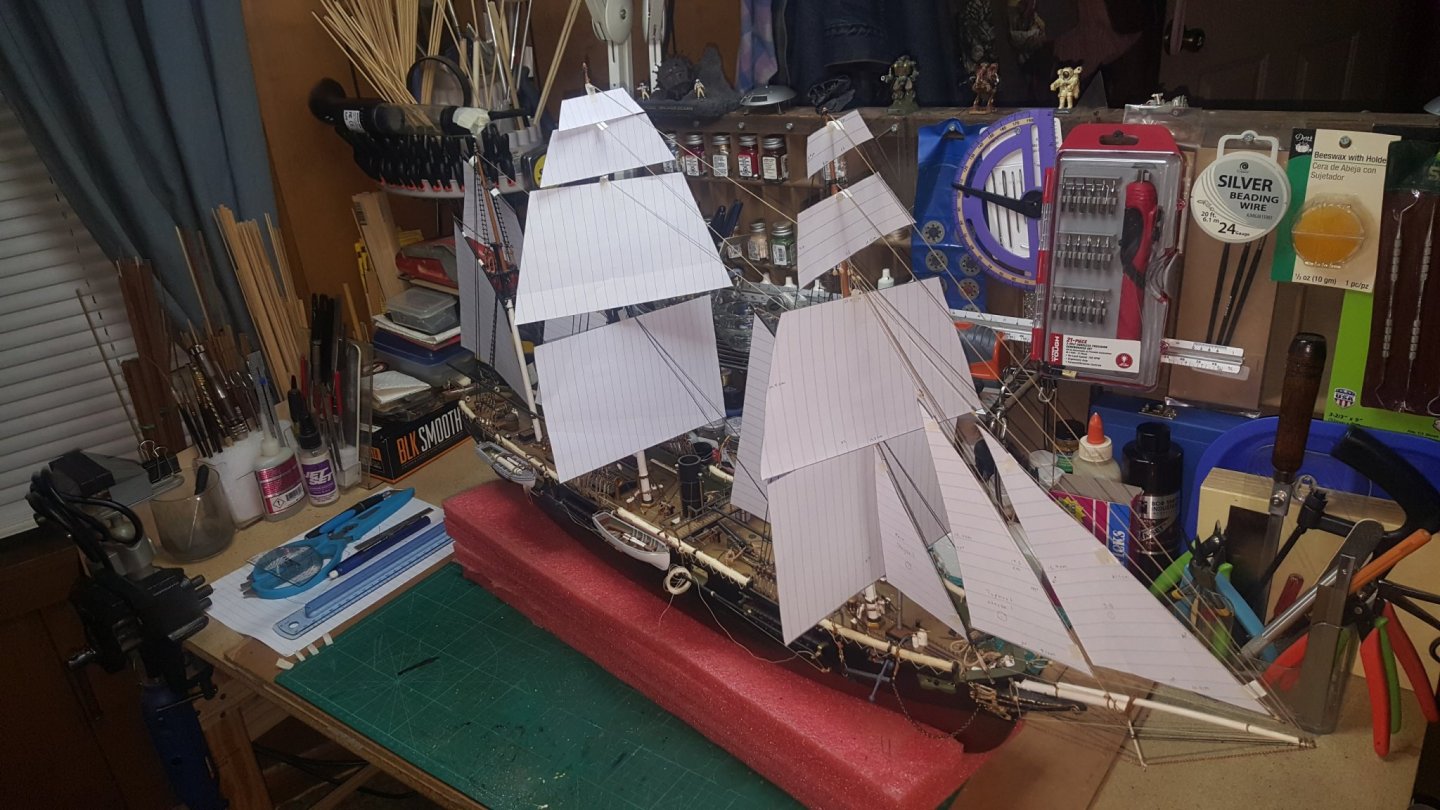
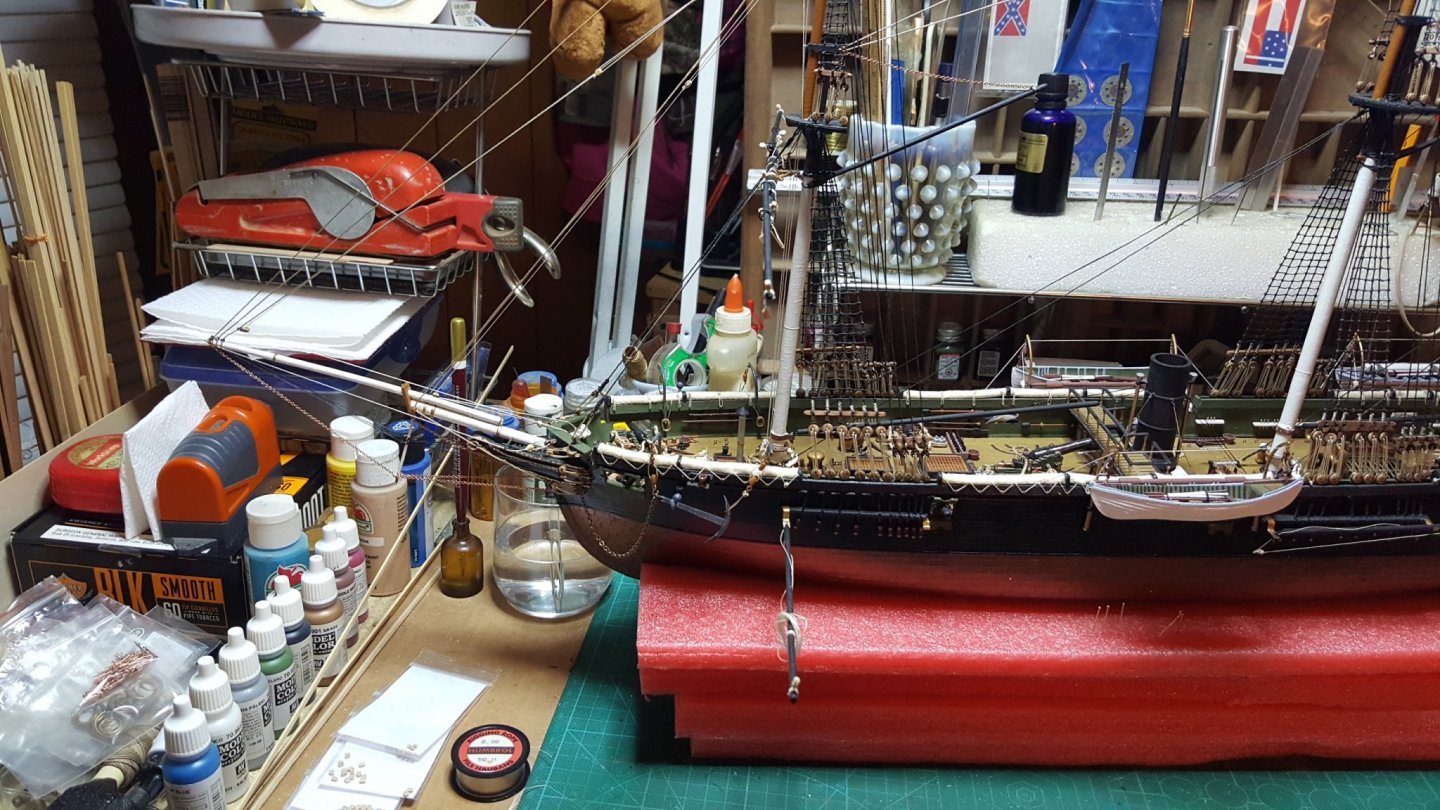
Well, it's been a few since I have worked on the Alabama or posted. My apologies to those whom have been following my blog for this build as to not posting updates. With all the problems arising from Covid-19 along with getting family members safe and secure; personal responsibilities have taken precedent. Have re-organized my work bench and cleaned it up along with the model, which was badly needed being gone from them for a few months. I have picked up from where I left off with the sails and have been working on patterns for twenty-eight sails needed. Paper patterns have been customized per my models dimensions. Here's a few images to show progress: As you can see, the Alabama is starting to take shape with the sail patterns taped up into place. I have the boom sail patterns done and will test them for proper sizing when I have all of these shown finished and installed along with all the masts. The booms have to be in place for proper sizing and pattern making. Rigging will be installed as needed for sail placement, then finished when installation sequence allows as to not interfere with sail placement. Don't want to get all tangled up and then have to back track, but as we all know it does happen. I'll be working on the actual sails this week and will post procedures and updates. Something of a rarity was given to me for a Christmas present. I doubt I will build this one as it's the only one I have ever seen, I had contacted BlueJacket for permission to post these images and was given permission to do so. Seems the kit is from the 1960's but the plans are from the 1930's ?? Weird but is verified from BlueJacket, maybe someone here has more information on this one and can clarify. Nice gift and honored to add her to my collection. It's great to be back and will hopefully keep updates coming for the Alabama as circumstances will allow. Prayers for safety to all!


- 383 replies
-
- 10
-
-
@GeorgeKapas, I'll be out of pocket for awhile for the holidays, but will have some images of the sails when I get back, so if you can wait; I'll have some workable data for you. Have great holidays!!
-
Thanks @popeye the sailor, I will be out of pocket for awhile as we will be doing the holiday travel and celebrations. I do wish all a "Merry Christmas and a Happy New year"!! Hope all have a wonderful holidays and I'll be back when we get all this travelling done.
-
She's beautiful, nice work!
-
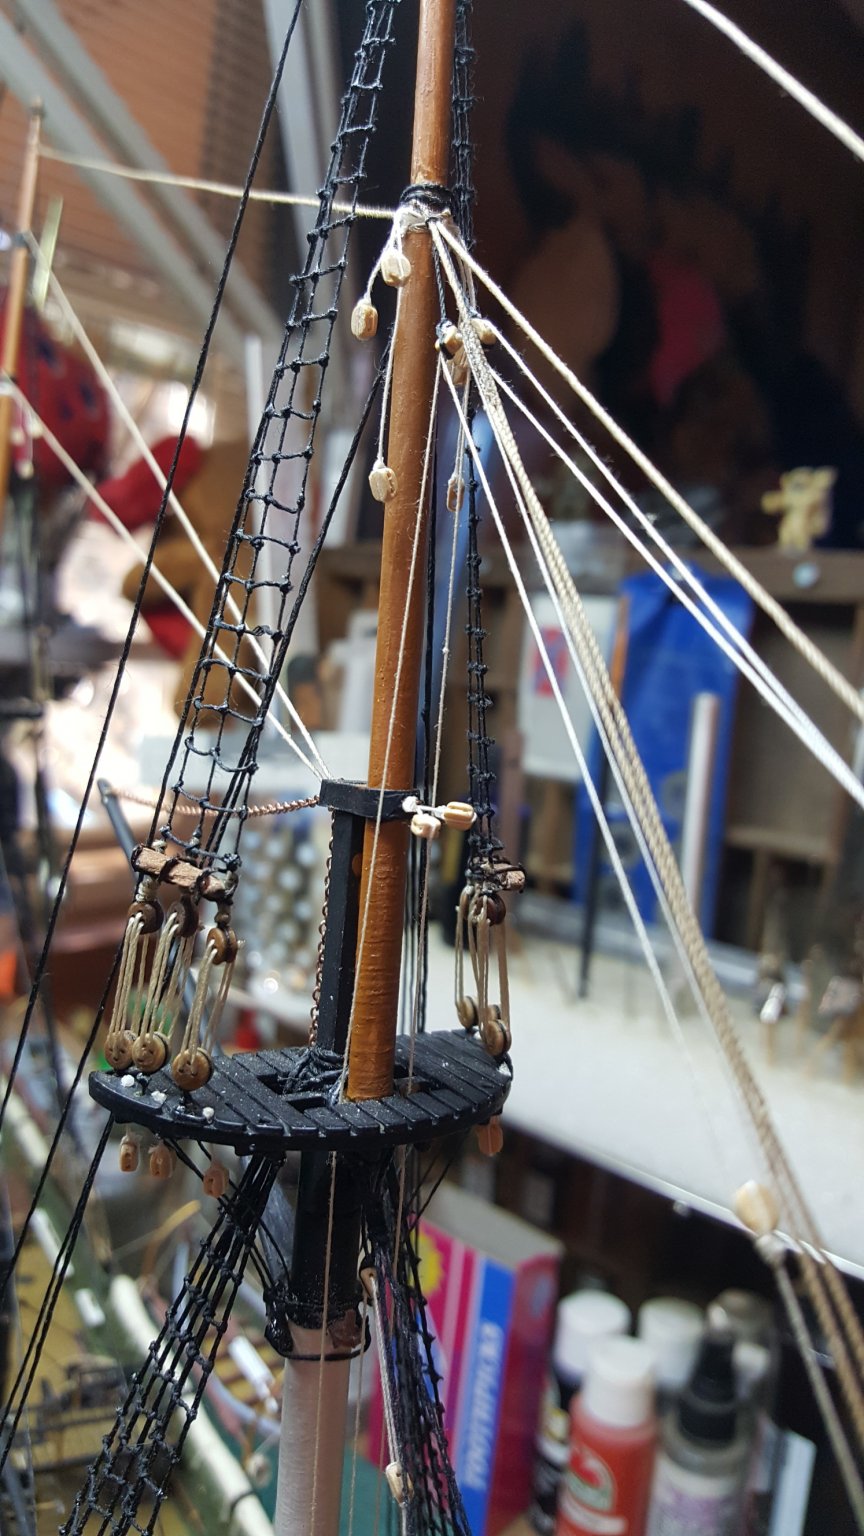
Well, how do you use up one hundred single blocks? Yards and mast prep work for rigging. Between sail patterns work I have also been placing the single blocks for all the future rigging coming up so when I install the sails to the yards all I have to do is rig them lines and speed up the finish line! I'll have some more sail patterns to show soon. Plus I'll be tightening these smaller block lines when I work on their rigging Here's a early Christmas present for all my friends here at MSW. I have been researching the "Big E" for a 1938 historical build in the future. CV5 and CV6 where sister ships when they were built and this file is priceless for the historical build project possibility. I am on the hunt for the plans on the "Big E" from the builder, which in hopes they can be located. If I do find them I'll work to get them posted also. If not this file will suffice just fine. Merry early ho ho, gentlemen: cv5.pdf Big E and Yorktown during first build:


- 383 replies
-
- 10
-
-
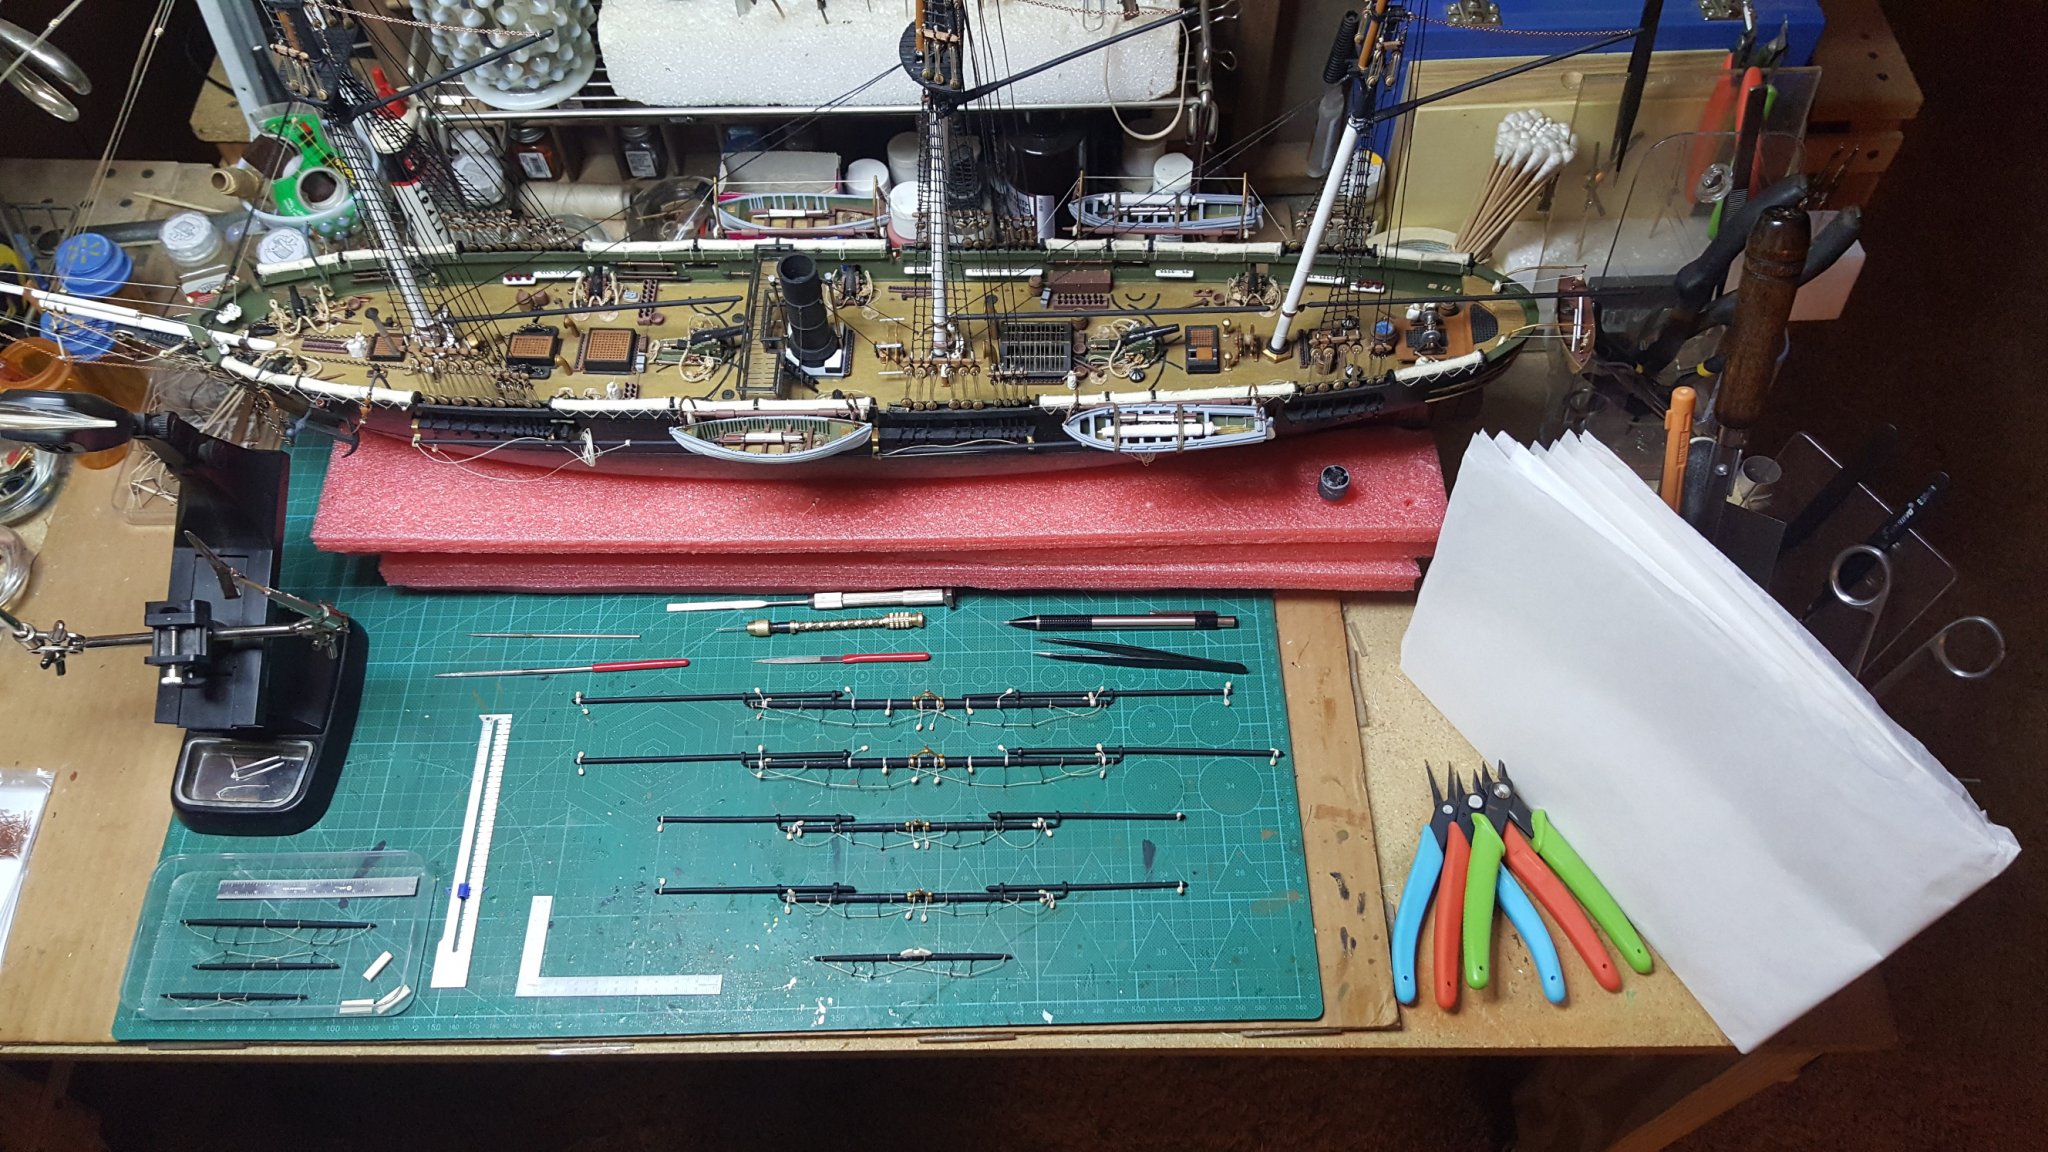
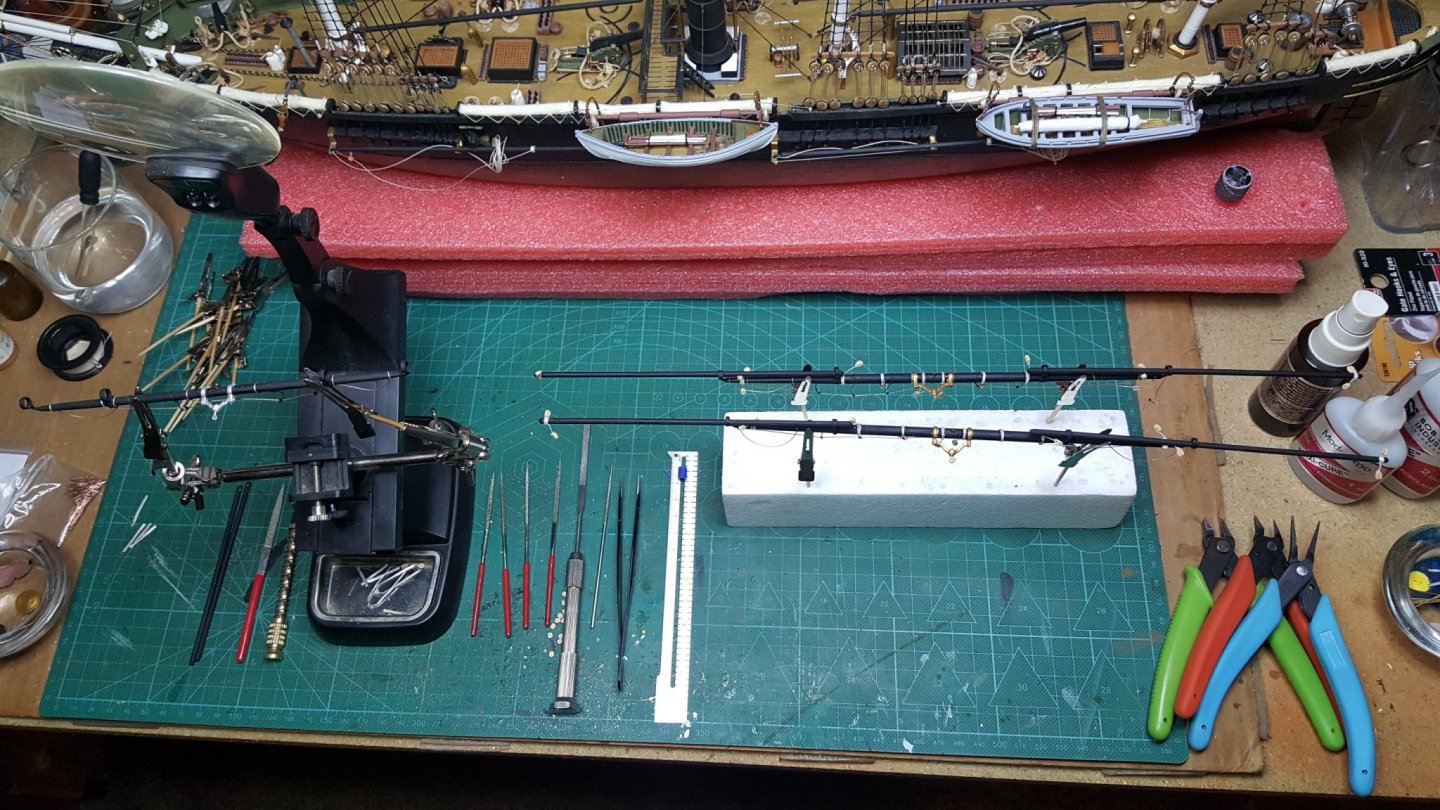
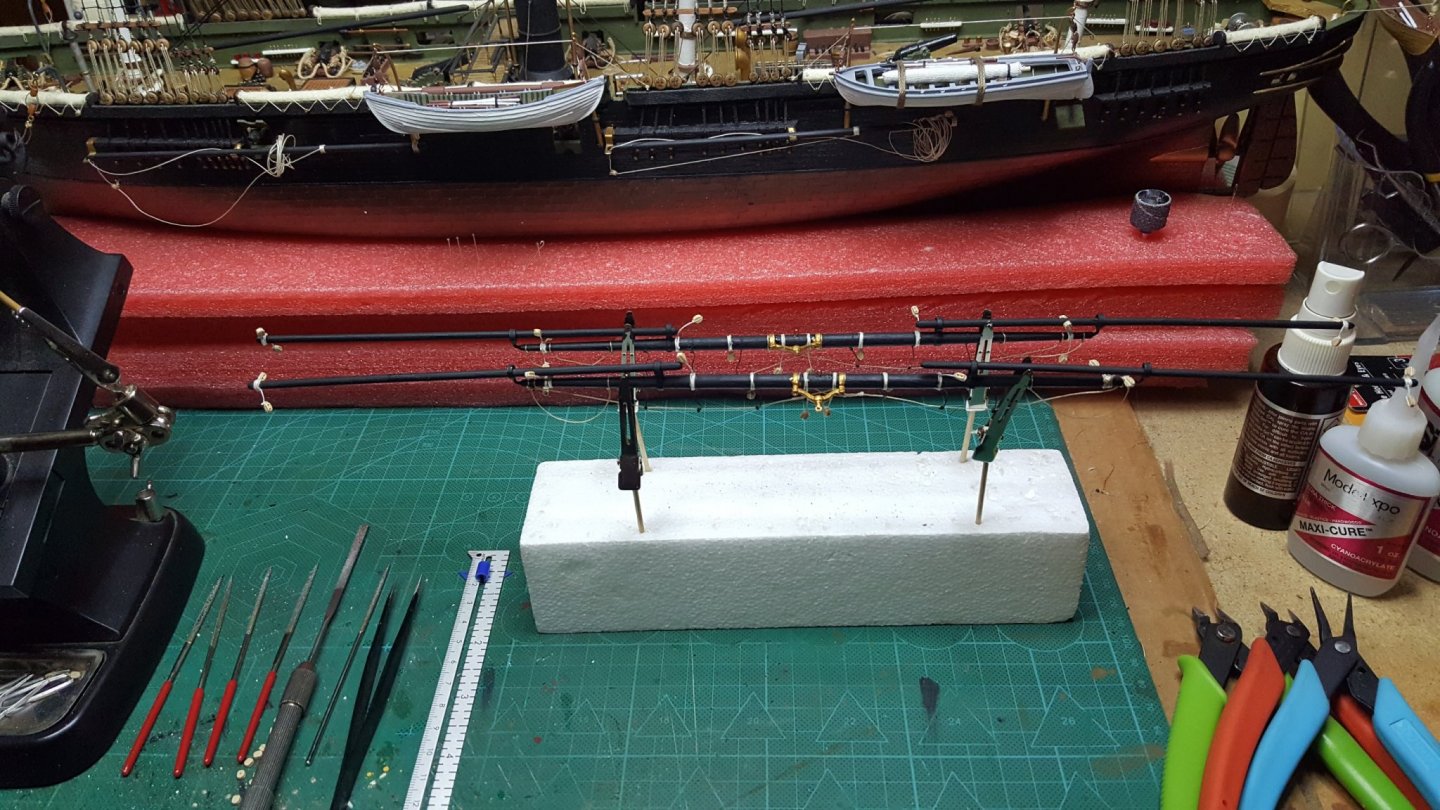
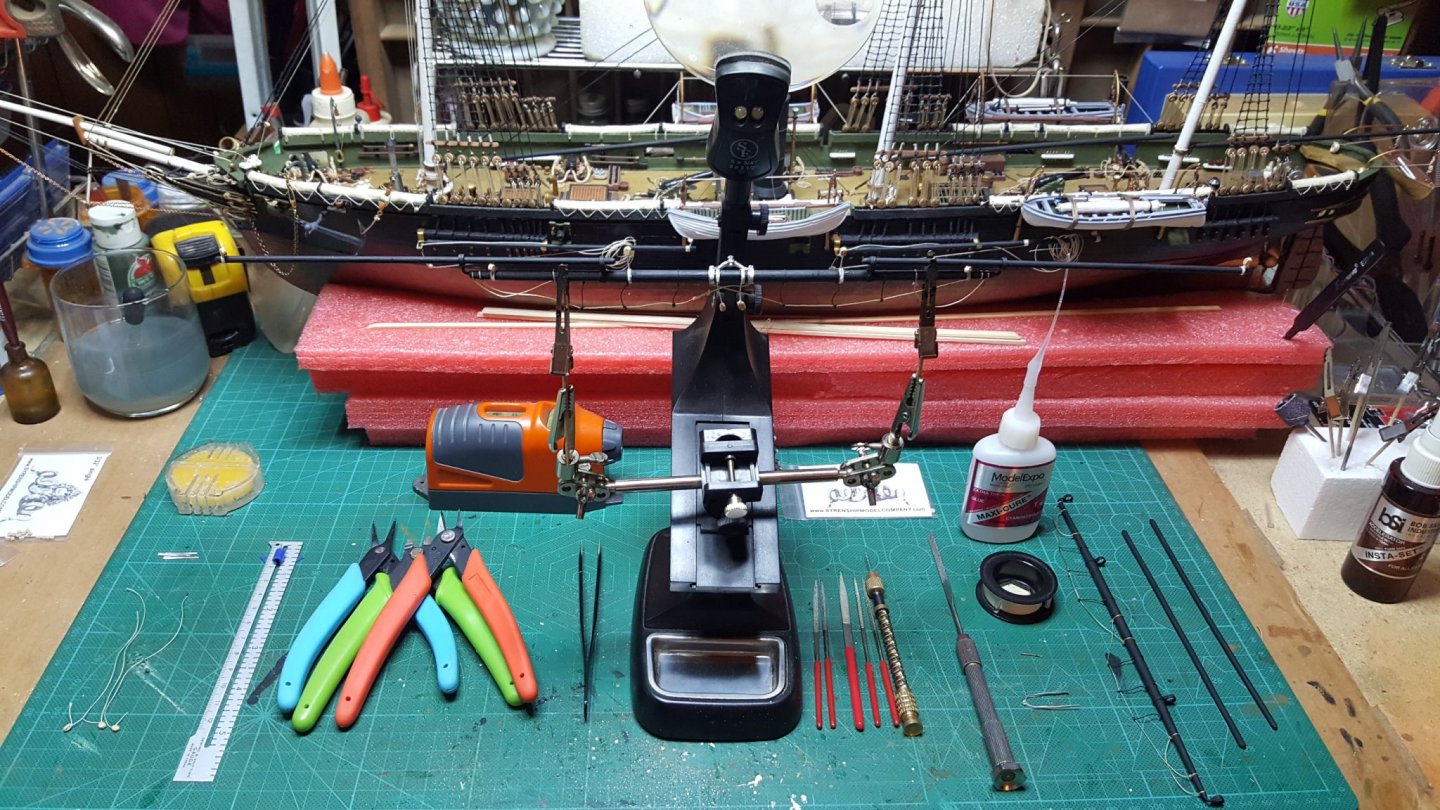
Another update as the yards for the masts are almost completed along with modelspan on the right has arrived. Sail making will commence in a couple days as I have to get a few basics of material and tools to get them done. Then for future models I will already have what I need for sail making. List for sail making tools and material is as follows: 1) Yellow ochre paint 2) PVA Glue (have) 3) Travel iron mini 4) Mini rolling pin 5) Curved sewing needles 6) New razor blades (have) 7) Mechanical pencil (have) 😎 Sail patterns with notes on them (finish) 9) Mini blow dryer 10) Small brass wire (have) 11) Wax paper 12) Prep paint boxes (have) 13) One thousand reef points (make) 14) Sharp scissors (have) 15) Titanium scale ruler (have) 16) Masking tape (have) Updated progress work image:

- 383 replies
-
- 11
-
-
Excellent rat-line work!!
-
Quick update on yard work, their coming along: The sails are a very interesting project as the detailing on them can be intense along with coloring and weathering. I am figuring since I am a novice at doing them that with completion in regards to rigging each one will be ten to twelve hours. Fortunately MSW has a bunch of reference blogs from other members giving their experience in making them which is a huge asset for me to tackle these rascals. Here's some of the references from other members for sail making for those in the future whom might need a to learn the processes all in one spot: https://myemail.constantcontact.com/News--tips--and-happenings-from-BlueJacket-Shipcrafters--Inc-.html?soid=1105166336677&aid=fVLCRI0uZ9o https://www.youtube.com/watch?v=g_m_VWzk4w8 https://www.youtube.com/watch?v=Q5vKvMeoT-E https://vimeo.com/297508363 https://www.seawatchbooks.com/ItemDisplay.php?sku=115003 https://modelshipworld.com/topic/20443-how-are-sails-fixed-to-yards/ https://www.youtube.com/watch?v=gMM2lCLQfdM https://modelshipworld.com/topic/11861-how-realistic-can-one-make-sails/page/2/ https://modelshipworld.com/topic/152-le-superbe-by-blue-ensign-finished-heller-plastic-built-as-le-praetorian-after-boudriot/ Which are excellent instructions also further down the blog.

- 383 replies
-
- 11
-
-
Beautiful!! Makes me want to take her for a sailing trip!
-
@CRI-CRI, magnificent as always. I'm assuming your using tweezers along with a small metal level to get these so perfect in construction? Or have you made a miniature spacer jig for this size work?
-
@mugje, nice work! I myself haven't put one together so for a couple future builds I now know threw your blog and Dubz recommendations how to get it done right the first time. You are now officially a deconstruction member!
-
Man; excellent tug!! I assume you will be using that one in the tub?? Thought I was looking at a real ship with all the quality detailing.
- 63 replies
-
- 3
-
-
- revell
- harbor tug
- (and 2 more)
-
Looking good! Nice craftsmanship on those carvings @GrandpaPhil.
-
@JesseLee, many thanks. The sails I feel will be the trick. Been watching and reading a bunch of other members sail blogs and works. The modelspan should be realistic enough for what I'm after in representation. Plus it's light, so won't add weight onto the yards to much which is a plus. Just recently my sweetie was showing me sewing machines and saying how useful it would be in sail making .... I think I'm being setup! Hmm, sewing machine for a couple new saws and sanding machine .... come to think about it; sounds like a great deal. I'll have a couple more images soon, funny as I thought I had enough single blocks bought, I have found more of them on the plans and will probably have to get fifty more of them .... love the Syren blocks and glad he offers such quality parts.
-
@Hubac's Historian, thanks for the compliments. It seems that this kit is fragile as the plastic on some parts is cracked but I have reinforced those parts with epoxy and paint. Then replaced a bunch with scratch built wooden parts. It is consistently breaking and I am repairing and replacing the parts as I go. The combination of plastic and wood is my mistake for this bash, but it is working; just have to be careful. With the drilling of the tackle into the spars and yards including the masts then maxi cure ca is bonding really well so far. I don't like sags in my rigging so if it does do sagging I will back-track and get it right if I have too. I am also keeping this as light as possible for parts without sacrificing strength. I also did a experiment with epoxy and some different paint types so I could paint and strengthen as I went to the danger areas that were cracked. Testors paints worked the best for this in added amounts..kinda played around with amounts depending on color. I felt it was important to let followers know that some of these older kits can be a problem when it comes to the plastic as we all know it depends on how it was stored for years before one has purchased it and it is a roll of the dice. This is a wonderful kit to work on, just a tad bit of a pain for making sure I don't break a part as she goes.
-
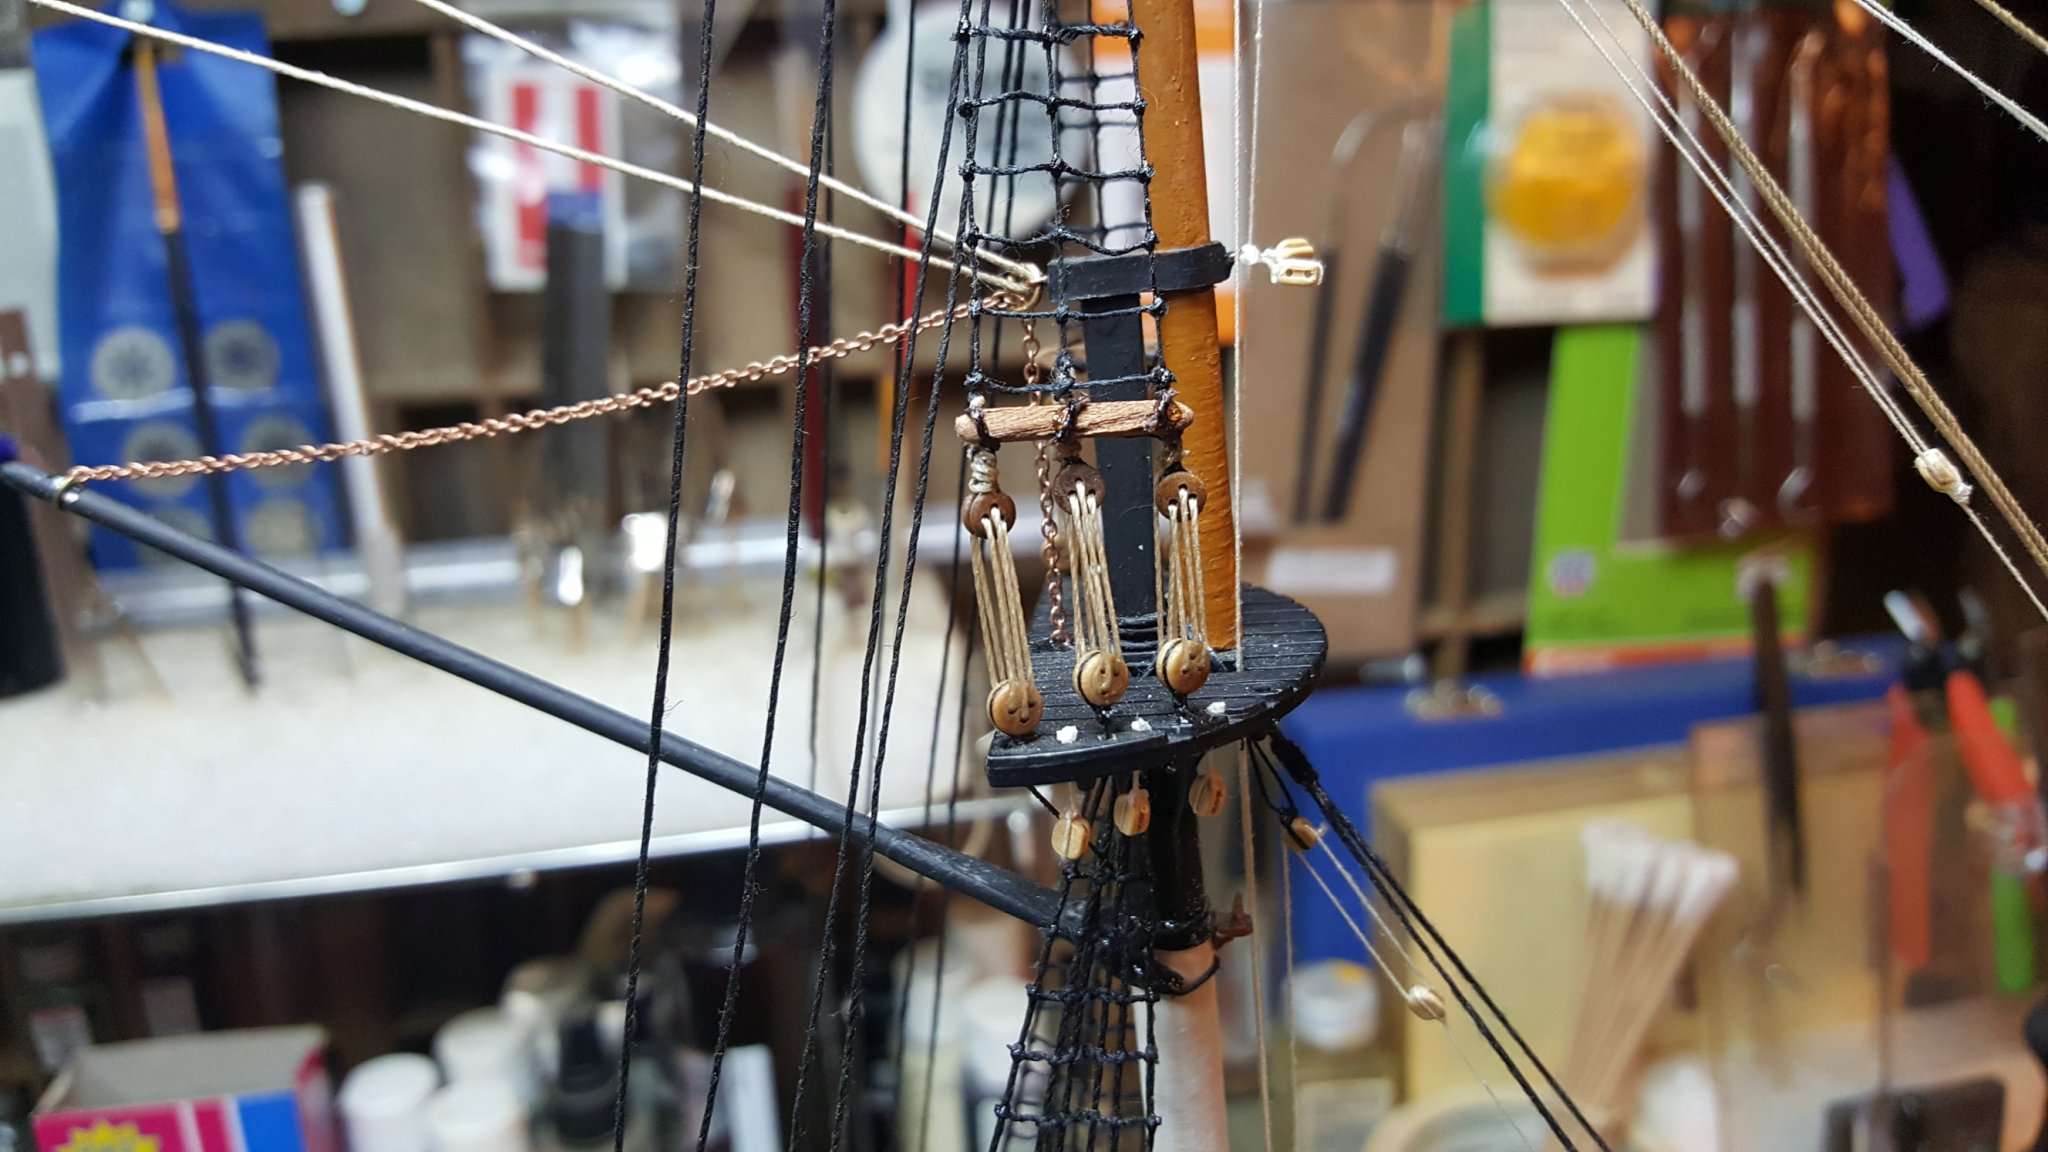
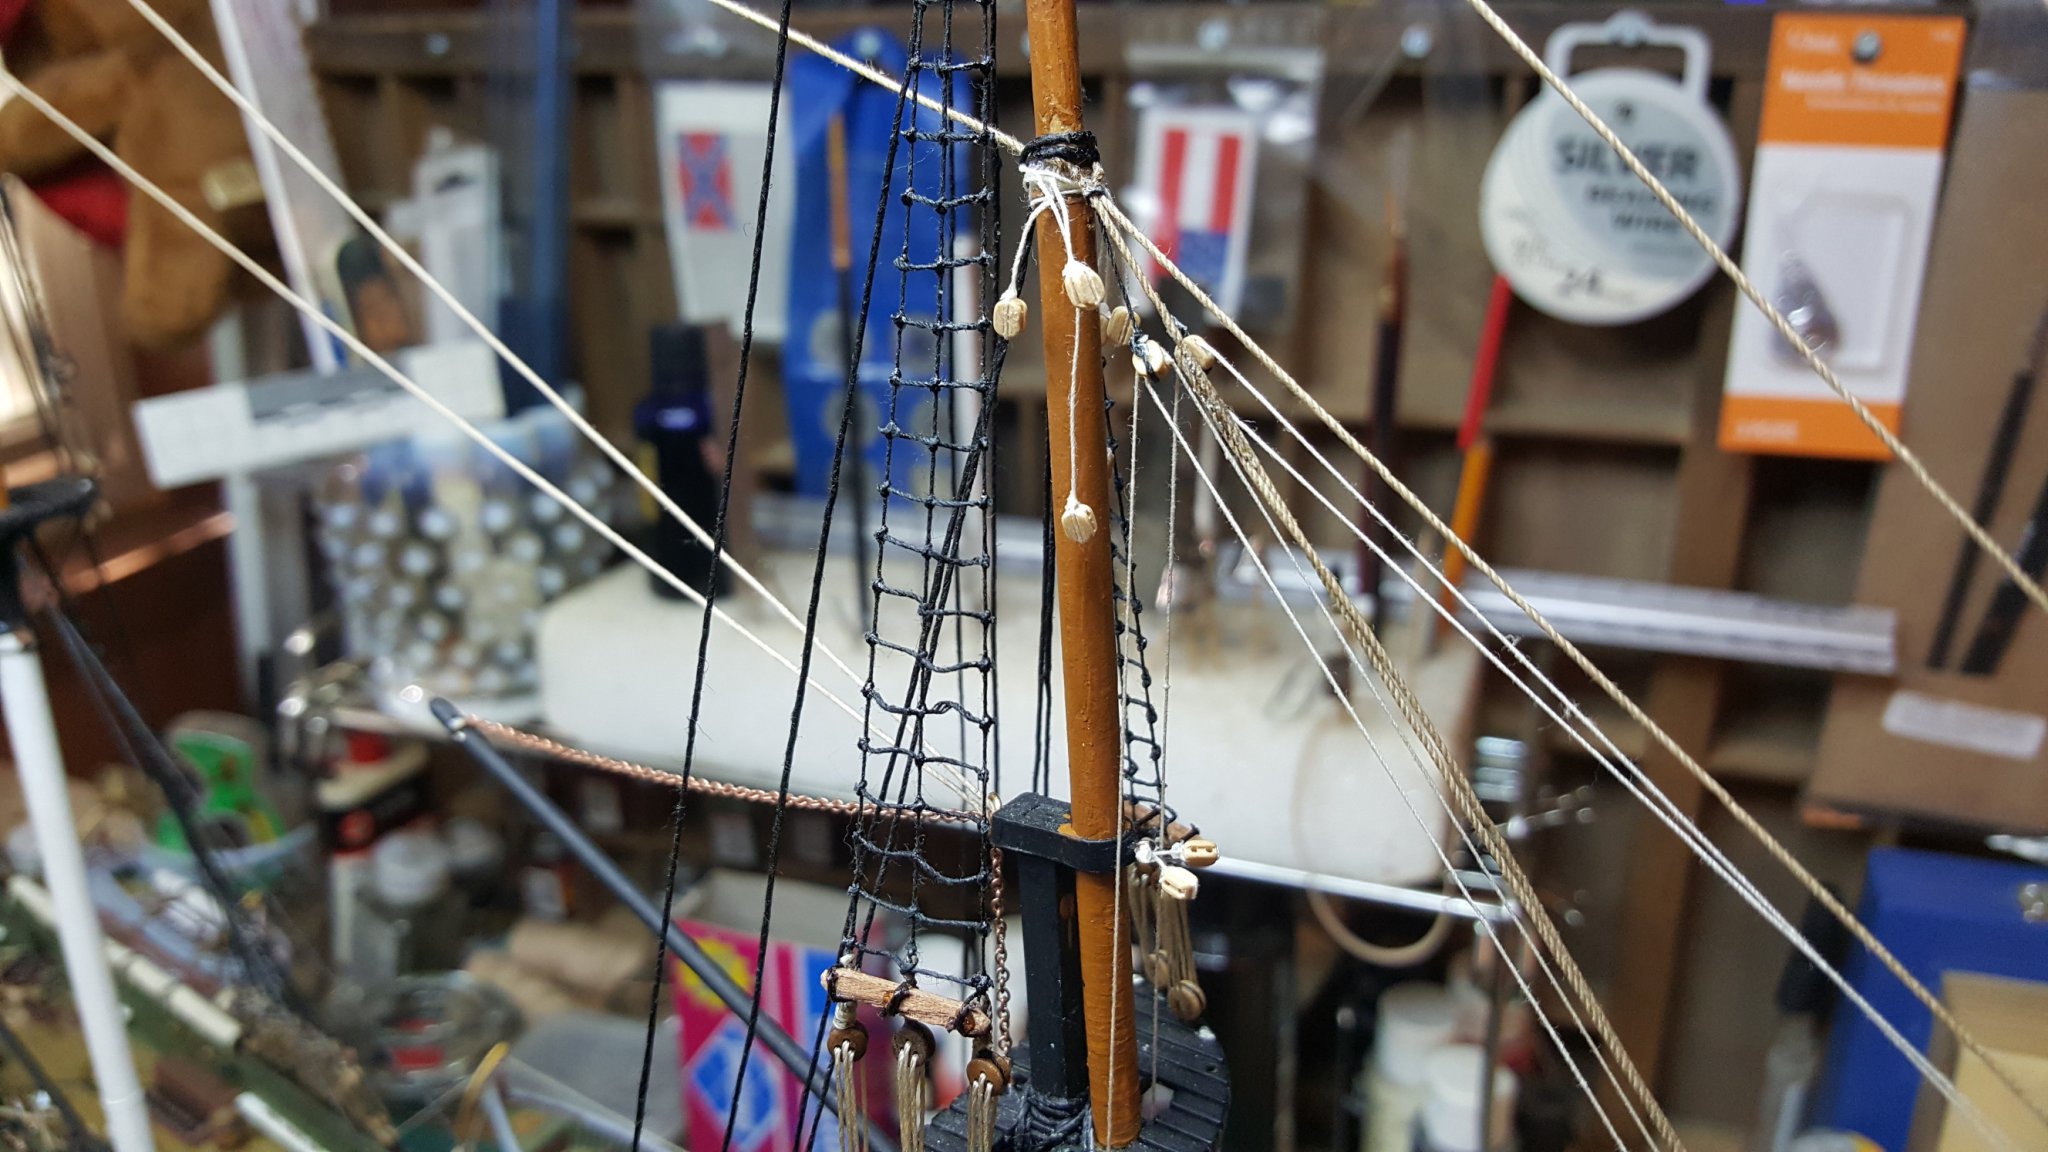
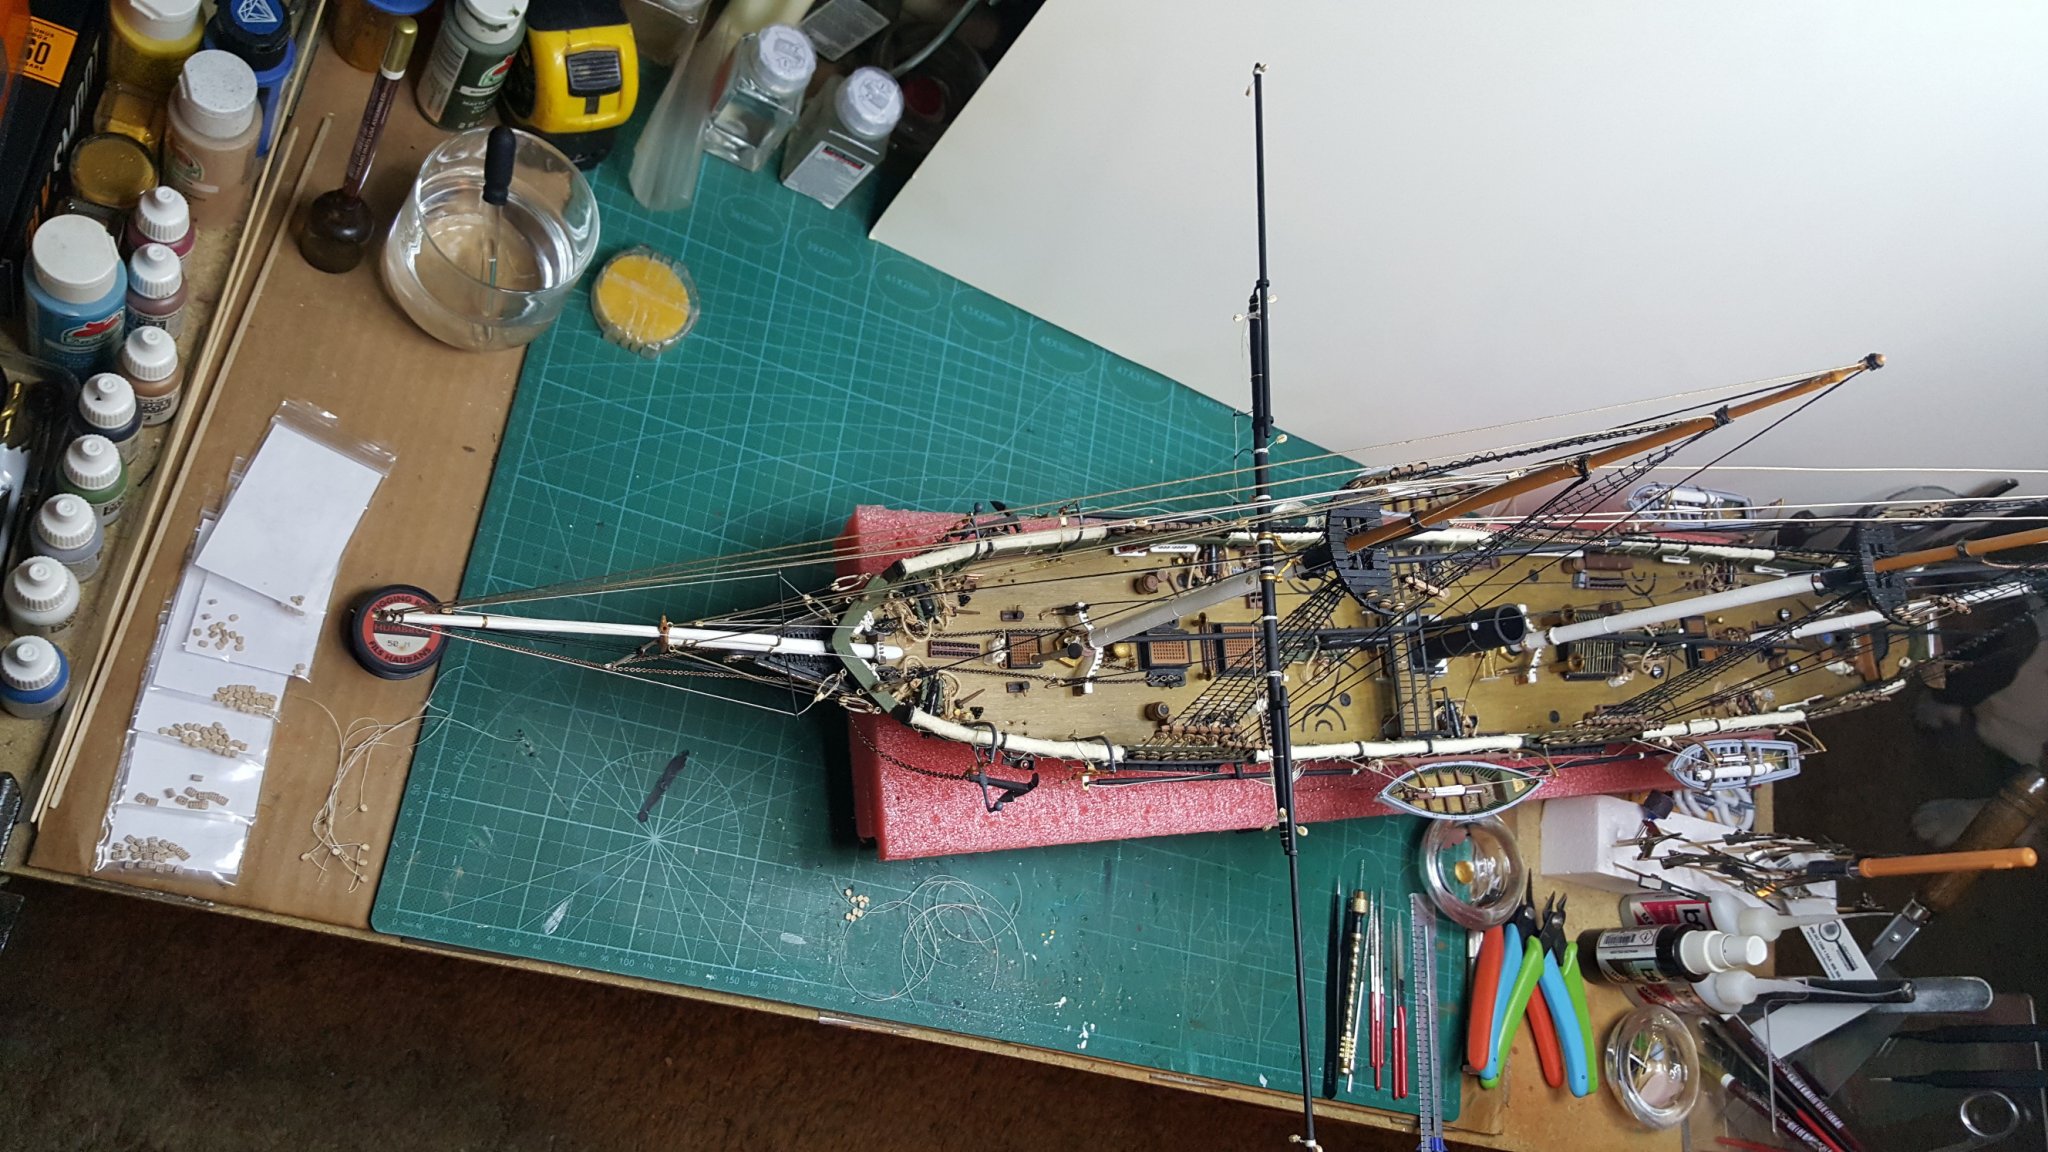
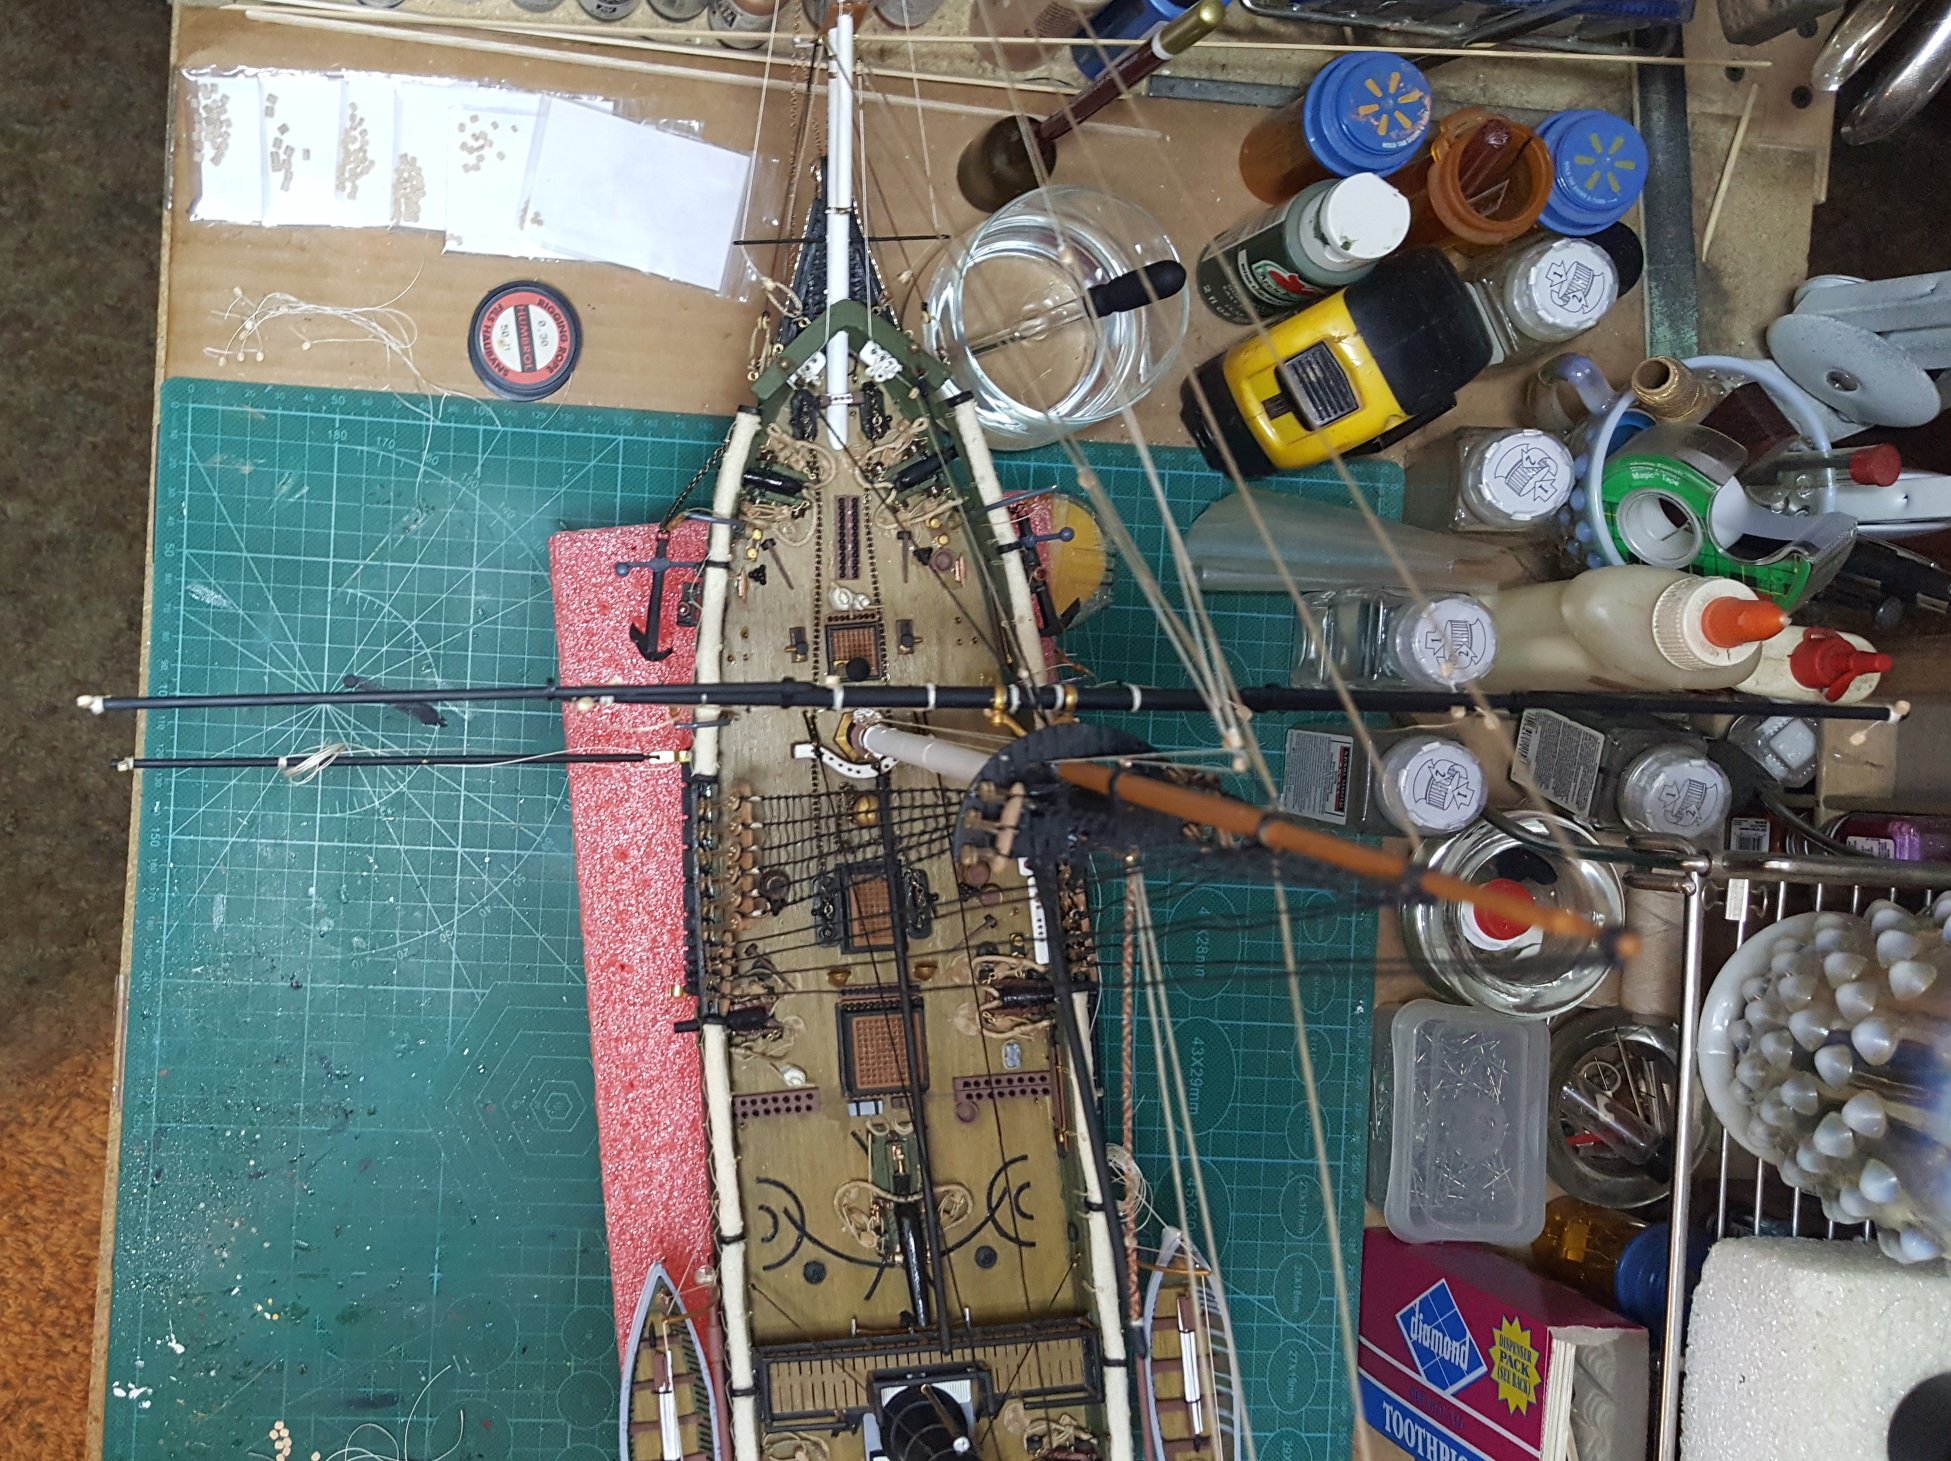
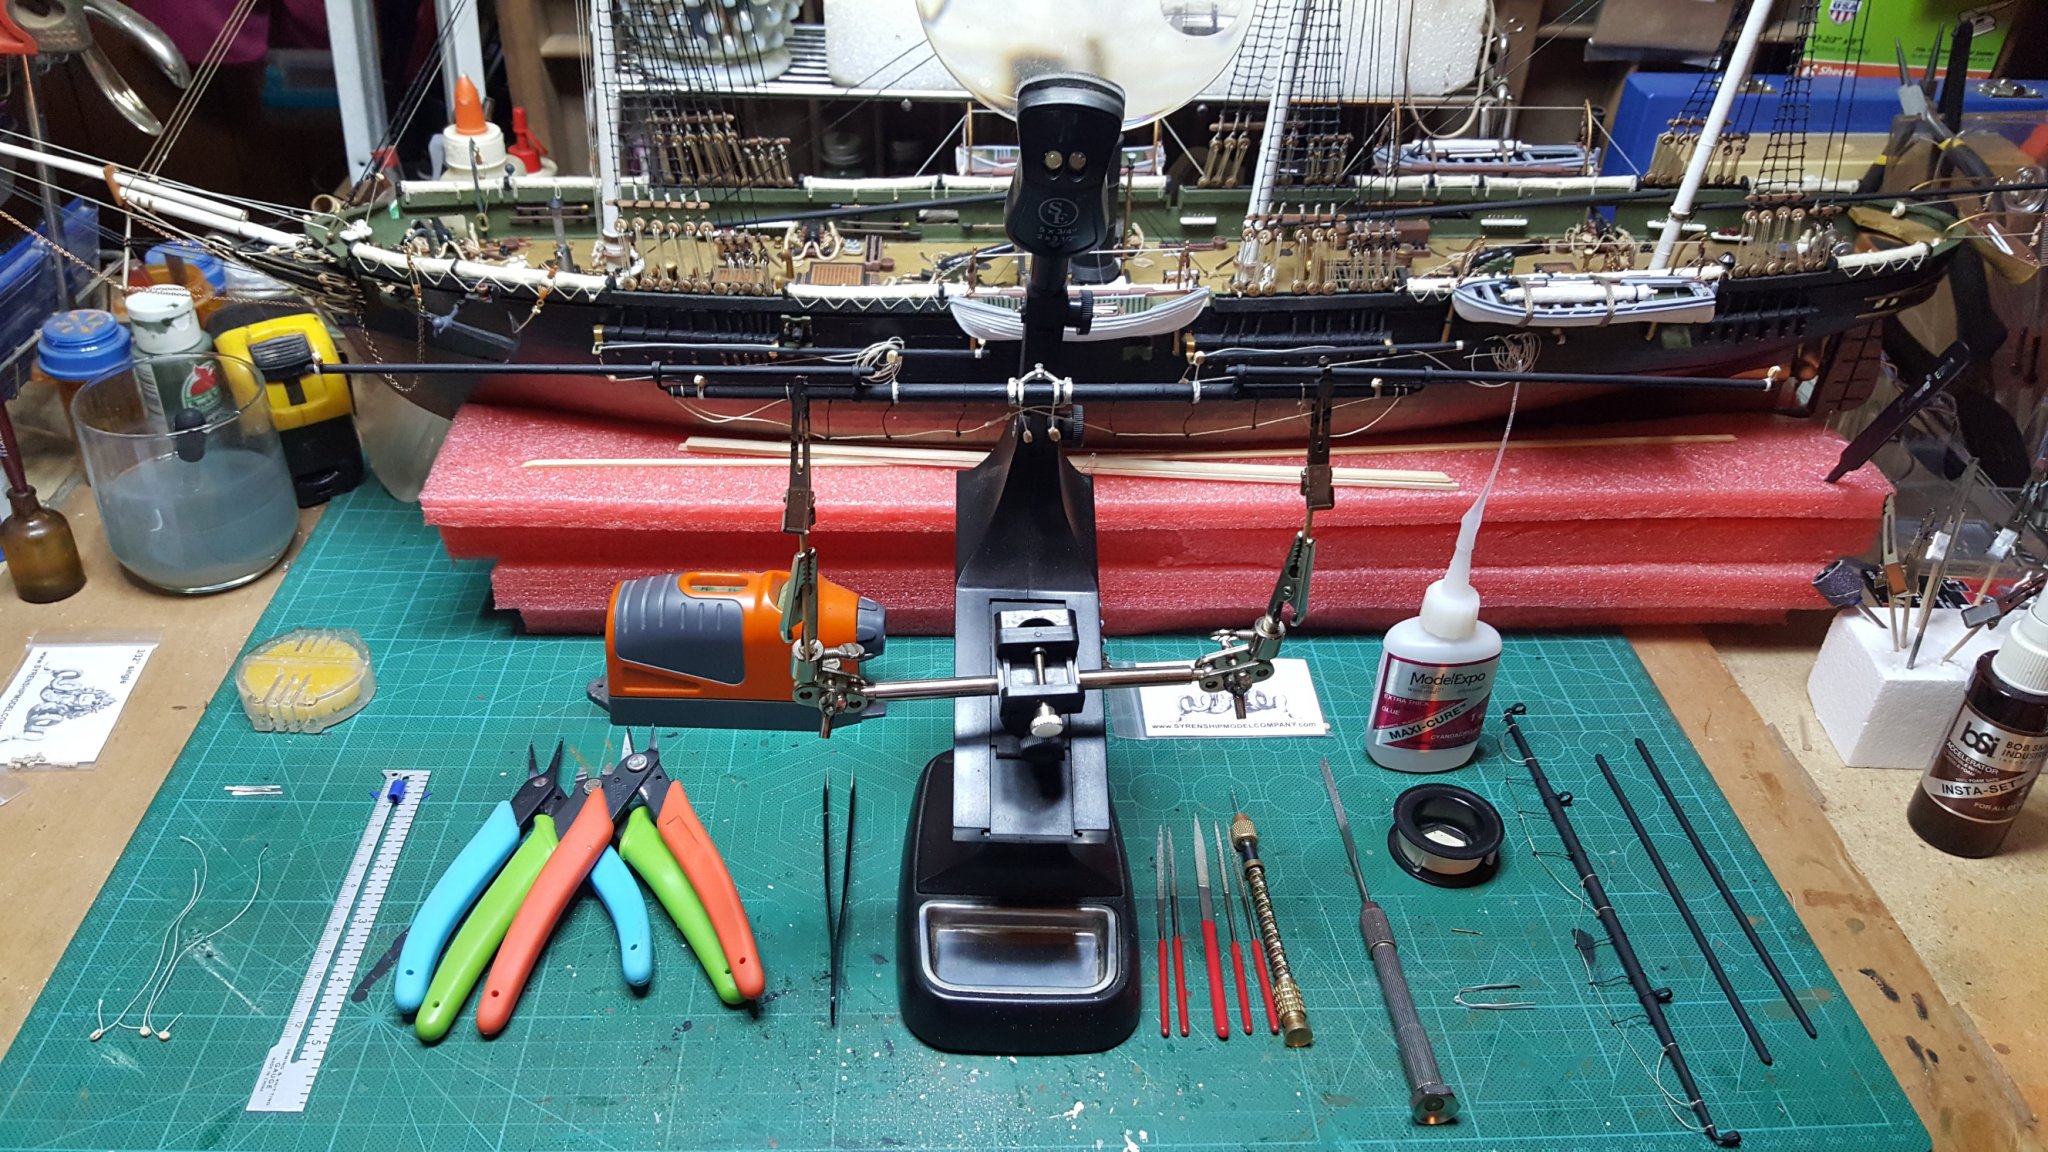
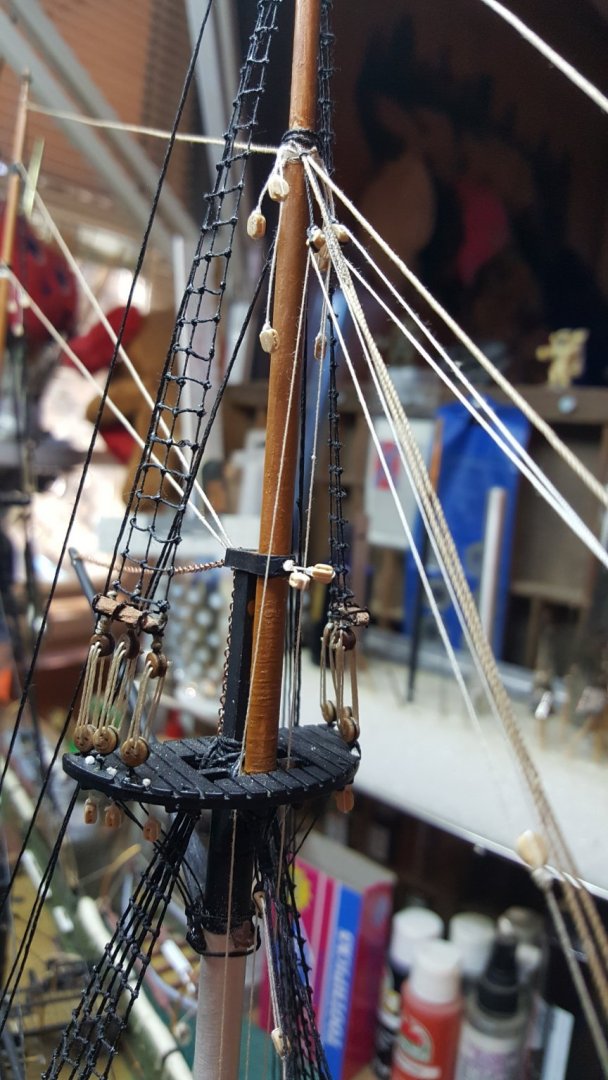
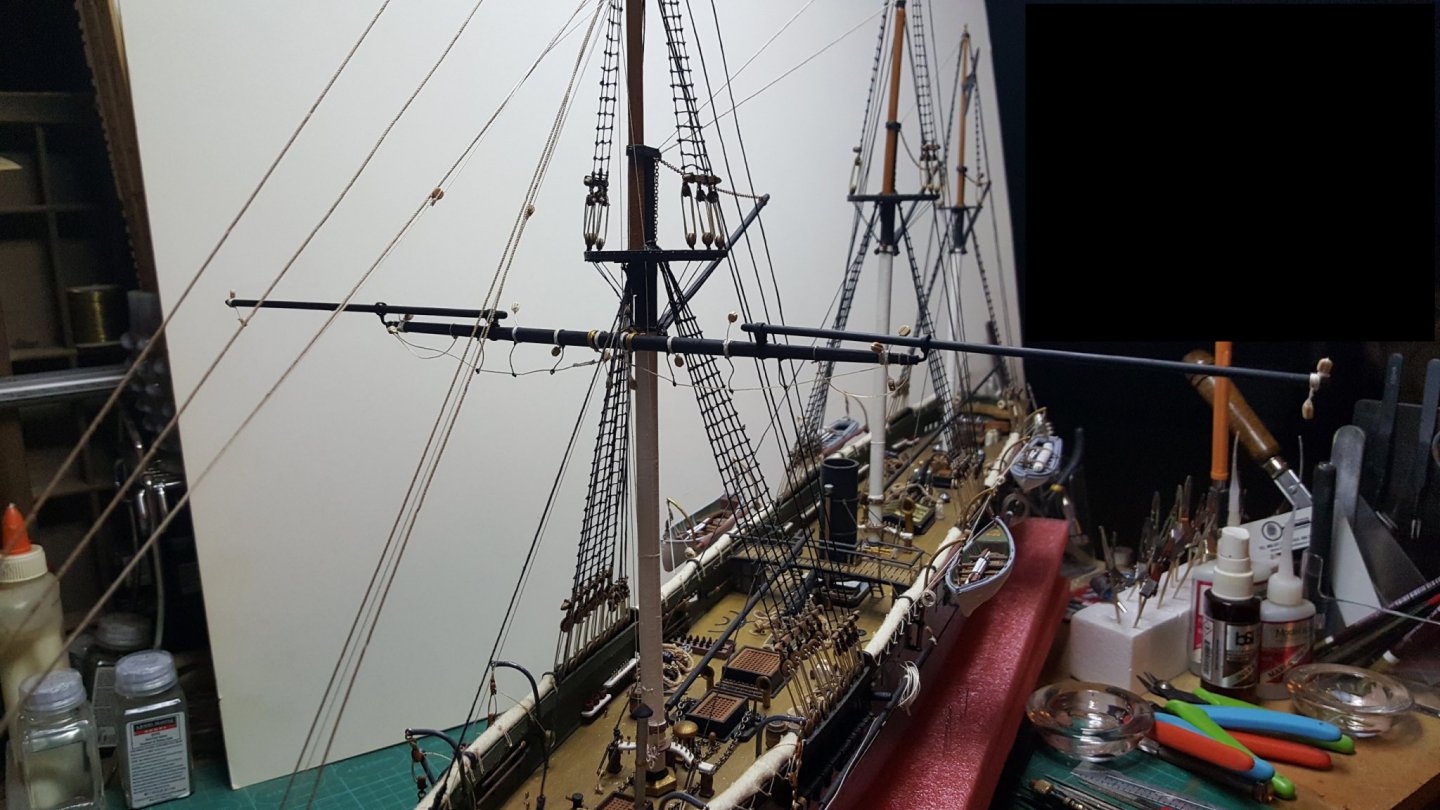
Gauging update: Working to see the placement of the yard on the fore mast along with the placement of the boom yard to make sure all the parts are going to function and placement is exact for sail mounting; I have imaged a few to give everyone the eye view of how this is coming together after all the tedious length measurements along with multiple plan usage to gauge the building for these additional detail parts. Looks like it has paid off and the rigging so far with sail placement will be non-interfering with each other along with tie down locations. Once the rigging and sail placement does commence after I have all of these yards done for prep, it will be a very careful installation. This rascal is so fragile I cannot make a mistake as it would be a disaster. 18 blocks are on the lower yard for the fore mast and the main mast, e-gads I have only one completed.... Lower yard temporarily placed on fore mast: Boom yard extended for placement gauging: Looking down for lineup of both yards: Now I know how a crew member would feel being at the top of the mast ... yikes ... what a ride! Slowly she's starting to look like a ship of the 1860's. I also do encourage others to tackle this ship. There are many excellent kits available to choose from out on the market. There are a couple older wooden kits out of production which can be had on ebay, just have to watch for them. I have noticed that the Revell plastic kit always sells when they do pop up and seems I have seen at least two to three sell each month for the past year. Hope to see a couple more builds here at MSW using the same kit in the future. The "BlueJacket" Kit is the best I feel out there and highly recommend it. I couldn't afford the price for it, if I could have it would be being built. My build is showing what can be done on a budget to produce a high quality CSS Alabama representation as other members are doing here at MSW. Bash baby bash! Your only limitations is your imagination in creativity. Thanks for all the likes and interest!!


- 383 replies
-
- 12
-
-
Update on progress: To complete the prep before sail, rigging and mounting to the fore mast has taken about five hours for one yard, so far the next few days; this is what is being worked on. As we all know, very gently these are being installed; so to make sure I can tighten the associated rigging fairly tight when that installation comes. Each one of the blocks rigging are drilled into the yard, then tied and wrapped for securing.

-
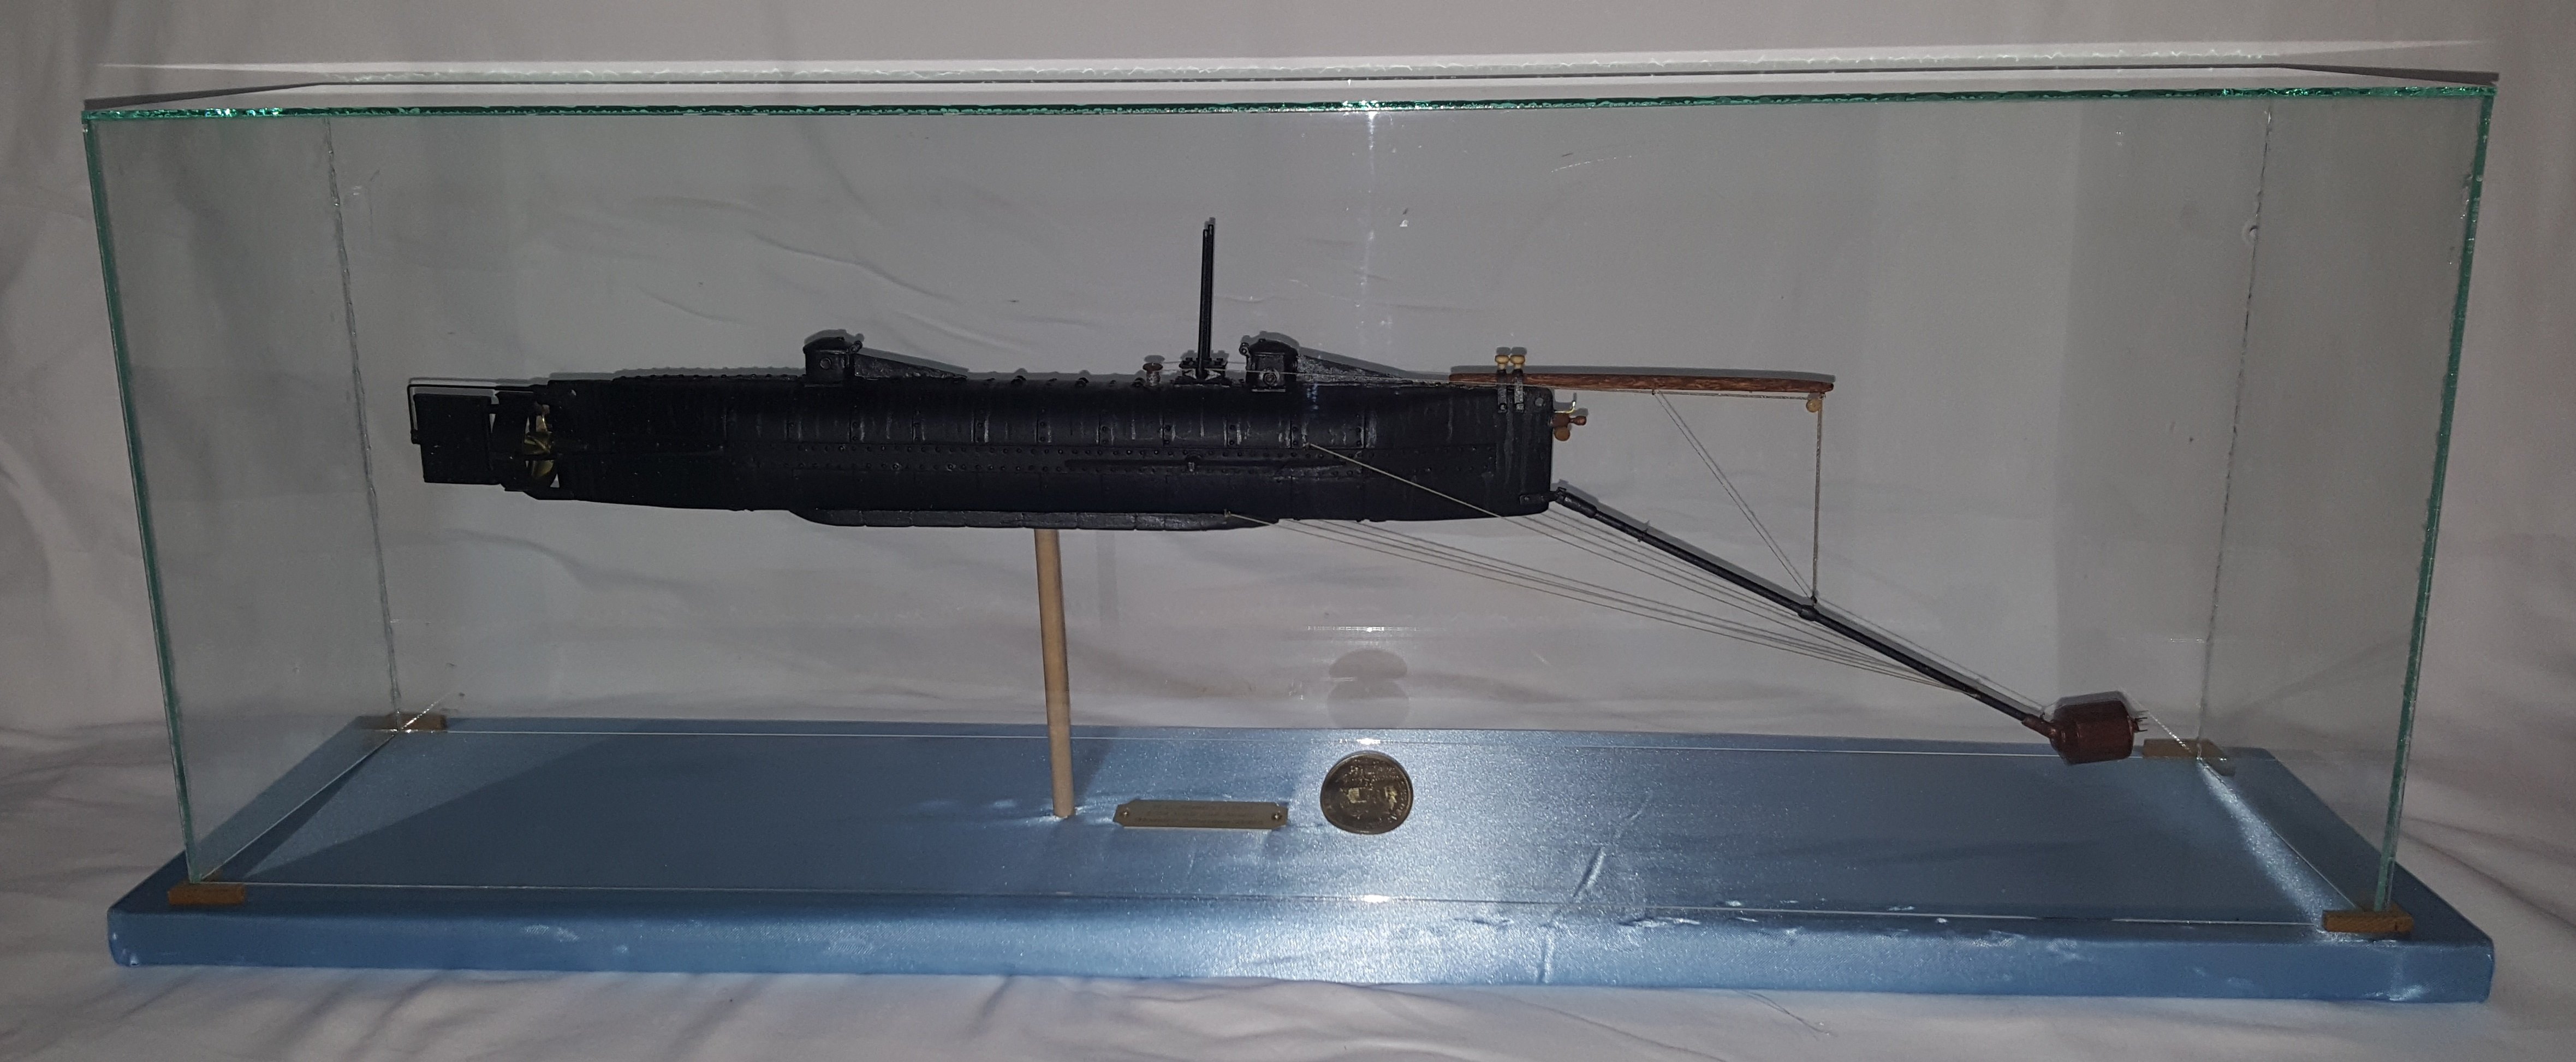
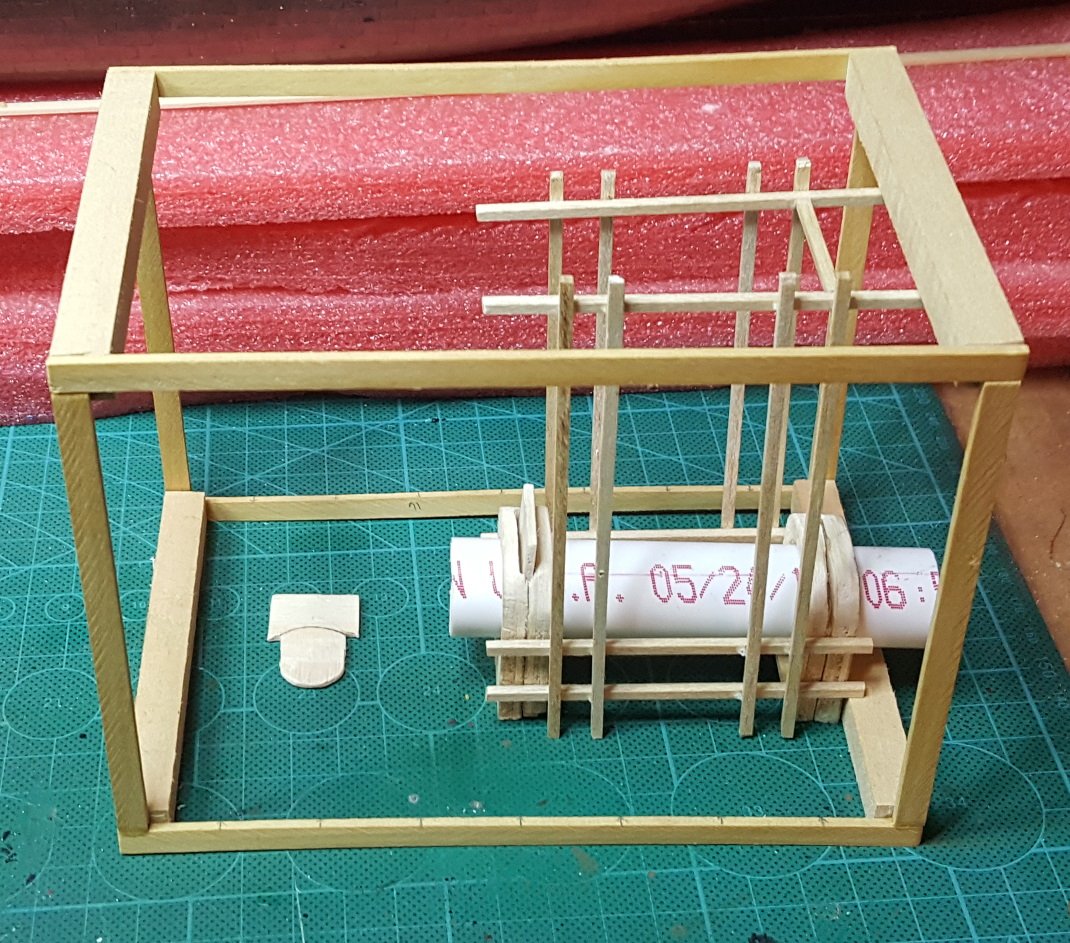
Reinforcing the frame and working on the hatch doors for the tube. Have one cut and functional and working on the second one. Will have to work on these for awhile to get them looking decent along with hinge work. Being careful as not to break this rascal.
- 12 replies
-
- 5
-
-
- what is it
- torpedo
- (and 1 more)