HOLIDAY DONATION DRIVE - SUPPORT MSW - DO YOUR PART TO KEEP THIS GREAT FORUM GOING! (89 donations so far out of 49,000 members - C'mon guys!)
×


niwotwill
-
Posts
596 -
Joined
-
Last visited
Content Type
Profiles
Forums
Gallery
Events
Everything posted by niwotwill
-
 Andrew I saw how you were holding the small parts for painting and said "Oh Wow" what a great idea. I have quite a few clamps that have lost their rubber tips and now I'll use them to paint not worrying how much overspray. Best Regards Will
- 206 replies
-
- 1
-

-
- Vanguard Models
- Brixham trawler
- (and 2 more)
-
Good Morning Andrew Wonderful job on the painting the colors look great!!! Your comment about masking is unnecessary as I can only imagine how hard it was masking at the joints of thick planks and thin planks joint must have been. WELL DONE Best Regards Will
- 206 replies
-
- 1
-

-
- Vanguard Models
- Brixham trawler
- (and 2 more)
-
Andrew the black is astounding and really shows off the scuppers. Well Done Mate! Best Regards Will
- 206 replies
-
- 1
-
-
- Vanguard Models
- Brixham trawler
- (and 2 more)
-
nice Andrew very nice. The floor heavy planks show really well a great feature you added. What colors are you going to paint? Best Regards Will
- 206 replies
-
- 1
-
-
- Vanguard Models
- Brixham trawler
- (and 2 more)
-
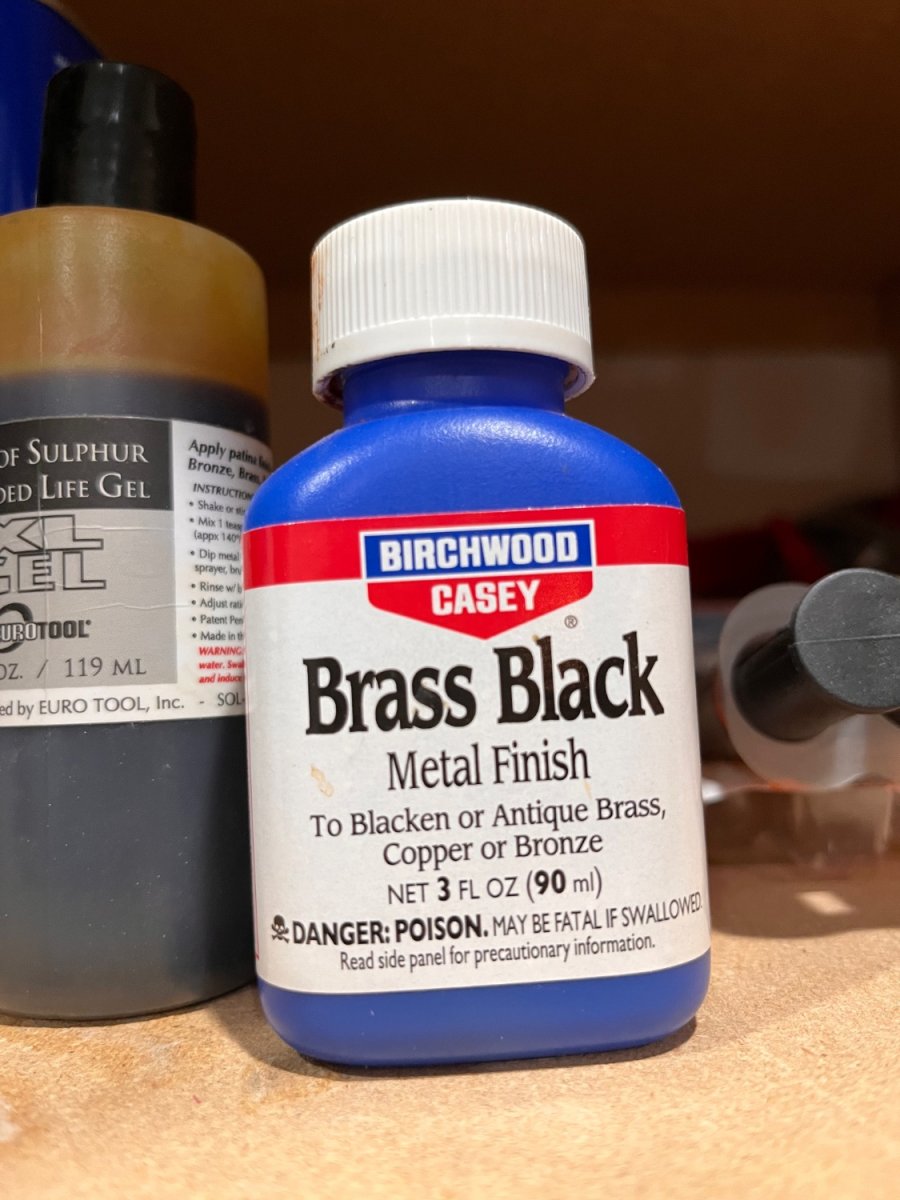
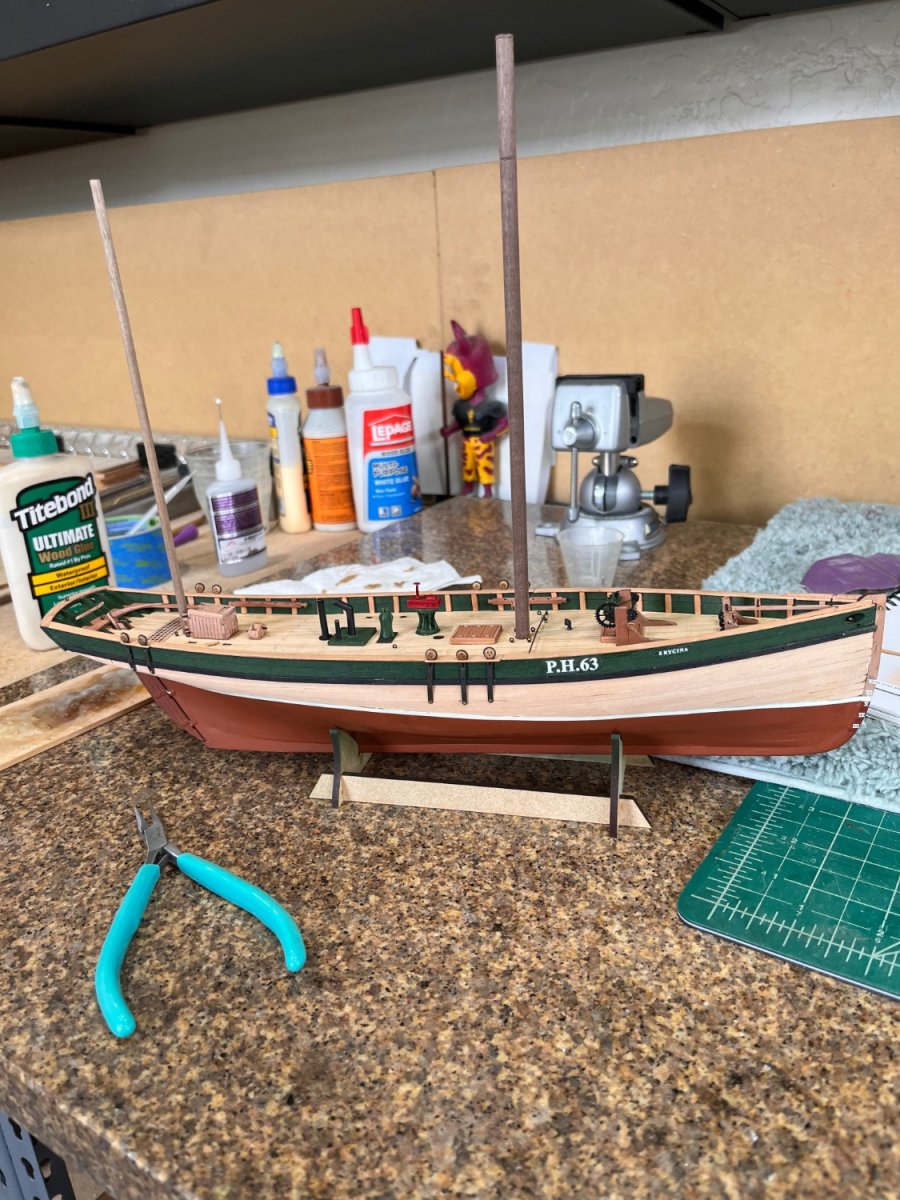
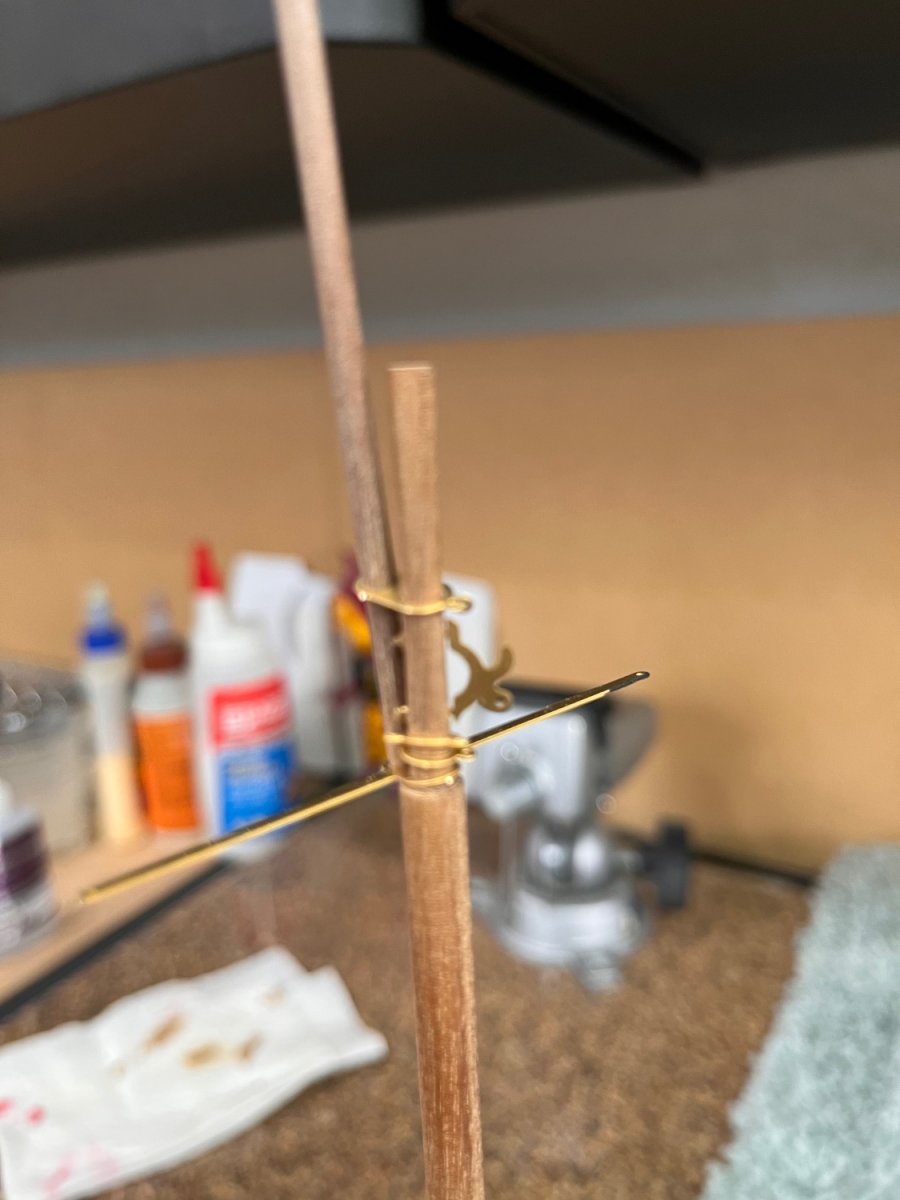
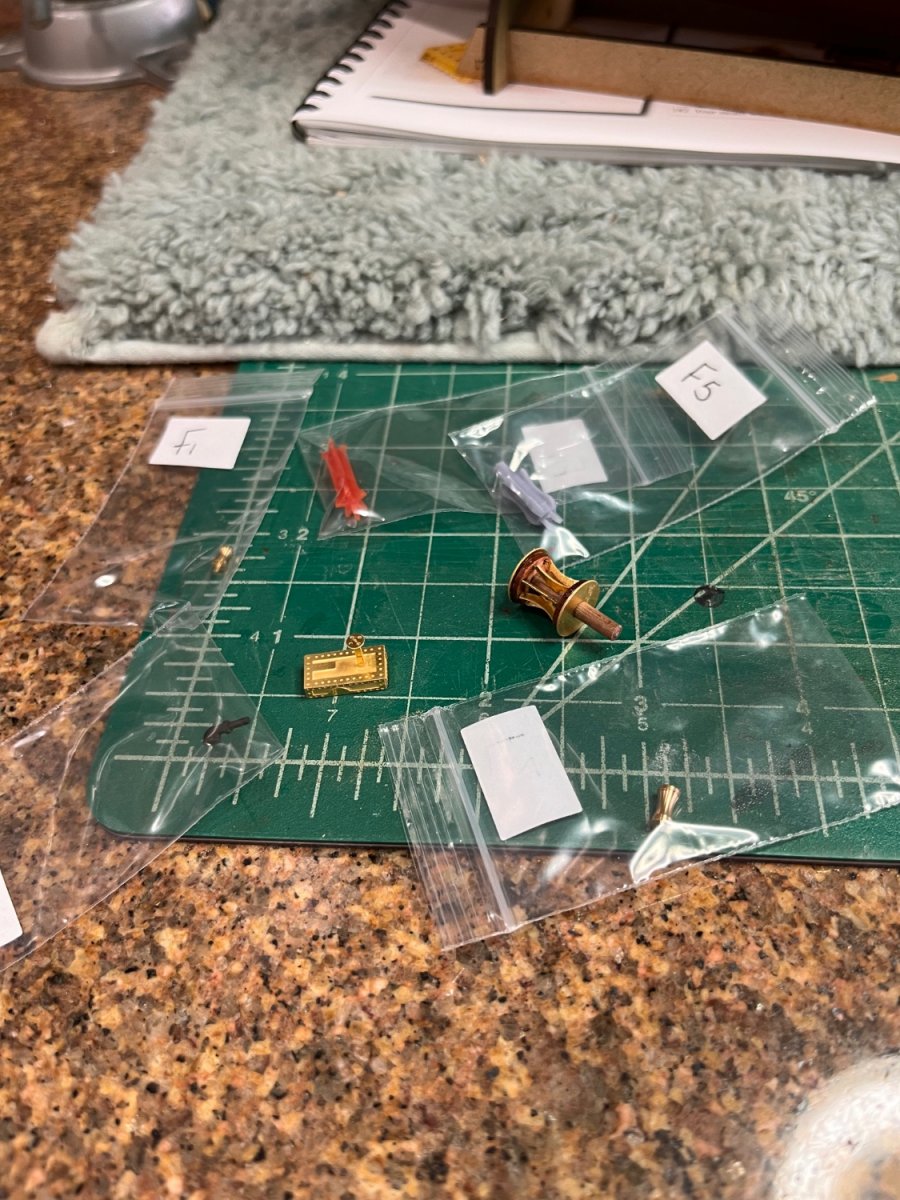
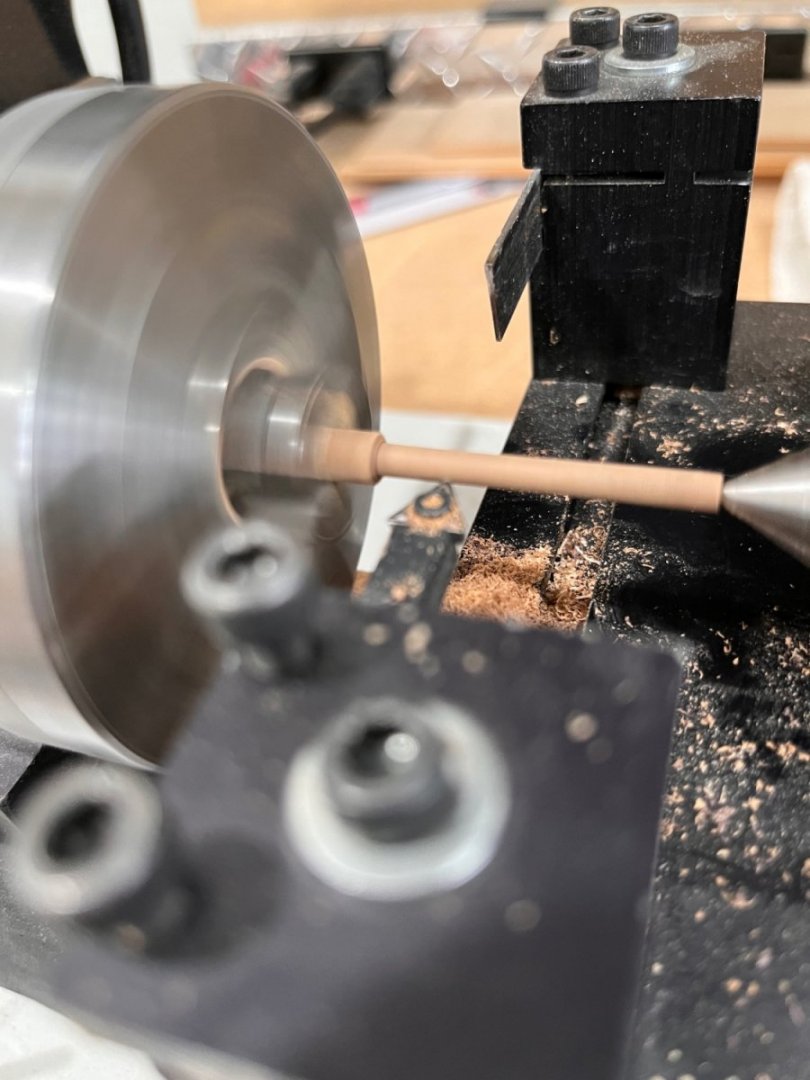
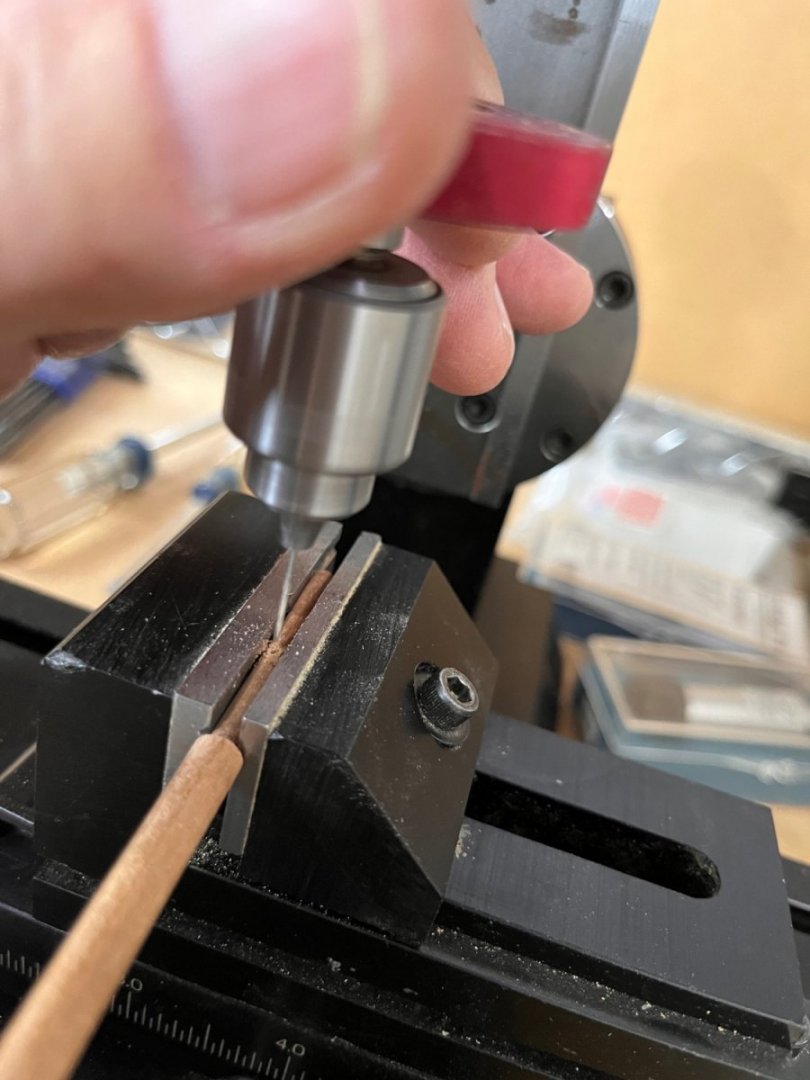
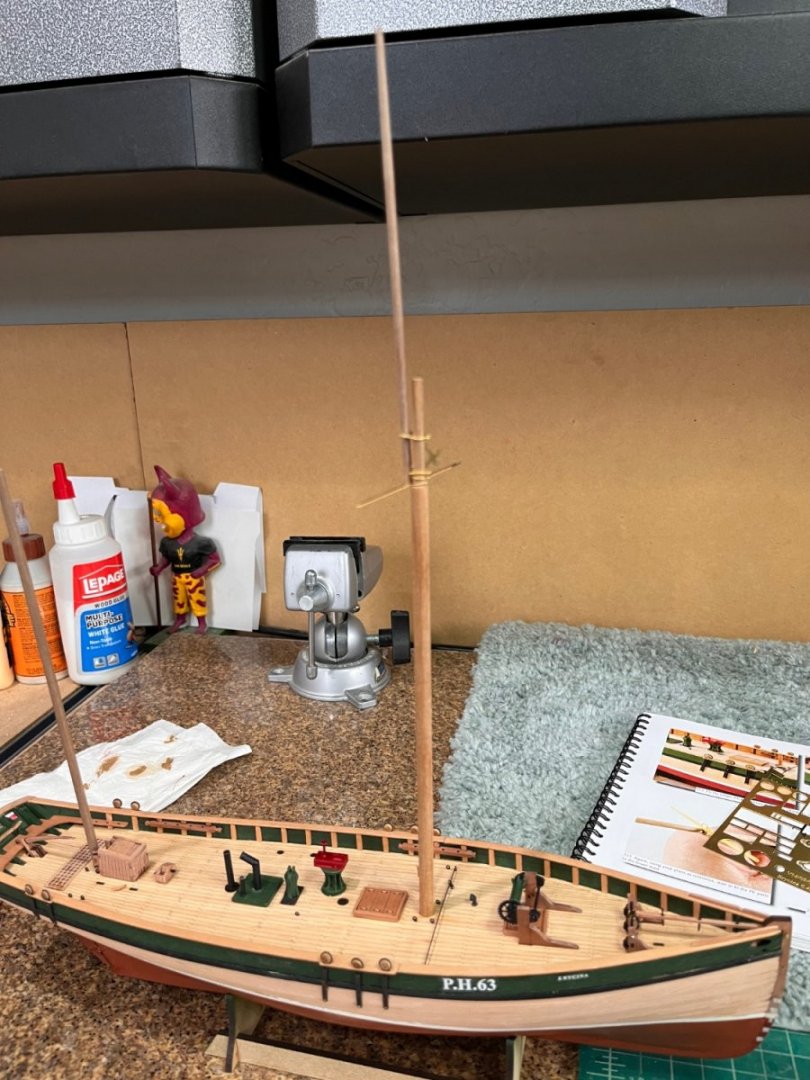
Thanks Don she's becoming a beautiful ship you can see why some became yachts. Finished up fixing the whoops and then started on the working part of a sailing ship. Removed the shroud ironwork from PE sheet and carefully filed the holding tabs until a smooth surface. I use Parts are cleaned with 91% alcohol before being immersing in solution. After cleaning all handling is done with tweezers. I've found that if you leave the parts in the solution until they turn to black and remove them to dry on a paper towel gives me the best results. Once dry parts are dry they're washed with water and left to dry. The deadeyes were put into the ironwork as described in the instructions. To get the angle correct to the shrouds a thread was strung from a dowel the height of where the shrouds attach. A mark was made using the ironwork with a straight pin and then a pilot hole was drill for the nail. The main mast required a 2mm relief at the top so out came the lathe. Simple matter of turning the 6mm dowel down to 4mm diameter at the required length. The 4mm portion required 3 holes for the metal work and an eyebolt. Using my ratio to find their positions and drill the holes. All parts made they were dry fit on the boat. Next to blacken parts, sand, stain, and finish parts and on the yard and gaff. Best Regards Will


- 77 replies
-
- 9
-
-
- Erycina
- Vanguard Models
- (and 1 more)
-
I've made the change to Mara awhile ago with fantastic results. Quick question: the rope in the picture is that the #854? Best Regards Will
-
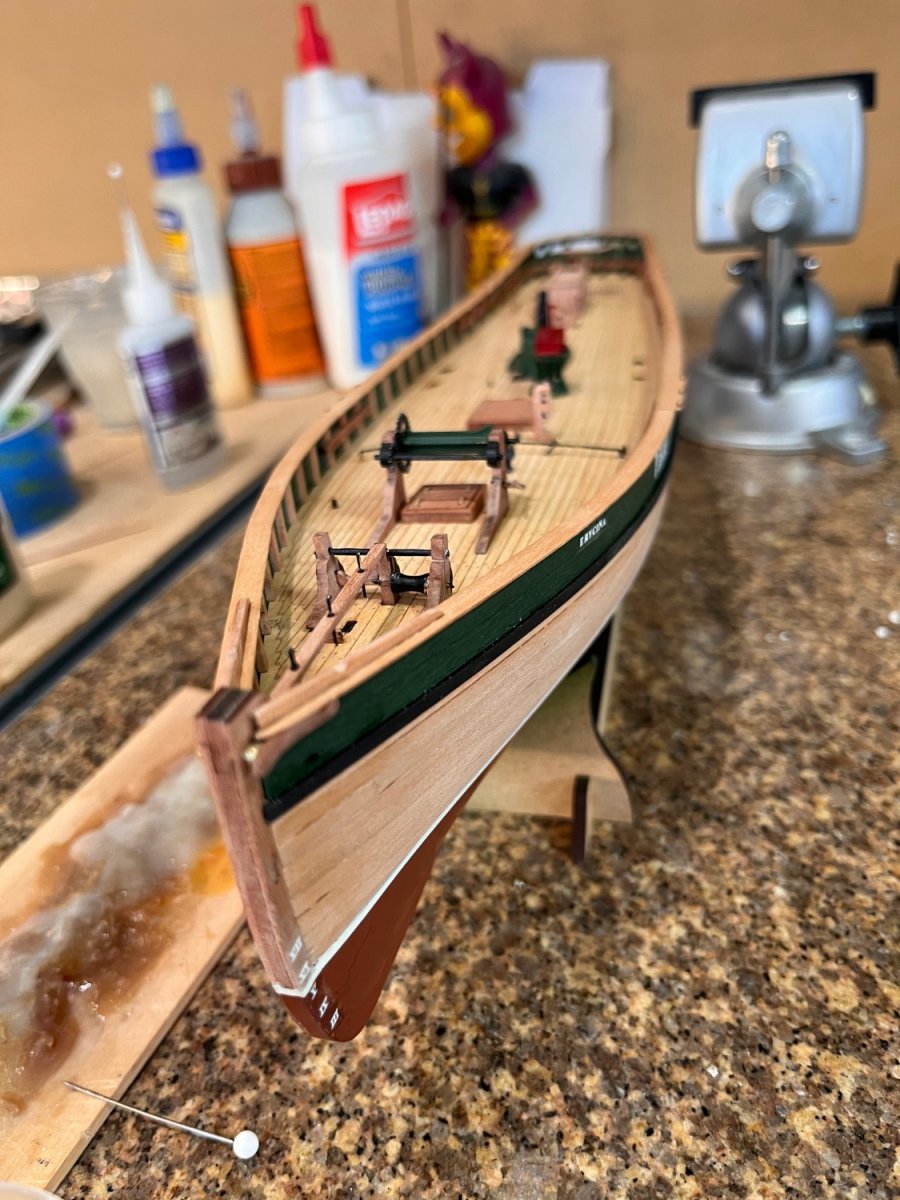
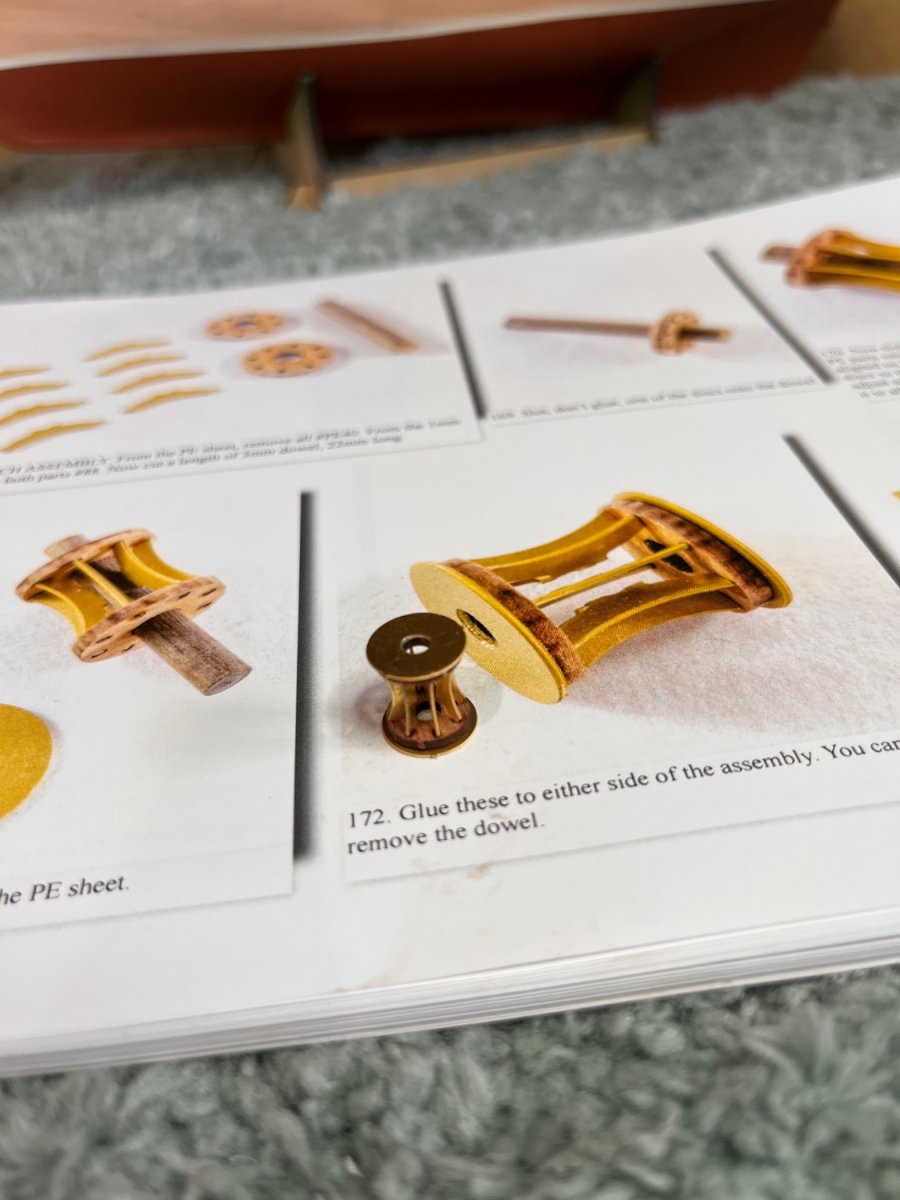
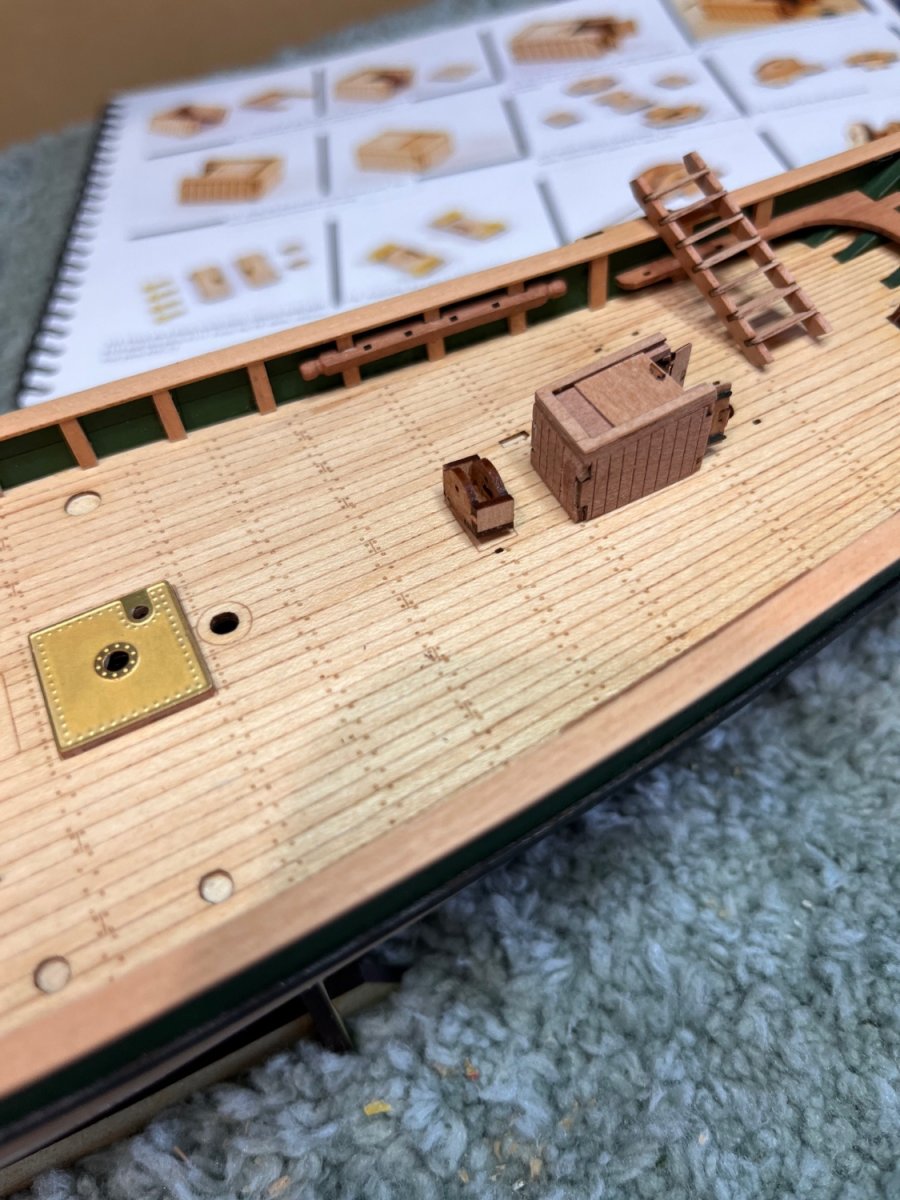
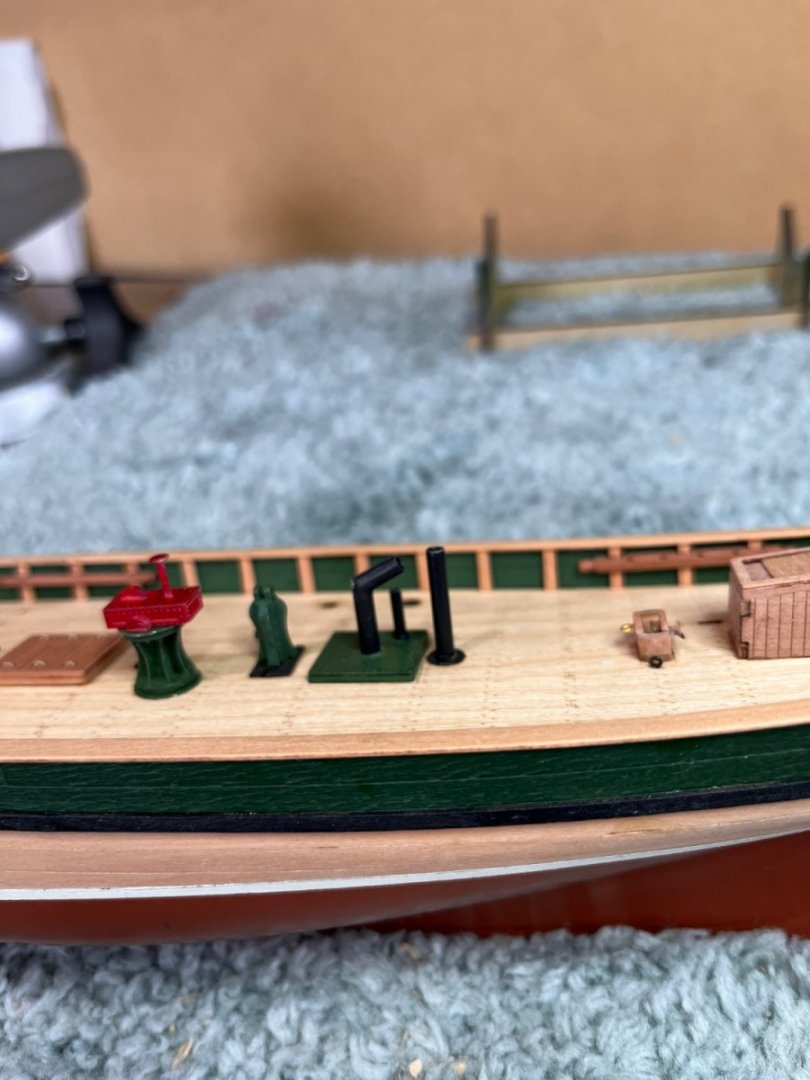
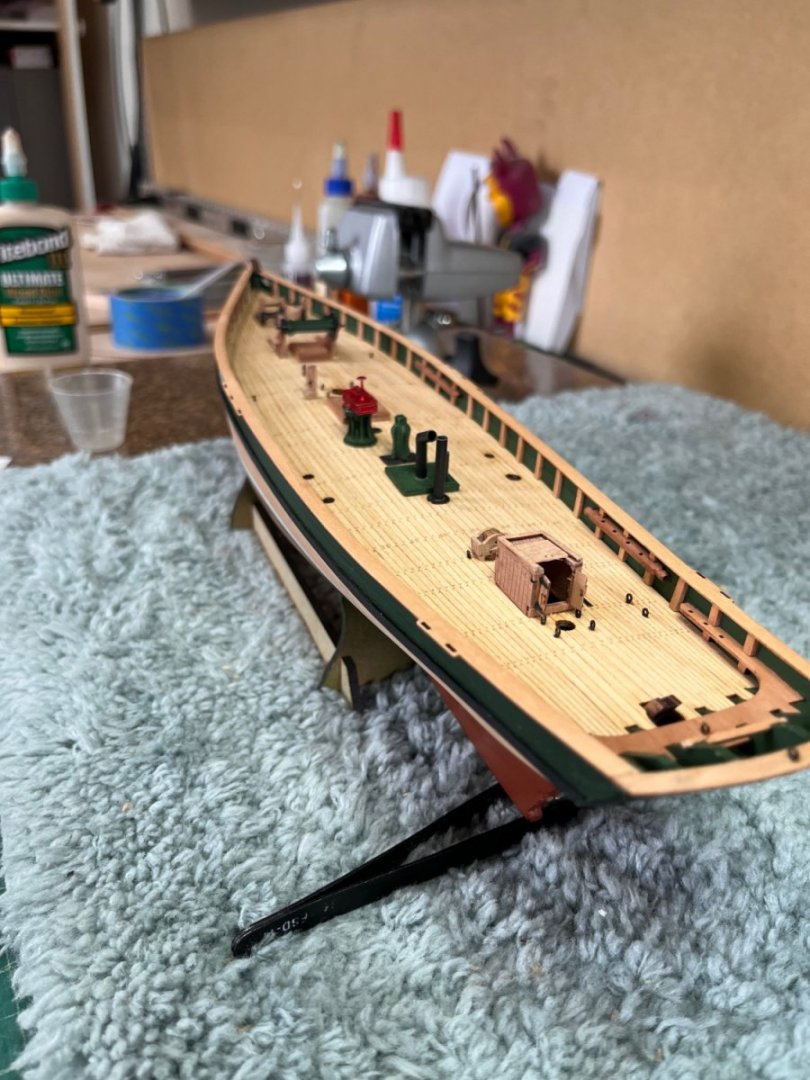
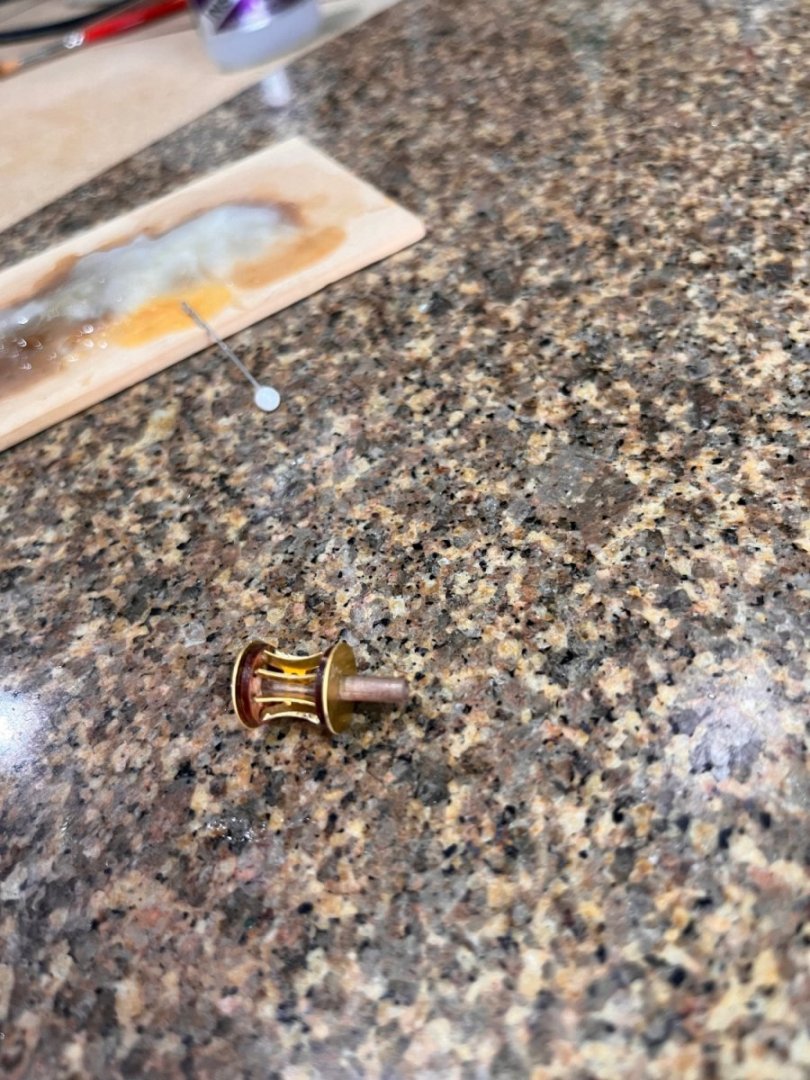
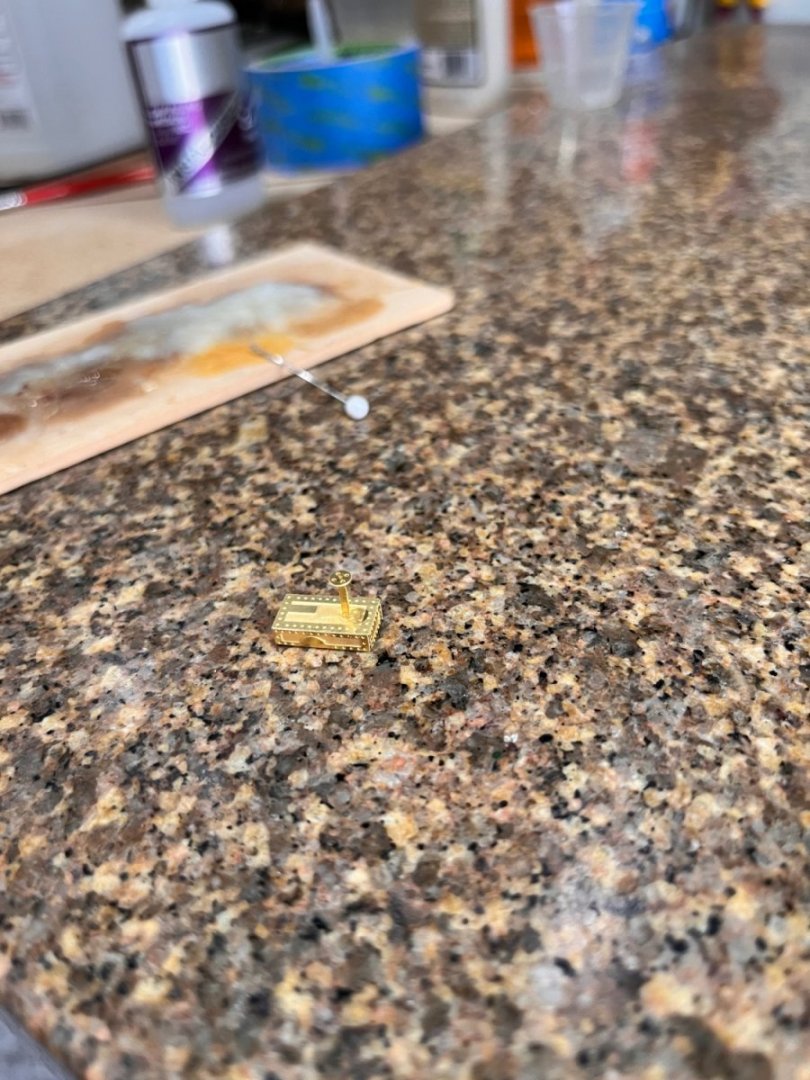
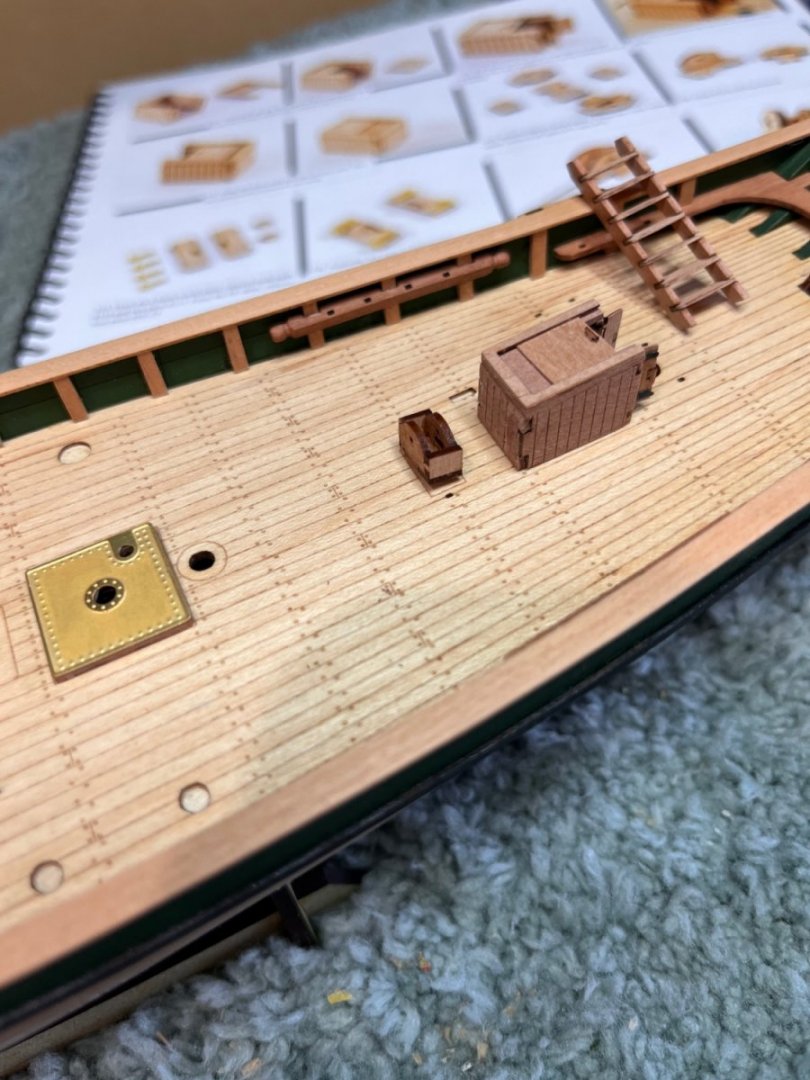
Finished the deck furniture today and started with the deadeyes. Not much to this work but to post ahead with sanding and shaping each part. First thing was the steam winch painted the winch with green paint and painted the un-named top red and when dry assembled and fixed to deck. The exhaust pipe was made from brass tubing I had. I filed a vee in the tube almost through and bend it to shape the angled part. Silver soldered the tube then filed smooth ready for paint. Fixed the tubes to the deck when paint dried. Very nice of Chris having the lower deck for the tubes sit. The tow post or dummy post depends who you read was painted green and fixed to the deck. An interesting thing about the tow post is that it also was used as the pivot point for a pump fulcrum. I wonder what Chris was thinking when he left the two sides on the top for attaching the fulcrum. I was tempted to make a pump but as I said I'm leaving the kit as designed. Oh whoops! I just looked at this picture and noticed the semi-circular pieces on the red box did not get painted black. Silly me. Next was to make the winch and bowsprit support. Clean the char paint the parts and put them together. When done fix to deck in the slots. Very hard to get this wrong. Splash rails with hawse grooves were next. Same process clean and fix no paint. Then the pulley. Made out of brass instead of the wood and I'll leave it brass colored. The only brass showing on the boat. The pulley was used as part of the trawling rig and looking at the drawings its not clear what this accomplished. Lastly the cavil between the stem and bowsprit support. another whoops should be an eyebolt on the top of the stem. Easy fix. All furniture Best Regards Will

- 77 replies
-
- 12
-
-
- Erycina
- Vanguard Models
- (and 1 more)
-
they look nice. what scale are the stoves in the pictures? I suppose that the scale would be just a matter of scaling the CAD data or am I being too simple again? Best Regards Will
-
Adding the false deck makes the whole thing feel like a ship. Great job on the fit Best Regards Will
-
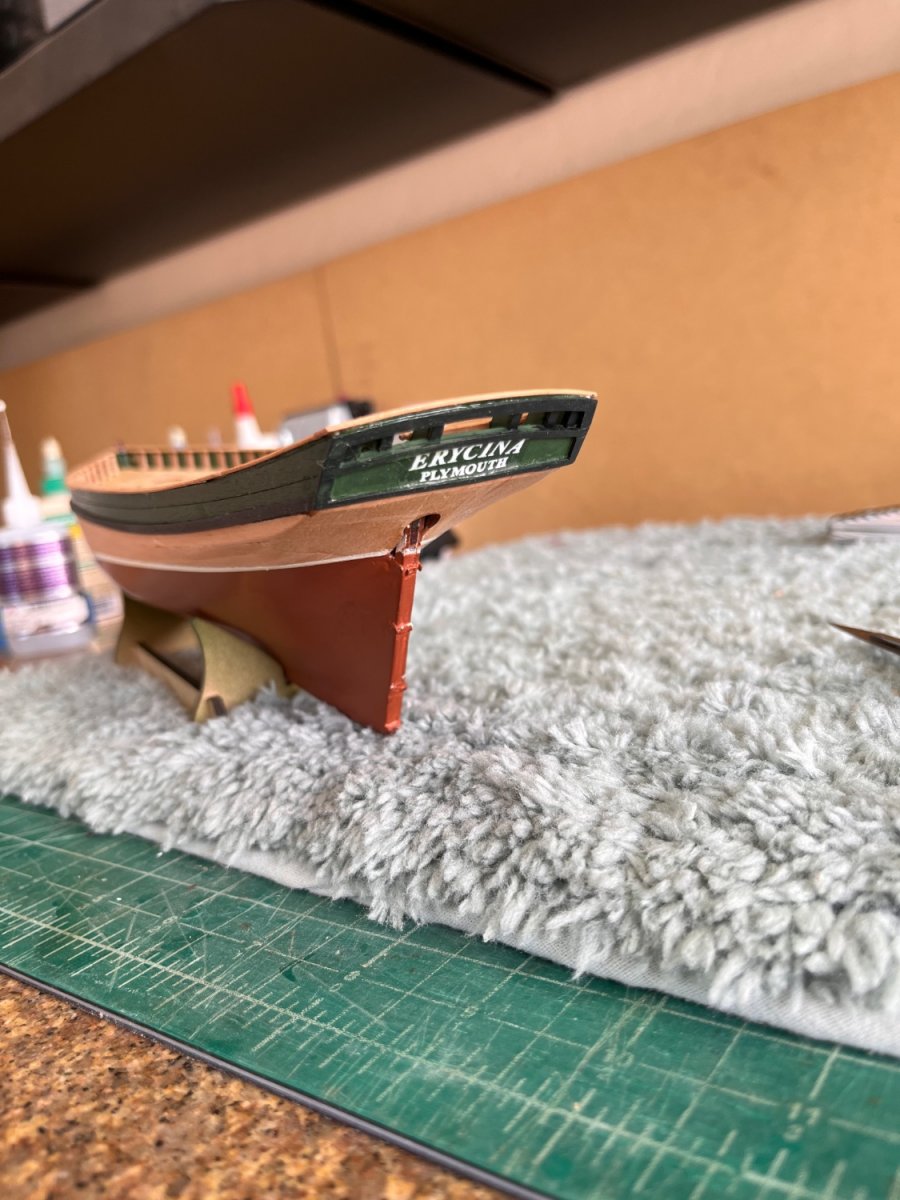
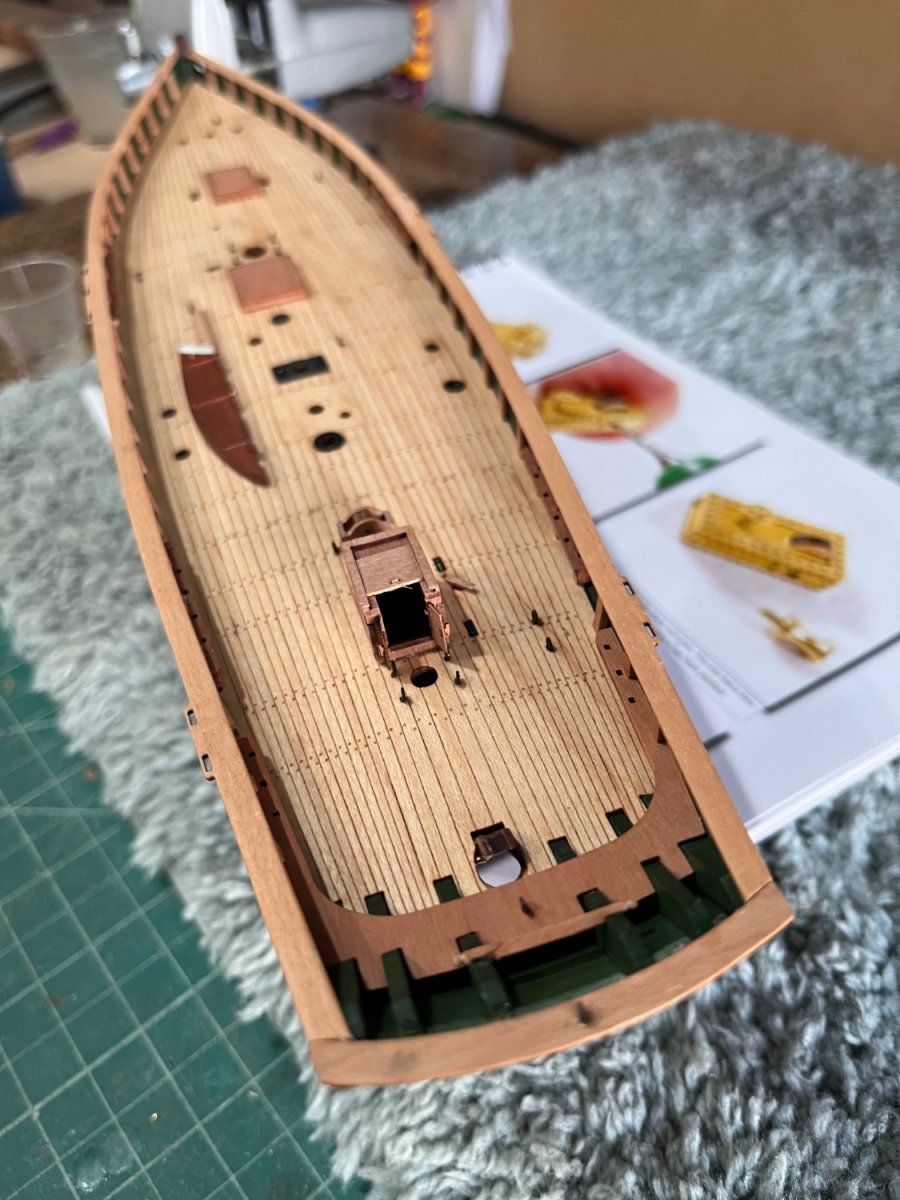
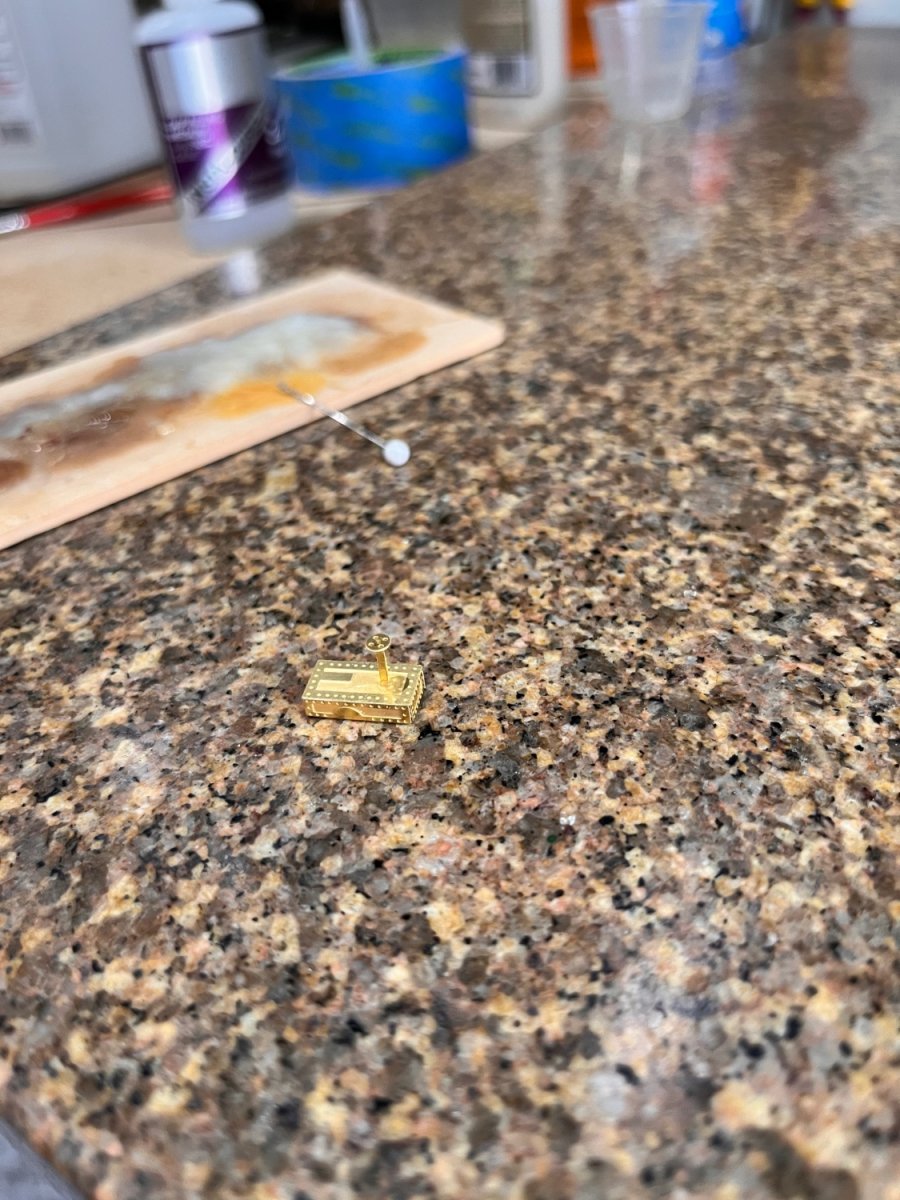
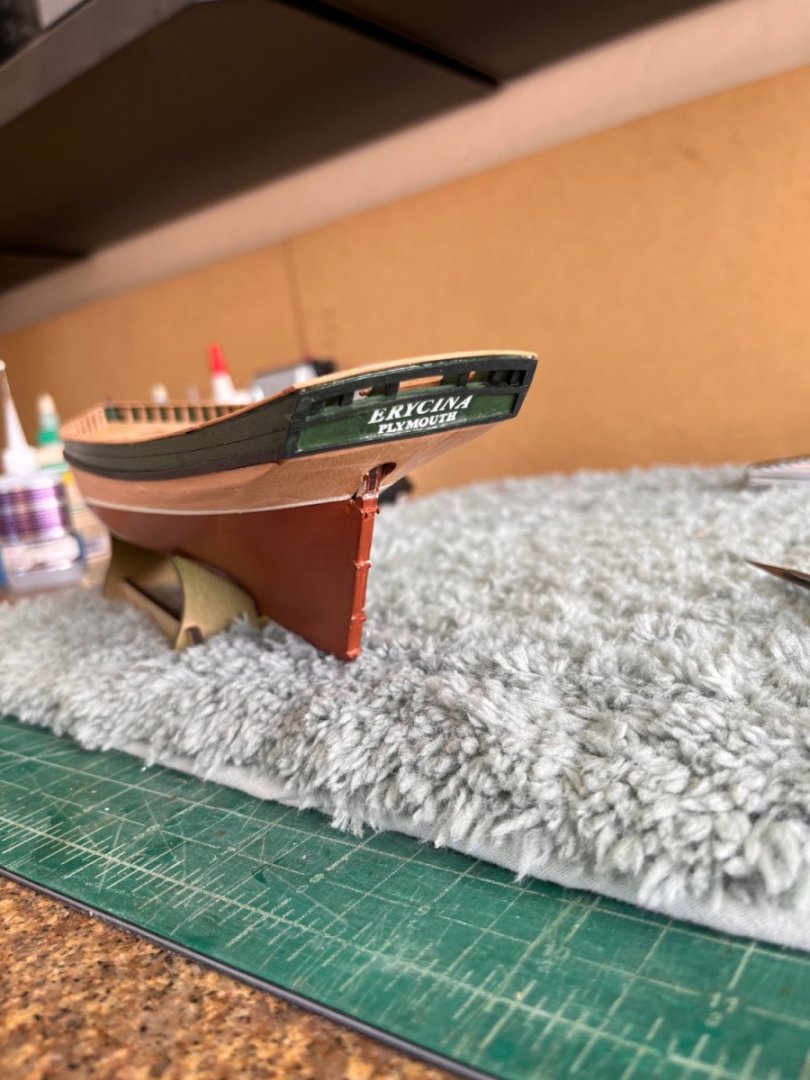
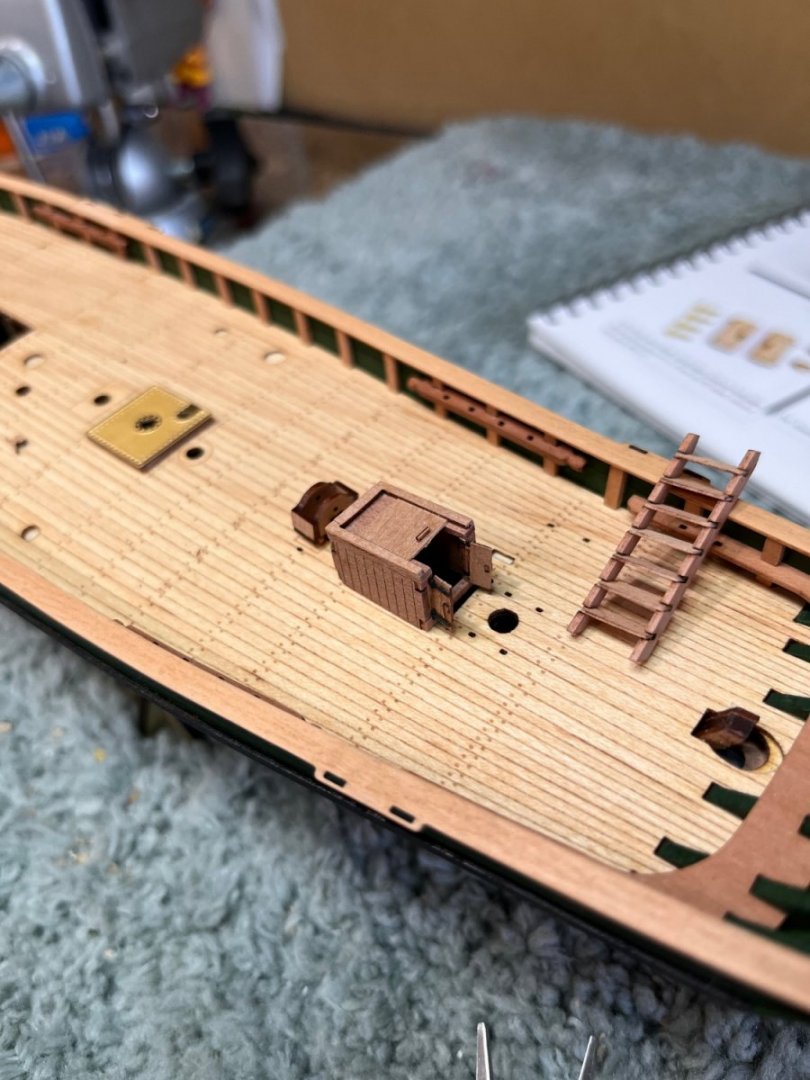
Time to put the decals on so starting with the stern the has the "Erycina Portsmouth" inside the framing. The framing should have been painted black so not I'll hand paint black. Not to future modelers PAINT THE TRANSOM FRAME BEFORE MOUNTING Name and registrations number along with water depth decals Getting the deck populated with eyes and lids. Not much to say except the eyebolts are too long to sit with the eye flush to the deck. Decision time 1} trim the shank 2} drill hole in false deck. Not liking either I used a straight pin to punch a hole the slots. The drilling option was discarded because the deck has rectangular holes to receive the eyebolt shank and drilling might change the shape or scar the deck. While holding the model and pushing the pins I broke the rudder from it position. It is held with 3 small tabs glued into the stern post. I going to leave it off until the time for the tiller and in the meantime hopefully find another way to mount the rudder. Notice the poor rudder That was yesterday finishing the main chock and companionway today was spent gathering up the parts needing paint and making the steam winch. Building the winch was a challenge with eight whelps to mount between two discs but when you loose one of the whelps the fun starts. Taking a piece brass from the photo etch and making another whelp took five hours. To make the whelp I needed a pattern I tried to trace a whelp on paper glue the tracing to the brass and file a whelp. The paper pattern became worn and not a true shape. Finally I glued a whelp to the brass and very carefully filed the shape using #2 swiss files. It did come together and the new whelp fit as the others. Oh well! the shop floor needed cleaning anyway so looking for the lost whelp gave me a reason. Next was the steam box (don't know what else to call it) that sits on top of the winch. It fun to build something without having to make a part. all the parts gathered up for tomorrows paint Best Regards Will


- 77 replies
-
- 12
-

-
-
- Erycina
- Vanguard Models
- (and 1 more)
-
Ah! the horrors of first coat of paint. It looks like you did a good job planking, I've done worse. Filler and sanding to fix. Your adaptation of scuppers is right on. When on the wind or towing the net the sat low to the aft. Pictures I've seen they are wet boats in weather so your scuppers are right on. Best Regards Will
- 206 replies
-
- 1
-
-
- Vanguard Models
- Brixham trawler
- (and 2 more)
-
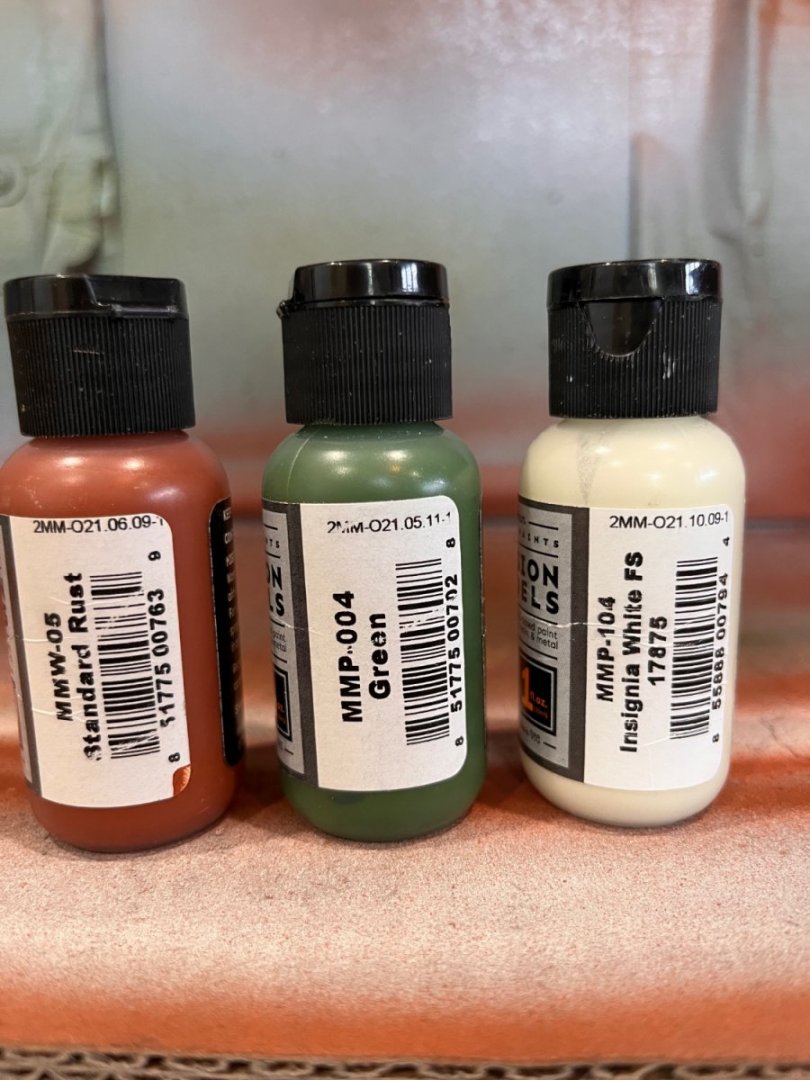
Andrew I use Mission Models paint and as said above I tested for coverage and lifting with great coverage and not being able to lift with tape. I was spraying at 35psi but have found 25psi give a more even pattern and easier to use as it uses less paint. I used the thinned ready to use paint. Here's a picture of the paint used the white is for the boot line Best Regards Will

- 206 replies
-
- 3
-
-
-
- Vanguard Models
- Brixham trawler
- (and 2 more)
-
You"re right on the grain its a sponge. If scratch try something harder like boxwood or pear. Good Luck! Can't wait to see the end result it will be as good as other scratch you've done. Best Regards Will
-
Also a note to all airbrush gunners. I found the awesome website for airbrush spray equipment and paint. spraygunner.com great select, good prices, and fast delivery Best Regards Will
- 77 replies
-
- 1
-
-
- Erycina
- Vanguard Models
- (and 1 more)
-
Thanks for the nice comments Bob, Don, Andrew always nice to read Andrew I use Mission Models paint and as said above I tested for coverage and lifting with great coverage and not being able to lift with tape. I was spraying at 35psi but have found 25psi give a more even pattern and easier to use as it uses less paint. I used the thinned ready to use paint. Here's a picture of the paint used the white is for the boot line These work like a rattle can as the have a ball in them that rattles when shaken as directed. Hope this helps Best Regards Will


- 77 replies
-
- 5
-
-
- Erycina
- Vanguard Models
- (and 1 more)
-
like the cross section approach. nice start except the baby poop. Just a thought if you're using kit material (i.e. basswood) you might try WOP on material before using and then another coat when finished. Its worked for me but it is a pain. Best Regards Will
-
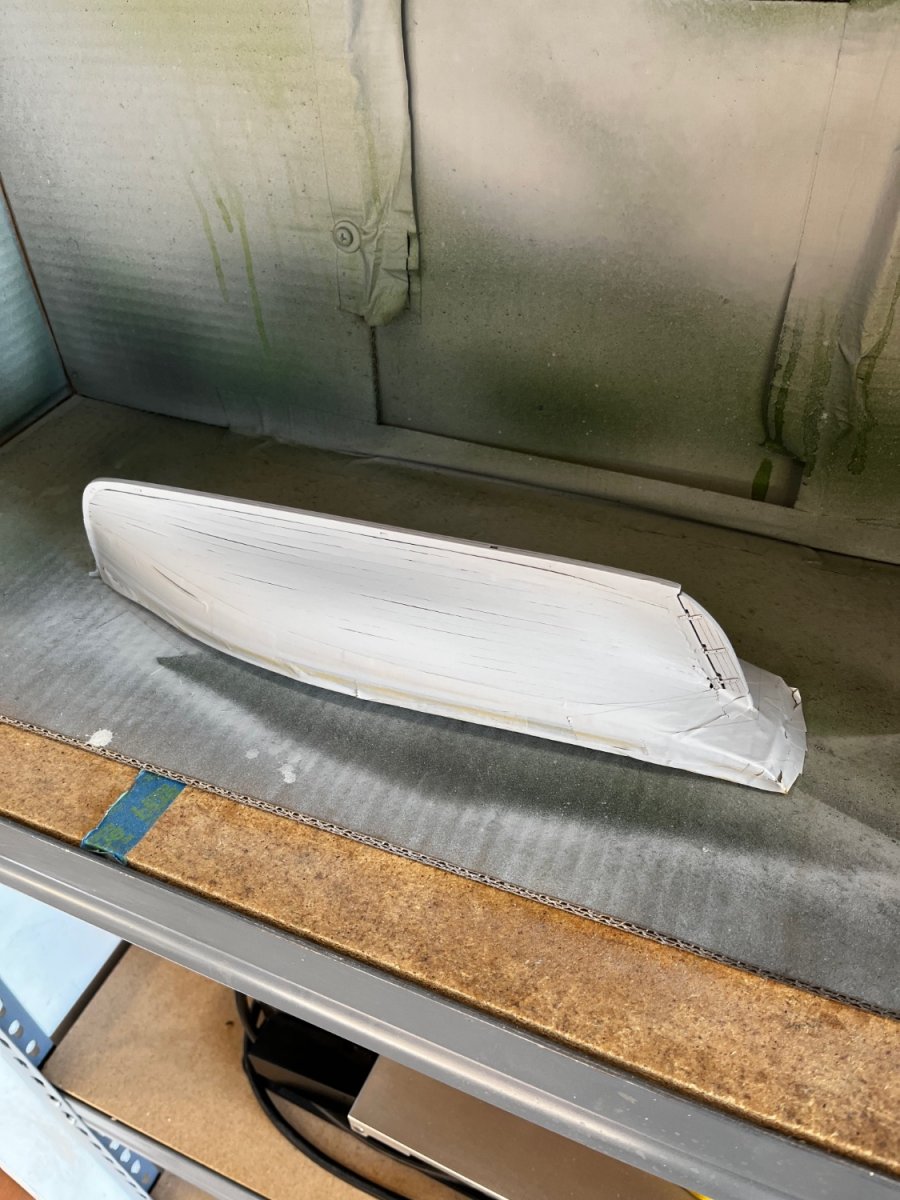
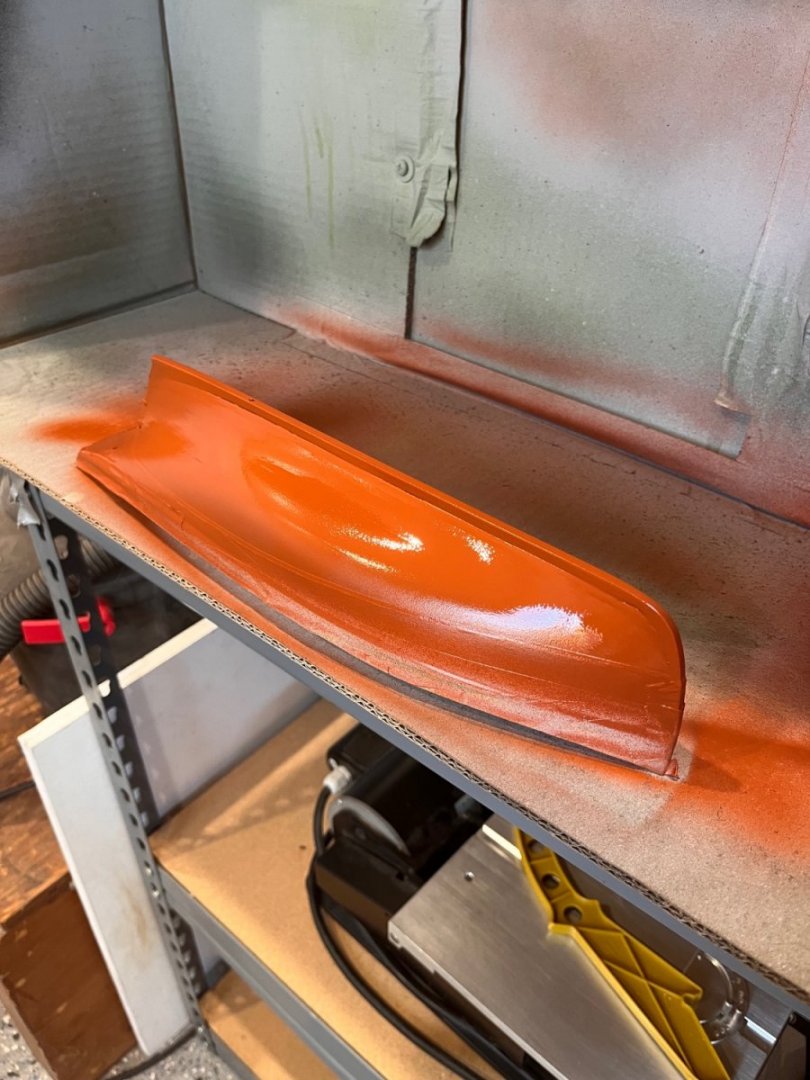
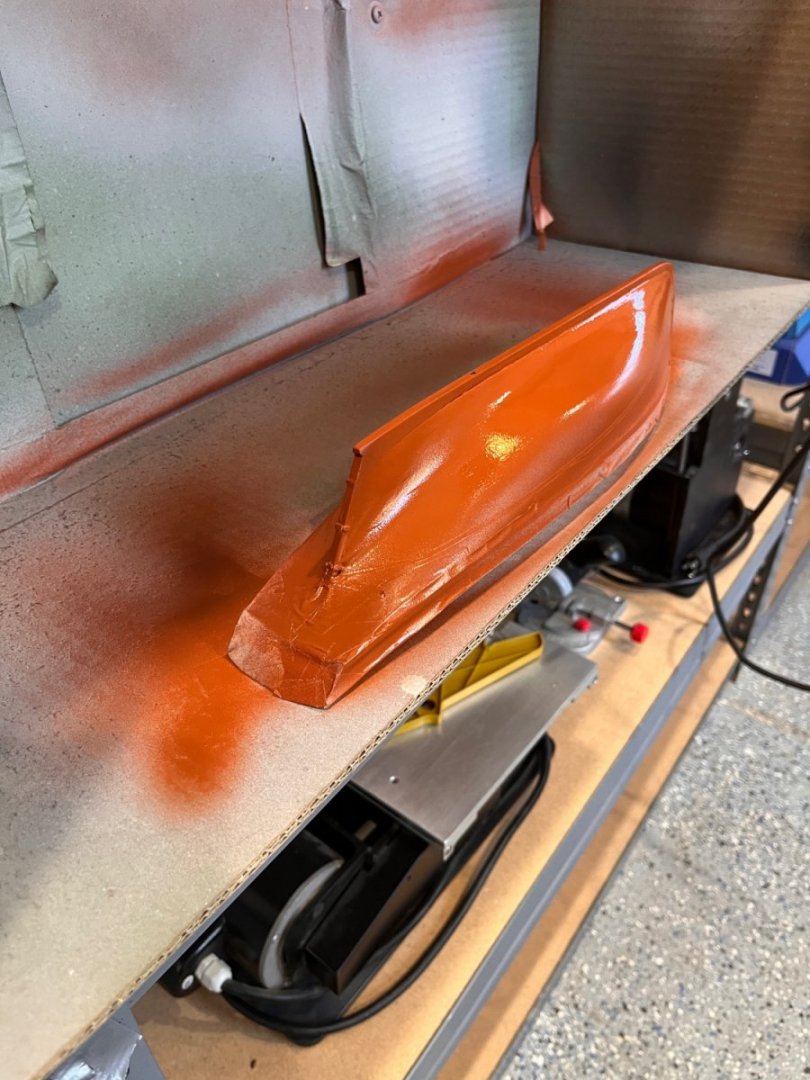
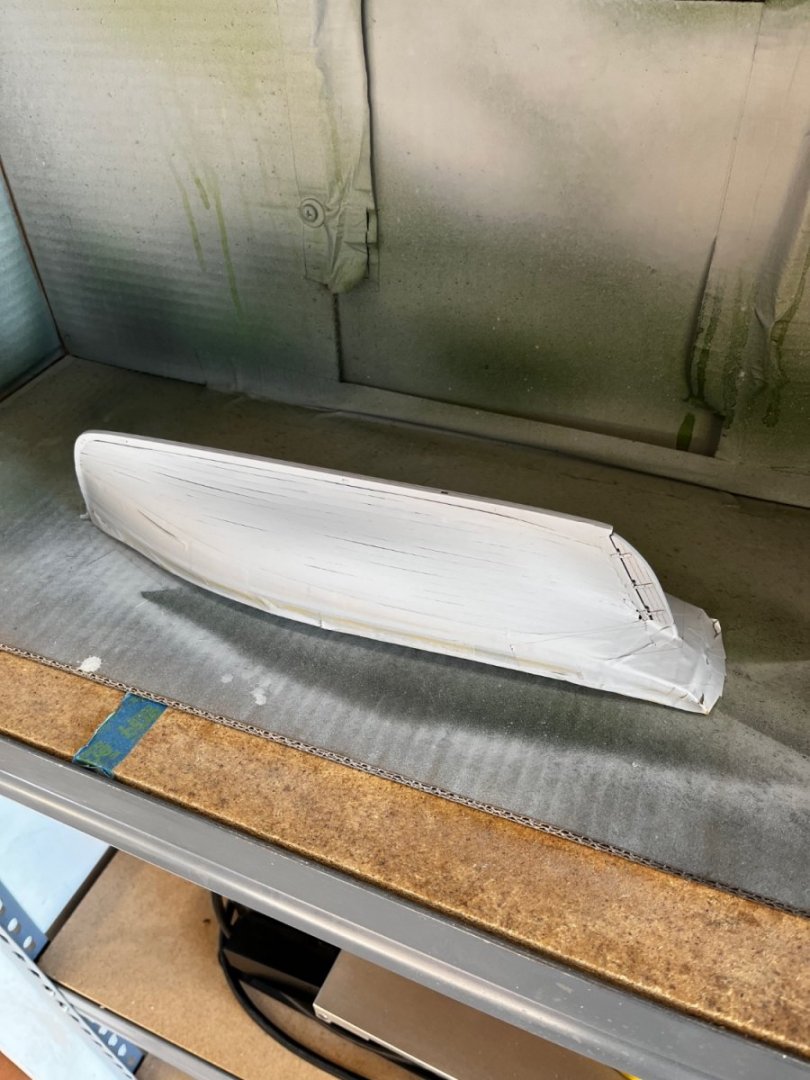
Thanks Bob G and Chris for the tape help. I have the Tamiya flexible tape but its a vinyl and I'm a little skeptical about it holding lines. I have some 2mm Tamiya tape that I'll use for the waterline boot. After checking and checking the tape and many deep breaths it was time to paint. Sprayed the first coat with great results I'm very happy with the first coat. First coat with great coverage. With other reds I've had coverage problems when going over white as red does go on almost translucent. Maybe its the brown in the red but great coverage. Second coat in the booth just starting to setup. This afternoon was another nailbitier and after many deep breaths I took the tape off. When it came off I was in a OMG moment. It looks as I hoped it would.. While painting process continued with it stops and starts I made up the companionway, the ladder, started the main block, and steam winch base. The companionway leaves me with a unsatisfied feeling. With the 1mm material that would make the siding 2-1/2" thick the same as the side planking. With the plans not being in scale, I might use my ratio and blow up to scale making another companionway. I'll see what I can find in March's book. Anyway here's what I made I'm going to jump ahead and make all the deck furniture that needs to be painted green so I can clean the gun and put the booth back on the shelf for another project. Best Regards Will


- 77 replies
-
- 10
-
-
-
- Erycina
- Vanguard Models
- (and 1 more)
-
Andrew she's looking really good its showing off your work. And you're right about March's book it really brings many things that could be done. Ah kit bashing. I was going to bash Erycina but decided to leave the kit as Chris designed. You can see a large omission in the photo of BM45, below the bulwark planking is a 1" opening the length of the bulwarks for scuppers. Kits have no way to dry the deck. One note on the wales and floors strakes is 1/64" makes a huge difference in the boats appearance, but too much makes a heavy appearance. IMO. Looking very nice Will
- 206 replies
-
- 1
-
-
- Vanguard Models
- Brixham trawler
- (and 2 more)
-
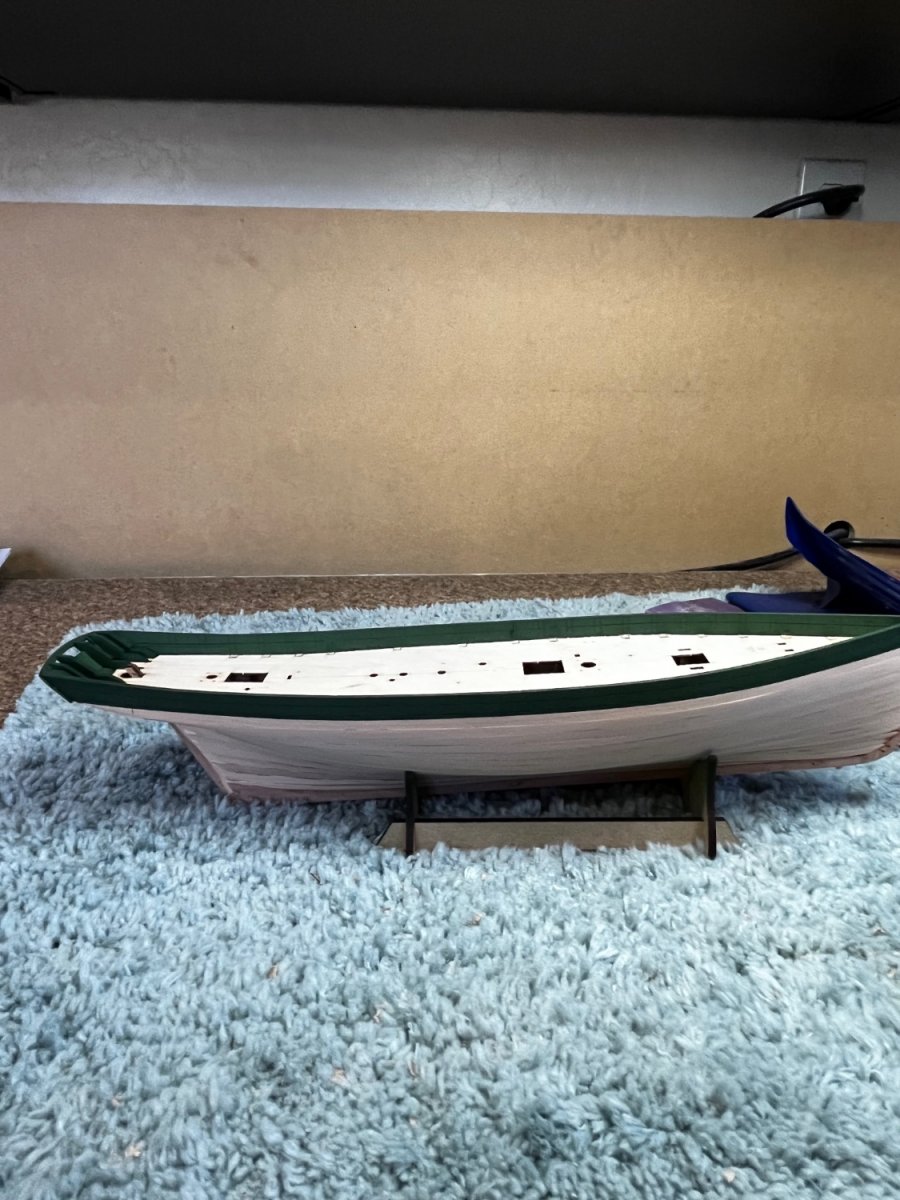
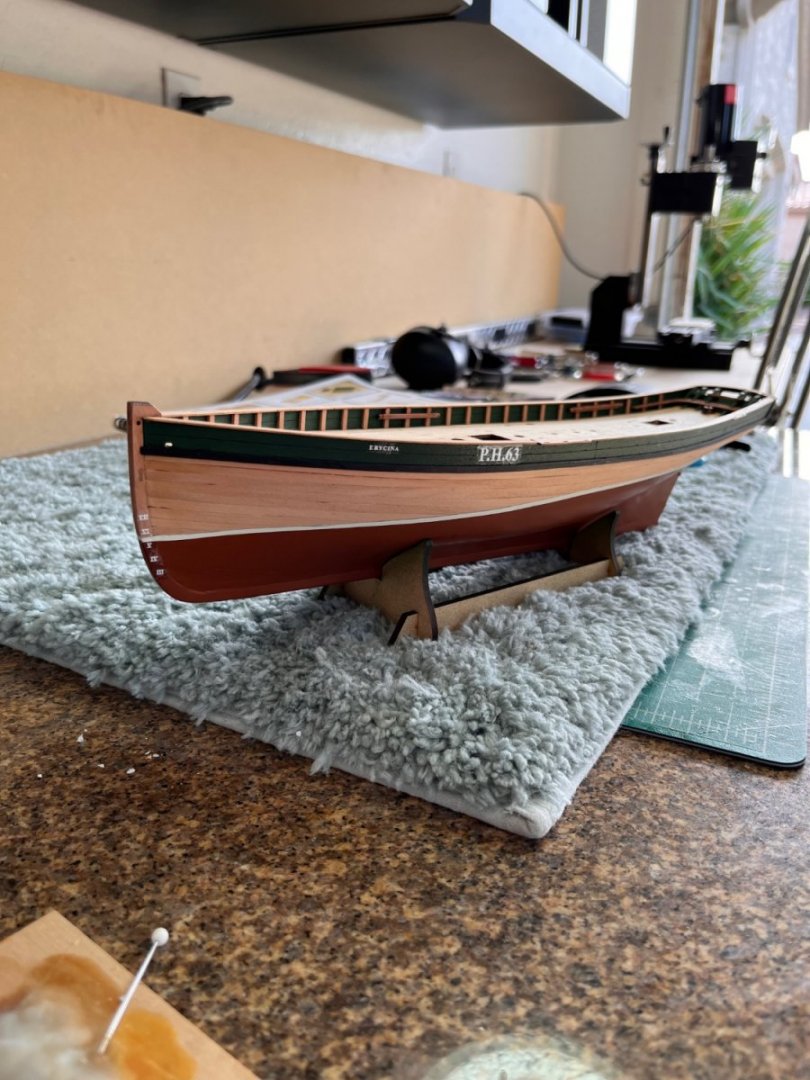
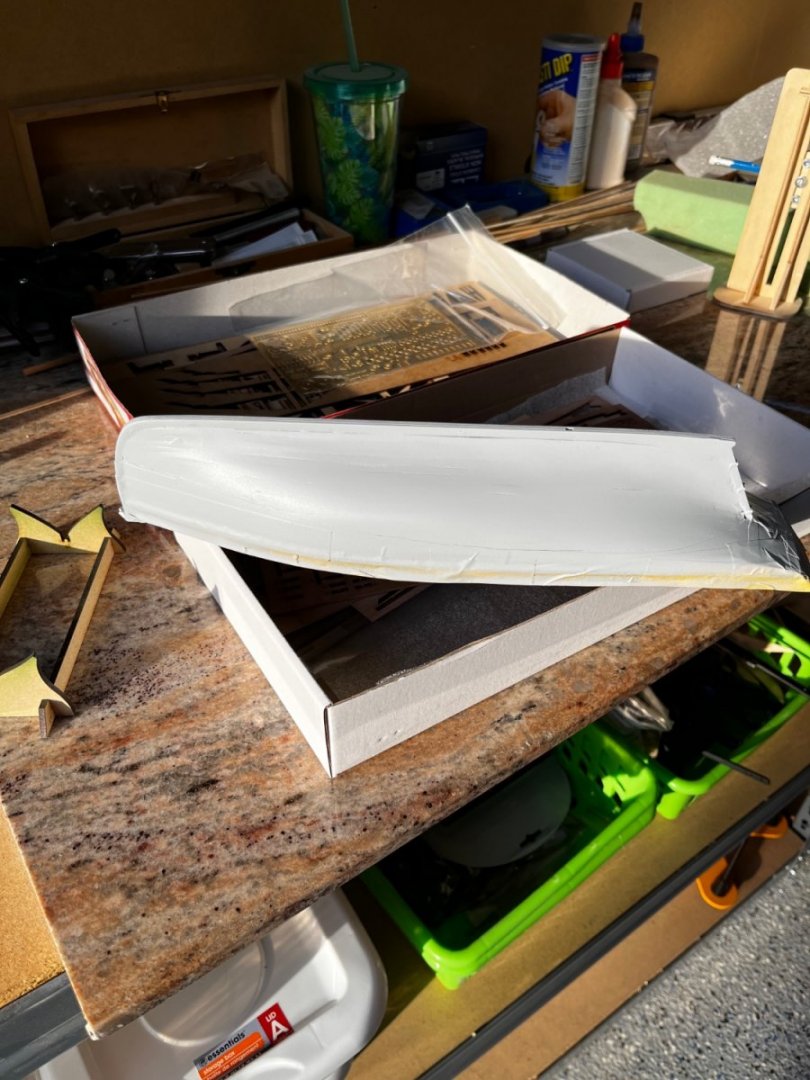
Thanks for the nice comments and likes it means a lot. Two day of sanding, taping and priming resulting in the below photo. Not much to tell except adding the waterline. It took two tries to get the stern area with a smooth line ending where the books shows. The stem was not clearly defined so I placed the pencil at the known location at the stern post. Drawing the line forward to the stem looks to be about where the photos and drawing show. The drawings are not to scale so measuring them was out. I made ratio between the drawing and the 1:64 scale and measured the distance to the waterline from a know location so I could ratio it to measure on the stem. The method of starting at the stern post and working forward had the waterline less than a 1/32" from the measured. Good to go. Using Tamiya tape is difficult as doesn't flex. With the waterline being fairly dark you can see though the tape so rather than small lengths I used a 18mm piece and cut the tape with a sharp #11. Painted the primer. I use automotive grey primer as it flows very flat and dries to touch in a few minutes. Primer brings out the worst of the planking and basic sanding. Going to be a lot of putty and more sanding and then more primer. Let everything set added the putty on the seams and sanded almost down to bare wood. Looking much better. I'll wait until the primer cures overnight to see if more putty and sanding is required. Best regards Will

- 77 replies
-
- 9
-
-
- Erycina
- Vanguard Models
- (and 1 more)
-
Andrew you are absolutely correct about the nature of these boats. In March's book there is a picture of Erycina being painted while on the sand so I'm presenting her as new. Couple of seasons and she would be very scrappy. Best retards Will
- 77 replies
-
- 1
-
-
- Erycina
- Vanguard Models
- (and 1 more)
-
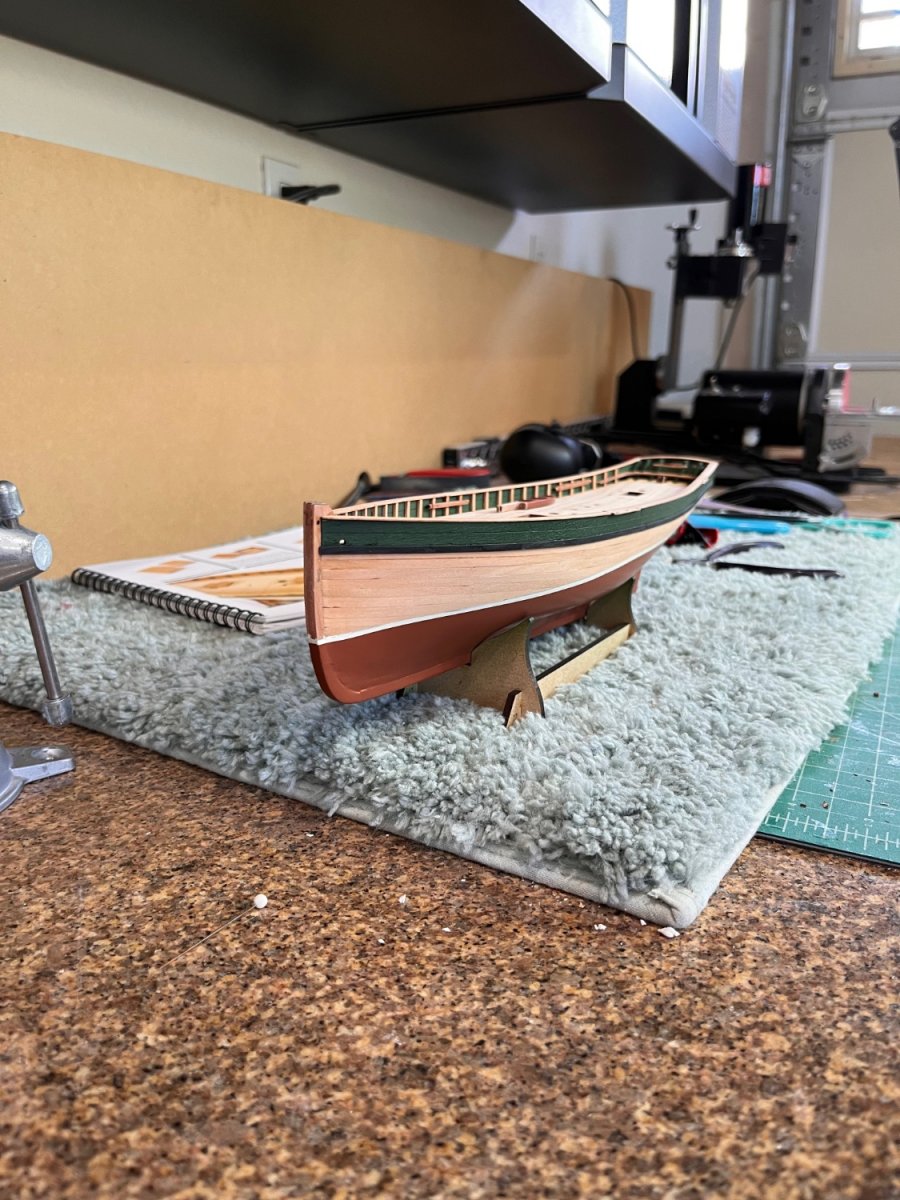
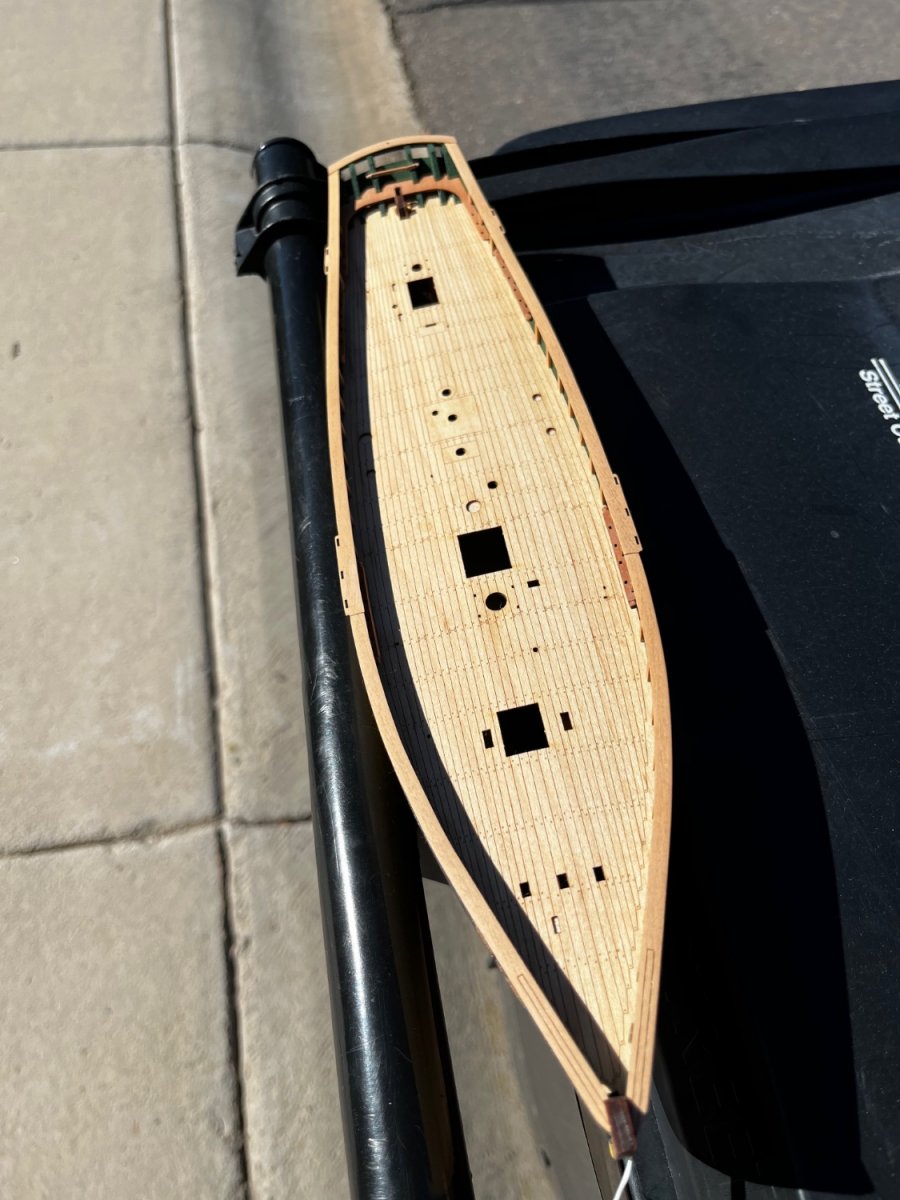
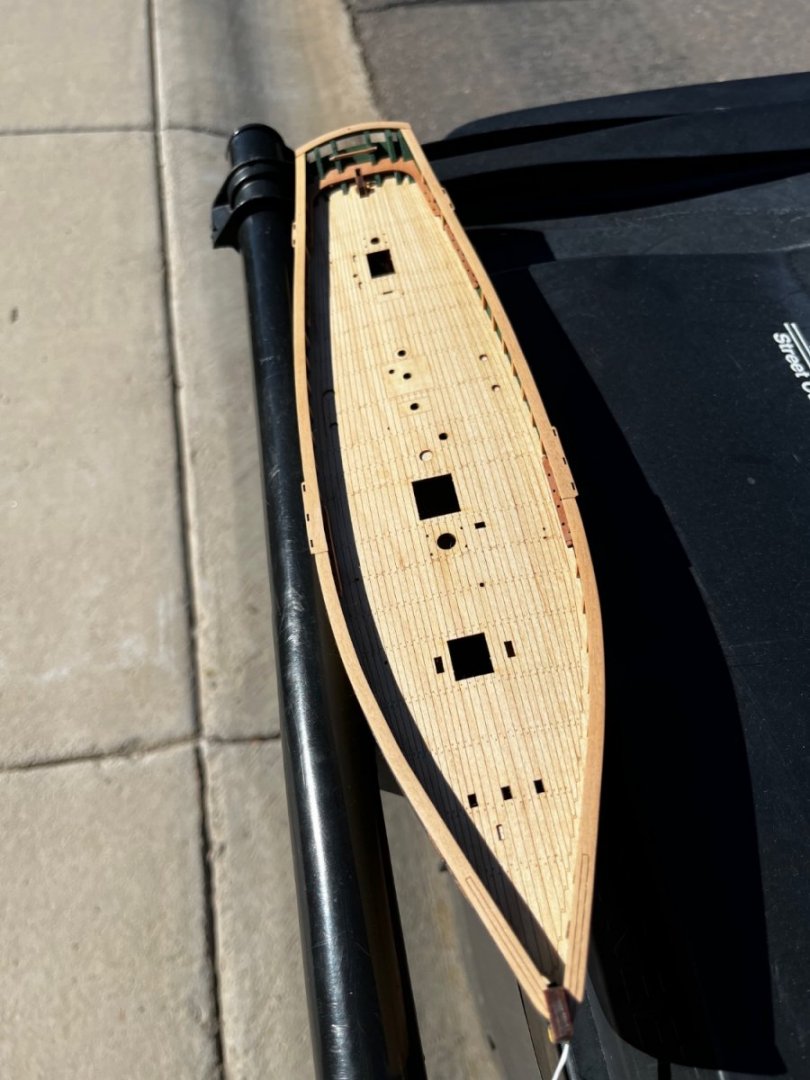
Hello Andrew Thanks for the nice comments. Have you started the Nisha? and a log? The kit deck is maple and I've wiped two coats of Wipe on Poly. Yes it does seem darker just the lighting I think. Went outside and took a picture in sunlight but looking at it, it does appear to have darkened. How do like my stand "the rubbish container ready for pickup"? Best Regards Will
- 77 replies
-
- 4
-
-
- Erycina
- Vanguard Models
- (and 1 more)
-
Goodmorning All Spent the evening wondering how I'd spent so much time with so little accomplished. Looking at the pictures it hit me sanding char of 50 timberheads and the .8mm thick cap rails without loosing or breaking anything was a time consuming tedious task. Reading Edgar Marsh's "Fishing Trawlers" I saw details missing from then kit. I originally thought I'd do some kit bashing on the Erycina but with the beauty of the kit I decided to leave it as Chris intended. Just wanted to explain why so much time yielded what appears so little progress, but beauty is in the details while leaving the kit as designed. Best Regards Will
- 77 replies
-
- 2
-
-
- Erycina
- Vanguard Models
- (and 1 more)
-
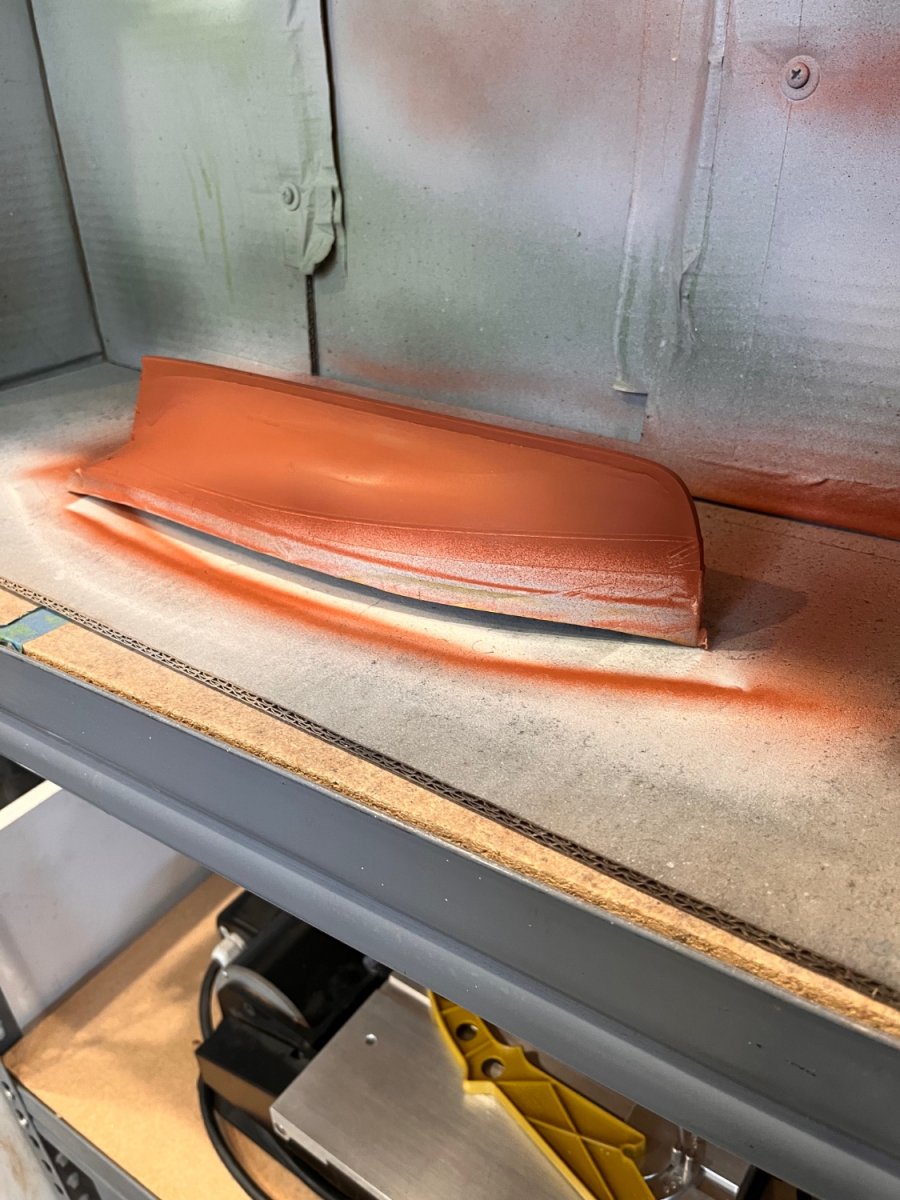
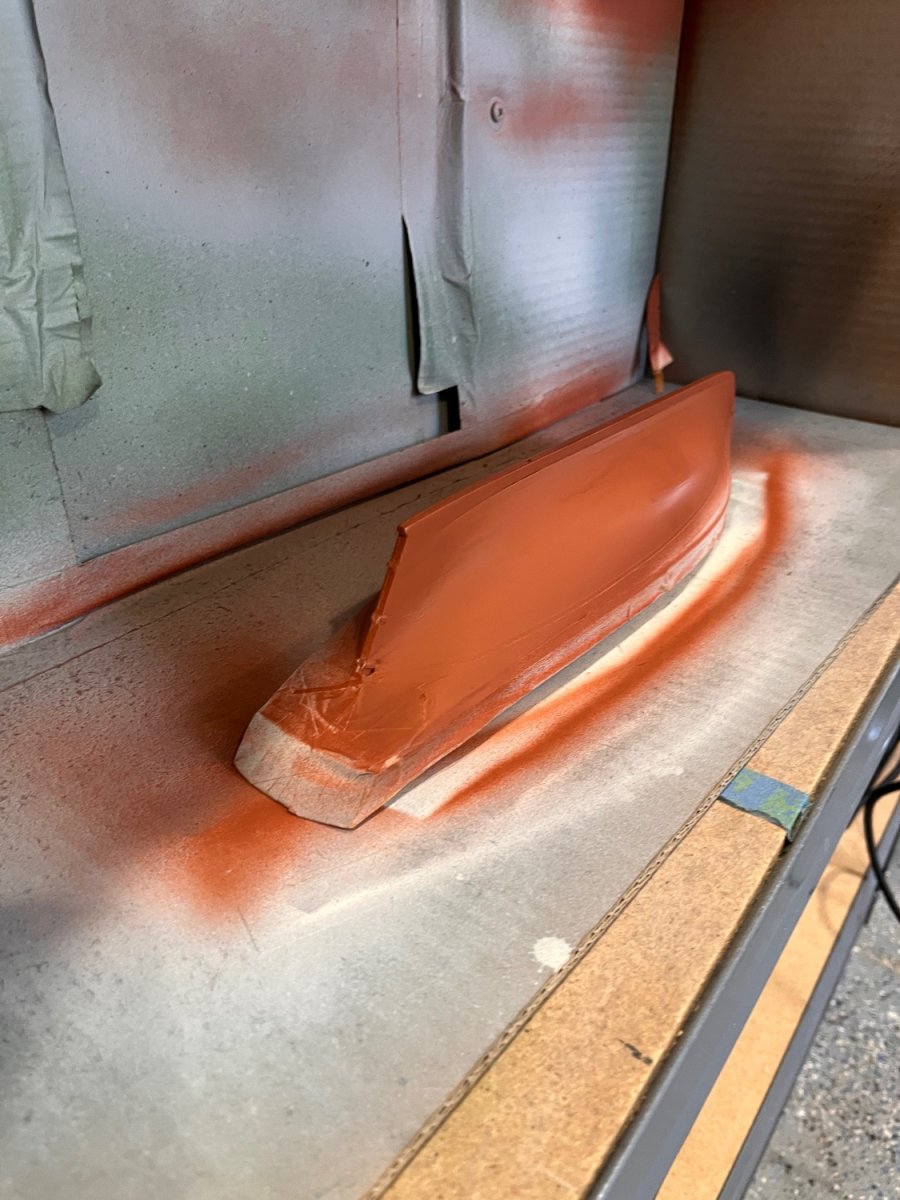
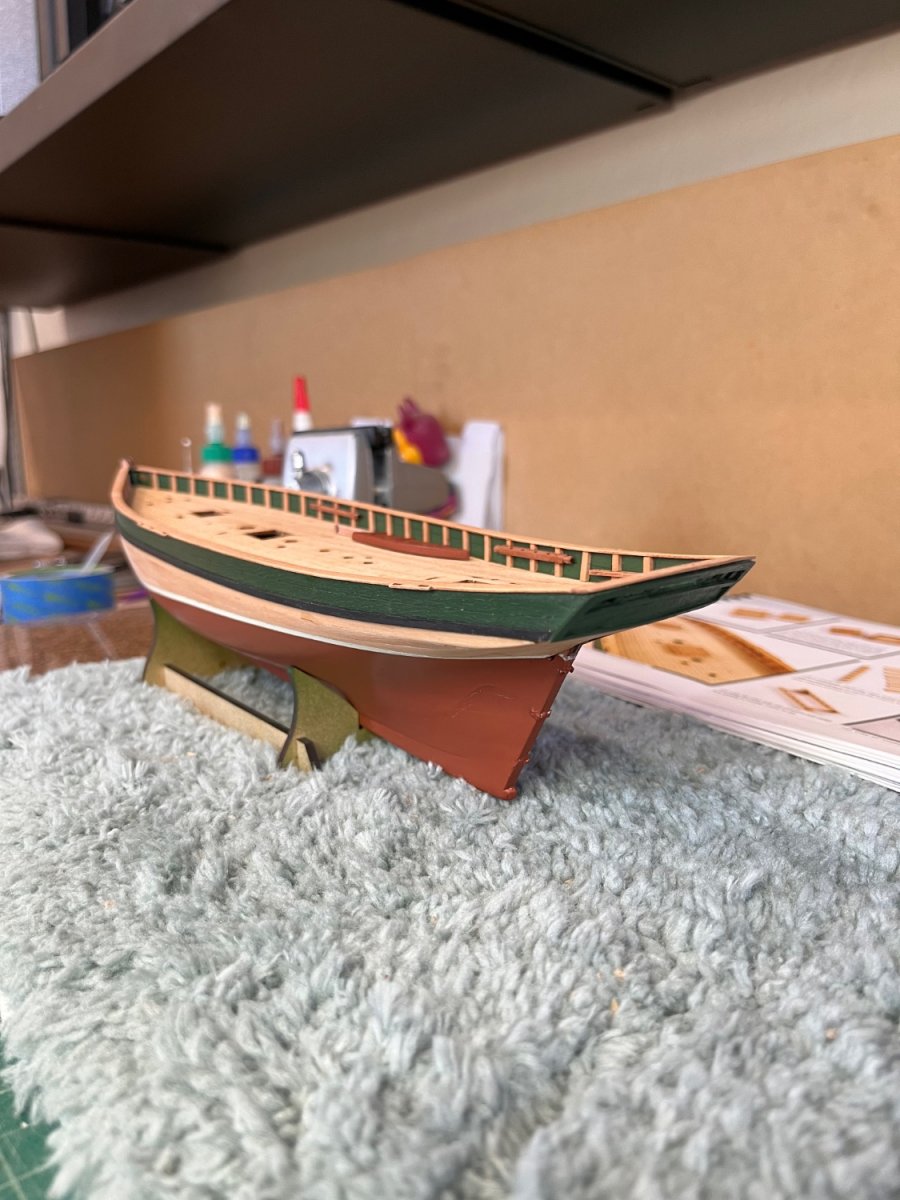
Thank you Bob and Andrew for the kind words and everyone else for the likes. Had a day full of lots of little details. Surprising how the little details bring the model to life, such as rounding the ends of the fife rails. softening the edges of the cap rails A day spent with the details getting ready to turn her over and paint the red oxide below the waterline. Doing this reminded me I have to add the rub rail at the bottom of the bulwarks. Its drying as I painted it black and will look tomorrow seeing if its good or needs another coat. Looking aft starboard looking aft port looking forward Hopefully tomorrow will be day of change to move beyond the deck structures. Regards Will


- 77 replies
-
- 13
-
-
- Erycina
- Vanguard Models
- (and 1 more)
-
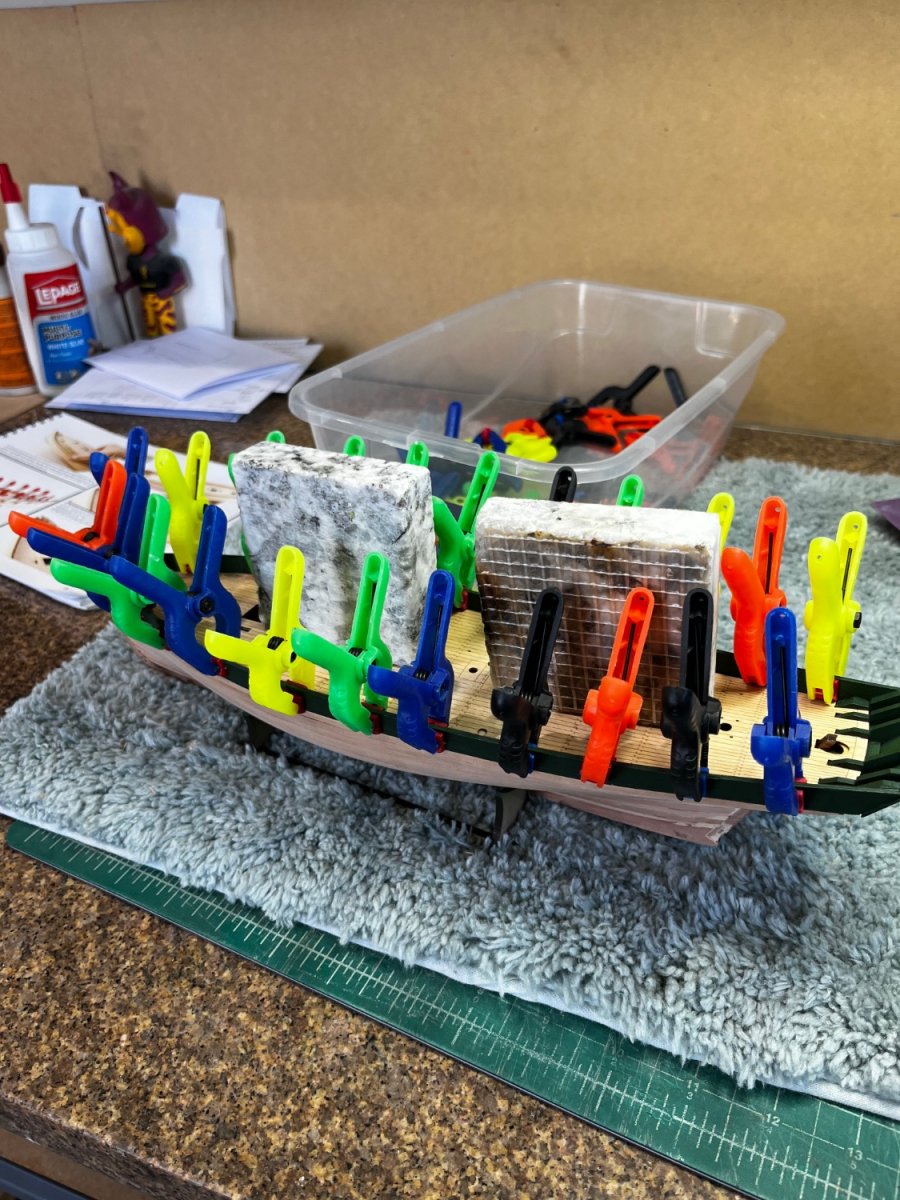
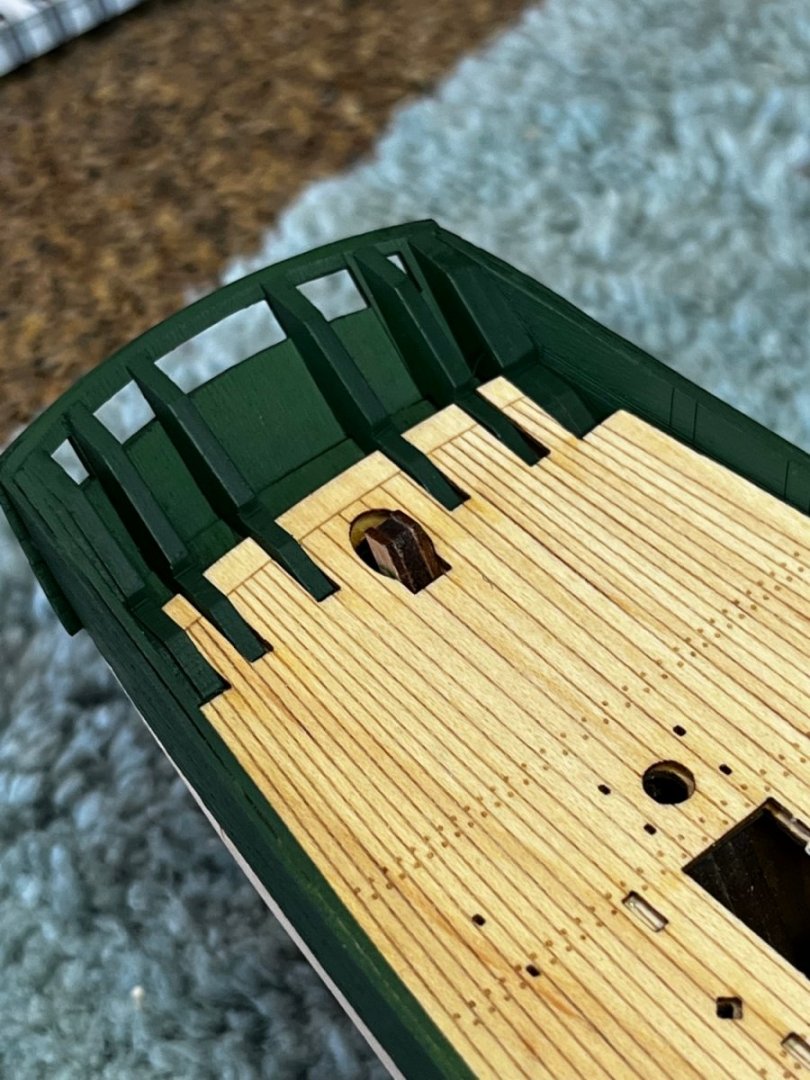
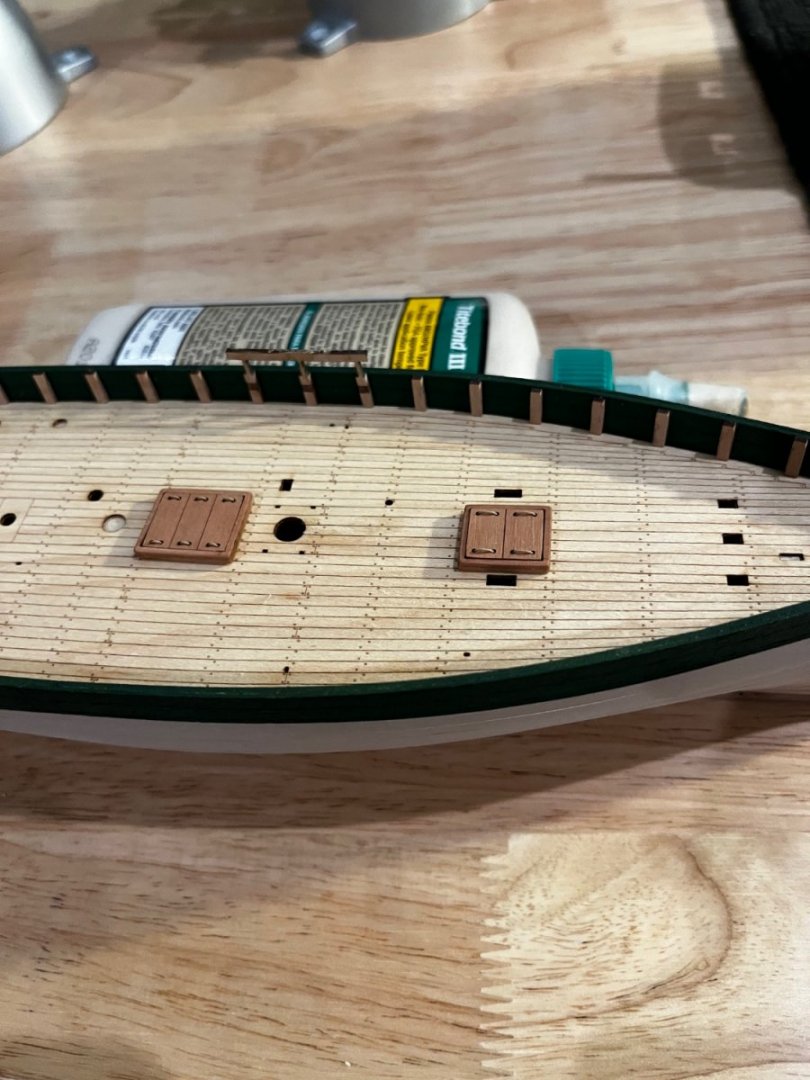
Now it was time to unwrap Ercyina and look at the paint job. I love Tamiya masking tape. Not a drop of bleed and the edges are sharp and crisp. The transom bulwarks Time to glue the deck to the false deck with a bunch of clamps. It was hard to put the clamps on the fresh paint but no problems. It was a big decision to paint the inside of the bulwarks, but I really like the results especially when I started adding timberheads. Getting tired of timberheads I went on to something less stressful. Made the fish hatches. I was very difficult to align the bottom with top coamings so after the glue set the disk sander made everything flush. Knowing boats did not have square sharp edges and corners I sanded radii and softened edges of the coamings. I'm going to use wipe on poly on all bare wood parts (already did the deck). WOP was applied to the hatches. WOP on pear wood is a nice dark shade so on to more timberheads tomorrow. Best Regards Will


- 77 replies
-
- 12
-
-
-
- Erycina
- Vanguard Models
- (and 1 more)
-
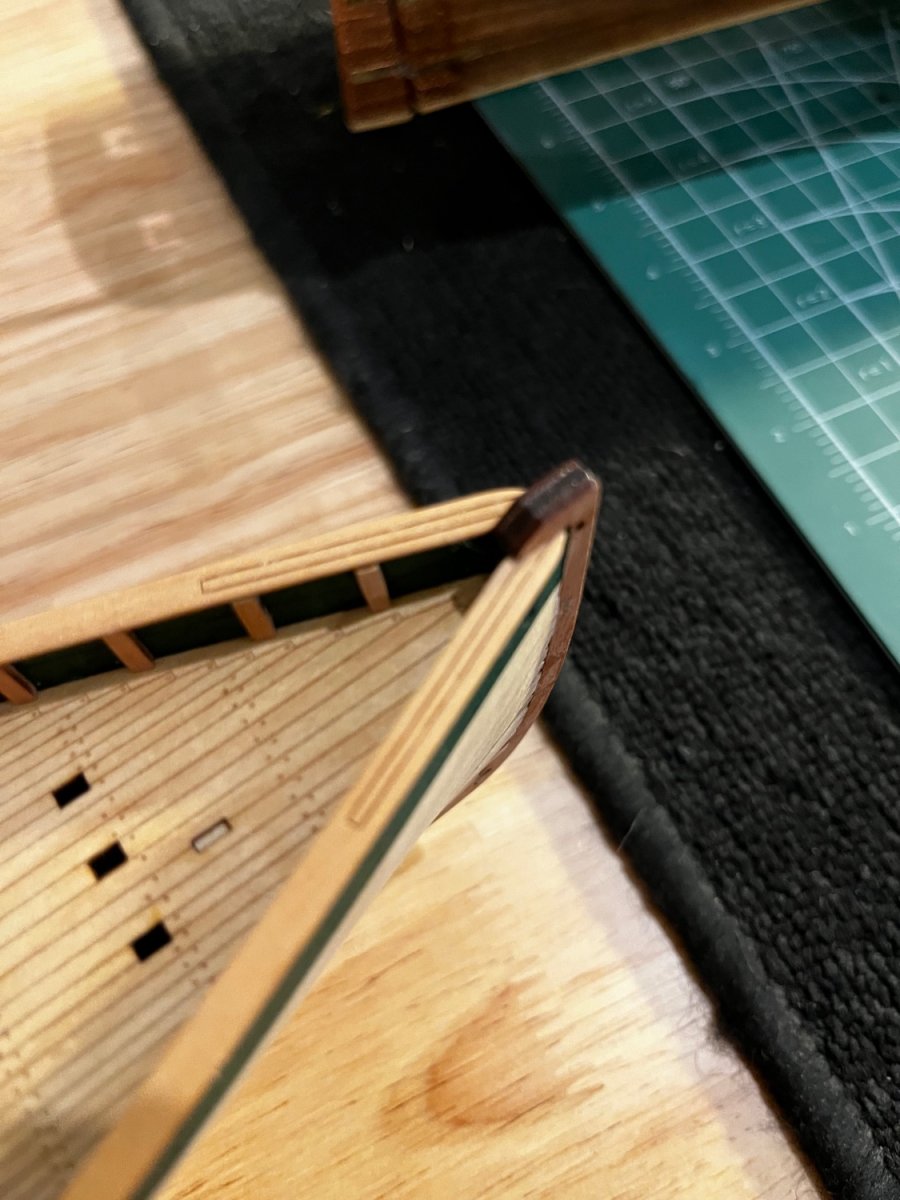
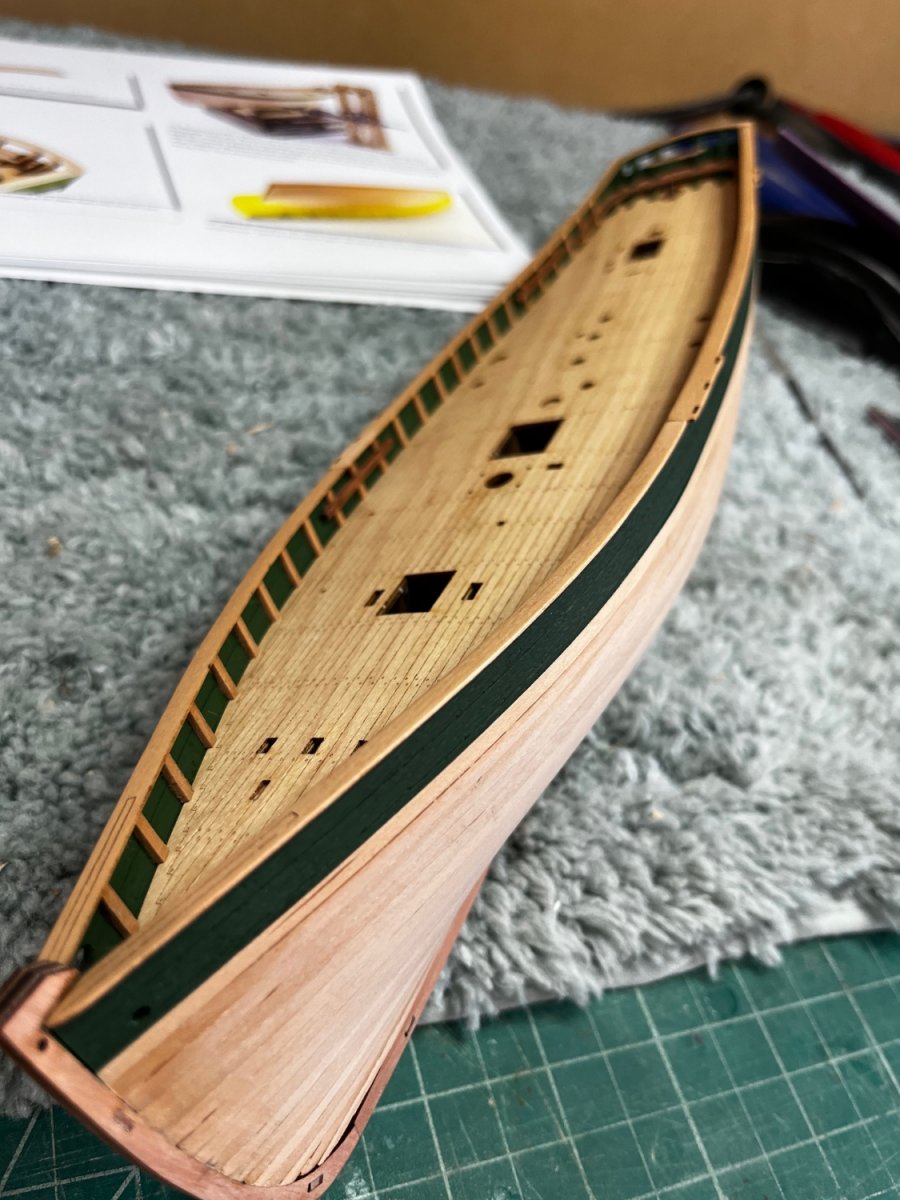
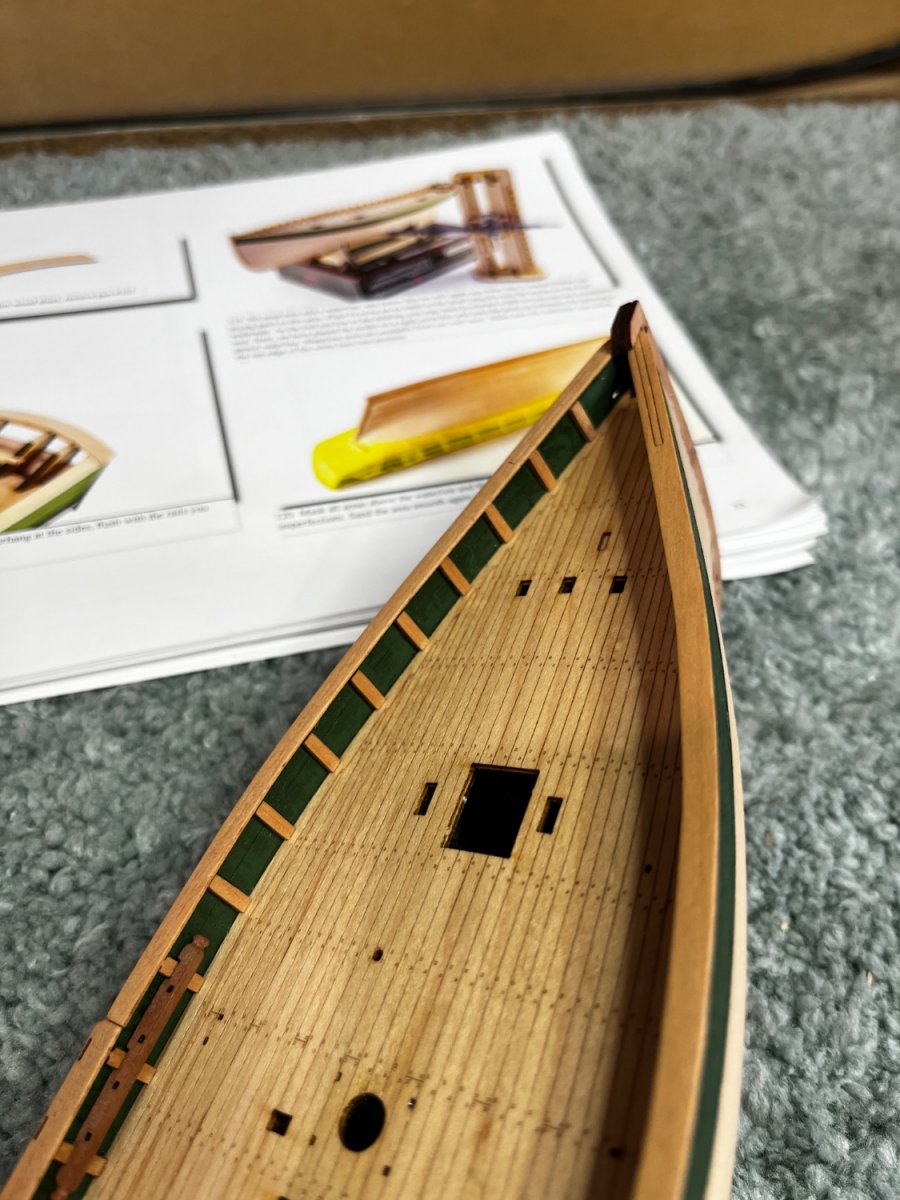
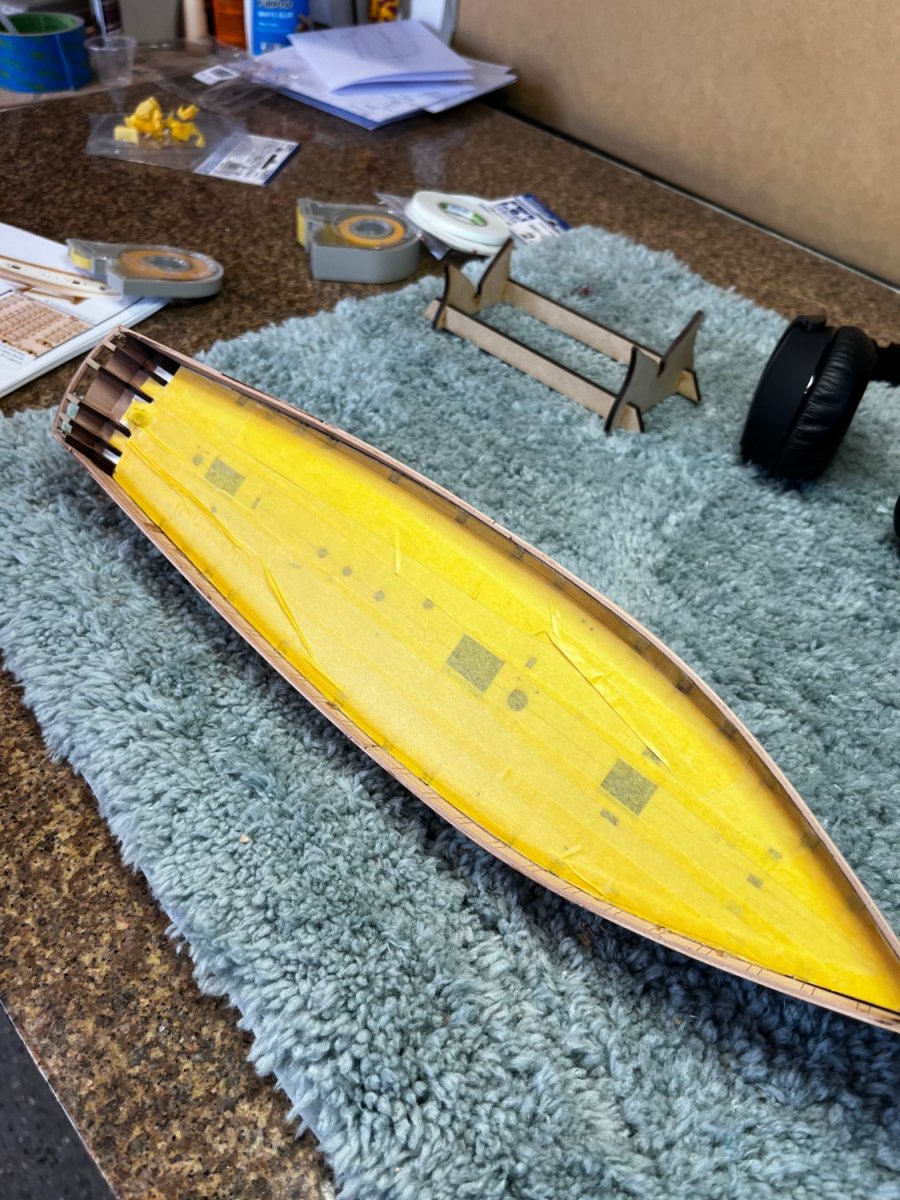
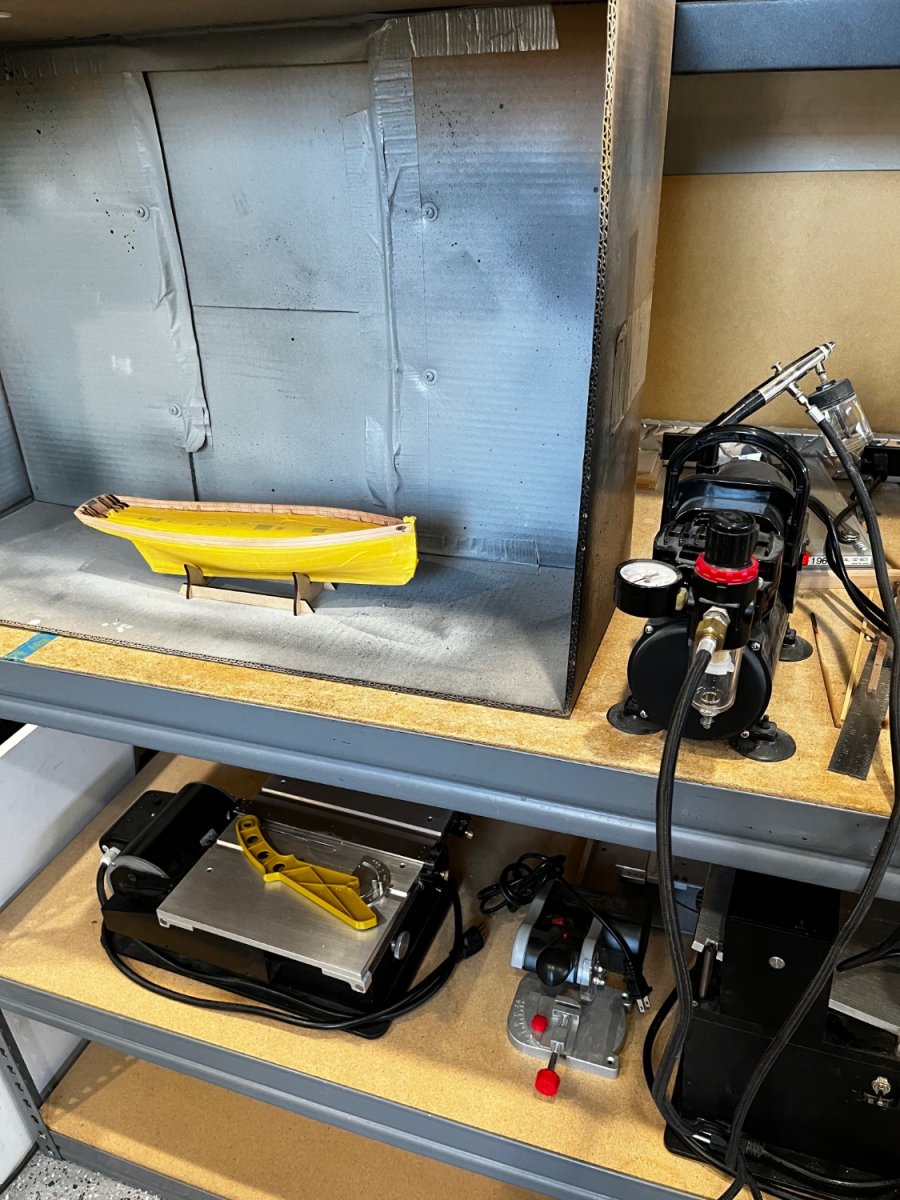
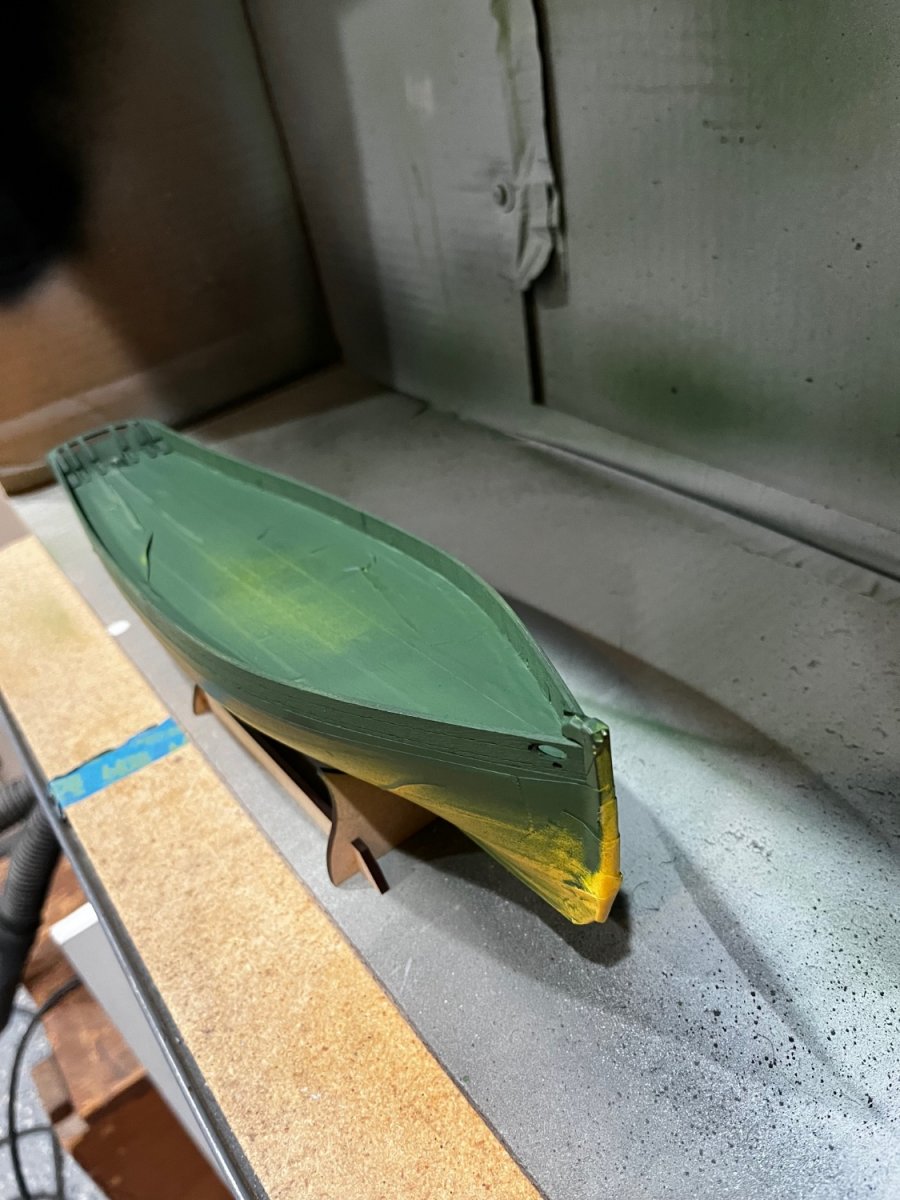
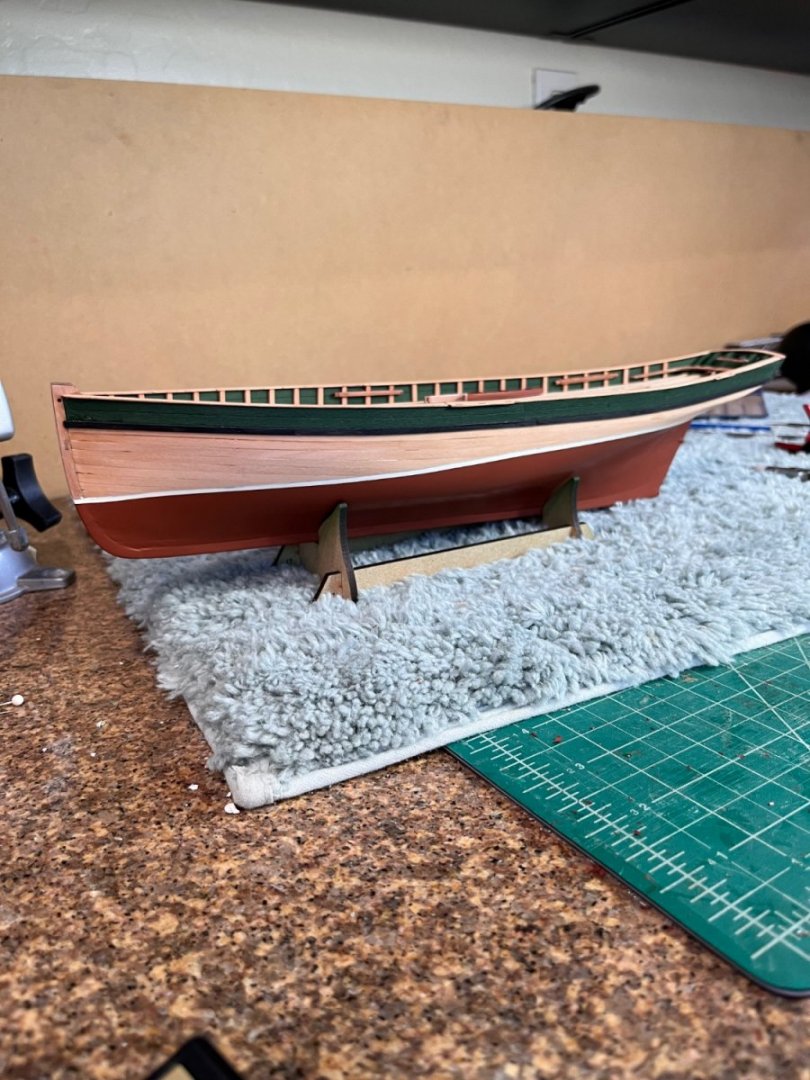
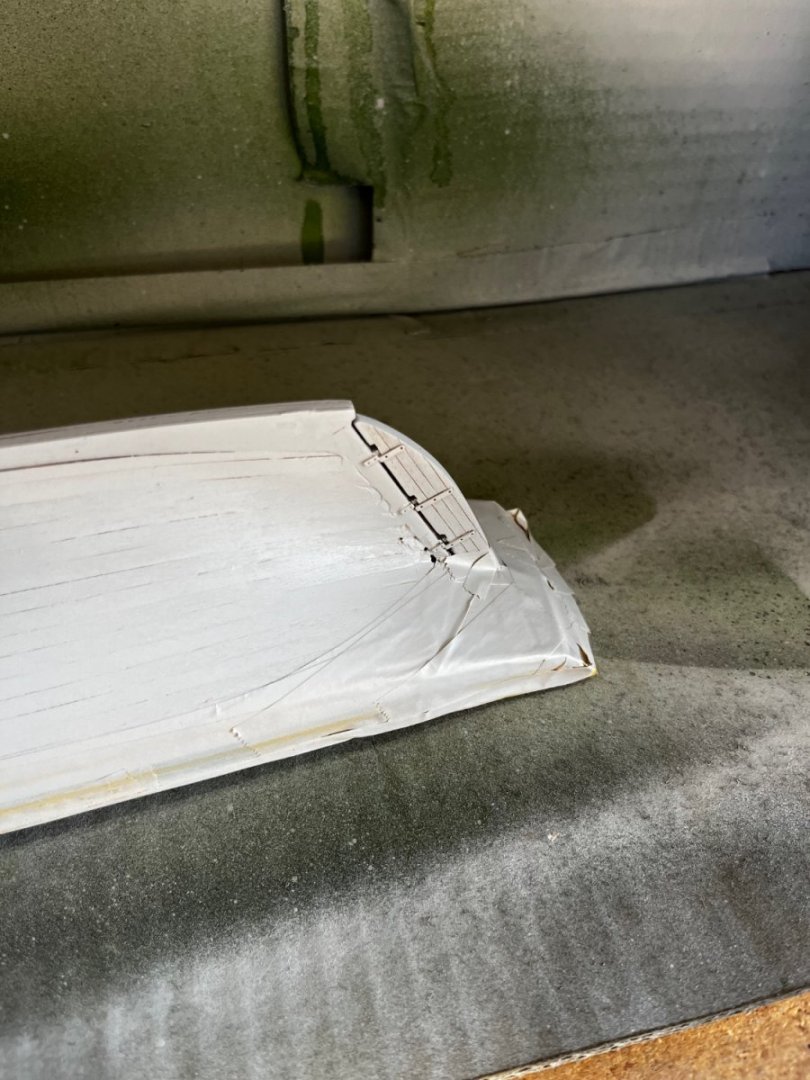
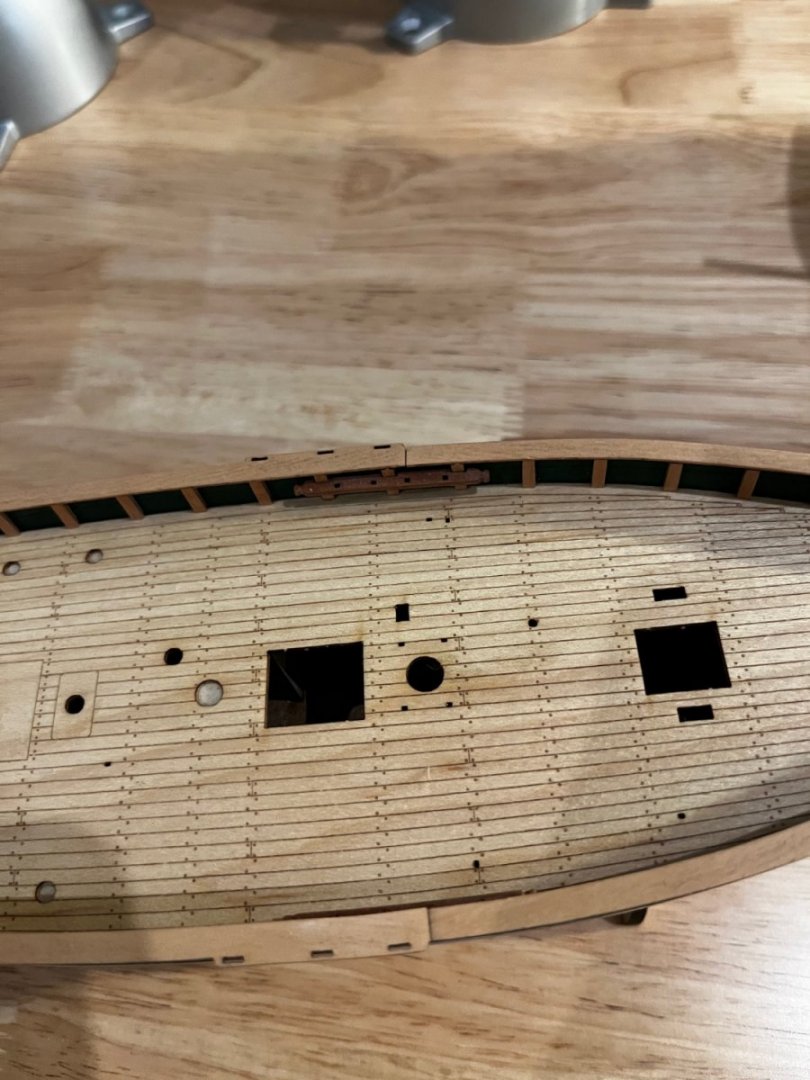
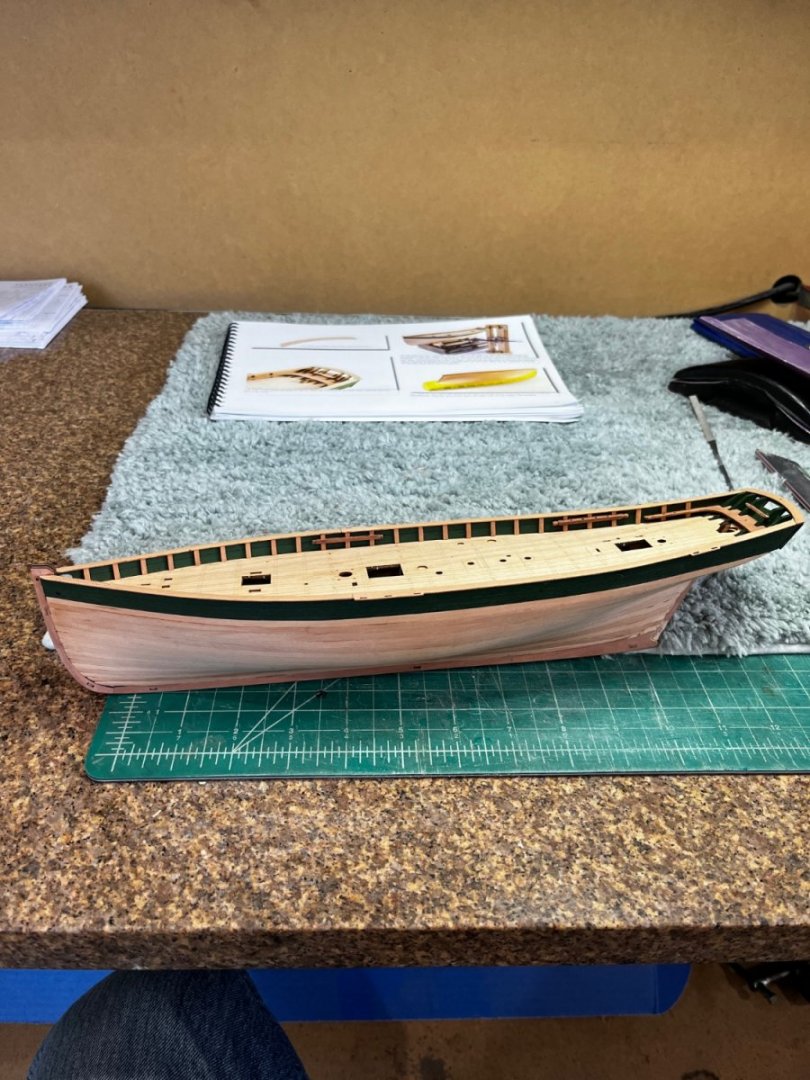
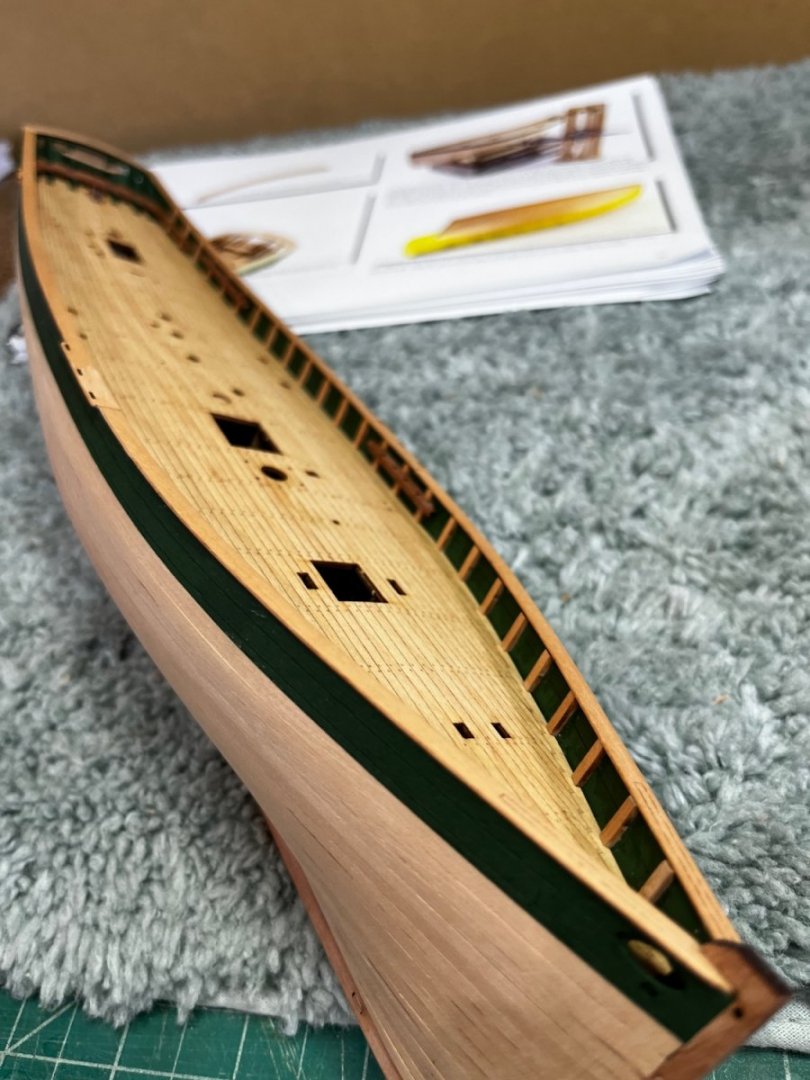
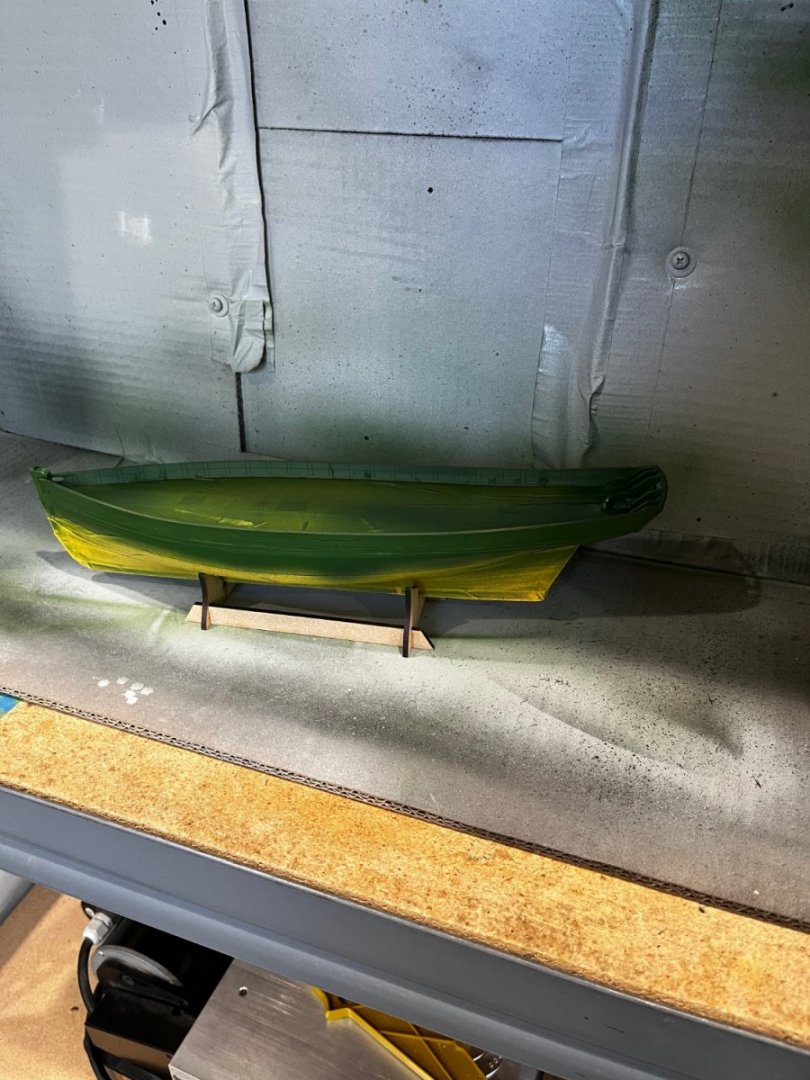
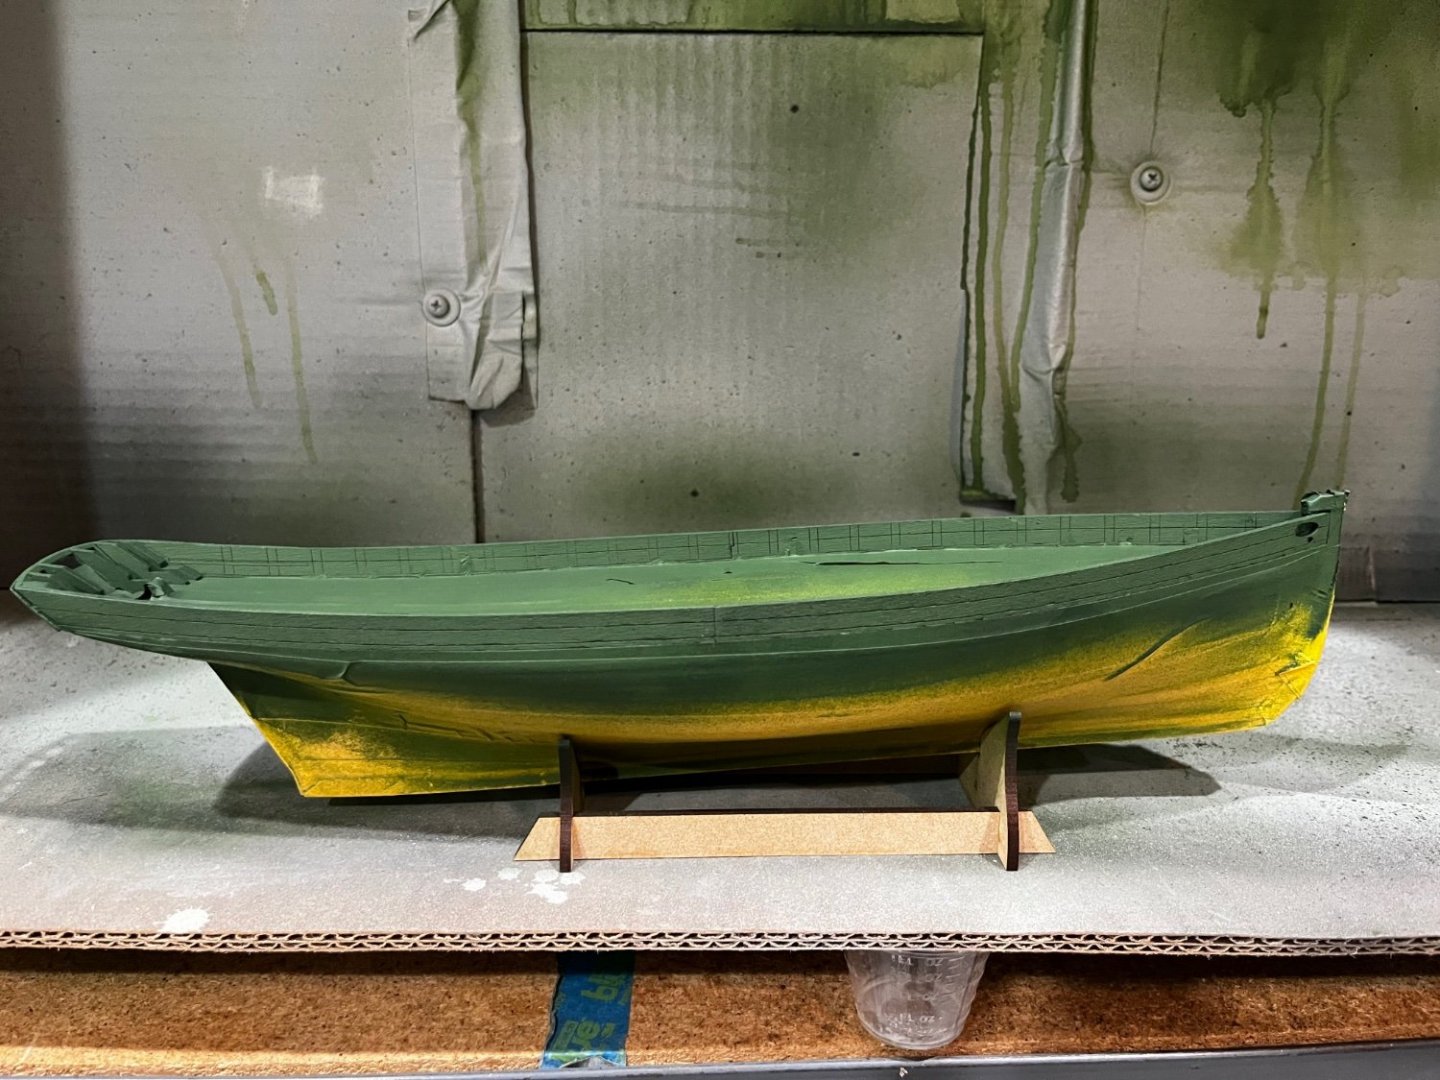
Well we're in the new year and have made some progress not that the holidays are over and everybody settled. Thanks Bob always appreciate your comments. I'm from Sacramento born at "Sutter Hospital". Finished the second layer of planking. The pear in the kit was of varying thickness so out came the thickness sander. All planks down to same thickness and a smoother surface than the saw ripping. I used Chuck Passaros method of lining off the hull and making tick strips to mark the planks. All worked out very well except that I did have more creep than I thought I would so the last plank was hand shaped. With the planking finished I moved on to removing the bulkheads about the false deck. That was not a difficult as expected. With pliers they just snapped off leaving slight pieces to hand finish. Here's what is really amazing the thin deck fit without any adjustments. I can't say it enough how great this kit is. Its truly a statement of excellence to Chris. I decided to paint both sides of the bulwarks so I taped out the outside and inside for spraying. Time to break out my homemade custom spray booth (a large packing box with the lids cut off and seams taped) and start painting. Deck taped Erycina in booth Erycina after first coat of green paint. Look at the stern for a view of coverage Just a tip to modelers I started using "Mission Models" paint and must say it covers well and sprays good. They have a large color pallet from which to choose. On a lark I tried their airbrush ready paint in a bottle. Shake the bottle then add to gun reservoir sprayed with 35psi at 6" it produced a even wet surface. I must be getting lazy as the premixed was easy to use with great results. More painting tomorrow Best Regards Will


- 77 replies
-
- 11
-
-
- Erycina
- Vanguard Models
- (and 1 more)