niwotwill
-
Posts
593 -
Joined
-
Last visited
Content Type
Profiles
Forums
Gallery
Events
Everything posted by niwotwill
-
 They look good to me. When zoomed up I like the cannons cast like surface. I have a few thoughts that might improve imagery. 1. Paint the quills a different color to highlight the part in contrast. 2. Apply dusting powder to cannons. 3. Paint the wheel tread brown. 4. Paint is a little to glossy for my taste. I really hope this isn't to much but I really like the whole thing. I must give fusion 360 a try. I've been using TurboCad 12 on my Mac which can't output to 3d printers yet.
- 274 replies
-
- 1
-

-
- Cheerful
- Syren Ship Model Company
- (and 1 more)
-
Thanks Glenn I keep studying the plans but maybe I should color the drop plank.
-
Glenn on plank bending station what is the metal piece holding the radius wood?
-
I use both for different purposes. #11 blades are thicker and stiffer scalpel blades are thinner so the cut has less of a bevel. #11 blades are best for paring and scalpels for cutting. And again as stated lets not for get razor saws which I use exclusively if I'm making joints. i.e. planking strakes, coamings, etc.
-
Taking a few weeks off helped the mental attitude and I started above the wales again. I had forgotten how tedious it was getting the planks shaped at the stem but I got them in with results I'm happy with. Getting the first 2 planks in the first strake with 1st plank in the 2nd strake was very tike consuming as I had to make three attempts to my satisfaction. Just a quick picture of the start. What appears to gap at the stem between the first plank and wales is actually a shadow caused by the wale being thinned to half for the final layer to fit into the rabbit. I feels good to start again. Tomorrow I'll get the strakes between the wale and moulding piece completed and then finally on the stern.

-
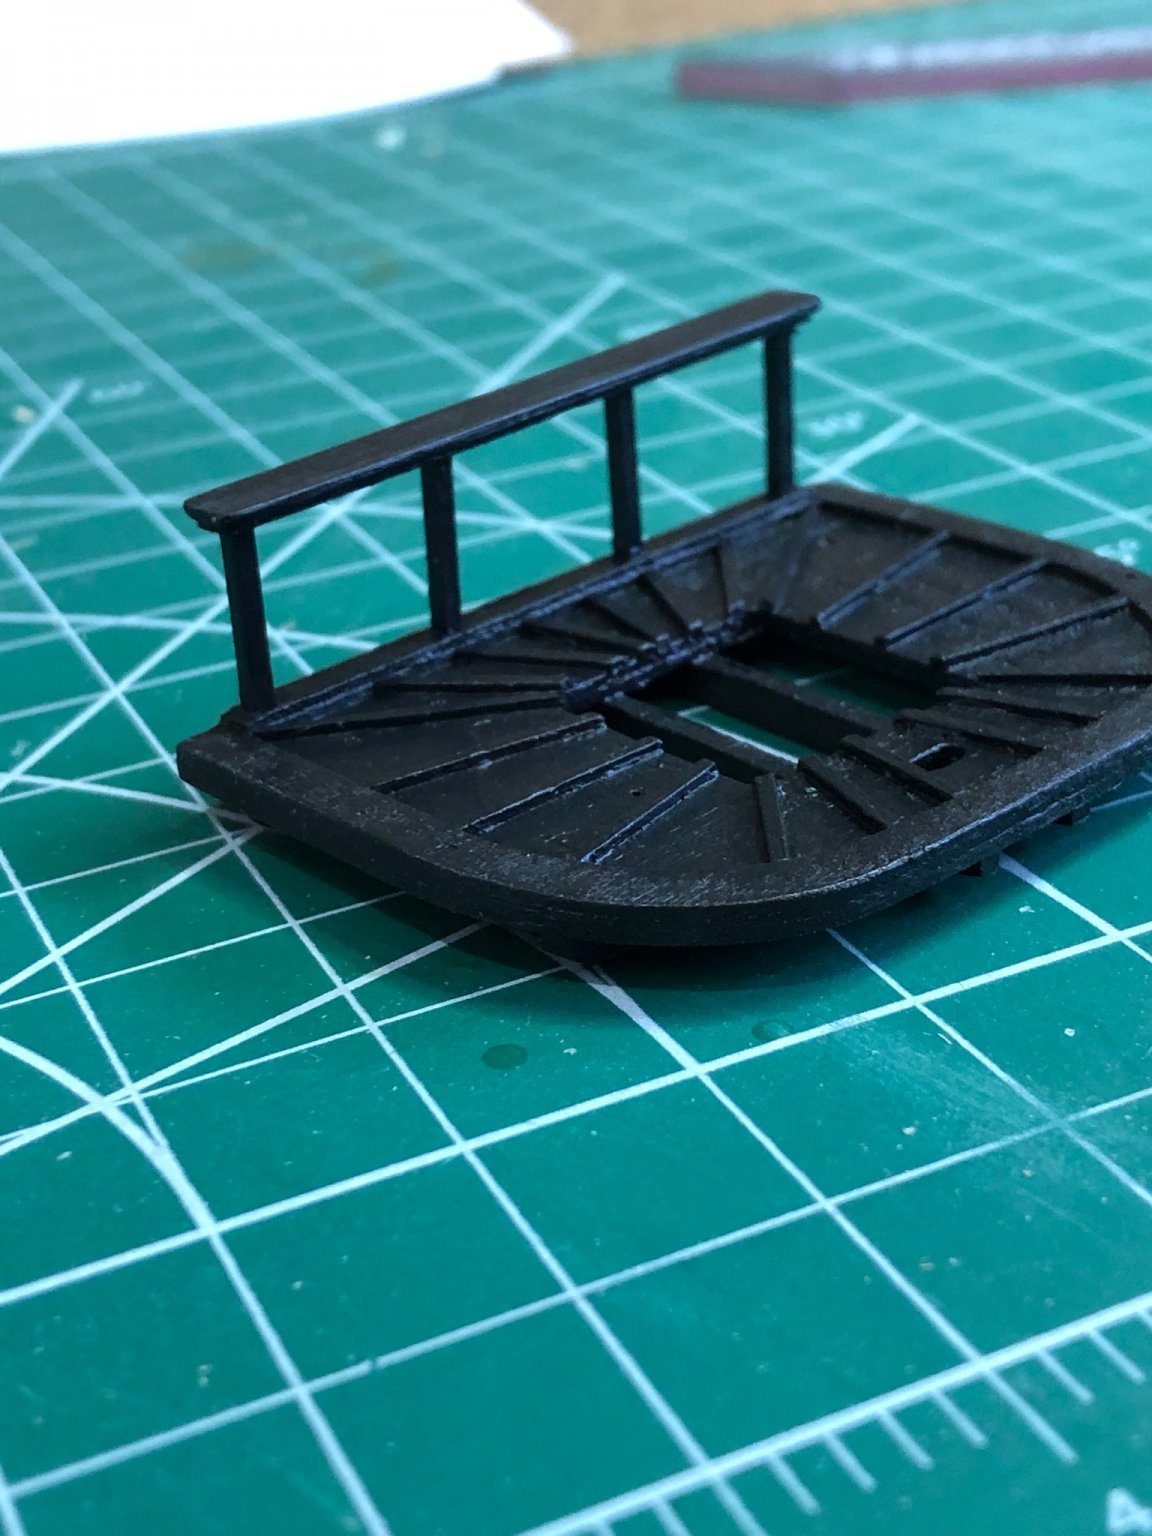
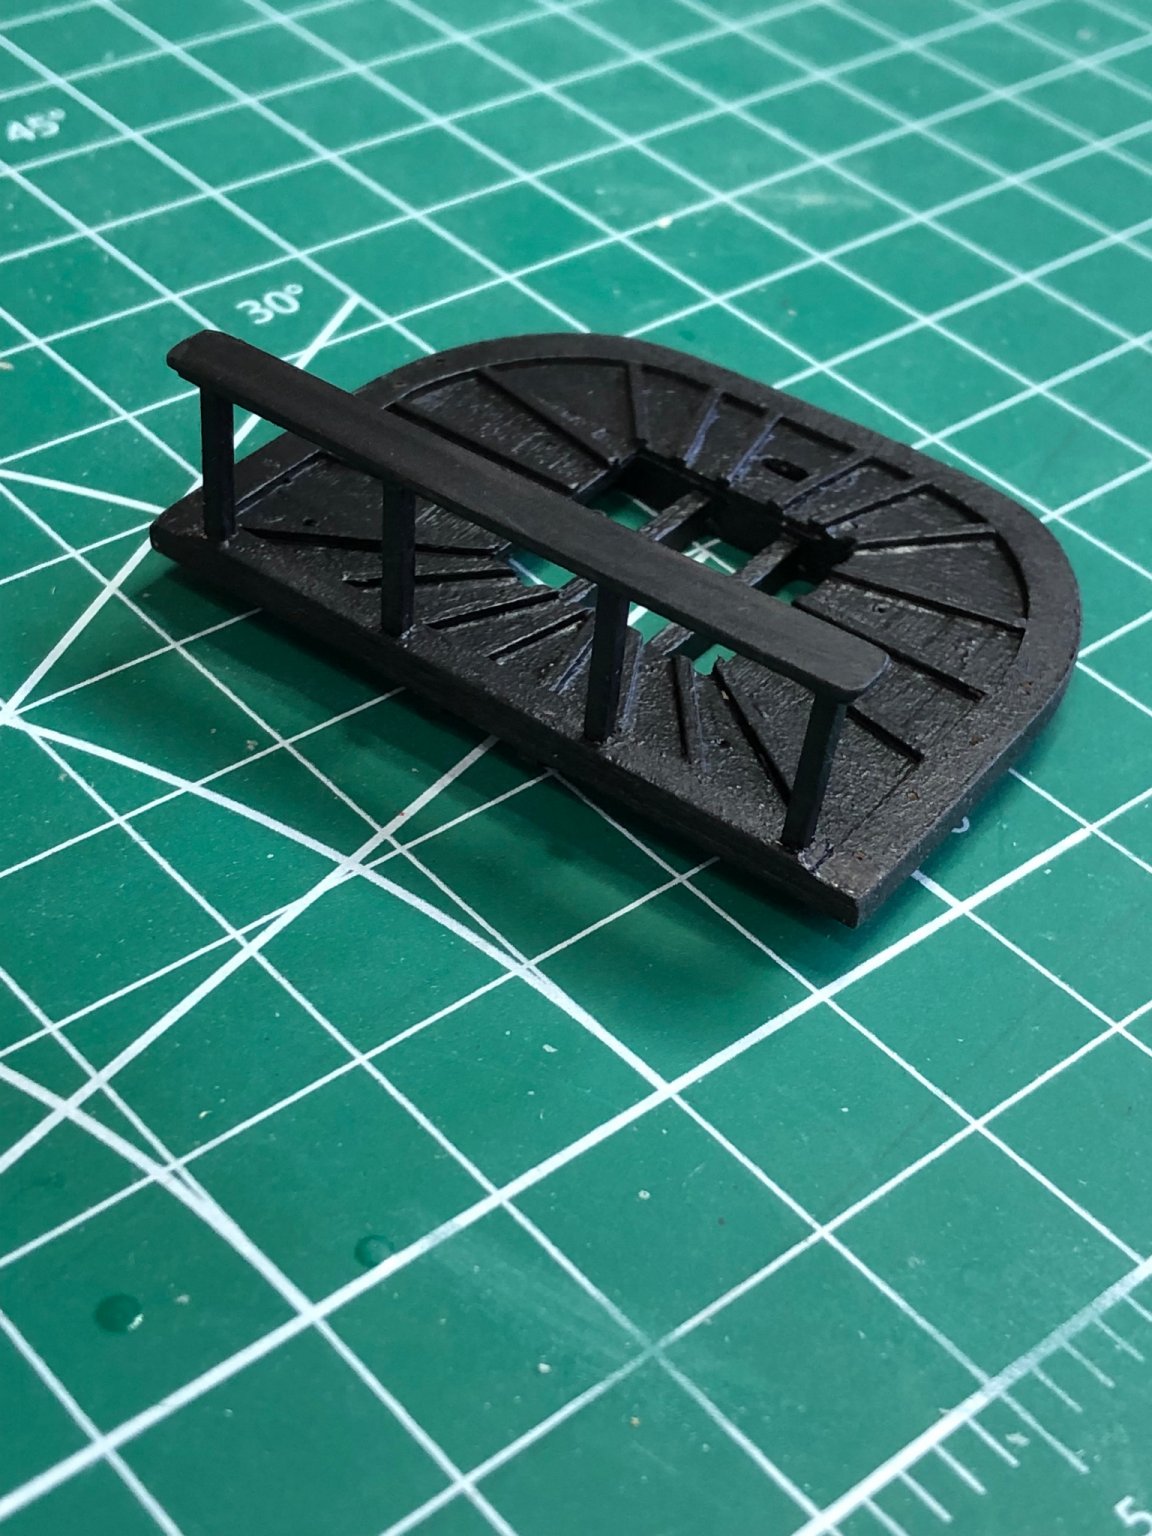
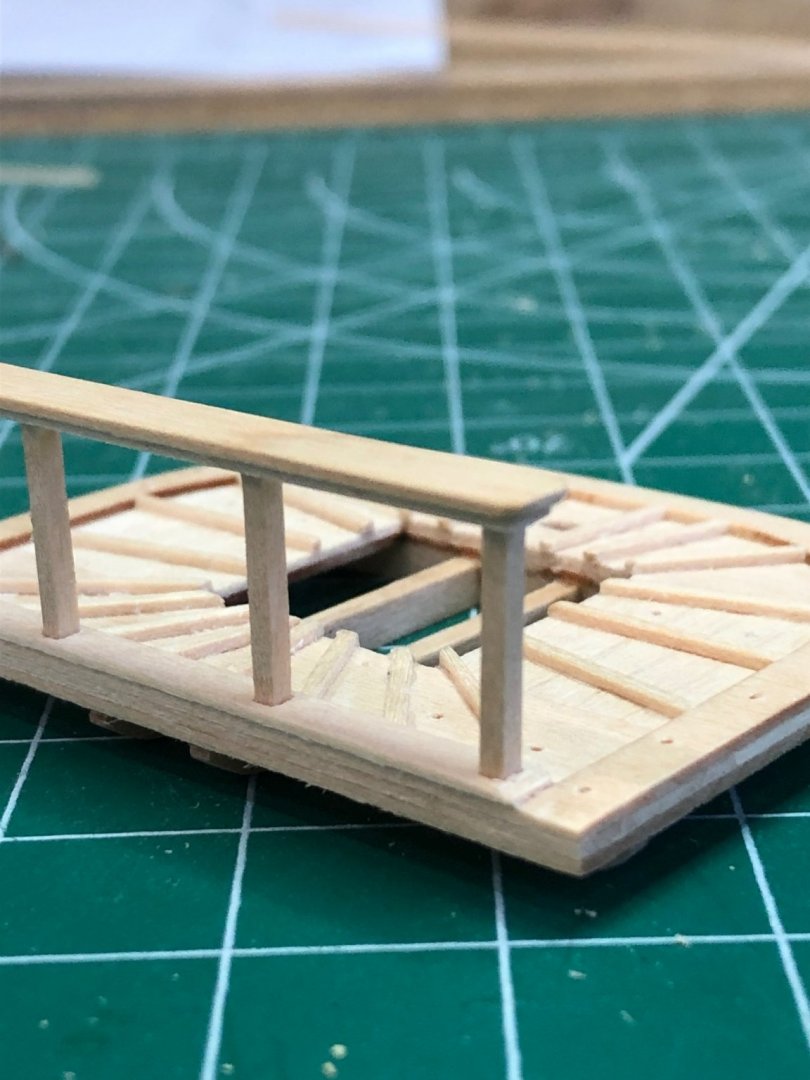
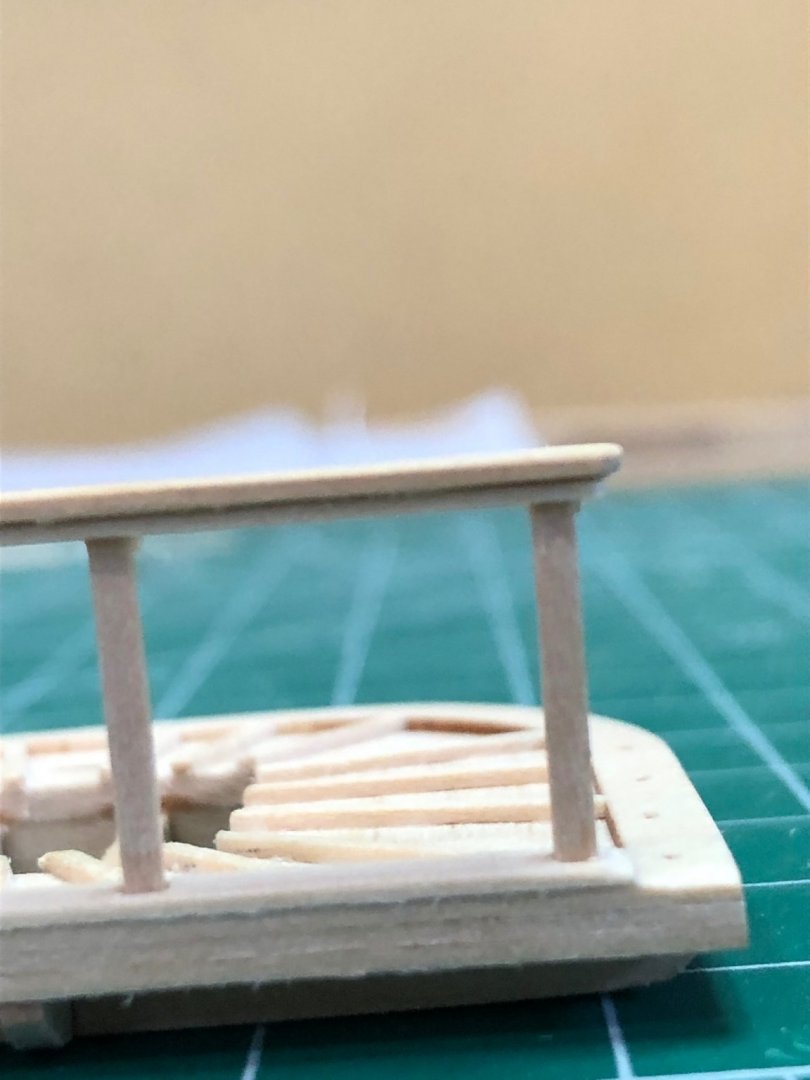
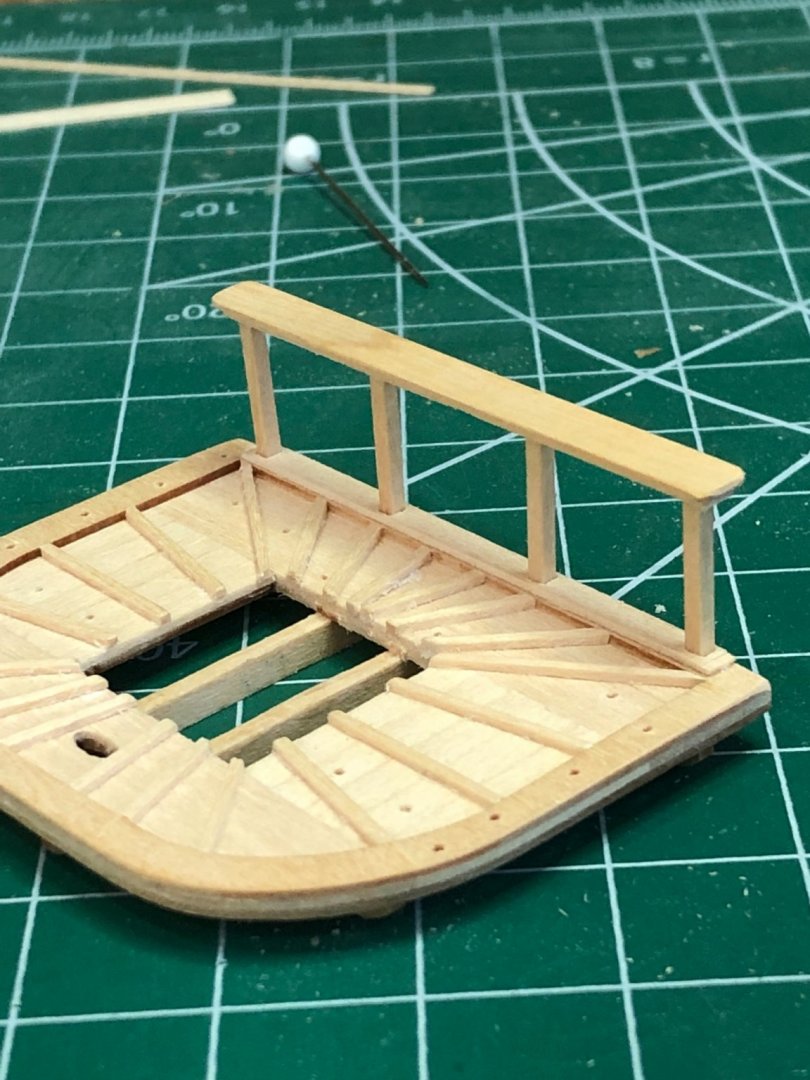
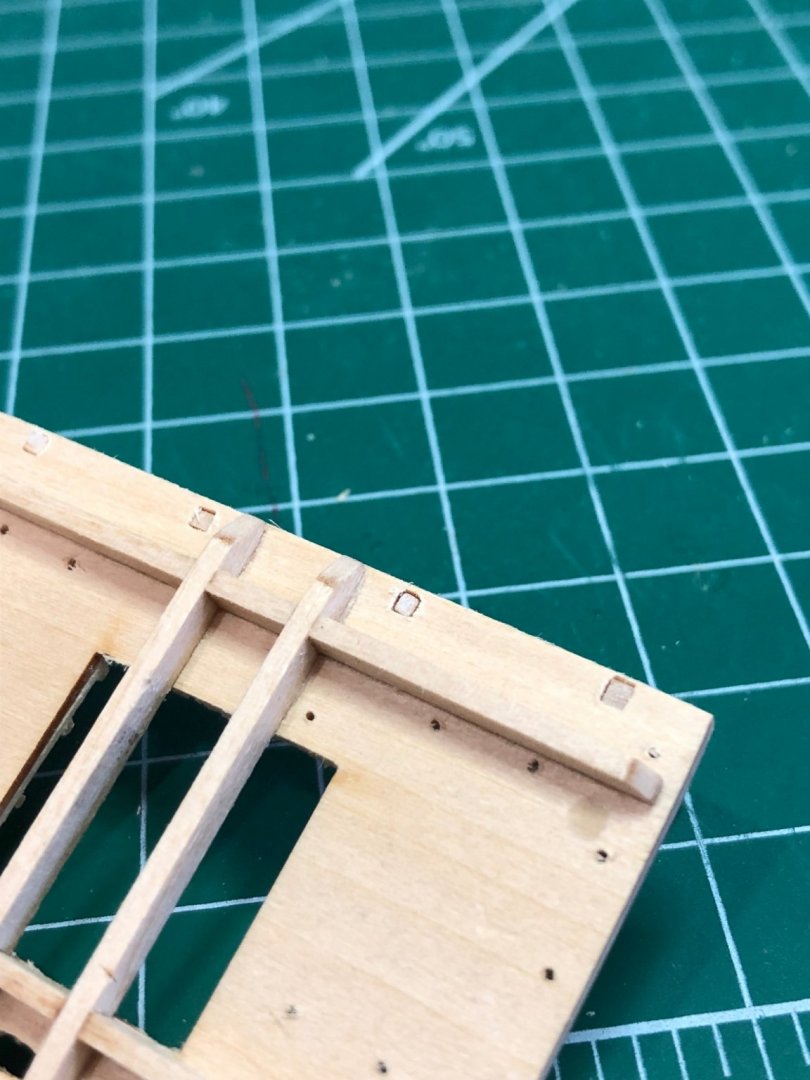
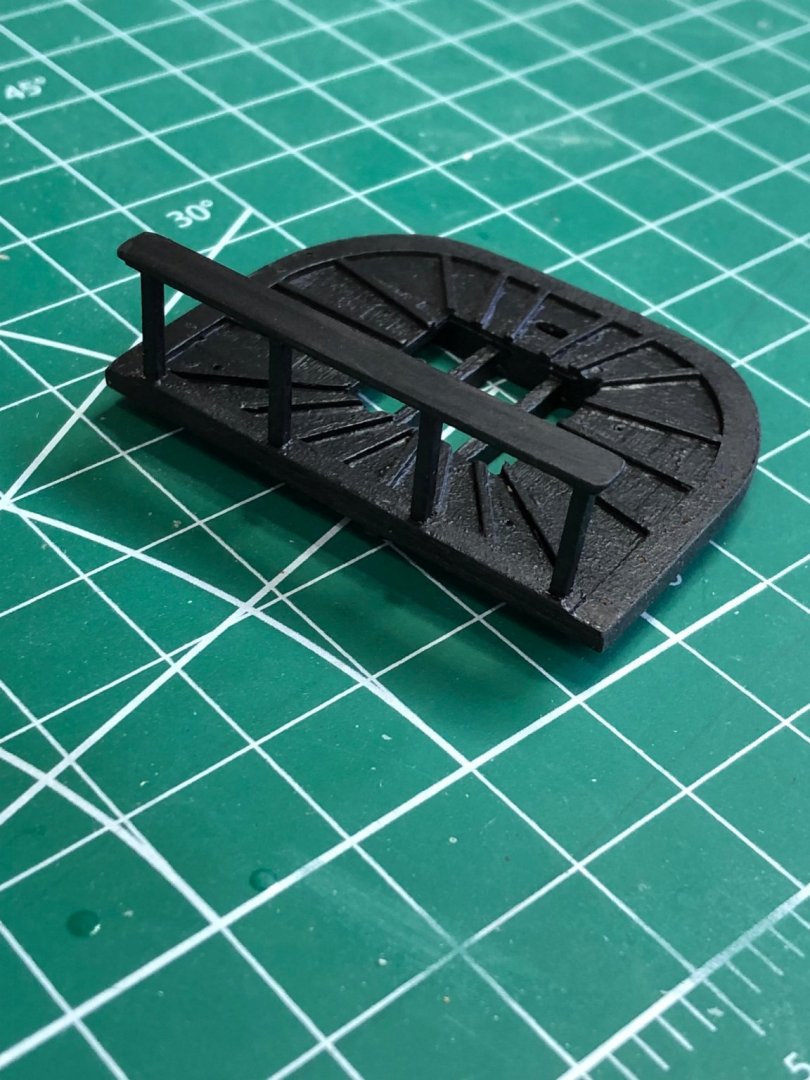
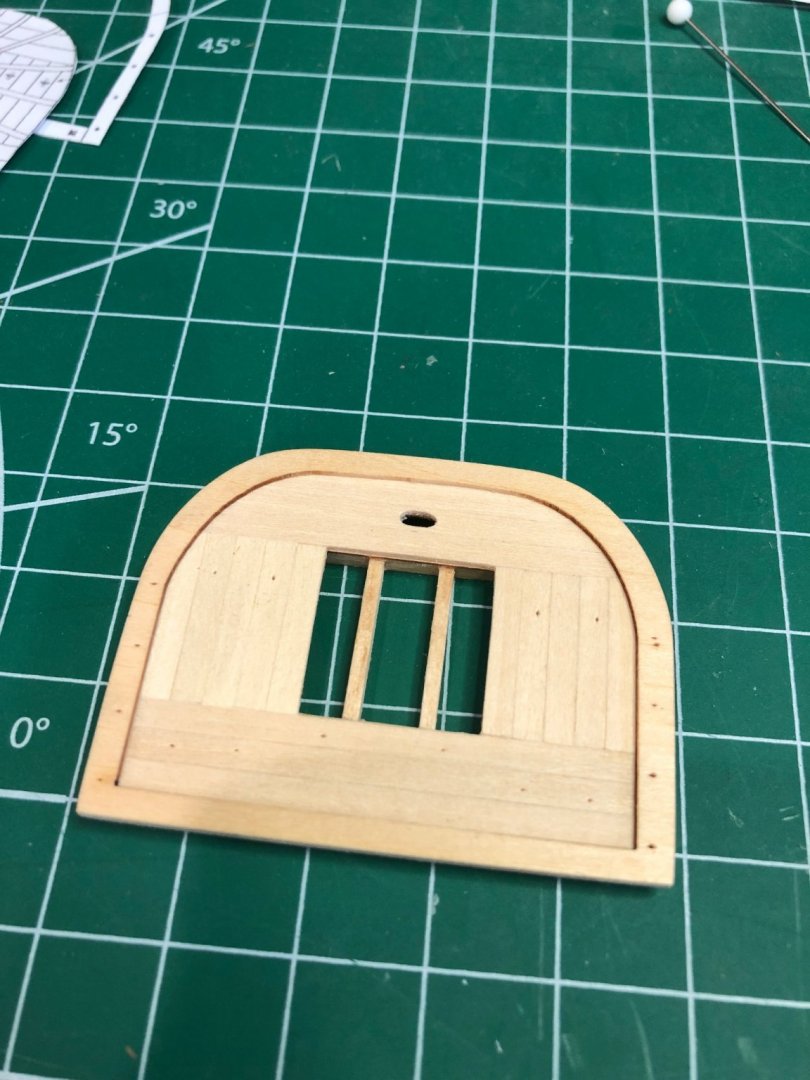
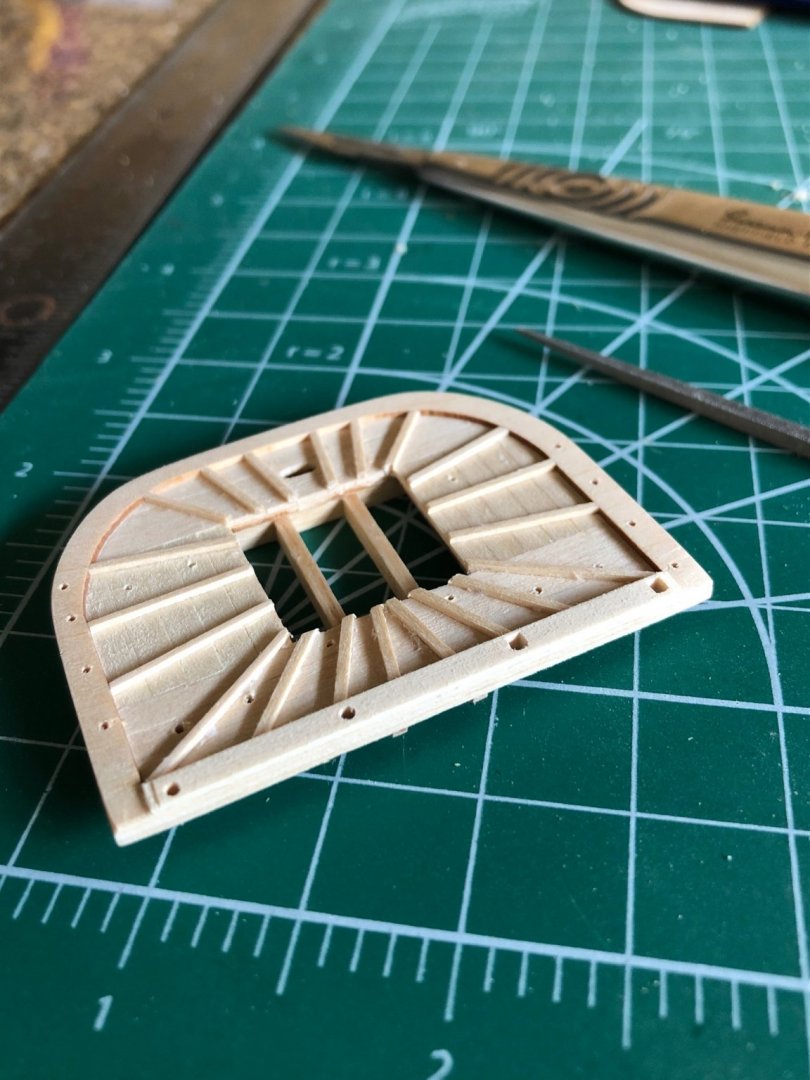
Completed the fore mast top now waiting for deadeyes and block to dry after staining. With the rear railing I made a few modifications that added to look and defiantly the strength. As before added square holes for 1/16" sq rod to slip into and at the top of the rail made changes to the design. I used the 1/32" strip with square hole in alignment with the holes in the base for stanchions. To make blind holes in the top I used a 5/32" by 5/64" strip to sit atop the lower piece thus creating the blind holes. The wider strip adds a little interest to rail with the offset. two square holes in base Making square hole in 1/32" top to create the blind holes Added the top piece creating the blind holes. All the parts dry fit to ensure fit to foremast top. View of the top two pieces showing the trim detail Finished ready for paint View of bottom showing the square stanchions in the base. Painted This has been a fun little project that made it special to me with my little touches.

-
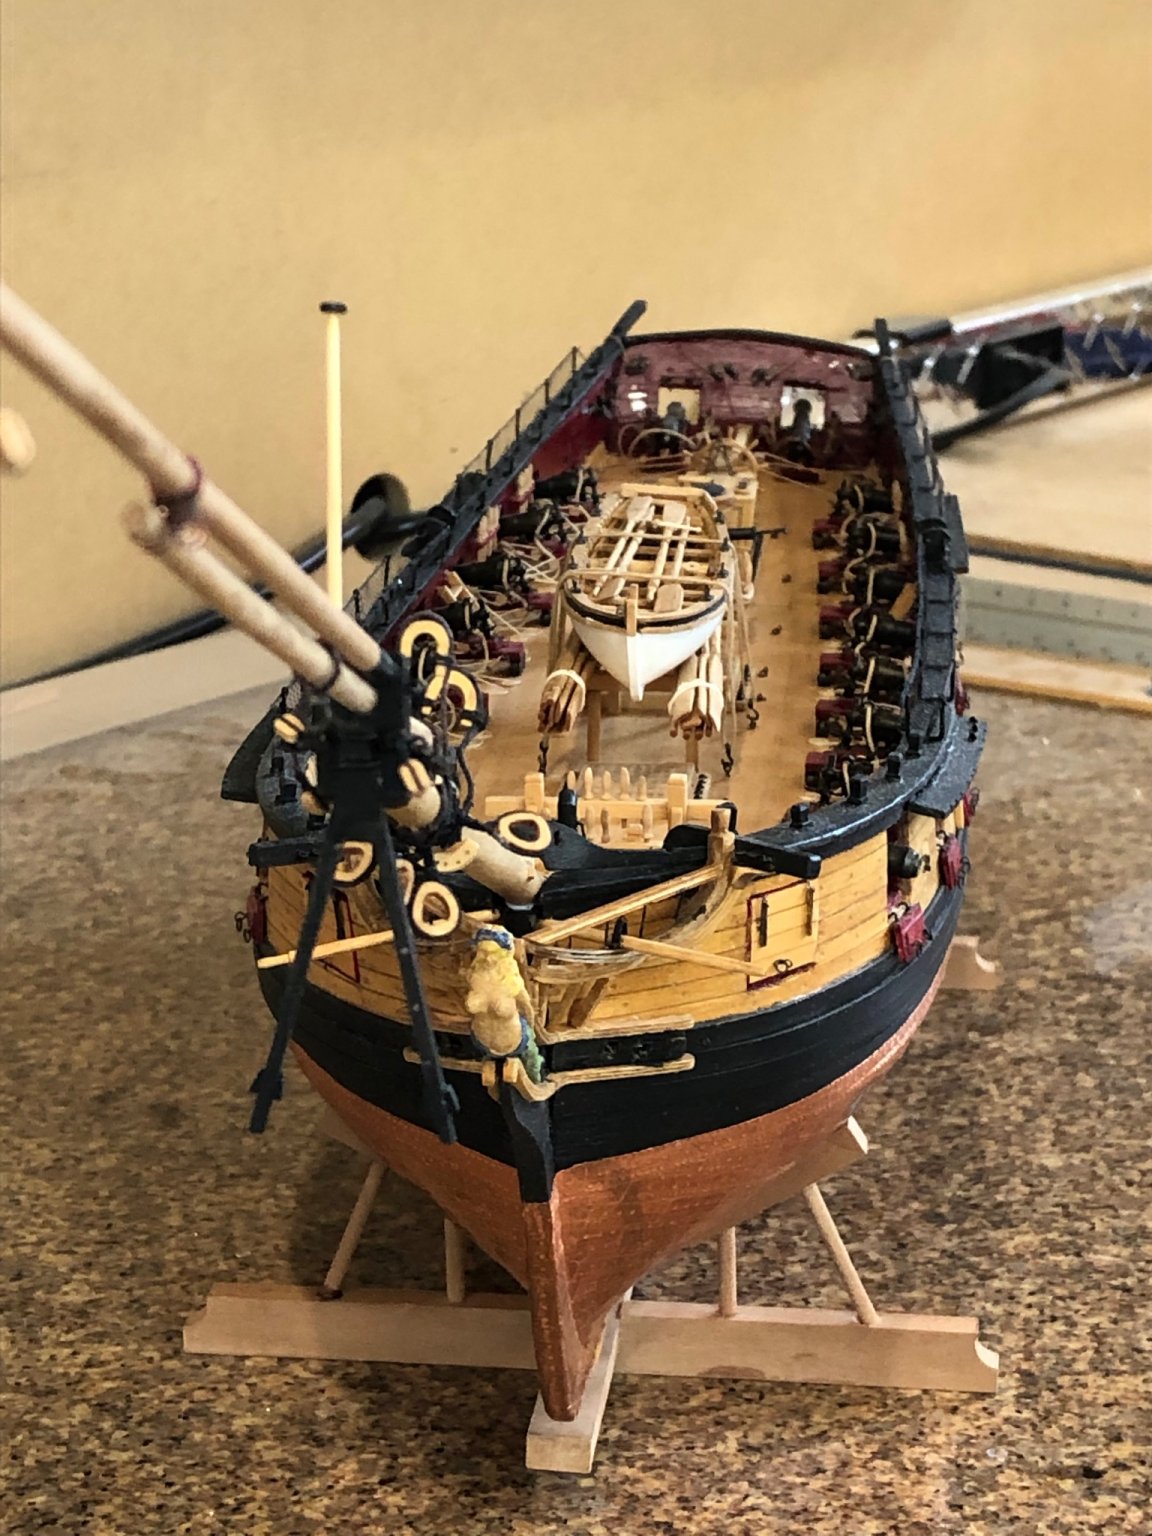
How deep into the keep are the mounting holes? Wondering if they may get loose and cause wobble.. I really like the colors and the color contrast between the red and black it looks great. Also leaving so much open makes an interesting viewing of all the interior detail.
-
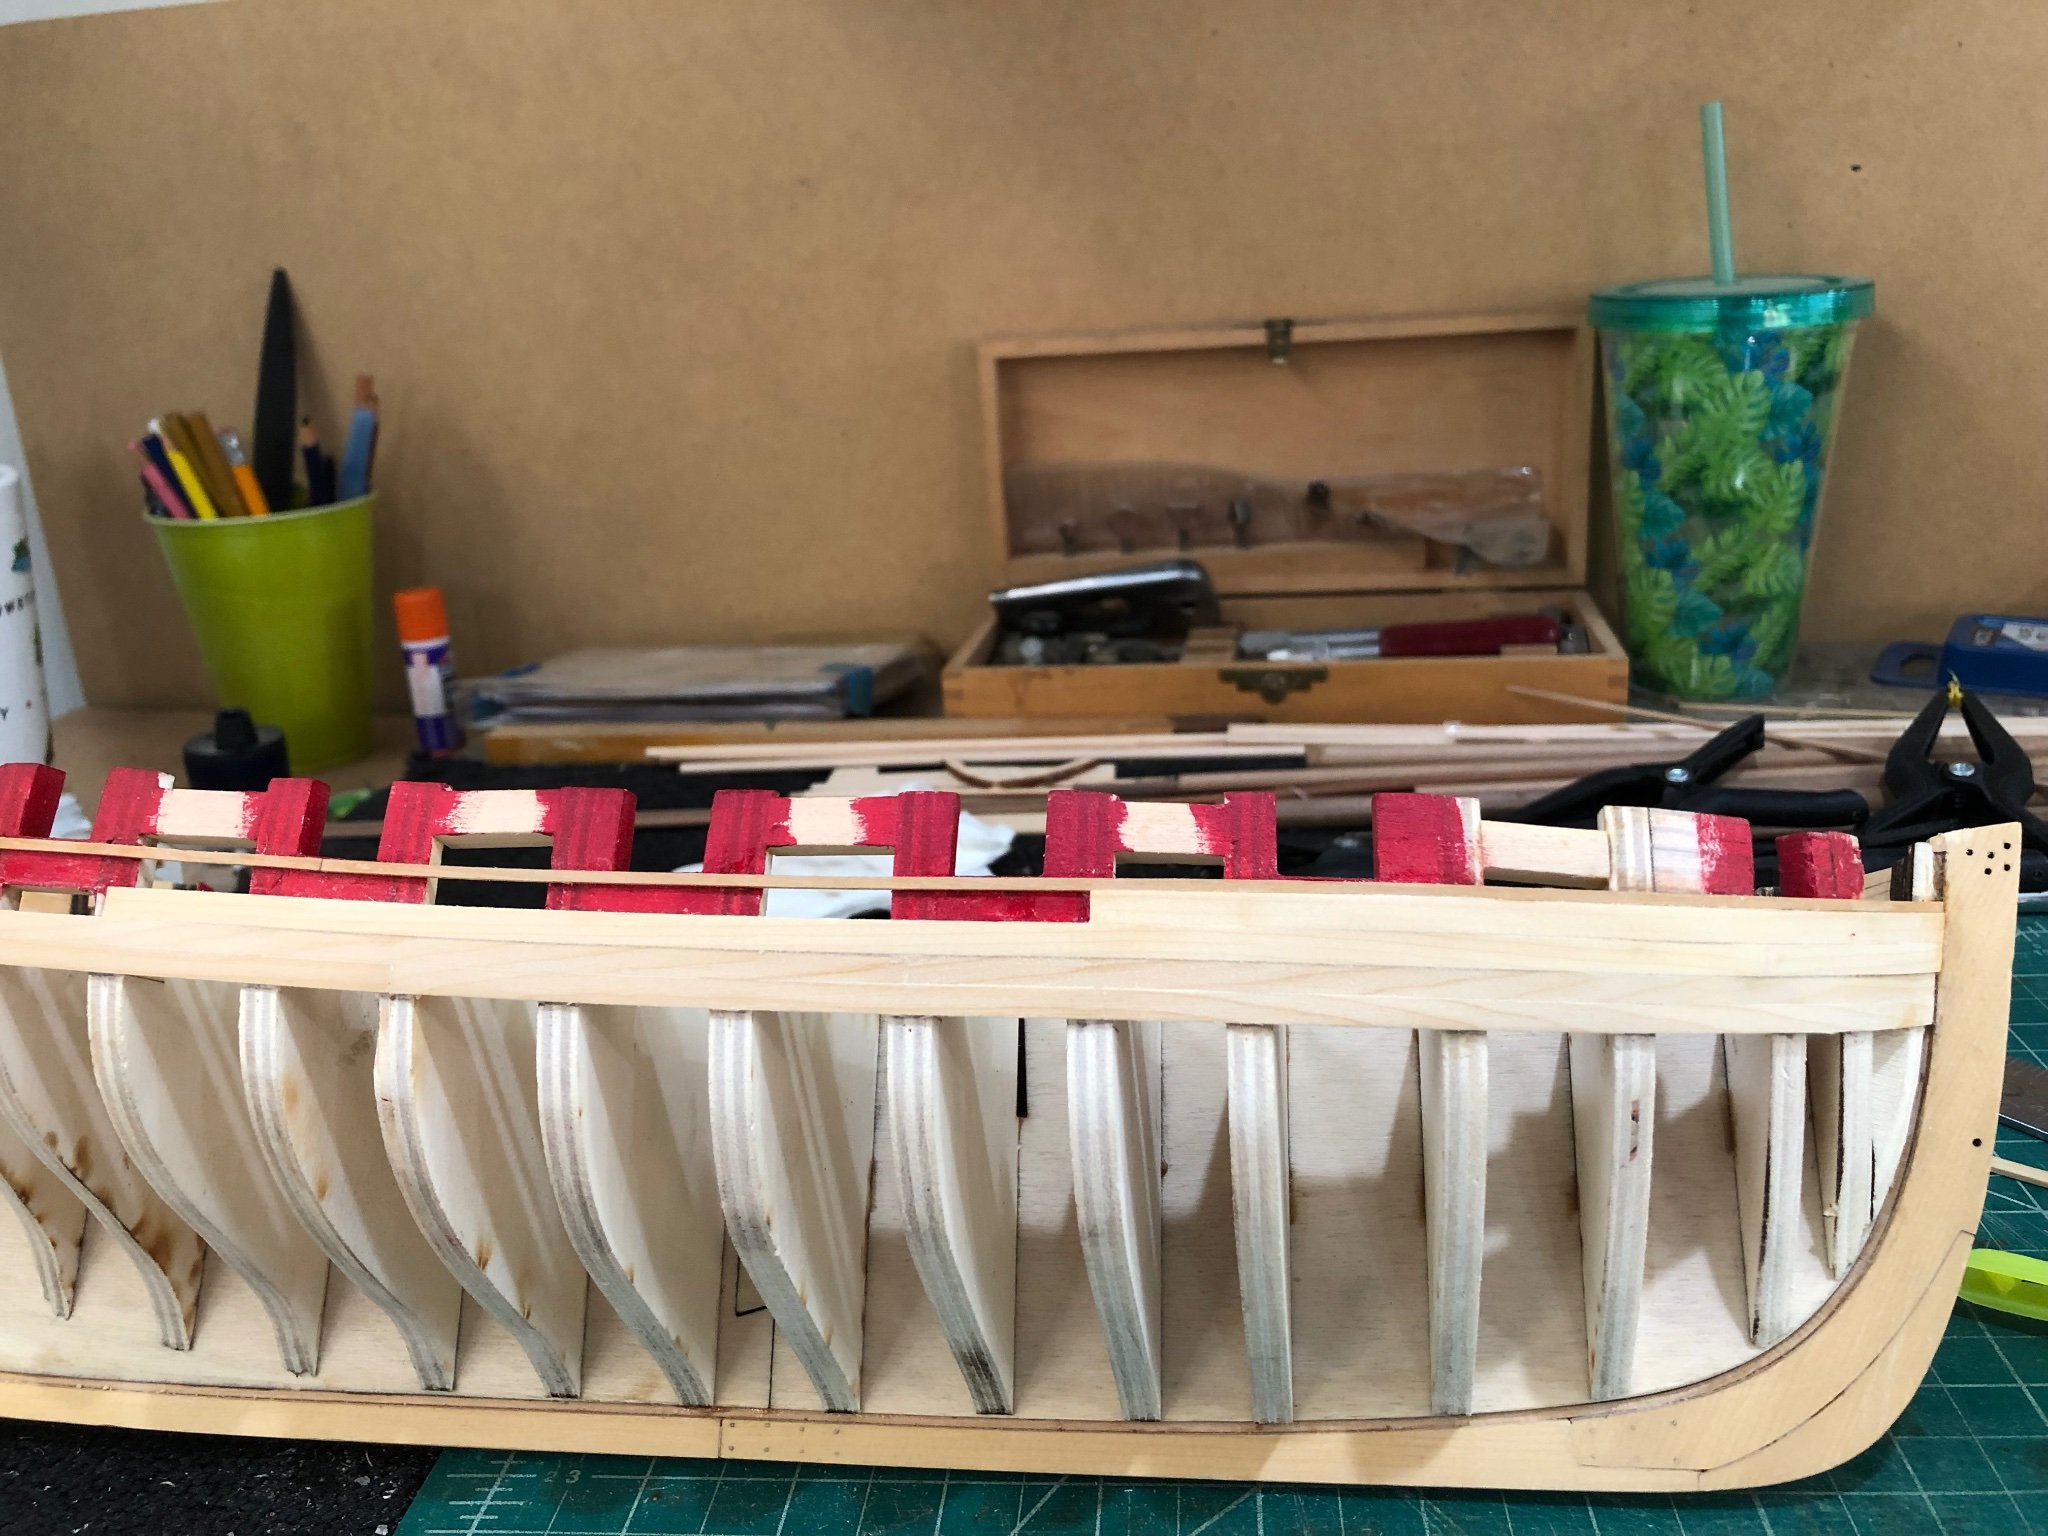
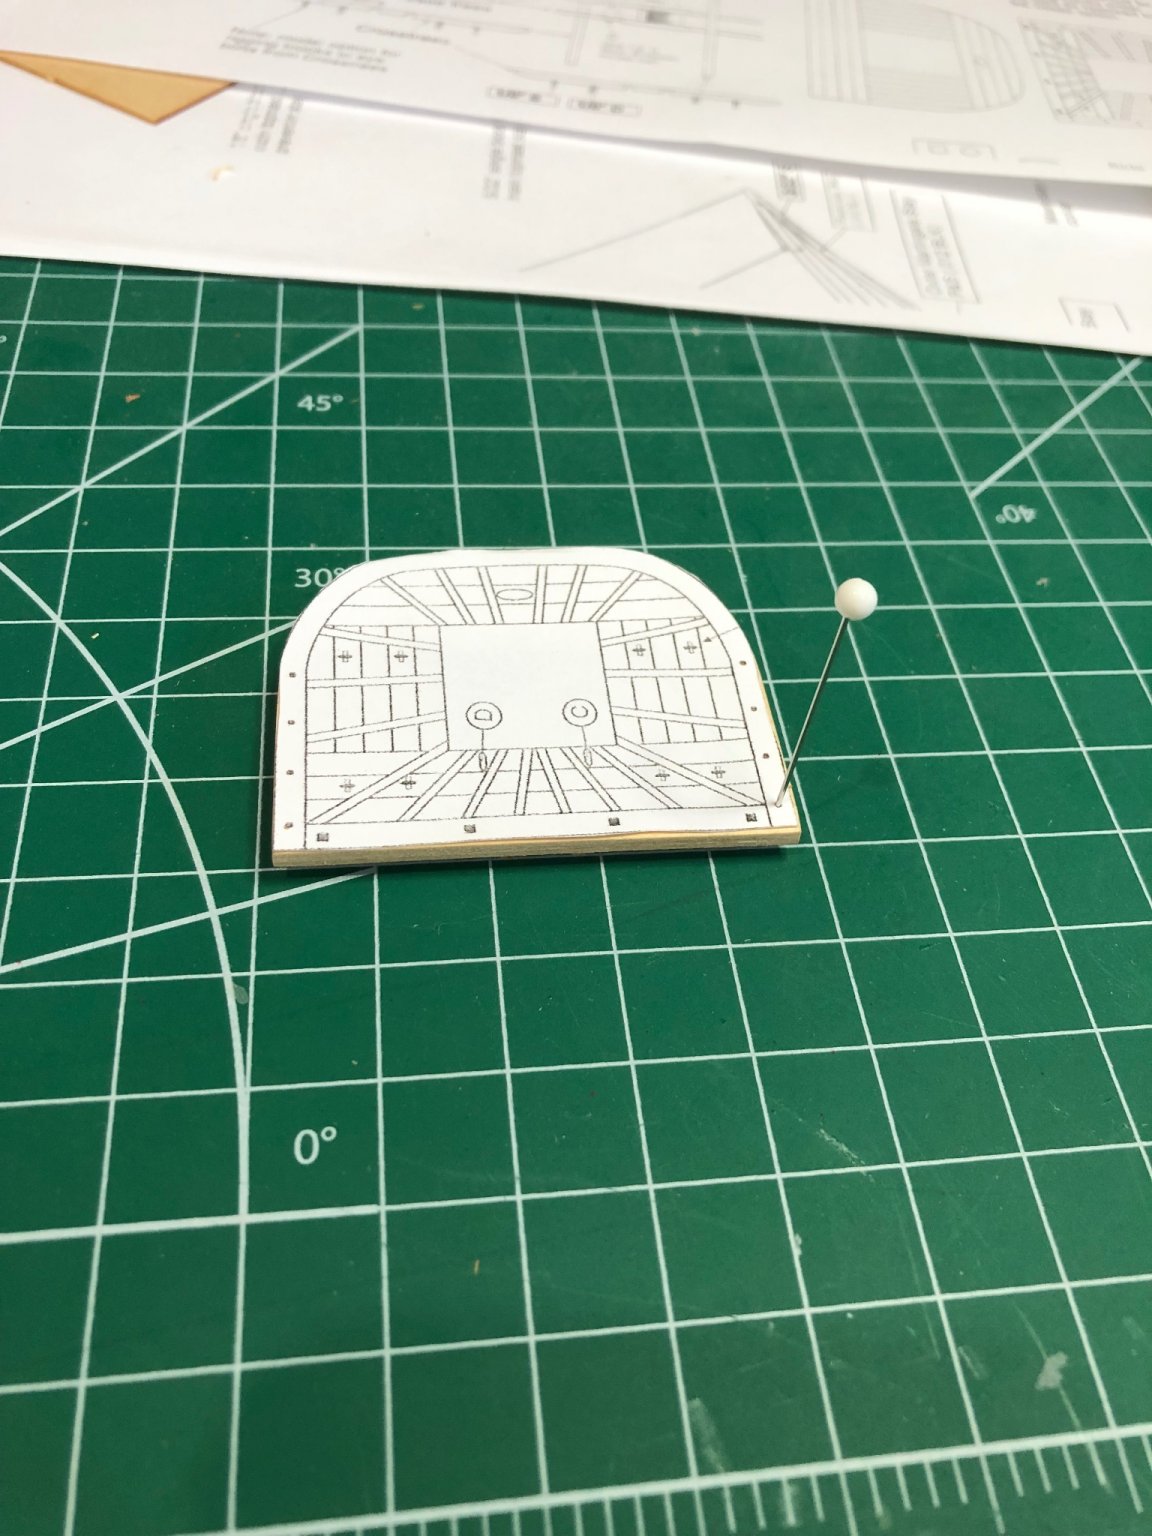
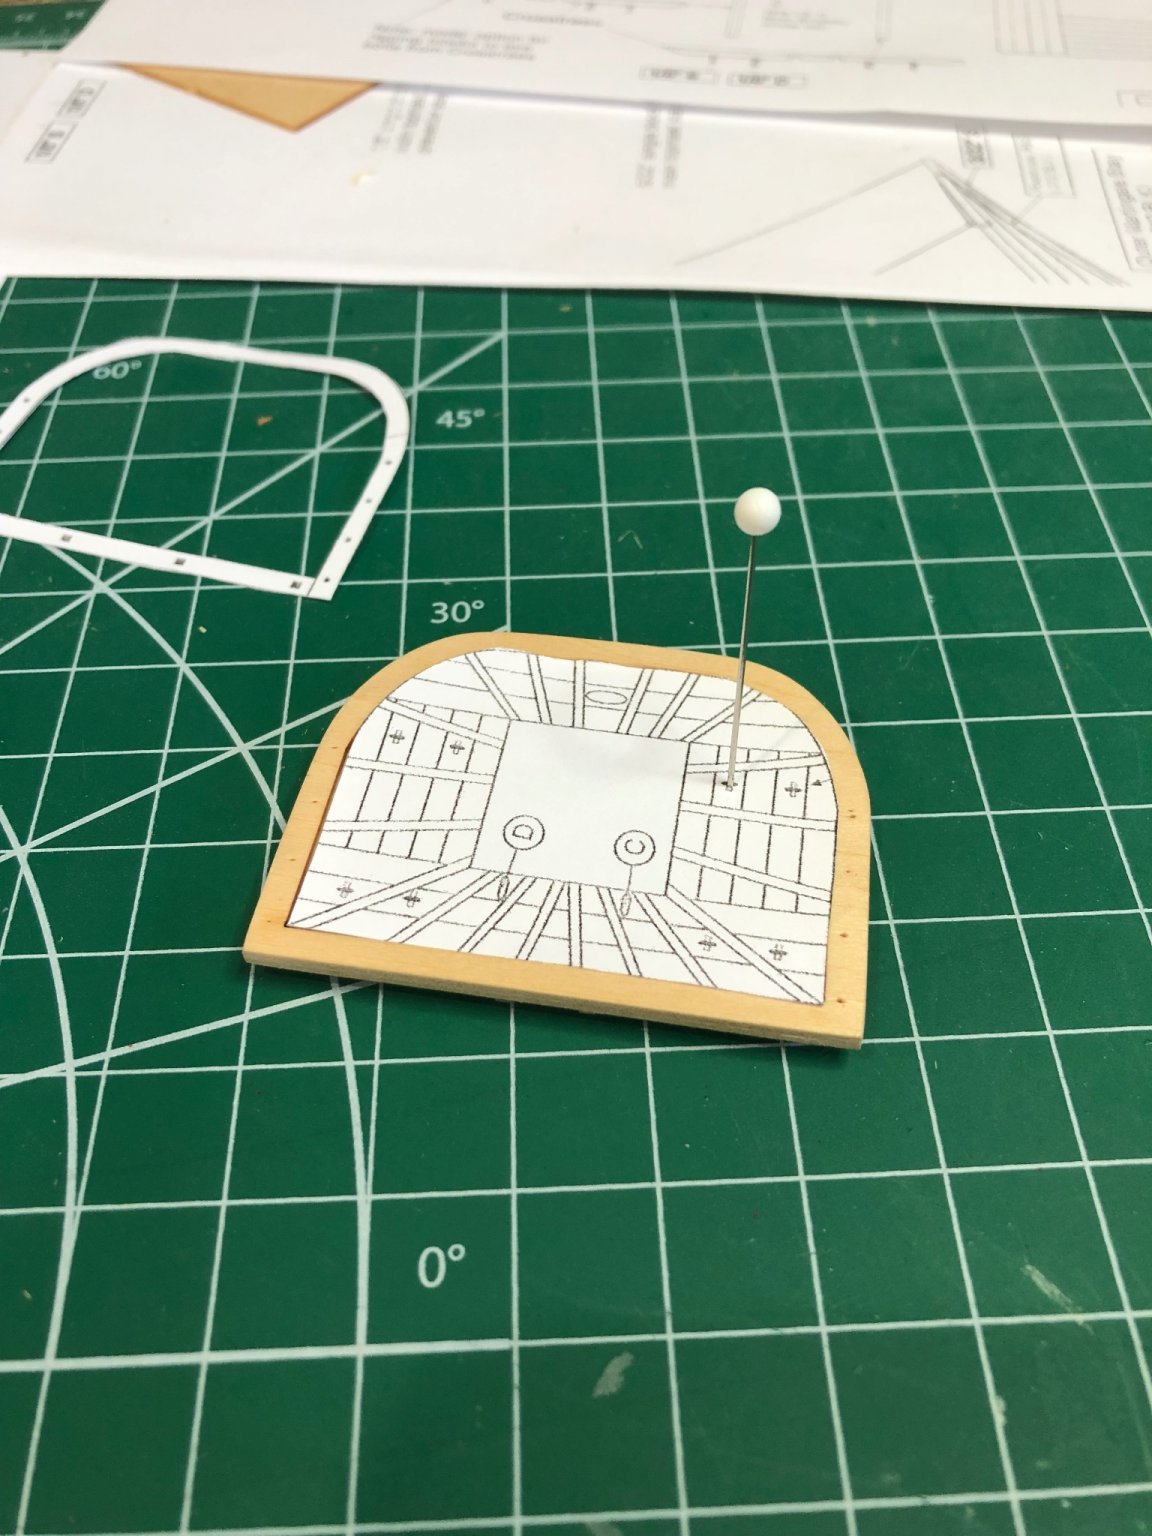
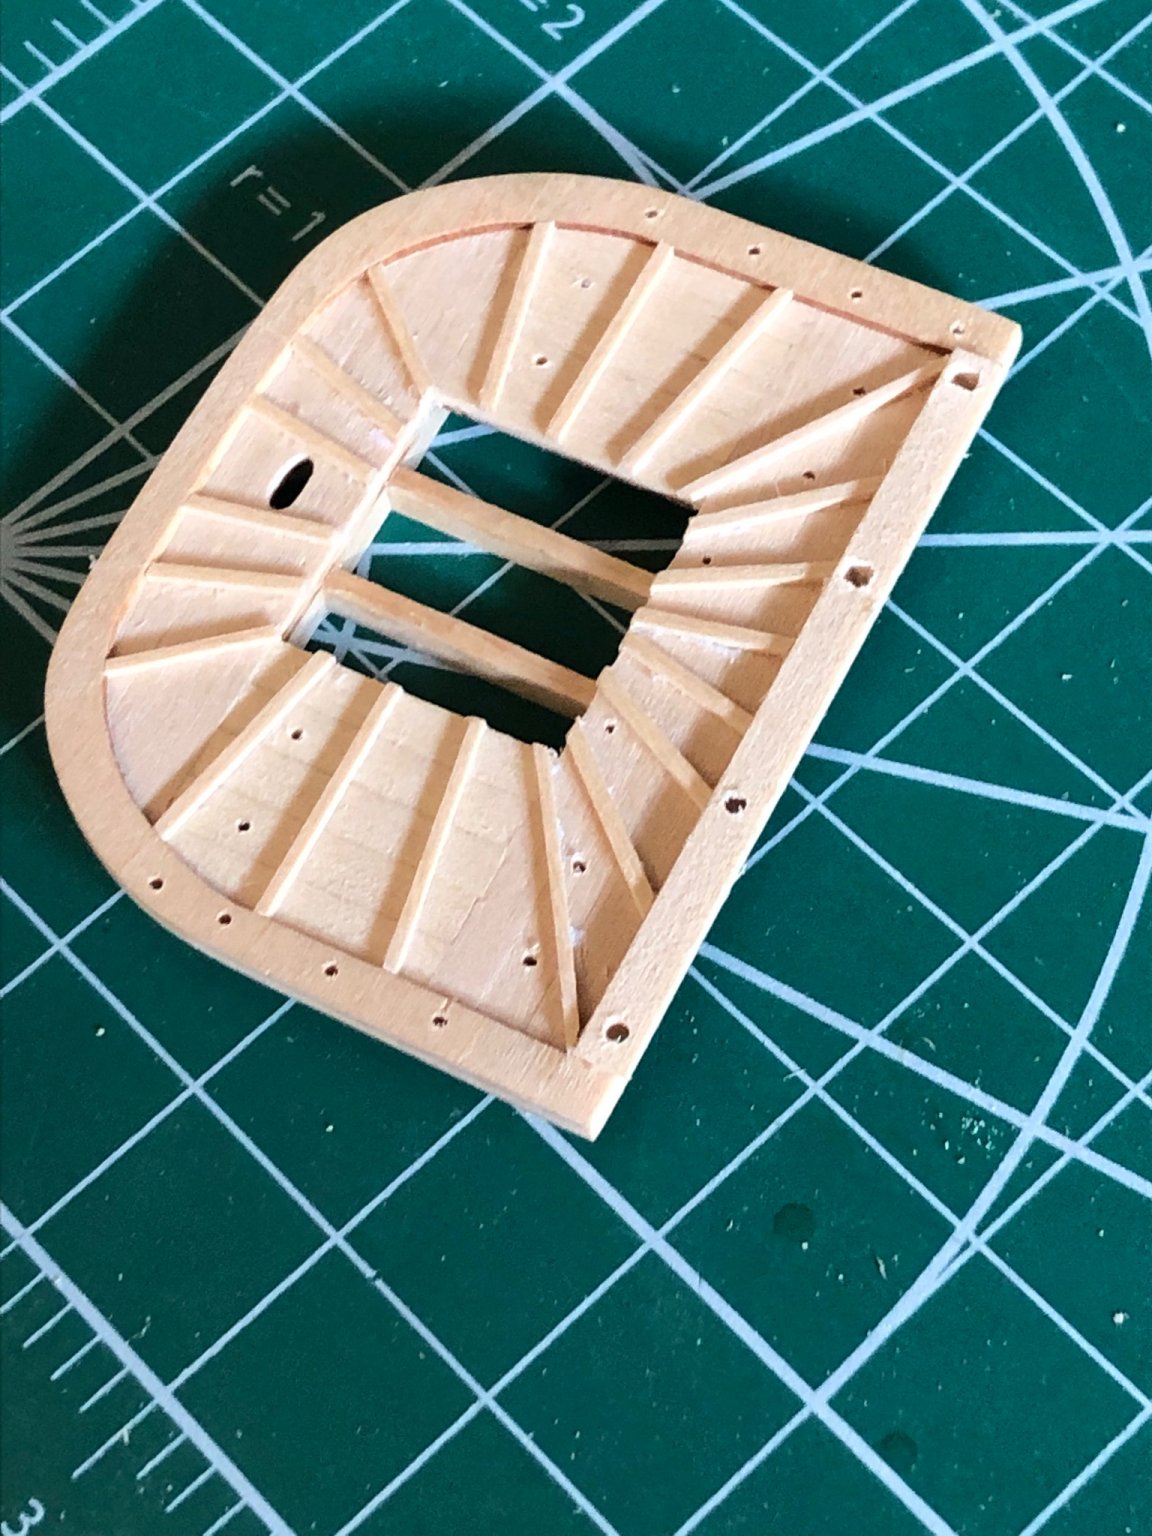
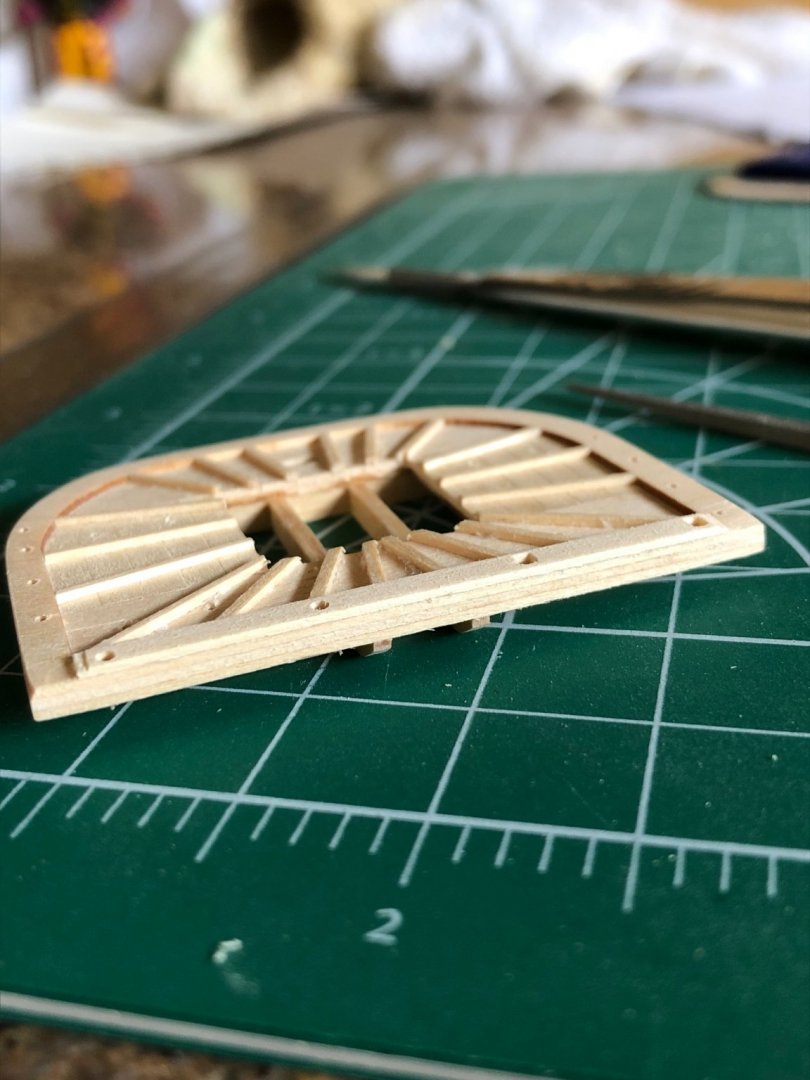
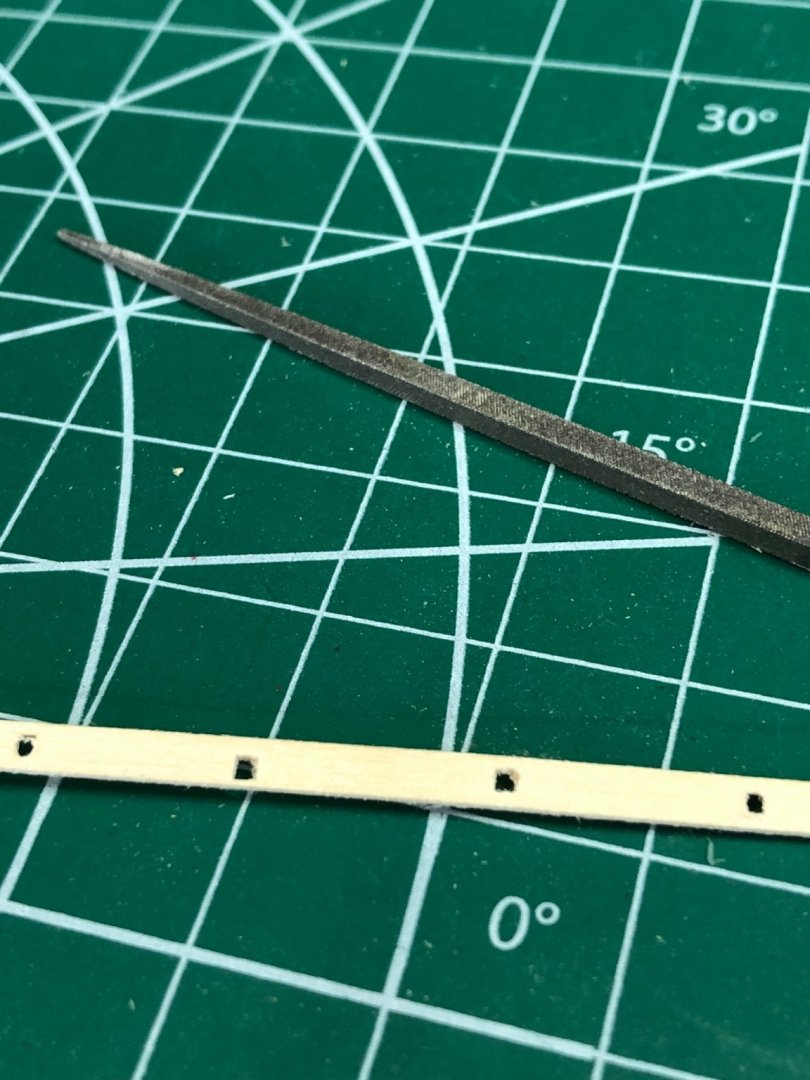
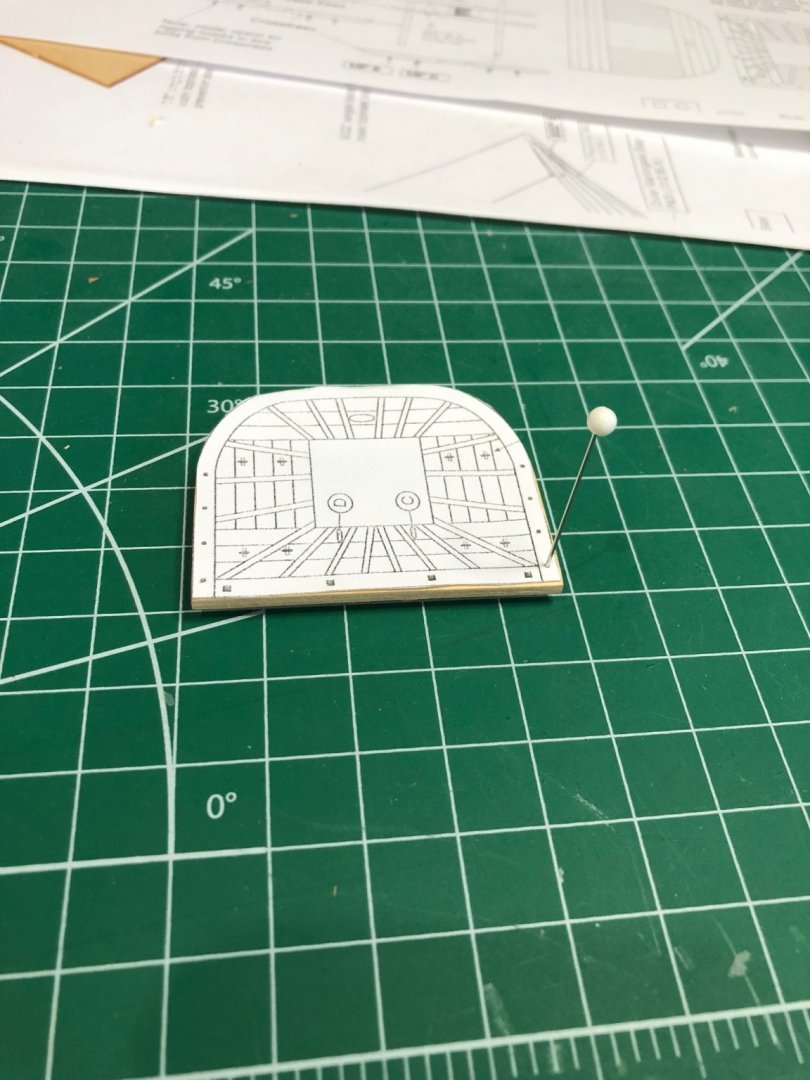
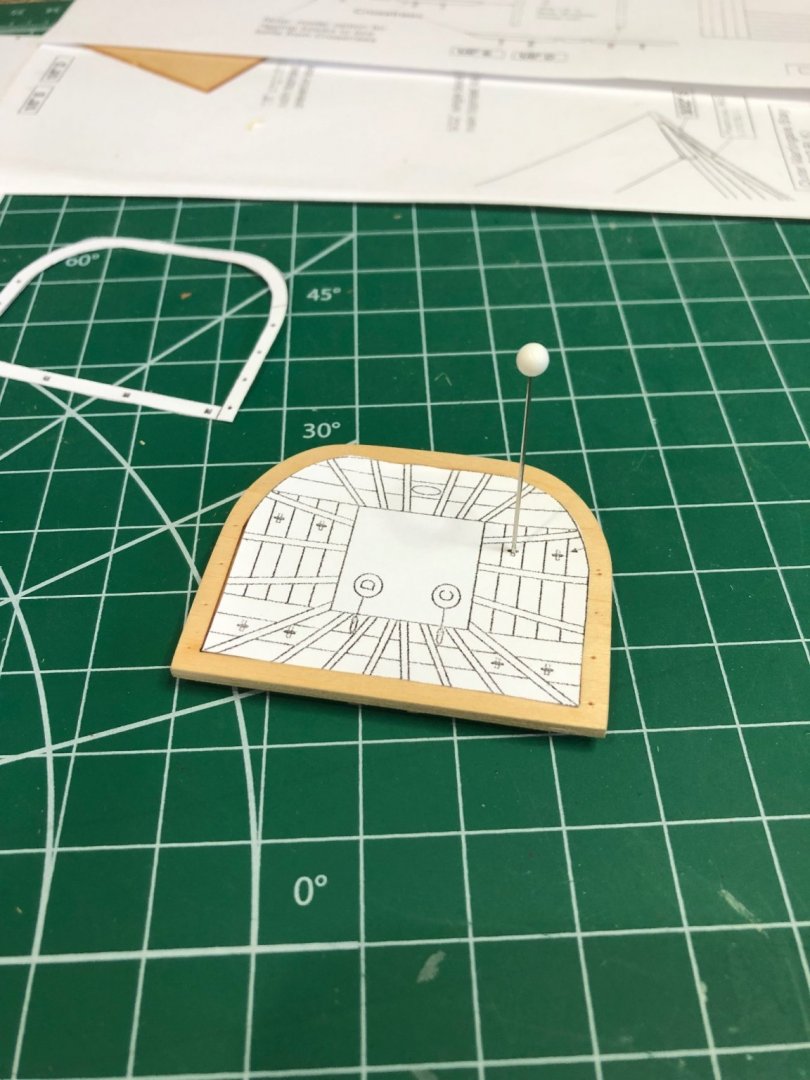
Started lower mast tops. Everything was very straight forward as per the monograph with the exception of working with 1/32" thick basswood. Fitting the crosstrees to the masts went as described and I couldn't believe that the crosstrees sled down the mast square as planned. Amazing, I know I'm not this good. Planking went easy with no problems. The support ring was tricky getting the laser burn off without breaking but got it glued on and sanded to fit. I made copies of the plans and used the copy as a template locating where to mark for the drill holes doing the deadeye holes around the perimeter. I then cut the center from the supporting rim and marked the holes in the center. Looking at the battens left me wondering how to get the pattern correct and then I thought of the templates. I taped the template in place and cut out where the first batten was to be placed. Followed around the pattern without any worry and fiddles. Set the base for the rear rail and drill all the holes. I don't like pinning into 1/16" square basswood so I decided I drill a hole and use a square file to make a 1/16" square hole for the rail stanchions. On the base I files a small decorative feature as done in the monograph pictures. Got two hole done when it was time to come in for the day. planking and holes marked Paint tomorrow


-
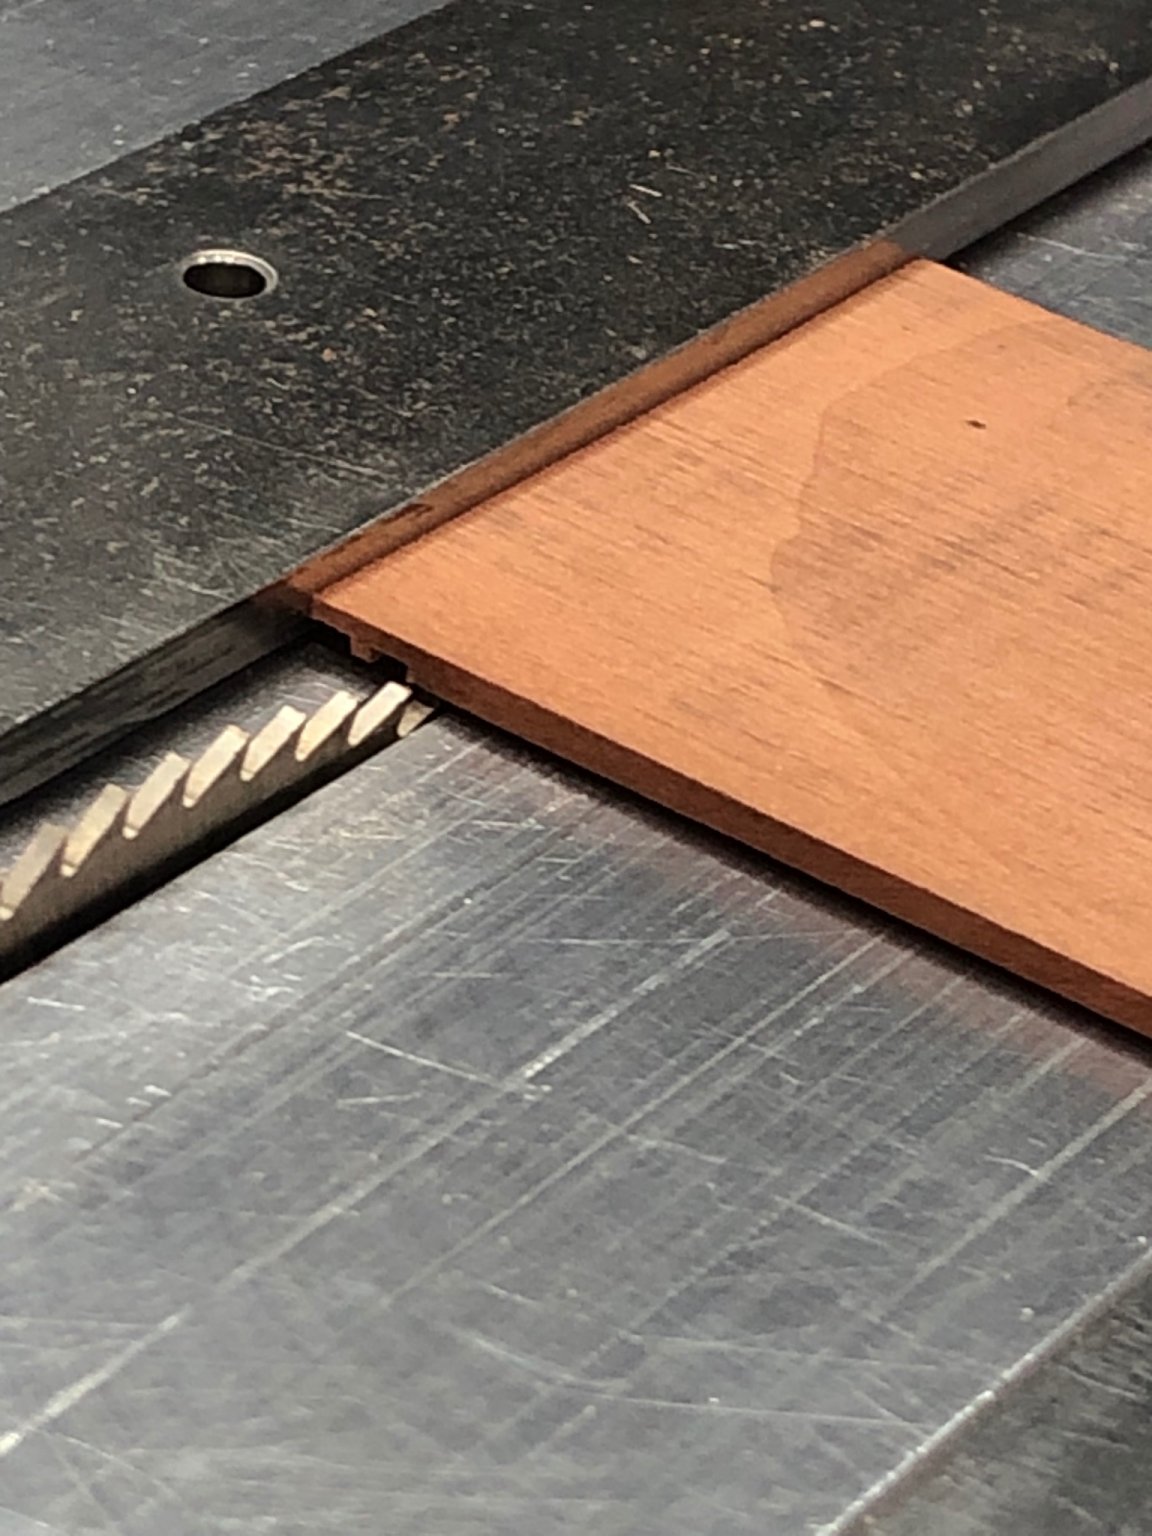
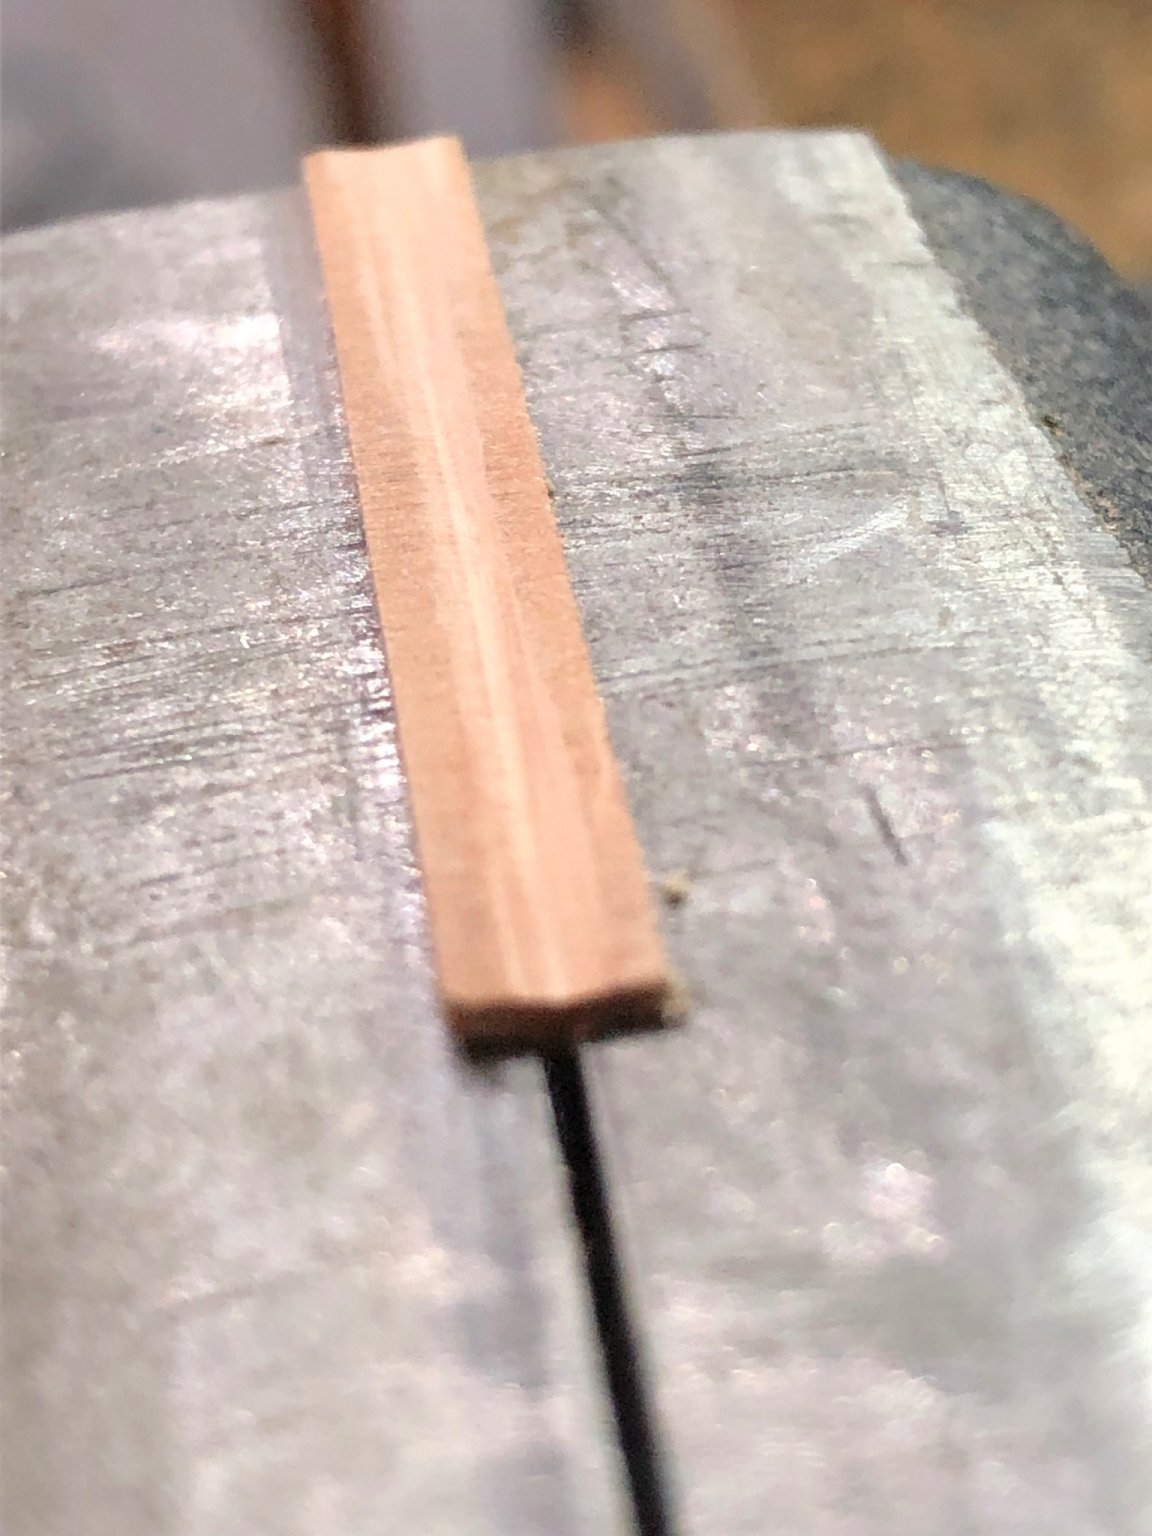
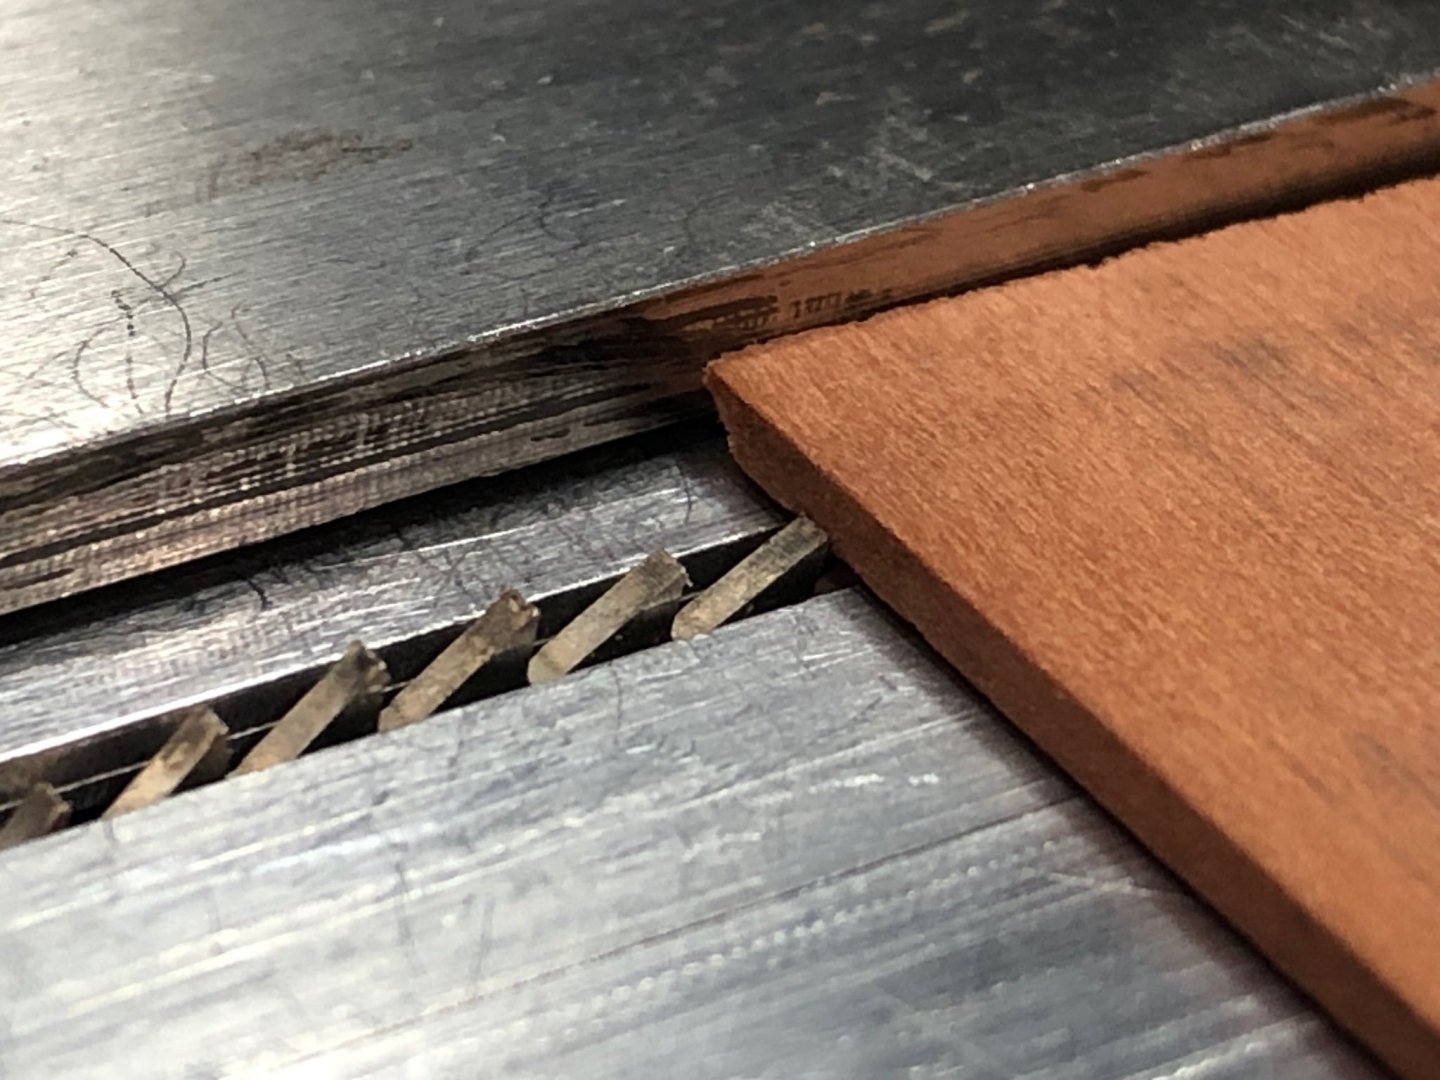
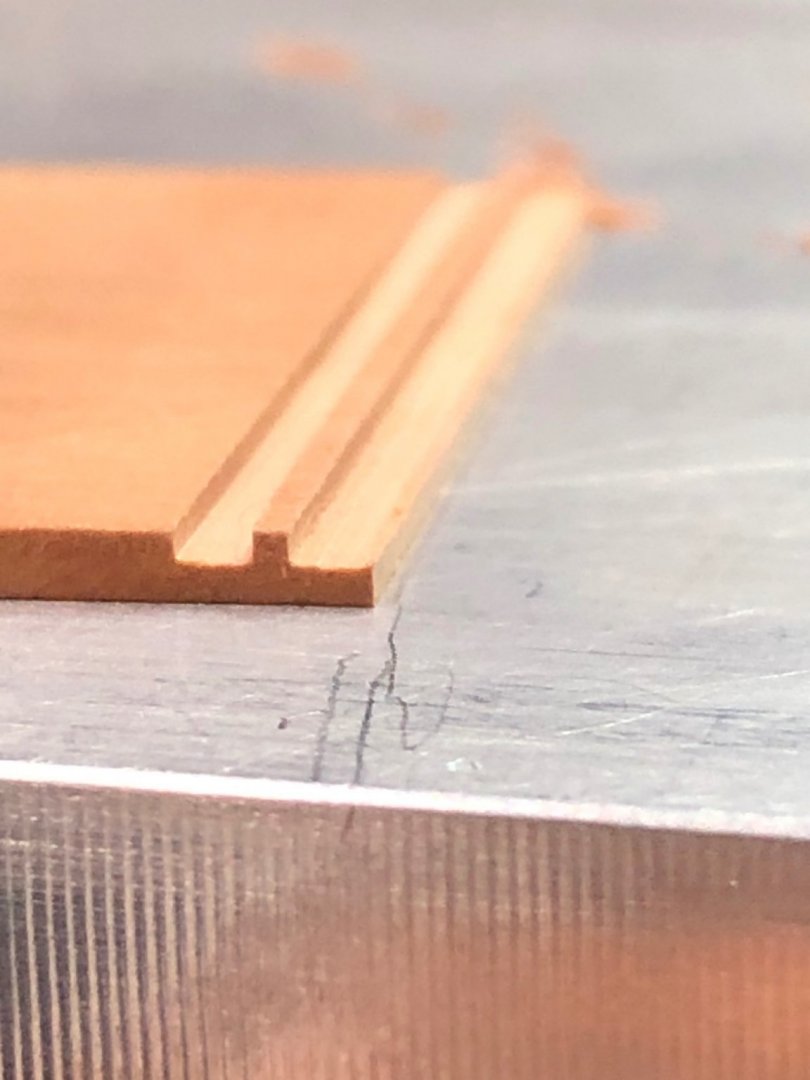
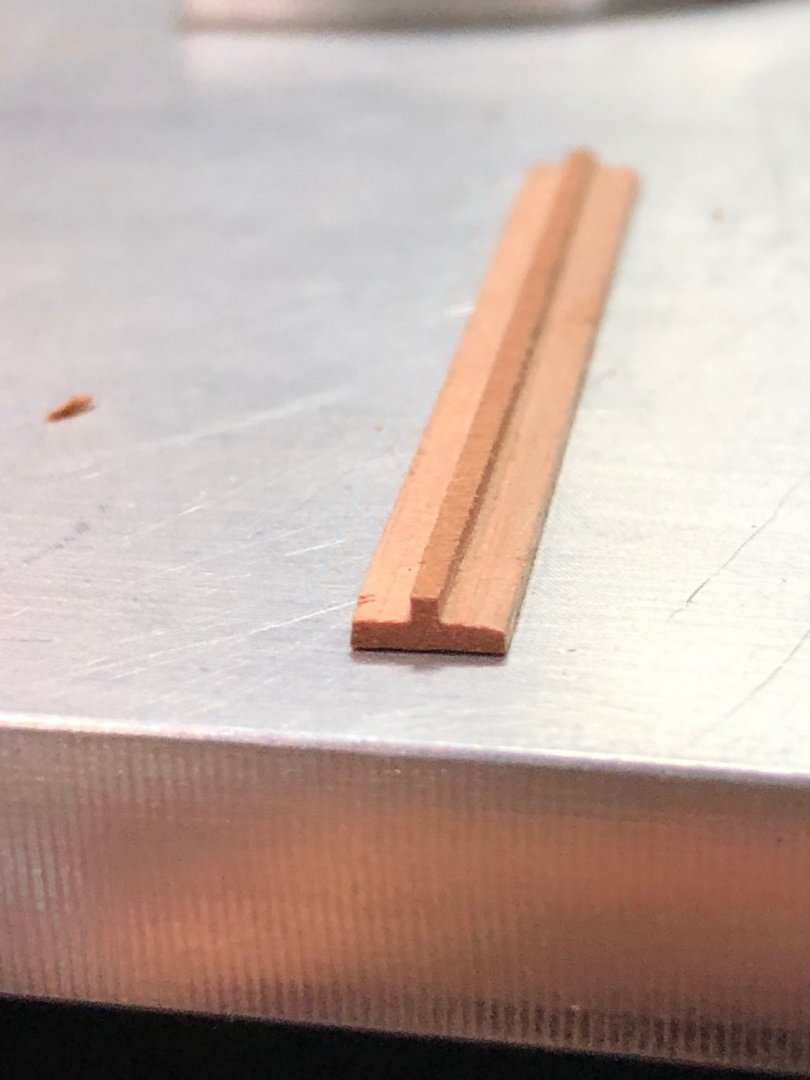
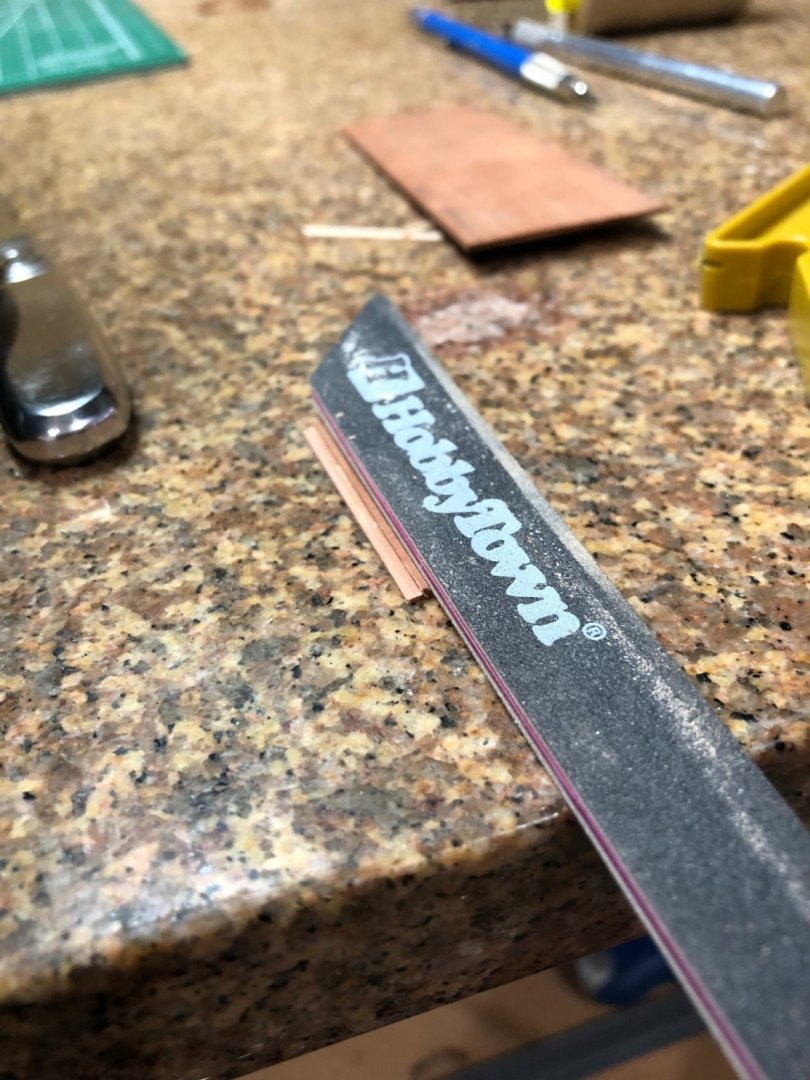
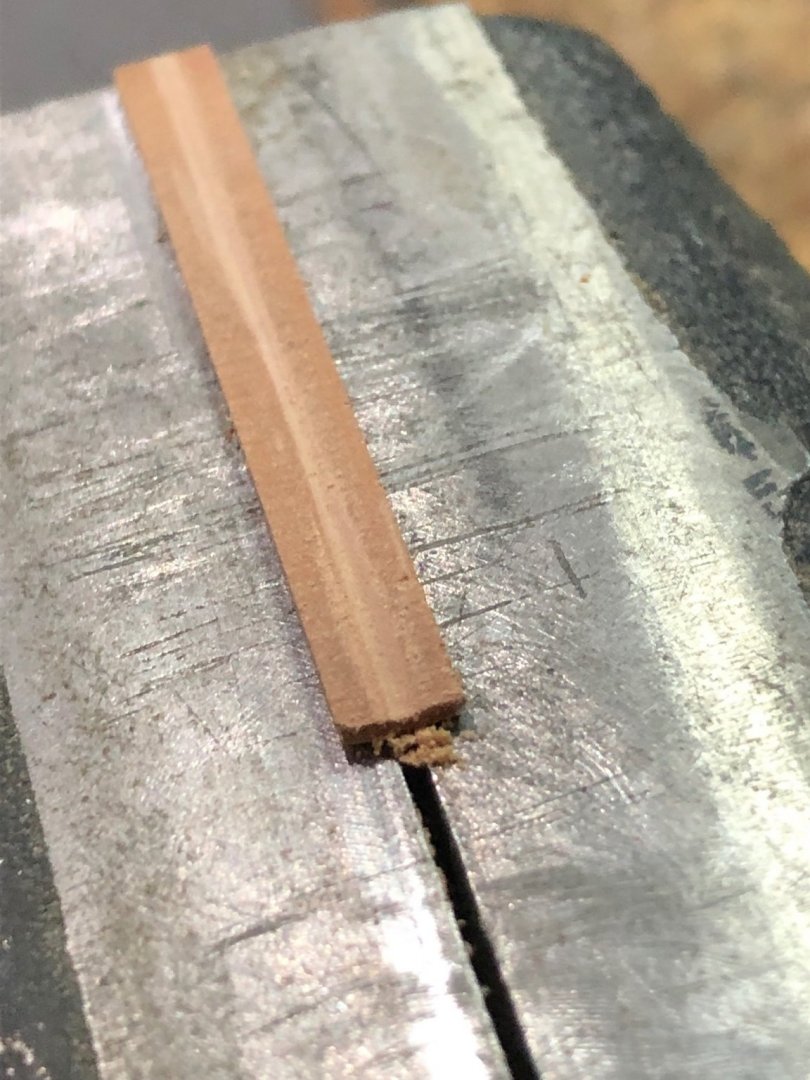
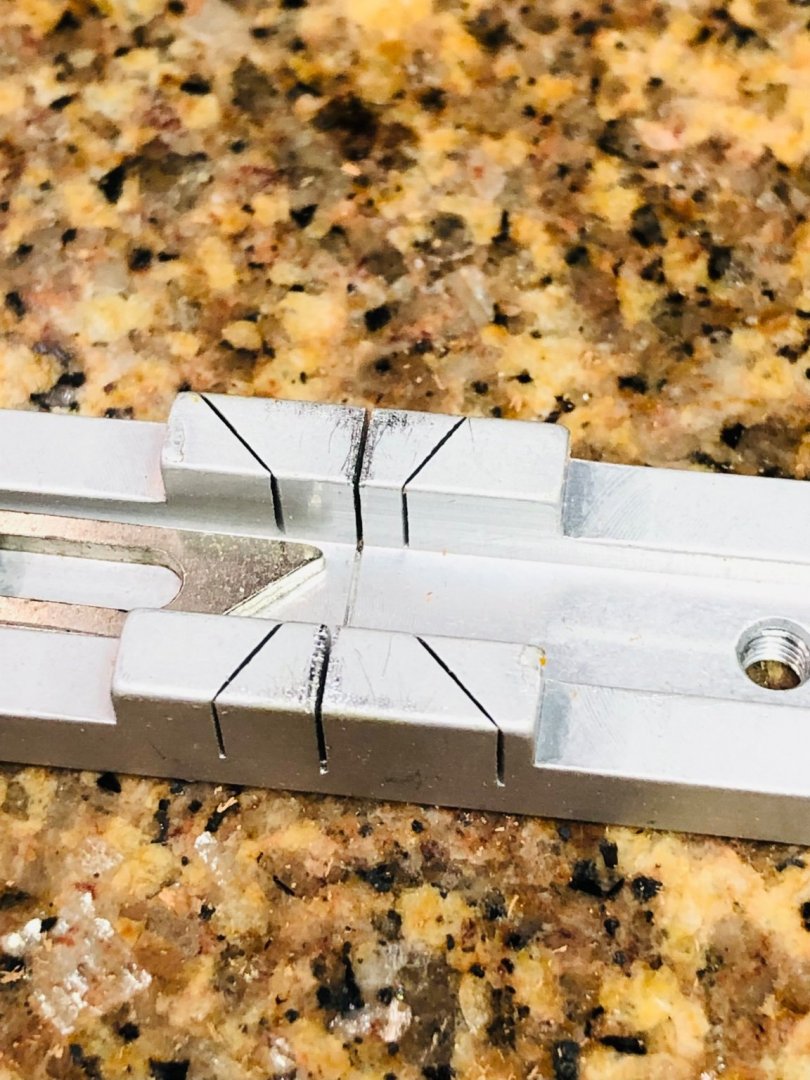
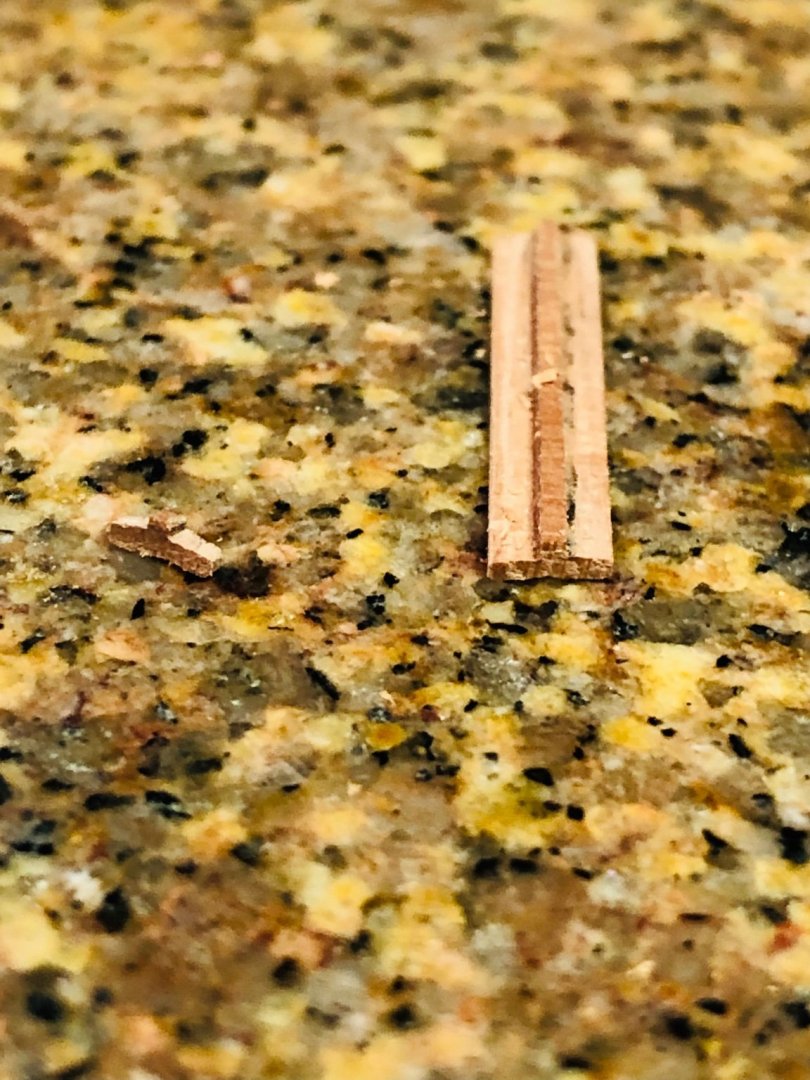
Patrick thanks for the likes and interest. I went out and cut another slice of tee ready for slicing like bread. Hope the photos help pm if you further info. Setting the depth of cut Set the width of the middle leg Second cut to make the leg length Raise blade to cut off piece Cut piece Finished piece to required size Sanding inner angle Secured in vise. Take a triangle file and score a line for the half round file to follow. Radiused top Razor saw and mitre set to the width you want Finished piece ready for sanding cleanup to what ever level you'd like It only took me several hours to make 70 cleats that are ready to finish sanding. Hope this isn't too much information


-
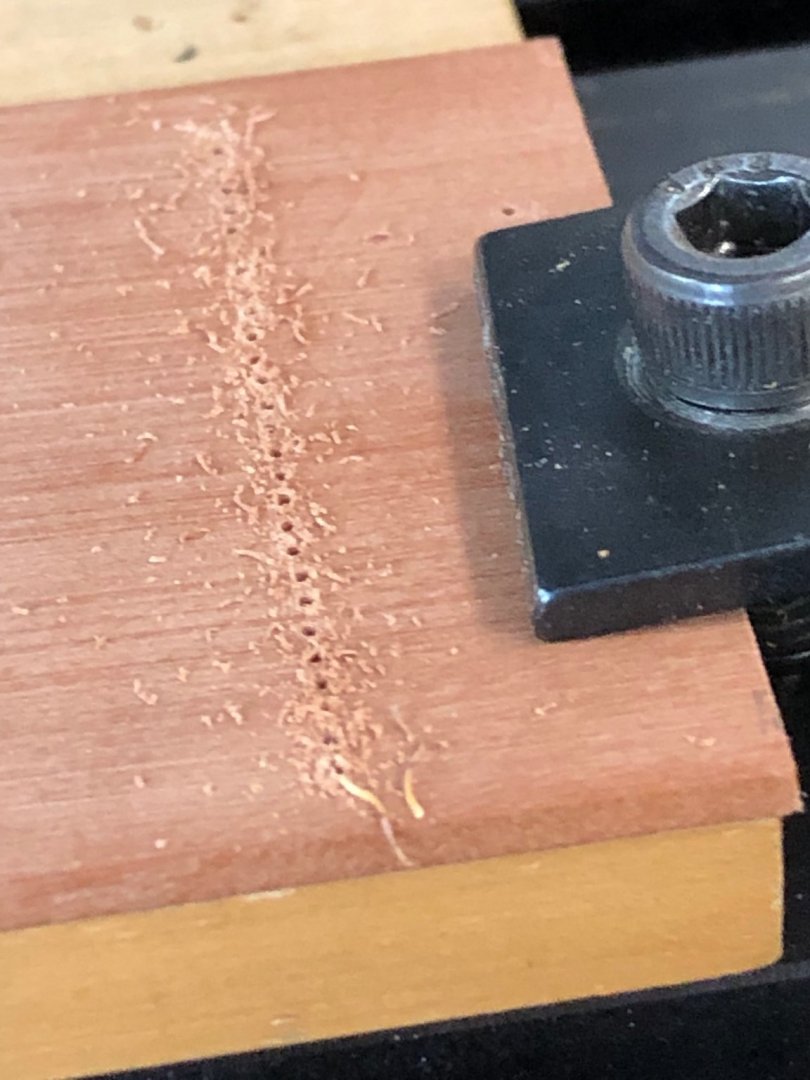
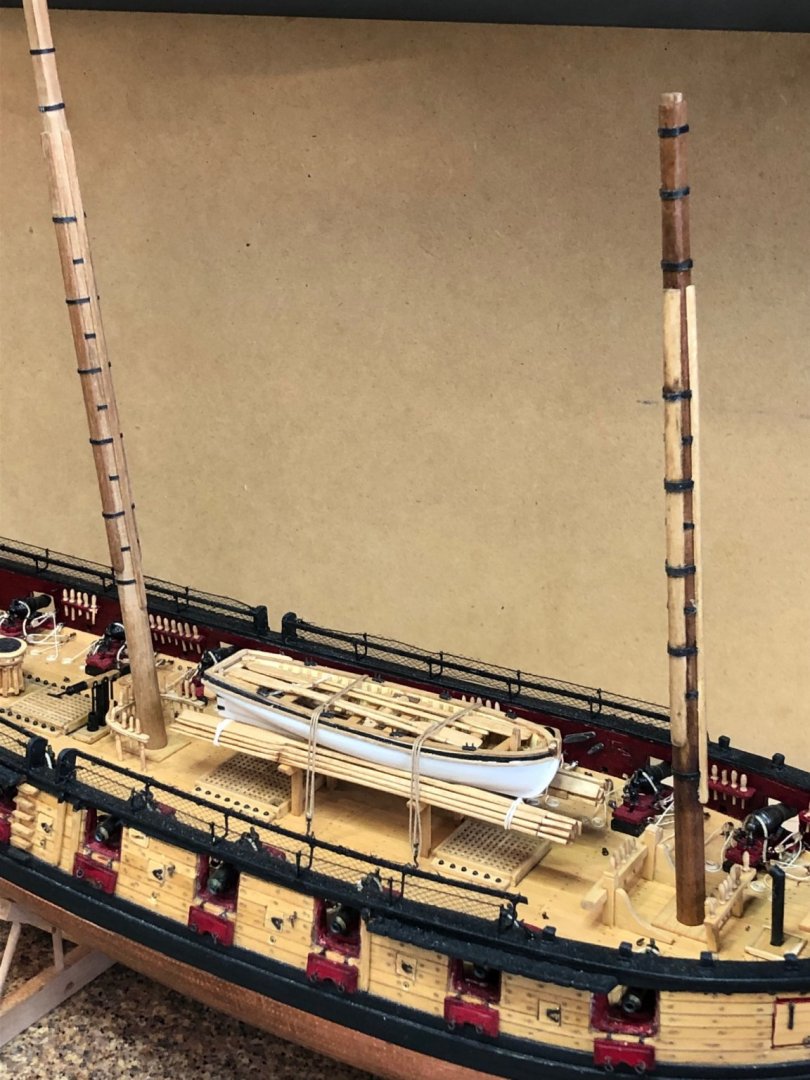
Lower masts completed today. Took the time to make 5mm cleats out of pear wood I had laying around. The process was to be a mass production method so I drilled blind holes at .05 centers for copper support wire. and then used the table saw to cut the piece to width along with controlled depth slices making the ears. Using a razor saw and mitre sliced off .05 tee shaped cleats. Some hand sanding was done prior to slicing. With each cleat I sanded the corners and edges with a radius along with a slight sanded radius on the top of the cleat. On the masts holes were drilled for the copper wire supporting the cleats. Then it was a matter of putting the cut wire in the blind holes on the bottom of the cleats and glueing the cleat to the mast. The boom rest was also pear wood and straight forward.

-
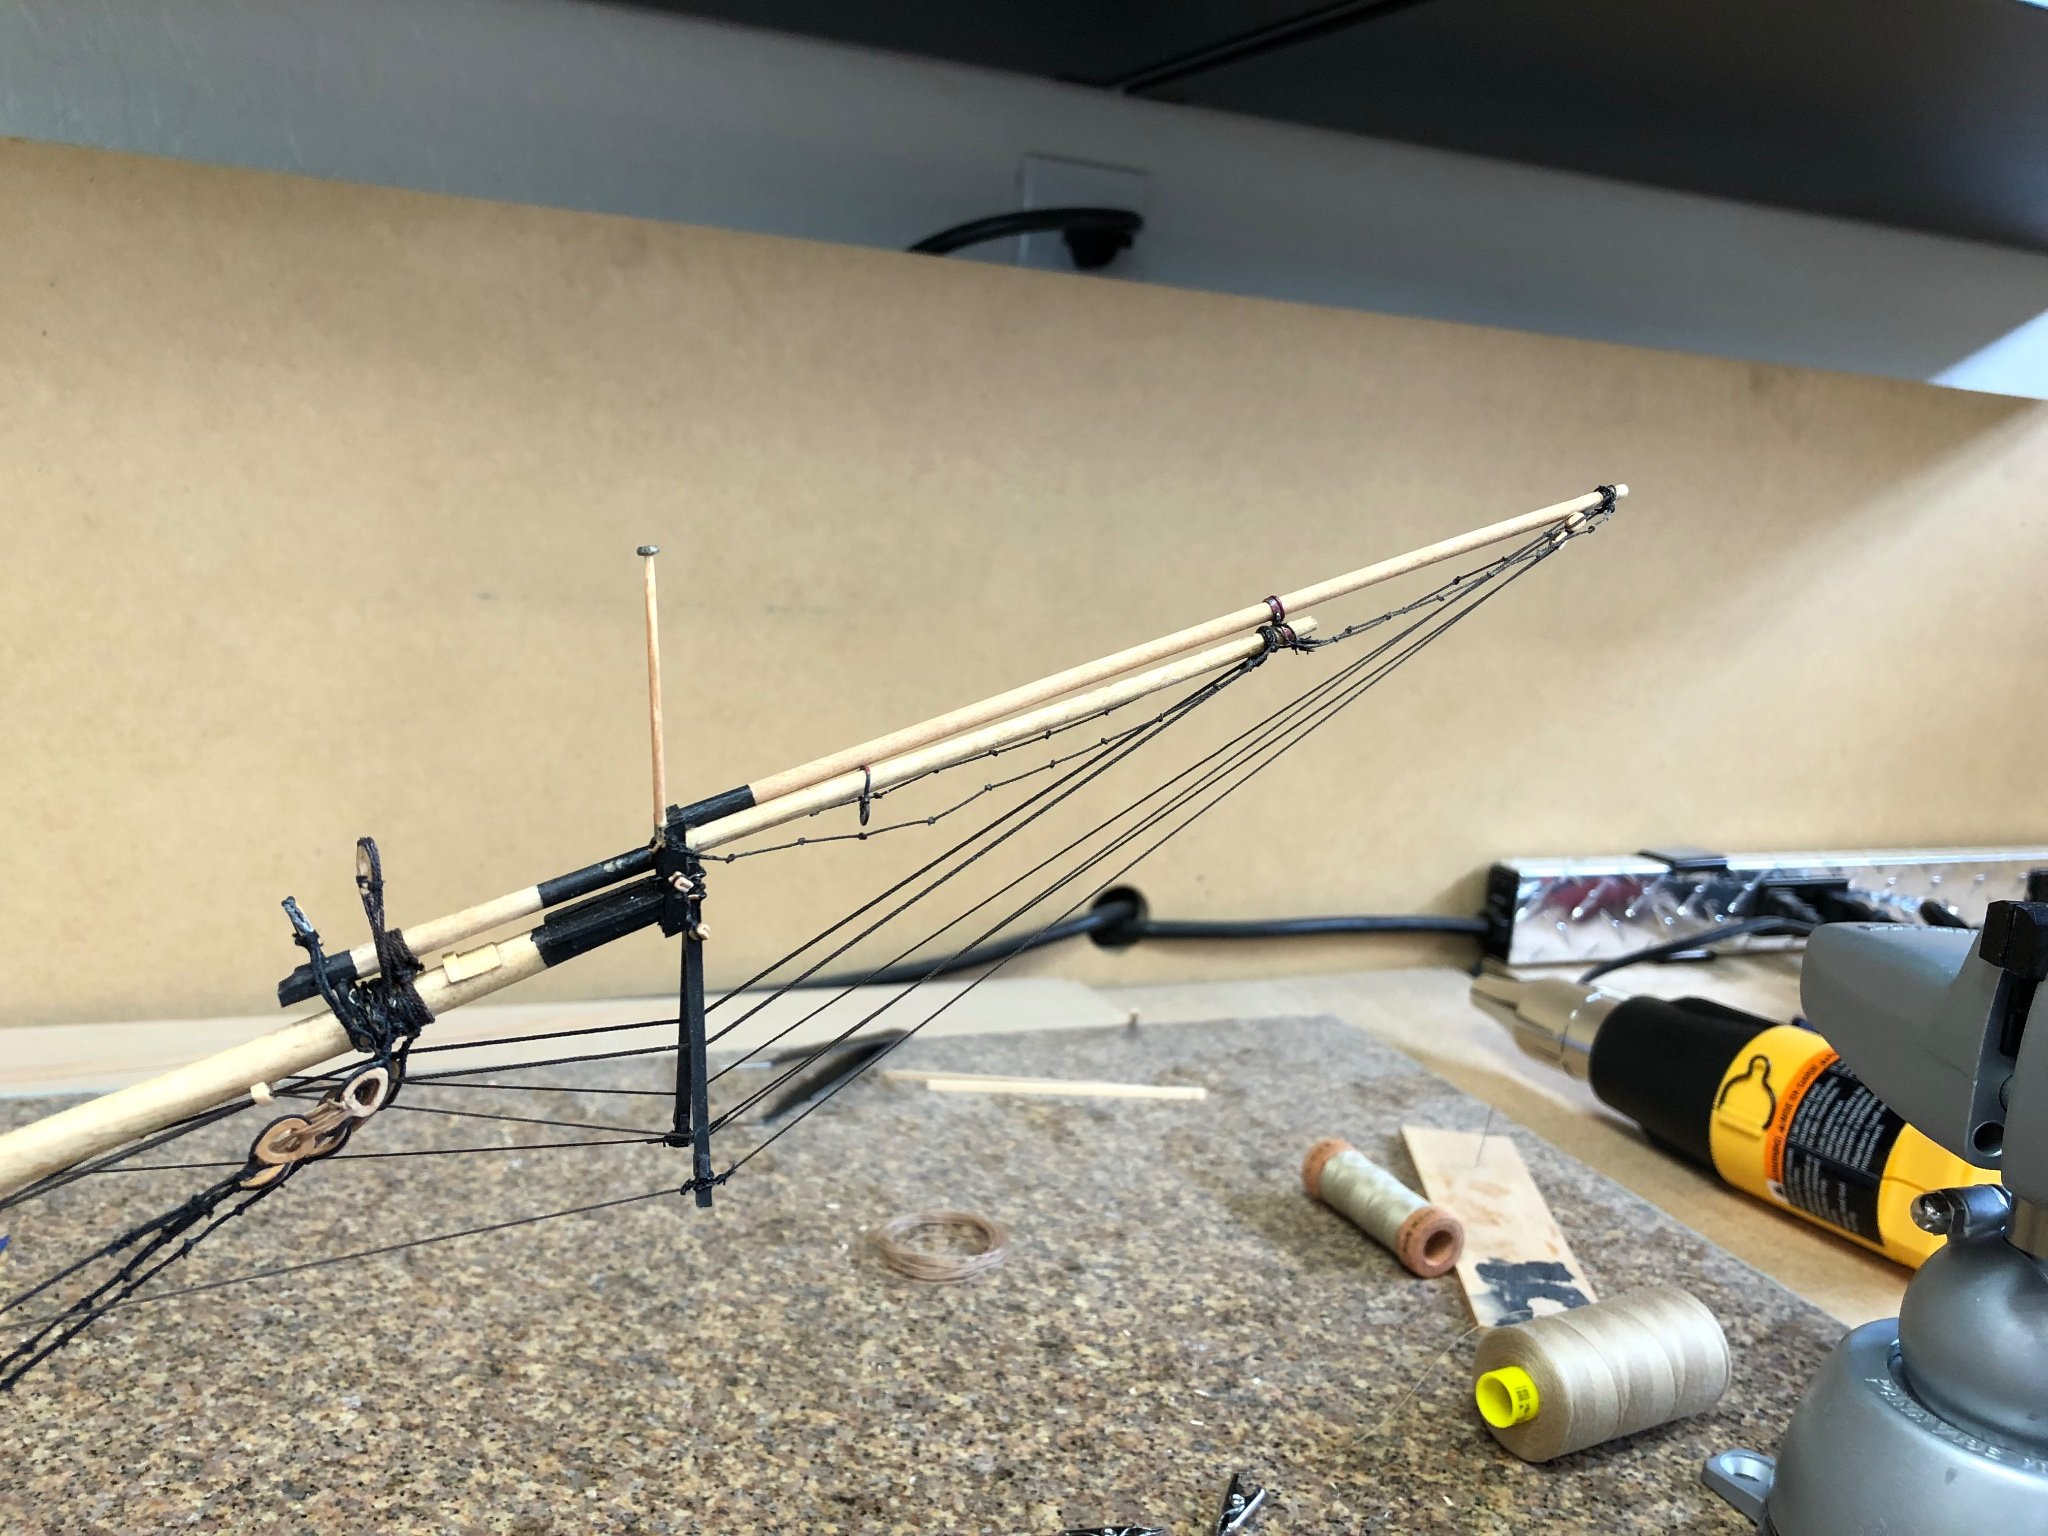
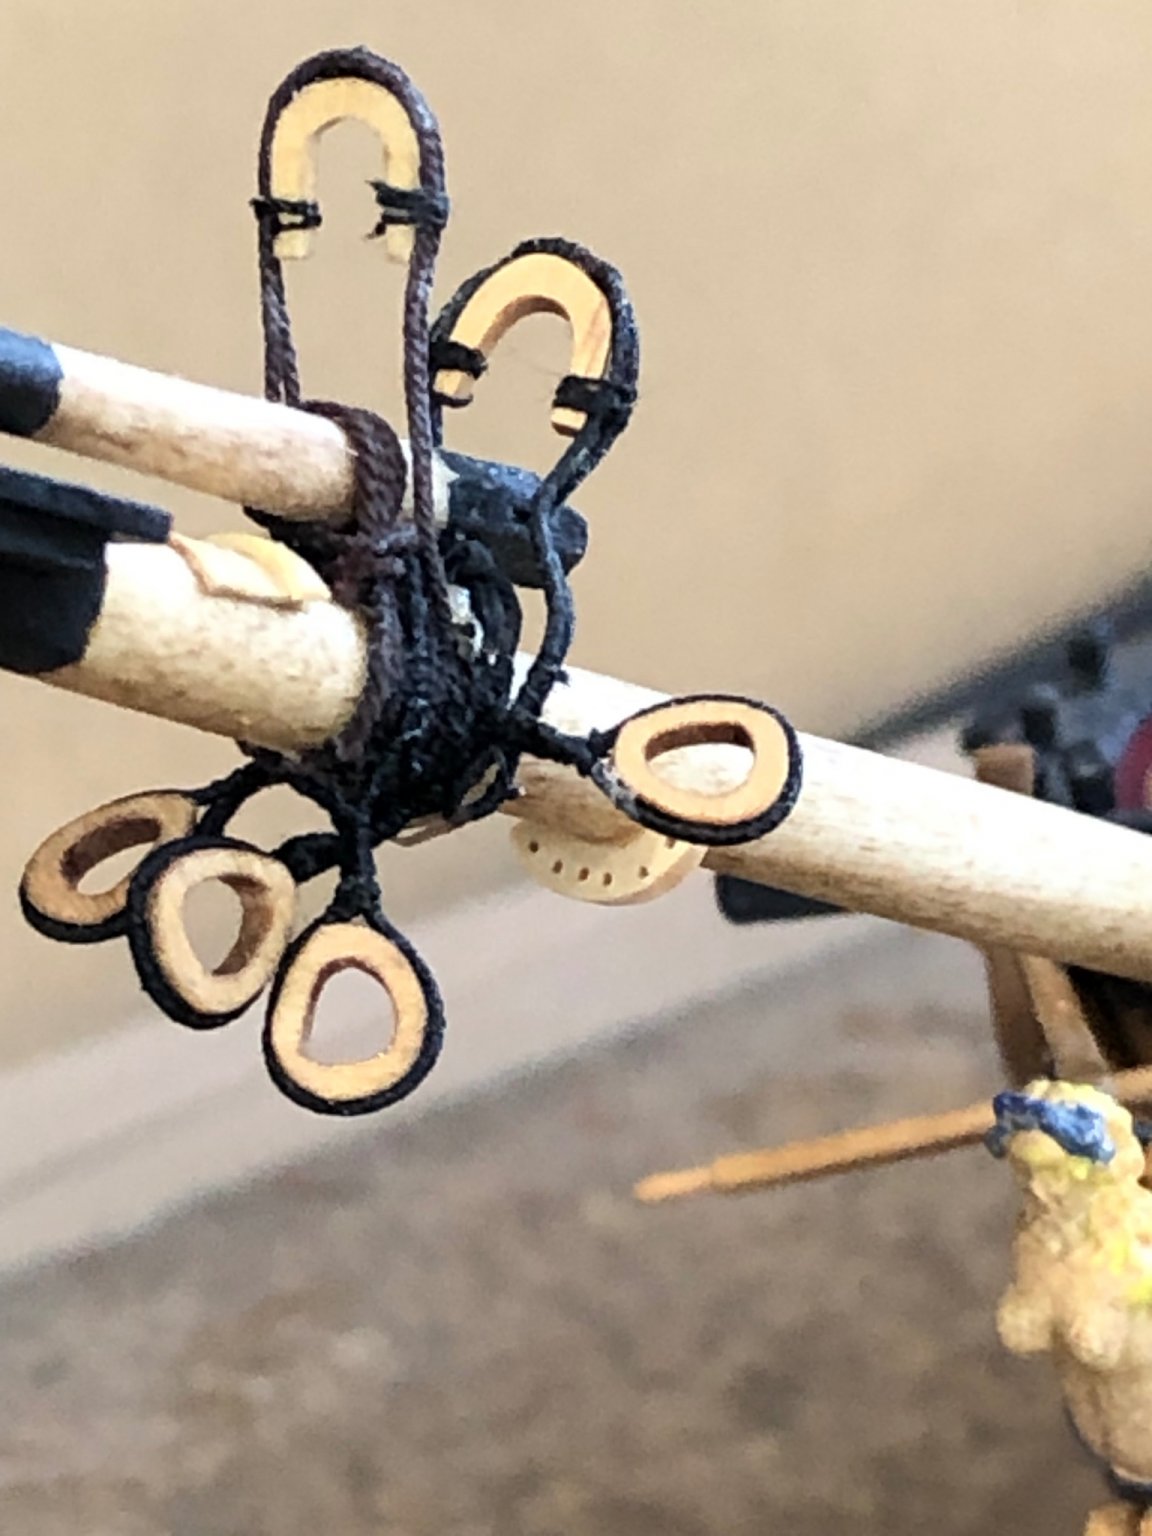
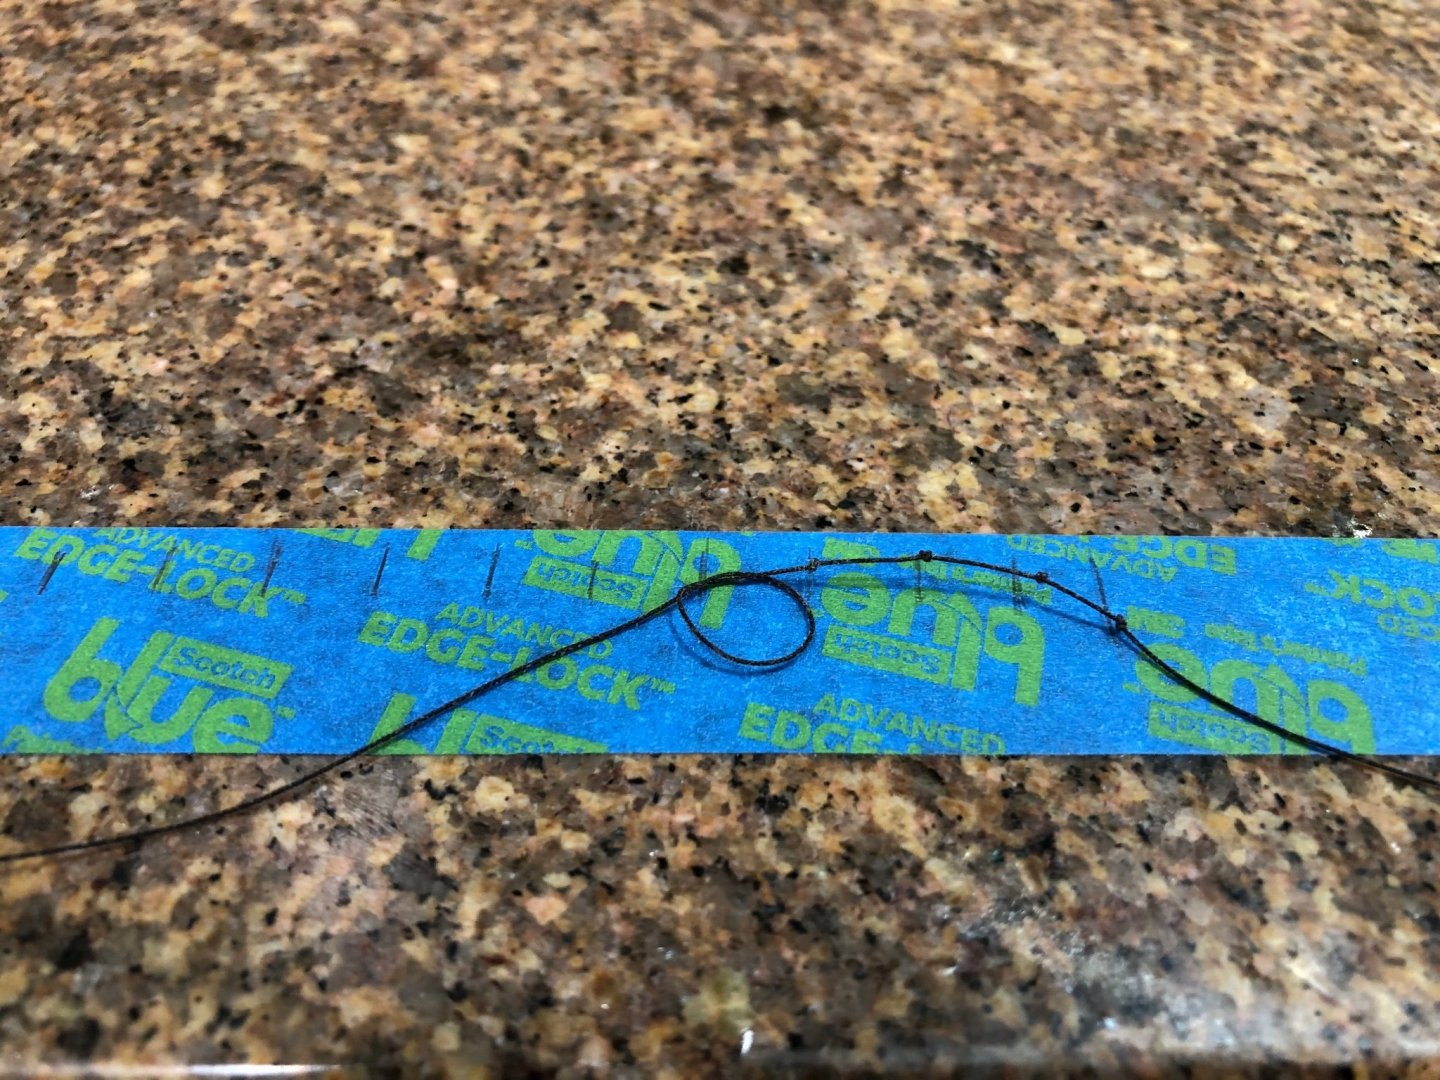
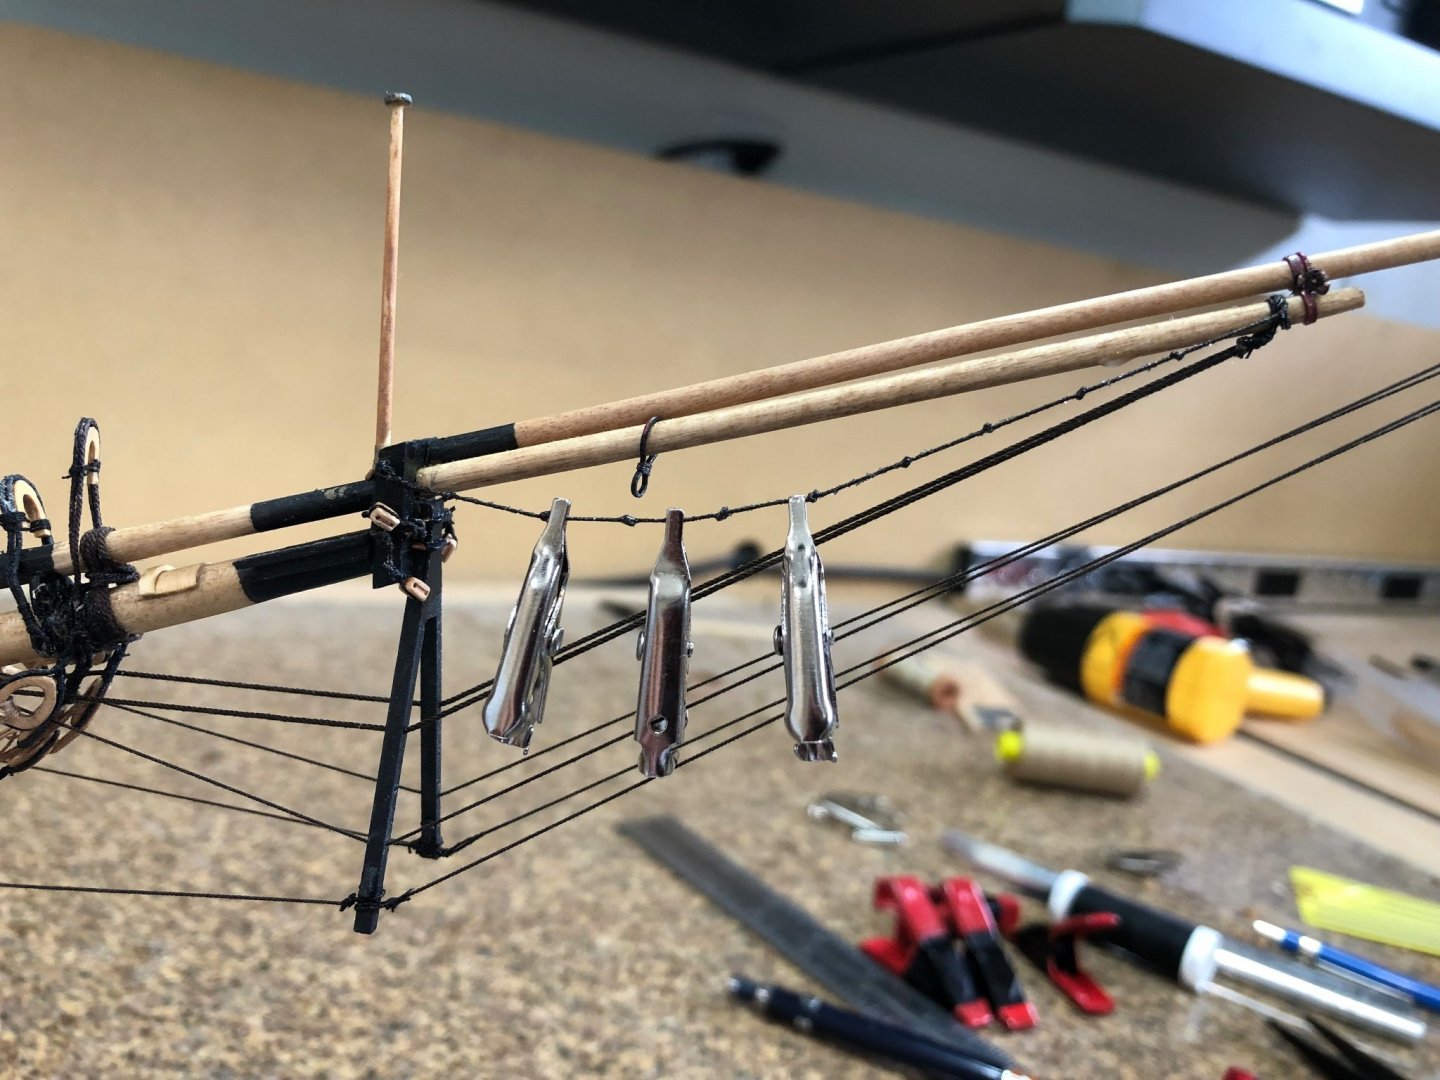
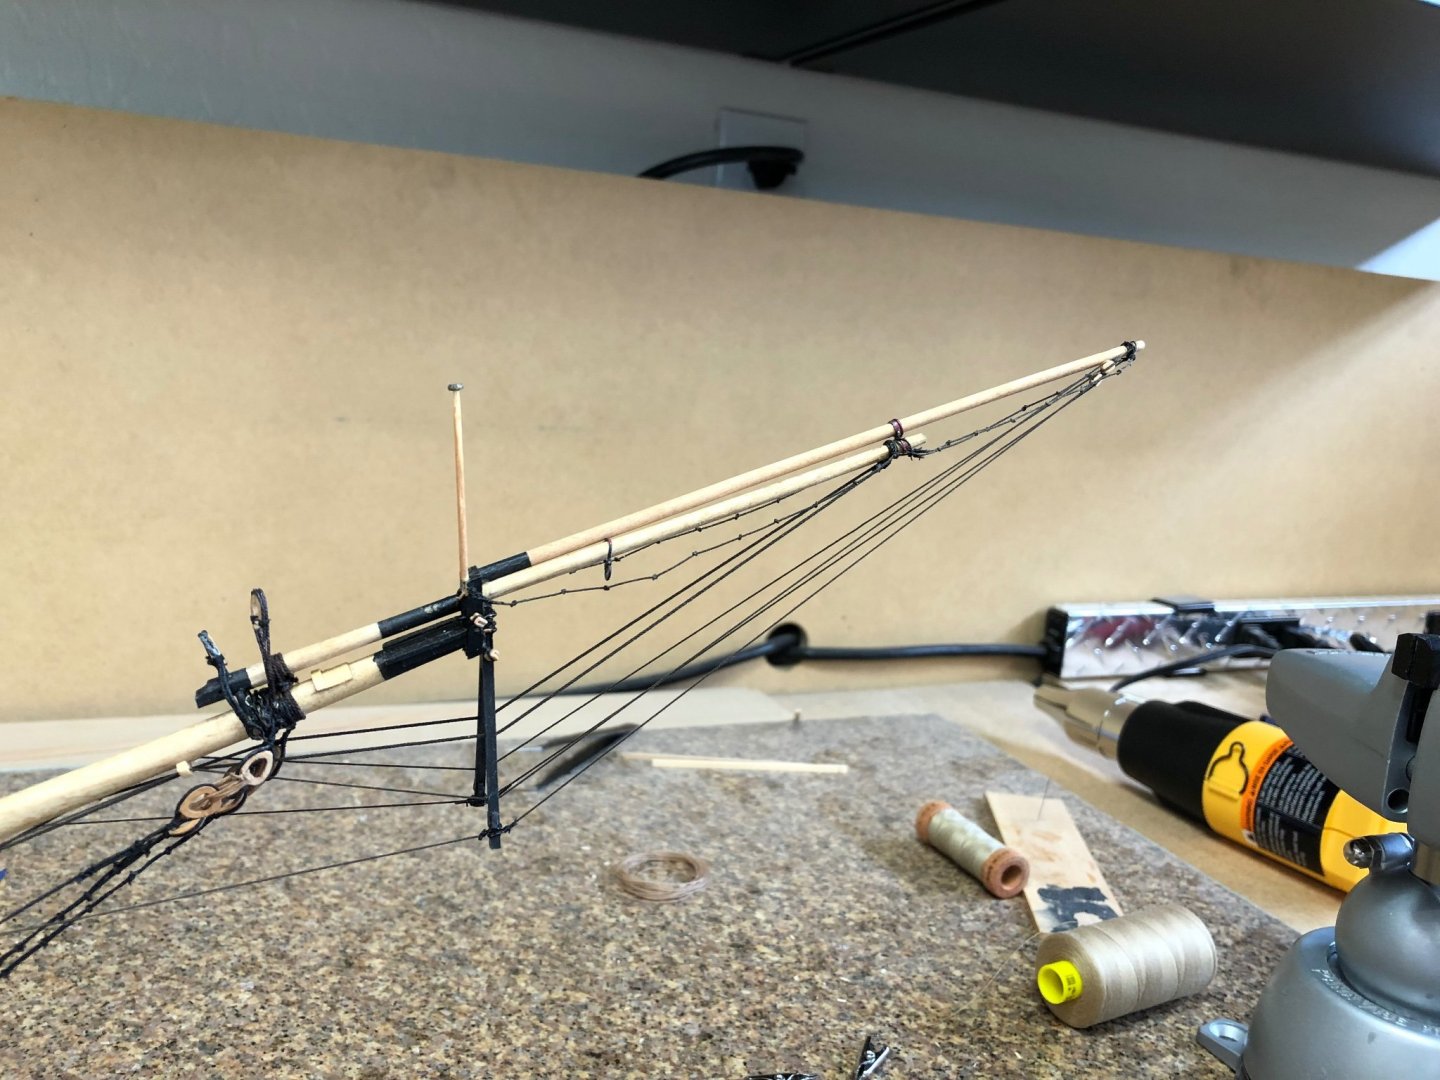
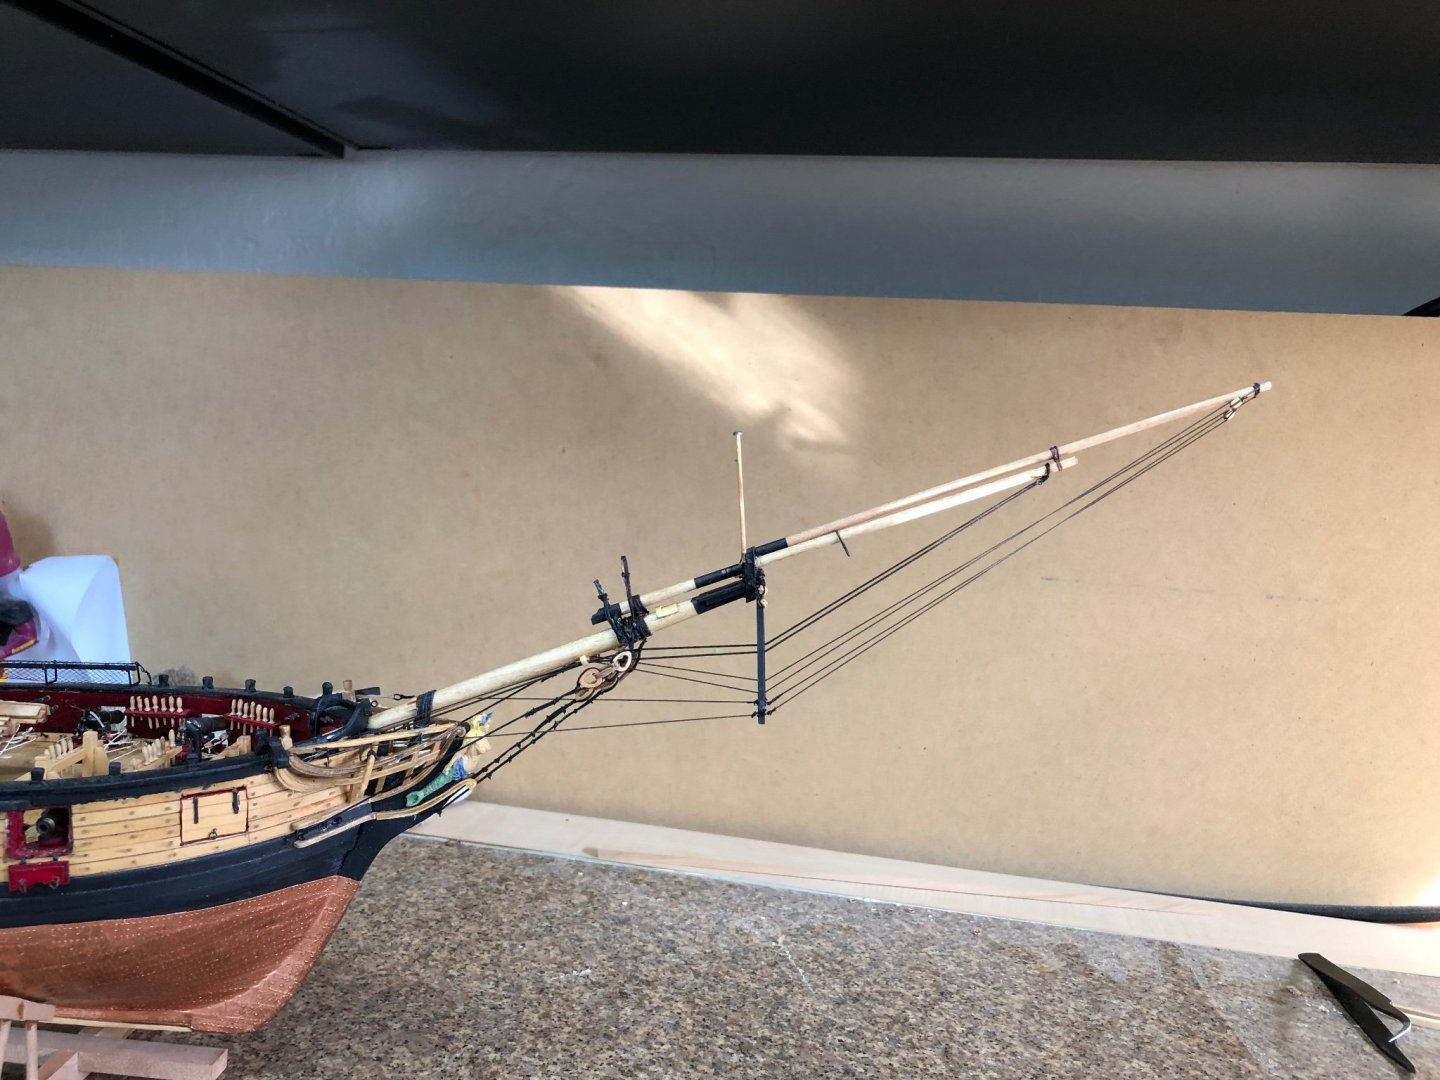
I had been procrastinating about the foot ropes so after promising myself that I'd do them today I did. It was more work than I had expected with the lines seized to the tips of the spars amongst the rigging. Deciding to tie the foot knots prior to hanging the foot ropes was the correct decision. Tied half hitches at 3/8" intervals seemed to be correct as this would be 24" at full scale. I had previously made a mixture of 50/50 white glue and water to soak the line and then hung it up with an alligator clip to weigh it down hanging straight. A piece of masking tape was marked at 3/8" intervals and the knots tied. rigged the after lines first and weighted the with alligator clips. Just like hang up the laundry. Completed foot ropes Tomorrow I set the droop getting rid to the kinks. So that complete chapter 16 and now on the chapter 17 in earnest.
-
Glad its holding. I've been using a piece of 3" thick foam rubber cut to fit inside the bulwarks to protect the stem and make a firm steady working medium. I buy the foam at a fabric store and its normal use is seat cushioning.
-
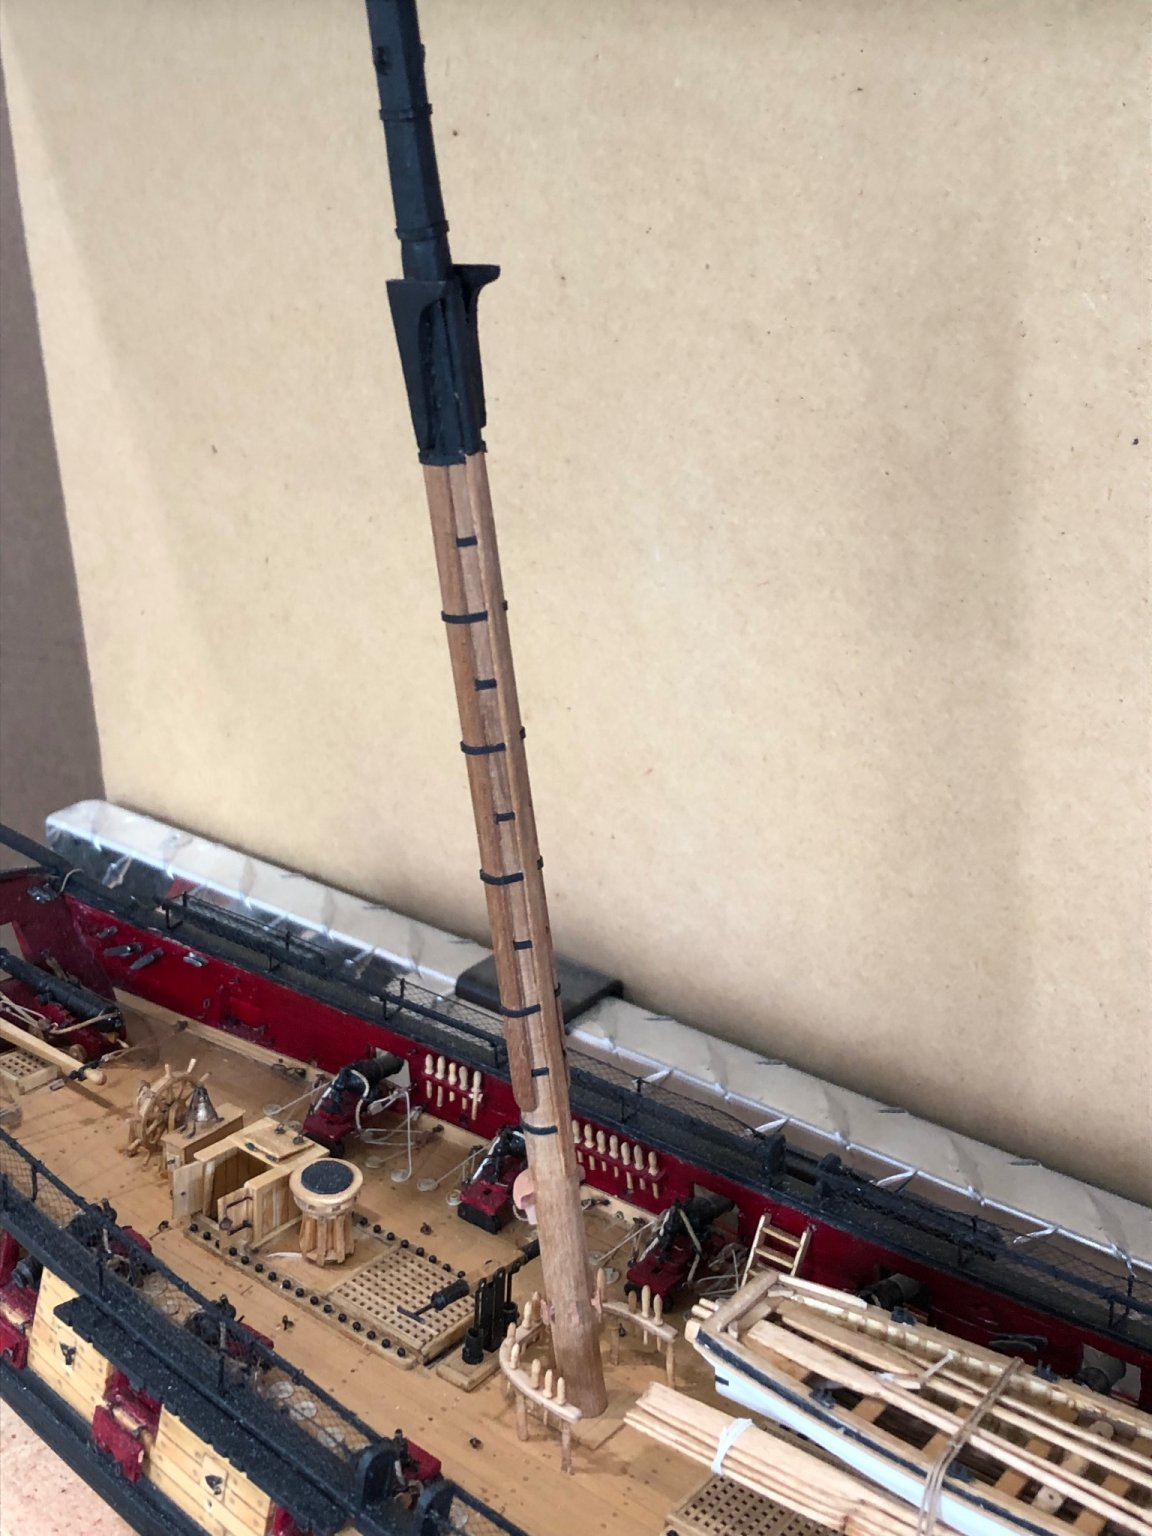
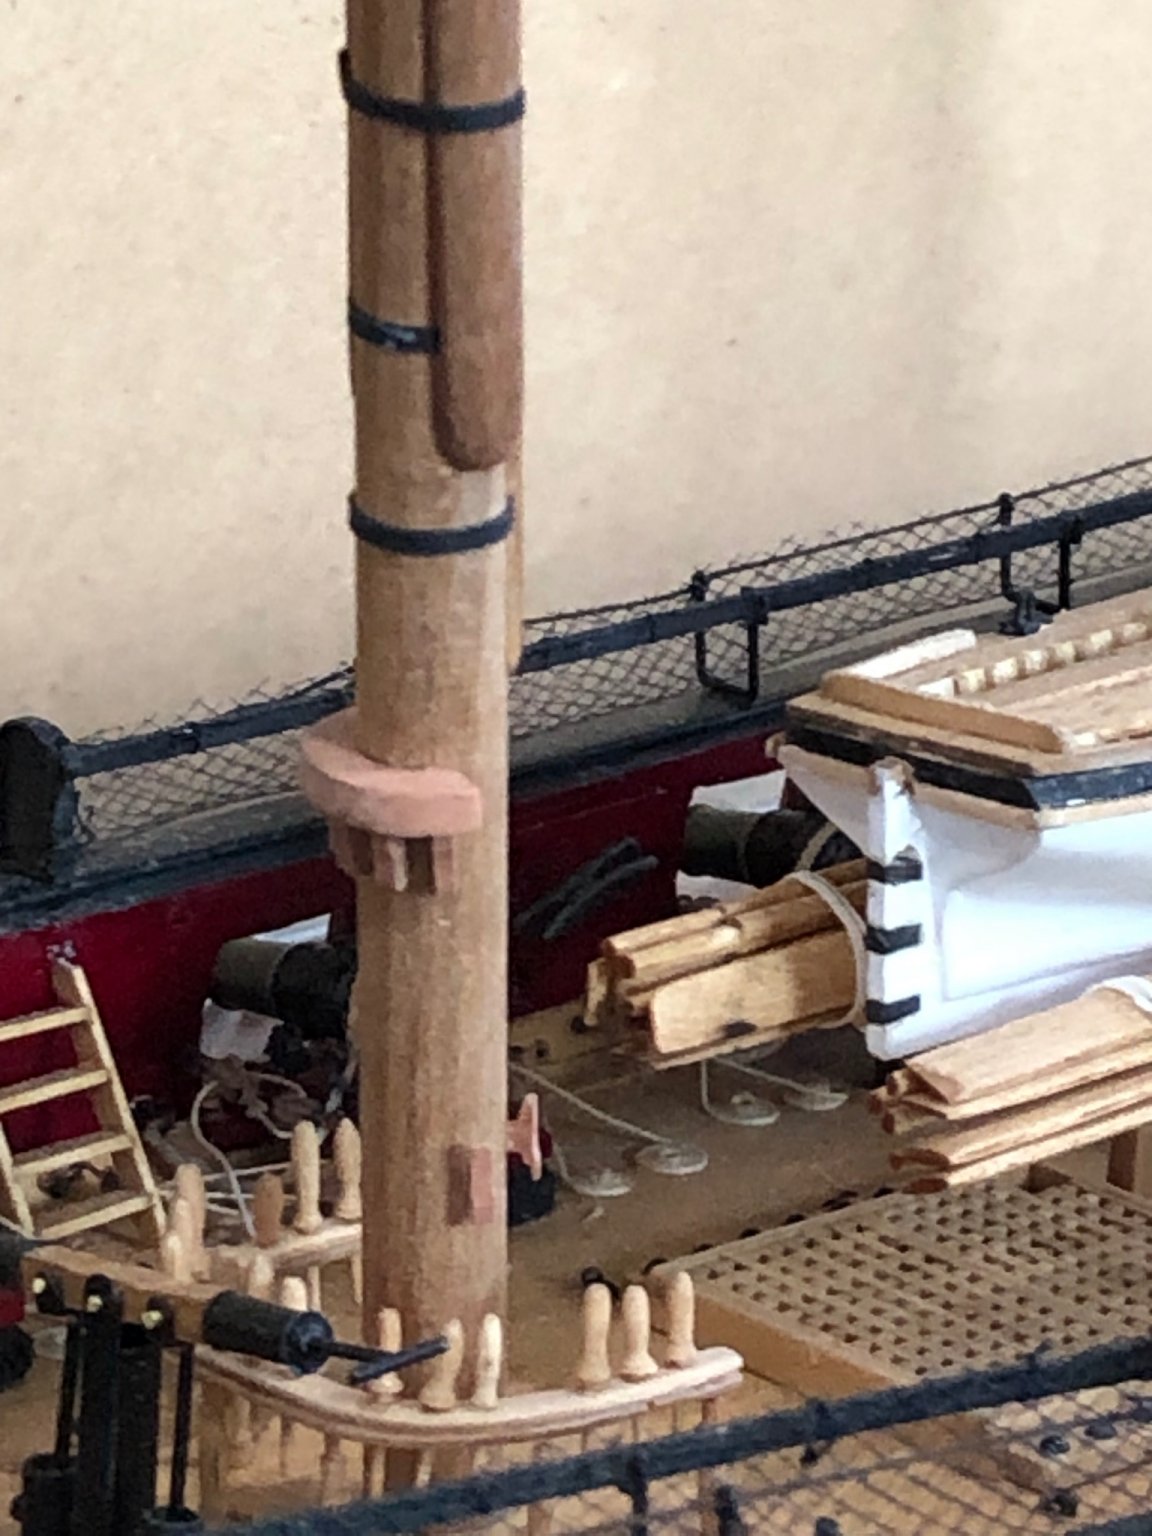
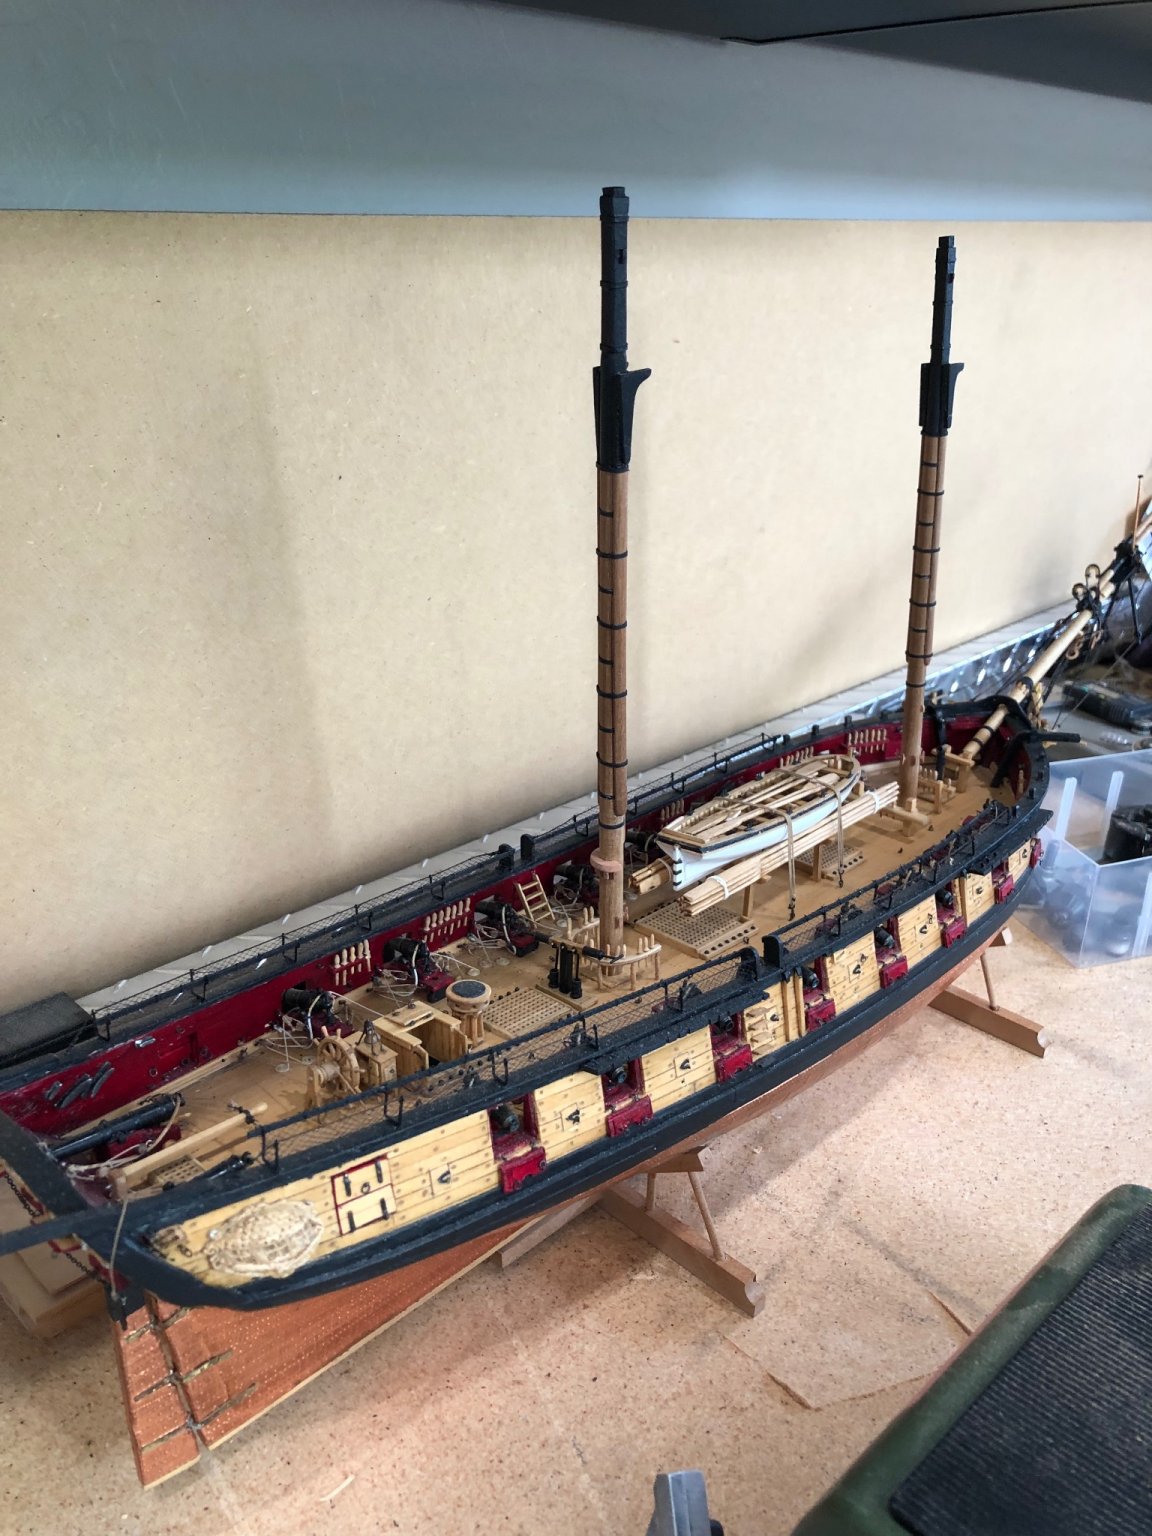
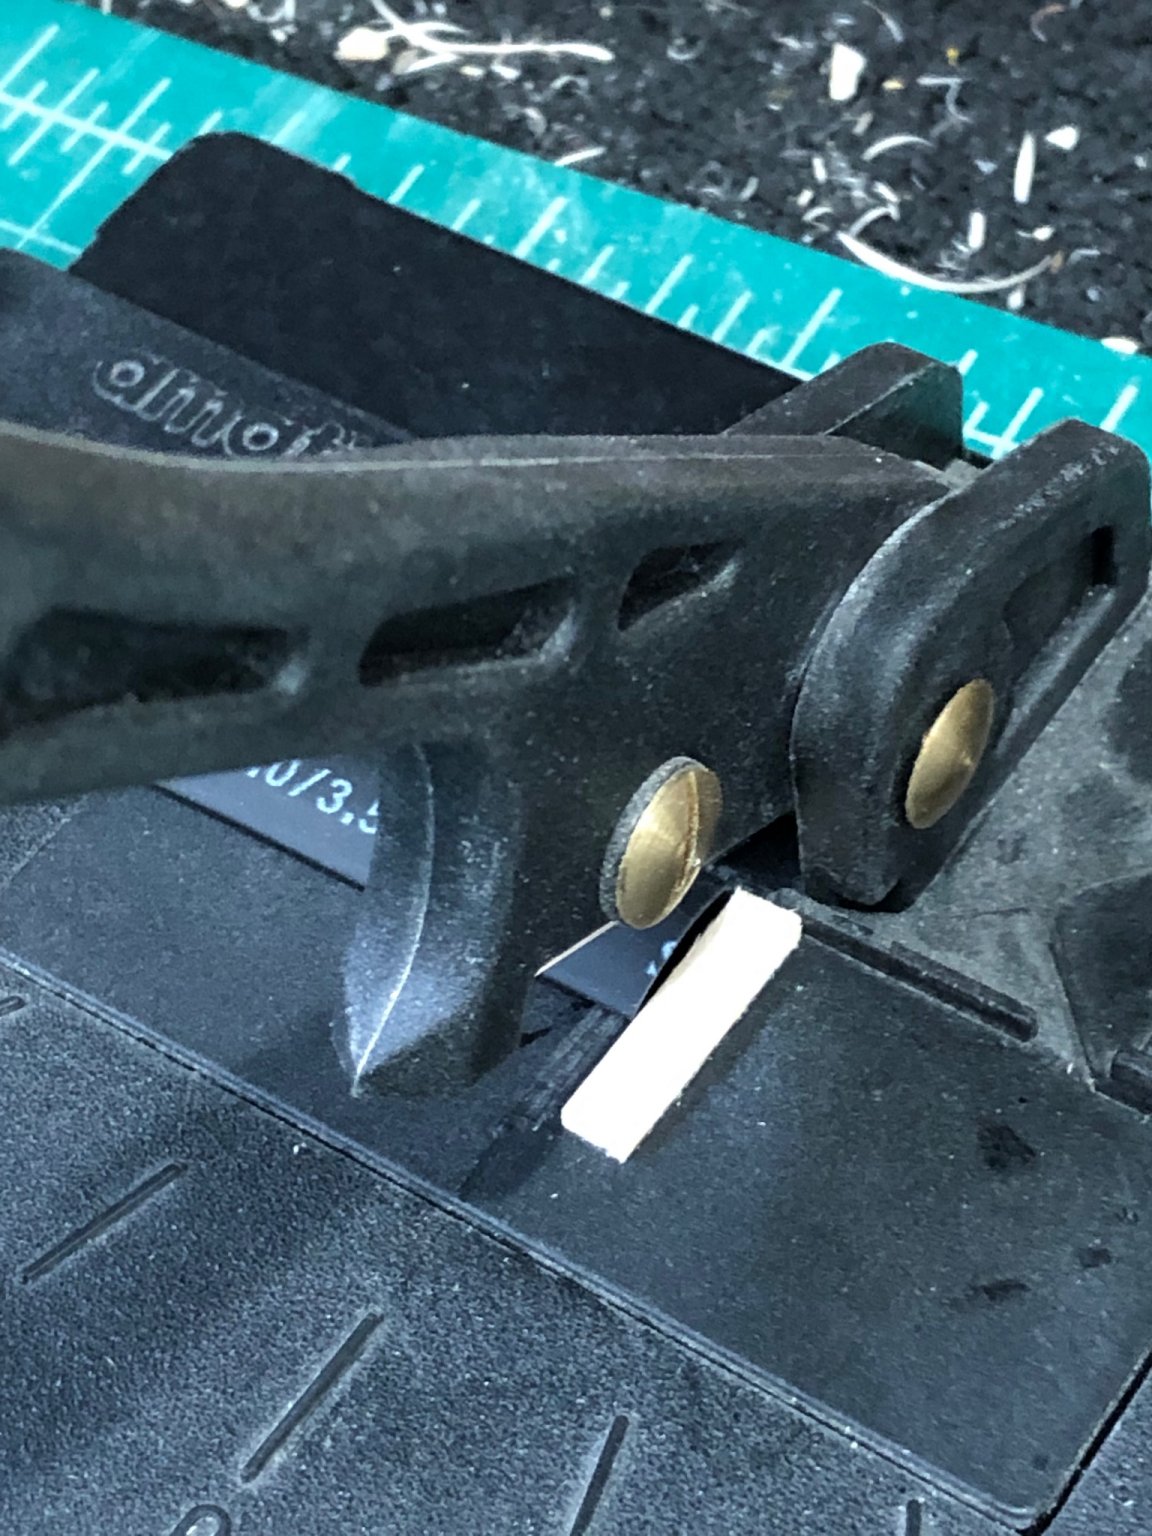
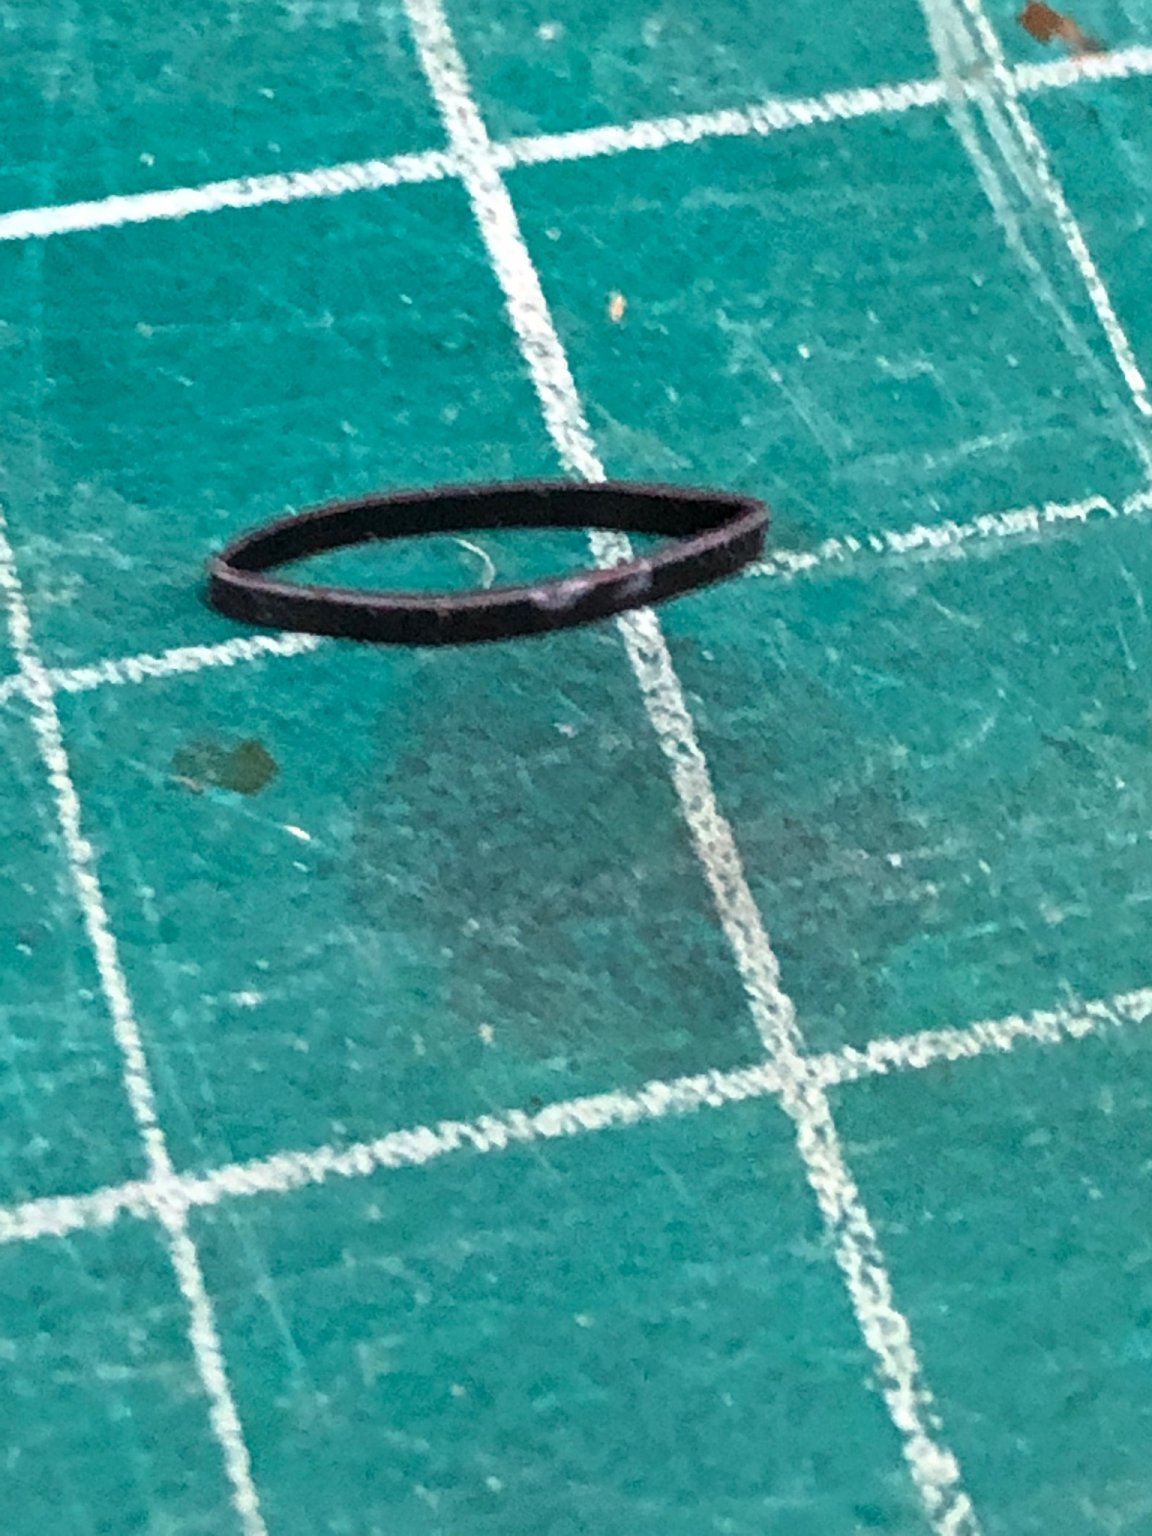
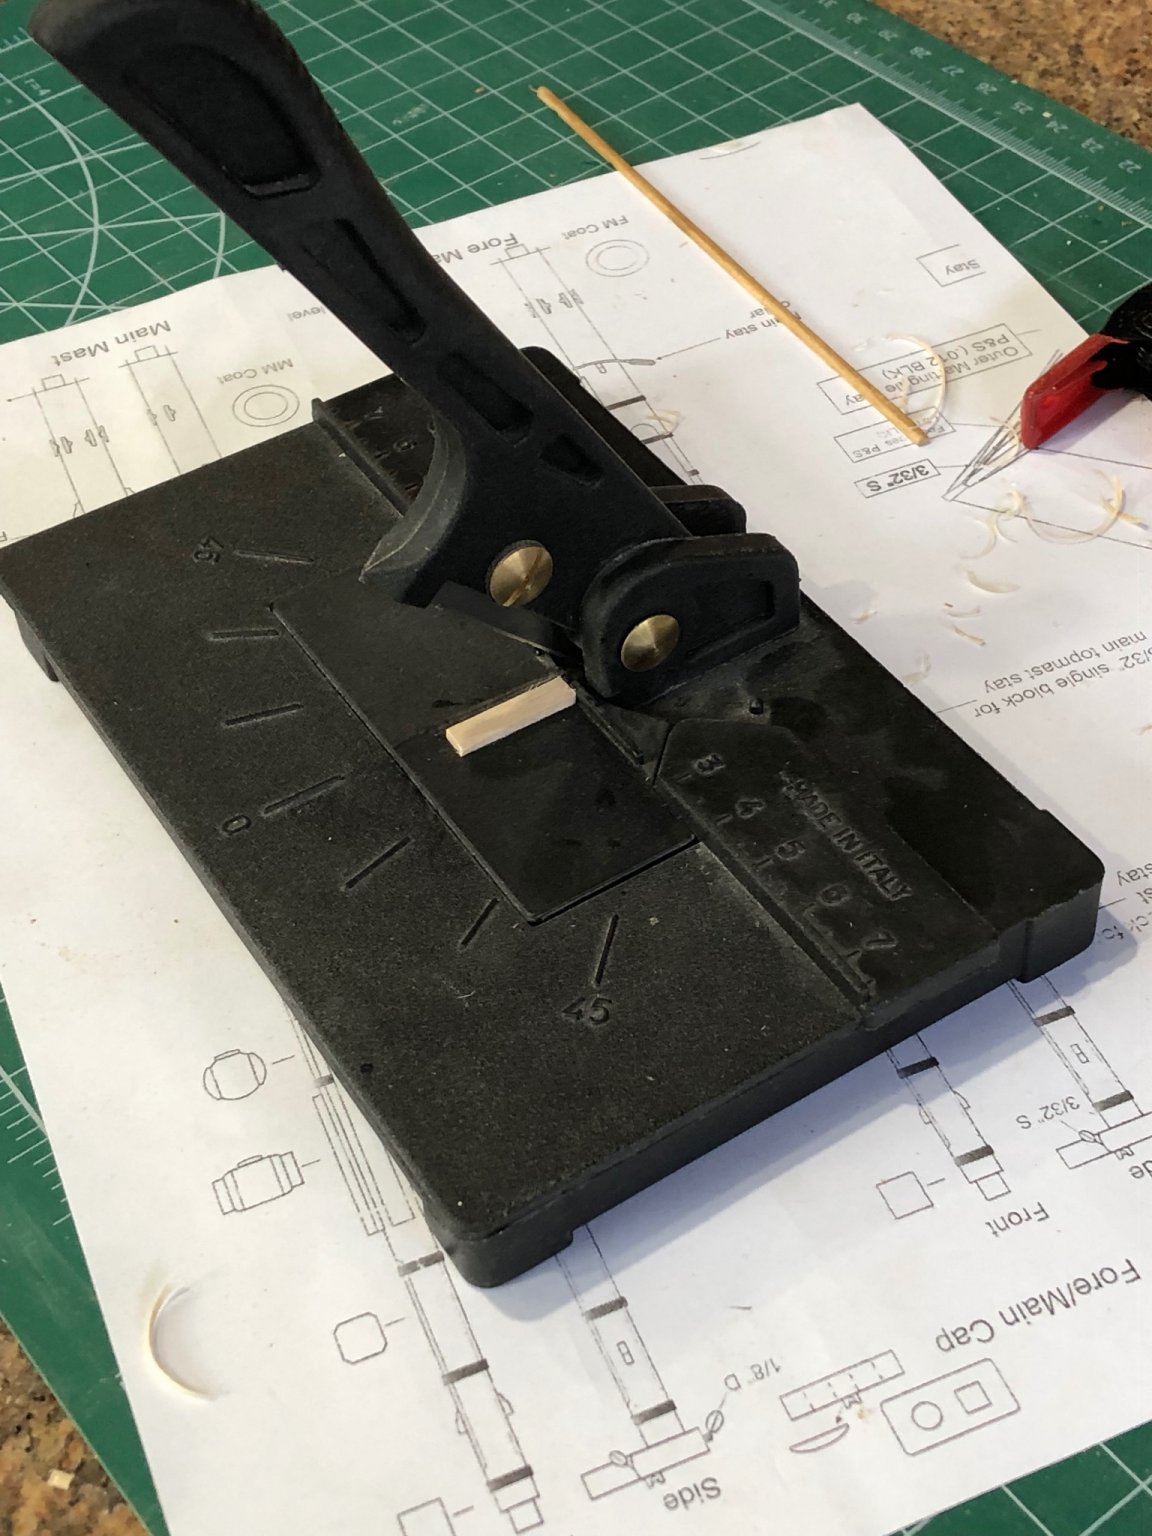
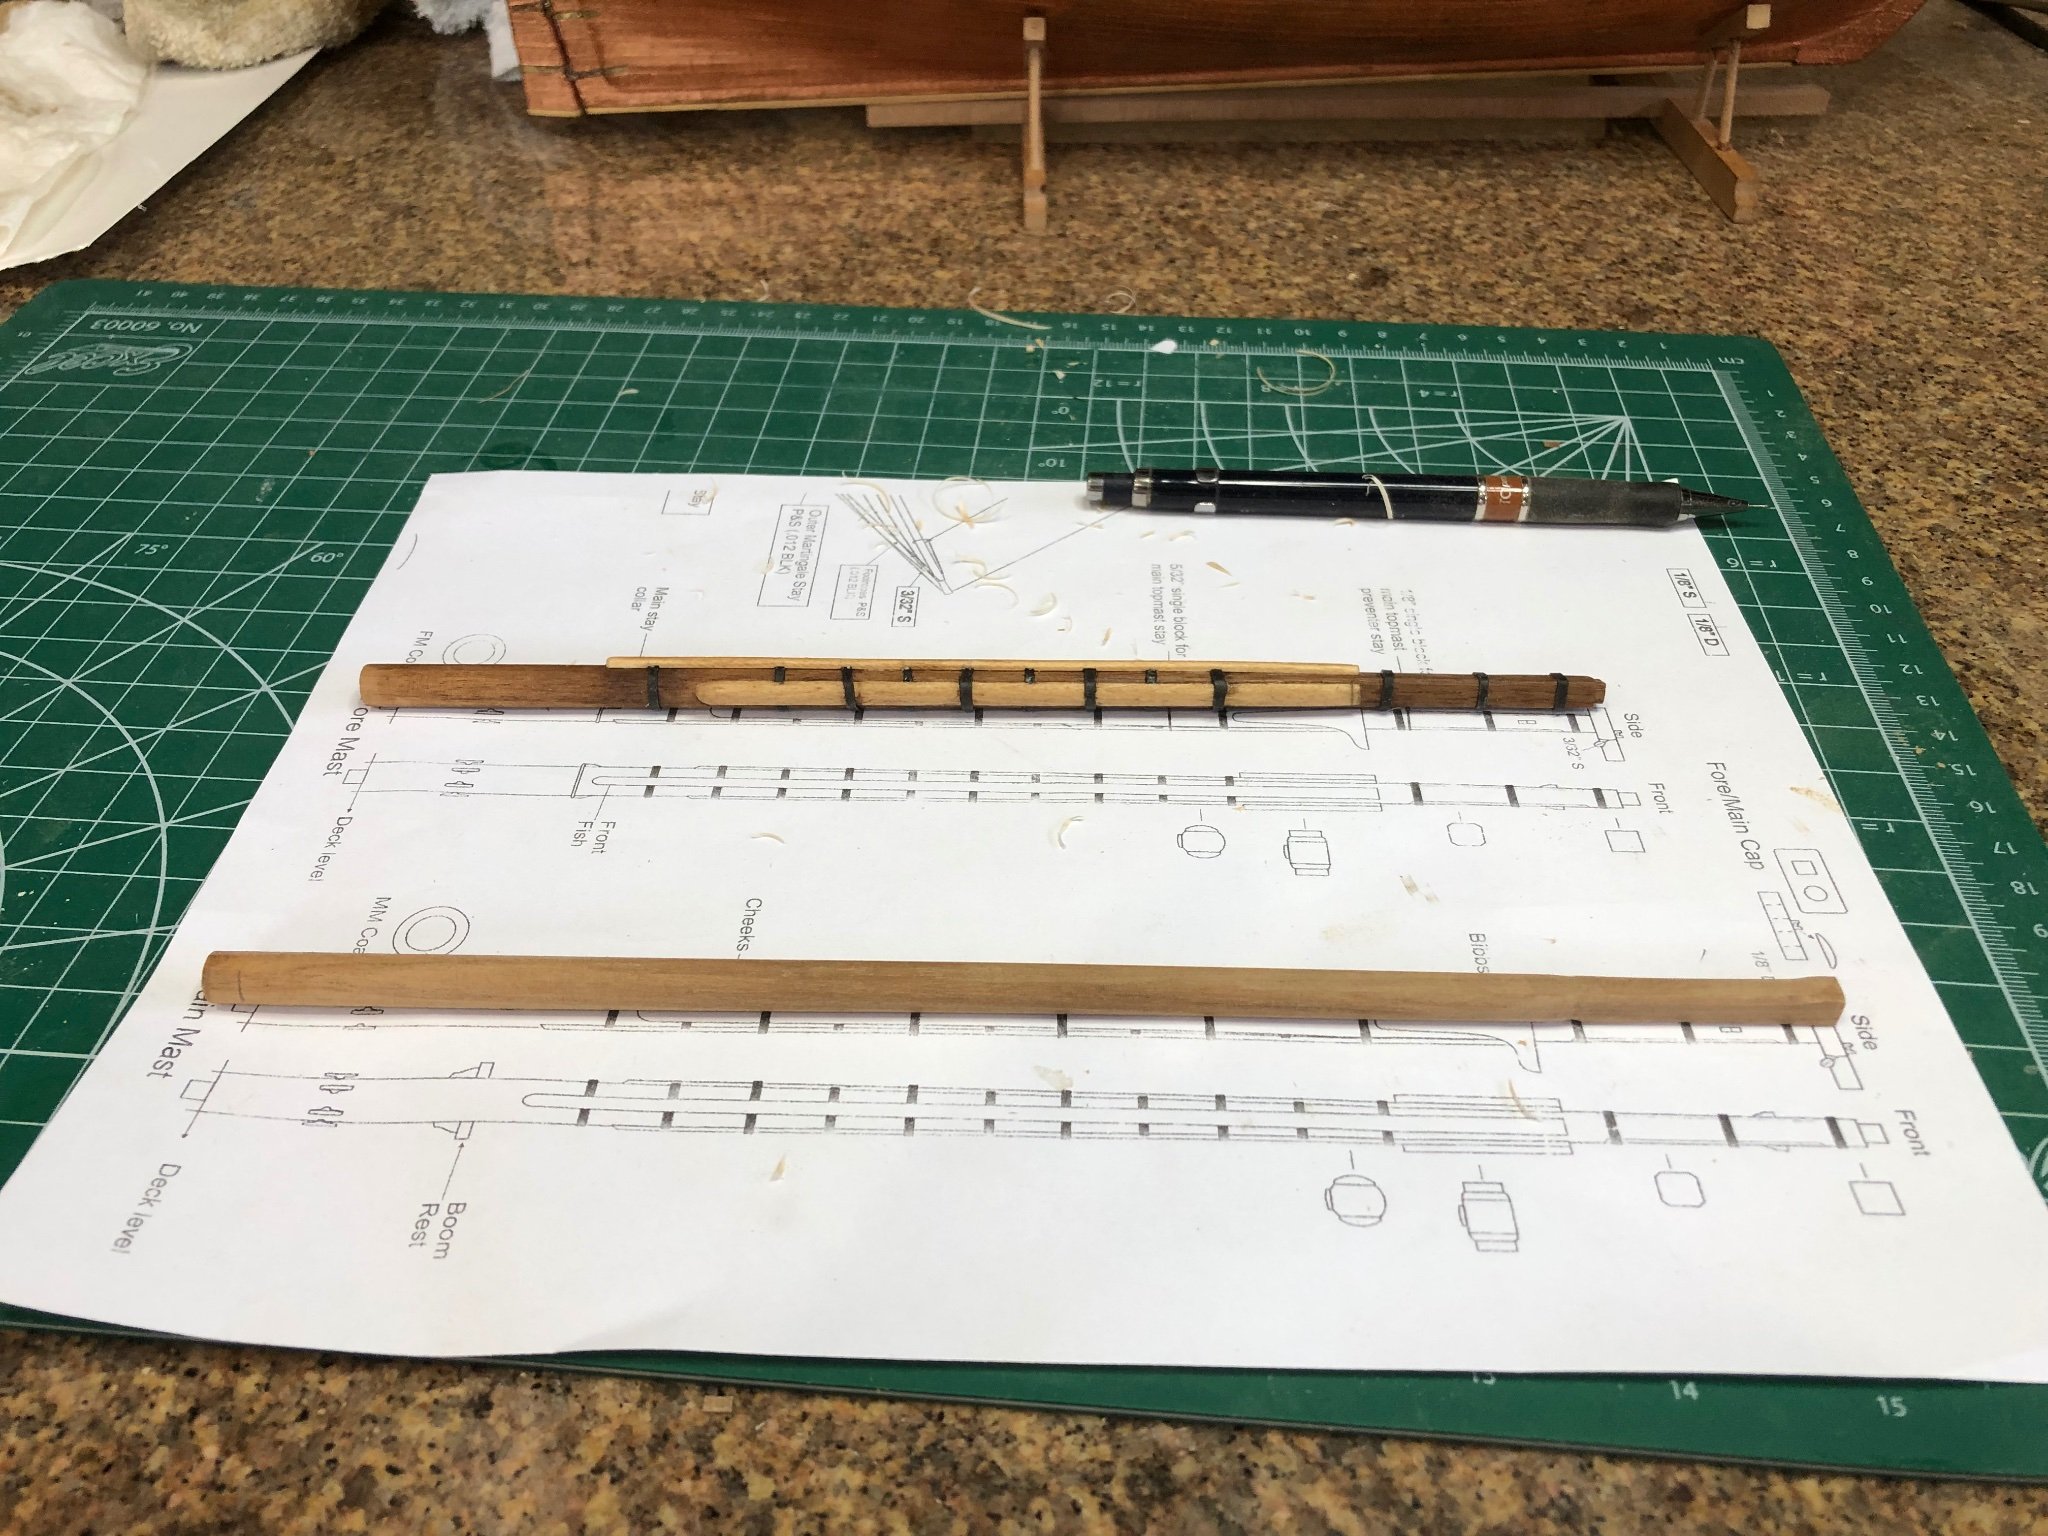
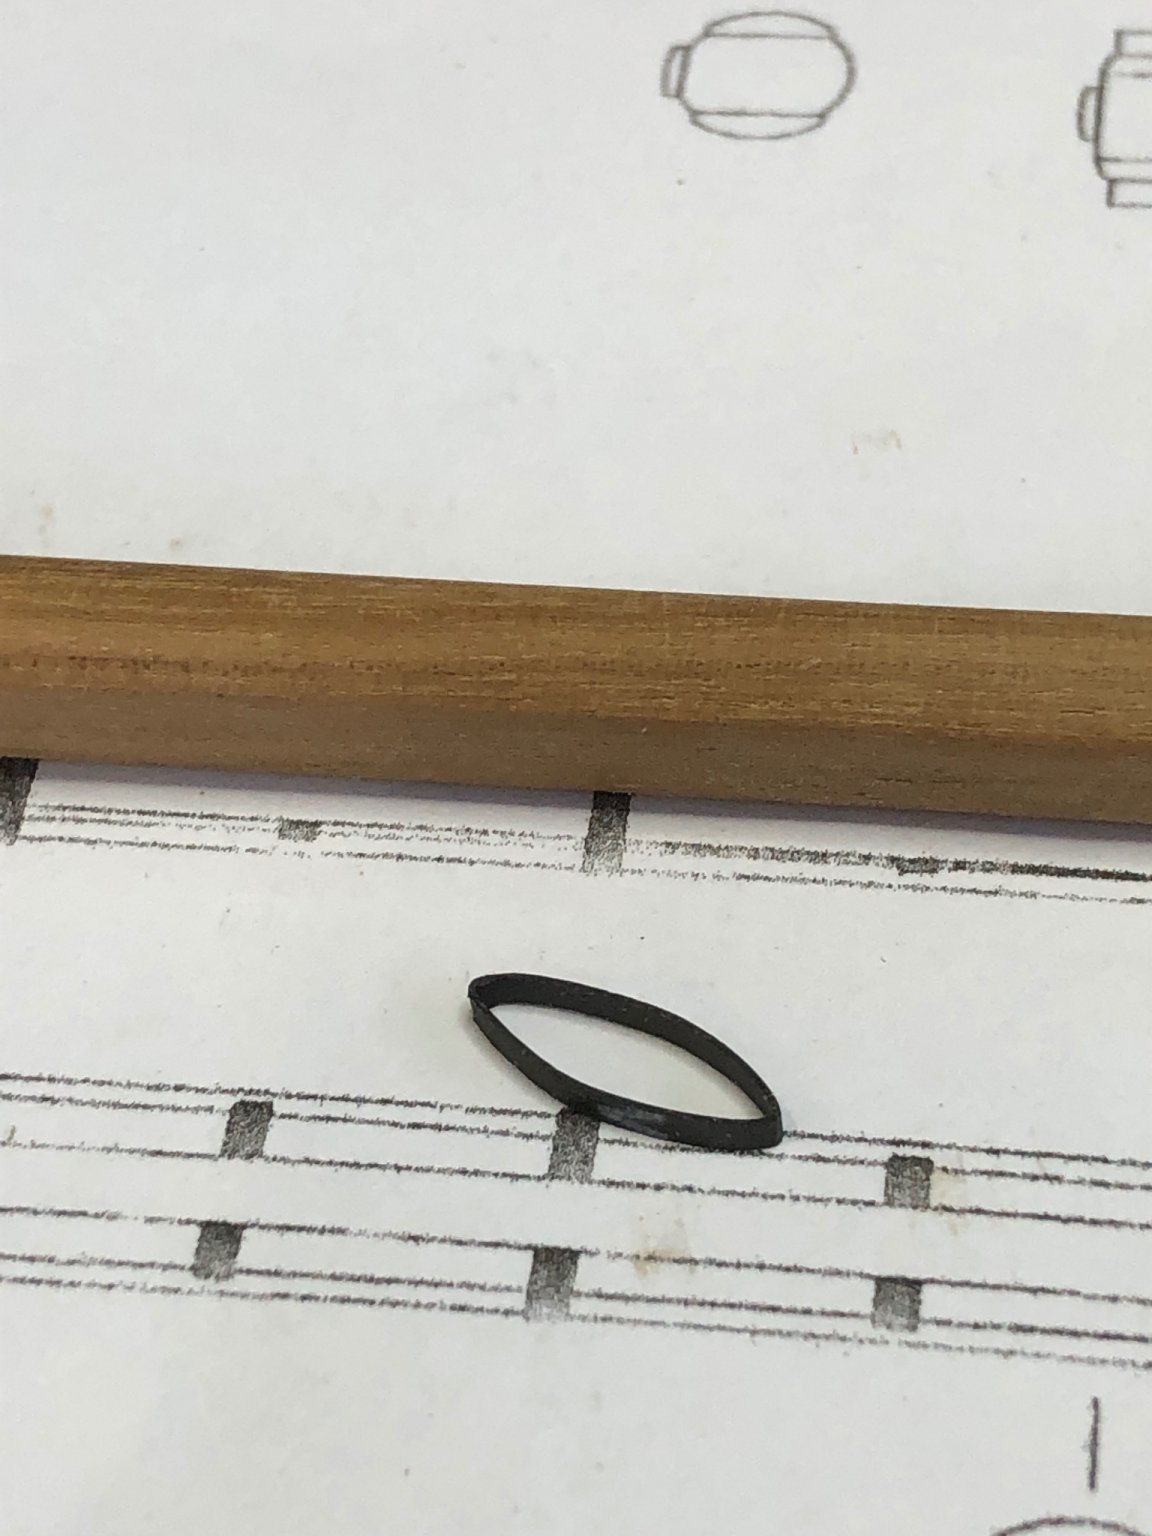
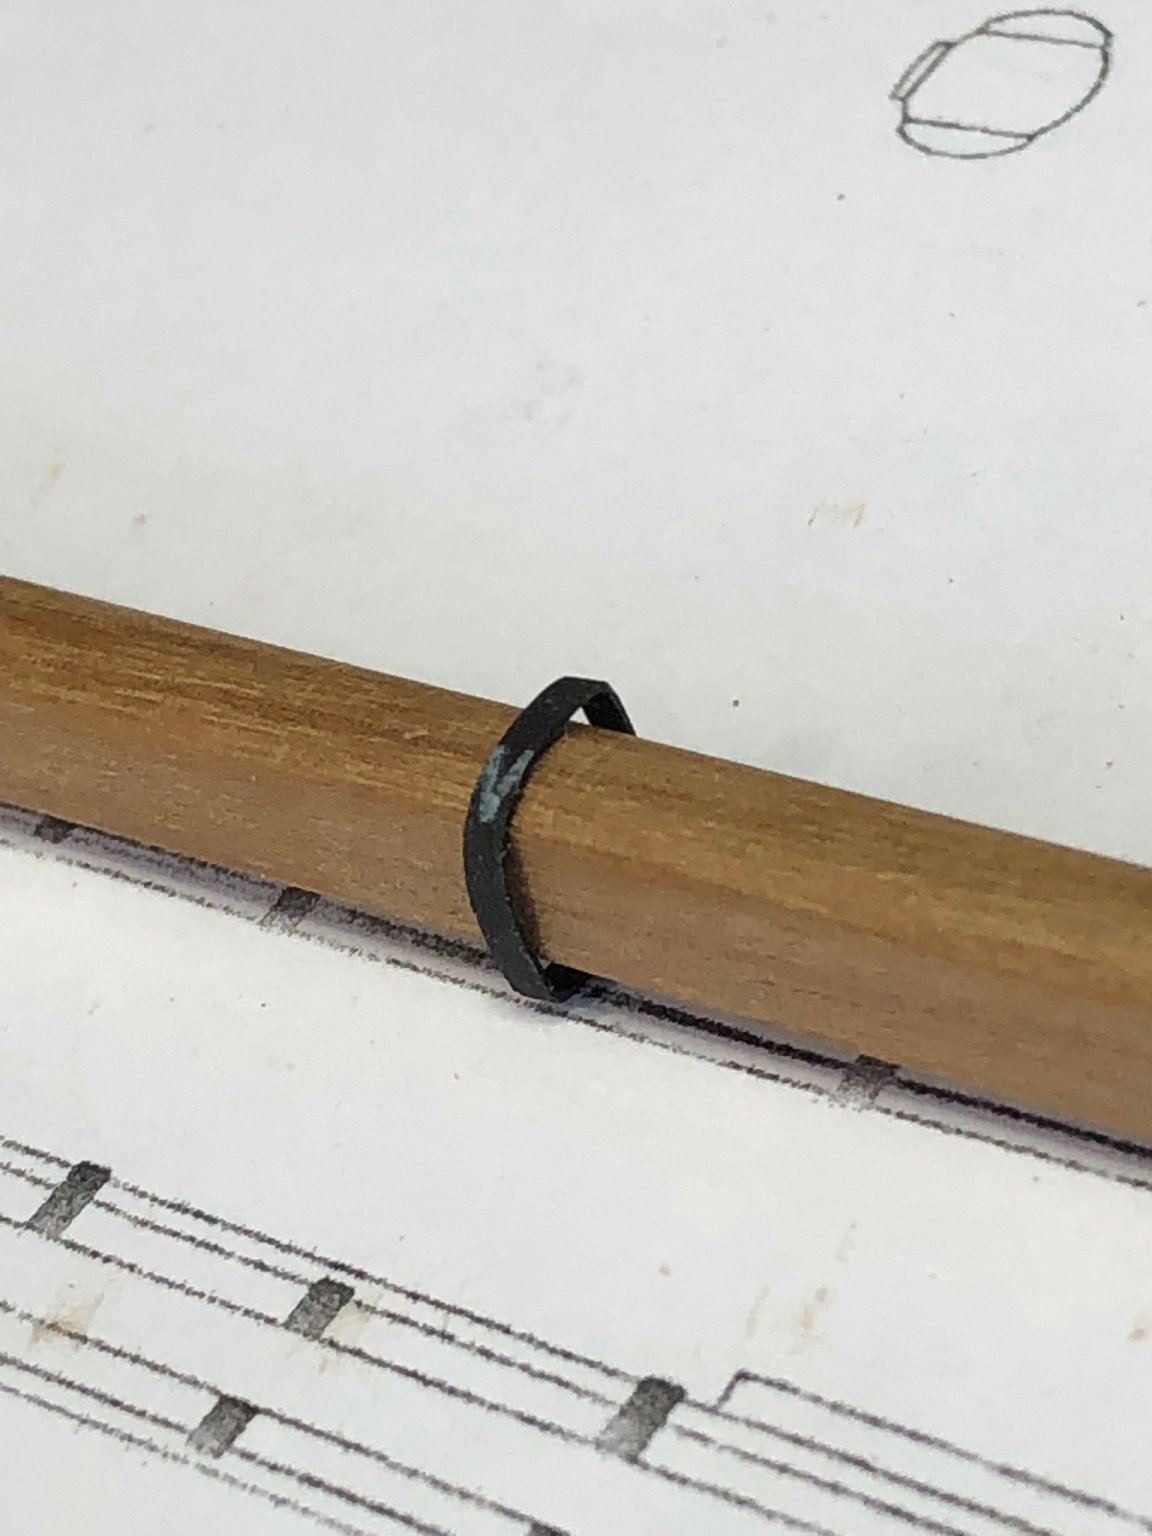
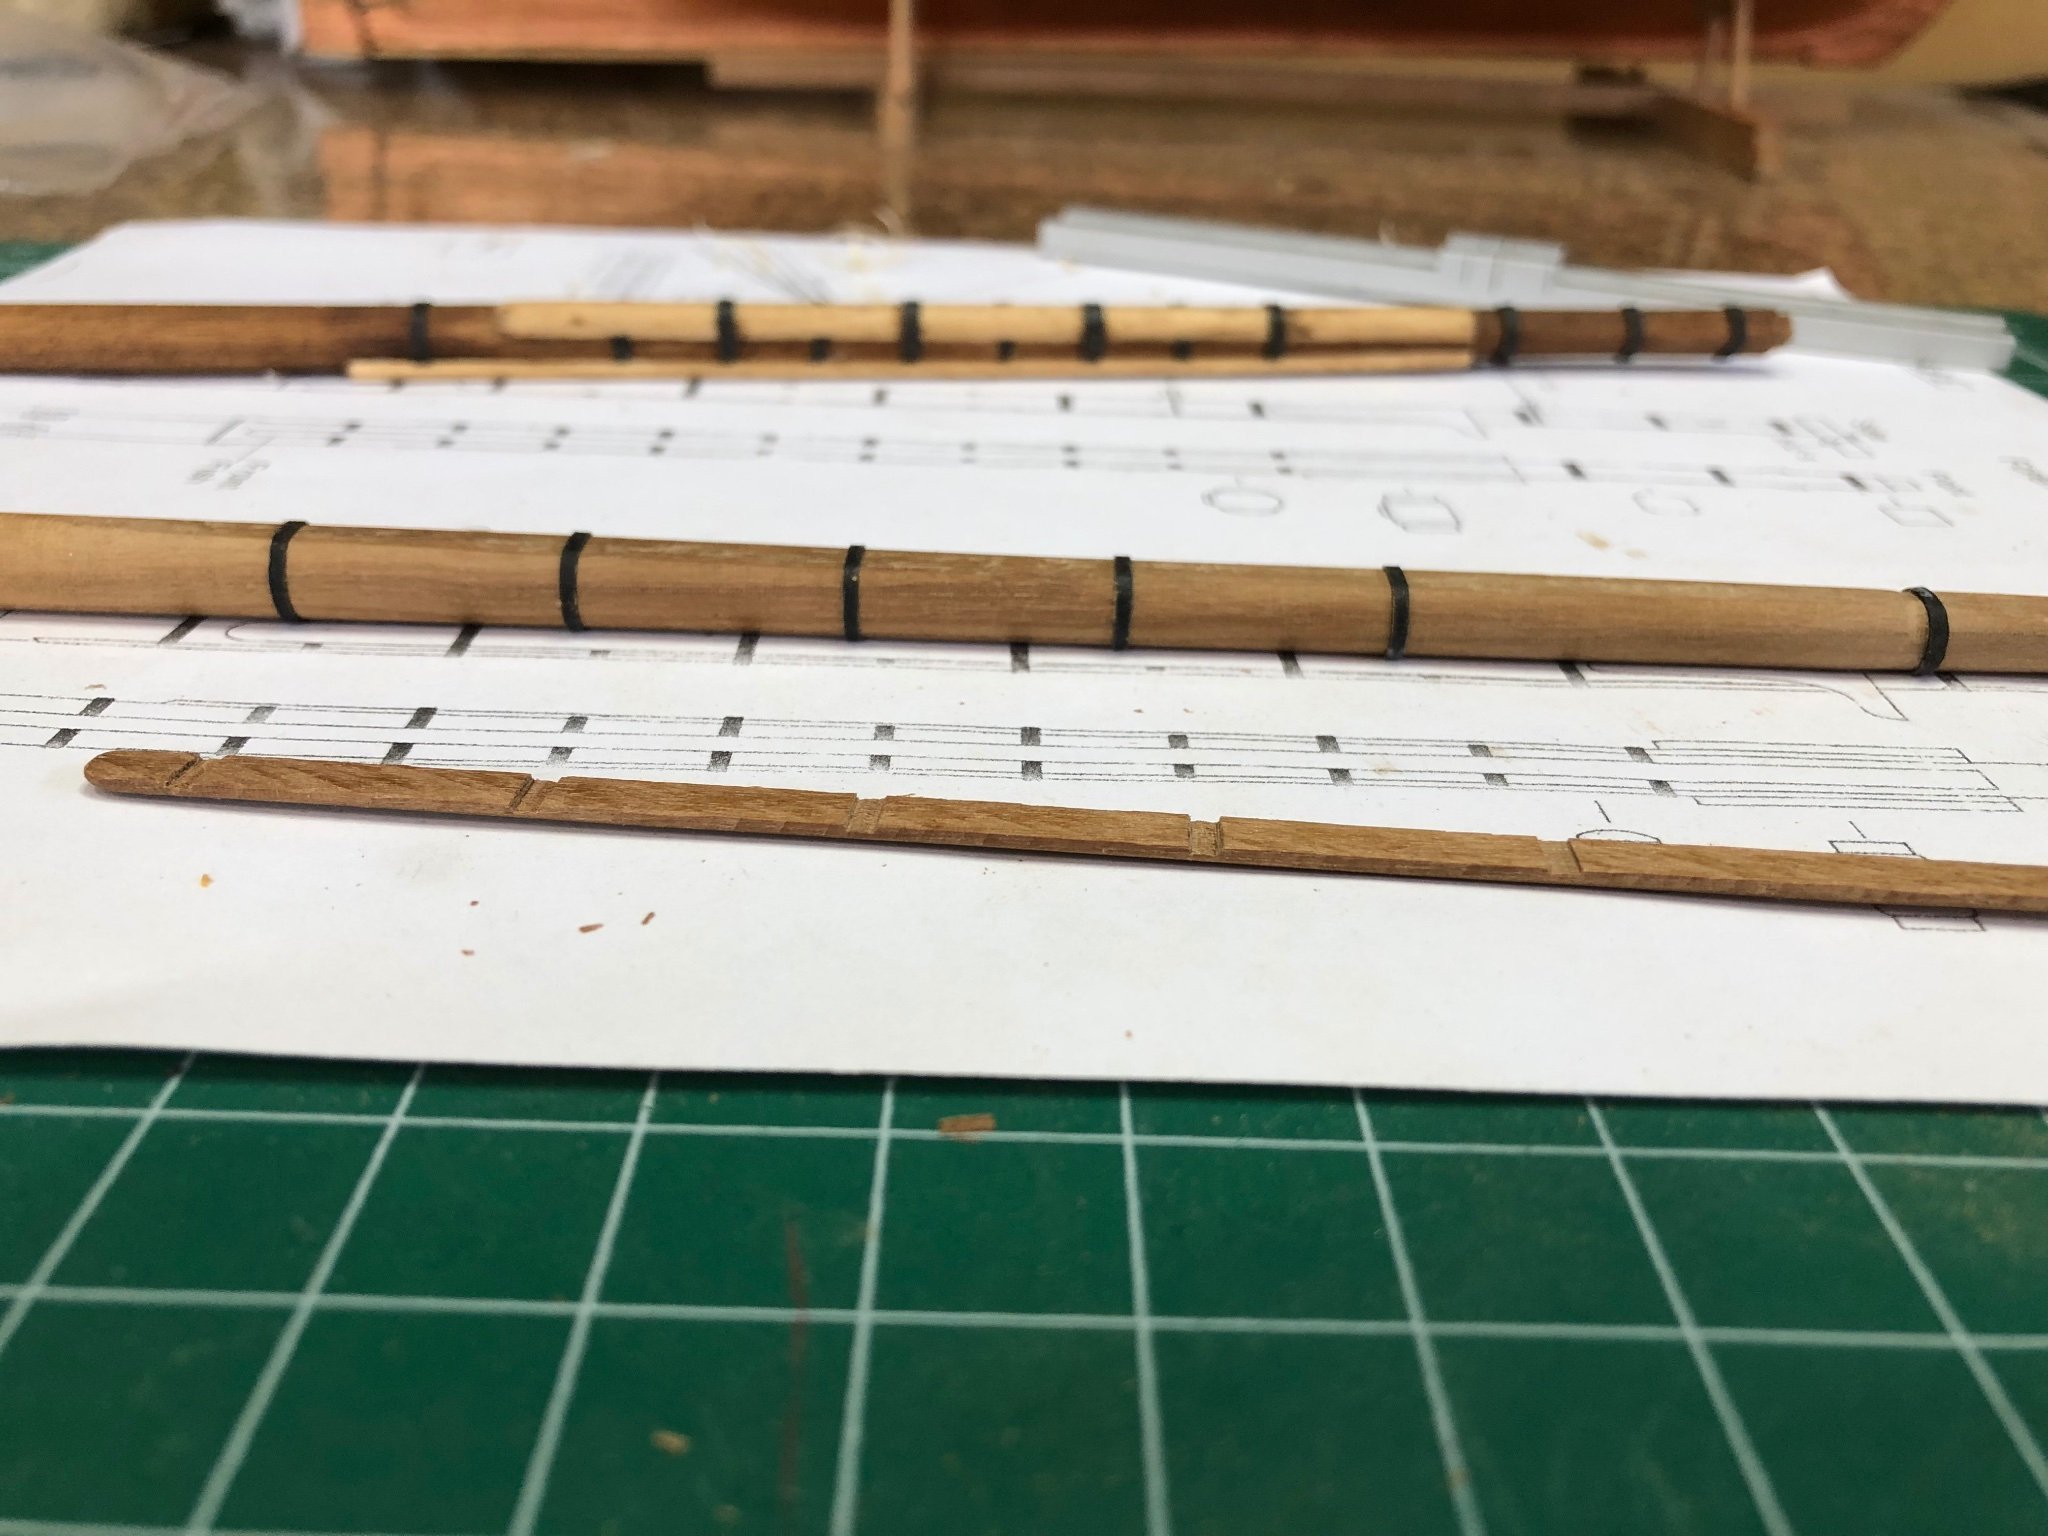
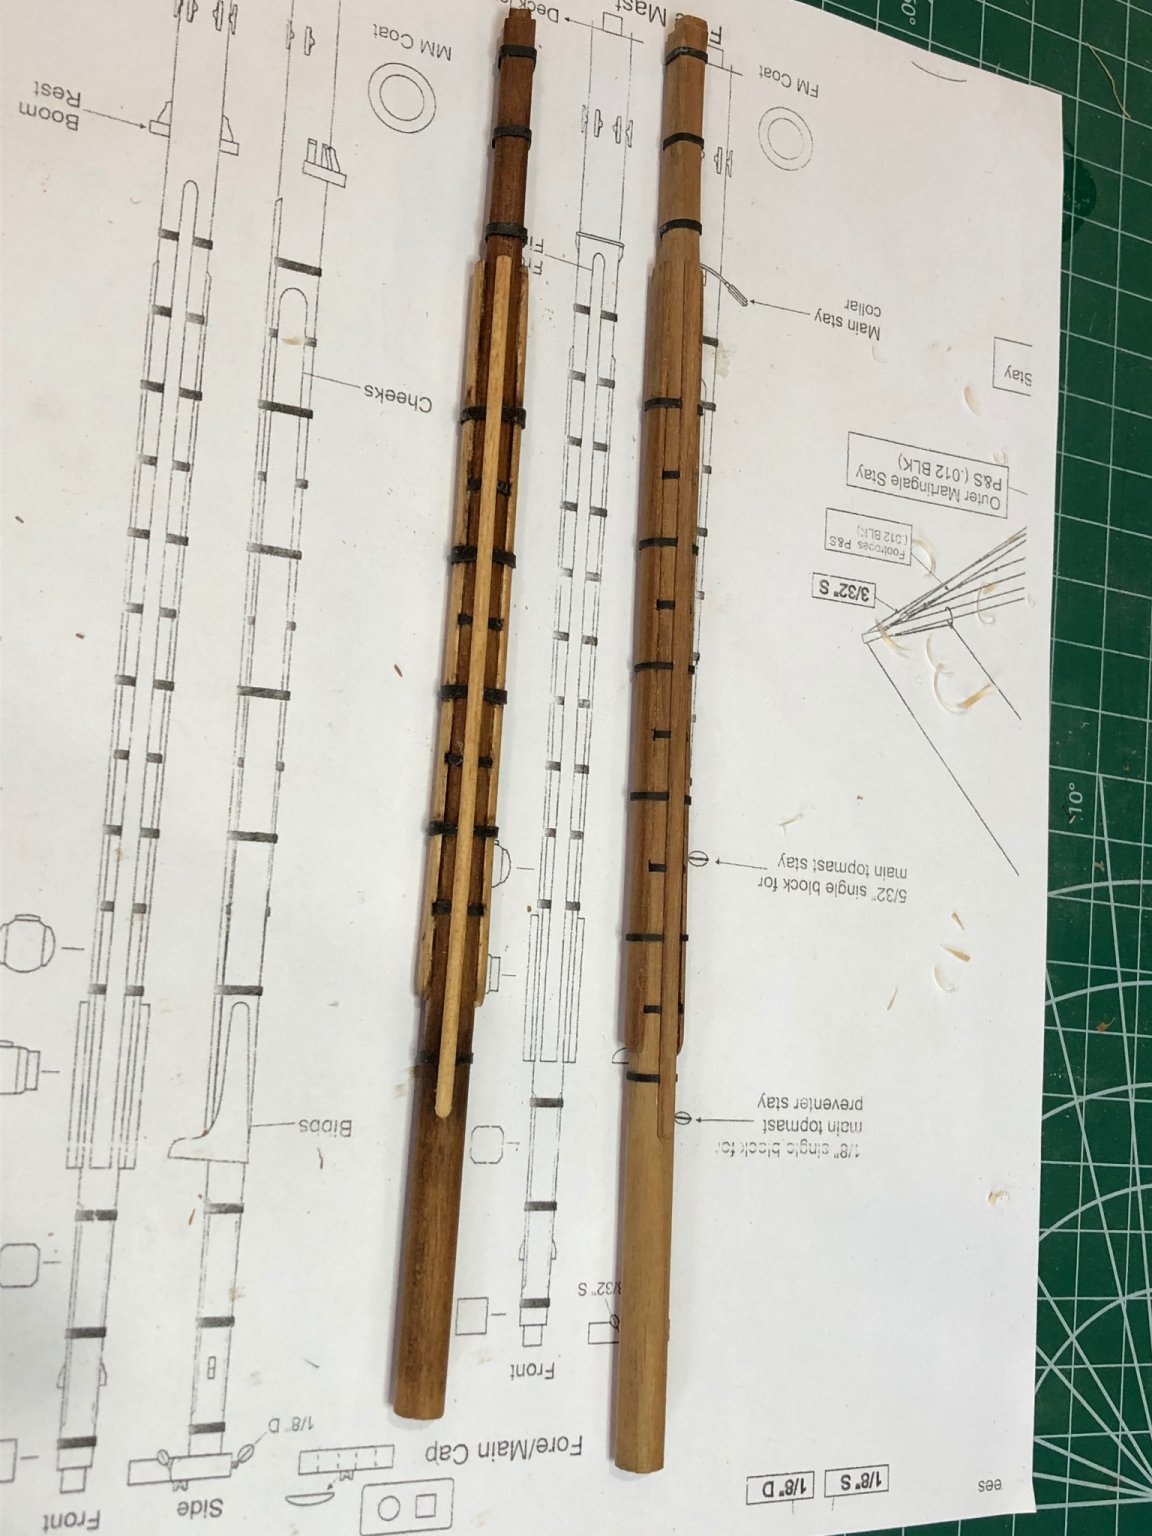
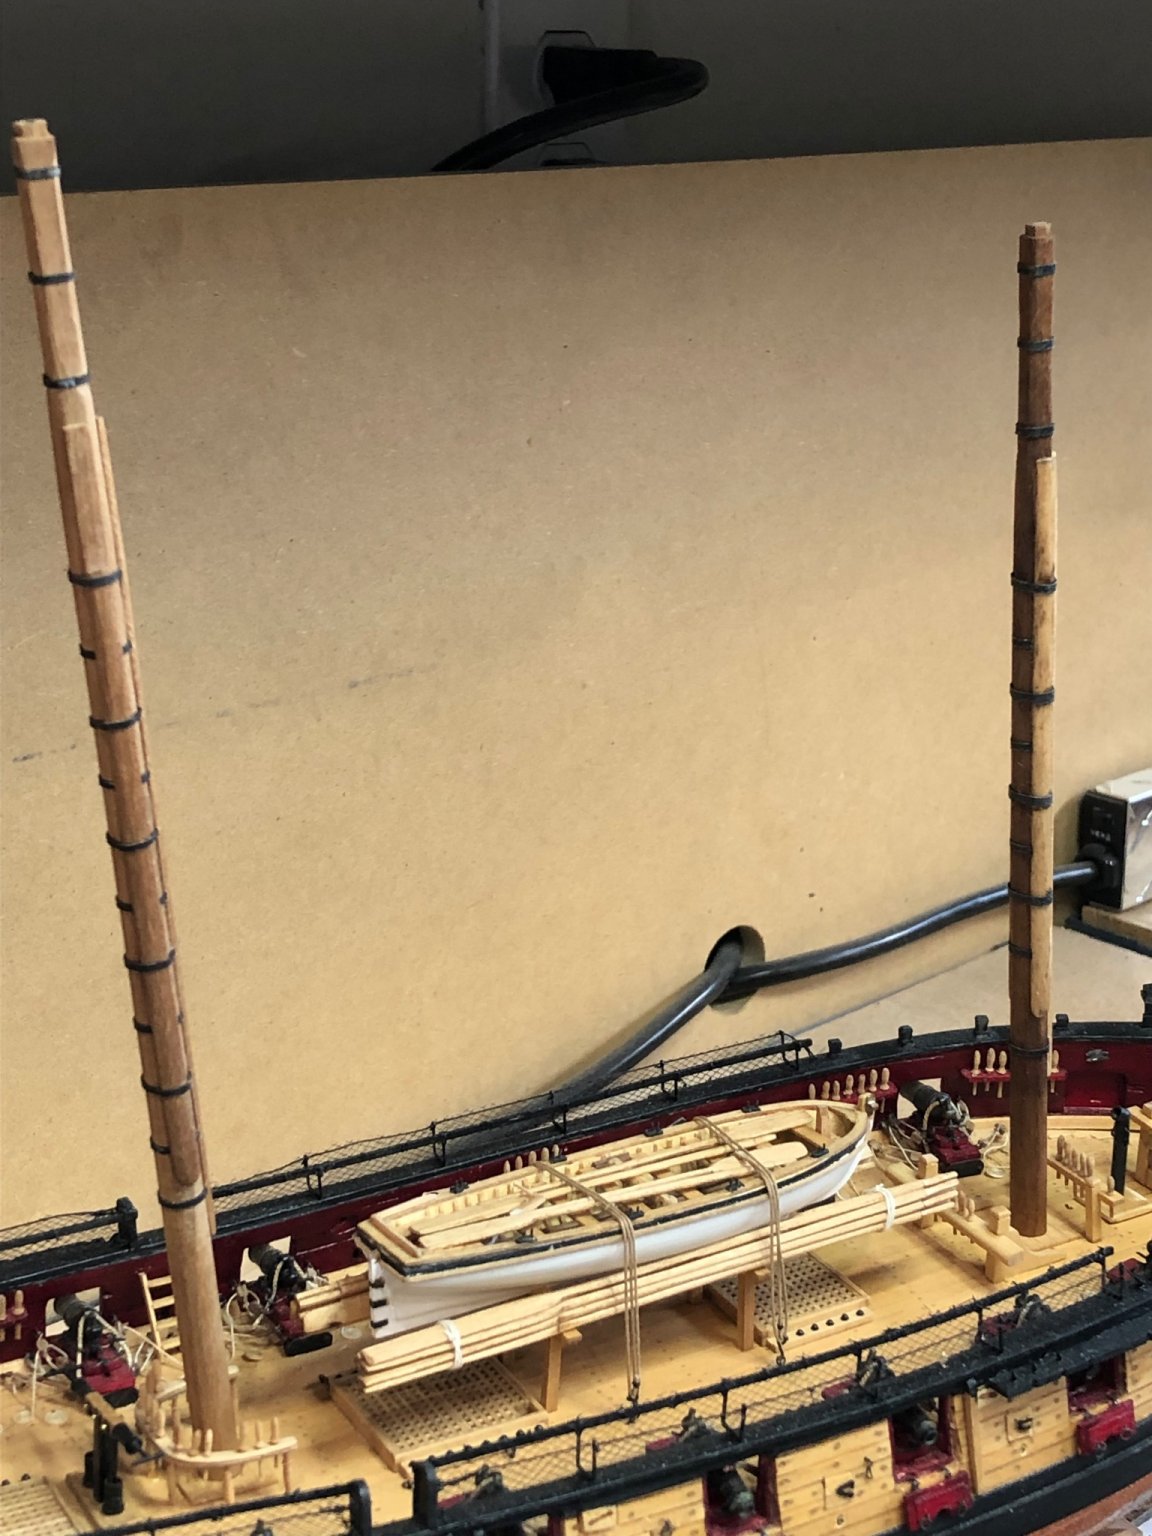
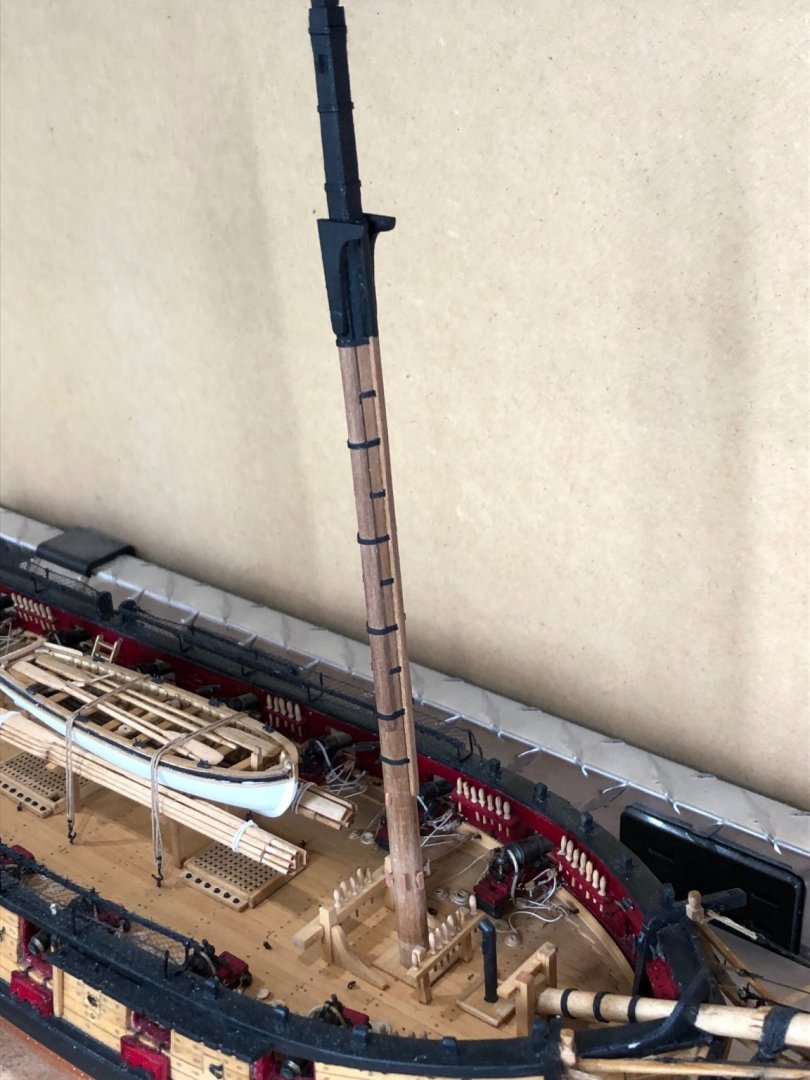
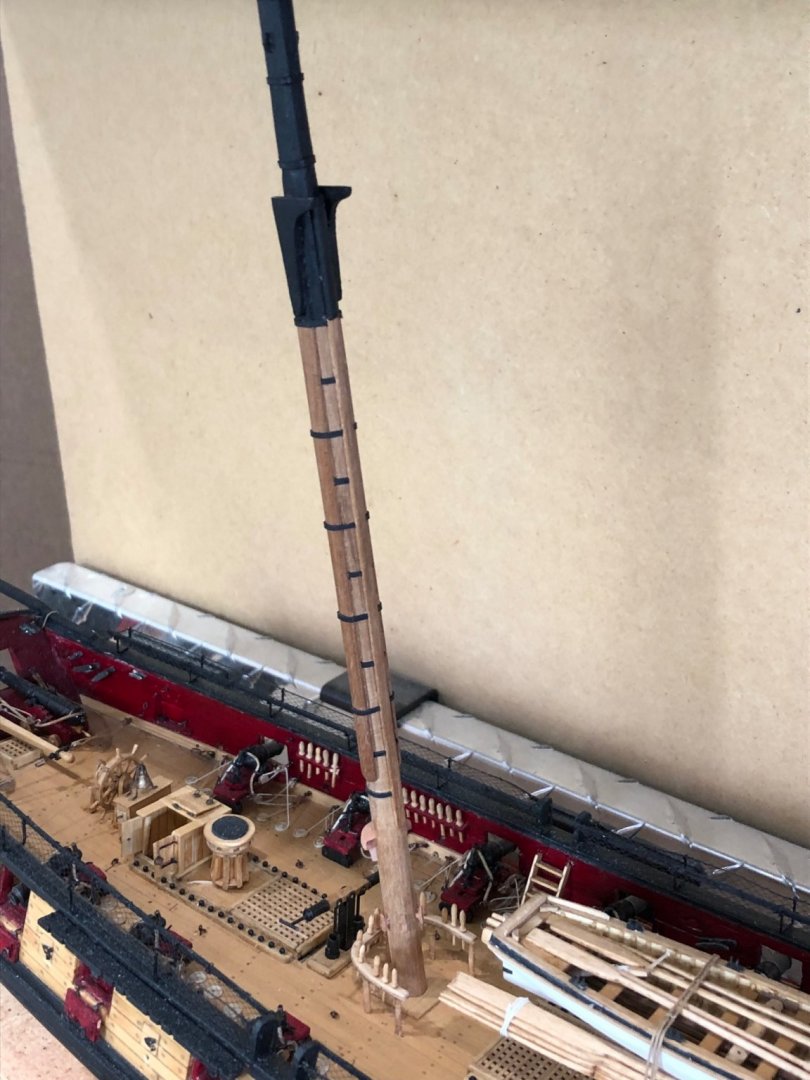
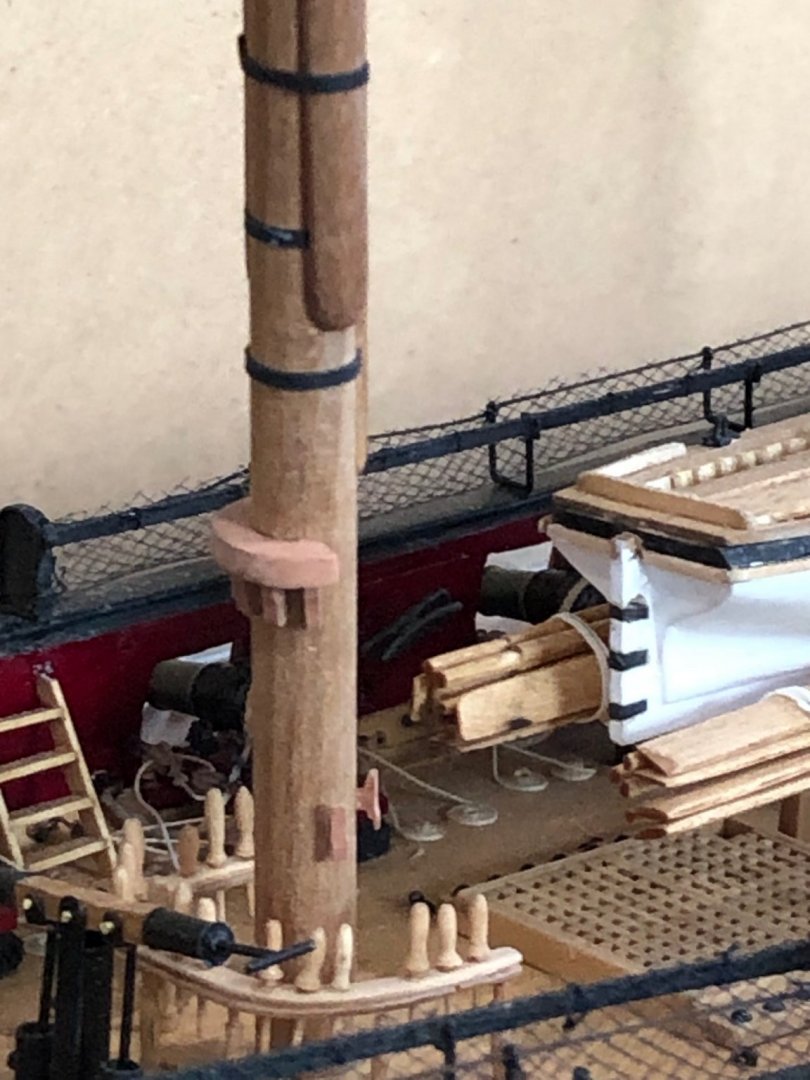
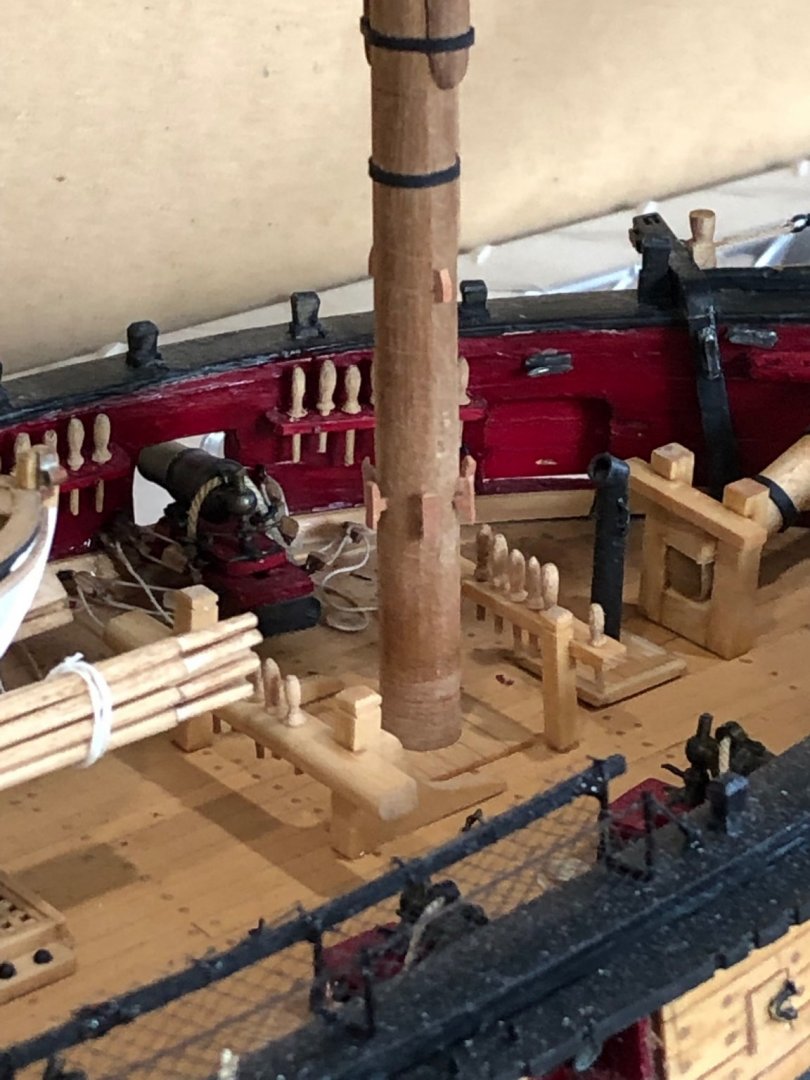
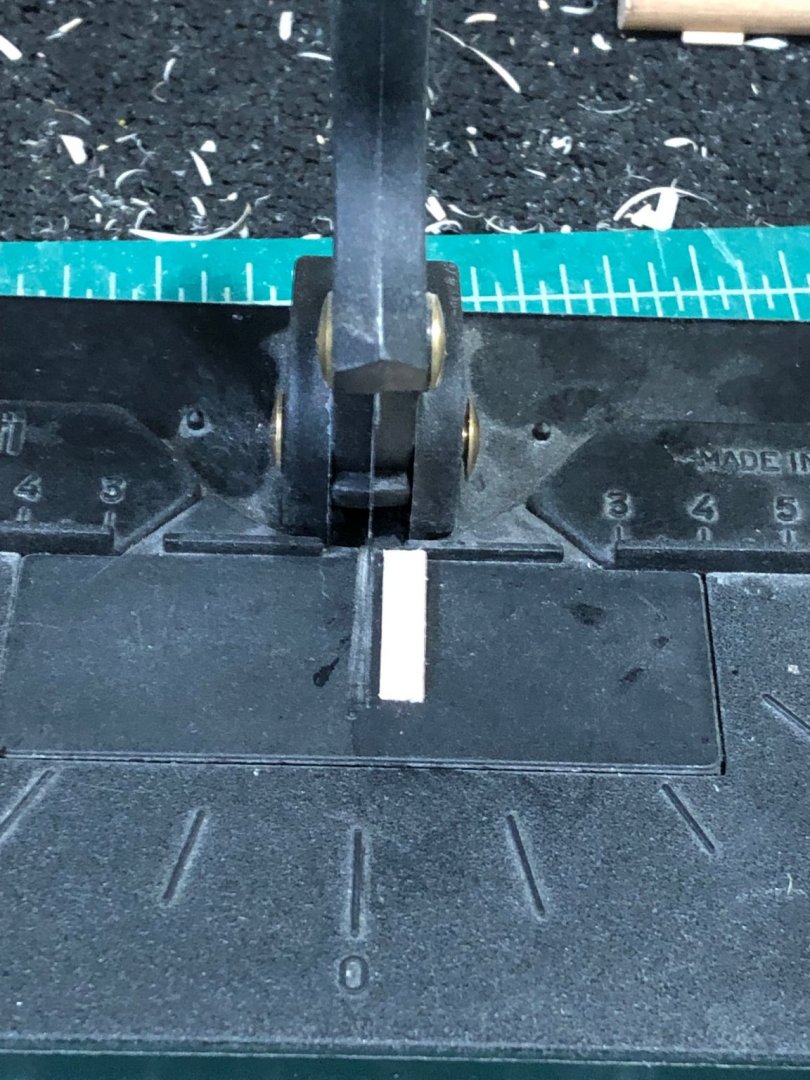
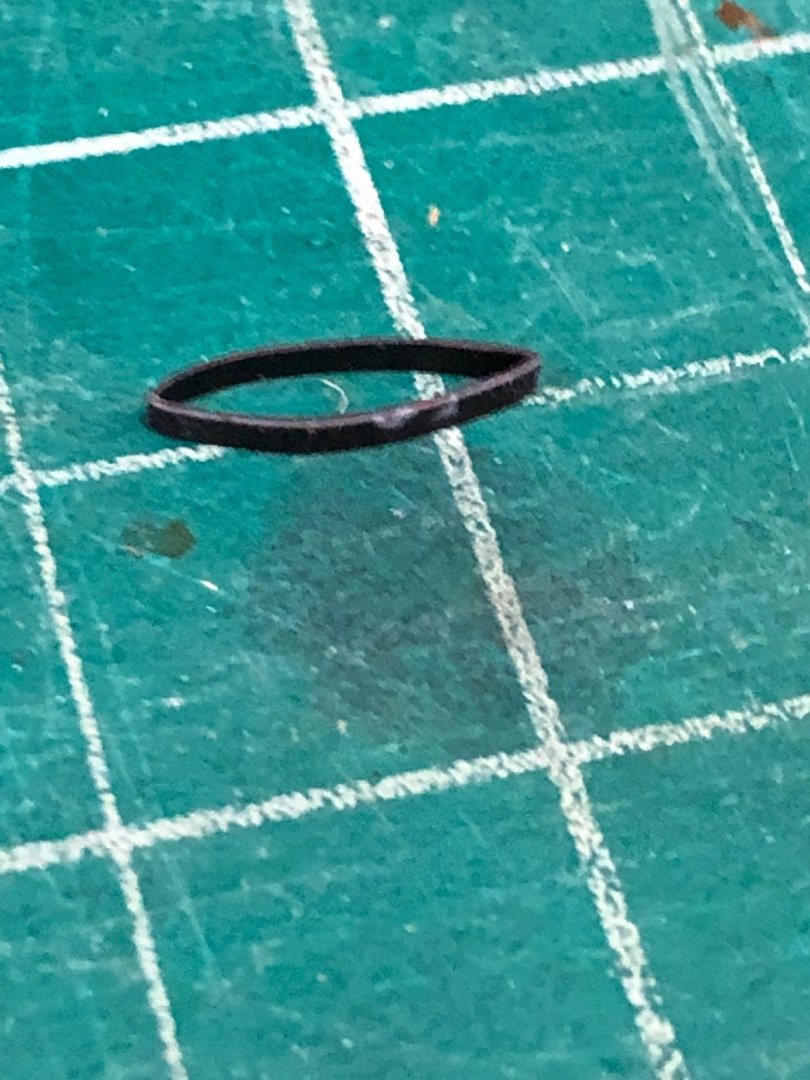
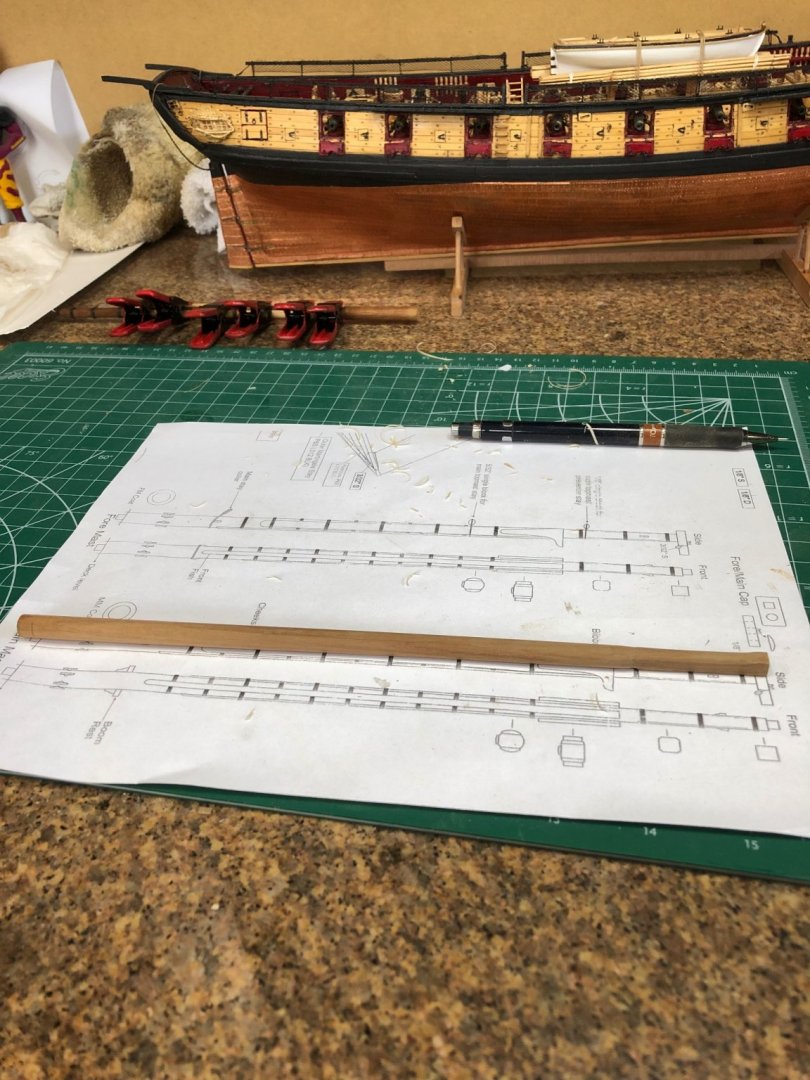
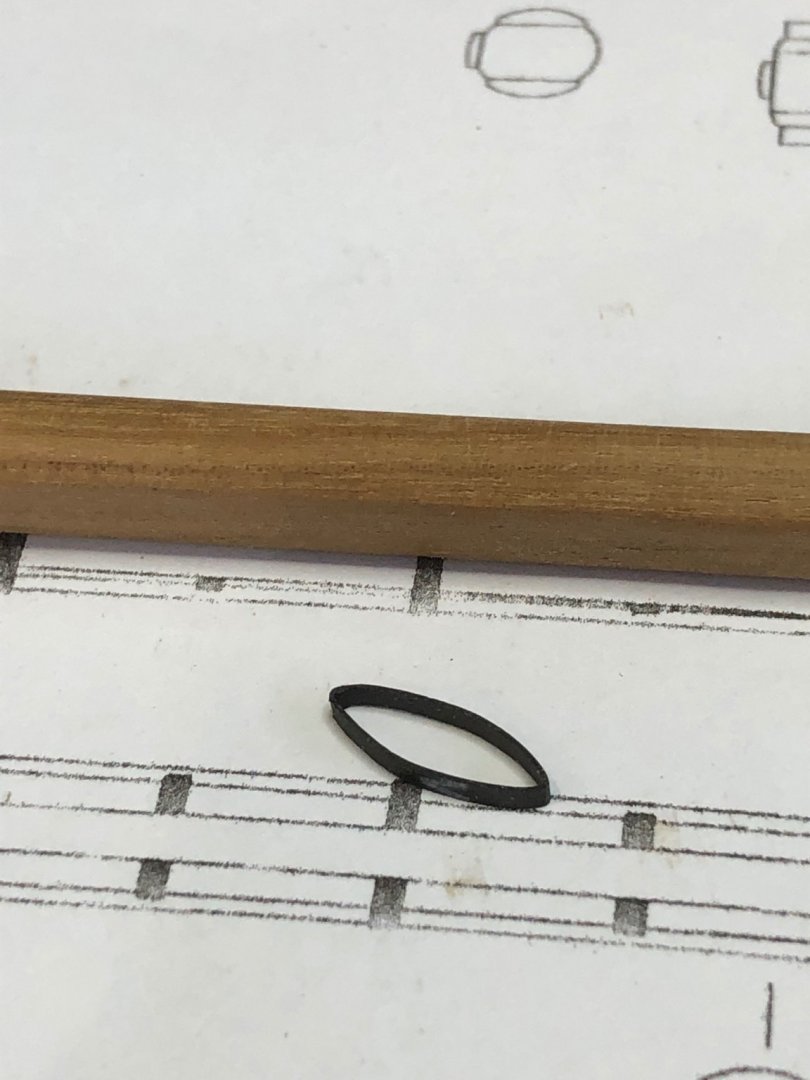
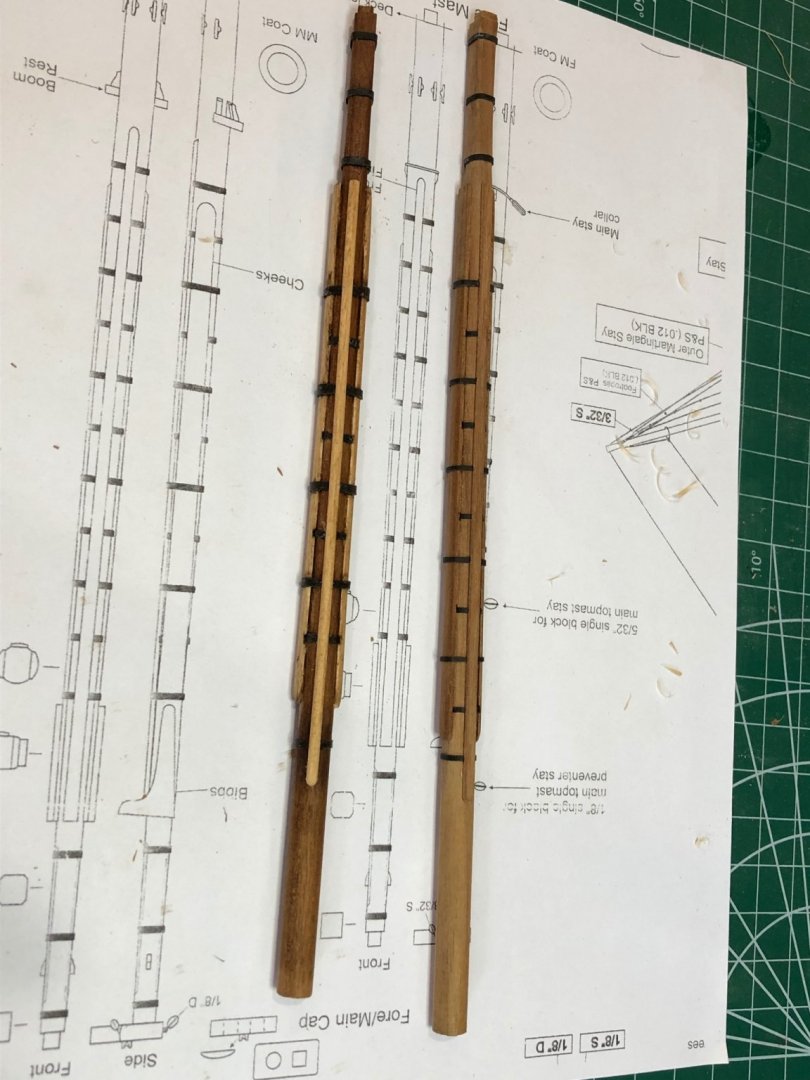
I straightened the foot rope line yesterday but I kept putting it off all day to make lower masts. I promised myself to do the foot ropes tomorrow. In an earlier post I mentioned that I used heat shrink tubing for the iron bands on the bowsprit with good results. I liked the results so much that I'll do them on the masts. When cutting a 1/16" piece with parallel lines it took many trys to get 3 that were needed so I had to figure a new method. I kept trying to design a jig that would hold the tubing while keeping a set dimension to cut with a #11 blade. Had a wow moment and remembered a tool I had from years ago and dug it out of the closet. Don't remember who make it but its vacuumed formed plastic with a handle holding a razor blade for chopping. Heres a photo I tested the cutting and it made a perfect slice of the tubing. The tubing has white lettering that is easily removed with paint thinner. So now all I had to do was glue a piece of wood perpendicular to the backing edge at the correct dimension. Looking at the pictures I can see it was made/sold by Amati. I chopped up enough of the rings for both masts in 5 minutes. Must keep track of tools I have and don't use regularly. I shaped the masts by hand using a mini plane to get the 4 sides for the square and then turned the taper in the Proxxon lathe. Next the cheeks needed to be shaped with the curved top and reliefs cut to clear the iron bands. Next was to glue the cheeks on the mast and put on the iron bands that go over the cheeks. Glued the fish to the front and it was ready for the final fittings. ONLY I used the material from the kit and you can see the mast at the top of the picture. The wood colors were not what i had hoped for and I don't like the look. The lower mast is a new mast with material from another kit. A much nicer color and I will use wood strips from the kit also to match the mast. Fore mast and main mast mounted on the model Comments appreciated


-
Oh! so bad. I know how it hurts and am hoping your fix will be perfect and you can proceed. Best of luck.
-
After waiting a few days looking at the planking above the wales I am not happy with the way it looks. I realized that I had sanded the entry into the stem rabbit as if it was a wale strake. This caused the uneven planks in the front. So I'll take it off and make another correctly. I had been concentrating of the spaces adjacent to planks and not the entry to the rabbit. Too much sanding. Thanks for all the looks and especially the likes it really helps with all my redos.
-
Much better color and the size looks correct
-
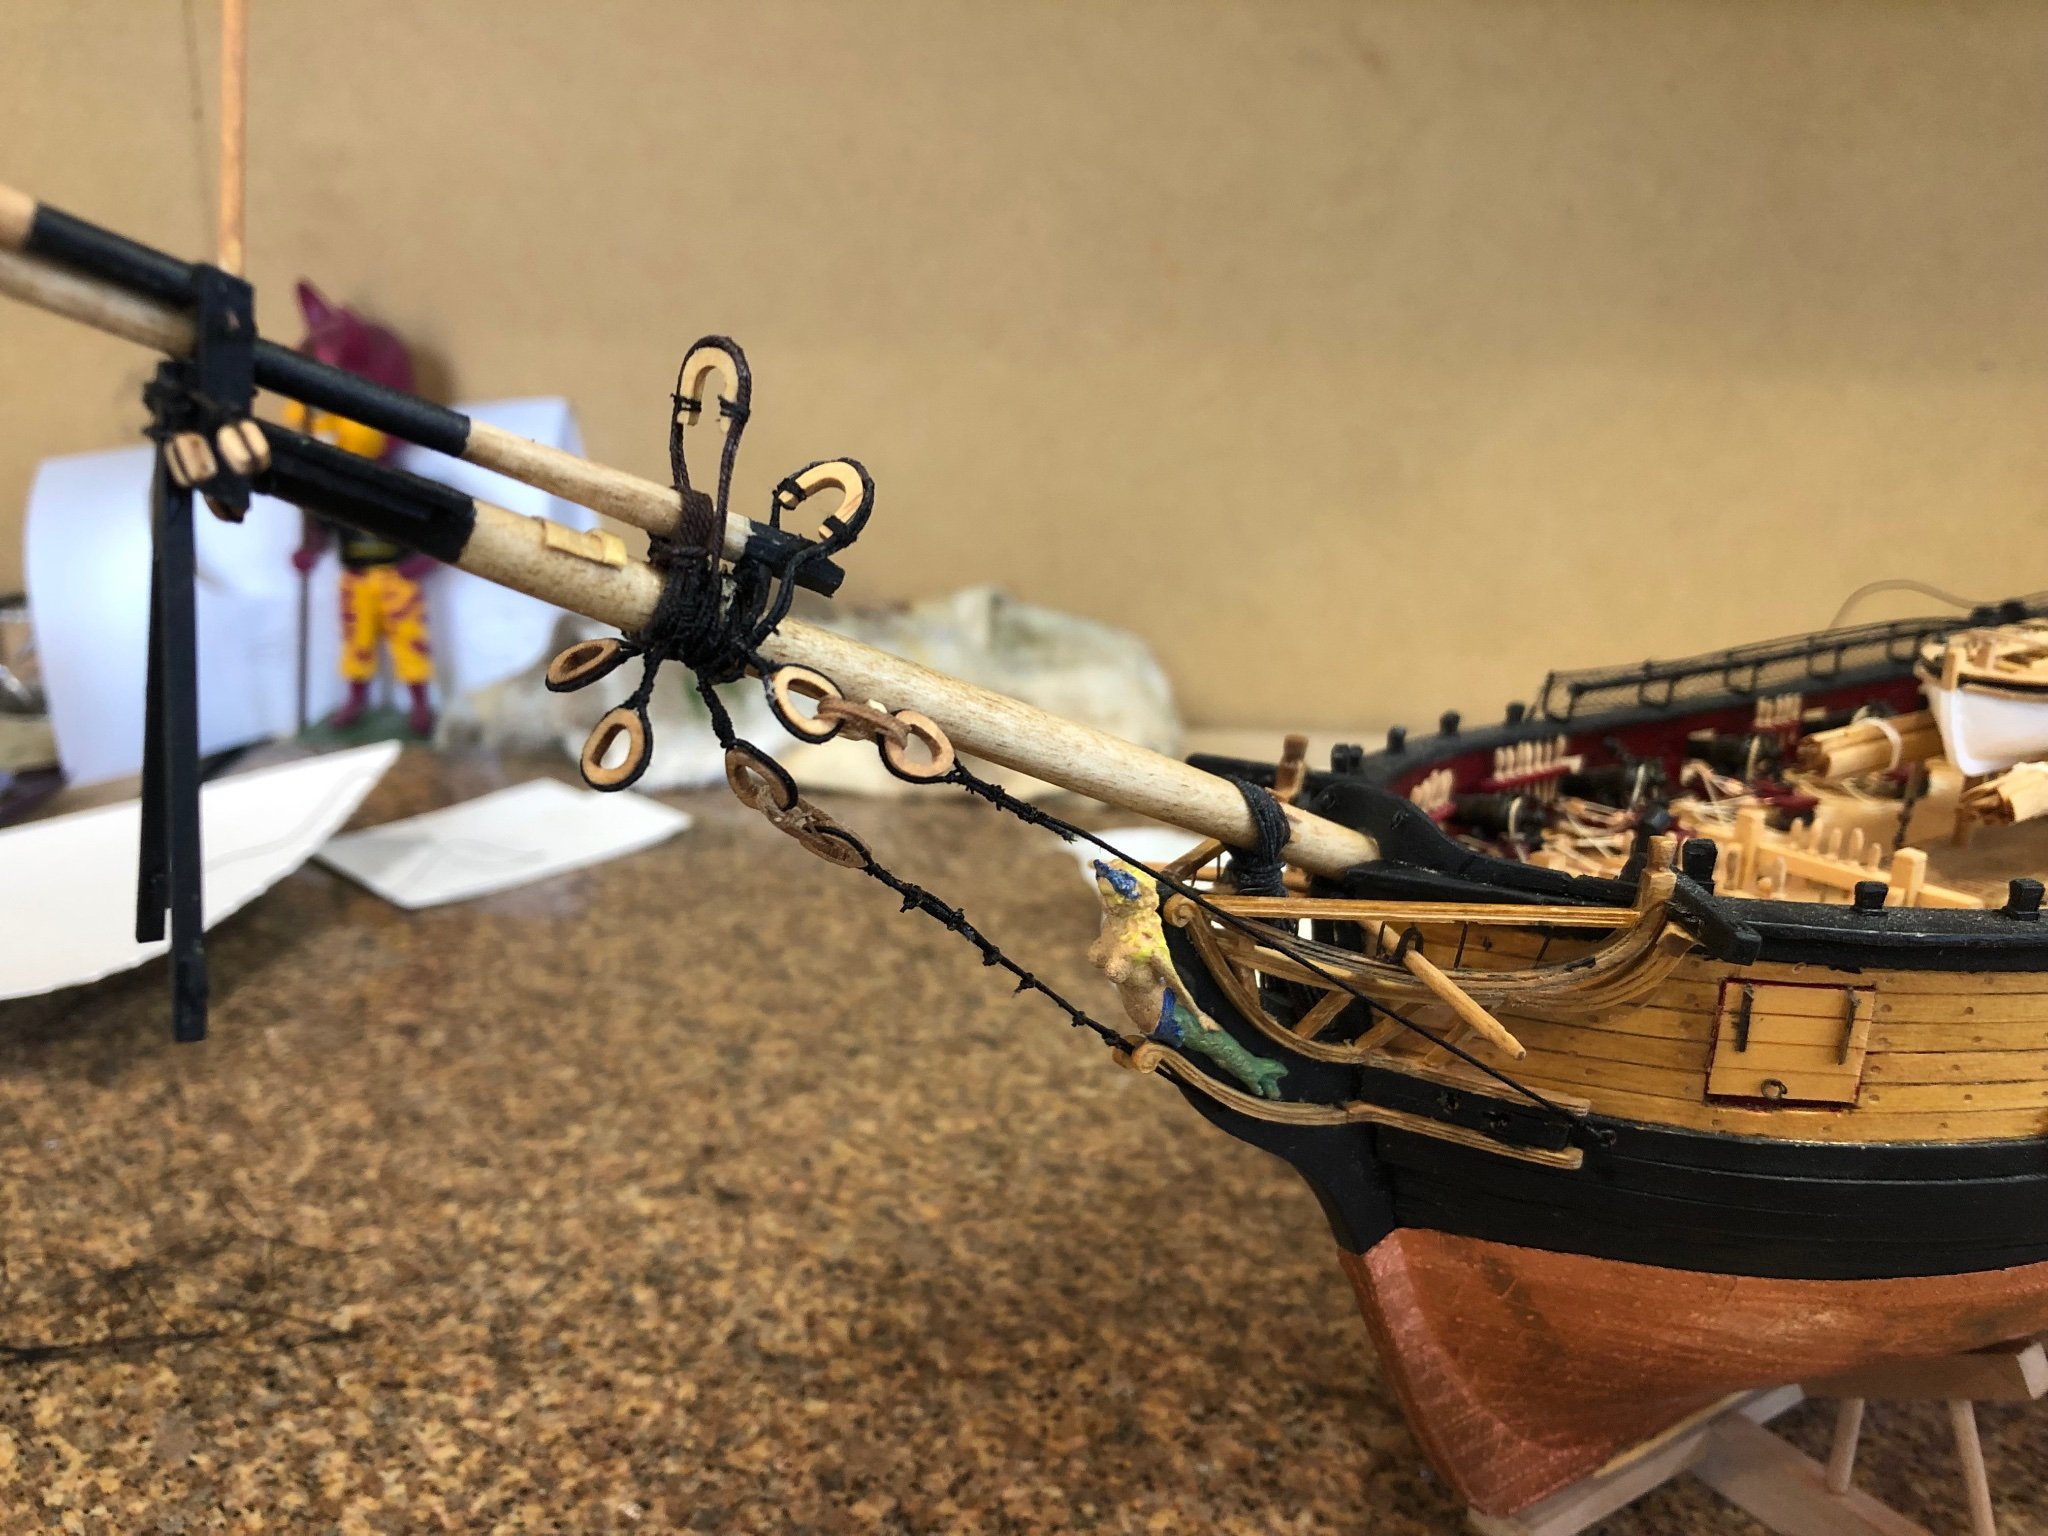
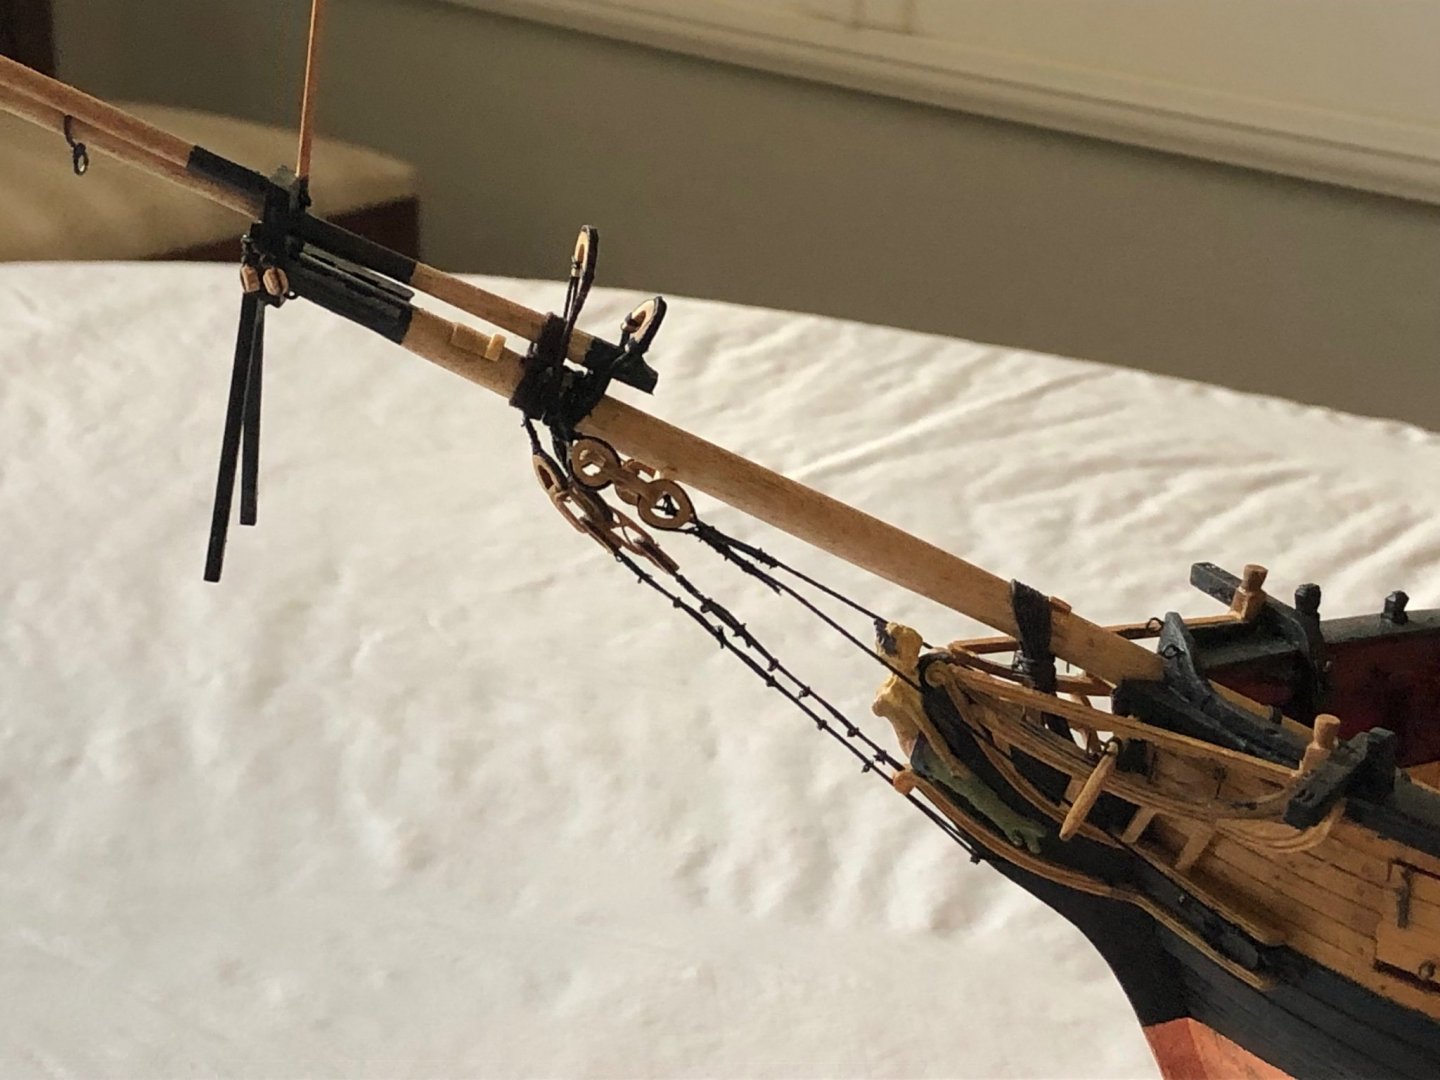
A lot of progress since the last update. Got the bobstays finished using my little alligator clip jig to space the closed hearts. It took quite a bit of time but all went well. I just finished the martingales inner, outer, and back all that is left are the foot ropes. I'm running a little test of conditioning the foot rope lines. I thinned LePages white glue and soaked the lines before hanging them to dry with a weight. LePages glue drys translucent when thick and when thinned it become almost transparent so we'll how how the test piece looks in the morning.


-
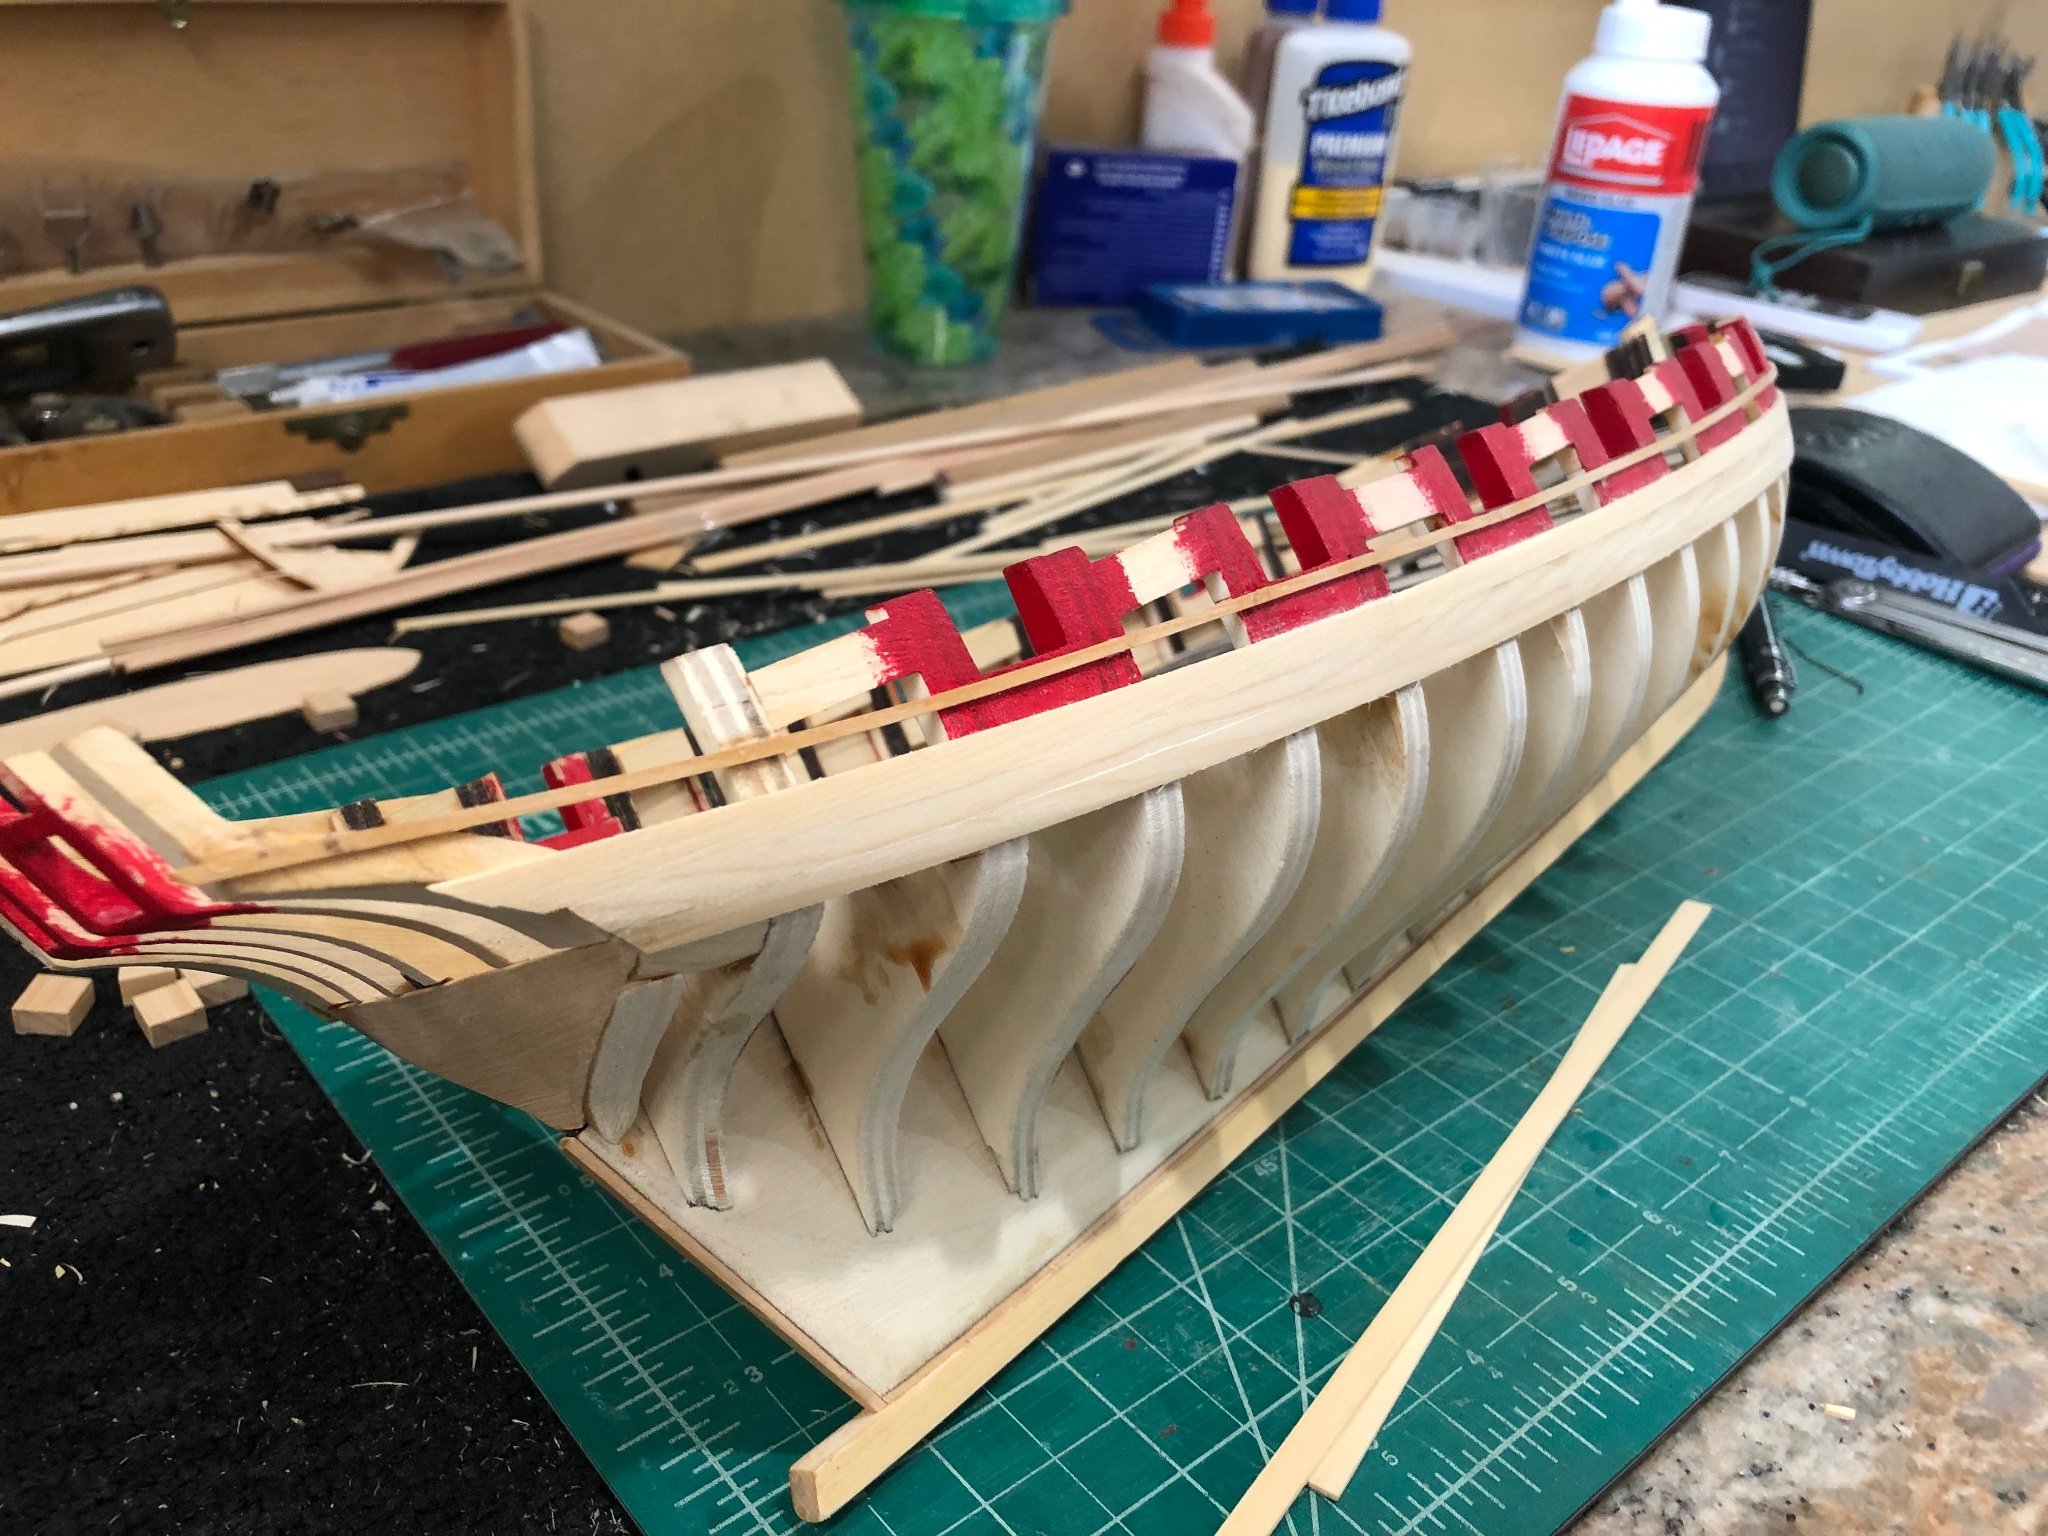
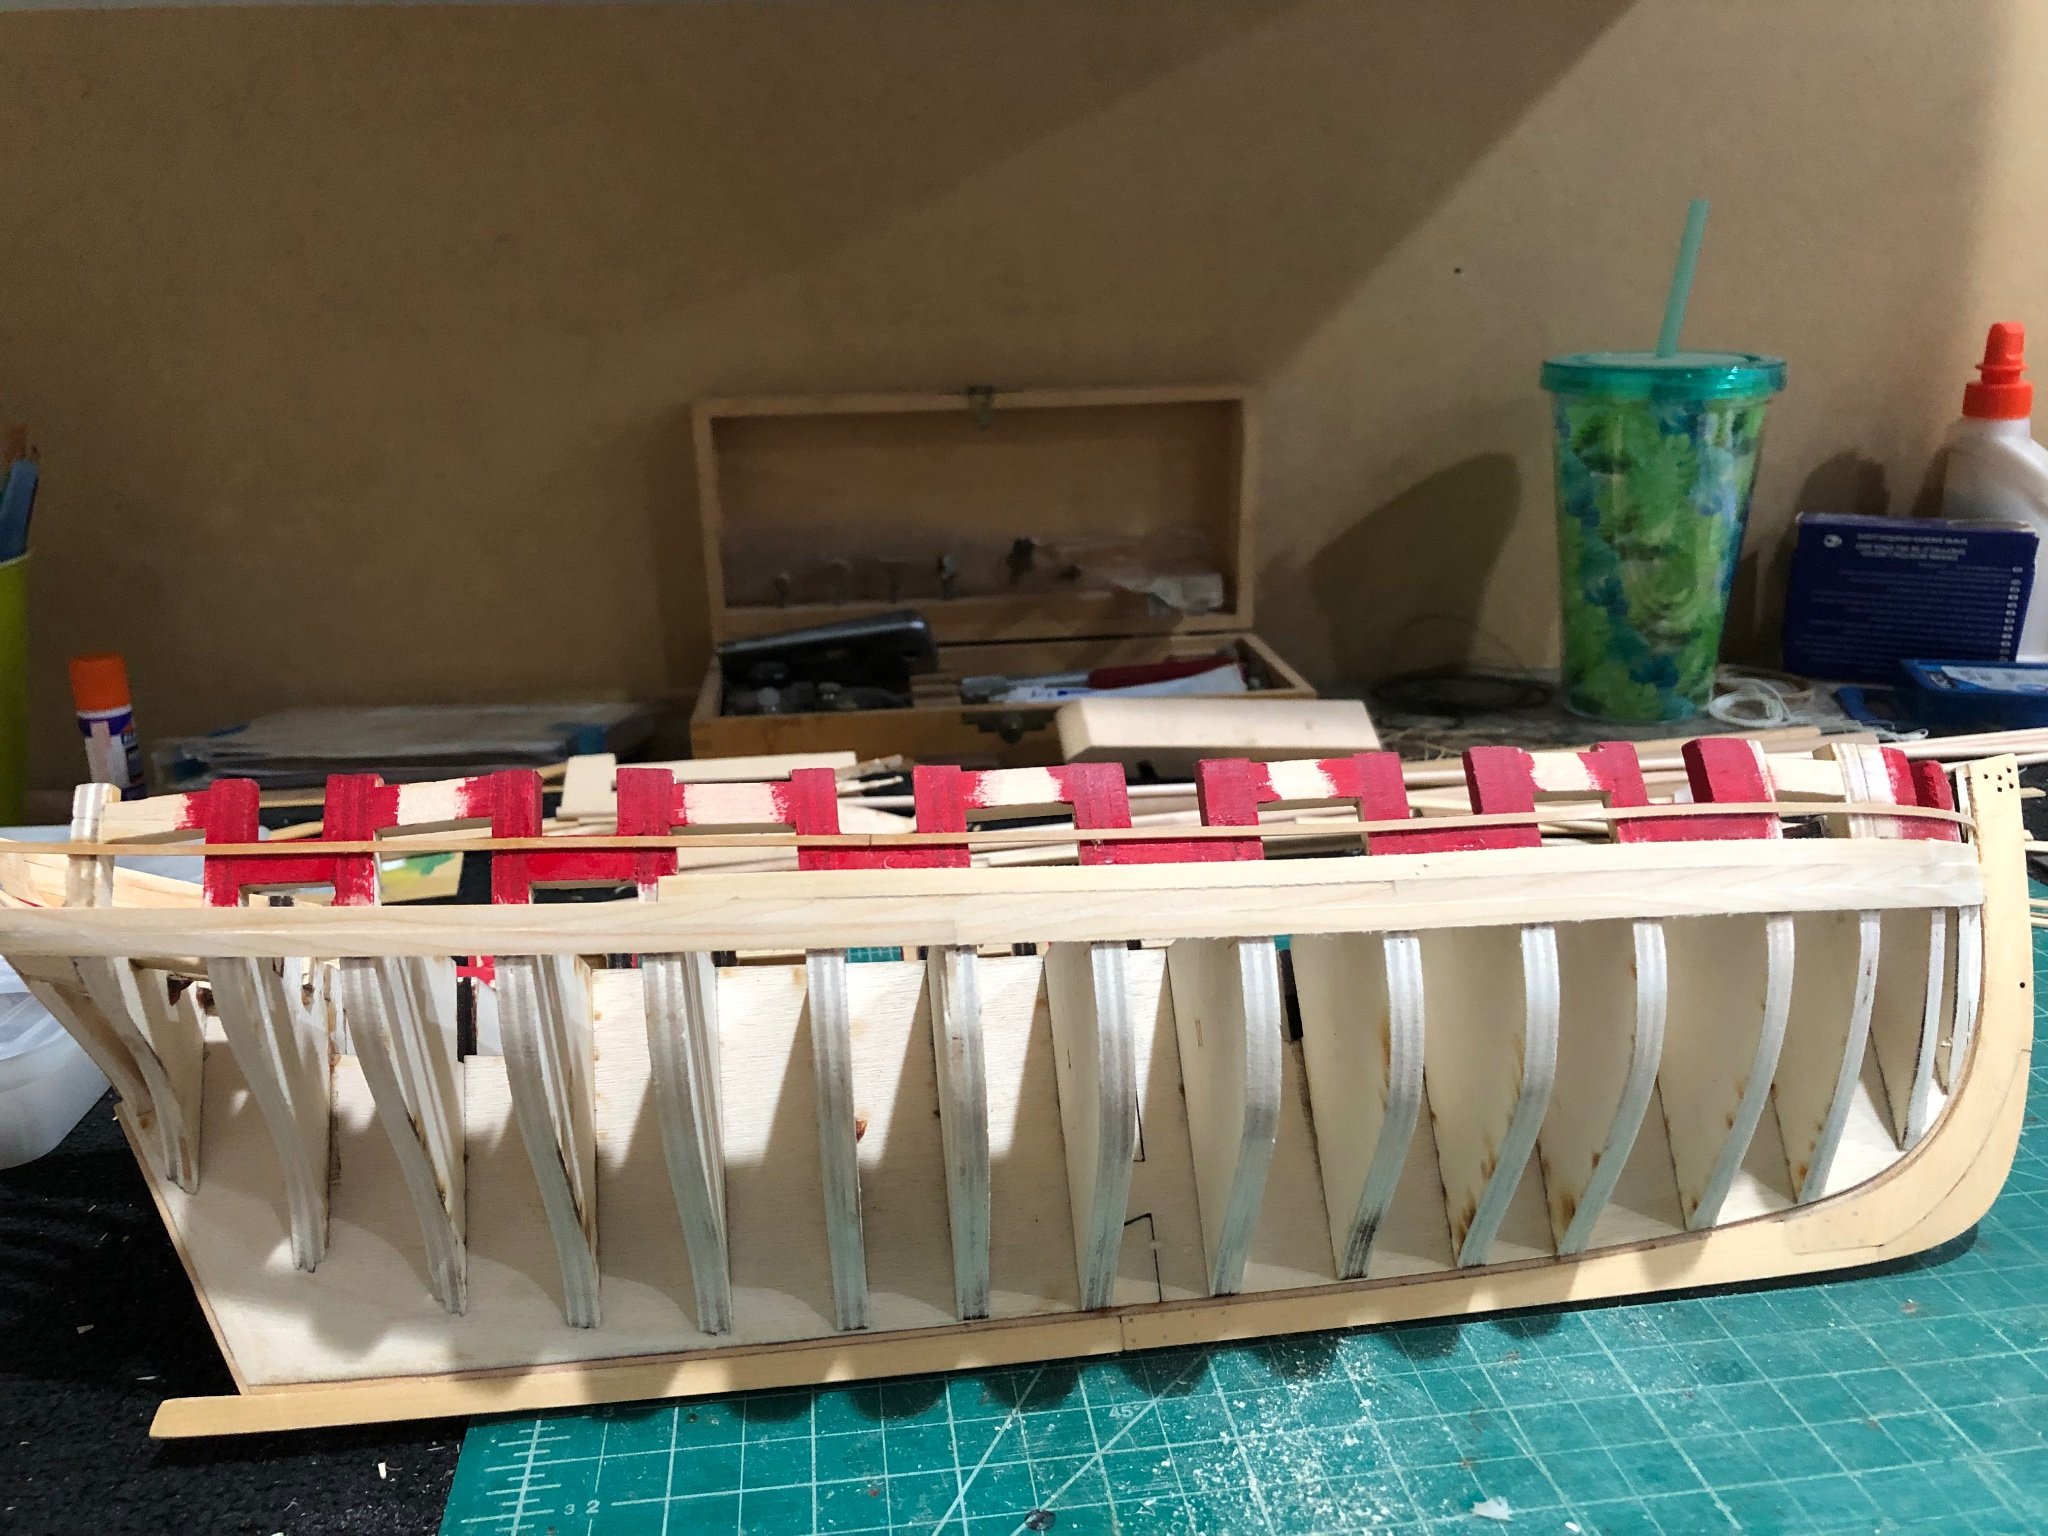
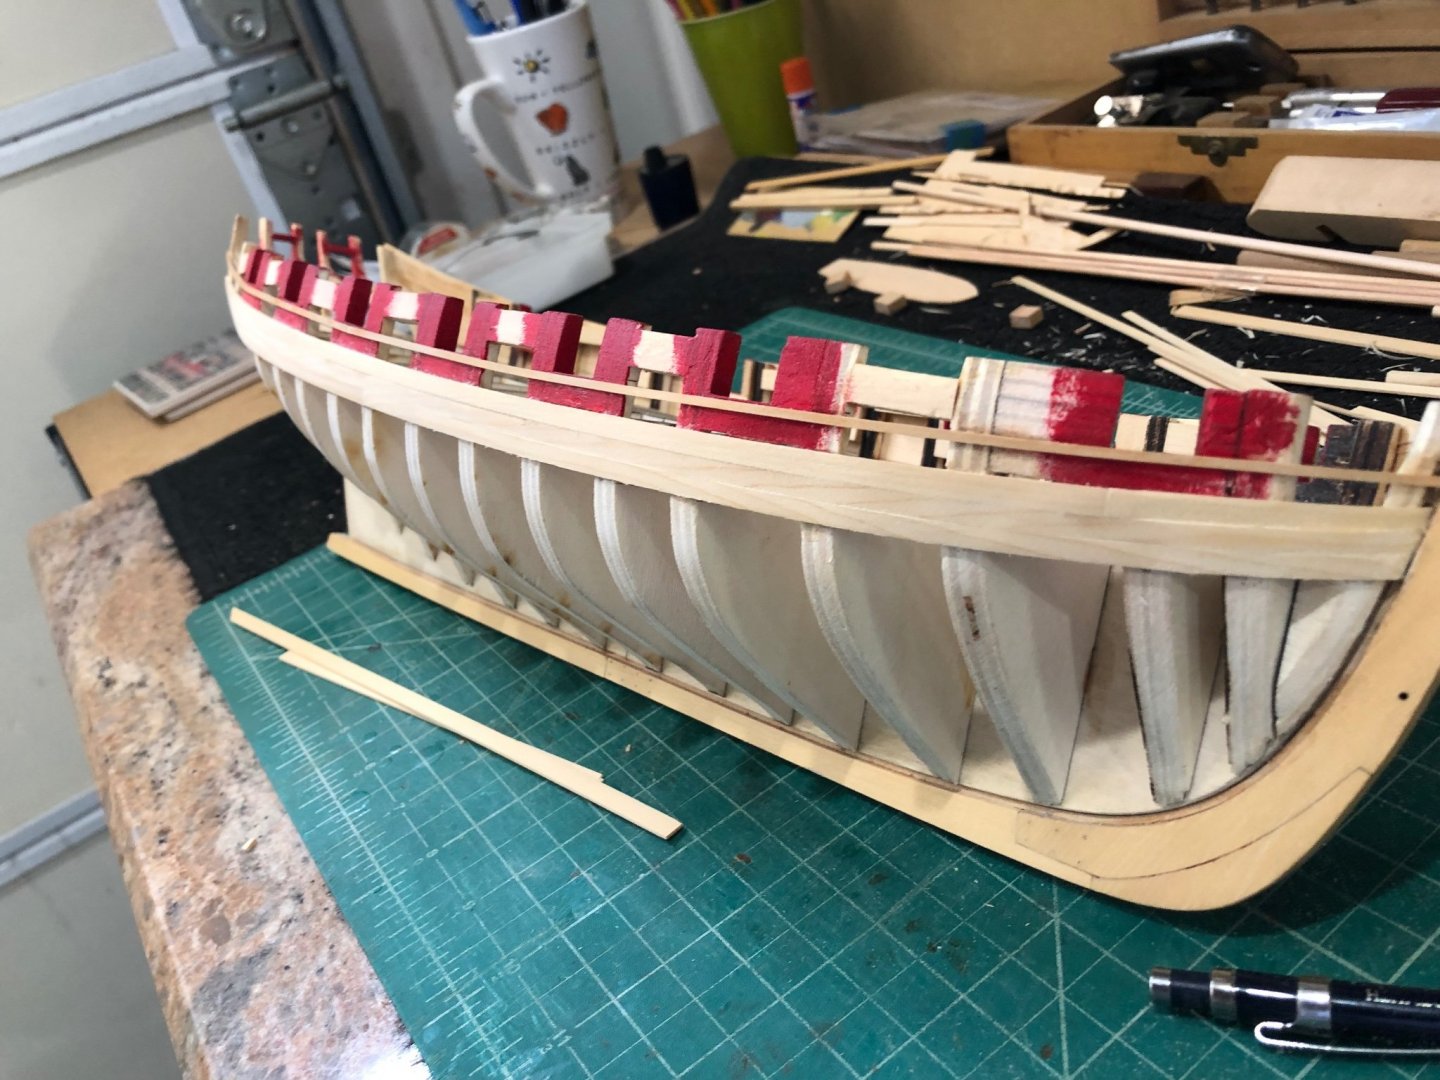
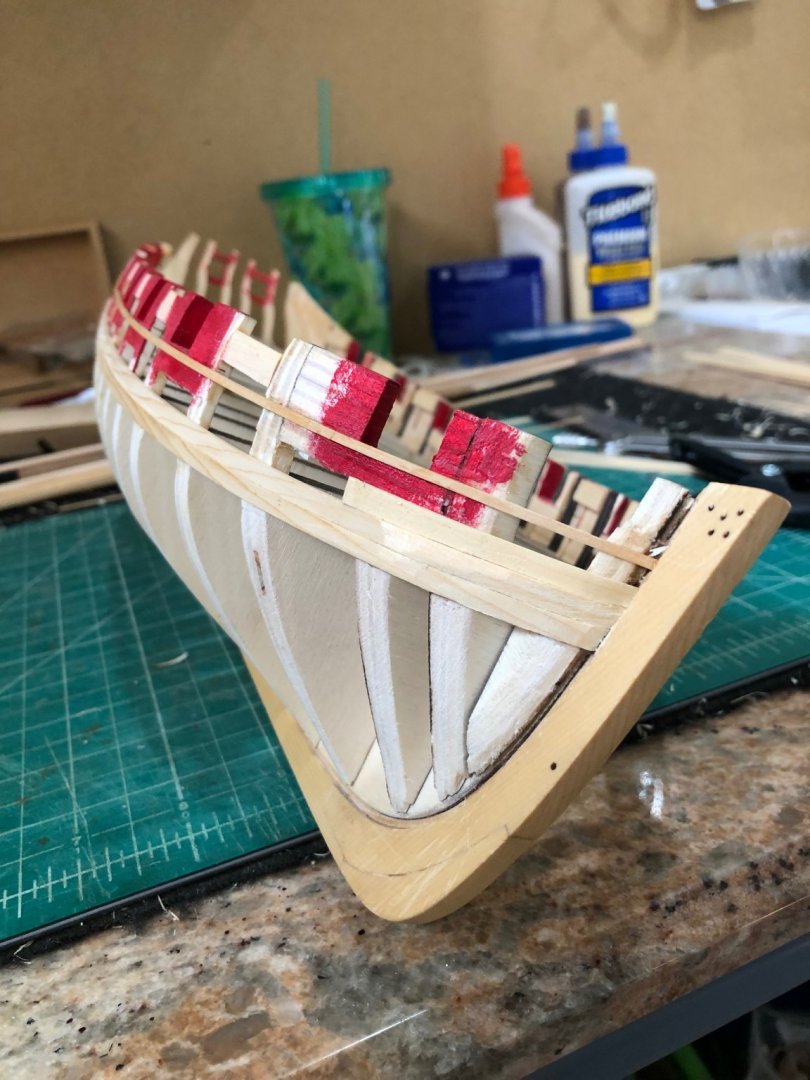
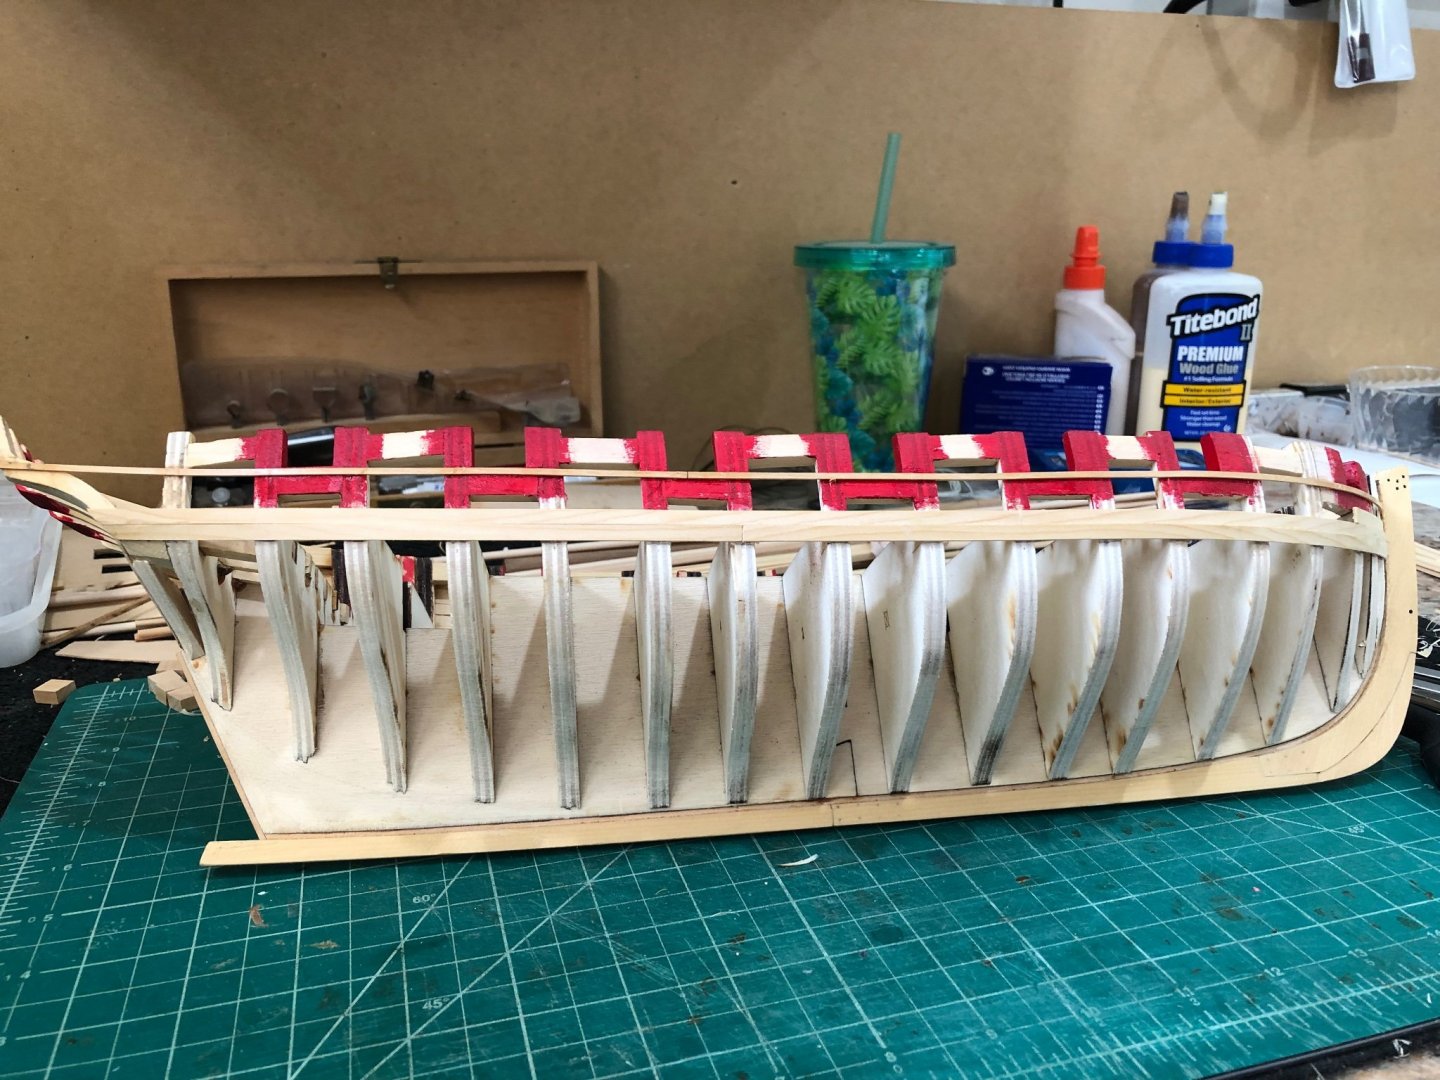
Finished the first strake above the wales. The planks were made using 3/16" wide strips shaped to fit the 1/2 distance between the wales and 1/16" moulding. The aft most plank had to be made from 7/32" wide strip as the moulding sweeps up from frame 14 and beyond. Started the first plank of the 2nd strake and will finish tomorrow. A few pictures of the planking so far. I think I can finish the 2nd strake tomorrow. Time will tell and how much sanding, fitting, sanding, fitting it will take.


-
Well we've had a change of plans and postponed or cancelled our vacation due to the Delta variant infection rate and my poor health. Started putting the starboard side back together with the wales. After placing the 1/16" trim moulding and starting the strakes between the wales and trim I had forgotton how hard it is to get two strakes fitting between them. I measured the distance at each frame dividing it in half to shape the plank. The first one from the stem was easy since it is so short it was just a matter of an angle. The second plank goes to frame 8 and starts wide narrowing towards the middle and then straight to the end. The fourth plank fits as it should but the proof will be the second strake. Just a quick update and tomorrow will be finishing the first strake and starting the second.

-
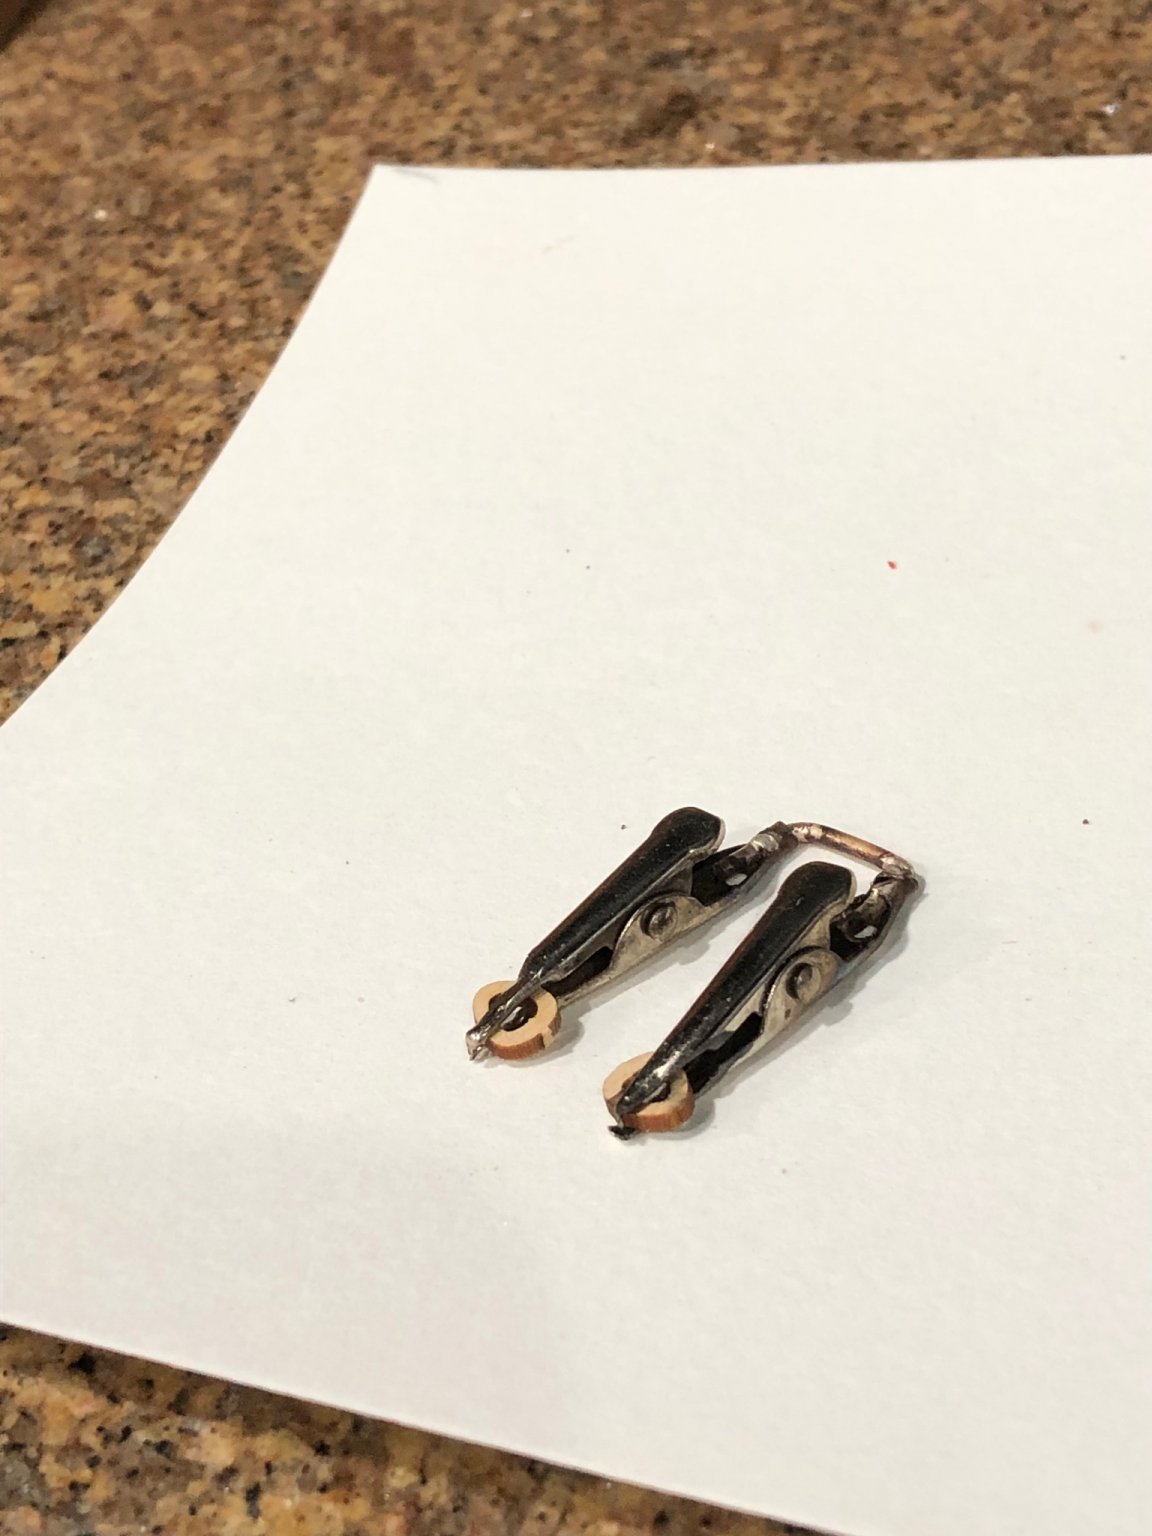
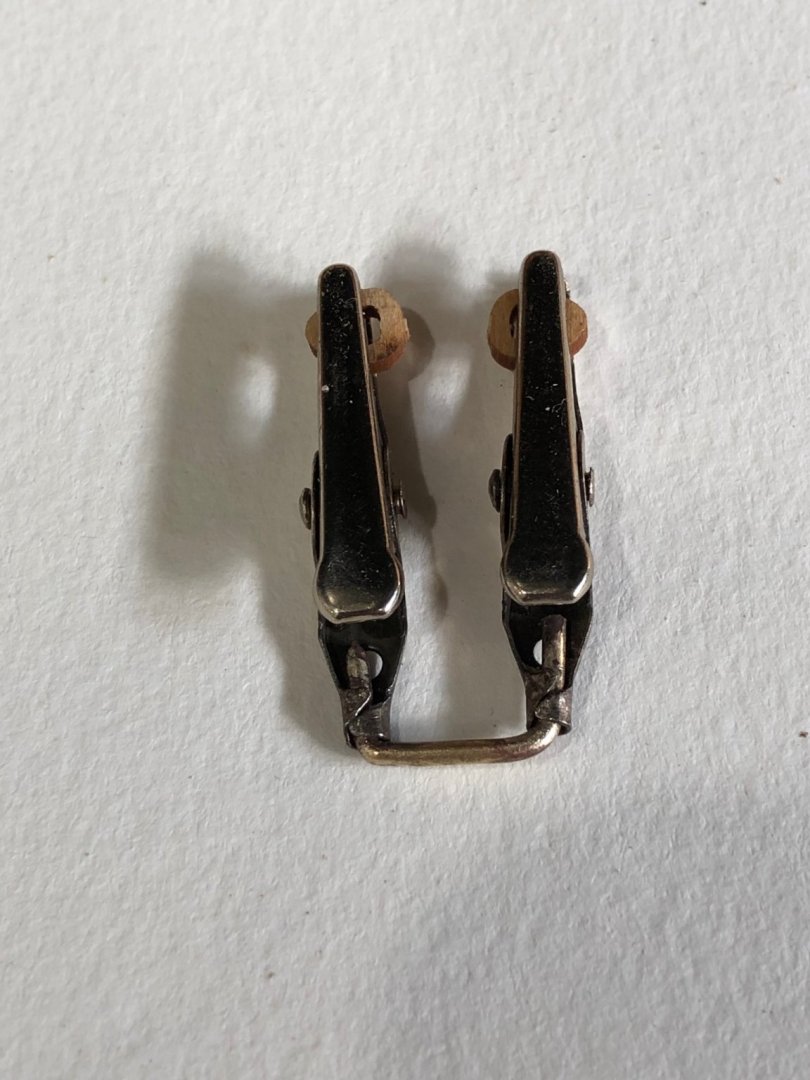
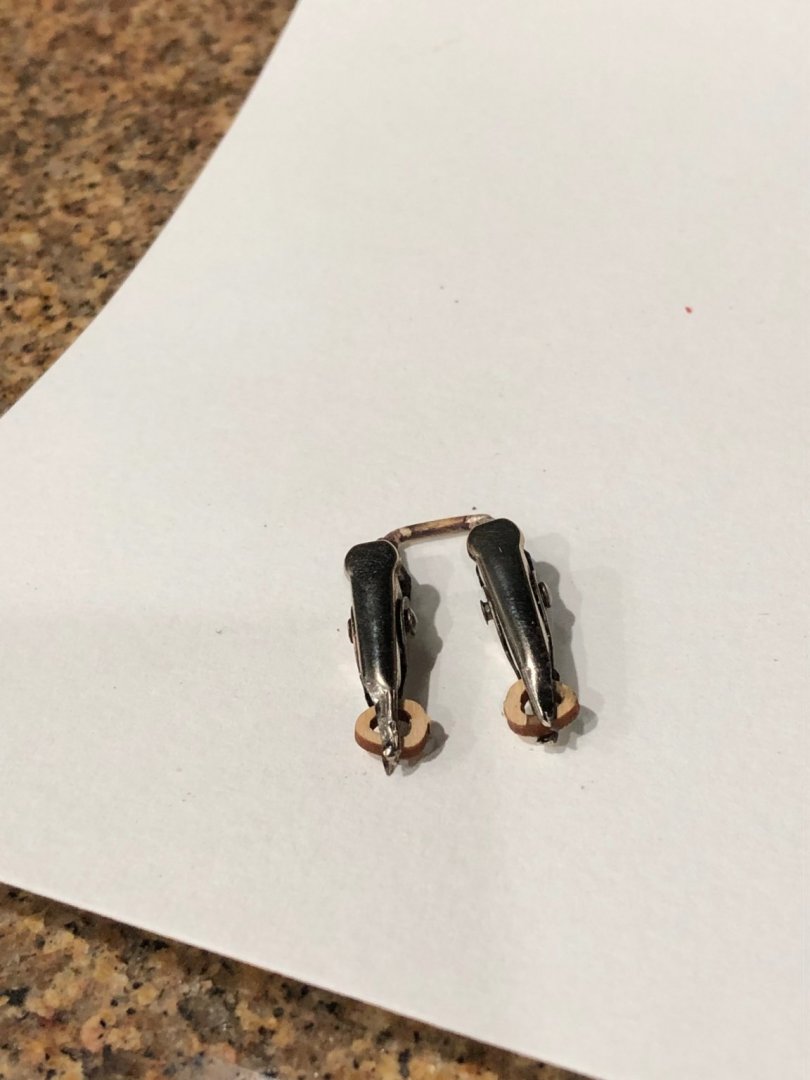
Made the rope necessary to get the bowsprit rigged. 24 feet of tan .008/010, 48 feet of .018 very dark brown, 24 feet .021 very dark brown and 48 feet of .012/.014 very dark brown this should be enough to give me plenty of error margin. I borrowed an idea from _SalD_'s Syren log only I ground the teeth off rather than use smooth jaw alligator clips.. I formed a 1/16" brass rod and soldered it to the alligator clips but when a heart was held the clips made dents so I found off the teeth. I ordered some from Amazon if my modified one don't work as hoped. Before I ground off the teeth After the teeth ground off Tomorrow rigging starts. A very exciting day as it represents the end is in sight ie a light in the tunnel that's not a train.

-
We postponed our vacation due to the Delta infection and my health so I'm back and will start on my Cheerful tomorrow. The nice thing to follow along is I get to use some of you great ideas and skills.
- 274 replies
-
- 1
-
-
- Cheerful
- Syren Ship Model Company
- (and 1 more)
-
Paul the mast coat looks really nice and a good setup for the dremel. Glad you found the post I referenced. I can not figure out how to post another referenced log. Hope it helped with the belaying pins.
-
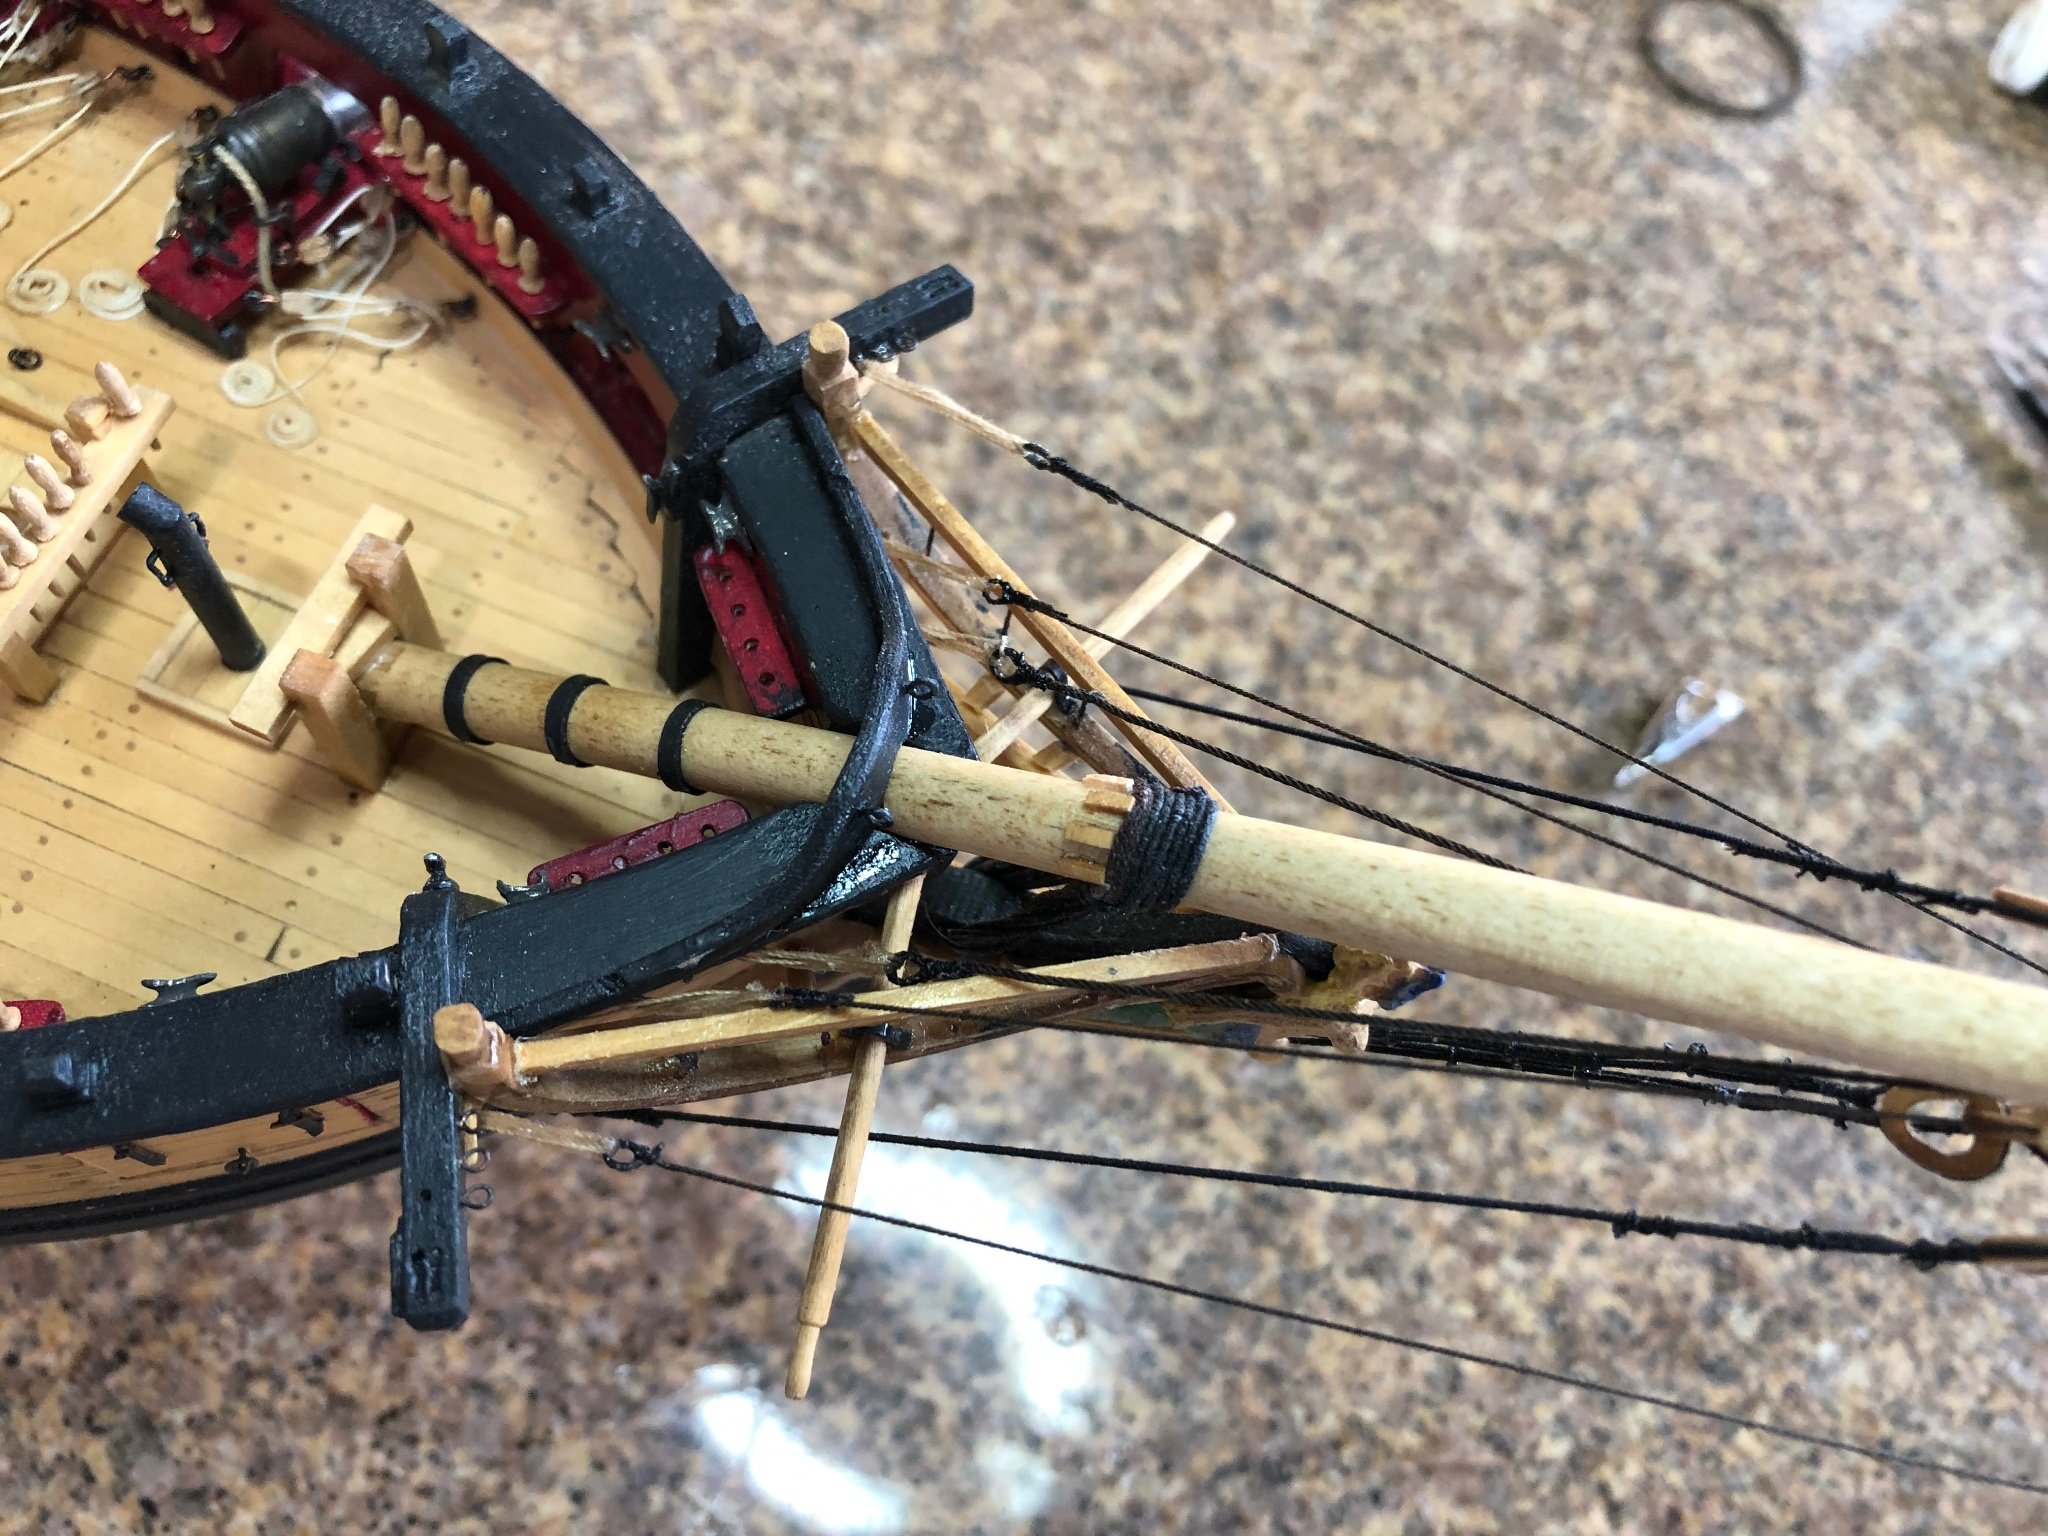
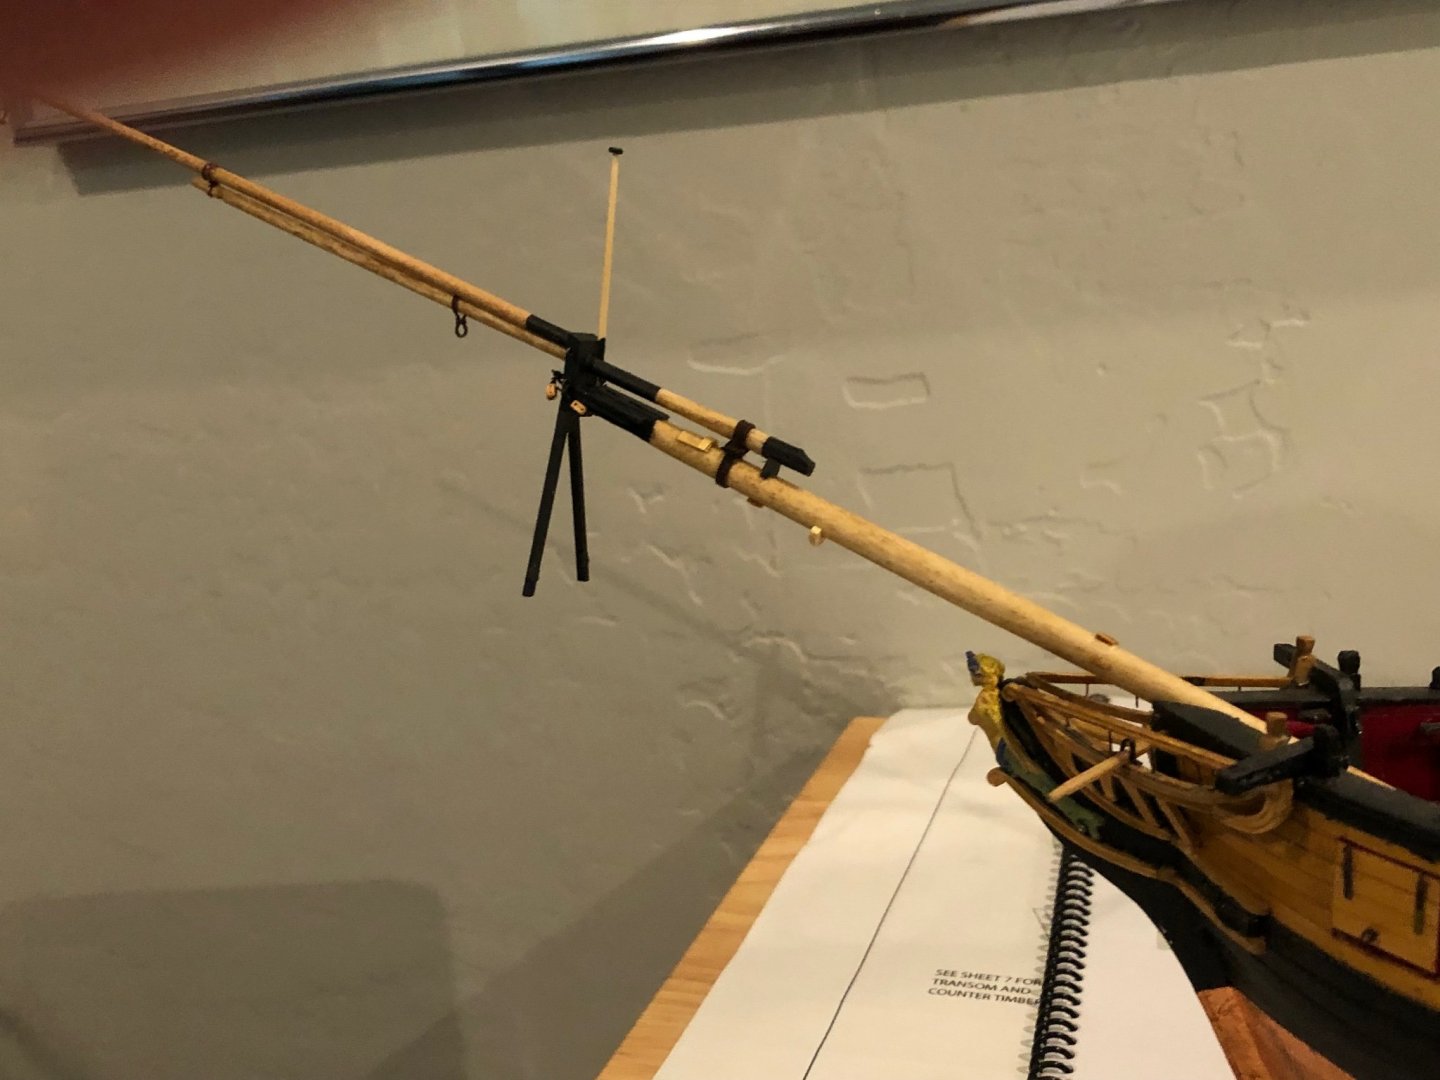
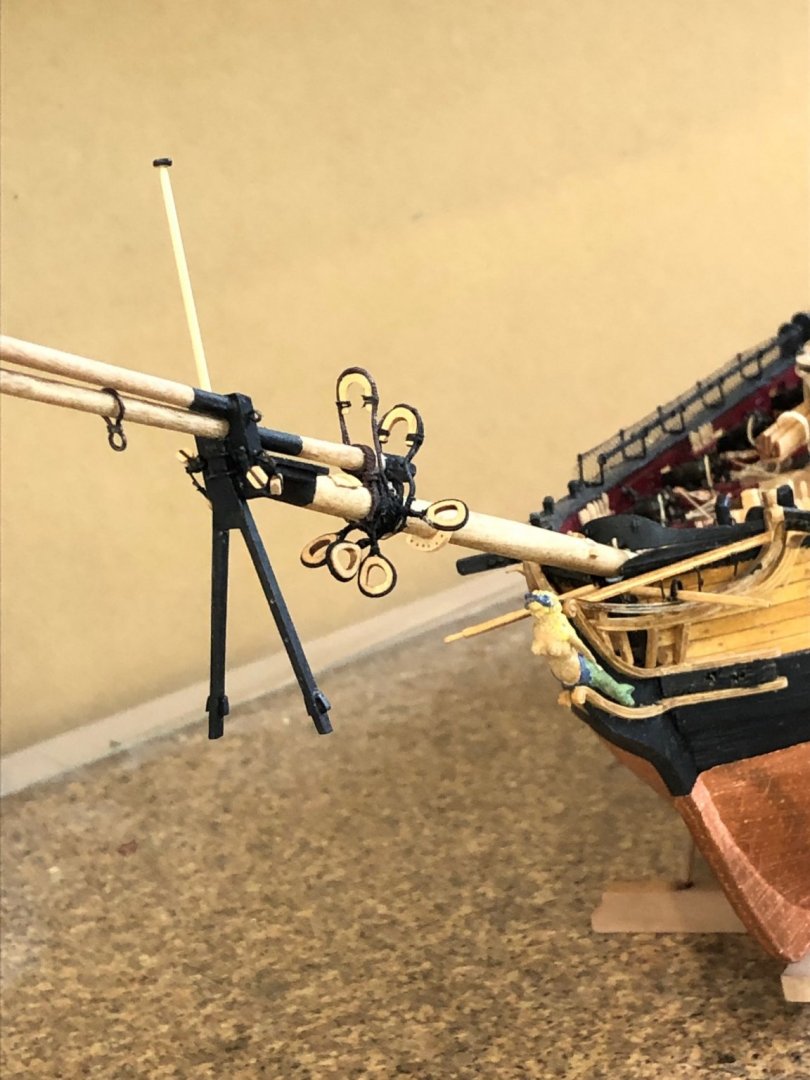
Well back in shop I go. We were planning on taking to month of August to tour Maine to Massachusetts coasts for lobster and museums but with the Delta variant and my health we cancelled. After breaking all the open heart while cleaning the laser burn I made new out of boxwood. Served up 9cm of line making a loop with a faux splice per David Antscherl's tffm vol 4. Made loops at the ends and attached to the open hearts. Served up 4.3cm making loops at the ends leaving the severing thread to be use for seizing the loop. Seized the line around the heart. Lashed the hearts to the bowsprit with tan thread per monograph. Finished up the bowsprit parts and glued them to the ship. Made the splash guard for painting and mounting. When all items dried overnight I lashed the gammon 9 turns and finished per tffm vol 4. Today I'm making rope for the rigging. Not very exciting.


-
You're on the right track. Its looking like the way to go with sculpy.
-
I agree with others that I use both scalpel and xacto for different cuts. I find xacto #11 good for cutting and carving the #11 scalpel is used for slicing and paring to flexible for cutting. I also use the Micro-Mark mini chisel set but they don't hold and edge and I've upgraded to the Vertas mini chisels.