HOLIDAY DONATION DRIVE - SUPPORT MSW - DO YOUR PART TO KEEP THIS GREAT FORUM GOING! (89 donations so far out of 49,000 members - C'mon guys!)
×


niwotwill
-
Posts
596 -
Joined
-
Last visited
Content Type
Profiles
Forums
Gallery
Events
Everything posted by niwotwill
-
 After watching the Cheerful planking its hard to imagine getting better planking, but you've done it. I can see you're using the Byrnes thickness sander to achieve these excellent results. Glenn I love to watch your logs they keep getting better. Regards Will
- 840 replies
-
- 5
-

-
- winchelsea
- Syren Ship Model Company
- (and 1 more)
-
Andrew Fantastic what more can be said. Tell me how you weathered the boxes? The colors are correct (really period correct) do you mix your own colors? You've got to finish the remodel of daughters bedroom and get back at Nisha. I'm feeling better and getting more strength from covid and can't even imagine how people in the hospital feel. Regards Will
- 206 replies
-
- 2
-
-

-
- Vanguard Models
- Brixham trawler
- (and 2 more)
-
Jean-Paul I must say each time I look at her i love the wood colors. Wonderful job. Regards Will
-
Hi Dan and welcome aboard. You've been given excellent advice on where to start and how to get help. This forum and build logs has been invaluable to my building. I'm building Erycina by Vanguard and it is not a beginner kit but still a simple model. The David Antscherl kits are a great way to start and make fine looking models along with his great tips of how too. Just a personal note of starting too big I did and lost interest with it and came back to a smaller kit that I could finish and admire while working on a larger model. Regards and welcome Will
-
Reading about this elevated support method to keep the frames true leaves me with wondering if this is not a version of Harold Hahns method of securing the frame alignment. Just wondering. Regards
-
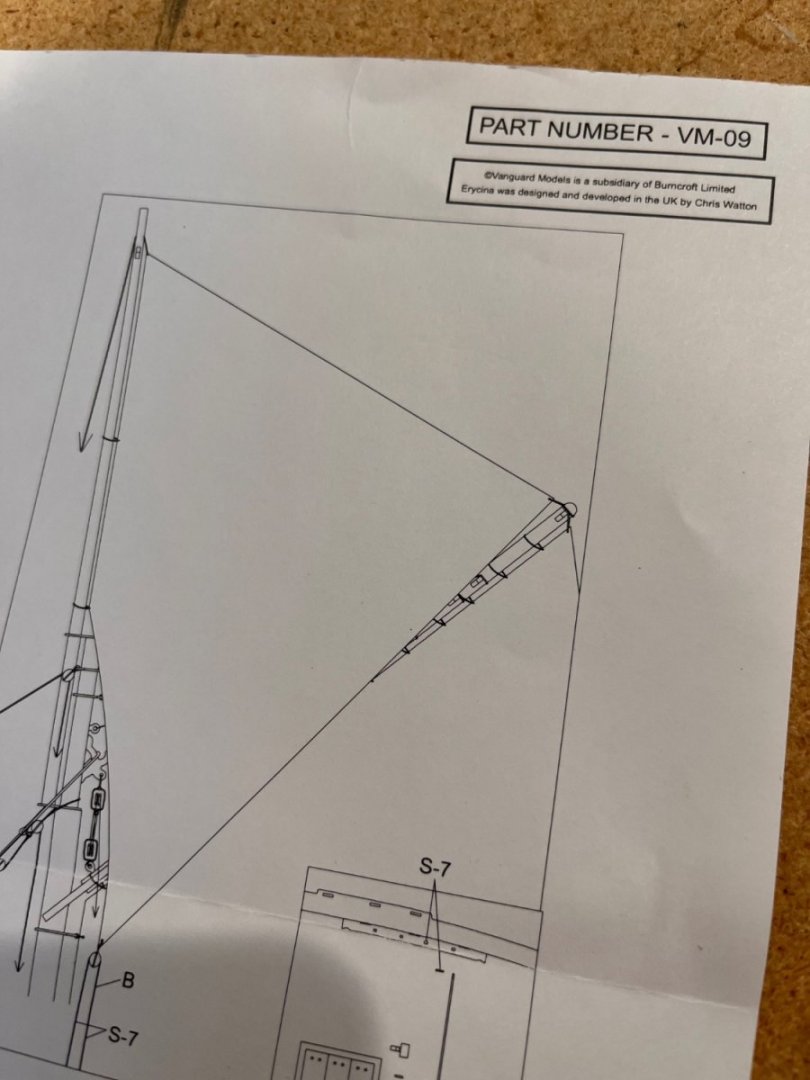
I have kept to Chris Wattons' design of the model and now reaching the rigging wondering which way to go. Reading "Sailing Trawlers" by Edgar J. March it appears that the standing rigging differs in detail from the model plans. Understanding Chris's desire to keep the model in the moderate to build catagory while maintaining visual accuracy was the desire. March's writings and drawings show the same basic configuration but with a more accurate as built configuration with the shrouds served and the forestay routing. I'd like to hear some opinions and/or suggestions on the matter of which way to go. Regards Will
- 77 replies
-
- 2
-
-
- Erycina
- Vanguard Models
- (and 1 more)
-
alized that I needed to blacken the coming parts i.e. belaying pins, hooks, etc. so I blackened them all. After that I'm ready for the shrouds but needed to make a simple jig keeping the deadeyes aligned. Got some scrape boxwood out of the waste box and drilled 4 .021 holes matching the holes in the deadeyes. Pushed income pins for alignment using the top two and bottom two on the deadeye. I've used these on other rigging and they hold the deadeyes while seizing to the shroud keeping everything taught. Out of time today and I'd hoped to get the shrouds on today but on to them tomorrow. Regards Will
- 77 replies
-
- 8
-
-
- Erycina
- Vanguard Models
- (and 1 more)
-
Many thanks to everyone for the looks, thanks, and kind words. These keep me motivated to complete Erycina as getting close is always hard for me to finish rather than say its good enough. THANK YOU ONE AND ALL Bob Erycinas' main top sail is only seized to the end of the gaff with a halyard through a sieve in the topmast and a downhaul through a single block to the deck. Below photo is from the Erycina drawings belonging to Vanguard Models Hope this helps Regards Will
- 77 replies
-
- 2
-
-
-
- Erycina
- Vanguard Models
- (and 1 more)
-
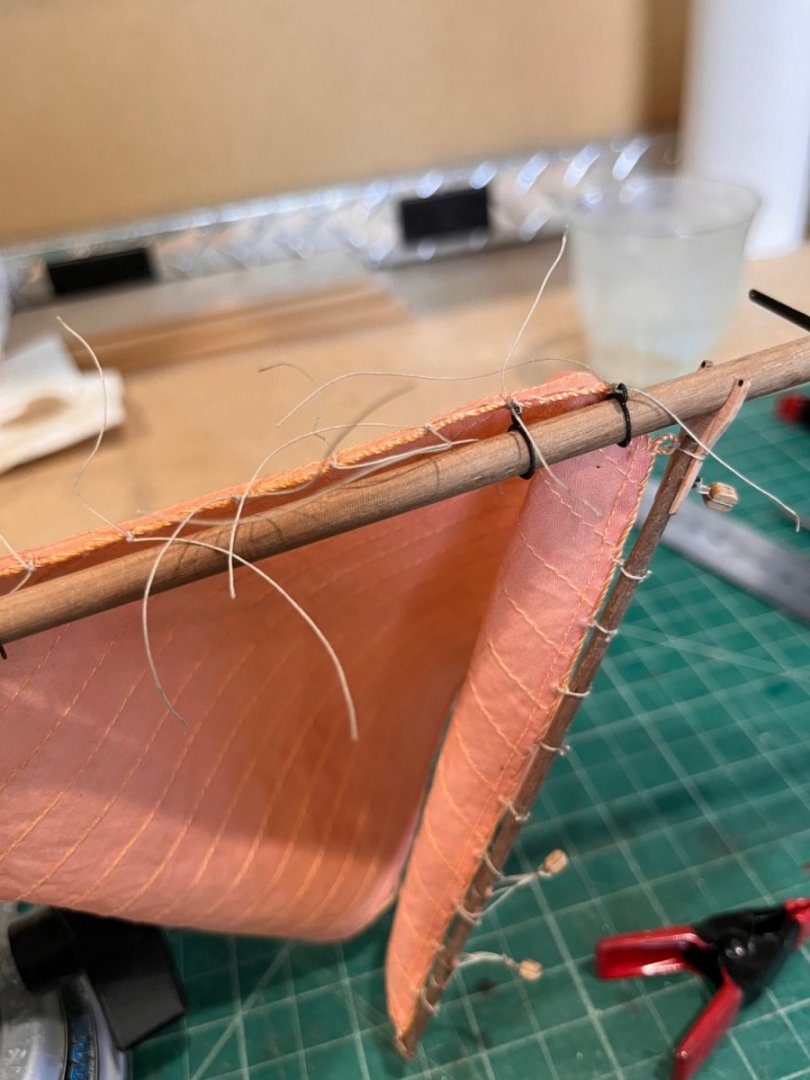
Thanks for the kind remarks Andrew. As too tying the sails I spoke with JamesH (the prototype builder for Chris) about how he did the sails. First to note is the bolt rope is sewn onto the sail and therefore loose. Meaning it can be pulled out of the sewing loops. What JamesH suggested is make a hole directly adjacent to the bolt rope with just a few sail threads from the edge. I then tied a length rope through the hole with a simple half hitch. I seal my knots with medium CA. The trick I use is to get a very small amount of CA on the exiting threads of the knot and it wicks into the knot body. How I do this is to take a 1" long push pin with plastic ball and insert it into the CA bottle tip with he CA in the bottle neck. When the pin is extracted it wipes the pin leaving the slightest CA coating. Lay the pin on the thread and it wicks into the knot without adhering to the knotted item. Attaching the sail to the hoops was with the loose ends from the sail using a clove hitch. Using the clove hitch doesn't seem to make a knot bump (technical talk) and is sealed again the the pin and CA method. Oh yeh! but you probably already know this the drawings are not scale so I use them as a pattern not actual locations for the holes. Measured the sail divided by the spaces and marked accordingly. Hope this helps Regards Will
- 77 replies
-
- 2
-
-
-
- Erycina
- Vanguard Models
- (and 1 more)
-
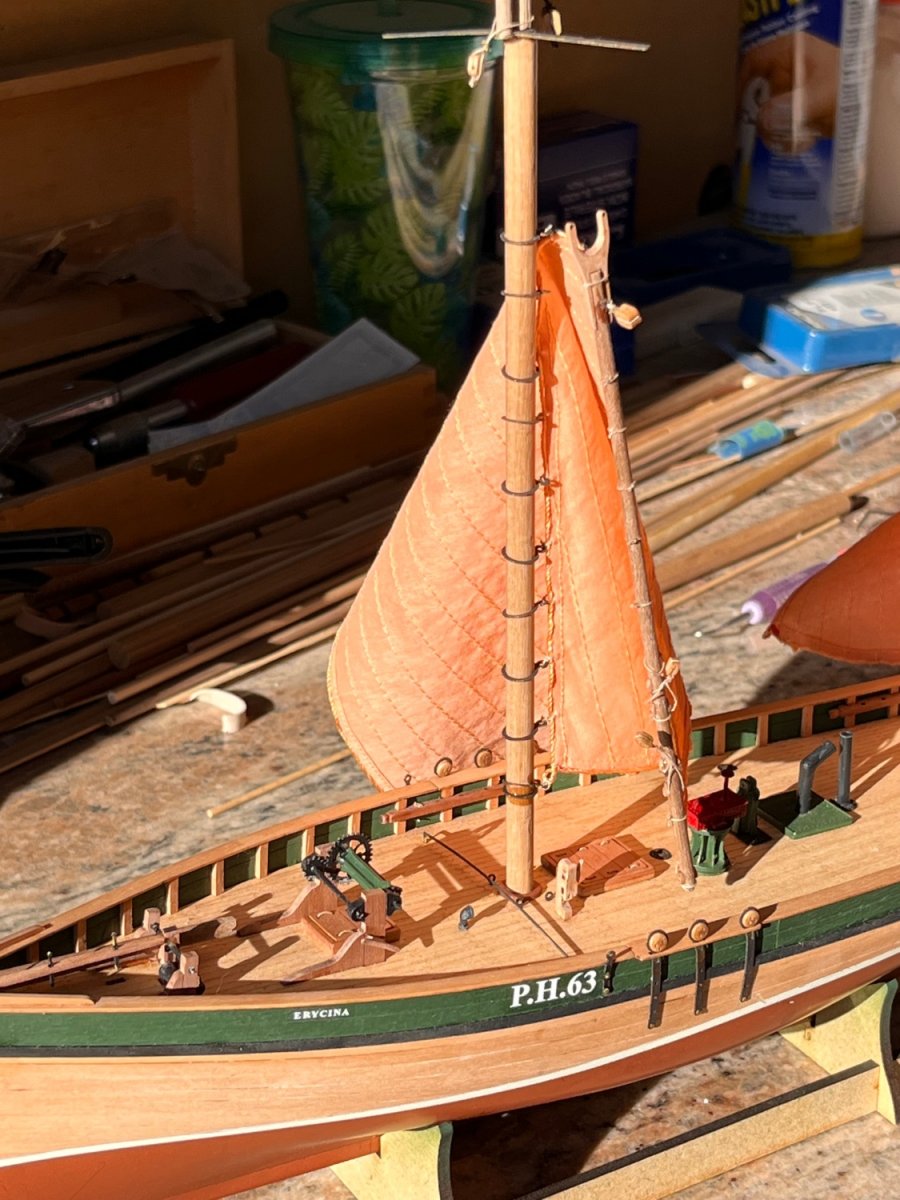
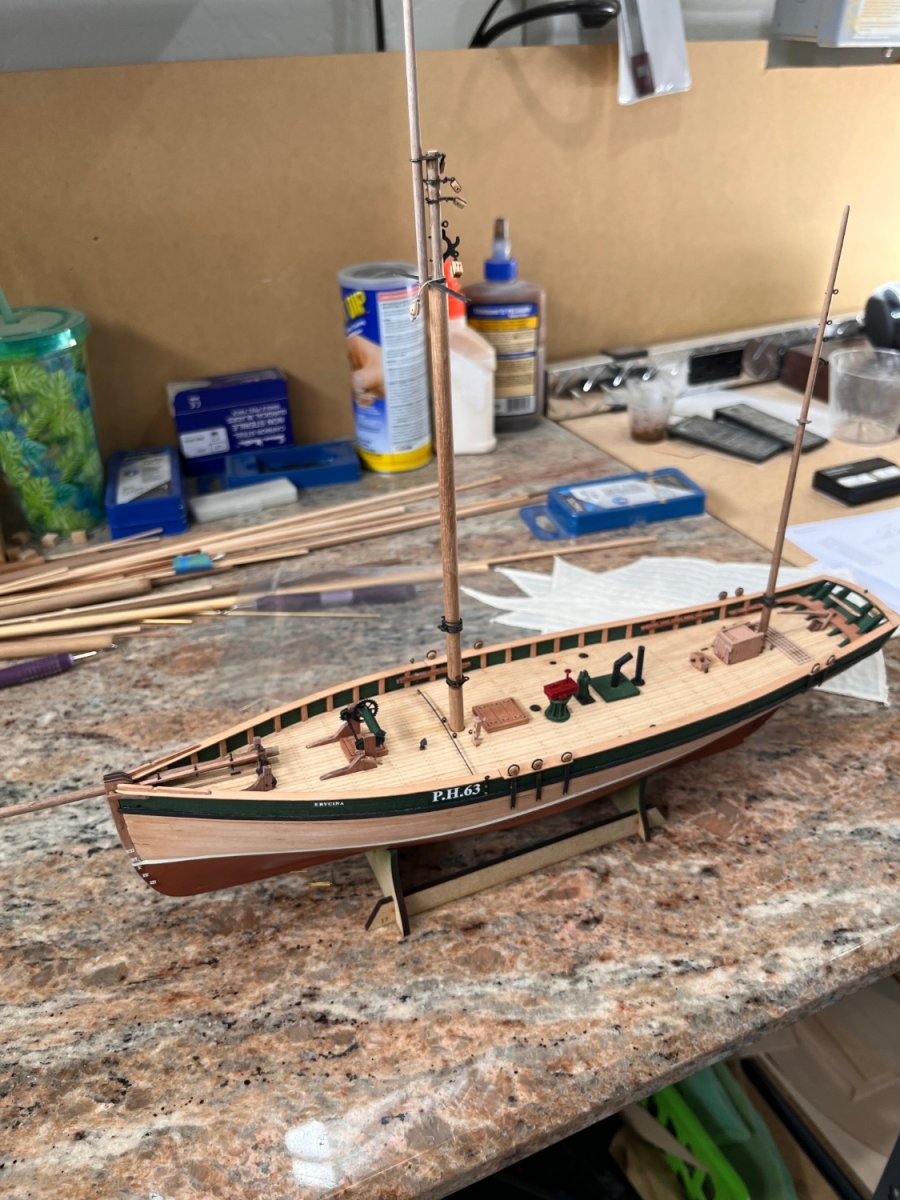
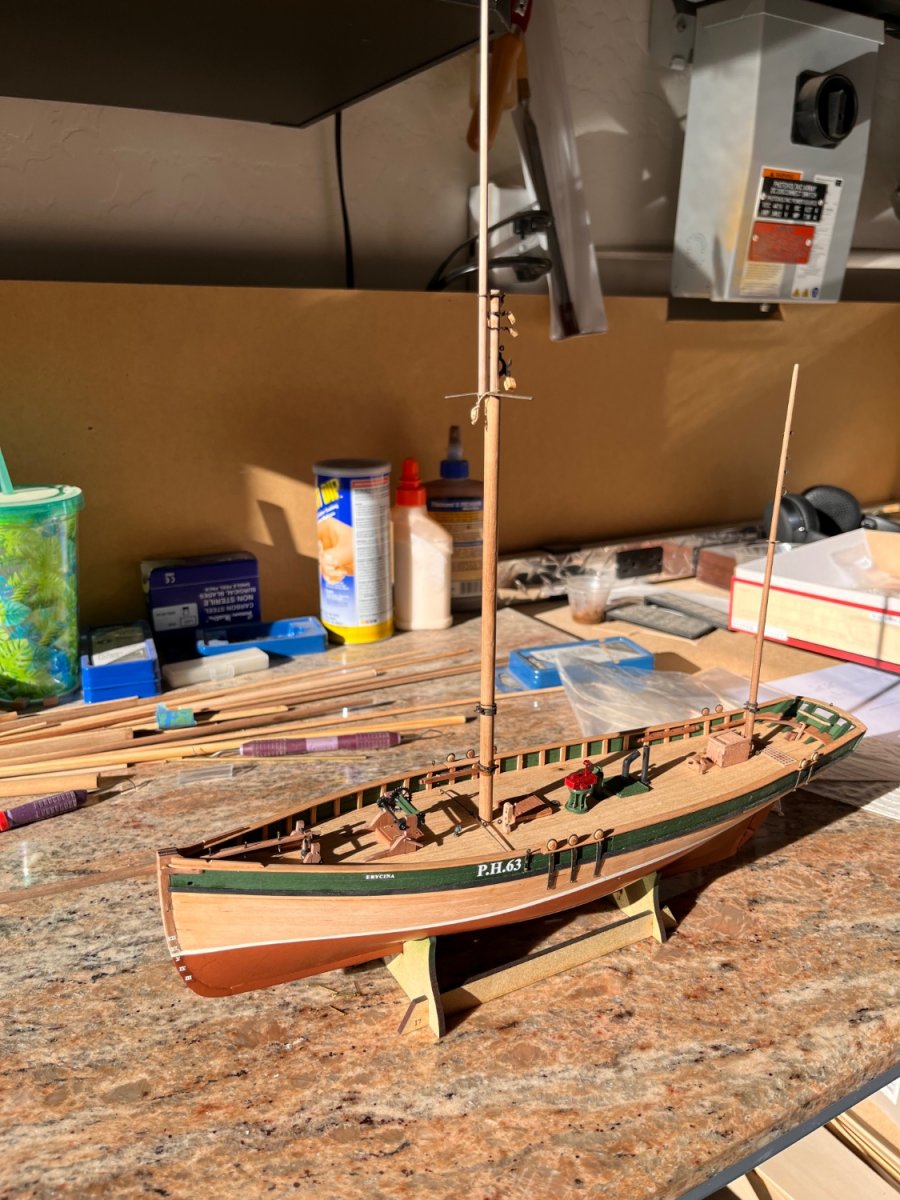
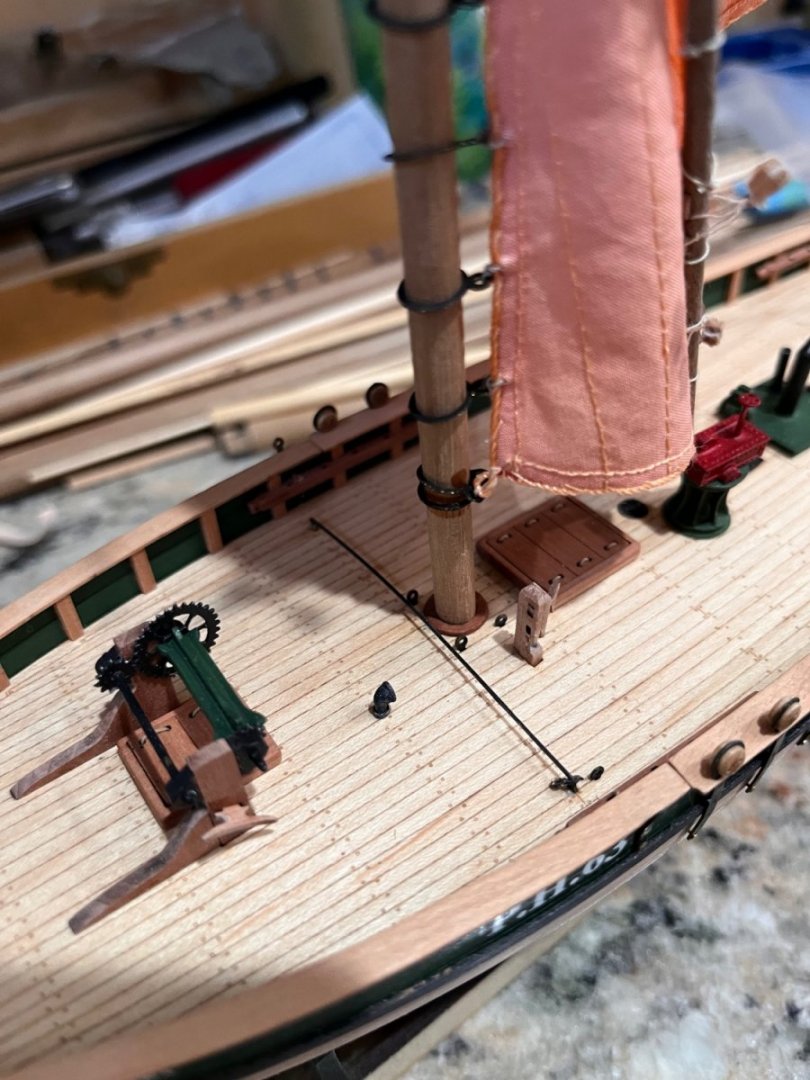
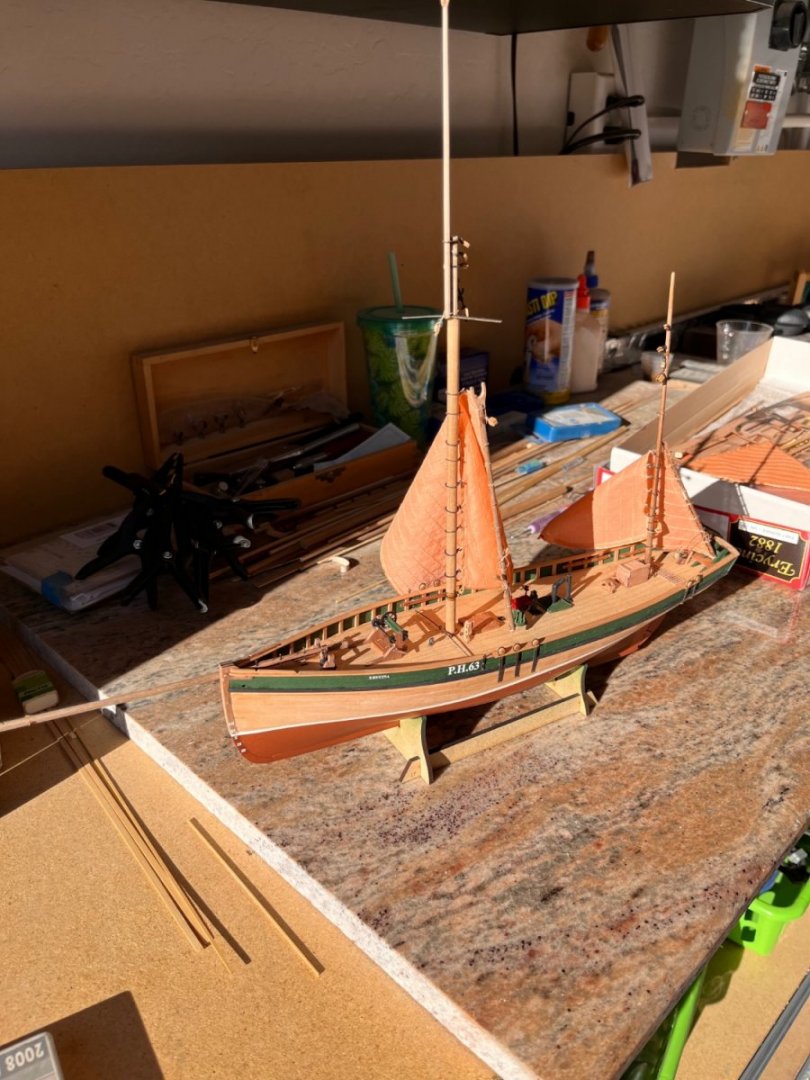
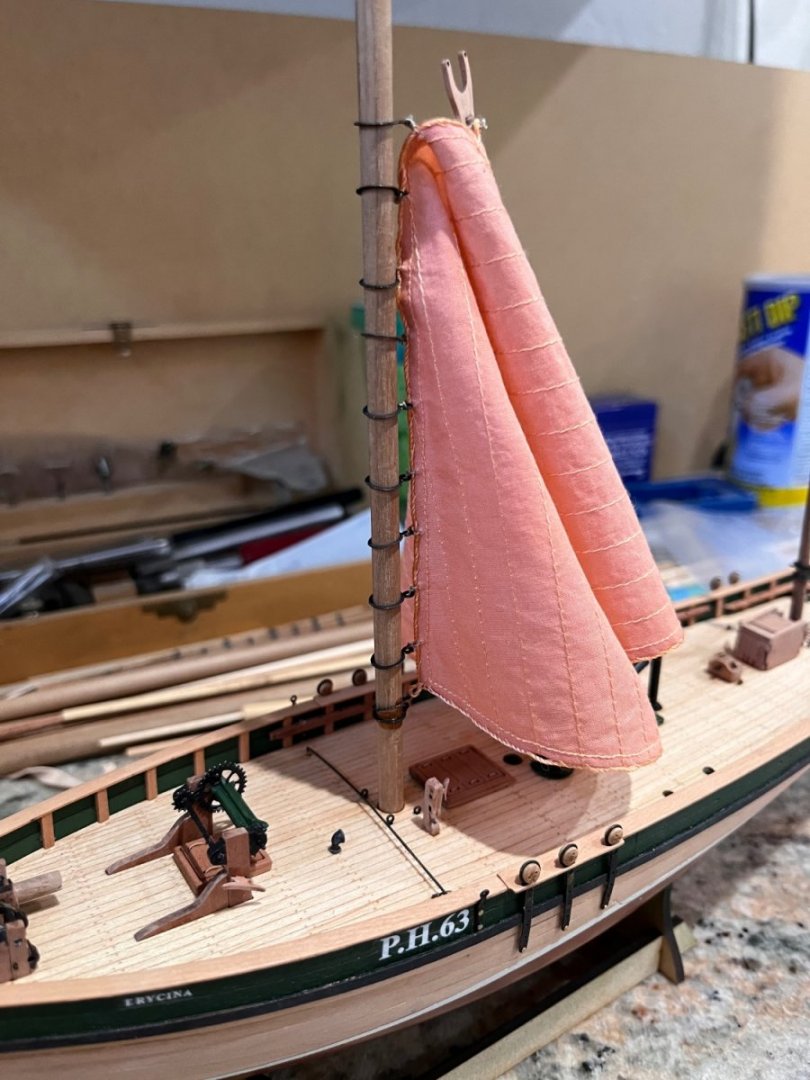
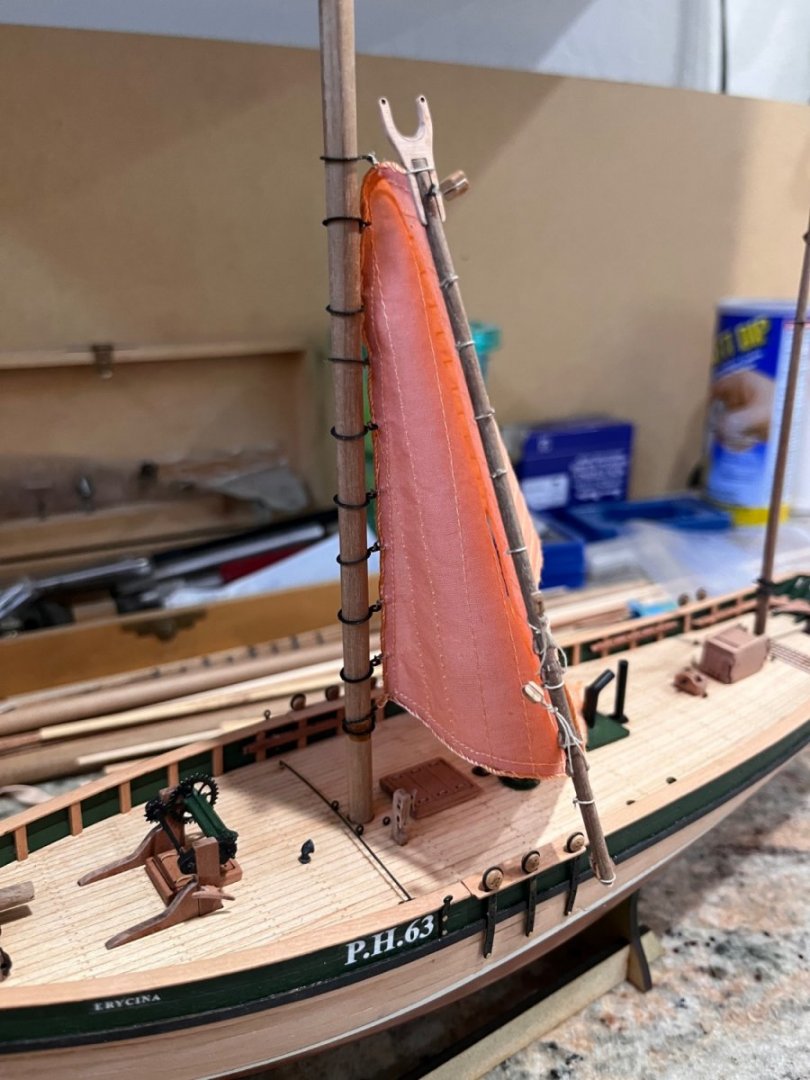
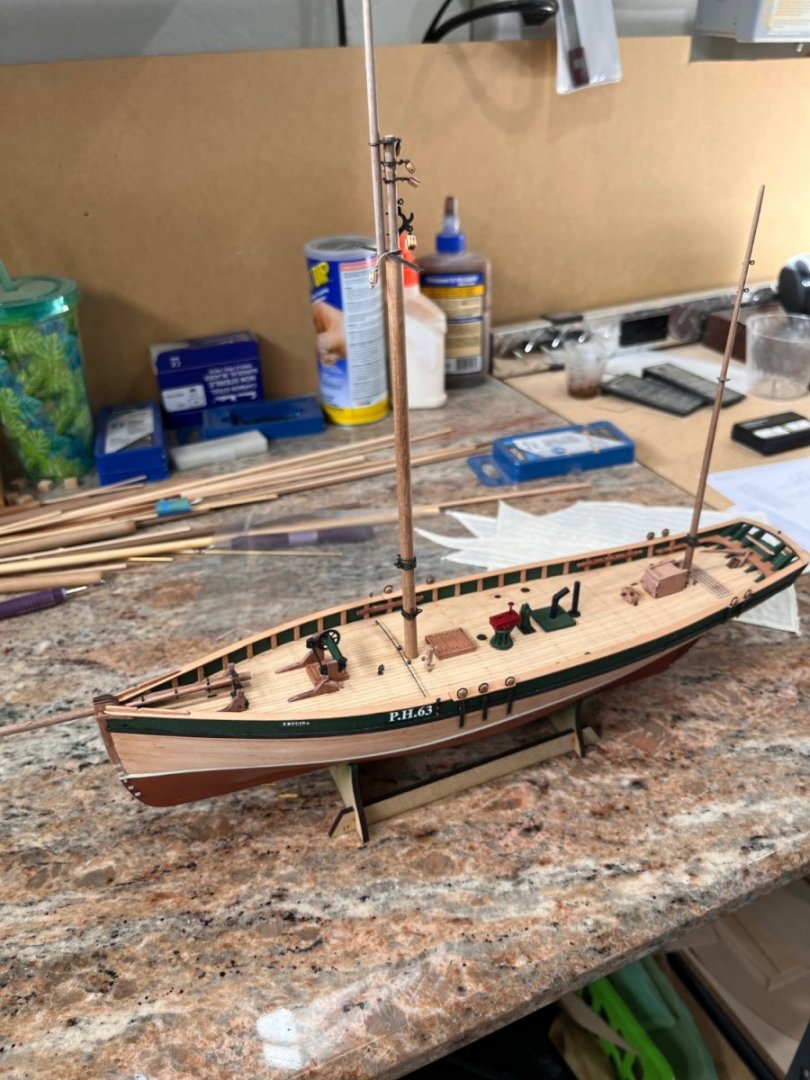
Tomorrow starts the rigging. First the standing rigging shrouds and ratlines and then on to the stays. Today I finished the mizzen sail to the gaff and mast. The masts were mounted using the supplied holes in the deck and false. The main mast has an alignment hole in the lower deck for perfect alignment. The mast coats glued in place and these are for visual effect only. This is a view of the main mast and coat. I Think the mast coat should have been darker, but oh well! This the Erycina as she stands in the sunlight. Closer view of the main mast and sail Closer view of mizzen mast and sail And as mentioned tomorrow on the the standing rigging and getting close to finish. Regards Will

- 77 replies
-
- 8
-
-
- Erycina
- Vanguard Models
- (and 1 more)
-
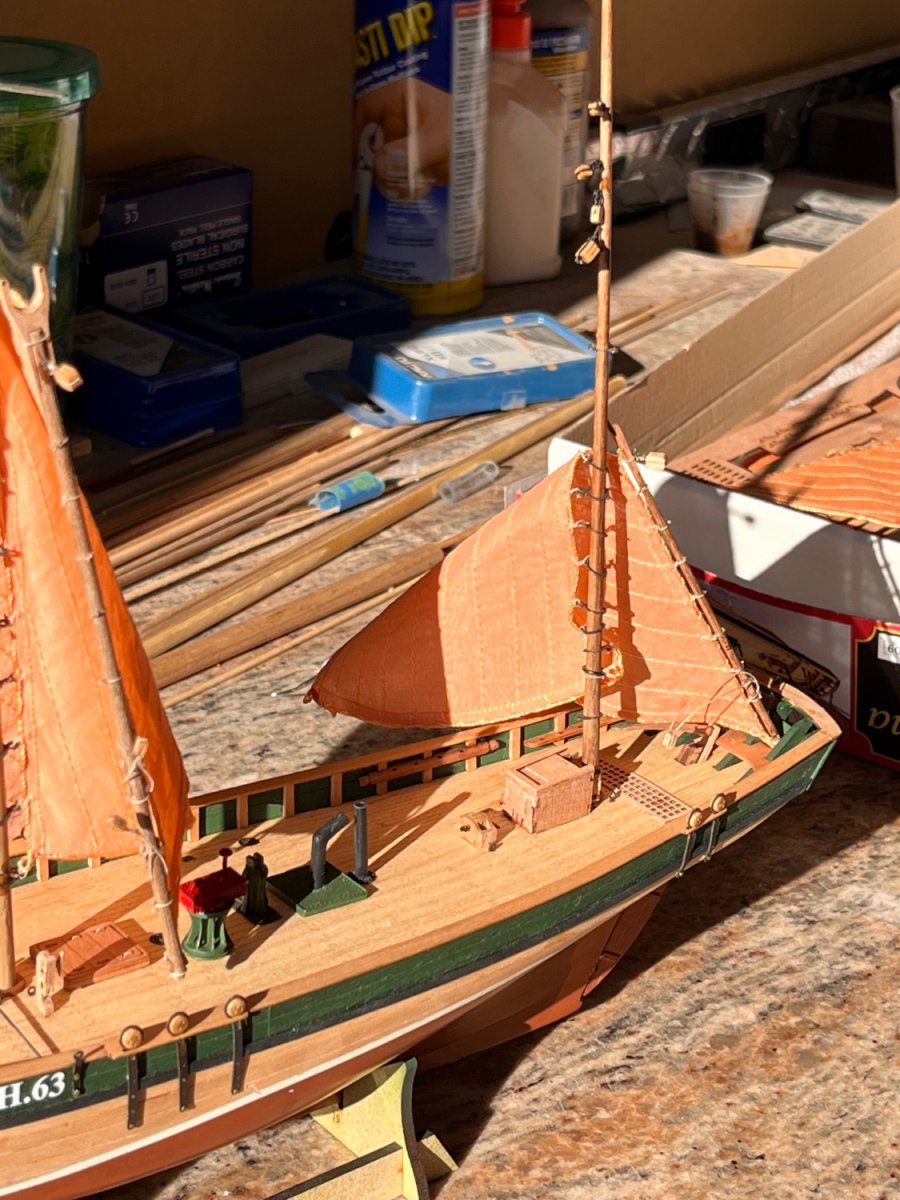
Well I'm back in the shop at least for an hour. Better now so I completed the main sail to gaff and got the main sail to mast finished. After an hour got really tired so tomorrow on to the mizzen sail to gaff and mast. Not much to describe so just pictures. Mizzen gaff attached. Attaching the main sail. Couple views main sail on boat. Oh yeh! I forgot to mention that the mast and mizzen have mast coats in the laser cut wood. The book doesn't talk about them so I'm going to use them. Rounded the outside edge with a slight radius and stained them using a dark walnut stain. Since they should have some kind of stuffing saturated in grease and basically black I think the dark walnut will work. I'm afraid to glue the main mast in until the mizzen is complete with both ready for shrouds. Regards Will
- 77 replies
-
- 7
-
-
- Erycina
- Vanguard Models
- (and 1 more)
-
Andrew I've got something for you to noodle on. The main & mizzen sails exactly matches the length of their gaffs and masts. Just something to further the parts rather than the drawings. Regards Will
-
My bad Andrew. Since nothing is attached to the heel of the bowsprit I just shorten it to agree with the prototype. (my opinion visual appearance overcome actual dimensions) With Erycinas drawings I found them to be reduced by 16%. That being said I multiplied measured dimensions by 1.16. What I found was sails about 1/8" longer along the mast. Regards Will
- 206 replies
-
- 1
-
-
- Vanguard Models
- Brixham trawler
- (and 2 more)
-
Andrew I noticed that you're referencing March's drawing of the ketch rigged Master Hand for you bowsprit detail. I've not spent the time researching Nisha as you, I used March's mumble bee measurement on p202 and if I read correctly the 98mm outside mightn't be 104.8mm. If this is correct the 6mm would be more in line with prototype build. By no means am I an expert and please forgive me if I'm wrong. Regards Will
- 206 replies
-
- 1
-
-
- Vanguard Models
- Brixham trawler
- (and 2 more)
-
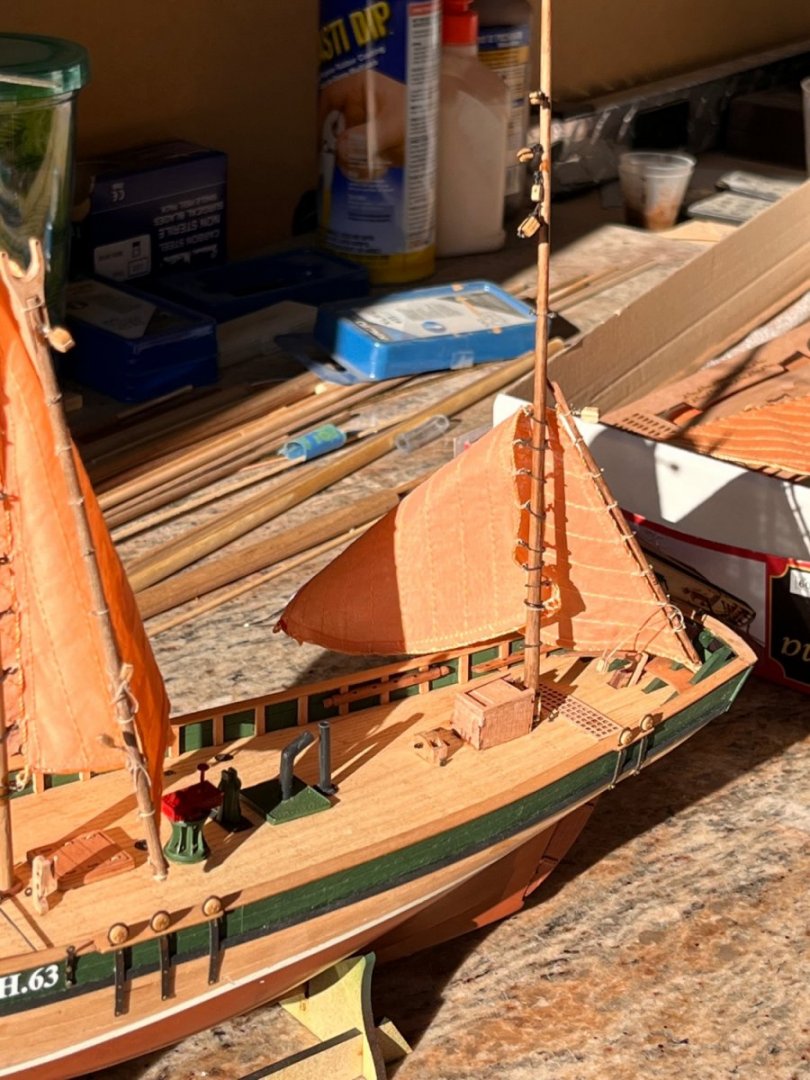
Just a quick photo showing the sails true colors. Regards Will
- 77 replies
-
- 8
-
-
- Erycina
- Vanguard Models
- (and 1 more)
-
Thanks James for the photo rotating. Tell me about how you did the rotation in paint? Regards Will
-
Bob I looked in the usual places with no luck. Regards Will
- 77 replies
-
- 2
-

-
- Erycina
- Vanguard Models
- (and 1 more)
-
I'm very happy with them Andrew and thanks for the multi-colored suggestion. Really happy with the dye that colored the stitching. Next week is my birthday and the Admiral got a package from England that's about the size and shape of a model from Vanguard. She put it away somewhere so I'll have to wait. Best Regards Will
- 77 replies
-
- 2
-
-
- Erycina
- Vanguard Models
- (and 1 more)
-
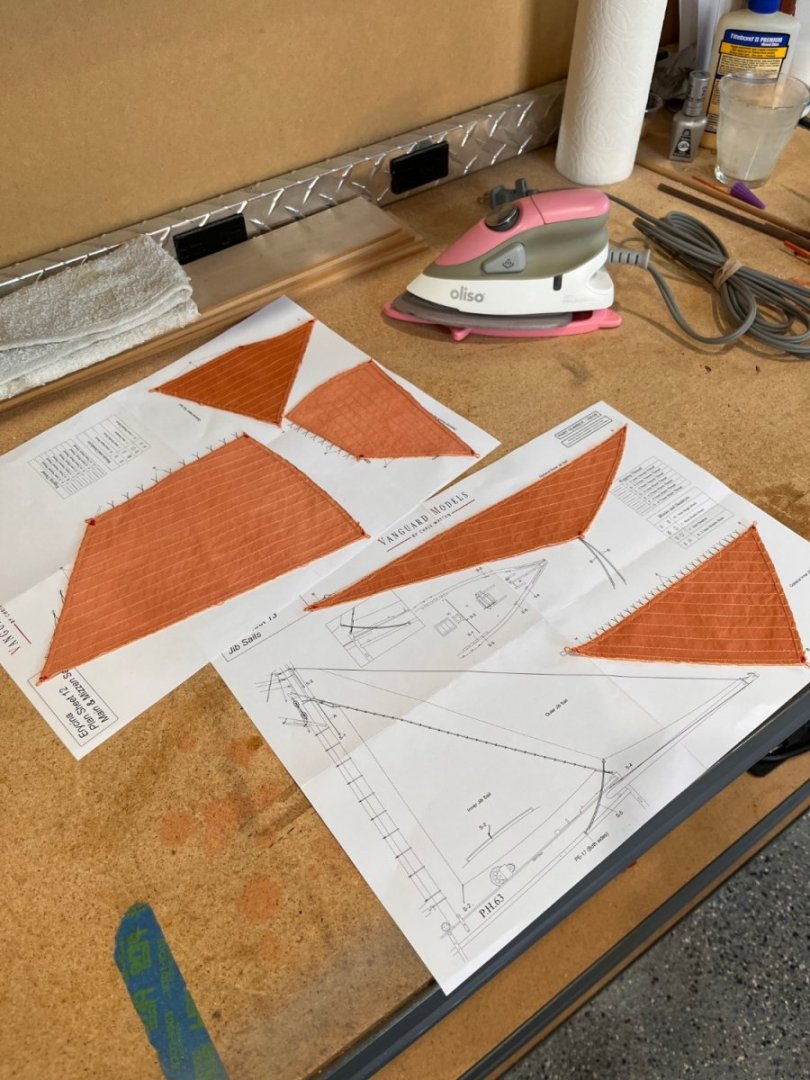
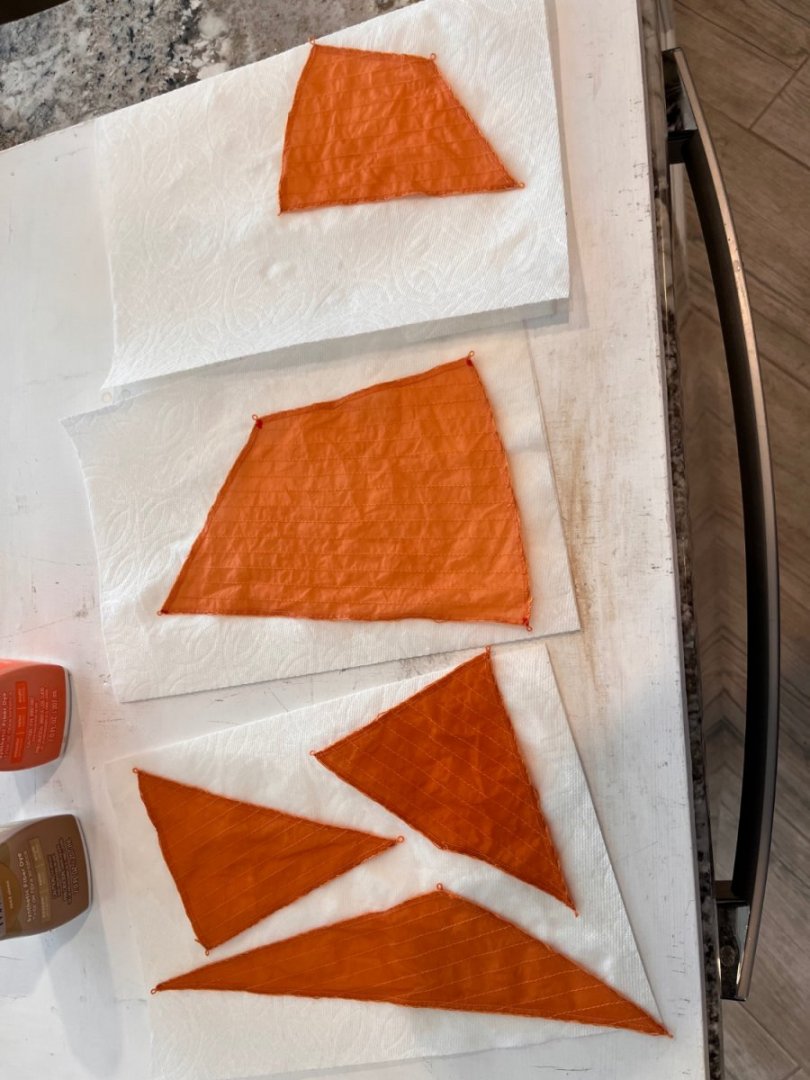
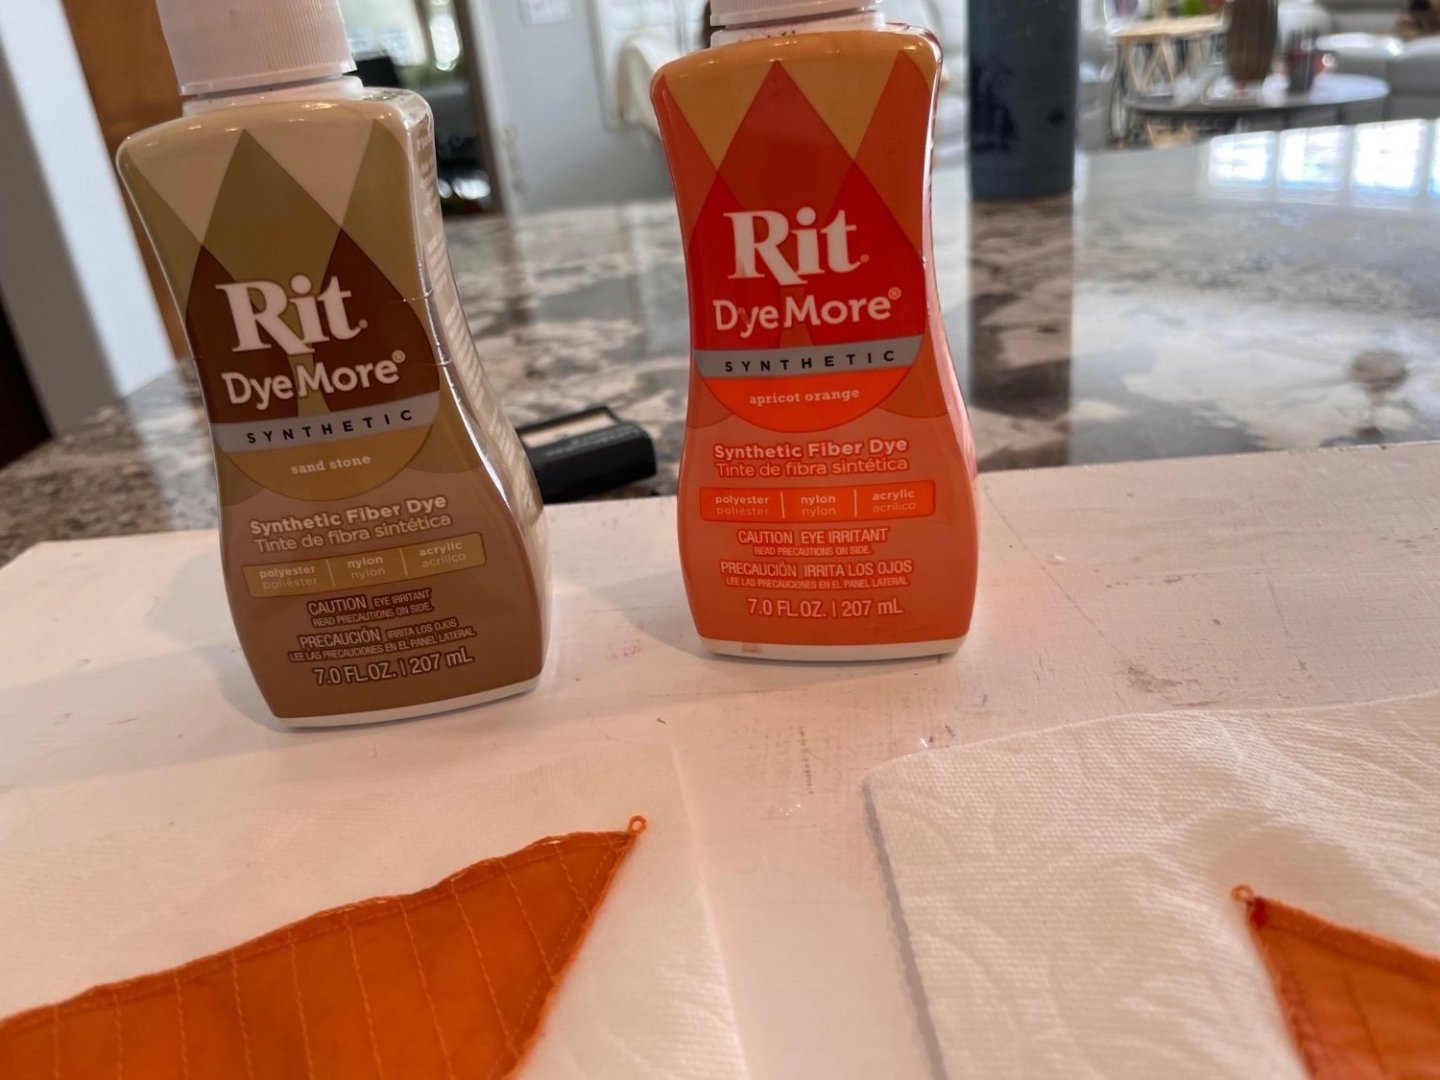
Sails dyed with no oops. So glad its over. The dye used also correctly colored the sewing threads. Now on to shaping and attaching to the mast rings. No Problems there. 😁 Riiiiight sails drying after rinsing in cold water I used the time in the dye solution to create the different shades the darkest being the least used and lightest be used the most. Below is the dye used. Best Regards Will
- 77 replies
-
- 8
-
-
- Erycina
- Vanguard Models
- (and 1 more)
-
Andrew I going to use the 3rd row and mix the times to get as you said varying shades. Best Regards Will
- 77 replies
-
- 1
-
-
- Erycina
- Vanguard Models
- (and 1 more)
-
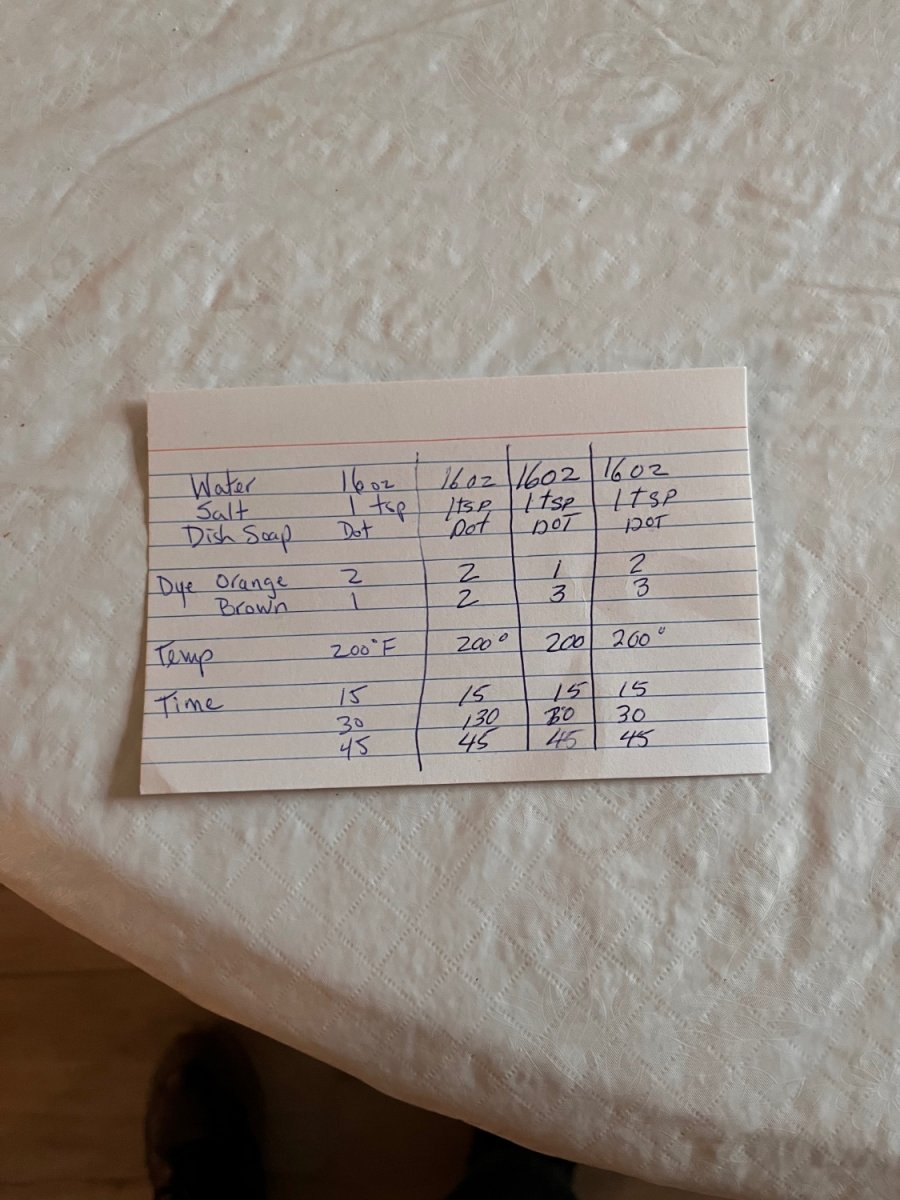
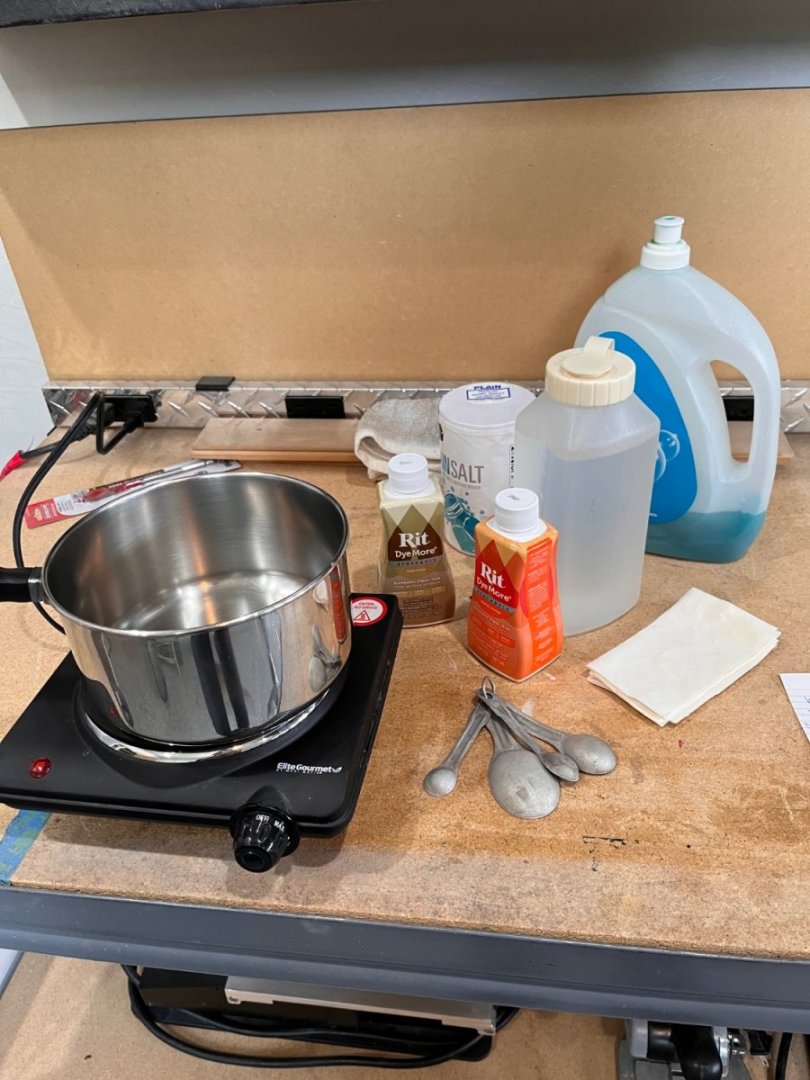
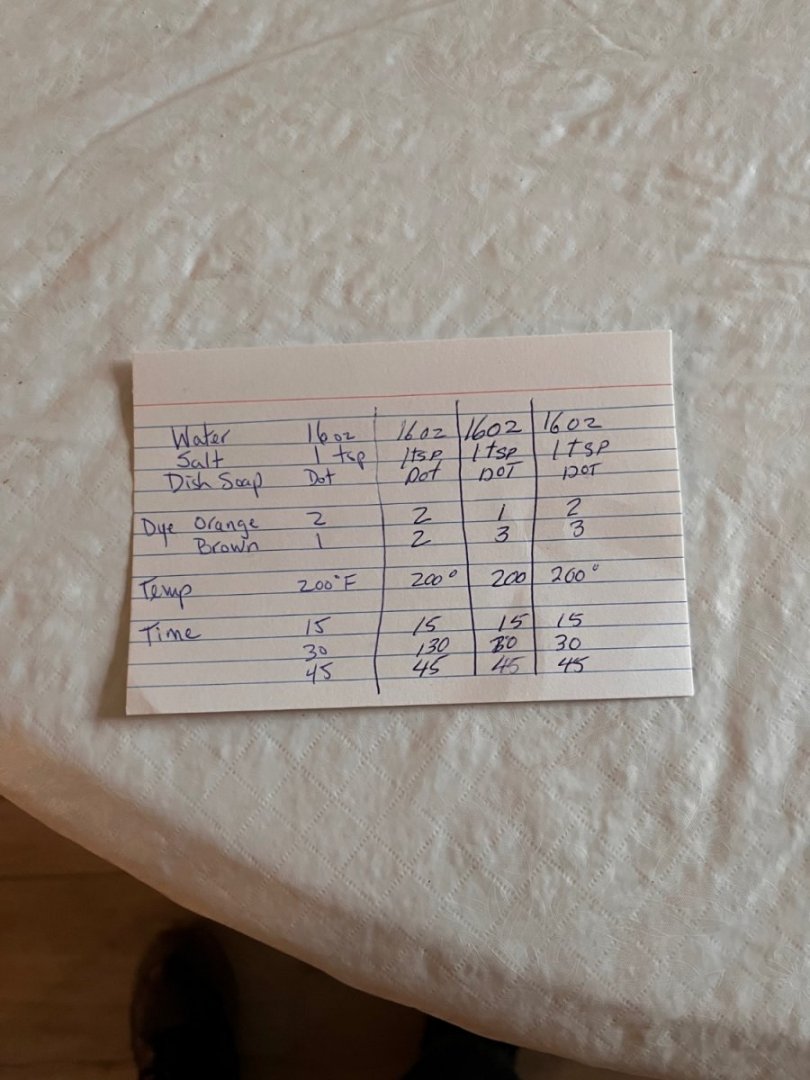
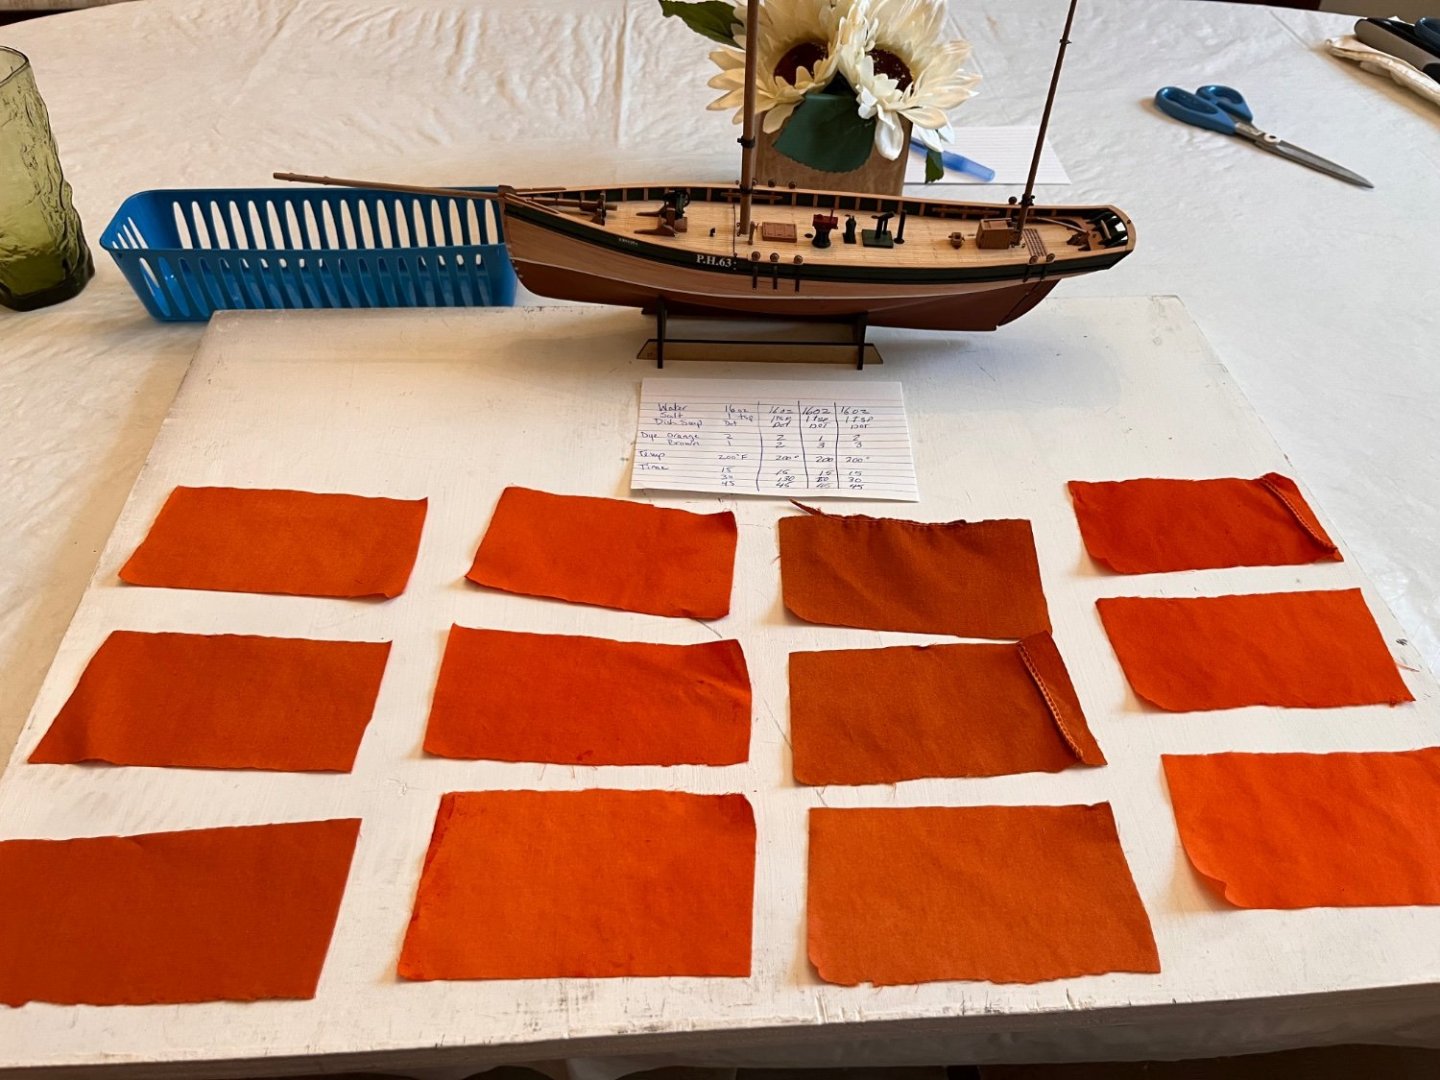
Thanks james. I'll definitely iron after sail dying. Thanks to everyone for the looks and nice comments. I've been noodling about the sail colors and have decided a more brown red color for my Erycina. I'm kind of partial to the brownish color as when I bought a dirt colored T-Shirt in Hawaii year Rit Dye in for all fabrics in orange and tan. I kept saying I want brownish red how's that going to happen with bright orange and tan? So I got one of her looks and said ok. We cut up an old pillow case just a little heaver weave for samples. She then gave me a starting formula and said off you go. Got my hot plate and old SS pan and set up on my work area. Here are all the supplies supplies gathered so off I go to mix my first patch. 16 oz of water, 1 tsp of plain salt, a dab (Admirals measurement) of dish soap, 200 degrees fahrenheit and 15 minutes. I made four batches as the receipt shows They are not as red as the picture shows much more brown I even set one on Erycina to get a feel of the color. I'm going to use the 3rd row from the left center swatch. Tomorrow I'll start dying sails and hoping they will look as I hope. Best Regards Will

- 77 replies
-
- 8
-
-
- Erycina
- Vanguard Models
- (and 1 more)
-
beautifully done as you have shown in all your work. Glad to hear you got the thickness sander as you said it makes less sanding necessary. Best Regards Will
- 840 replies
-
- 2
-
-
- winchelsea
- Syren Ship Model Company
- (and 1 more)
-
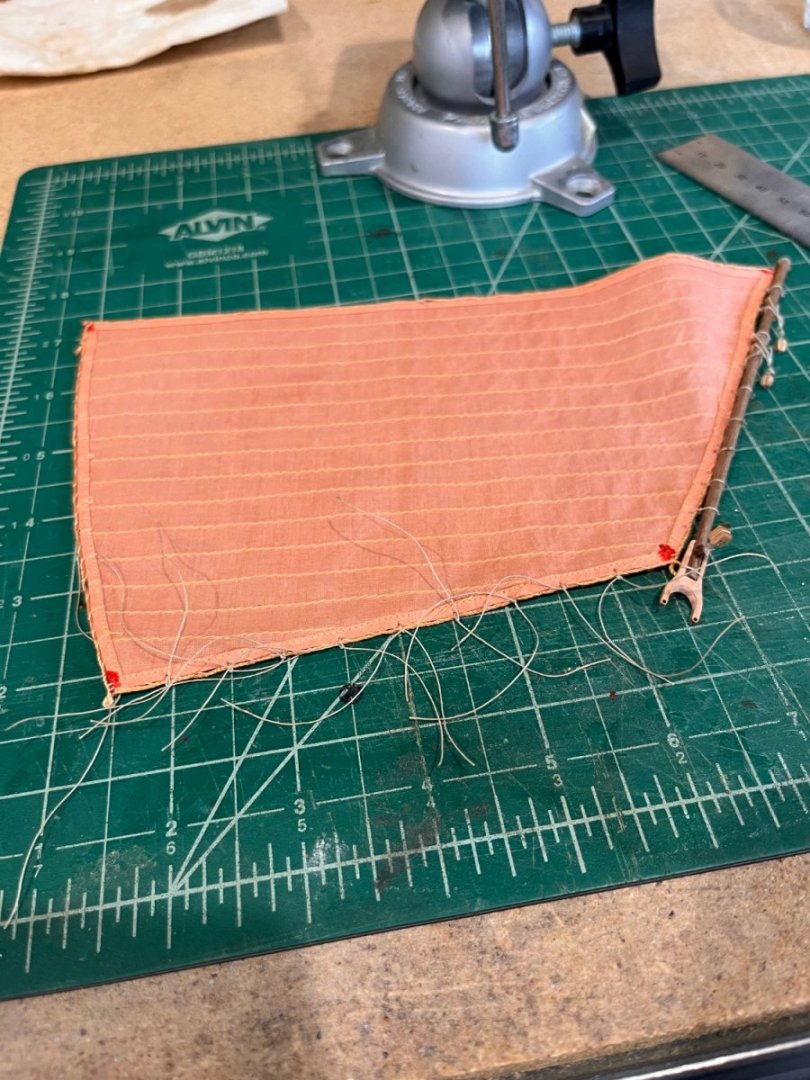
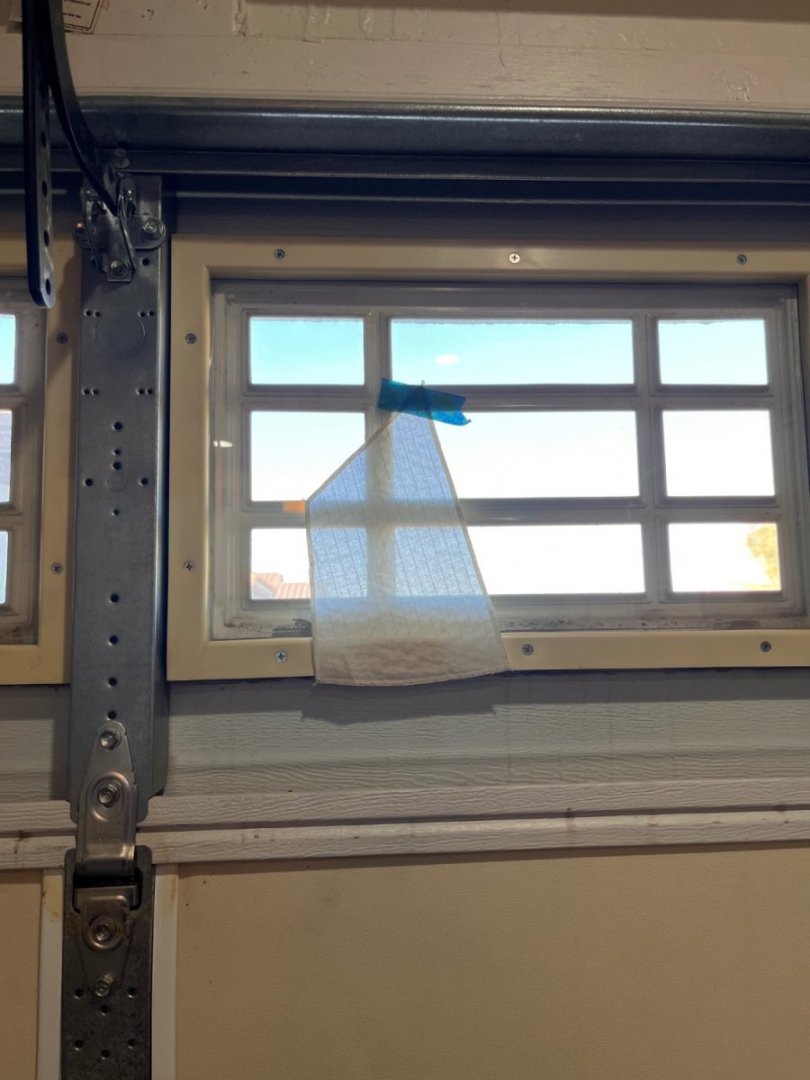
I've reached the point of dread, I've got to dye the sails. They have been laying flat since the beginning of the model and most of the fold creases have flattened. The next sail post will be them drying but here are some pictures showing the translucency. Best Regards Will

- 77 replies
-
- 6
-
-
- Erycina
- Vanguard Models
- (and 1 more)
-
Andrew and all thanks for the looks, likes and comments. Andrew I made the decision is keep the model as designed and therefore am using Chris's sails. Small comment on the sails. The furnished (bought) sails are a great quality and the material is the best I've seen. They are tightly woven, thin in depth, very translucent and have a correct feel to them when compared to the models feel. They've laid flat for several weeks and the shipping folds are coming out. I'll post a picture today so you can see what I've described. Best Regards Will Andrew PM me about silkspan
- 77 replies
-
- 2
-
-
- Erycina
- Vanguard Models
- (and 1 more)
-
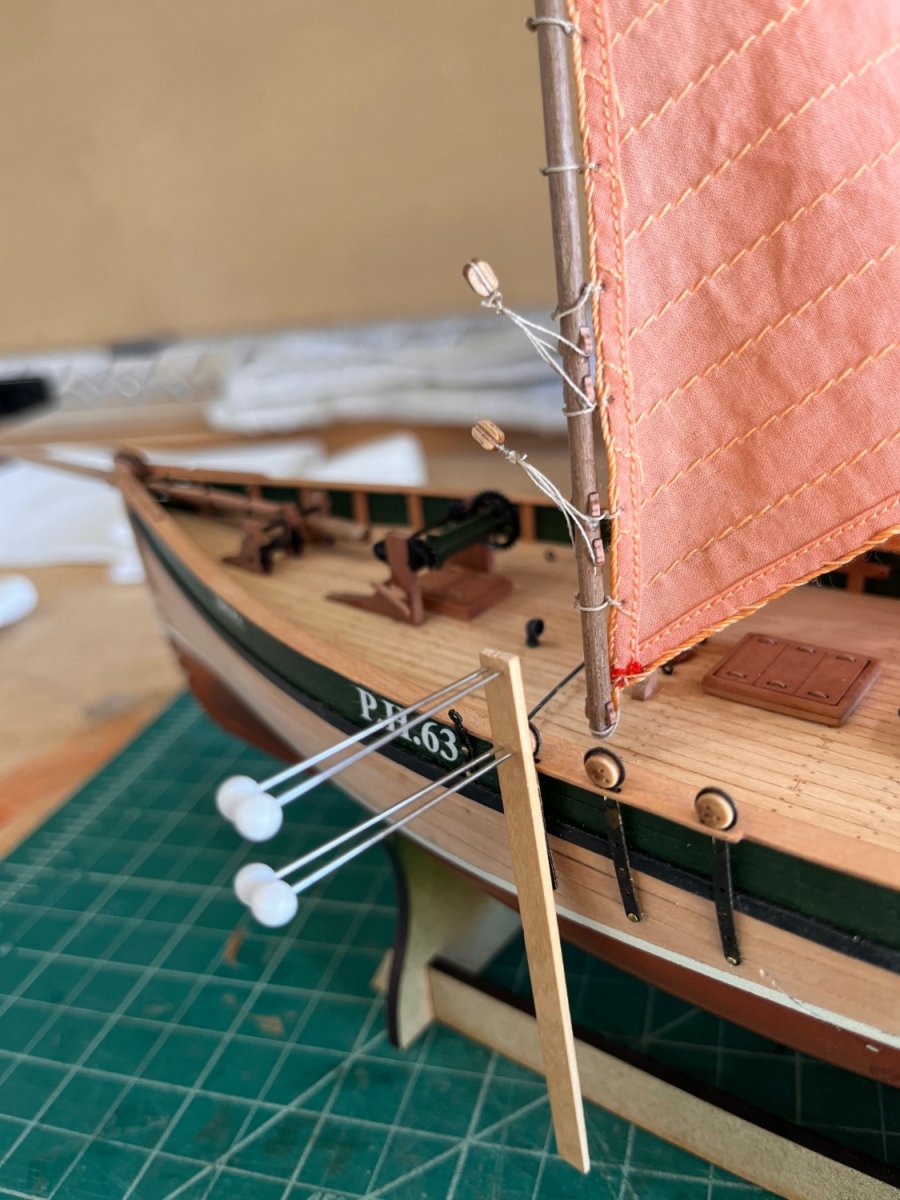
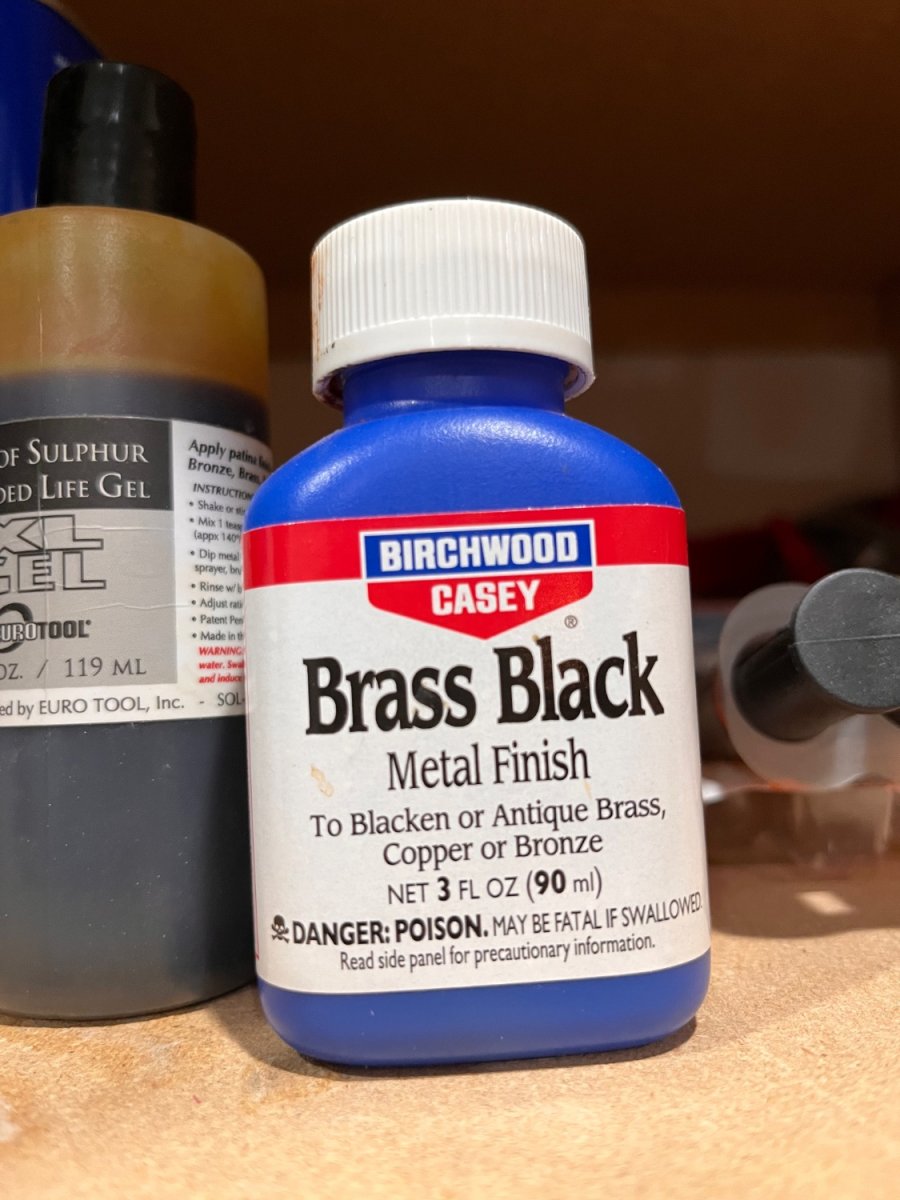
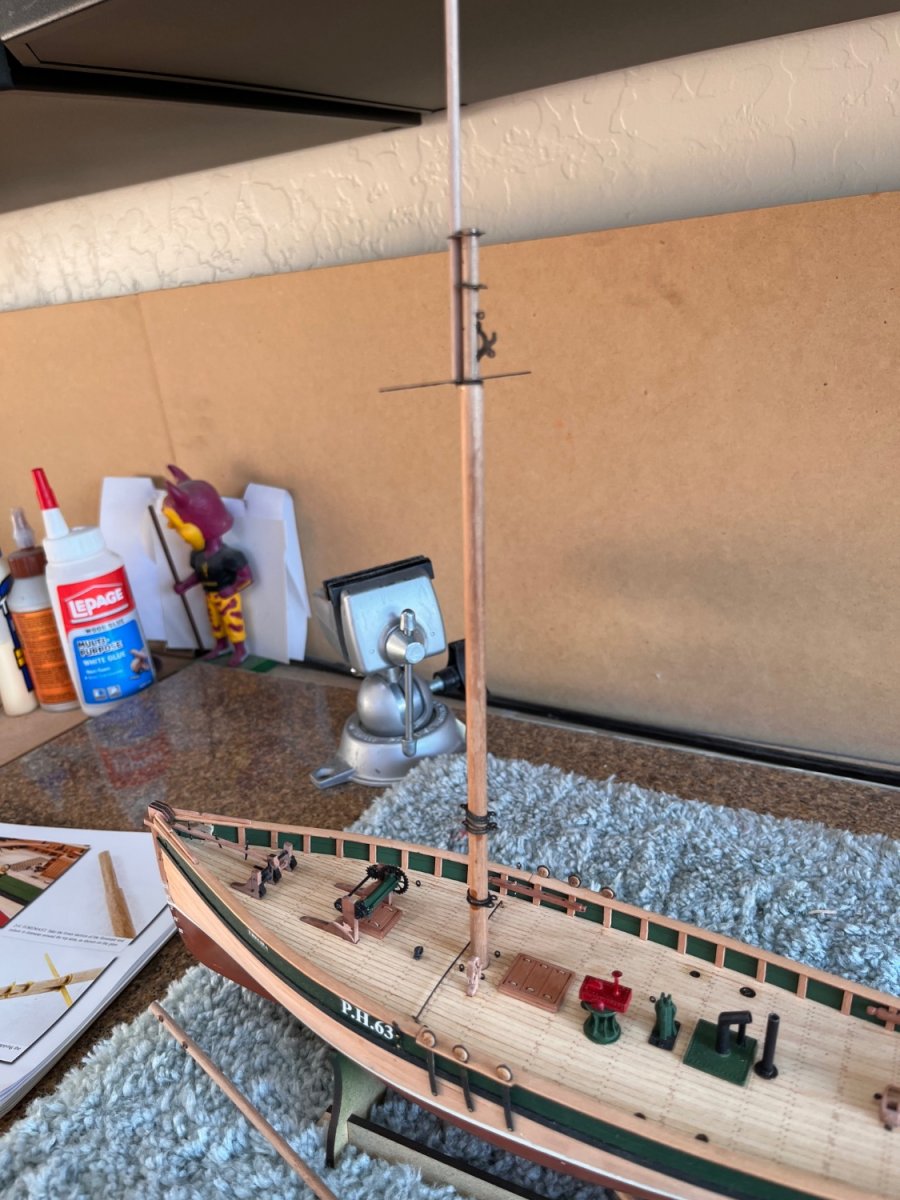
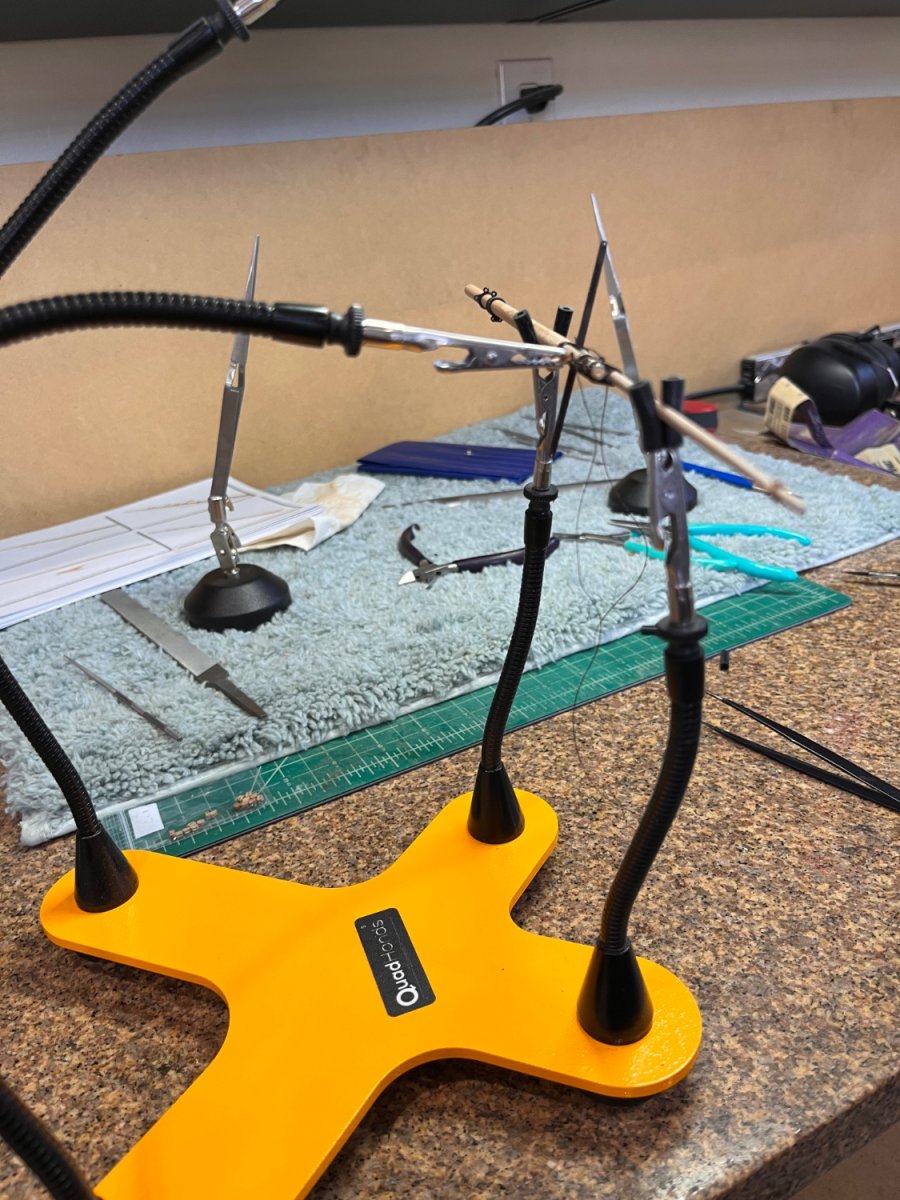
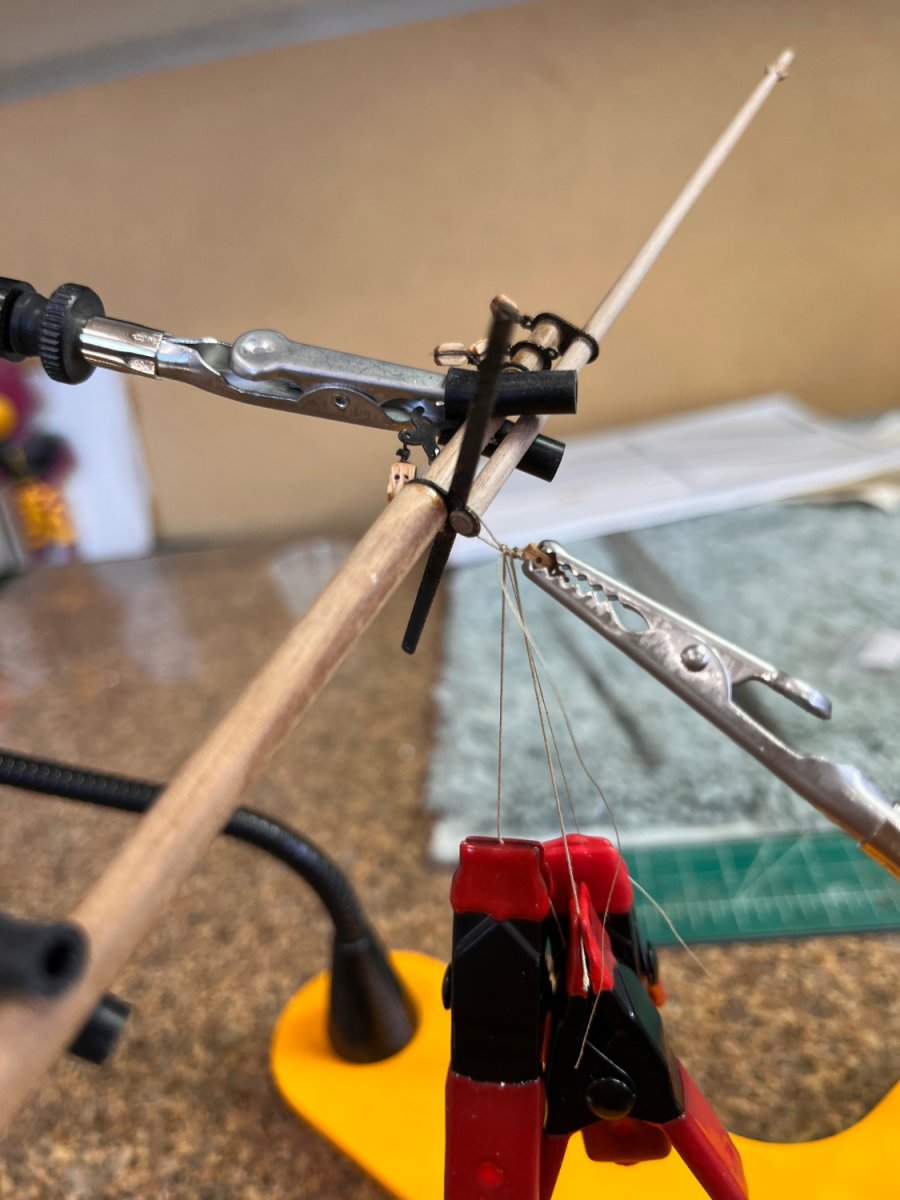
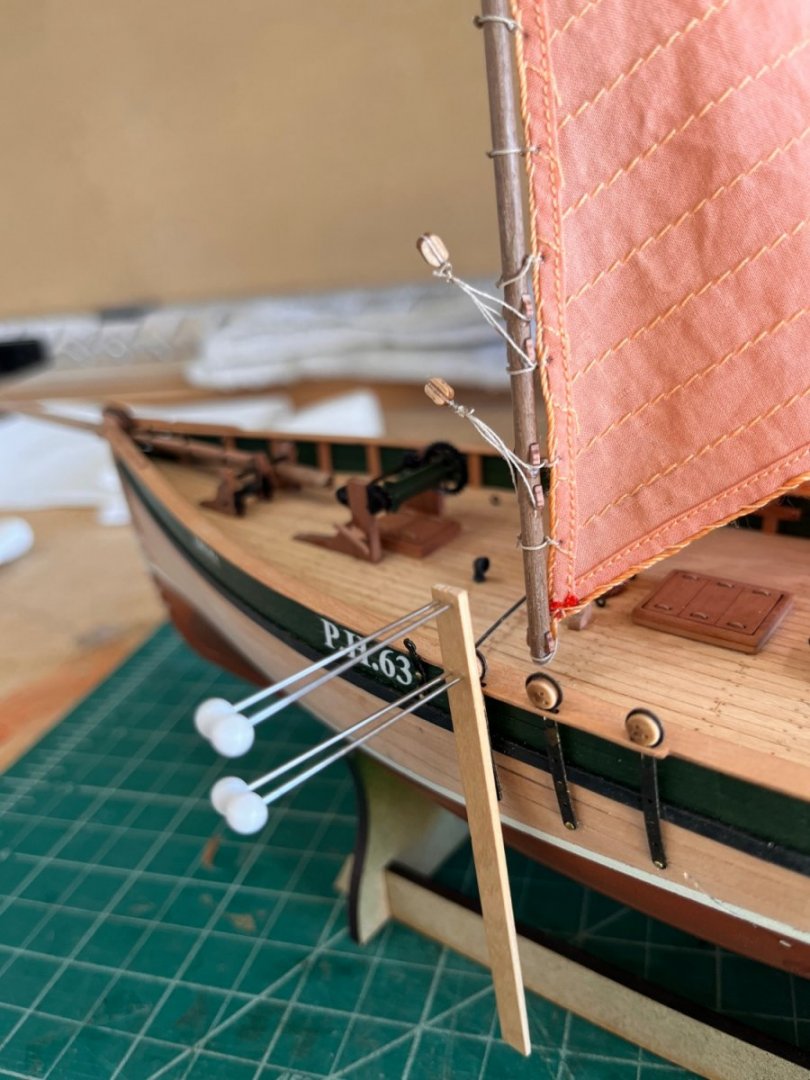
Been awhile doing less important, IMO, but they needed to be done so i'm back. There's not much to say about removing PE parts from the sheet so I'll go on to cleaning. Oh yes! One thing I found out was if you use the side cutters with the flush surface in the wrong direction it allows the cut to be controlled so there's less to trim. With the parts trimmed they were cleaned by soaking in acetone. Drying one a clean paper towel doesn't take long and then into a 91% alcohol bath again to dry on the paper towel. When dry put them into a glass with Brass Black. Watching them until the turn the black color you want. Again too a paper towel to dry. After dry washed in warm water and wiped to remove the excess material. Just mast showing some of the brass It seems obvious but remember to slide the rings on before the upper hardware. Spent the afternoon strooping blocks to the mast. With help of my third hand it was done holding the block while being seized. The mast held in place with the fourth hand. Taking the line from the block through the eye and back the to block.With a block seizing line wrap both lines to simulate actual seizing. A method I found that works is to tie an overhand knot next to the block on one of the lines and then take one seizing line away from the block and wrap 3 to 6 time away from the block. When complete tie and overhand knot and slide the wrapping up to the block. A very tiny drop of thin CA to hold in place. Hardest one was the lowest with becket. To make the becket a loop was seized around a pin and tied with an overhand knot directly adjacent to the pin. A drop of thin CA was applies opposite of the knot. When the loop dries bring it up to the block and seize as I had the others. They last thing was the block hanging from the mast. First seize the block and then one up around the mast and seize together with seizing lines from the block. Not sure if this makes sense but that's how I did it. Maybe a photo will help. All done for today and a couple of photos In the sun Best Regards and thanks to all the looks and kind remarks Will


- 77 replies
-
- 11
-
-
- Erycina
- Vanguard Models
- (and 1 more)