niwotwill
-
Posts
597 -
Joined
-
Last visited
Content Type
Profiles
Forums
Gallery
Events
Everything posted by niwotwill
-
 Don't know how the last picture got of of sequence but 🤫 this is before the deck was glued.
 -
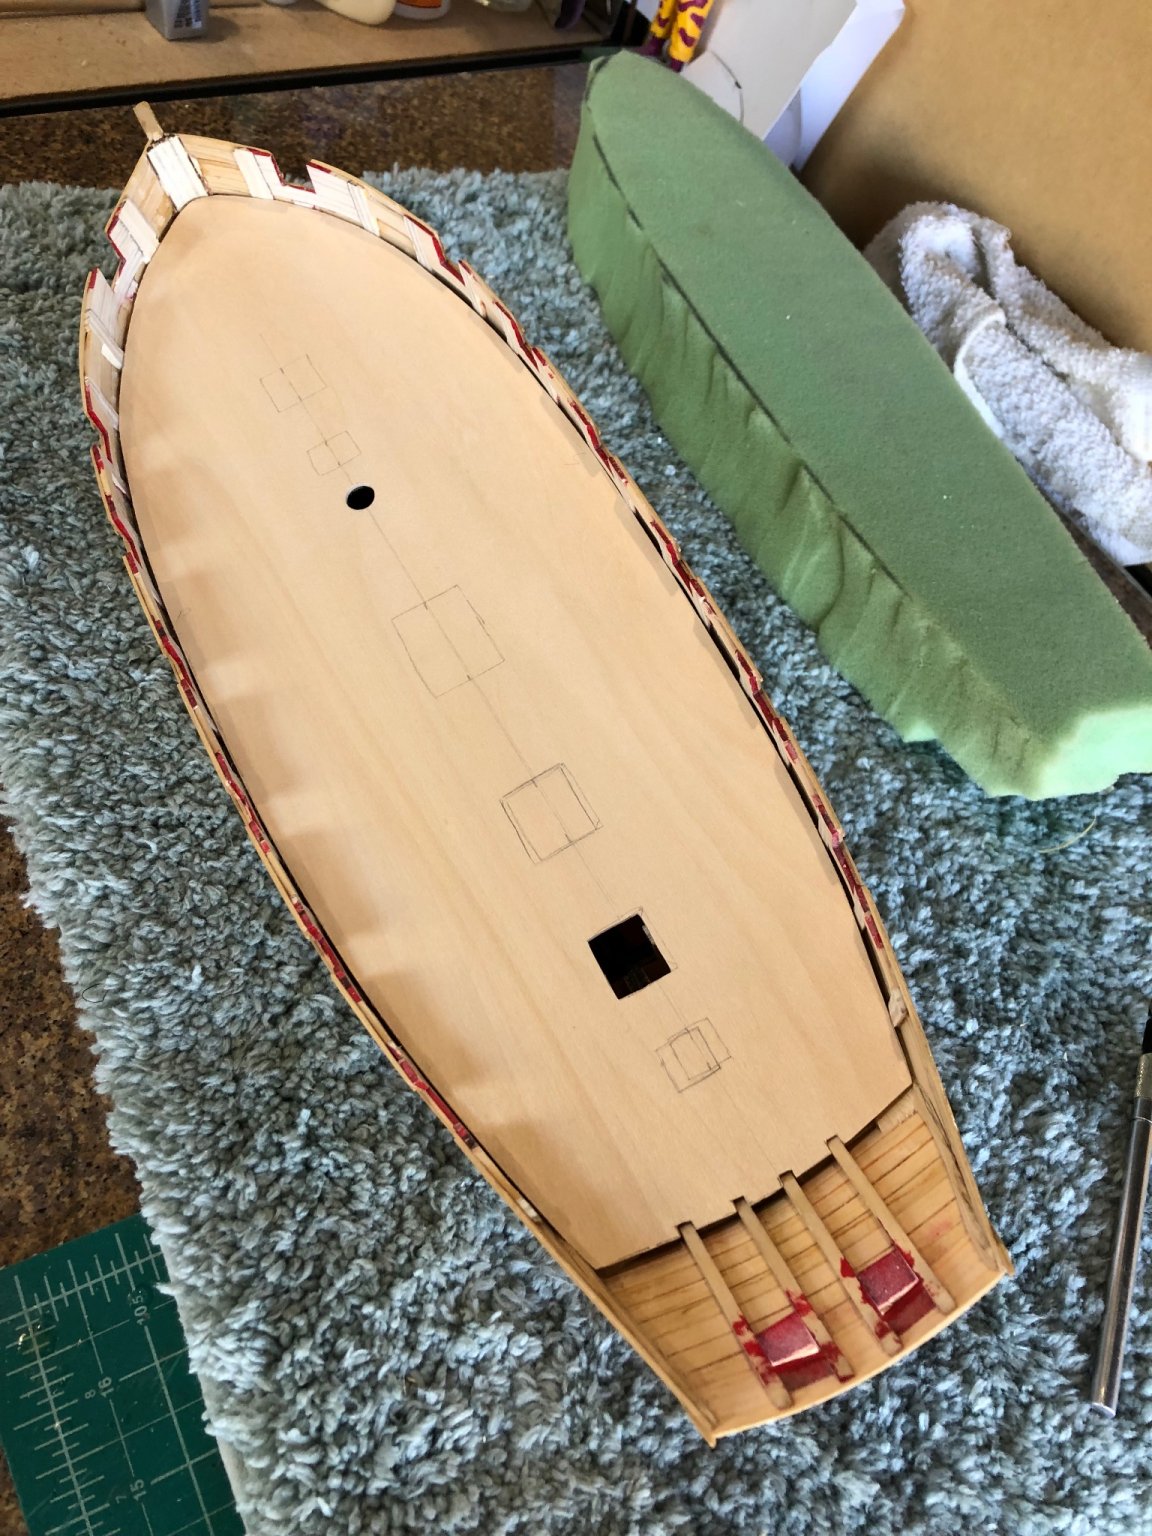
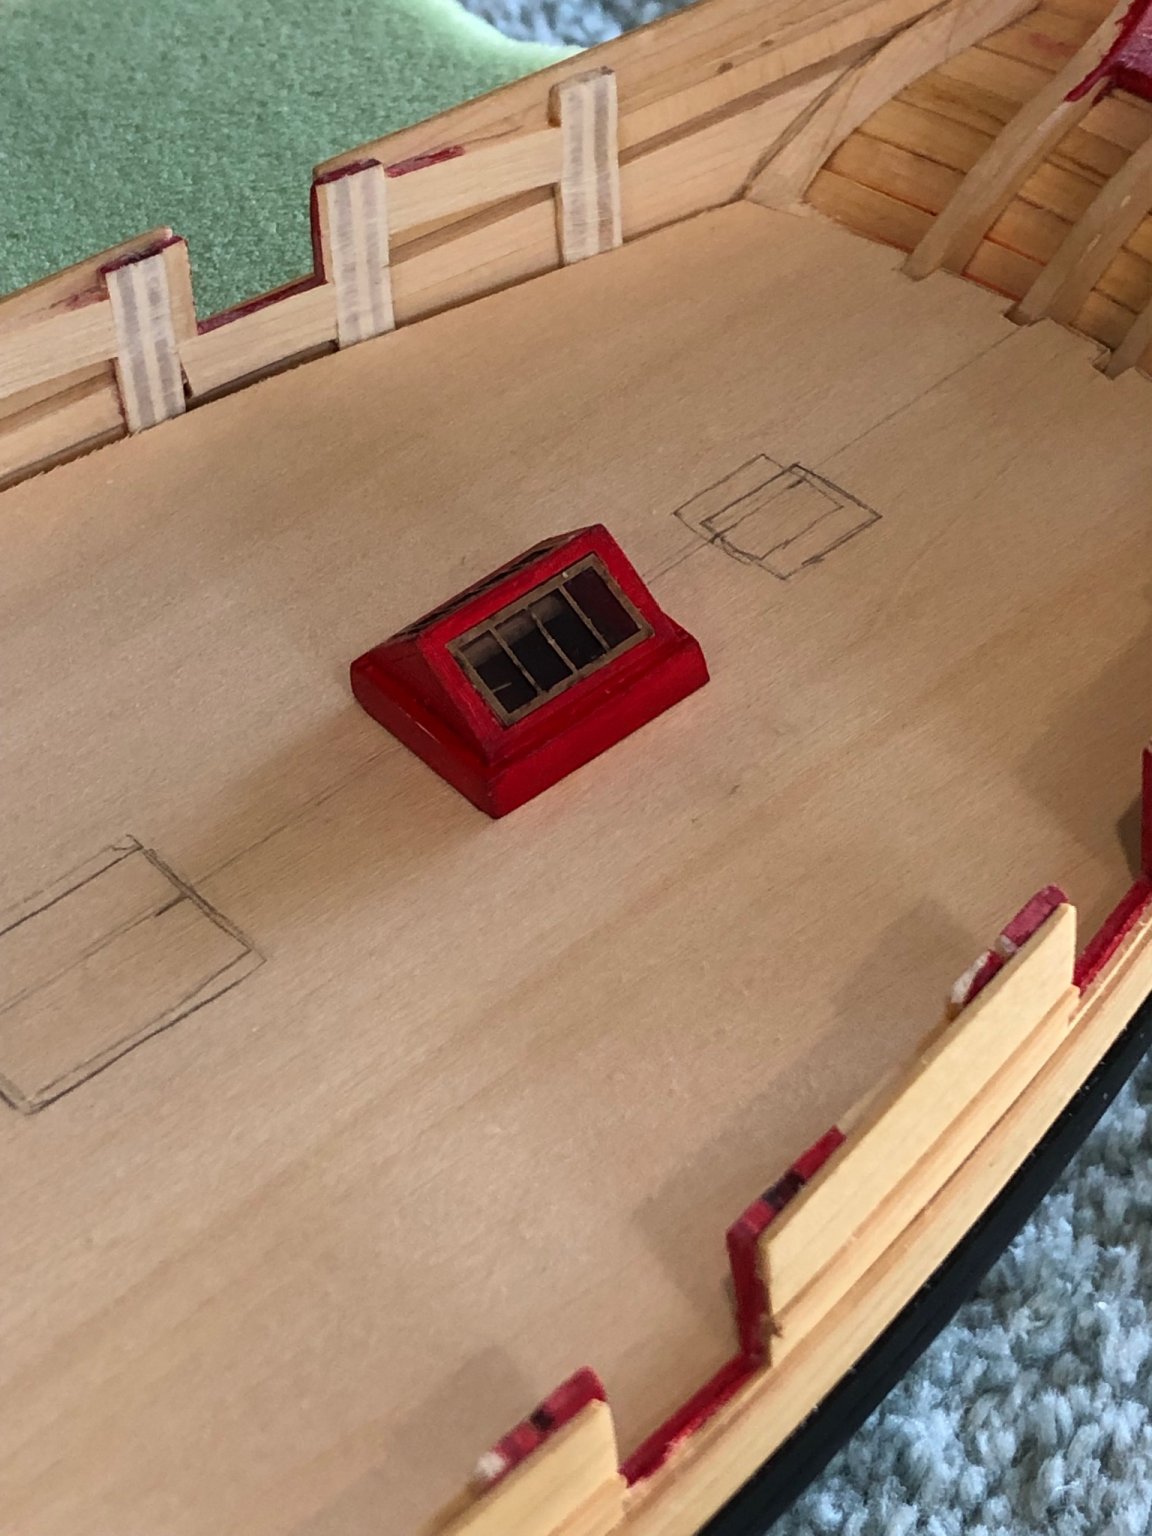
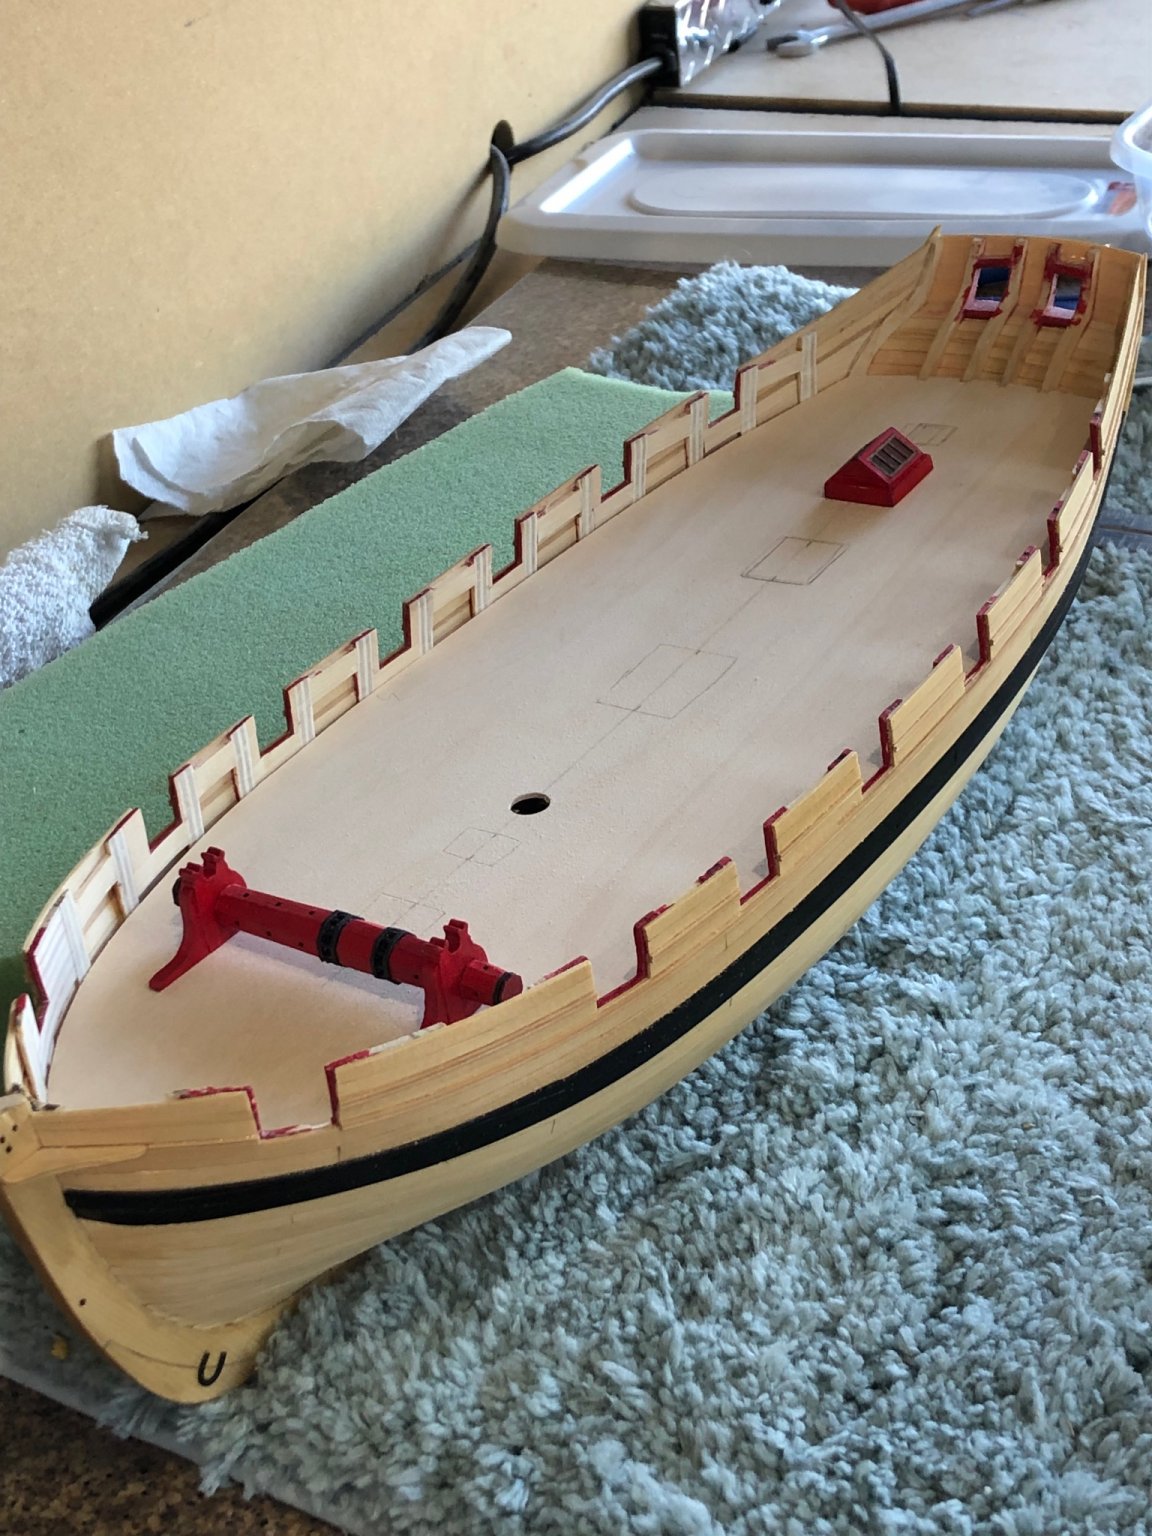
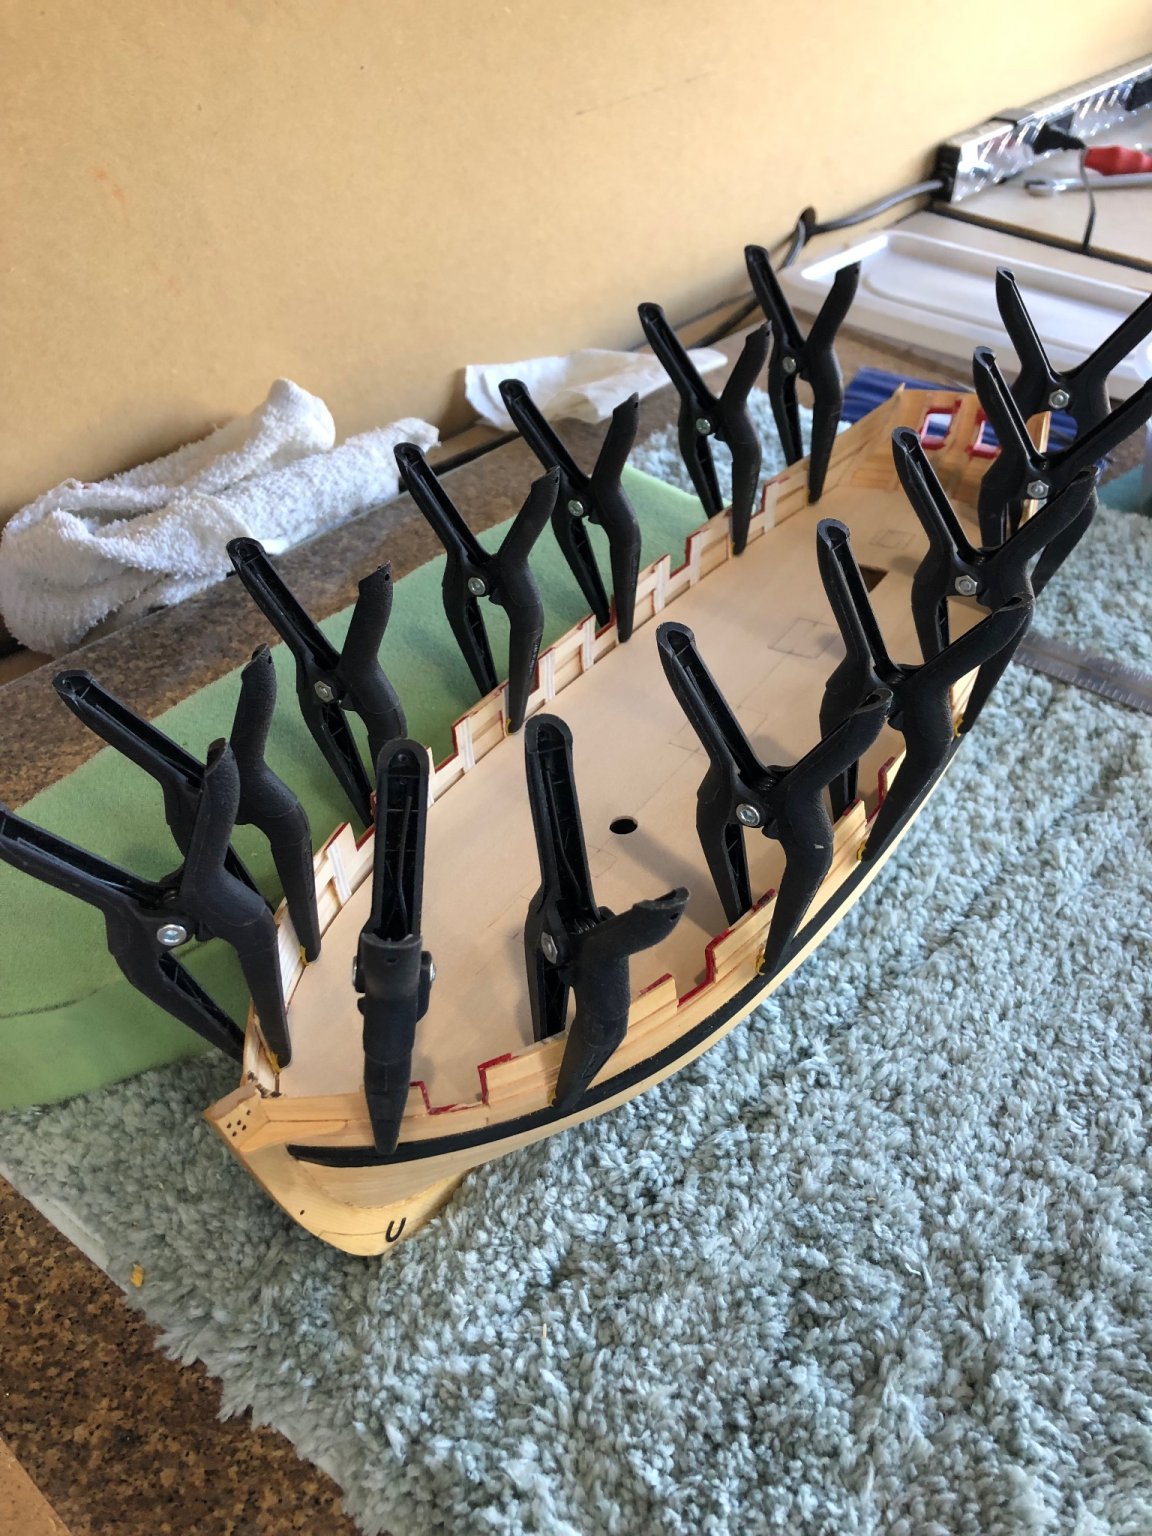
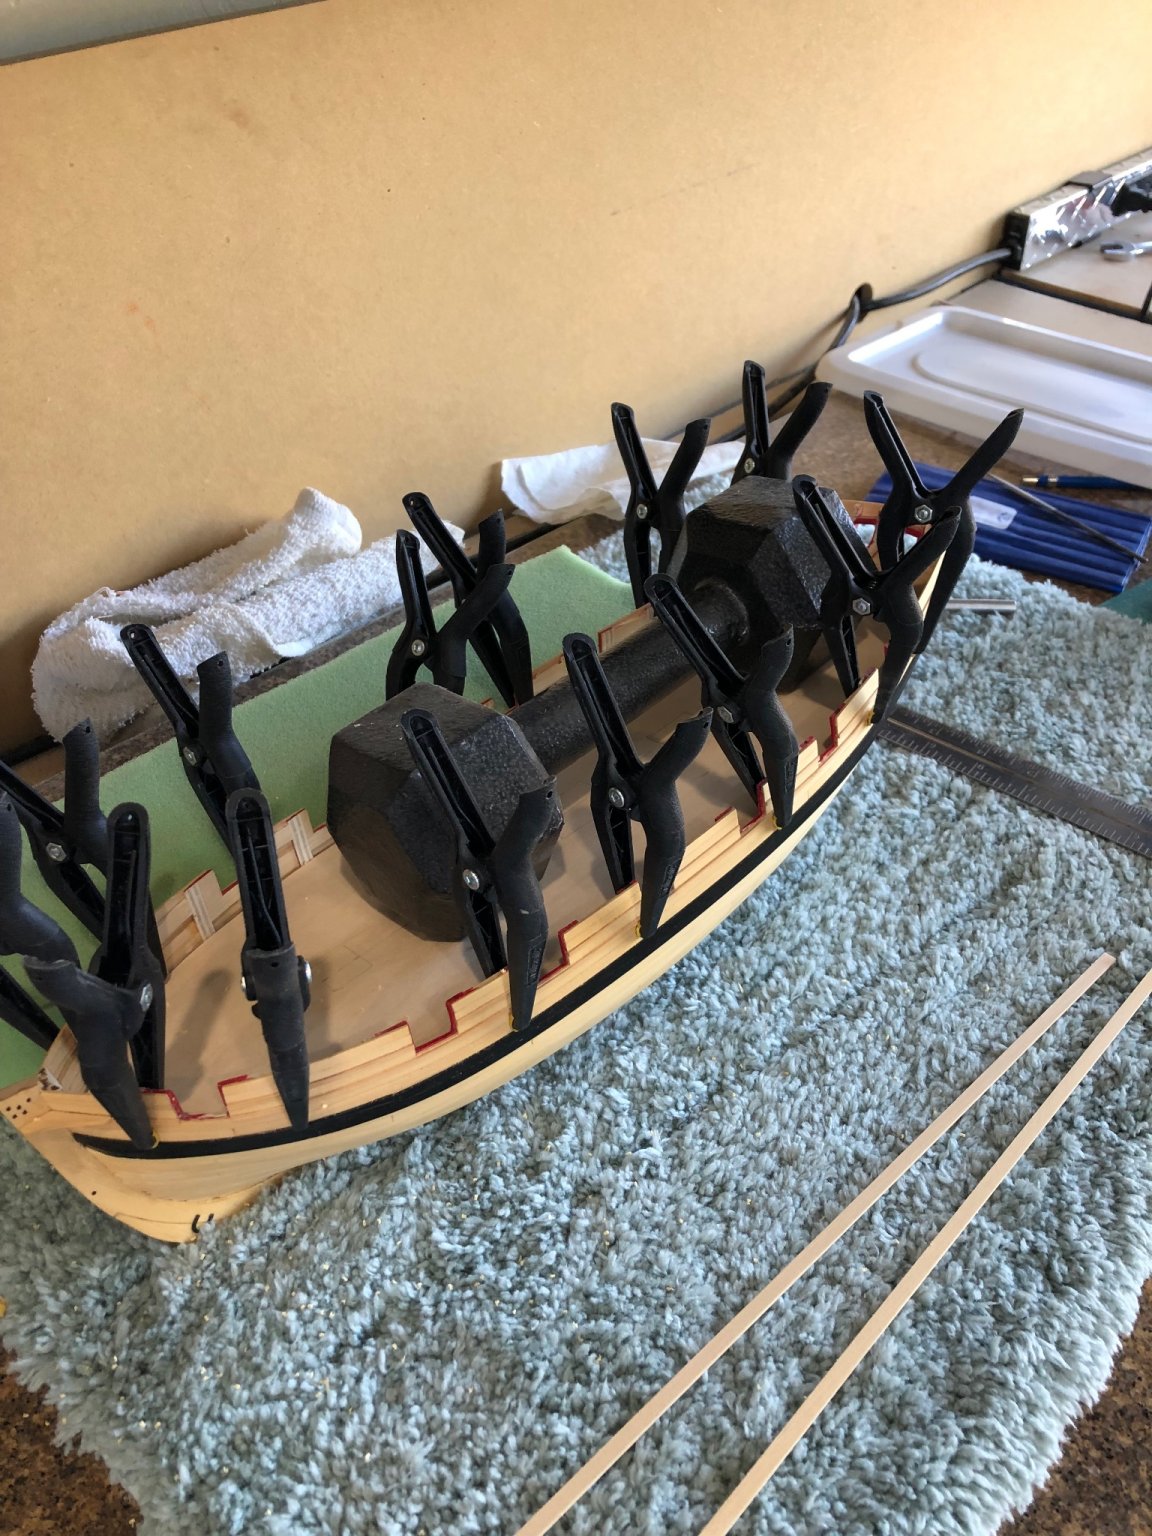
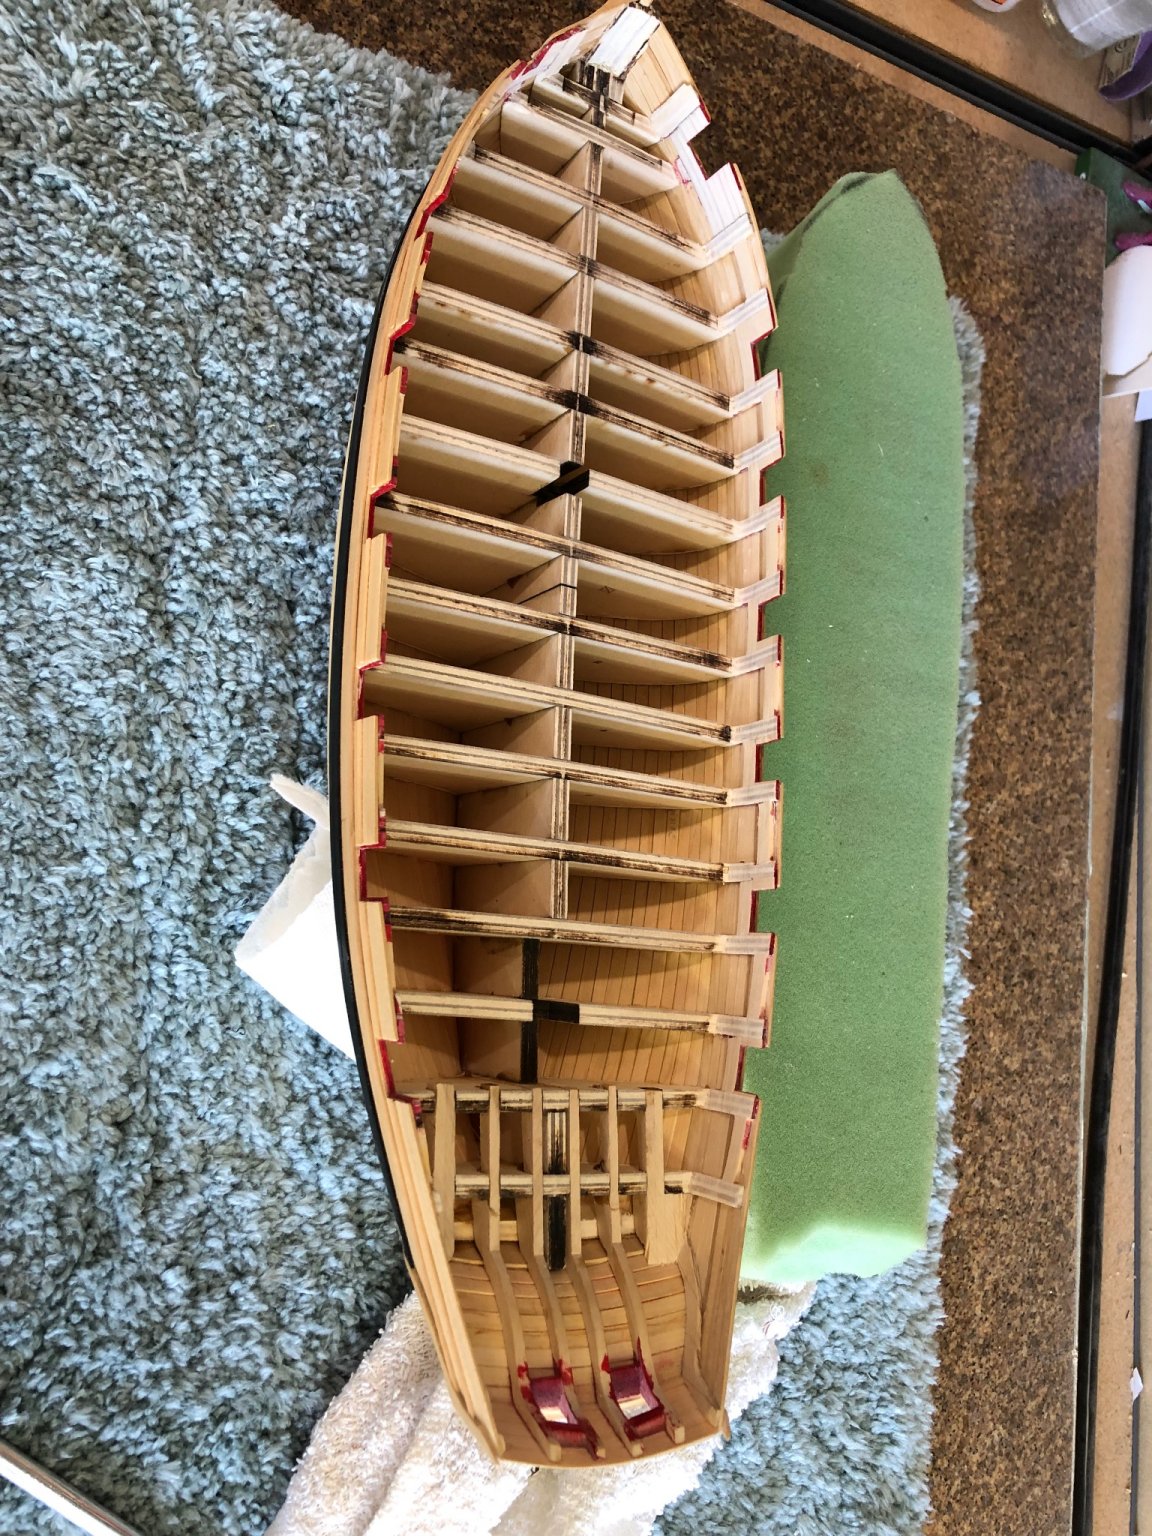
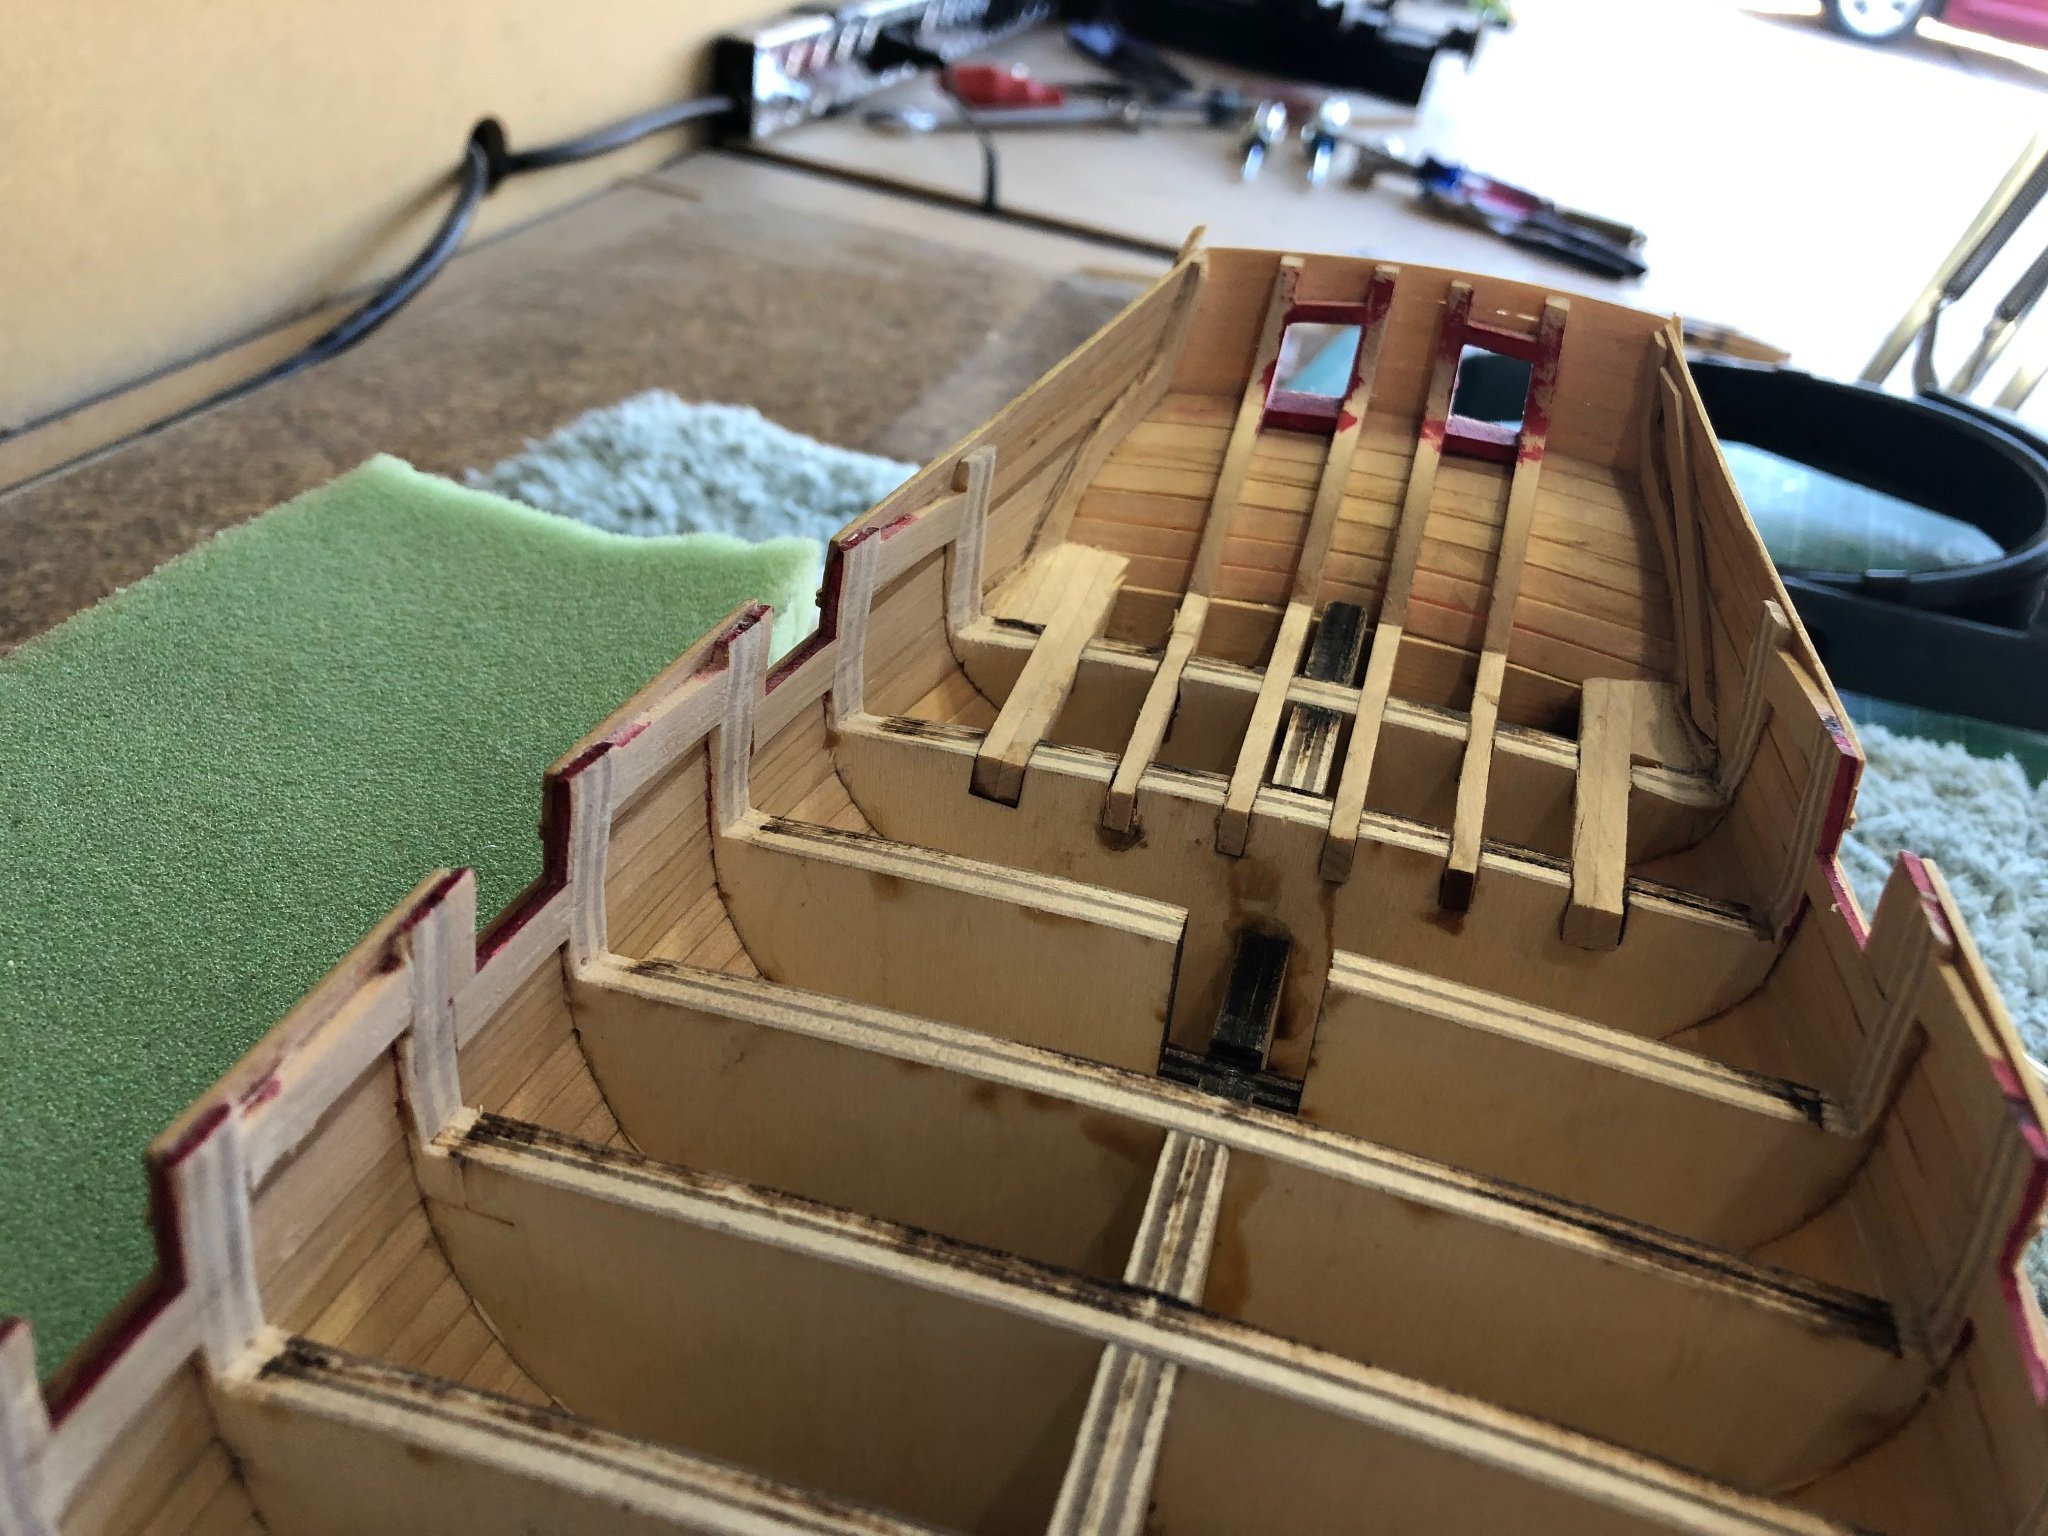
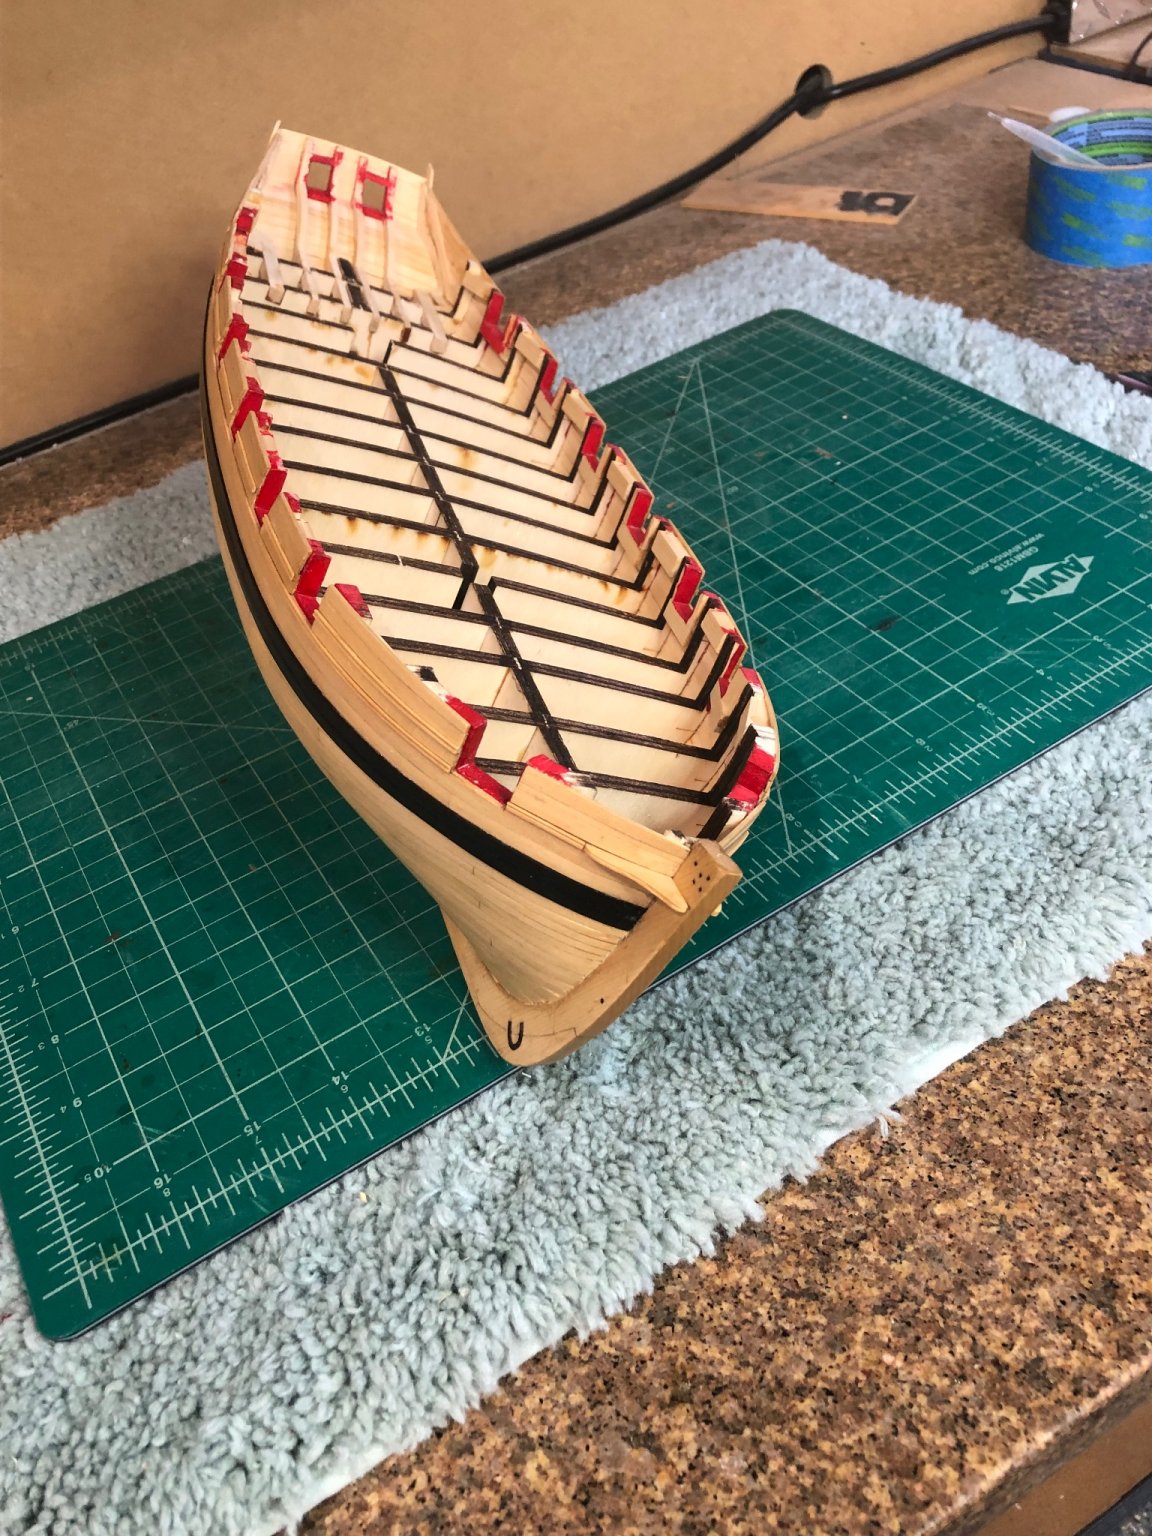
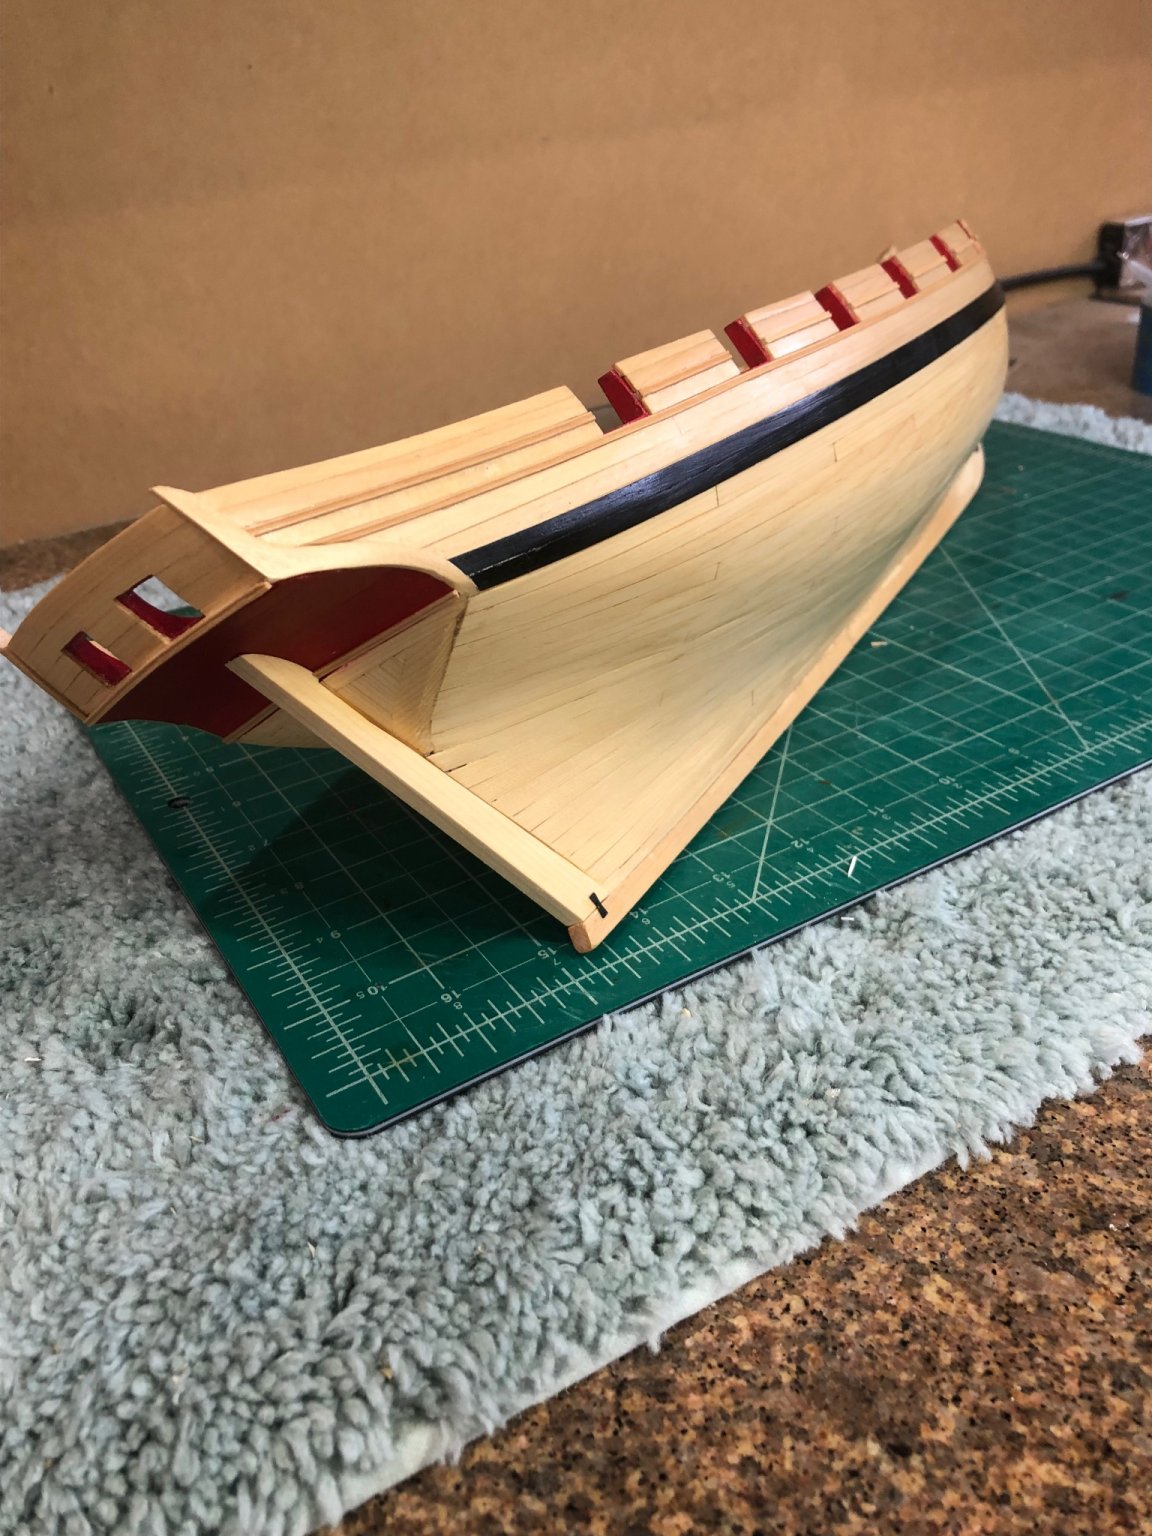
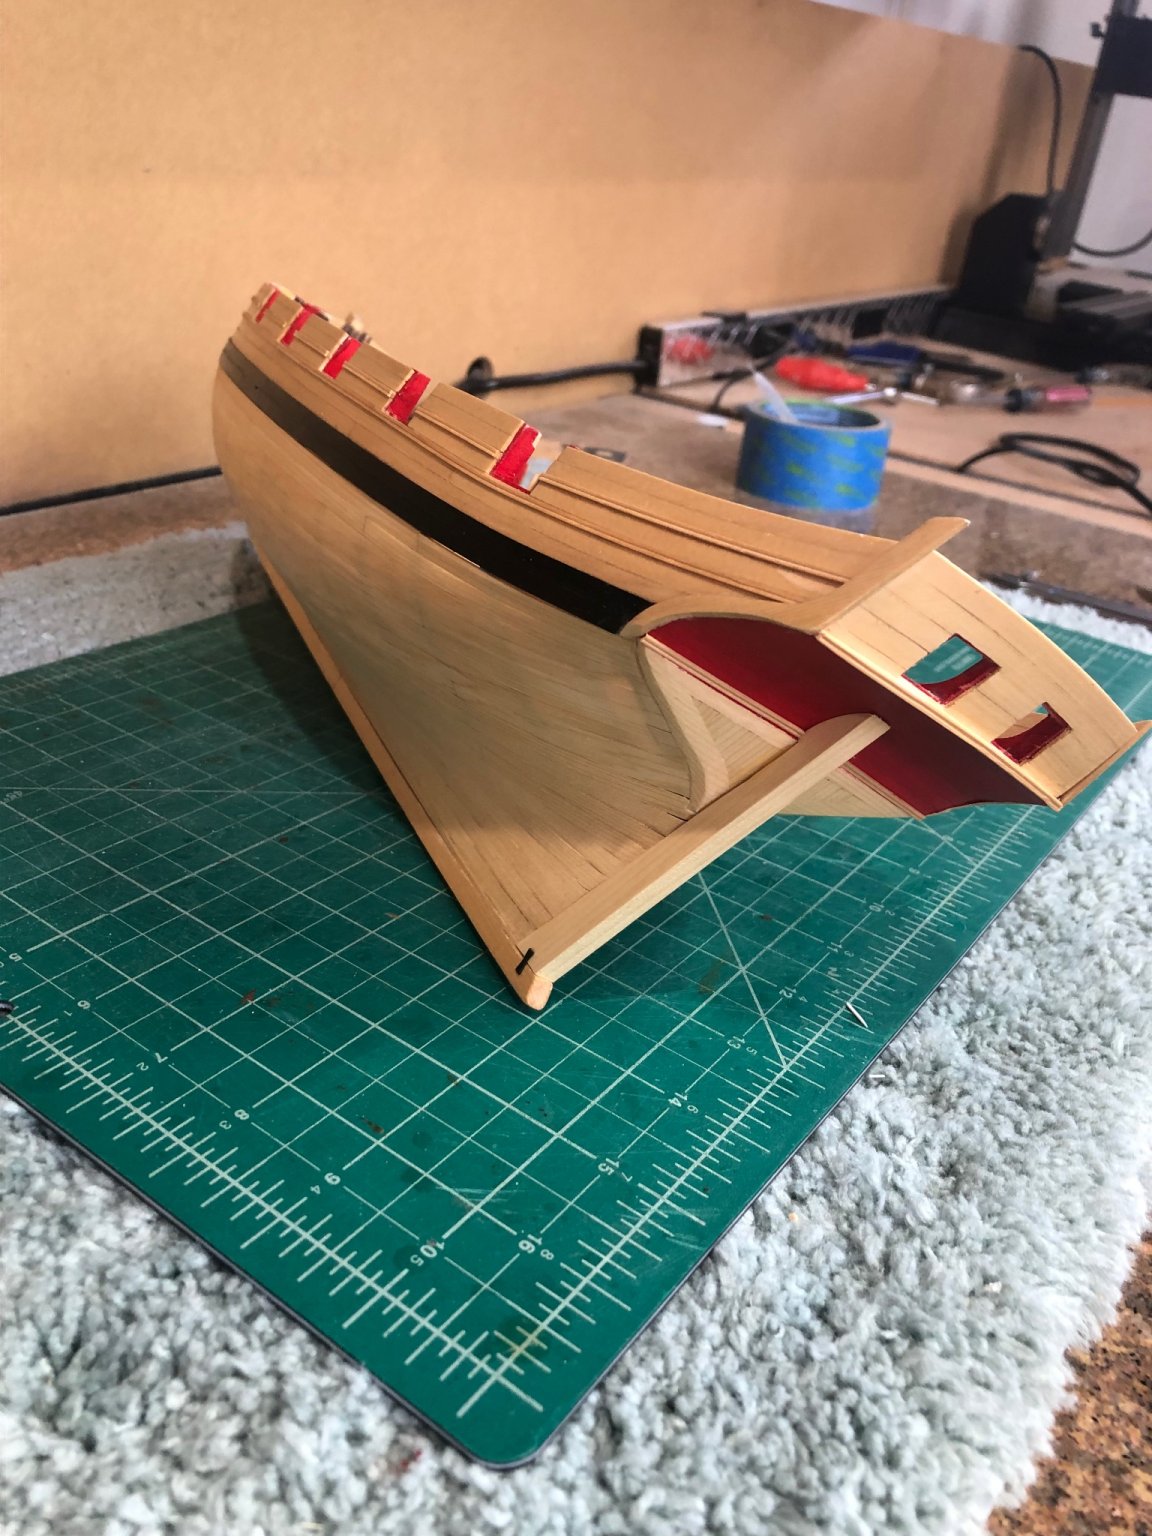
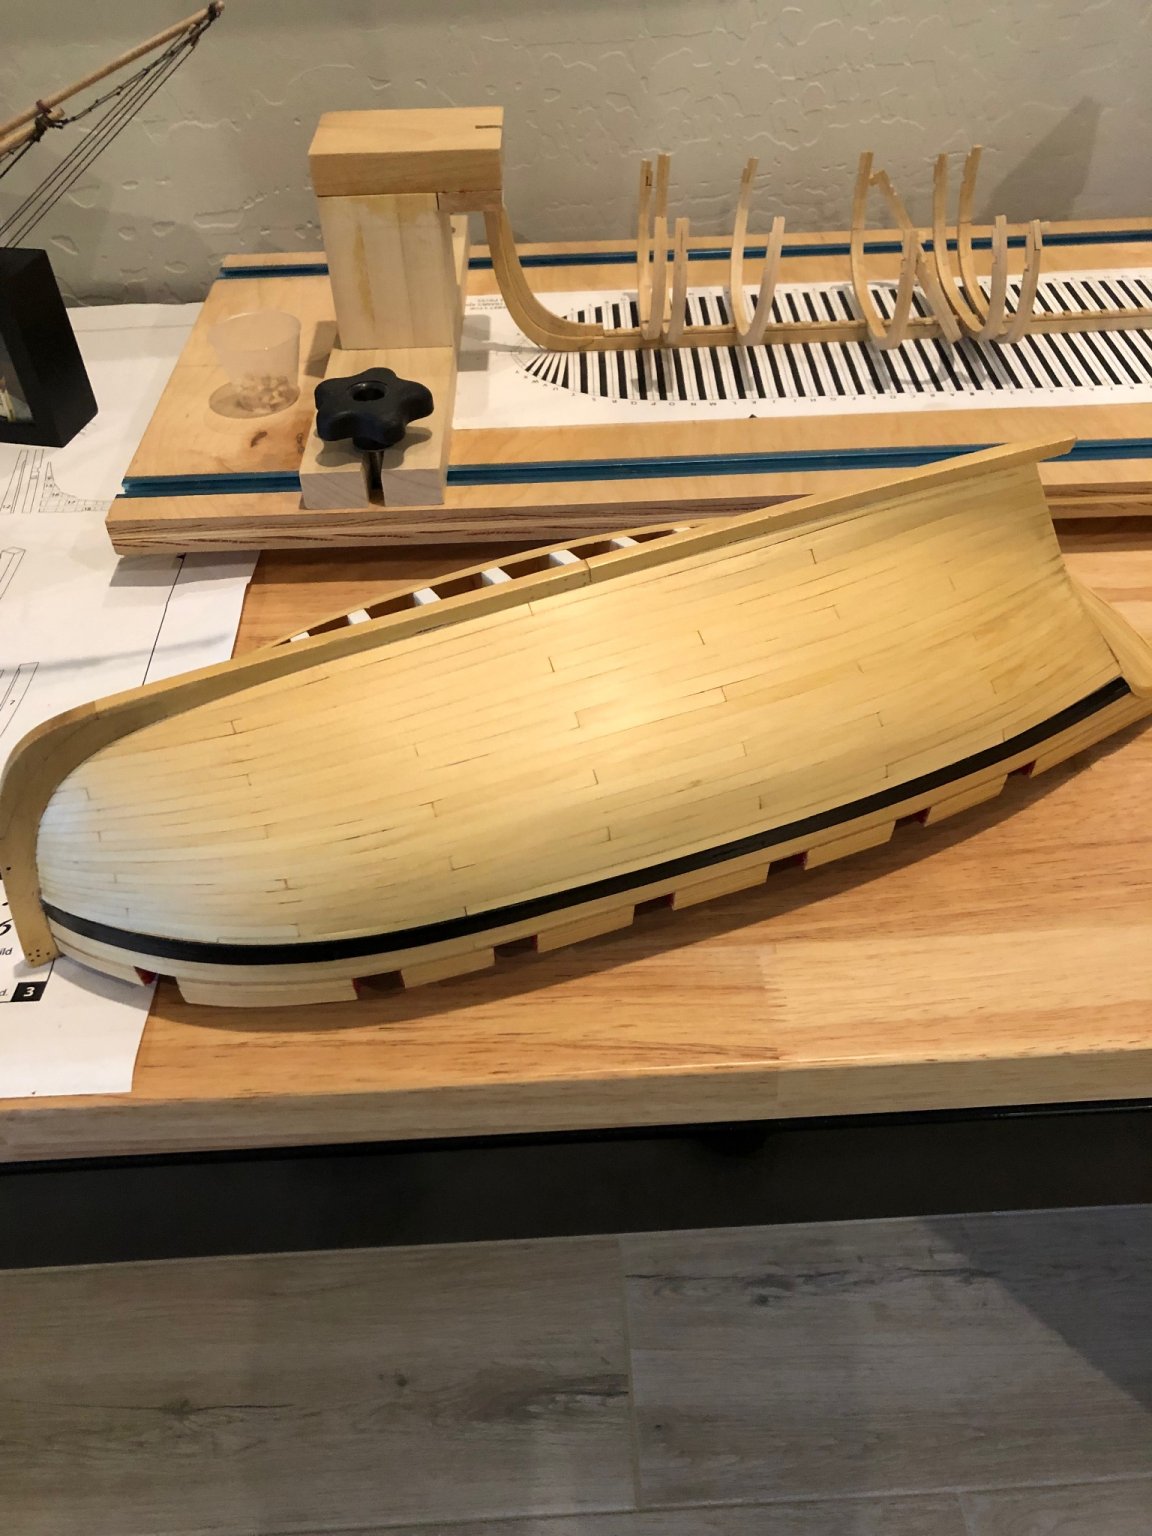
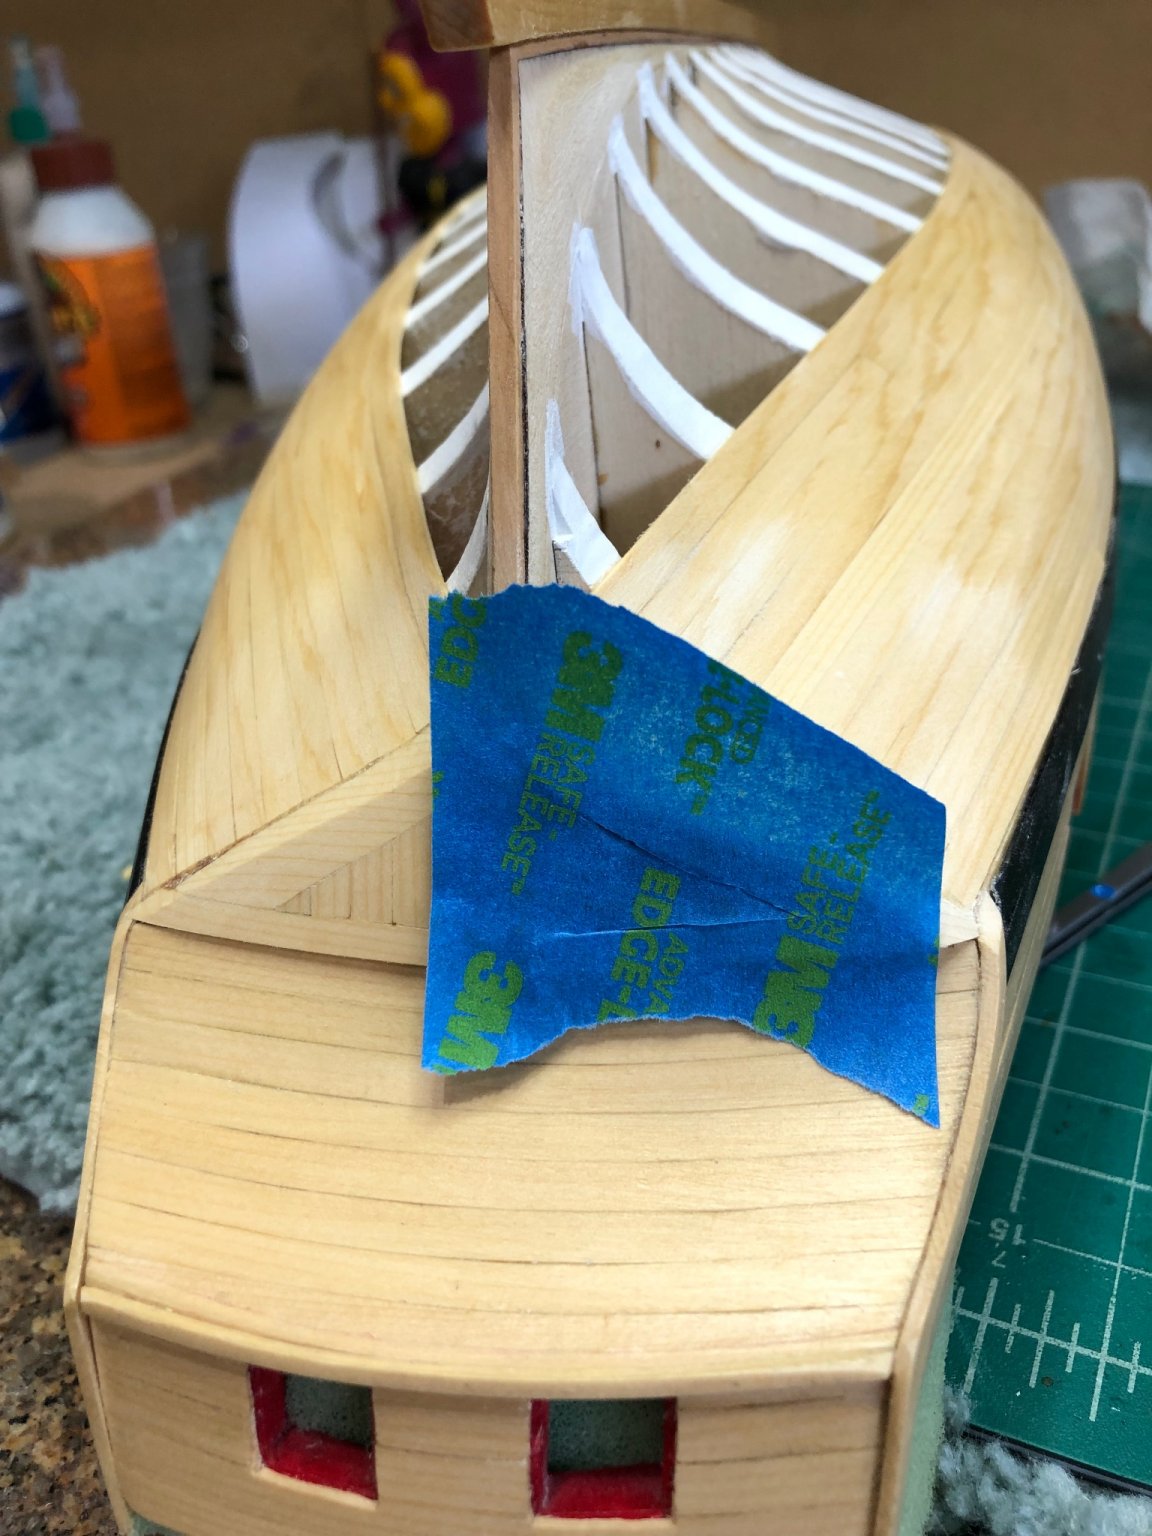
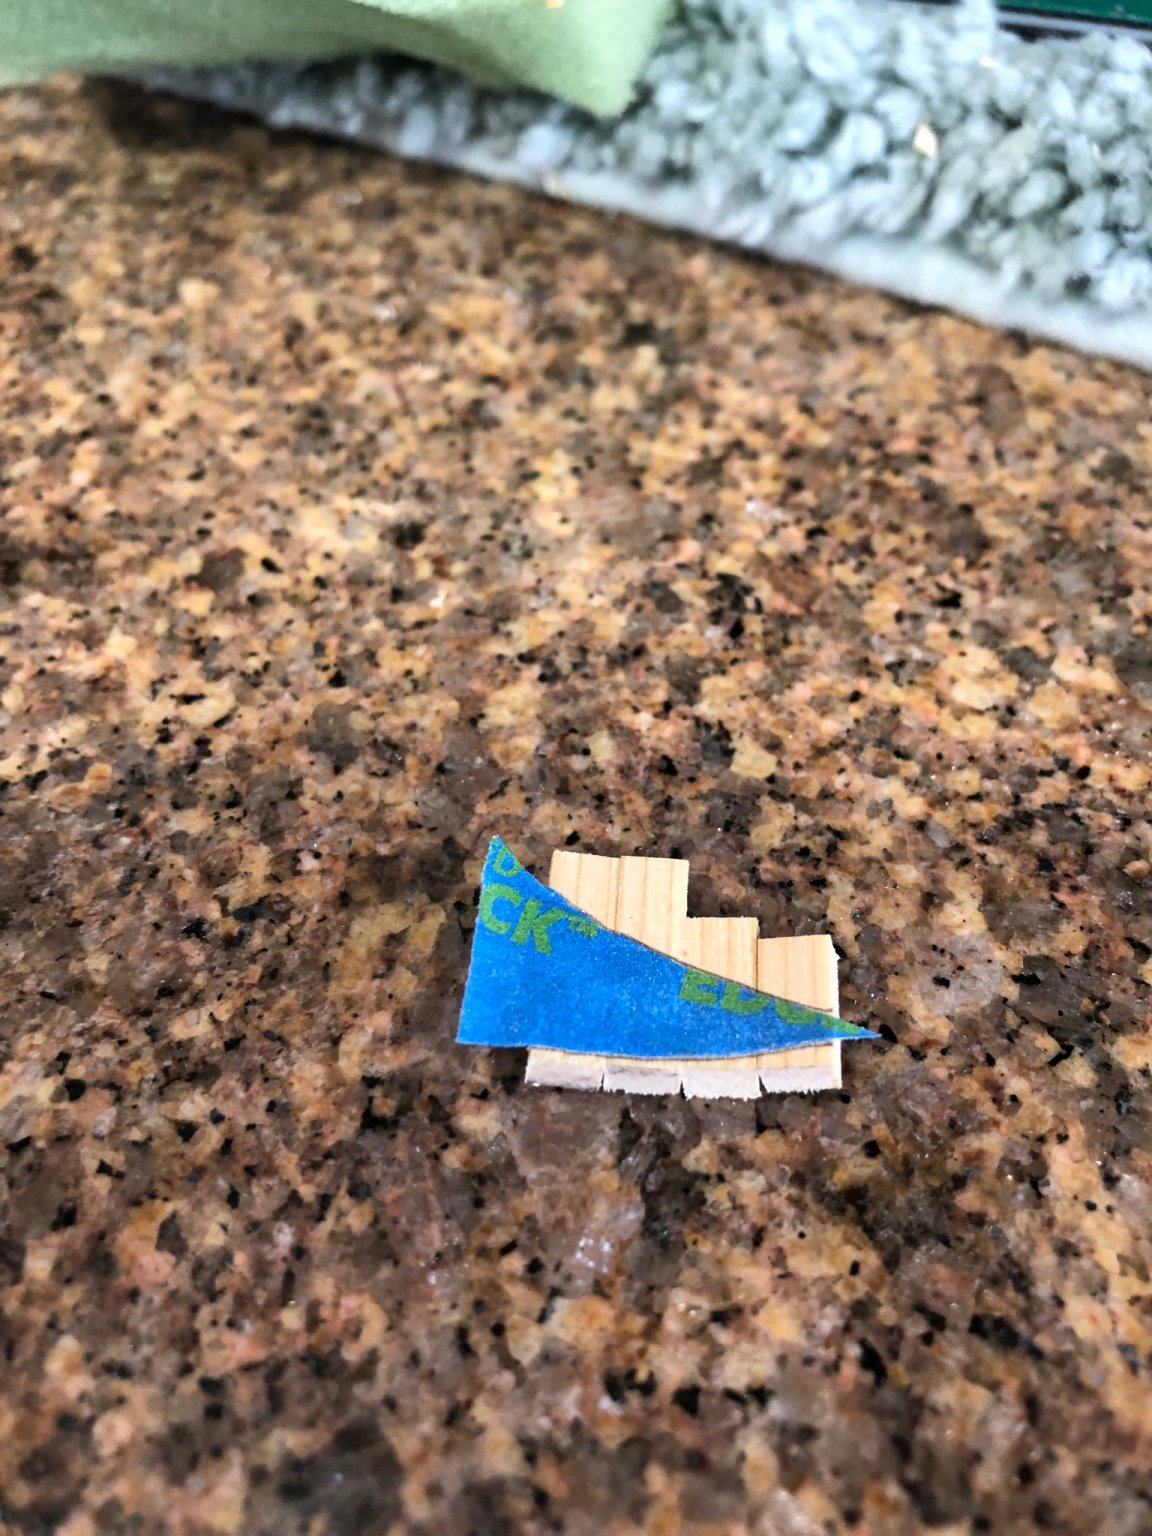
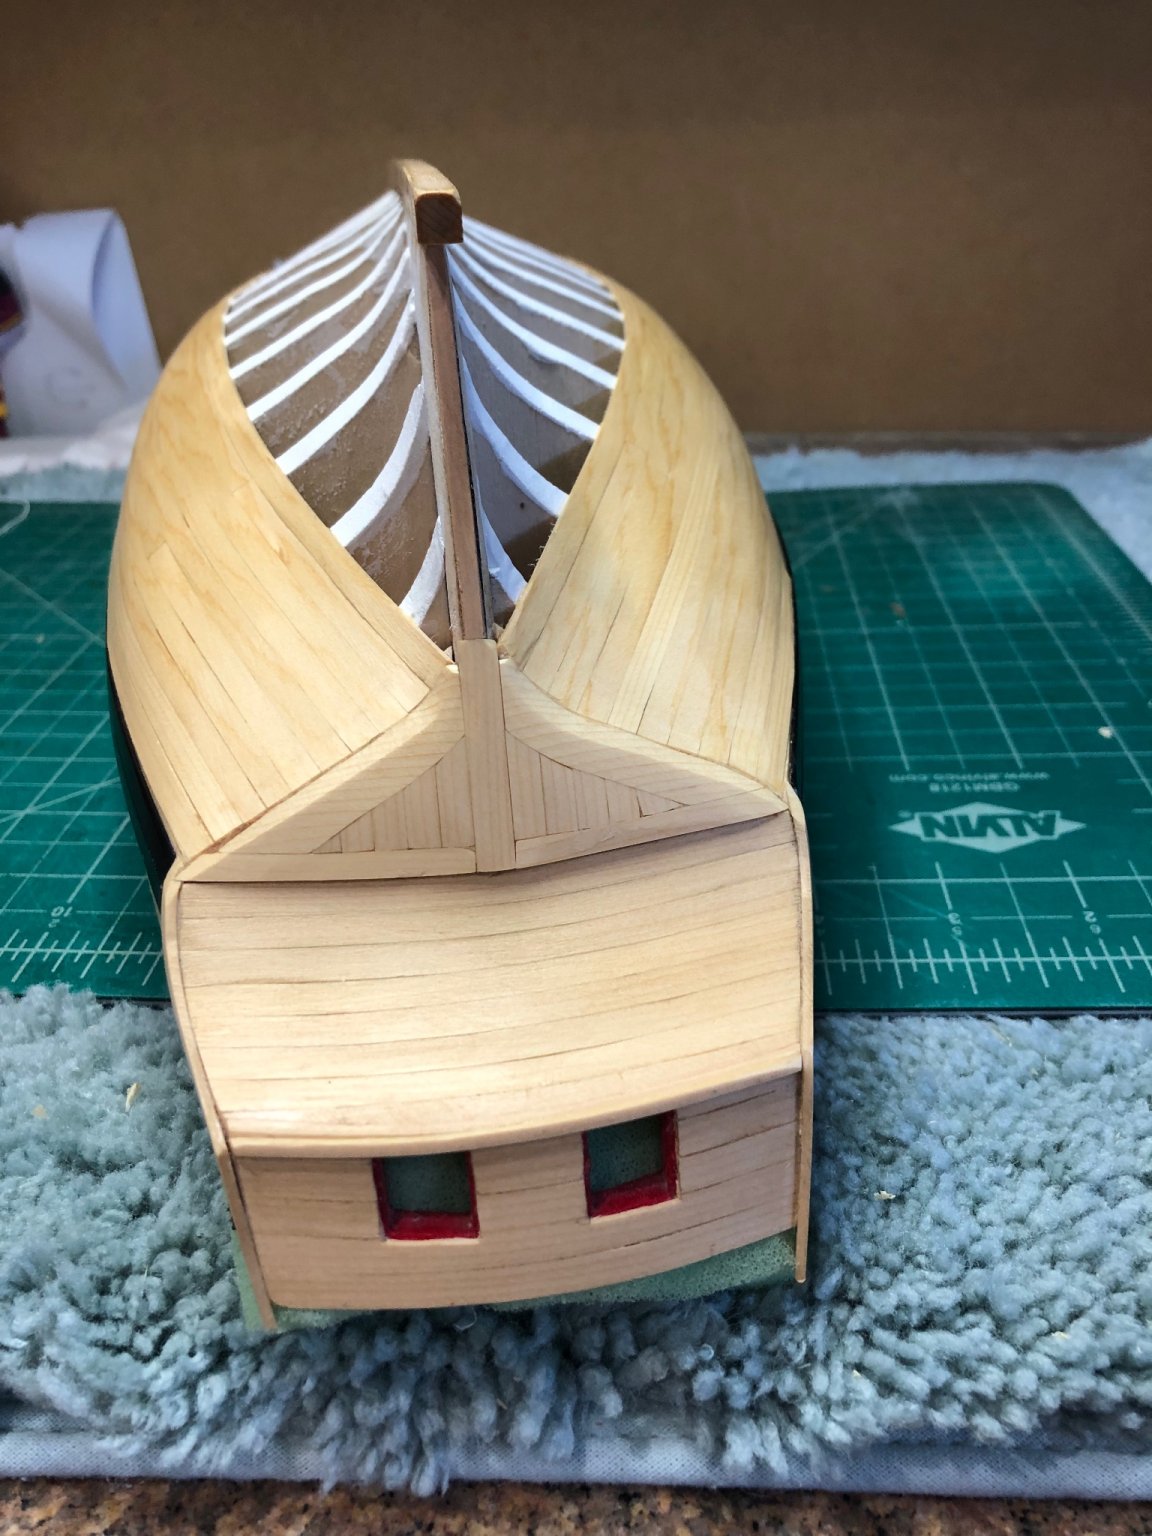
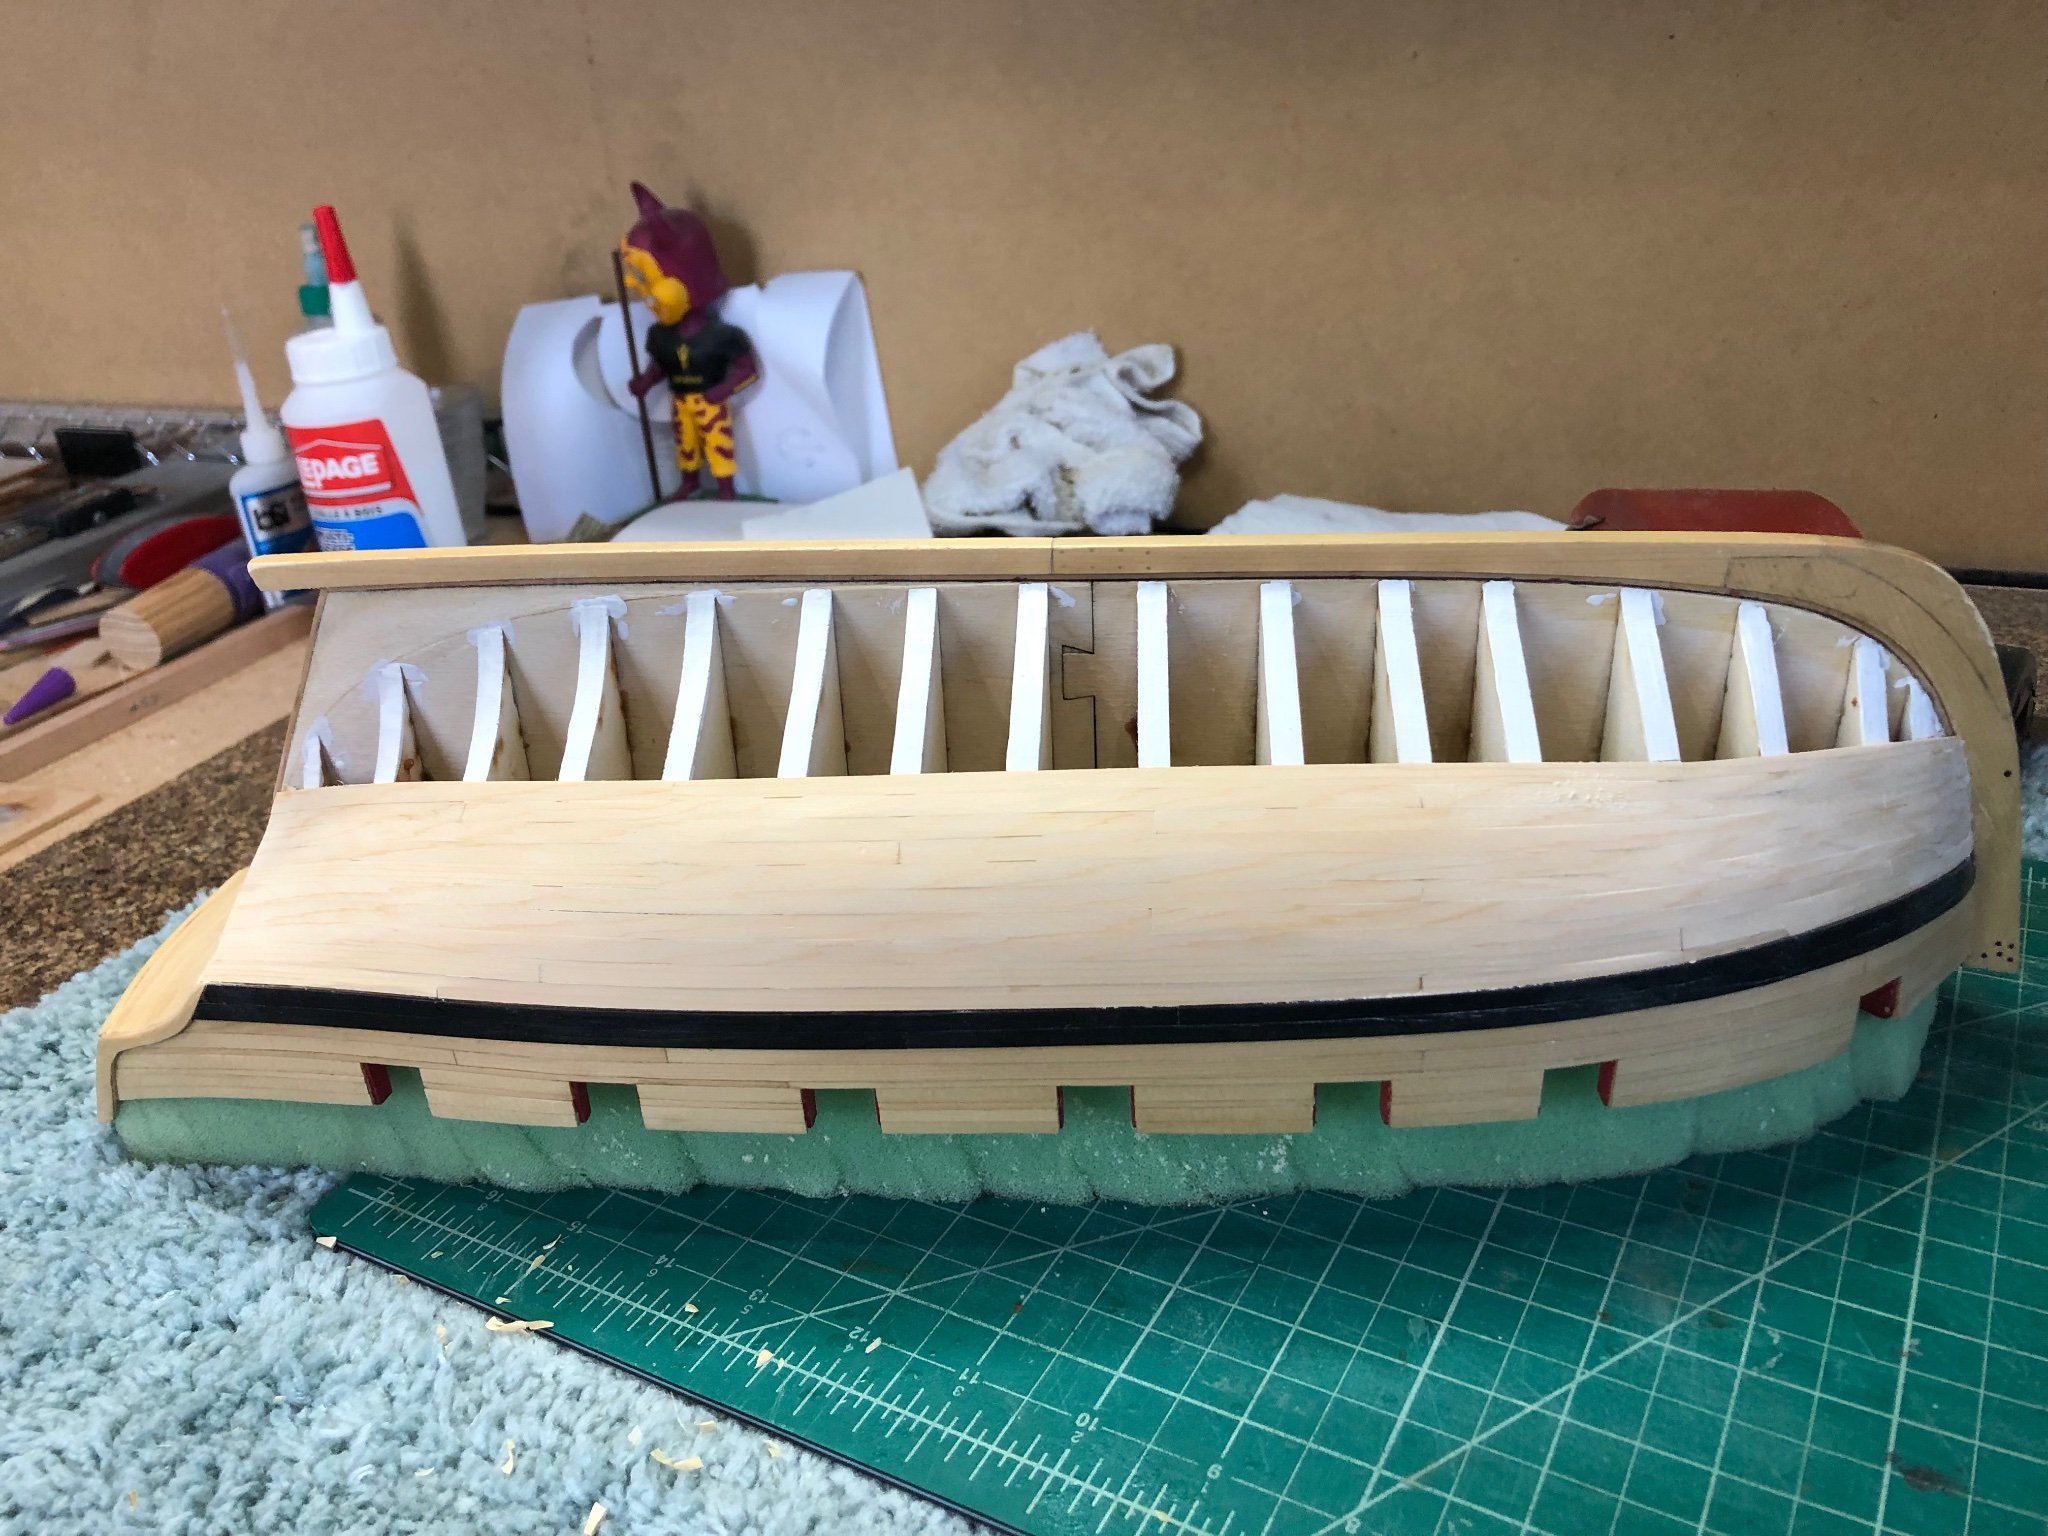
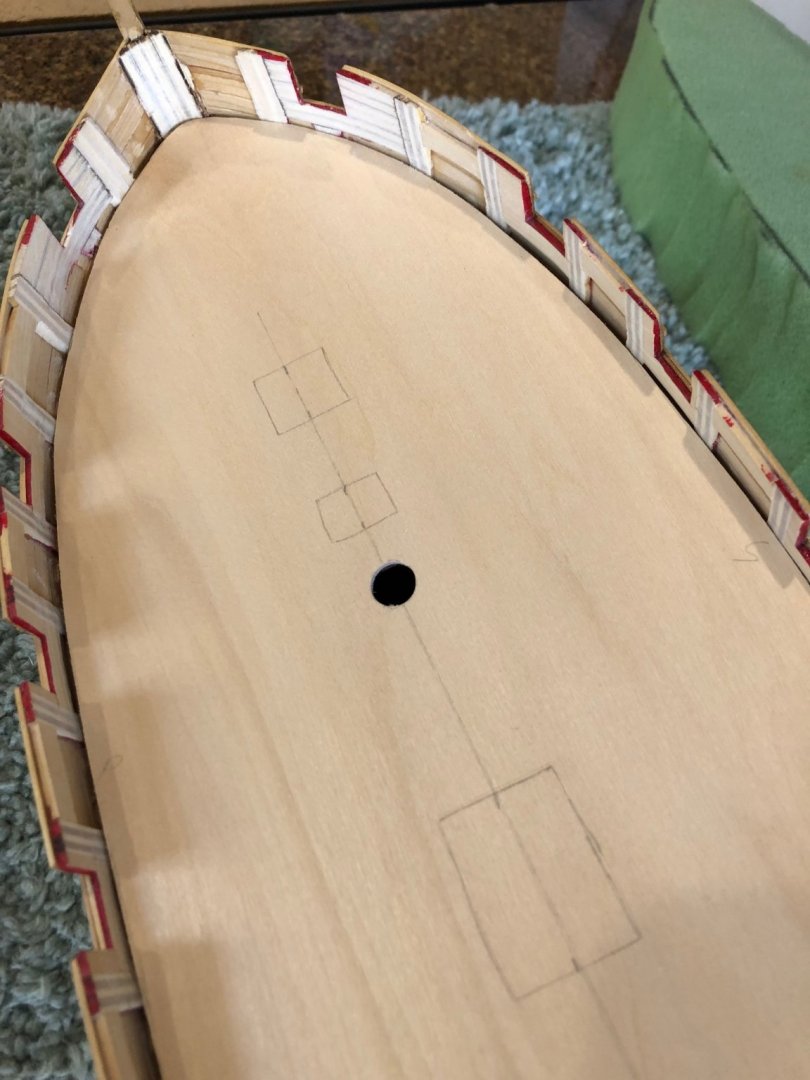
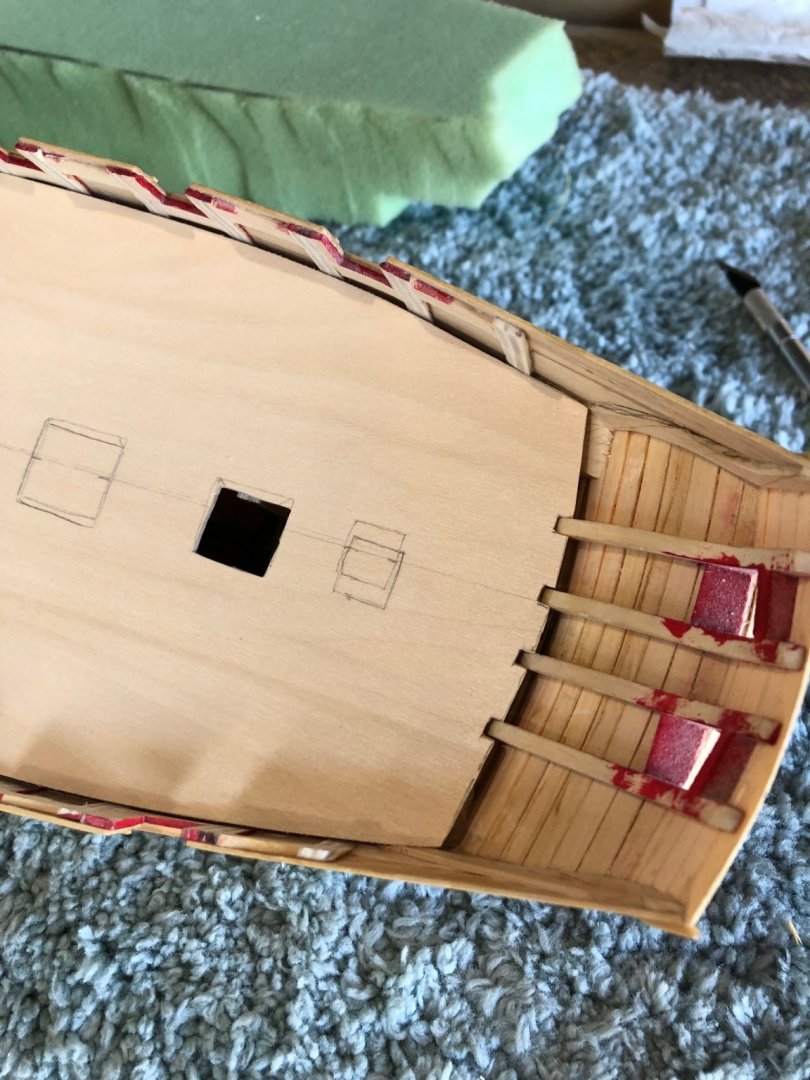
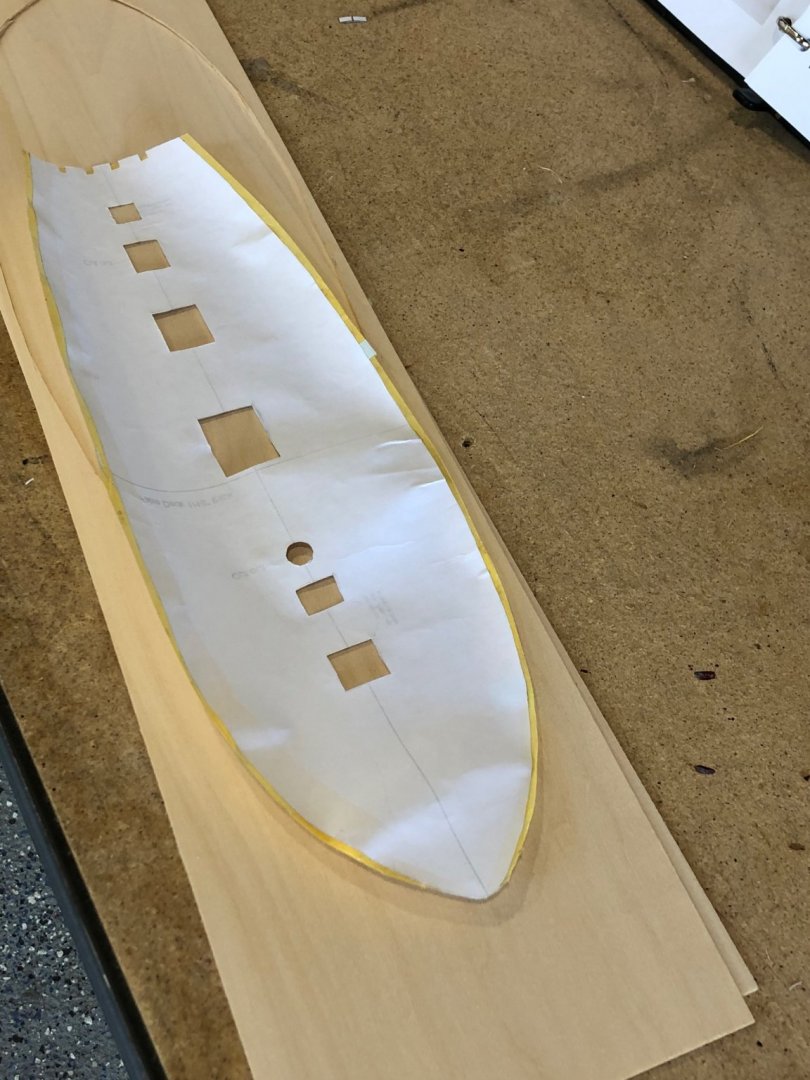
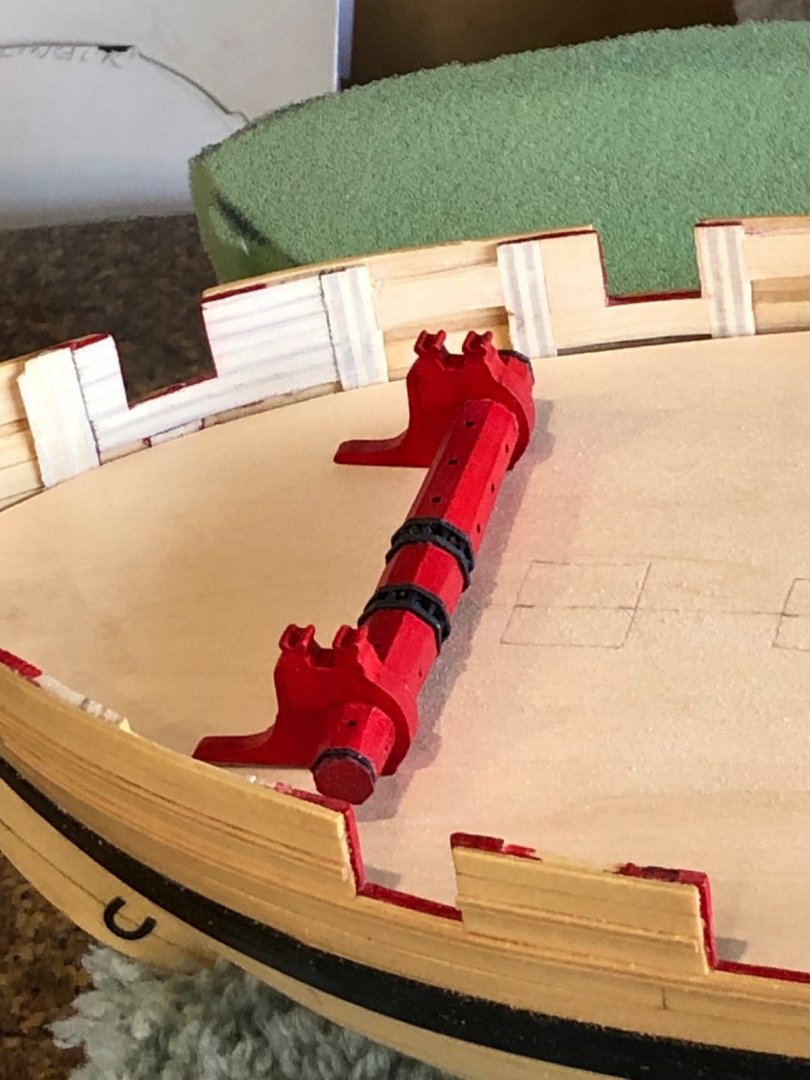
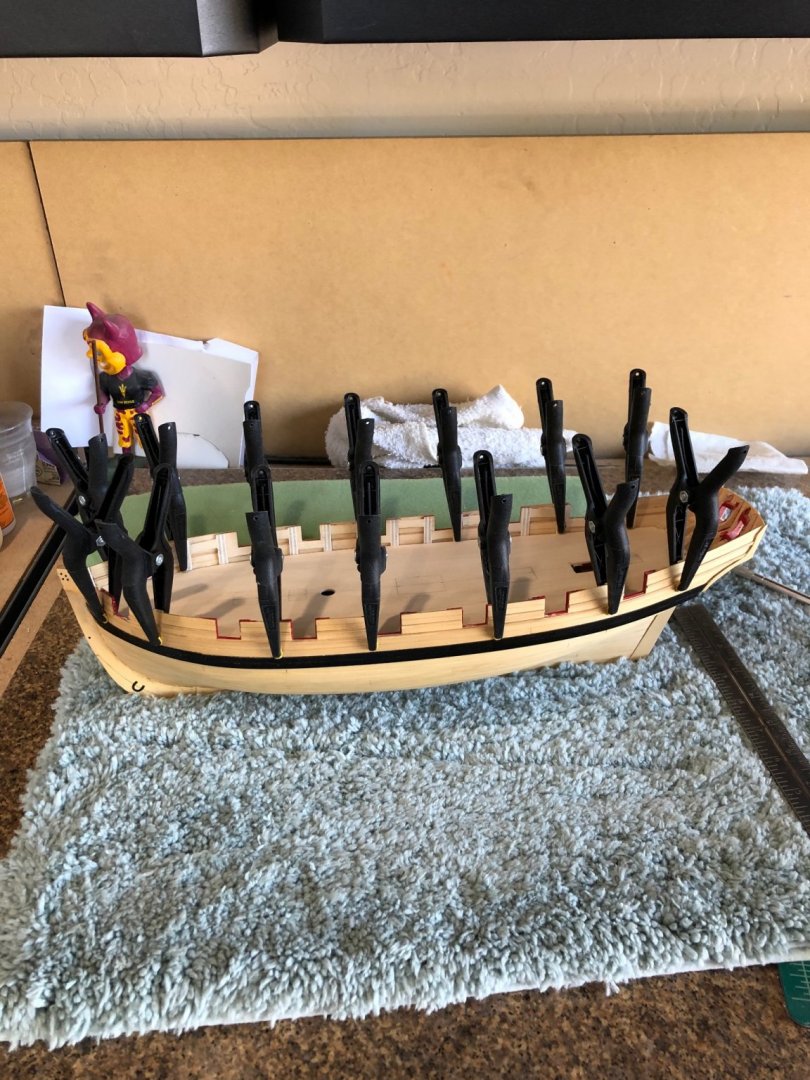
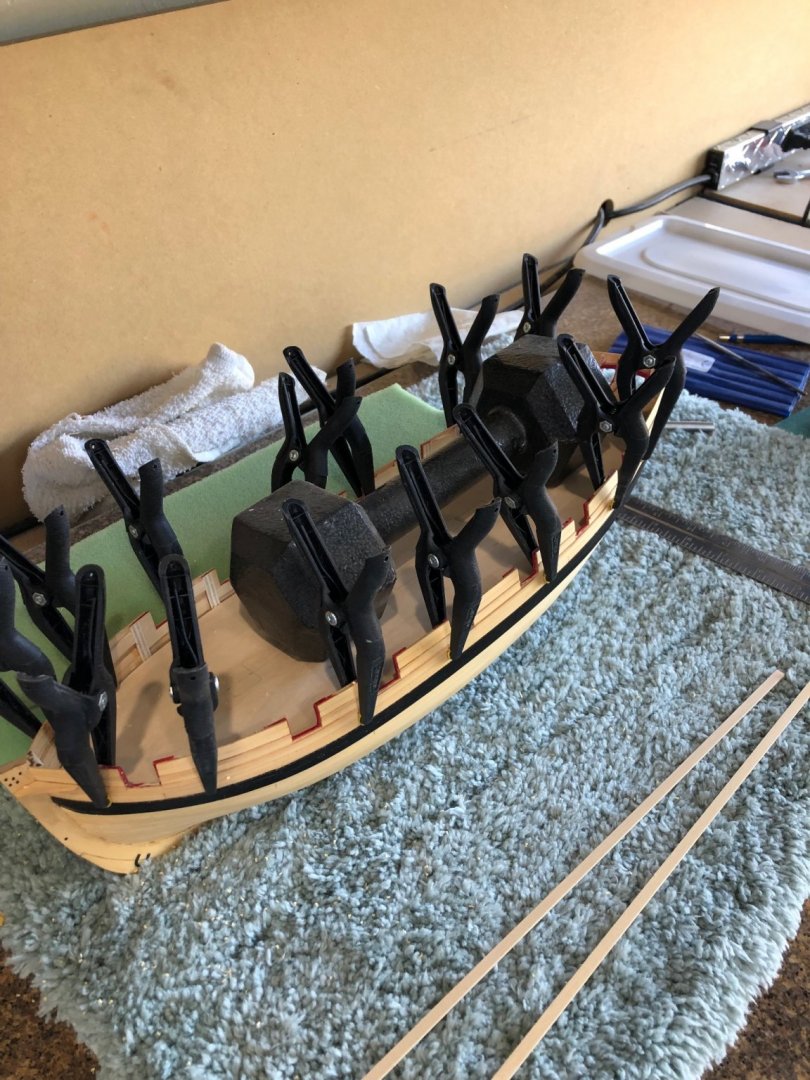
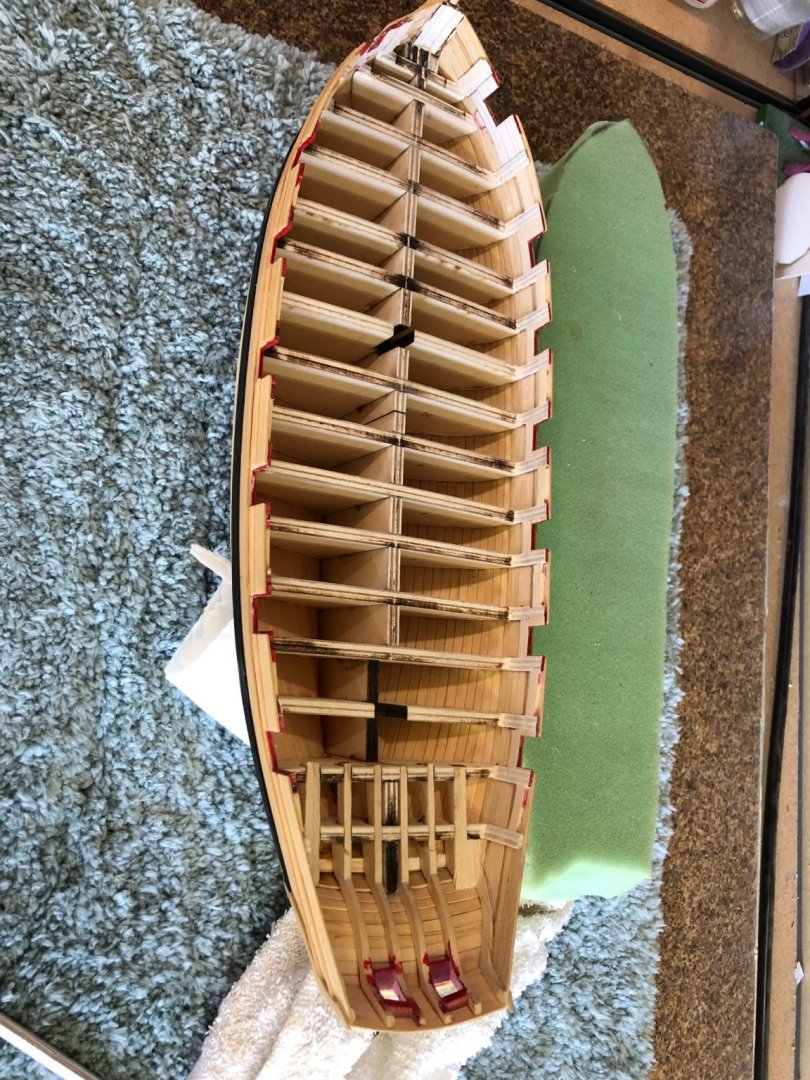
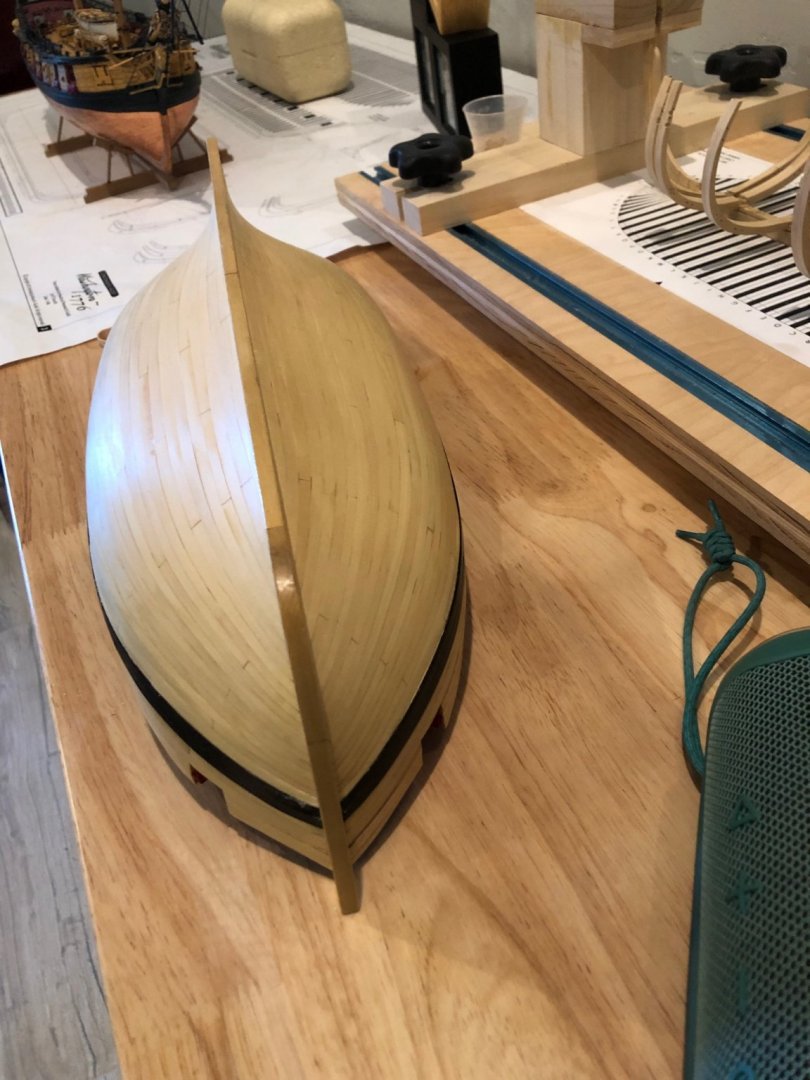
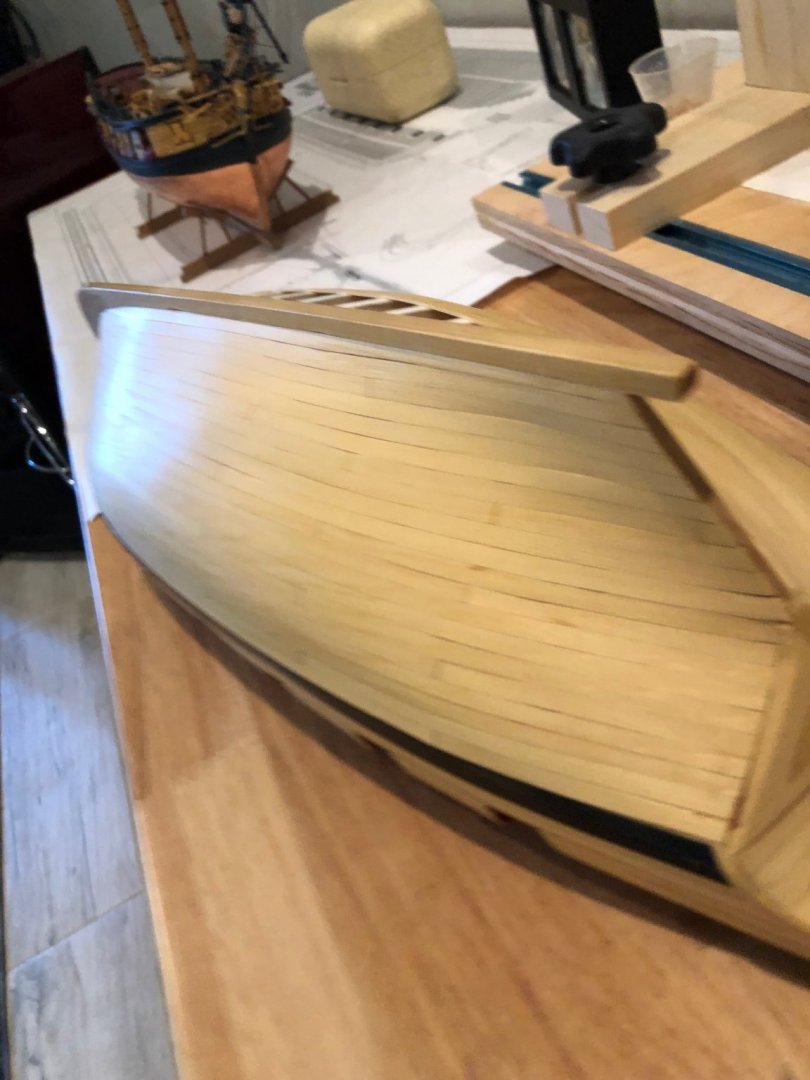
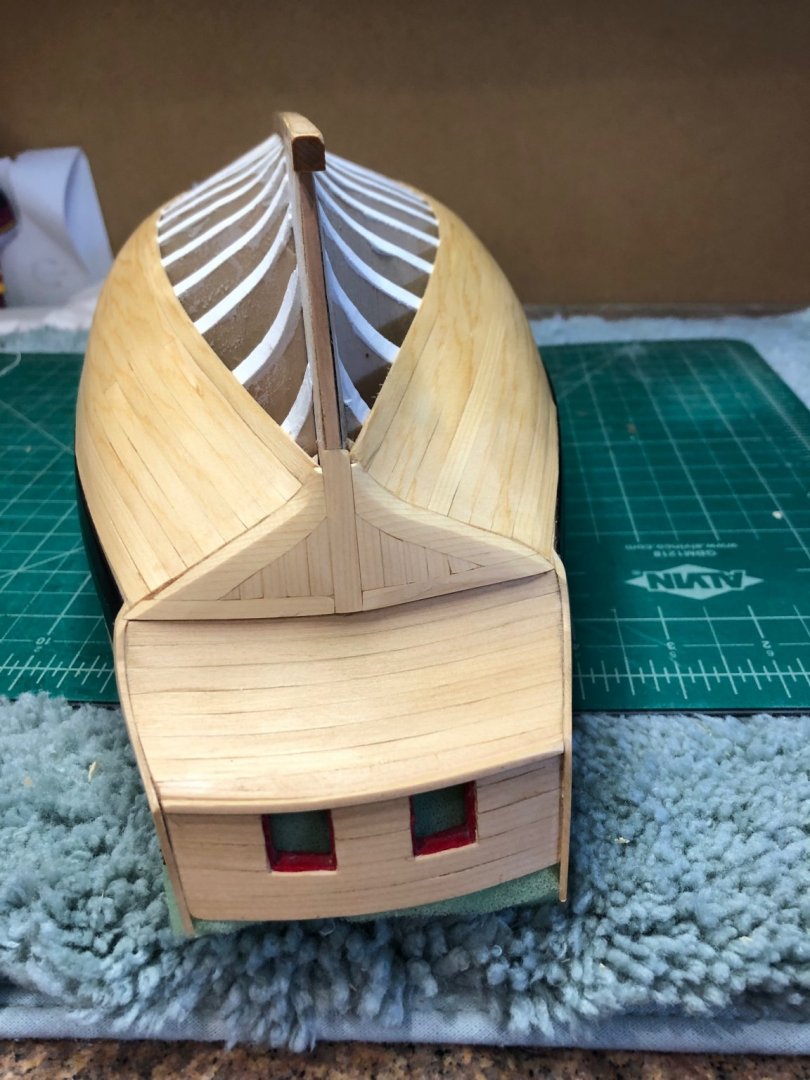
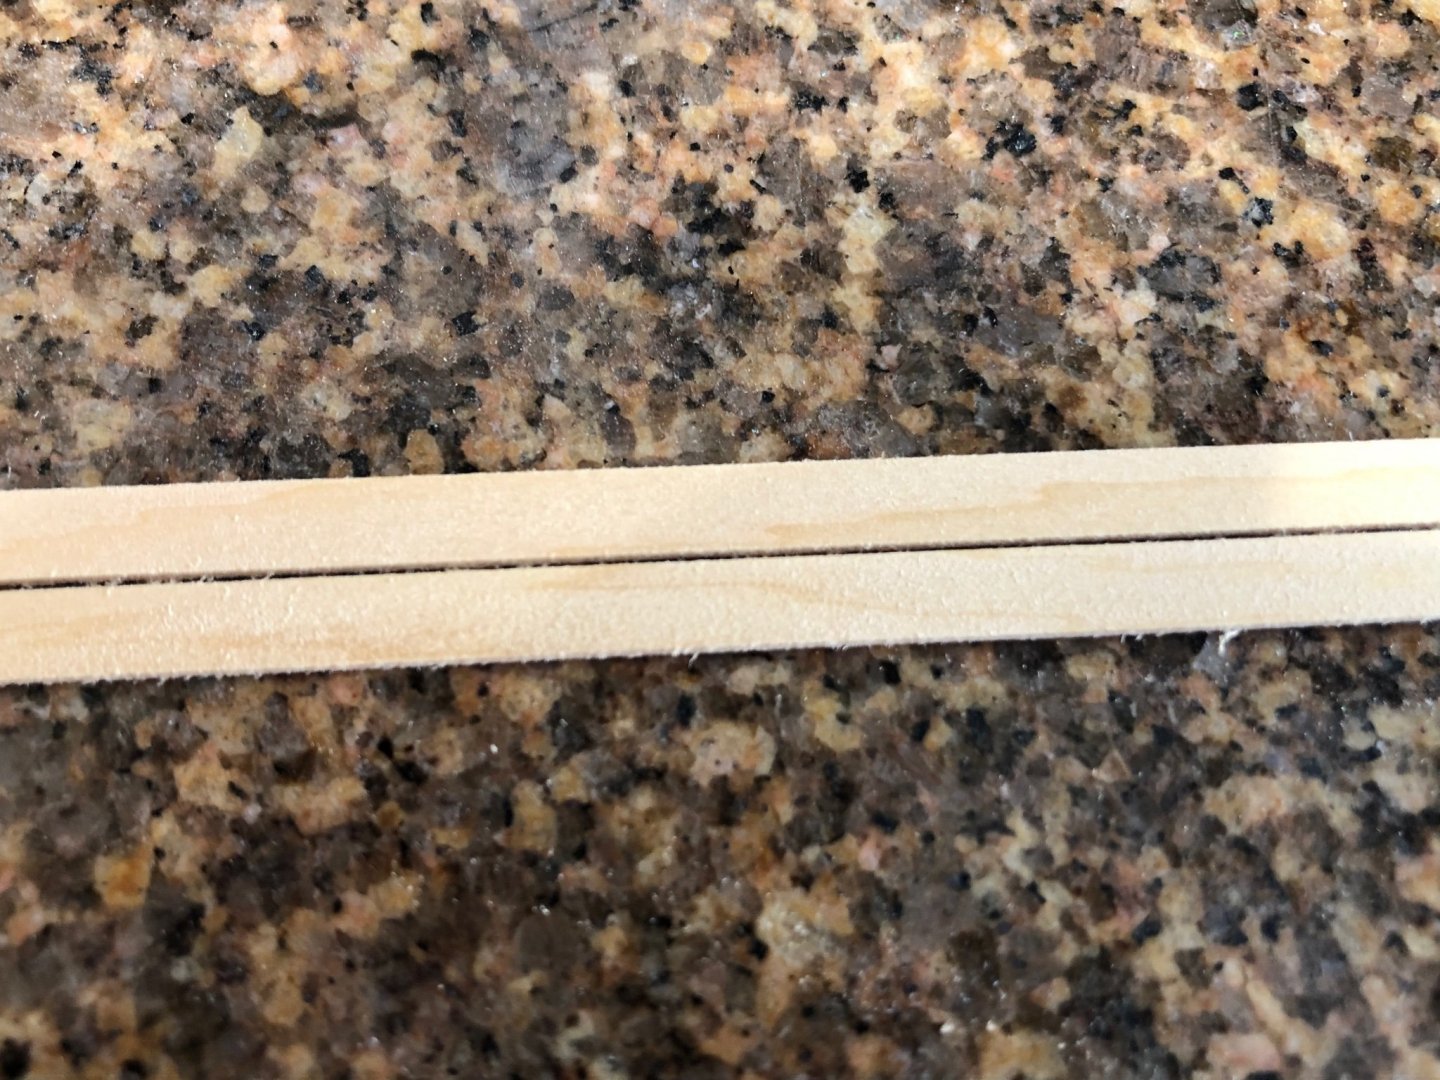
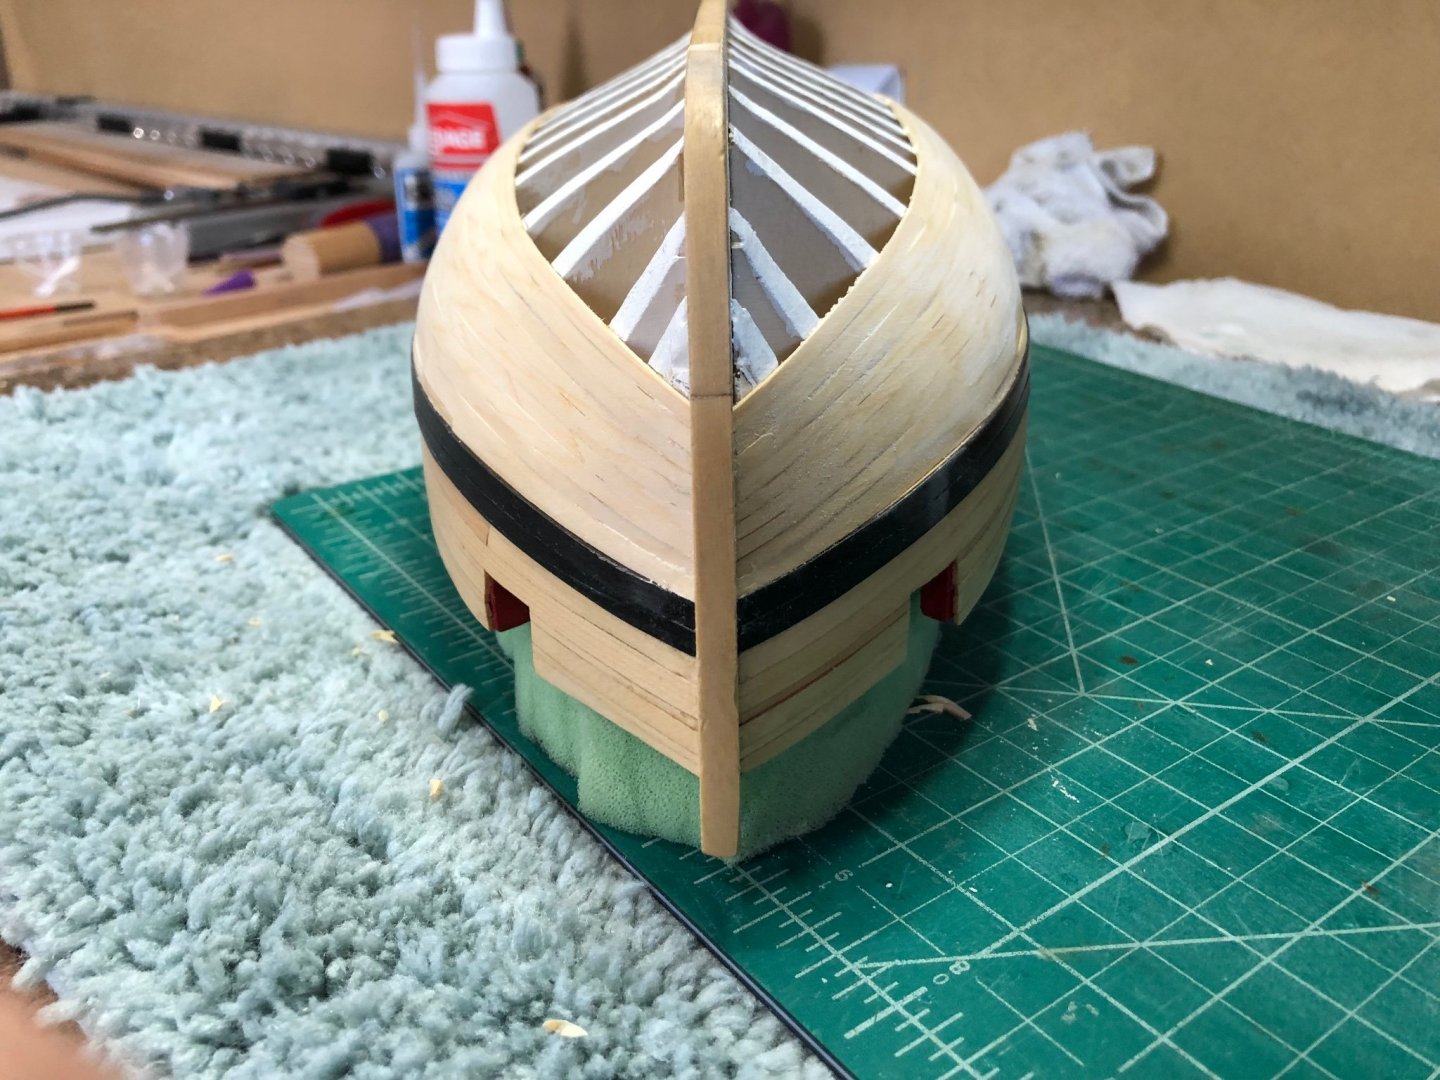
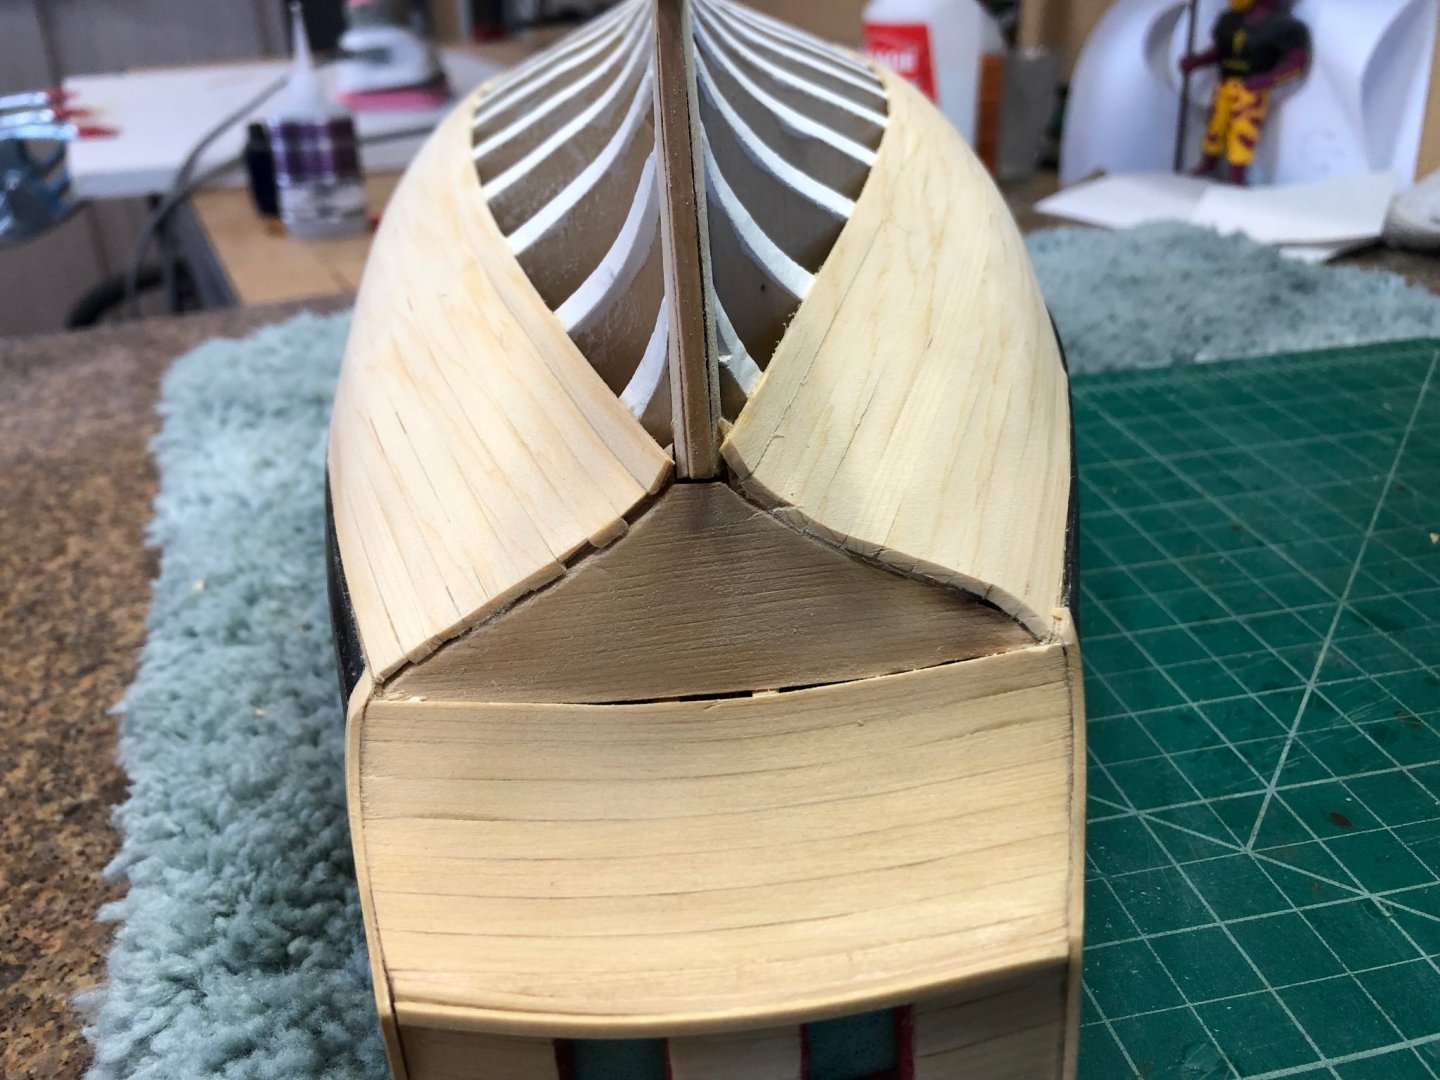
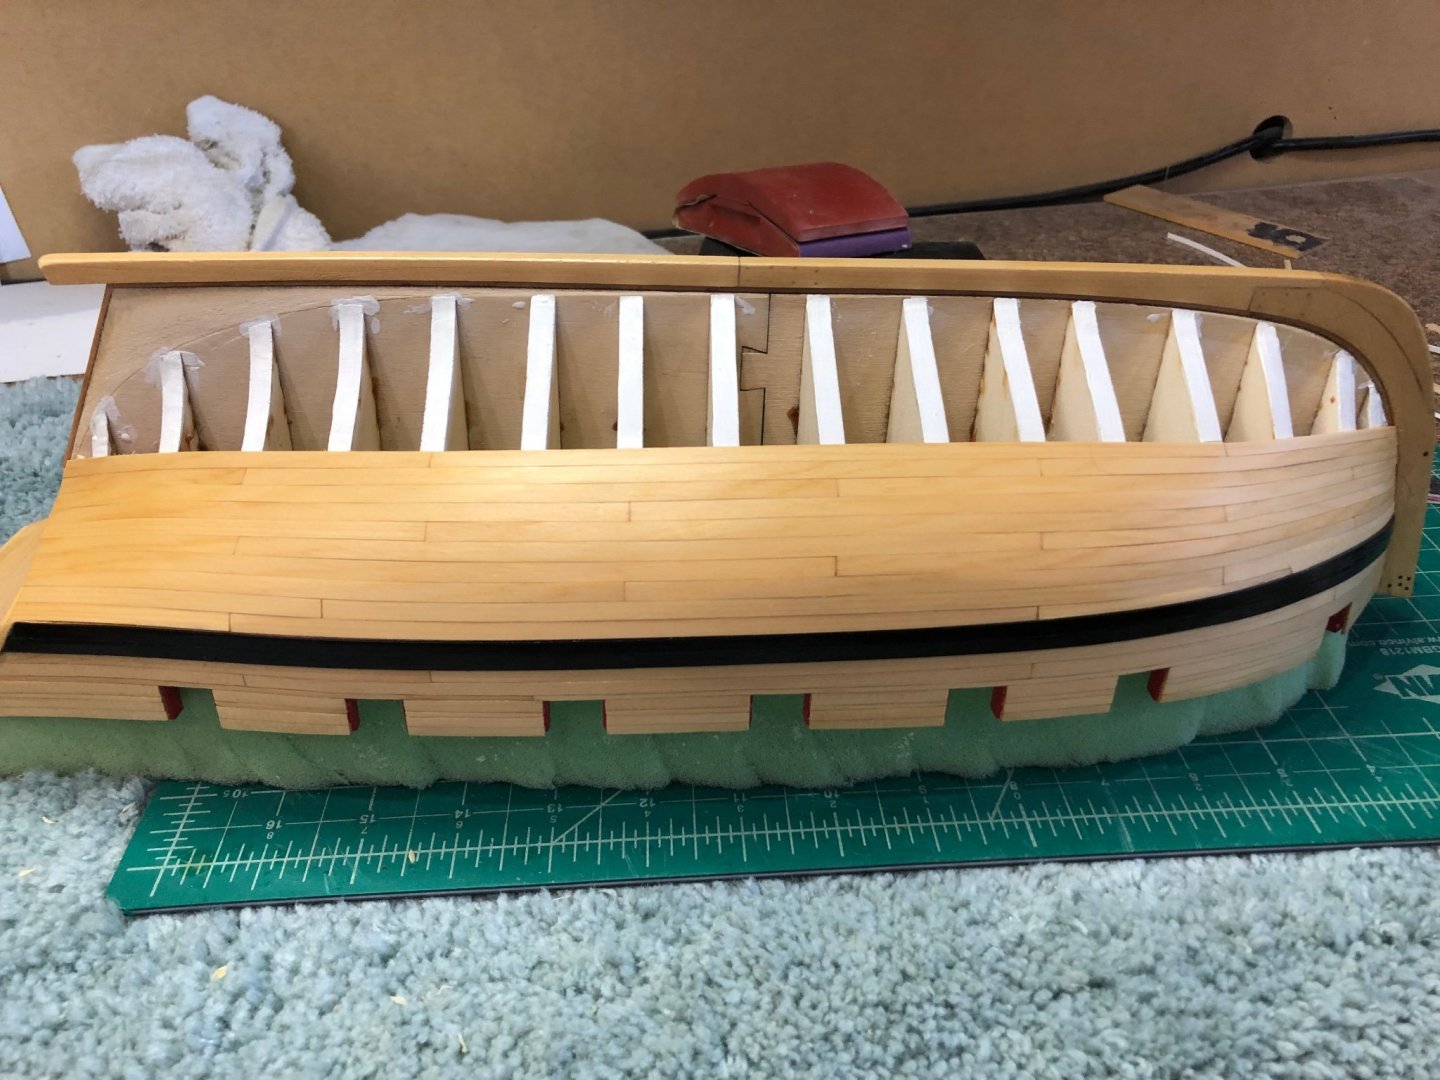
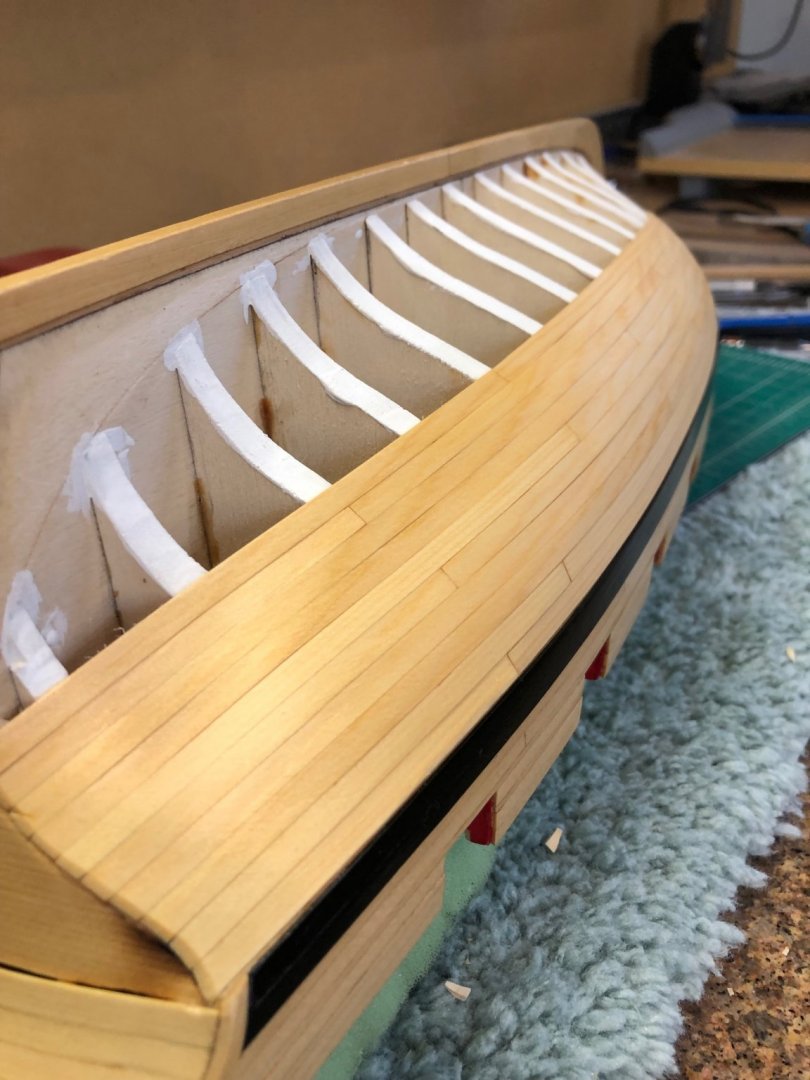
Thanks for all the likes and looks it keeps me motivated and Glenn you are right about a very tough step thinning the bulwarks it was very nerve wracking and tedious. Now with the bulwarks thinned and bulkheads faired it was time to make the false deck. I used Chucks method of cutting the pattern from the plans and edging it with tape to secure on the bulkheads. Then just a matter of removing it from the model and securing it to a piece of 1/16" basswood. (purchased a Hobby Lobby for $4.69 for 1/16 by 6 by 24 I bought two just incase) After securing to the basswood and tracing the outline it was a matter of tracing the holes and deck furniture locations. After cutting the outline the outside was sanded smooth and with so little tumblehome it wasn't difficult to slip the deck in place with a slight amount of radius. After fitting the deck I had some slight leveling to do at the stern on the port side that done and with the deck in again checking fit I had some fun with the already made skylight and windless. After applying a sufficient coat of glue the deck was set and using sprint clips to hold the edges against the bulkheads to dry. Also used a dumb bell to hole the deck down at the counter as there is a slight rise the the clip couldn't address. While the deck drys 3/16" by 3/64" strips were ripped and when the deck dries filler pieces can be added prior to starting the planking.


-
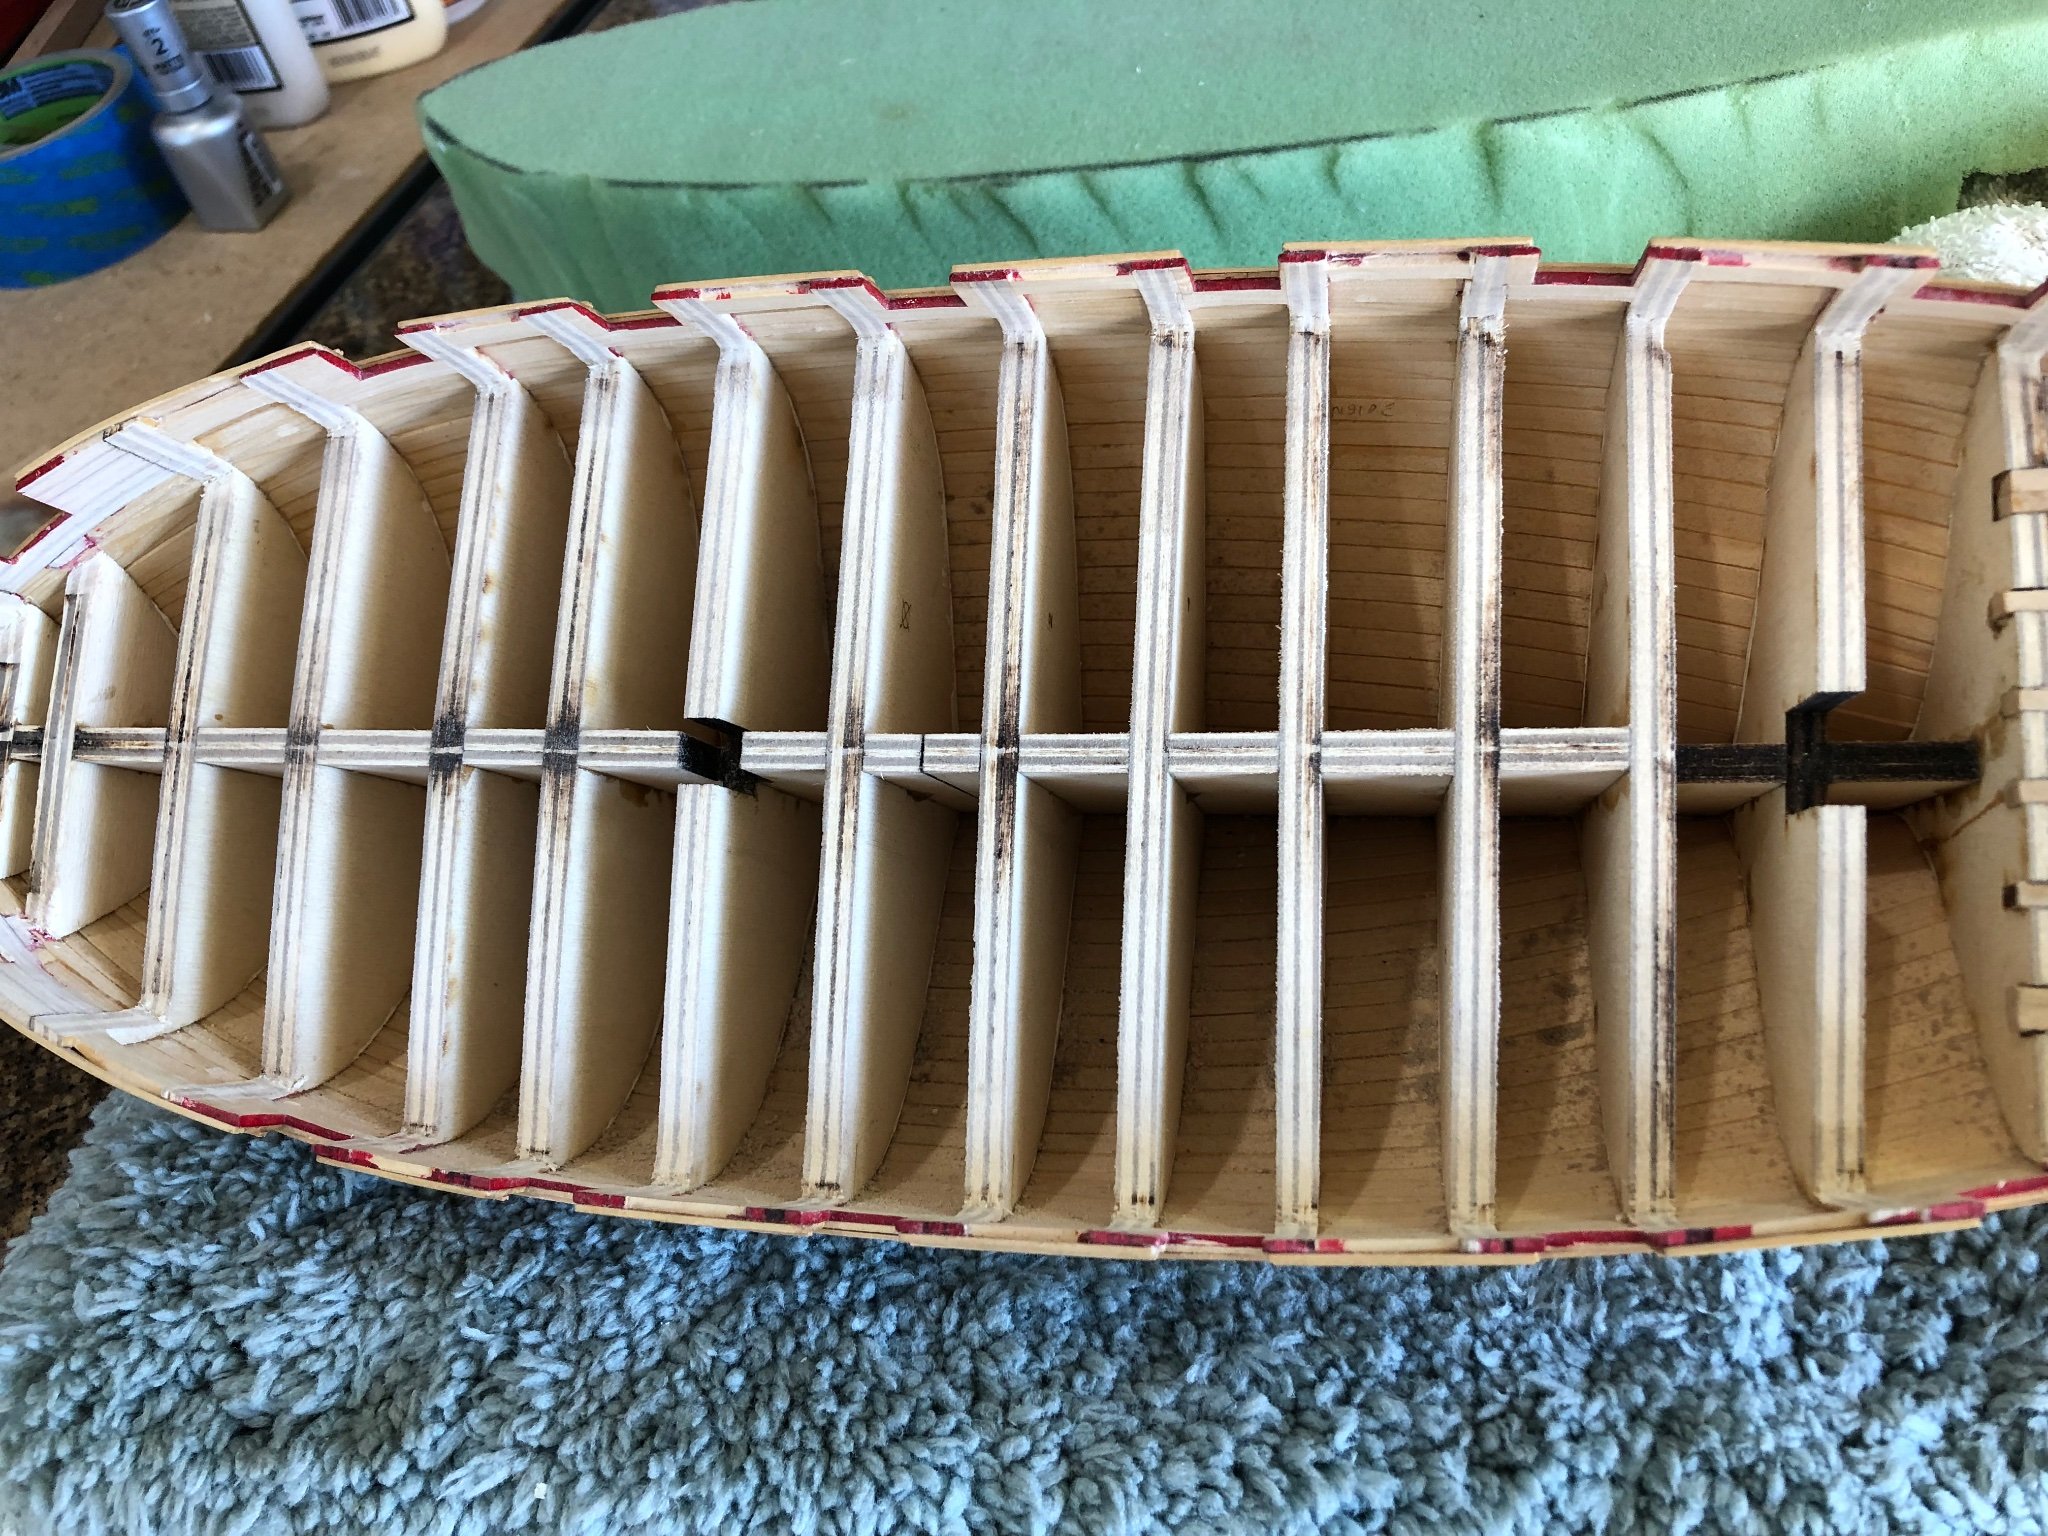
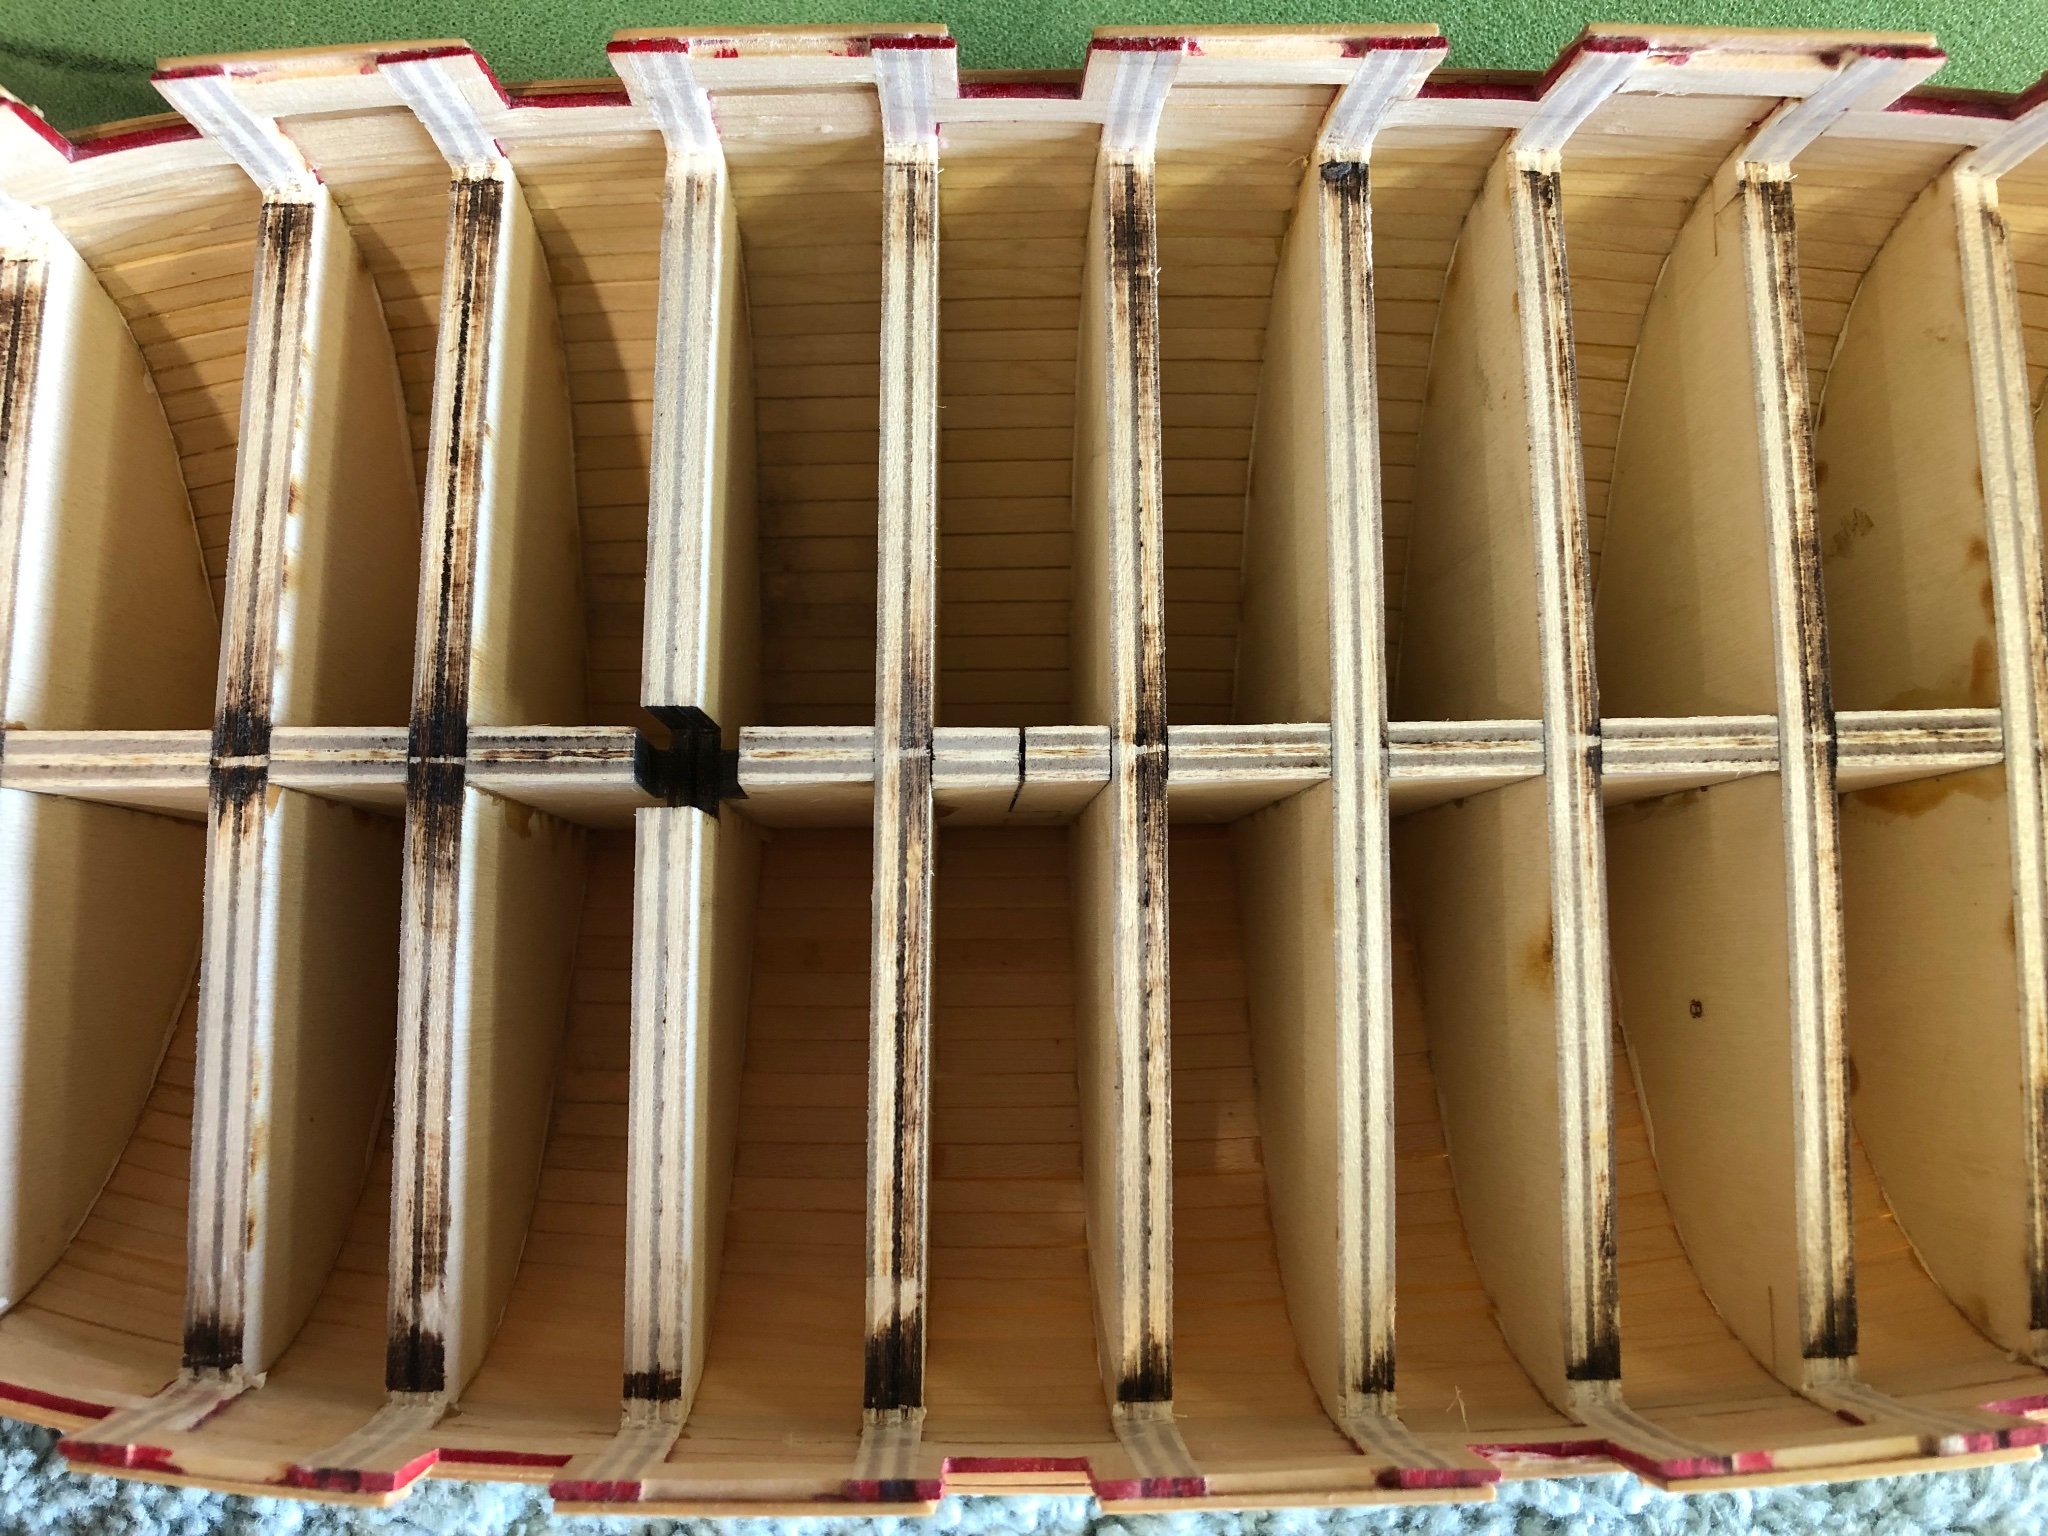
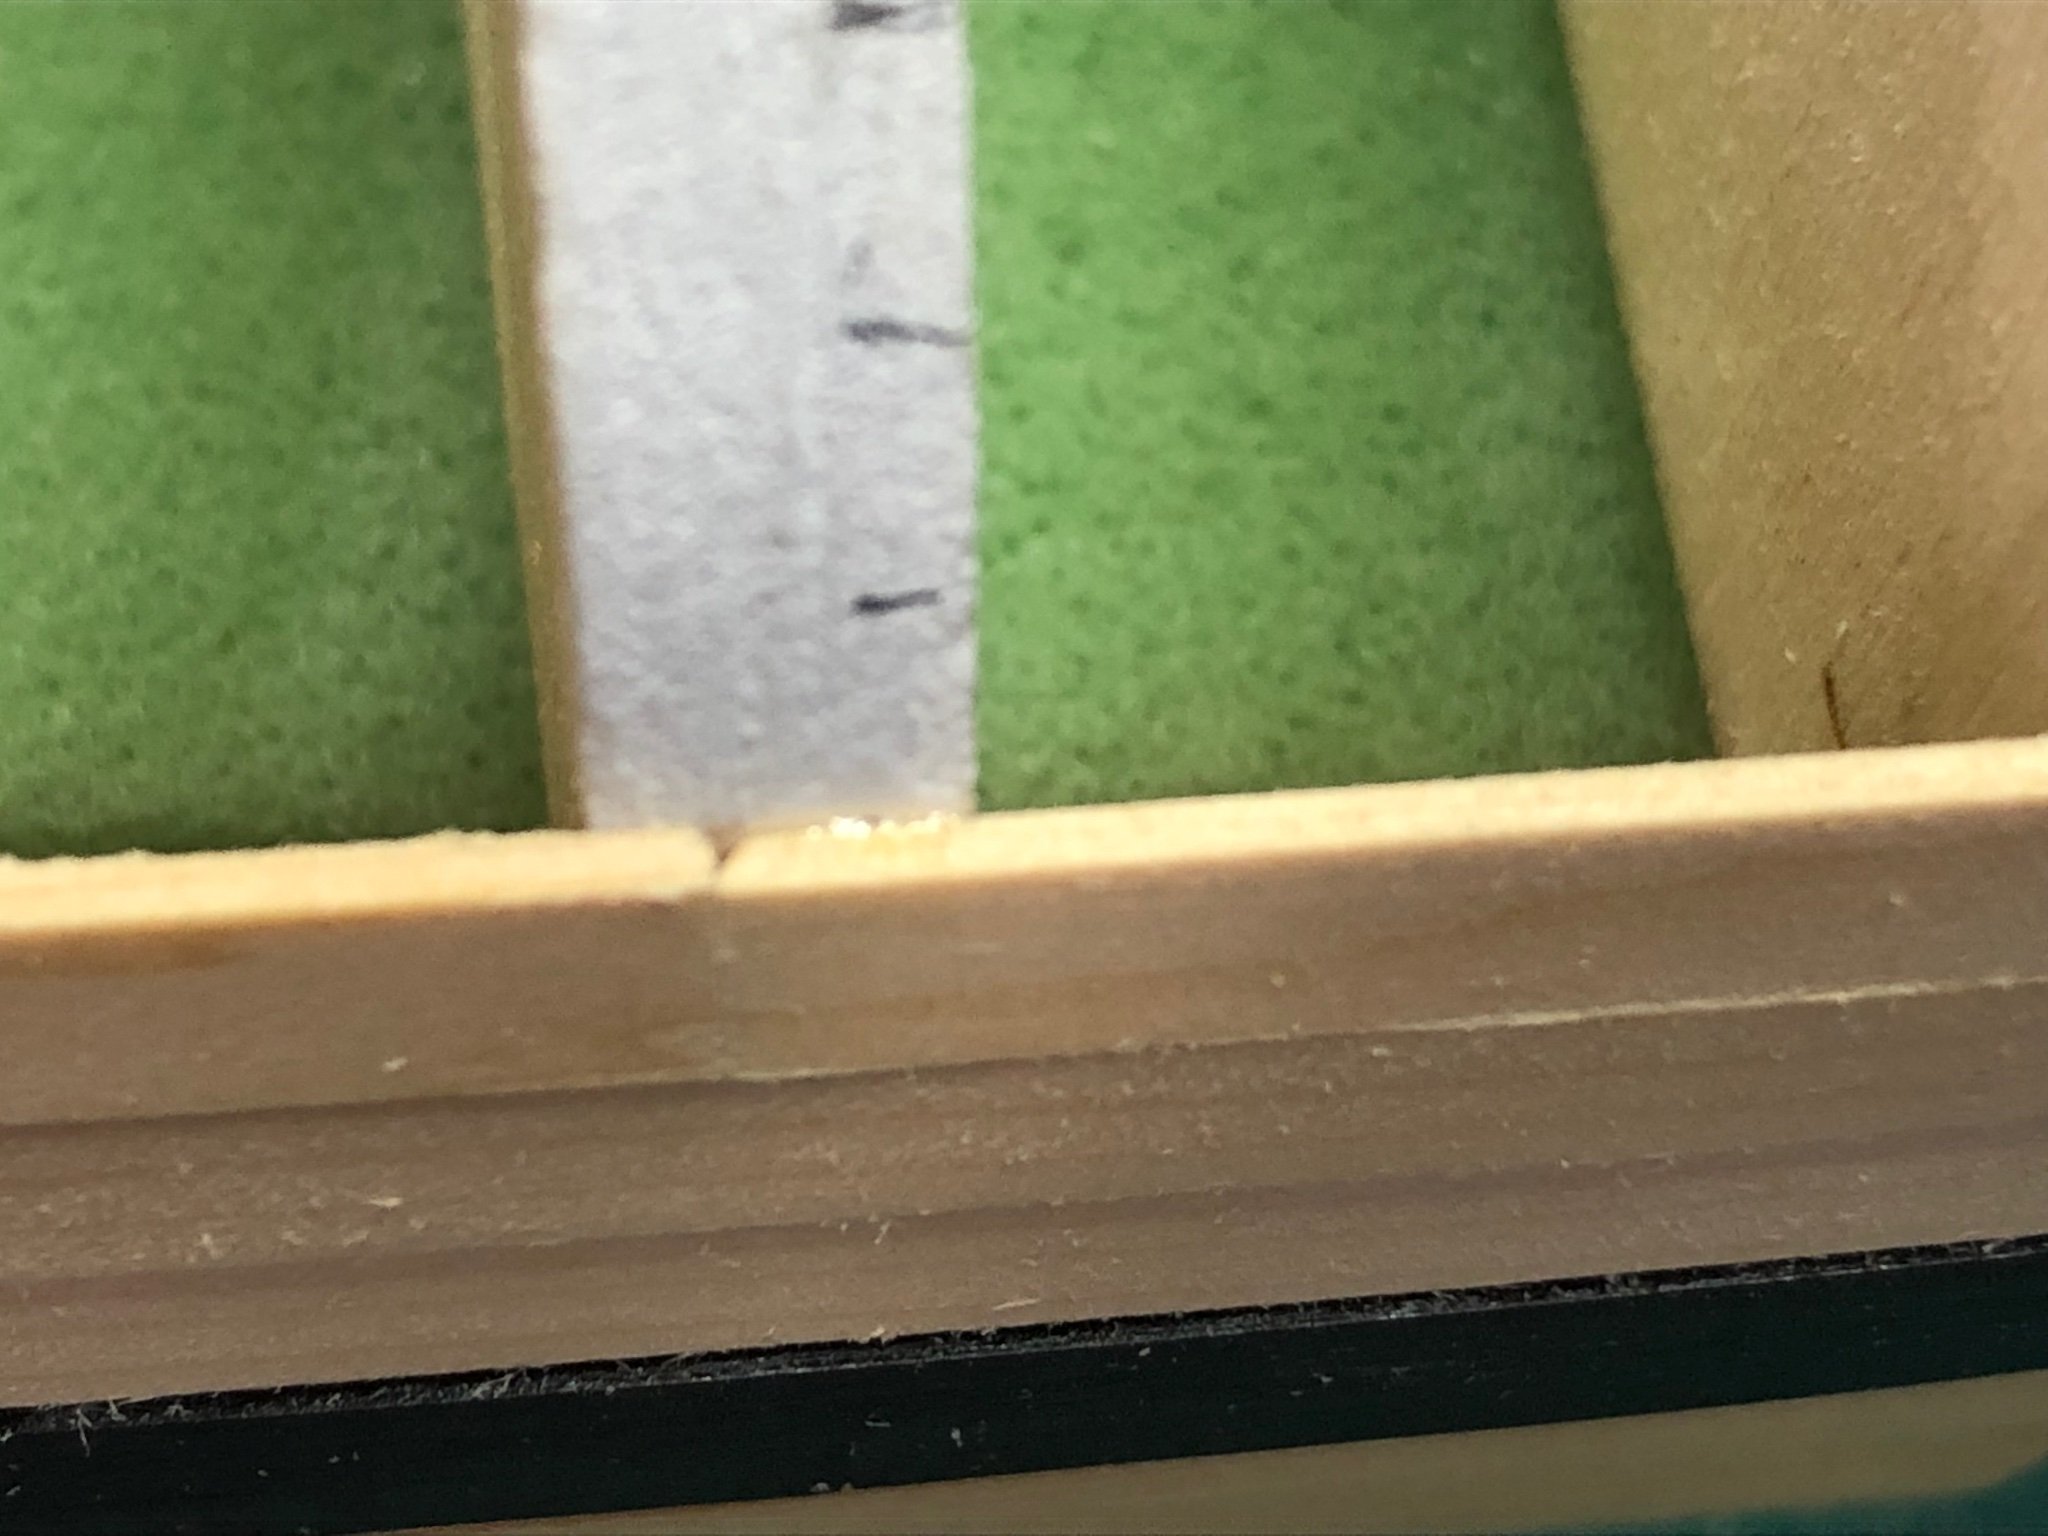
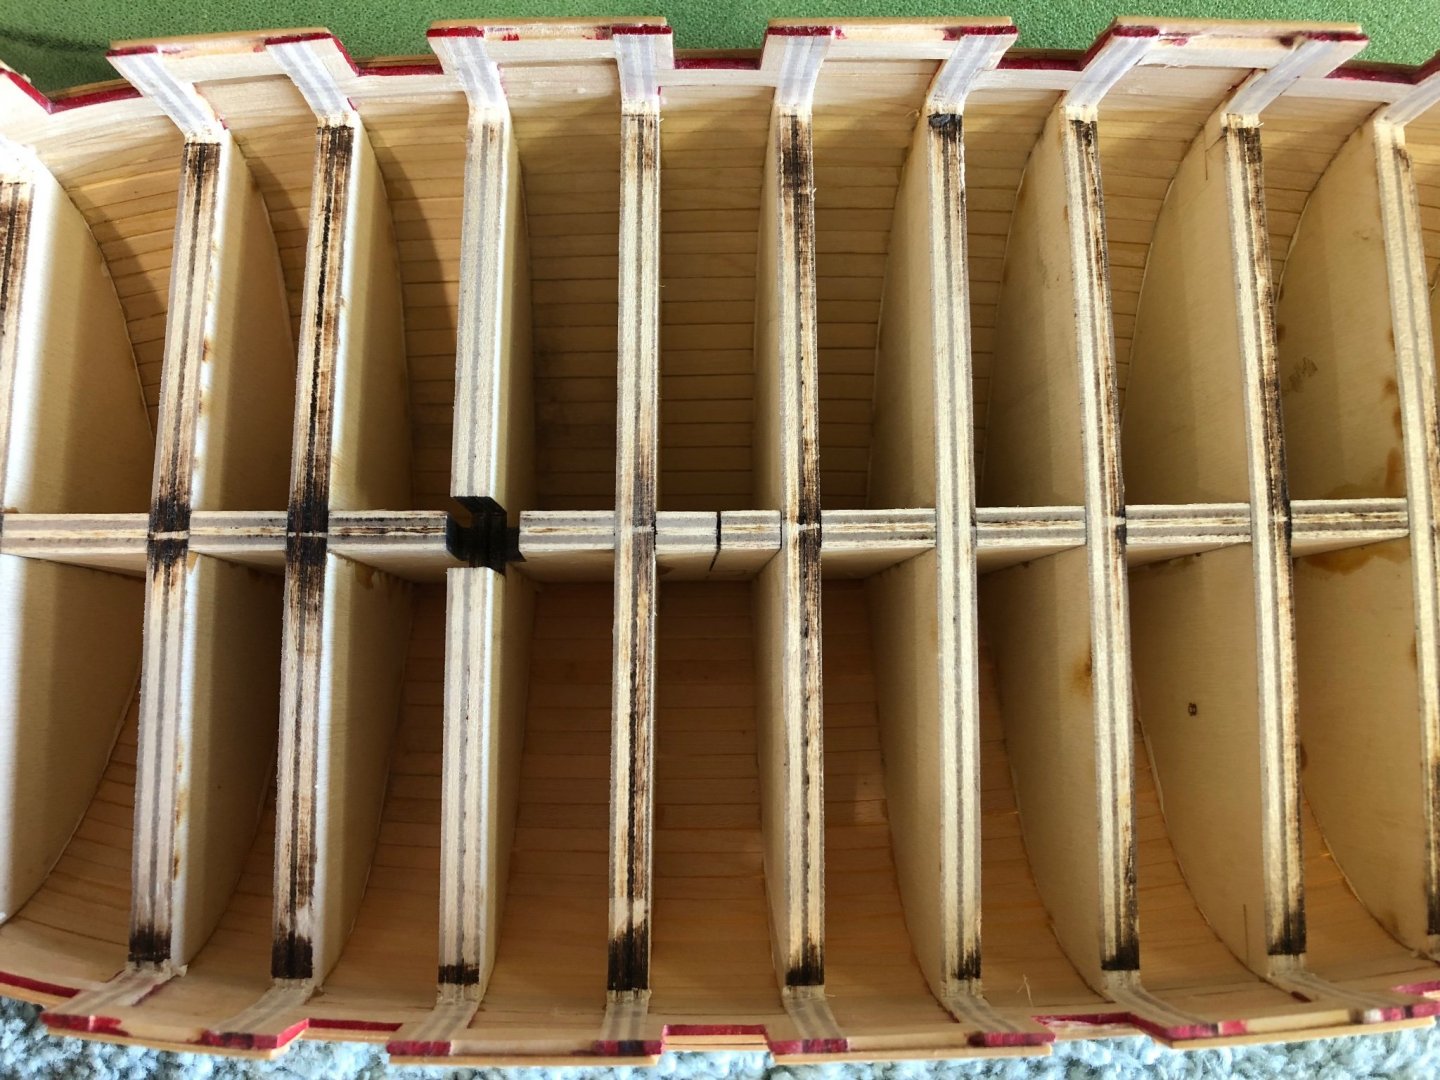
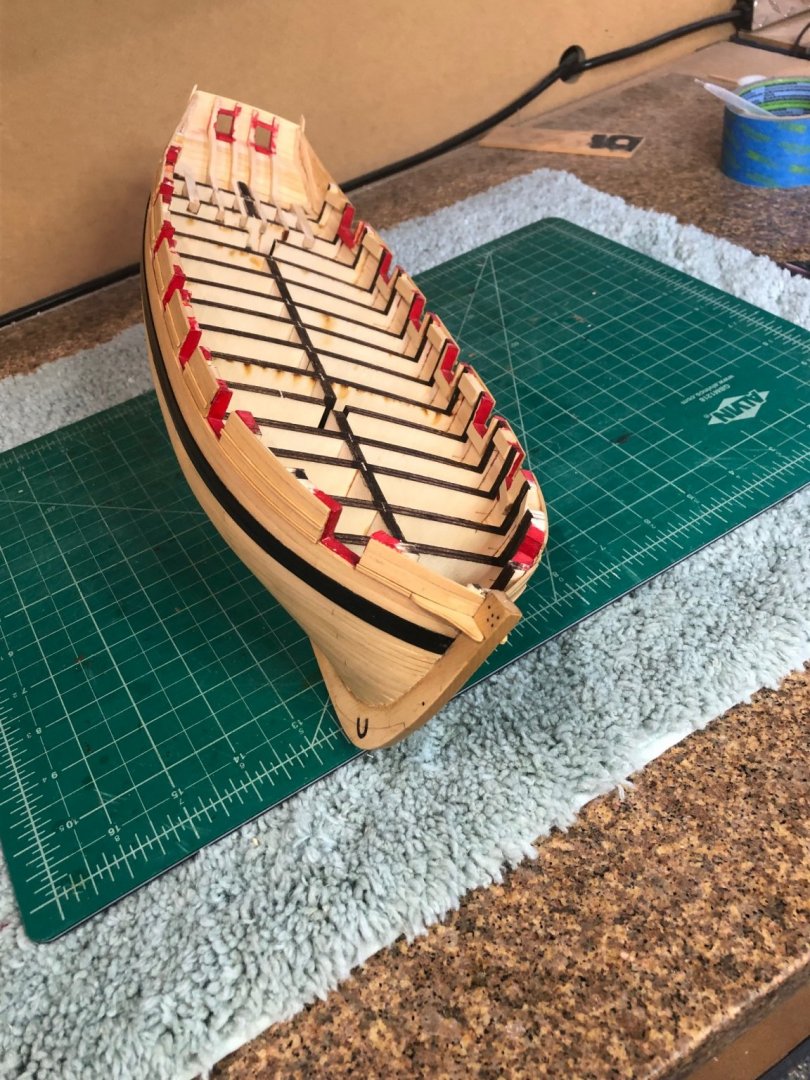
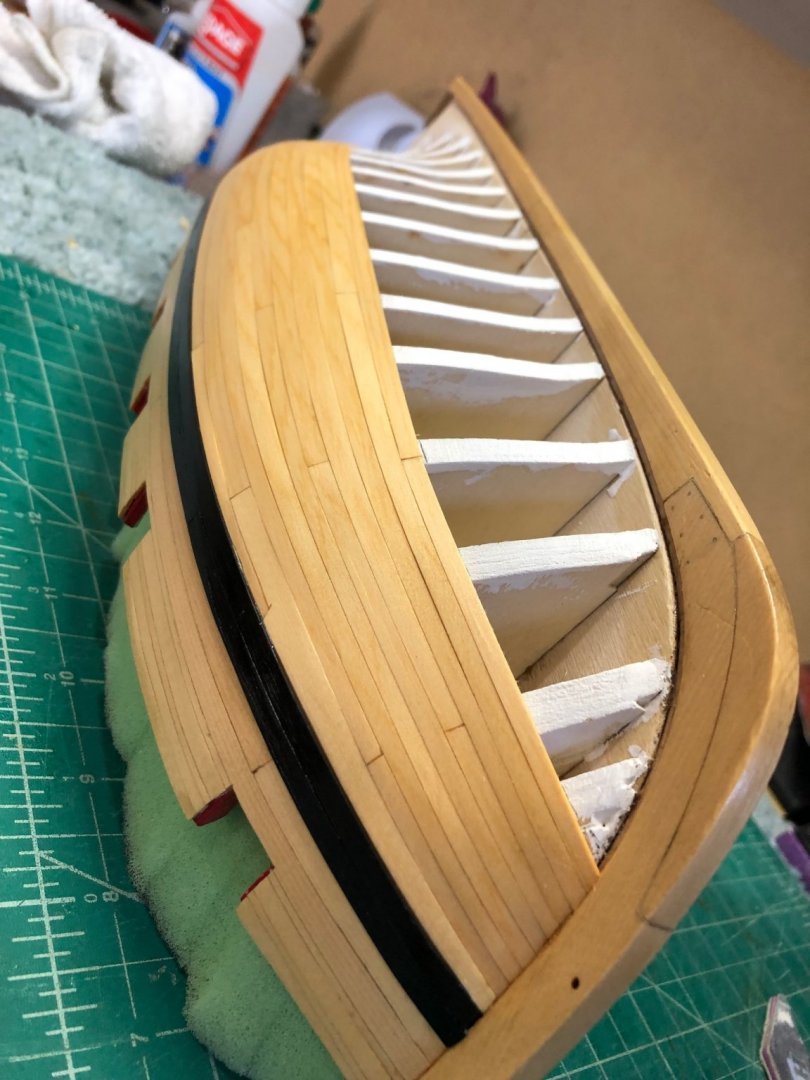
Thanks Paul I have not stopped on Cheerful but I take breaks to work on other projects. Went back and cleaned up the bulkheads adjacent to the bulwarks. Took a couple of hours but I'm much happier now. Look at the new photo. When thinning the bulwarks I used a piece of 3/64" planking scrape as a gauge while sanding with the rotary tool and vibrating mini-sander and chisels and #11 blade for the corners. Note to self and others: when fairing the bulkheads make sure that you maintain the crown of the deck as I almost forgot in my enthusiasm. You can still see the burn at the center. That was a close one.
-
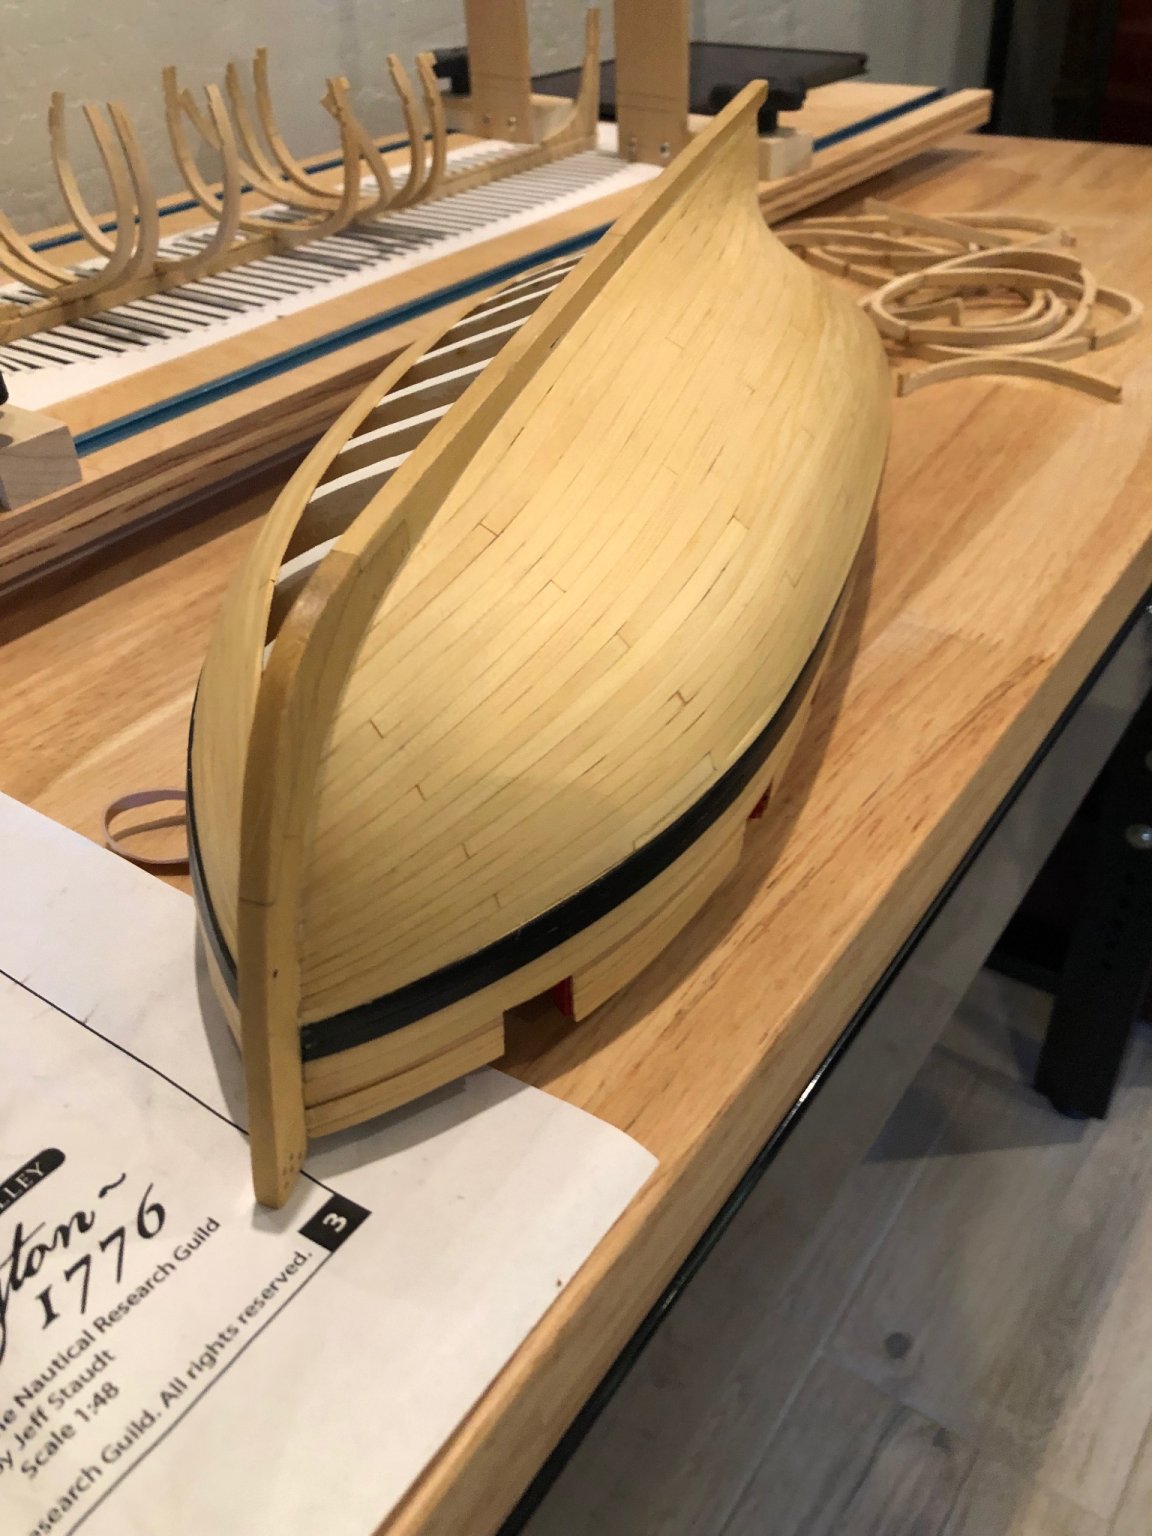
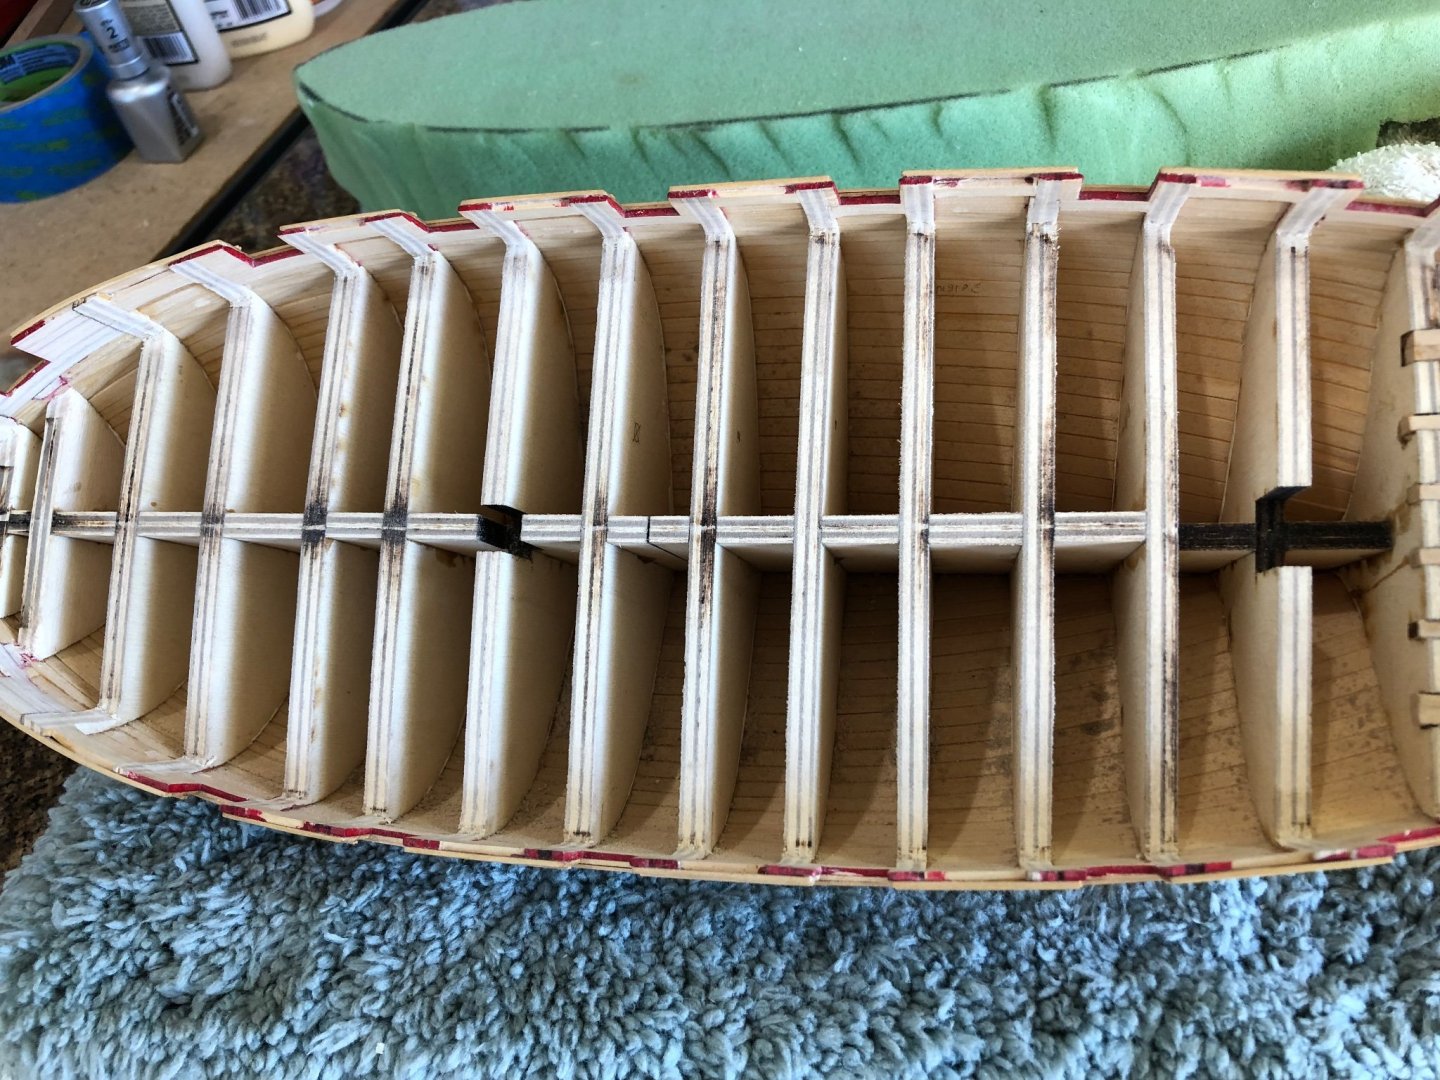
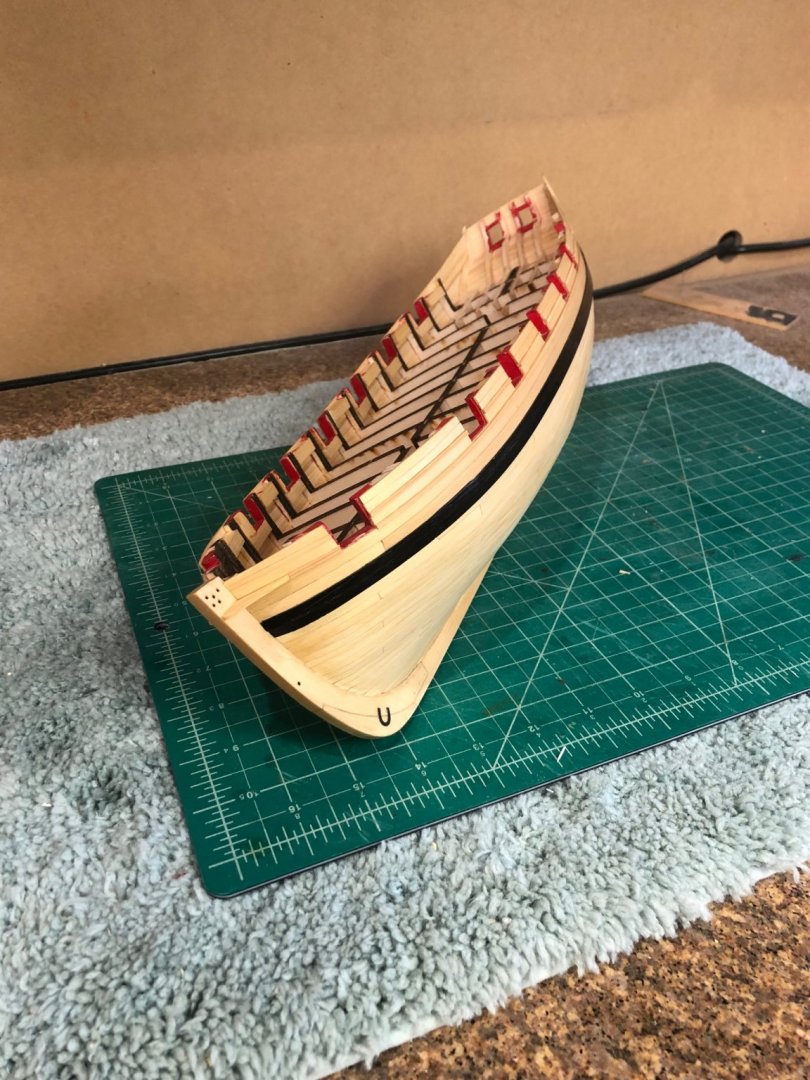
The last of the really messing work according to Chuck was to thin the bulwarks. Spent many days carefully sanding then chiseling and then more sanding to get them down to 3/64" thick uniformly the length of the model. The last thing was to fair the tops of the bulkheads so the false deck rests flatly. A lot of work without much to show so here's a couple of photos. Looking at this picture it seems as I have some more work in the corners. I'm going back to a little more work in the corners. I think I'll use a small pieces of 1/32" sheet to make sure my corners are correct and then to the template for the false deck. Really exciting to think of closing up the inside and moving on with more construction.


-
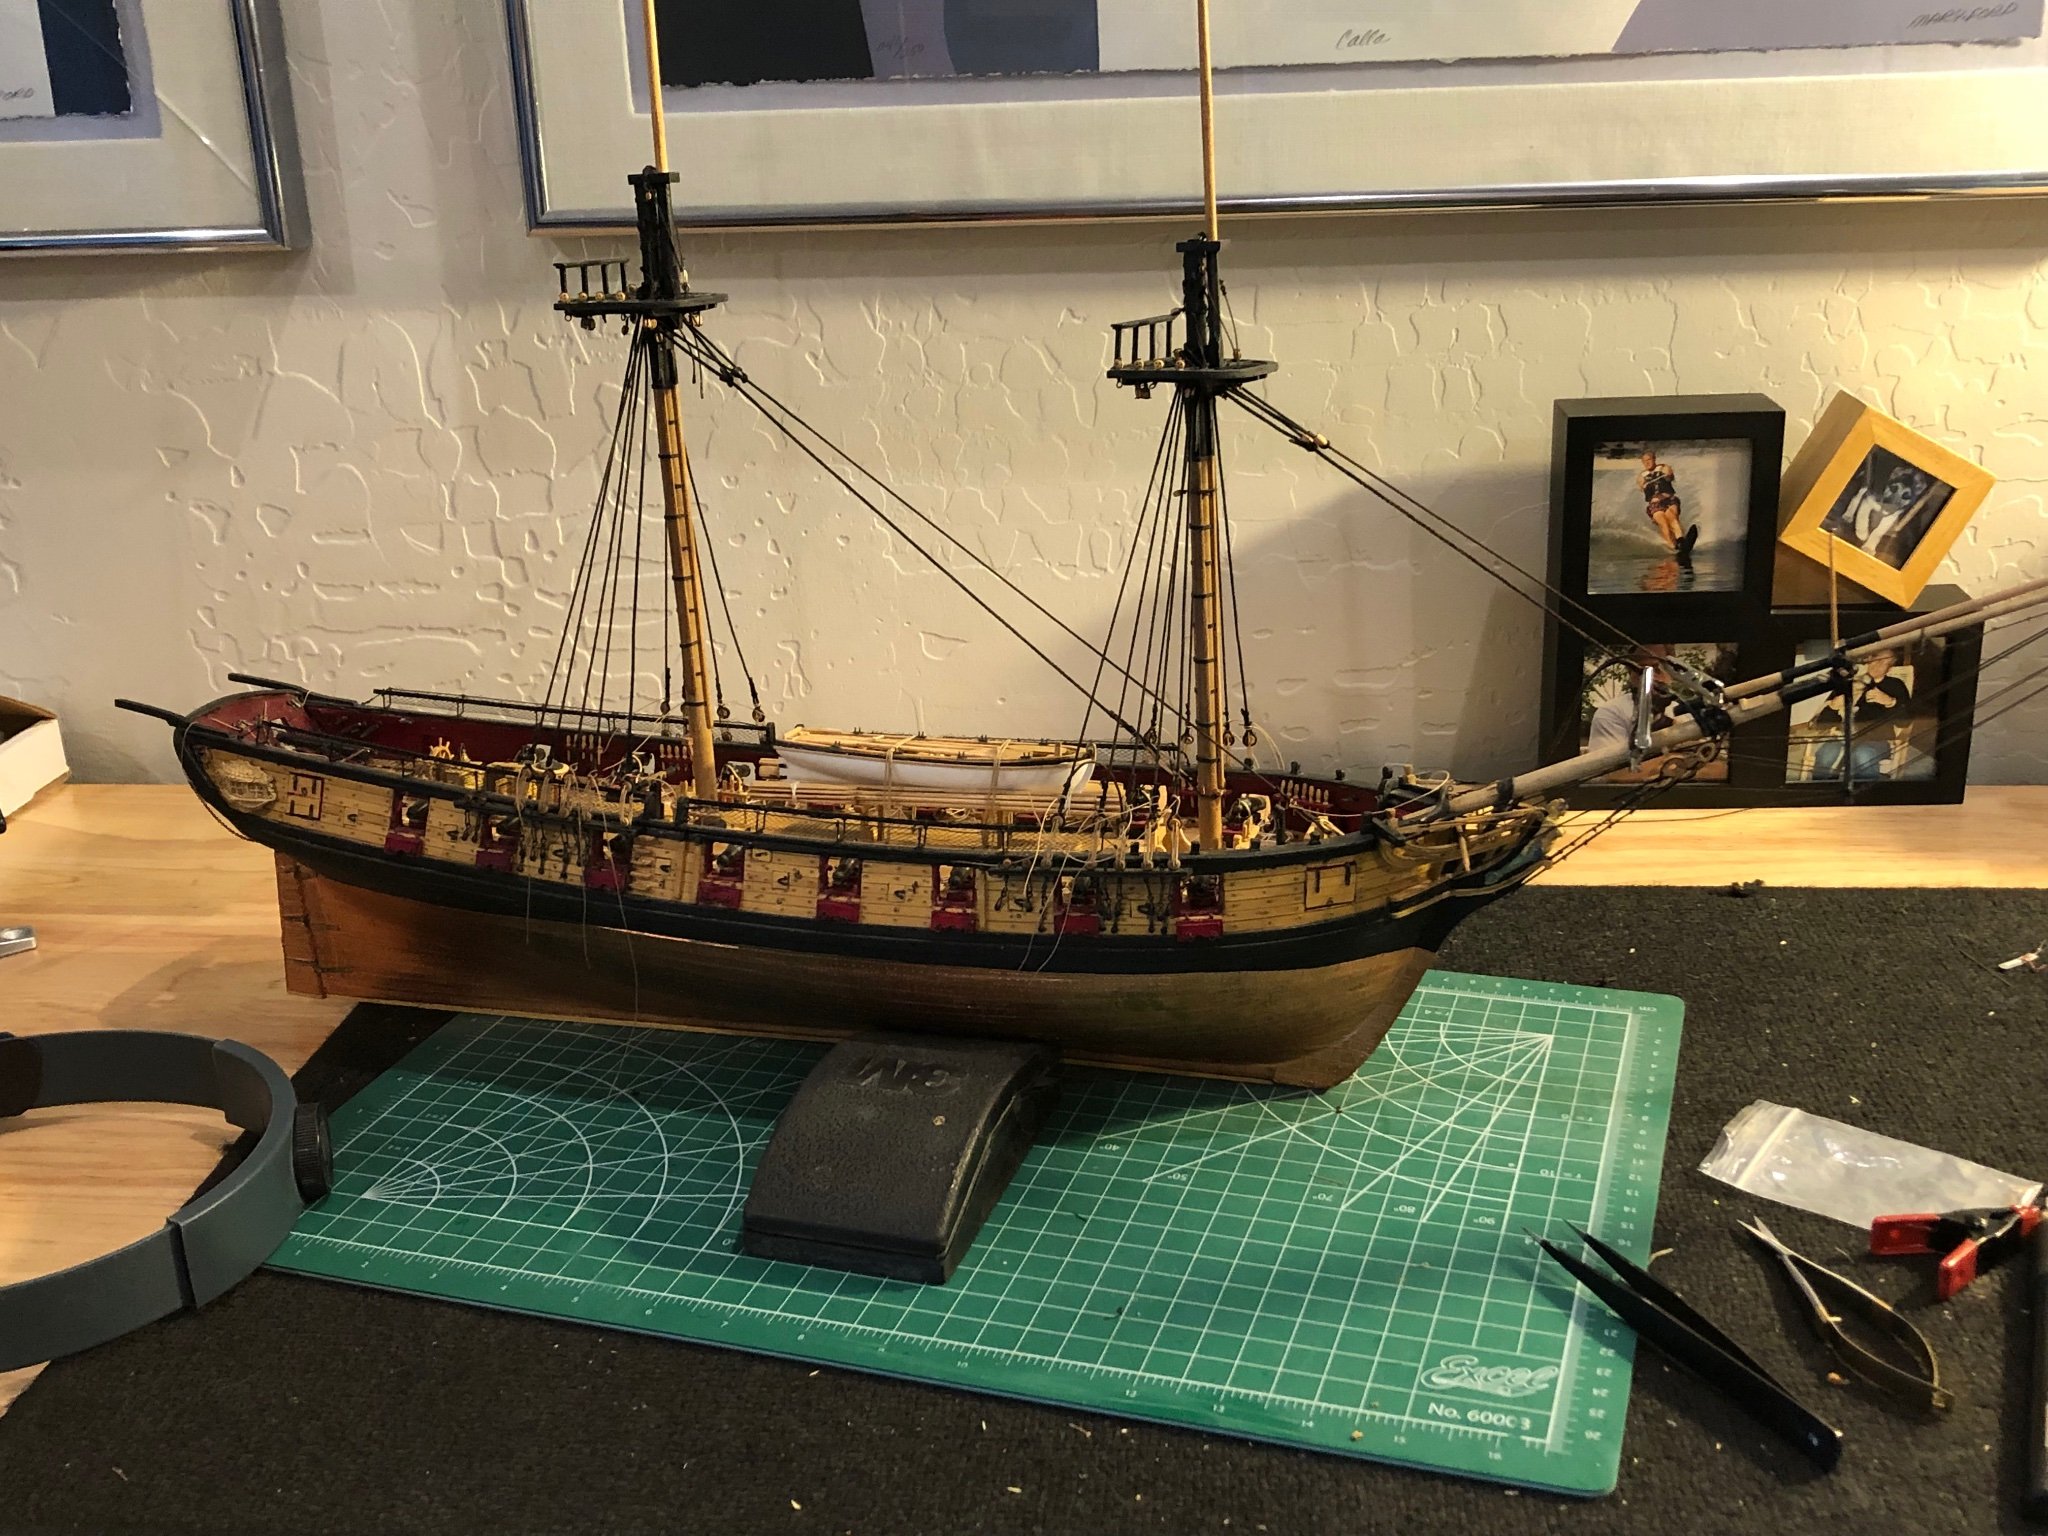
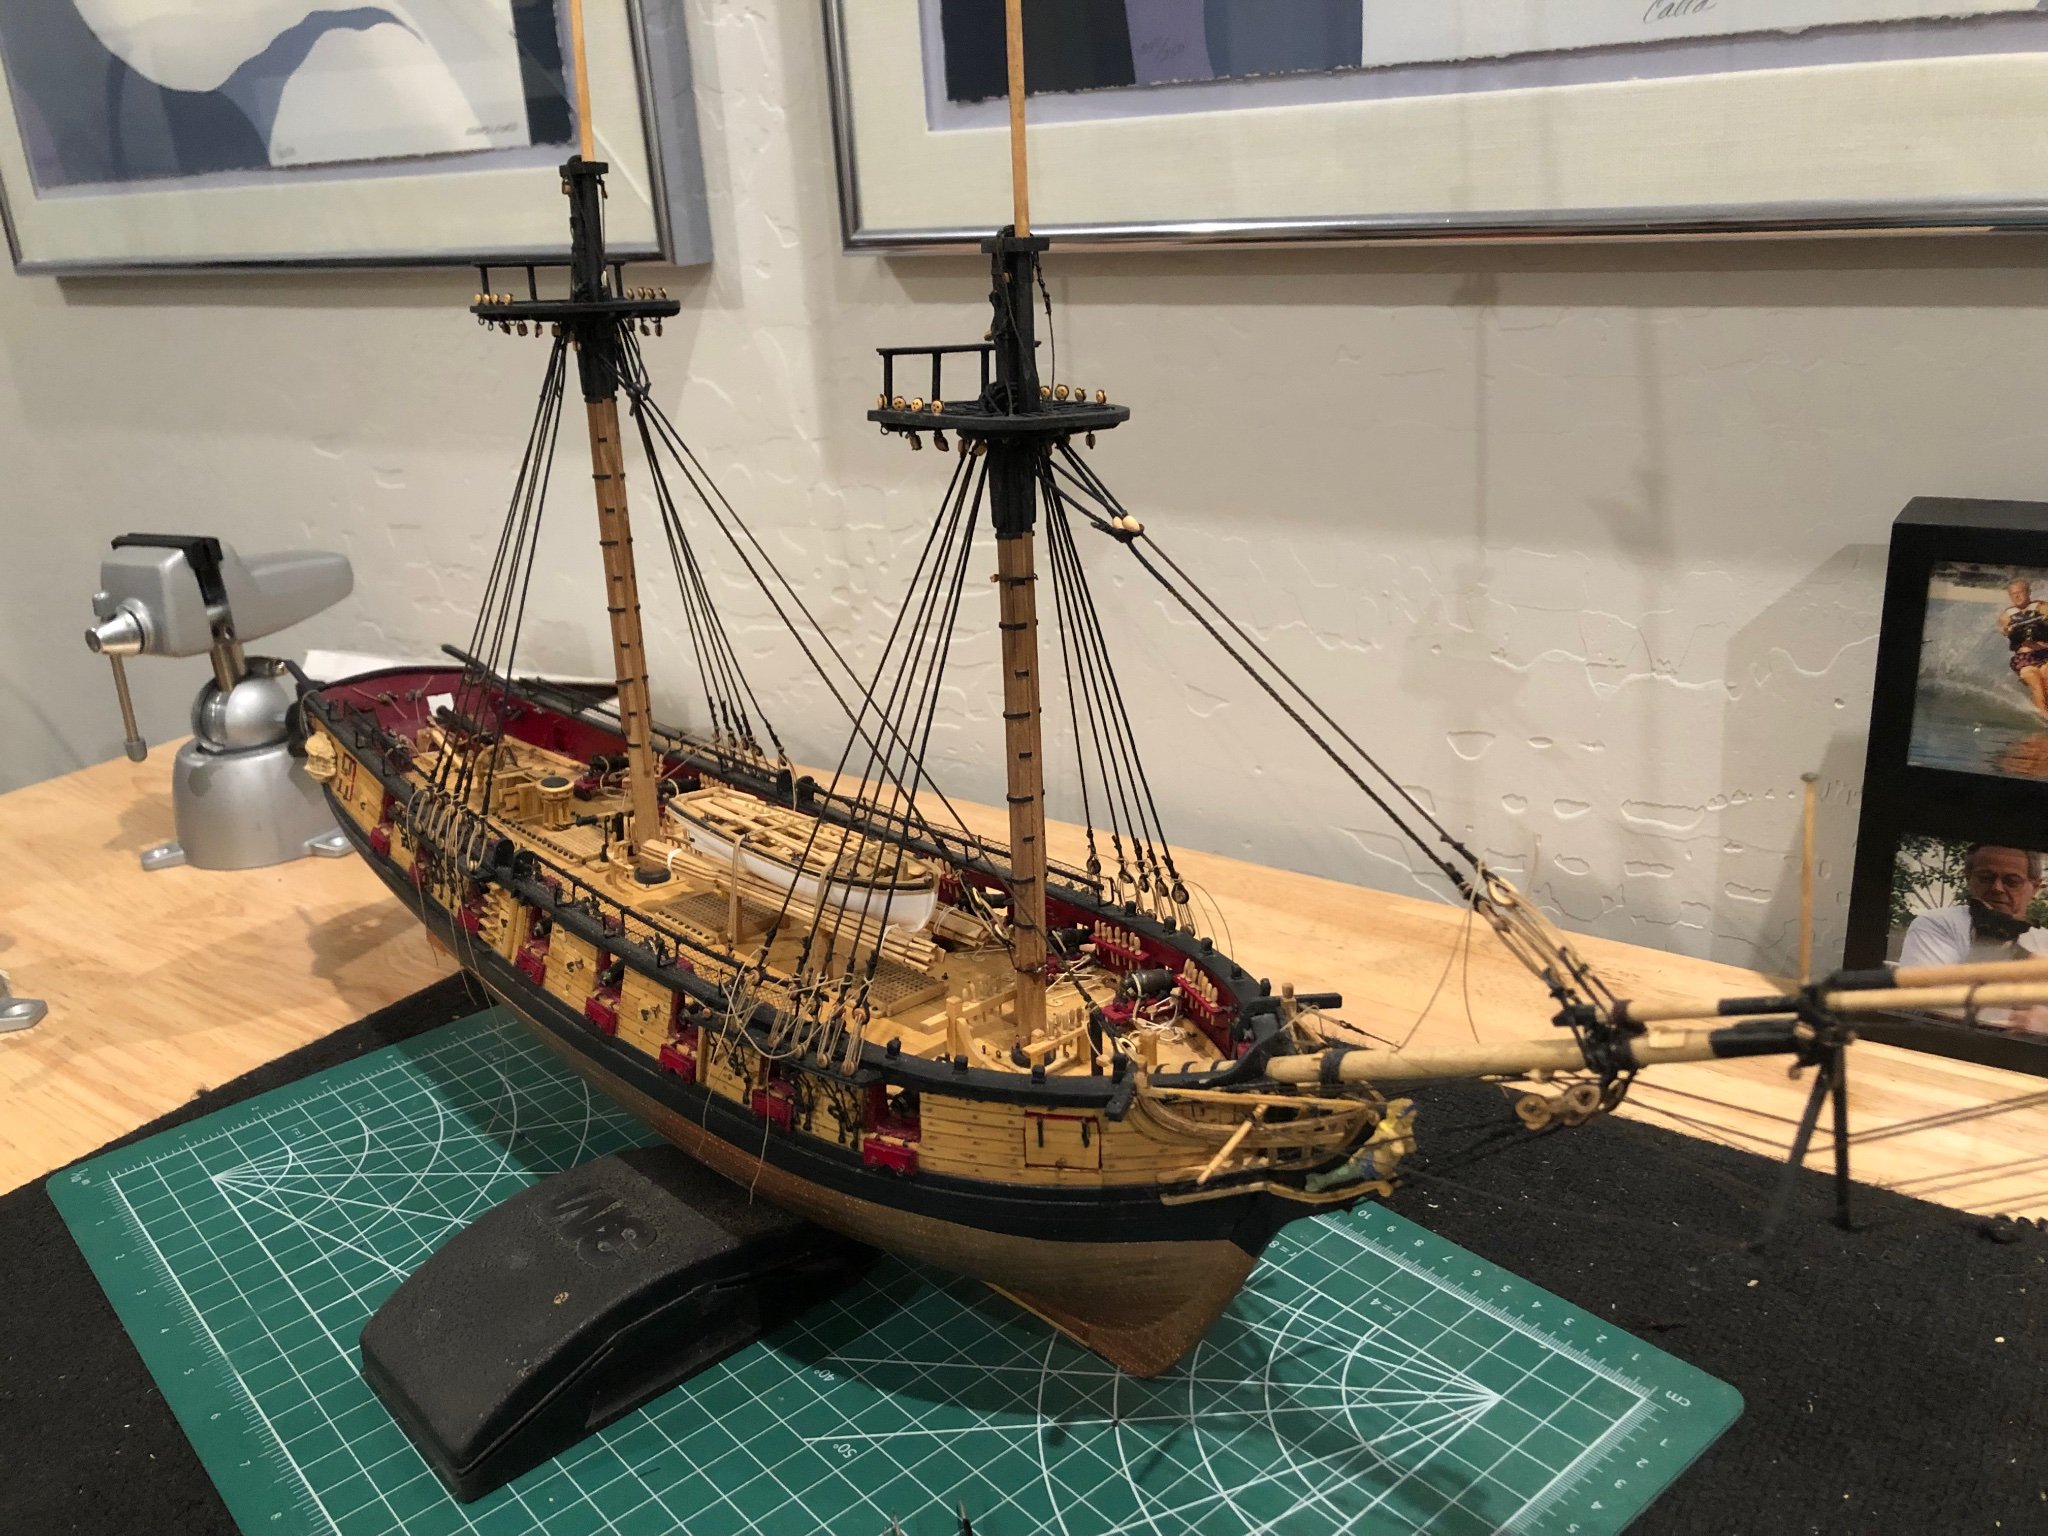
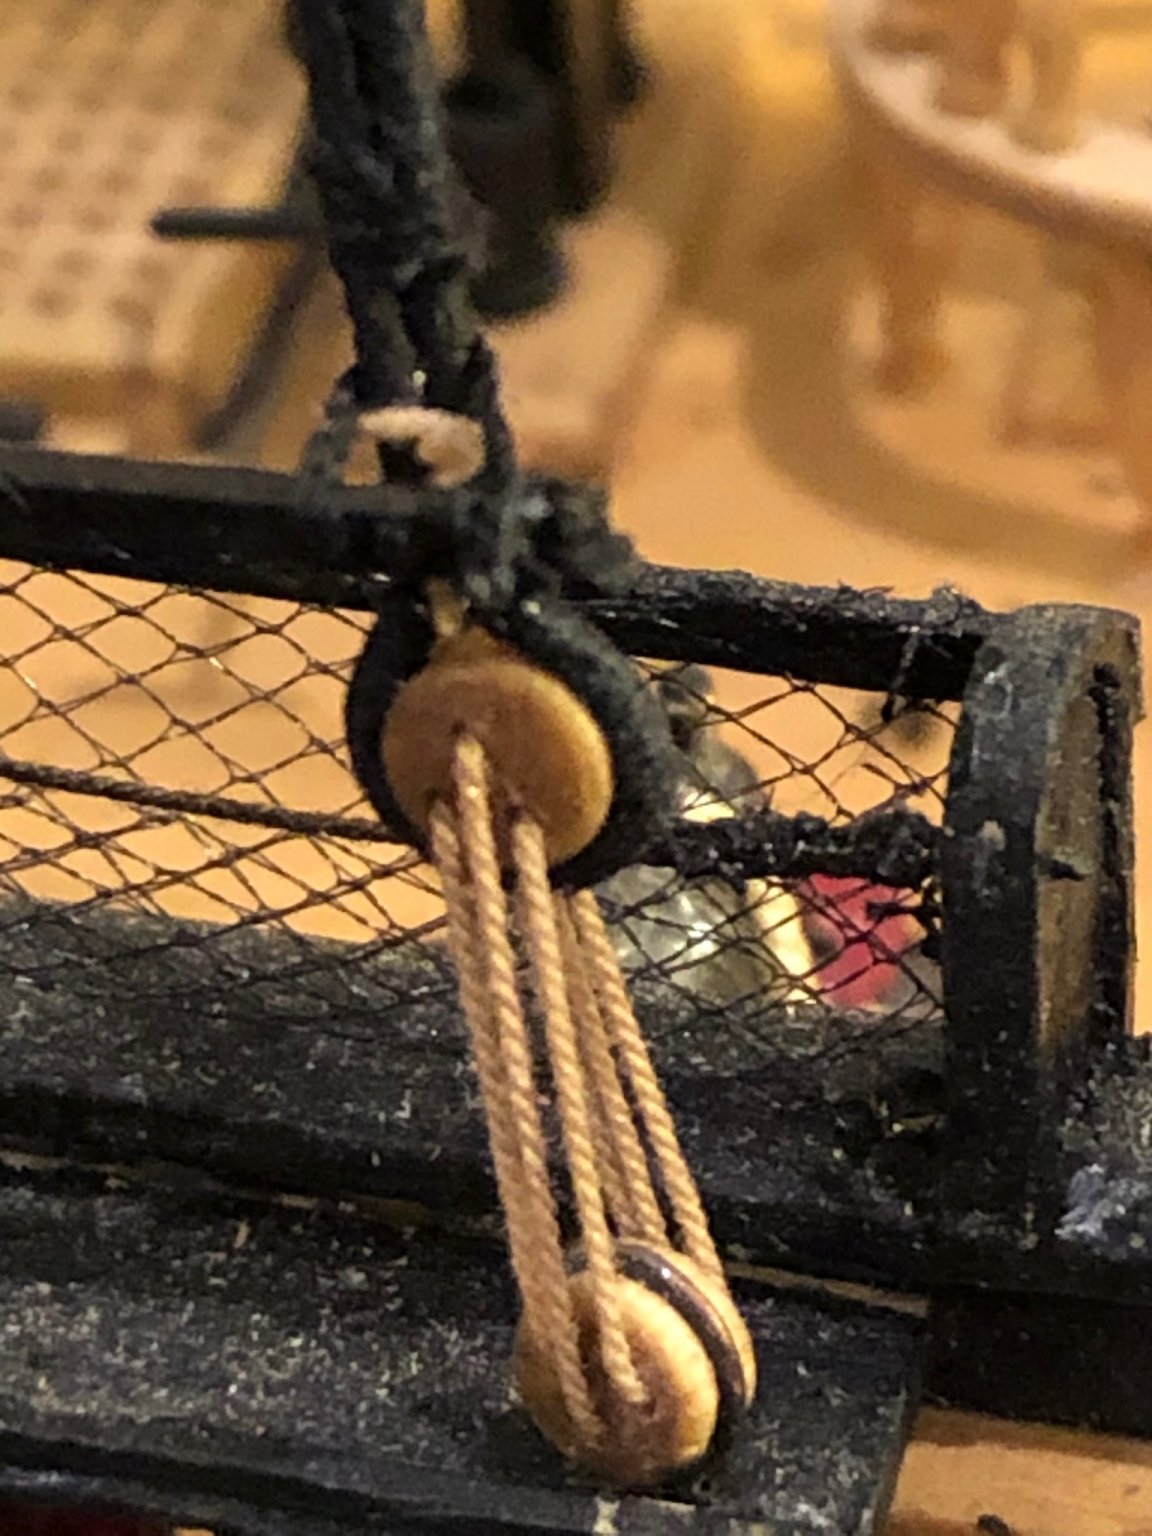
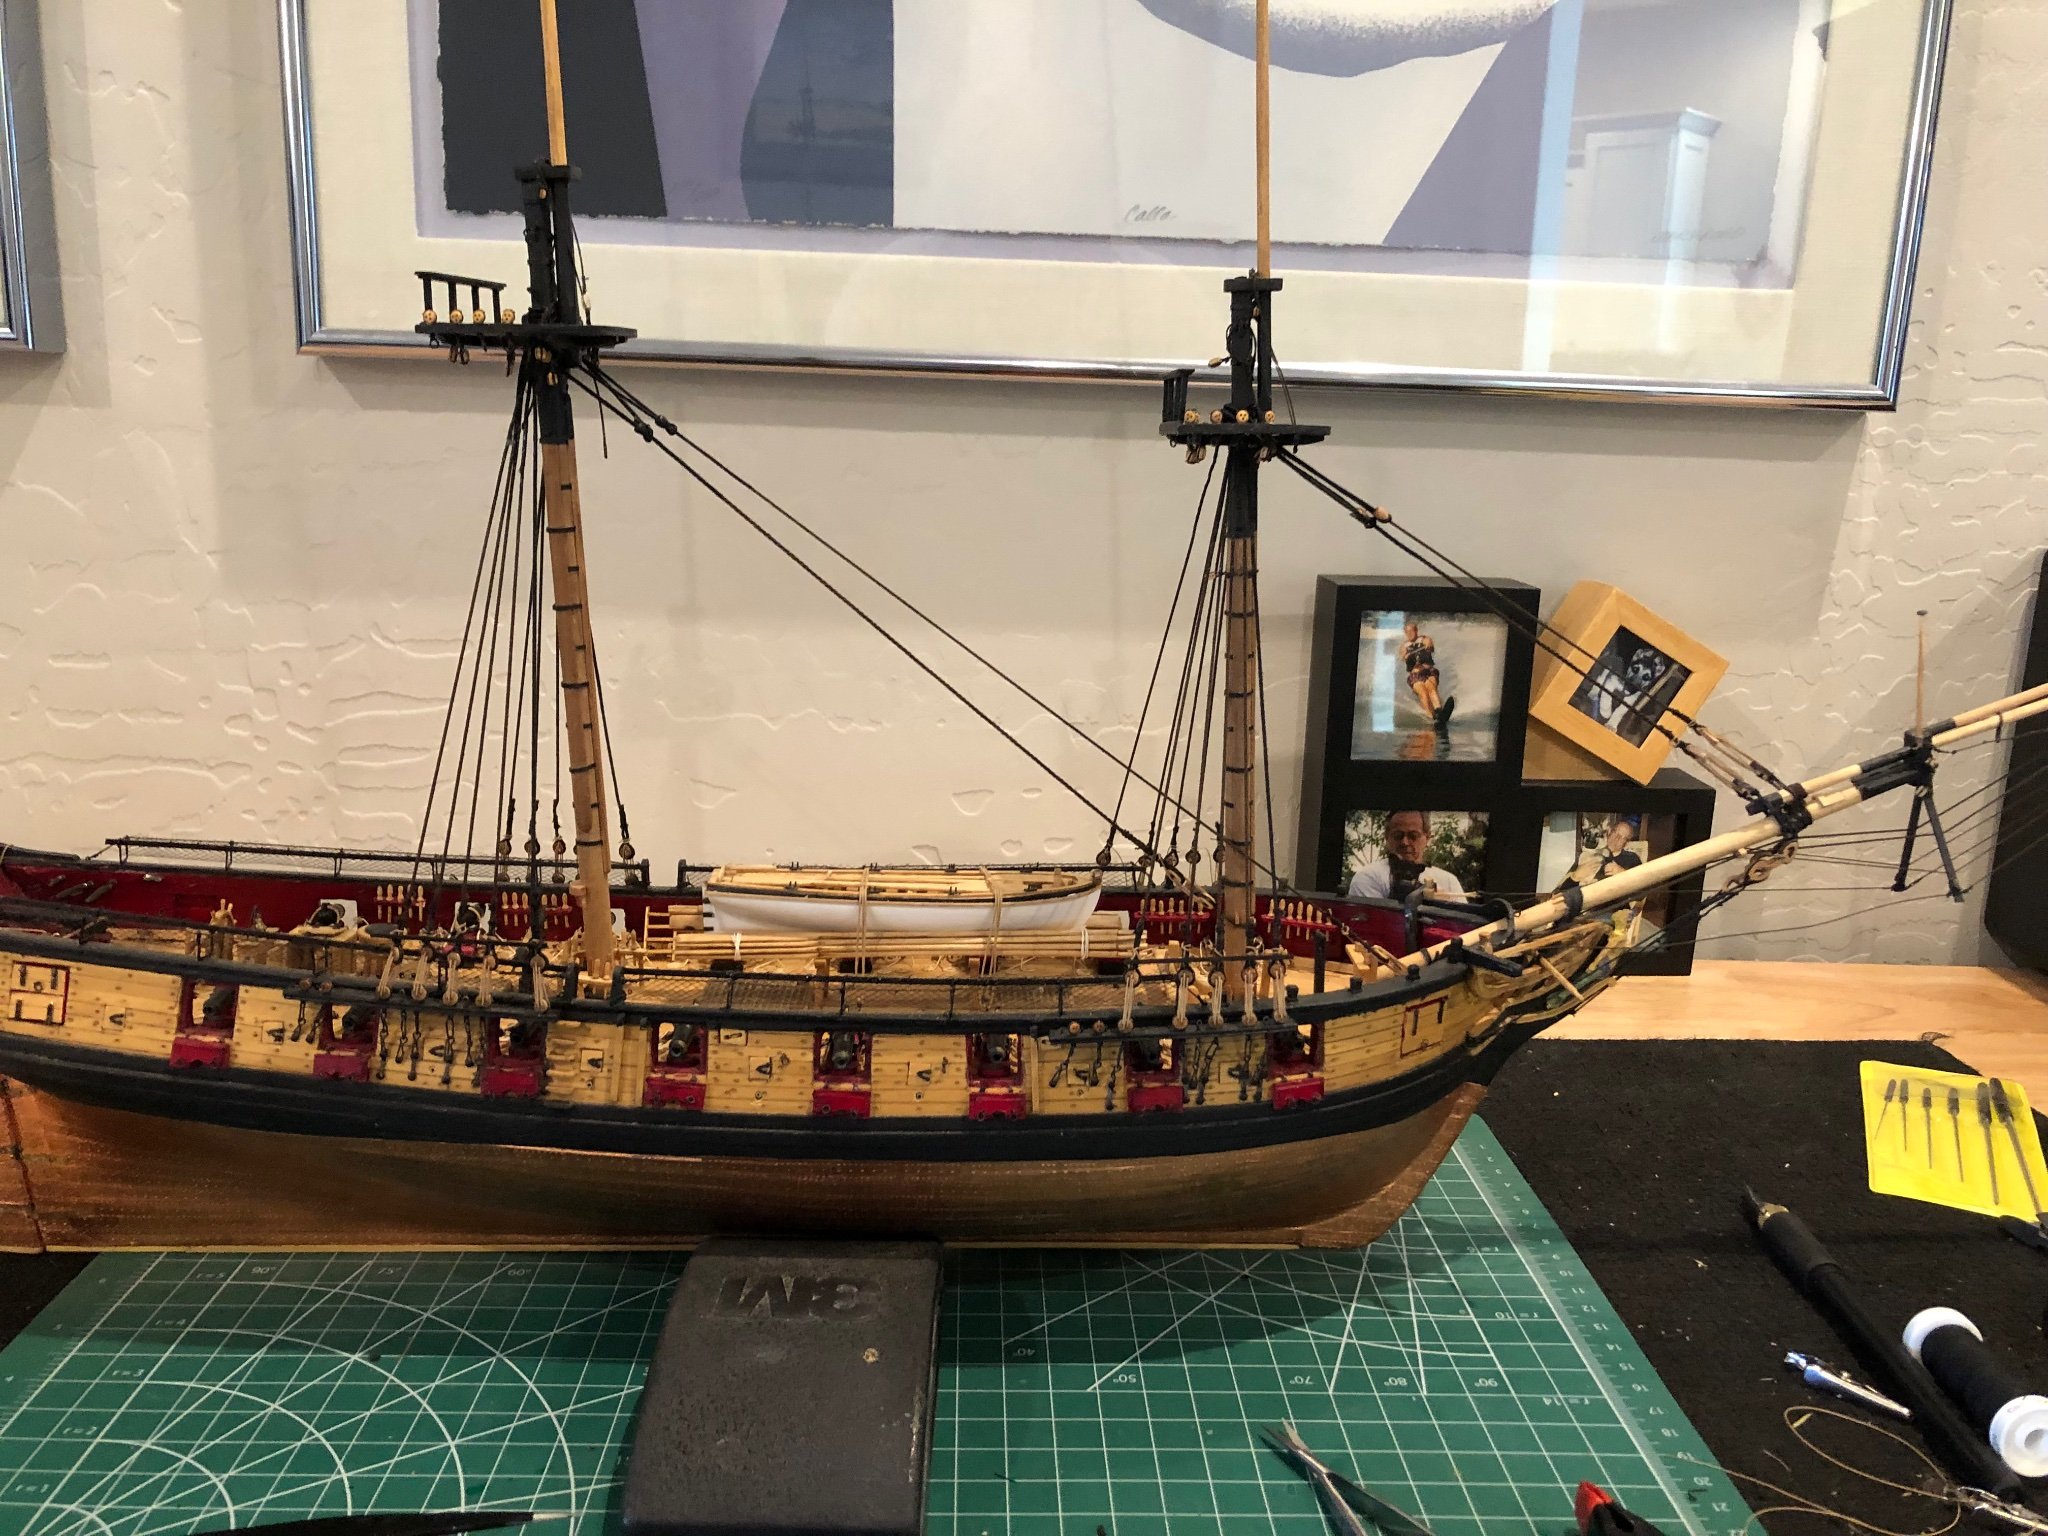
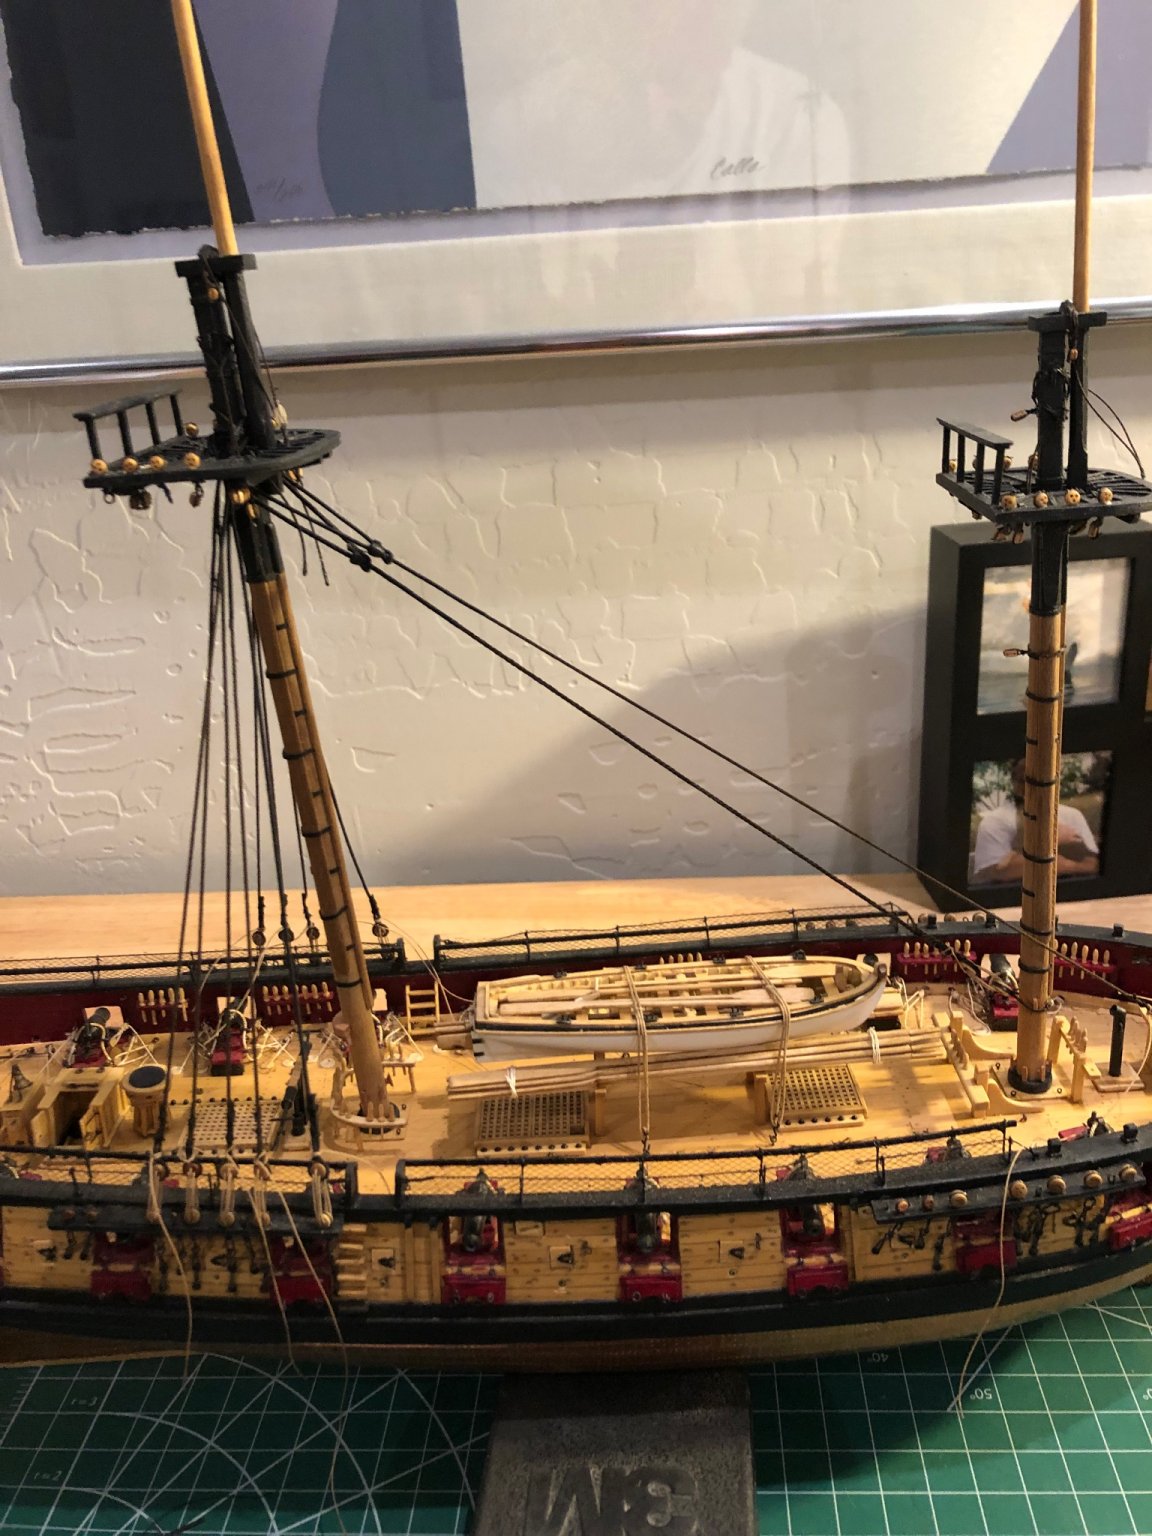
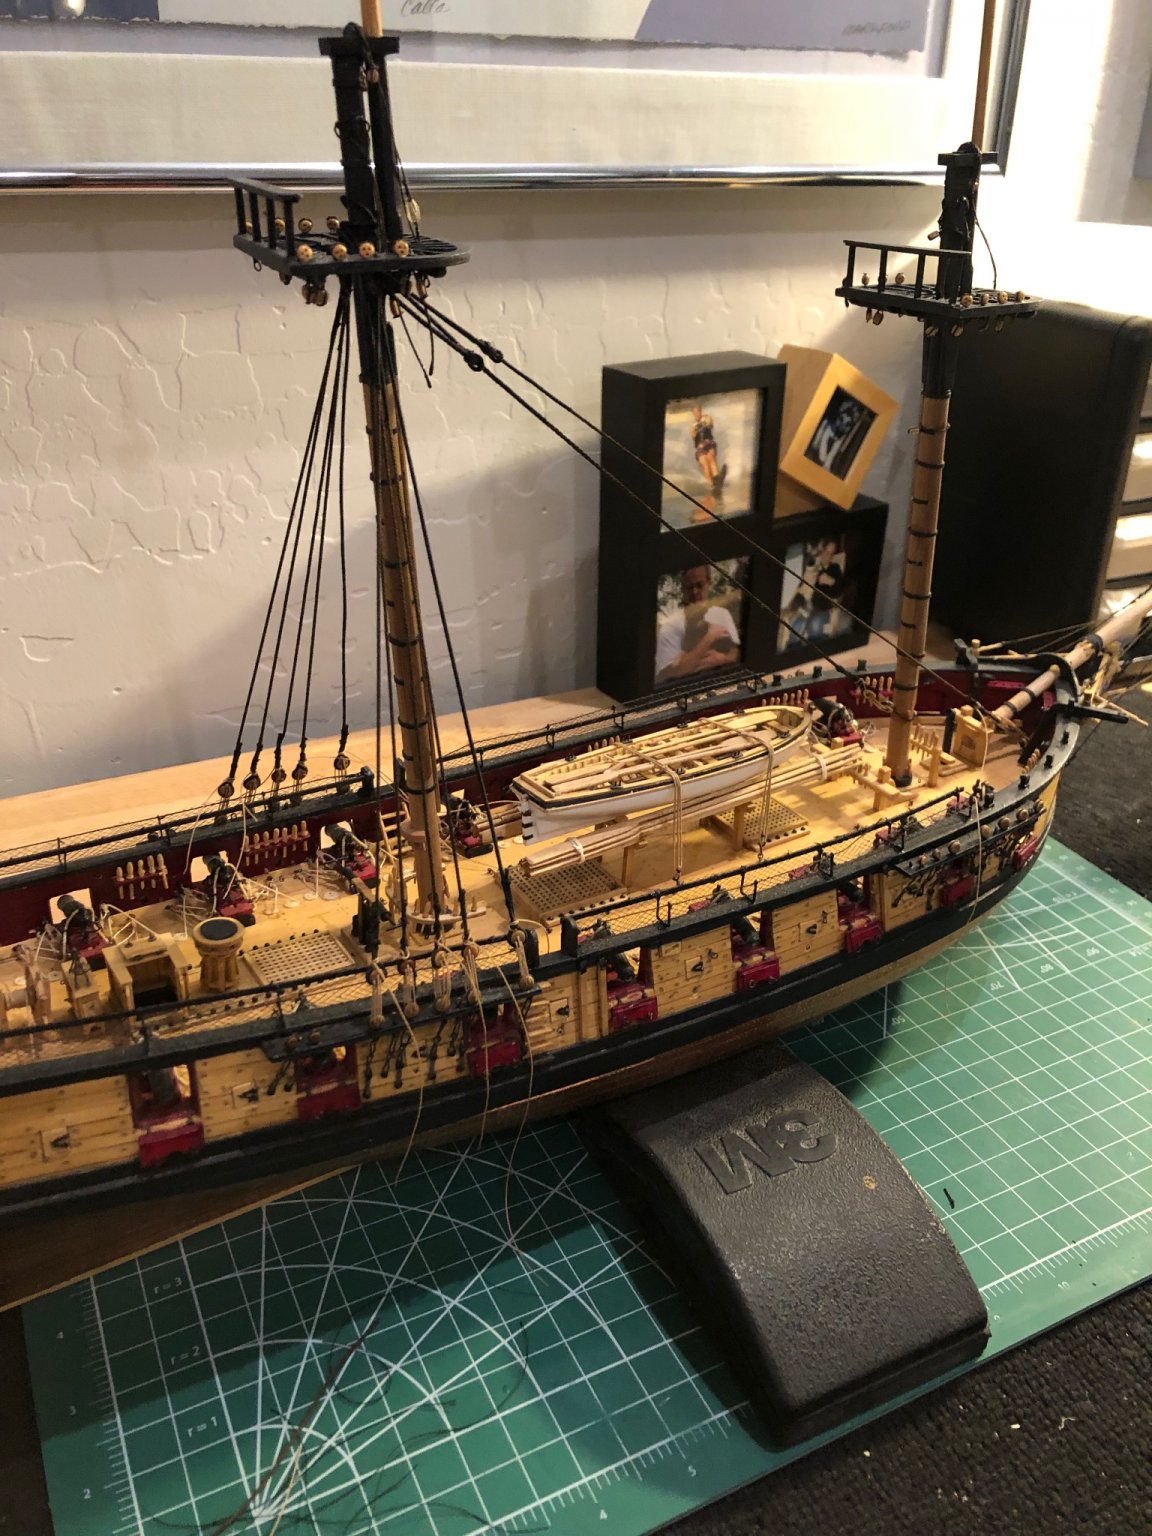
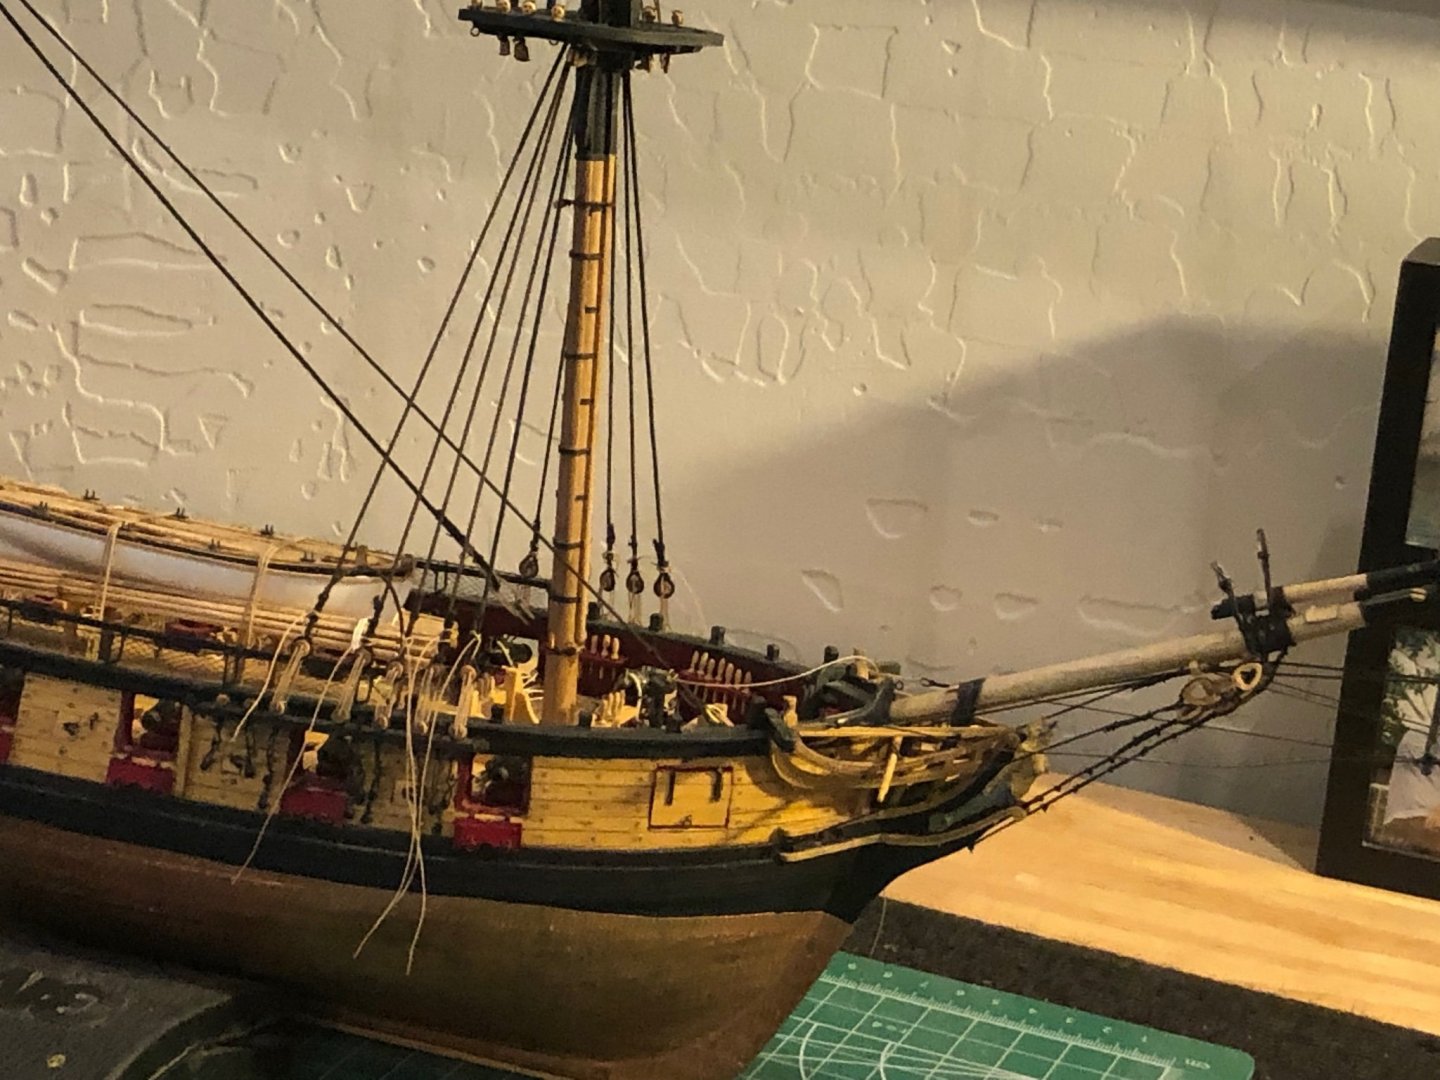
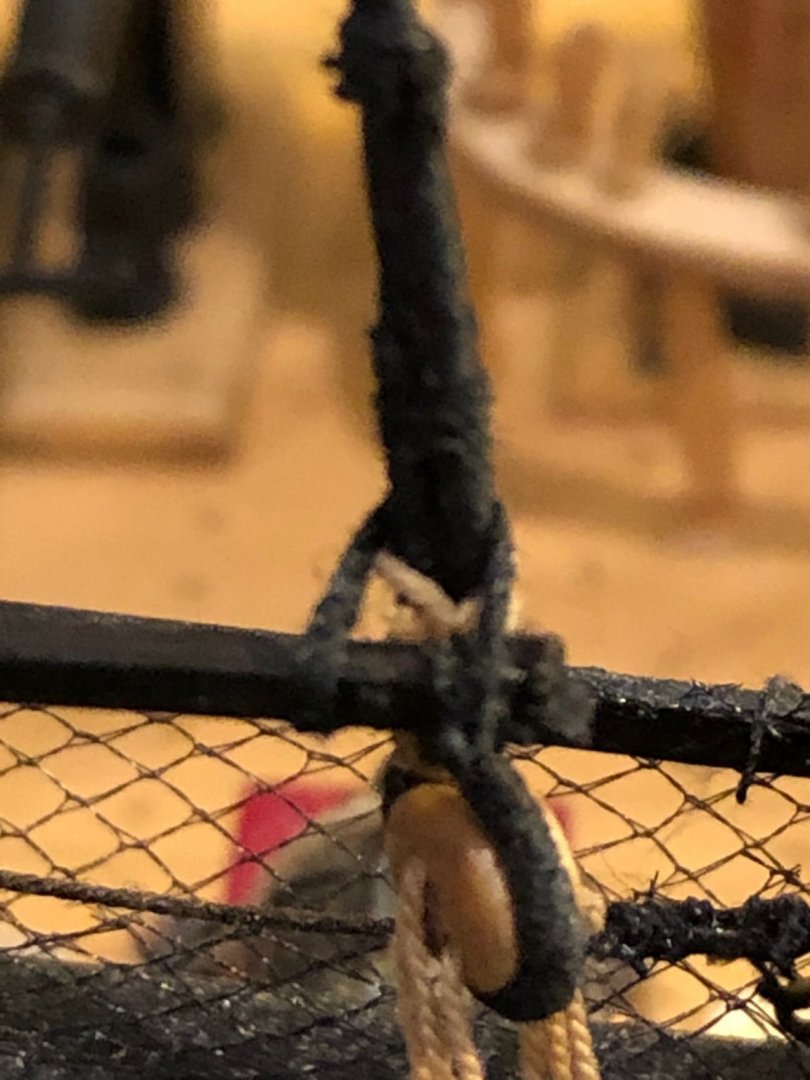
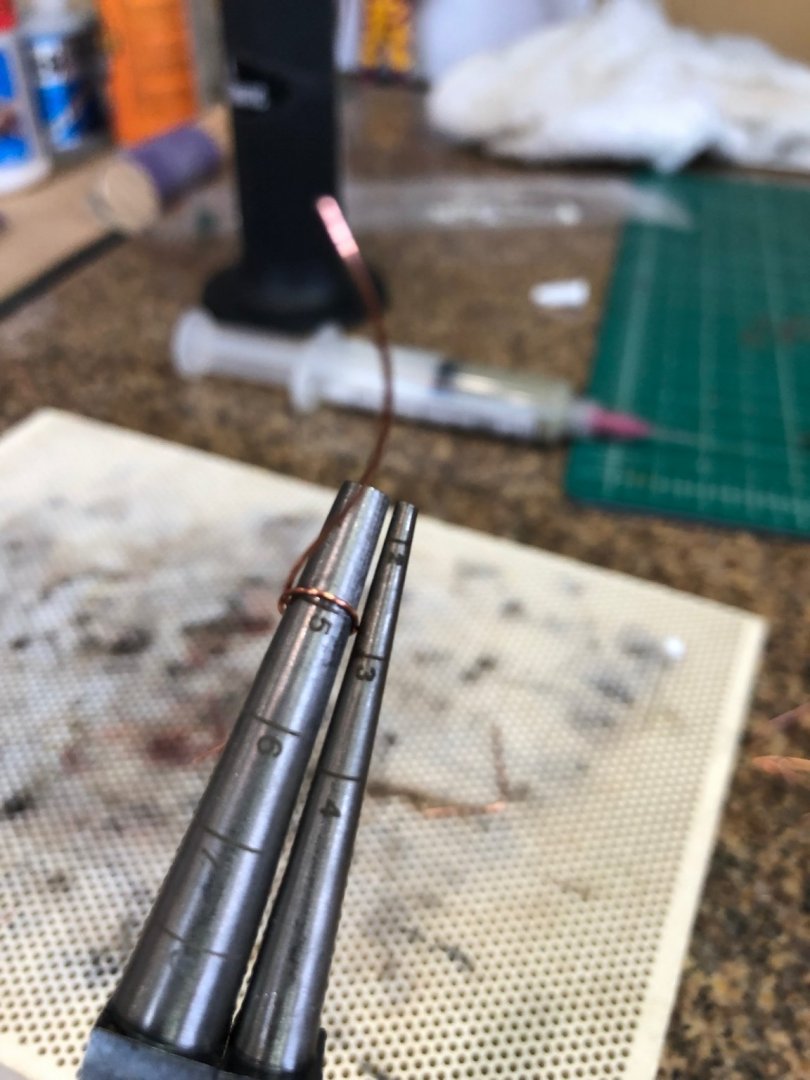
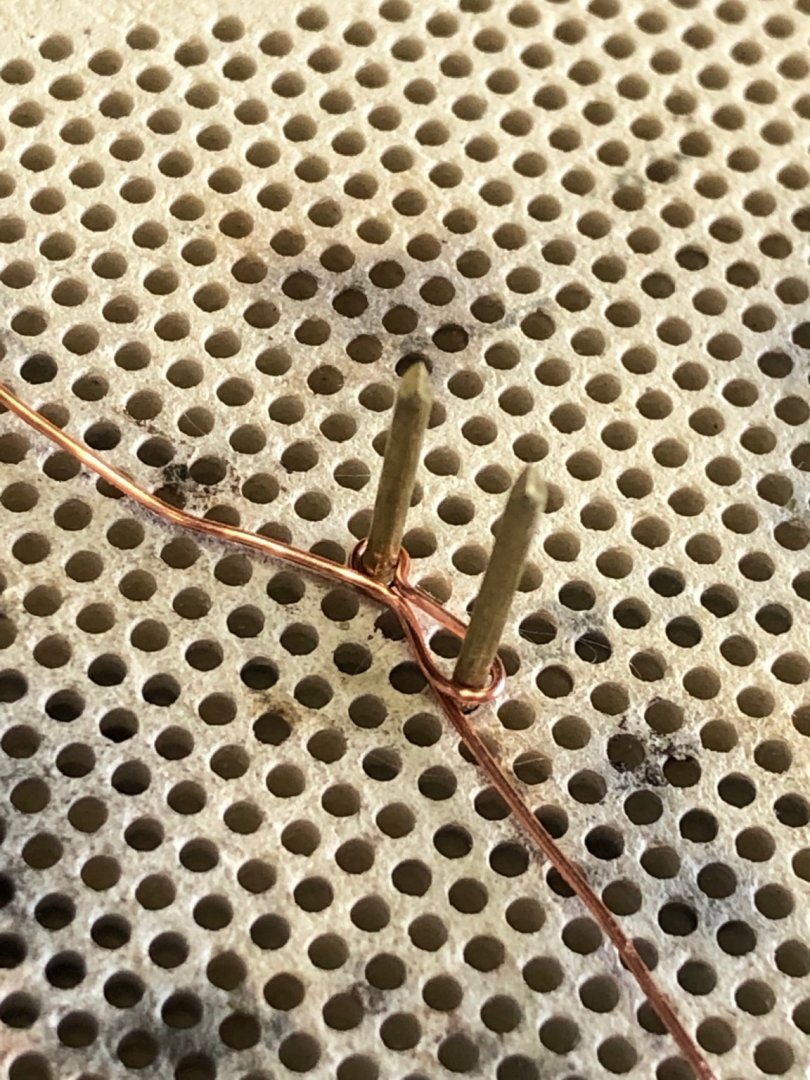
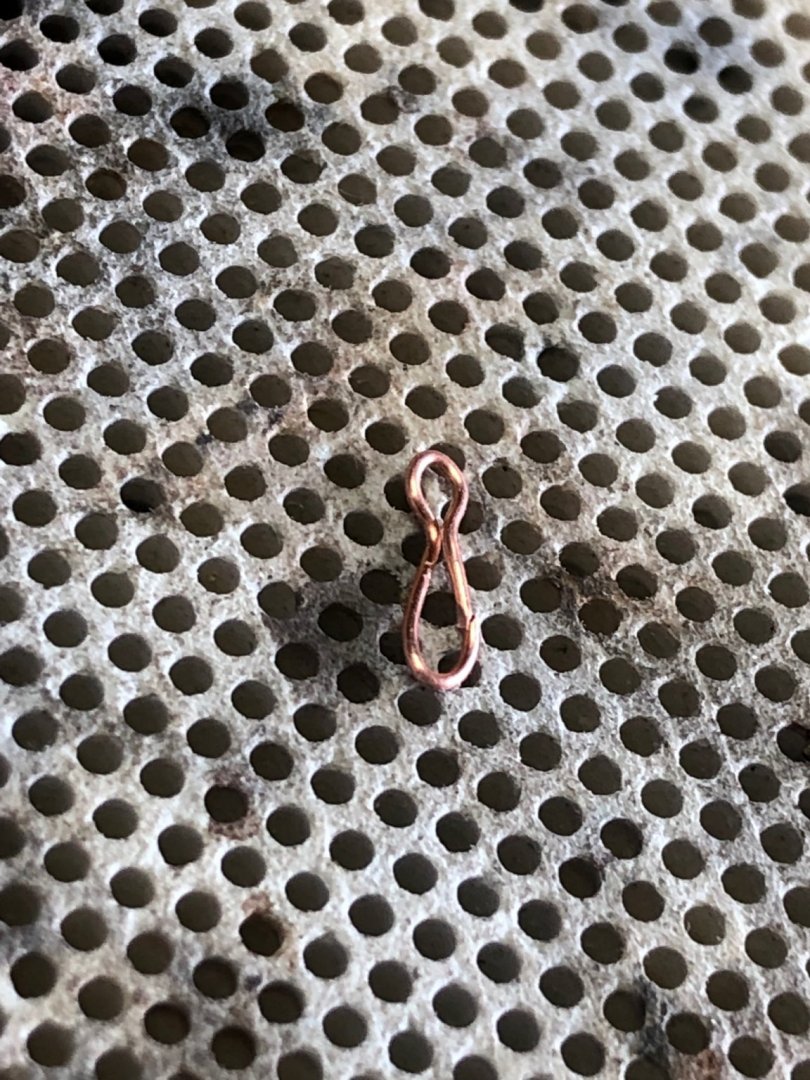
Lower shrouds, forestay and fore preventer completed. Once the forestay and fore preventer were tightened the fore shrouds were tightened into alignment. The same with the main mast. Next the sheer poles and futtock staves were installed. I glue tacked the poles and staves prior to lashing them to the shrouds this way making them stable to lash. The mouse were made from a 1/8" birch rod and turned on the lathe after drilling the appropriate diameter hole. Then the rod was shaped to form the mouse using swiss files. The stays and preventers were served to the length and then an eye was formed to capture the mouse and then seized to a closed heart. The hearts were pulled tight with lanyards to create the necessary adjustment. fore shrouds with the lanyards loose until the stay and preventer are tight forestay and preventer stay ready to be tightened stays and preventer closeup but still not tightened everything snugged up closeup of sheer pole lashing (some much work and hardly noticeable from distance) Next the futtock shrouds and catharpins and of course the ratlines.


-
Great work James. The finish you did with the planking is amazing. Airbrush painting without planking lines and imperfections is an art you've mastered. Couple of questions: Before we splash some real colour onto the hull, a waterline is first added which runs along the top line of the white boot. I'm not familiar with the term "white boot" help please When masking for the red oxide did you first use 3mm flex tape to follow the waterline and then sections of wider tape to cover the balance? After that did you add 3mm flex tape adjacent to the earlier 3mm tape to create the white waterline stripe? Your technique is very impressive and the results are amazing.
- 36 replies
-
- 3
-

-
- vanguard models
- Erycina
- (and 2 more)
-
Yes Maury 24 hours is probably the minimum. I live in Arizona and I painted my red during the summer here leaving it outside in the shade to cure after tacking up on the surface. Made sure it was in the shade and above 100 degrees so the next day it was hard enough to sand without gumming up the paper. I use 400 grit paper between coats and honestly it probably could have used a couple more LIGHT coats. Hope this helps
-
I've been following this build with great anticipation as I'm tired of decks filled with guns. While following I became interested in the Vanguard kit of the zula Lady Isabella. Not knowing about drifters and especially Scottish drifters caused me to web search drifters. Being my wife is of Scottish heritage as her mother was born in Kilmarnock drifters consumed me so much I ordered the Lady Isabella kit. I just wanted to take the time to tell all and thank Chris for the OUTSTANDING service and looking at the kit it is evident why others rave about his kits. I ordered my kit on November 2 and it arrived on November 5. What is amazing is I live in Gilbert Arizona and that's 3 day from the UK.
- 36 replies
-
- 4
-
-
- vanguard models
- Erycina
- (and 2 more)
-
Small comment on painting with red paint: Red paint is somewhat translucent and requires many coats to cover evenly. (Thinned I've had to make 8 coats getting even coverage) Sand lightly between coats helps getting better coverage. lastly a lot of patience. The model is looking very nice can't wait to see the colors completed.
-
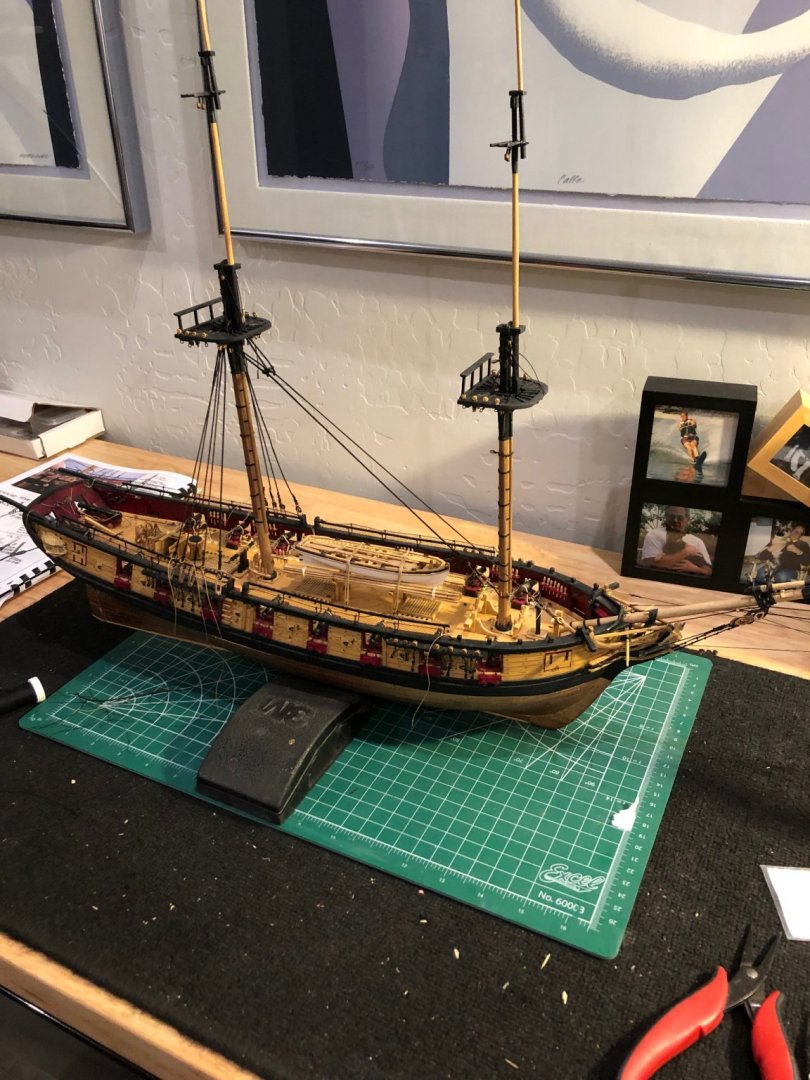
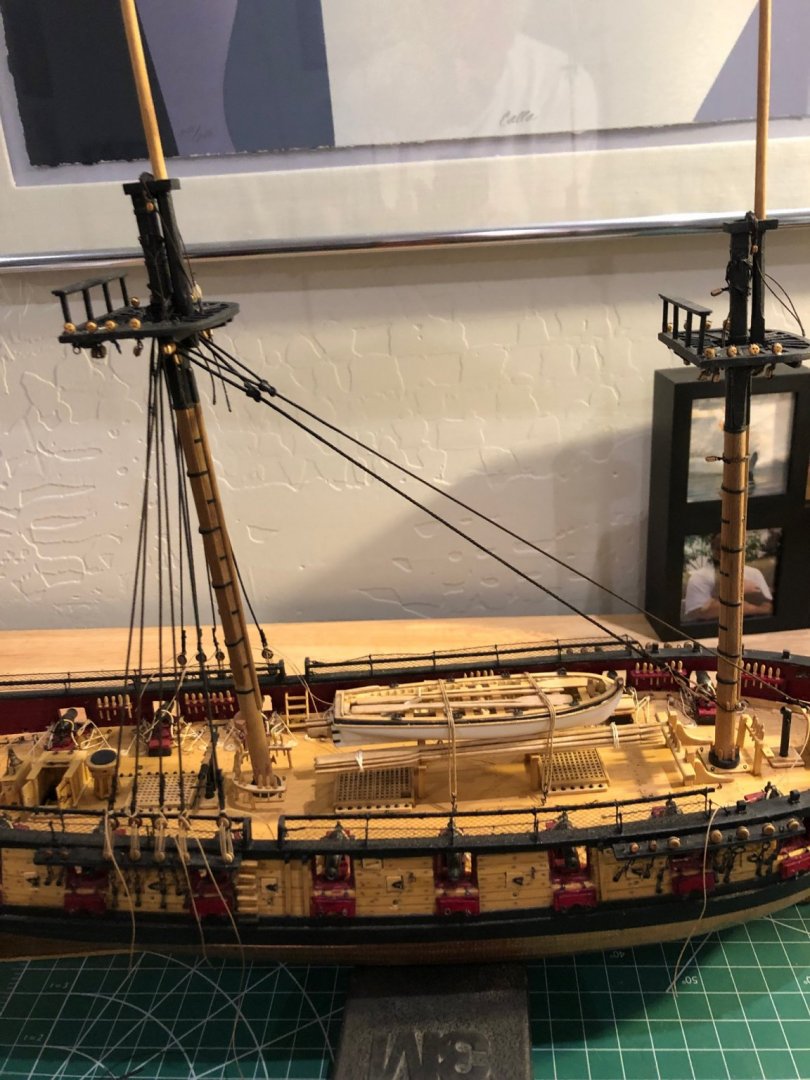
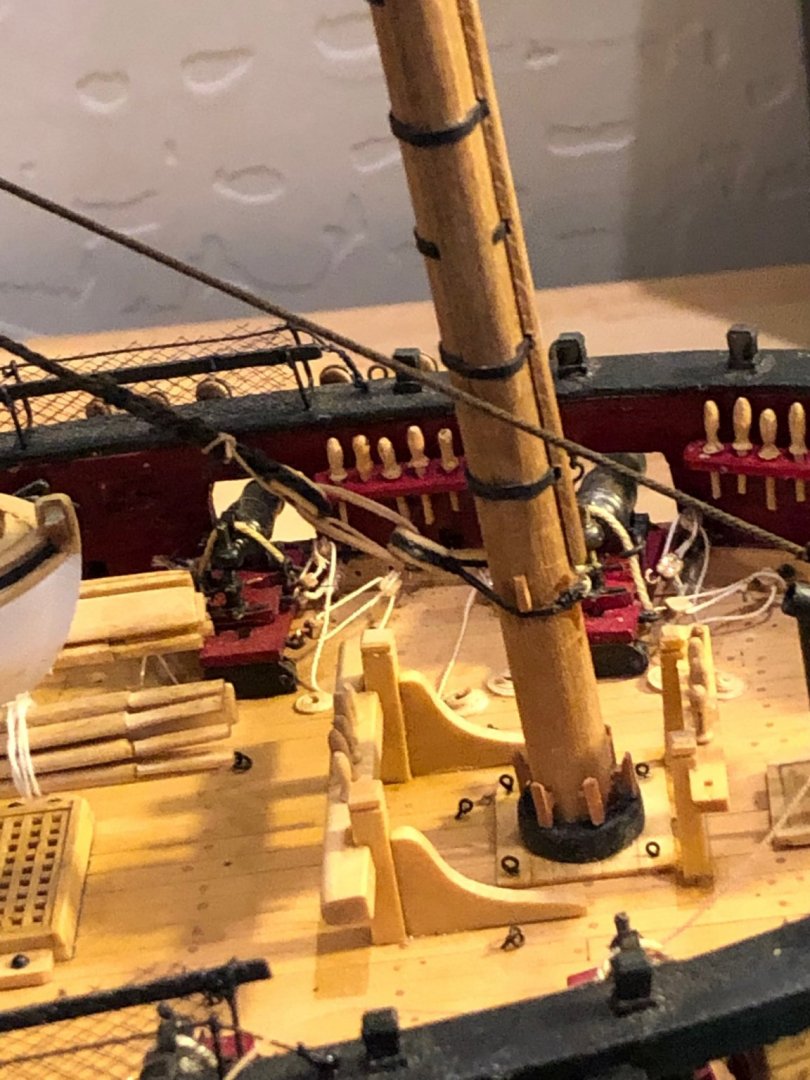
Thanks for all the likes and thanks to Allan for the LoS suggestion. I read Eds Naiad and Young America and tried the method on some scrap wood with great results. Don't know why I forgot about Ed Tosti's method but will definitely use it in the future. Got the main shrouds on along with the main stay and main preventer all lashed in with closed hearts and lanyards. I left the shrouds loose and will tighten them when all the shrouds, stays, and preventers are installed. But a note to self: install the shrouds before the mast is assembled. It will be a lot easier and neater if the shroud pairs are seized and then slipped into place as is suggested in David Antscherls TFFM books vol IV 15.22 & 15.23 pages 48 through 50. Couple of photos


-
I can't find more to say that hasn't been said by others, so add my comment to the list. Wonderful example of a build and log. Its a beautiful model you've made. I use your log as reference while I slowly build my Cheerful. Its like having a good book on how to build a scratch model of a British cutter. BROVO
- 274 replies
-
- 2
-
-
- Cheerful
- Syren Ship Model Company
- (and 1 more)
-
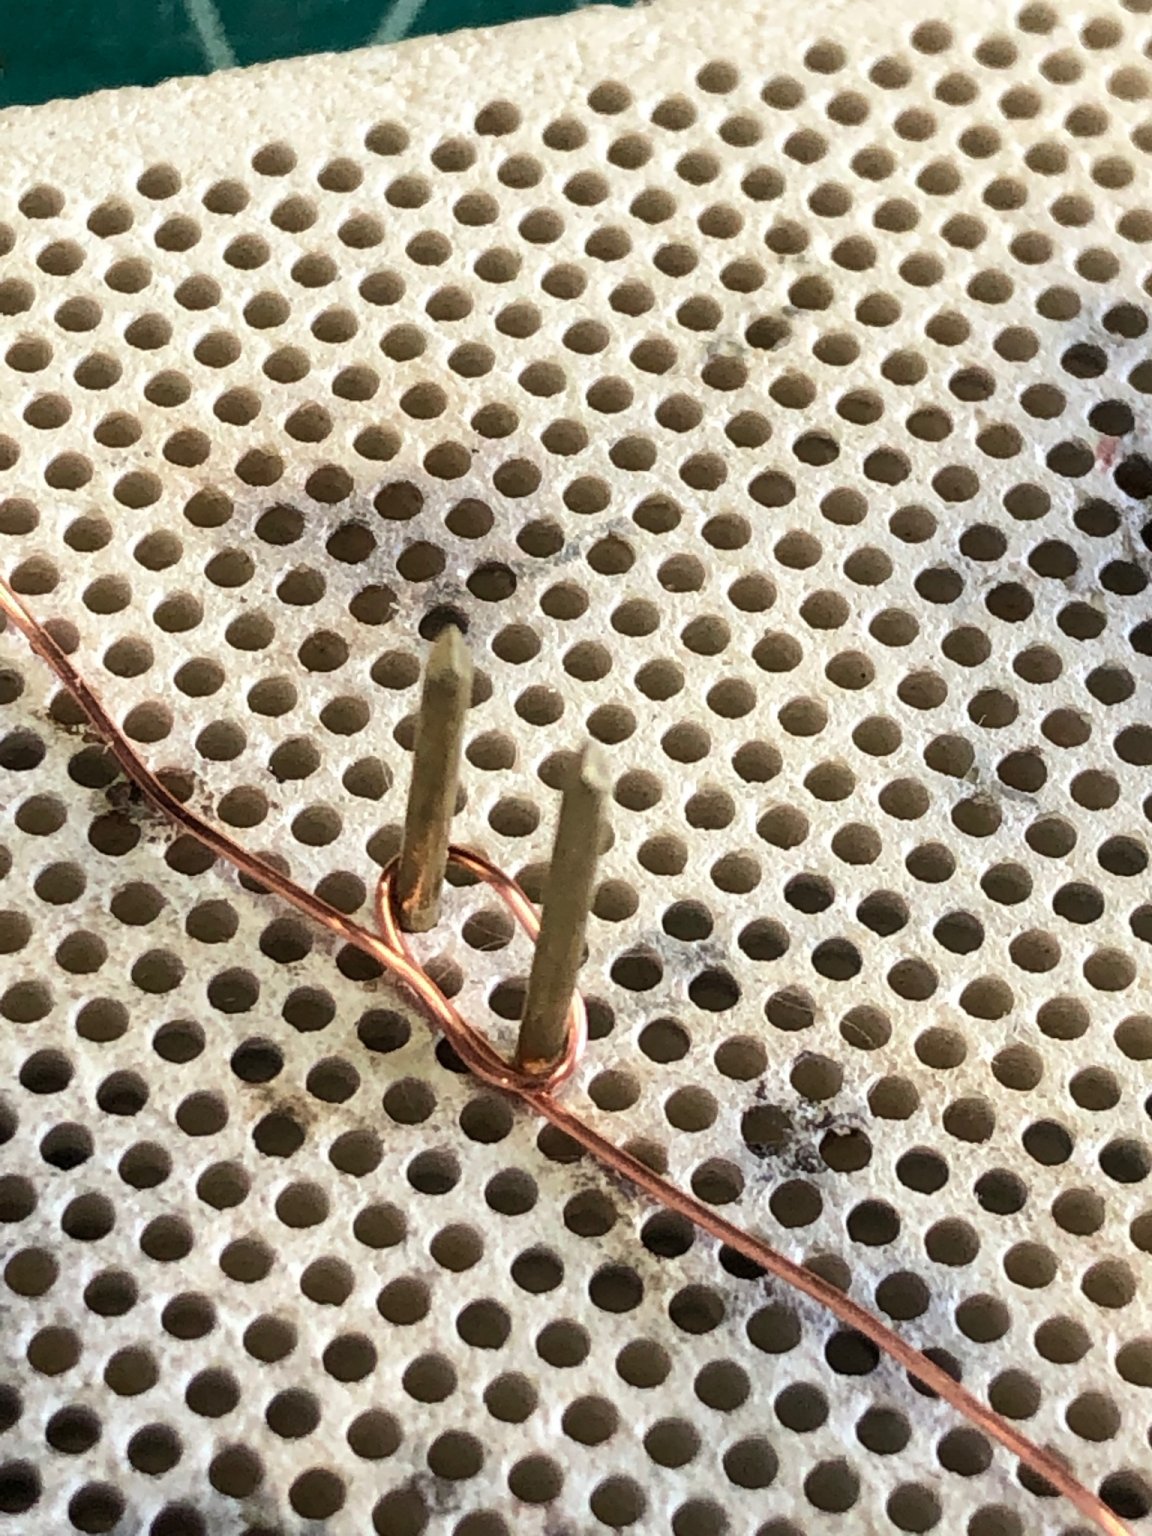
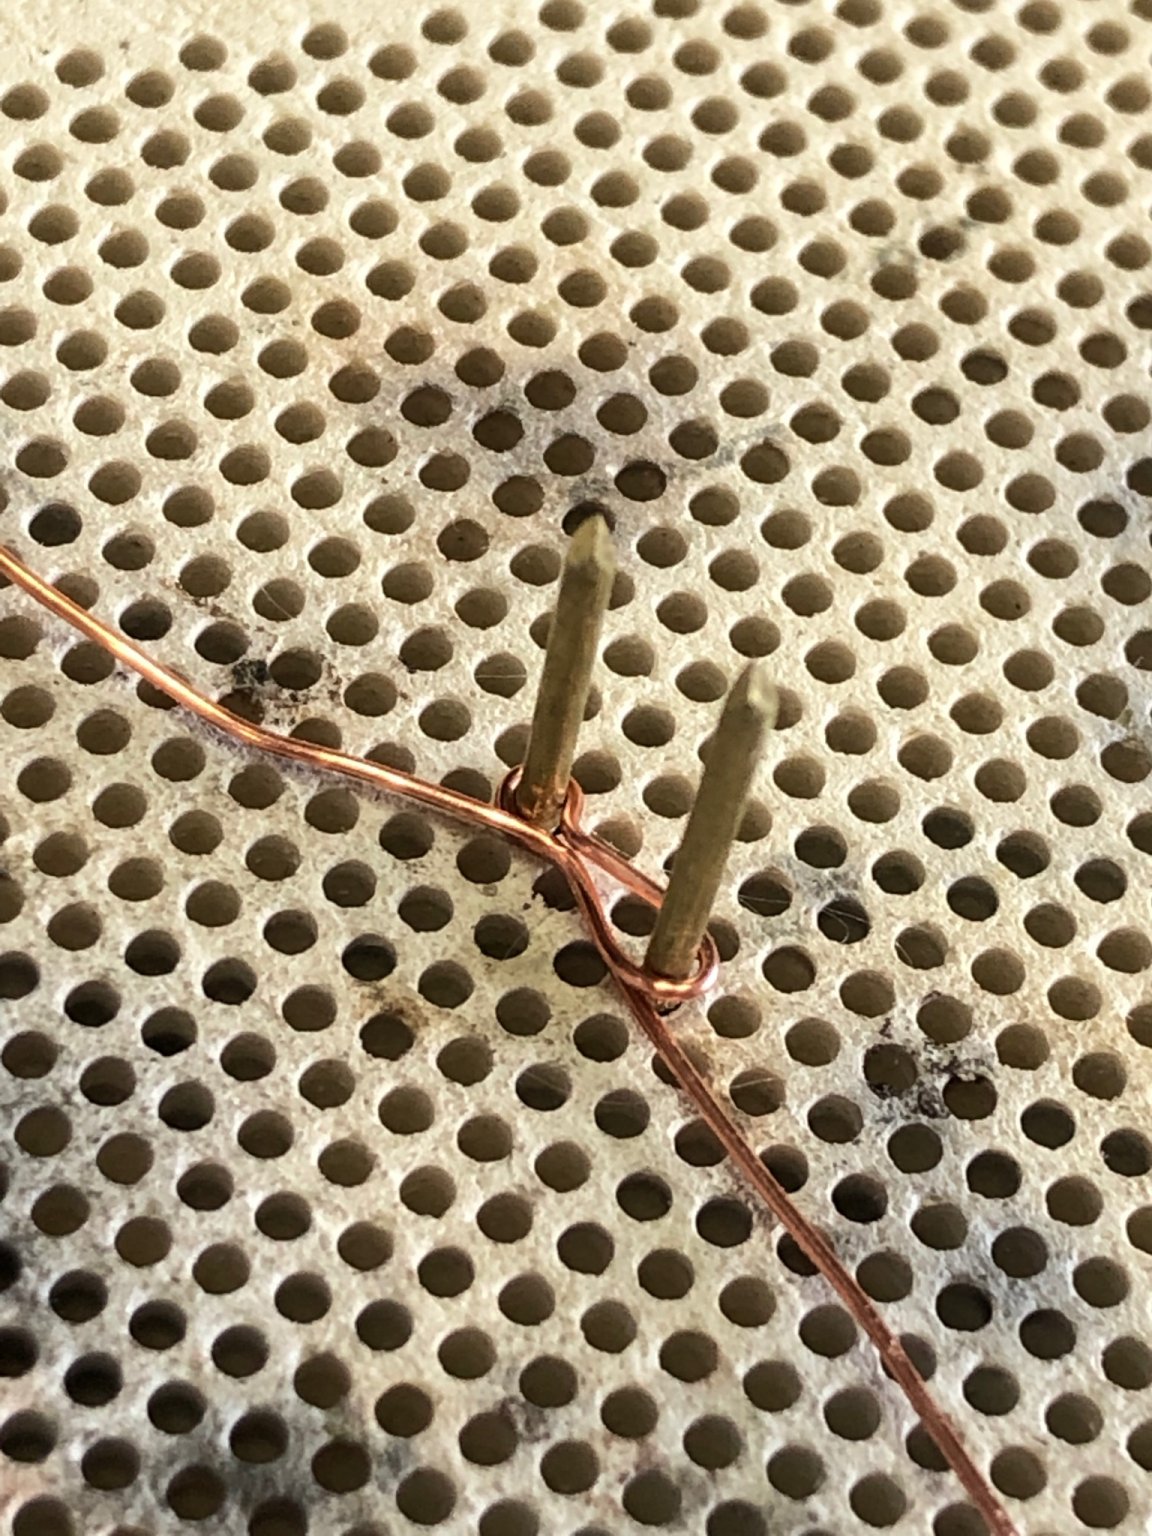
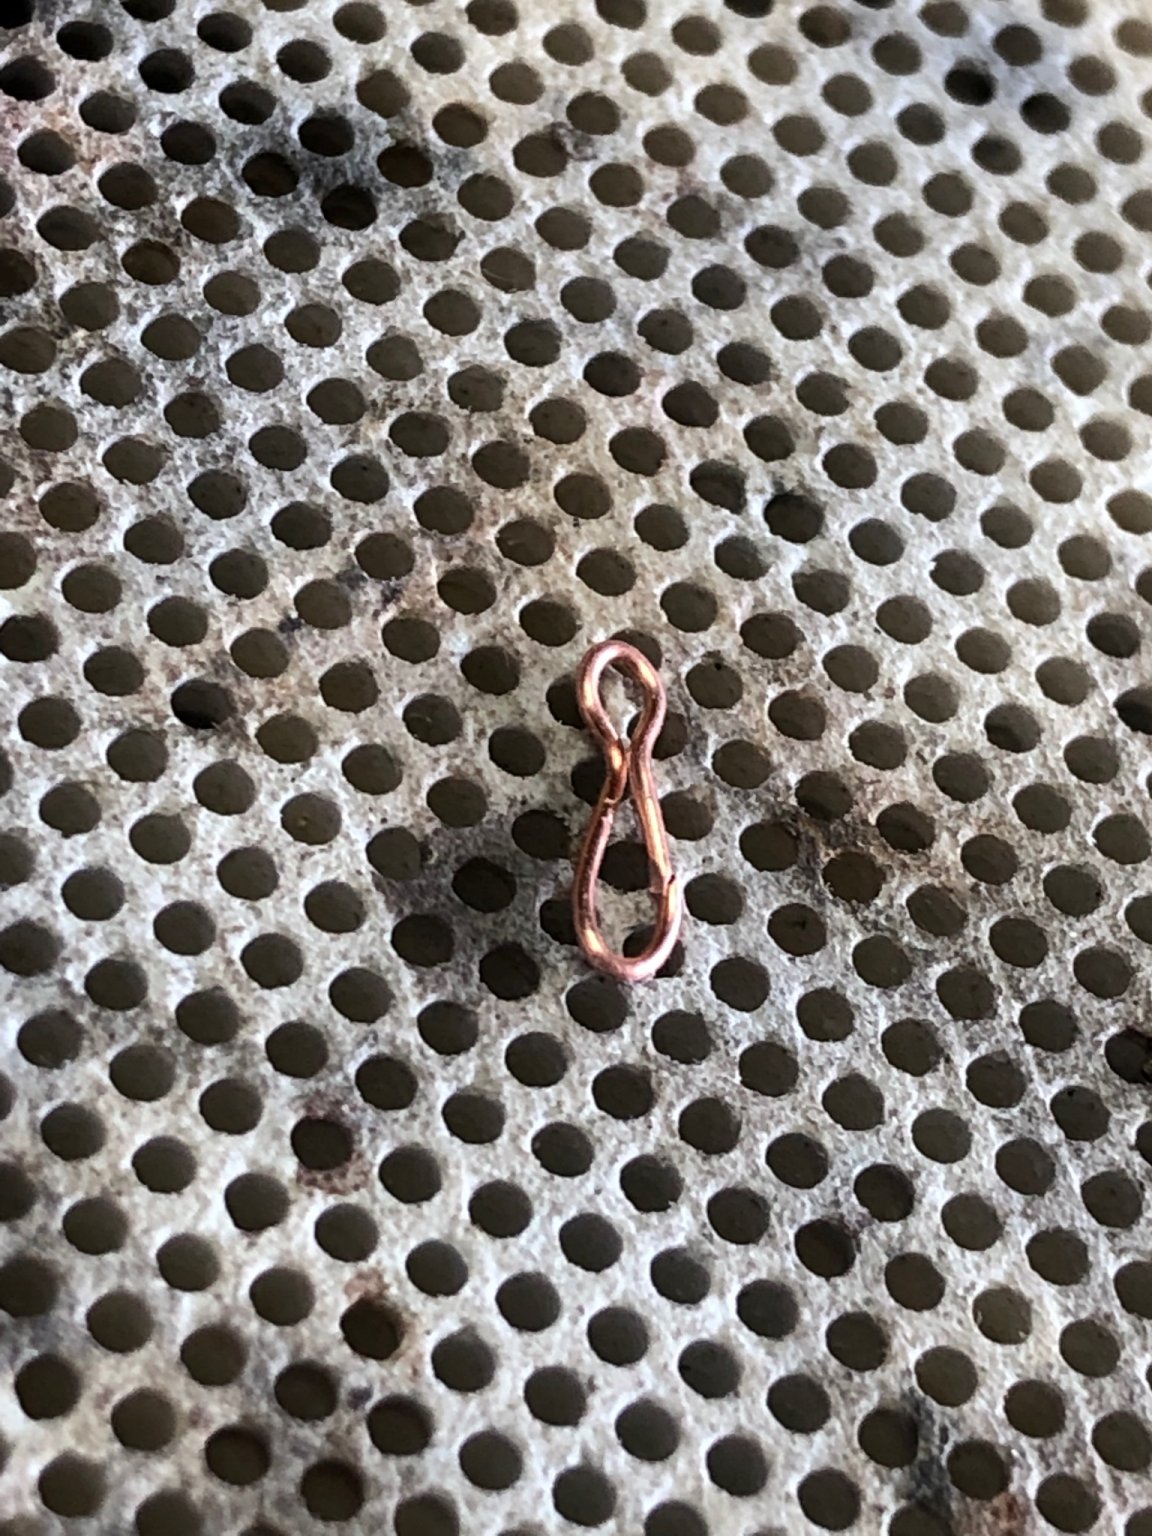
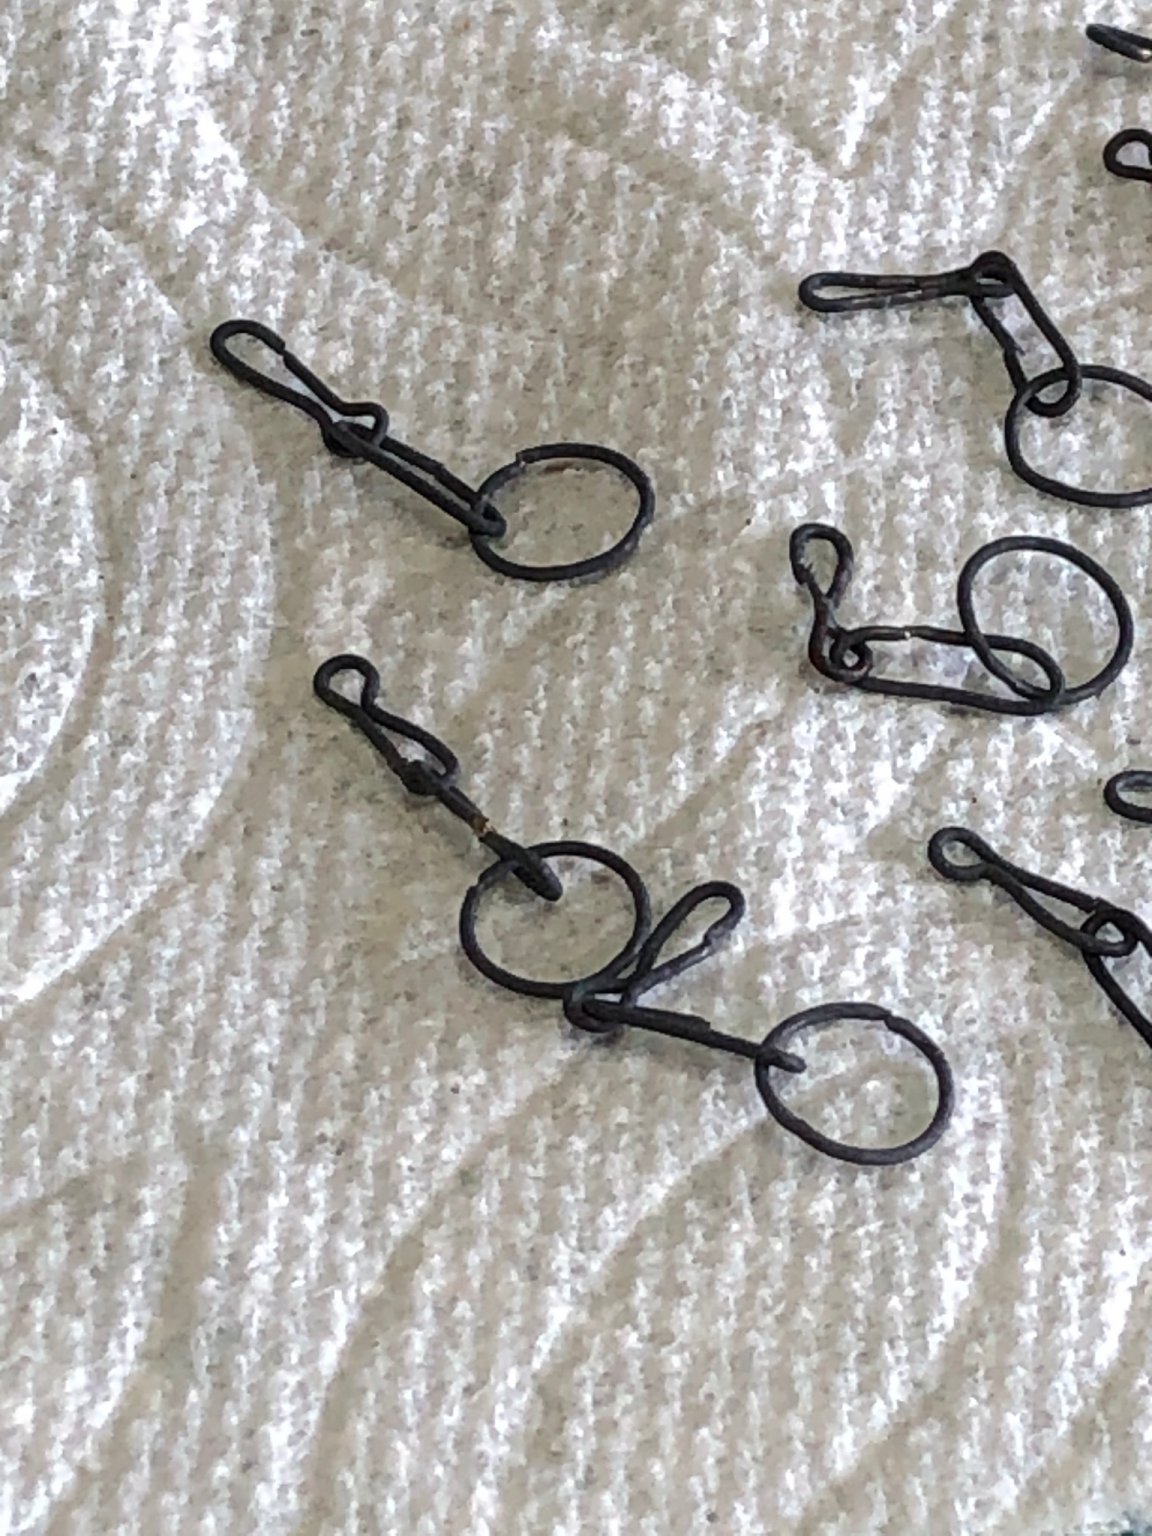
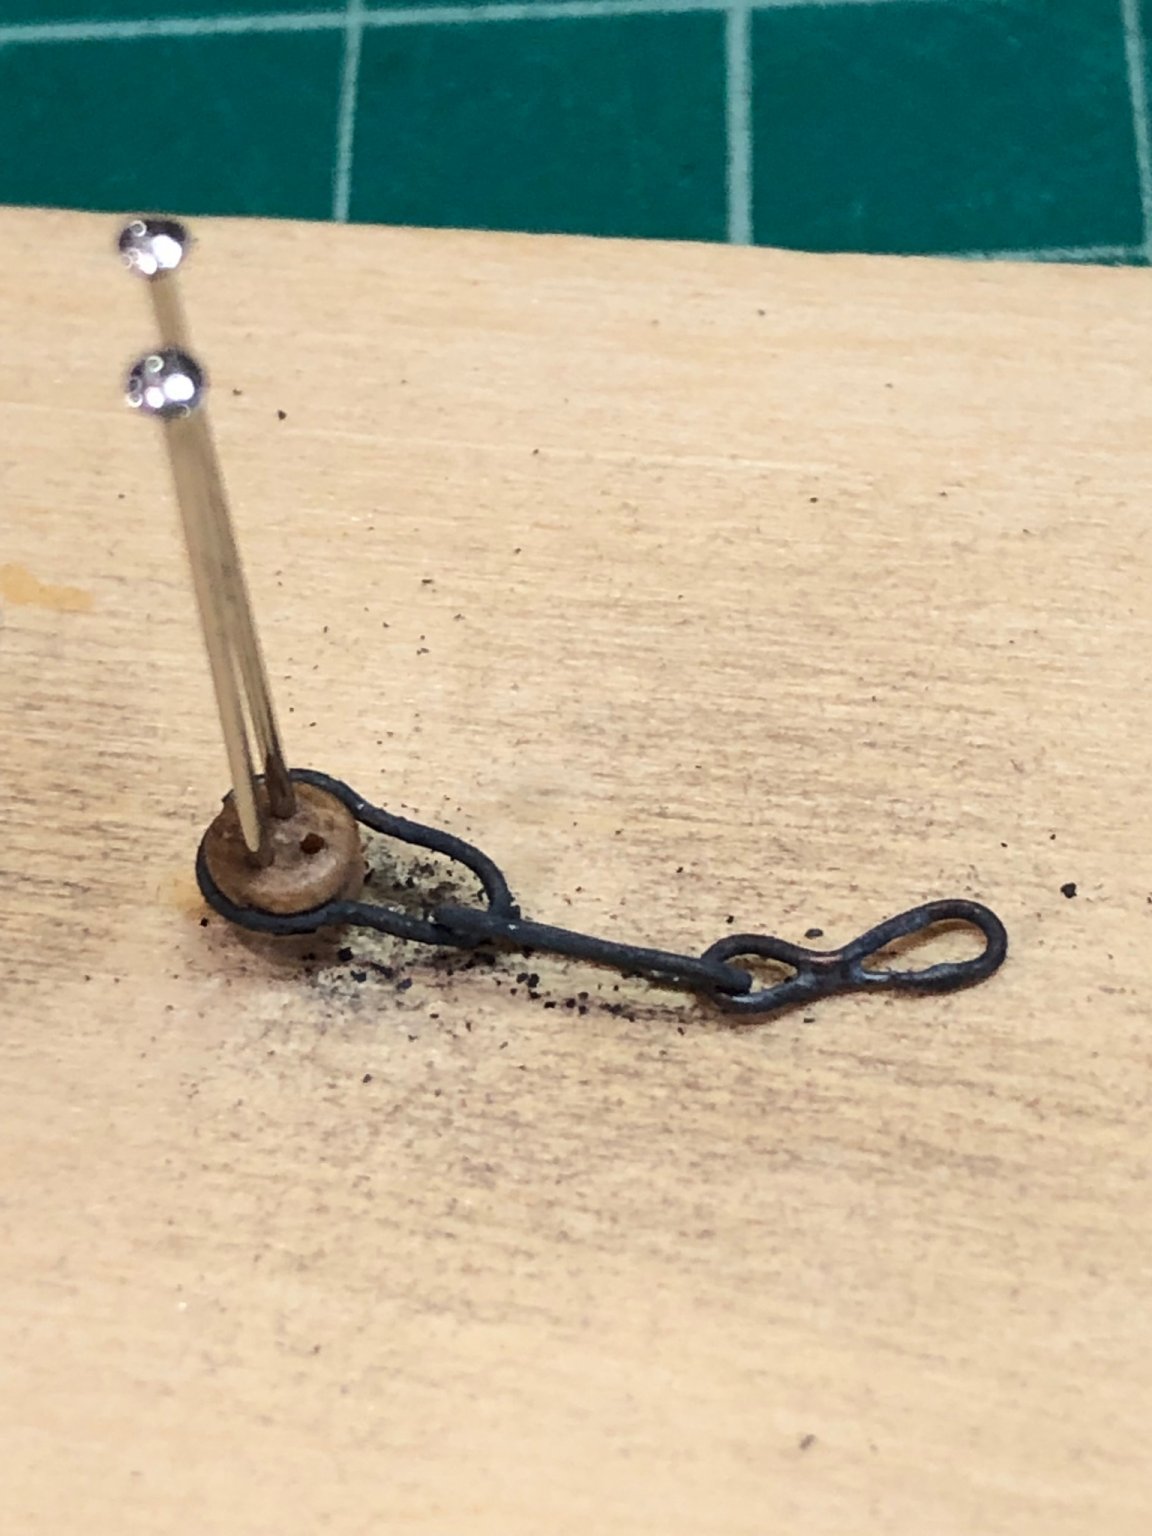
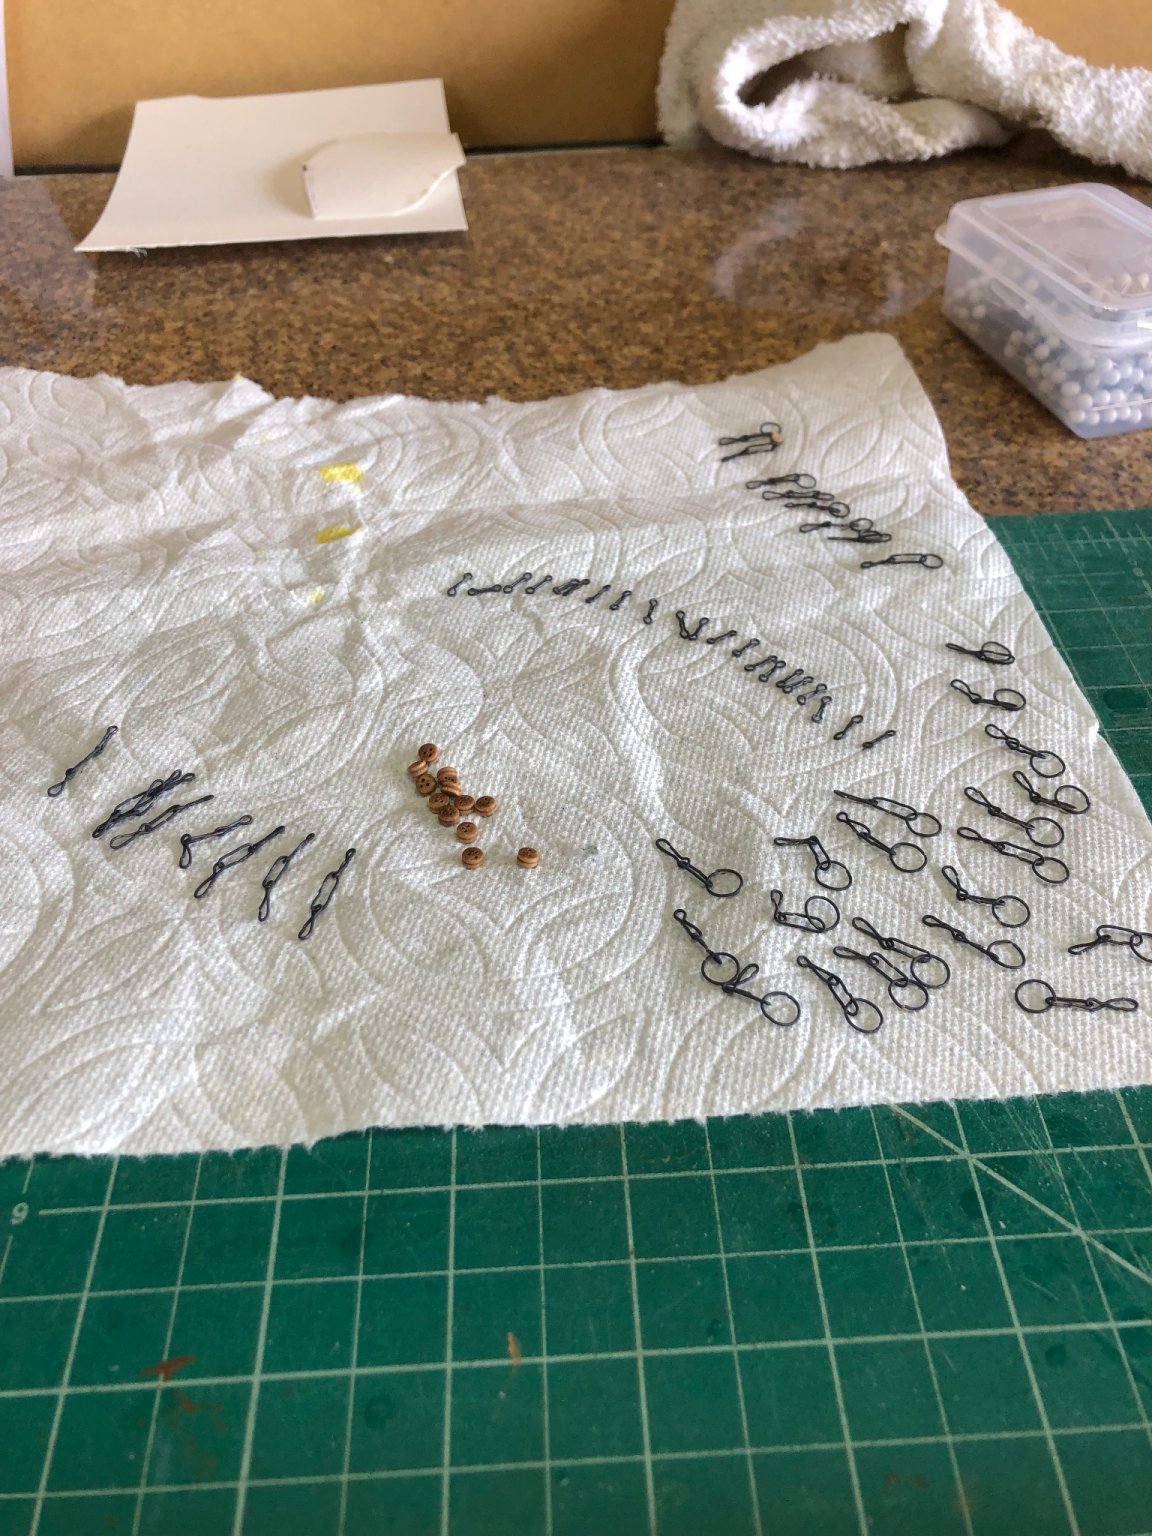
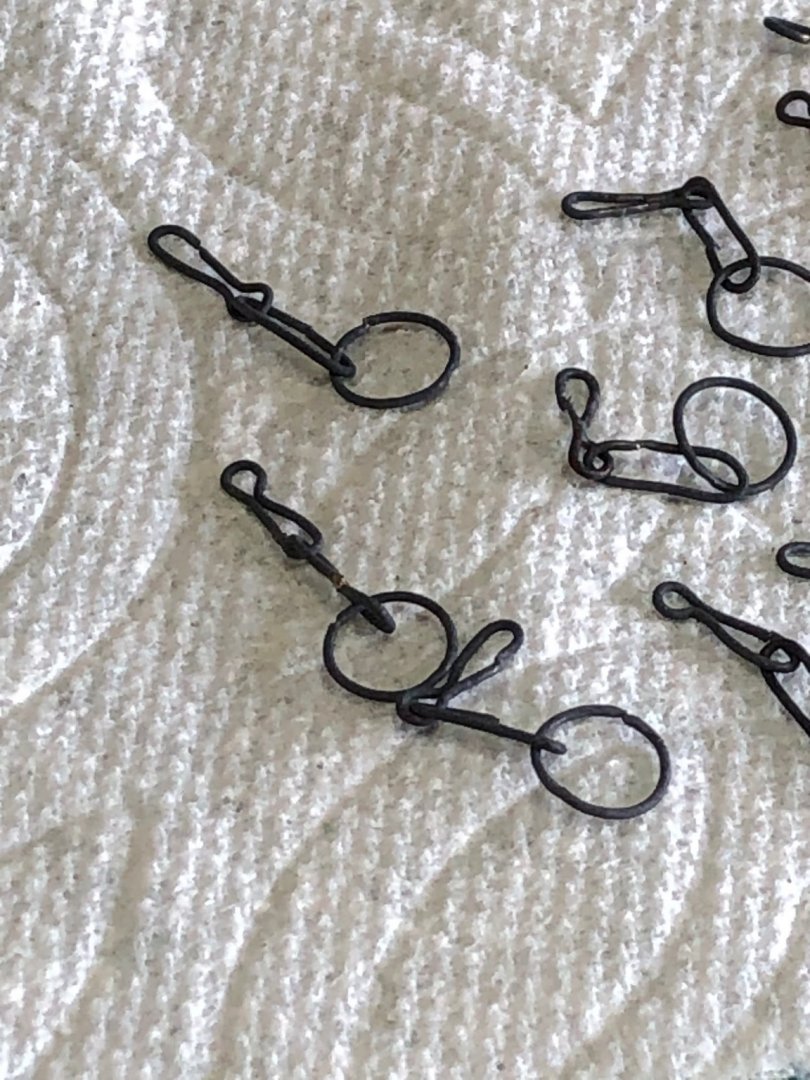
A lot of work but not much to show. Completed the chain plates and attachment to the channels. I kind of followed the instructions making the chainplates with the exception of soldering the joints rather than glue. First I made the deadeye strop using a time trued method of trail and error using jewelers ring pliers. Several tries and a 5mm diameter ring fit on the 3.5mm deadeye and when squeezed it created a loop with the correct amount between the deadeye and loop for the middle link. The 2.5mm deadeye was the same except a 4mm ring was needed. The middle link, eyebolt link, toe link, and preventer link were formed as described in the monograph forming the link squeezing the link finished link ready for soldering I was fortunate enough to use my soldering mat as the holes were the correct spacing of the different links. The strop links and toe links were soldered prior to assembly. To complete the chain plate the middle link was soldered after capturing the strop and toe links. Using silver solder allows the soldering of close proximity to previous joints due the solder that melts at different temperatures. High heat for the links and low heat for the joining middle link. With the links assembled I squeezed the deadeye in position The black is liver of sulfur residue that comes off after washing. All my work And like I said a lot of work not much to show On to rigging


-
Well folks chapter 6 is officially done. Adding the fancy moulding added a lot to the visual of Cheerful. Its amazing how much a little finish will add to the overall image. Not much to explain just followed others logs and the monograph. The one thing that was problematic was scratching the fancy moulding out of AYC. Being soft wood my tool kept leaving fuzzy surfaces. I decided to you Boxwood as I have had excellent results with other fancy moulding. I had a sheet of 1/16" and ripped off 1/16" strips. Using the brass scraper to form the detail. When done with detail I applied a coat of WOP and when dry the Byrnes thickness sander was used to reduce the thickness to .025. I found it much easier to work with the thicker strip and thin it to the desired thickness. On to chapter 7


-
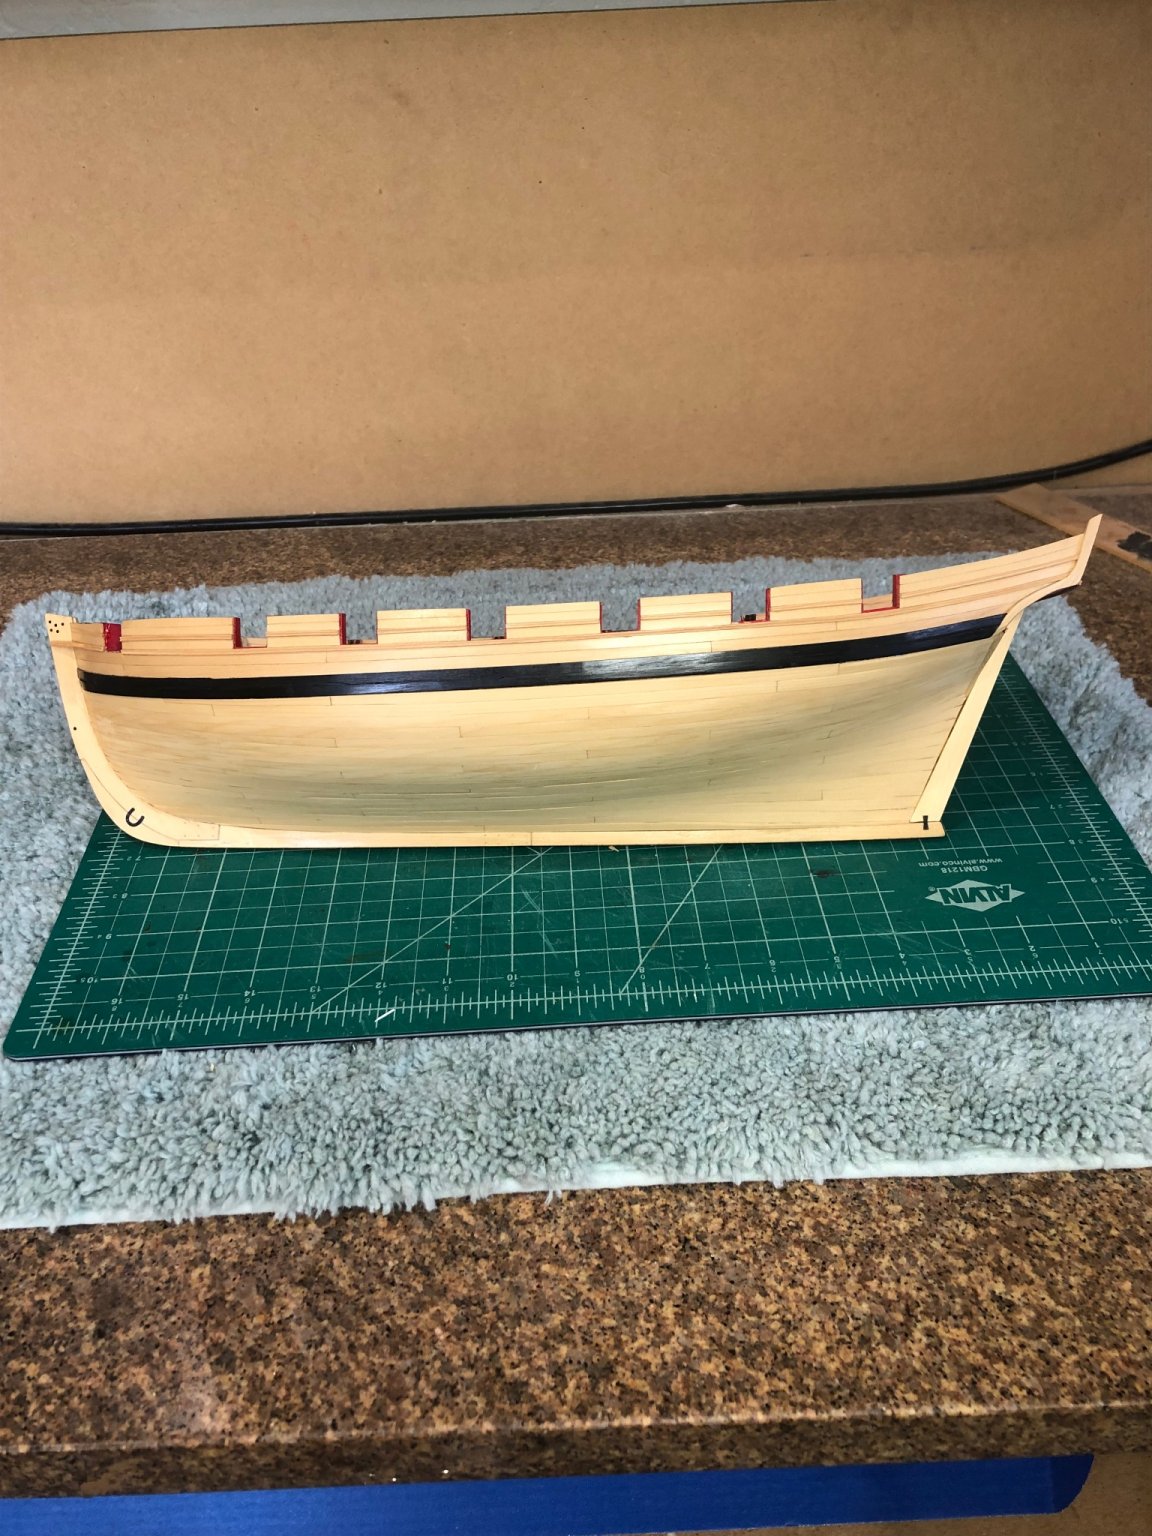
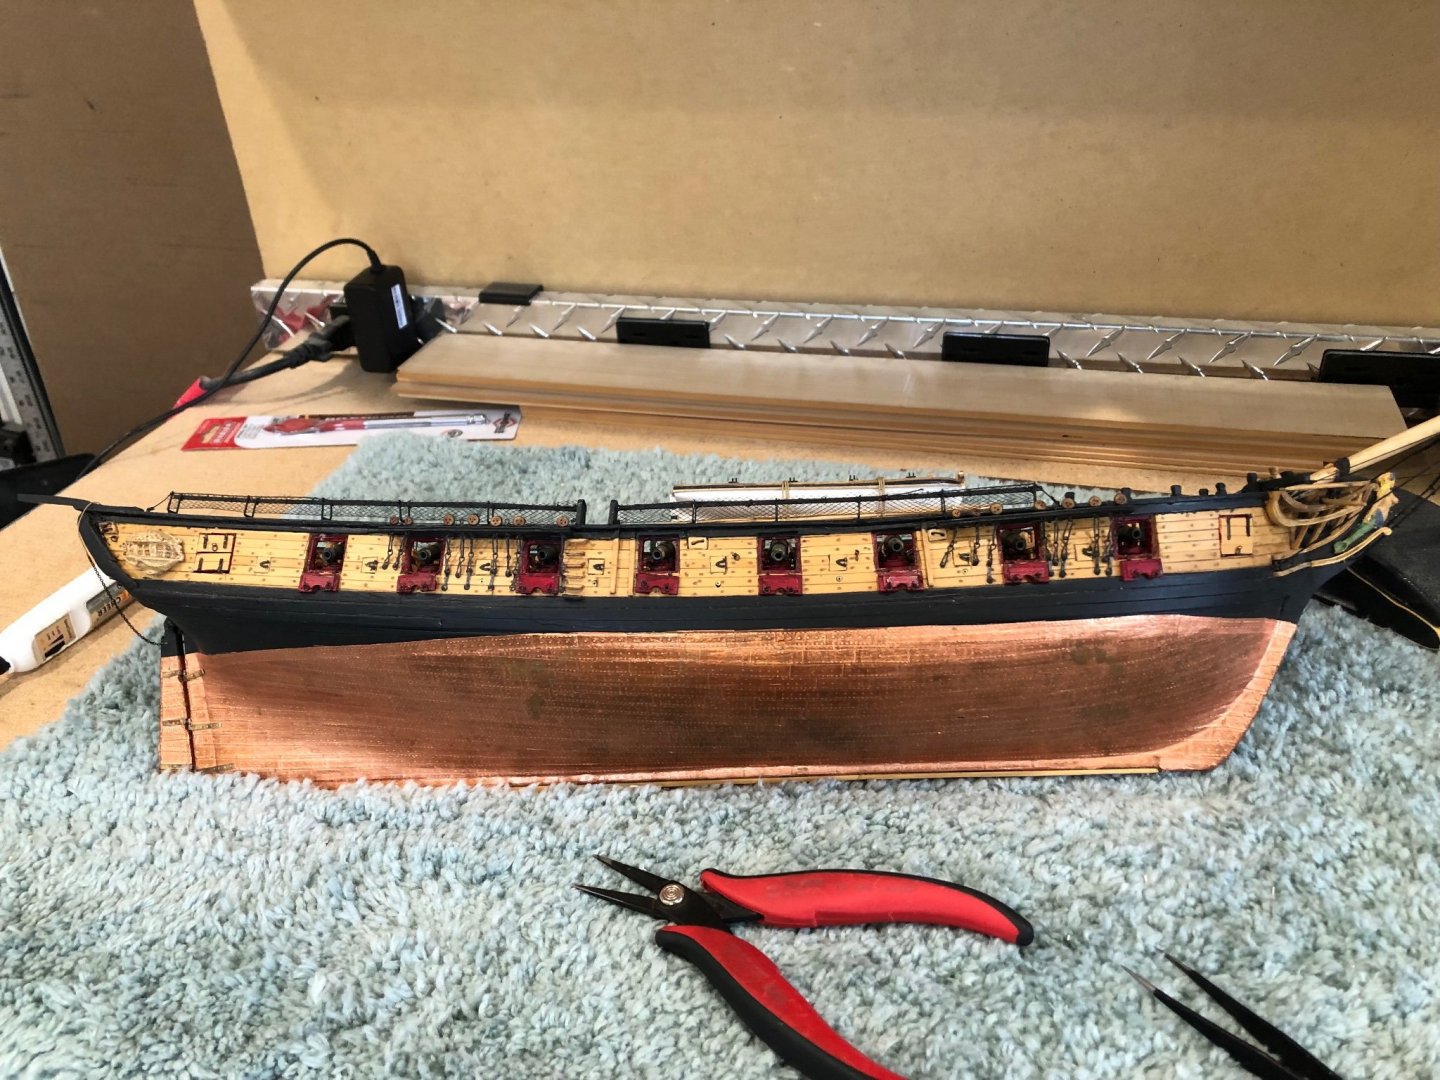
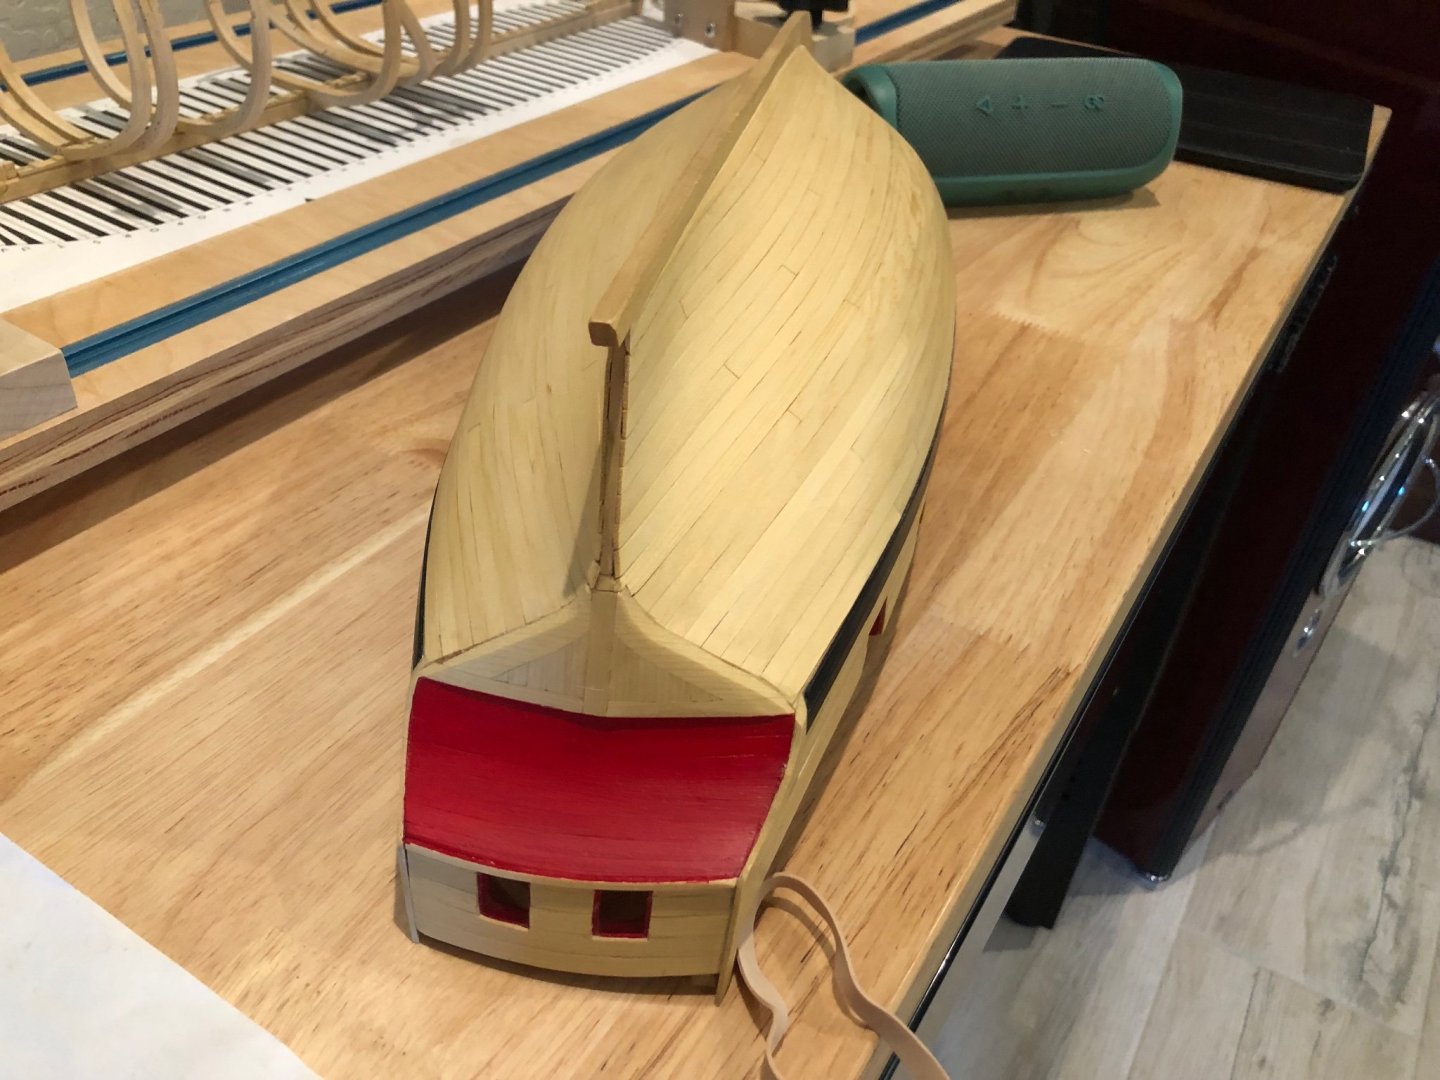
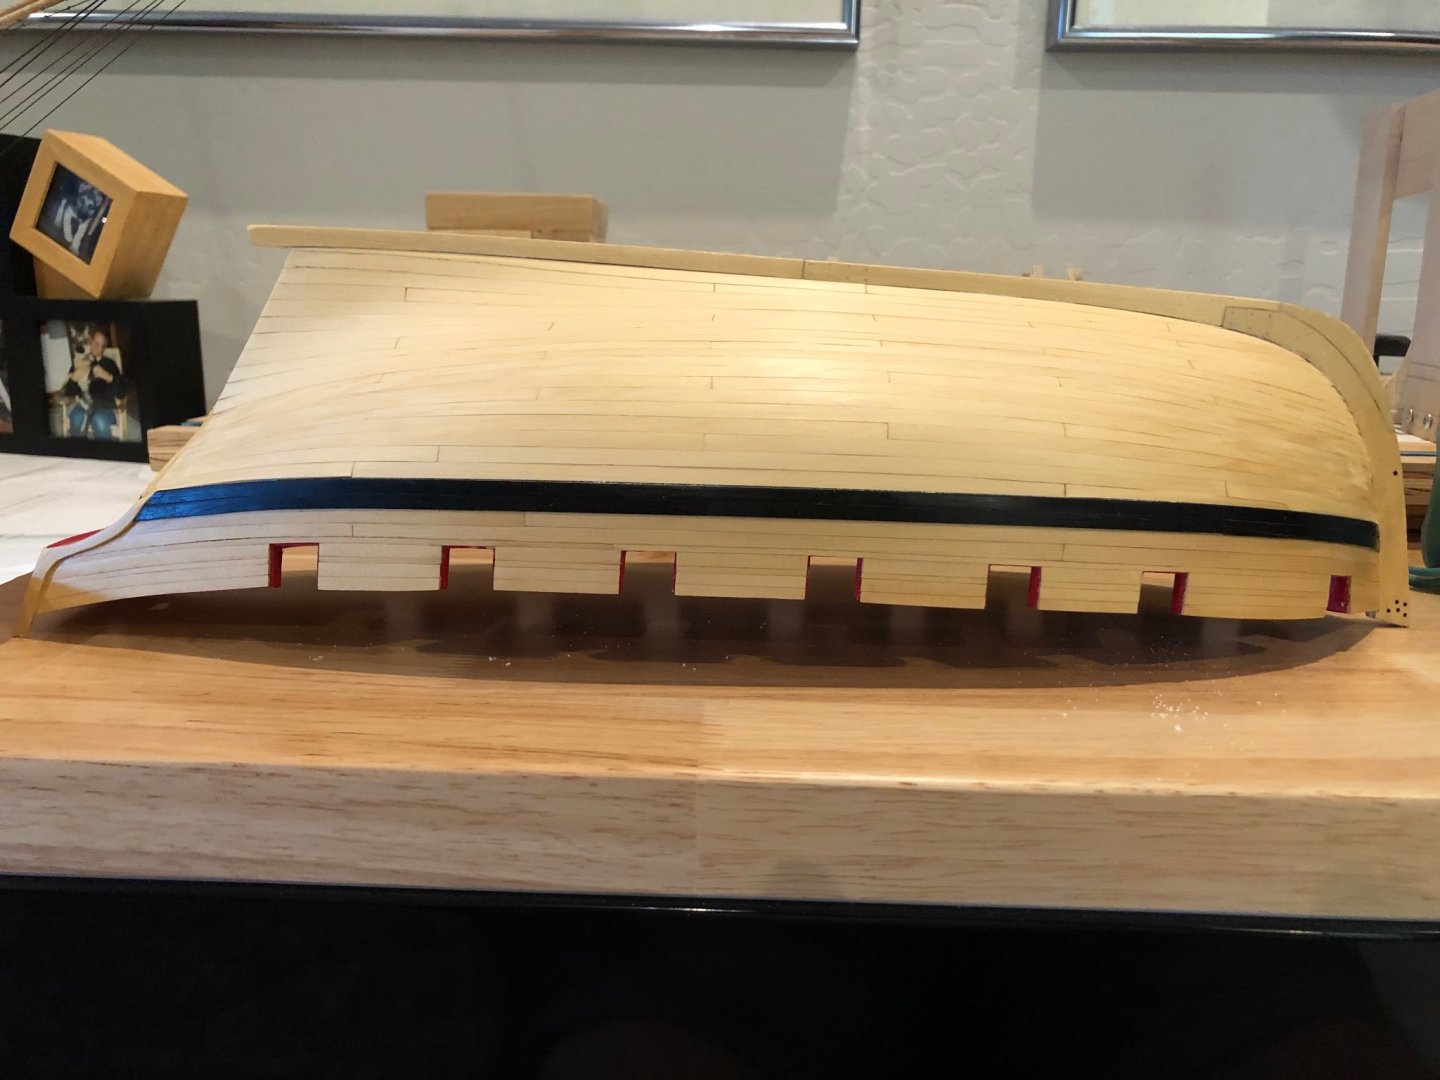
Planking completed and a light coat of WOP. Next is the stern post after the WOP dries. While waiting I'll get the fancy pieces ready to be put on after the stern post. Port Side view Starboard Side view Bow view Stern view Oh yeh! I painted the counter while working on the planking. Followed Chucks helpful hints and thinned the paint and added many thin coats to get the even coverage. Red is somewhat translucent and when you have thick areas it becomes a darker red and doesn't seem to matter how many coats of paint. So using a 1/2" natural hair water color brush with slow even light coats worked to get an even color. Really glad the planing is finished and excited to get some details done and then on to the deck.

-
Like your idea of wire to make the stirrups off the model using the third hands. I'll definitely be using that technique when I have to do mine. Will
- 274 replies
-
- 1
-
-
- Cheerful
- Syren Ship Model Company
- (and 1 more)
-
Thank you Steven great catch and very helpful. I'll add the block before going any further.
-
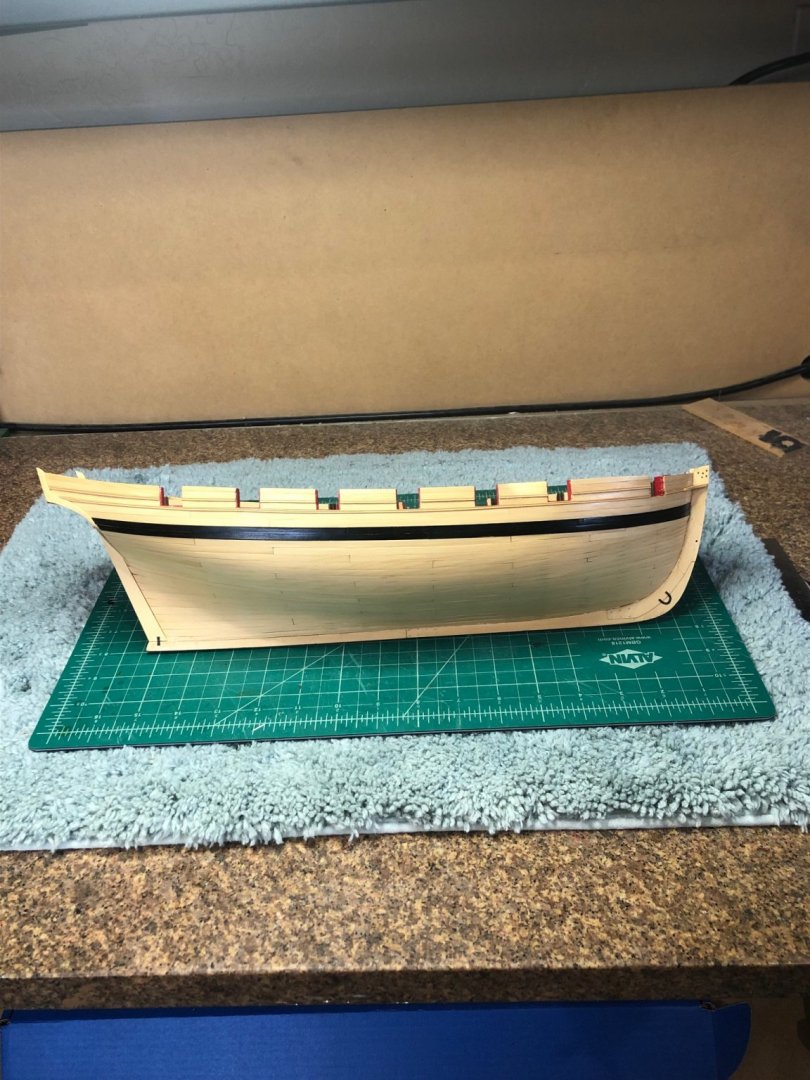
Finished the lower band of strakes. This has been the first time I carefully lined off the frames before planking and I can't believe how well it worked. When I measured the "0" frame and divided the dimension by 10 the planks needed to be .2 instead of 3/16". On the advice of Chuck I ripped strips that were .2 wide. Interestingly enough at frame 16 the measurement was closer to 3/16". Instead of trimming each plank I left them at .2 and on the garboard strake the end was then a little larger that 1/8". It was easier for me to do it this way rather than fiddle around each plank to meet the lines which always have the line width to deal with. Lightly sanded and one coat of WOP On to the port side


-
Thanks Glenn and all the others likes and comments. As to the top even with the counter, it is almost even but a little more careful sanding is required. When I get it where I'd like I'll start painting the counter. I asked Chuck for suggestions of how to get even color with the semitransparent red paint and have tested his suggestion of many coats of thinned paint with light sanding between coats using 400 grit paper.
-
Very nice Andrew a job well thought out and executed. The results are amazing. A fellow modeler, I know, uses resistance soldering with outstanding results without burning the wood. Seeing his work I bought a system but am still learning how to use it on such small parts as I've only used silver soldering and the flame immediately burns the wood holding substrate. Your work is amazing.
-
Very nicely done it makes me even more anxious to start my ECB which is sitting on the shelf so I can look at the box everyday. Great Job. 👏
-
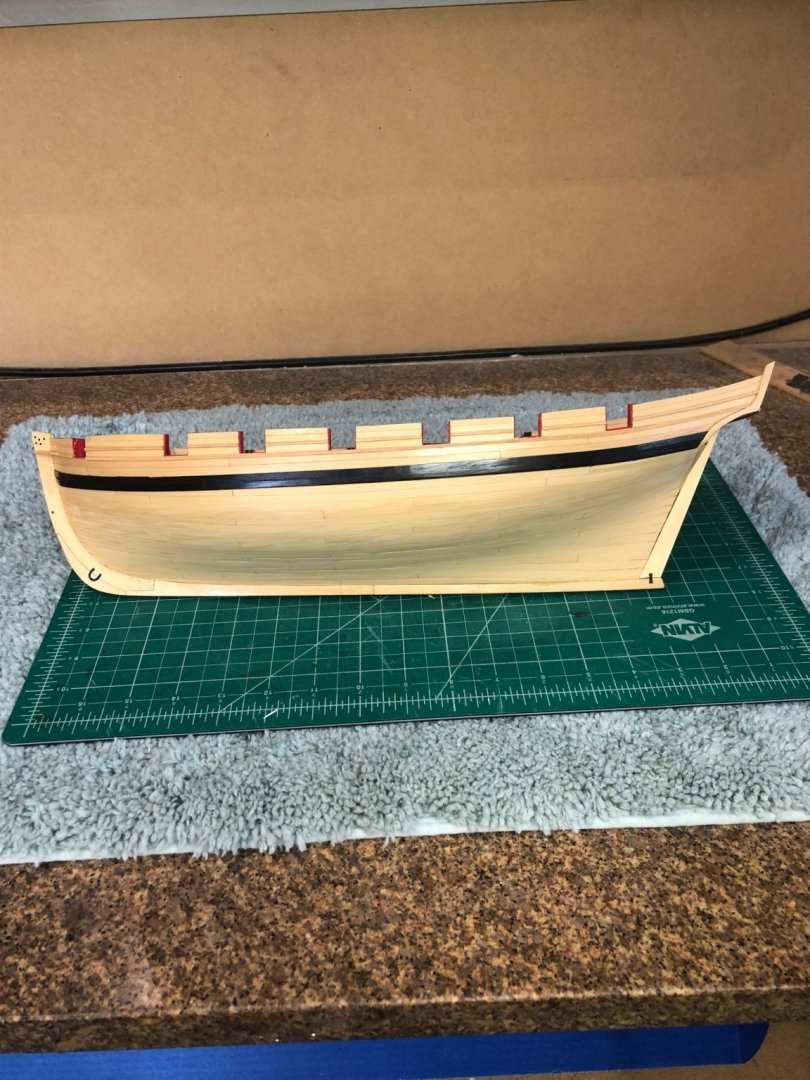
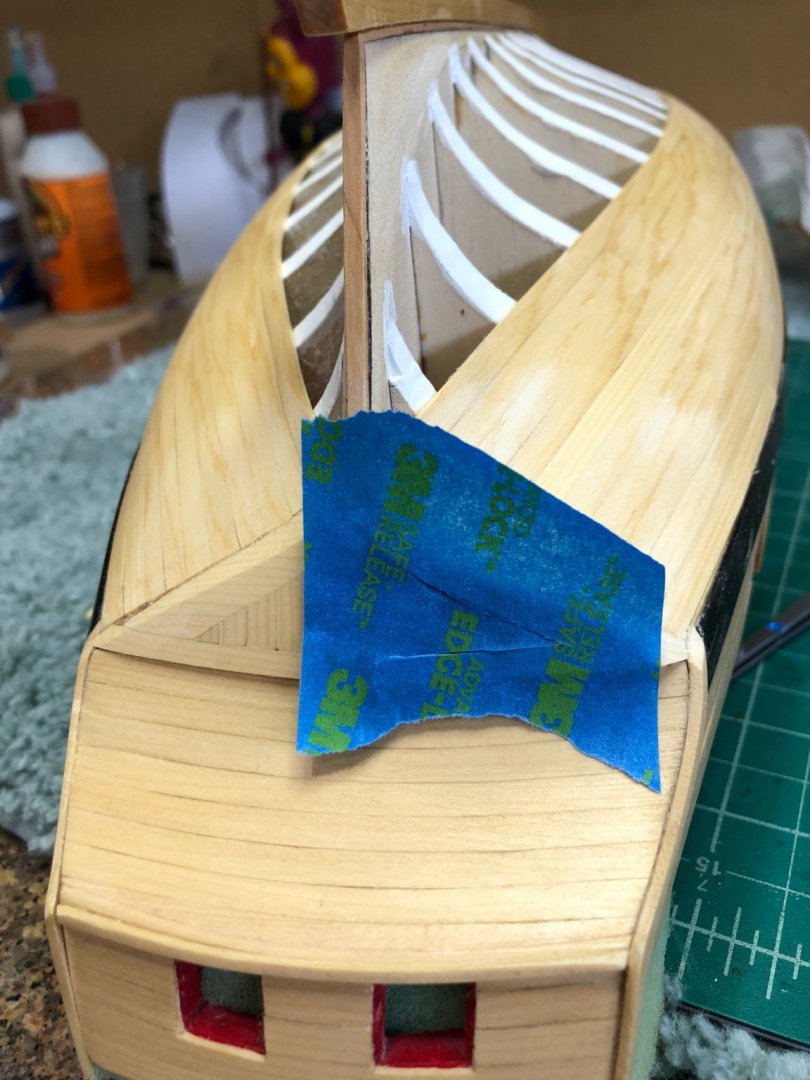
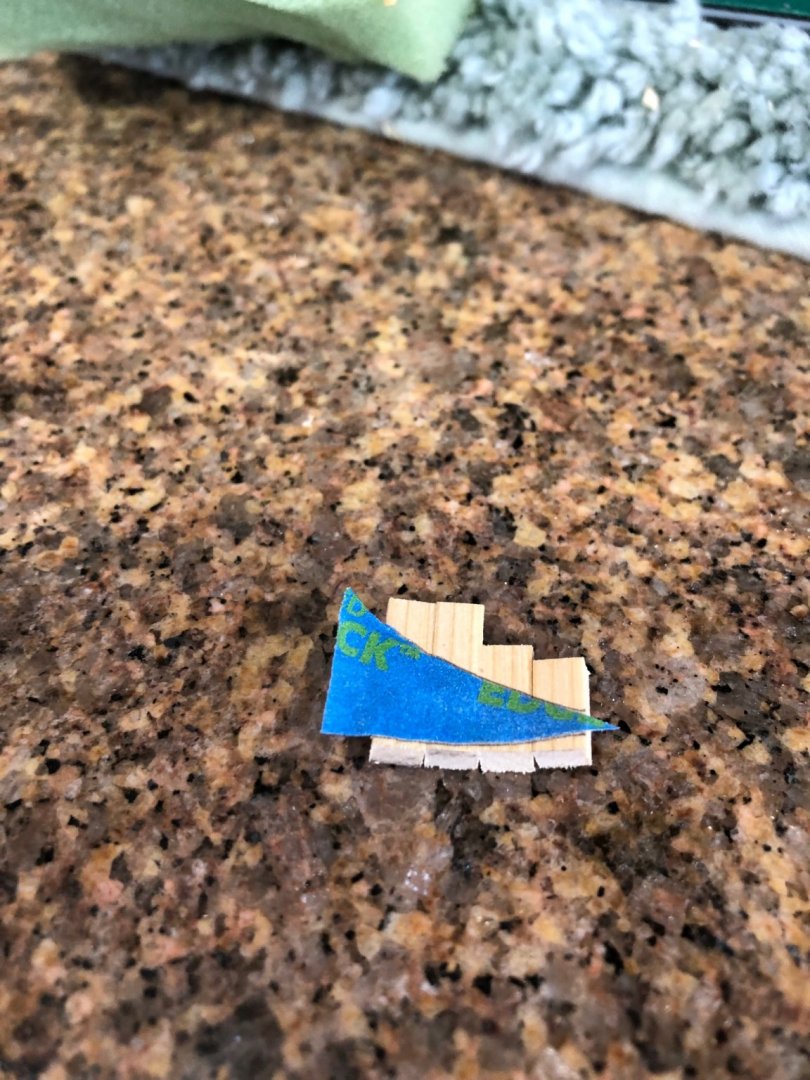
Square tuck completed and now ready to line off the lower 10 strakes. Building the frame for the square tuck was straight forward but the fiddlely little vertical pieces were another matter. First I tried to free form the curved end and when fit align the length to fit the opposite end. That piece has a slight curve and that was the issue. After many attempts there had to be another way. Being a straight line kind of thinker maybe a template would work, but how to make the template. To make a template I stretched a piece of painters tape across the port side tuck frames and using a new #11 blade cut the tape using the inside edge of the frame as a guide. Cut 5 pieces of wood and taped them together using the triangular shaped tape template. Tracing the outline left the pieces a little long for final shaping. System worked and was able to finish the square tuck. The coat of WOP made the joints more visible than I thought they would be but we'll see. I think I've become too critical of my planking lines and the transom and square tuck are about the same,

-
love to watch your work and how I may use some of your techniques.
-
Many thanks to everyone with likes and especially thanks to PRS, Chuck and Glenn for the very nice complements. Chapter 4 is finished I realized that I hadn't described how I taper the planks and file the mating edges. Somewhere I saw a board with a slot cut to hold strips during shaping. I took a piece of boxwood and with the table saw cut a slice slightly wider than the plank strips. After measuring and marking the strip it is set in the slot and using a sanding block with 150grip paper sanded to shape As you can see this plank is almost to the mark Another tip I learned from gbarlow was to sand an angle on the adjoining ends of planks to make tight straight butt joints. Thanks Glenn Starboard side completed with no sanding Both side done and lightly sanded Coat of WOP on both sides My planking has gotten much better and as Glenn has said I wish the boat had three sides. On to chapter 5 starting with the square tuck when the WOP dries.


-
We're here wishing you the best. Please don't go off the recovery program. That will set you back and maybe have to start over. I've never had shoulder surgery but my wife has had to have both sides repaired and recovery is a long process.
-
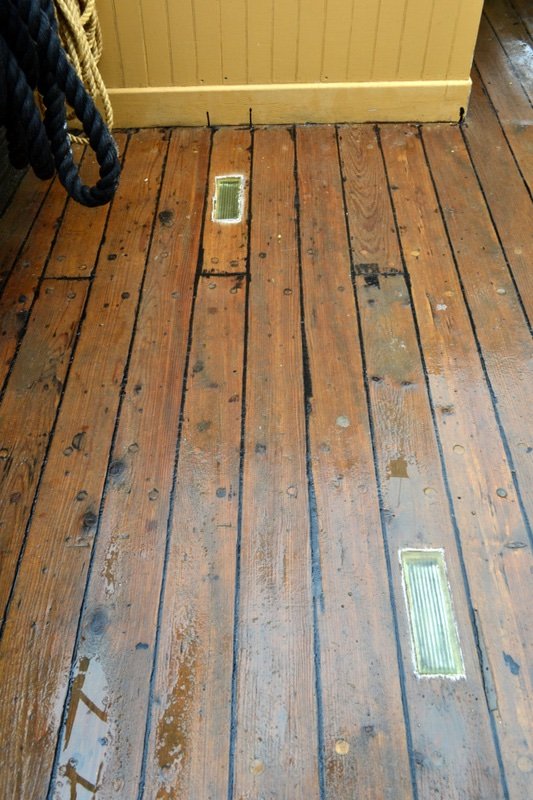
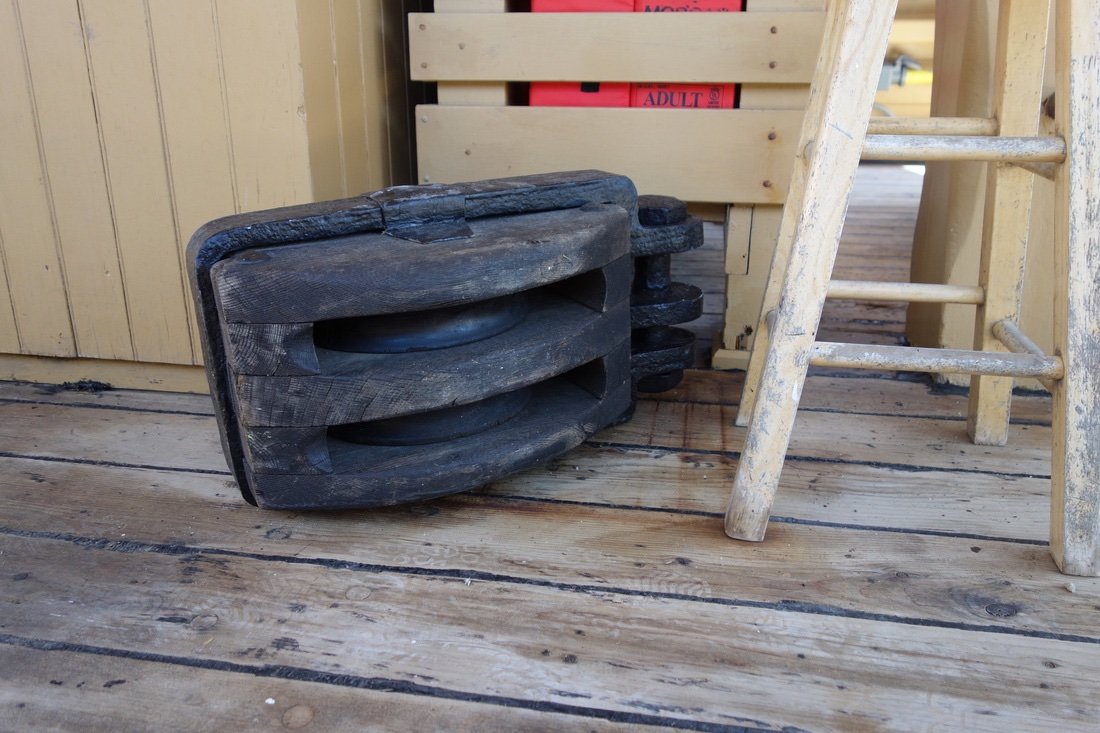
I like the work you're doing its coming along beautifully. I only wonder if the grey deck is not brown/grey enough. A couple photos of the Charles W. Morgan deck for reference. Deck when dry Deck wet from a rainy day I hope I'm not being to critical.