HOLIDAY DONATION DRIVE - SUPPORT MSW - DO YOUR PART TO KEEP THIS GREAT FORUM GOING! (89 donations so far out of 49,000 members - C'mon guys!)
×


niwotwill
-
Posts
596 -
Joined
-
Last visited
Content Type
Profiles
Forums
Gallery
Events
Everything posted by niwotwill
-
 As always Patrick your attention to detail ends with magnificent results. Very well done really well done I mean. Just one thing I did not think of on my and has resulted it uneven tarnishing. FINGERPRINTS. Best regards and a Happy and Healthy New Year Will
 -
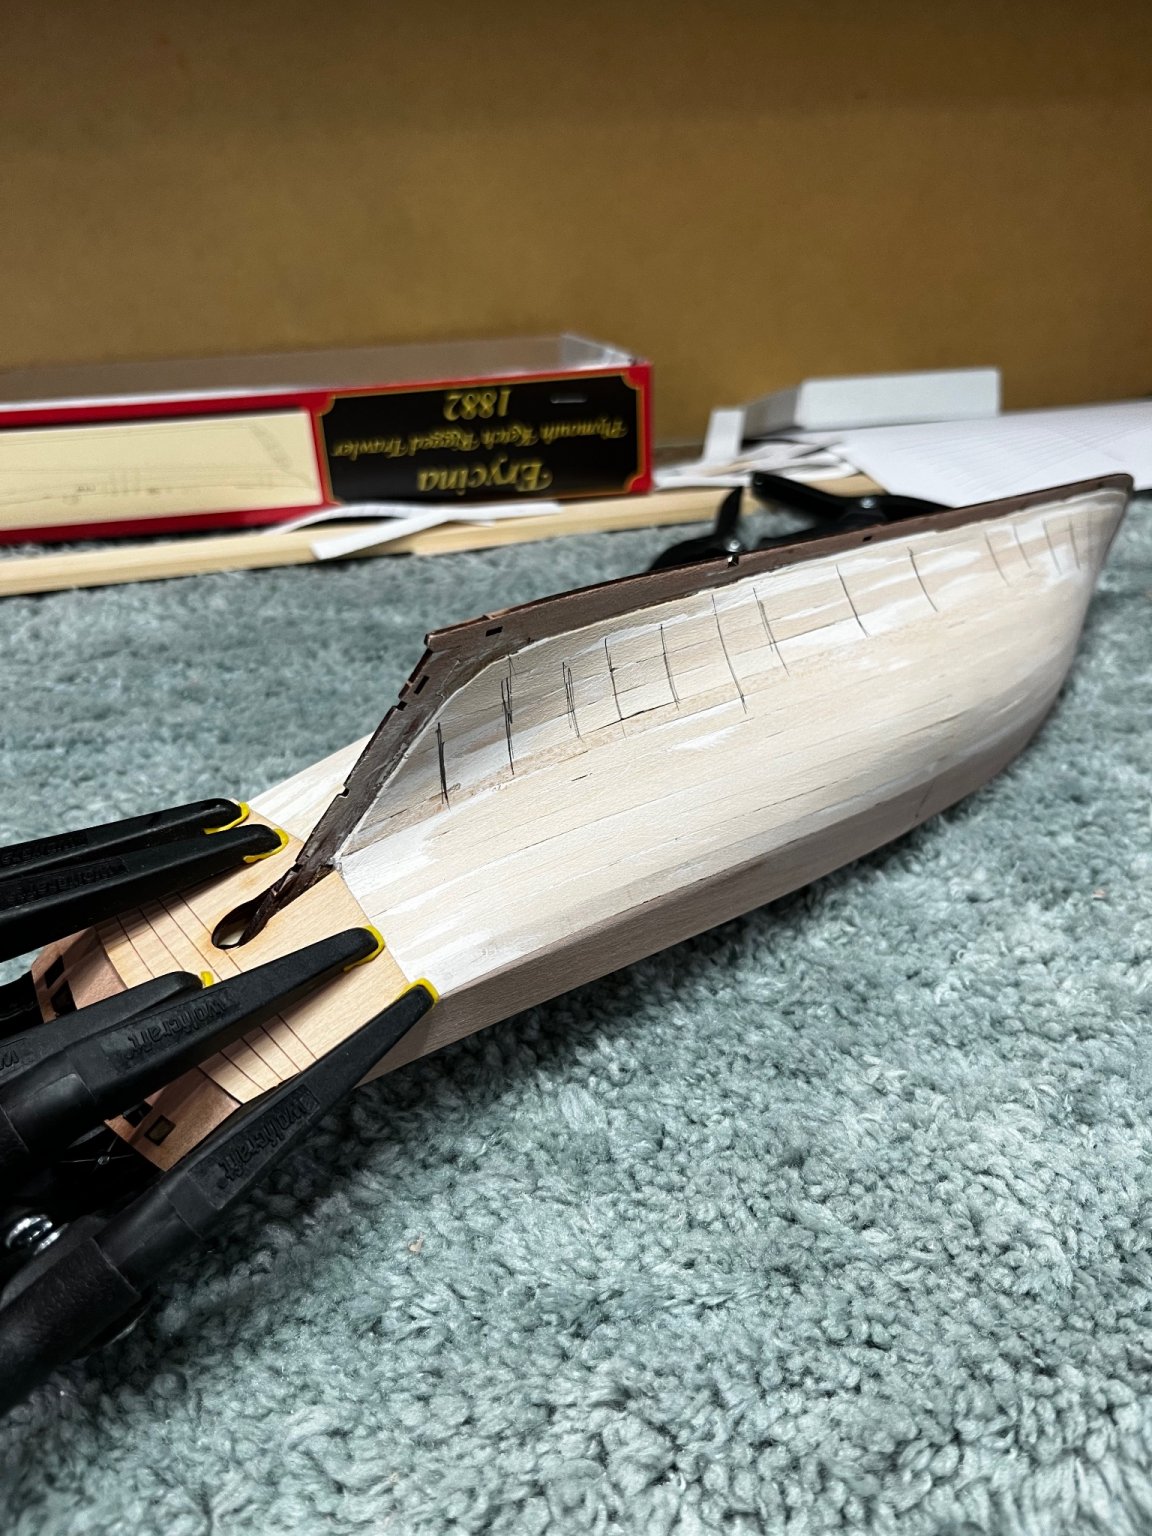
More work on the bulwark outer layer especially the starboard. The holes don't align between the inner and outer layers. This is not a huge issue as some file work on the inner layer brings the into alignment. This is the starboard side and in not really a problem since you have to file the hole for the bowsprit. The bowsprit hole will be tapered to the angle of the bowsprit. Not sure where the filler sanding dust came from but you can see the white dust. Port side This hole was filed into alignment using a #2 cut round swiss file. You can see the start if planking at the stem. Finished 12 strakes with 4 to go. Just a little light sanding making sure the planking will look okay. More tomorrow and then the starboard sided. Many Regards and Happy New Year


- 77 replies
-
- 8
-

-
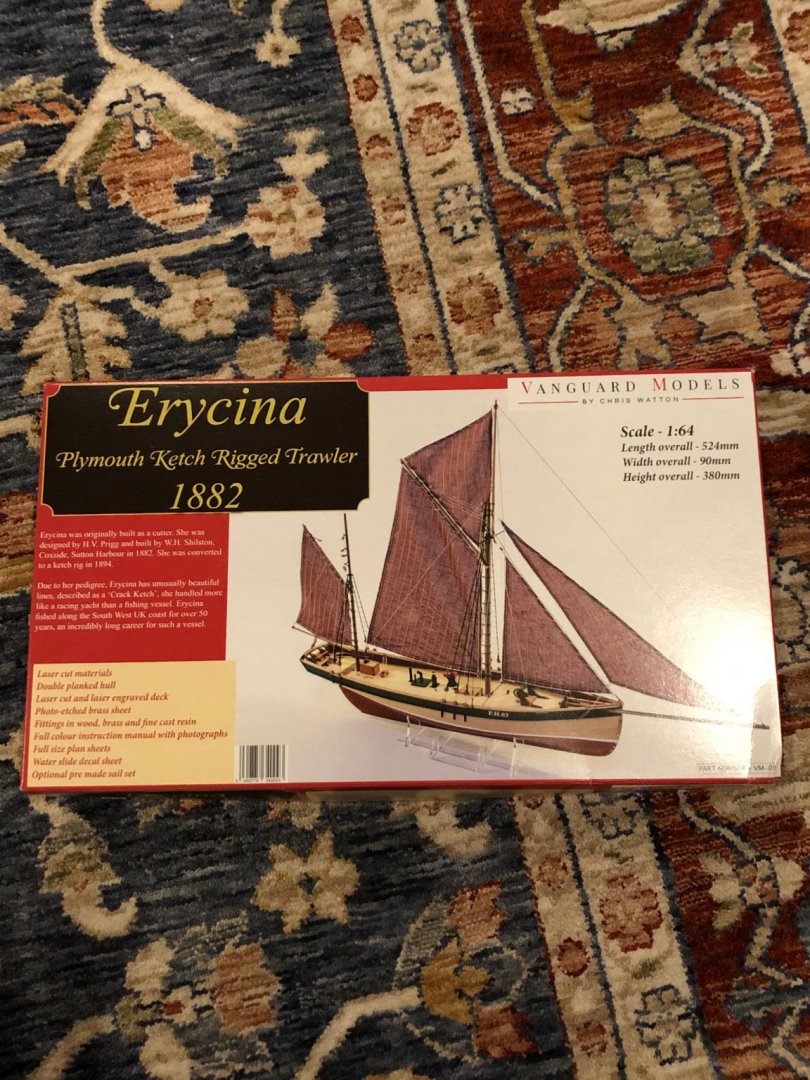
- Erycina
- Vanguard Models
- (and 1 more)
-
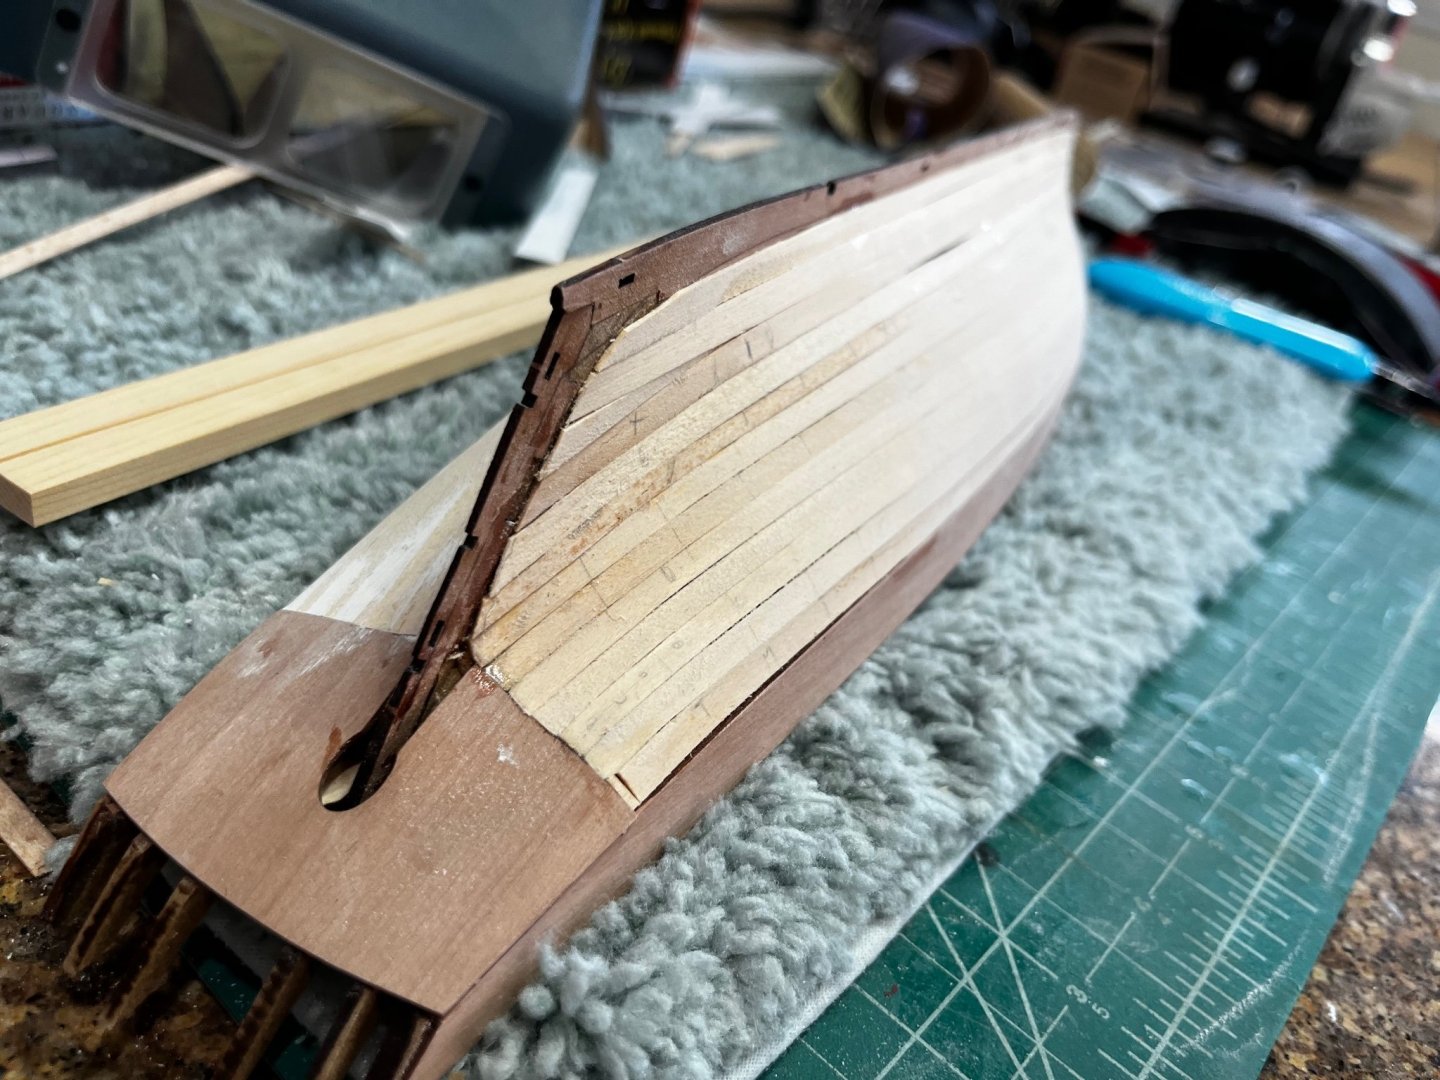
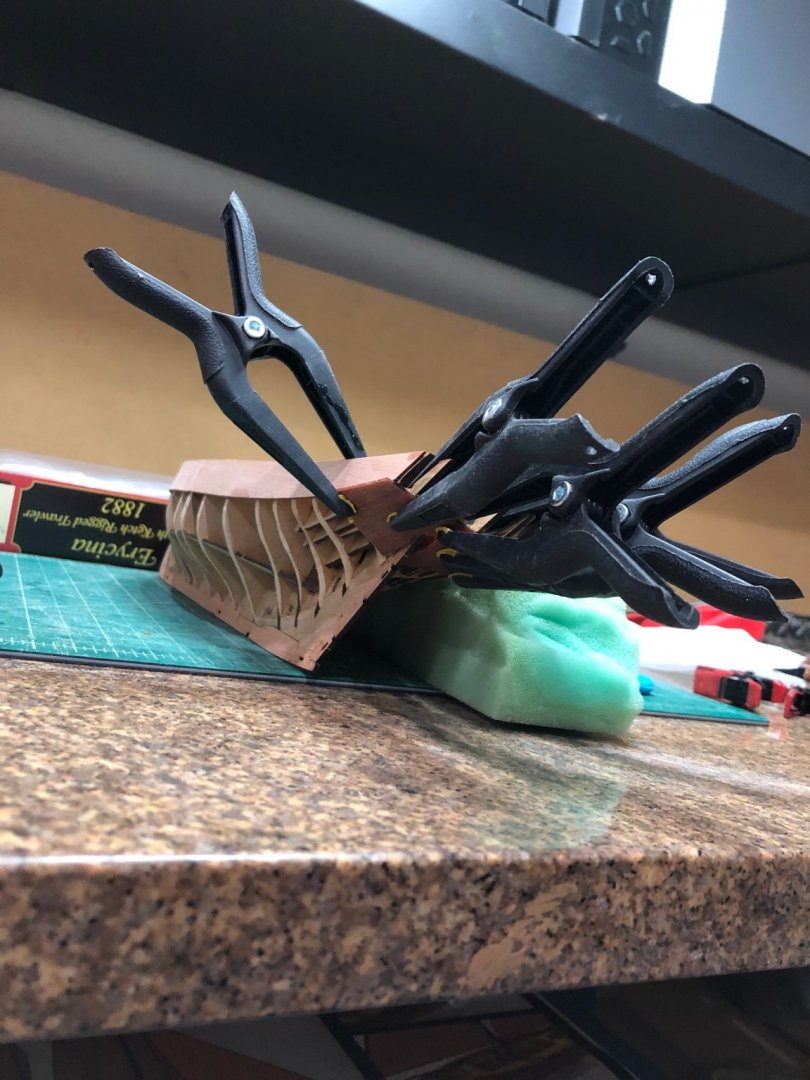
Thanks for the all the comments and looks with nice flags. Just note of caution to all building or going to build Erycina. The outer counter layer goes on as instructions state, but after I undid all the clamps the counter had split. Not noticeable but still split. Getting it wet may have prevented this or maybe one more clamp right next to the stern post hole. Finished putting the stem, keel and stern post sides on again with multiple clamps. Looking carefully at the joints I noticed the seams and decided to add filler and sand smooth since they are to be painted. Next was the outer layer of bulwarks. These went on with not issues. Again their fitting is a statement to Chris's kit quality. Let everything dry and set and then on to pear planking. More to come Again thanks to everyone Best Regards Will

- 77 replies
-
- 7
-
-
- Erycina
- Vanguard Models
- (and 1 more)
-
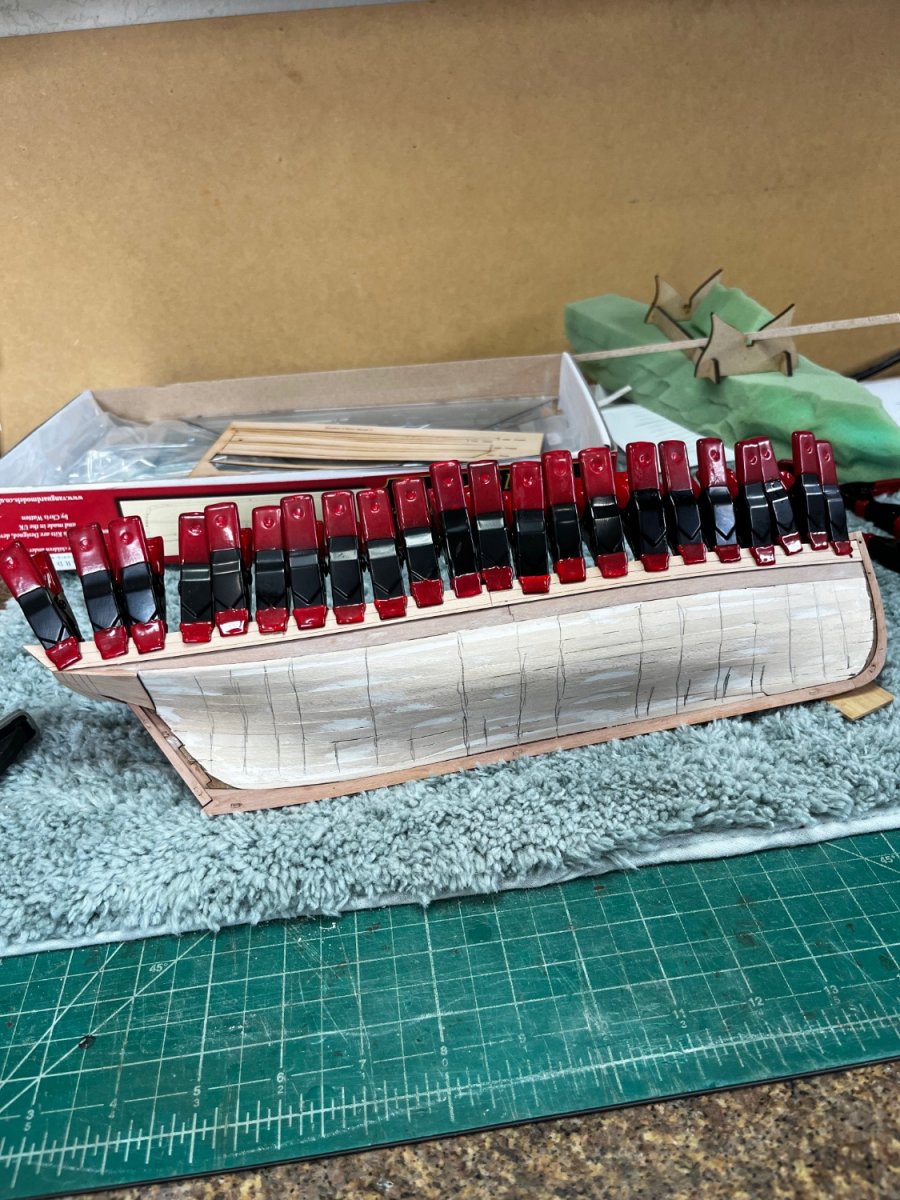
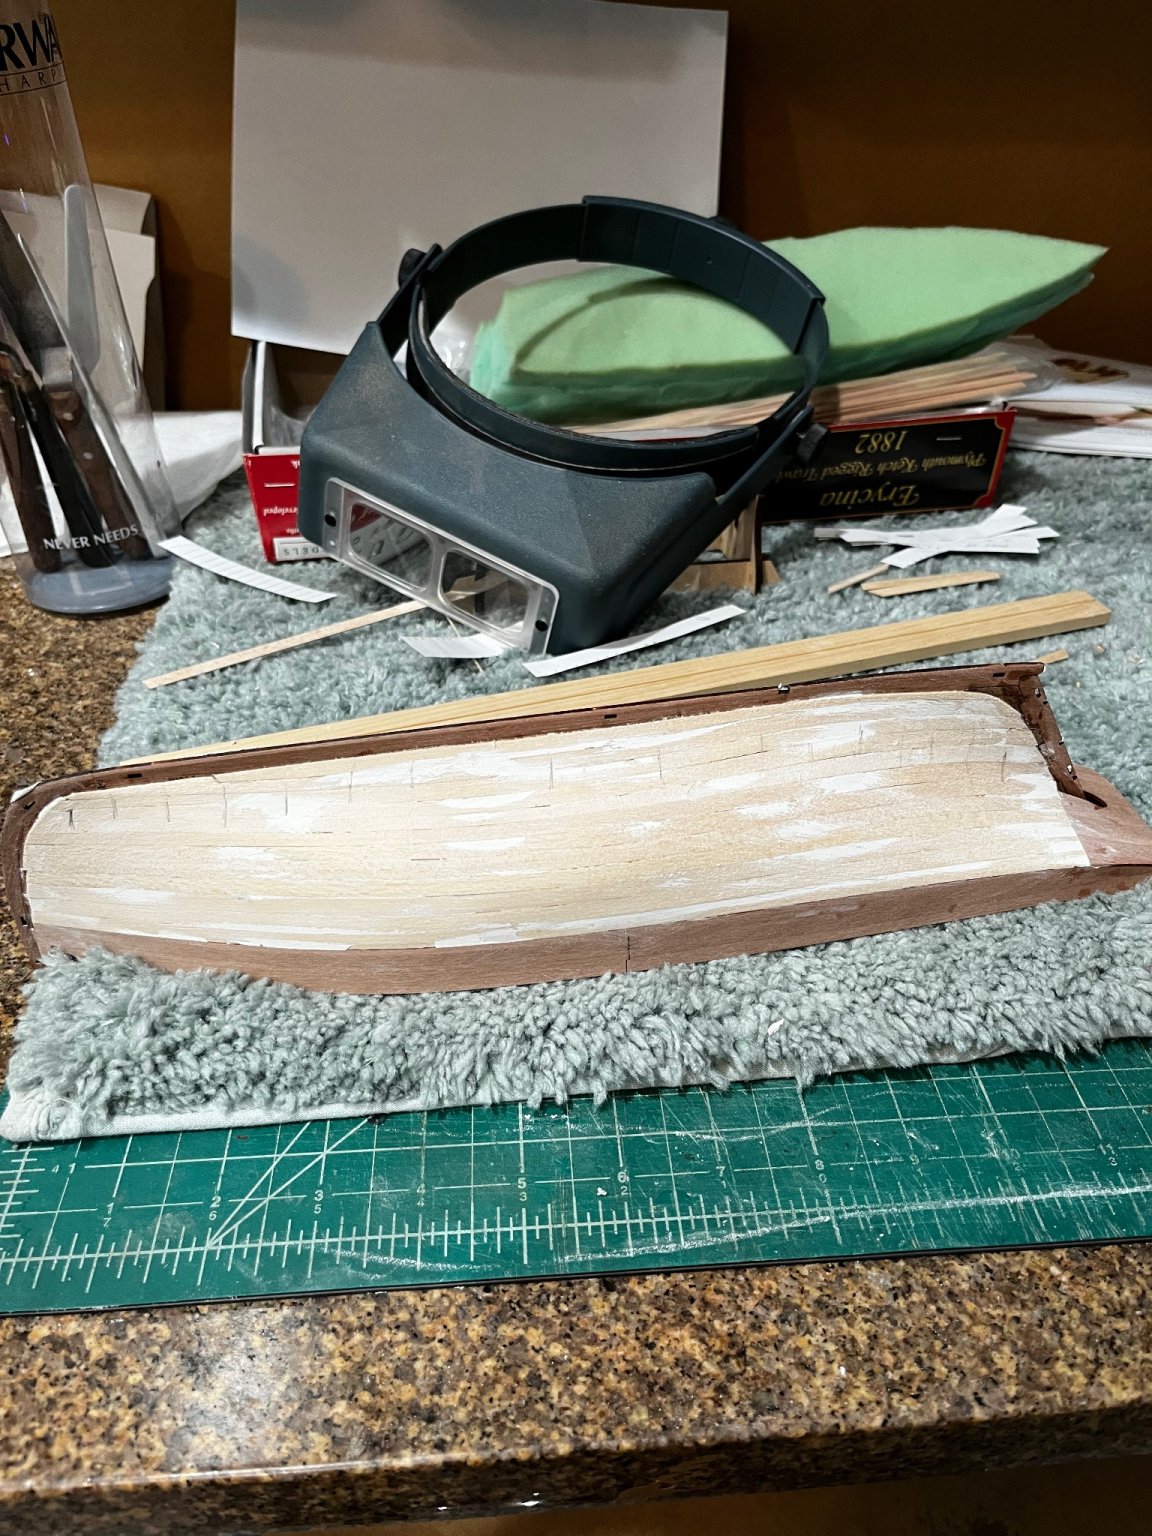
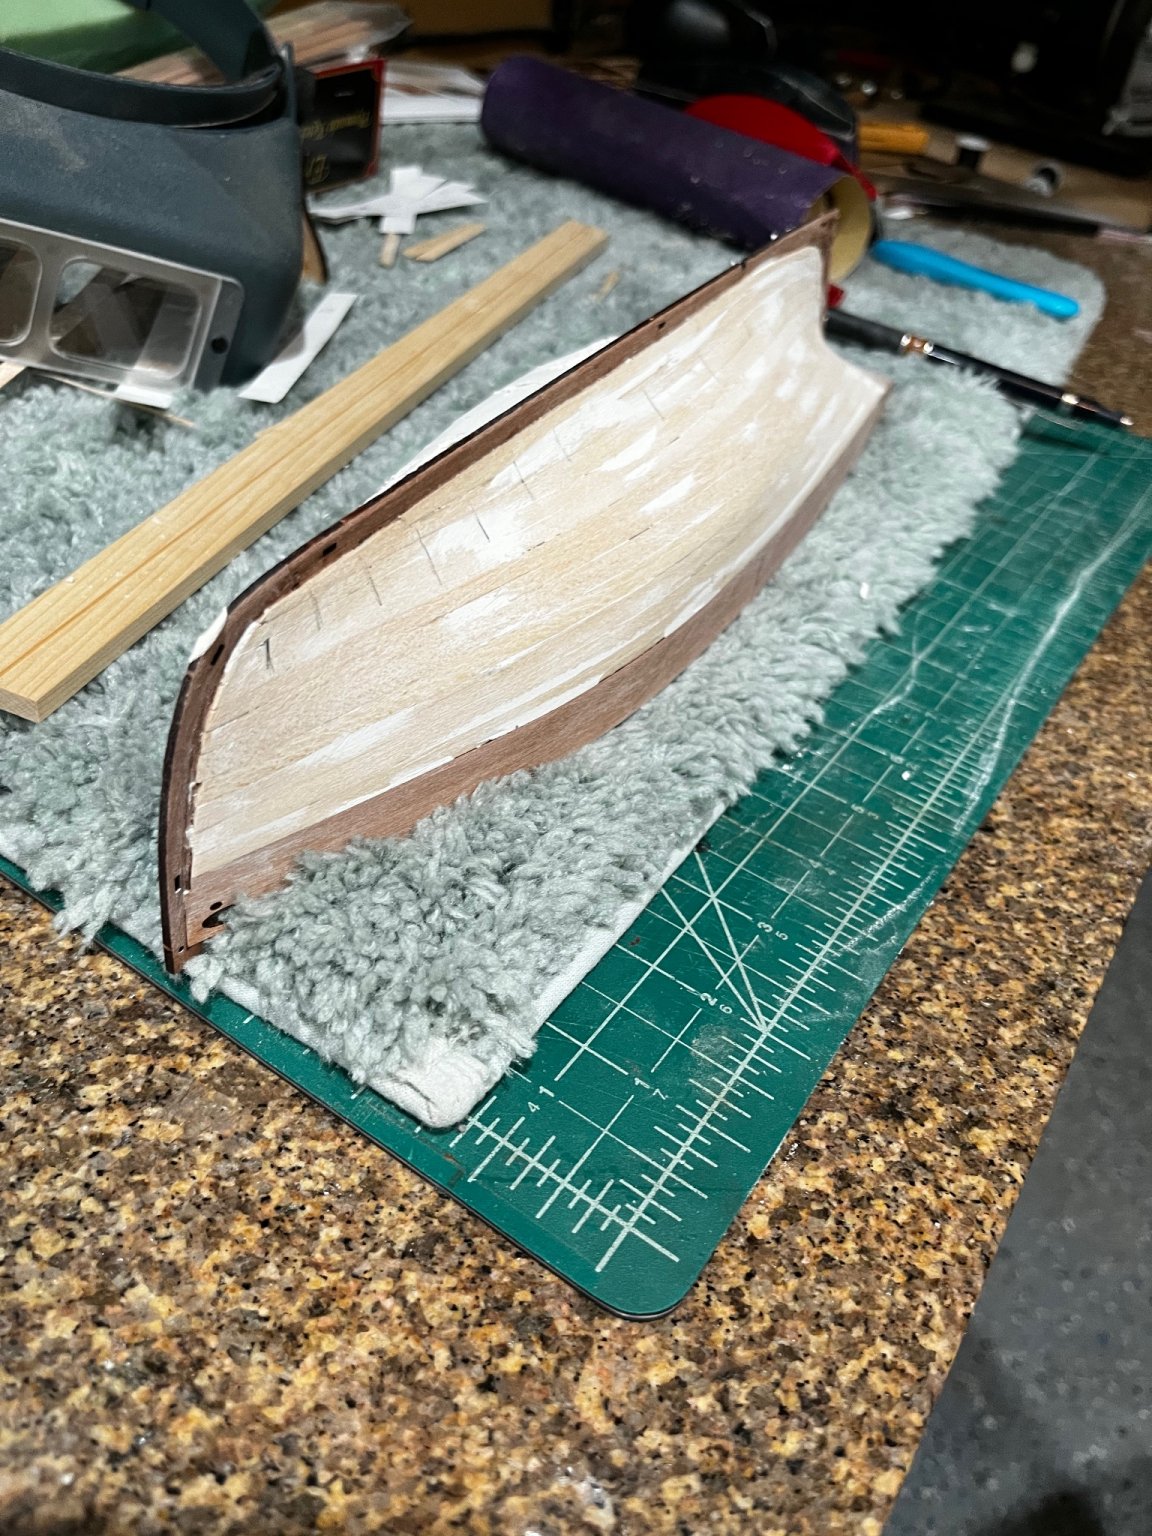
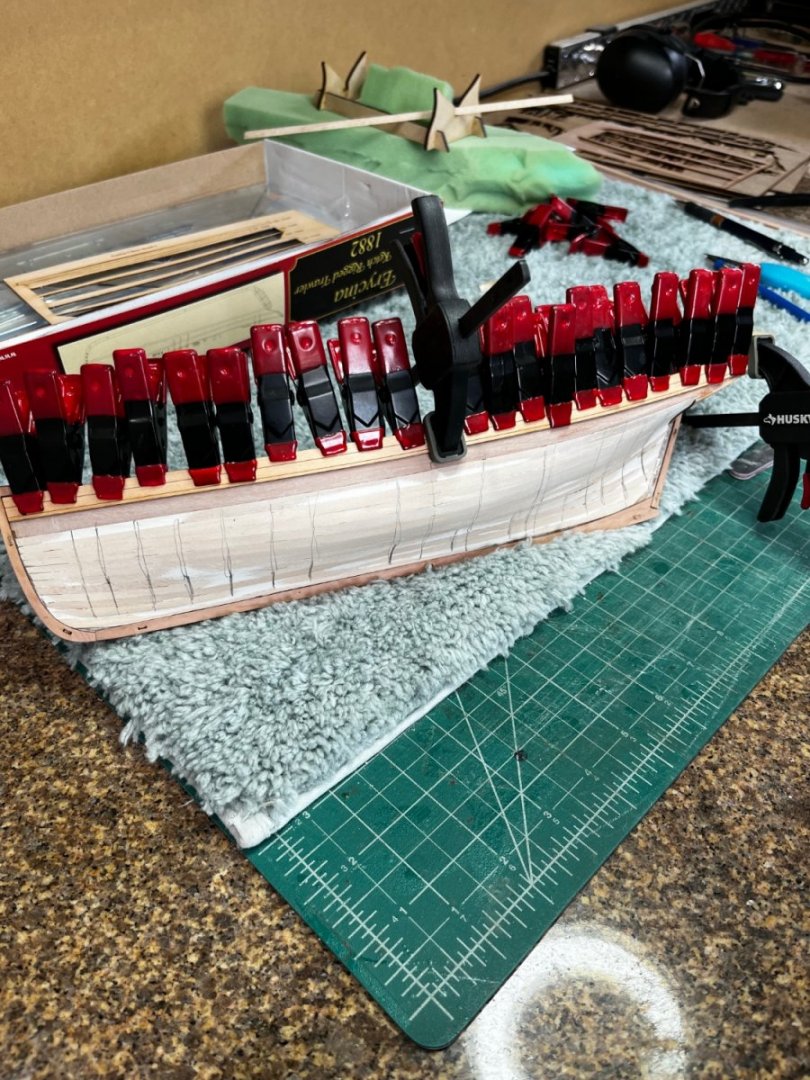
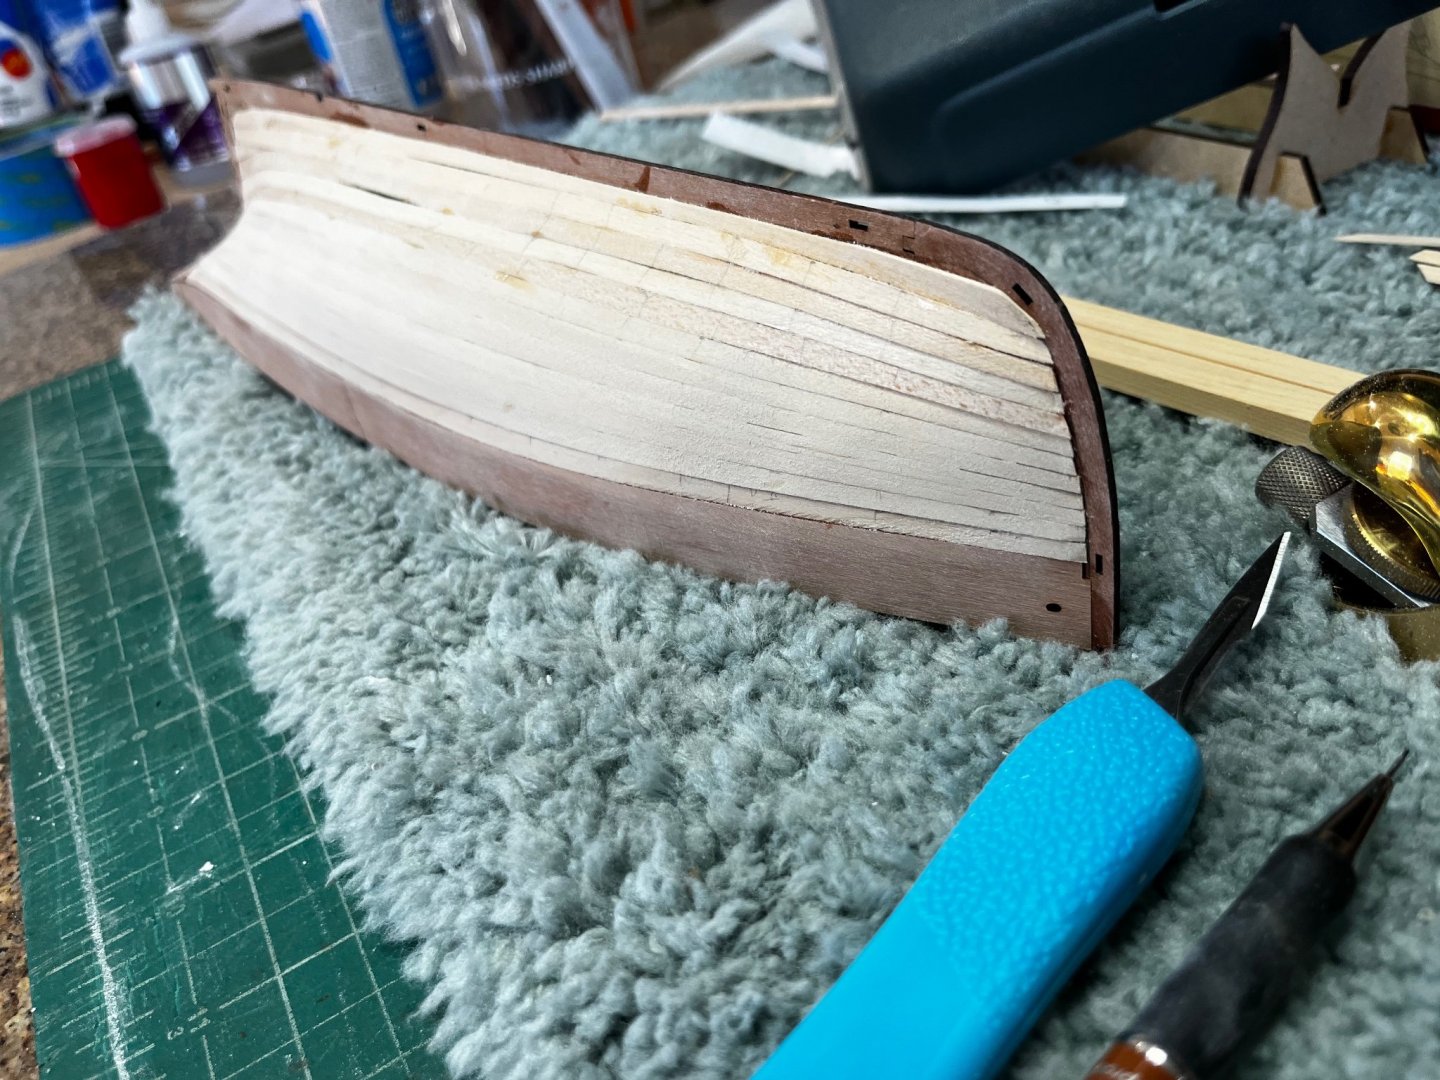
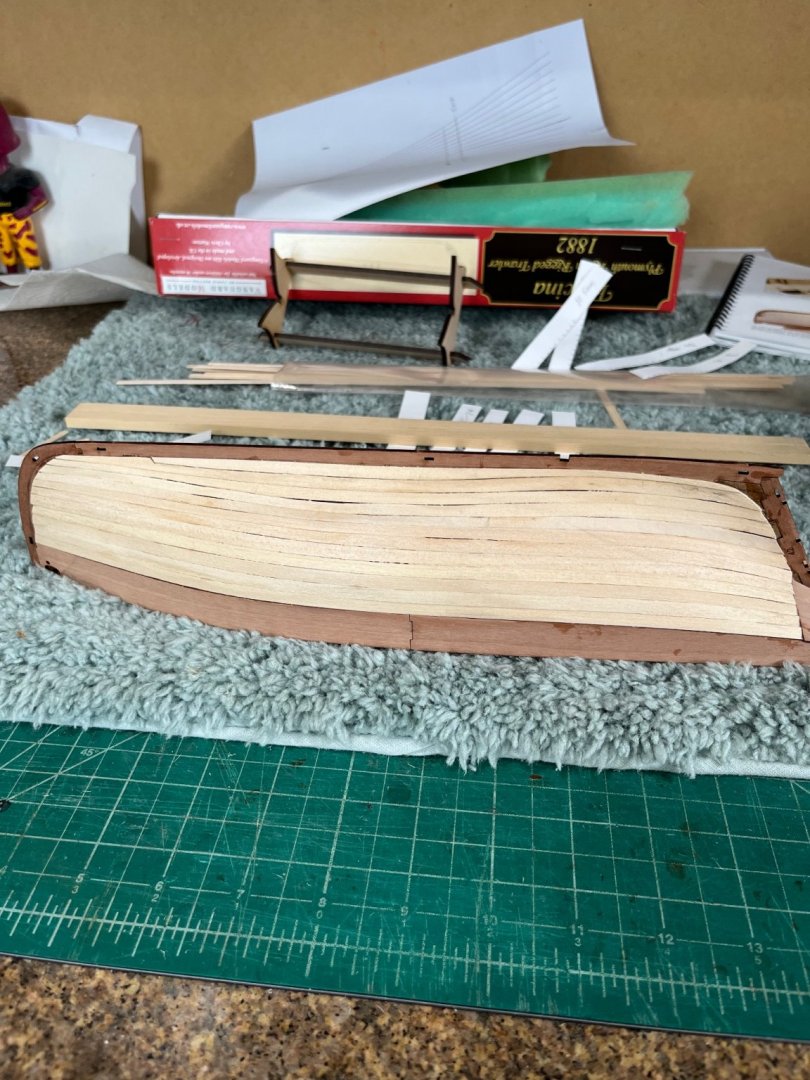
Back to work today spent quite a bit of time with not much to show for the work. Completed the finish sanding of the planking. These pictures are after a coat of sanding sealer was applied. I use sanding sealer as a primer for glueing the outside layer of planks. The sanding sealer also is absorbed into the wood filler making it more secure by filling any cracks. When completed the transom was added after preparing the bulwarks. I found that some light sanding was required to fair the bulwarks to give the transom a glueing surface. With the transom on some sanding was required to fair the lower edge of the transom with the inner counter. Once faired the outer counter was able to rest against the inner counter and transom. outside counter in place and holding until glue sets Now I must wait until the glue sets before continuing. Patience is hard for me but maybe I can practice and get a virtue what ever that is. More to come. Many Regards Will


- 77 replies
-
- 6
-
-
- Erycina
- Vanguard Models
- (and 1 more)
-
Very Nice Hoss!!! 👏 👏 EMB is on my shelf todo and got to thinking about the diorama and went to a model railroad shop and got lost in all they had for layout dioramas. Many Regards Will
-
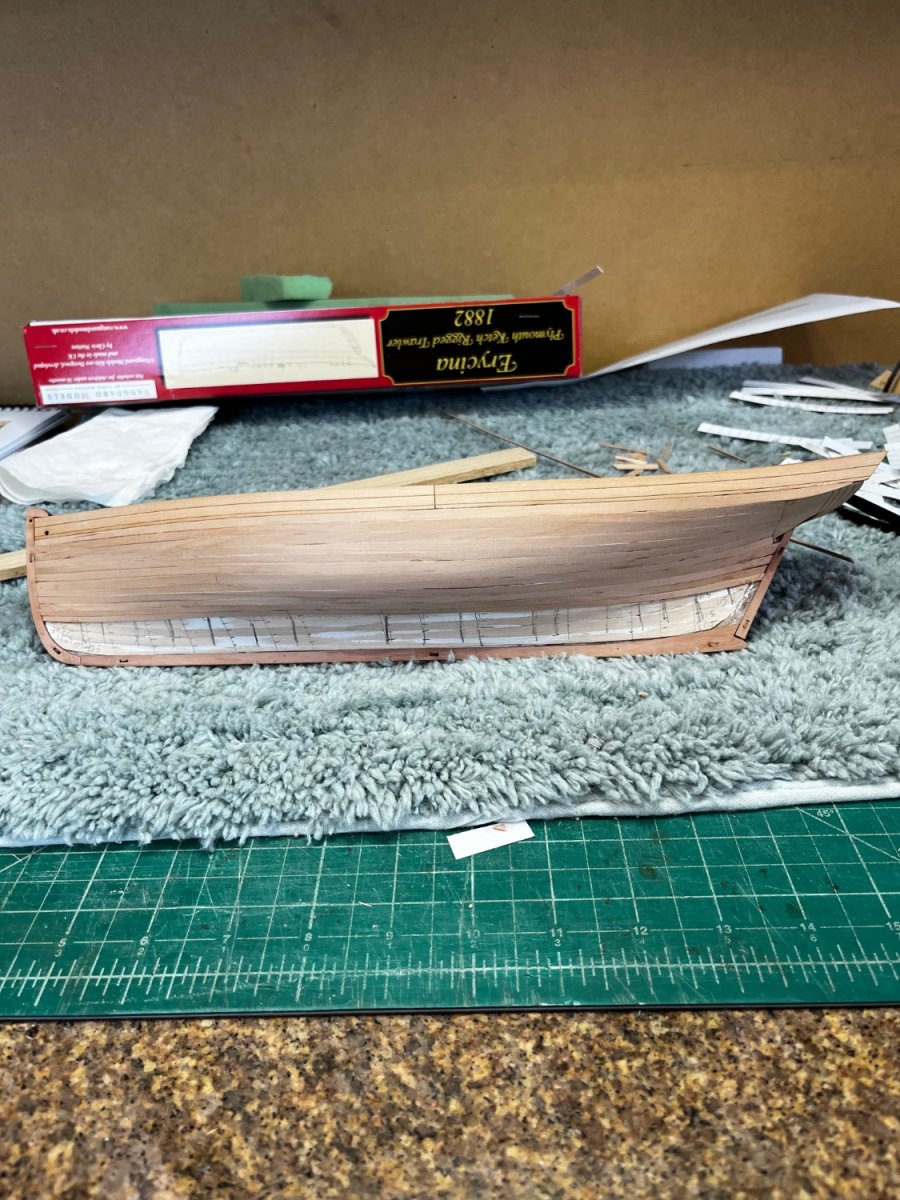
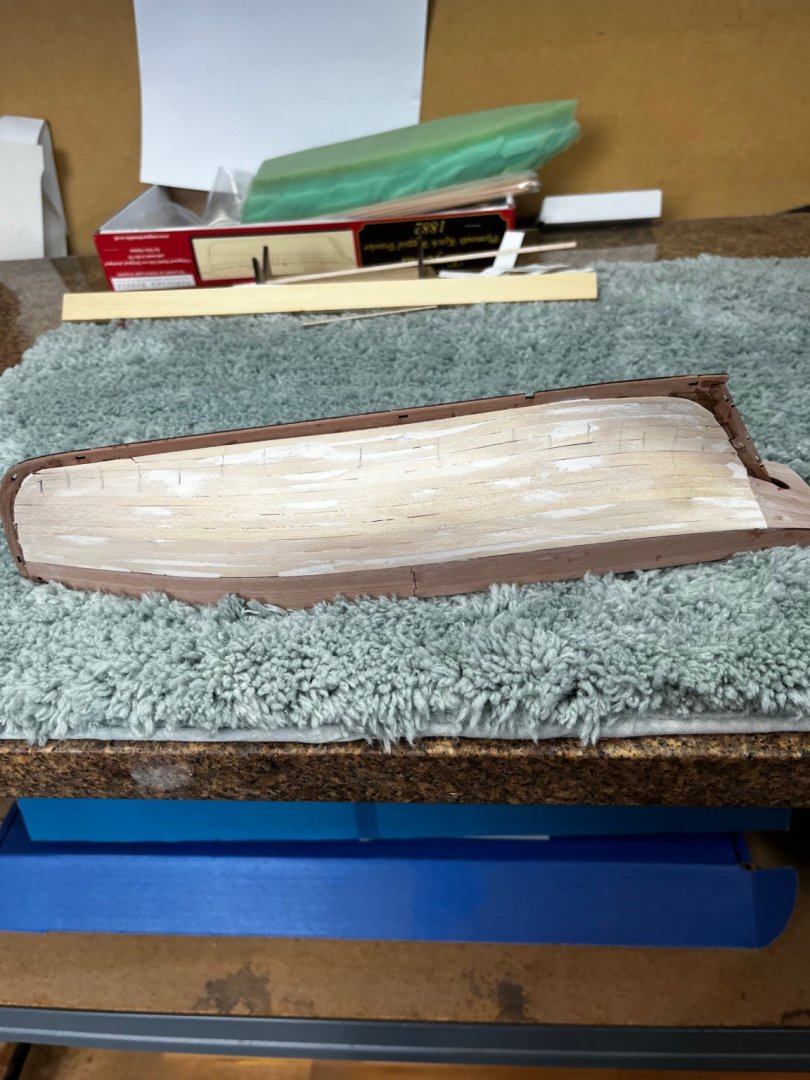
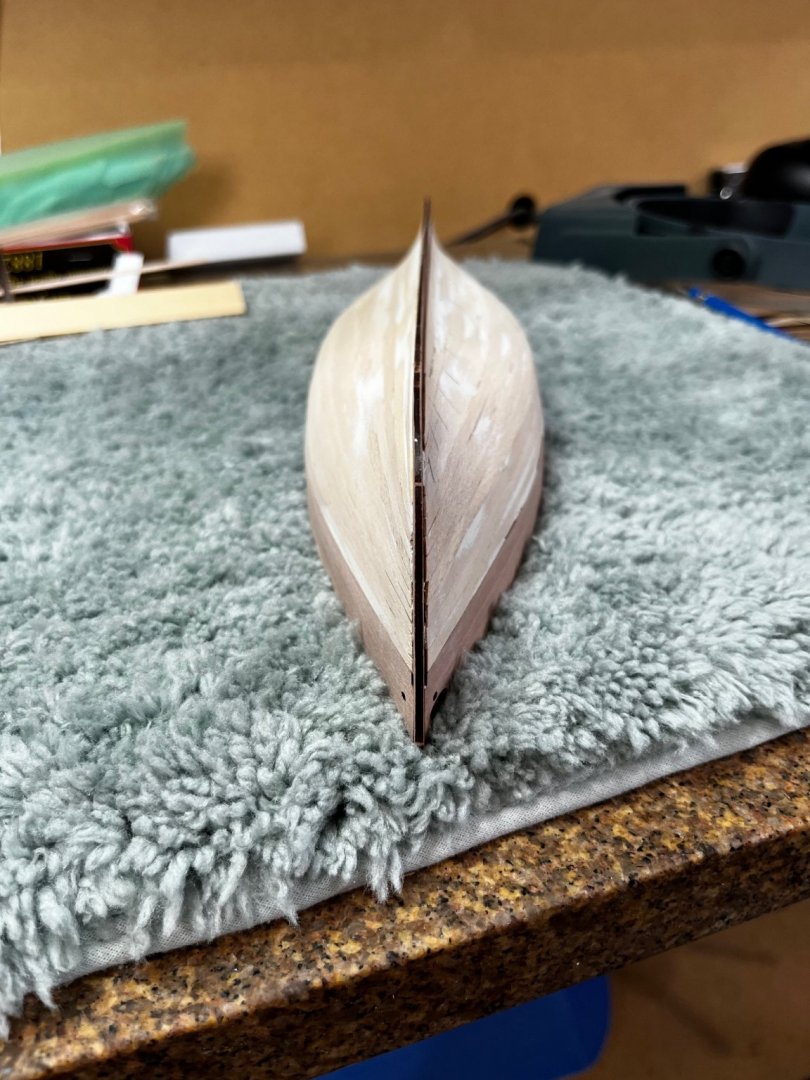
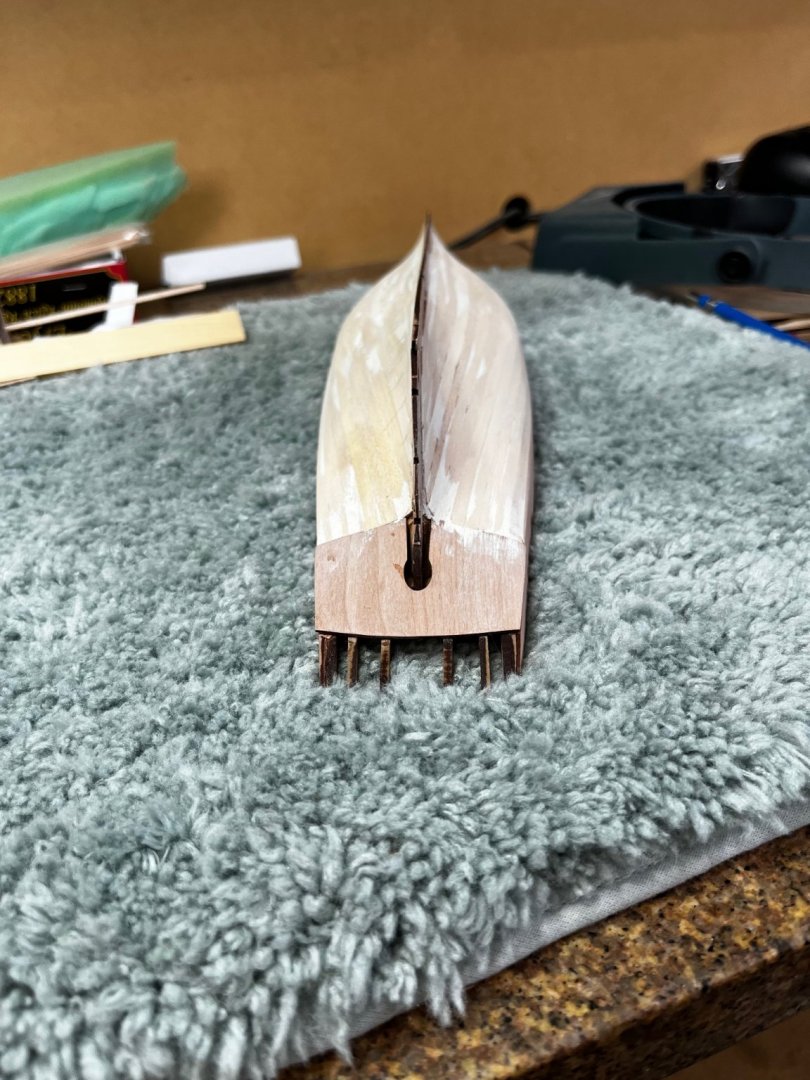
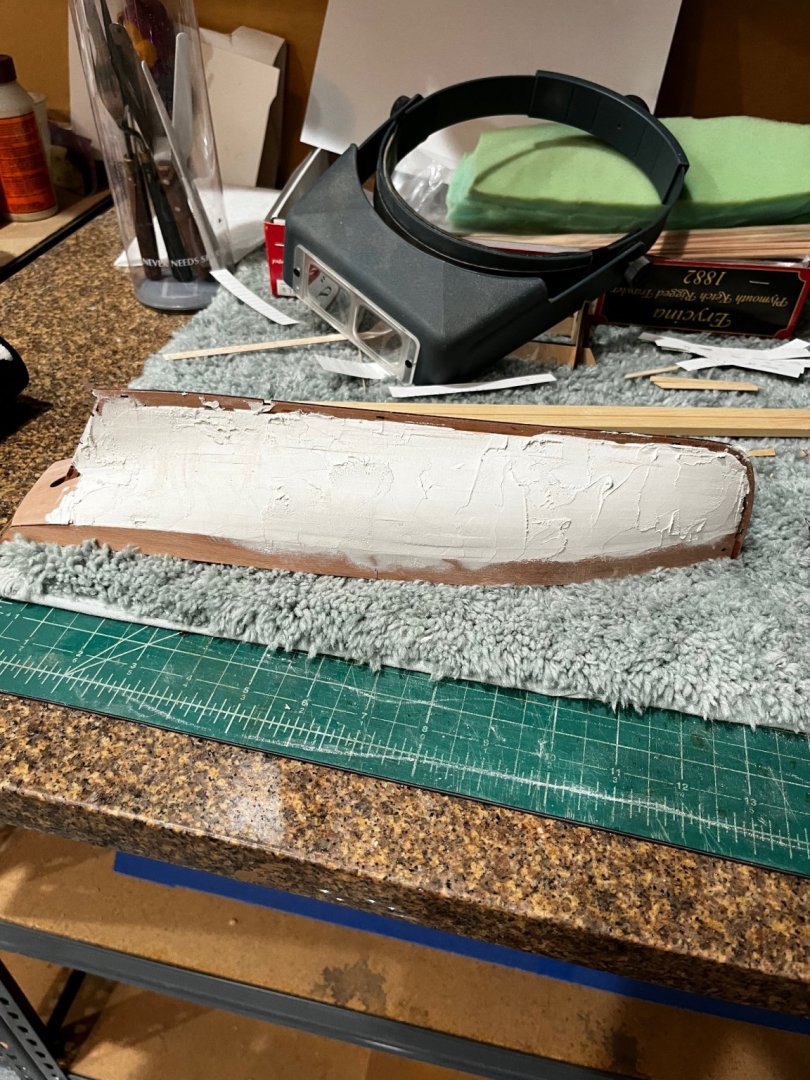
Had wonderful holiday with the family and friends with beautiful weather here in Arizona. Now back to modeling Erycina. First layer of planking completed and filler added. Not much to show except the filler. Completed planking port side Filler added. Just an even coat covering all the planking. Sanded smooth with lines checked with a strip of planking making sure the fairing is good. Bow view Stern view You can see the filler drying to sand tomorrow and then on the the next steps Many Regards Will


- 77 replies
-
- 12
-
-
- Erycina
- Vanguard Models
- (and 1 more)
-
looks fantastic Chris. Building boats for ships is a model in itself. It can be fun but it is tedious the 3d boats for a smaller kit are a great answer. It appears that you painted the outside of the boat with the oars and thwarts, is the correct? If so it give a good gauge as to the boats thickness. Can't wait to we can order. Many Regards Will
-
Chris these are amazing. I find it hard to imagine how you've become such an expert at 3d modeling, many kudos to you.
-
I want to take time to thank everyone for the likes and comments really helps Now a short update. Not much time in the shop with the Holiday and family but I did squeak out a few hours and got 7 strakes on Erycina. Maybe a few more tomorrow. The lines on the strakes are marking the frames locations where to measure the strip width. Many Regards Will

- 77 replies
-
- 5
-
-
- Erycina
- Vanguard Models
- (and 1 more)
-
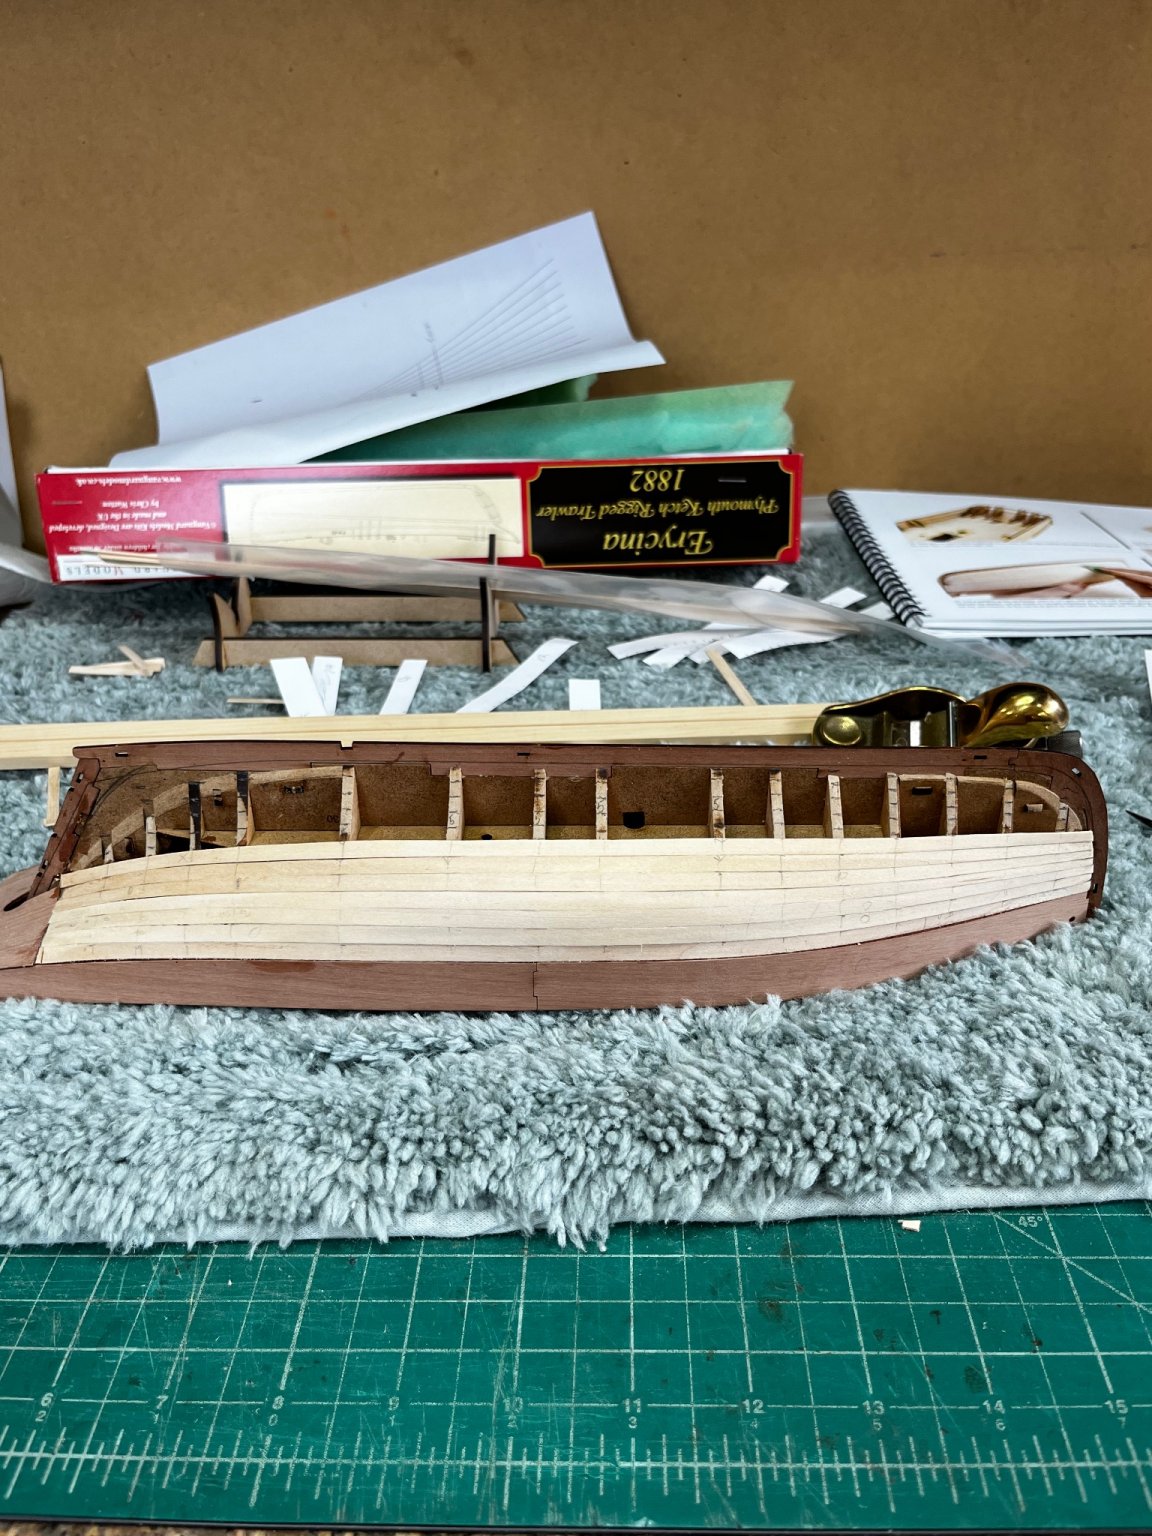
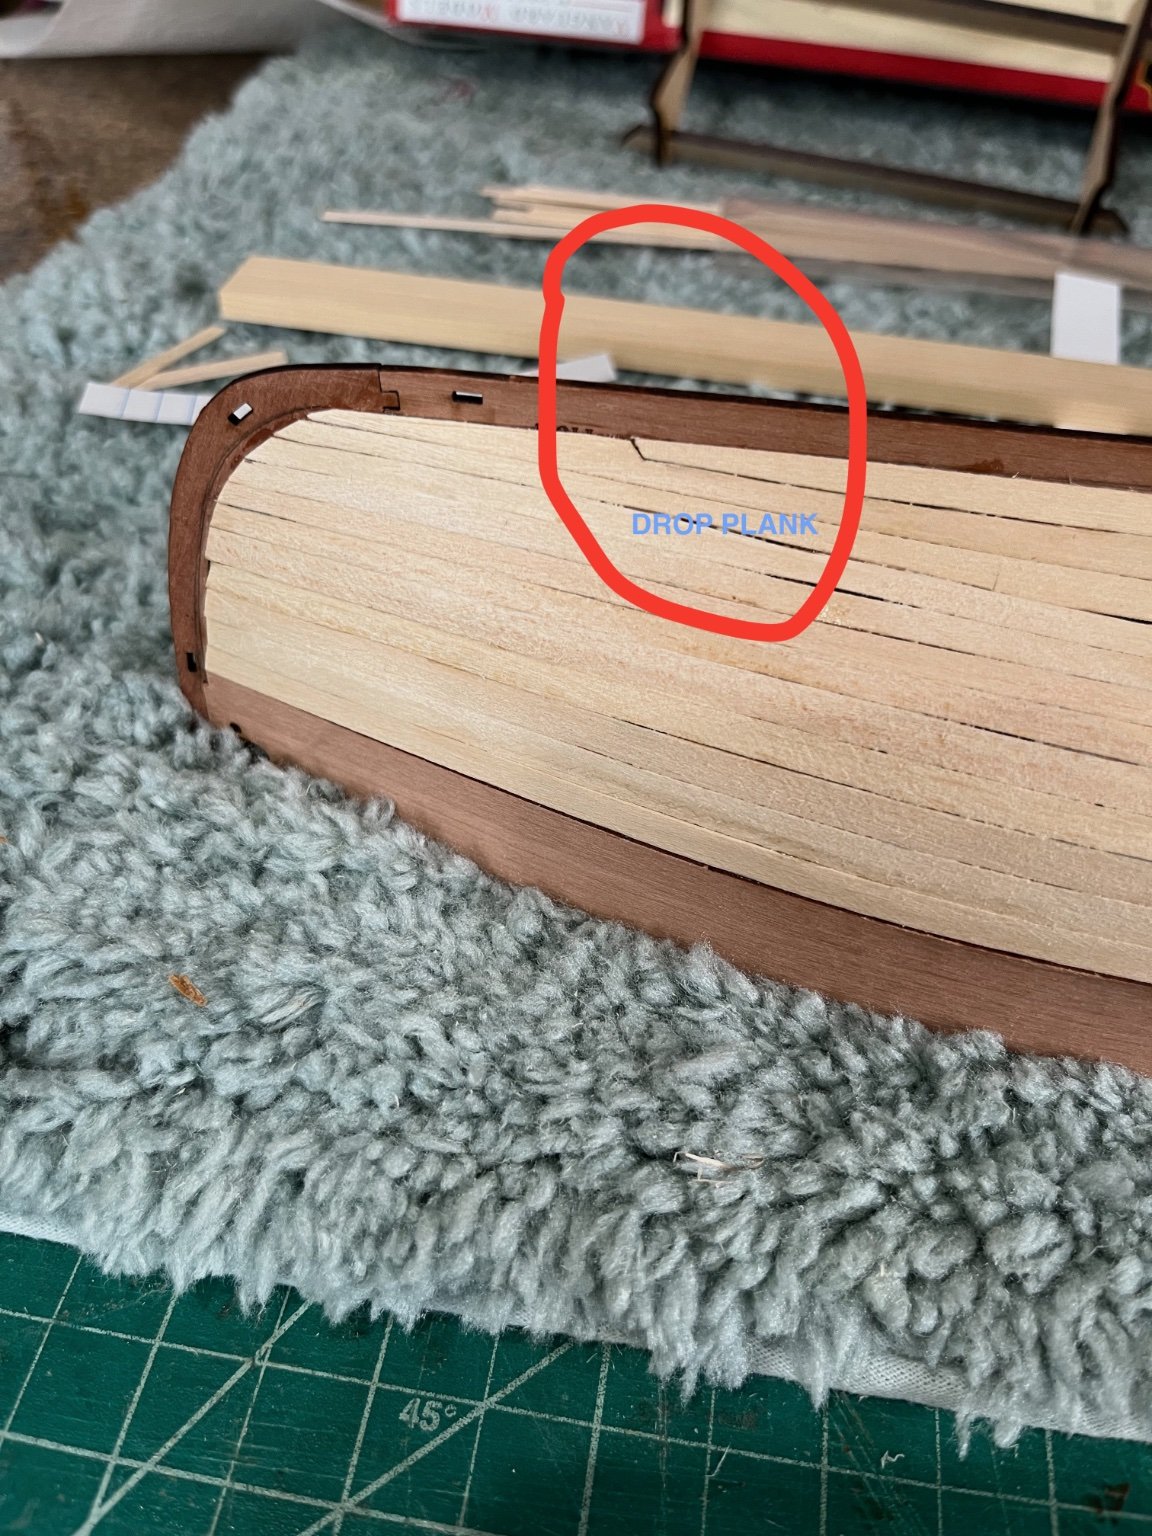
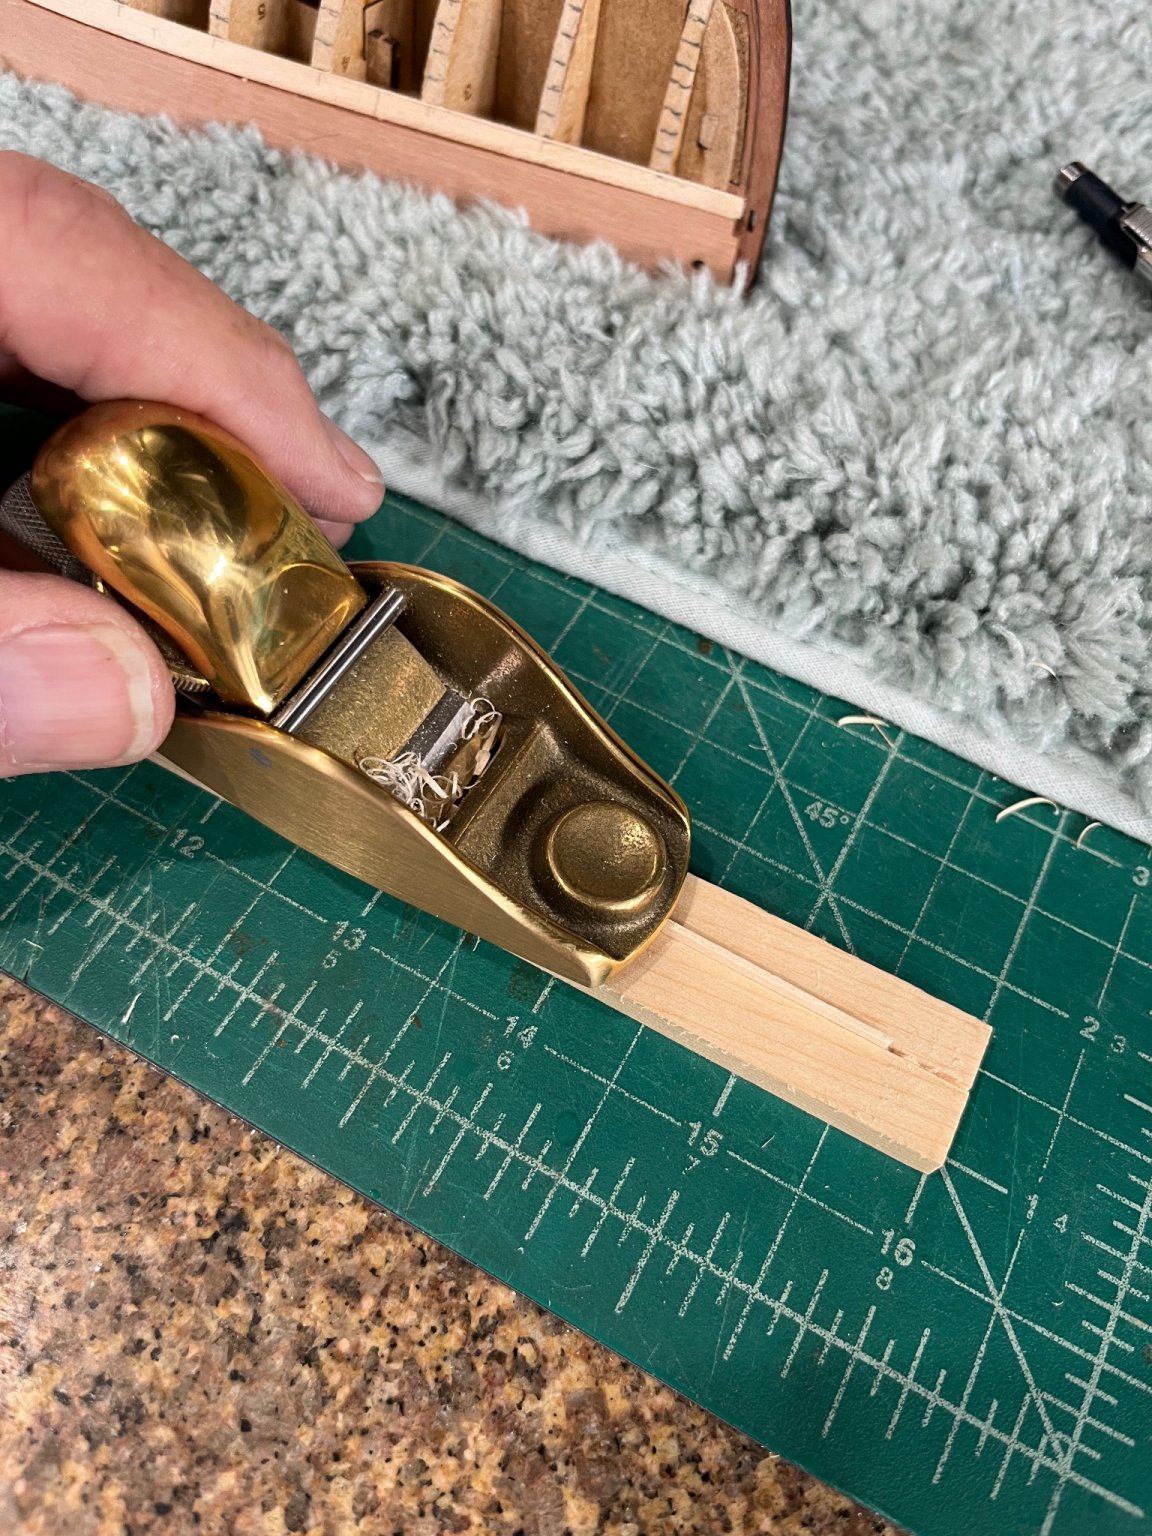
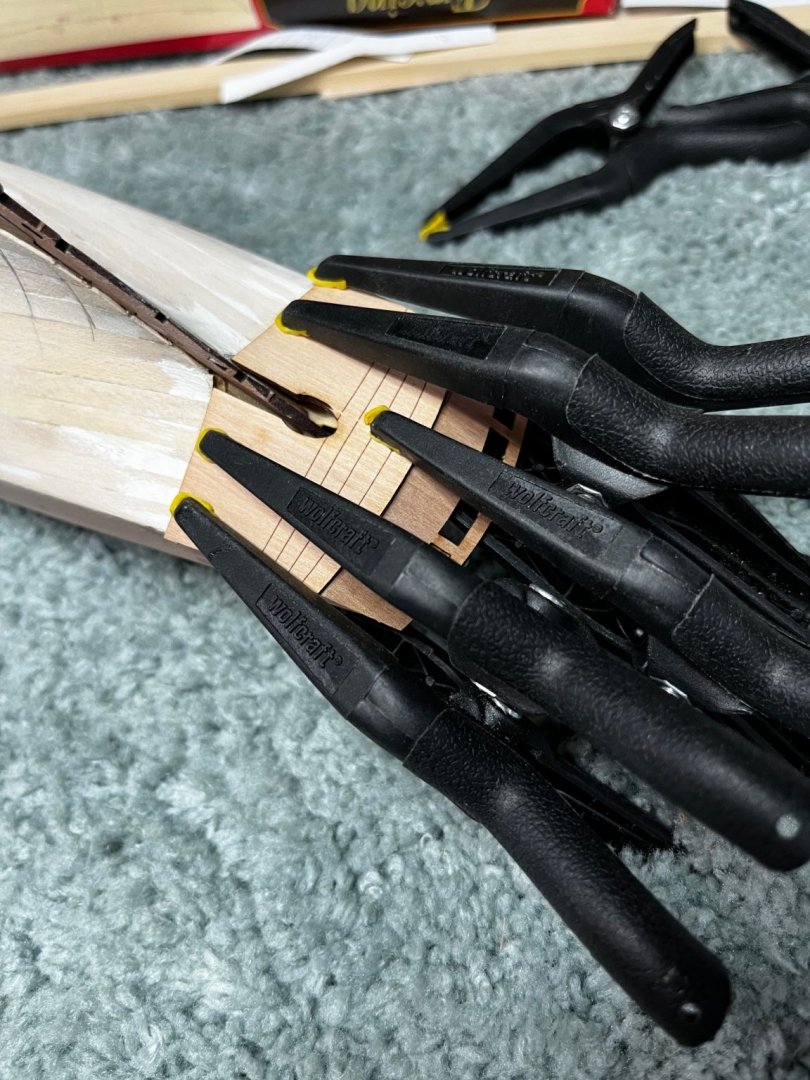
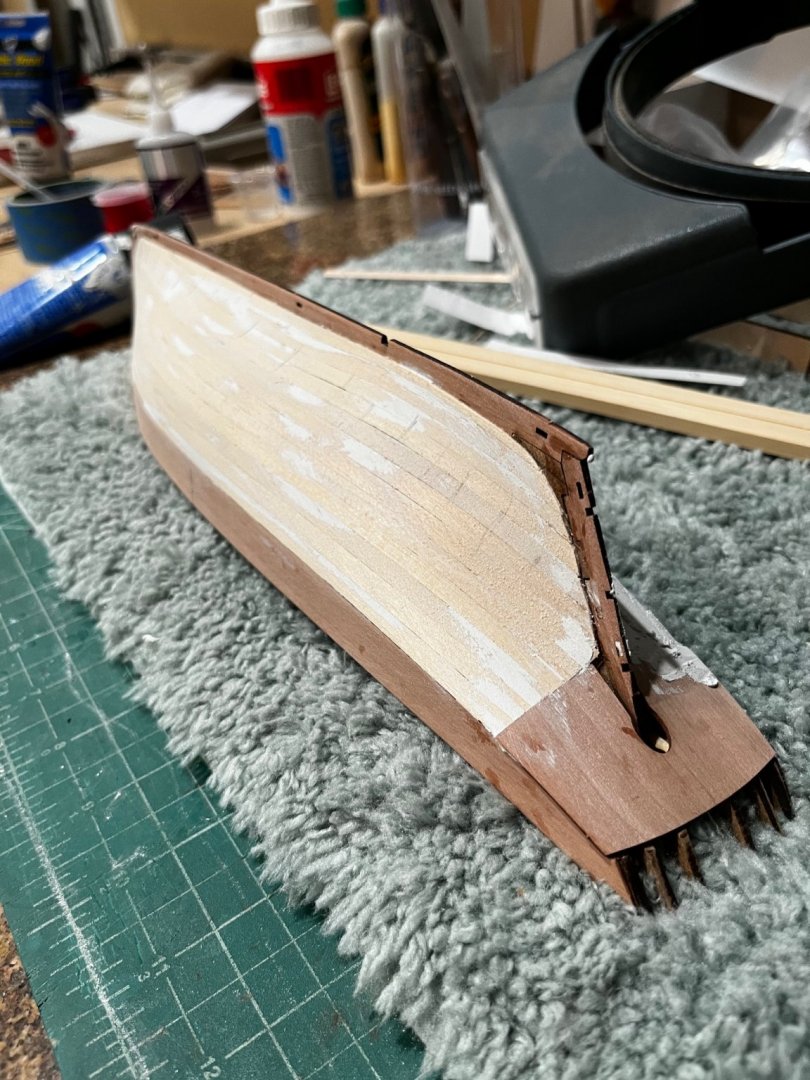
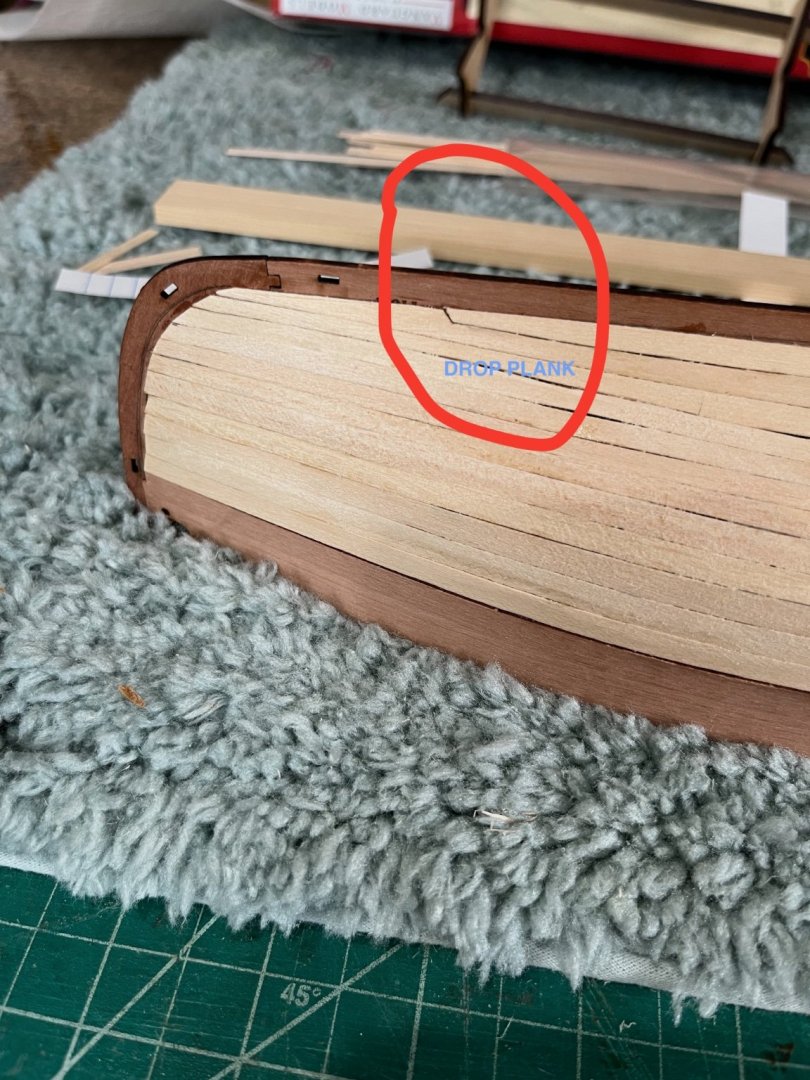
atest update: Counter glued in place. Next was to start the first layer of planking. I've learned that kit strips have been sawed to thickness leaving a varying thickness so I run them through the thickness sander. While this may seem unnecessary I believe it gives a more even surface after planking to finish sanding. That done I followed the instructions by running the first three strakes without any taper. They almost lay flat of the frames but could be glued and held. The balance of the strakes I tapered as suggested. On my model this made quite a wave midships but I did have to make a drop plank at the keel. The final result is useable with some putty and sanding but I not satisfied with the result. I very glad there will be a second layer that I will have to do a much better job. You can see the opens between planks (the picture looks worse that it is). On the Port side will be done using Chuck Passaro's method of lining off each frame and transferring the data to strips to be shaped. So measuring the the frames to find the one with the largest distance between the bulwark and keel and dividing by 5mm resulted in 12 strakes. Nice even number to work with. Cut tick strips from card stock the length of each frame. Knowing the each strake is 5mm in the middle I used a radiating fan to place the tic strip so it touched 12 points and marked the locations on the tic strip. That divided the strip into 12 equal 5mm sections. The same was done with each tic strip. I then transferred to tic strip marks to the frames. You can see the tic strips in background. Next you mark the frame locations on a plank and then mark the width using the appropriate tic strip. To shape the strip a line was drawn using the tic marks. I made a simple jig to hold the plank while shaping to drawn line. The jig is a piece of scrap wood run through the table saw and a depth that allowed the shaping of the strip. it was easy to cut the strip using my violin plane. The problem of bending a strip around the compound curve of a model is where one side of the strip doesn't sit on the frame so we taper the planks to reduce this problem. Another method is to bend the planks to a curve so it sits against the flush against the frame, A simple jig for bending the plank at predetermined location. Heating the plank keeps it in the shape. I use a small travel iron to heat the plank while retained by the clamps. Now you just place the plank in position and glue. I use CA glue because I can hold the plank in position with slight finger pressure. Holding the plank up while adding the CA. Again you can see the tic marks on the frames. Two planks done 10 to go Many Regards Will


- 77 replies
-
- 13
-
-
- Erycina
- Vanguard Models
- (and 1 more)
-
looking good patrick.
-
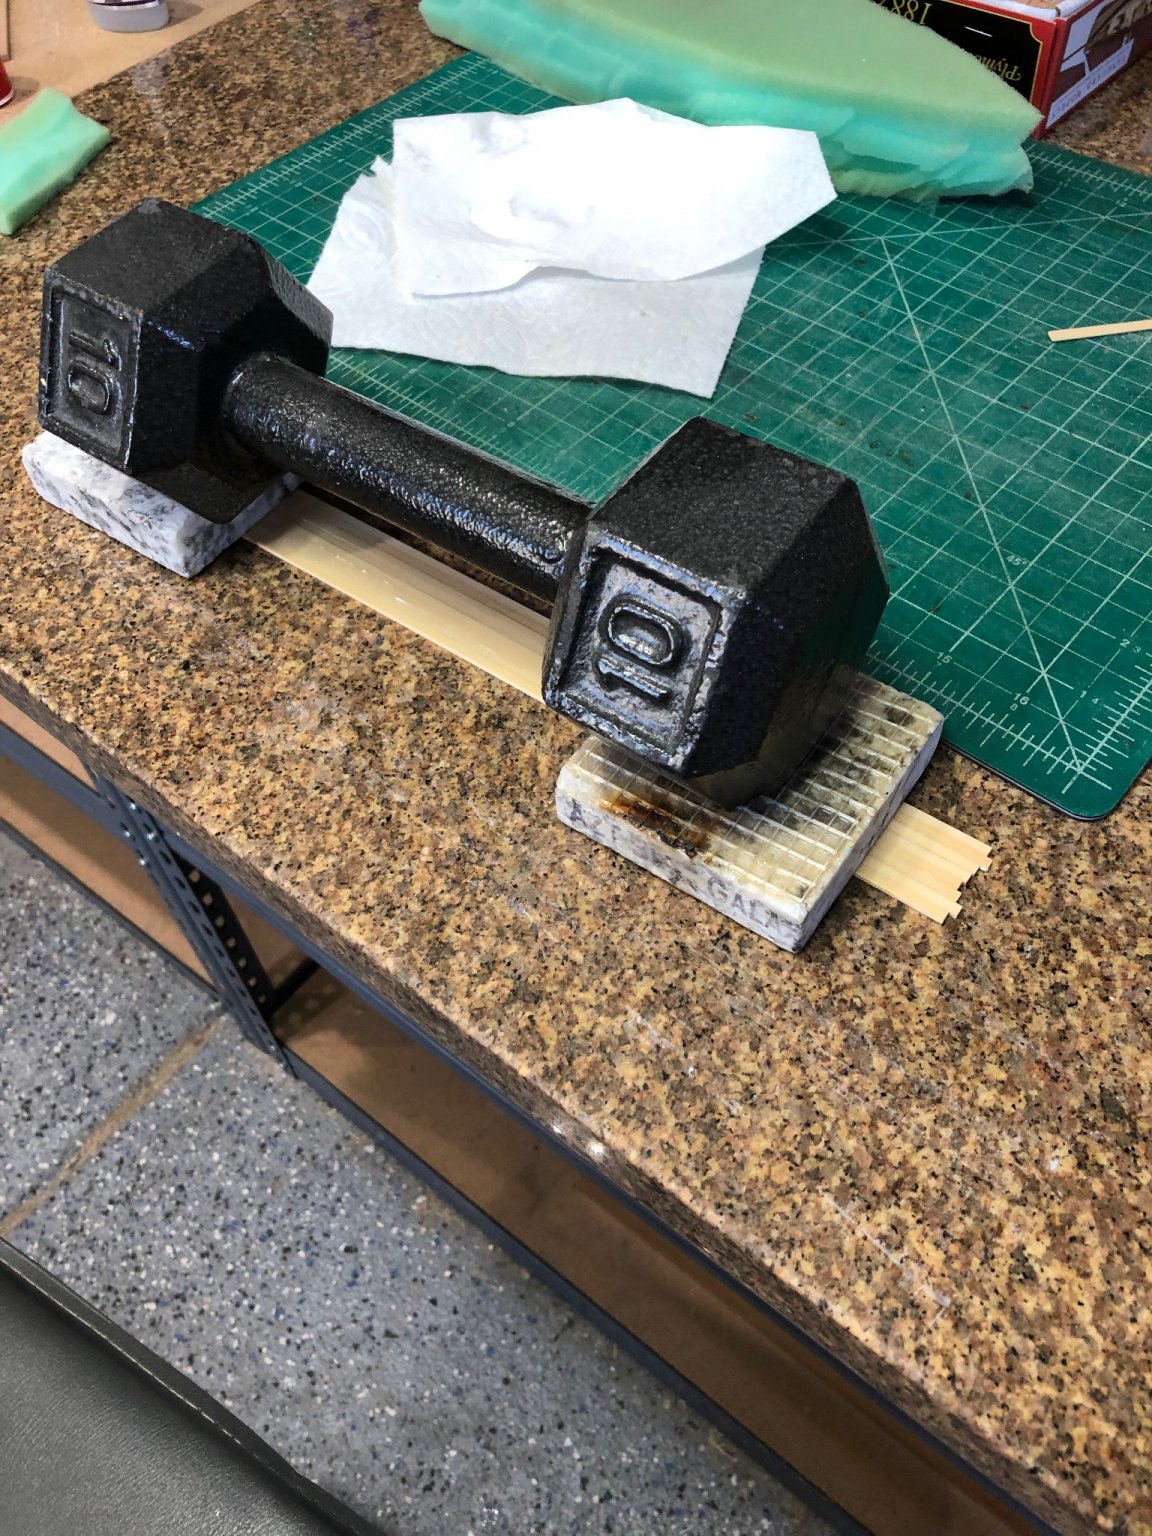
I took your advice Allan and glued 14" strips together and then ran them through the surface sander. I had some 1mm by 5mm by 14" AYC left from planking. I have a scrape piece of 2cm granite from a kitchen remodel that I use for a flat surface. It also has another helpful property glue doesn't adhere. I simple scrape with a straight razor and it clean. Glued the strips together on the granite and used weights to keep it flat from warping and after letting it dry overnight sanded it down to .026 thick. also had granite samples left over from picking the granite to use in the new kitchen Now I have enough to remake the companionway. Can't thank you enough Allan. Many Regards Will


-
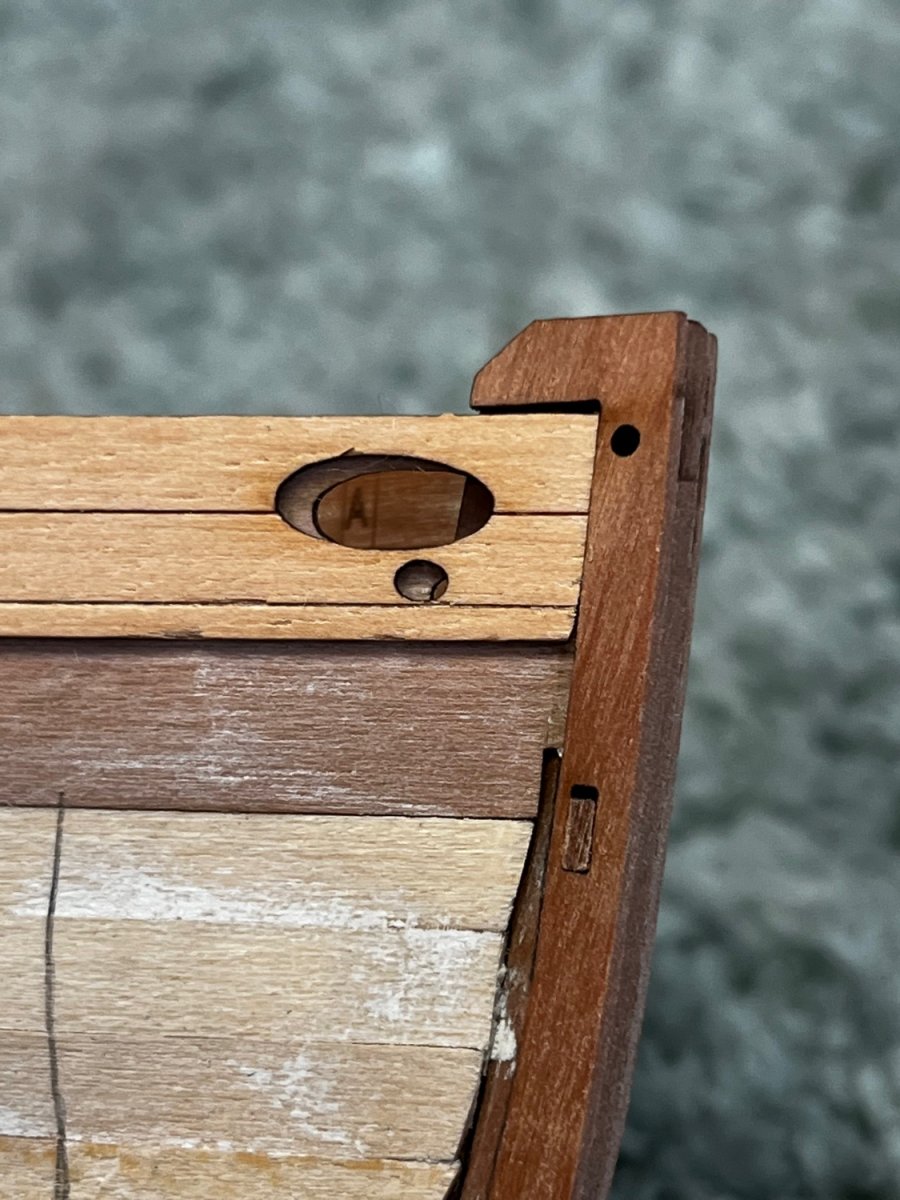
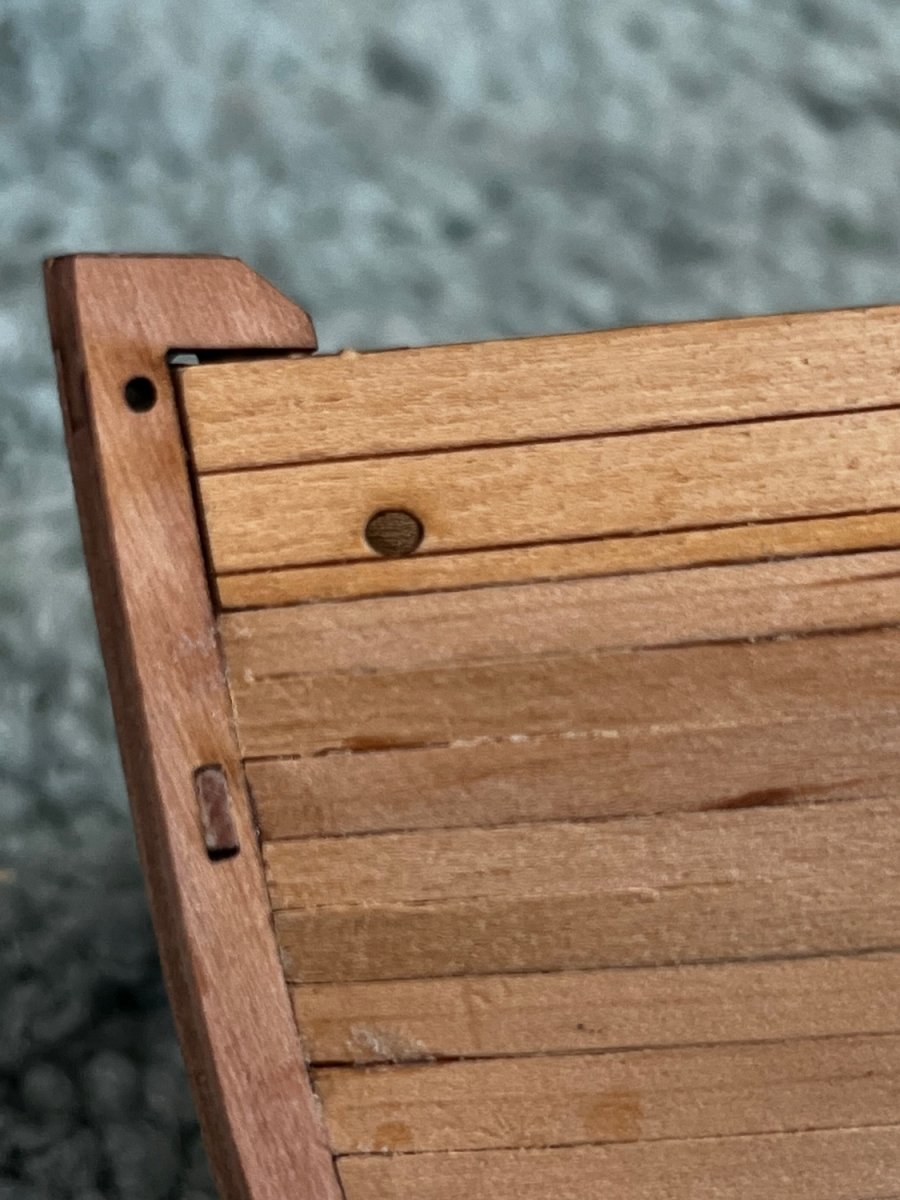
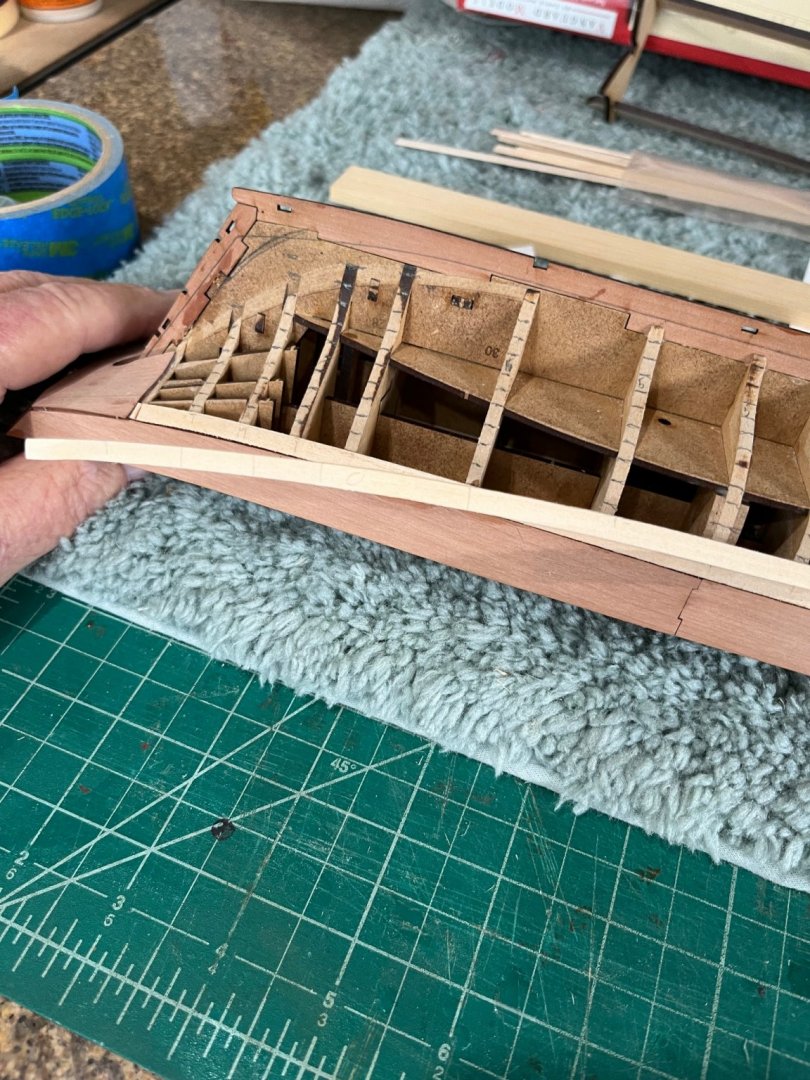
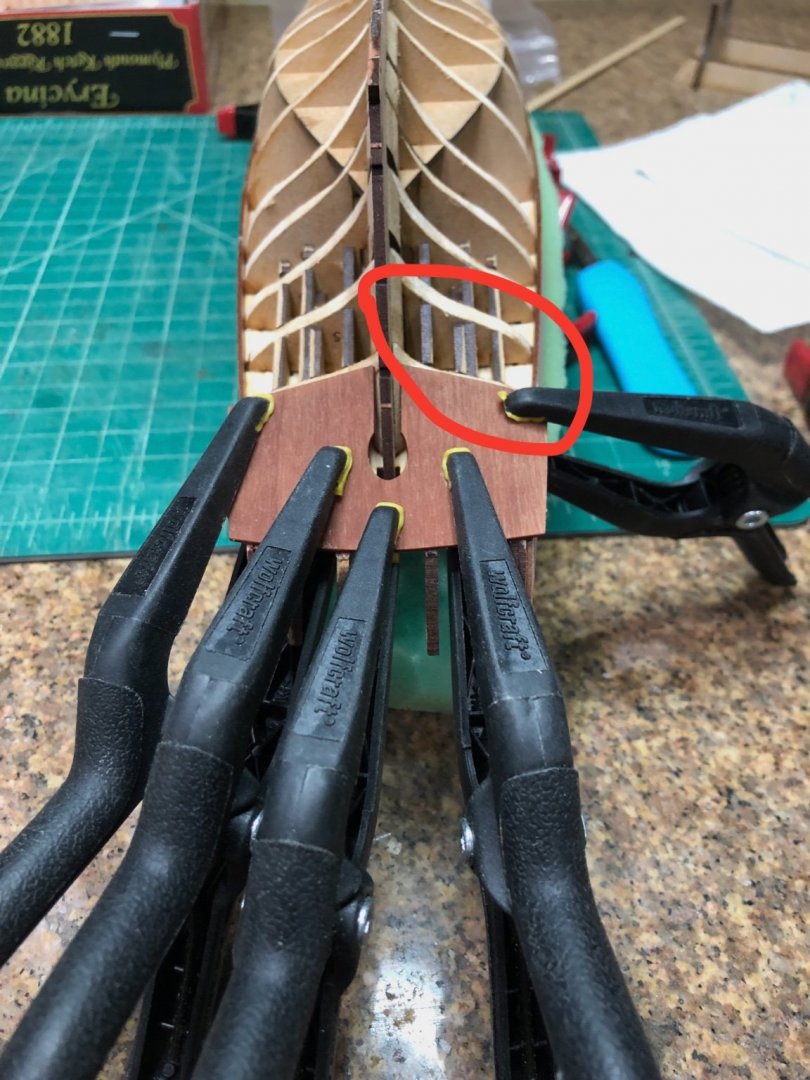
Wanna take time to thank everybody for the likes, looks and comments I'm having fun building this little trawler. Having worked on my first Vanguard model I have become spoiled by how the laser cut parts fits, but now it time to do a little free flying. The keel fit onto the false keel perfectly and the cut water stem fit perfectly as well after the little sanding as described. The stern post fit the same with not modifications required. Again elastic bands held everything in place while the glue sets. A couple of clips holding the pieces square and they really weren't necessary since the frames had extensions below the false keel that kept the keel in alignment. All glued up and ready for the bulwarks. The pear wood really shows its color and seems a real shame to paint. Oh well! No locating tabs for bulwark mounting just the same old method of fit and glue. One thing that is very important about this part of the build is to read and understand the instructions. Two things jumped out to me that I'll speak to when there. The forward section fits into the slot on the cut water and just a little sanding on the lower section that sits below the slot. It becomes obvious when you hold the part up to place. This is where the two cautions come into play. The first is align the part on the lower deck etched into the bulwark. This is very important as you get the transom extensions you can see that reference for the little deck to be built. The second one struck me with a wham boy did I almost goof up. DO NOT GLUE THE BULWARK ABOVE THE DECK. The extensions above the deck will be cut off and stanchions will be added in the locations etched on the bulwark. I alway use medium viscosity CA glue when I'm planking and the bulwarks seemed like planking so I used CA. So what I did was set the bulwark in place and use clips to ensure it stays in place and turn the boat upside down and apply the CA at the joint of the deck, frame and bulwark. The last thing today was the counter. I put the counter in a bowl of water and boiled it in the microwave until is sank. Then it was just a process to set it in place and clamp for 12 hours. One thing that I should mentions is the counter extensions have a small notch as the turn up to the transom. When you set the counter against this notch on mine the forward edge of the counter rested the last frame by about 1/32" Glue the inner counter on tomorrow. Many Regards Will


- 77 replies
-
- 8
-
-
- Erycina
- Vanguard Models
- (and 1 more)
-
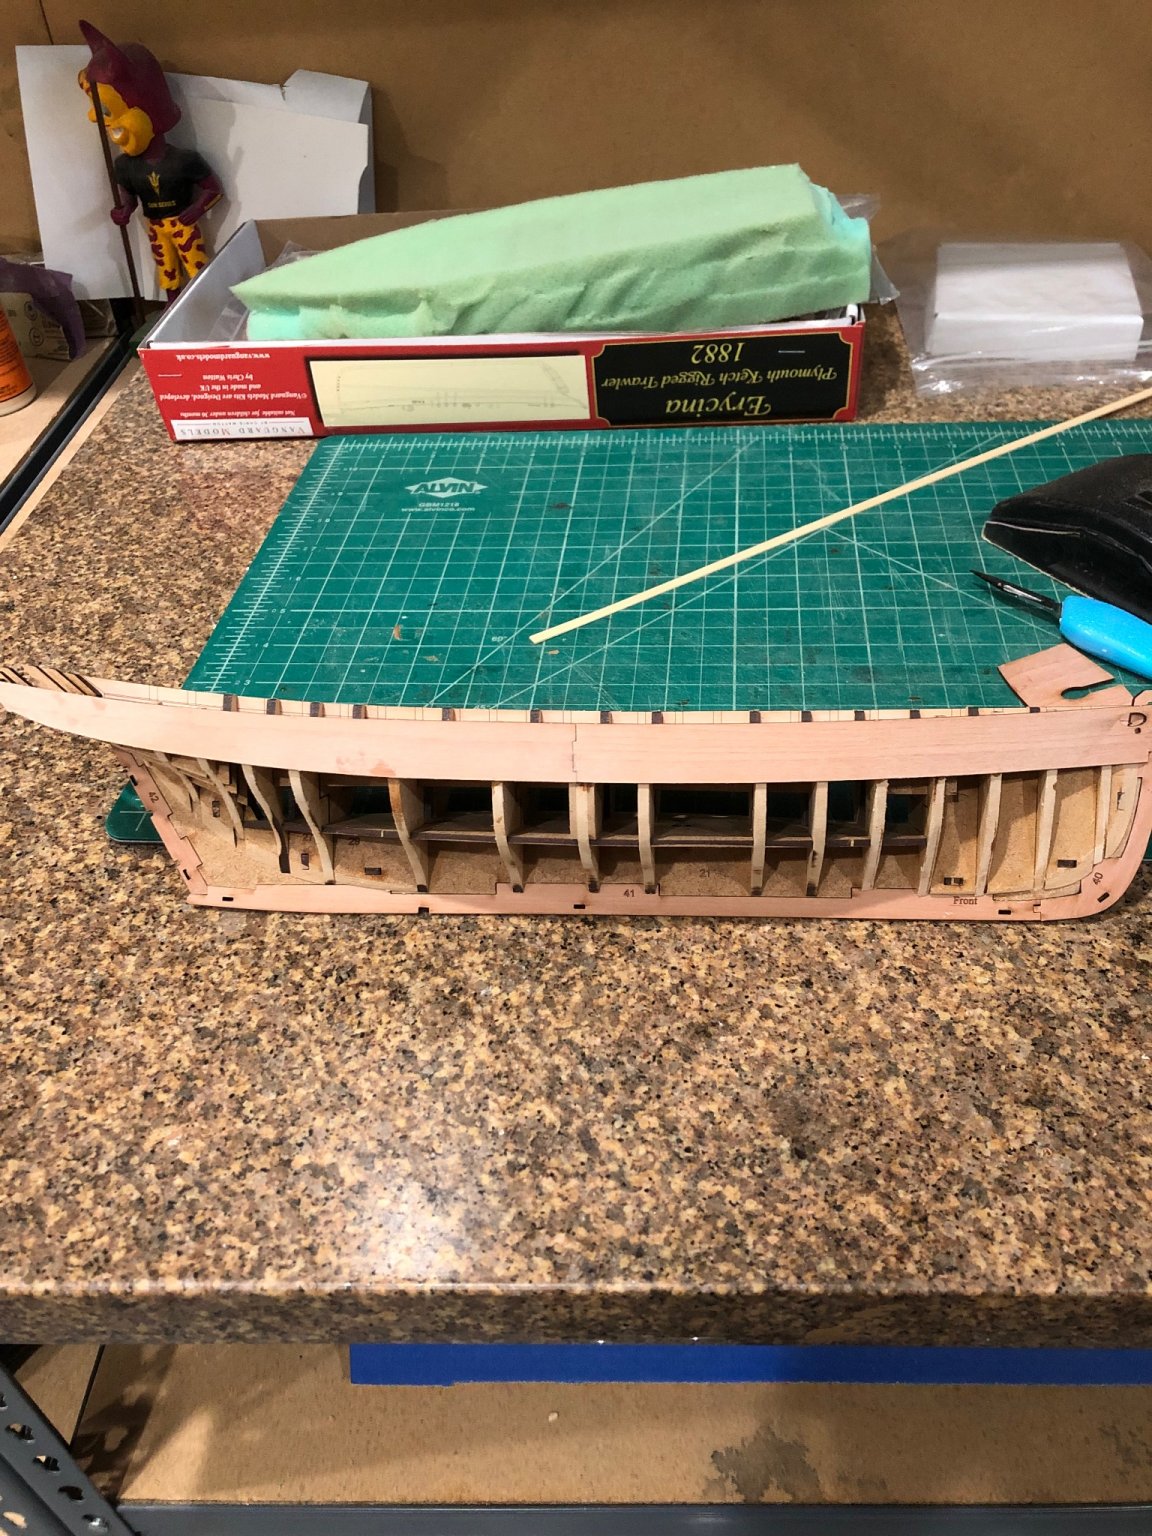
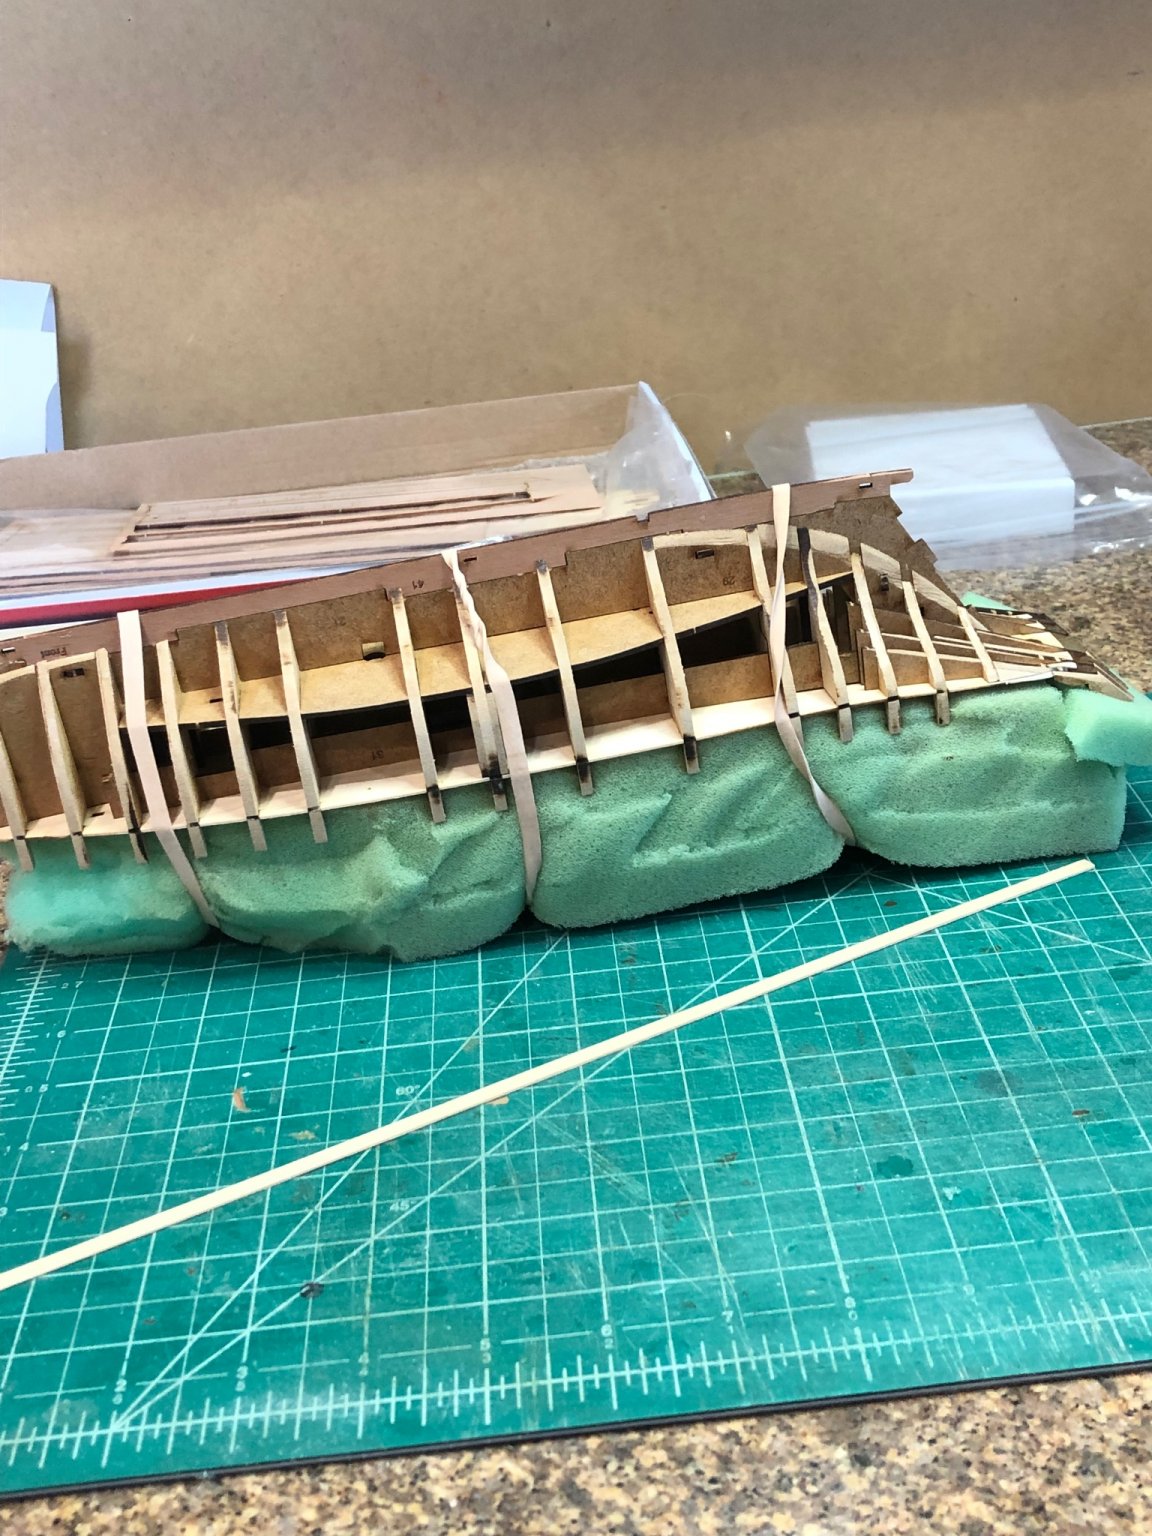
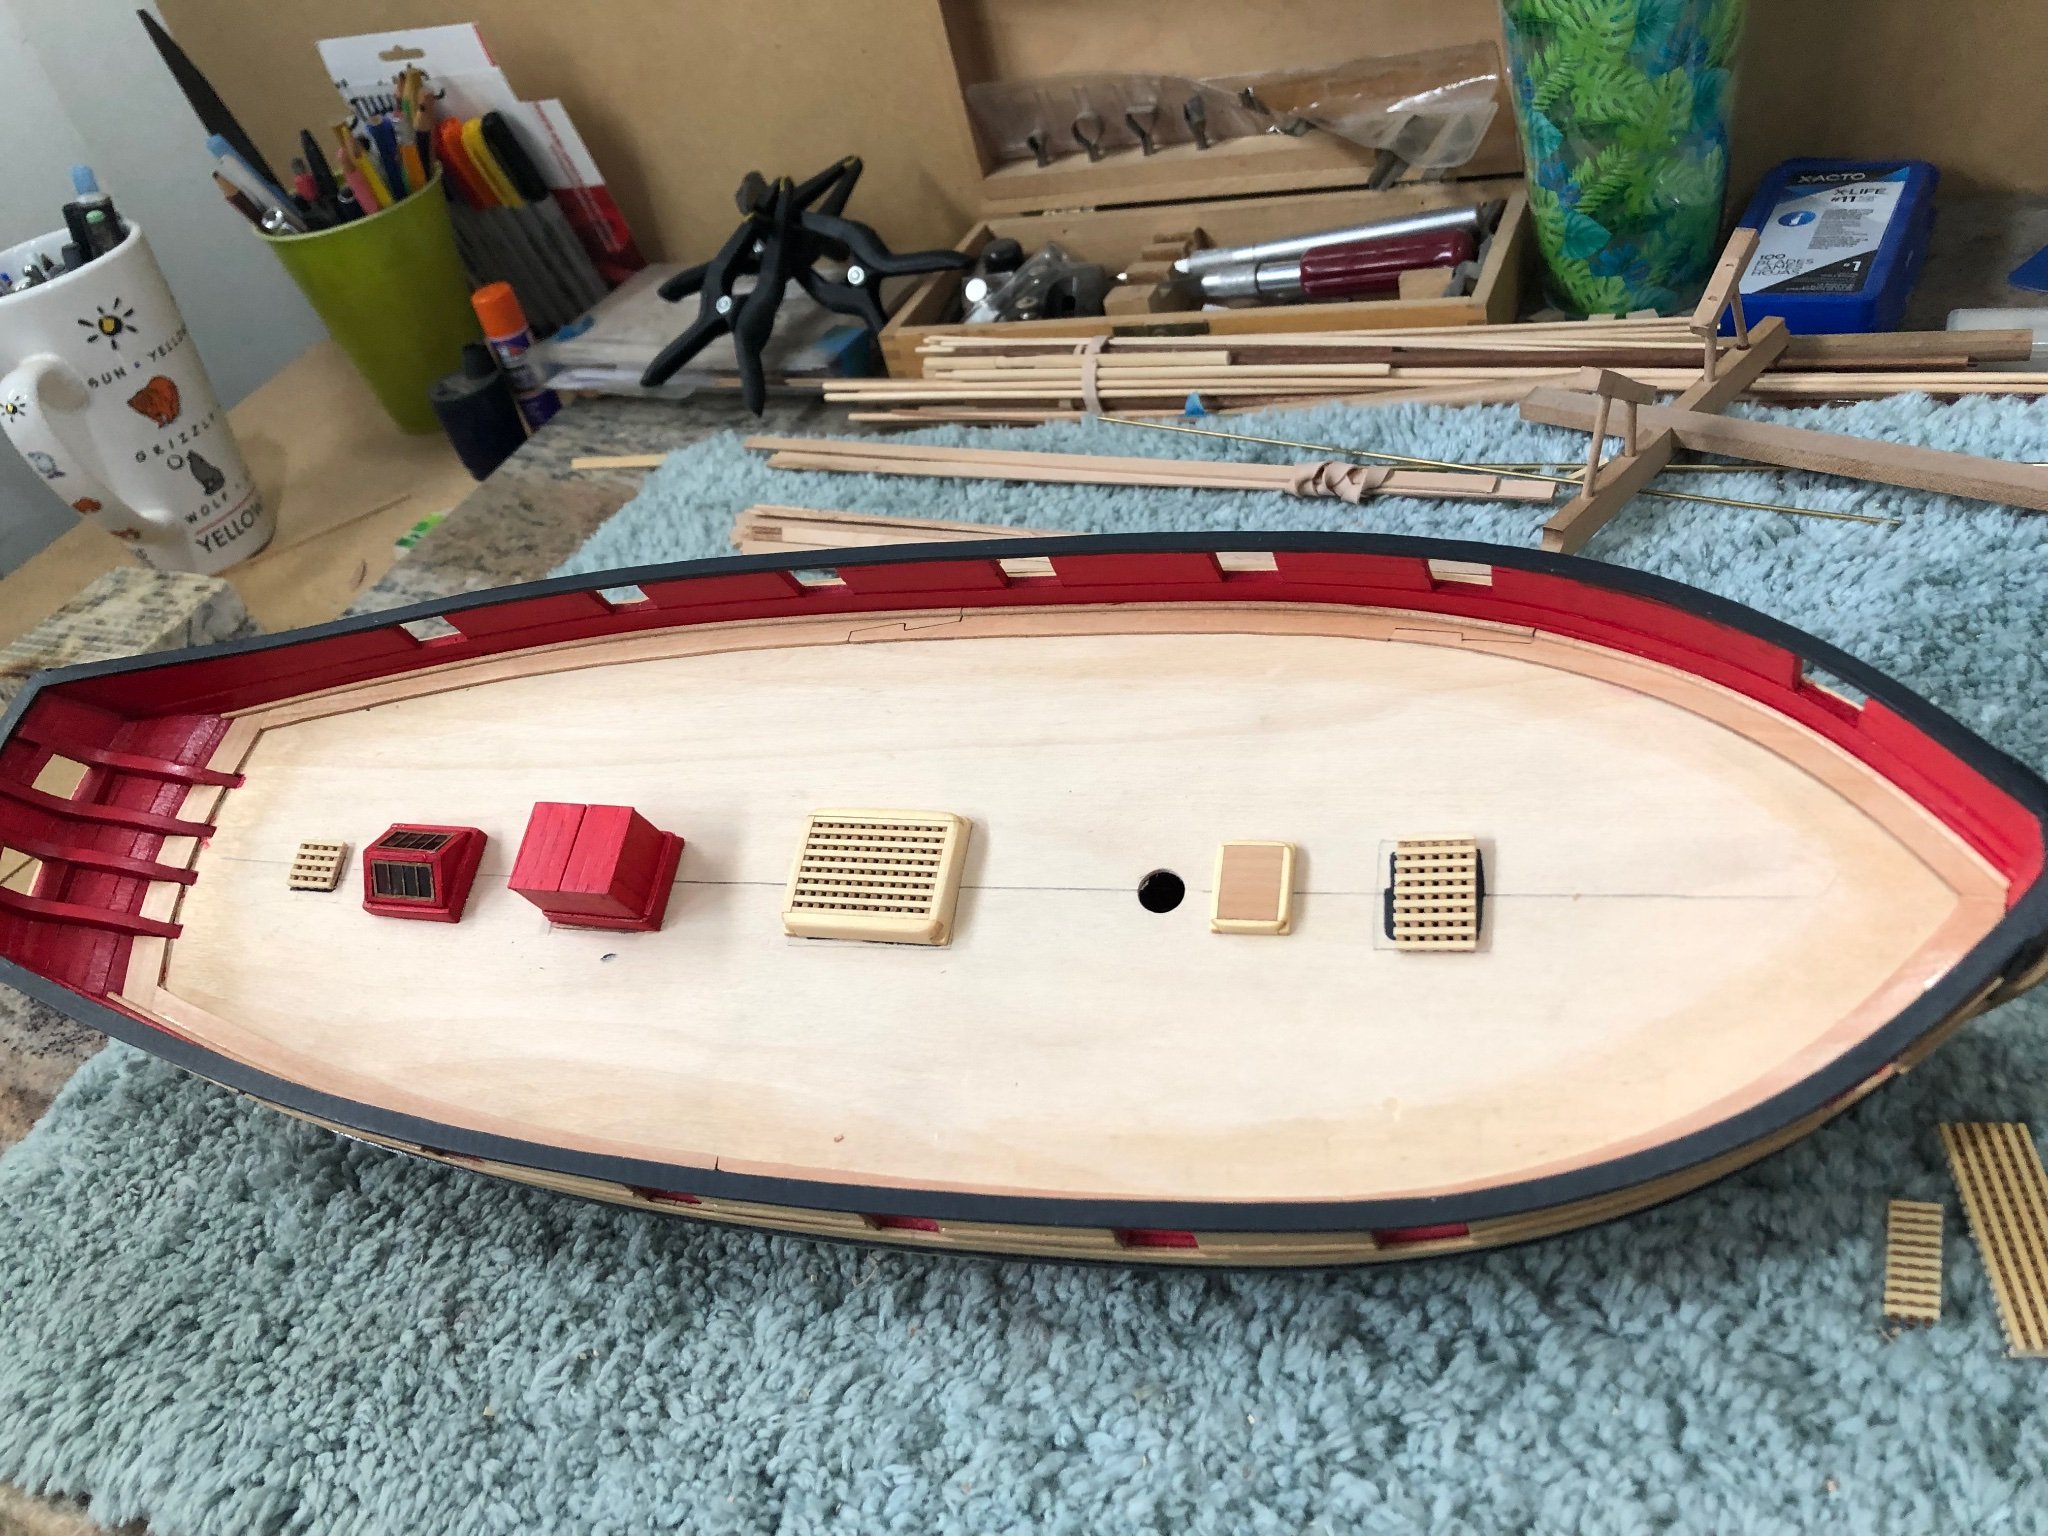
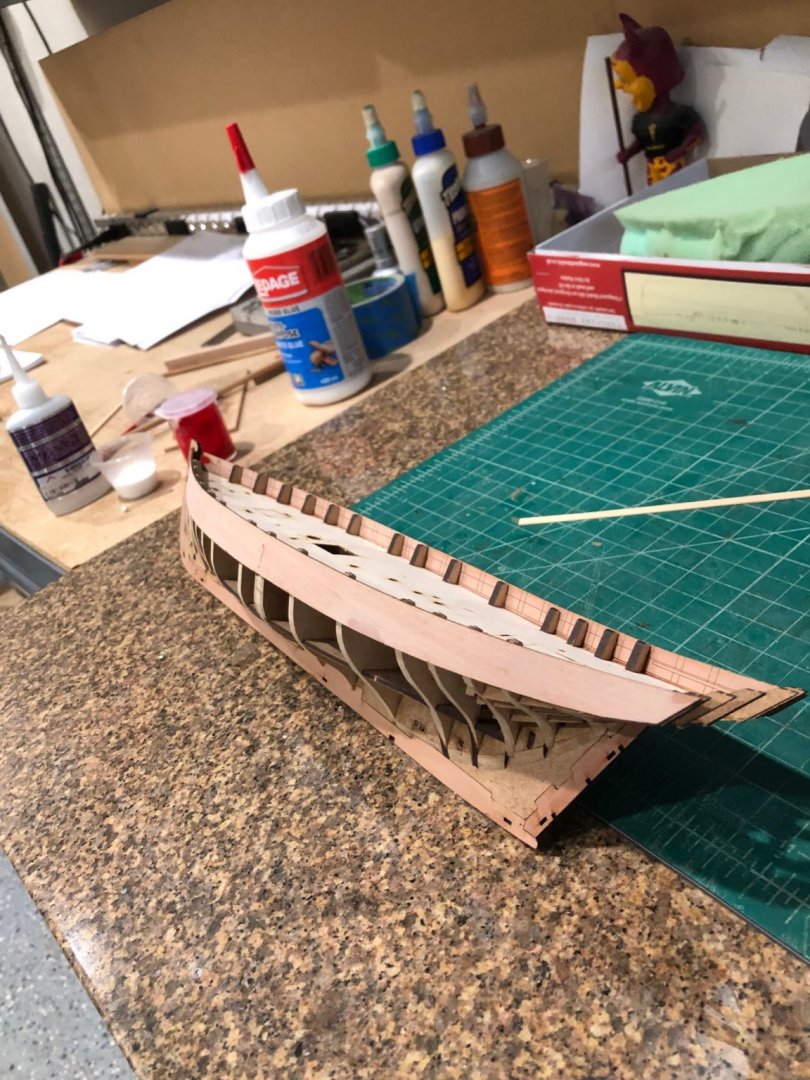
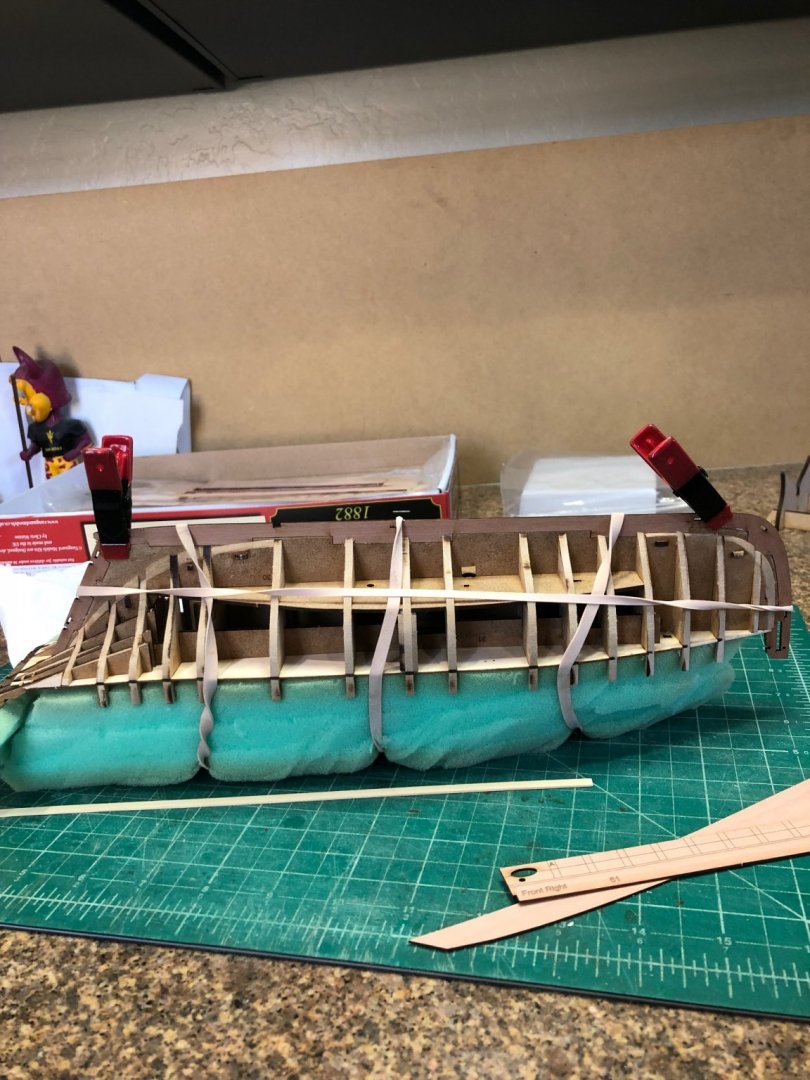
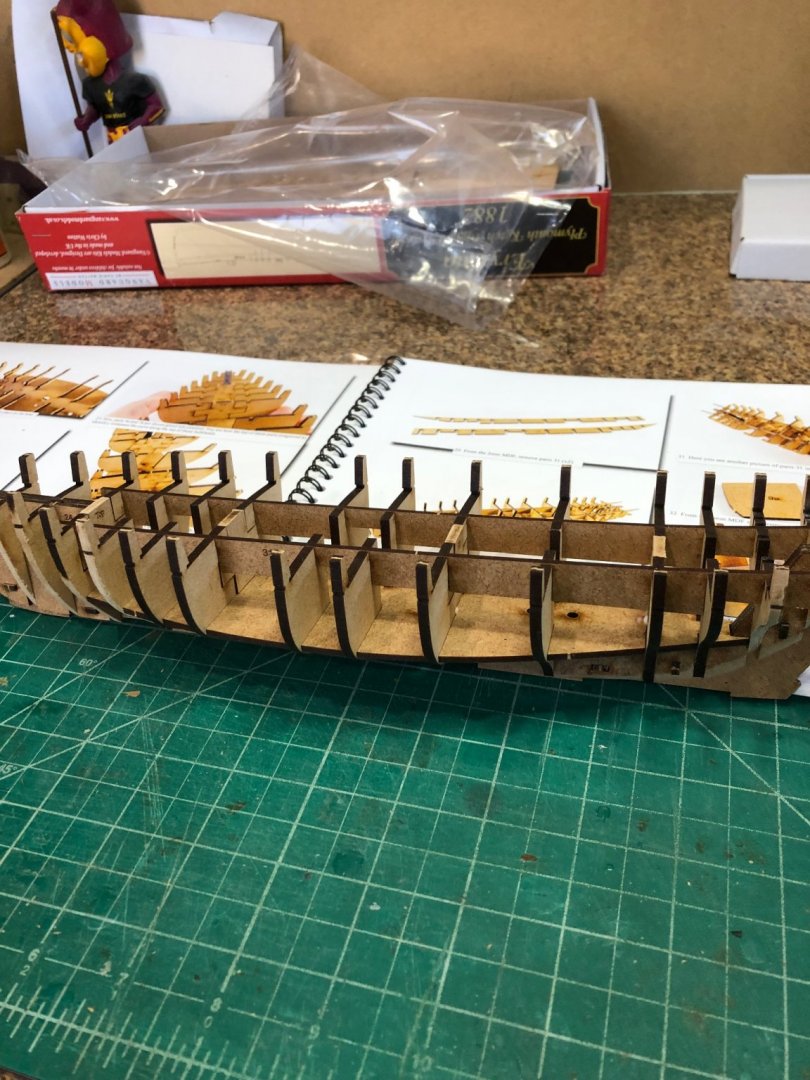
Spent the morning fairing the bulkheads getting ready to plank. Nice to have the marks so the gross sanding was completed prior to bulkhead mounting to false keel. One note to anyone wishing to build Erycina THE TRANSOM BULWARKS ARE VERY FRAGILE ESPECIALLY THE OUTSIDE. The outside bulwarks were doubled and a 3mm filler added and all this must be faired for planking to flow. When complete the outside bulwarks are almost half their size at the tips. A trick I use to make the bulwarks less prone to breakage is using upholstery foam cut to fit in-between the bulwarks. Its not pretty but does an amazing job of protecting the protruding bulwarks. I buy the foam from a fabric shop near me in 2" thick pieces. When I dry fit the pear wood keel pieces they fit perfectly and I went ahead to glue the bottom piece. I use elastic bands to hold the keel snug while the glue sets and you can see how the foam supports the bulwarks especially the transom bulwarks. Many Regards Will


- 77 replies
-
- 9
-
-
- Erycina
- Vanguard Models
- (and 1 more)
-
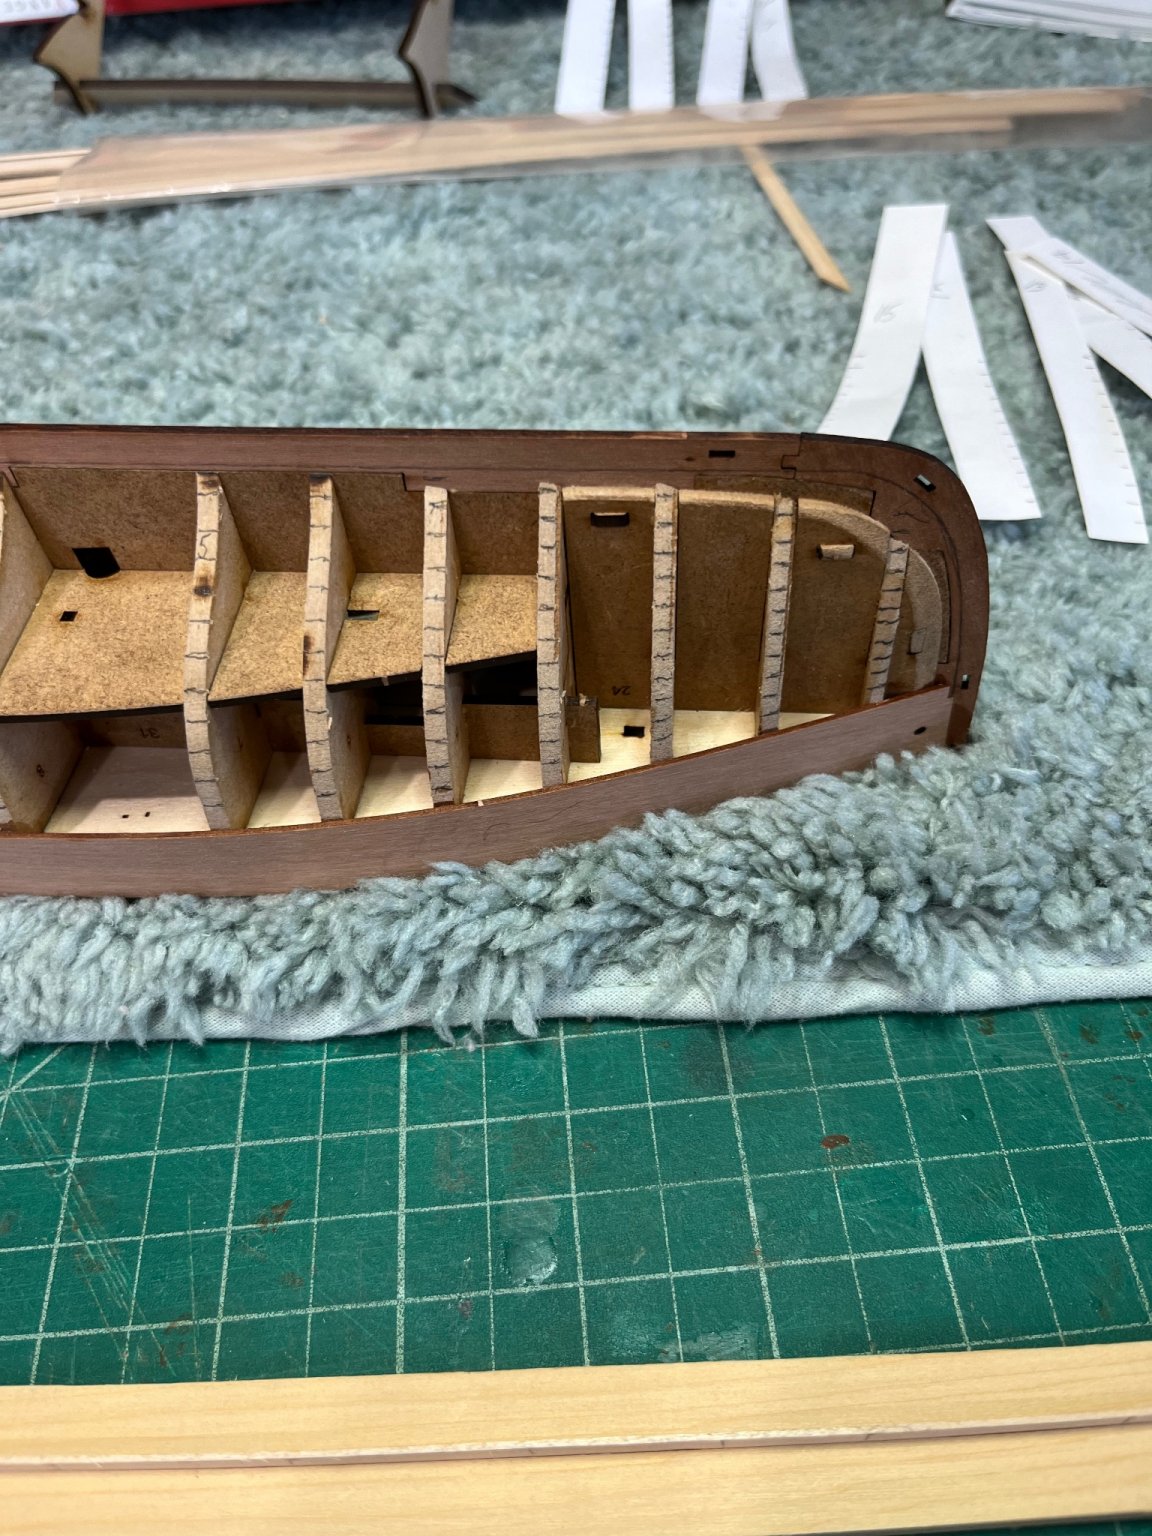
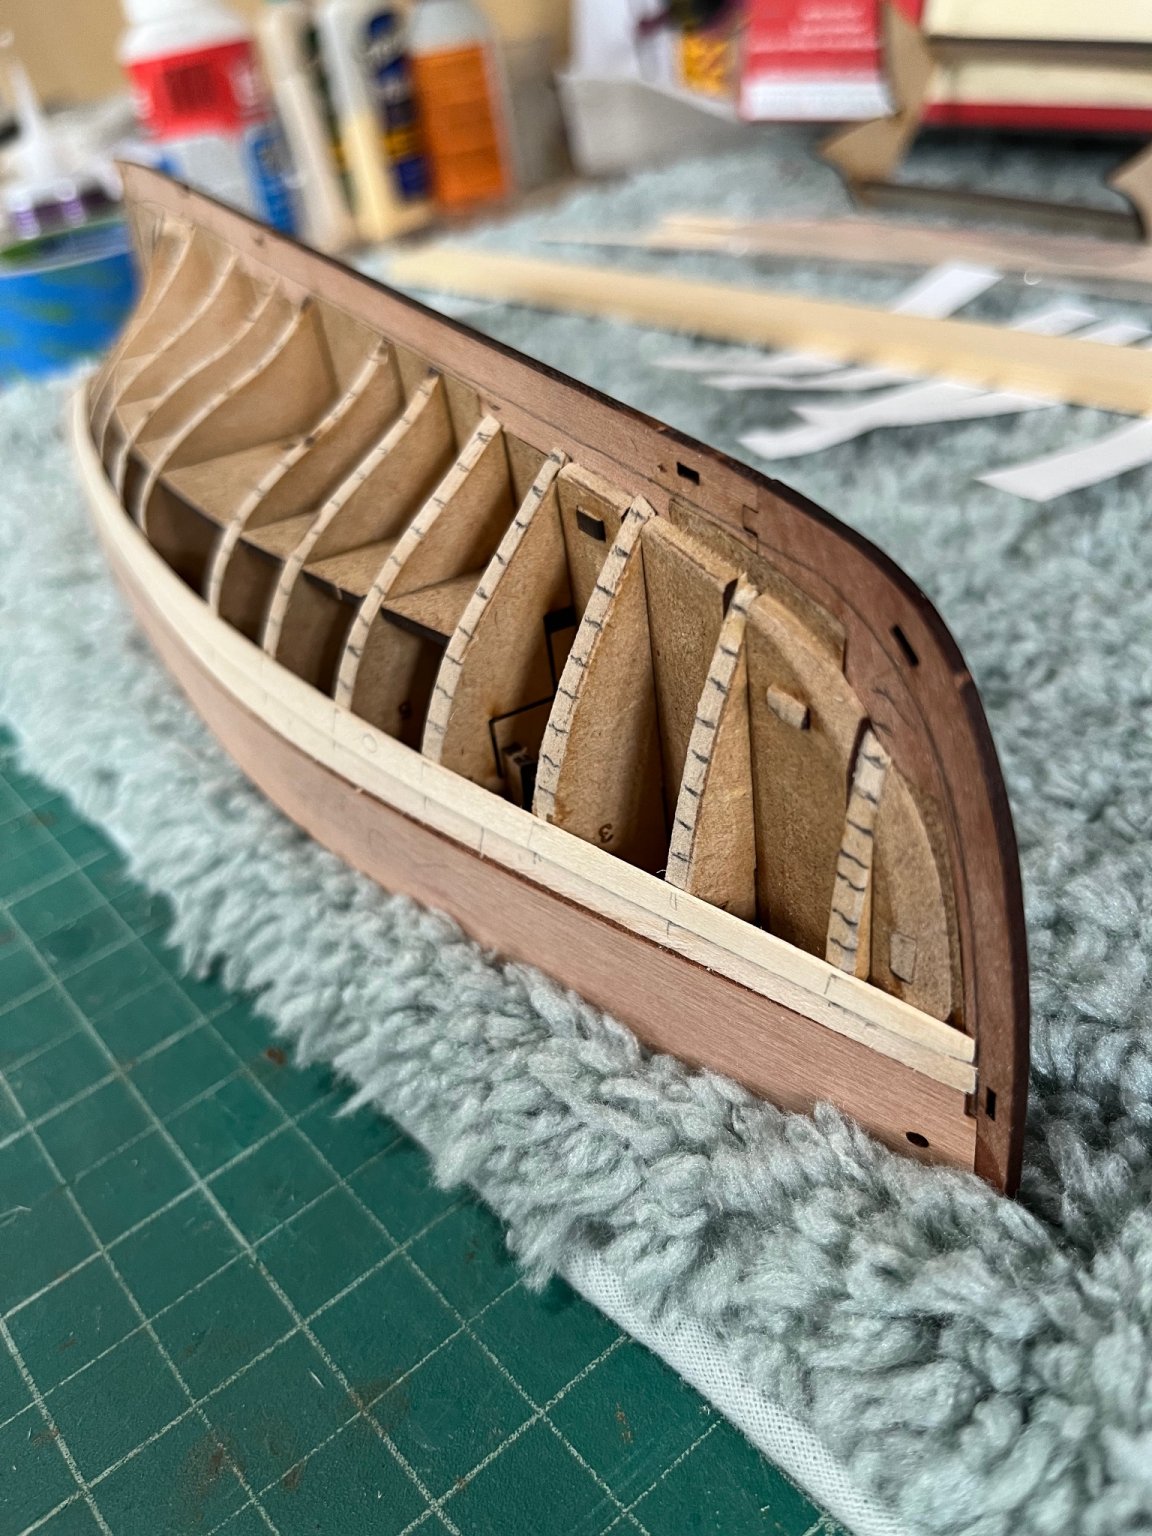
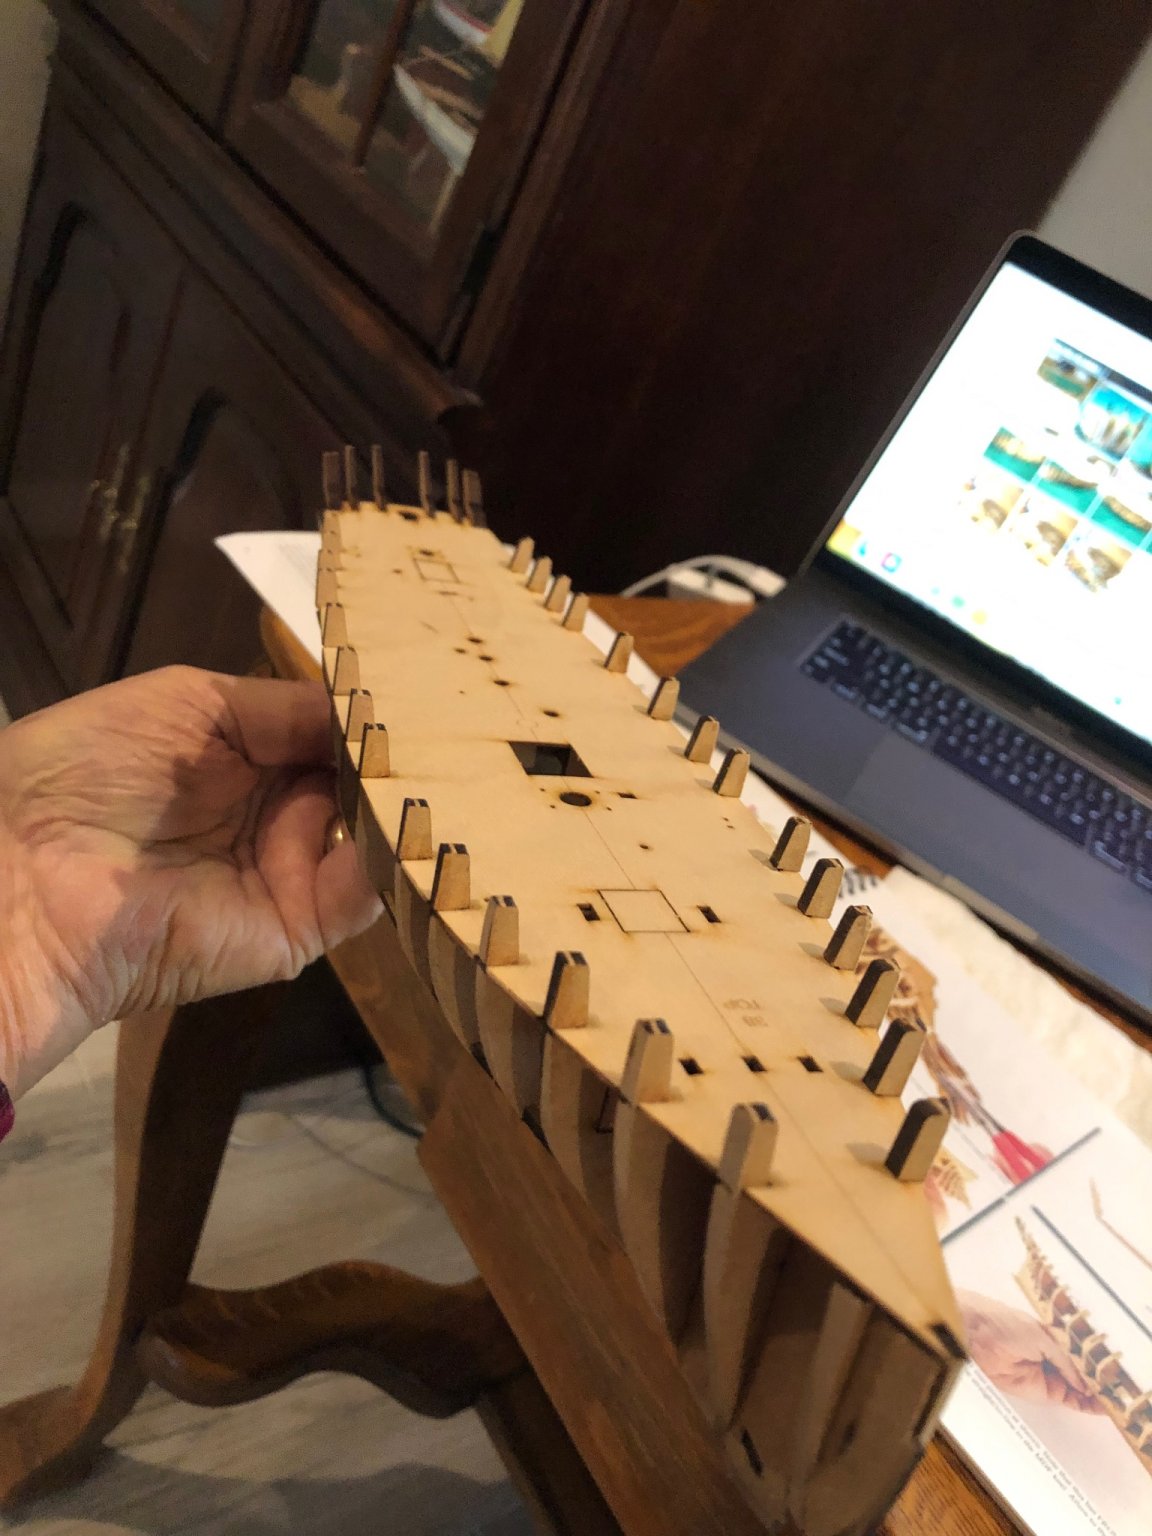
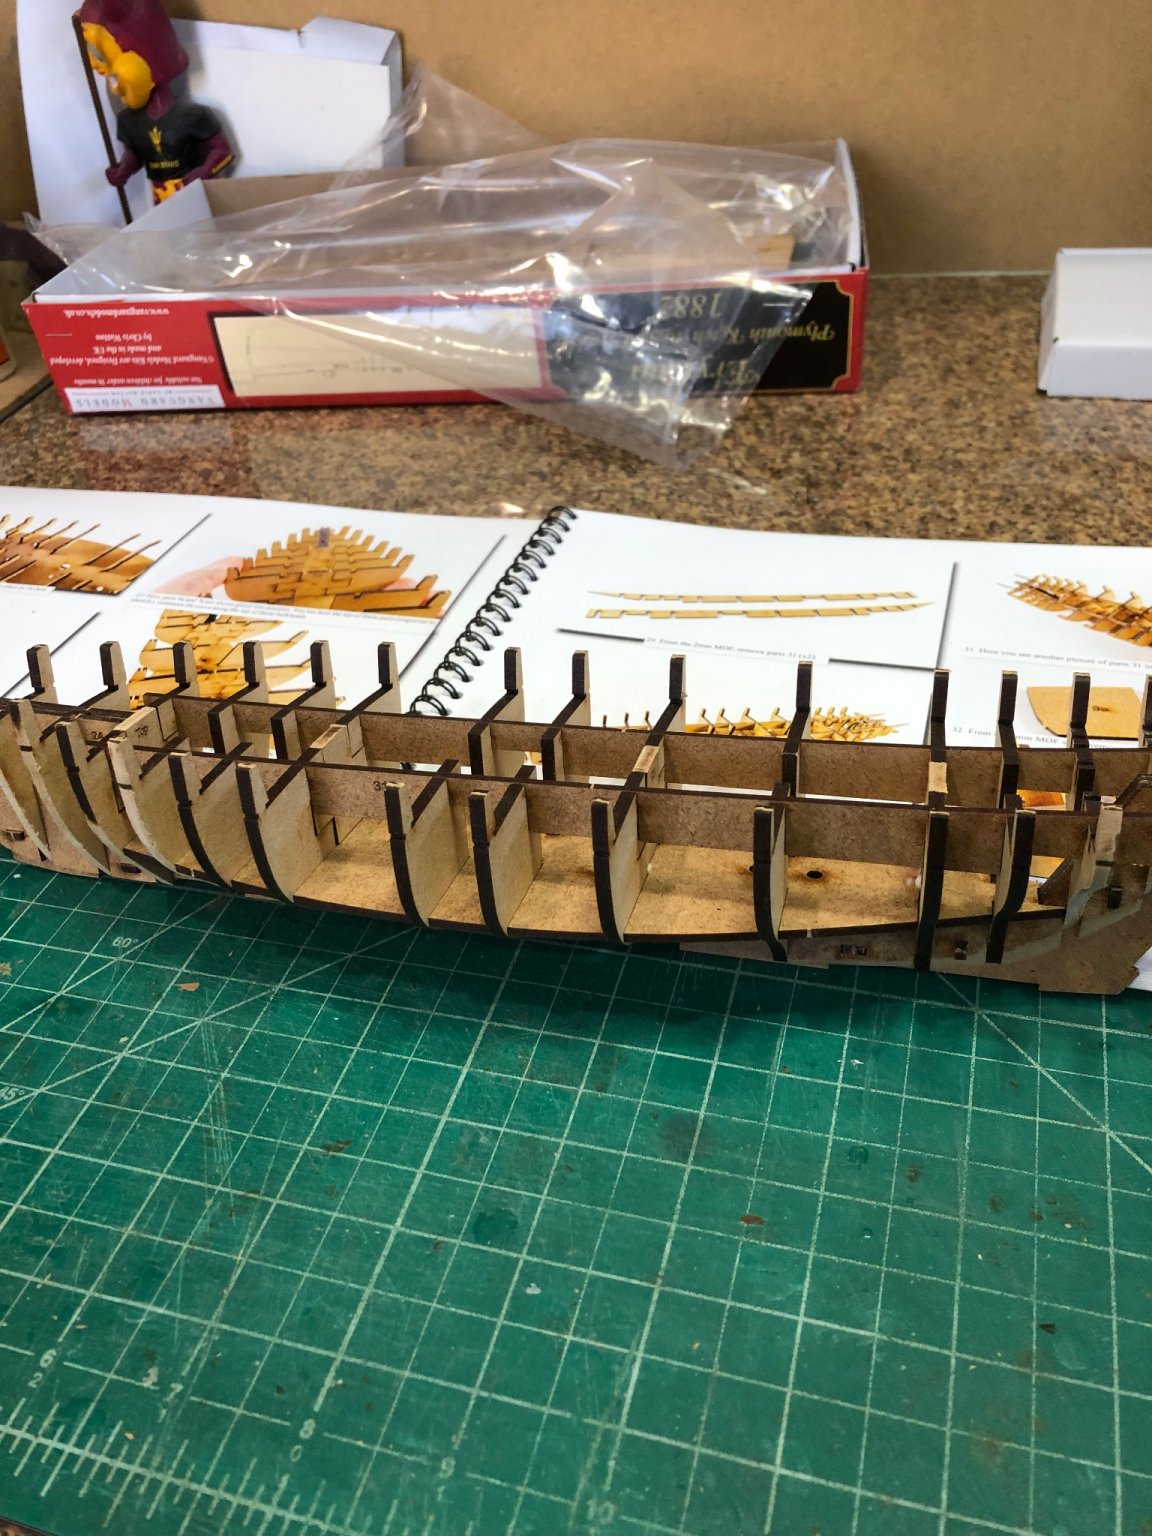
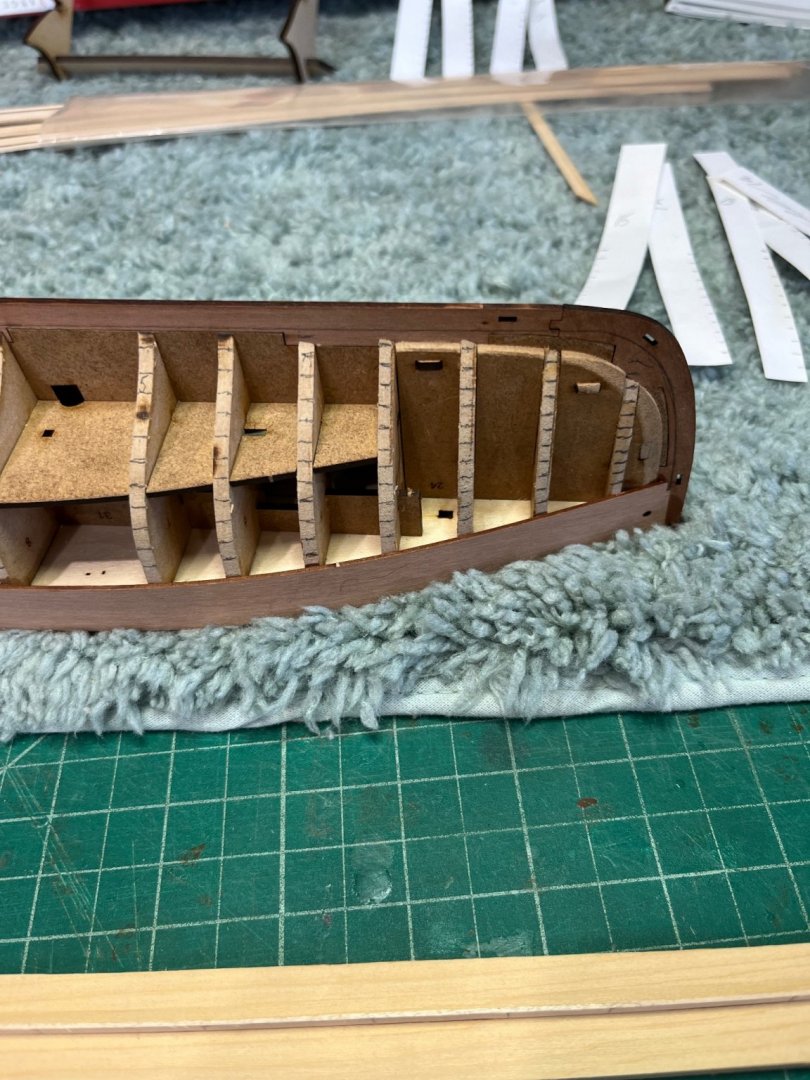
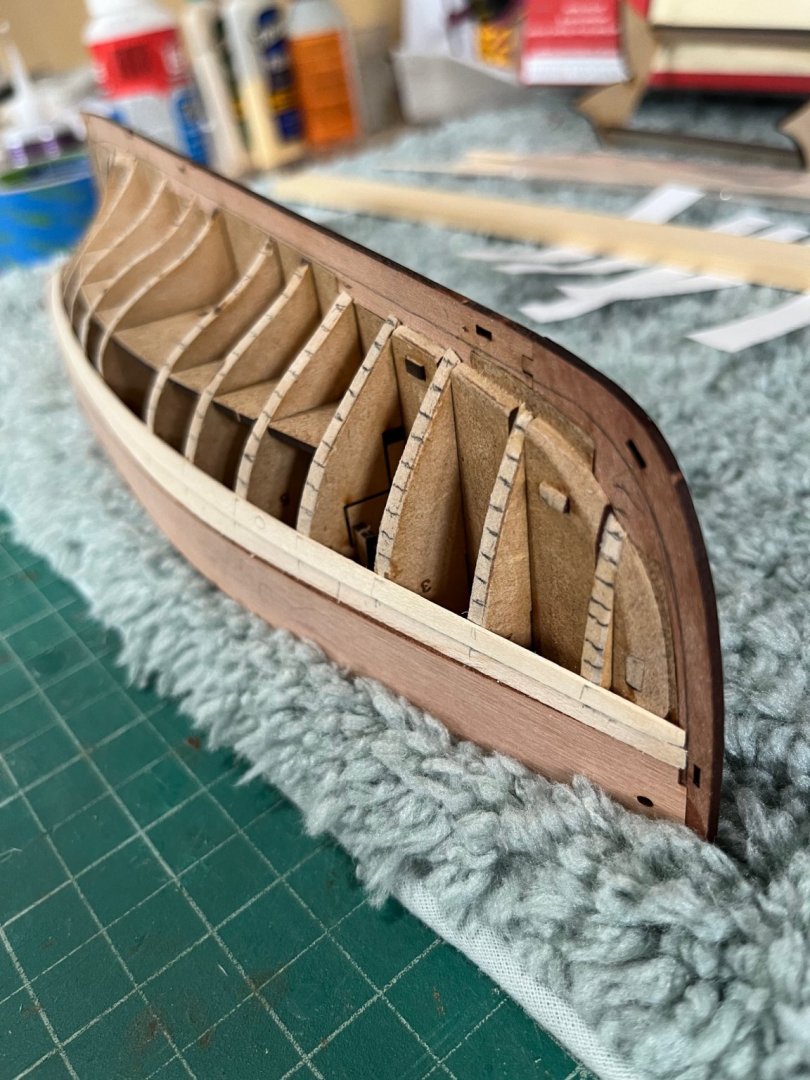
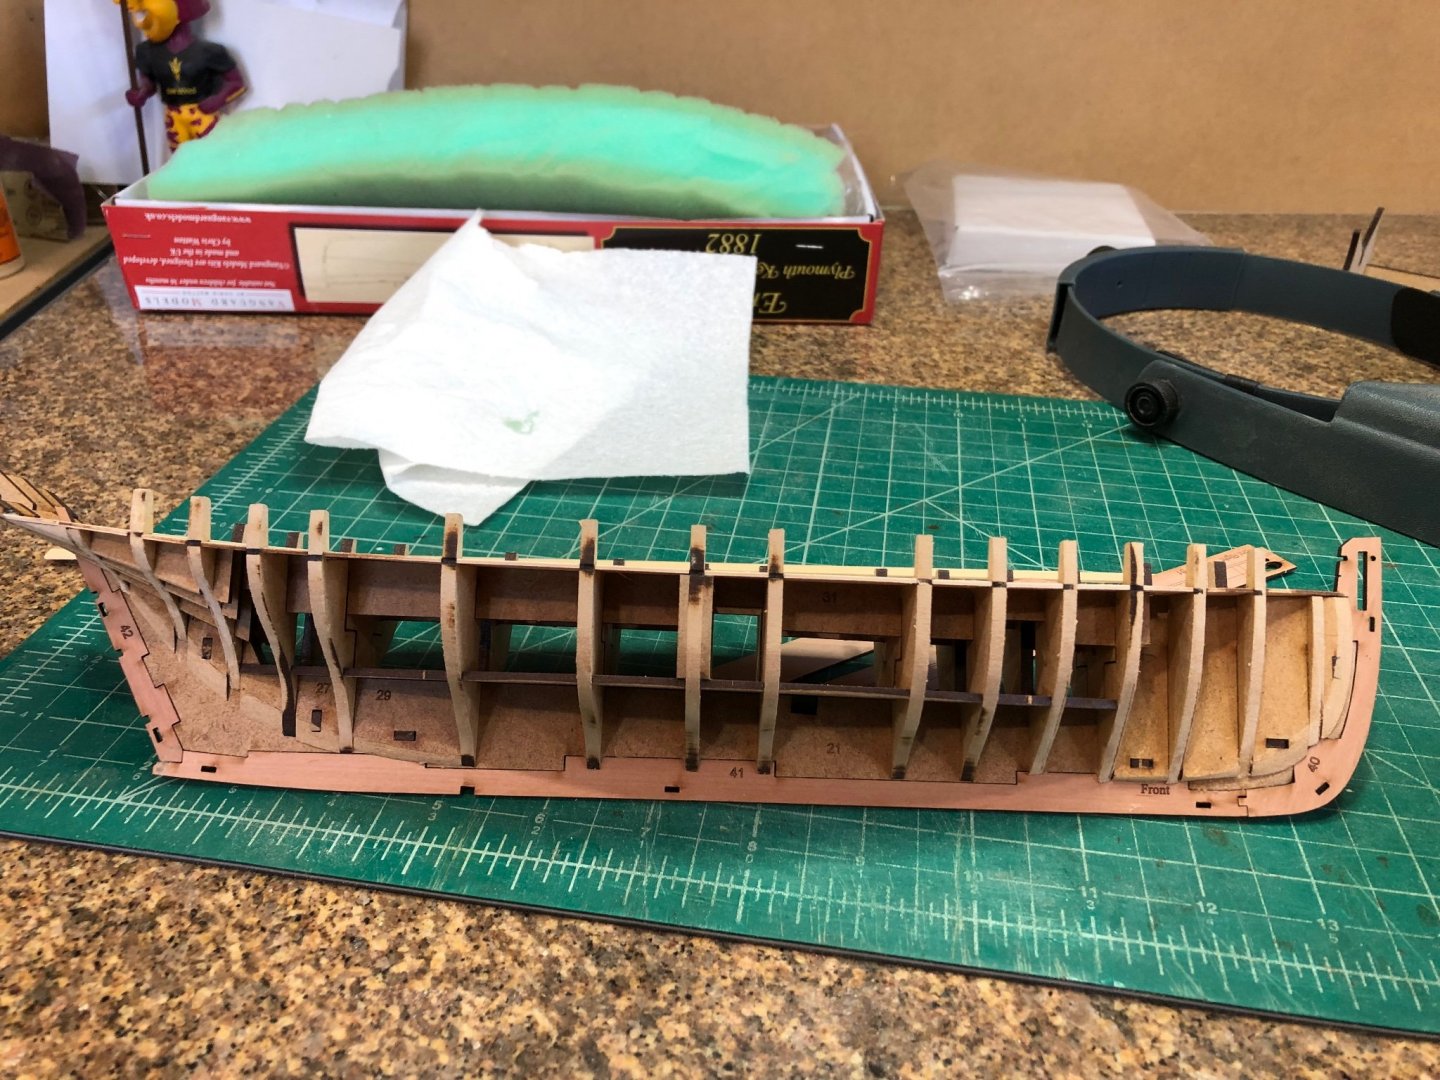
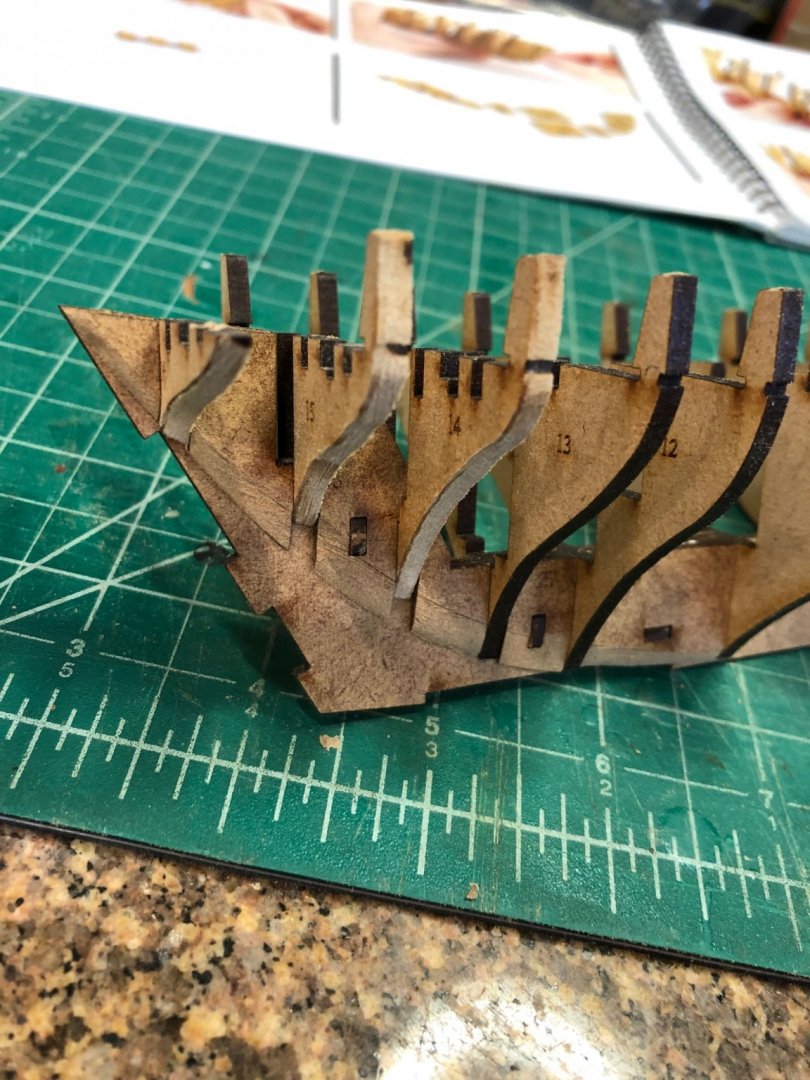
Finished Christmas shopping so now back to Erycina. Started the fairing the forward support pieces and kept putting them on the keel section wondering how is this going to work? Being basically noisy I removed the locating tabs from the 3mm sheet and placed the pieces in place. The more I work with Chris's kit the more impressed I become. Holding the filler pieces to the keel all 3 tabs slipped into place. Amazing. I had done a little fairing on the forward frames prior to attaching the fillers. But still wondering how to fair fullers. So now the stern fillers using the same method. These fillers flow into a nice bearding line for a rabbit. And as stated the lower deck fell into place with a little frame jiggling. Each time laser cut parts fall into place amazes me. Put the + shaped parts in place and glued into position. It is so foreign to me that the frames are just left in a dry fit position. I've always used squares, levels and glue to insure the frames are square to the frame and level athwartship. Now putting in the longitudinal pieces squaring the frames along with the lower deck the boat is becoming rigid. Had a small problem with the longitudinal pieces aligning with the + pieces. A NOTE TO OTHERS MAKE SURE THE + PIECES ARE FLUSH WITH THEIR ADJOINING FRAMES OR THE LONGITUDINAL PIECES WONT SLIDE INTO PLACE. I fixed my problem with a slight amount of sanding and then the parts sled together. Snapped the after pieces with no issues.The last thing was to snap the false deck into place. Once again the parts alignment is amazing. I slide the deck into the starboard side making sure it was fully seated and the with a slight amount of bowing slipped the port side into the frame notches. Diluted some white glue and painted all the joints. After setting awhile the structure is very secure with no bending or flexing. Thats enough for today must let all the glue set and begin tomorrow. Many Regards Will


- 77 replies
-
- 12
-
-
- Erycina
- Vanguard Models
- (and 1 more)
-
I want to thank everyone for the looks, like and nice comments. Allan I like your idea of how to make strips it definitely would make life easier. I think I just need to get over being frugal with wood. Make a bunch use what you need and feed the barrel with the rest should be my motto. Kind Regards Will
-
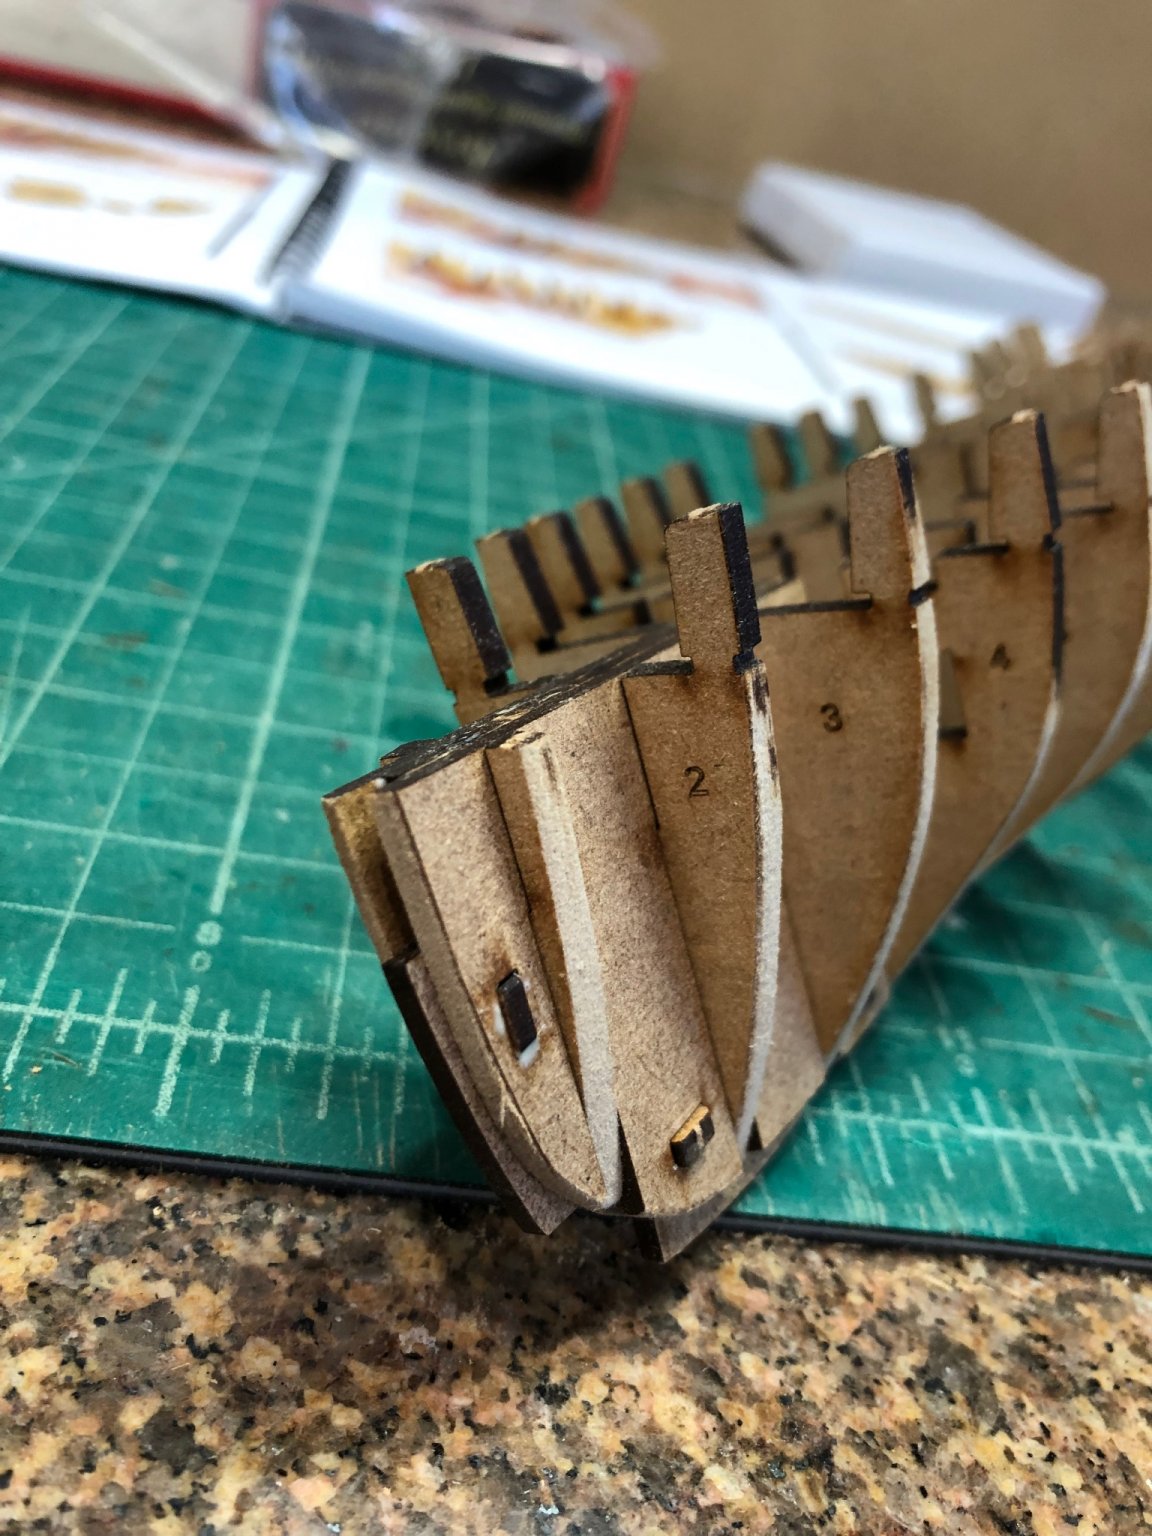
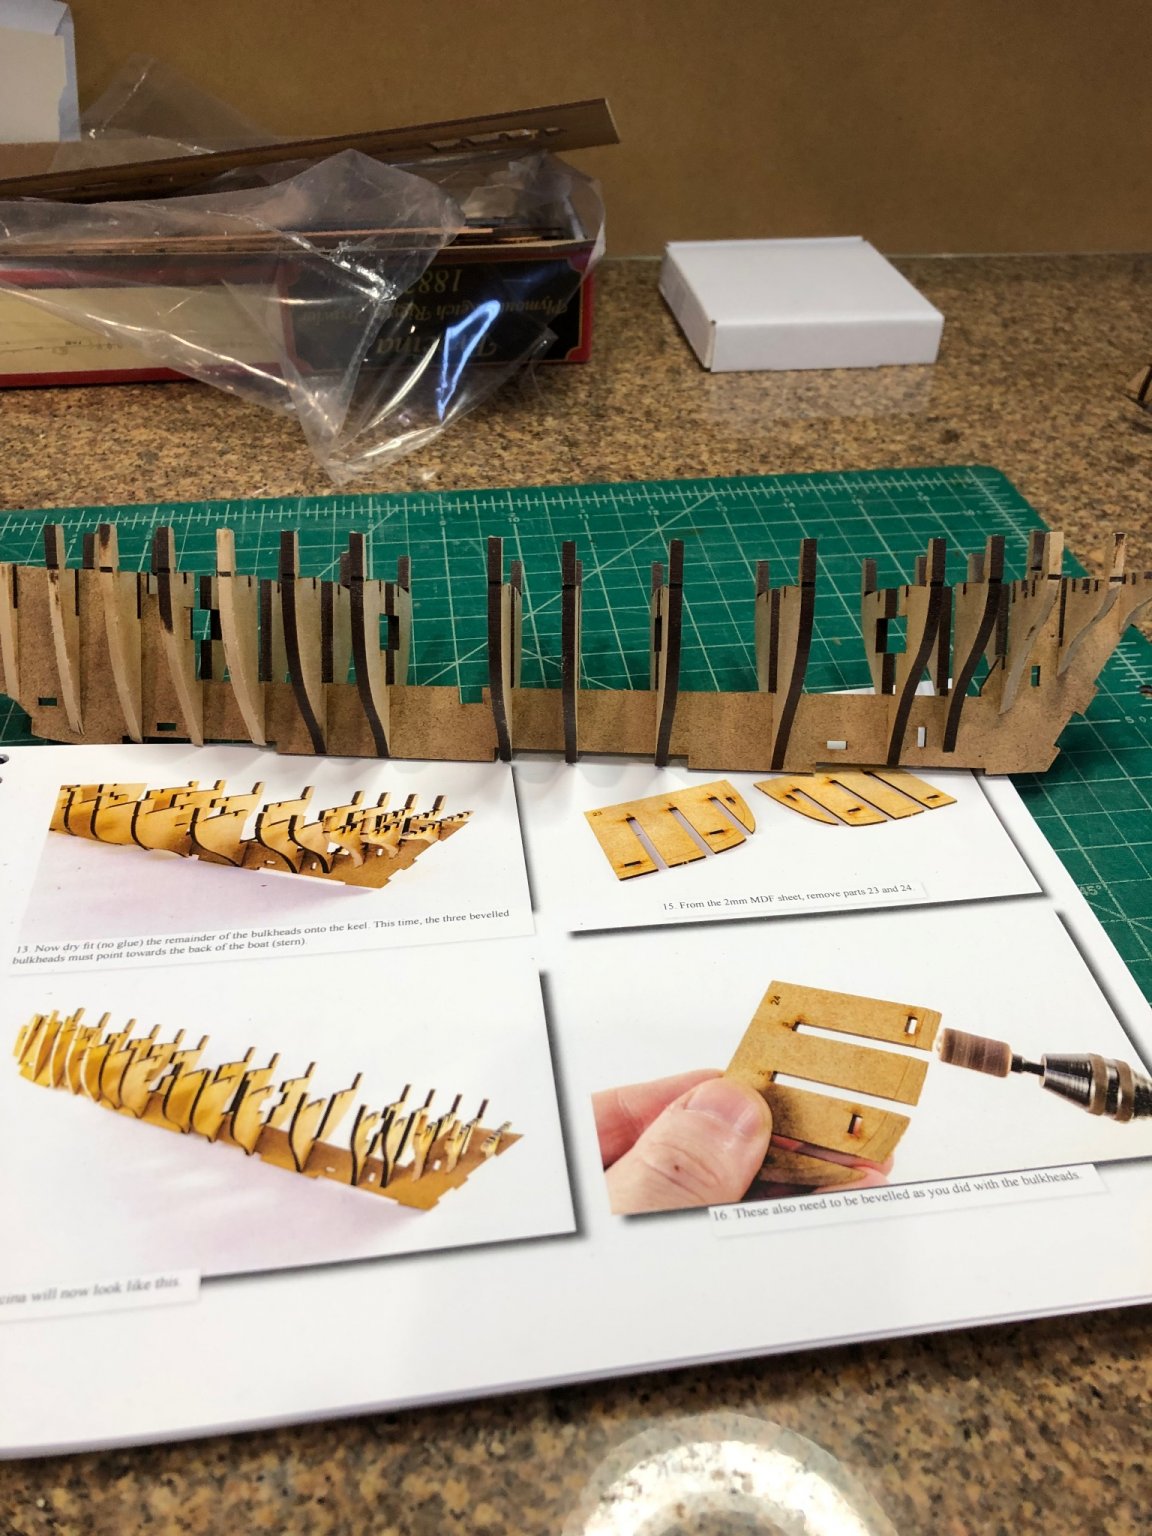
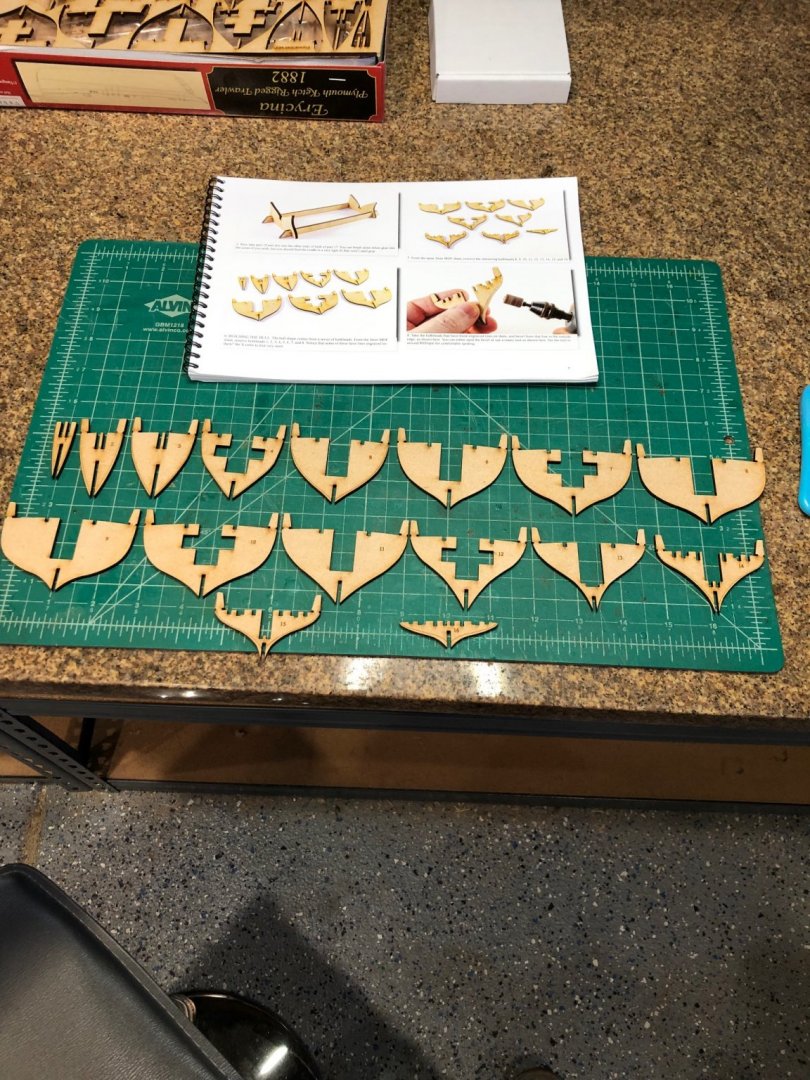
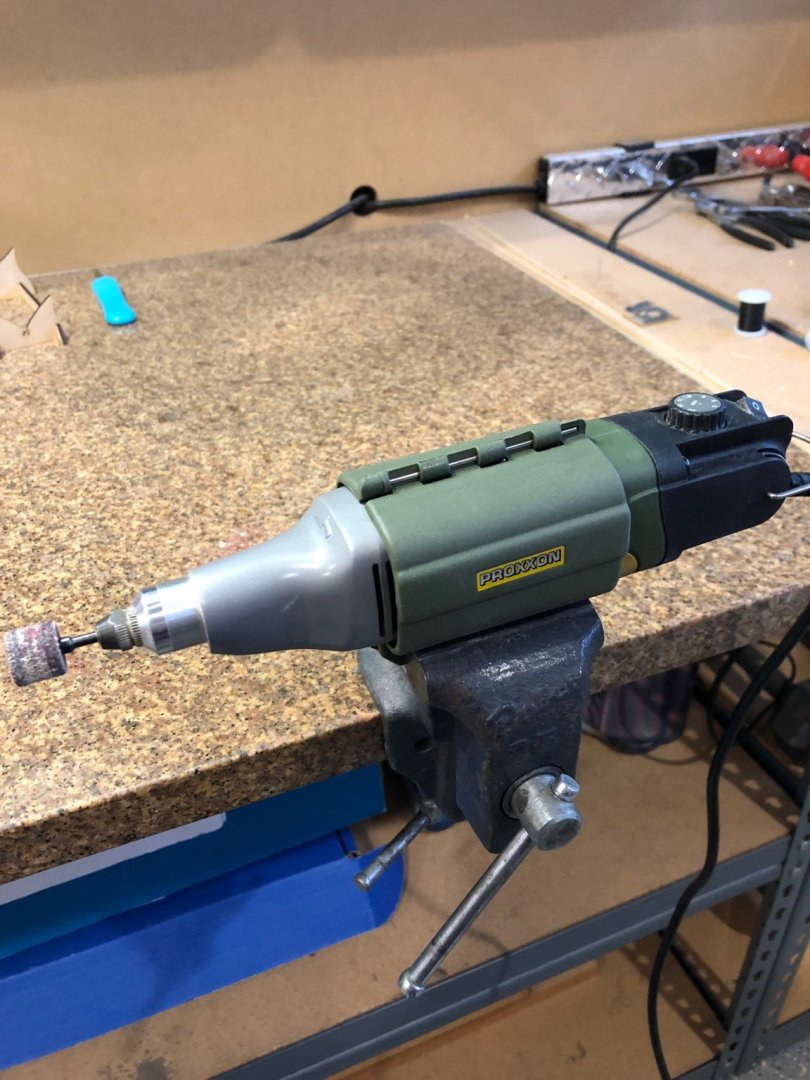
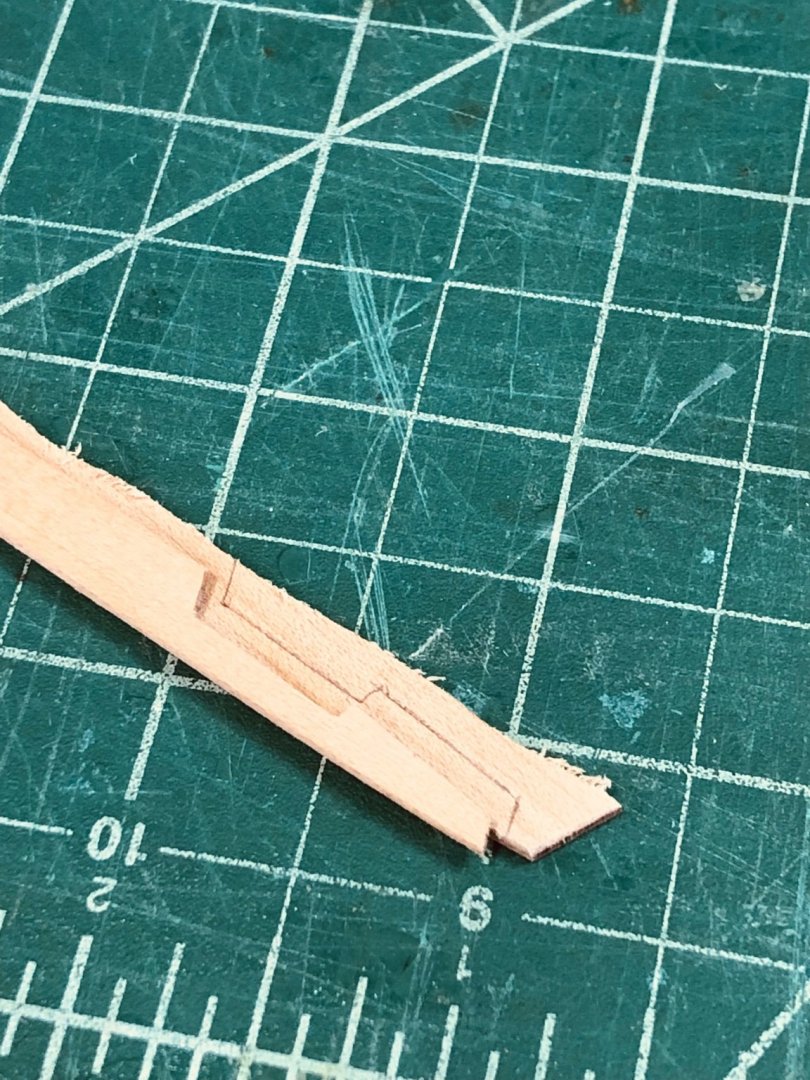
Welcome everybody plenty of room to join the party. Lets get started. First I carefully cut the 16 bulkhead frames from the 3mm MDH using a #11 blade. When not being sure if the laser char should be removed I removed the keel from the 2mm MDF and dry fit each bulkhead. The fit is so tight, not too tight and not a sliding fit, so I'm leaving the laser char. I did remove the little attaching tabs from each piece. 16 bulkhead frames on such a small ship will make planking easier keeping a clean smooth sweep. I used my Proxxon rotary too to fair bulkheads 1, 2, 3, 4, 15 & 16 to the laser scored line. It was a little nerve wracking on the first and last frames as the line was so far from the edge. I put the frame back into the keel to check and went ahead fairing to the line. Proxxon has a great clam shell clamp to put in a vise. With it secured it was easy to hold the frames along the drum and up to the line. All the fairing done and the frames back on the keel as the manual suggested. So I'm now back working in the correct order Doesn't seem like a lot of work but after spending so much time checking, checking, and rechecking I feel better that it is correct. On previous kits I learned that small mistakes always seem to come back to haunt the design later. So my neurotic checking continues. More tomorrow now its time to do some Christmas shopping. Many Regards Will

- 77 replies
-
- 7
-
-
- Erycina
- Vanguard Models
- (and 1 more)
-
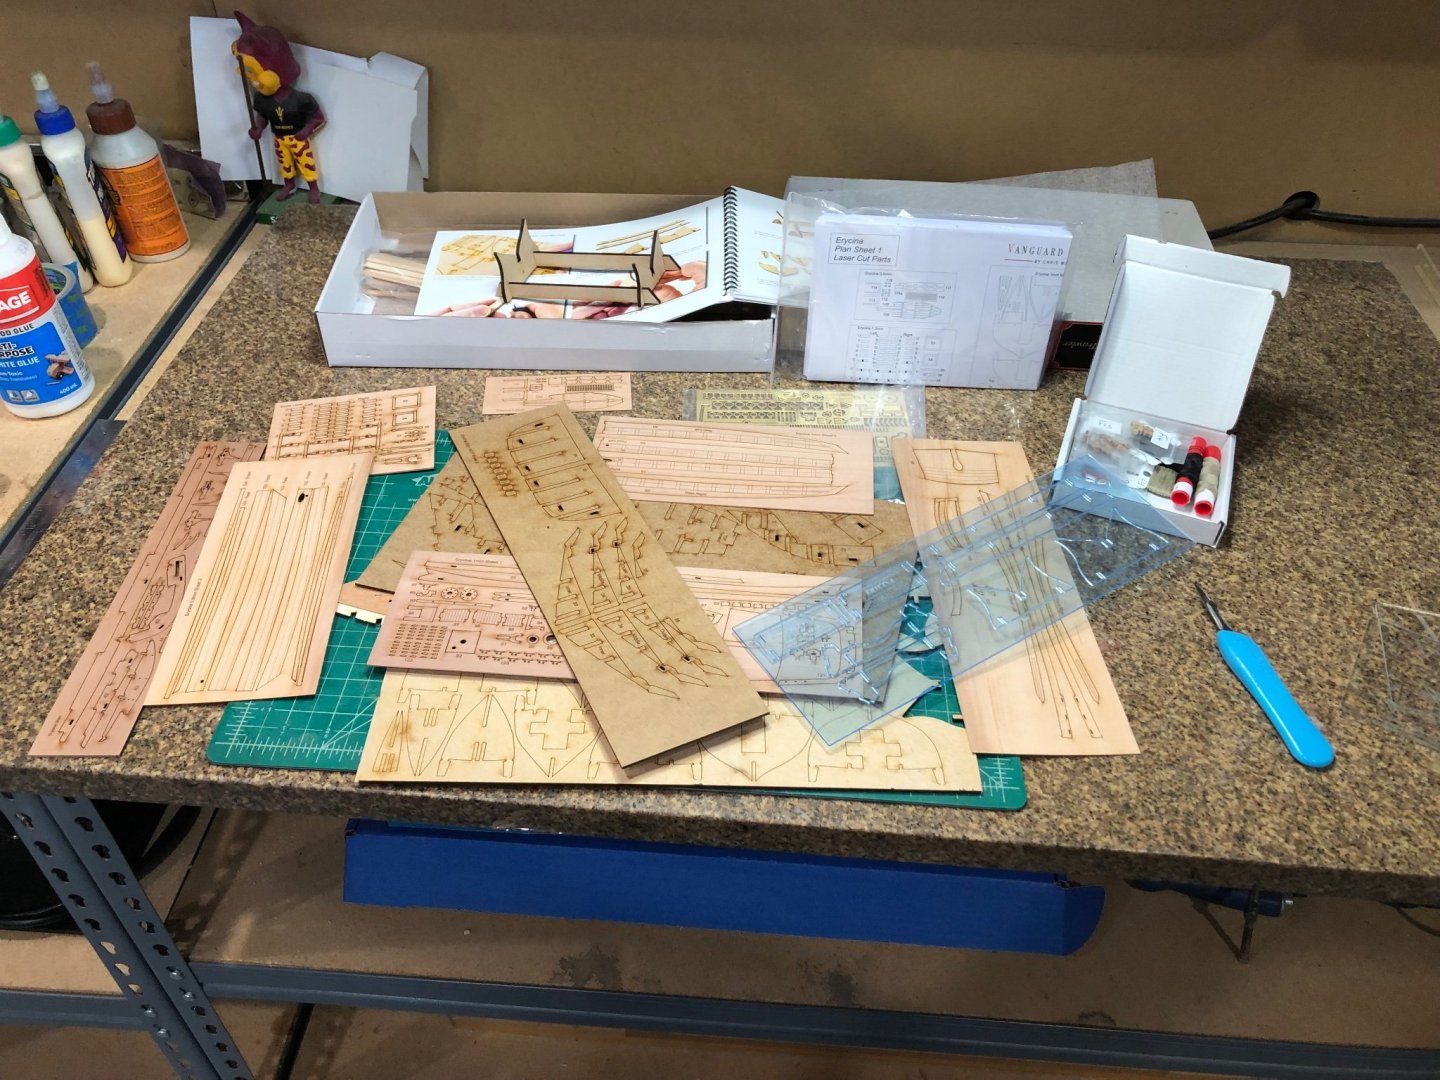
Been following Vanguard Models by Chris Watton for some time and when I saw this kit I jumped. Got the box a couple day ago and had planned to put it on the shelf until other project were finished and when it was time to wait additional supplies I figured I'd start. What the heck 😬 Opened the box and did the usual inventory of parts along with a photo. Kit contents I couldn't wait and put the working stand together. When Chris said it should not require glue, he was spot on. The parts fitting was very snug with not wiggle. The laser cutting of the 3mm MDF was very fine and a #11 blade did not fit between the edges. Looking at the parts I am very impressed with apparent quality of the material. THE BEST KIT I HAVE SEEN. Can't wait until tomorrow. Best Regards Will
- 77 replies
-
- 6
-
-
- Erycina
- Vanguard Models
- (and 1 more)
-
I started the Syren 2 years ago and lost my way. Inbetween I've finished several small boats and started others now I realize that I can't work on 2 models concurrently and have put the other models on hold to finish Syren. I finished up with the lashing to sheer poles and now on to the futtock shrouds and catharpins. More to come Regards Will
-
Ok, as I said I had not ordered sufficient grating strips and since the Syren Model ship company is closed I've decided that I'll put the Cheerful on hold until I finish another project that has been in the works. I have not given up on Cheerful just need to finish something else I started. All deck furniture completed waiting for more material. Until I start again Regards Will

-
Very nice Patrick. Can't wait to see the completed rudder with the P&G's you've done so masterfully. Couple things I like help on 1. Earlier on you detailed how you sandwiched brass to cut when its so thin I could go back and read the log but I'm lazy. Could you explain? 2. How thin is the brass for the P&G's? Regards Will
-
Chuck Somehow I failed to order sufficient grating slats to make the gratings on my Cheerful and your store is closed, when do you expect it to be open for orders? In the mean time I make coaming for the large grate and chimney. Will
-
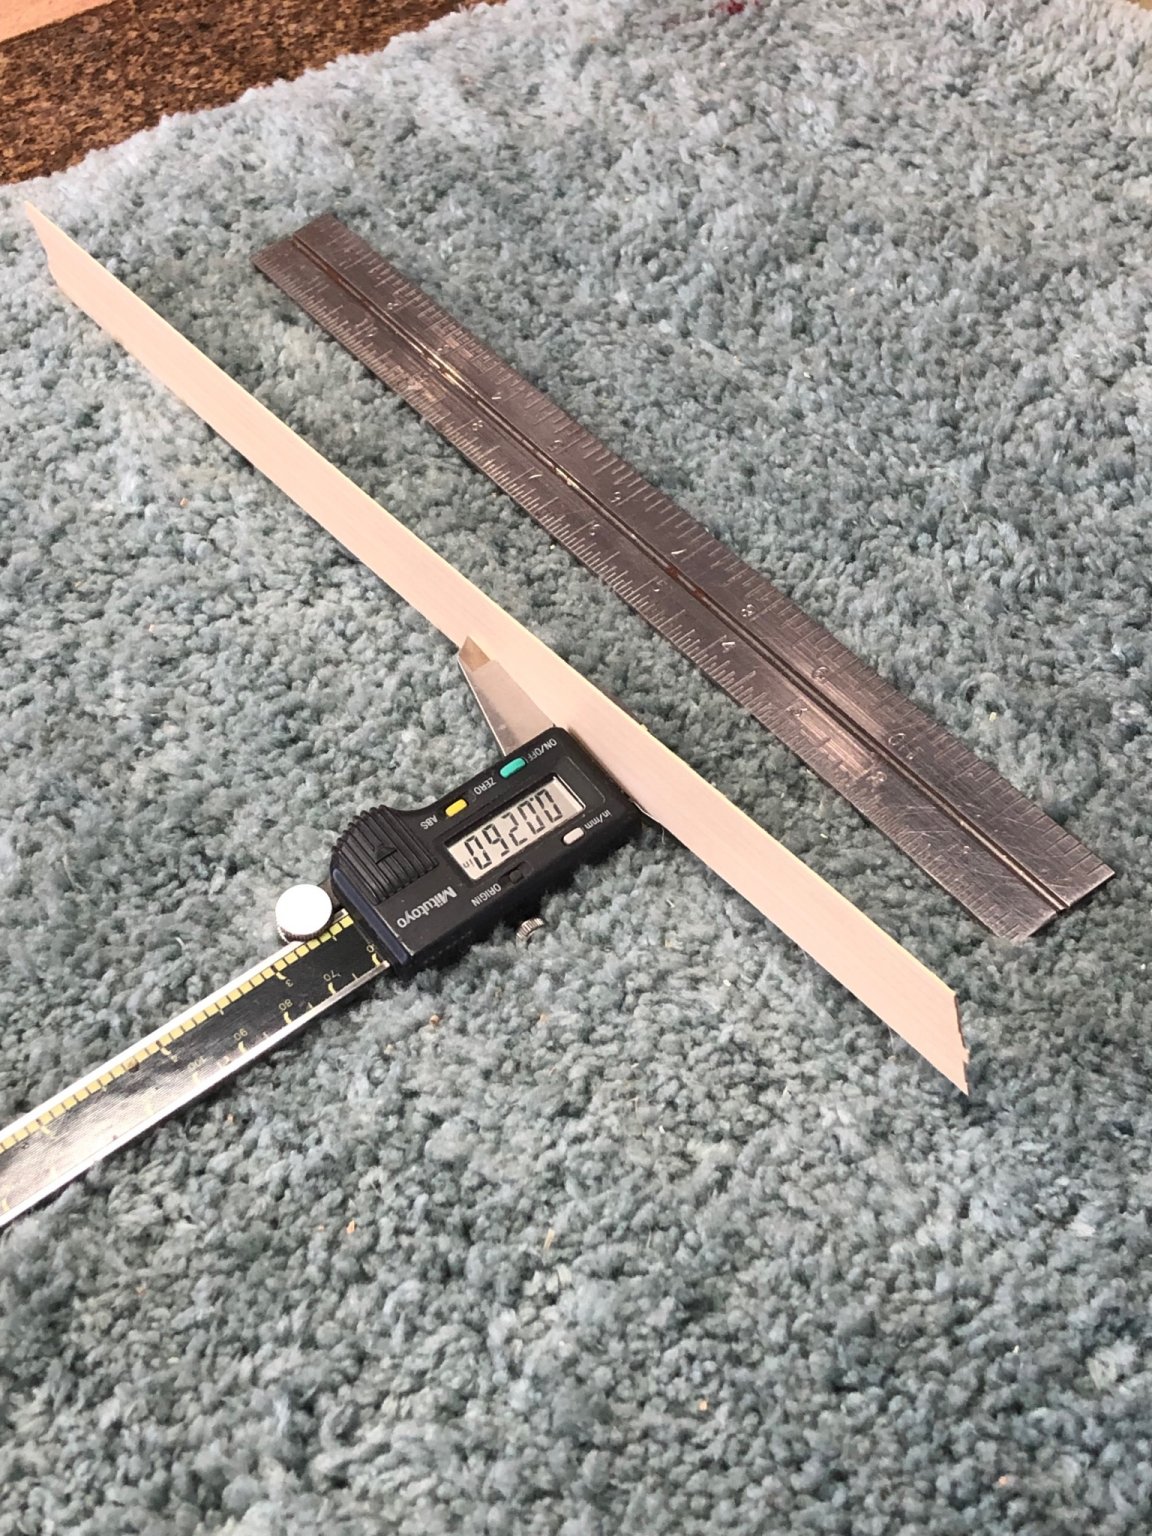
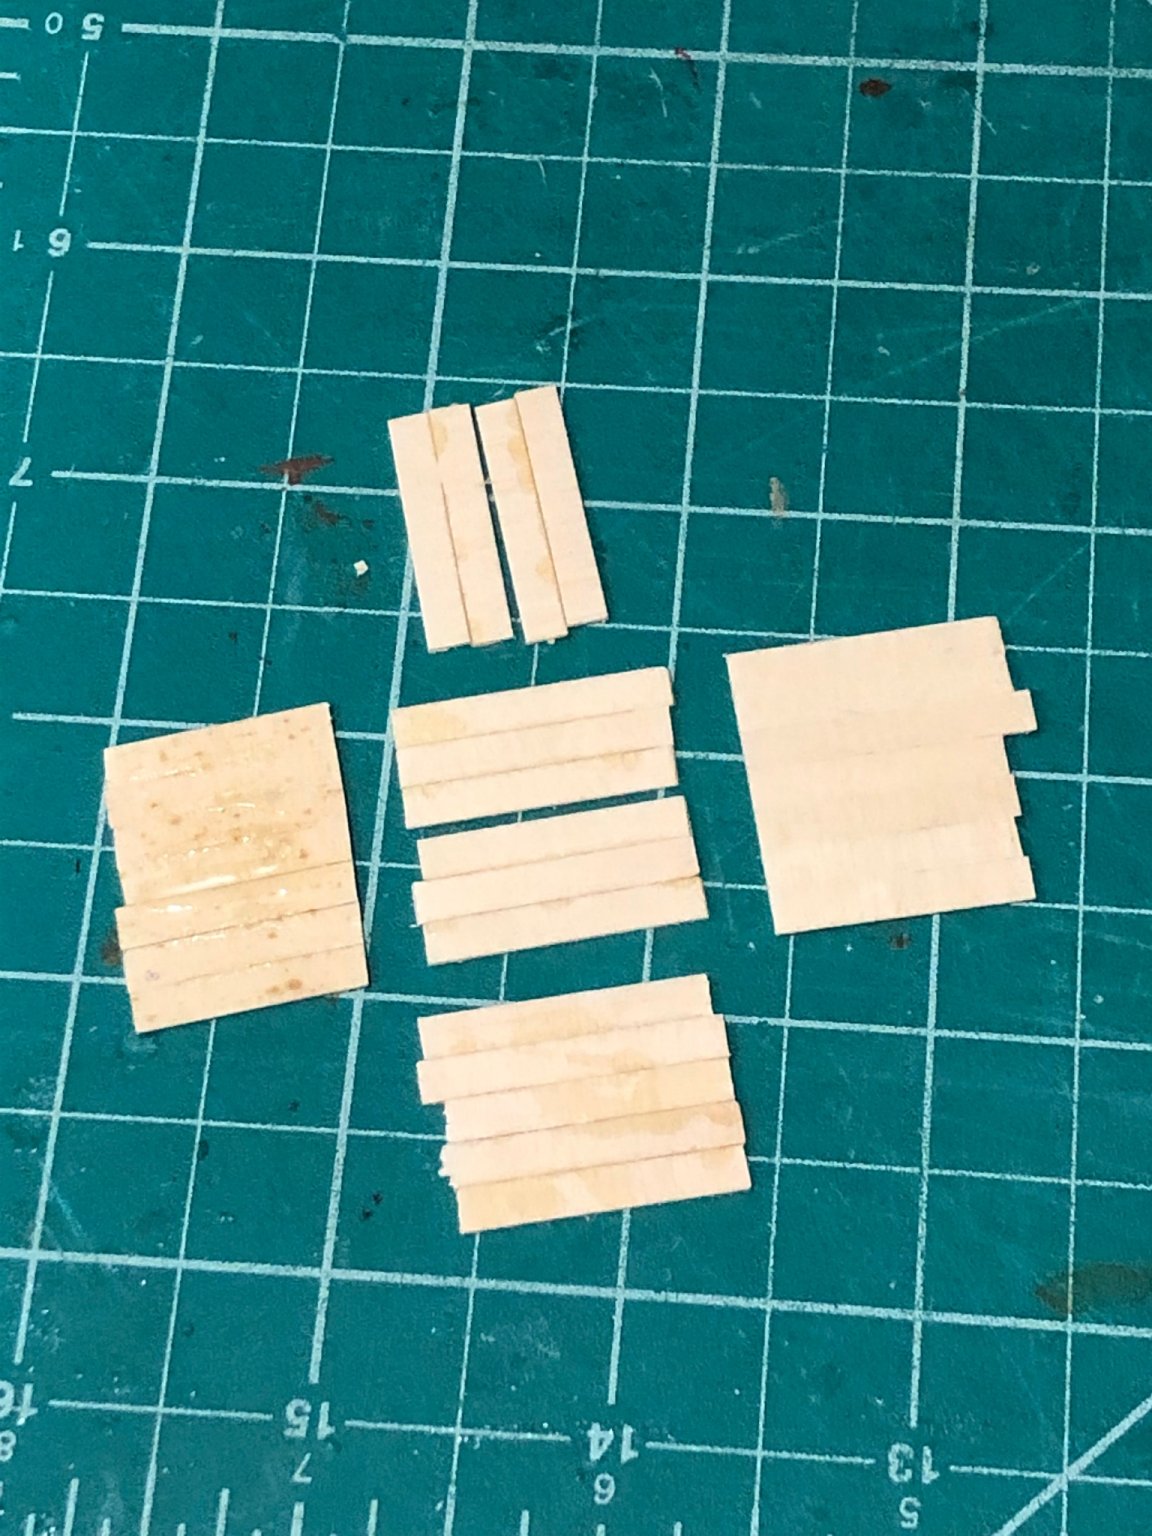
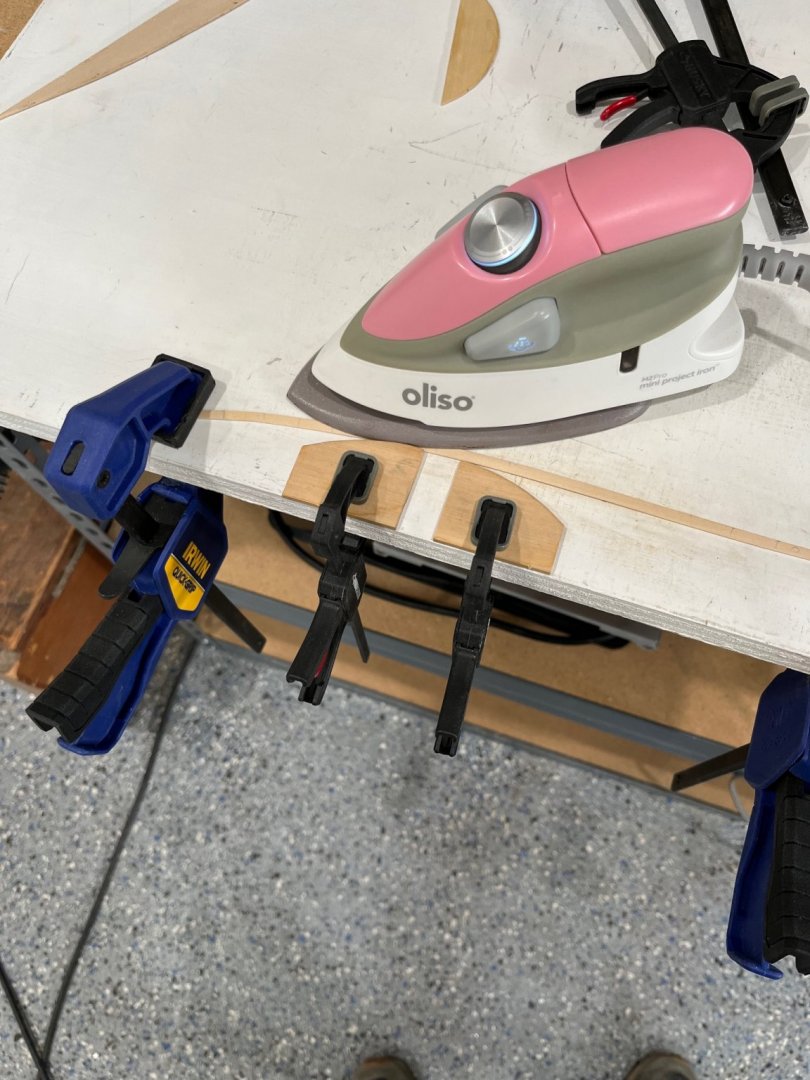
Started the companionway this afternoon. Using the plans for the sizes and started with a 5/32" board and ripped .03 strips and sanded them to .025 thick. Not sure how to build this without any frame so I glued 1" long steps together laying them on my granite work surface with weights on top to keep them flat. Parts laid out to dry Door Pieces Sides Roof in the middle Rear Side I'll make the roof and doors in two pieces so its very obvious that they should open with the hinges in position. When glue dries I use the disk sander to square the edges and then sand in the sloping sides. The sides need to angle to make them perpendicular to the keel and match the slope of the deck. Regards Will

-
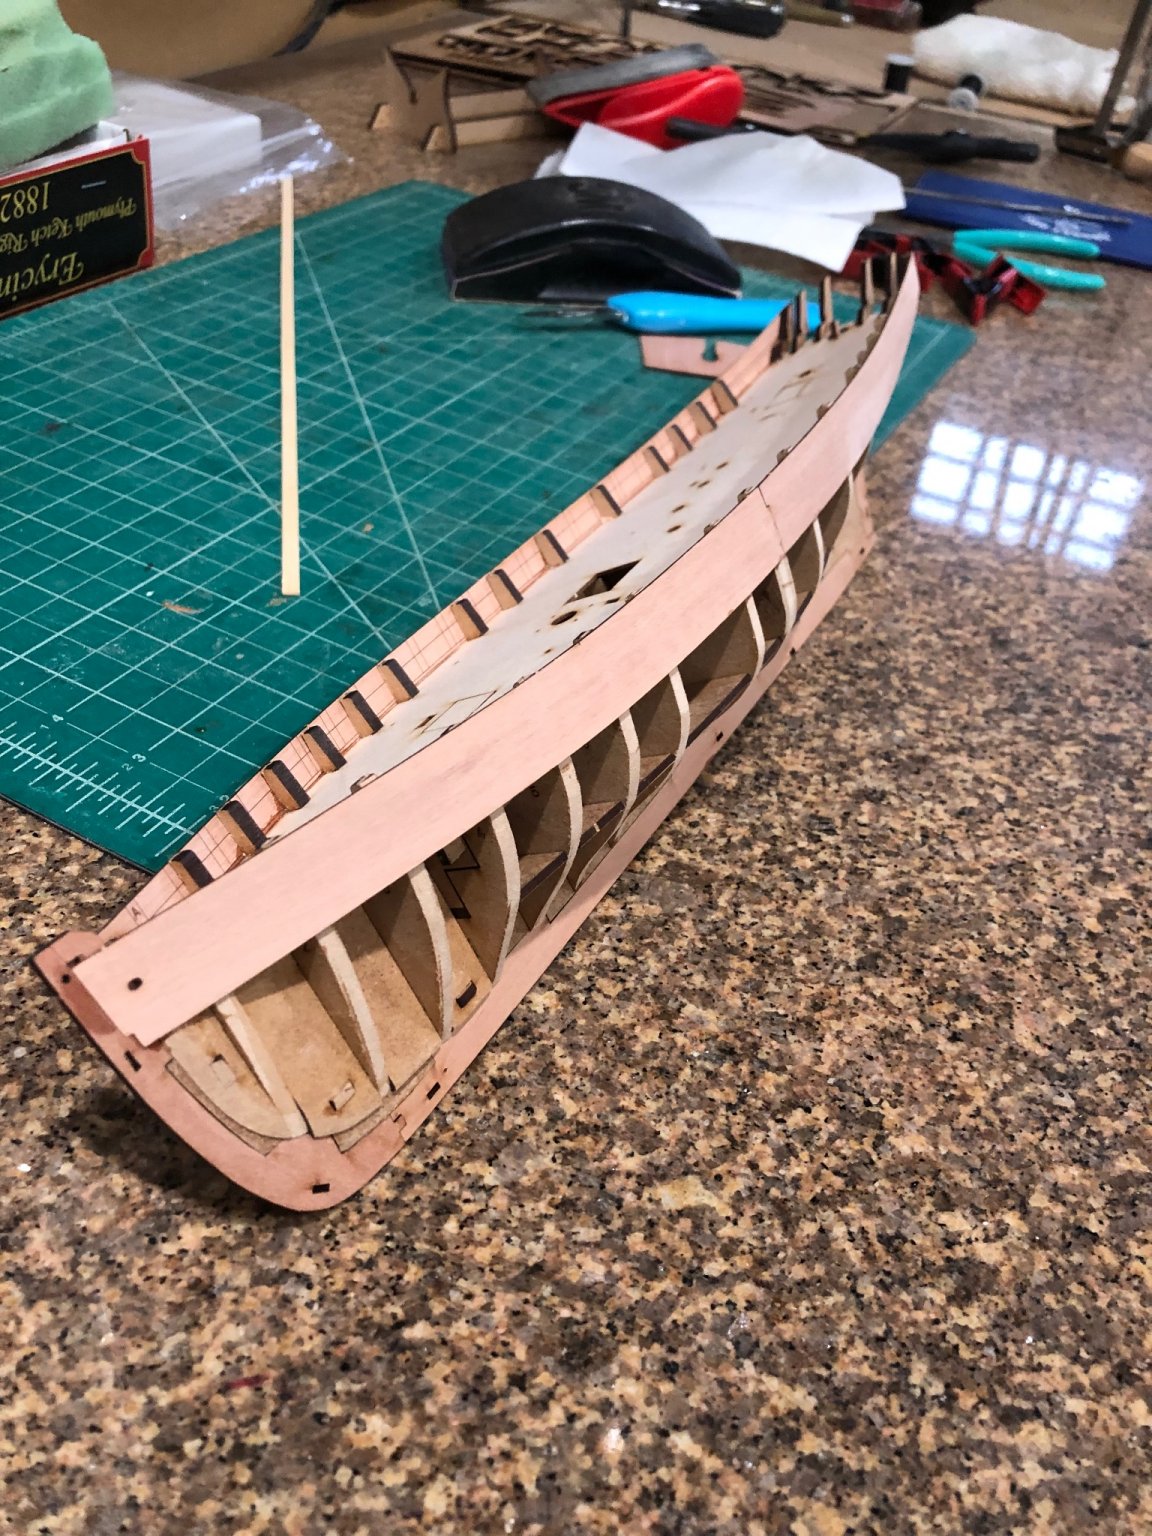
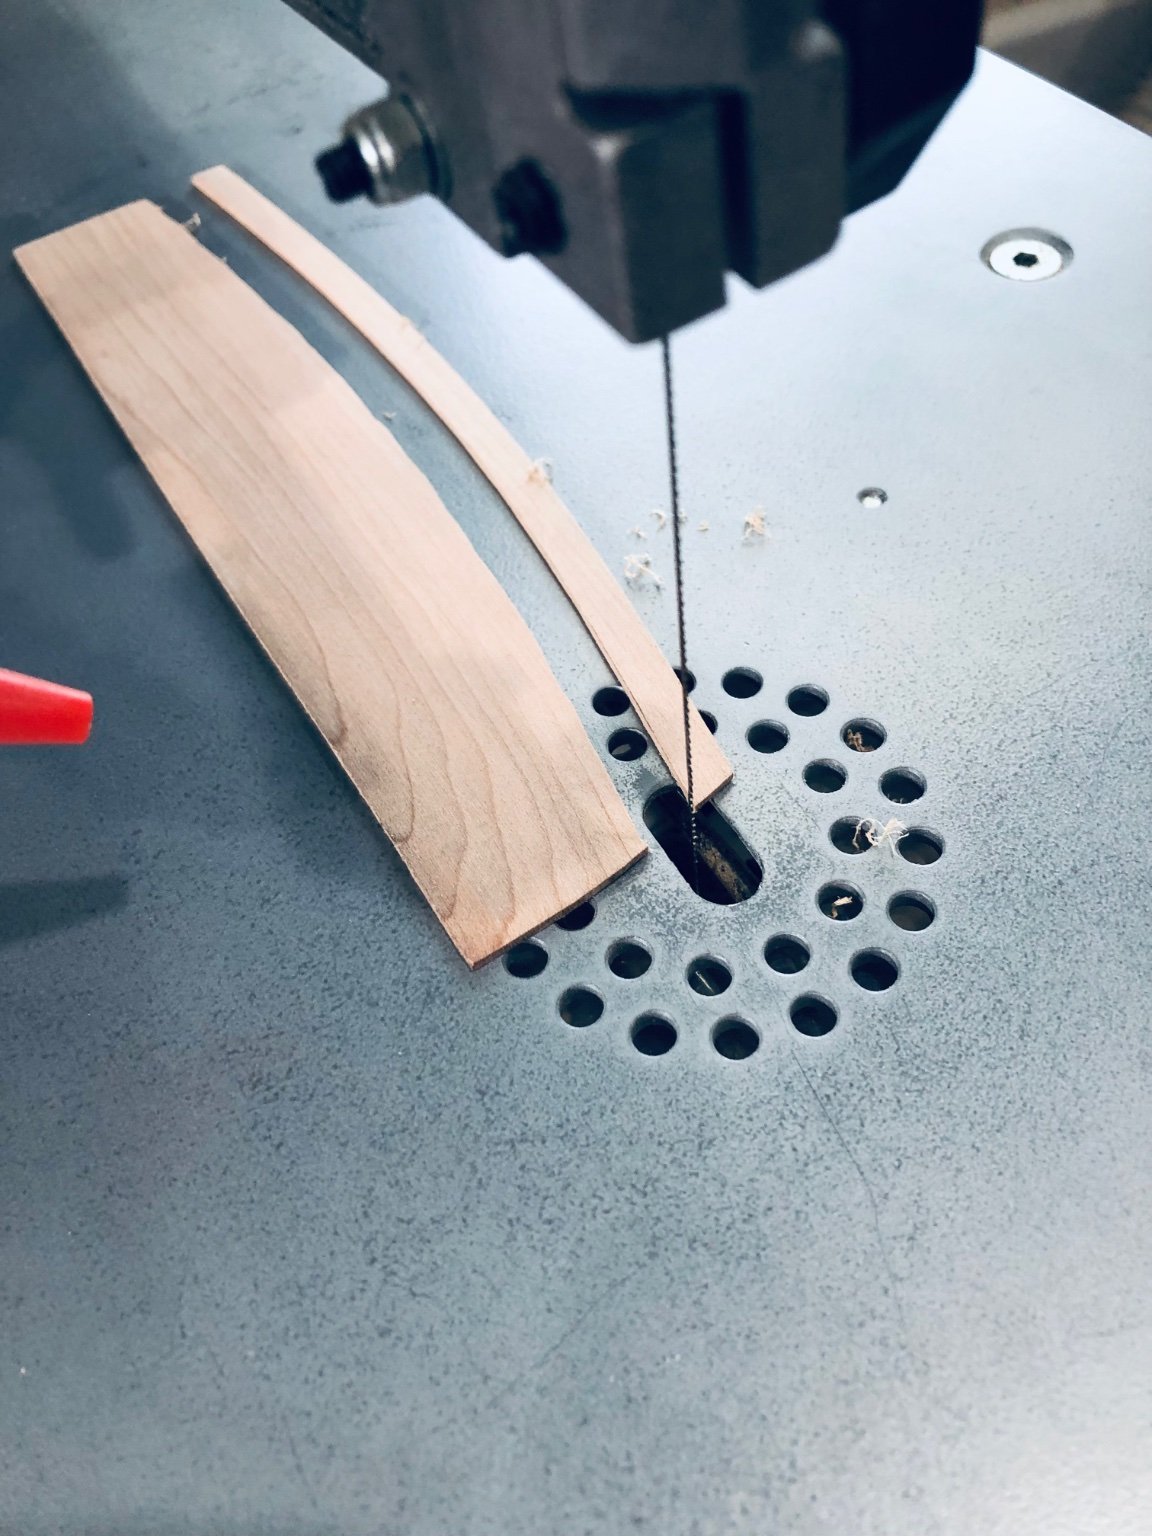
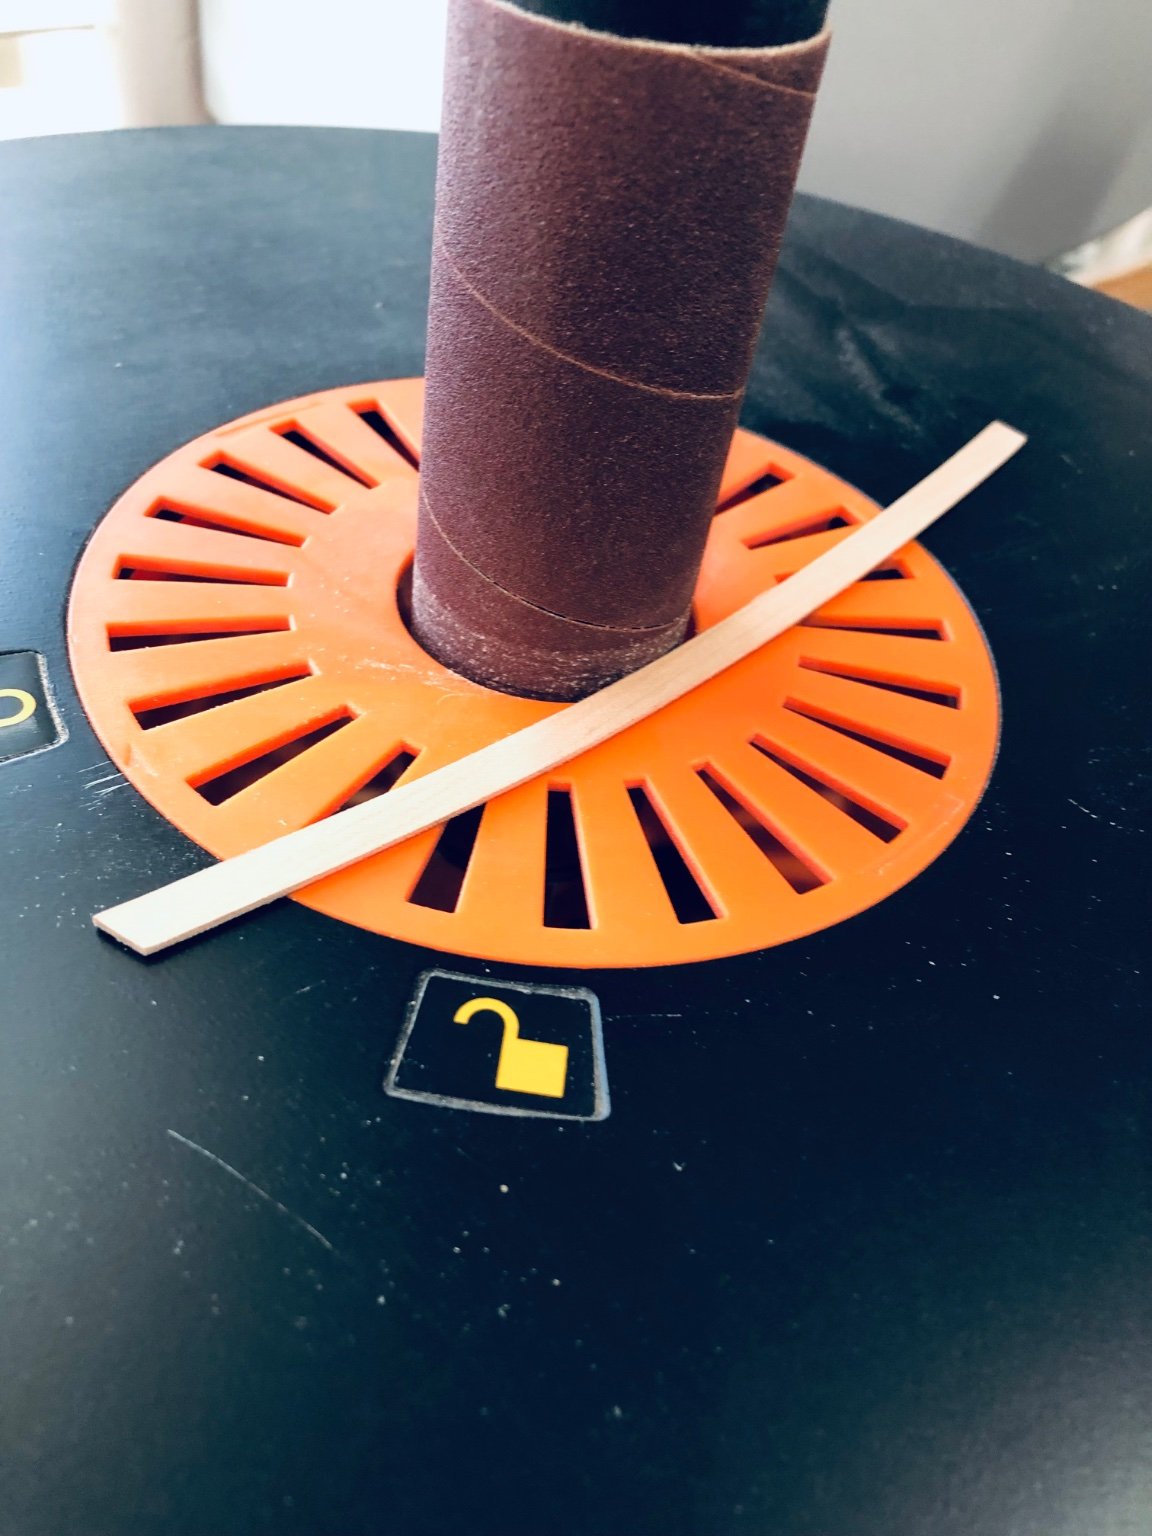
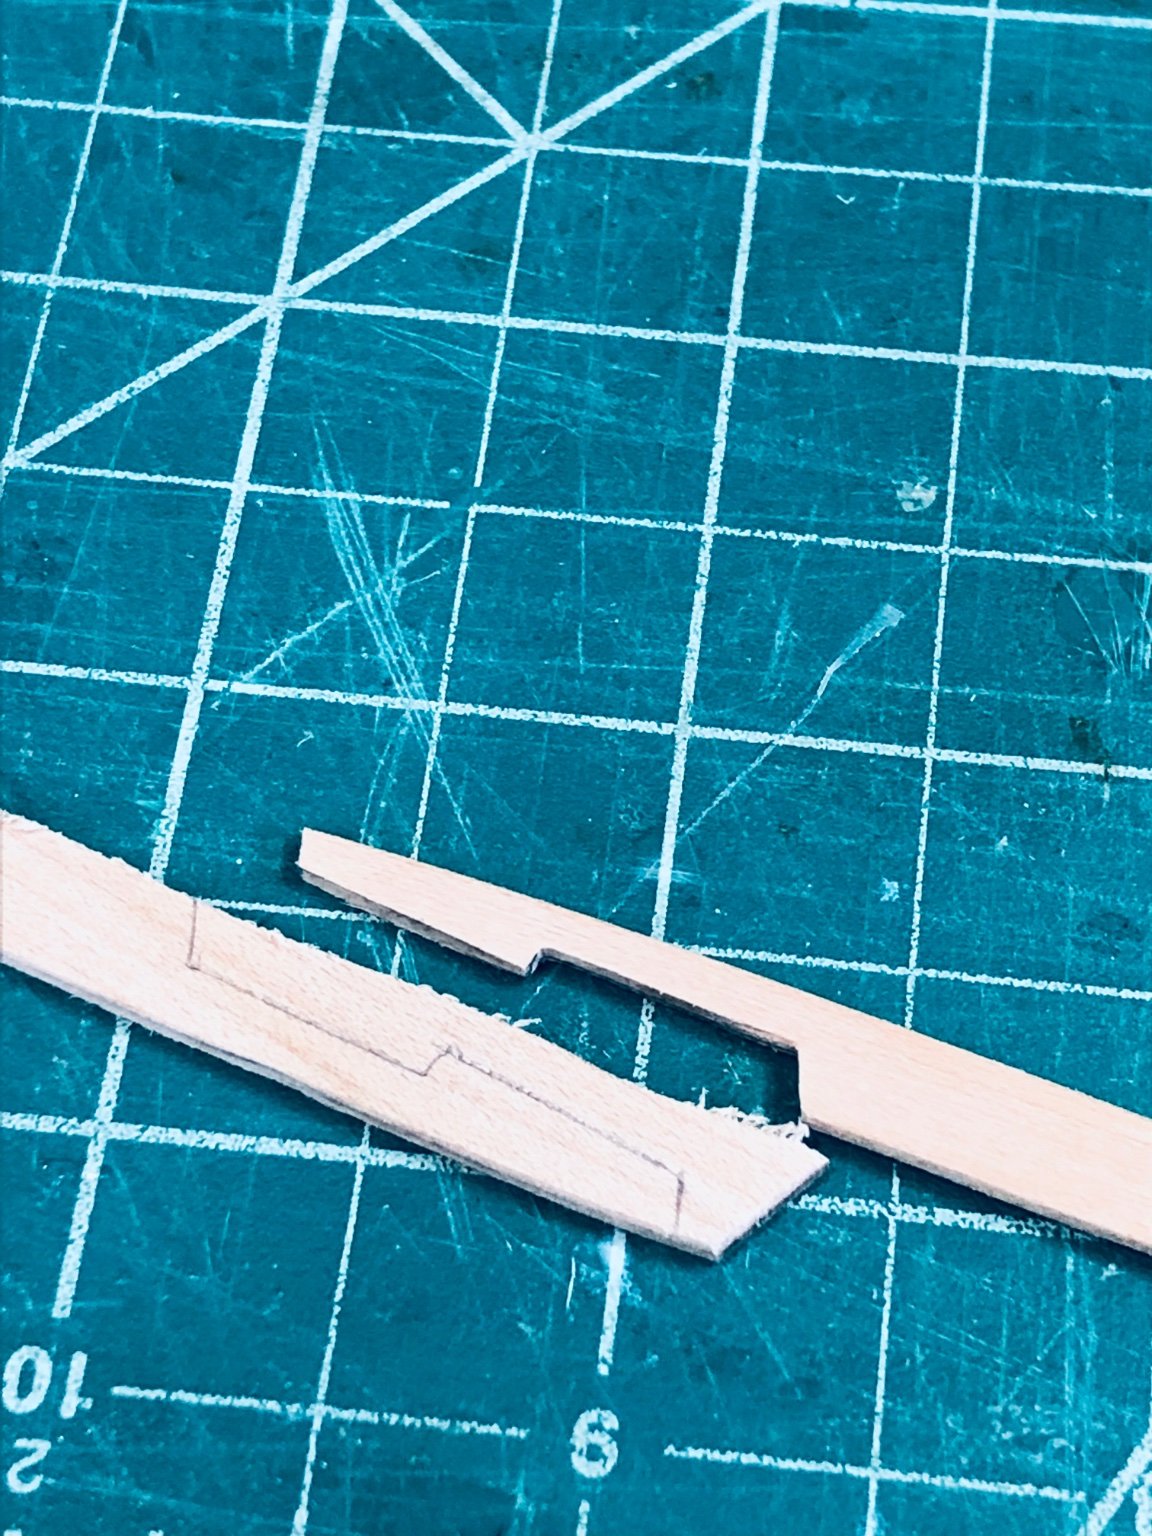
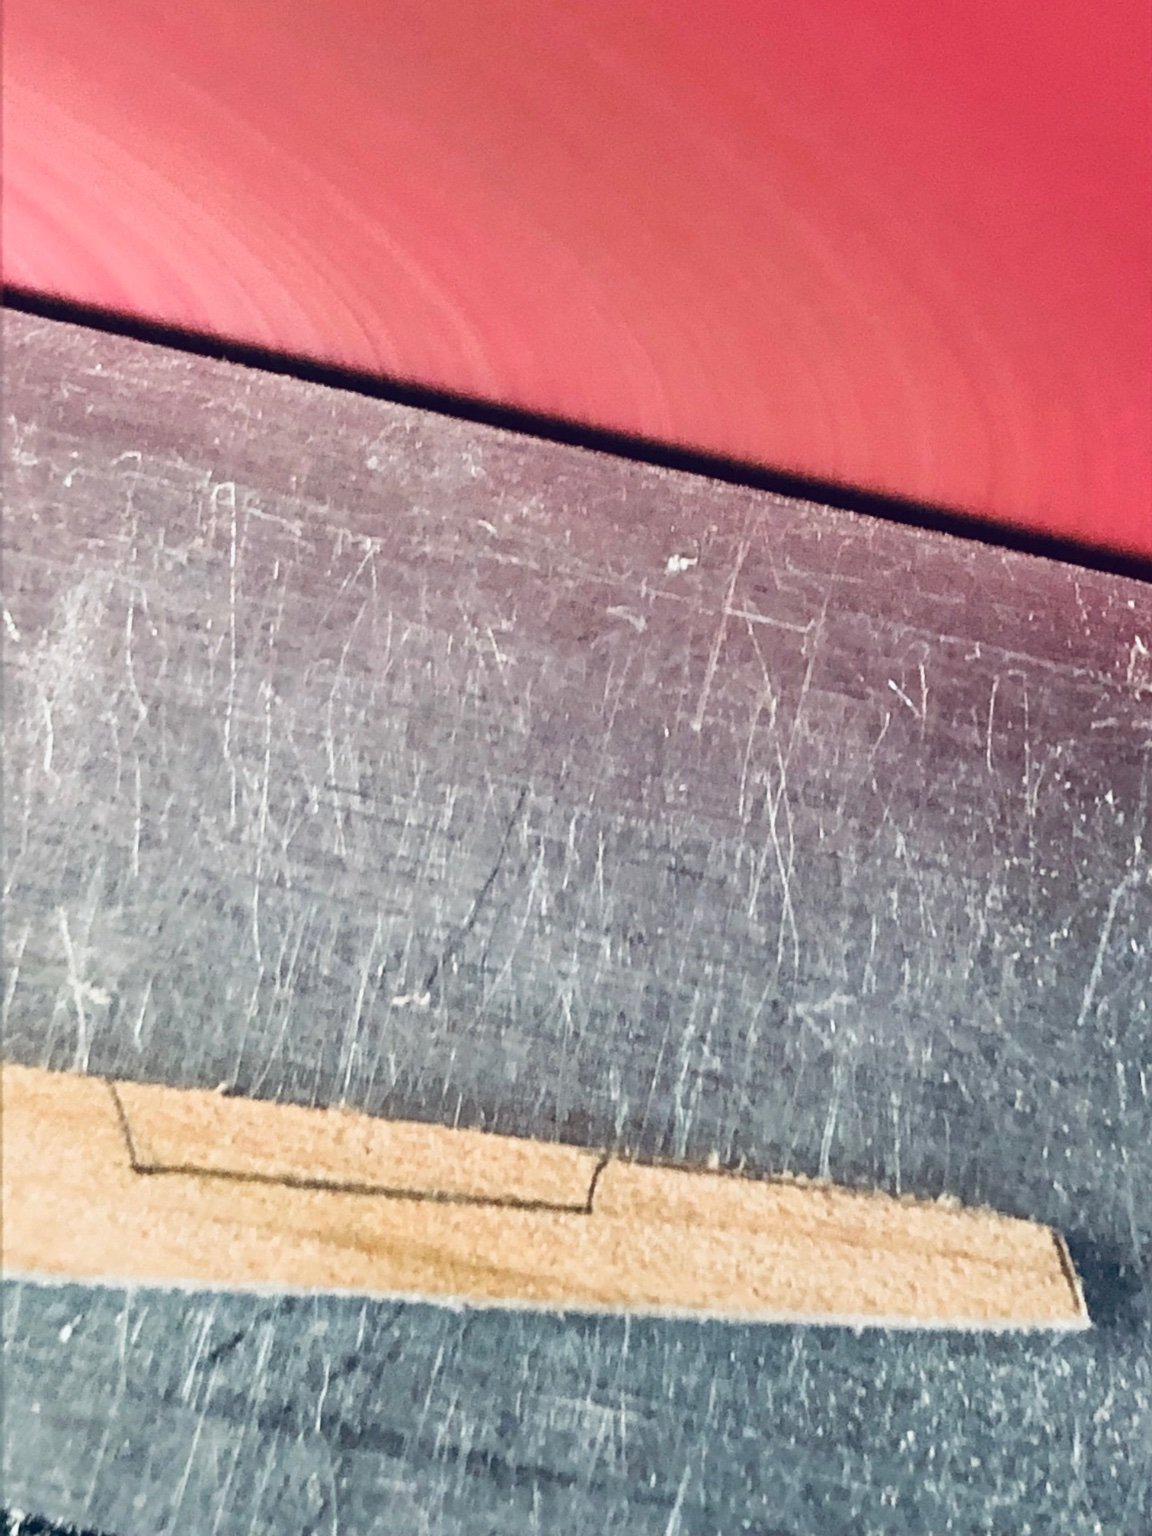
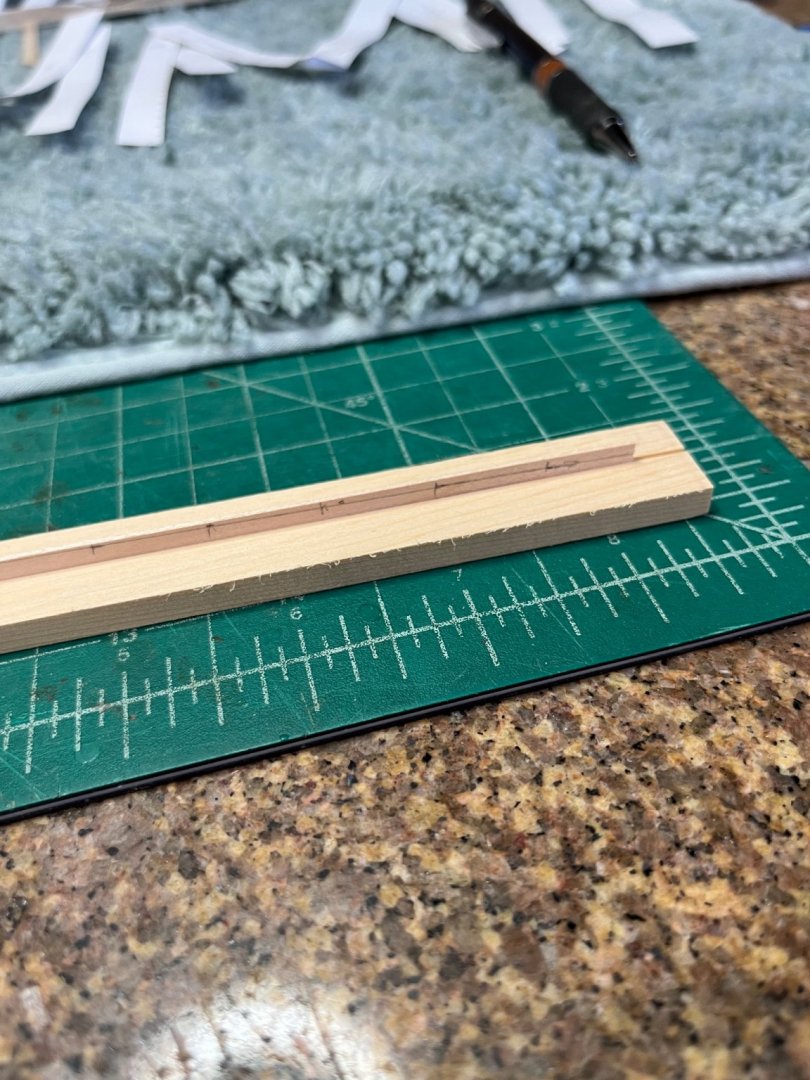
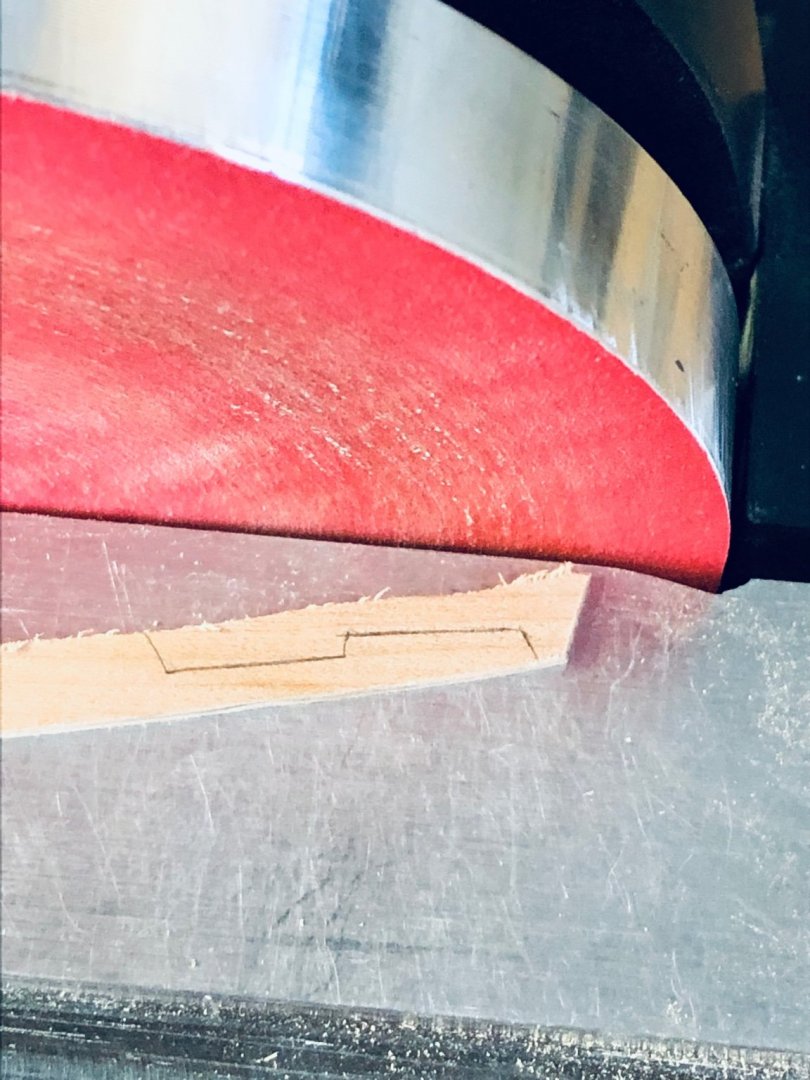
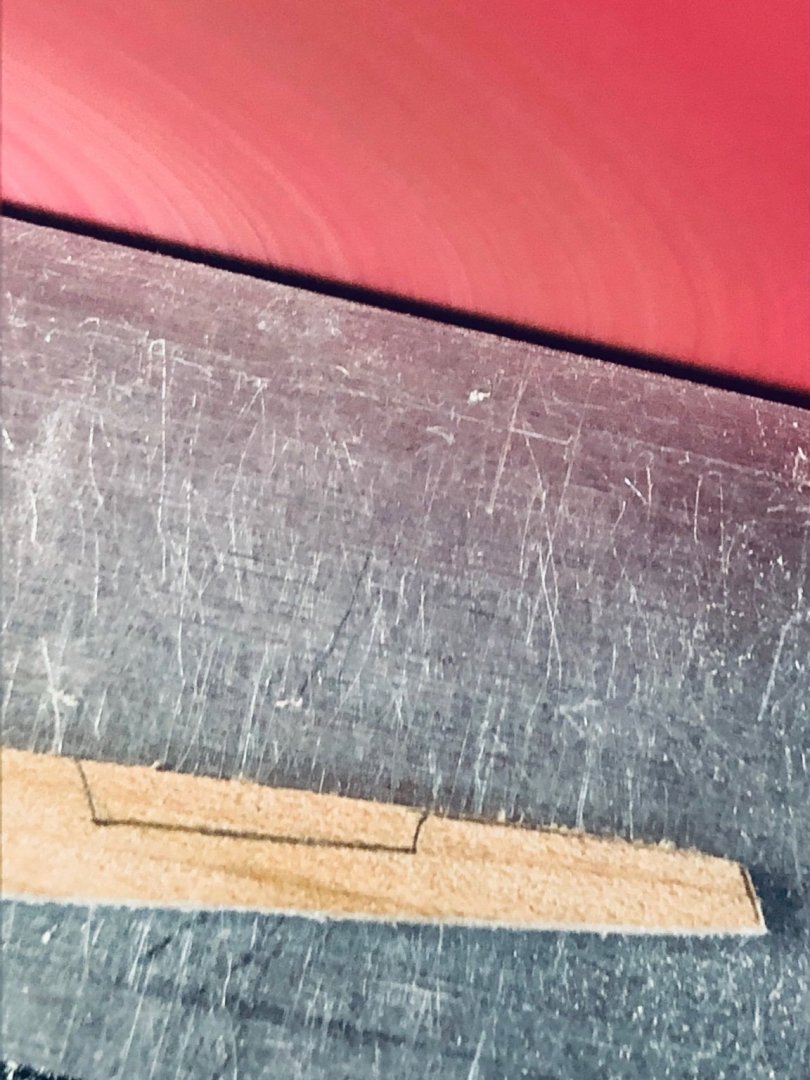
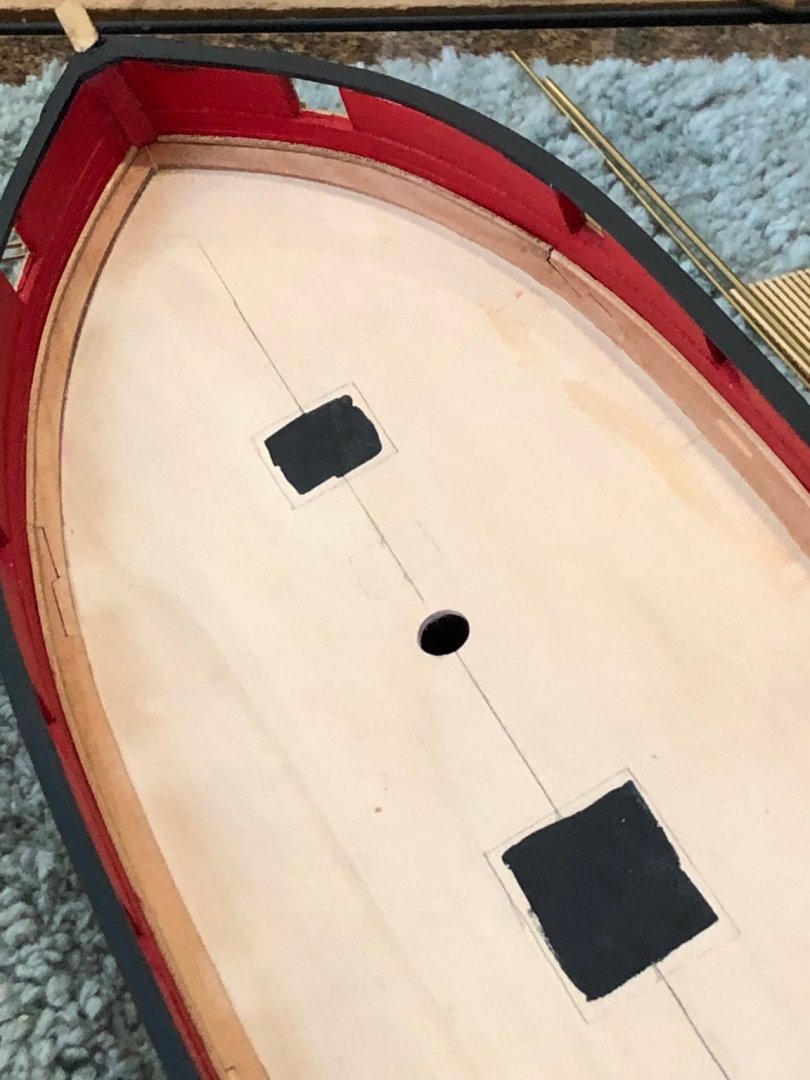
Thanks everyone for comments and likes The margin planks and waterways are now complete so I'll try to document the process. In the above post it shows a piece shaped to the bulwarks which was used to cut the forward margin planks. I used a drafting compass to mark the 1/4" width of the plank. Cut the piece close to the line on the scroll saw. After cutting the inner shape it was sanded to the line a spindle sander. Now I marked the first scarf on the piece after fitting to the stem. Using a #11 blade the scarf was cut, but two problems arose from the cutting. The first was cutting across the grain of the maple required many passes and the result was the cut was too wide with edge angles and the second was the small portion broke off when the blade finished the cut. Many attempts resulted with one or both results so another process needed to be developed. Looking at the traced pattern of the scarf maybe it would be easier to saw the cuts and then finish with the flats. The traced scarf shape Next I sanded the flat portion of the scarf The tab protruding from the recessed portion is what kept breaking while cutting with the #11 blade. After sanding I put the piece in a small vise so the recessed line was level with the top of the vise jaws and used a razor saw to make the cuts. Then it was a simply paring down to the level of vise jaws. A little filing and I had a joint. Made the balance of the margin pieces the same a the fore section. Still had several joints/pieces that had to be remade but a lot easier with this method. Once the margins were glued down I made 1/32" strips for the waterway. In doing this I realized that there had been no mention of scuppers. I see them in the photos and drawings so I guess that's my next step. Margin Planks and Waterways On to scuppers Regards Will


-
Very nice Patrick. If I take mine off will you make me some? HA HA HA Regards Will