niwotwill
-
Posts
593 -
Joined
-
Last visited
Content Type
Profiles
Forums
Gallery
Events
Everything posted by niwotwill
-
 Started to line off hull and got midships to stern completed on port side. This is a lot of work especially when I first was using the fan printed on my printer was not to scale. Had to mark a new 3'16" and use this as the reference point. Taking my time so didn't get as much done as I'd hoped. Where the marks were too thick I think I'll paint white gesso on the bulkhead and redo them.
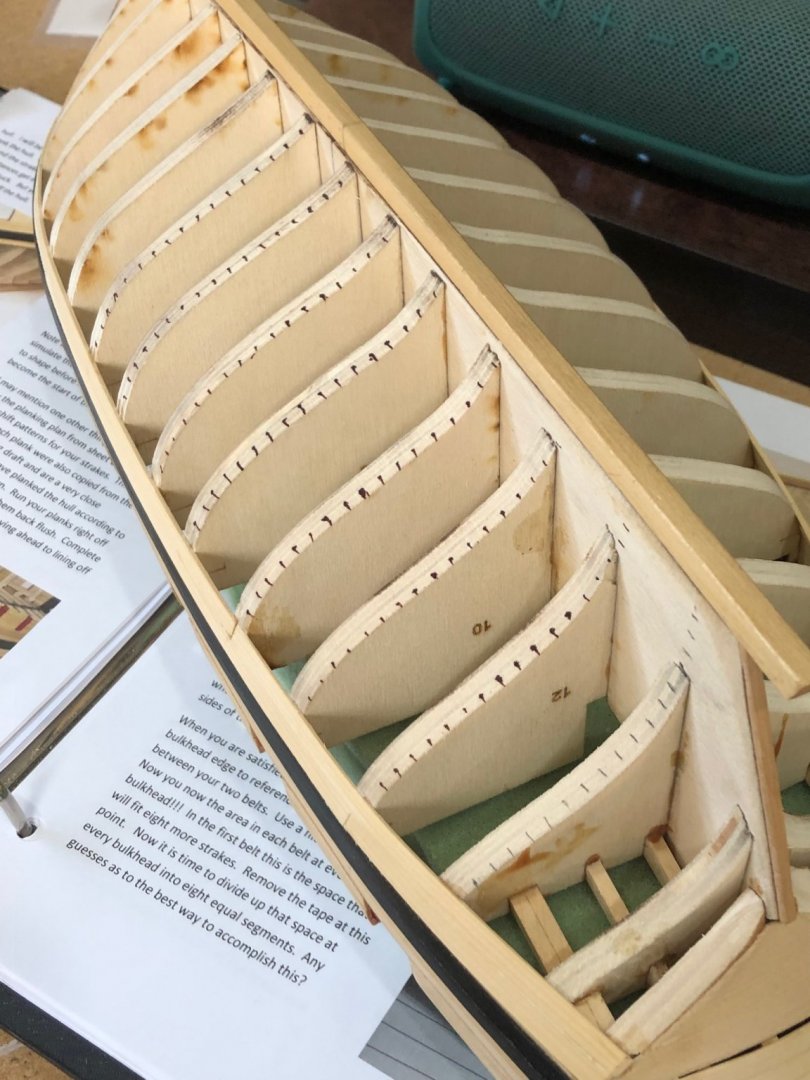
-
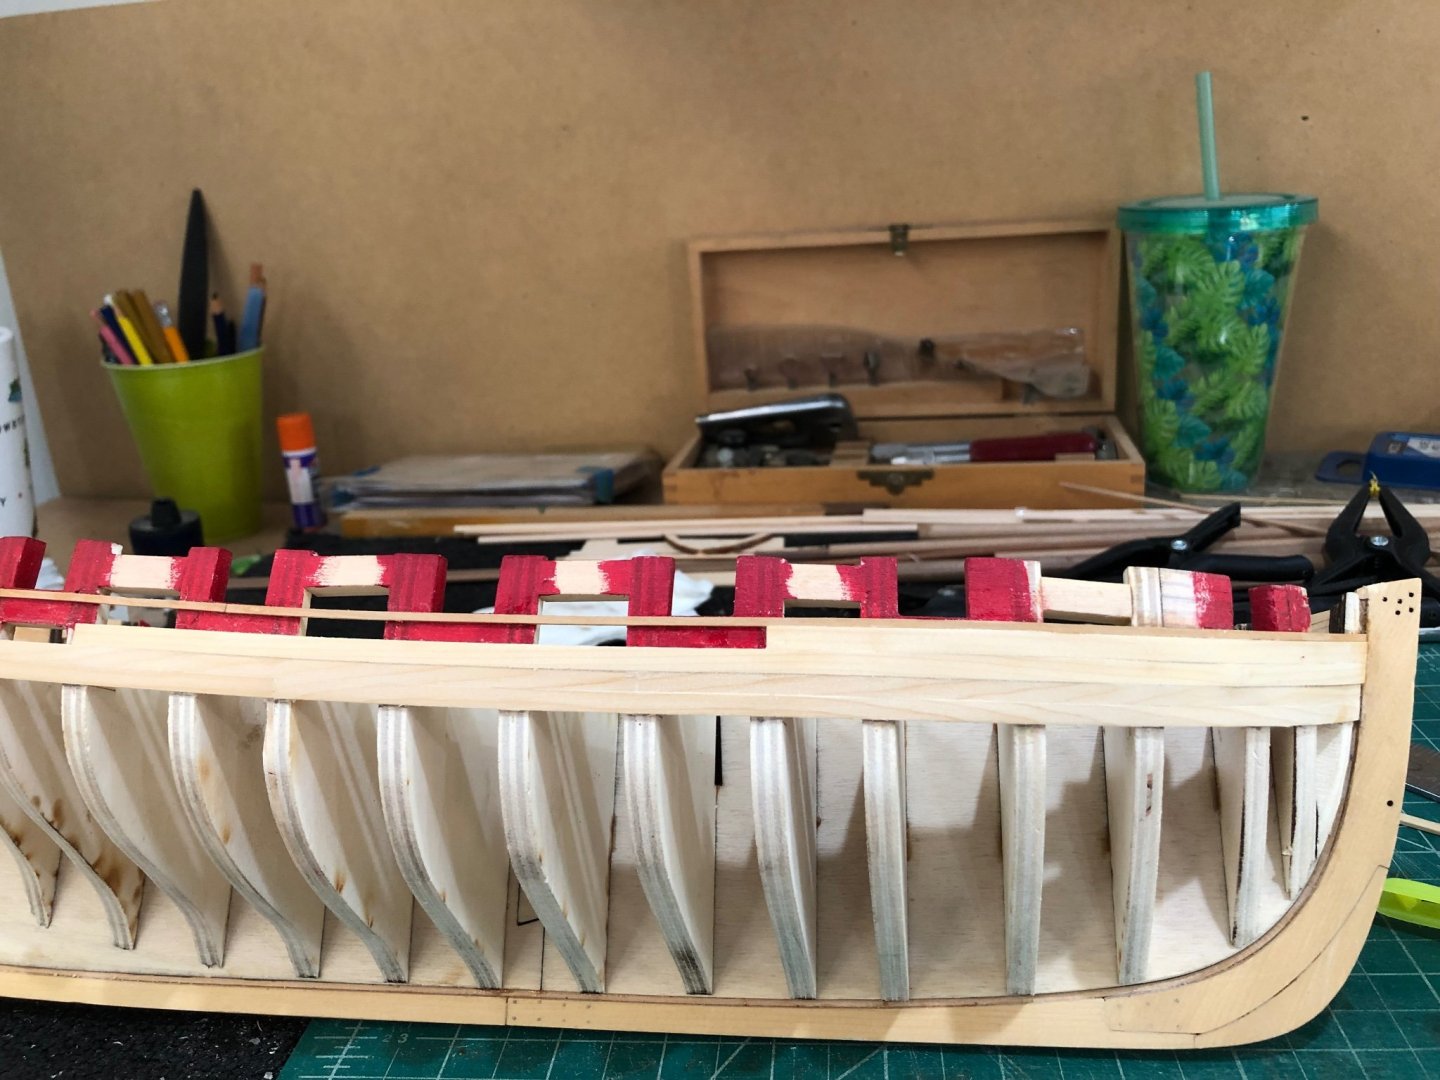
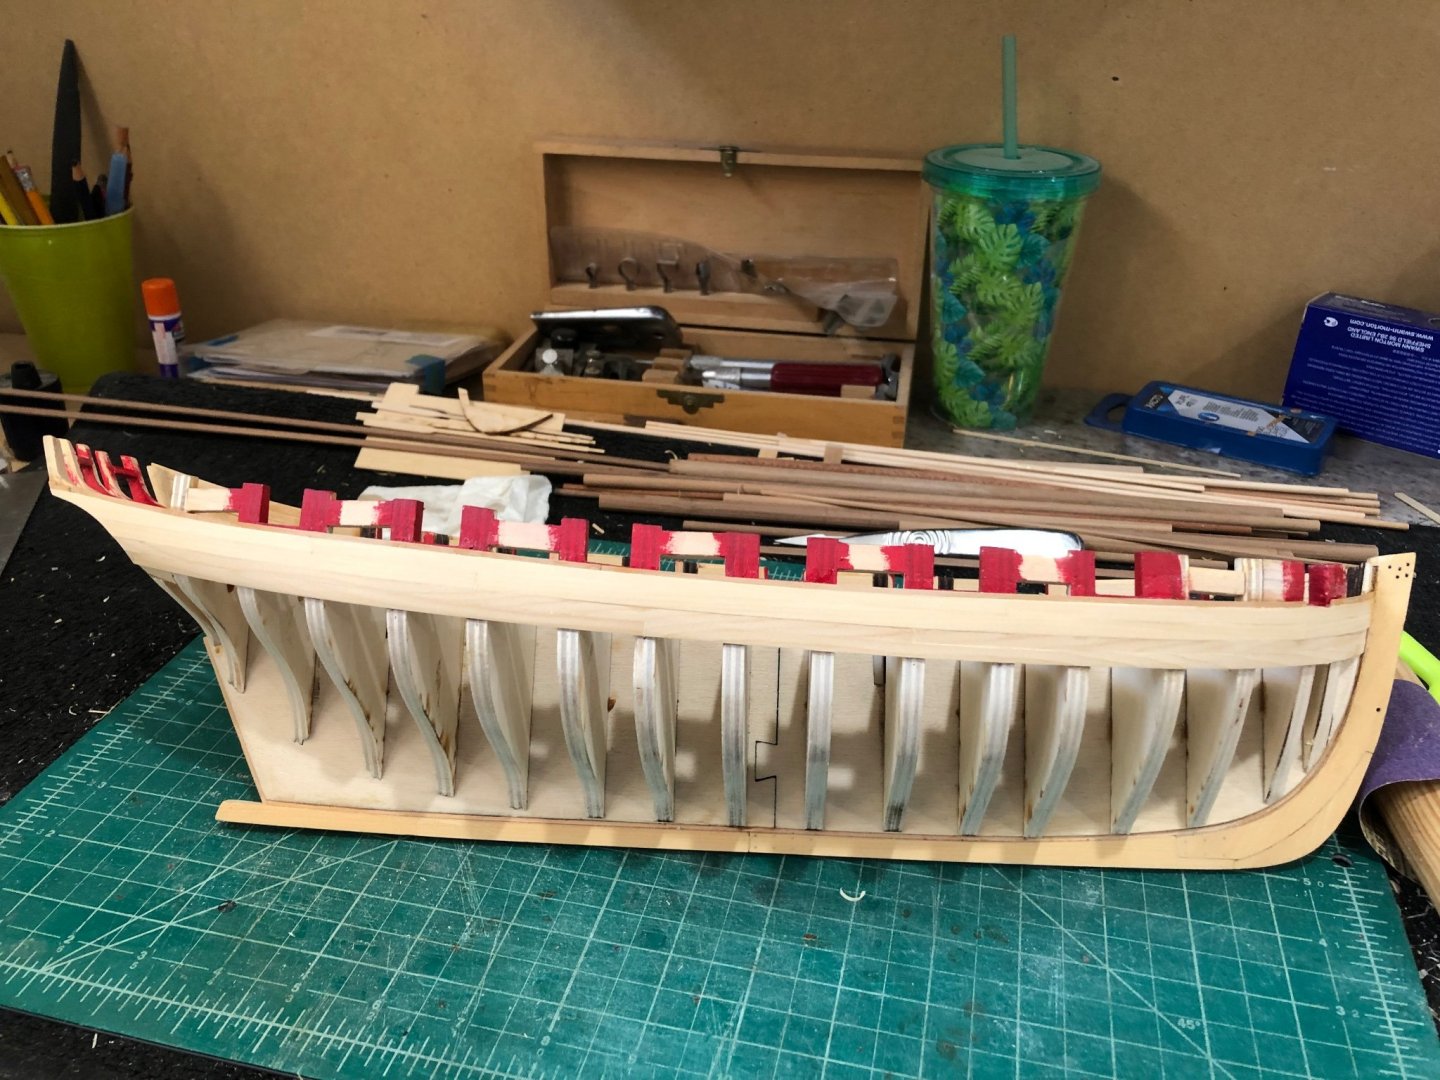
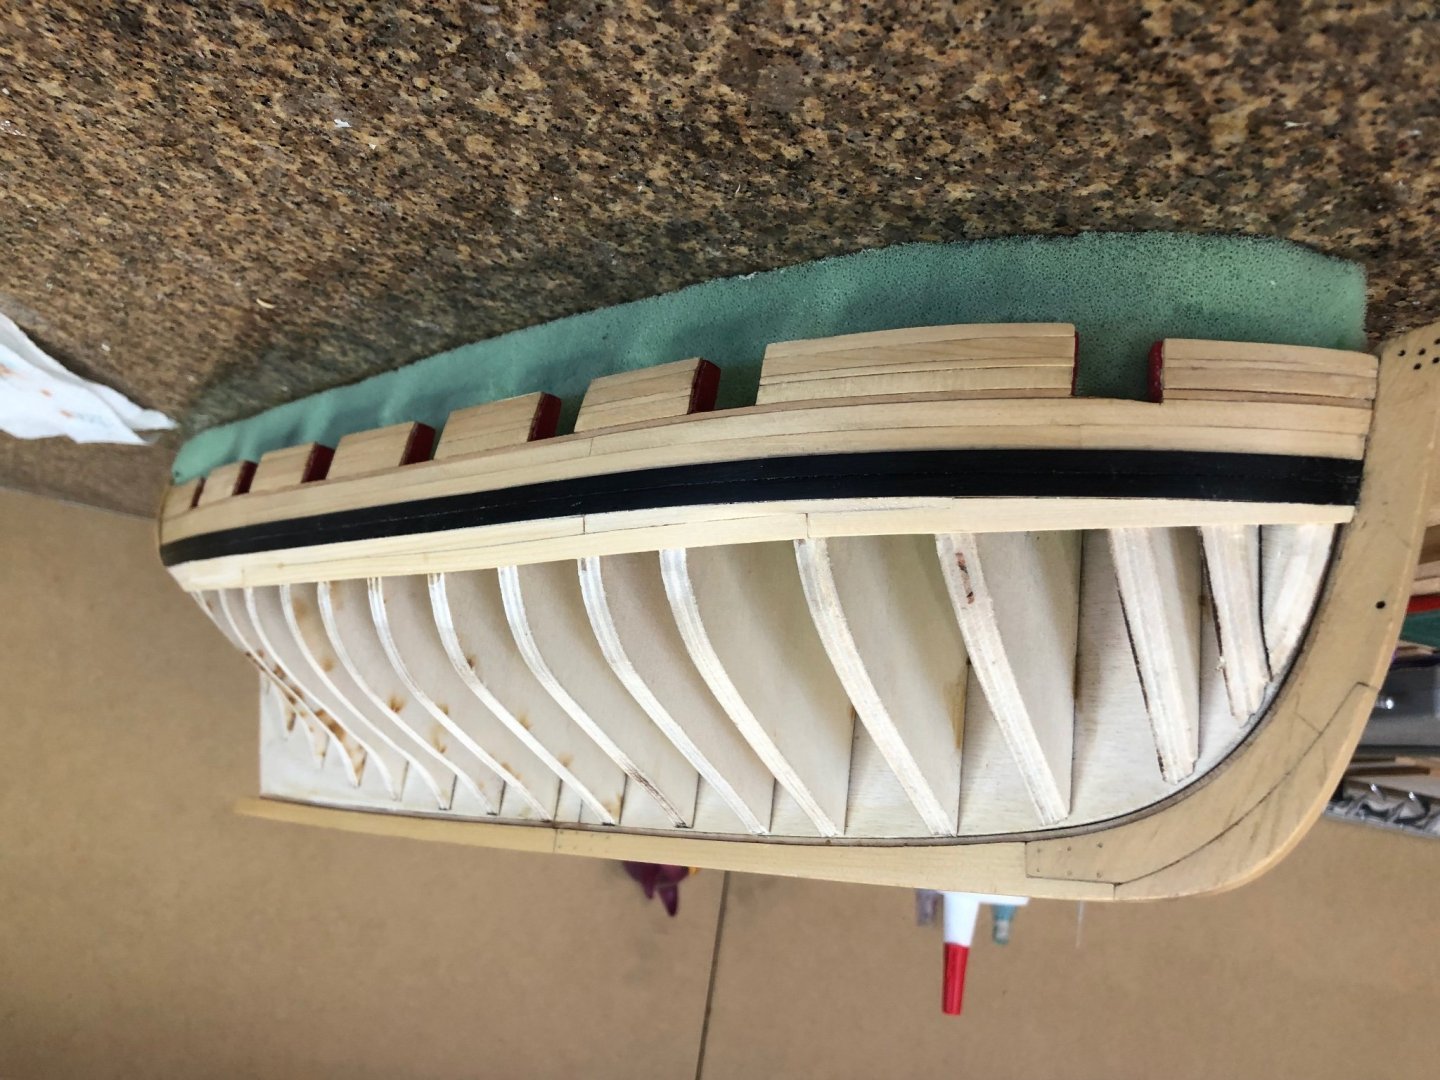
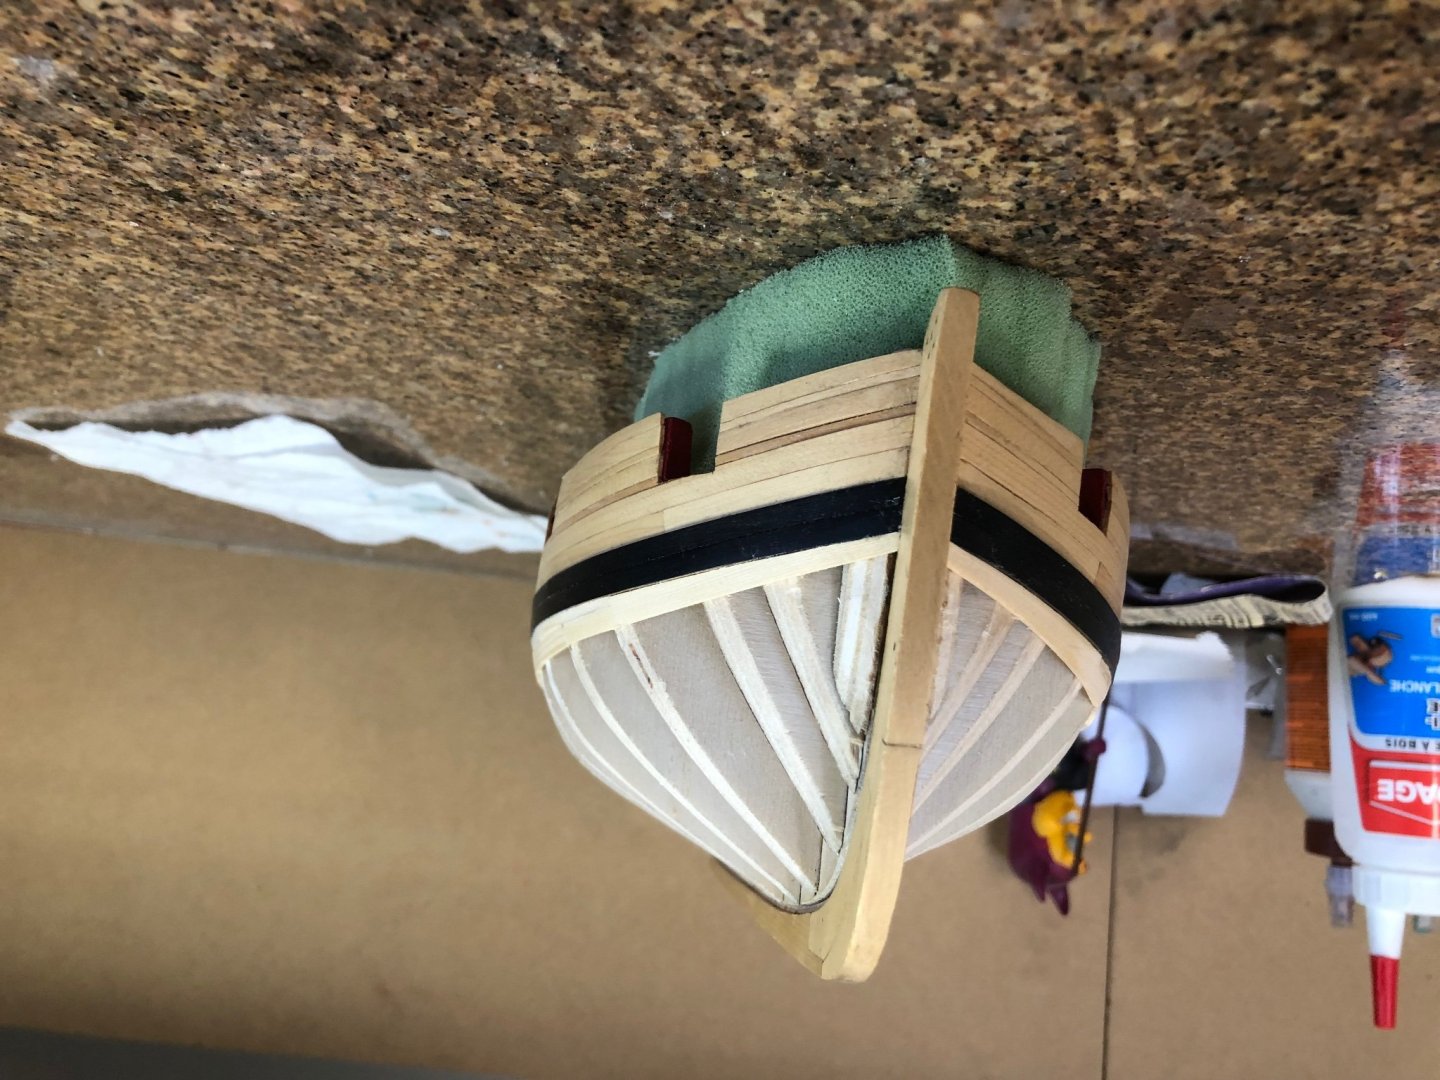
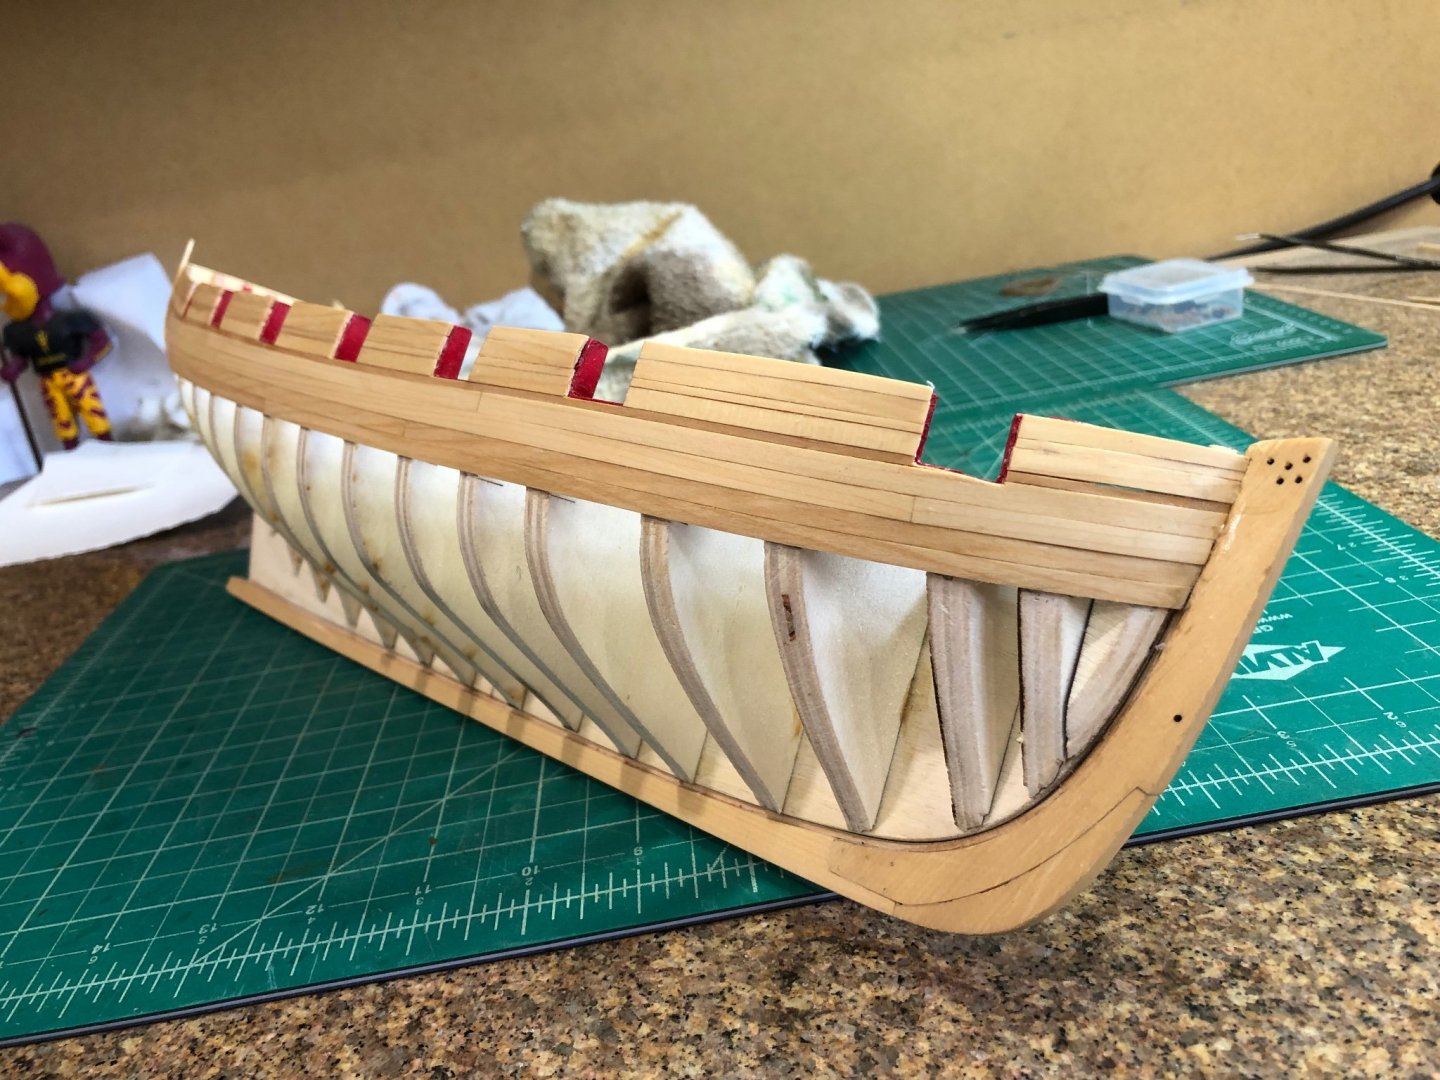
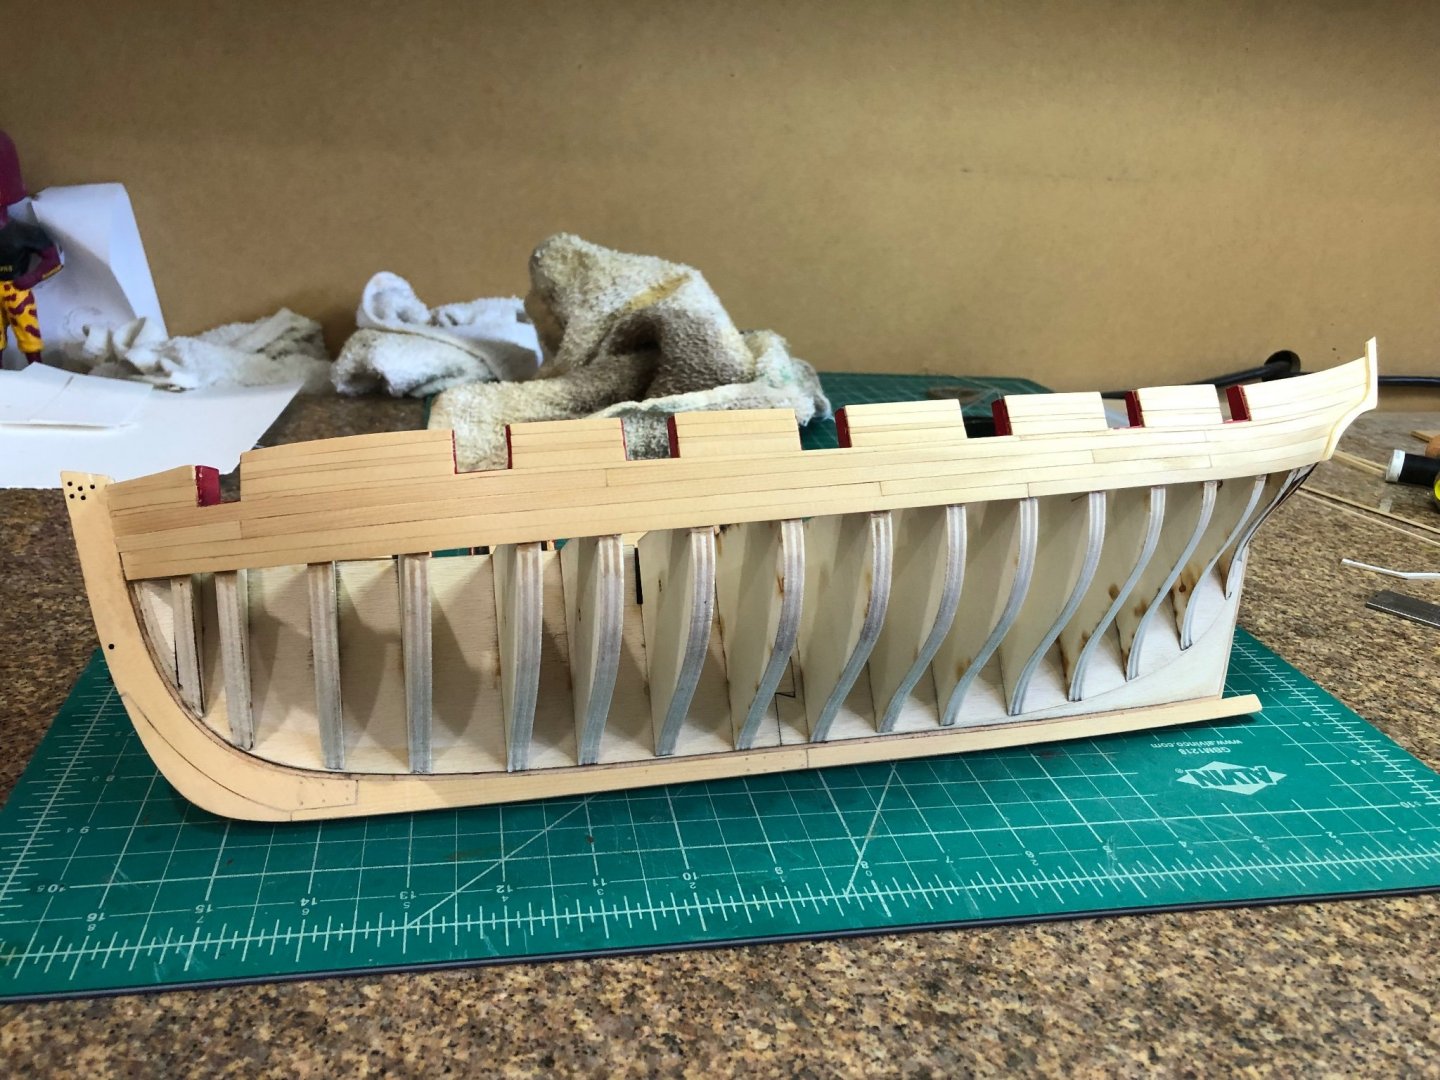
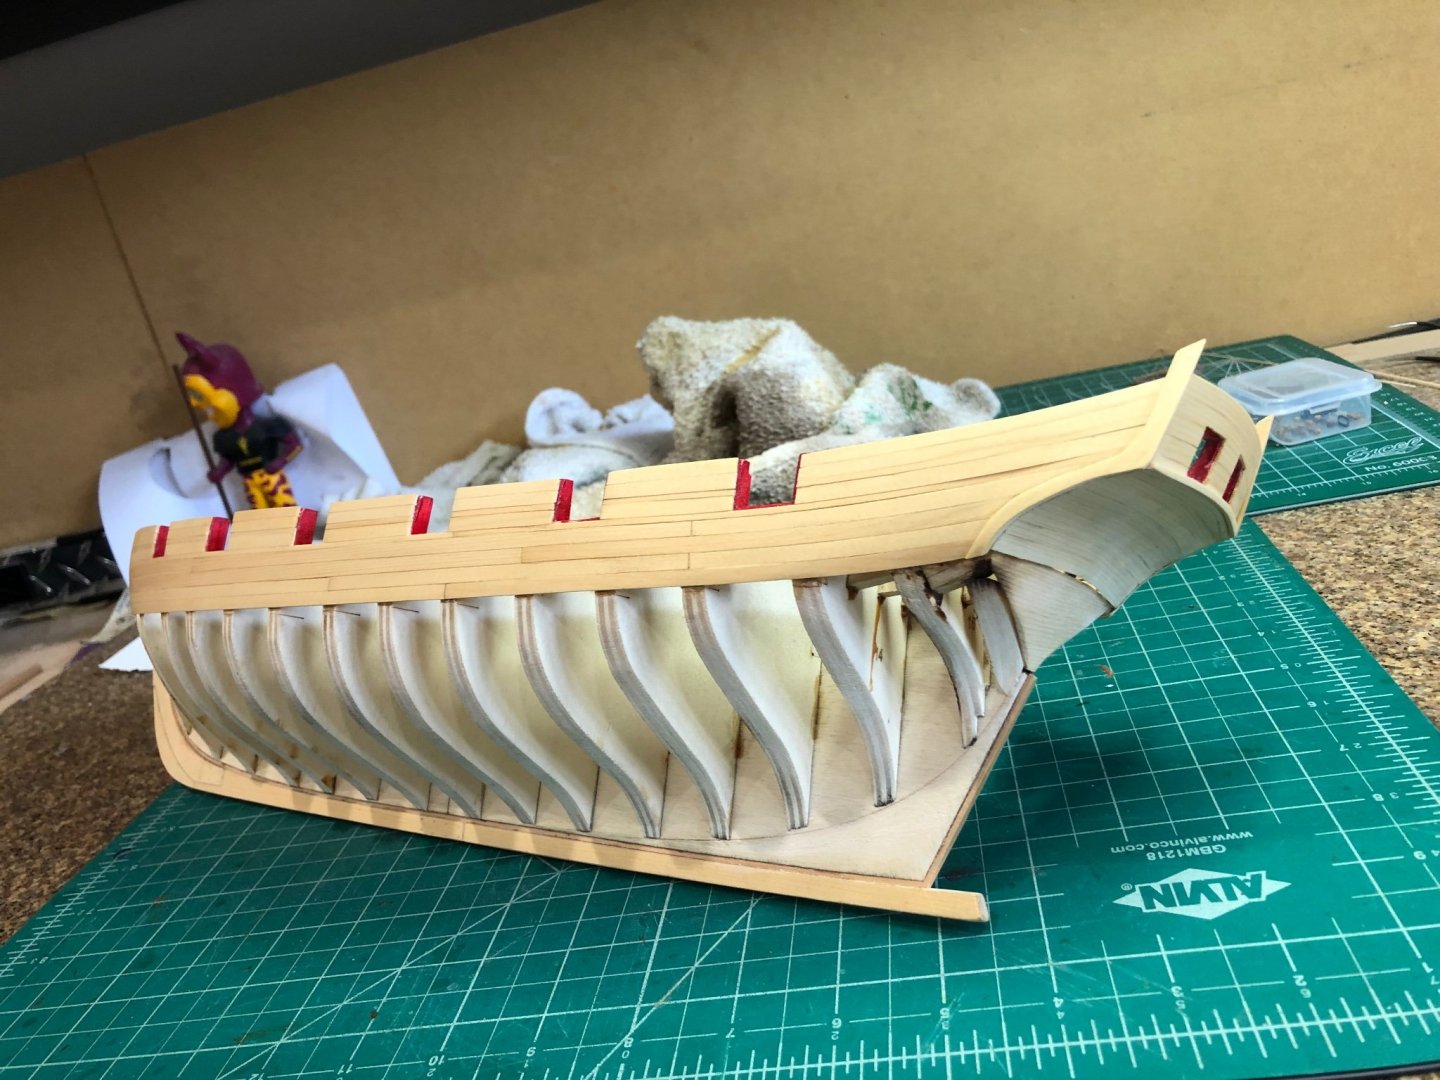
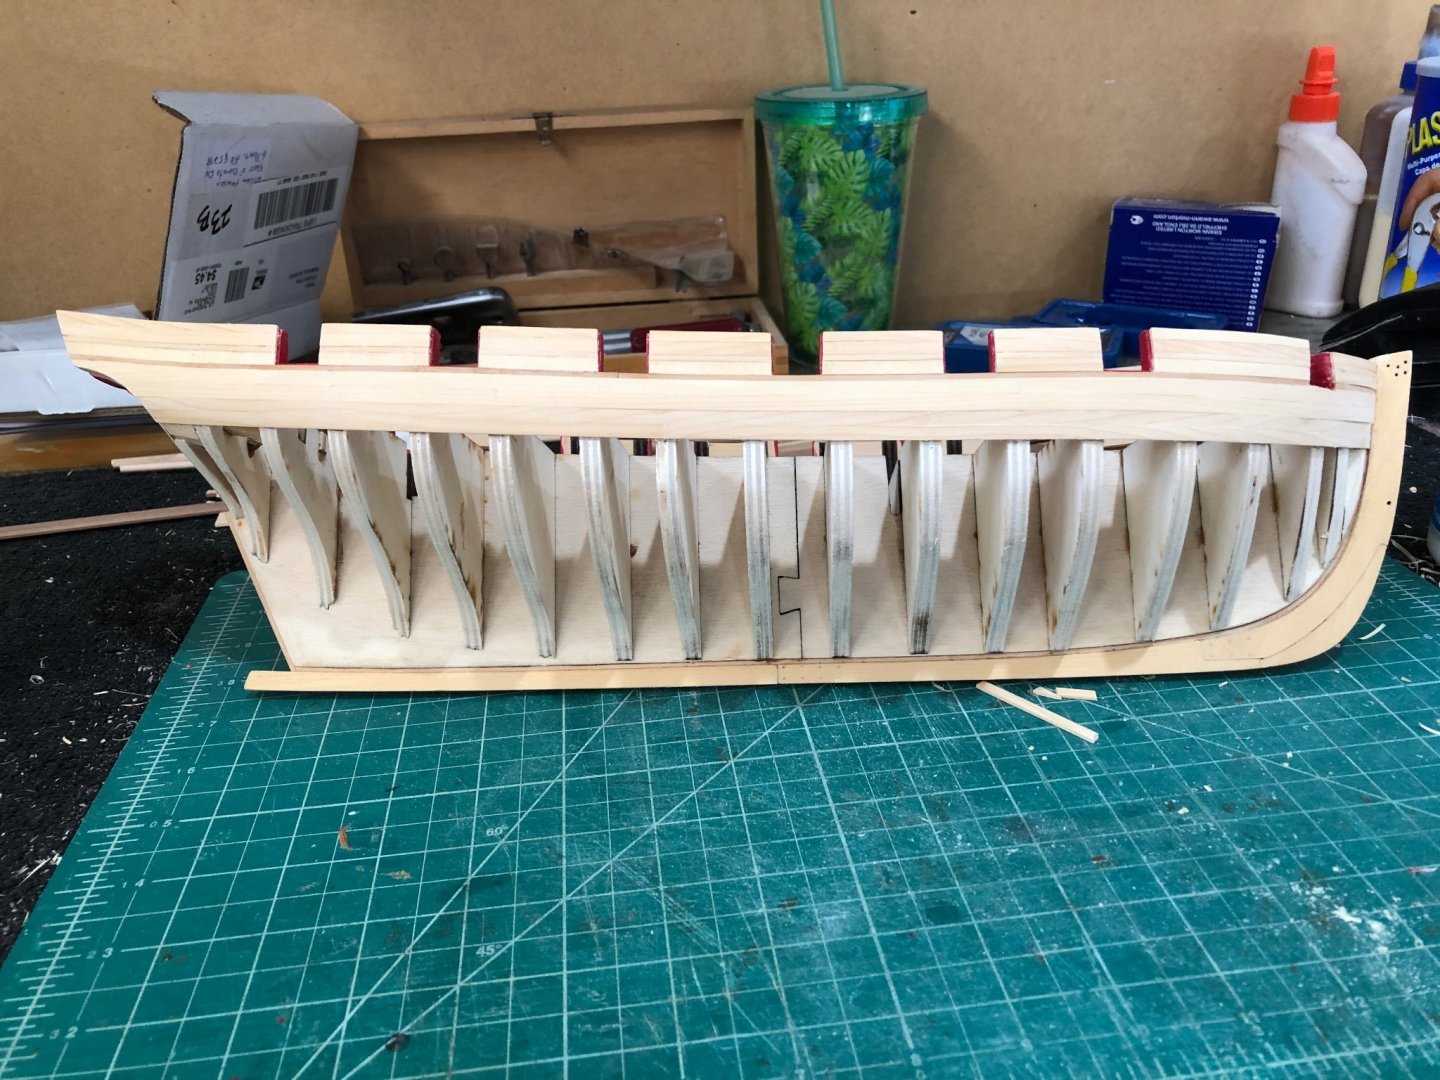
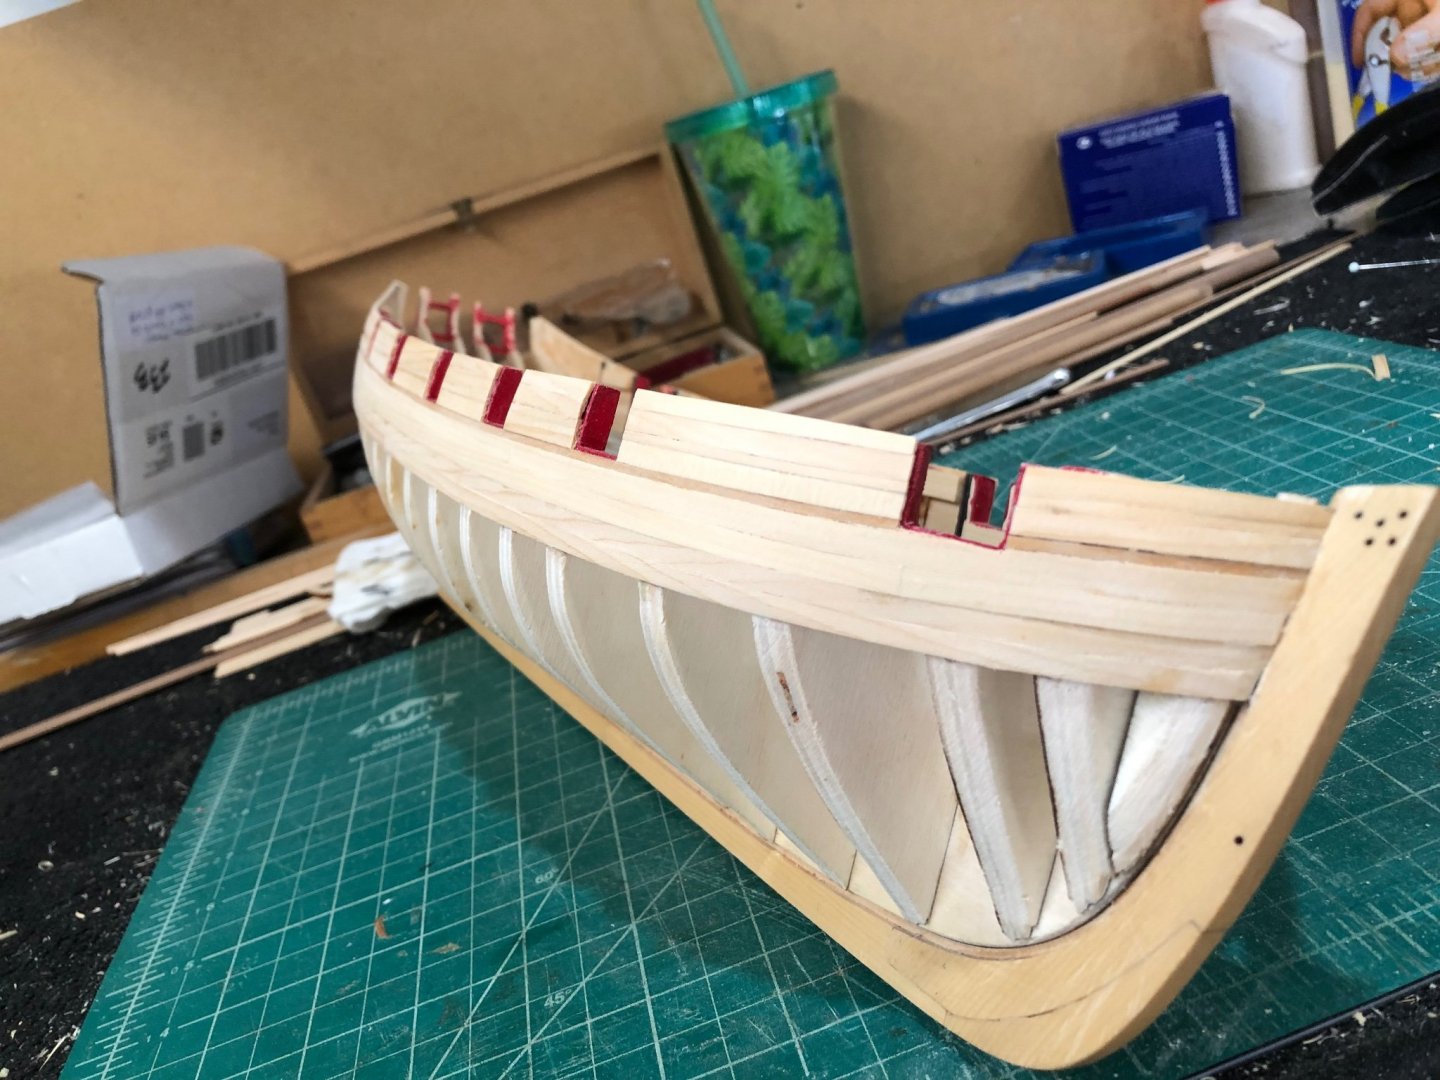
Switched gears and started working on Cheerful Sunday. Today I finished the first two strakes including the drop plank. I took a 3/16" plank and using the bulkheads as reference marked the 5/64" end and where the taper starts. Placed the plank in a jig I'd made and tapered to my mark. Using a long plank allowed me to cut at appropriate lengths making a nice butt joint. Started making a pattern when I realized that it would be best to have the second strake in place to determine the end of the drop plank. After many patterns one was glued to the 3/64" thick wood. After the glue had cured it made it easy to use a new #ll and follow the pattern. Minor sanding was required to fit into the opening. Starboard done now on the port side where I used the same process for the pattern and drop plank. The process was fun and turned out nice. I haven't done any sanding yet I think I'll wait until I get the next 8 strakes in place before sanding. Now on to lining of the hull. I've never lined off a planking and for the matter this is the first single planking I've done. Reading the monograph, Chucks Winchelsea, and many logs I am ready to start. First I made a tick strip for the bulkhead 0 and out of curiosity I divided it by 18 and OMG. The tick strip was 3.375" and when divided by 18 the result you guessed it .1875 (3/16") No way I could be that good but both sides are the same. I feel better to start lining off the bulkheads.

-
Paul what weight cotton thread do you use for serving?
-
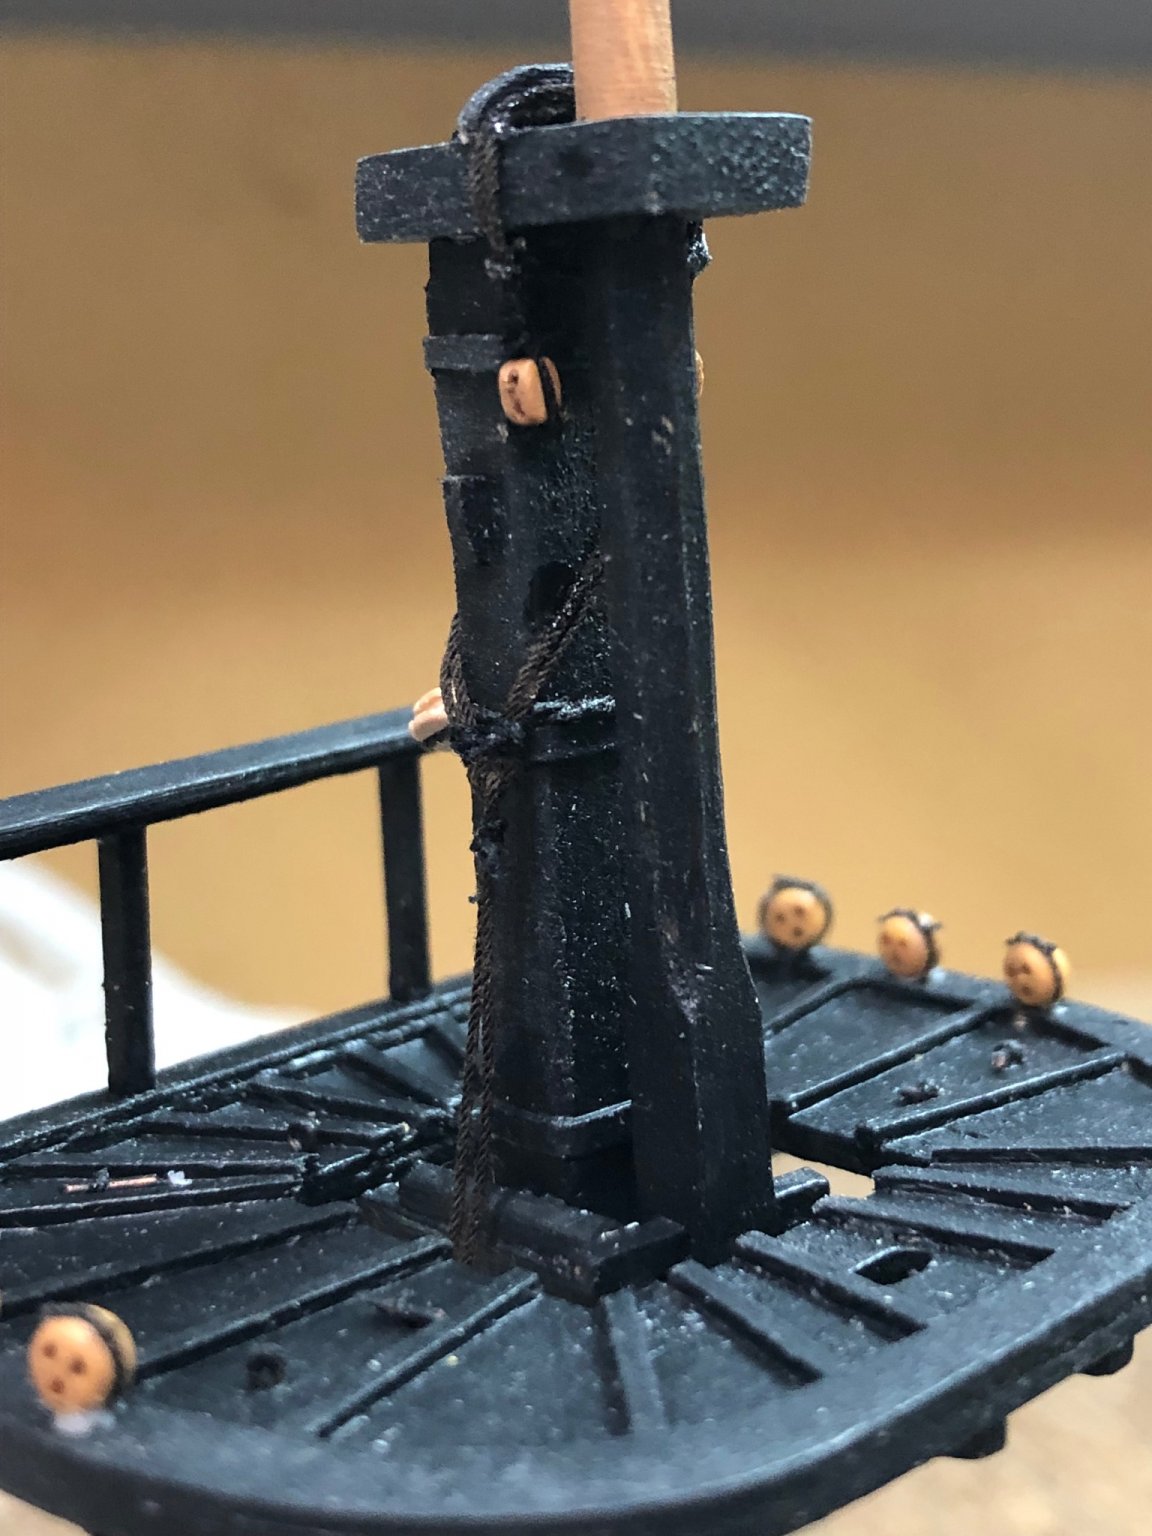
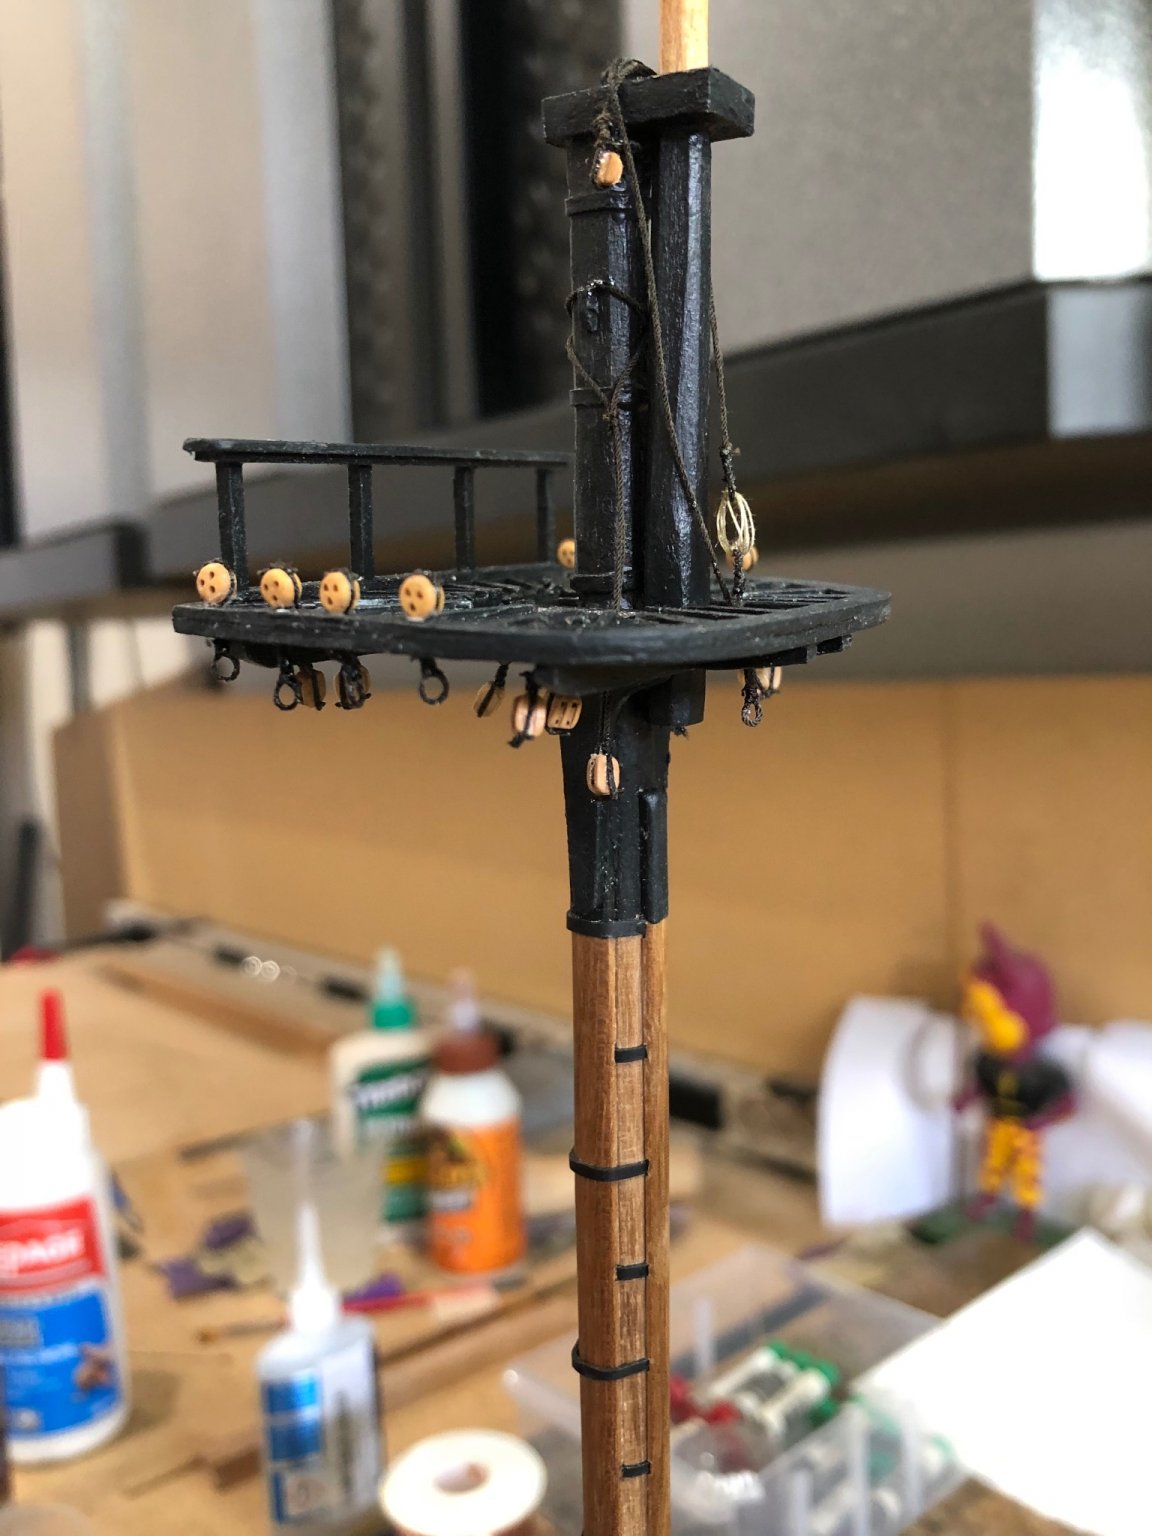
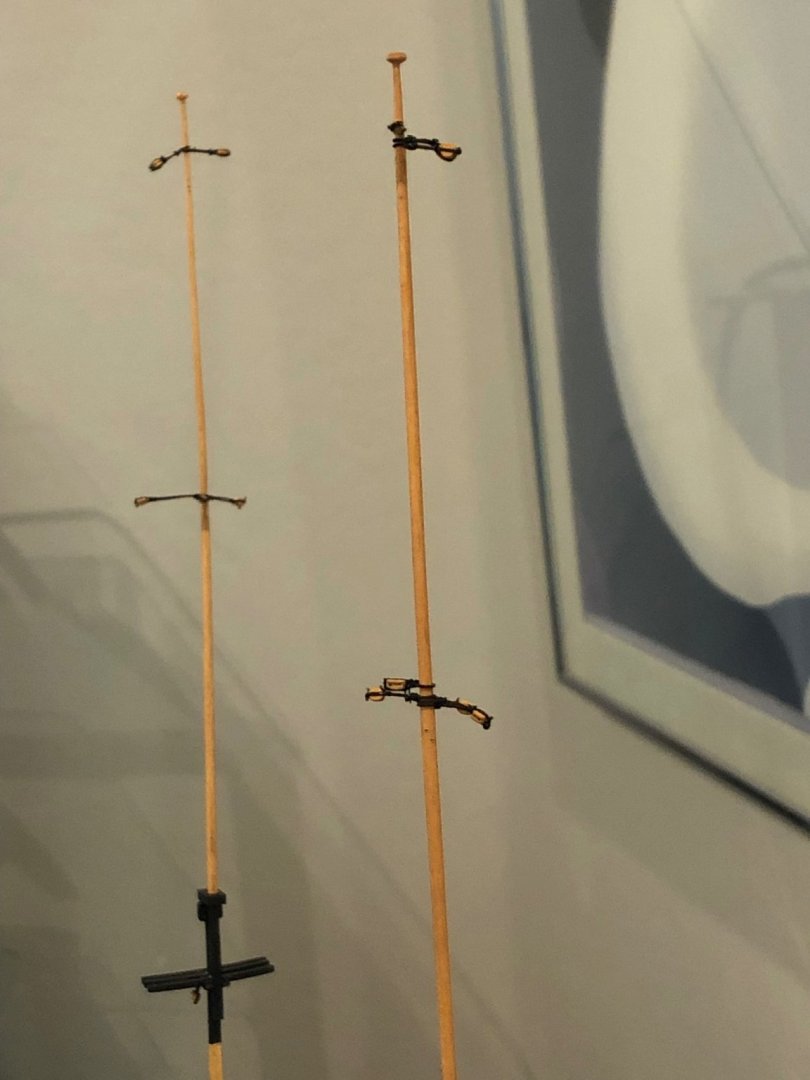
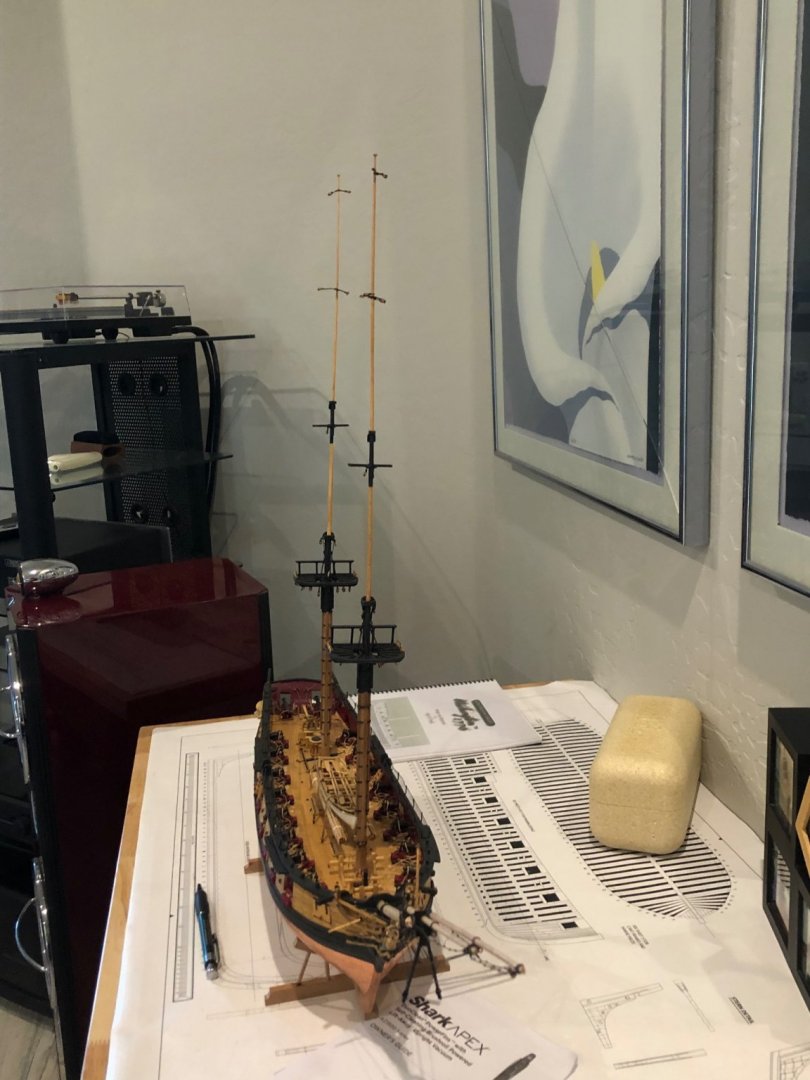
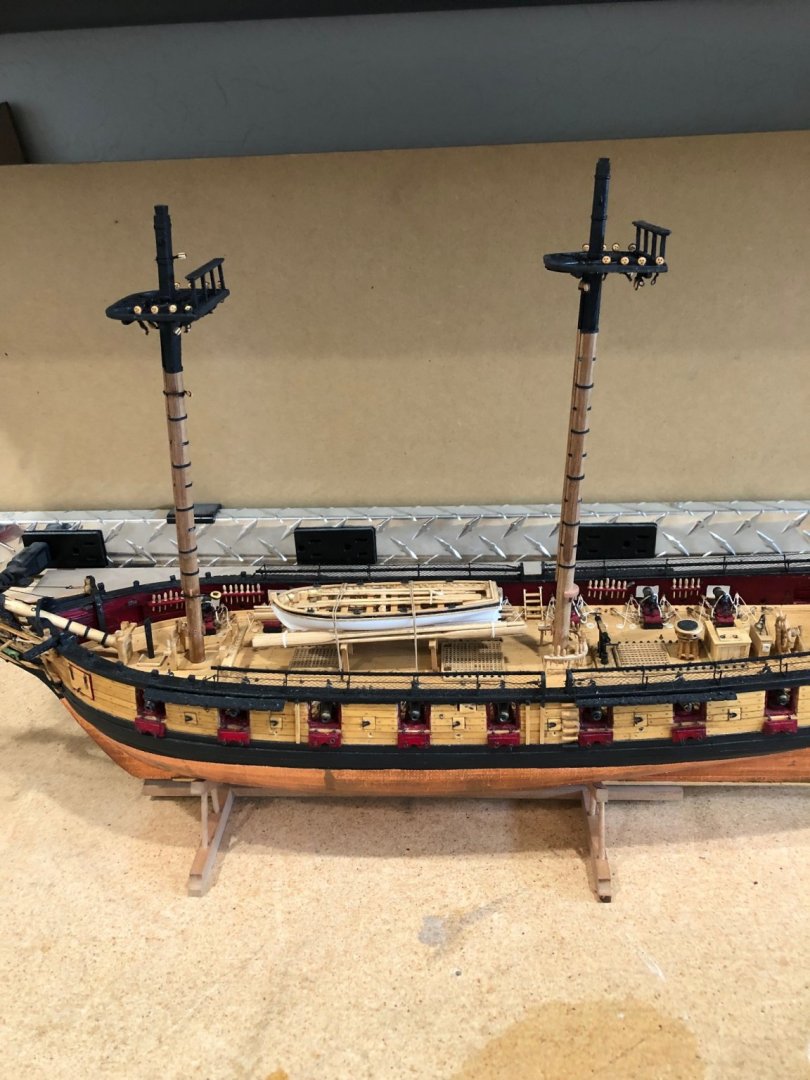
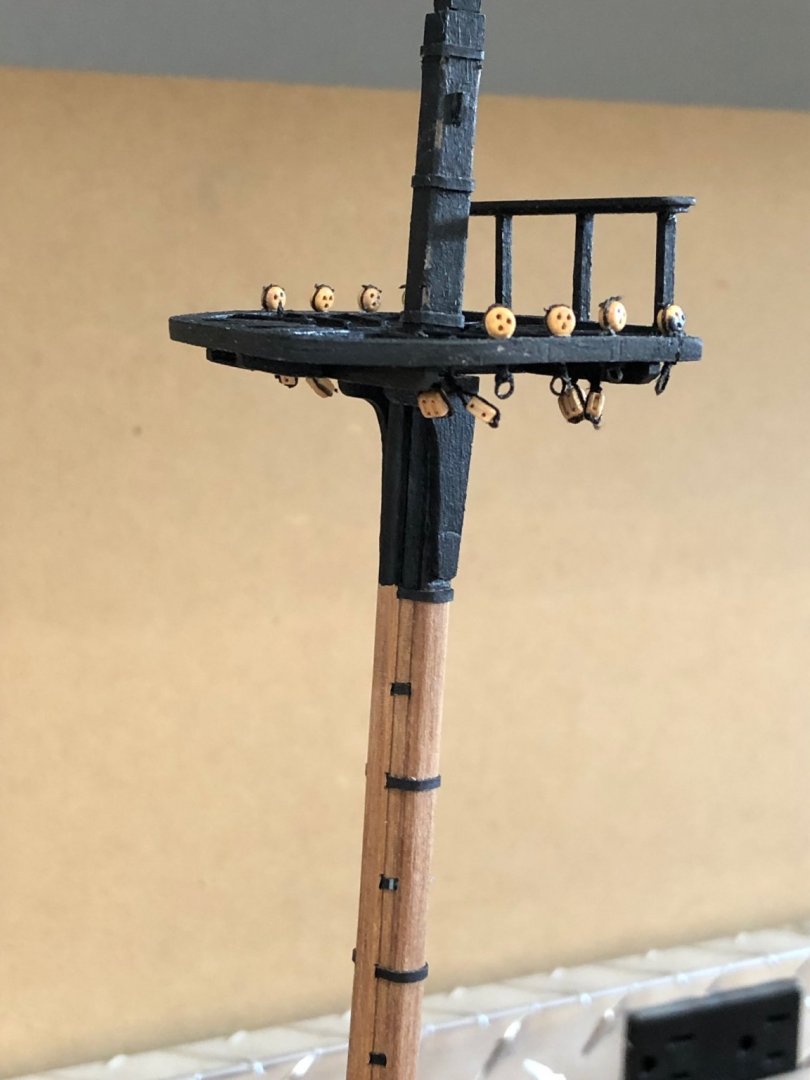
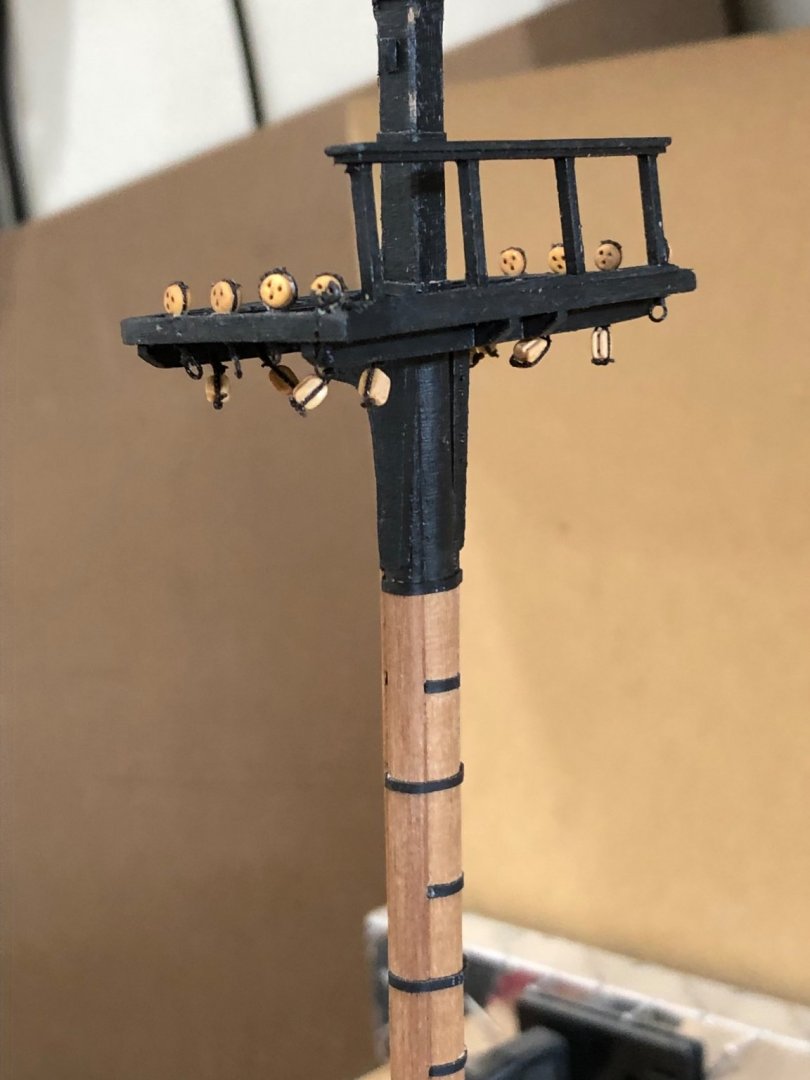
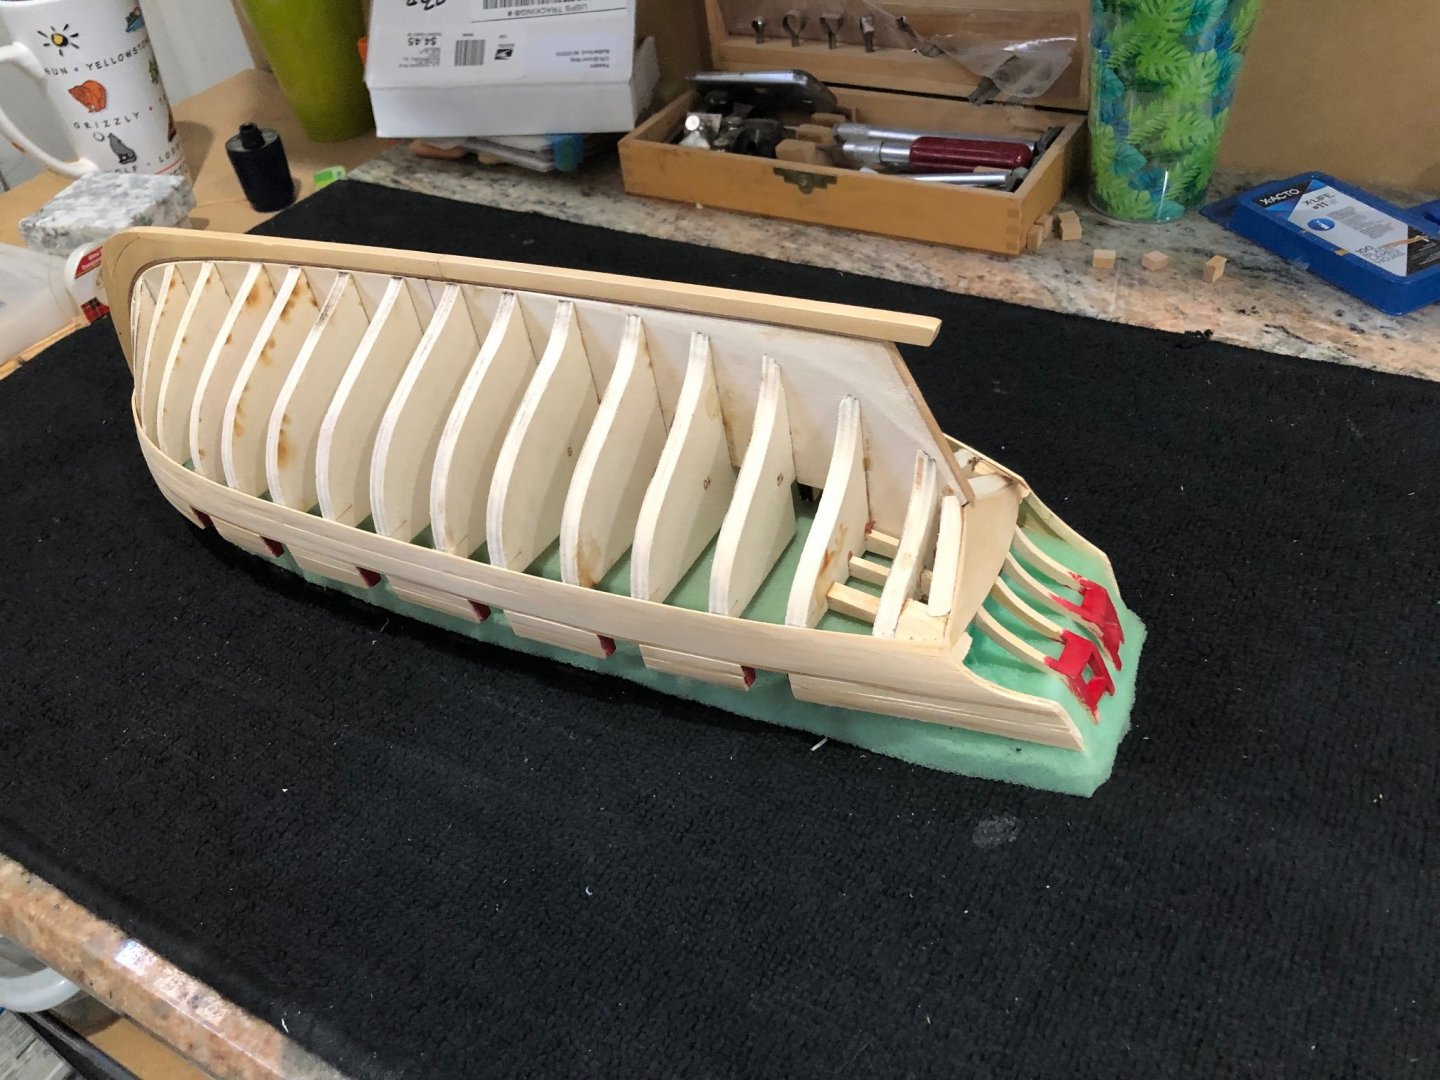
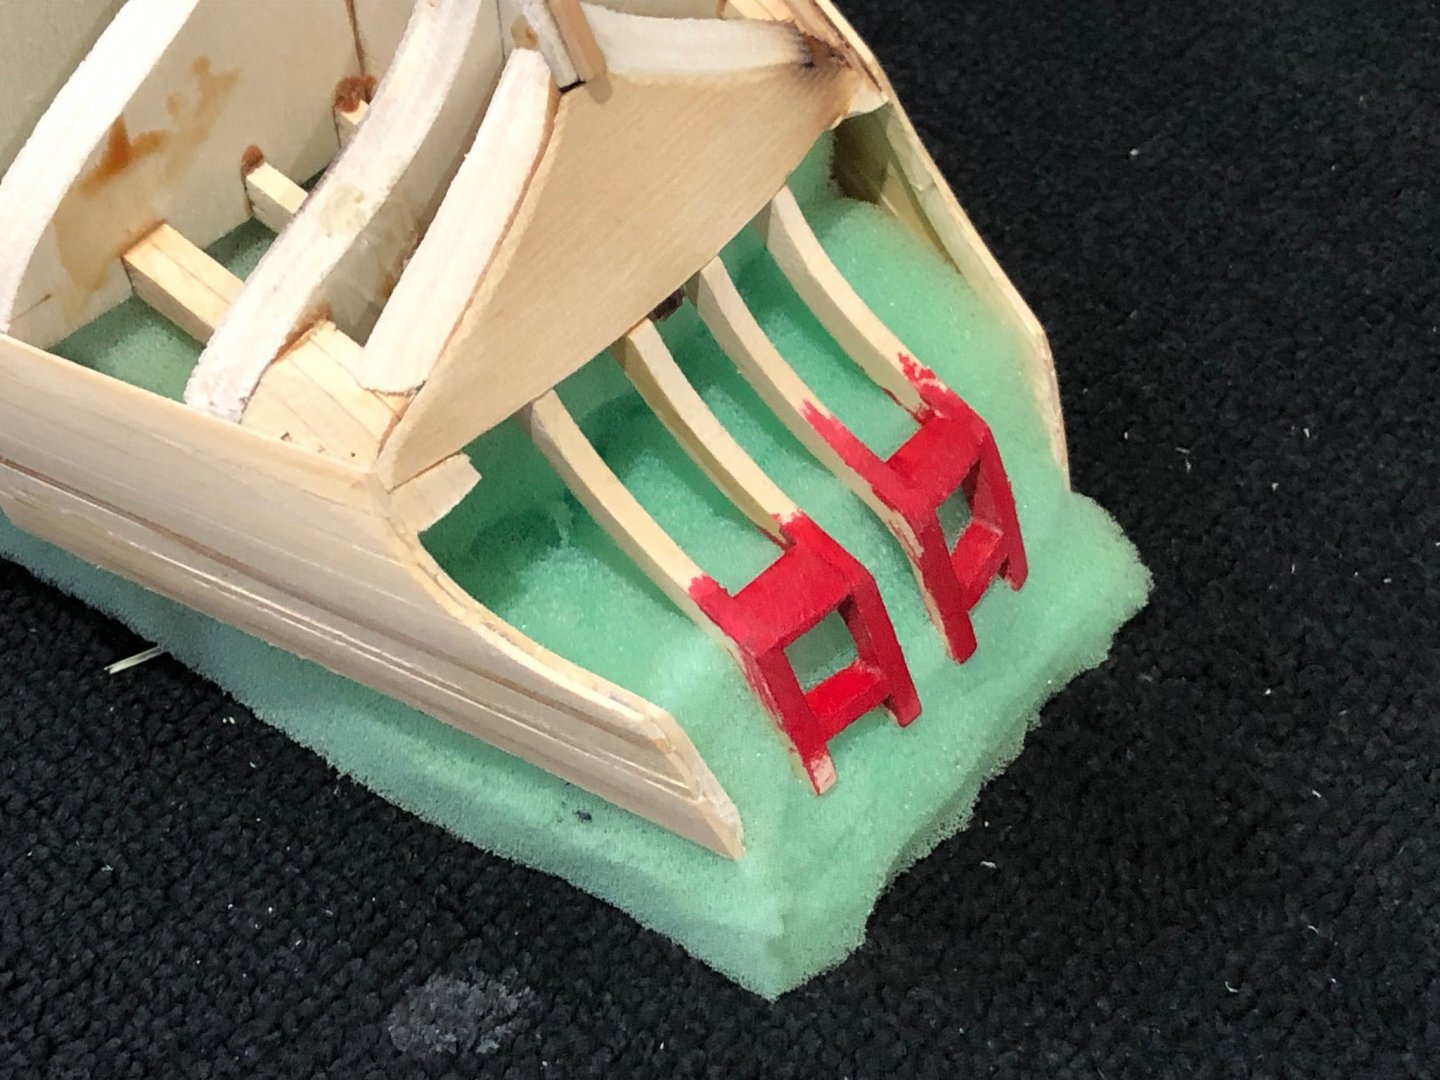
Chapter 17 is DONE. Making the masts and poles was a challenge to say the least. I made 5 fore top gallant poles before getting one that looked correct and didn't break. The masts are in place but not glued due to the holes make them very secure and stable. Early on I put blocks between the bulkheads along the frame for strength and giving planking something to grip. Since I had no way to accurately drill 5/16" holes a friend, a retired tool maker, had a large mill and volunteered to drill the for me. Using the plans he made a jig to hole the skeleton and drill the holes at the correct angle on the centerline. Now I place the masts 1" deep into these holes getting the required stability. Everything else was a matter of being very careful not to break something using judicial clamping during the tying of blocks. Top mast lift blocks Top mast jeer blocks, and sling Lift and stay blocks on top poles Completed ready for standing rigging I've enjoyed this step especially using James Lees book about the rigging. I'll continue to use the monograph, Lees, and the TFFM vol 4 to get the rigging accurate as possible given my experience. Thanks for all the likes


-
Great fix and wonderful picture. You can never have too many clamps, elastic bands, and initiative overcoming obstacles. Great job Glenn.
-
Lotta practice cutting. I'm not sure that the stand visually takes away from the great job you've done on Cheerful.
-
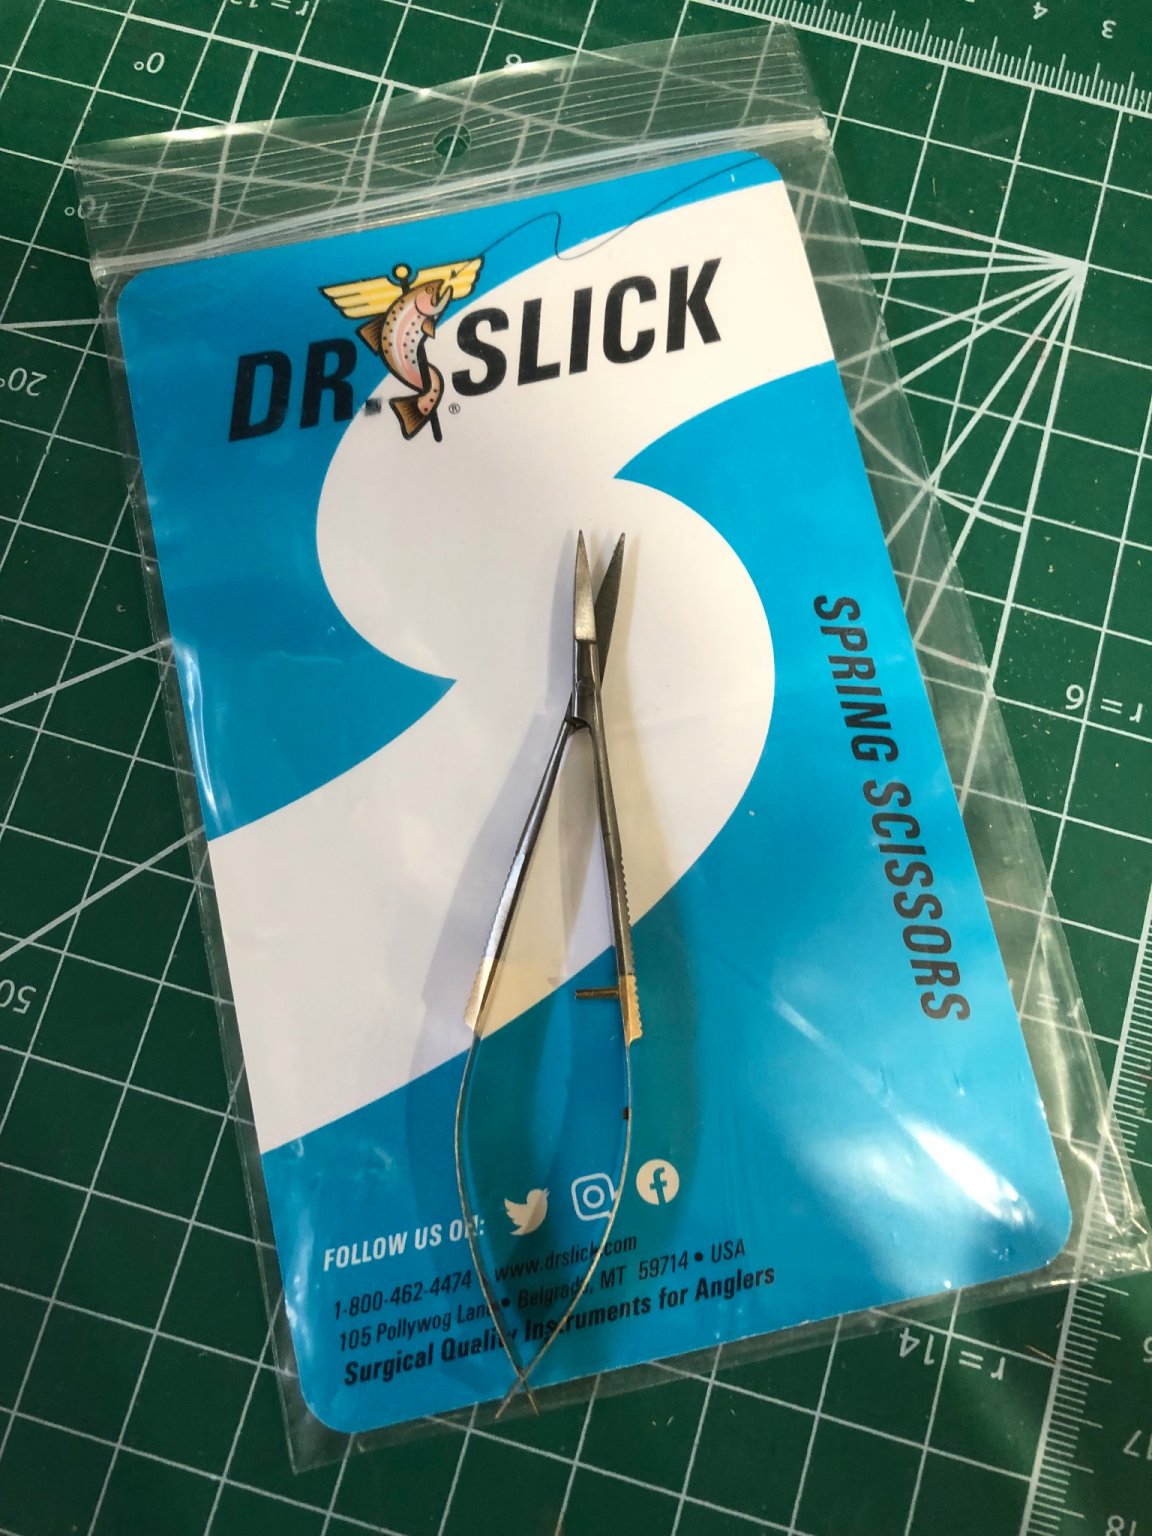
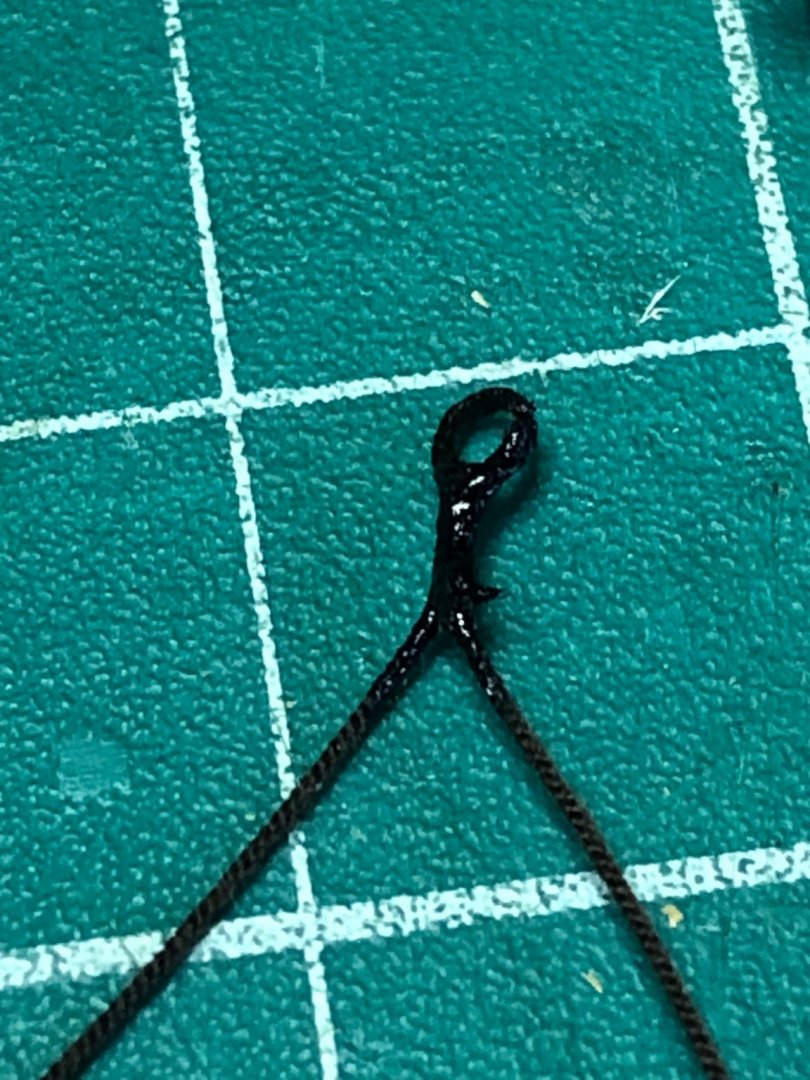
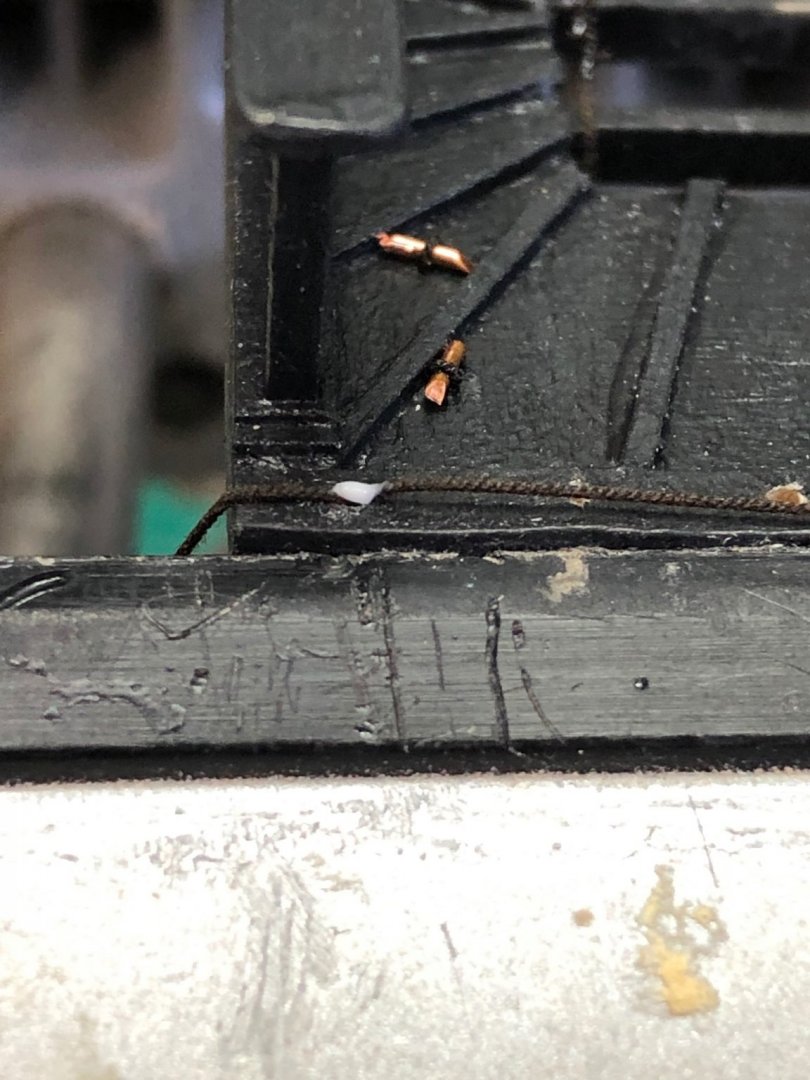
In my last post I forgot to detail how the deadeyes were mounted on the topmasts. First I cut a 5" length of line doubling it to form a loop around a #57 drill bit. Lashed the end close to the loop and added a drop of CA. When hardened removed the loop, now a deadeye plate, from the bit and added another drop of CA. ready for lashing Finished deadeye plate You can paint it black as the practicum recommends or spray with flat clear Krylon. Next feed the open ends through the hole from the bottom and after splitting the leads add a drop of glue. I use LePage white glue which dries a translucent white color. Then place the deadeye letting it set before tying. When set simply tie a half-hitch around the deadeye and add a drop of CA. Use the thin CA so it soaks into the line and around the deadeye. When complete just snip of the loose ends and wait for the glue to dry clear. You can see the glue dried nearly invisible. On another post, I forget which, the user recommended these spring scissors which I now use and love. These are used by the fly tying hobbyists. They come in straight or curved tips.


-
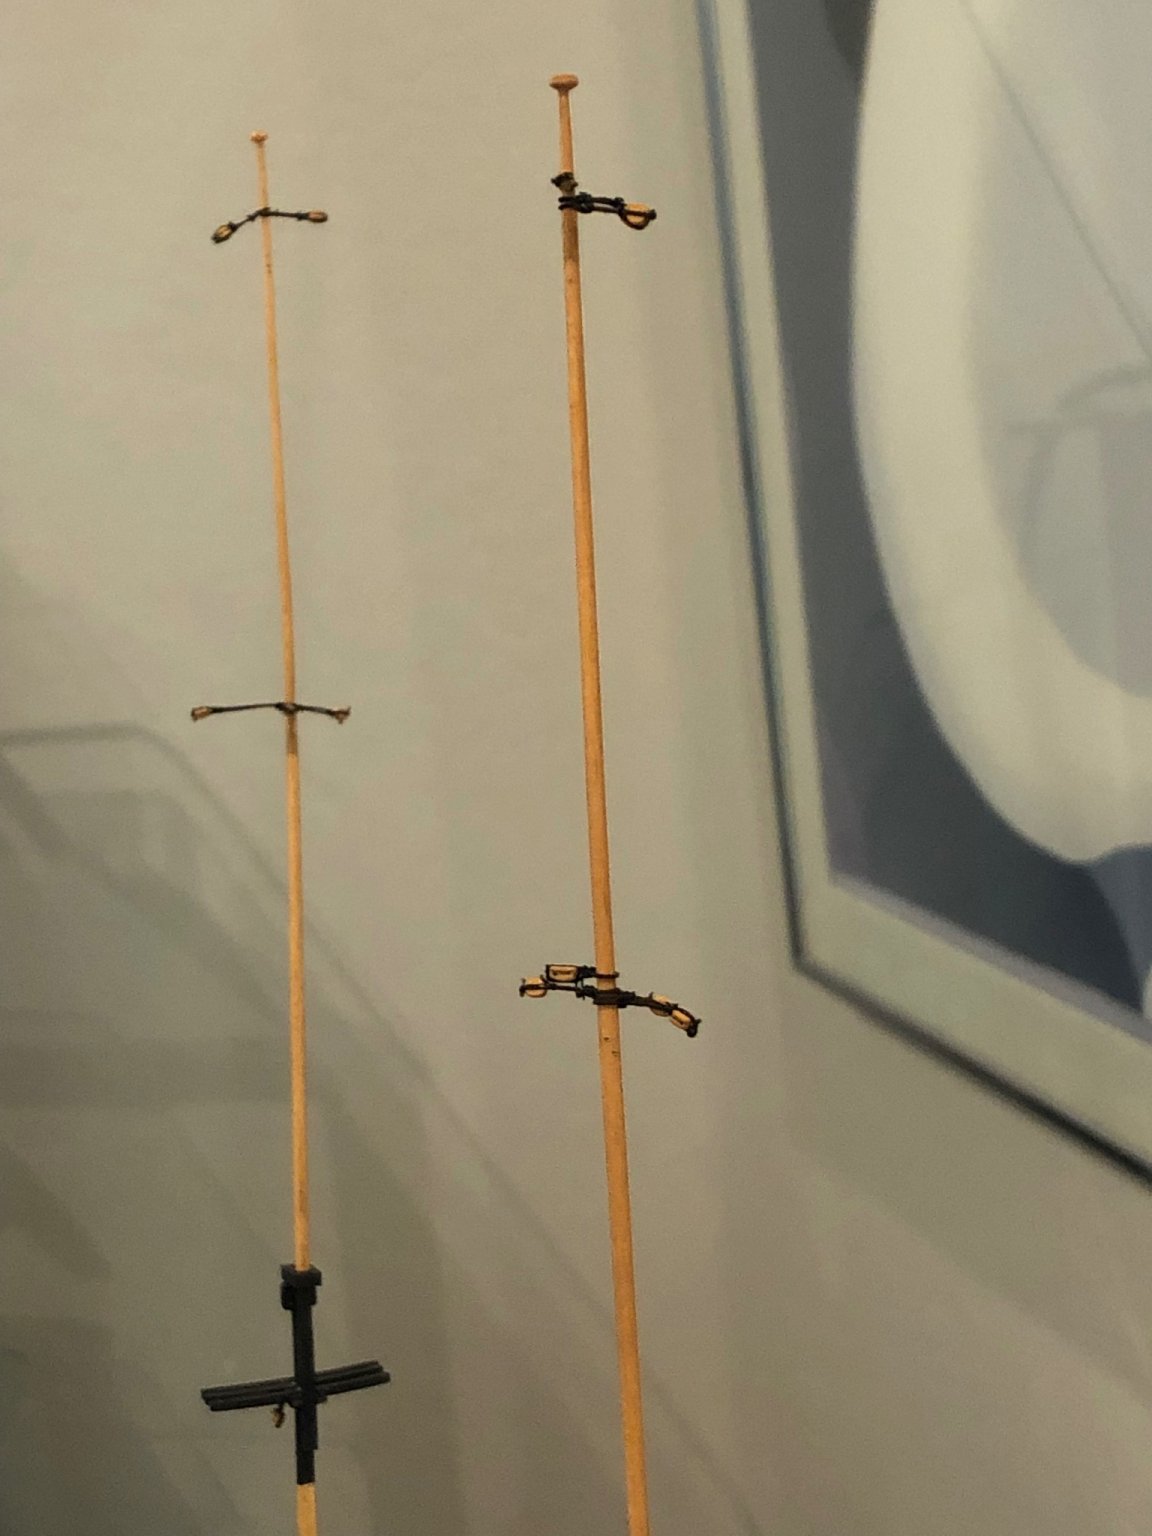
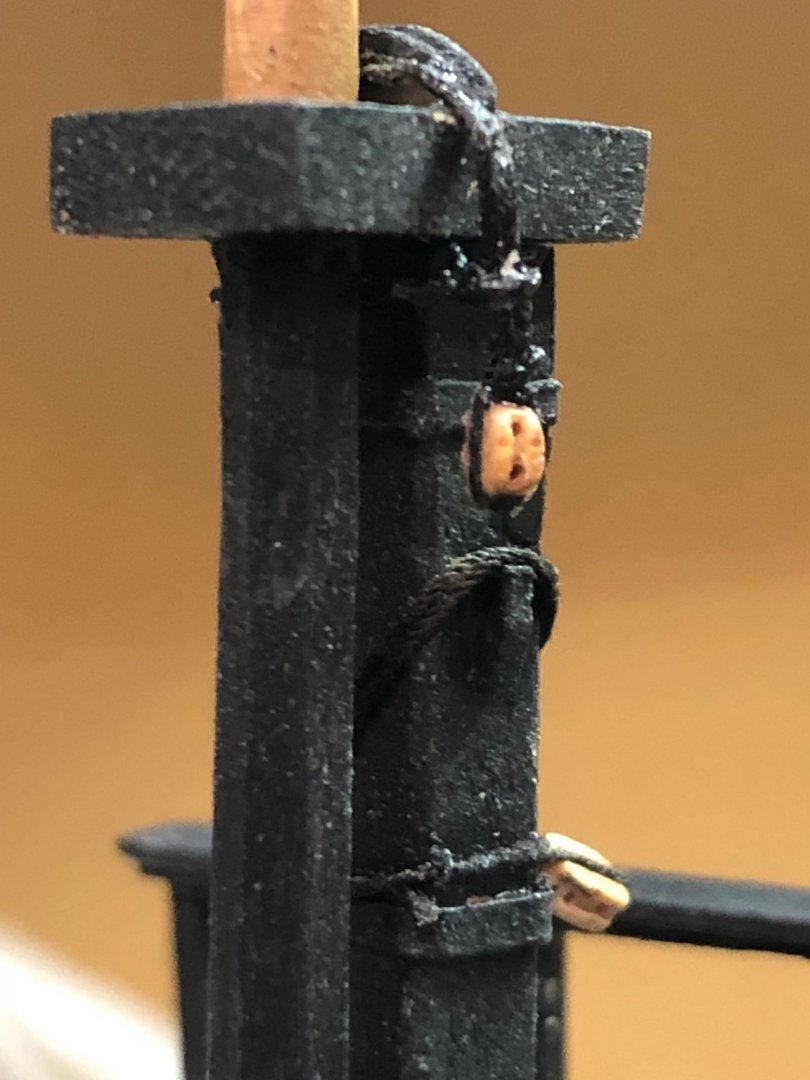
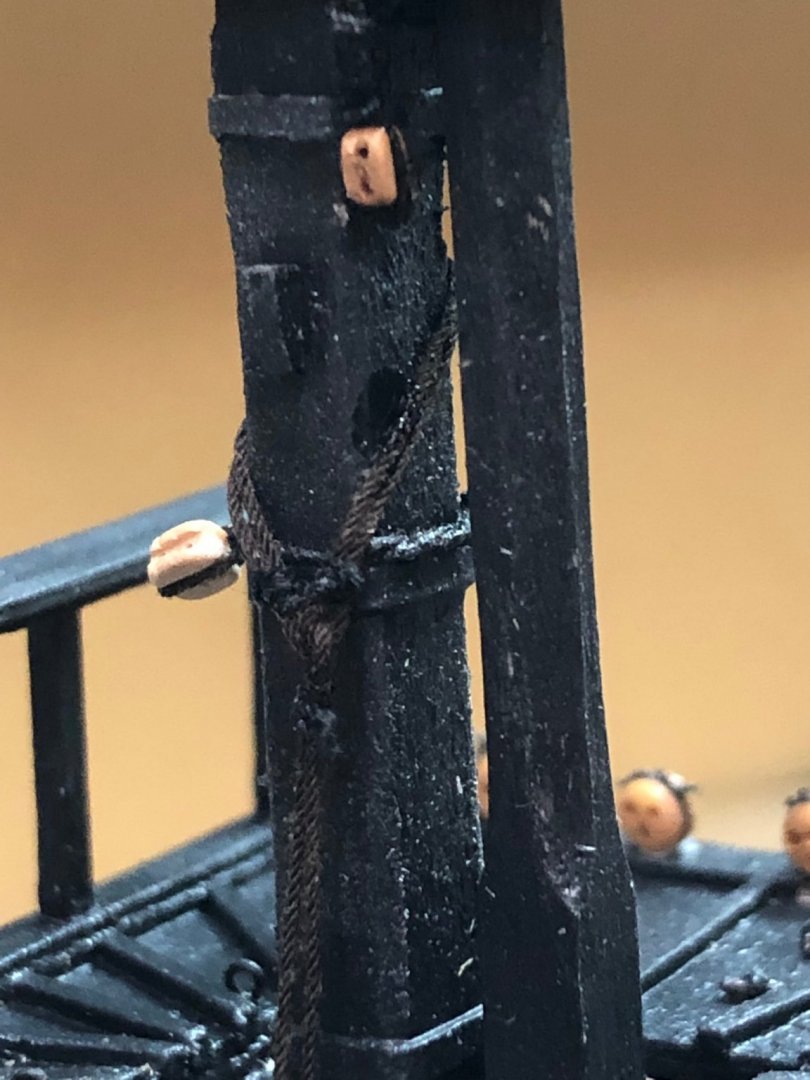
Completed the main and fore lower masts with all the rigging. After finishing the mast tops I rigged the main preventer collar using a open heart from Syrenmodelship. To rig the collar I first used .015 rope doubled and realized the rope amount was too much for the open heart. Doing it again with .012 rope made all the difference in proportional looks. Glued everything together so the lower masts are ready for stepping. With all that done started the fore upper mast. The practicum says to use 3/16" and make square at the base to shave into an octagon. The drawing scales with a 3/16" square to start with before make the octagonal sections but how do you make a 3/16" square out of a 3/16" dowel? The kit was missing a 3/16" dowel but did have a 1/4" so that is what I used. Used the 7/10 scale to mark off the octagonal and square sections. Planned off the 3/16" square and then the 7/10 to shave off the edges for the octagonal sections. I finish up the first mast tomorrow. Mast after first cuts ready to finish Masts ready to be stepped Fore lower mast with collar I didn't like the pictures of the collar in the practicum so I checked Lee's and decided to use a similar method where I lashed the the ends around the mast and lashed between the mast and close to the heart. That give it more security for rigging.

-
I haven't read this far in the monograph so I can look forward to the fun. Very nice process and the results look good. Soldering is the way to go and how will you blacken them? She's coming along nicely and looking good.
- 274 replies
-
- 1
-

-
- Cheerful
- Syren Ship Model Company
- (and 1 more)
-
Can[t say it'll be ok soon as I know from my wife's 2 surgeries but it will get better and as said "this to will pass". Hang in there.
-
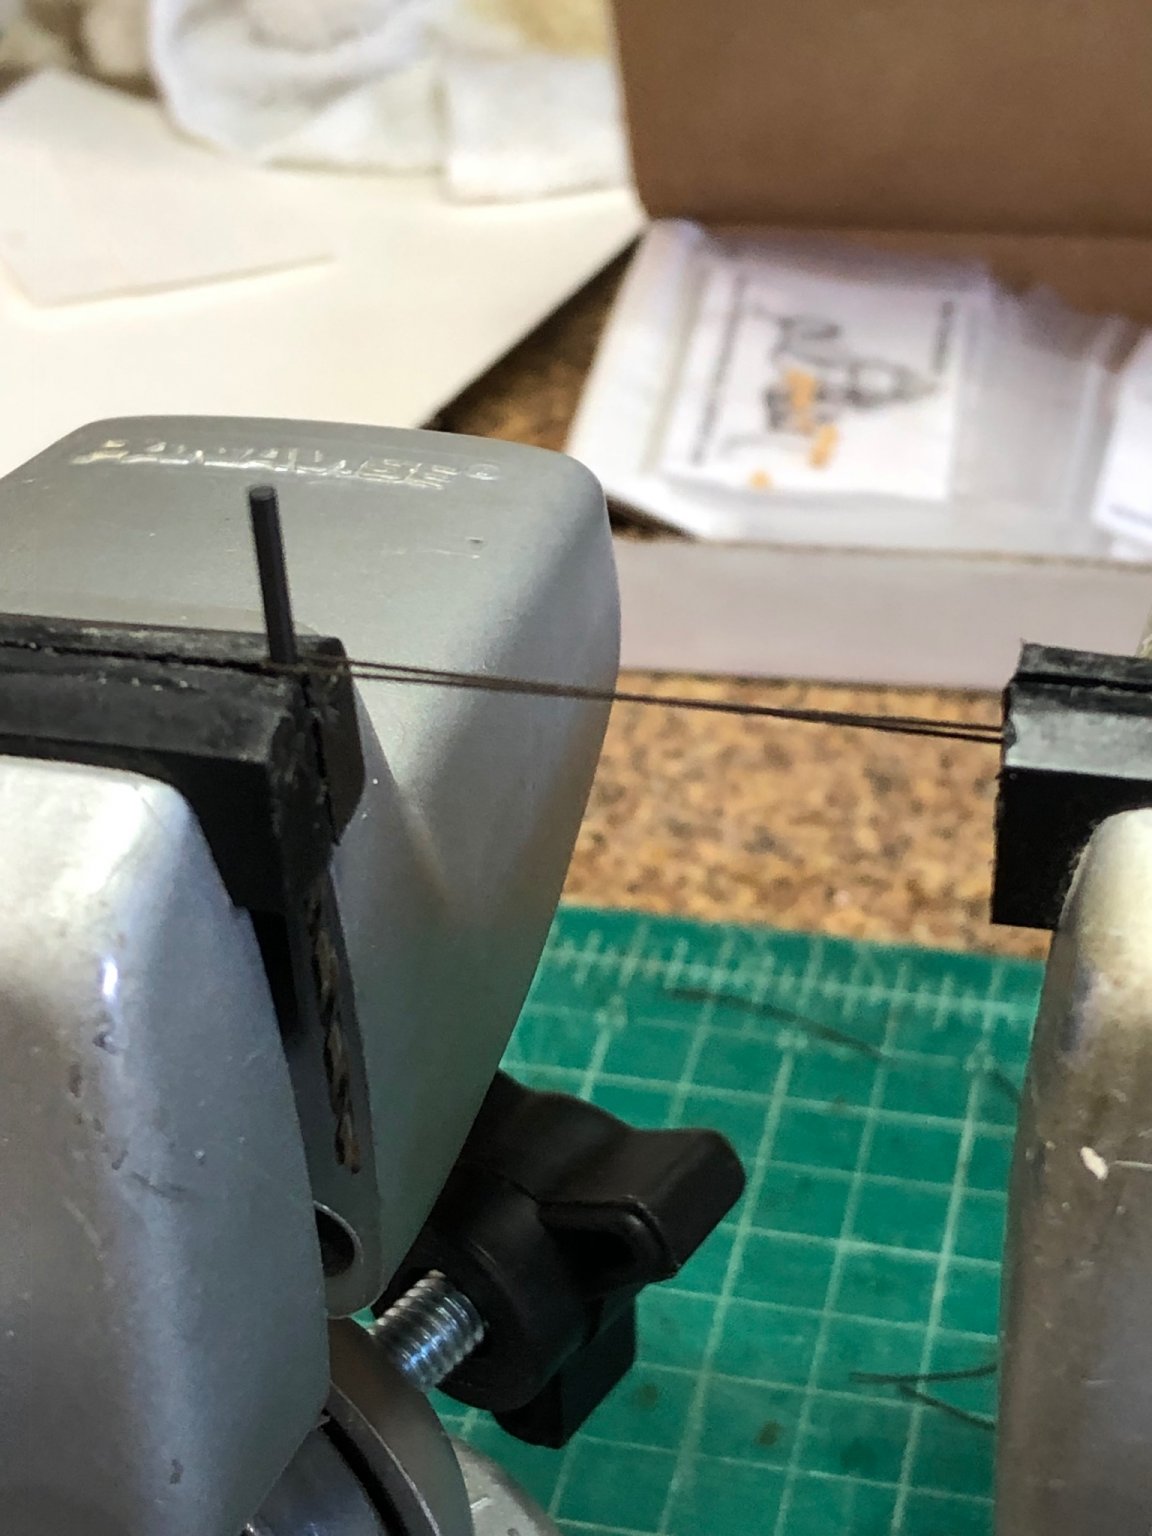
Took a week off to work on another ship but back at it now. I made the .012 dia rope for the topmast blocks and deadeyes. I used Chucks formula for rope making and with Mara 100 in a 1X3 wound tightly resulted in a rope mearsuring .012. ThoughtI put that in to tell everyone his formula works. Completed the format top blocks and deadeyes today and the main topmast tomorrow. The blocks were a real challenge keeping the wrapping to about 3/32" on all 8. Tying the blocks with the no way to hold required a new method. It took more rope than I had accounted for so I'll have to make more. What I did was to make the rope almost twice the length required so I could hole the topmast in Panvise and grip the open ends in another Panvise (can't have to many vise). I pulled the rope taught with the lines being 1/16" parallel. With the block held between the parallel lines I could then put a small drop of CA on the line at the junction with block. This fixed the block and allow tying the lines to the block as in the monograph. Spent quite some time learning what topmast deadeye plates. Actually there is too much information on the internet and sometimes it just muddies the water. It seemed that iron rings (plates) were lashed to the line from the deadeye and then a futtock was either lashed or hooked to the plate/ring. So the method in the monograph is as correct as I could find in my short search.
-
Planking lines are very nice the flow pattern is brought out by the boxwood wop. I just looked at Jim's Flirt and the white waterline covers most of the planking so it looks like the uneven colors are not going to be an issue. It looks up to your standards. What thickness is the boxwood 2nd layer"
-
Thanks Glenn. You got me on whore verses wore not a word I use often but very funny made me laugh.
-
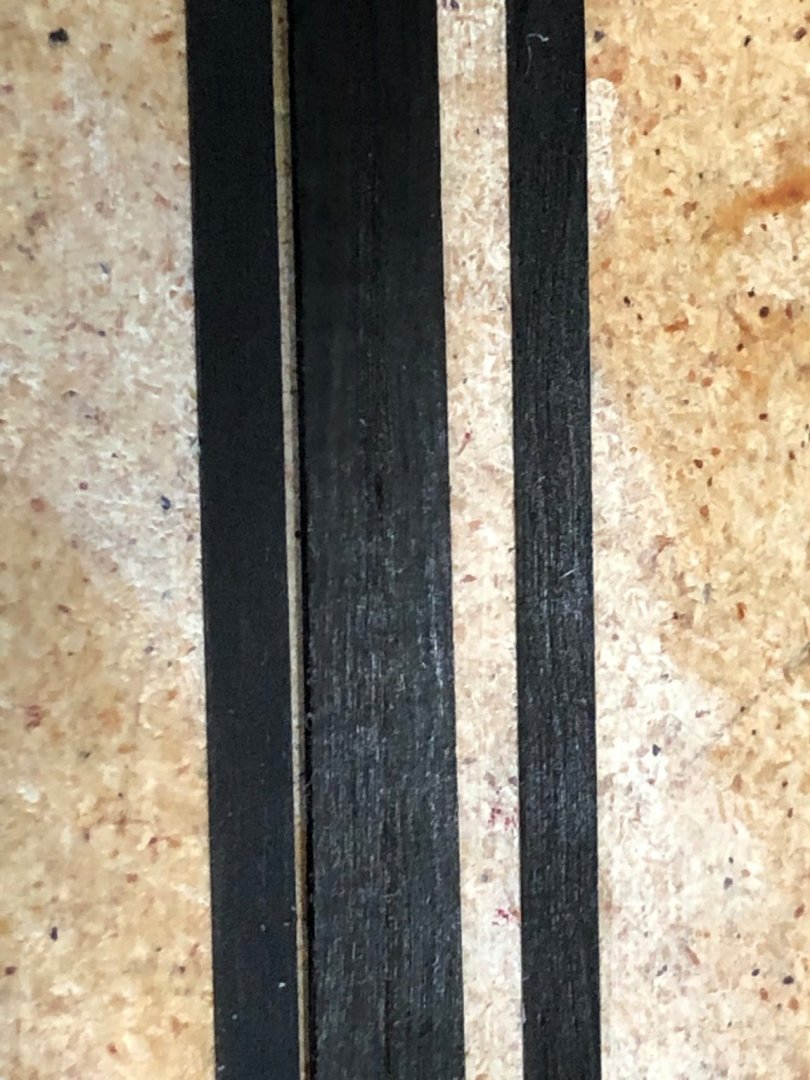
Chapter 3 is finished Planked the wales with ebony wood without any problems. First I finished the ebony I had ripped earlier by running them through to sanding planer to get a width of .031. Next I sanded with 400, 600, 800 and finally 1000grip wet-n-dry paper. While working with the ebony i used my dust collector and whore a max continually as I've read the ebony dust is toxic. I followed the plans for the plank lengths and with a minor amount of bending to get the stem curve. Thinning planks down to enter the rabbit at the stem worked as I had hoped. I also bent a slight curve for the aft upsweep. It was just a I hoped not a problem and the results are wonderful. The only thing I'll mention is the butt joints are invisible with the black wood. Maybe I should have broken of the top edges of the cuts made with the razor saw. Oh well what's done is done and I'm on to Chapter 4. Ebony strips after planning and before sanding (don't know why these pictures rotated) Closeup Added the first coat of WOP and some pictures Again thanks for the looks and likes

-
Thanks guys for the likes and nice comments. Glenn yes I'll scrape the fancy moldings and you right it is not very difficult to add such a fine detail. It really makes the moldings pop.
-
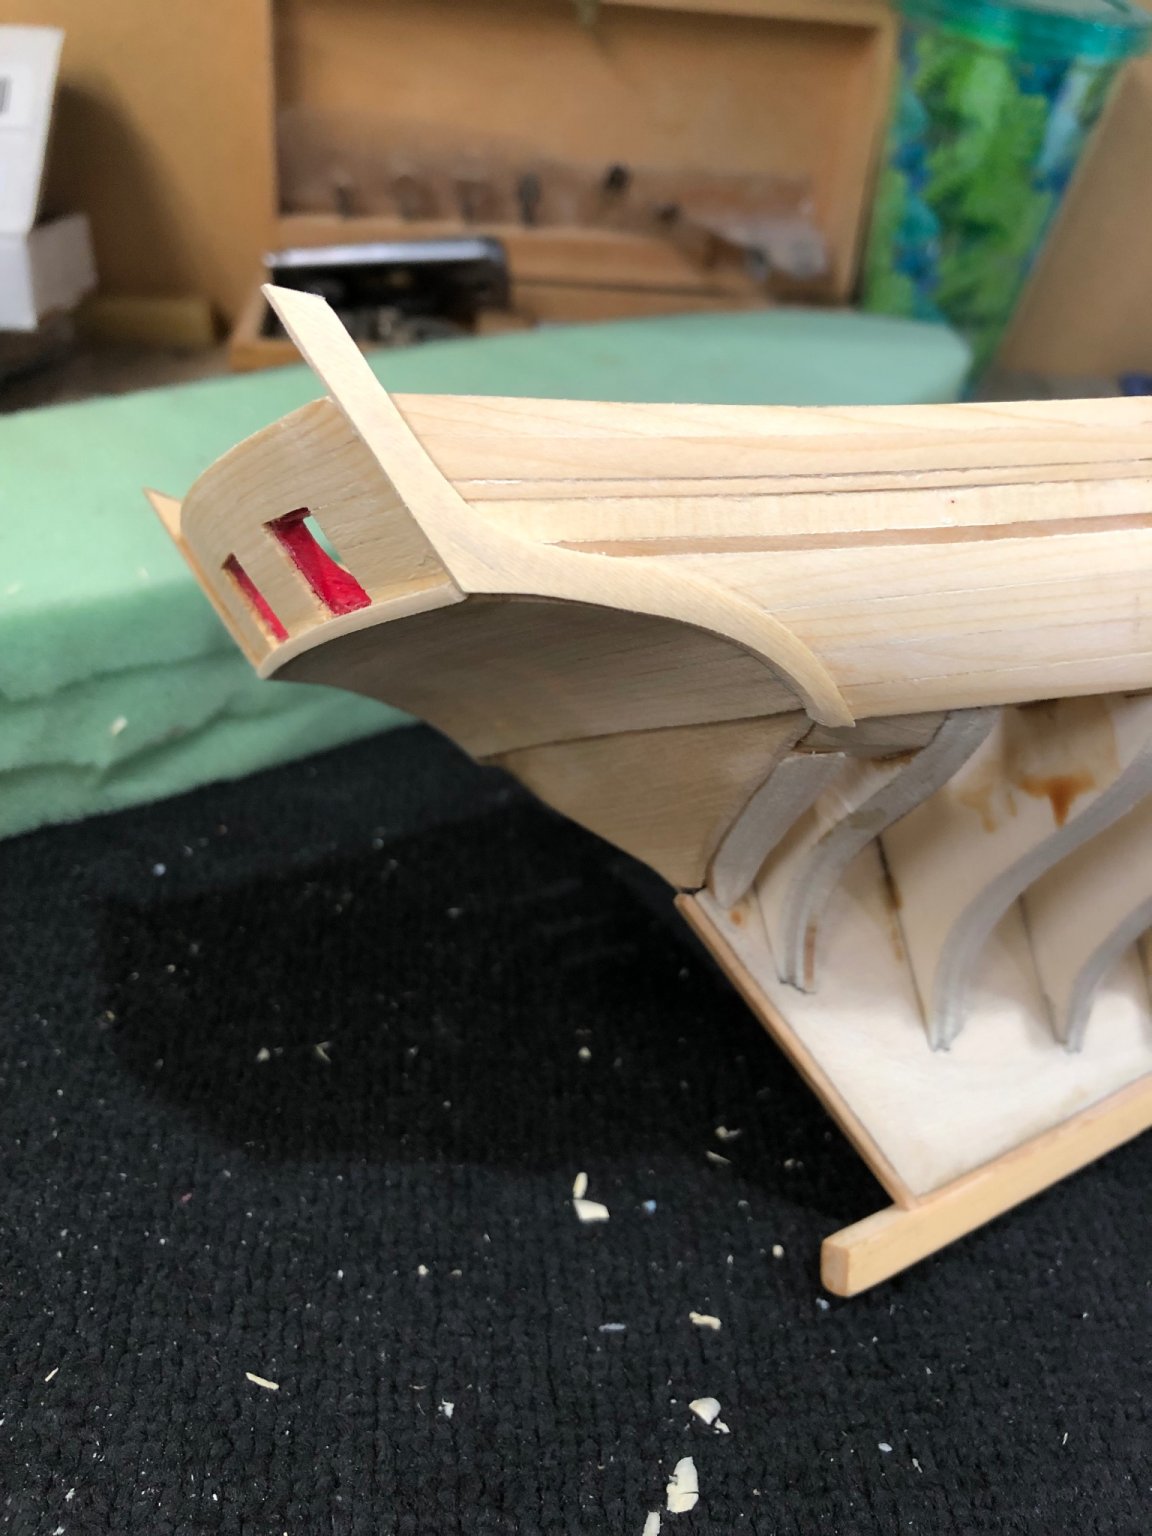
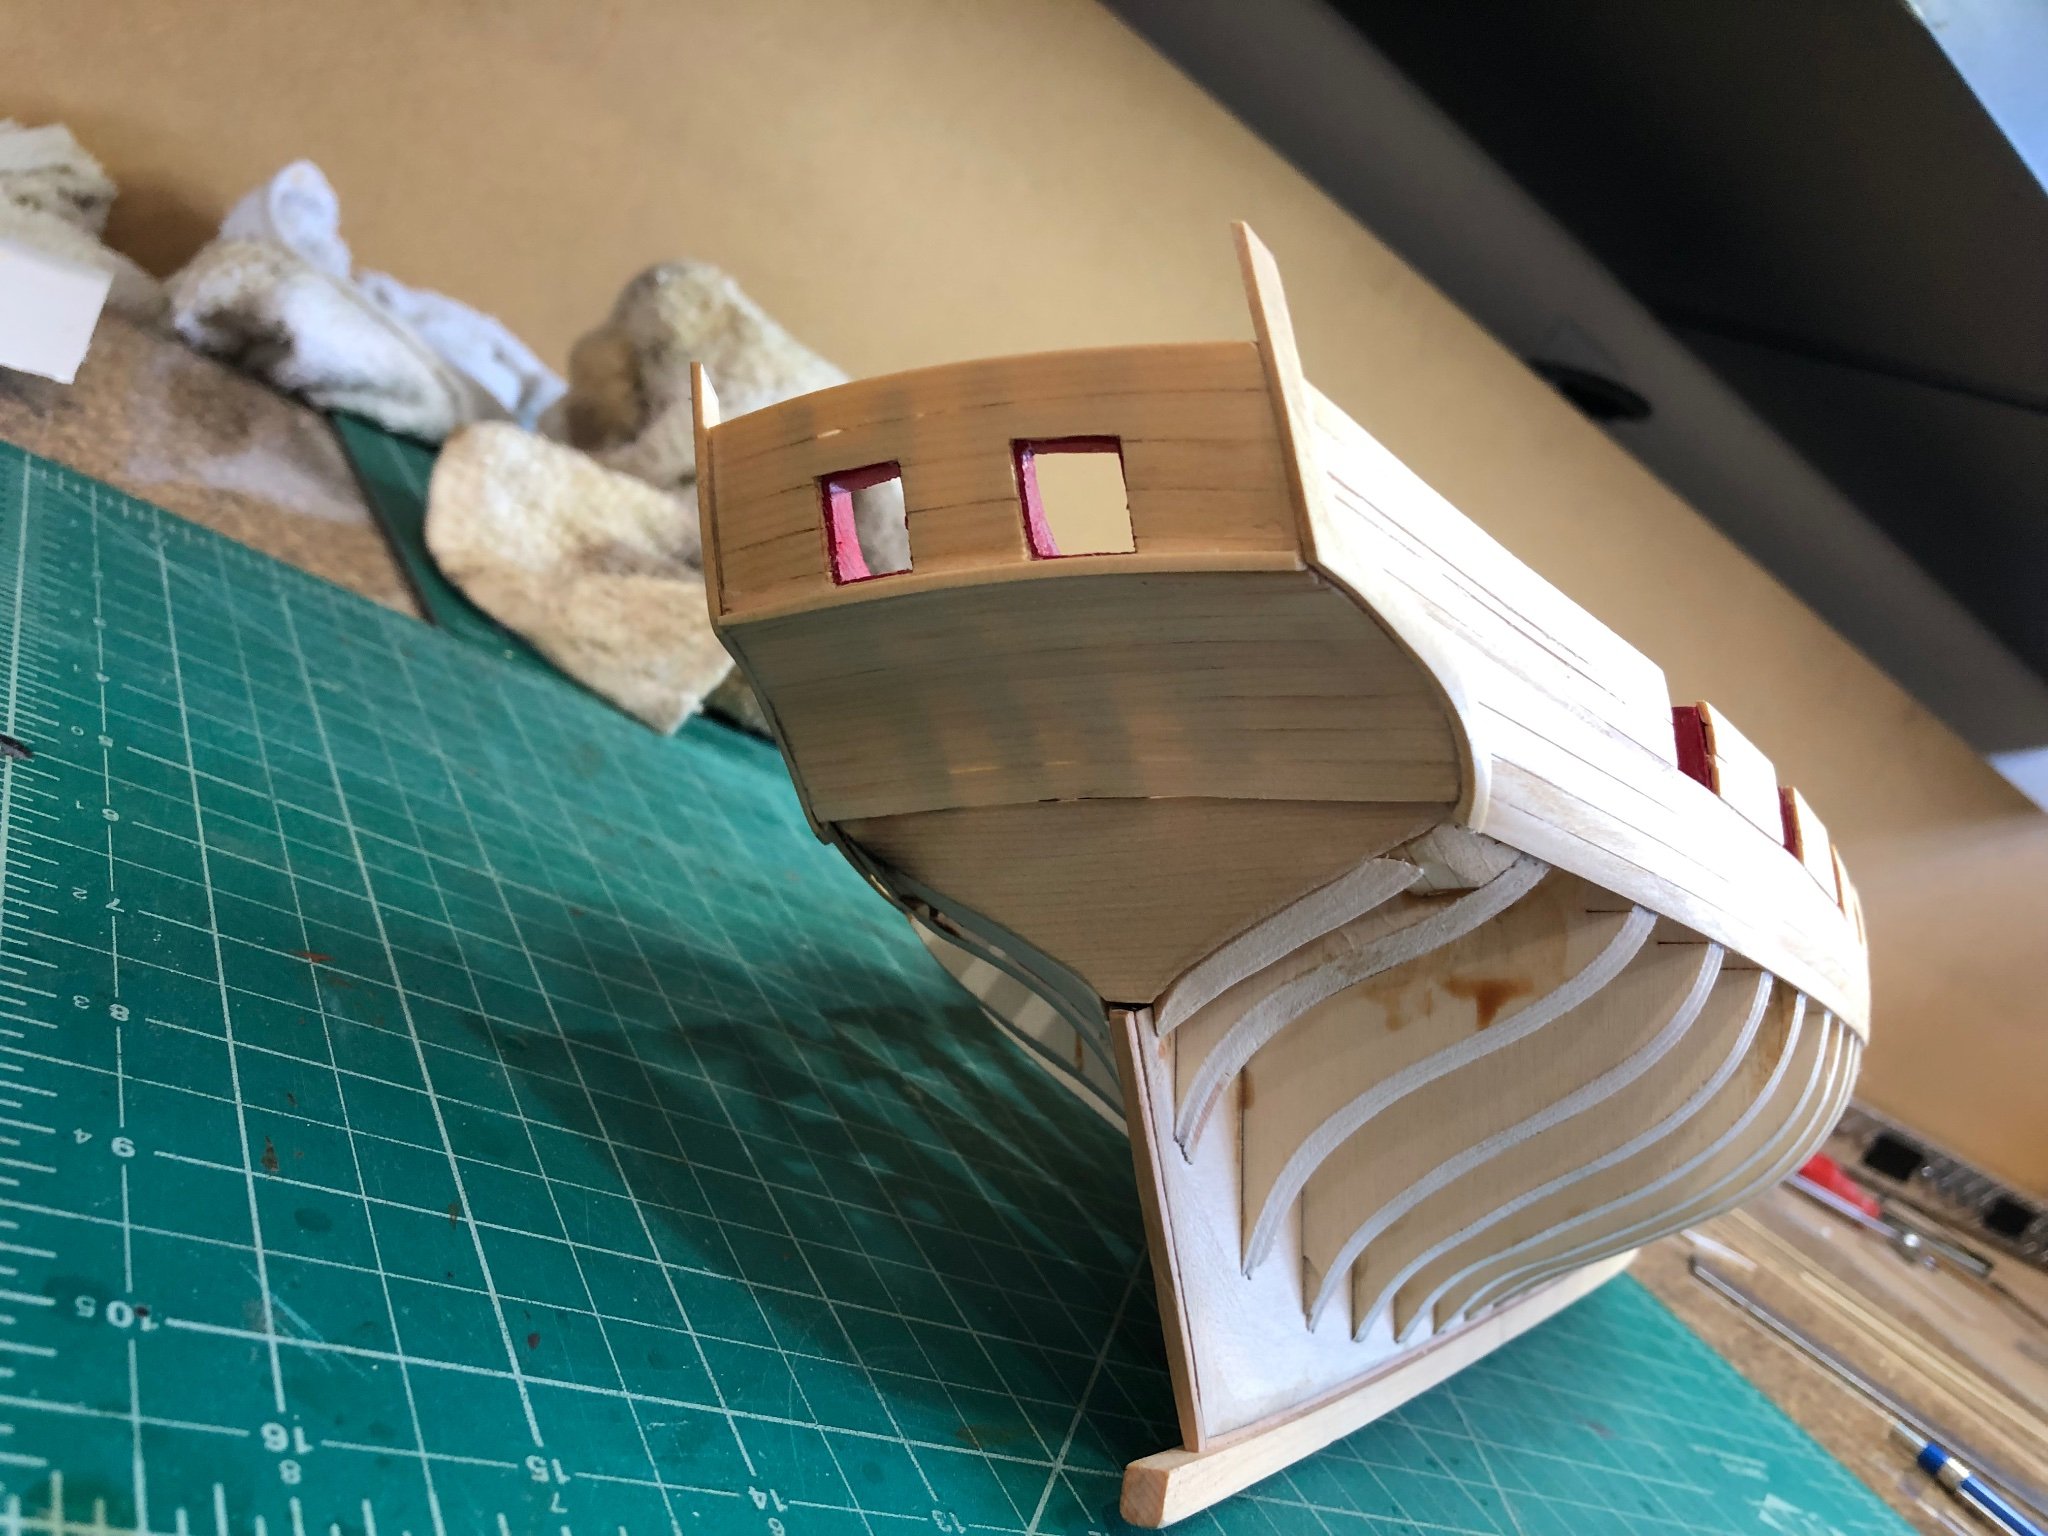
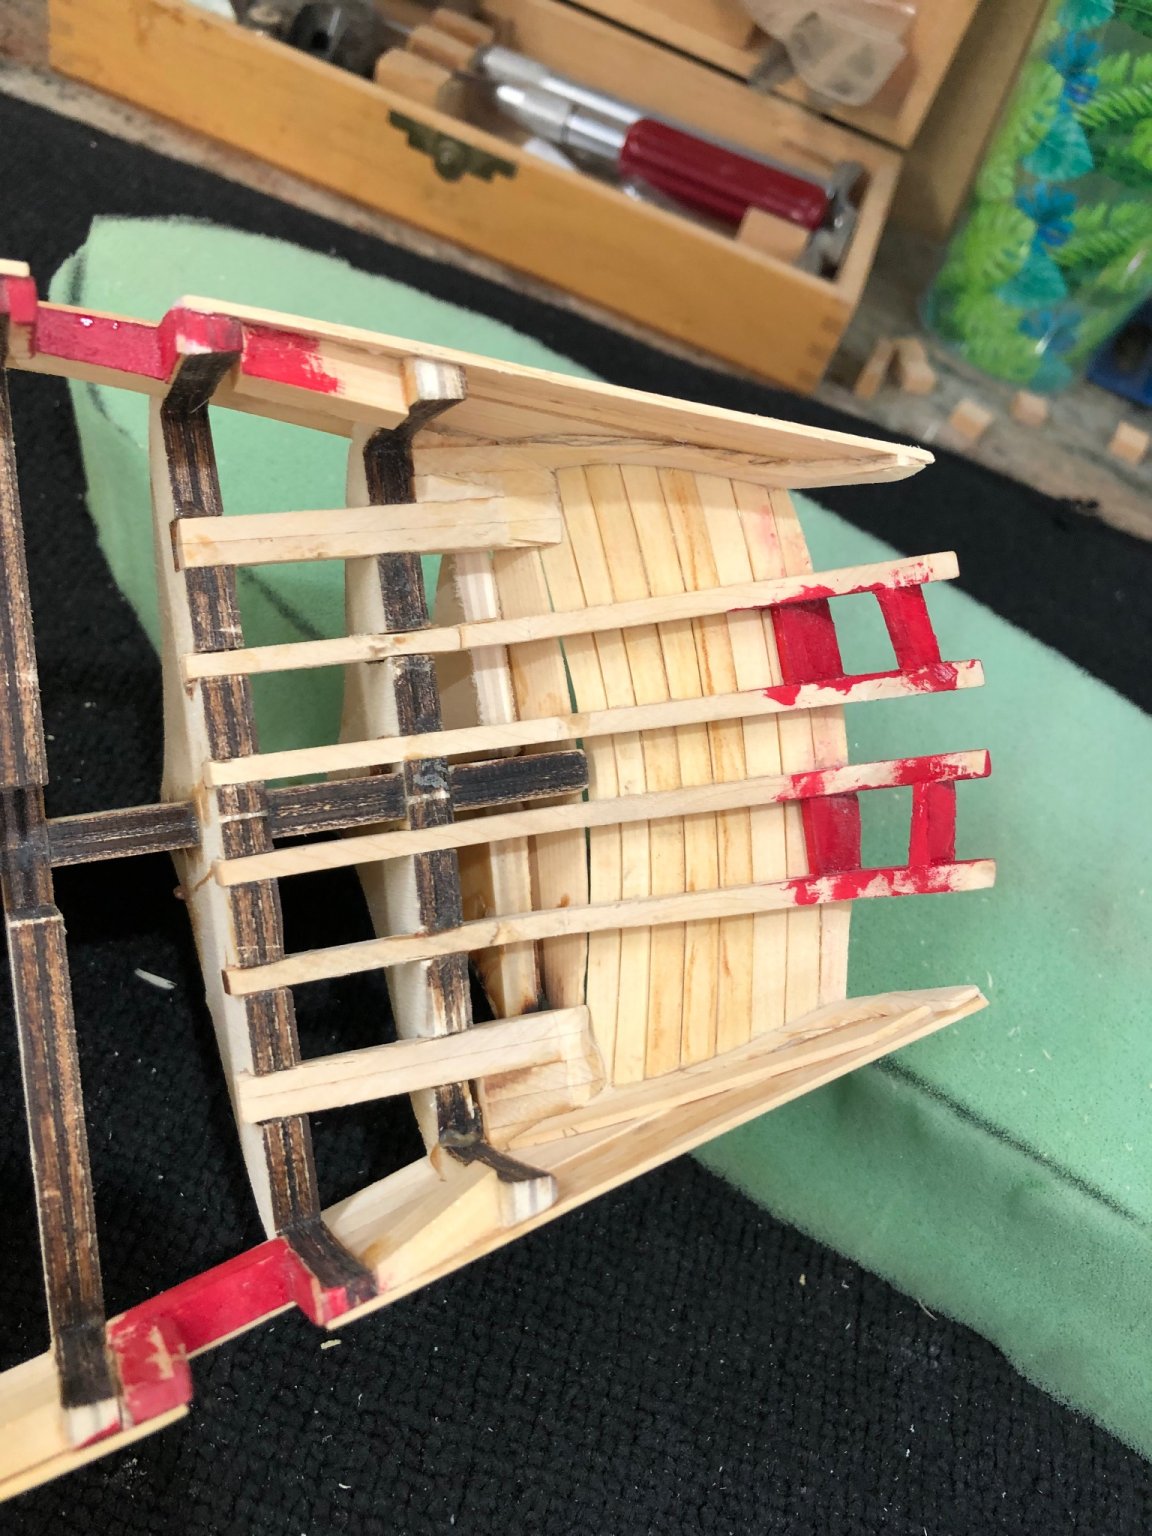
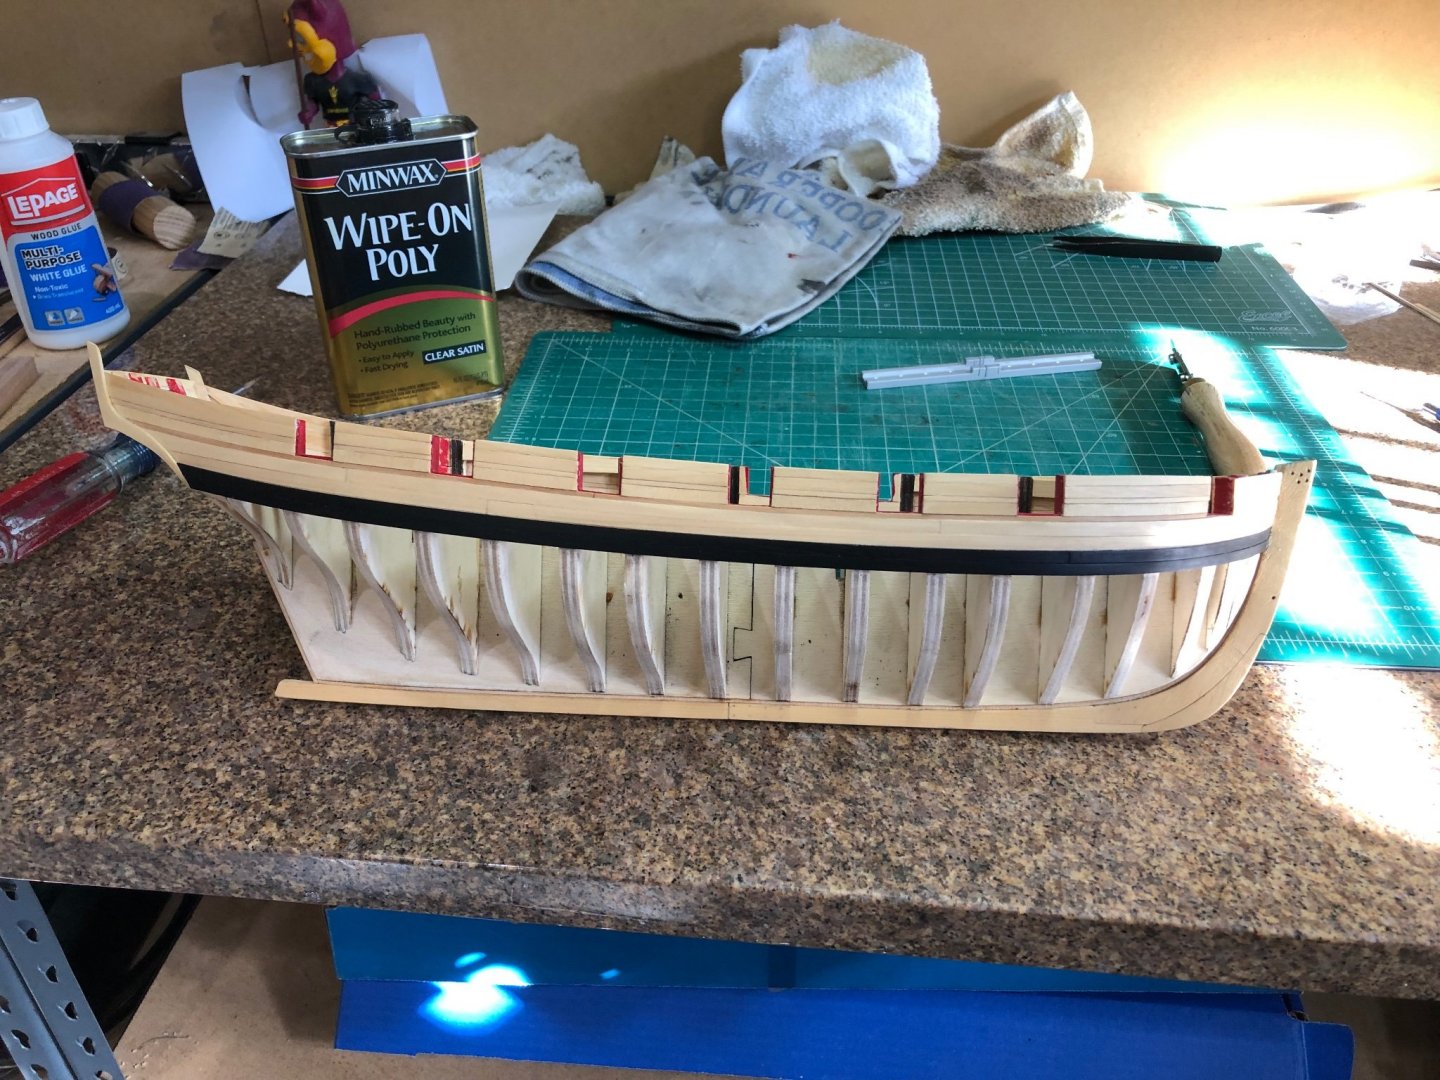
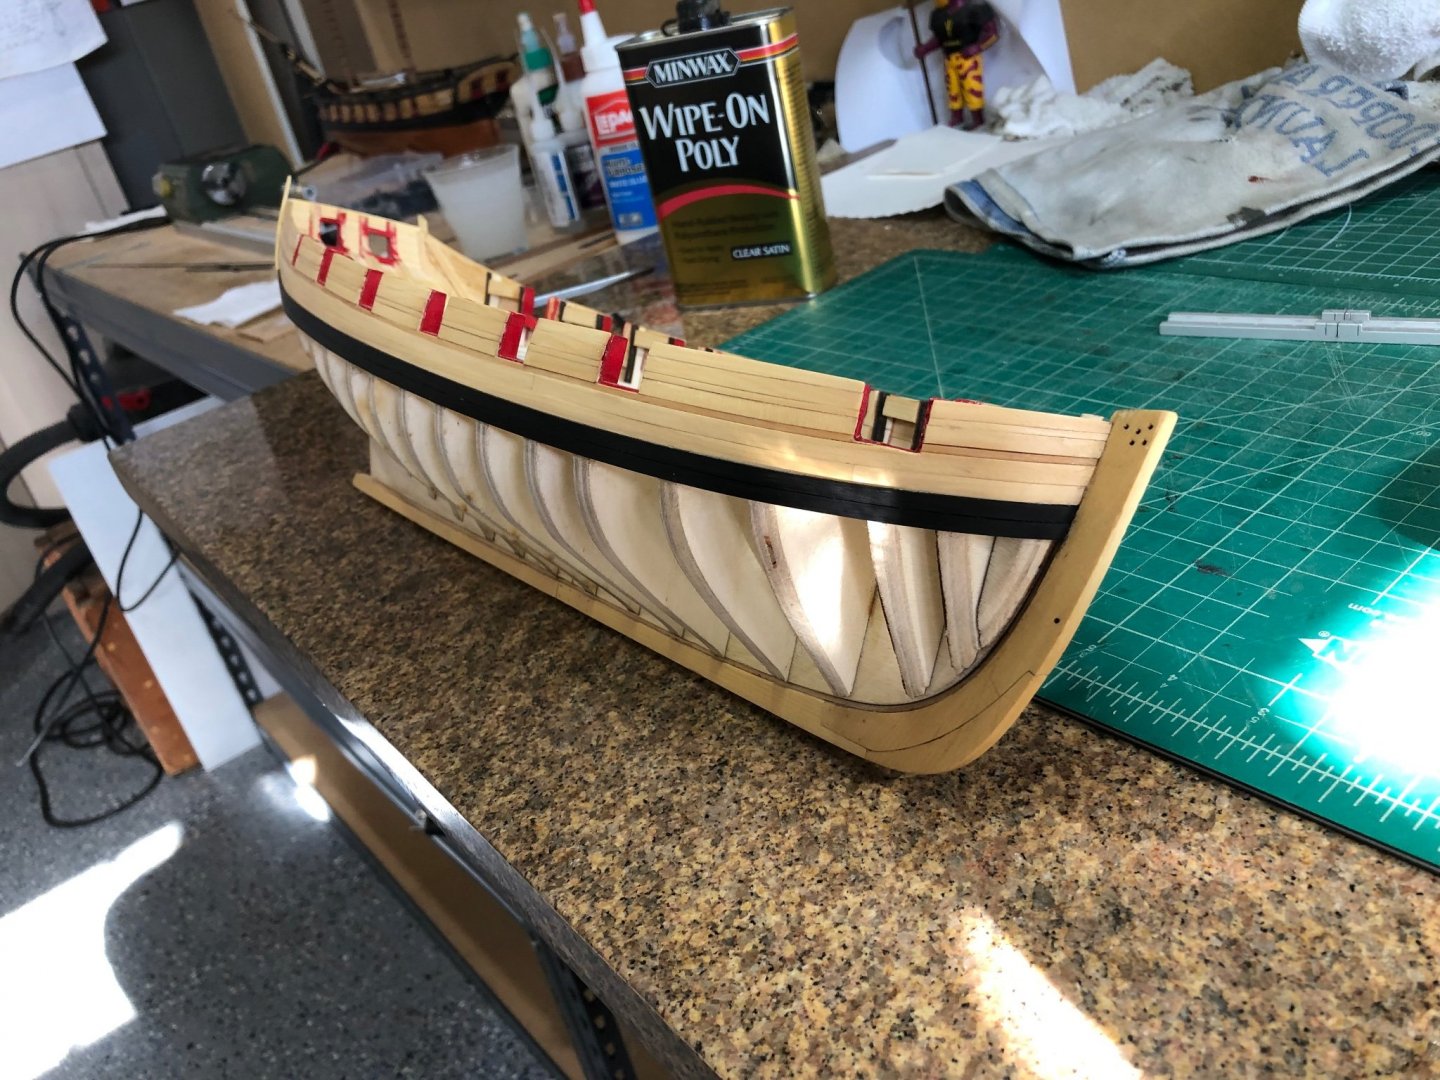
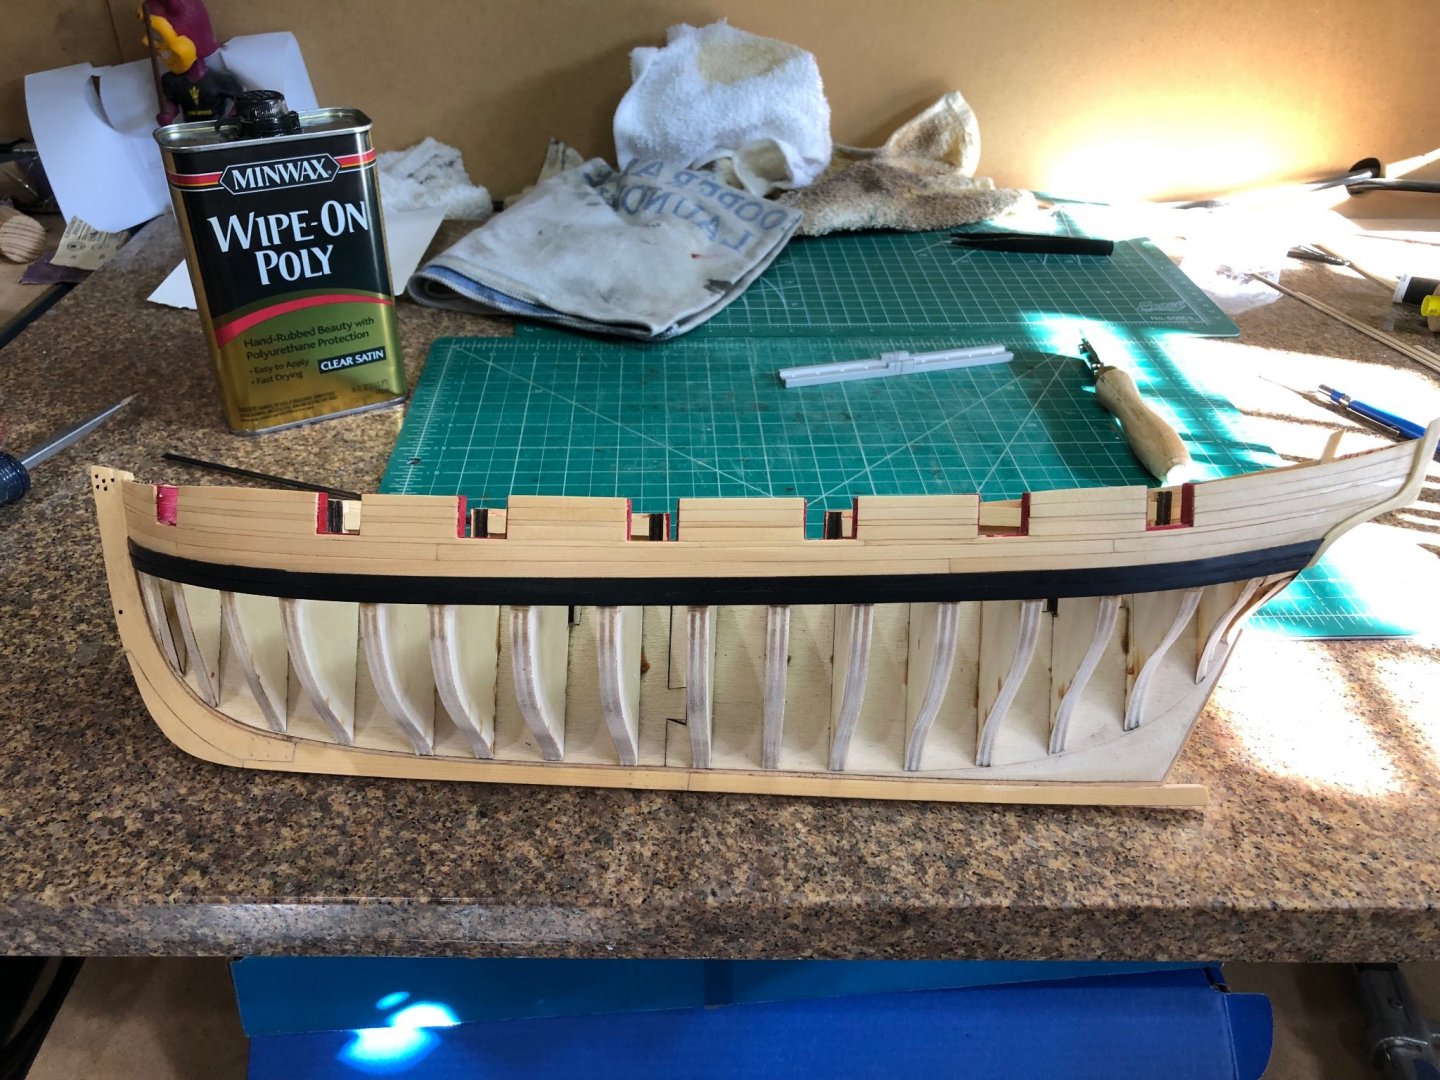
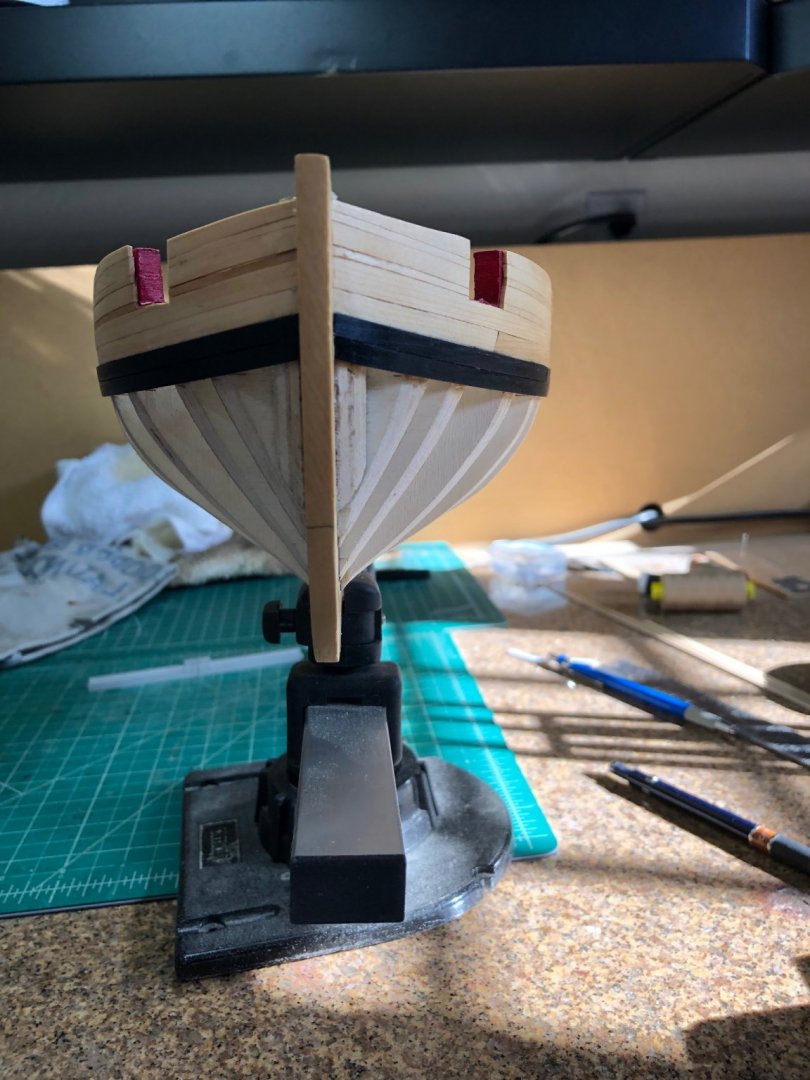
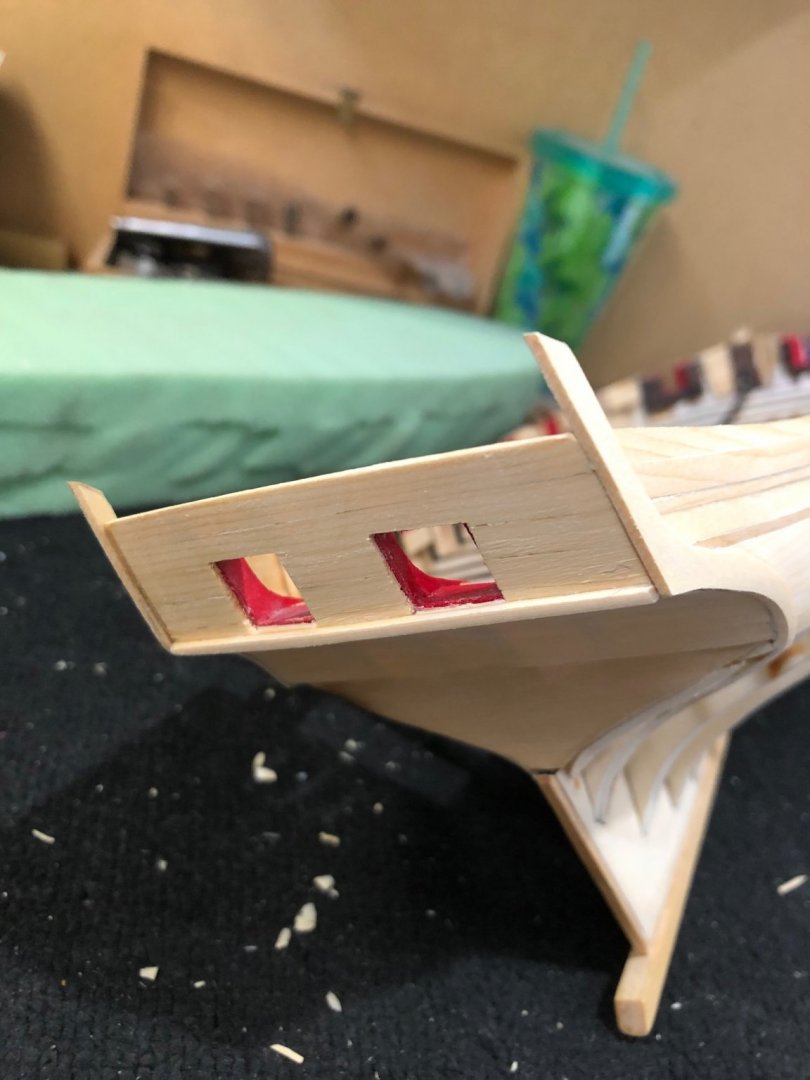
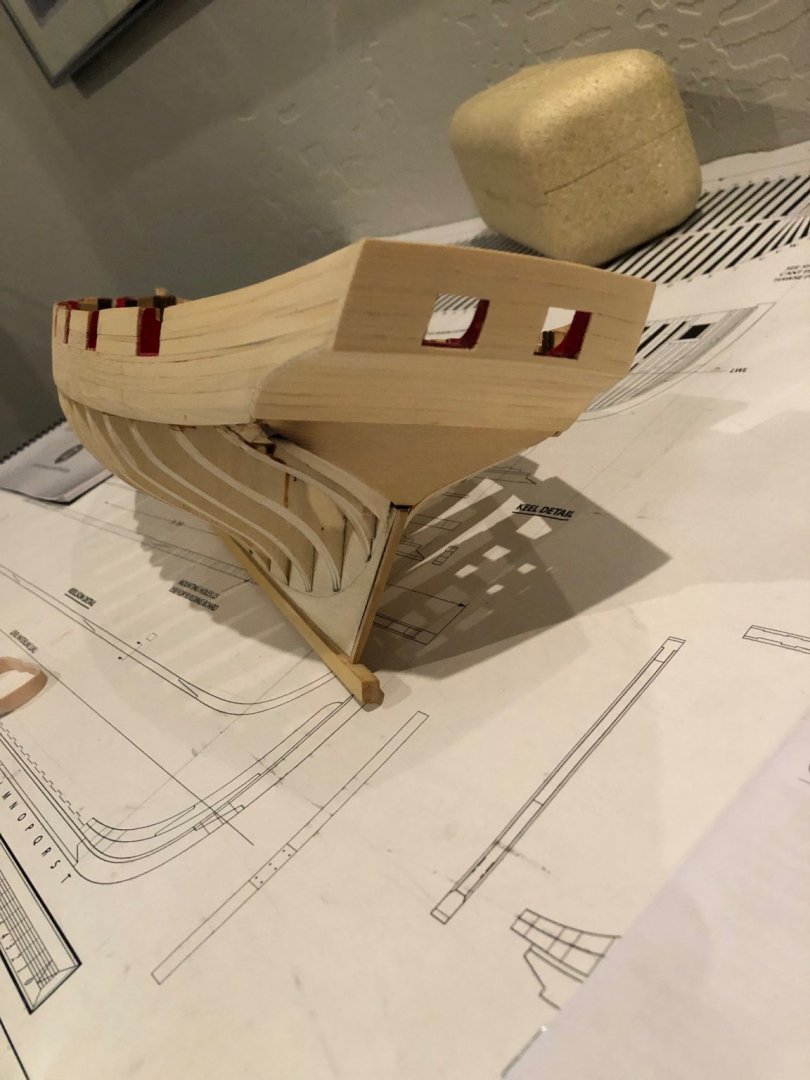
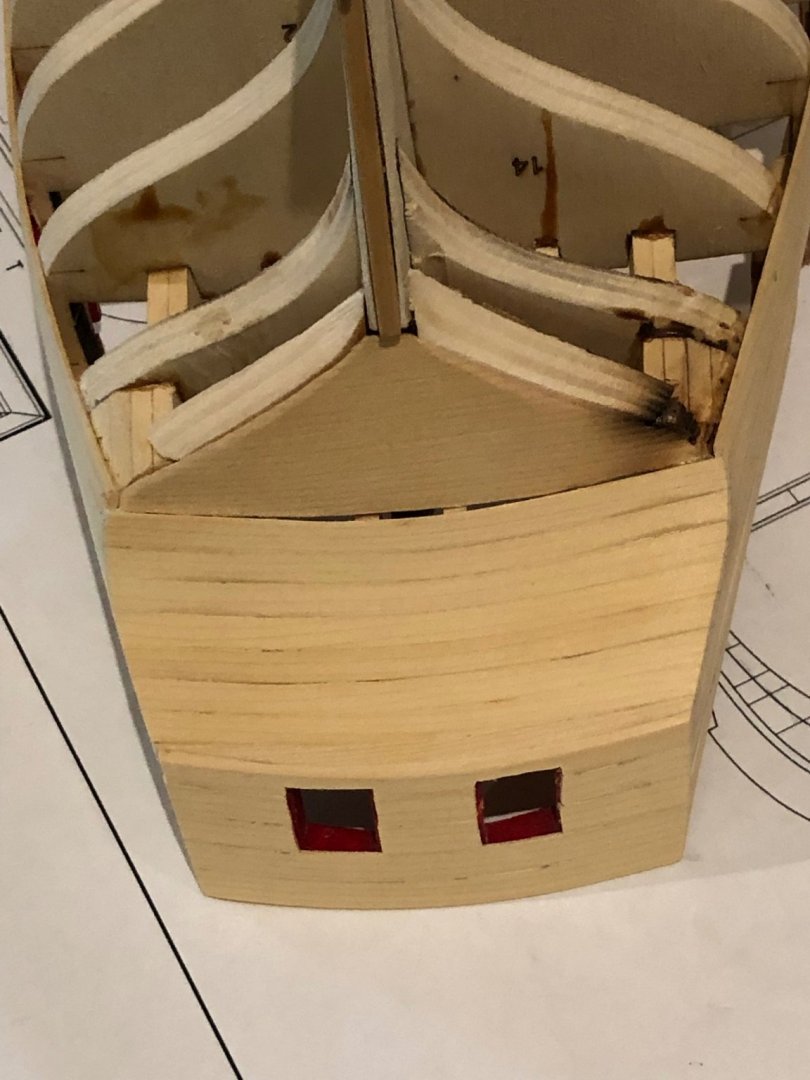
She's complete waiting for poly to cure and then the wales. The rabbit around the aft ports was cut a little larger that the sides were since the aft ports will have doors and will need something for the glue. The fashion pieces really brought home that this is not a kit when I tried to use the plans to make patterns for the fashion pieces. They were close but not good. So I made hybrid patterns using the forward side from the plans and the aft side from the boat. Using a cardboard I traced both side of the counter and transom and when with the pattern on both side I couldn't believe it fit on both sides. I knew I was careful but not that good so the sides matched. Bending the fashion pieces in two directions was a problem the required multiple heating cycles. Even then I had to hold them in place while the glue set it took 3 songs to get them in place. Starboard Side Port Side I also placed the fancy molding base below the ports Couple of pictures after the first coat of wipe on poly StarboardSide Aft view Starboard Stem view Port Side view Aft Port view Stem Port view You can tell I like the way she looks with wipe on poly. I didn't put any highlighting on the edges of the frames and have been concerned that they won't display very well. The pictures really show the lines and I'm very happy with the way it looks. Can' wait to plank the rest of Cheerfuls strakes.


-
Yes! You're right about the size being smaller that you imagined. Another rigging I'm doing is using 2.5mm blocks (almost 3/32") and appreciate your dilemma. Good Luck you"ll get it.
-
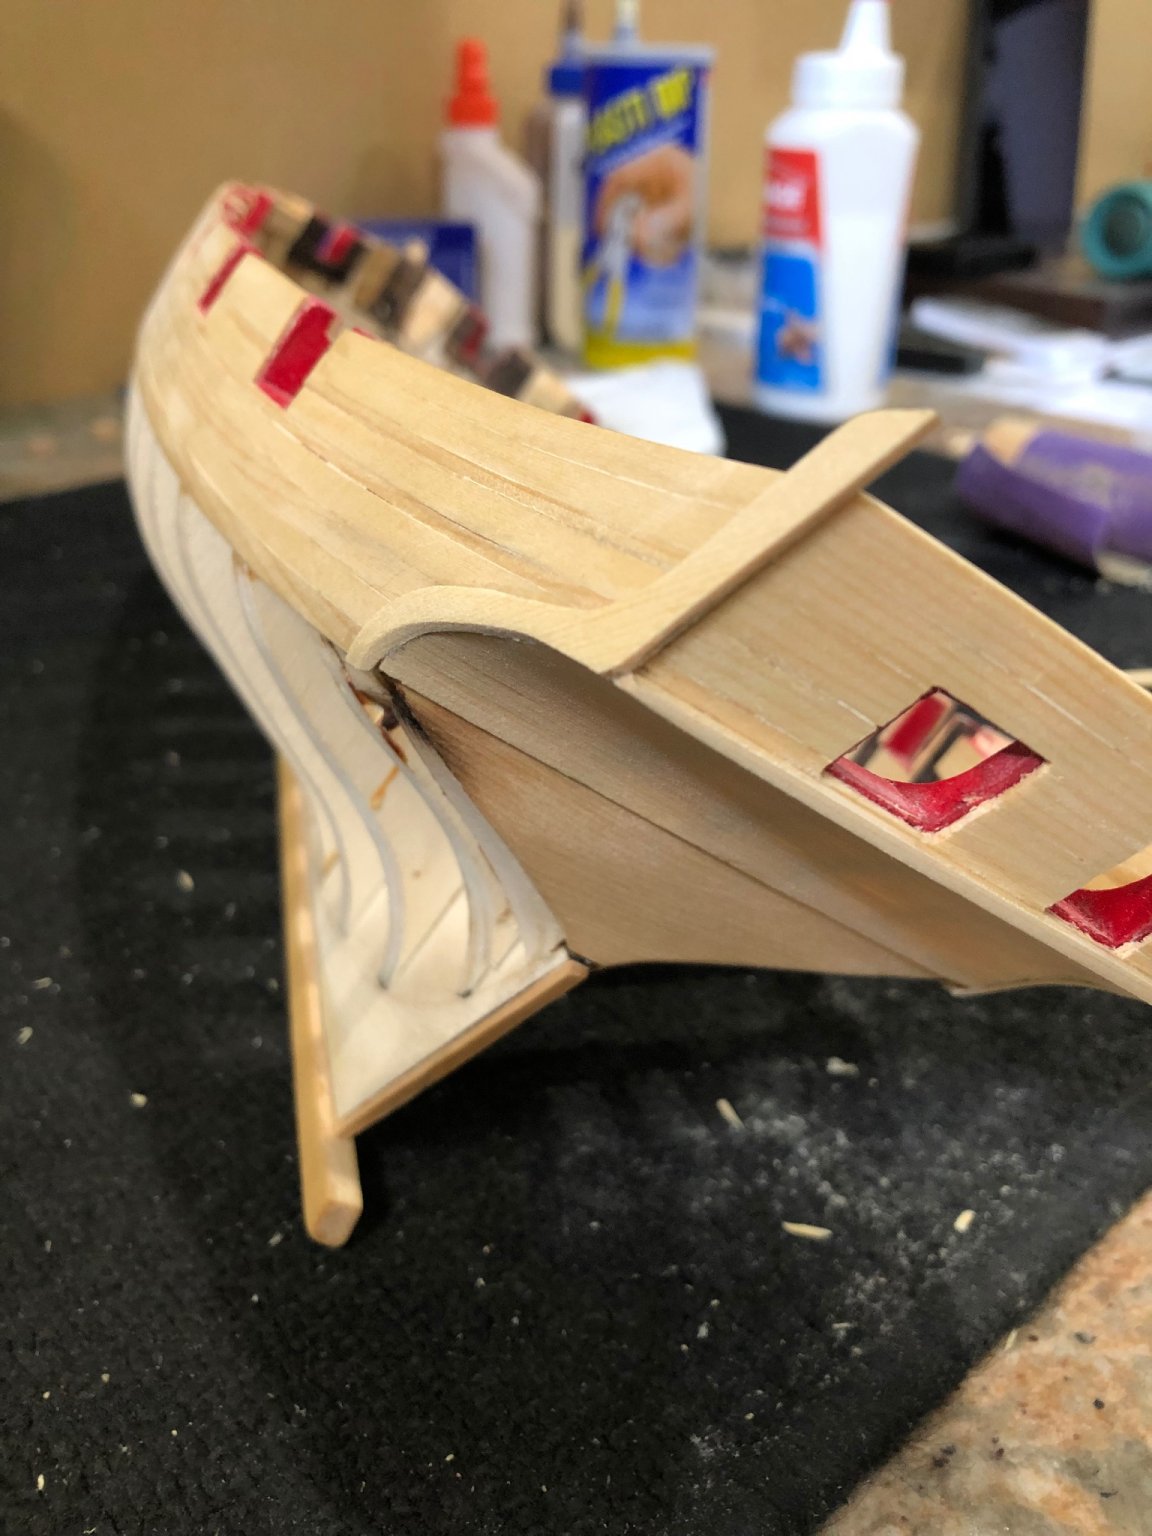
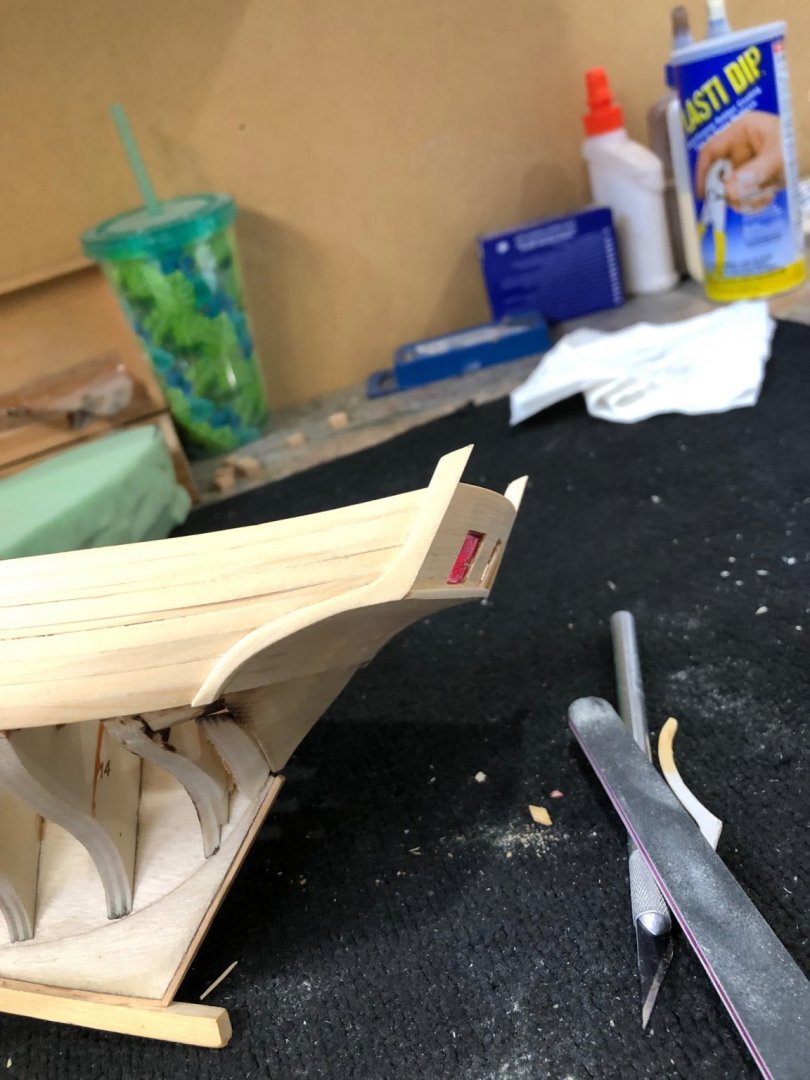
Busy day on house cleaning but I did manage to sneak out and plank the transom I thought it would be better to bend the planks in a whole piece rather than piece it together between the ports and sides. The planking came out really nice and now I have to finish cutting out the port opening. I'm going to finish the Cheerful with the ports closed as there will be no long guns aboard. finished planking and start cutting the port openings From the port view From the starboard view Tomorrow first coat of wipe on poly and then the 2nd coat before fashion pieces. Maybe I should put the fashion pieces on before the wop. Thoughts

-
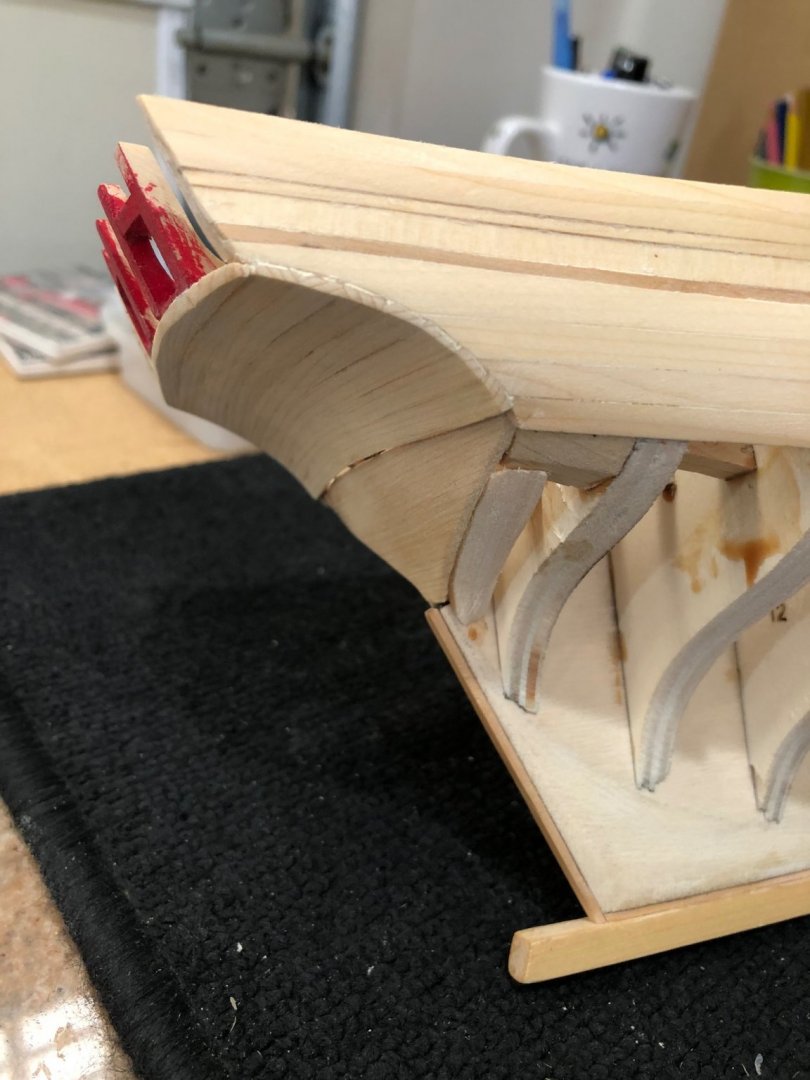
Afternoons work got the counter planked. Bending all the planks so they fit adjacent to each other was a challenge with many do overs. Bent too much. Not bent enough. Putting plank in bending jig for a second bend is touchy business as when you get the plank hot it also gets harder along the grain and with to much bending they split and break. A do over. It was fun watching the stern come to life tomorrow I'll plank the transom. The transom will bring it own set of challenges or as my friend Nick used say opportunities to succeed. The usual pictures. The scorched area is where I was heating up the glue joint to remove planking. It worked well making the titebond churn sticky but the wood turned faster that I could stop the iron hence the scorch. Luckily it will be covered up and only you and me will know its there.


-
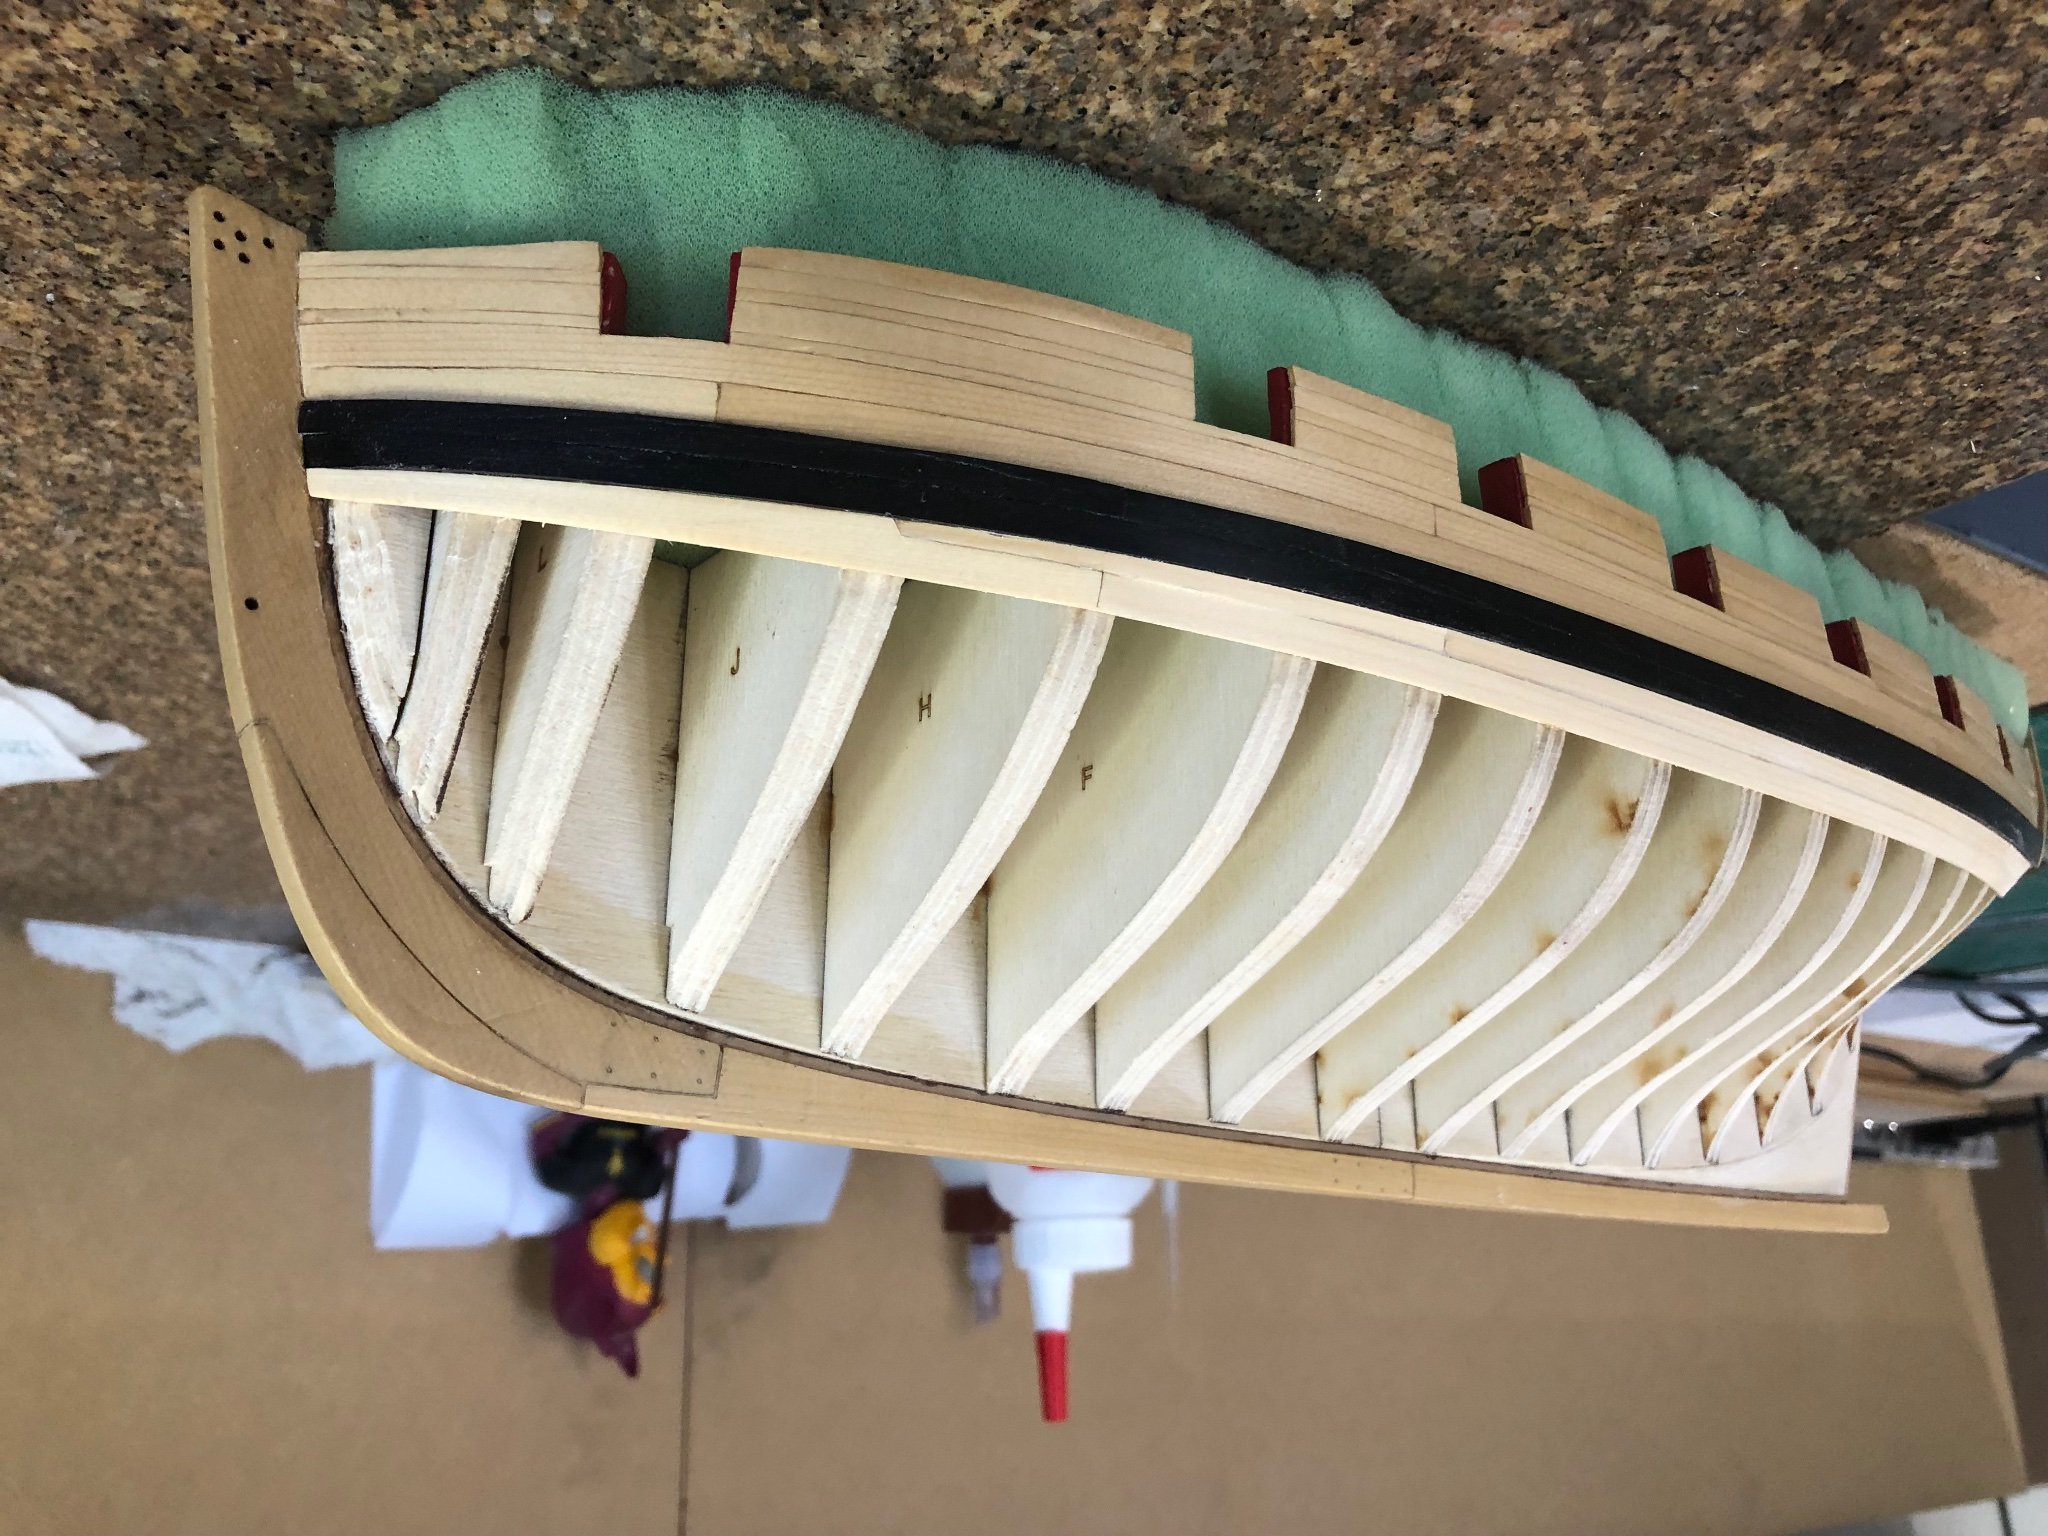
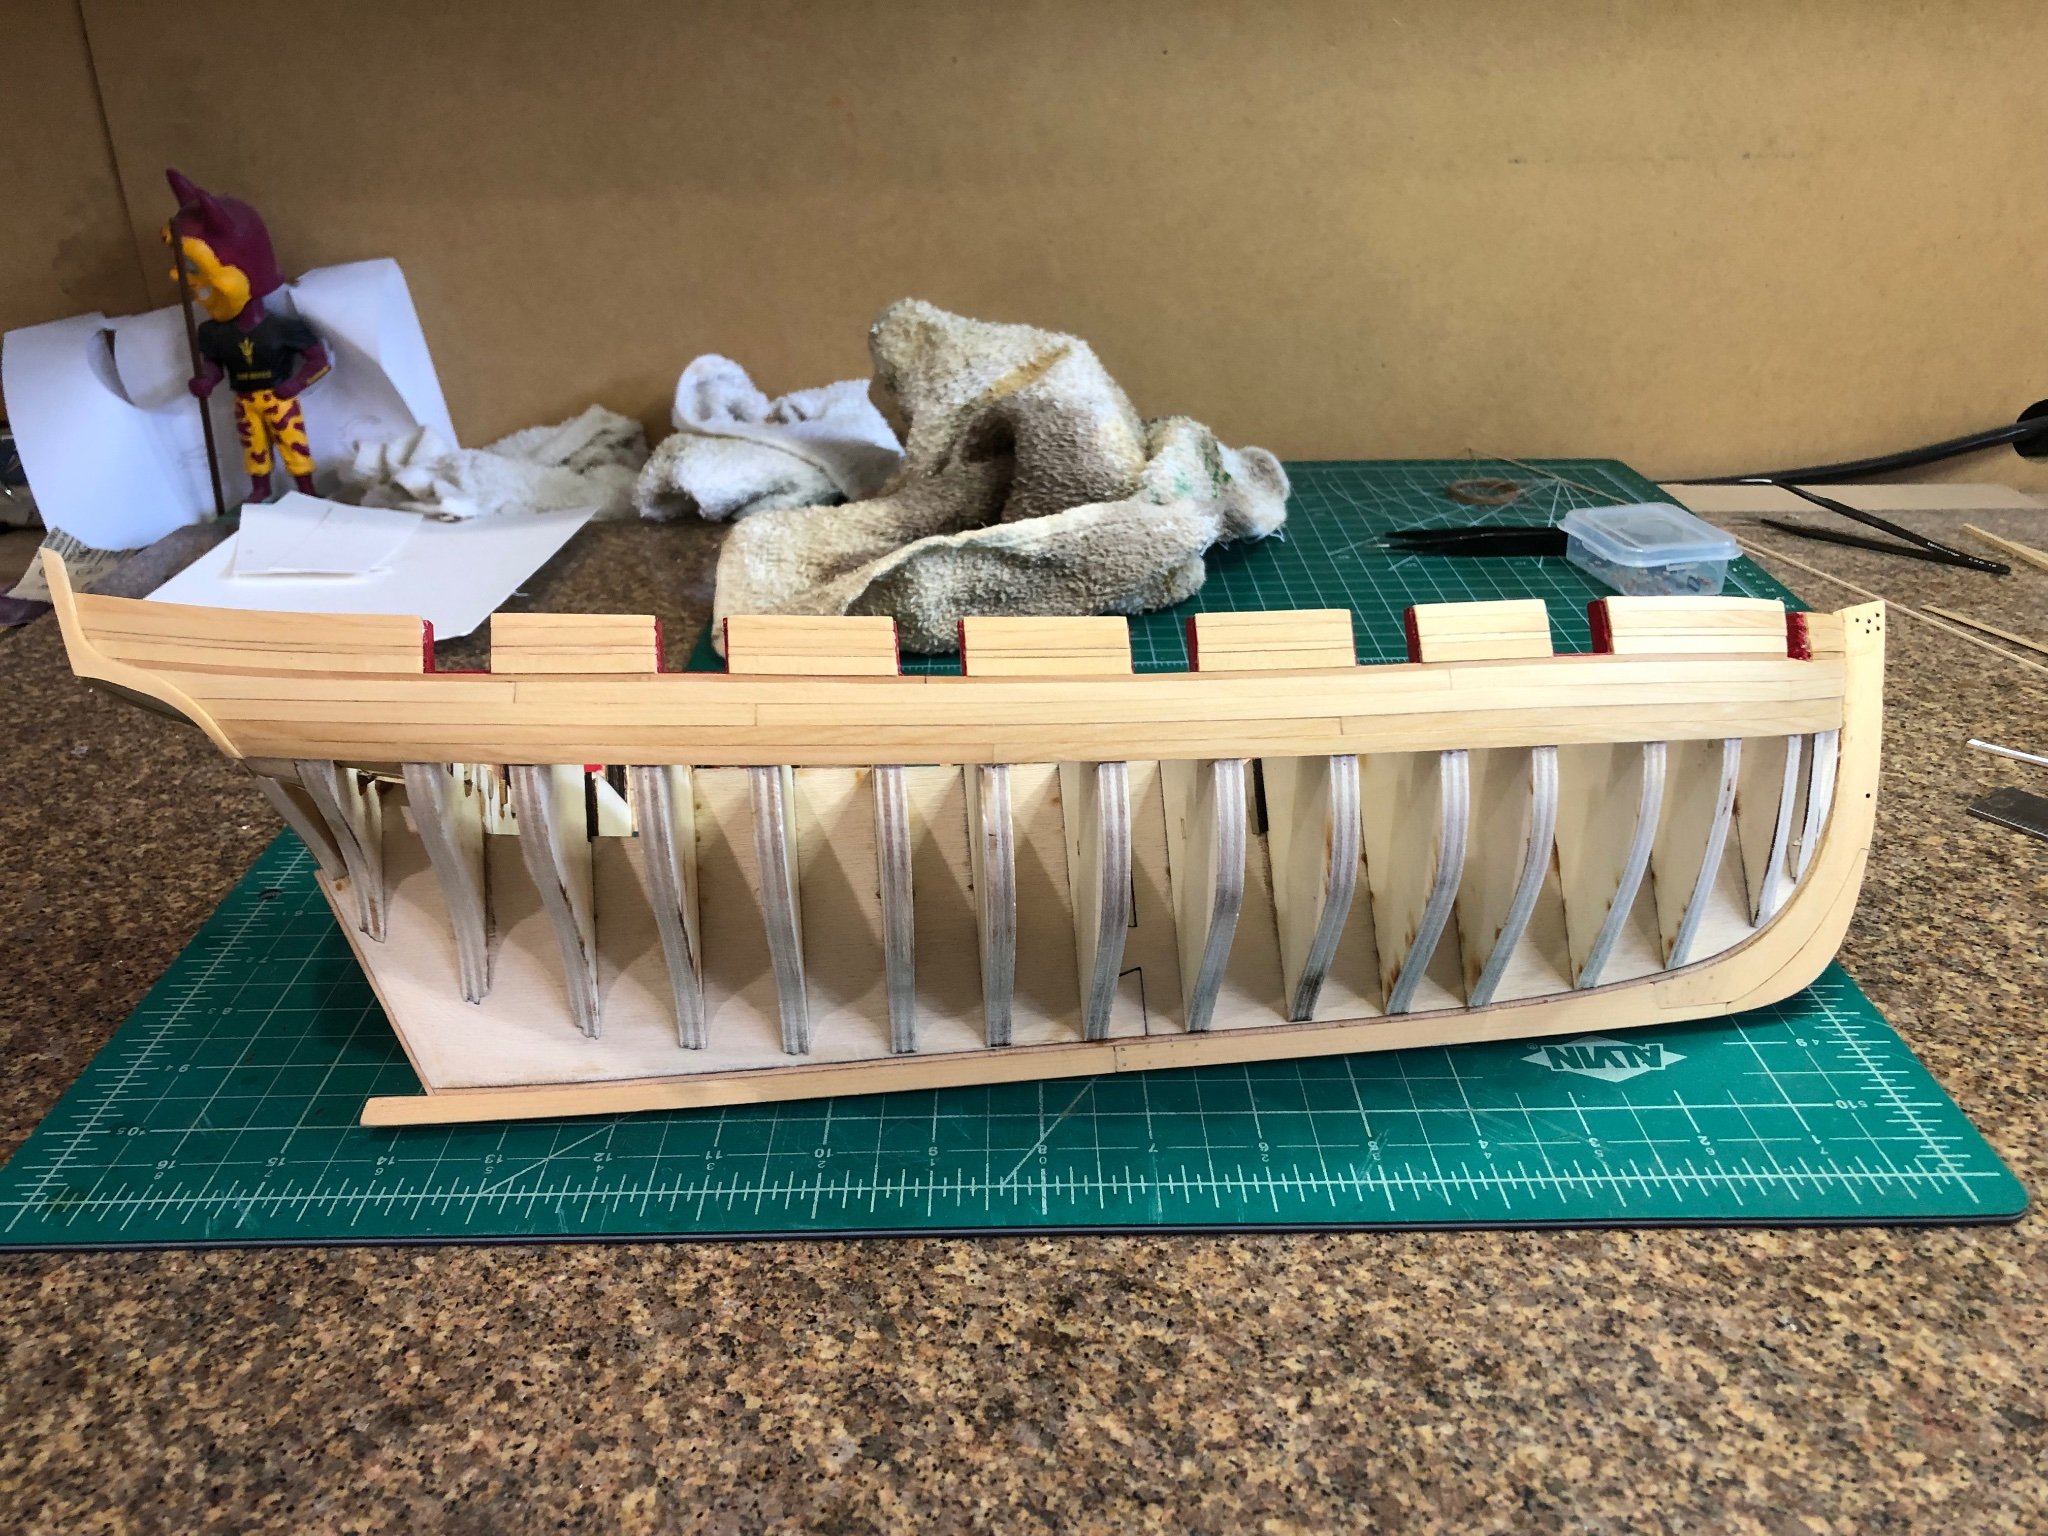
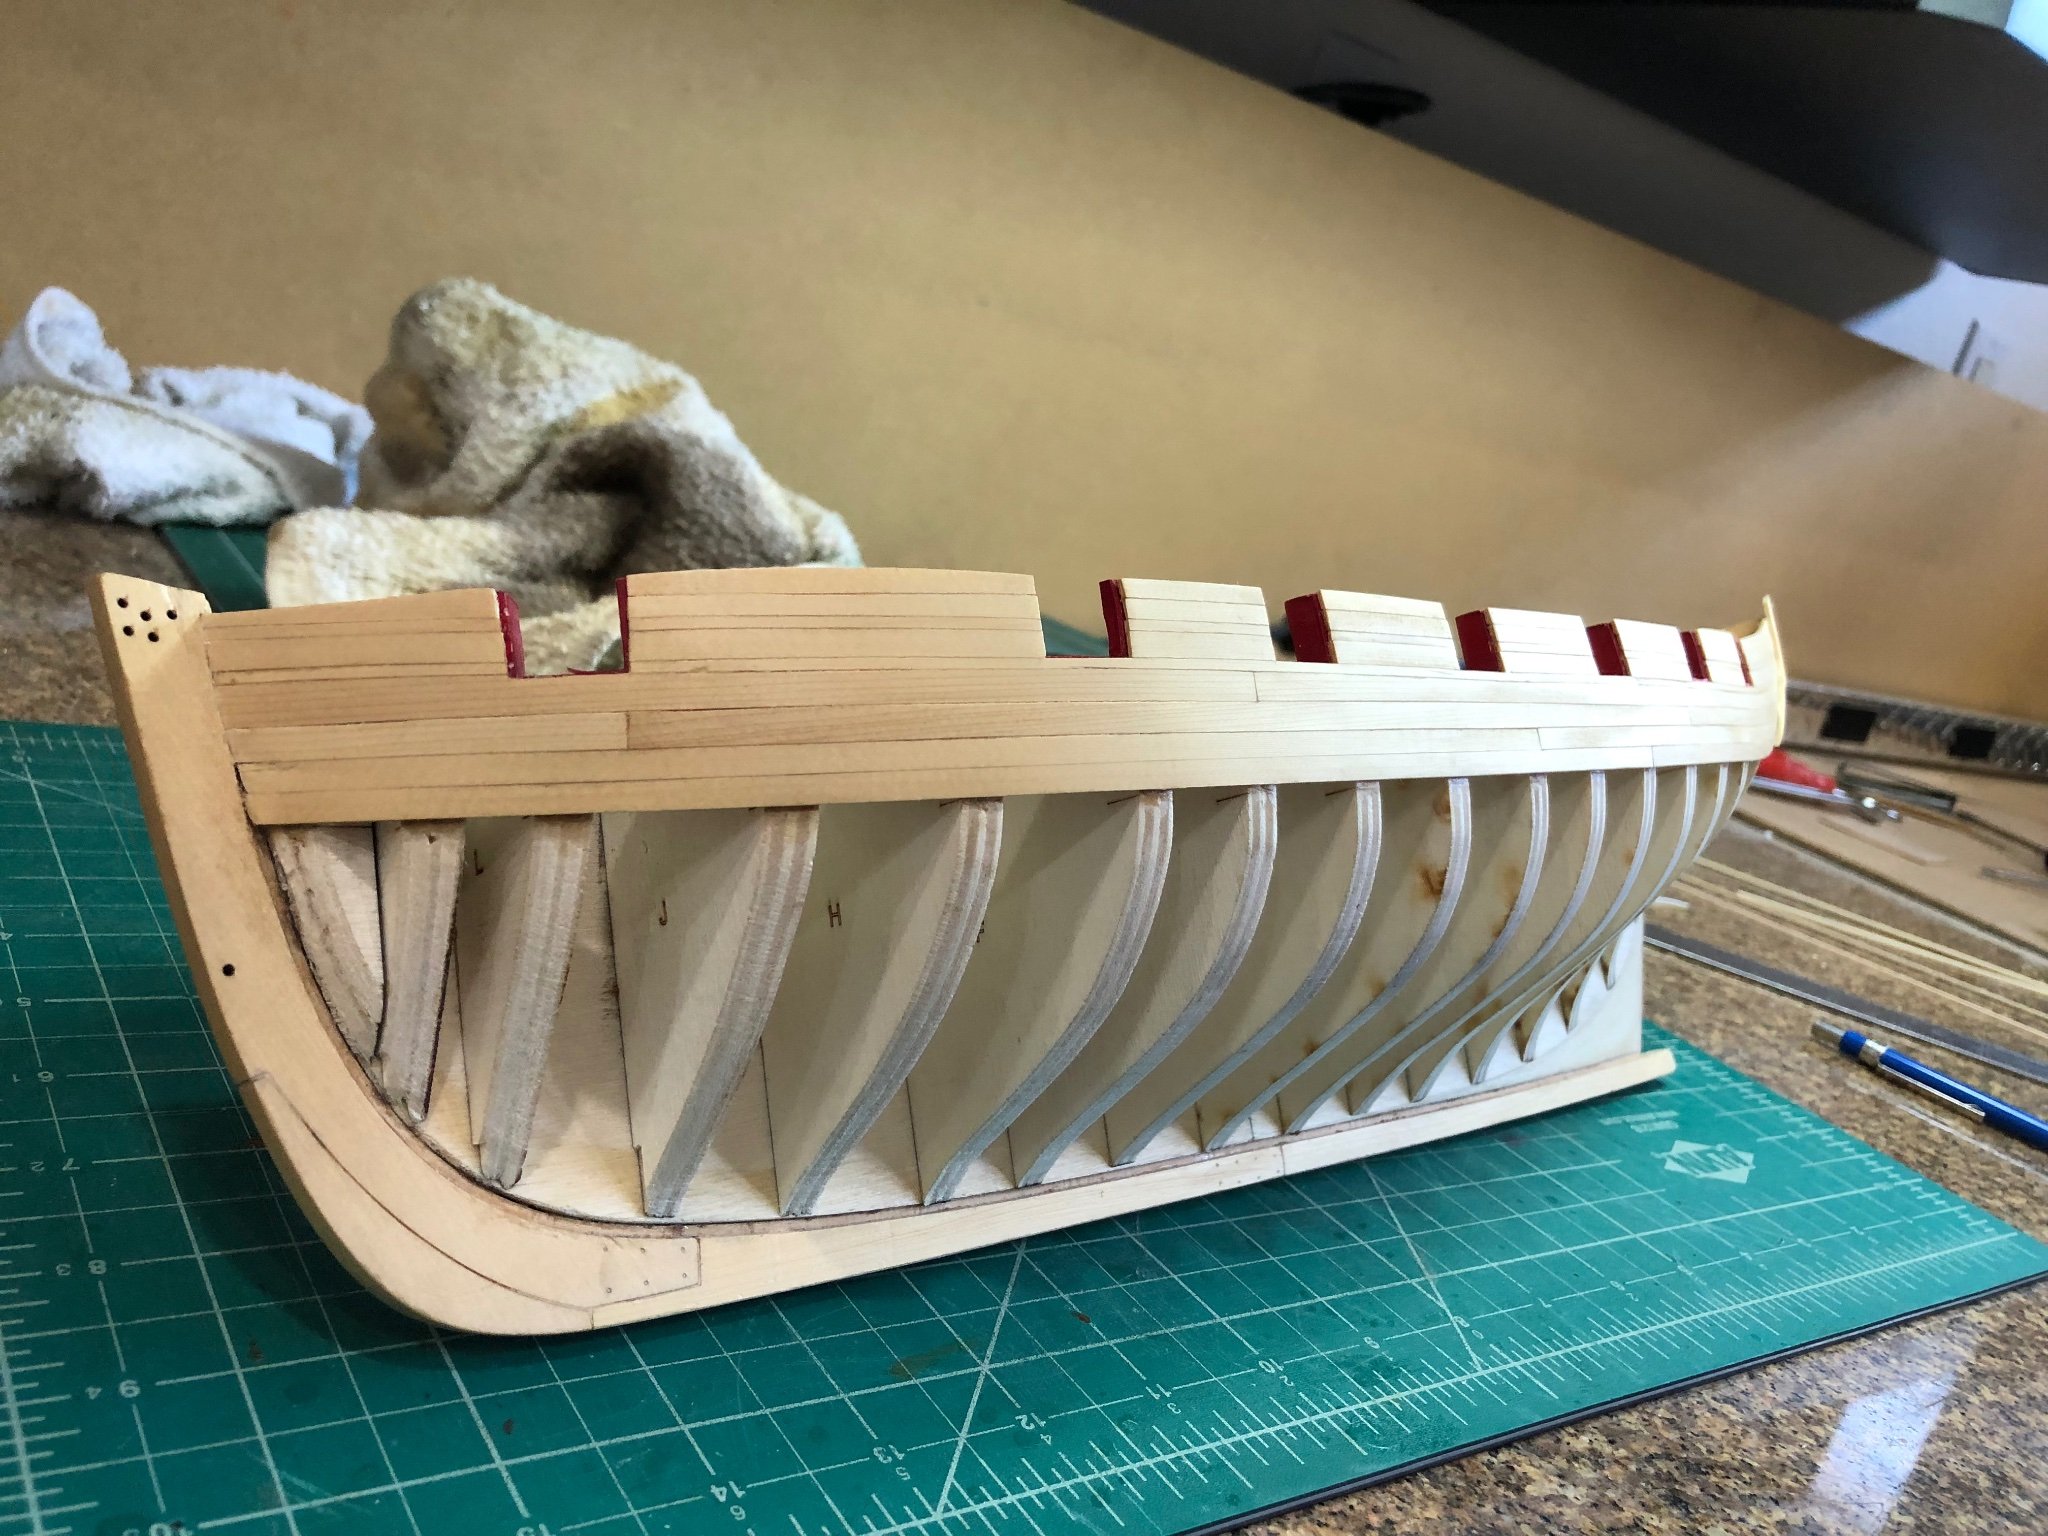
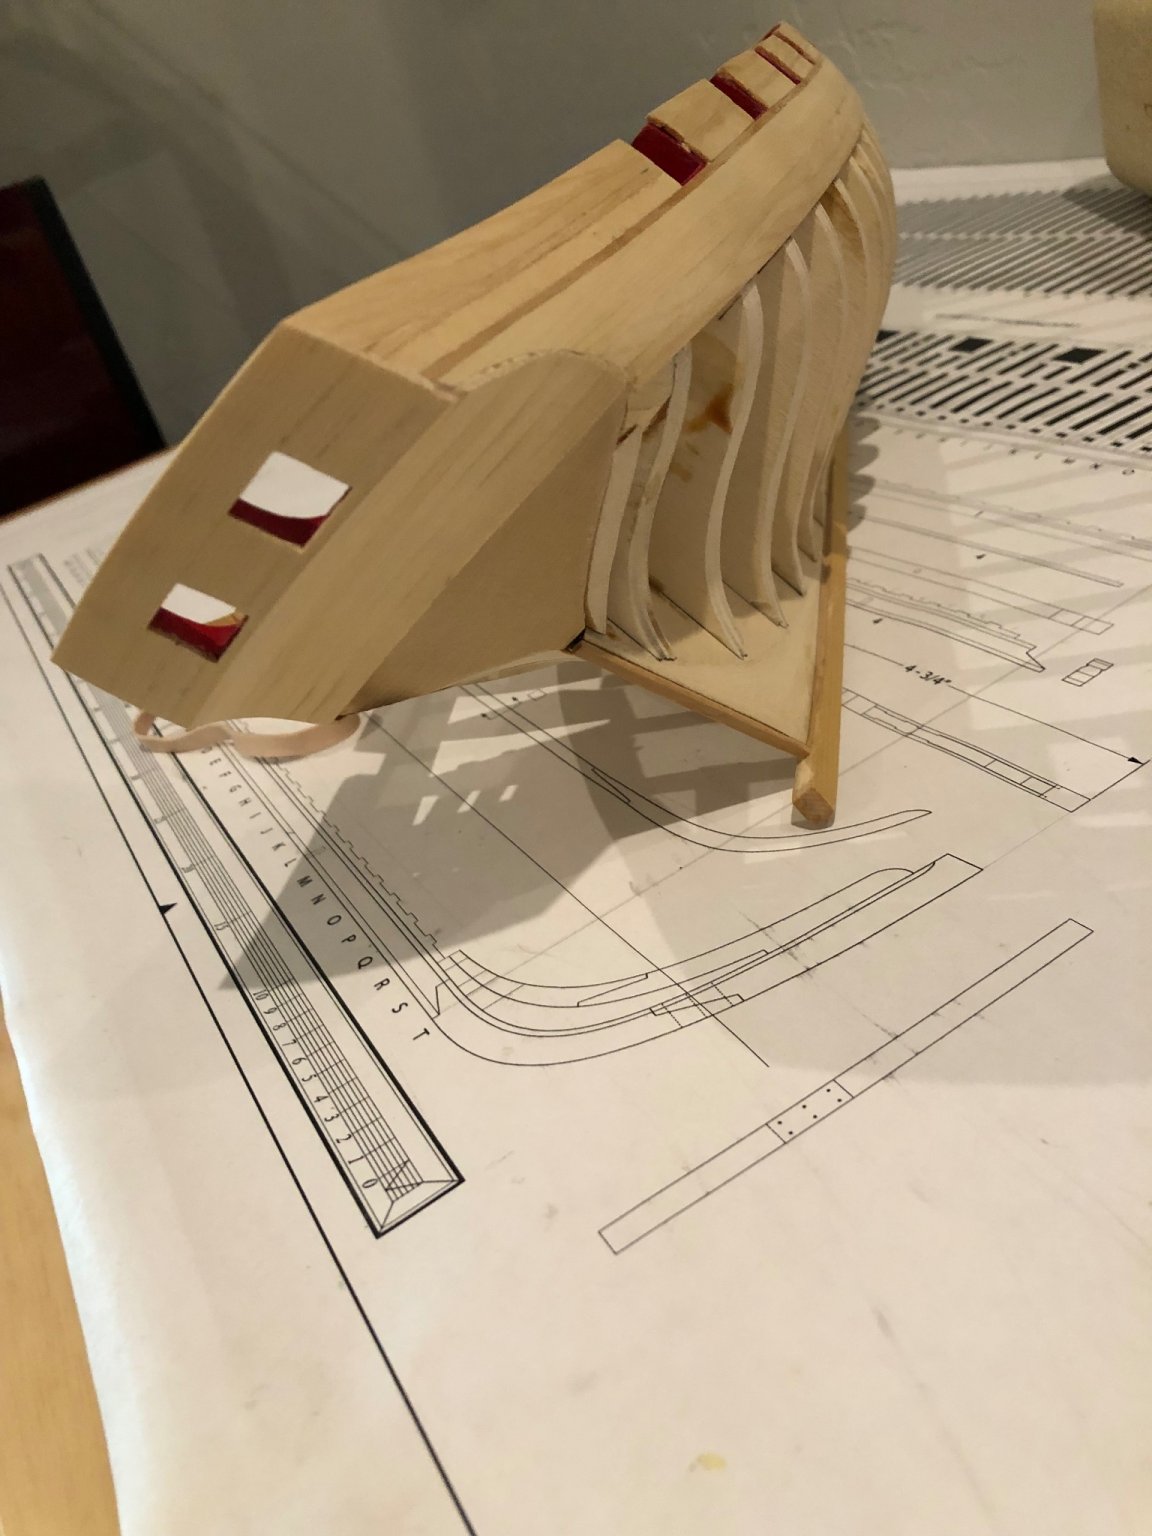
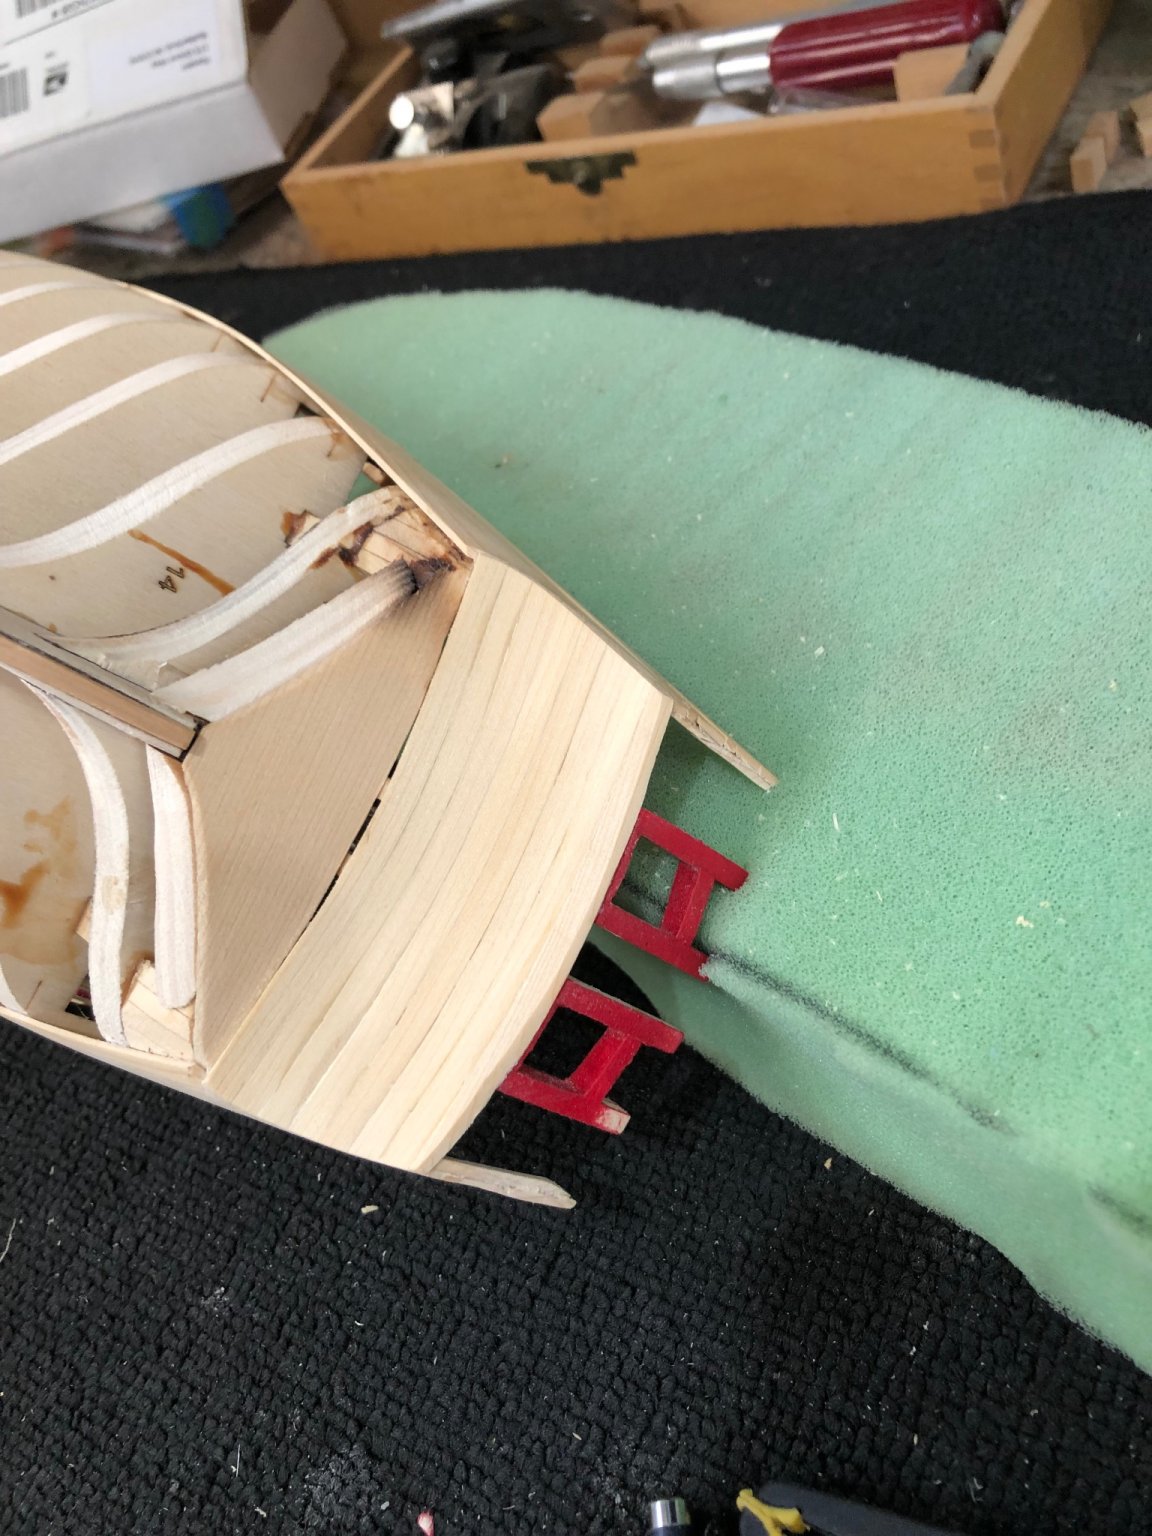
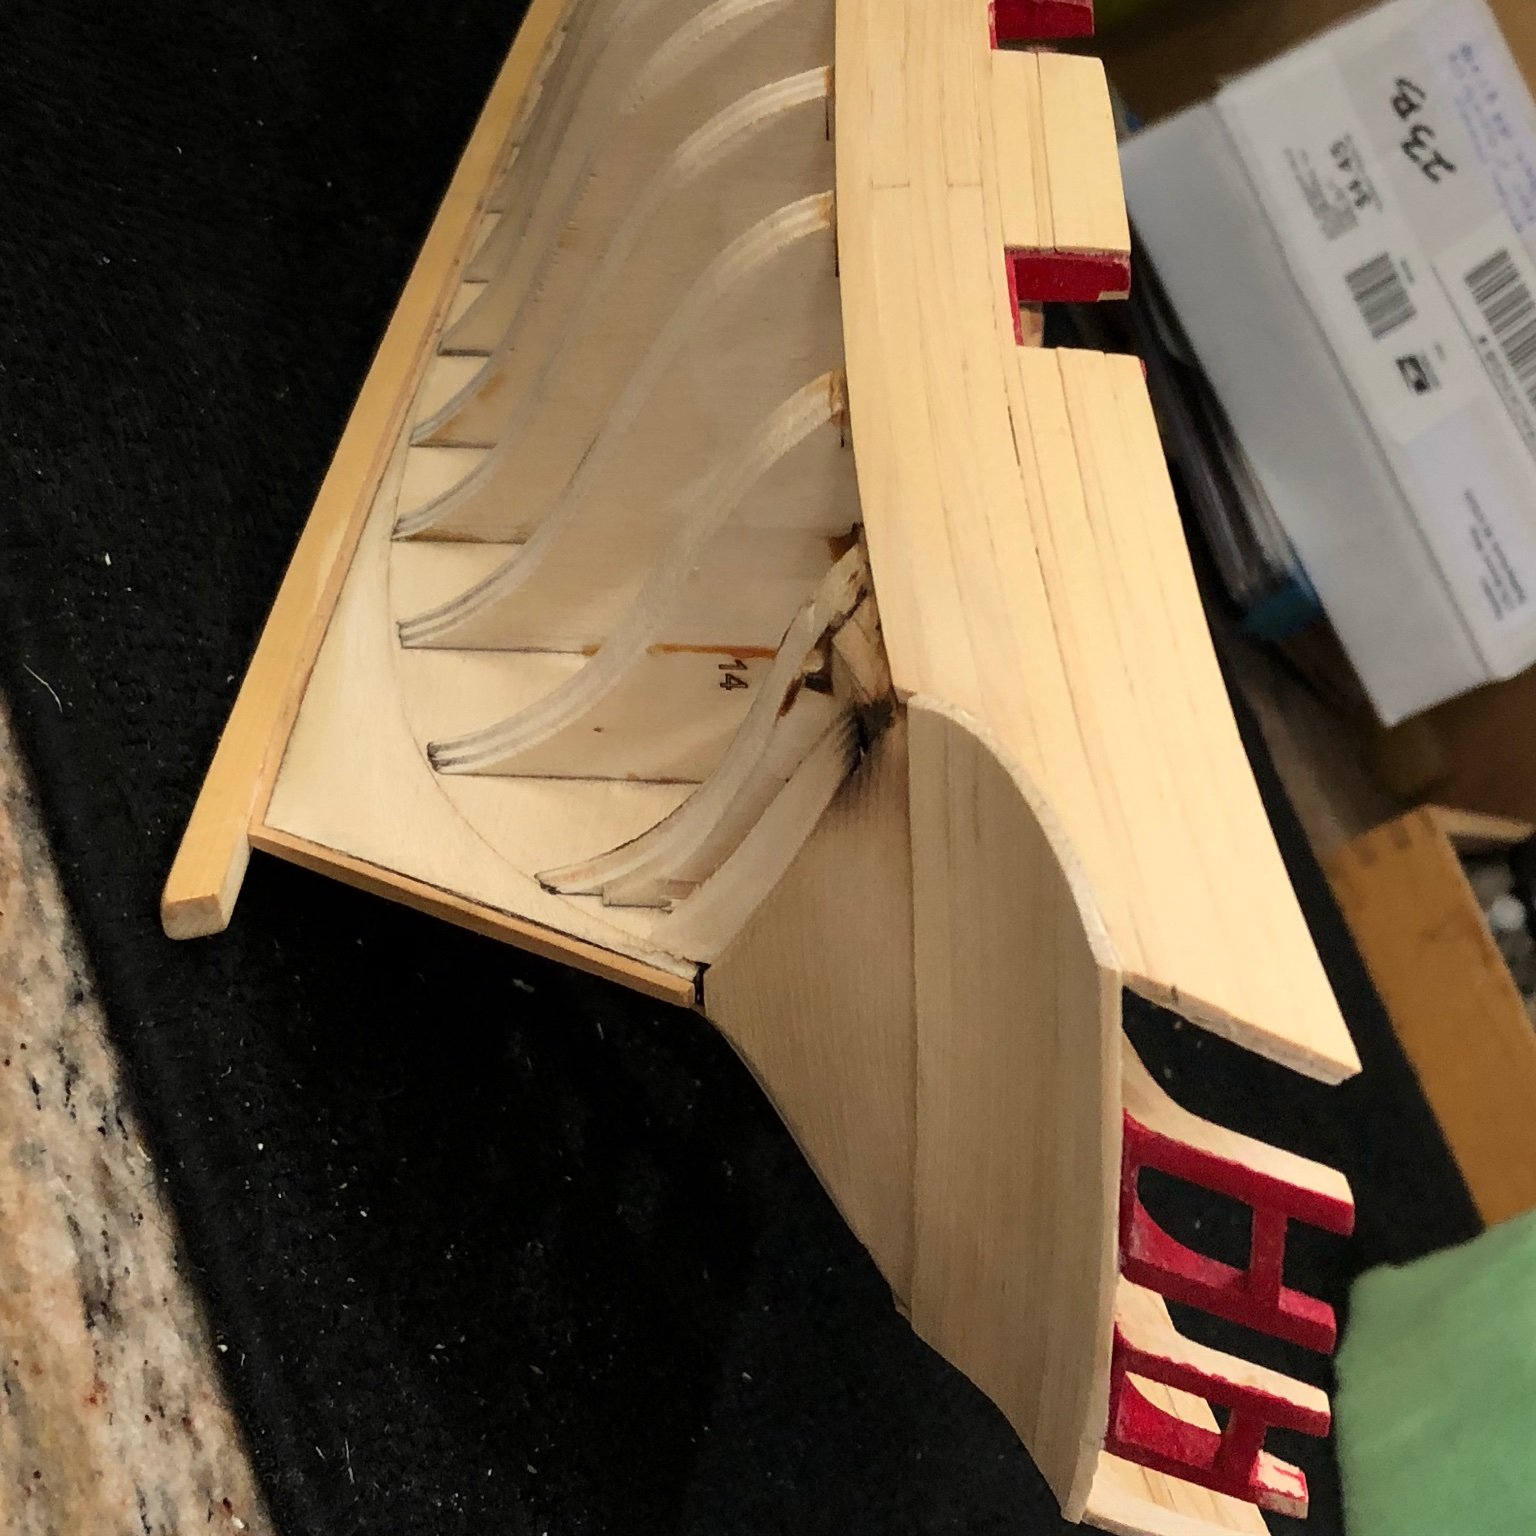
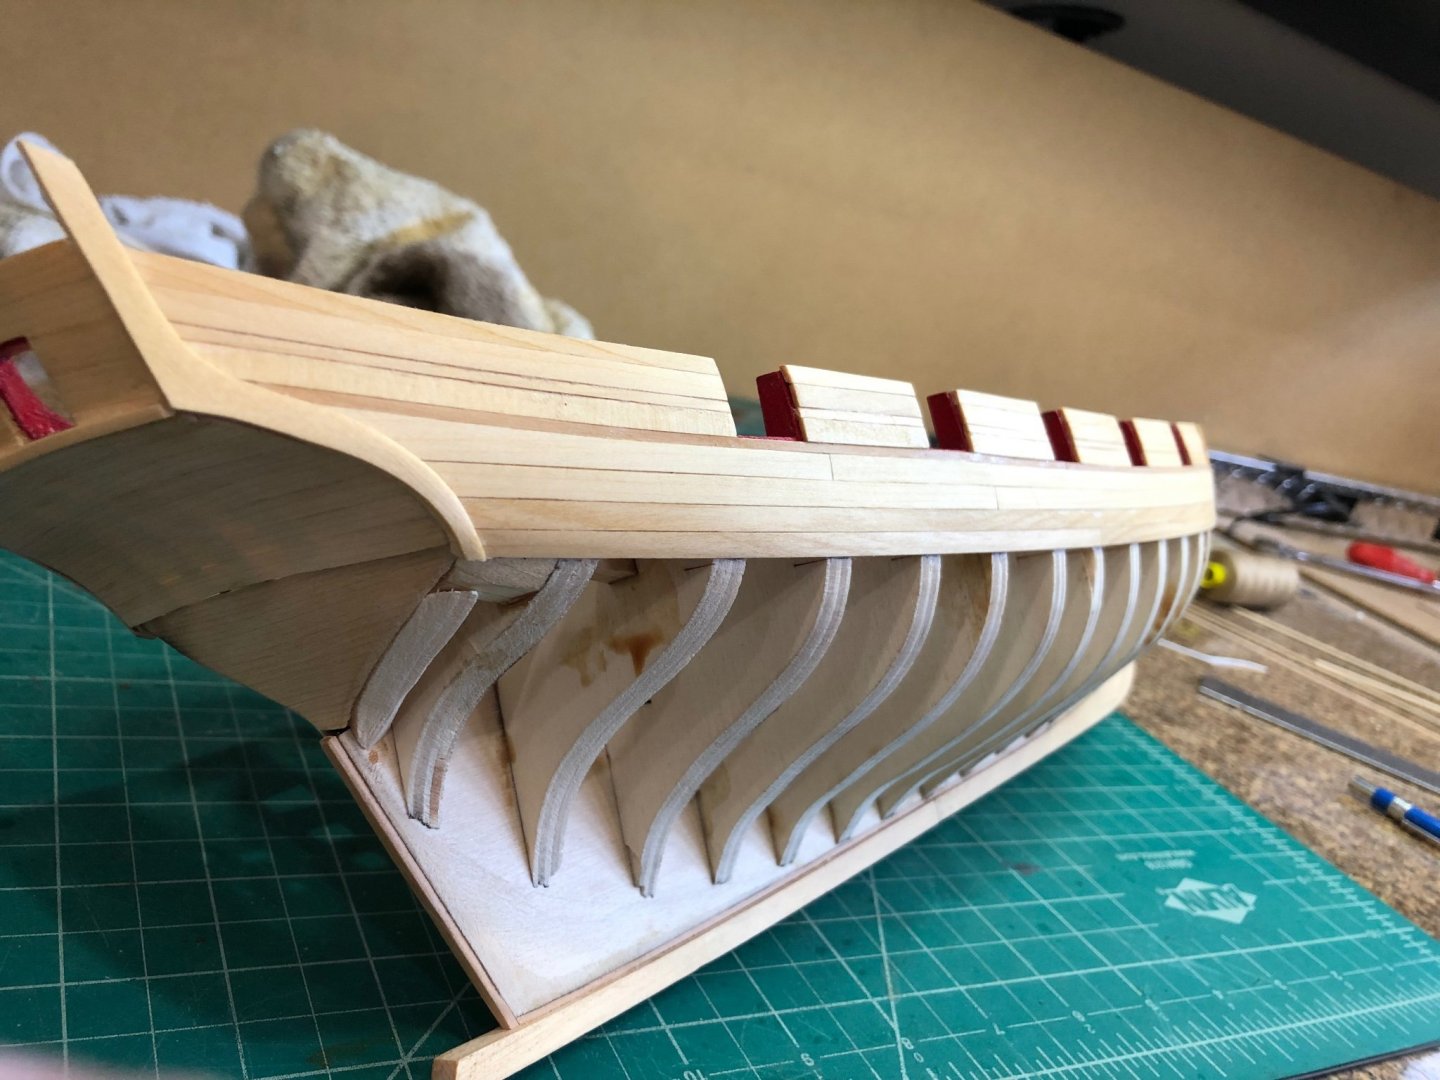
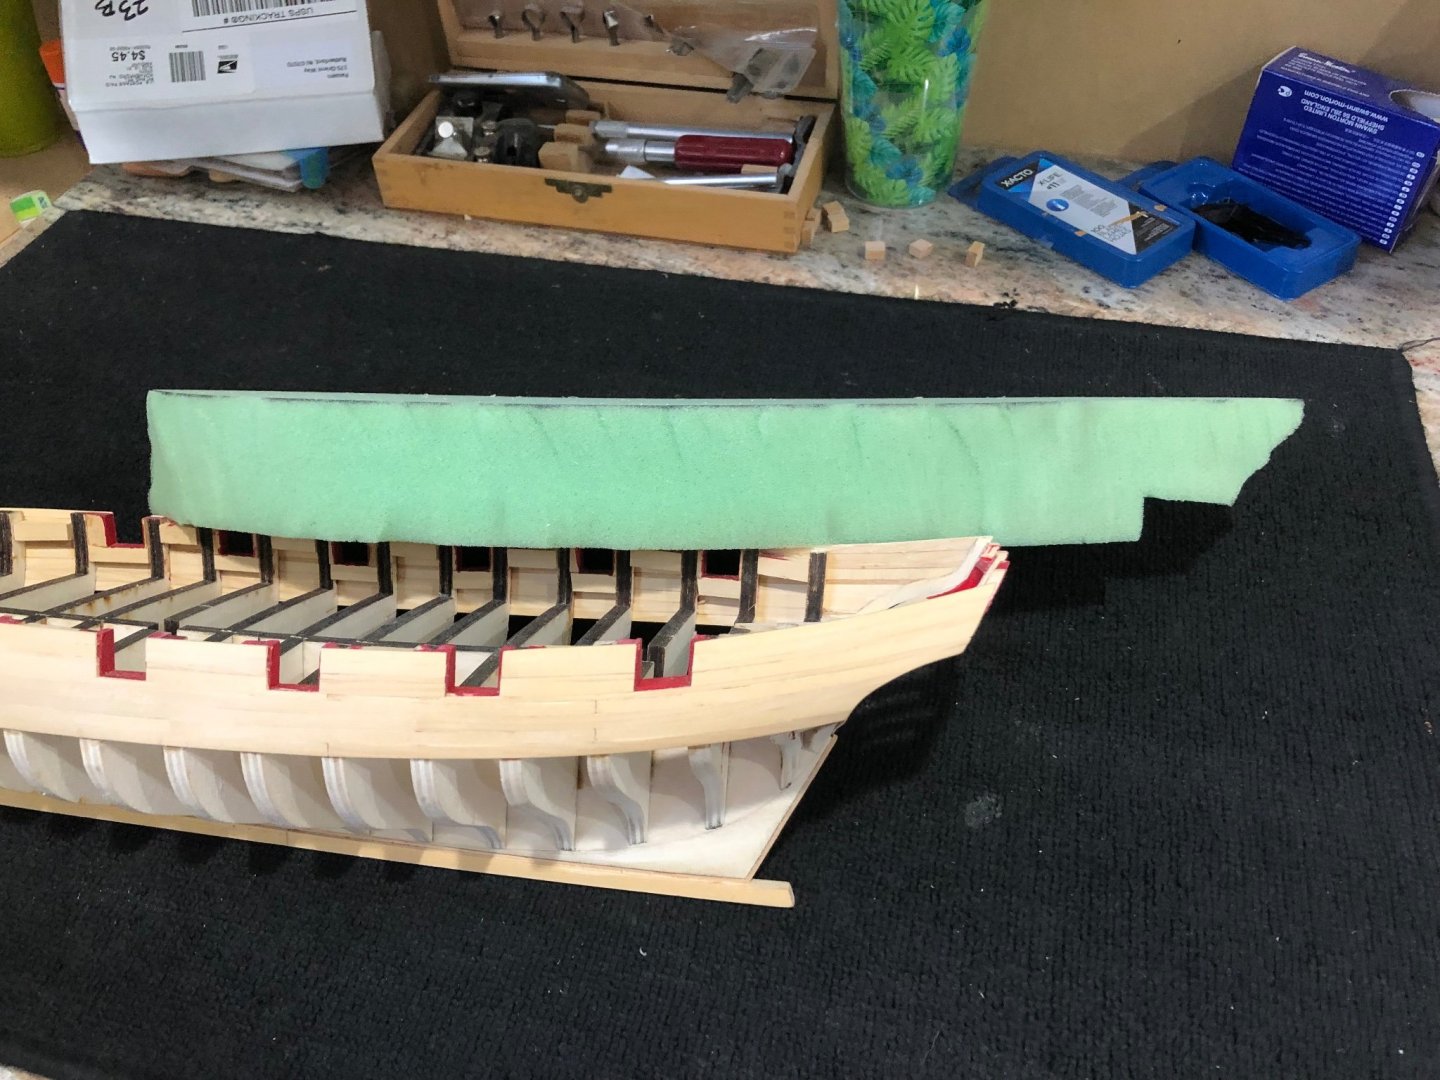
Again many thanks Chuck and Glenn for the nice comments along with all the likes. Started on the next step the counter and transom planking. First is to thin the outmost stern bulwarks to 1/16". The monograph suggested to use a dremel or similar with a small abrasive. I had a small 1/2" dia sanding drum and it fit between the outmost and next bulwark with about 1/32" clearance. Before getting into how I thinned the bulwarks I'd like to show a couple of items that I use regularly. The first is a 2' by 3' piece of carpet that I had made from scapes at a carpet shop. When working on your model the carpet surface is a very good protection for your priceless model. Heres Cheerful sitting on the carpet Another thing I use is a piece of 2" foam from a craft store and cut to fit between the bulwarks. When working on an upside down model its so easy to break a bulwark so the foam makes a stable piece and keeps the model from sliding around while your working. On the Cheerful you can see where I notched the foam for Cheerful's stern bulwarks Here is a picture of the foam in place and Cheerful upside down Back to thinning. I used the grinder to get down to 1/8" or so but this was very nerve wracking. So I went on to use #11 blades to pare down to 1'16" and clean out the radius at the deck. I finished up with sanding sticks and moved on the other side. For the starboard I used #11 exclusively paring down to approximately 5/64" and then finished up with sanding sticks. Just a word this is much easier on the nerves and does a cleaner job requiring less cleanup. Another note of caution is while the monograph says it is stronger after planking and while that is true until you get down 1/8" thick and then you can feel the side starting to flex. This where the carpet really comes into it own as you can safely lay the model on it side with carpet beneath protecting the planking. Remember this is a single plank model and dents/scratches will be shown. Finished ready for counter planking Time for lunch and then counter planking

-
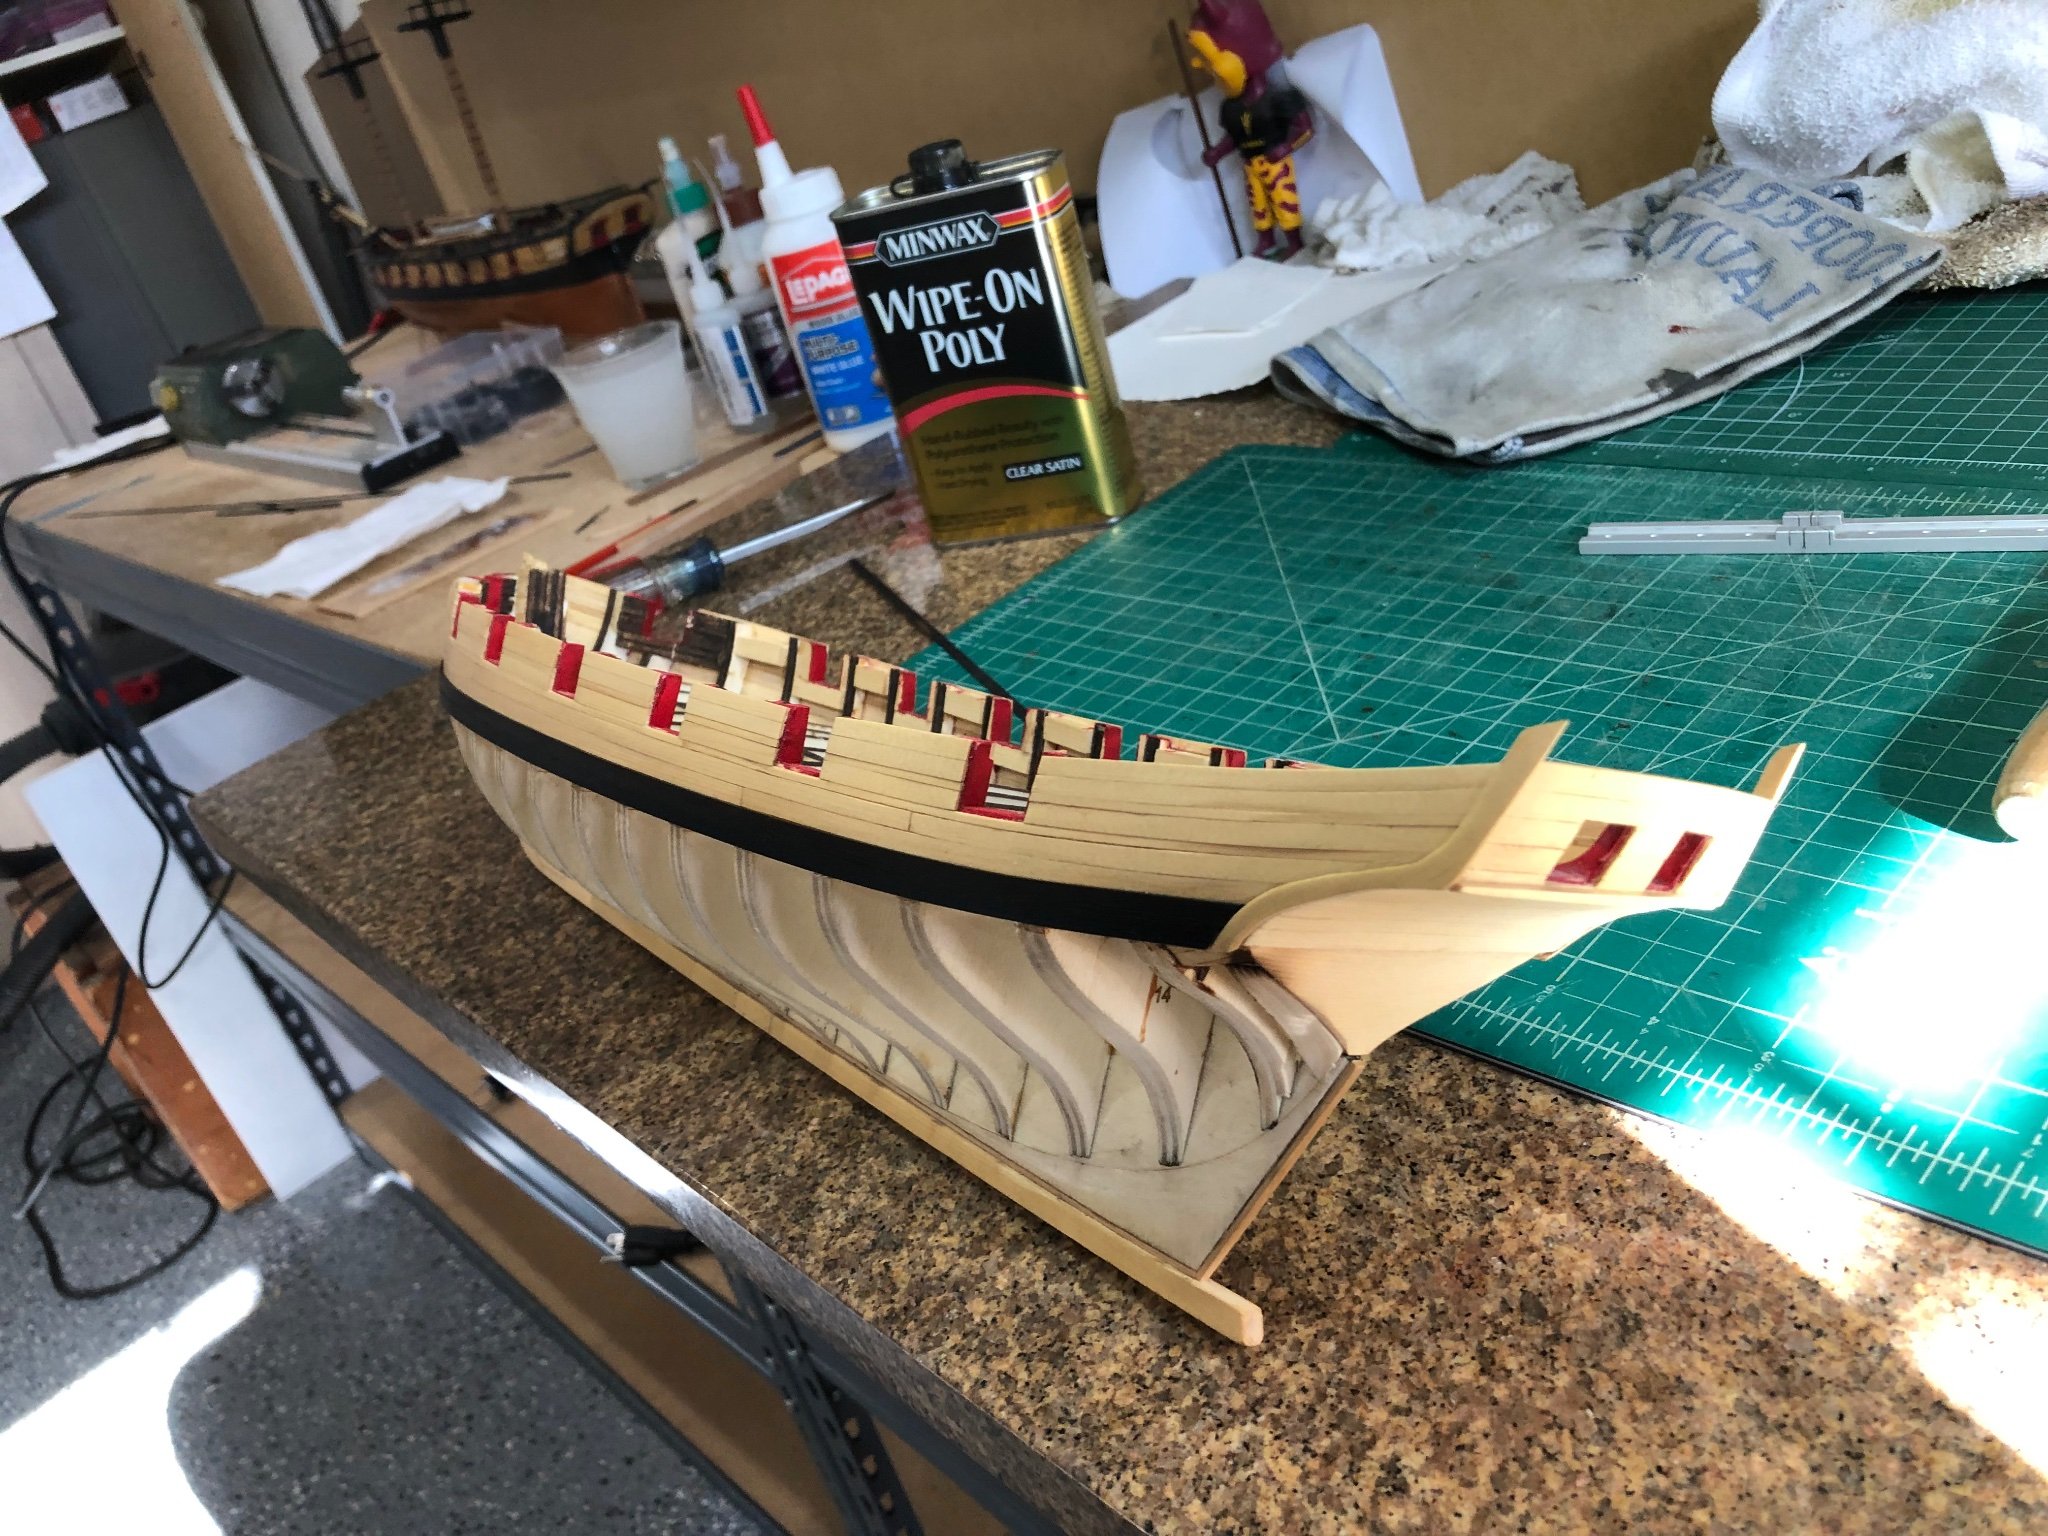
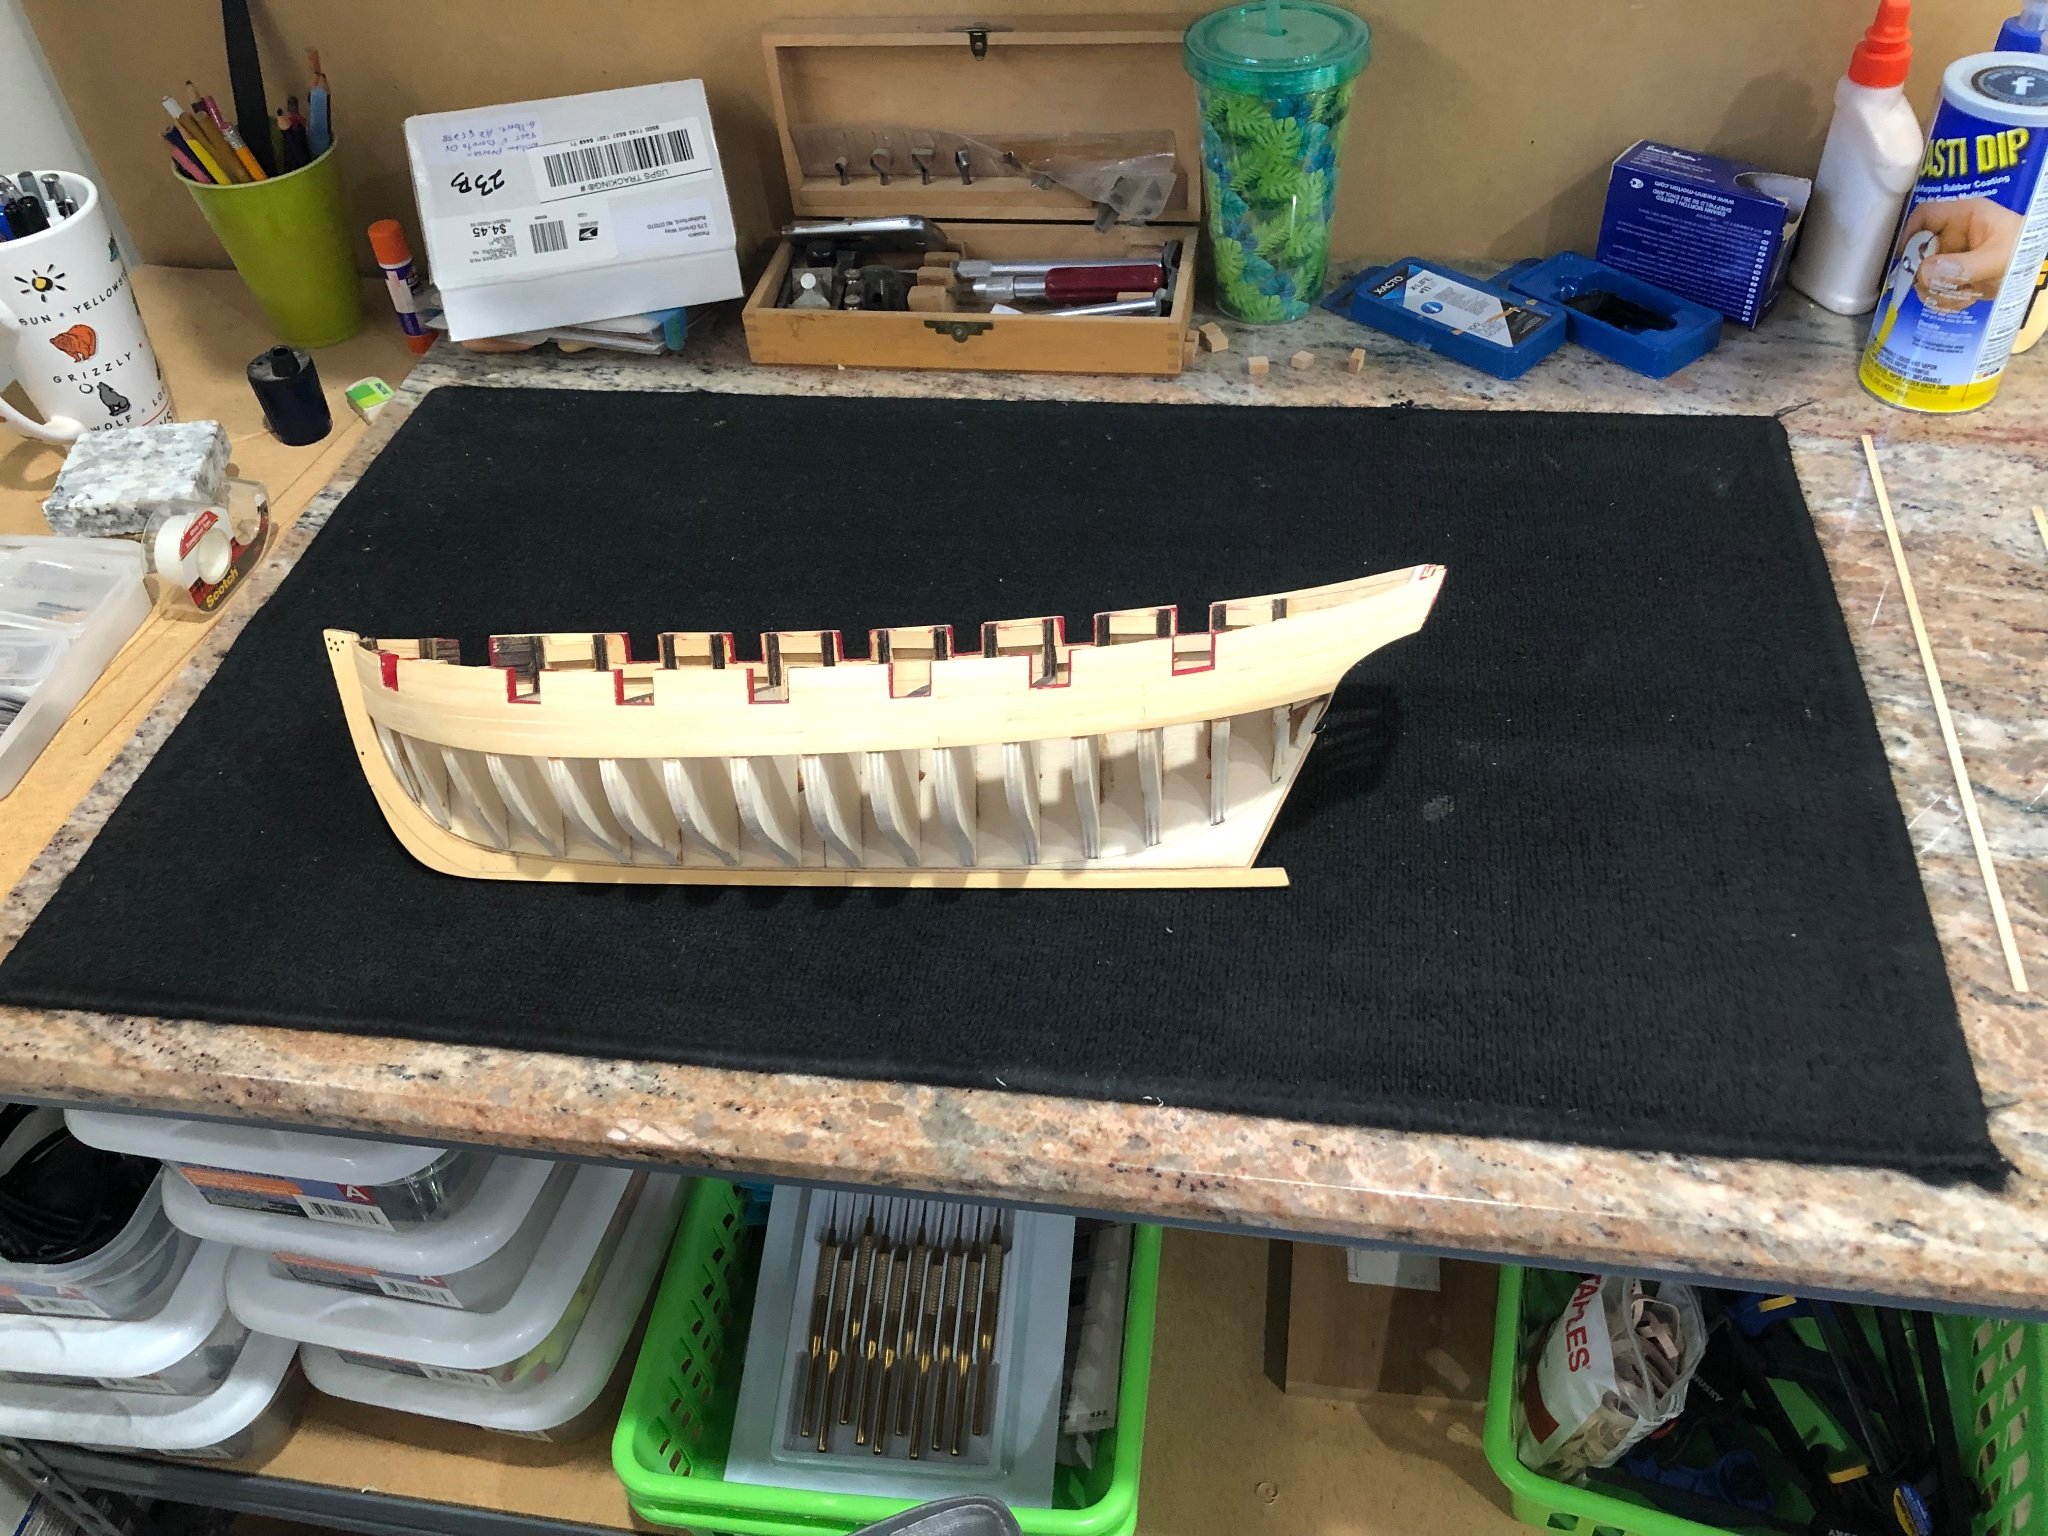
Yippee👏 Finally back to where the construction where the accident happened. Been a long hard road but the molding to sheer planking is completed. Just a couple of pictures showing the Cheerful as she is today. Looking good besides being cheerful. HA HA HA Starboard broadside view From the stem
-
Been awhile since I checked in but she's looking good. The ways look good and kind of like "Lincoln Logs" from when I was a kid.
-
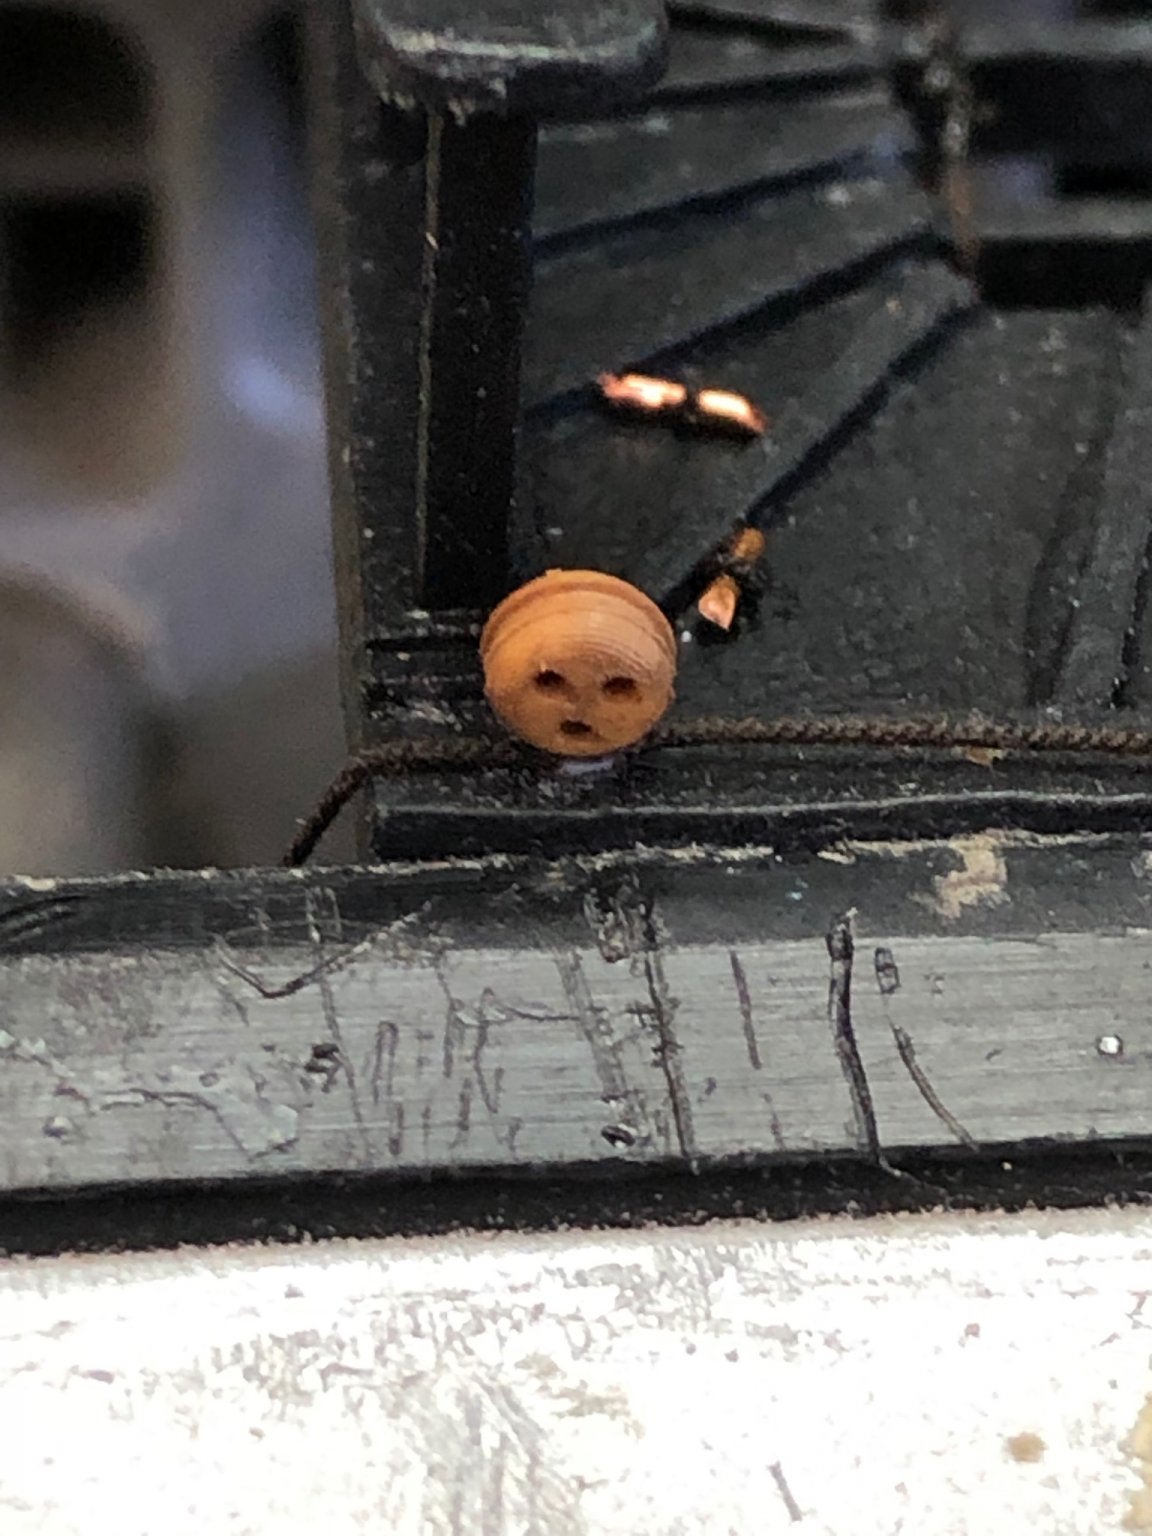
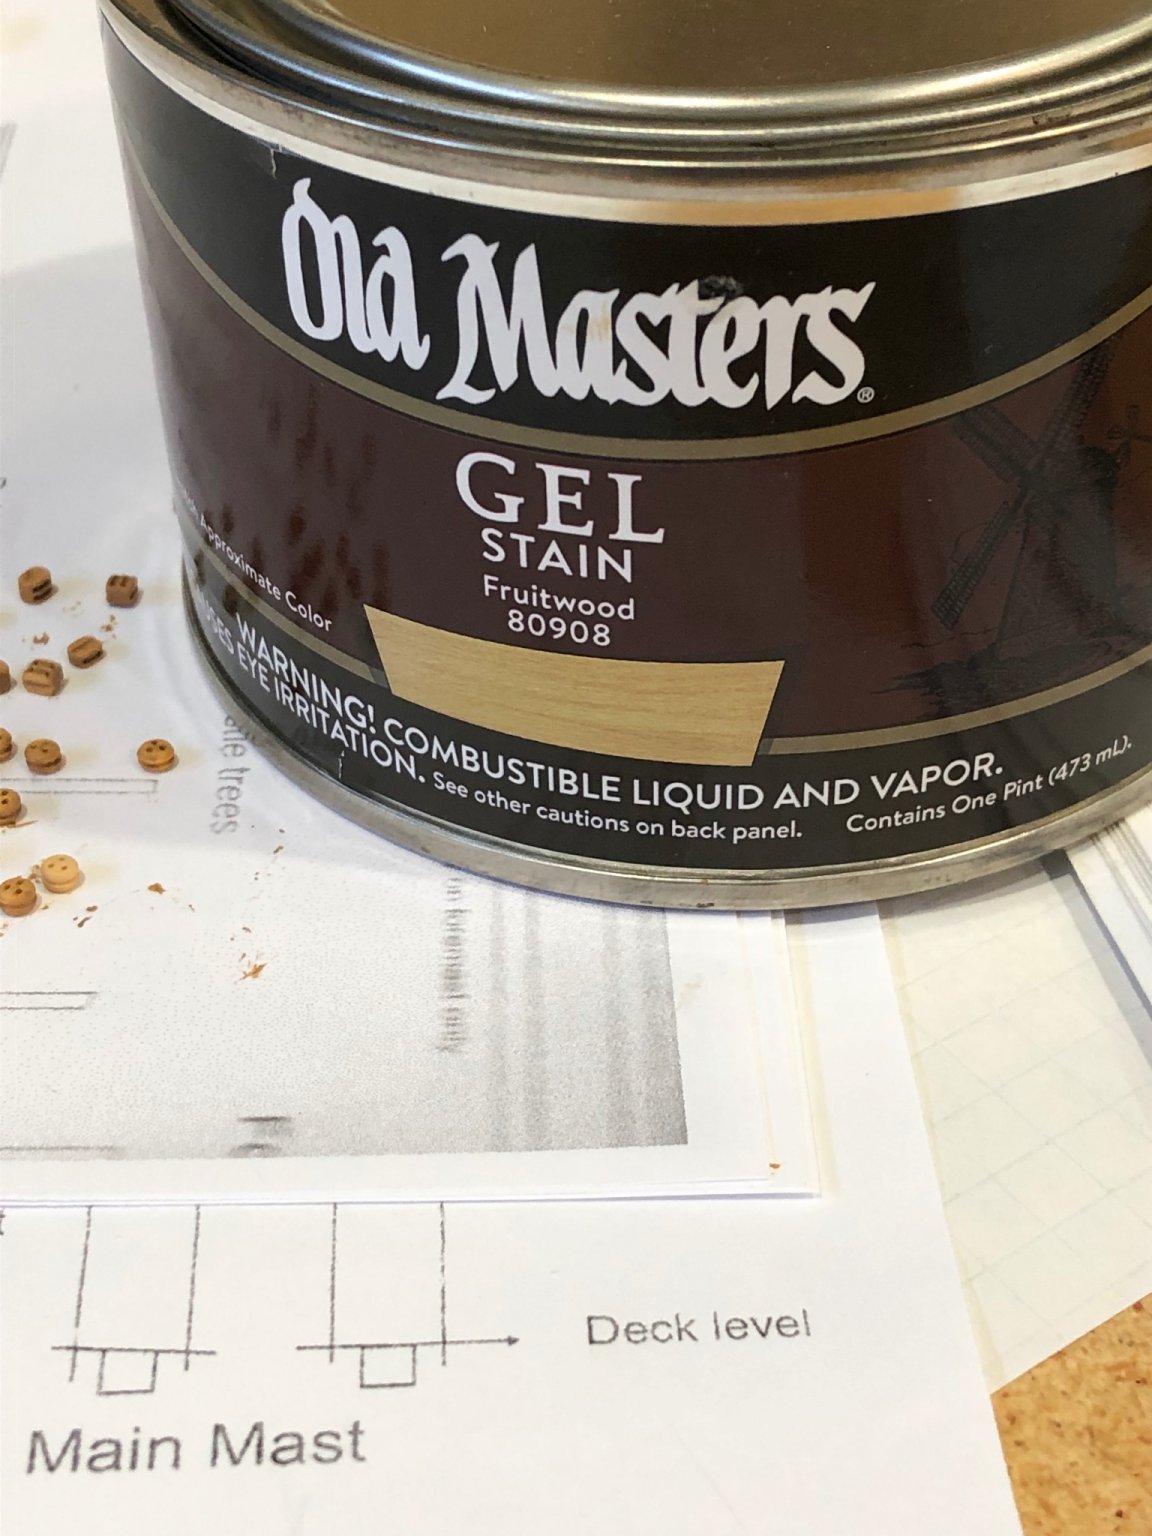
Thanks Patrick and Jesse and the likes from others. Yesterday I got my shipment from Syren Model with all the blocks, deadeyes and open hearts. I need to start making the open hearts as they come as a kit. In a post by Chuck he stains his blocks with Old Master Gel stain in fruitwood and taking his lead I stained the blocks and deadeyes for the mast tops. Here is a closeup of two deadeyes on the left stained and on the right as received. I stained them last night and left to dry. I can now finish the mast tops and move on the upper masts.

-
Paul I downloaded Fusion 360 and have not worked in 3D solids only 2D. This is going to take a learning curve even after watching the videos. Is the red color in the plastic or paint? Just casually looking at Fusion 360 last night I can see how much work these must have been. Do you do your own printing? Krylon make a flat crystal clear spray coating that I've used with good results and is available at Lowes type stores.
-
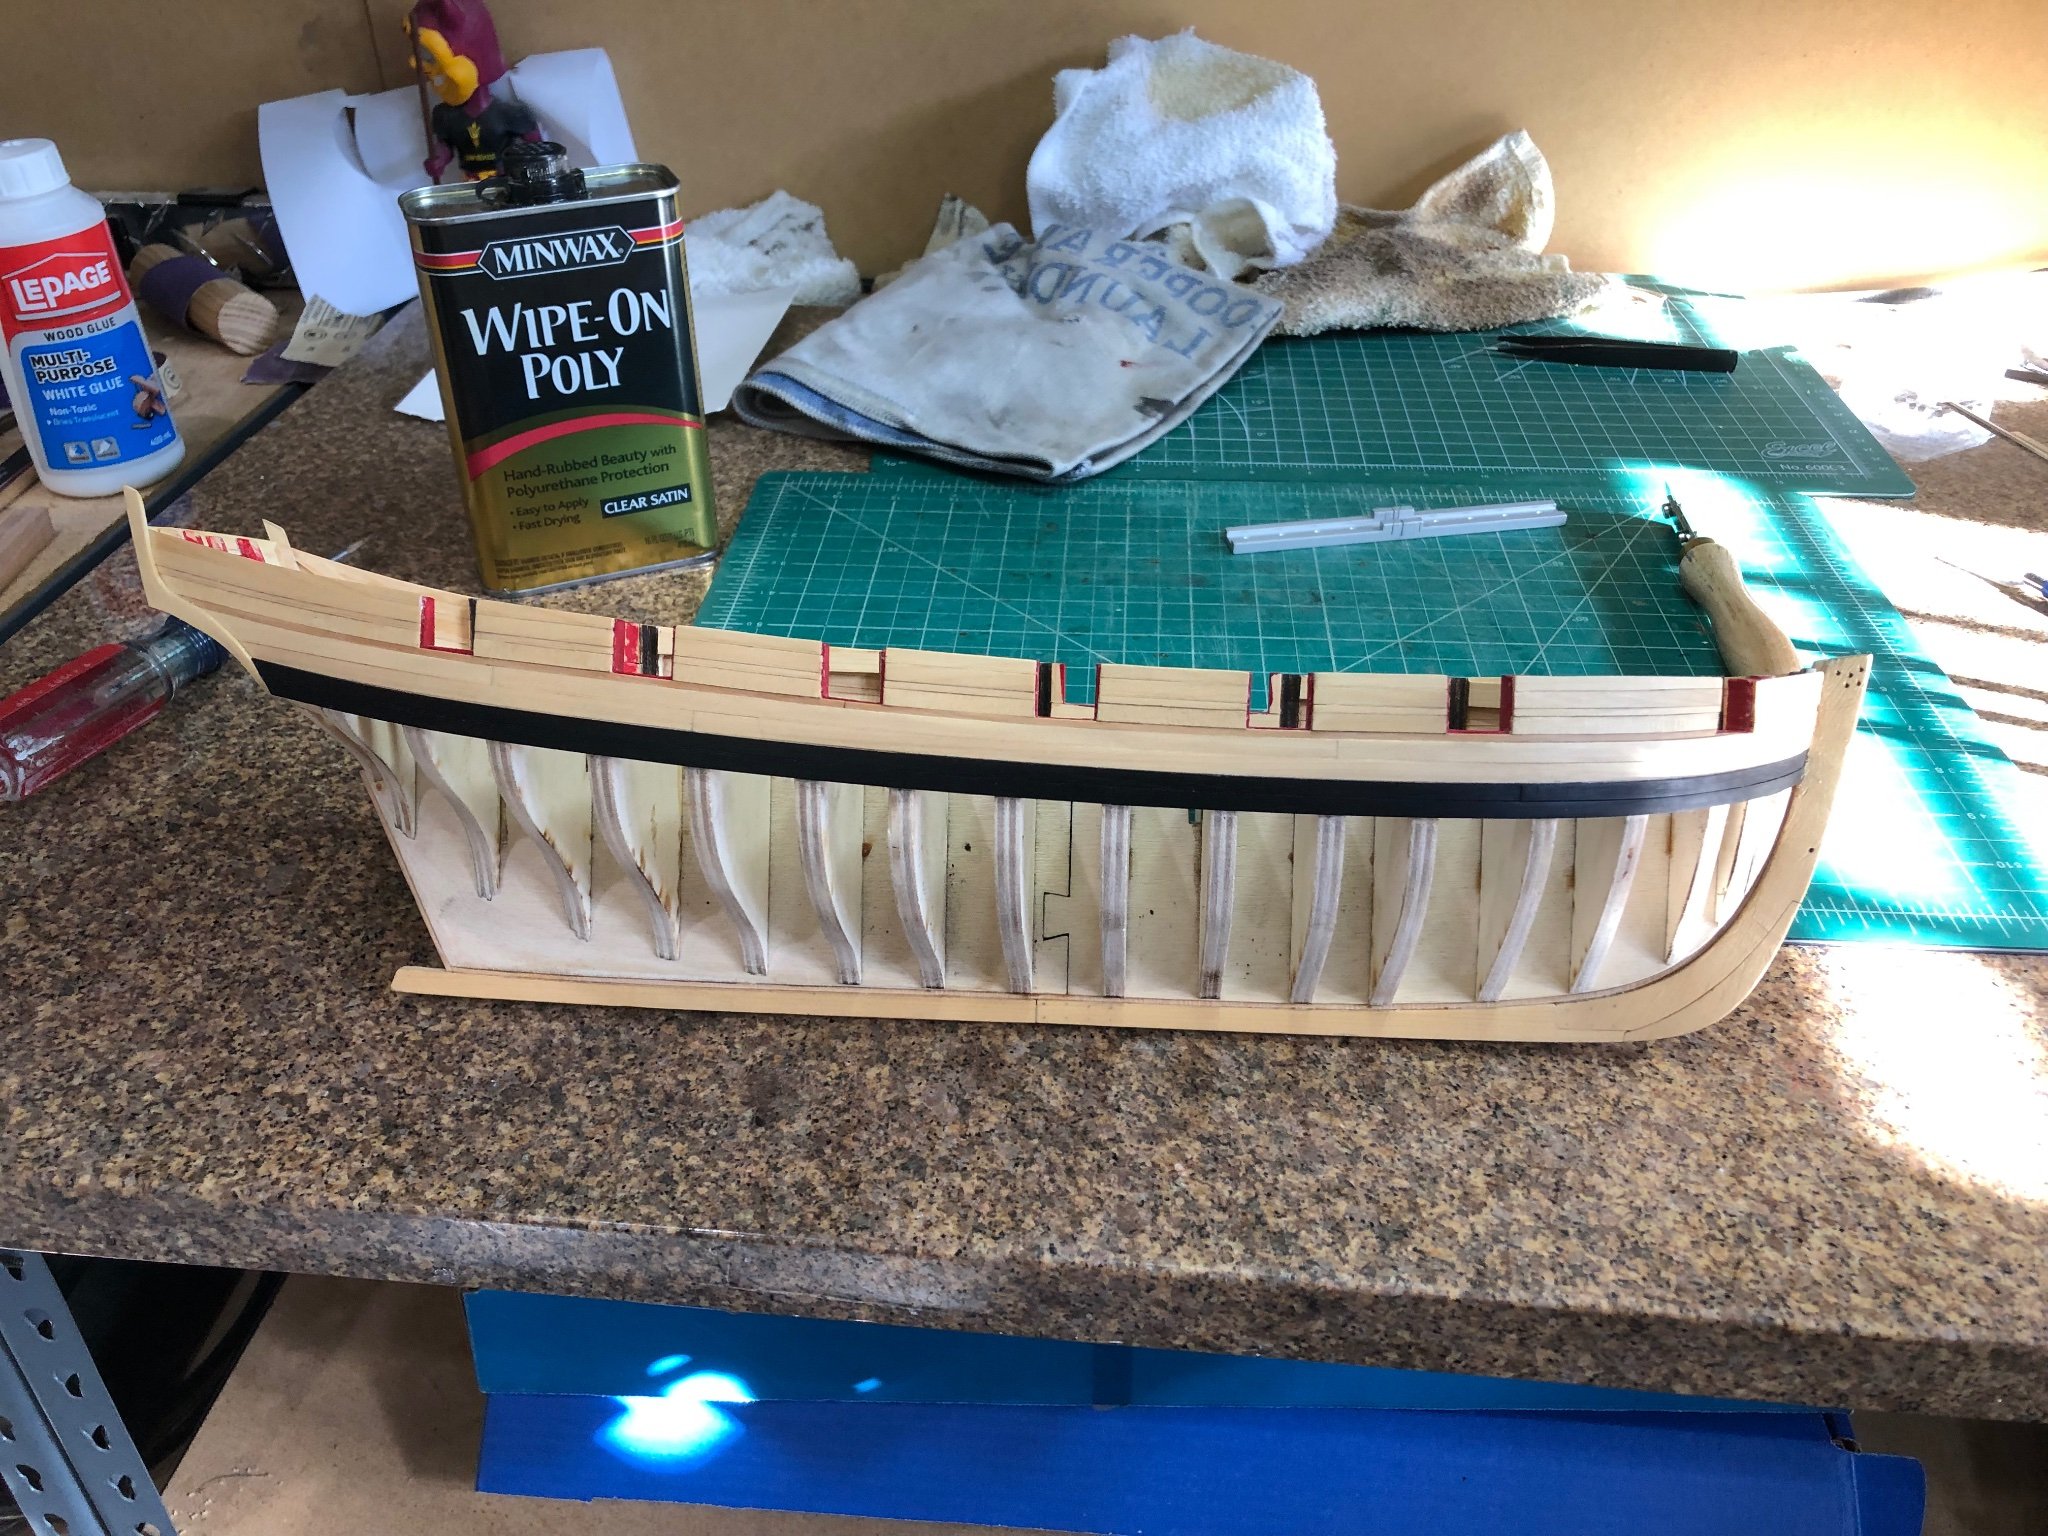
Thanks Paul and Glenn for the information and like along with everyone else. It really helps keep me going. Today was spent finishing the strakes between the wales and molding. Everything went very smoothly until getting to the aft most planks. I had forgotten how much the molding swept up and to fill the gap I had to use 7/32" material. Getting the pieces to sweep up evenly and together was very time consuming and required multiple tries. The end result is good and I'm very happy. Started the molding to sheer to continue tomorrow. Picture of fist strake with second starting. The molding looks like the line is wrong but its an optical illusion it does have a nice flow. Picture of the final strakes wale to molding Again thank for the looks, likes and comments much appreciated