hollowneck
-
Posts
1,589 -
Joined
-
Last visited
Content Type
Profiles
Forums
Gallery
Events
Everything posted by hollowneck
-
 Hey Tom, you got that right! Spot the FLAW(s), that's all you'll ever see of your own work...unless you can deal with knowing this will be the case afterwards. As the Budweiser beer slogan a few years back reminded us: " If you poke it, you own it!" This will be a ton of work, but I'm more than halfway on changing the deck color. My photos (old iPhone) are a little too warm and the "orange hue" is much less pronounced in real life. I've judged it to look a little like teak. This shipyard has the BEST PRECIOUS TIMBER!!! Thanks for your encouragement. I'm anxious to see your next OCD project.
- 542 replies
-
- 3
-

-
- Sphinx
- Vanguard Models
- (and 3 more)
-
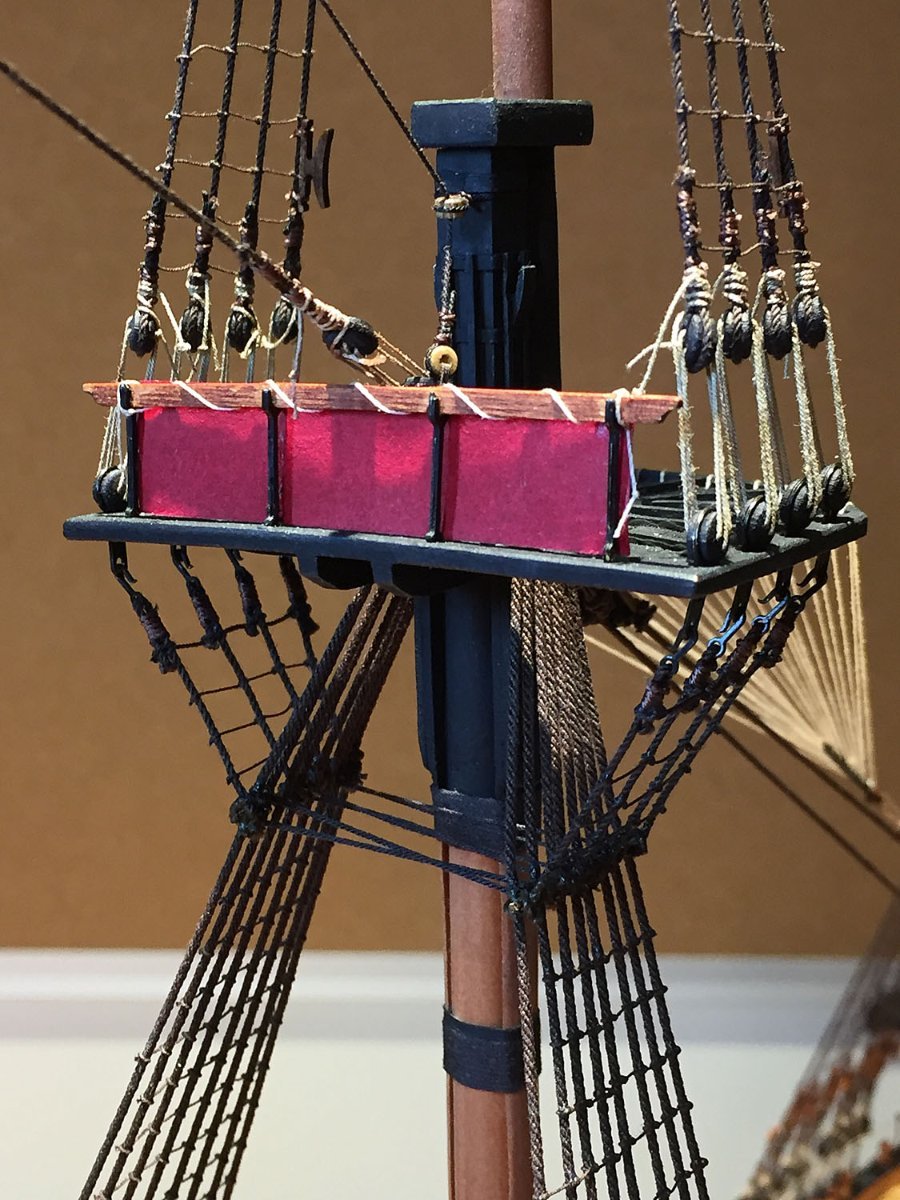
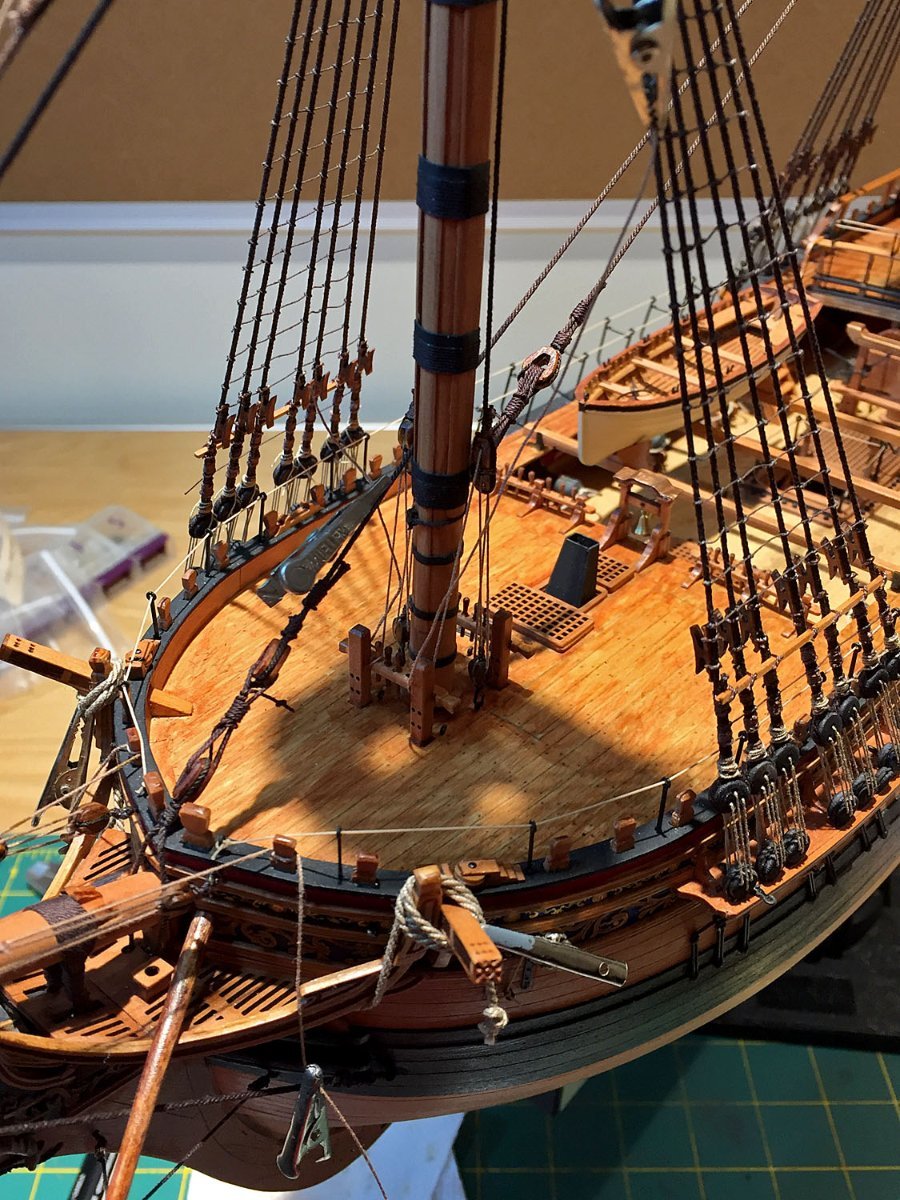
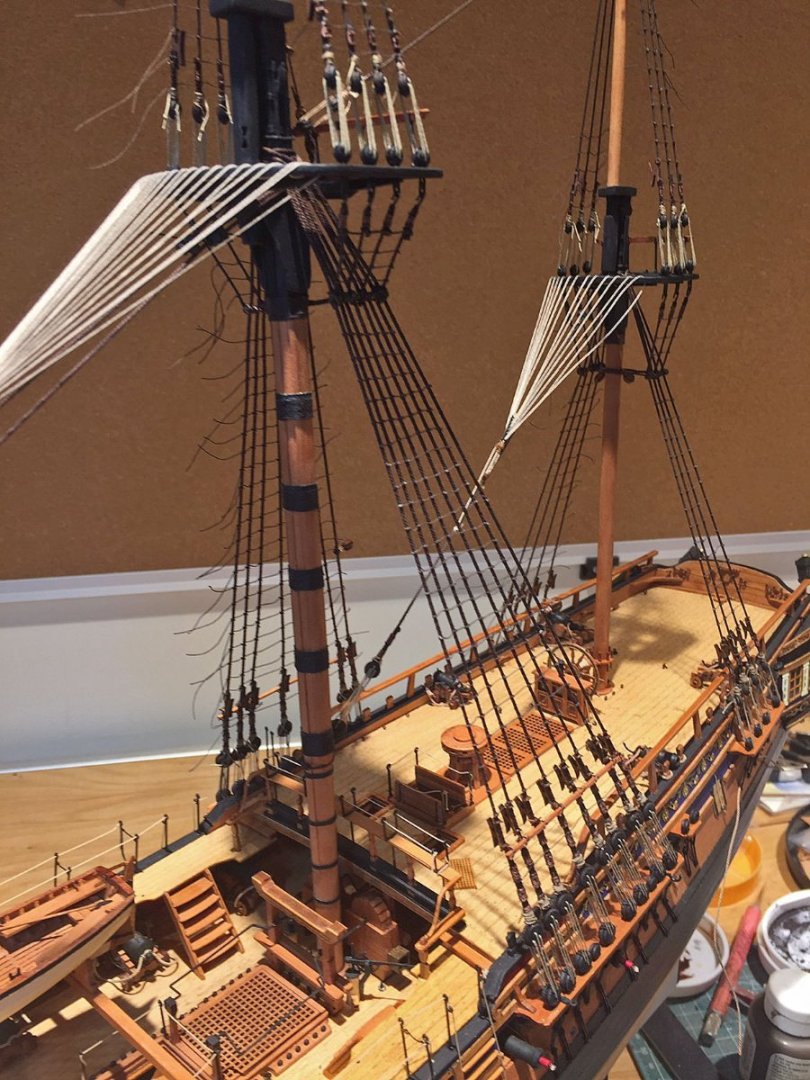
The "fighting tops" railing cloths (screens) have been added to all masts. I hand painted strips of bond copier paper with "crimson" acrylic, then trimmed each panel to fit its railing. The "cloths" are attached with tiny spots of matte medium to hold them in place. When dried, I laced a .1 mm rope along the wooden top rail to simulate the lacing of these cloth panels to the railings. The lacing rope is the same material as the crowsfeet rope. Aft view of the mounted cloth screens. I decided to change Camilla's deck color. It's taken me awhile to figure out how to accomplish this rather dramatic change to my model. The lighter colored decking (still visible on the midship's gun deck that I've lived with thus far in the build) just wasn't going to "cut it" for my ship's eventual diorama setting; HMS Camilla will be pursuing an enemy ship (French schooner. Who else?) on a choppy sea in the English Channel with plenty of water drama. After several test tries on leftover deck material with varying wood colors, I chose one that would simulate a slightly weathered oak deck, for a considerably darker "used" look. I chose the alcohol-based Promarker ink (Cinnamon) color, which to my eyes, did the trick. I also rubbed this alcohol stain with a pinky fingertip (where it would fit!), small cotton tip swabs as well as using a dry brush technique with a tiny 0000 lining brush to even-out the coloring and to minimize "splotchiness." I still have some delicate work left to do in a few areas to achieve a little more consistency. I didn't want to go "overboard" with this weathering approach, just enough to make my ship's deck look more realistic to better match the rest of my build's color palette; it would be very easy to over do it. Another view looking aft with my deck color change implemented. Again, the color shift to the darker oak decking is quite evident compared with the lower gundeck which still has the lighter color that I initially used on all the decking of the model. My strong overhead shop lighting emphasizes the uneven coloring on the gangway in the foreground. It isn't this obvious when the model is out from under the intense light where the decking doesn't appear quite as "orange" colored. To similarly colorize the gundeck to match the upper deck's new color, I'll temporarily remove the boat and the three skids for better access. I'll use the same tiny brushes, mini cotton swabs and the Promarker tips to carefully apply the alcohol stain into the many nooks n' crannies per previous: this is going to take awhile to get right - and a challenge I wasn't anticipating at this late stage! I wish I'd made this decking color decision much earlier - of course - since it would have been considerably easier to accomplish. Once all the decking has been color-finessed, I'll get back to some interim rigging: mounting the breast stays. I will then warm-up my Ibex finger plane and Proxxon mini-lathe for shaping the spars...


- 542 replies
-
- 14
-
-
- Sphinx
- Vanguard Models
- (and 3 more)
-
Thanks B.E. & Theodosius. Progress at this point is measured in very incremental steps, slow and steady as she goes. I just ordered some needed materials for sailmaking and creating diorama water...having these on a shelf to stare at gives me additional incentive to plow forward - not that I dislike these final rigging stages. Another somewhat tedious but important mini-project (before making sails and "bending" them to their spars) is crafting a few dozen rope coils. I'm saving the painting of Chris' included superbly sculpted 3D resin figure for last: for my build, it's Camilla's beloved Captain Pennypincher, who - when after all the sails are bent and unfurled - has told his crew they'll get an extra ration of grog.
- 542 replies
-
- 3
-
-
- Sphinx
- Vanguard Models
- (and 3 more)
-
Thanks druxey for the kind words! Now I can go to bed and have restful, no anxiety sleep...
- 542 replies
-
- 2
-
-
- Sphinx
- Vanguard Models
- (and 3 more)
-
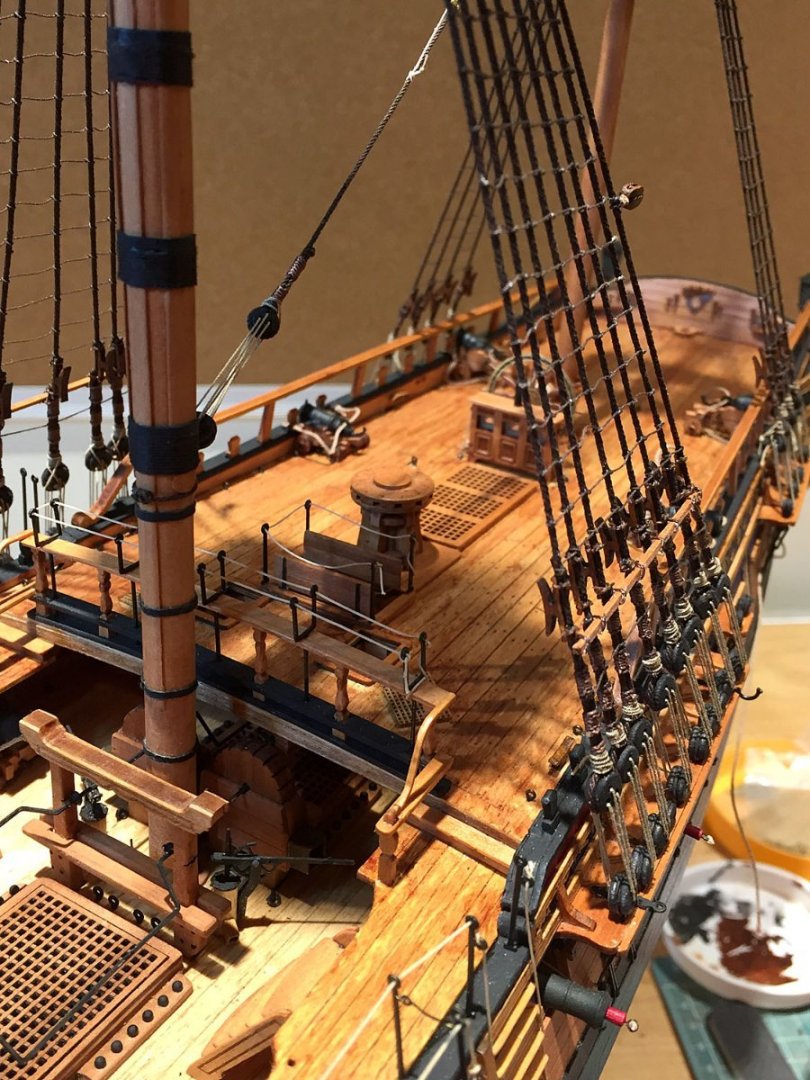
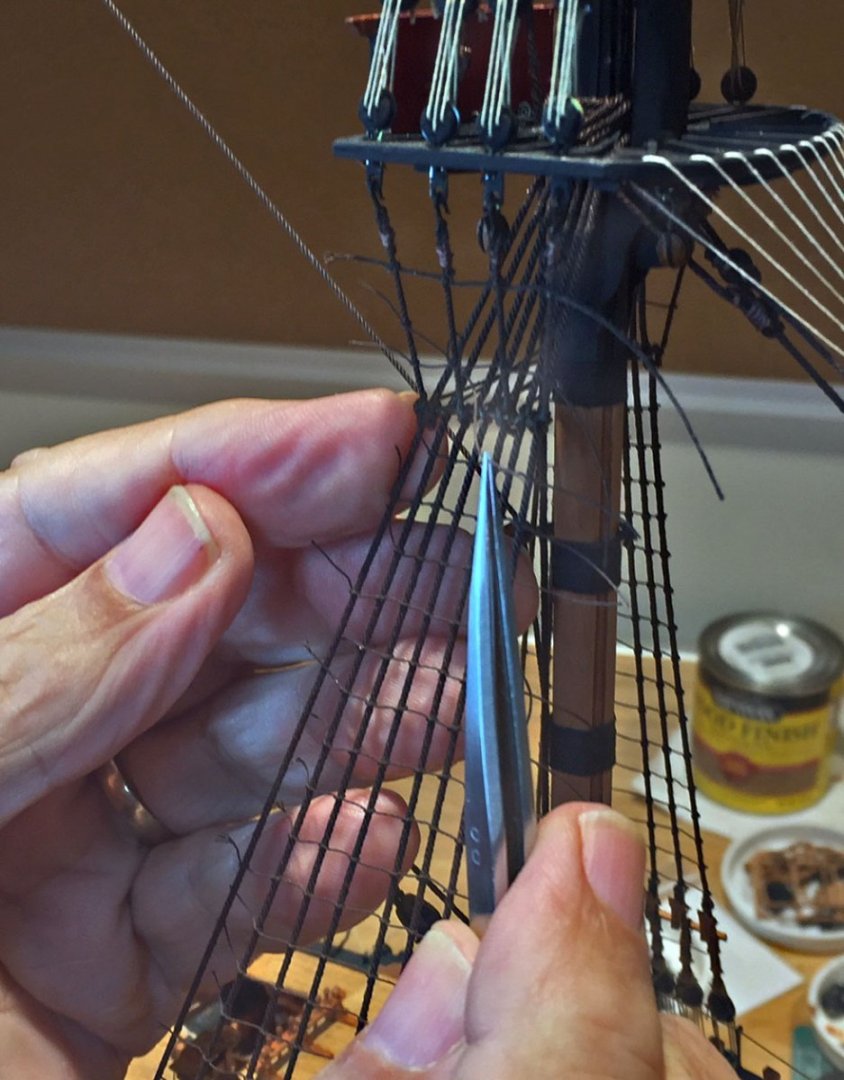
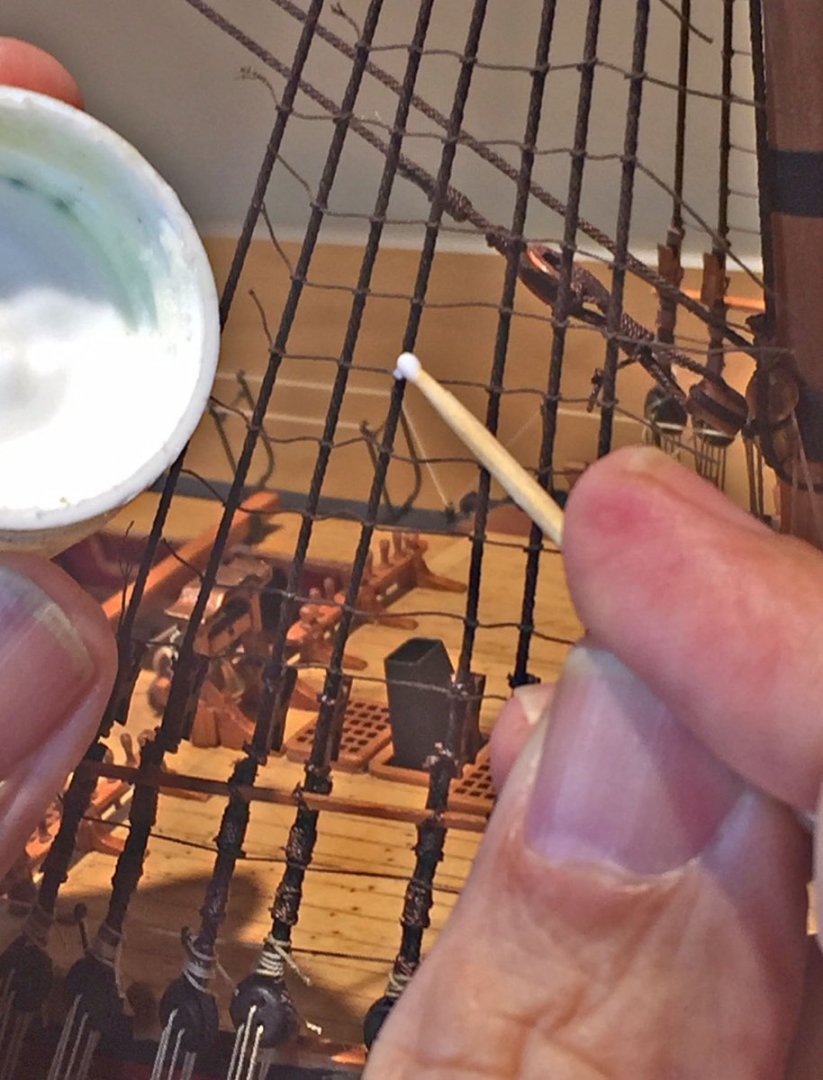
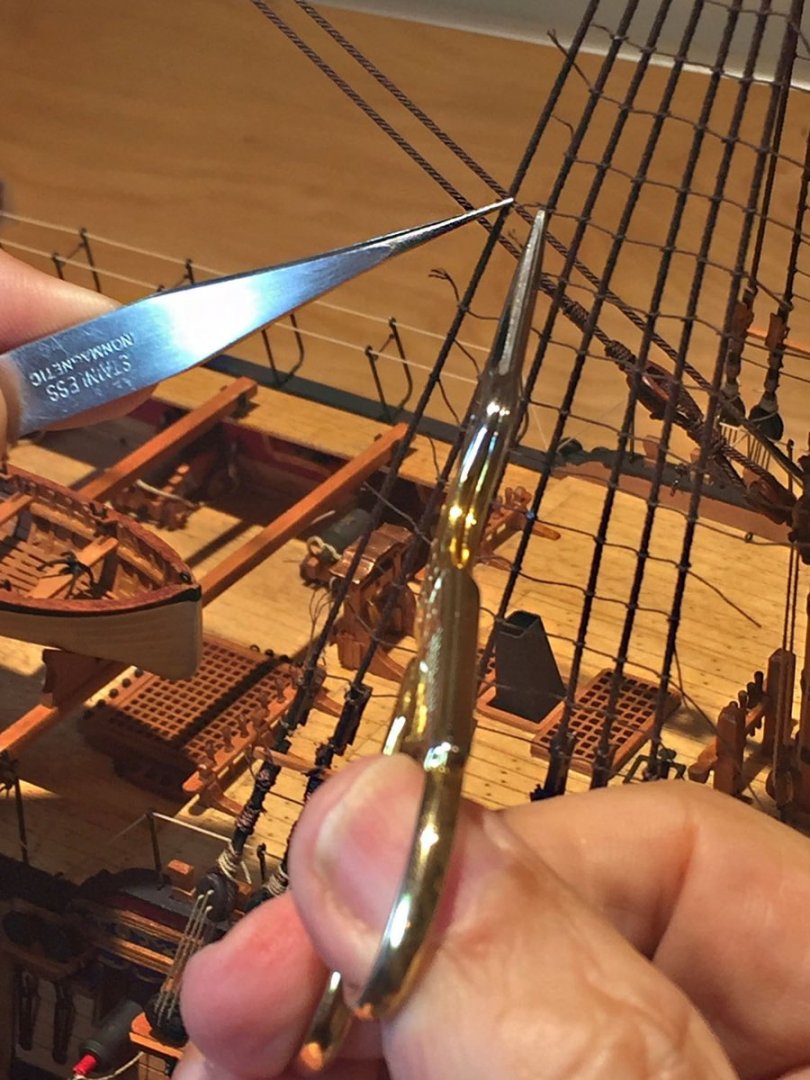
Back to Rigging. Shop time in the summer months slows waaaaaaay down for me. However, it doesn't disappear! An update on tools, materials and a little technique on one of the final stages of Camilla's standing rigging. The ratlines need trimming after some minor adjustments to the shrouds. All three masts now have their crowsfeet. Tying-off the ratlines to the futtock shrouds; tricky business tying-off clove hitches in these tight spots. A pair of fine tipped tweezers are essential for this work. After making final adjustments to each ratline I apply a tiny dab of Liquitex Matte Medium to each and every clove hitch "joint." As an adhesive, it dries within a few minutes and when dry is transparent and as the name suggests, matte. This is a better solution than applying CA or aliphatic glue. Over time, these rope knots can slacken and droop, randomly, depending upon the tension one initially applied. It's worth the additional time to take this final step after all the hours invested in this repetitive task. After the joints have dried, I use my tweezers and favorite pair of embroidery scissors to trim off the excess rope ends. The rope I used for the shrouds (Ropes of Scale, an NRG sponsor) is dark brown .7 & .8 mm. The ratlines are made from Ropes of Scale . 25 mm dark brown rope. These sizes present a good approximation of the relative rope sizes used on these ships. In this photo, it appears as though I'm snipping the thick main preventer stay, which I assure you I am not!! My tweezers is pulling an excess ratline end taut so I can more easily snip it off with needle-nosed scissors. A Tip: When doing this tedious, repetitive work, set a time limit for yourself. For me, this is not more than 3-4 hours maximum in a build session. I've found that if you spend too much time doing this critical work, you'll tend to get lax on the details. The "ratt'lin down" task can be a little "Zen-like"- a monotony of tying-off endless loops of tiny thread (rope) can almost put one in a trance-like state. That's when things can go South quickly if you don't check your work! And the clock. Take a break. In fact, I took a whole week between the main and the mizzen rat-lining! Some builders use a paper guide for adding ratlines. I "eyeball" my lines with frequent caliper checks on their spacing and also check that my side-to-side intervals are nearly identical as this symmetry is important. Note: Our visual acuity is very unforgiving when looking at objects in a horizontal plane that are the tiniest amount askew. Ratlines need to be level to the deck and consistent across the entire width of the shroud; this fact is especially true on the topmast rigging, which are the most difficult ratlines to execute cleanly. The next step for my build - before I get to mounting backstays and fashioning Camilla's many spars - is to make some cloth "screens" for all the top railings. I'll use regular bond copier paper for these, painted in an appealing crimson color. I'll lace each to the railings while I still have decent access before the breast and backstays are added. I've done a little research on the "cloths" in Lee's, their purpose and with some further advice from member druxey, I've decided to add these. Some of the period models I've seen in various museums show these on fully-rigged English warship models. On past models I mounted fine netting across the top railings. This model, something a little different.
- 542 replies
-
- 21
-
-
- Sphinx
- Vanguard Models
- (and 3 more)
-
This is the Sweet Spot, Daniel. Welcome. Friendly, expert help and answers to just about anything you can think of about ship modeling!
-
I don't think the count will matter unless it is a BESPOKE model...🤣
- 857 replies
-
- 2
-

-
- Sphinx
- Vanguard Models
- (and 1 more)
-
Clever B.E., this may be the worst (reverse) pun I've heard this year! How can Ms. B.E. possibly be "on your case?" Nice choices on the channel knees and deadeyes. Both hues/wood choices suit perfectly with your build.
- 857 replies
-
- 2
-
-

-
- Sphinx
- Vanguard Models
- (and 1 more)
-
Keep that pinky finger away from sandpaper or your MAC will remain locked forever!
- 488 replies
-
- 6
-
-
-
- Indefatigable
- Vanguard Models
- (and 1 more)
-
Love the bench towel. So far, no apparent signs of blood, the true sign of an artisté...
- 488 replies
-
- 7
-
-
-
- Indefatigable
- Vanguard Models
- (and 1 more)
-
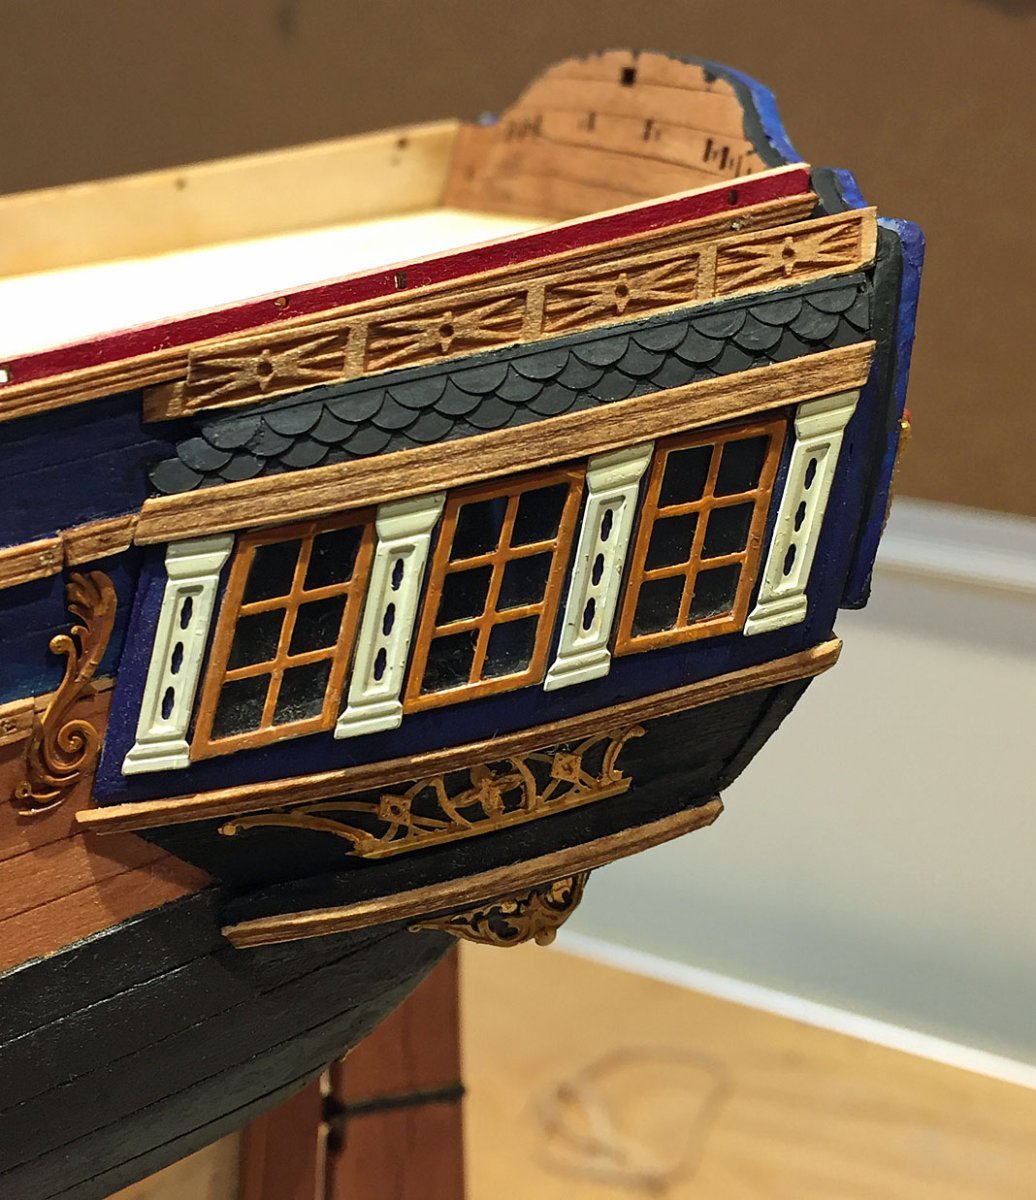
This was a difficult decision for me too, deciding what to do with the fit of this decorative piece. I decided to "trim-off" a piece of the fretwork and mortise it against the top rail - as shown in the manual. I've noted that your approach aligned it nicely but the compromise was an awkward slope to the roof tiling. Here is a pic of how I approached this area. I also used a section of flat Evergreen styrene for my HMS Camilla capping rail and it worked a treat; I'm glad you also decided to paint it black. The ochre didn't look good to my eye either as this contrasting color interrupted the clean, continuous line of the black capping alongside the quarterdeck. I have a new aphorism for us detailed-obsessed ship modelers: Macro Never Lies...or, if you're feeling very satisfied, take a macro photo and see if you still feel the same way about your work. Your model is looking superb, B.E. Captain Barnacle must be pleased! Your hand painted transoms was such a good decision.

- 857 replies
-
- 8
-
-
- Sphinx
- Vanguard Models
- (and 1 more)
-
I believe Indy's main topgallant mast would get entangled with the crystal chandeliers at the Watton's residence.
- 488 replies
-
- 7
-
-
-
- Indefatigable
- Vanguard Models
- (and 1 more)
-
...don't tell anybody but I kinda like rigging....I hope to finish rigging by the end of July. As the Plague recedes, Summer beckons!
- 840 replies
-
- 3
-
-
- winchelsea
- Syren Ship Model Company
- (and 1 more)
-
These puzzled me too. The large "hoop"- as well as the symmetry - is certainly something not intended for running rigging. I'll bet you're correct on these serving as crutches for a boom used for emergency jury-rigging broken rudder steerage.
- 857 replies
-
- 3
-
-
- Sphinx
- Vanguard Models
- (and 1 more)
-
Nice detail. the slotted entry for the rope makes really good sense!
- 857 replies
-
- 3
-
-
- Sphinx
- Vanguard Models
- (and 1 more)
-
Very interesting and clever...a mold to align and hold ribs. But I'll need to buy a load of those precision clamps!😆
- 216 replies
-
- 6
-
-
-
- masterkorabel
- ships
- (and 3 more)
-
You've read my mind, Chris: the transatlantic telepathic distance presents no hindrance! For HMS Camilla, I'm planning on having one (1) superb, miniature Lord Cochrane placed on her Quarterdeck - and no others on board - this, a departure from including a small complement of crew figures on my diorama models. As you've suggested, having a single figure is adequate to show scale and admittedly, this is experimental on my part. If, at the end of the day, if it looks "goofy", inappropriate, I'll figure-out a way to add some more crew figures(pun intended). We'll see what presents itself when HMS Indy exits the shipyards in a year or two...should a Vanguard gun crew magically appear in the next few months, all bets are off! One gun crew = five (5) sailors X 64 guns = 320! Gulp.
- 488 replies
-
- 7
-
-
- Indefatigable
- Vanguard Models
- (and 1 more)
-
Psych!🤯...easily TWICE. Oh well, creative license by film directors.. should I build this one with sails I'm planning on having a separate room to display her! (if one browses through my history of builds below, most of them are displayed in my home, so I am truly fortunate to have SPACE..."The Final Frontier...") Not bragging, just thankful.
- 488 replies
-
- 6
-
-
- Indefatigable
- Vanguard Models
- (and 1 more)
-
You're not alone, Glenn. Hopefully by July my HMS Camilla's rigging may be done. So many grandchildren, so little time...
- 840 replies
-
- 2
-
-
- winchelsea
- Syren Ship Model Company
- (and 1 more)
-
Chris, these master sculpts are very nice, indeed. These are from clay (Sculpy, whatever) I presume, neither resin nor 3D printed as they are on armatures and going on nearly 20 years old. Did you make them or were these done by another Amati vendor?
-
Thanks for the tip, B.E. I'm having difficulty visualizing the better arrangement from your description; so much to learn, so little time. However, I'm sure you're correct. I don't think I'm going to disturb these little creatures, uncertain that reversing them will present a "functionally correct" look (to my hybrid)! And, at the end of the day, this is now the decision of Captain Pennypincher - and I'm not going to risk a flogging...
- 542 replies
-
- 2
-
-
- Sphinx
- Vanguard Models
- (and 3 more)
-
I considered this, one aboard with another in tow...until recently deciding that Camilla will have shortened sail, on a chase in rough water, a looming squall ahead. Please don't shut up! I consider MSW's denizens as Better (knowledgeable) Angels, never harsh nor bothersome critics.
- 542 replies
-
- 2
-
-
- Sphinx
- Vanguard Models
- (and 3 more)
-
Thank you kindly, B.E. As we know, "hybrids" for transportation are gaining in popularity. 😬 There will be many details to examine when HMS Camilla's completed. This is a large part of the journey we perfectionist ship modeling types pursue in our quests! I intend to have only one other item across her midship's skids: a spare topmast. This item and her boat should still leave some "space" to see all the work on her gundeck.
- 542 replies
-
- 4
-
-

-
- Sphinx
- Vanguard Models
- (and 3 more)