

Ron Burns
-
Posts
177 -
Joined
-
Last visited
Content Type
Profiles
Forums
Gallery
Events
Everything posted by Ron Burns
-
 Hey, this is the fastest I've done anything in a long time! Thank you Chuck for making the counter so easy to plank with your laser cut precision. This is the second time now that I didn't follow through on freely given, valuable advice. First time we all know was the Baltic Birch thing. 2nd thing Chuck mentioned was to only pencil in one side of the planks as doing 2 sides becomes too dark. Thankfully it will be covered with a frieze and I have learned a valuable lesson! Ron, Pay attention to your betters! (when in my juvenile delinquency have I heard that?) Anyways, joking aside, I'm happy with the way the counter looks but I know I messed up somewhere. I can't wait until my next build when all of this trepidation and anxiety turns into experience! Curious, does it hurt to throw a coat of WOP on the counter prior to frieze application?
-
Welcome to MSW! Although I've never built this particular model, there are a few completed build logs right here. Have a look here https://modelshipworld.com/topic/16920-greek-warship-bireme-by-moreplovac-finished-amati-scale-135/ . It looks like you might have a bit of filing to do for some reason. One good thing is that 'it's better looking at it than for it' and removing a bit of material is to me better than having to add some. Is there a parts layout on the prints that you can compare with? At any rate it looks like it will make a beautiful model and I look forward to watching it being built
-
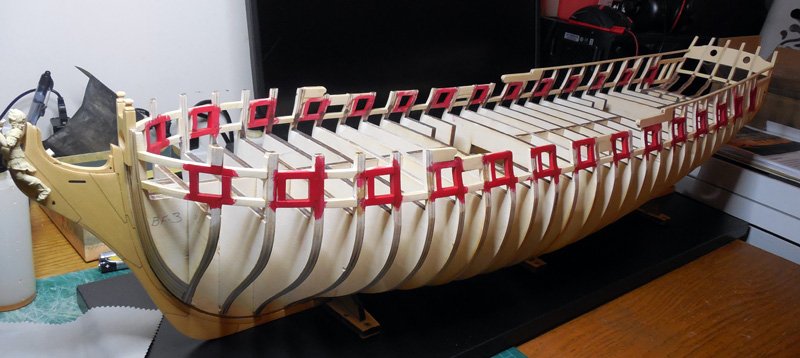
Hi everyone, I don't know if I can say this but....bollocks to bollards! Darn did I have a time with them. I burned through the included laser cut pieces and ended up making some of my own blanks. I still haven't gotten them quite right so I haven't glued them in yet. As it stands, CHAPTER 1 is DONE!!!!! Adding the 1/8 fairing strips and hance pieces sure gives this ship some beautiful lines. Yep, I think I was a little over zealous with the red paint Thank God it gets mostly covered up! As always, thank you for the likes and encouragement.
-
So Vlad....what's the story? Does she fit? I'm sitting here in suspense I like the red you've chosen. It looks great.
-
Right on! Welcome to the Winchelsea group Christian! I look forward to seeing the Winnie rigged. Between yourself and Tom, we should all be in for a treat
-
Those stern angles....yep. I caught that mess up right after the glue set but managed to pry them out and re-align them. I printed out portions of the blueprint and the stern frame guide on heavy card and went over it from every angle. Talk about needing Depends
-
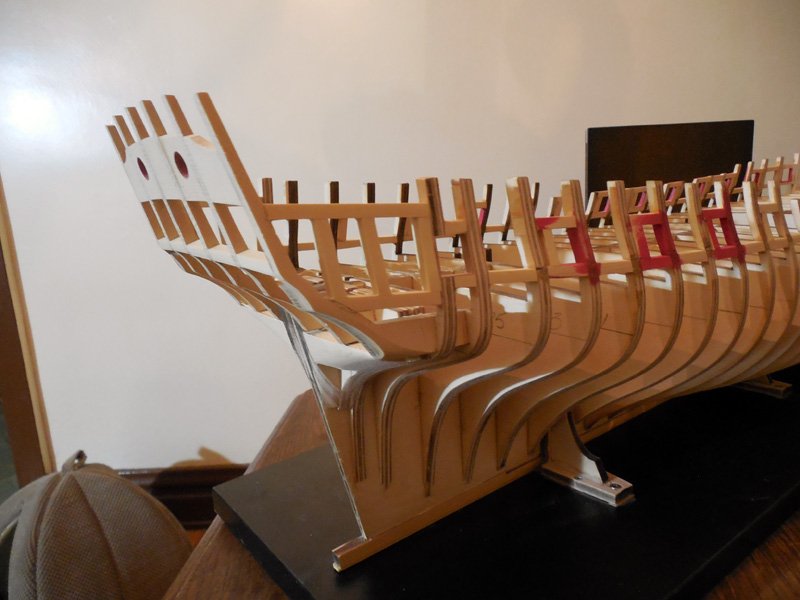
Stern framing is complete! (I think)...Thanks again JJ for your assistance. It really helped a great deal! Just a note to self here..pay attention to what people say and write. Next time, use lite ply instead of Baltic Birch. For those of you just thinking about building your own from scratch, Baltic Birch is a pain in the butt to sand. Anyways, on to the bollards!
-
JJ Thanks for the assurances! You're right on the money! I buggered up the side you noticed so quickly. Butting up a plank against one on the counter seems to be ok....On to the other side. My wife is starting to ask when all this sanding is going to come to an end. Wait until I show her all the fairing that needs to be done topside
-
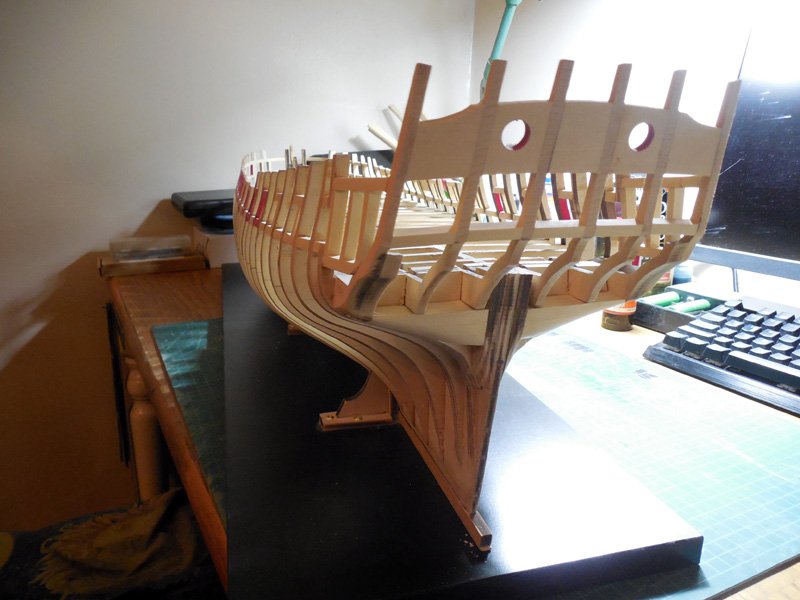
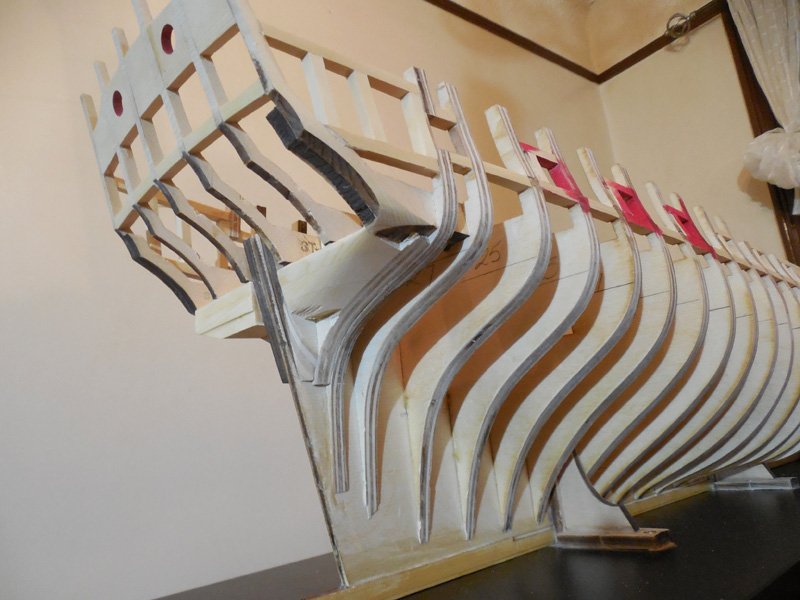
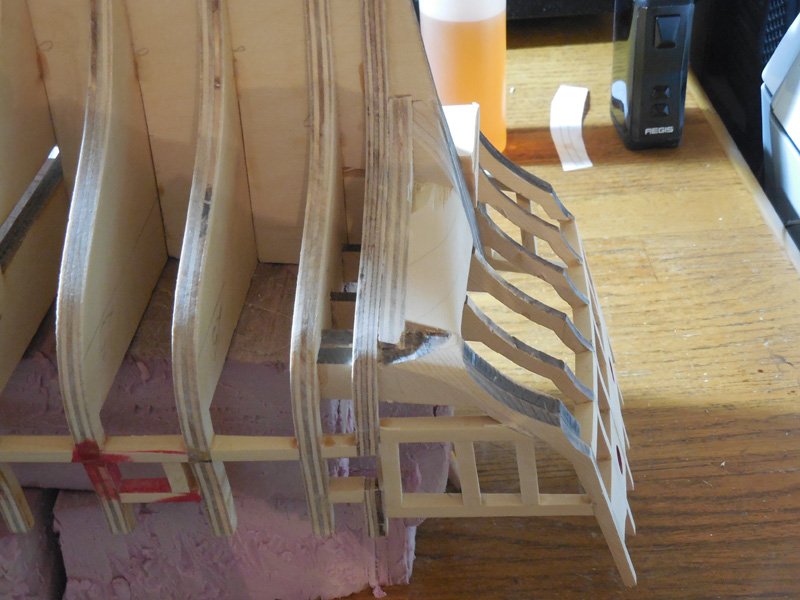
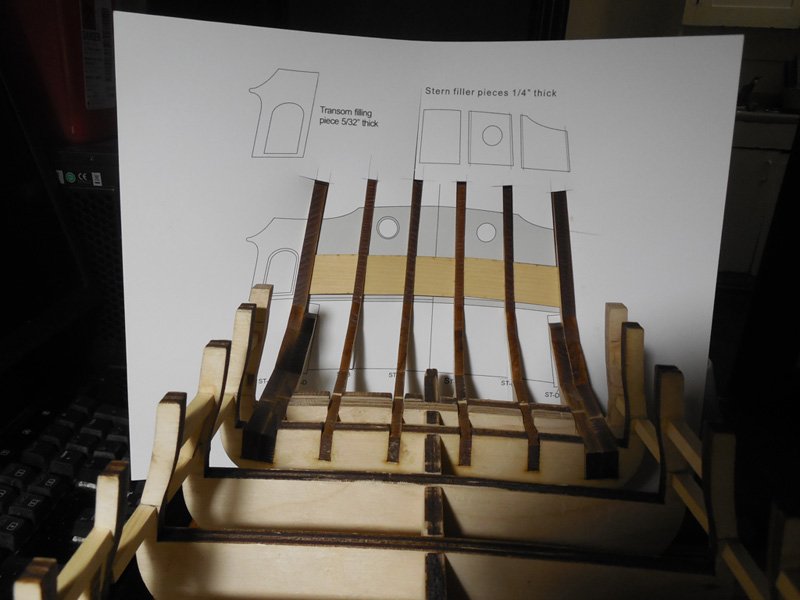
Hi everyone, I hope everyone is having a wonderful holiday! I need advice! I have been following the many great Winnie builds and have come to the point where I have added the filler blocks under stern. Fairing this bit has me a bit confused. I hope I have gotten it right or at least on the right track. Please have a look and pass judgement. For a start I know I did a dumb thing and made the blocks too big. Of course it dawned on me after the glue set! Ron
-
Wipe On Poly Techniques
Ron Burns replied to Freebird's topic in Painting, finishing and weathering products and techniques
Awesome information! I've never used Wipe on Poly until now with Chuck's Winchesea. Knowing how it is formulated vs regular Poly and how to use it properly goes hand in hand. Now I will attempt to try it 'properly' on my old dining room table this spring. Thanks! -
Thanks for the scraper info JJ! I have the A.L set already so it's a start! Going to order up a set from Tom now. Merry Christmas to you as well About those LED's, just perfect! The yellowish tone to the light seems to really emulate that candle/whale oil glow. What voltage are they rated at? They would look amazing along with having the stern lantern lit up
-
I'm at a loss...positively beautiful! You made your own scrapers for the moldings? I think I will divert my attention for a bit and learn how to make them on some scrap. Again JJ, what a sweet model!
-
Simply astounding! One gets the feel of watching a real ship come together. Are you happy with the fit so far?
-
Small steps. I see the light at the end of chapter 1! Just faired the transom structure after installing the sills yesterday. Framing it in next...I need to by some Depends for this next stage. For some reason it makes me a tad anxious!
-
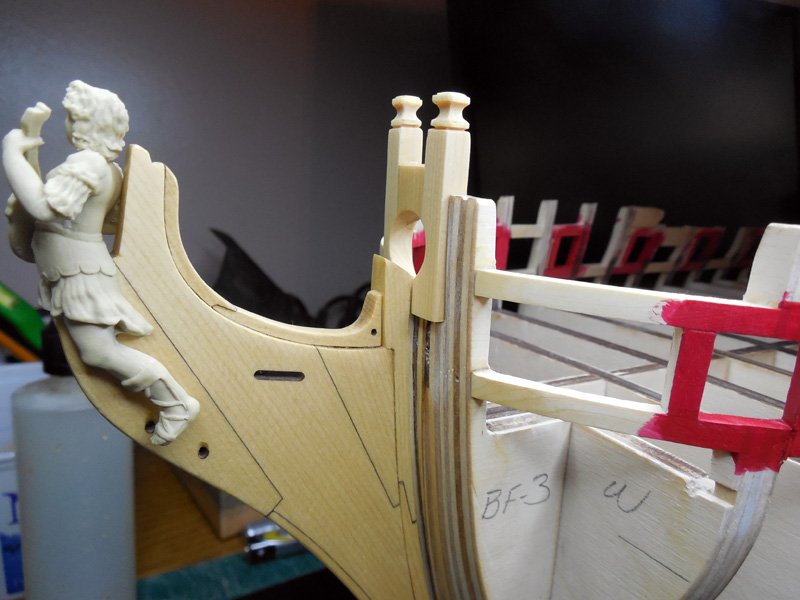
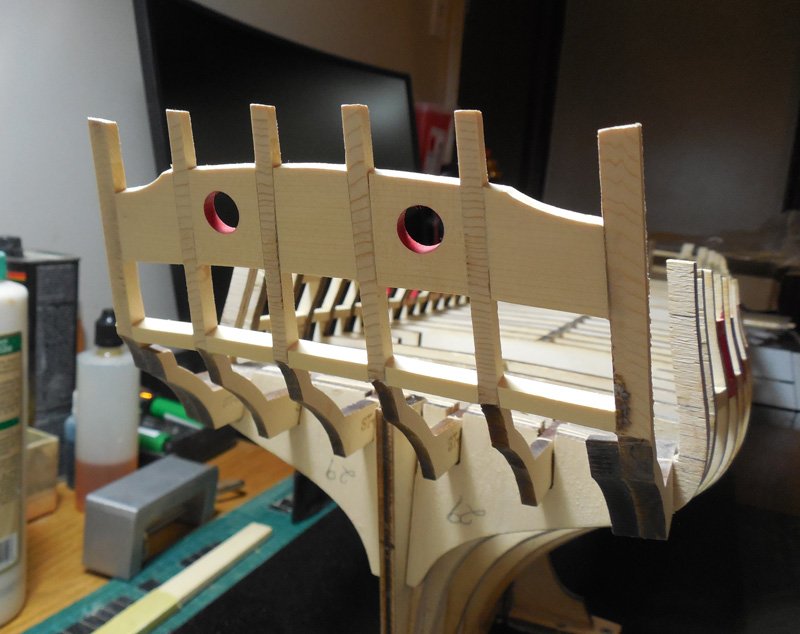
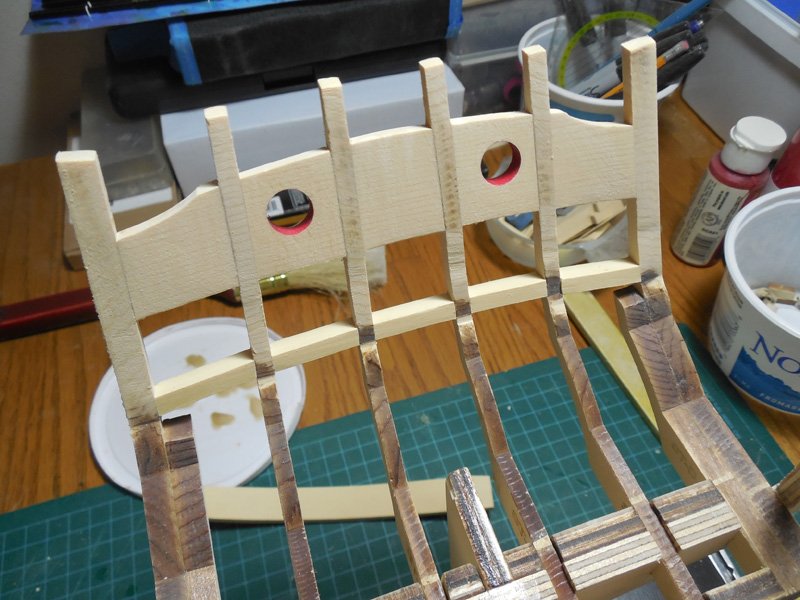
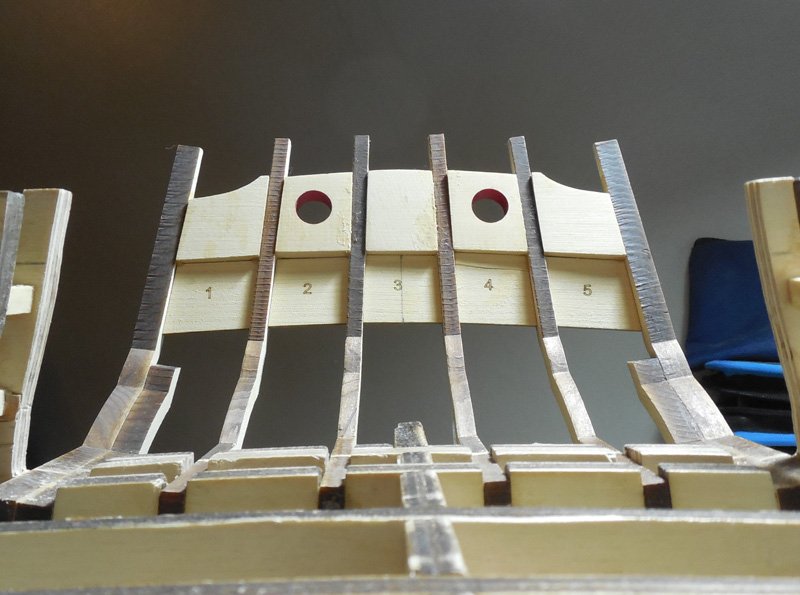
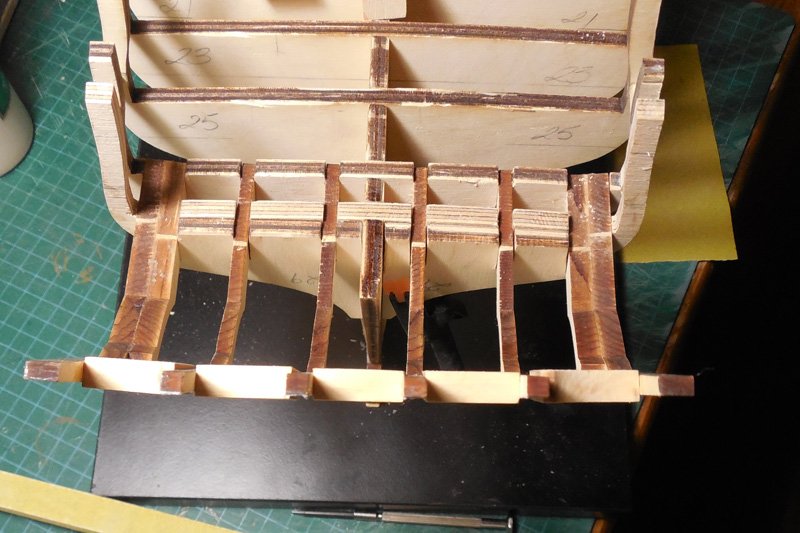
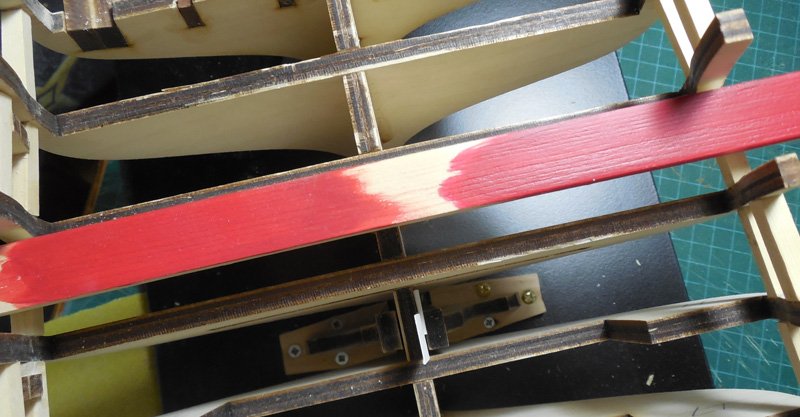
Nothing big at all...I just wanted to show the transom as it is being built. After placing the strips from Chuck's guide and doing a few measurements, I discovered the port side outer frame was pressed down too far into frame 28. It was a small joy to dig it out and re-position it (note the sarcasm). Once the fillers were in place, it was a cakewalk to bevel and place the upper sills. Once again, Chuck made it easy for us. This is just a shot of the upper sills glued into place with another from the top down to show the slight curvature. I hope it's right! The next thing I wanted to show was red acrylic I settled on. I grabbed 2 types yesterday. The one on the left is a cheap craft acrylic that surprisingly went on smoothly and dried flat. It is 'Decoart Crafter's Acrylic Tuscan Red'. The sample on the right is made by a local art supply chain called Wallacks. It's their version of 'medium cadmium red'. Both samples were given 2 quick coats with a slight sanding in between. I Chose the Wallacks brand as it is a little deeper in tone and has a nice satin sheen to it. I gave it a small try in the ports in the upper transom sills.
-
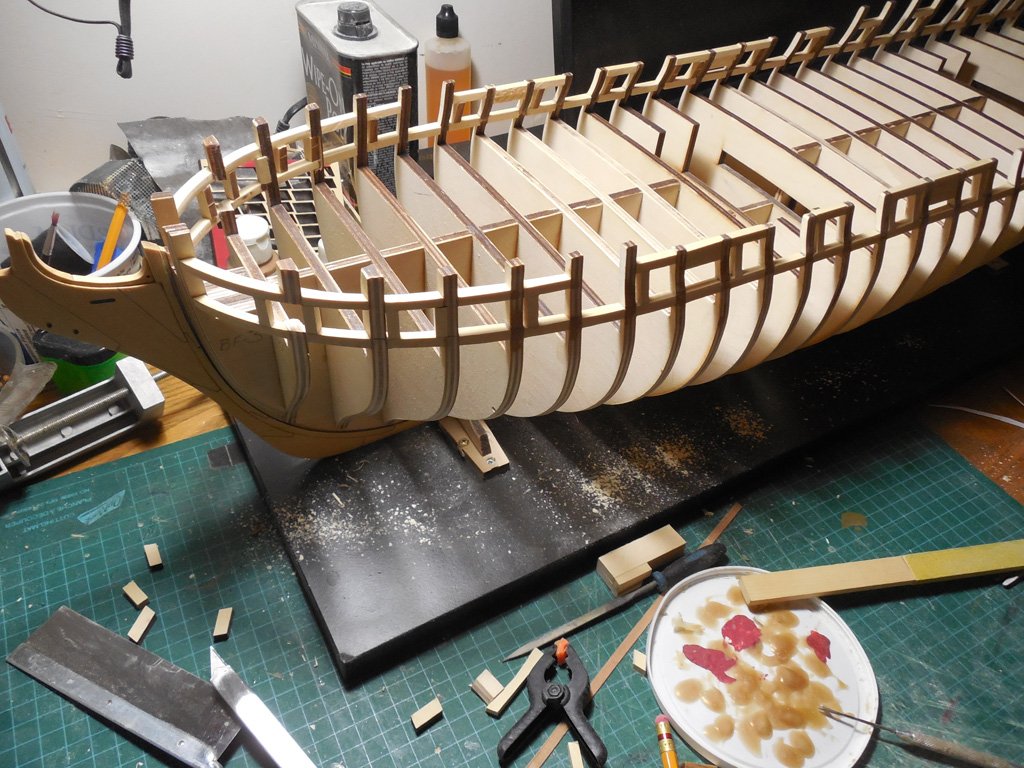
Hi everyone, Not much at all going on other than gluing in the stern timbers and almost defecating in my pants as I did it. They made me a tad nervous! I cut out the strips from Chuck's sheet and stuck them on and then had a small epiphany...Ron, you bonehead, use the heavy card you cut the strips from to check the angles of the timbers! What a relief it was to see that the timbers come very close to the angles called for! Back when I was assembling and then fairing the bulkheads, I had removed #28 and the 2 x #29's. My original 28 had discrepancies in the stern timber angled cut-outs for some reason and I had faired it wrong as well.
-
The darker wood does have a certain feel of richness to it. I thought about cherry for the longest time and then I saw how clean looking Chuck's and the others were. Those white window frames are beautiful! JJ has done an amazing job and I think I might follow in his footsteps too with the white. Funny you mention the paint. I'm just about to go out to buy some this afternoon. I like the medium cadmium red but I will need to really look as some of them look purple to my eye and other shades that just don't cut it. I was trying to get the Grumbacher but it all looks sold out around me.
-
Vlad, she's coming together beautifully! I raided a construction site down the street for my Styrofoam. What wood have you chosen to do your Winnie in?
-
Another small chip out of Chapter 1...Gun ports are done! (except for painting) . I messed up where I was cutting in the 2 port on the starboard side. Not paying attention, dog wants out, wife talking up a storm. Any excuse except for my own stupidity. Well, now I have a wee bit more planking support after repairs . When I said 'a bit of sanding is good for the soul' I lied. I started fairing the inboard side of things for a bit of a change before I tackle the bollards and the stern framing. The Dremel drum is now my new friend even though it kicks up a bit of dust.
-
Great idea using the scrap to support the uprights. Looks like you have a great space to work too. I do my building in the dining room and I'm always 2 mm away from crucifixion by my wife
-
Chuck, will we be seeing little Alaskan cedar ship's boats gracing the decks in the future? It would be so nice to see an offering other than the ones that are out there.
- 1,784 replies
-
- 1
-

-
- winchelsea
- Syren Ship Model Company
- (and 1 more)
-
Simply astounding! I hope you have a nice case designed for her as she deserves a place of honor. I keep checking yours and Chuck's build as I plonk along on mine. One day in the distant future ....
-
Thickness Sander questions
Ron Burns replied to Ron Burns's topic in Modeling tools and Workshop Equipment
Thanks everyone for your comments and suggestions! We're getting closer to a conclusion. Now I will.. 1- Get the vacuum attachment ASAP 2- Figure out a way to isolate that little DC motor. It's built like a small cheap tank but I can see it jamming up real fast with crud 3- The auto-feed seems a bit beyond my ability and most of all my knowledge. Google will help I can see the benefit of a steady feed, Thanks! 4- Isolate that wobble! For some reason I feel it's the cheap self levelling bearings. I'll see what other flanged ones I can find. As far as balance is concerned that drum was a solid piece of aluminum that I had bored out for the axle. There is a 1/8 inch channel about 3/16 deep to accommodate my paper which is kept in place with screen door spline ( I was proud of that idea :)). The hubs I used are milled aluminum and identical in size etc. using the exact screws on both ends. 5- Look into stepped pulleys! That is a great idea. That way I can keep the voltage where I need it and bring the speed down maintaining torque (I think) I use the fabric backed paper and that little test piece I did took very little to make a whack of sawdust and the finish was nice. I have a piece of Black Hornbeam that I will attempt to make some small billets from. It might make some nice wales on my Winchelsea if this sander works ok -
Vlad, I measured mine with a digital Vernier caliper and it comes to 14.19mm but that doesn't account for a bit of laser char removal, etc. I still have my original scrap sheets outside of my building where I could get you a measurement from the cutout if needed. Let me know before they become snow covered
