
HOLIDAY DONATION DRIVE - SUPPORT MSW - DO YOUR PART TO KEEP THIS GREAT FORUM GOING! (Only 13 donations so far - C'mon guys!)
×

Ron Burns
-
Posts
177 -
Joined
-
Last visited
Content Type
Profiles
Forums
Gallery
Events
Everything posted by Ron Burns
-
 Those are some pretty sexy cheeks! I can't wait until it all gets released. Thanks for an immaculate job Chuck.
- 1,784 replies
-
- 2
-

-
- winchelsea
- Syren Ship Model Company
- (and 1 more)
-
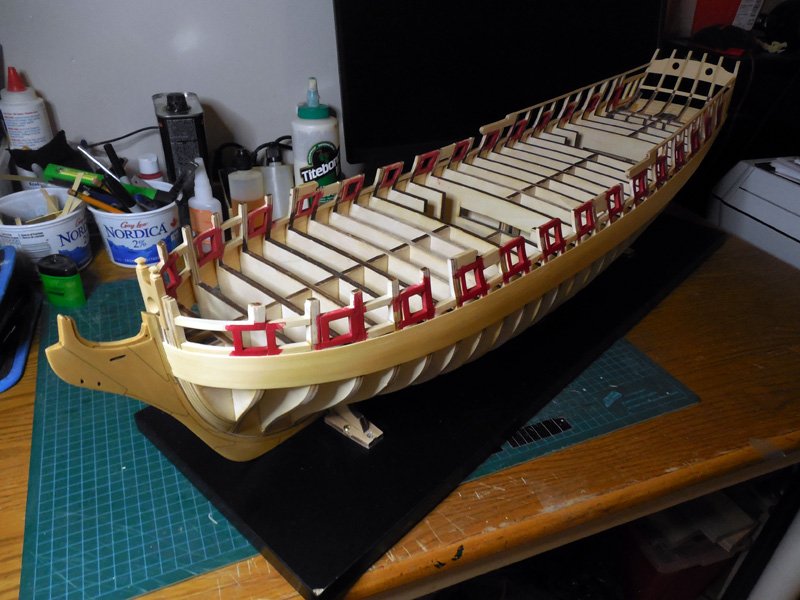
Vlad, you are a machine! I can see how lining off the hull makes such a difference. What kind of wood are you using? That photo of your ship upside down on the chair really shows the beautiful curves of the hull. Like a beautiful lady posing in the sun
-
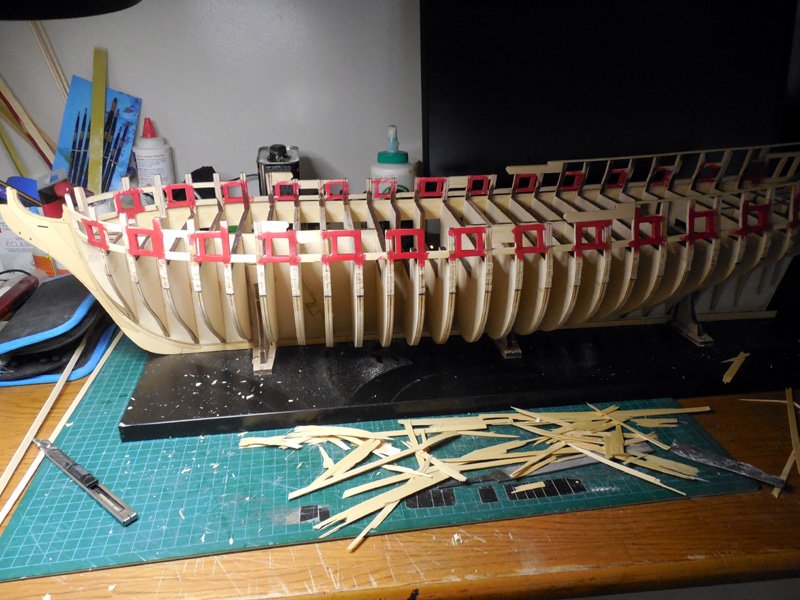
Ok, one more thing down First layer of wales complete along with black strake. I'm glad I ripped out my first attempt and redid them. Of course they will look better covered with the next layer. Now to make things count and try to do them right. Single layer from here on in!


-
Tom, I think I should check my birth certificate 'cause we might have the same middle name I just have a IV or V after my name! I ended up ripping that entire side off yesterday as it was a bit wonky. The first strake didn't sit right and and when being pried off decided to take some of it's brothers with it. I can't imagine trying to remove so much on a solid hull! The surface area being bonded to would make that a supreme PITA!
-
Your Winnie is coming along really well! I just wanted to say thank you for showing how you planked around the gunports. For the life of me I couldn't figure out a good way to measure out the rabbet until I saw your method. Not looking forward to fairing the insides!
-
WOW! Those are many more options than I realized possible. This will prove to be a great learning experience and I think I will give the dye a shot along with the steel wool and vinegar just to have options in the future. Experimenting is *always* fun and any method that keeps me away from a paint brush will keep me *and* the model very happy! Thank you very much
-
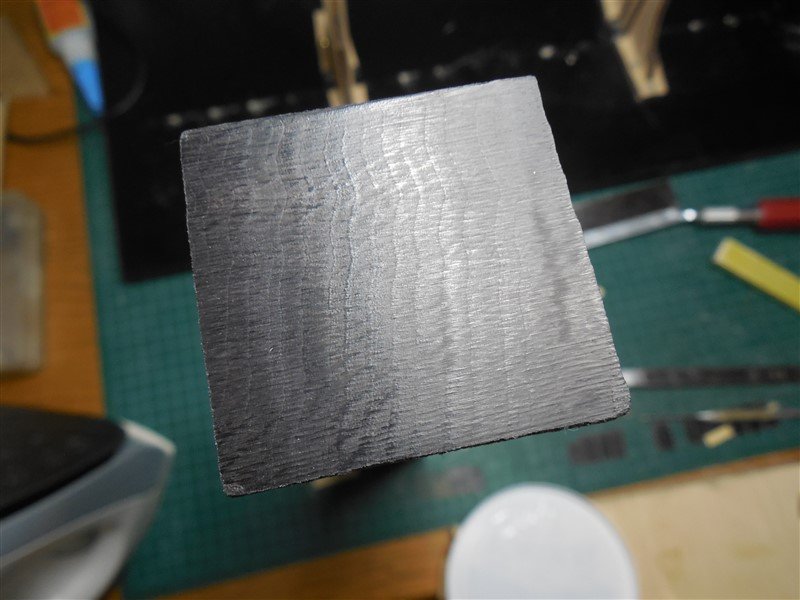
Thank you Jim, Tom and Jaager (I apologize, I don't know your name). The piece in question looks wedge-like in the photo. It's actually relatively square but the macro function and the angle of the photo really made it look off. Unfortunately, Ottawa doesn't have too many places to provide the re-sawing service. I have used the advice and sent out a few feelers and hope to get a note back. Black Hornbeam is actually just hornbeam that is impregnated with a black resin through and through. Hornbeam, from what I understand is not very useful except for firewood until it's been stabilized with the resin. It can be cut through and through and will be black. It can be polished up and look quite beautiful. If interested, a quick search on Etsy will give you an idea of what can be done with it. In regard to the Winnie's wales, yes, they are meant to be painted if one uses the Alaskan Yellow Cedar or Cherry or whatnot. I am not the best painter and to paint something of that length, I would be sure to mess it up. If it comes down to it, I will paint but would rather not. From what I can see, the black hornbeam used by modelers for that purpose by many eastern bloc countries looks amazing without a drop of paint :). I will follow your advice Jaager and do some practice runs. If it proves too problematic with my crappy bandsaw, I will save for when I can do it justice. Thanks again guys!
-
I did as Chuck instructed and I also liberally glued the joint. I did mine on a piece of tempered glass just to make sure it was a perfectly flat joint with a few weights on it as it cured. That false keel will stand on it's own when you get it together
-
Hi everyone, I'm sorry if this has been gone over before but I am looking for some re-sawing advice. I have a small piece of Black Hornbeam that is roughly 4cm x 4 cm x 35cm. I am looking to create some planking for the wales of my Winchelsea. Unfortunately I am only in possession of a 9" porter cable band saw. With the proper fence set up and the correct tension, do you think it is possible with my bandsaw with the stock blade? I'm willing to try it if you guys think its possible. The other question I had was which way to cut? Here's a pic of the hornbeam on end showing the grain. Thanks ever so much! Ron
-
Absolutely awesome program that keeps me from having to load up Photoshop every time I want to post. It literally took me seconds to load the program and resize 3 images. Thank you for something that is actually useful!
-
Wow! I can actually see the shape of the hull quite clearly now. You must be nearing 30 lbs or more before you start trimming off the 'fat'. Thank you Tom for those great explanations as you go along. It does a soul good to think along different lines of construction once in awhile and I am really enjoying it (think I mentioned the enjoying part before)
-
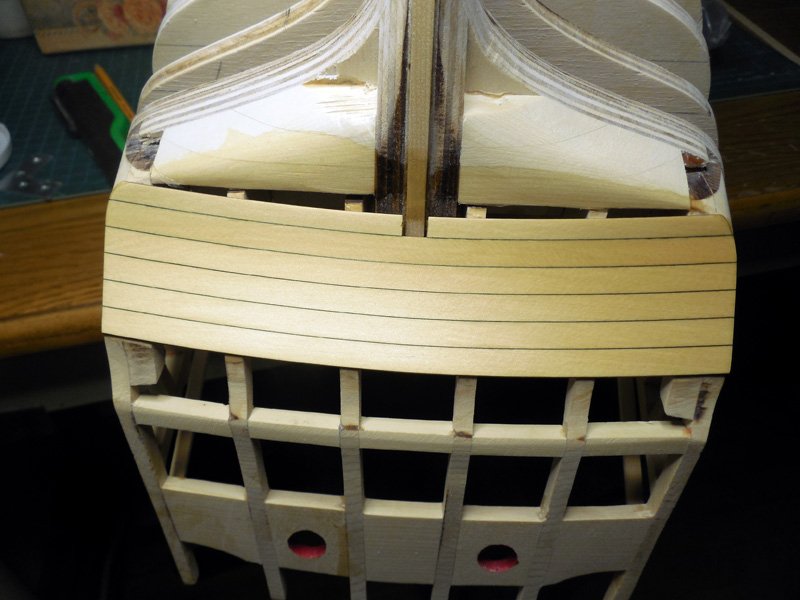
OK, I lied. I had to show this. 1 wale down, 3/4 wale to go. I'm really glad this is a first layer planking and that i will be adding more. Its definitely a learning process and I'm positive there will be more than a few do-overs after this. JJ, thanks for those pics. They made a world of difference. One thing I learned, wait until all strakes are installed, then sand. I had installed 2, sanded a bit and then the other 2. My sanding is never perfect and it took just a wee bit more to level out all 4 strakes in the end. I also like the idea of giving those planks a bit of extra meat on their bones just to enable a bit more sanding without getting too thin.


-
Anyone using electric plank bender?
Ron Burns replied to MESSIS's topic in Modeling tools and Workshop Equipment
Looks like a great device but us in N America would require single phase 120V 60hz. Our 208 (240) is actually using 2 phases and is used for stoves and dryers on a dual breaker rated from 20-30 amperes. It looks like a good 30 watt soldering iron with a great looking head on it for shaping planks. I have a butane iron I use that would be the cat's meow with that head on it! Come to think of it, it looks like it will fit your average soldering iron... -
Tom, I'm happy to see you making sawdust! Curious as to why the inside wouldn't be hollowed closer to actual size. Is that strictly for rigidity during the carving/shaping of the hull's outside and perhaps larger bonding surfaces? Ron
-
Tom, JJ, Vlad et all, Thanks for the encouragement! Well, here it is. My first wale strake. I promise, no more posts here until I actually *really* get something done Chuck, thanks for your planking videos. Made myself a little planking board, swiped my wife's iron and learned how to edge bend. Took me 3 planks bent the wrong way to realize what I was doing at the bow. Once figured out, she lay flat and happy. Gonna work out how to re-saw on my little bandsaw and make some black hornbeam planks for the 2nd layer. Thanks for the patience everyone! Ron

-
Why do some manufacturers make single plank kits?
Ron Burns replied to Meriadoc Brandybuck's topic in Wood ship model kits
See? The voices of experience can always make sense of things! I never even thought of many of the reasons for double planking and it does make sense for many circumstances now that you guys have laid it out. I've seen the magic that certain people have done with single planking and I can't see wanting to do it any other way (especially with that AYC :)) -
Why do some manufacturers make single plank kits?
Ron Burns replied to Meriadoc Brandybuck's topic in Wood ship model kits
Not that I am in the know what so ever, I think there are a few reasons for this. Using a single layer is basically the way a real ship was built. Using 2 layers allows for a much cheaper wood to be used as a base. The 2nd layer of better quality wood is thinner and less expensive than if used as a single layer. The 2nd layer also allows for the mistakes of the first to be covered up. Using a single layer leaves less room for mistakes but I think will teach the correct way to plank right from the start. There are many tutorials for planking here and if followed, the builder will learn a wonderful skill. To me it's scarier but well worth it -
Thanks JJ, weird how I kinda latched onto you as my mentor I appreciate it more than you can imagine. I skipped the nail part and even tried using those T-type pins. I started splitting the crappy basswood so I marked and pre-drilled holes for the pins. That didn't work well either so I ended up tacking a batten with cyano every few bulkheads. The joints were easy to pop off and re-tack. For Shi*s and giggles I took random measurements along the waist to compare to the other side and they seem to be close. Close enough only counts for horseshoes, handgrenades and crap fights so maybe I'll be lucky and pull this off!
-
Frank, welcome to the group! In case you're still looking for a building board, I ended up using a pre-made laminated shelf from a local hardware store. It was cheap, really flat and straight and the lamination made it easy to clean off glue, paint and dust. Love the cigar boxes! They seem to be harder to get here these days. Ron
-
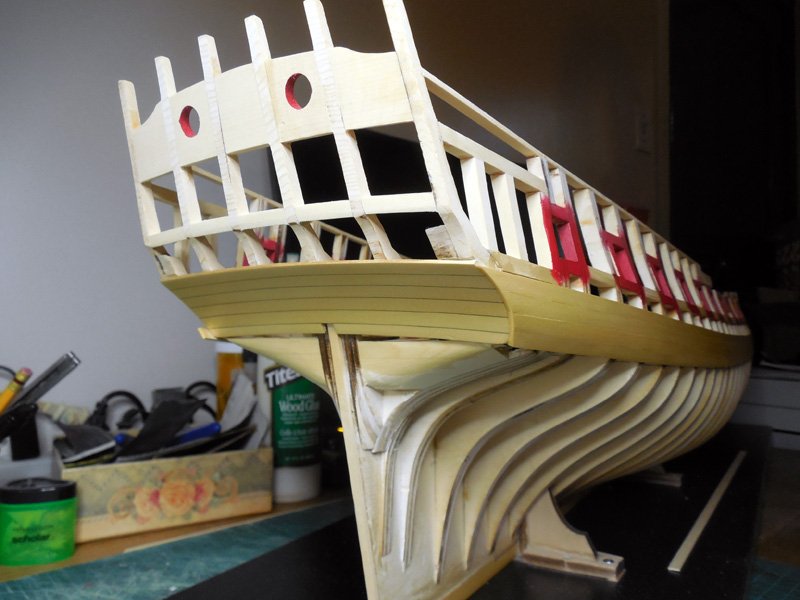
Edward, I'm just about to follow in your footsteps having just mapped out my wale runs. Now I'm scared! Awesome save you made by noticing your error in the wale runs. Your Winnie looks great and I look forward to seeing more. Ron
-
Thanks guys for the encouragement! JJ, I did what you suggested and it was well worth it! That poly sure does nice things to Alaskan cedar. I'm at the point where my inexperience is driving me nuts. I'm not used to 2nd guessing myself so much but I'm sure in time it will get better. I found some cheapo basswood sticks for battens at a hobby store miles away. It was a tossup...hardware store or just pay 60 cents and get them cut already. Figures I find the wood but small brass nails are on back order forever. Anyways, I mapped out my starboard wale and I *think* it looks ok. What do you folks think? PS. since posting these pics, I saw that it needed to come down just a wee bit at the bow. It's fixed I spend too much time here..good night1

-
Tossed on the WOP and man, it pops! It's a great place to experiment a bit being able to cover it up should it go south a bit. I can only imagine what a second or third coat will do after some 600 grit sanding or better. Just trying to figure out where I can grab some 1/8th strips long enough to map out my wales..
-
Tom, What a learning experience! I'm happy to have such a well thought out and documented process take place in front of our eyes. From a newbie perspective, this is near magic Thanks for sharing with us. Ron
-
New To Building Ships Help and advice needed
Ron Burns replied to Richard O's topic in New member Introductions
My real first ship model is Chuck's HMS Winchelsea. It slides right into the size you are looking for and the support is second to none. The materials are first rate if you choose to pick up the parts for each of the published 'chapters'. The other thing that really got my attention were the many build logs of the other members here along with Chuck's as he continues to develop the Winnie. As it stands, to me, this is one of the most beautiful frigate models I've seen. I come from modeling in card for years and slid right into this. You will have no problems coming from RC. -
Vlad, I can't believe how quickly you have gotten this far! And well done too! It's great to see the confidence. As I get older, I hesitate and procrastinate more and still make mistakes! Now I will follow in your footsteps friend I'm really relieved to hear that all worked out with the scale of your model. Happy New Year to you as well Ron