

Ron Burns
-
Posts
177 -
Joined
-
Last visited
Content Type
Profiles
Forums
Gallery
Events
Everything posted by Ron Burns
-
 Vlad, I feel for you! I'm not all that experienced but if it were me, I would do it again. I don't say it lightly as money is always tight for me it seems. If you were to make the entire kit from scratch, I would say 'who cares' as its like you said..a couple mm less all around won't matter. Since you have parts coming at full scale, I wouldn't want to have to sand them down as they are just perfect coming from Syren. Perhaps you could save the bulkheads for another frigate or a wee bit smaller, second Winchelsea
 -
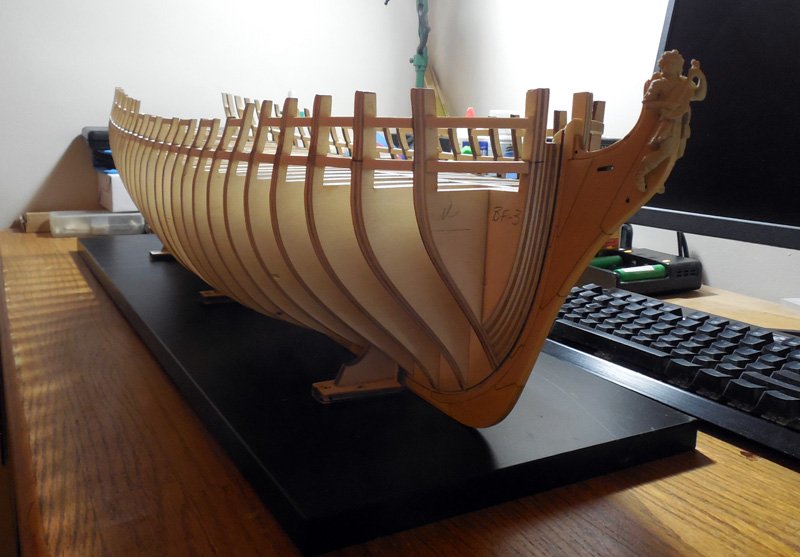
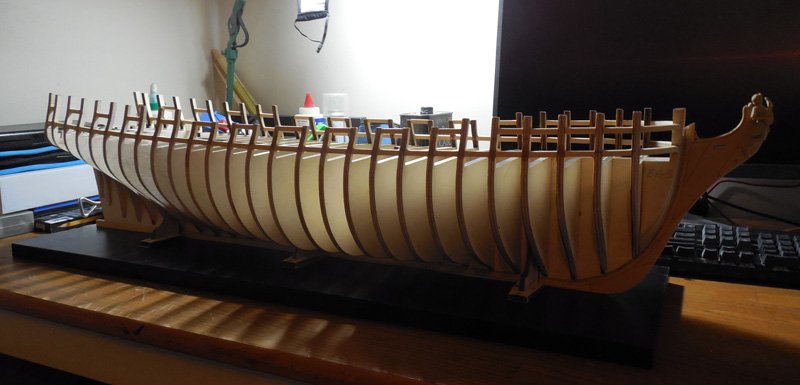
Hi Everyone, I know...slow as molasses I am! Finally finished the upper sills and now onto the verticals. One can really see the shape of the hull taking form and I can't wait to catch up to you guys! I'm just happy my Winnie is resembling Chuck's prototype and you guy's builds so far. The piece of black hornbeam I ordered finally arrived from just outside of Moscow. What a journey! Moscow, Poland, Canada, back to Poland and finally to me. I am hoping to use this stuff for my wales. Gonna learn how to use my bandsaw and thickness sander to get some nice planks. It's a pretty small piece at 14 x 1.6 x 1.6 inches but weighs quite a bit. I'm guessing it's from the resin it's been impregnated with. Any advice cutting this stuff will be welcome

-
Thickness Sander questions
Ron Burns replied to Ron Burns's topic in Modeling tools and Workshop Equipment
Hi all, Got a bit more done on the sander to the point that it functions but with a slight wobble to the shaft. If running a piece through too quickly, it will leave slight divots in the wood. I think this may have to do with not having my tension spring installed yet or...I think I made a mistake using 'self leveling' pillow bearings. Regardless of that, if I go at a reasonable speed pushing the piece through, it works with no visible divots! I got a piece of Alaskan cedar down to .6 mm and could probably go much further. I have yet to install the vacuum port and thought it wise to not make any more sawdust. In case anyone is interested, I used a 1/4-20 swiveling, self levelling machine foot as my elevation device. It worked like a charm after epoxying the base into the sander's base board and tapping a loose thread in the aluminum plate. A simple left or right turn to adjust the height and the swivel takes care of the angle increase or decrease with hardly any play at all. The motor is a high torque DC unit run on a 10A variable power supply. As always, any suggestions or if you see any fault in my layman engineering, please feel free to comment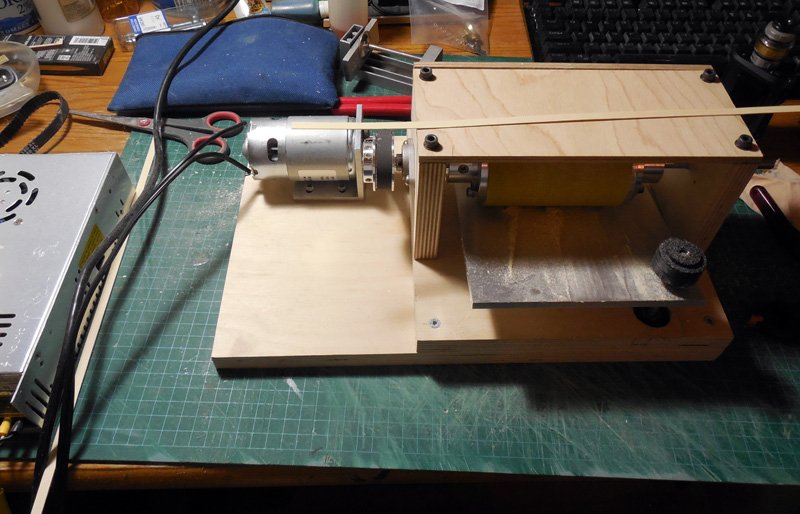
-
Oh how I wish I had used lighter plywood! You will congratulate yourself when it comes time to fair the 27 bulkheads and bow formers! It looks like you are off to a great start! Wait until your chapter parts arrive...you'll see the quality and care that went into this project.
-
Looking for info on scroll saws.
Ron Burns replied to Moab's topic in Modeling tools and Workshop Equipment
The Wen looks like a cheap, almost direct rip of the Buck Tool! (just south of there on the page with the Buck, but more than double in Canada) My interest is definitely building for a scroll saw, thinking I might get a lot more use out of it than the bandsaw I bought. Great thread so far! Ron -
I've seen photos of the prototype of this model I believe. As far as I remember it is a beautifully detailed boat done in really nice wood. I look forward to seeing it built as well. Thanks for sharing it with us!
-
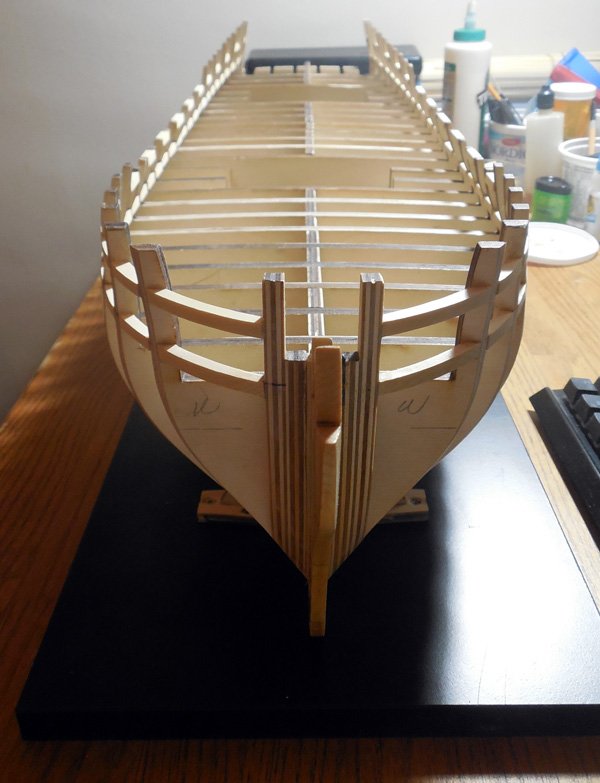
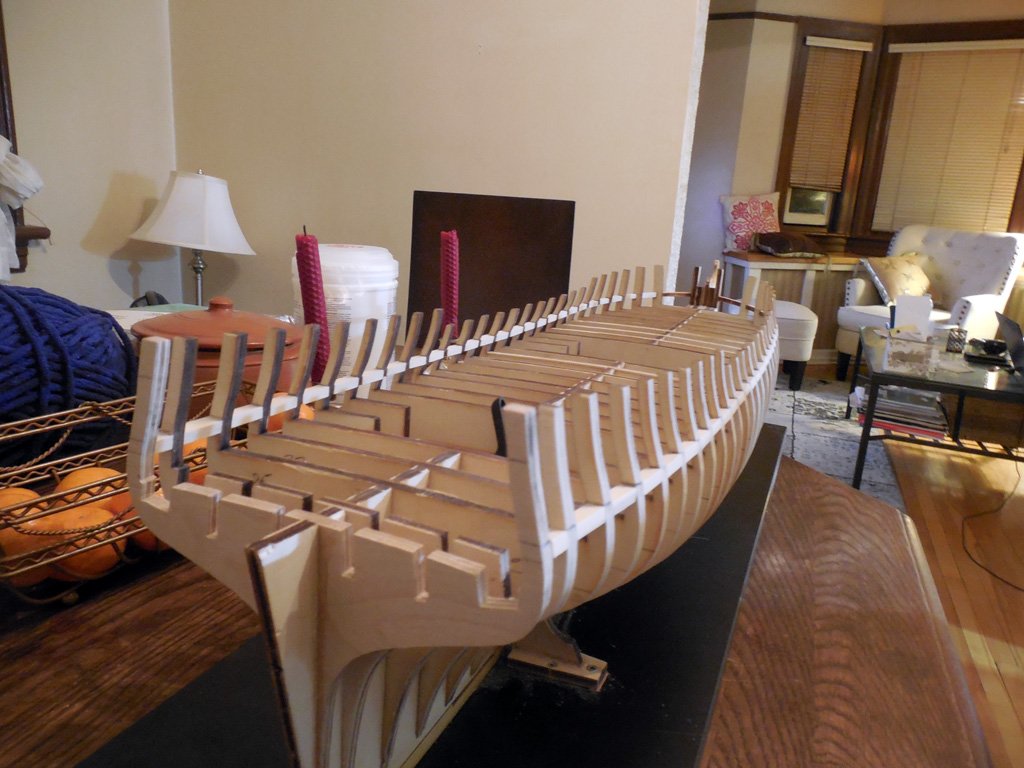
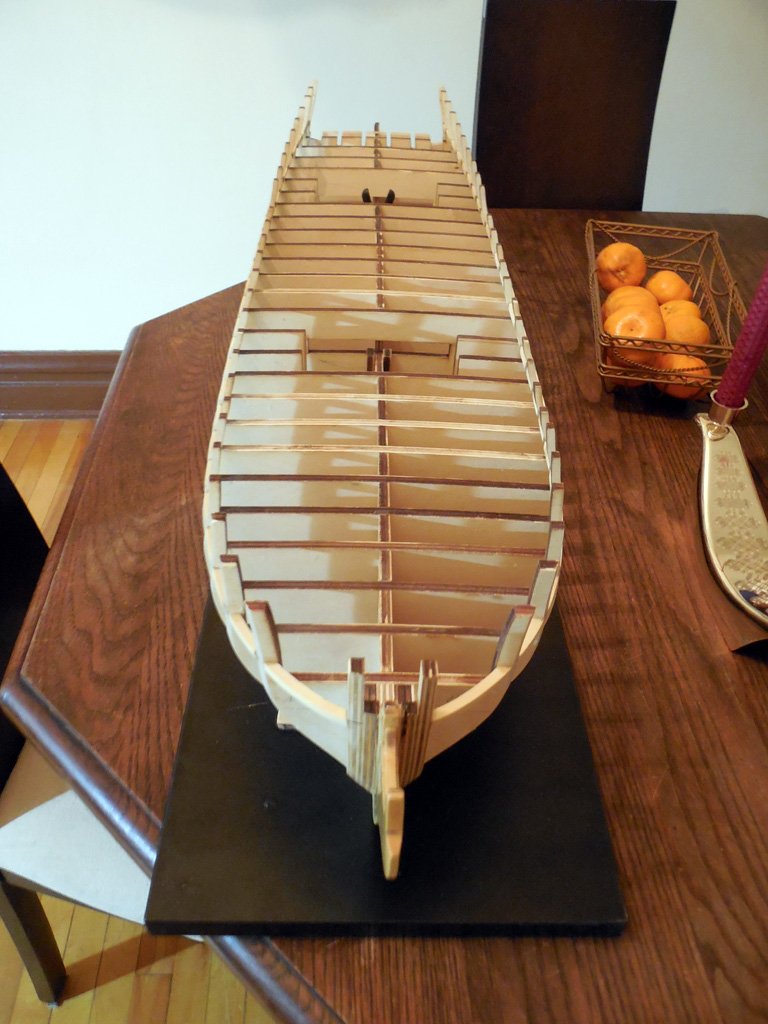
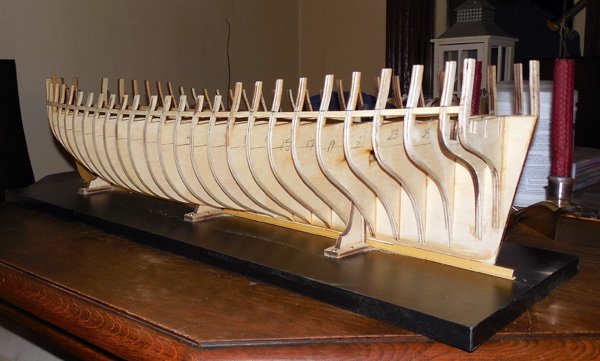
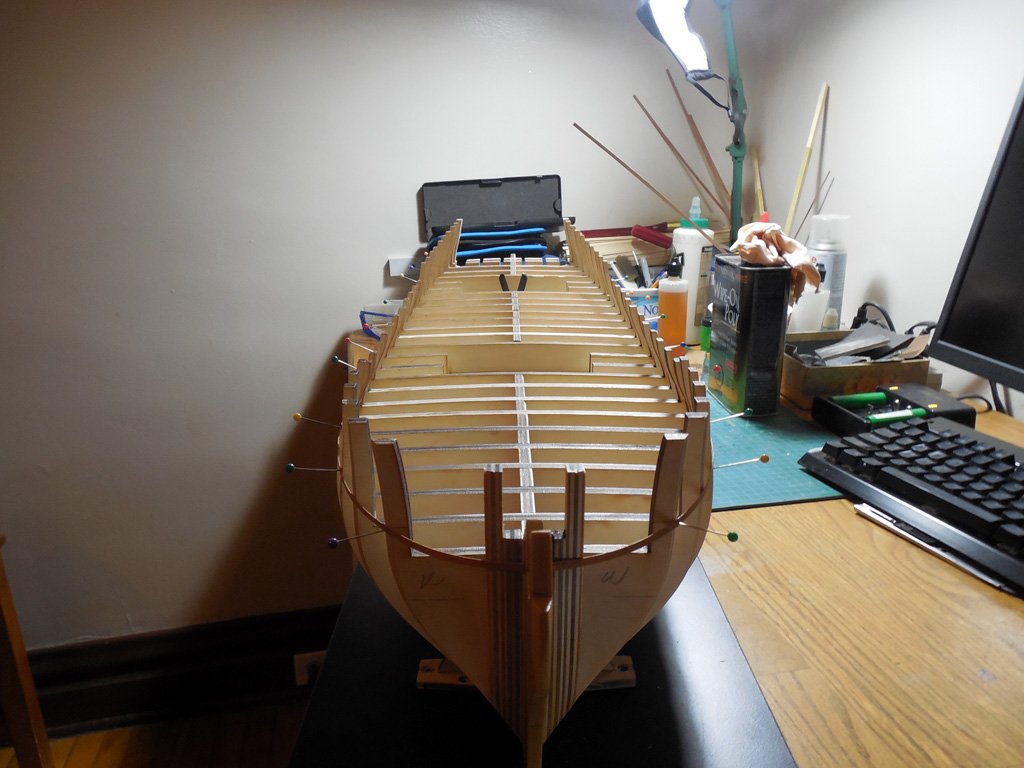
Just finished up the lower framing. What symmetry! Just by putting in those frames one gets a great idea of what the ship's lines will be. Upper frames next! Sorry, not a very big update...I just get enthused
-
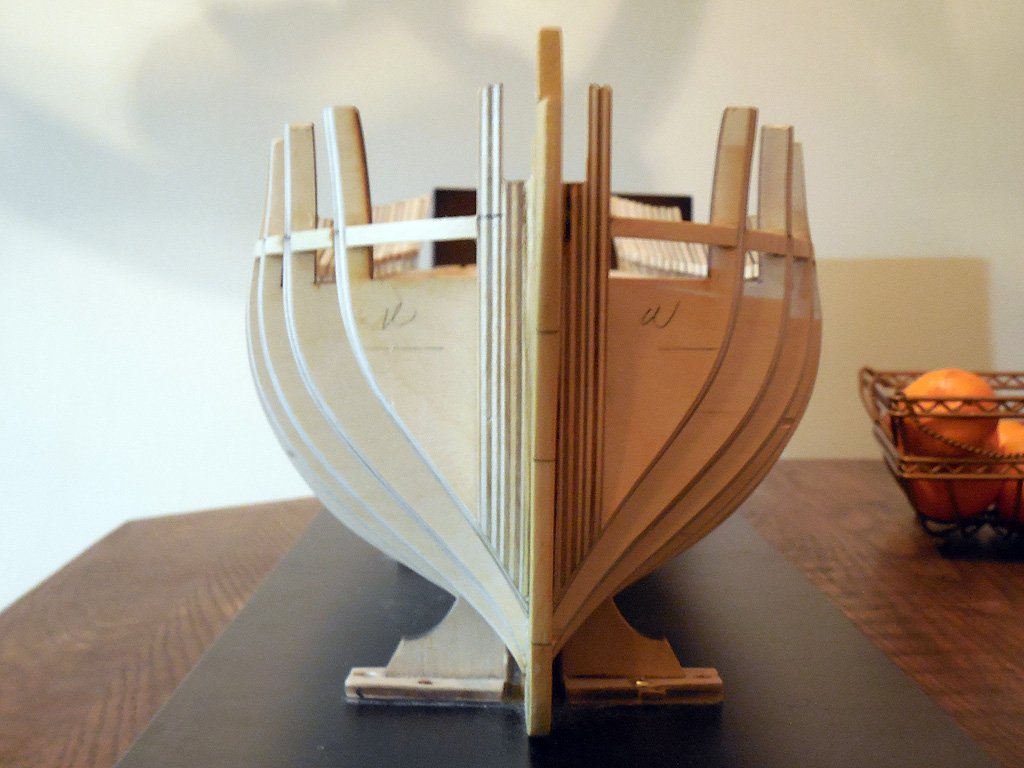
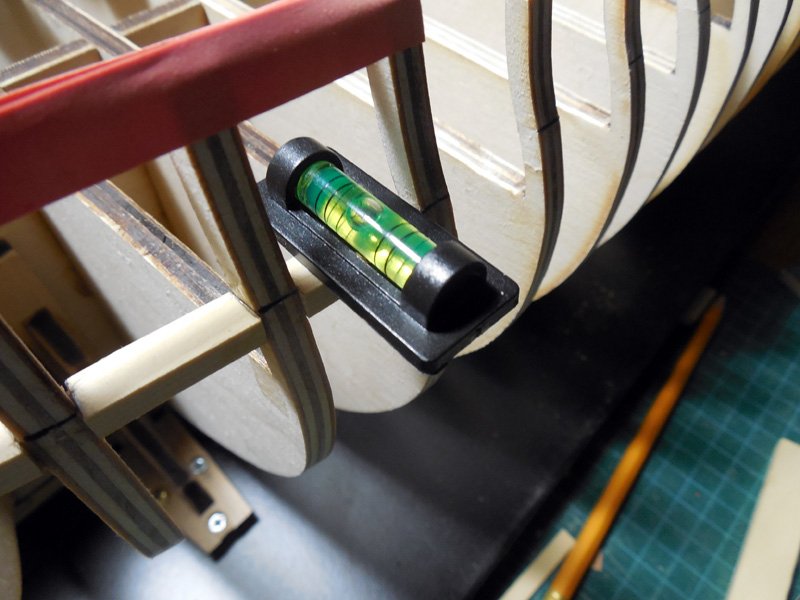
Hi everyone, Just wanted to say thanks for the likes! Not too much to report except for one wee thing...Use a darn level instead of eyeballing it! I started installing the framing and completed the lower frames on one side. Man was I proud of myself! (until I moved it to the dining room table for a different perspective). Long story short, I cut out all the segments and re-did them all using a mini level. Supposed to get wiser as we get older. hehehehe:)
-
Sorry to be a bit off topic..What red did you use for your Winnie? Gonna hit those two birds with one stone and get paint and monofilament at the same time. Glad to see you back as well. I should have mentioned it before.
- 1,784 replies
-
- 1
-

-
- winchelsea
- Syren Ship Model Company
- (and 1 more)
-
Master ship model designer/builder....talk about an understatement! Yeah I'm blowing smoke but it is well deserved. I'm going to try this out myself as it looks amazing but guaranteed I am destined to fail doing it by hand. Seeing how you made the boxwood hardware will be a treat. Will this be part of Chapter 5? I need to start hiding a few bucks away here and there even though I'm far away yet
- 1,784 replies
-
- 2
-
-
- winchelsea
- Syren Ship Model Company
- (and 1 more)
-
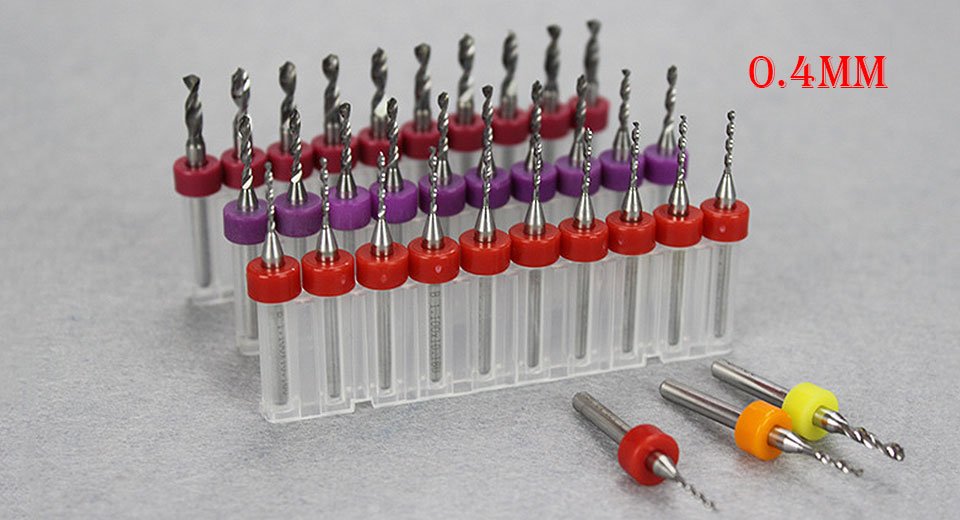
I hate to say it....China. They were 14.00 Canadian roughly on Amazon. Here's a link. I hope this is not against the regs... PCB Drill bits
-
I recently picked up a few boxes of small tungsten bits in metric sizes .4mm, .55mm and .6mm for a song. I believe they are used for drilling printed circuit boards etc. They were literally $2.50 for 10 bits including the box. For any others I do what was suggested and grab the packs on Amazon or what they call 'Jobber' packages (a whole series of sizes in a plain brown box). I haven't used the small bits yet except to try them out and they seem sharp as can be and leave very clean holes.
-
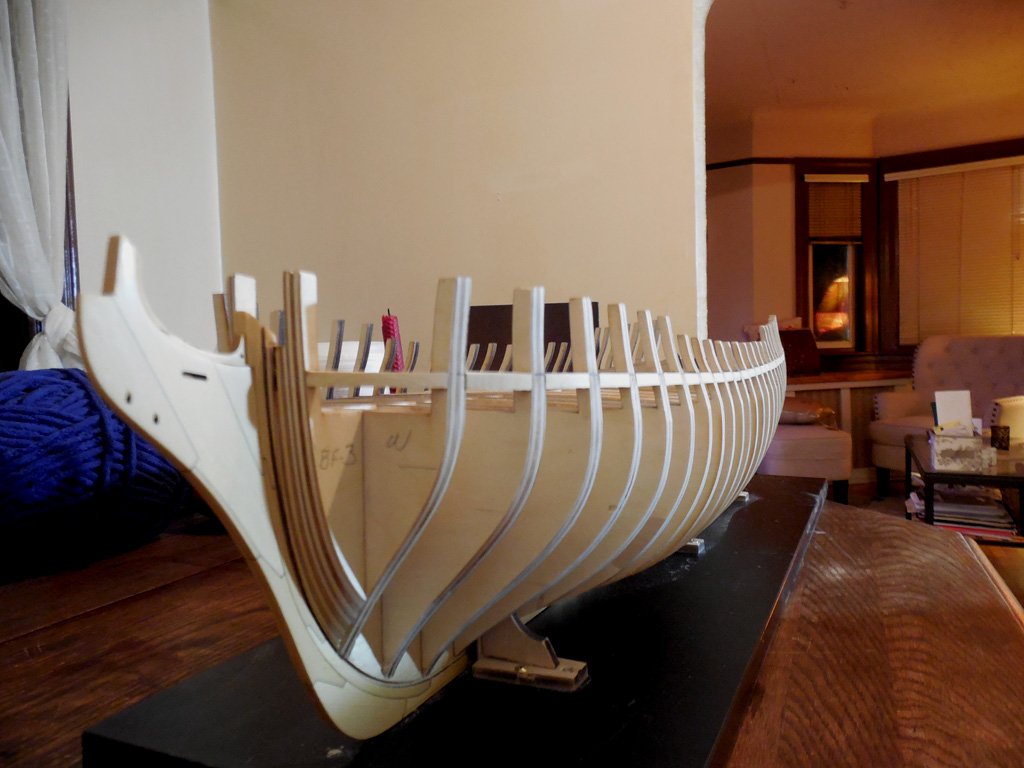
My Fair Winnie! Finally finished sanding (and sanding and sanding). Why didn't I read a bit more of Chuck's build logs and that particular conversation where he recommended using light ply over Baltic birch? Anyways, she's looking fairly respectable I ran the stringer from bow to stern on both sides, took some measurements, compared them on both sides and against the plan. I think we're finally ready to start framing! Sorry for the bad photography but I just couldn't wait until daylight to take them so I could finally post a bit of progress.

-
Another flawless Winchelsea. Absolutely stunning workmanship!
- 607 replies
-
- 3
-
-
- winchelsea
- Syren Ship Model Company
- (and 1 more)
-
I hope it's nothing serious. I *know* you'll work it out!
-
Sorry to everyone back east...
Ron Burns replied to Patrick Matthews's topic in Modeling tools and Workshop Equipment
Michael, My Dad sent me pics last week of the dumping you guys received. Being in Ottawa at the time, I was snickering and grateful we hadn't been hit yet. I should have known it couldn't last as we got that same kind of dump last night. It sure looks beautiful seeing it in it's pristine, fresh fallen state but my gosh does it get old fast! I grew up in Thunder Bay and never got used to the cold. I envy the folks down south for the weather! -
What a way to show us the way The precision of your work astounds me. Thanks for sharing!
-
Greg, I got bored last month and didn't have the strength to tackle the hull fairing so I sliced up around 270 1/4" planks. Like you I hit a bad board a couple of times and just went on to the next. Mind you I didn't know about deflection and I was using a .5mm (.02") blade. I have a couple new blades coming in and will try them out with the wonky boards. As far as color goes, the most I've noticed is a bit more grain in some than others but no changes over that short time nor in the 5 months since my wood arrived. Love watching your Winchelsea come together!. Ron
-
Greg, Thank you! Would it be wise to replace 28 perhaps? Might be pain but worth it if deemed necessary. Thanks again for the help Ron Sorry, after thinking about it, I removed the culprit for a re-make. Glad we have such resources as the knowledge that makes up these forums. I can't count the number of times I keep referencing the work here.
-
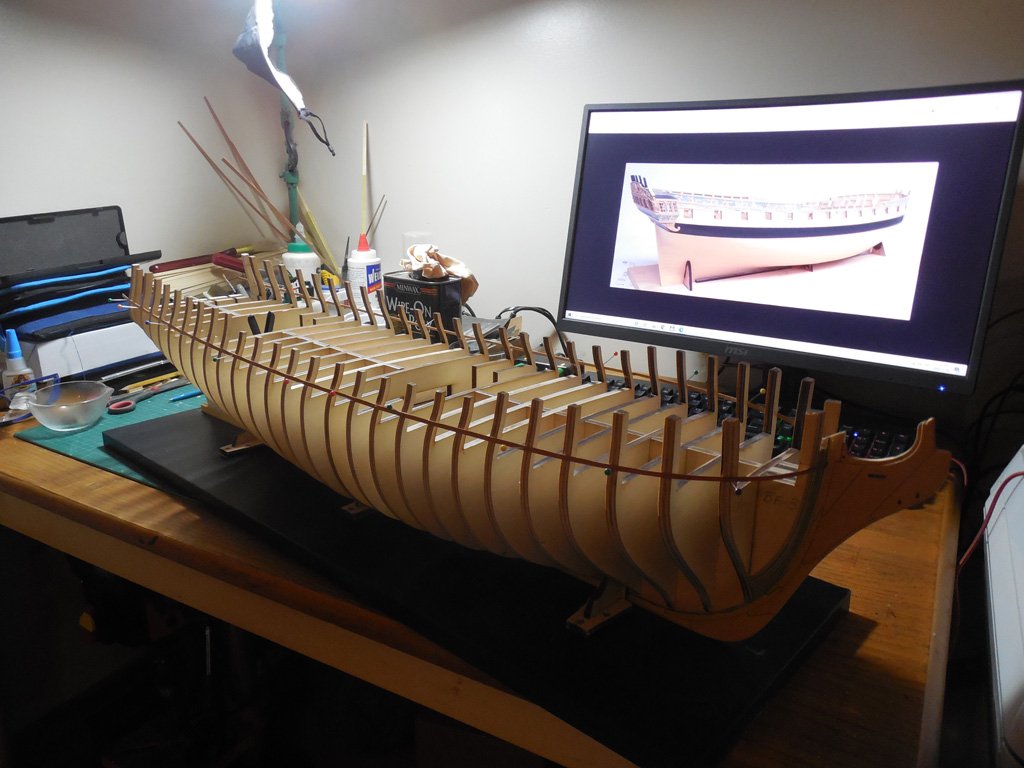
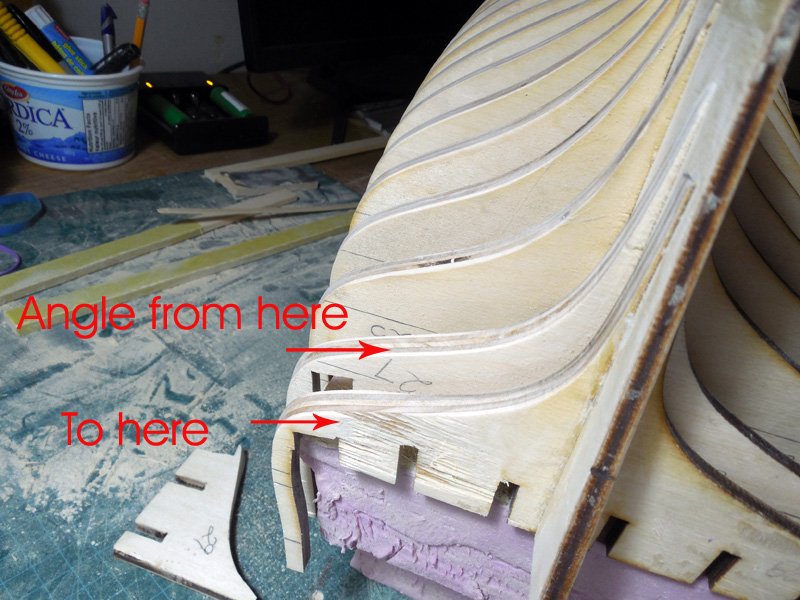
Hi guys, Silly question... I'm fairing the bottom side of the hull and have made my way to the stern bulkheads 25, 27 and 28. From what I gather, the plank should sit flat on the edge of each bulkhead. Going with Chuck's statement, if there is remaining laser char, it means more sanding. The step from 25 to 27 is steep but not so drastic as from 27 to 28. Should I keep sanding until the plank sits flat? When 29 gets added later, there will be a heck of a lot to remove to keep up with that angle. I hope I'm doing this correctly!
-
Thanks for the reminders guys! All of these novels got me through many tough times and hold a very real place in my heart. The latest series I've embarked on are the Naval Adventures of Alan Lewrie by Dewey Lambdin. It's a long series but never once had me bored. A morally questionable young buck with a suitable allowance finds himself drunk and pressed only to end up thriving in his new life. A great story of coming up from the lower deck to command over the years, fighting the king's enemies.
-
Thickness Sander questions
Ron Burns replied to Ron Burns's topic in Modeling tools and Workshop Equipment
Jaager, I'm glad to make your acquaintance! I will take your advice and re-do the top and add to the back side as you suggest. I have some 6mm ply I can cut to size. The 18mm top piece is a bit overkill. The warning about the dust is good. It will save my hide from 'she that commands' Perhaps I will find a place outside to do my sanding. Since the big 'C' hit she's been tolerant of my messes in the apartment but now that the treatments are coming to an end I have to watch it a bit more! -
Thickness Sander questions
Ron Burns replied to Ron Burns's topic in Modeling tools and Workshop Equipment
Thanks Jaager! I'll keep those speeds in mind and consider your advice in regard to the Byrnes sander. Money is tight these days hence building my own. It actually worked out well I think but the proof is in the pudding. I need to finish a couple of things and I'll show the results. Here's a peek so far ... Ron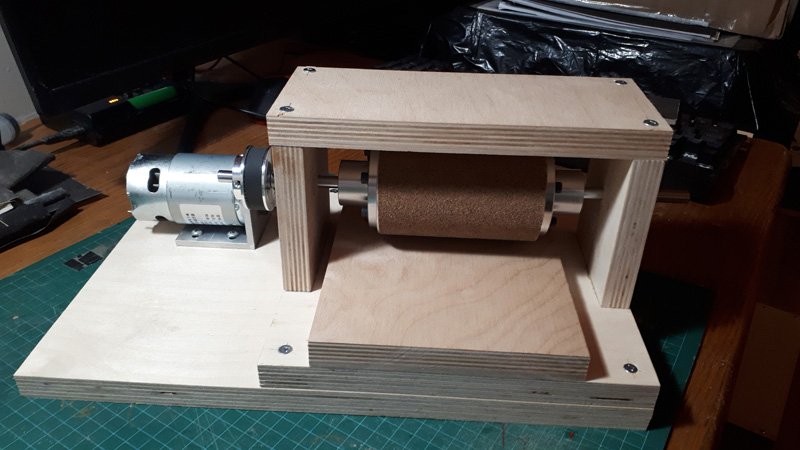
-
Hello everyone, I've recently built a thickness sander using a 3 x 5 inch drum driven by a high torque DC motor. I've never used one before and was curious what speed I should be running the drum? Power is not an issue as I can get up to 48 volts at 10 amps current draw. The motor is rated to 12 - 36 V rated at 9000 rpm at 36. Speed has been cut in half by a 2:1 pulley/timing belt. The other question I had is what direction should the drum be turning? I thought I had read somewhere here I believe, that material should be fed against the direction of rotation. Any help would really be appreciated! Thanks a million Ron
-
You just had to tell us that!