


CPDDET
-
Posts
1,135 -
Joined
-
Last visited
Content Type
Profiles
Forums
Gallery
Events
Posts posted by CPDDET
-
-
Just a thought. Did you consider blackening these pieces or coating the brass to prevent discoloration?
-
Crisp, clean and nicely detailed. Very nice work, Pat.
-
I find a good bourbon worked wonders. 🤪
- hlong222 and Overworked724
-
 2
2
-
Thanks Pat, slow going but forging ahead.
-
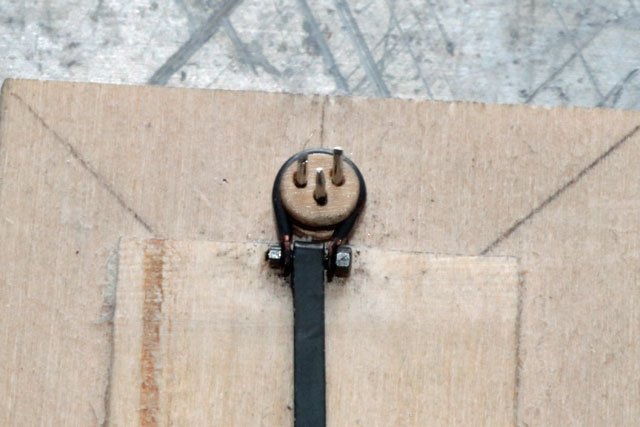
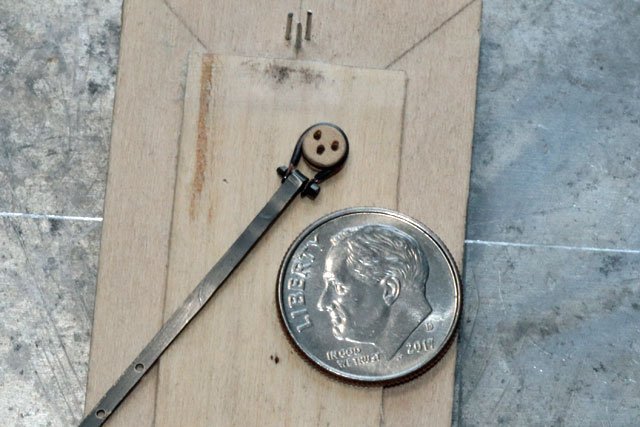
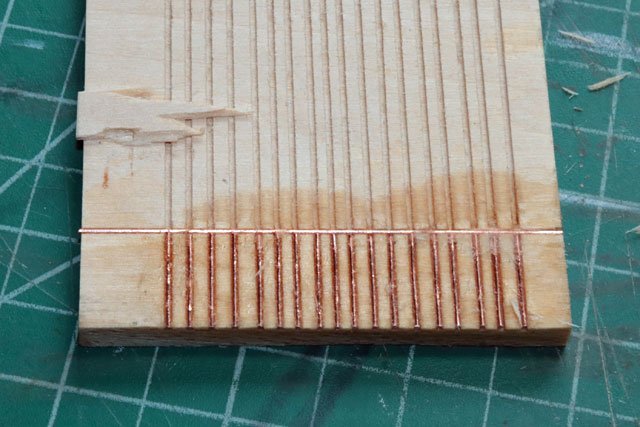
In order to assemble the chainplates, deadeyes and deadeye strops I needed a way to hold everything in alignment. So time to build a jig.
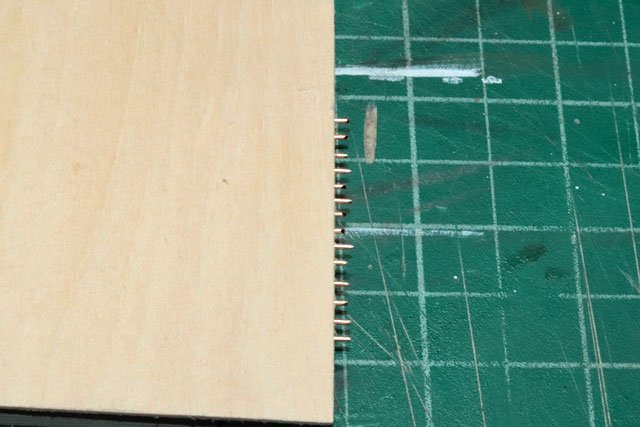
Using one of the deadeyes as a template, I marked the 3 holes and drilled through the wood base. Since these holes needed to be as straight as possible, I did them on the mill rather than free hand (a drill press would work nicely as well). Then ran 3 straight pins through the wood base from the bottom with a touch of CA and clipped off the excess length of the straight pins. This allowed me to drop each deadeye over the pins and hold it in place.
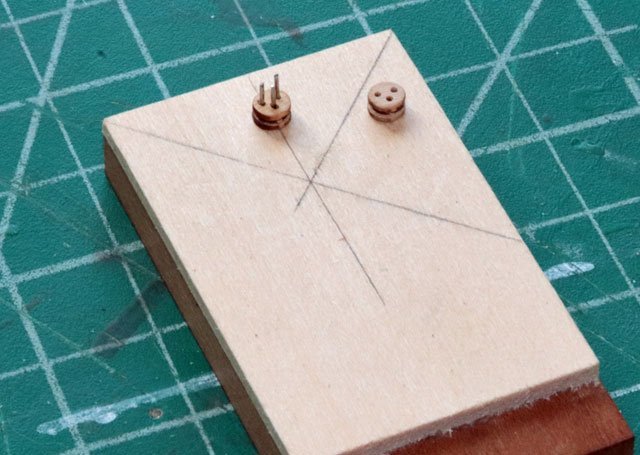
To help keep the deadeye, strop and chainplate in alignment, I added a piece of scrap wood and sanded it down to ½ the thickness of the deadeye.
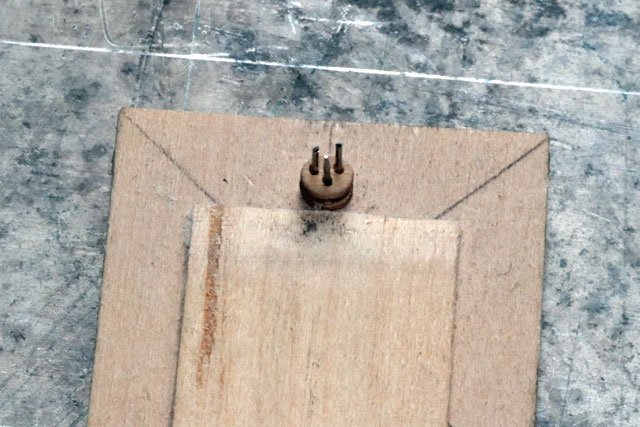
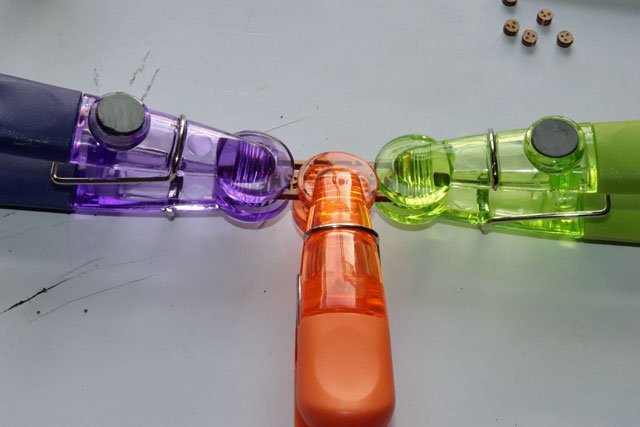
After placing a deadeye on the pins, I added the strop and laid in one of the chainplates
Used a straight pin to further align the pieces
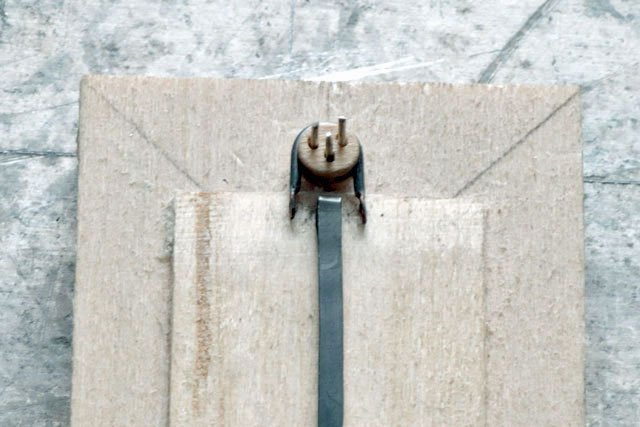
Then used a pushpin through one of the predrilled holes in the chainplate to help hold that steady.

Then it was just a matter of removing the straight pin and replacing it with a .8mm bolt
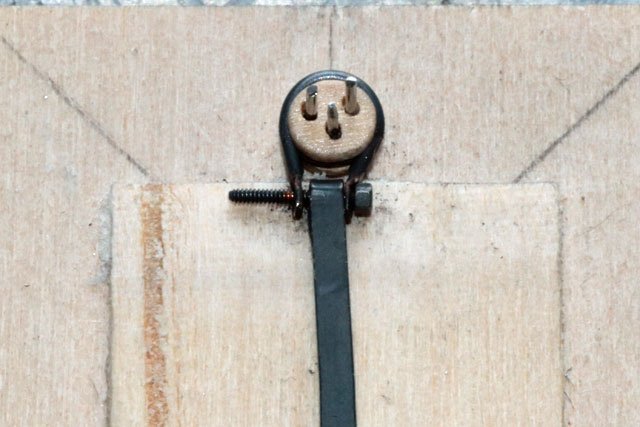
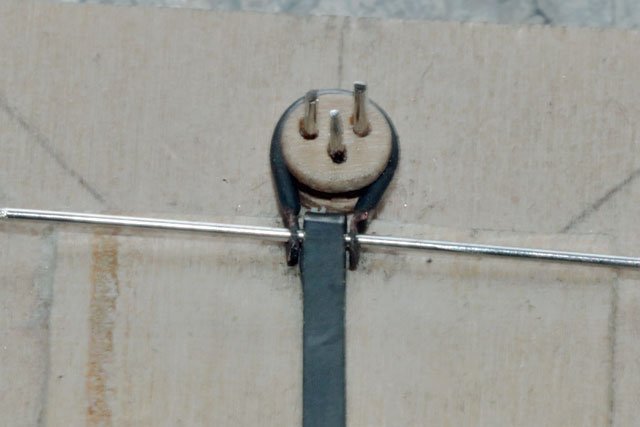
Threaded on the nut and trimmed off the end of the bolt
One down and 19 to go!
-
That will be the best beer I've had in 2 years! LOL
-
As always Pat, your setting the bar for the rest of us.
-
First or last, your doing an excellent job!
I'm already rethinking my next build, so I can see where you're coming from.
-
Looking really good. Don't know if I'll ever copper plate a hull. But if I do I'll follow your excellent work.
Keep up the great work, you've got a stunning model going.
-
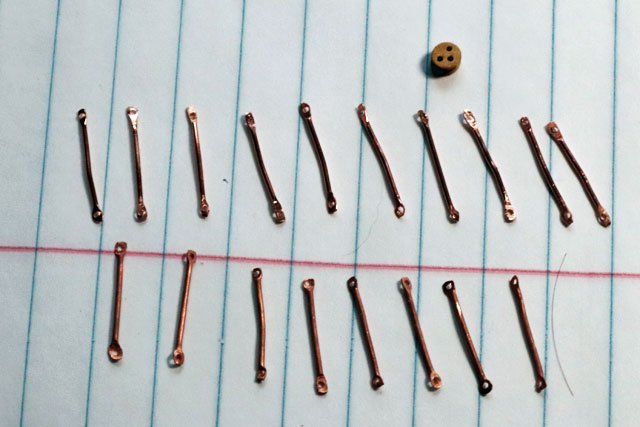
I should add that I used 20 gauge solid copper wire for the strops. I found copper much easier to work with than brass wire; softer, easily shaped and less "springy" that brass. From what I can find out, there should be no reaction between the 2 metals (brass & copper) being in contact with each other.
- Overworked724 and Duanelaker
-
2
-
Im pretty sure the coats of wipe on poly made a smooth, non porous surface for the tape. Great job!
-
Things slowed over the past 3 weeks. Was down with a sinus infection for a 10 days, then came holiday decorating and finally the family Christmas celebrations. But eventually I got back to the build.
After measuring the proper length of the strop needed to get around the deadeye, I grooved a scrap piece of wood on the Byrnes saw to hold the individual strops. To keep things as accurate as possible I cross grooved the scrap piece wood and glued in a piece of wire to butt the individual strops against. I rough cut the strops laid them in the jig and glued them in place with CA. Then added a thin piece of wood on top so the strops were sandwiched between the two pieces if wood. Then trimmed the exposed end of the strops.
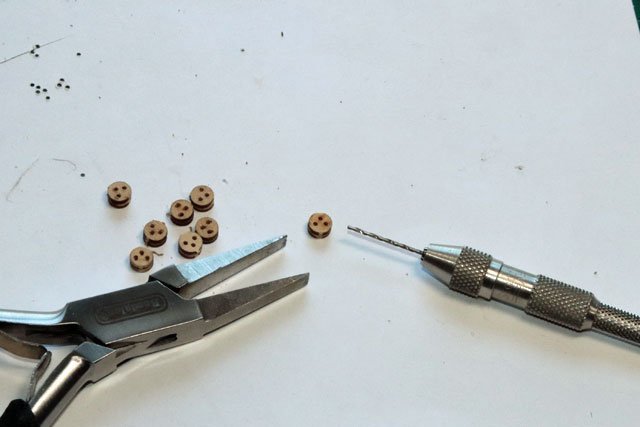
After soaking the jig with acetone, I removed the strops and cleaned them up in an acetone bath and a soft sponge sanding block. Using a pin driver, I flattened the ends of each strop and drilled holes to accommodate the bolts I will be using.
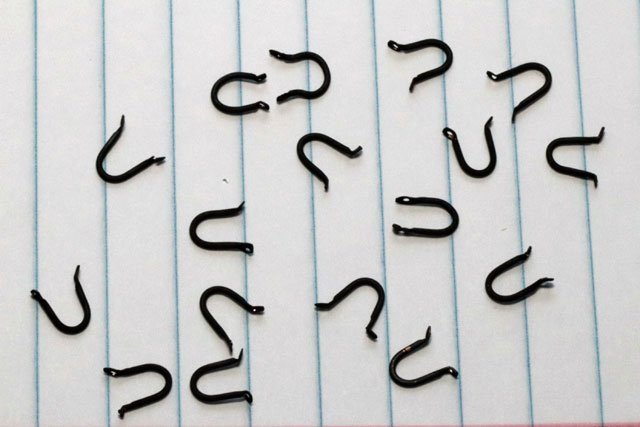
Threw together a jig using a dowel rod of the same diameter as the deadeyes. The horizontal piece of wood butted up against the dowel was used to simulate the width of the chainplates. Using a very thinly pointed pair of tweezers inserted in the end holes, I was able to shape the strops around the dowel.
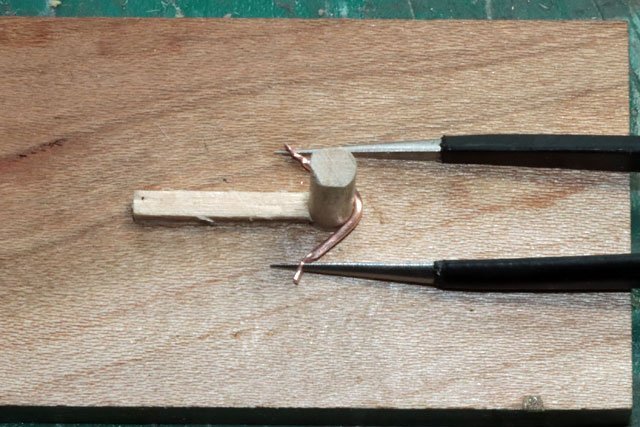
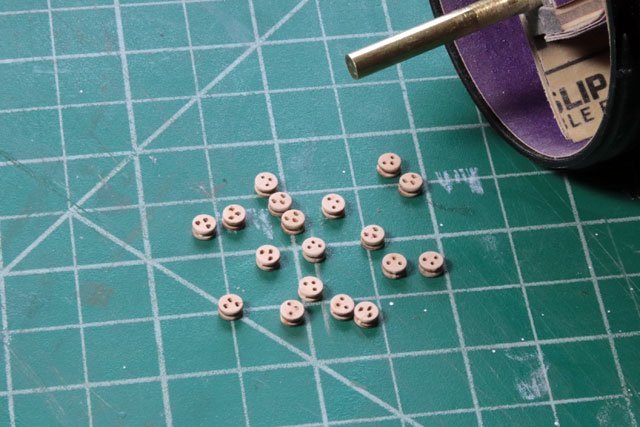
Then got them cleaned and blackened.
Still must blacken the bolts and nuts and then begin the assembly process.
- Overworked724, ccoyle, GrandpaPhil and 3 others
-
6
-
Really beautiful work, Pat. Slow and steady wins the race, you're proving that.
-
Nice work Pat, thanks for sharing your process.
-
-
-
-
Thanks Bob, I'll check it out!
-
I didn’t care for the deadeyes that came with my kit so I ordered some from Syren. These are laser cut boxwood and come in 3 layers that must be glued together. The inner layer is slightly smaller than the outer two, forming a groove for the strop rings.
The instructions said to use CA to glue them together. But since this was my first time assembling deadeyes, I decided to use wood glue which would give me a bit more time to be sure of proper alignment.
Fairly straight forward process, I used straight pins to help keep the layers aligned properly.

Then some simple clamps to hold the layers together until the glue dried.
I reamed the holes out to remove any glue blocking them
Then gave them a turn in the tumbler.
Now I must figure out how to build the strop rings that fit around the deadeyes and attach them to the chainplates.
- Retired guy, Duanelaker, Nirvana and 2 others
-
5
-
Thank YOU, for sharing your techniques. You're a huge help / mentor to us newbies.
-
13 hours ago, Overworked724 said:
Dear @CPDDET Dave,
Thanks again for the kind words. You and the other shipmates kudos always keeps wind in my sails!
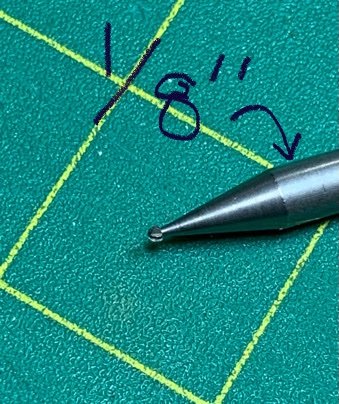
Ok. My technique for nail holes in my P&Gs is as follows. It might sound stupid…but it works! A mini drill press equipped with an x-y table are sort of mandatory for this to work.
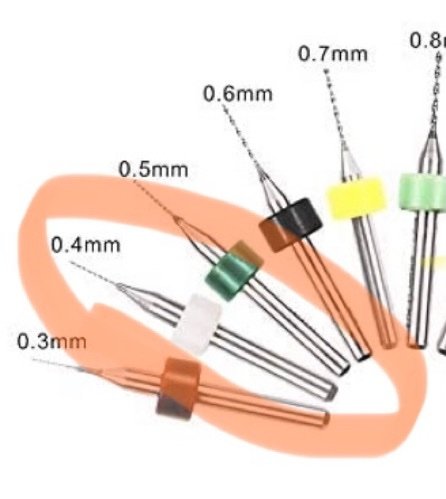
My initial trials with a #78 drill bit(s) met with disaster. I broke two before I went to the high precision PCB bits (0.4mm) and broke two of those little buggers. 🤬
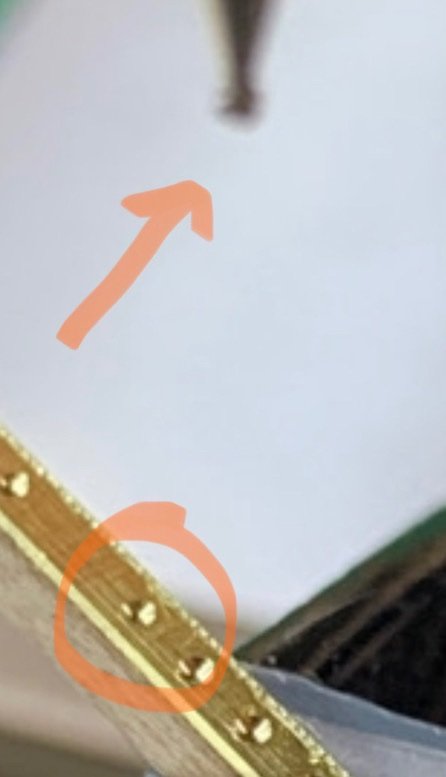
The pics below shows one of my strip attempts. You can see where the drill bit was drifting (red arrows) as it scored the brass. The bits invariably snapped. I was beginning to doubt my choice of 0.3mm brass nails! Those bloody things are tiny.
AND BEFORE ANYONE ASKS…YES, I HEATED UP THE BRASS!! I don’t believe it was annealed, as it was pretty soft. But the nail pattern looks like a drunk Irishman heading home on Saturday morning (said the drunk Irishman typing in a ship log).
Hard to believe that was done with an x-y table. That’s how much the tiny bits drift before they gain purchase. 😣
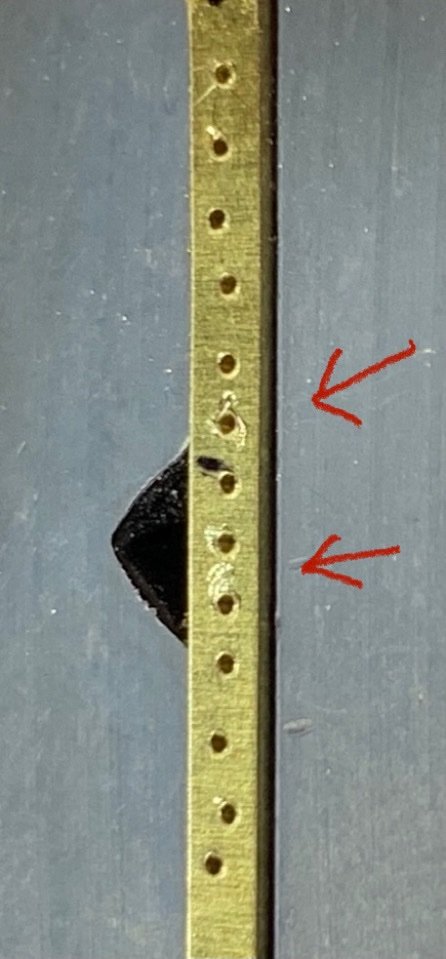
I figured giving the drill bit a cup or starter point would work. Using a hammer and awl just deformed the brass strip. So I opted for using an engraving cutter. It worked beautifully. I just pressed it lightly into the strip of brass and it made a prefect little divot.
Dremel 105 Engraving Cutter, 1/8" Shank , Gray https://www.amazon.com/dp/B00008Z9ZT/ref=cm_sw_r_cp_api_glt_fabc_AT62H13H1PW0ZN5DRMA5
After that, I just repeated the drill pattern using a tungsten high precision drill bit 0.4mm. Both the drill bits and Dremel engraving cutter are really cheap (yes…Amazon).
The results speak for themselves.
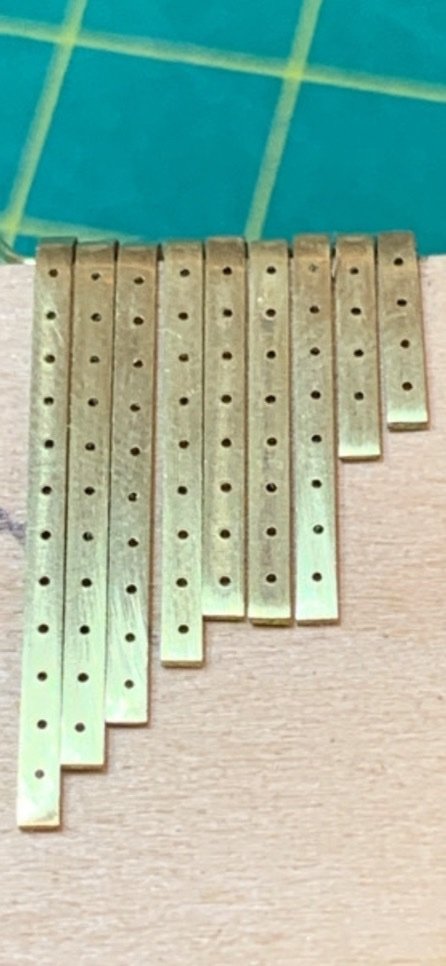
So…that’s my workaround. After I adopted this method, I cranked through the drilling portion in 45 min using one drill bit. No trouble.

-
Beautiful work, Pat!
I would be very greatfull for a photo or link to the "round head drill bit" you refered to. Keeping wire size bits from straying has been an issue for me. Sounds like you have a good solution.
-
My "I need this yesterday" attitude hasn't helped either. But who can argue with almost instant gratification.
-
4 hours ago, niwotwill said:
Where would we be with Amazon Prime? But I do hate to see local business getting hurt.
Regards
Will
Sad but true


US Brig Syren 1803 by Overworked724 – Model Shipways – Scale 1:64
in - Kit build logs for subjects built from 1801 - 1850
Posted
They look great against the copper plate.
I've often struggled over consistency in my model when it comes to metal work. All blackened? All natural brass color? Mixed?