


CPDDET
-
Posts
1,135 -
Joined
-
Last visited
Content Type
Profiles
Forums
Gallery
Events
Posts posted by CPDDET
-
-
-
-
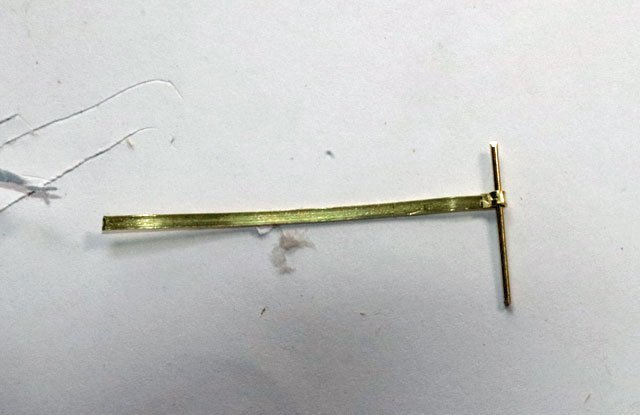
In order to make the chainplates I needed to form a tight loop on the top end, drill two 1/32 holes in each one and cut them to the proper length.
Since I had to make 16 of the larger chainplates and 4 of the smaller ones, I decided to make a simple jig that would make the job of forming a small, tight loop easier.
I decided to bend each chainplate around a piece of 1/32 inch, round brass stock. So I cut a 1/32 slot into a 1/8th piece of basswood and then cut that piece in half and set those 2 pieces apart, the same distance as the width of the chainplate material which came with the kit. These 2 pieces were glued to a scrap piece of cherrywood.

I then glued a thin piece of wood over the top of the 1/32 round stock. This allowed me to slide a piece of the flat brass stock under the 1/32 round stock and bend it up and over the round stock. Keeping the bend to a bit less than 180 degrees, I could then slide the brass piece out the top.
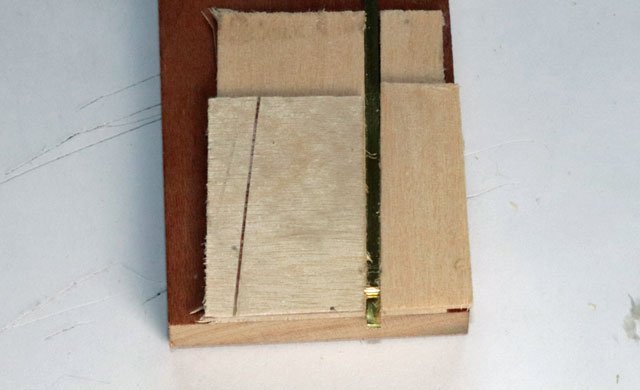
Using a scrap piece of 1/32 round brass stock and smooth jaw duck bill pliers, I completed the bend.

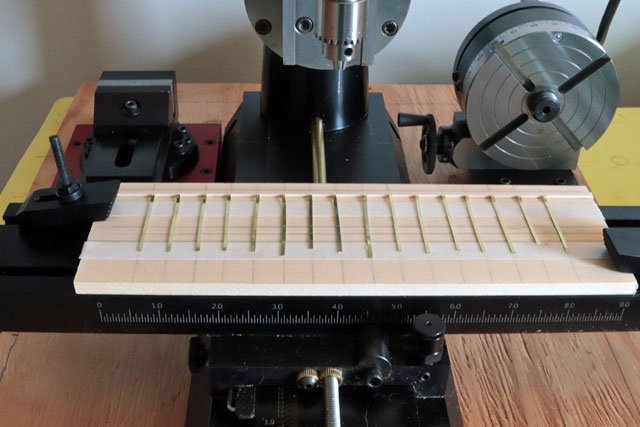
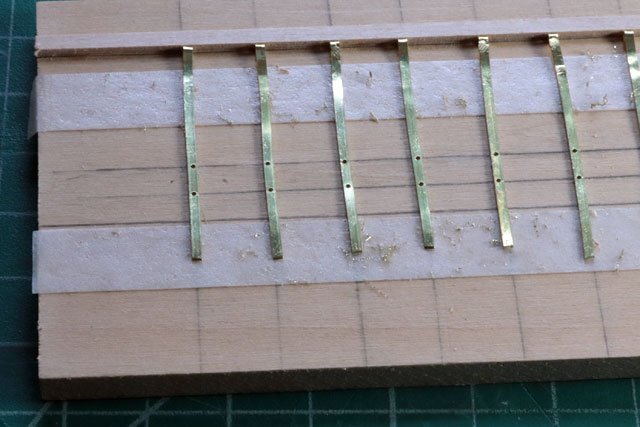
In order to get uniformity in the location of the mounting holes in the chainplates and the proper length of them all, I took a page from Suburban Ship Modeler and built another jig. After some careful measuring of where the holes should be and the proper length, I drew vertical lines to make sure the chainplates would be mounted straight. Then drew 4 horizontal lines, 1 for the top of the loop, 2 for the hole locations and one for the length. Then glued a thin piece of basswood along the top line. I added 2 strips of double stick tape to hold the chainplates in place.
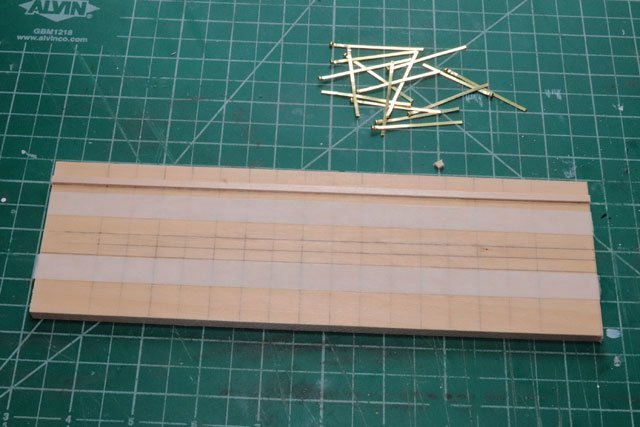
Then mounted the chainplates to the jig
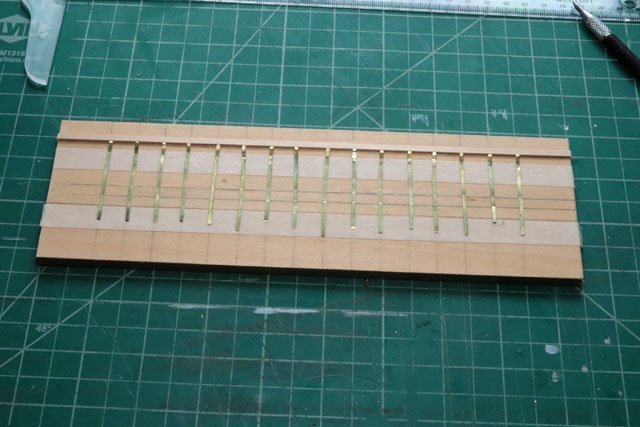
After squaring the jig in the mill, I used the X-Y table to make adjustments as I drilled all the 1/32nd inch holes.
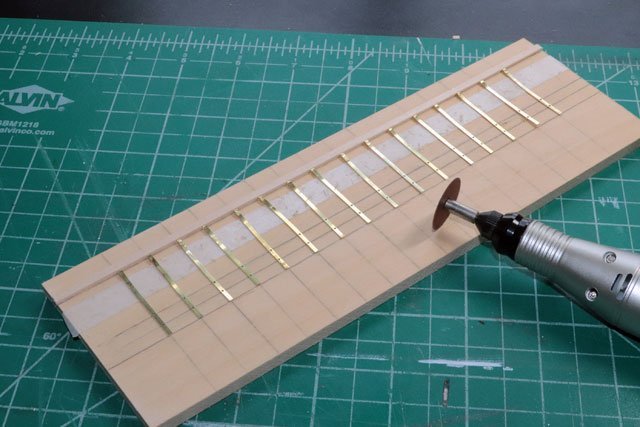
I then used a cutoff wheel in a rotary tool to trim each chainplate to the proper length.
After a cleanup, I blackened the chainplates
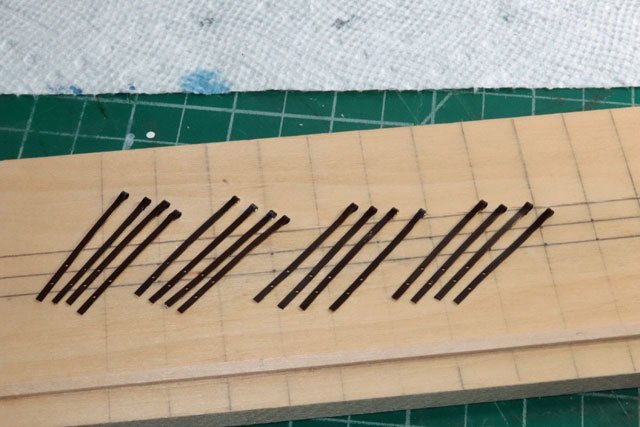
While the double stick tape worked in this process, it didn’t really hold the chainplates rock solid, still allowing very slight movement. This wasn’t going to work for the 4 thinner / shorter chainplates which required smaller, 1/64th holes. So, after sanding off the guide lines used for the larger chainplates and drawing new ones for the smaller chainplates, I tacked them in place with gel CA before drilling them. Then used acetone to loosen and clean them before blackening. The CA held them rock solid.
Now its on to building the deadeyes.
-
Sometimes we learn as we go. Thanks for sharing your methods, I've learned a lot.
-
Looking for a source for quality small drill bits. I haven't been very happy with the products from MicroMark.
Any help would be appreciated.
Dave
-
Looking great, Pat. As always.
Glad to hear the arm is continuing to improve.
-
What do you mean by "Big Jobs"?
- thibaultron and mtaylor
-
 2
2
-
-
Glad to hear your recovery is progressing, maybe not as quickly as you like but progressing. And nice choice on the wood!
-
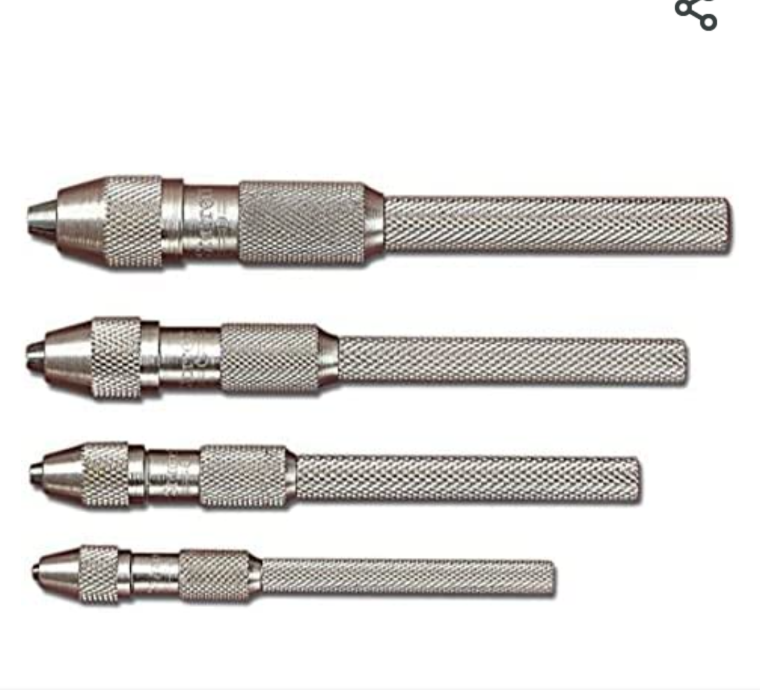
I purchased this set of Starrett pin vices a couple of years ago. Not cheap but nice quality that should last for many years.
-
-
Gluing sandpaper to rigid pieces of wood should solve the rounding off issues. I use several different sizes of wood for this, everything from popsicle sticks to 1 X 1 X 6 blocks for faring. Just purchasing sheets of sandpaper in various grits and use spray adhesive to make your own sanding sticks.
-
-
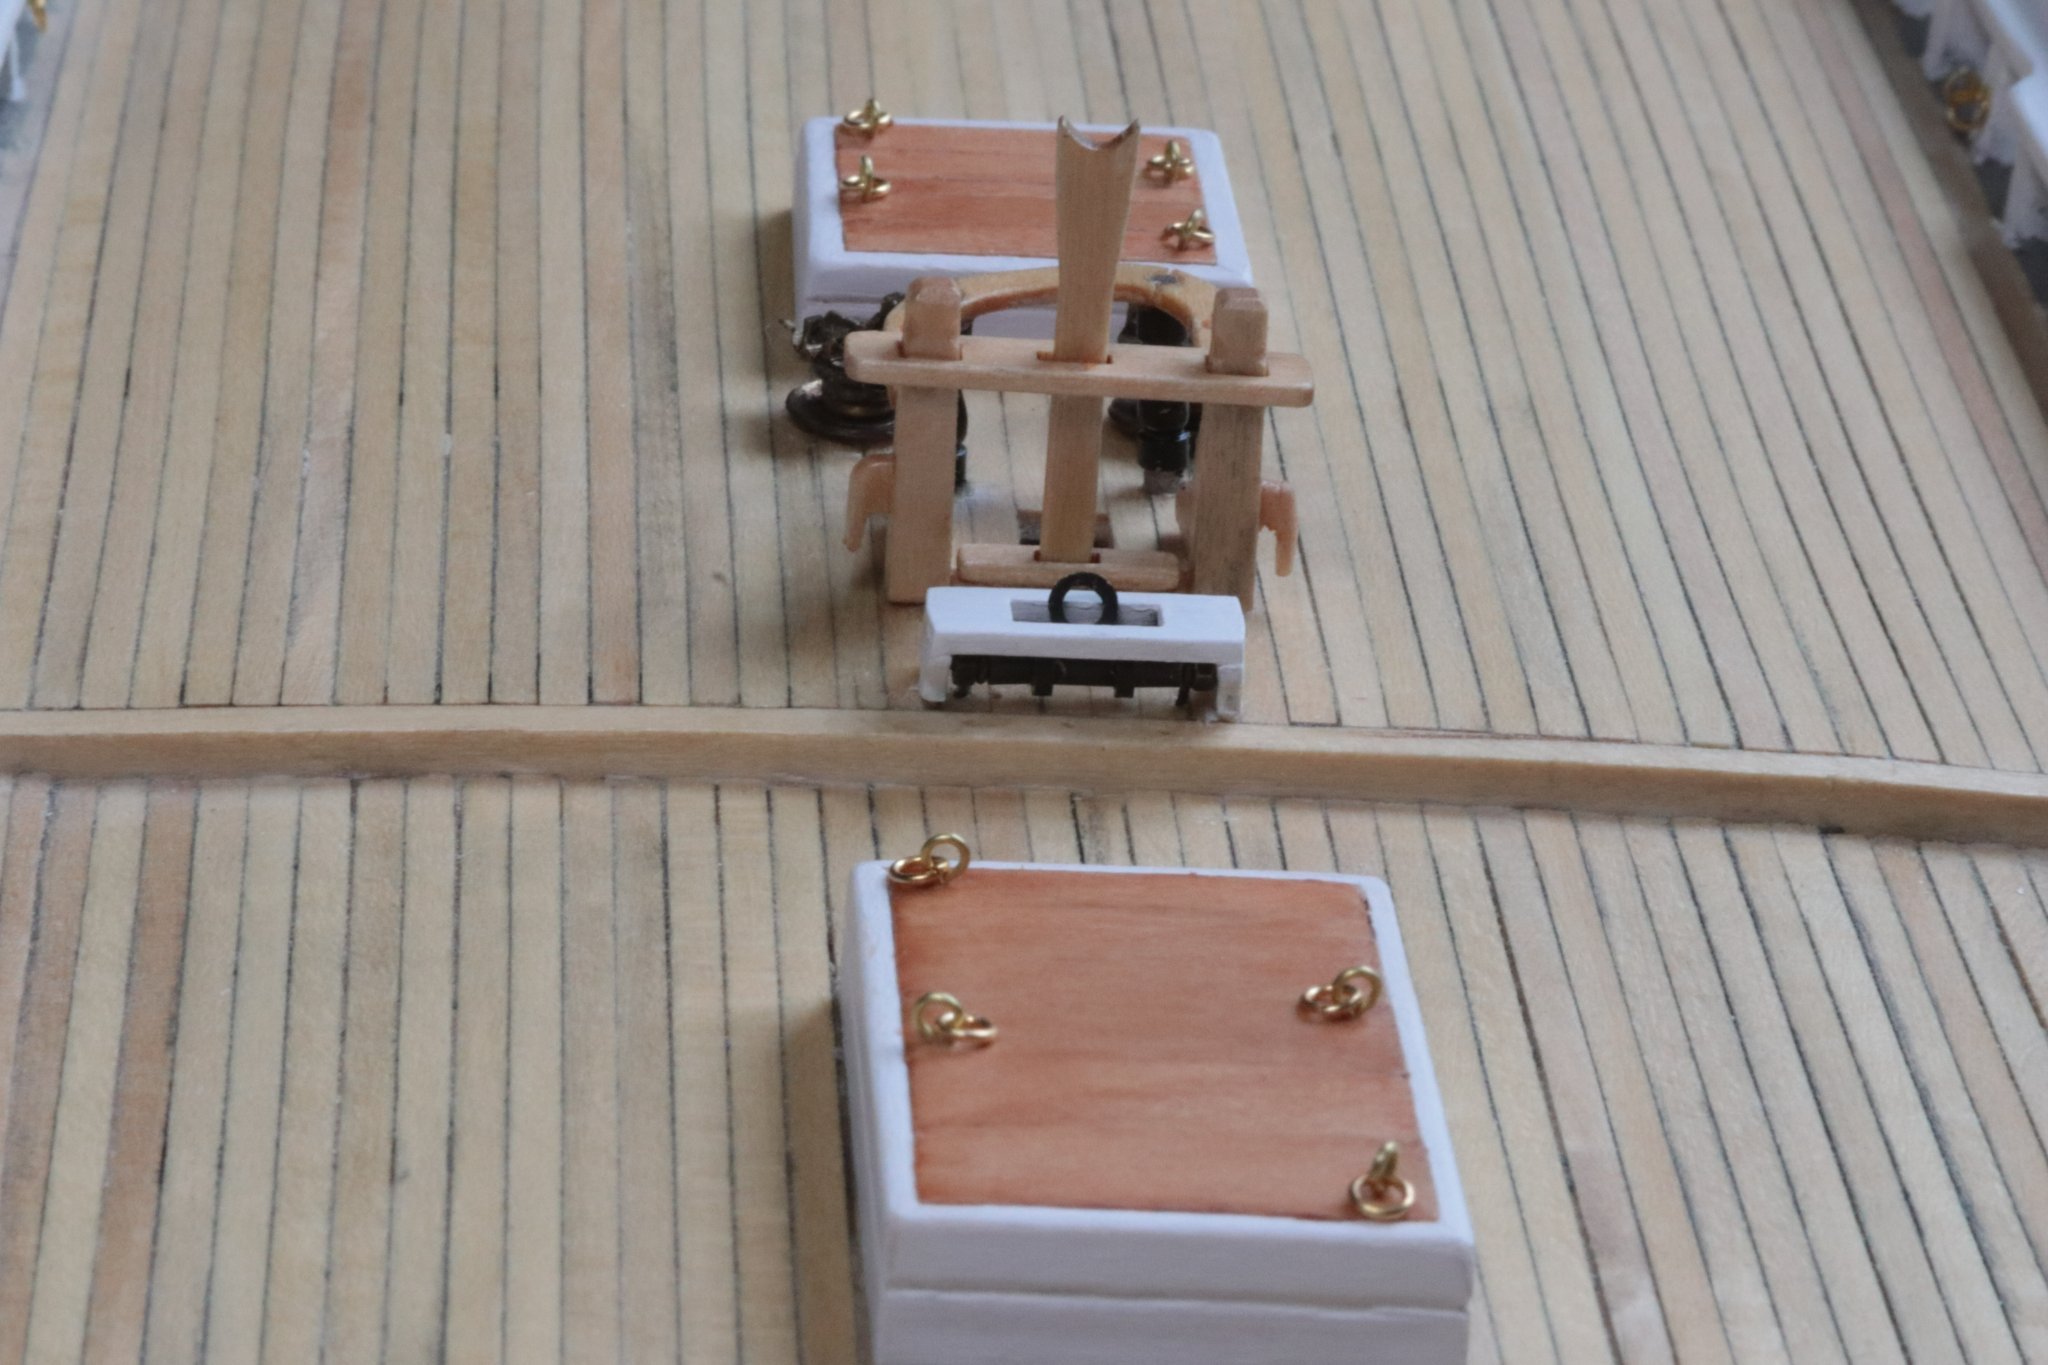
Finally finished the forward boom buffer.
I decided to simplify this build a bit using three pieces of 3/32 brass tubing, 1.5 mm bolt, nut and washers.
After flattening one side of a washed and grooving one side of the center piece of tubing with a triangle file, I soldered the washer to the tubing. The other washers acted as spacers and the wire as the “legs”. This was all held together by 1.5 mm brass bolt which fit nicely through the pieces of brass tubing.
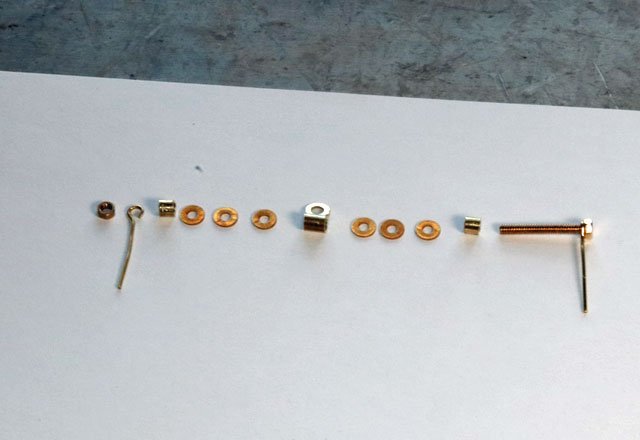
This was all held together with the brass bolt and a brass nut threaded on the end and finished with Casey Black. Not extremely detailed but I’m happy with it as it looks much better than the white metal piece that came with the kit.
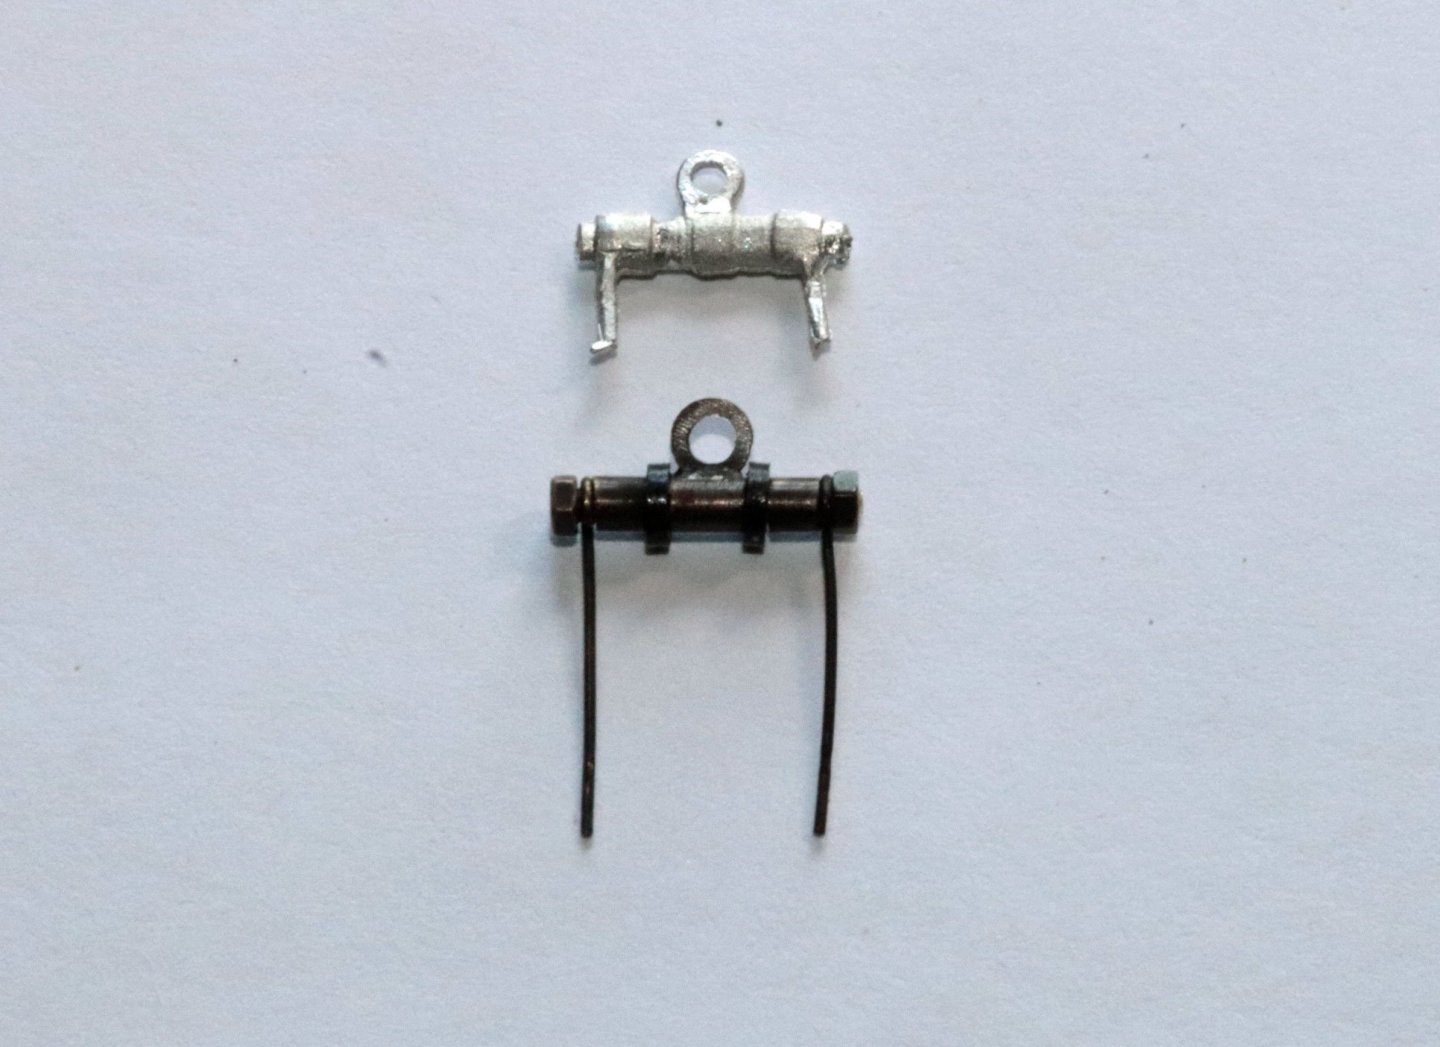
The “cover” for the boom buffer came from 3 laser cut pieces in the kit. I glued these together using Titebond Quick and Thick white glue. Once dry I hand painted the piece.
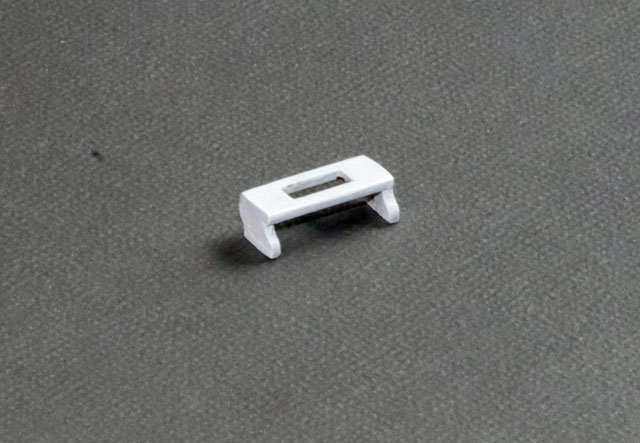
All that was left to do was to drill 2 holes in the deck for the boom buffer “legs”, mount the piece and then add the “cover”.


Now I have to install the cleats / chocks and the deck will be complete. Looks like the white metal ones that came with the kit will be usable, just need to be filed a bit, cleaned up and painted. Then its on to the chain plates.
- Nirvana, Overworked724, Altduck and 5 others
-
8
-
After having the opportunity to get a closer look and feel at a variety of brushes I purchased Princeton Velvetouch synthetic blend brushes. They were a bit expensive but Blick gives a substantial discount if one purchases 5 or more brushes. I picked out 11 and paid $58. Without the discount they would have been $110.
By the way, my prior brushes were Dynasty Set #25 gold nylon. That set of 10 brushes set me back $15, so these Velvetouch brushes are quite an upgrade for me.
I also picked up a container of The Master Brush Cleaner and Preserver.
Thanks to all for your advice, comments and support.
Dave
- Bob Cleek, mtaylor, thibaultron and 1 other
-
4
-
6 minutes ago, Bob Cleek said:
If you are spending money on good brushes, it's important to remember that natural bristles (sable, badger, squirrel, etc.) are for oil-based paints only. Synthetic bristle brushes are for water-based paints only. You can get by with either, but you will ruin a natural bristle brush using it in water-based paints because the bristles will absorb the water and the brush will lose its shape and "snap." Oil-based paint doesn't work so well on synthetic brushes because the synthetic bristles don't hold the oil-based paint as well.
Thanks! I was just researching synthetic vs natural for acyclic paint. Looking at soft taklon in a quality made brush.
- Canute, Bob Cleek, thibaultron and 1 other
-
4
-
Finally getting around to replacing my paint brushes. My old ones were a cheap set (10 brushes for $15) and I'm about fed up with them.
At least the old set taught me what sizes I use most often so I won't throw money away on sizes I don't need.
Will be going to Blick Arts for the new brushes and see they offer brushes in soft, medium and stiff synthetic bristles.
Of course my cheap set isn't labeled as any of these but I'm thinking of buying soft or maybe medium.
I use 80 percent Tamiya paint mixed with 10 percent thinner and 10 percent extender. This mixture works well for me. It's thin, but not too thin, so Im thinking a softer brush for a thinner consistency would work best.
Any advice would be much appreciated.
Dave
- Canute, mtaylor and thibaultron
-
3
-
Thank you for the compliment, Toolman. Now that camping season is about over and the RV has been put away for the winter, I can finally get back to the shipyard. Except for Sunday football, of course.
-
Pat, I can empathize with you after going through surgery myself last year. Hang in there, take care of yourself and remember, this too shall pass.
- WalrusGuy and Overworked724
-
2
-
Hang in there, Pat. The old noggin will work it out.
-
Looks great Pat. You may not be able to work in the shipyard but I'm sure the gray matter will won't be taking any time off.
Wishing you a successful surgery and a speedy recovery.
- WalrusGuy, Overworked724 and RichardG
-
3
-
Let's not forget razor saws and jeweler's saws as cutting instruments
- Roger Pellett, Canute, GrandpaPhil and 1 other
-
4
-
However, seldom will one cutting tool cover all situations. I keep a small supply of disposable scalpels on hand to use when they are the best fit for the job at hand. Cutting tools are no different than files, sand paper, paint brushes ect. The right tool for the job is best.
-

Drill bit source?
in Modeling tools and Workshop Equipment
Posted
Thanks to all for the tips and clues.
Dave