HOLIDAY DONATION DRIVE - SUPPORT MSW - DO YOUR PART TO KEEP THIS GREAT FORUM GOING! (Only 27 donations so far out of 49,000 members - C'mon guys!)
×


Ab Hoving
-
Posts
689 -
Joined
-
Last visited
Content Type
Profiles
Forums
Gallery
Events
Everything posted by Ab Hoving
-
 Hello Ron, Thank you, I am totally convinced. Still it is peculiar that the hight was as much as that. We've seen it in the Wasa in Stockholm. Incredibly high decks, and we all know how that ended.🙂 It seems useless to give a ship so much hight where is was neither necessary for the length of the people, nor for the hight of the guns, which was very low. And added to the number of decks fore and aft, which are sometimes visible on pictures, once should be inclined to have some doubts. No, no, although the way you worked your way through the available material is worth a paper in any case. No, what I meant was, that this hull shape could be a very nice template for a model built in paper. Perhaps you have seen my tutorial on building with paper (although in Eastern Europe you can find model builders on every street corner who are much more capable in the execution of the build). There are people out there who make beautiful paper kits of ships like this one...
 -
Good! Perhaps you might consider to do the measuring from the waterline to the wales as well. It might prevent a bad curve...
- 332 replies
-
- 2
-

-
- fluit
- abel tasman
- (and 1 more)
-
Hello Ron, I am surprised to hear that I even have fans in Moskou :-). Your build is inspirational, especially because of the thorough research you have done. I remember I looked at the material for a long time because it is interesting to reach beyond the borders of the written data but never succeeded in making good plans from what was available, but you did it. You succeeded in getting a fine line in your design. Chapeau! I do have some positive criticism though. As you know the average number of frames for vessels of this era is 60-70. As the tops of your frames show on the inside of your bulwarks it might be an idea to add extra frames, quite simple as separate frame tops. They don't have to be worked into the top rail or the waterway but I'm sure they will improve the looks of the model. I also have some doubts about the hight of the model. As you have showed the cannons of those days were very low, compared to guns on carriages of a century later. That implies that the hight between the decks could be made significantly lower. The fact that people could not stand straight was of no importance to the builders, 1.50 m must have been no exception. I think your decks have a more than comfortable hight. Don't start ripping your model to pieces, what I say is just an educated guess. Furthermore I have no remarks, except that this seems to be a beautiful project to execute in paper. It will take away much of the costs that come with wooden kits. Just a suggestion...
-
Brilliant ideas often miss their aim in daily practice. When I joined the museum in 1989 it was practice to show restorations in shipmodels, for instance by not painting the newly added parts or using different colors for rope, so any modern changes were visible at once. The backdraw of that system is, that the viewer is still not looking at an object in a state in which it originally was. In fact the only parts of an object he keeps on looking at are the restorer’s corrections. We deliberately abandoned that method and kept precise reports of what was done to the objects instead. The object is for the public, the problems with keeping it in a presentable state is for the scientists. Total replacement of a rigging might be a no-no, but what if the complete rigging drops on the floor the moment it is touched? Tests to chemically repair the broken fibres in rope show that the result hardly looks like the same rope in better days. In theory some ideas seem so appropriate...untill the harsh reality shows its face. By the way, it is a remarkable fact that the idea of showing the restorations on the historical objects was never applied in the painting department, the museum’s most prominent workshop. One must be a genius to see what has been restored on our Rembrandts and Vermeers. Still, for technical objects like ship models the method of showing restorations seemed appropriate? In some cases yes, perhaps, in other cases no, rather not. Every objects asks for its own theoretic and practical solutions.
-
A great thread. Extremely well done, both in research and in build. I tip my hat for you sir!
-
Thank you for the undeserved praise, Justin. I doubt that there is a consensus on this side of the ocean for what I have done. What I think is interesting in your answer is that you mention curators who want things to be like new. Over here it is most important that the age of the object shows, being restored or not. A restorer is much more criticized for working too clean than for delivering a product that shows its age. Especially with metal objects it is hard not to make them too shiny. I remember a large brass quarter of a dry-dock which had to be restored and was therefore placed a few days in a reservoir with water with a mild cleaning agent. It came out shining like gold and that caused something like a panic under curators. As an experiment we once treated one of the pewter candlestick holders found on Nova Zembla, where they were left by discoverer Willem Barentsz in 1597 when he stranded there on his way to China through the North, with a very mild electric current in a basic bath (we call it electrolyse, but I can't remember the English term for it). It came out quite nice and clean, but panic again... I agree that for students it is important to know that every step they take should be considered over and over again, so you are doing your teachers job perfectly. The proces is to be reconsidered in every phase. Dogma's are good als long as one can deviate from them. I sometimes was jealous at my collegues of the painting restoration workshop one floor below my attic. They have the choice to select a method from a limited number of regular treatments, all tested and scientifically researched. In my field of work every restoration was a new experiment. Every object asked for its own treatment and there were a lot of methods to choose from. Many restorations were pure inventions, which made the work challenging every single day. Never a dull moment. Thanks also for the clips of the painting restorers. To many people the treatments seem extremely rude and messy, but as could be seen, there was no harm done (although I doubt I would have delivered the object as new as these ones. But fortunately I was not a painting restorer ). It is a beautiful profession and I enjoyed my existence in the museum every single day. As for the figurehead: we deliberately did not fill all the cracks and kept the guilding a bit 'damaged', as you can see here: https://www.rijksmuseum.nl/nl/zoeken/objecten?q=boegbeeld&p=3&ps=12&st=Objects&ii=5#/NG-NM-11549,29
-
I was afraid this was going to happen when I first saw this thread and I must say I am rather unwilling to jump in, because I cannot find my way through all these well-educated opinions and propositions. But as there seems to be no escape: here is my 50cents opinion. If I learned one golden rule about restoration/restoring, it must be that there is no golden rule. Hundreds of historical objects passed my hands in the 23 years of my active career in the Rijksmuseum and even looking back at all the processes of recovering or maintaining original objects I still cannot find a general line in the treatment of all of them. It is an unflinching law that everything that exists will disappear over the years and we can only try to stall that proces. Of course I must have 'repaired' some ship models in a way some of you would call a crime. But hey, what is the point in finding a beautiful but dismantled 17th century hull of a very rare 40-gun man-of-war and leaving it in that state, if such a model is needed in the museum's presentation. Is it allowed to take off the 20th century paint with which it was mistreated and rig it in the way how it to my best knowledge should be done? Of course I did all that and I'm proud I did. On the other hand I saw many ship models pass my workbench of which the running rigging was deteriorated beyond repair, but which still had a perfect standing rigging. I would be mad if I replaced both parts of the rigging. Whatever is still intact, I keep it that way. Fortunately I am a lazy person and nothing is better for a historical object than falling into the hands of a lazy restorer. But anything that is literally falling to dust has to be replaced. We had models in the depot which we passed on tiptoes because any shock would cause rigging parts to fall off. There is something I have to add here. Being a conservator in a museum mainly presenting art objects I always tried to fight for my own place between my respected collegues. A ship model in my opinion is not a work of art, although out of admiration we are most willing to judge it so if the build was done in exquisite way. But in reality it is a depiction of something technical. It shows for instance how the rigging was done, which allowed the vessel to sail the oceans. If such parts turn into dust (and I have seen many examples of that, carefully rubbing it between my fingers and ending with nothing but dust) and you want to maintain the intention of the maker, showing a working rigging, what harm have you done replacing the missing part with material as close as you can get? (The Victory in Portsmouth seems to be 'renewed' for over 90 % so I was told. Should all the rotten pieces have been still there, sooner or later we would have ended up with a pile of debris.) What is always interesting to see is the attitude of the curators. If we lived in a perfect world the curator was to be the one to say yes or no to a restoration or a technique. In practice dealing with objects is something completely different from what an average curator has studied. Doing archives was his training, not dealing with objects. So what happens is that the conservator (or restorer if you like) makes the decisions and carries them out. Next the curator ceremonially cries out about the mistreatment of the object, immediately followed by its placement in the showcase to show it to the public. I experienced this literally with an old figurehead of a knight in armor which was in a terrible state. Me and my co-operator closed the many cracks, re-applied the guilding and paint (after intensive research), added missing wooden bolts and repaired the not-original stand, at the same time suggesting a better solution to present the object. For a short time we were the talk the town and the next thing that happened was the installation of the object as it was in the hall as an eye-catcher. It is still there.... The bottom line? There is no golden rule. I applaud every researcher trying to find solutions to maintain old objects that show their age and I am most willing to apply any solution to solve problems without intervening in the object, but I am not a chemist, I only know a lot about ships and their ins and outs and I would be lying if I denied that every object I had in my hands has taught me something. The museum allowed me to have an extensive library both on technical ship-matters and on conservation techniques and I have always loved to find a happy marriage between the two. If you want one unavoidable rule in this matter it must be a deep love and respect for the object, but I'm sure every participant in this discussion feels that too, with apparently totally different outcomes.
-
I usually start with the waterline. You can simply do that by placing the model on an improvised stand and scribe the waterline with a pencil on a block. Then you can take the hight of the decks on several locations from the draught and mark them on the outside of the hull.
- 332 replies
-
- 4
-
-
- fluit
- abel tasman
- (and 1 more)
-
Thank you Toni for this wonderful tutorial. I hope everyone who still thinks long straight strips will do to plank a hull has understood that it is totally impossible. Maybe some of your readers are withhold from buying worthless kits for outrageous prices. You did a great job.
-
Beautiful Drazen, you both are master model builders! Ab
-
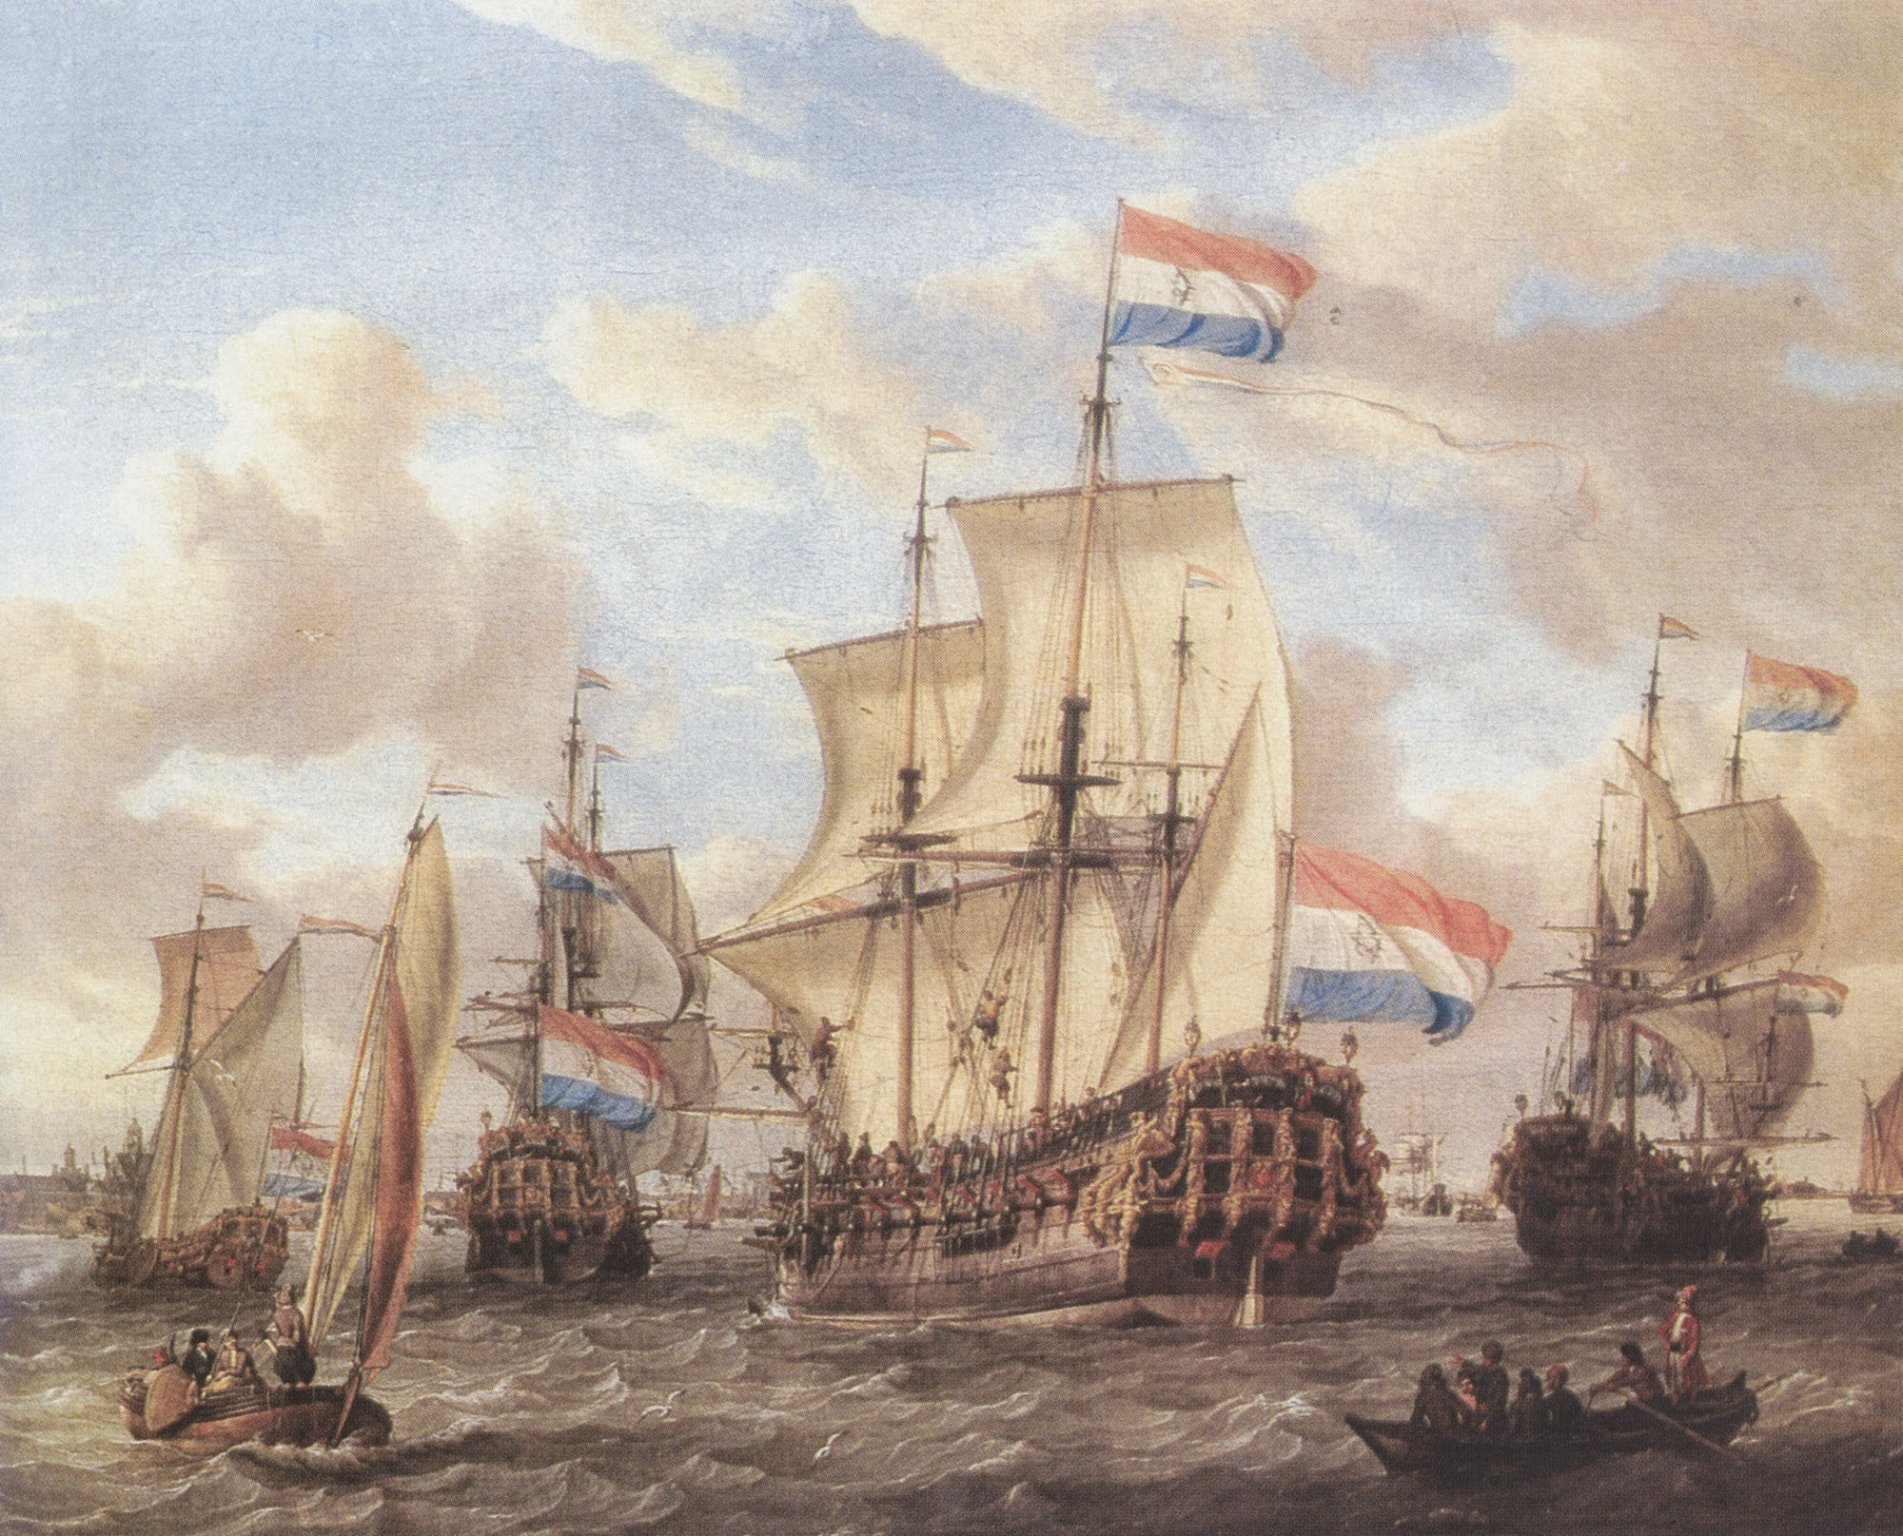
Hello Eberhart, Thank you for enlightening this peculiar thread of which the content seems to wonder into various directions with a nice view on Amsterdam in the 17th century.:-) This is surely a pleasure vessel. We know it under the name of 'kopjacht', a name I cannot explain. It is more often depicted on paintings of special occasions on the water, like this one, dealing with the visit of the Czar Peter the Great to Amsterdam in 1697-98. Another attractive type for model building...

-
Glad you take it this way Marcus. I didn't realize you planned a double planking. In that case I would do my best to sand the first planking up to a degree that nothing is left of the irregularities you caused by rather random planking. I would even go as far as using filler to get a smooth and even surface to lay the outer planking on. You might consider a layer of white paint so you can draw the lines of the planking directly on the hull. I don't know how you want to attach that planking. Just glue? It may be a bit late for an advice, but I think the use of balsa wood for spacers between frames is rather useless. I don't consider balsa wood as wood. You cannot use nails or dowels in that stuff. Any kind of wood would have been better, as it would have given you the opportunity to choose the locations of nails or dowels. Now you can only use your plywood frames. Plywood is useless in modelbuilding too. Another fairytale from the kit business. Where you stand now, you might just as well have built a solid hull, carving it into the right shape. Or you will have to give real building a try: Start with keel and posts and build your frames and planking like in the real thing. Have you read Harold Underhill's Plank-on-frame Models? I can recommend it. Ab
- 332 replies
-
- 5
-
-
- fluit
- abel tasman
- (and 1 more)
-
Jan is 100% right. Traditional shipbuilding is not an invention. It is an endles developing process that goes back to the bronze age (3000-800 b.C.), consisting of small steps forwards (and sometimes backwards). It took ages before it got to what is described for the first time in Dutch literature in 1671. There were no alternatives though. Because the method of designing ships hulls on paper was not invented yet (here you really have an invention) there was no possibility to do it frame-first. Traditional rules-of-thumb were all our ancestors had. Now is that impressive or not?
-
Hello Marcus, I want to make a few remarks about your planking. Sorry I didn't keep up with this thread but seeing your planking only now you deserve some clues because of your impressive drive to build this difficult model. The first thing you should let go is thinking that a ship can be planked with straight strips from fore to aft. It is a wide-spread misunderstanding caused by kit makers that straight strips can plank a round model. In reality there is not a single straight plank in a ship's outside planking. Take wider strips and shape them according to the shape of the ship: they look like crooked sabres. Never force the wood, treat it gently and it will do what you want without splitting or breaking. Twisting wood in different directions for instance is a proces that can only be done by applying heat, and only after you have made sure that the piece of plank you are applying really fits its destination. You show my Zeehaen model from the pictures in the book, but if you really study those pictures, you should see that every strake of planking consists of at least three separate pieces of wood and mostly more. Bending wood with heat (for instance a flame of a candle) is a technique you can master if you apply pressure to the hot wood and feeling that it gives way at a certain moment. That's how you get the shape. If you can mount the plank without using force, that's when you are on the right track. Secondly the mounting of the wales is, like you said yourself, crucial. If they are in the right location and have the right curve, very little can go wrong. Now look at your side view and ask yourself: is the curve of my whale flawless? I don't think you can say yes. You gave it a lot of attention, but you missed it slightly. A solution could be another technique: dress the unplanked hull with a wide strip of paper and draw the lines of the wales on it until you finally feel you have the shape right. Don't decide at once. Try to find a satisfying shape and put the model away for a few days. Then look at it again and repeat the proces. If you are satisfied with the run, take off the paper and cut the wales. You will see how curved the shape is. It also helps measuring if you draw a waterline on the unplanked hull for reference. It diminishes the problem of orientation and gives you a landmark to work from. This is really challenging stuff. I can honestly tell you that I'm wrestling with the shape of the hips of fluits up to today, even though I built quite a few. Recently I was trying my hand on a 'wadconvooier', a small armed admiralty vessel, used to protect merchants on the 'Zuiderzee'. It is not a ship type, but rather a function, for which several types were used. One of them really looks like a fluit, but shows another type of rig. I thought I could use old plans for another fluit I made by rescaling the draught. I was wrong. The result was another candidate for the dustbin where it is now, because the hips were placed too low: Finding the right curves is the most challenging part of the proces. And there is only one way to learn: the hard way.

- 332 replies
-
- 9
-
-
- fluit
- abel tasman
- (and 1 more)
-
Congratulations with your work Glenn. It must be years ago that we met in College Station. Keep good memories of that event. Ab
-
Twist in the lower shrouds/ratlines
Ab Hoving replied to Ronald-V's topic in Masting, rigging and sails
In my opinion you don’t have to remove the ratlines to tighten the shrouds. I always leave my lanyards more or less loose until the ratlines are done. Then you can easily tighten them, taking care that the shrouds are stretched in an even way. -
You are welcome. Why do you think I traded Amsterdam for Alkmaar?
-
Thank you. Let me emphasize that every modelbuilder has his own motivation for building and every motivation and hence every technique and every material is appropriate.
-
Hello Eberhart, I only recently found out that you are chairman of the Arbeitskreis Historische Schiffsbau in Germany. As you know I sometimes contribute to its magazine Das Logbuch, invited to do so by the editor Robert Volk. You seem to lead an extremely active life. 🙂 Houtboard: I am not an expert on the fabrication of it, but I suppose even wood-dust is used. It causes the material to become more or less 'flexible'. You can make concave shapes by pressing it with round surfaces, like a spoon or an iron ball. It can also be filled and sanded, but I only use it for covering up the skeleton of a planned ship model. You are right that the result is not exactly crispy and clean, but I don't care, as I cover it with self-adhesive plastic strips, which improves the result. In cases where sharp contours are needed, like the wales of a ship (the most important part as it goes for catching the right sheer) I use 2 mm thick polystyrene. Nobody ever told me that you have to stick to paper once you started building in paper.... Compared to what I see accomplished here on this forum, I am not exactly what I call a good model builder, because in fact I have no interest in finished models to put them on the mantel shelf. Sometimes I give or throw them away, sometimes I sell one, I even considered burning some, as they take a lot of space and only gather dust. I only build because I want to learn something. For me model building is a technique I use, a way of scientific research, building itself is never my purpose. The end result is always something different from a ship-model, like knowledge, which is the reason why I am often reviewed by historians and replica builders. I have worked in wood all my life, but getting older, I am running out of time, so I switched to an easier material, being able to work faster. Having explored in model scale the way 17th century ships were constructed, I now turned to the outside looks of the vessels, trying to make them look as real as possible, so a Photoshop painting can be made in a convincing way. This leads to the conviction that too small details are totally nonsense (for me) to apply to a model, as a model can be compared to a real ship seen at considerable distance. From a hundred meters I cannot see what sort of head the nails of a ship have, so why should I bother to model them? I don't make real ships, they are only models, probably the most useless objects in the world... All this beside of the fact that I am notoriously lazy...:-)
-
Hello Jan, (funny how two Dutchmen have to communicate in a foreign language through an American forumsite :-)) In Dutch it is called 'houtboard' and I buy it in Amsterdam at an art-suppliers called Van Beek on the Weteringschans 201. It comes in various thicknesses. I know that local art suppliers don't sell it because it's an 'old-fashioned product', replaced by many more sophisticated materials, which are of course all useless for our purpose. Another problem is that it is so cheap that sellers are not very interested in holding stocks of it. Maybe you are planning a trip to our capital anyway to visit the Rijkmuseum, located at 400 meters from Van Beek....
-
And here is a picture of us (rigger Floris Hin and me) finishing the re-rig of the model in 2012. The model was relocated twice, once in 2007 and once in 2012. Dismasting took 2 1/2 days, rigging 4. I made a u-shaped construction to take off the masts with all its rope work and sails together, with the shrouds temporarily attached to the legs of the U and the mast tightly connected to the middle piece. Those were the days...
.JPG.d6e9f738c08254949cf295d474084db4.JPG)
-
Thanks for sharing Kenny. I'm sure many people will be very glad to see all this. I hope you also enjoyed the 'special collections' with all the ship models well hidden in the basement of the museum?
-
It seems to me that you made a wrong choice. If it is a pirate ship you want to model, forget these big monsters. Pirates were not so well organised that they could manage big ships. You better find a smaller ship, about a hundred feet. That means of course that 24 pound cannons are a bit over the top. Fortunately you can simply scale your cannon down and you will never see the difference. If it is the 17th century you are looking for, you might consider the Heemskerck, Abel Tasman’s ship when he discovered New Zealand and Tasmania in 1642. His 100 feet long ship might have been suitable for a pirate. If you are interested you can send me a PM and I will send you the draughts.