HOLIDAY DONATION DRIVE - SUPPORT MSW - DO YOUR PART TO KEEP THIS GREAT FORUM GOING! (Only 27 donations so far out of 49,000 members - C'mon guys!)
×


Ab Hoving
-
Posts
689 -
Joined
-
Last visited
Content Type
Profiles
Forums
Gallery
Events
Everything posted by Ab Hoving
-
 Hello, A bit earlier than expected the news about the pinas-program is out. It will take another two weeks to implement the English texts. Until then I can give a short description of the program. The user can choose between three options: one is to see (interactively) how a Dutch ship (in this case the pinas) was built. In the second you can virtually walk through all compartments of the ship and recognize the various parts. In the third option, the encyclopedia, any part can be found with the description of the formula for that part and its measurements for this particular ship. It sounds complicated, but it is very user-friendly and intuitive. Especially for people like Amateur, who has obviously not much trust in Witsen, this program shows that this 'lay-man' was very well informed, by a shipbuilder he especially hired to help him describe the example ship he chose to tell the story of the Dutch method of shipbuilding. I have worked about 40 years with the material from the book and though I often first thought that he gave wrong information, I always, with no exception, had to change what I did, because after all Witsen appeared to be right. The only problem was that his book is a total chaos. I cut the relevant pages into 1200 parts, relocated them until I had a plausible story and made my drawings. After three years I was able to use the drawings for a model, which took another 3 years. In 1994 I published the book I based on Witsen's work, followed by the English translation in 2012. Now, after almost 40 years the digital version is almost ready. I hope it will convince you of the thustworthiness of Witsen's data, like it convinced me. All I know I learned from Witsen. Soon on your screen!
 -
Papegojan 1627 by mati - FINISHED - 1/48
Ab Hoving replied to mati's topic in - Build logs for subjects built 1501 - 1750
Beautifully executed Matt, you’re a master! Ab -
So good to see that picked up the thread again after your terrible loss, Doris. Hope you are well. Judged by your work you are healing and possibly model building helps you, as it does so many of us. Your work is beyond any criticism. Your models are works of art. Ab
- 1,035 replies
-
- 9
-

-

-
- royal katherine
- ship of the line
- (and 1 more)
-
Dutch yacht by henry x - RESTORATION
Ab Hoving replied to henry x's topic in - Build logs for subjects built 1501 - 1750
Really Henry X, nobody put me up to do anything. I simply recognized the stupid design of this model, based on the book I mentioned. Of course the kit maker based his product on the drawings in the book. I never accused you of thinking the model was worth of anything, I just wanted to show you that models like this one may look interesting to a layman, but in fact they are simply rubbish. But as I told you, you can have a lot of fun playing around with it. All I want is that the remains of the book I mentioned will disappear as soon as possible, because they create a false image of the sort of ships I love. This model is a bad example of how people can turn beautiful ships into lousy objects. I refuse to believe that you really think I approached your thread with other intentions than doing right to history, whatever anyone else thinks about it. I did not. Ab -
Berlin 1674 by Strelok - 1:100
Ab Hoving replied to DaKea90's topic in - Build logs for subjects built 1501 - 1750
Perhaps you should read this: Seventeenth-century Dutch ship design drawings. Real or counterfeit - by Ab Hoving - pages 33-48.pdf -
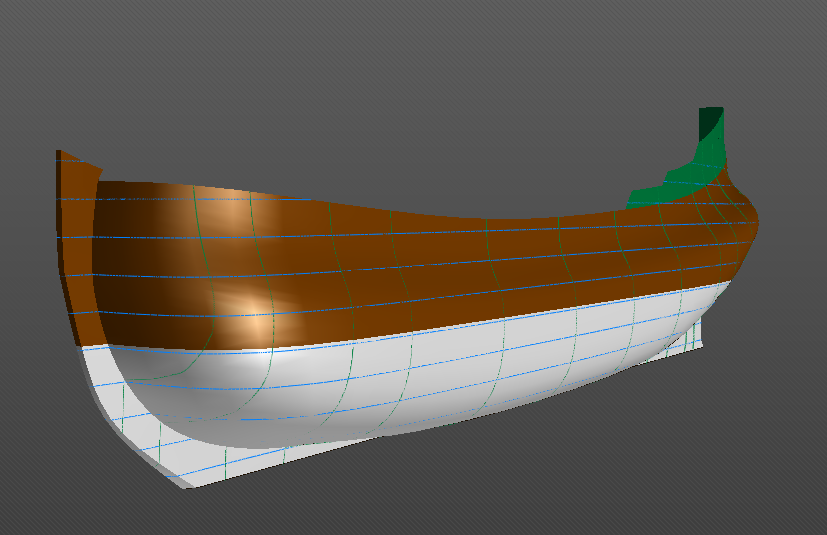
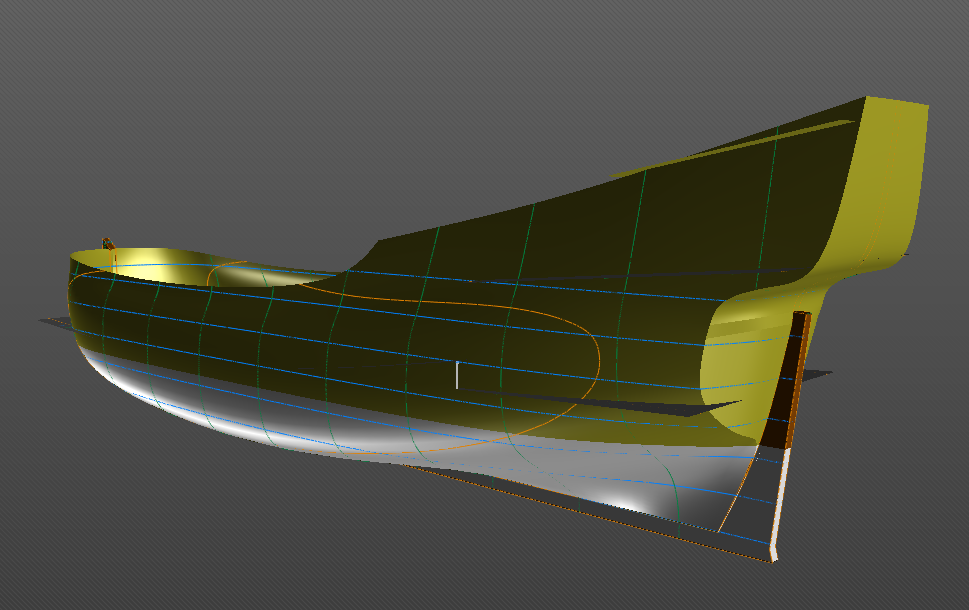
Hello Peter, In case the bottom is not entirely flat, like in fluits, the transfer from bottom to bilge is not so very pronounced. On top of that computerprograms hate corners in a hull. As you can see in my original design the straight bottom is there. In Delftship is is gone. In this case of a yacht-like ship I did not mind too much. Good luck with your project, Ab
-
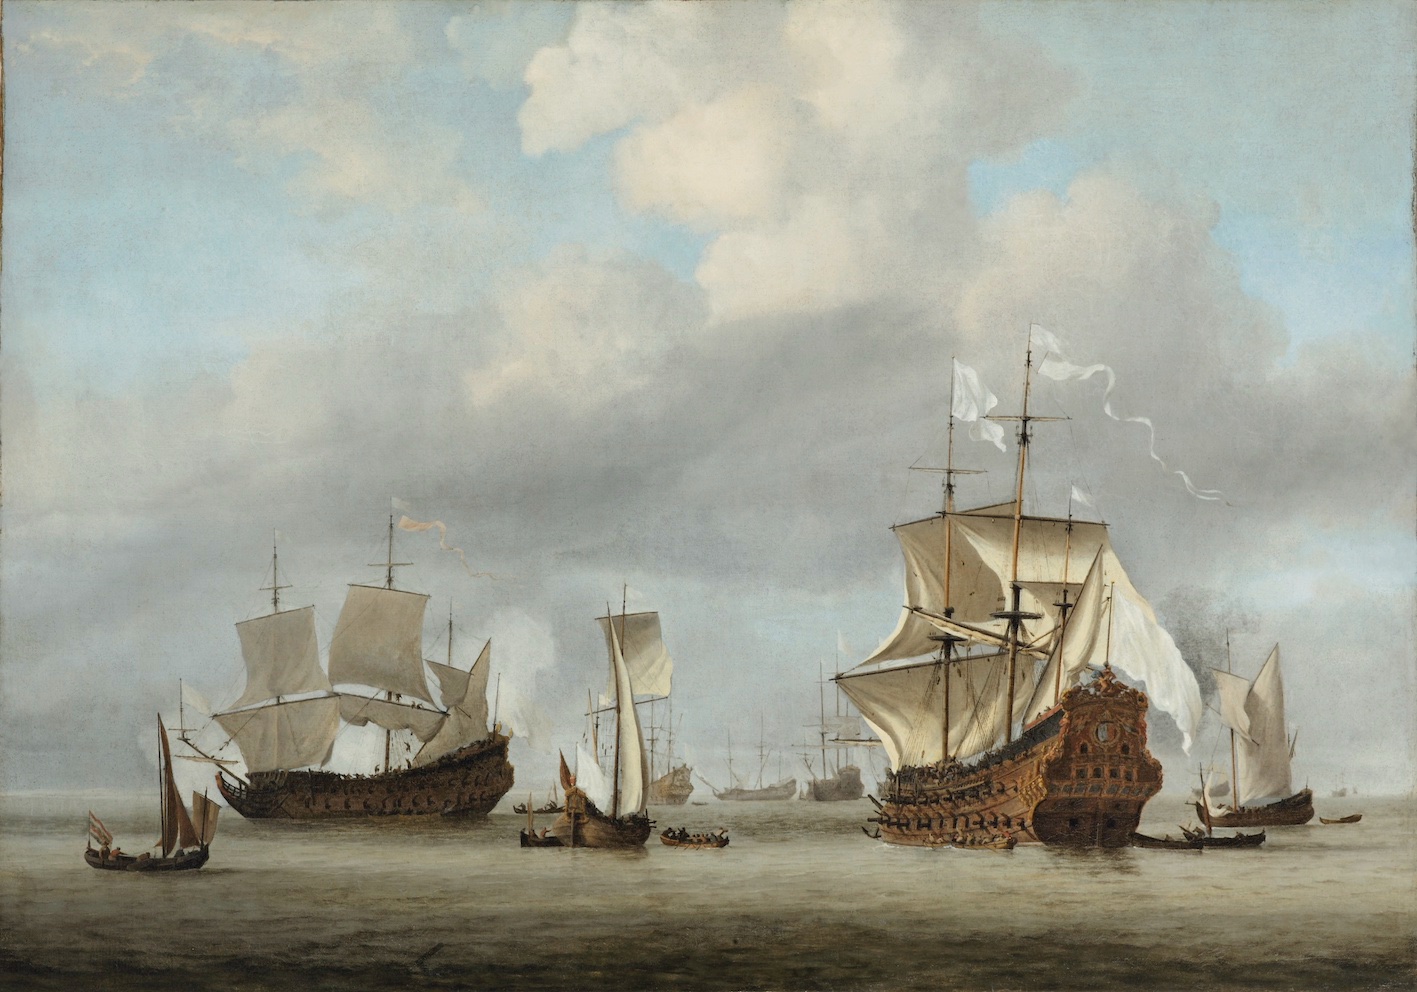
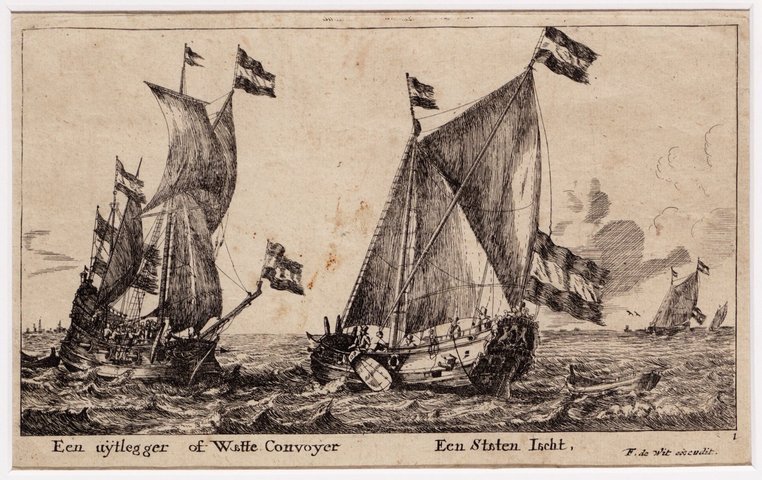
Actually there are not too many sources dealing with this ship type. It was used on the Zuiderzee (the area between the islands and the coast, which stretches all the way up to Denmark. Usually this was a dafe area, so most ships did not have any armament on board, but in rough periods these convoy ships were used to sail with the unarmed merchantmen (most smalschepen en kaags). Here is another picture by Van de Velde of some war ships built on private yards in Amsterdam for the French king. Because they were unarmed for delivery wadconvooiers guarded them in inland waters until Armed vessels for the trip to France took over. They are of the fluit-like type, but the purpose and the rigging are the same.
-
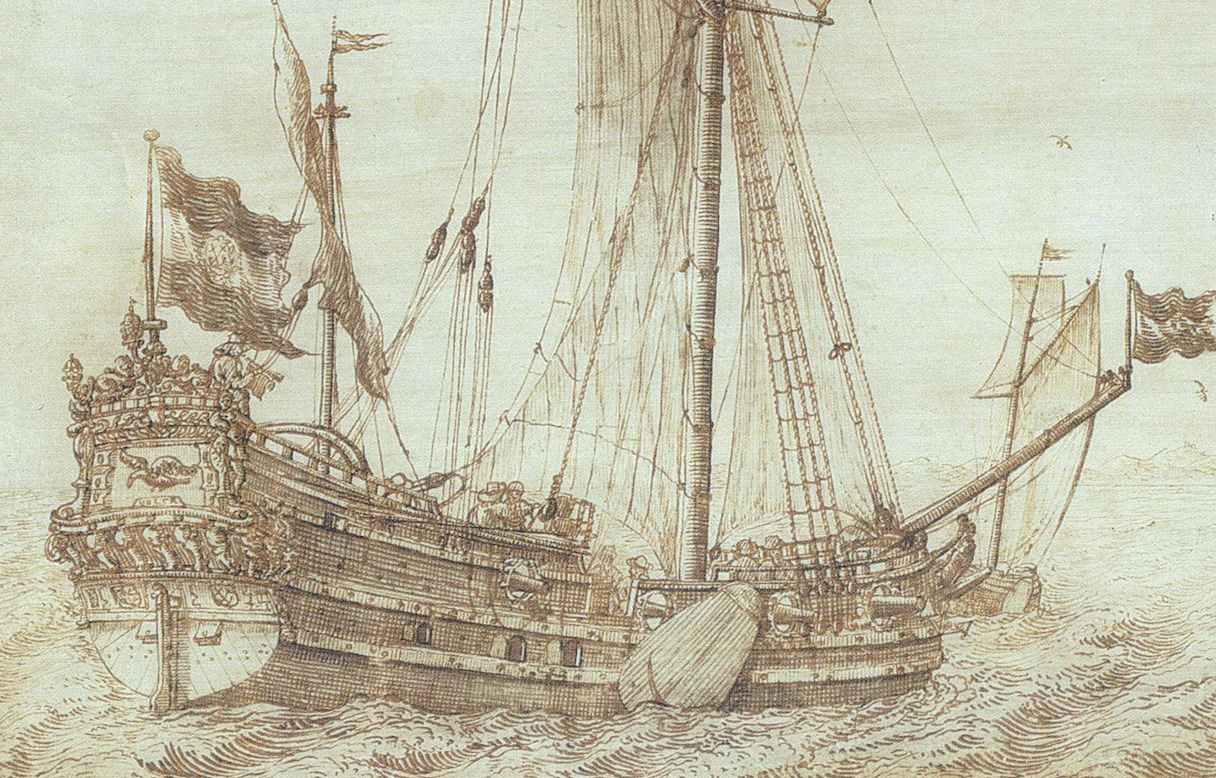
Oh, and before I forget, these were the pictures I based my design on: The upper one is by Willem van de Velde (father) and the other one by Reinier Nooms.
-
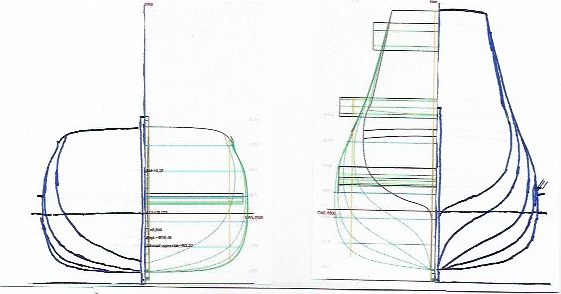
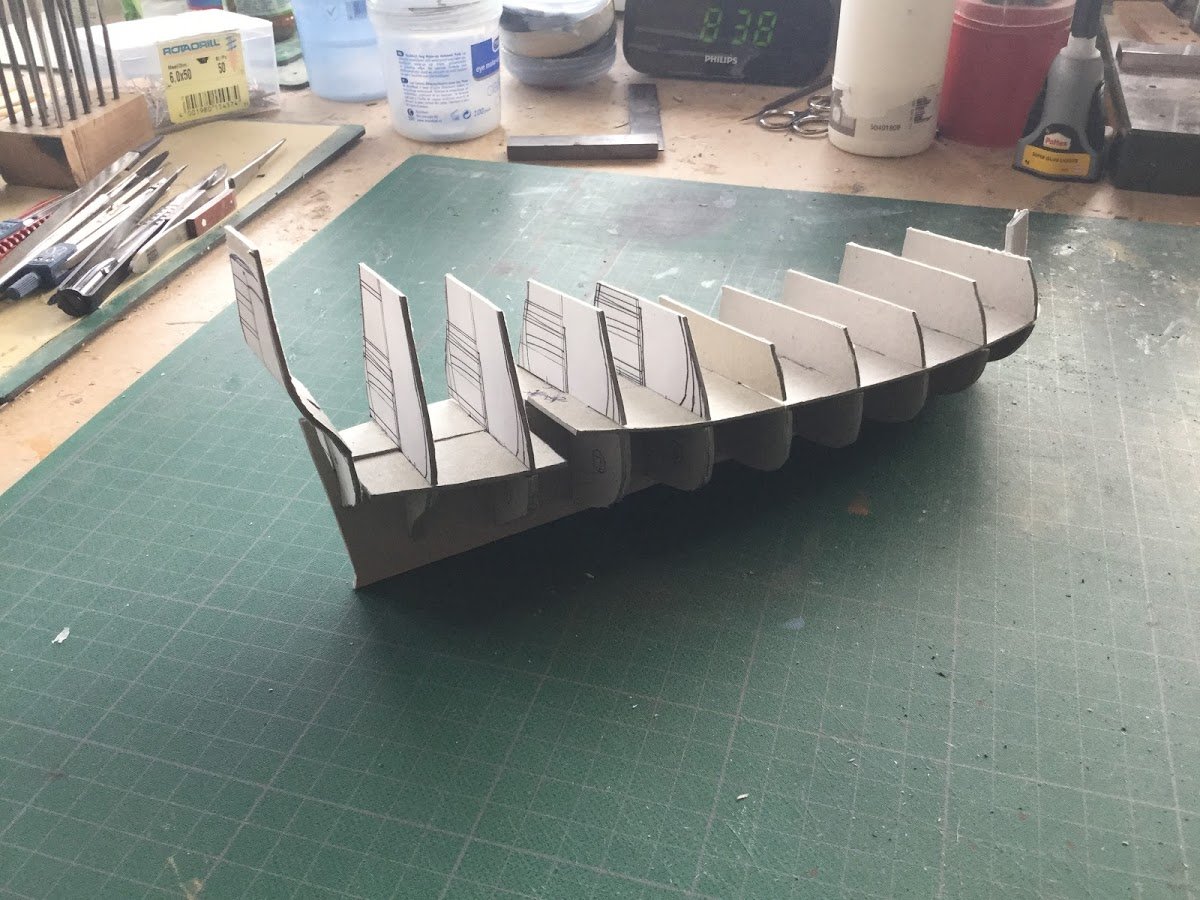
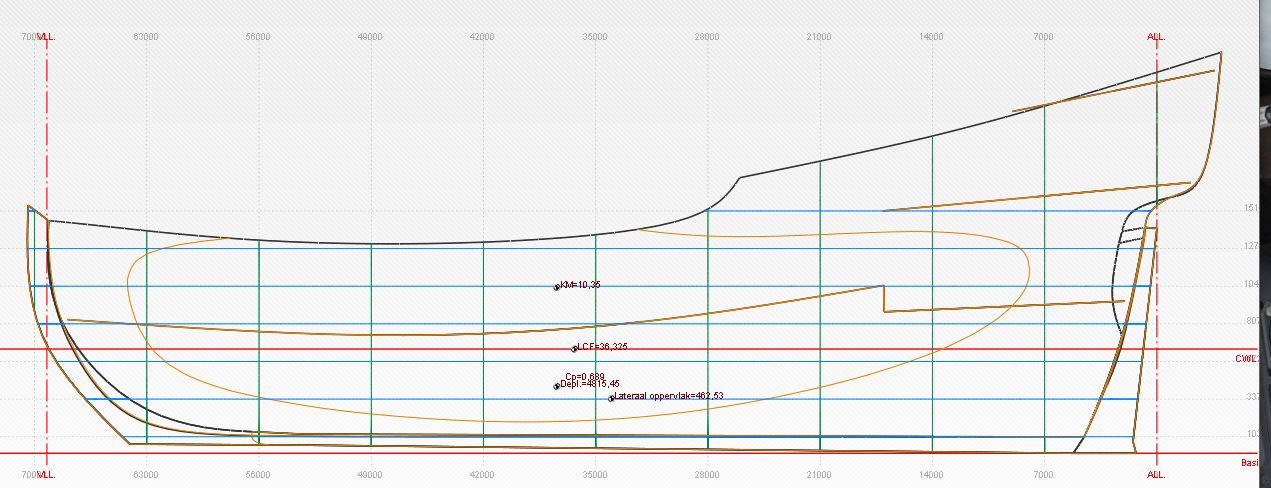
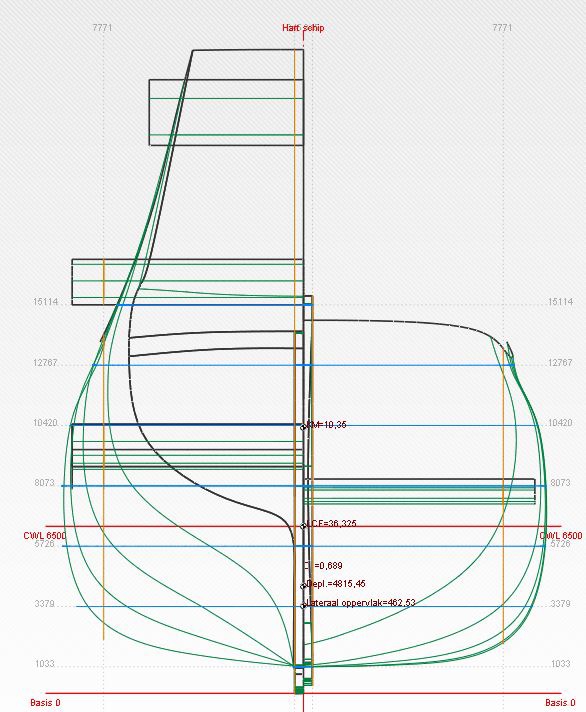
Here is the original design, which was worked over by Rene Hendrickx in Delftship: On the basis of Rene's lines plan I made the front and aft frames: The rest is relatively simple: Good luck! Ab


-
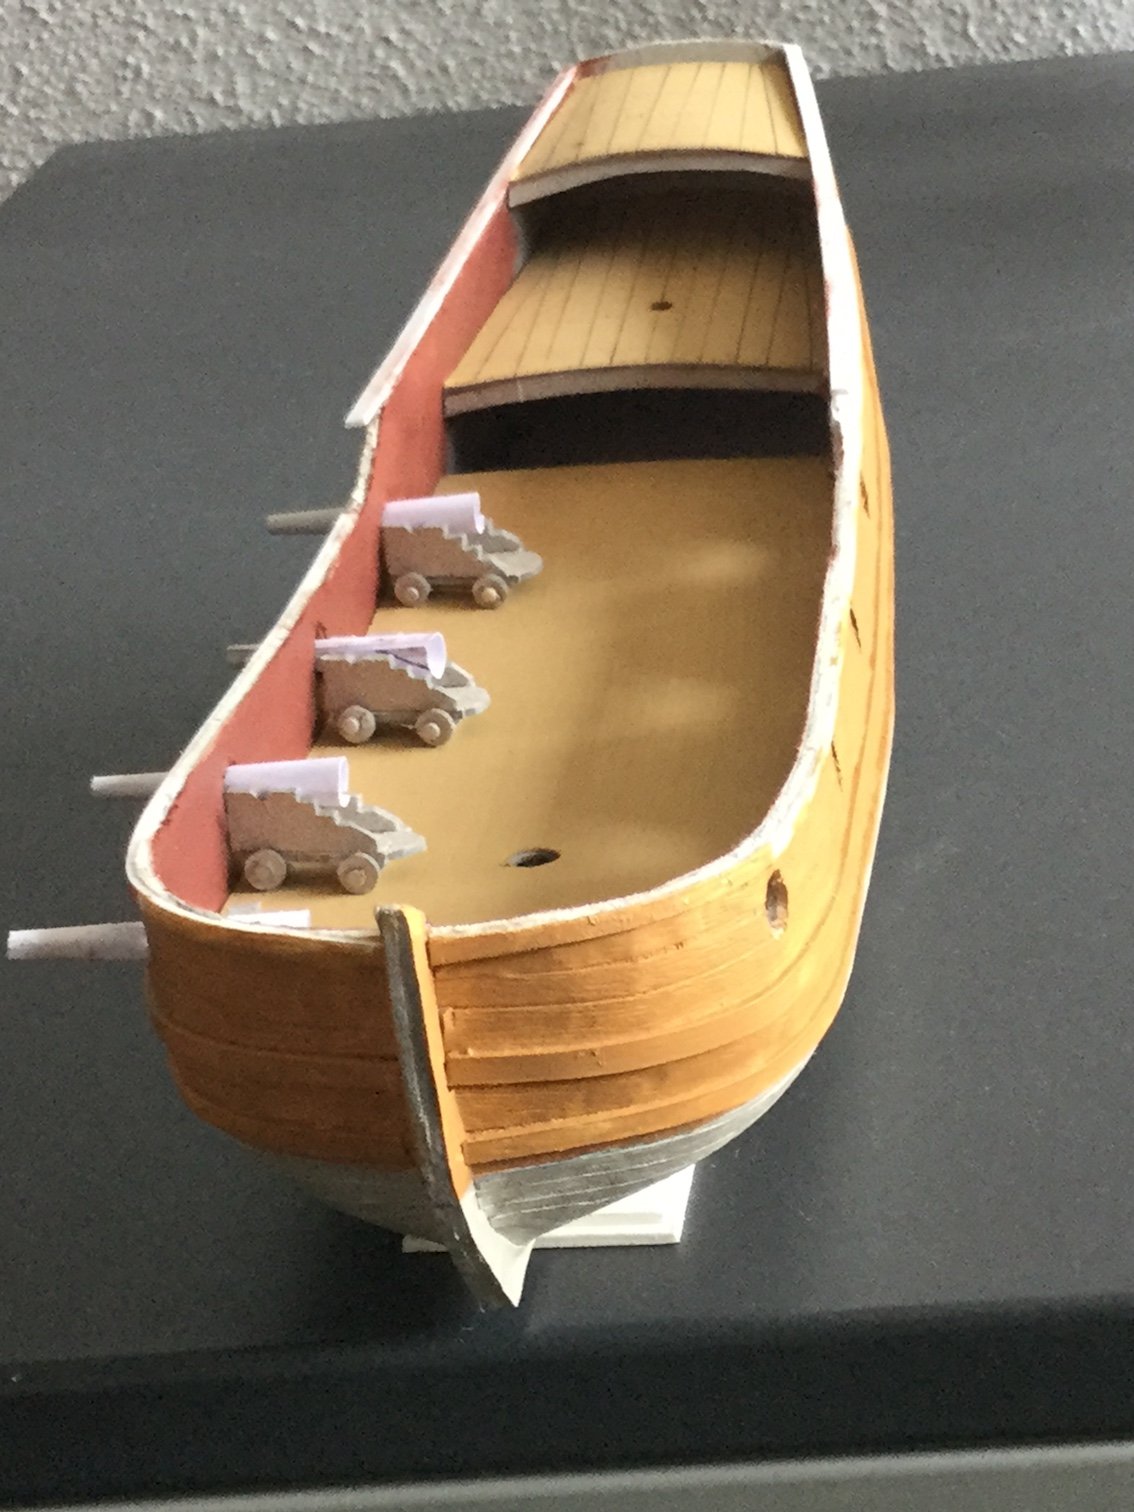
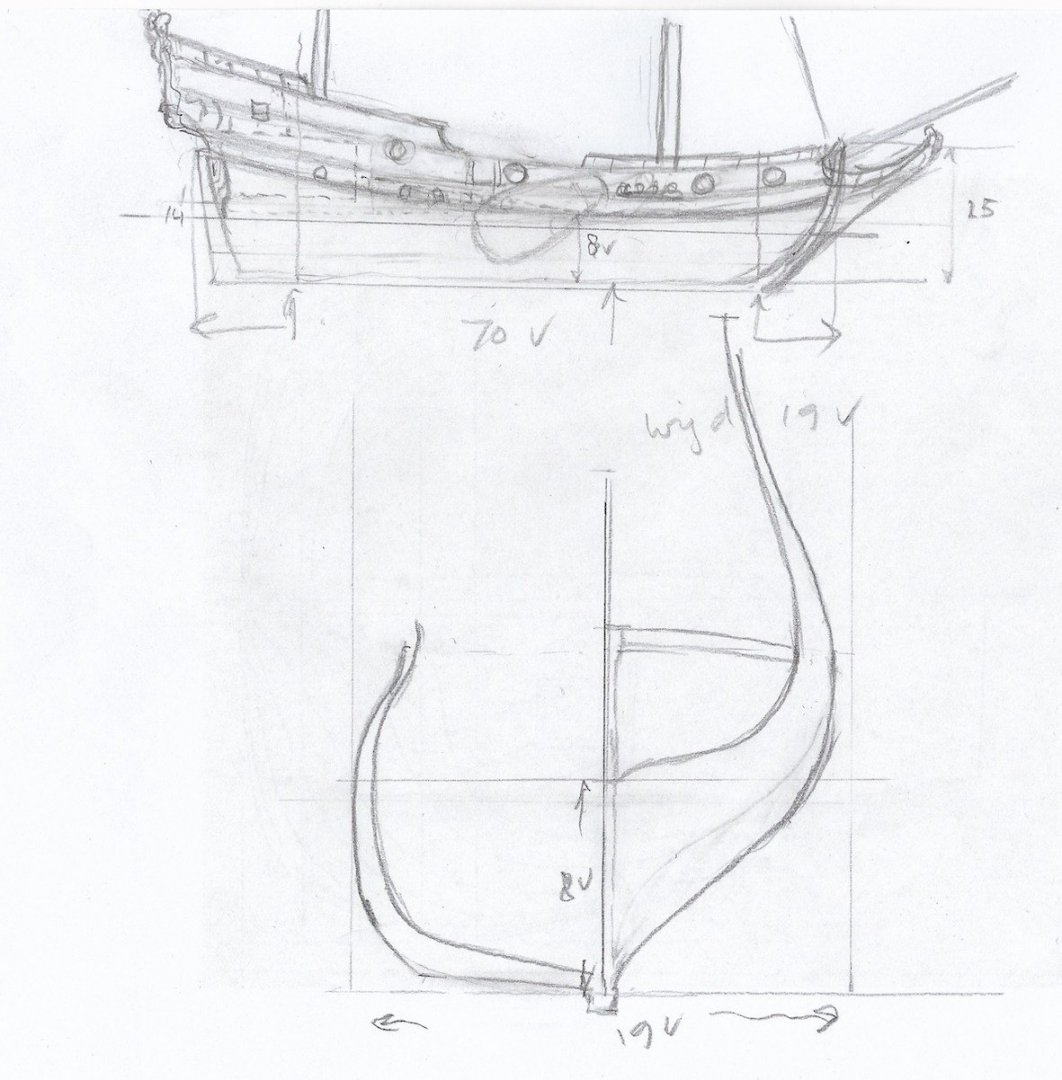
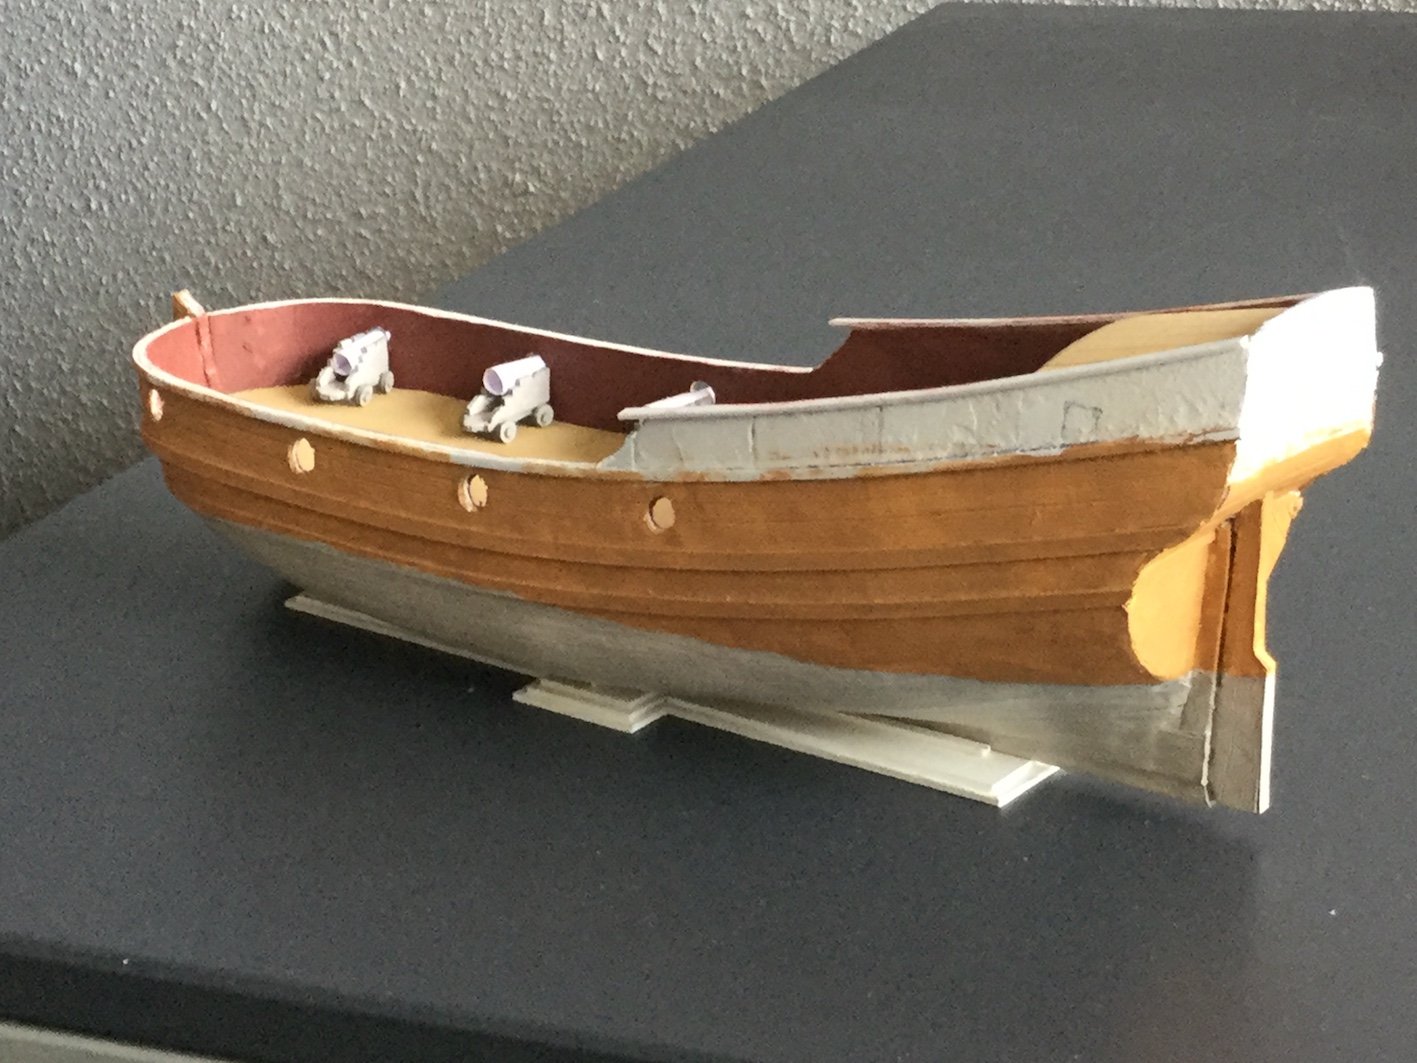
I made new plans, based on a statenjacht and with an interior that seemed useful for the ship. I stopped building because there were so many questions, too little answers and too much guess work, which is not good for my motivation. Here is the lines plan, I hope it works better for you than for me :-). The length of the ship was 70, the beam 19 and the depth in hold 8 Amsterdam feet (28,3 cm). You will have to do some math to put it all together, but that is only part of the joy. Ab
-
I’m so sorry Meriadoc, I did not read your message well. Indeed the one on my ‘shipyard’ is a wadconvooier, you are right. For the answer, my reply here above will be sufficient, I hope.
-
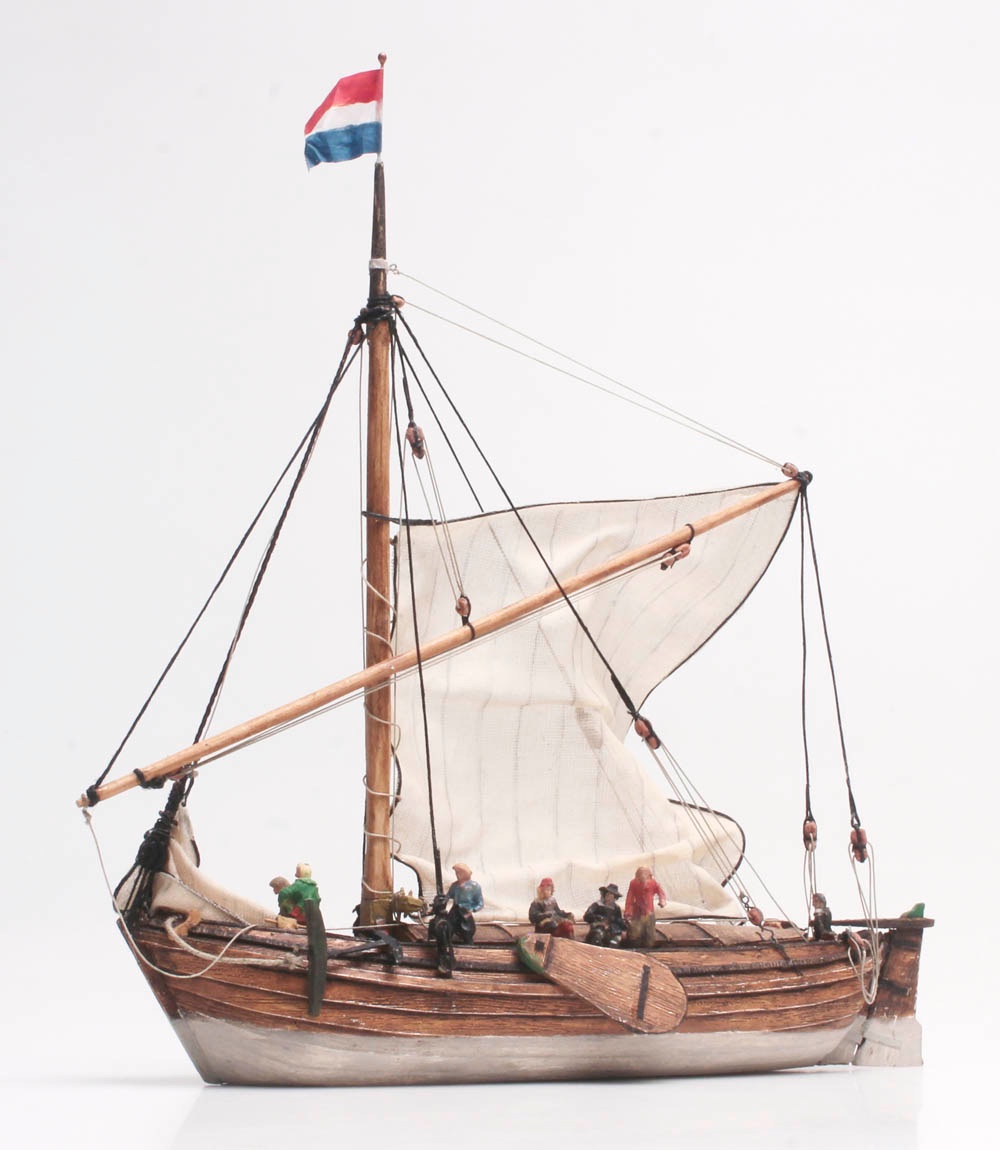
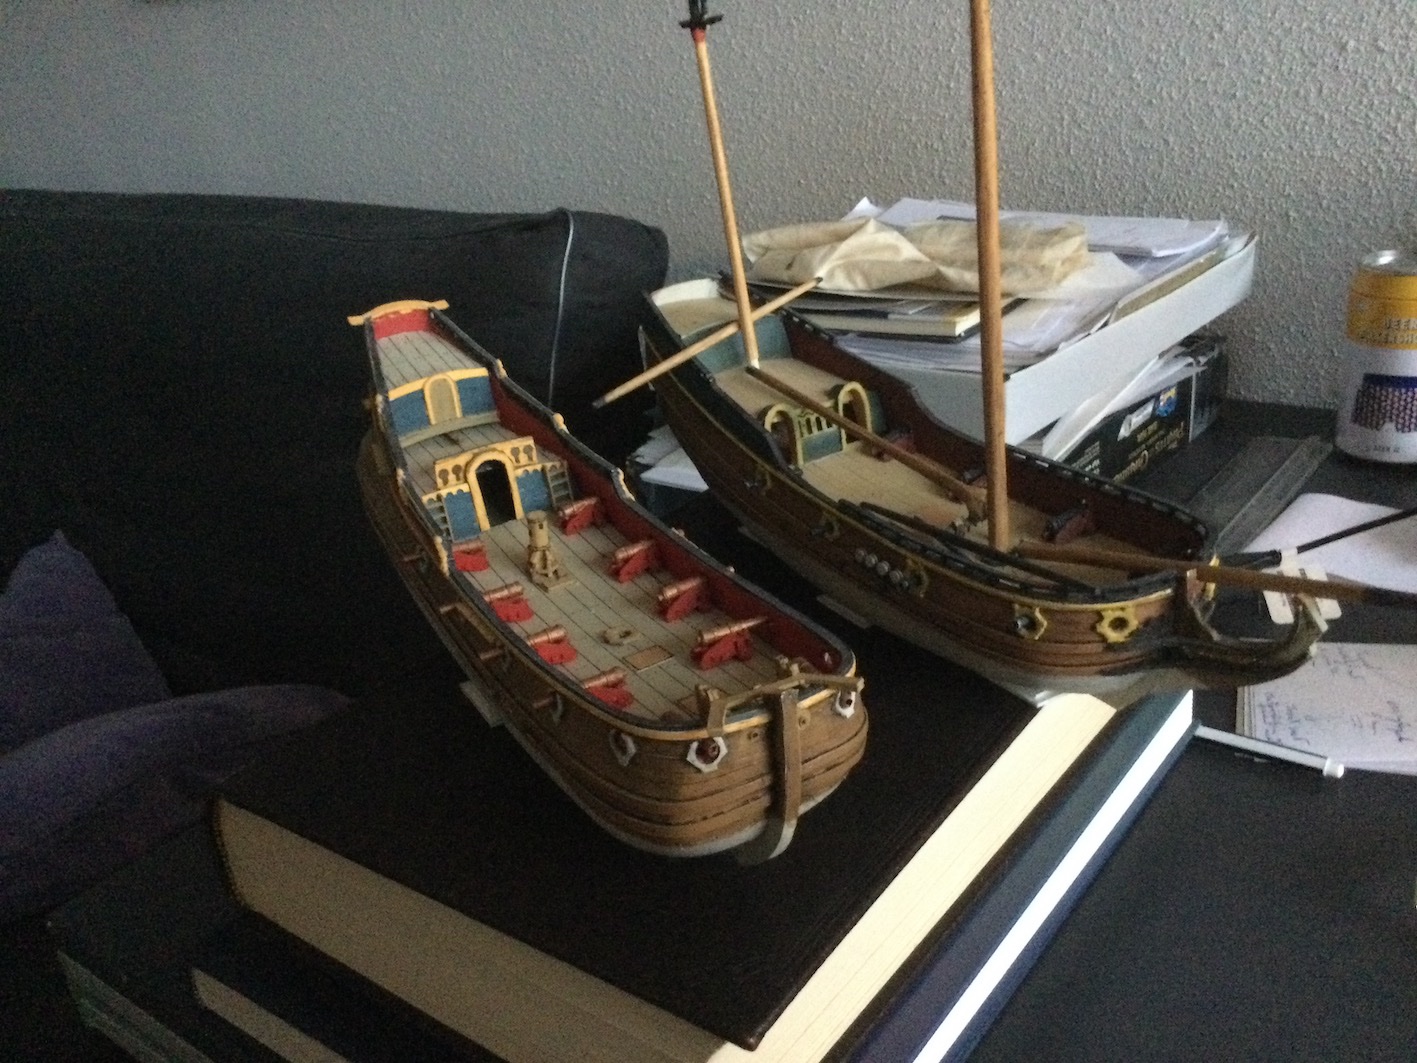
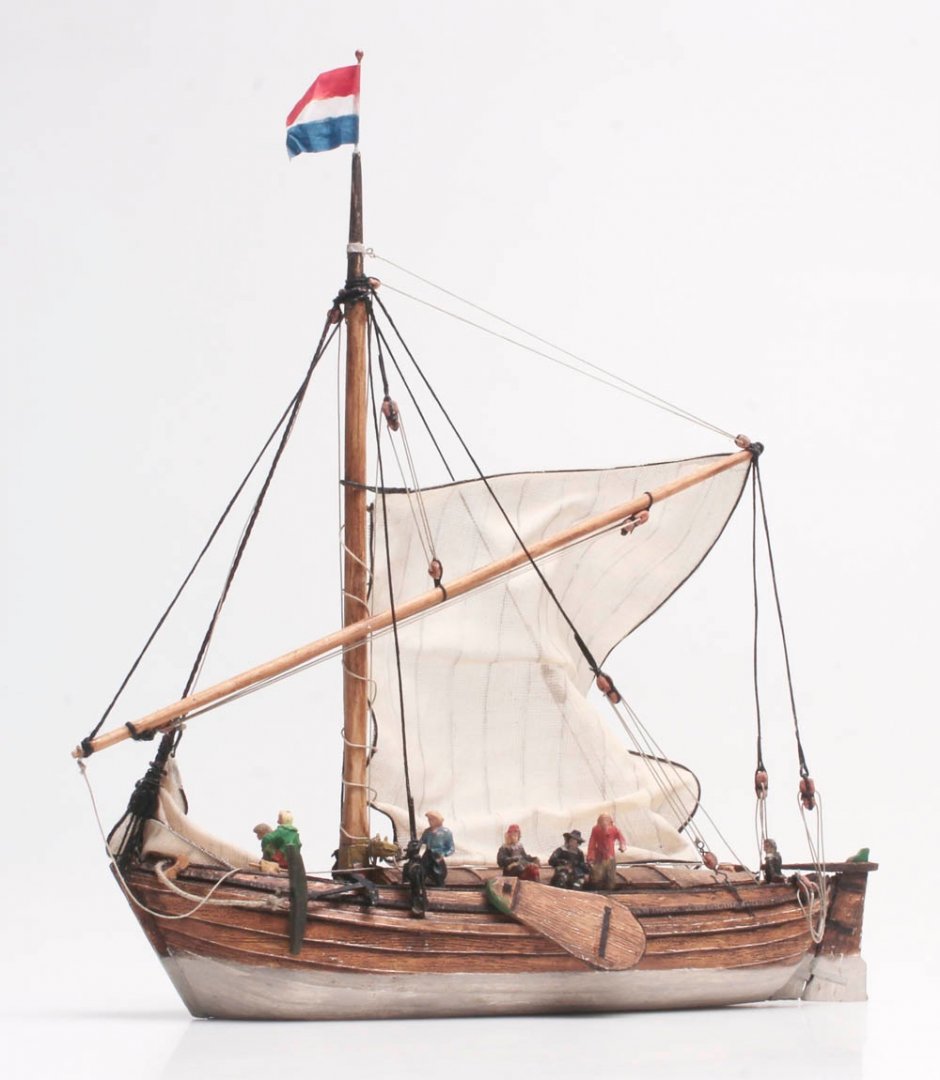
Hello Meriadoc, Thank you for your compliments. Actually the ship on the View of the Amsterdam Harbor with the Admiralty Store house in the background is not really a wadconvooier. It is a 'kaag', a very popular small inshore freighter, often used for transport of people. The type with its straight stempost is very recognizable on many maritime paintings of the era. I have draughts if you are interested, but it is not really the easiest way to start building in paper, because it's clinker built. Although I don't know your level of skills, I would advise you to build the hooker in the tutorial first. You will have to find your way in what sorts of card are available and which ones are the best for your purposes. I have made two efforts to try my luck on the wadconvooier, but neither of them entirely satisfies me. It is indeed an obscure type, maybe not even a type, but only a function. I spotted two variants, one seems to be based on the design of a statenjacht, the other is mostly fluit-like, both with an extra mizzen mast and triangular sail. As you can see I have draughts of both, but although most of the work on the models has been done, they could not completely convince me, so I 'abandoned ship' in both cases. Let me know your choice, perhaps I can help you. Best, Ab
-
Need CAD type program
Ab Hoving replied to Sambini's topic in CAD and 3D Modelling/Drafting Plans with Software
Hello Sailor1234567890, Am I correct if I suppose that you want a tutorial about the way you copy the shape of your model from an existing plan? Ab -
Perhaps I have a tip for you Jan. Cleaning a model mostly means dusting the rigging (and vacuuming after that). For cleaning the rigging I always use an ostrich feather. These feathers a a bit fatty and the dust sticks to the feather surprisingly easily. For the rest of the deck I use paint brushes in various sizes and in the end I remove the gathered dust with a 1/2 cm wide flexible tube, attached to a vacuum-cleaner. Just a hint.
-
This sound so familiar to me. When I was still building custom made electric guitars the painting proces showed all kinds of horrible effects. Imagine a body sanded untill it shone like a mirror with after spraying all sorts of blisters coming uit. The most horrible effects with reactions between filler and paint, paint and paint and anything that can cause disasters. It almost drove me crazy, although I have to admit that once the effect of spraying cause a beautiful, but unplanned crackling, like on an antique painting. Making guitars was a piece of cake compared to spraying them. In the end I just painted the bodies. More work, polishing afterwards, but no blisters any more...
-
Hello Jan, If you don't want to put the brails on your model, just don't do it. The few people who knows about them will forgive you. 🙂 The question was how were they rigged. There are two kinds of brails, the ones coming from the side of the sails and the ones coming from the bottom. The first kind passes a sheave on the front side of the yard ( a turtle block) and then through a block attached to the top, or to the noose of the stay down to deck. The second kind pass through the clamp on the yard, also through a block hanging from the top or from the stay. As to my models: I must confess that I cheat with these ropes. I led them to the yard and secure them there, to prevent a too lage number of ropes going down to the deck. And about my Swan: the ropes are there, you just have to look close. Because this is a very small ship the there is only one brail to the middel of the low end of the sail instead of the usual two. They are hardly visible, but they are there, I assure you.
-
Looks good Jan! Shouldn't there be brails on the front side of the sails? Great job man,
-
My condolances Doris, very sad news, but what a beautiful model you have made. You are an example for all of us. Ab
- 1,035 replies
-
- 6
-
-
-
- royal katherine
- ship of the line
- (and 1 more)
-
That's the spirit Henry X. It may seem as if I know it alle, but basically I only have a very small expertise... Ab
-
Hello Henry, Thank you for the compliment. The fact that I try as good as I can to document what I do, is because long ago I chose the Dutch 17th century as my specialism. I know the literature on the subject and the pictorial material left, as well as archaeological finds. The plate you show here depicts a ship from way before that age. Maybe 16th, maybe even 15th, but certainly an era of which no written sources are left, that reveal enough information for us to build a model after. I know nothing about these early ships. Everything beyond 1600 is based on guesses and interpretations. That's where the dark ages start for me. Some people on this forum (very admired by me) show us their interpretations of gathered material to make reconstructions of dromons, galleys, carracks, gallions and whatever names these vessels have. Highly interesting, but also often highly speculative. If you want to make a model after this nice, but not extremely realistic plate, you will have to start with diving into the material there is. Soon enough you will find out that there is next to nothing you can work with. My advise: find a more recent ship type. More and more publications are becoming available about an almost infinite line of ships, both specific ships with a name, and data on ship types in general. I'm sure that will bring you more satisfaction than spending a long time of your life on a model that is based on a series of unproven ideas and assumptions. I wish you good luck with your choice for your next model and if you really find things we, here on this forum, can learn from, I will be first to read it. By the way, not because I want to use this as a way of advertising one of my books, but I think Cor Emke made drawings of a very early buss in '17th Century Dutch Merchant Vessels (Seawatch Books). Perhaps that is an option (although in my opinion this is one of what I call the 'too early models'. Ab
-
Hello Olha, Thank you for the presentation of my Tasman book. I hope many readers will like it. Are you by any chance related to Kroum Batchvarov? Cheers, Ab
-
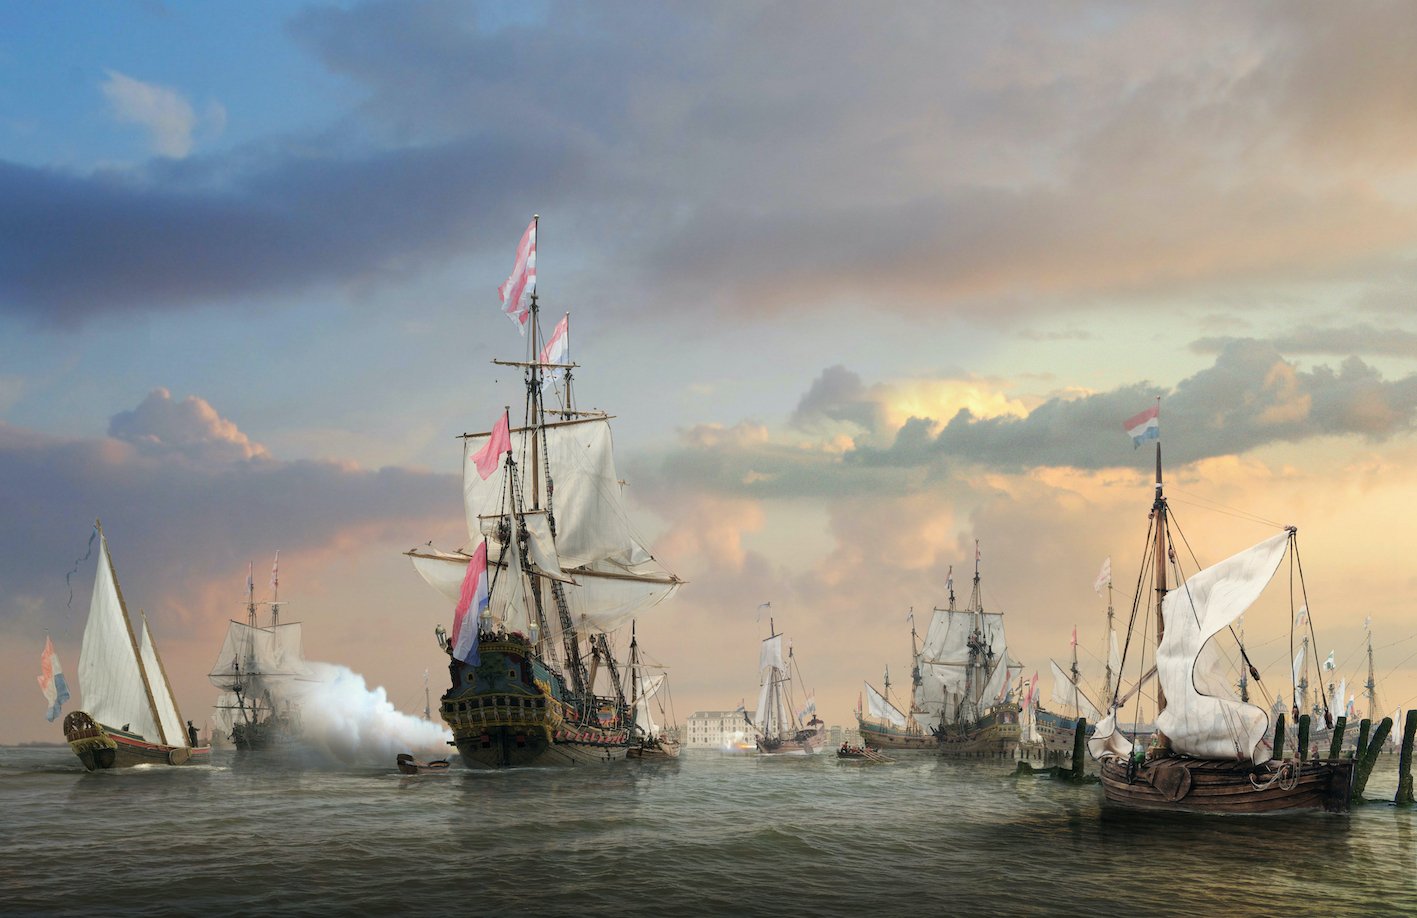
Emiel supplied me with the long expected Photoshop painting of the man-of-war I showed here this summer. It is a view on the Amsterdam harbor with the Admiralties magazine (today the Scheepvaartmuseum) in the near distance.It is the end of the day and a calm allows various vessels to dry their sails, while some yachts still find enough wind to view the anchored ships. There is a lot to see and it does not even show my entire fleet! Hope you like it just as much as I do.
-
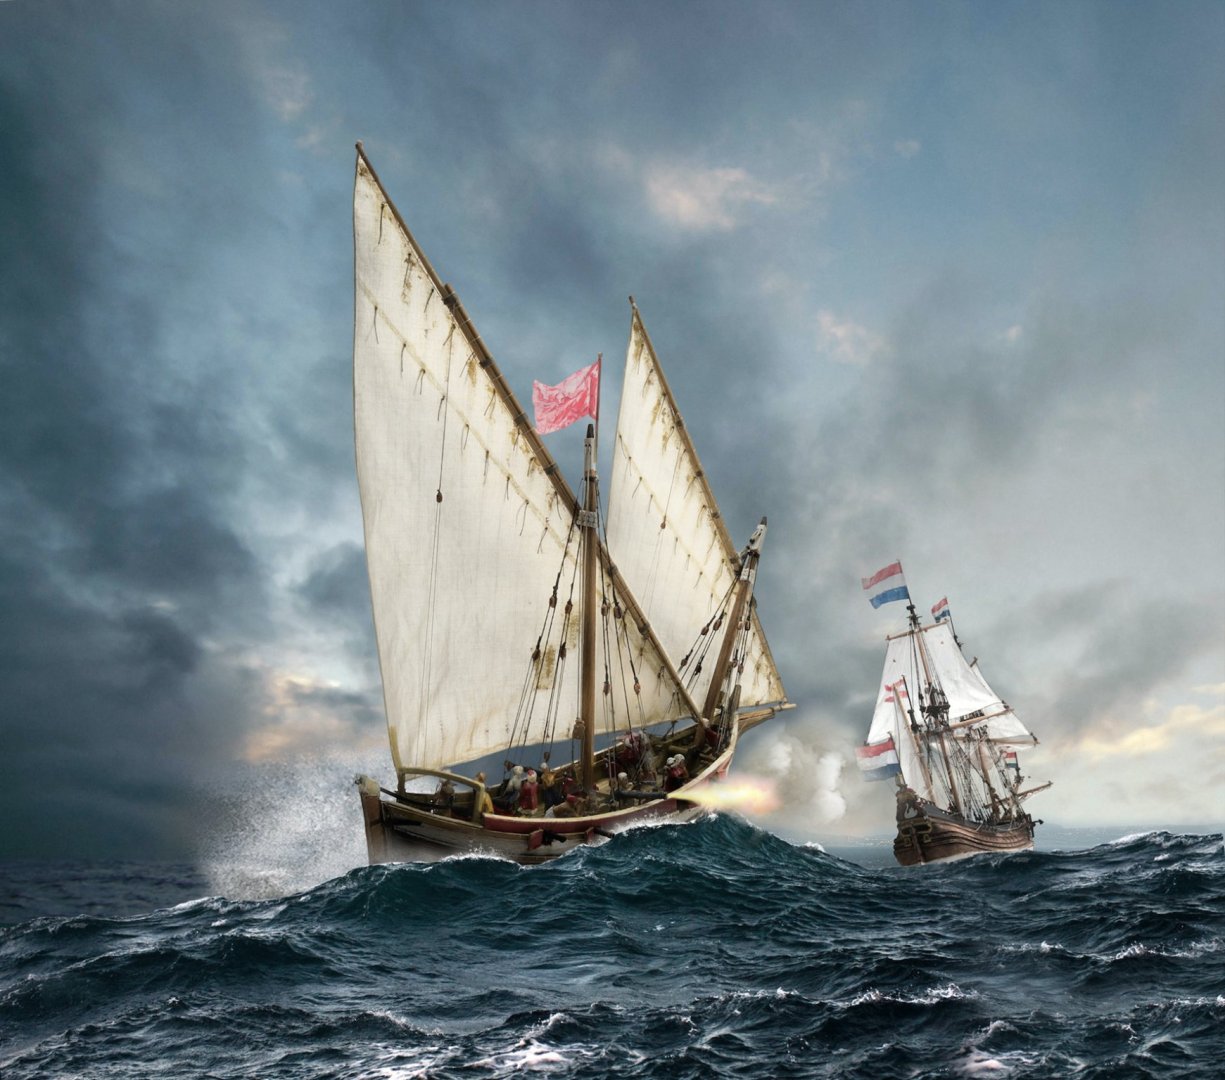
In February is showed the model of a tartan, which I picked for its simple fluent lines to test Seahorses method of paper building without using filler. My son made the design for a book sleeve with an older model of a small fluit under attack bij a North-African corsair. I thought you might like to see it:
-
The bowsprit might originally be used to serve for the bowlines (I suppose).