


Dsmith20639
-
Posts
254 -
Joined
-
Last visited
Content Type
Profiles
Forums
Gallery
Events
Posts posted by Dsmith20639
-
-
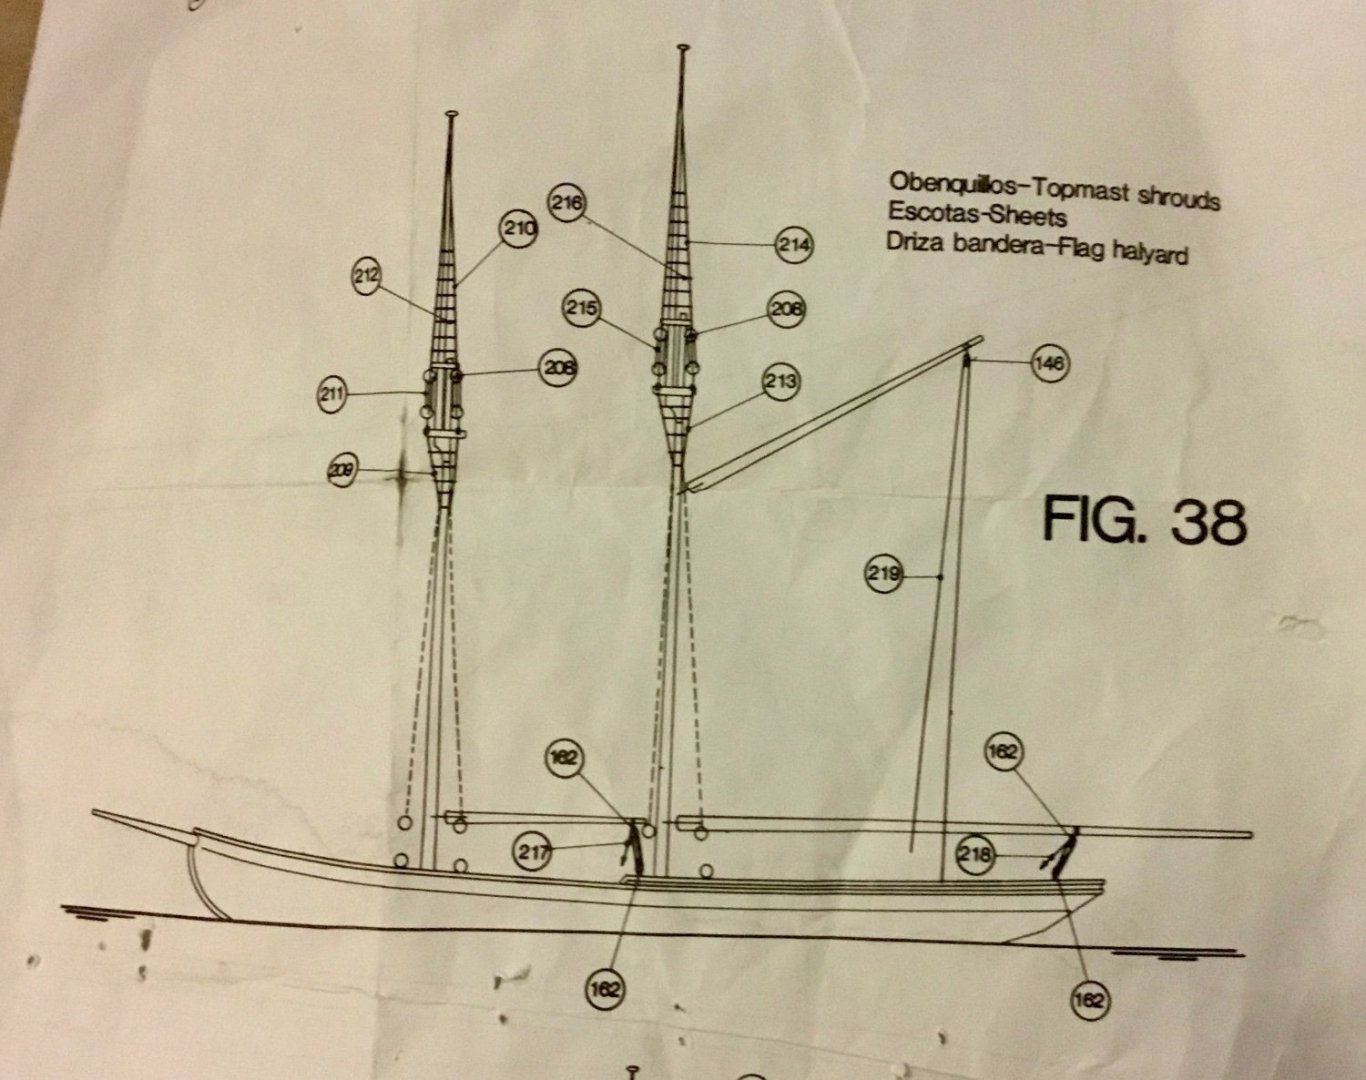
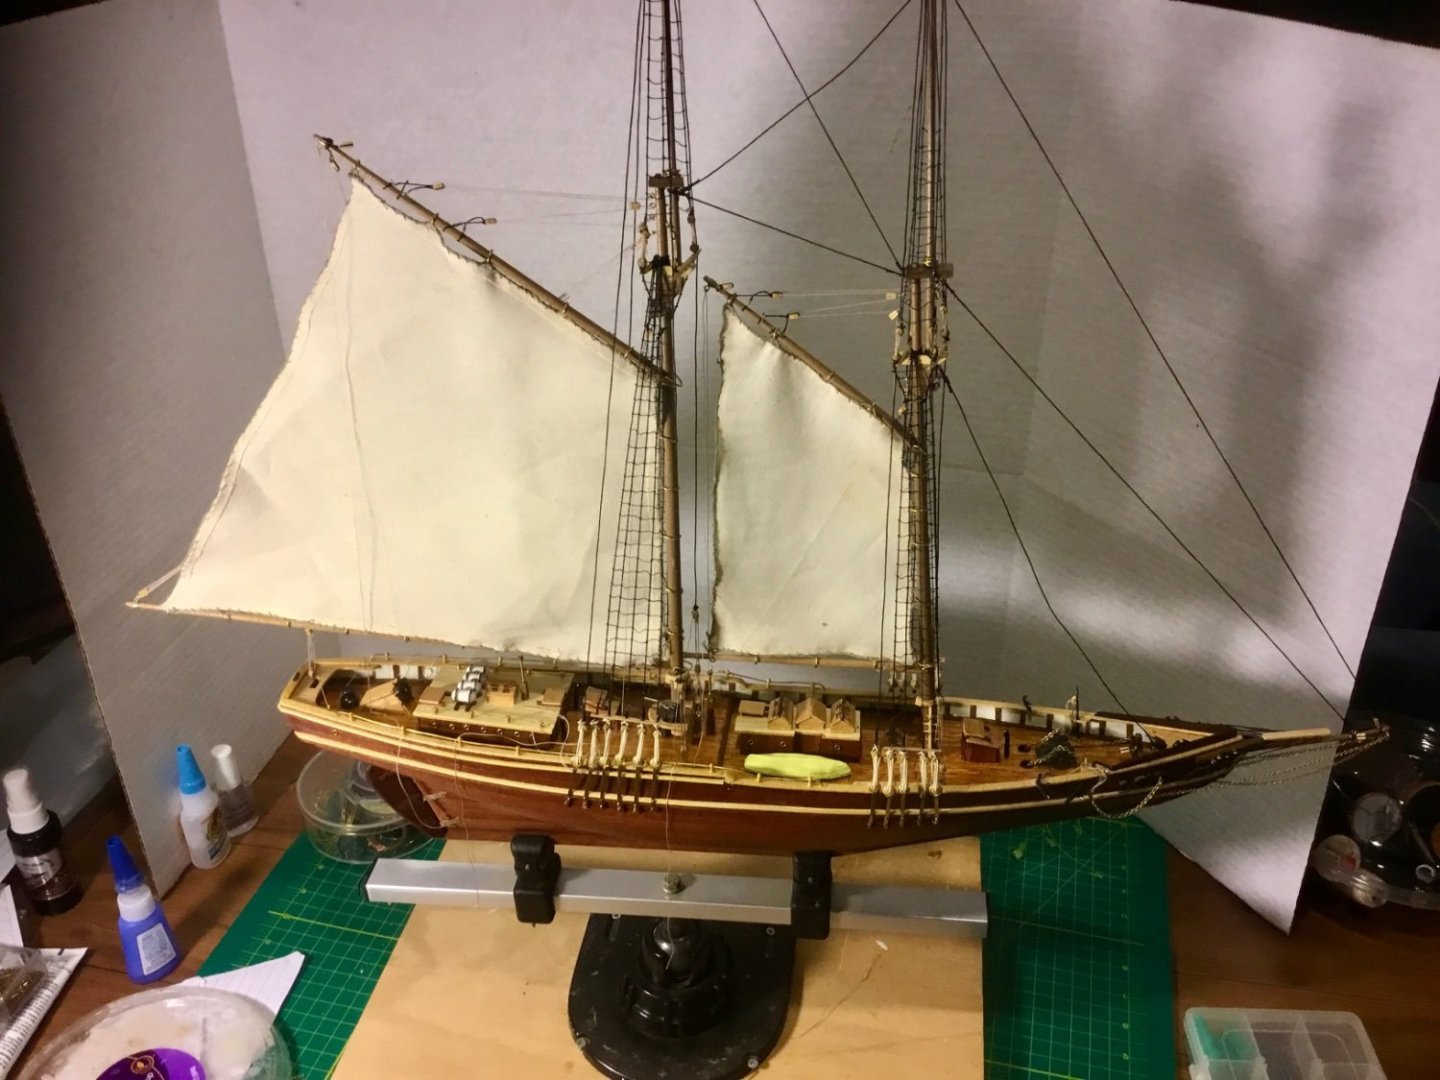
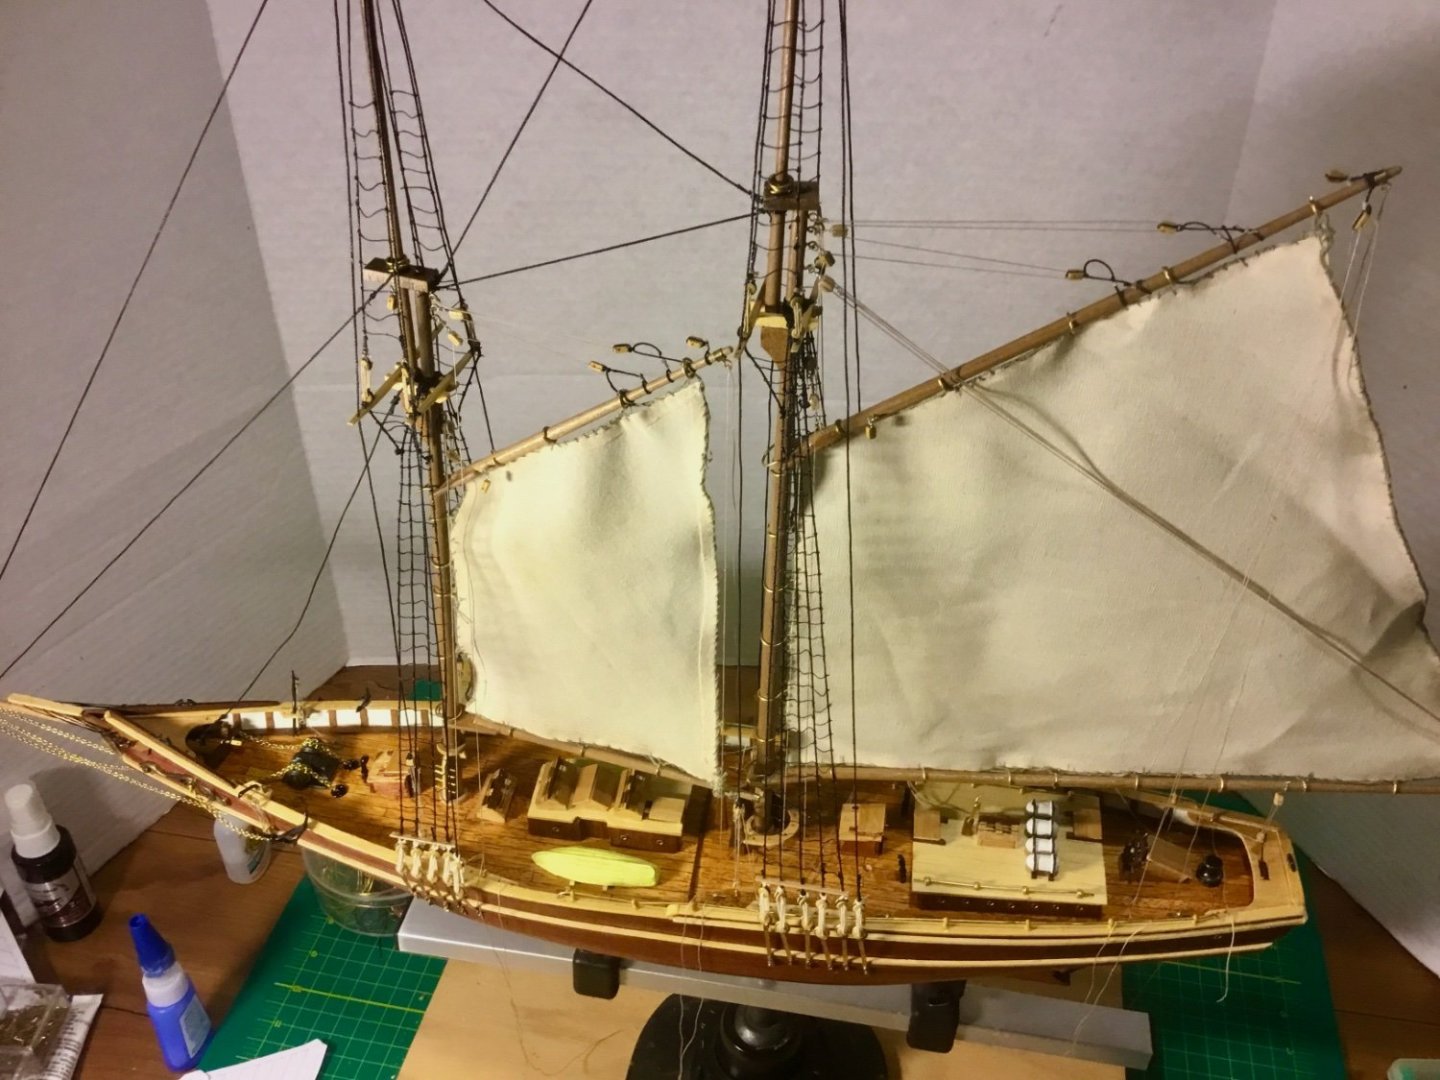
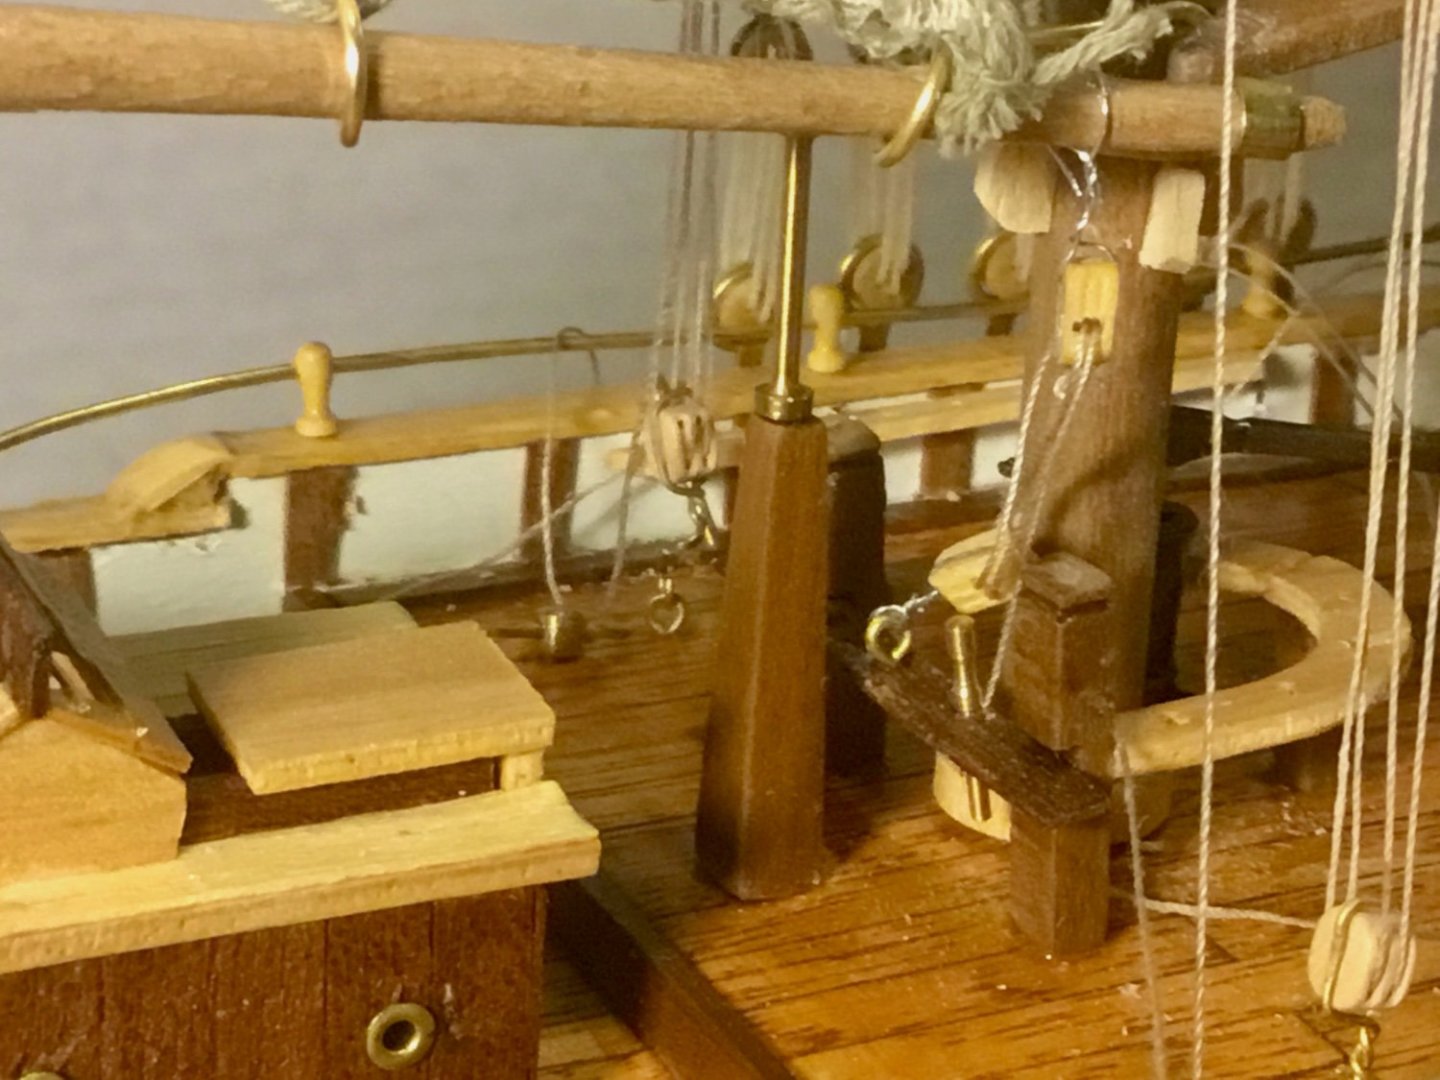
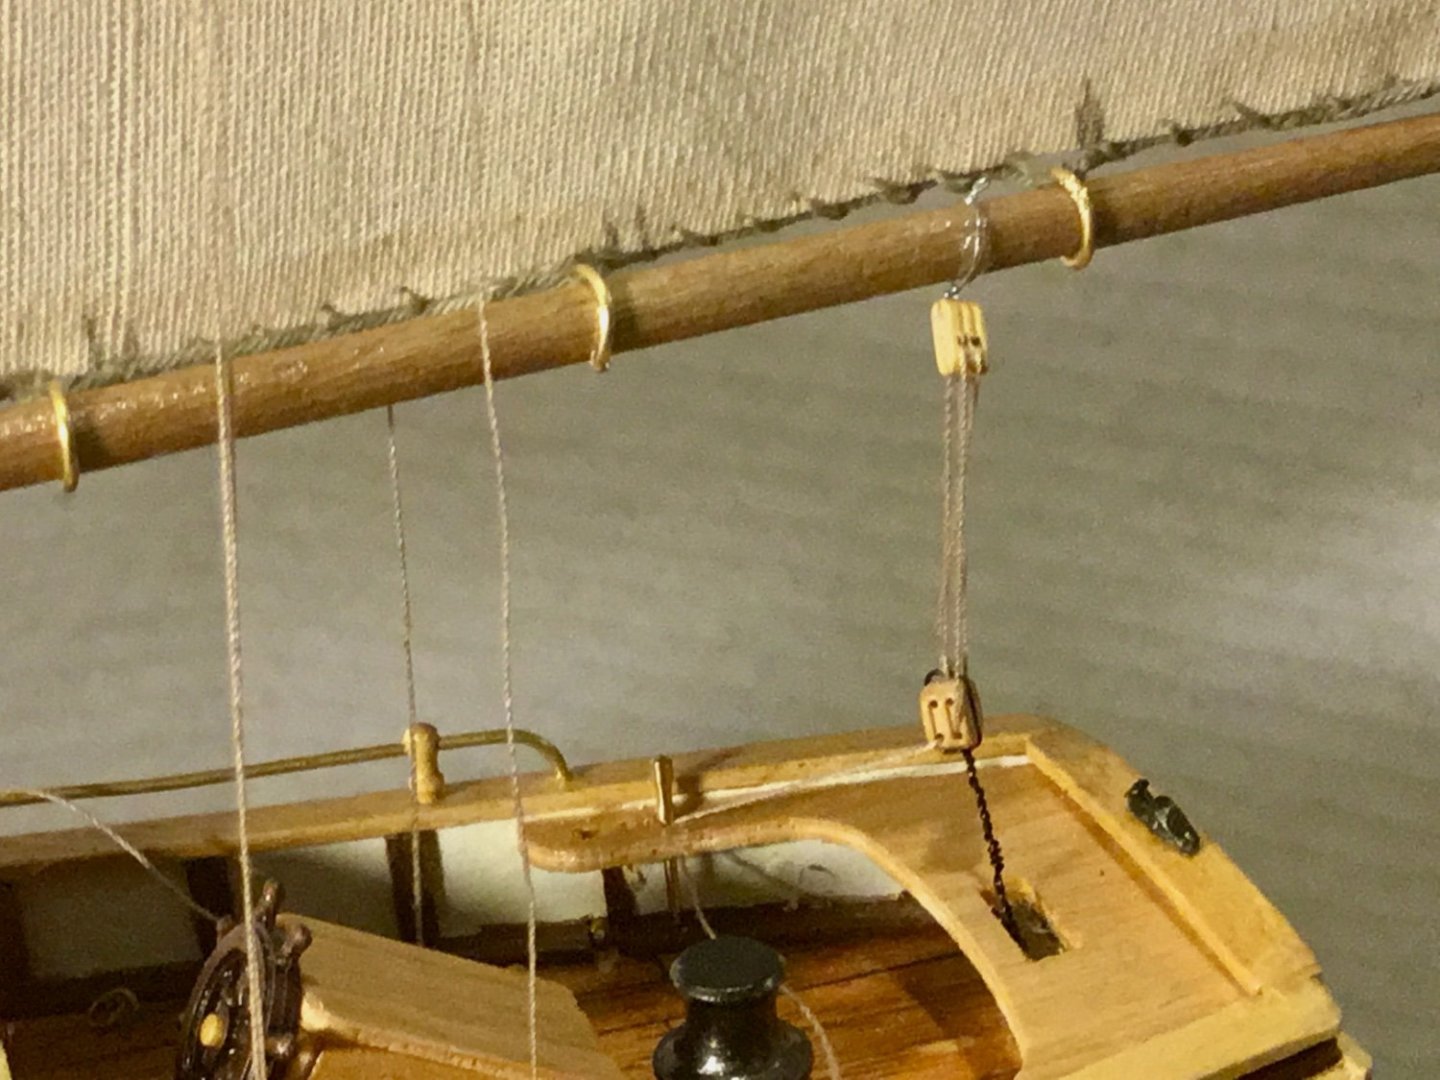
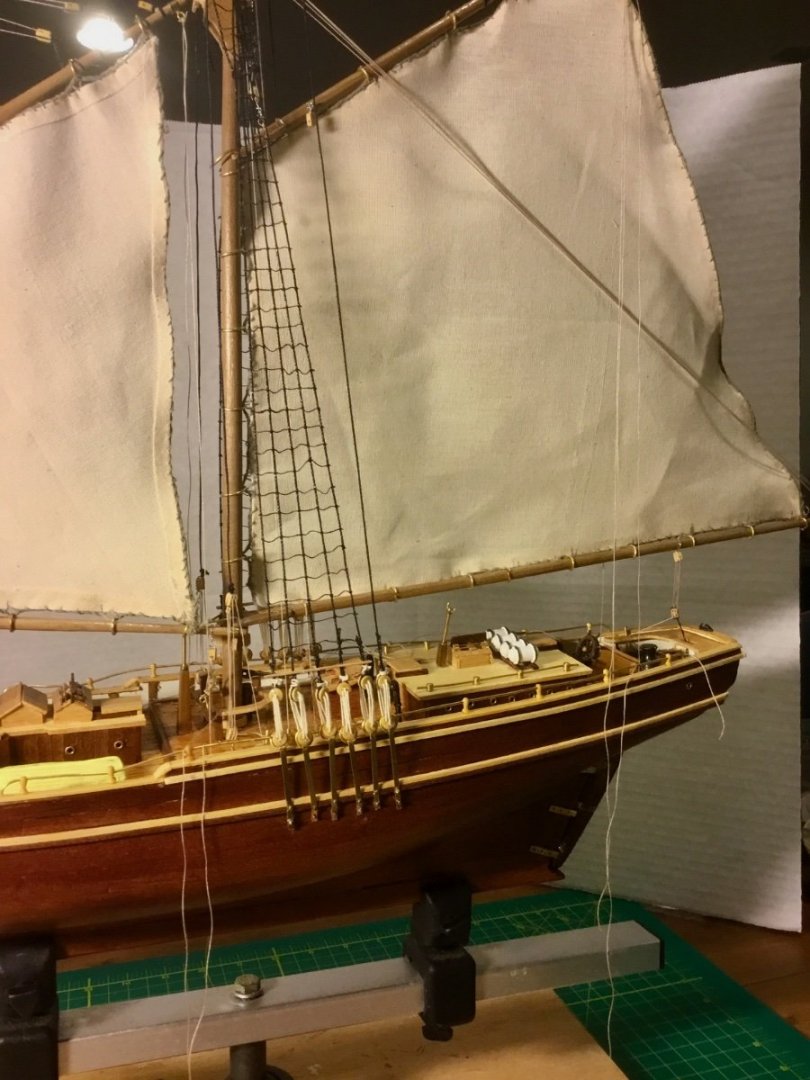
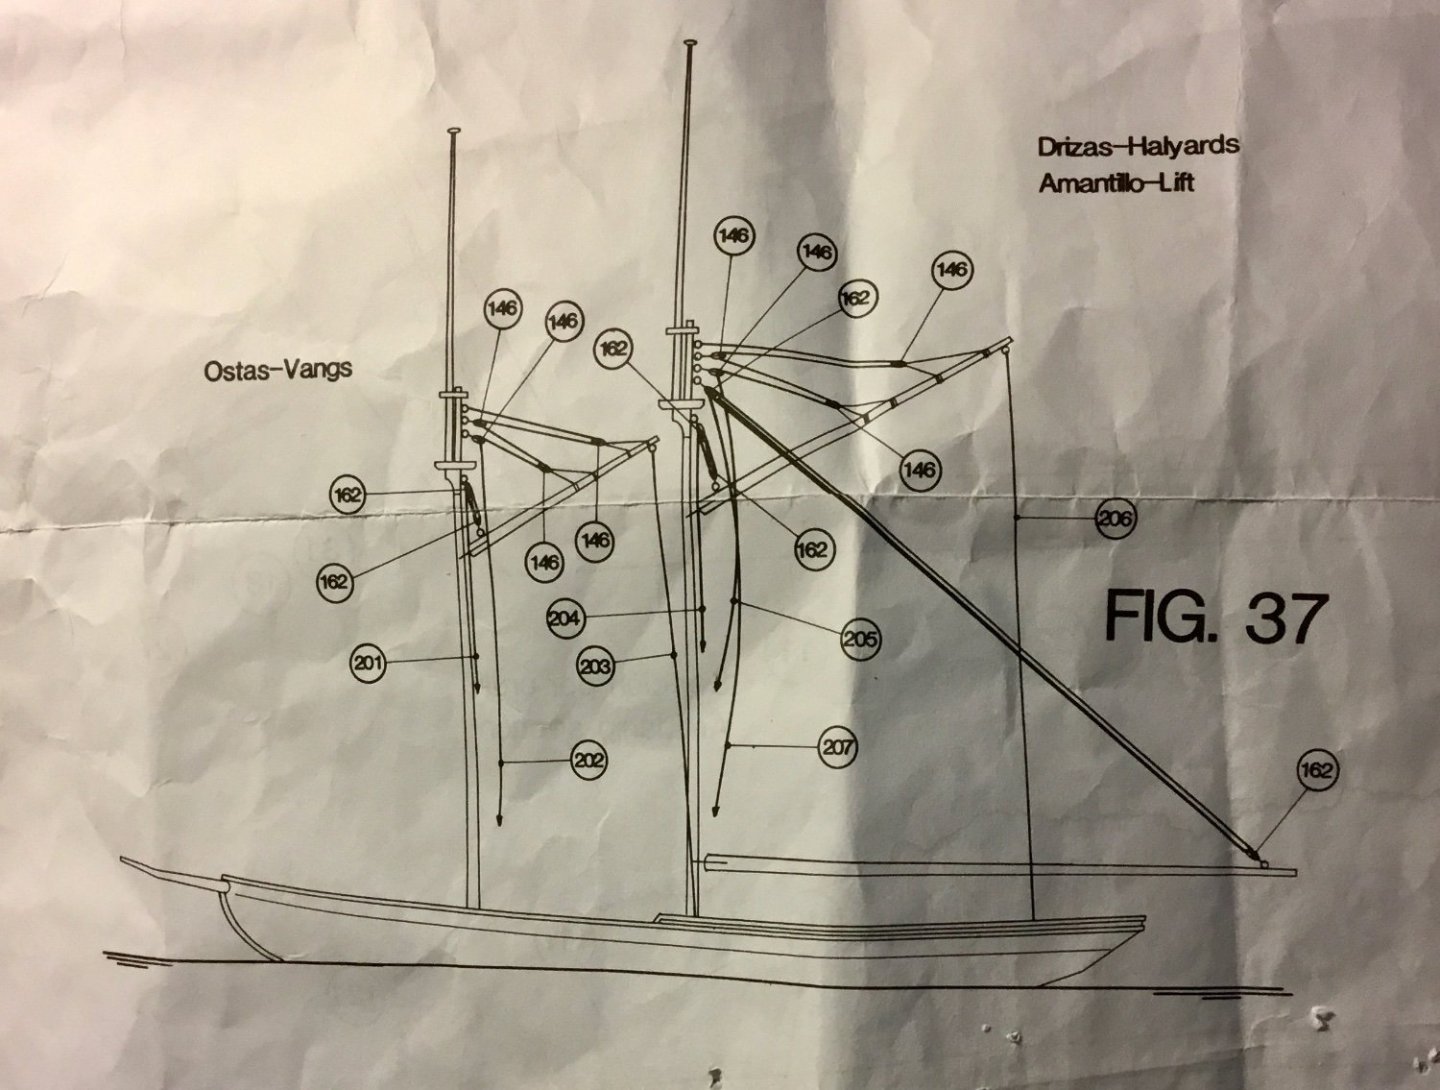
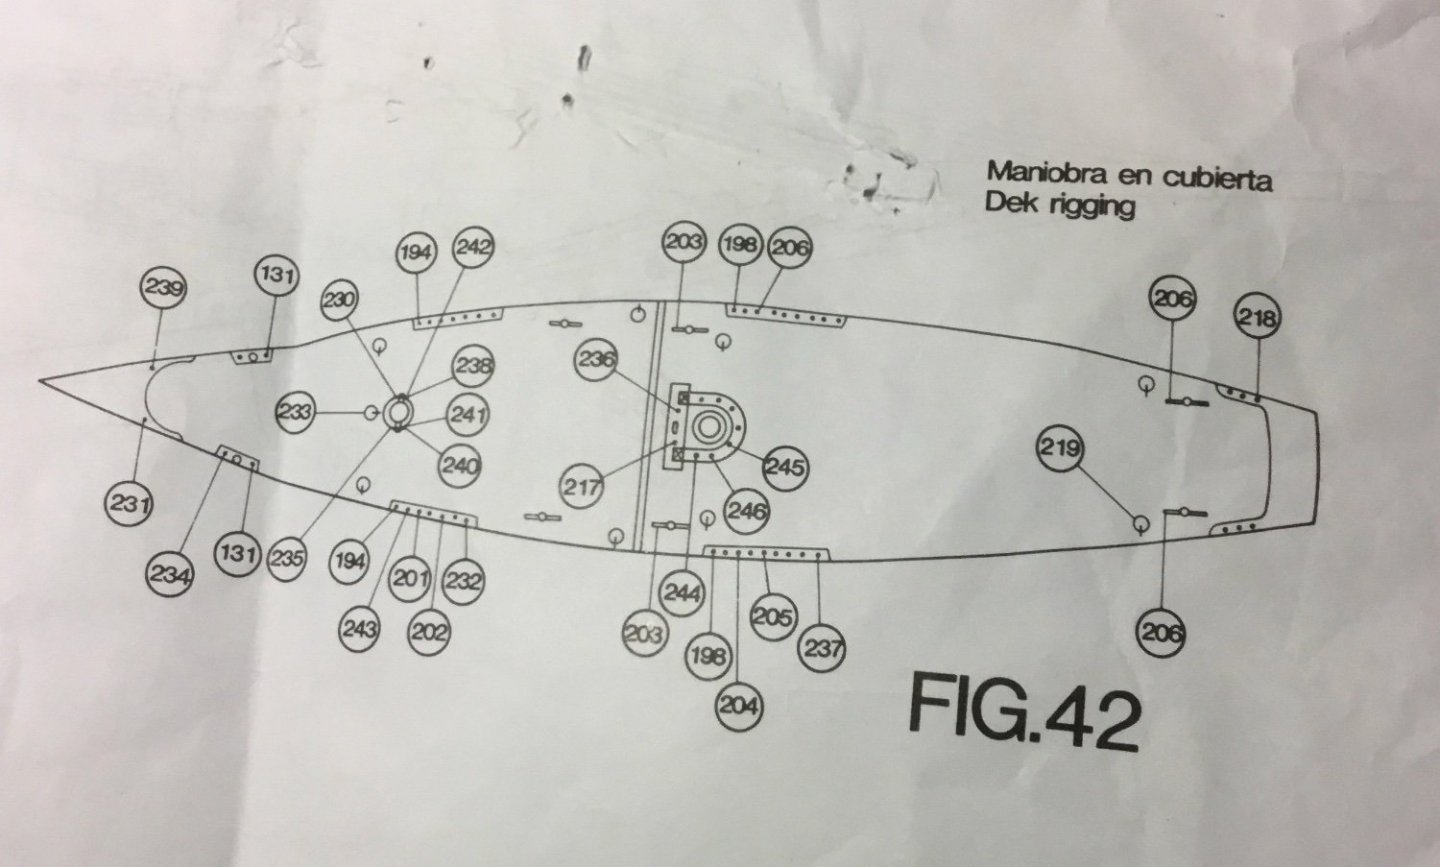
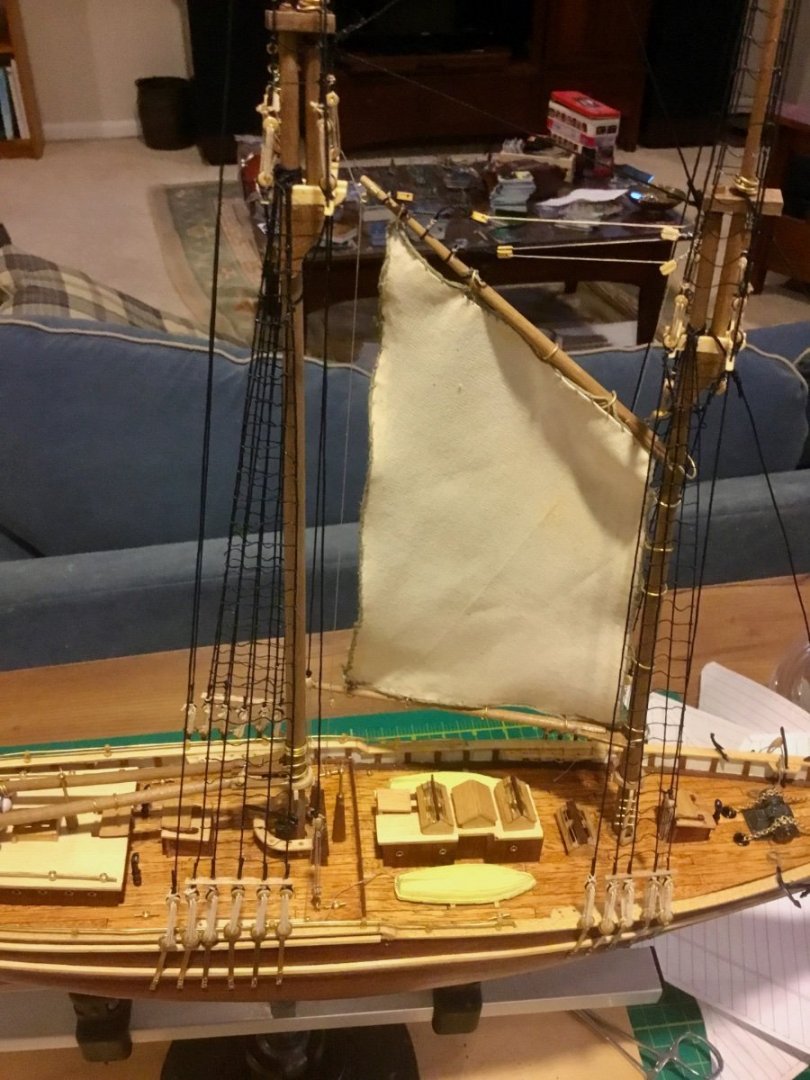
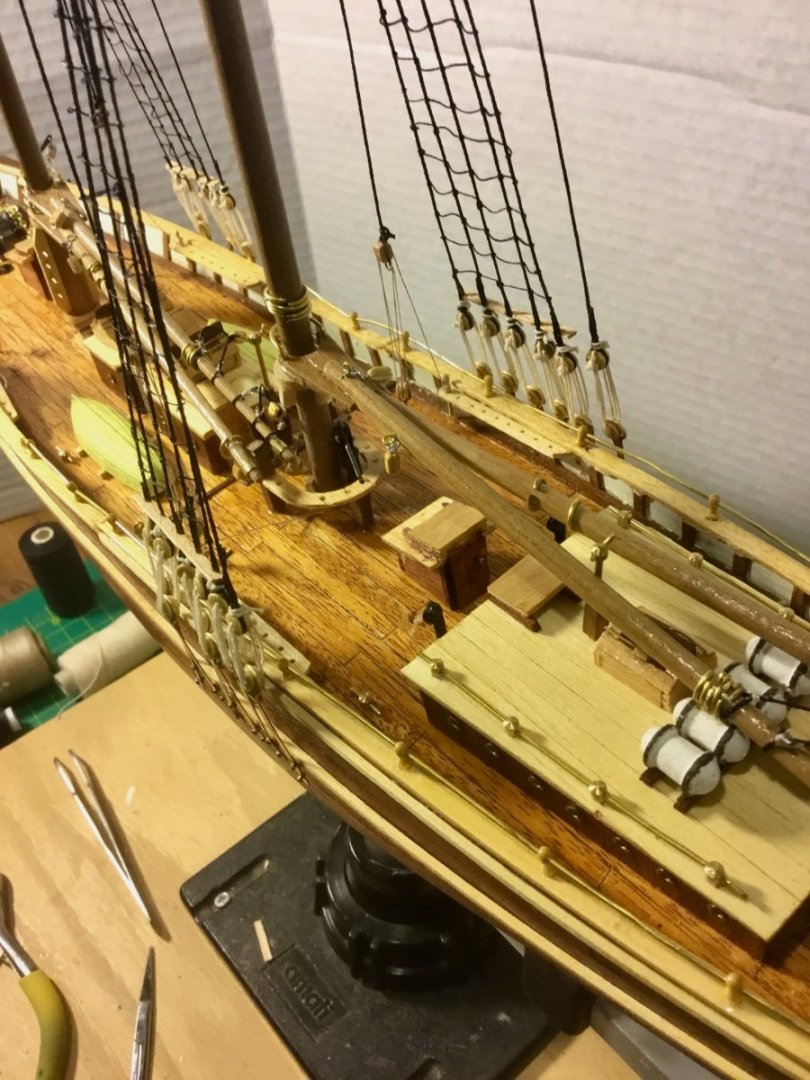
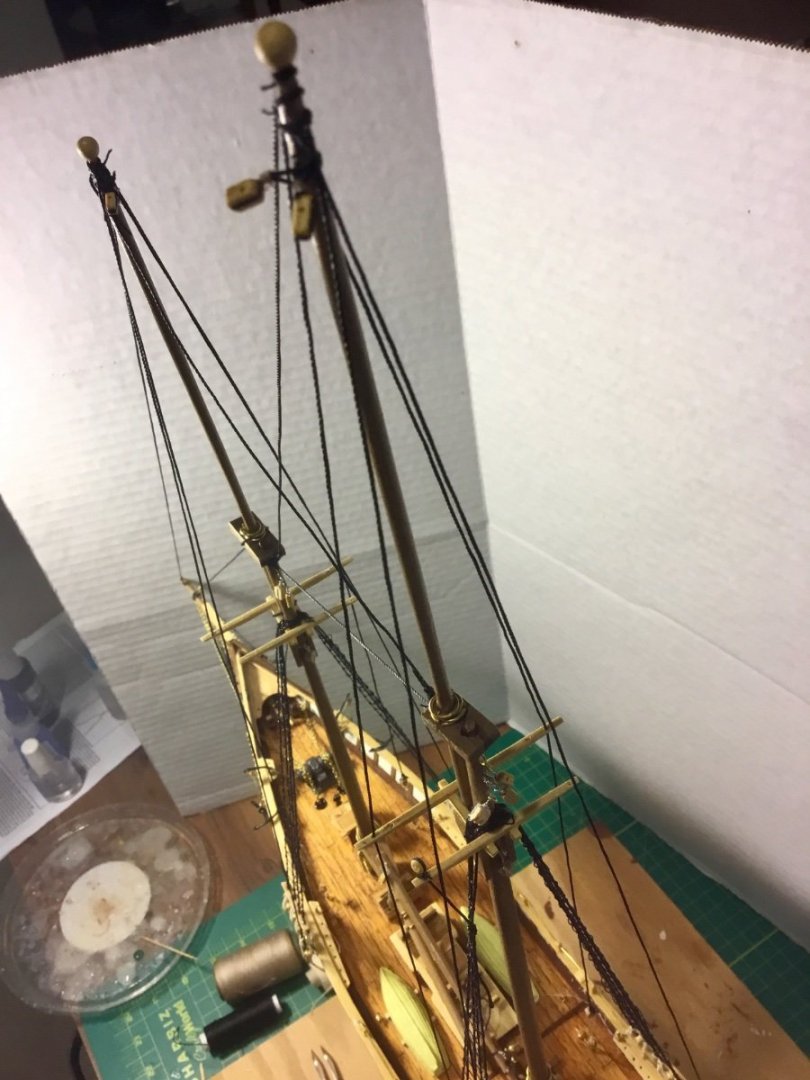
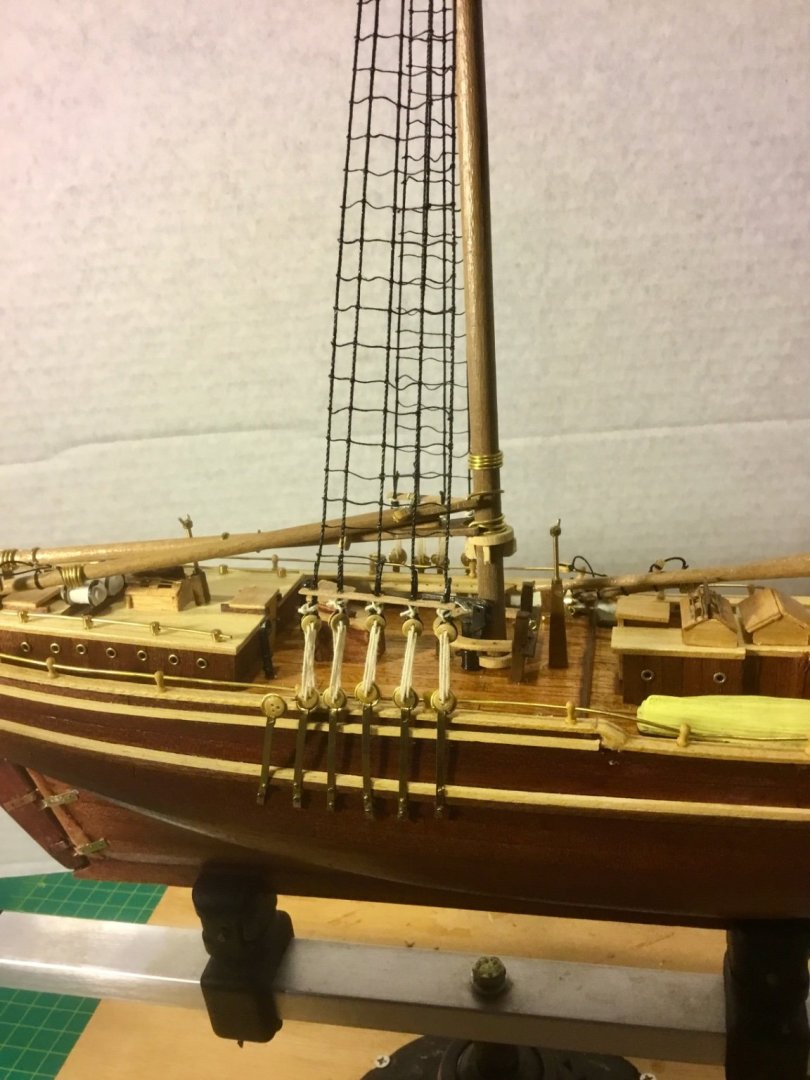
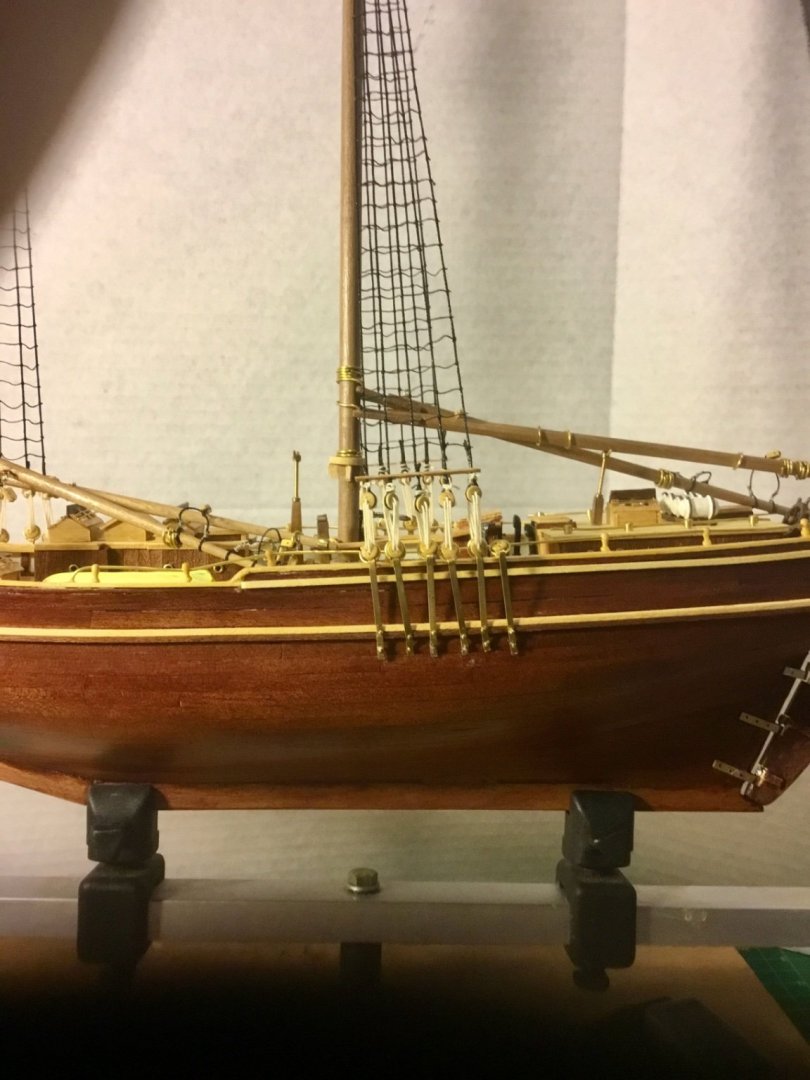
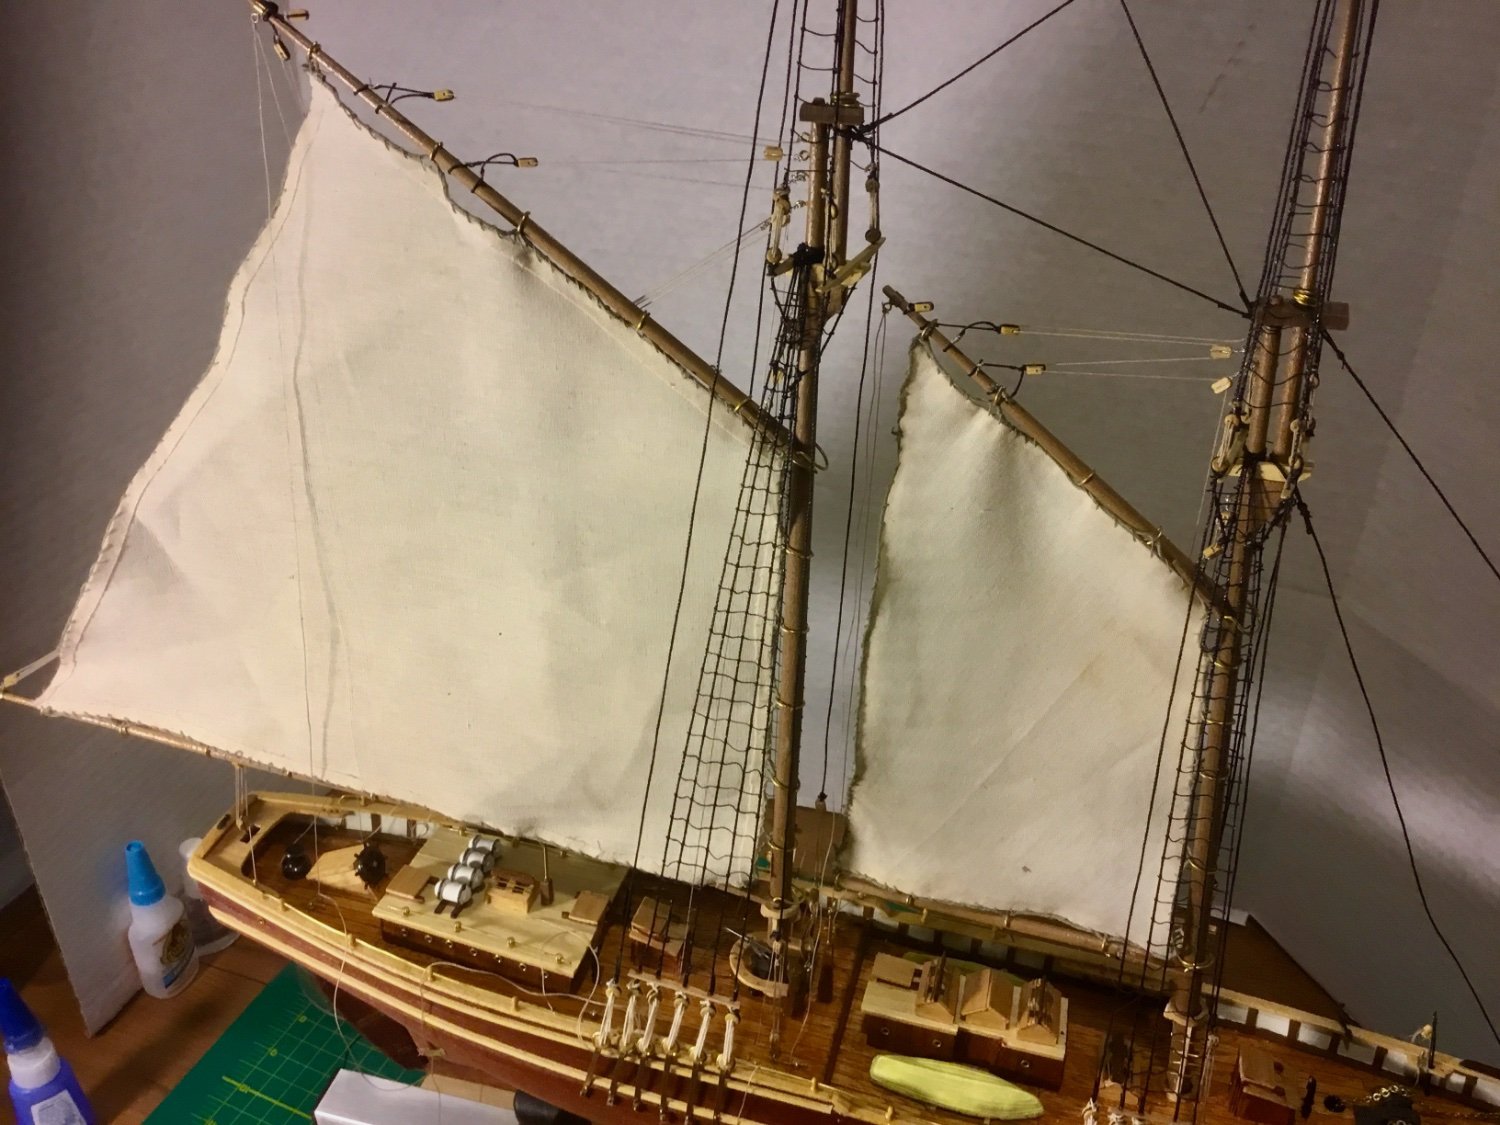
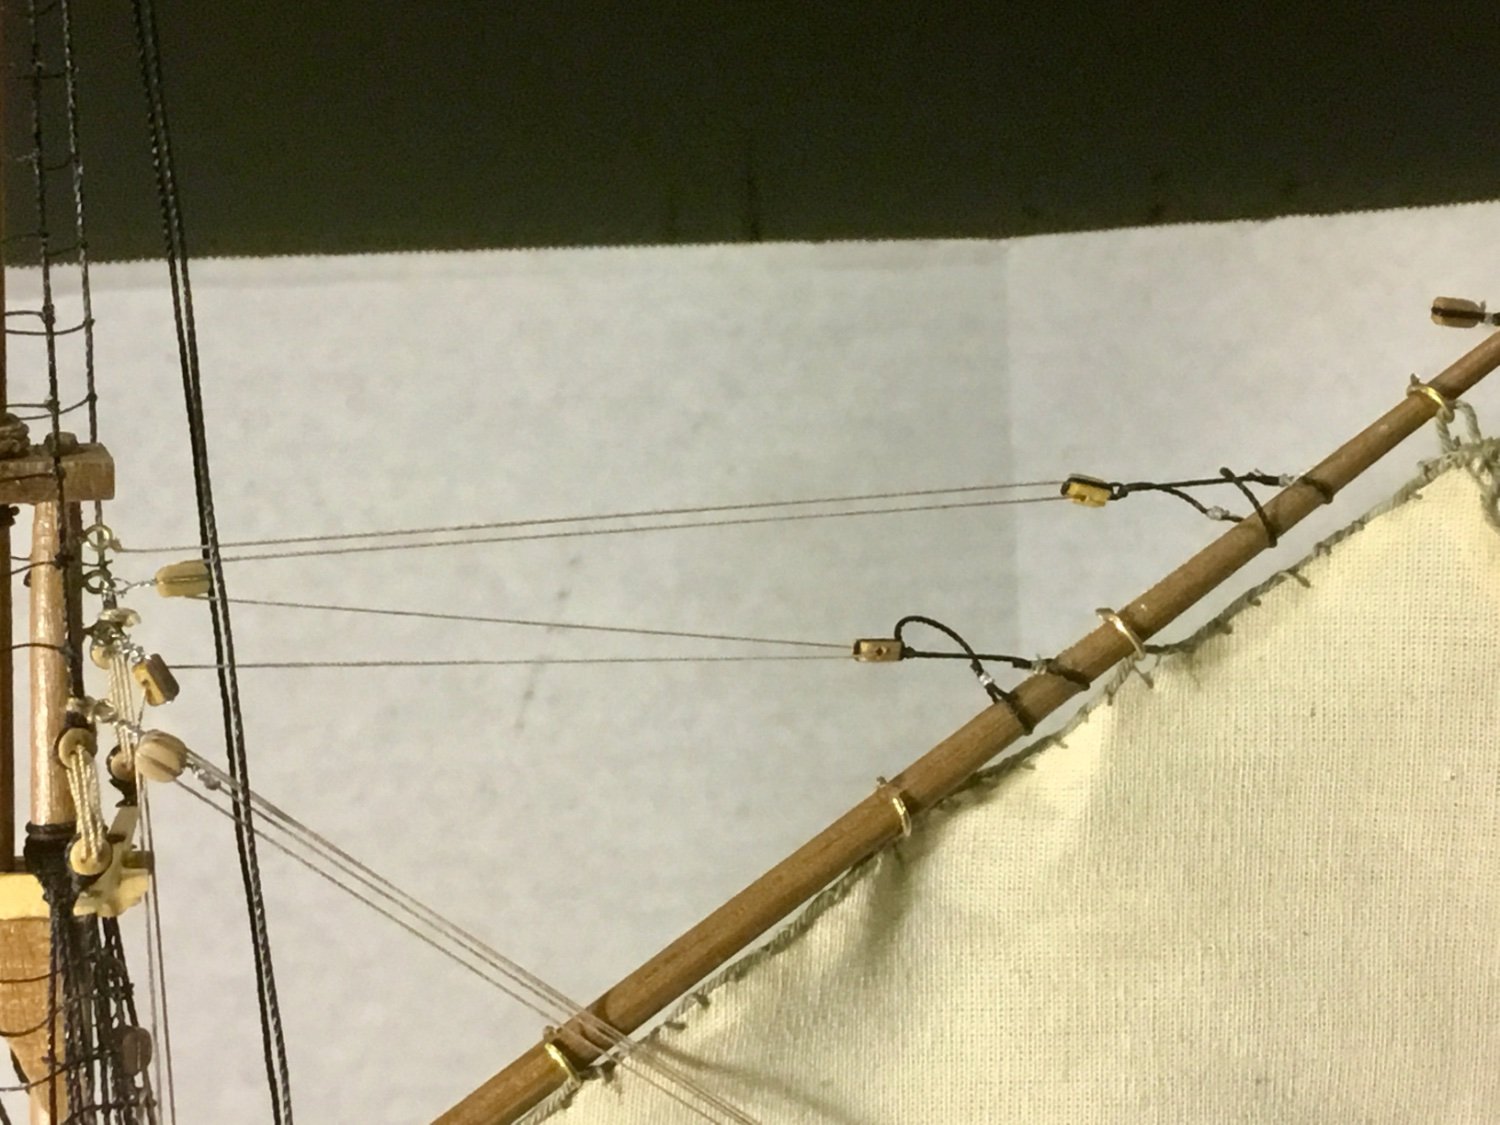
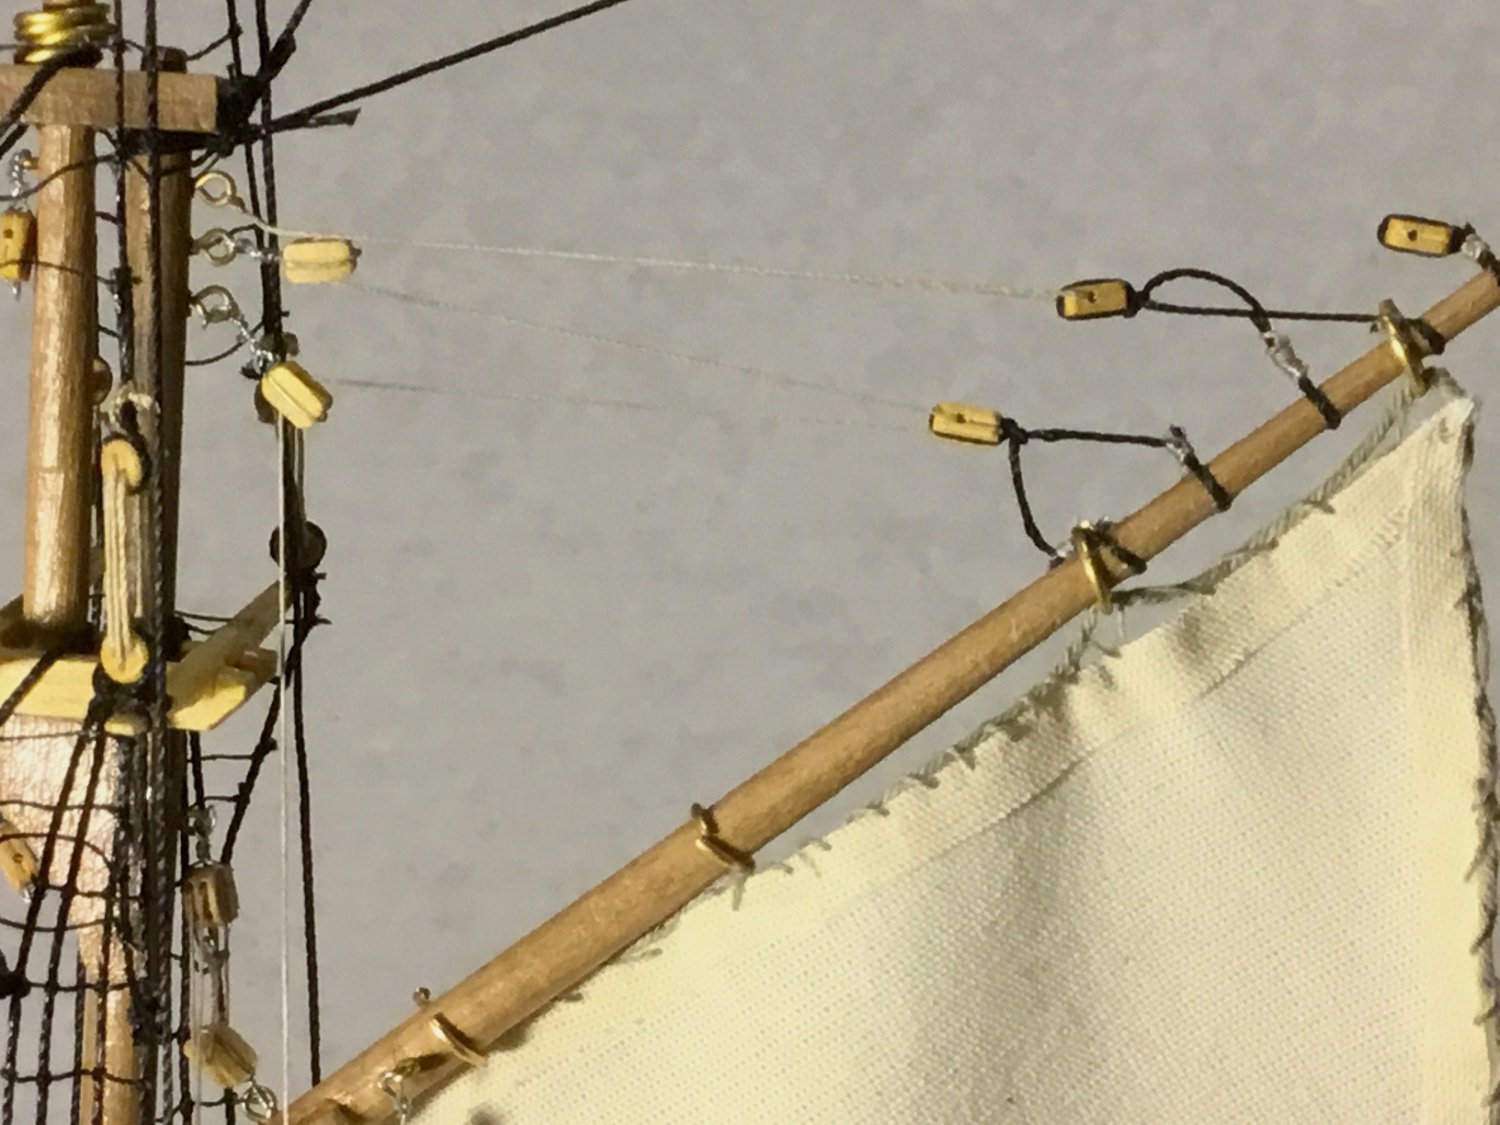
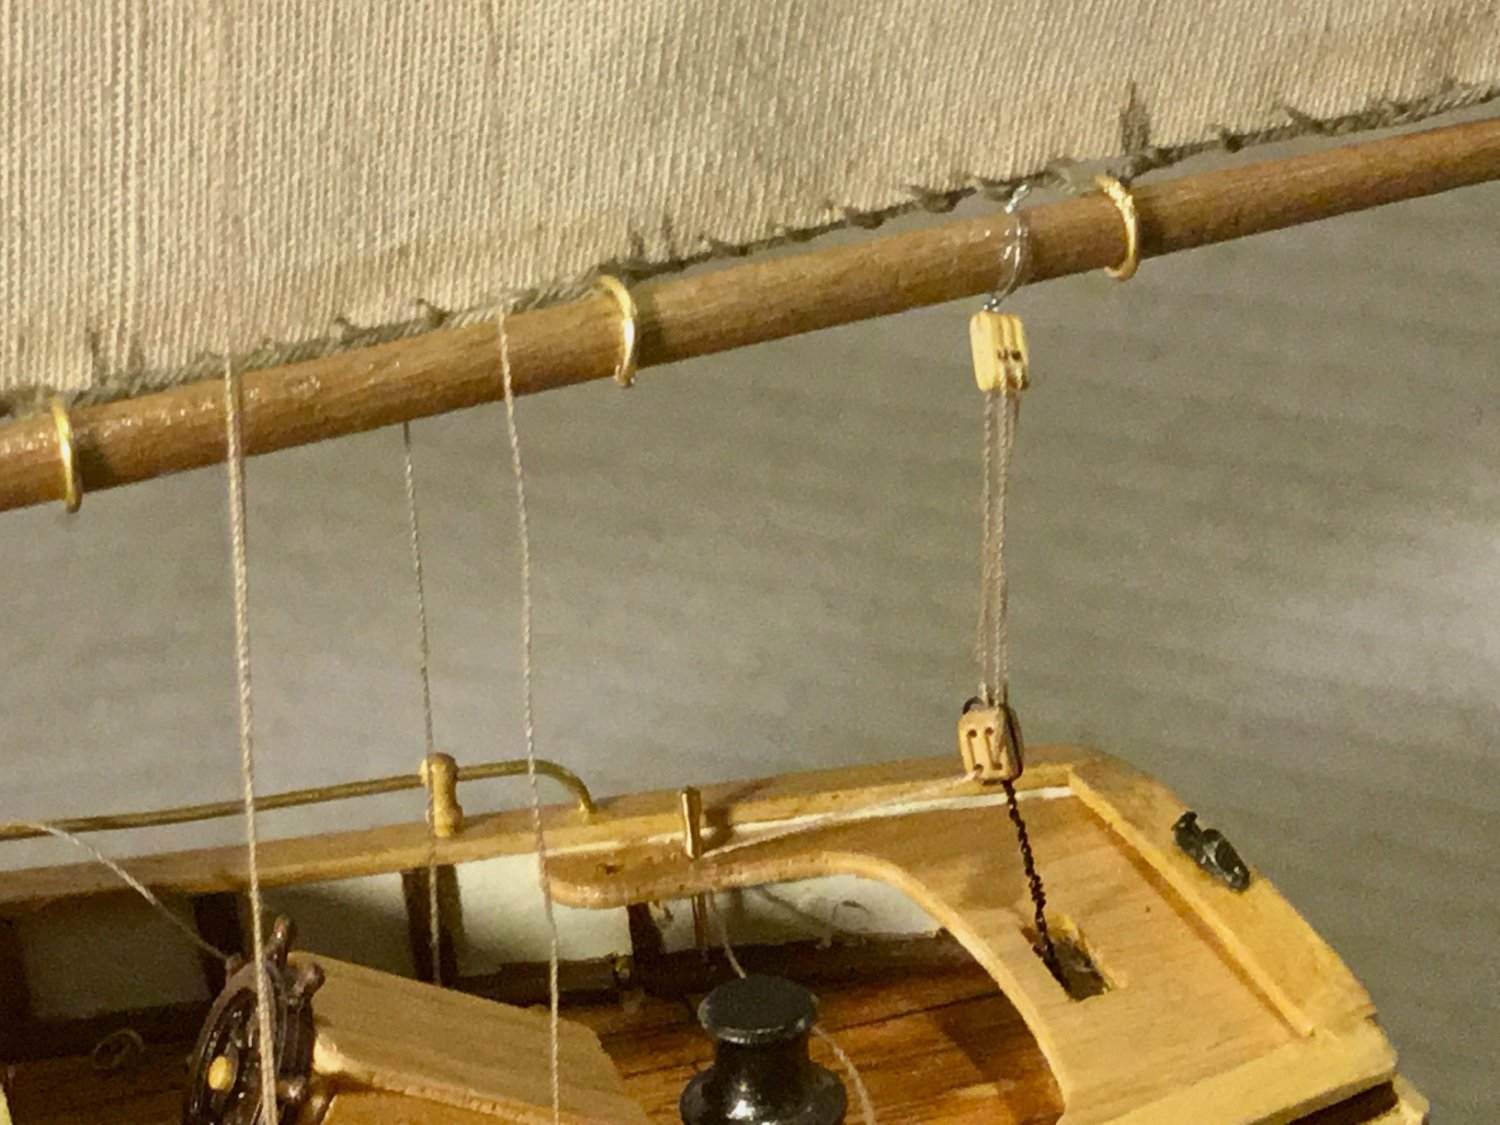
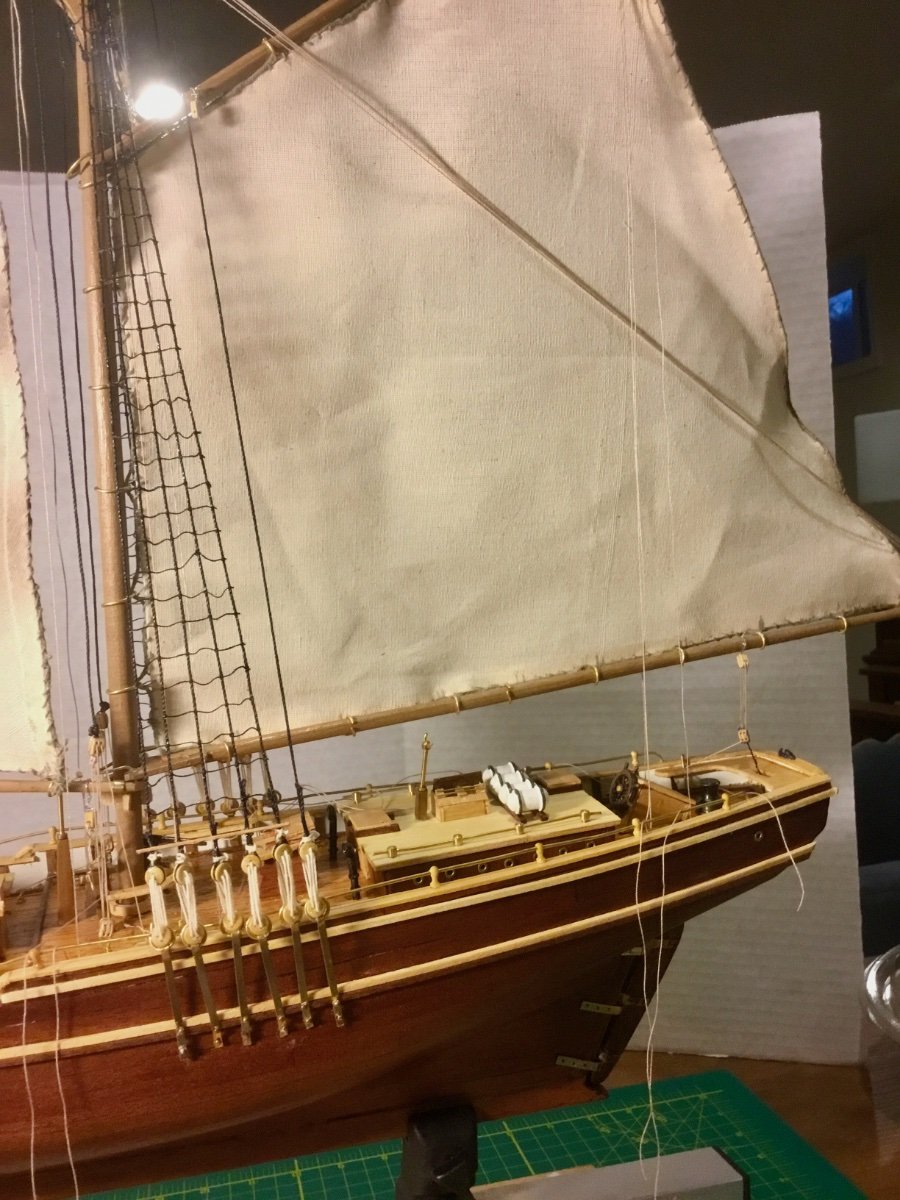
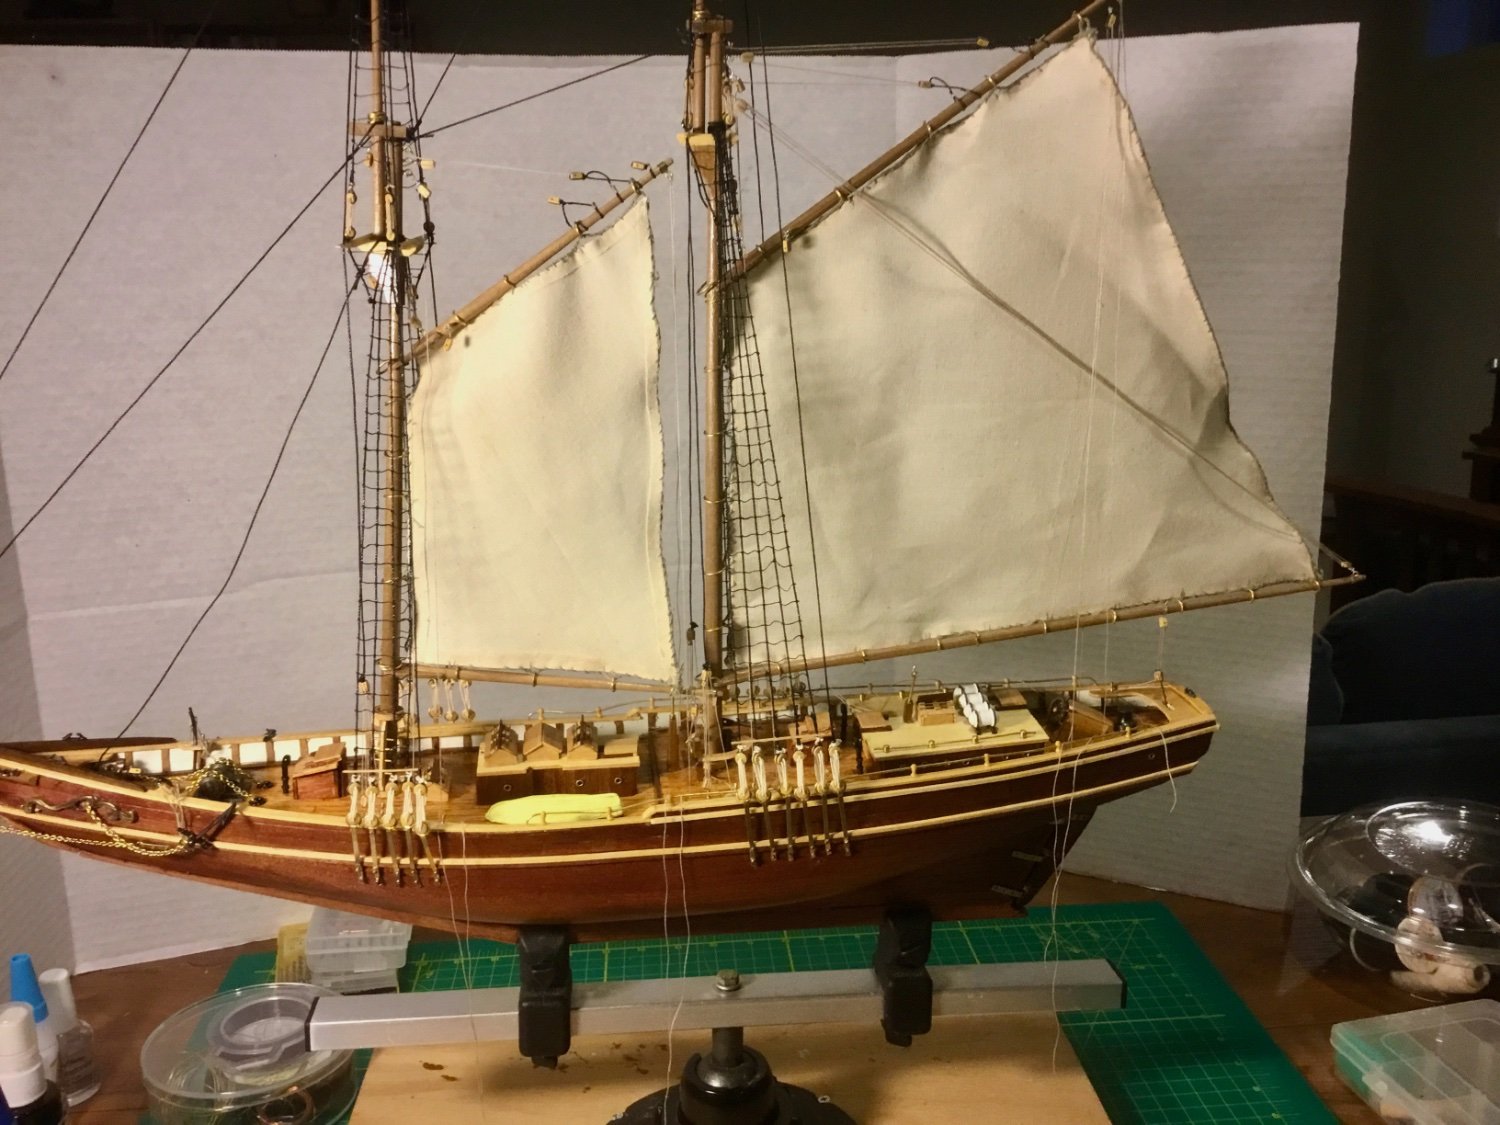
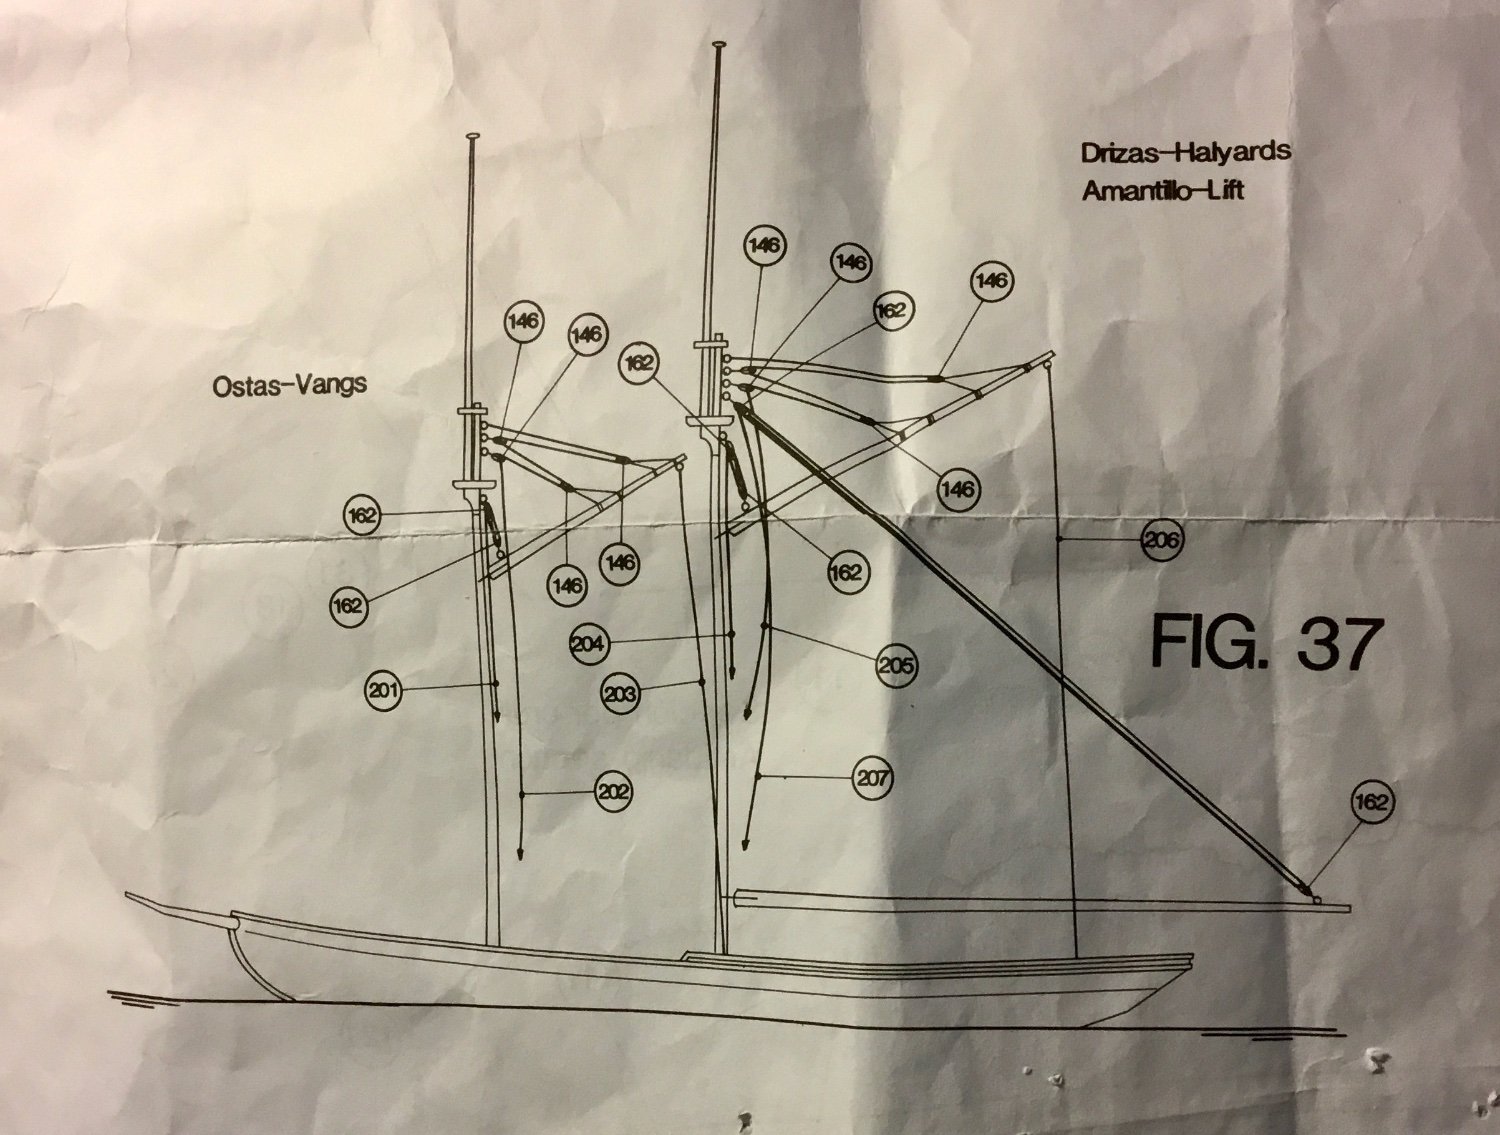
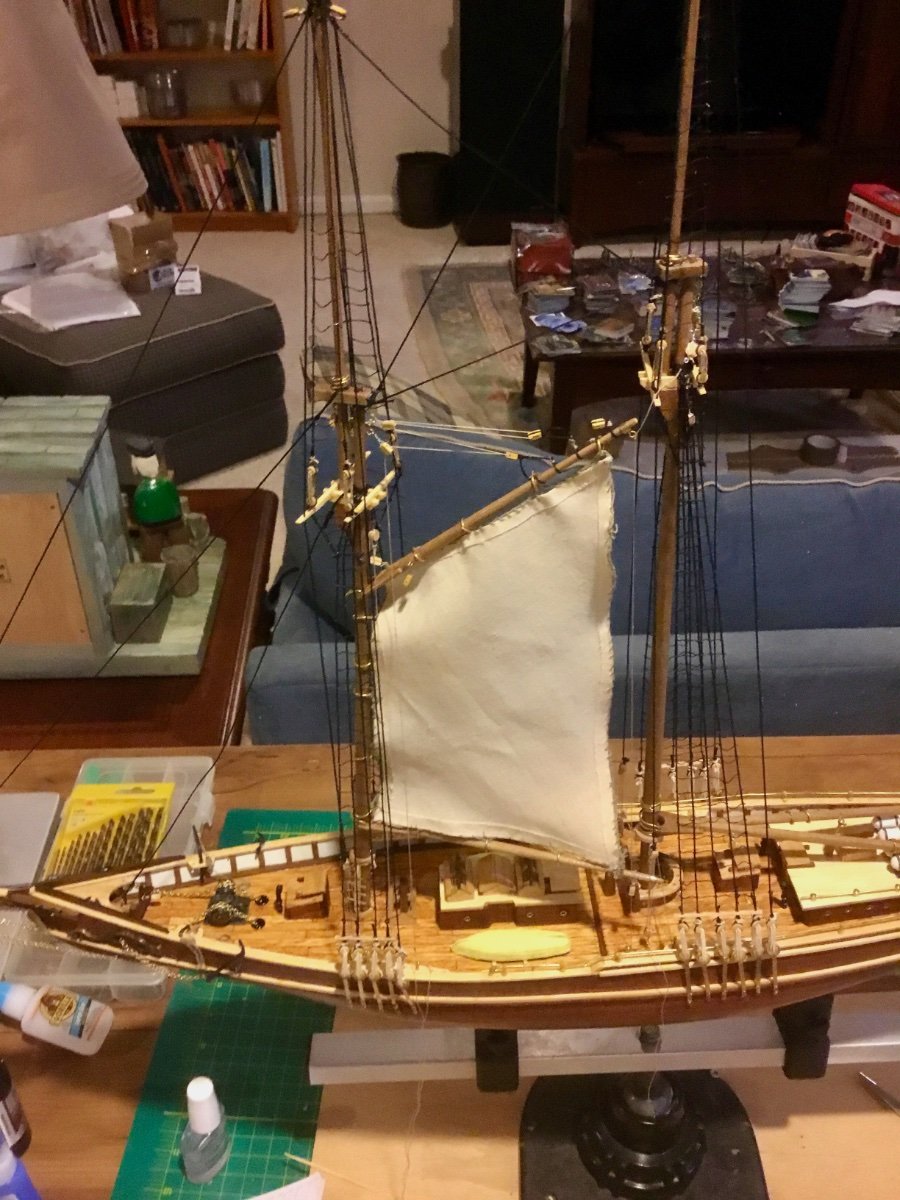
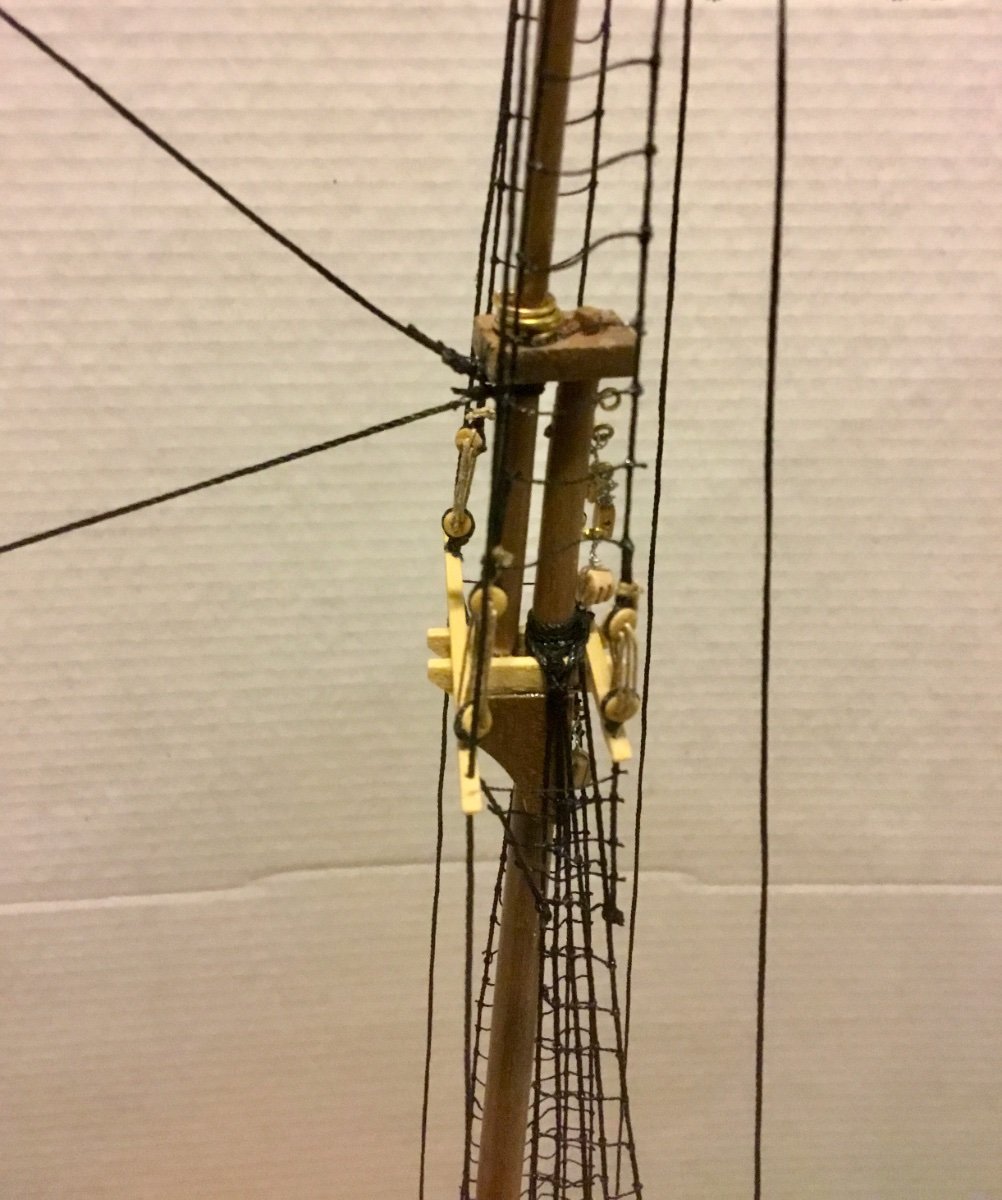
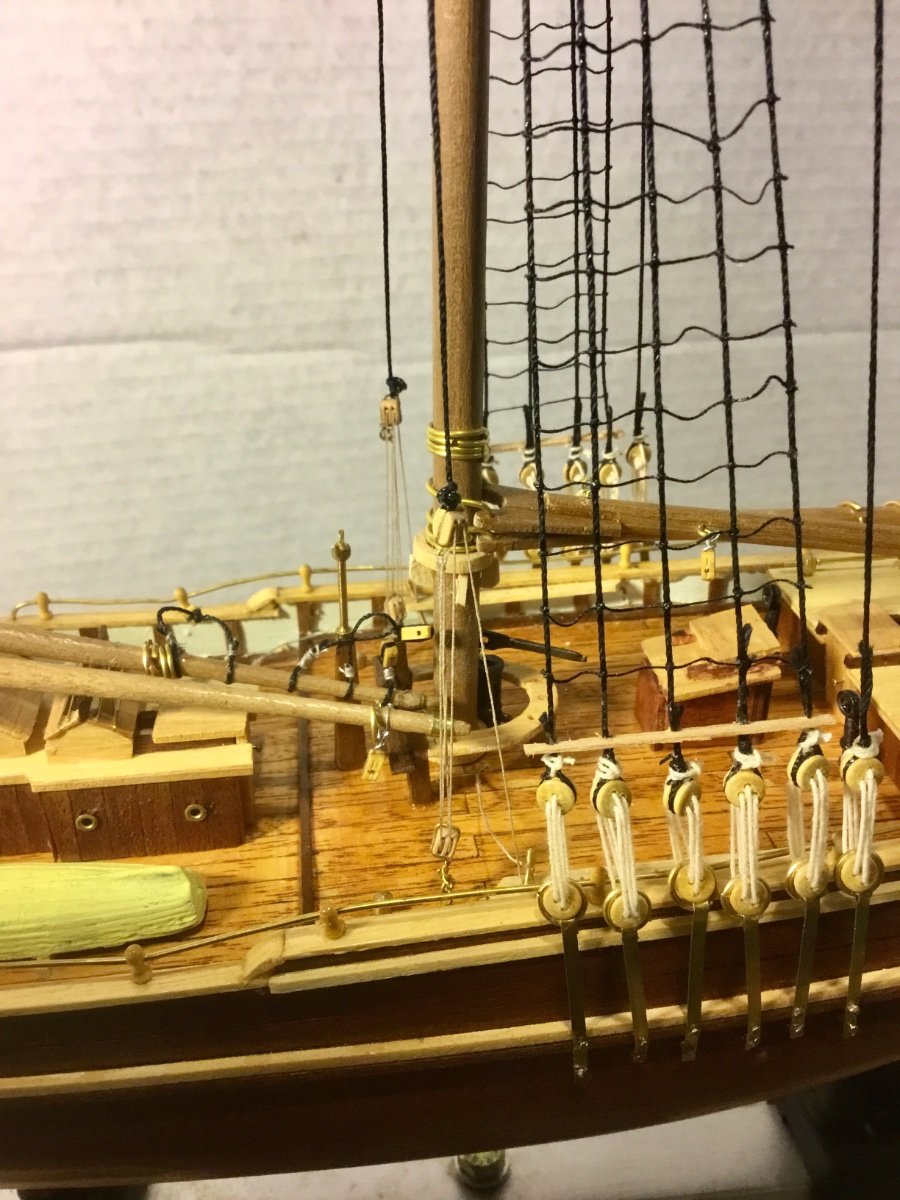
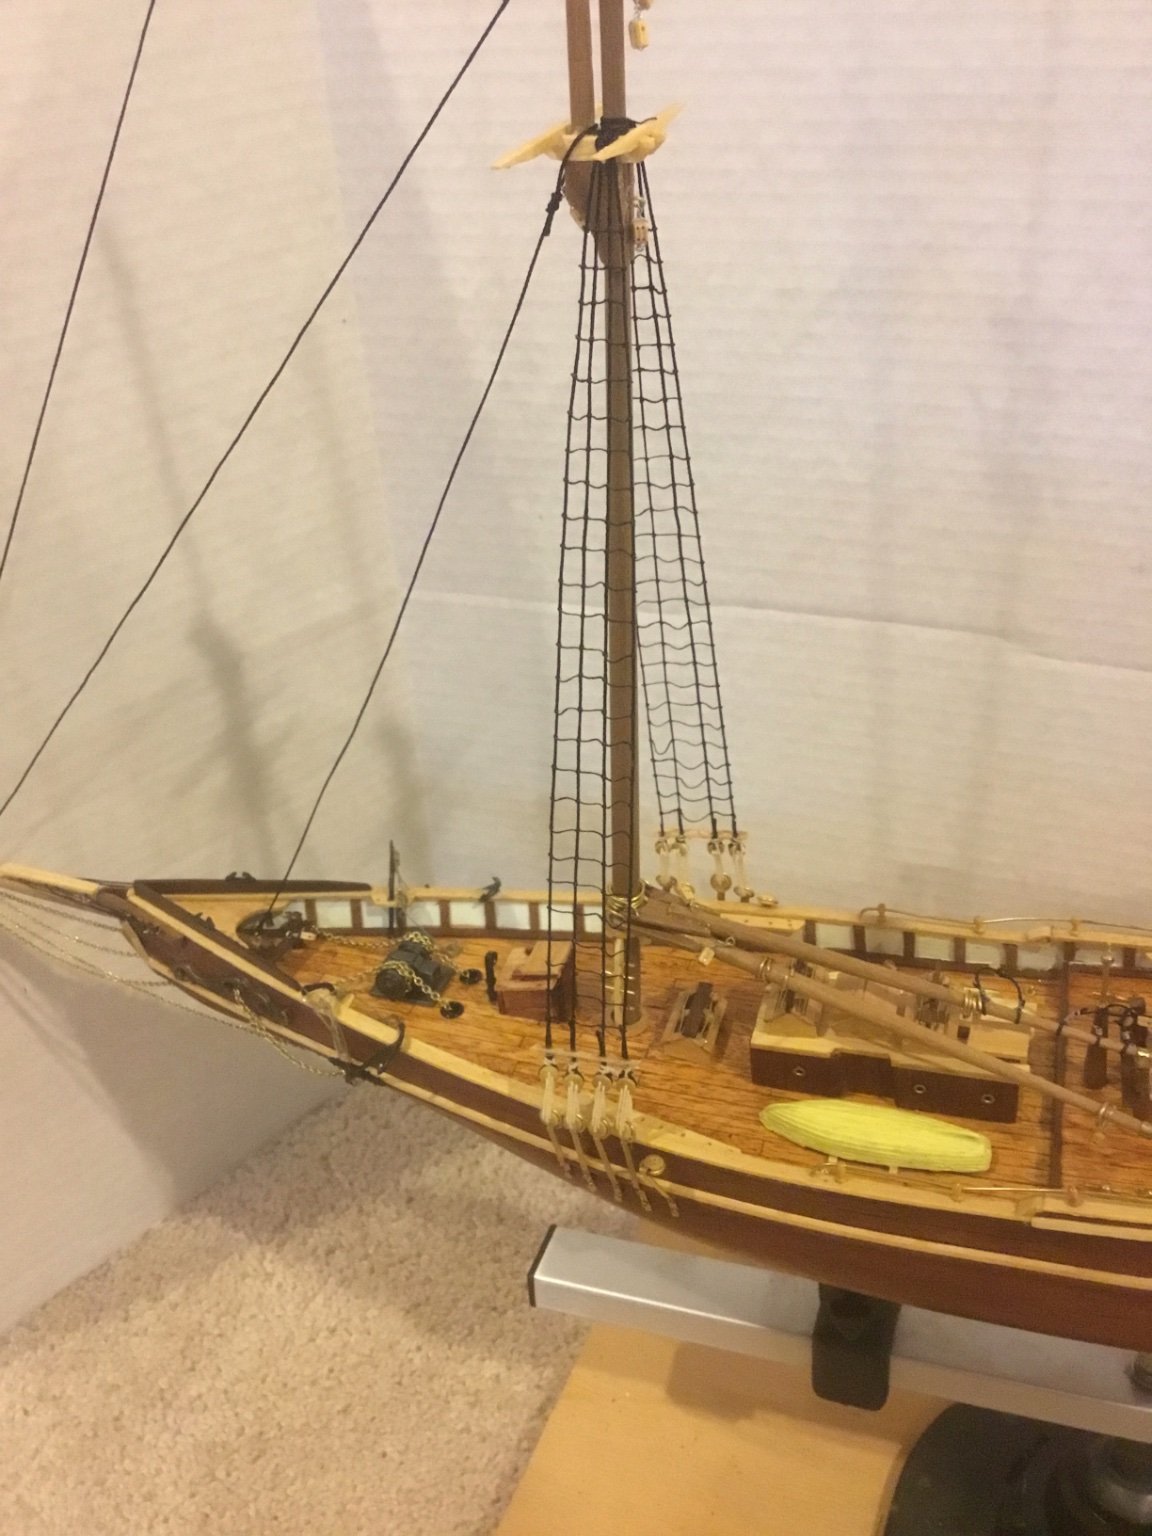
Fitted main sail to ship, including running rigging for Foremast and Mainmast gaff peak vangs (port and starboard , main mast gaff peak halyard, main mast boom lift, flag halyard and fore and main mast boom sheets. I have left the lines free (not glued at belaying points) so I can do final adjustments when completed rigging. Next to tackle will be the fore and main gaff top sails. I broke off the tip of the bowsprit in the process but was able to repair. I wanted to keep all the sail hems on one side of ship for appearance sake but goofed that up so I'll have to live with it as I don't have any leftover sail cloth. I think I like the look of the ship with sails so far.


-
I generally discard the plans and instructions after building the model but in the case I still have them. If you send me your name and address I will mail what I have to you. No cost, my treat! Since you just joined, hopefully you will create a build log like I did when you start to build the model.
-
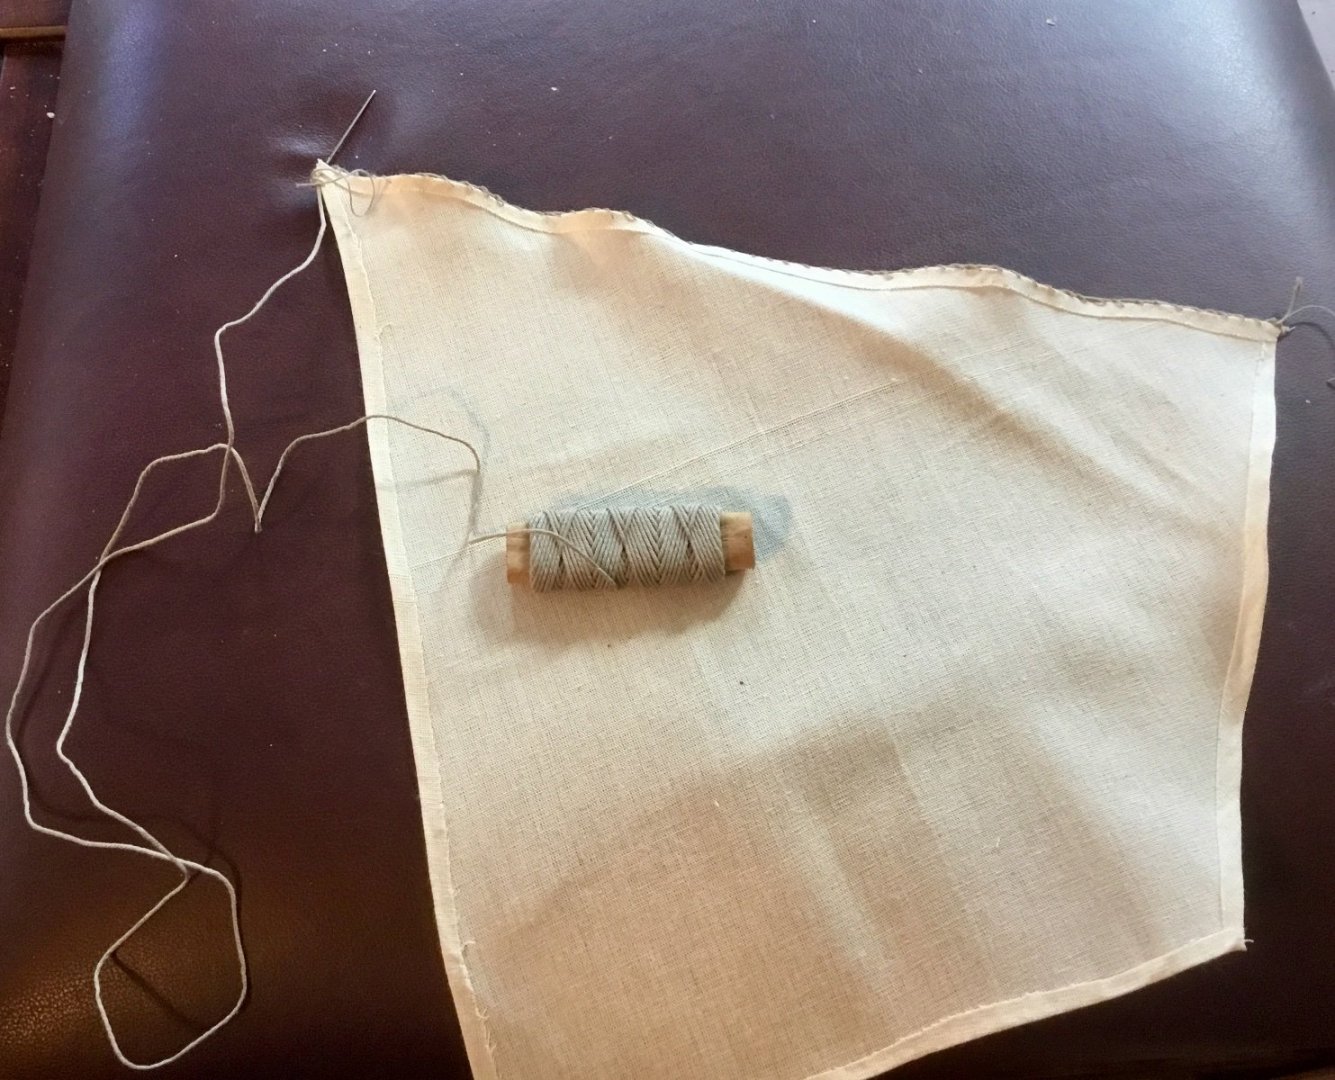
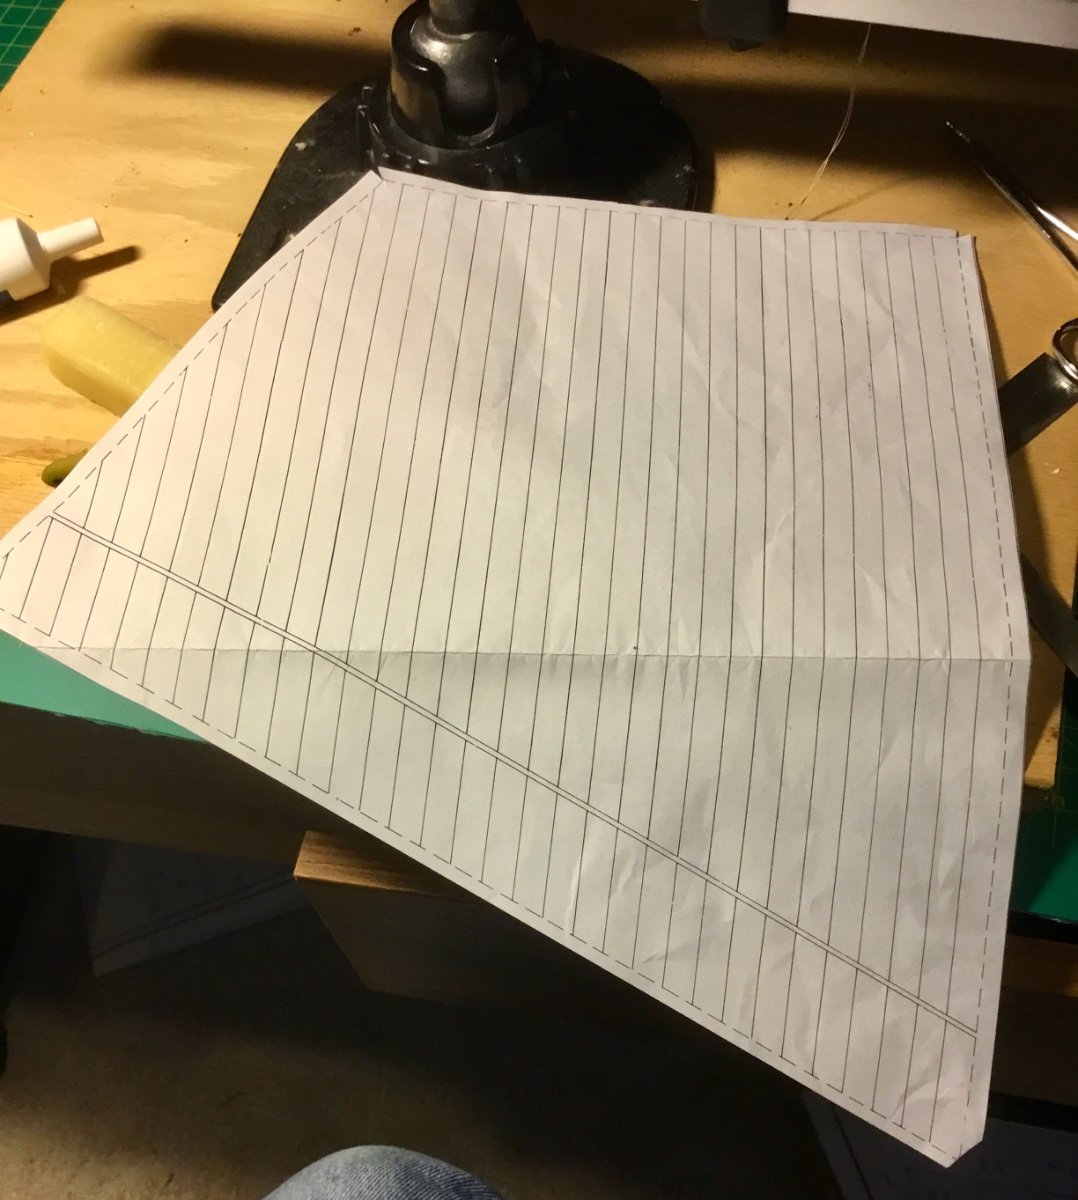
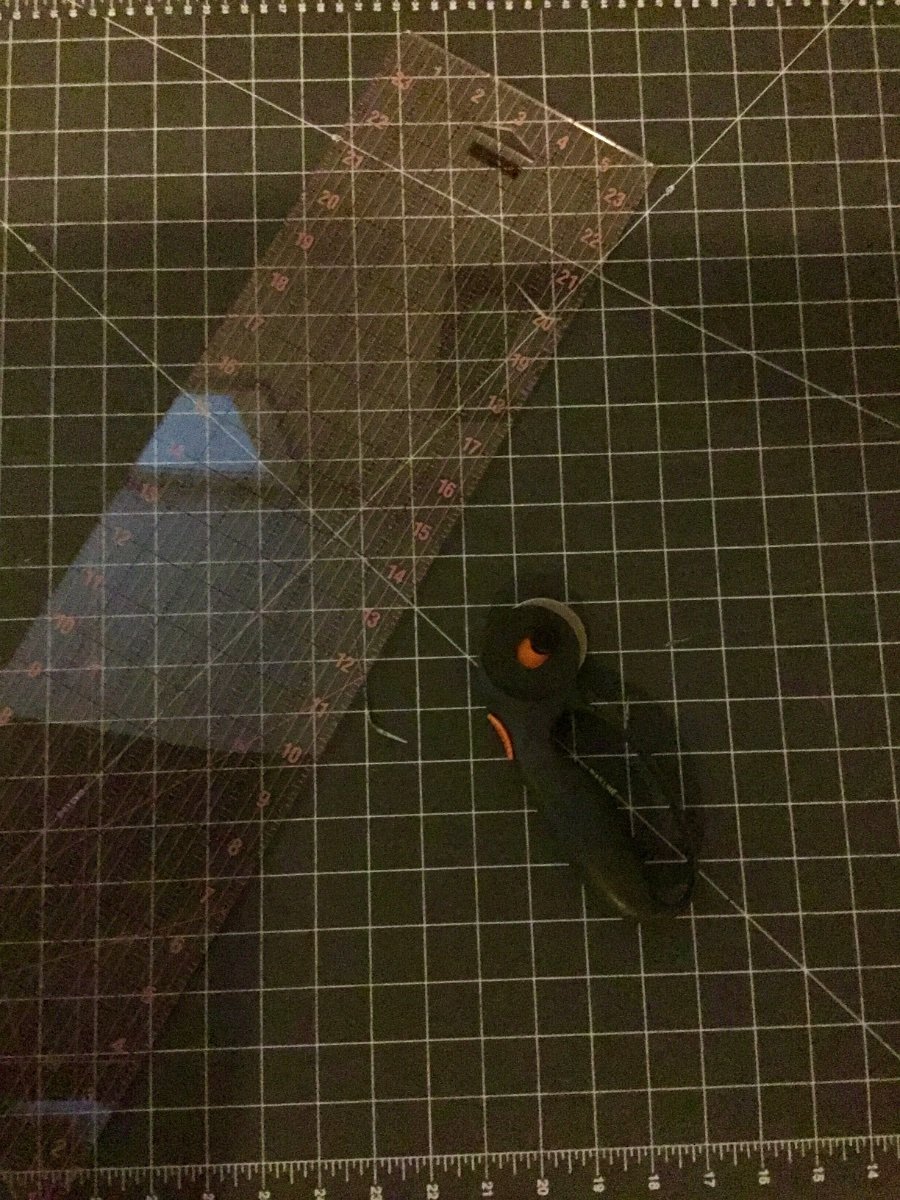
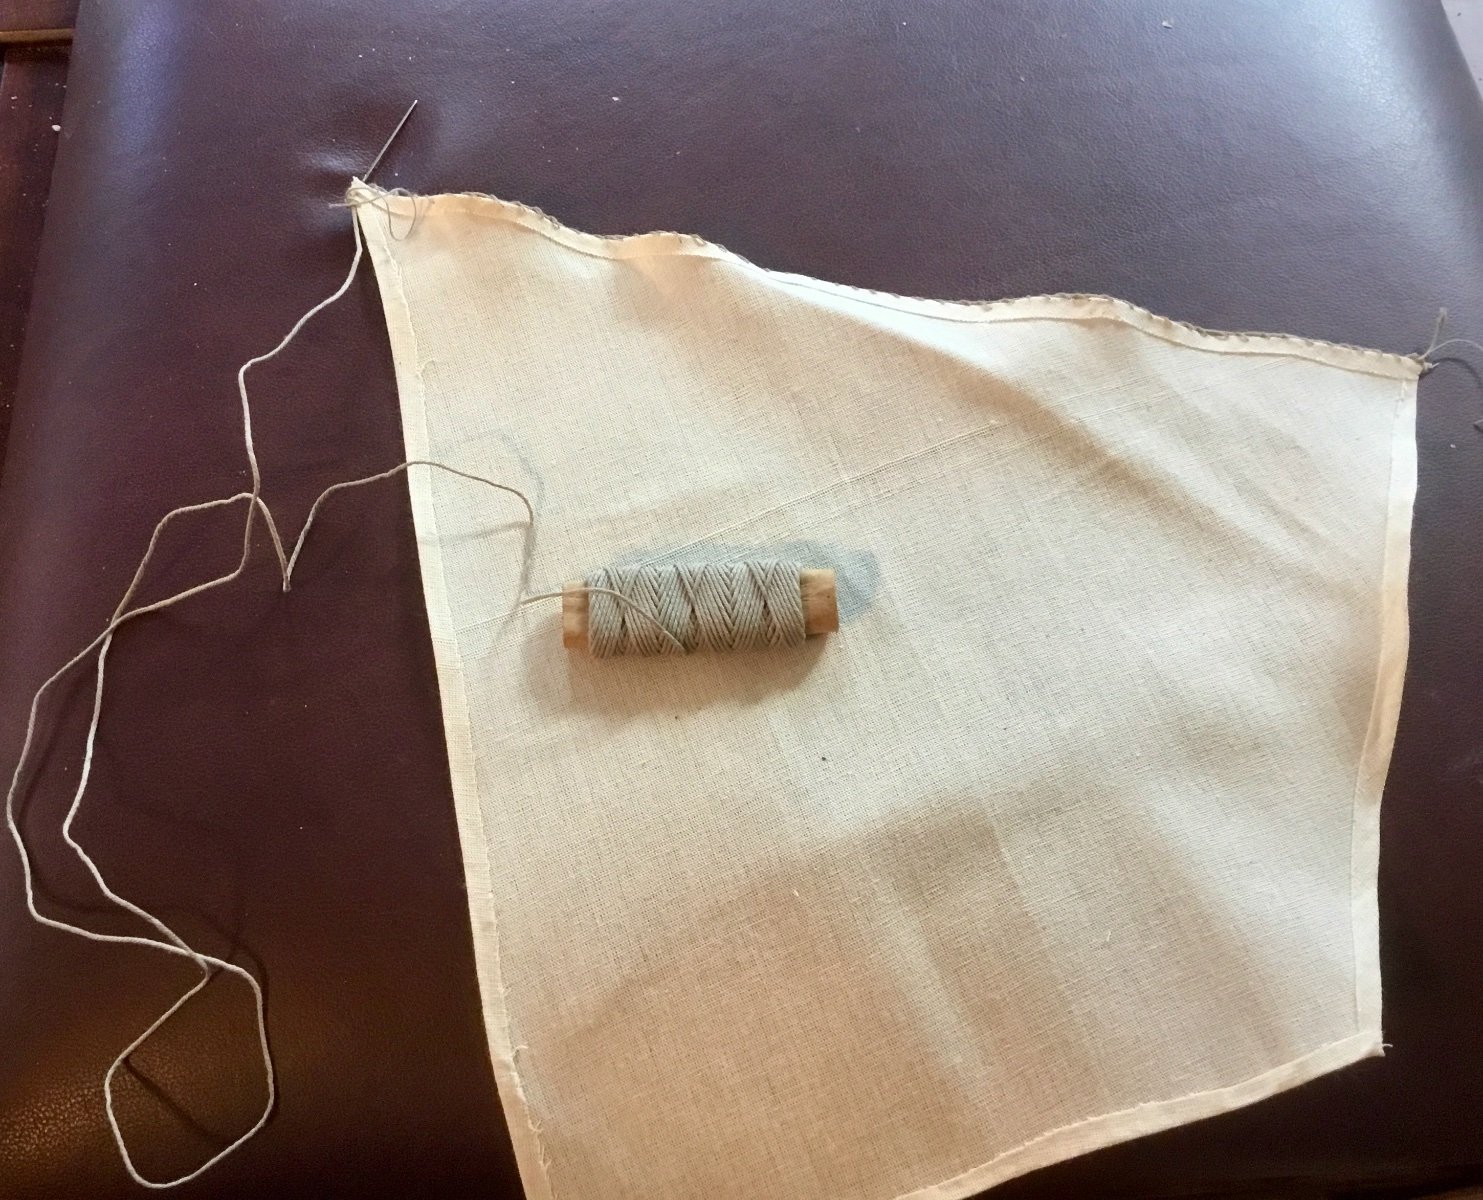
Began installation of running rigging. Decided to add sails. Using my wife's quilting tools I ironed out the sail cloth provided, used her special spray glue to attach the sail patterns and her wheeled cutter to cut out each of the sails. Instead of sewing the hems of each sail I am using a fabric glue. I started with the Fore Sail and hand sewed the bolt rope around the edges of the sail. I then mounted the sail to the ForeMast, boom and gaff via the mast rings provided in the kit. Then I threaded the lines for the Foremast gaff throat halyard, peak halyard and the first of the two aft peak vangs. Belaying each line to the appropriate location on the deck. Next I will work on the Main Sail.


-
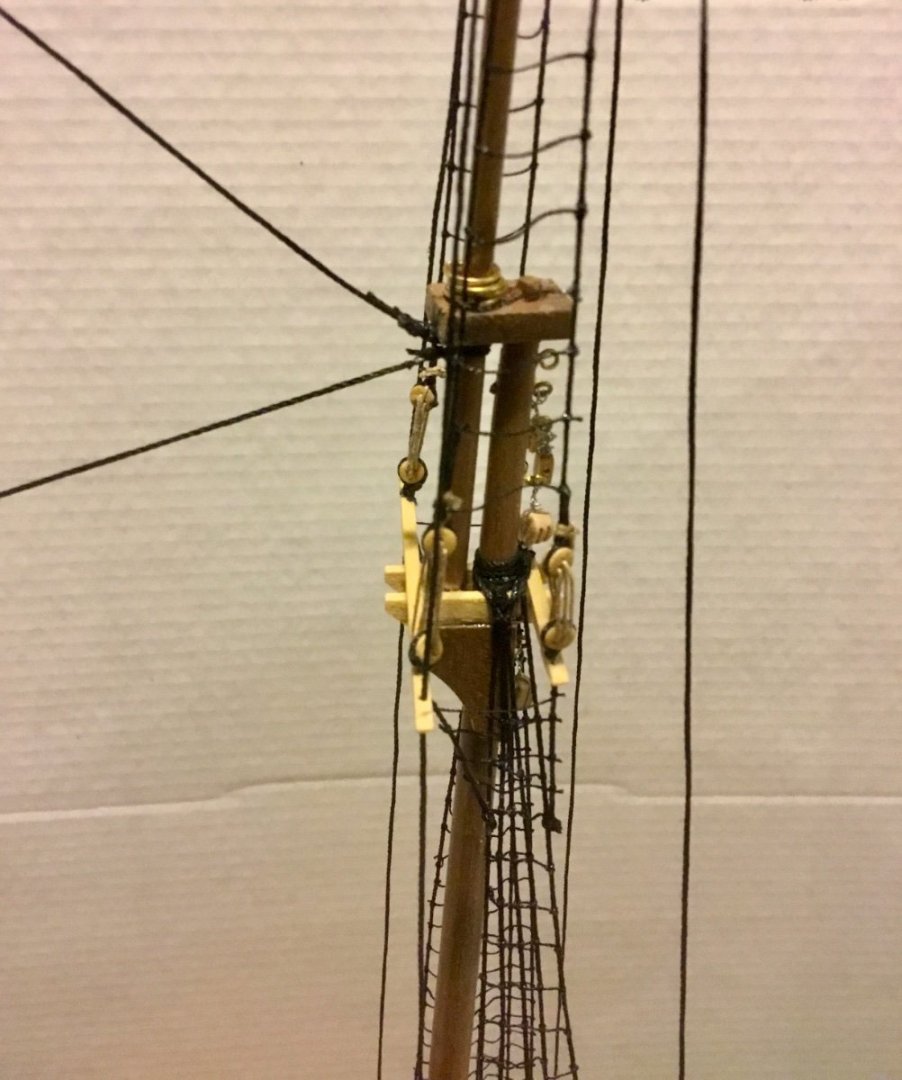
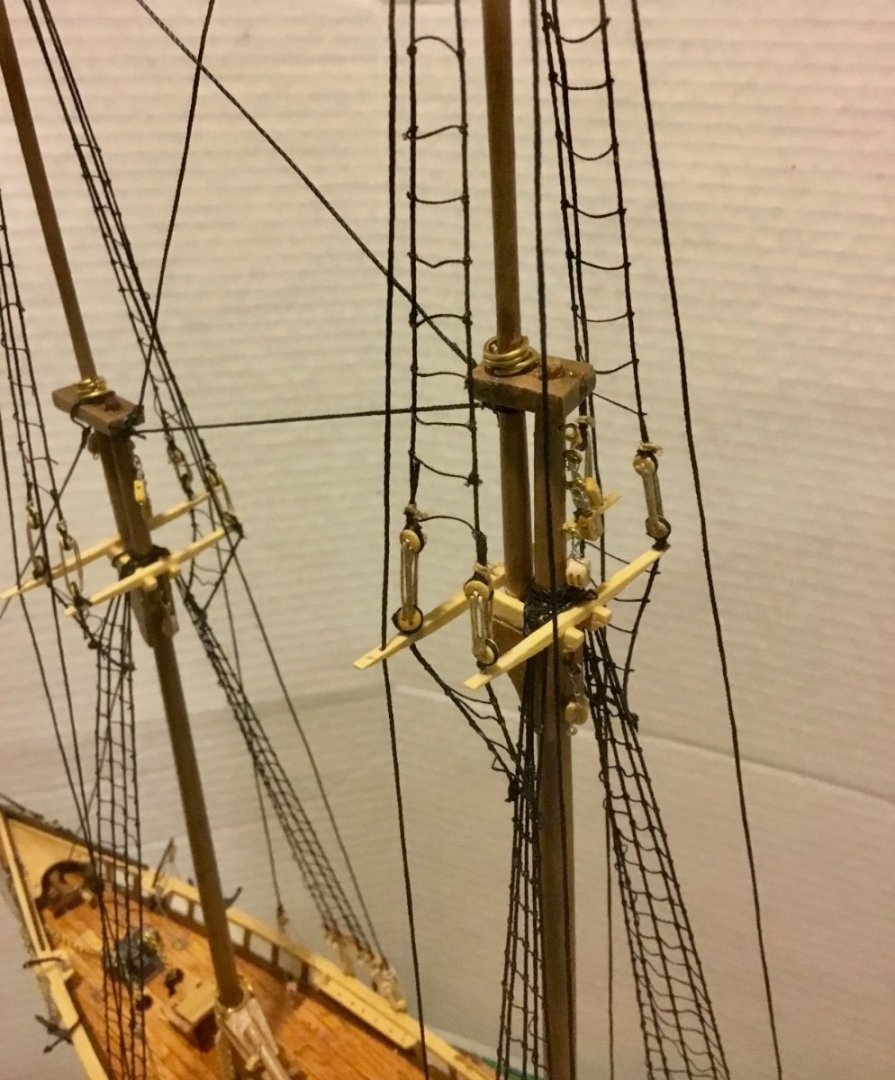
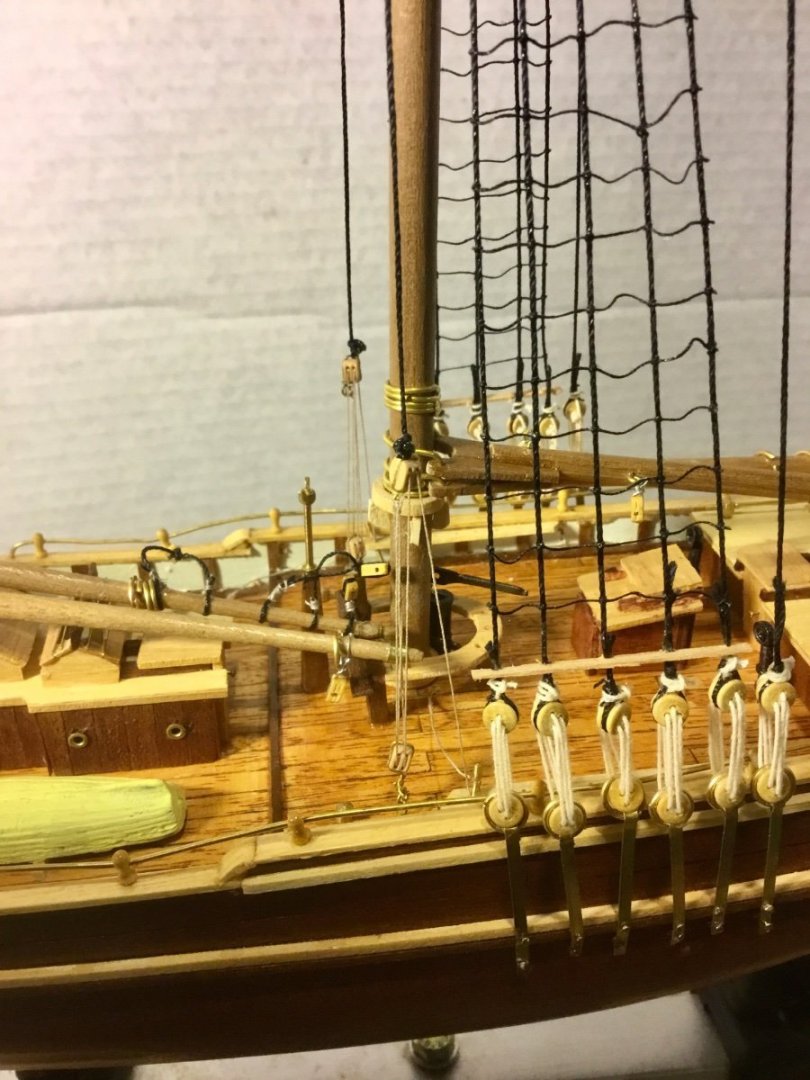
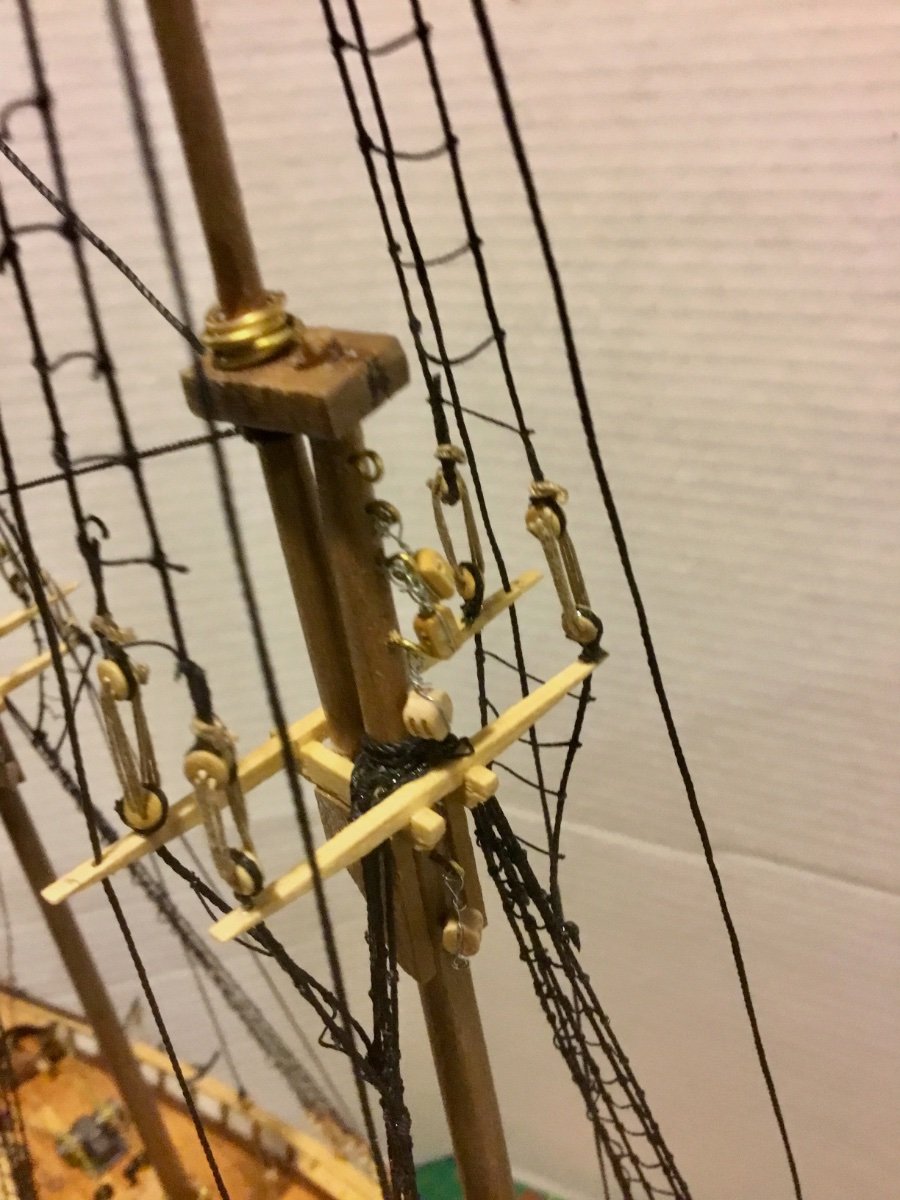
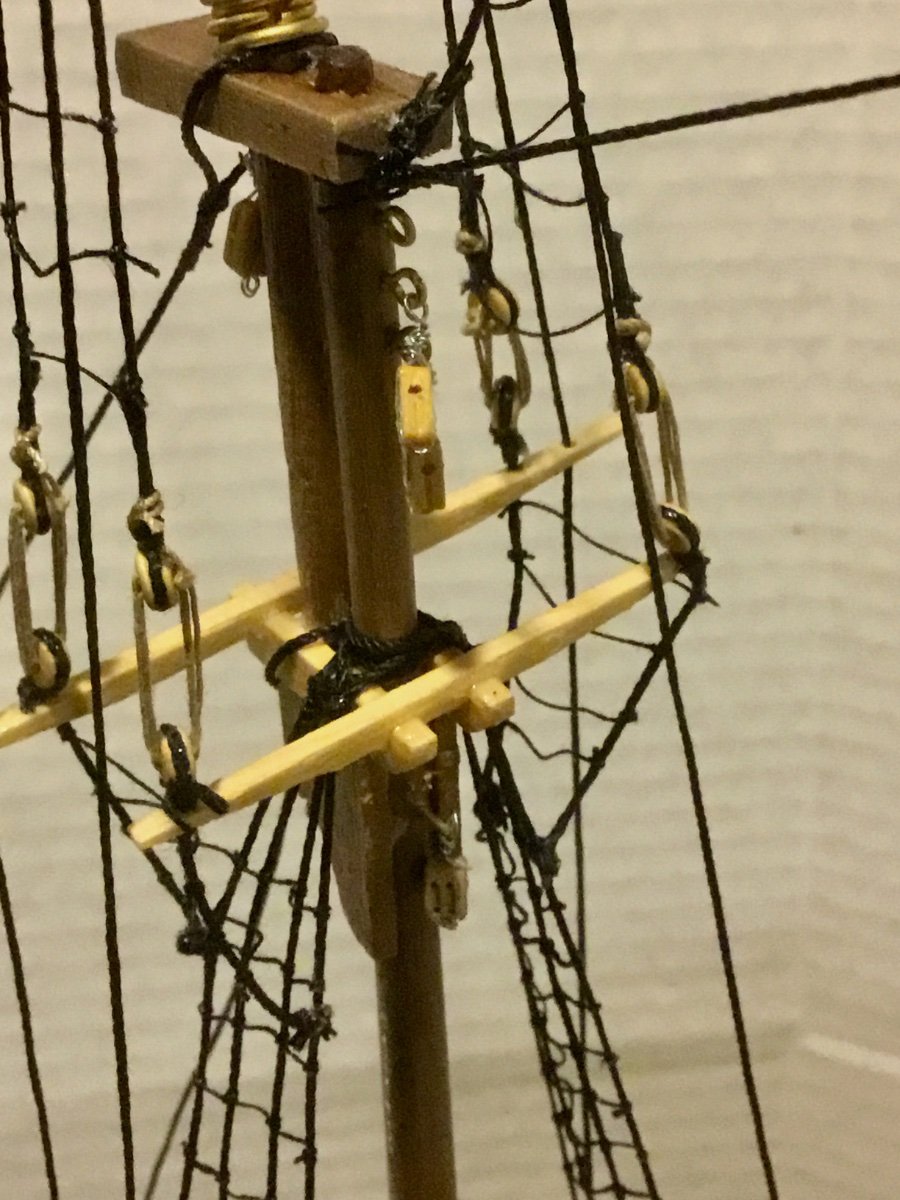
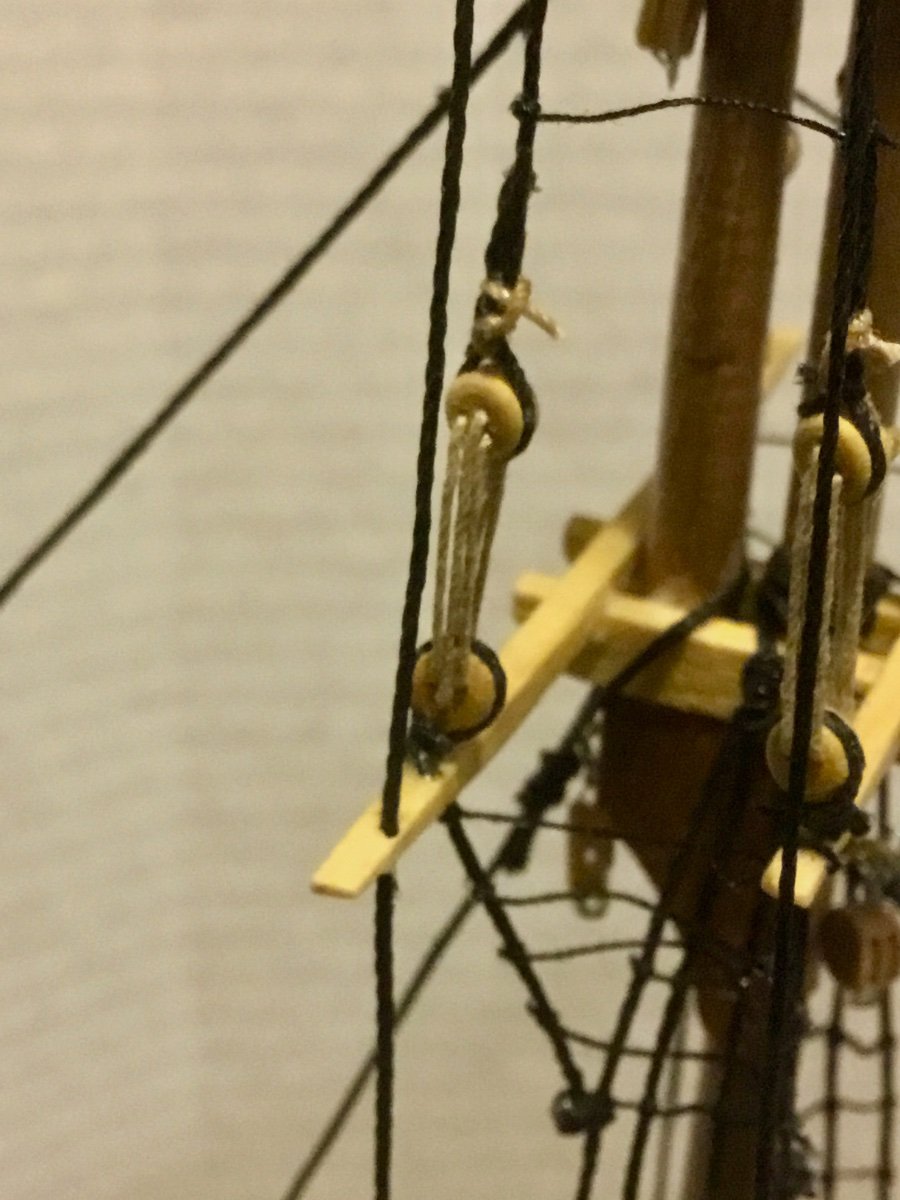
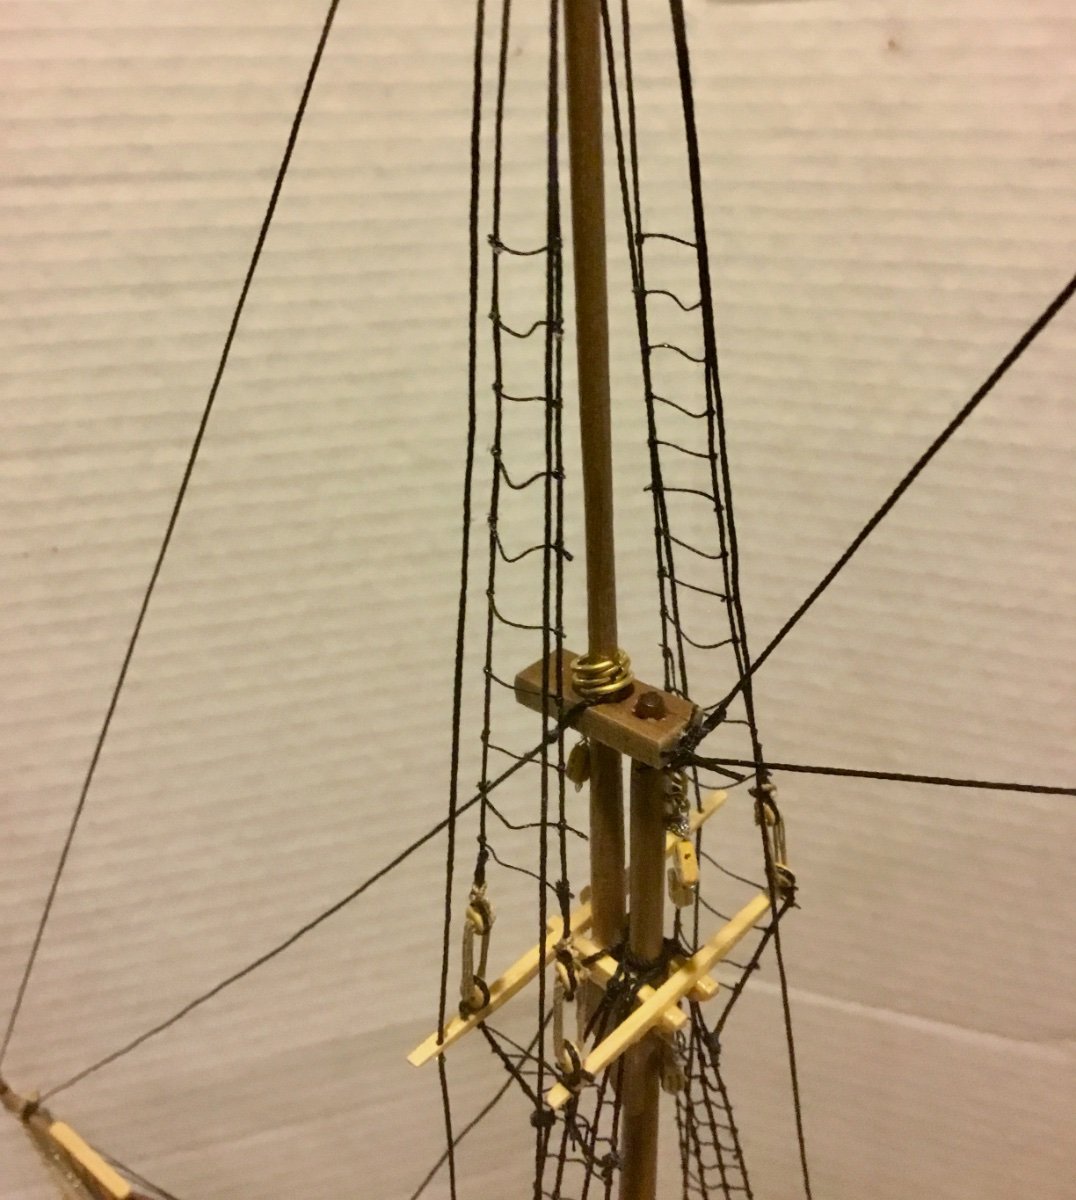
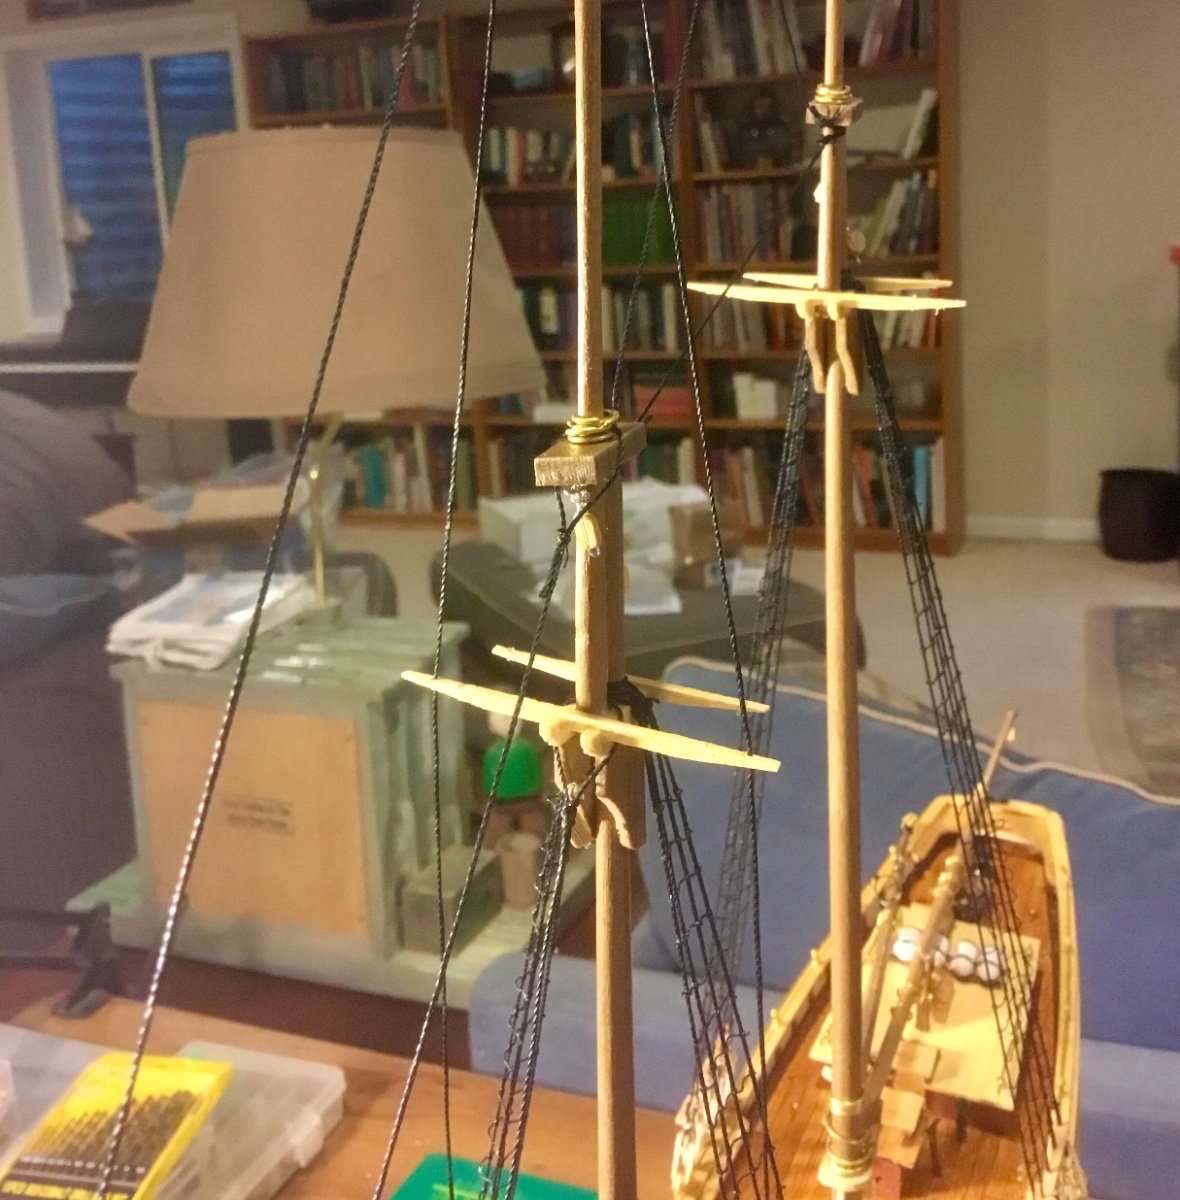
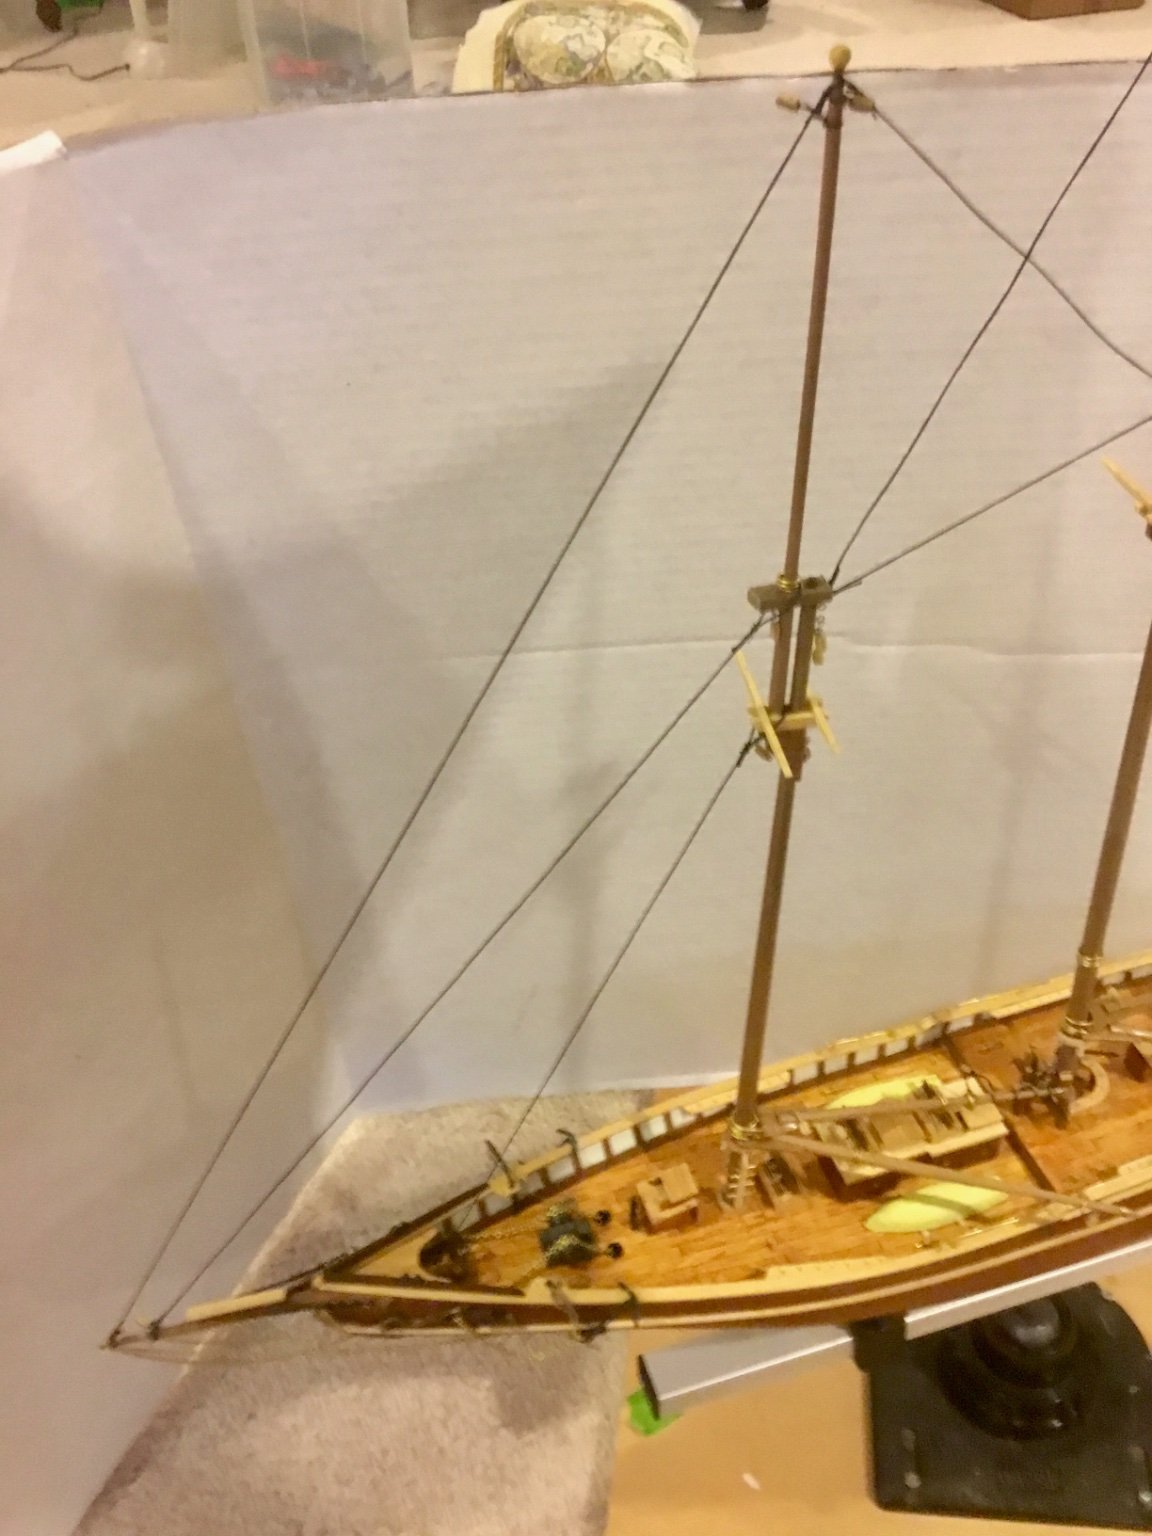
Installed topmast shrouds and futtocks with ratlines to the Foremast and Mainmast. Threading the 3mm deadeyes was no fun and installing the ratlines working around the already installed backstays was no fun either, but I got it done. Now on to the running rigging.


-
Reduced the size of one of the image files that would not upload from 728kb to94 kb using preview on the MacBook and it loaded OK. Is there a size limit on uploads? other images of greater size ( more than 1mb) loaded fine. Anybody have an idea?
-

Completed installation of Foremast and Mainmast mobile and fixed backstays.For some reason I got "An unknown server error -200" on half my photos when trying to upload. Have no idea why? Tried multiple times. Always the same photos, but they display fine on my MacBook.
-
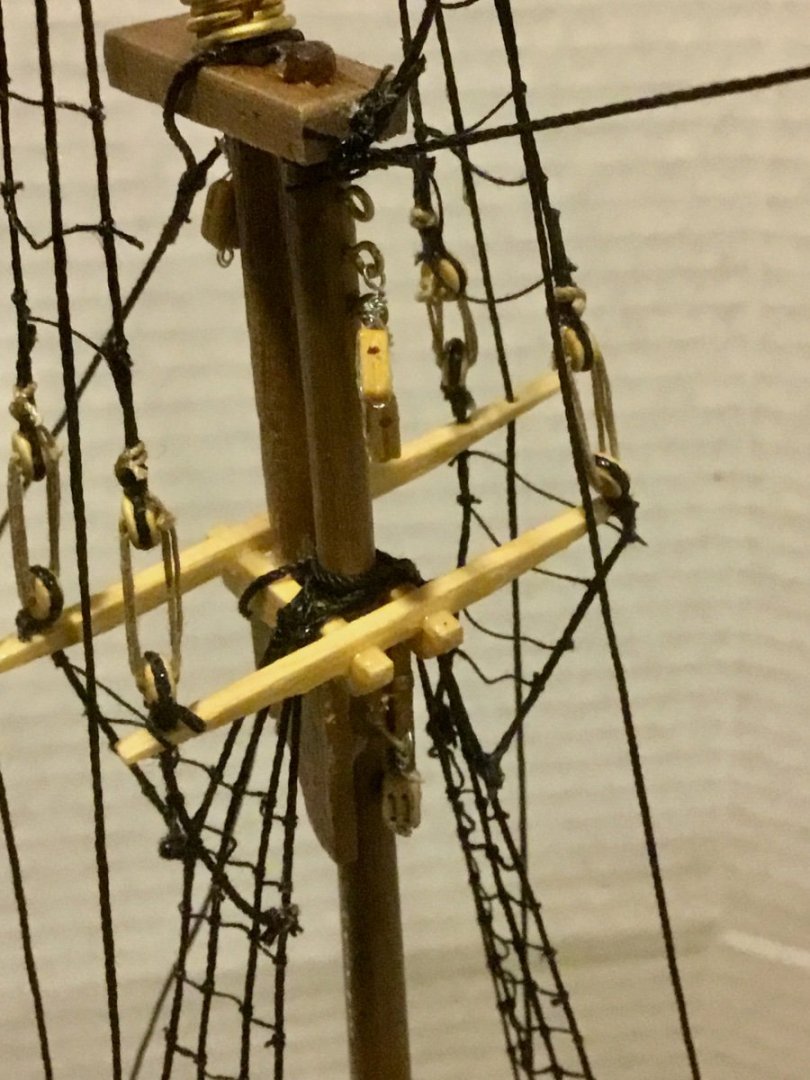
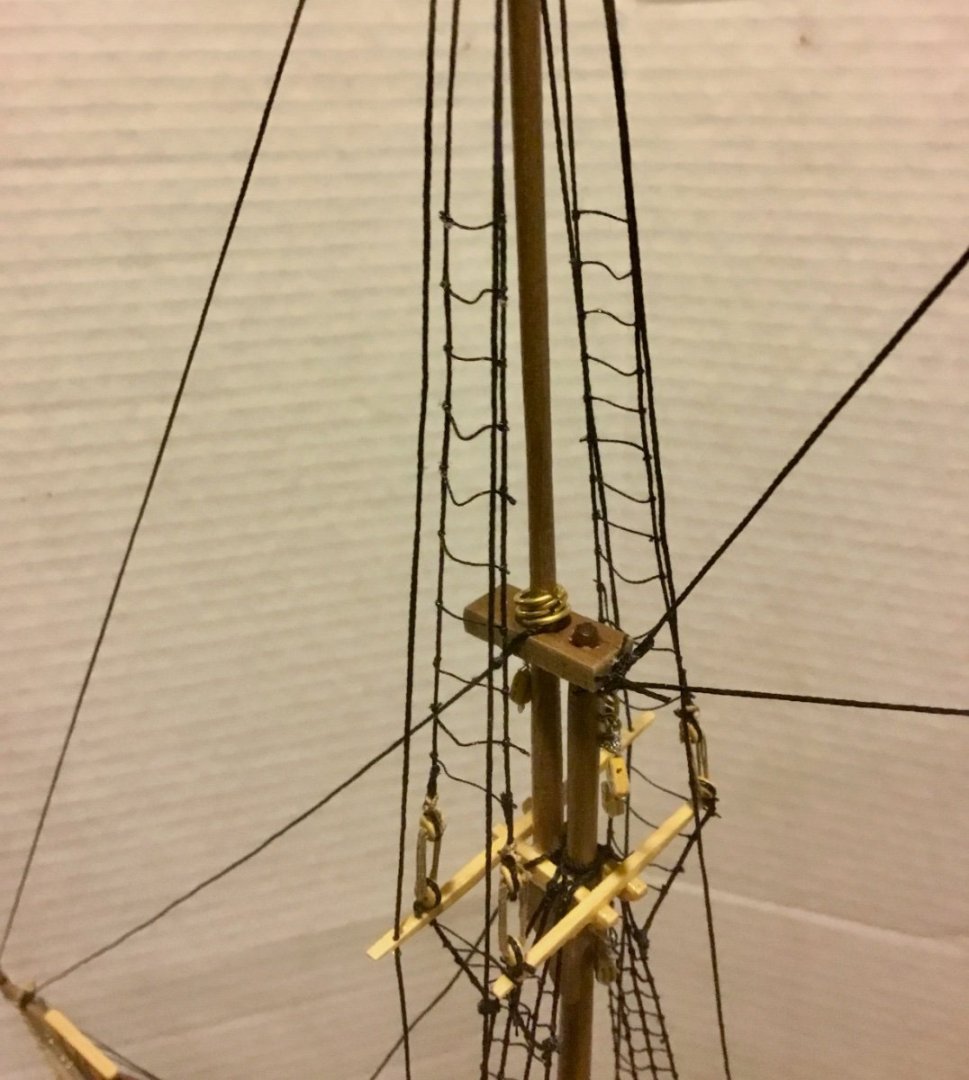
Slow going, but I finally finished the main mast shrouds and ratlines. The ratlines were fairly easy, but monotonous.

-
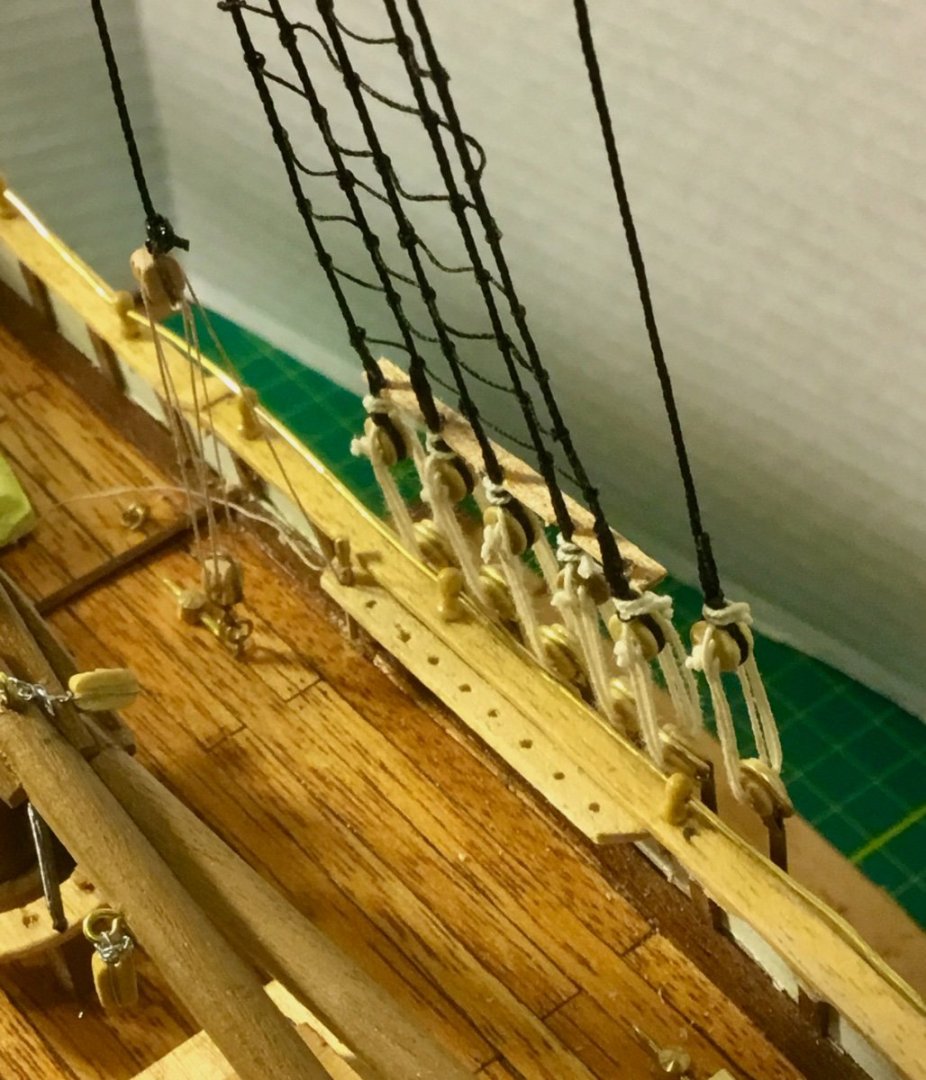
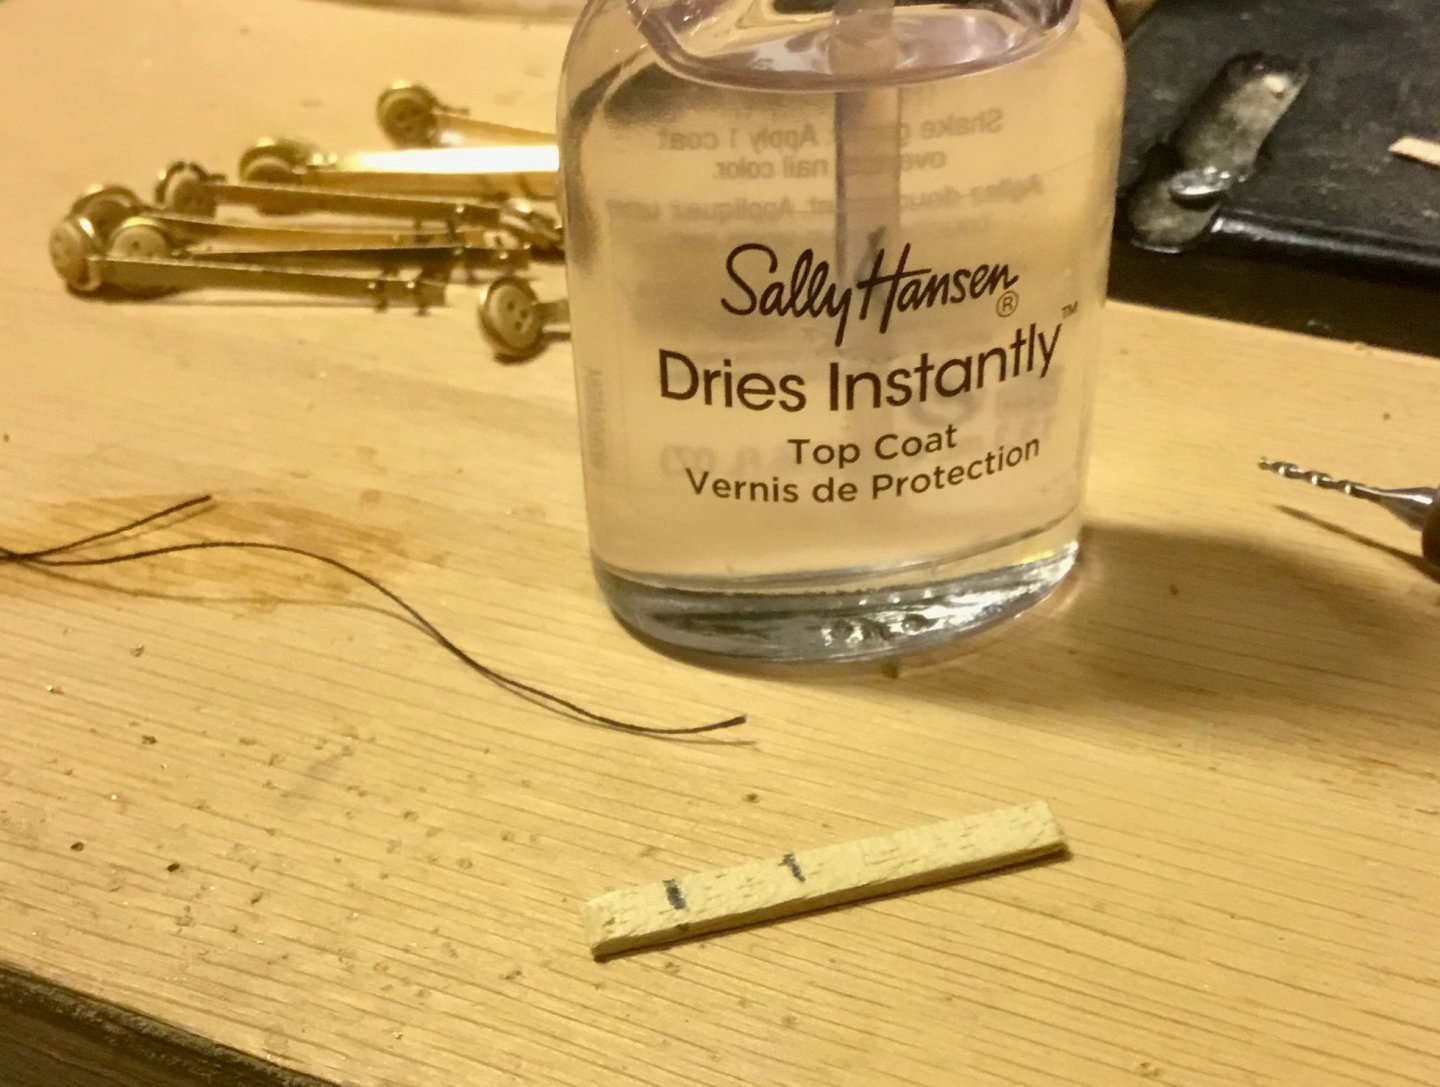
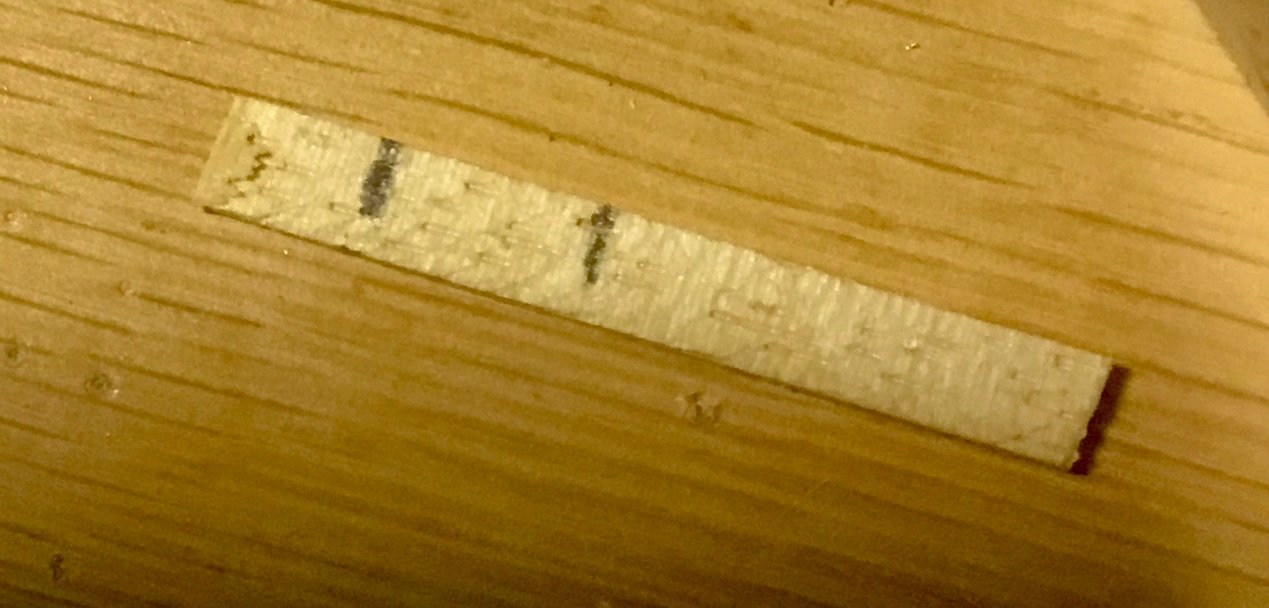
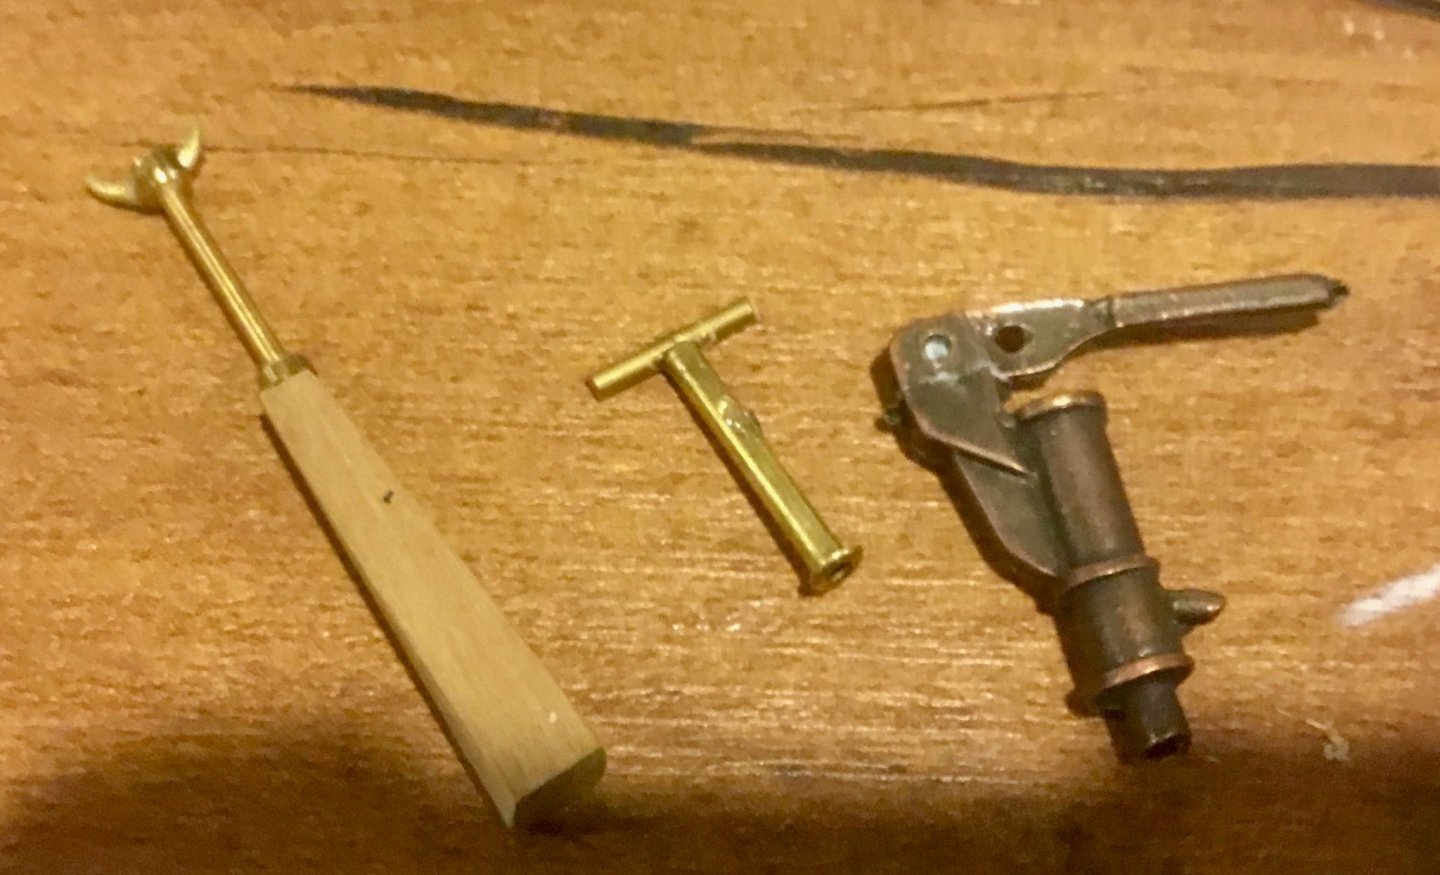
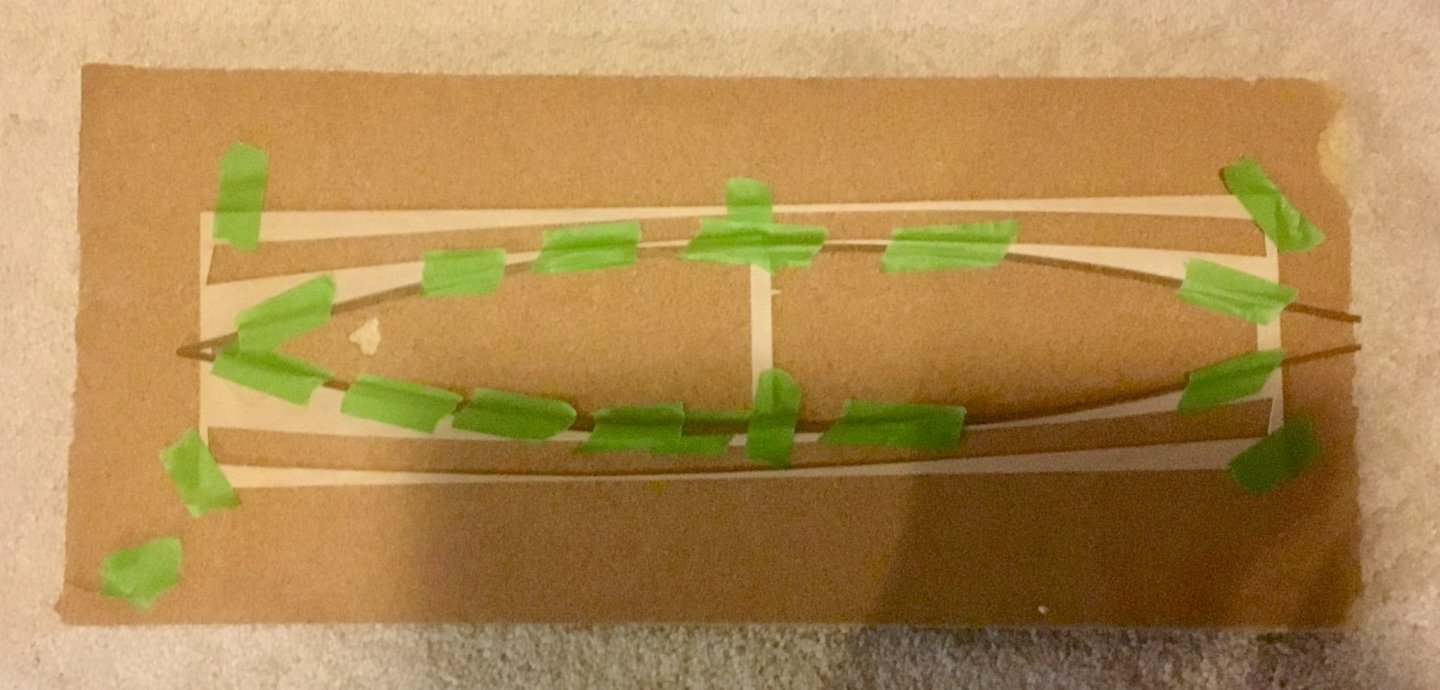
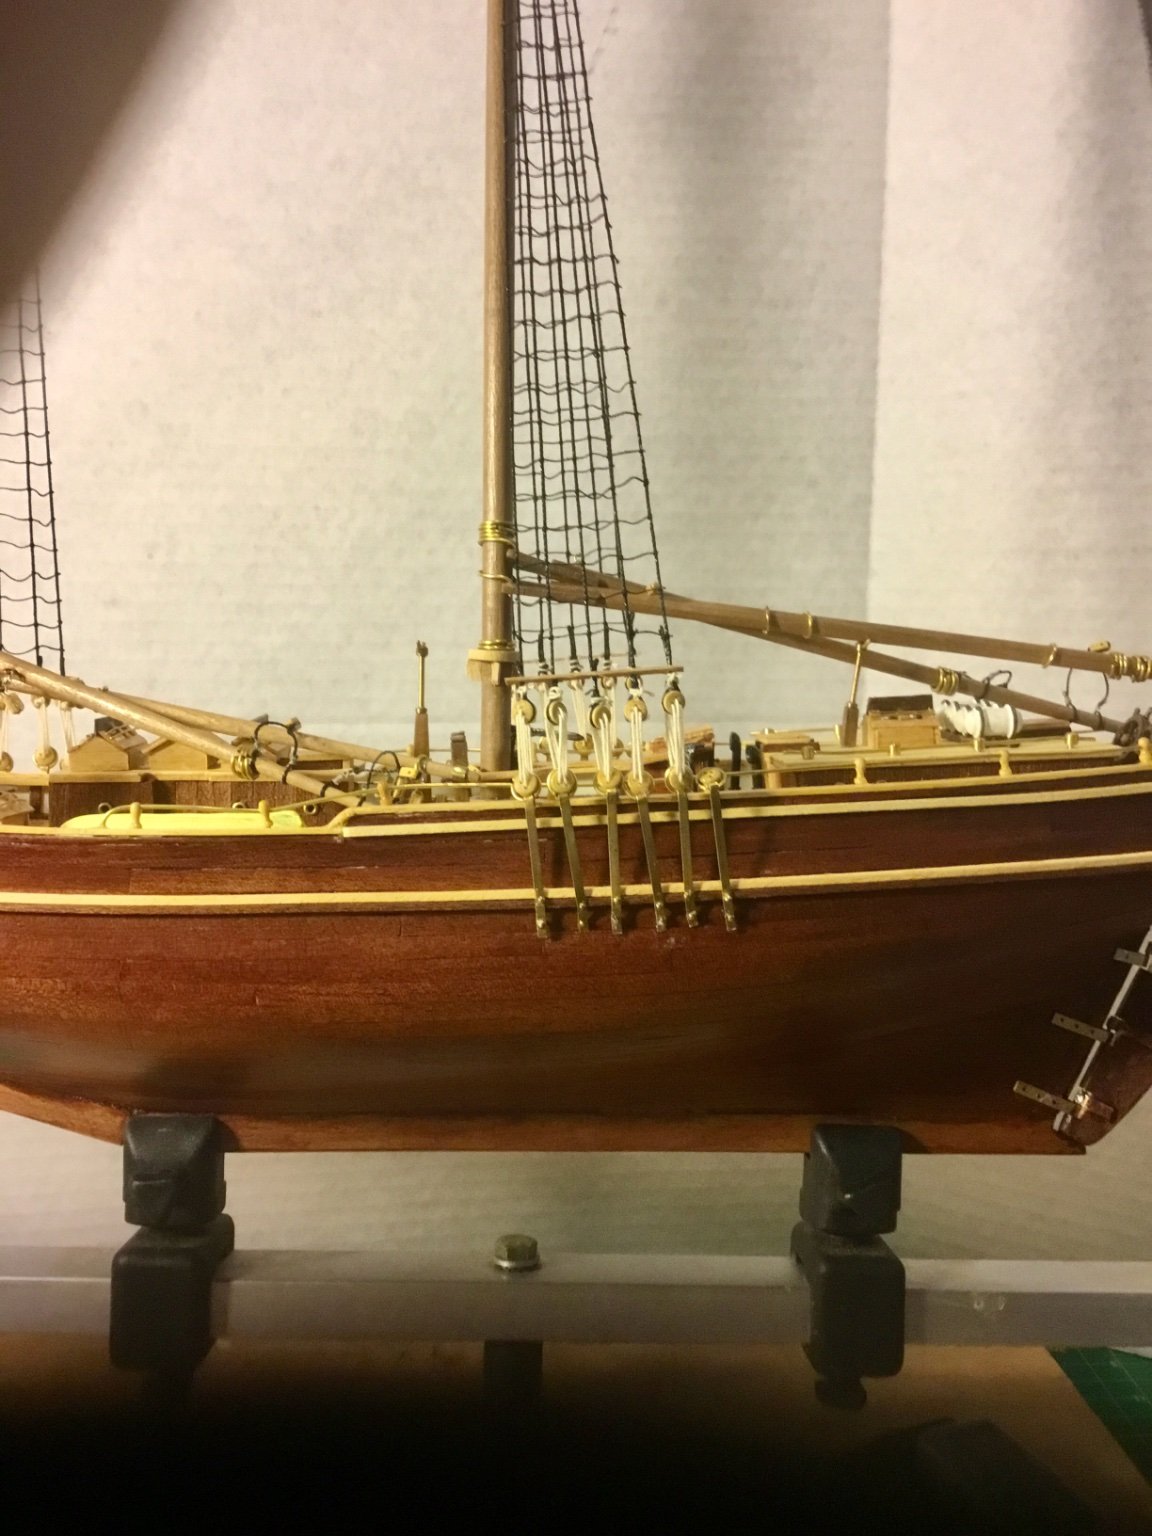
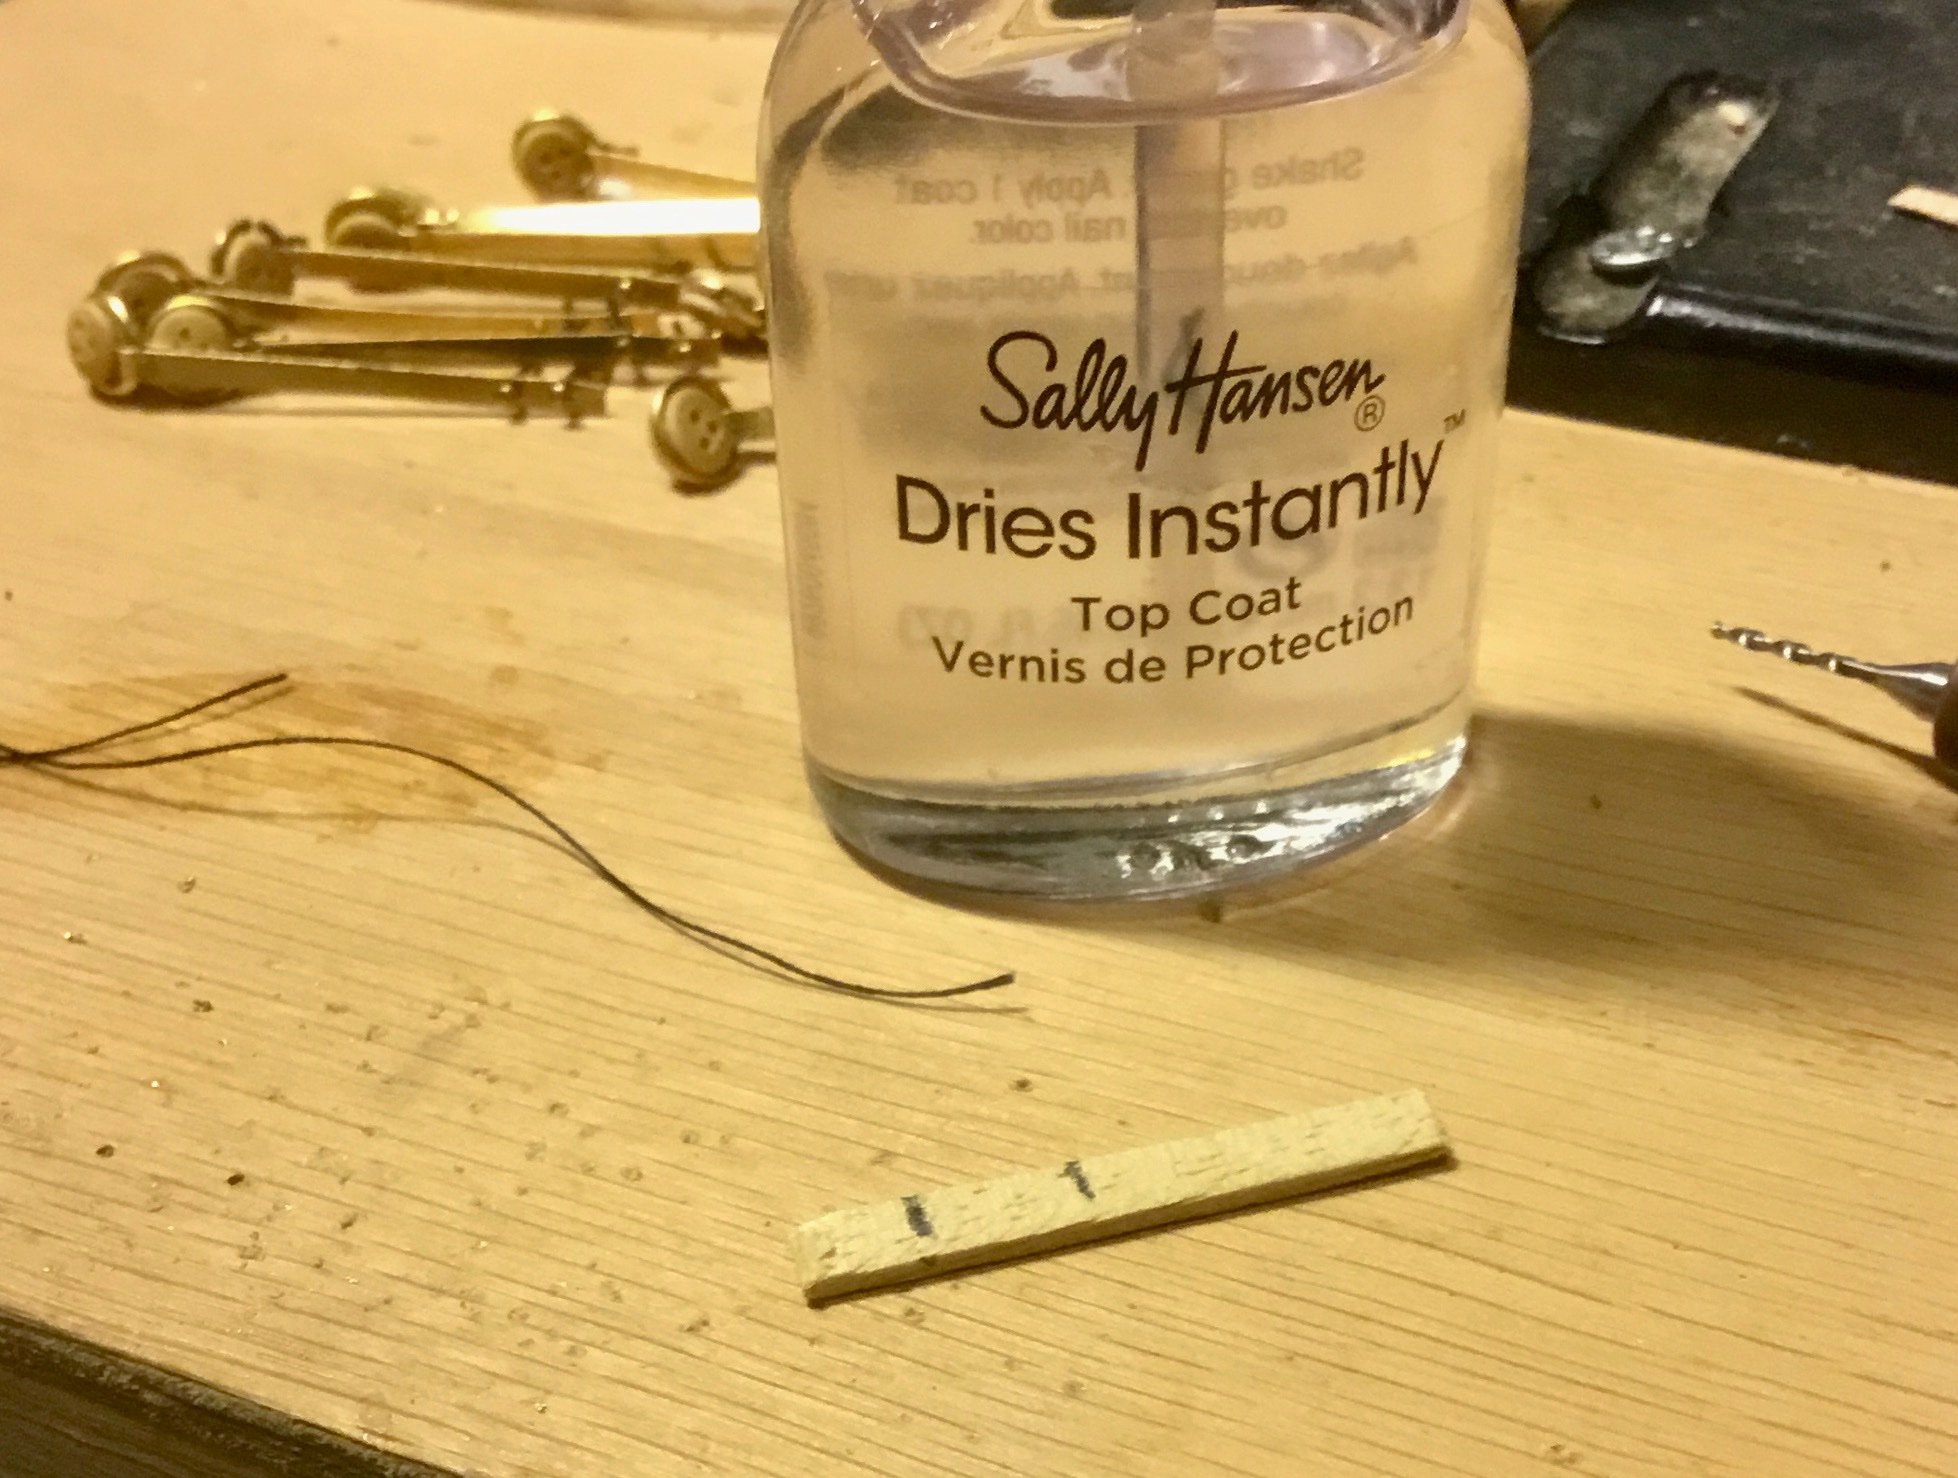
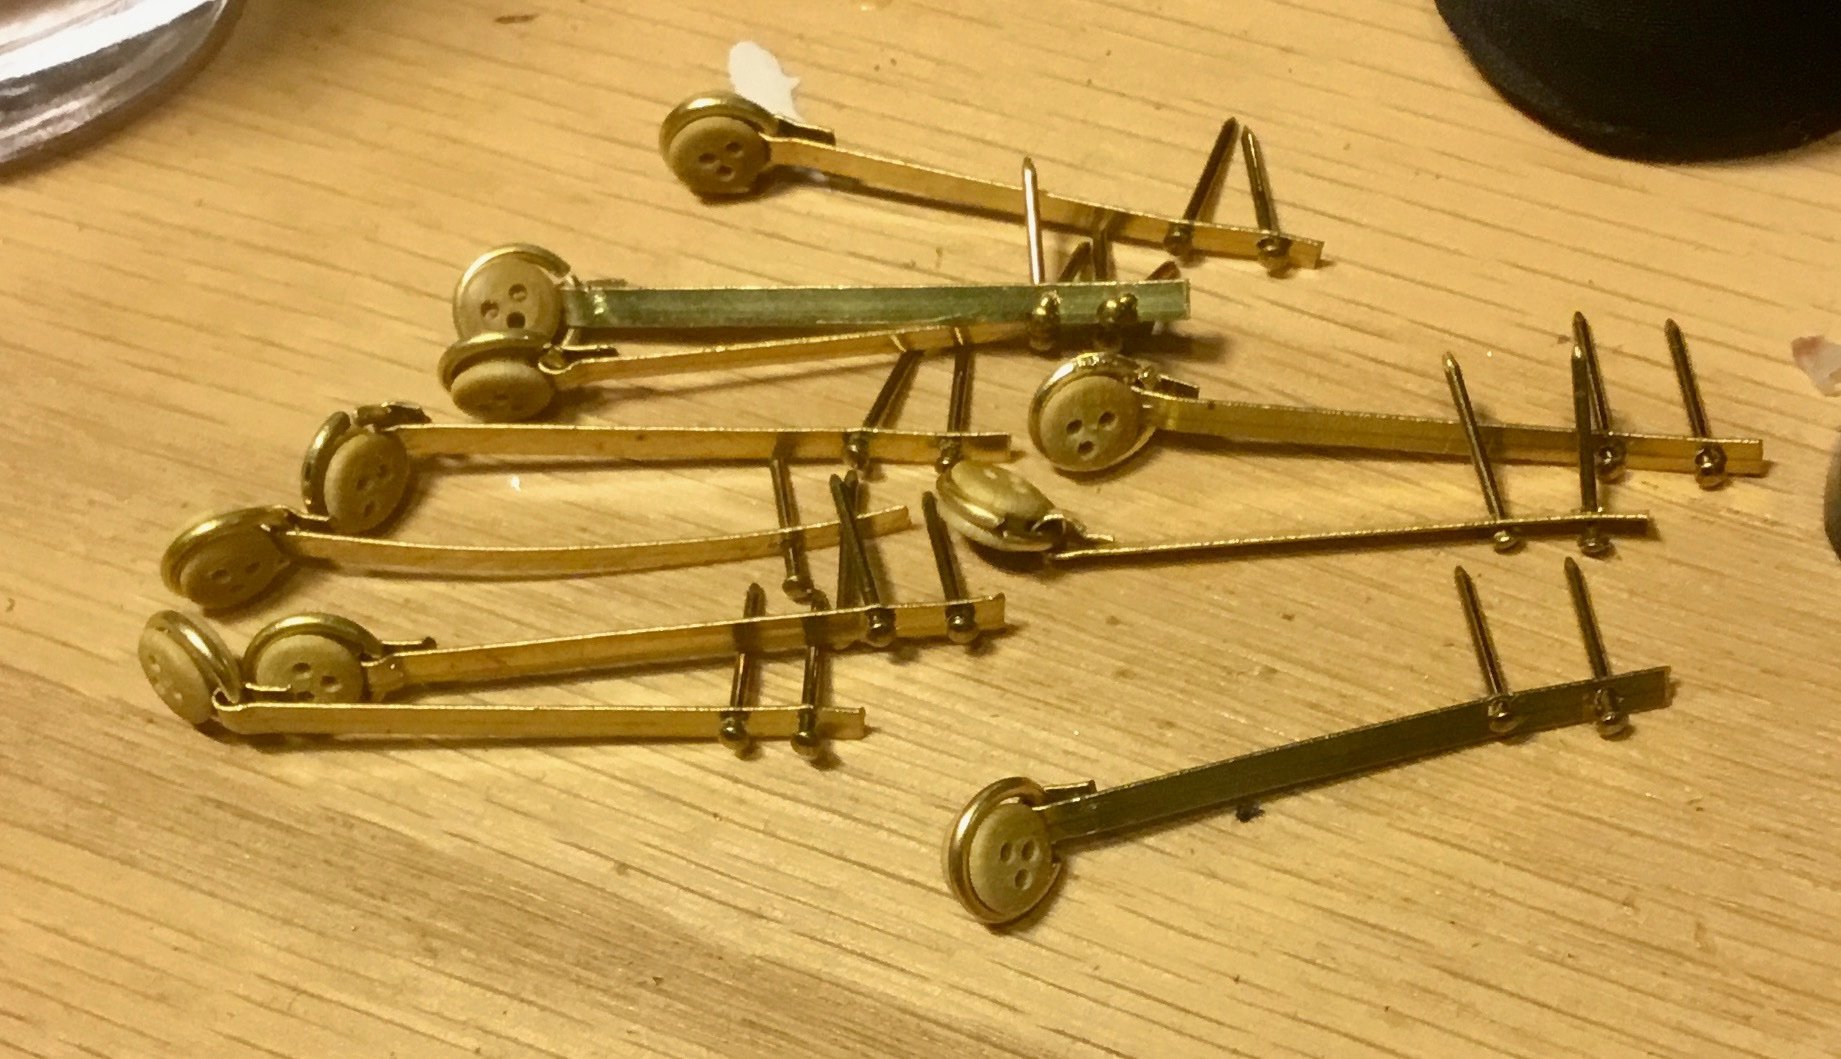
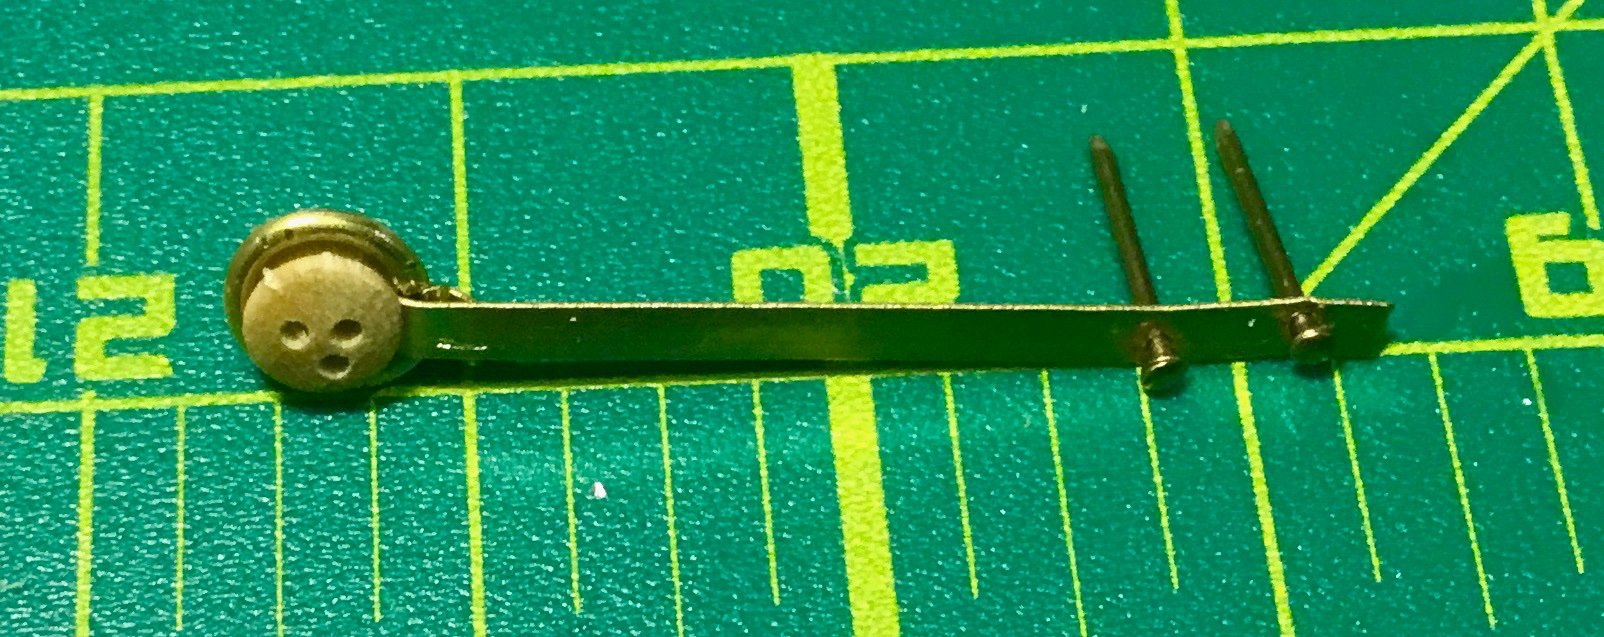
Completed the foremast chain-plates, shrouds , lanyards and ratlines. Also in the pictures are the stick I used to check the spacing of the ratlines. In the past I've used a lined piece of white paper behind the shrouds when spacing the ratlines, but in this case I found that using a spacing stick works better for me and 80% of the time my eyeball spacing is right on. I used the nail coating fluid to set the ratline knots as I've seen on other builds and it worked out well. As a periodic break when doing the monotonous work on the ratlines I built the chain-plates for the mainmast shrouds.


- hof00, GrandpaPhil and Tim Holt
-
 3
3
-
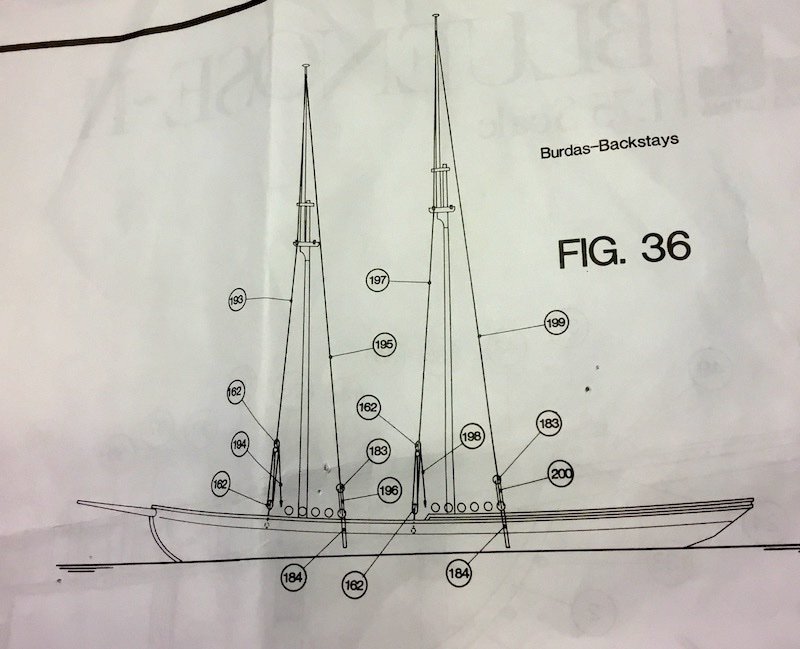
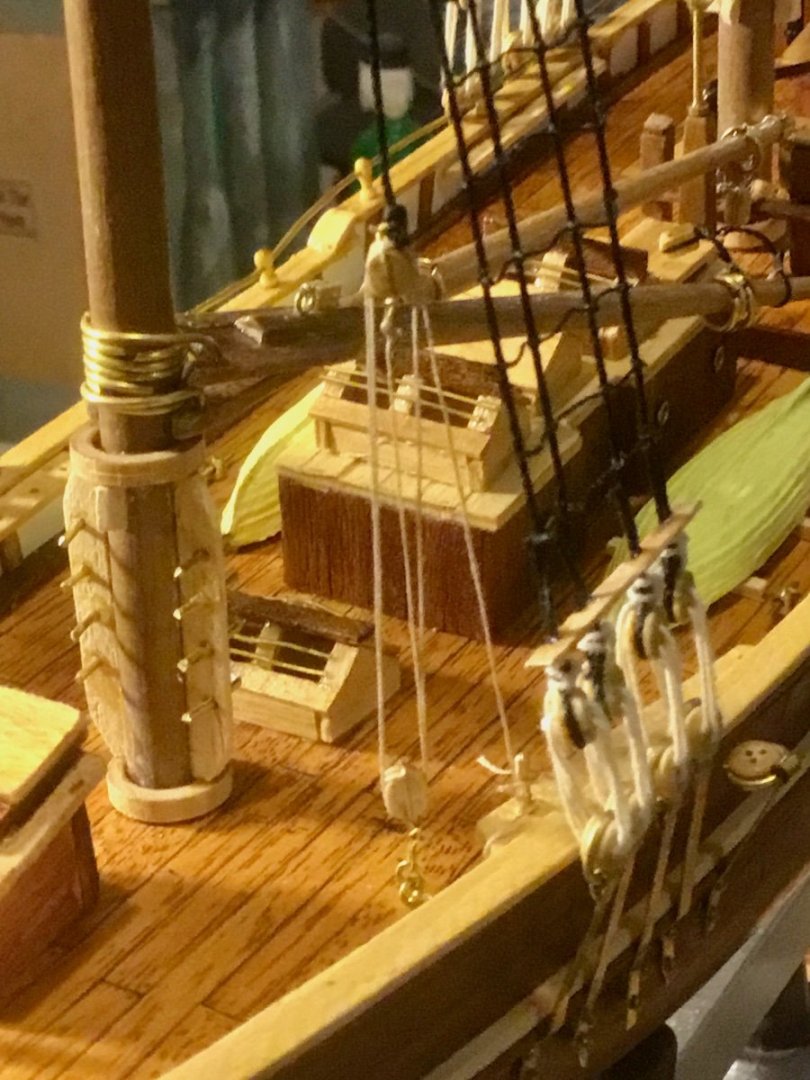
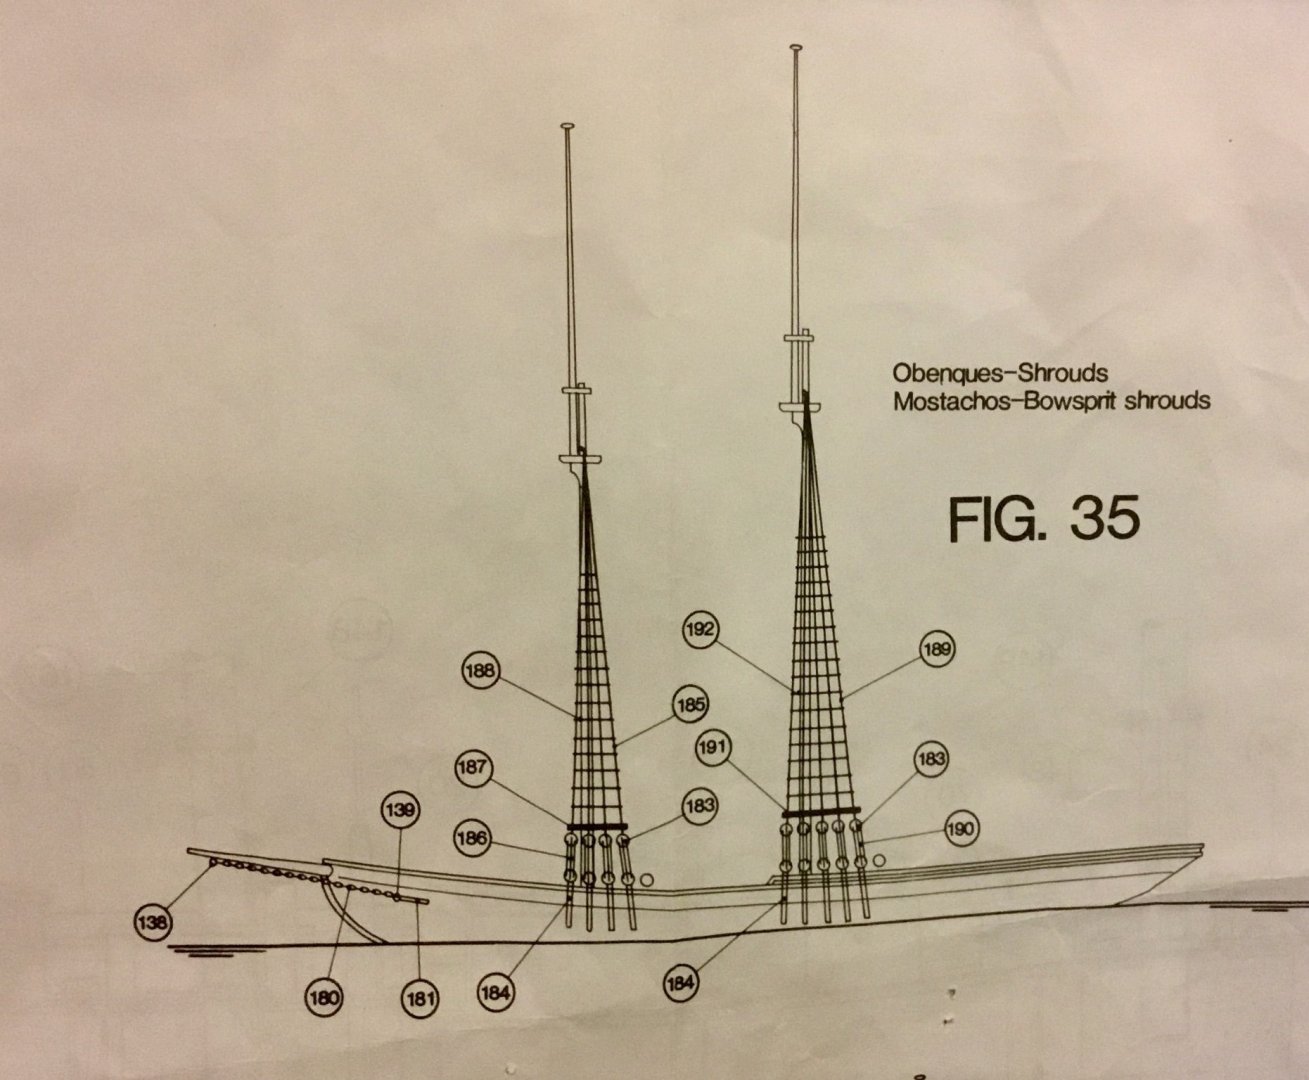
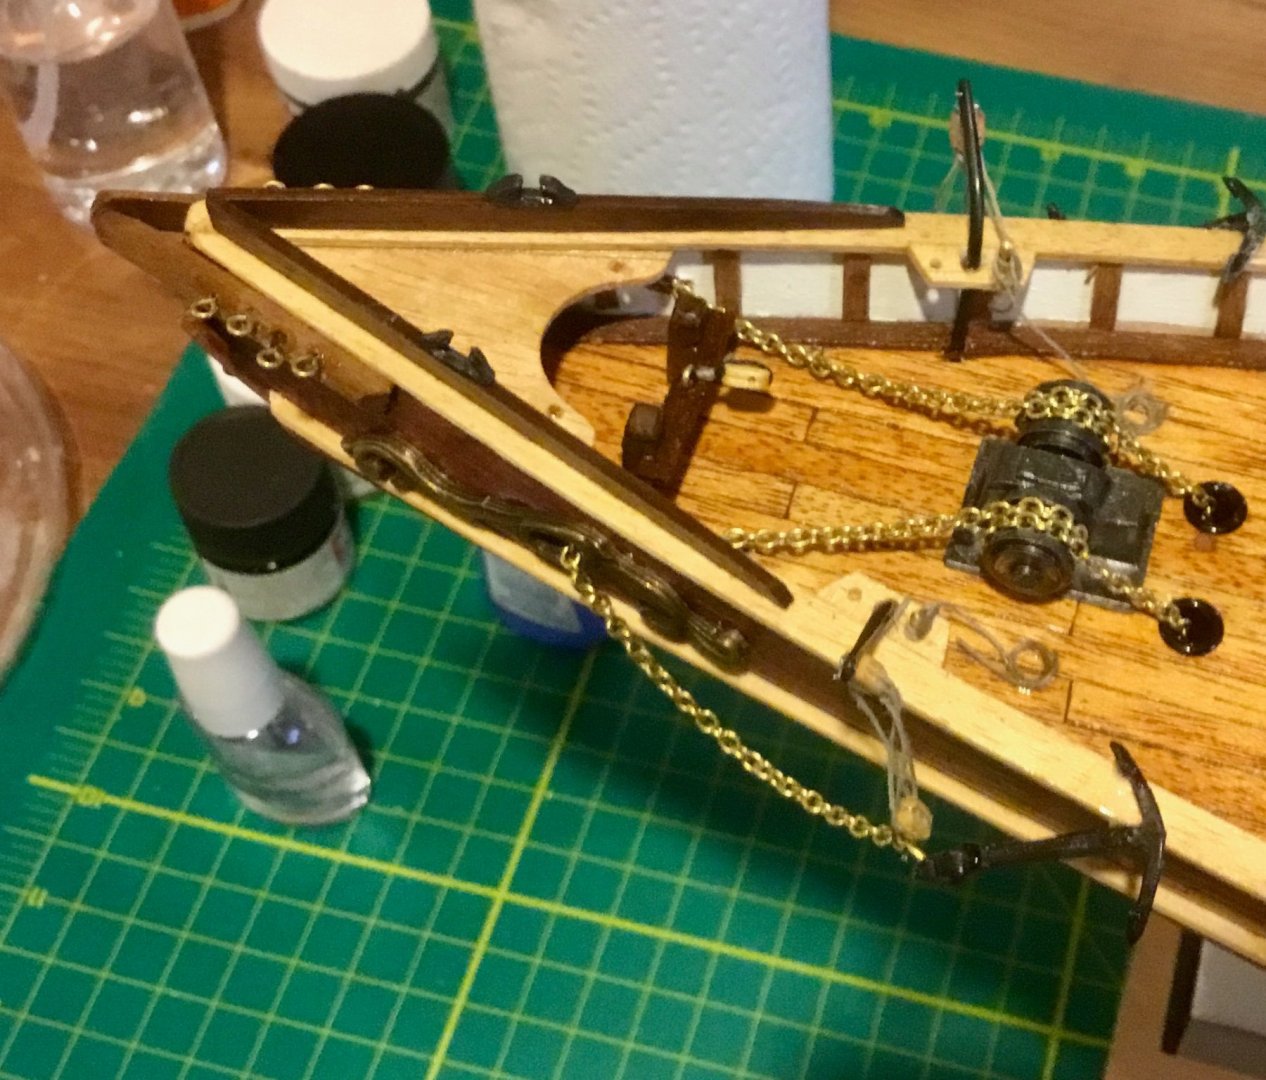
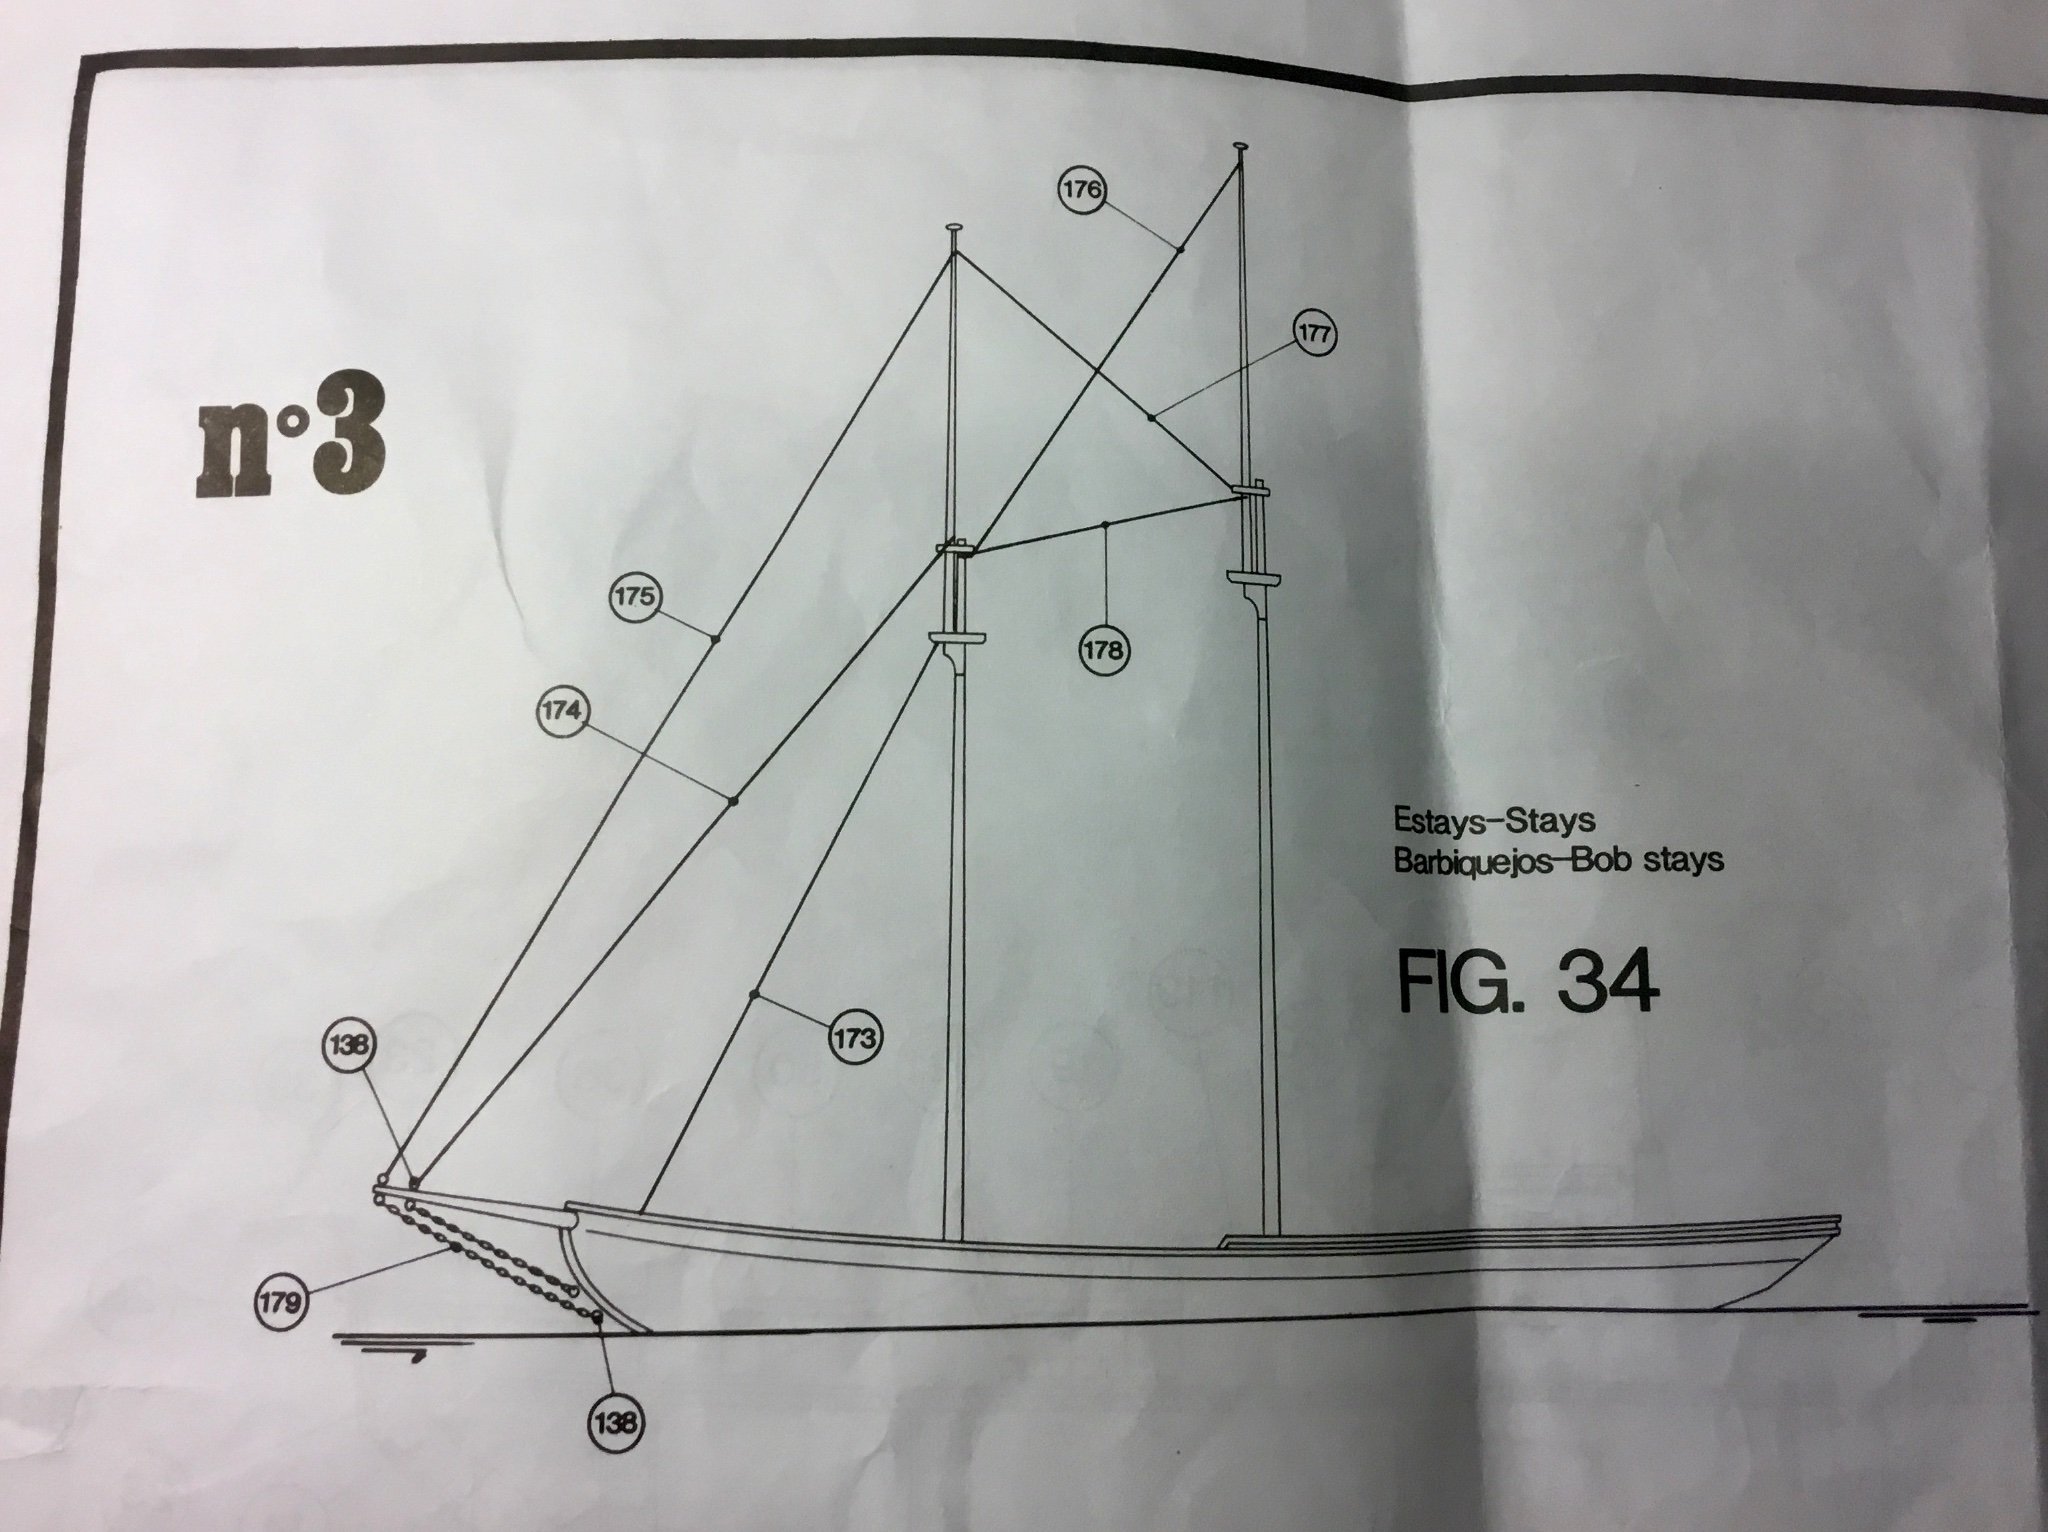
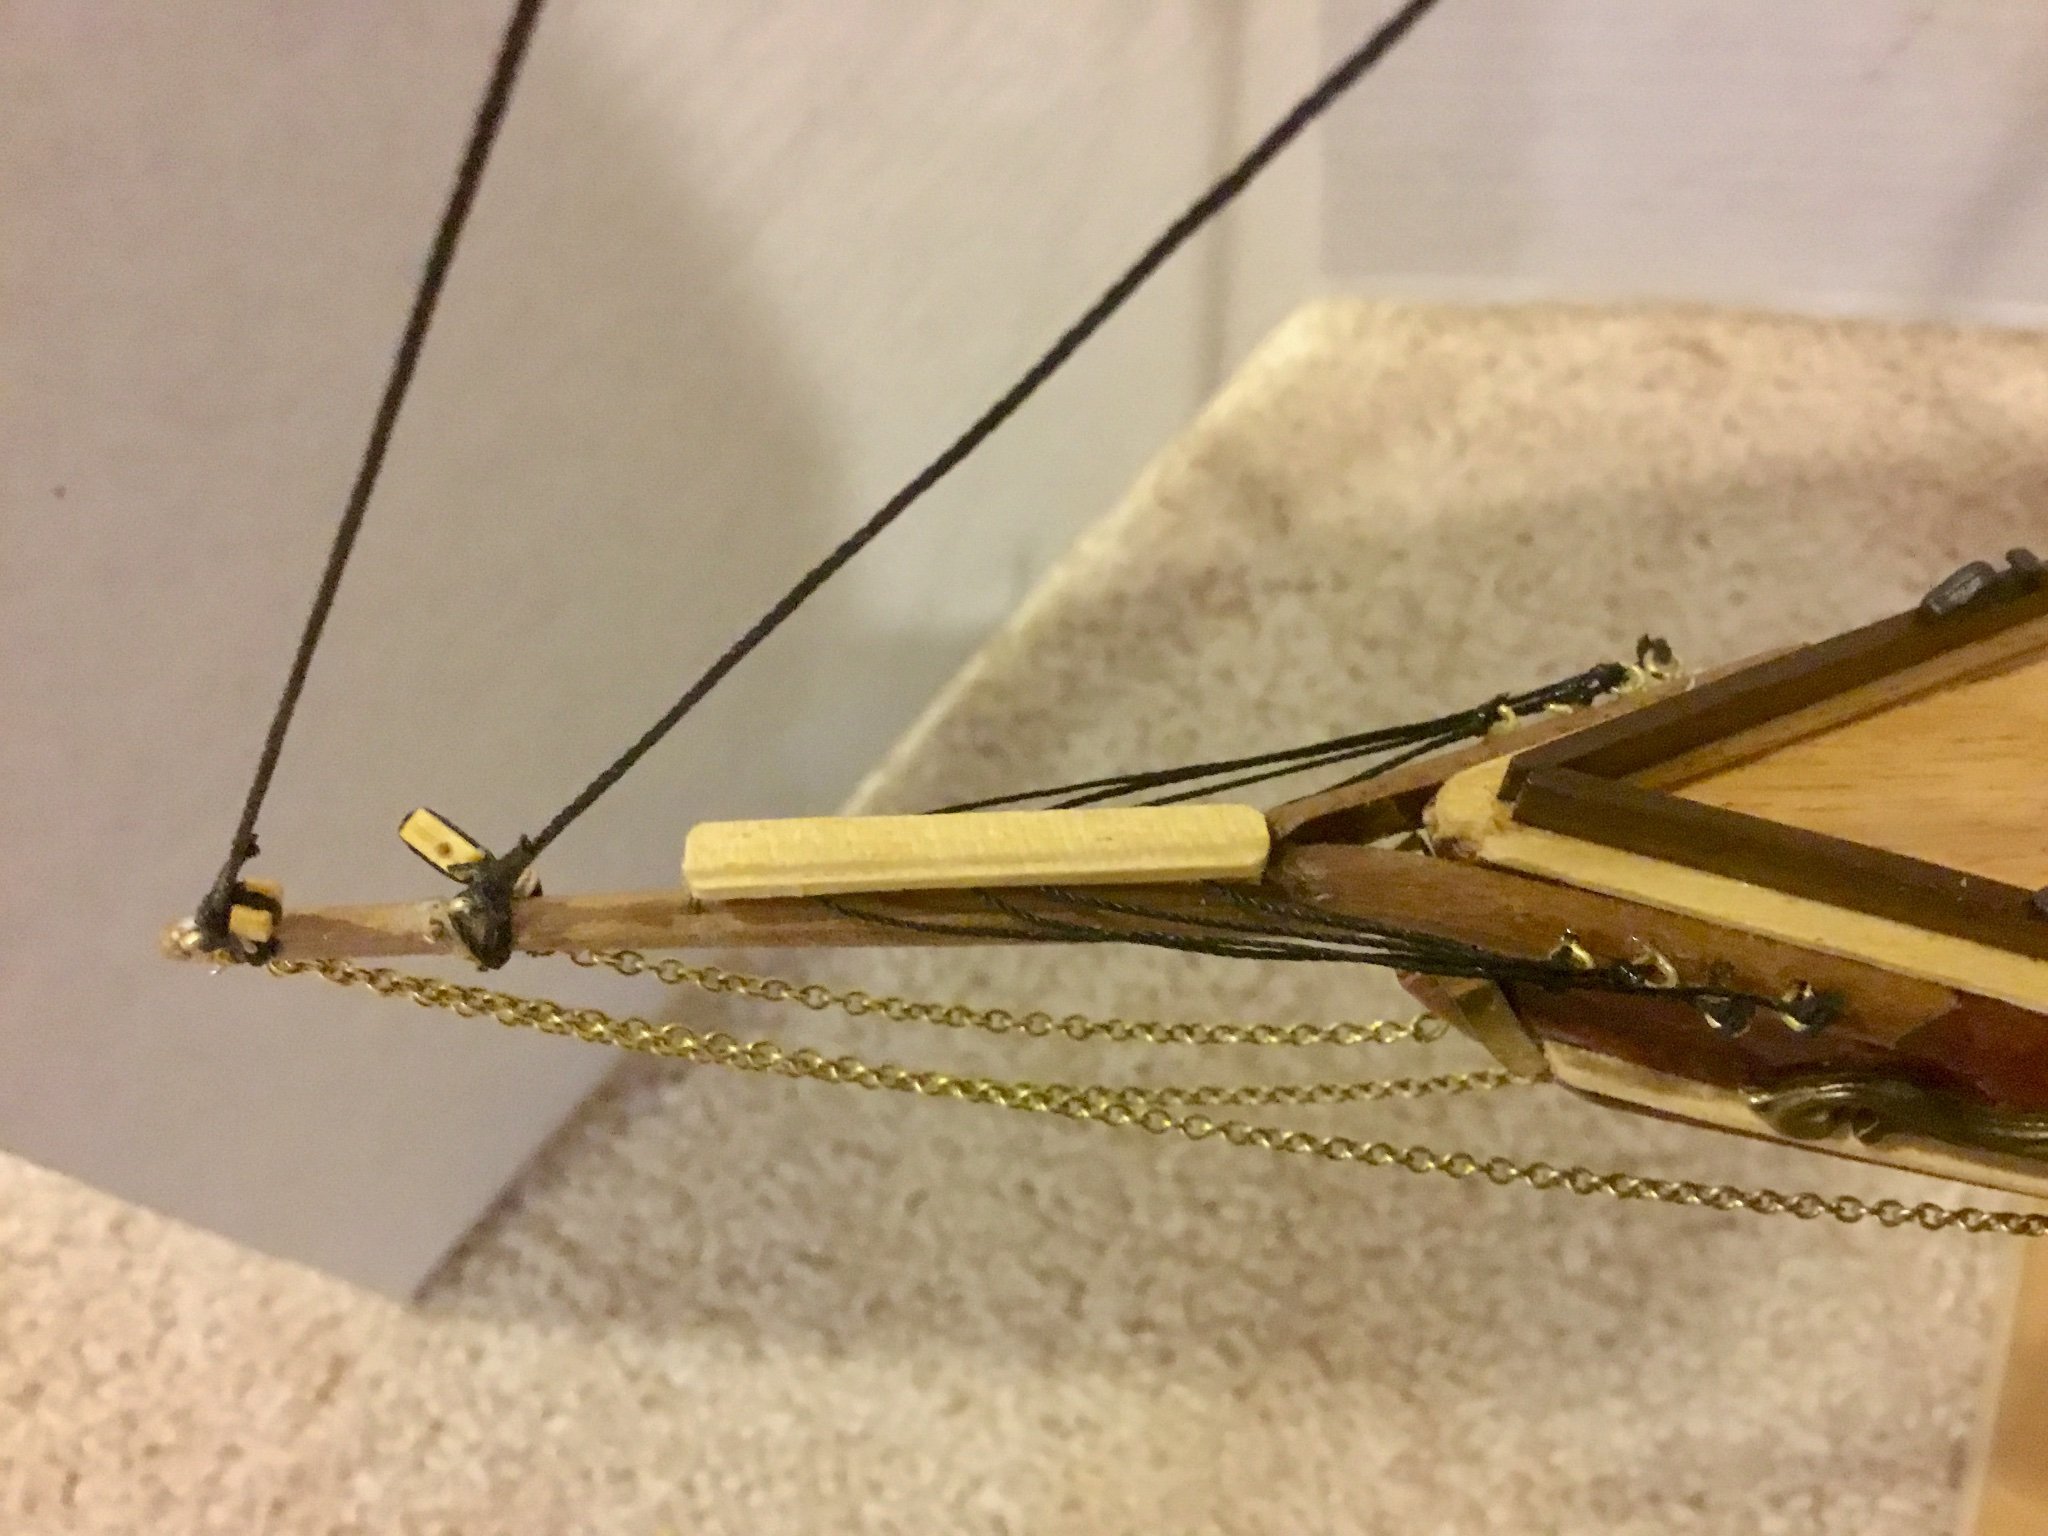
Ship rigging has begun. Installed stays (foremast, outer jib, flying jib, Fishermans stay-sail, fore topmast, main topmast, bowsprit bobstays, martingale back). Installed bowsprit foot-ropes

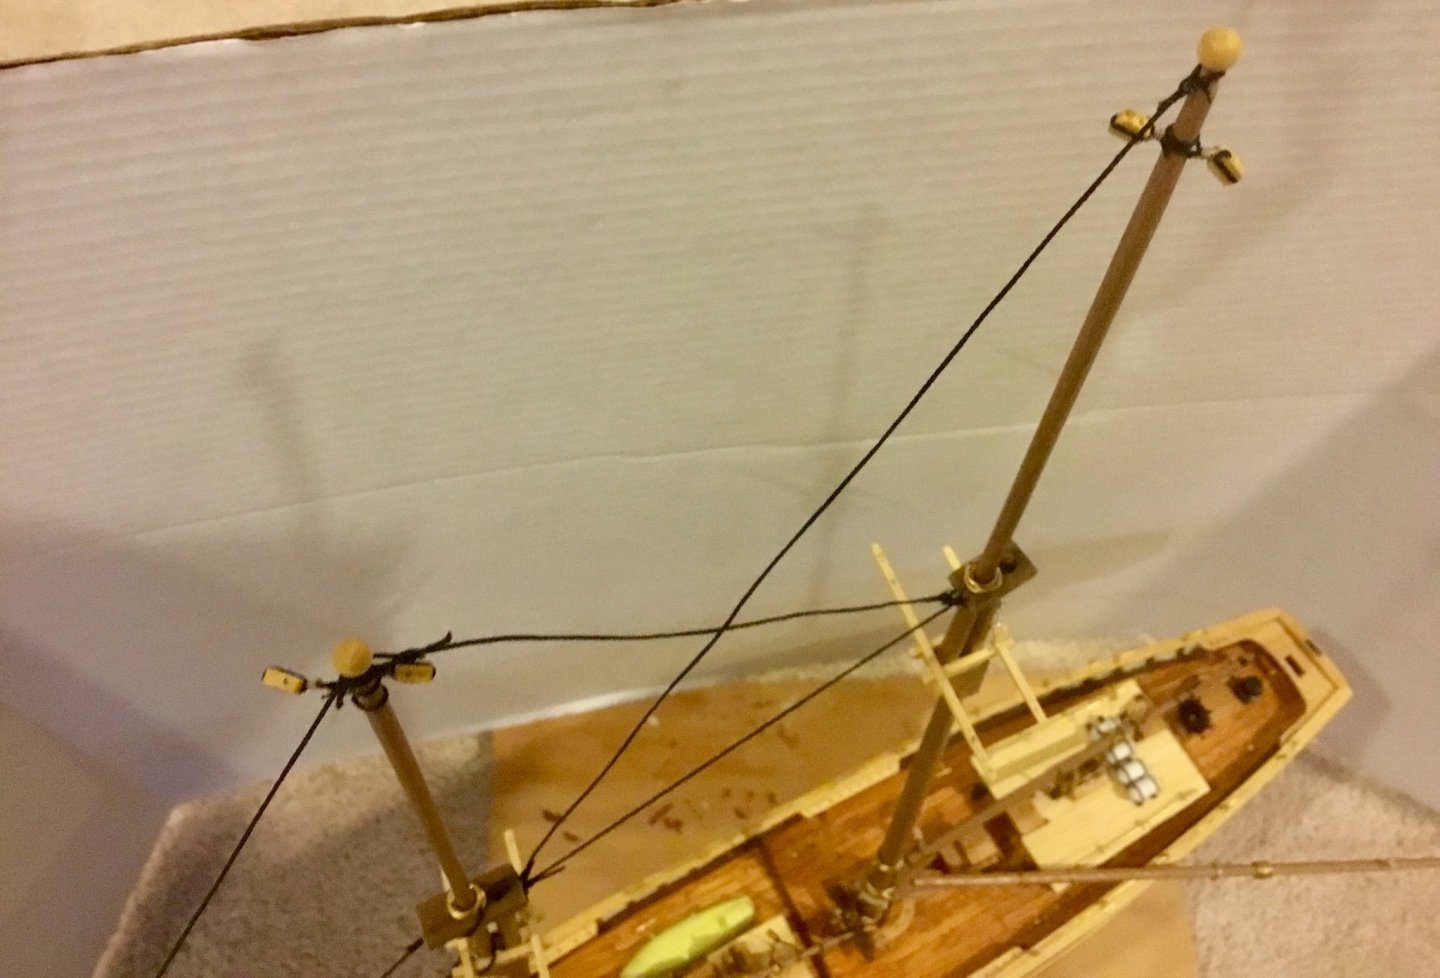


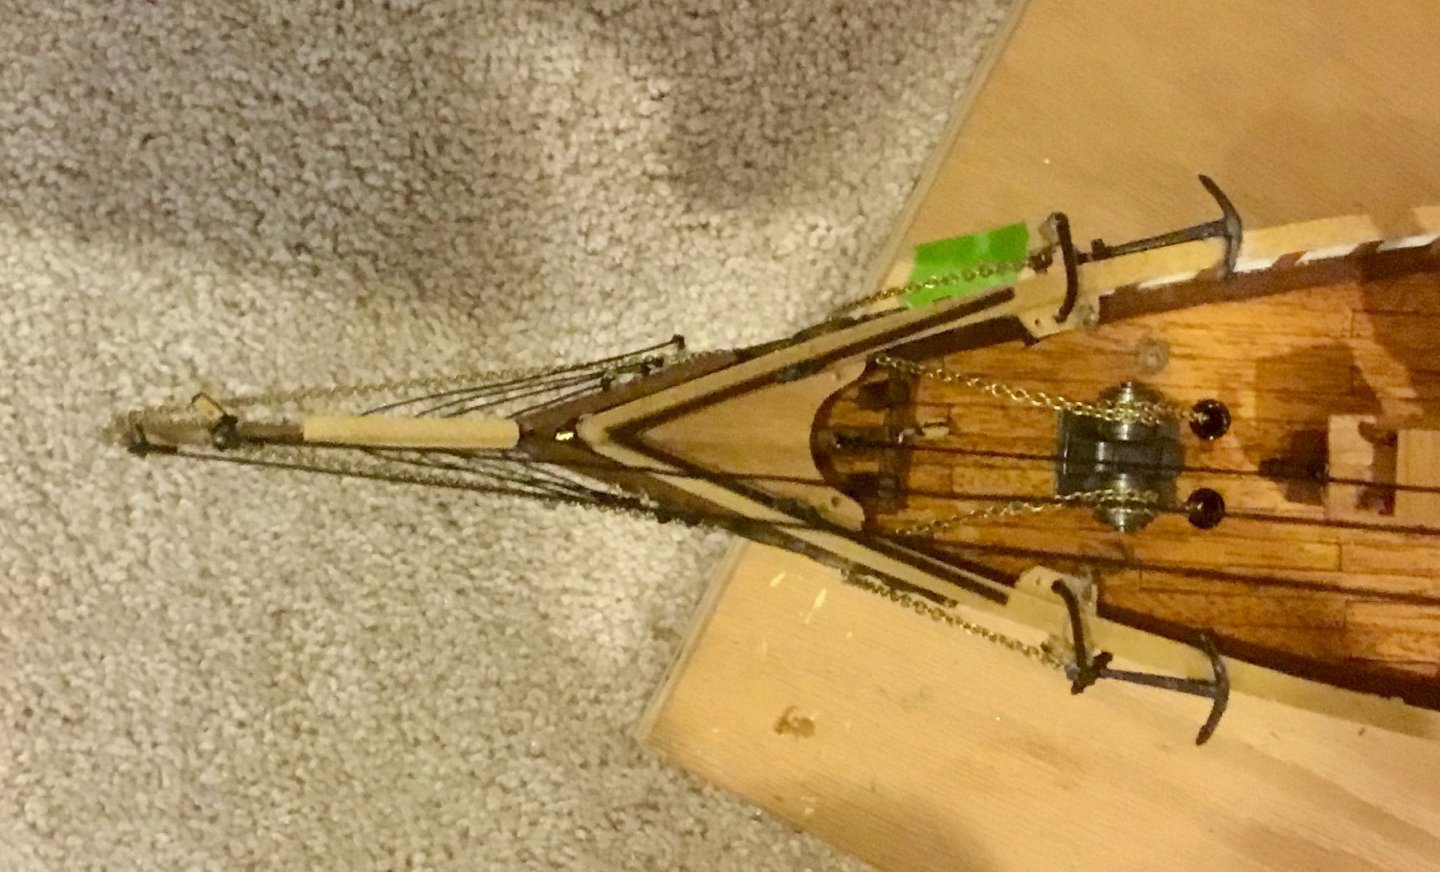


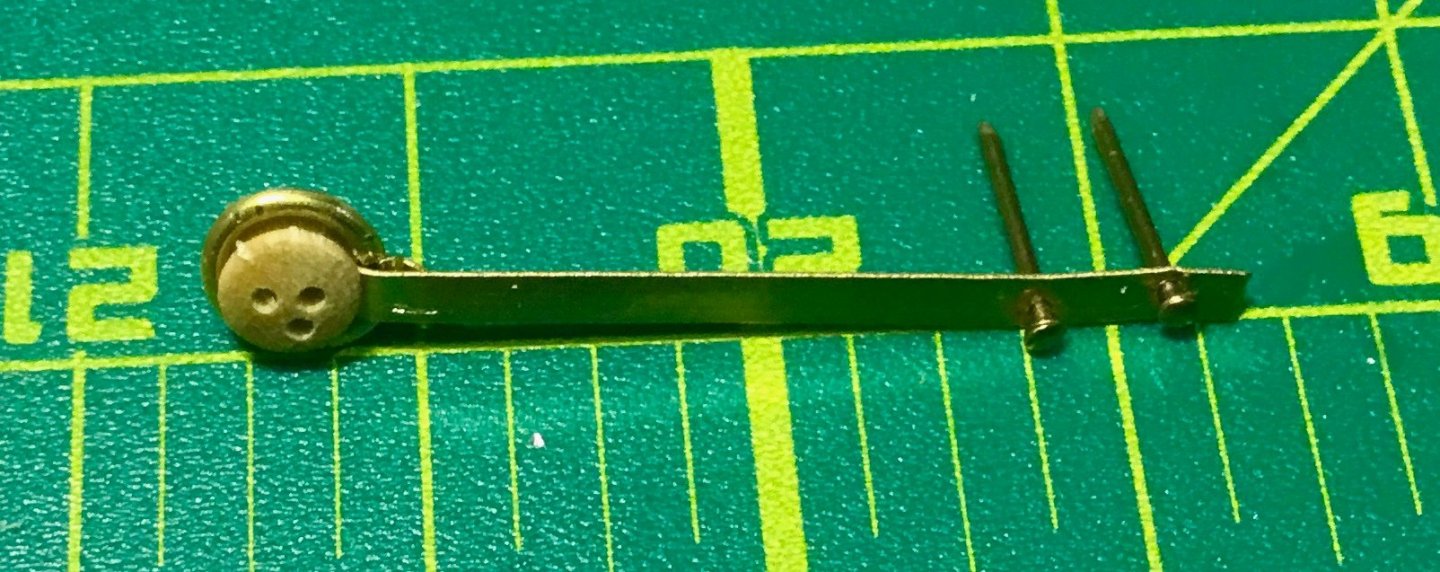

 . Fabricated chain-plates with deadeyes for foremast. Next up will be to install chainplates and begin work on foremast shrouds.
-
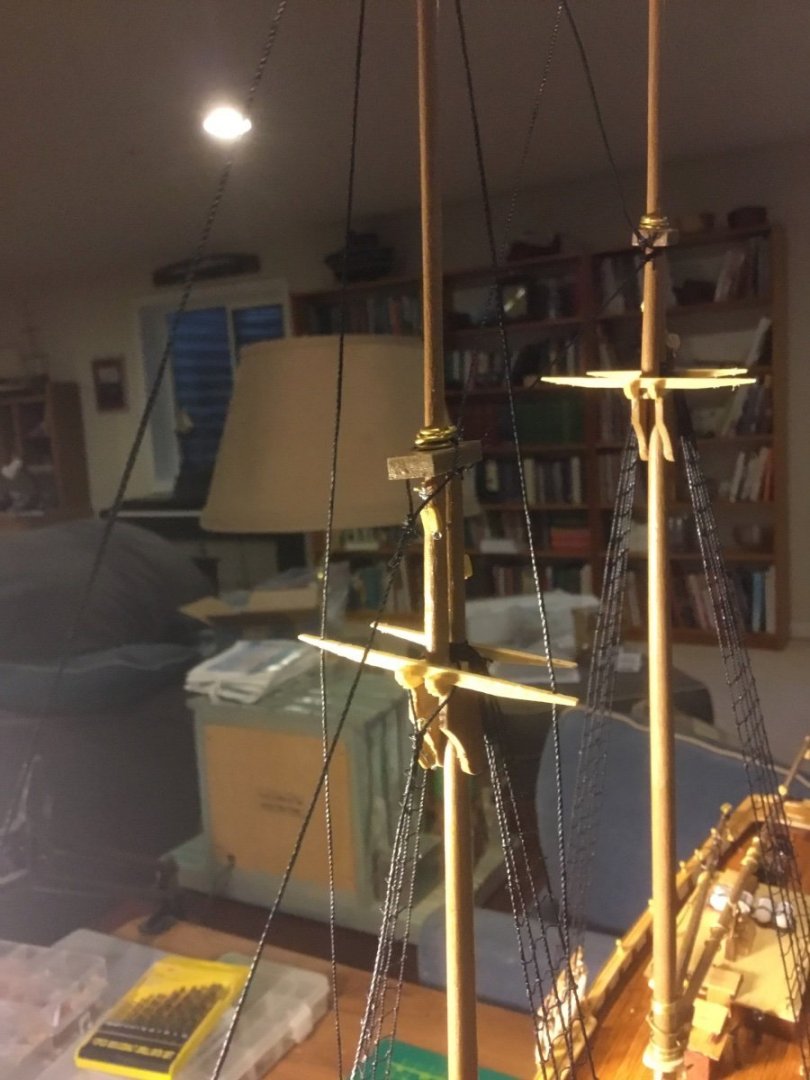
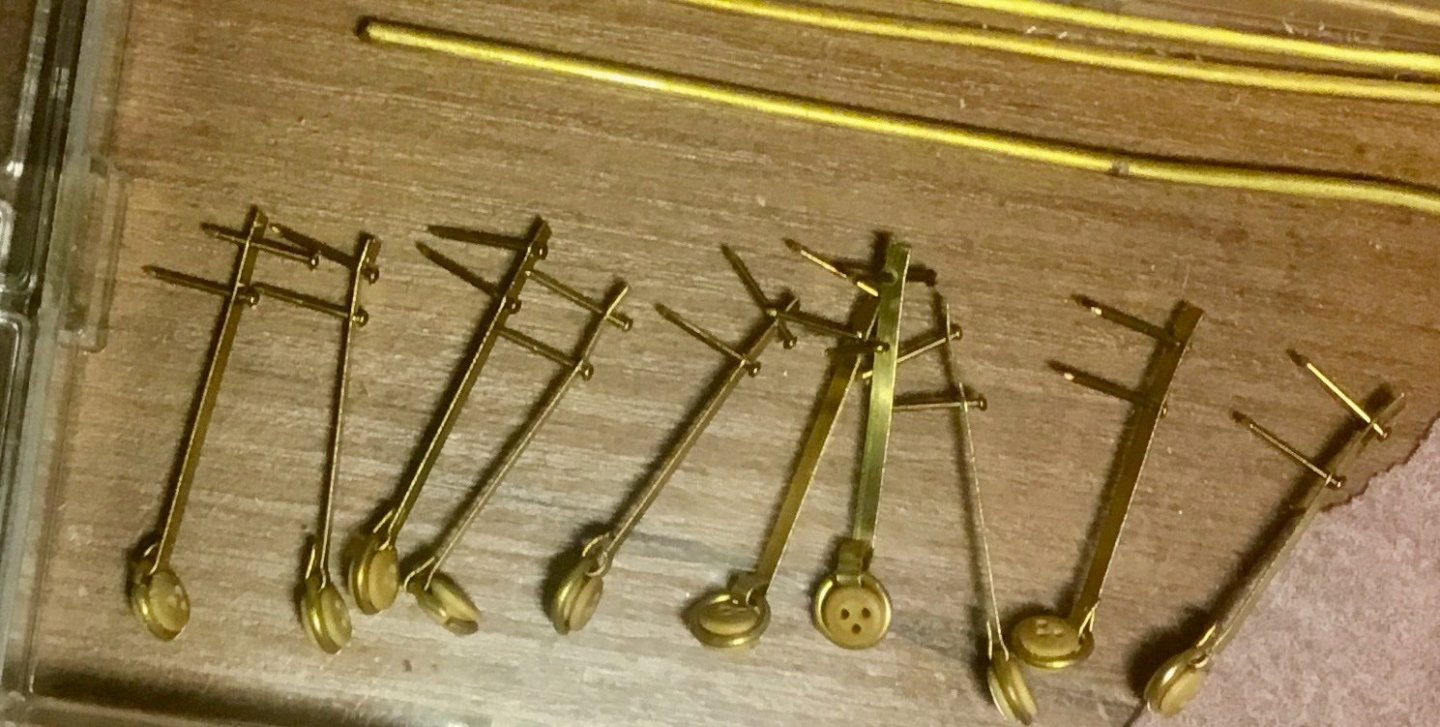
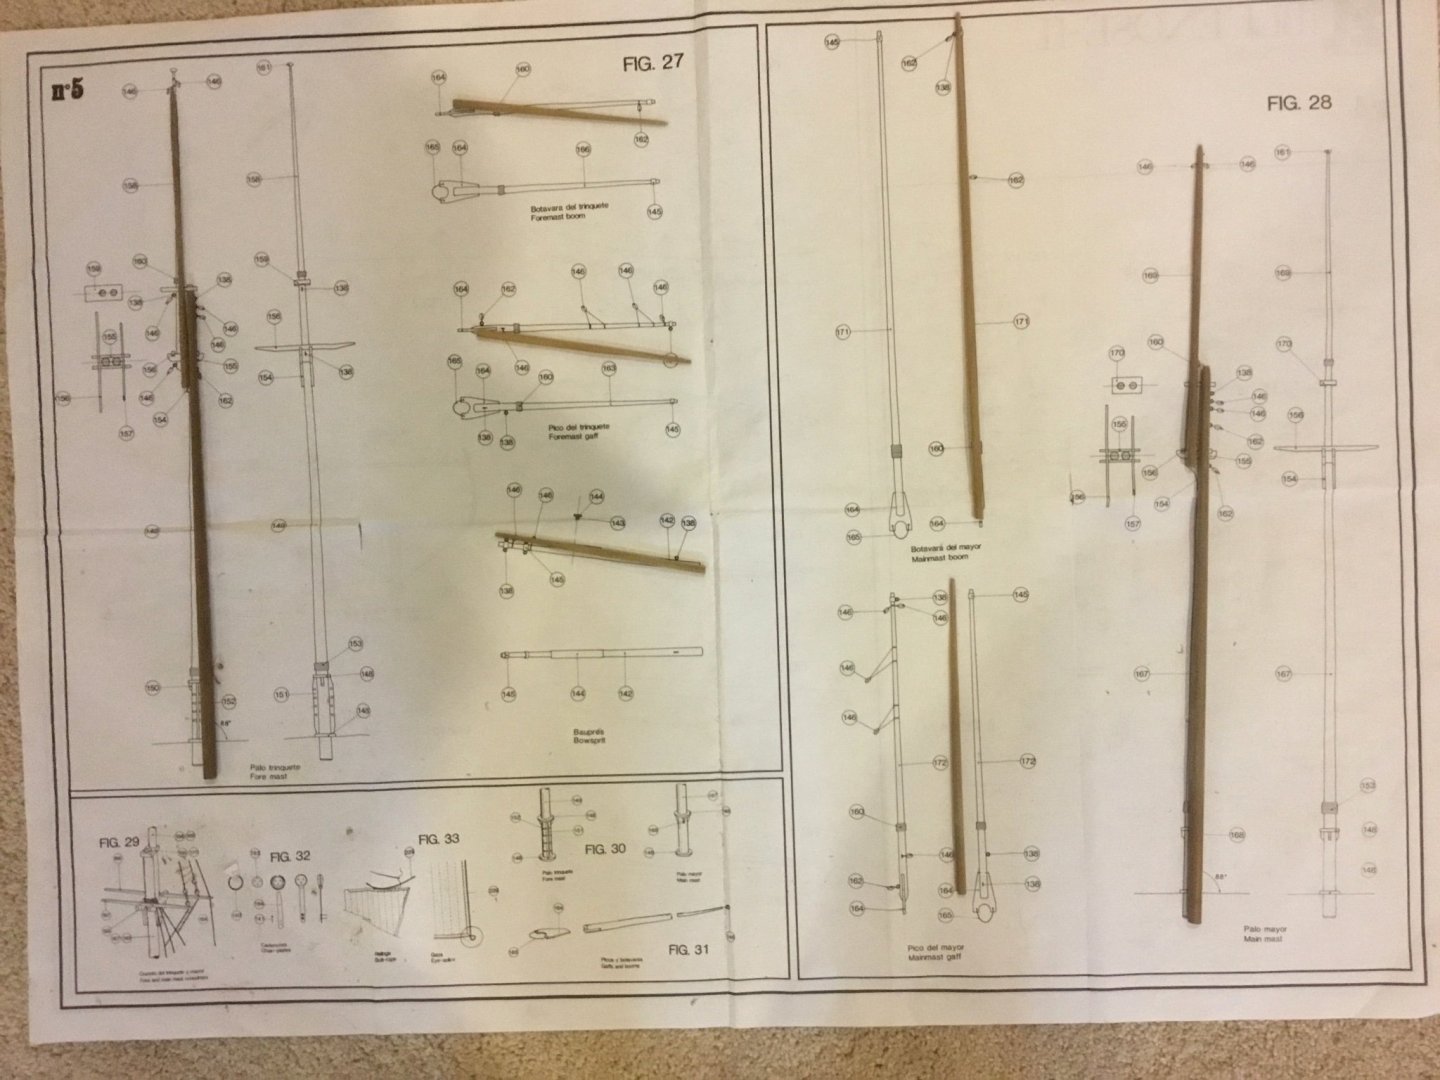
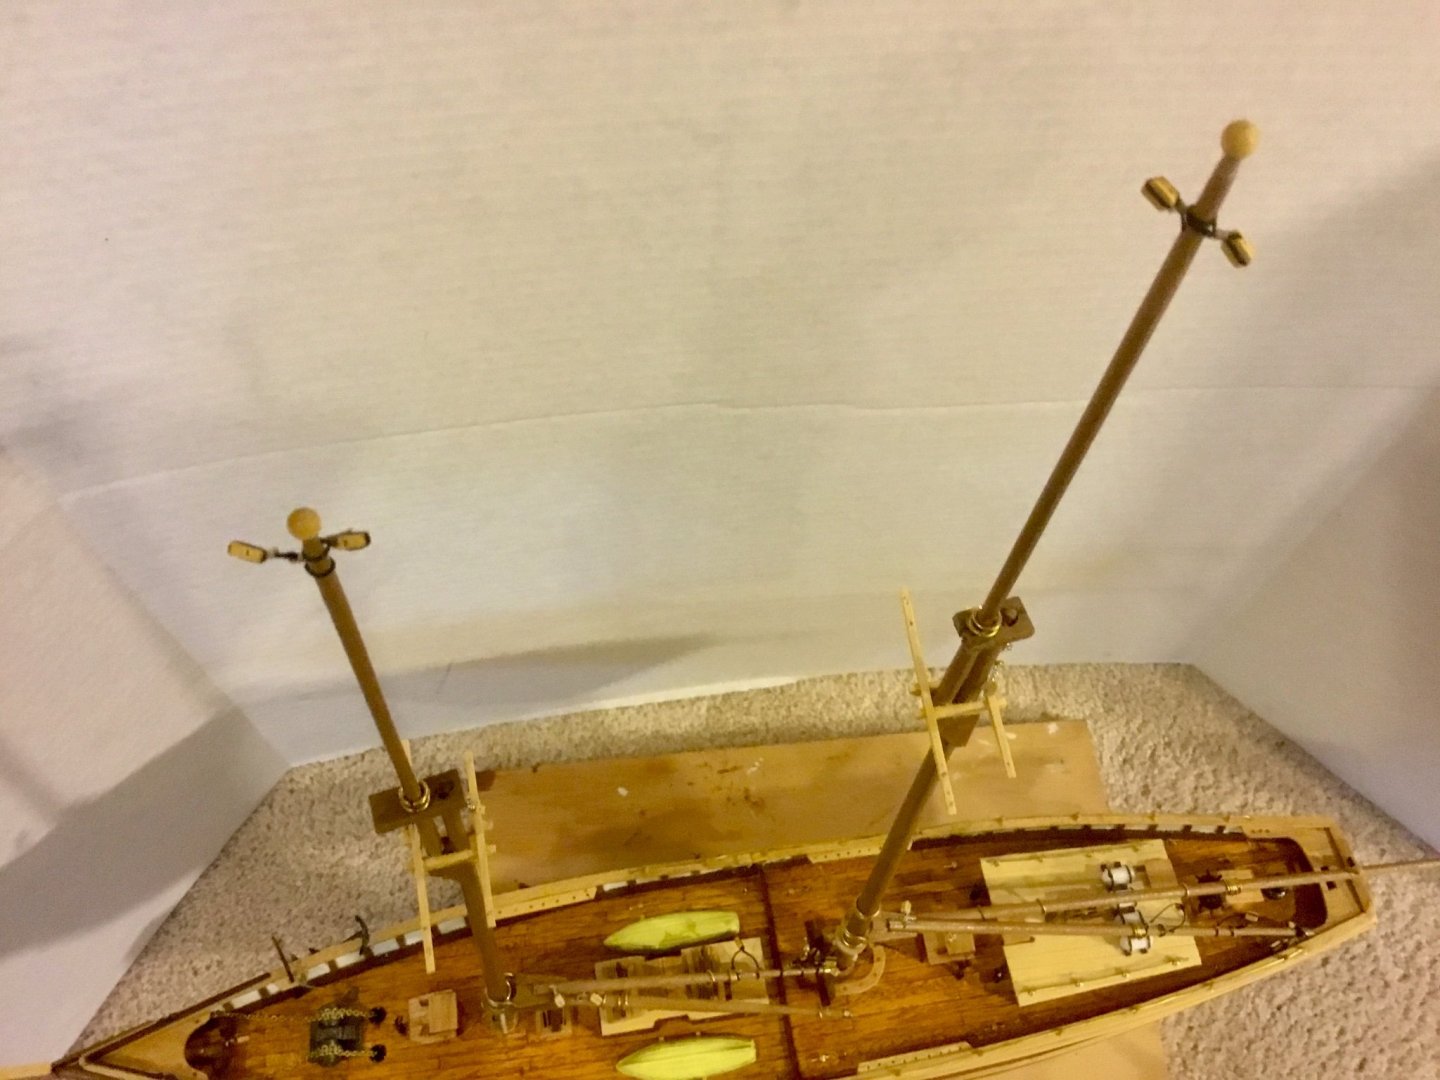
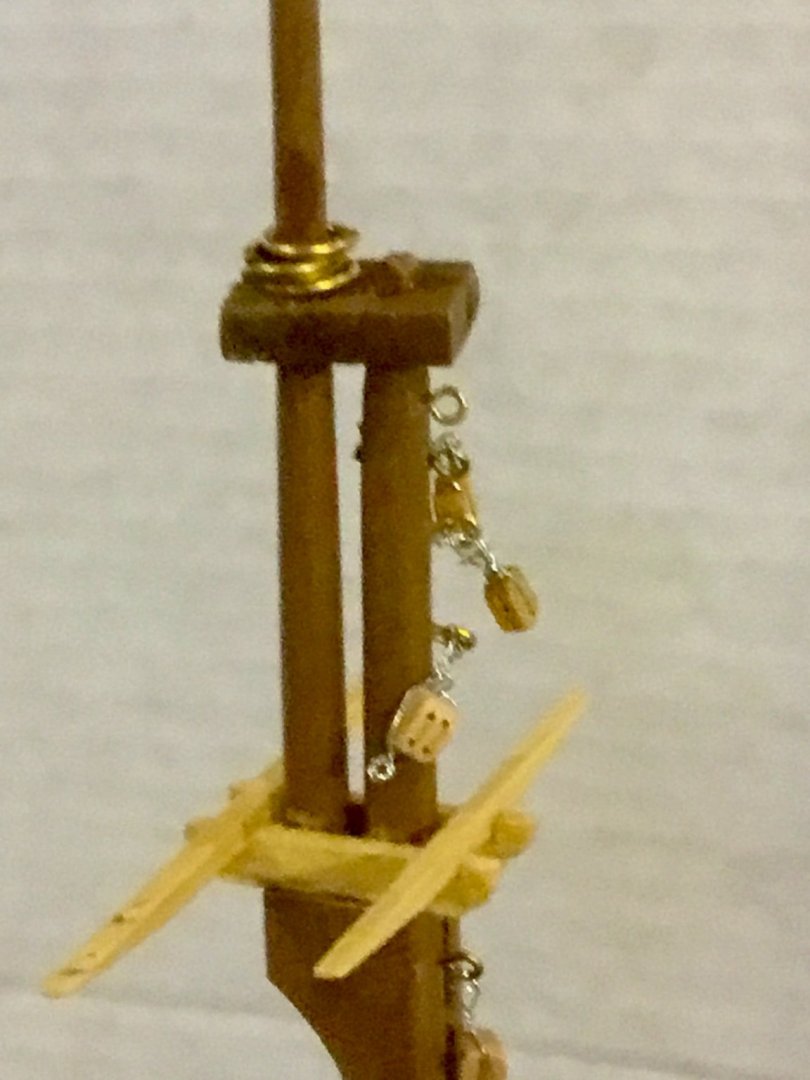
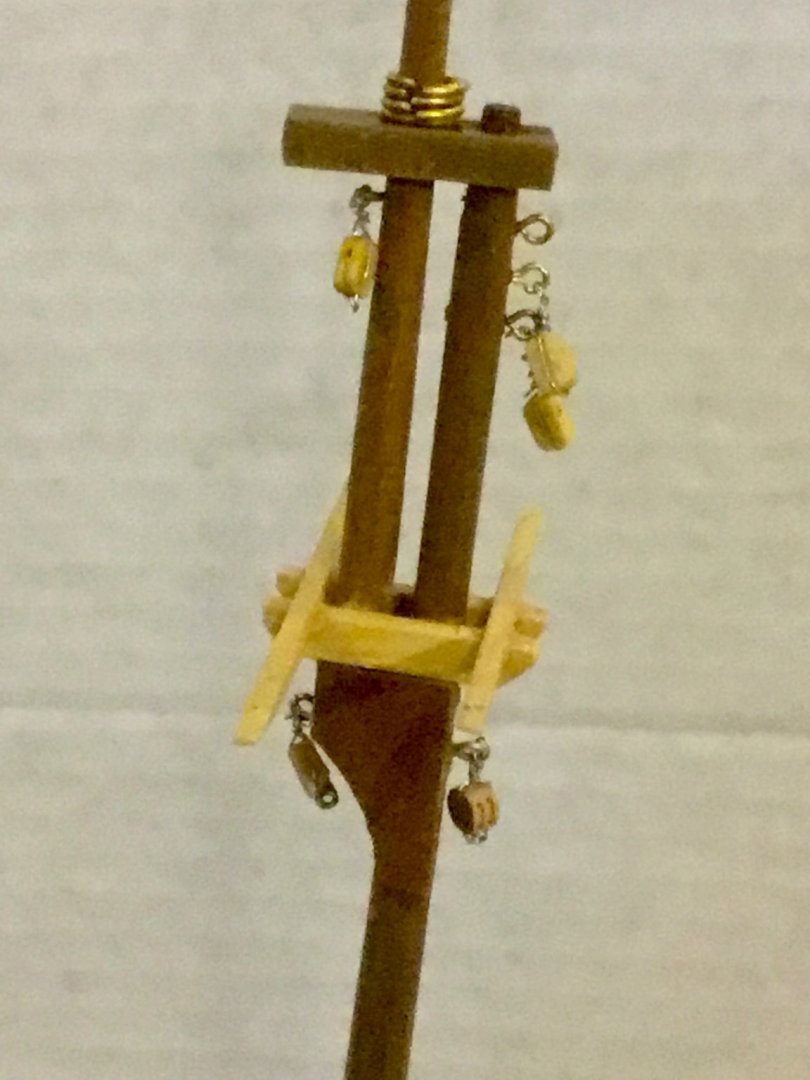
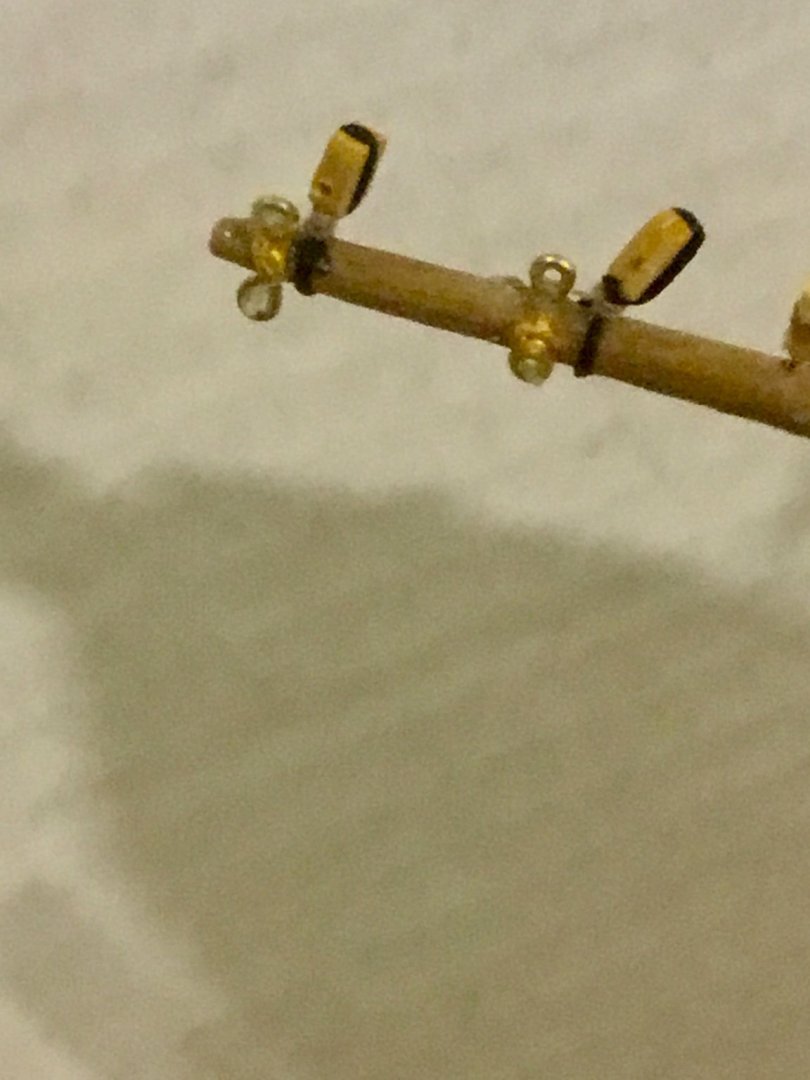
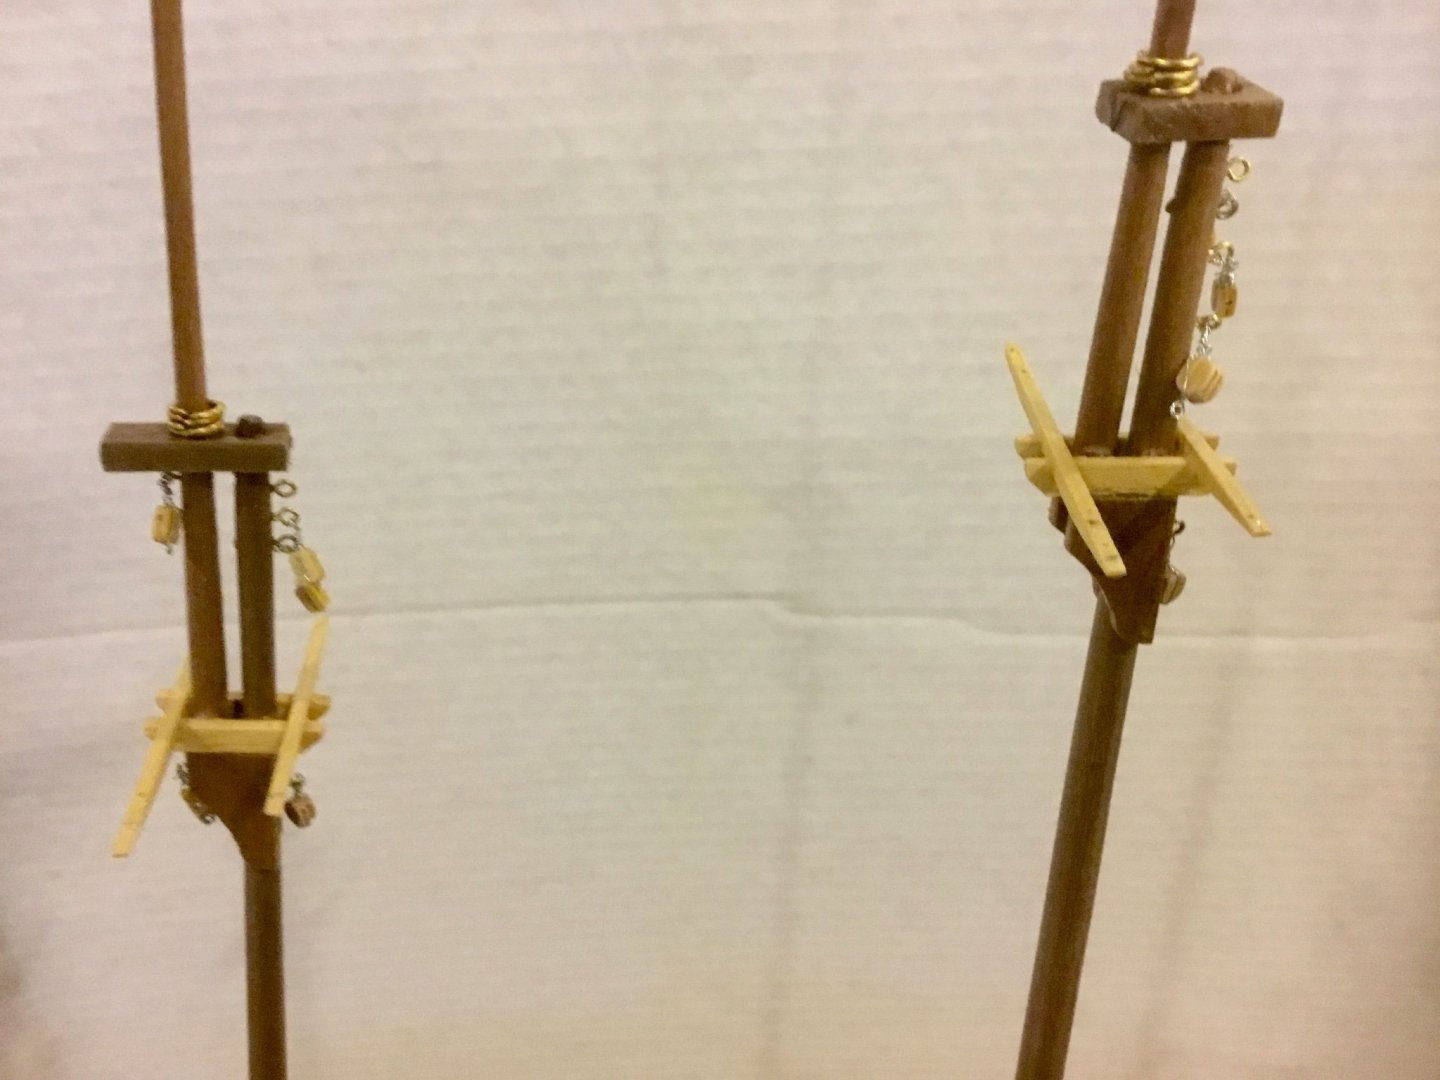
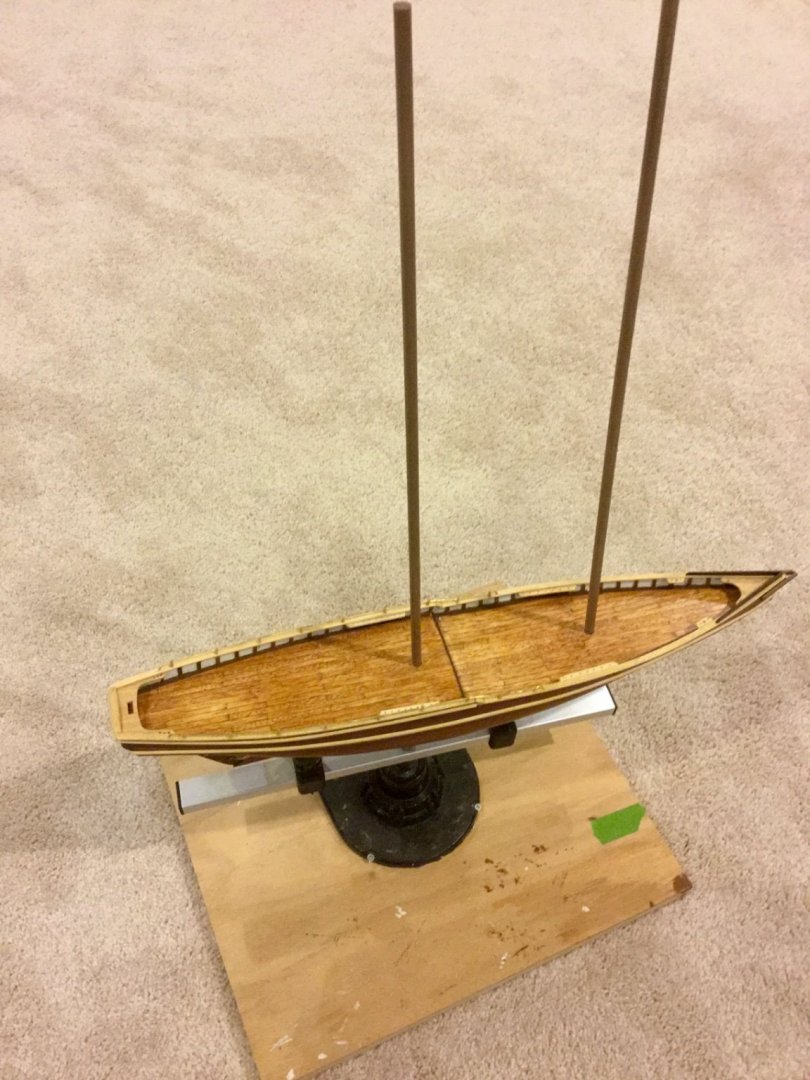
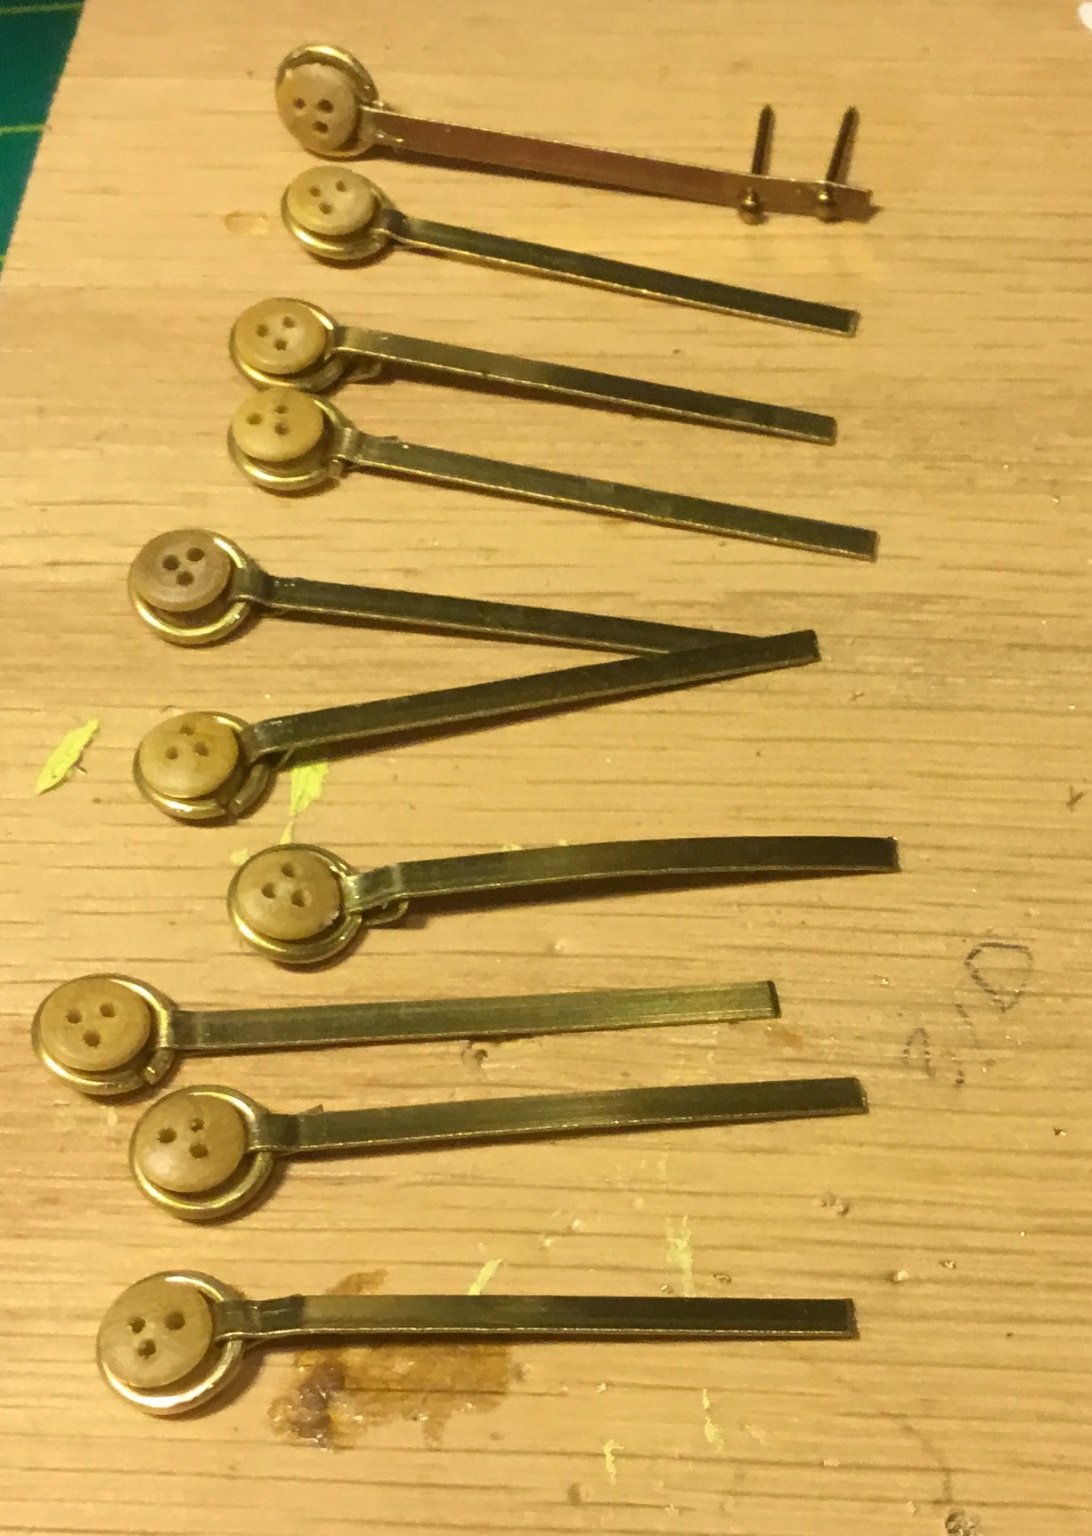
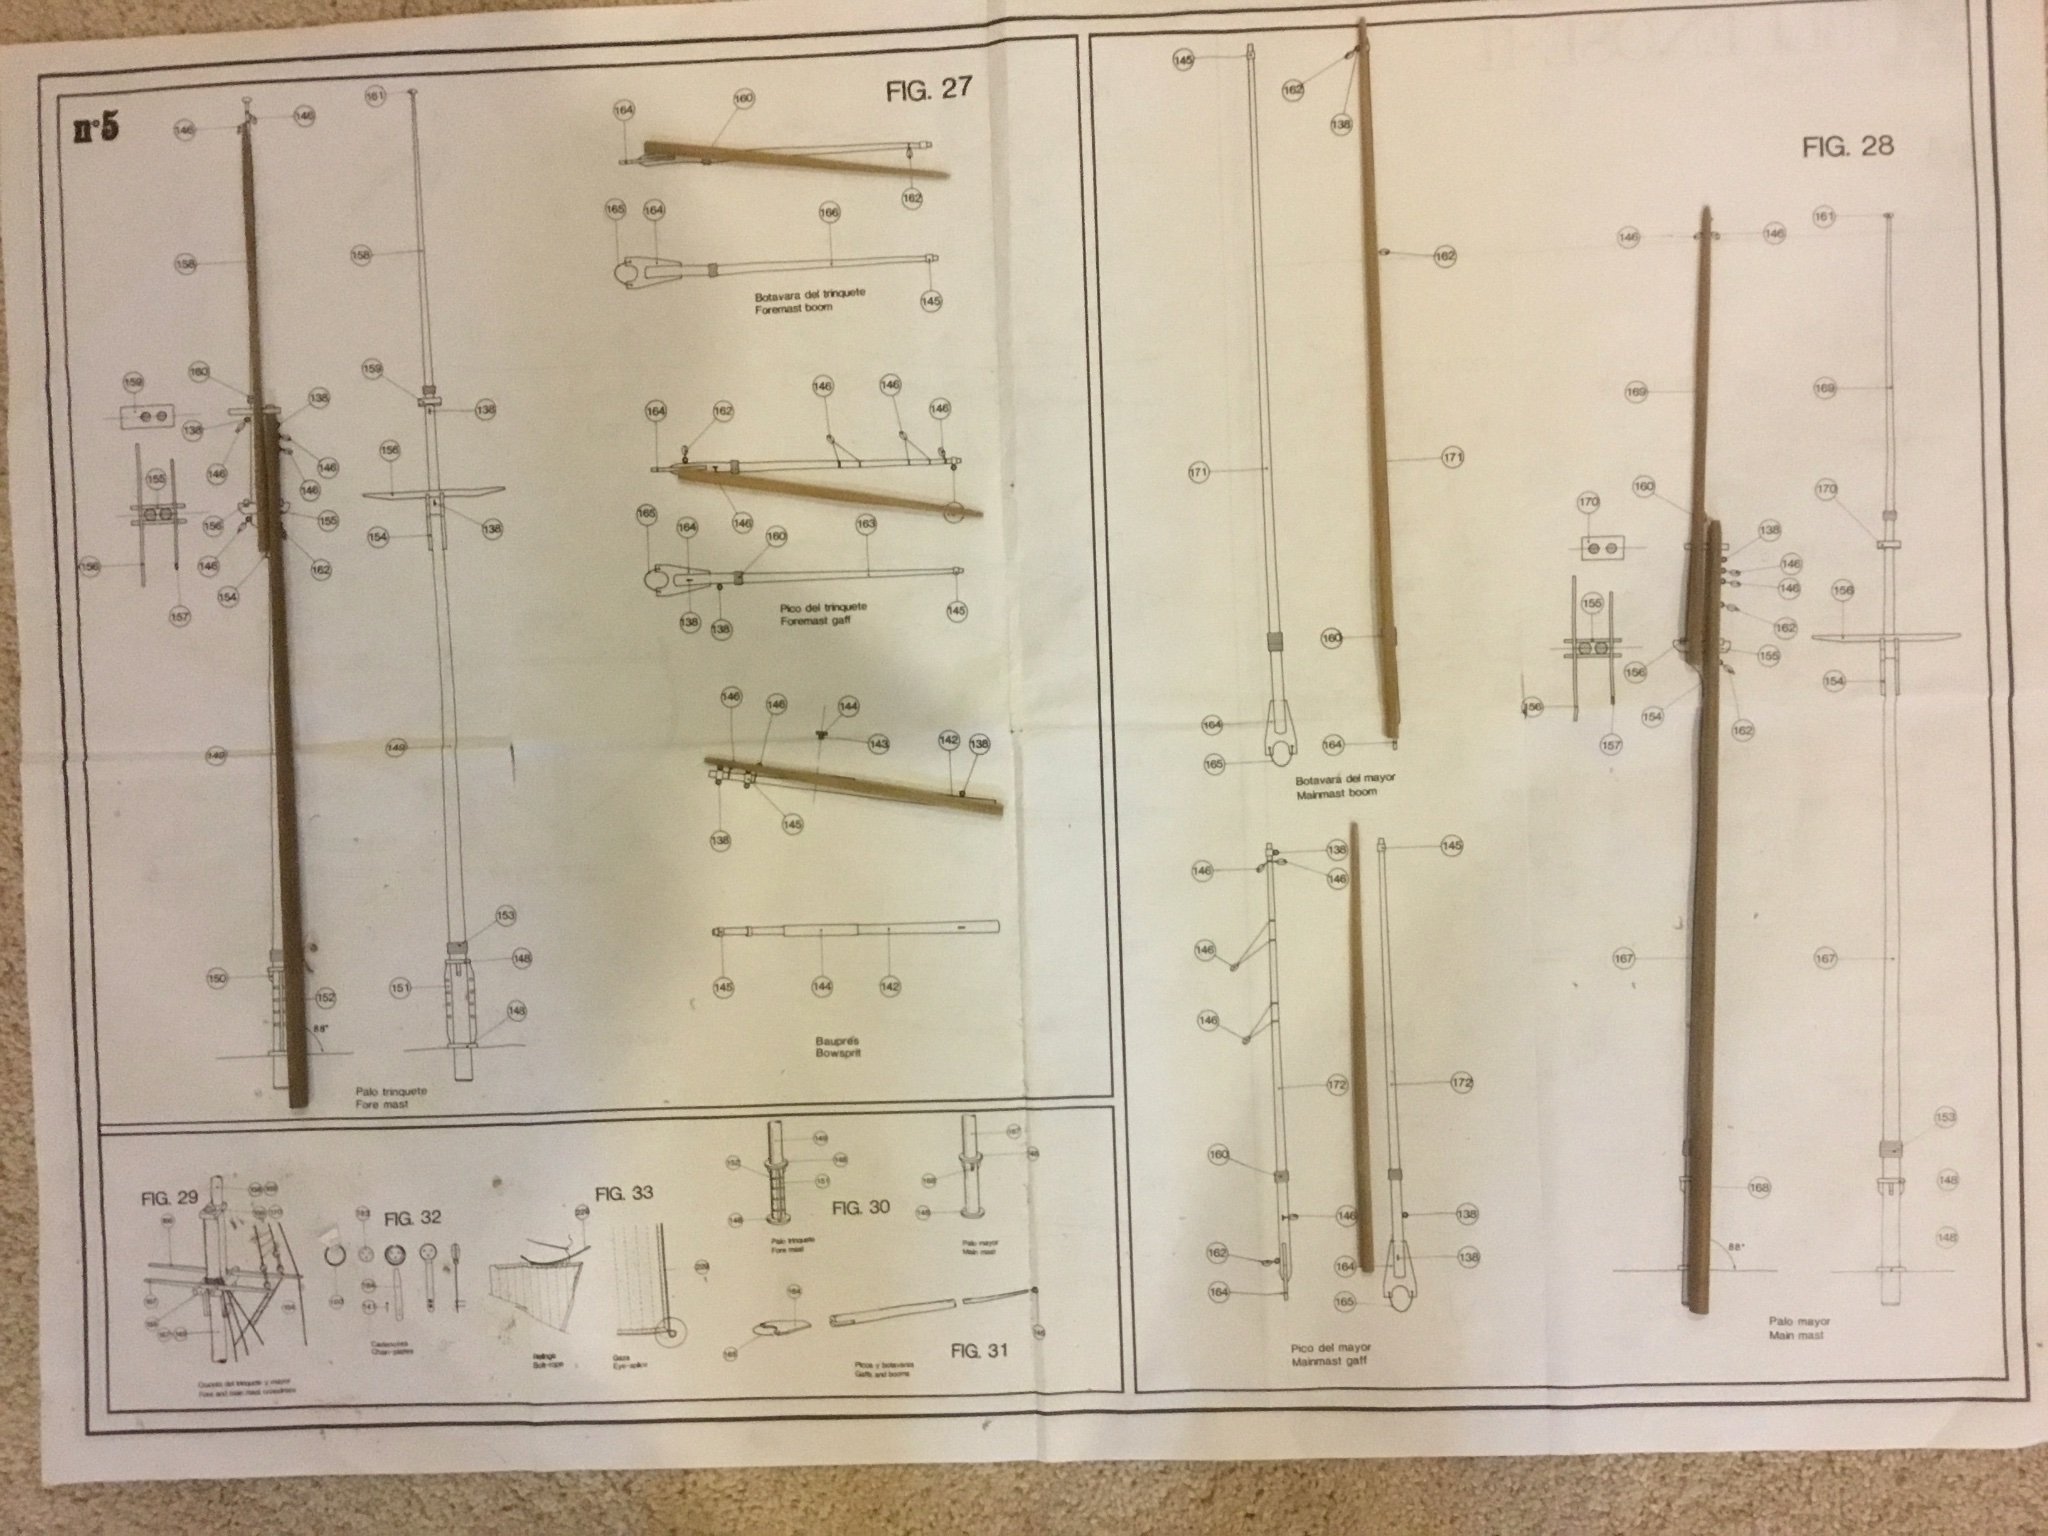
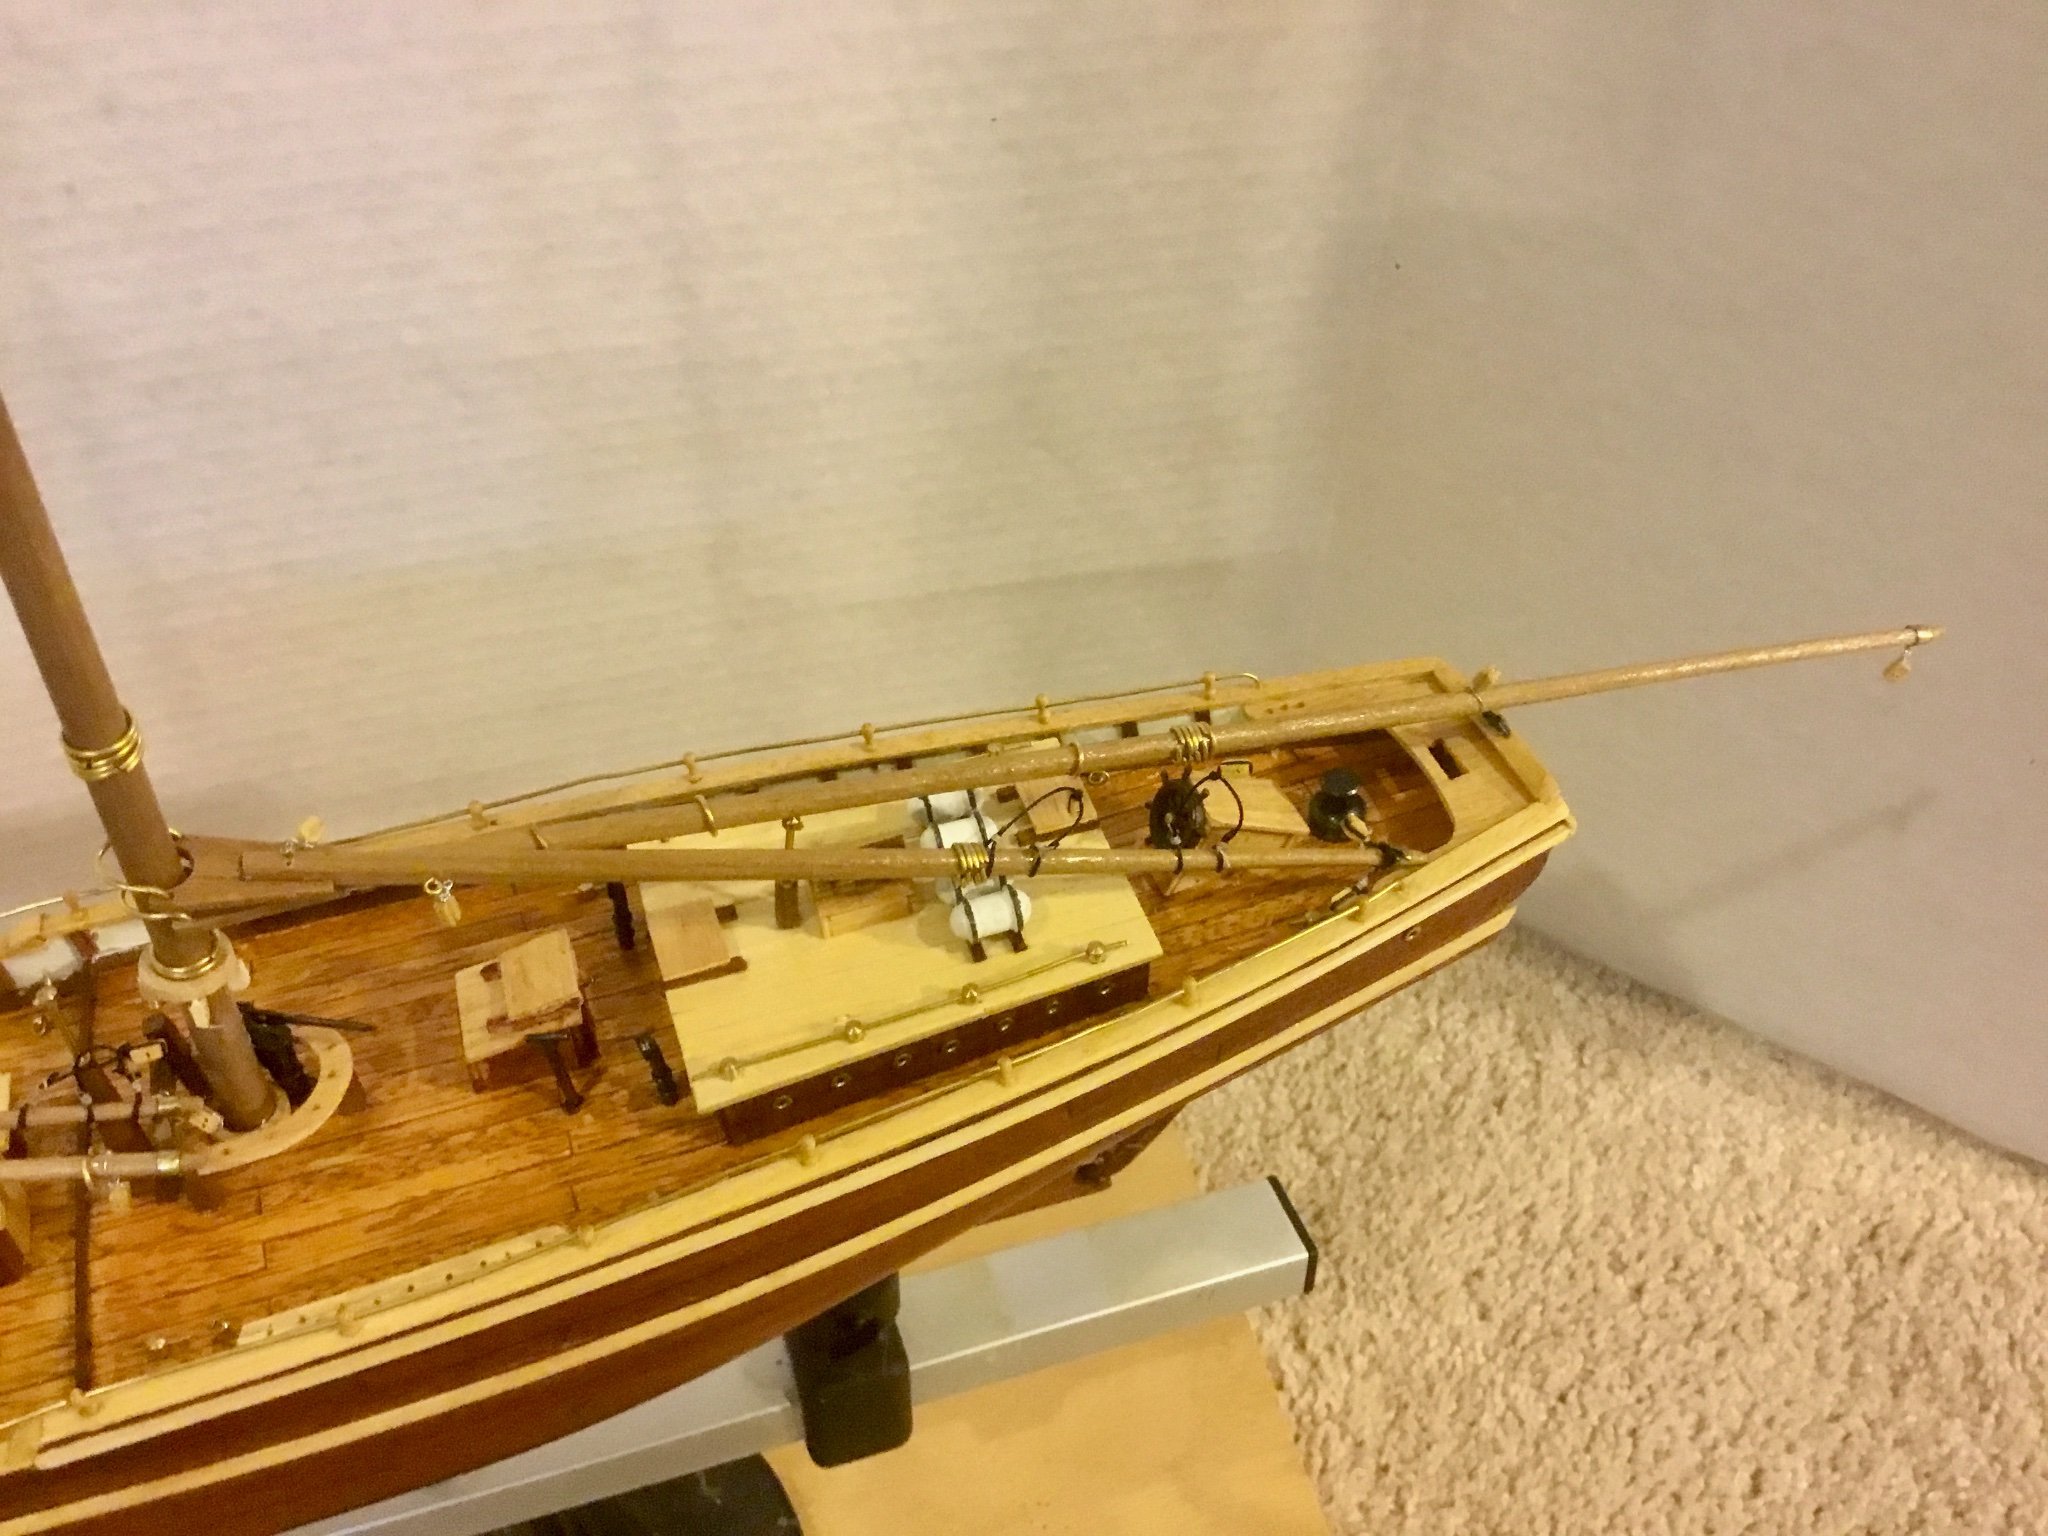
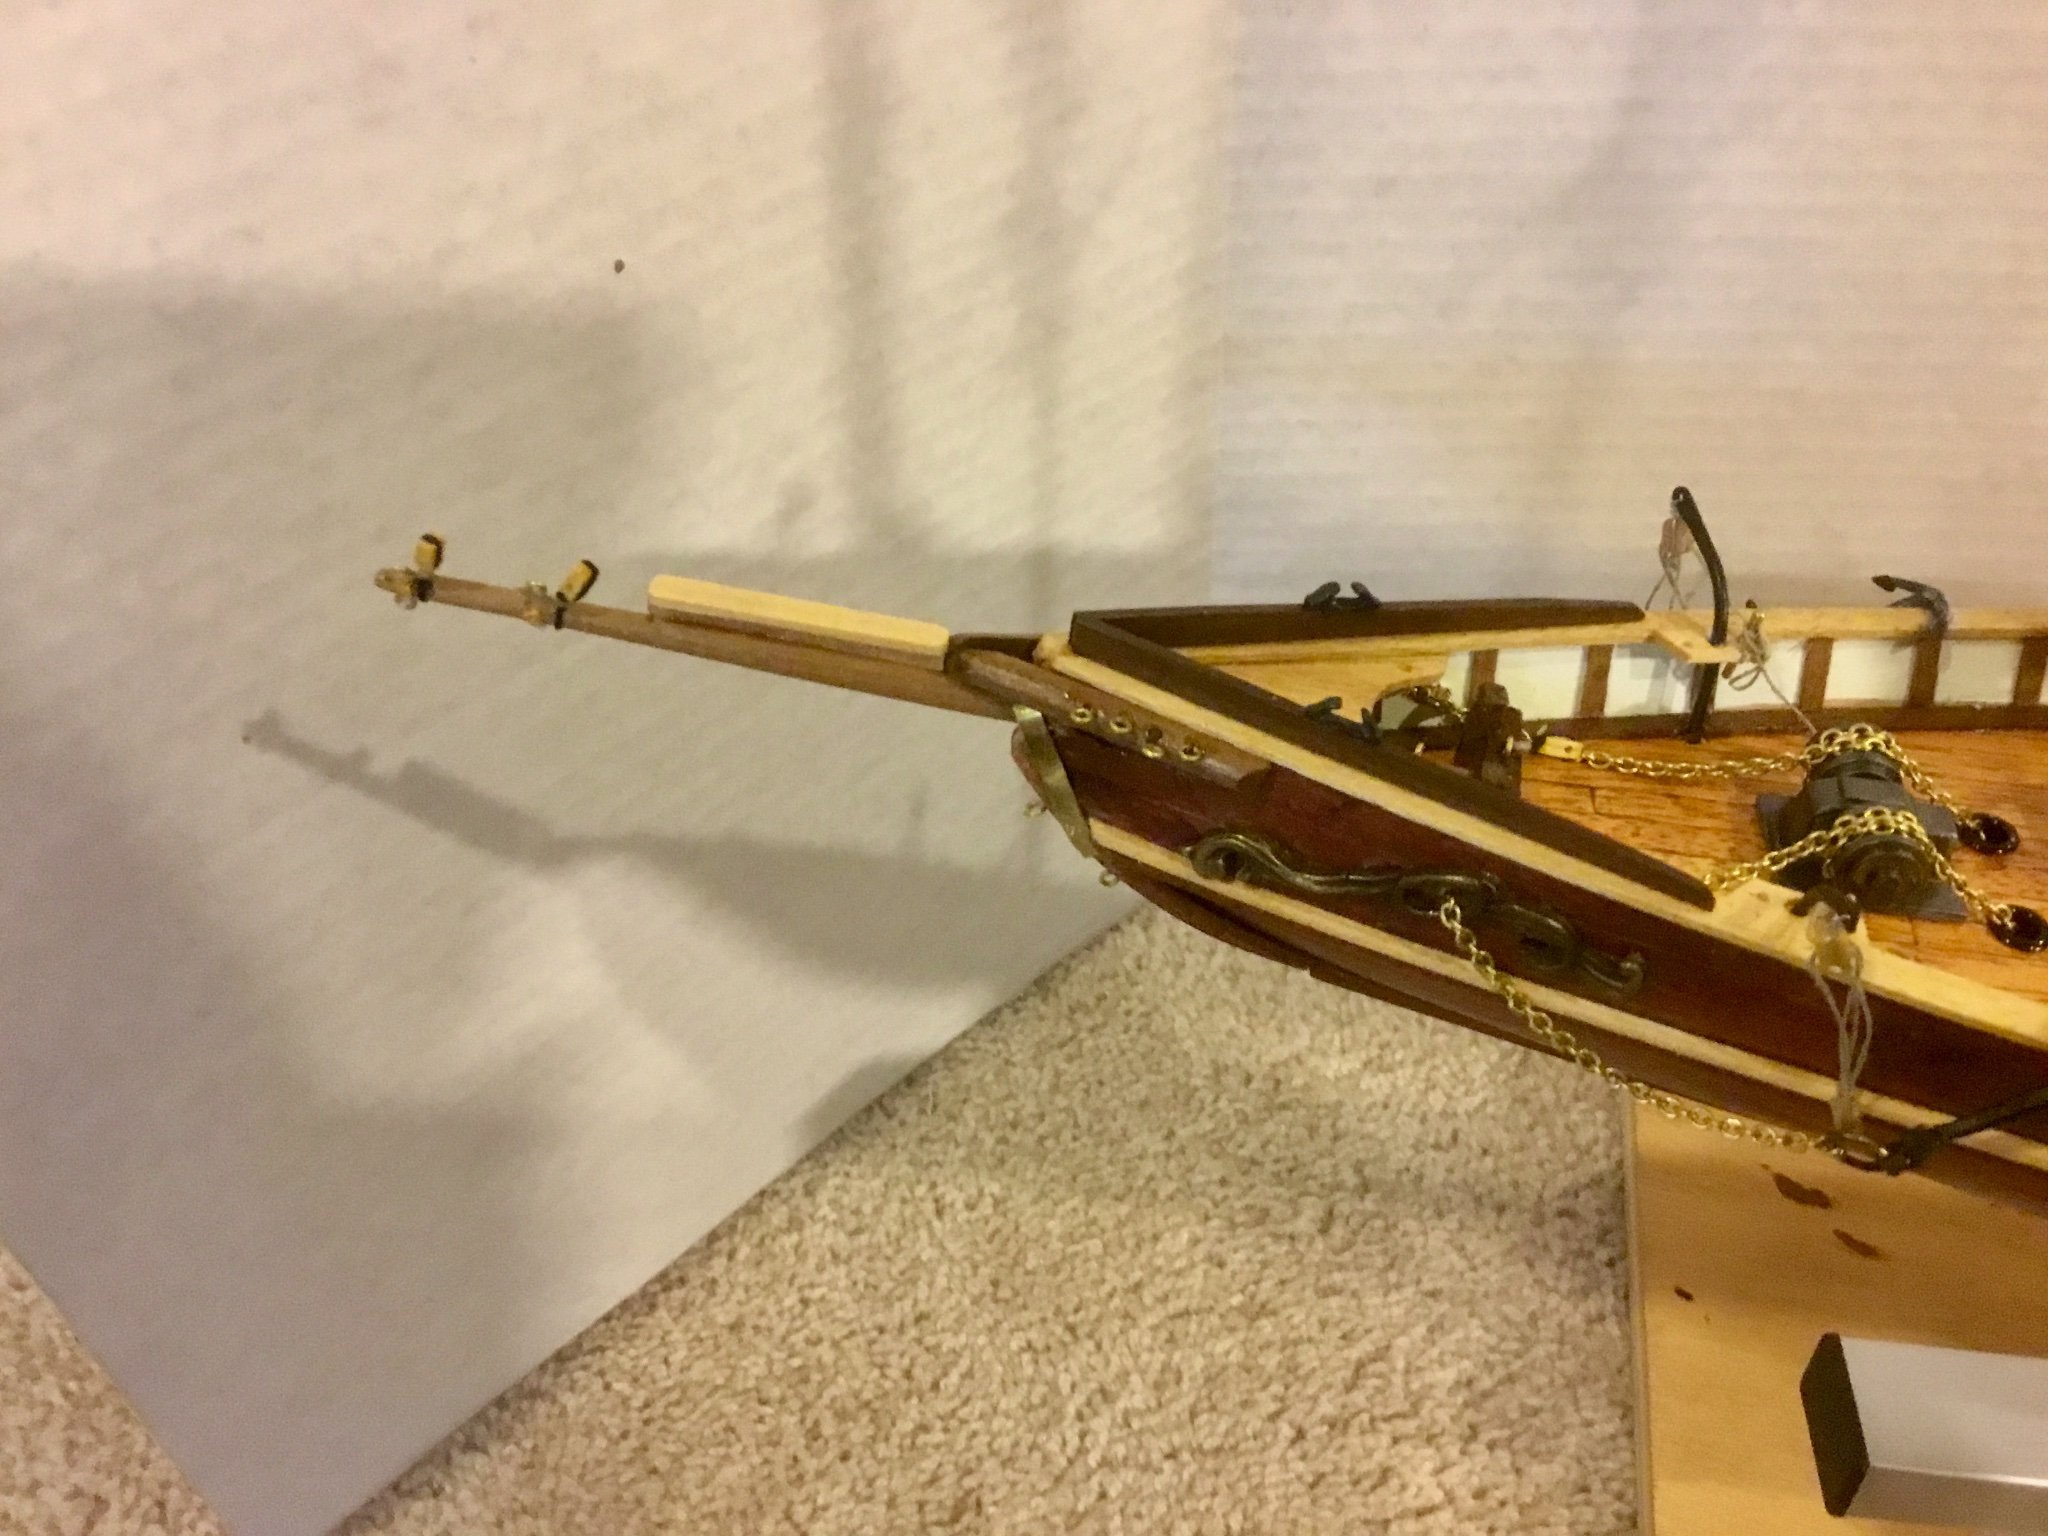
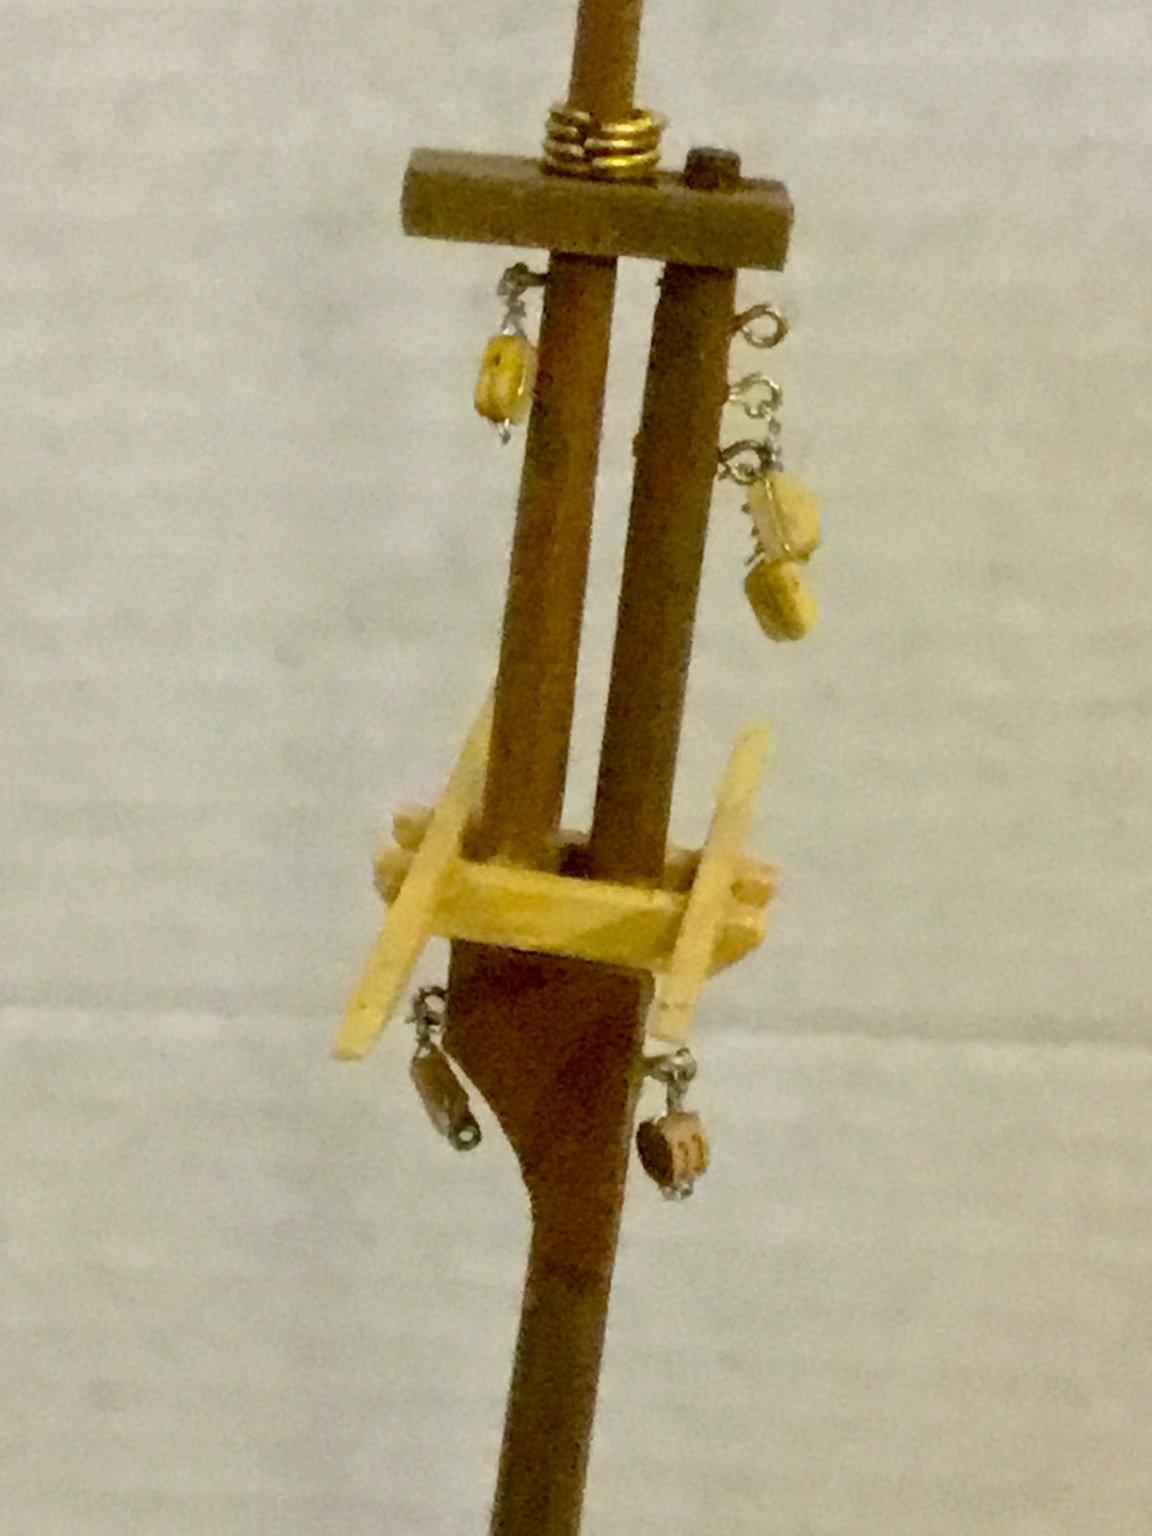
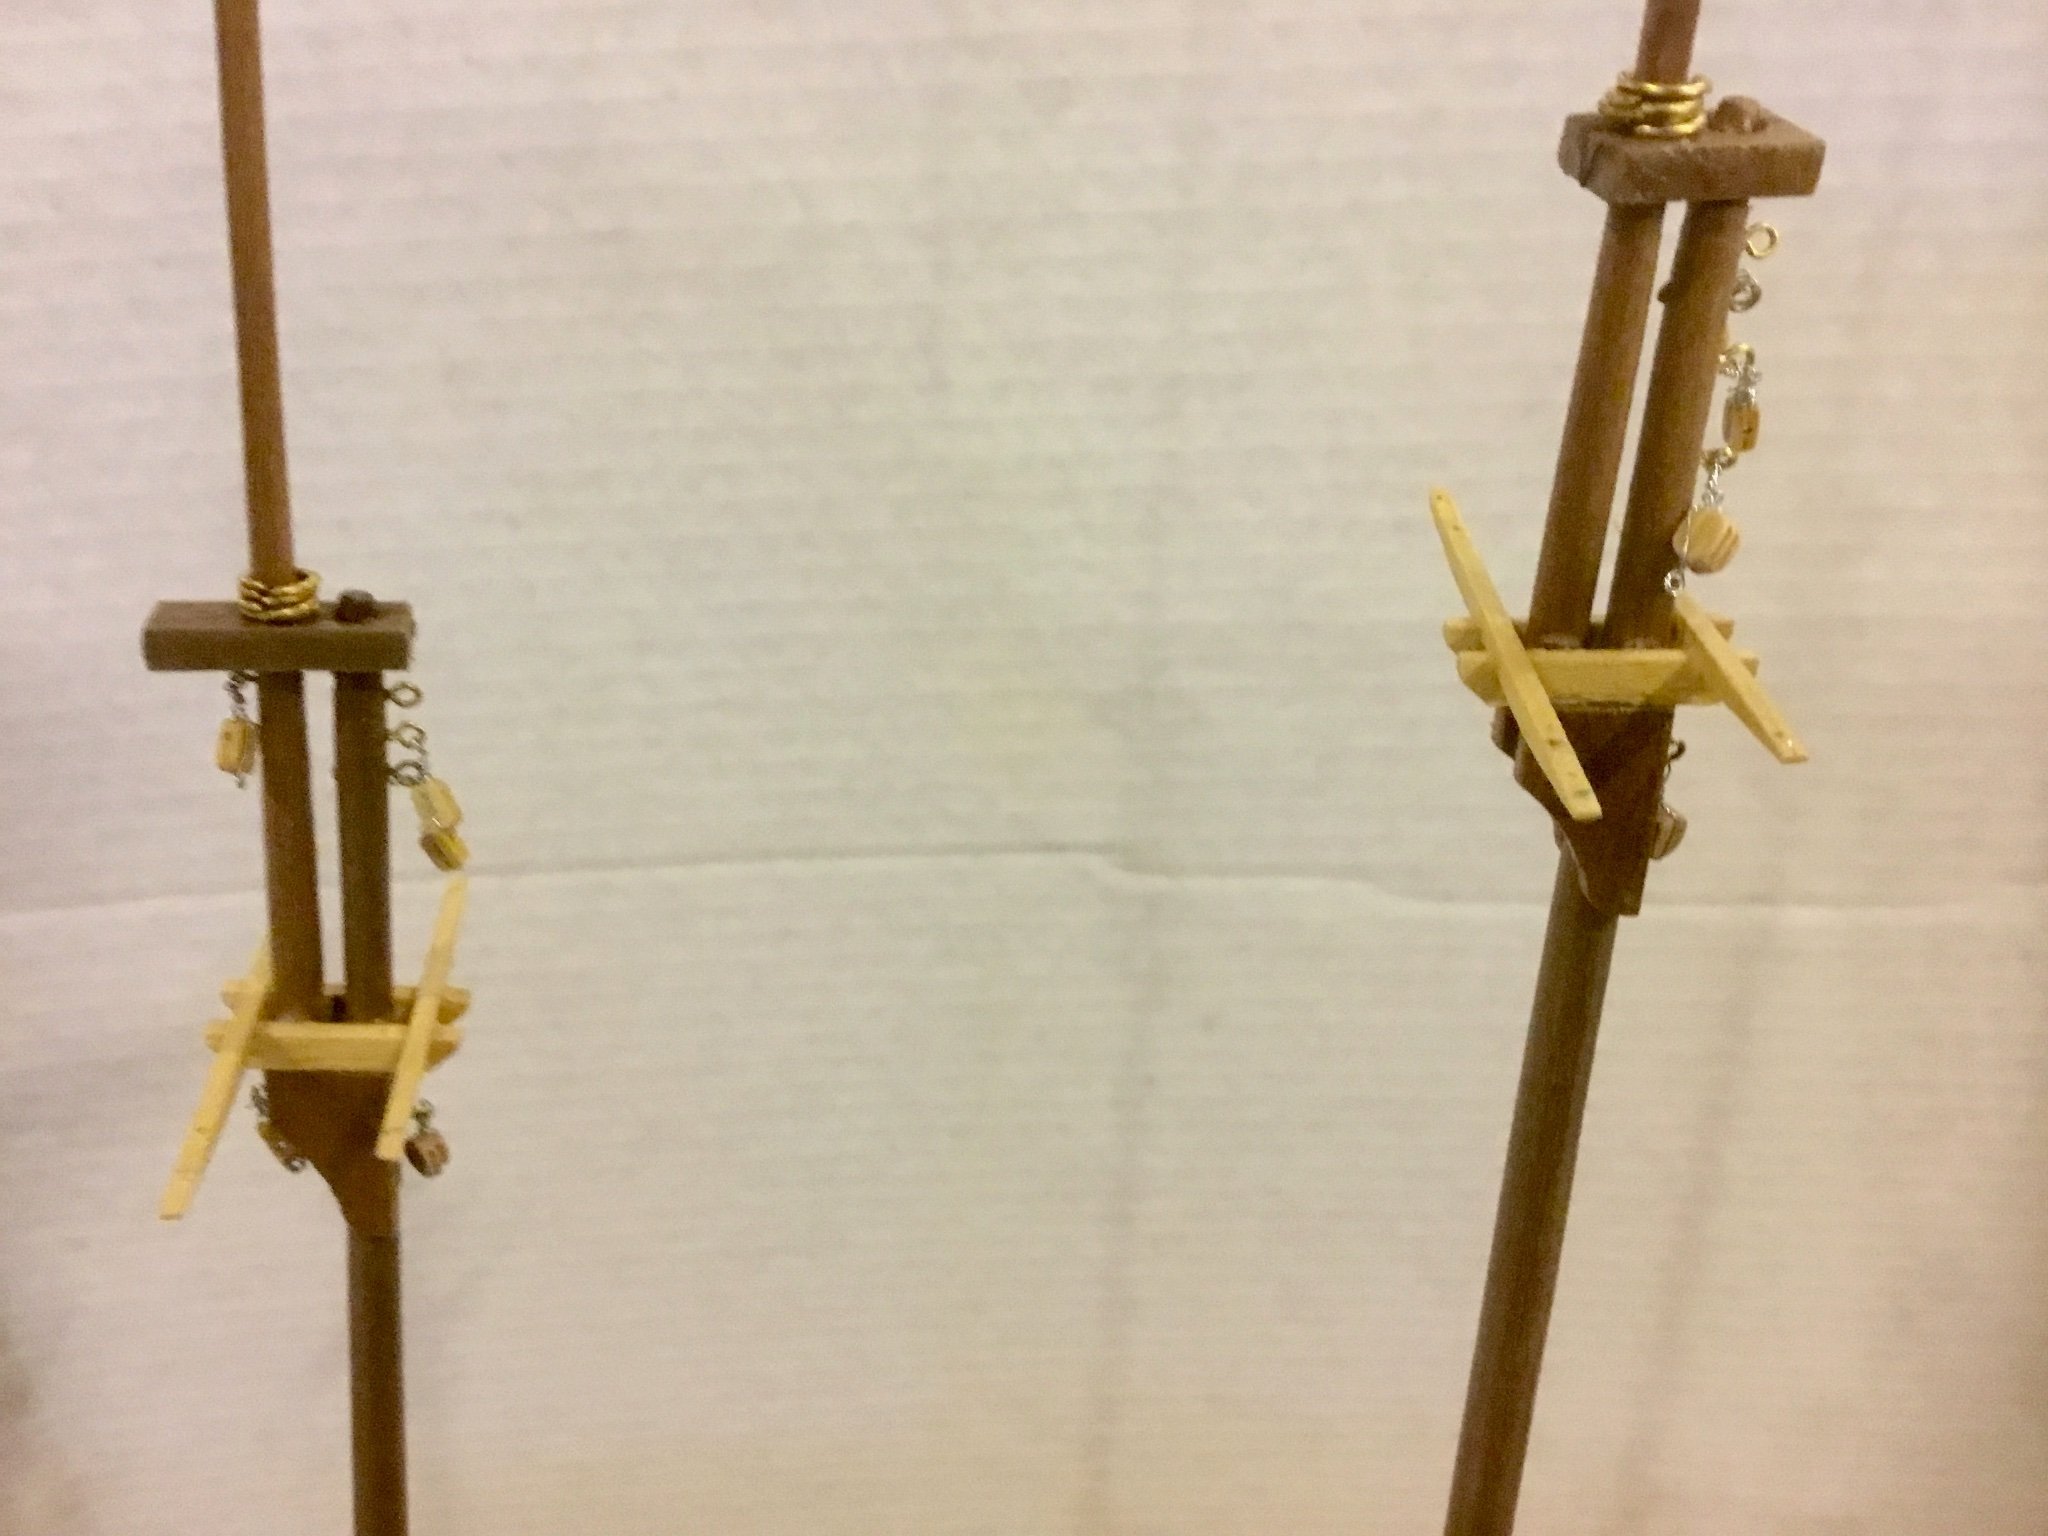
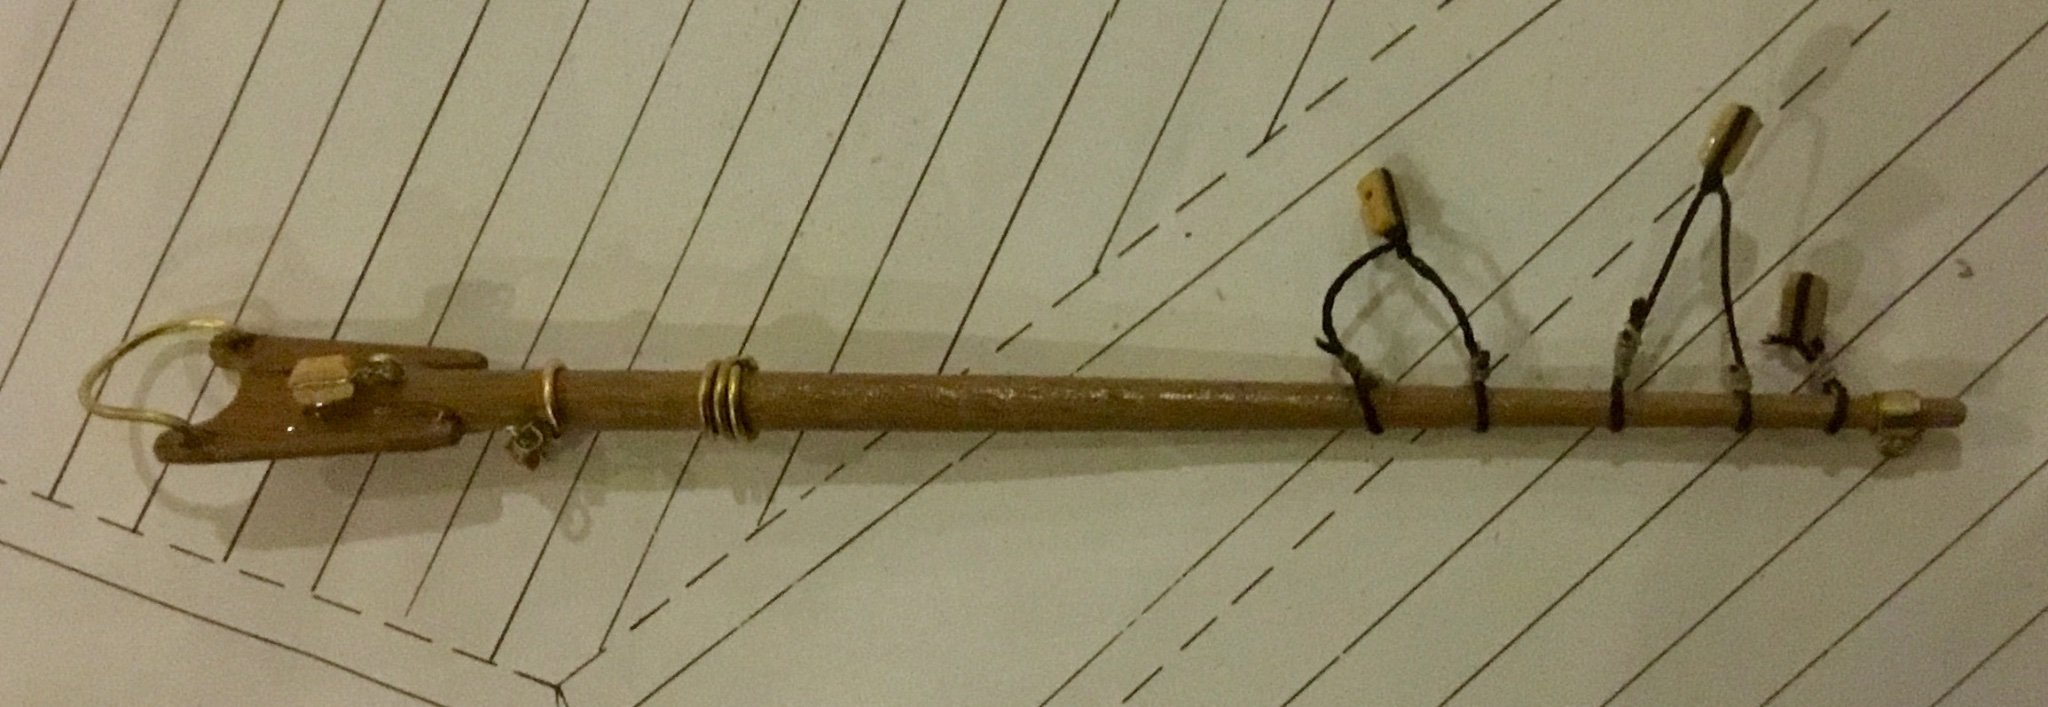
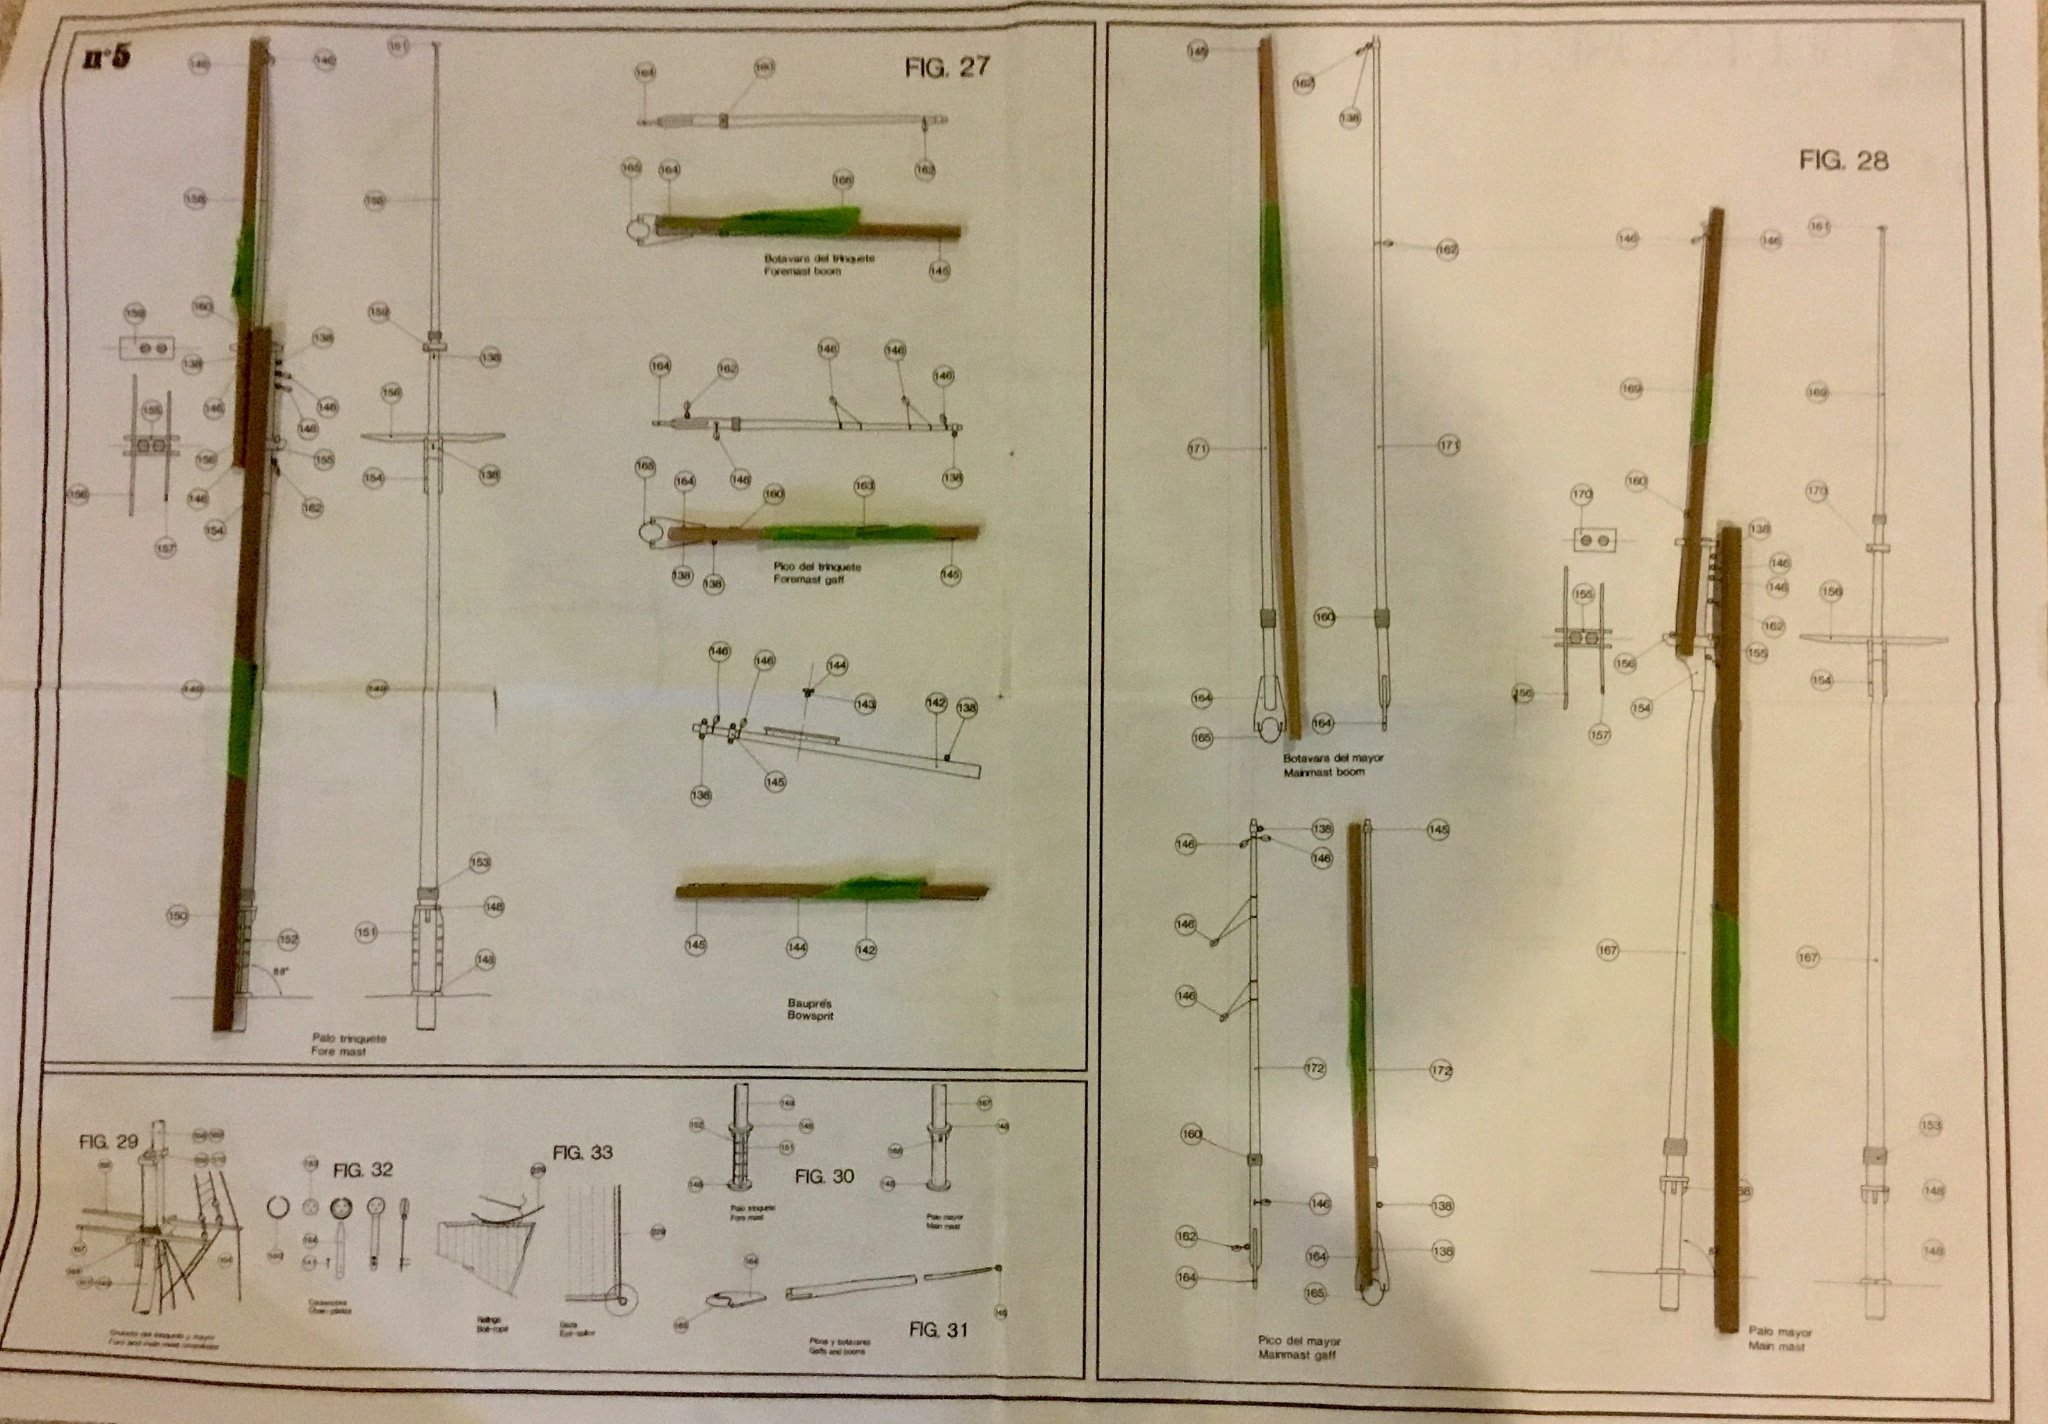
At this stage I have tapered all the masts, gaffs, booms and bowsprit dowels. I drilled out the holes for the bowsprit and masts. I mounted the top masts to the lower masts. Added the crab-jaws to the booms and gaffs. Varnished all the parts. Attached eyebolts and blocks where indicated in the plans. I permanently mounted the bowsprit. In so doing I knocked the bowsprit bitts loose so I reinstalled them but this time I inserted pins into the bottom of the bitts and drilled holes in the deck to accept the pins. I don't want to cause the bowsprit bitts to come loose again when tying on the foremast stay. I've inserted the masts in the deck holes without gluing as I prefer to hold them in place using the standing rigging.


-
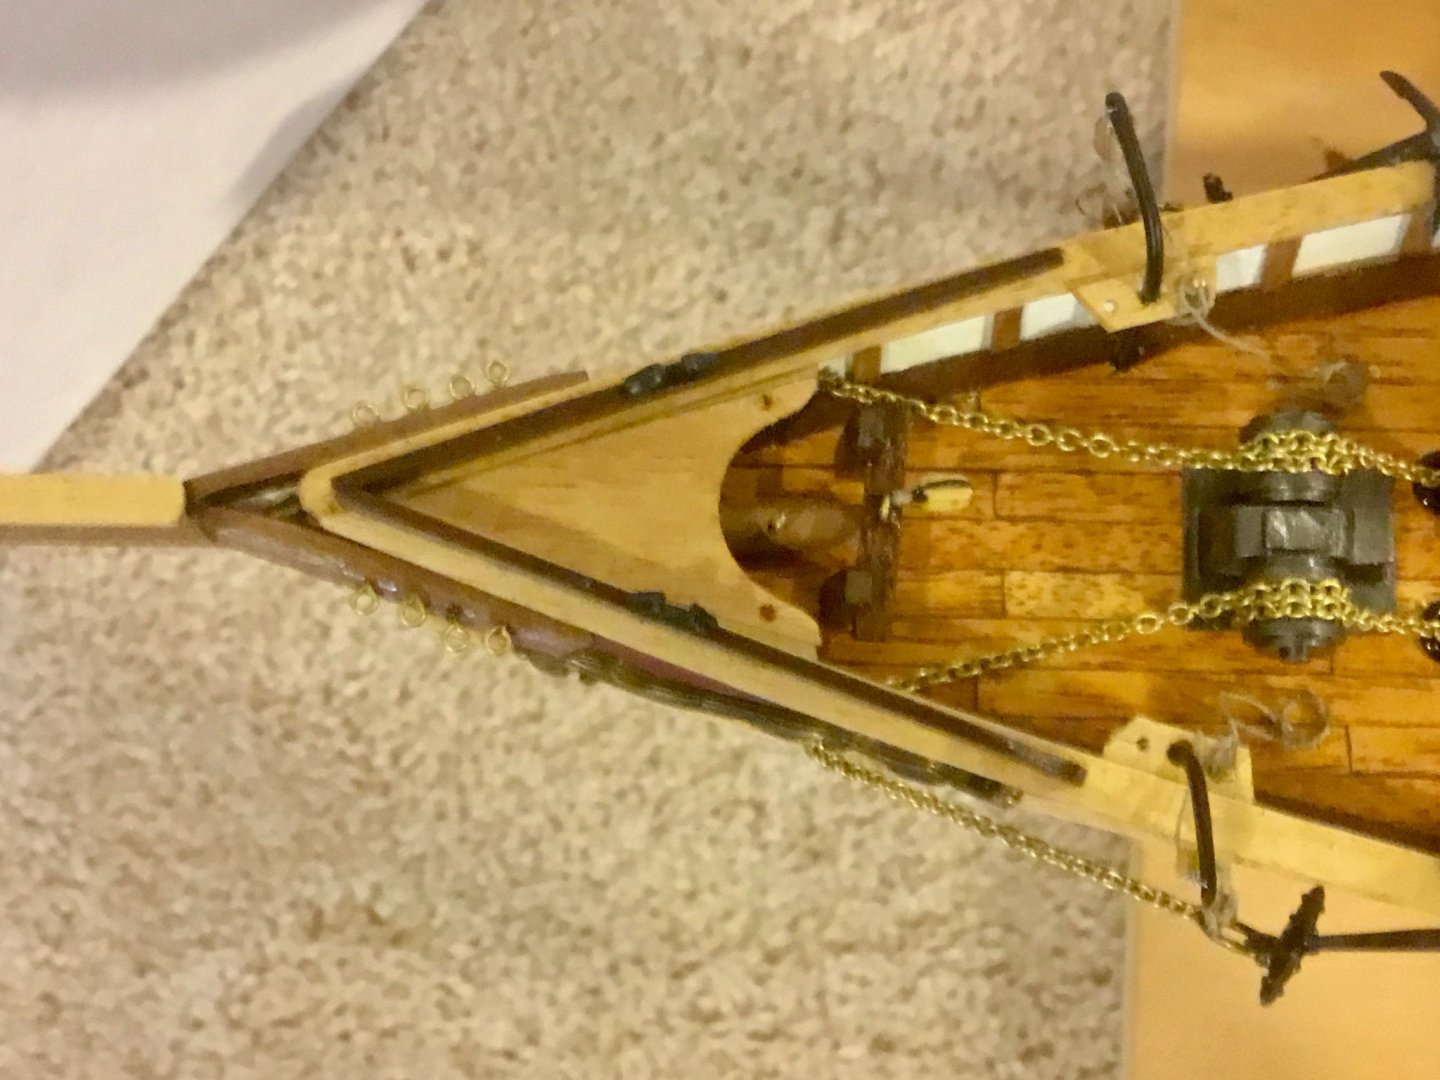
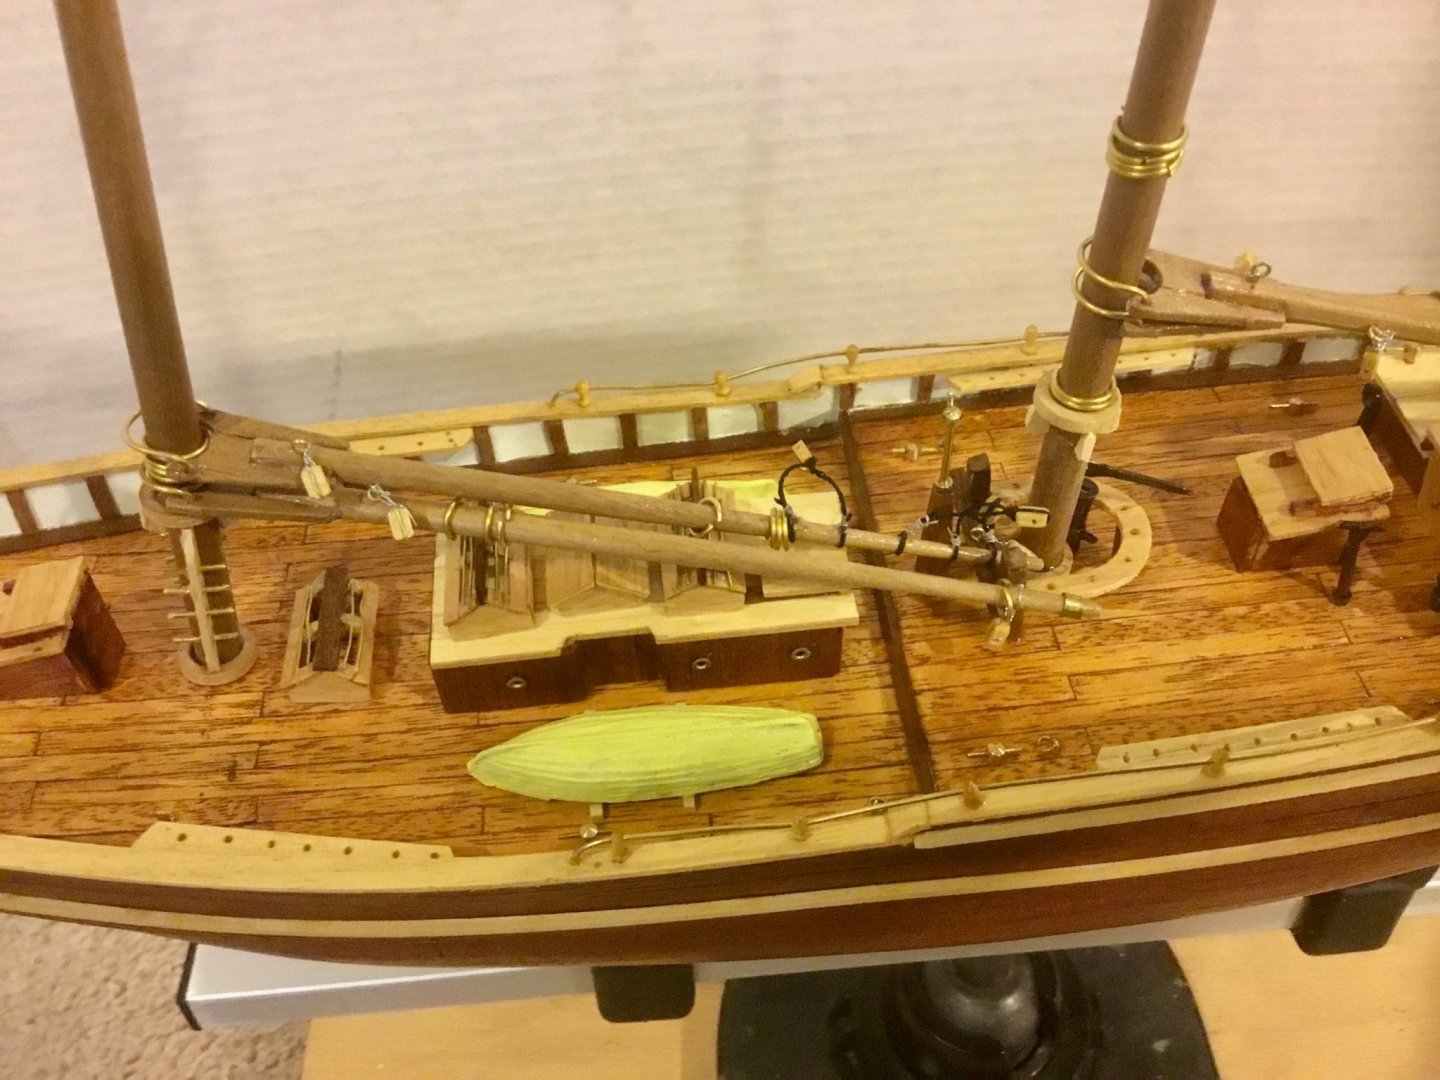
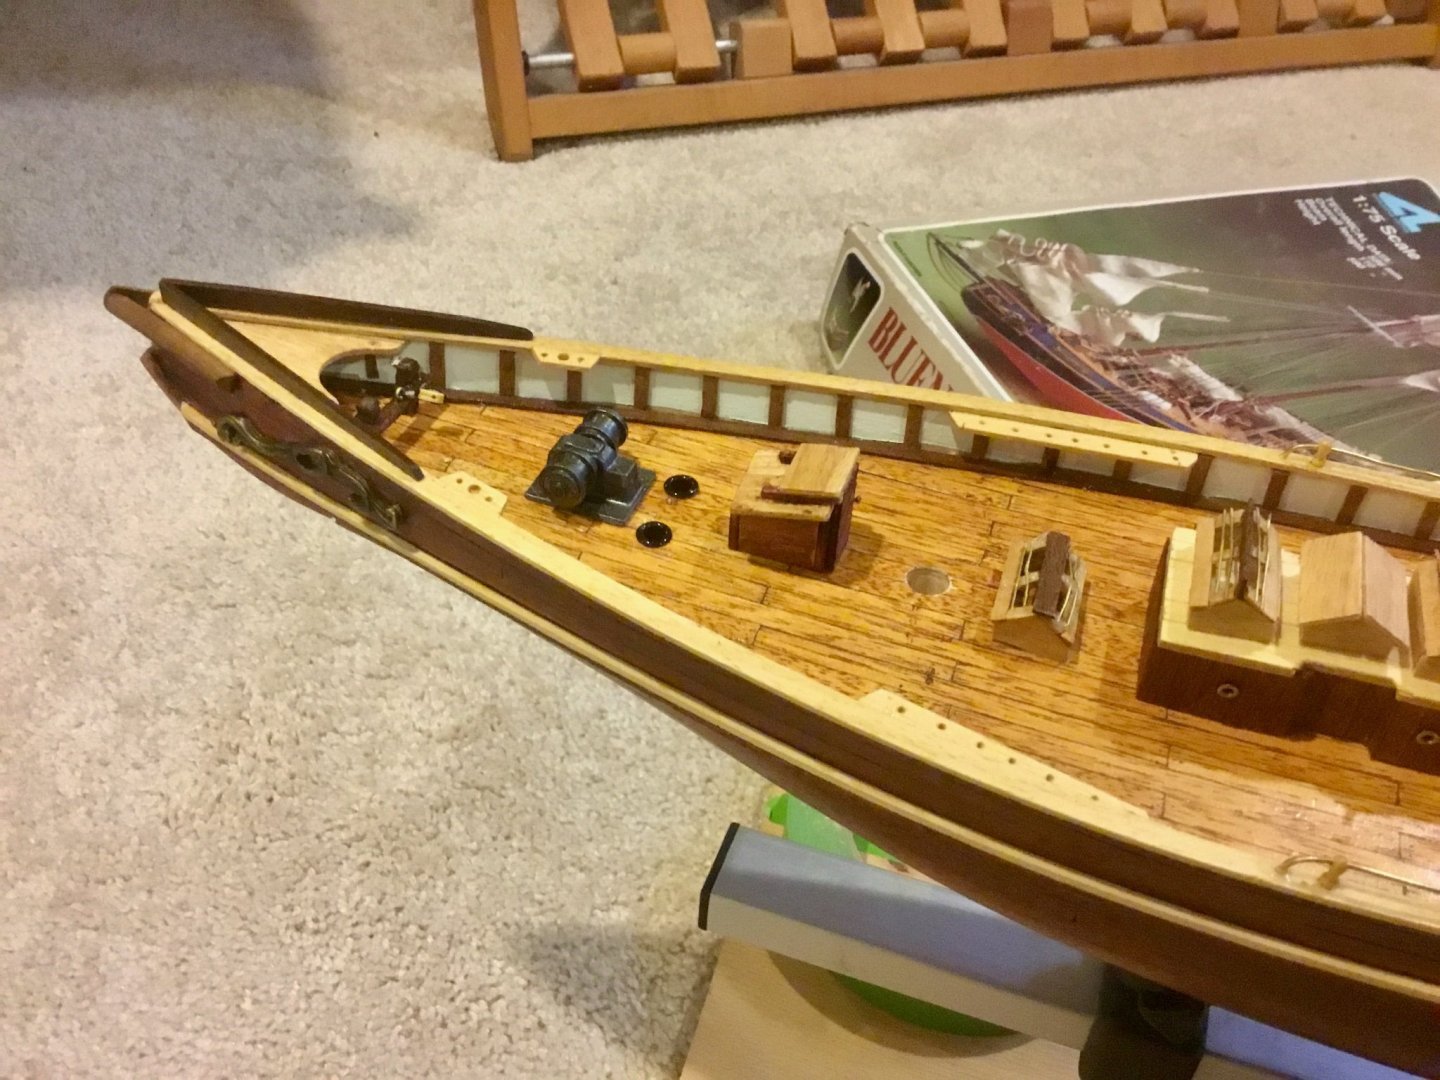
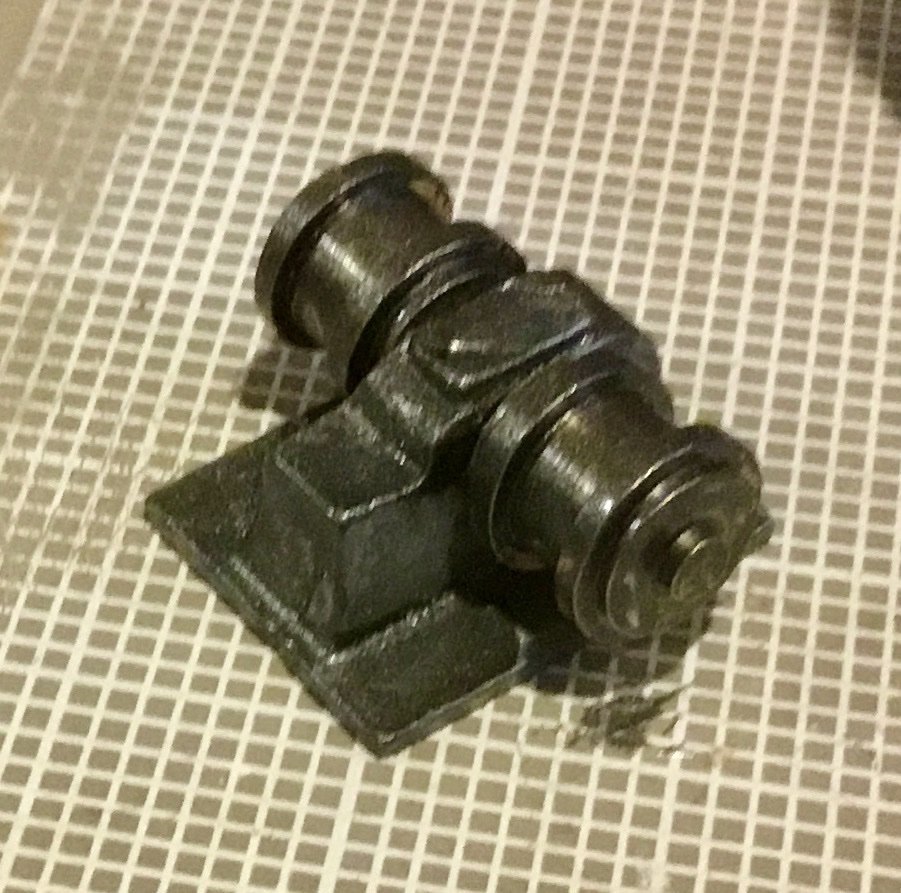
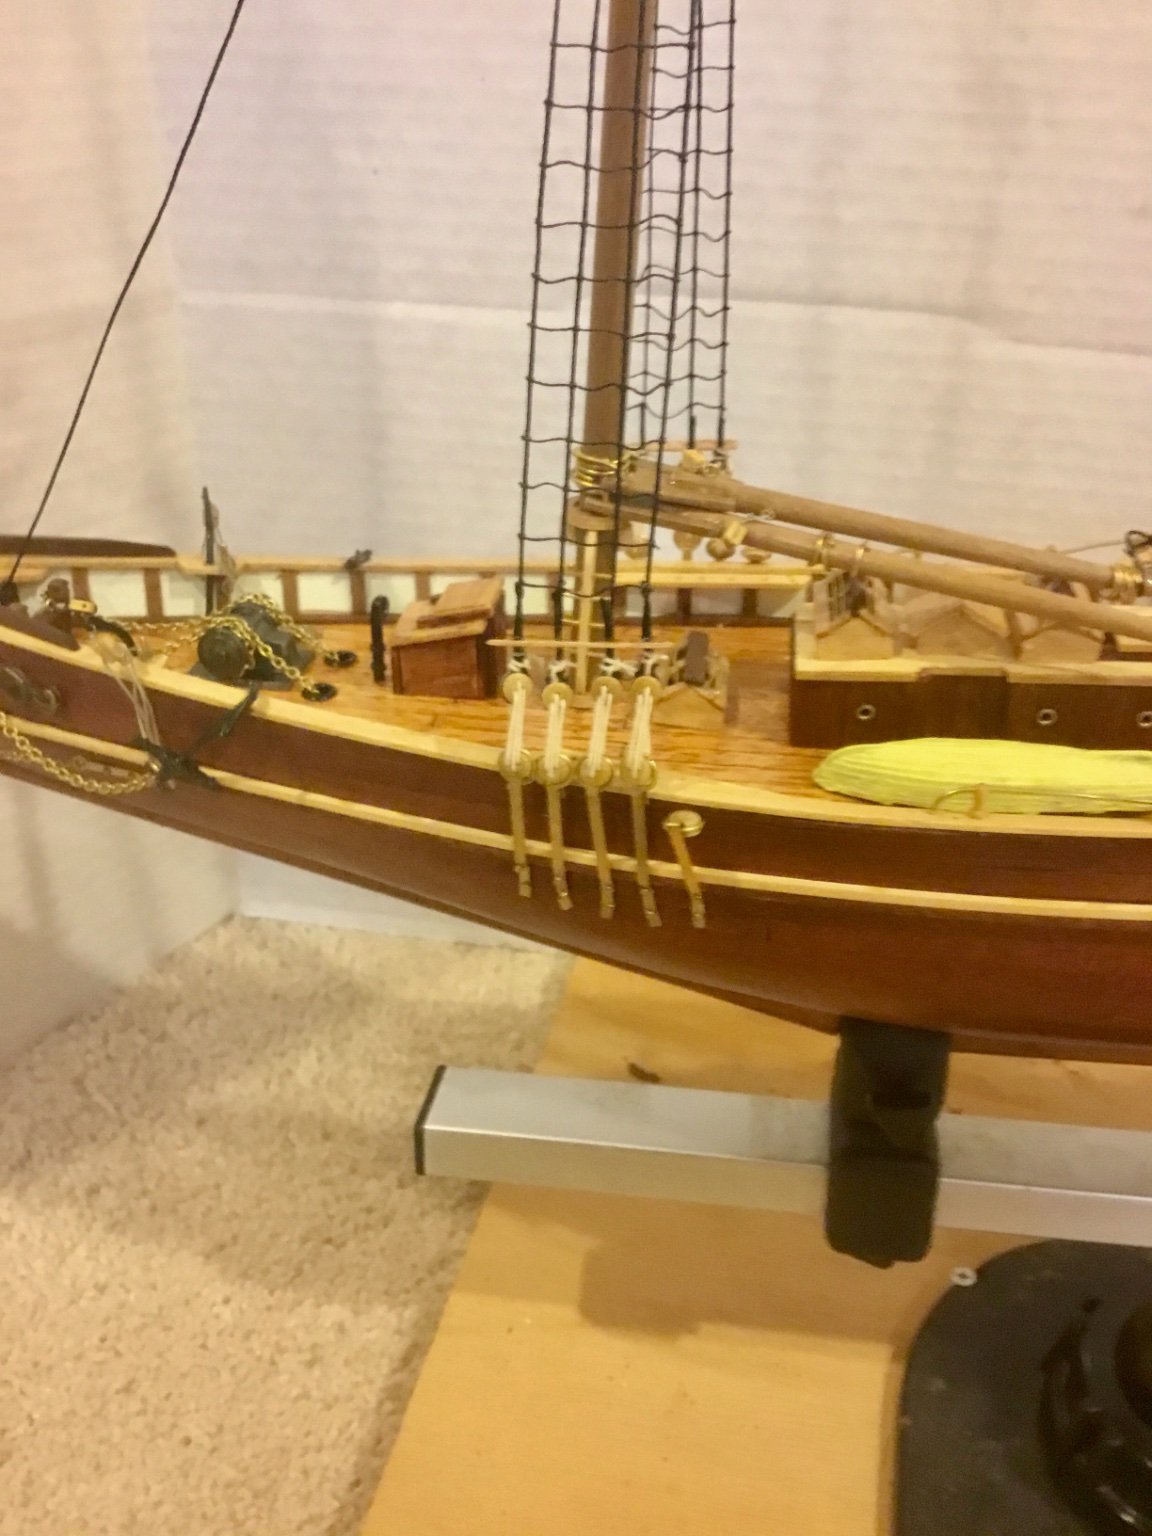
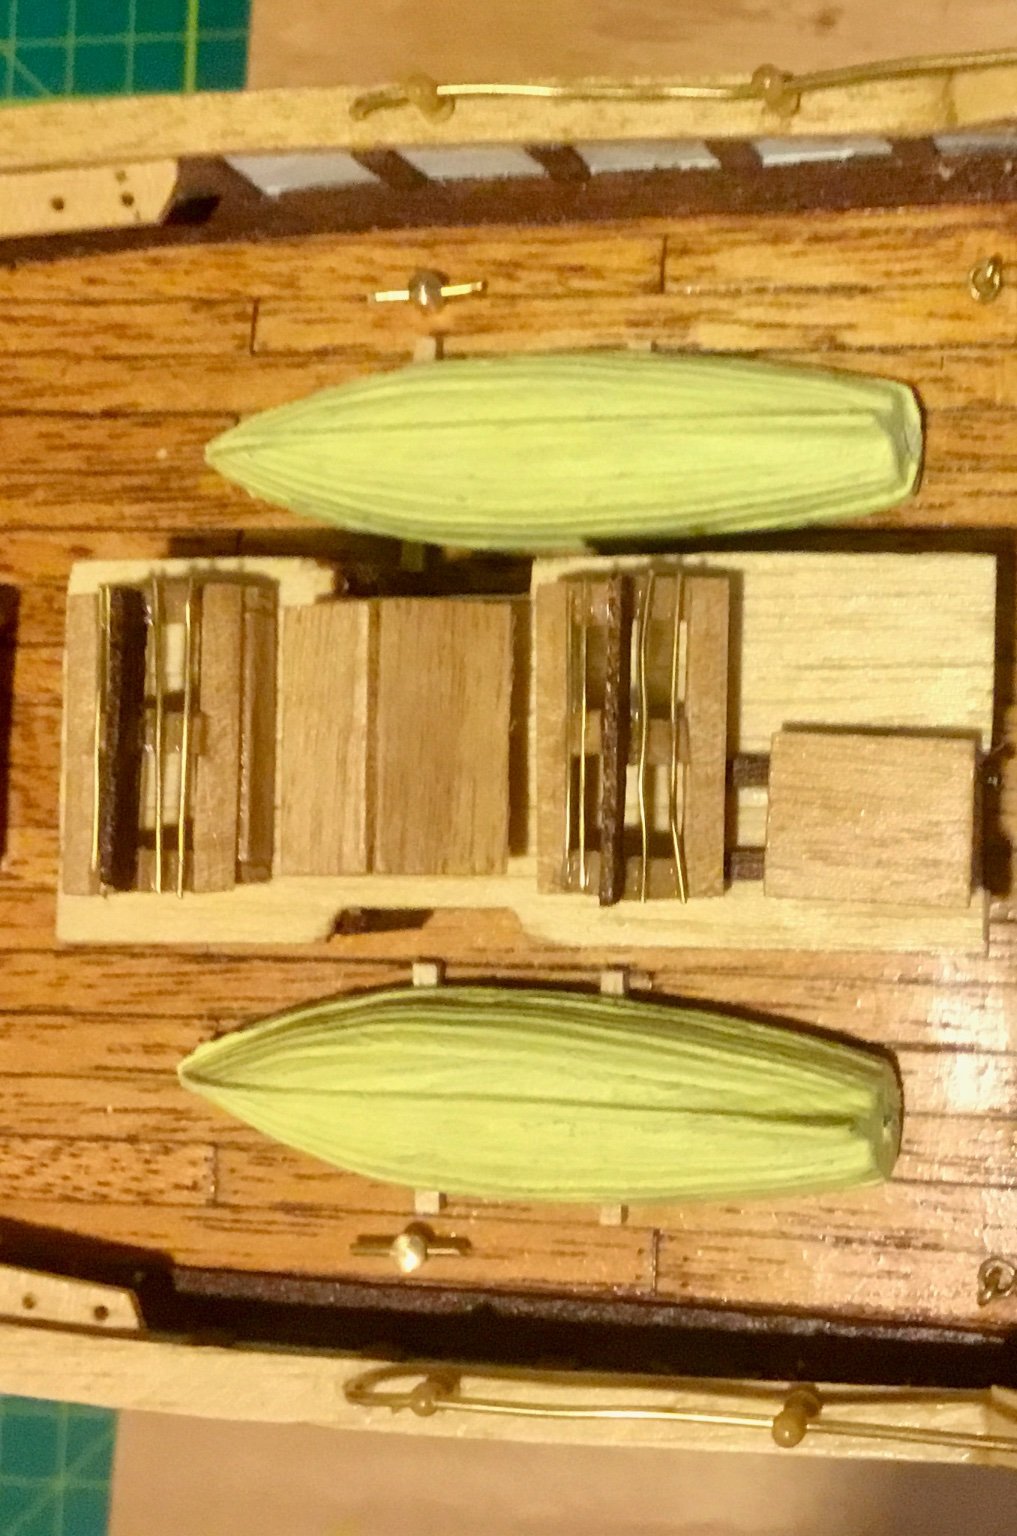
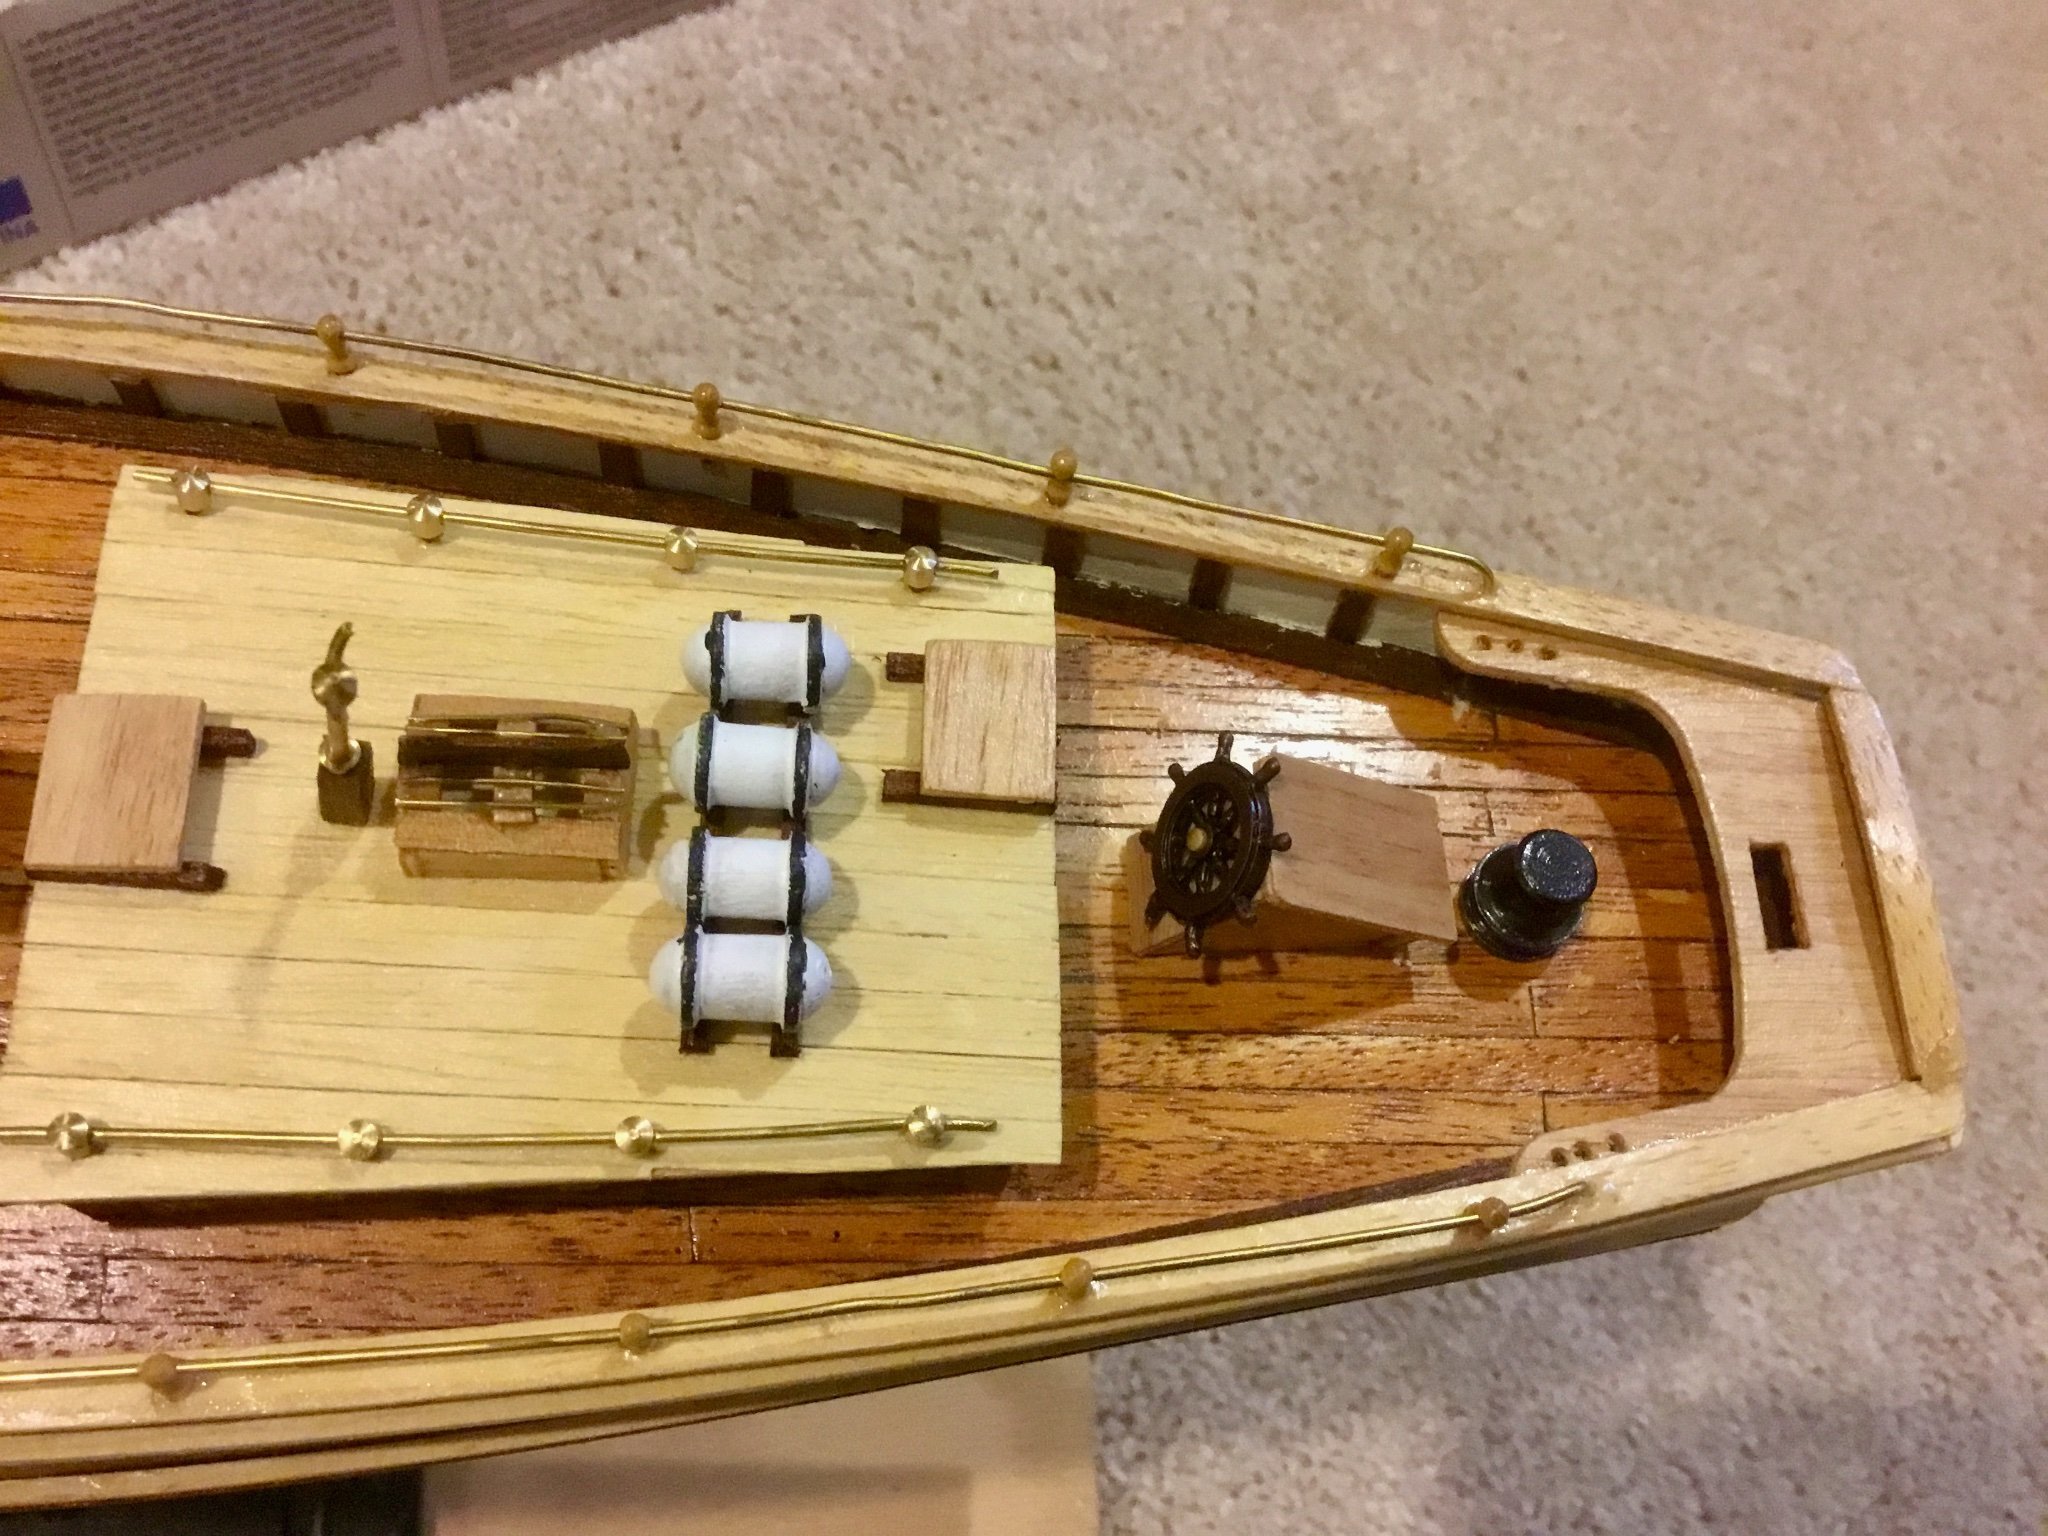
Drilled holes for and installed the ventilator shafts.
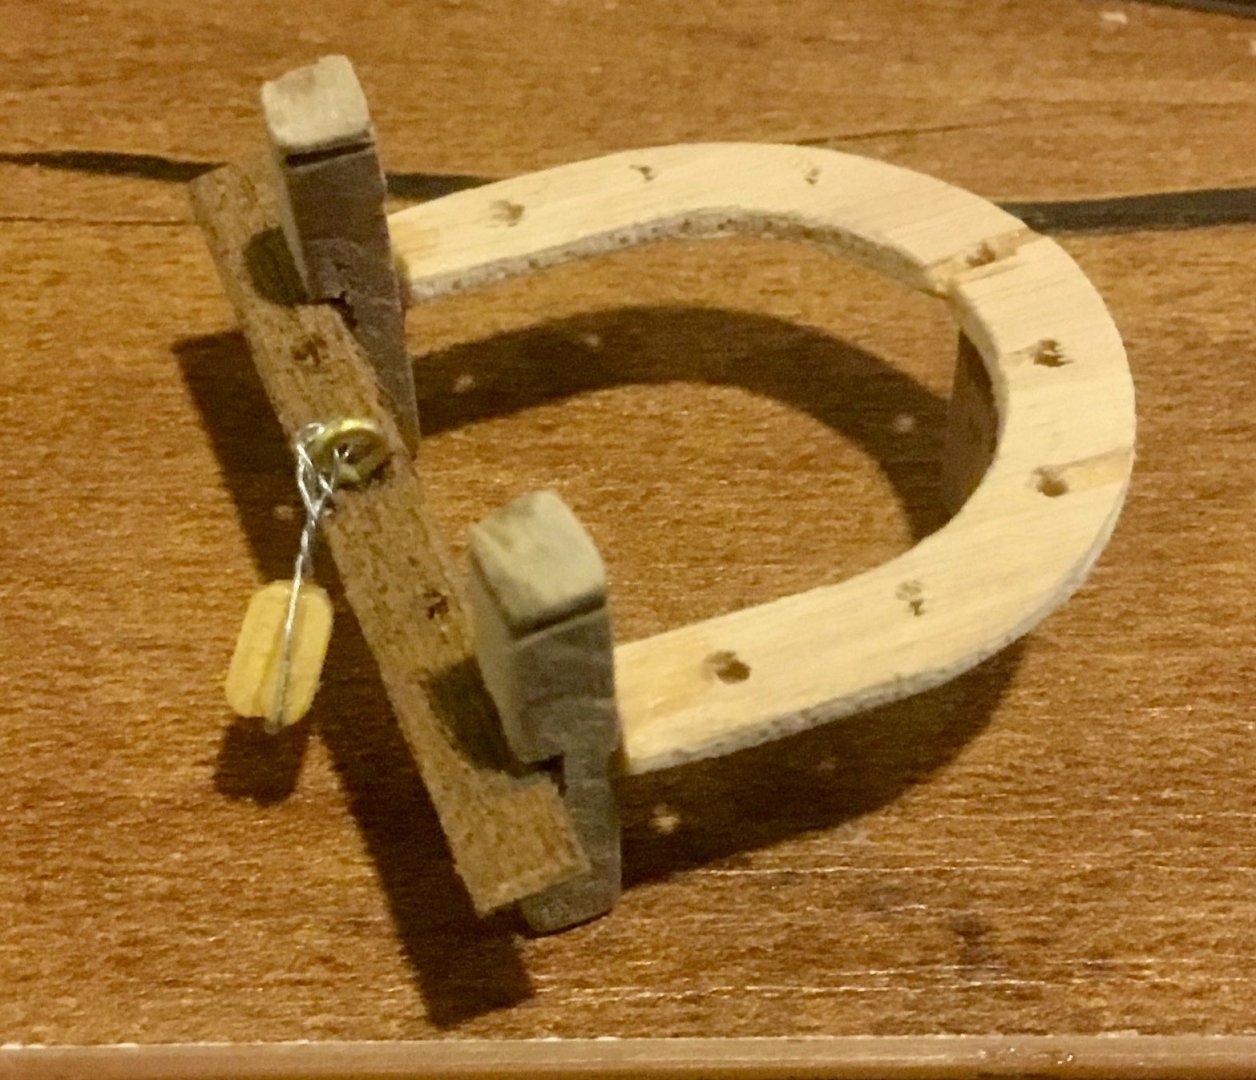
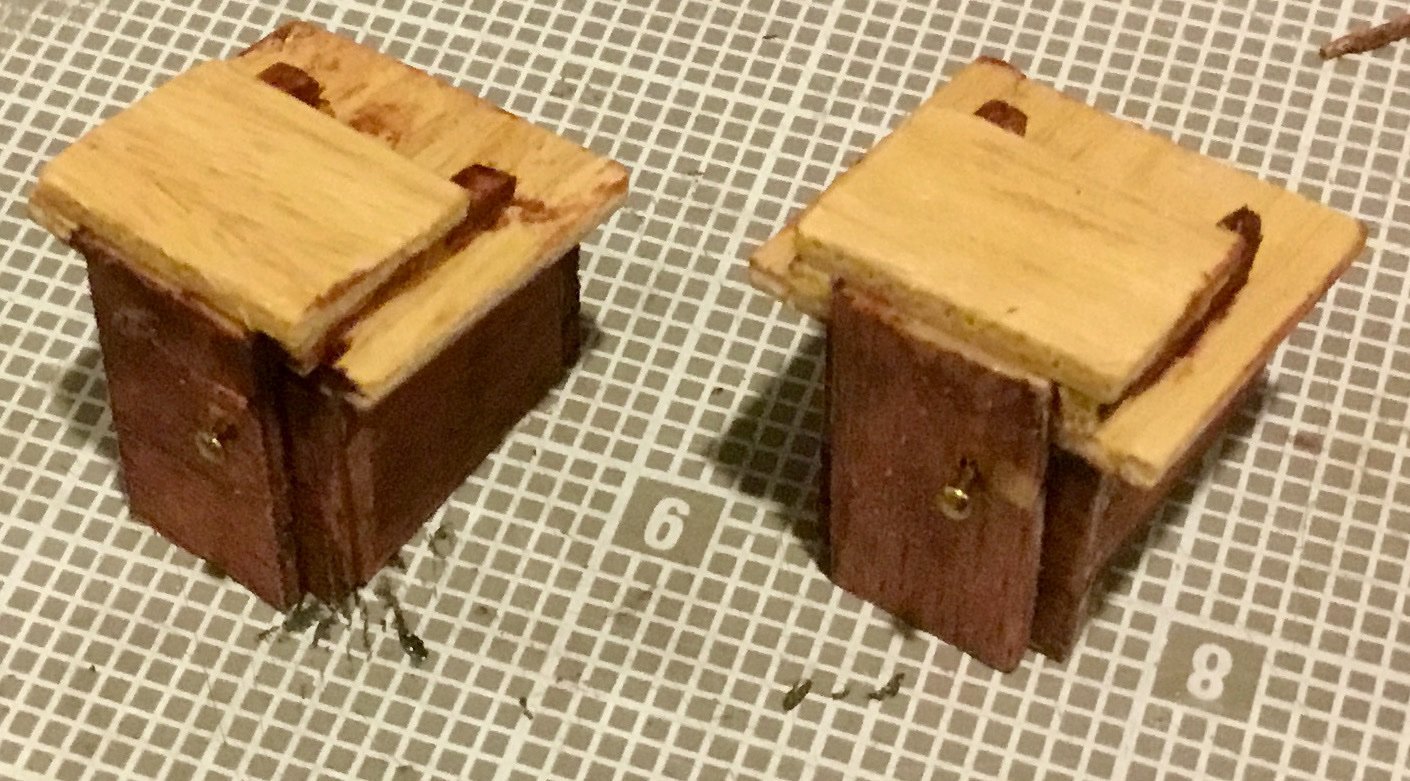
Made cradles for and installed the Dory boats.

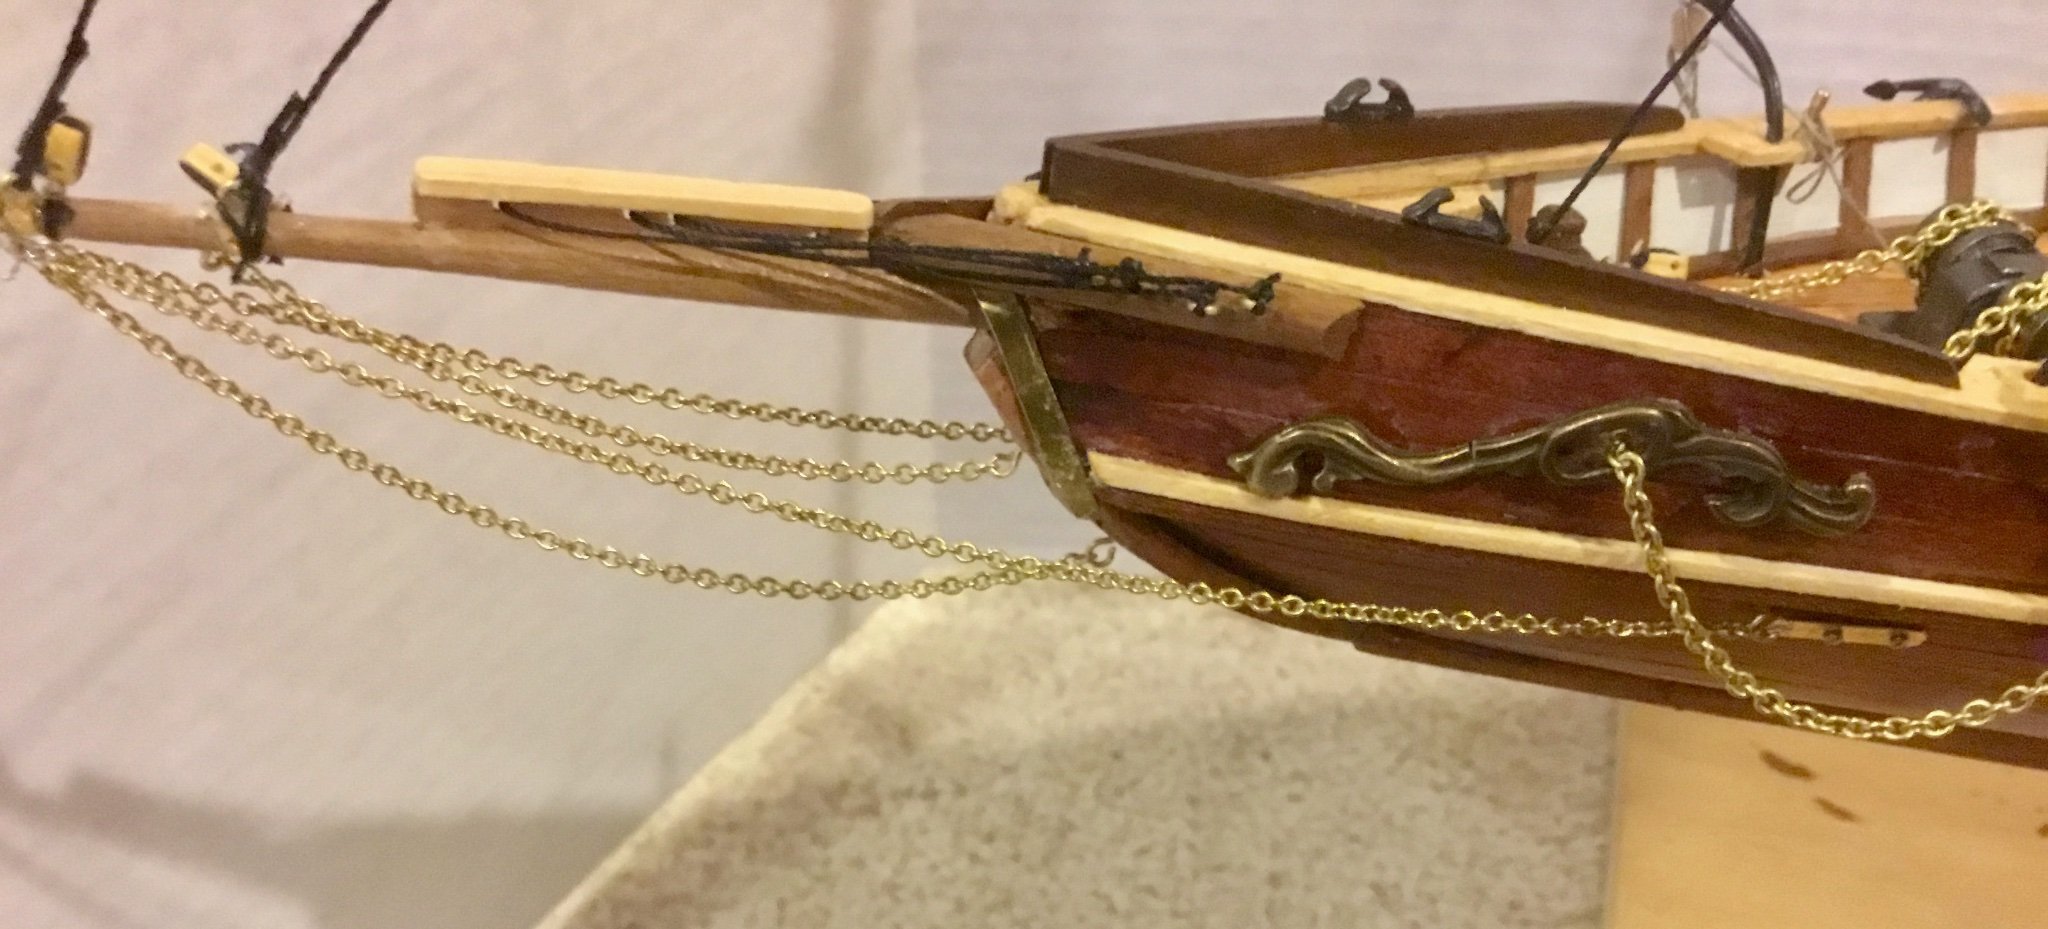
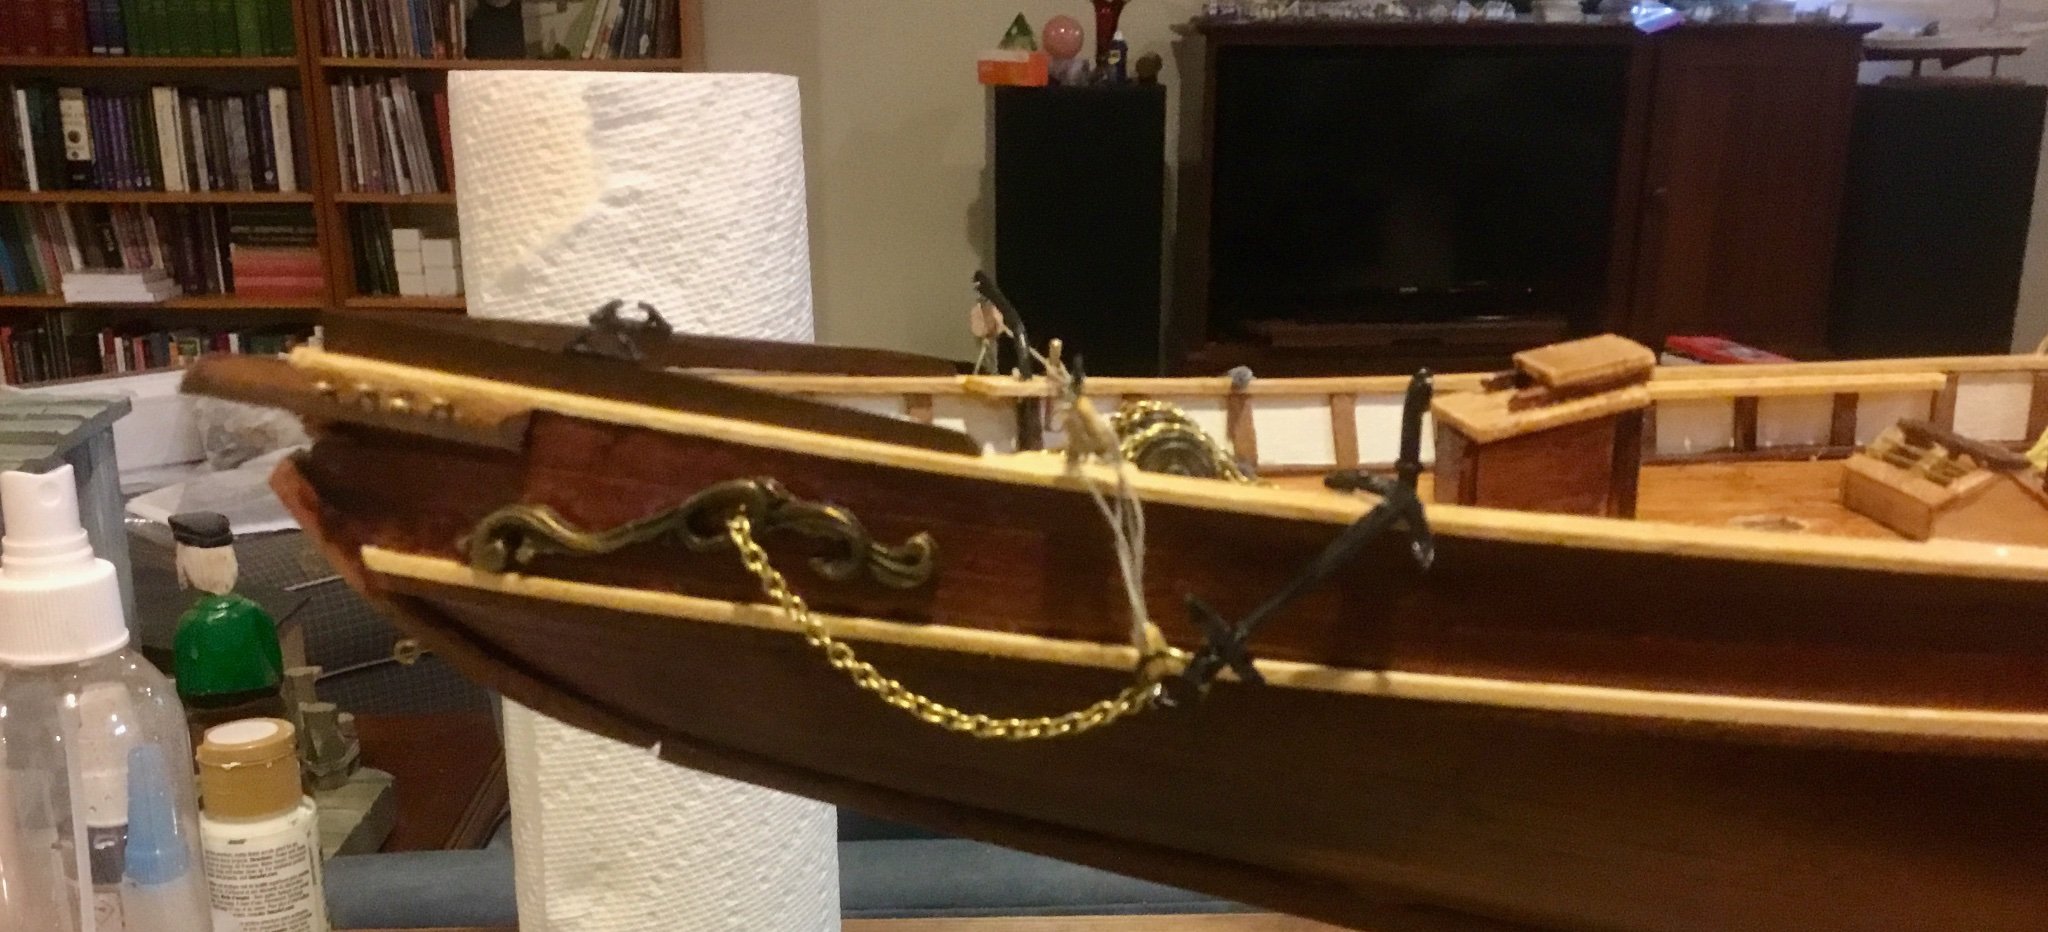
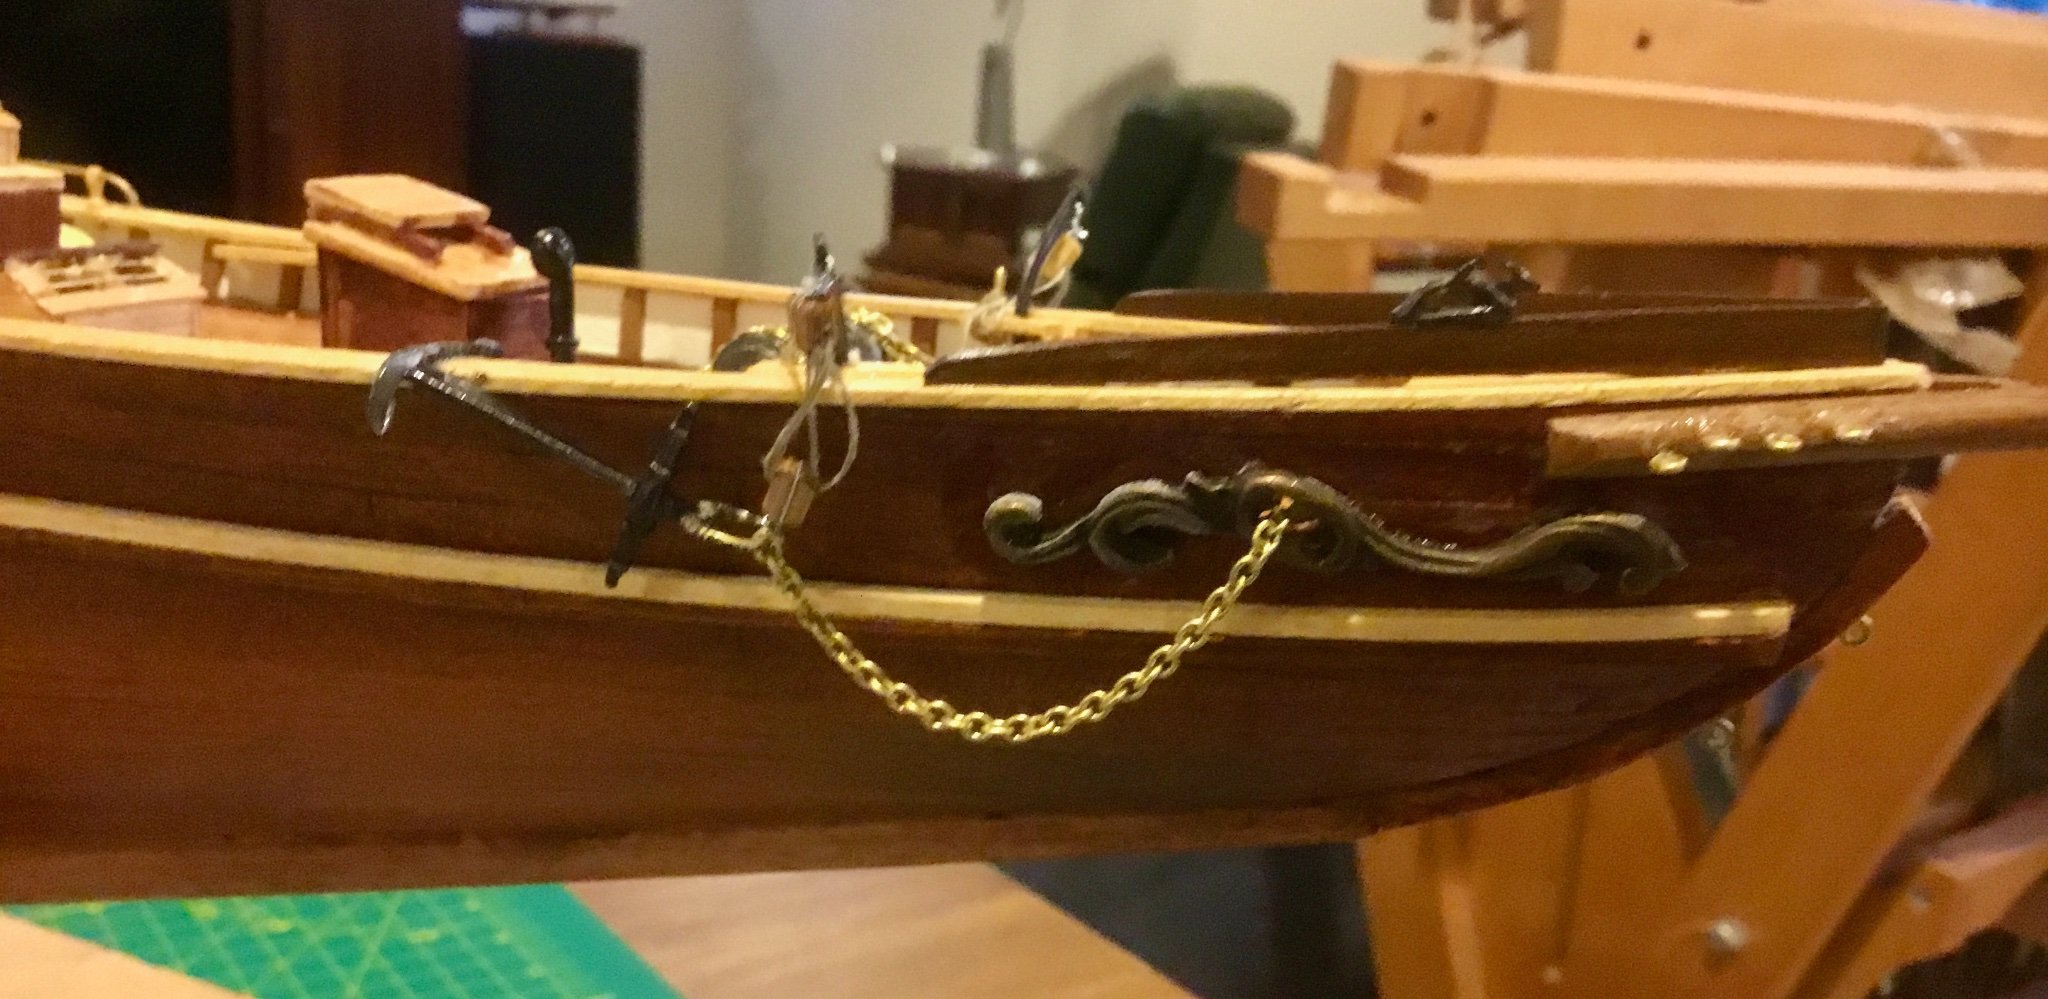
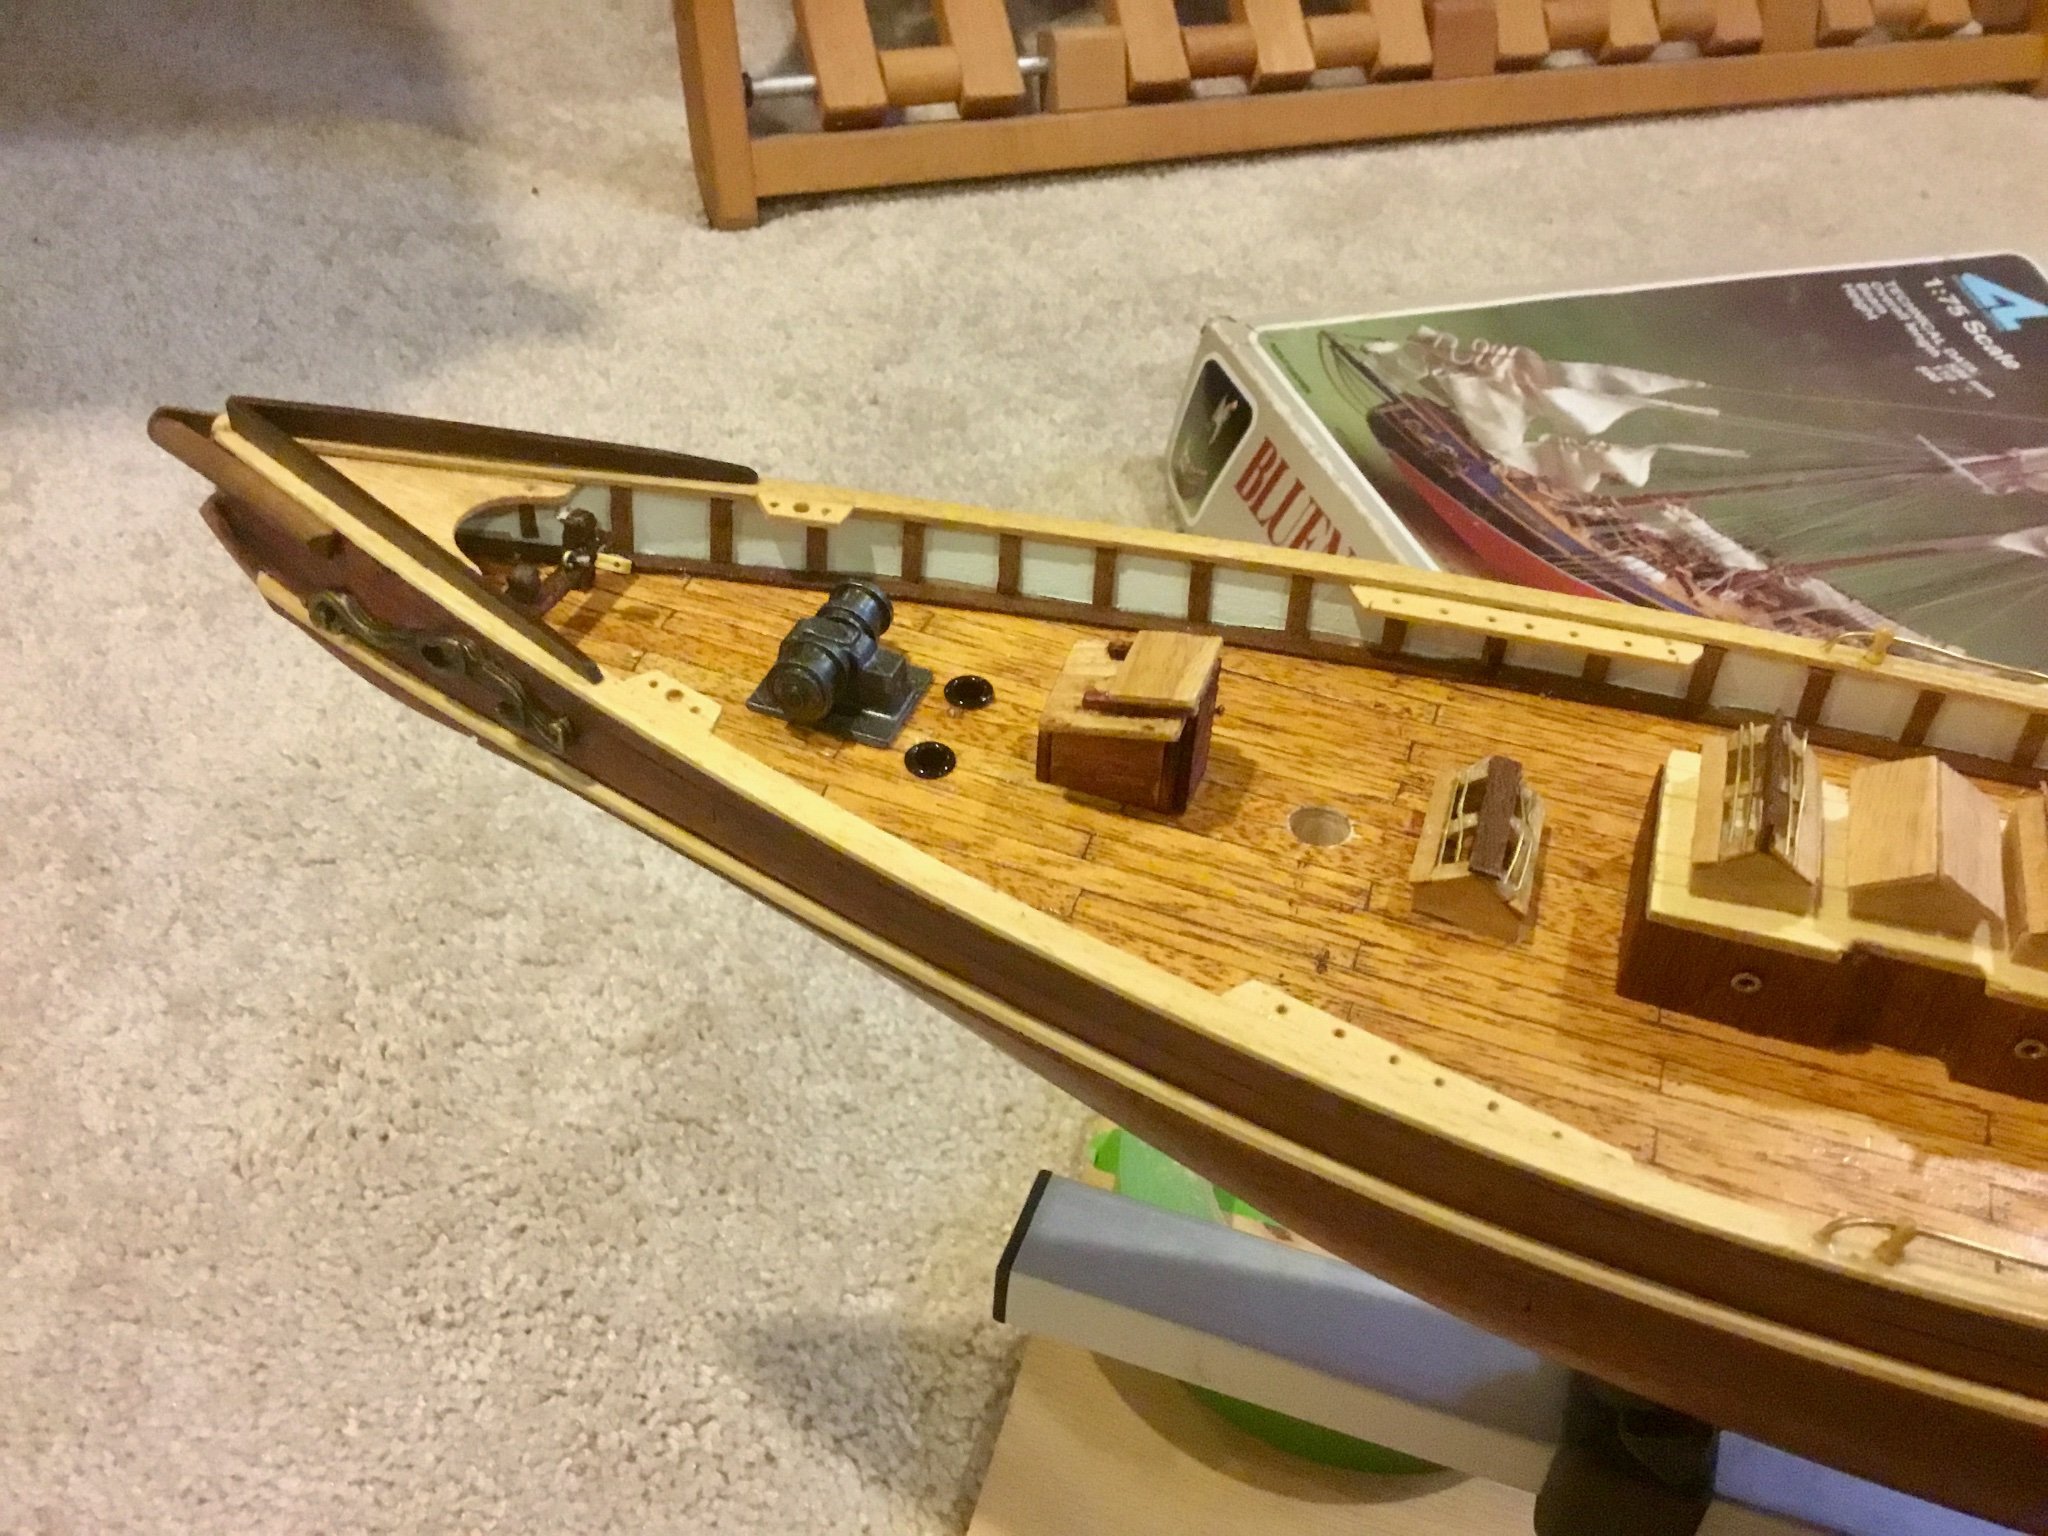
Installed the catheads, rigged up the anchors and chains and installed both anchors.

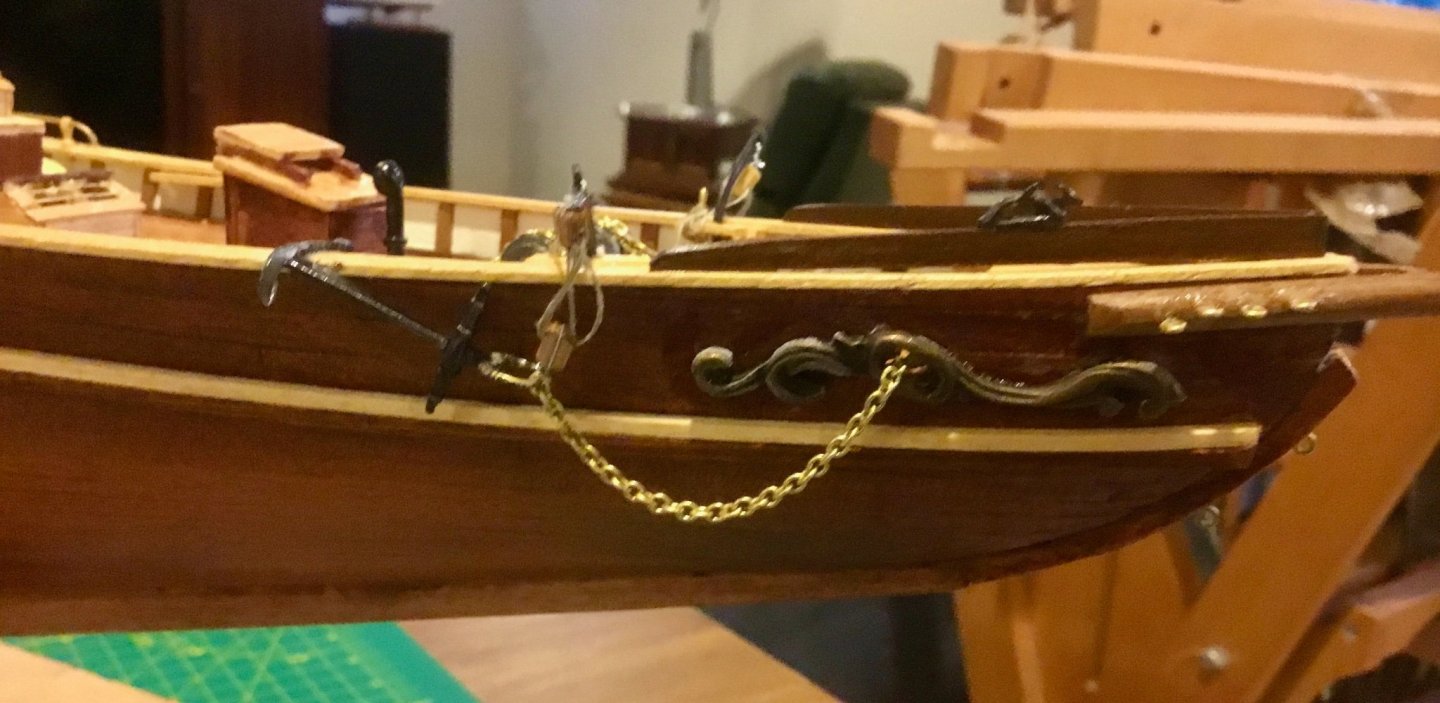
Installed the mooring chocks on the trail boards and stern.
Cut the bow sprint, masts and booms to size. Next up is to create the two masts with gaffs and booms and the bowsprit.

-
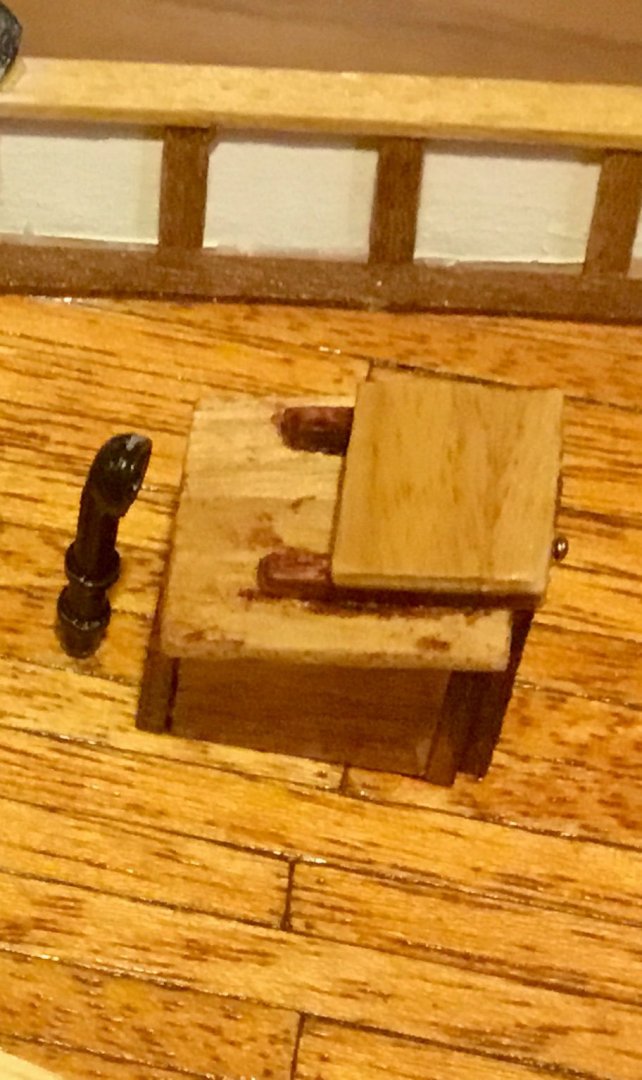
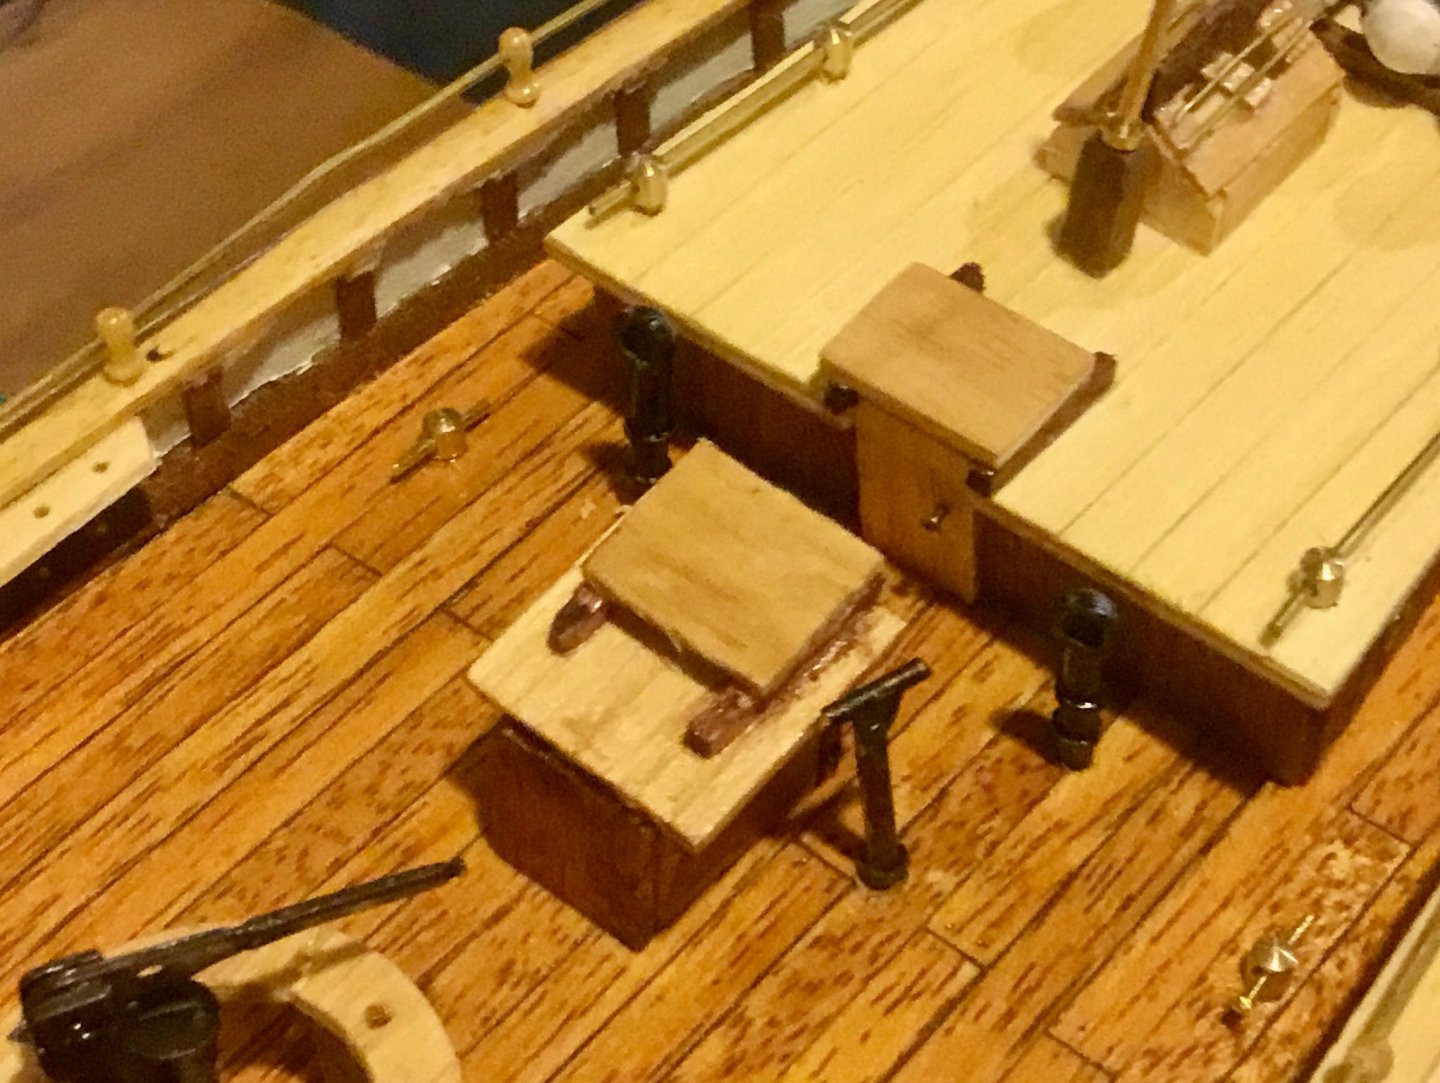
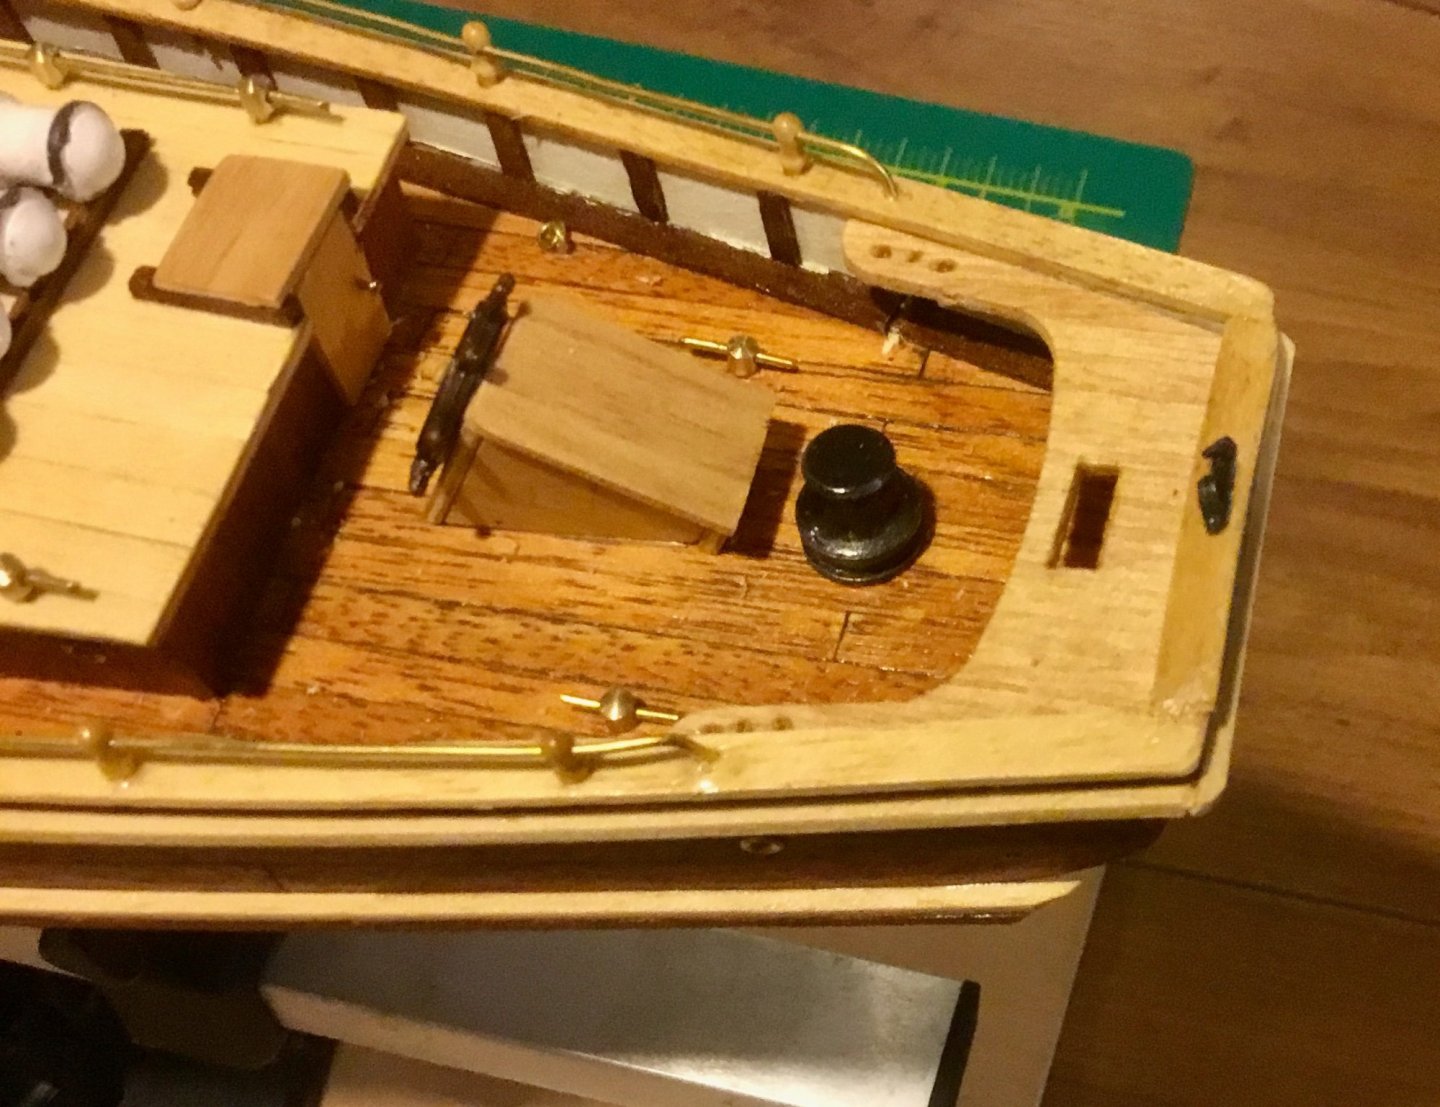
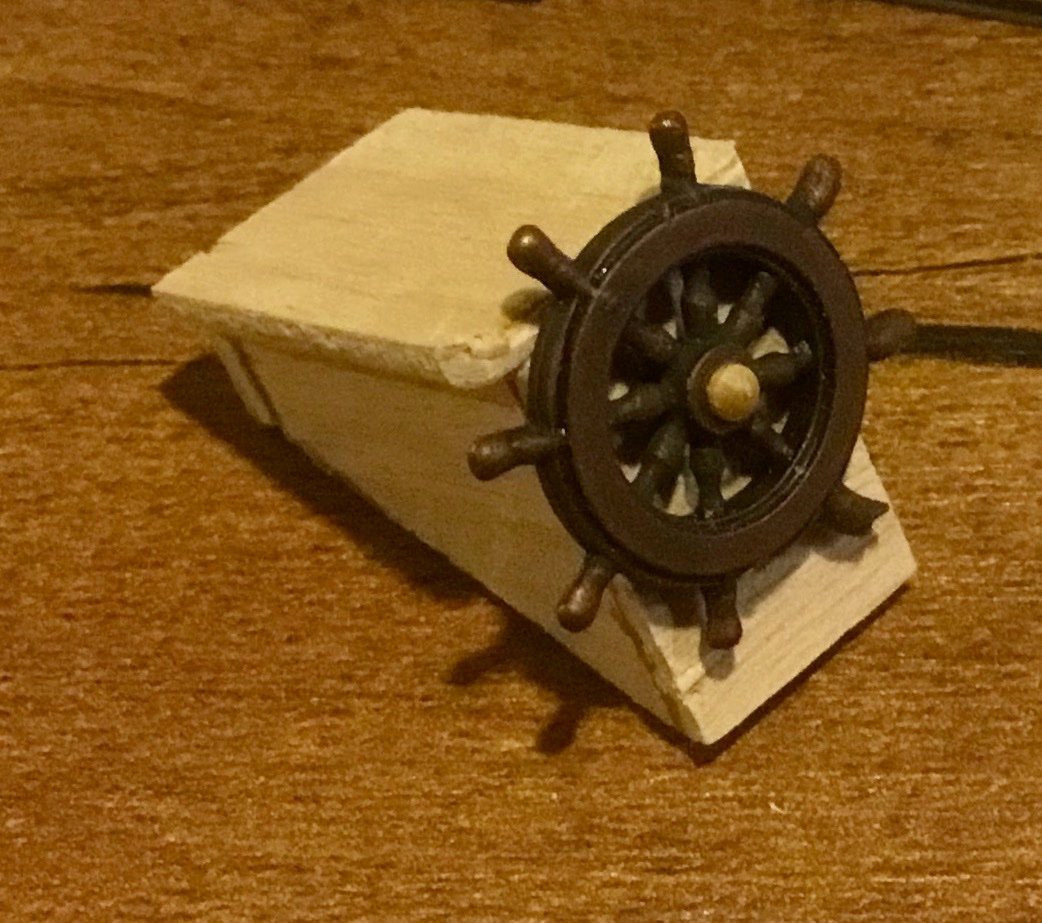
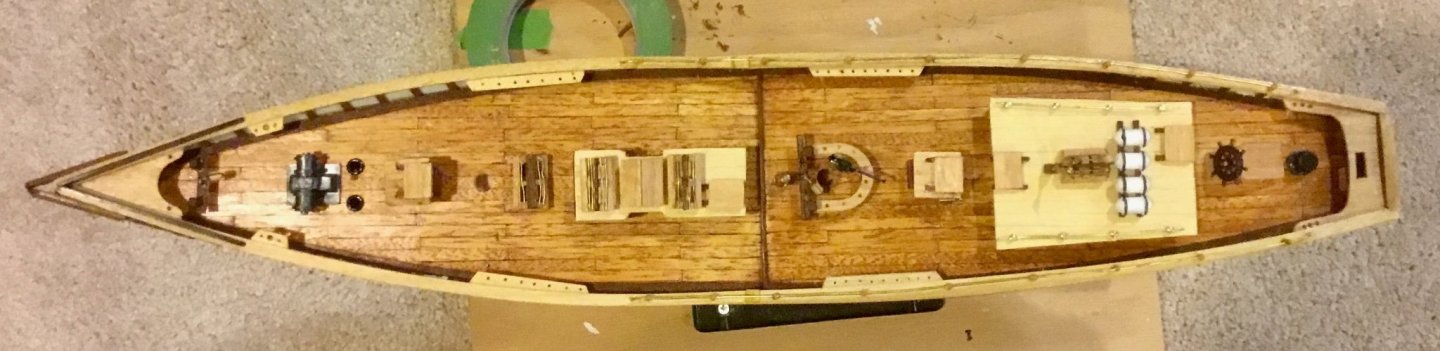
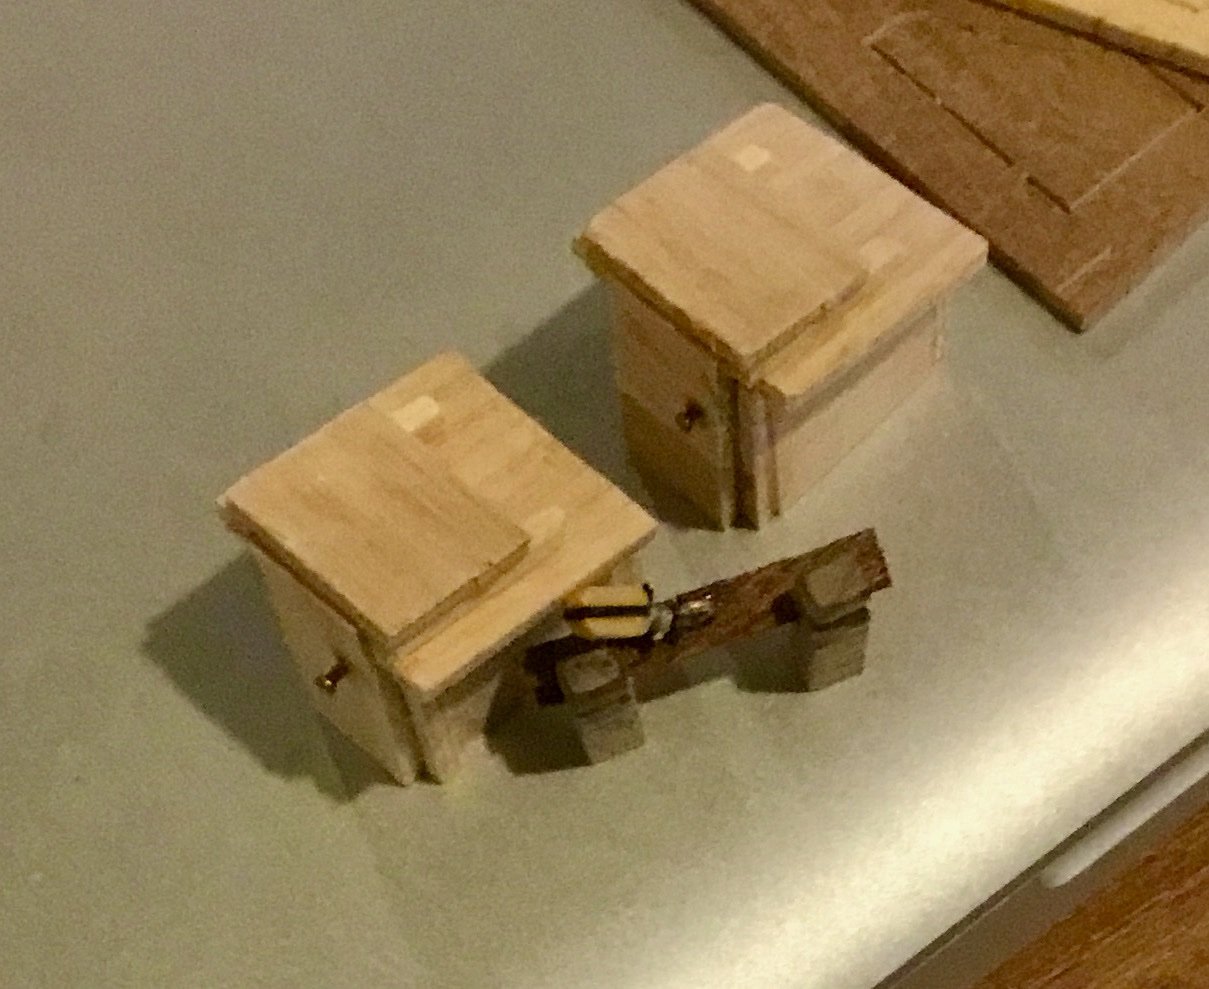
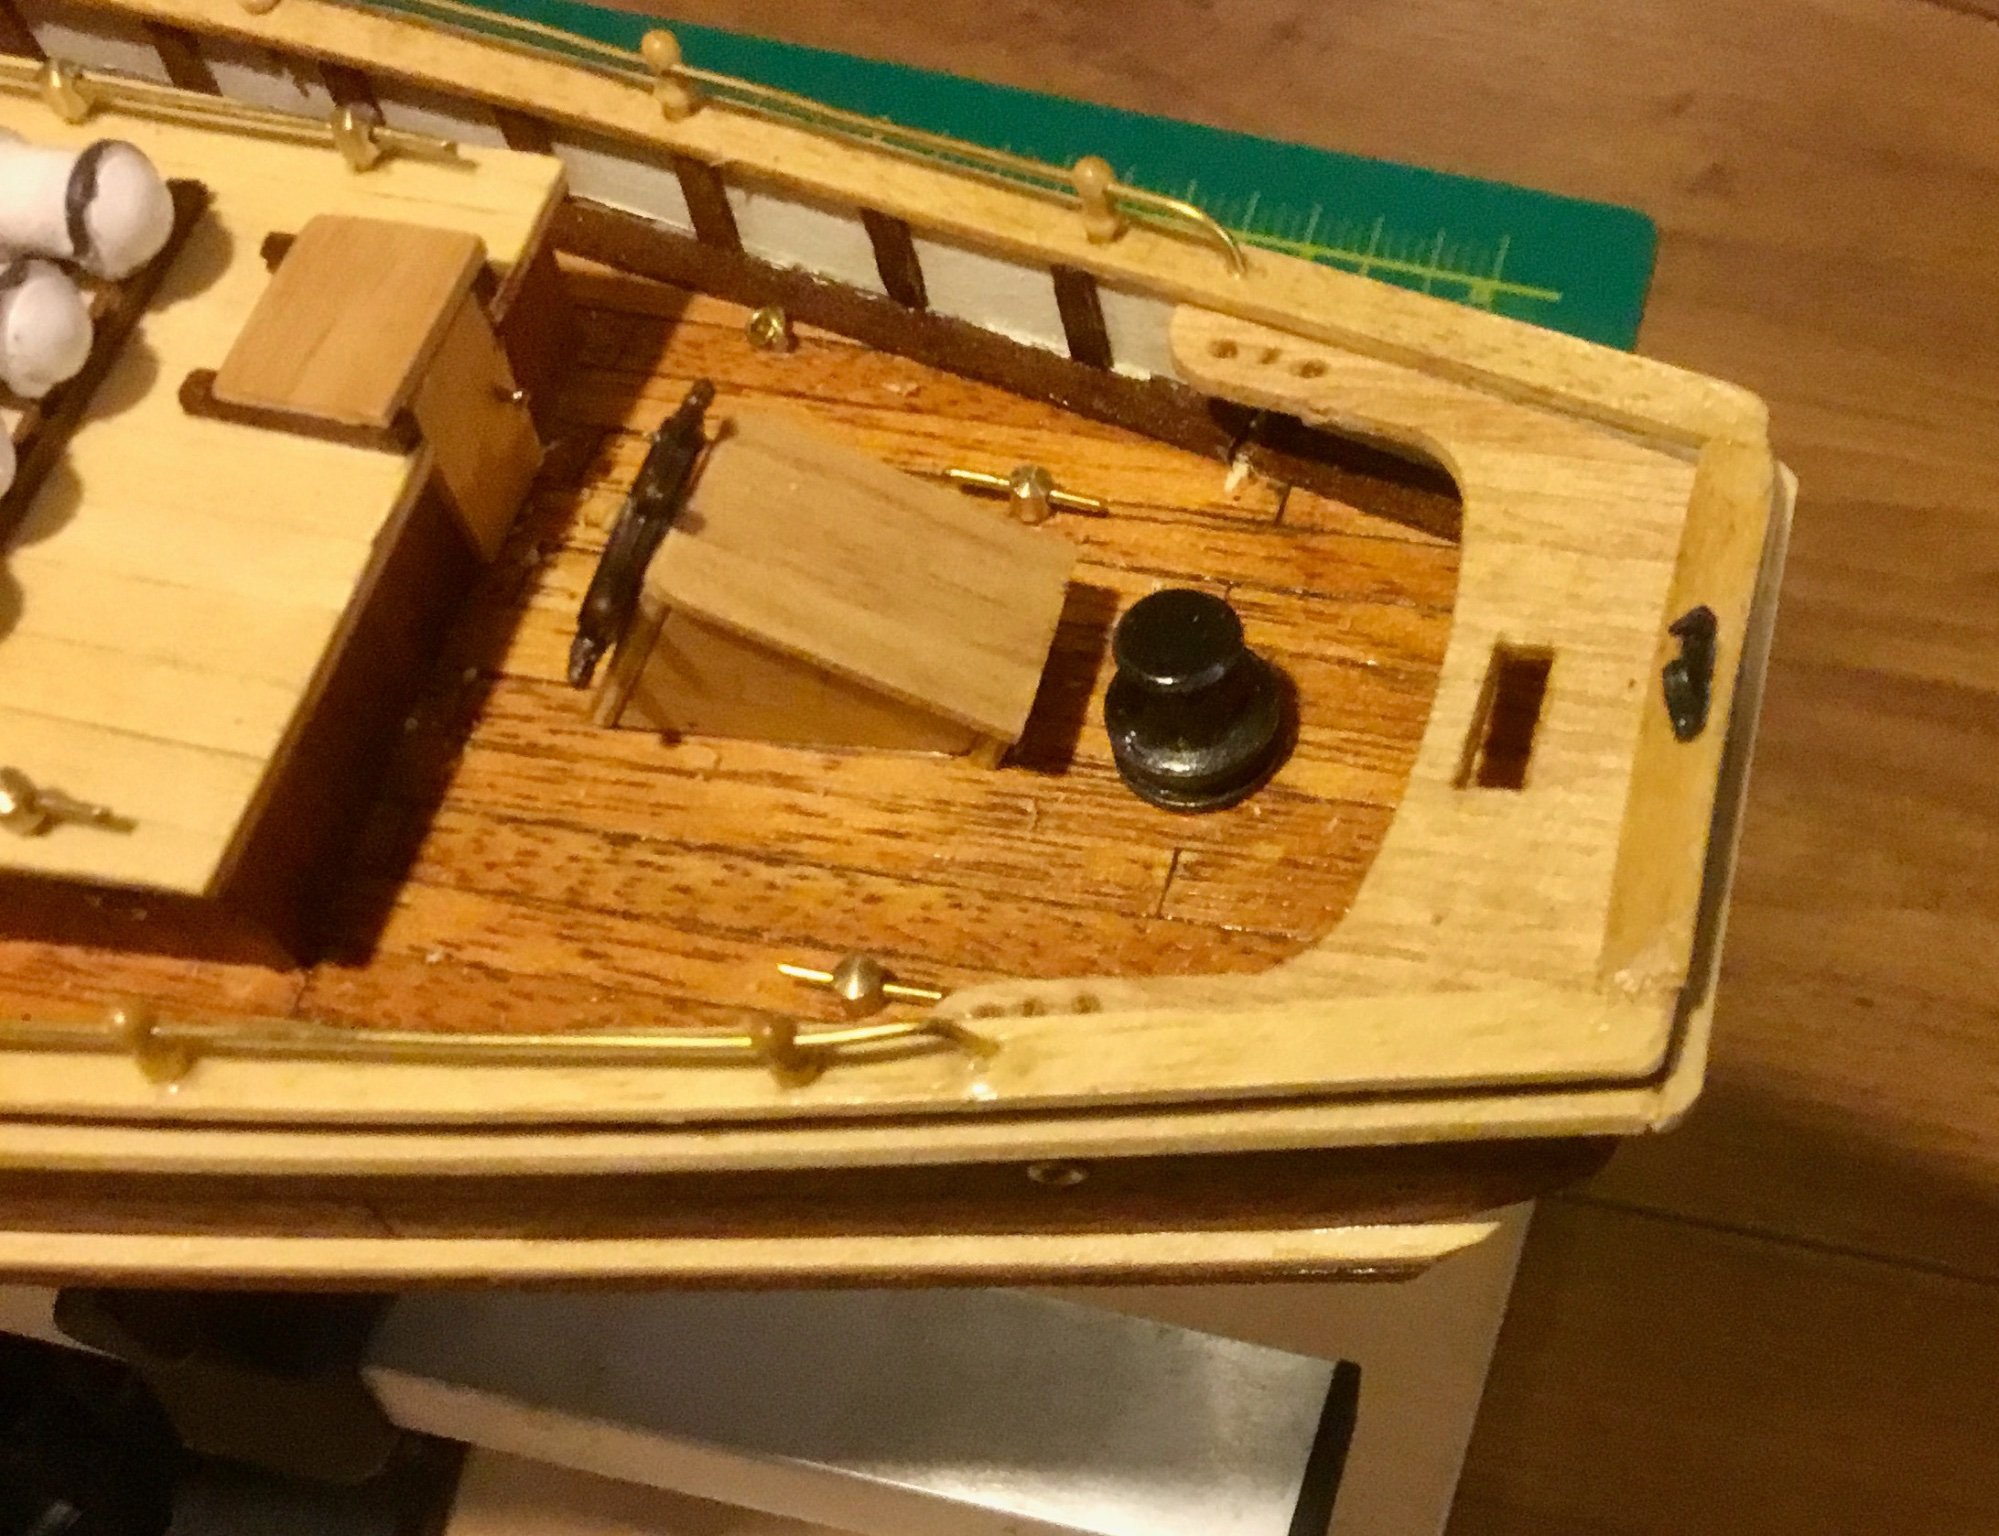
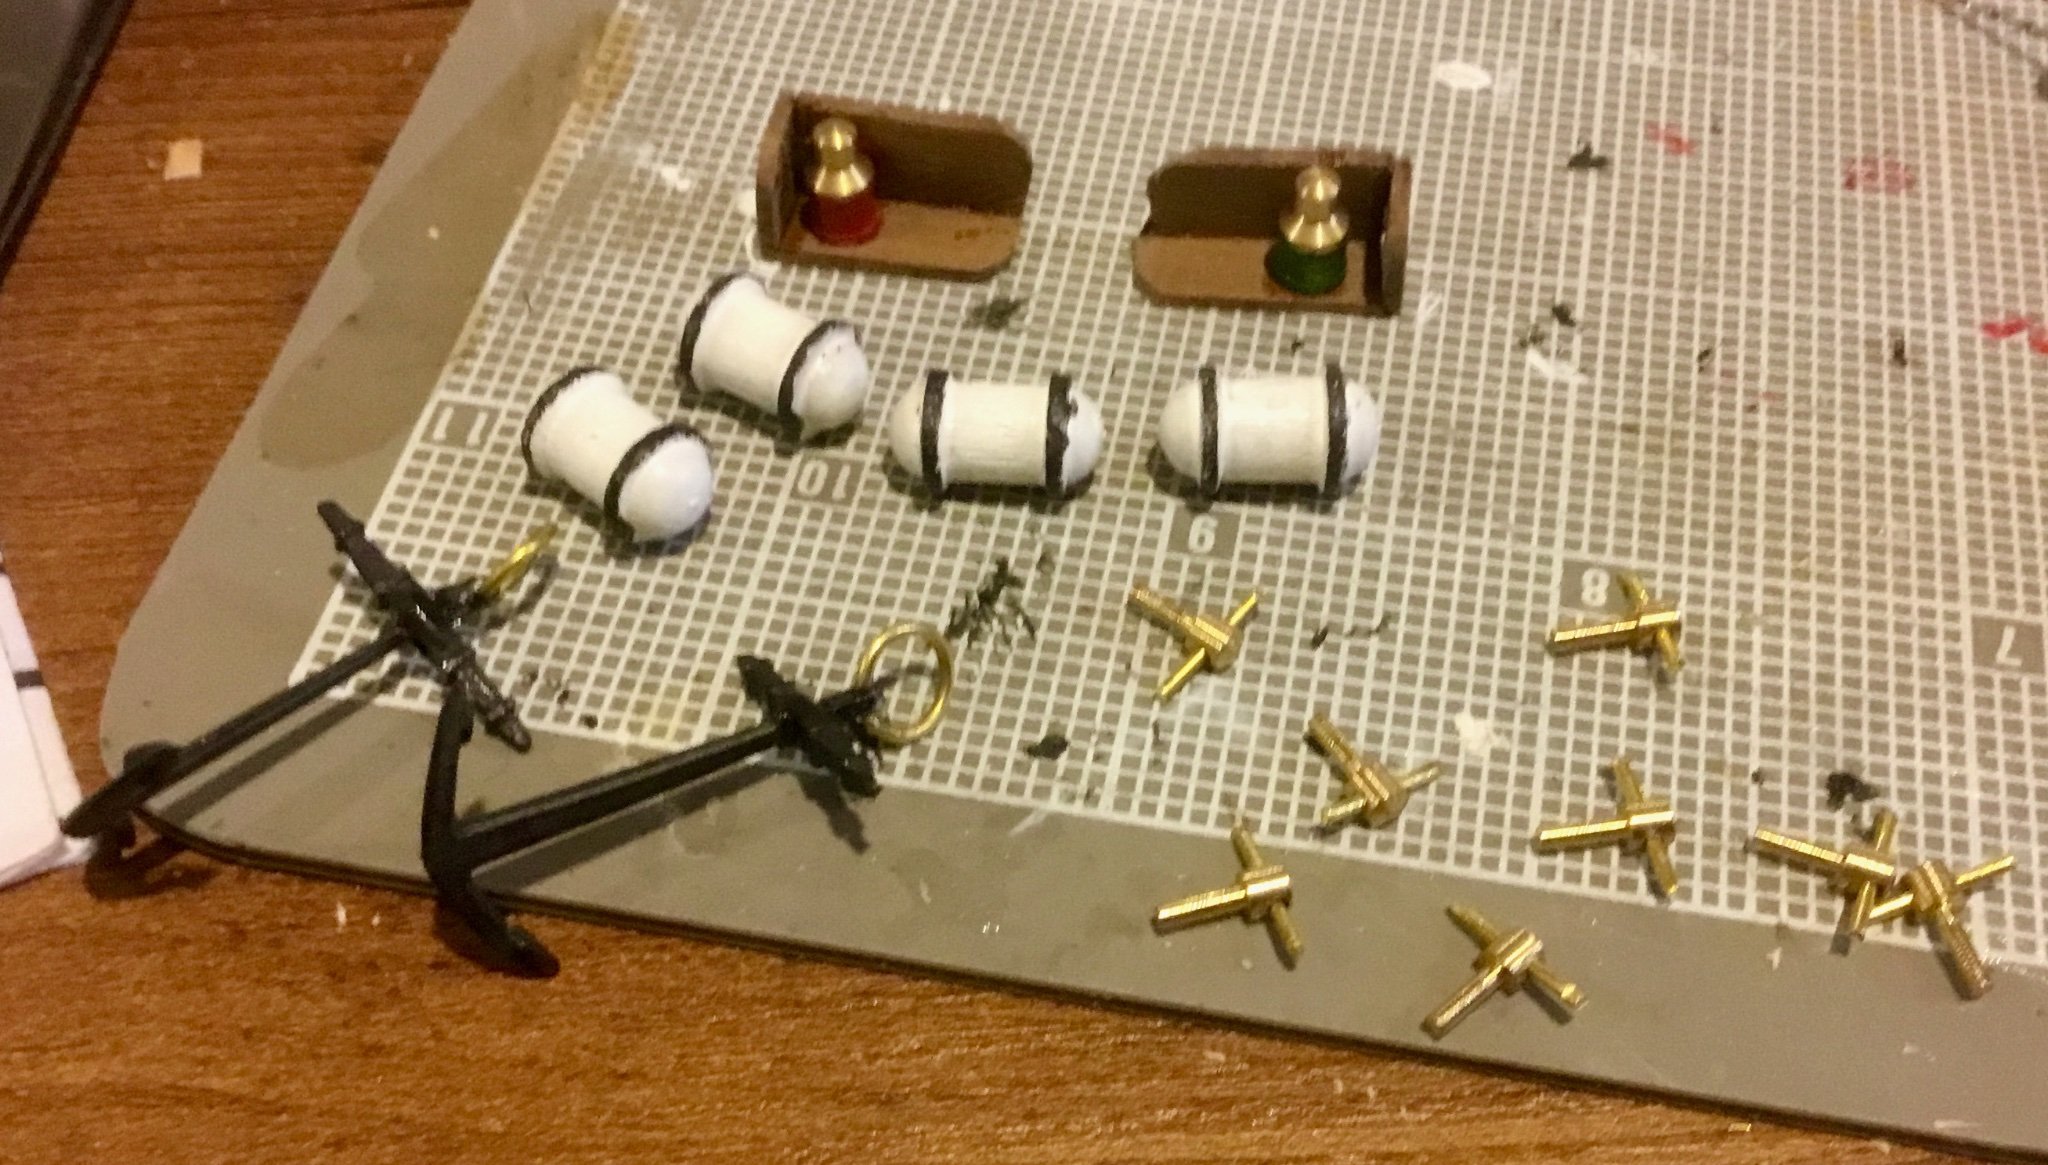
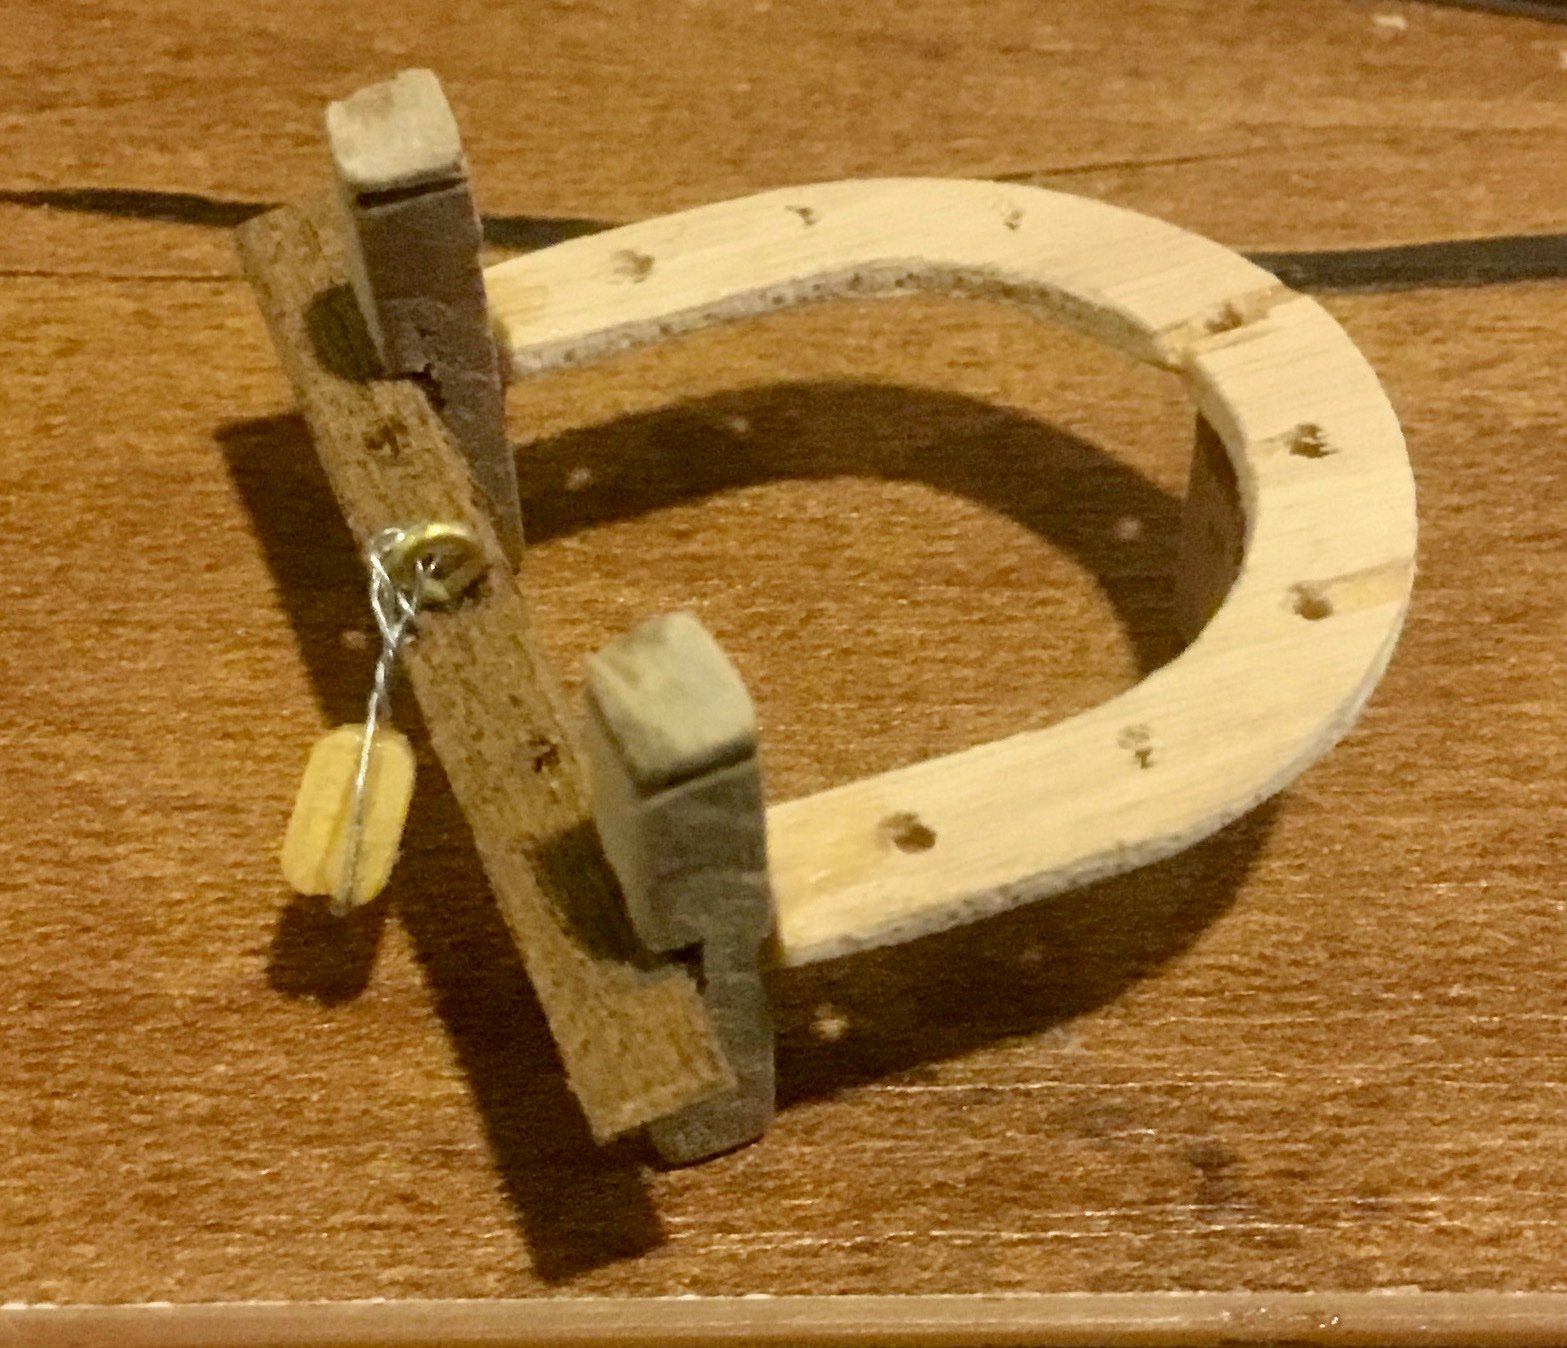
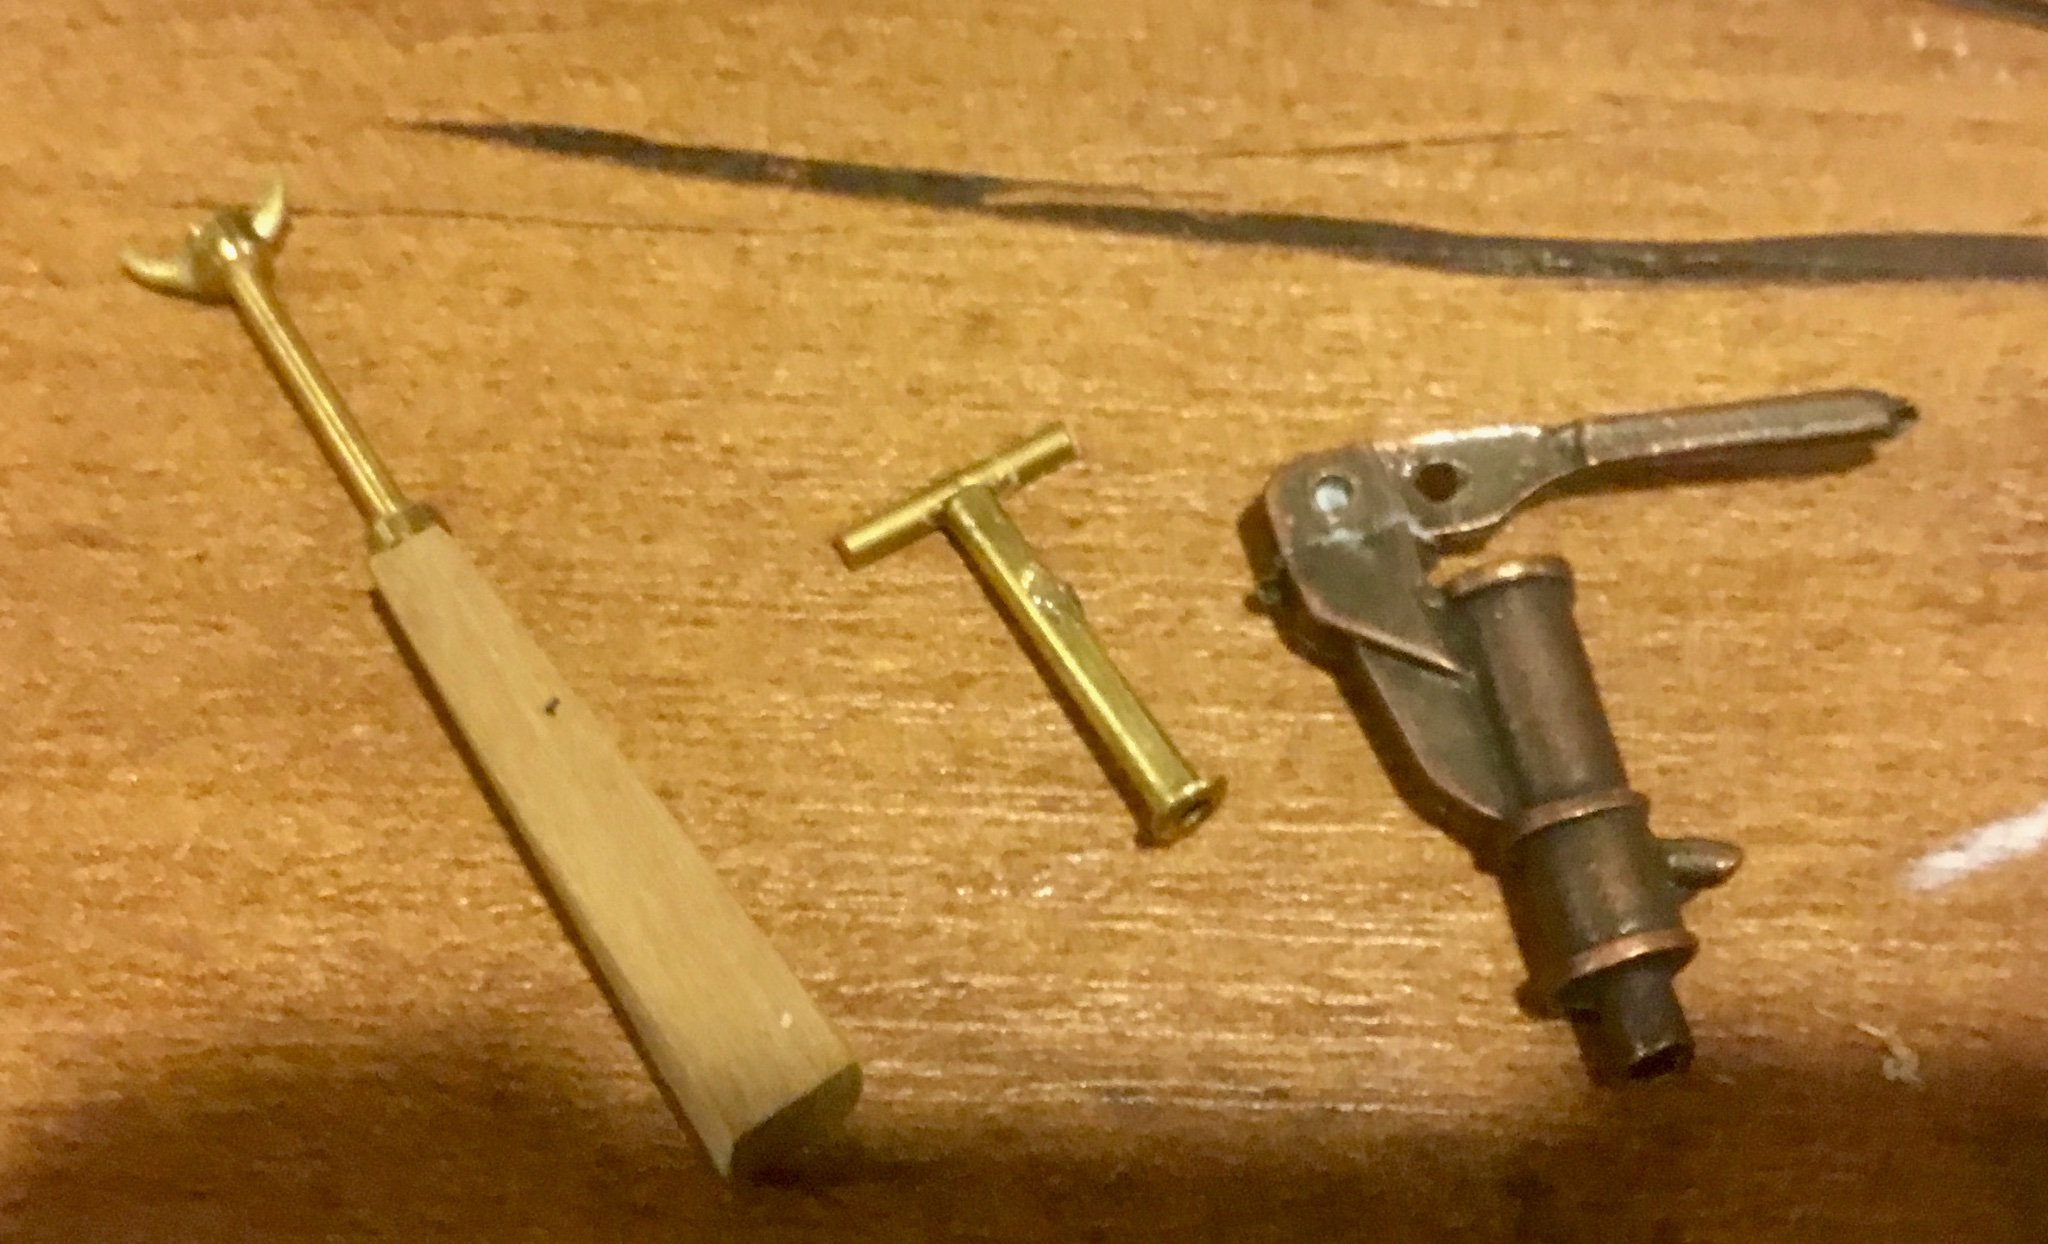
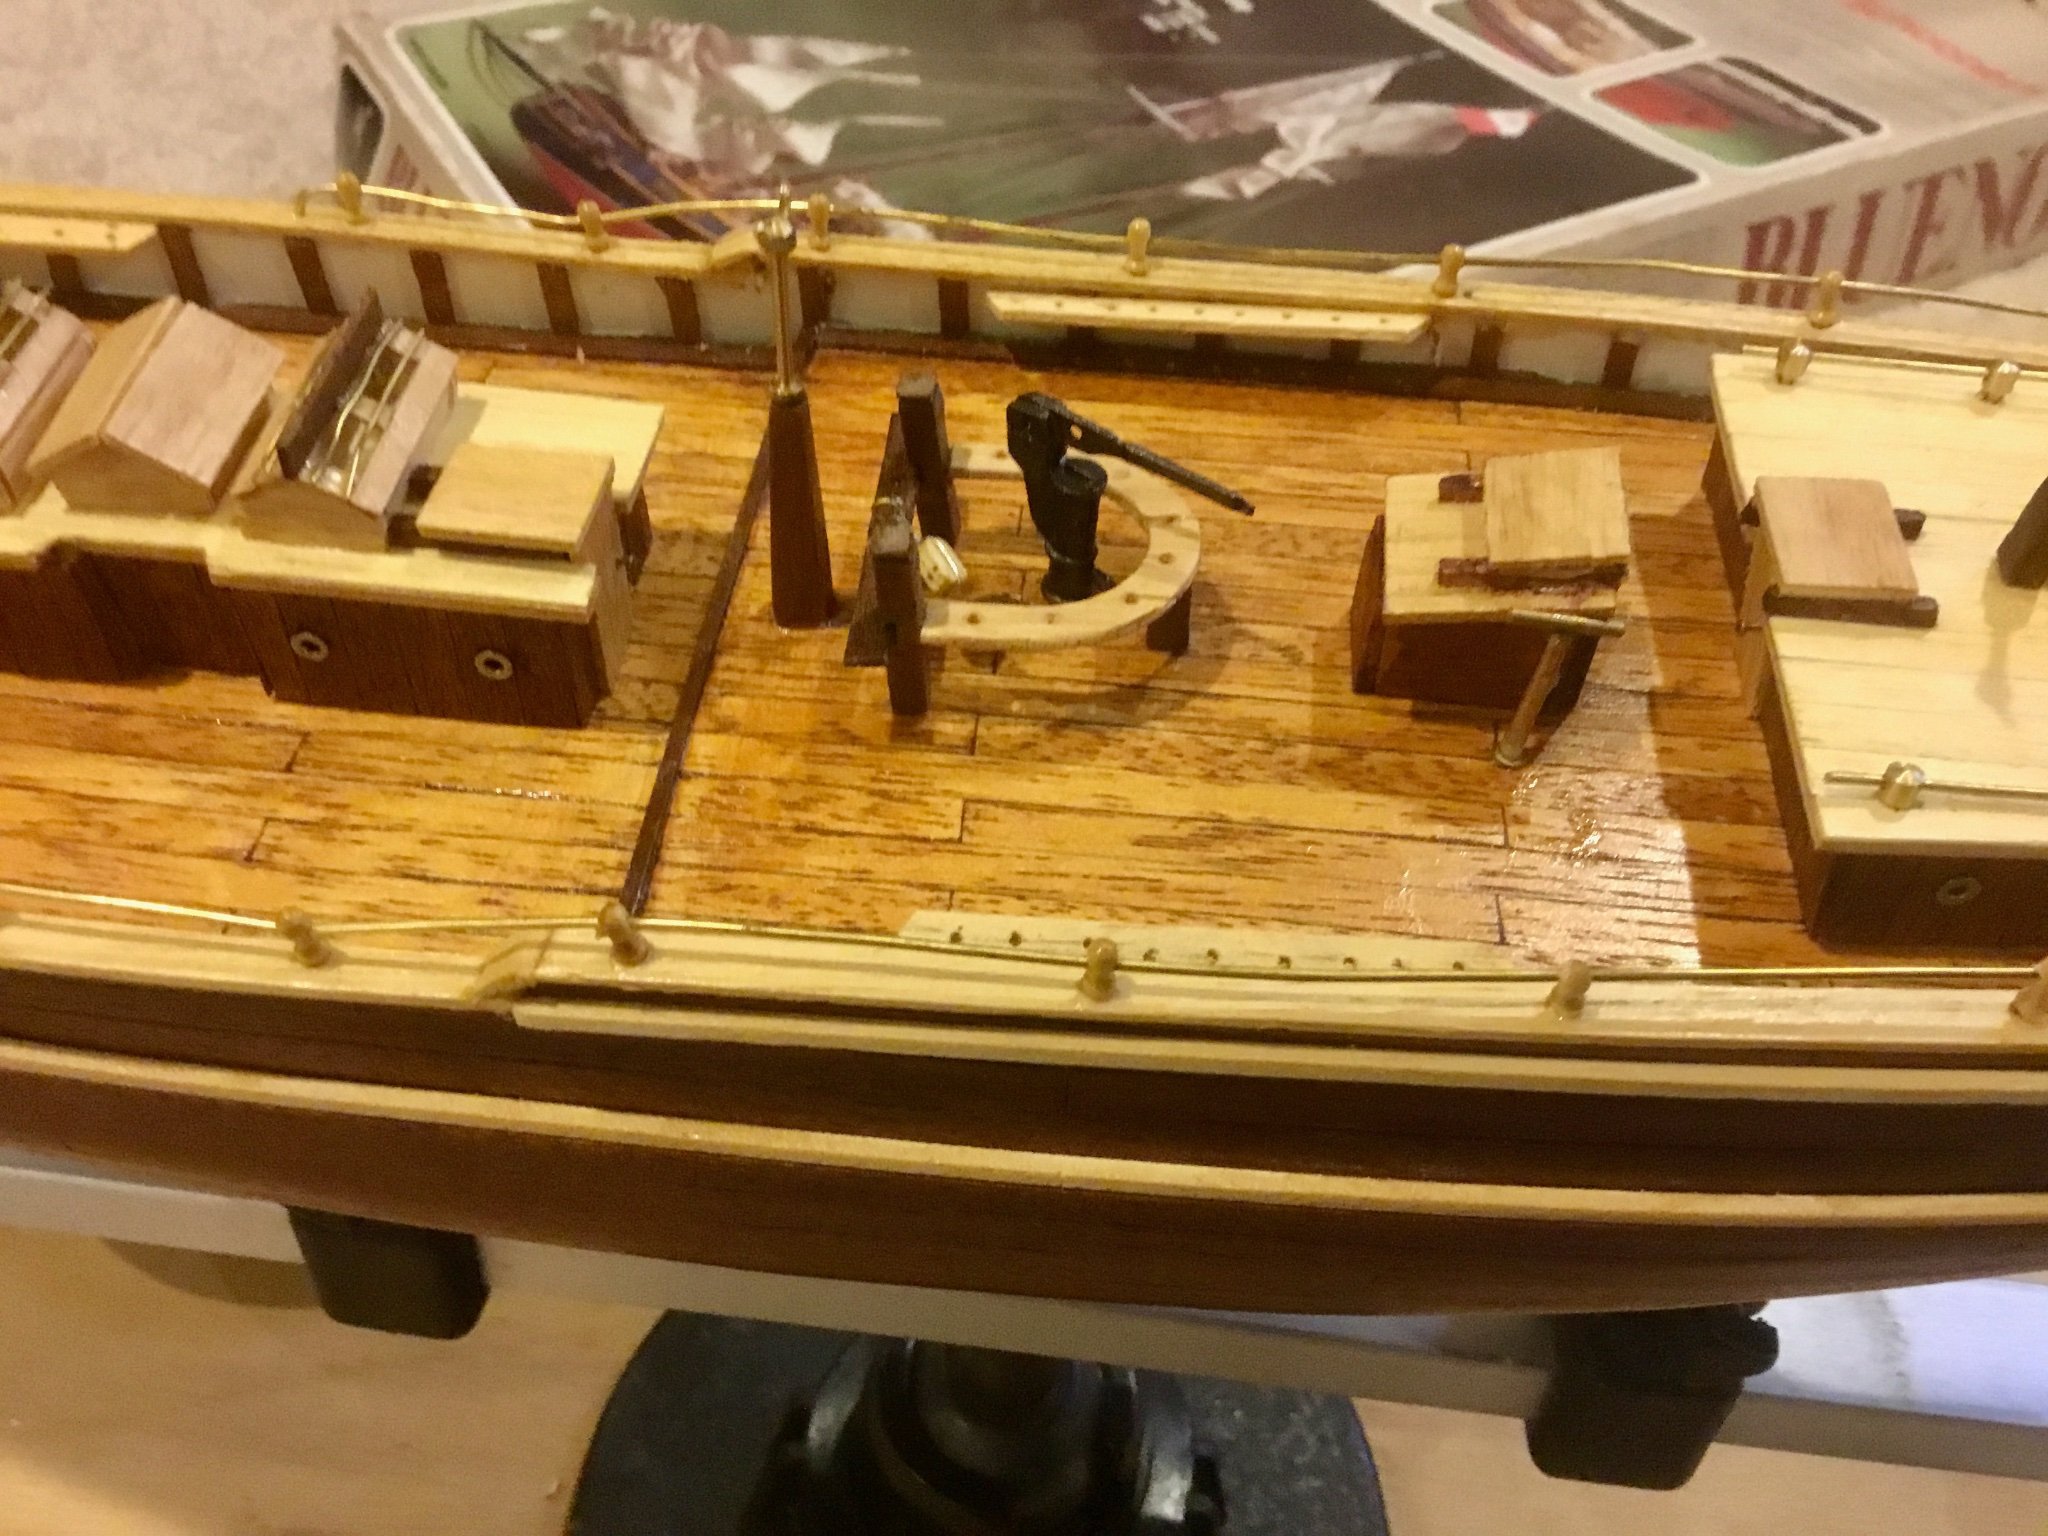
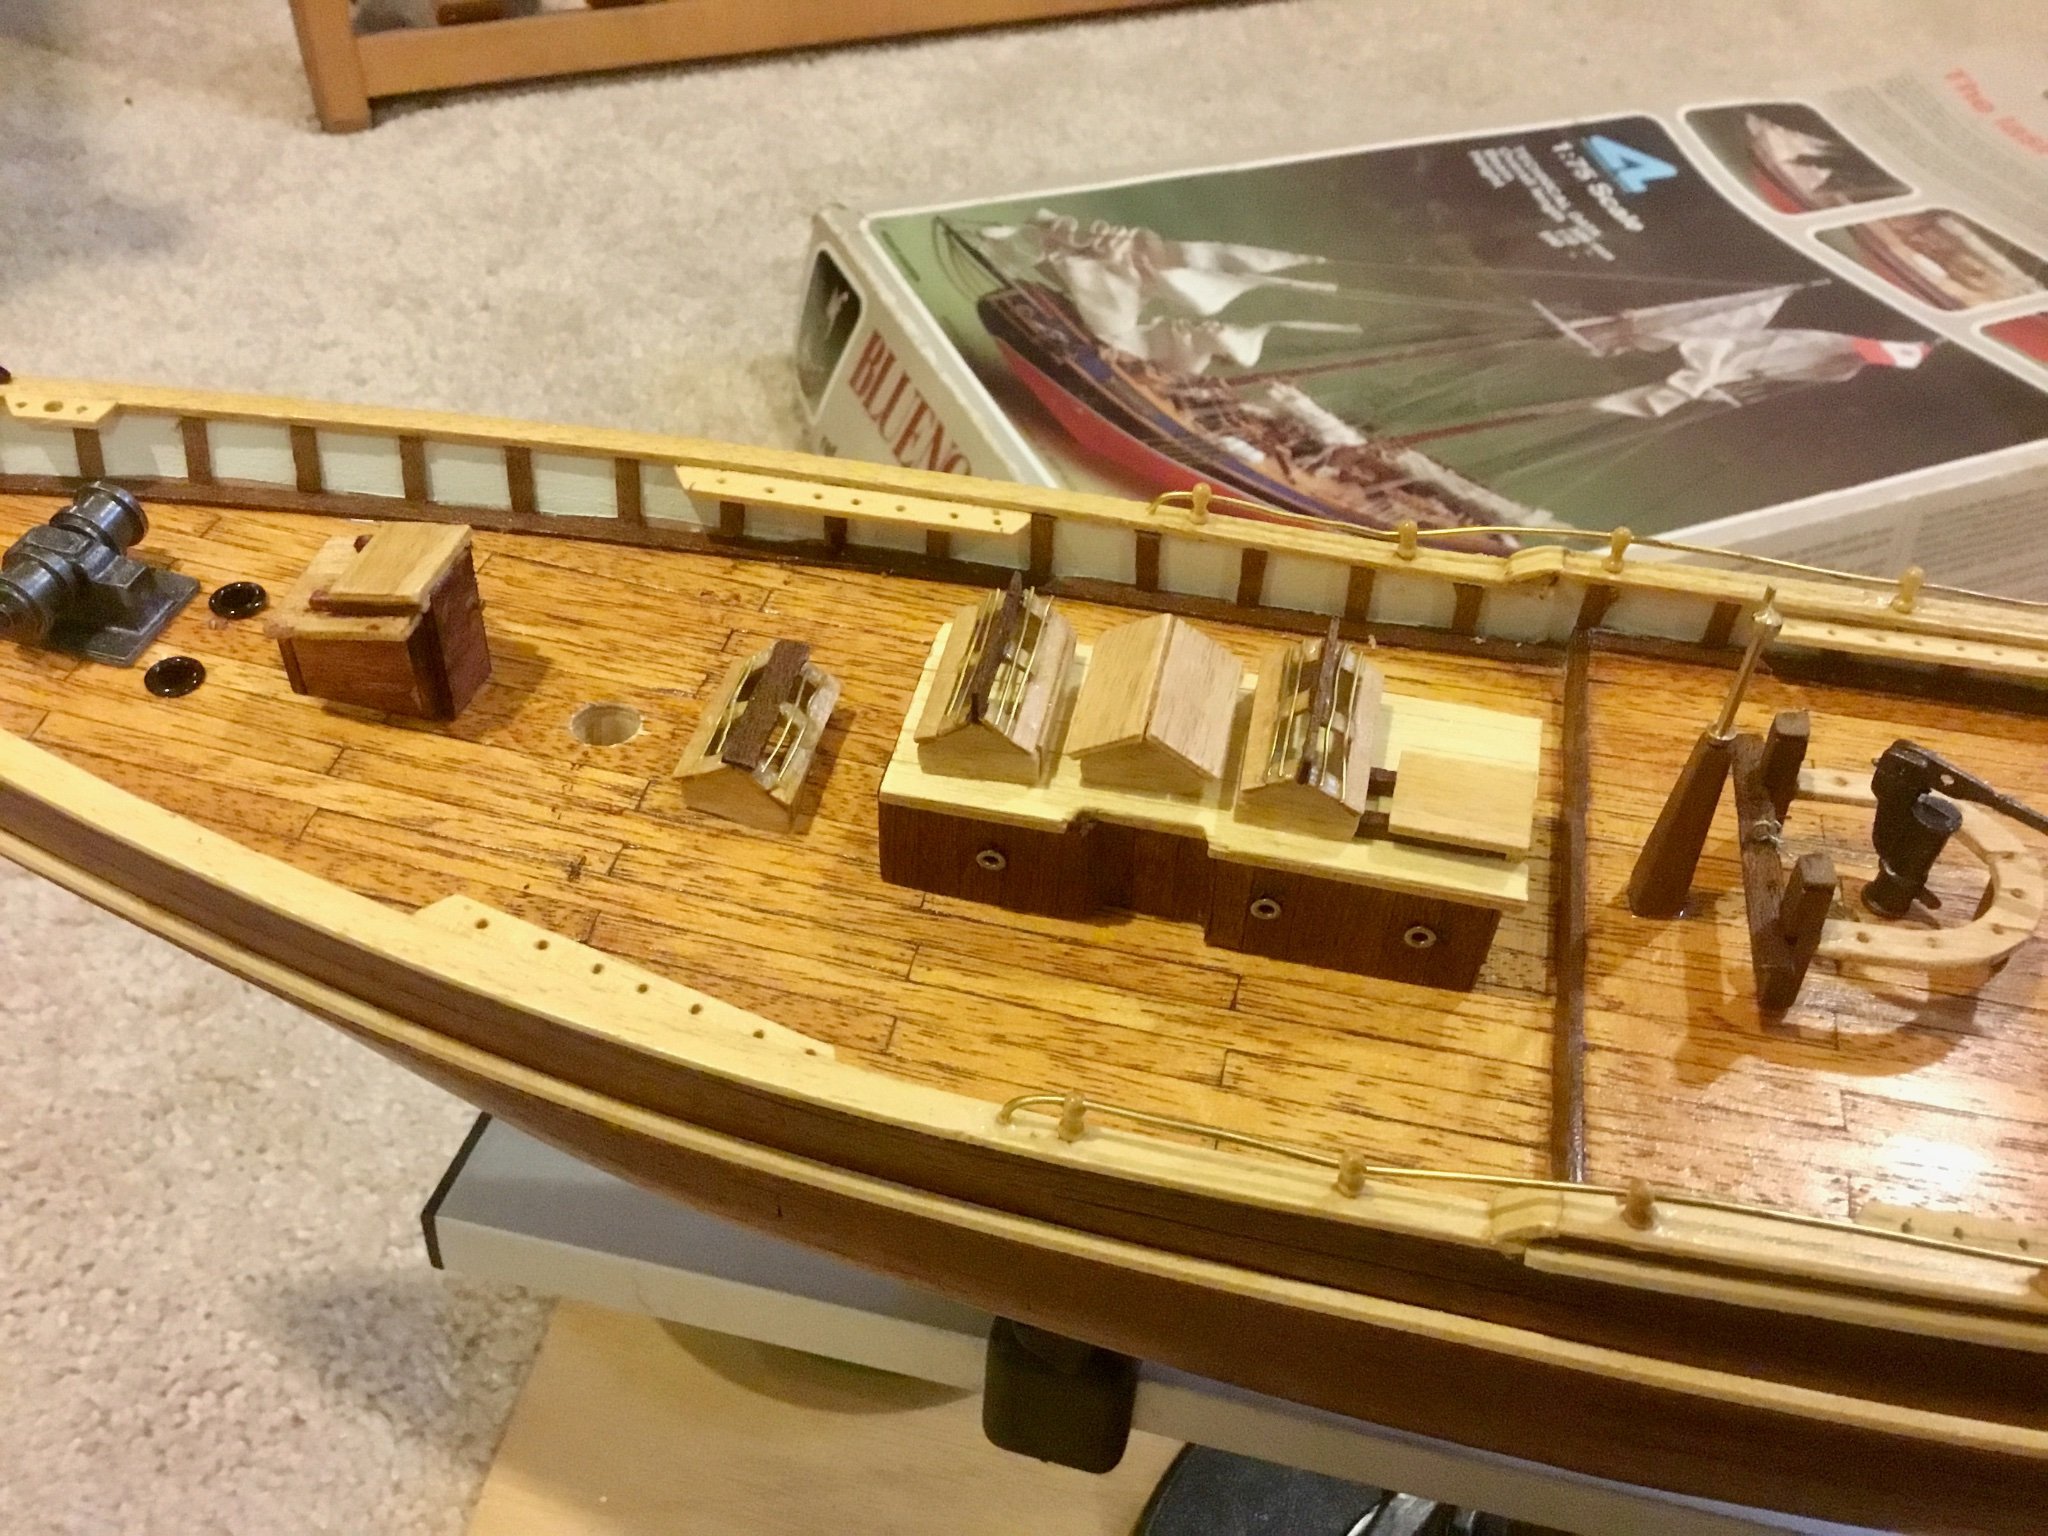
Completed the main hold unit, boom supports and fife-rail, bilge pump and chimney, the cabins and associated skylight, inflatable raft covers and hand rails. The steering unit and navigation lights, deck cleats and anchors. Finally mounted all superstructure items on deck.


-
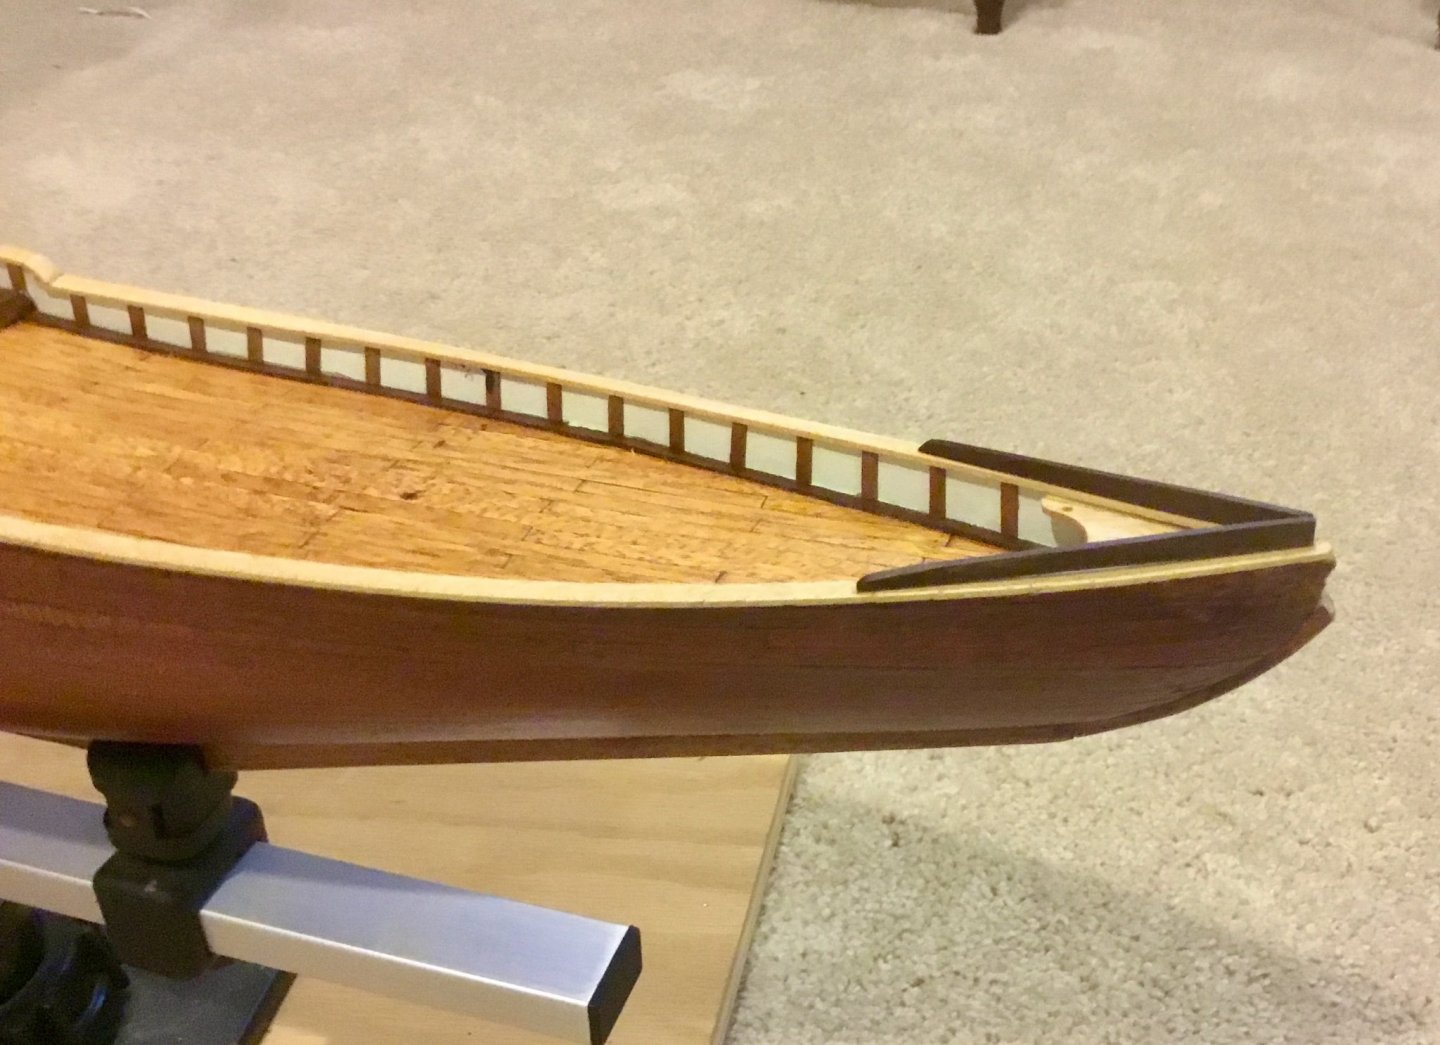
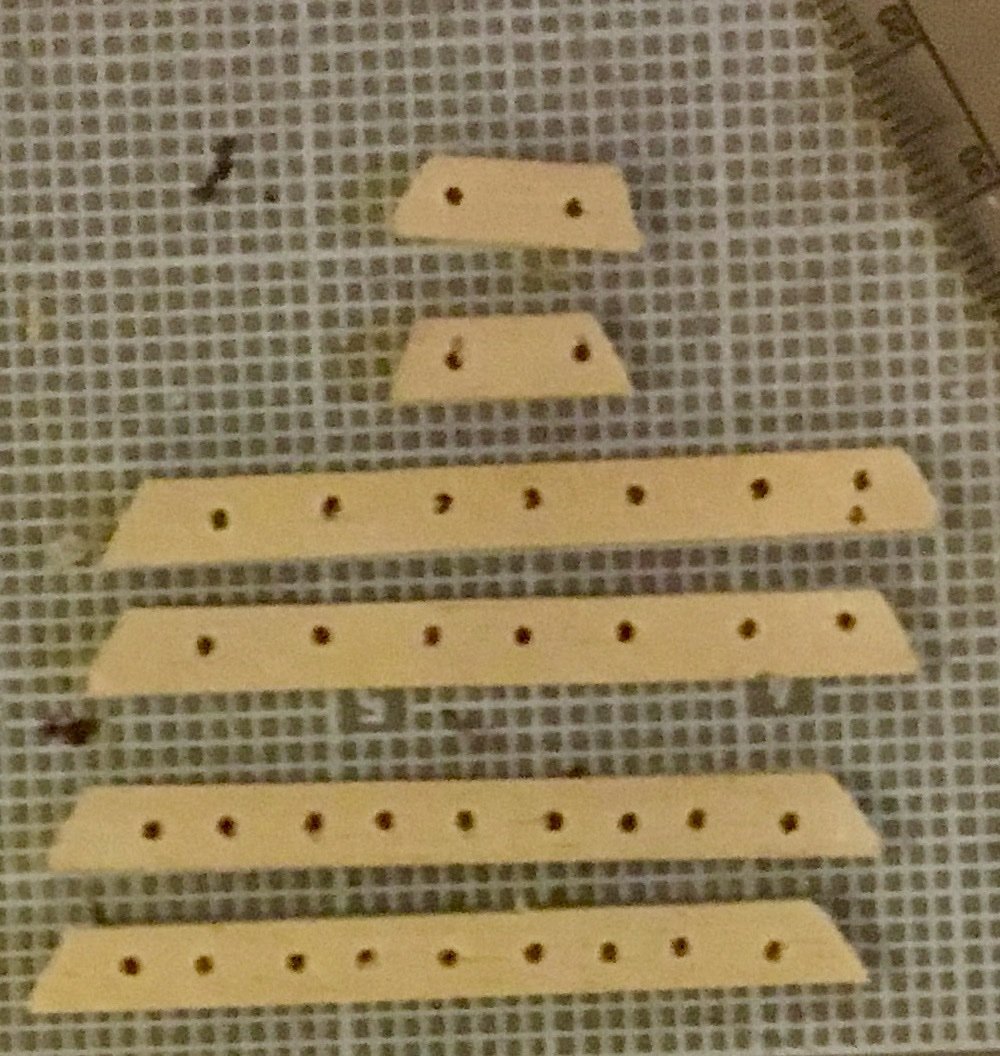
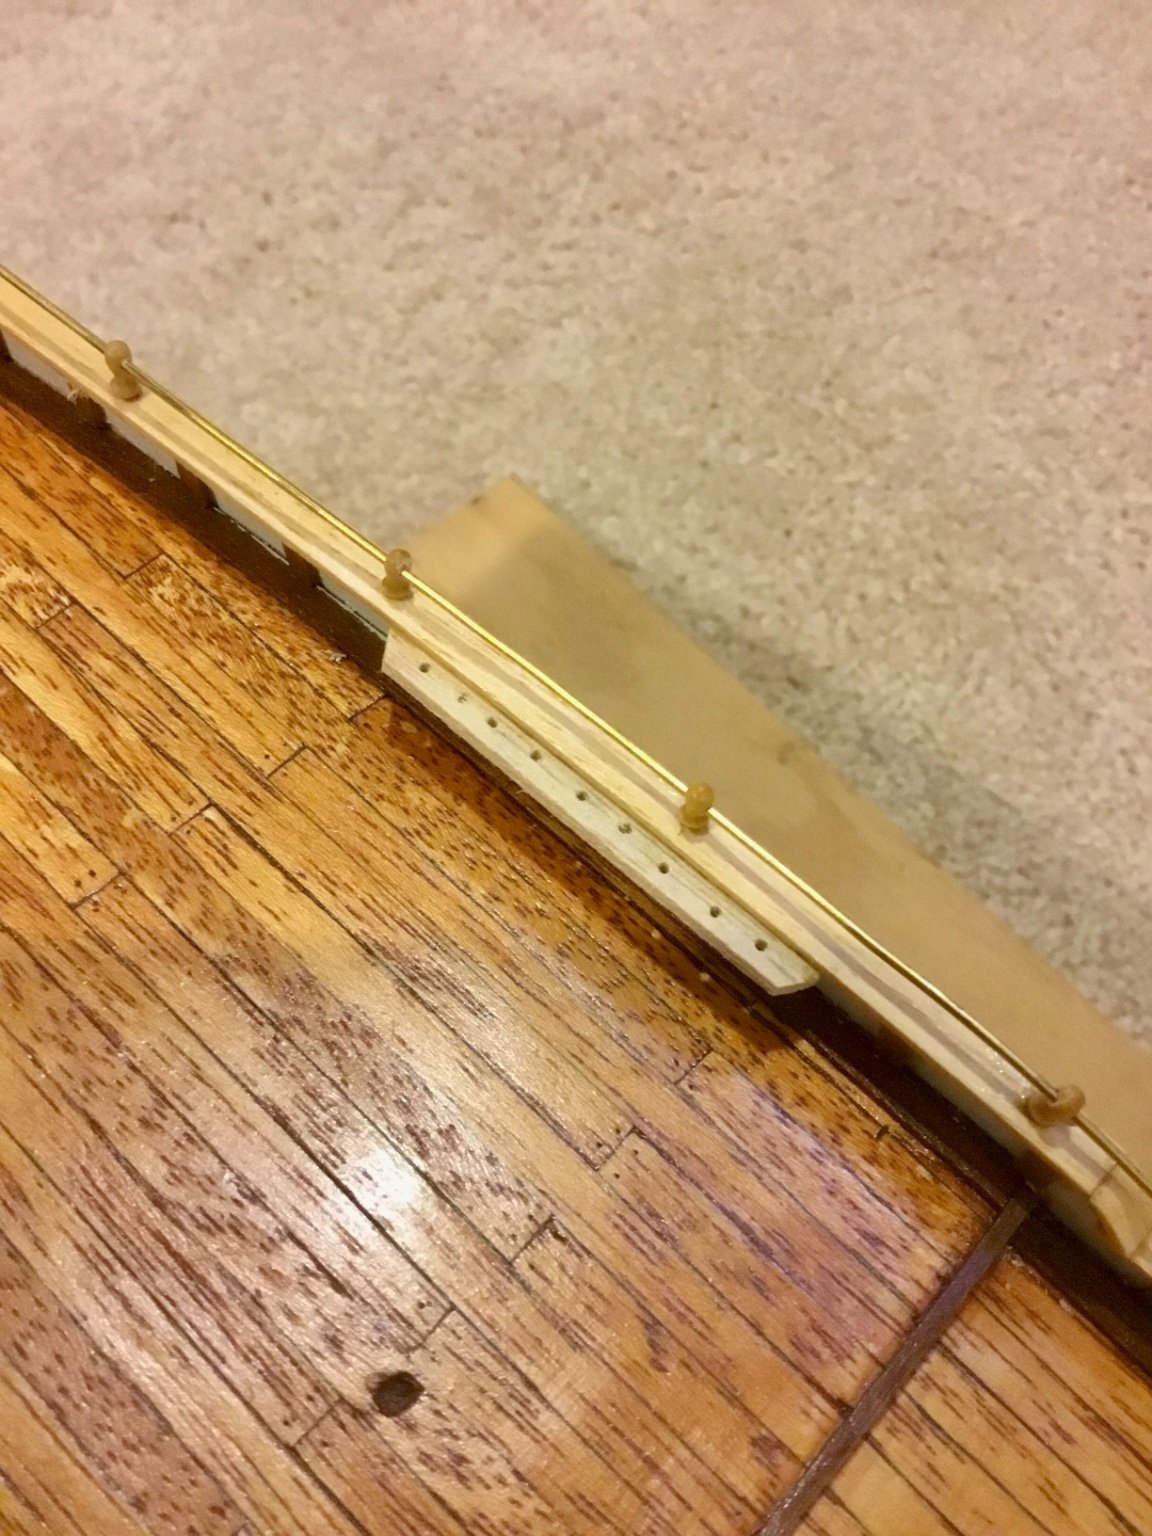
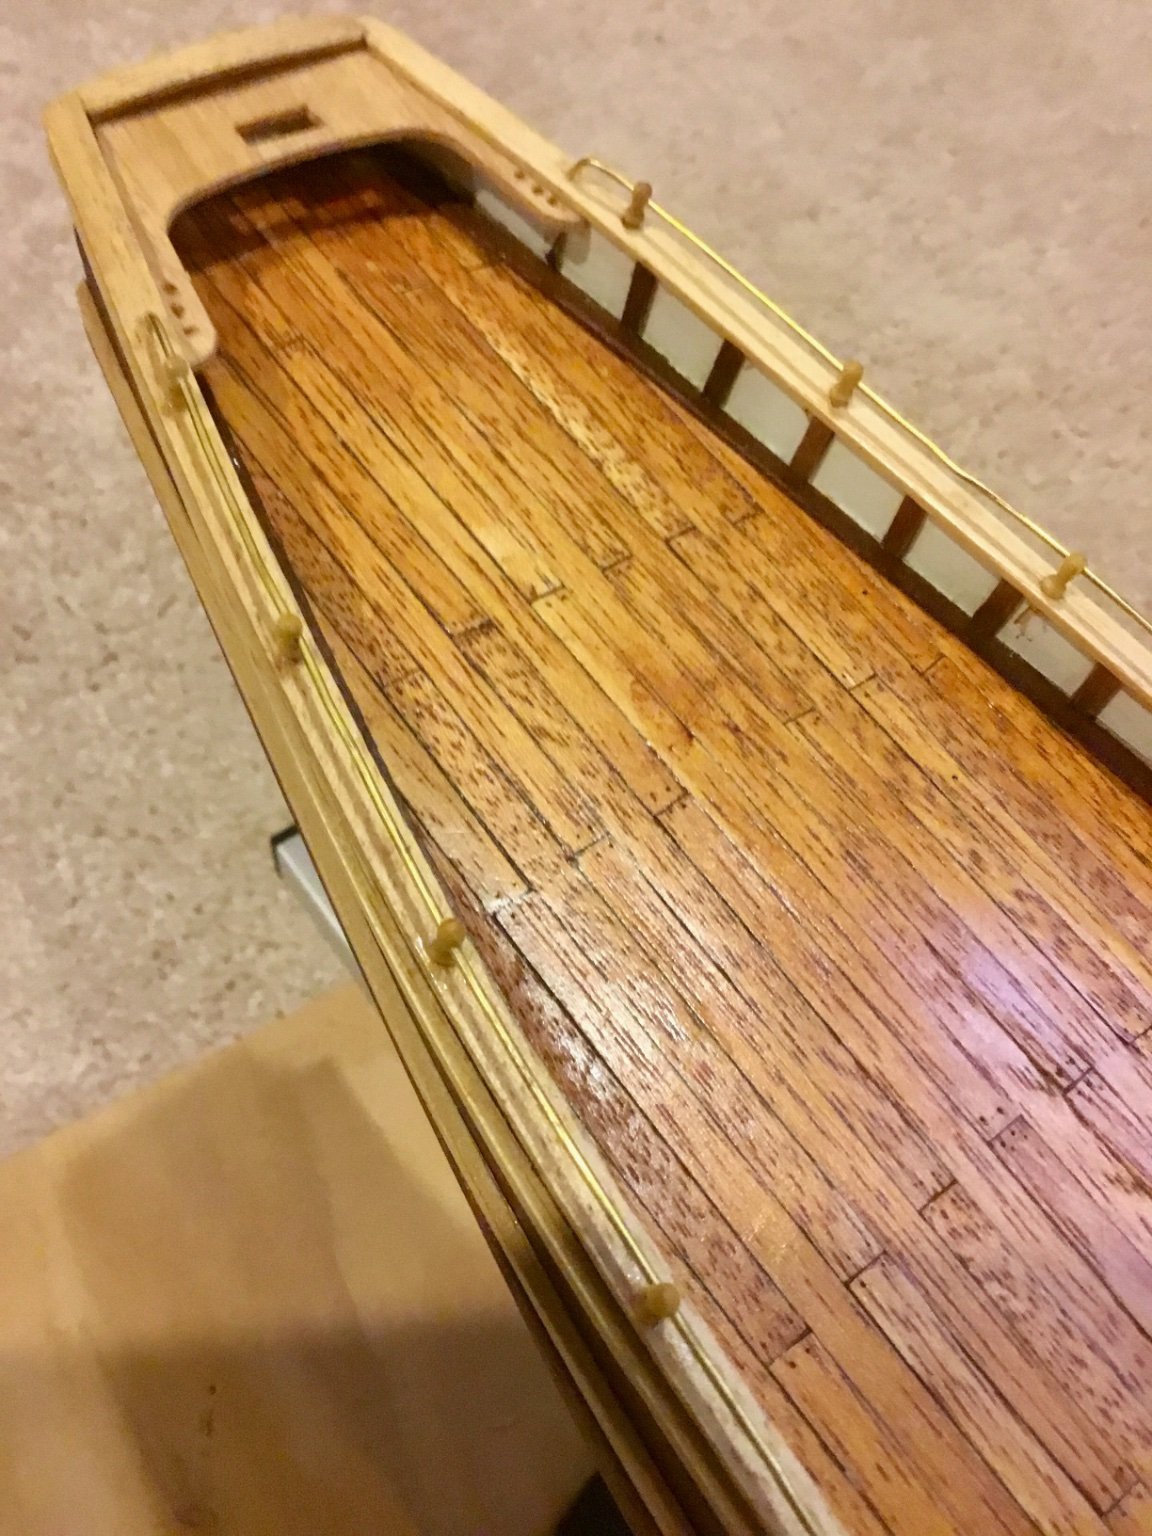
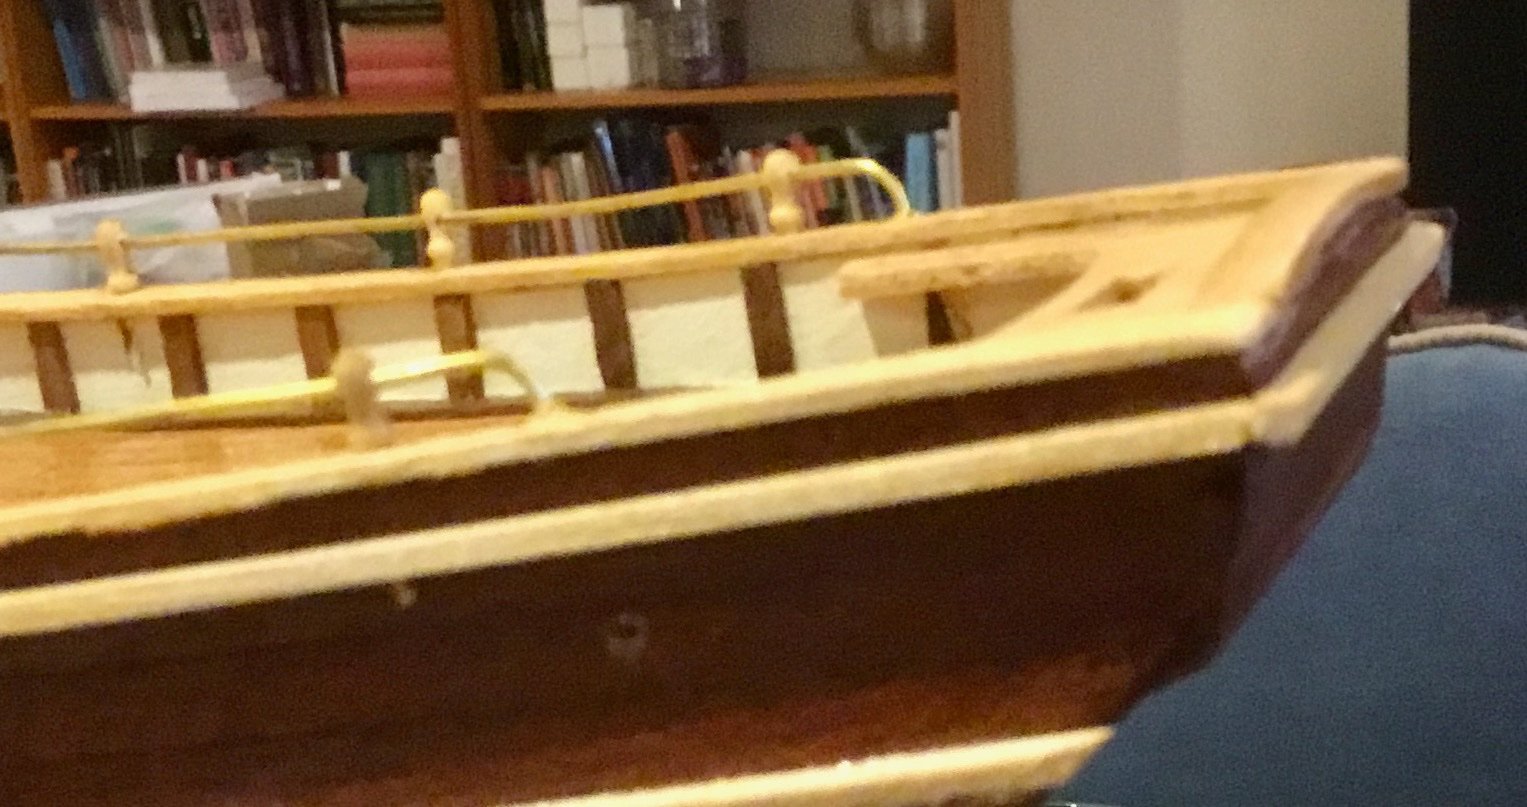
Installed the belaying pin racks.


Installed the wales and the prow exterior reinforcement.
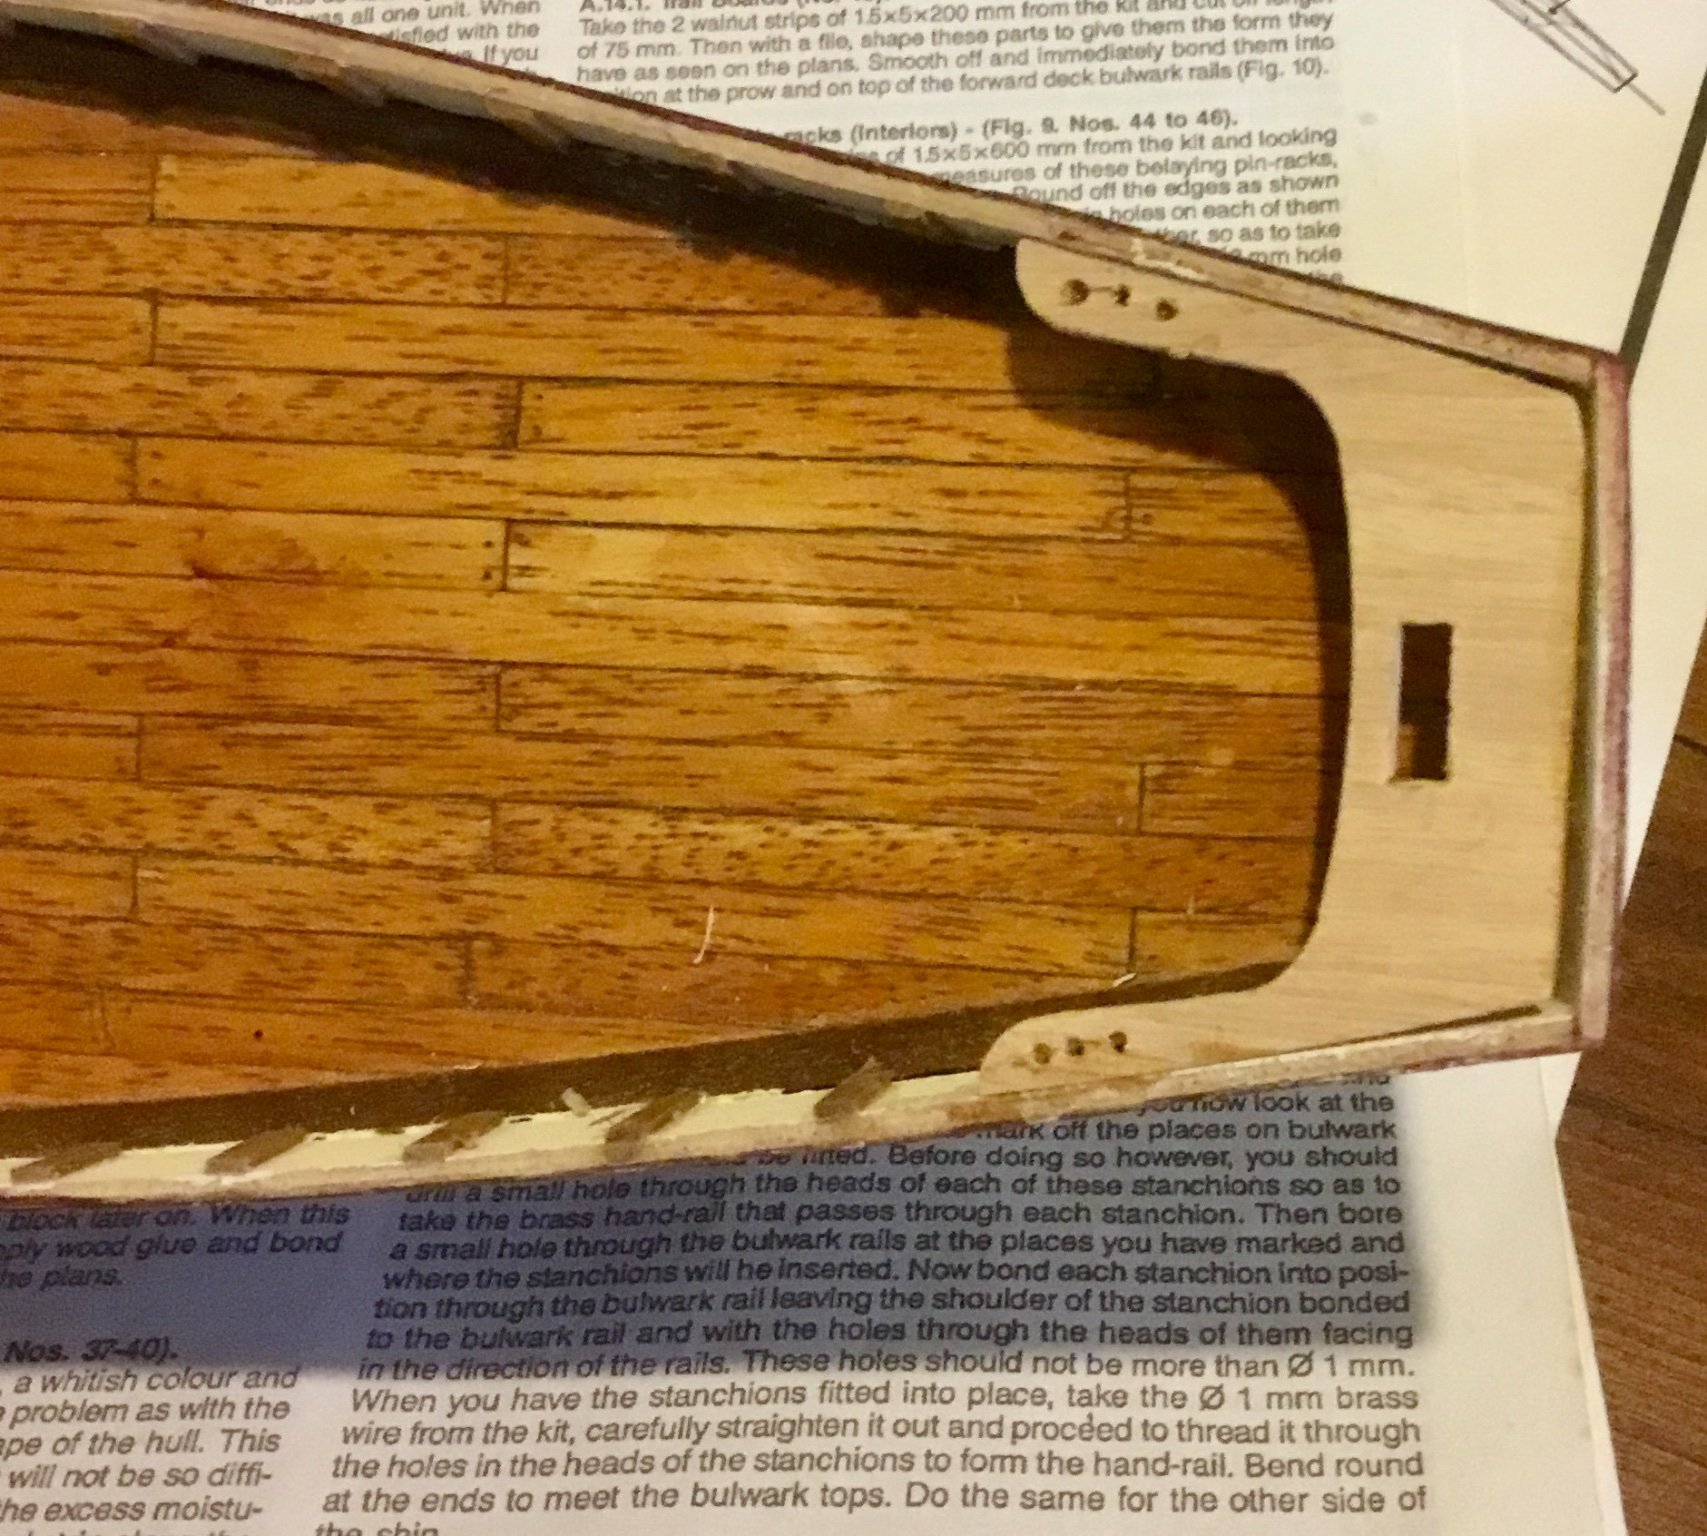
Installed the bulwark rail stanchions. (this was delicate as I was drilling 1mm holes into the 2mm stanchions, luckily there were two extra in the kit as I ended up breaking a pair). In the process I noticed that I had placed the quarterdeck belaying pin racks too far aft and had to remove them (of course they broke and needed to be remade) and place them farther forward.


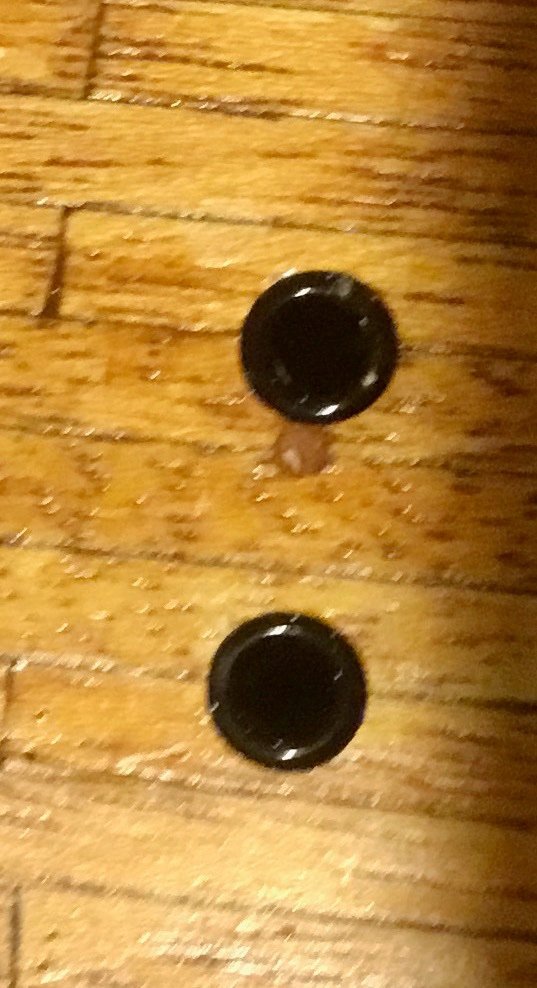
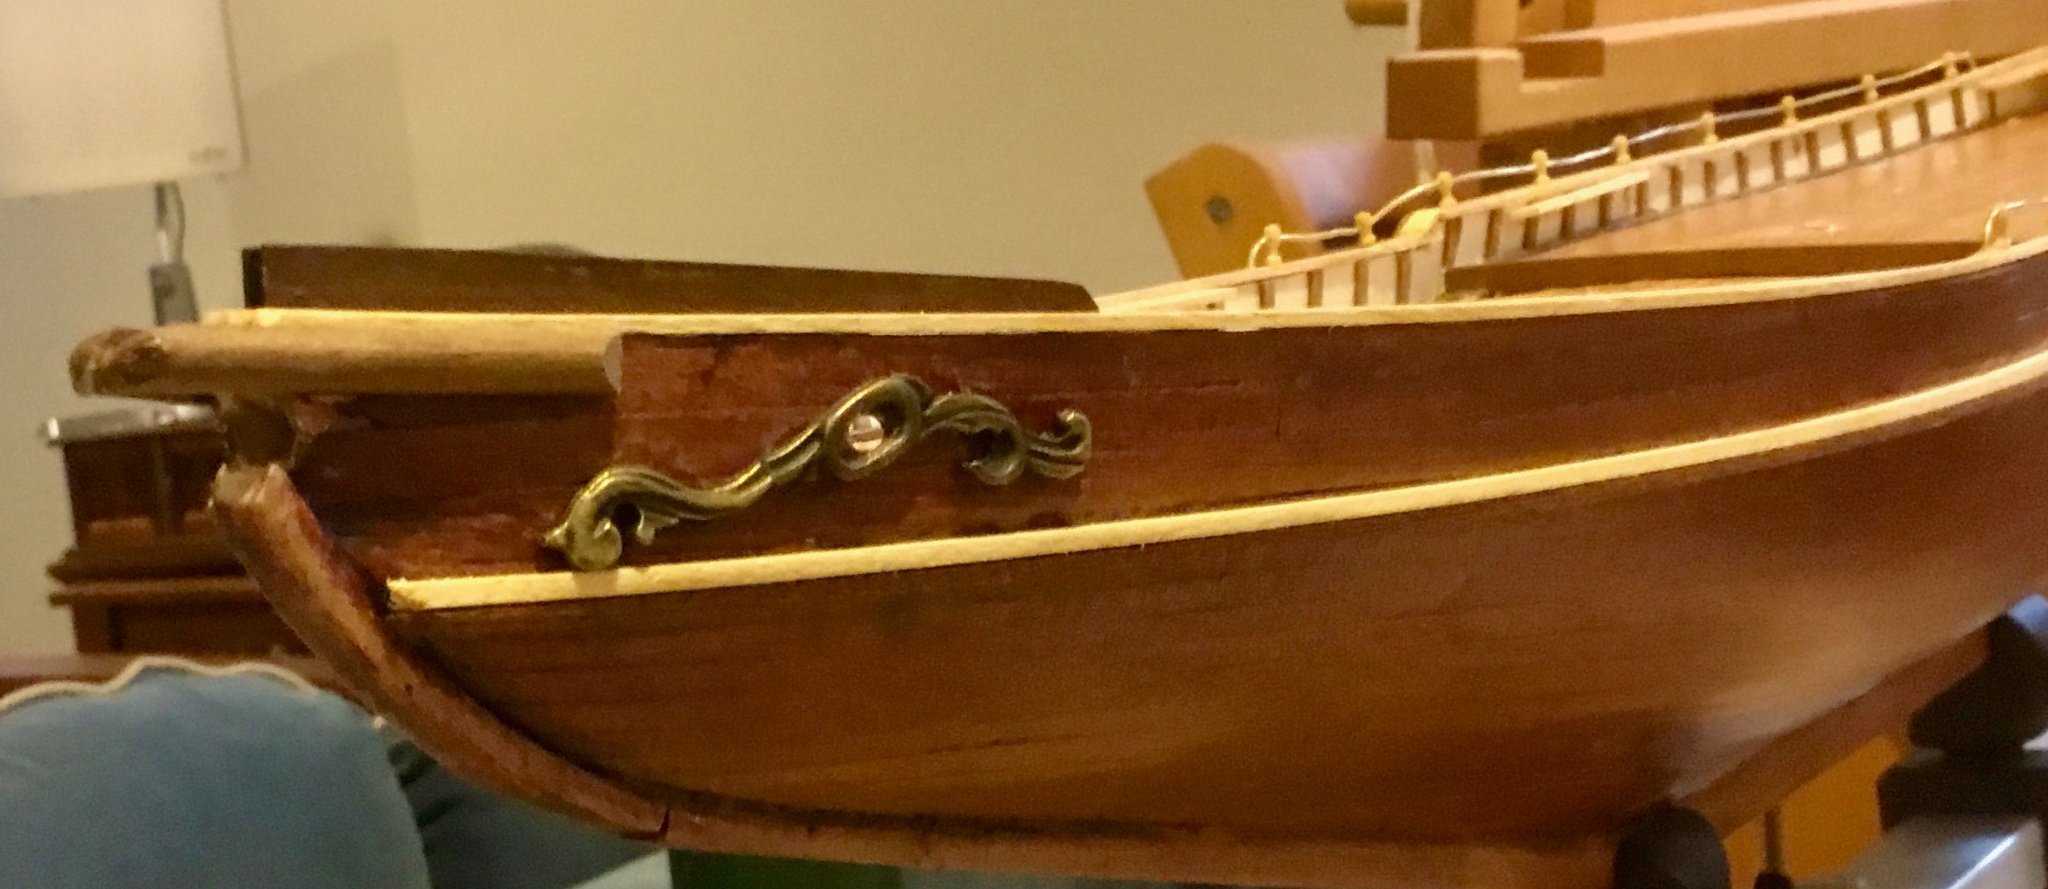
Because of lack or experience and confidence (and due to the fact that I already have a model of the original Bluenose and do not want to have two models that look alike) I decided not to paint the hull of this model and not to drill out the scuppers or install the propellers. I did drill the holes for the masts, the hole for the bowsprit, installed the scrollwork and drilled the holes for the anchor chains and the stern hawse pipes. I also drilled two holes in the deck for the chain hawse pipes but made a mistake in positioning one of the holes and had to fill the hole and stain it so it would be less visible.


Continued work on the superstructure with the prow skylight ( a rough job, hope to do better on the two remaining skylights on the main hold) and began construction of the main hold.
-
Used one of the plan sheets as a pattern for bending the bulwark rails. Installed the bulwark rails, the quarter deck topgallant rails, the taffrail and the shoulder rails (between the forward deck bulwarks and the quarter deck bulwarks). Installed the fake
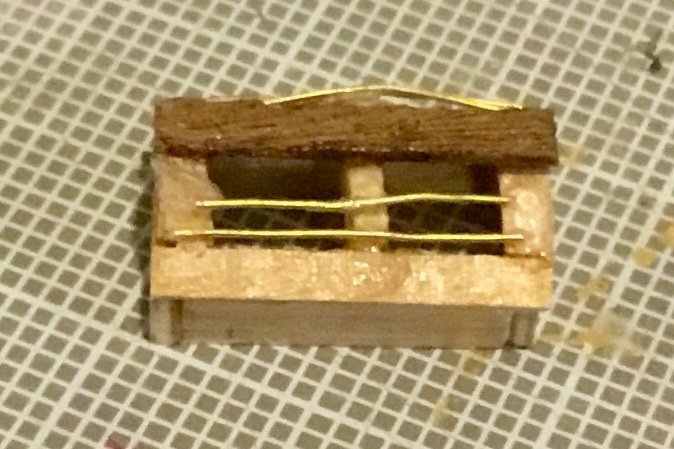
continuation of the forward deck bulwark rails. Formed and installed the trail boards at the prow. Created the belaying pin-racks including holes for the catheads in the forward-most pin-racks. While waiting for the bulwark rails being bent to shape I began work on the deck superstructure items, the bowsprit bits with single block, the windlass, and the two companionways.


- GrandpaPhil and hof00
-
2
-
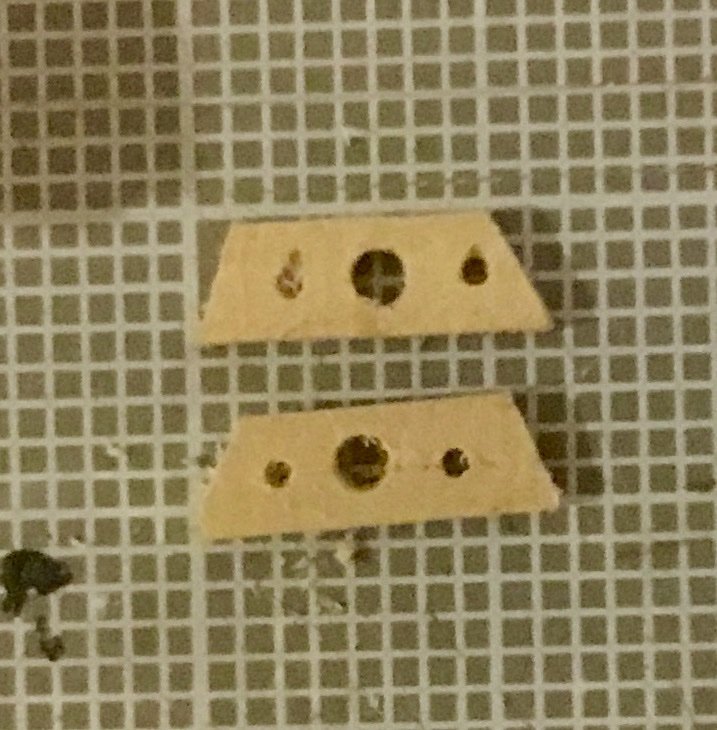
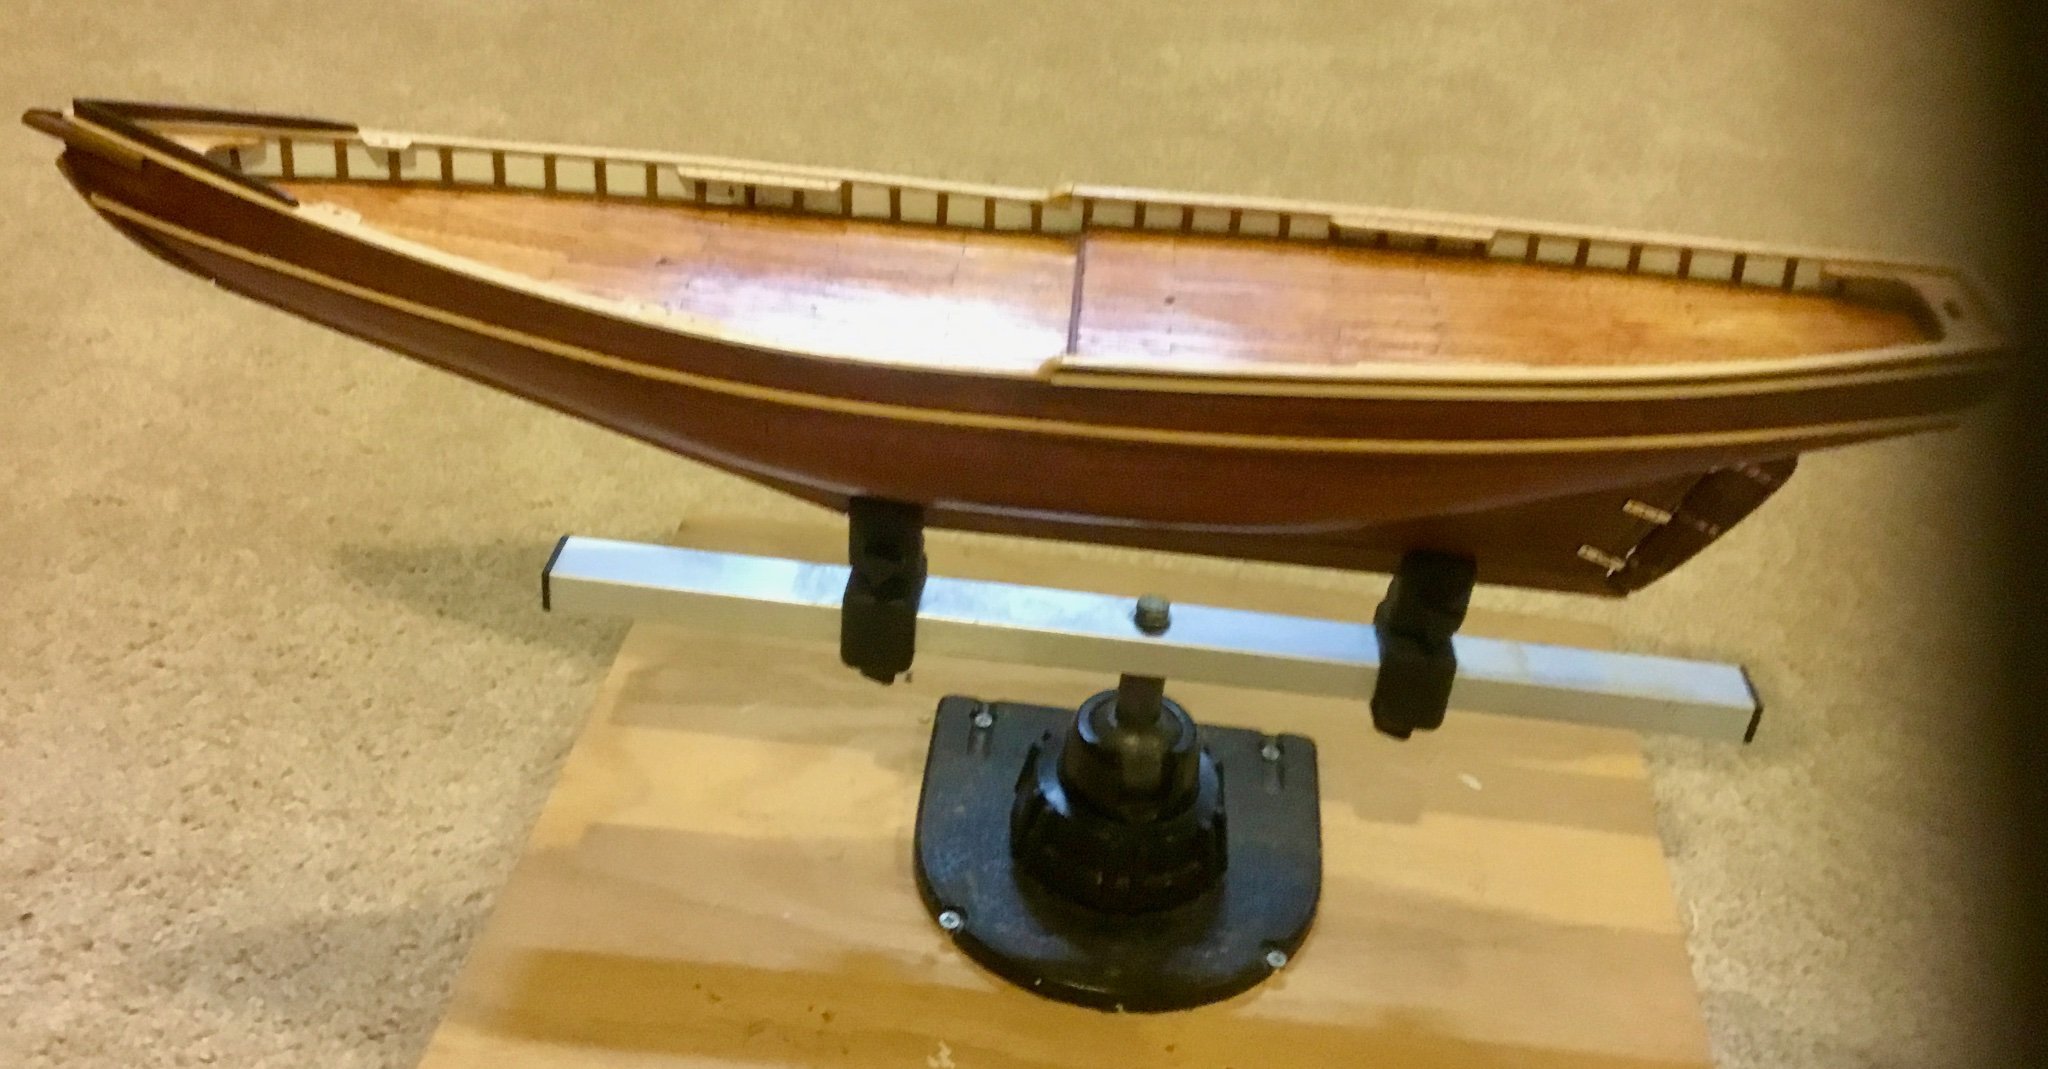
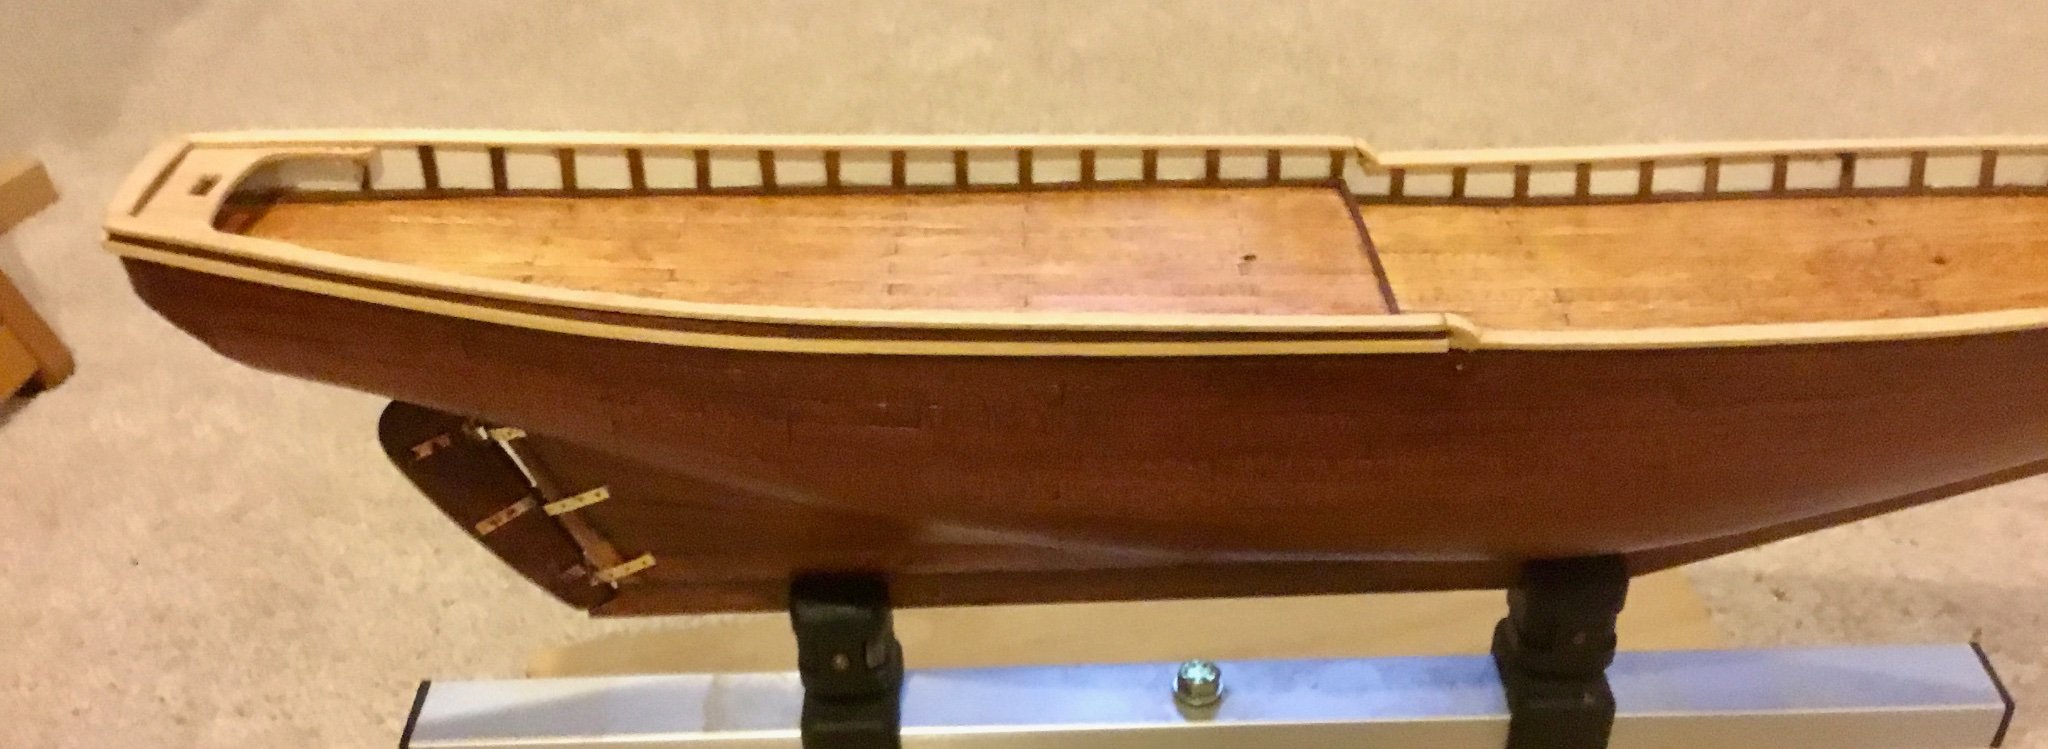
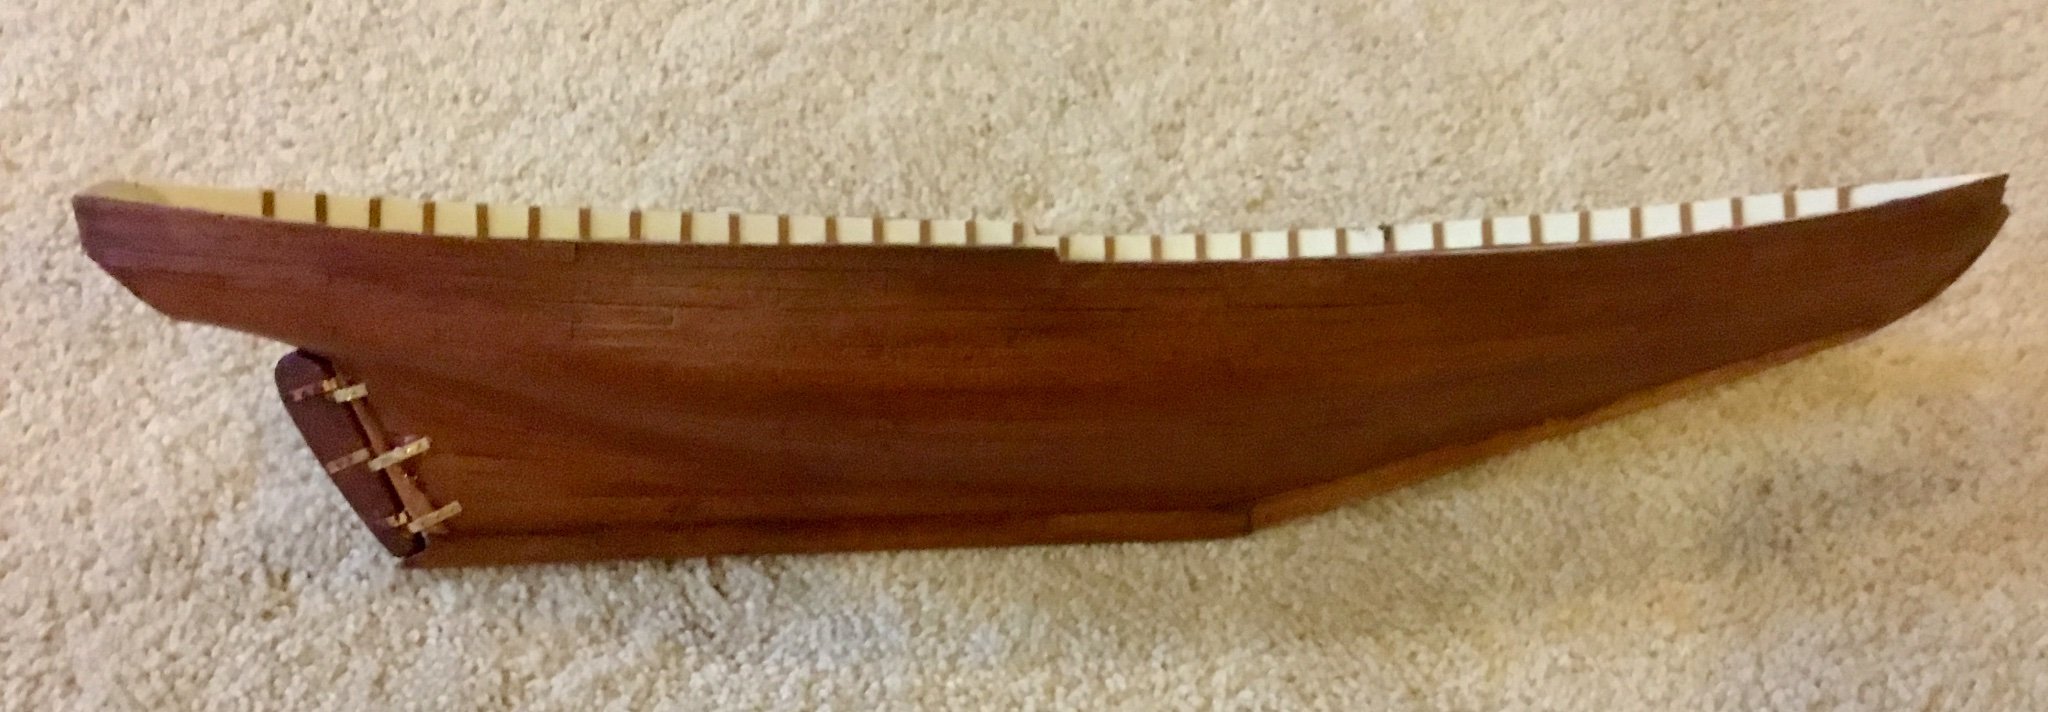
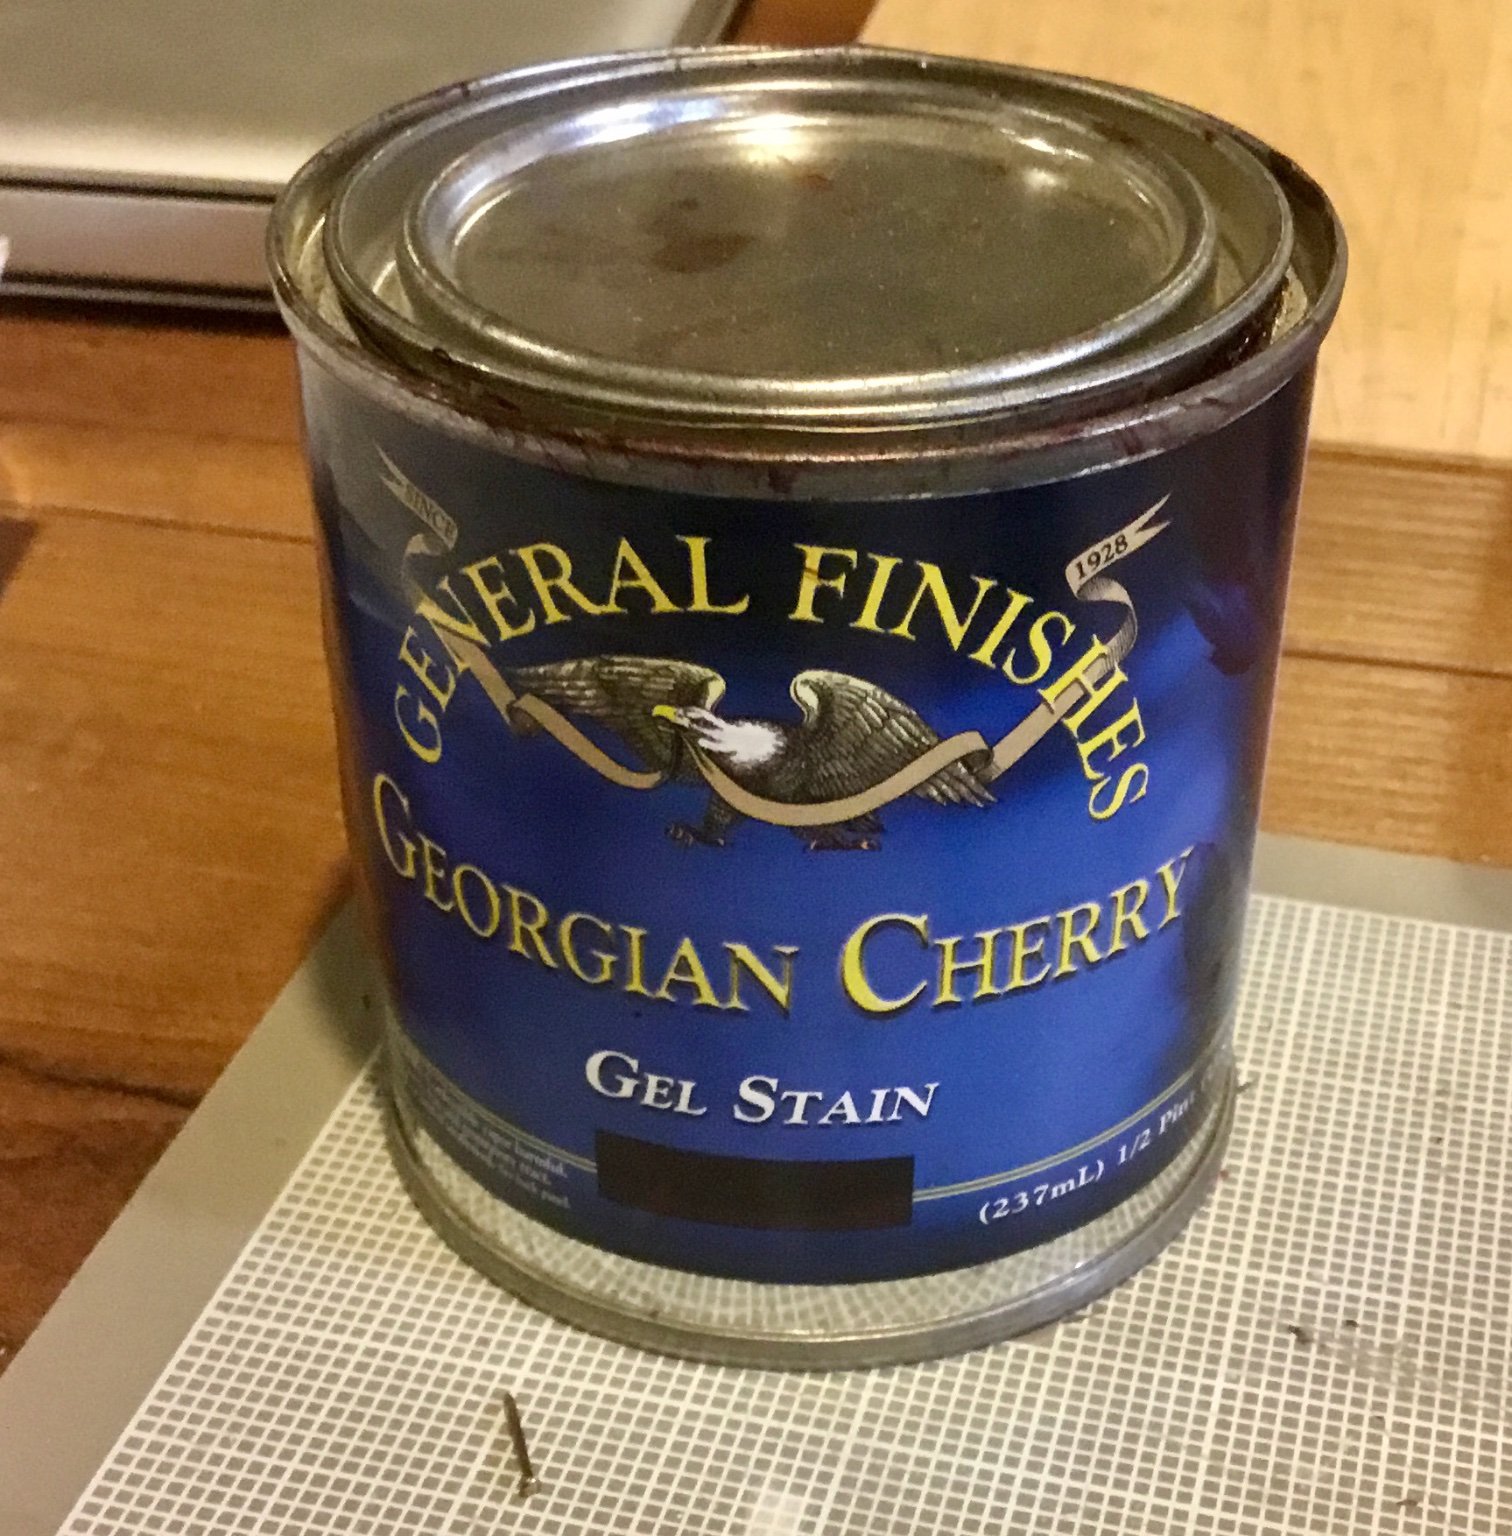
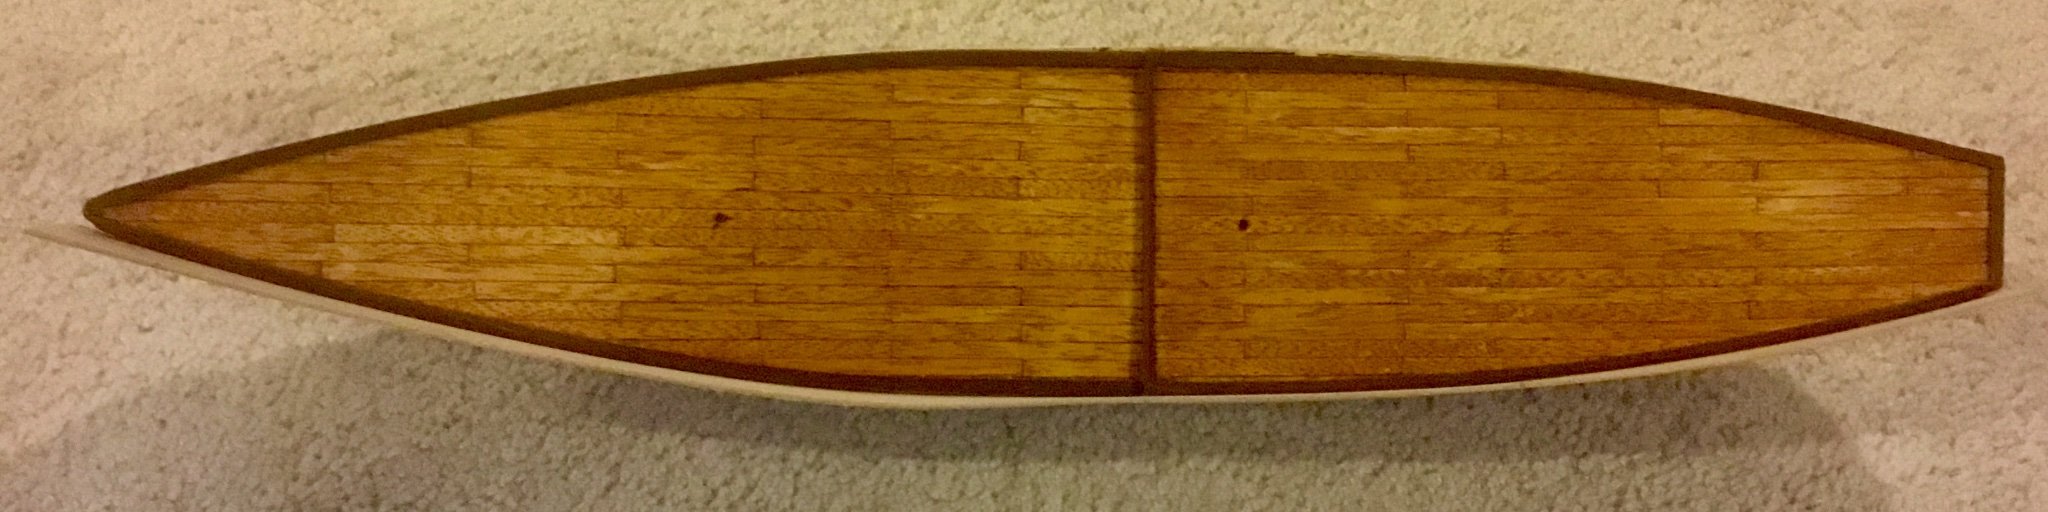
I didn't care for the contrast in colors between the keel components and the walnut planking so I applied a Cherry stain to the hull and keel. Made it a little darker but reduced the contrast. Painted the insides of the bulwarks white and installed the bulwark stanchions. Sanded the edges of the rudder smooth with sandpaper. Soldered a brass wire to 3 of the rudder brace hinges to form the pintles and attached the rudder to the rudder stern post. Attached the forecastle breast plate and poop cover. Needed to add some additional wood to the breast plate to get it to fit and needed to remove some wood from the poop cover to get it to fit. Drilled holes in each for the belaying pins as shown on the plans and opened up a rectangular hole in the poop cover for access to the double block that will eventually be installed there.


- hof00 and GrandpaPhil
-
2
-
Completed second planking, used walnut sawdust to fill cracks and voids, then sanded hull and taped off deck in preparation of painting internal bulwarks.
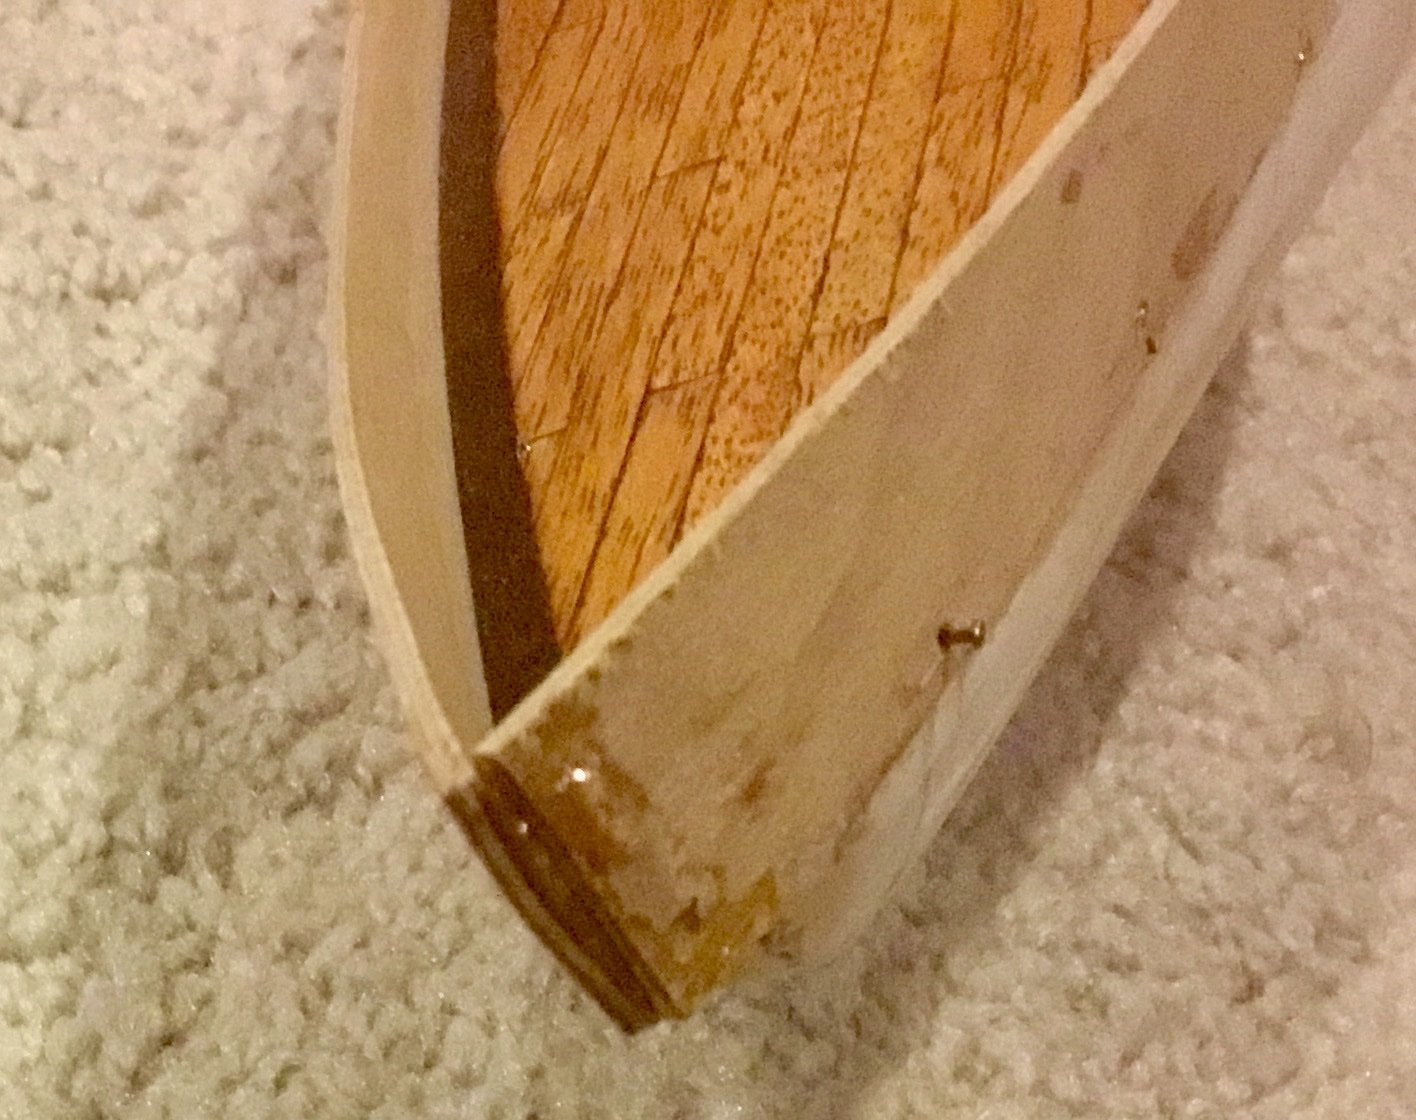
Installed stem, under-stem, stern post and main keel.


Next up will be to apply a couple coats of matte varnish to hull, install bulwark stanchions and paint internal bulwarks white.
-
-
Not initially. I had to do some additional sanding and filing to make it fit the false keel better. So there was minimum empty space visible when placing the keel piece against the bow curve. I may need to do some more tweaking after I have completed the second planking. I don't plan on painting the hull so I've been saving the walnut sawdust created during the second planking to use as a potential filler medium if needed. Hope I don't.
-
And I thought that I went overboard when I started this hobby! I have 4 recently purchased model kits still in my queue to do, but I've finished 5 so far and working on my 6th. Hope you at least had the opportunity to start and finish a couple. None of these kits are for beginners. As the saying goes, "looks like your eyes were bigger than your stomach". If I had the time left in life and wasn't so deep into things myself already....
-
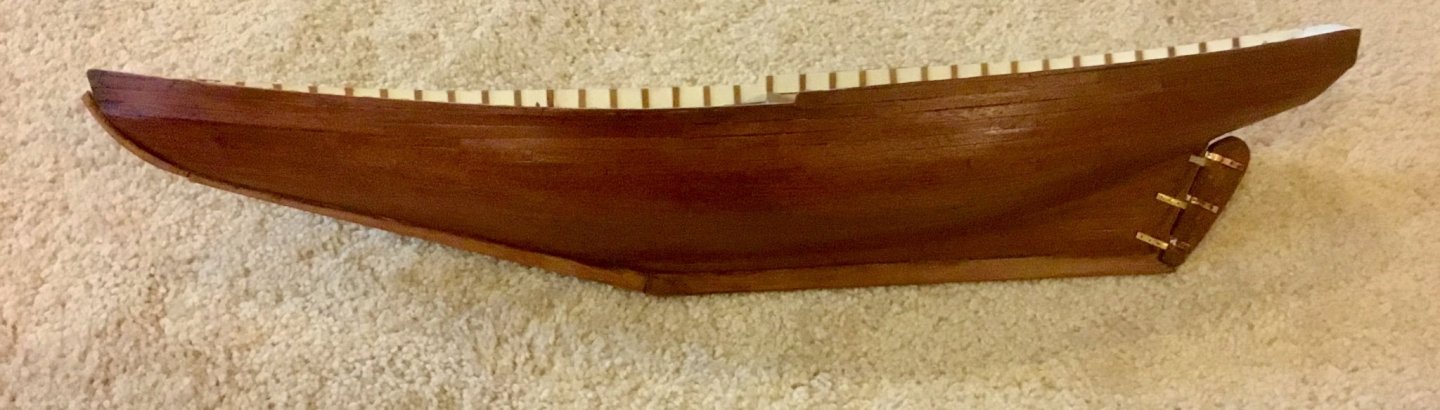
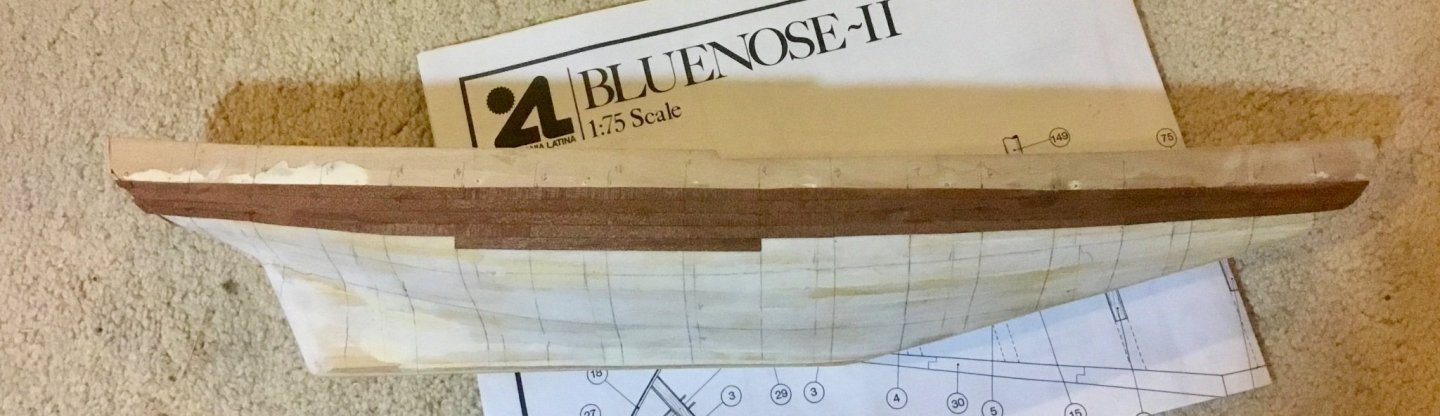
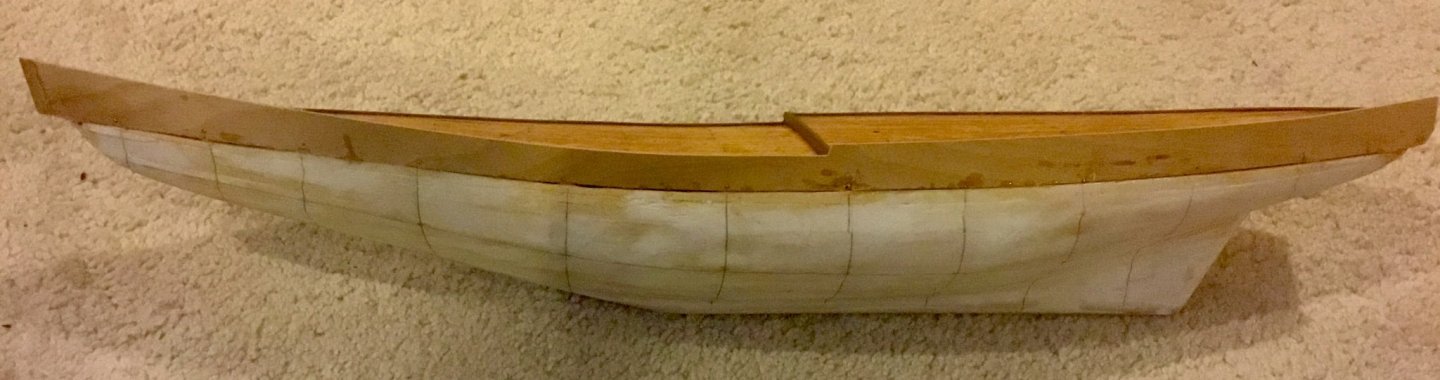
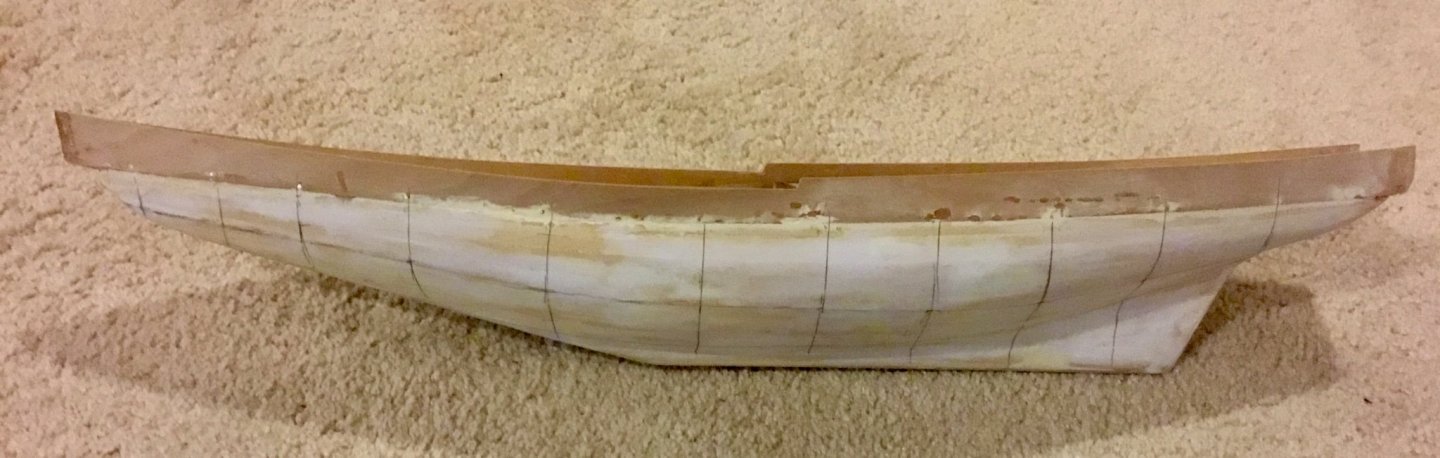
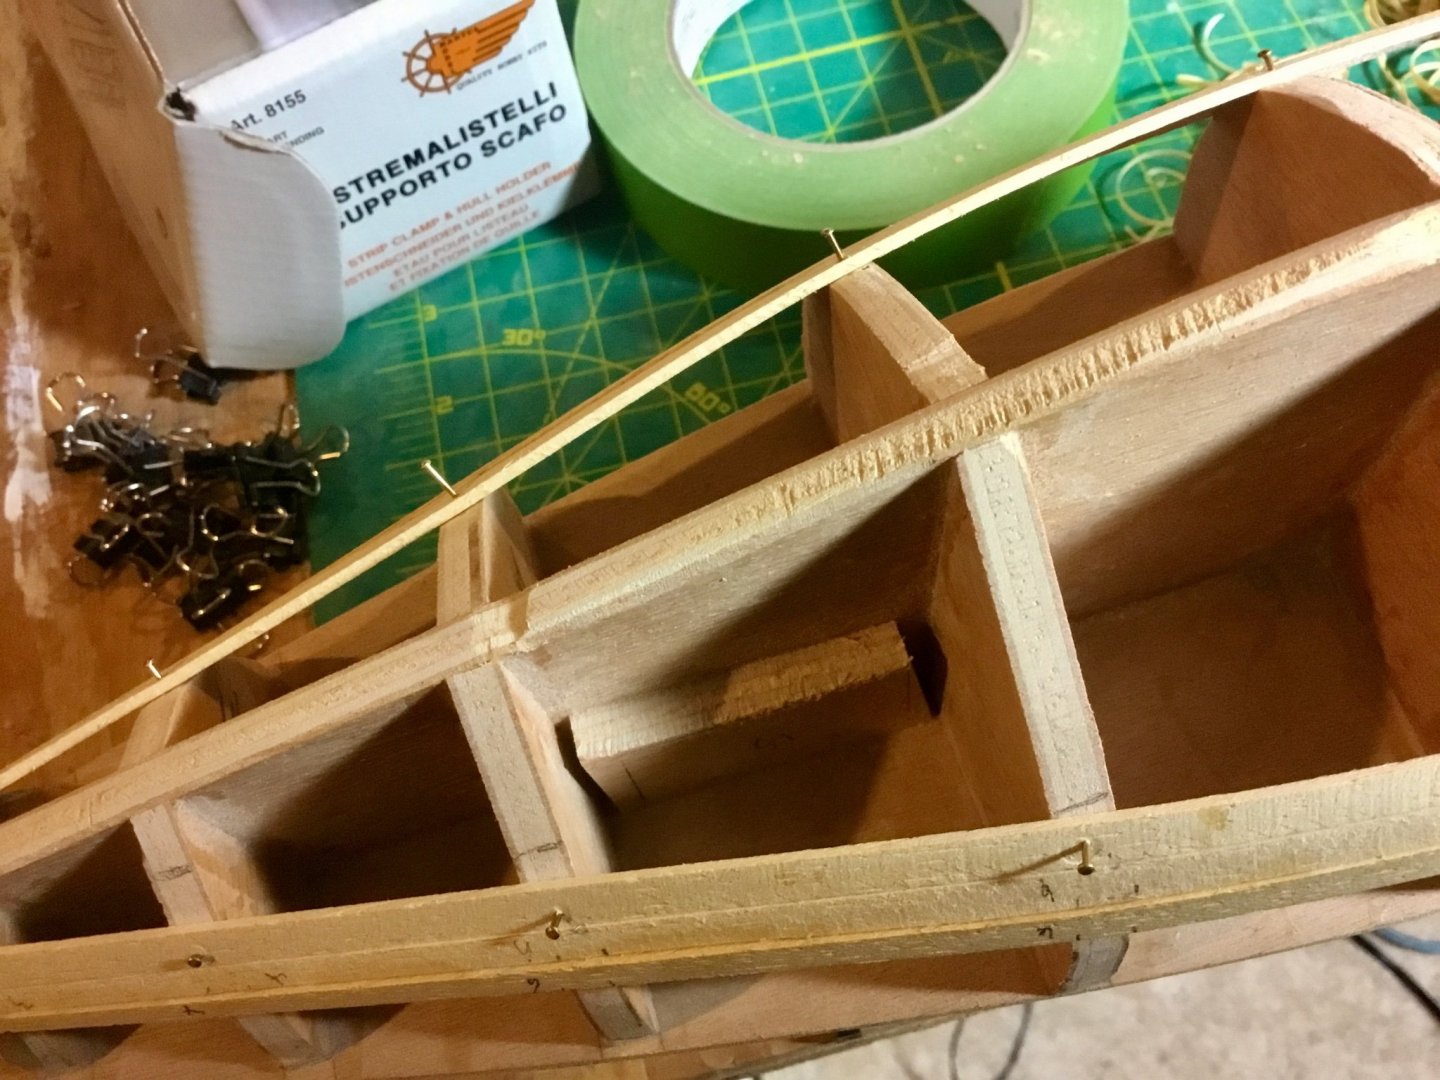
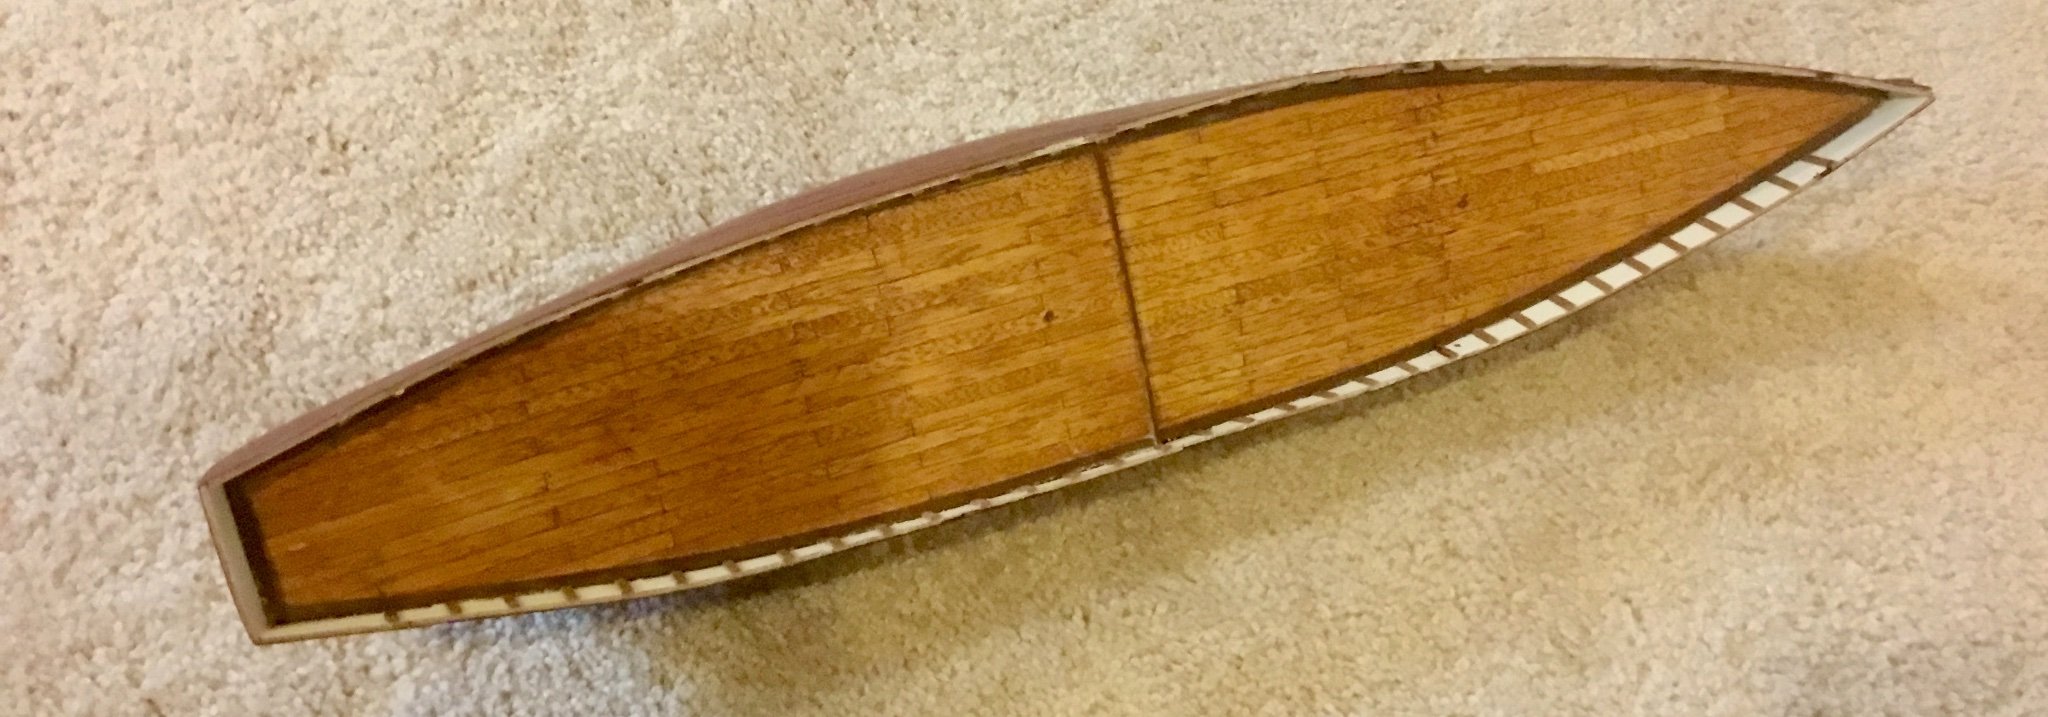
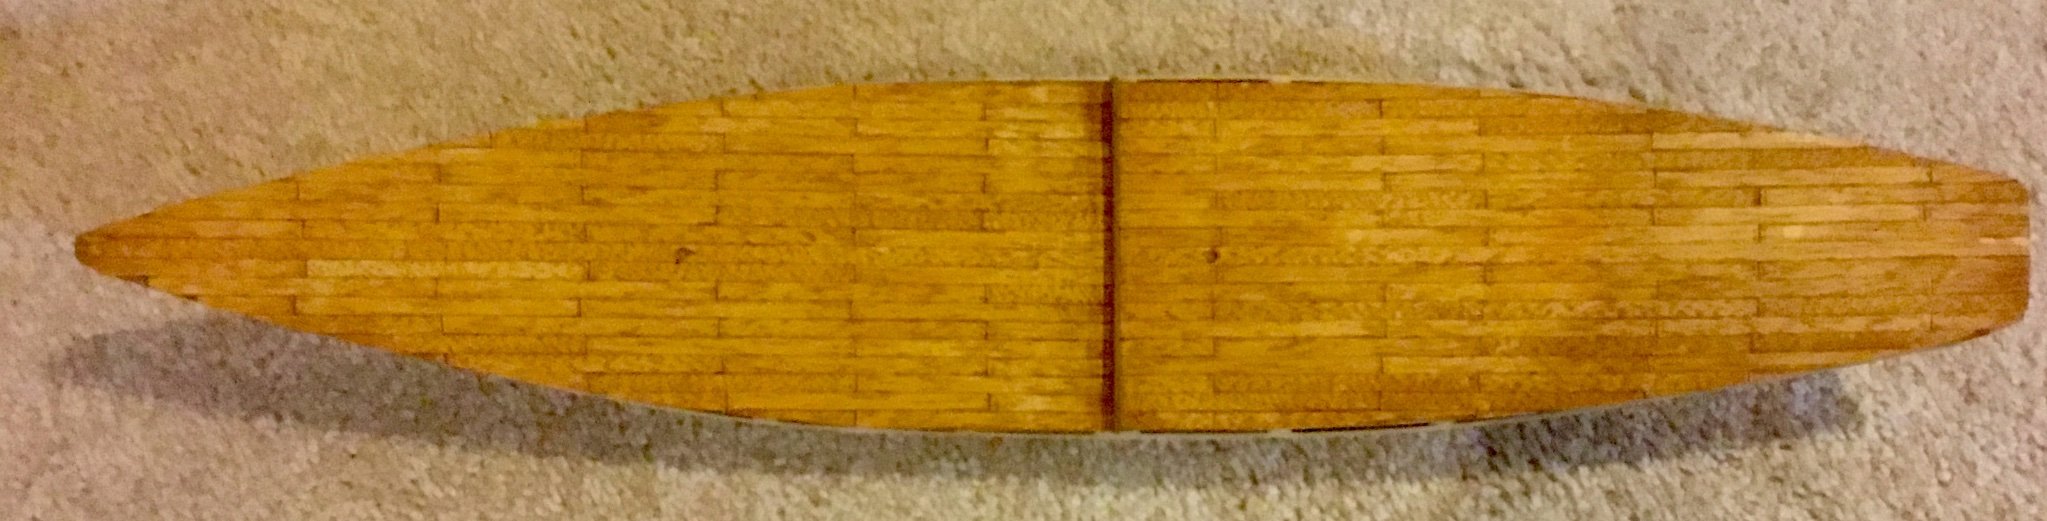
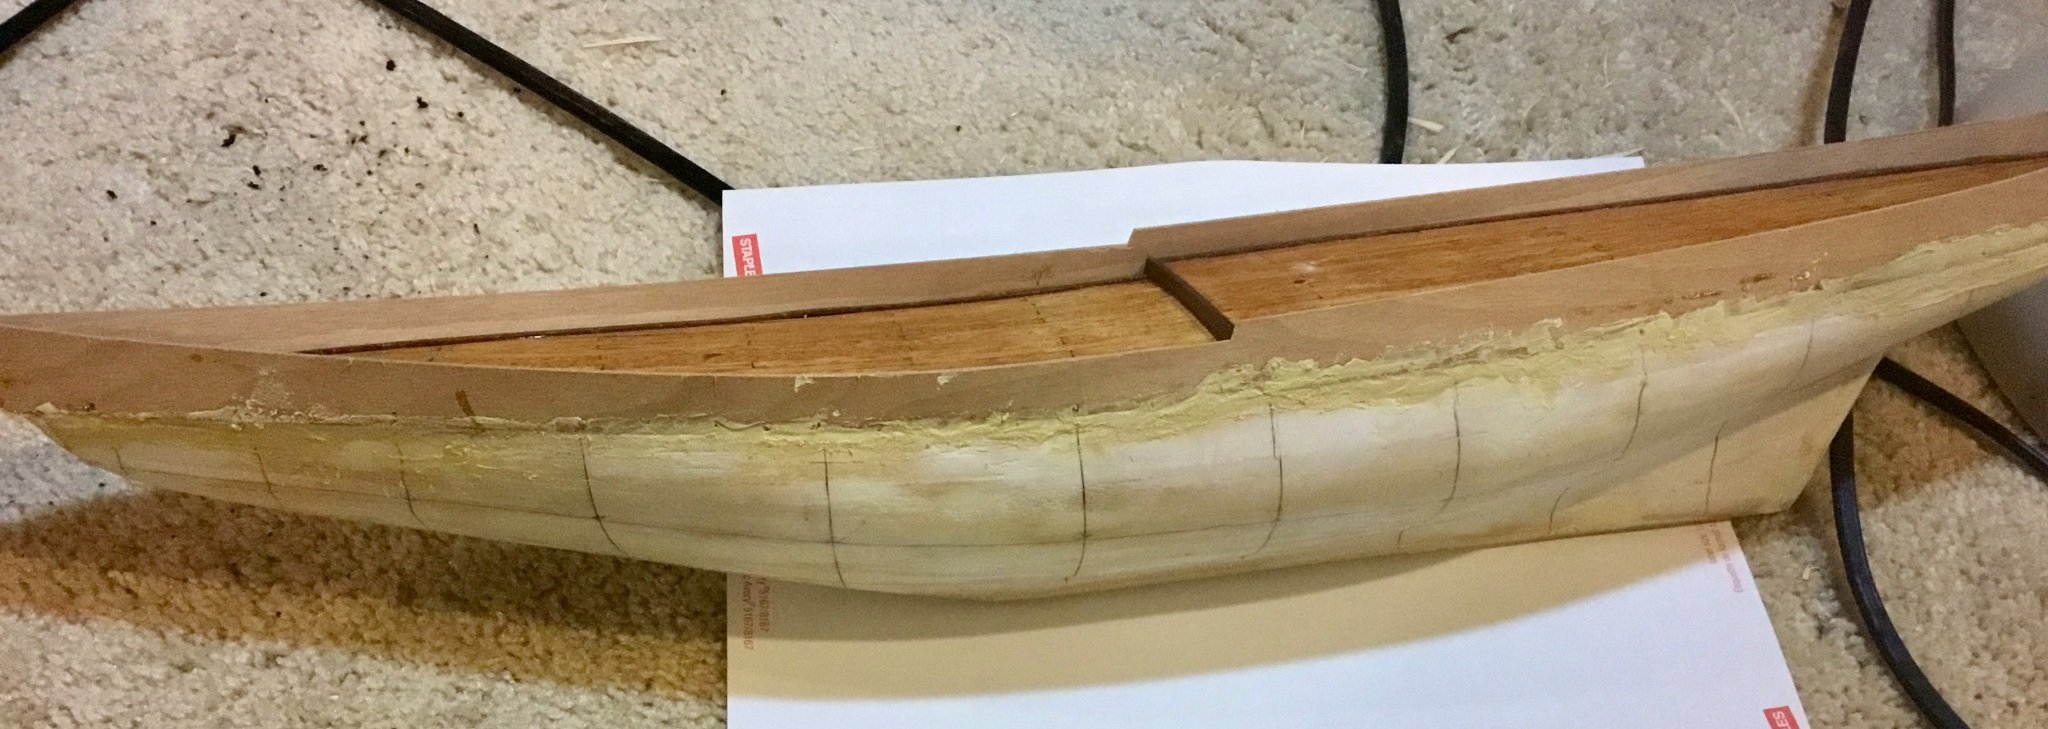
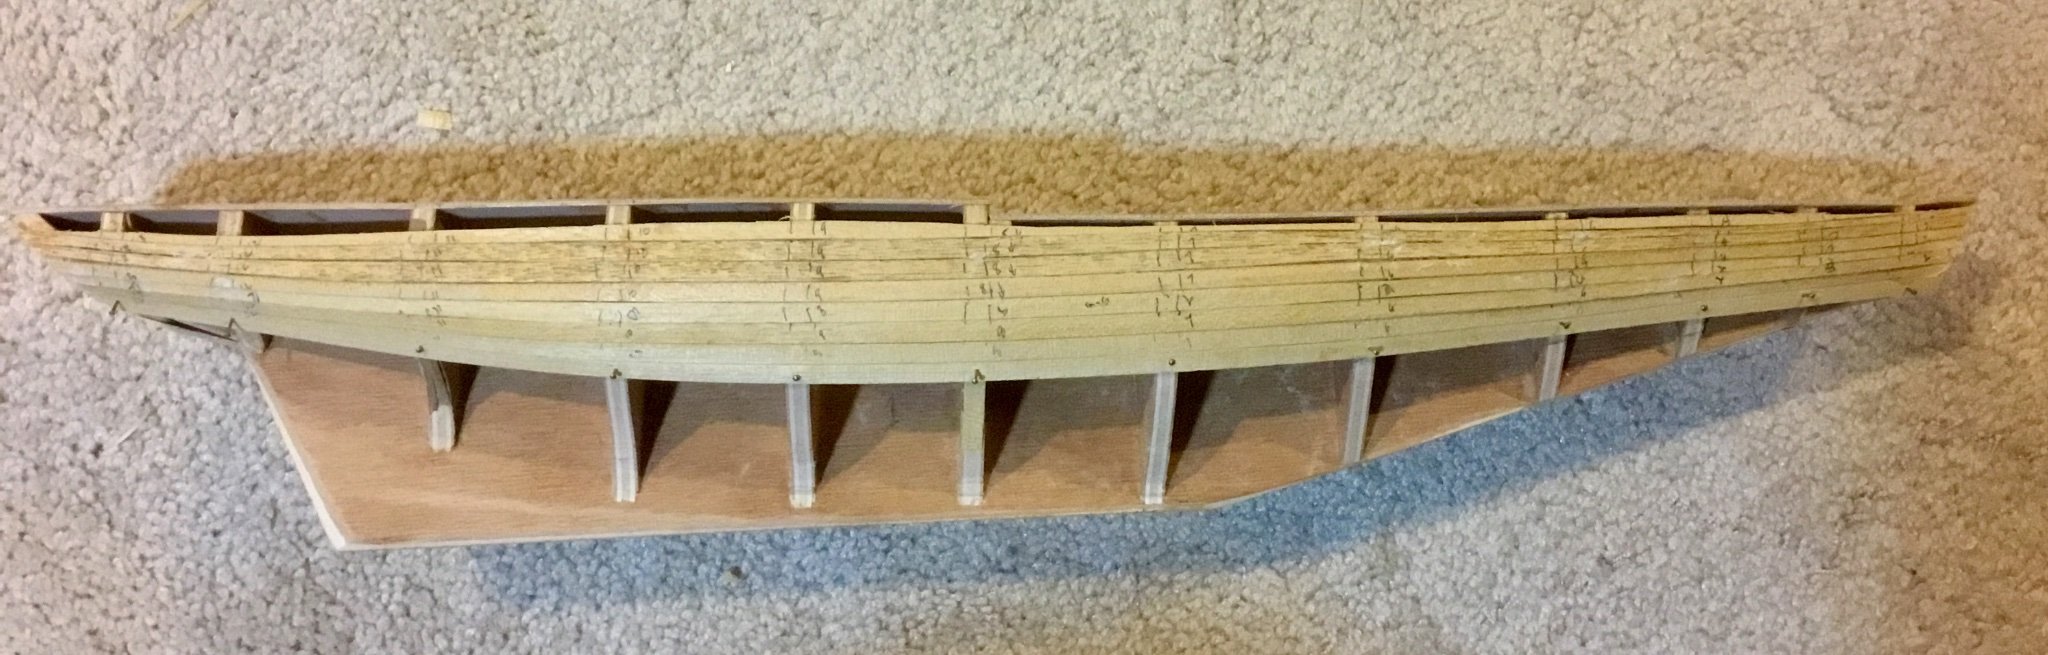
Started second hull planking. Using an estimate of a maximum plank length of approximately 4.5 inches at a scale of 1/75 I rounded up to a scale length of 120mm which represents a real plank length of about 30 feet. Then I divided the hull length which is 540mm long into 18 sections of 30mm each and drew lines perpendicular to the keel every 30mm. Therefore a plank would span a maximum of 4 sections. I created a plank butting pattern so the 120mm planks butts would line up correctly. Then I divided the hull into 3 planking stripes using battens as I did for the first planking level (but just drew lines for the strips since I now have a smooth hull to lay the planks on). I wanted the planking to look realistic and I thought trying to lay one long plank the length of the hull would also be more difficult. It appears like this will be a slow process as I am so far averaging only about 2 or 3 strakes a day with and estimate of of 20-21 strakes per hull side. Which means about 2 to 3 weeks to complete.
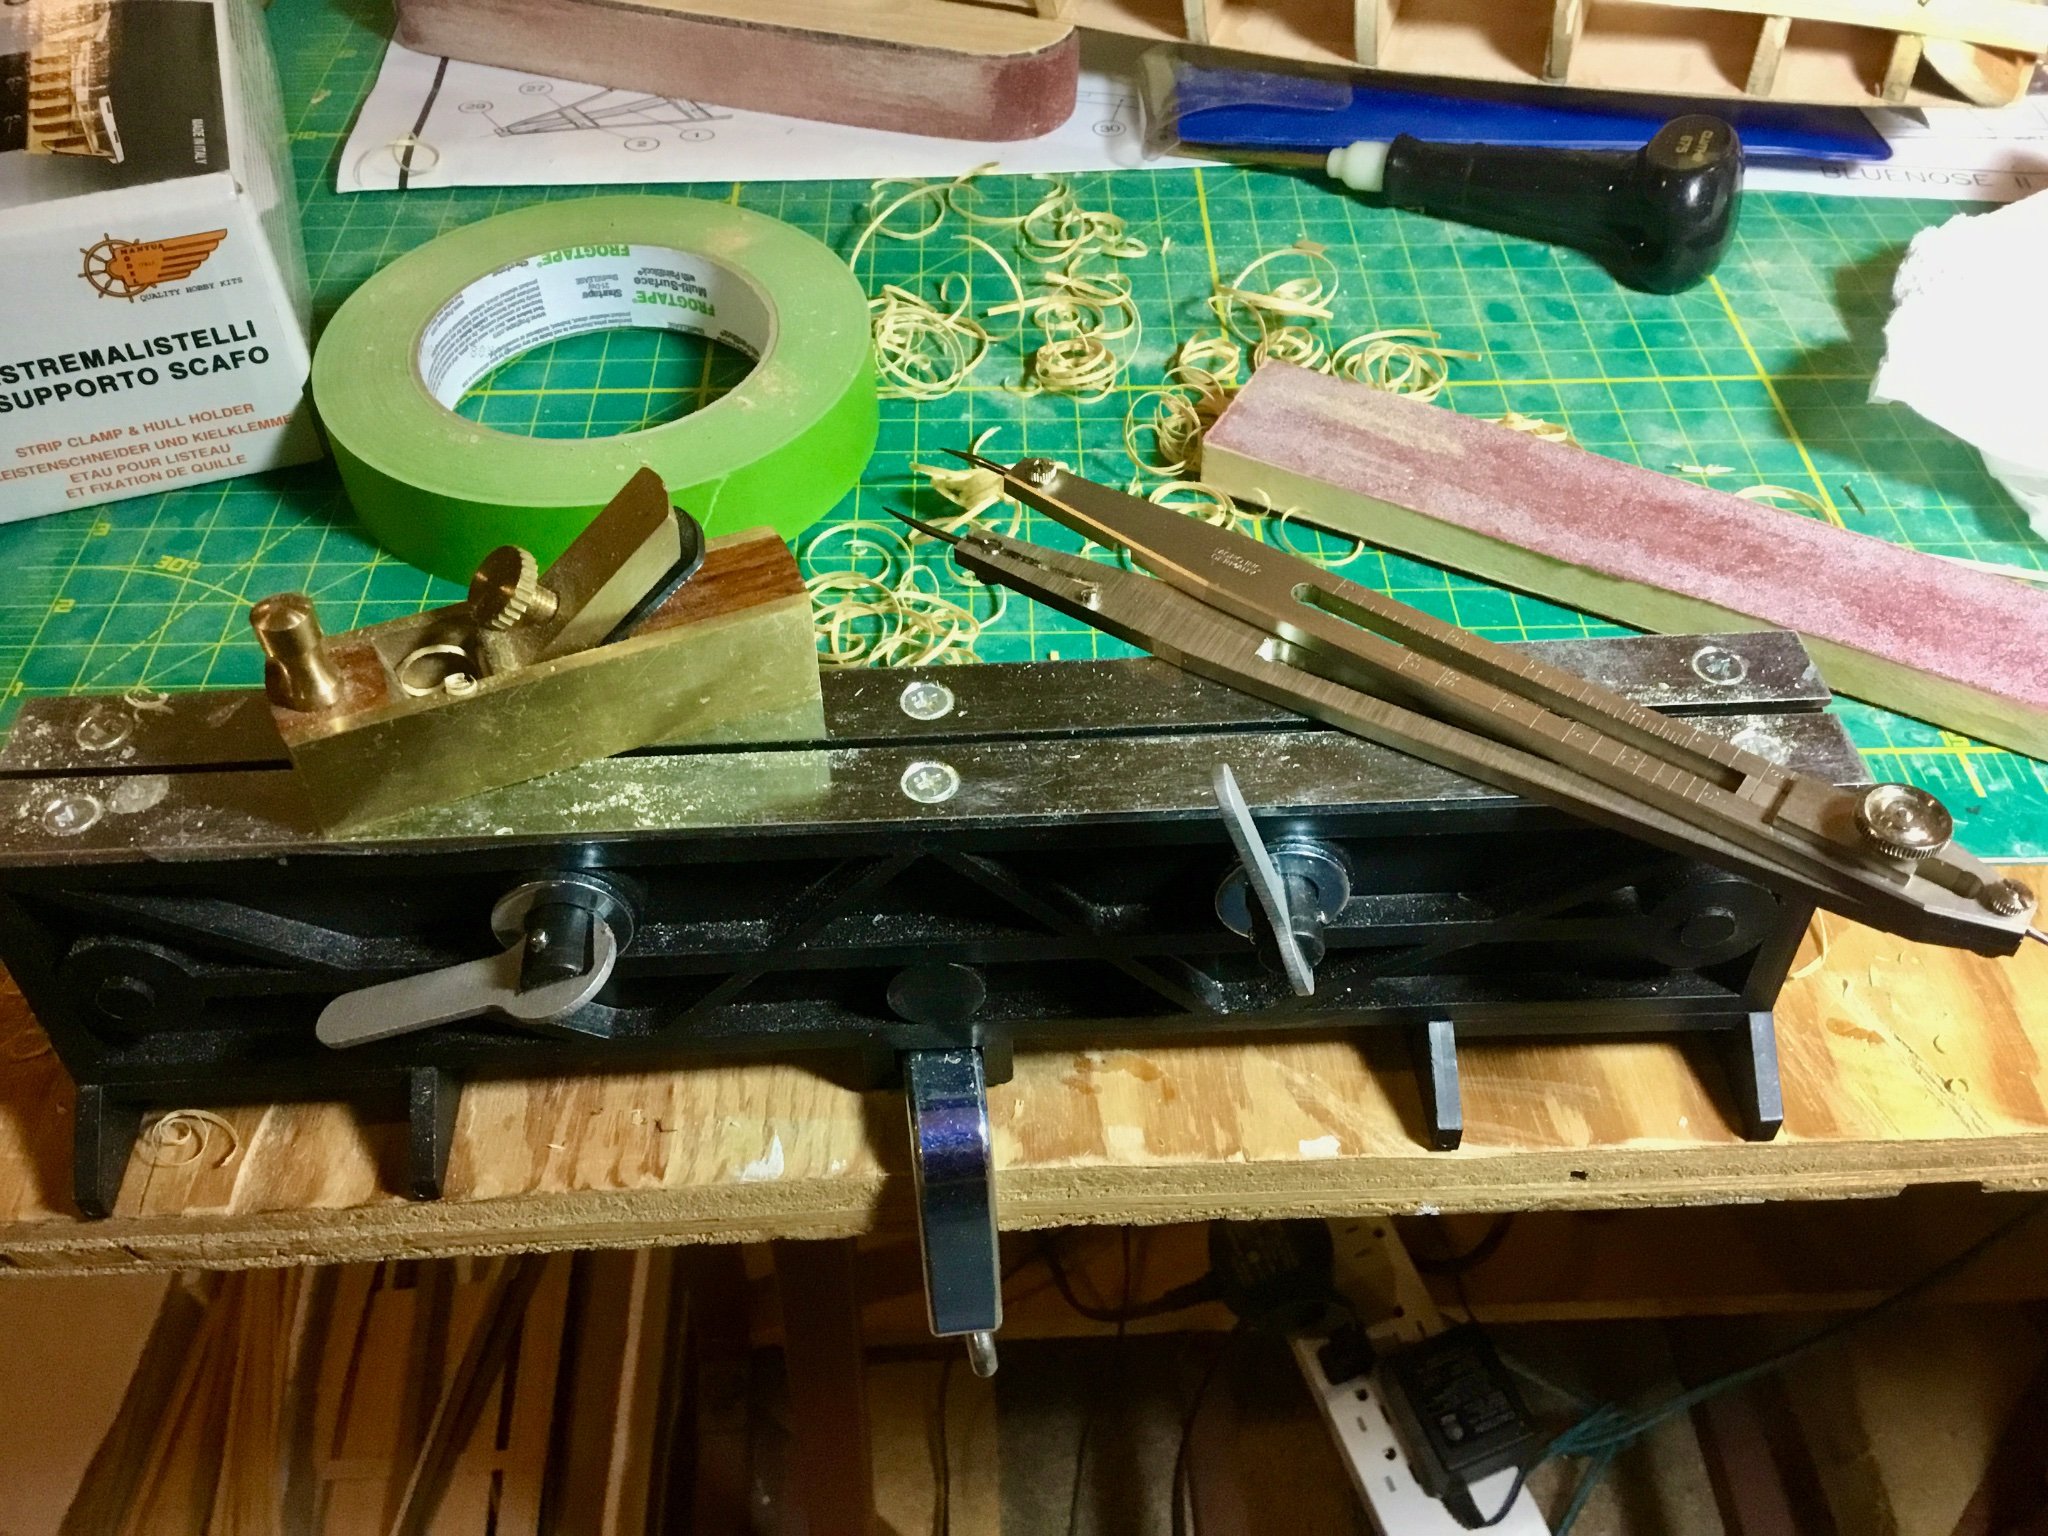
I am using the proportional divider technique I used for the first planking layer for tapering the planks.
Heres what I've got so far.
-
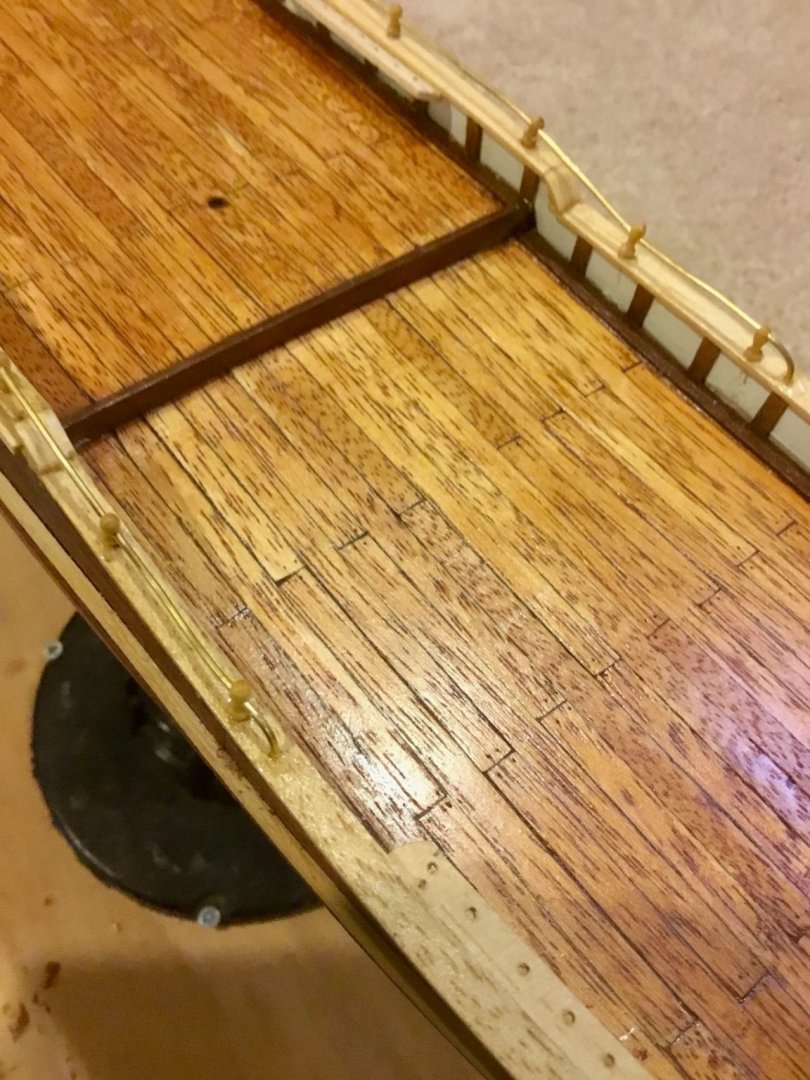
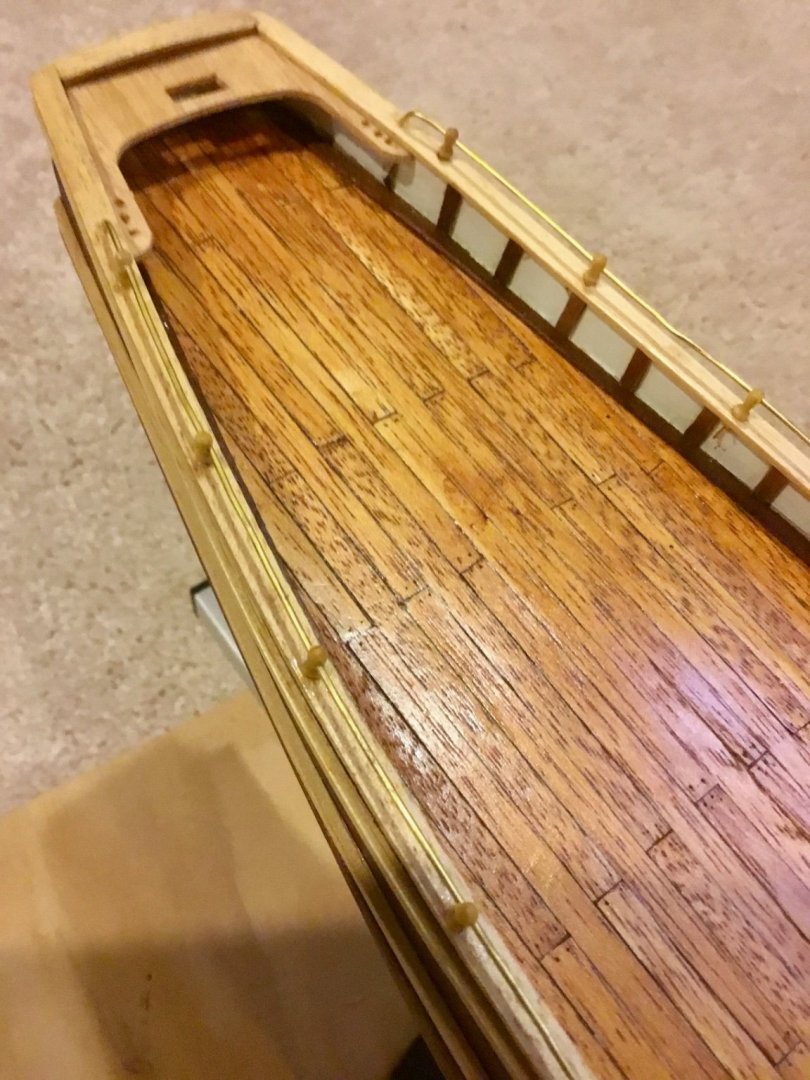
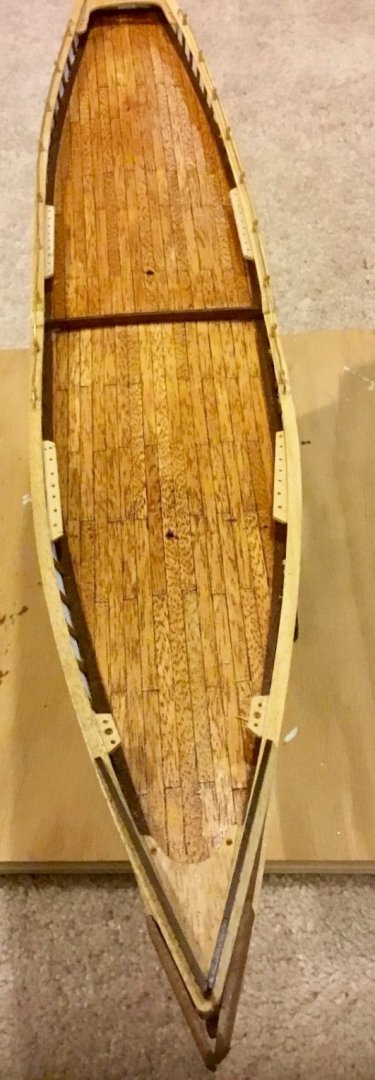
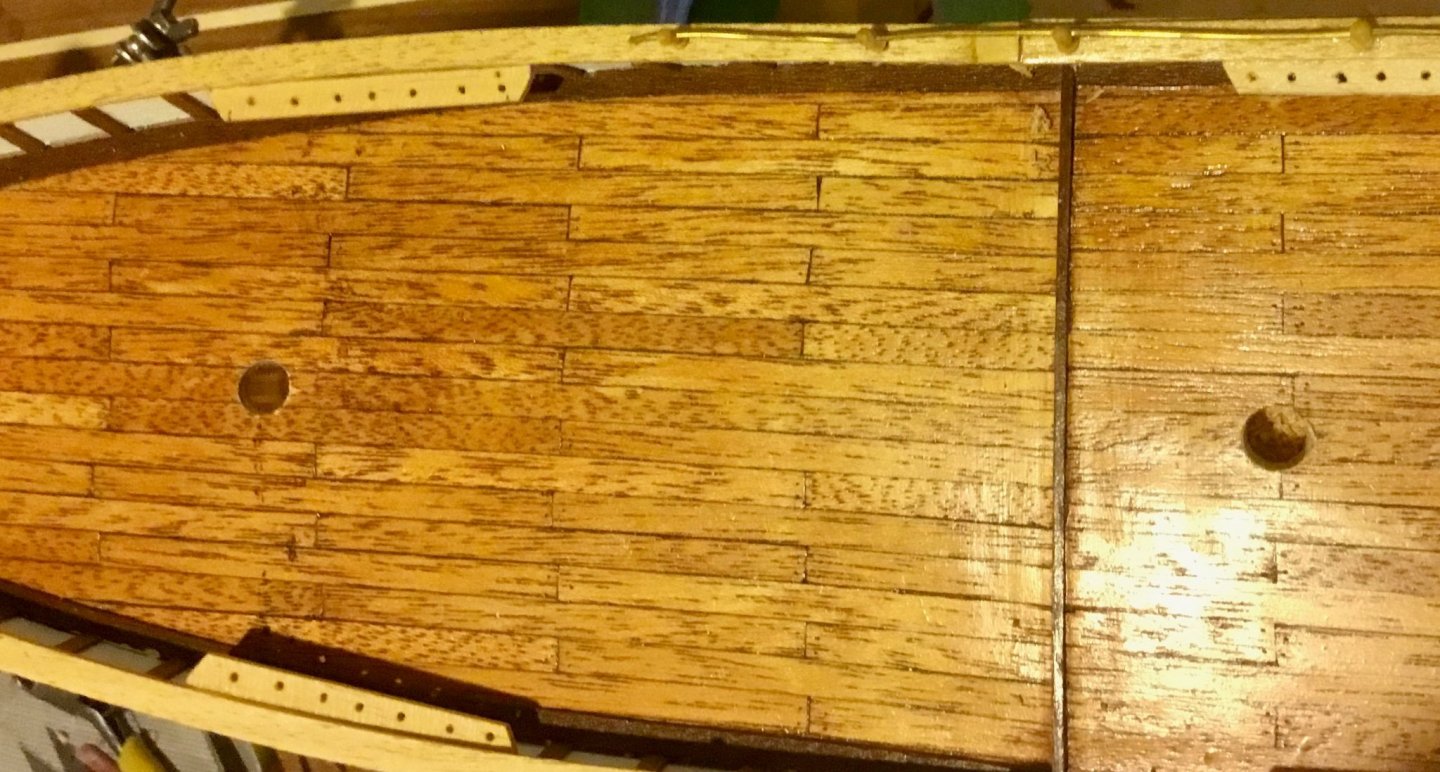
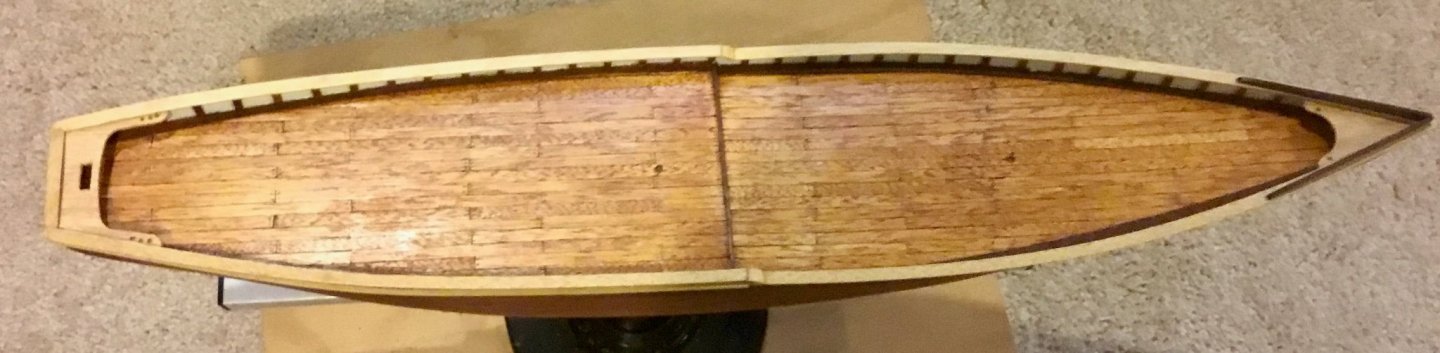
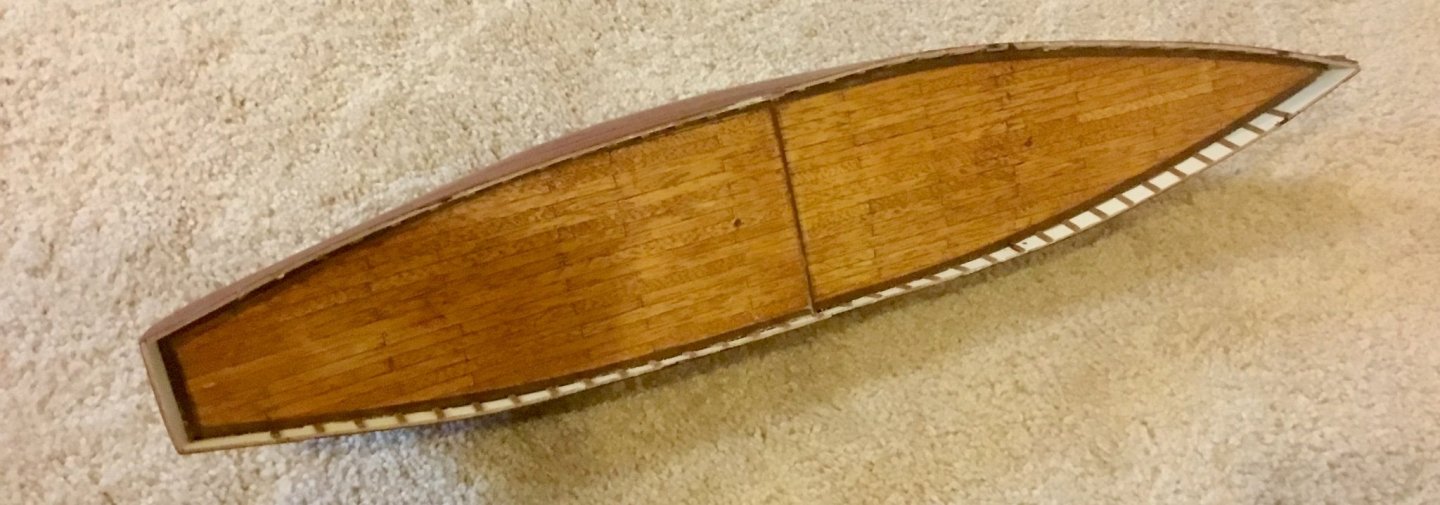
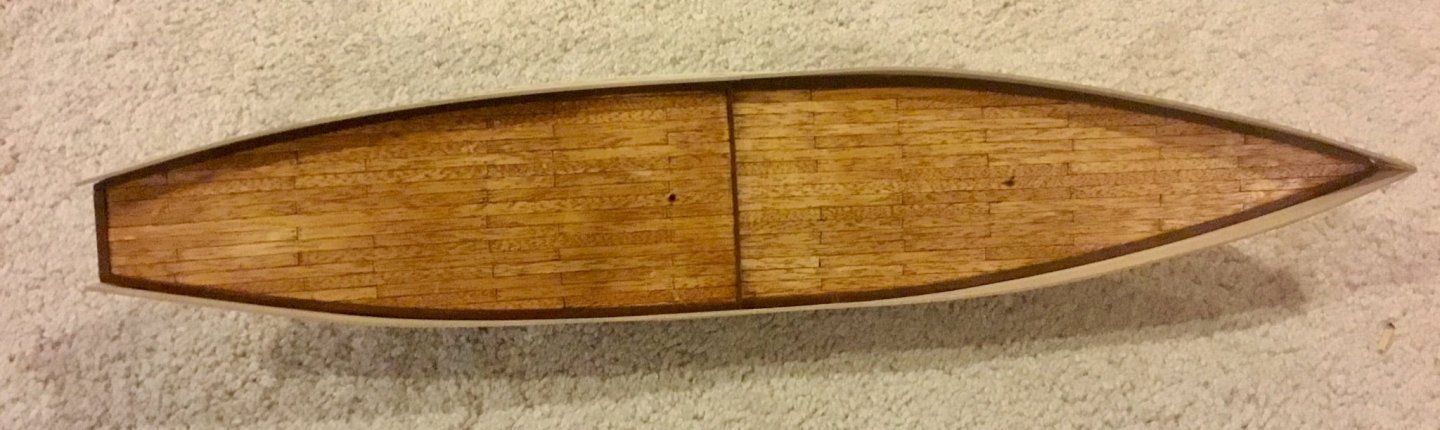
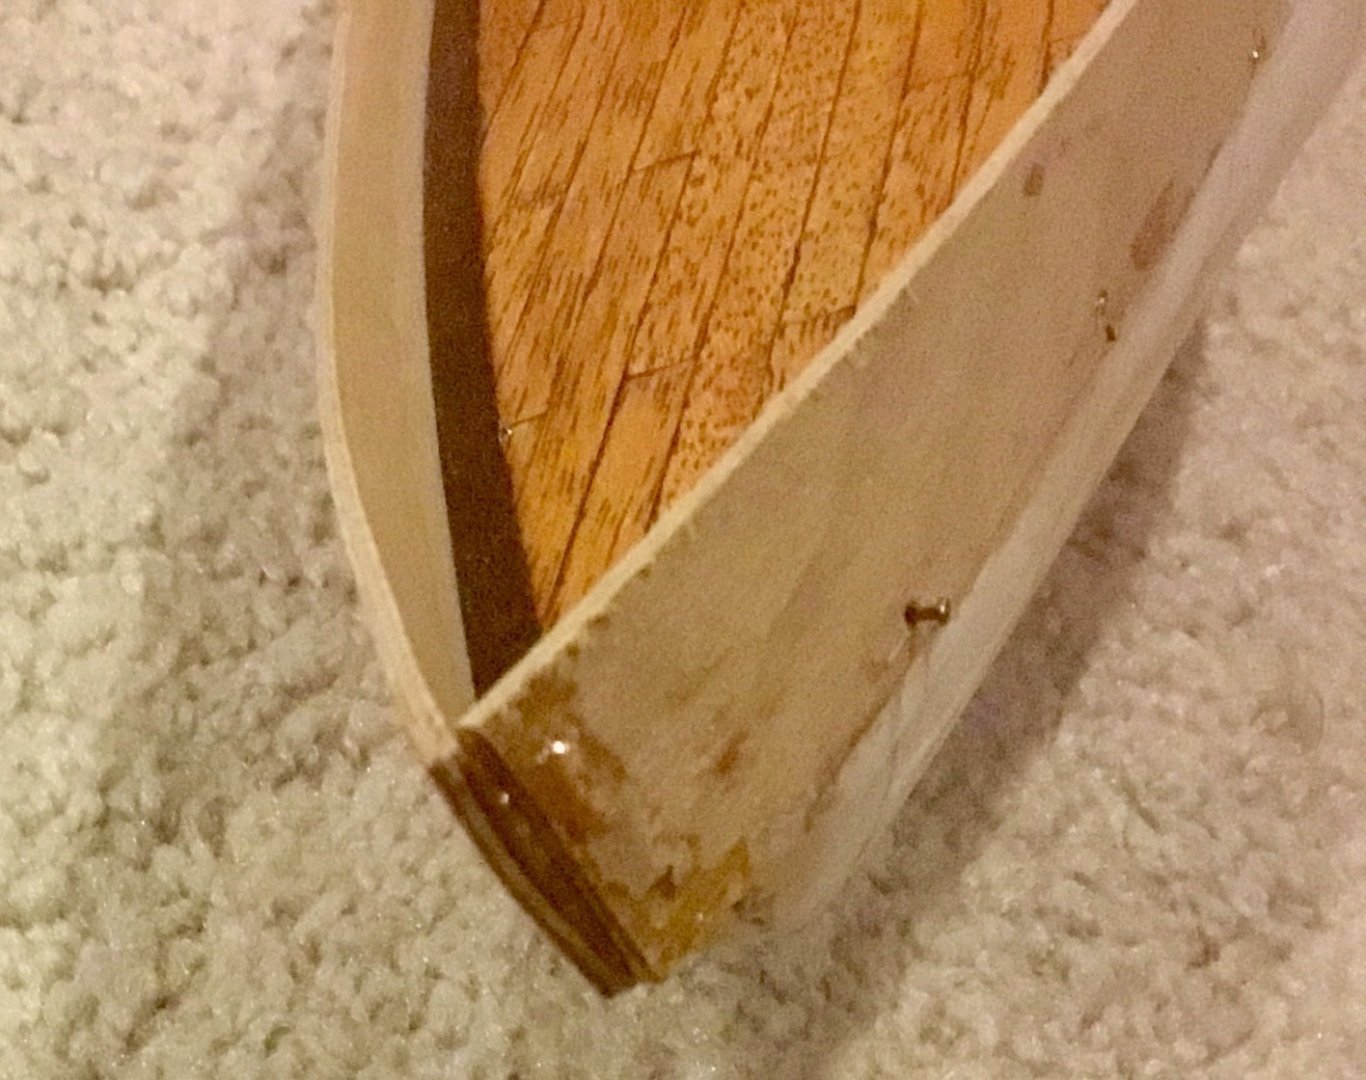
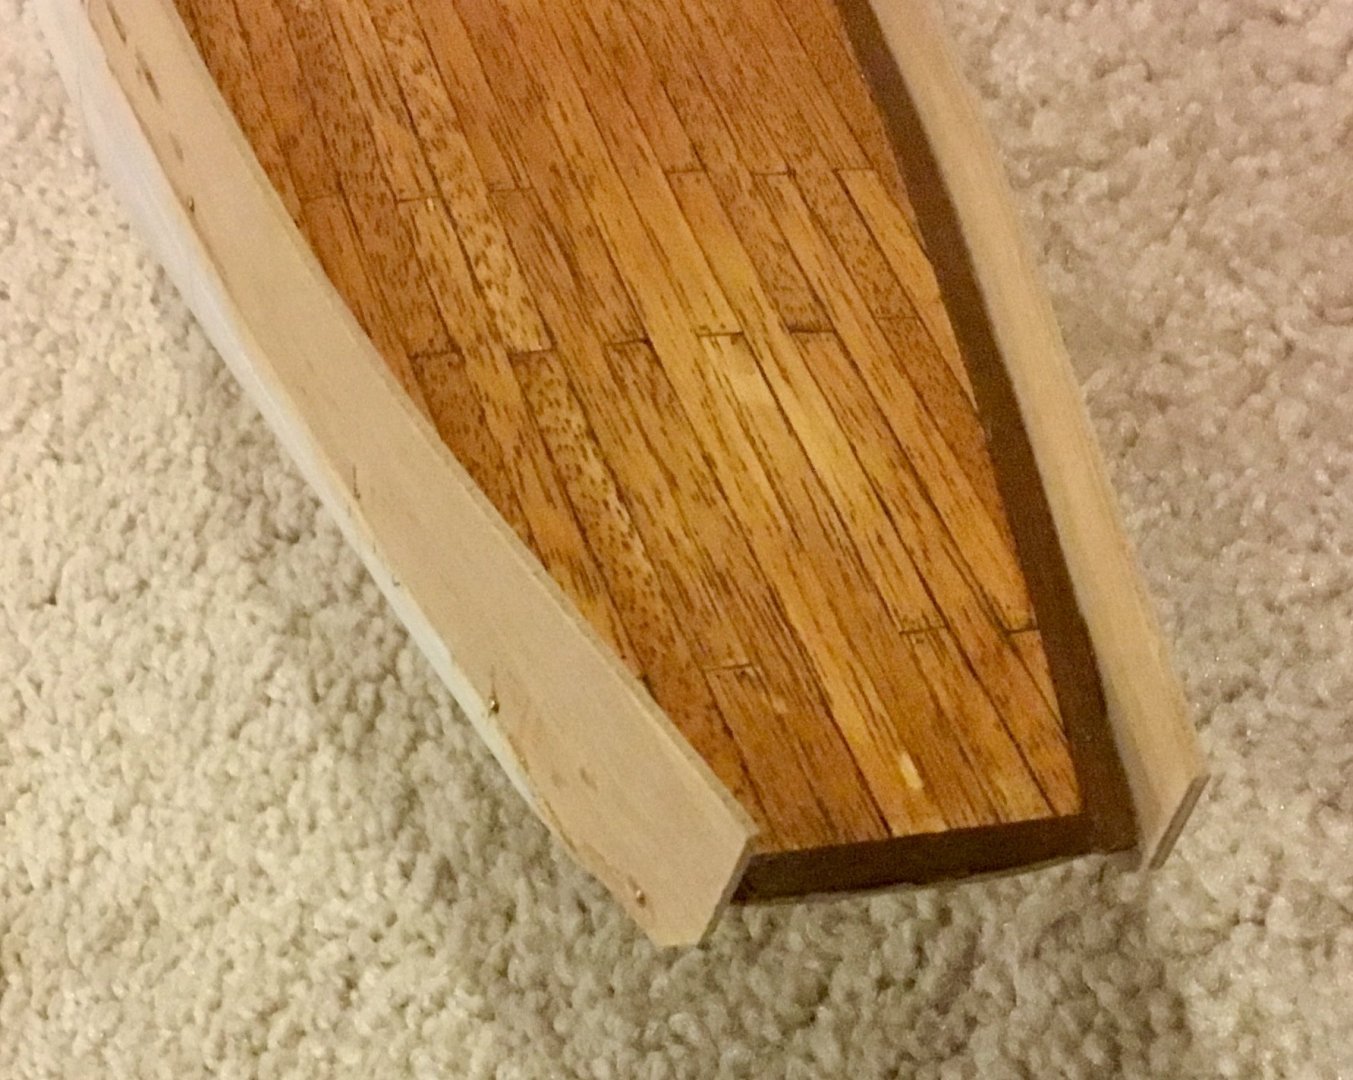
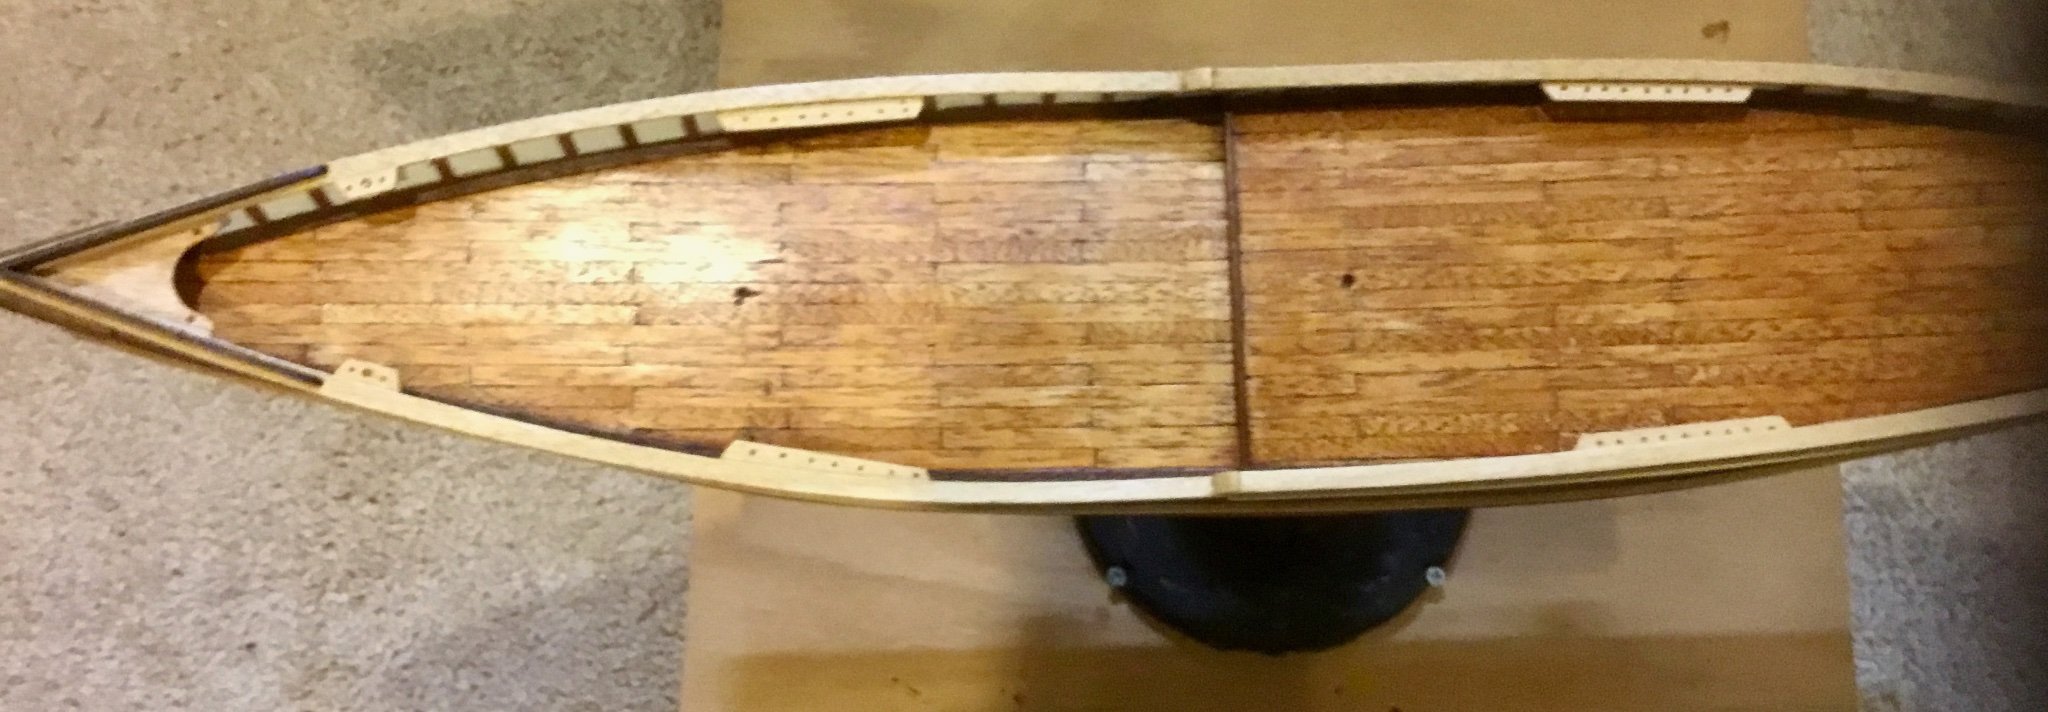
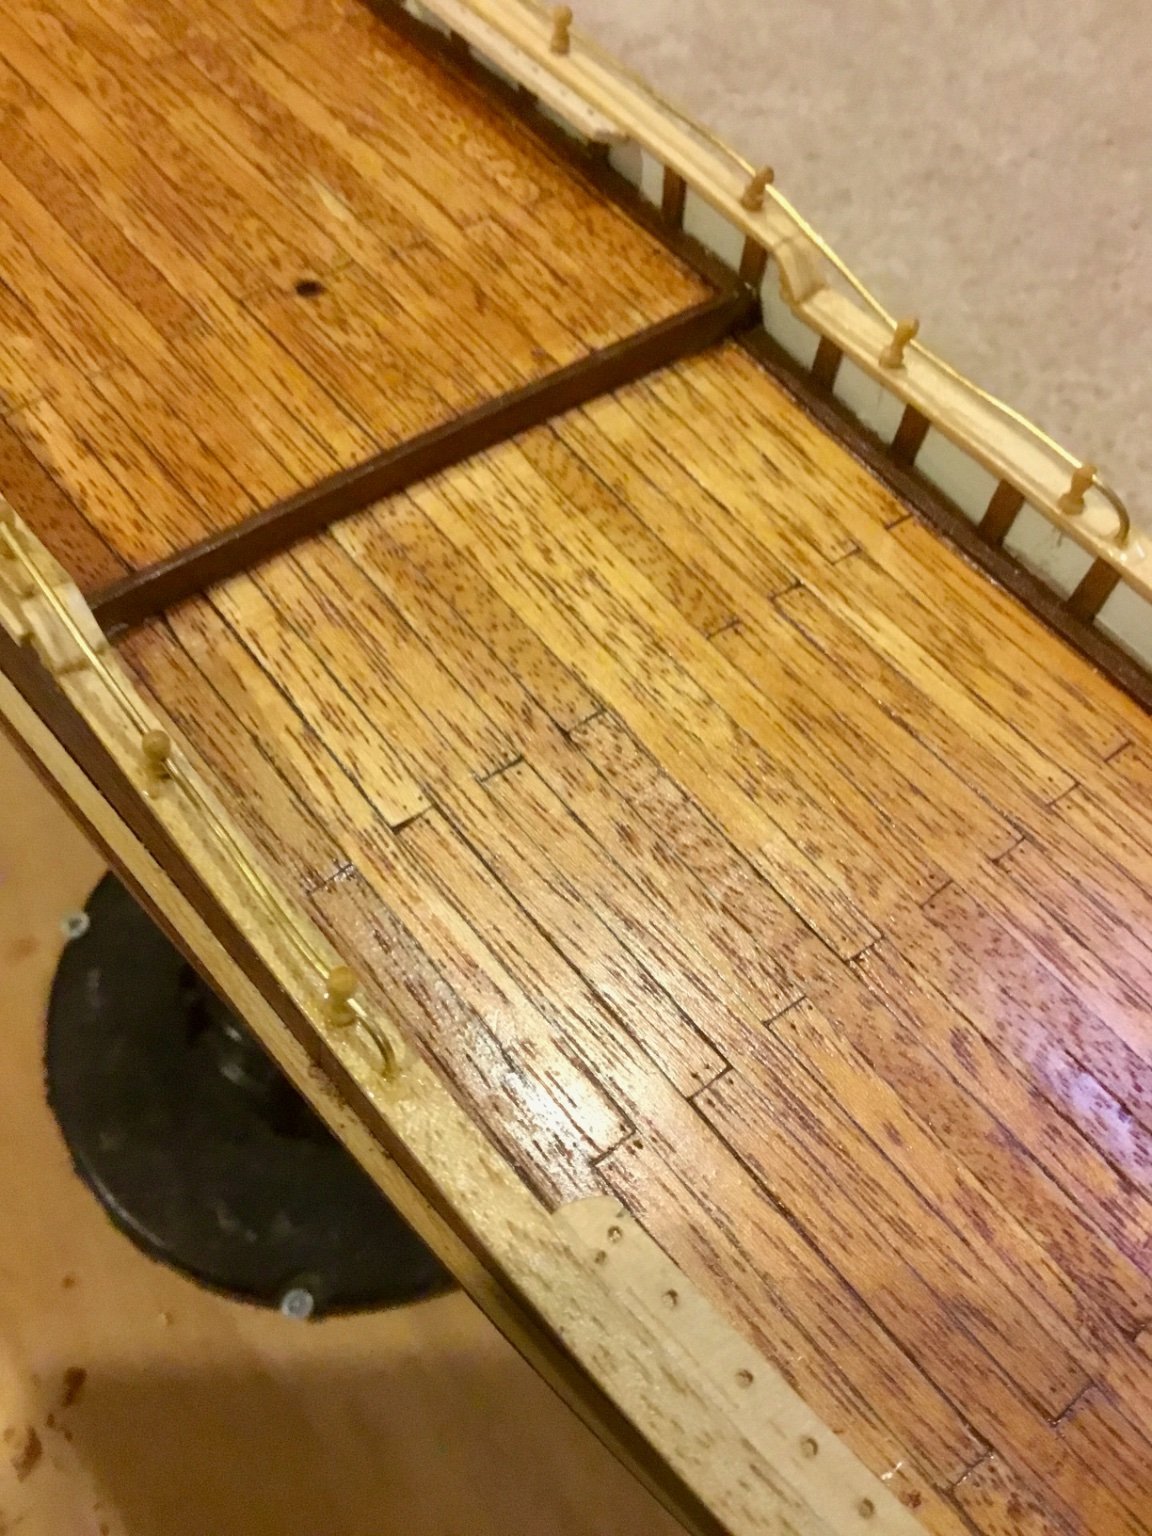
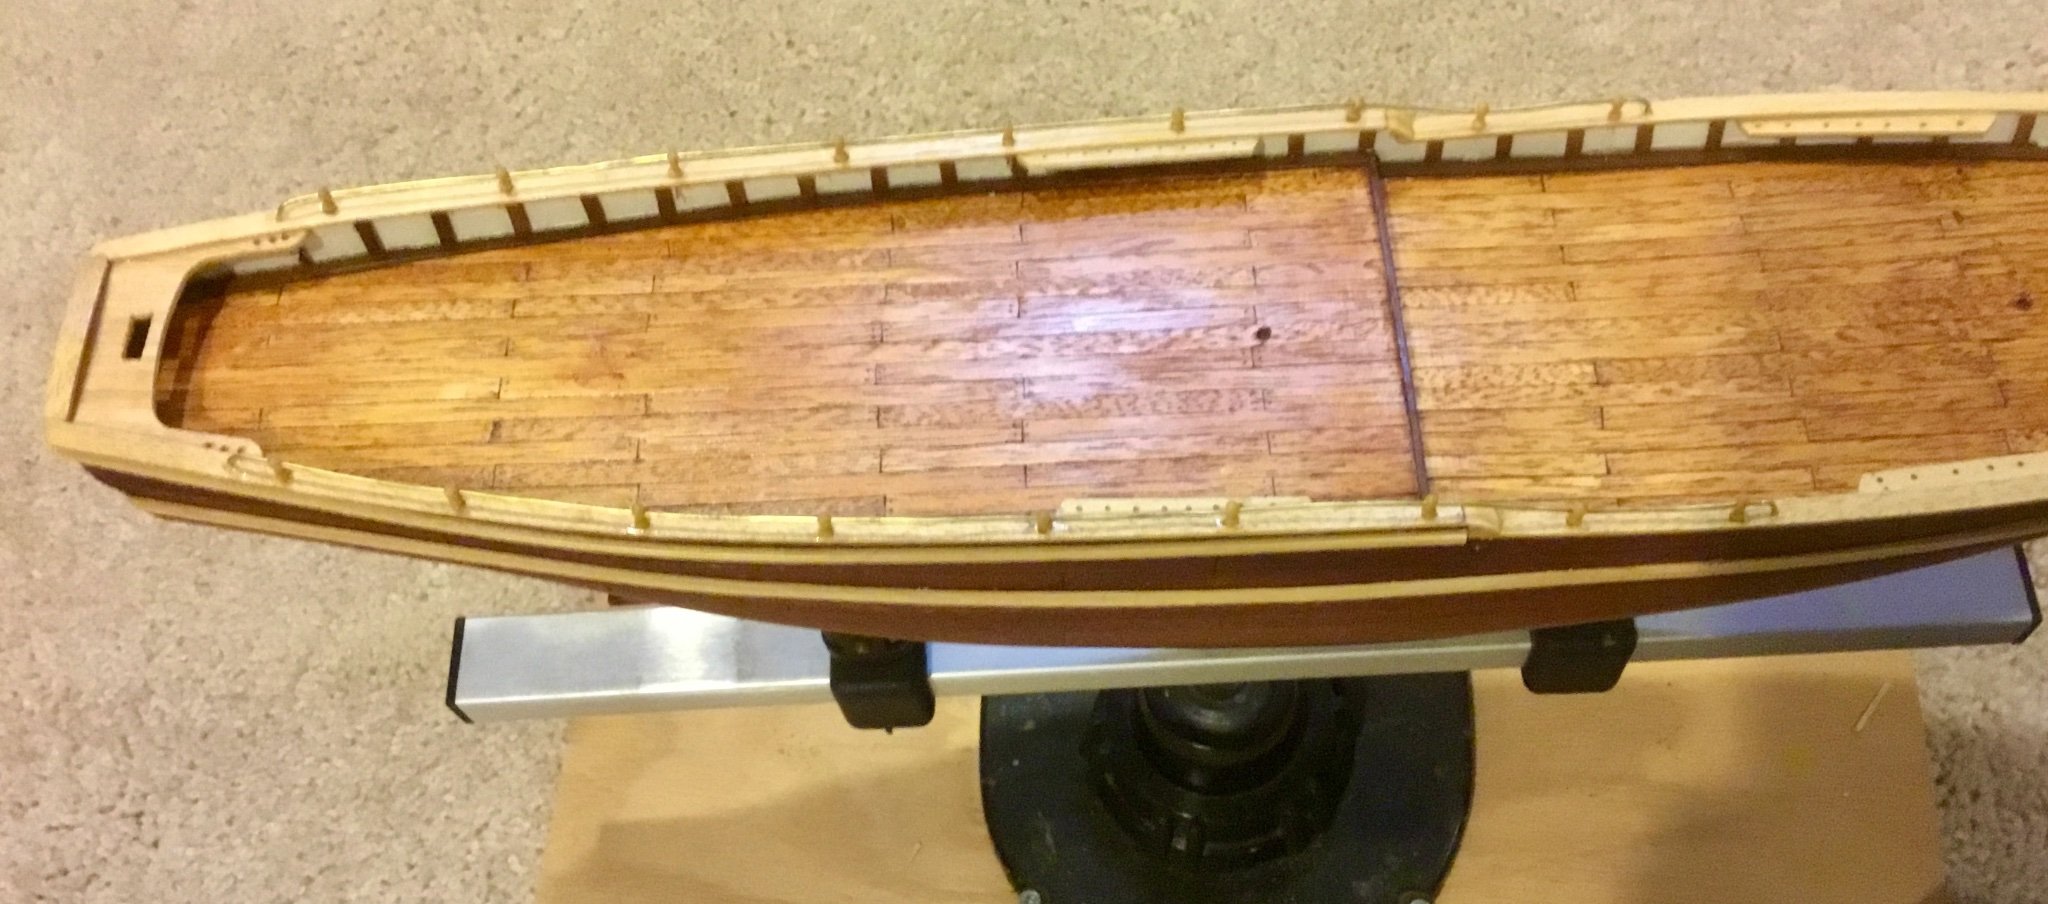
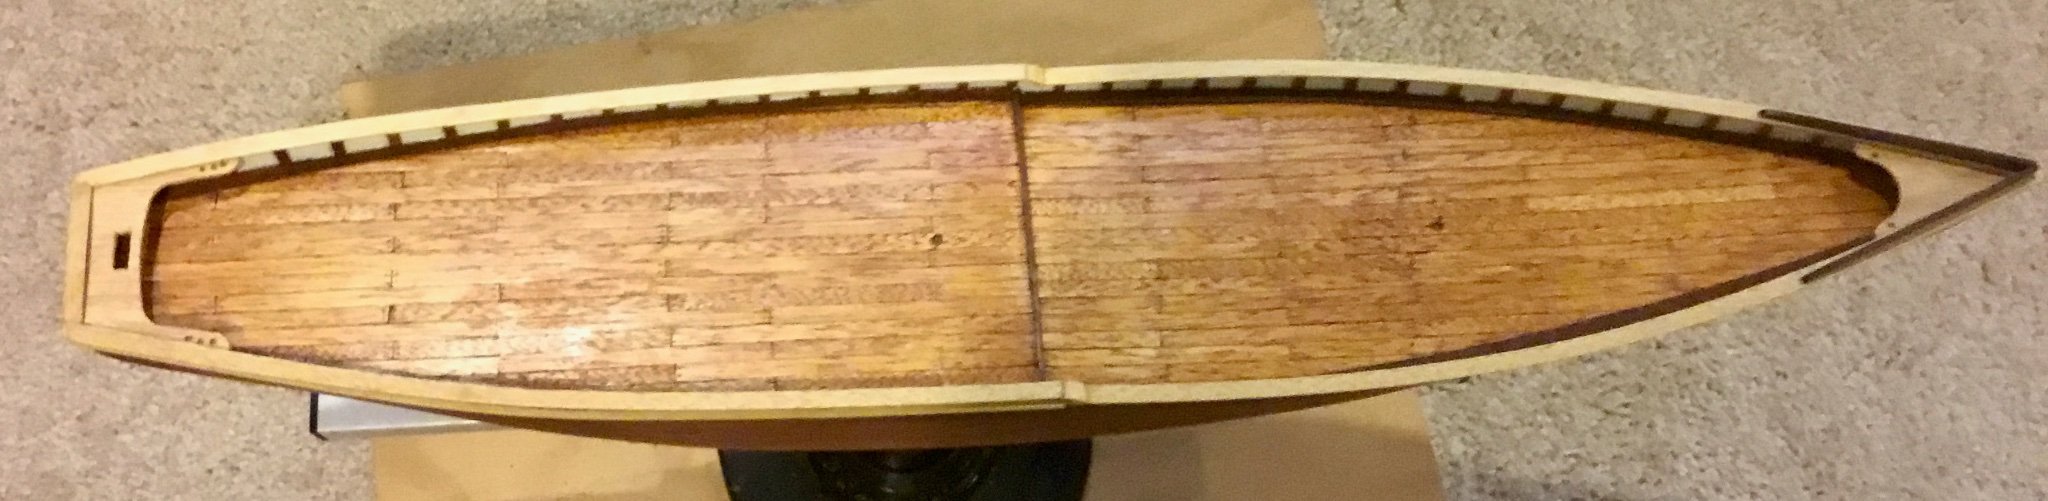
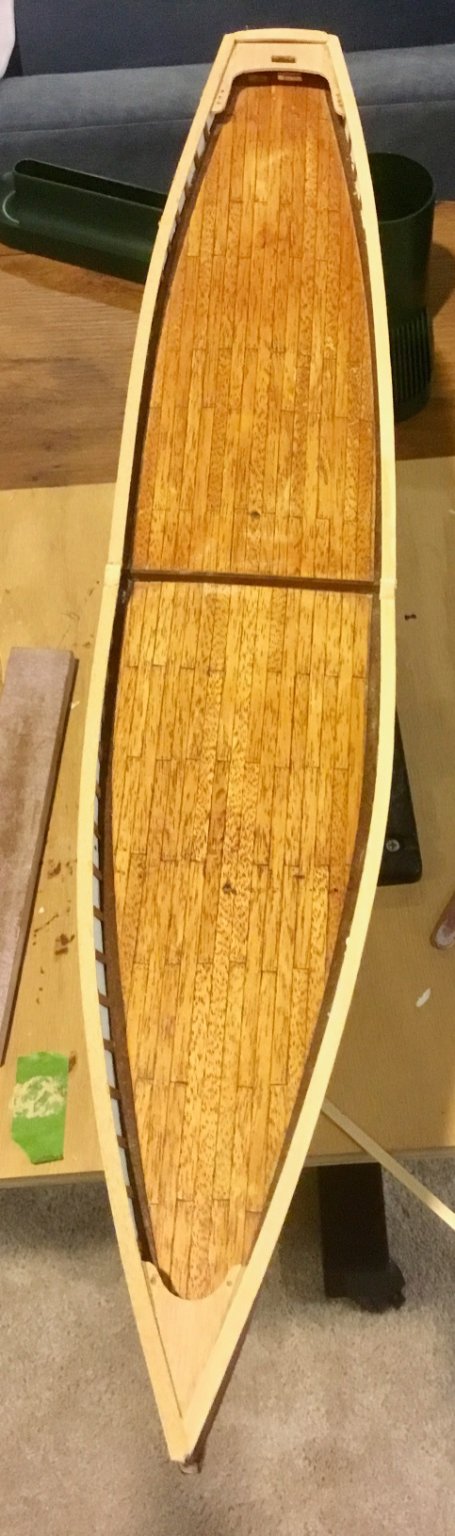
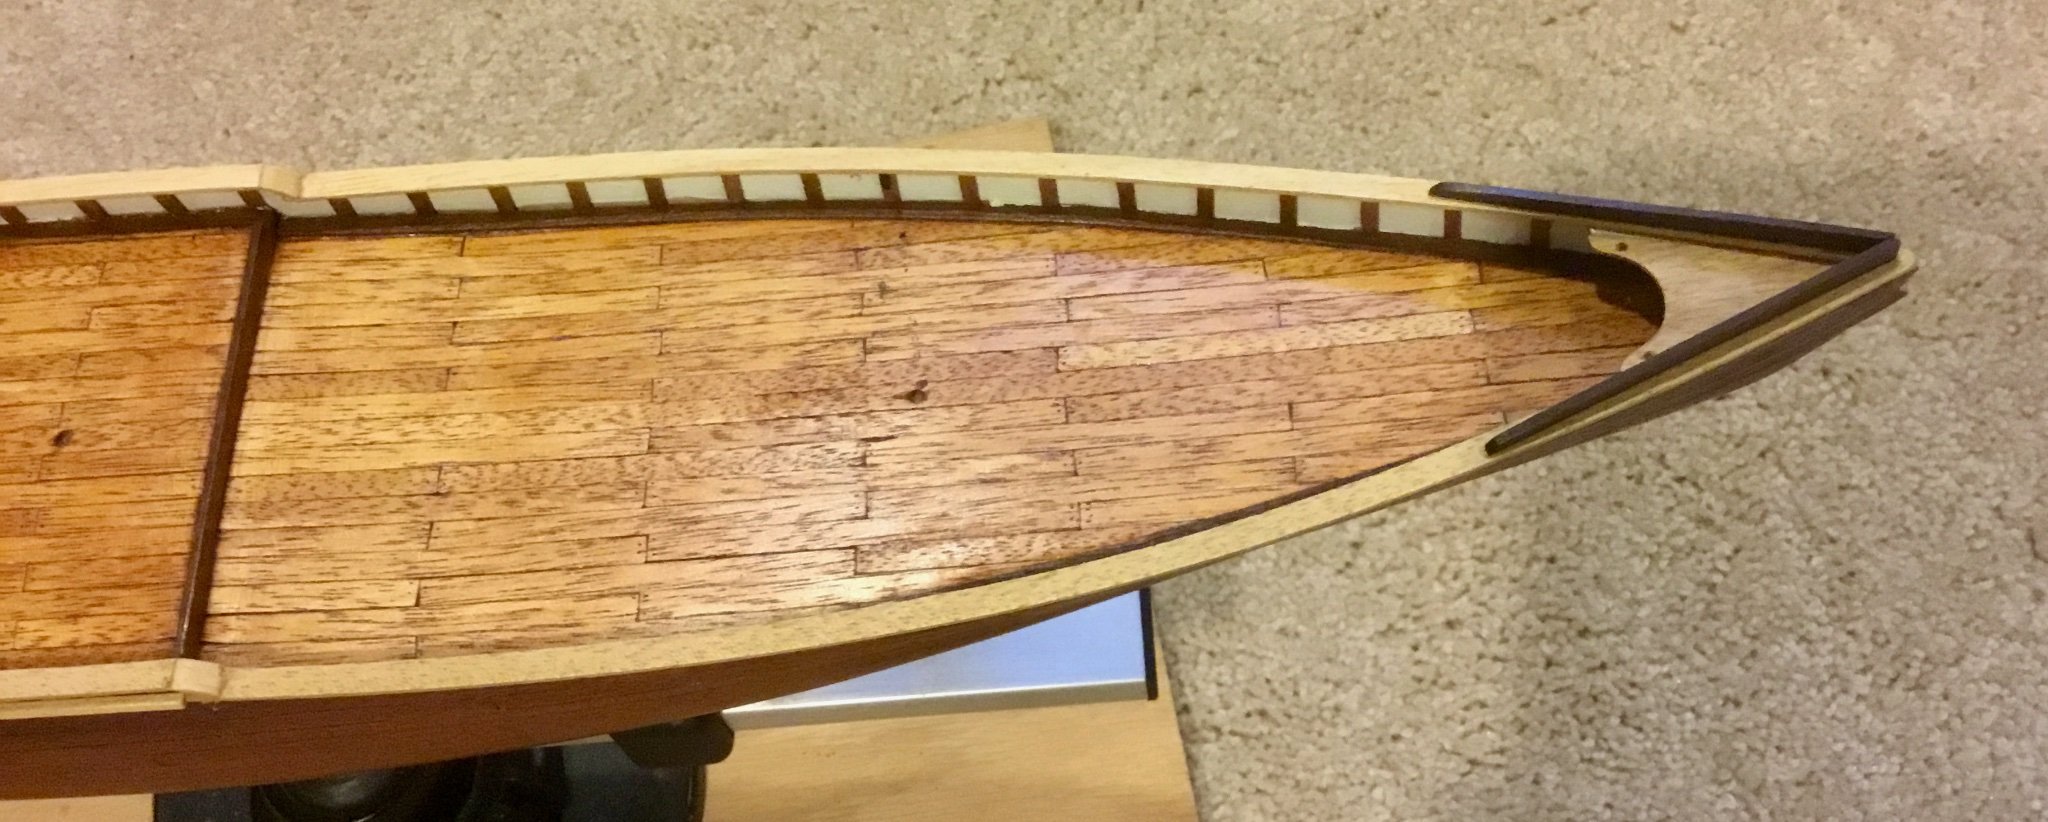
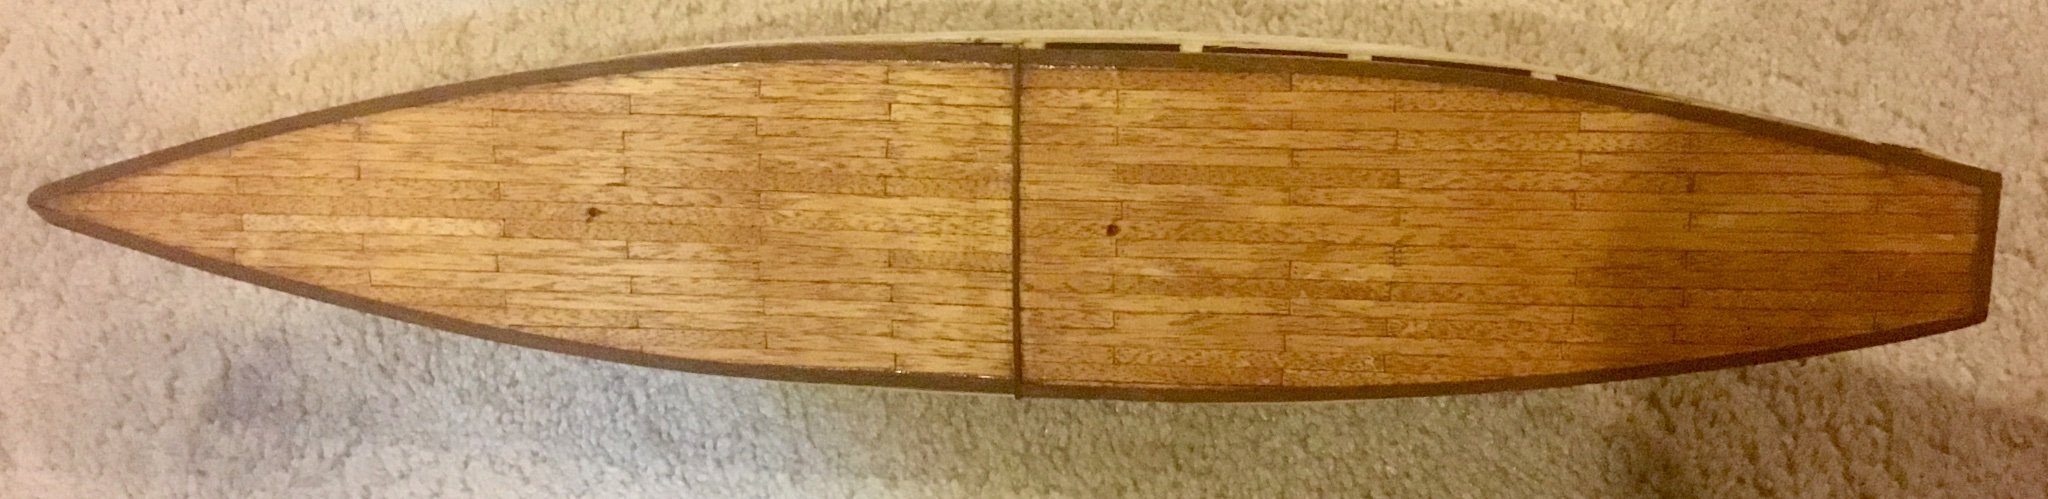
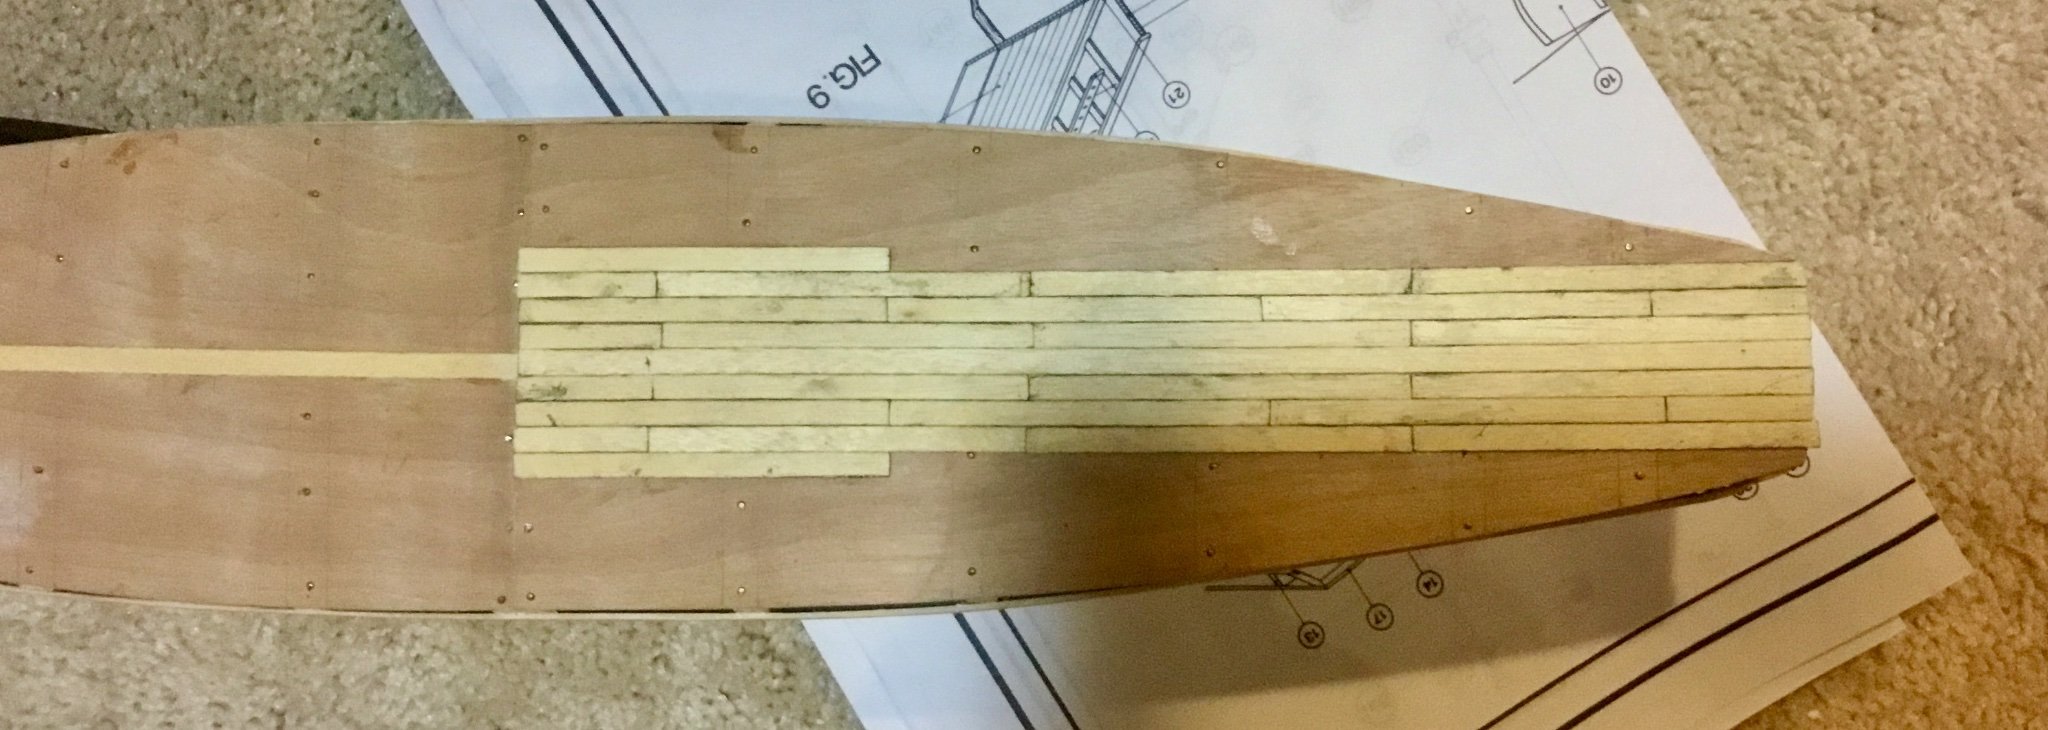
Applied deck planking supplied in kit in maximum lengths of 75mm, staggering butts and adding pencil lead on plank edges to simulate caulking. Sanded smooth and then stained with a wheat colored wood stain.

Bent waterway timber using leftover deck boards as a pattern and then glued to deck edges. This is not realistic as the real ship has the forward planks nibbed and the aft planks curved with thinner planks, but it's as specified in the kit instructions. Followed up with 3 coats of clear wipe-on poly.

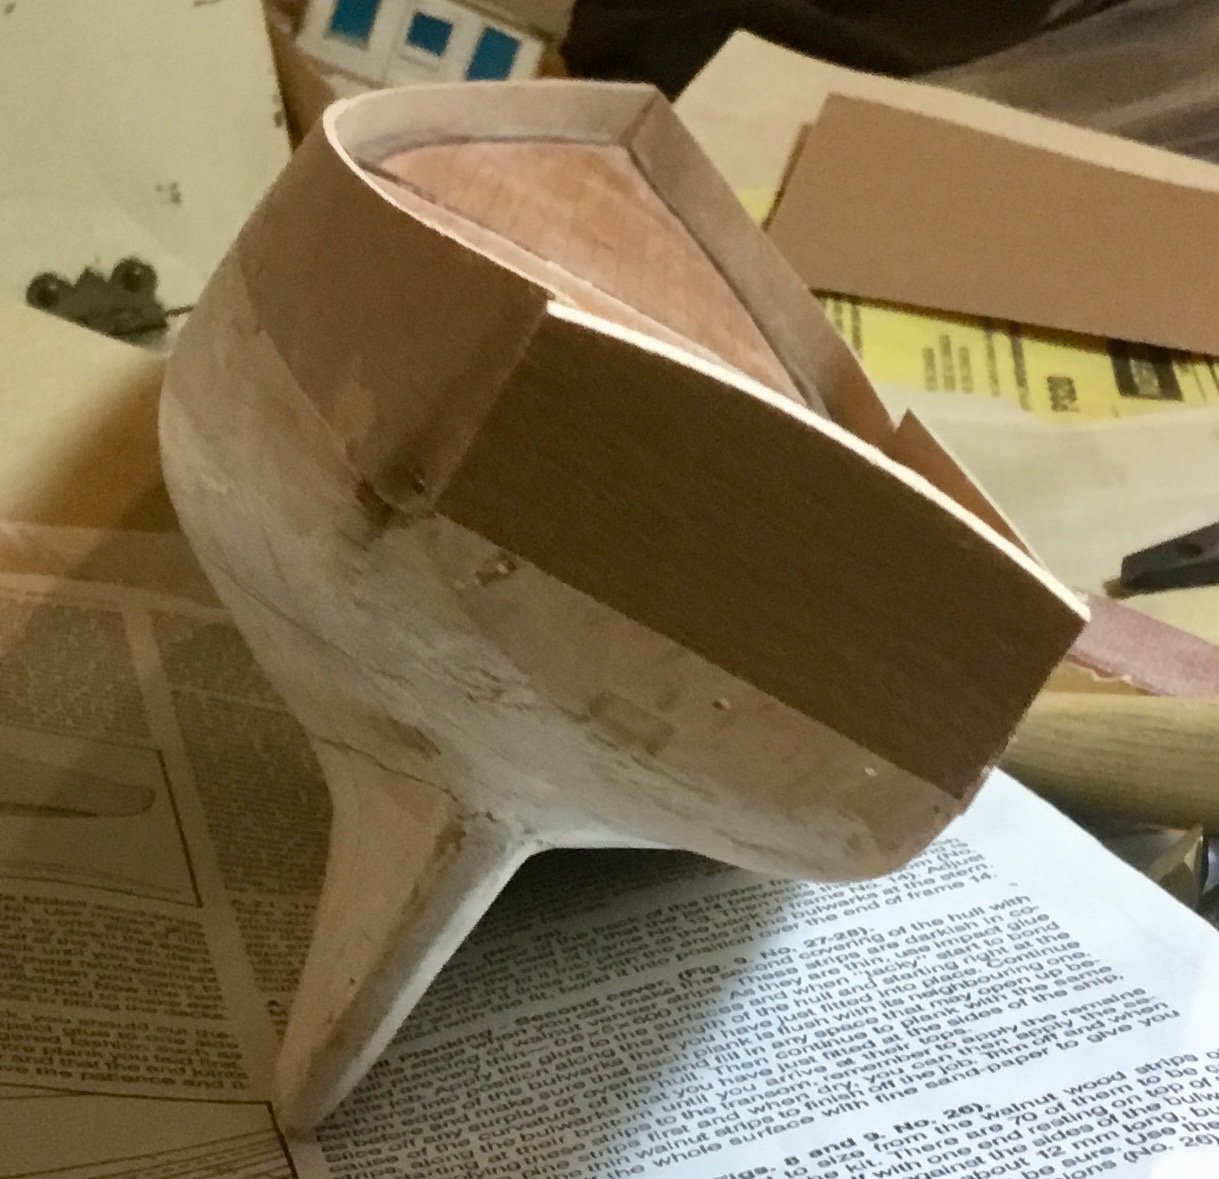
Installed the bulwarks supplied in the kit. I can see why this posed problems and wasn't used in some builds or practicums. I did my best. Instructions said to start at bow and work your way back toward the stern after gluing the two bow pieces together. I ended up working from the stern forward gluing and pinning the bulwarks to the hull as I went along. One side seemed to fit OK with only minor gaps, but the other ended up with much larger gaps in some places.

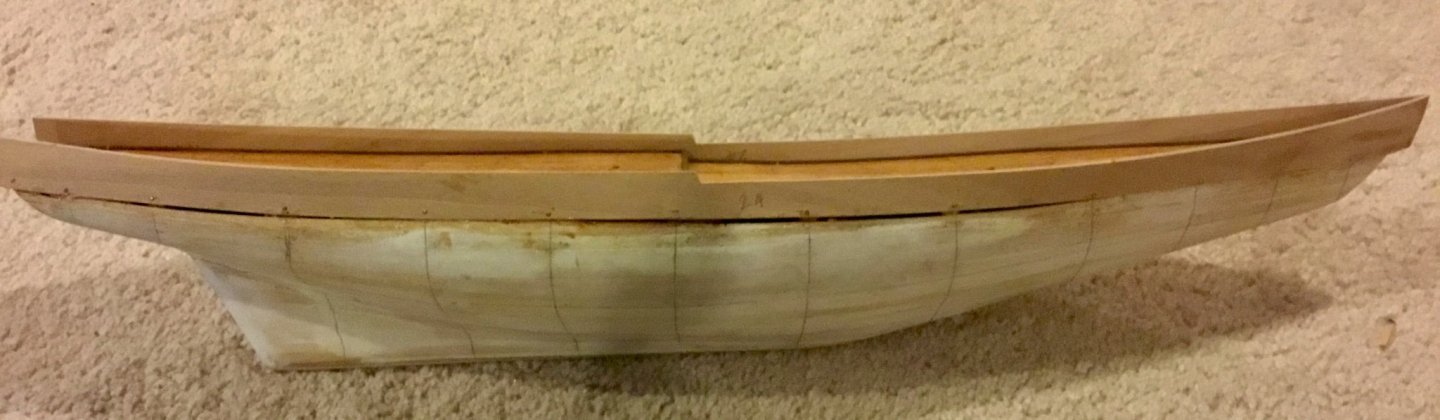

Used water putty to fill in the gaps, then sanded smooth and marked location of bulkheads and planking belts in preparation for second hull planking.

Added transom and filled in gap at bow so the current hull merged more cleanly with the bulwarks.

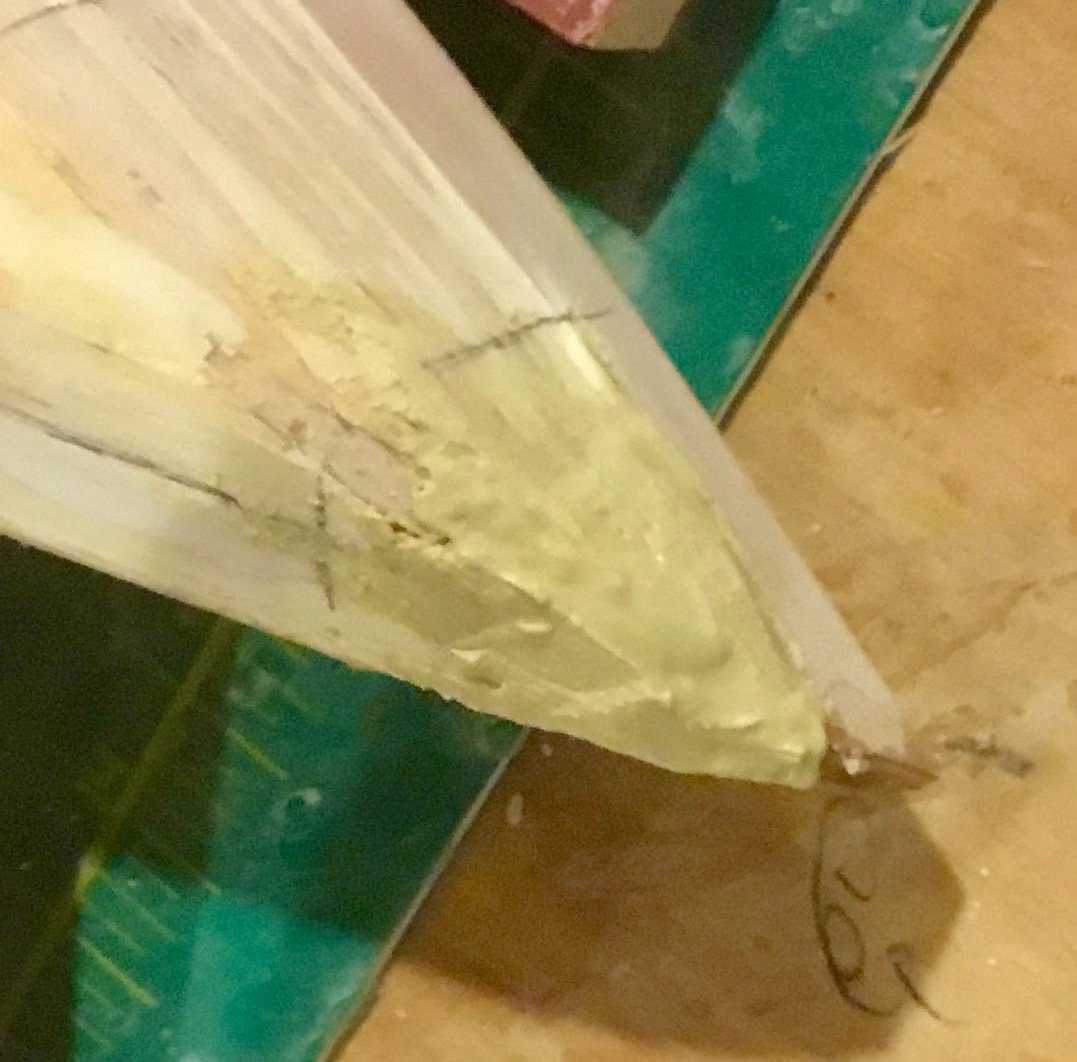
Next up is to test fit the stem and keel pieces and are any last minute adjustments before followed by the second planking .
-
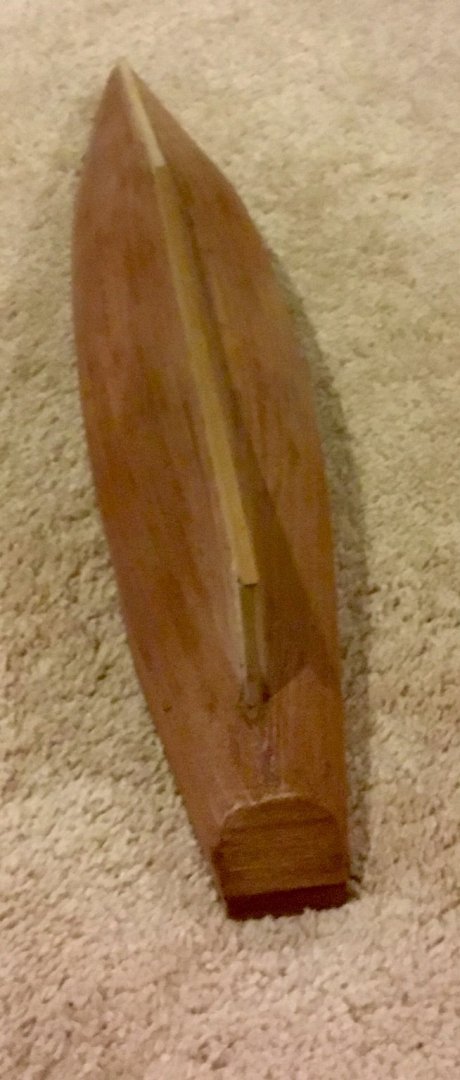
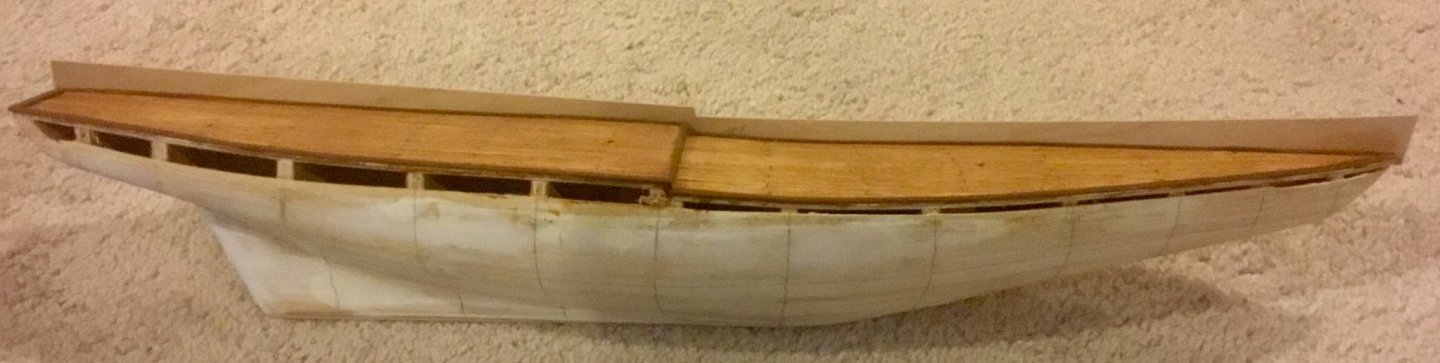
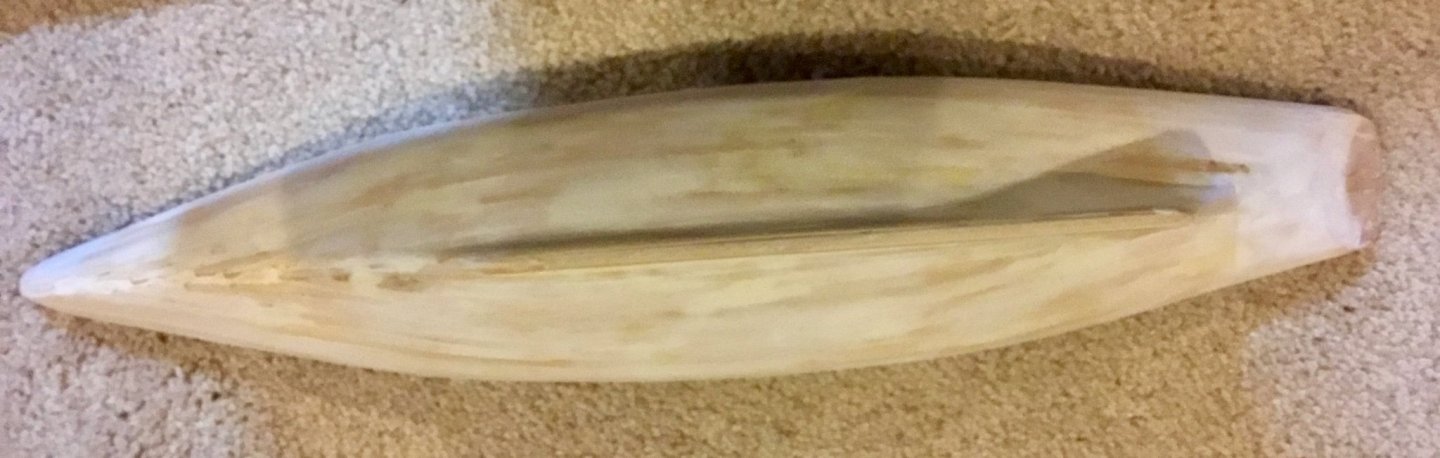
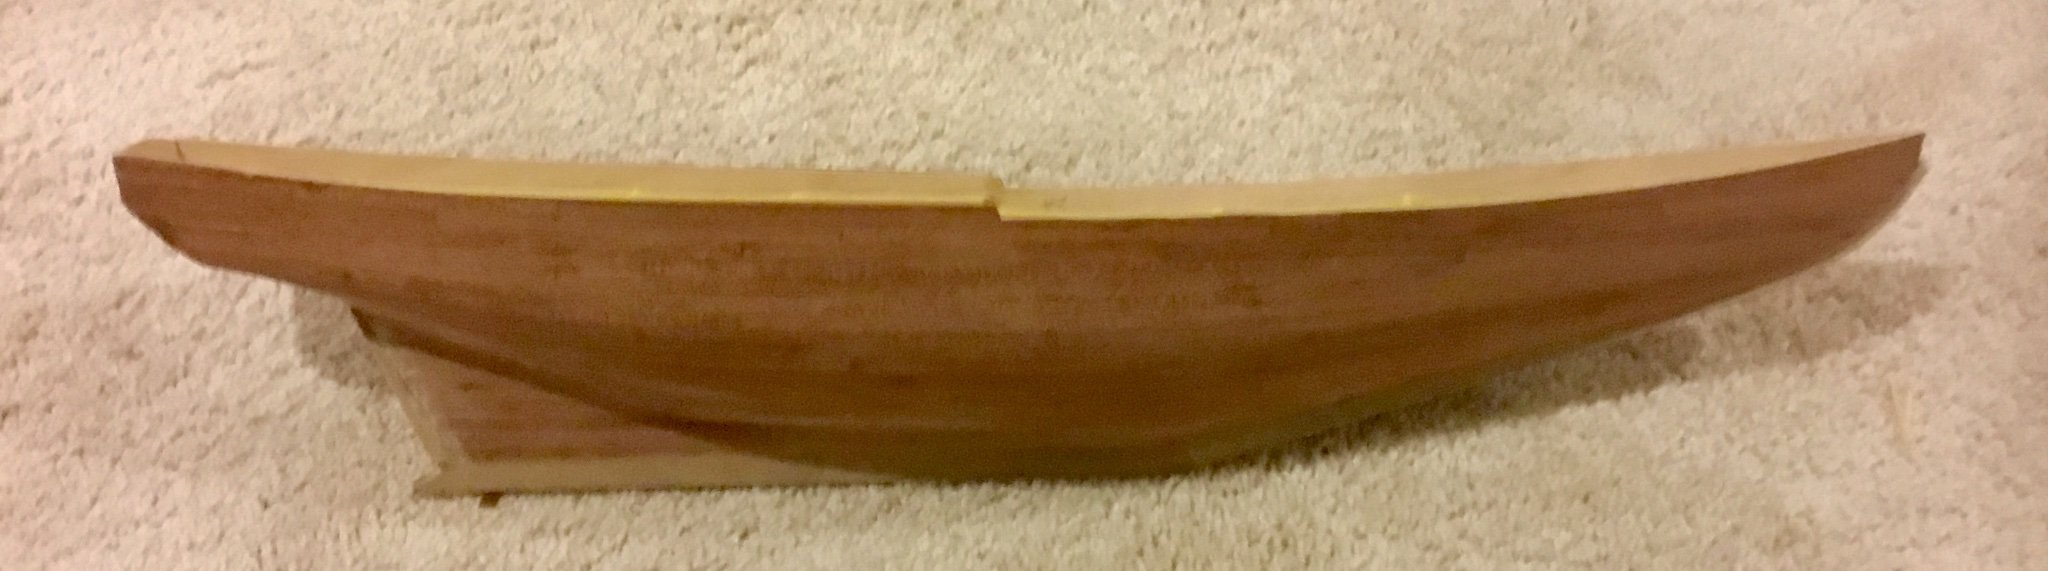
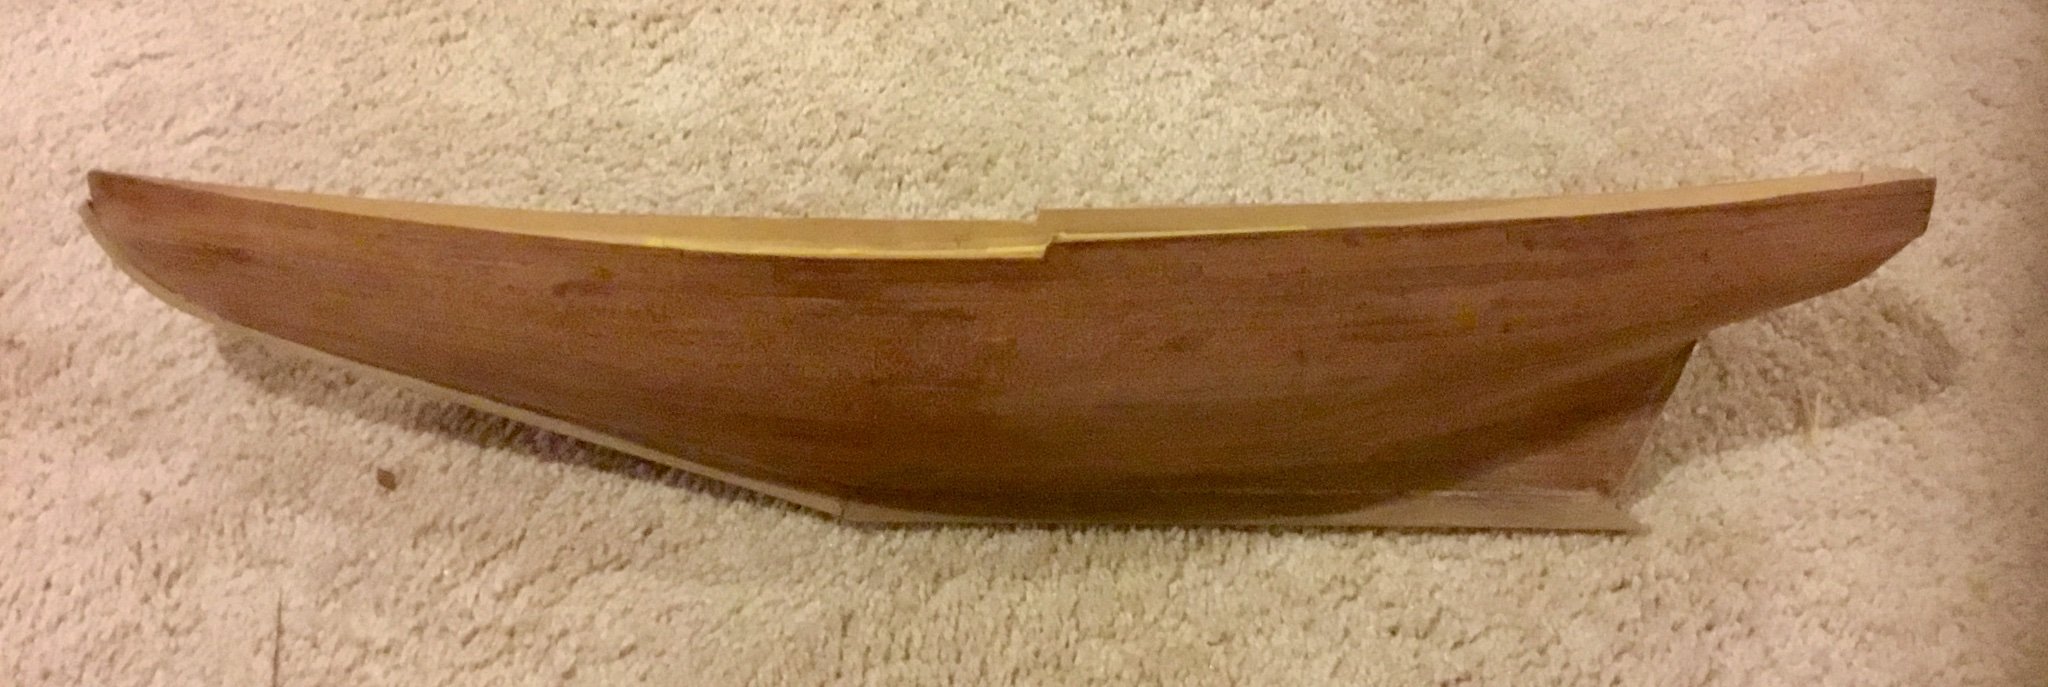
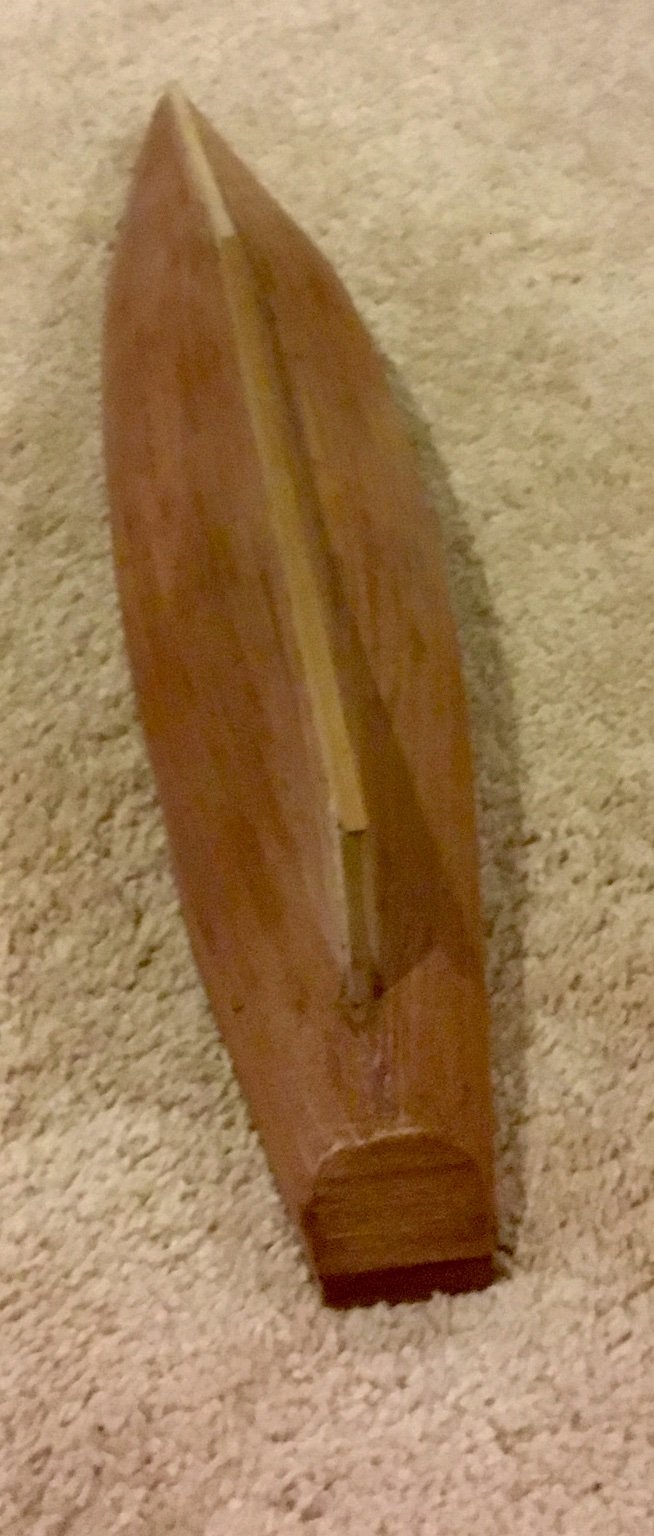
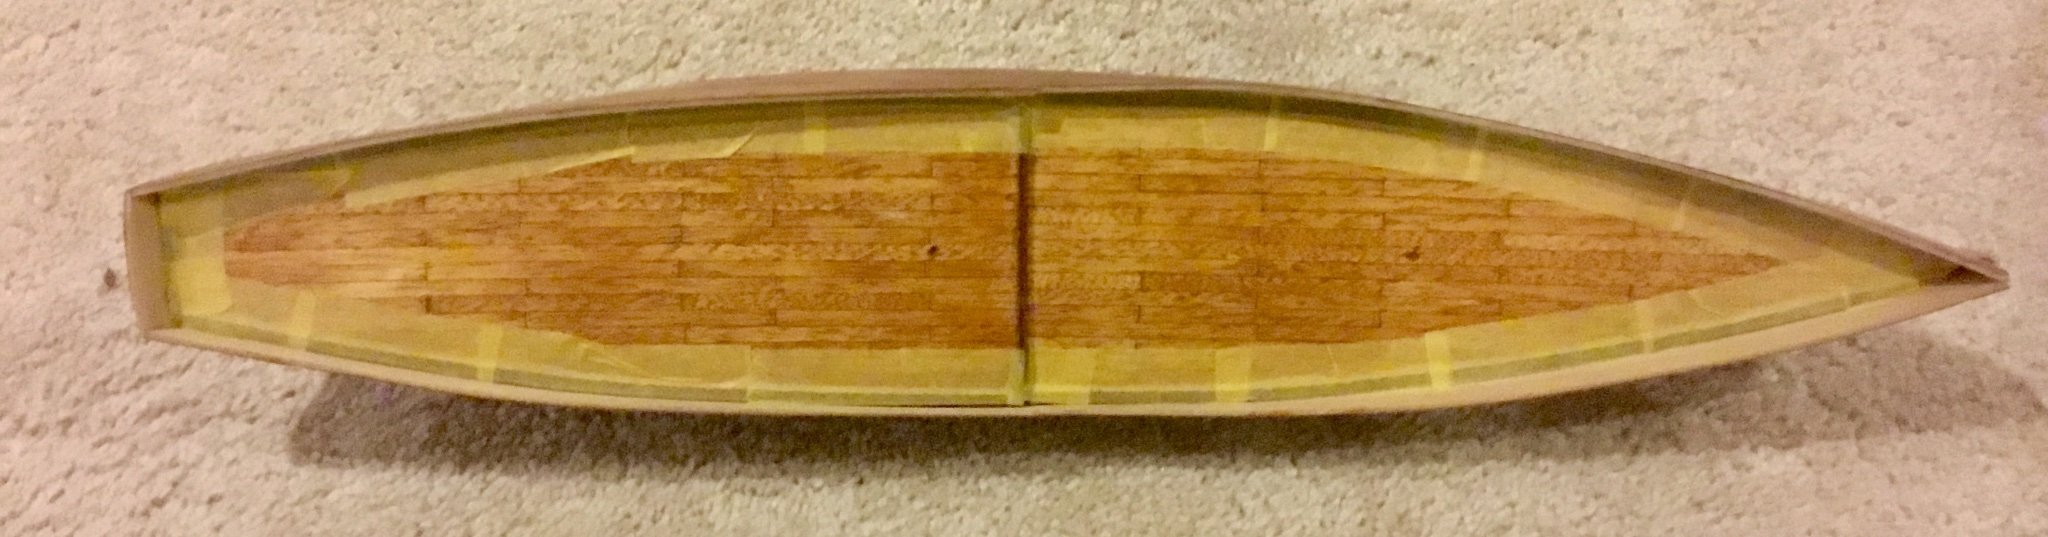
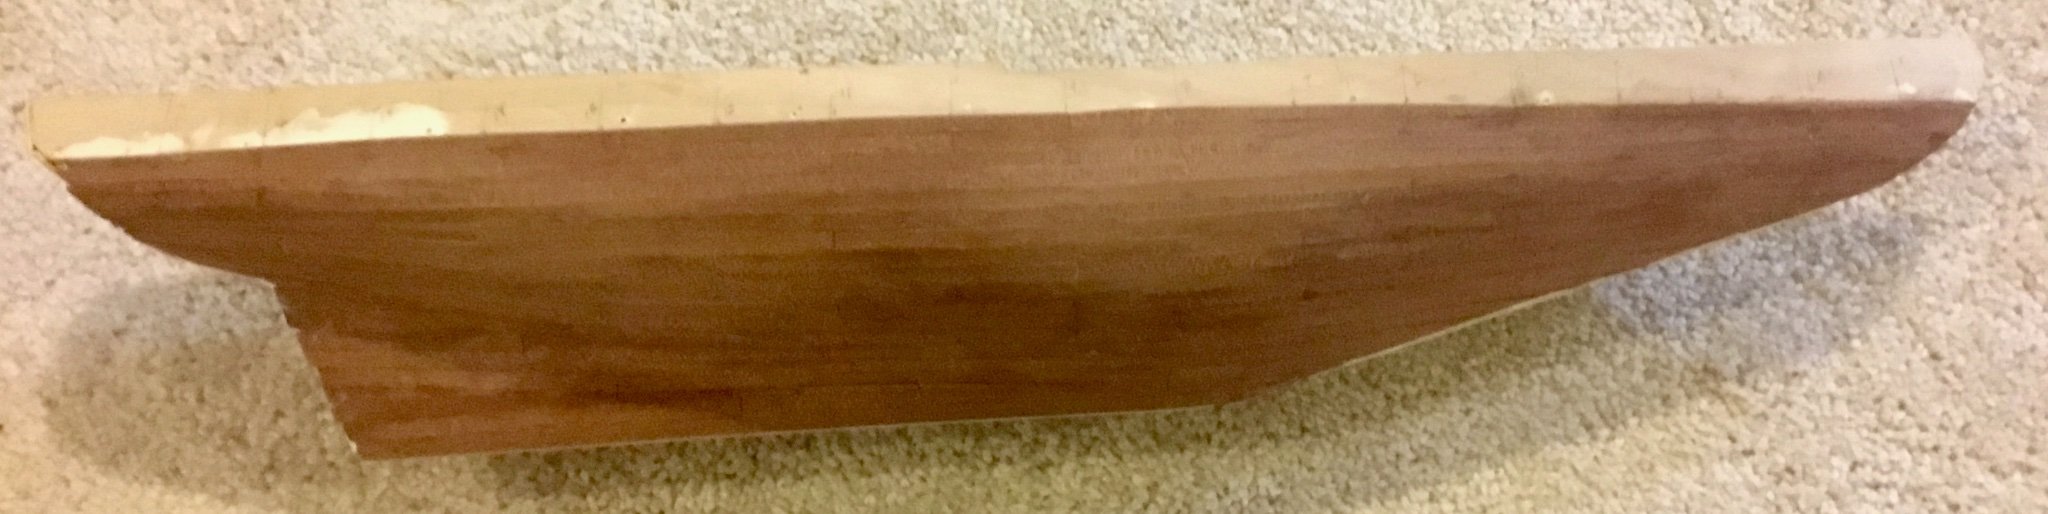
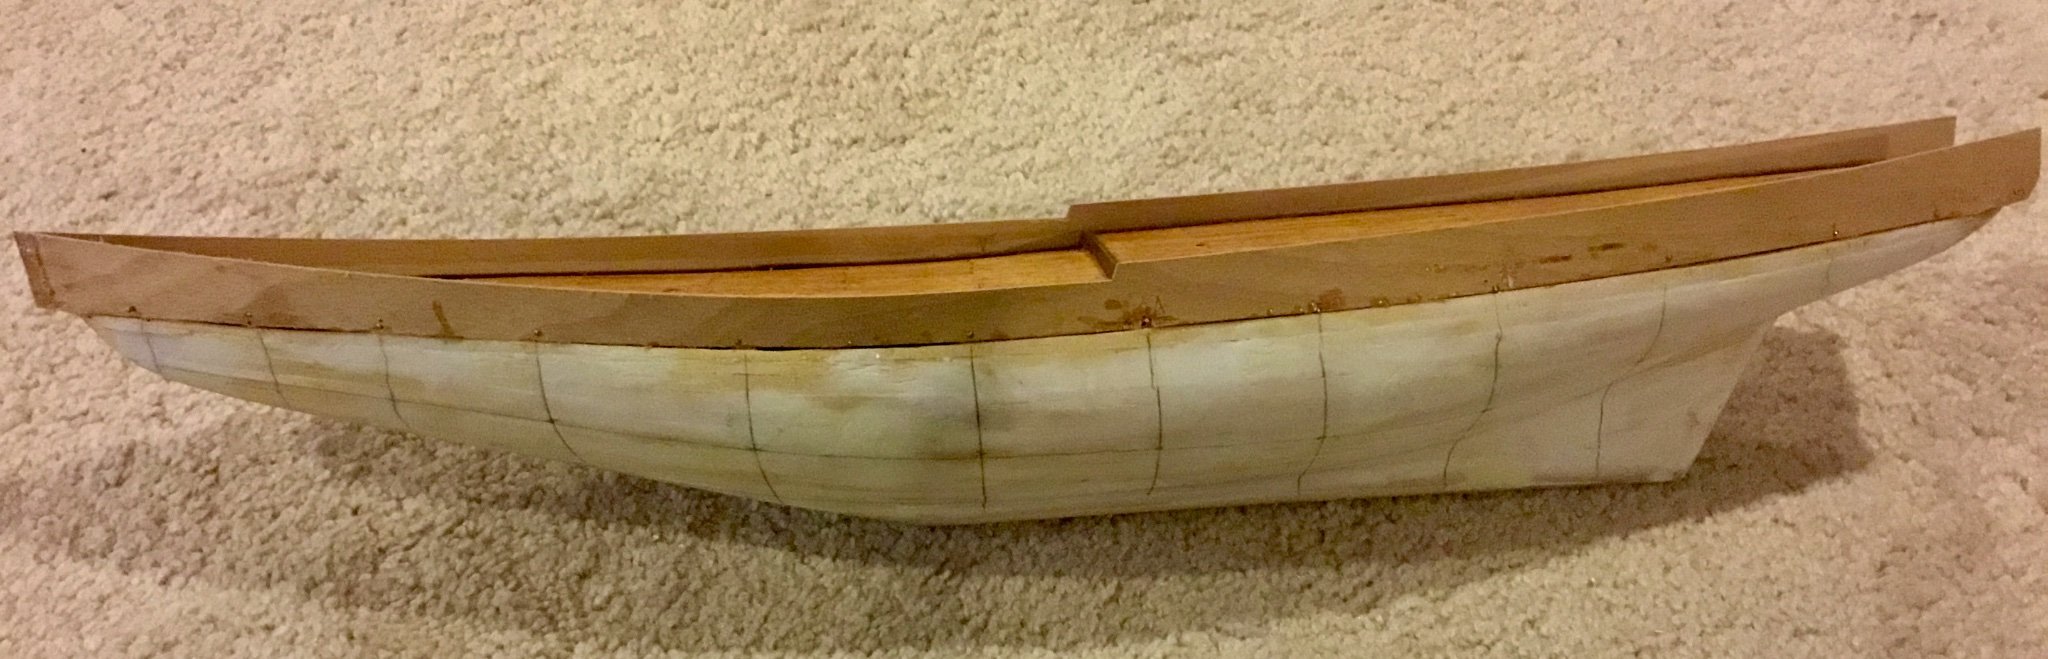
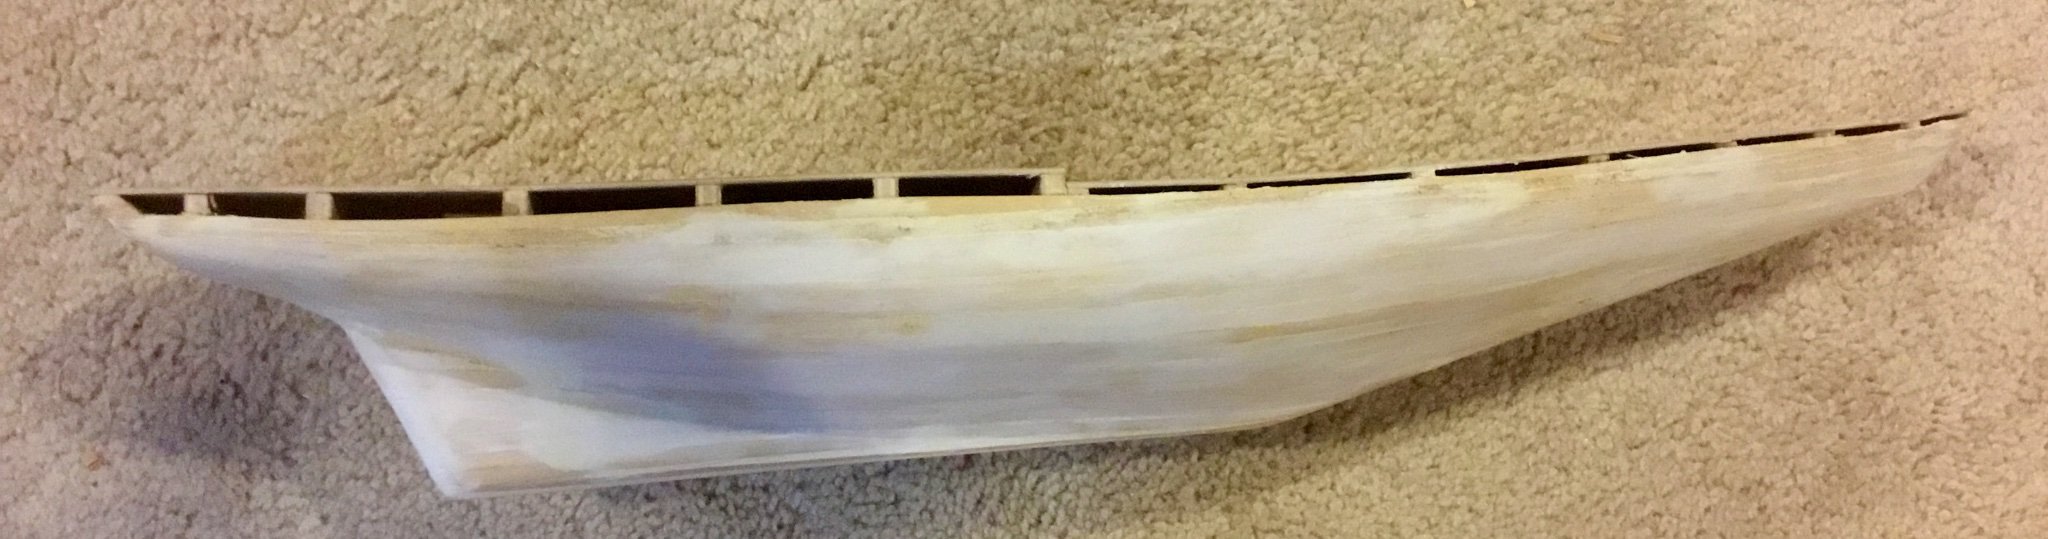
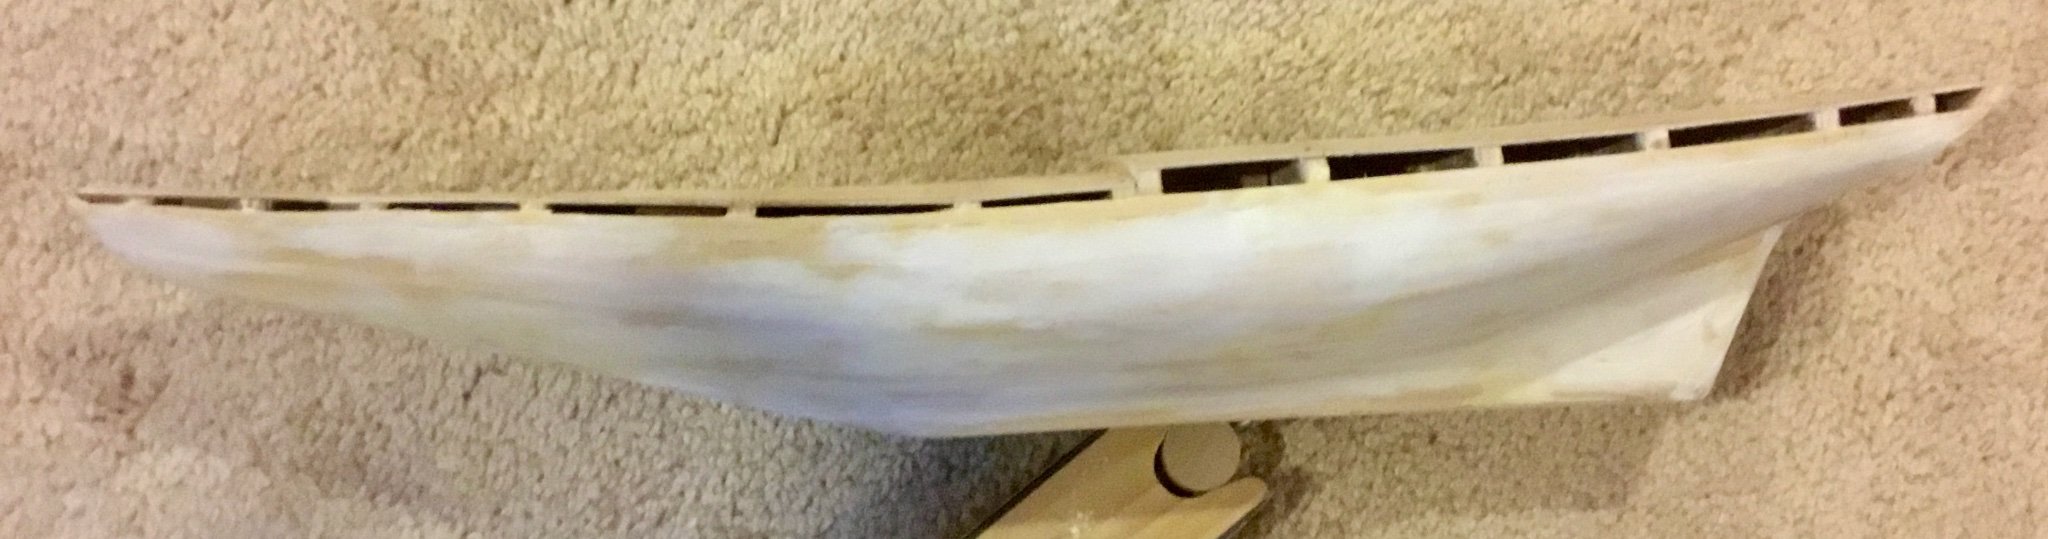
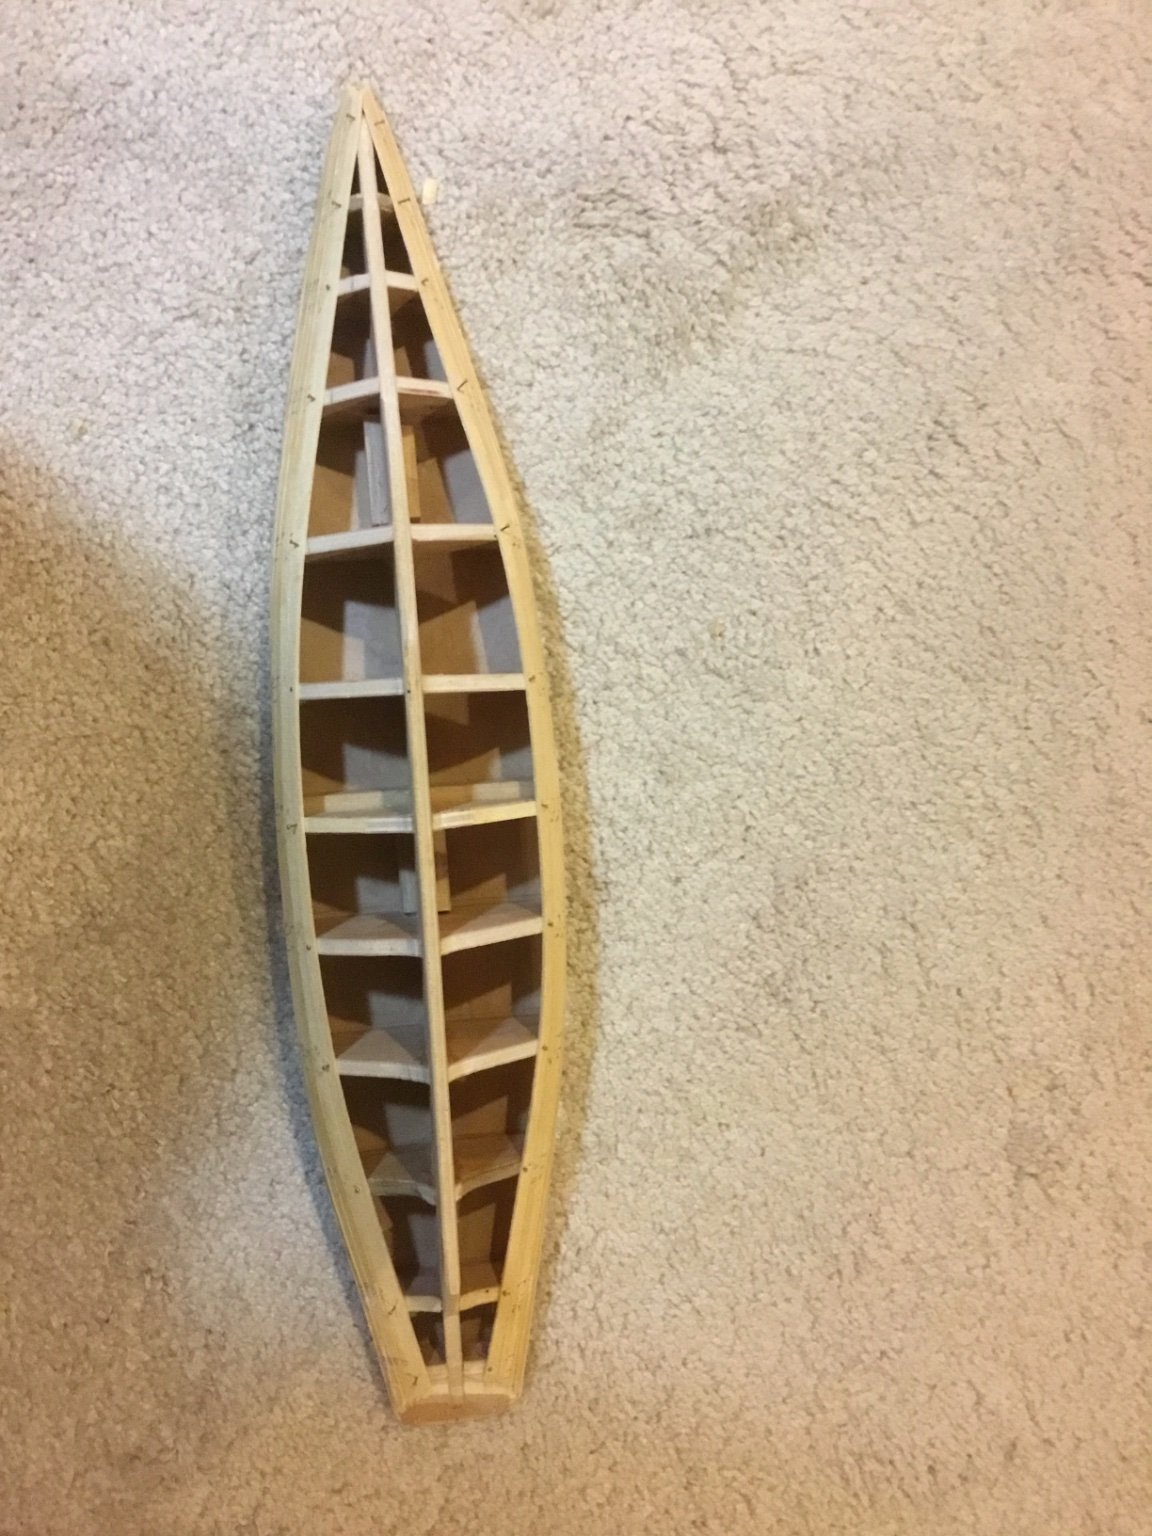
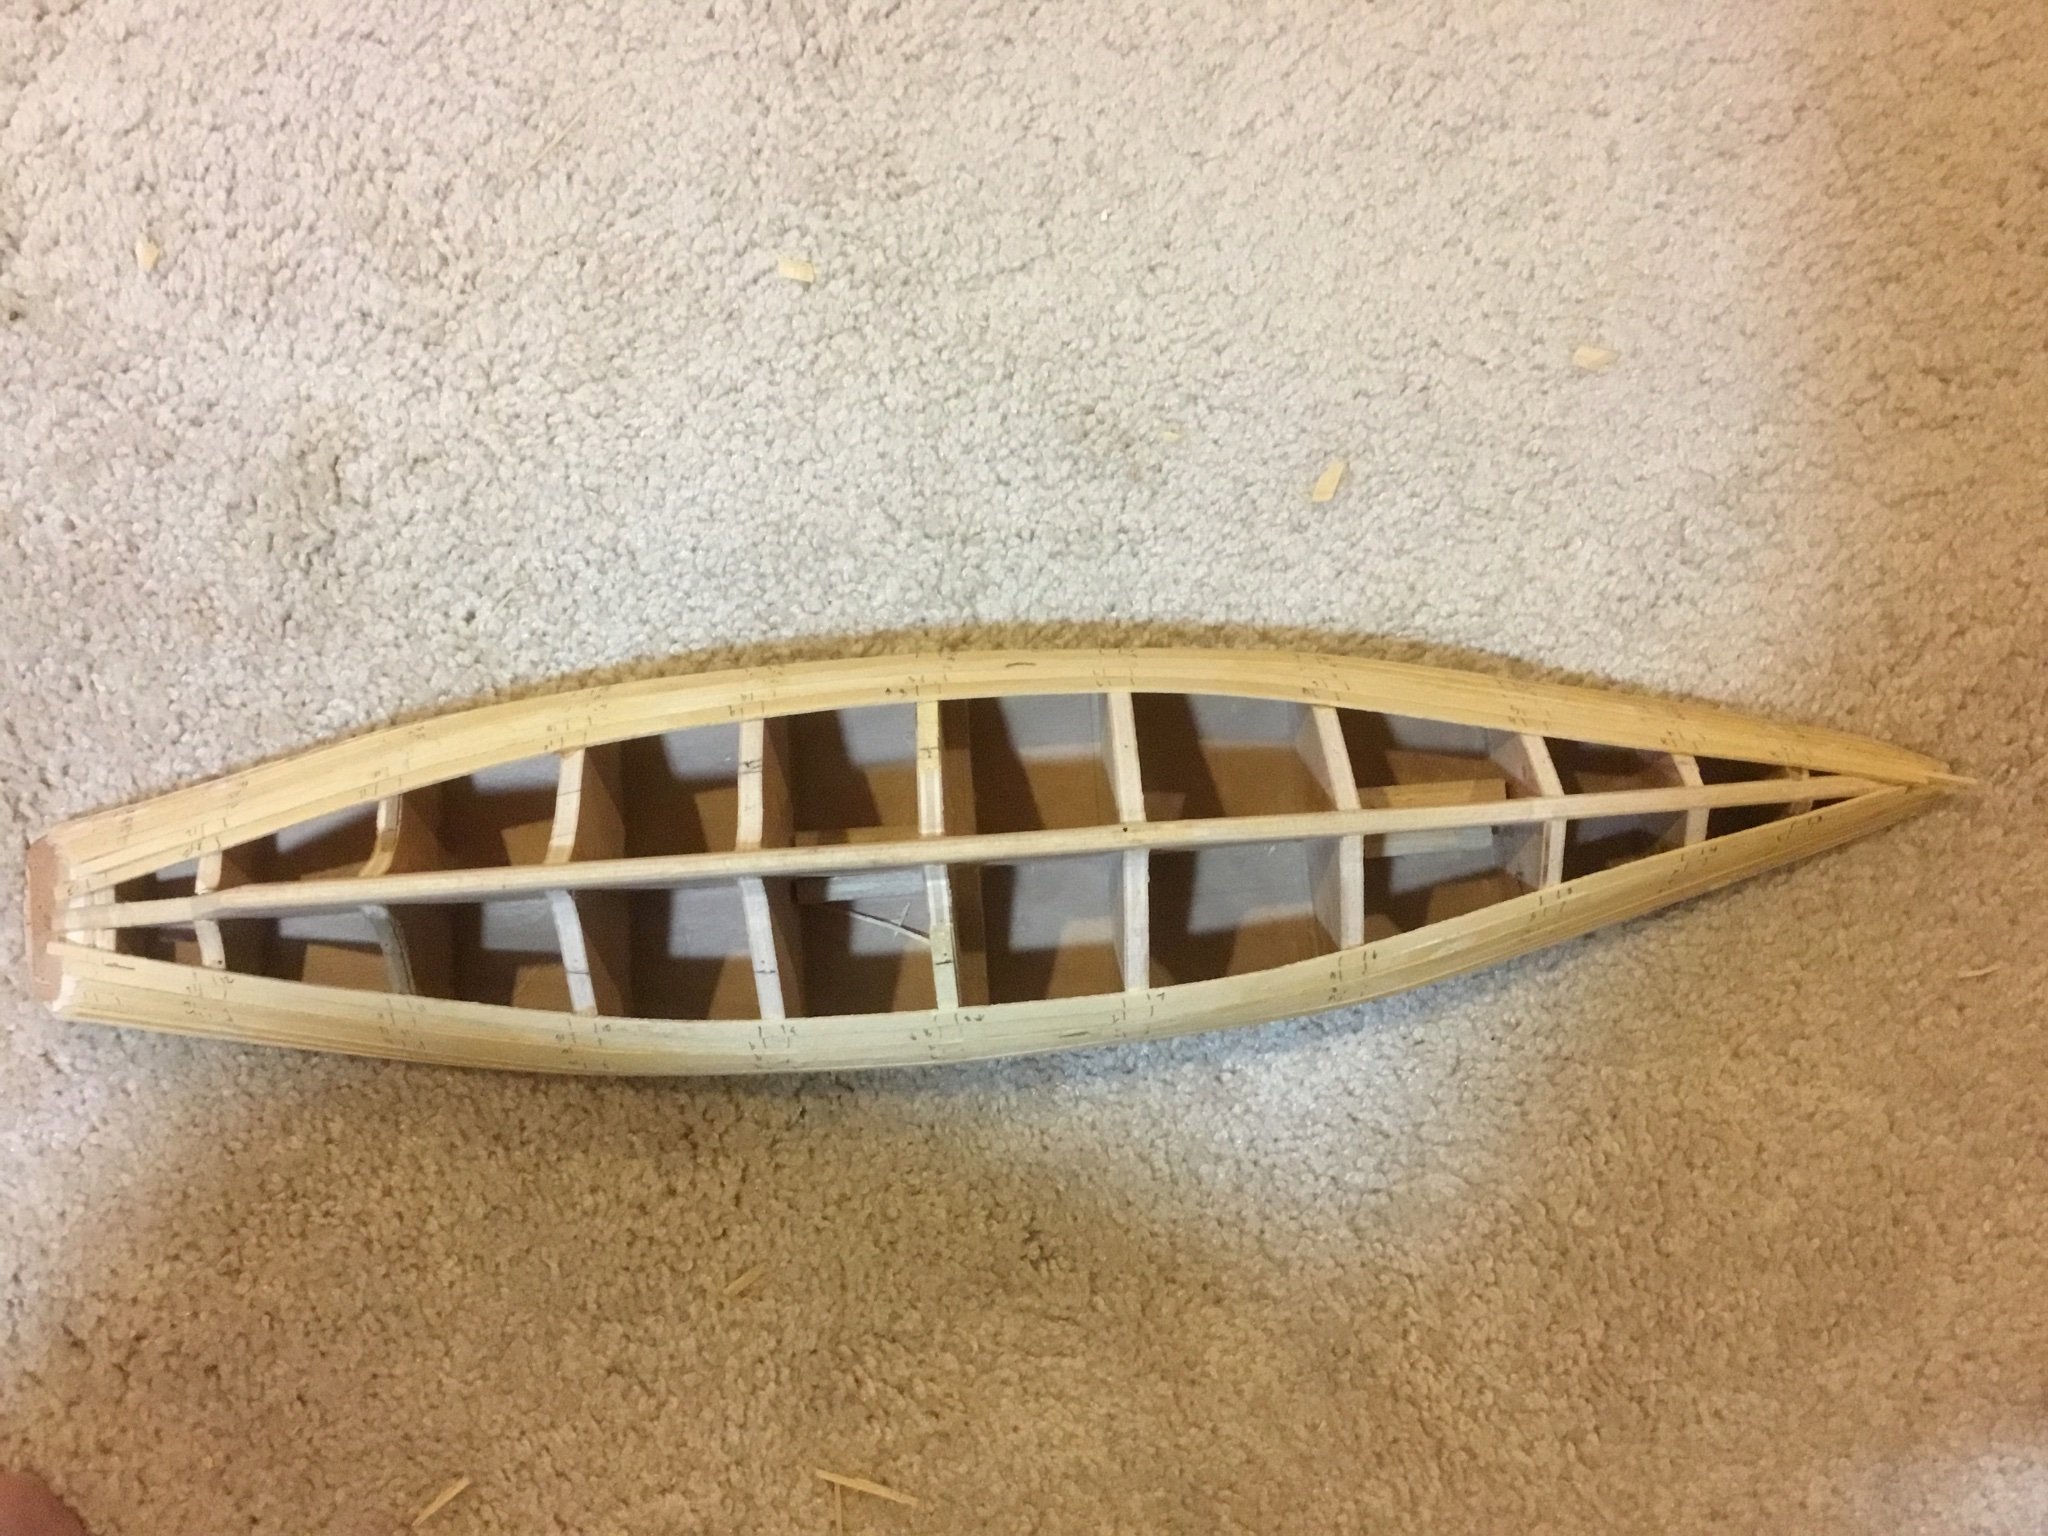
Completed first layer of hull planking. Sanded hull smooth, filled a few cracks and voids with Durhams Rock Hard Water Putty and after further sanding applied a thin coat of Liquitex modeling paste and then a final sanding was done. Didn't go for a perfectly smooth finish as this will be my first application of a second planking layer. Even though I will probably paint the hull, I wanted the experience as in the past I've only ever done a single layer of planking followed by a painted hull. Began applying decking using material supplied in the kit. May not be authentic but I don't want to go to any extra expenses for material for this kit. Began to read ahead on non-manufacturers instructions for applying stanchions, Earl's practicum says the real ship has 56 per side 29 on the foredeck and 27 on the afterdeck spaced 9mm apart. I decided to go with the kits 35 per side assuming 18 on the foredeck and 17 on the afterdeck. The kit instructions say the positions of the stanchions are on the plans but I have been unable to find any, so according to my calculations at this time in my case the spacing would end up being 14.5 mm, since the stanchions in the kit are 3mm wide I will create a 11.5mm spacer to separate the stanchions. The newer kits appear to include a stanchion spacer and a jig for spacing the scuppers, but I have an older kit so I'll have to fabricate my own.


-
-
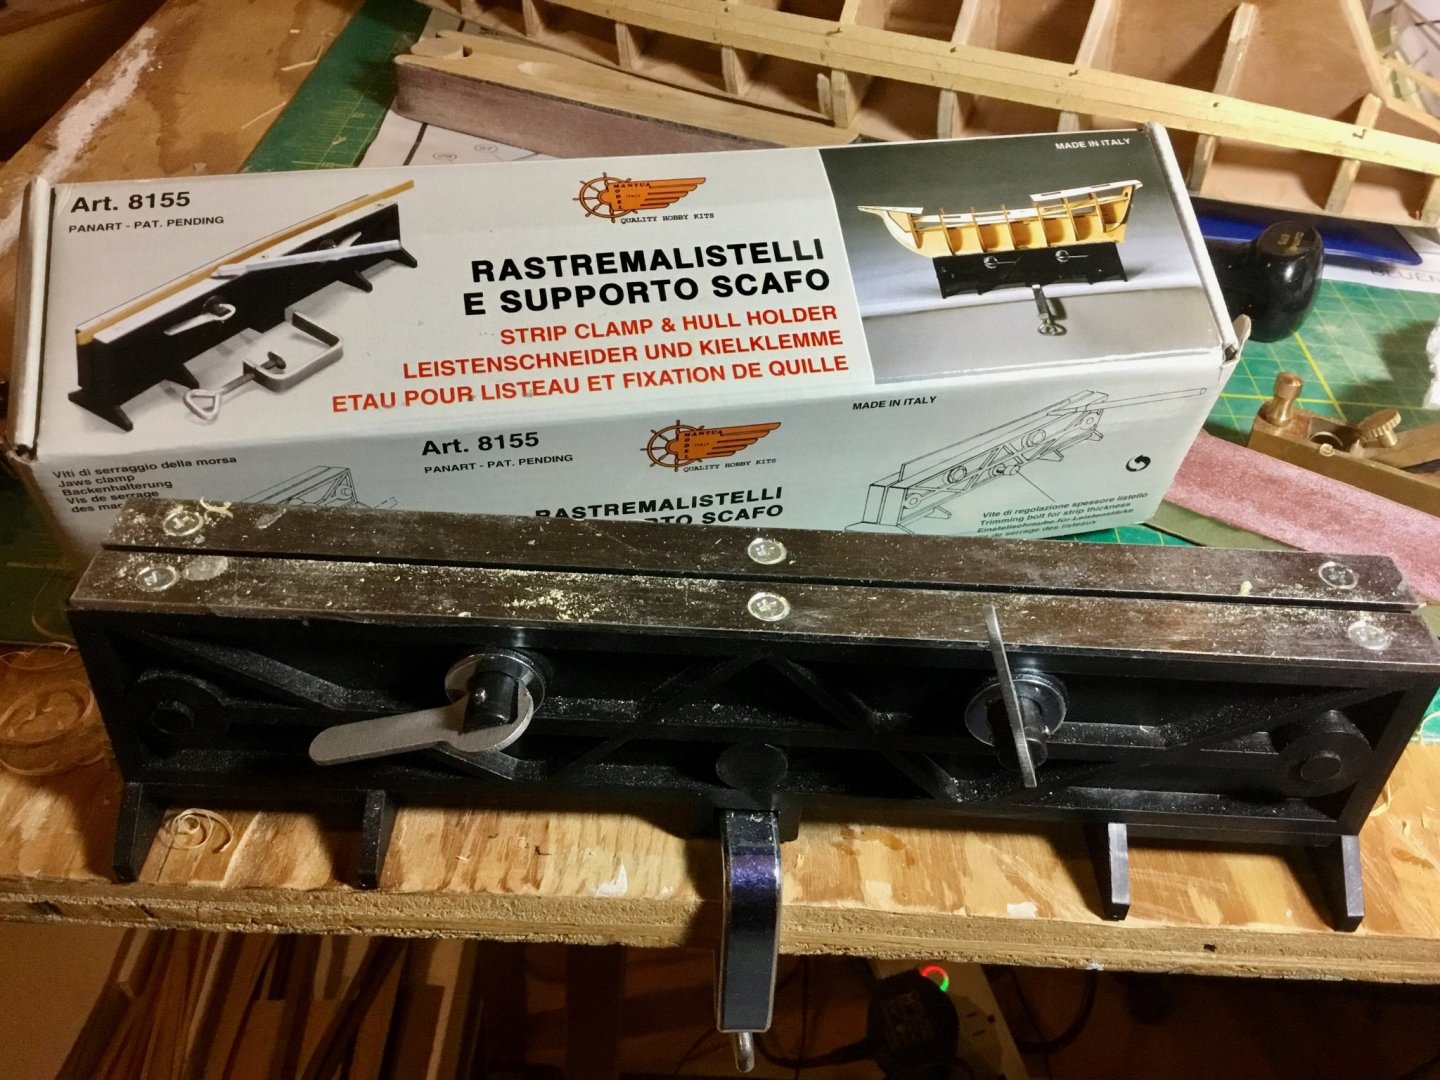
Tried to use tic strips and measuring with a steel ruler and using the ruler as edging for scalpel cuts to adjust the taper of the planks but didn't care for the results. Instead I switched to using my proportional dividers to make the measurements and a strip clamp combined with a mini hand plane to create the tapers. I've laid the first two planks on both the port and starboard sides so far.
I am adjusting the proportional dividers to fit the remaining distance as I go along rather than make all the planks on a side the same. So I started with the dividers set at 7 for the first plank as the instructions said to lay 7 planks in this run. I then reset the dividers to 6 for the second plank. I plan on continuing 5, 4, 3, 2 etc. in hopes that it ends up adjusting for any errors that may creep in as I go along. We'll see if that works out. I plan on doing a second planking as I've never done a second planking so far. I've always ending up filling any dips with wood filler and after final sanding painting the hull. Since I already have a completed model of the original Bluenose I might leave this version unpainted or just partially painted and leave the lower hull just stained.


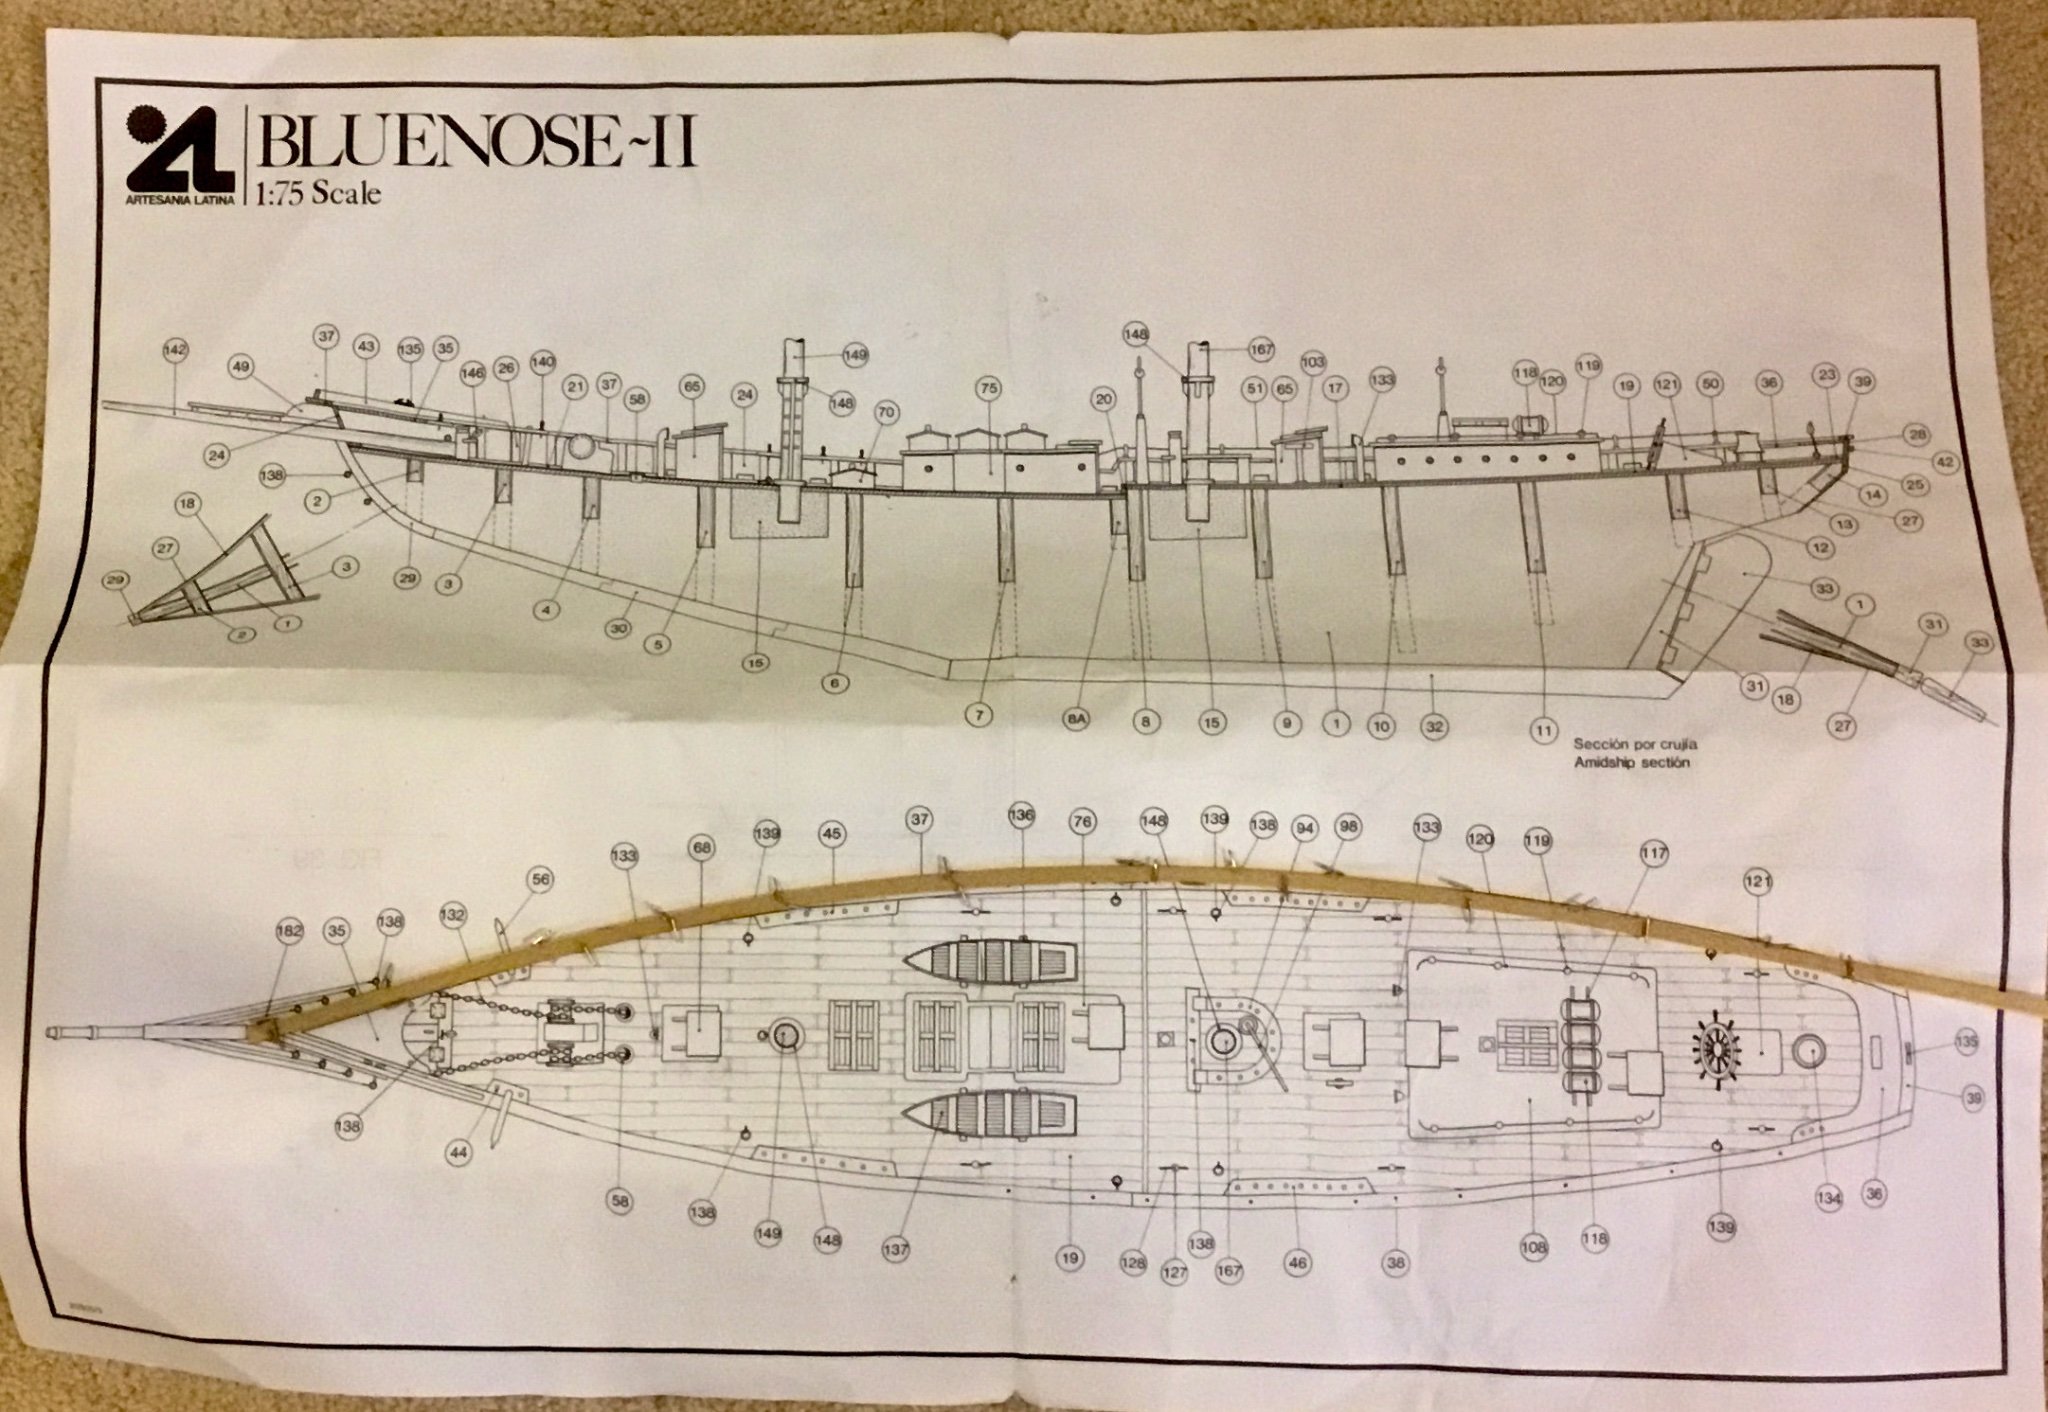


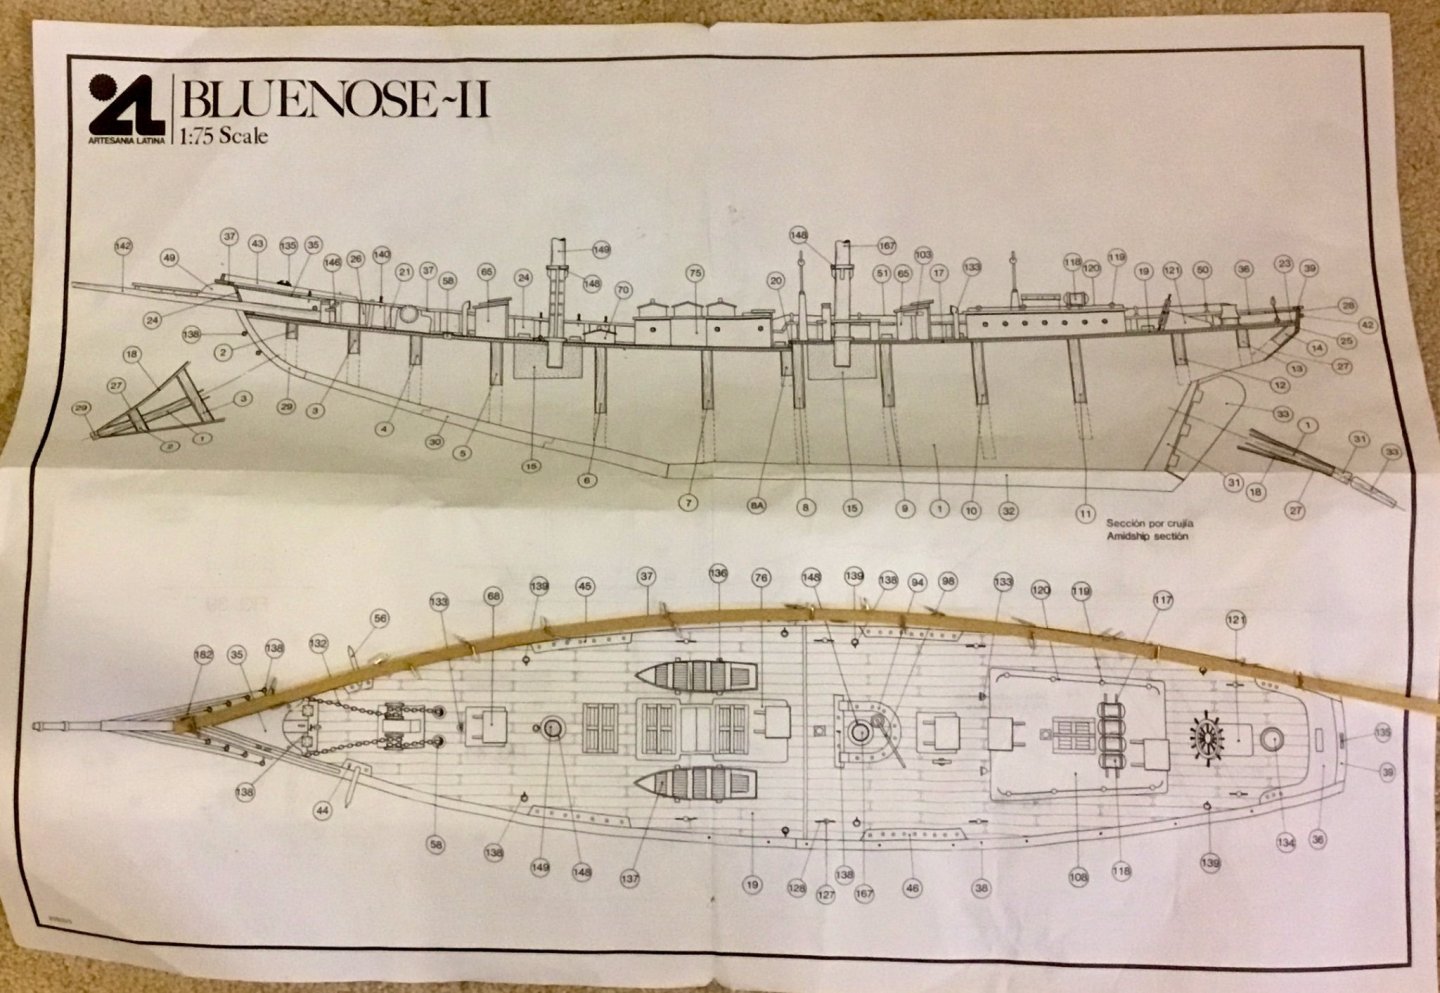
Bluenose II by Dsmith20639 - FINISHED - Artesania Latina - 1:75
in - Kit build logs for subjects built from 1901 - Present Day
Posted
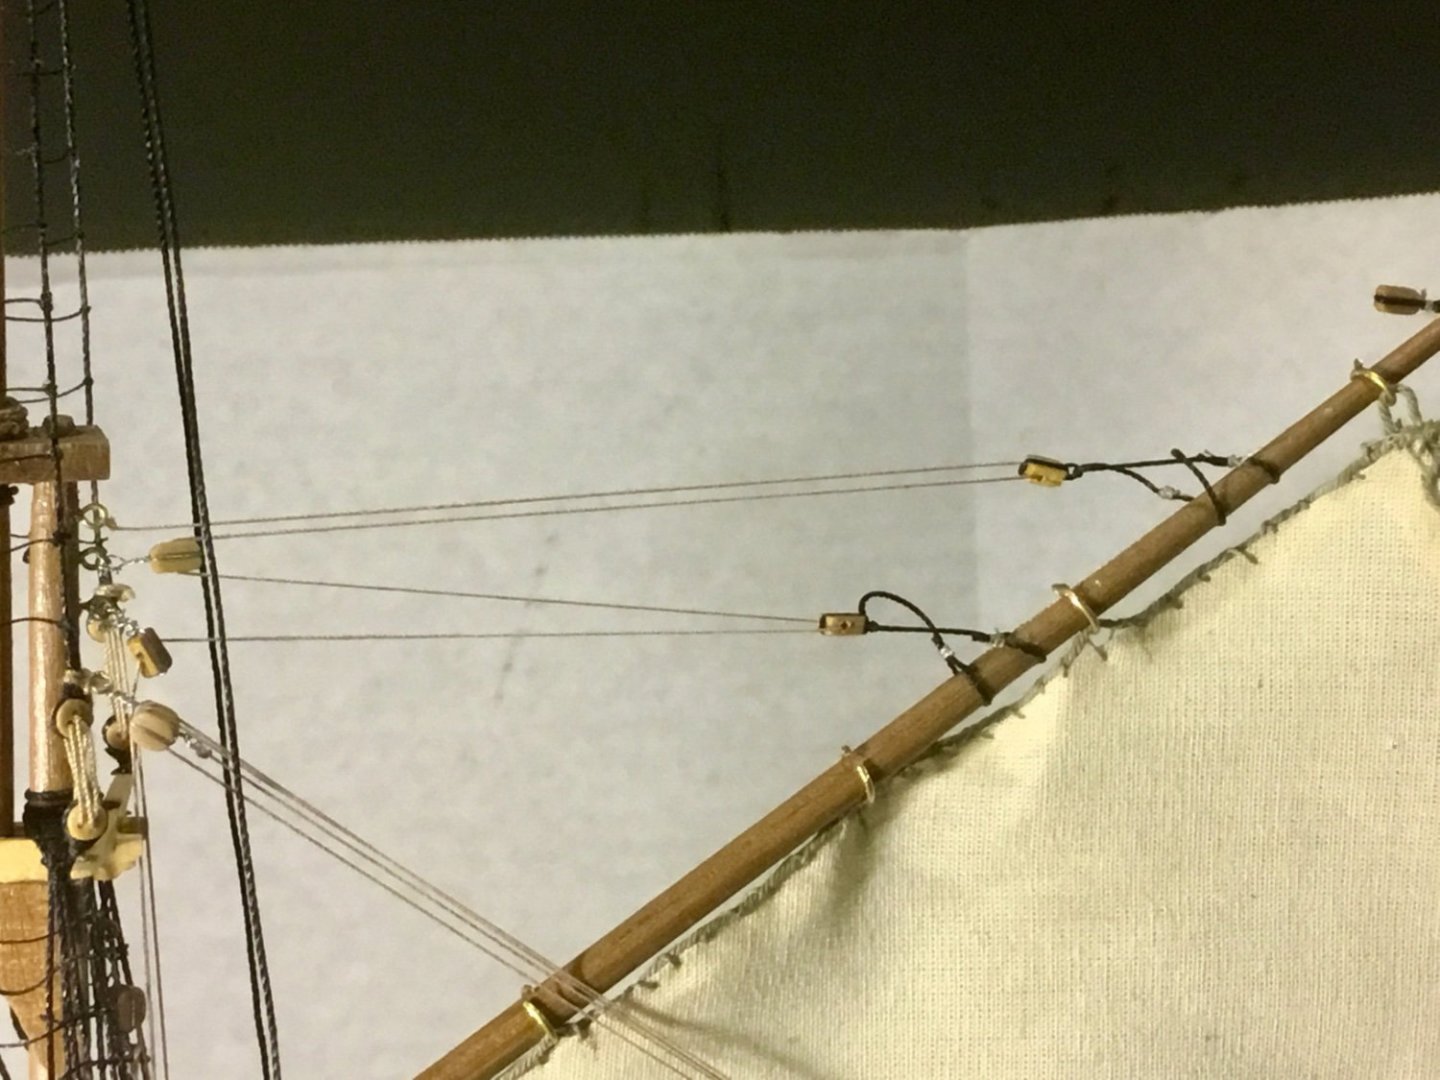
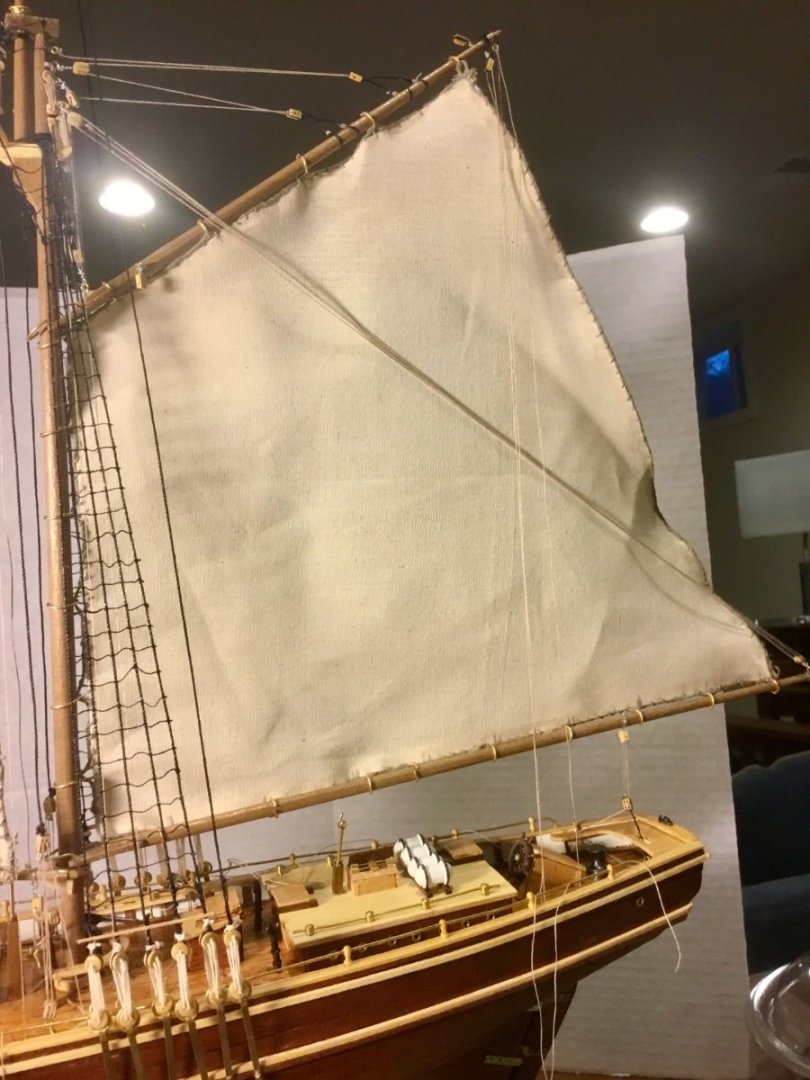
Fitted Fore Gaff Top Sail, including Foregaff top sail halyard, Foregaff top sail tack line and Foresail halyard rigging lines