MORE HANDBOOKS ARE ON THEIR WAY! We will let you know when they get here.
×

Kikatinalong
-
Posts
91 -
Joined
-
Last visited
Content Type
Profiles
Forums
Gallery
Events
Everything posted by Kikatinalong
-
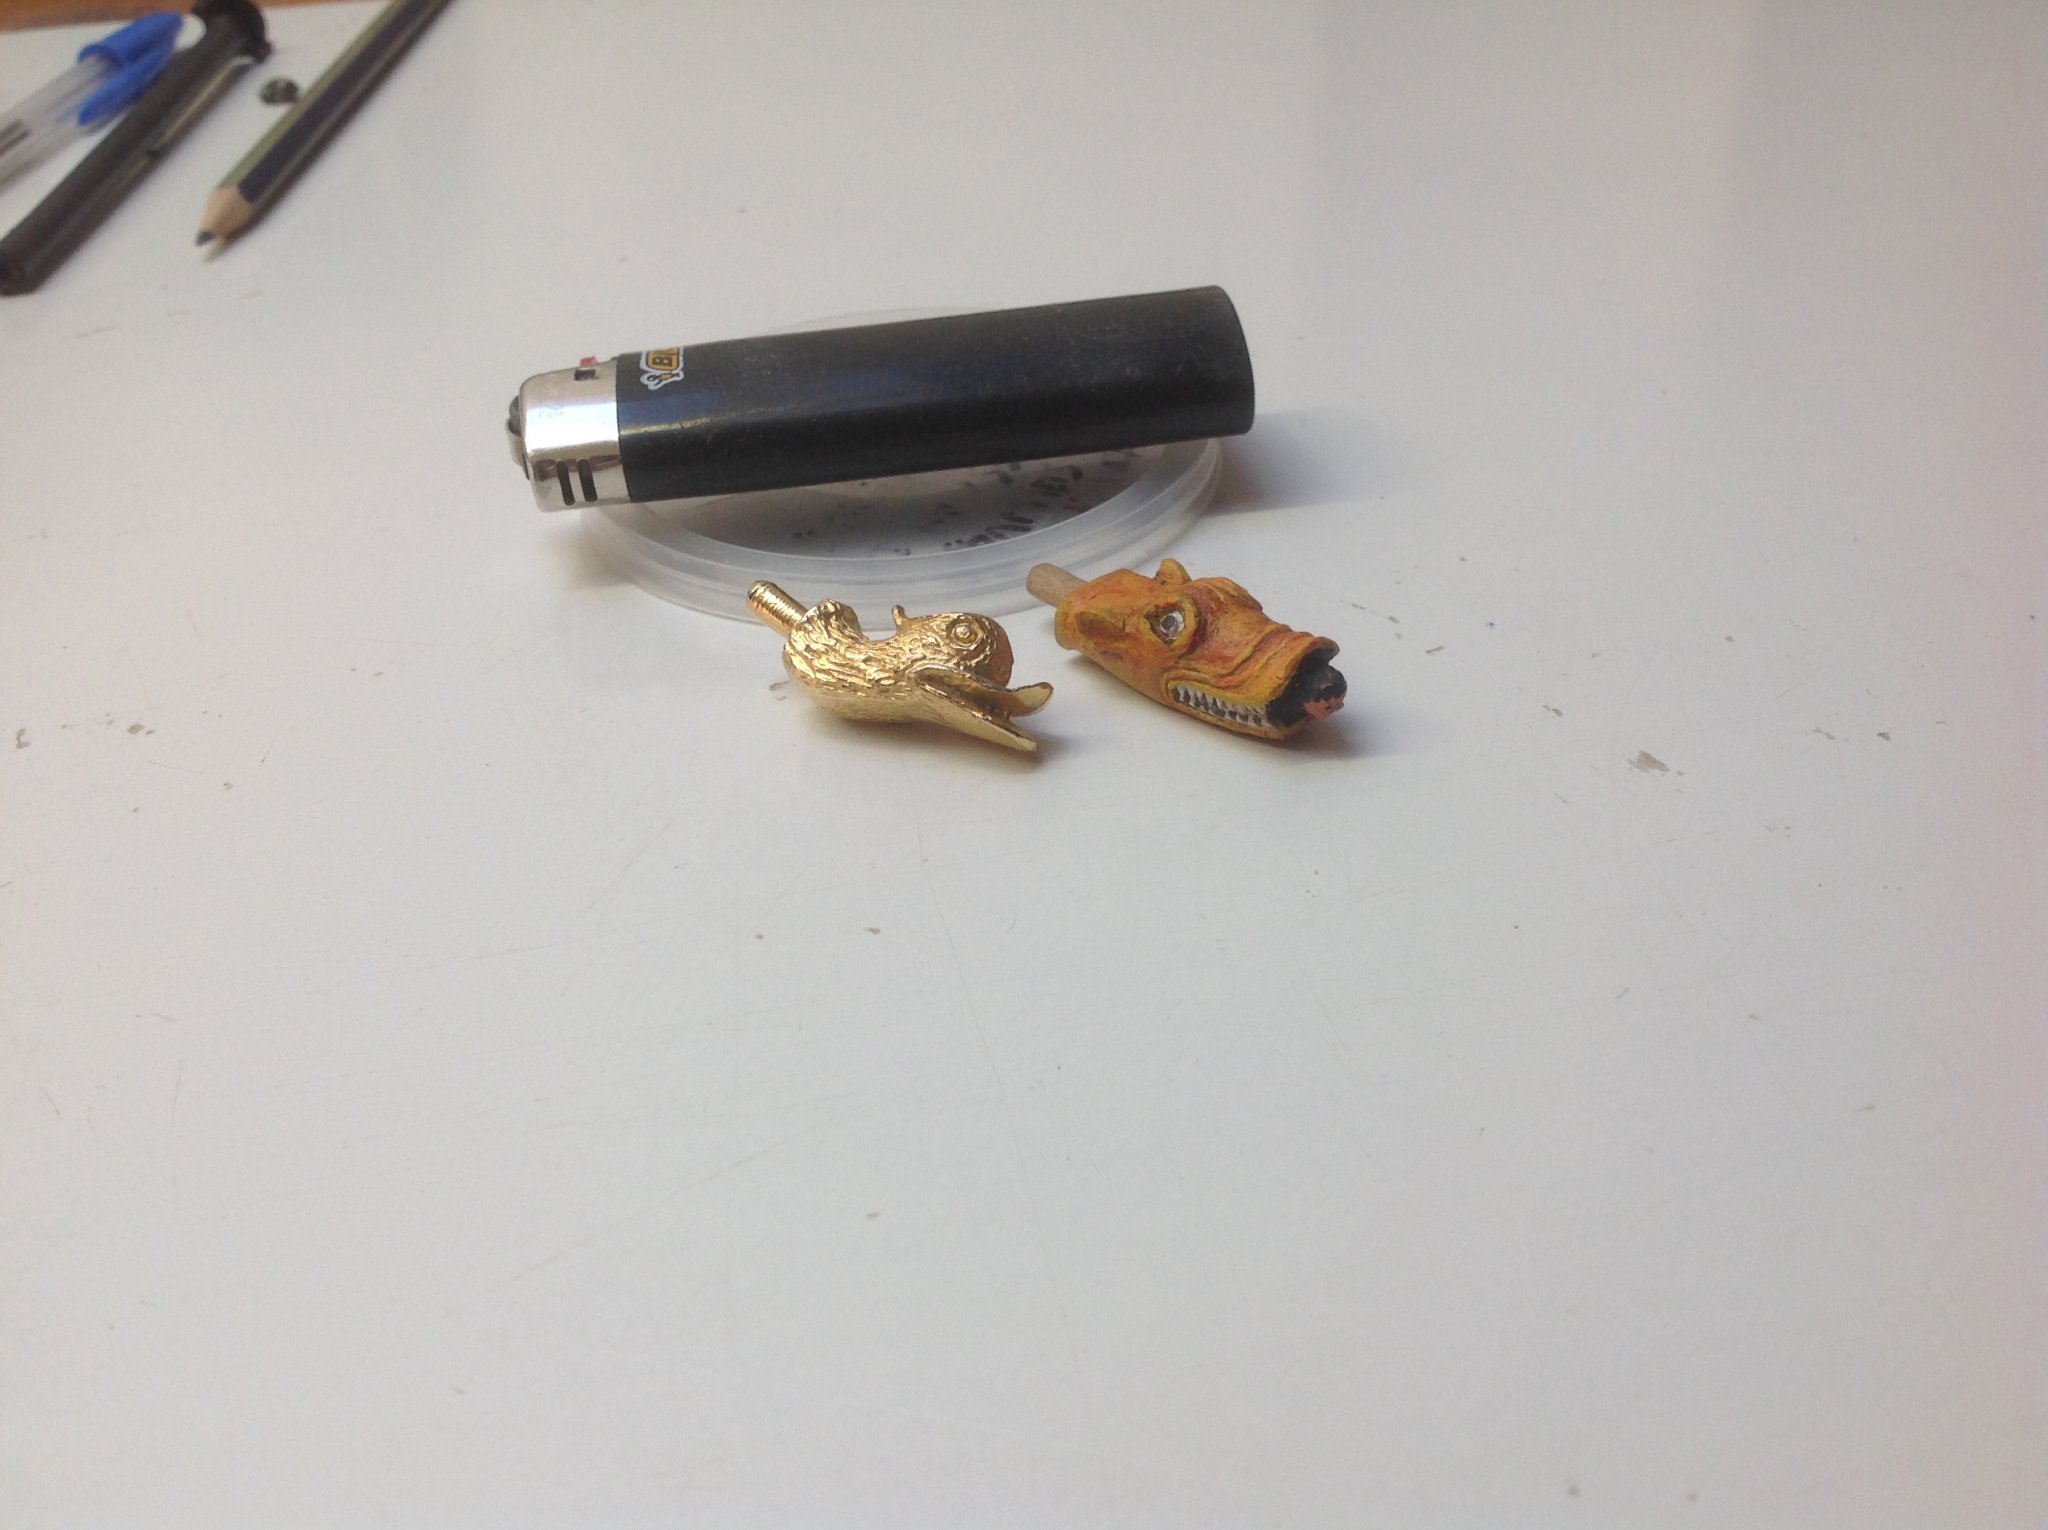
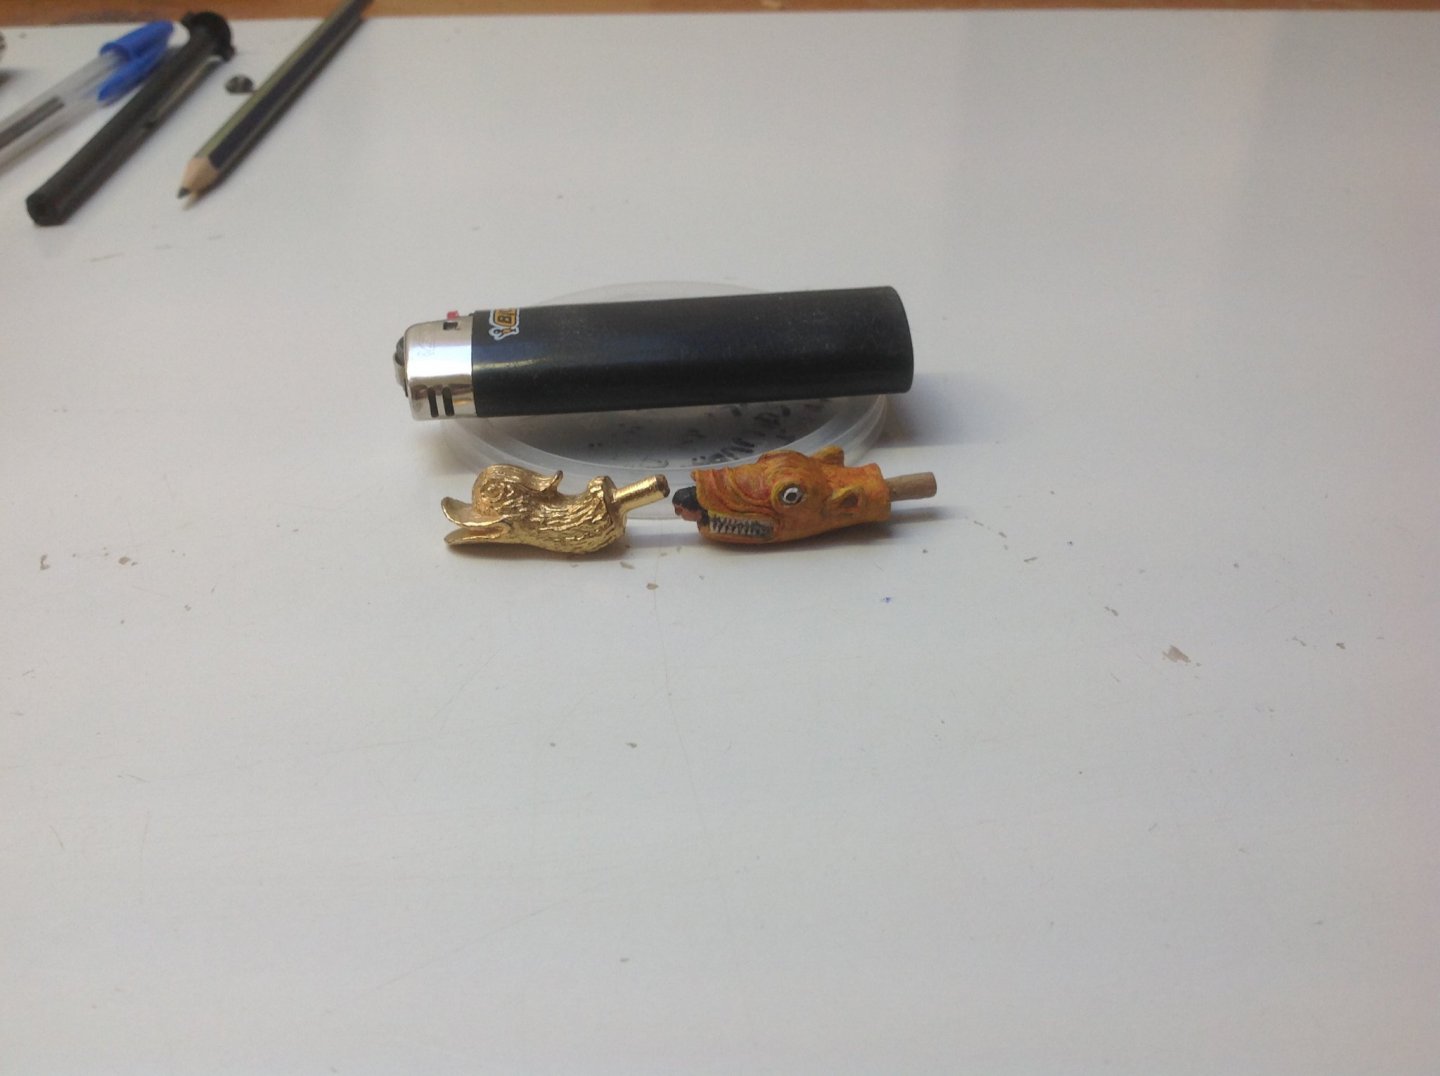
Hello to all A BIG THANK YOU to Steven ( Louie da fly ) My kit came with a brass head carving which I assumed was a dragons head. I was horrified when I finally unwrapped it and discovered it was a bloody duck, the Admiral kept laughing as I tried to convince myself it was just a bad looking dragon. Being new to modelling and this group I soon realised that Steven and a few others loved Carrack's. Then I realised Steven lived a few hours from me in a town I visit another friend a few times a year. Push forward a few months and after many emails I visited Steven and his lovely wife, as course I took my model. Having already seen the ugly duckling via email Steven offered to carve me a dragon head piece, I gladly accepted his offer and in a very short time it arrived in the mail. It's based on a headpiece found and recovered from the fifteen hundreds. I love it Its amazing And it will be a great addition to my model. I dips my lid to u Steven, you have been a great source of information and an inspiration to push ahead even when I have doubts I could do this, a wonderful host in your stunning house, and a great new friend. Ive seen your Dromon first hand and I can easily describe your craftsmanship as exceptional, I can't wait to see your Dromon sitting in a prised area of your house. Once again thank you for all of your help. Cheers Peter


-
A really nice start, I'm going to pull up a chair. I'm already looking for my next build, this or similar would be a nice add. looking forward to more posts
-
Welcome John, enjoy yourself
-
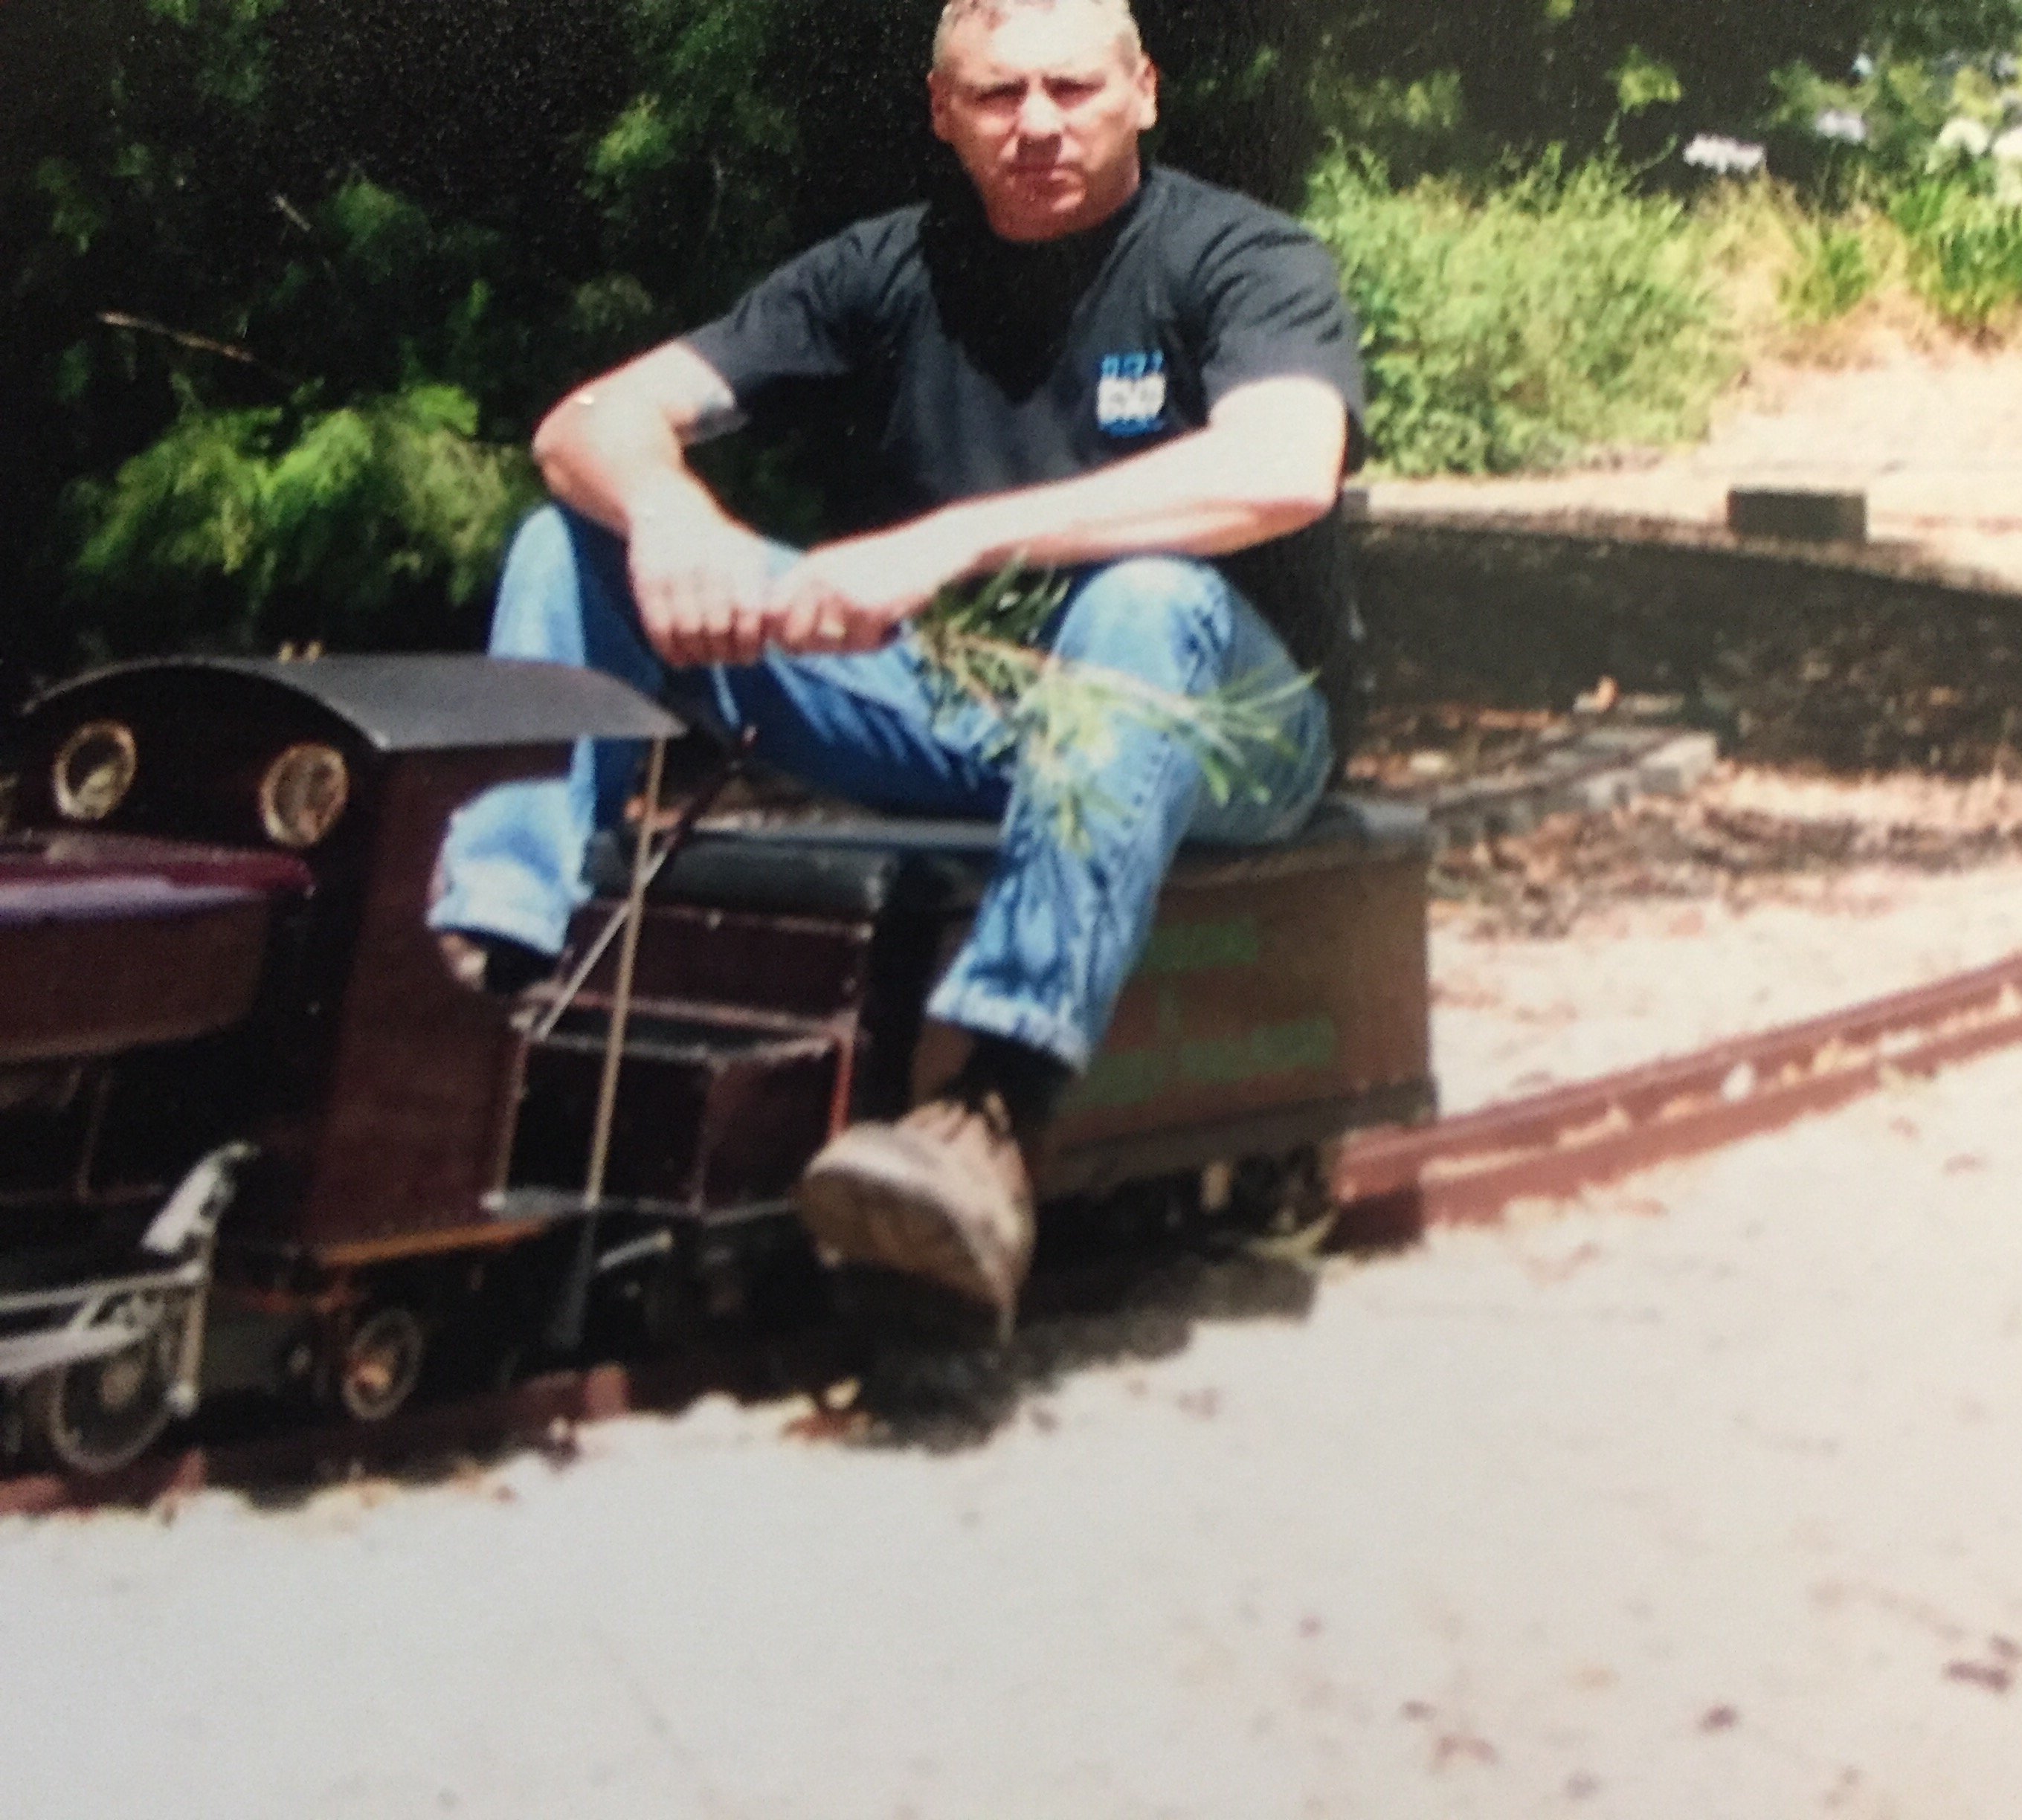
Love the truck, the model is certainly taking shape and looks terrific. You might need to buy an old duffle bag to Carry it to ur club, and your a bit like me, we both have good heads for a radio show. 😂😂 what local club do you go to, as a newbie I have one near me in Box Hill ( Melbourne) which I intend to visit now that the weather is improving. Cheers Peter
-
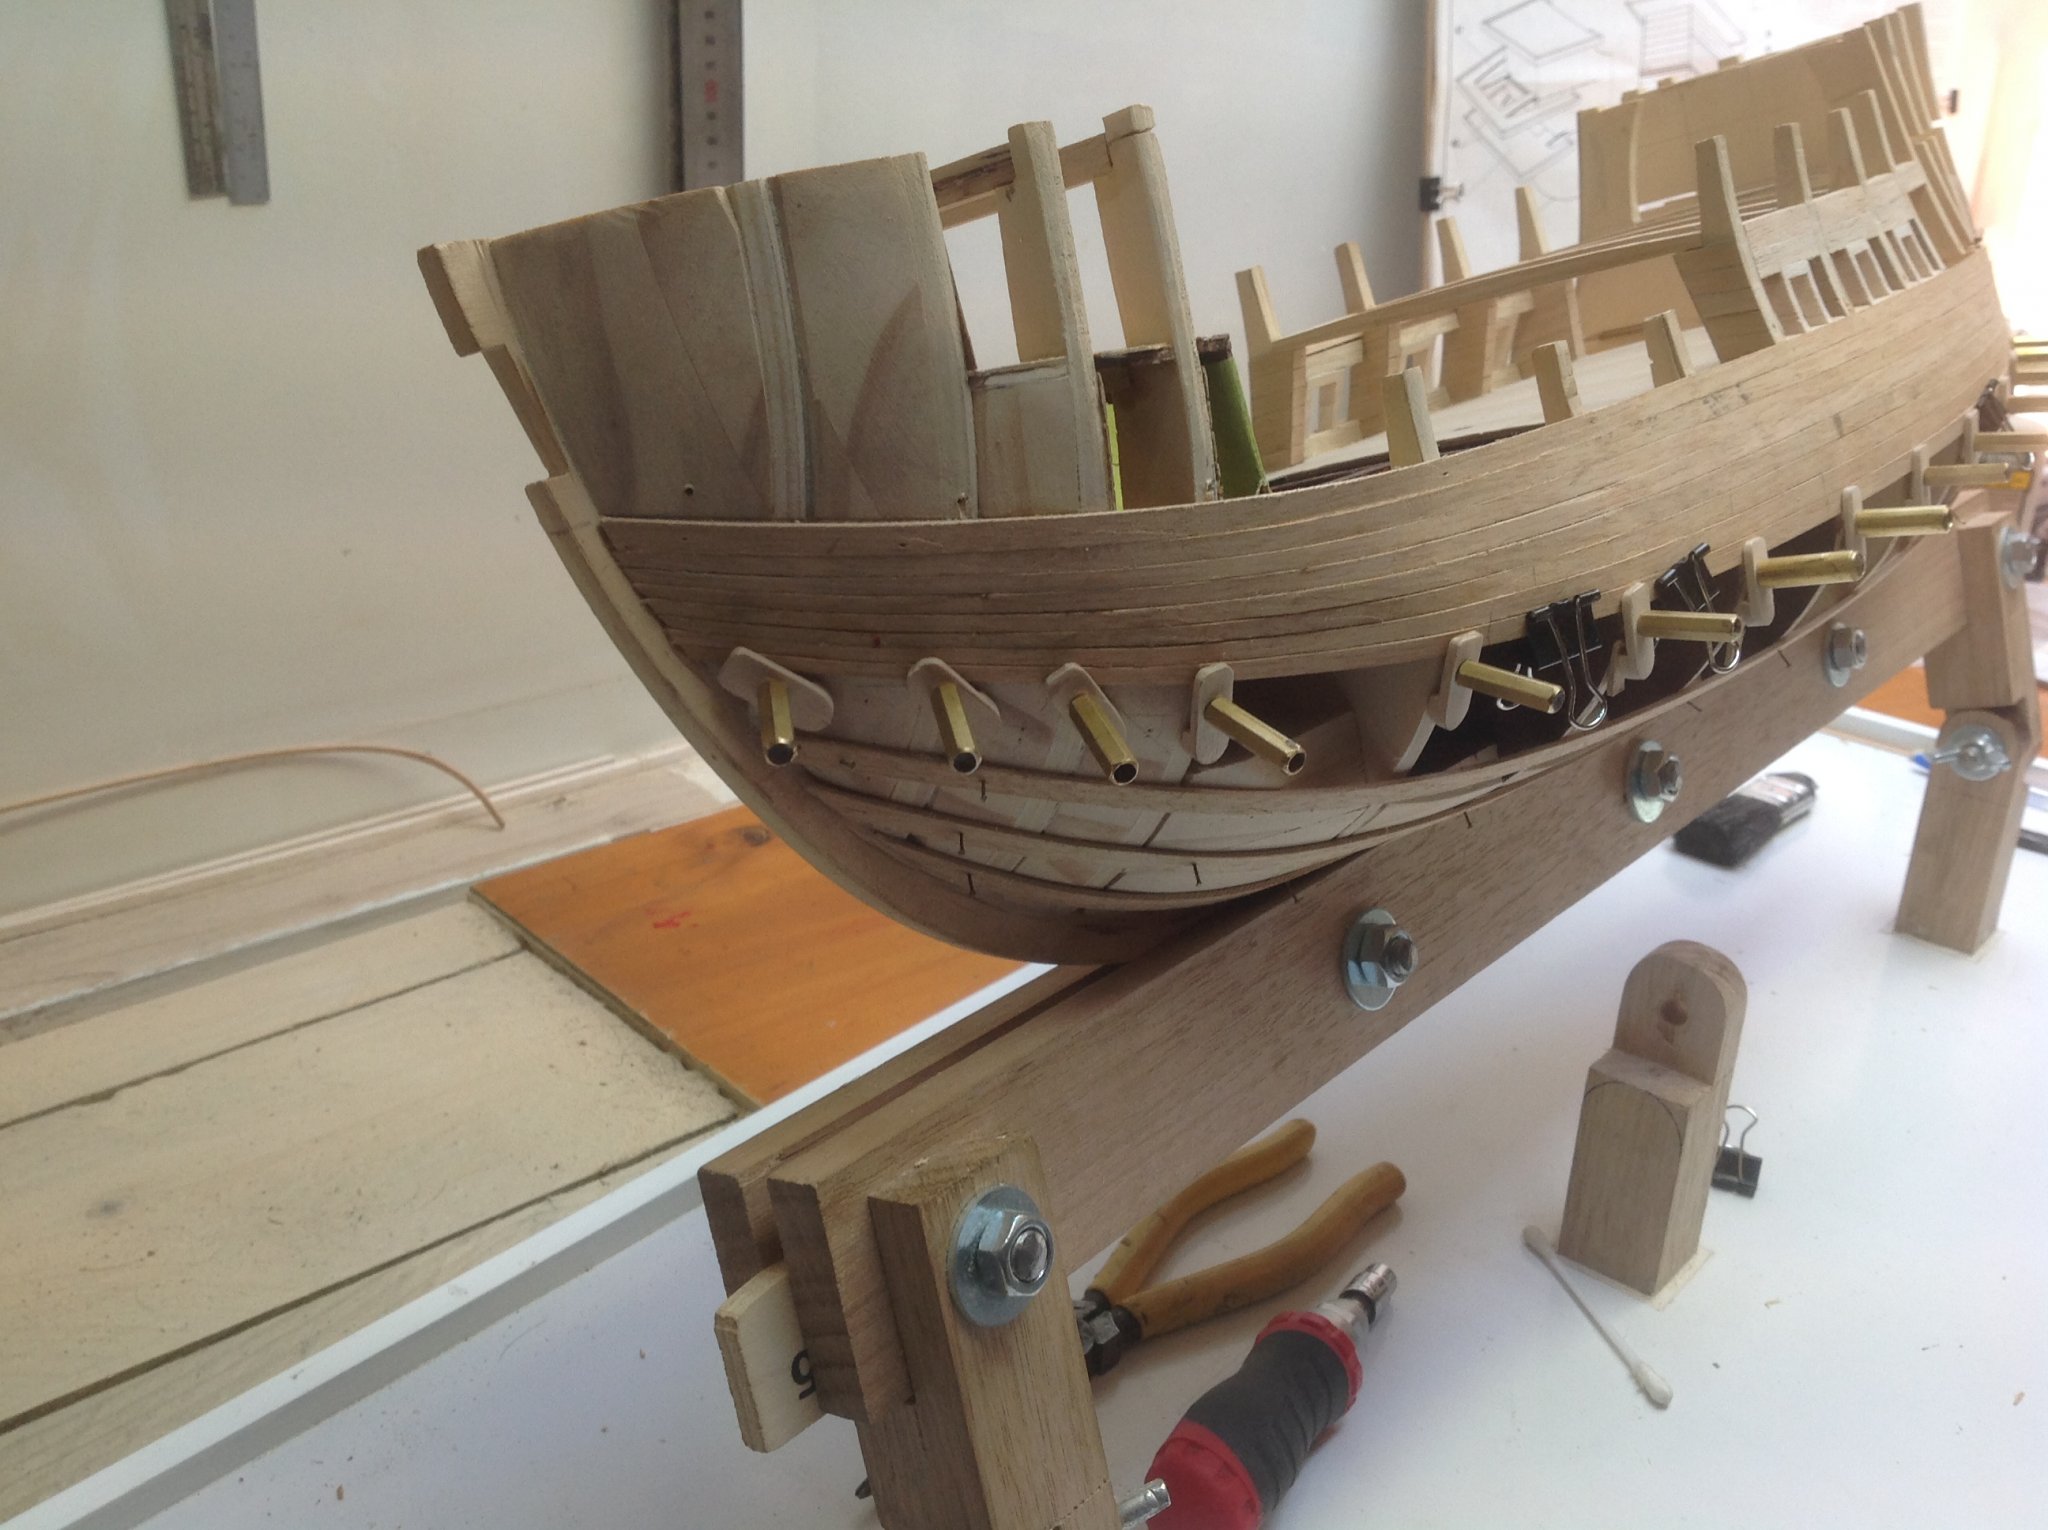
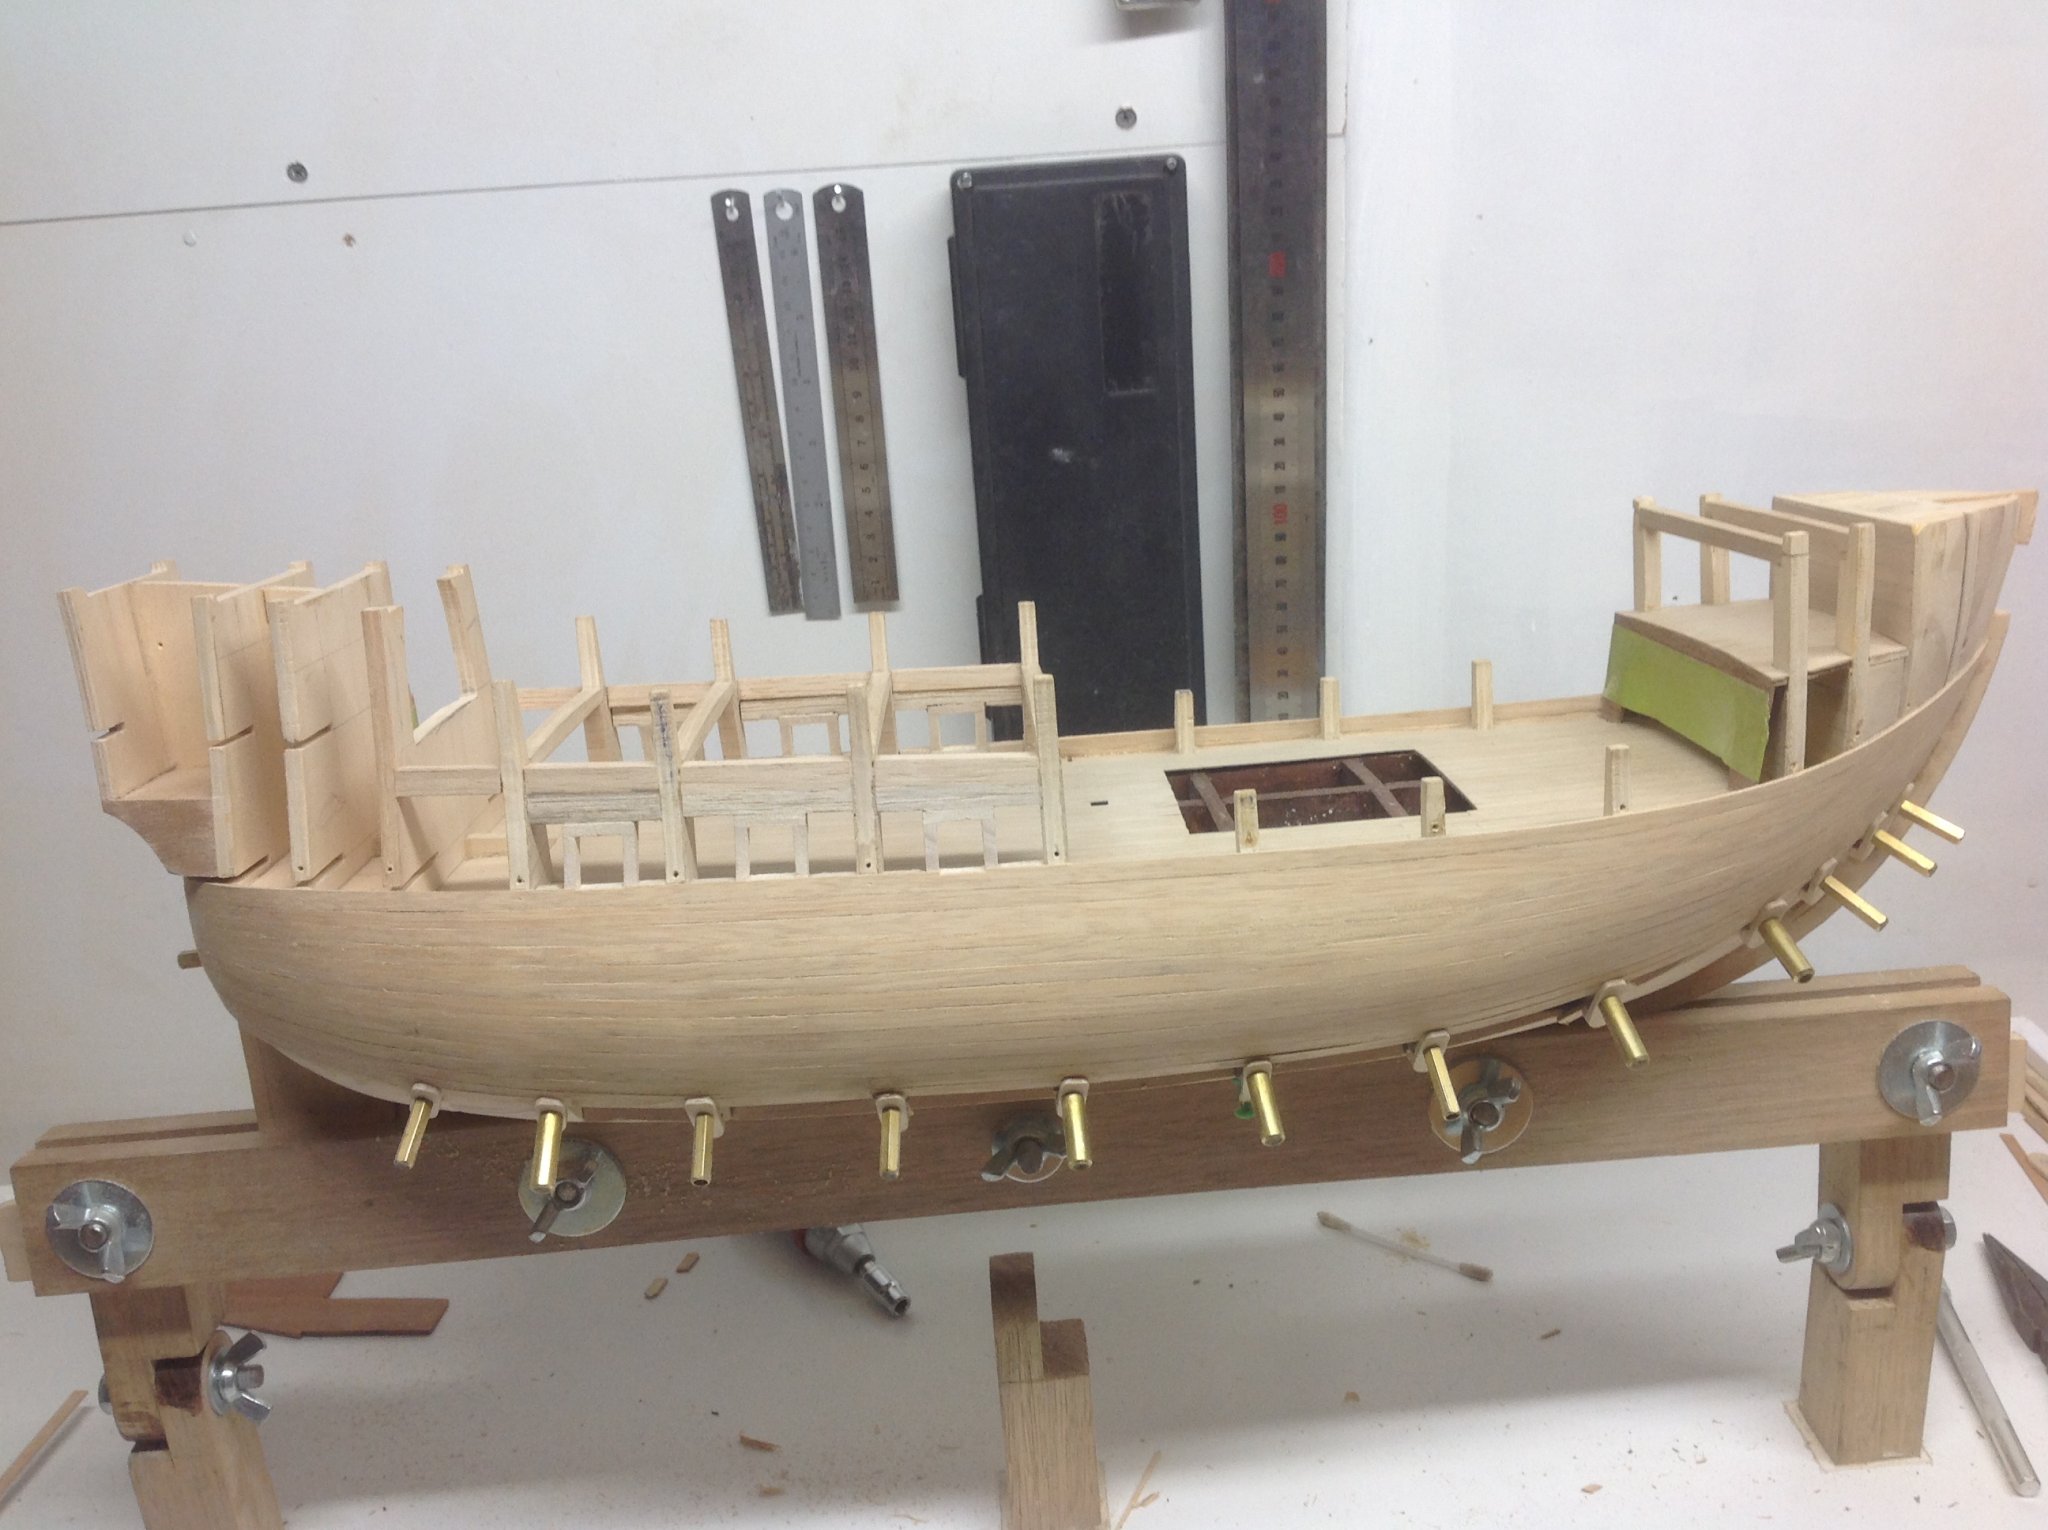
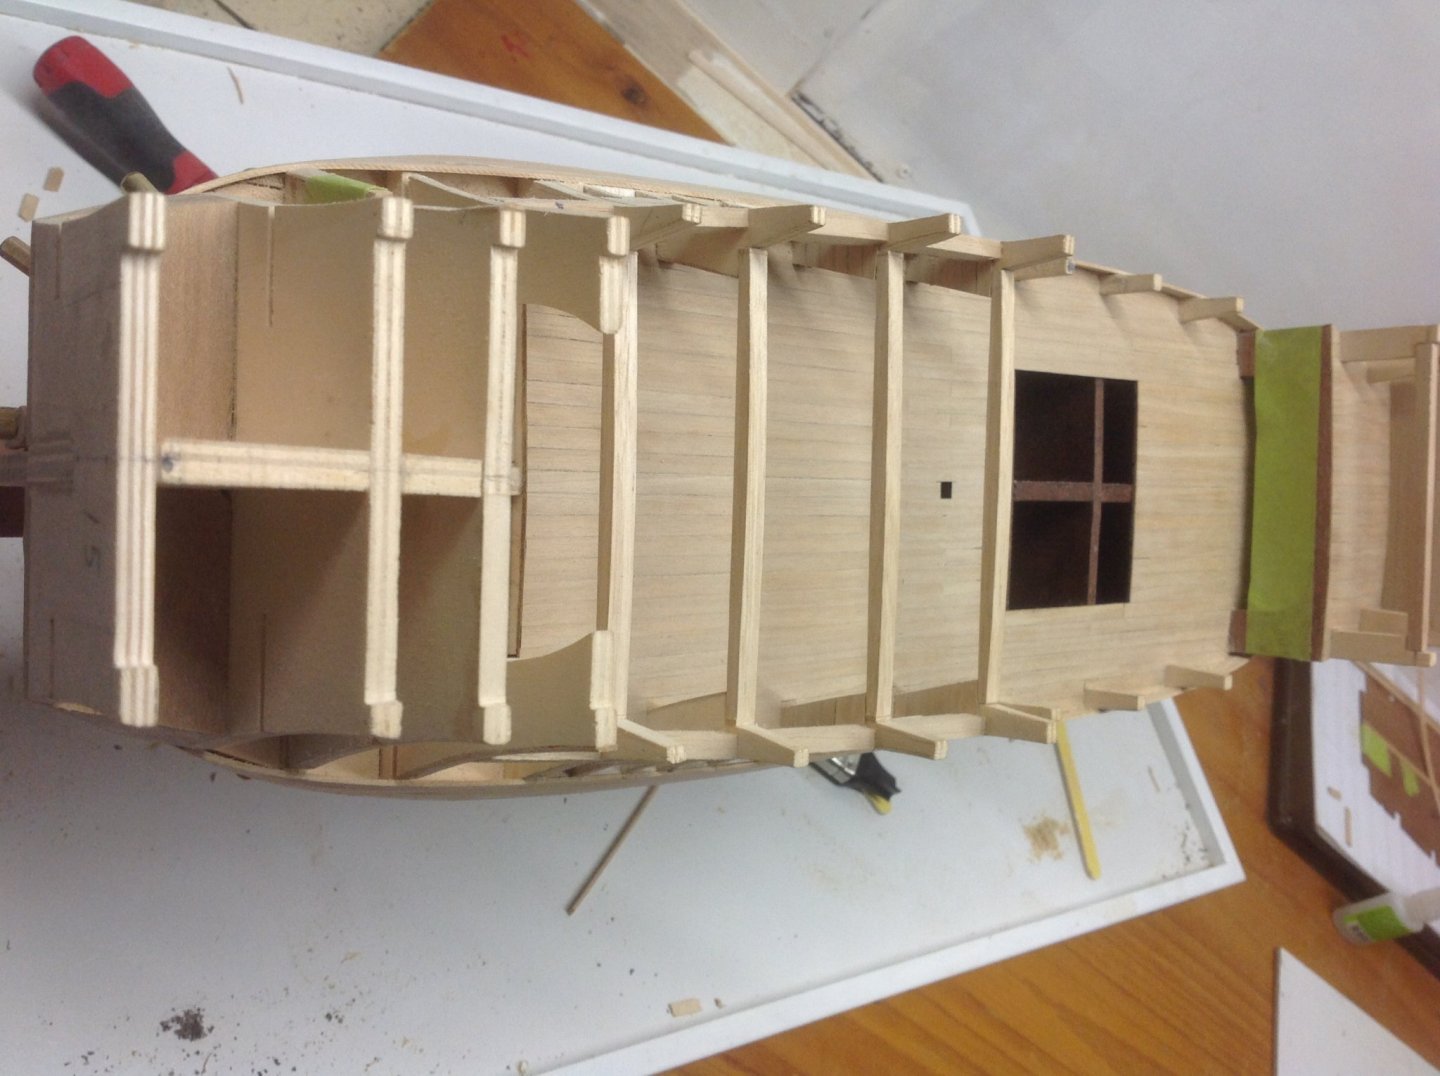
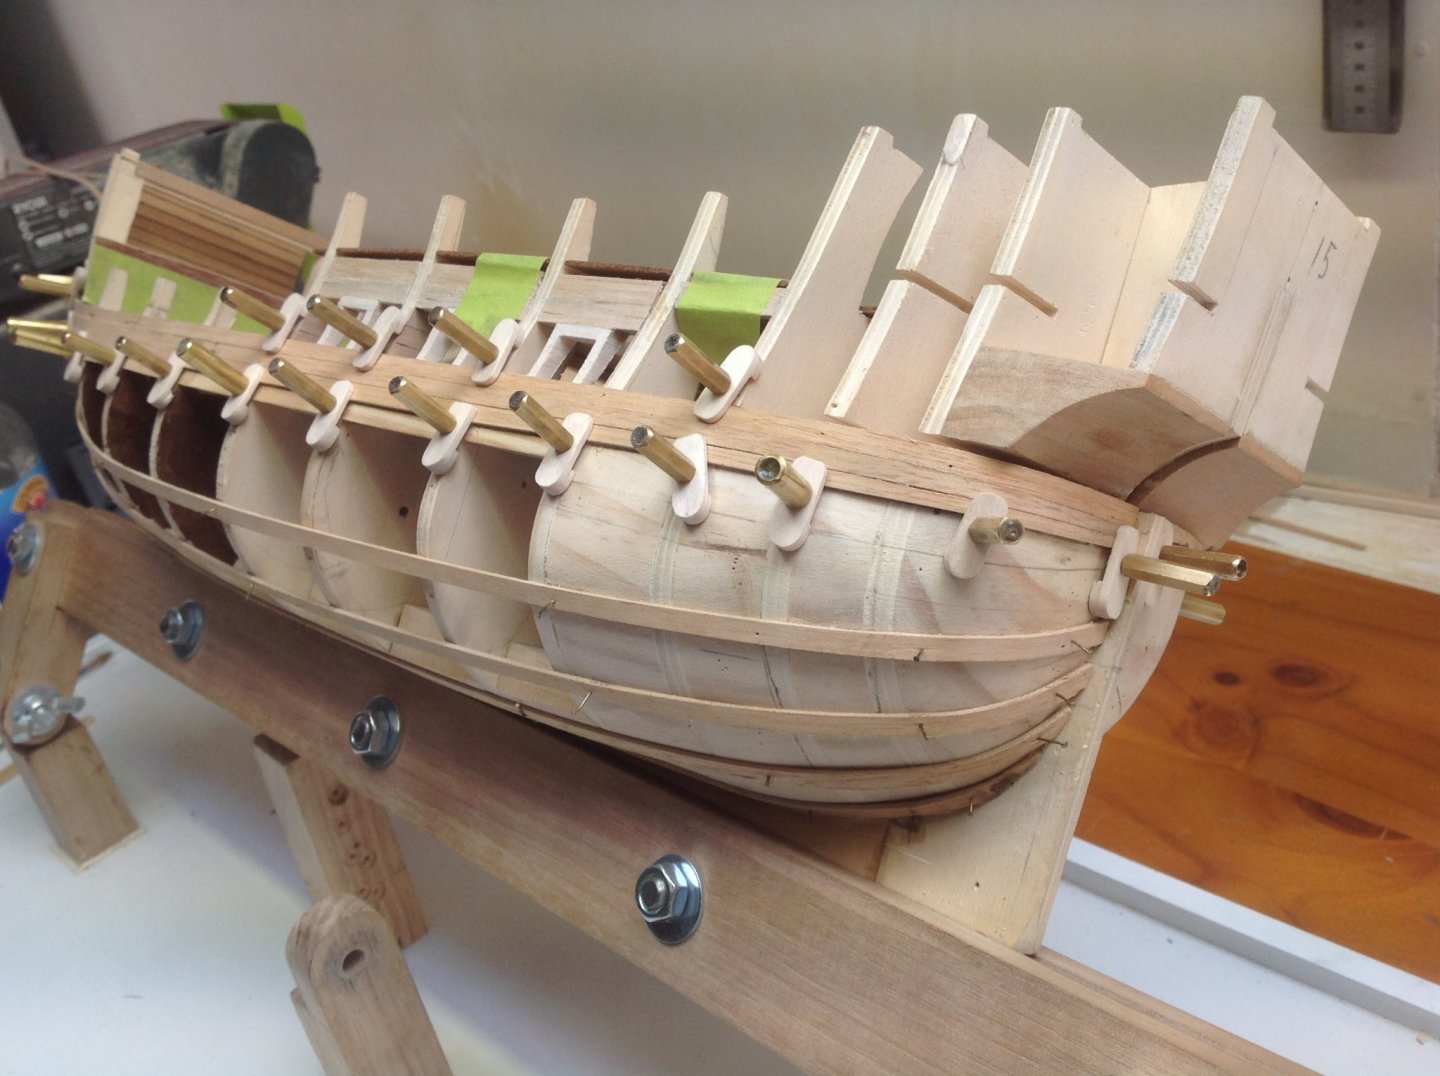
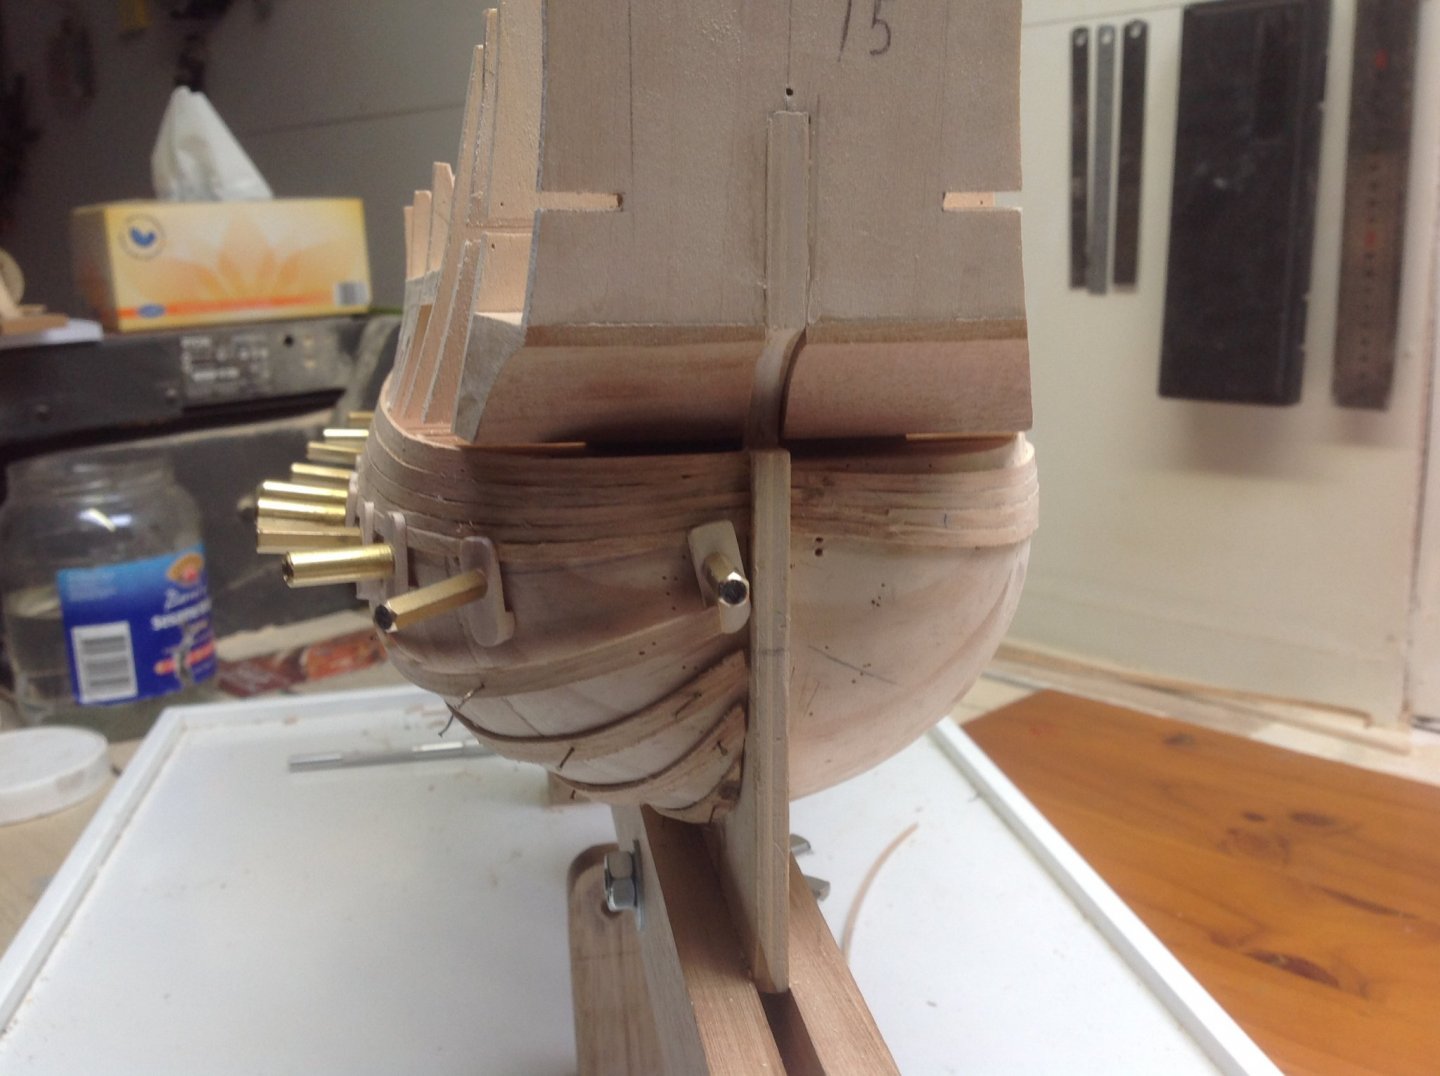
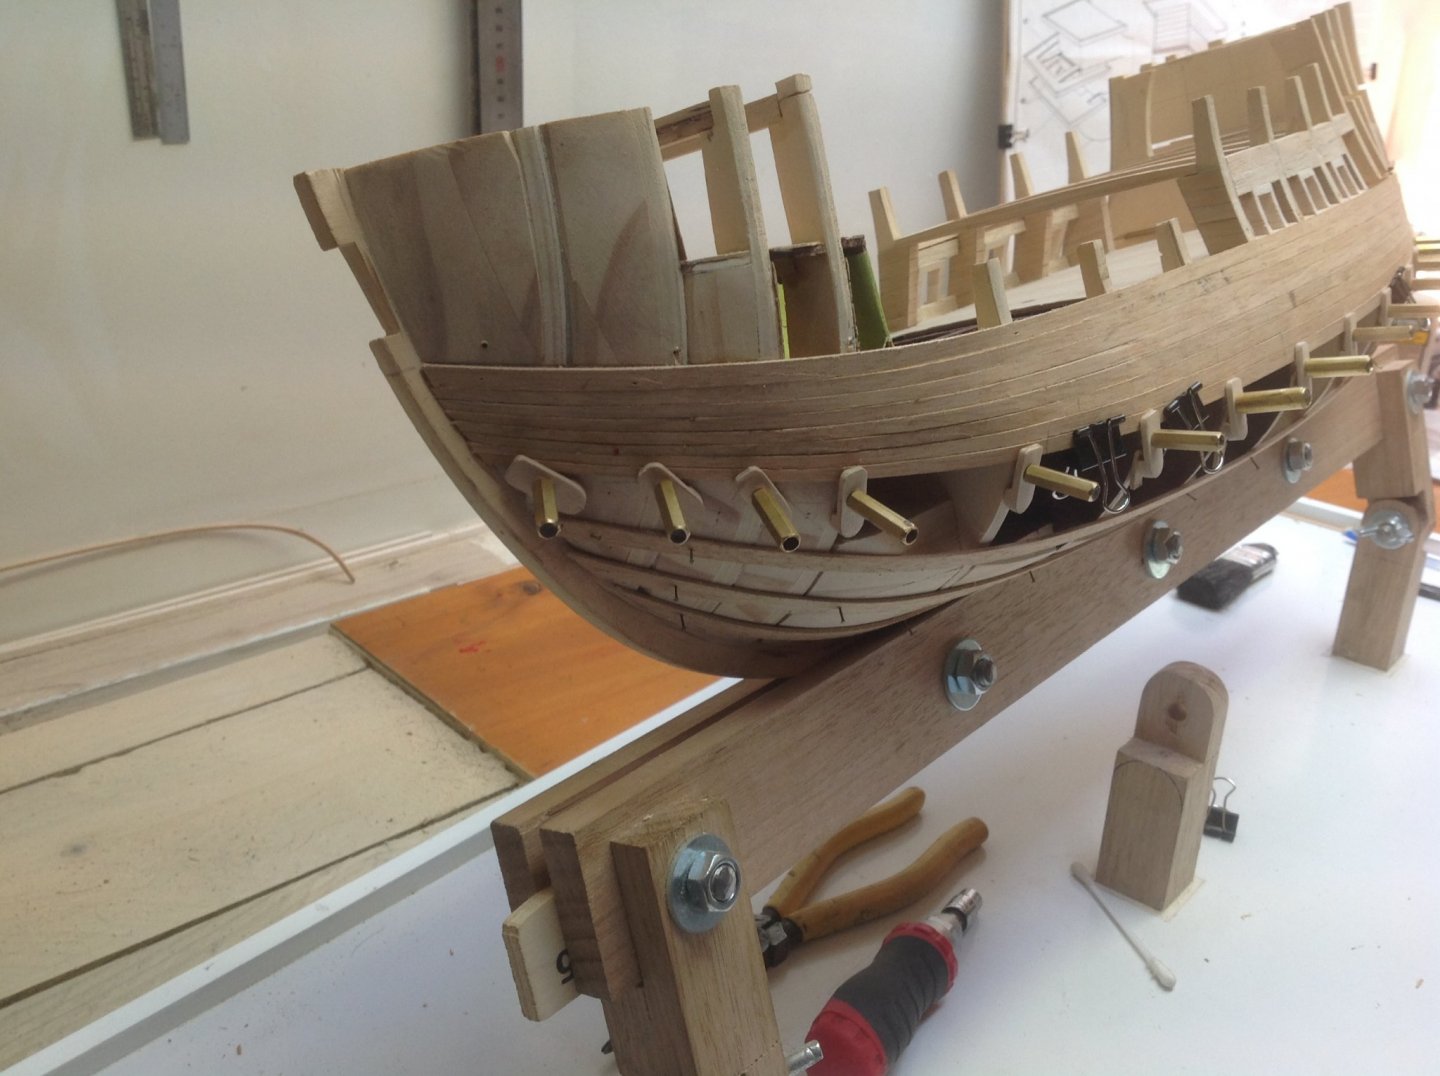
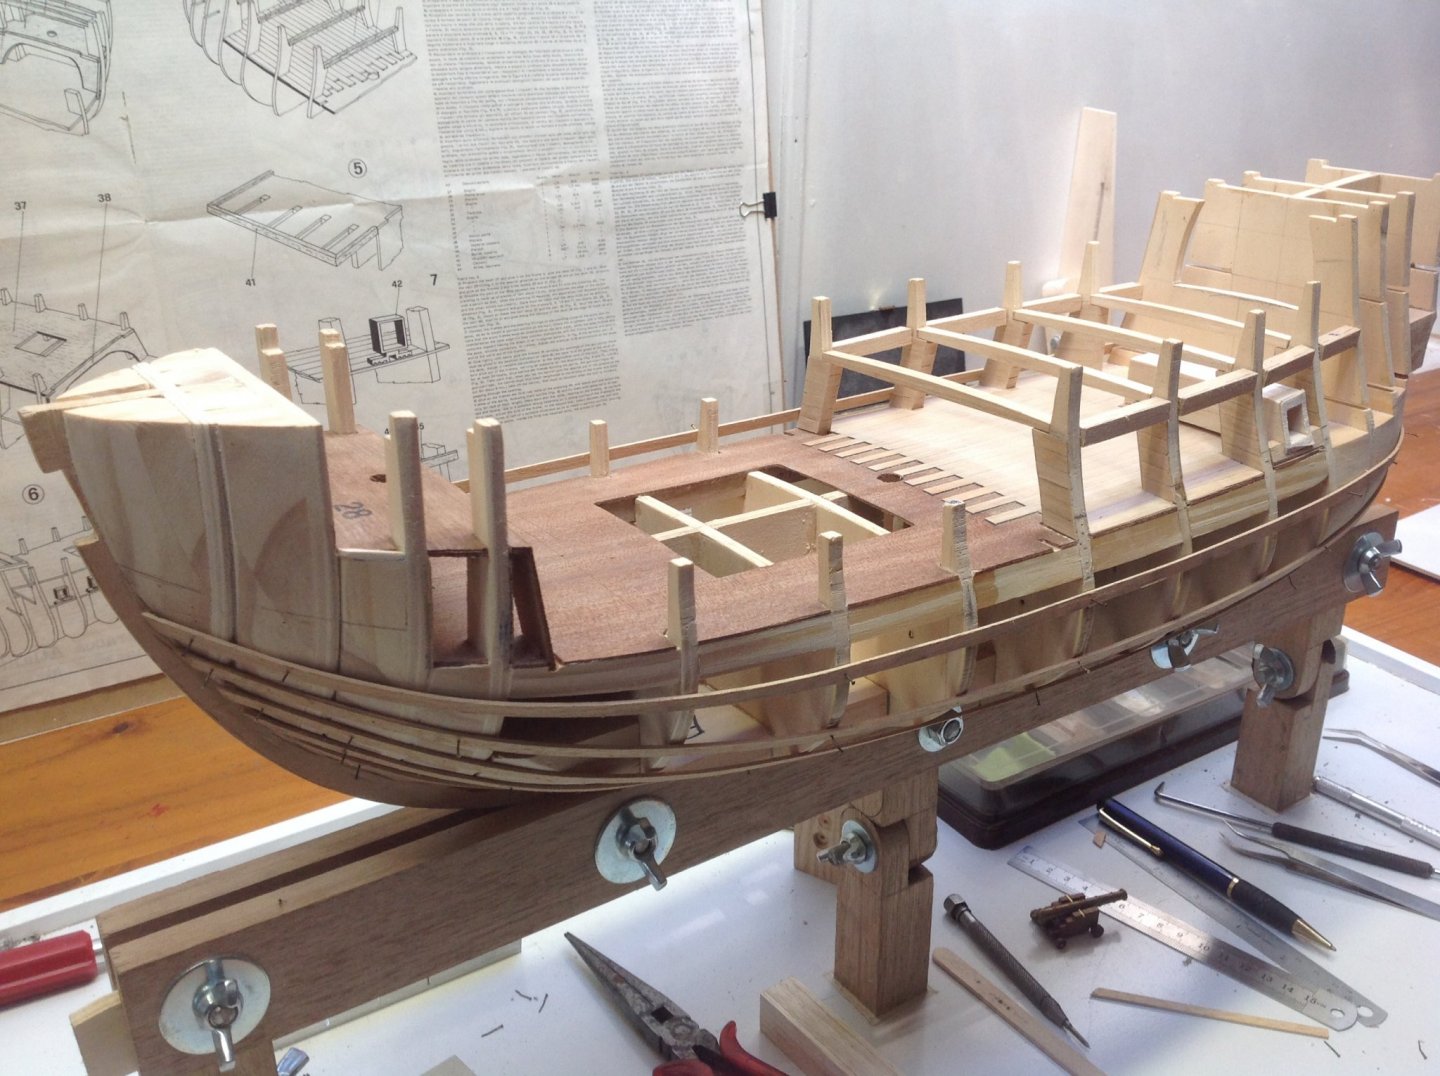
Latest update. Hello to all and thanks for the comments and likes. Ive managed to add the gun ports and finish off the deck planking, also painted under the cargo hold with burnt umber which turned out ok , with one coat it looks like a worn darkish brown colour. Began the planking. It started out very well and I was sort of confident I was headed in the right direction. I laid about ten each side and then realised it was looking out of line towards the stern. I worked out where I'm going wrong and as it's only the first planking have just laid a filler piece in, as I know I can amend my errors for the laying of the main planking. I hope so anyway. So it's back to more planking and sanding, at this stage I will be using very little filler which i think means I'm doing something right. I'm enjoying the planking as I watch the ship take its real shape. im still undecided on the stern galleries, I have some ideas and know I will remove the bulky venitian look and make it sleek and narrow in this area above the hull. Cheers Peter

-
Great work Steven, me thinks you being a little hard on yourself regarding the detailed painting, from what I saw first hand the detail is amazing despite the shaky hand. Love the forecastle, I didn't get to c that. On another note it's good to see the cat be helpful in some way by supplying a tray 4 your beautifully made benches. peter
-
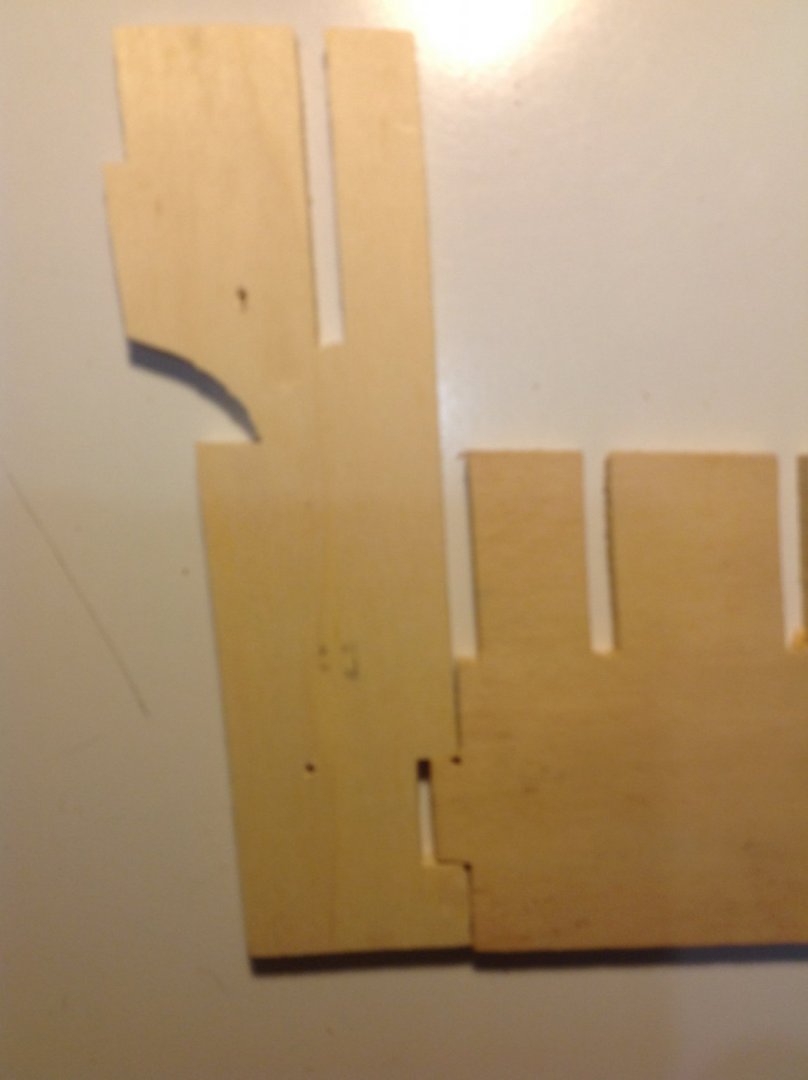
Latest update Ive added partial planking to the main deck, I erred in following the drawing, and then discovered the 2-3-4-5 step planking system, I will probably finish it off and redo it over the top. I also planked in some areas where I didn't need to, just got carried away and will learn from that too. Next I laid the half deck beams and added some supports for the outer edges of the half deck. I then turned my attention towards the first layer of planking. After spending a fair amount of time laying batons across the hull I soon realised my attempt wasn't going to work. I then raised a post asking for help and received some great advice and started again, I think I'm starting to comprehend what's required for planking this particular shaped hull. ( I will add a pic of my first attempt which is on the right hand side and the amended planking on the left). The gun ports which come with the kit are terrible, so I am making my own following the same method I saw on another build log, a little extra work will be well worth the effort. This weekend I'm meeting up with another member from this forum who has helped me enormously via email in regards to not only building my Carrack but helping me understand a little about the type of ships they were. I will no doubt return home with a vast amount of knowledge. It will be great to see another persons builds too. So all in all I'm making a few errors but they are nothing I can't remedy and I'm having to much fun to worry about them. Cheers Peter
-
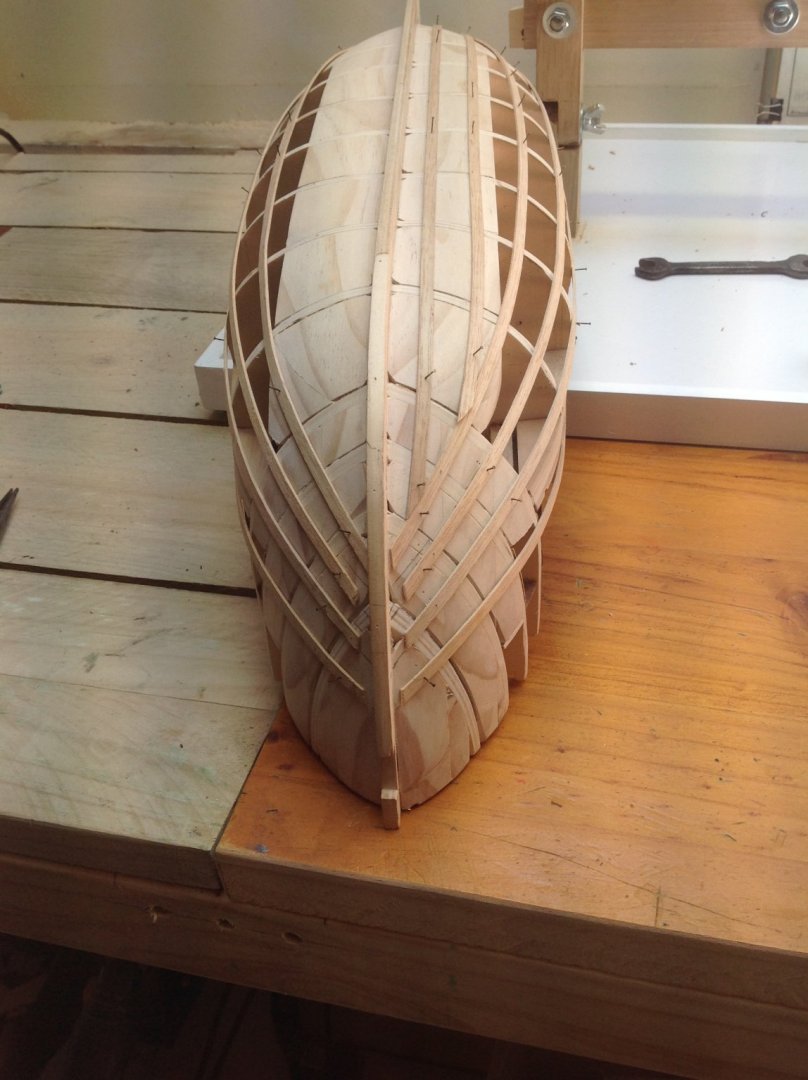
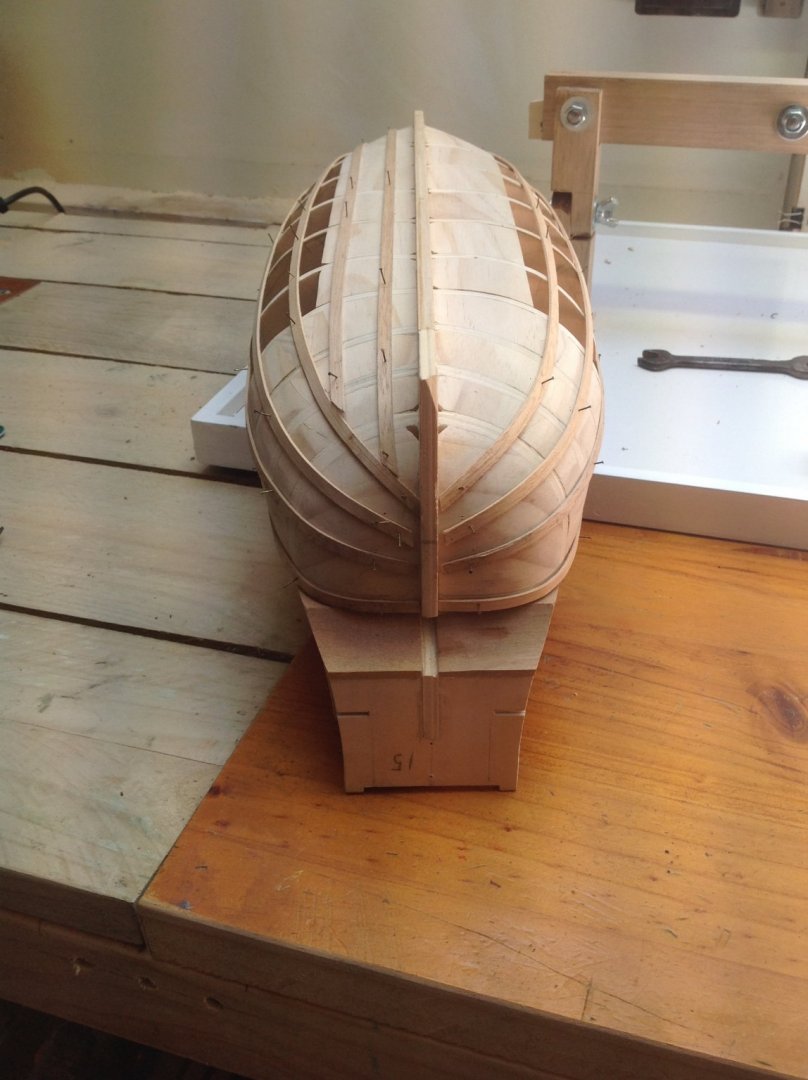
Thanks to all of the responses to my topic, as I now understand a little better with what's required. I've read a lot and frankly as a newbie it's easy to end up with information overload. I aim to complete the planking without using steelers if possible. My attempt so far only ran into trouble trying to keep a set width at the stern so as I wouldn't cut away more than half of any strake in that area. Gino, thanks for pointing to the exact area, as mark said earlier, the second strake at the stern should be raised which would help to raise the other two. so I'll study some more and start again. Once again, thank you to all for your help and support Cheers Peter.
-
Thanks Mark The two batons you highlighted are the reason I raised the topic, they just didn't look right. Appreciate the advice. peter
-
Welcome to all im at the stage of planking my Sao Miguel ( Caracca Atlantica build log ). This being my first build I would appreciate any advice on what I'm doing right and more importantly what I'm doing wrong. MSW has a beginners guide to planking which is wonderful, but I'm not sure it works for my model. Ive laid temporary batons which are ok and I understand how the tapering in between batons works, but the closer I get to the stern the less the MSW guide works on my particular model. There's no doubting it must be a great resource for beginners with simpler models and I applaud whoever put it up for all to use. So I'll add some pictures of what I've done and look forward to any advice and help in regards to what's right and what's wrong. It's obvious some of the batons are short, but for now they are just a guide. cheers Kikatinalong.


-
Enthusiastic Novices, Dad and Son
Kikatinalong replied to Hotswarf's topic in New member Introductions
Welcome to you both, what a great way to bond further with your son. Best of luck with your build peter -
Welcome to MSW Tony, hopefully someone can help with the booklet, sometimes I wonder who enjoys the tranquility of this hobby, us or the admiral's of the house
-
Greetings from Tacoma. Have I taken too big a bite?
Kikatinalong replied to Paul Gardner's topic in New member Introductions
Paul, welcome to MSW. For $50 what do u really have to lose apart from some of your free time. i bit off way more than I could chew a few months ago when I started my Carrack, but I'm really enjoying the build, especially all the techniques and skills I need to learn along the way, sure I've made a few errors, but nothing I can't fix. measure twice cut once is good , but I've learnt it's now study 5 times, ask a few questions and do once on anything your not sure about. Take it on, and most of all, enjoy yourself. cheers Peter -
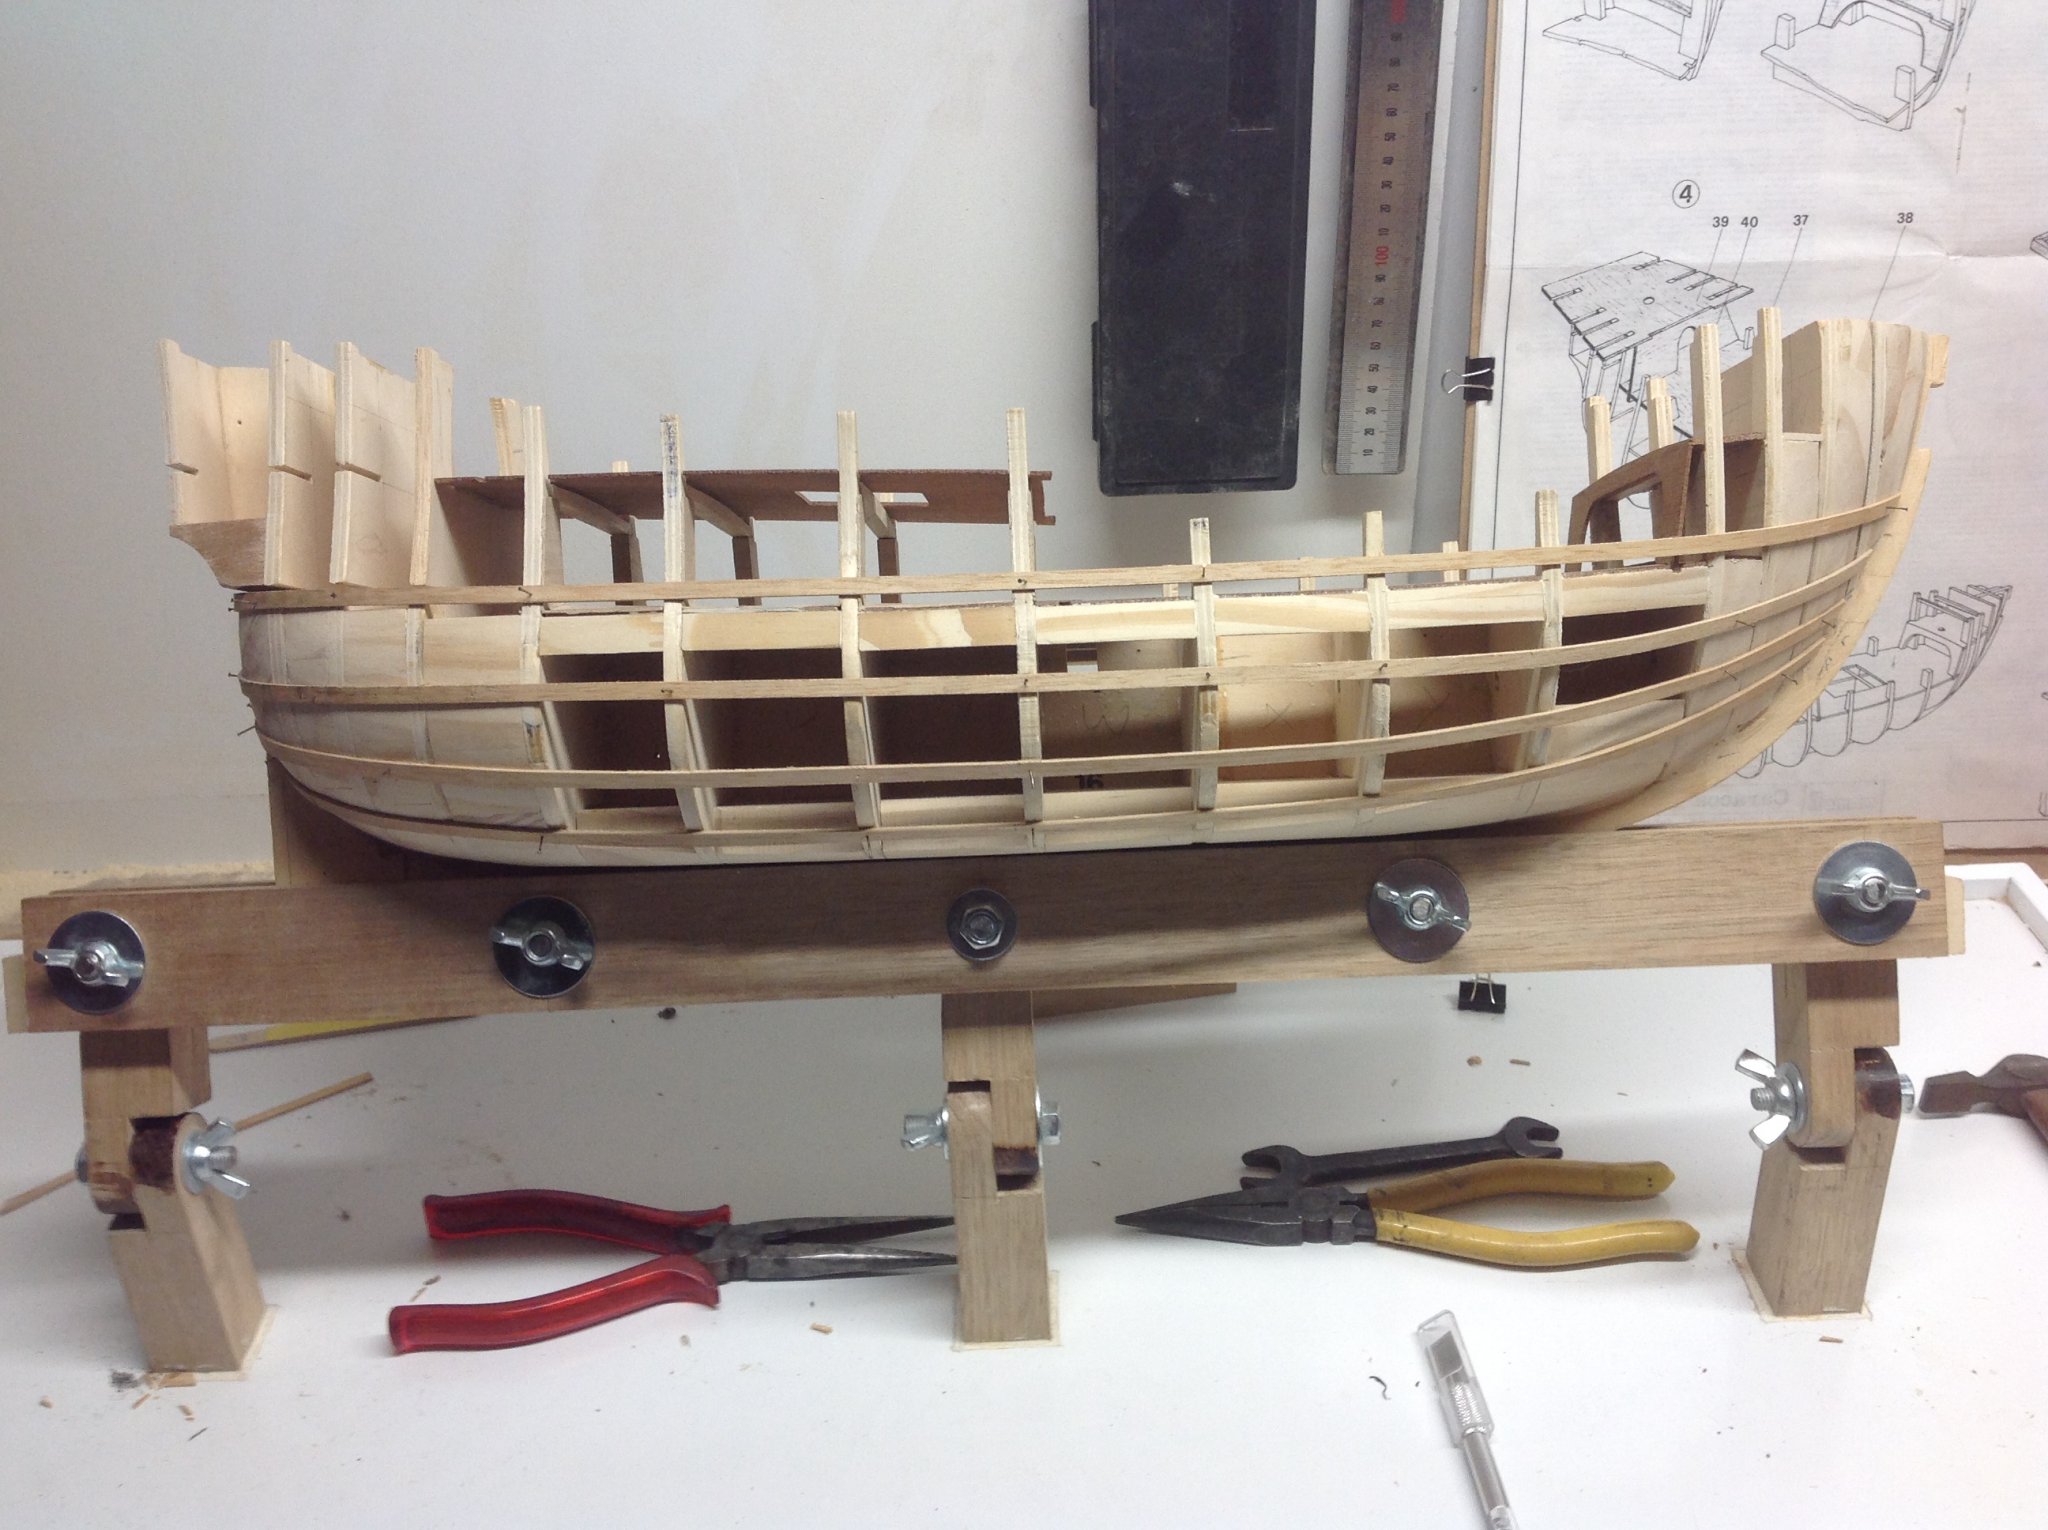
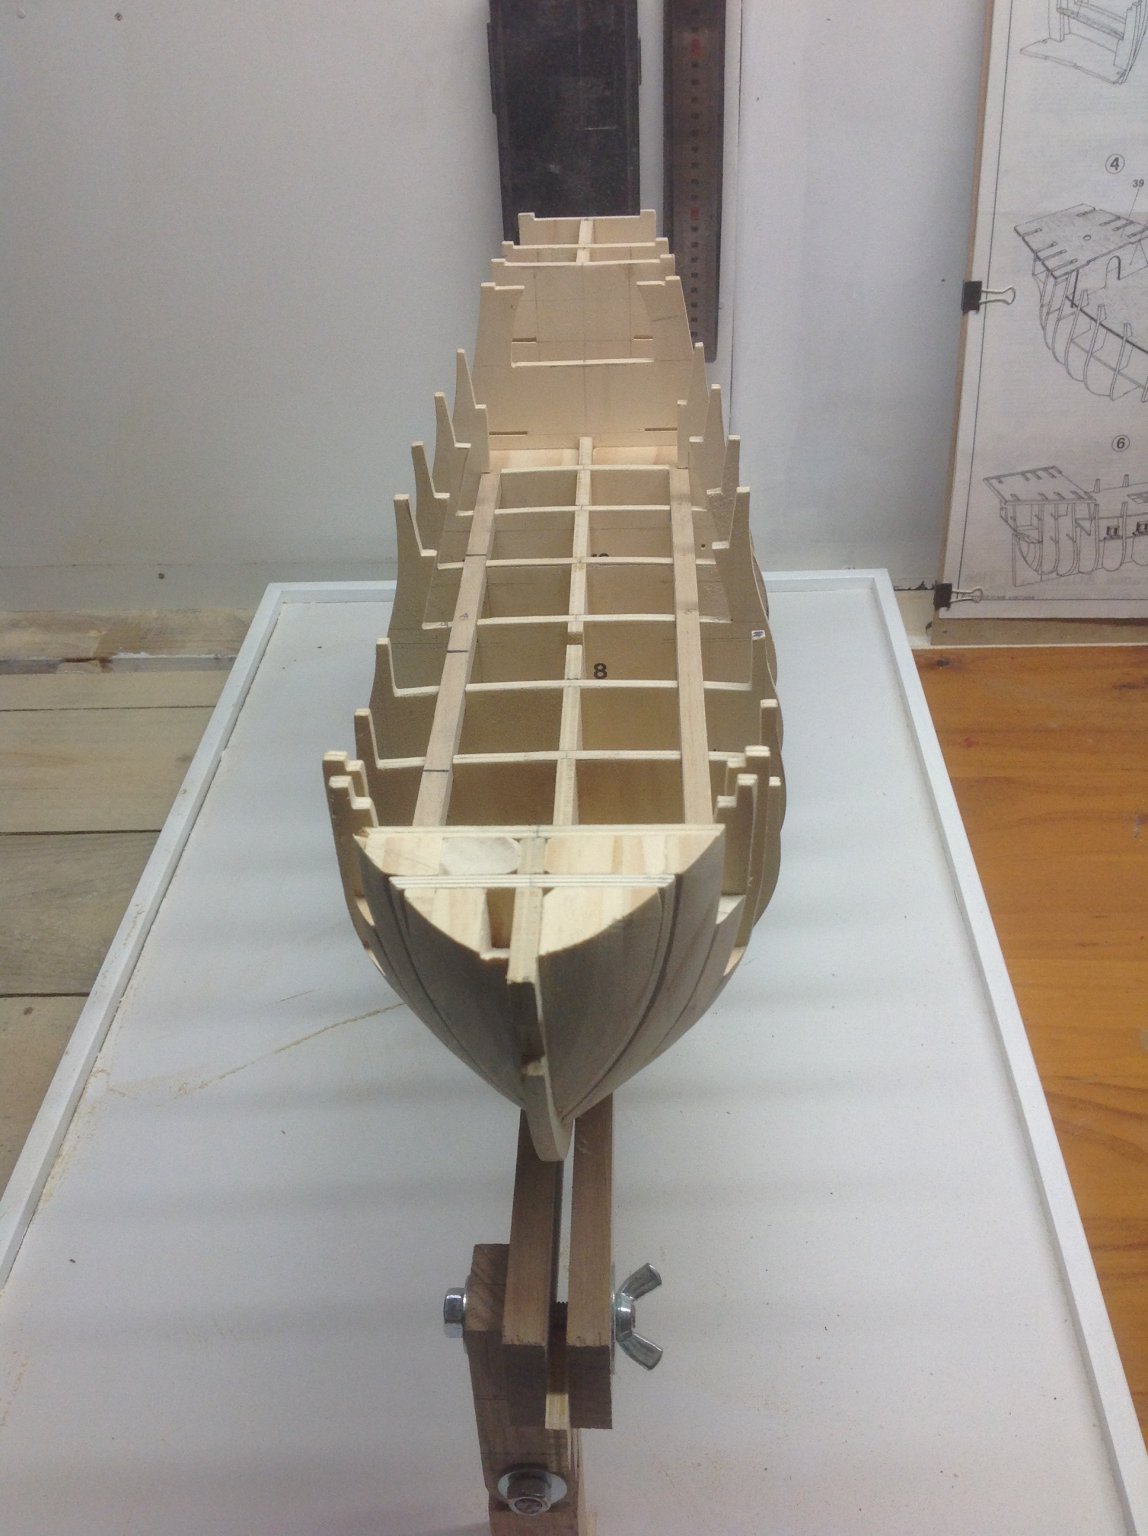
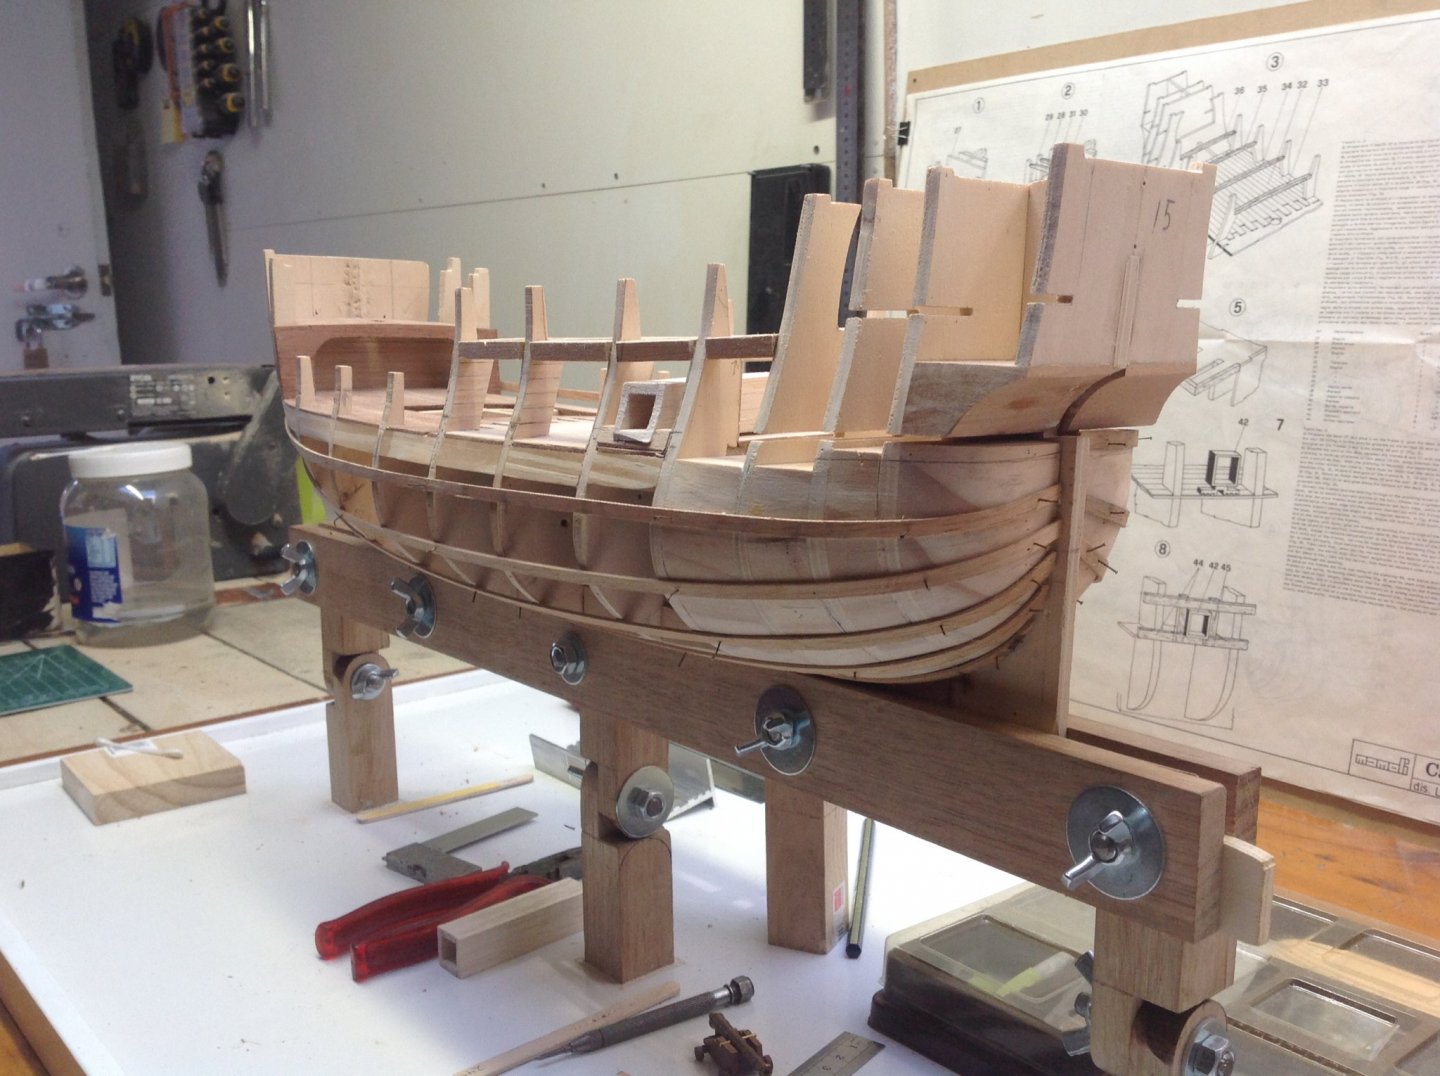
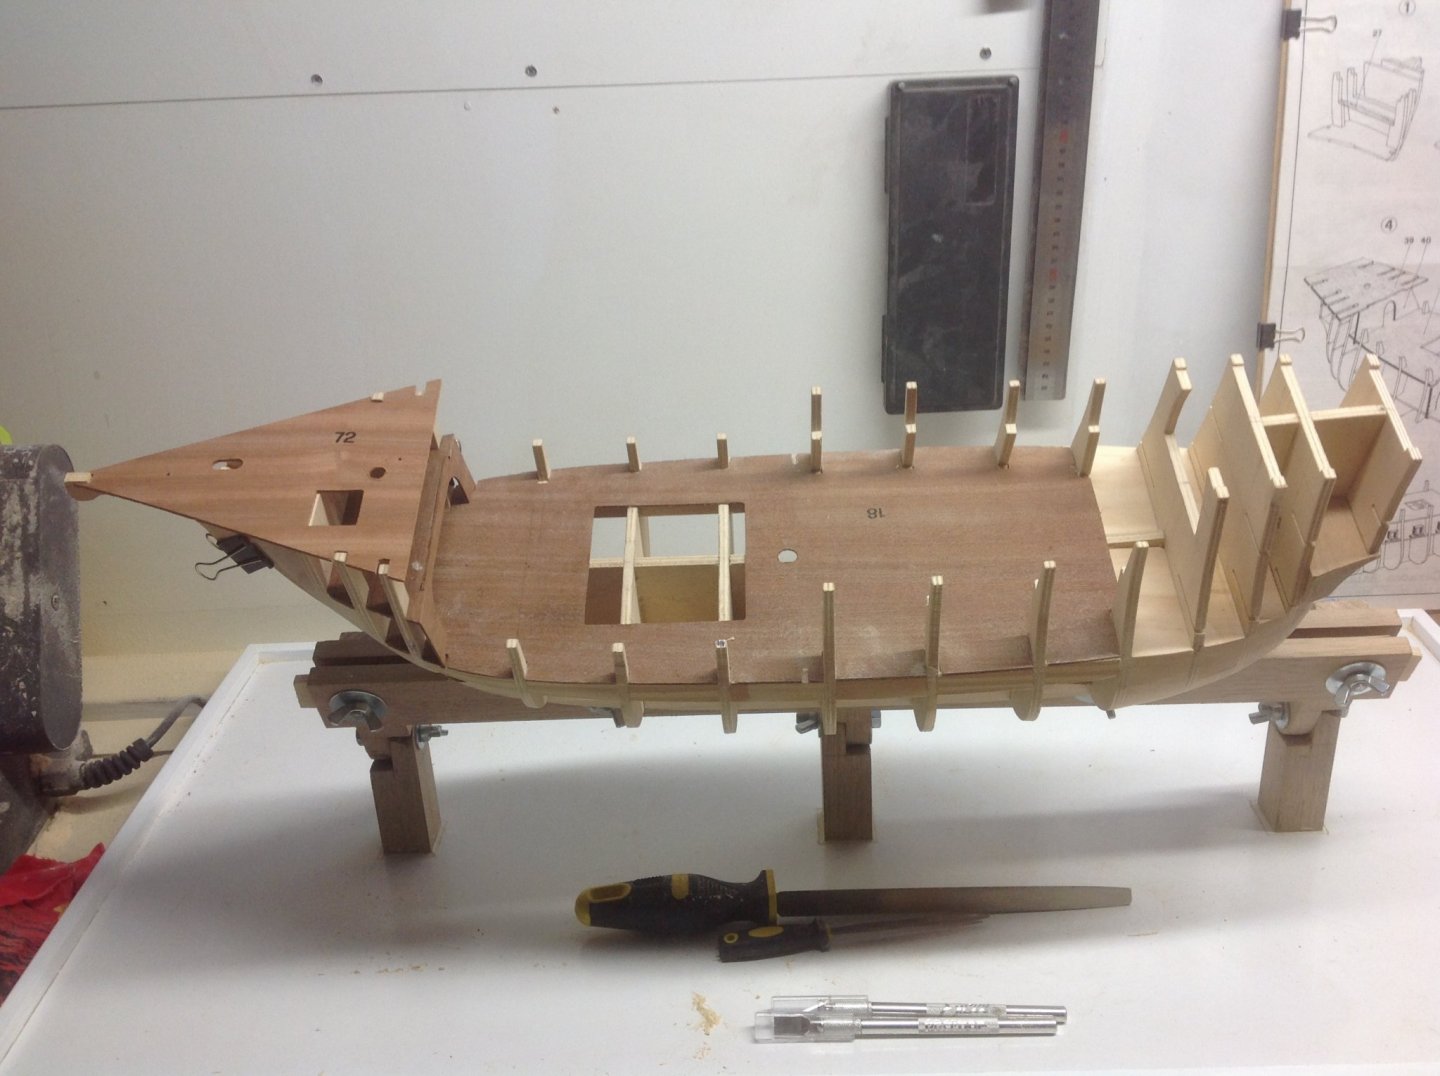
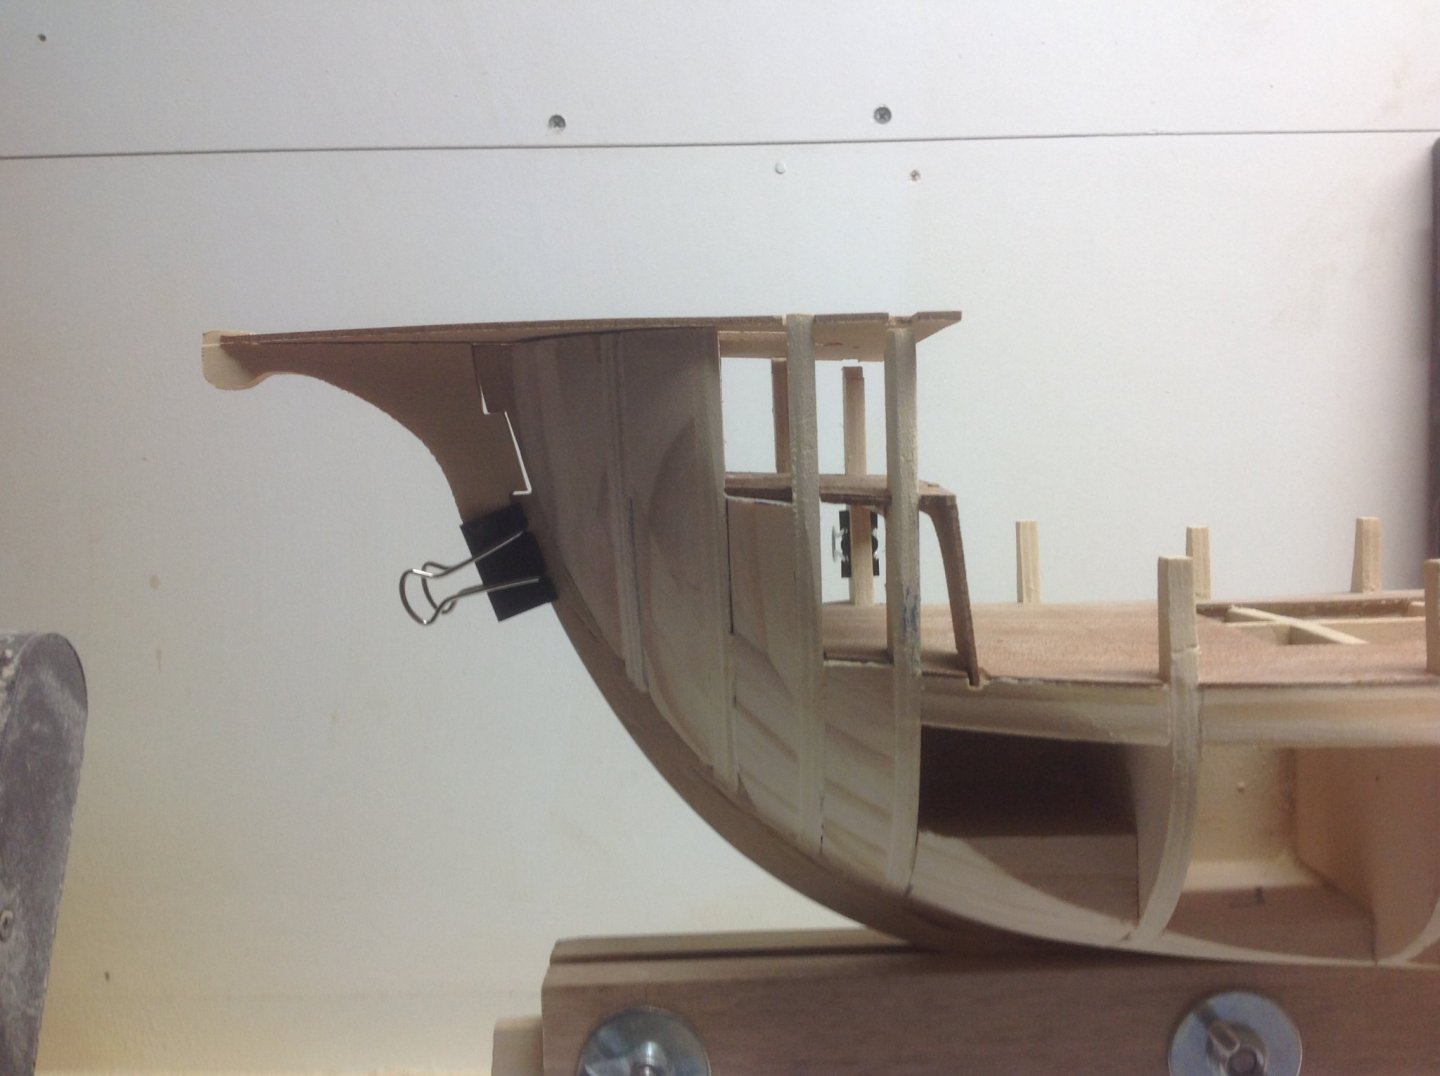
Another update as the model is moving along as I find more time to spend on it as the days become warmer. The extra stabilising supports were placed along the keel and the deck added. I then wanted to add supports under the 3 gun ports on each side but once I begun it was just as easy to place these supports fully along the deck edge. While waiting for glue to dry I tried dry fitting the fore deck and ran into my first real problem, bulkhead 4 clearly sits way to low which will require adding to so I can achieve the desired results . Next is to partially lay some of the deck planks, then add the beams and half deck. Padded are a few progress pics and a picture of the fore deck problem. Cheers Kikatinalong
-
The art of modelling, with a huge emphasis on the word art. Can't wait to see future posts
-
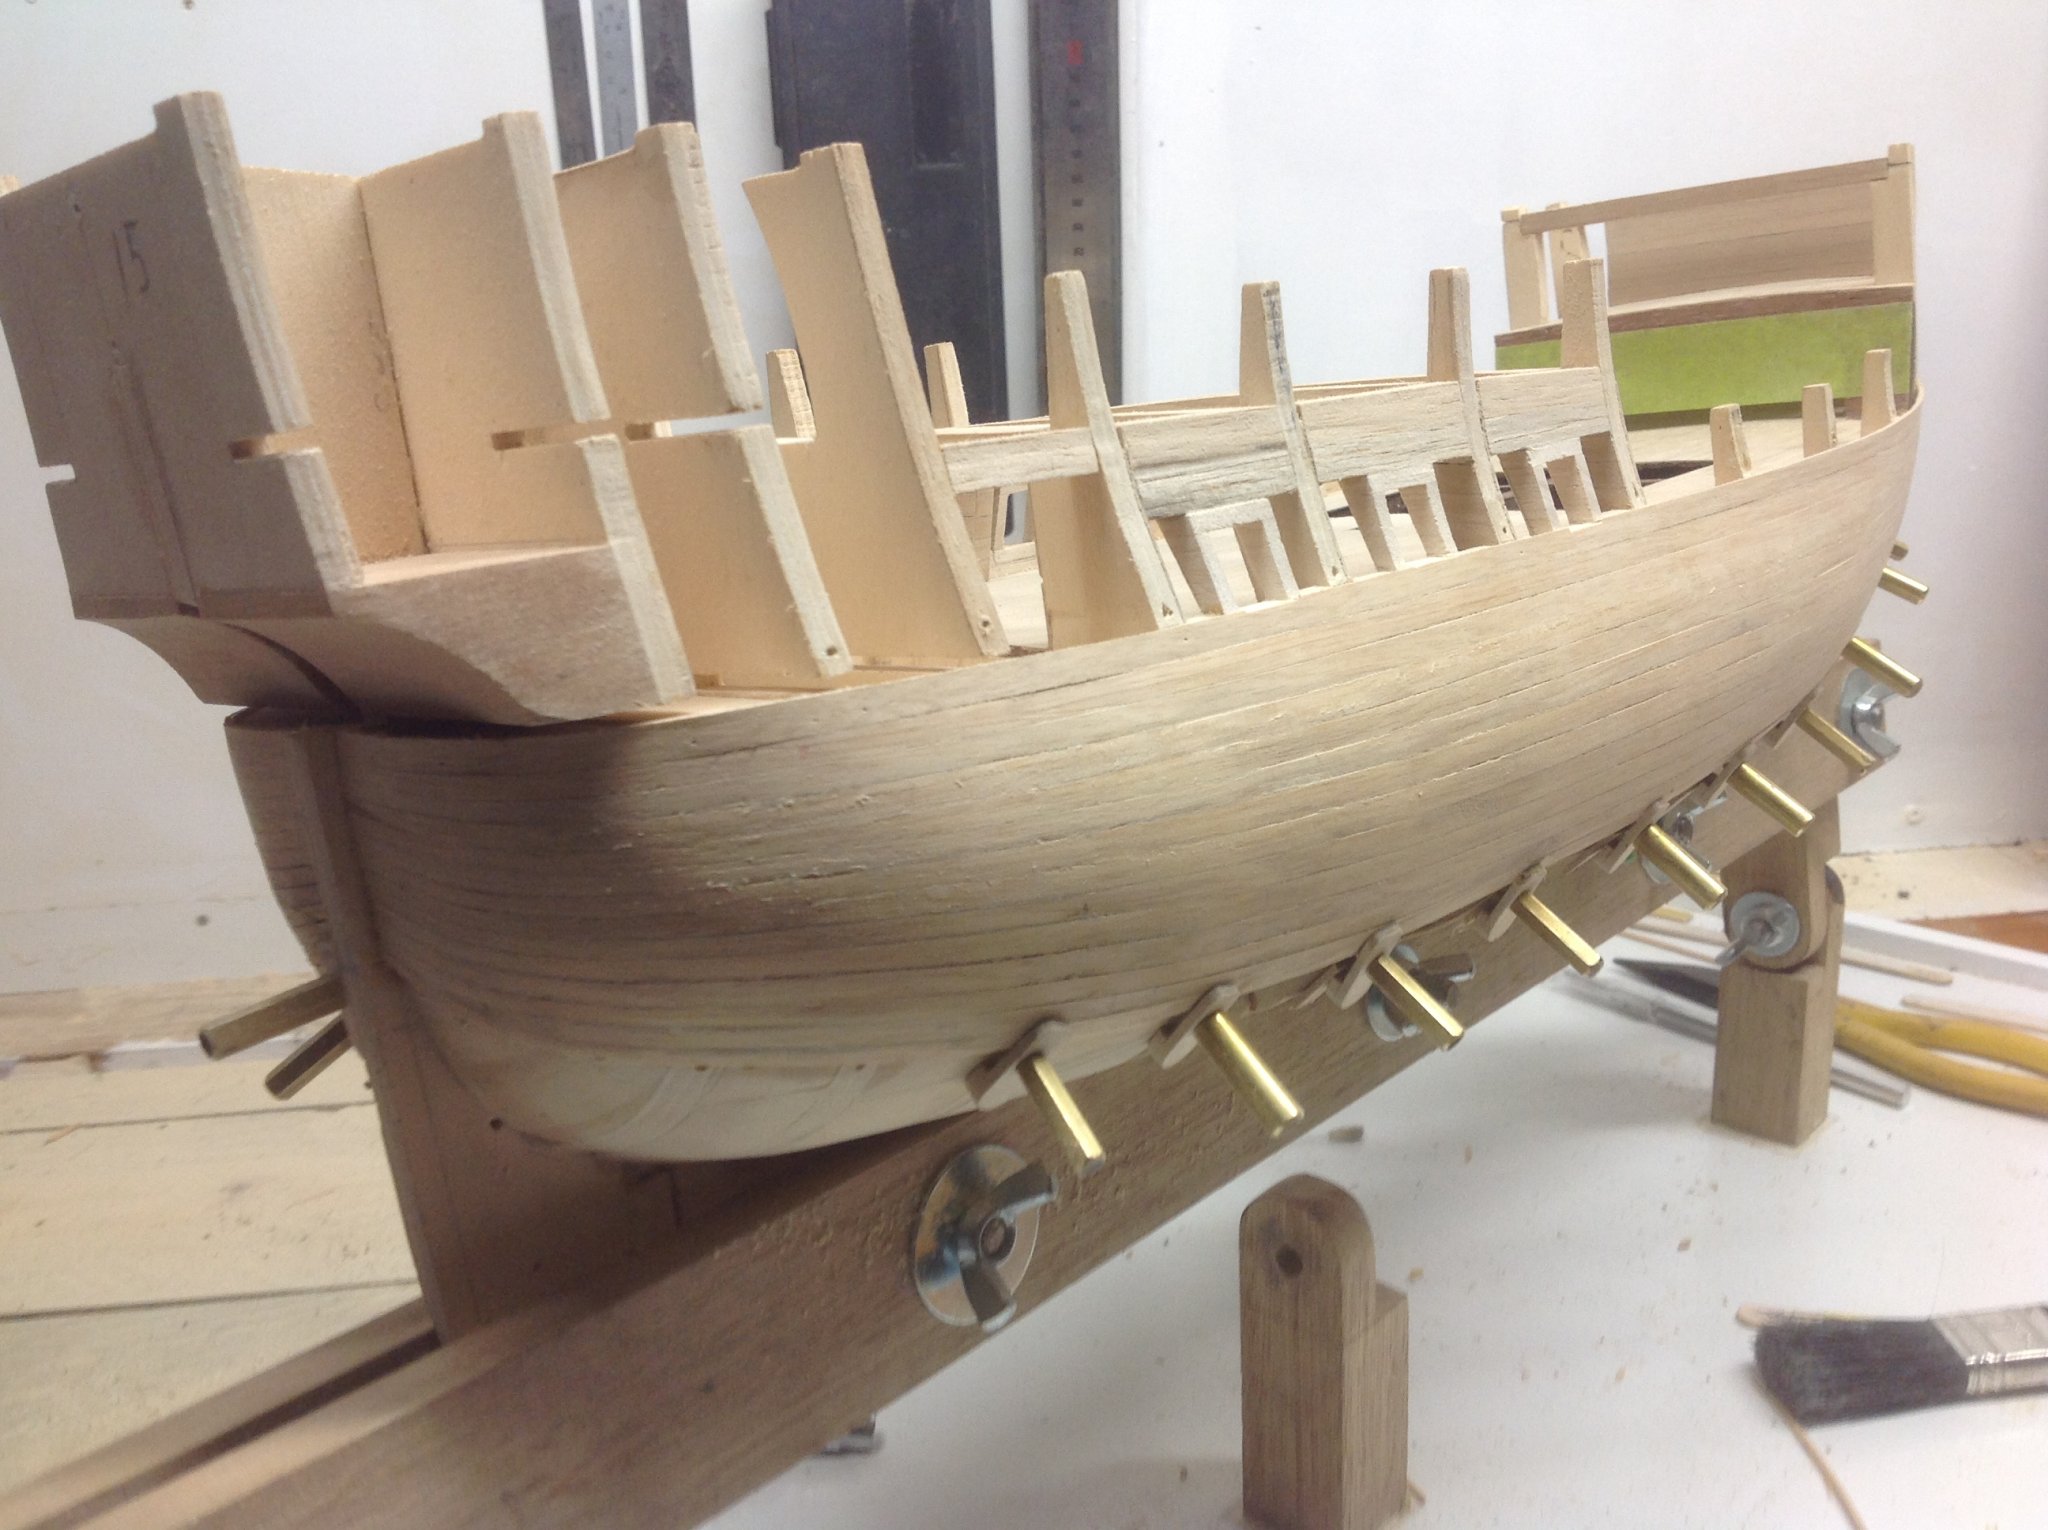
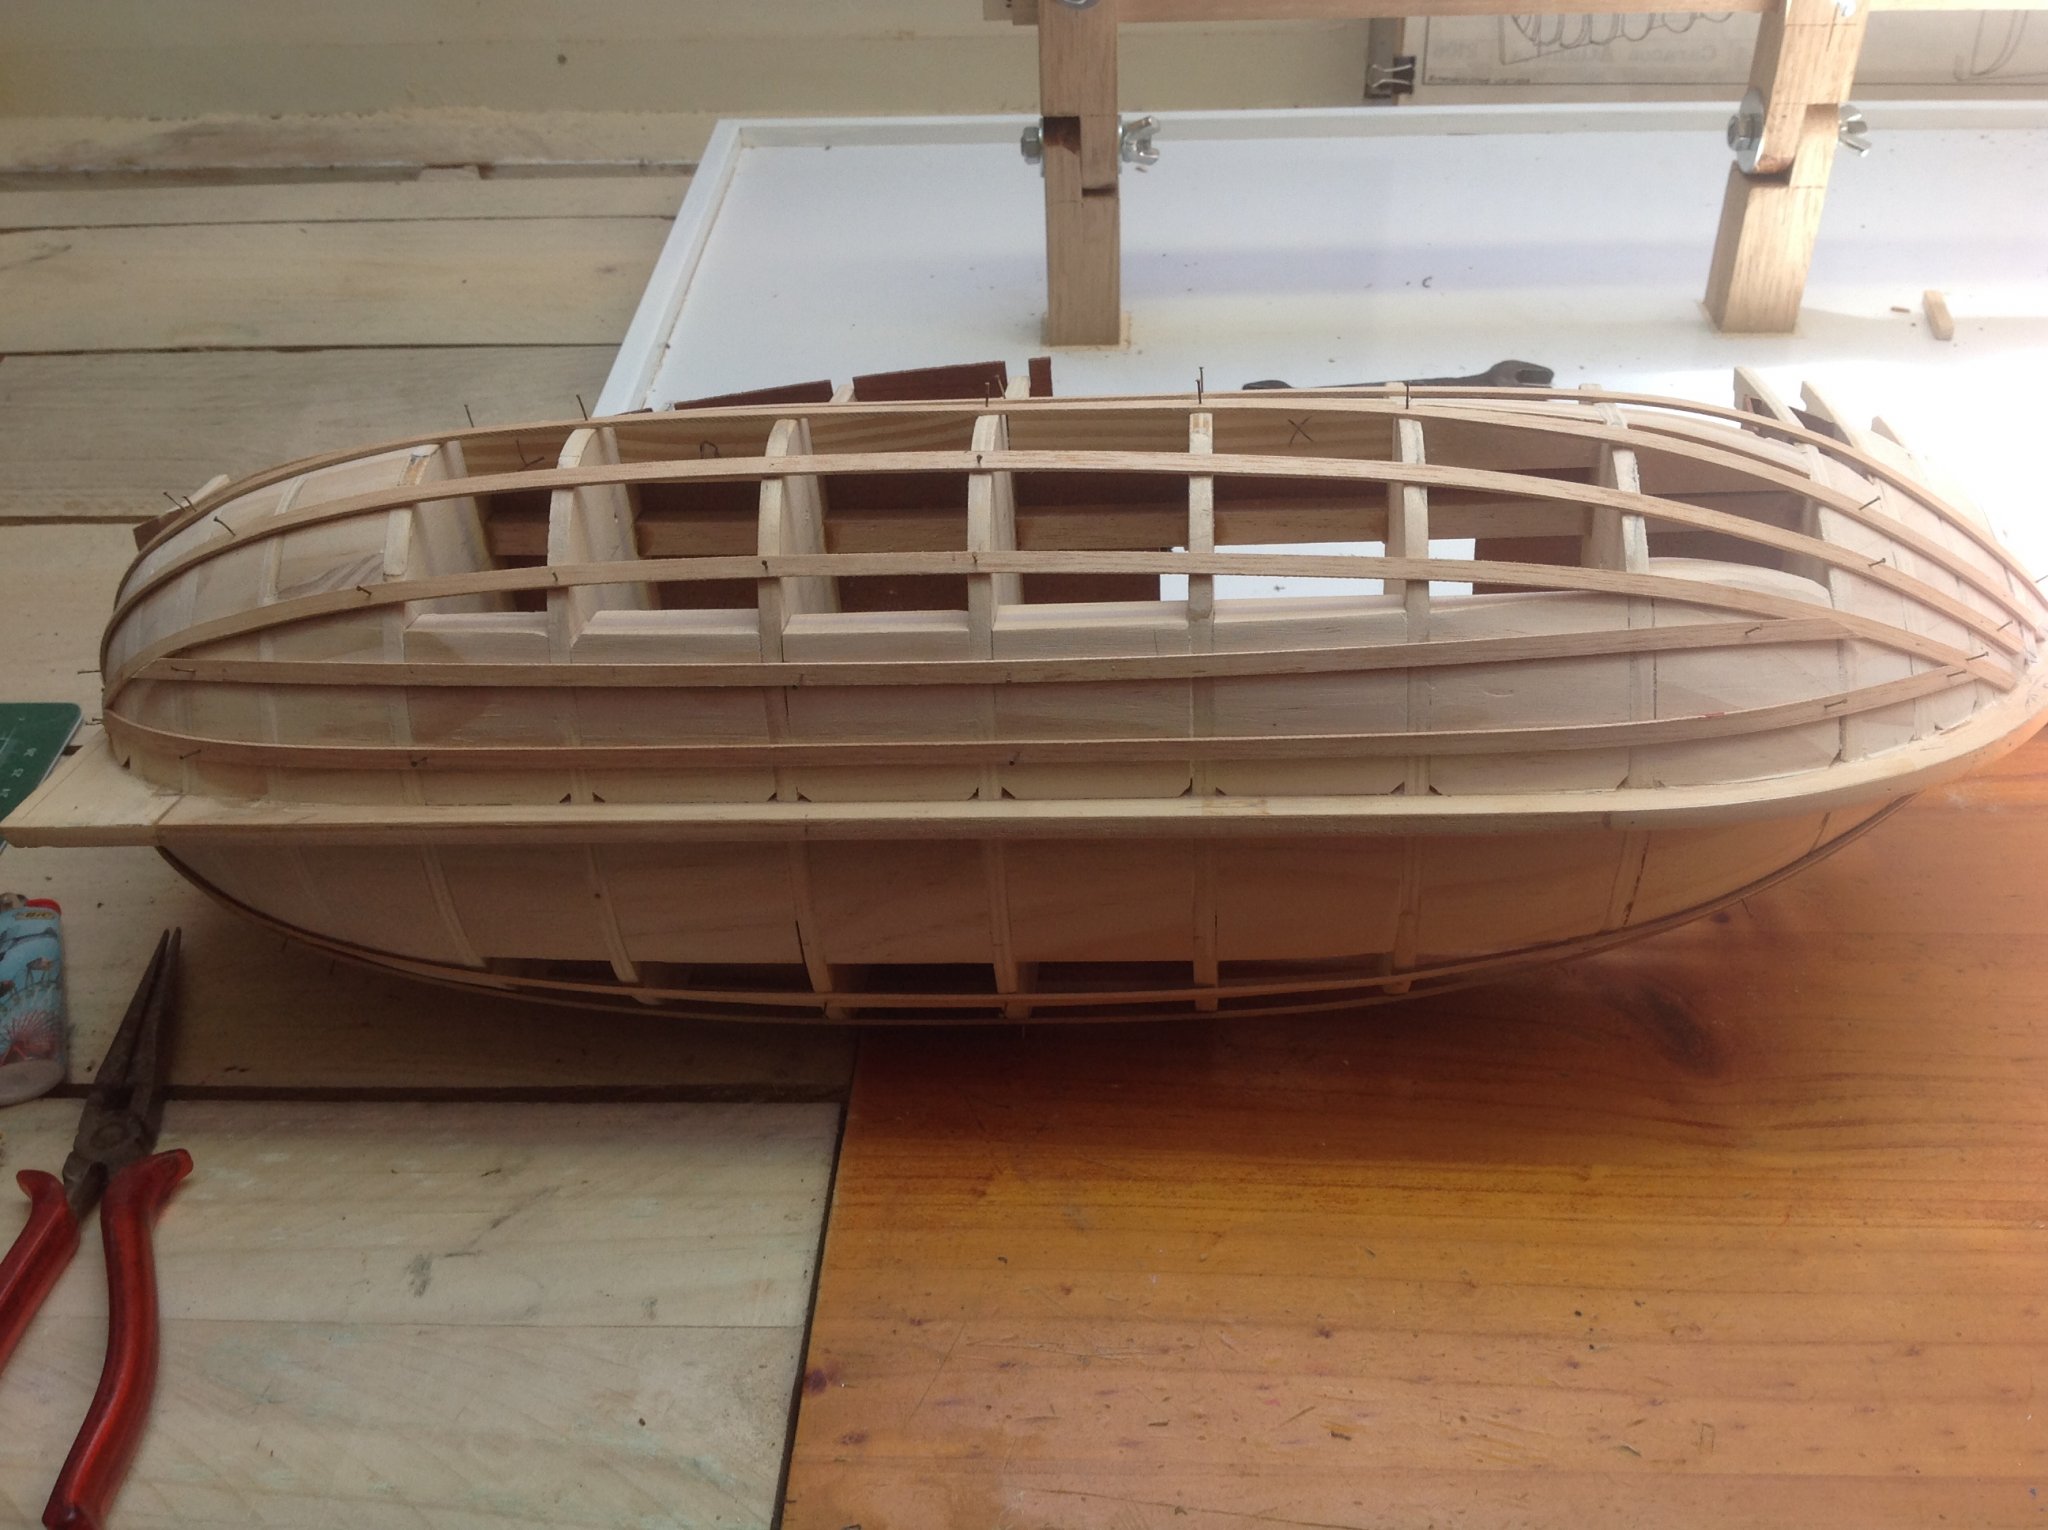
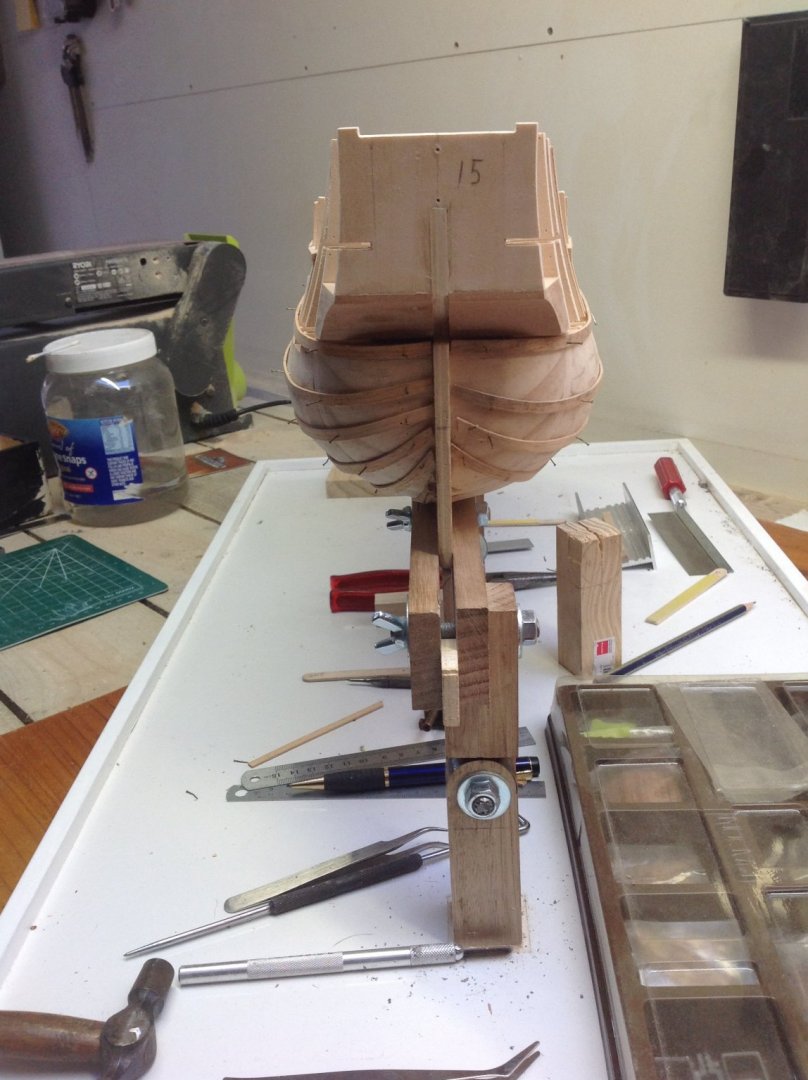
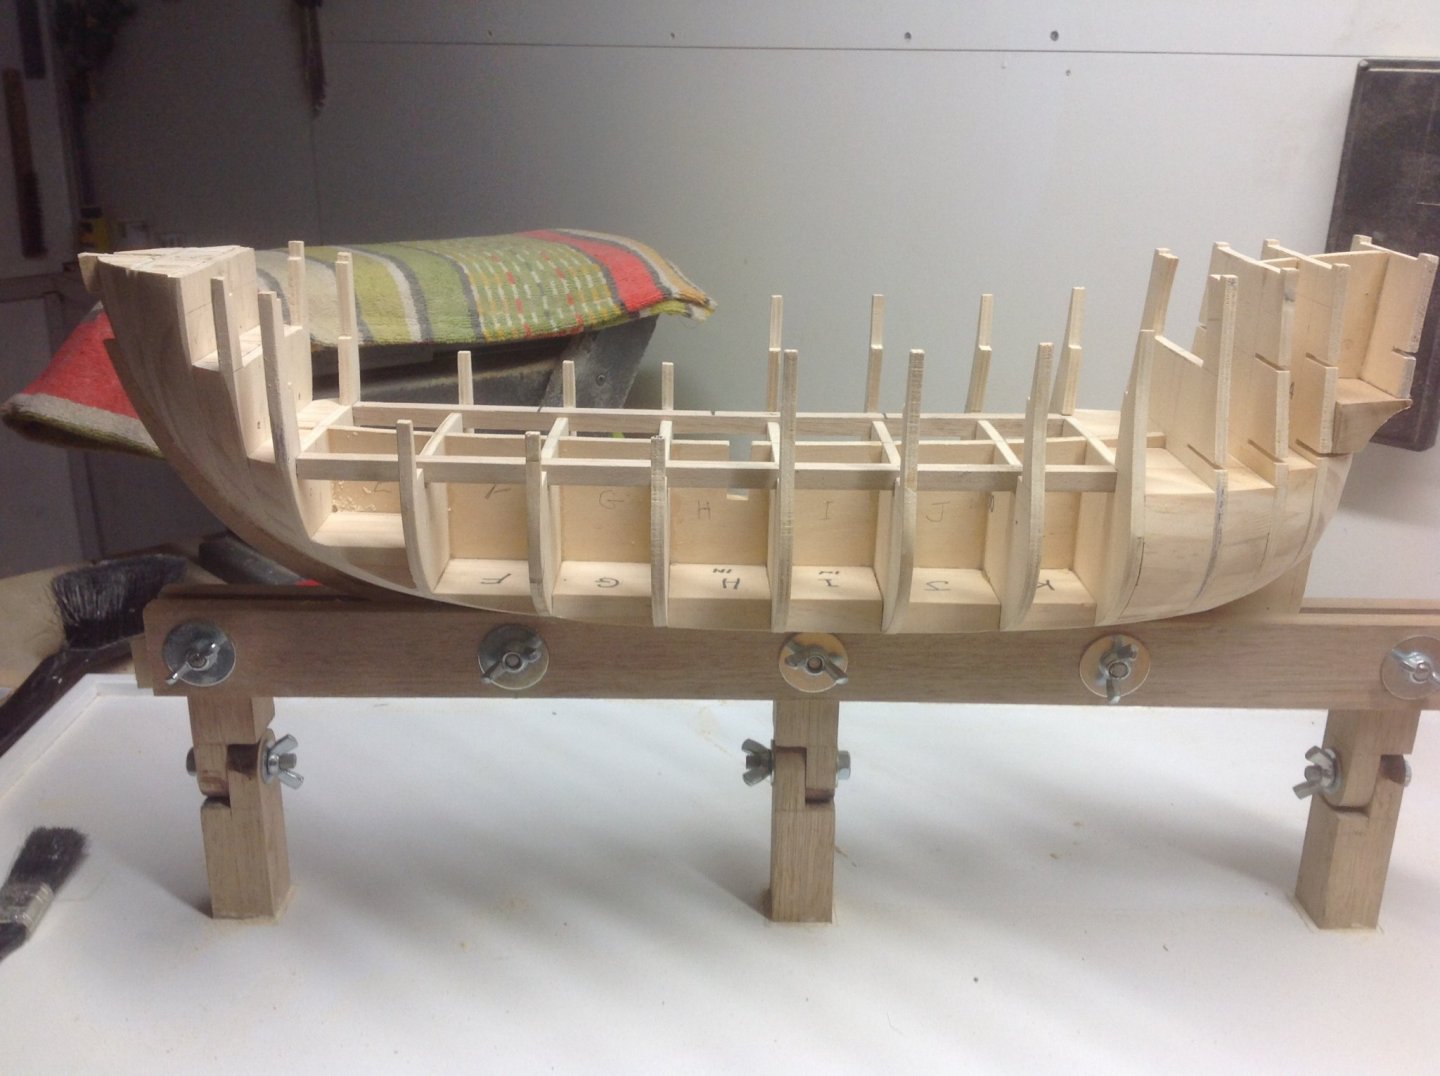
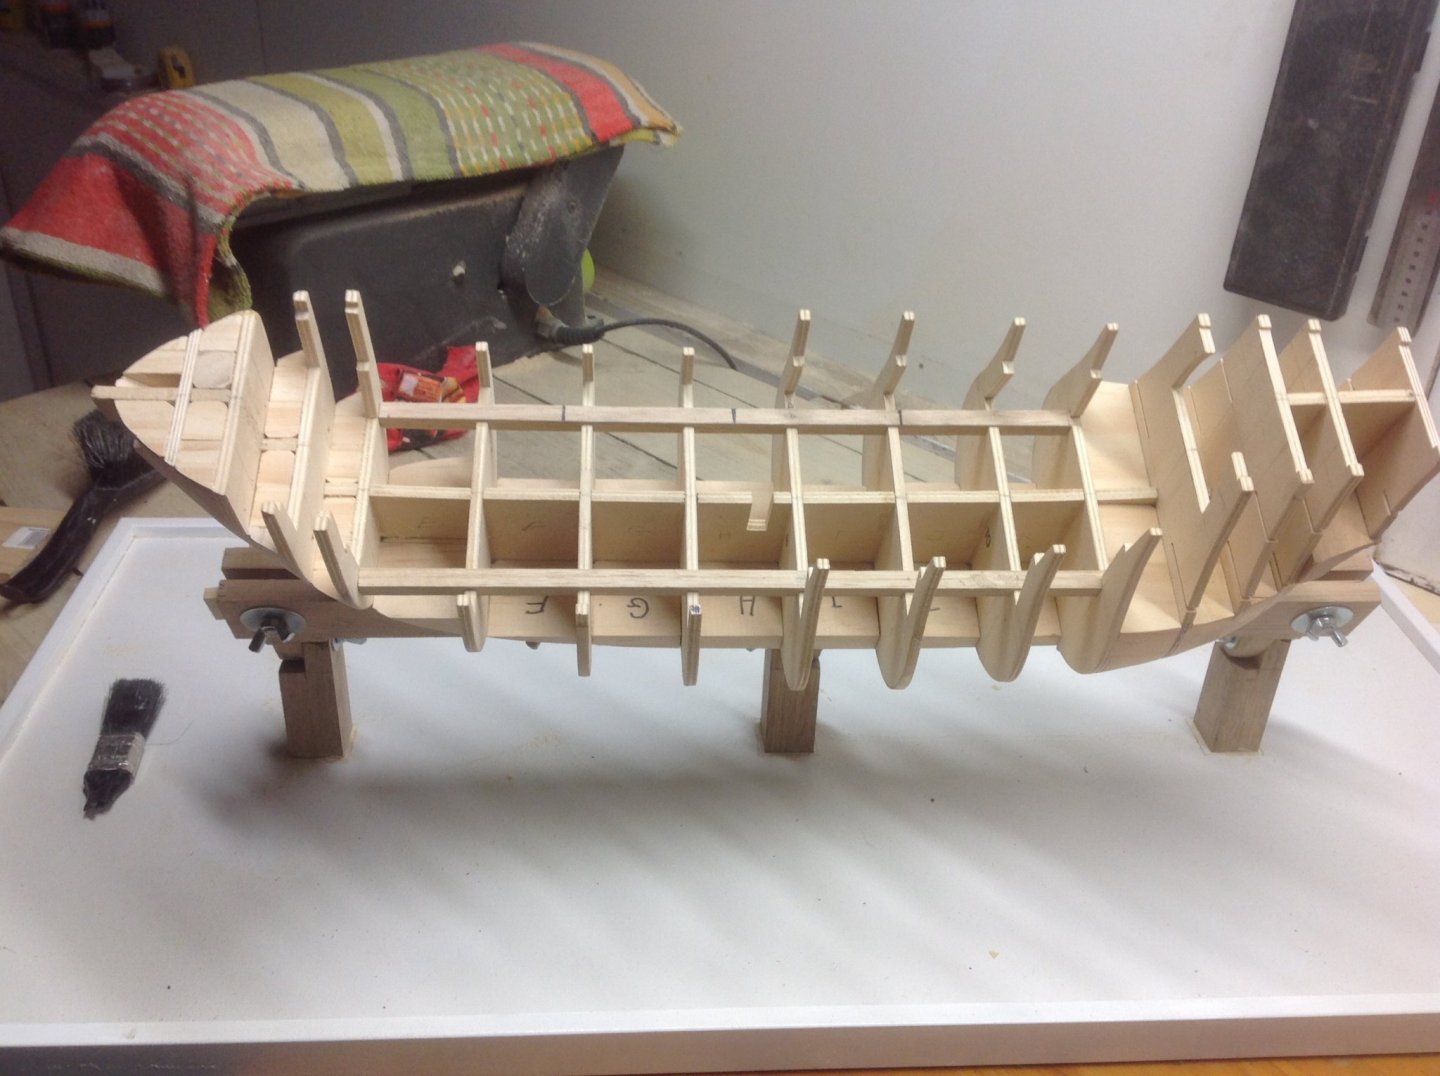
I thought I would share my latest progress. In what's been a hectic yet thoroughly exciting month in family life I've still managed to find the time to move forward. All the bulkheads have been fitted and I've started to add and begin to sand back the filler blocks, I've also slotted and added some bracing along the top of the bulkheads to assist with strength of the hull and stability for the main deck. I will also add some smaller fillers along the deck edges before I head any further. As I'm very new to modelling and it's hard with only pictures as a reference I would be more than grateful to accept any advice as to something I may have done wrong or any problems u can foresee me heading forward in my build. Happy modelling Kikatinalong.

-
Jack, love your work and have thoroughly enjoyed following along since joining this site not long ago. Regarding your 12 mm mast at the base not fitting in the lathe chuck. Could you possibly drill a 10 mm hole into the 12 mm rod and glue in a piece of 10 mm dowel leaving enough protruding out to fit the chuck of your lathe. If u can't do this due to your lathe restrictions and don't possess another tool option for doing the job I'm sure u could find someone local who would be happy to ream out one small hole for you. all the best, look forward to your next post.
- 190 replies
-
- 2
-

-
- ragusian
- marisstella
- (and 1 more)
-
I'm enjoying the build, and looking forward to the next stage. I think I might have a go at building one of those plank benders, looks simple and u have given it top marks, a lot easier than water and heat, plus I have the advantage of a brother in law owning a gear cutting business.
-
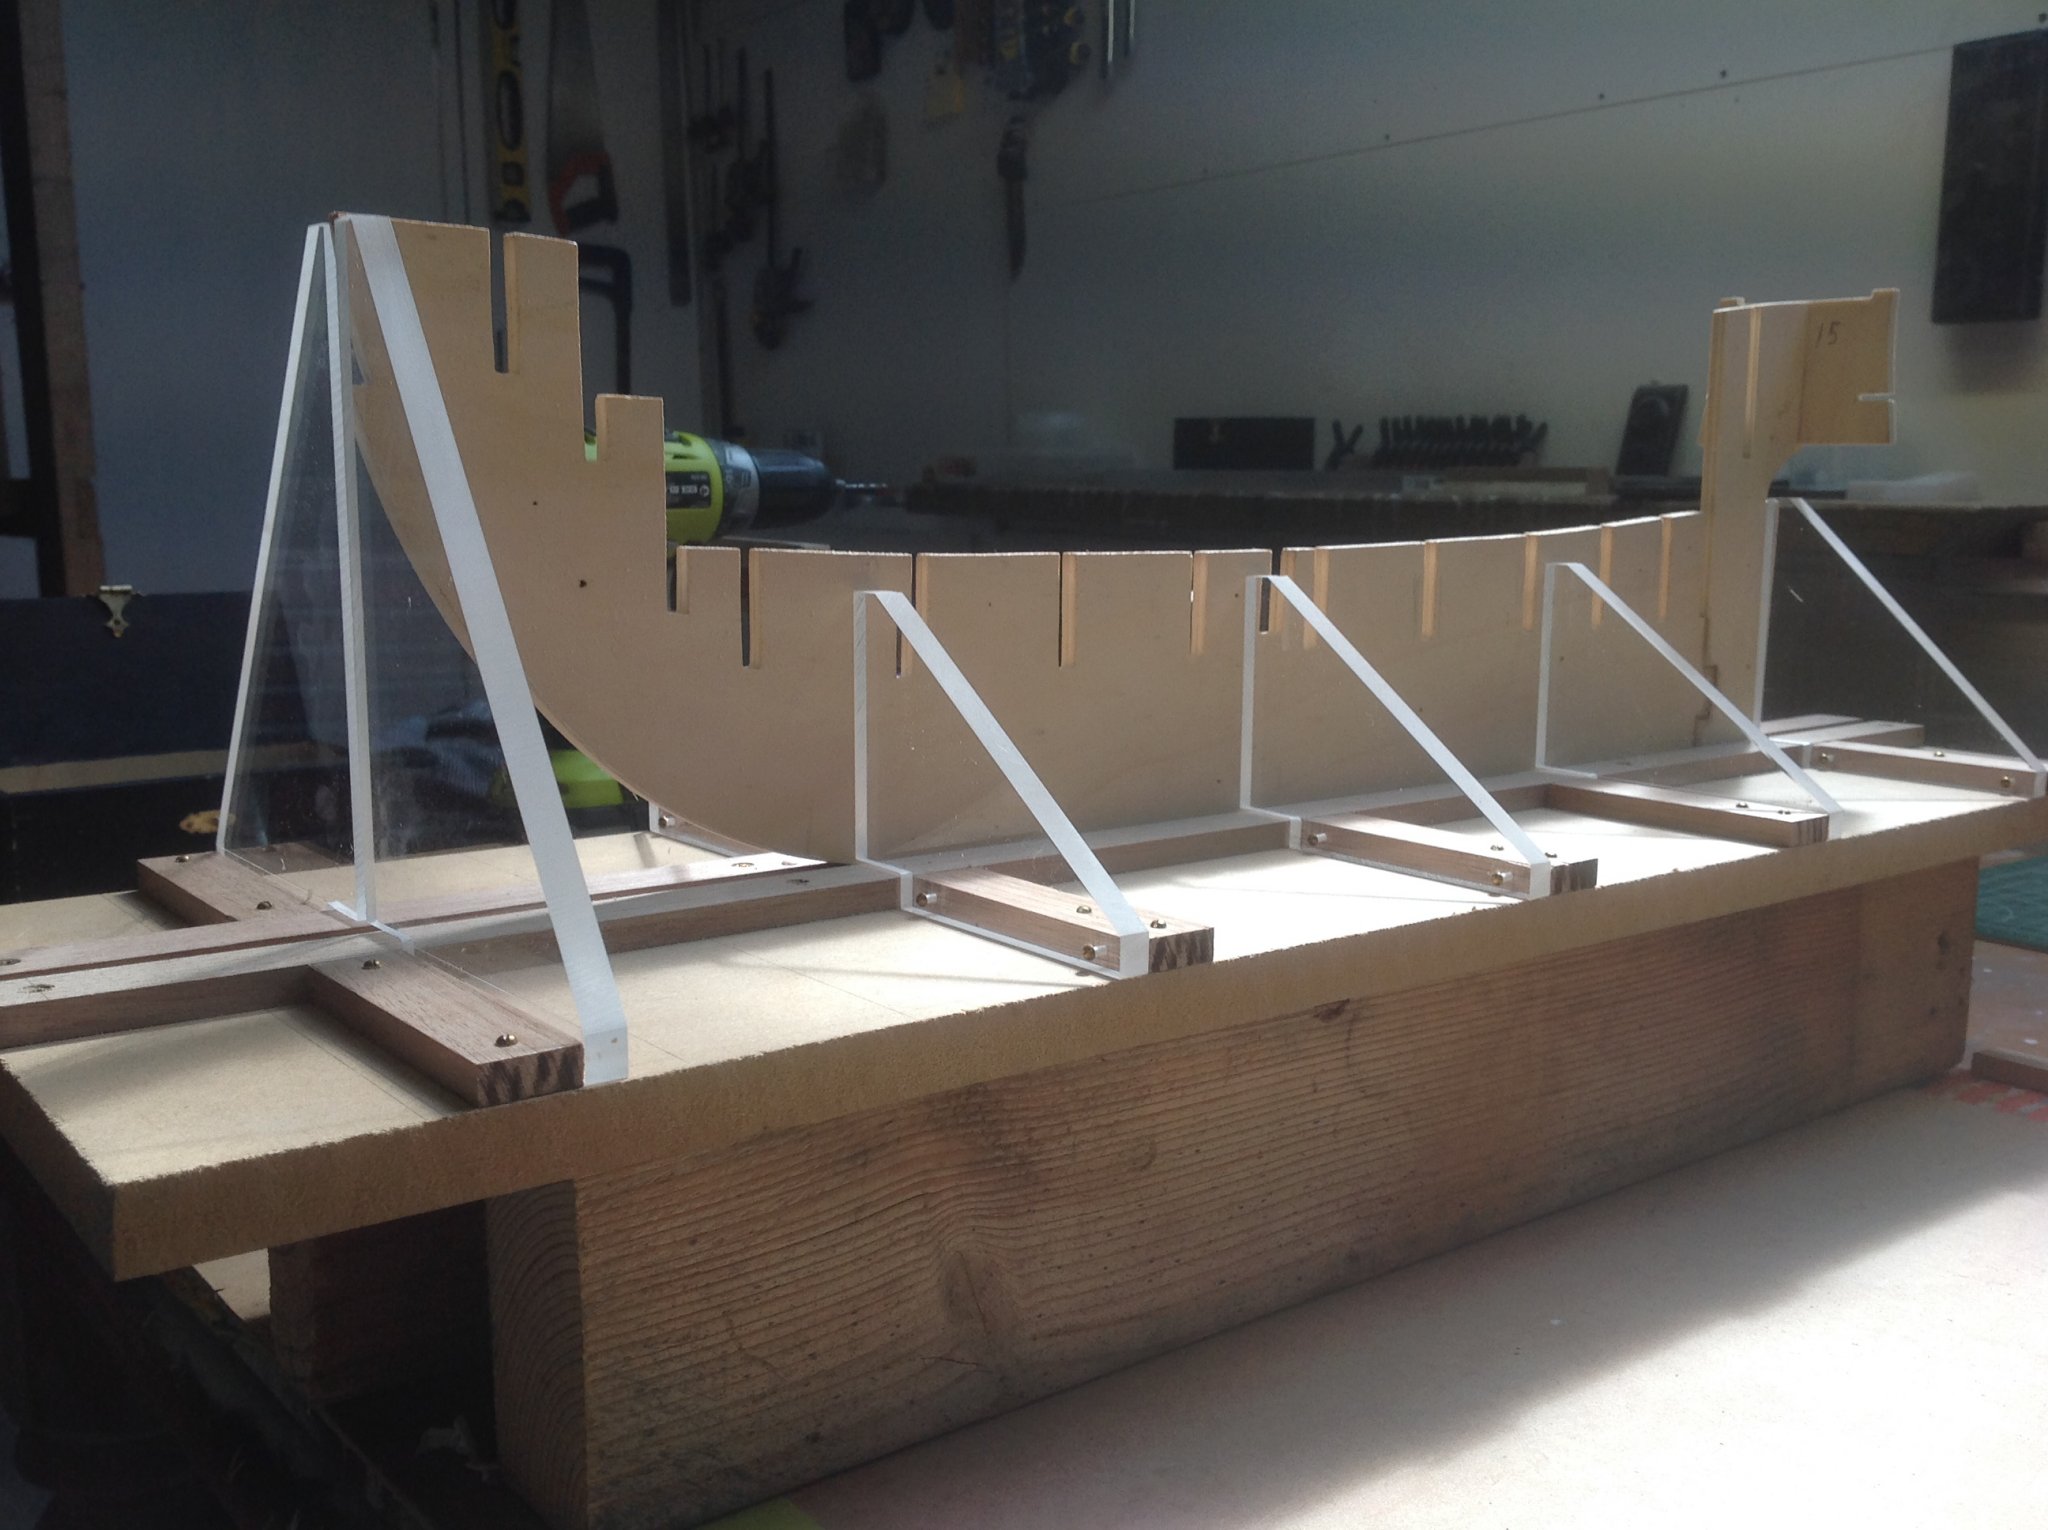
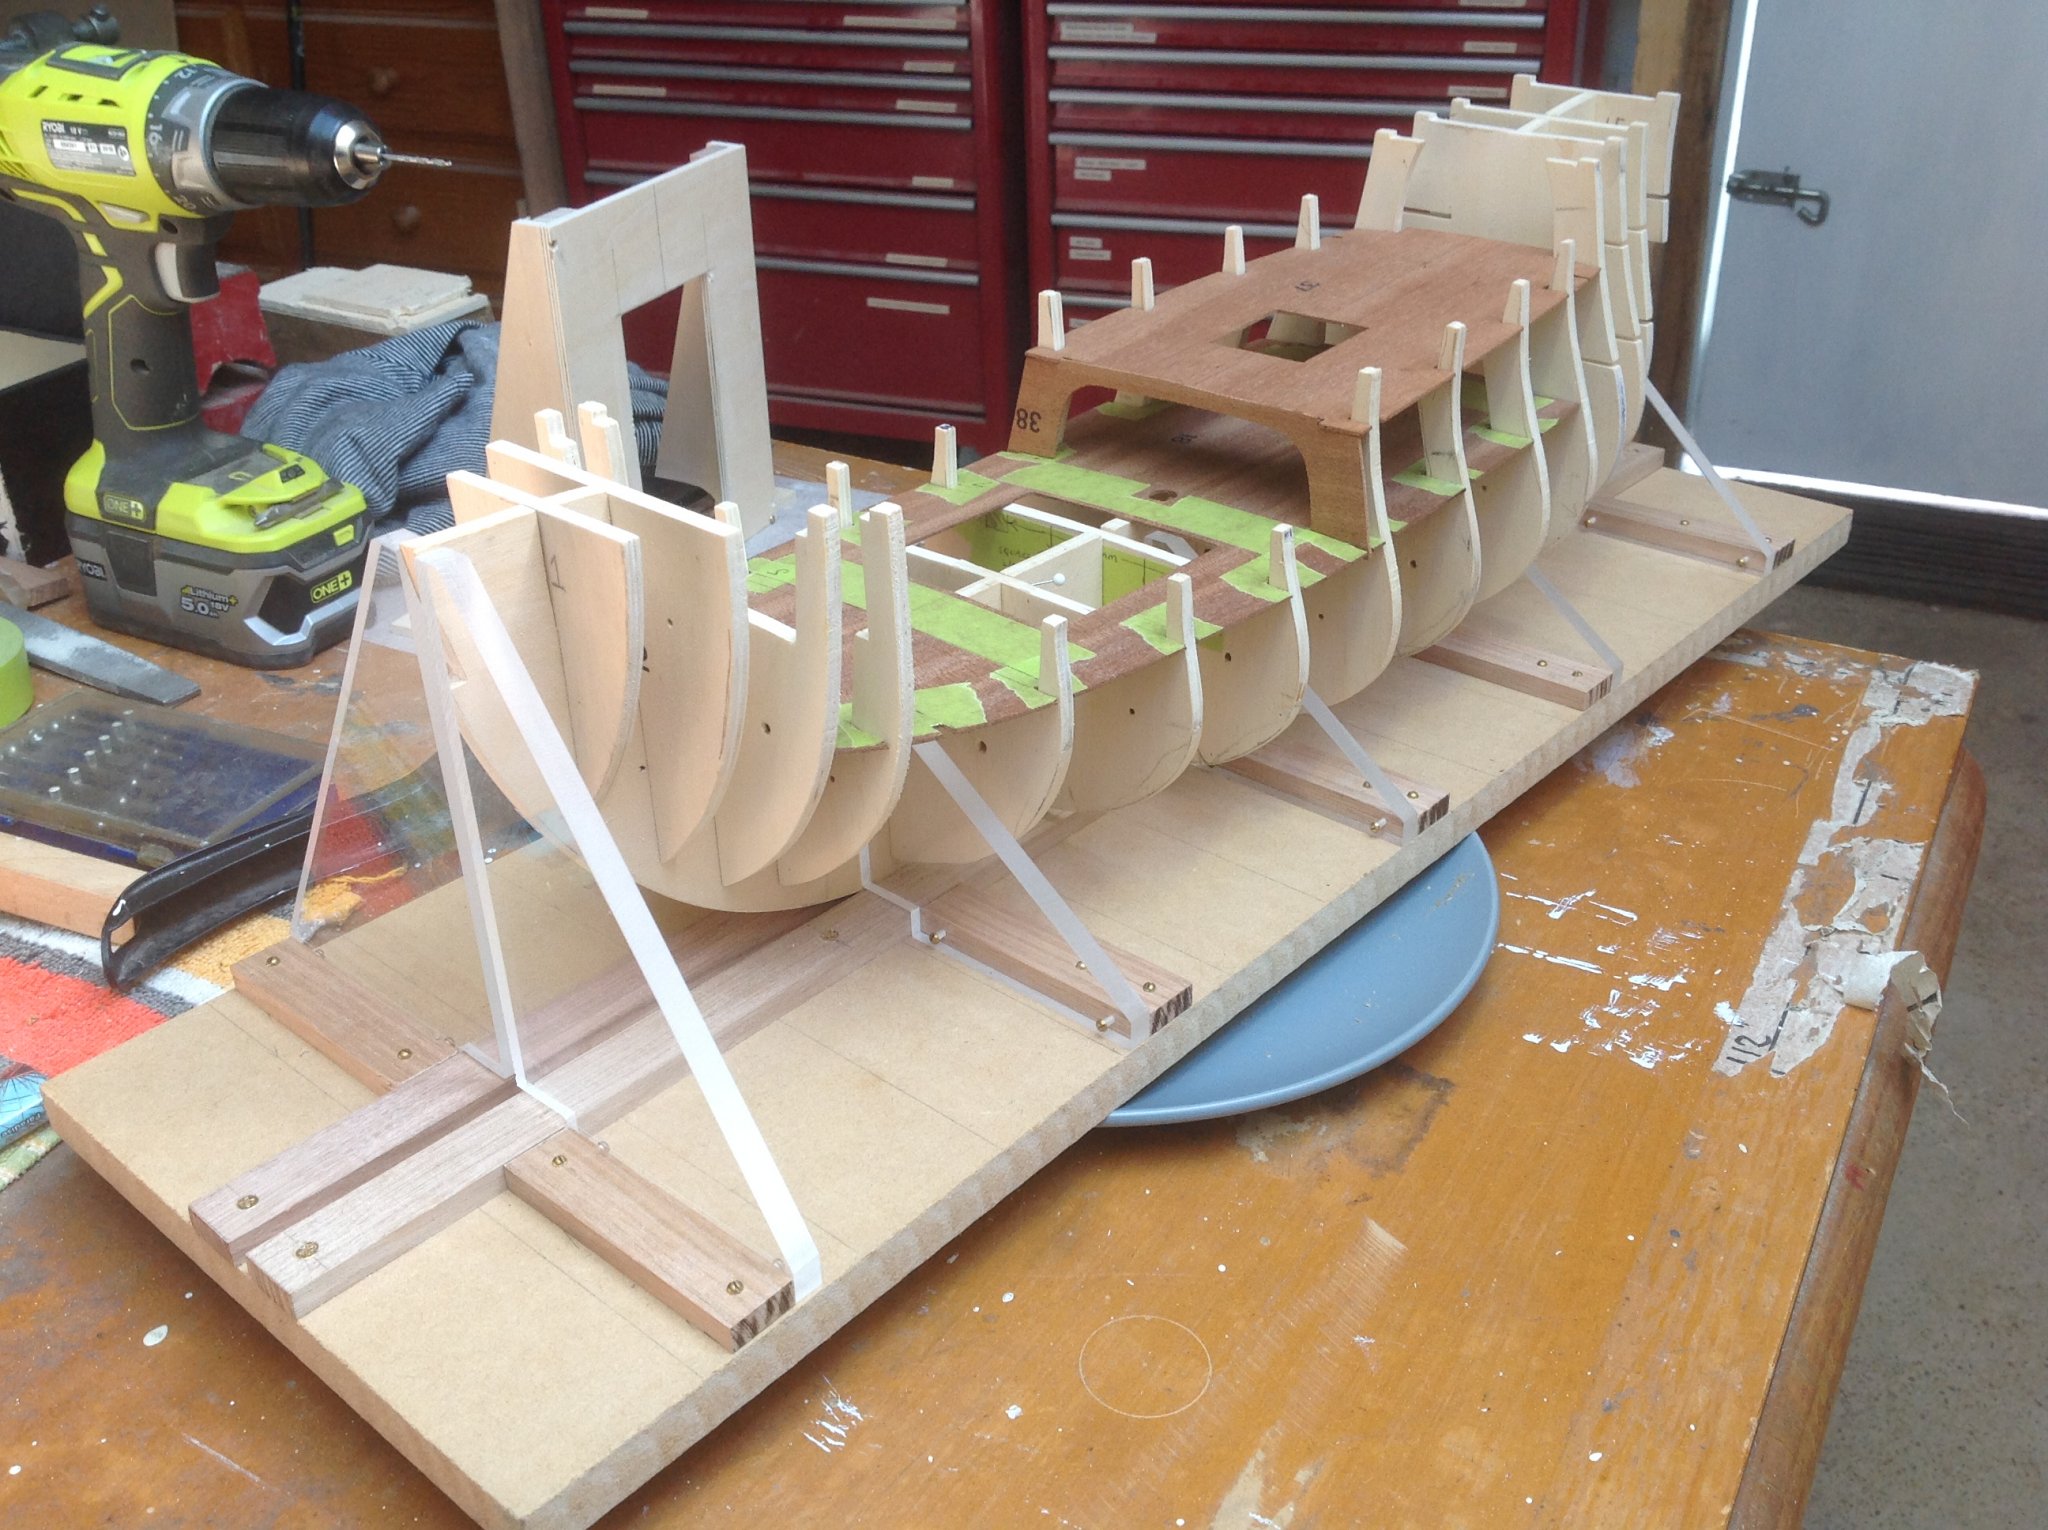
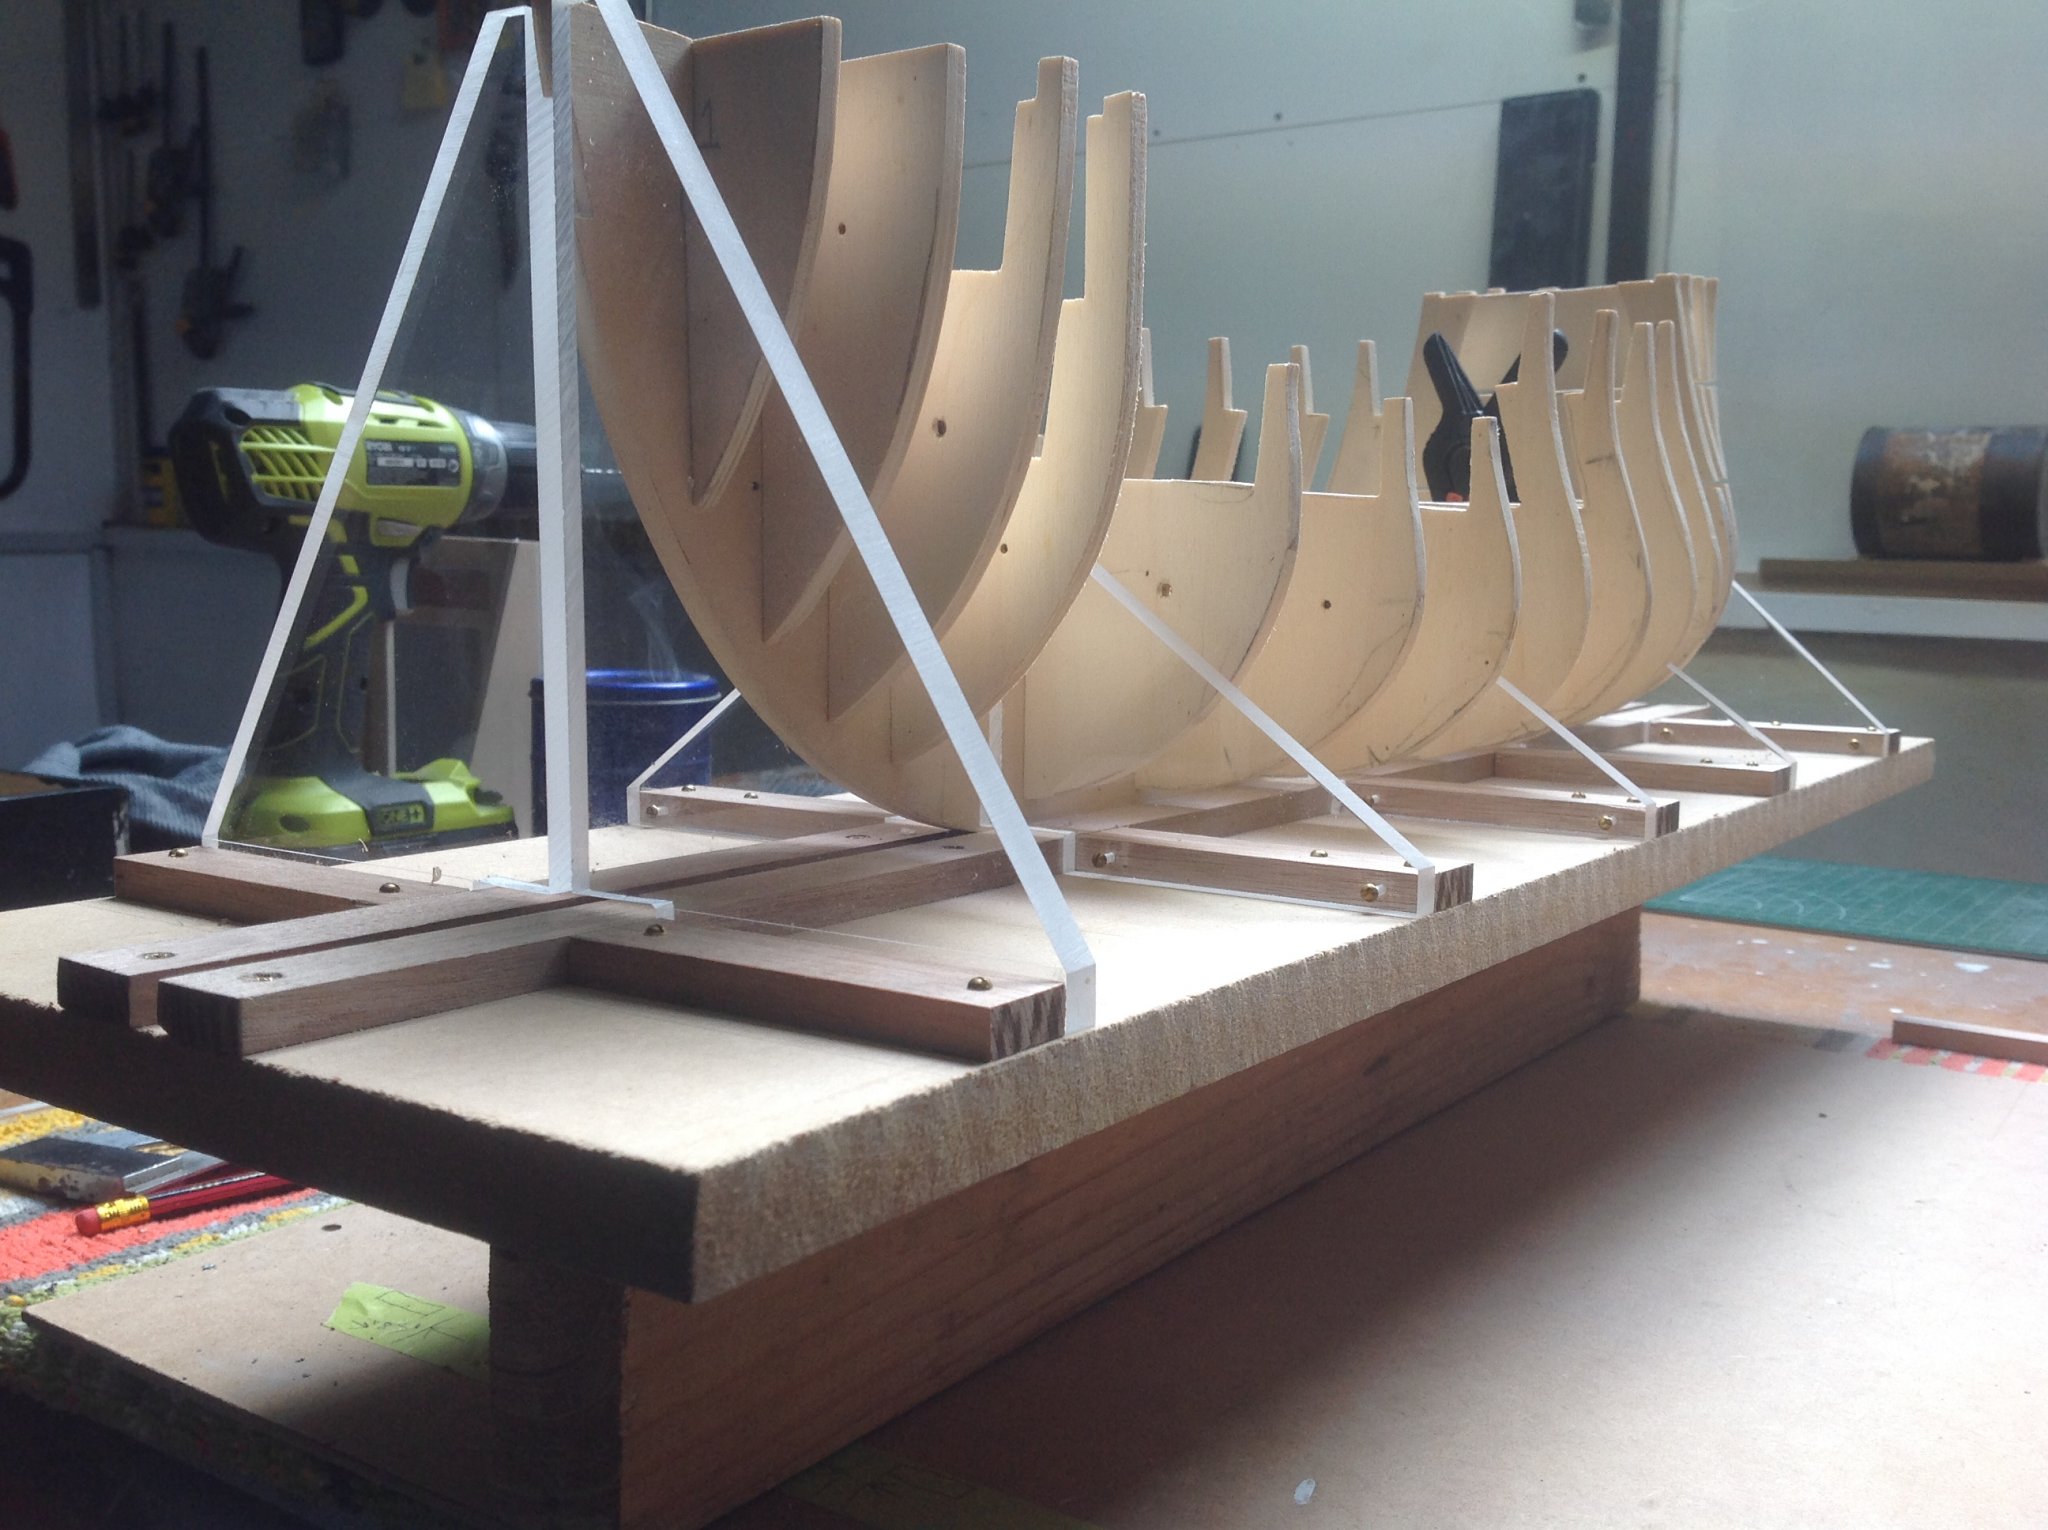
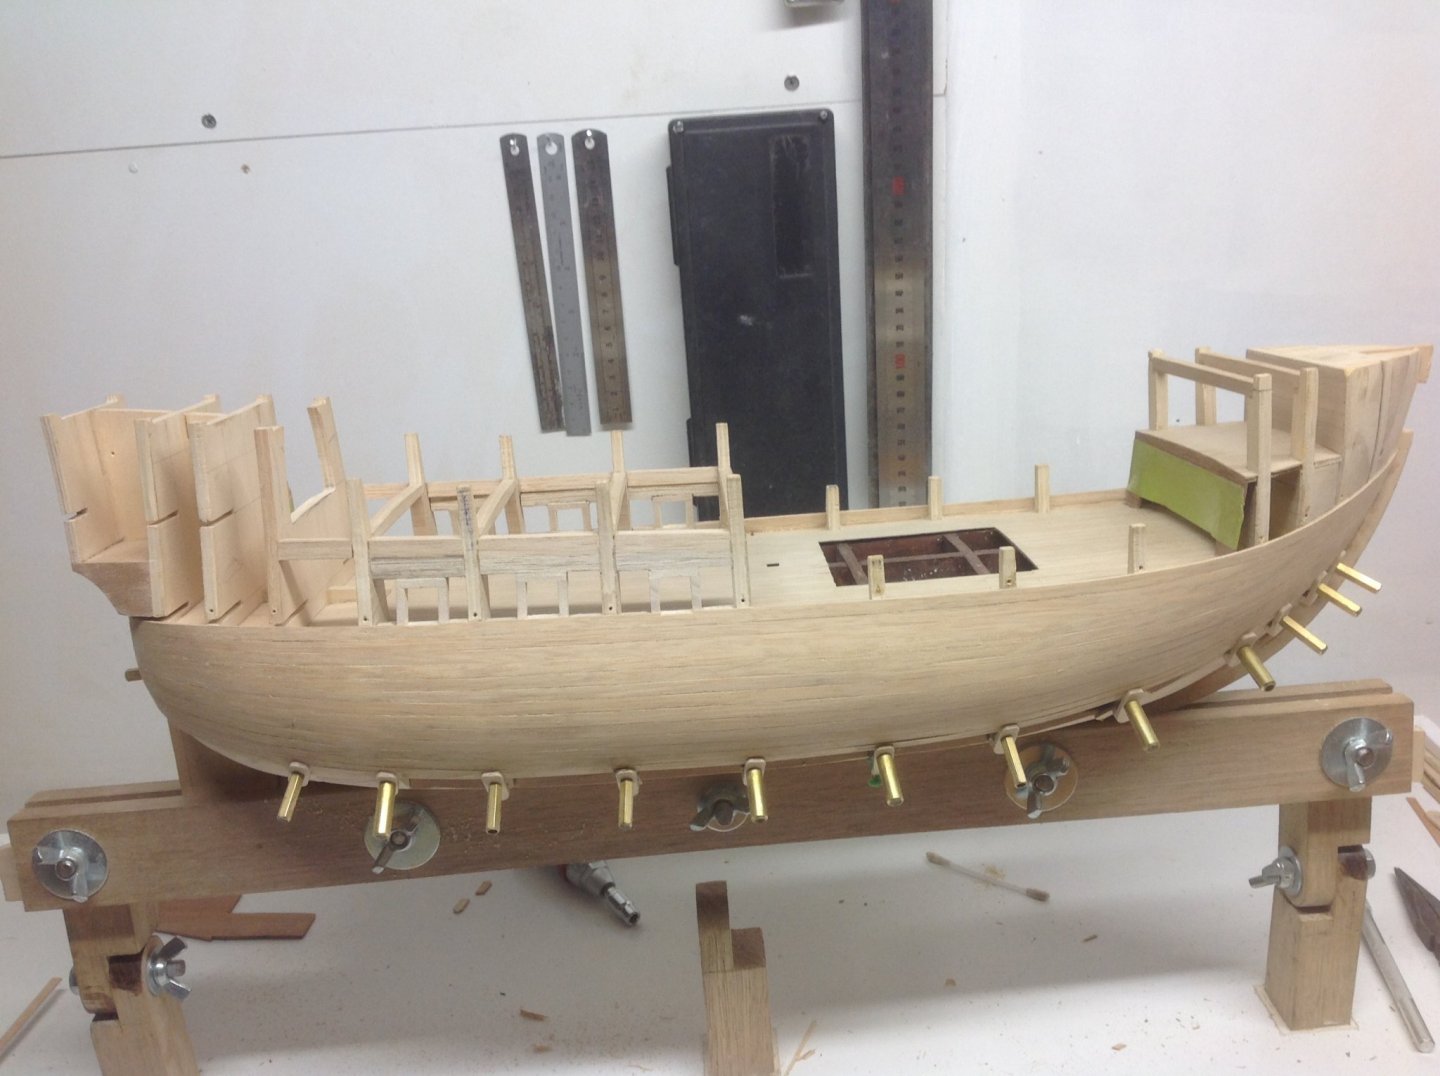
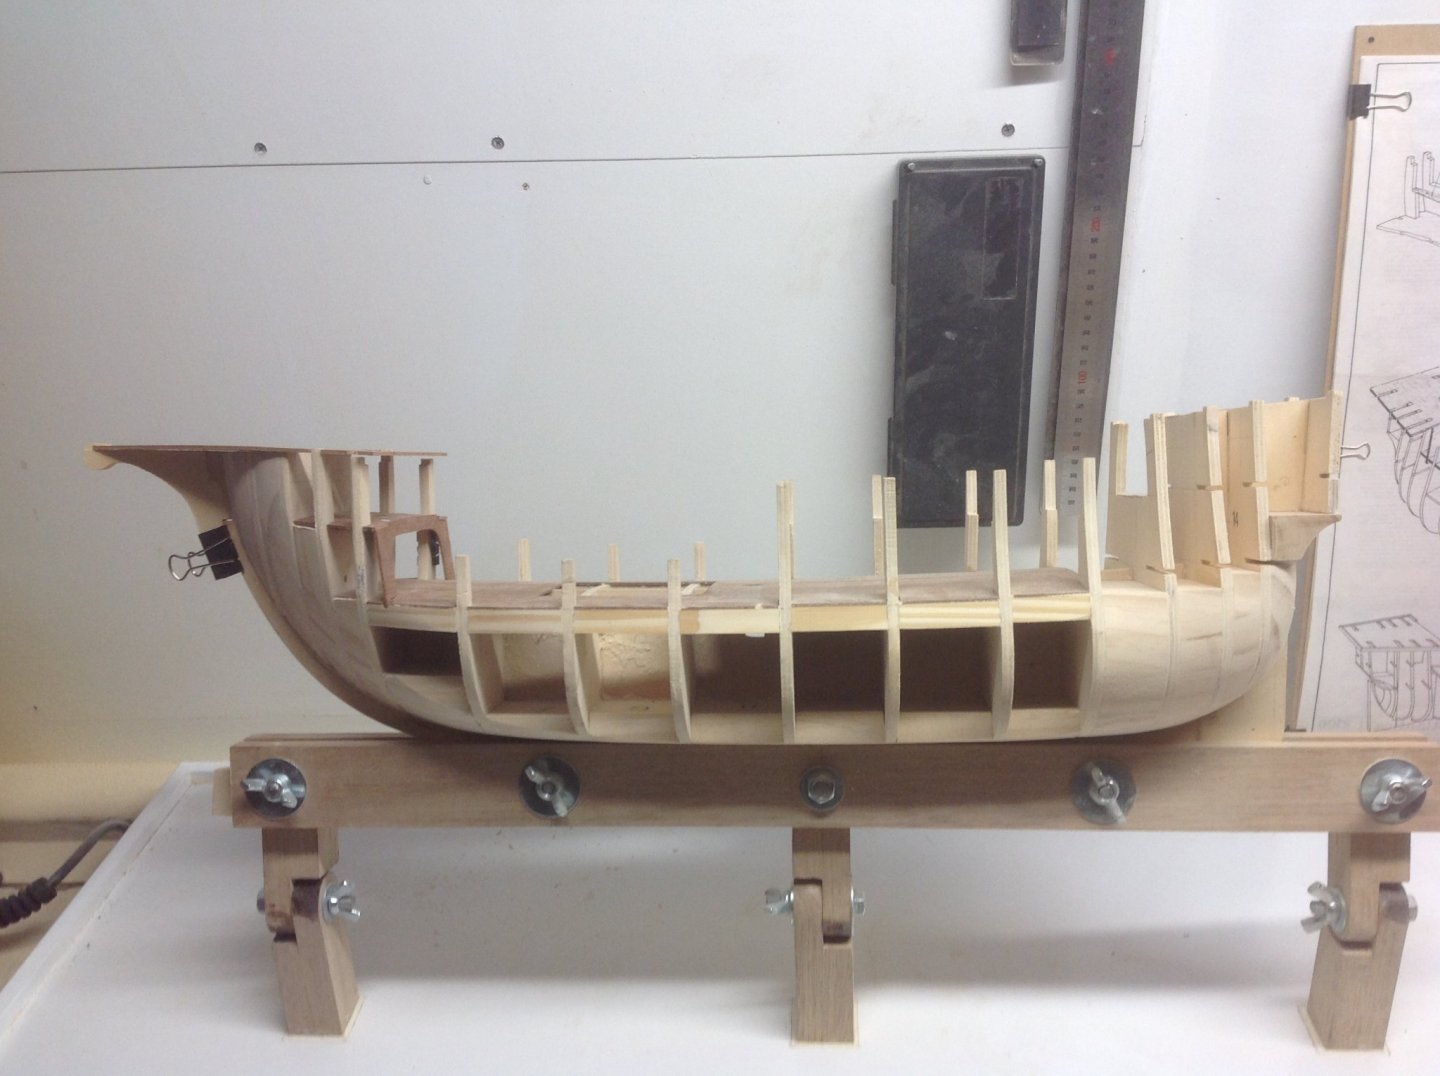
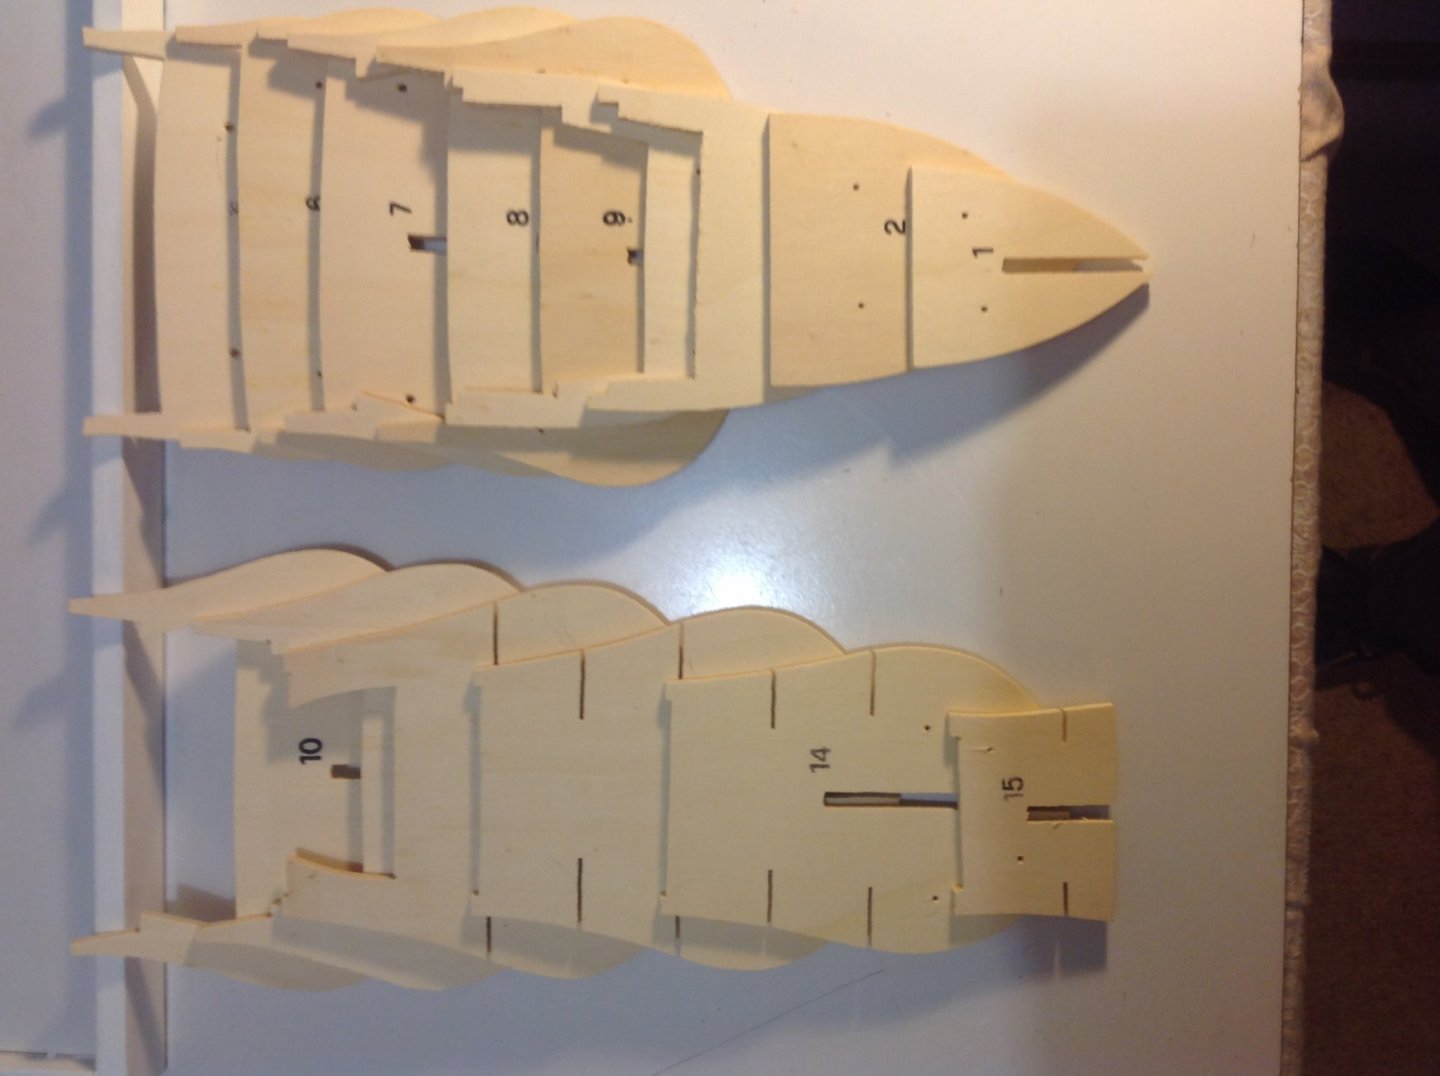
Hello all At this stage I've finished my baseboard consisting of mdf, dressed timber and have used Perspex to keep the false keel square and running straight. As mentioned earlier all the bulkheads required either re cutting, trimming or adding to. They have now been dry fitted along with the main and half decks. These decks are as roughly cut as the bulkheads, I won't complain as it's a very old kit and most pre cut parts will need a lot of attention to achieve my desired results. i will also be adding 9x9 mm square timber running parallel to the keel under the main deck near each side of the cargo hold for extra stability. So adding the 9x9 cut outs to the bulkheads, will be my next task,and then start to glue the hull frame together . Then lay the deck and some deck planks. the support beams for the half deck are missing from the kit ( should have seen that earlier) so these will need to be made before it can be added. Ive added some dry fit pictures. Happy modelling Kikatinalong.


-
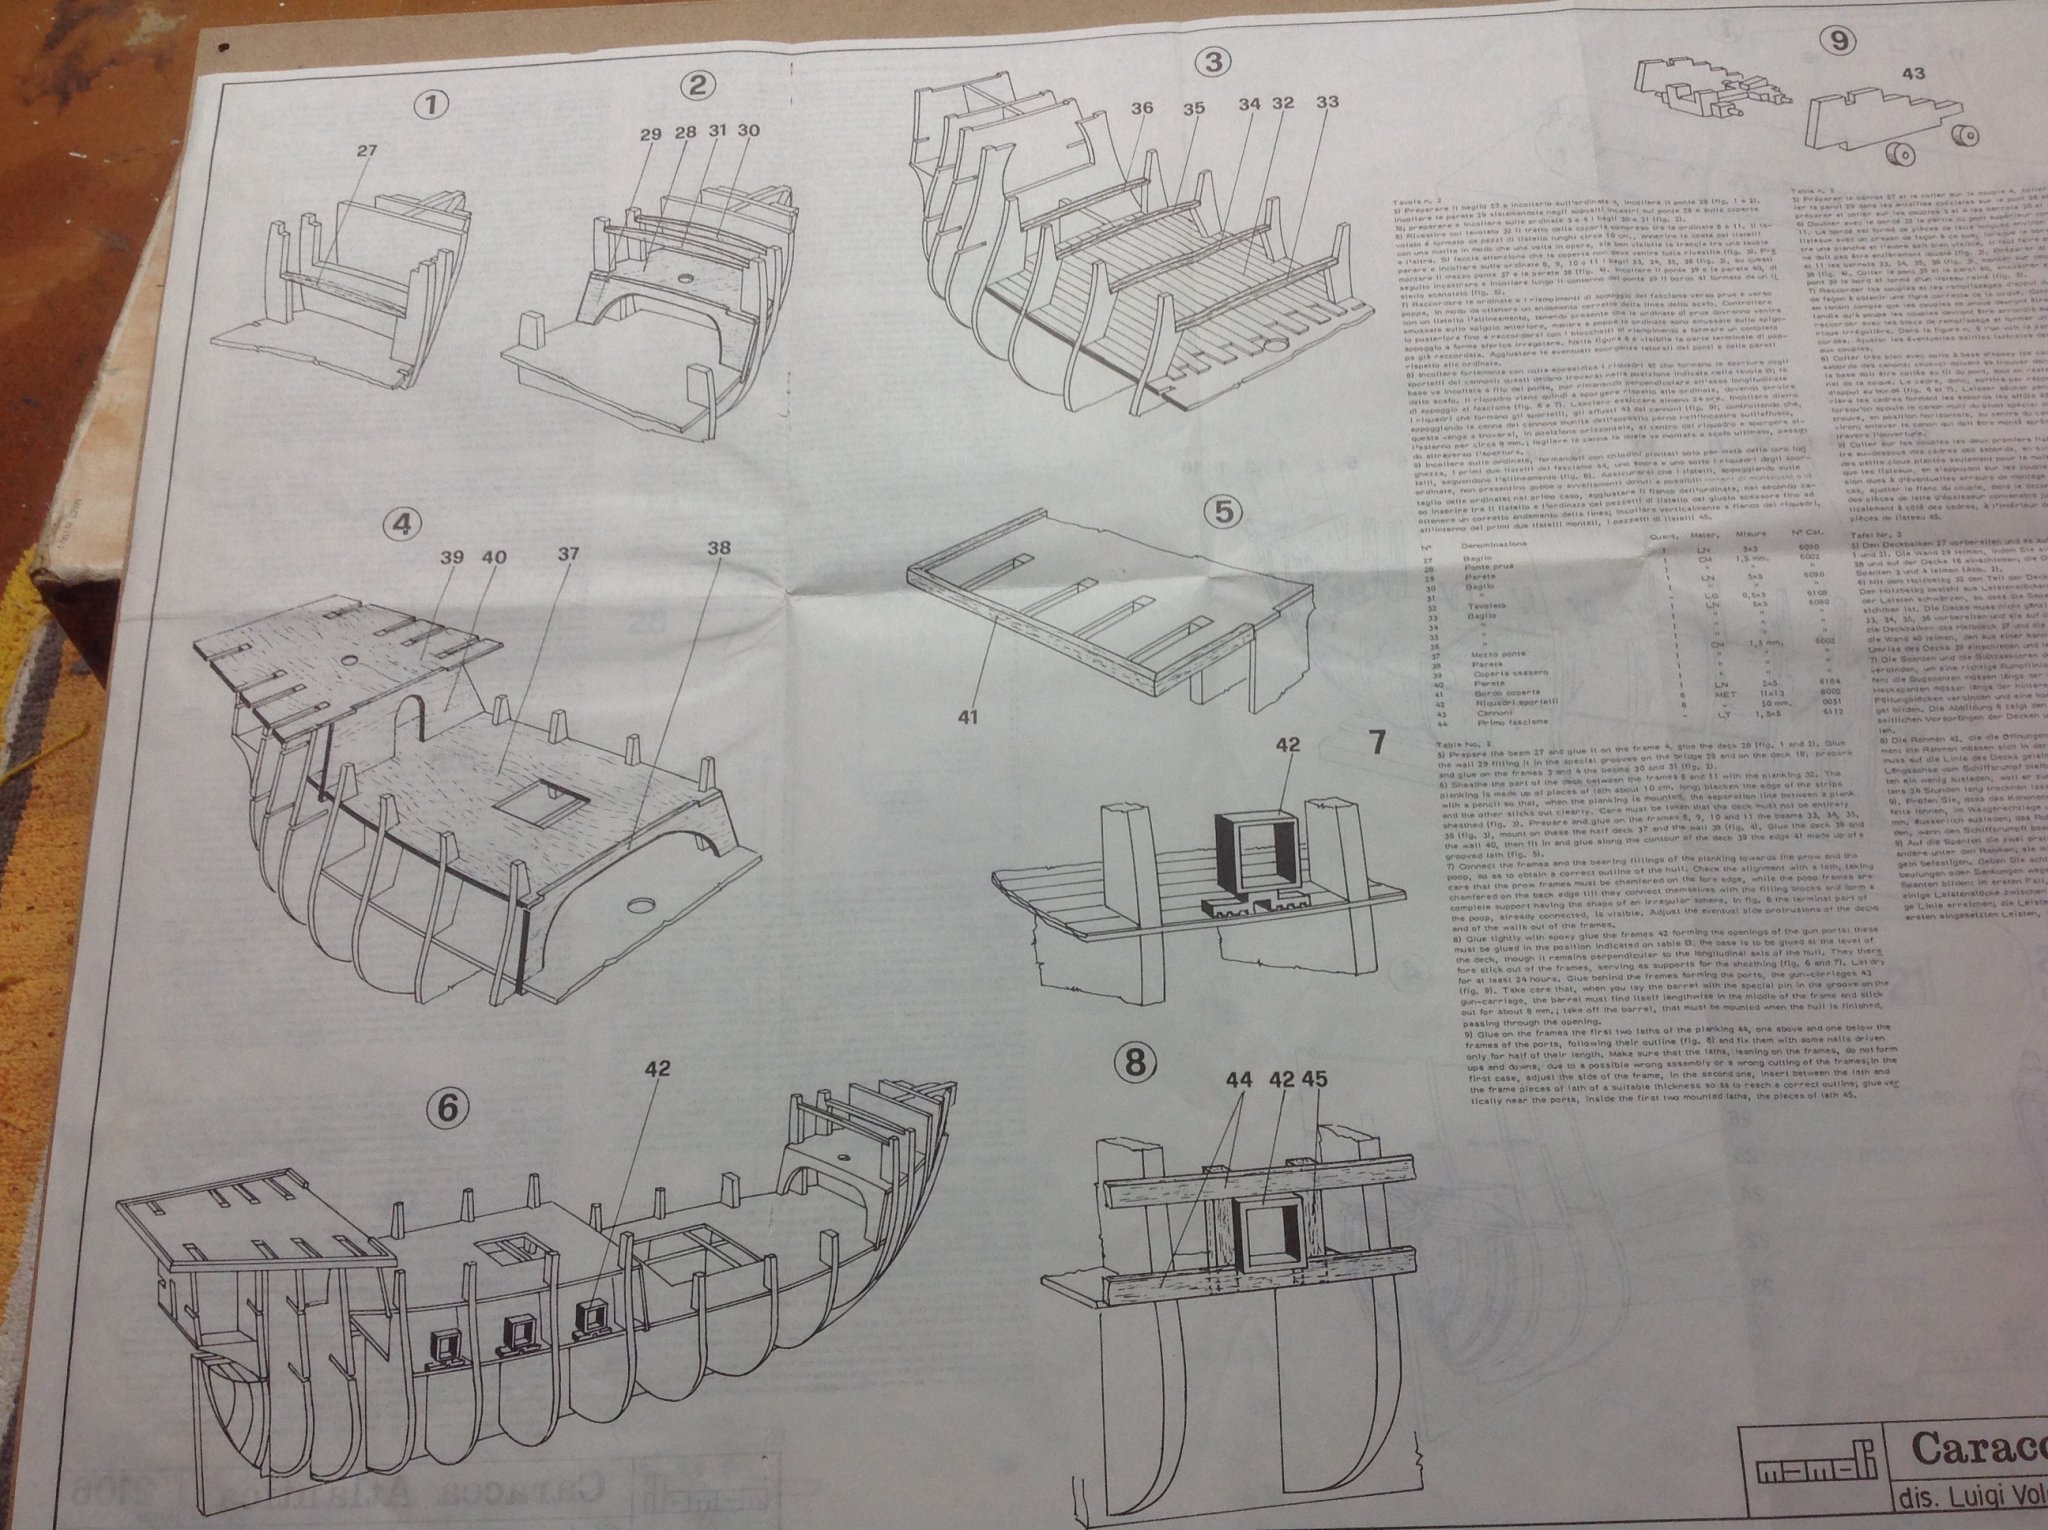
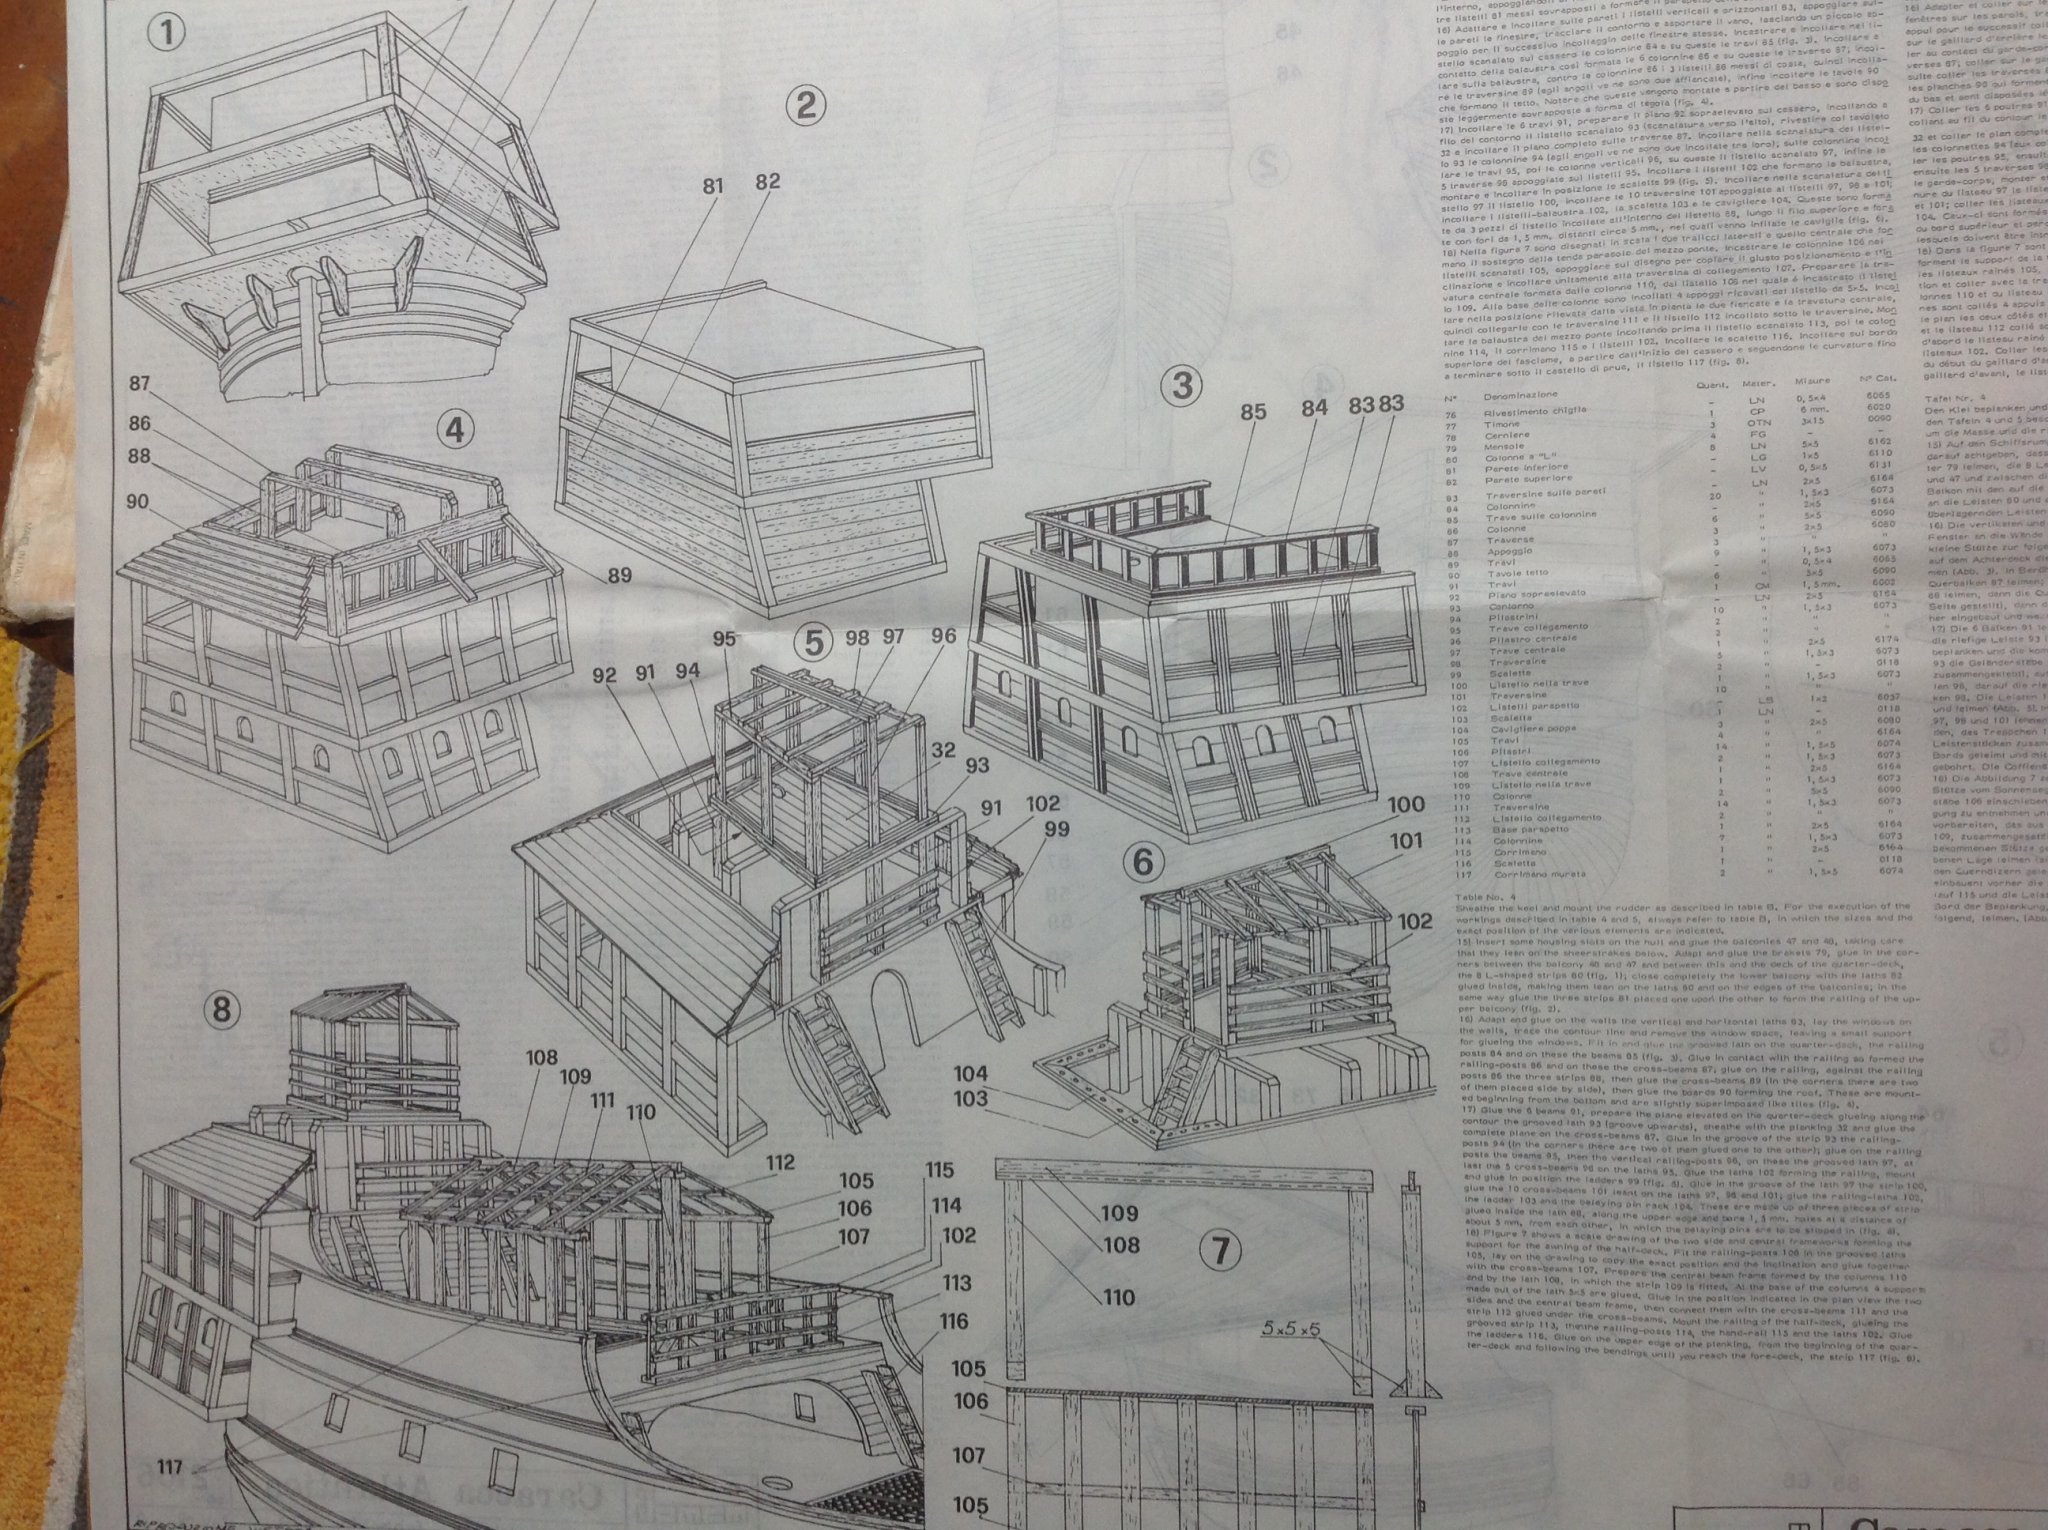
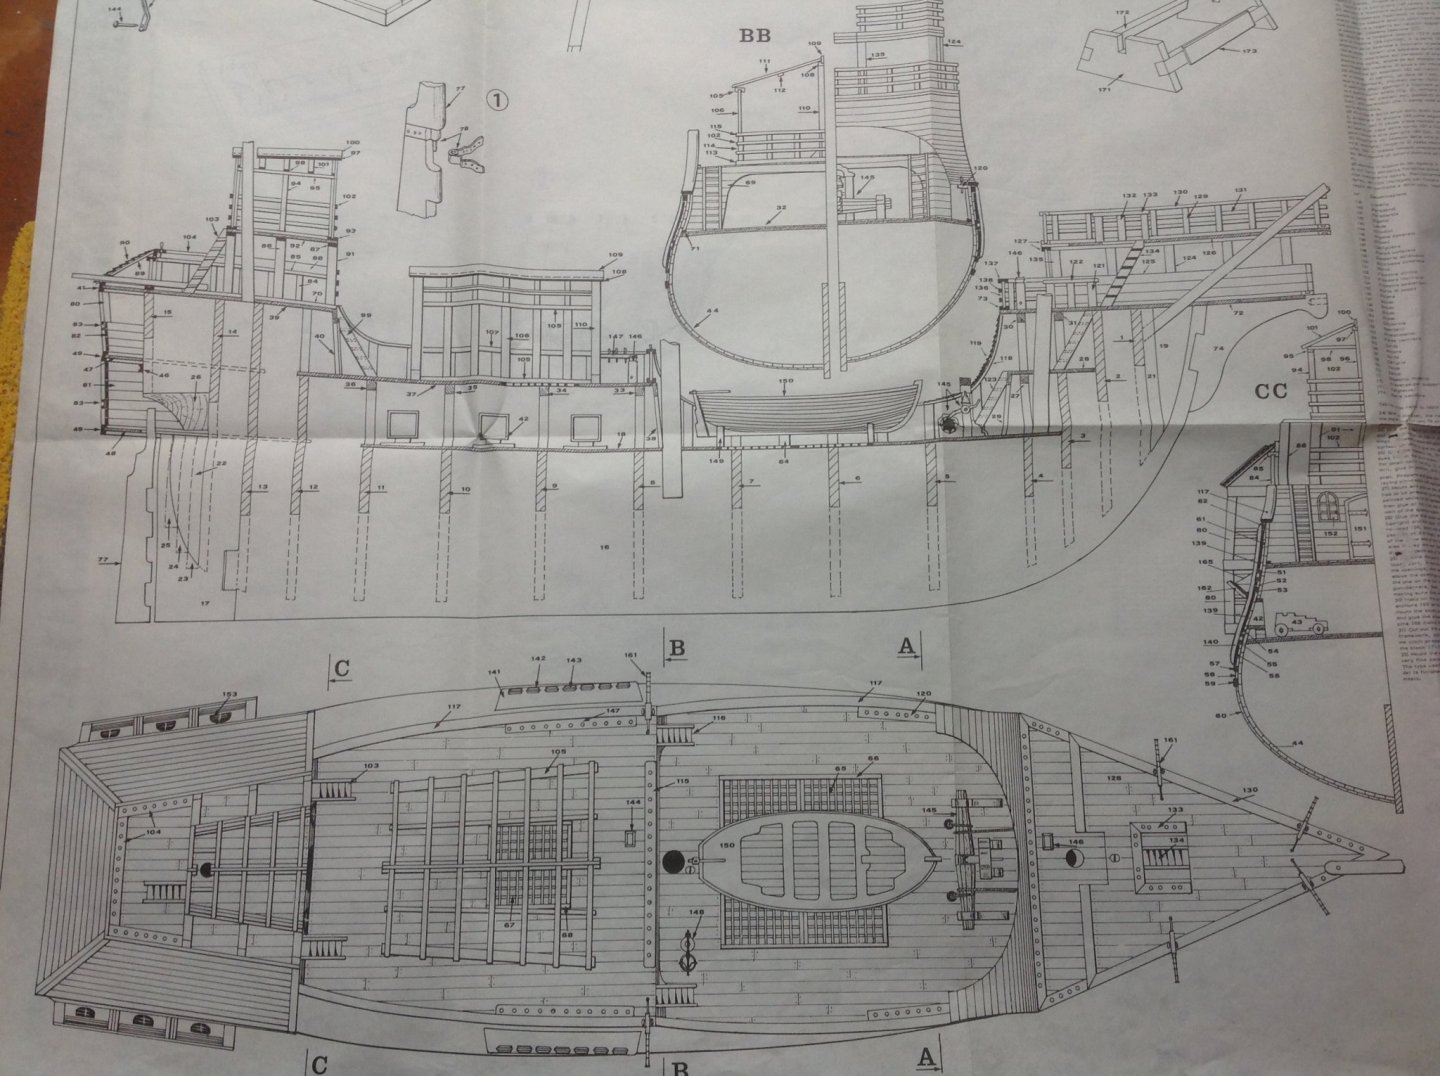
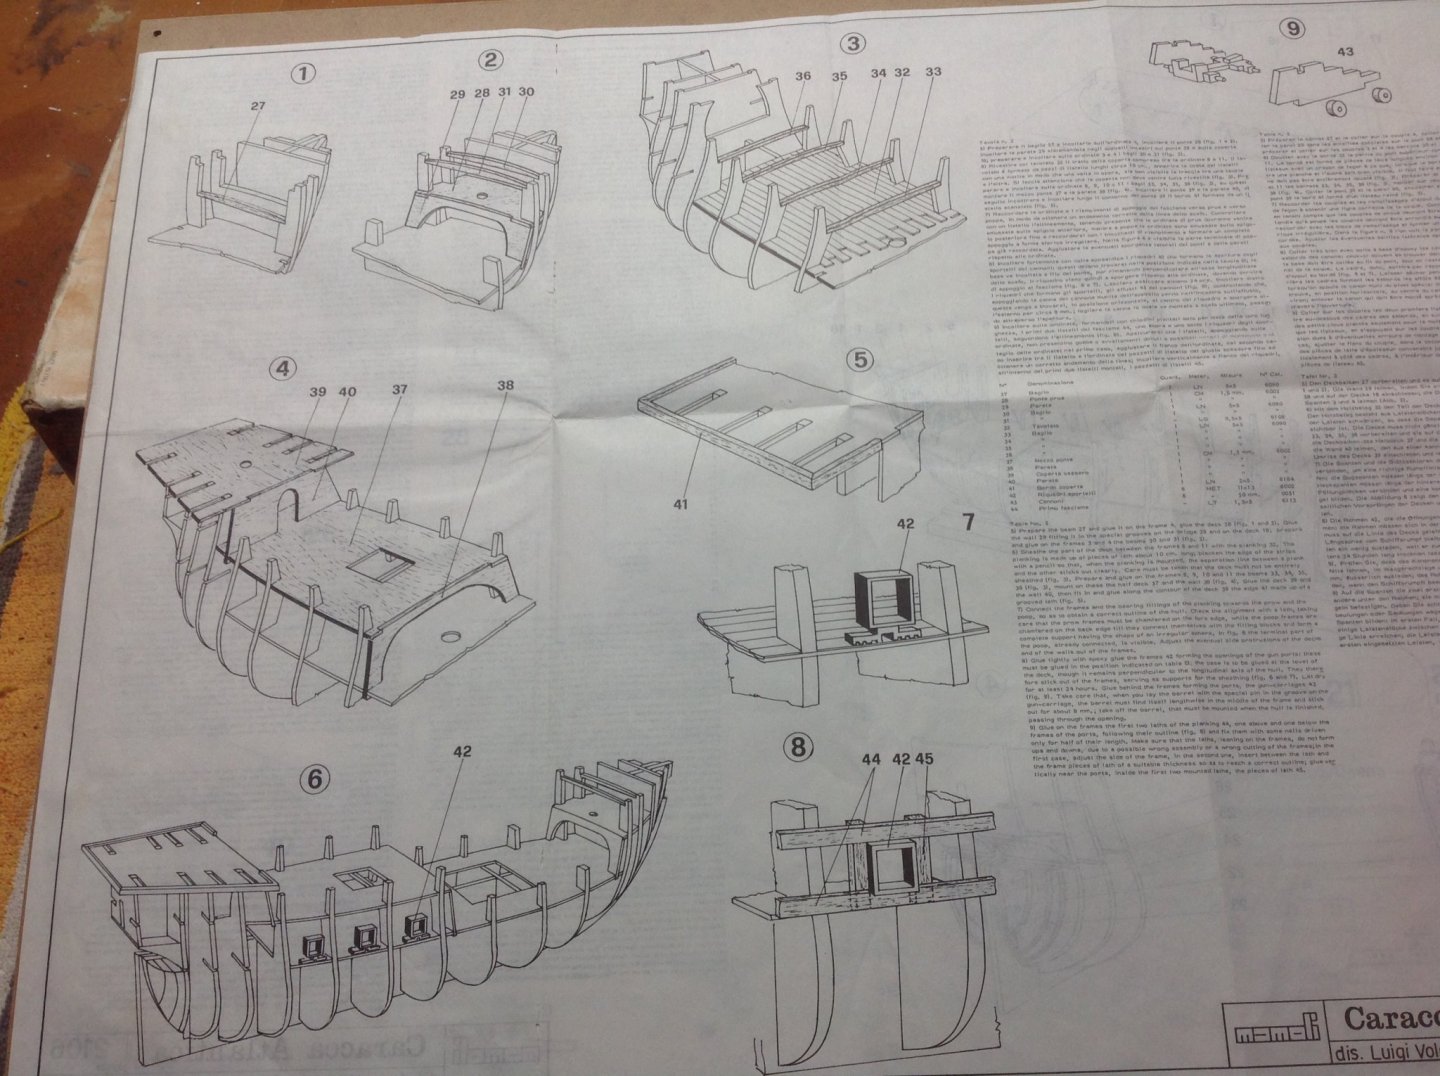
In this log I will just add a few pics of the kit and some drawings, I'm not great with computers and will keep this simple until I get used to the site. ive made a little progress in far as jigs and some dry fitting and will update that in a day or so. The false keel, bulkheads and deck pieces are very roughly cut , it is what it is and I've been re cutting and repairing to get the desired results. It seems some of the uploads failed so I'll leave it at that for now, and try and post more tomorrow. happy modelling Kikatinalong


-
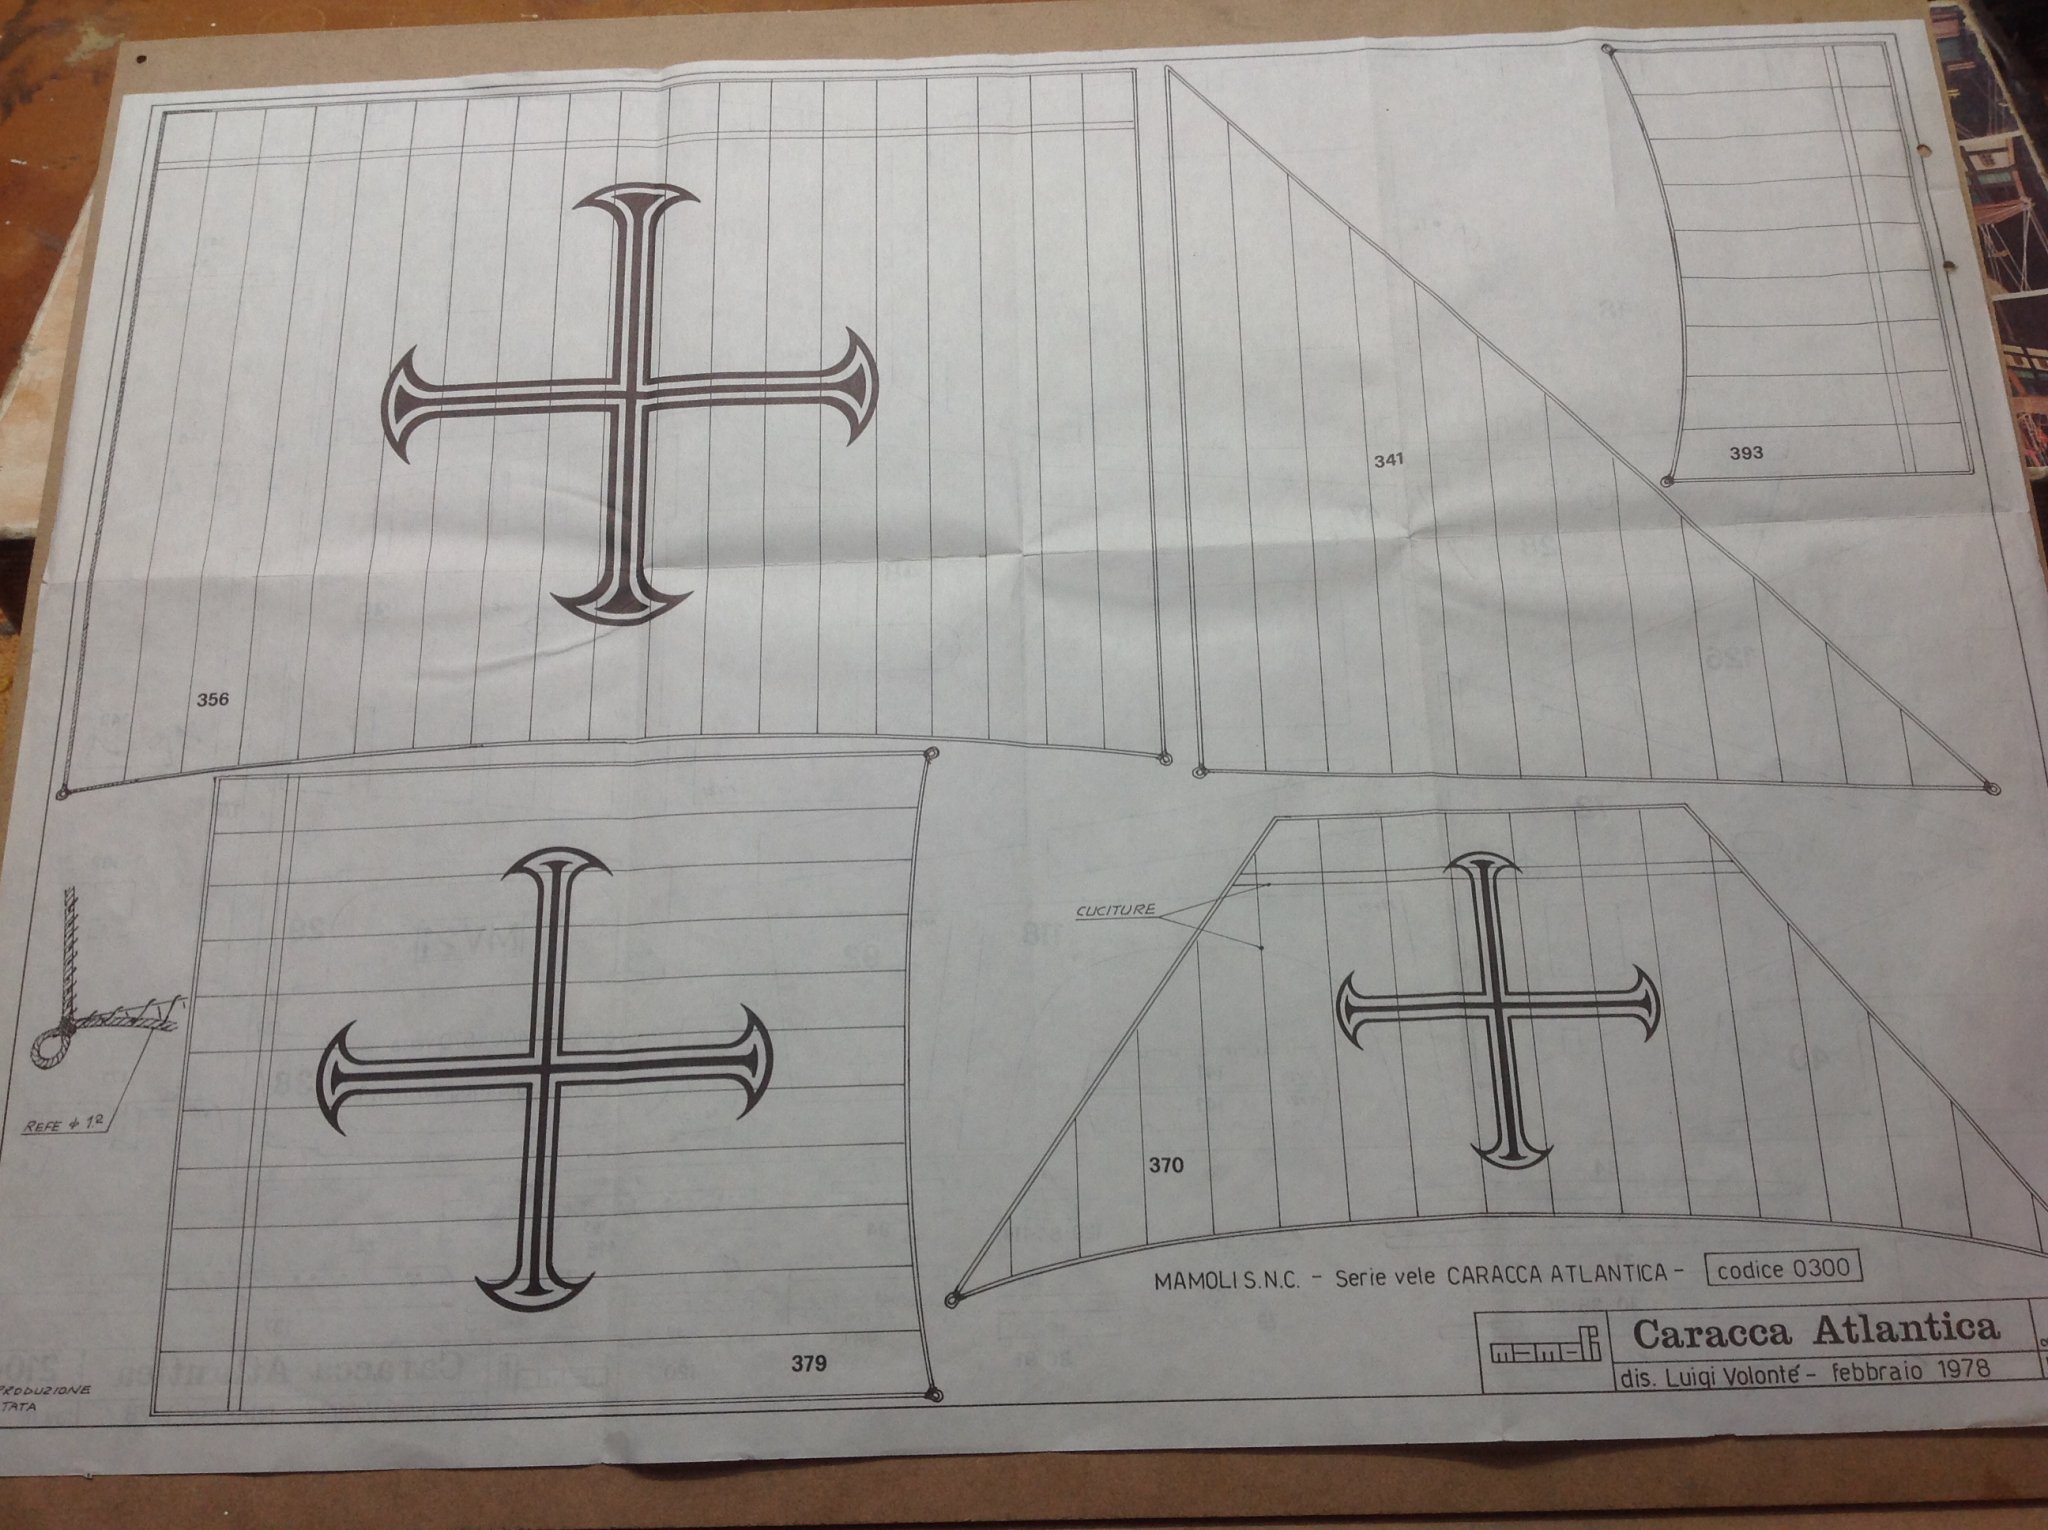
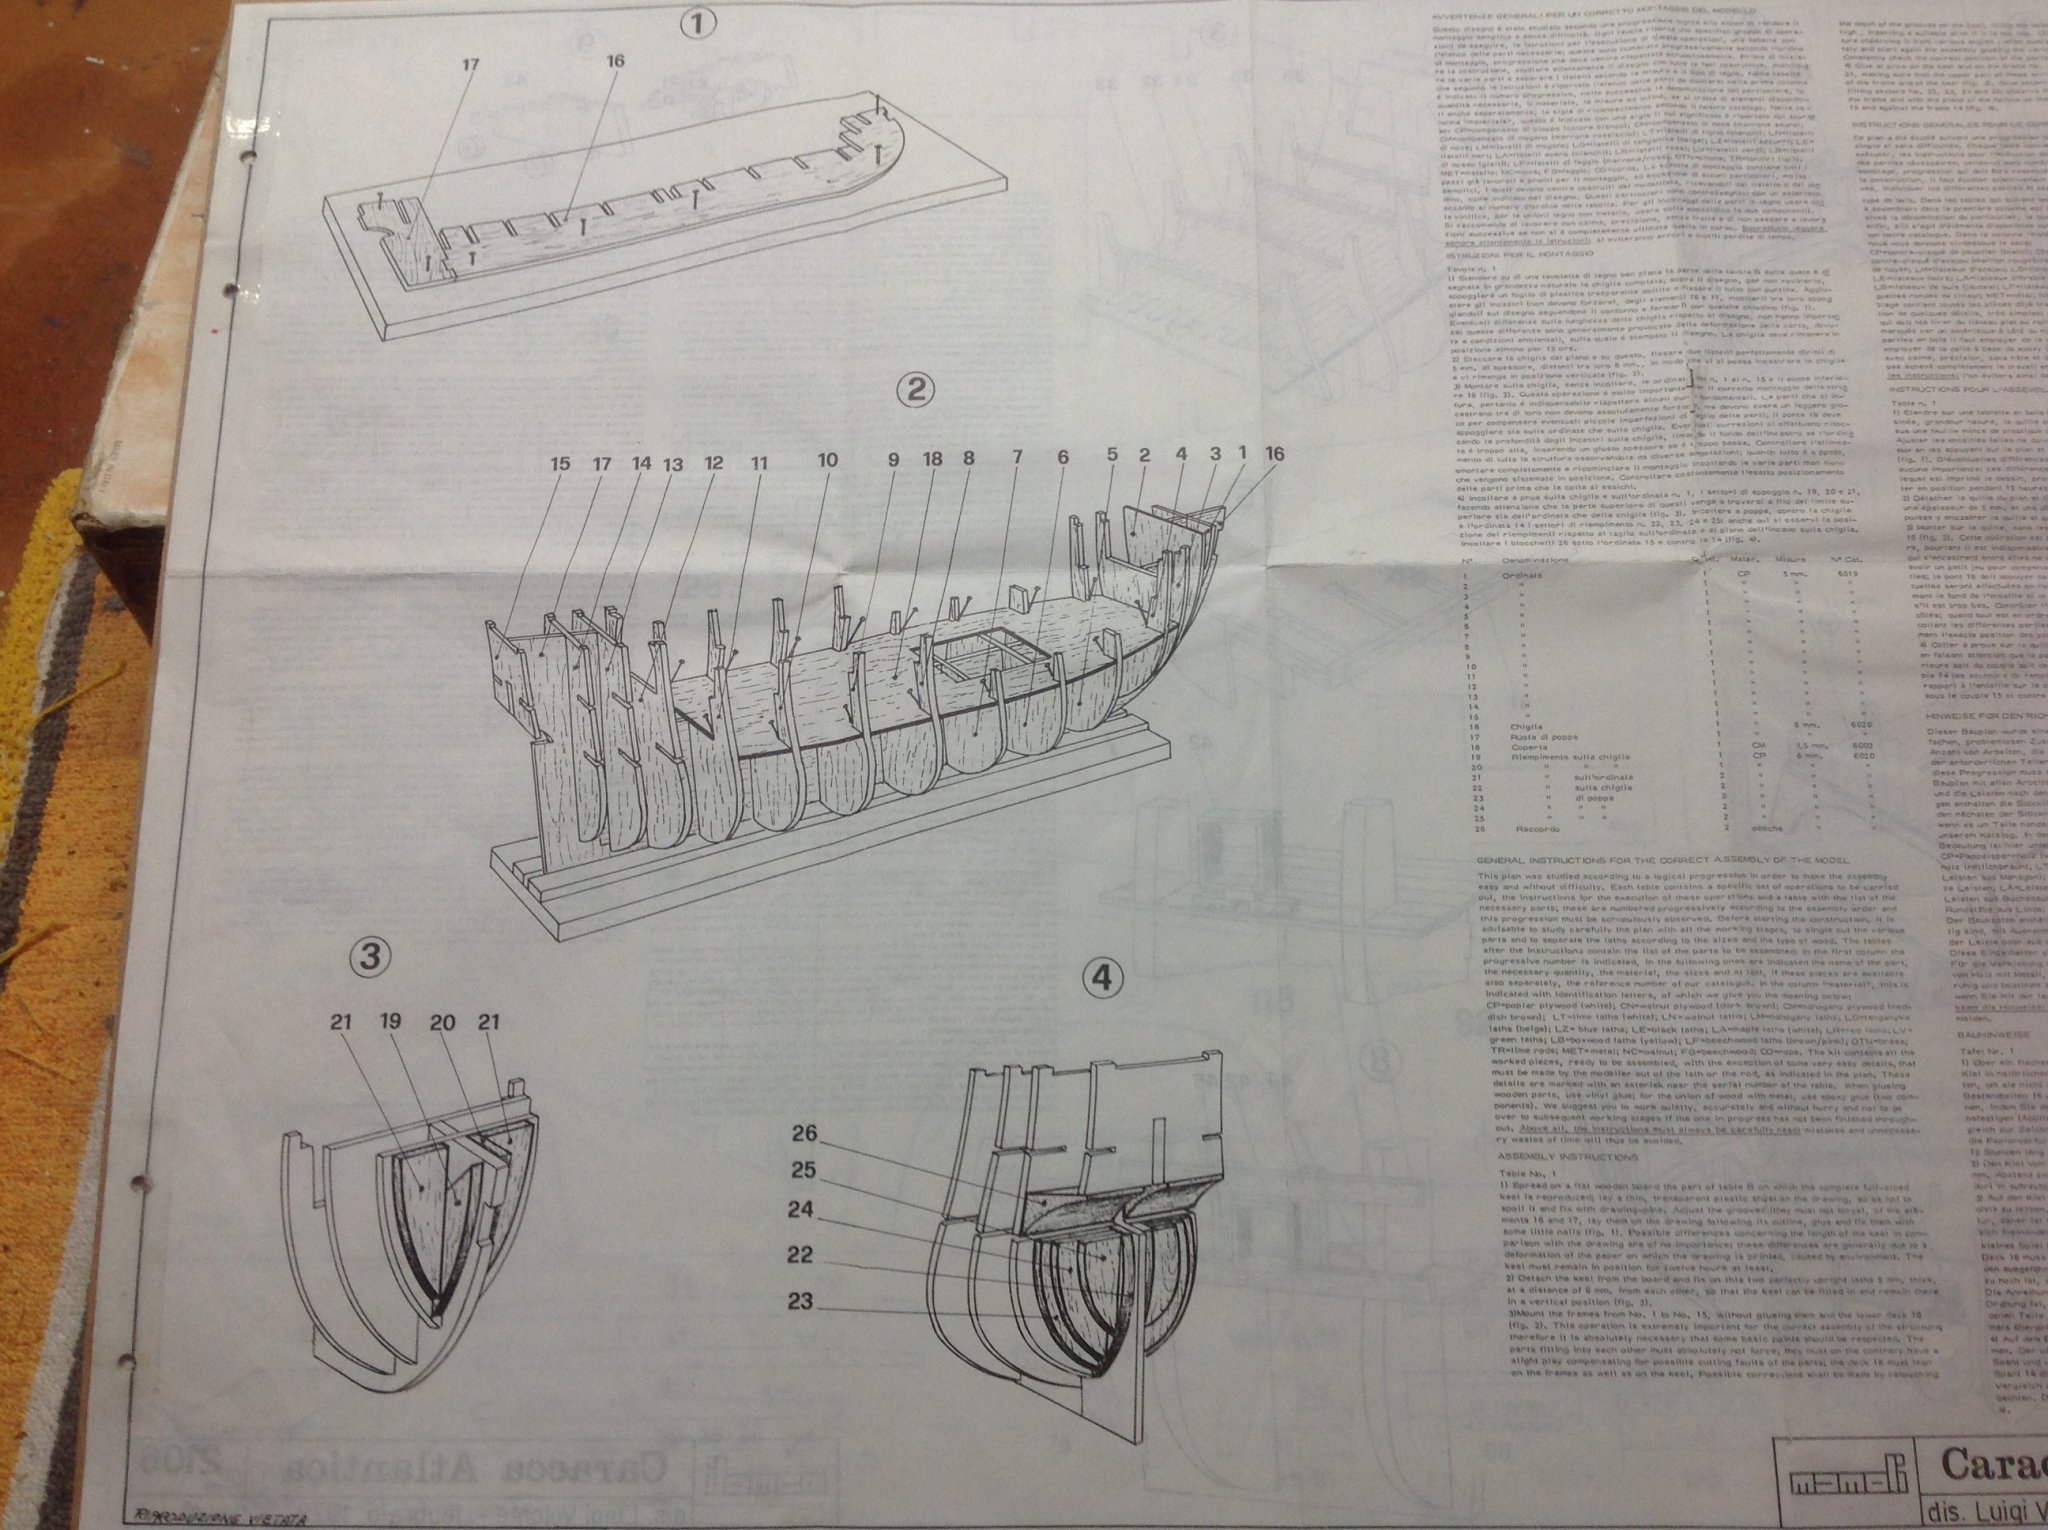
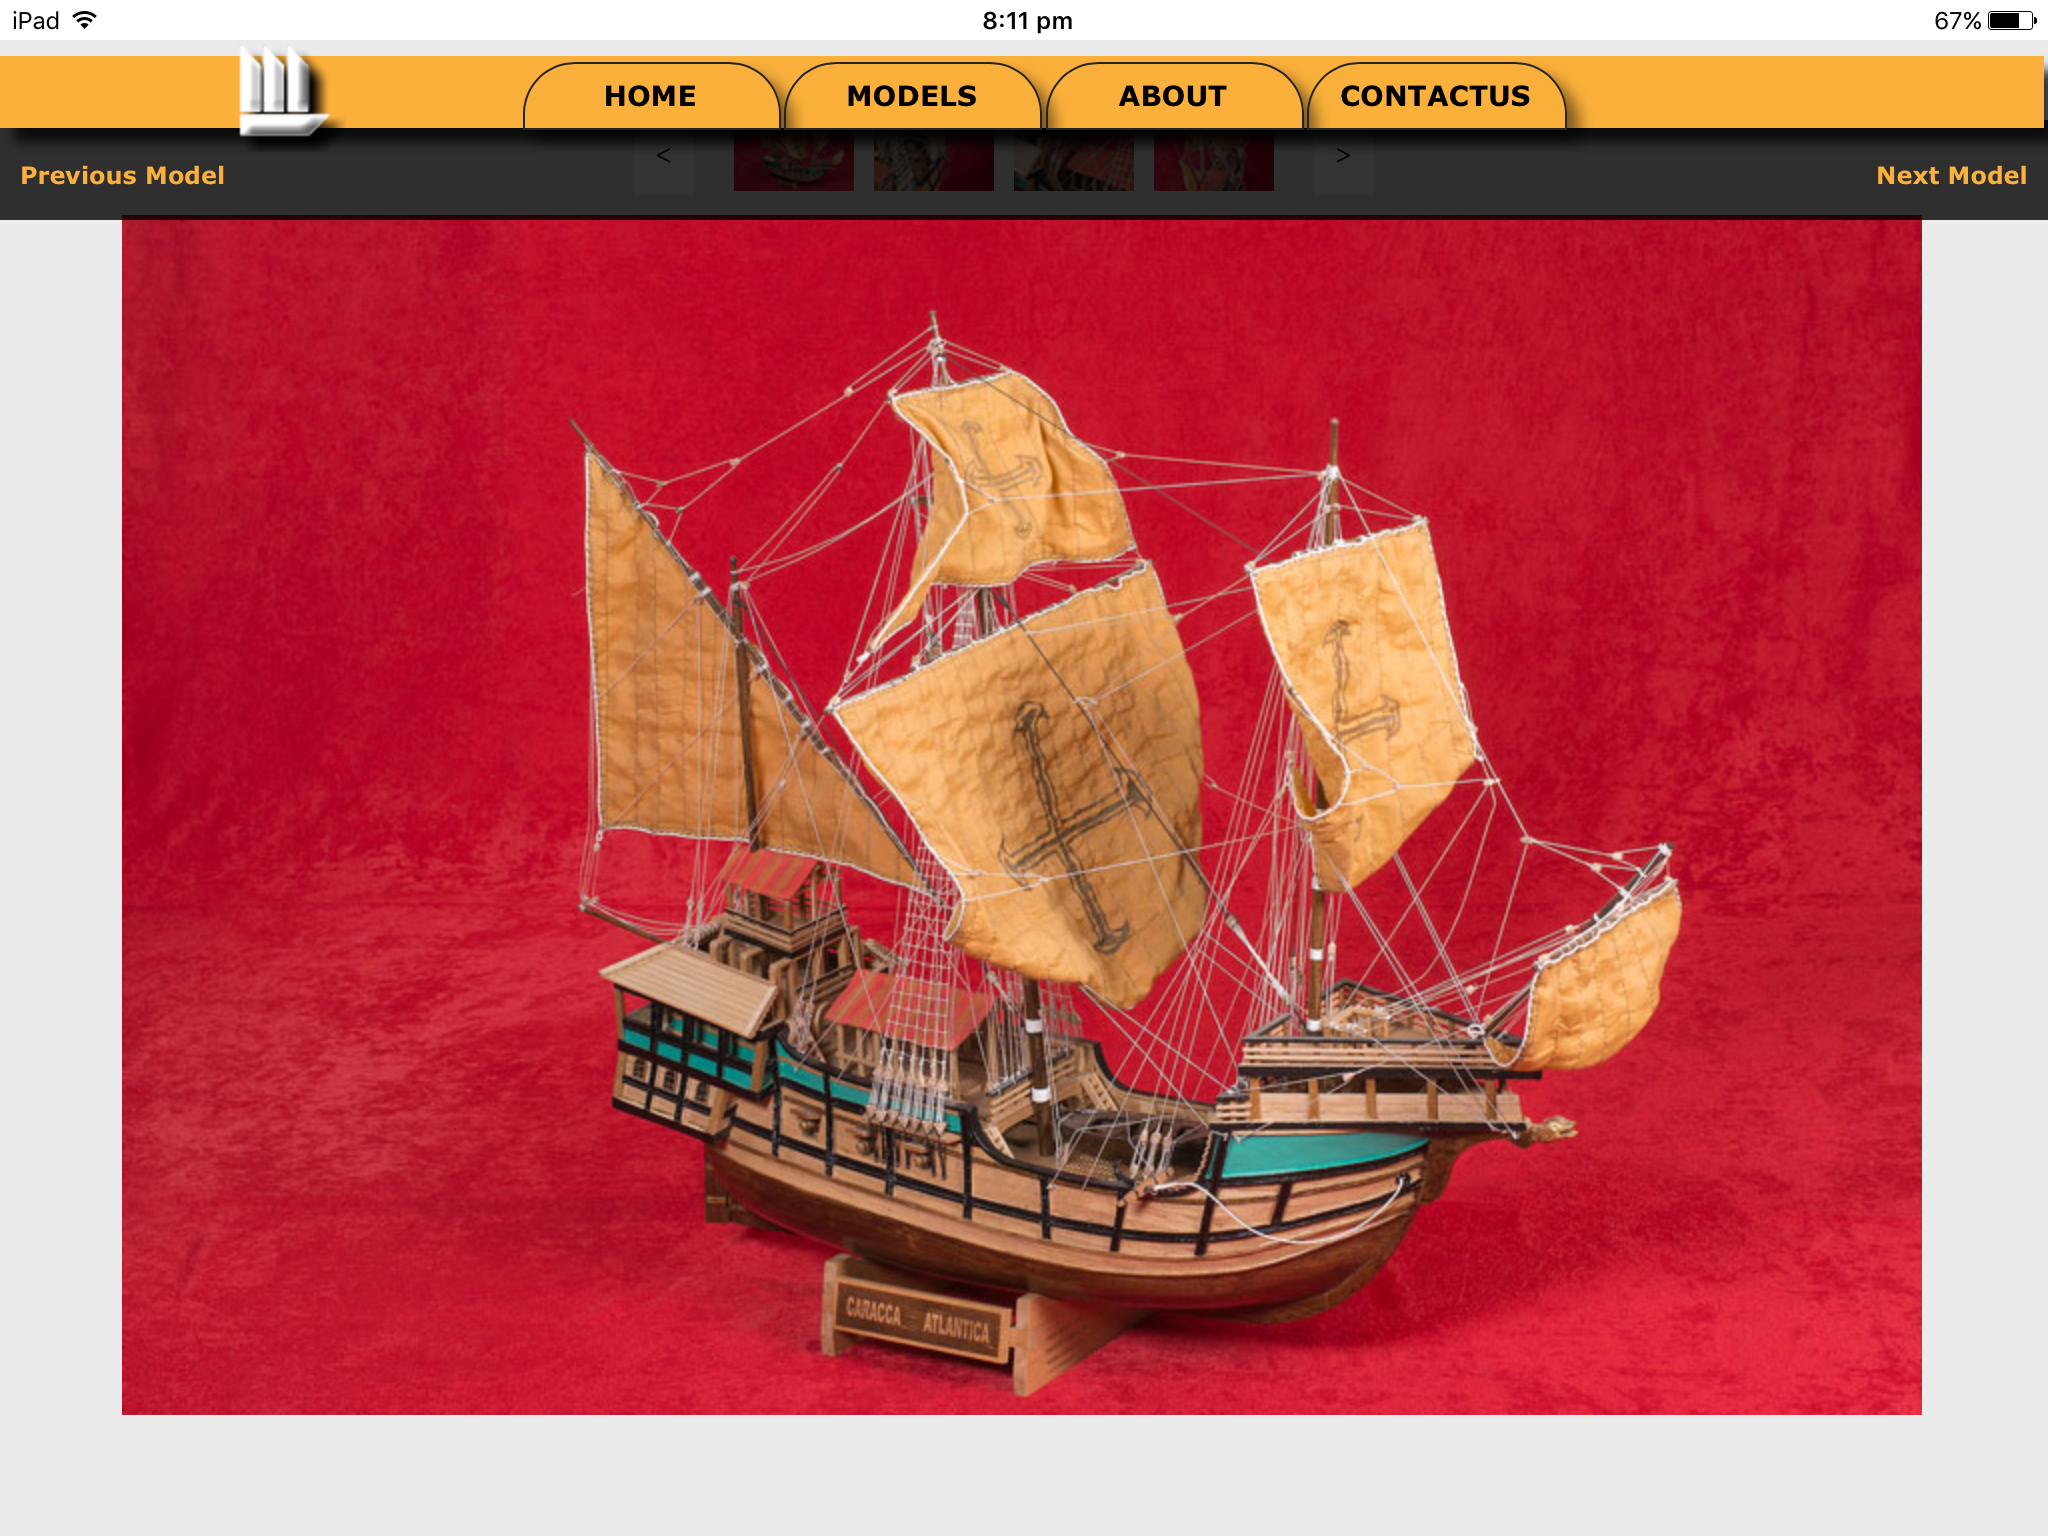
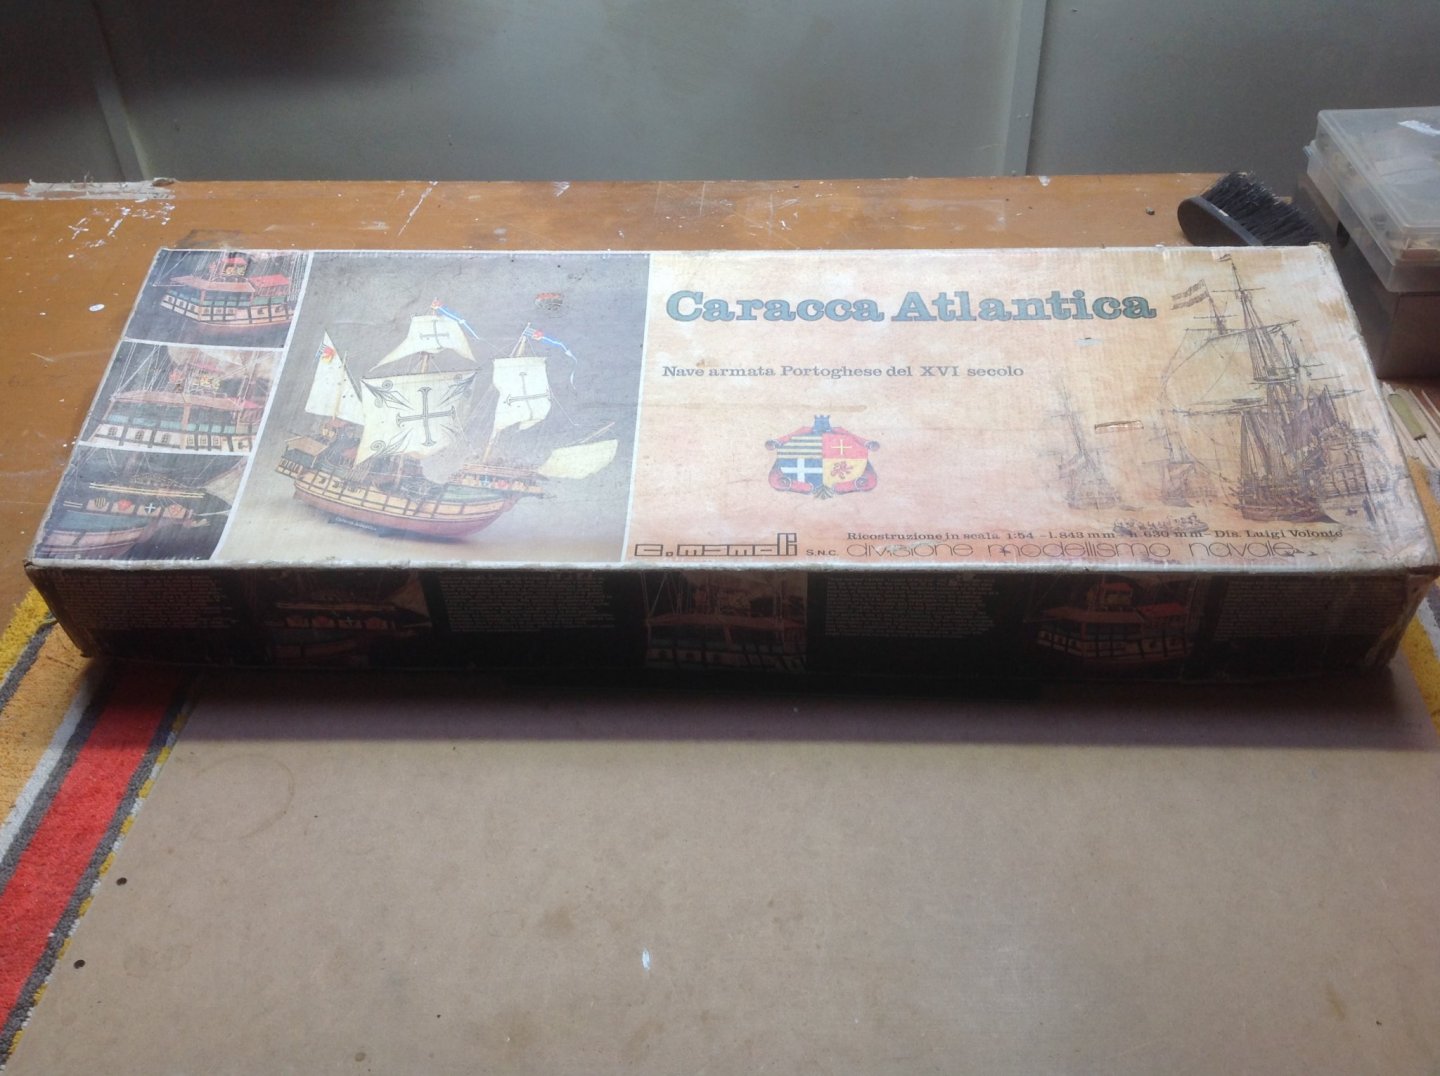
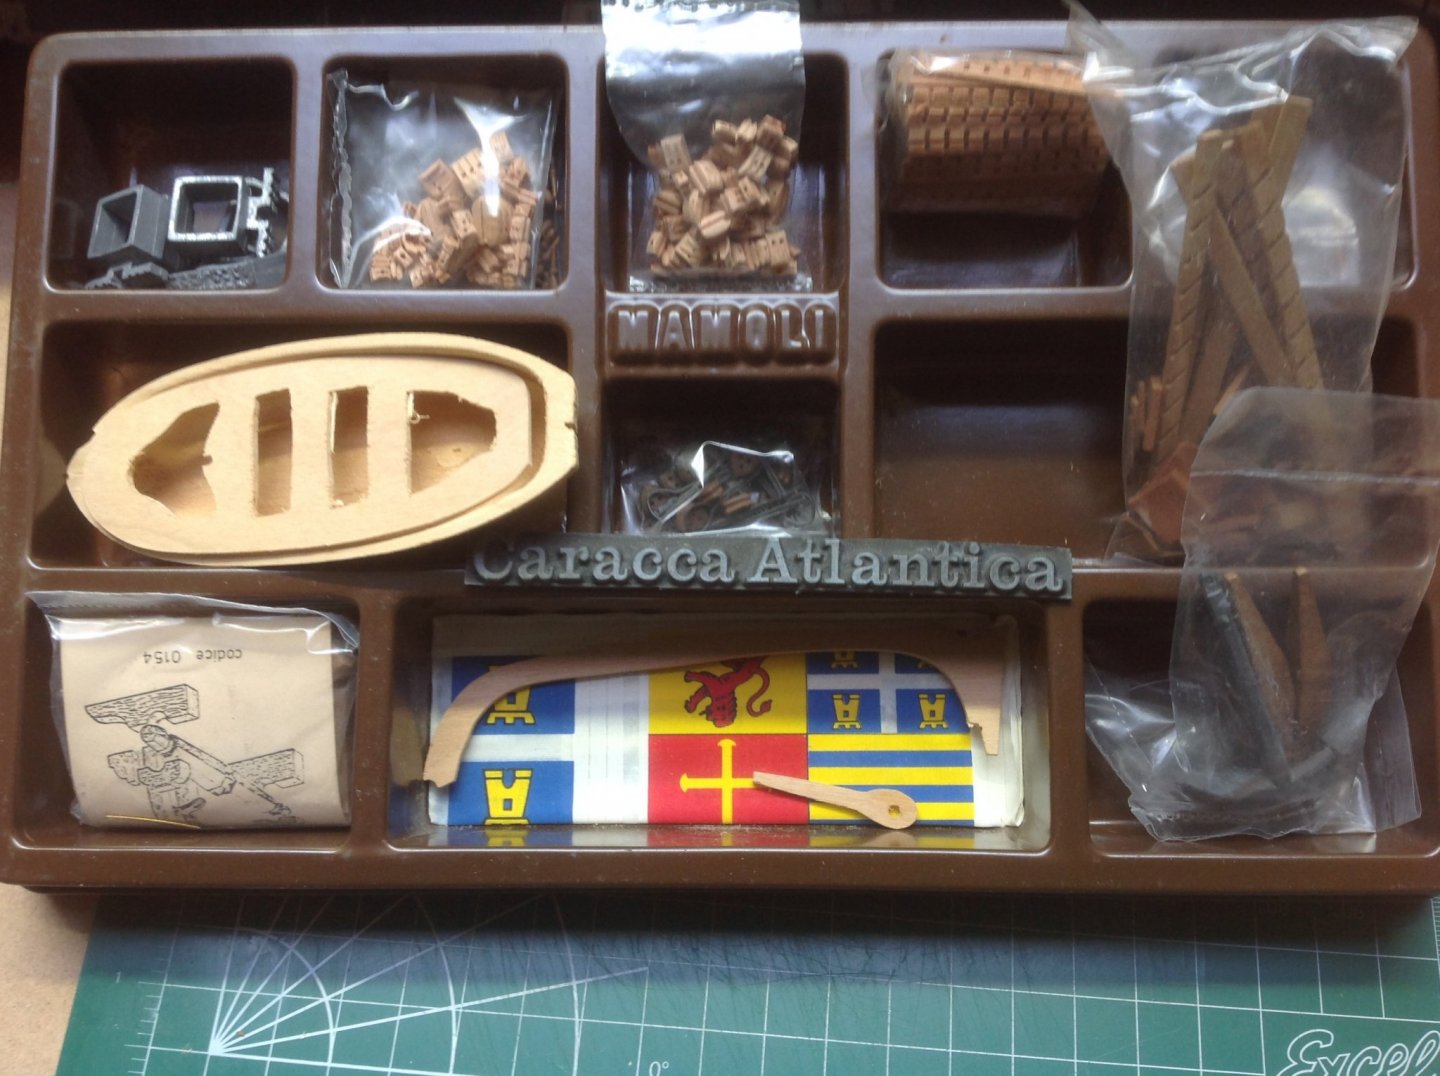
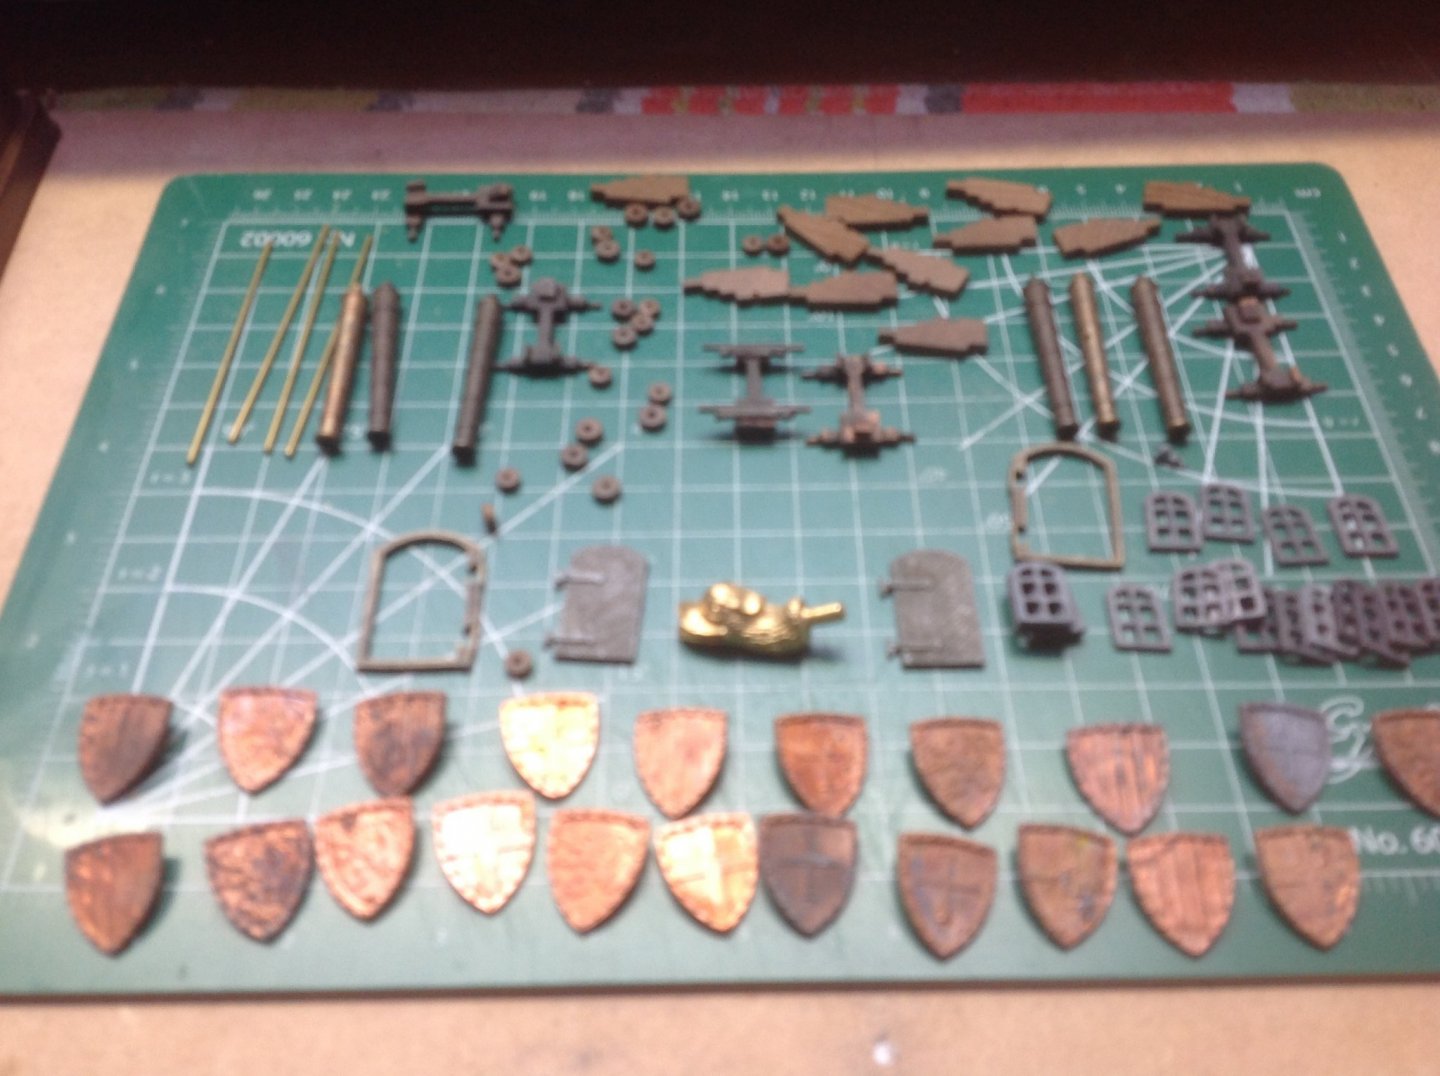
Hello and welcome to all. I guess luck was on my side when I found this kit very cheaply on eBay. I certainly had concerns it would be incomplete yet took a chance and was excited when it arrived as the only contents package in the kit that had been opened was the planking bag. I don't think any are missing but if there are they can be easily sourced. Its a very old kit and on inspection I found the keel, deck and bulkheads to be very roughly cut which will require some recutting and repairing. All the other parts including cast metal, brass and pre finished hardwoods are in great condition. The Mamoli kit recreates a 16th century Carrack, double planking bulkhead construction using lime wood, walnut, mahogany, poplar and other woods. Fittings are cast metal, brass and preformed hardwoods. Nine sheets of plans, 12 cannons and sails. Scale 1:54 Total length 833 mm Total height 650 mm Drawings are dated 1978. A little study has been done and a few pieces of reference have been found. The ship is a three masted Carrack, length of the hull was 35 metres. Height from the top of the mast to the keel was approximately 30 meters. The prints of that name and the documents found in the historical archives of Barcelona allowed the reconstruction of the ships plans, which takes its place between the medieval merchant ship and the galleon , classed for its particular structures of the forecastle and the quarterdeck among the Carracks. Probably around 1519 it took part in an important expedition, which led Fernandez Cortez to conquer Mexico. ( I'm yet to find any other evidence to support that reference ). The outer galleries, one of which is a balcony, the apartments under the small quarterdeck , the super structures of the decks providing the installation of awnings for protection from the sun, indicates they were employed for passengers of wealth and high class. Characteristics of the ship are the escutcheons at the prow, painted with very bright colours and merely having a decorative function. Portugese merchant ships like the Caracca Atlantica played a vital part in the age of exploration. They were fully rigged to run before the prevailing winds, large enough to hold precious cargoes of spices, and armed for protection against hostile natives and greedy pirates ( was there ever another sort of pirate). When Magellan sailed around the world his entire fleet consisted of these vessels, known as Caracks. At this point I'd like to give a huge thanks to Louie the Fly for inspiring and helping to learn a little about the ship before I build. Once again thank Louie the Fly. ill post a few pics I've found of the model once completed. In my next log I'll add the drawing pictures and the contents of the kit along with a few ideas to change the stern galleries which I find unsightly and very busy to the eye. cheers to all Kikatinalong