
HOLIDAY DONATION DRIVE - SUPPORT MSW - DO YOUR PART TO KEEP THIS GREAT FORUM GOING! (Only 36 donations so far out of 49,000 members - C'mon guys!)
×


Mahuna
-
Posts
1,504 -
Joined
-
Last visited
Content Type
Profiles
Forums
Gallery
Events
Everything posted by Mahuna
-
Michael - very nice work! As a final step after shaping and sanding, I use a cloth wheel and jeweler's rouge on a 'dremel' device to polish the brass. Frank
-
 Hi Bruce: Have you been able to find the DMC Cordennet in the appropriate colors, or are you dying it? If so, what are you using for the dye? I have a wide range of sizes of the DMC, all in ecru, and will need to color the rope. Thanks, Frank
 -
Hi Neil and Bruce: Thanks for sharing your websites with us - you both have awesome talent. I'm enjoying seeing Bruce's work on Lightning, and I hope that Neil will share a build log with us soon. And I love Laura's wildlife work. I'm a bird carver, and think her birds are perfect! Frank
-
Bruce: A beautiful ship, and wonderful workmanship. I wish I had seen your original build log. Frank
-
I recently bought a used Sherline lathe and milling machine, with many of the available accessories - a great deal. Since the machines are about 15 years old, and since the plant is within a day's drive of my home in the Phoenix area, I decided to bring the machines to Sherline for reconditioning. I spoke to Fred Smittle in the Sherline customer service area, and he said they would be able to turn the machines around in the same day if I got there early enough in the day. My friend Peter (my mentor in ship modeling) and I drove to Carlsbad on Sunday, so we were able to get to the Sherline office a little after they opened on Monday. We dropped off the machines, had a very good tour of the plant with Craig Lebuse, then visited the nearby Craftsmanship Museum (started by Joe Martin - the owner of Sherline). The machines were ready by the time we returned to the Sherline plant just before noon, so we were able to get back on the road to the Phoenix area and got home at a reasonable time. I've read a lot of great comments about the Sherline tools on MSW, and anyone I've spoken to about them has had high praise for them, so I'm really glad I found them on our local Craigslist and I'm excited to start using them. The customer service, professionalism, and friendliness of the staff at Sherline all match the quality of their product. If you're ever in the Carlsbad area of California I highly recommend a visit to Sherline and to the Craftsmanship museum. Thanks to Craig, Fred, Francisco, and Kim at Sherline, and most of all thanks to Joe Martin for building a great business.
-
The article at the following link may help. http://www.woodzone.com/Merchant2/articles/sandpaper/ Frank
-
I've read that you can use an old blade in place of a stone, and hone your good blade on it. I tried it and it seems to work. But with the price of a 100 blade box it just seemed like too much hassle to do it repeatedly, so I generally swap out old blades for new. Frank
-
Amazon has several to choose from. This is the one I have: http://www.amazon.com/Mini-Tap-And-Die-Set/dp/B005NJUJ86/ref=sr_1_6?ie=UTF8&qid=1379854298&sr=8-6&keywords=jewelers+tap+and+die
-
Ed I appreciate your thorough explanations, even covering Adobe settings and using your own errors as teaching points. What a learning experience your build logs are! Frank
- 3,618 replies
-
- 1
-

-
- young america
- clipper
- (and 1 more)
-
Hi Ed: This is great news! My preference is commercial sailing vessels, and have the Leon and Dunbrody in my plans for future builds. I'll be following your build with great interest. Frank
- 3,618 replies
-
- 2
-
-
- young america
- clipper
- (and 1 more)
-
Thanks Ira! I'll definitely try this. Very well thought out and presented. Frank
-
Belt/disc sander questions
Mahuna replied to md1400cs's topic in Modeling tools and Workshop Equipment
I had the sander from Micromark, and my biggest complaint was that the table for the disk sander would not stay square to the disk. I upgraded to the Byrnes sander and wish I had originally bought it - would have saved some money. Like all his tools it's very precise, which is very important at smaller scales. Frank -
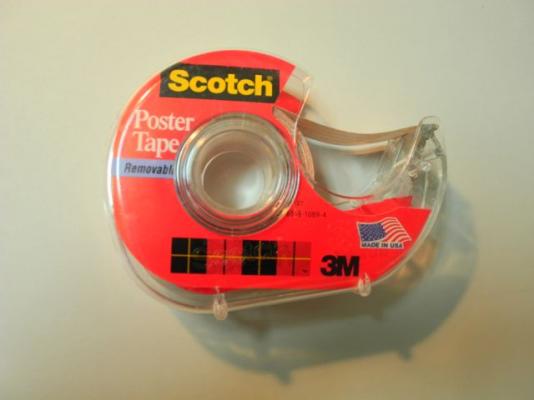
I've started using Poster Tape to temporarily hold small items in place. It's a two-sided removable tape that doesn't leave any residue, and can be stuck to paper with no rips or tears when removing. Very useful little tool! Frank
-
- 2
-
-
Standing rigging color preference and historical musings
Mahuna replied to Chuck's topic in Masting, rigging and sails
Hi Chuck: I prefer the grey or a warm black (black that leans towards a brownish tint). Of the two choices you show for standing rigging I agree with you that the grey looks better. I've been dyeing rope using a dark walnut water based wood dye with some blue-black ink in it to darken it - it came out grey with a hint of brown - I like it. Frank -
Freezer Paper - an awesome tool
Mahuna replied to Mahuna's topic in Modeling tools and Workshop Equipment
I doubt if baking paper is the same thing - I don't think freezer paper would do well in an oven, and it seems like baking paper would be used in an oven as a lining on a pan. Freezer paper has a wax coating on one side and plain paper on the other side. The plain side is not textured - it's very much like bond paper, maybe slightly softer. The waxed side is what melts and adheres to the wood. -
Freezer Paper - an awesome tool
Mahuna replied to Mahuna's topic in Modeling tools and Workshop Equipment
It prints the same as regular paper, so if your printer is doing a good job with that you shouldn't have a problem with freezer paper. -
Freezer Paper - an awesome tool
Mahuna replied to Mahuna's topic in Modeling tools and Workshop Equipment
It's wax coated on one side only. The other side is like a regular bond paper, and can be written on or used in a printer. -
Dixie Art & Airbrush Supply is a good source for parts http://www.dixieart.com/Dixie_Art_Supplies_Airbrush_Main_Page.html Hope this helps, Frank
-
One of my favorite sayings is "A happy wife is a happy life" - and it's true! I started buying tools before I had thought through what I really needed, and the level of accuracy needed at the scales we work at. Consequently I wound up replacing a lower priced disk/belt sander with the Byrnes disk sander, and replacing the Luthier's Friend with the Byrnes thickness sander. I could have saved some money if I had slowed down a little! My son is happy though - he gets my rejected tools.
-
Milling Bit Questions and Vendor Recommendations
Mahuna replied to Jay 1's topic in Modeling tools and Workshop Equipment
Hi Jay I don't have a mill yet, but expect to get a Sherline Mill and Lathe setup in the next few months. In anticipation, I've been reading "The Home Machinist's Handbook" by Doug Briney. I highly recommend it - very simple and clear, and aimed at you and me - the beginning home machinists. From what I've read, Harvey is right on with his advice. Interestingly, I also just had hand surgery and the stitches are still in - the only difference from Harvey is that the surgery is on my left hand and I'm left handed. To add some - HSS is what we should use - carbide cutters are more expensive, are brittle, and are mostly used for machining hard materials on automatic machines - not what we're doing. The author also seems to recommend 4-flute cutters - smoother cuts, less vibrations, and work on most materials, although some can't be used for plunge cuts based on the flute configuration. I've also been thinking about doing some 'milling' on a mini drill press with x-y table, but everything I've read seems to discourage it. Drill presses are built for vertical stress, not the horizontal stress you get from milling. If you have a full-size drill press you'd be better off using that for the milling type of cuts, using some kind of jig, instead of the mini drill press. Another option for the full size drill press is to get an x-y table built for that size machine - I got one from Harbor Freight for less than $70. The best advice I can give is to get the book I mentioned. It's recommended by Sherline, even though the owner has published his own book. Frank- 17 replies
-
- 1
-
-
- Mill
- Milling Machine
- (and 2 more)
-
Ed Thanks for the additional tutorial on liver of sulfur - excellent as usual. I've followed your recommended approach and it works beautifully. Frank
-
Hi Ed: Thank you for taking the time to post (and re-post) your work - I can't tell you how much I've learned by reading about your tool usage and techniques. You really are a master ship modeler. I wanted to experiment with the liver of sulfur for blackening copper, and I see there are several choices. Can you give us a little more detail on the form of the chemical that you use? I tried the 'stabilized' version, which is a light gel, and the instructions say that the metal needs to be warmed, and the gel needs to be diluted with hot water. I don't remember you mentioning a preparatory process like that in the blackening, and was wondering if you're using a different form of the sulfur. I tried just painting the gel on a piece of cleaned copper wire, and after a couple of minutes it did blacken the copper but also left a fairly thick residue which I had to wipe off. I can't see doing that satisfactorily if the copper piece is already installed. I also tried diluting the gel in tap water, and it did blacken but took a lot longer. There was still a little residue, but that could probably be washed off using a wet brush if the item is already in place. Thanks again for sharing the great work that you've done, and thanks in advance for any additional information you can give on the liver of sulfur (it really is pretty stinky stuff!) Frank
-
Iwata is a high-quality airbrush manufacturer. This is a double action airbrush, and I think it's an older model. The newer models are generally in the $200 plus price range and have a cutaway in the handle for a fine adjustment knob. I have an Iwata and am very happy with it. Here's a link to a site that has some good lessons and other information on airbrushes: http://howtoairbrush.com/airbrush-lessons/ Enjoy your new airbrush! Frank
-
Hi Meredith: From the description of the lumber you want to cut, it seems to me that the 14" bandsaw is more than you need. I have an old 14" bandsaw that I was given by a friend. He shipped it to me after buying it refurbished, and the shipping was more than he paid for the saw. It's a real workhorse and I love it, but it's fairly big. It replaced a 10 inch swiss saw that I had, but I needed the bigger size to cut large blanks for bird carving (hawks, owls, and falcons can be pretty big). If I was only building ships, the 10" would have been fine for my purposes. If you are comparing quality bandsaws, the only real difference between 14" and 10" is the clearance - meaning that you can cut bigger pieces of wood on the 14" - and it doesn't sound like that's your requirement. I would make a decision on size first, then compare available saws in that size. As always, buy the best quality you can afford, but don't pay extra for a size you don't need. Hope this helps, Frank
-
Freezer Paper - an awesome tool
Mahuna replied to Mahuna's topic in Modeling tools and Workshop Equipment
I discovered today that you can buy freezer paper pre-cut to 8.5 X 11 so that it can fit in a printer. It comes in 30 or 50 sheet packages and is called Quilter's Freezer Paper. So far I've seen it in Joann's and in Amazon. It's more expensive than the roll normally found in the supermarket, but it saves the cutting to size and trying to get the curl out.
