LyleK1
-
Posts
541 -
Joined
-
Last visited
Content Type
Profiles
Forums
Gallery
Events
Everything posted by LyleK1
-
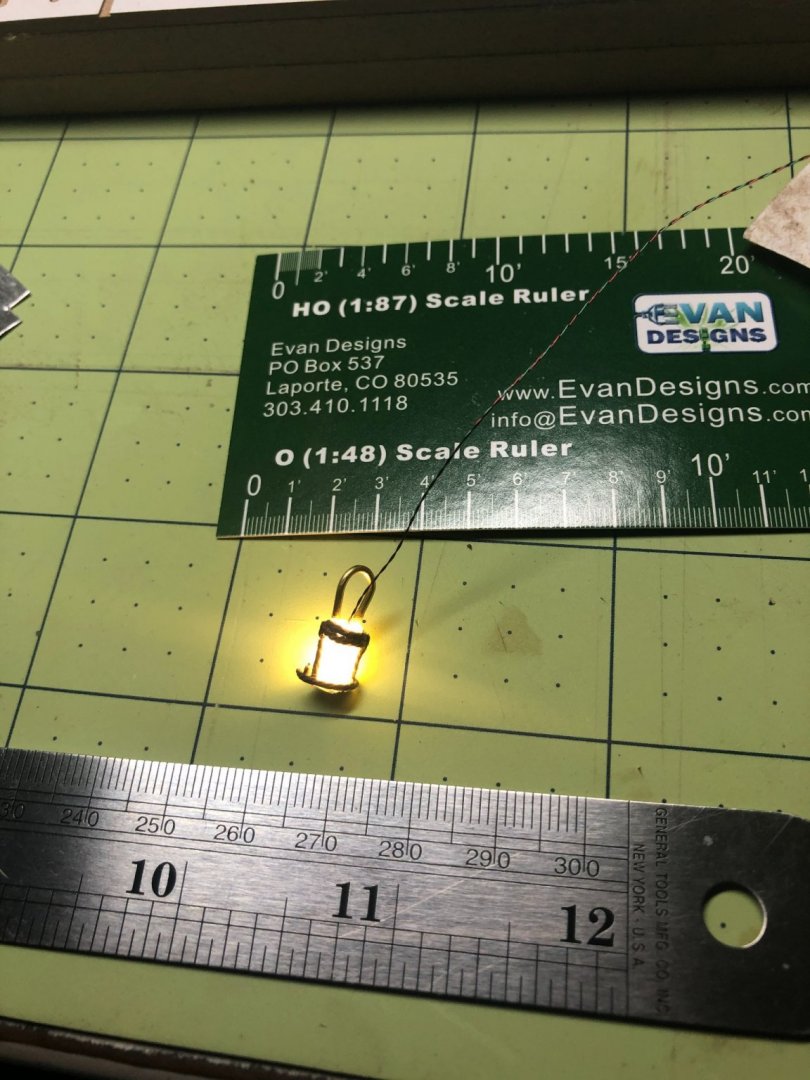
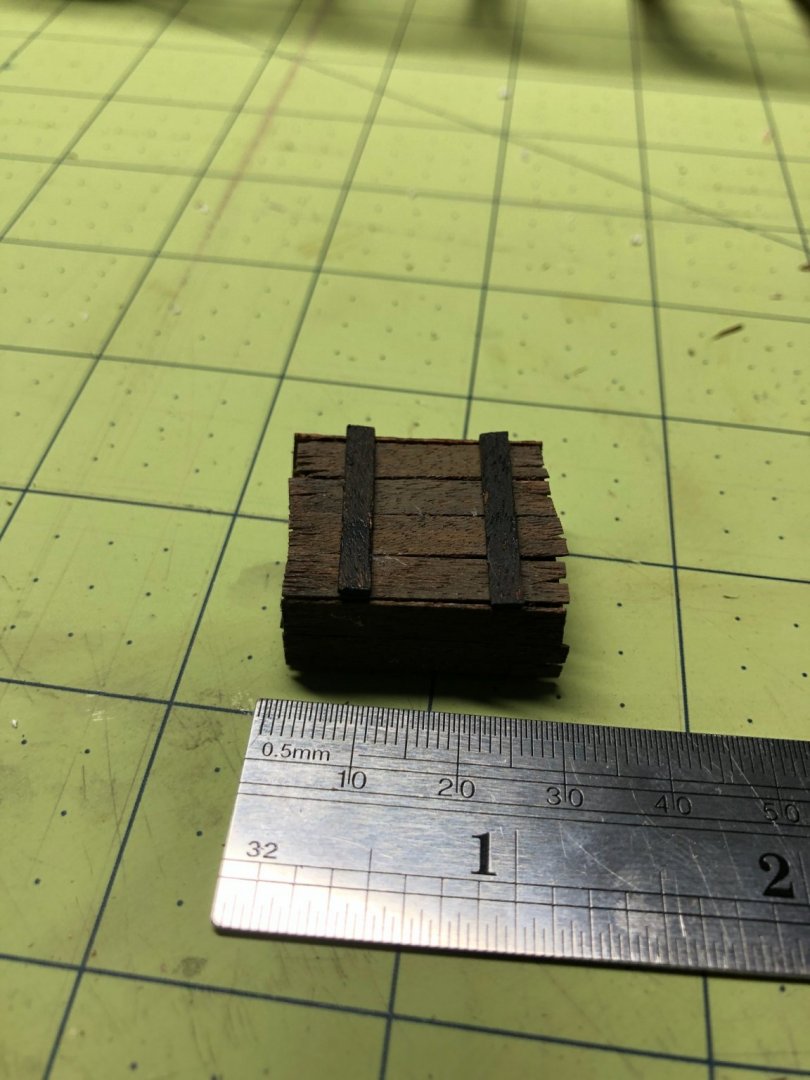
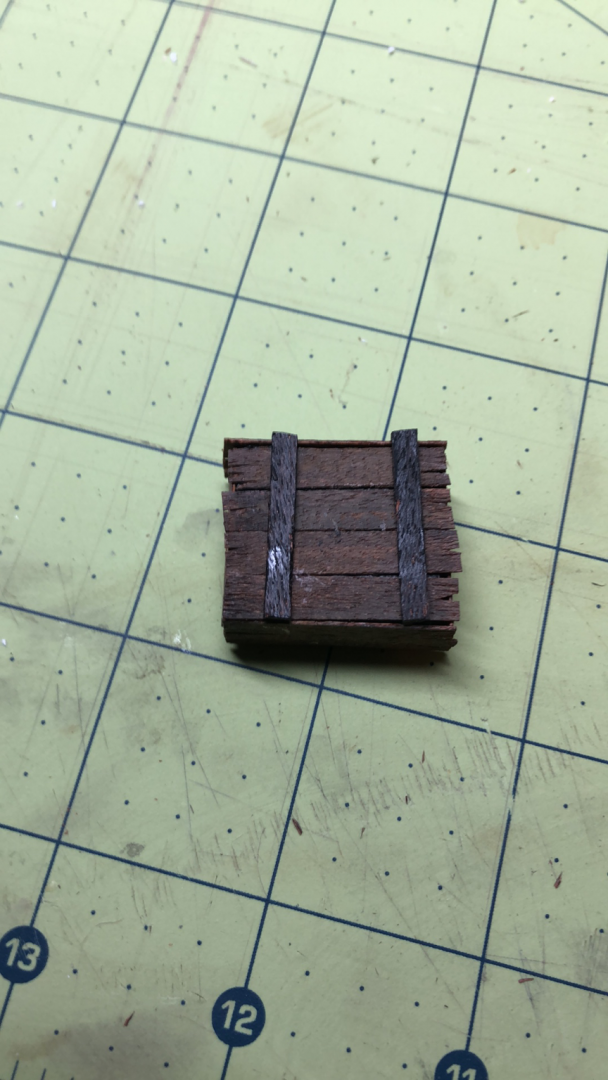
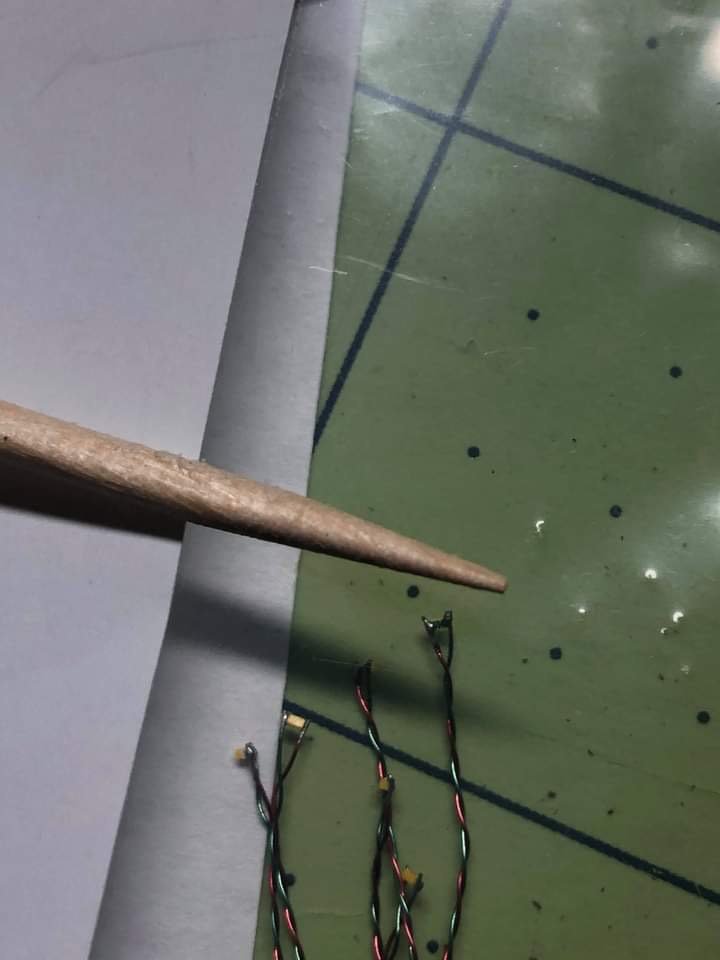
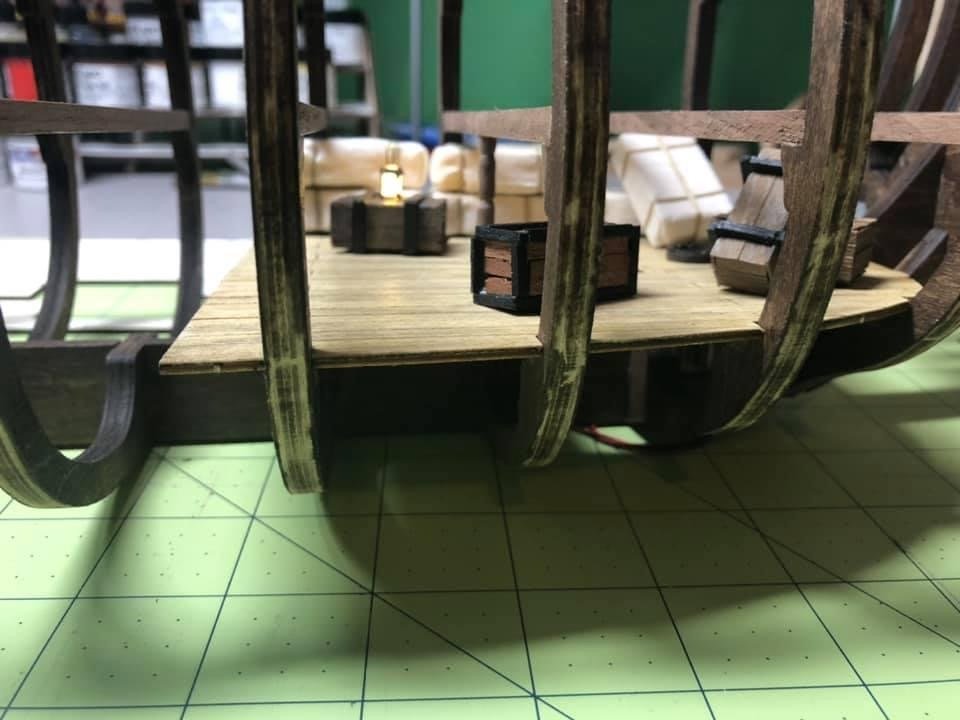
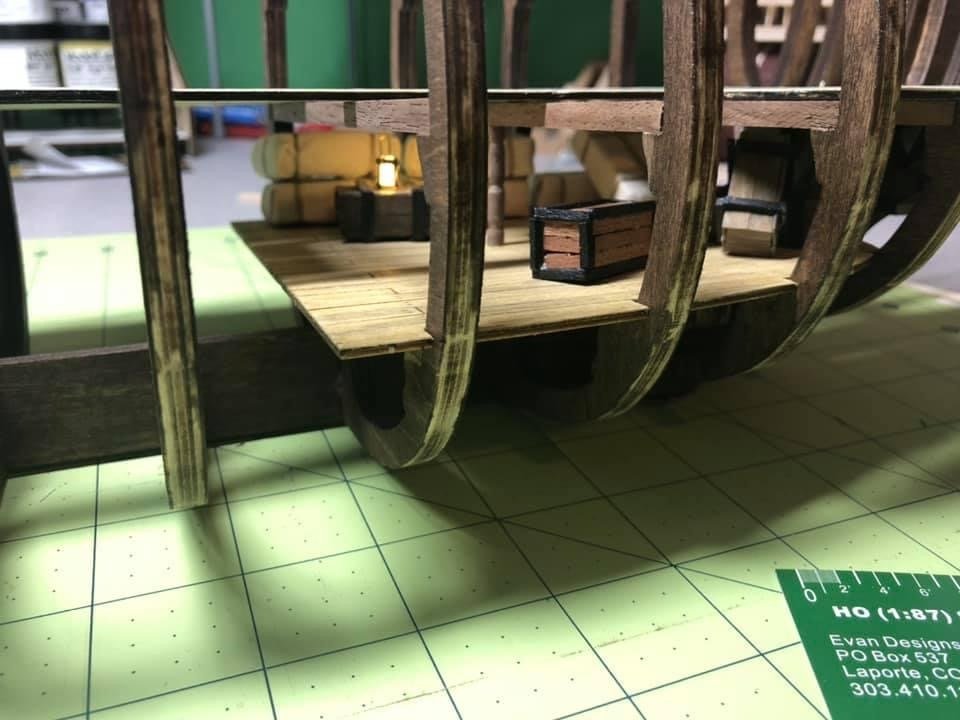
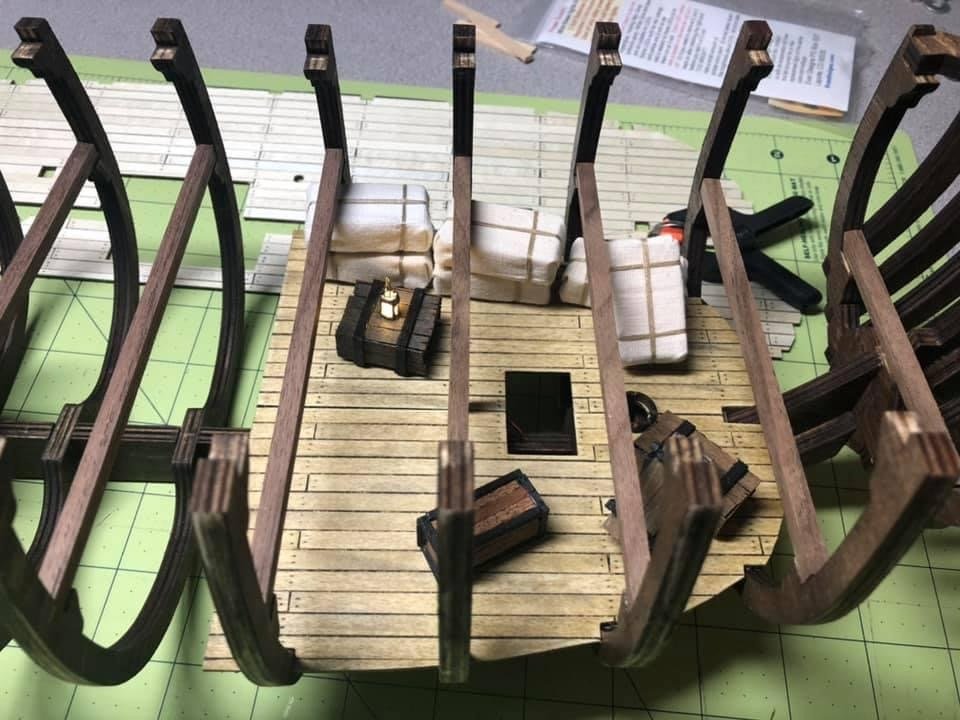
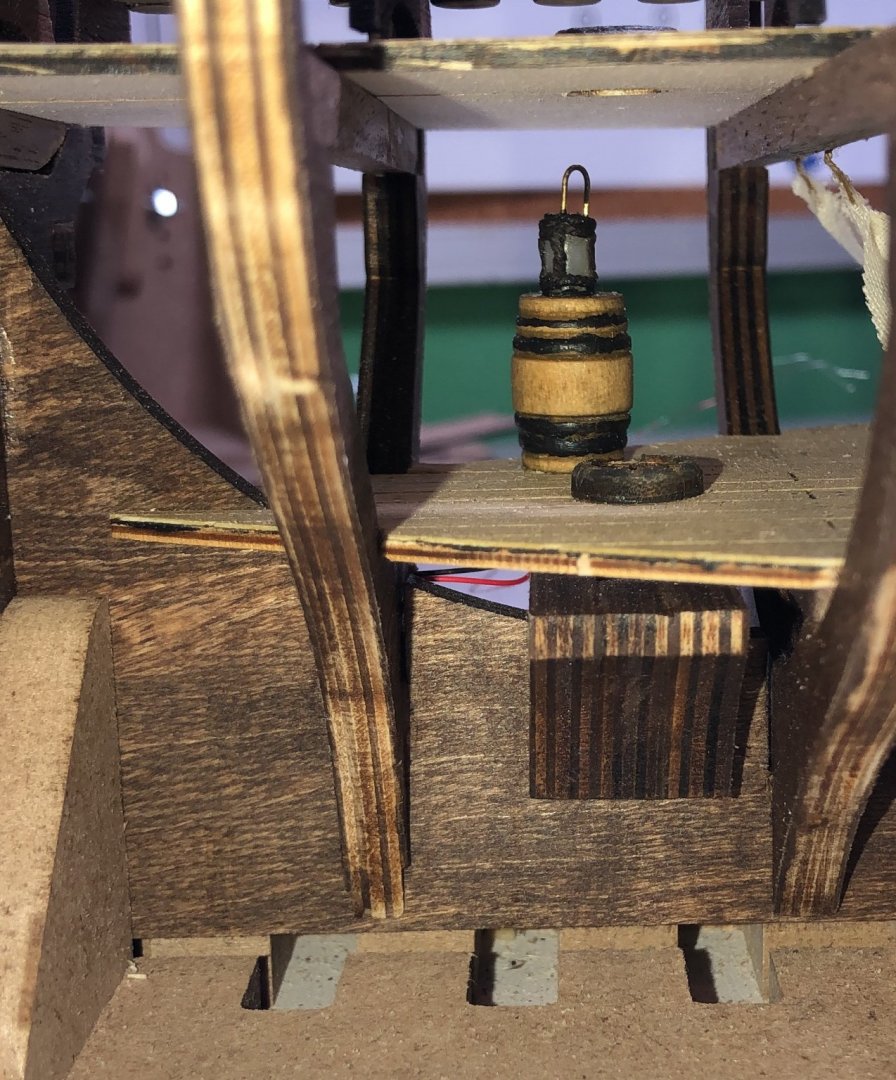
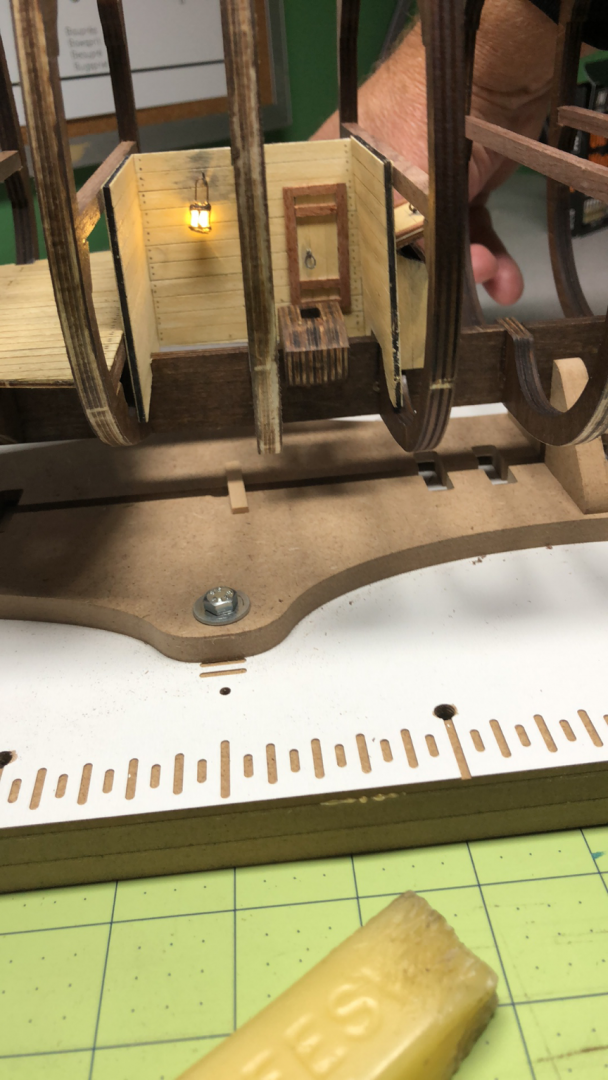
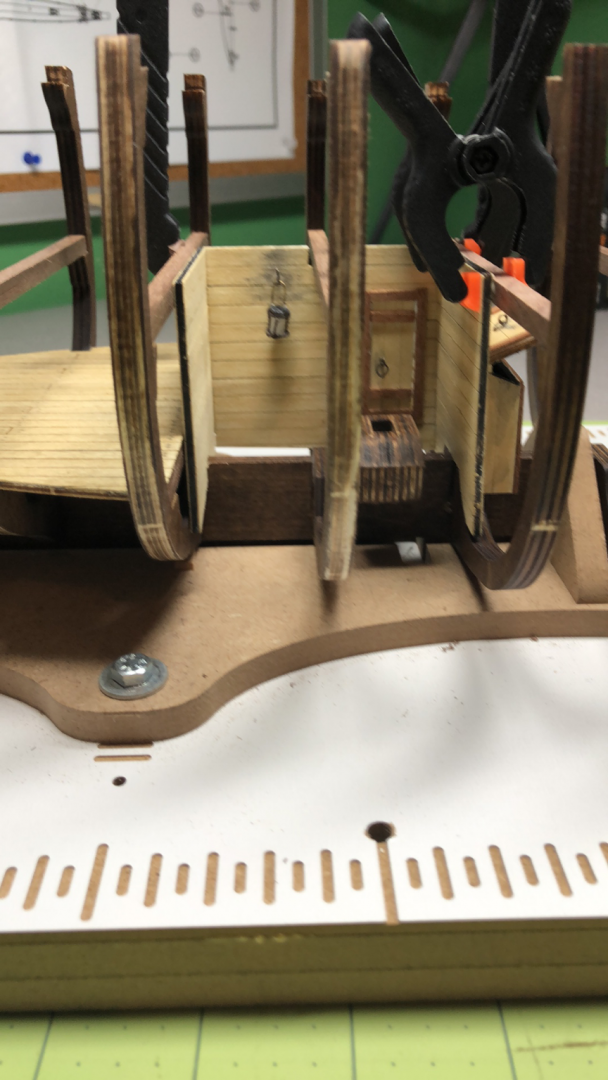
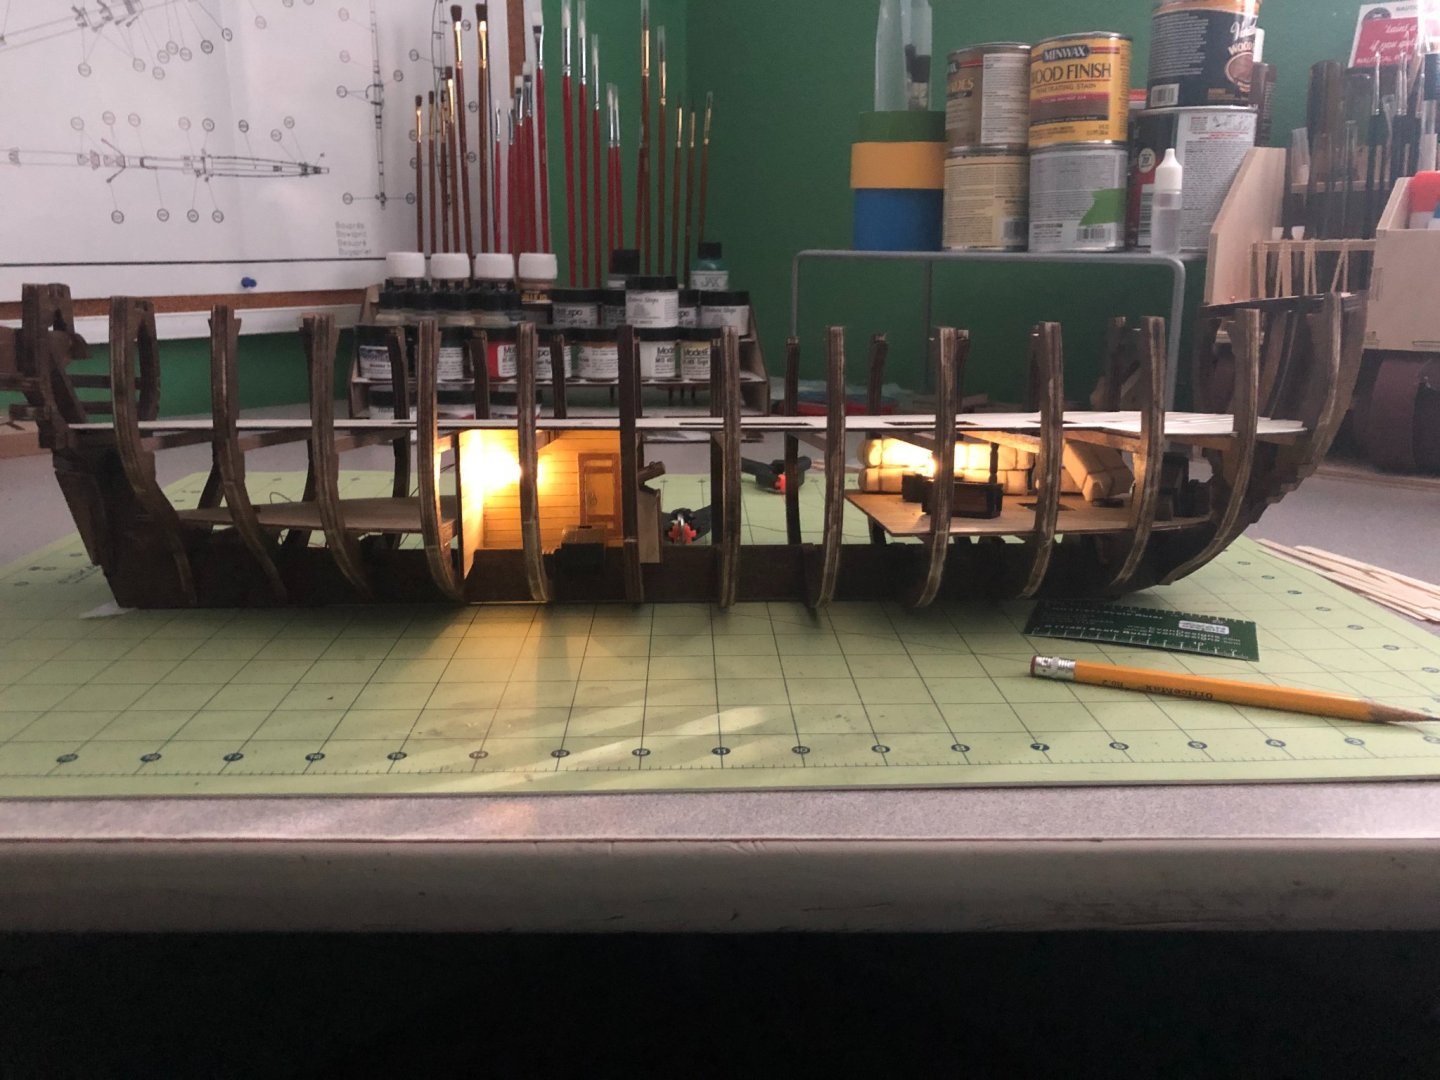
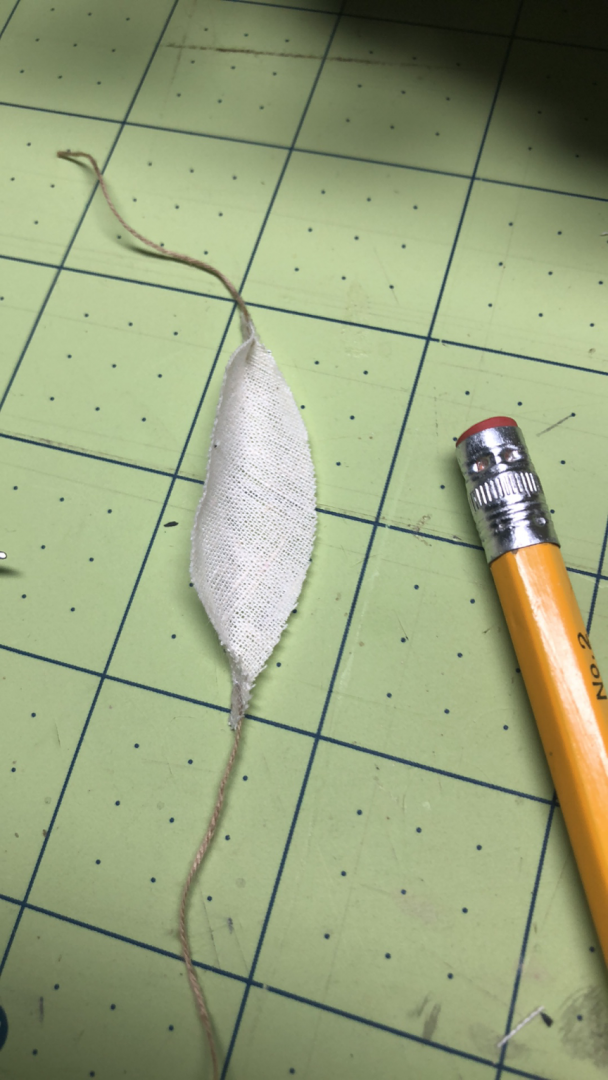
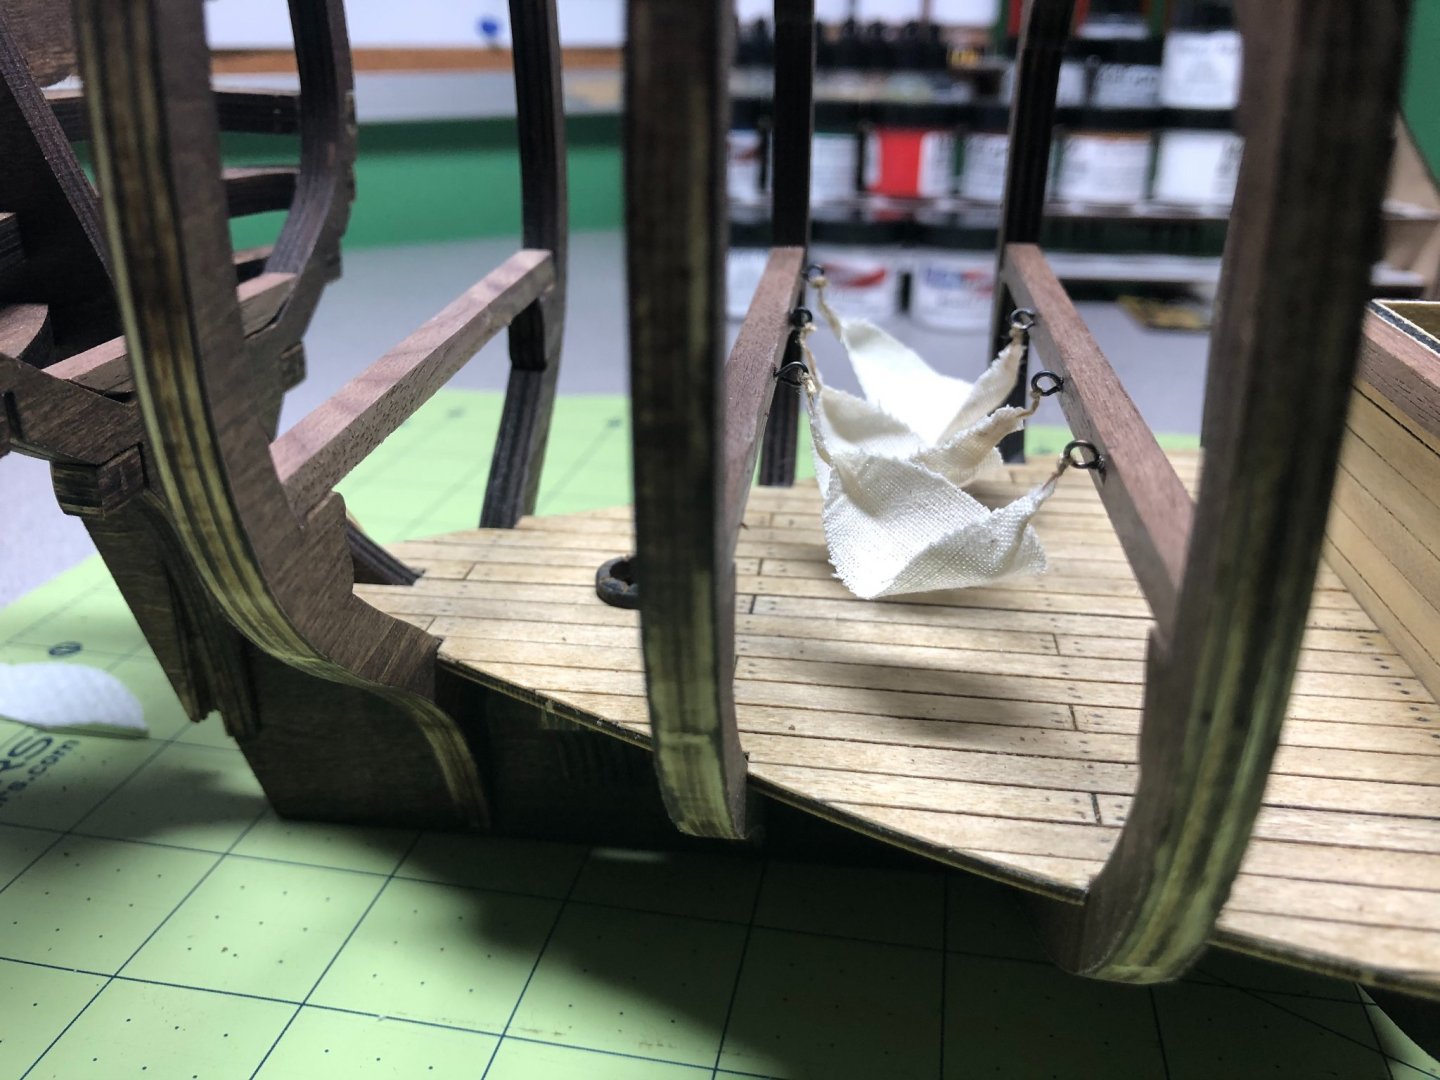
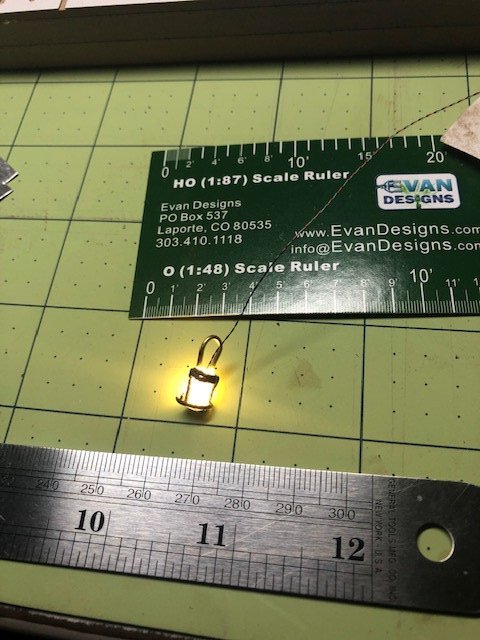
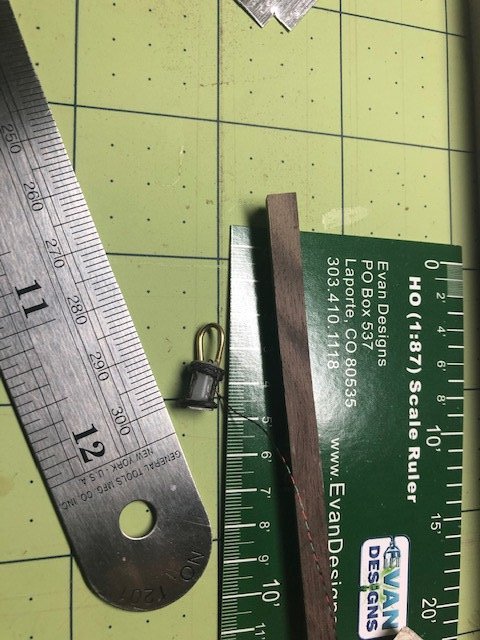
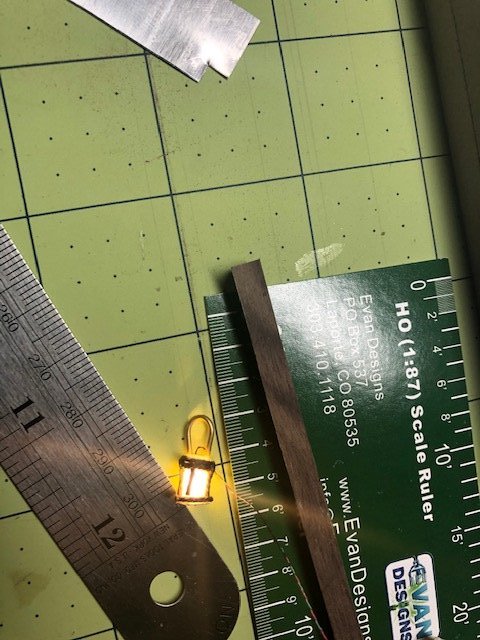
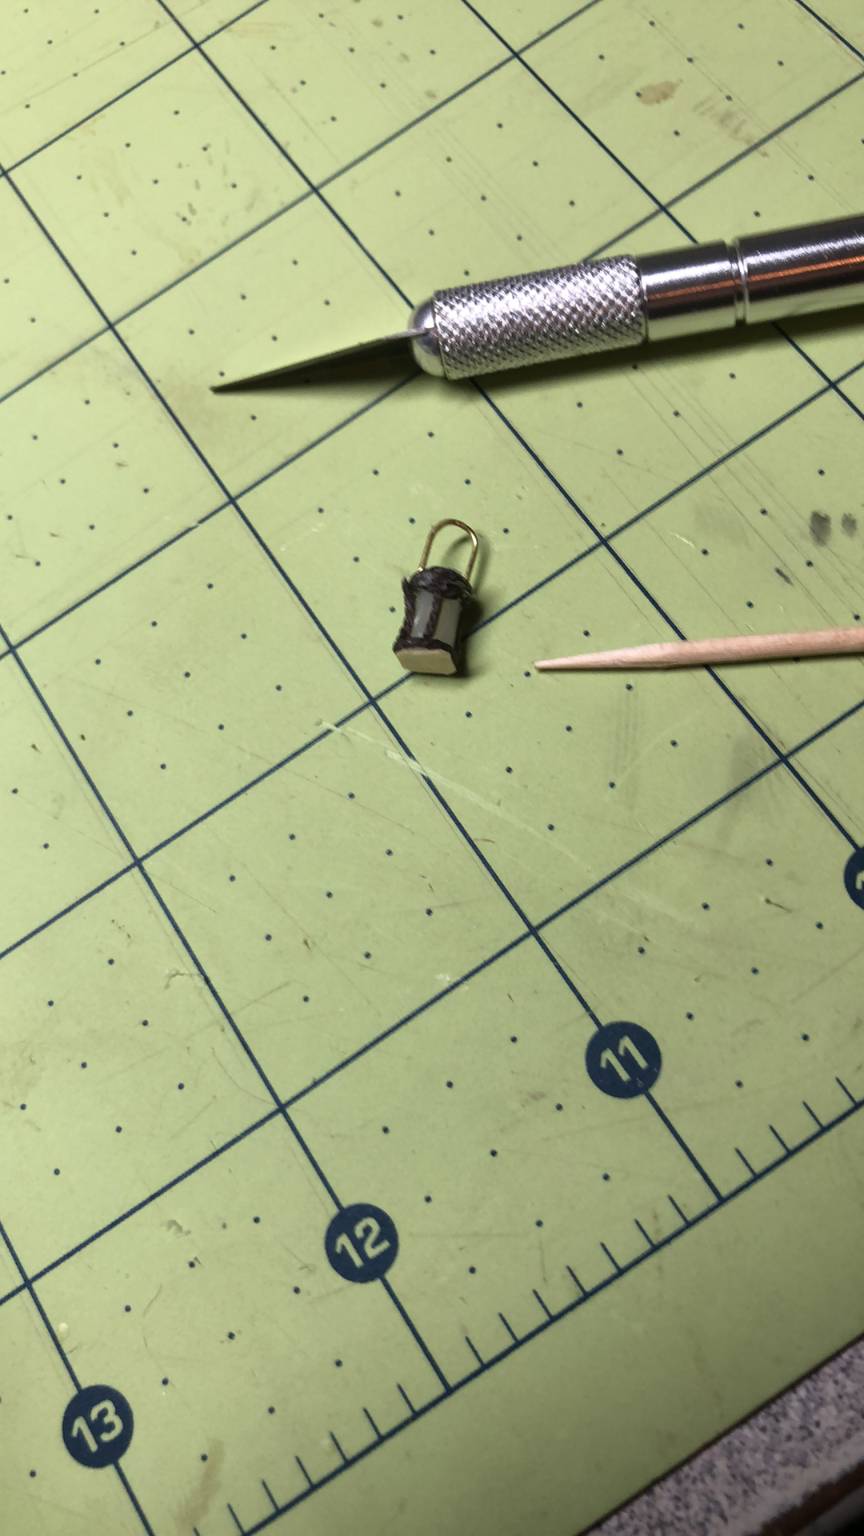
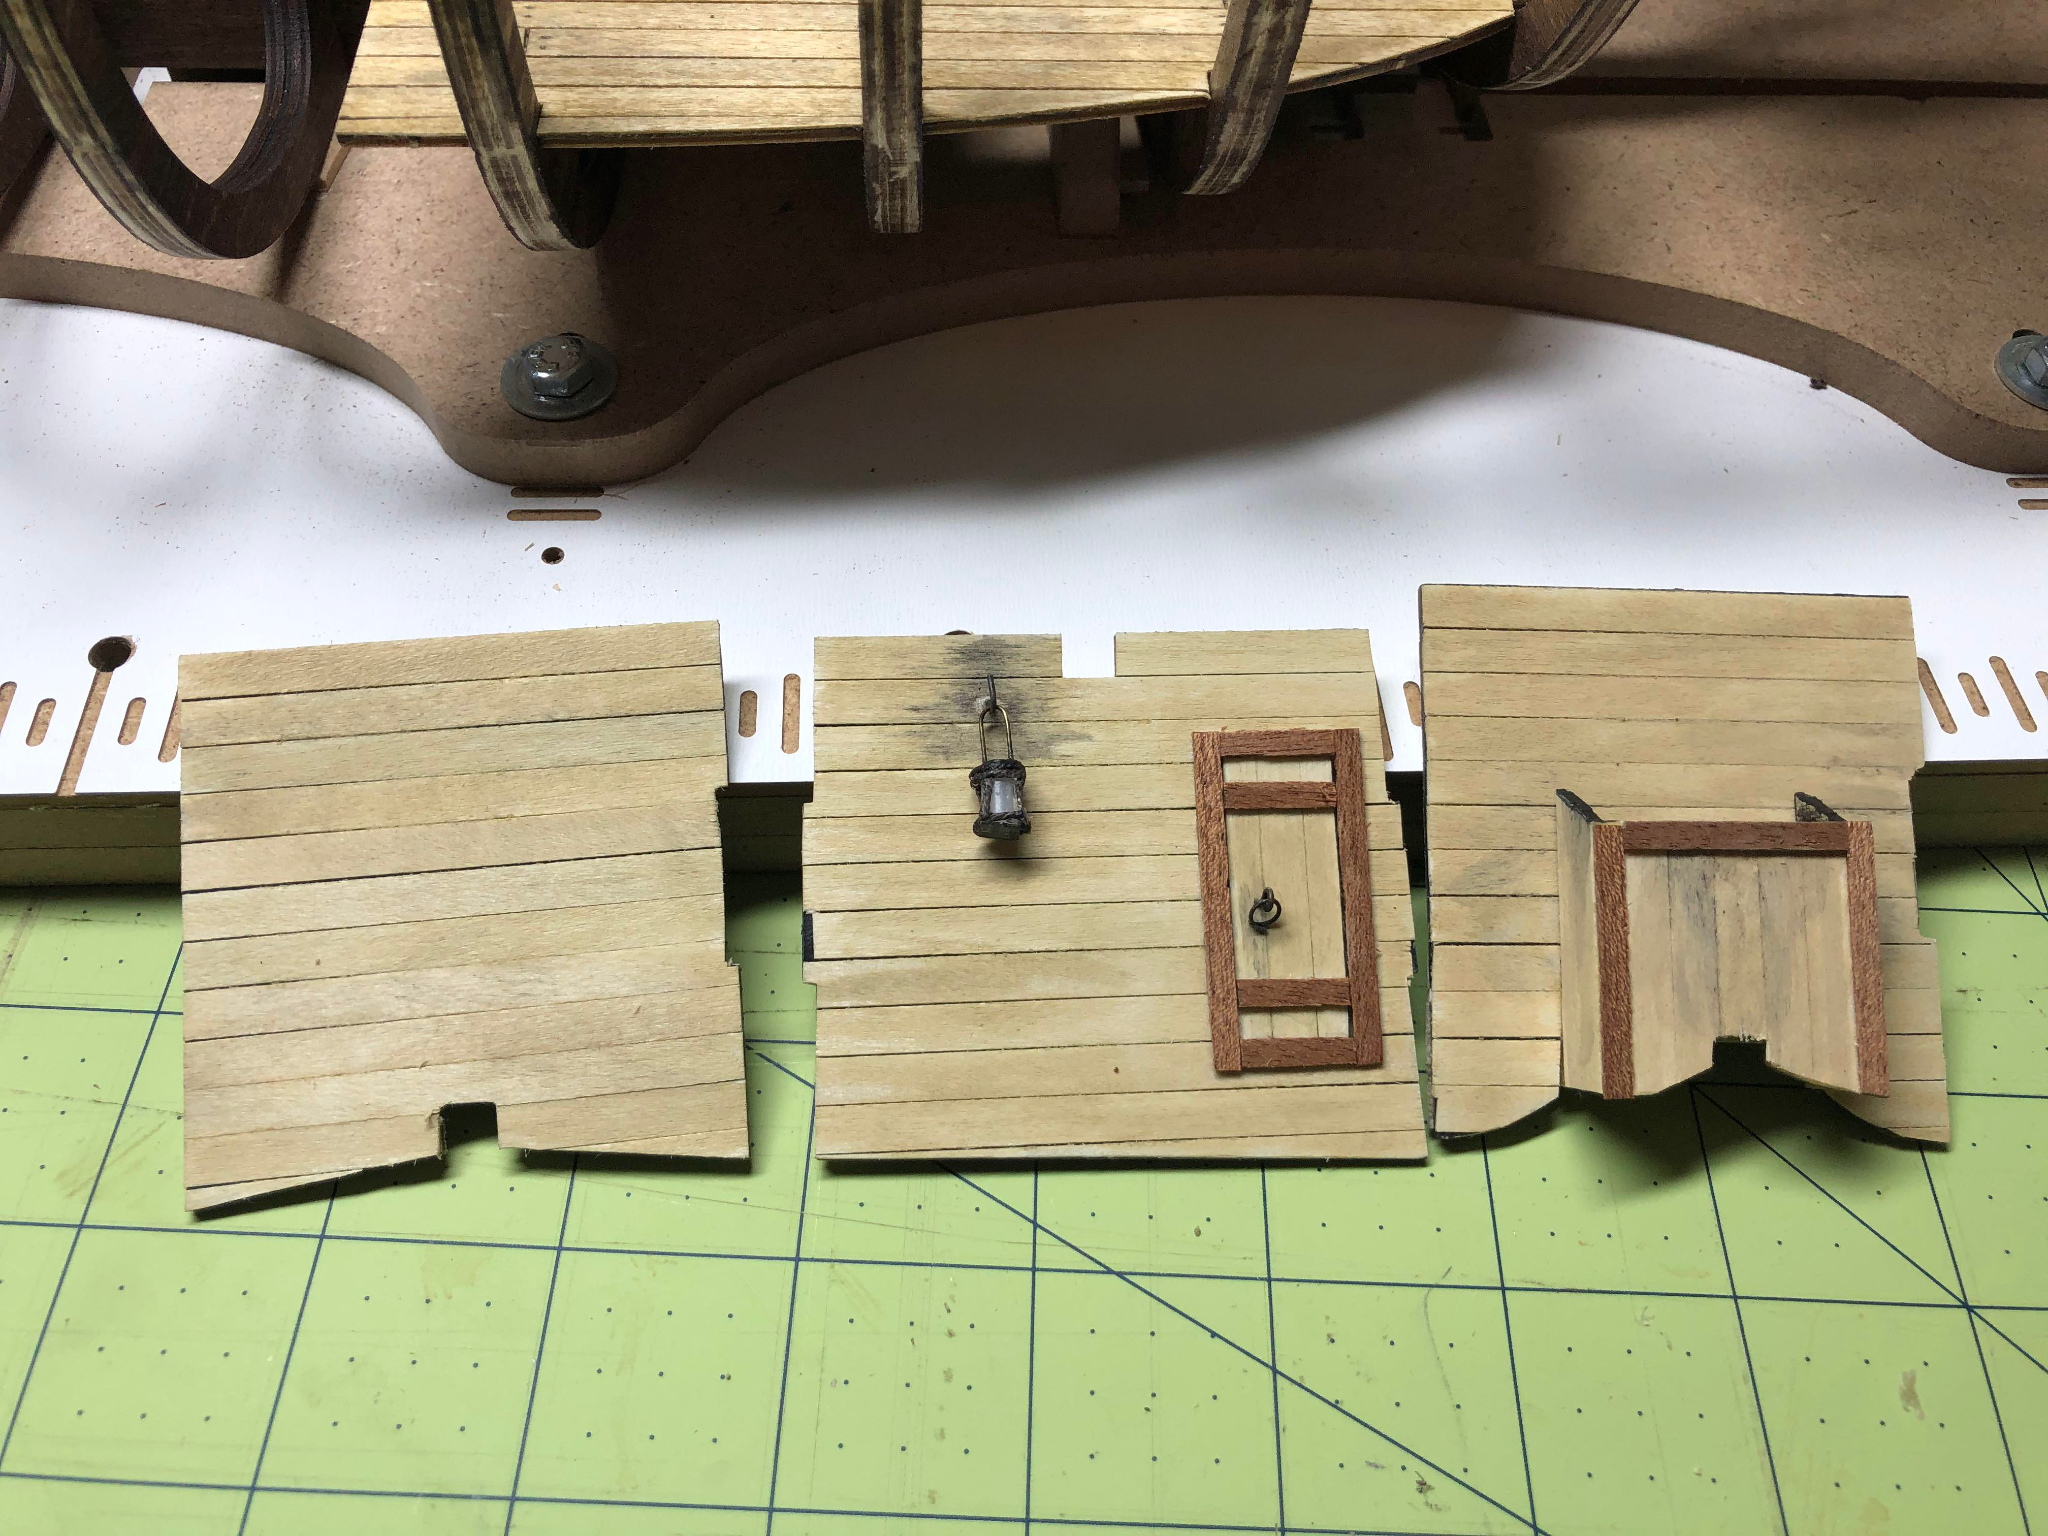
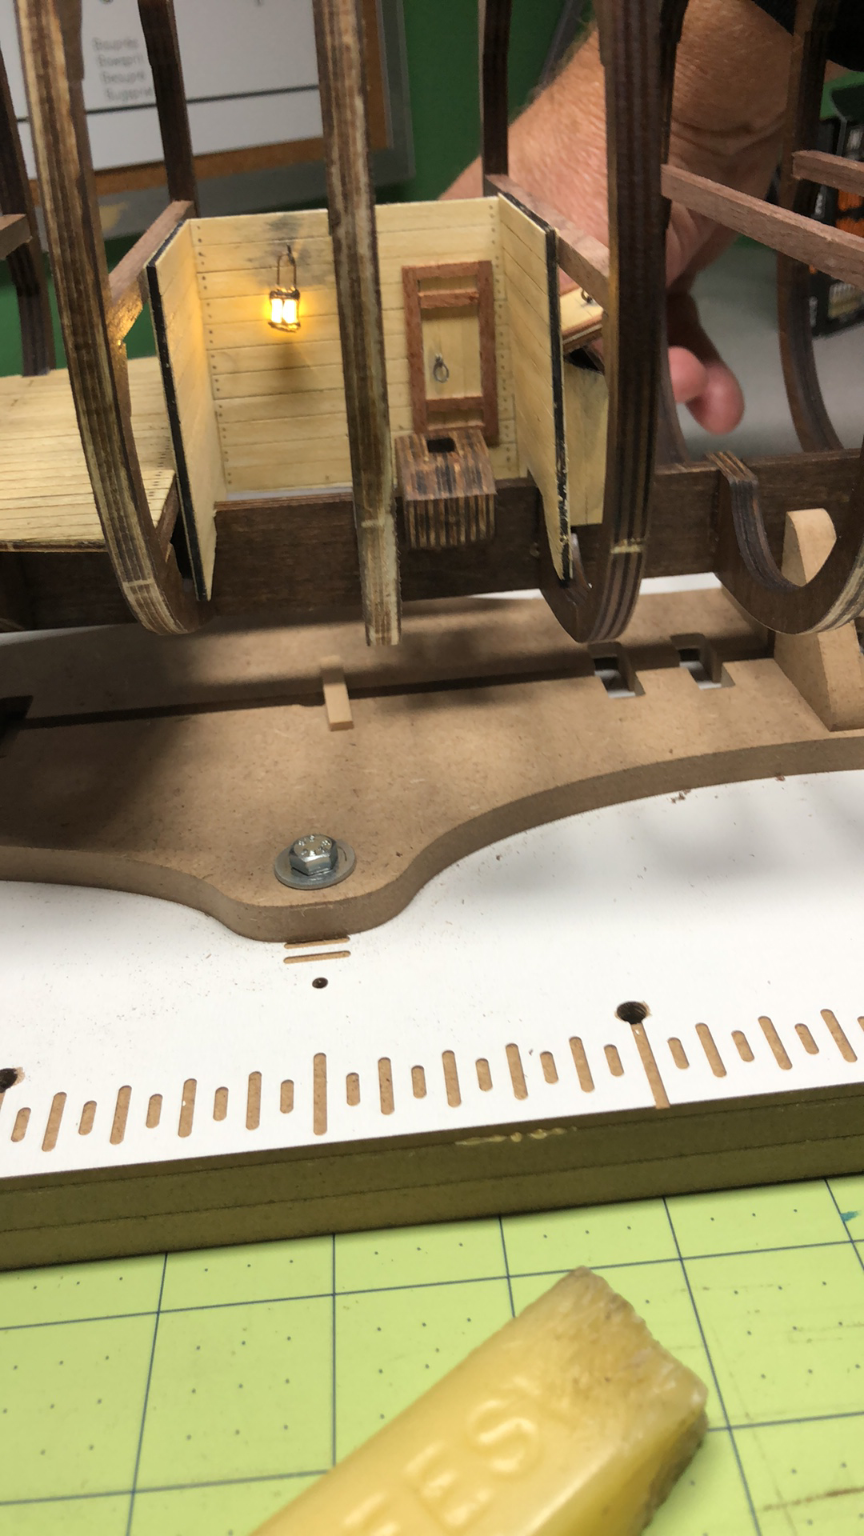
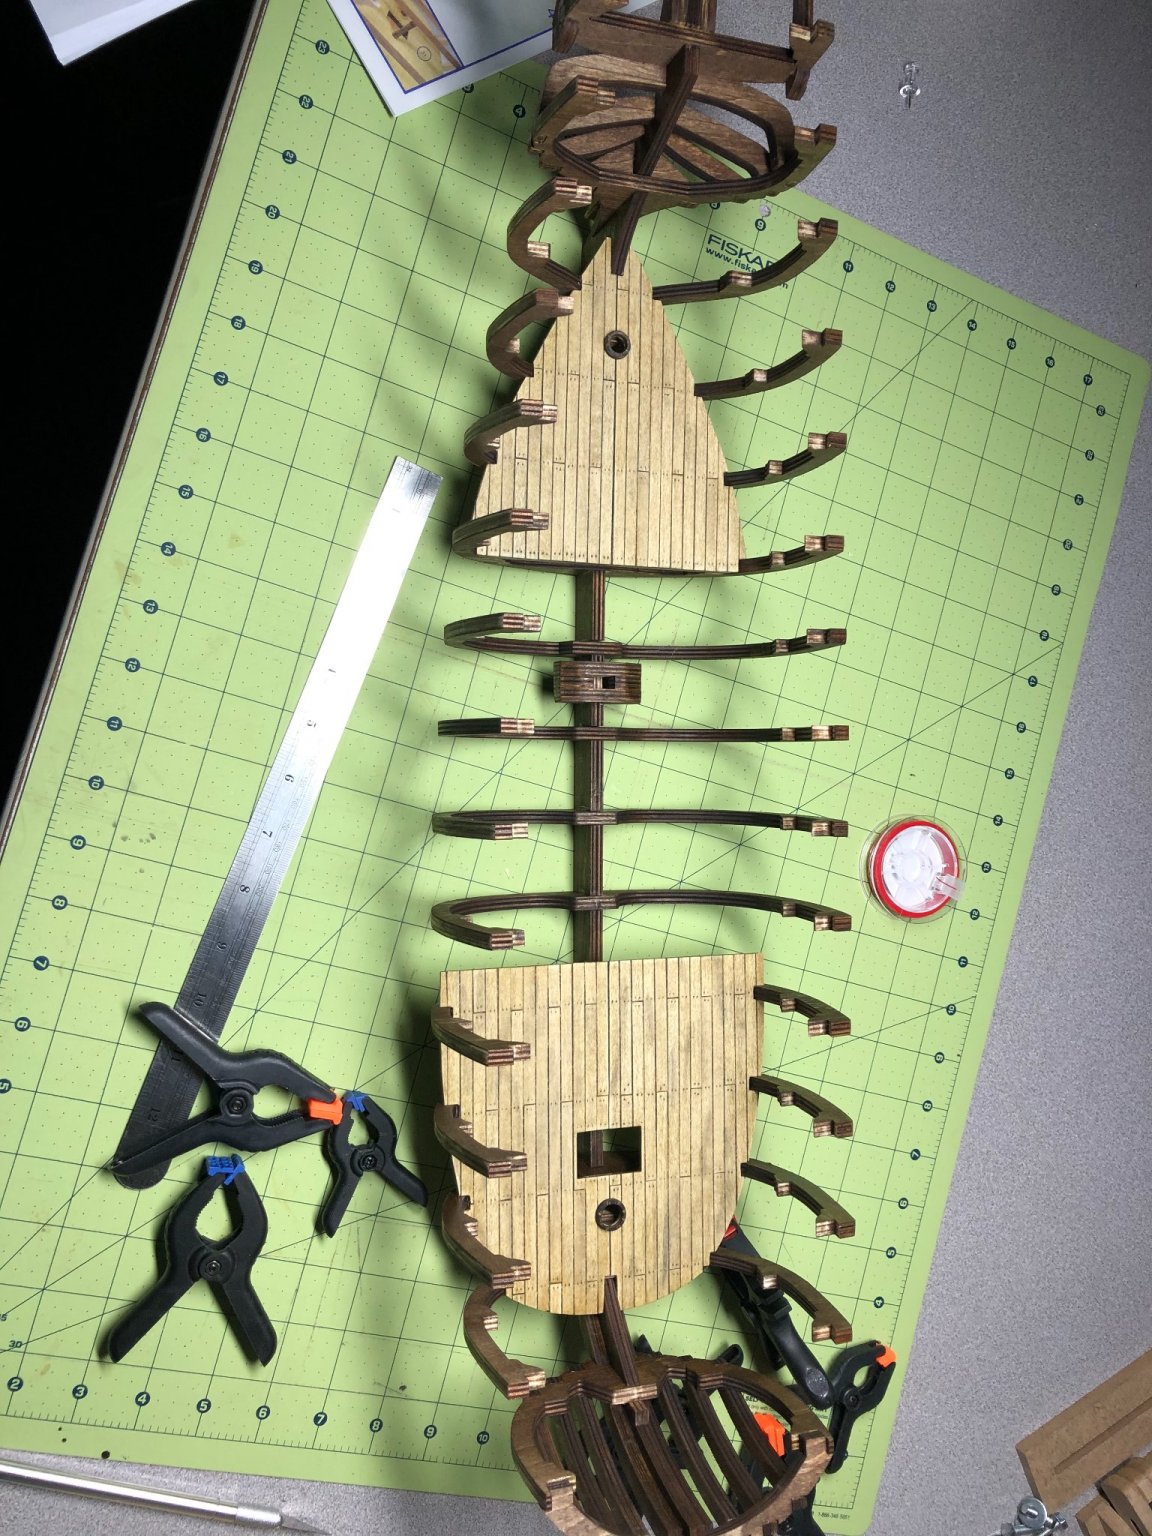
 Although the kit comes with some extras, I just thought there wasn't enough and the model looks empty. So, I decided on a few things: 1. Lighting will be added throughout the lower decks and the two stern lanterns, and 2. Detailing will be added to make the model look "lived" in. Let's start with the lighting... Again, something I had not attempted on previous builds. Lots of research and perusing other attempts by other modelers. Technology has advanced to the point that small LED's are ridiculously small! I purchased "Z" size LED's. These are less than a millimeter across, are already wired and very easy to hide. But how to hide them and make the model look realistic...? I decided to make lamps! This is a proto-type of the lamps to be used. I made the lanterns from a piece of very small PVC, brown thread and brass rod. Eventually, I reduced the size of the handle and cleaned up the thread work. This one is done except for some black paint: Hiding the wiring would be the challenge! For the lower deck, I decided to have three lamps. One forward one aft and one on the bilge well (more on this one later). Staging them so that wires wouldn't show was the next challenge. For realism, I made some crates and I used a barrel. First, the crates: Again, lots of experimentation! Aging the wood was a process. The above photos were taken while working through the process and the only shots I own. However, the process wasn't complicated as long as the end product looked like an old crate! infinite ways to achieve the look. I cut small cubes of Styrofoam and glued the wood to it. In the case of the bow section, I ran the wiring for the light through the deck and up through a crate. The I glued the lantern to the crate! The end result: In the aft section, I did a similar trick but I used one of the barrels that came with kit: Ignore more poor painting job on the barrel!! The last one was placed in the bilge well hanging on one of the walls. The bilge well was a simple task to assemble but I deviated from the instructions and made the walls more time period realistic. Of course, aging was done, the lamp was hung, some soot placed above the lamp and the hardware all aged too: The shot box is on the right panel. I decided to open the shot box lid and during final staging, I plan to add cannon balls in the box! I made a shallow false bottom in the box. The panels were easy to install and glue into place. Here is the results: Before the barrel was installed but you gets the gist of it: The final detail for the lower deck until later on - Hammocks! Made from the remnants of past sails, a little thread and a few hooks. I glued the edges with a gluestick... hoping it will keep them from unraveling! Moving to the middle deck next! Almost caught up with my current work!
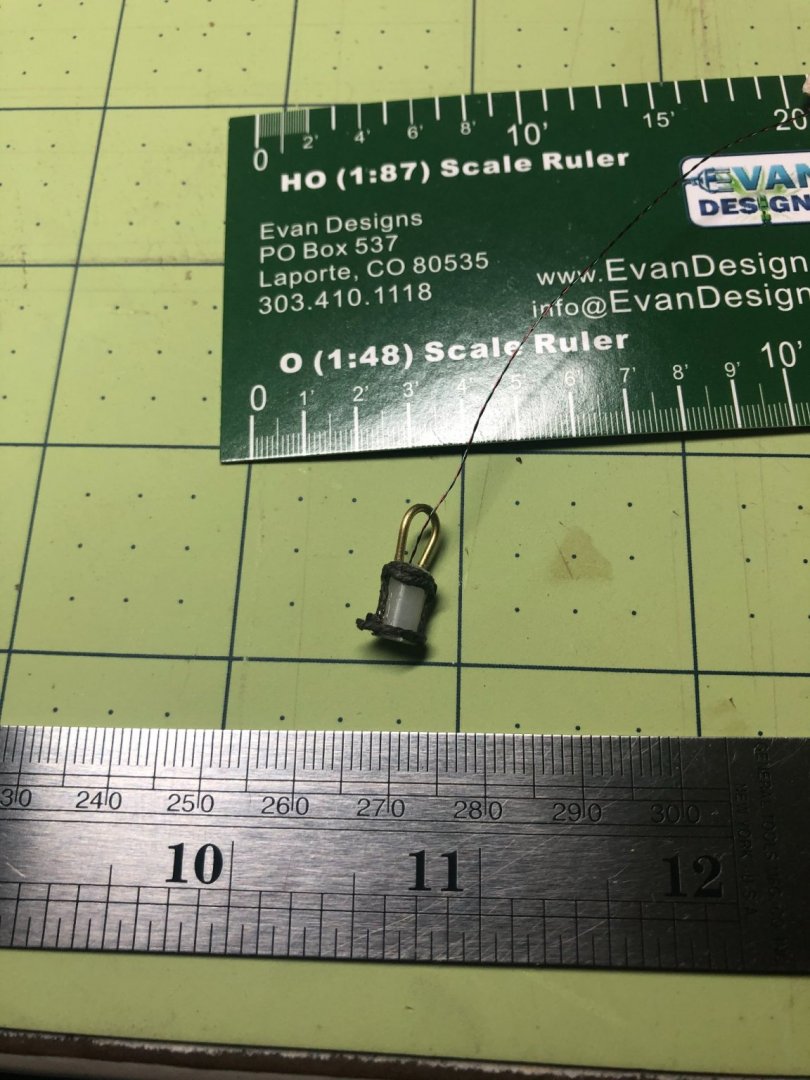


-
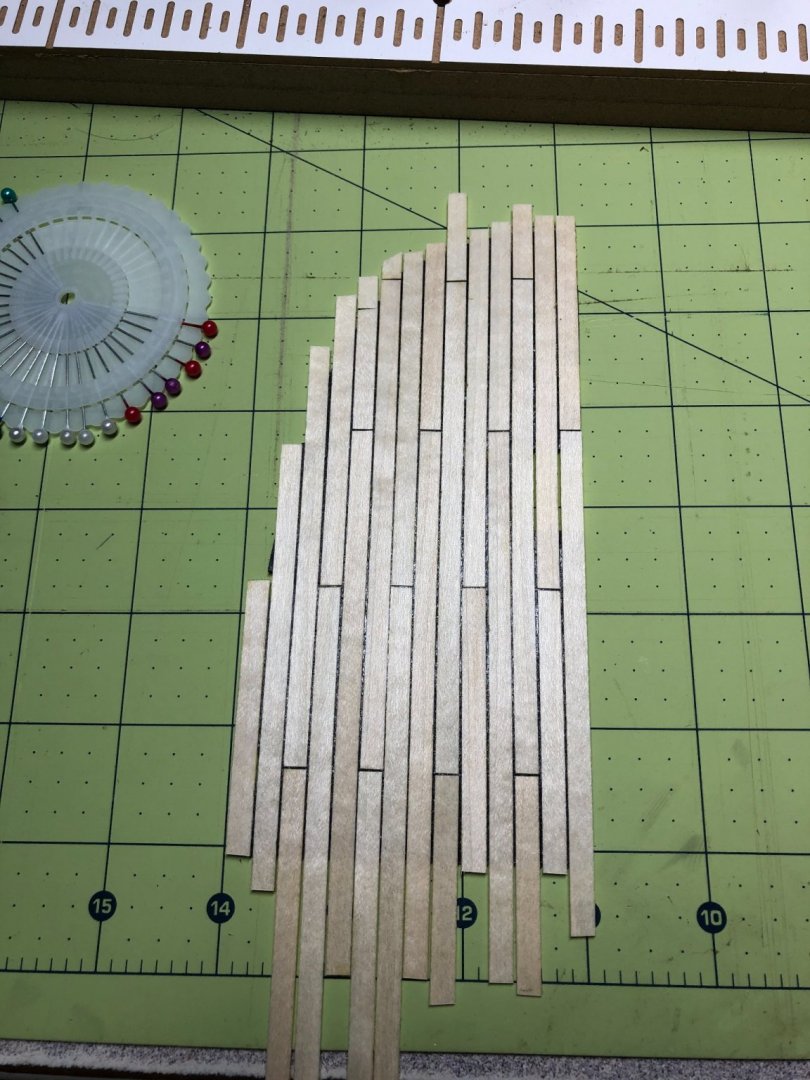
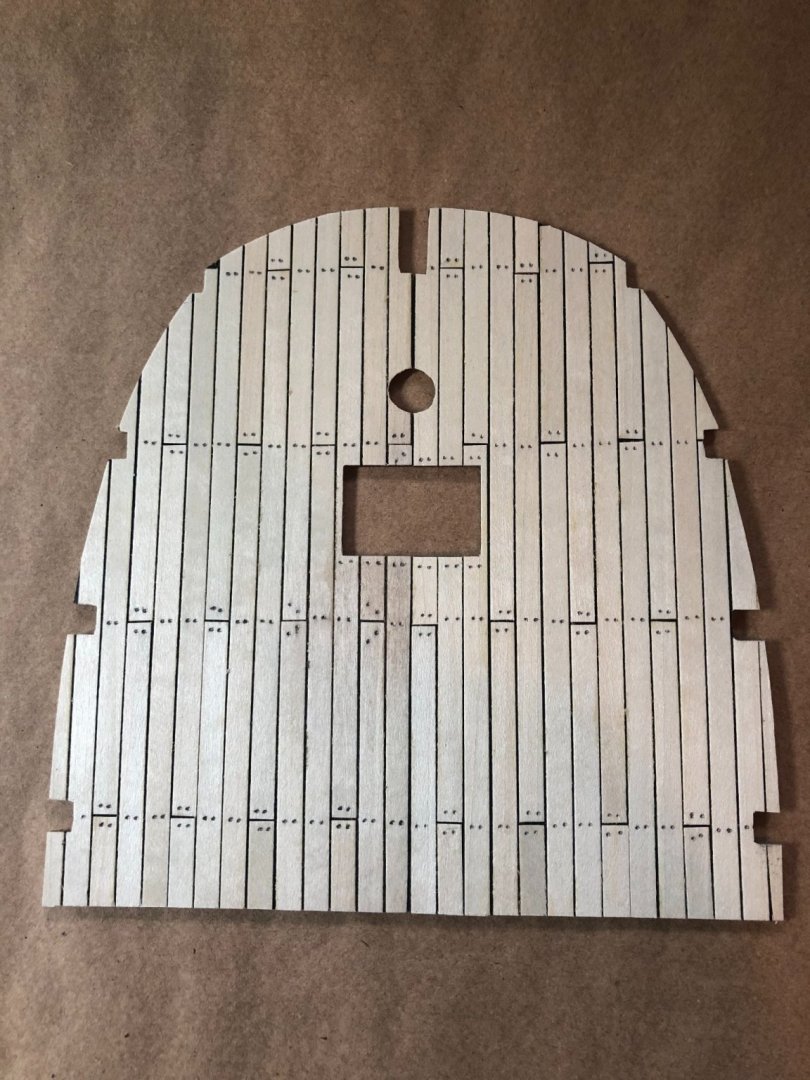
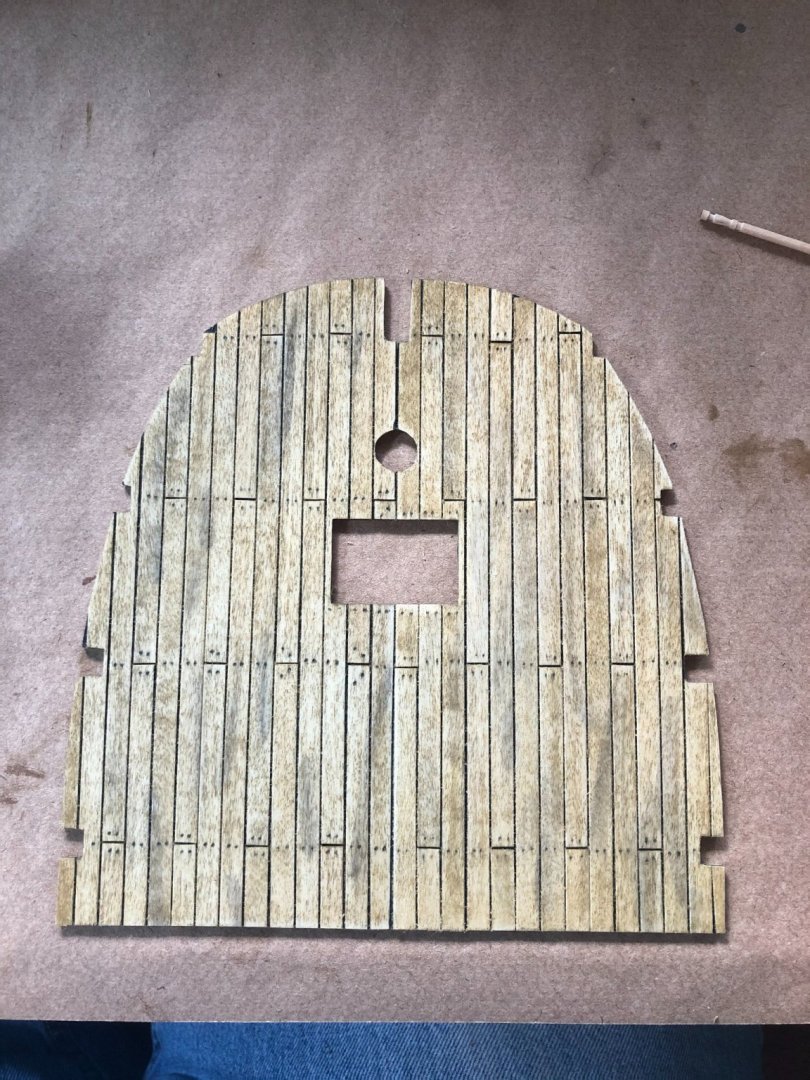
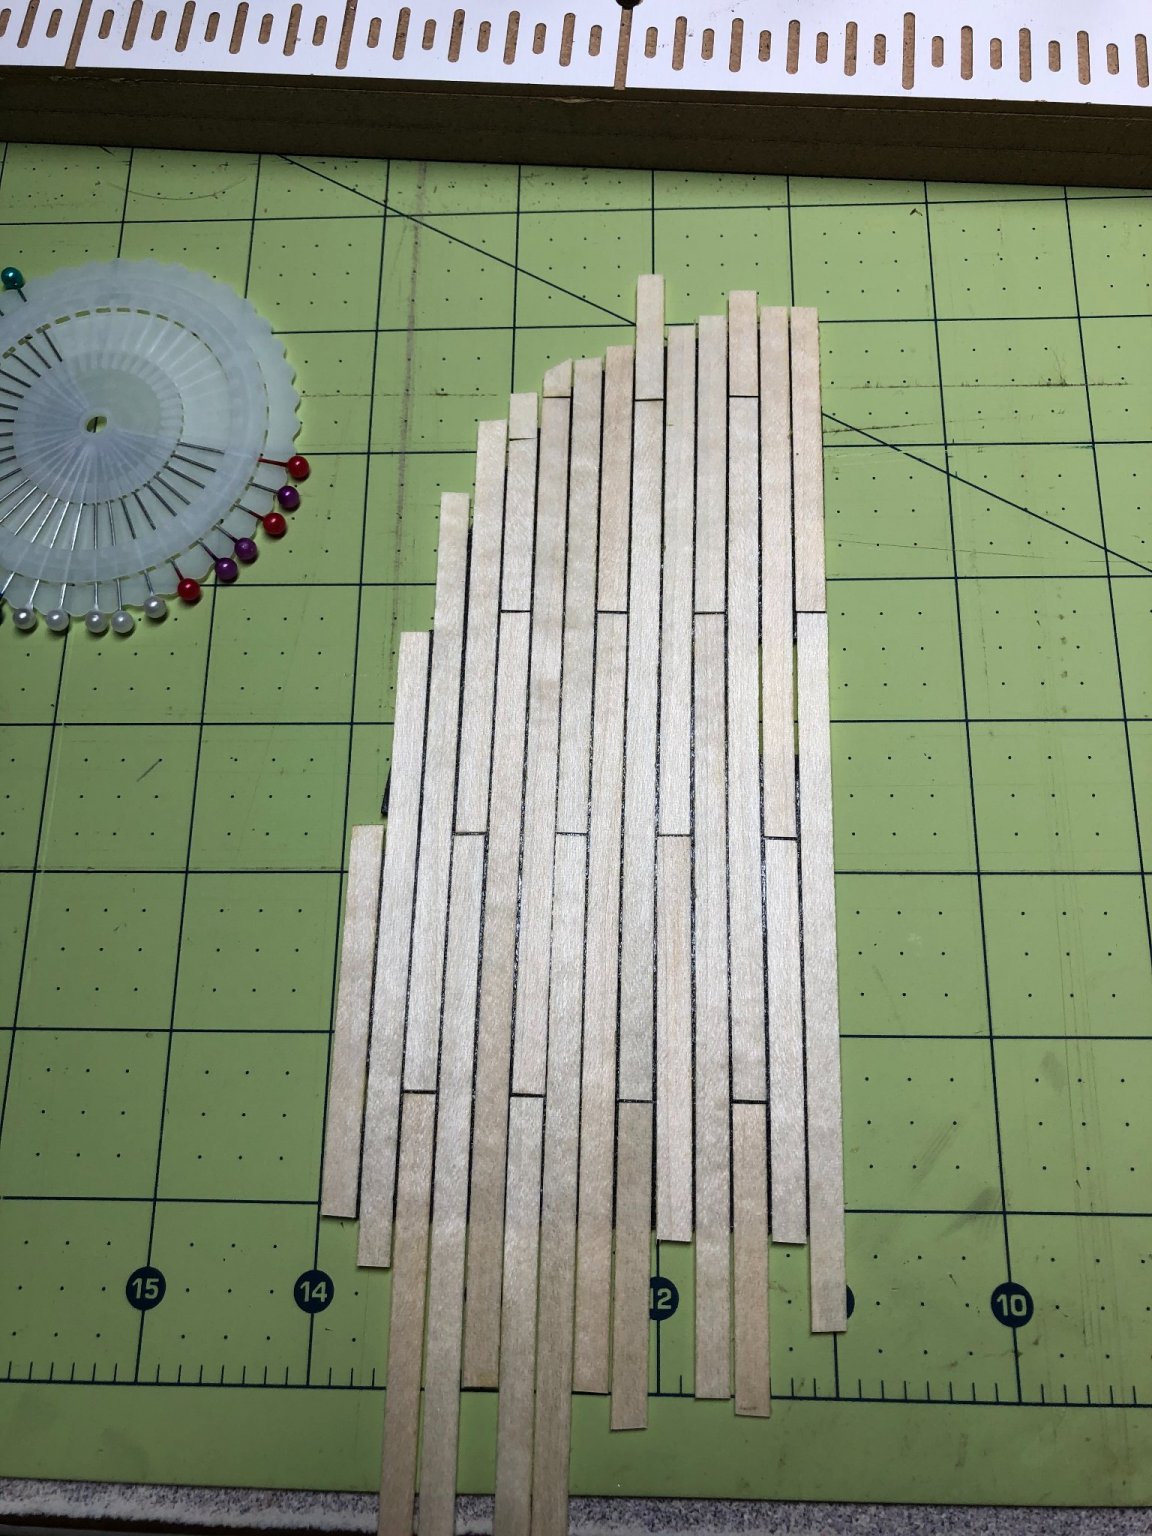
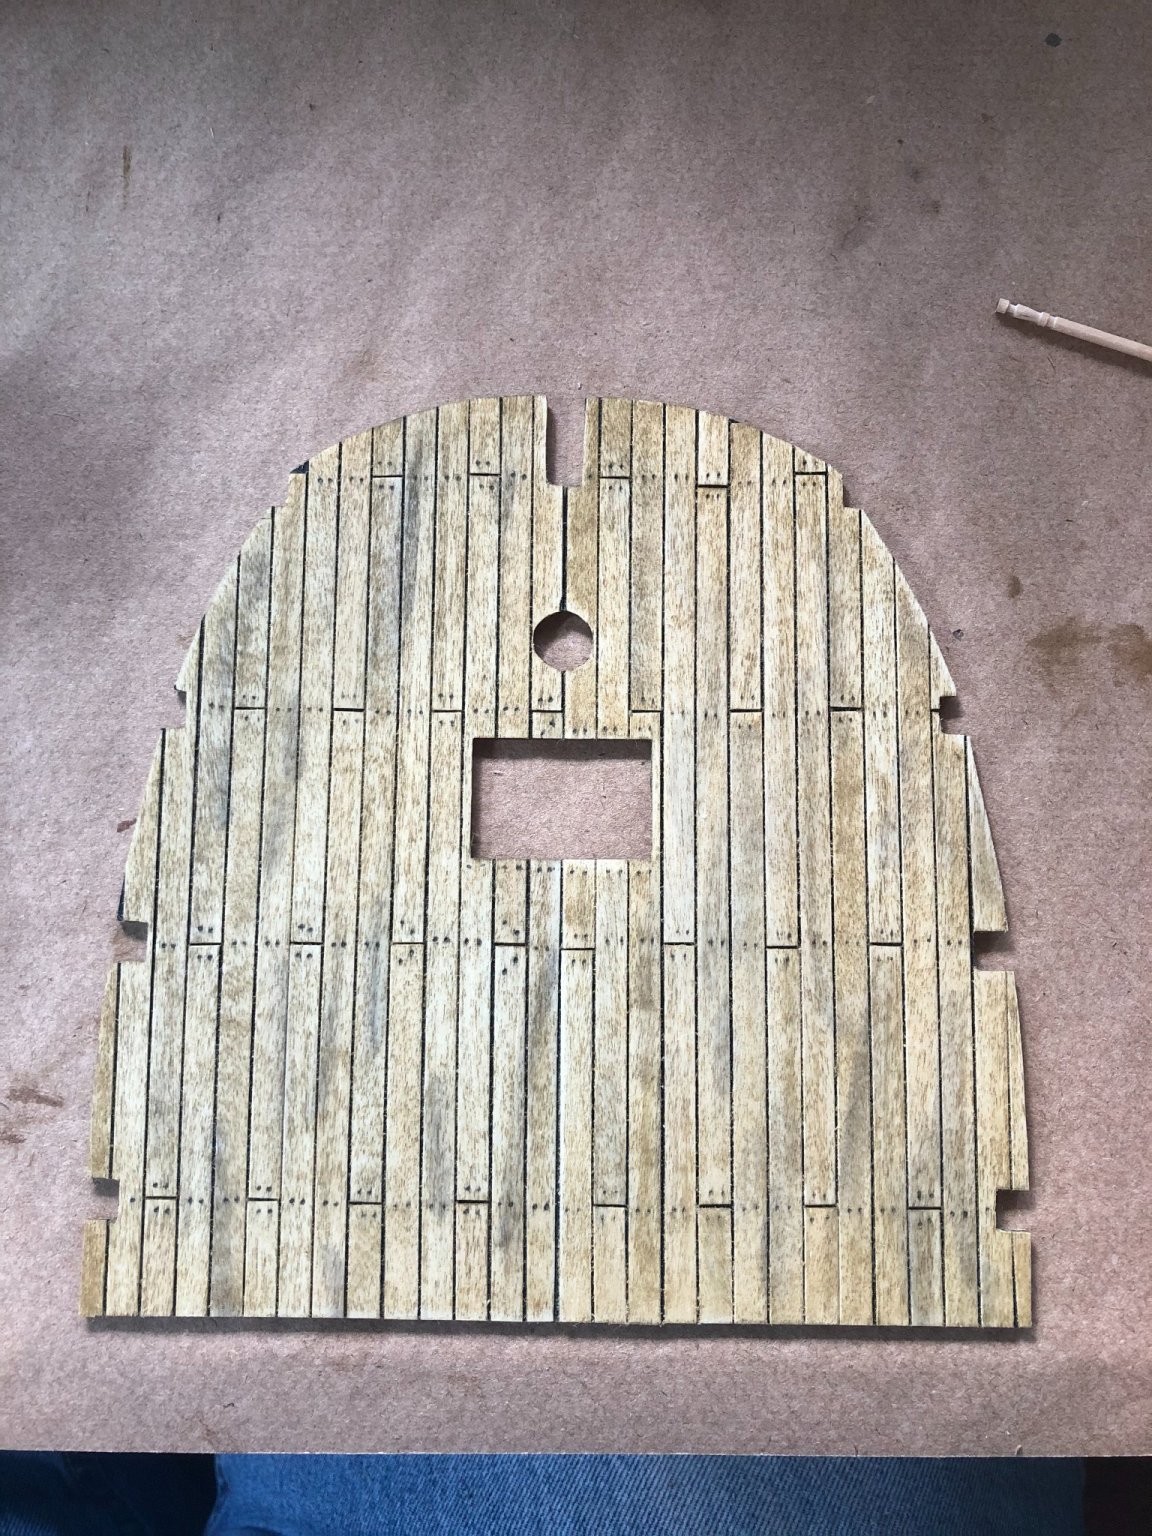
The lower deck section are next! Consistent with many models, there is a false deck that must be "planked" before installation. There are more methods than I can begin to list for performing the planking of the deck. I think the final expected "look" can make a difference on which method is chosen. As I noted earlier in the log, I plan to "age" or "weather" the model throughout the build. This area is my first trip into that realm! I painted the false deck black and spaced my planks approximately .5mm apart to simulate the caulking between planks. I also cut my planks to matched the beams below the deck. Trimming and treenail markings next: I did a some experimenting with how I wanted the treenail pattern to be throughout the ship. Because this deck is hidden enough to be unnoticeable, you can see my experimentation! Obviously, I settled on the side-by-side pattern and the decking on a three butt pattern... not as noticeable on these smaller deck sections. Aging and weather was a completely new concept to me and I did a ton of reading and looking at other work. I experimented with some leftover plank pieces trying for the right "look". Not quite right and I didn't like the "scarring" effect. After much head scratching and wasting a lot of planking material...! I settled on a system that I used on both the lower deck and the middle deck. The main deck will be different since it is exposed to the sun and weather. Here is the system I used and the supporting pictures: I used a Golden Oak gel stain and coated the entire deck with a medium coat and I immediately wiped it off with a clean rag: The wipe down helped reduce the depth of the color but also helped highlight the grain of the wood. After this dried, I added highlights and random "wear" with a black wash: This was allowed to dry and then I coated it with polyurethane. The stern section was handled the same way and I think I got pretty equal results: Once both sections had dried, they were installed on the frames and beams, ensuring proper alignment with the mast steps and the deck mast clamps. I glued the mast clamps with a very small amount of glue in case I need to adjust later. Now for some kit bashing! That's in my next post!


.thumb.jpg.19d97c8ae90ab2d39a0cae37bc70a1a2.jpg)


-
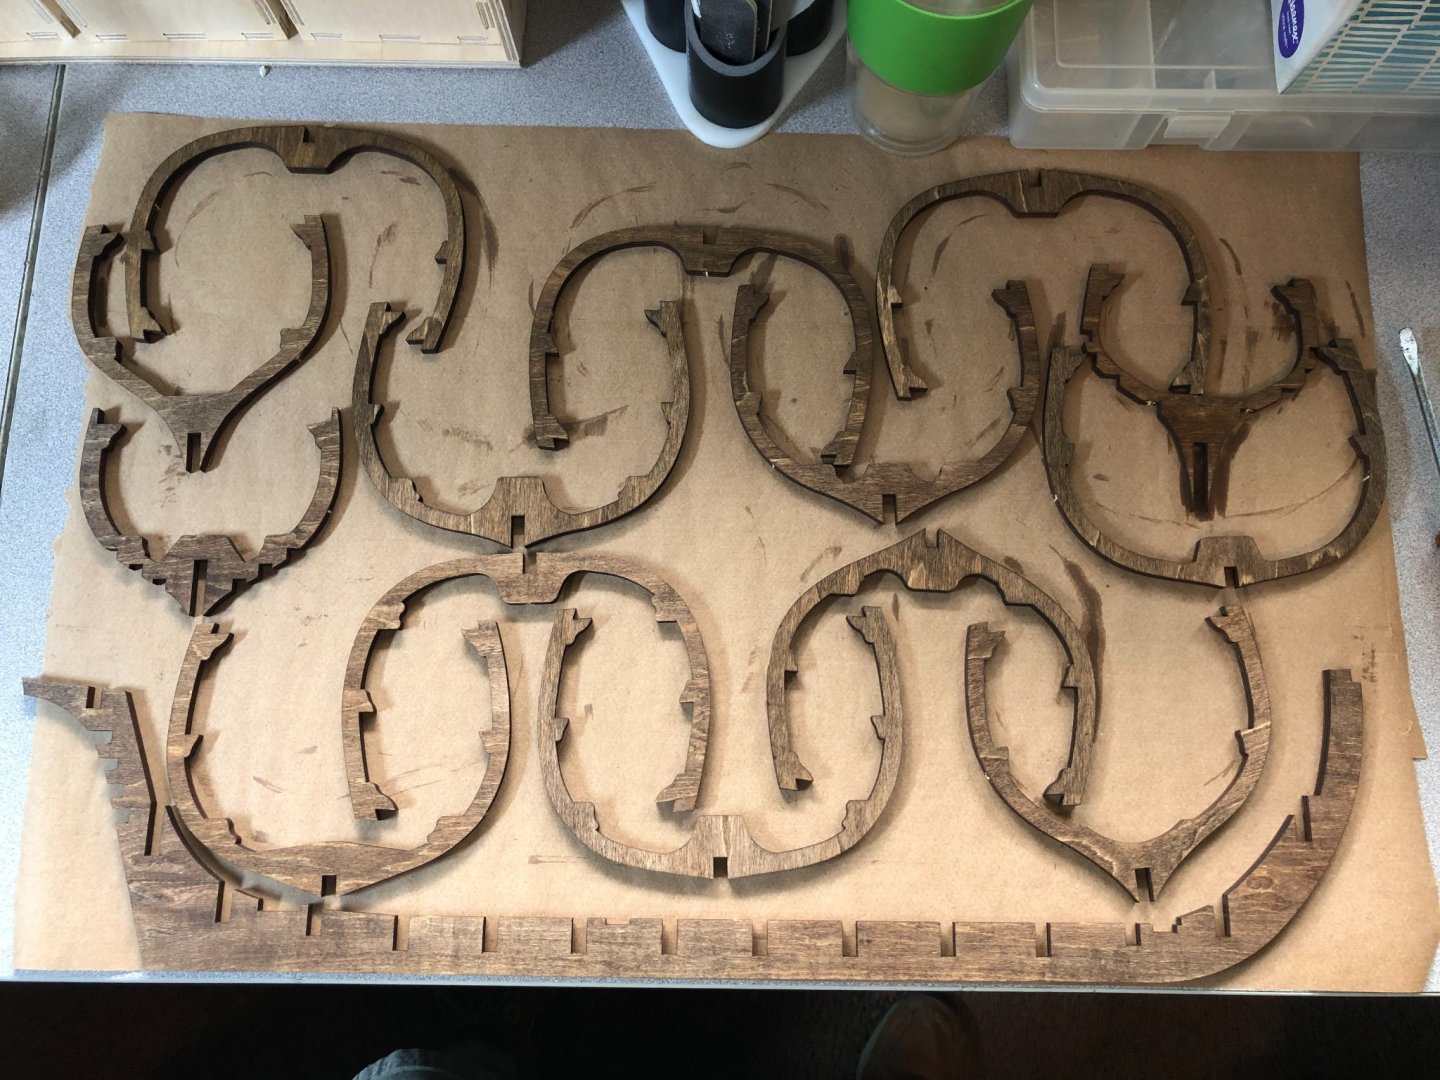
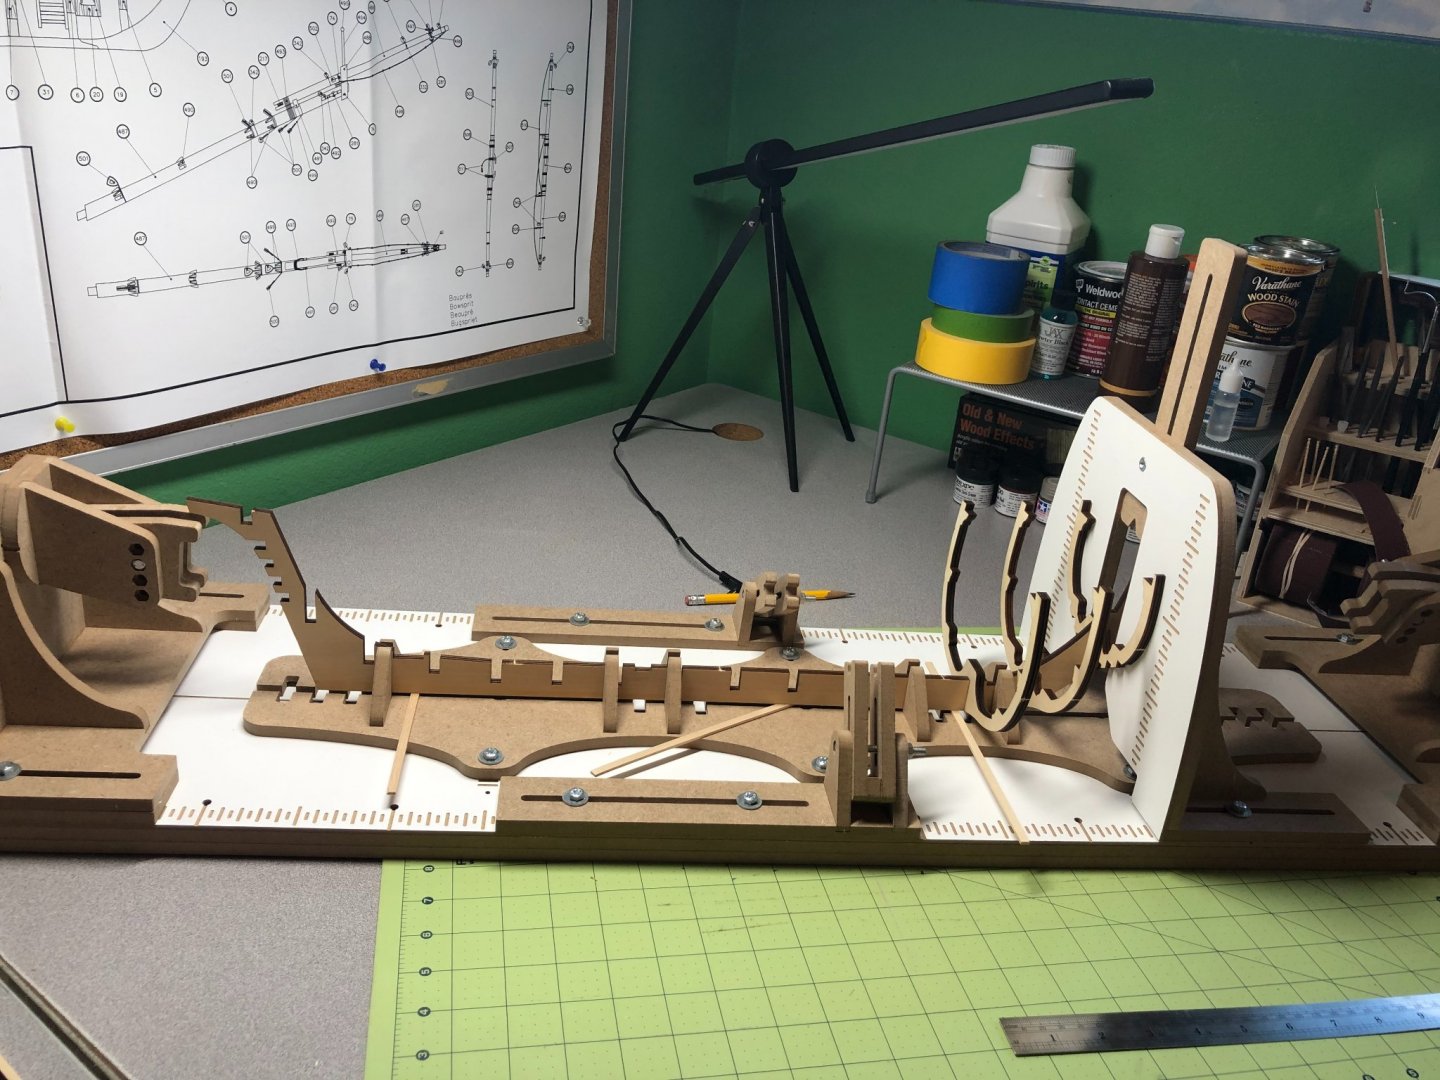
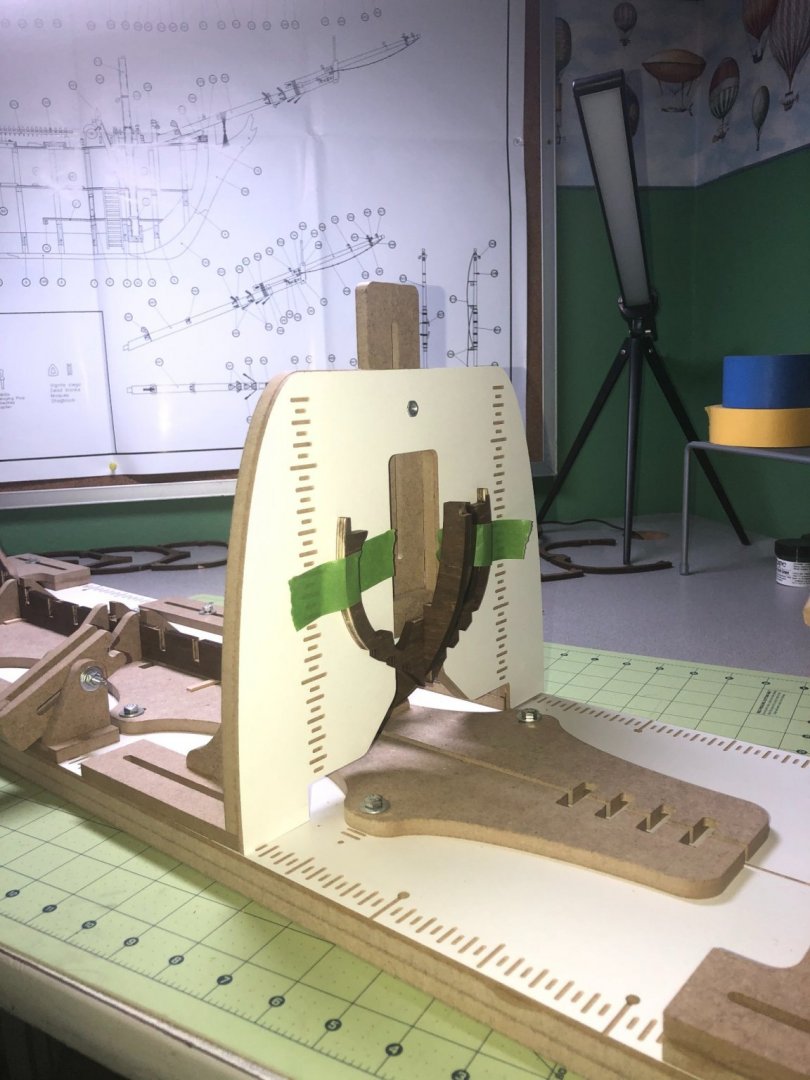
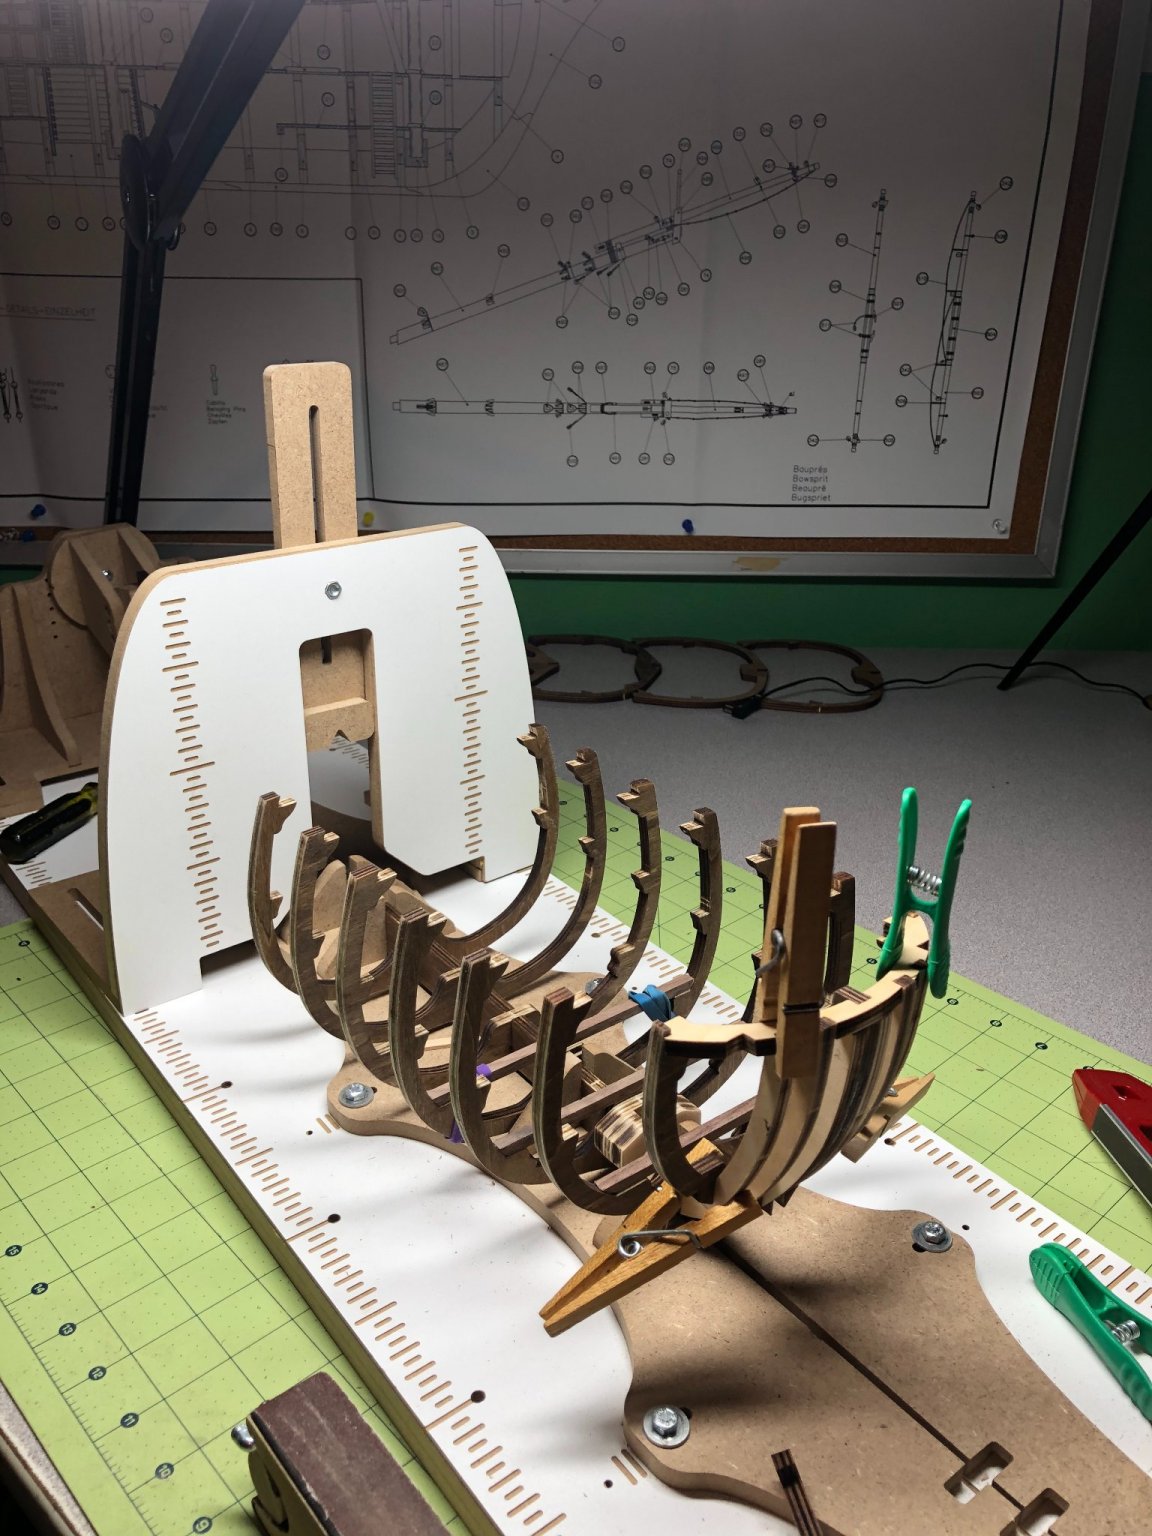
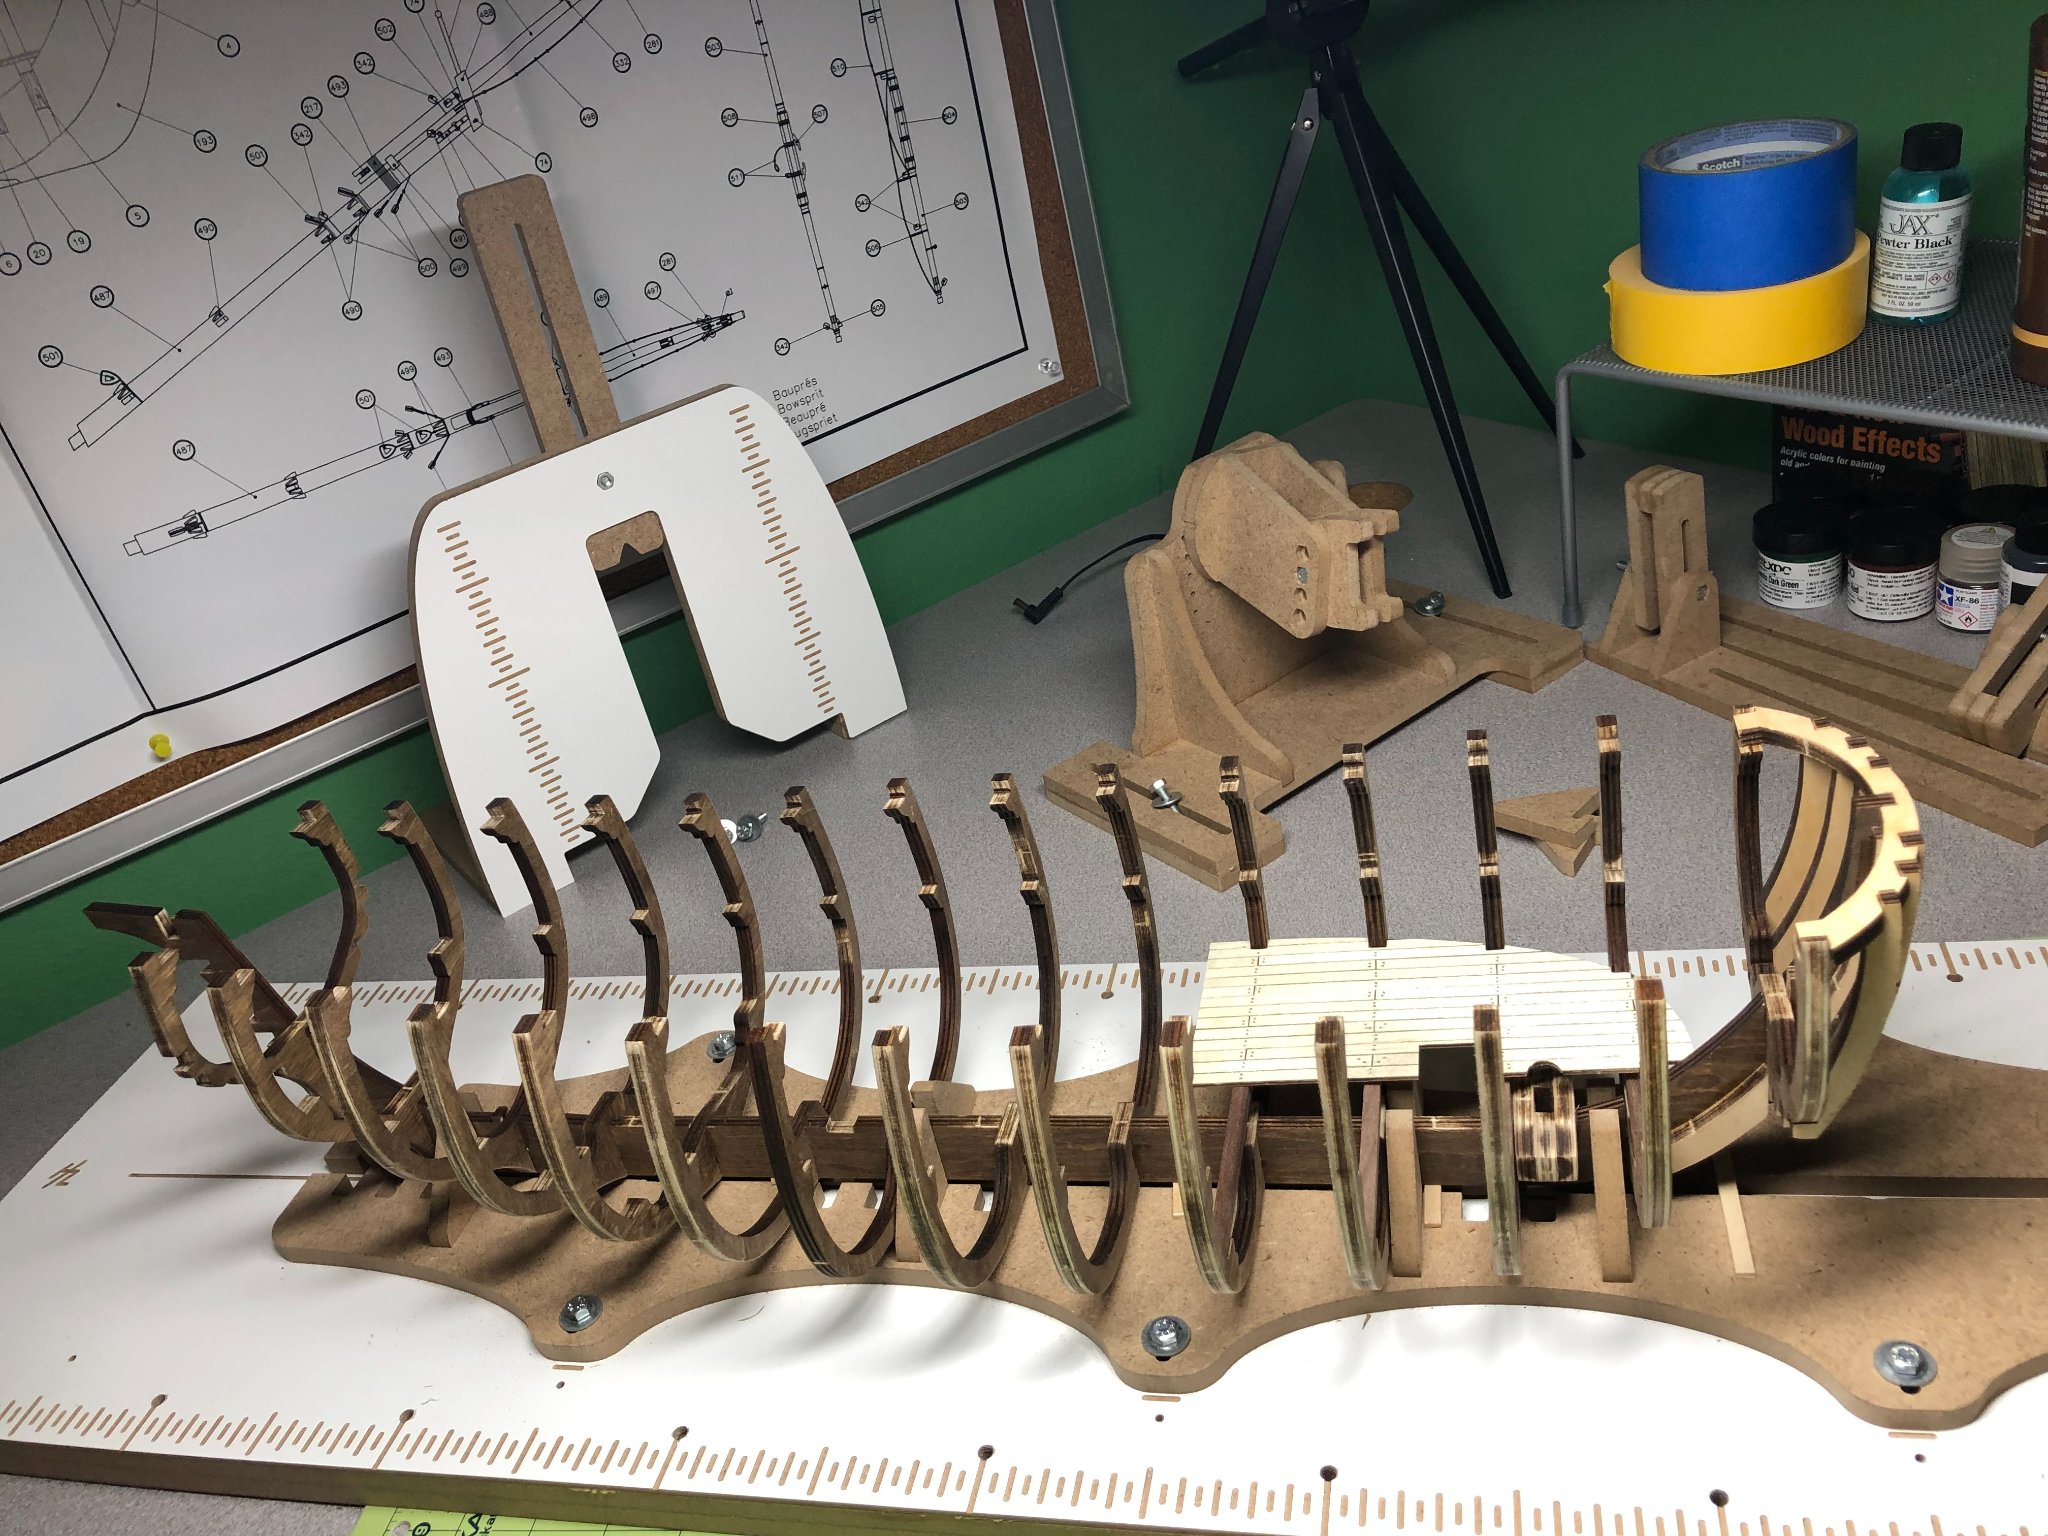
Moving along, a few things to mention regarding the frames and keel... Using the ship building slip helps to keep things straight but it does require a few shims under the keel to ensure the frames fit completely onto the keel section. I dry fitted every frame piece to ensure that was the case. As I stated earlier, these steps are important for the future alignment of the model! Frames going into place and the bow section pieced together: Additionally, the first of three mast steps is in place... disregard the lower deck piece, for now! I didn't have any other pictures of just the frame work! Once the frames are in place, the bow and stern frame work can be accomplished... pretty straight forward work. I had no problems but did have to sand and fit a few tight pieces. Nothing out of the ordinary. The beams for the lower deck are next. Again, straight forward work. A few things to mention, first, in a few logs I noticed some modelers did not take the time to index and inventory the parts prior to work. This could cause confusion during the construction and this is one place for that to happen. The lower and middle deck beams are cut from walnut stock and are not part of the pre-cut pieces (the main deck beams are pre-cut). The beams will need to be cut and sanded to fit, care must be taken to have a good fit but not too tight as a tight fit will spread the frames apart and cause problems later in the build. Also, the mast steps should be finished and placed before doing the lower deck beams. Nothing difficult about the mast steps just ensure that you place them correctly on the keel. The lower deck beams are only installed at the bow section and the stern section per the instructions. Next up is the lower deck sections.


-
Welcome aboard and thanks Matt! Next update coming...
-
I'll start by saying, I wasn't planning on doing a build log... There are a 15 logs for the same model on MSW already. However, at last check, only one was to completion. The other logs offer a lot of help and information but only as far as they go! So, even though I started the model 3 months ago, I did take pictures along the way and any details I may have left out can easily be found on the other logs. I pledge to keep this log running to the models completion, however long that takes. This is my 4th model and I continue to learn new techniques and ideas. I think that will never stop. There are so many masters on this forum! I hope, someday, to be as capable as them. I am attempting to keep this model as historically accurate as I can based on the plans and the book "The anatomy of a ship : The armed transport Bounty". Additionally, I will be aging or weathering the ship as I build it to give it that "realistic" look. This is the first time I've tried this method and as you'll see it has been challenging but also a lot of fun! Before I start, I'd like to thank several builders that have inspired and unknowingly helped me to this point. Many are still on my favorites list and all have build logs that you may want to reference too: Captain Al Cobr Grendel Rcmdvr Thomaslambo Tim Moore Trig There are probably a couple more that I missed... Okay, lets get started! I didn't bother taking pictures of the box, unpacking and indexing the parts. I'm sure there are plenty of those out there! I found the contents to be of very good quality and I was not missing any parts or components. The scale drawings and picture book are very detailed. The instruction book is probably a bit sparse if you are new to modeling. The picture book helps fill in some of the gaps but frankly, without some of the build logs, it would be very difficult in places. The first few steps are pretty straight forward: 1. Cut out the keel and frames 2. Sand the little tags off and remove the charred layer for better glue adhesion. 3. I chose to stain the frames and keel with a walnut stain, taking care to keep stain away from the areas to be glues. It took two coats to get to the color I wanted. The picture below was taken with just one coat. I purchased (prior to starting this model) a model ship building slip: It has been a great tool for holding the model and I expect to use it throughout the build. Look at the above log for more details... worth every penny! It is extremely important that the keel is kept straight and that each frame is installed plumb and level to the keel. This CANNOT BE STRESSED ENOUGH!! If any of these are off, you'll struggle with it throughout the build. A word of caution... Make sure the table or bench is level too... If it isn't, make note of the difference and ensure that the identical difference is transferred to your model as you build it. As you can see in the pictures above the building slip has an attachment to help keep the frames at 90 degrees to the keel and the frames were leveled using a small level resting on the top of the frames before gluing and taping into place. Each frame was allowed to dry several hours before the next frames was added. More to come later today or tomorrow.
-
Welcome back! Looking forward to seeing some updates.
- 171 replies
-
- 1
-

-
- artesania latina
- bounty
- (and 1 more)
-
I finally got it mounted! Couple of screws in the plate and it's ready for display!
.thumb.jpg.5a56606bf828601994ce34d4faa0517e.jpg)
- 44 replies
-
- 12
-
-
- half hull planking project
- half hull
- (and 2 more)
-
Tim, Very impressive work! Can't wait to see the finished product. As I stated in my post in March, I had this queued up... I started it on 9-13-20 and am well underway. I am doing things a bit different in that I am looking for the "weathered or used" look and with the opportunity for some kit bashing, I am making the interior a little more filled out. I've attached a couple of pictures... The lower decks "weathered" and installed, and a prototype to the lanterns I am building to light up the interior some. They still need a little refinement. Especially, the handle. It's a bit out of scale but I'm close! Thanks for keeping me inspired and help when I get stuck!

- 171 replies
-
- 3
-
-
- artesania latina
- bounty
- (and 1 more)
-
HMS Bounty by Artesania Latina problem/question
LyleK1 replied to LyleK1's topic in Wood ship model kits
The building slip is from HobbyZone... I don't know how I did without it before this build! Great piece of equipment. -
HMS Bounty by Artesania Latina problem/question
LyleK1 replied to LyleK1's topic in Wood ship model kits
Thanks Tim! I just didn't look far enough ahead! BTW< I love your build log! Been a good source of info! I've attached a picture of mine... Long ways to go!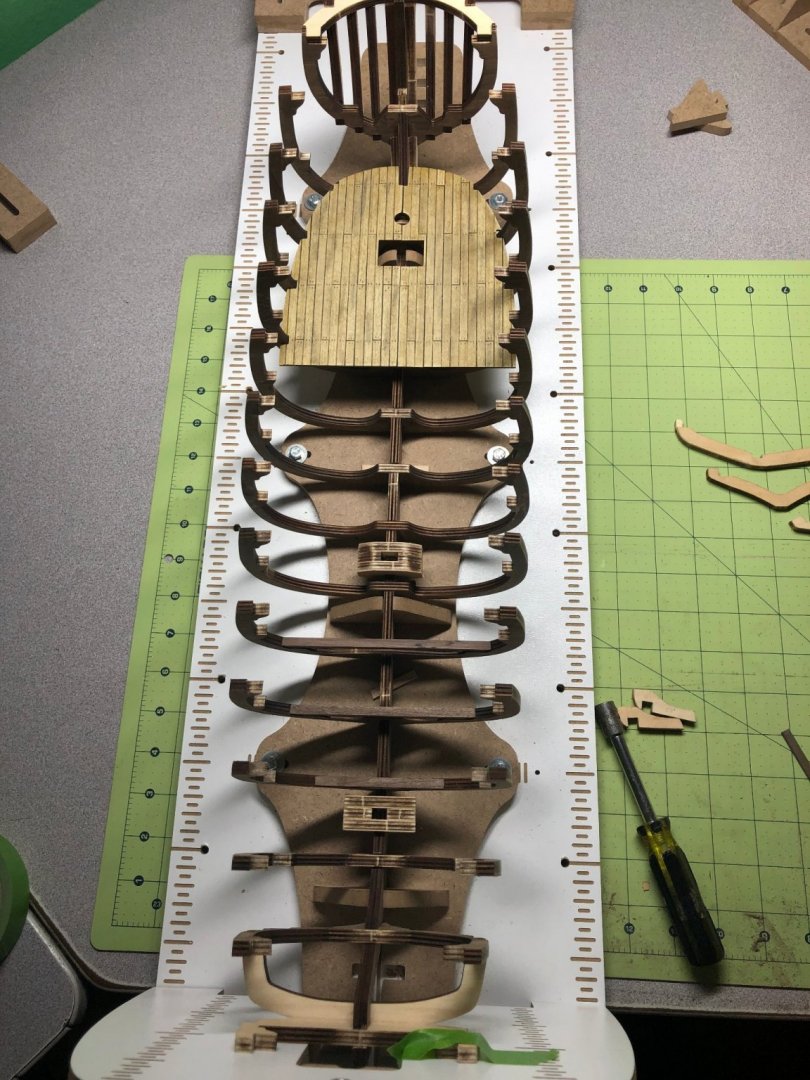
-
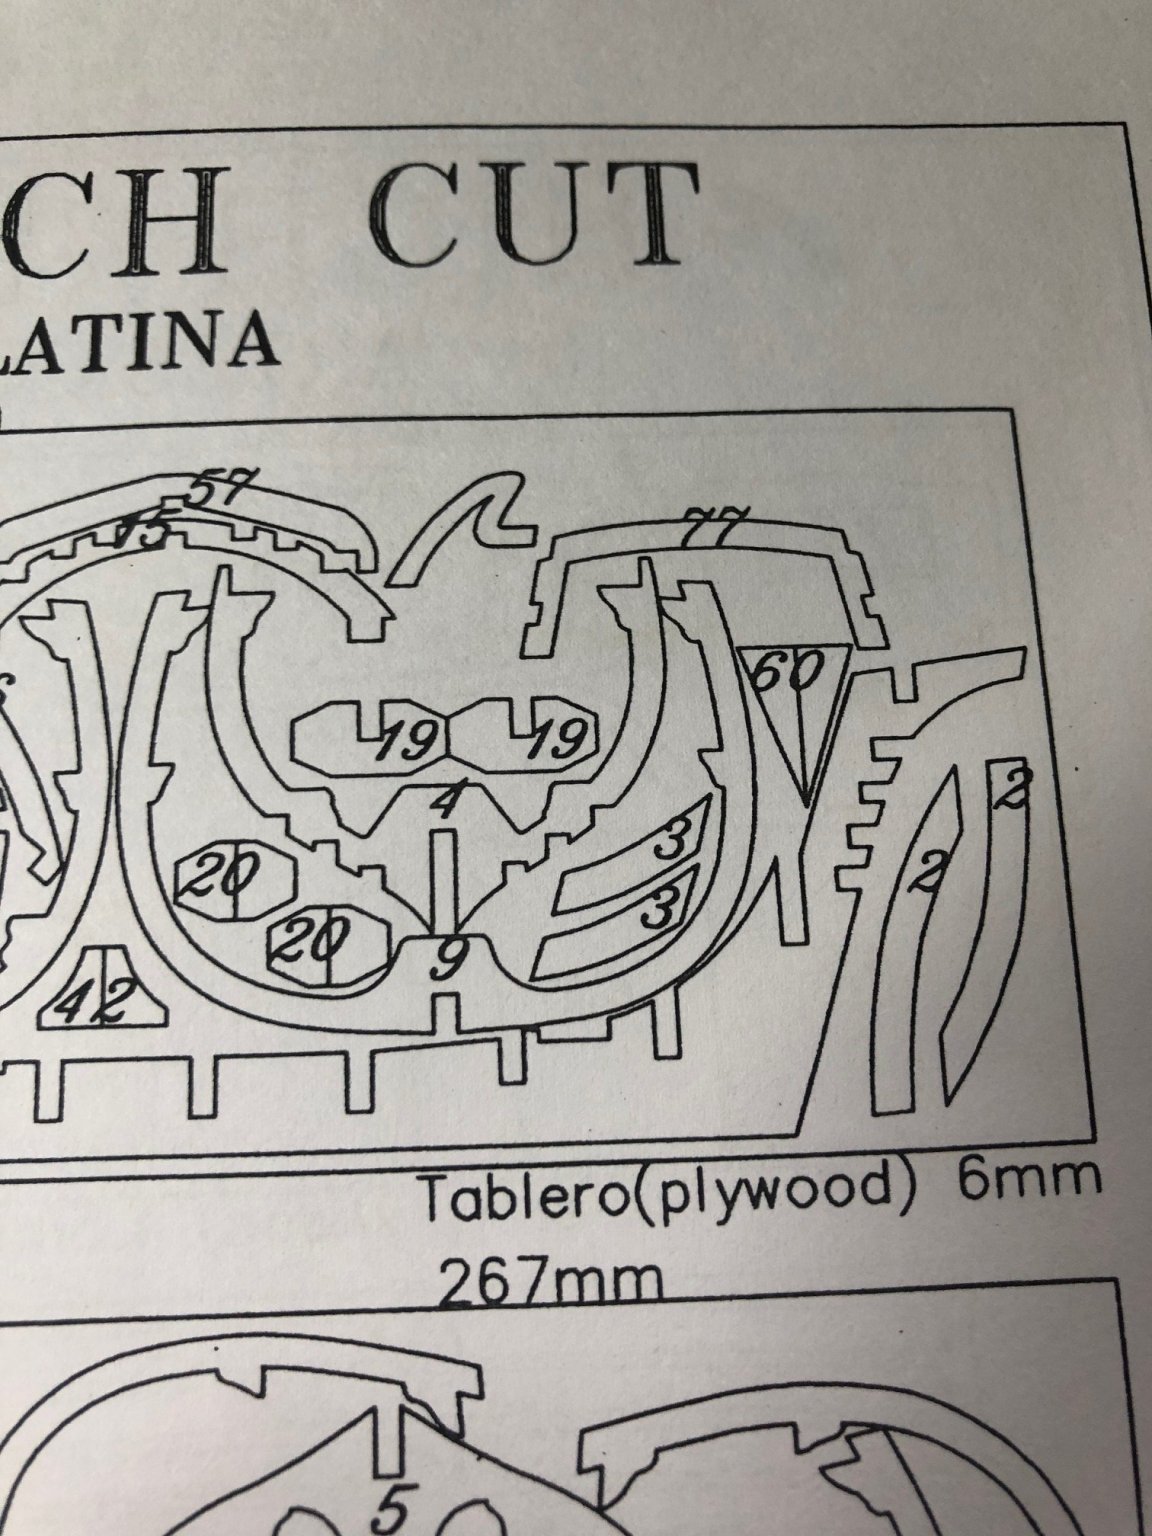
So, I'm working on the Bounty and I've run across a numbered piece that doesn't match anything! The picture below shows you the laser cut parts on one of the sheets. In the upper right corner is number 77. In the parts list and the instructions, #77 is a part of a box for one of the decks. If you look at the part, it clearly is not a flat piece for a box! Has anyone figured out what it is and where it goes? It looks a lot like a frame piece but all of those are set... nothing missing! HELP!!!
-
Wow! You've made some great progress! Love the lighting... something I had planned to do too. I'll be examining your work closely as I like they way it turned out. I finally got started on my kit... staining frames and the keel... funny thing, I numbered my frames but the stain washed the numbers off! Not a big deal but I had a good laugh! Looking forward to your next updates.
-
Yep... I actually used a permanent marker for mine and it worked... sorta ok. But I got some of the bleeding too and had to be extra careful when I started sanding. Turned out ok. You can see where I got into the ink.

-
https://artesanialatina.net/en/modelcrafts-elite/486-wooden-model-ship-kit-hms-bounty.html Everything you'll need!
-
I just started this kit too but am headed out on vacation until late August... will be watching your build as I plan to do a lot of kit bashing too. Looking good! I bought the Hobby Zone building slip and as you can see below, I think it will work quite well... some dry fitting in the works. See you in September!

-
Just started on the Bounty with my slip... Trying to find the best way to set up for the laying of the bulkheads (shown dry fitting). I haven't gotten the level and square out... but I will just to confirm that it is true, level and square. Sure looks like it. You'll notice the strips under the keel... my bulkheads run right to the bottom of the false keel... I think it will hold fine with the clamps... we'll see. So far, I like it but need to learn how to use it!

-
I highly recommend it! But keep in mind, if you are building from a kit, the planks come pre-cut. You can still use many of the techniques but unless you purchase some matching material, it will be difficult to do some of the things you'll learn... For example the wider planks at the keel... I'm planning to start the HMS Bounty and I will be using many of the things I learned. Good luck and let me know how it goes!
- 44 replies
-
- 1
-
-
- half hull planking project
- half hull
- (and 2 more)
-
Thanks again, Toni. I hope to take what I've learned and apply it to my next build... I'm finishing up a 1:130 1847 Harvey kit. Should be done in a week or two. My next big project is AL's HMS Bounty! Really looking forward to getting started... Planning on some serious kit bashing!
-
Toni, Great learning project! I made some mistakes but am happy with the results and knowing how to fix those mistakes next time. Thanks! Here is mine all completed except for mounting... very soon!

- 167 replies
-
- 10
-
-
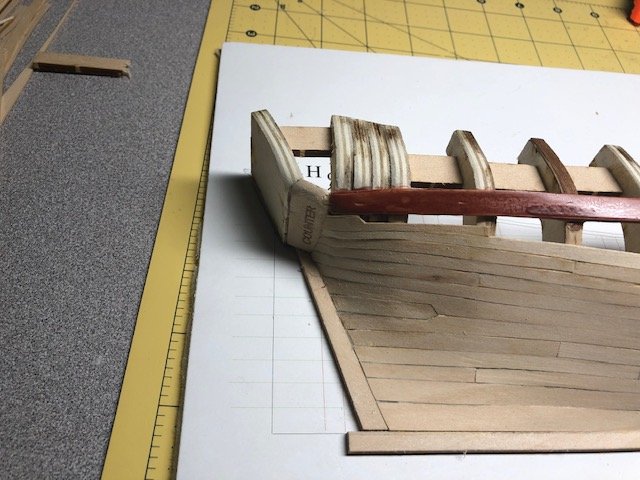
Two coats of linseed oil with a light buff with steel wool between the coats. I've removed it from the board and have a plan for mounting it. I'll post the final product in the next few days! I have thoroughly enjoyed doing this little project and I learned a lot... primarily through my mistakes!! They are easy to see for the trained eye but am happy with final product and of what I learned.
- 44 replies
-
- 6
-
-
- half hull planking project
- half hull
- (and 2 more)
-
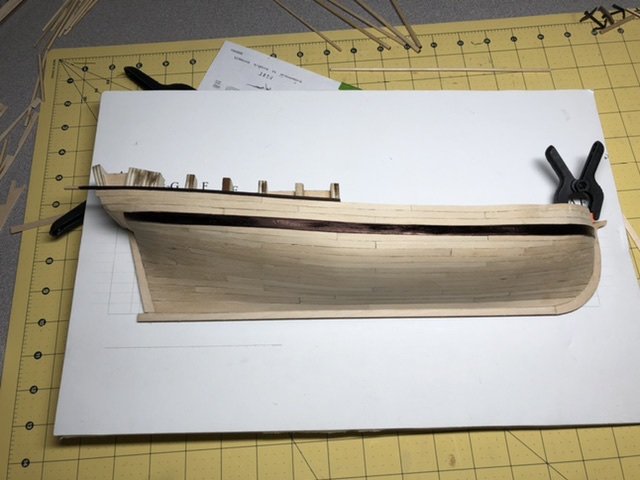
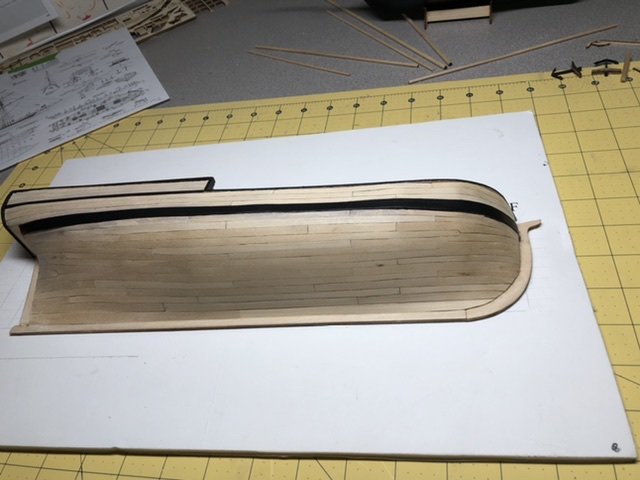
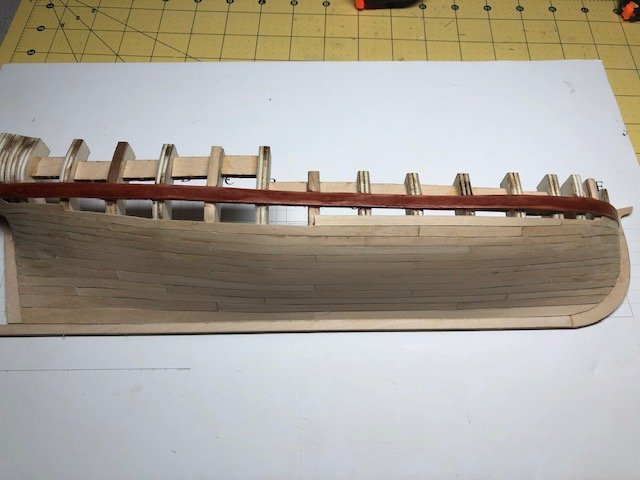
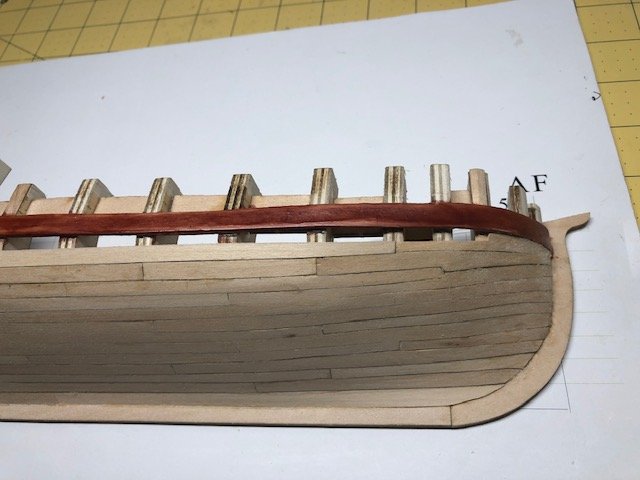
Finishing the final planks... Trim and rail caps... I decided to do something a little different but with similar results. Using some wood leftover from a previous build, I made the rail caps and the trim: All done except the linseed oil! Oh... and the mount. That will be a few days. Linseed oil and off the board coming up!


- 44 replies
-
- 4
-
-
- half hull planking project
- half hull
- (and 2 more)
-
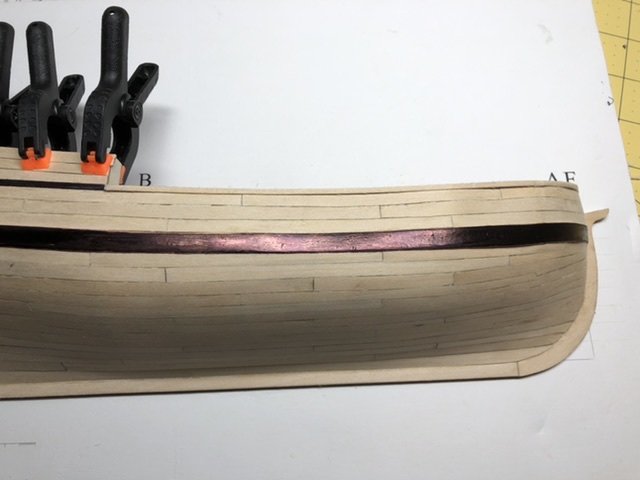
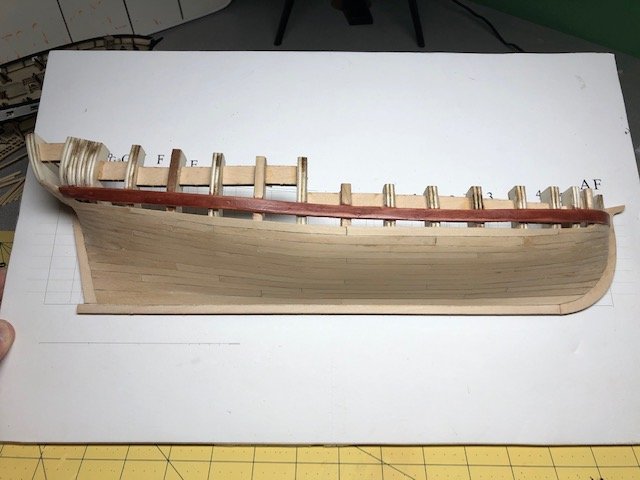
Down to the last 3 planks and planking the counter and transom. Some decorative trim installed... more of that to come. Decided to change the color of the wale too: Should finish this weekend... depends on the sanding and finish. Planning to use Boiled Linseed Oil, 2-3 coats with a little steel wool sanding between coats. More pictures later in the weekend!
- 44 replies
-
- 4
-
-
- half hull planking project
- half hull
- (and 2 more)
-
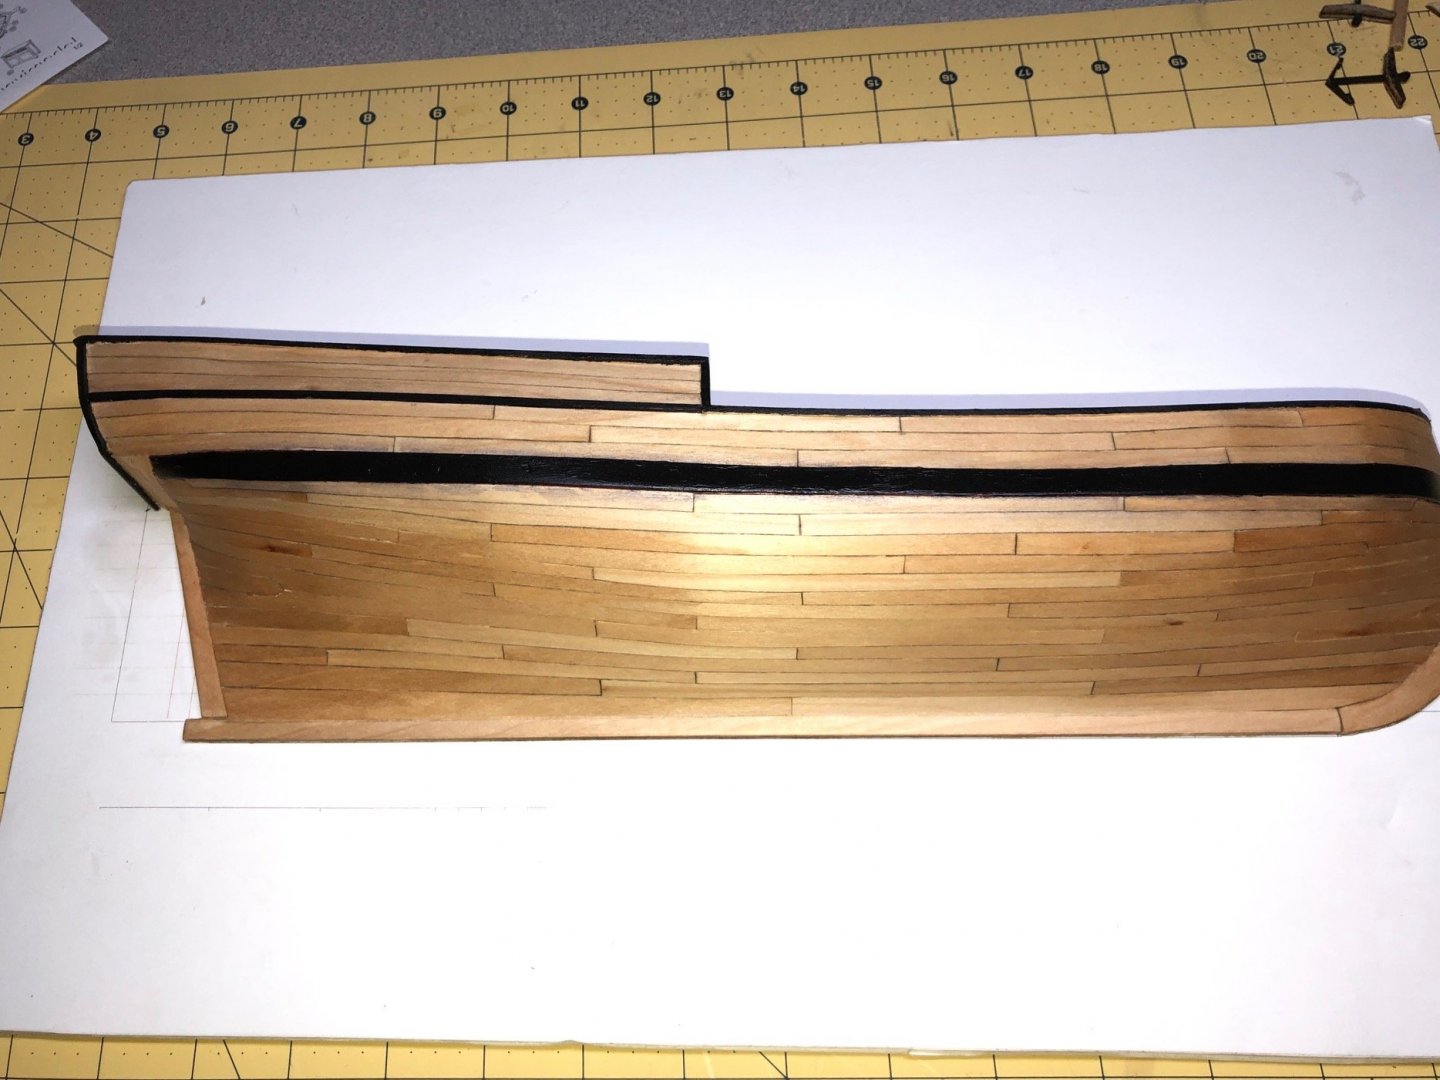
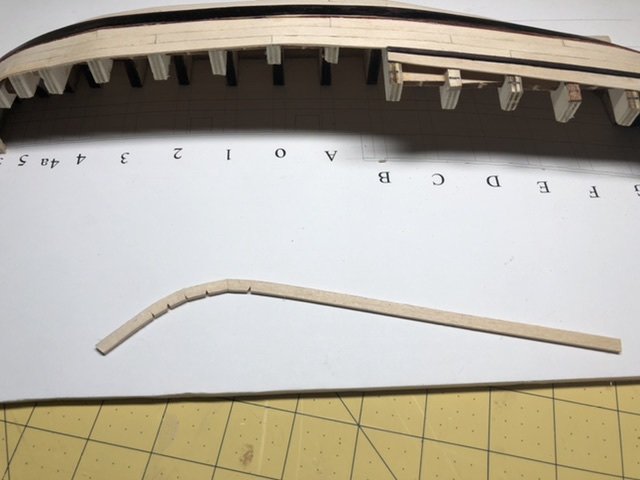
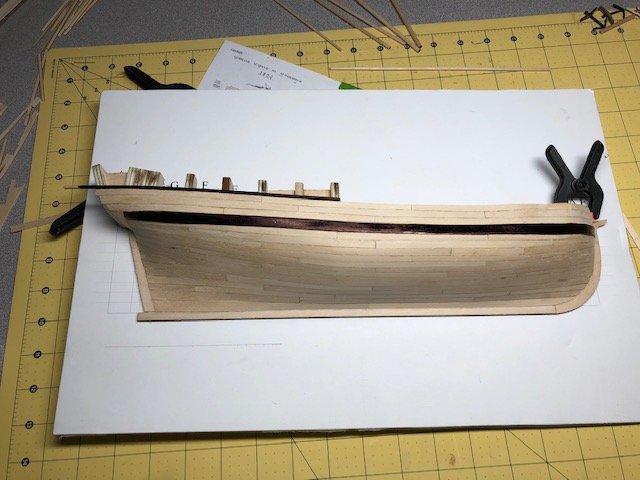
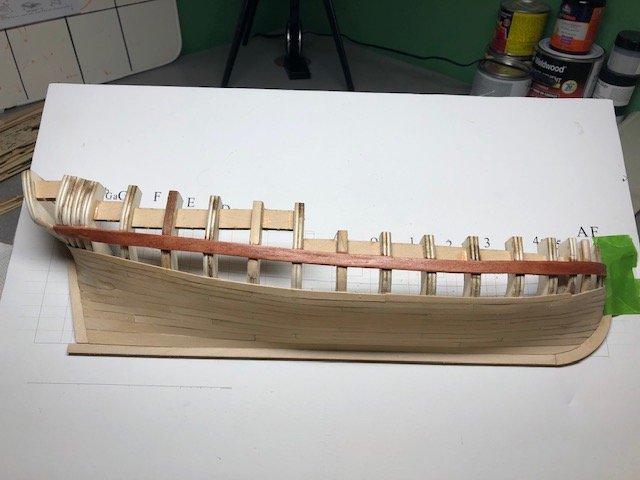
So, I was forced to deviate from the plans a little due to my not taking good measurements and keep the planks on a parallel with the wales. I chose not to start over or go back several planks because I got some good practice making dropped or stealer planks! Additionally, this is a teaching tool and I have learned a lot... and I'm not done. The last rows in the middle belt had to be modified to meet the wale properly: Last couple planks below the wale. Lower portion of the hull is done except for lots of sanding and finishing: On to the next part!
- 44 replies
-
- 4
-
-
- half hull planking project
- half hull
- (and 2 more)
-
Looking good Dan. I'll post more pictures tonight... Be careful to ensure you stay parallel to the wale throughout the process. My BIG mistake was not doing so and I've had to add more dropped/stealer planks near the wale to make it come out right! No gonna start over!
-
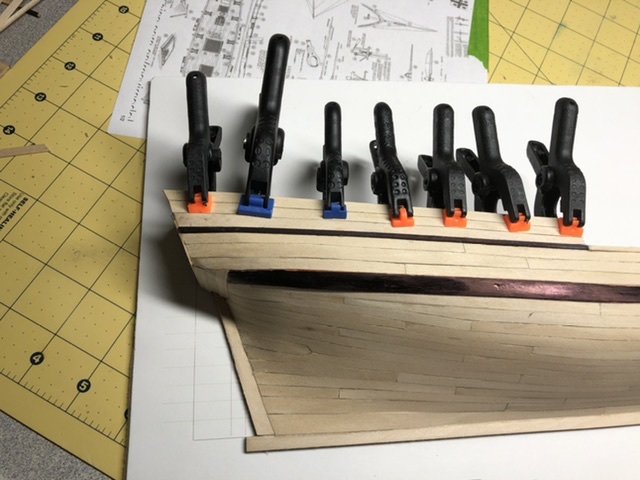
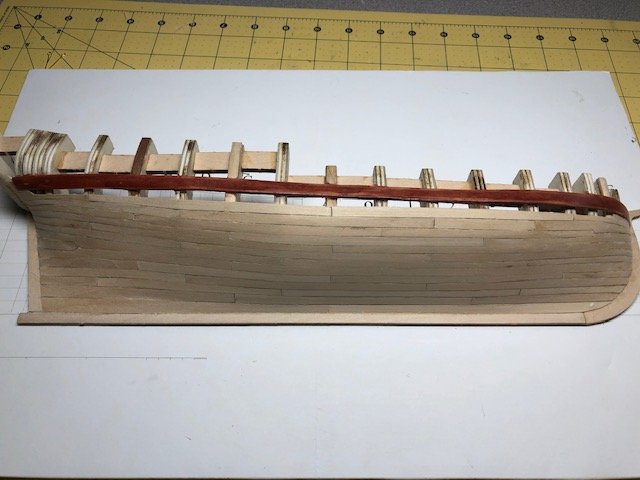
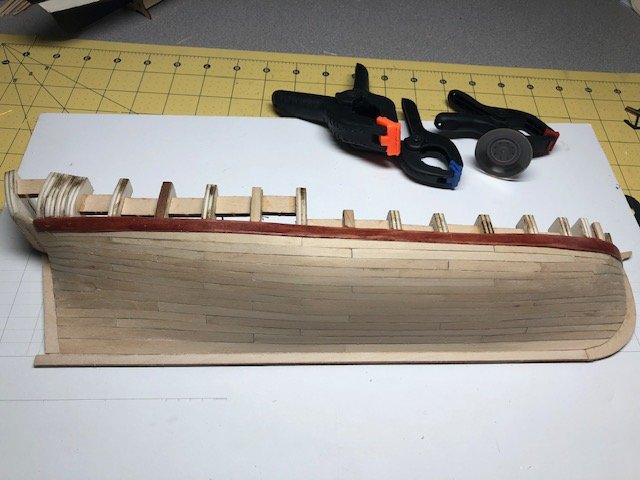
I needed some better clamps... finally got them! The Wale is done! Now to finish the planking to the wale: More to come soon!
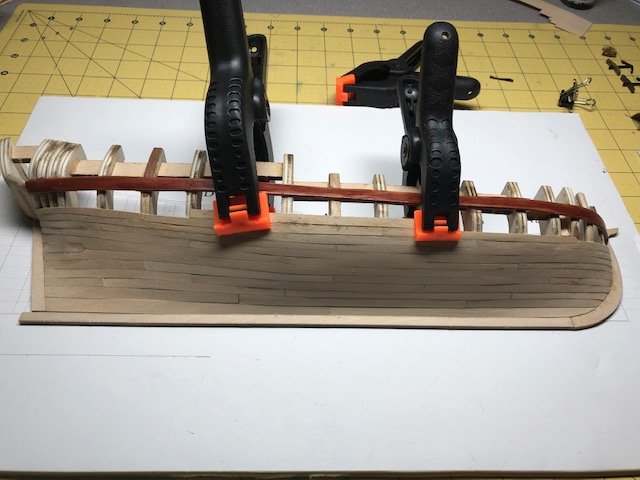
- 44 replies
-
- 3
-
-
- half hull planking project
- half hull
- (and 2 more)


.jpg.94de54f6c0de5afaa30d92b839decbf4.jpg)


.jpg.858a4f9208708680926b1c8ccd0453f4.jpg)