HOLIDAY DONATION DRIVE - SUPPORT MSW - DO YOUR PART TO KEEP THIS GREAT FORUM GOING! (Only 20 donations so far - C'mon guys!)
×


desalgu
-
Posts
363 -
Joined
-
Last visited
Content Type
Profiles
Forums
Gallery
Events
Everything posted by desalgu
-
You're doing great work on the stern, very cool looking! Your building is always so neat and precise, and great photos. No surprise for a structure like this that it required some shims to get things to fit. I can imagine the difficulty getting it all aligned. It is so different and more complex than DOK that I'm building. This looks like a good sized model, significantly larger than Syren. I was a little surprised, DOK is slightly smaller than Syren.
-
I really appreciate all the kind comments. This is a very nice kit with lots and lots of detail. I'm waiting on an art store to find time to fit plexiglass into my display case. They were swamped thru this weekend with father's day stuff. Hopefully I can take it by next week and get that project finished. I'm eager to get it into the case and see how the lighting looks. I'm so close to being done!
-
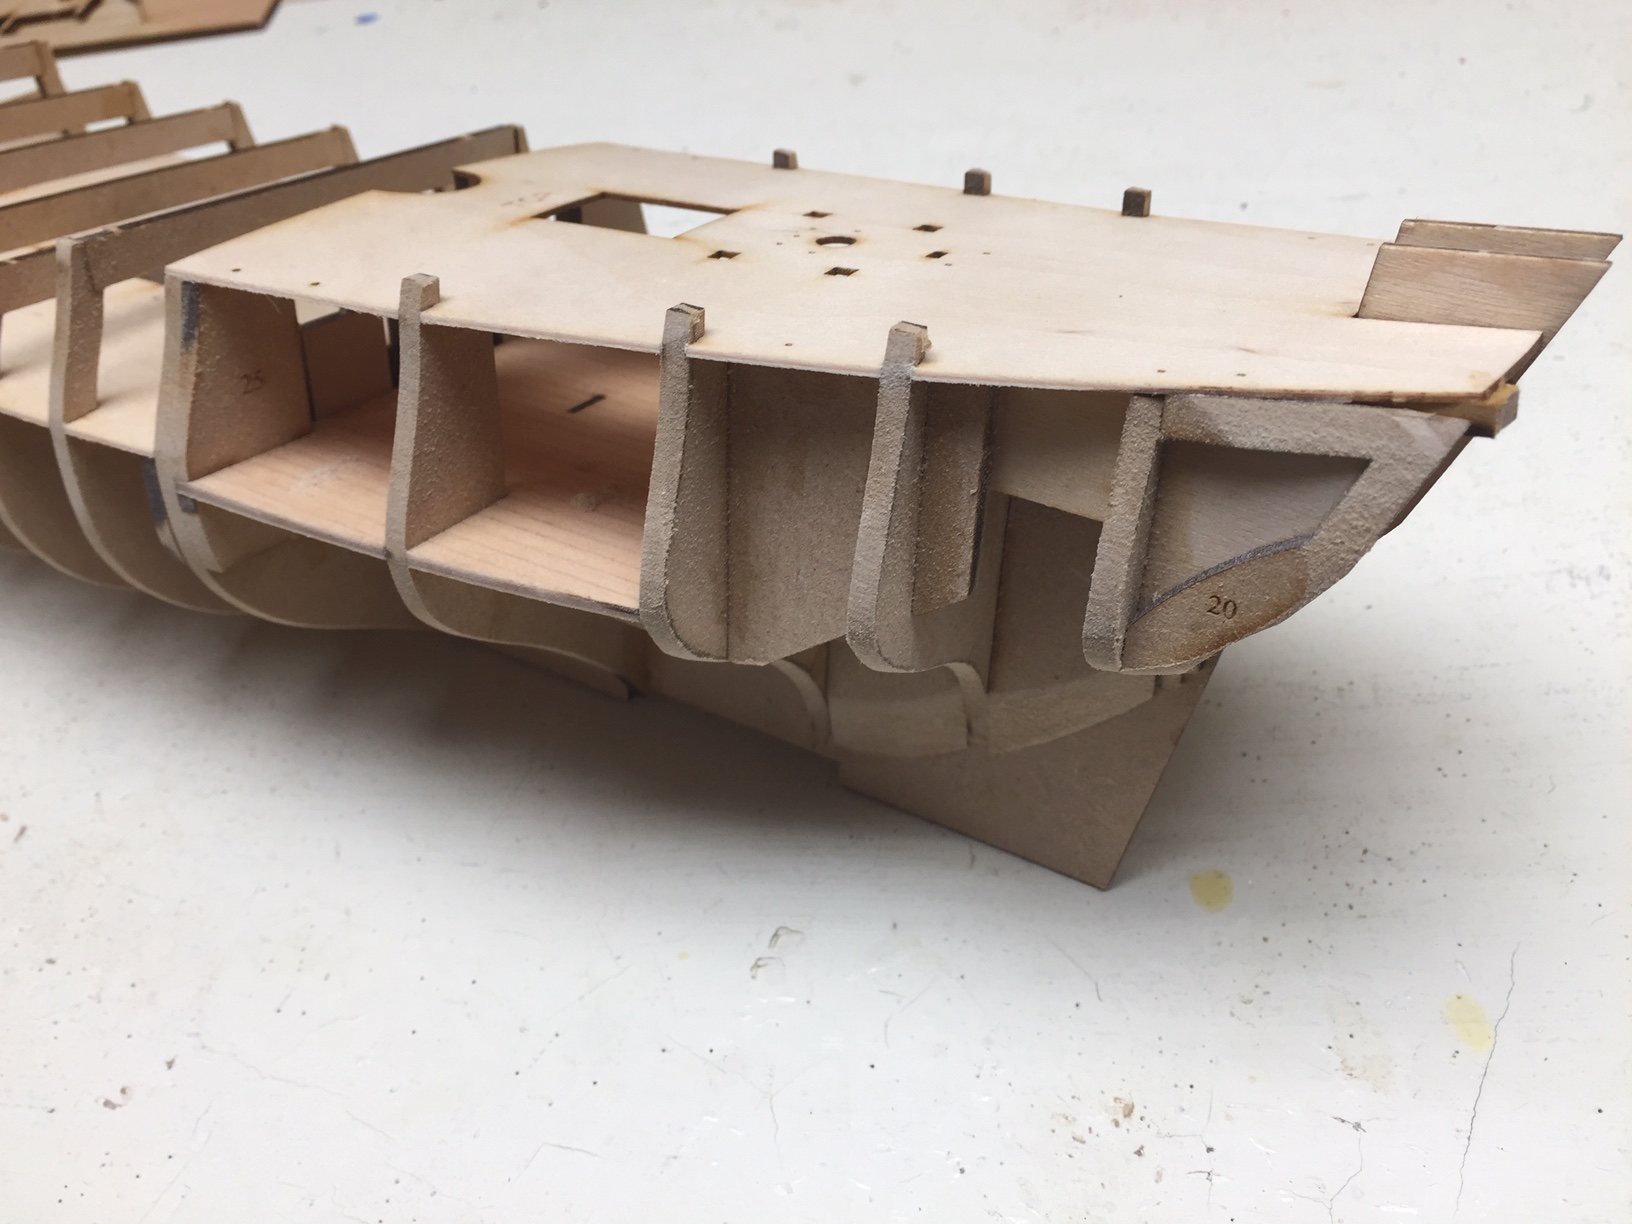
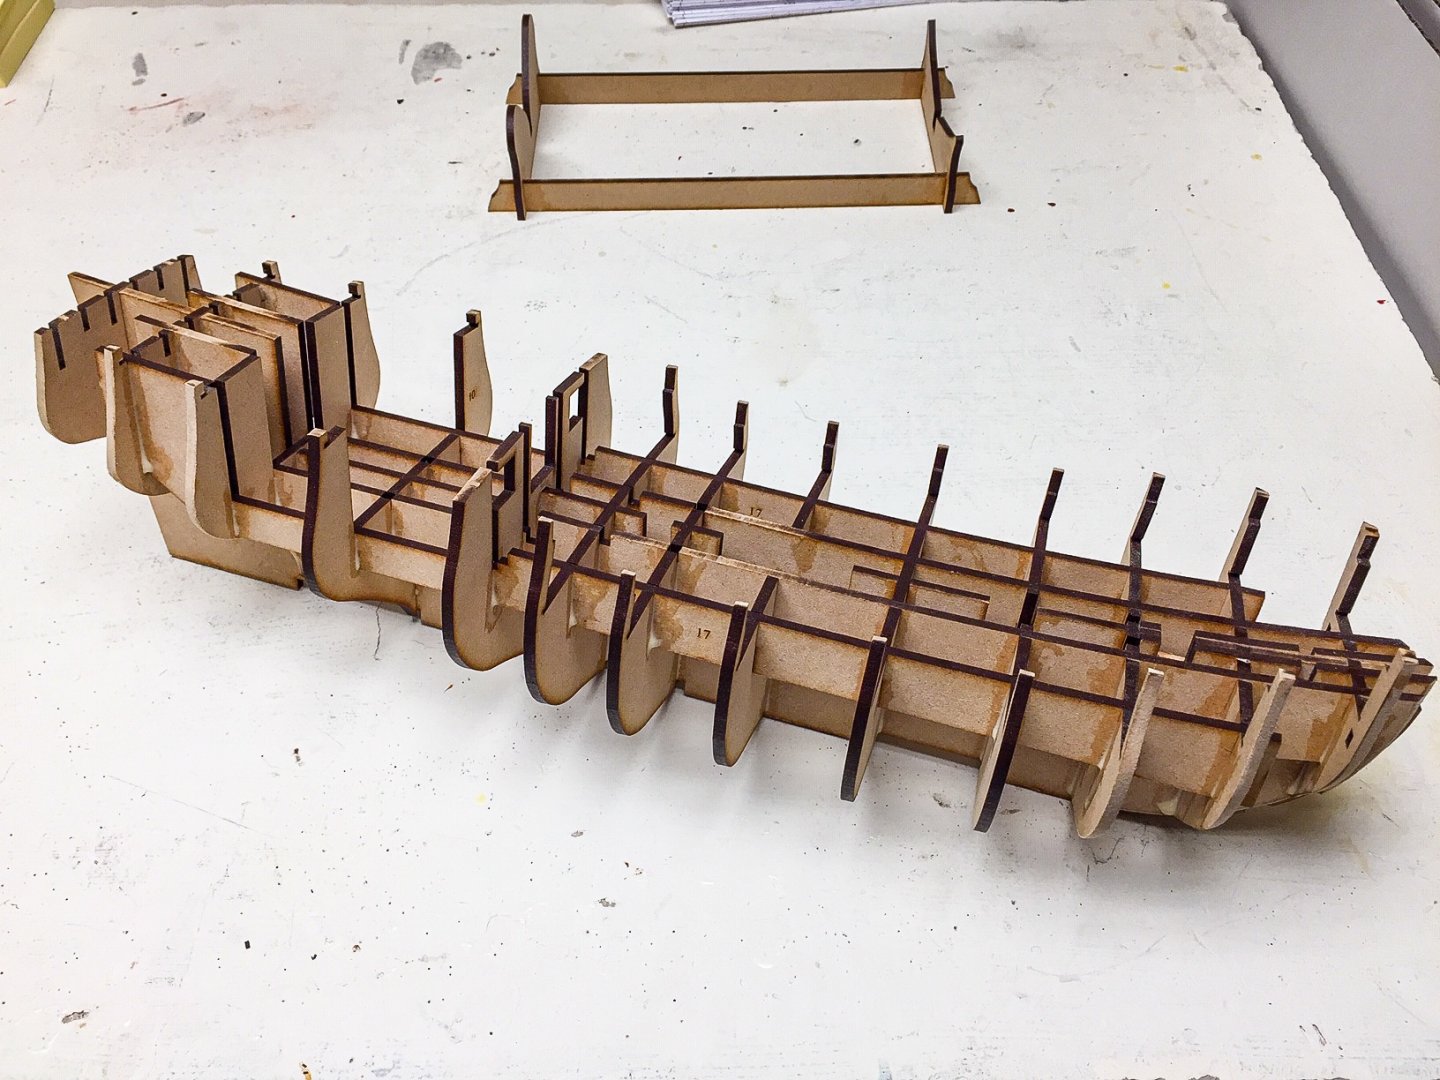
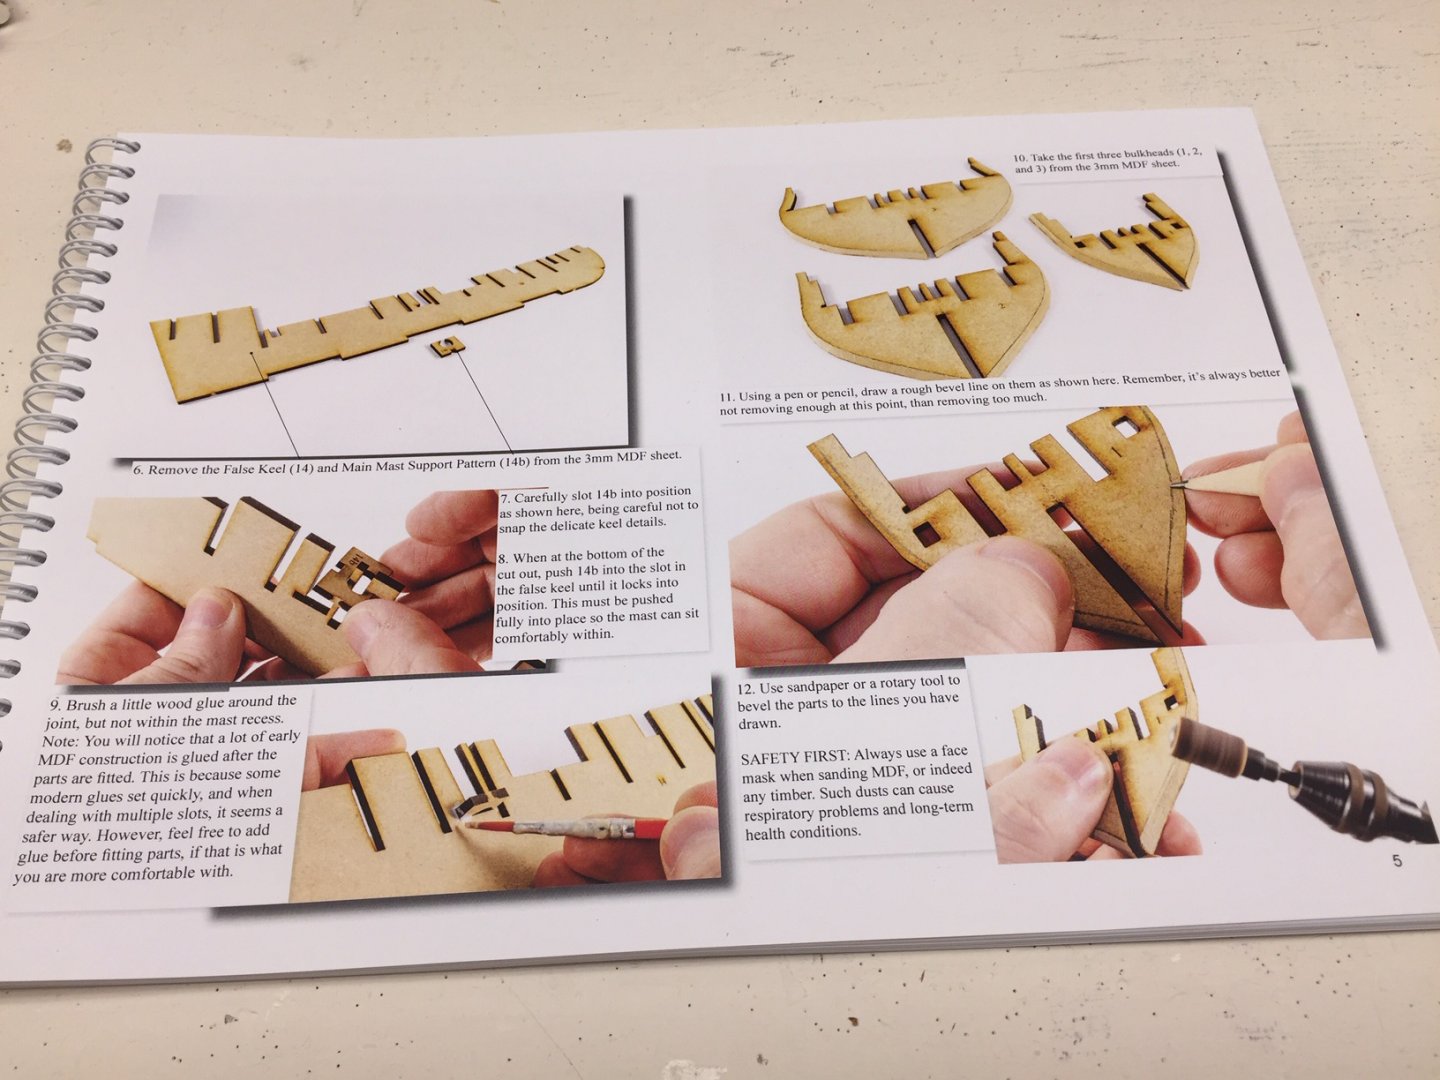
It's now time to sand and fair the hull. As I got started, it looked like I was going to open up a small gap just below the upper deck and the stern bulwark or bulkhead. The manual said to use the upper deck as a guide for sanding the bulkheads, and if I sanded that much, there was going to be a small open area, only 1/16" at most, but I thought this needed some extras support. So I added a couple of small pieces of MDF to fill in this area. If it turns out they interfere with future pieces, I can chisel out whatever causes the problem. First photo shows the pieces glued underneath the upper deck along the outer edges. Pictures show the progress so far. I still have a lot of sanding to do. The stern area along the false keel has the sharpest curvature, and that's the part that I think is the most difficult. I may end up adding a little wood filler in this area. I'm using a combination of round sanding files and a sanding block. I've found MDF sands easily, not too different from basswood, maybe slightly harder and it doesn't have grain. It's much easier to sand than plywood.

-
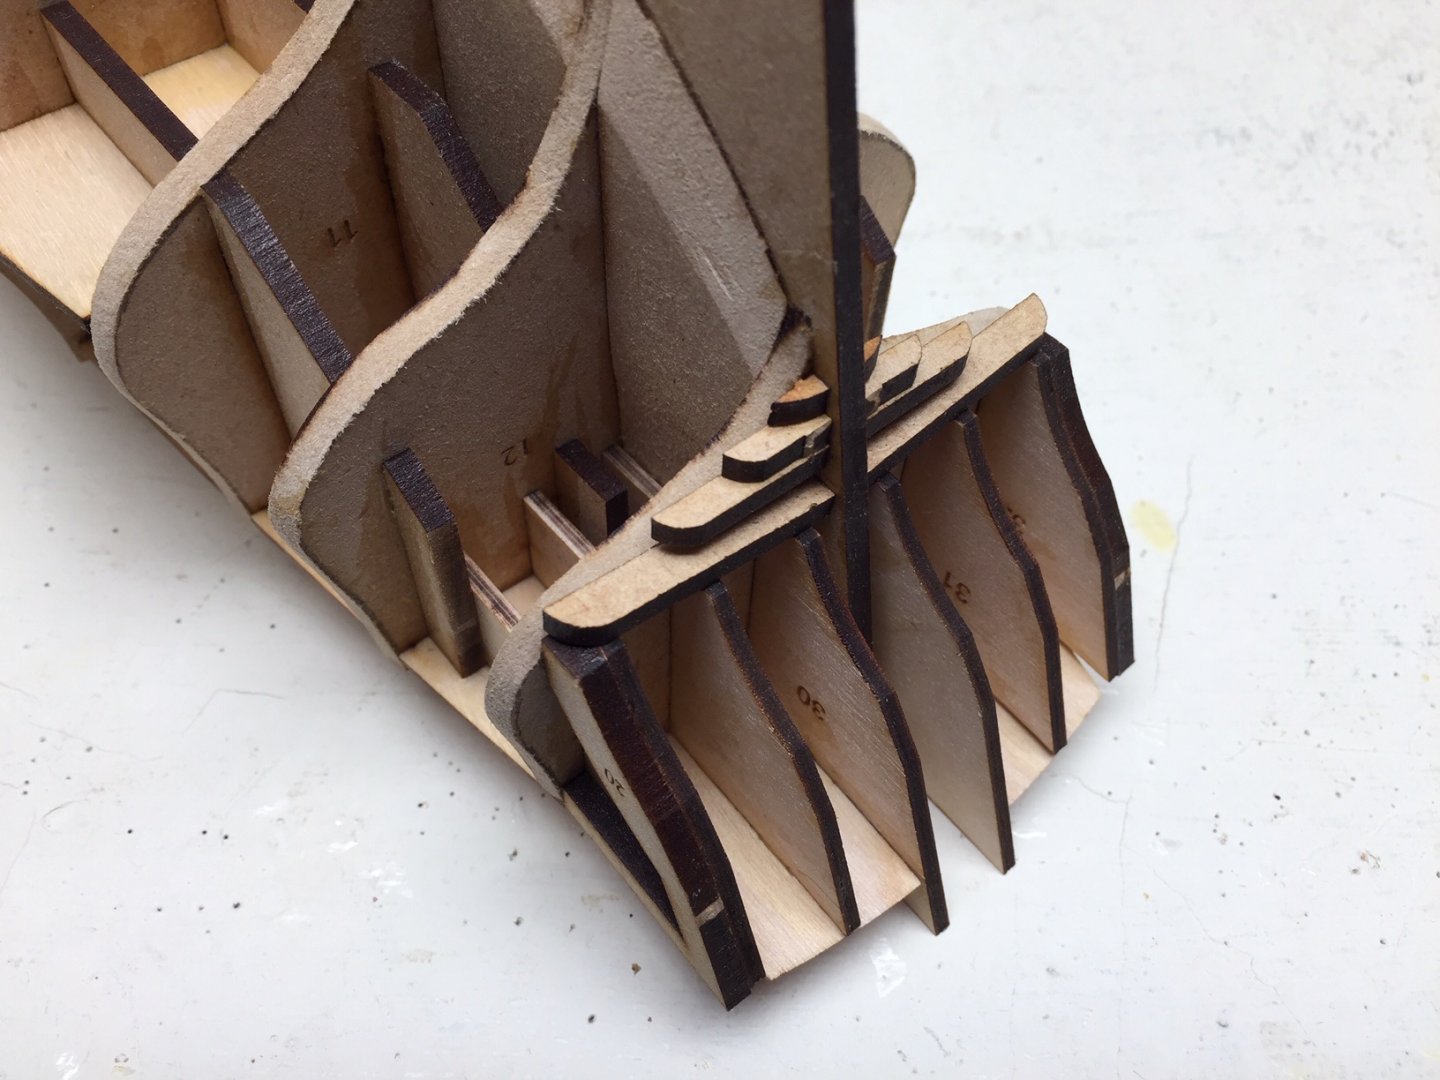
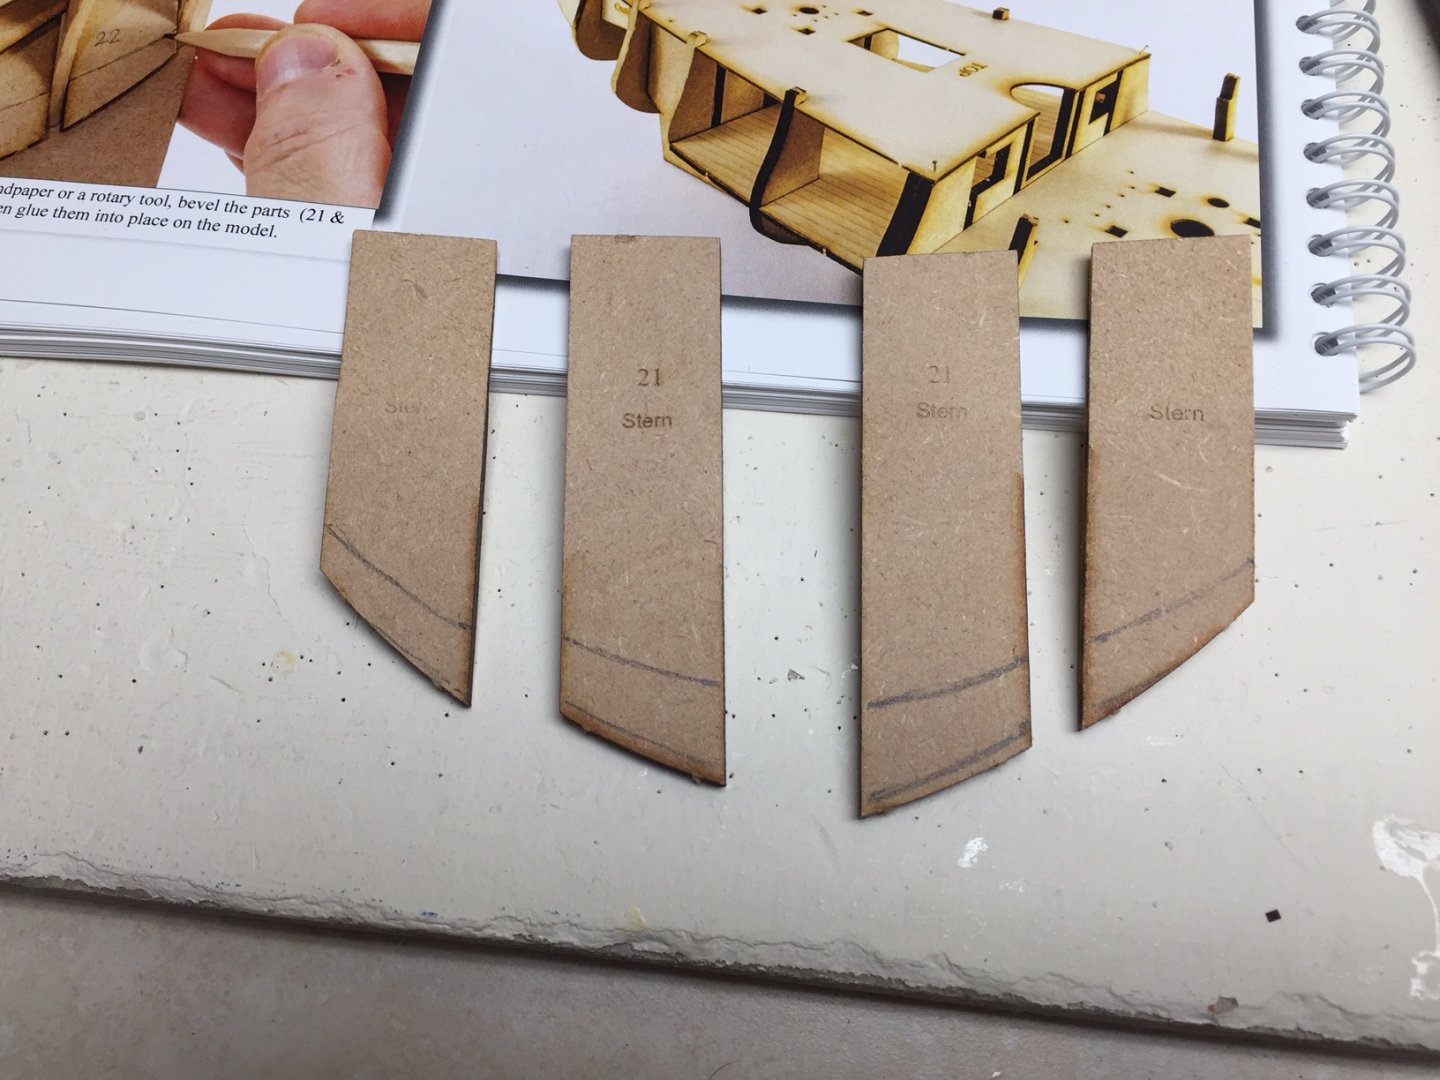
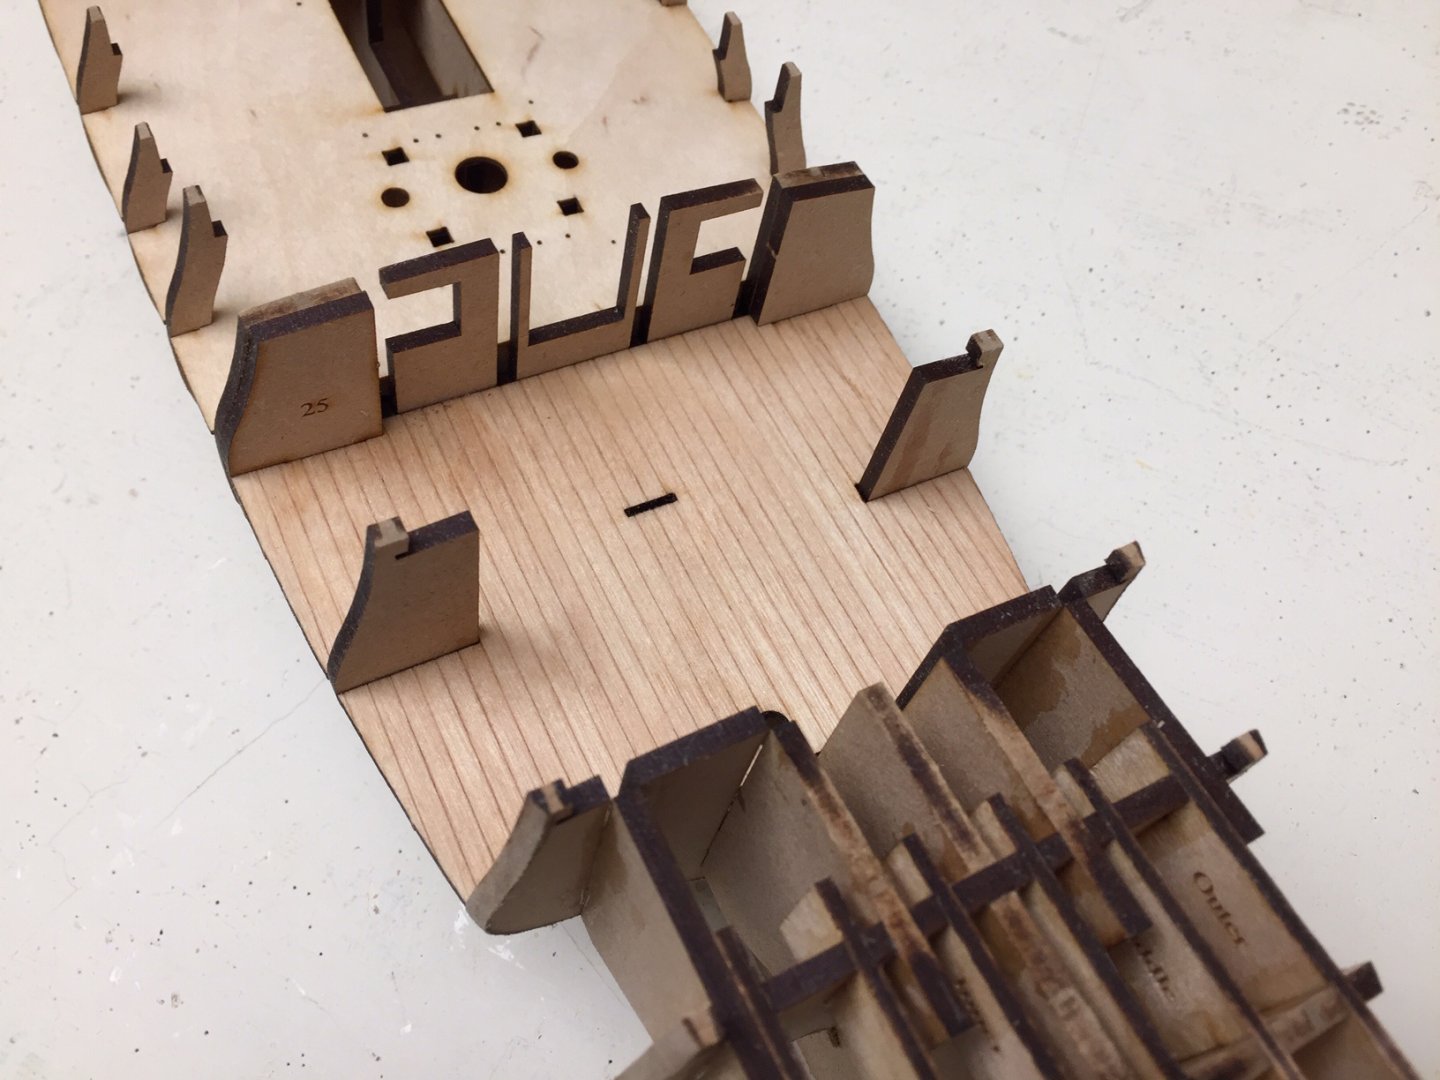
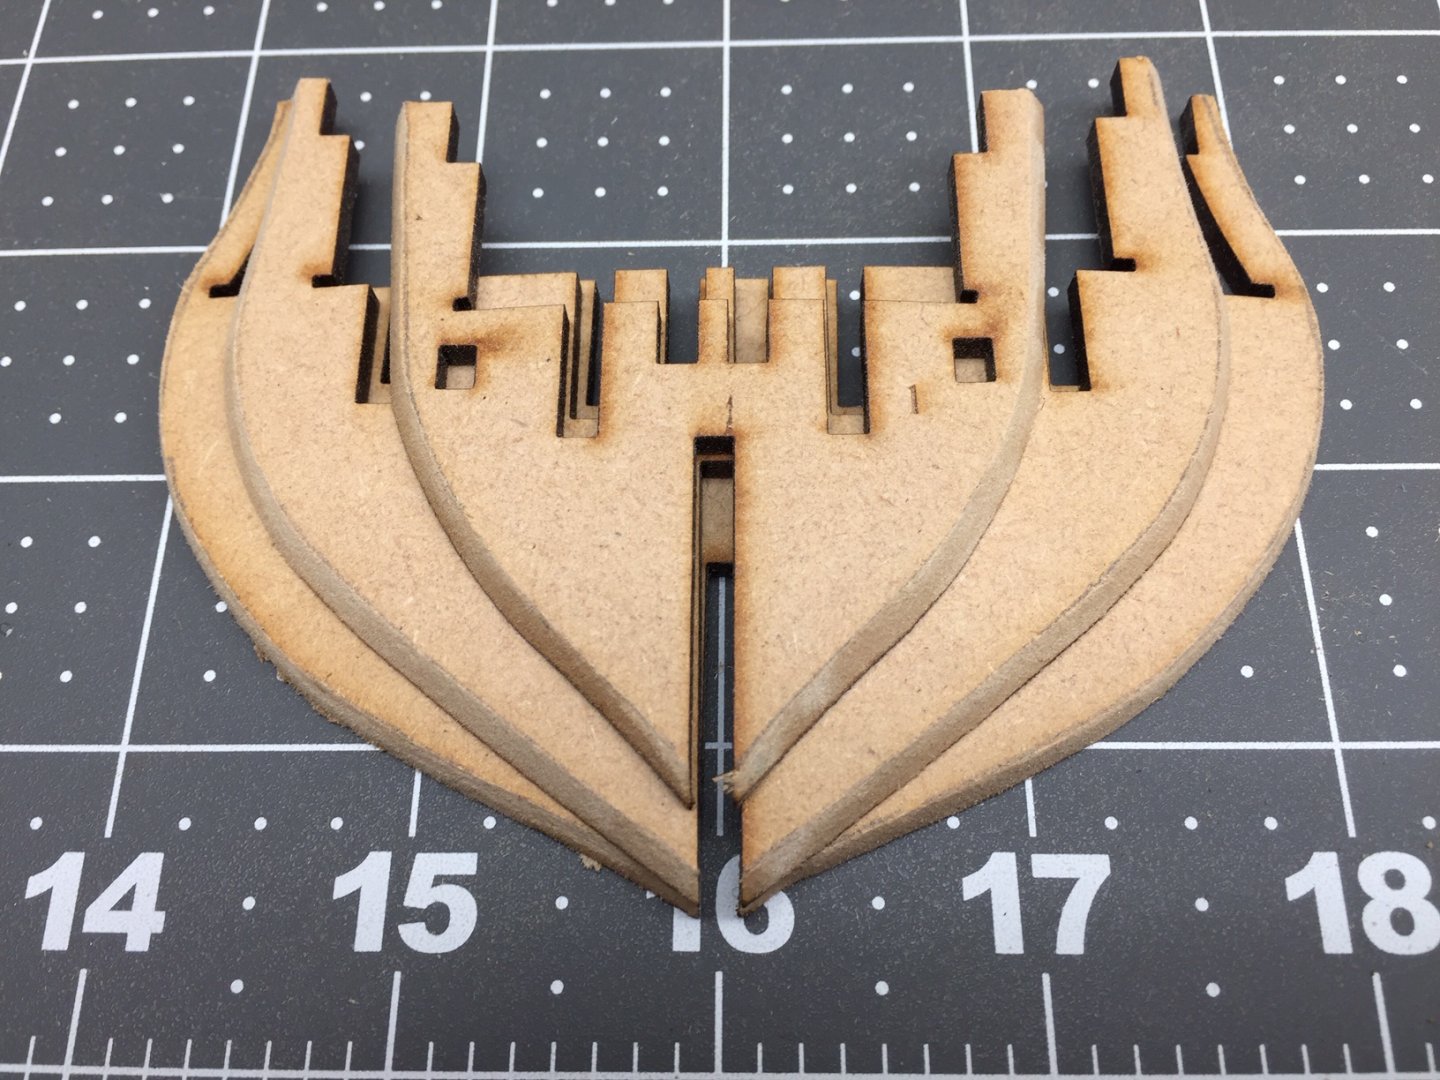
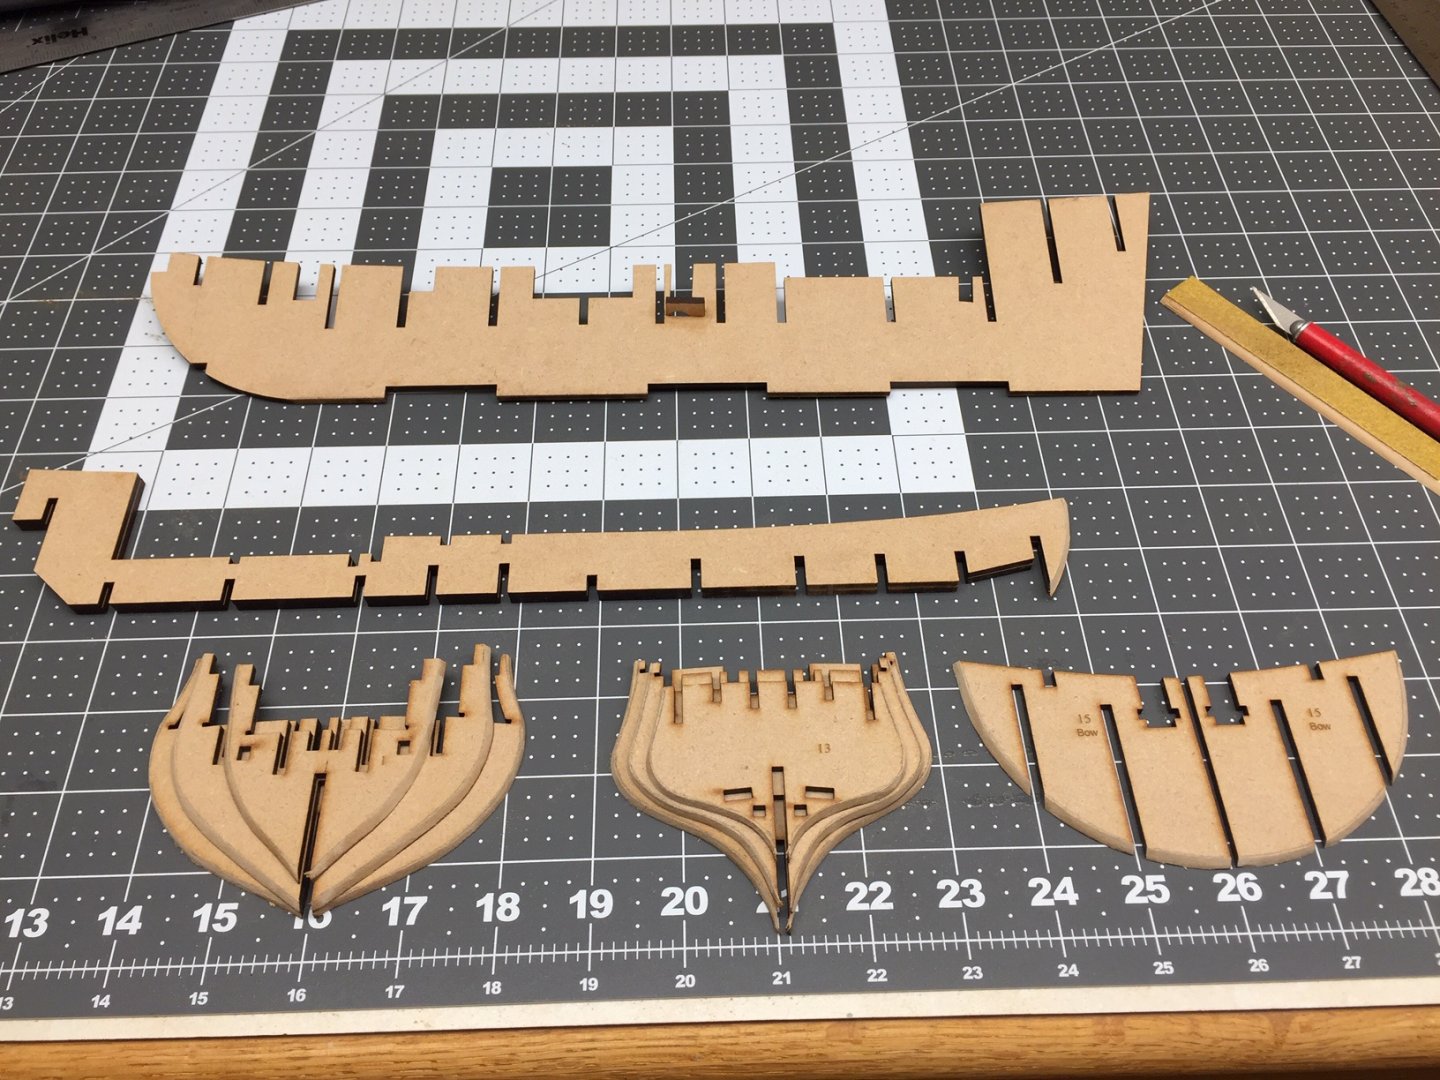
There's only a few more fill pieces to add before it's time to fair the hull. Here are the ones on the bow and stern. These will make planking maintain it's shape and be a little easier.

-
There are some beveled fill pieces that go along the false keel to support planking this area. I beveled these before gluing as recommended in manual. I don't know about others, but I have more difficulties shaping and planking the stern than the bow. When I fair the hull, these will required more shaping.
-
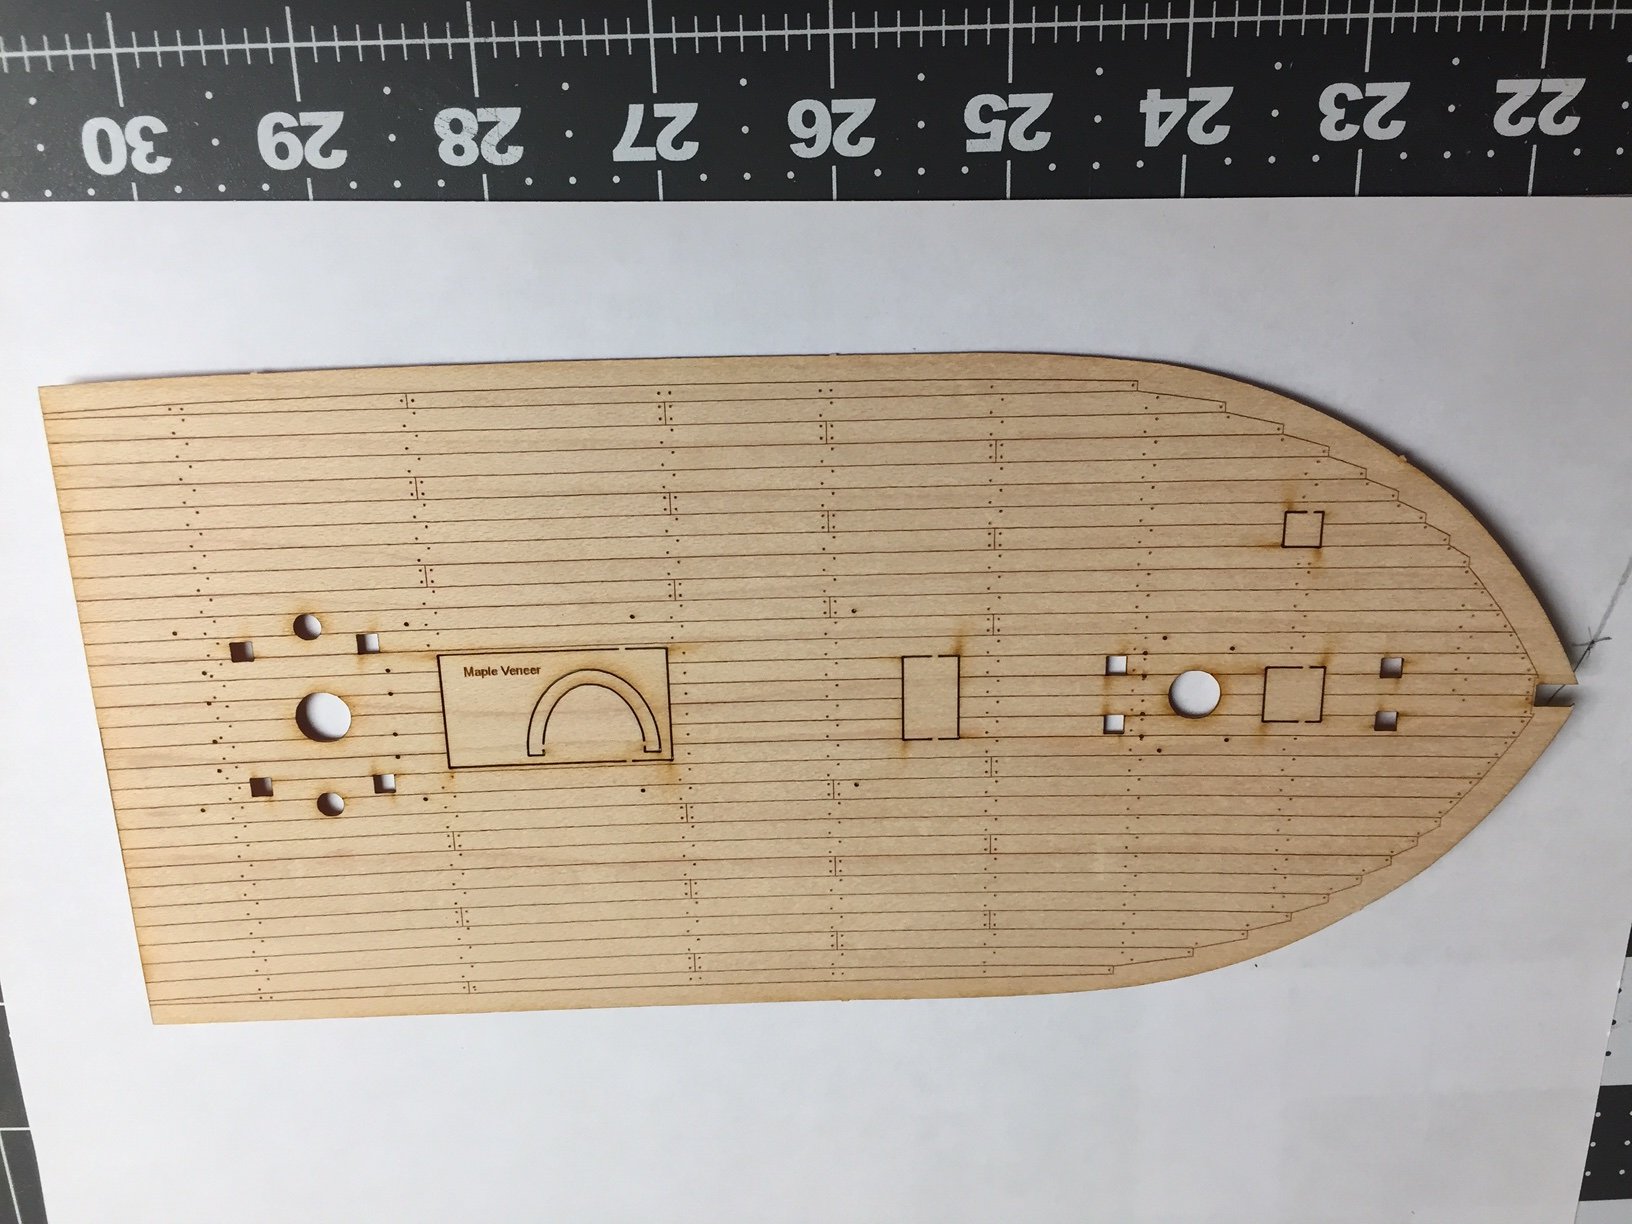
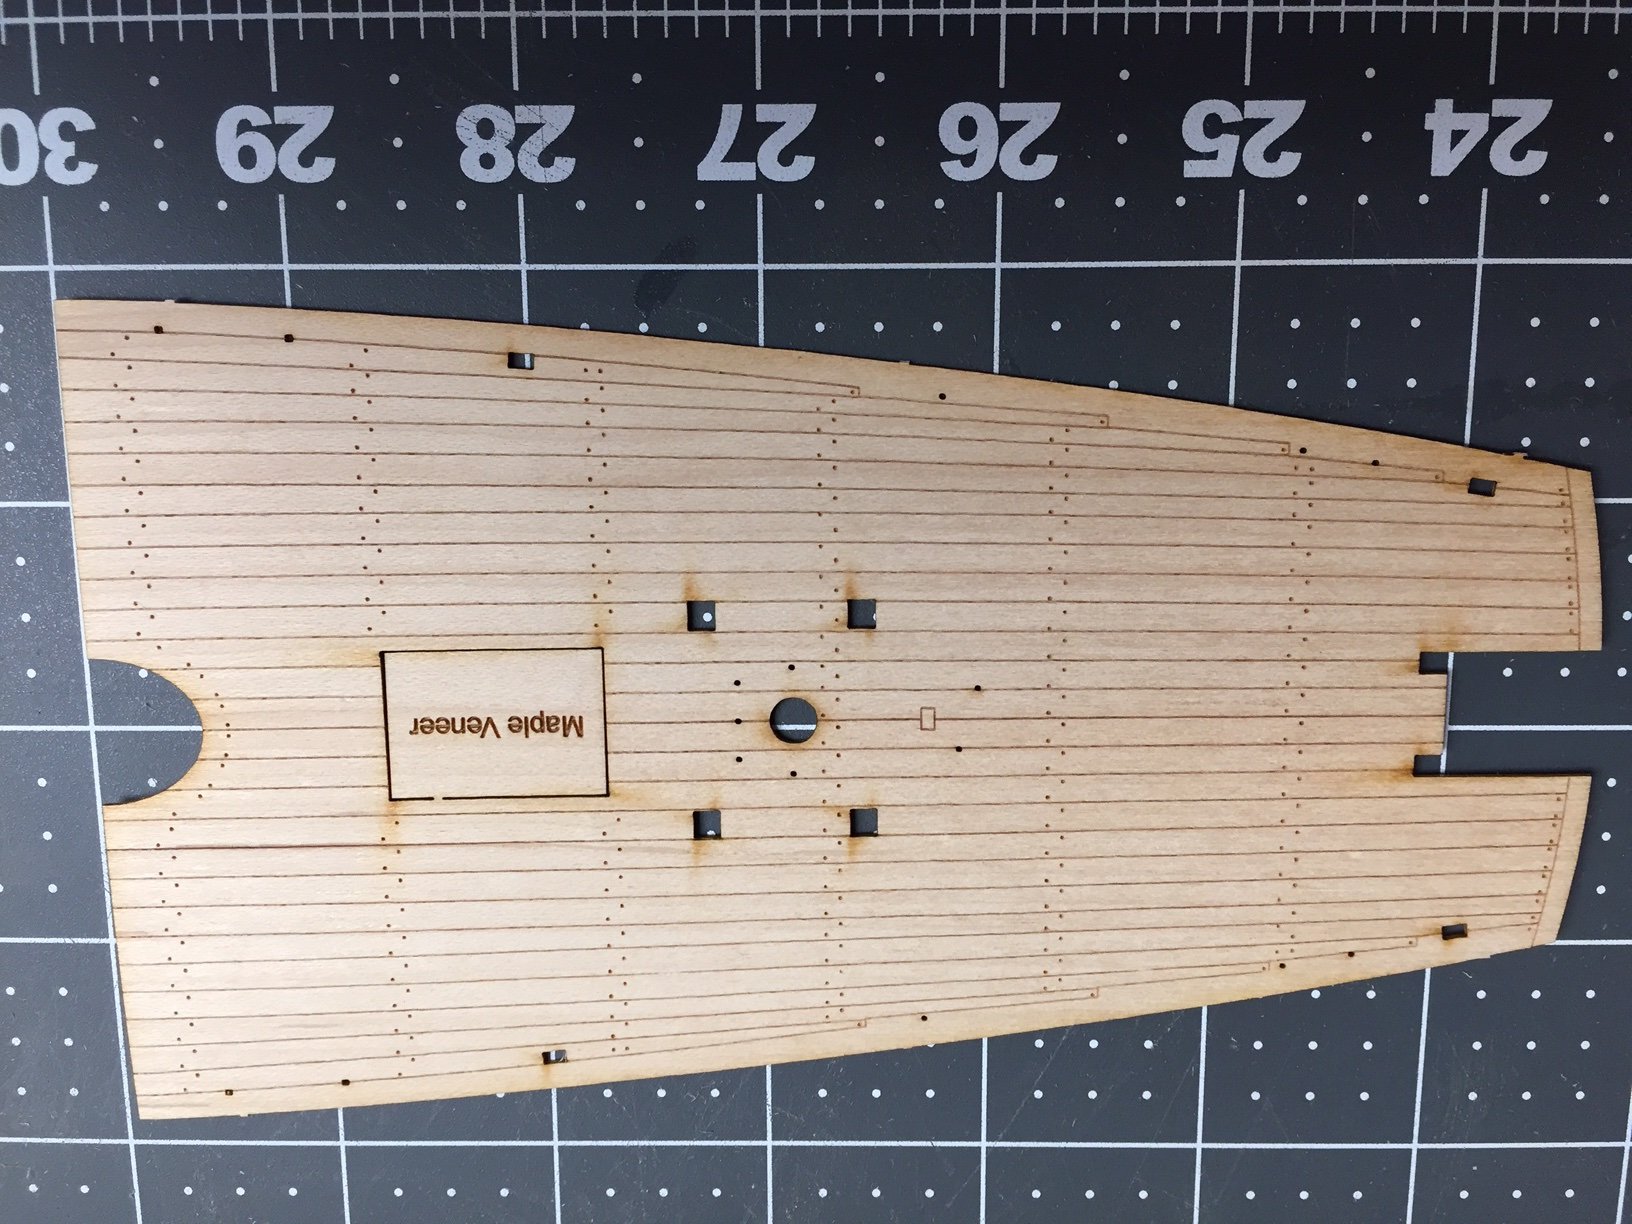
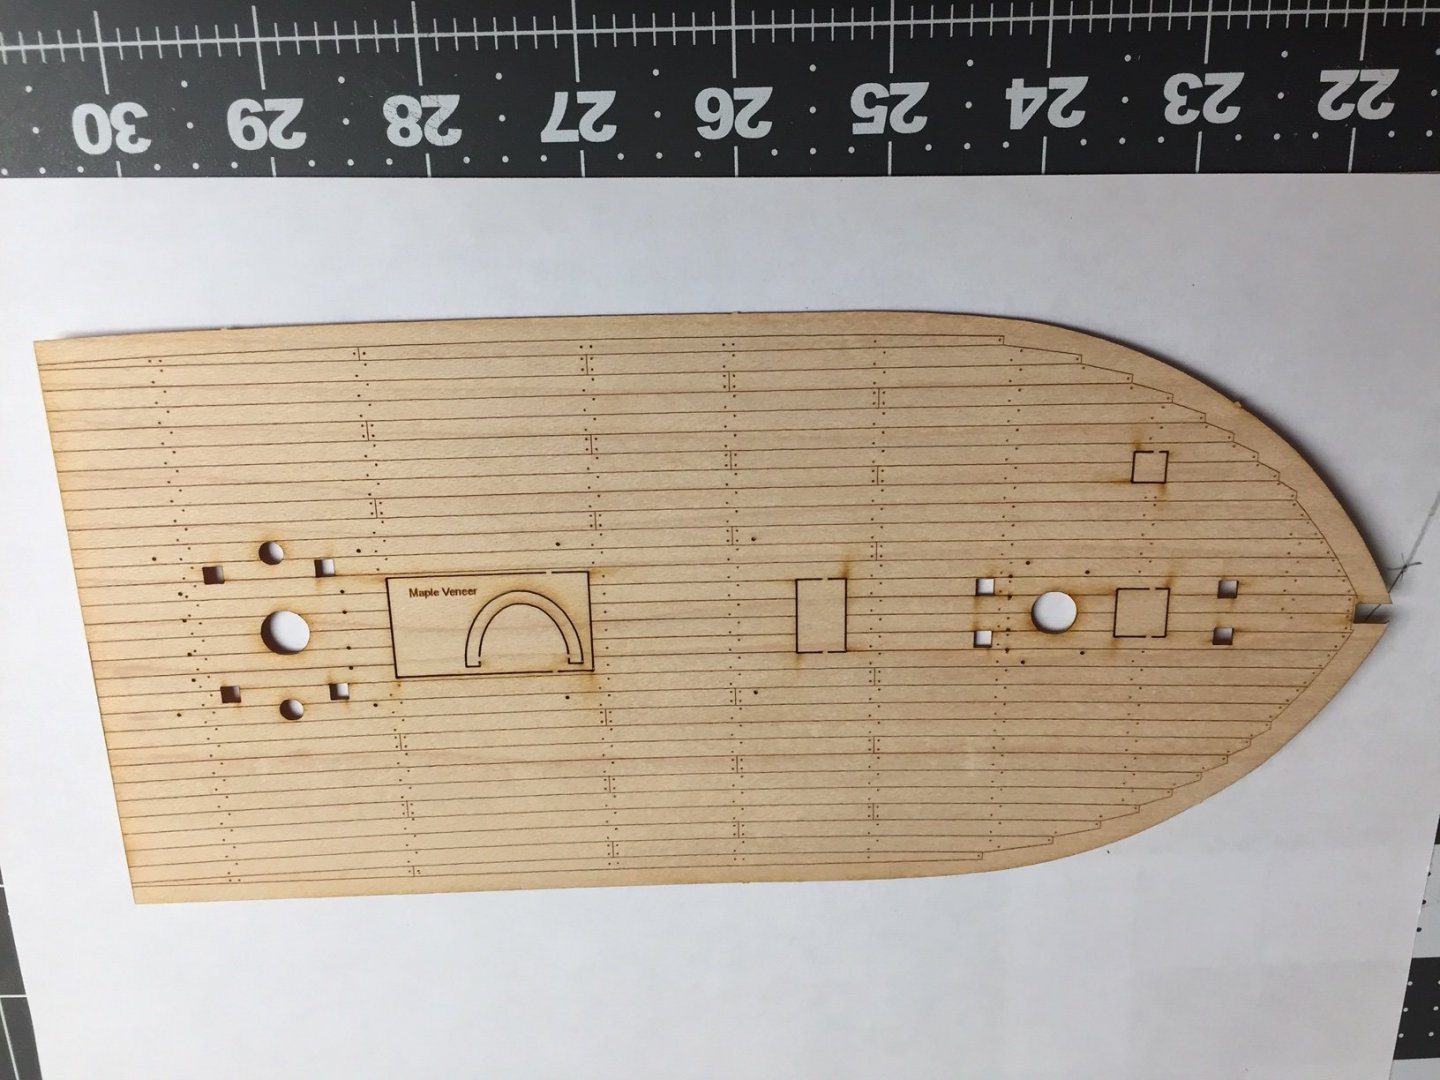
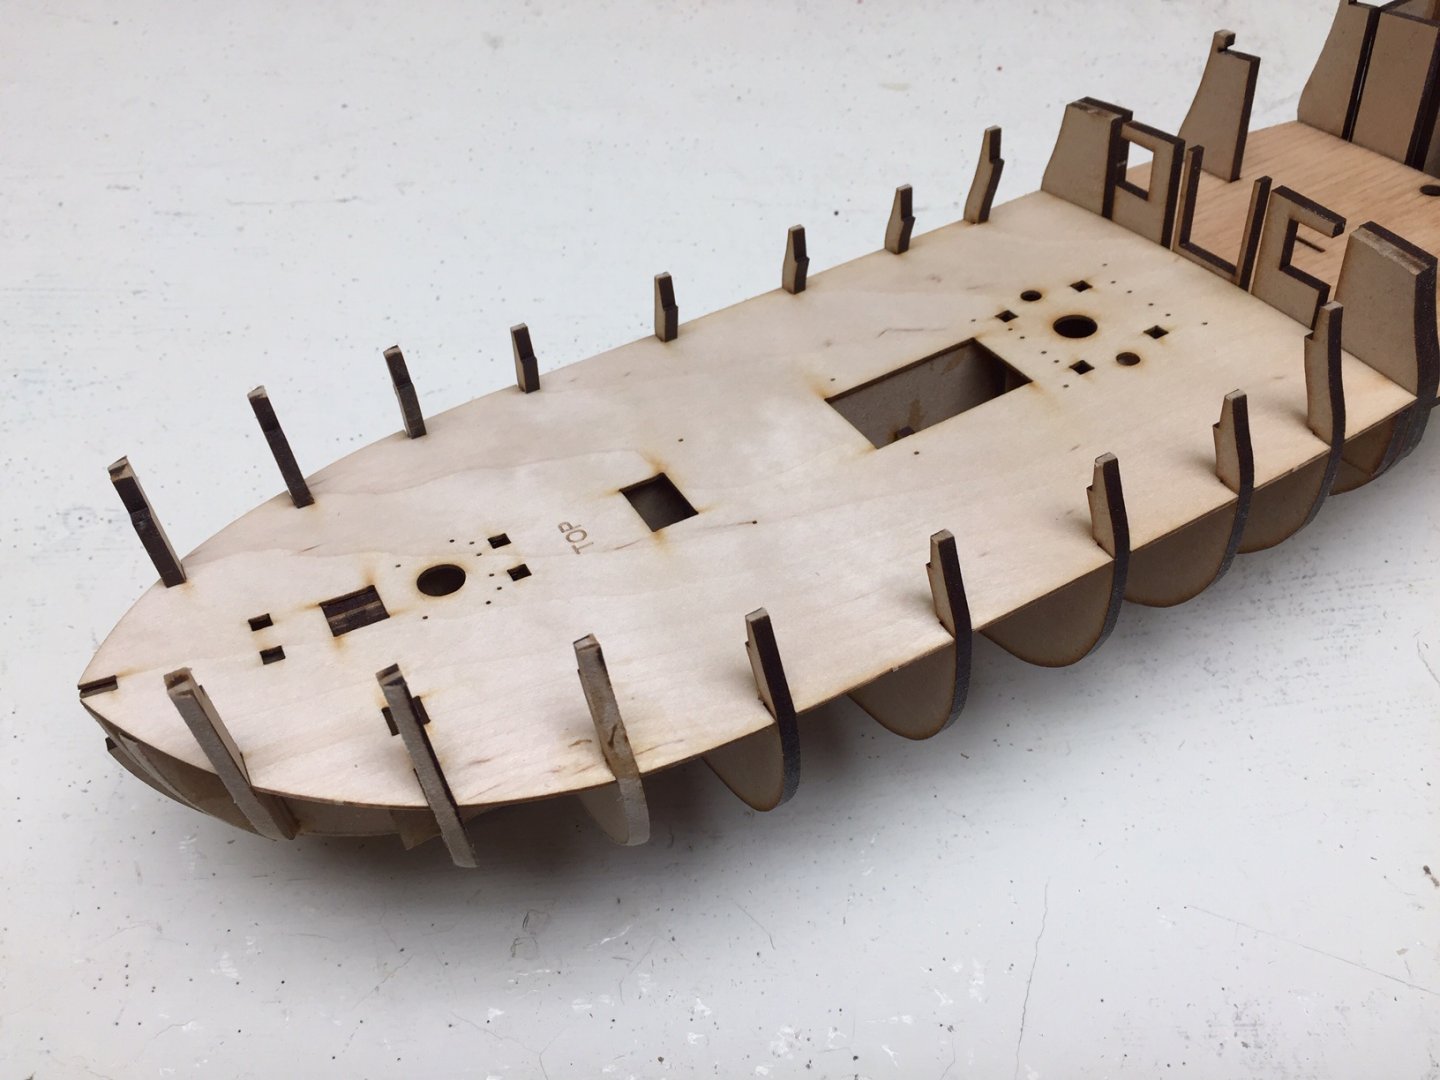
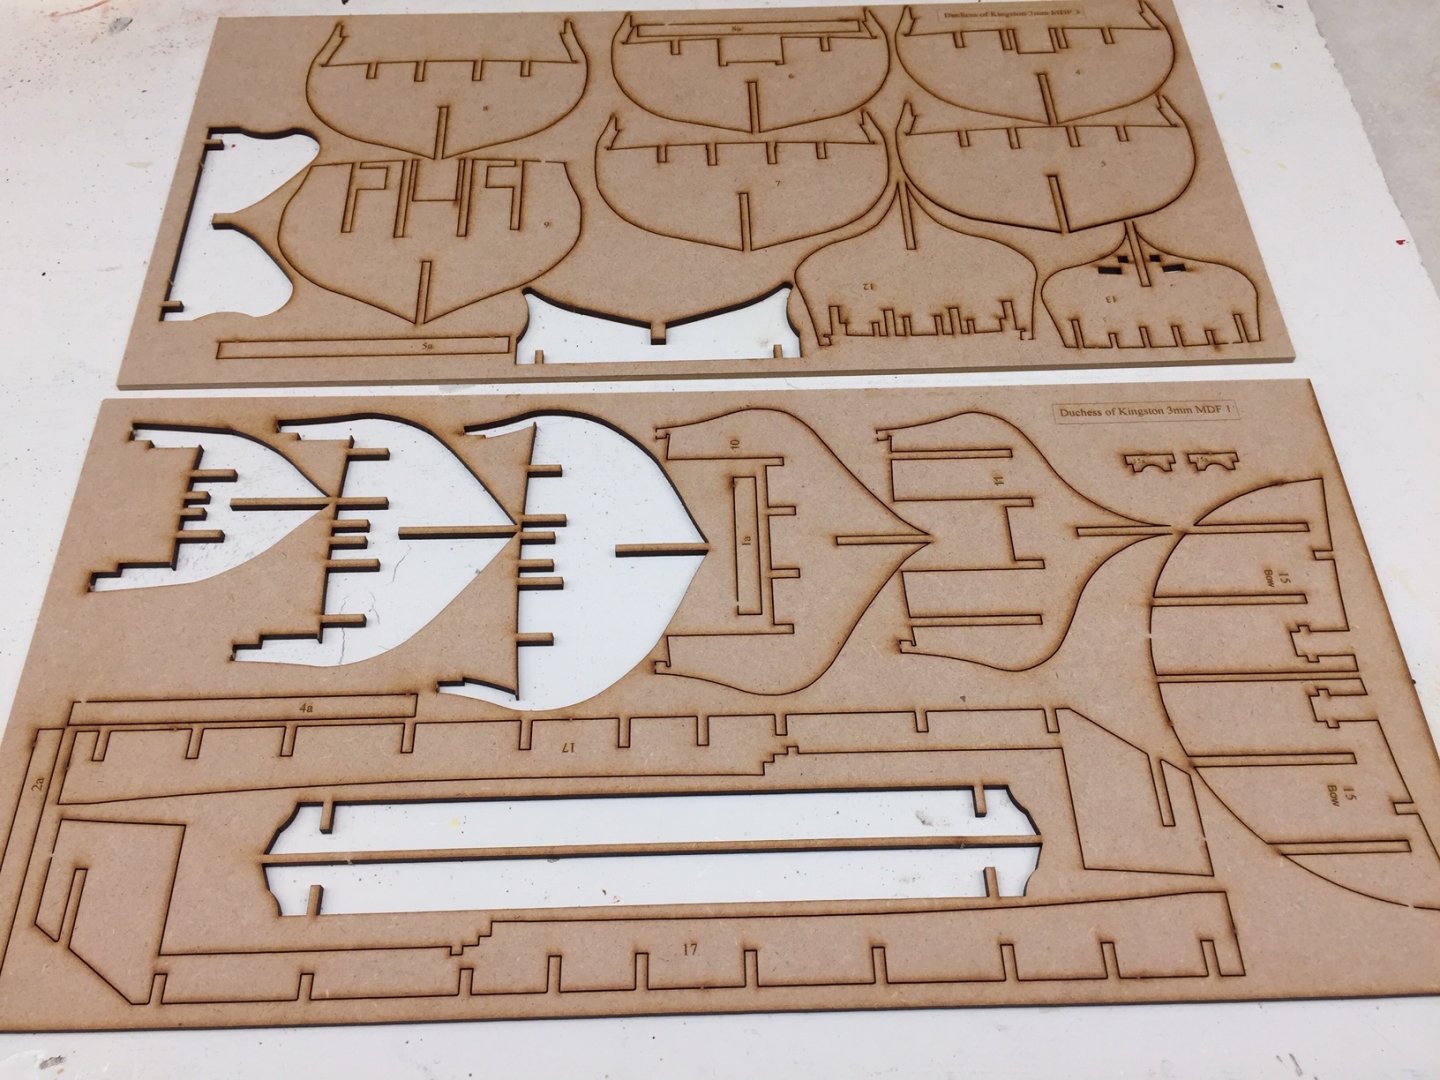
I forgot to include photo of the upper deck base, so here it is. Looking ahead, the kit provides laser etched forward and upper deck parts. They look pretty good to me, although I've planked decks in the two previous builds. Treenails are simulated along with planking. When the time comes, it will certainly be easier to use these parts instead of planking the deck, although I don't mind planking. I'm not very good going along the edges though. I'm including pictures of the laser etched parts. Does anyone have thoughts on this?

-
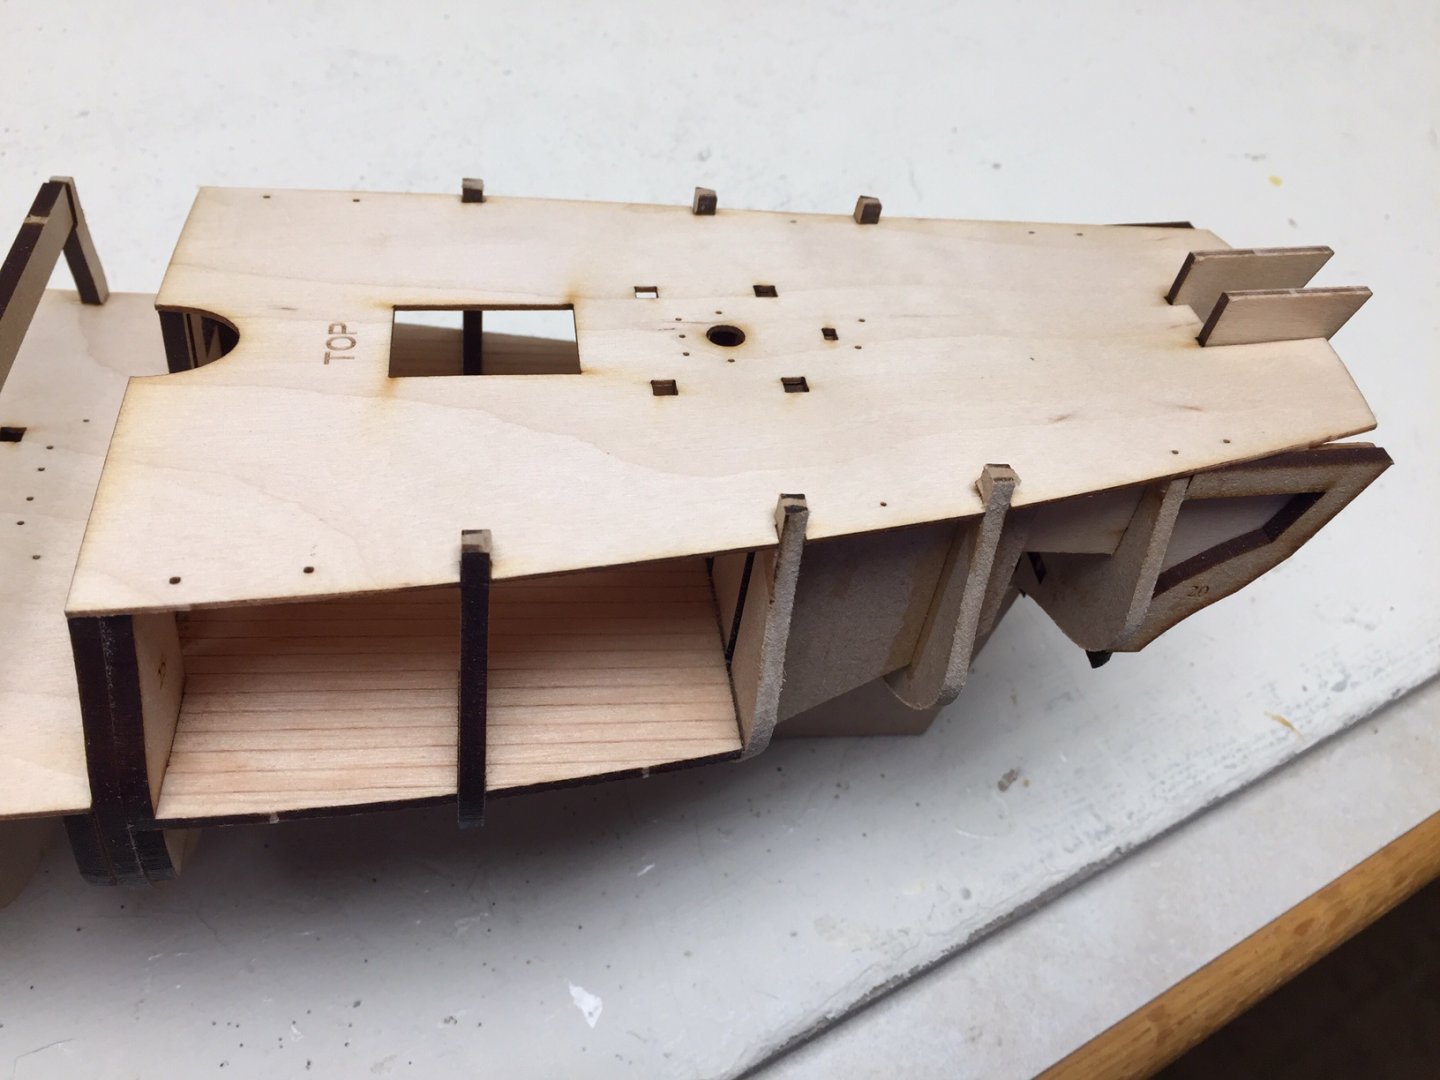
The next step was to put in a plywood base for the forward deck. Manual said to bend it to get it to go over the bulwarks, and you really have to bend it. I was surprised I had to bend it that much to get it over the top of the bulkheads. I thought it might break, but it didn't. There are slots in the bulkheads for it to go into, and it kind of pops into place. Took a little fiddling to get it into all the slots. Once in all of them, it fit nicely on top of the bulkheads. I brushed glue on from underneath, the same way I did for the framework. There was no need to clamp. There is a similar plywood base for the upper deck. I installed it the same way, although it didn't require quite as much bending. It fit nicely into the bulkhead slots, and I brushed glue on from underneath again. I used tape to hold the deck on the corners instead of the little nails in the kit. It seemed to work fine. I've always had a hard time with the little nails, so usually find another way to hold something in place. It's just me. I've been using thinned Tightbond and guessed how much water to add. I didn't make it too thin. I'm guessing I added 1 part water to about 4 parts glue, but I didn't measure anything. There was no need to be very precise about it.
-
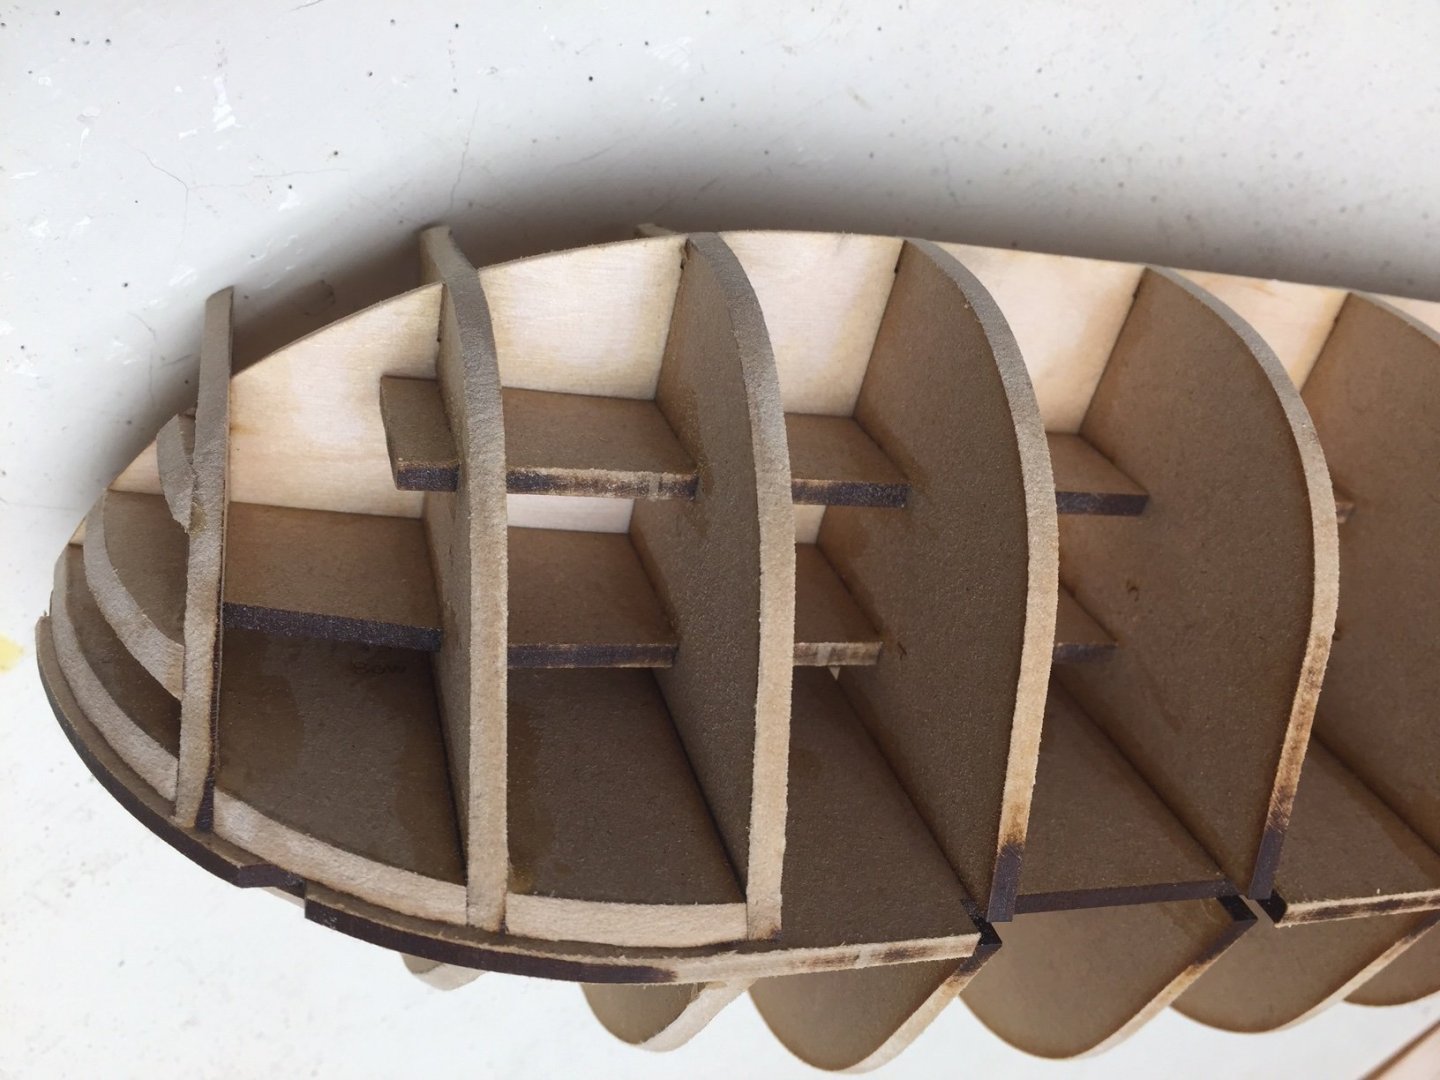
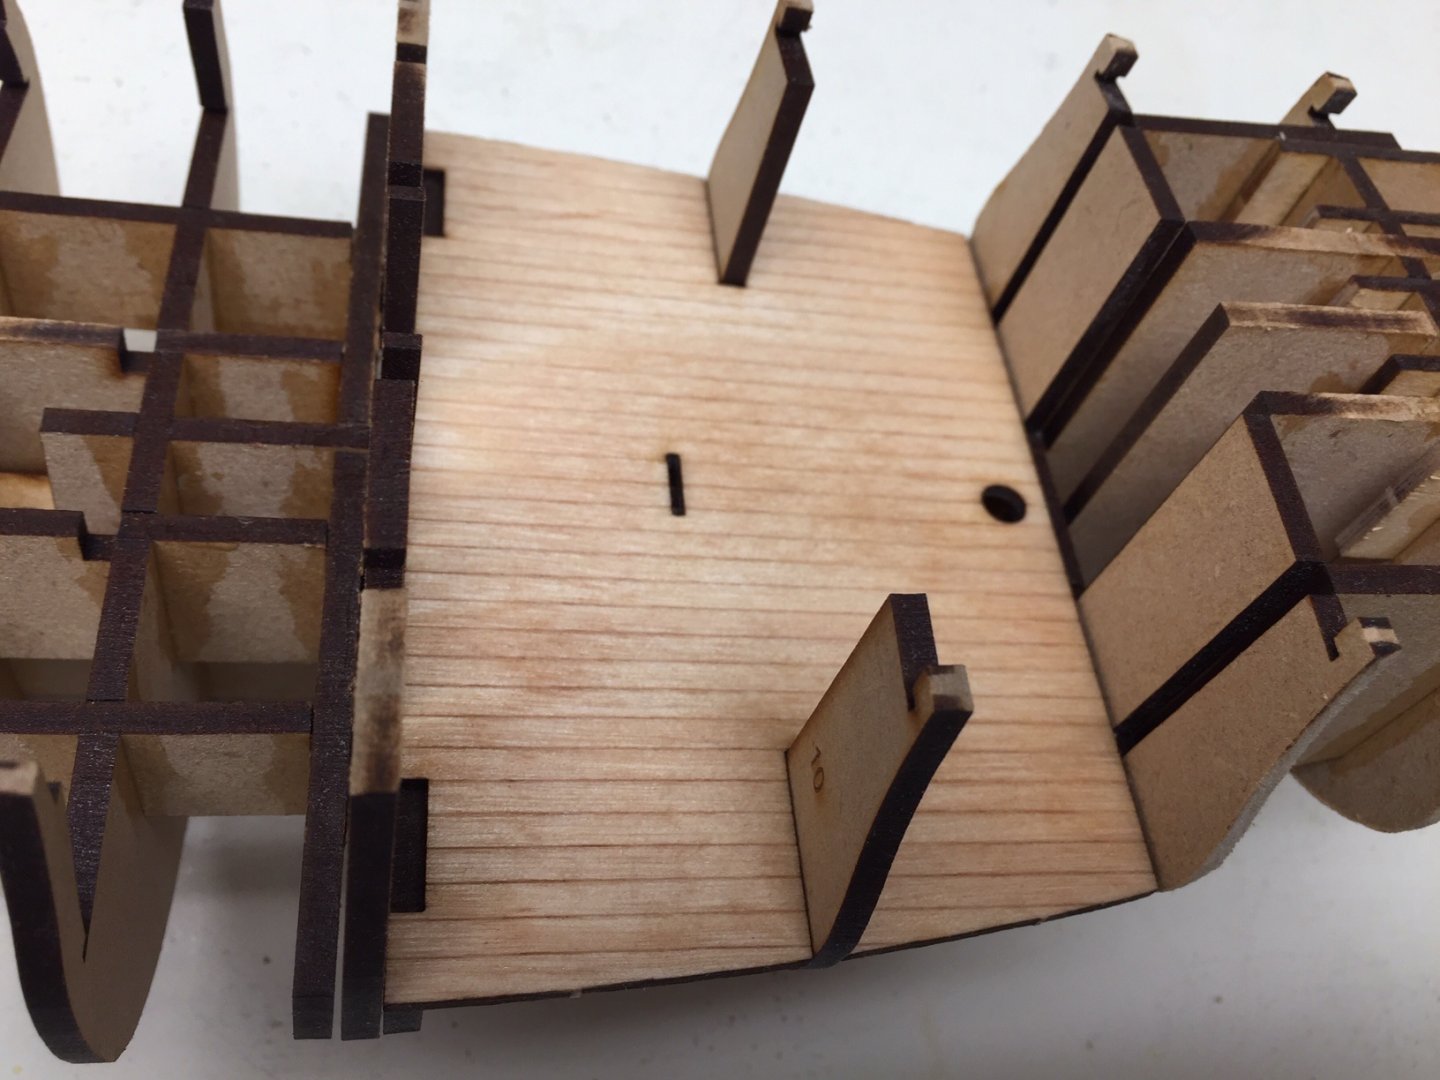
Many thanks for everyone following along. I've had computer problems (bad disk), so haven't been able to post any updates for about a week. Without a computer, it's amazing how much time I had to work on the boat and other projects around the house, LOL! I hope I can post these in the right sequence. After doing the basic framework, I added some supports for the lower deck. The lower deck has laser etched "planking". It's a little more subtle in appearance than if you plank it yourself and use a pencil along the edges. Using this for the lower deck planking sure makes it easy.

-
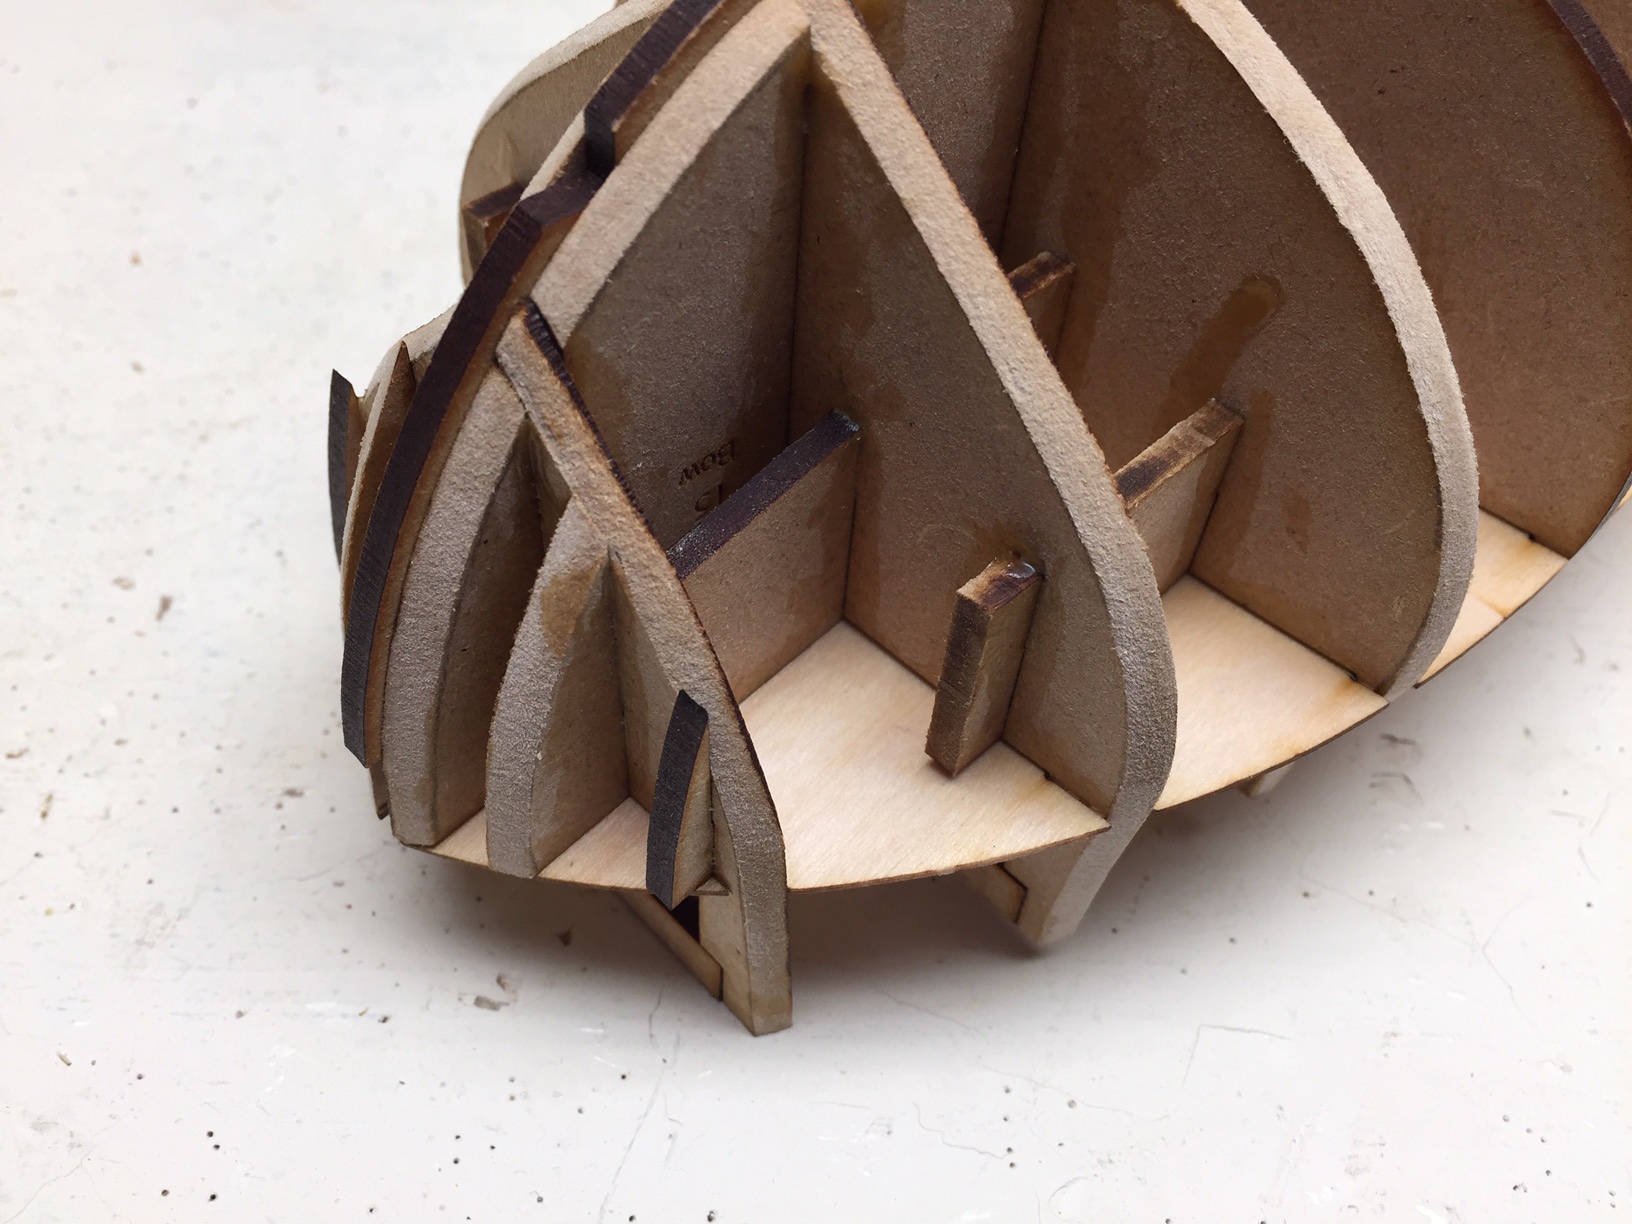
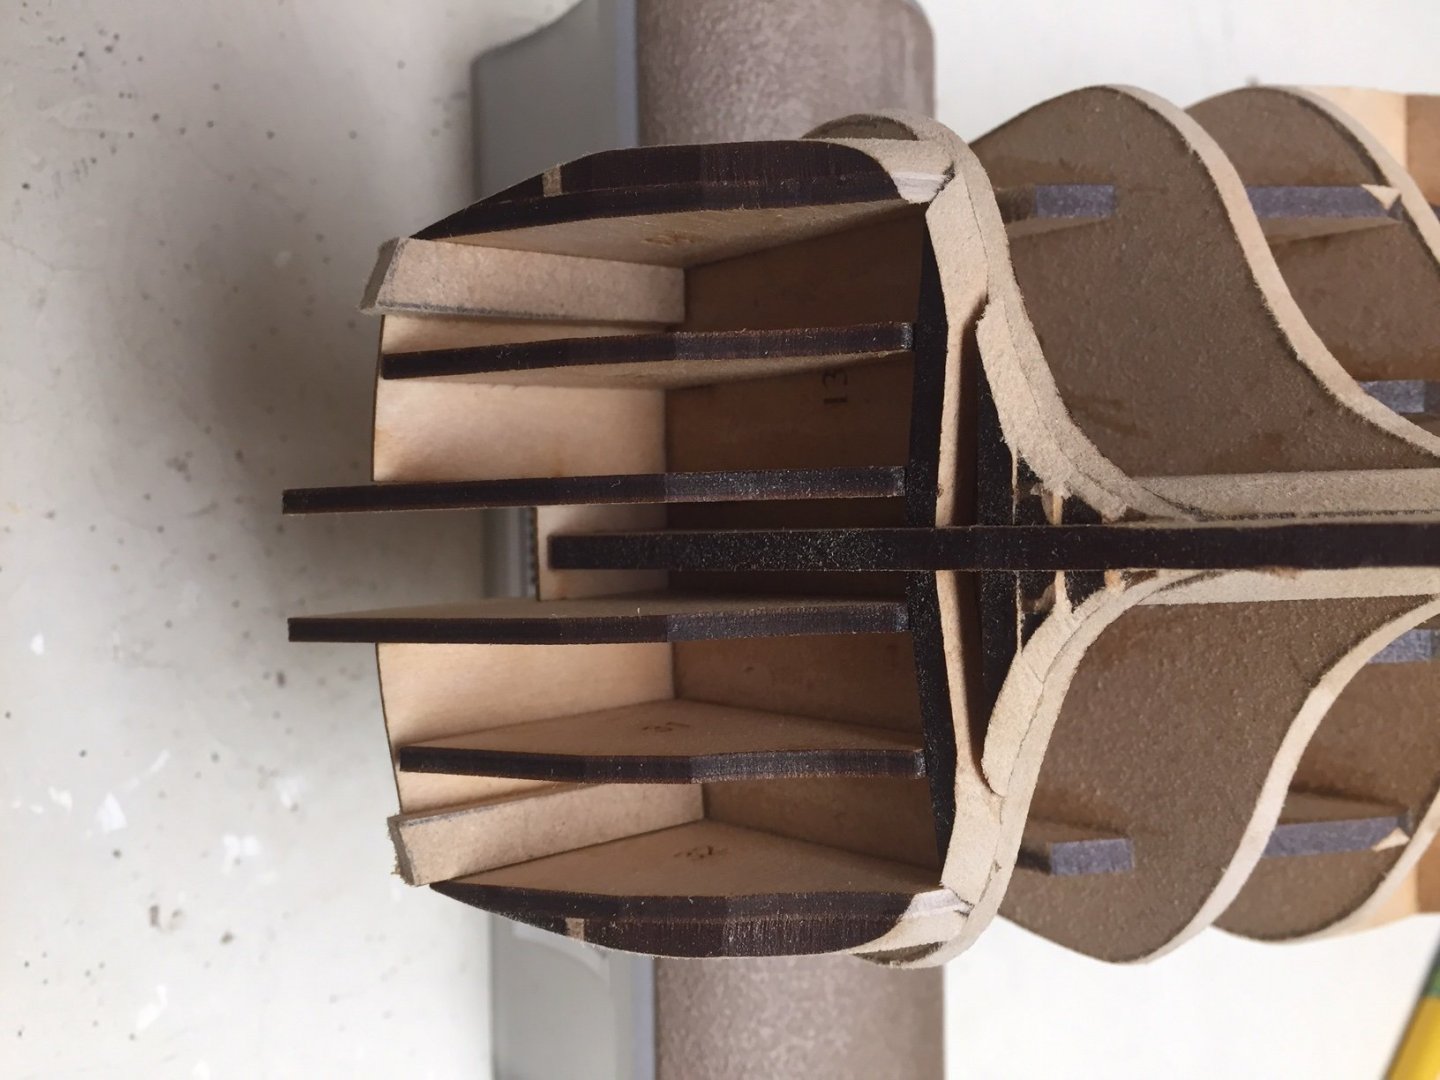
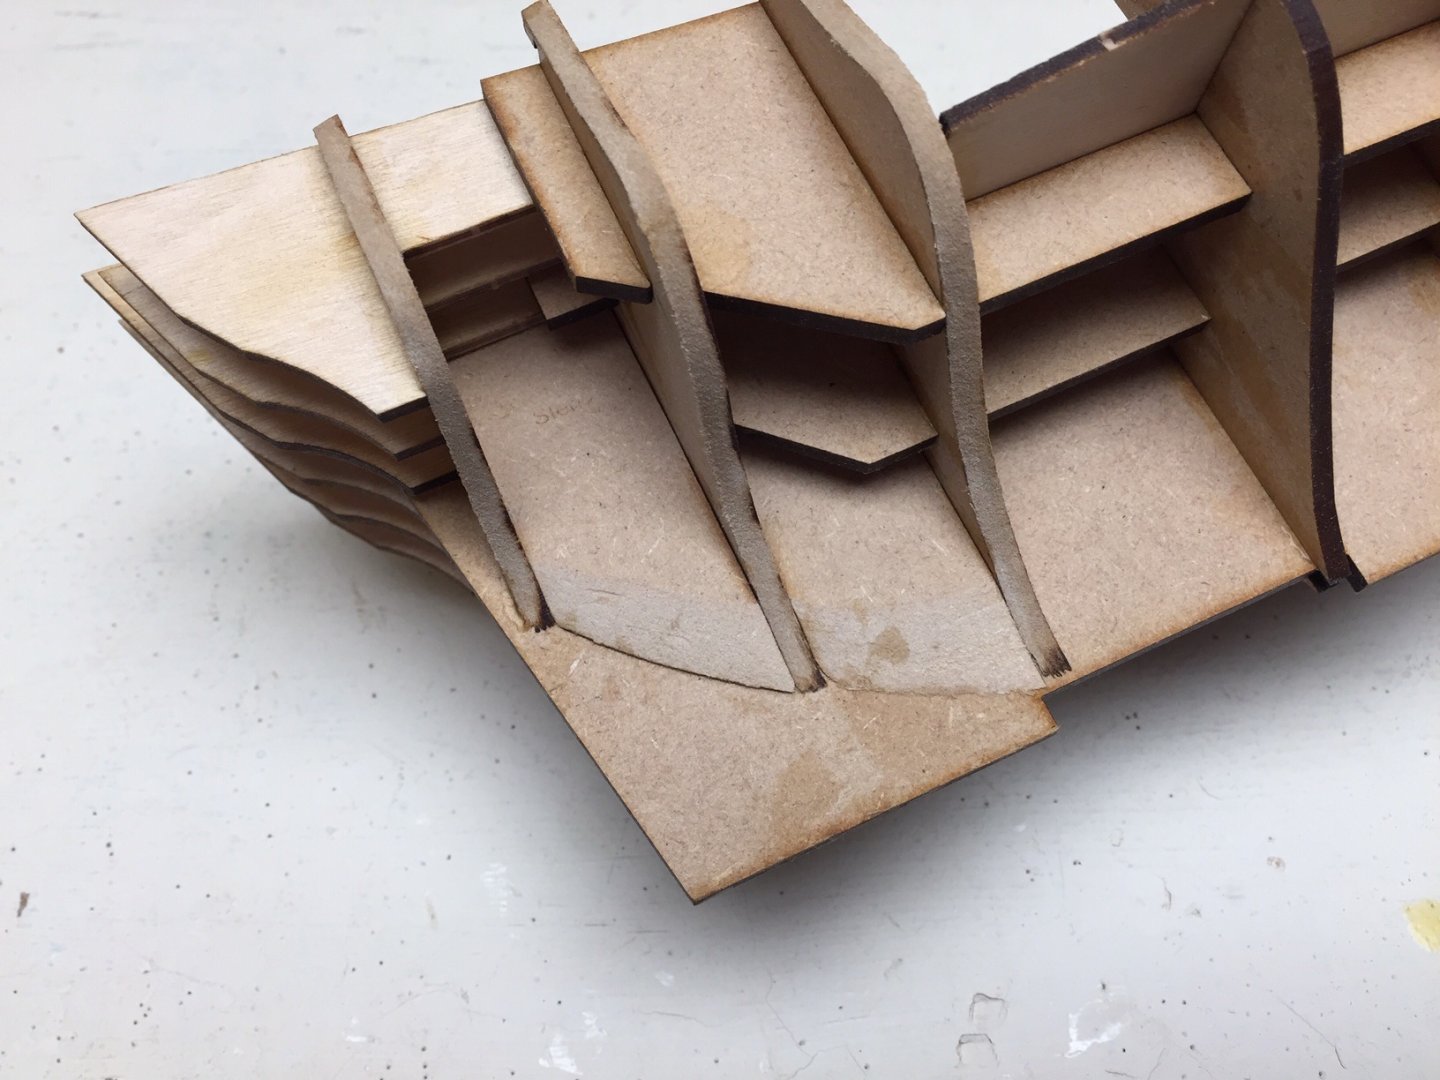
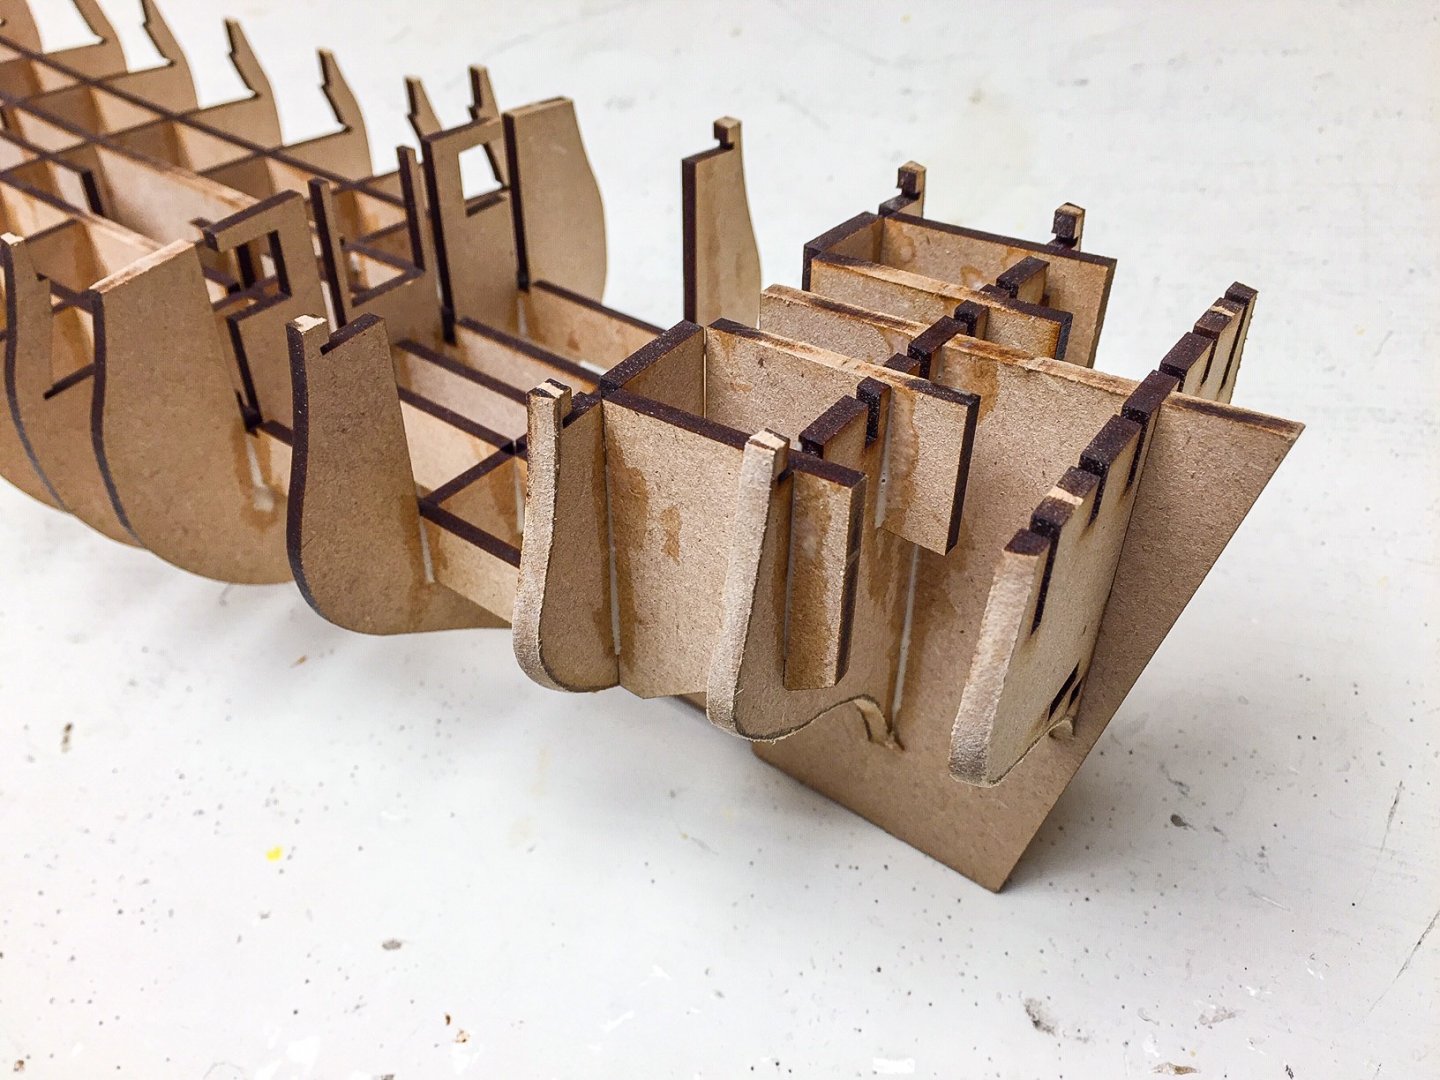
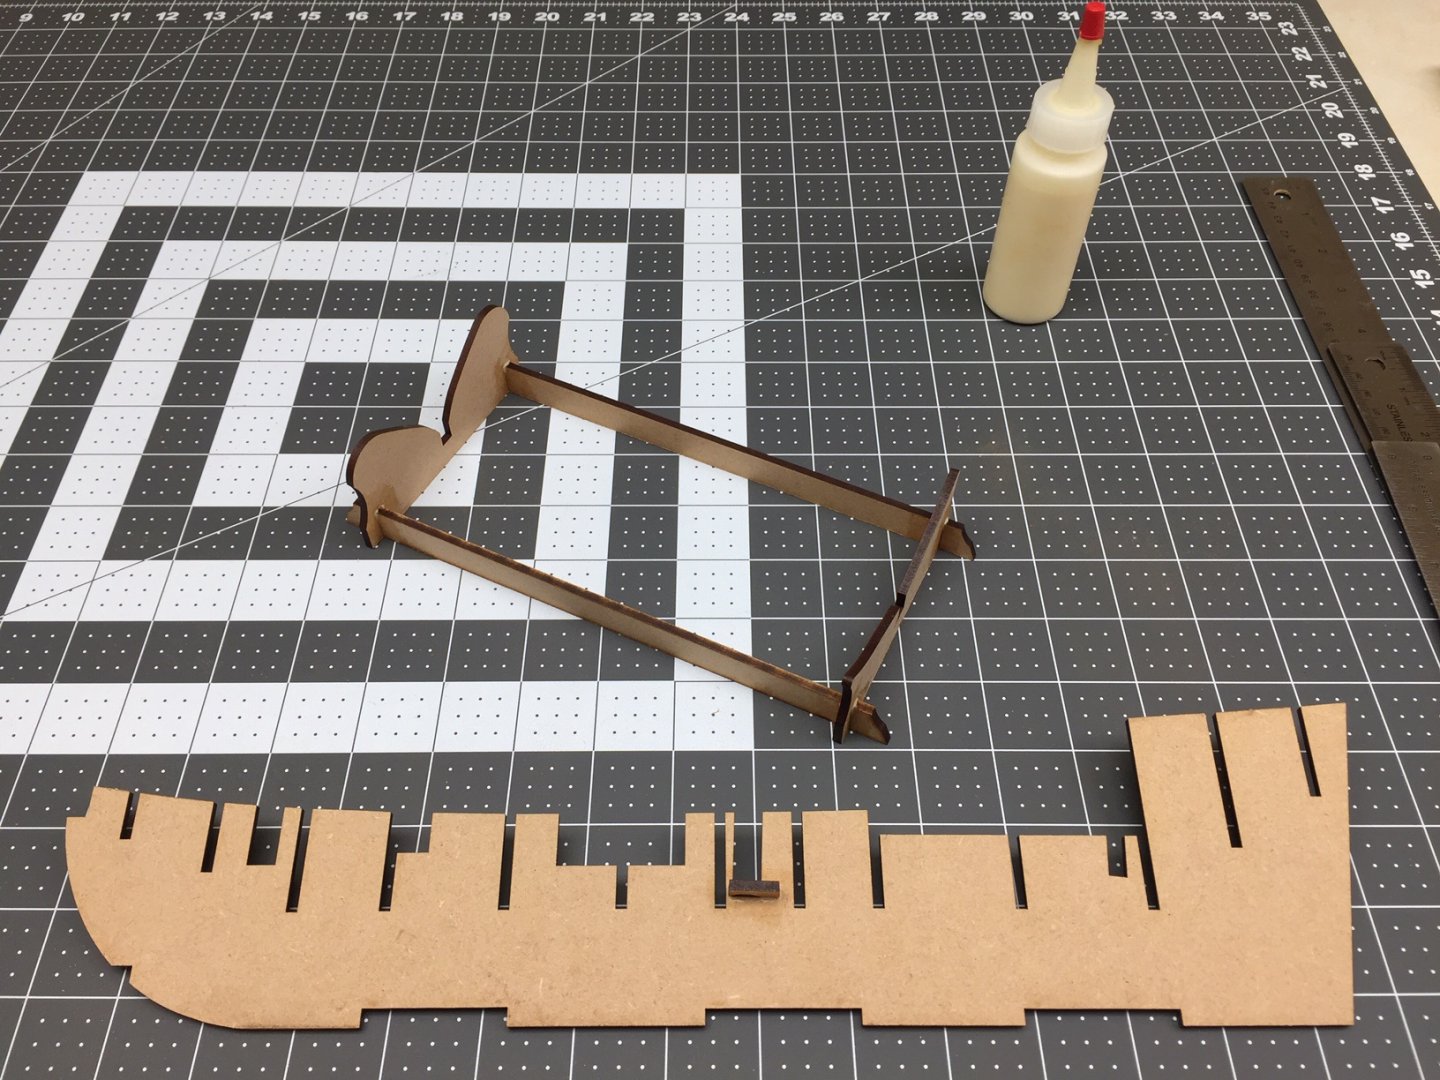
Once the parts were beveled, they were assembled into the basic frame. Slots in each part interlock together, which forces alignment, and makes it more difficult to make mistakes (parts won't fit if you do it wrong). I was impressed that the parts slipped together easily with no extra sanding or filing. I didn't glue anything until I had all the parts fitting together correctly. Then I brushed thinned yellow glue over all the joints as recommended in the manual. Since this is internal structure, I didn't worry about being very neat with glue. This is just the start of the framework. Additional support parts still need to be added. For example the stern bulkhead will have supports to keep it aligned, so it hasn't been glued yet. The glue wasn't even dry when I took some photos.
-
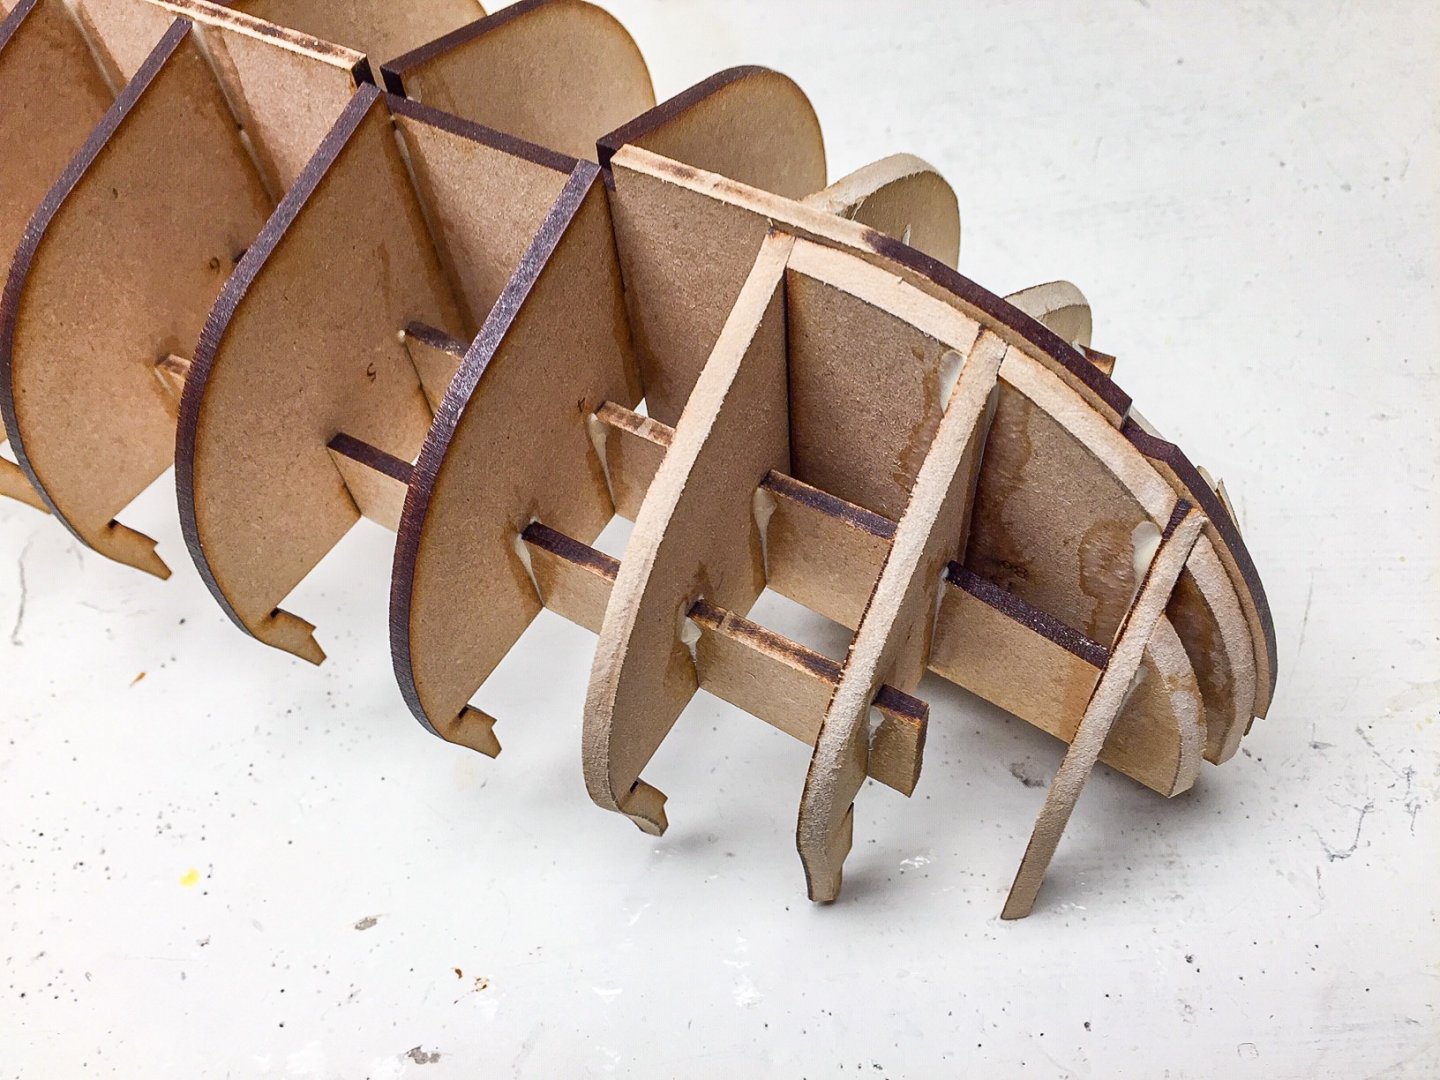
I've made a little bit of progress. Before assembling the basic framework, 3 bow and 3 stern bulkheads along with some bow support parts were beveled. It is smart to do some preliminary beveling before assembly when it's easy to do. Only problem is how much do you bevel, and to make sure you don't bevel too much. I used the photos in the manual to estimate how much to bevel, and used a Dremel with sanding drum to do the job. MDF parts were easy to sand with Dremel. I got it fairly smooth with Dremel, but smoothed it some more with sanding stick and circular sanding thing (a circular sander from "perma-grit"). Tried to be real careful and not take off too much wood (MDF).
-
Great work! You are really making progress. I'm curious what you think of the bamboo tree nails. Do they look any different than the "fake" tree nails on Syren that were holes drilled and filled in with wood filler. The bamboo ones are a lot more work, so curious if you think it's worth it as far as appearance goes. I like the filler pieces you added to keep things square. The Duchess that I just started uses what I call an egg crate structure which will force everything into alignment, or at least that's the theory. A lot of balsa airplane kits use this type of structure and it works well. It avoids the alignment problems you have just gluing bulkhead into center frame.
-
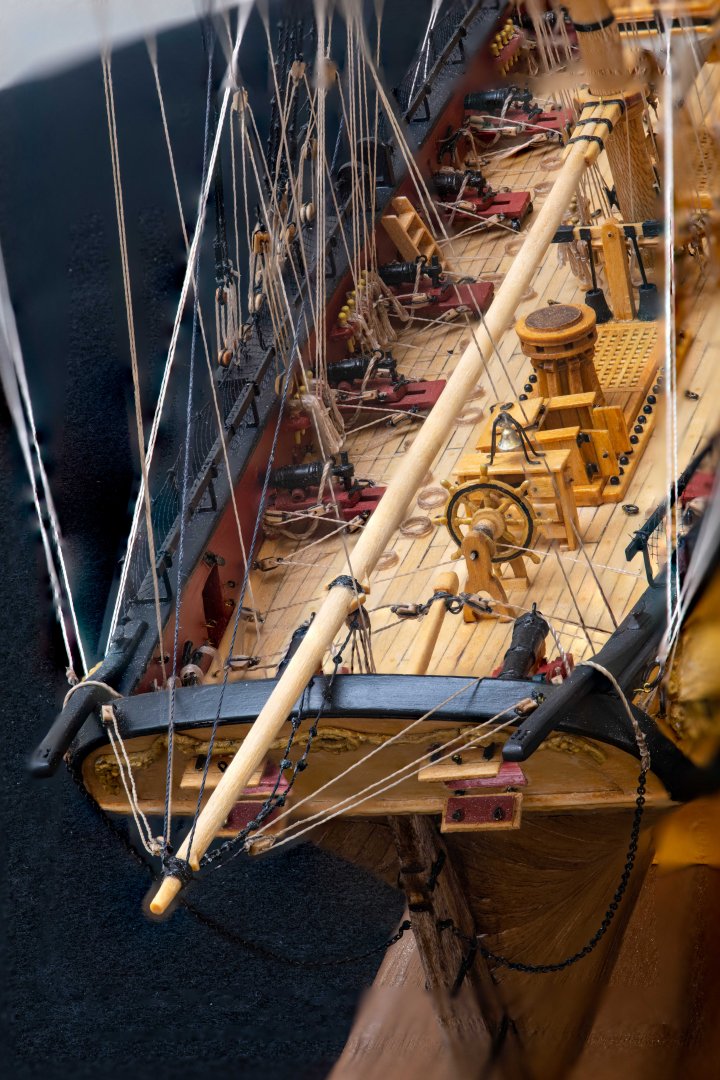
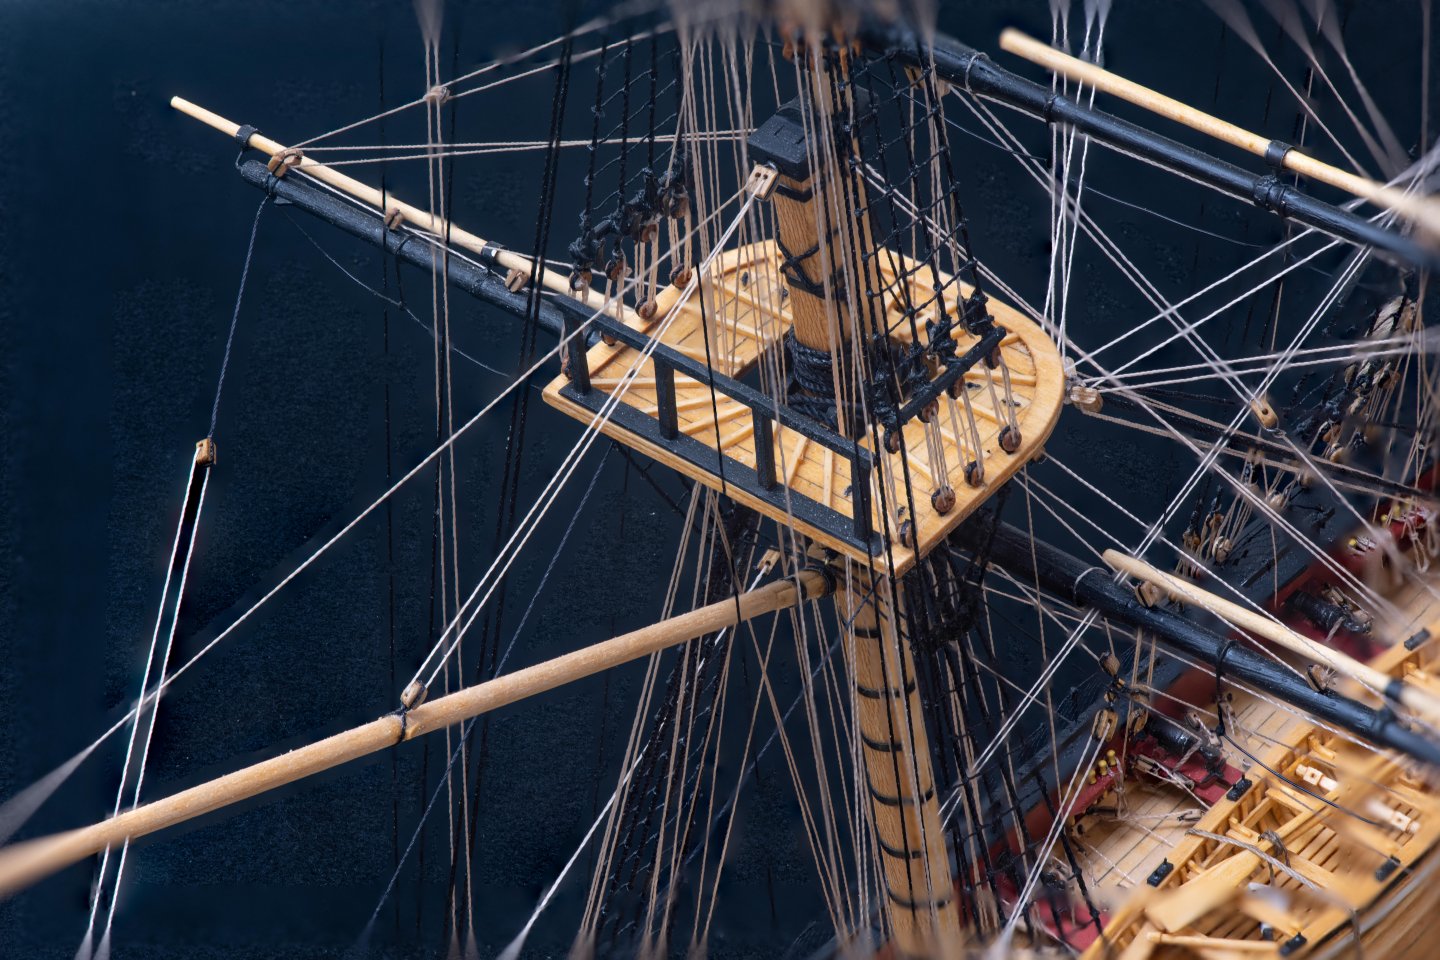
Here's couple more photos from today that were focus stacked with Helicon software. Much, much easier and faster than Photoshop. I will use it from now on when I want to use focus stacking, which isn't all that often. But it's very nice when you need it, like to show details on a completed model.


- 87 replies
-
- 13
-

-
I have display case ready for plexiglass, but the store I'm going to have do it needs to order and then cut to fit, so that's on hold. I finally got around to taking some "final" photos of Syren. I tried using focus stacking and it seemed to work pretty good. But in the process my computer got extremely slow and I'm still trying to figure out what's going on. I've got my computer running fairly well again except for Adobe Lightroom and Photoshop, so I'm suspecting that somehow that software was what messed things up. First photo is of overall boat. The other photos of the deck are the focus stacked ones.


- 87 replies
-
- 12
-
-
I've barely done anything, but here's some photos. The first thing you do is built a simple cradle to hold the hull while building. These parts are MDF, which I haven't used before. There's no grain or warping to worry about, and they seem pretty strong. The laser cutting was excellent. I only had to sand smooth where the small tabs where and sand the slots a little to get the parts to slide together. The same goes for the false keel and a small piece that will be the base of a mast, assume main mast. The slot in the false keel and this piece will really help getting the mast in the right position and aligned. I'm going slow on this right now, so you'll have to be patient for updates. I'm including a photo of a page in the manual, which I'm impressed with so far. It's printed on very nice paper and has lots of excellent photos. As far as I'm concerned, you can't have too many photos in the instruction manual. So far, I'm impressed!
-
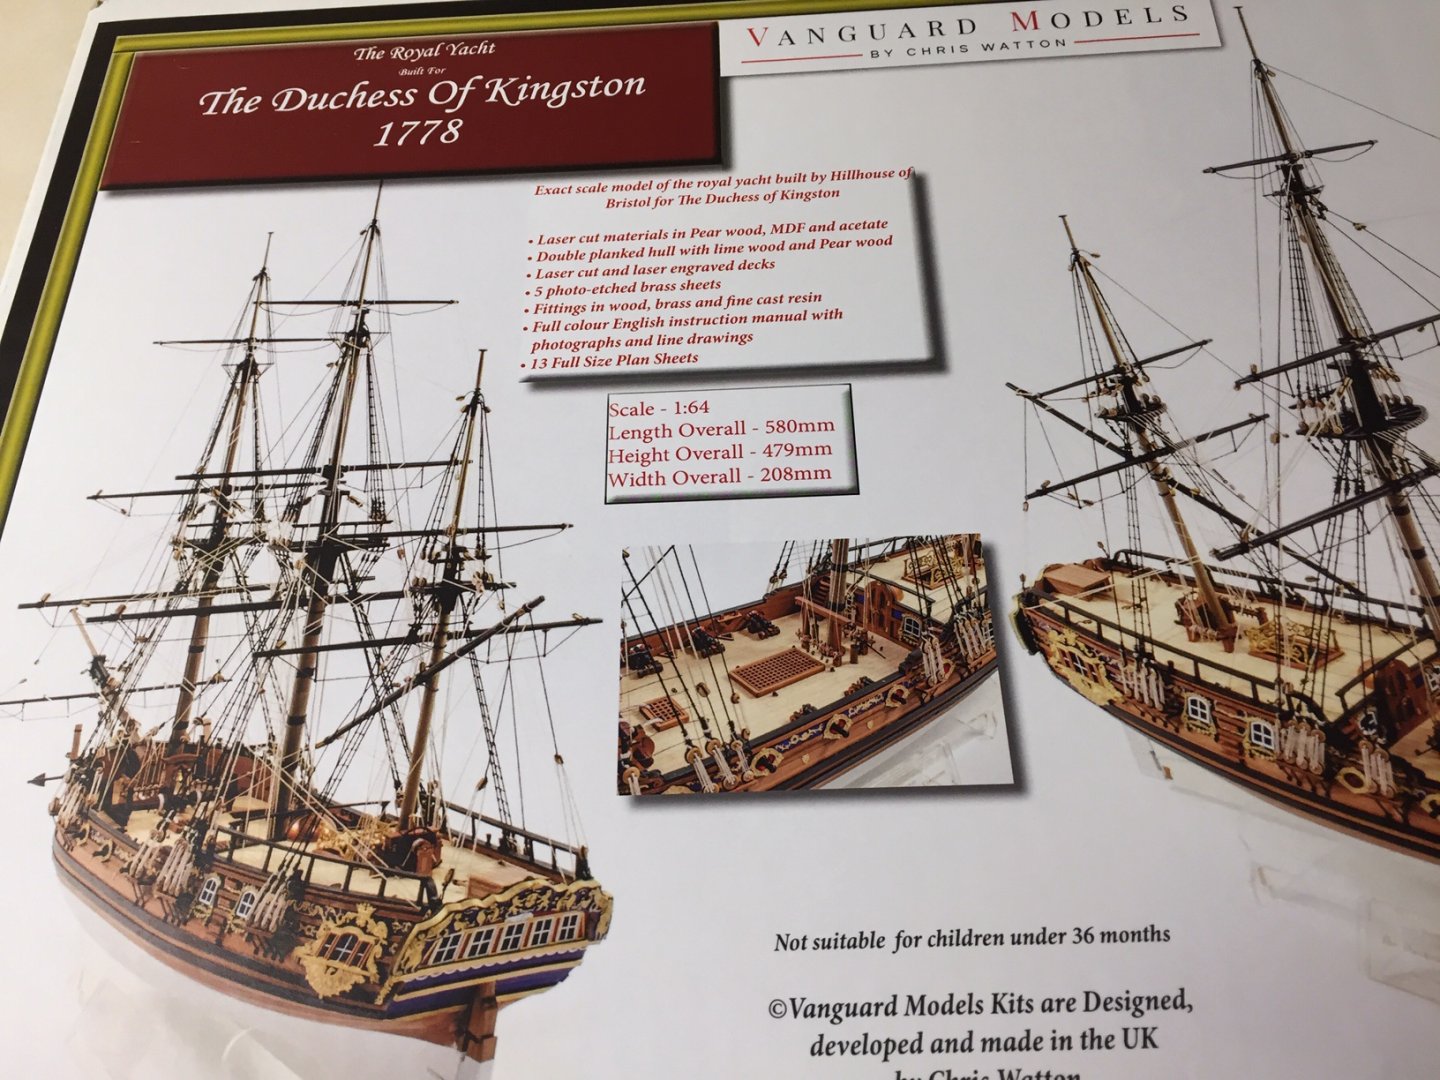
Several months ago I ordered the kit from Vanguard Models. I knew I wouldn't be starting it for a while, but thought shipping from UK might be slow. It was not. The kit was delivered hardly a week after I ordered it, so it's been sitting here teasing me to get started. The box has something I found quite amusing. It says "not suitable for children under 36 months". Really? Maybe it meant 36 years! Unfortunately, I'm over qualified age wise, but not necessarily skill wise. This is my 4th build, but really my 3rd major build. The other kits I've built were all Model Shipways, so this kit is a big step up in quality (and price). My first impression is you get what you pay for. For someone that's only seen Model Shipways kits, this one is kind of amazing. And that's not meant to slam Model Shipways, because their kits, especially those designed by Chuck are good and much, much less expensive than this one. For less expensive kits, they are excellent. That said, I can see myself getting spoiled building kits (or maybe even a scratch build) with parts of this quality.
-
You are really moving along quickly! I've never used tung oil. How long does it take to dry?
-
I'm following along also, and looking forward to your build log. You're going to inspire me get started on the Duchess!
-
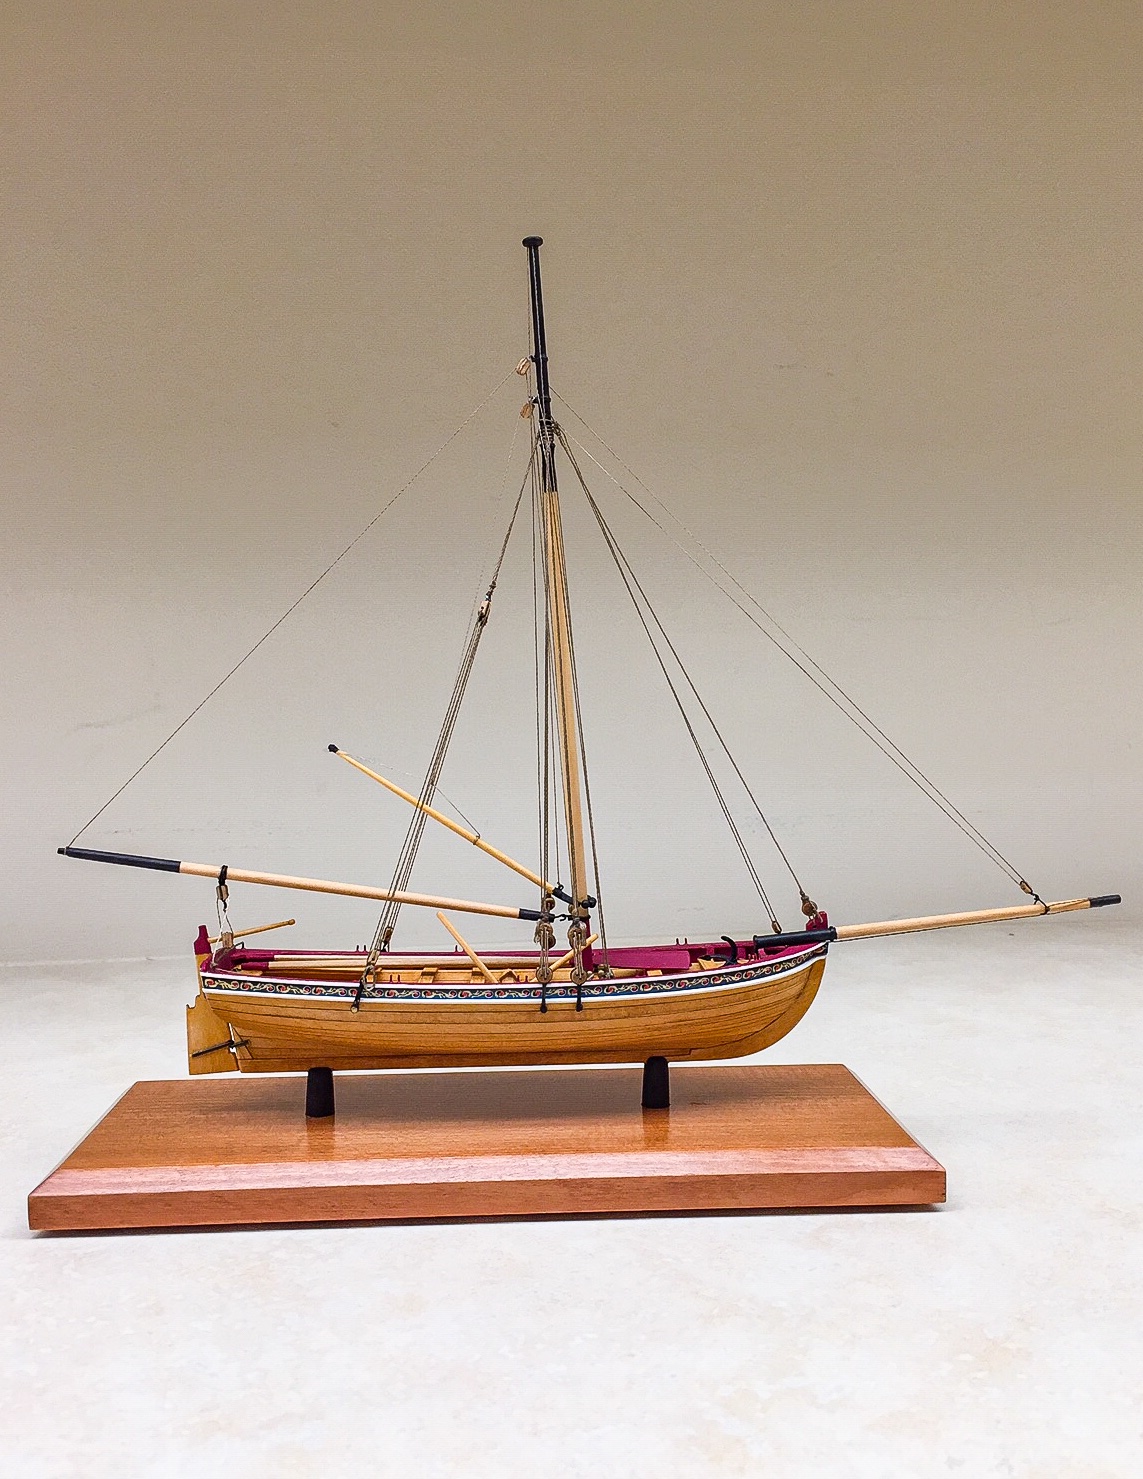
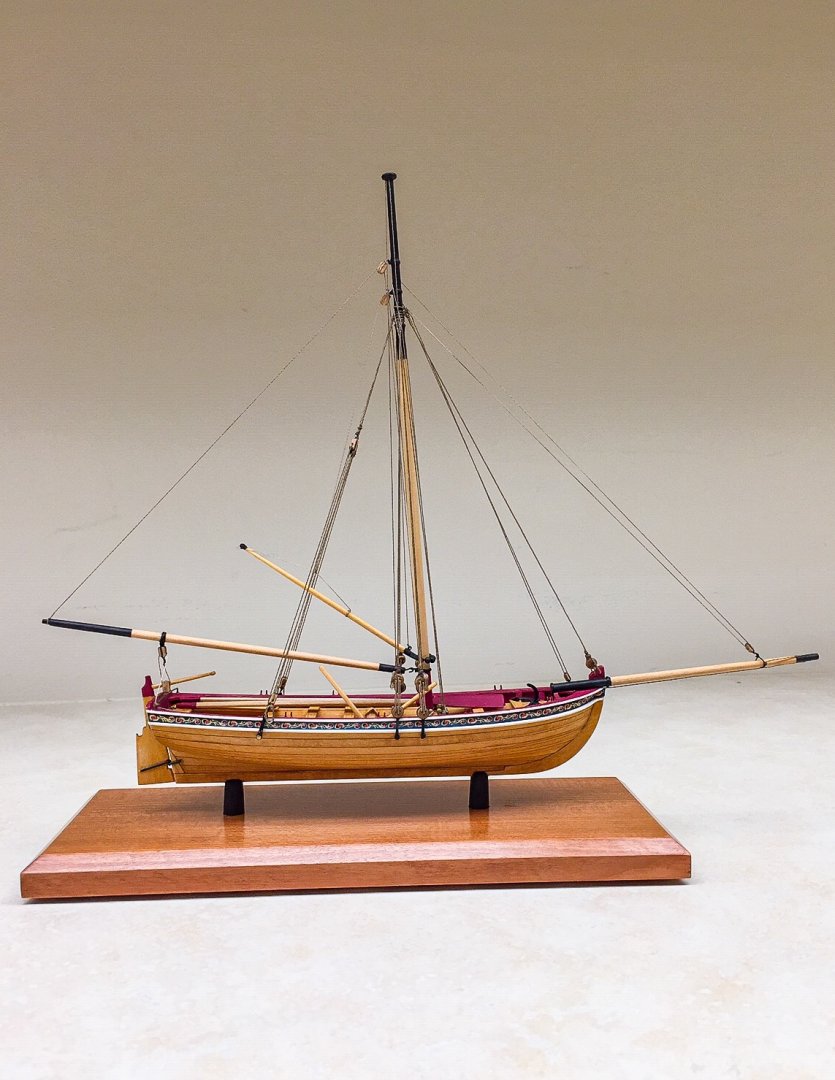
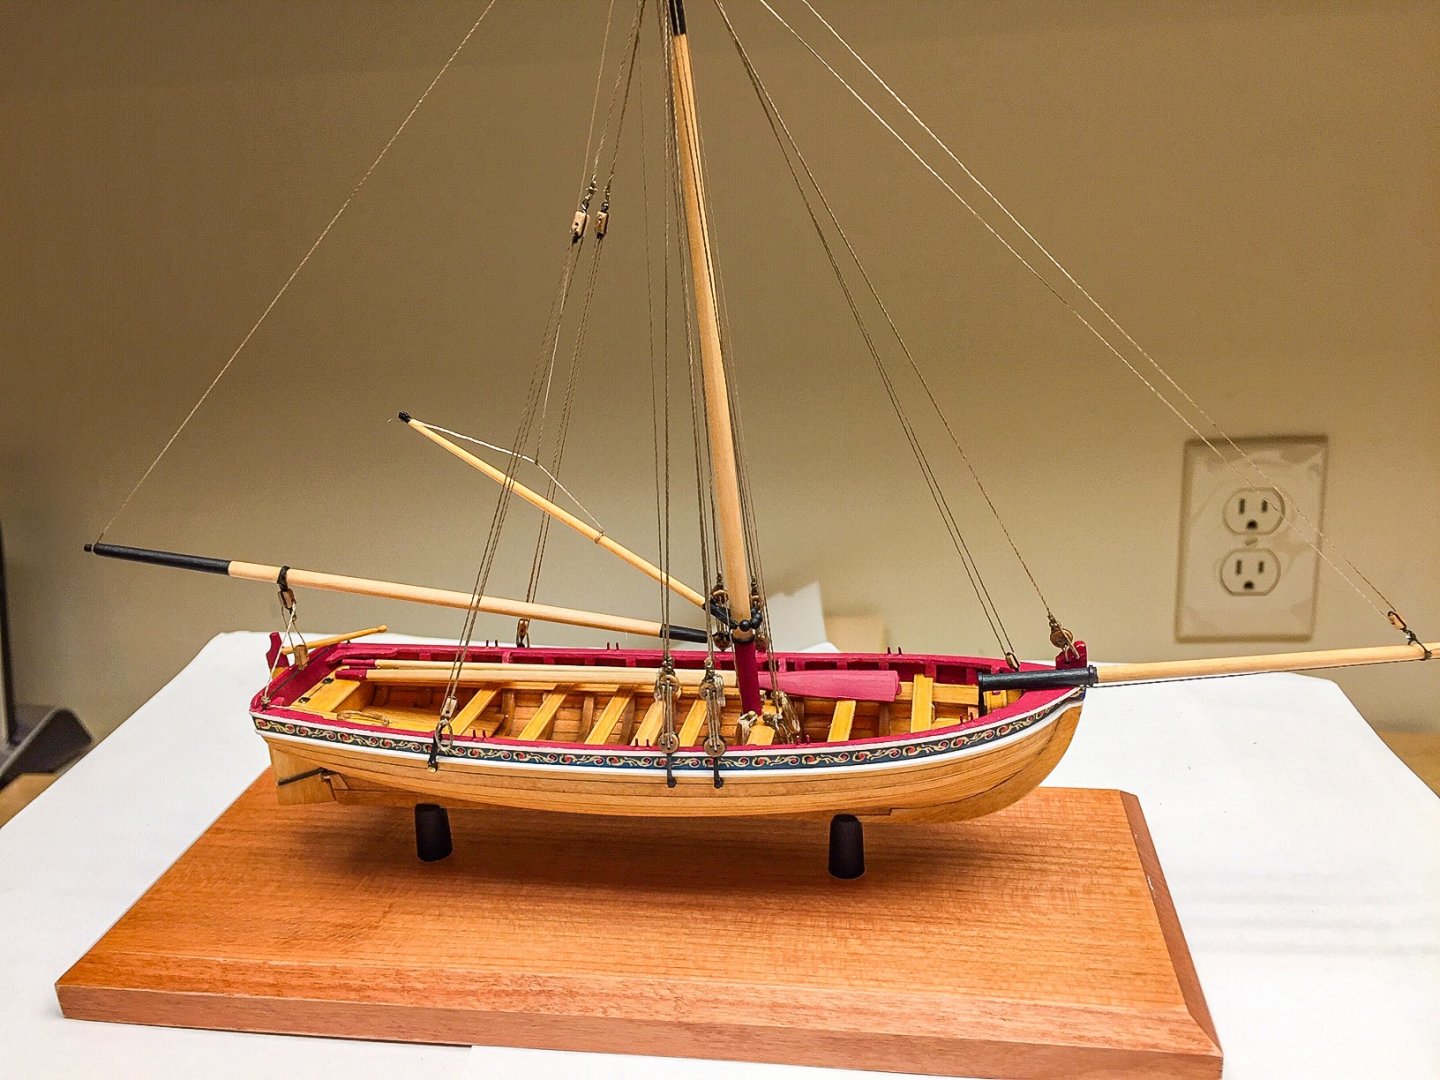
I'm finished! Many thanks for all the "likes" and comments. They are all very encouraging, and I need all the encouragement I can get. The boat makes a nice addition to the fireplace mantel, although from a distance the stones in background hide details. Here's some final photos.
- 55 replies
-
- 9
-
-
- 18th Century Longboat
- Model Shipways
- (and 1 more)
-
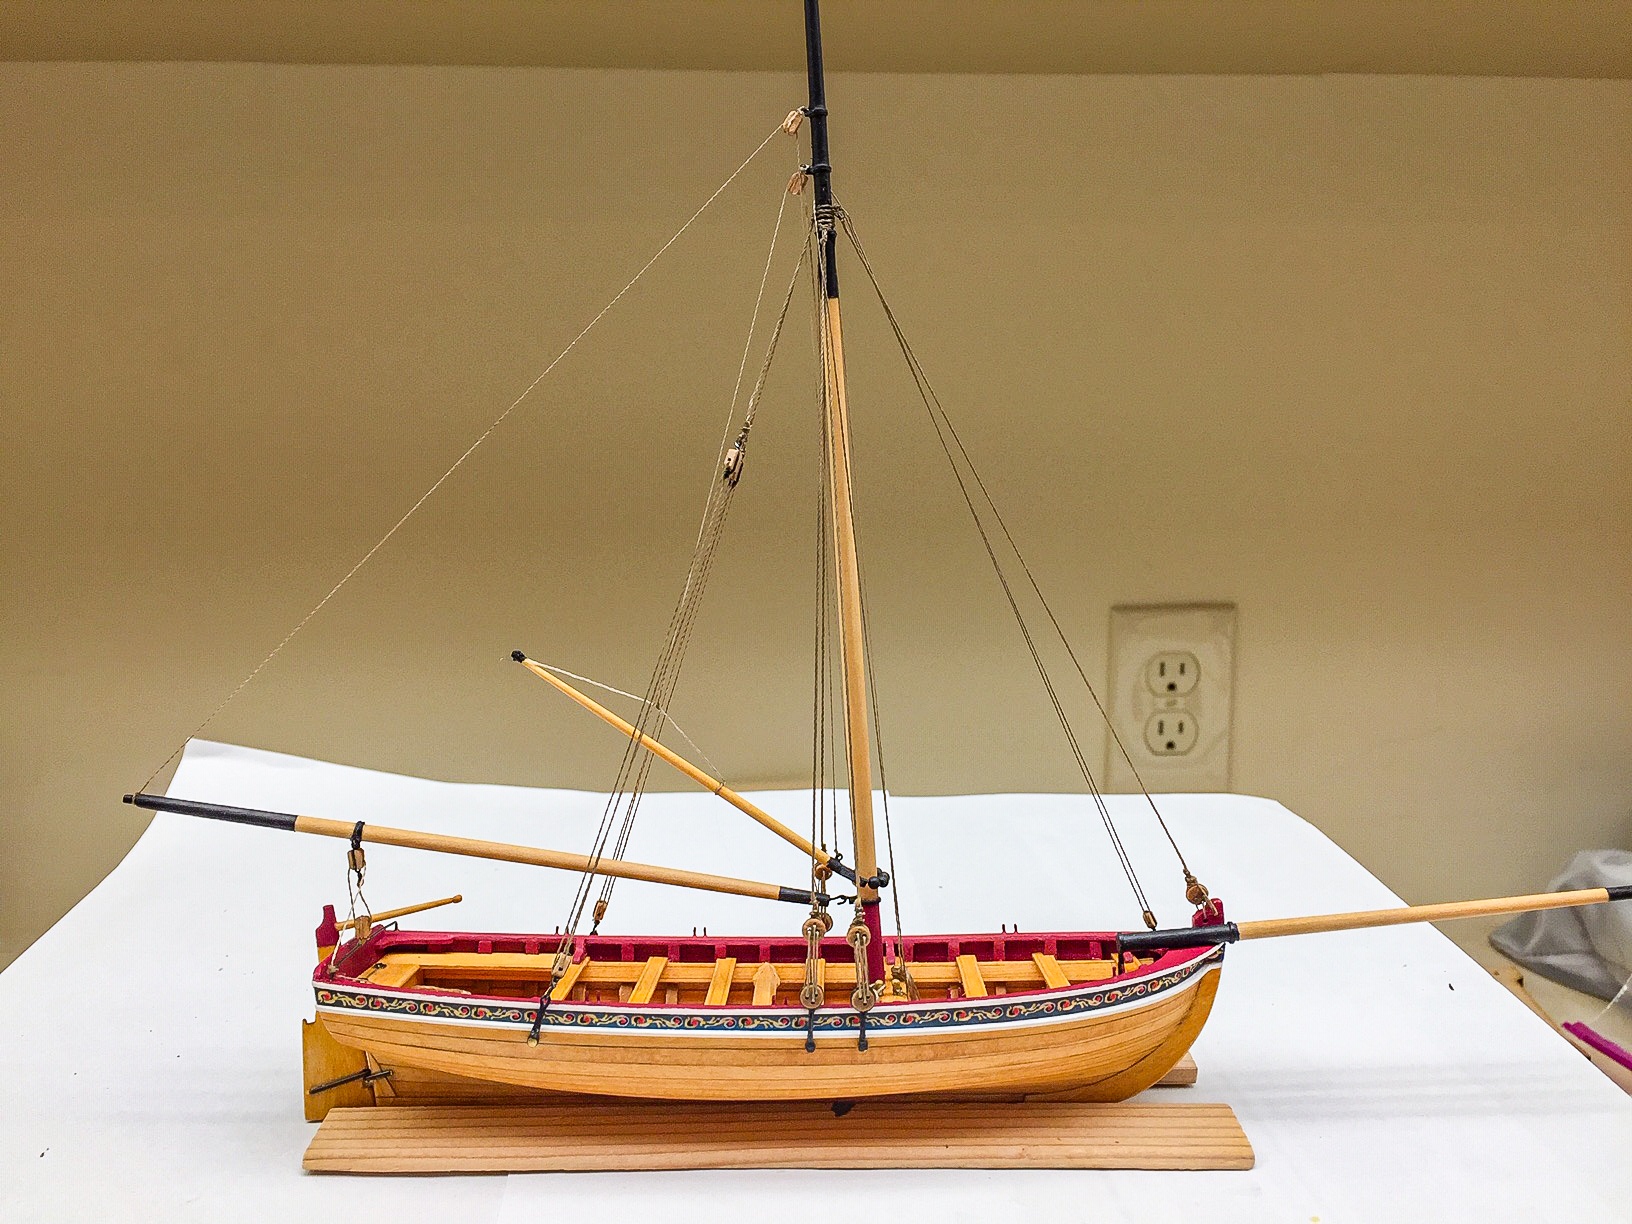
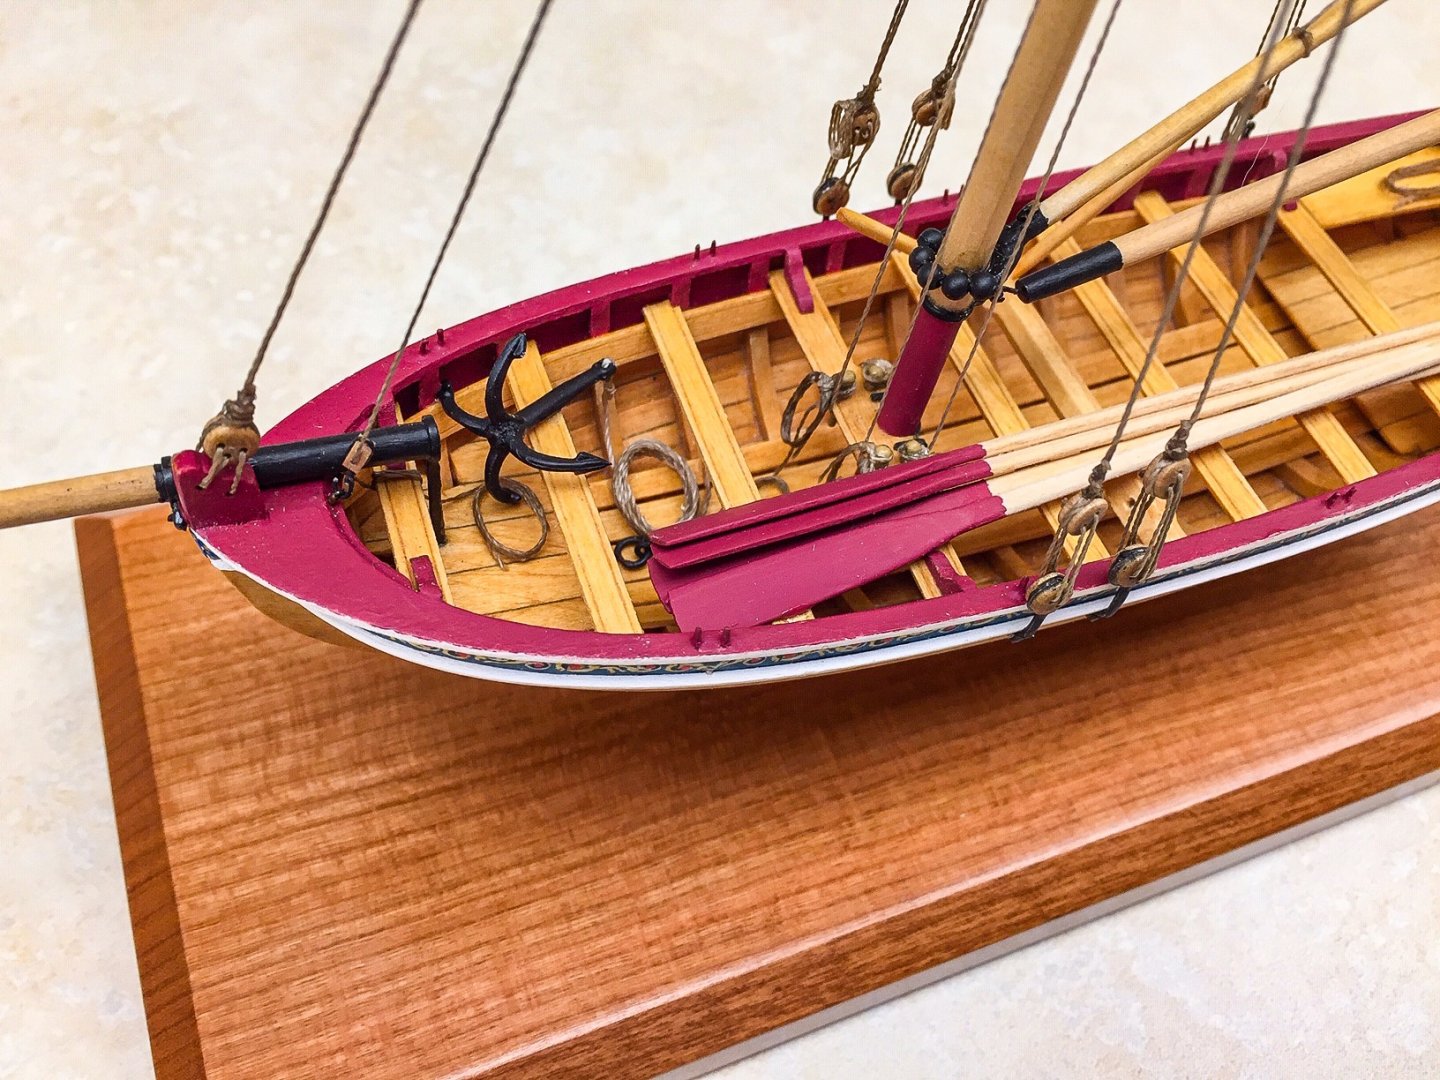
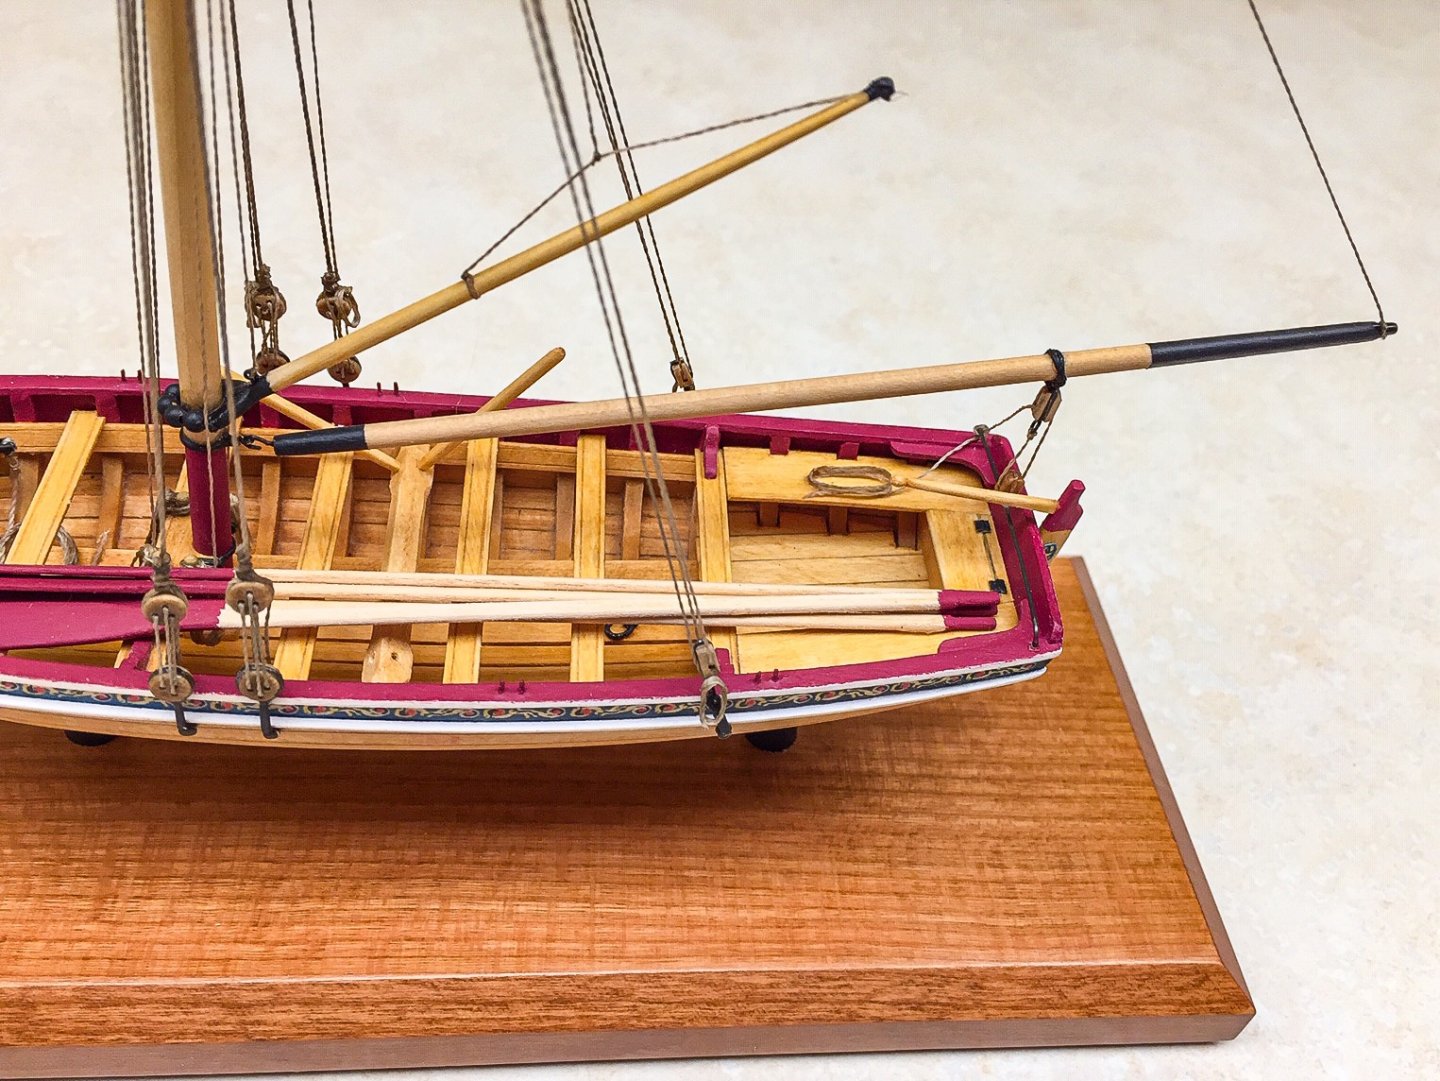
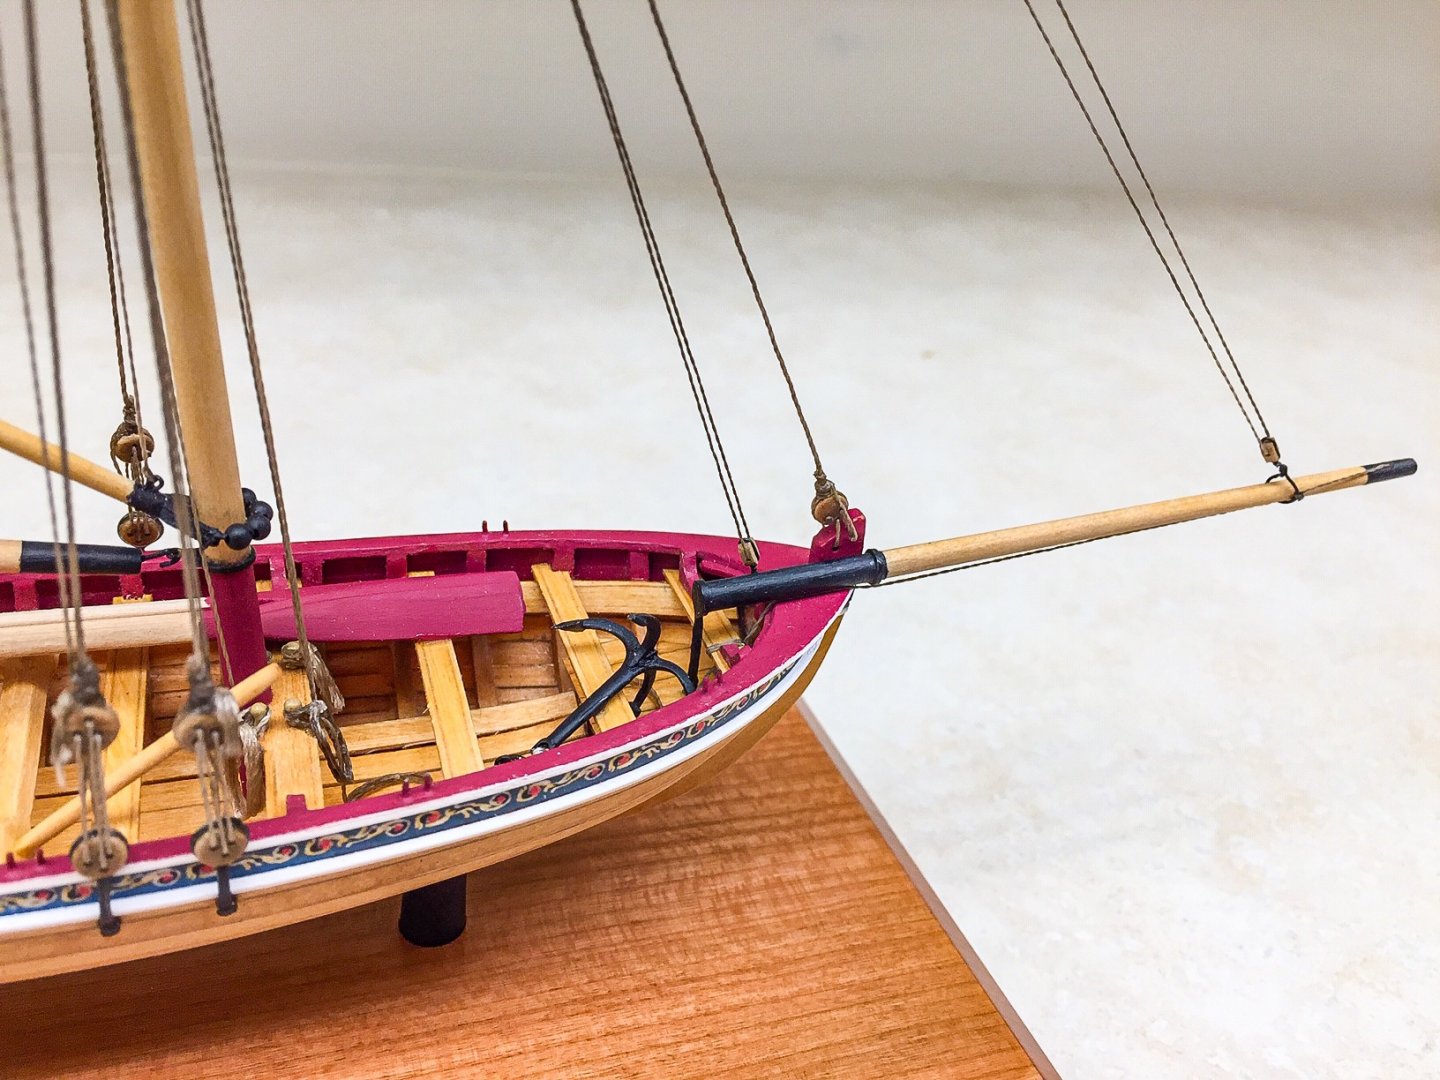
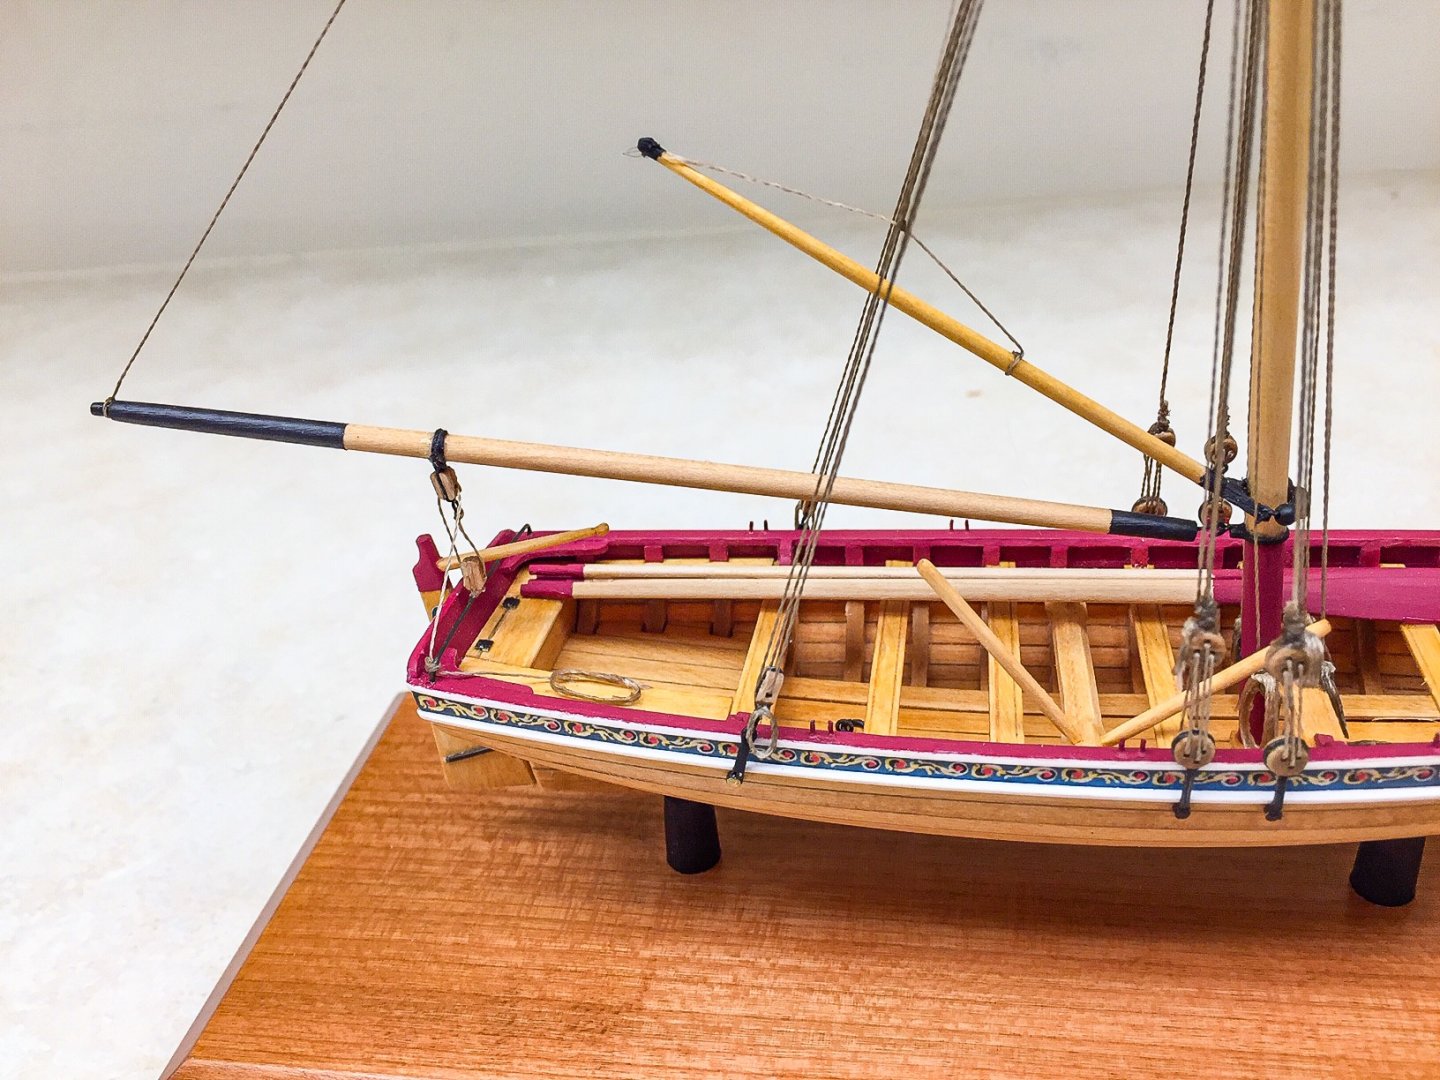
Thank you for the compliments, and I'm glad the log is helpful. When I see closeup photos, I start seeing all the things I need to try to do better next time around. Those closeup show everything, things I didn't see until the photo. I feel like this is hardly a beginner's kit, but it's great practice if you haven't made many model ships. The manual is excellent and the kit includes a number of spare parts which is kind of unusual in my experience. The small size is what gave me the most trouble. I was pleasantly surprised by how nice the printed friezes looked; I'd never done anything like that before. Building this pointed out, I sure need practice planking and rigging. I cut a mounting block from some scrap cherry I had and stained it. I used gel stain for cherry because it's a porous wood. Then several coats of spray-on lacquer (minwax from lowes). I made small pedestals from 5/16" dowel, sanding a slight taper in them, and filing a slot for keel. Photo shows a test fit of everything. Mounting block looks larger in photo than it is. It's the wide angle lens effect from phone camera. Since it all fit together, I'll do a final coat of lacquer on the board. On the boat, I finished rigging, and made the oars. Oars just require some sanding and painting. I painted the red as per manual. The red I'm using is actually darker than the photos. I increase exposure of photos so you can see everything, and that makes the red look a little brighter. It's Vallejo "dark red", and I think it looks real good on model ships. Only need to do the grapnel and mount everything to the board. But I want to let lacquer dry several days before final assembly. I've learned the hard way lacquer will feel dry, but takes a number of days before it really cures. Wipe-on poly is another excellent choice for finish, and you don't have to worry about cure time.
- 55 replies
-
- 5
-
-
- 18th Century Longboat
- Model Shipways
- (and 1 more)
-
I agree with all the comments. It's a beautiful model, and details are stunning. I knew you'd make the anchor buoys look great, and all the rope coils look fantastic. I have really enjoyed your build long and look forward to following your next build. I have a lot to learn, and your log has helped a lot. It's inspirational! I think you were well past "beginner" stage when you started this model, and now you're fully qualified to be an "expert"!
- 950 replies
-
- 2
-
-
- syren
- model shipways
- (and 1 more)
-
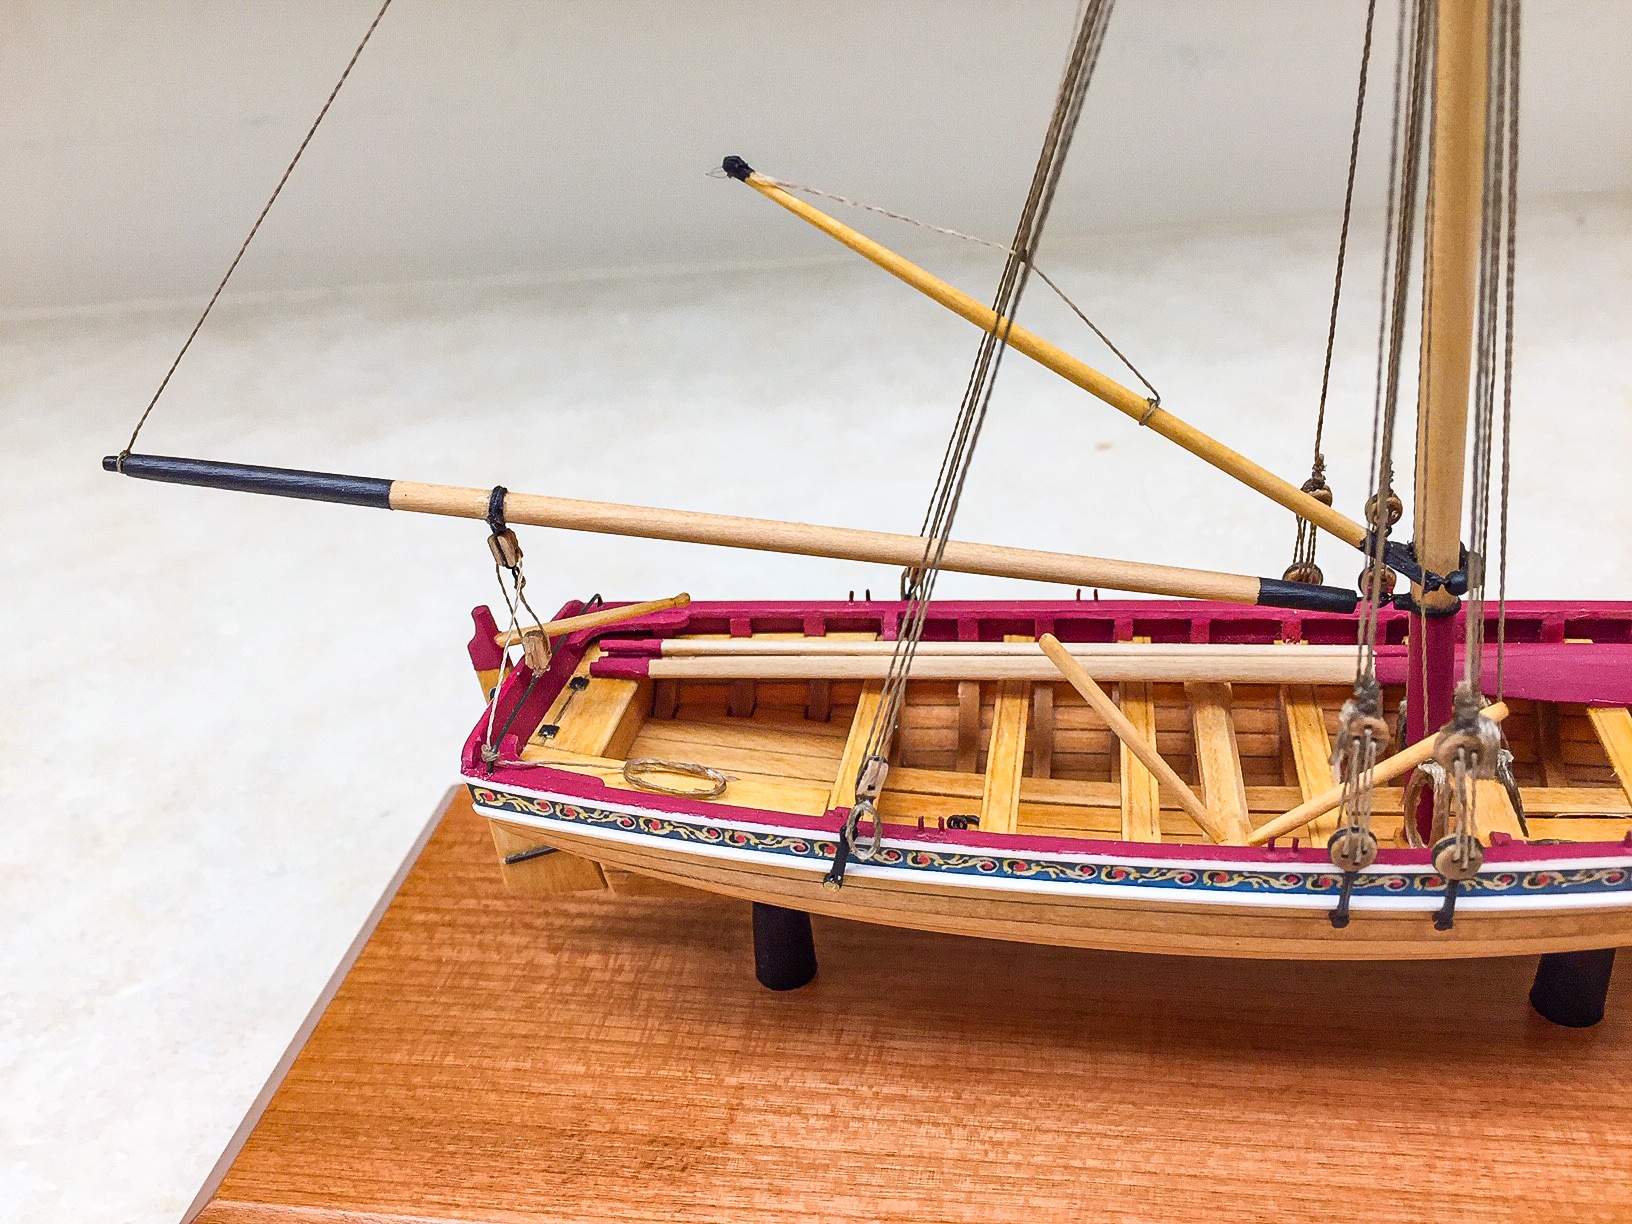
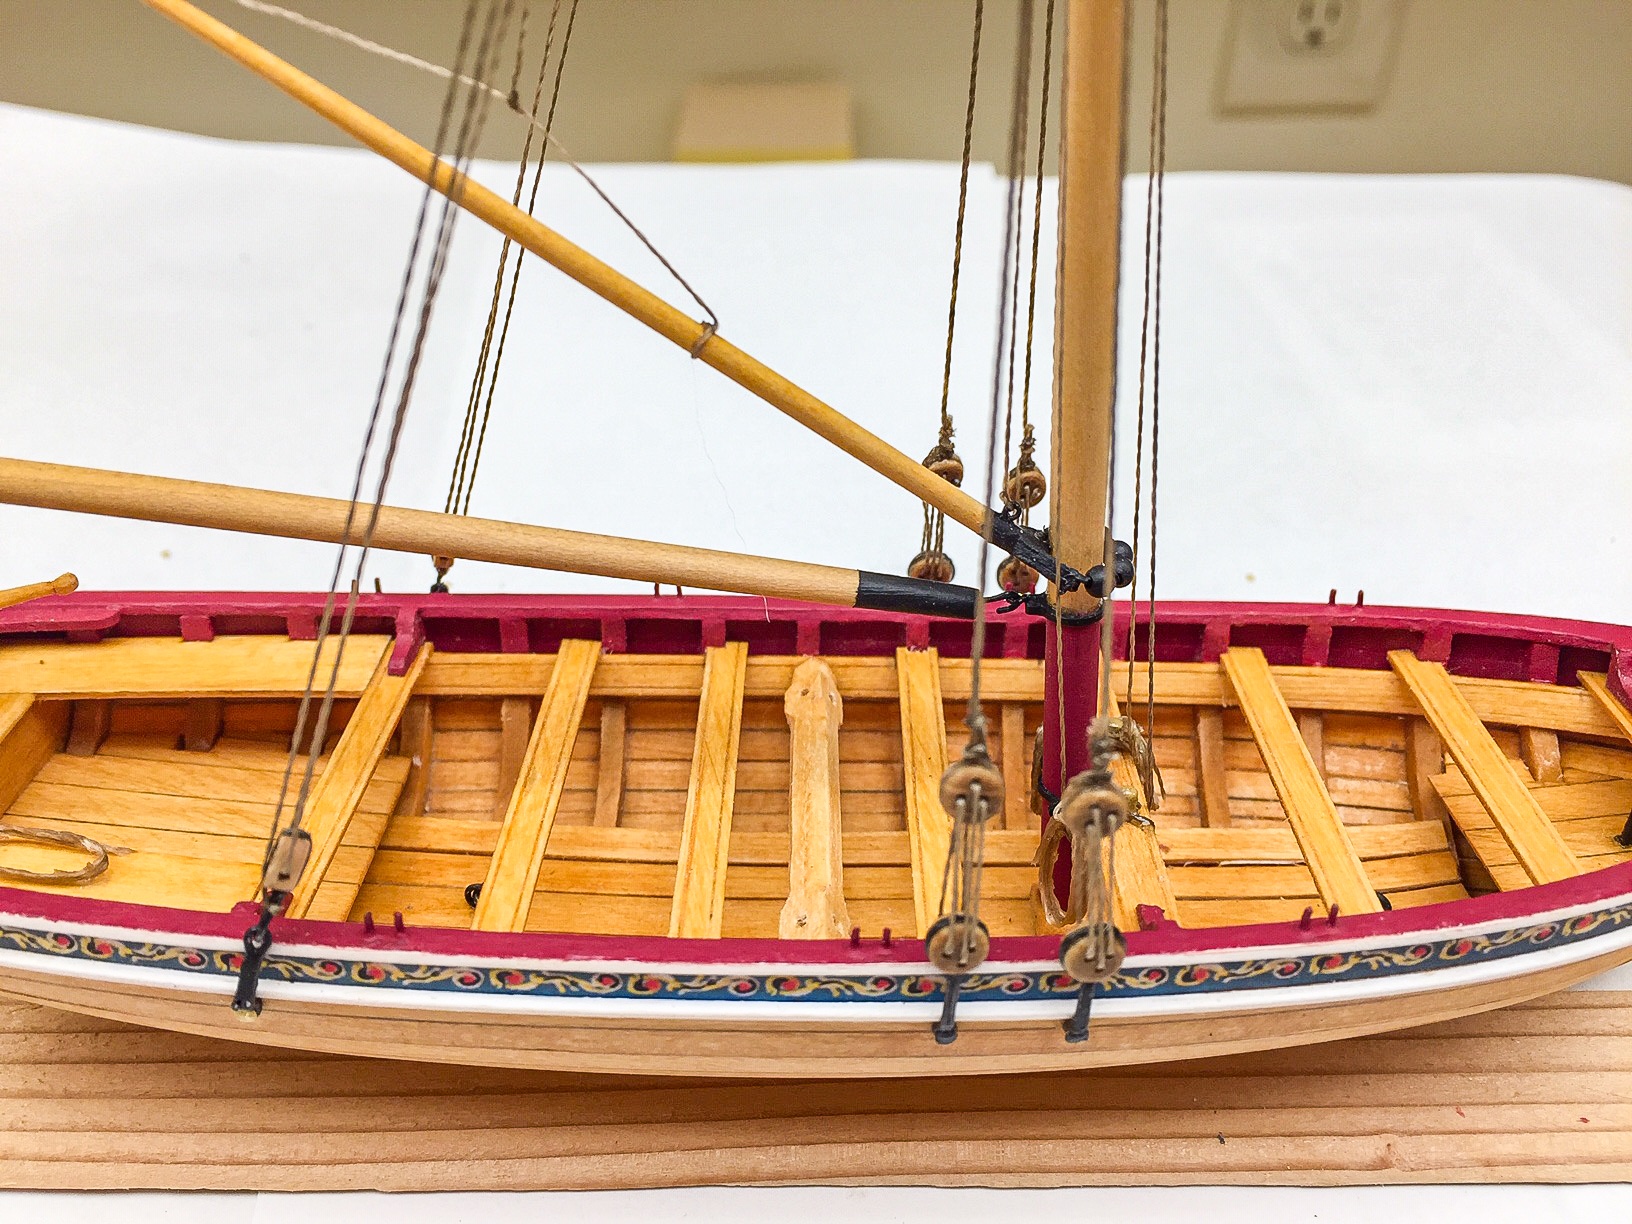
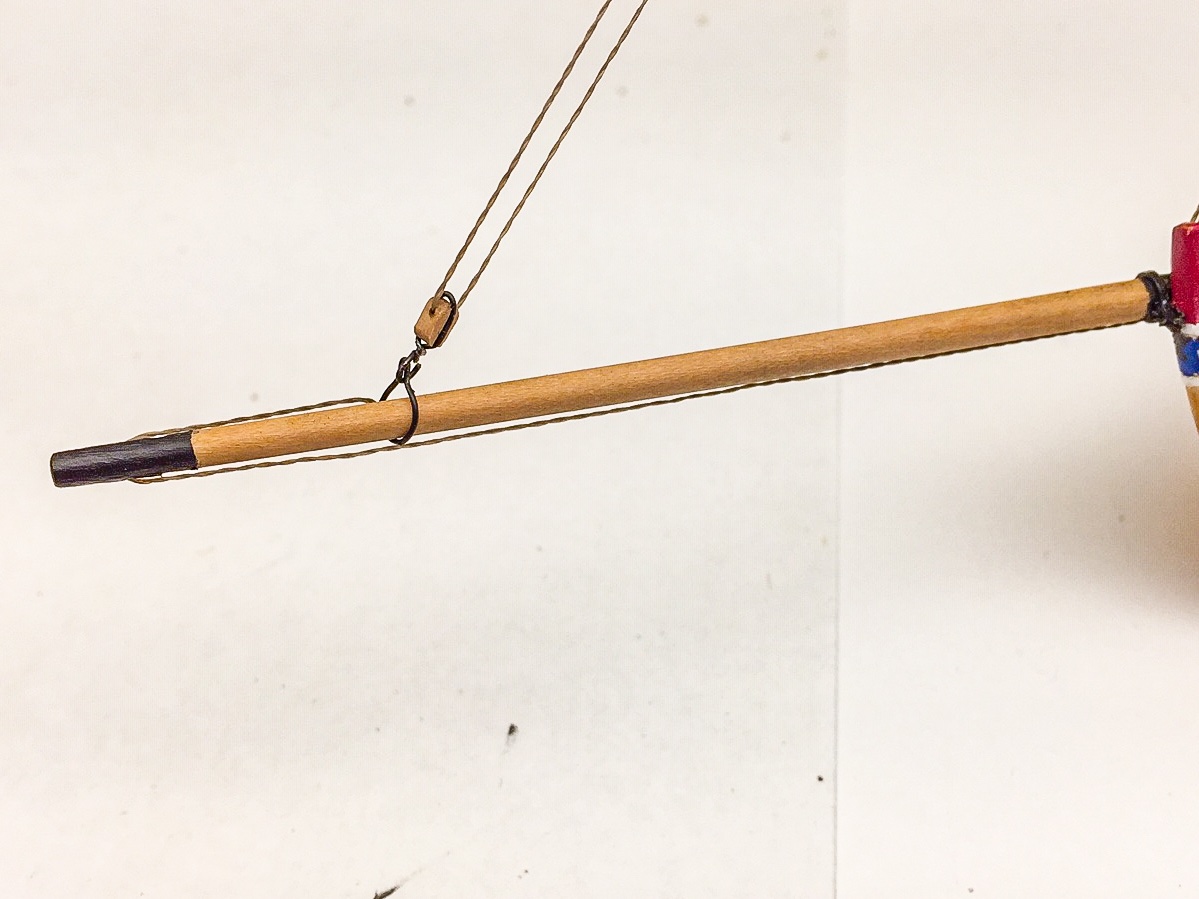
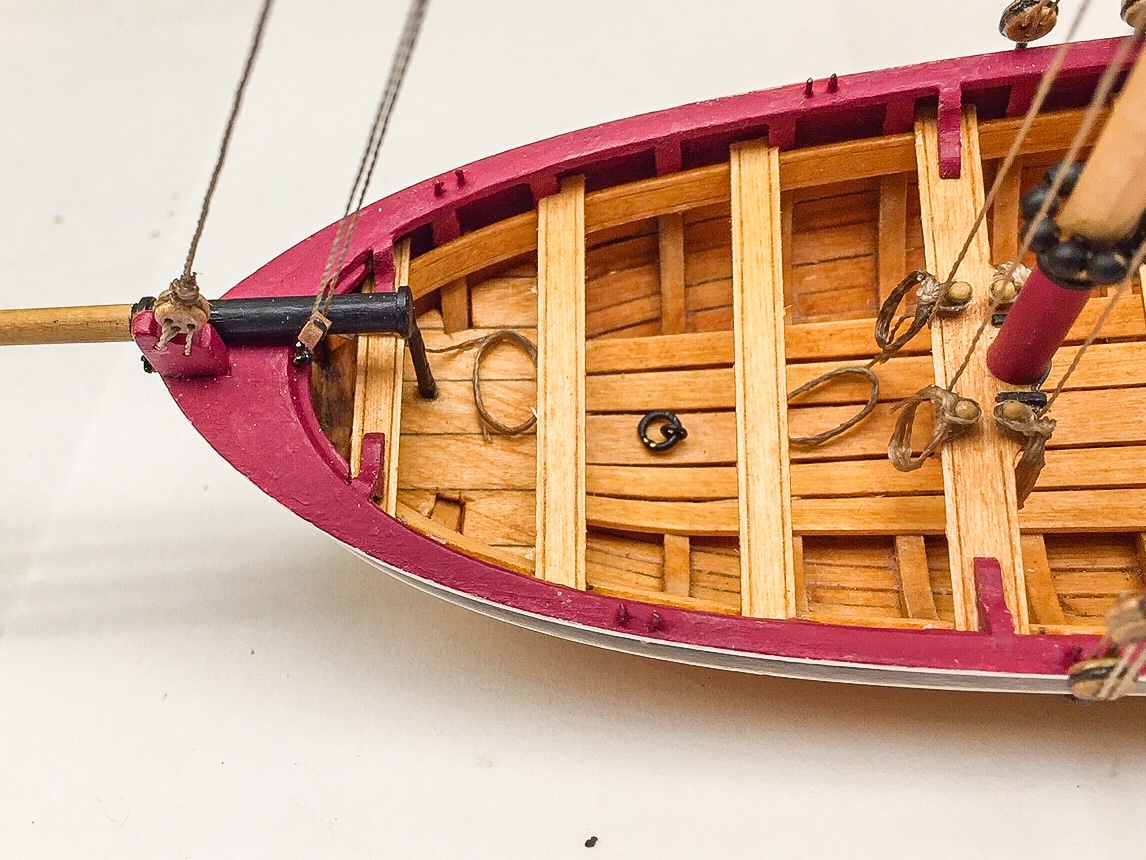
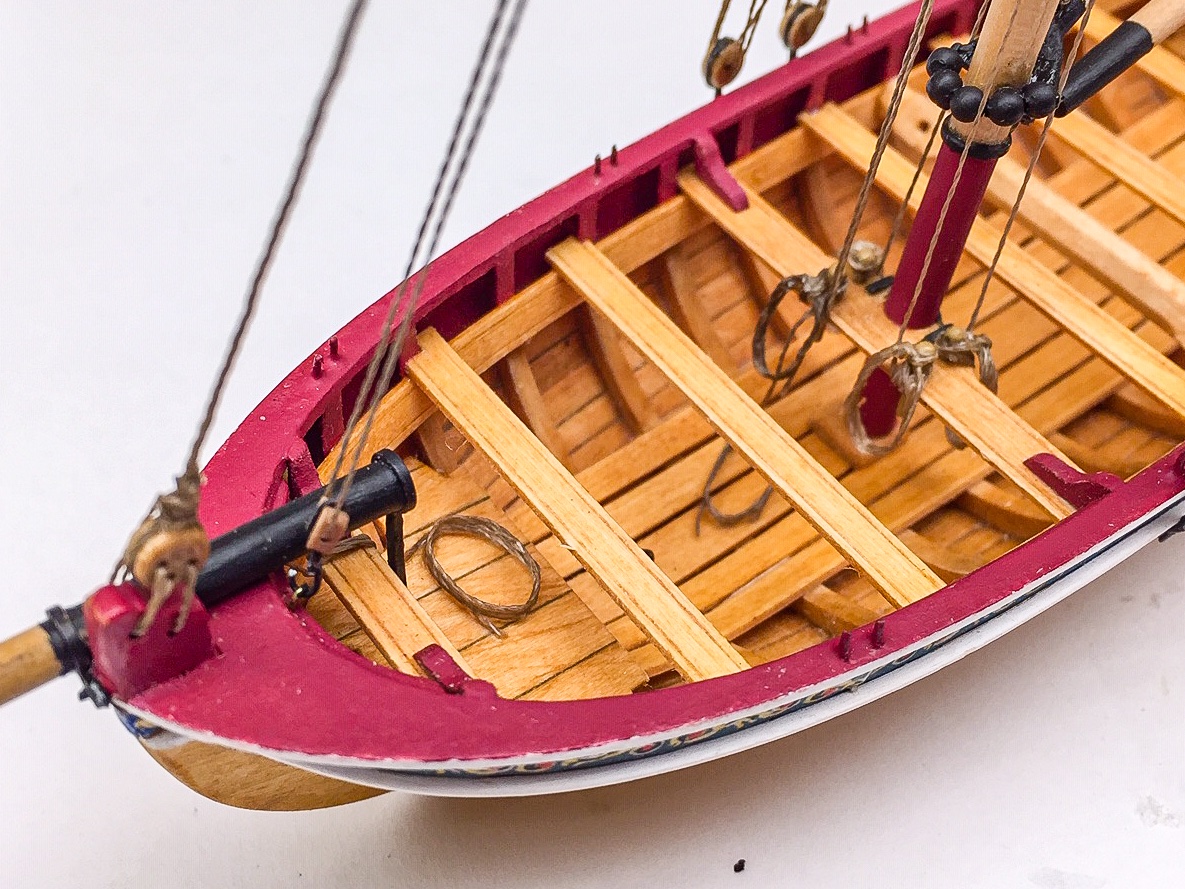
Here's photos of the jib sail halliard and some of the rope coils where lines are tied down. I'm getting close to the finish line.
- 55 replies
-
- 7
-
-
- 18th Century Longboat
- Model Shipways
- (and 1 more)
-
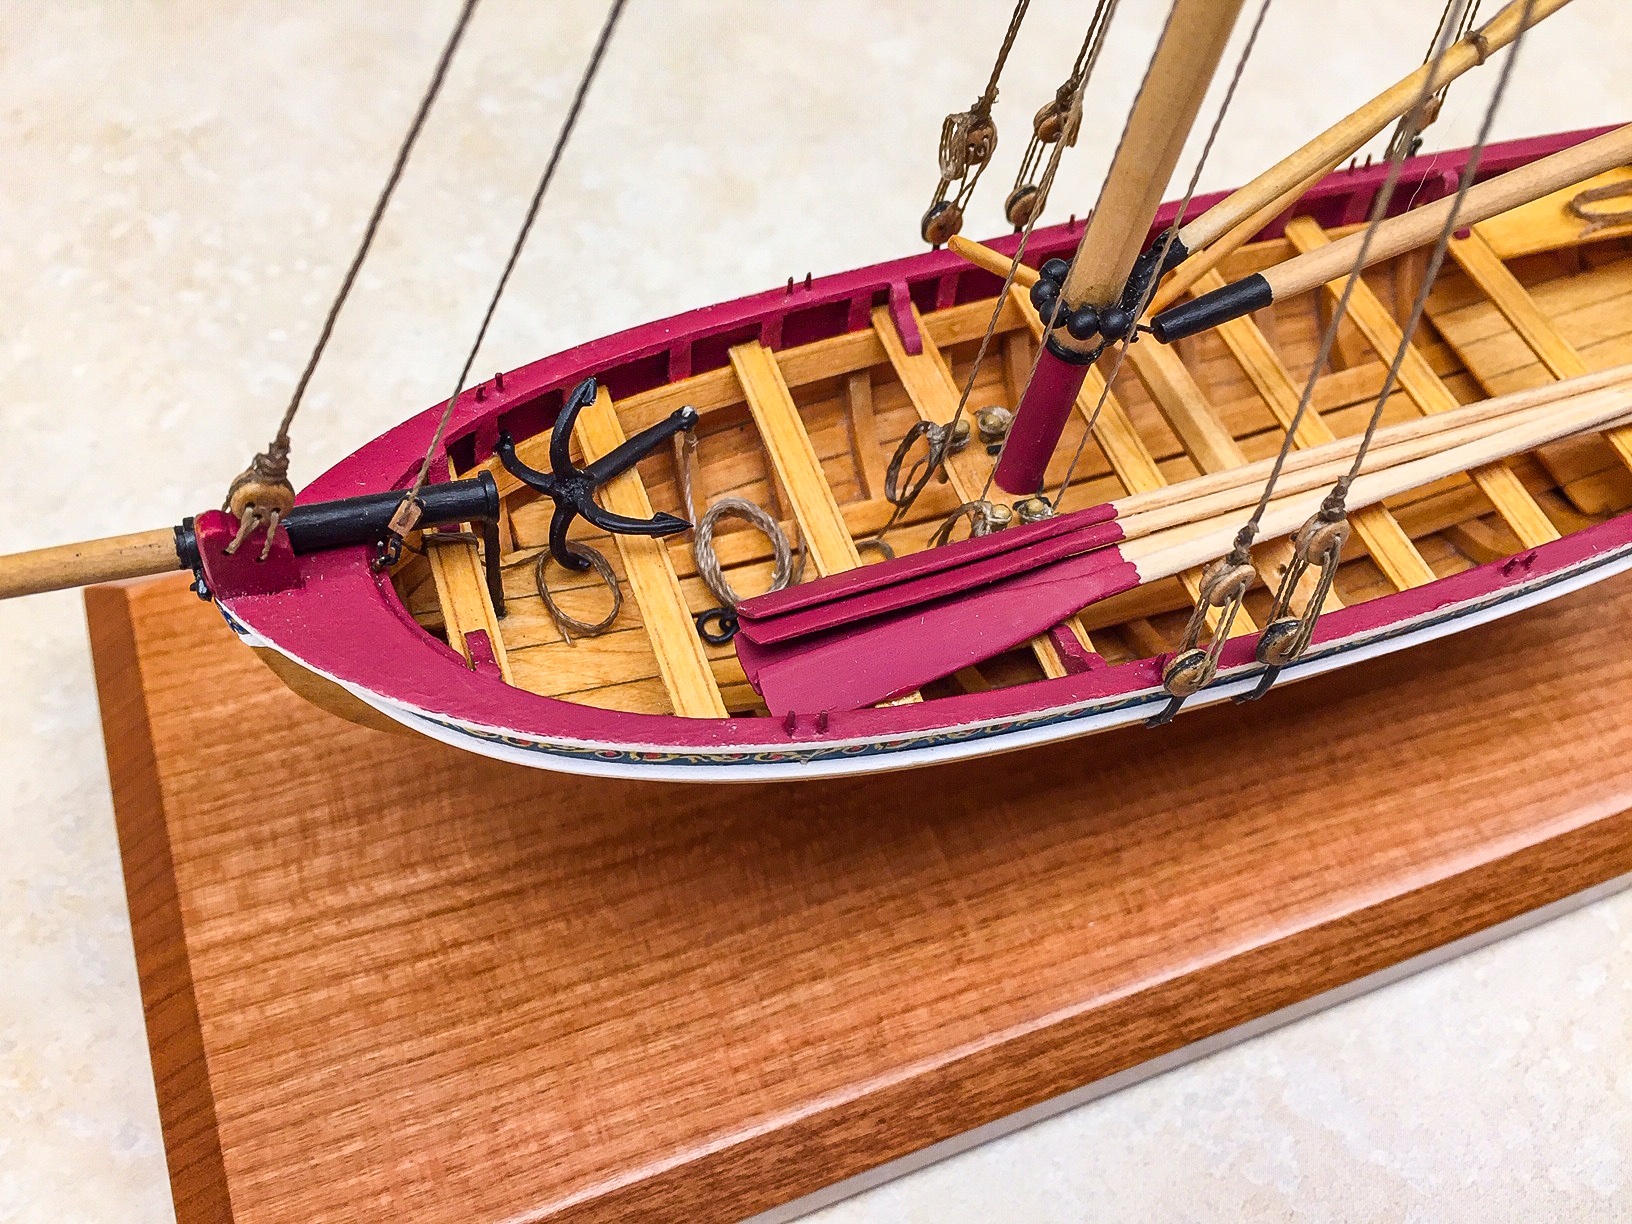
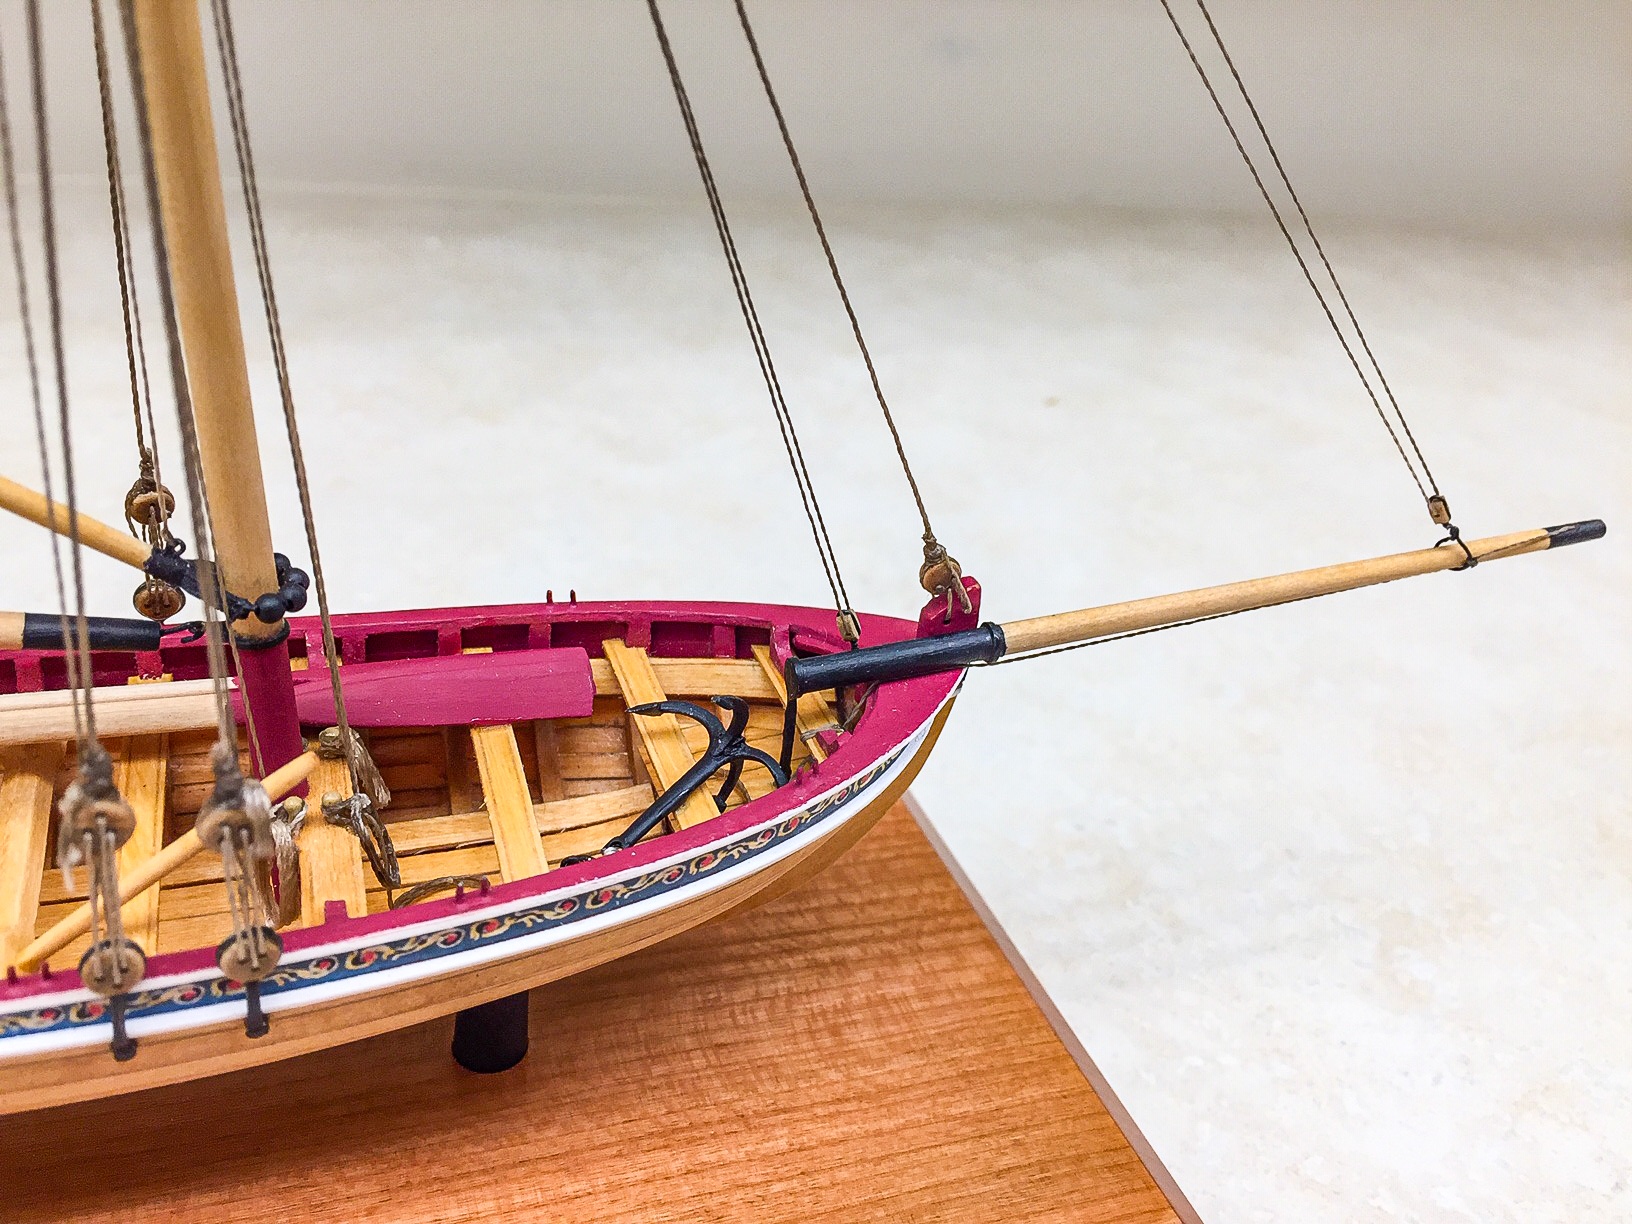
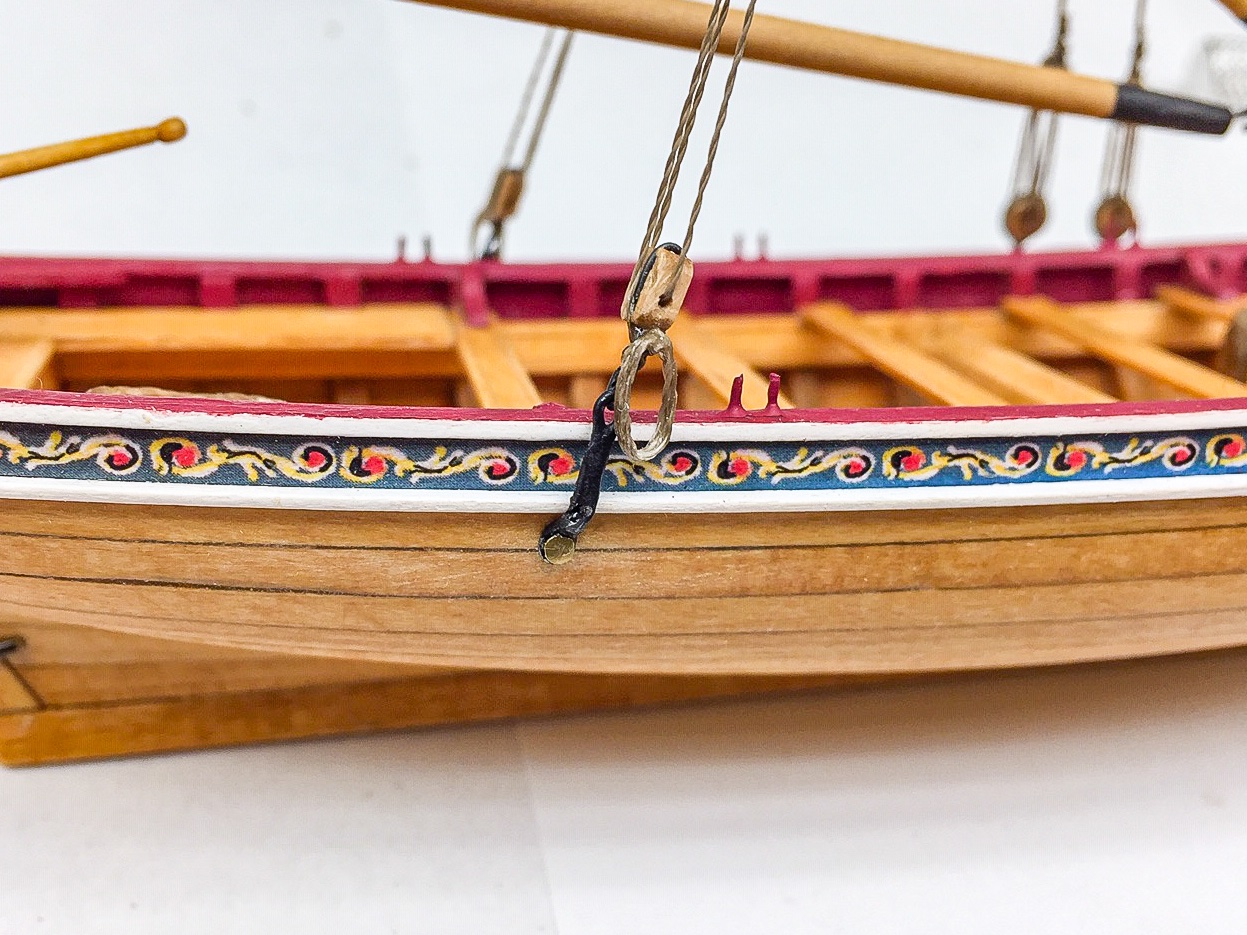
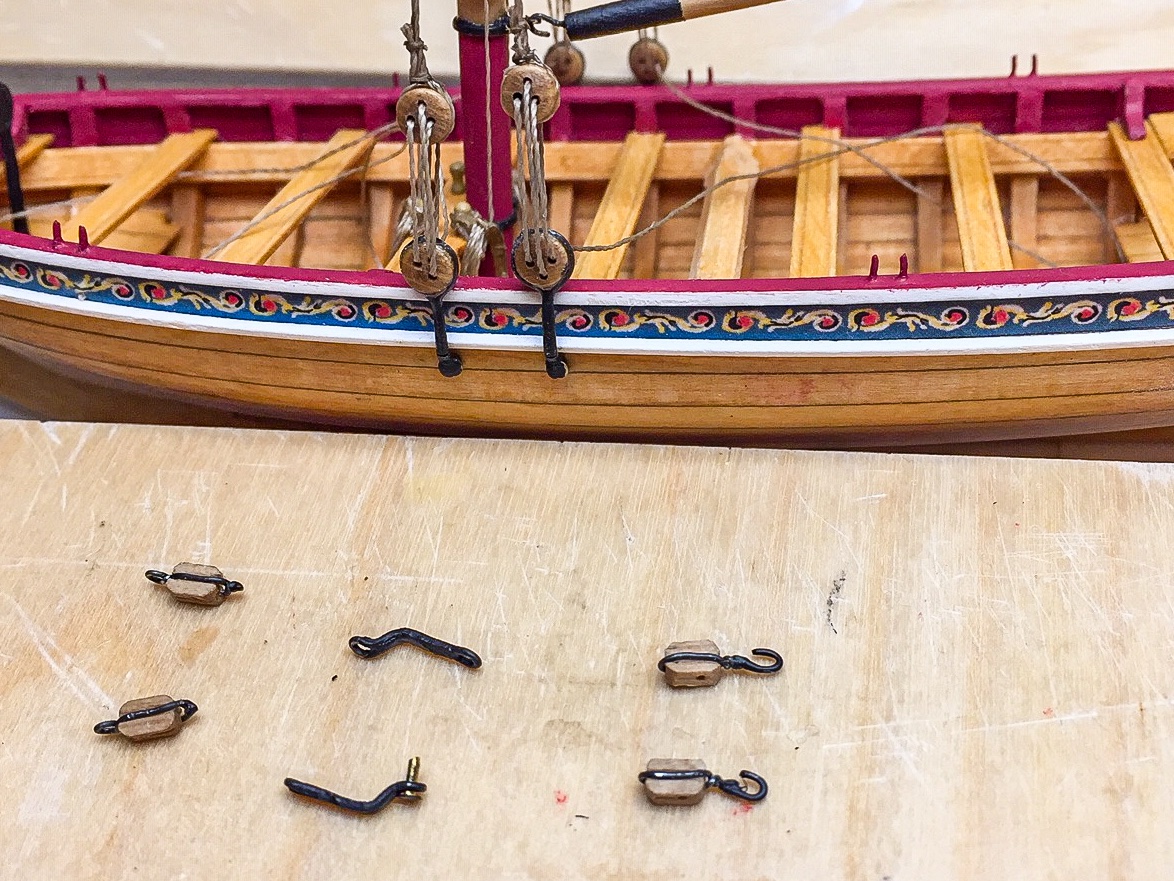
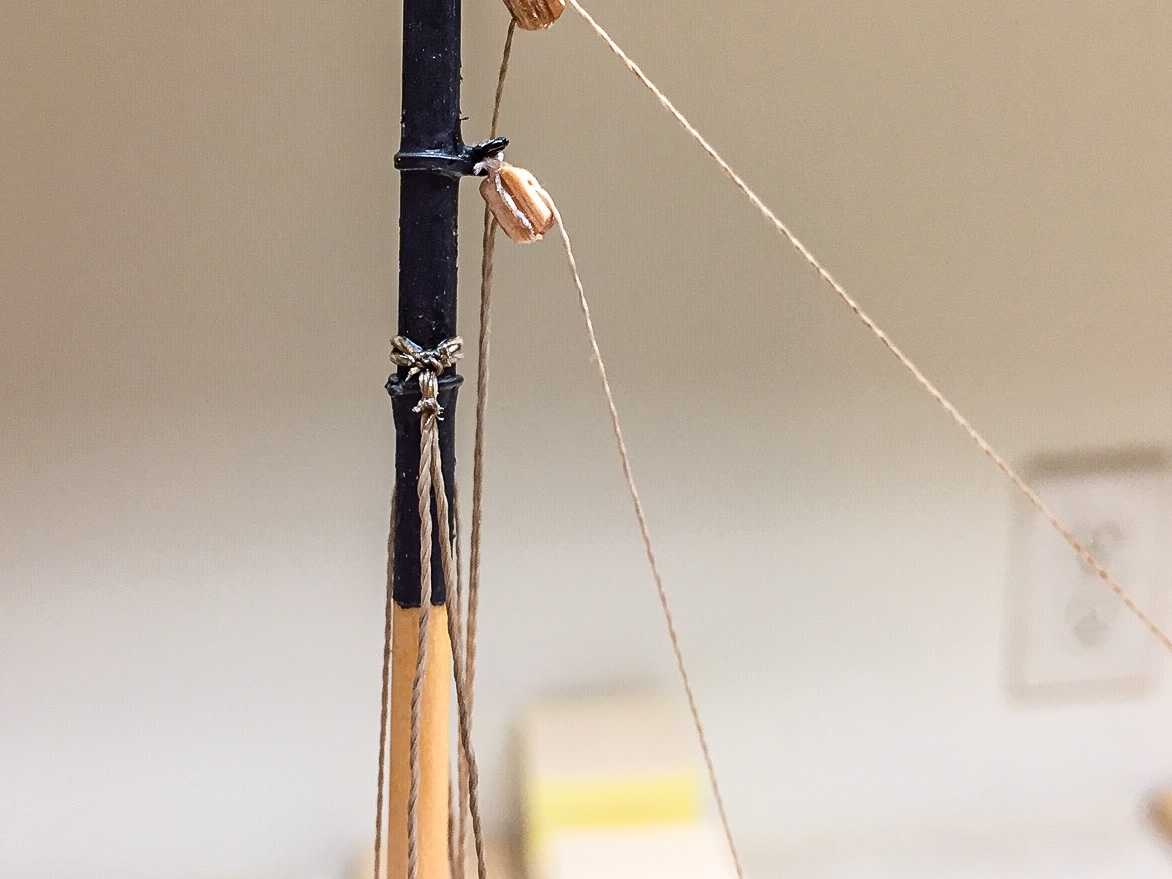
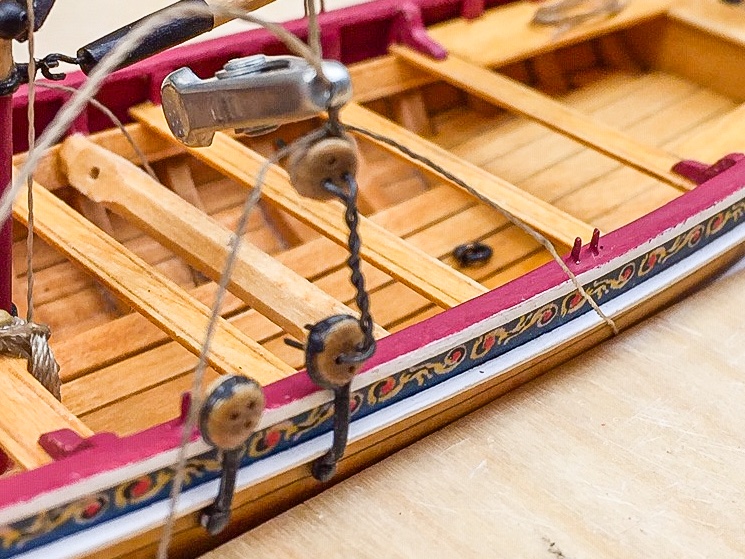
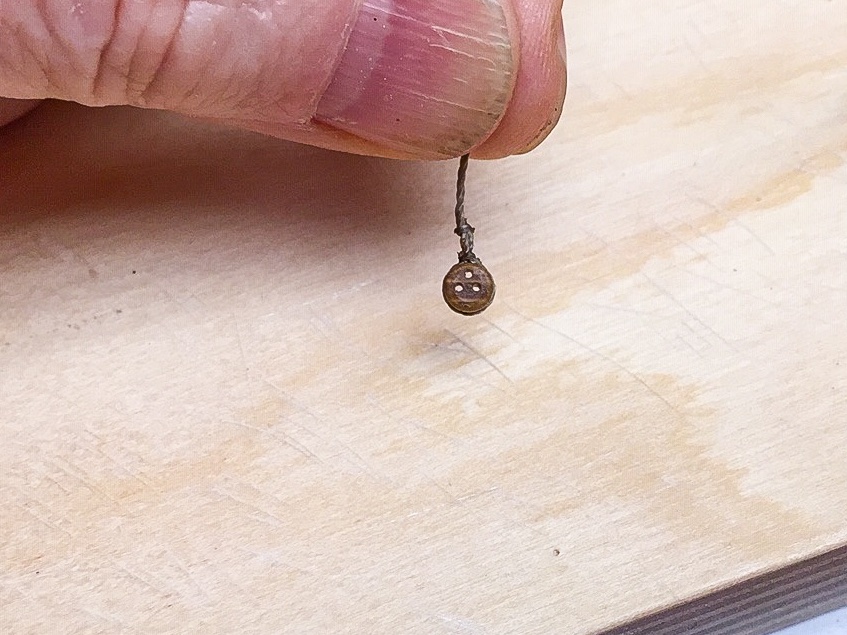
I used the blocks and rigging from model expo instead of upgrading them. The wood they are made of isn't very strong and splits easily. I've found if you try to drill into these for a hook, they crumble. You can also damage them pretty easily trying to round them off, so I used them as is. If I needed an eye or a hook on the block, I used wire to form it. These are so small, that I don't think it makes much difference visually except in closeups. Here's photo I took of blocks and "chains" for the backstays, so you can see what I did. You can also see that I was in the process of lashing the shroud deadeyes when I took this photo.
- 55 replies
-
- 5
-
-
- 18th Century Longboat
- Model Shipways
- (and 1 more)
-
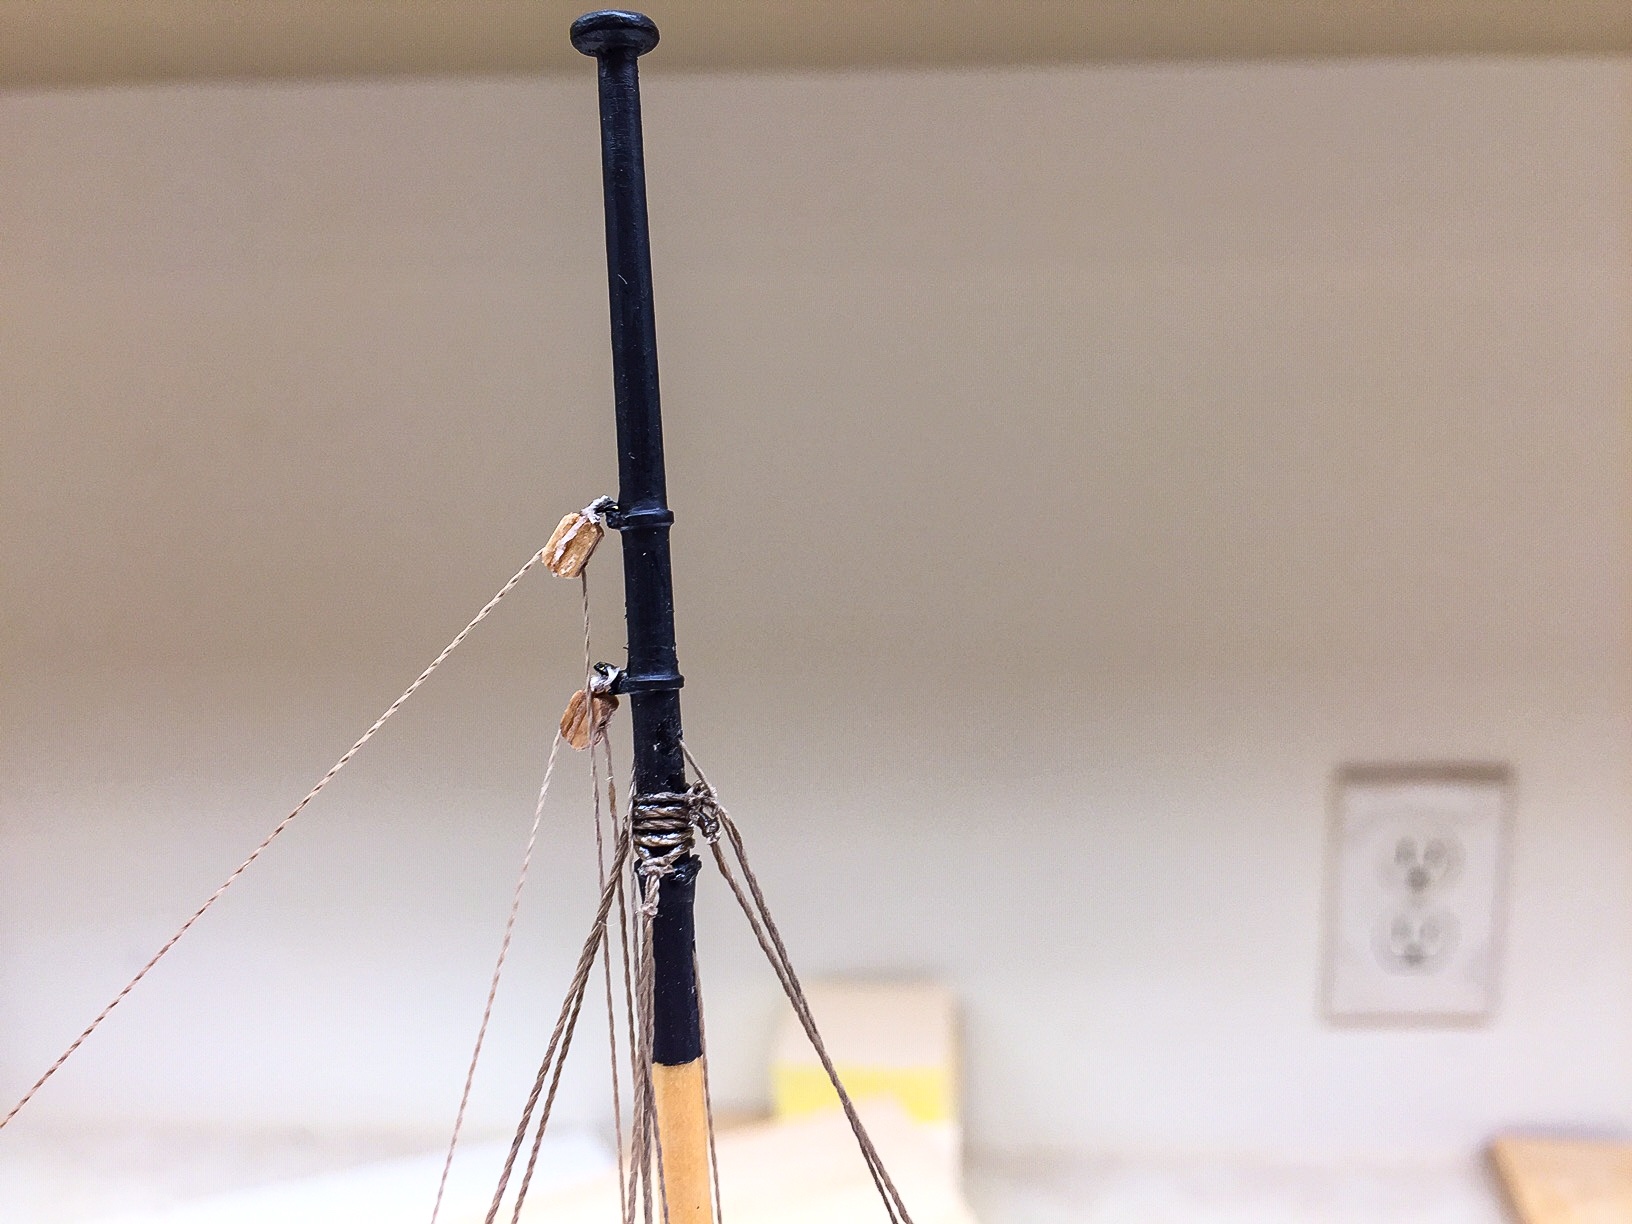
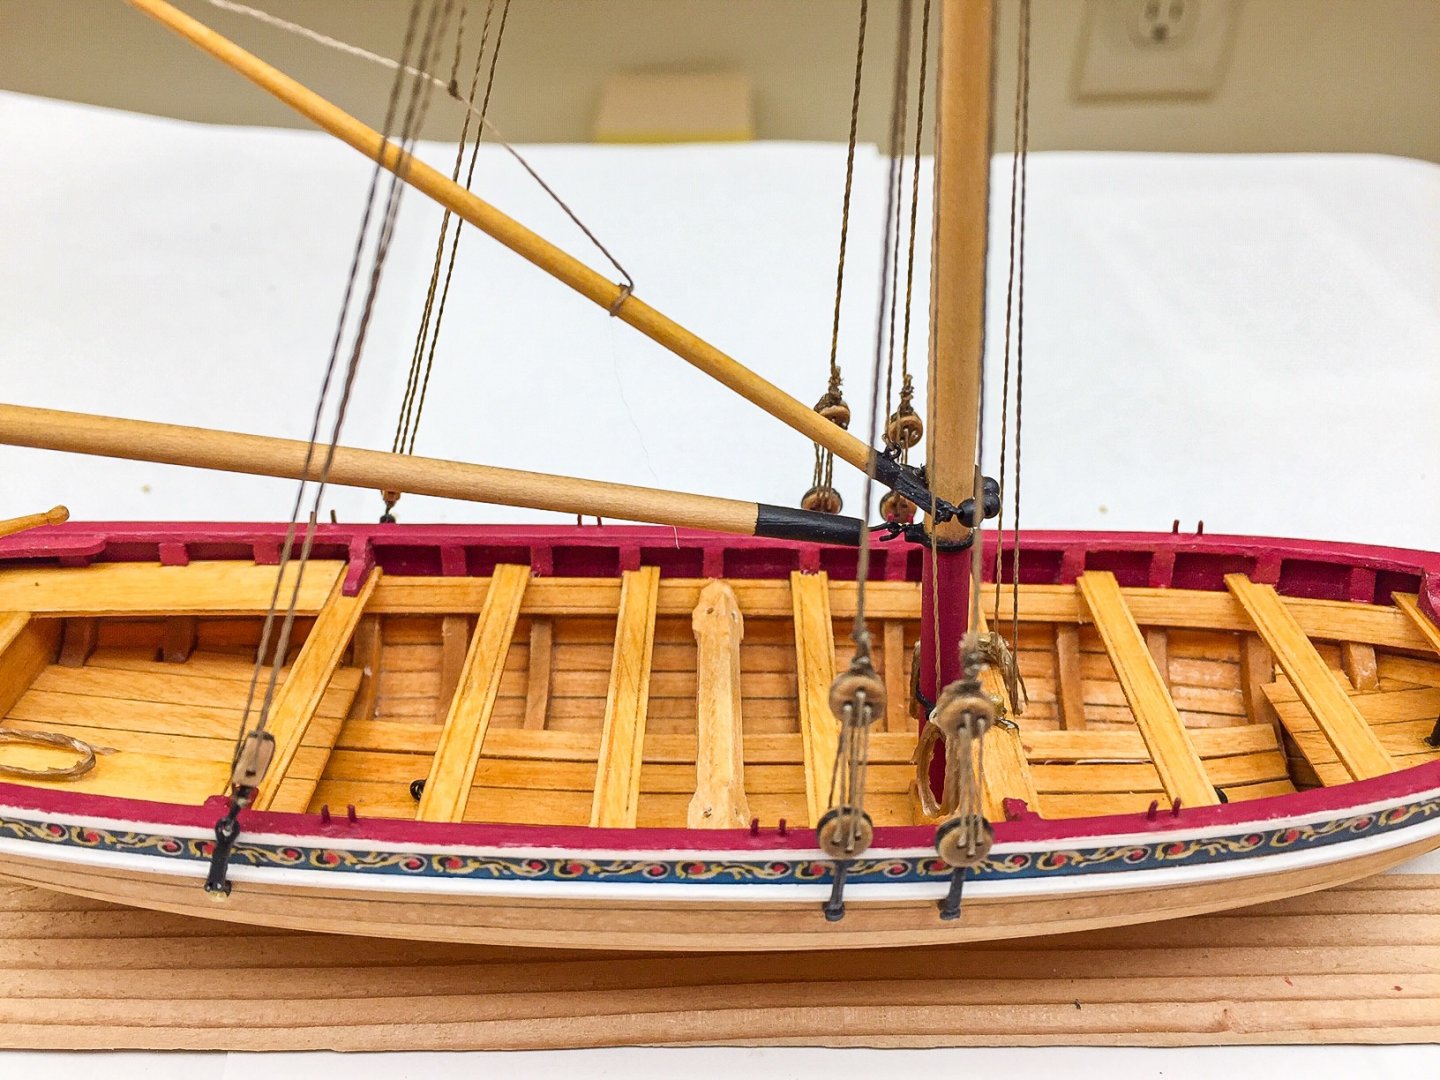
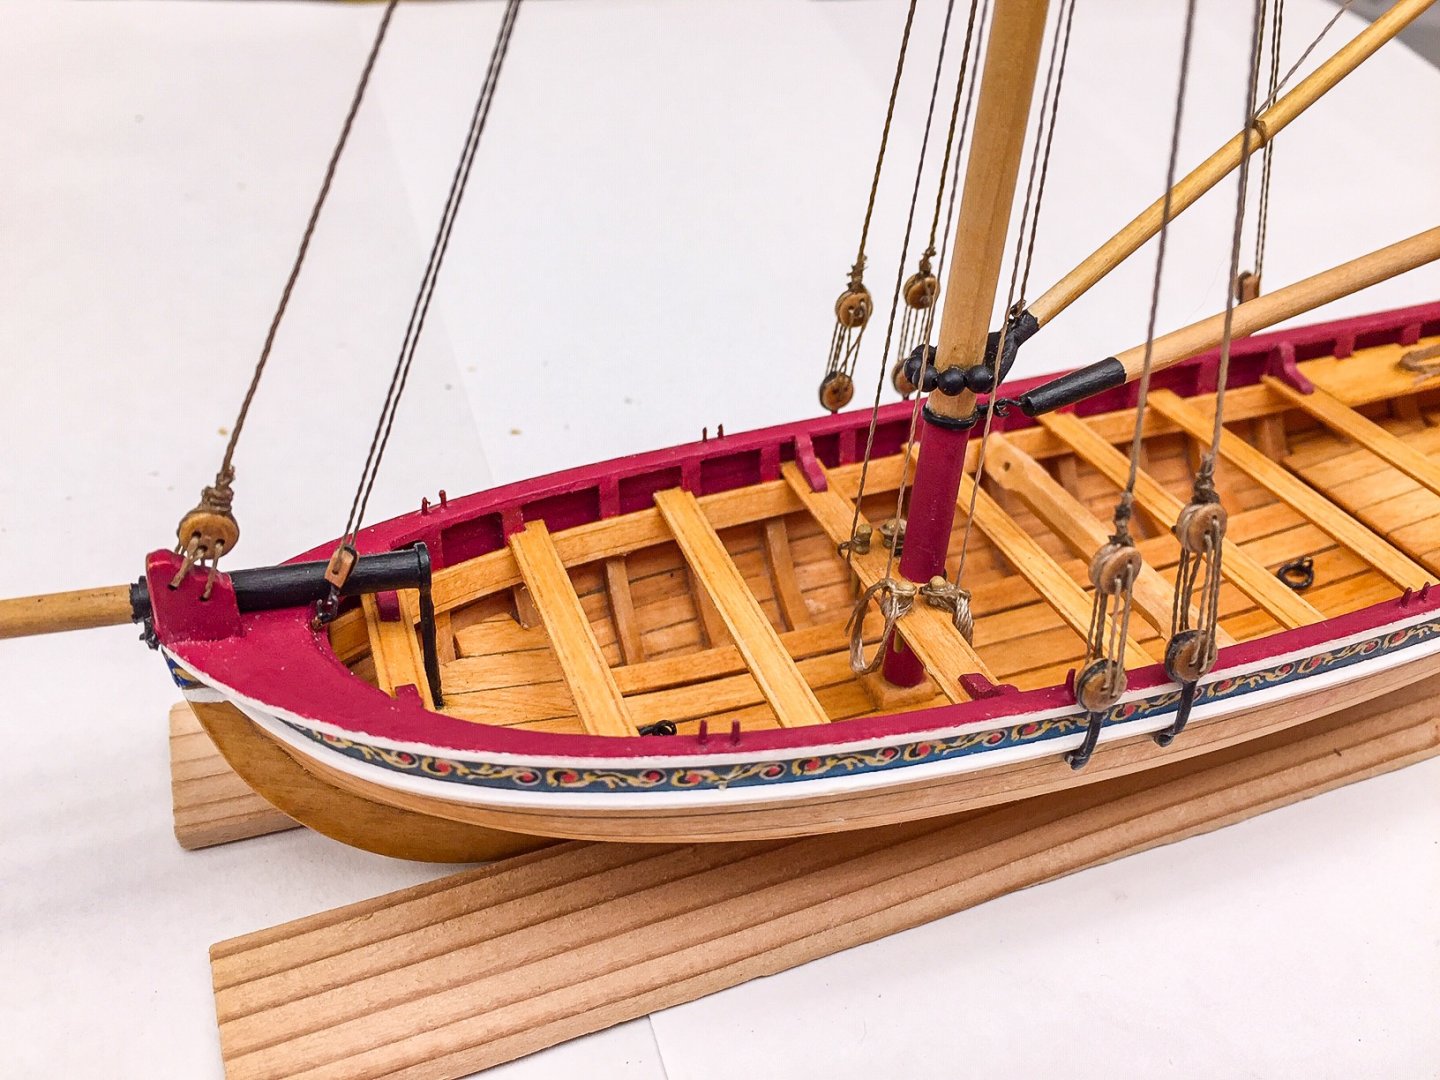
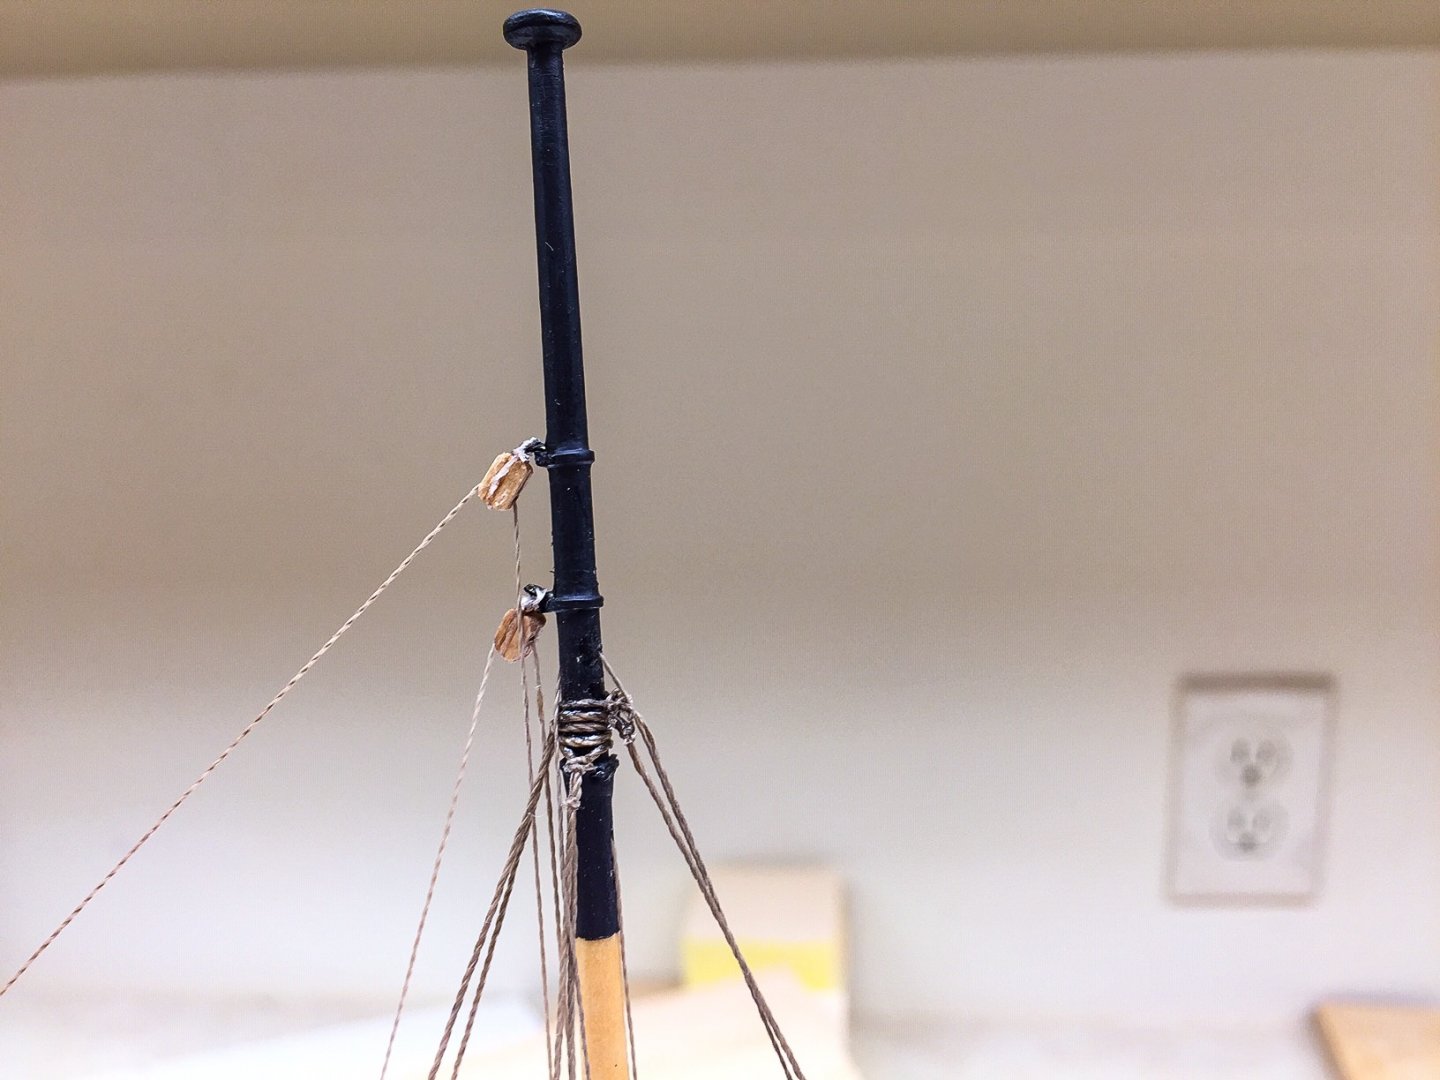
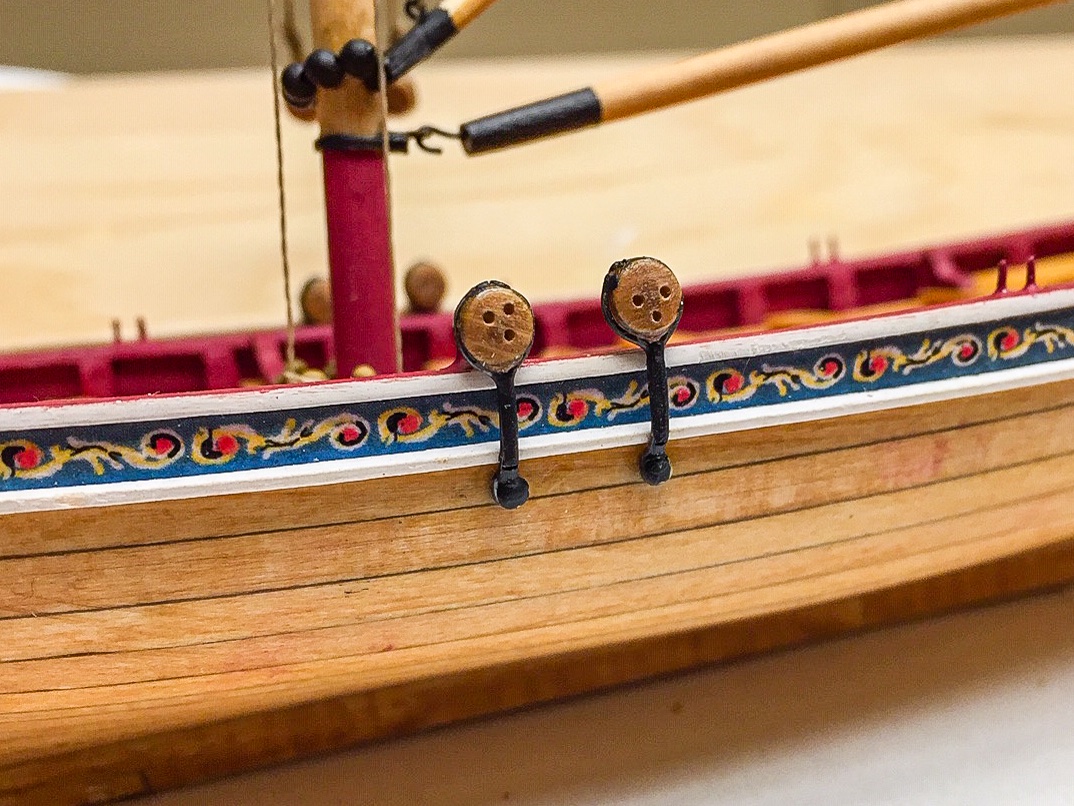
Here's two closeups of the shrouds where they attach to the hull with deadeyes and lashings. You can also see where the backstays attach to the hull with running rigging. The next photo shows the fore stay and halliard. The fore stay was a little longer than I wanted, but I decided it was ok to go ahead and lash it to the bow, even if lashings were short. The last photo shows the top of the mast where all the lines are seized. It's a real bundle of lines, especially when shown in a closeup.

- 55 replies
-
- 6
-
-
- 18th Century Longboat
- Model Shipways
- (and 1 more)
-
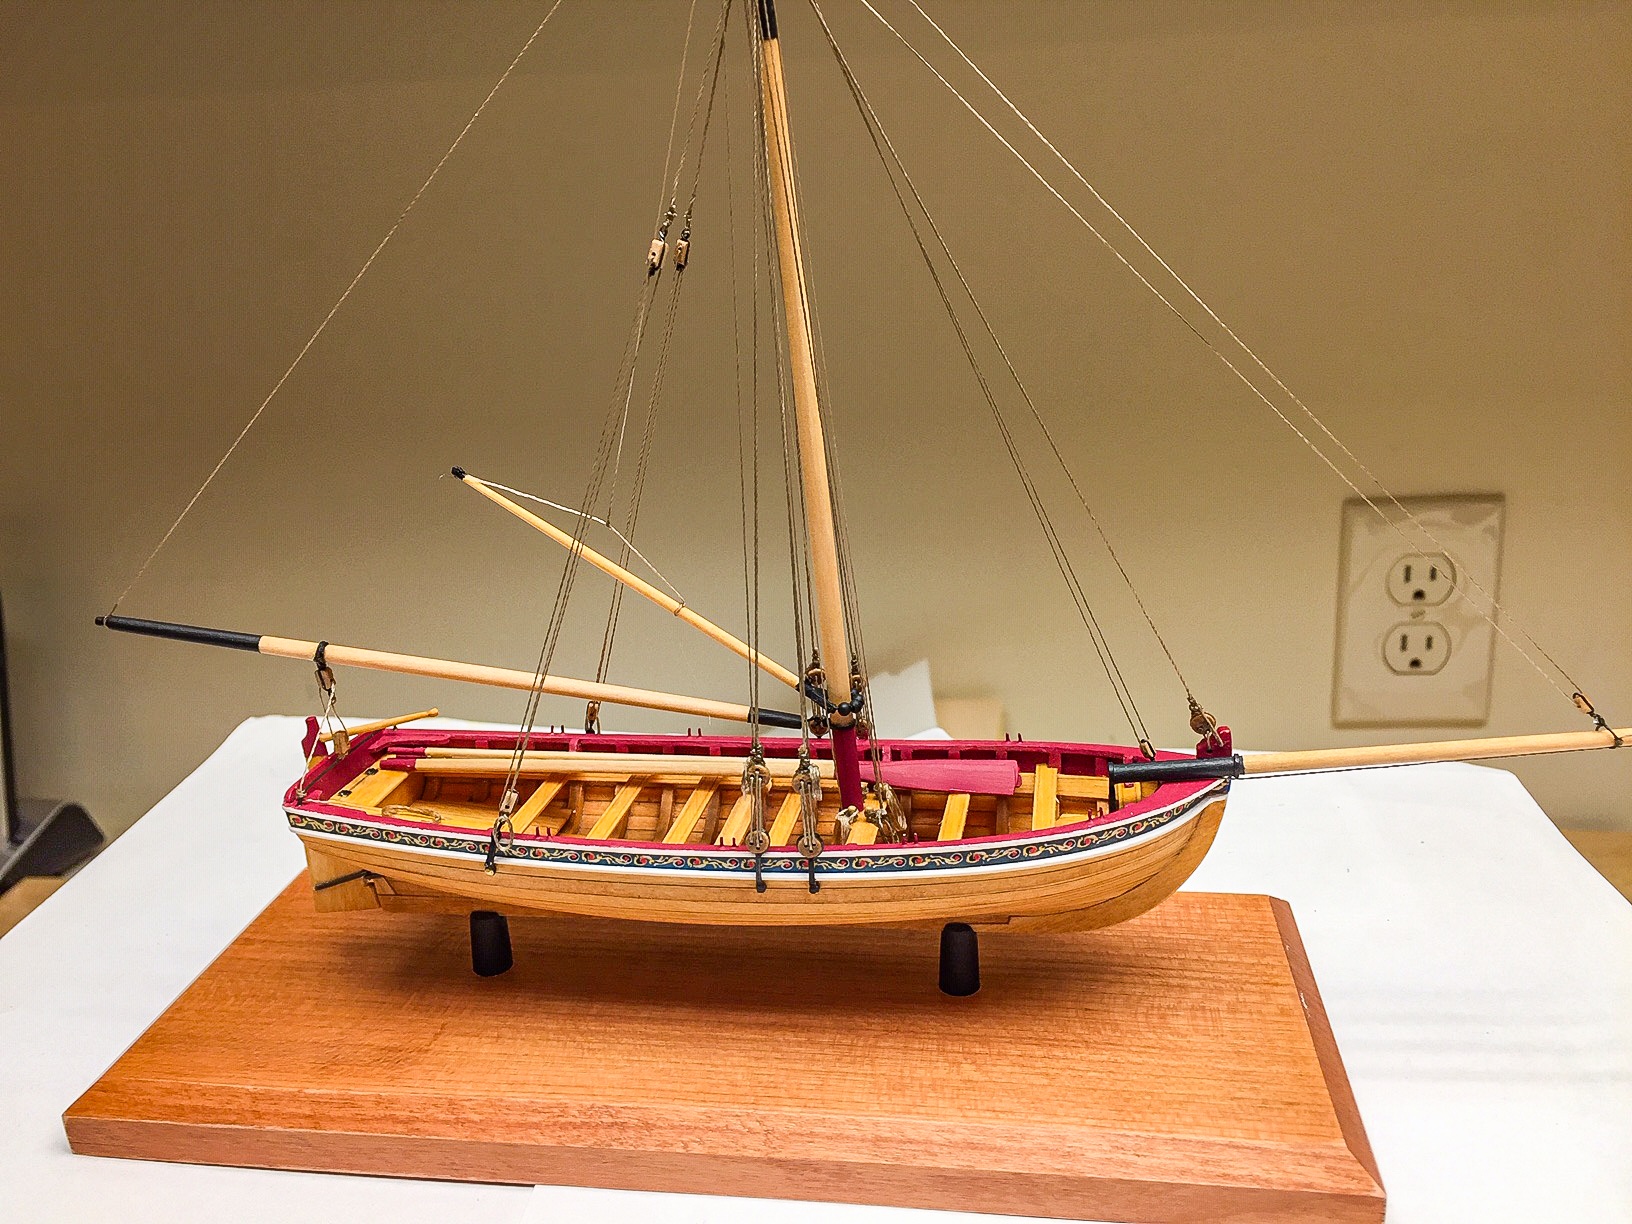
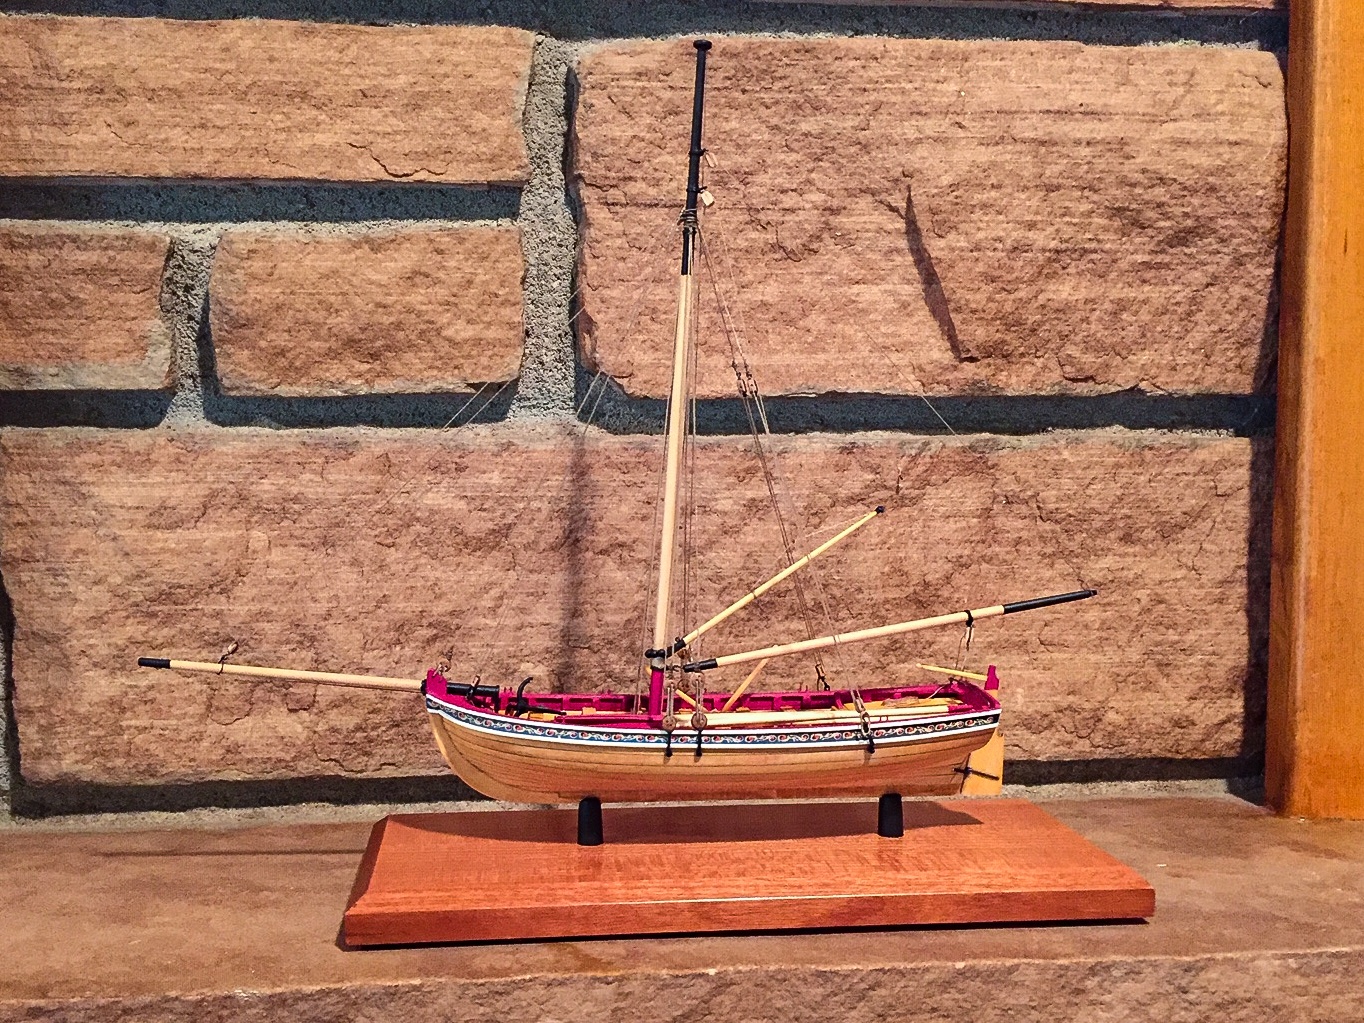
With rainy weather, I'm making good progress on long boat. For the most part, it's coming along fairly well. This shows what it looks like right now. I think there's only a couple more lines to rig.

- 55 replies
-
- 5
-
-
- 18th Century Longboat
- Model Shipways
- (and 1 more)
-
Thank you WalrusGuy! I'm trying to learn from your efforts & photos of Syren. I put the chain plates on the hull, and of course, had to make some bends to go over the hull moldings. I had trouble putting shrouds around mast and getting them to stay in place toward the top of the mast while seizing, so decided to add wire ring around the mast to hold them there. Otherwise, it went smoothly. I tried to take photo showing the twisted wire piece with prongs to hold deadeyes at the right height to tie shroud. I used small alligator clip to hold shroud, so I could tie it. This is the same procedure I've used before.
- 55 replies
-
- 4
-
-
- 18th Century Longboat
- Model Shipways
- (and 1 more)