mikegr
-
Posts
830 -
Joined
-
Last visited
Content Type
Profiles
Forums
Gallery
Events
Everything posted by mikegr
-
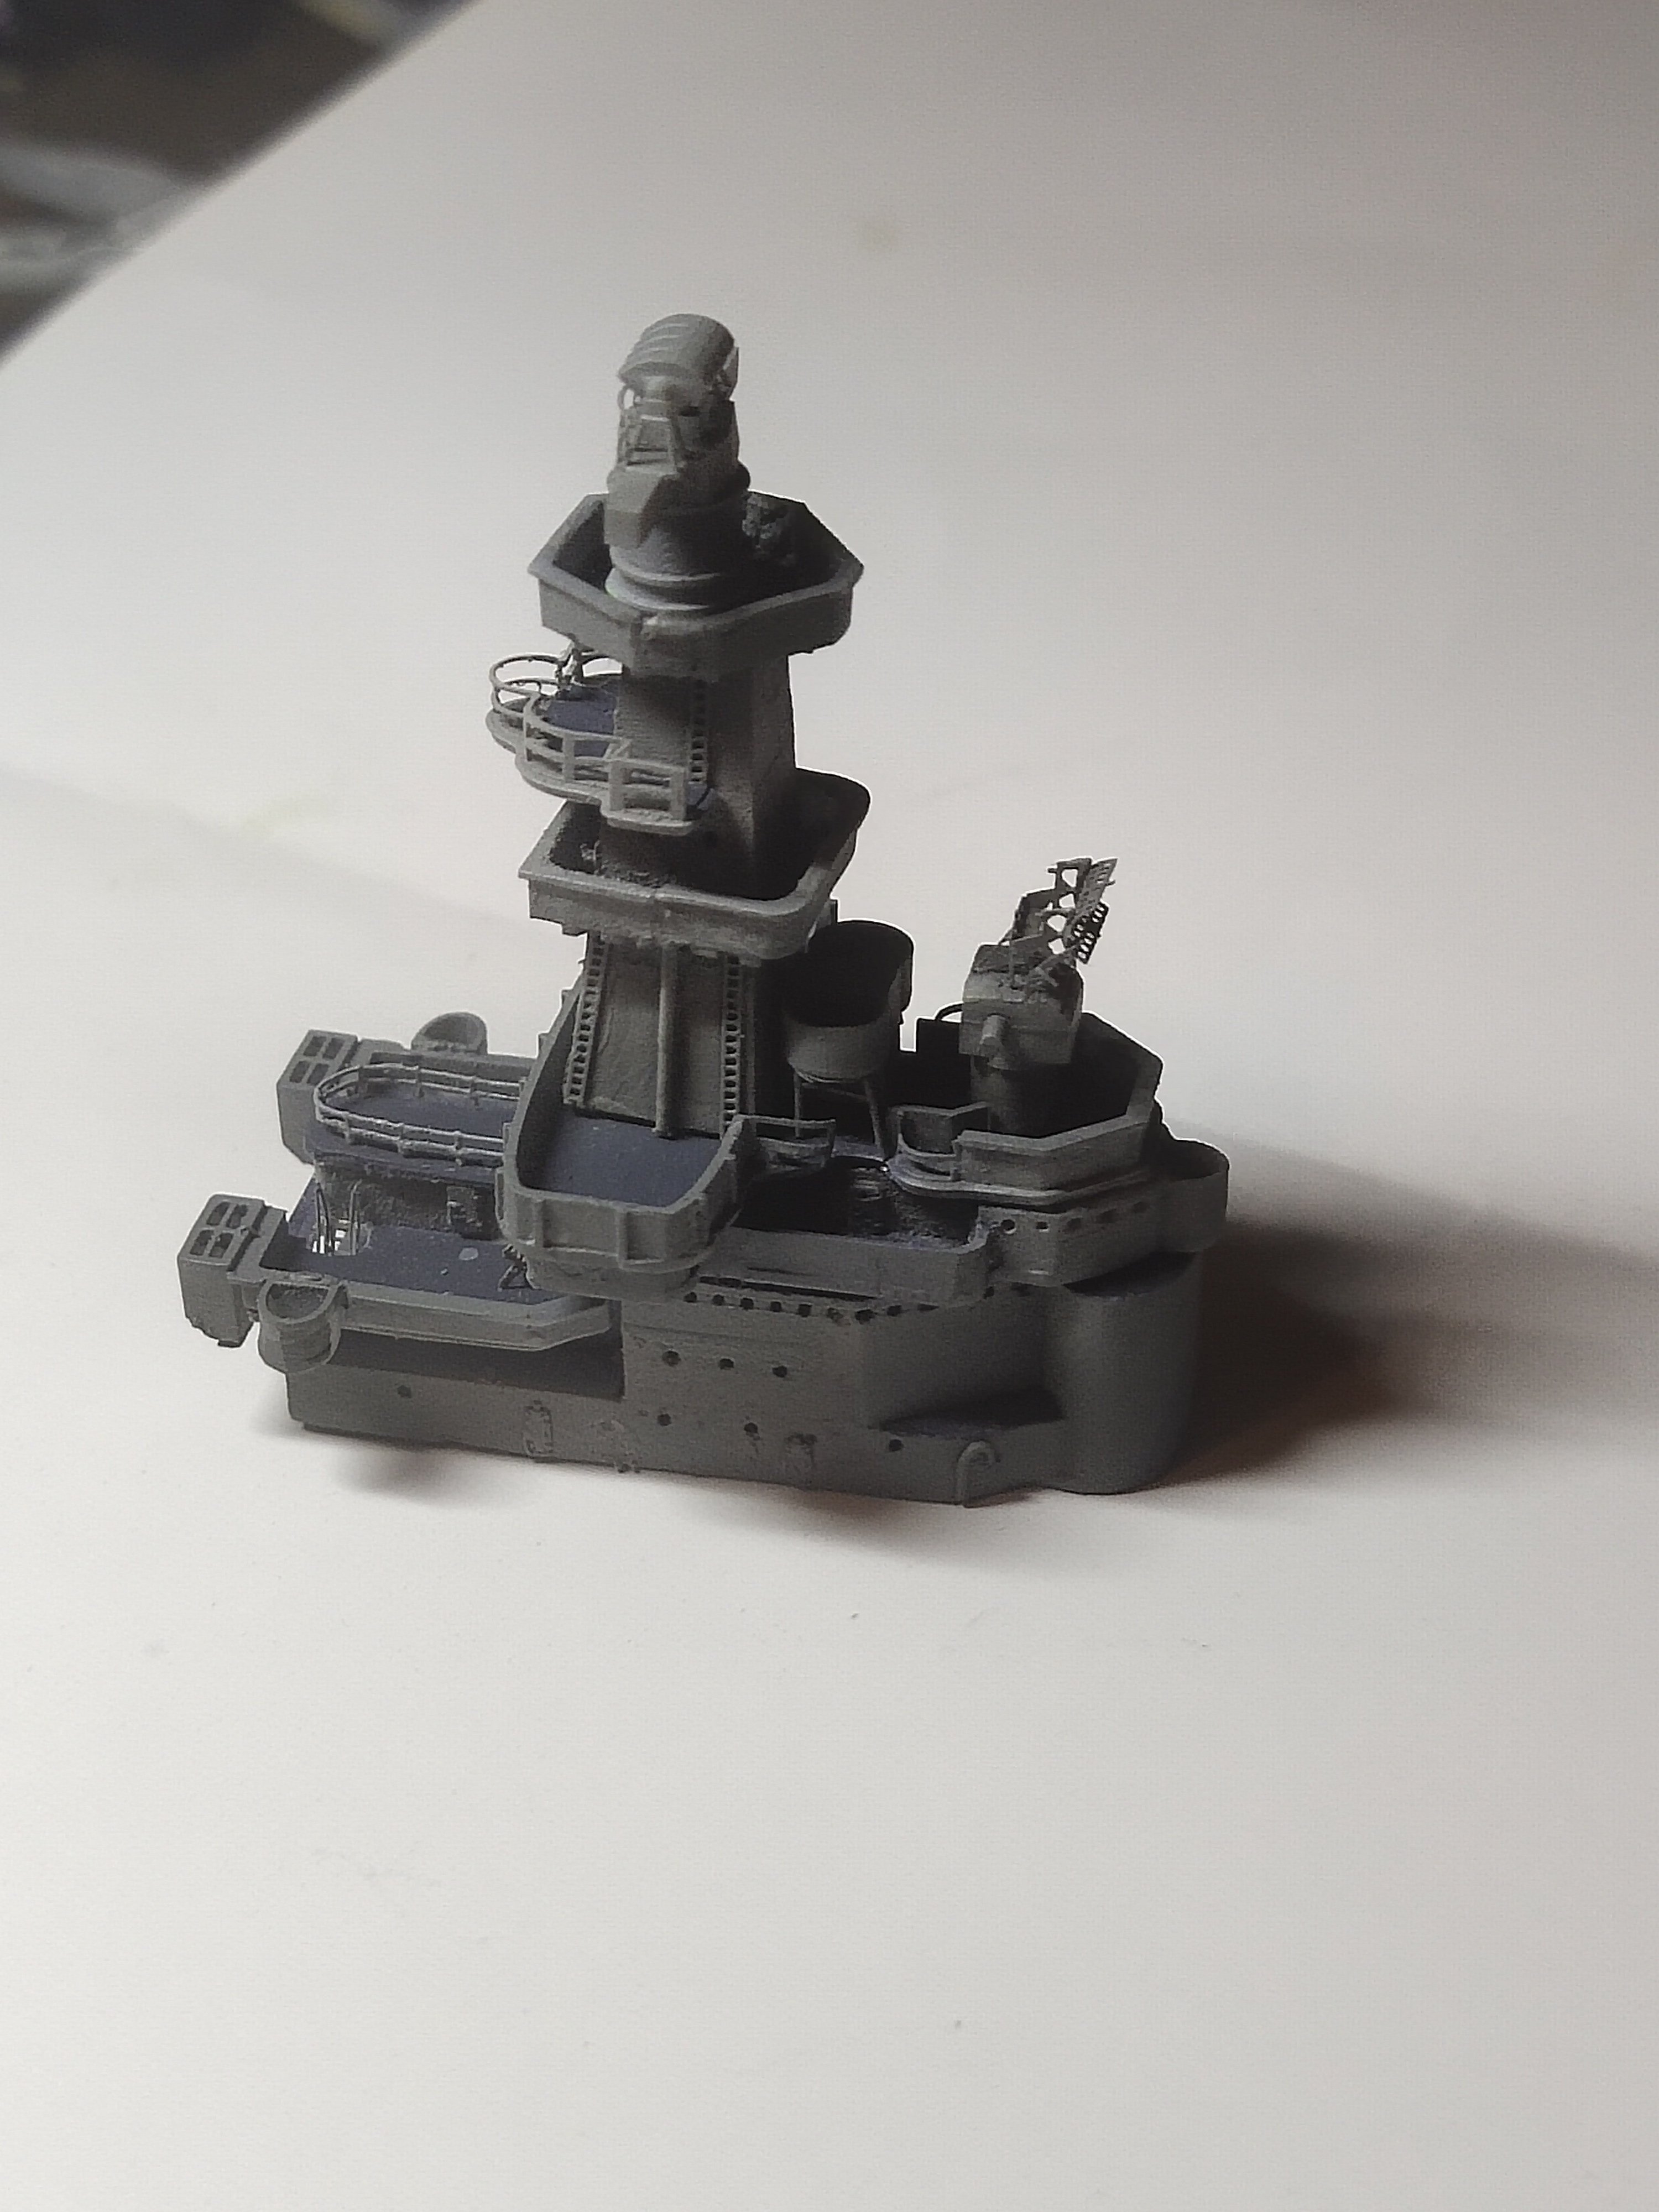
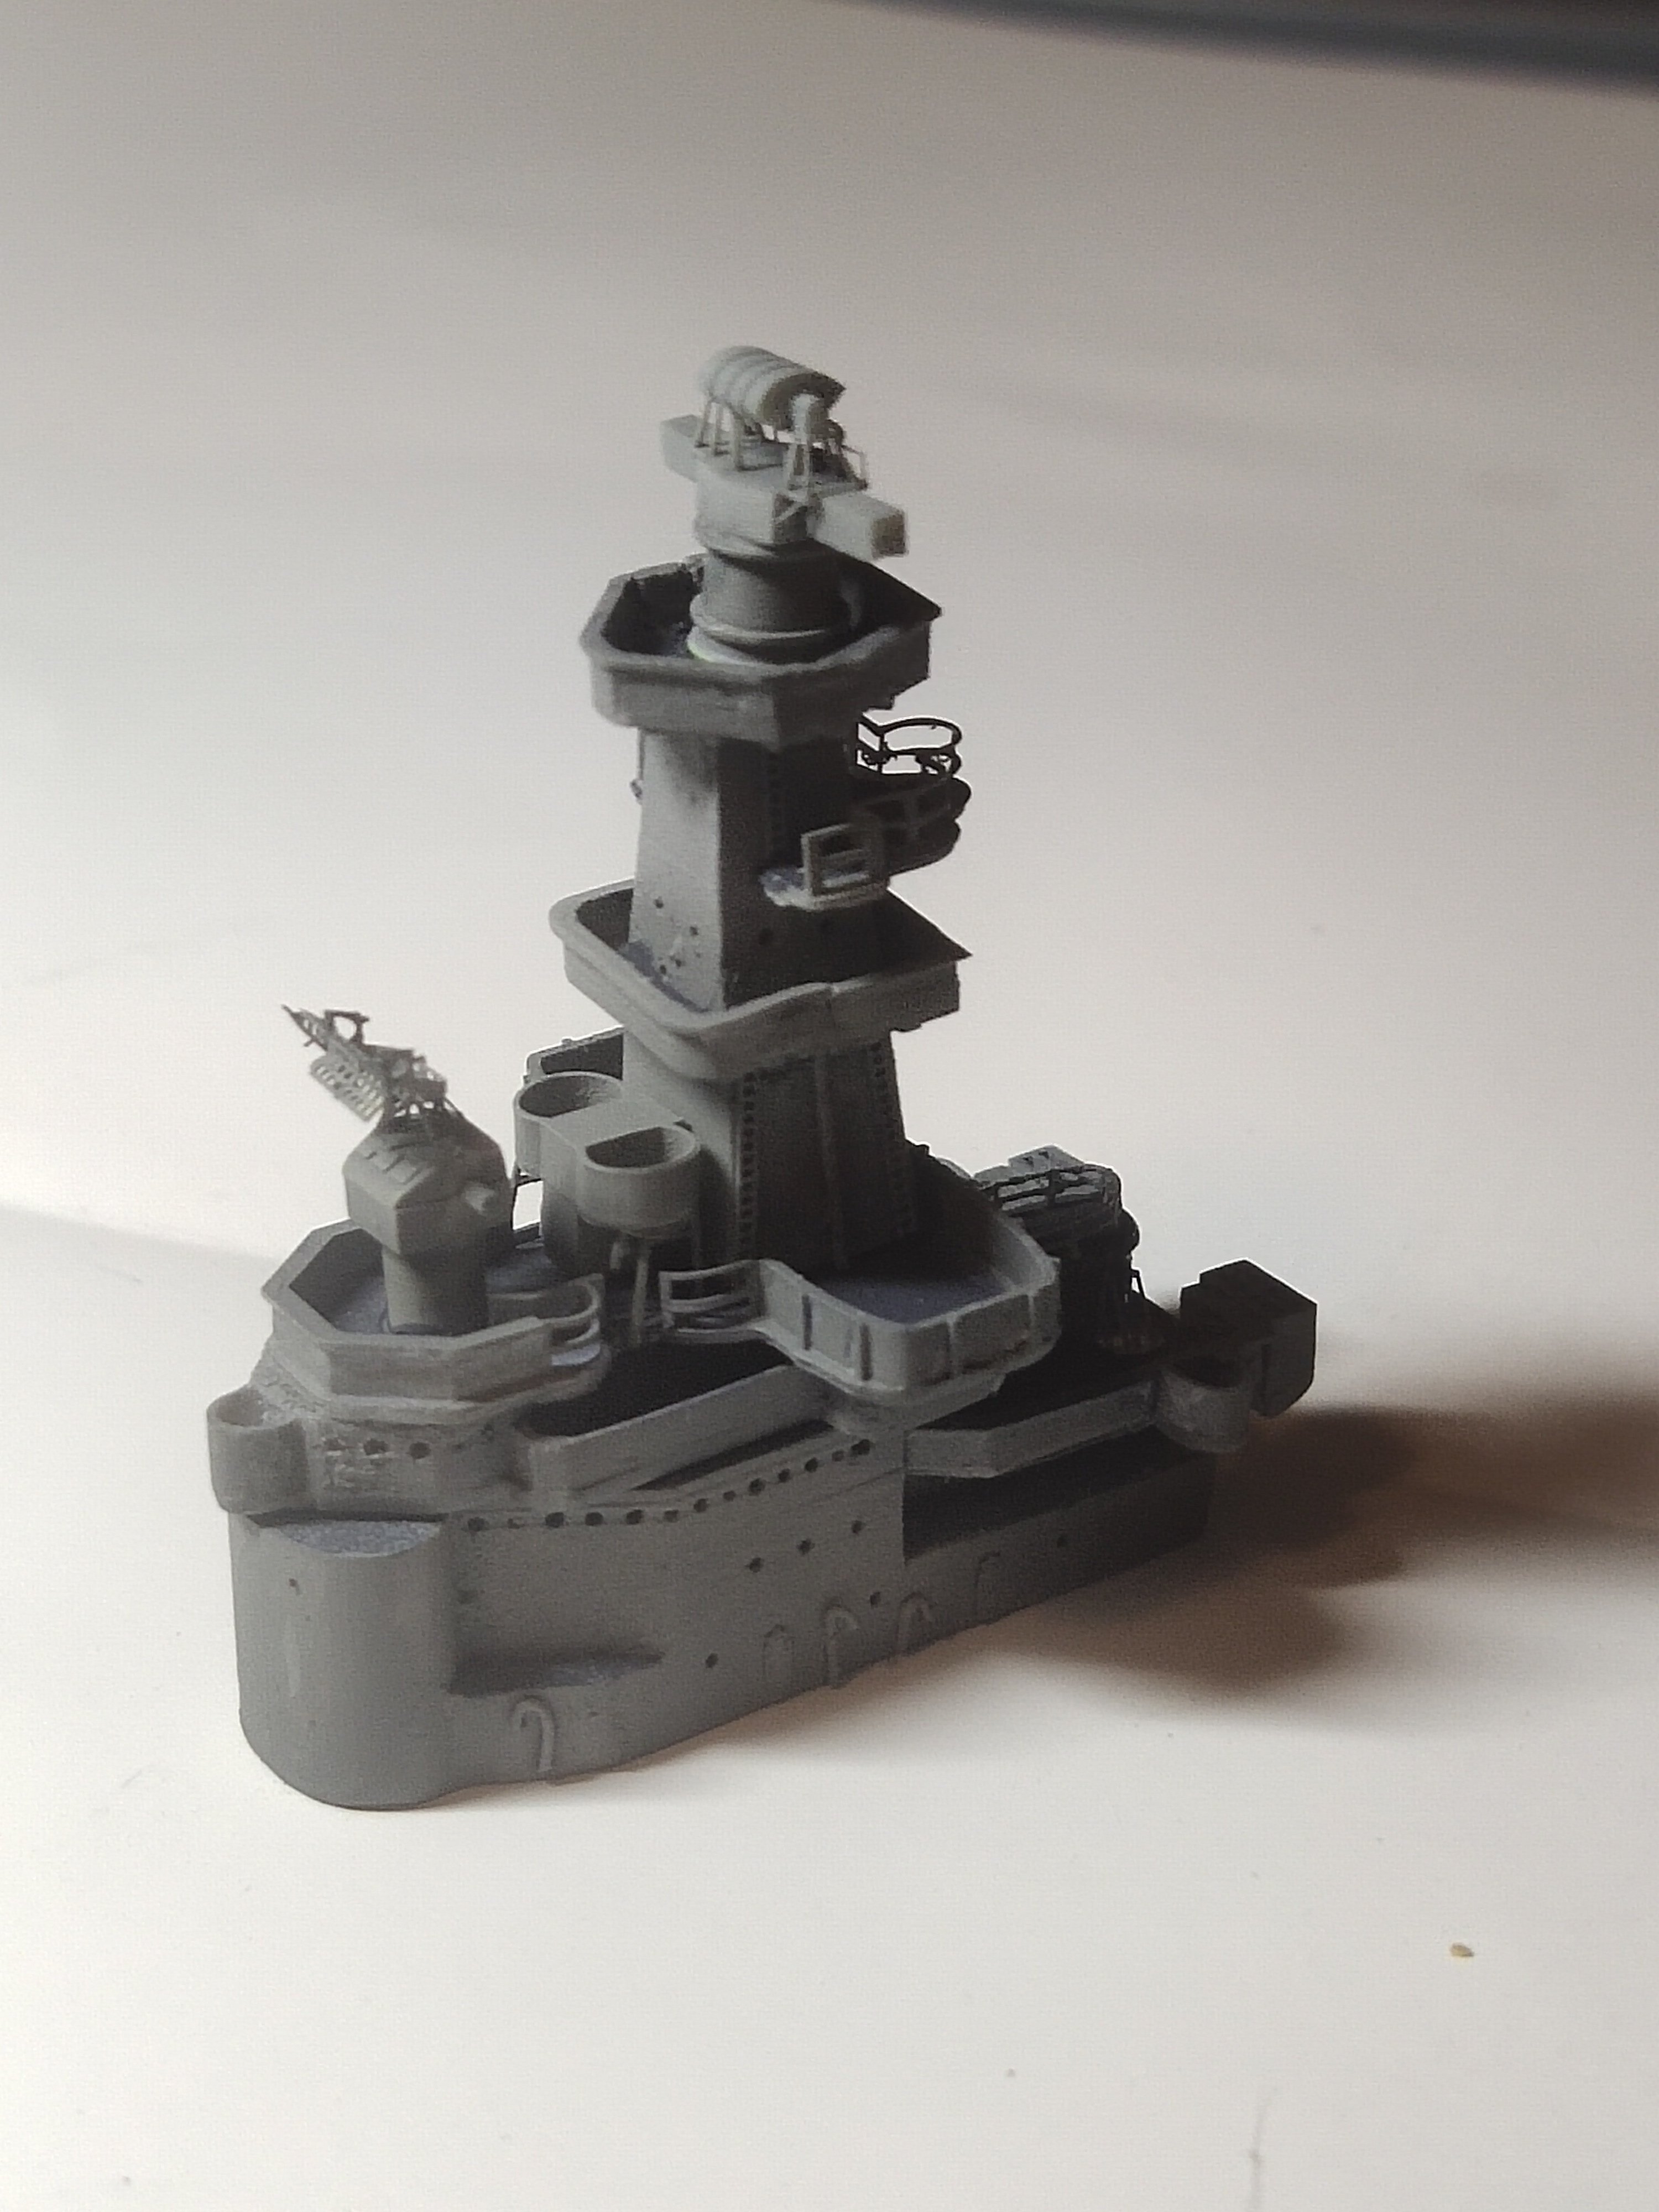
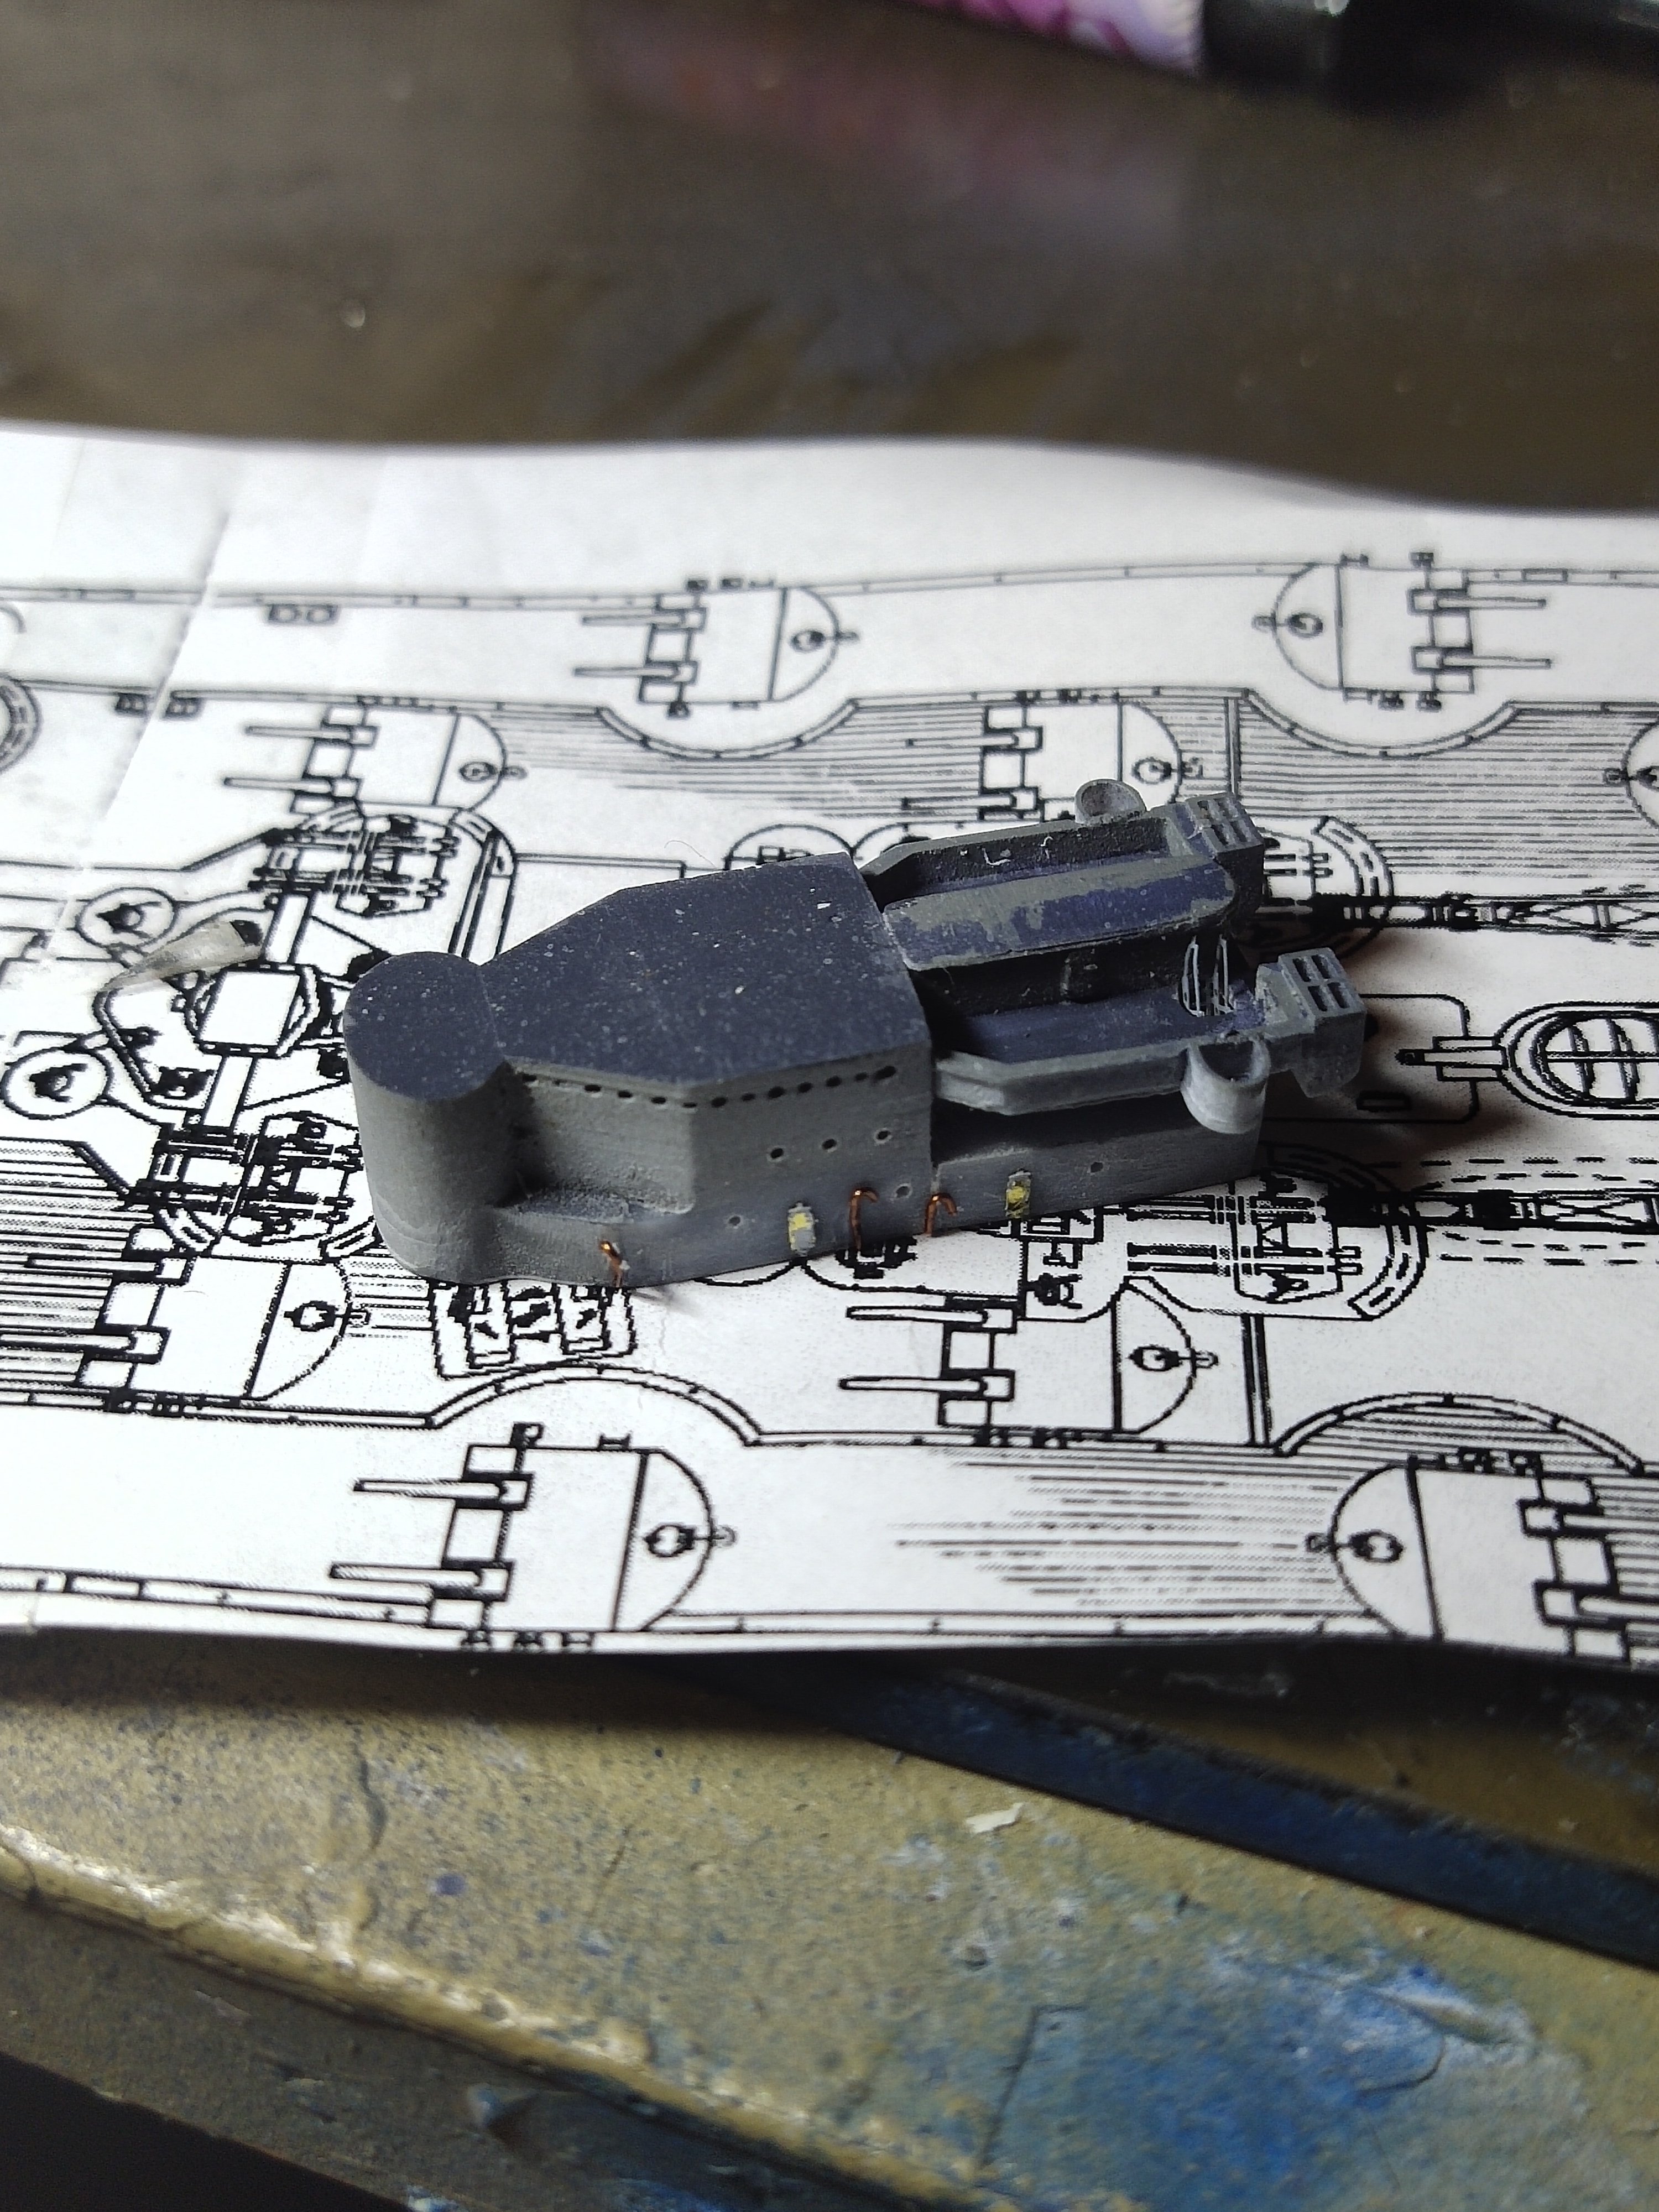
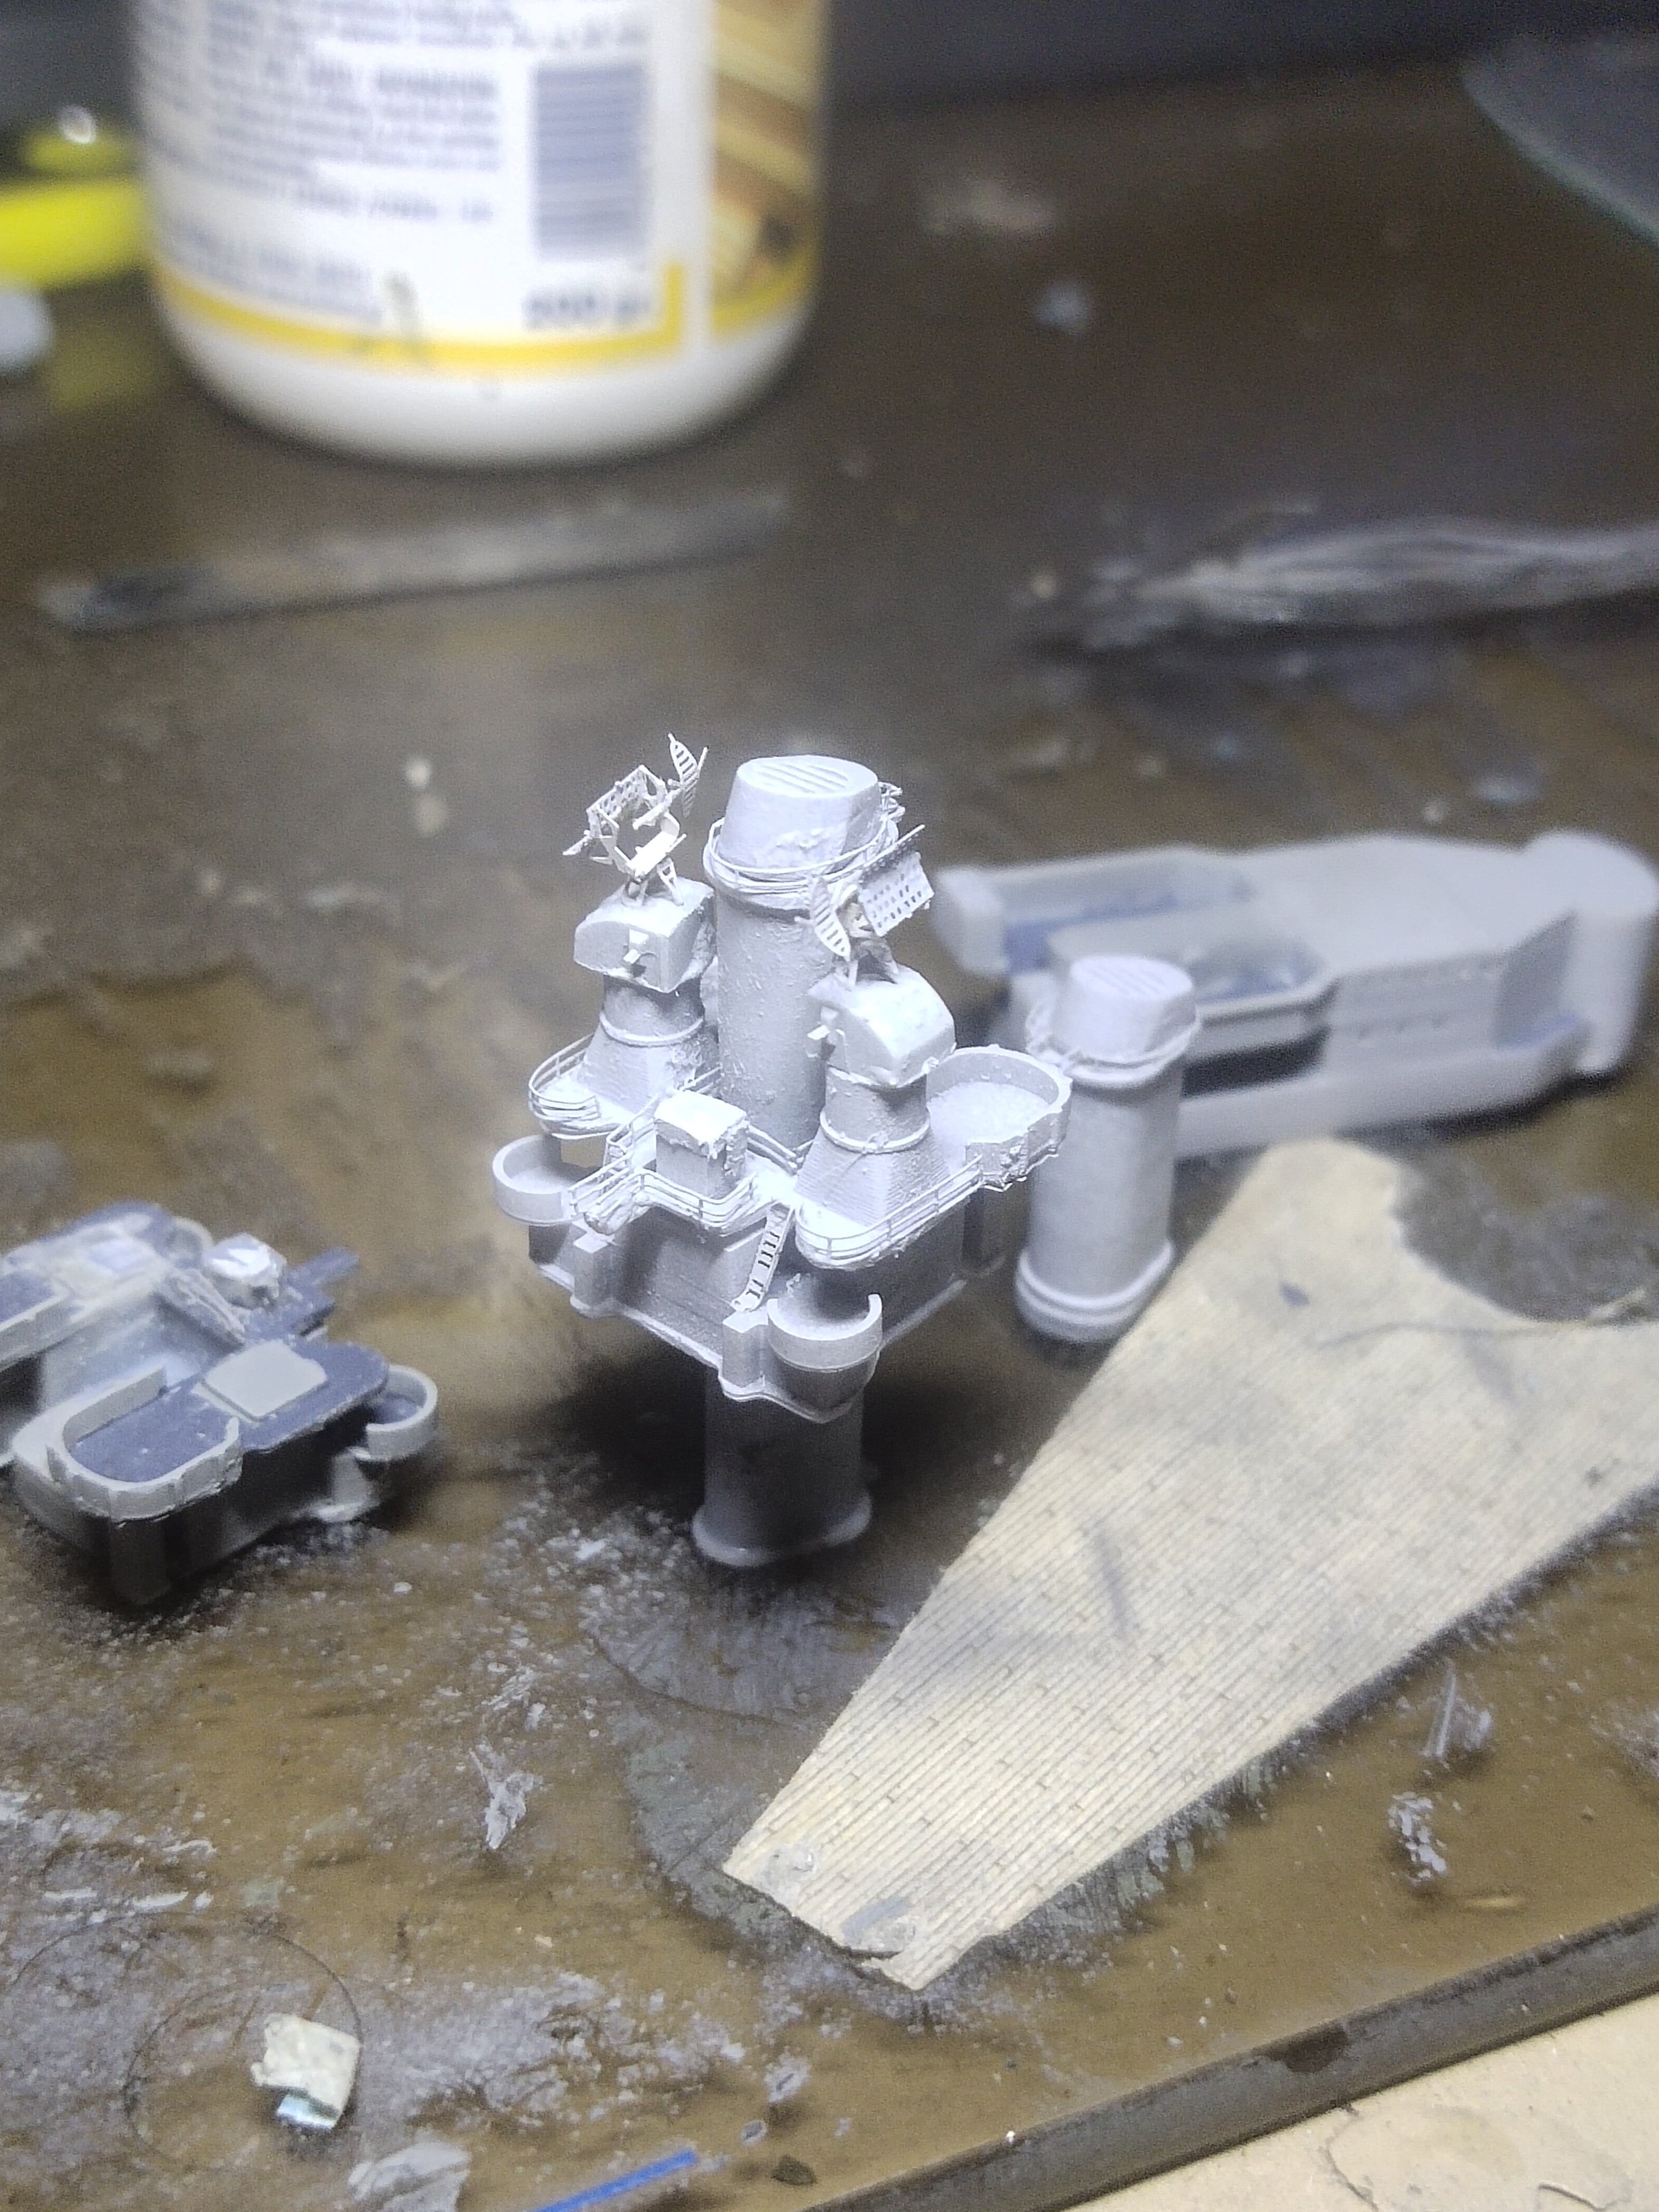
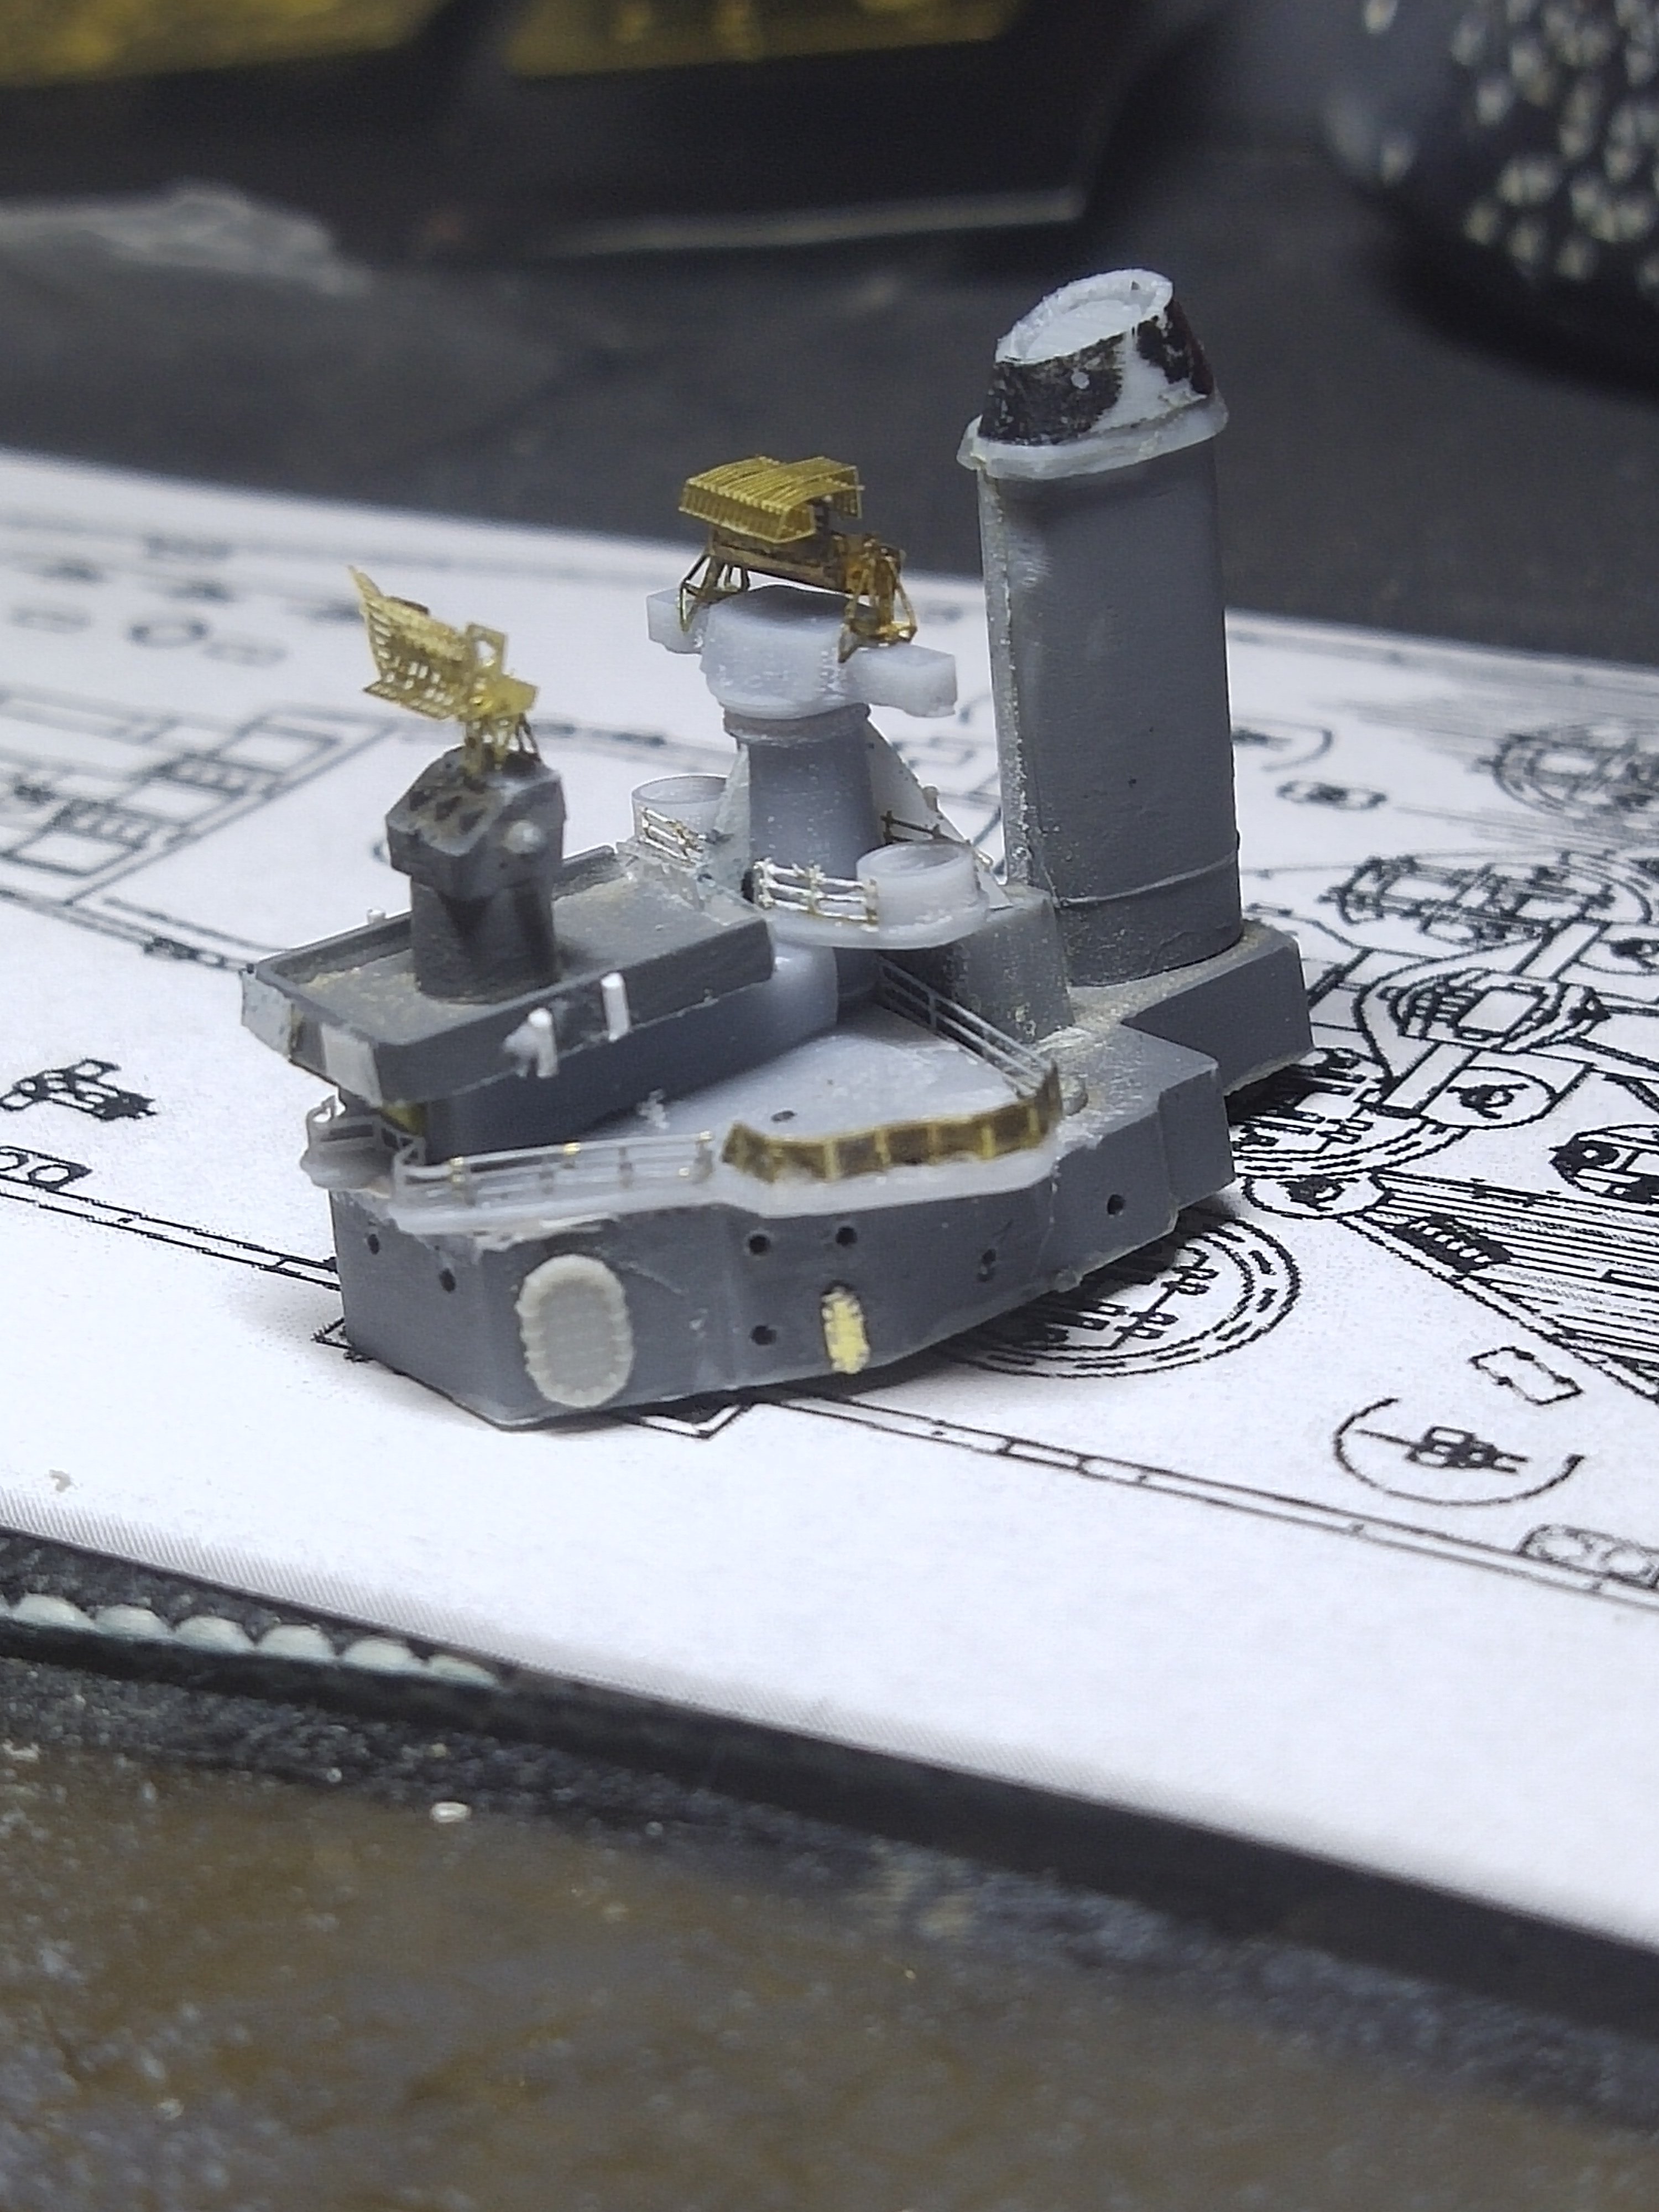
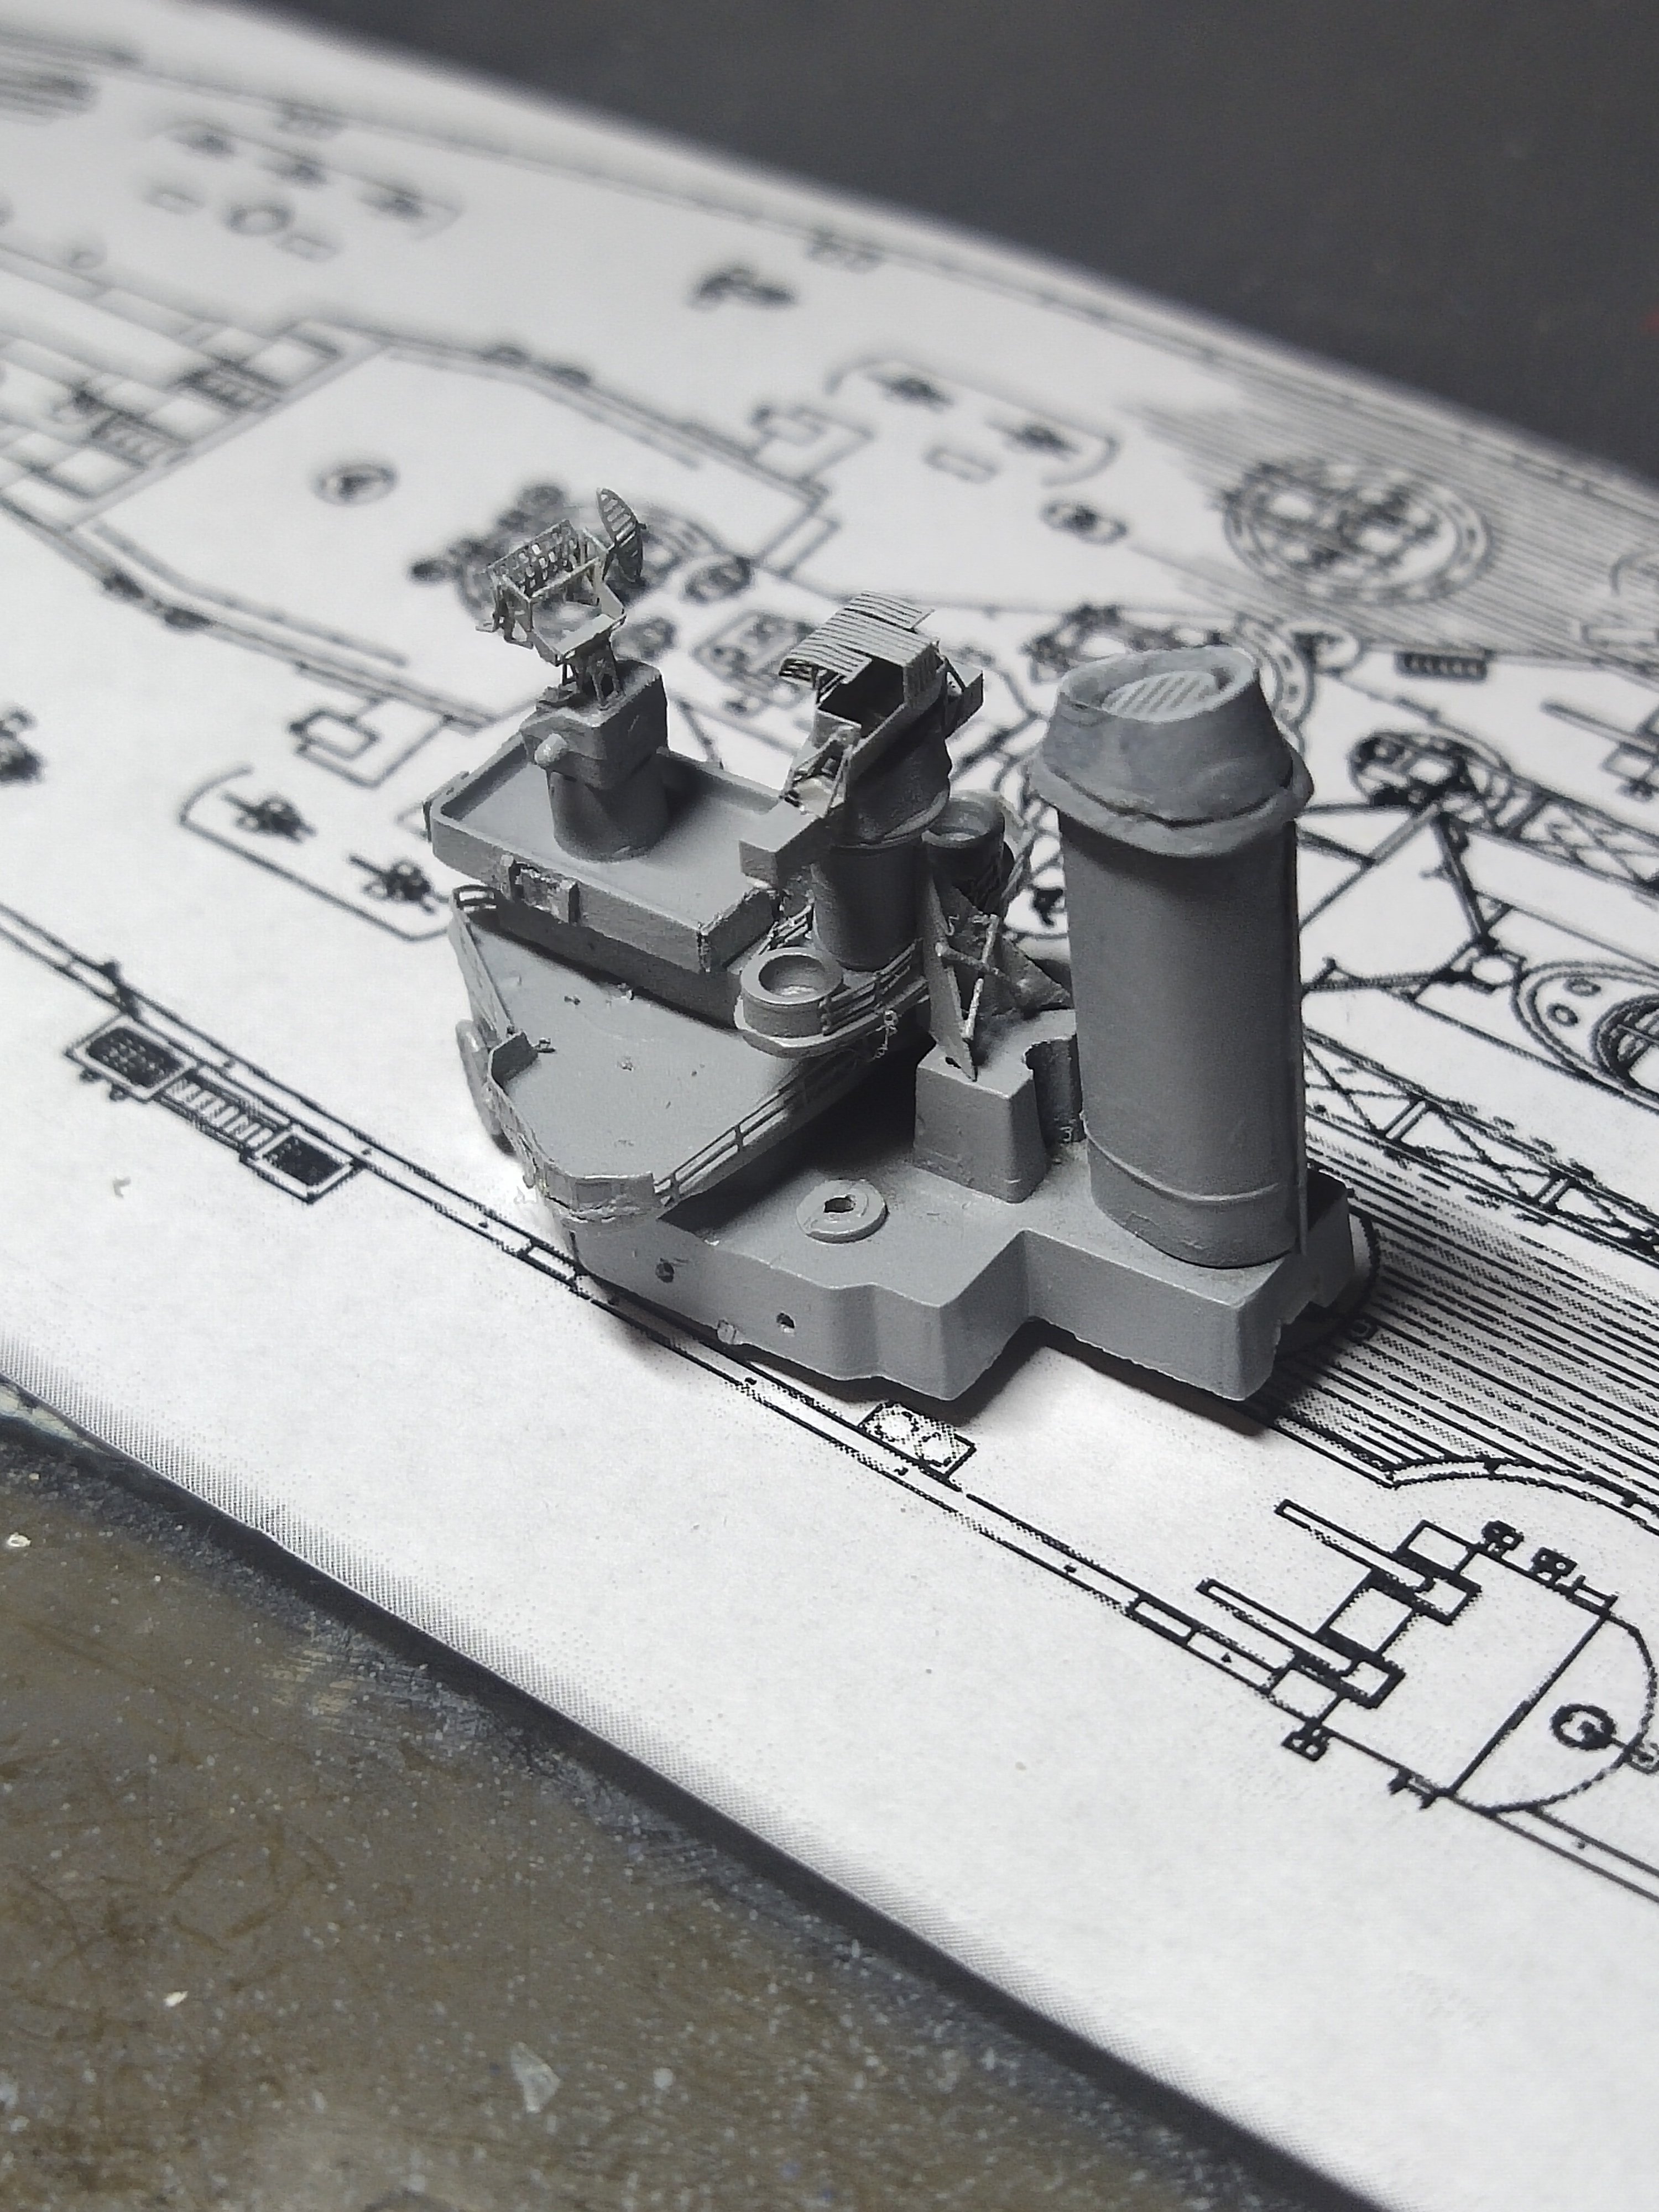
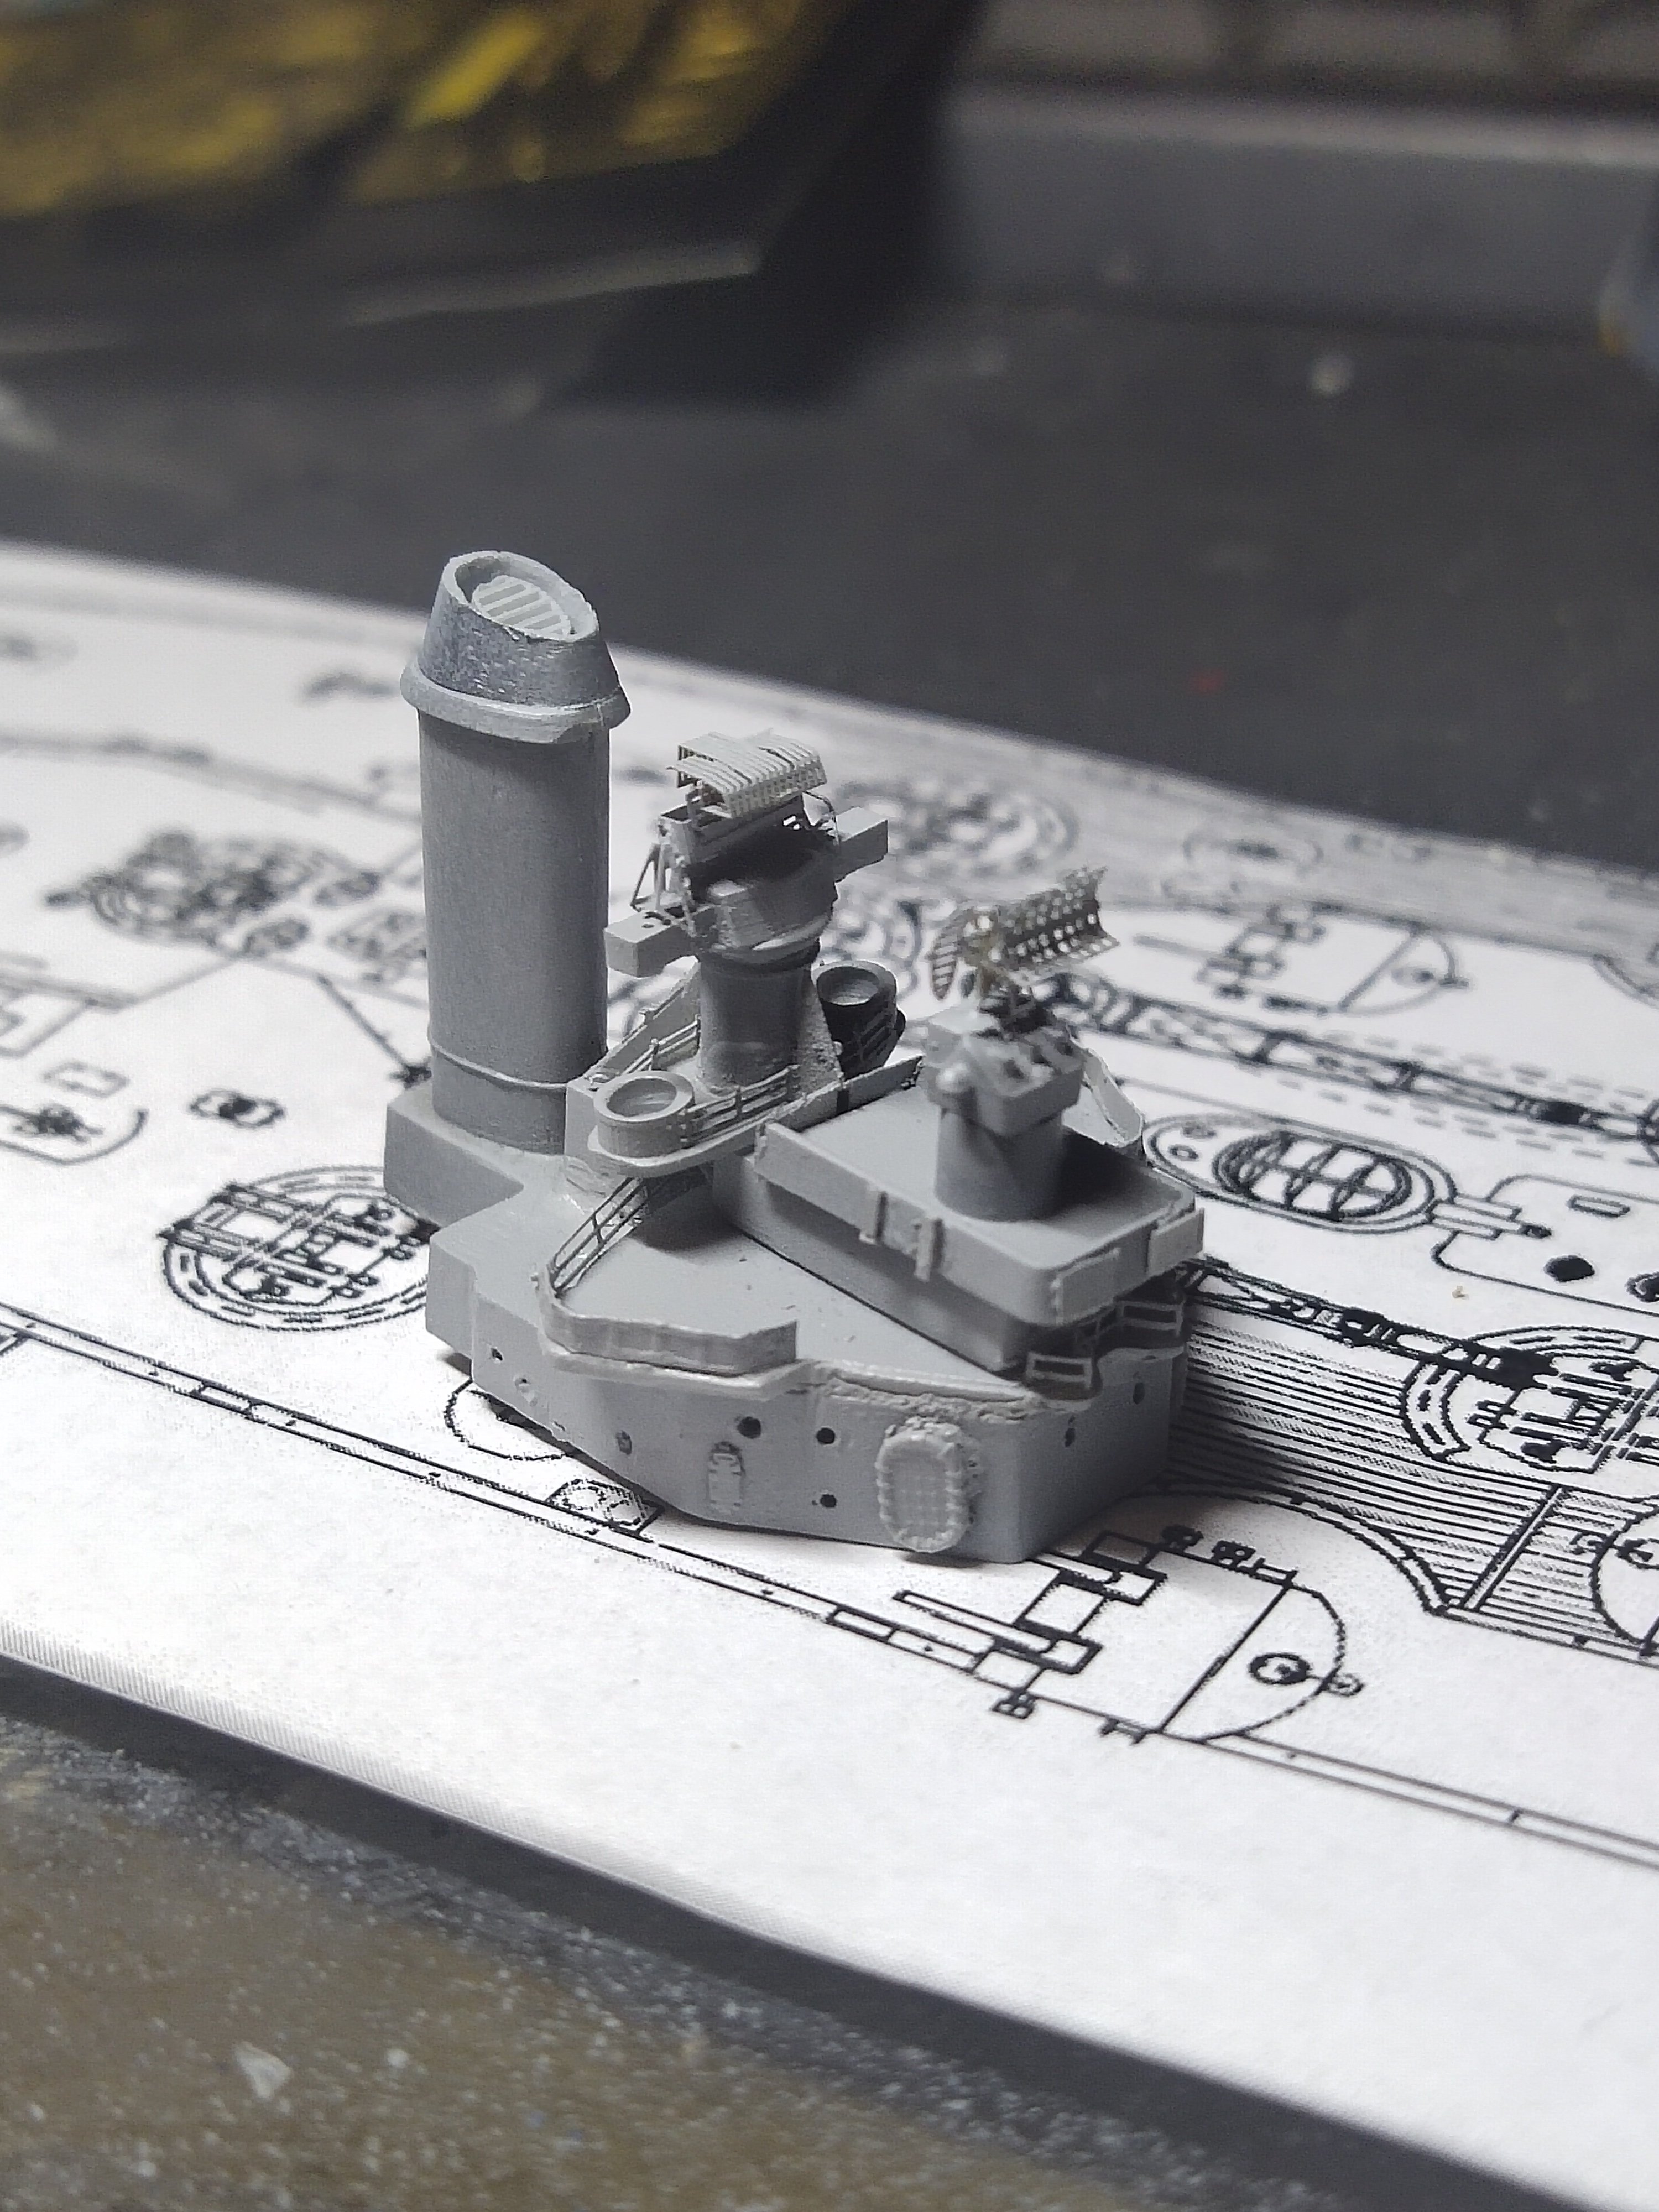
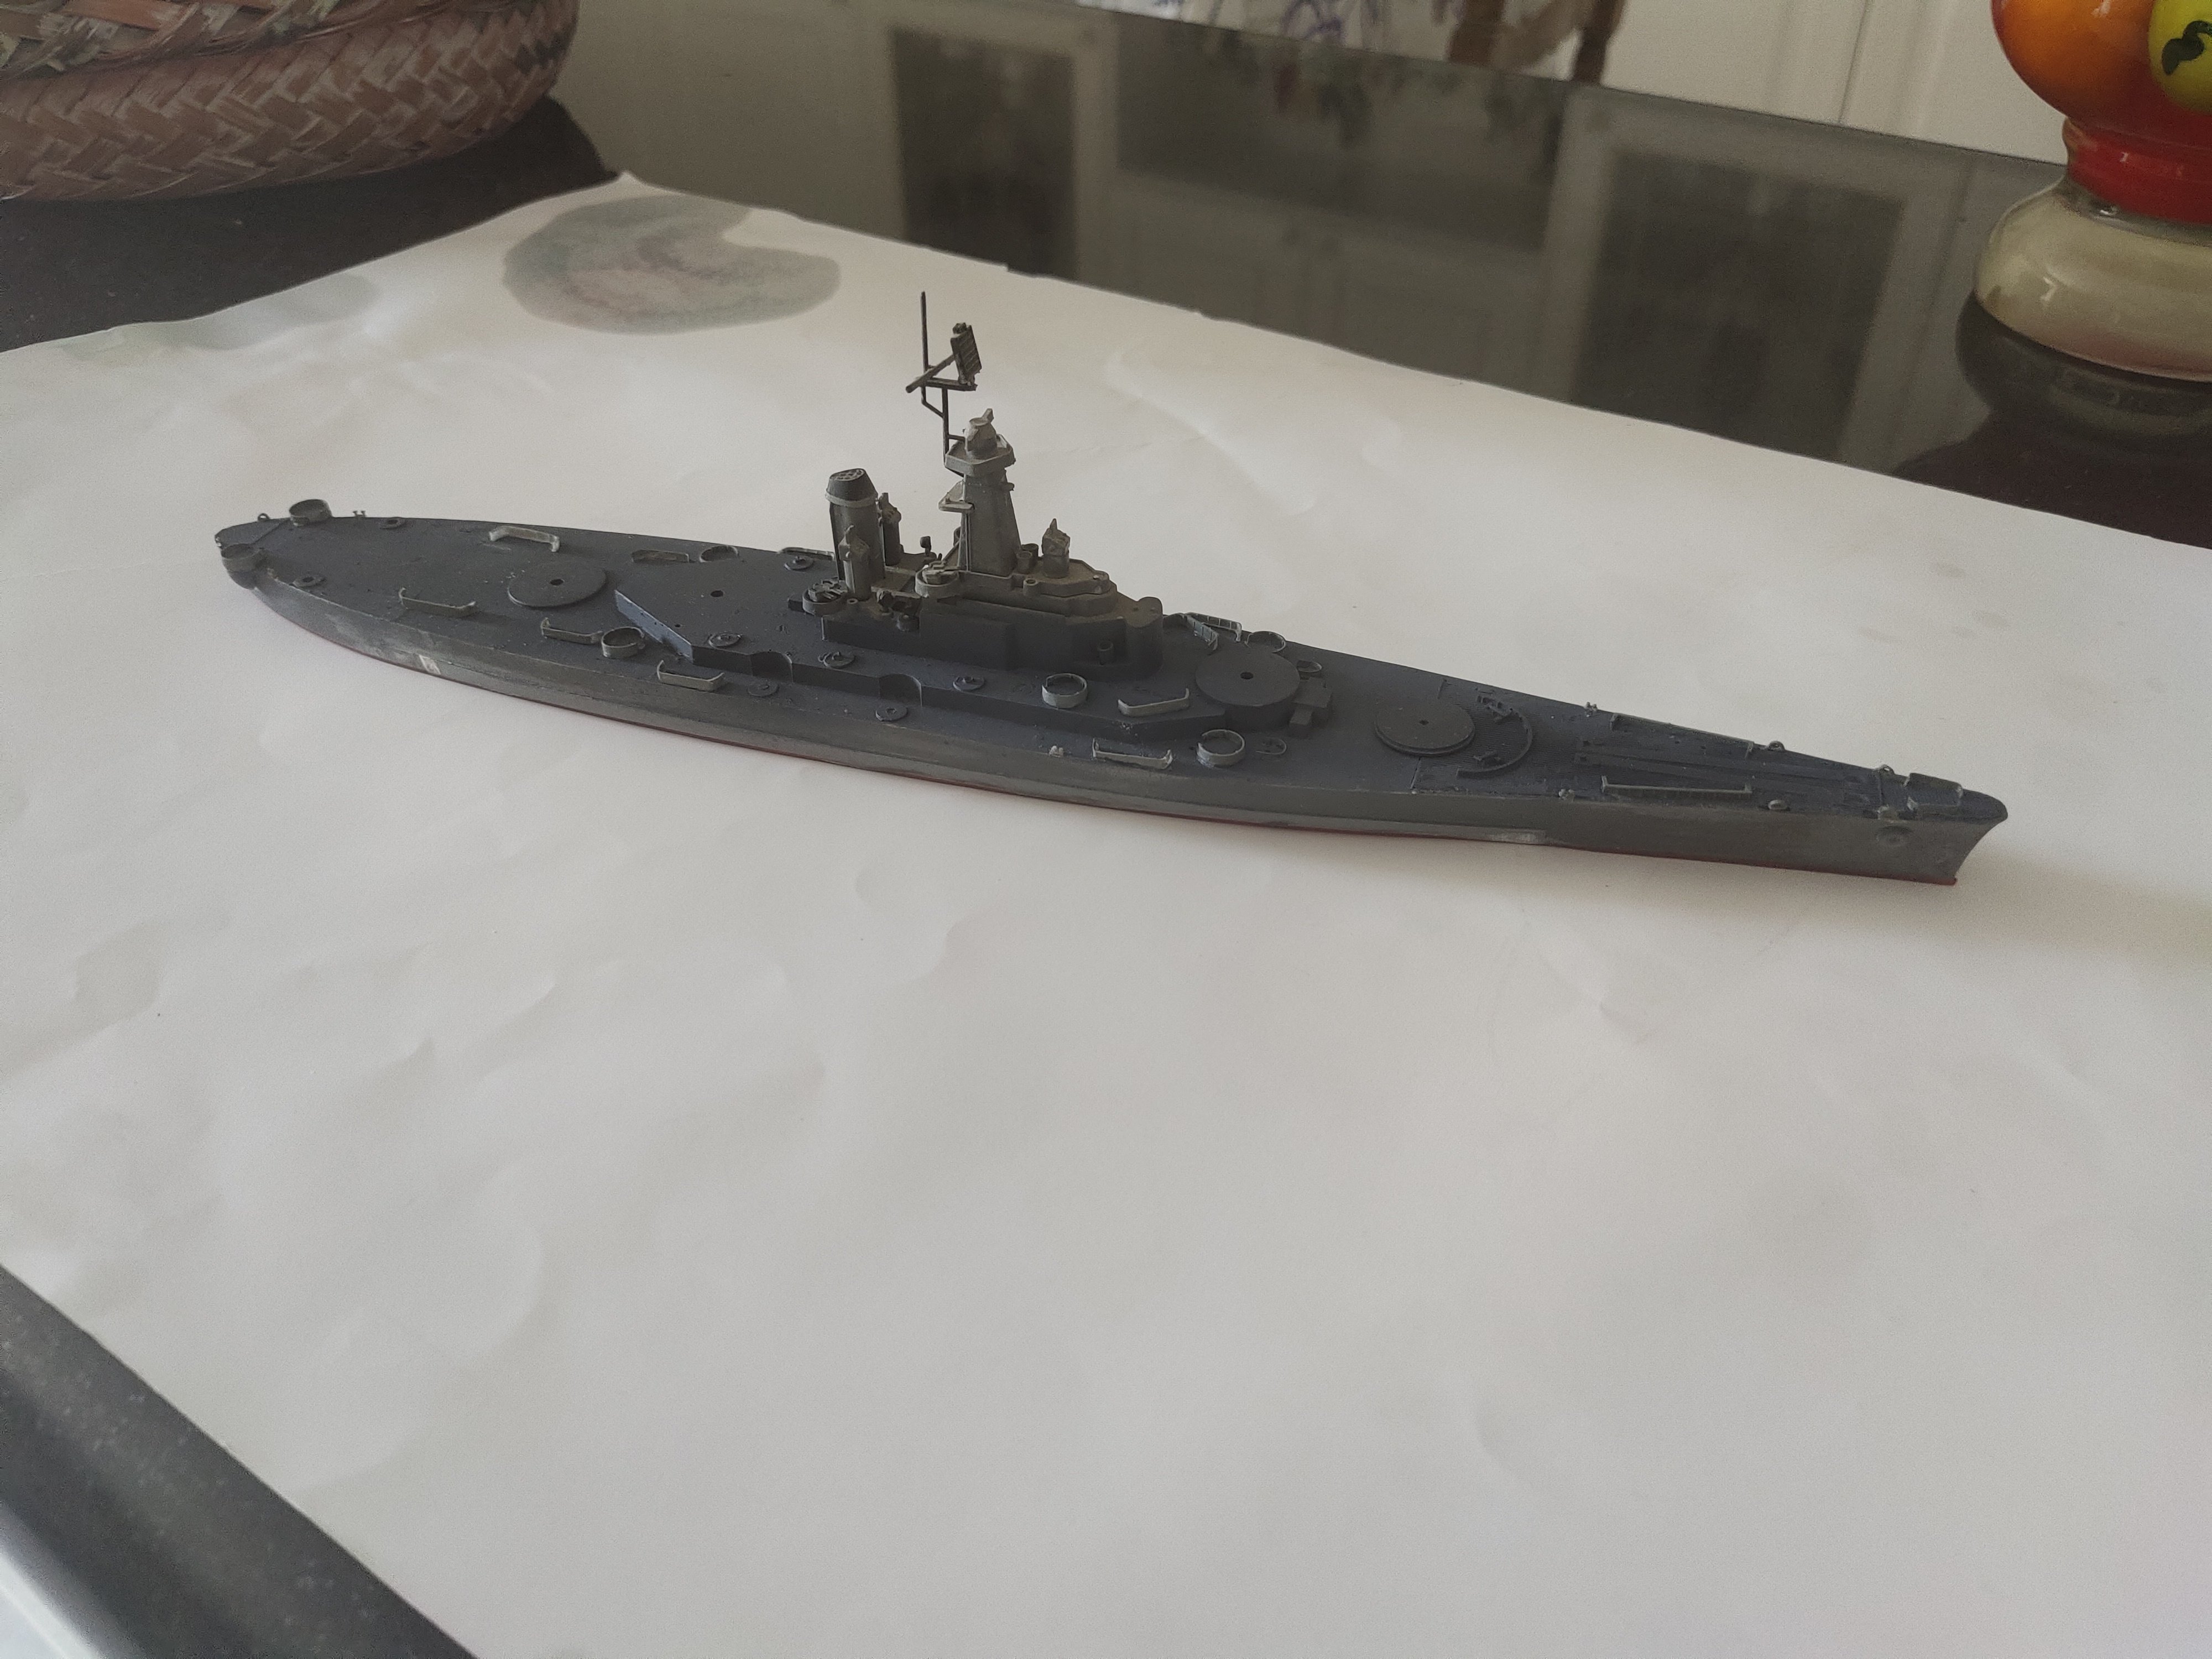
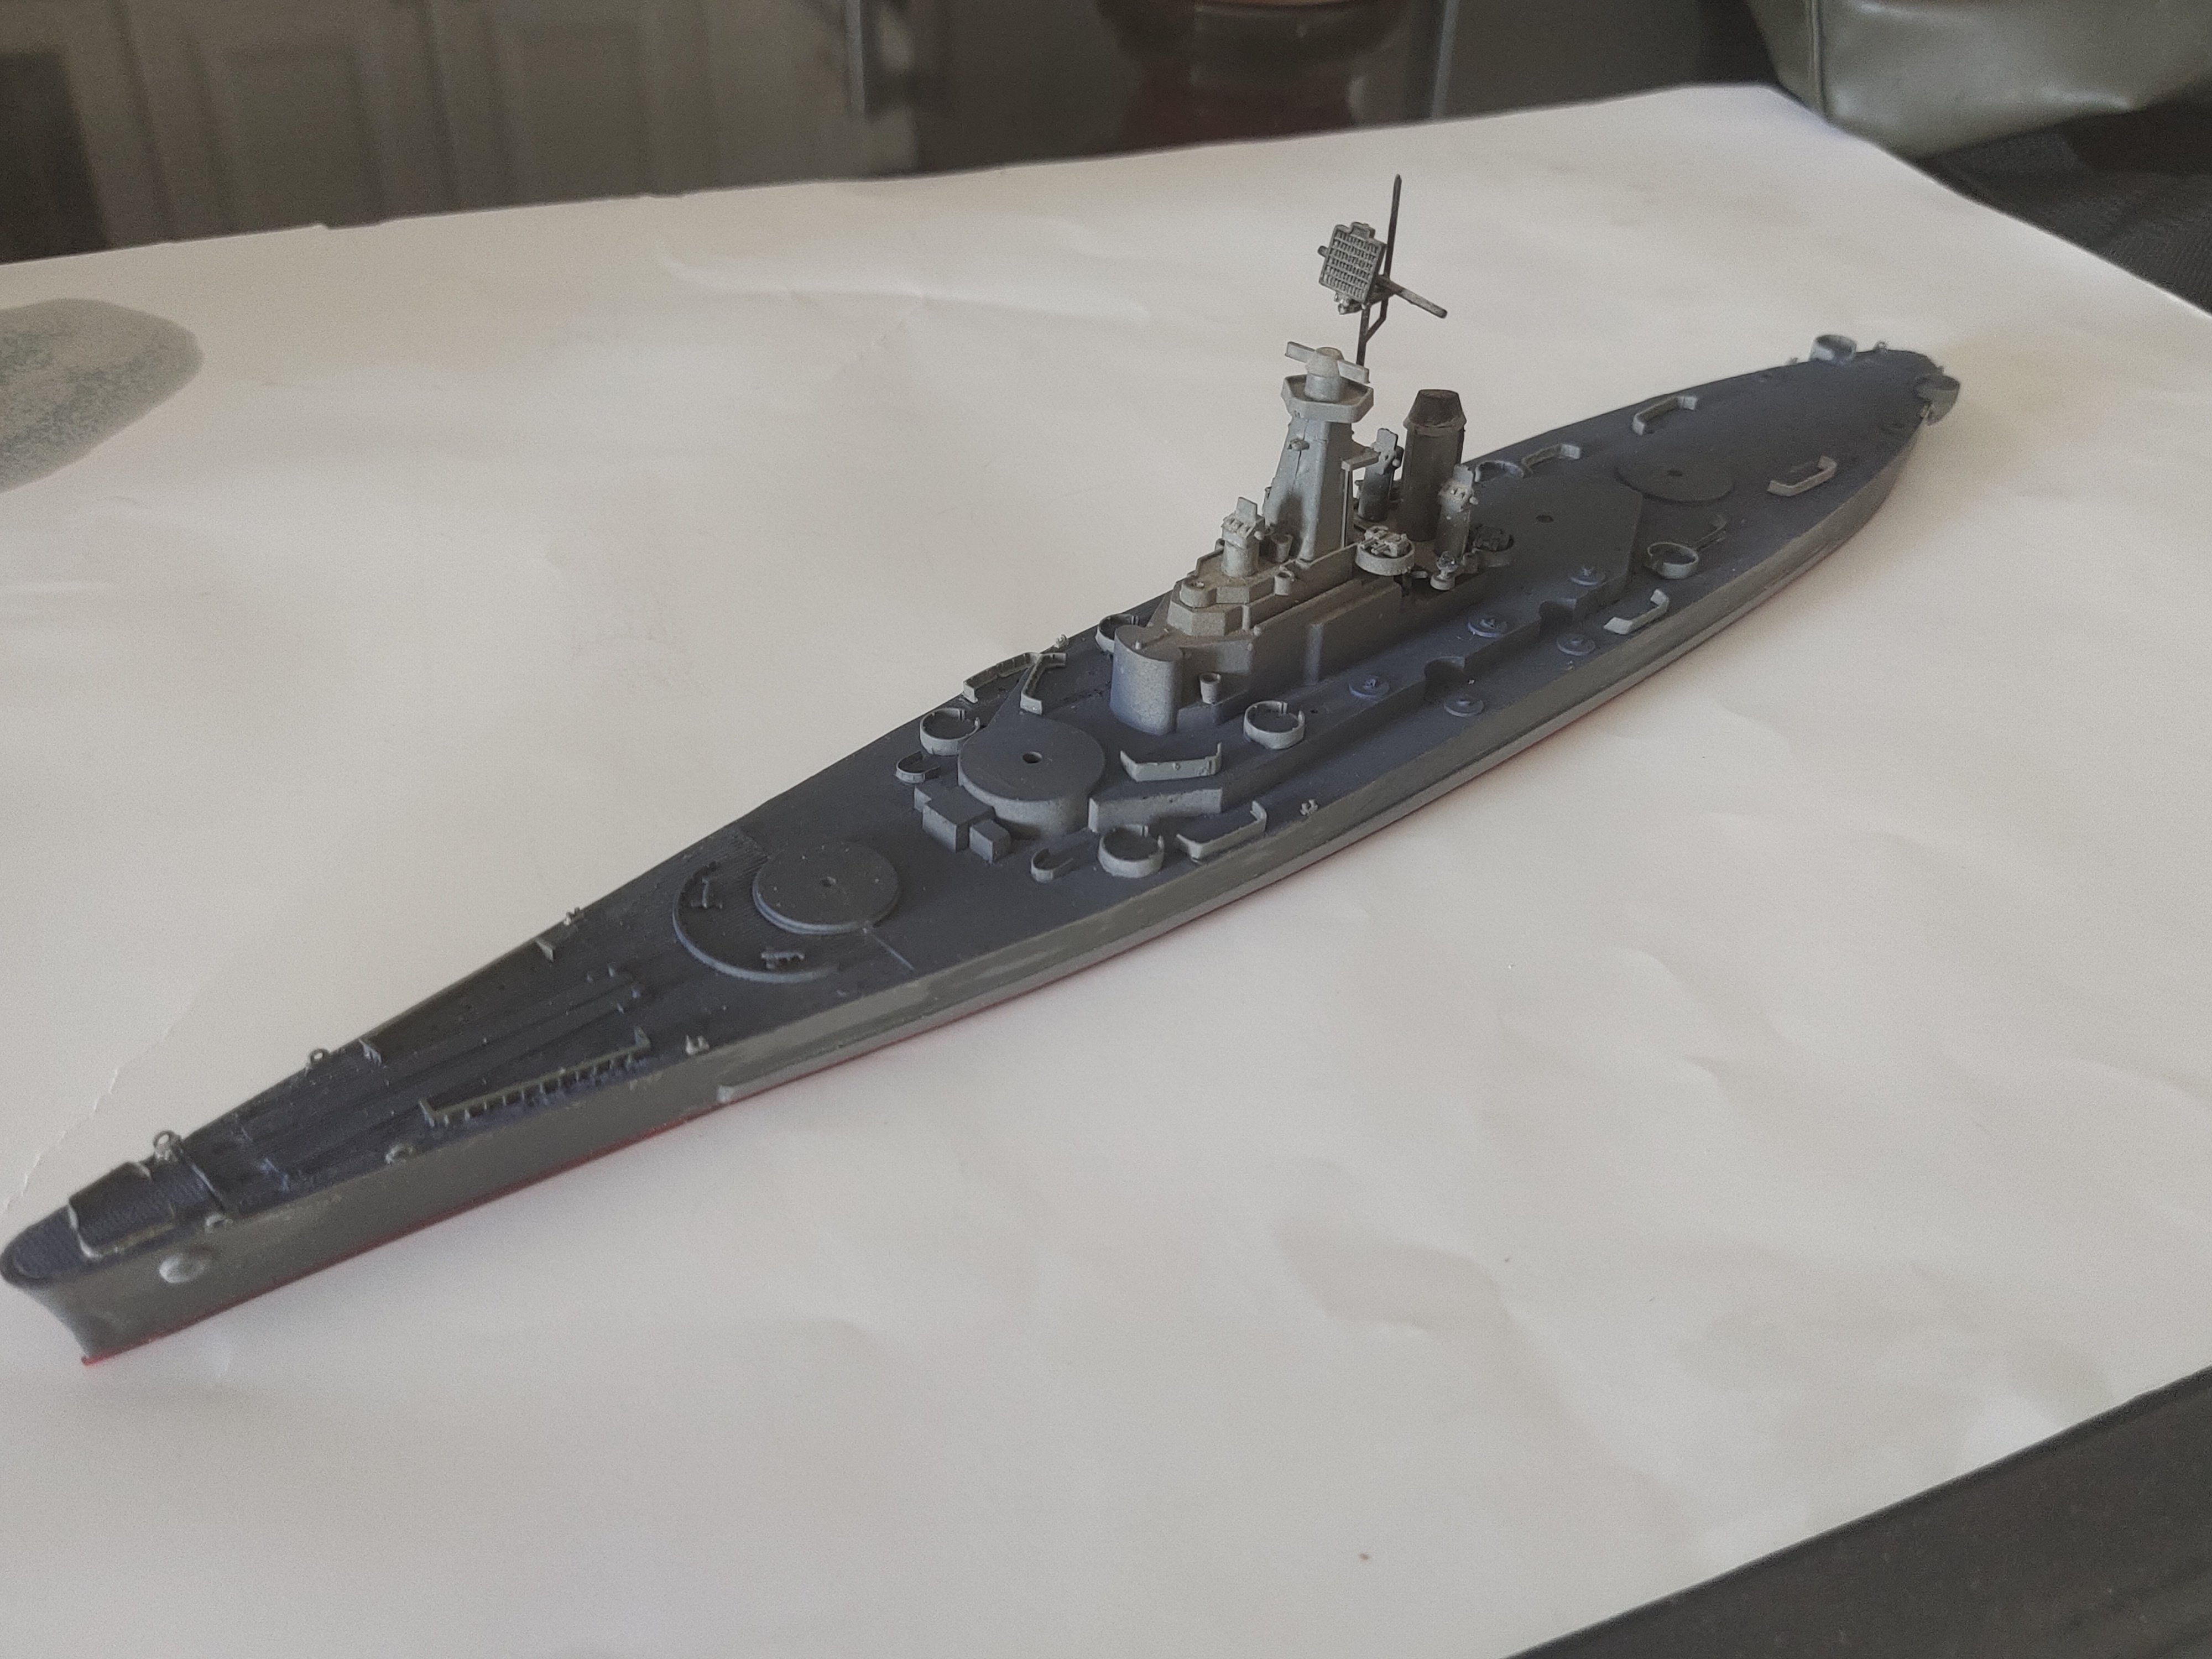
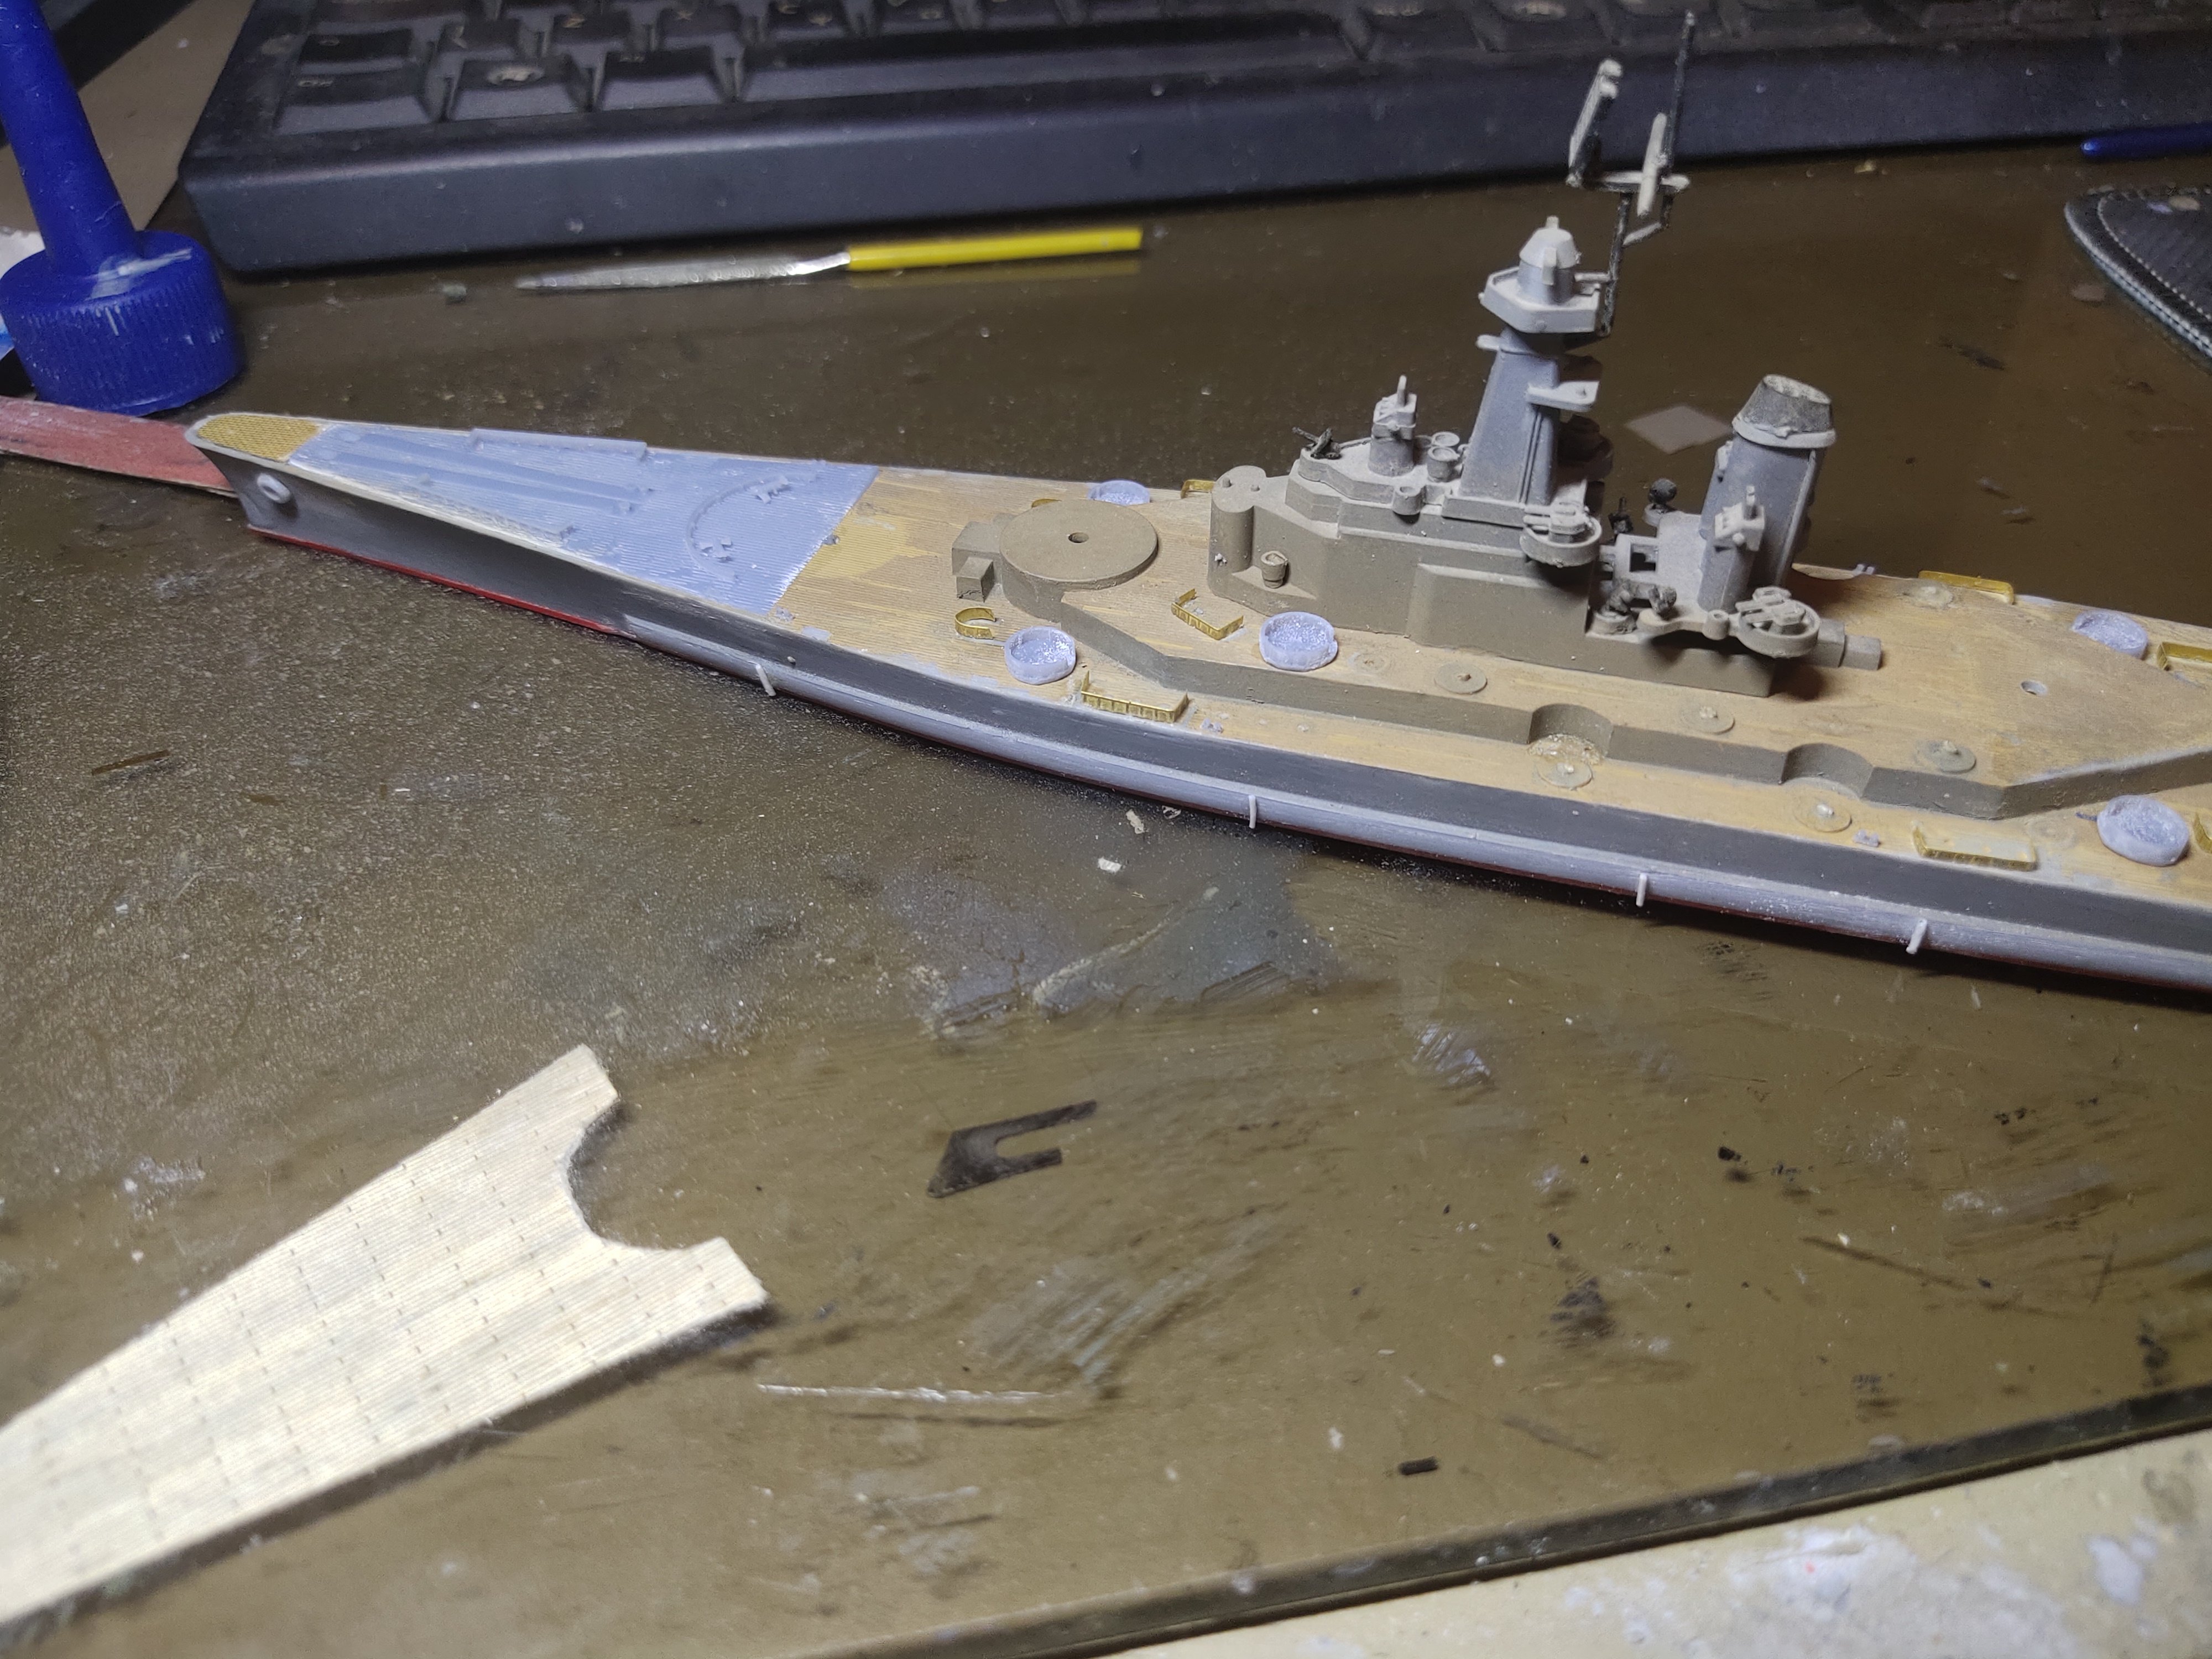
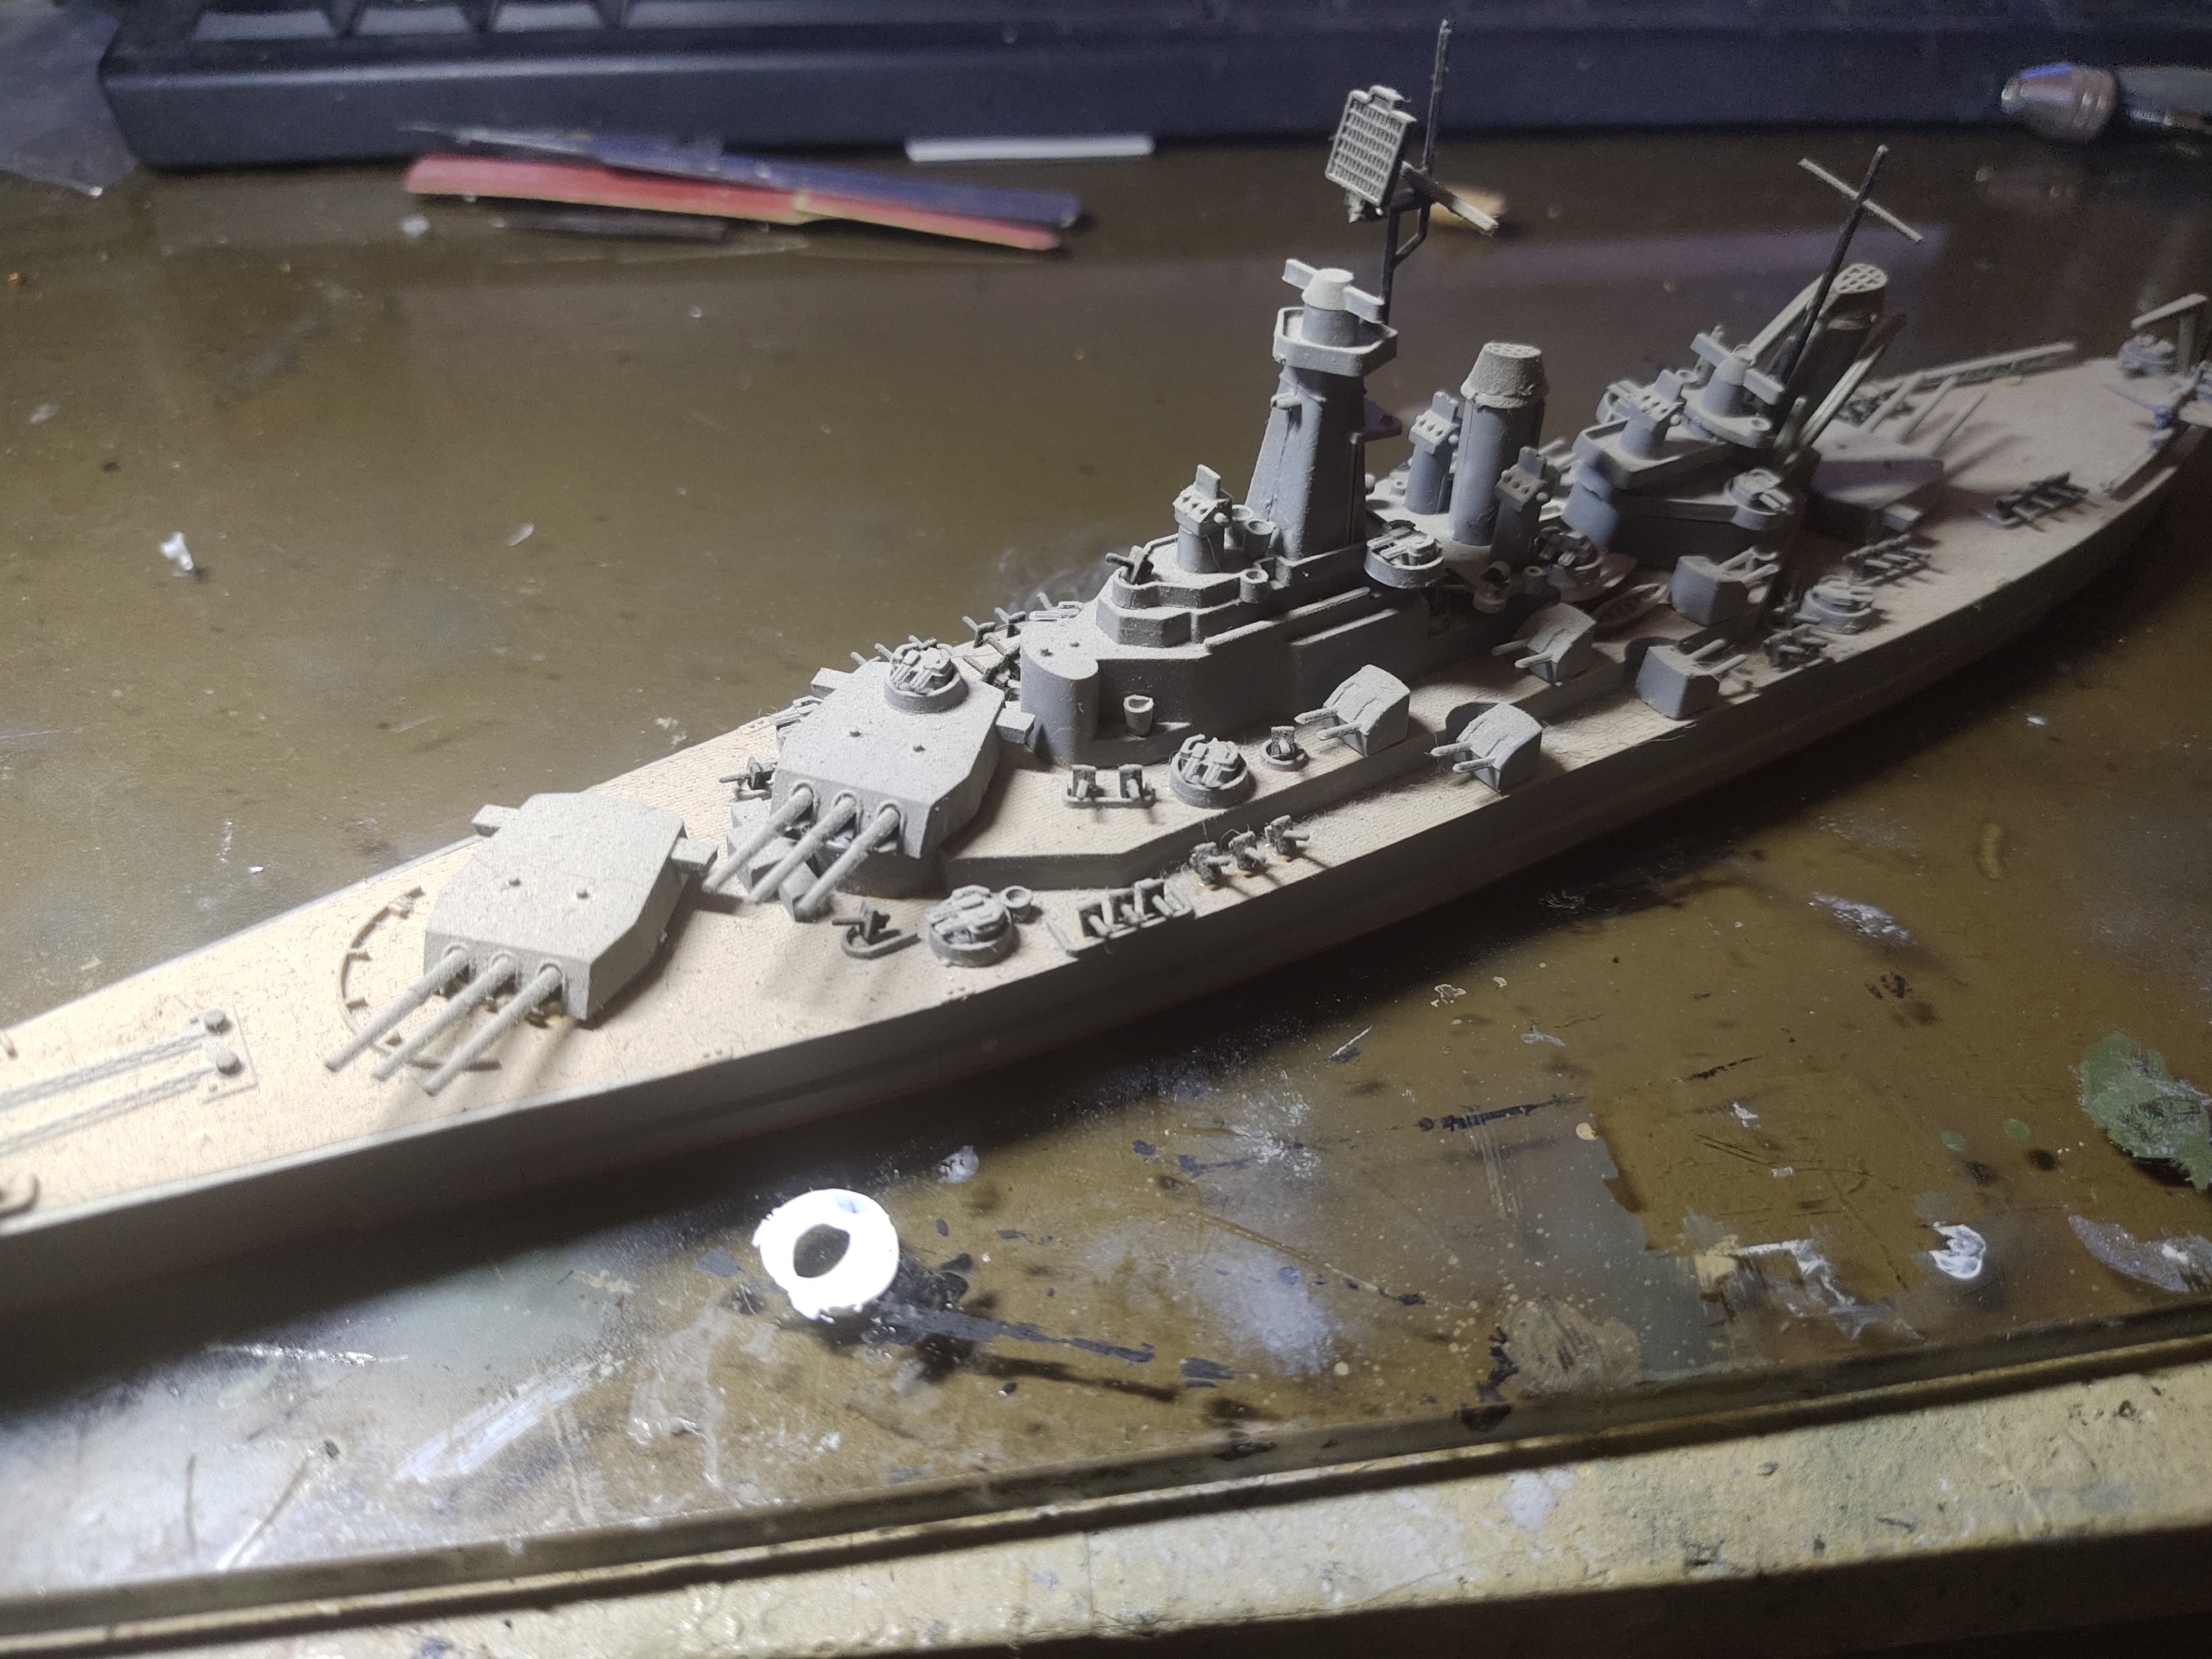
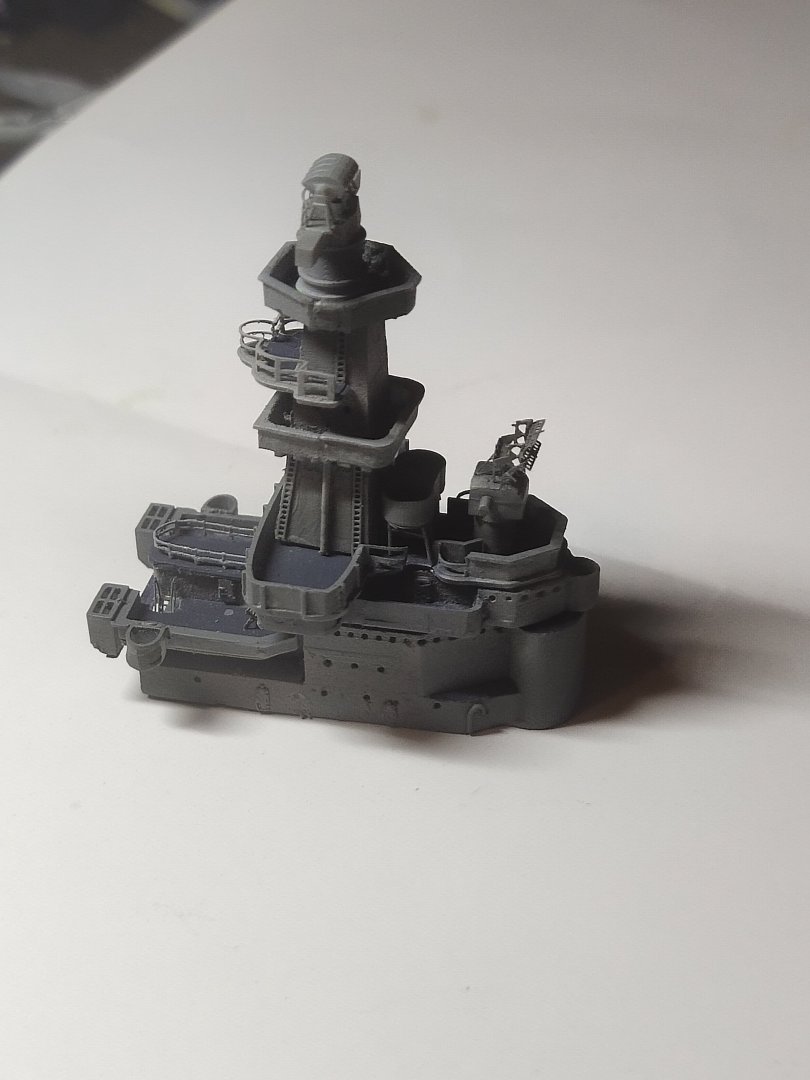
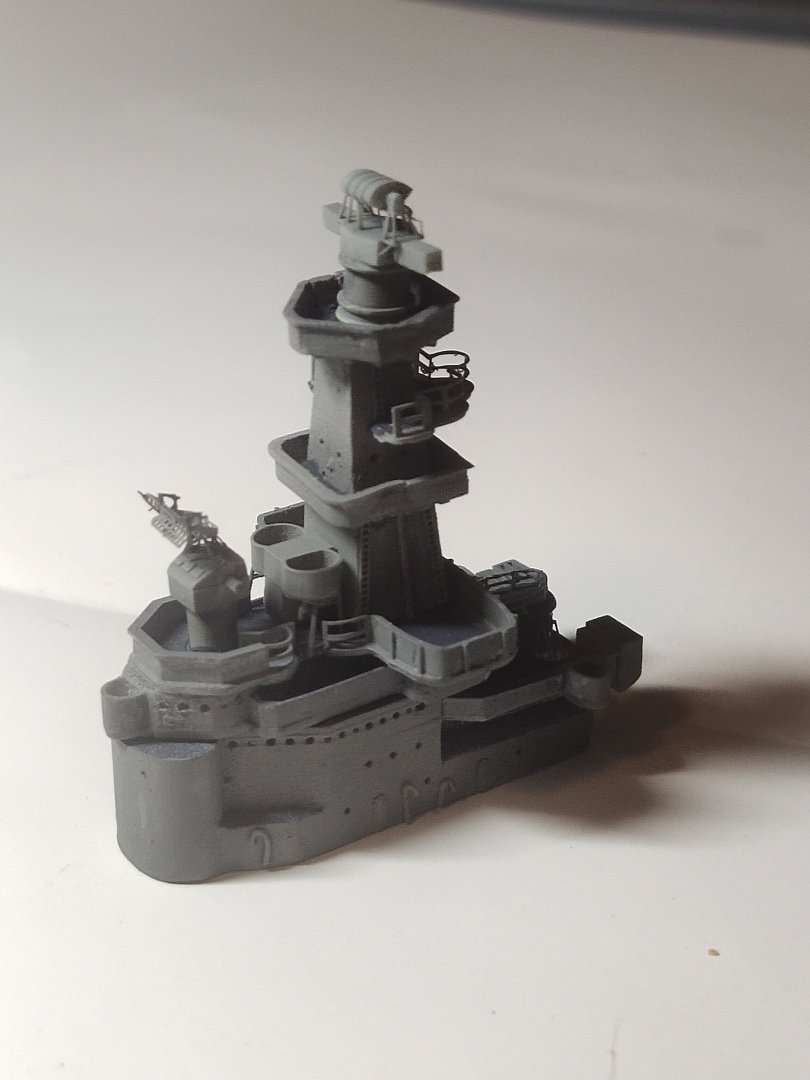
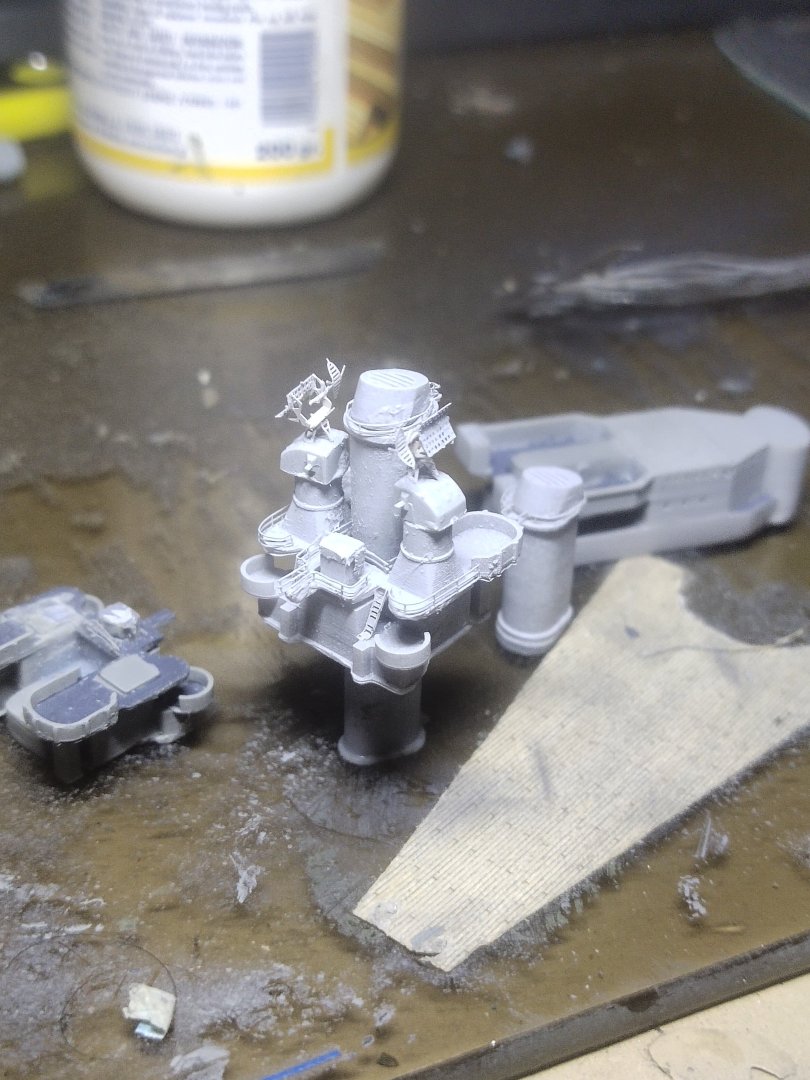
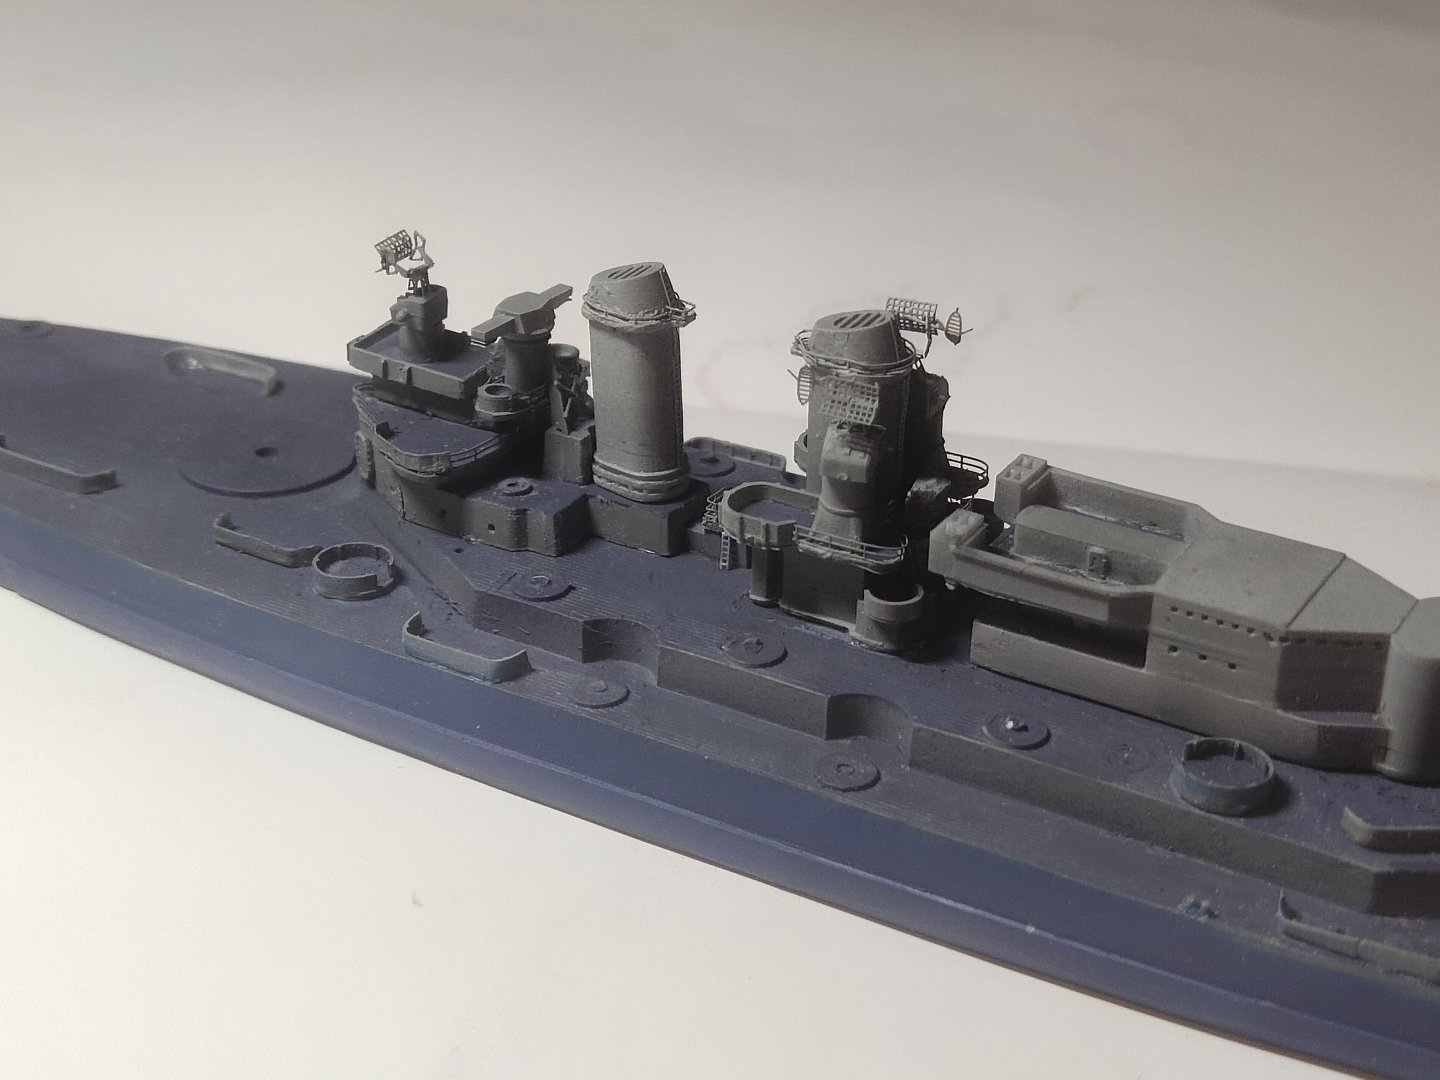
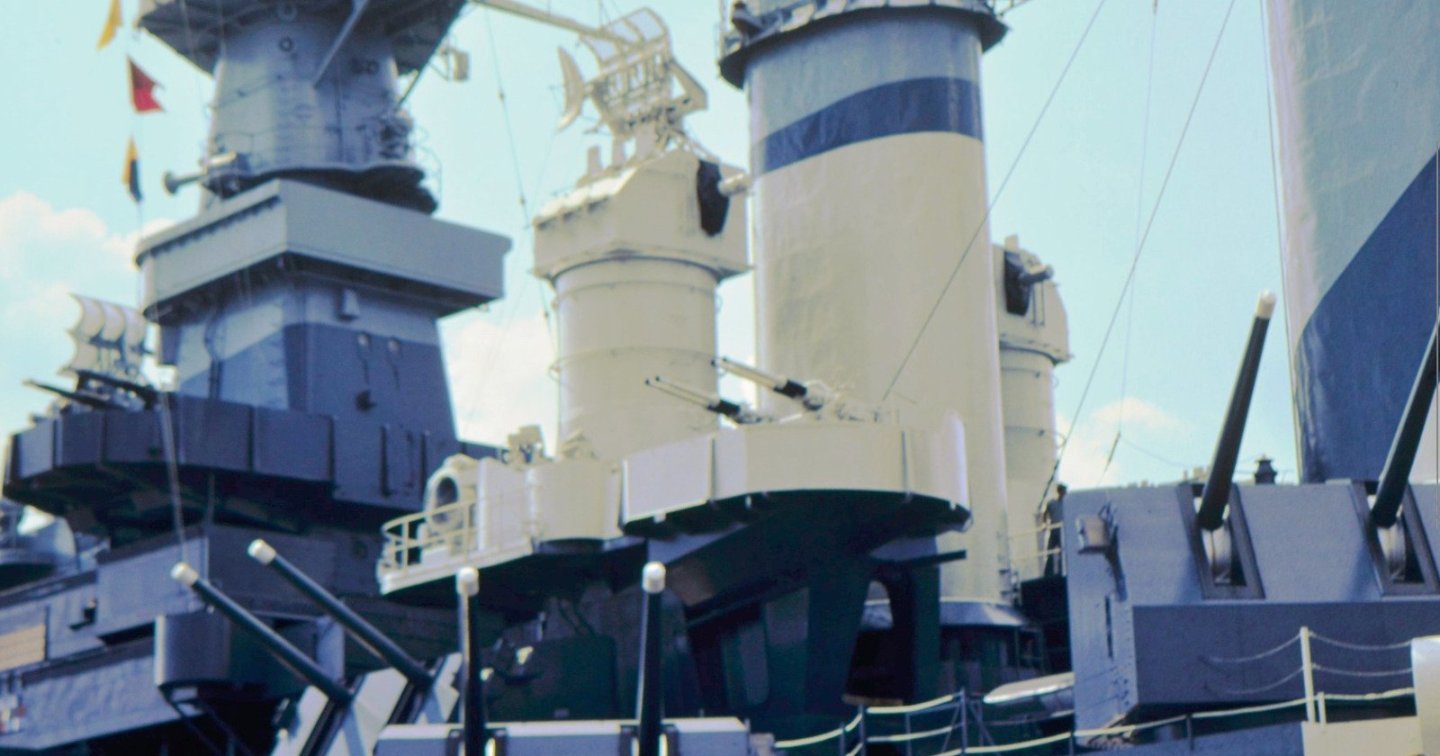
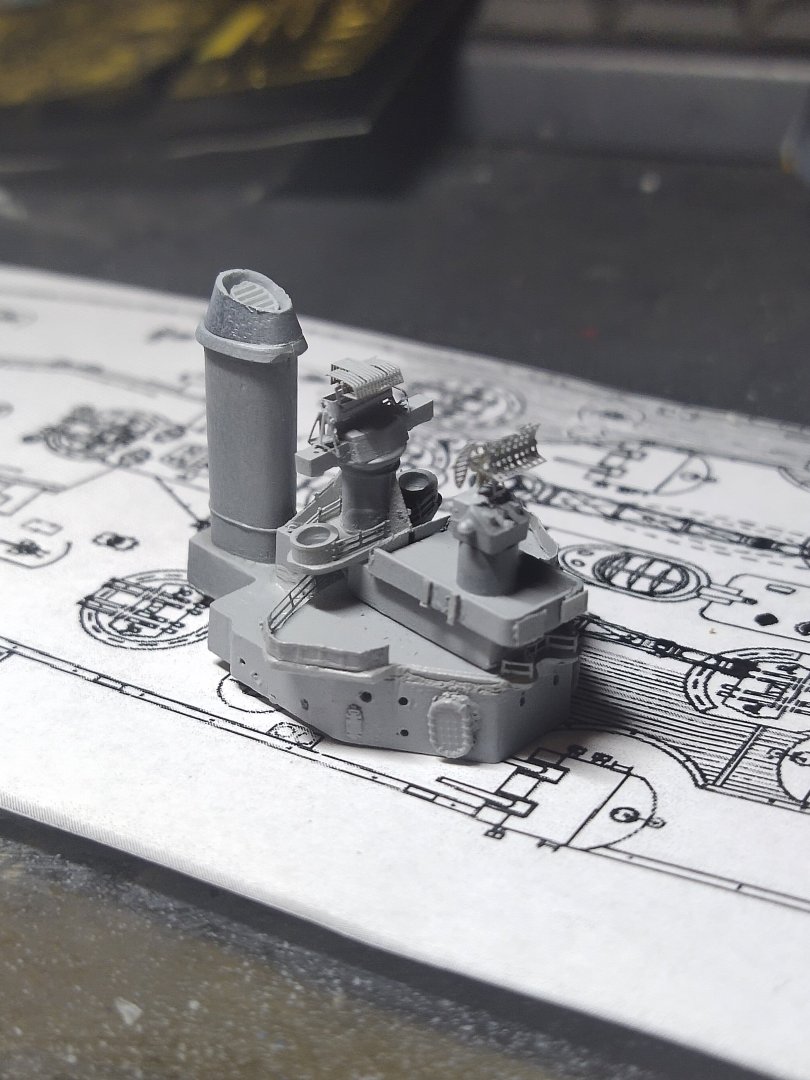
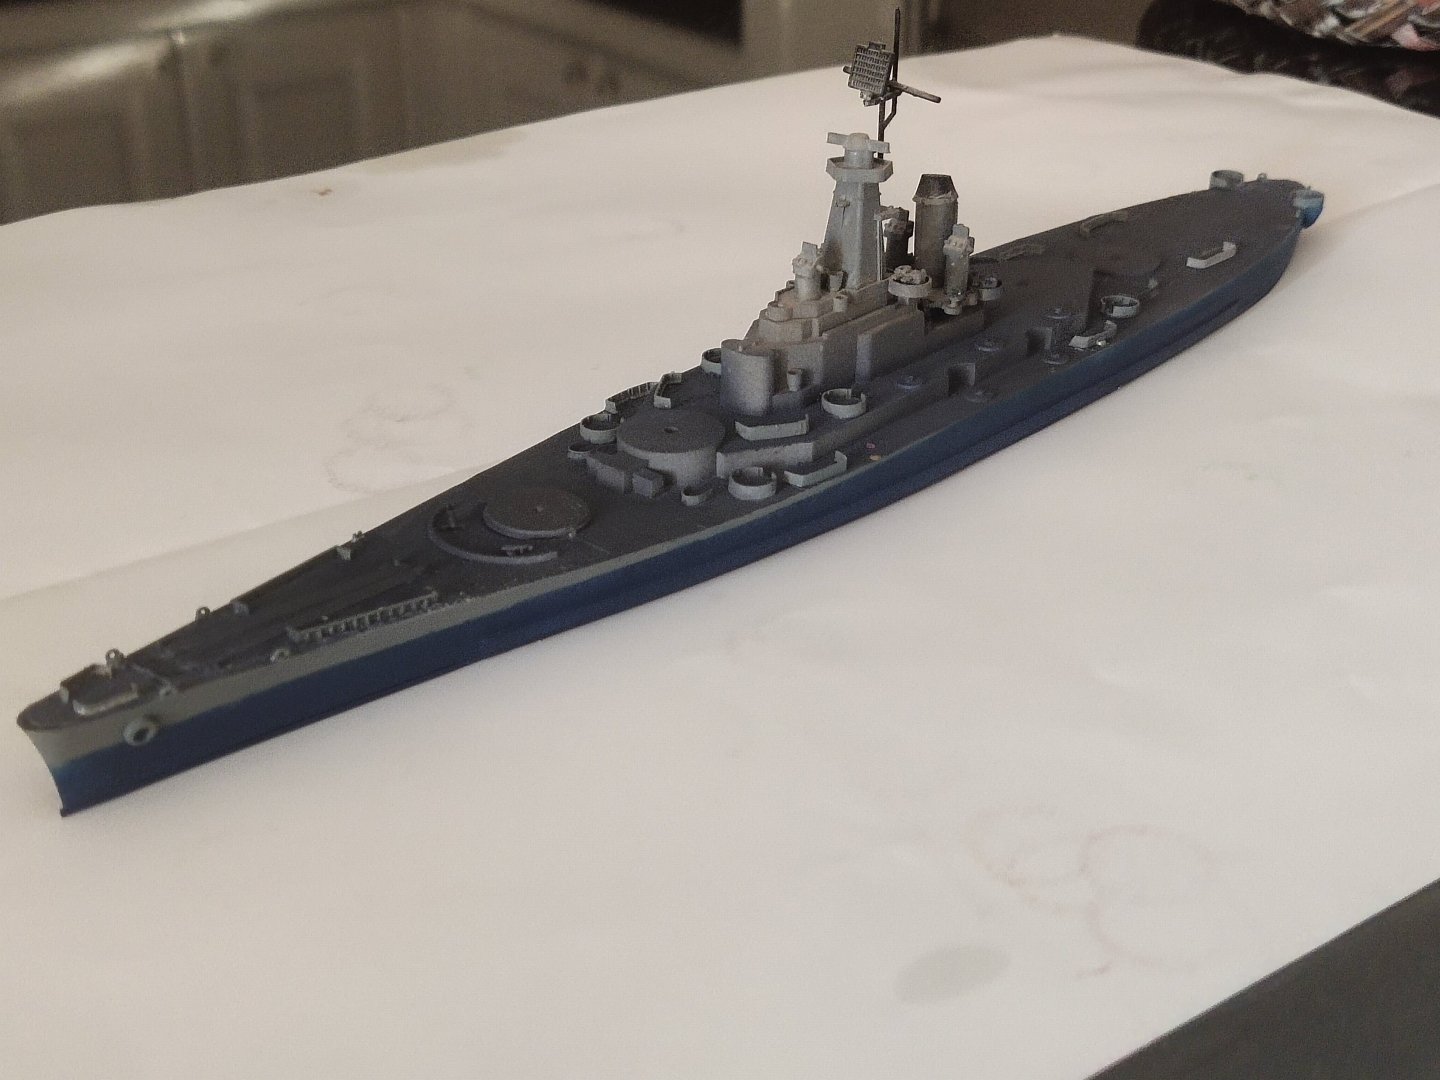
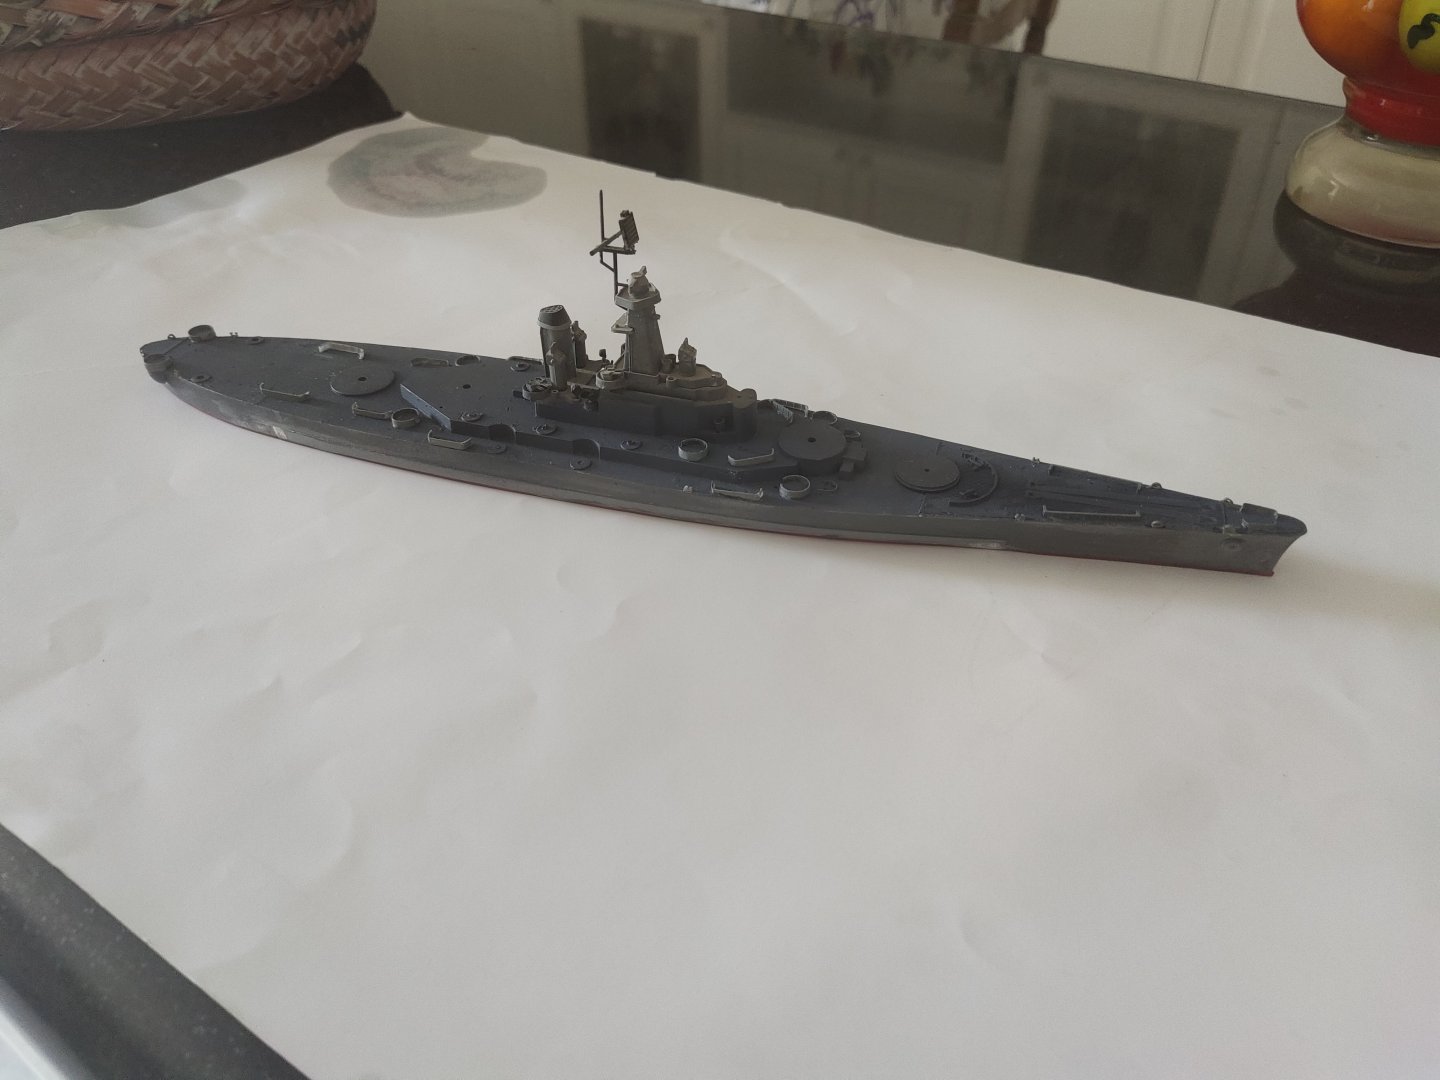
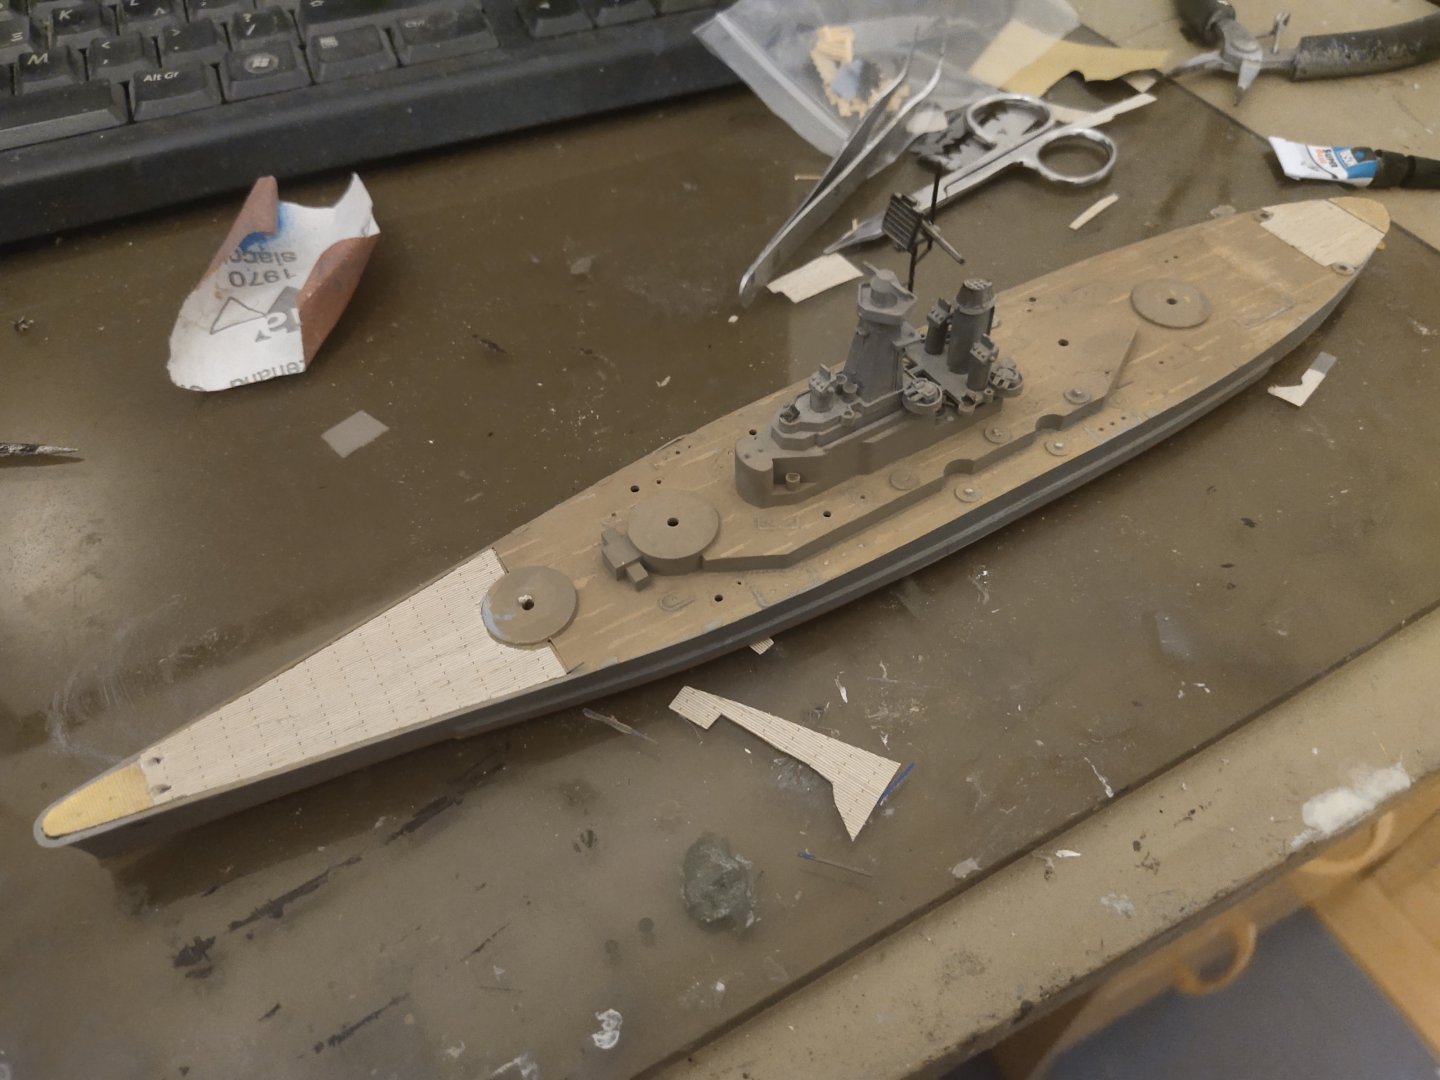
The tower was a bit higher and had to be aligned with the funnels so I sand it carefully reducing it by 2 mm. There is a radar called Mk 8 at the top of the Mk 38 director. The instructions for this PE are horrible, can't understand anything. Instead, I designed and printed my own Mk13 radar for them like those installed on Iowa class. Not sure if NC had them in 1944 but its better than a wrongly made PE part. Anyway after a couple of test printings it turned very satisfactory in detail regarding the scale. Some details added on tower, platforms, cases for Mk51 directors, doors etc. The whole superstructure piece is ready. It fitted perfectly on deck, some check tomorrow before I glue it. A hard two evenings works with two steps forward and one and half step back. But I got the desired result.


-
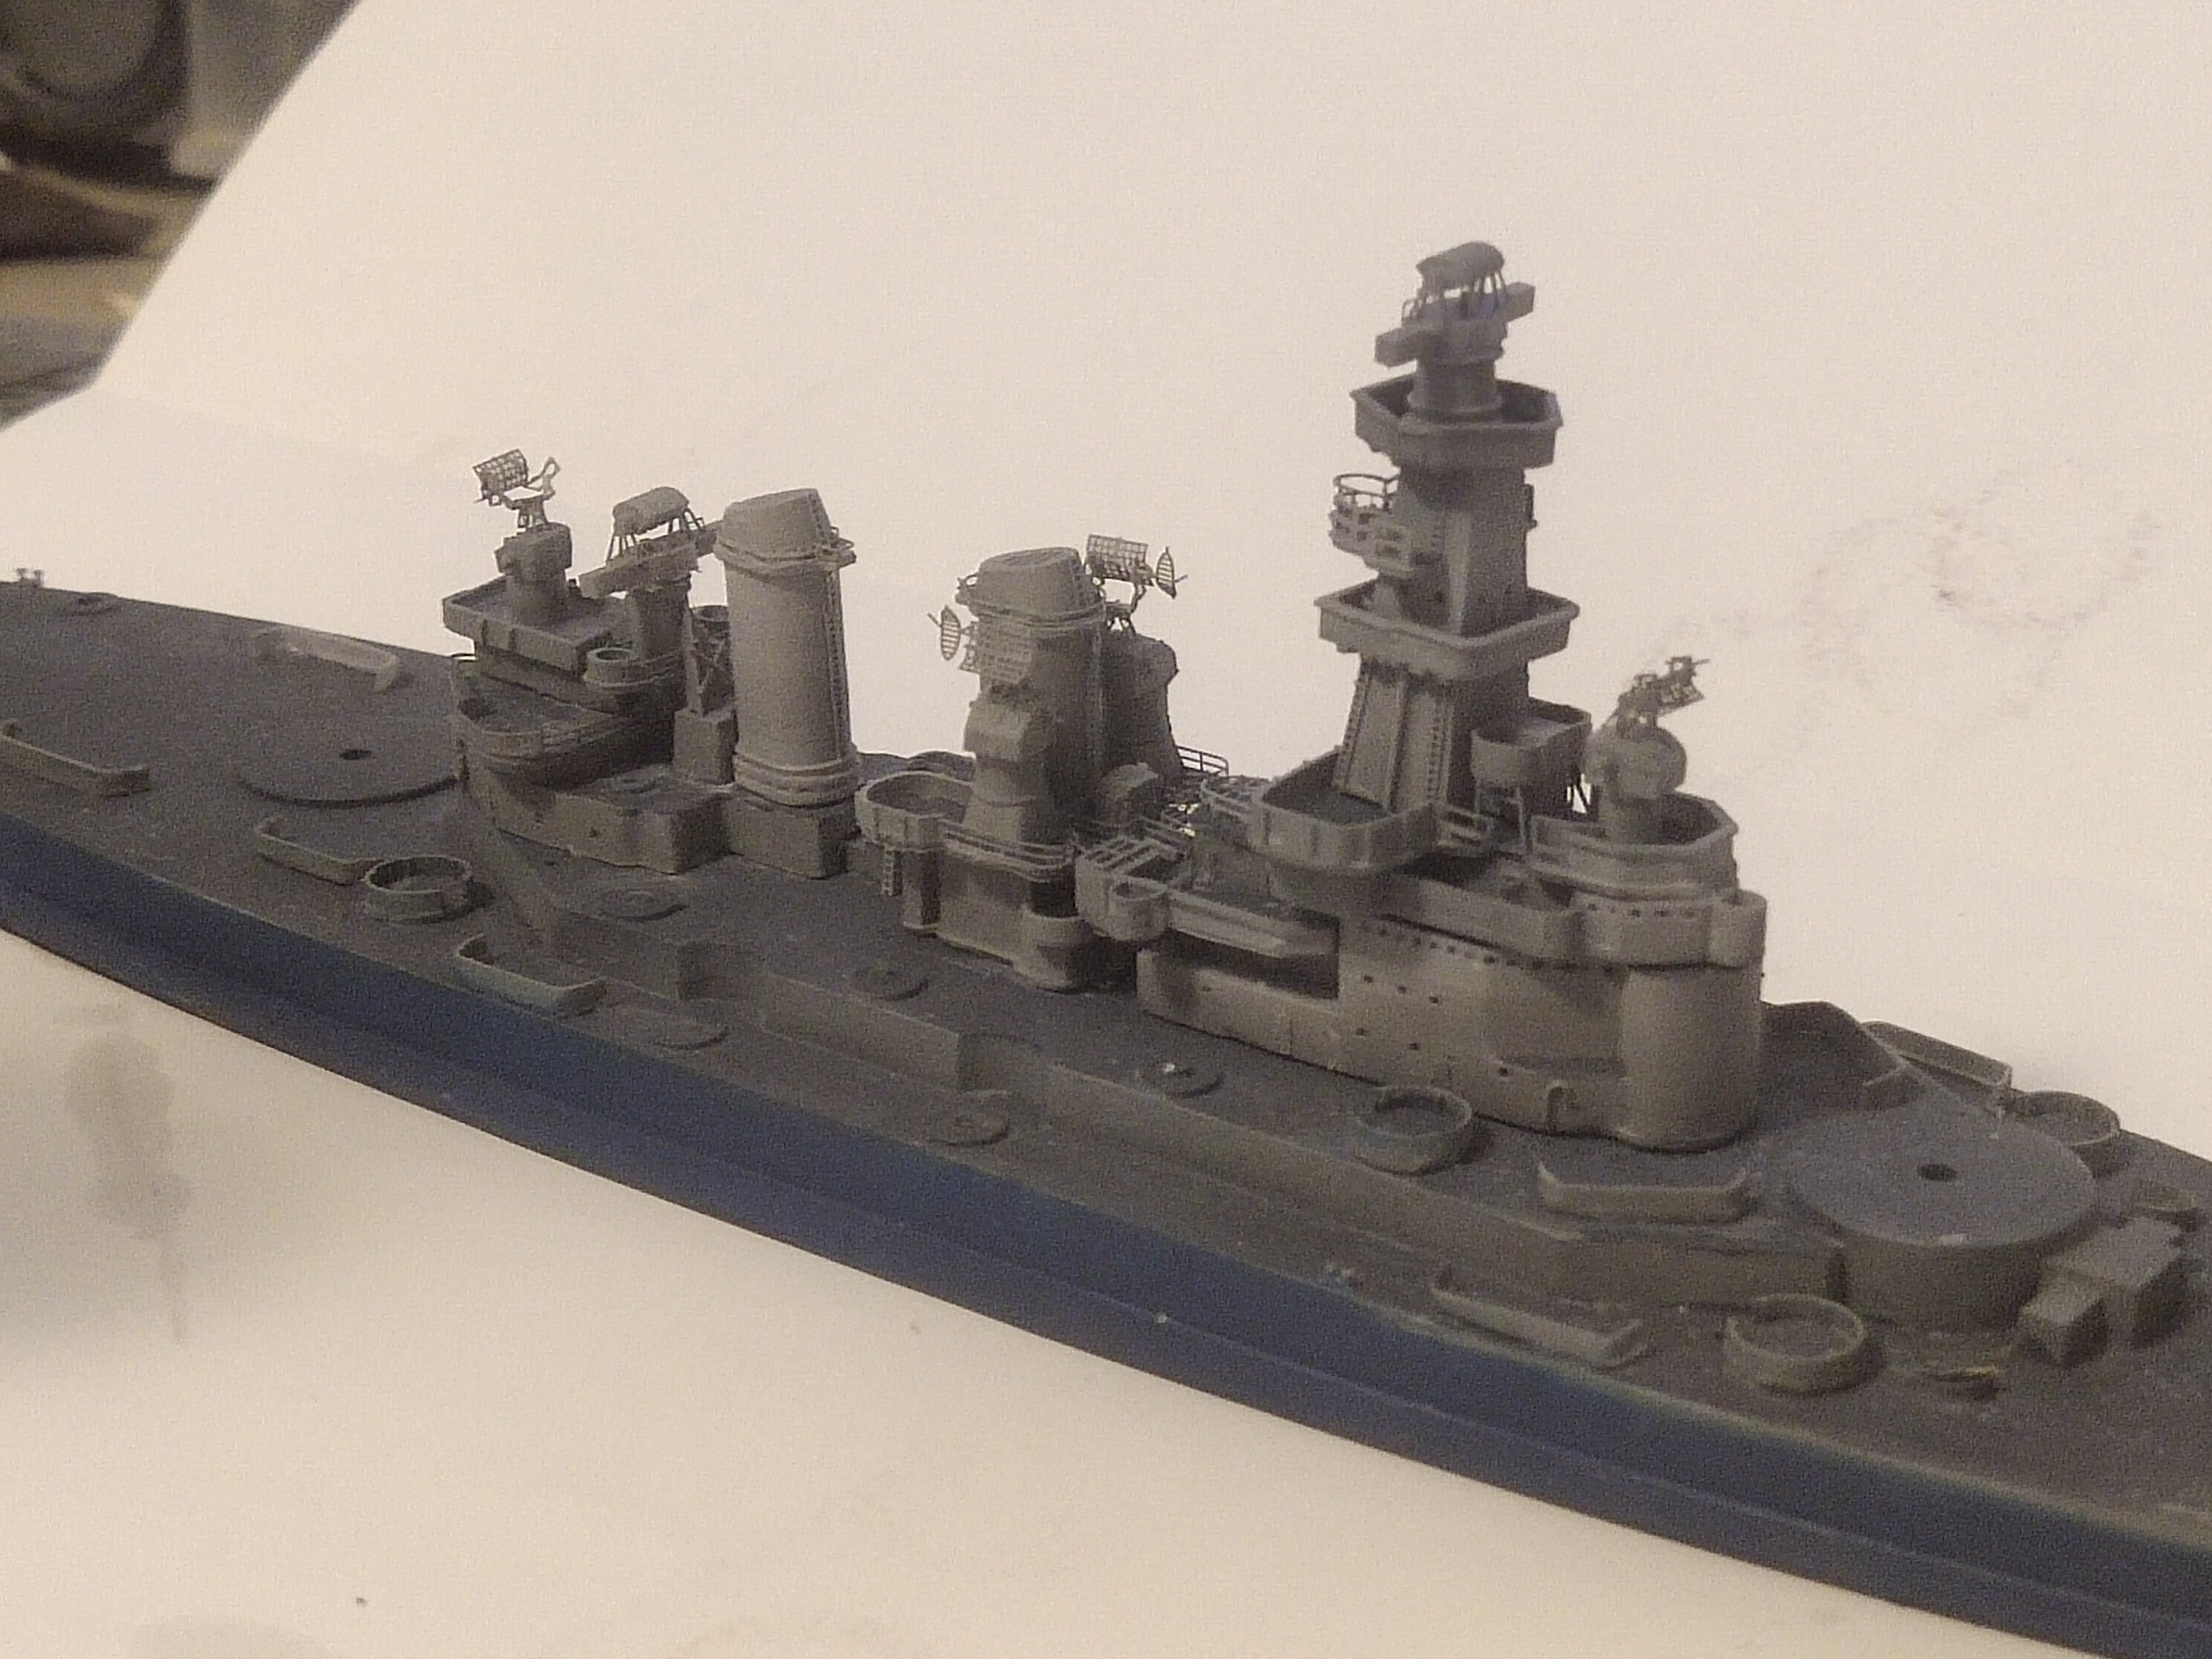
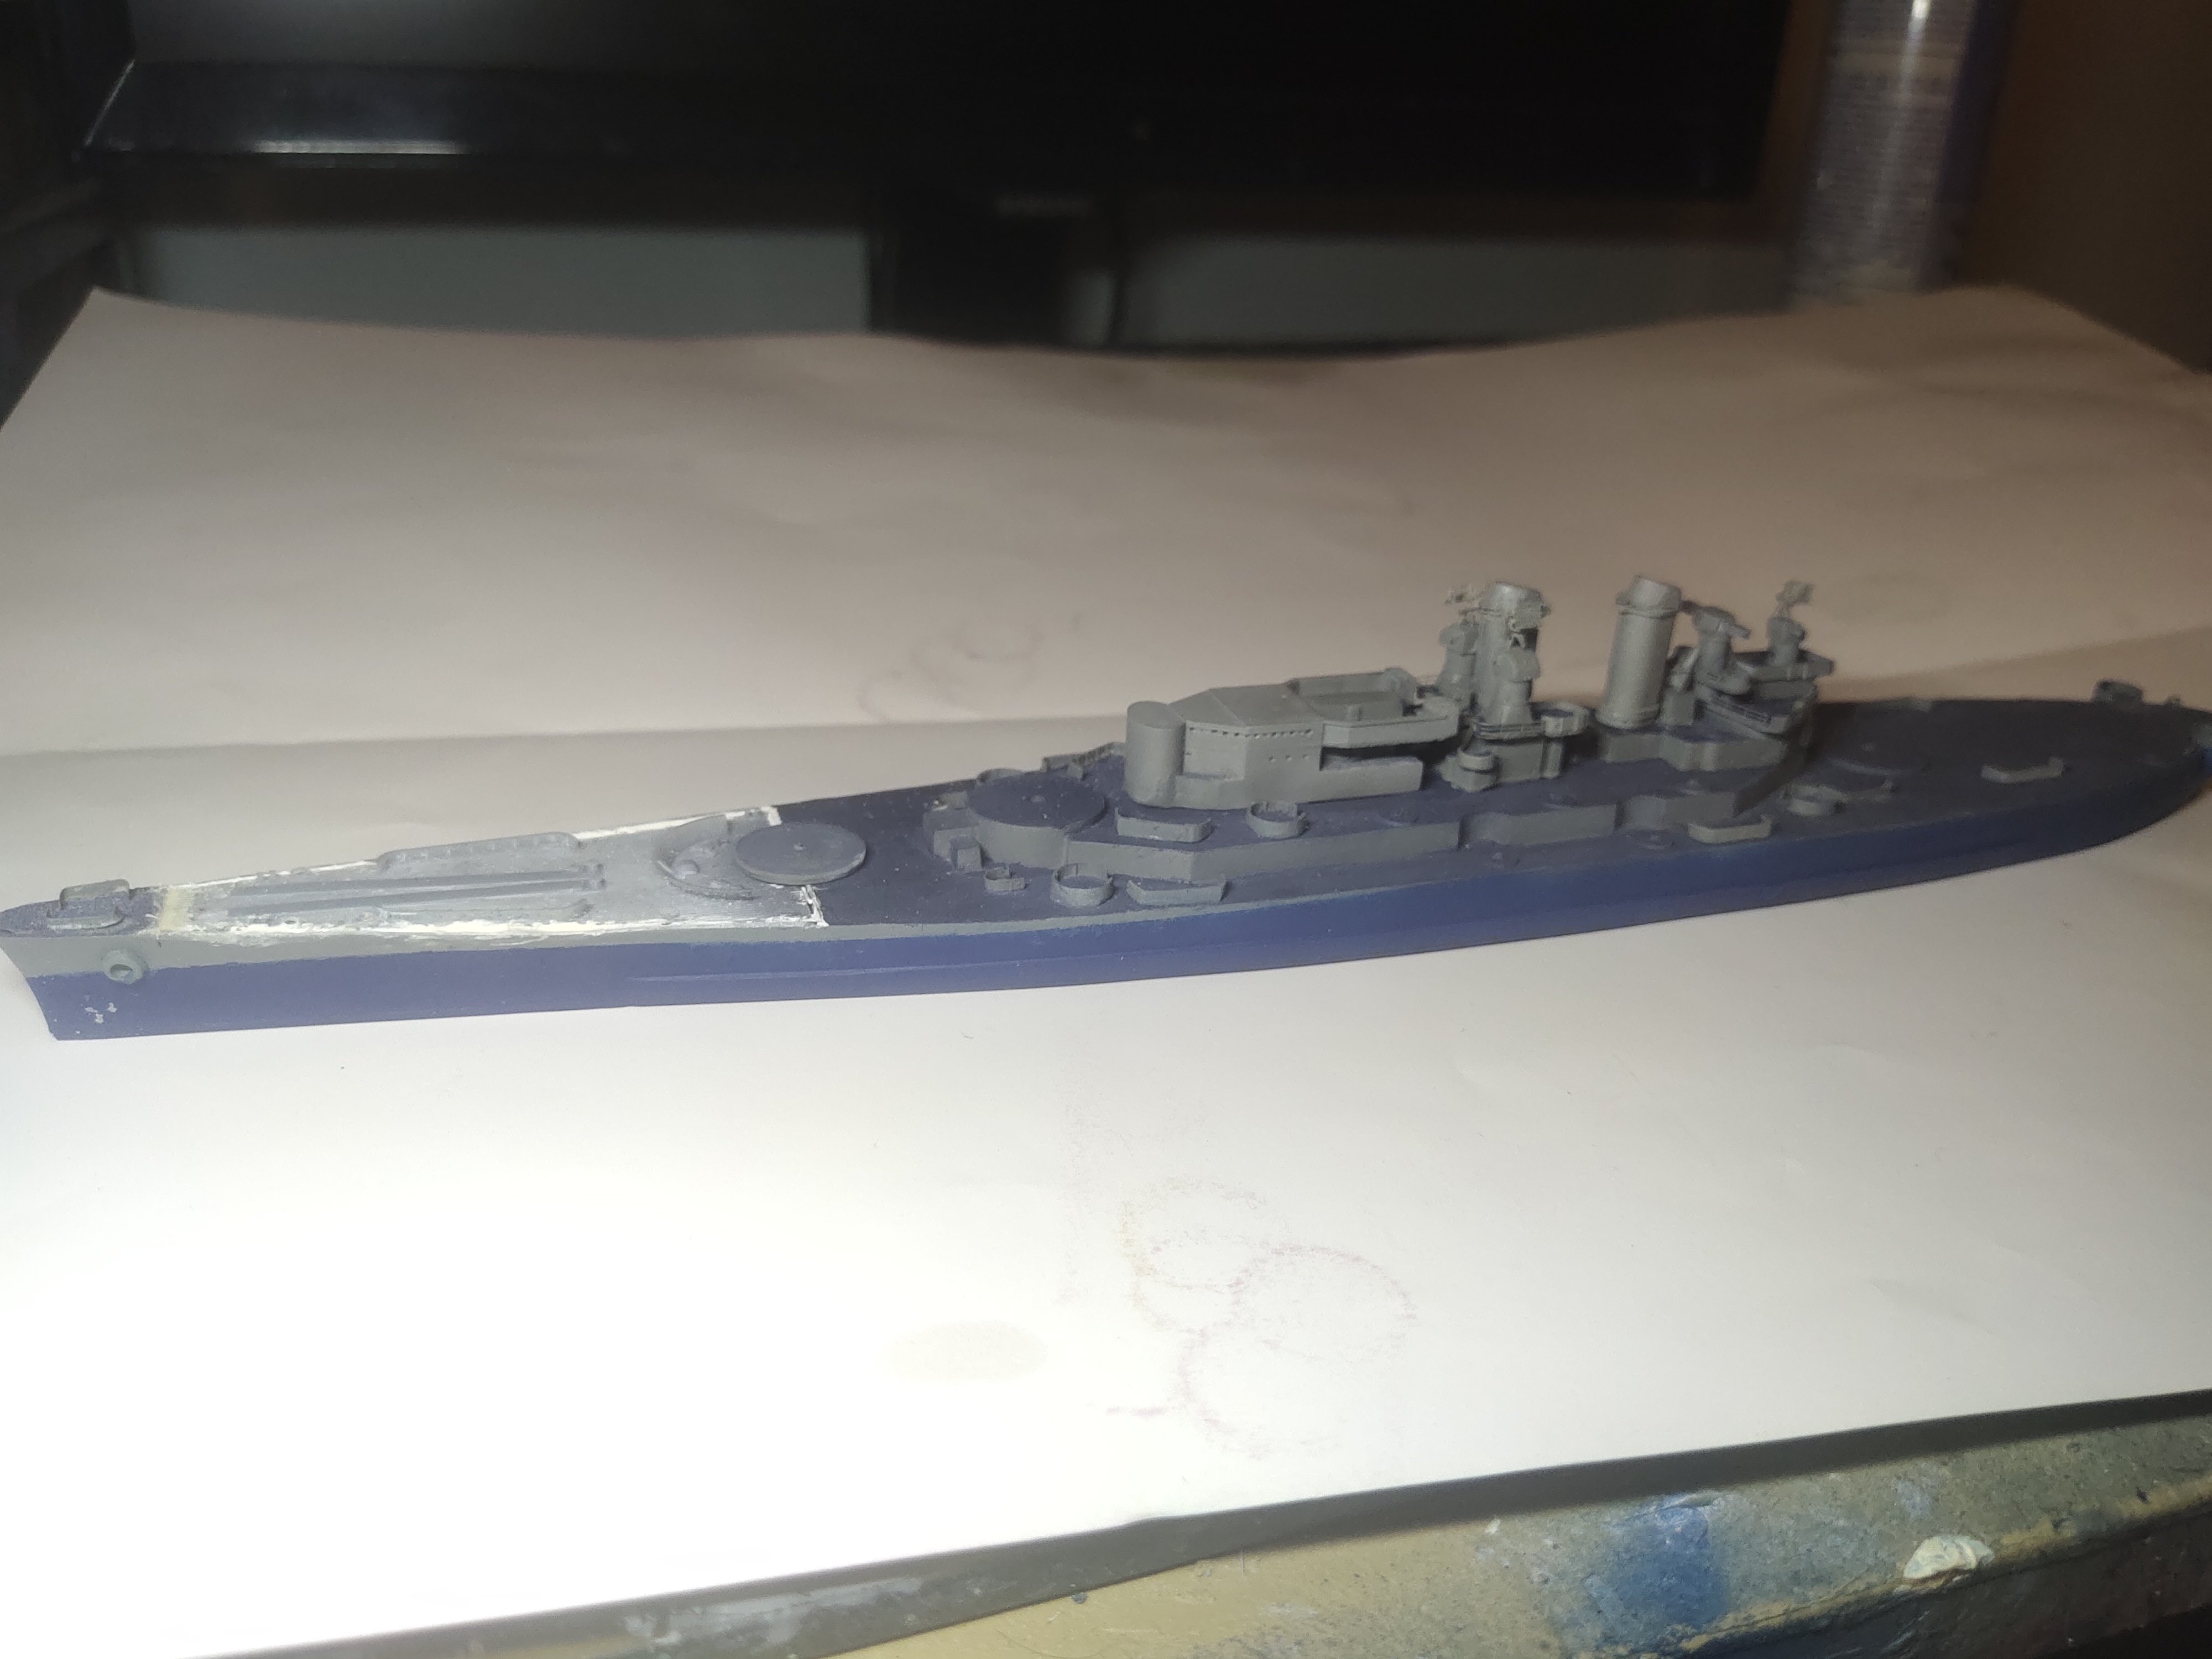
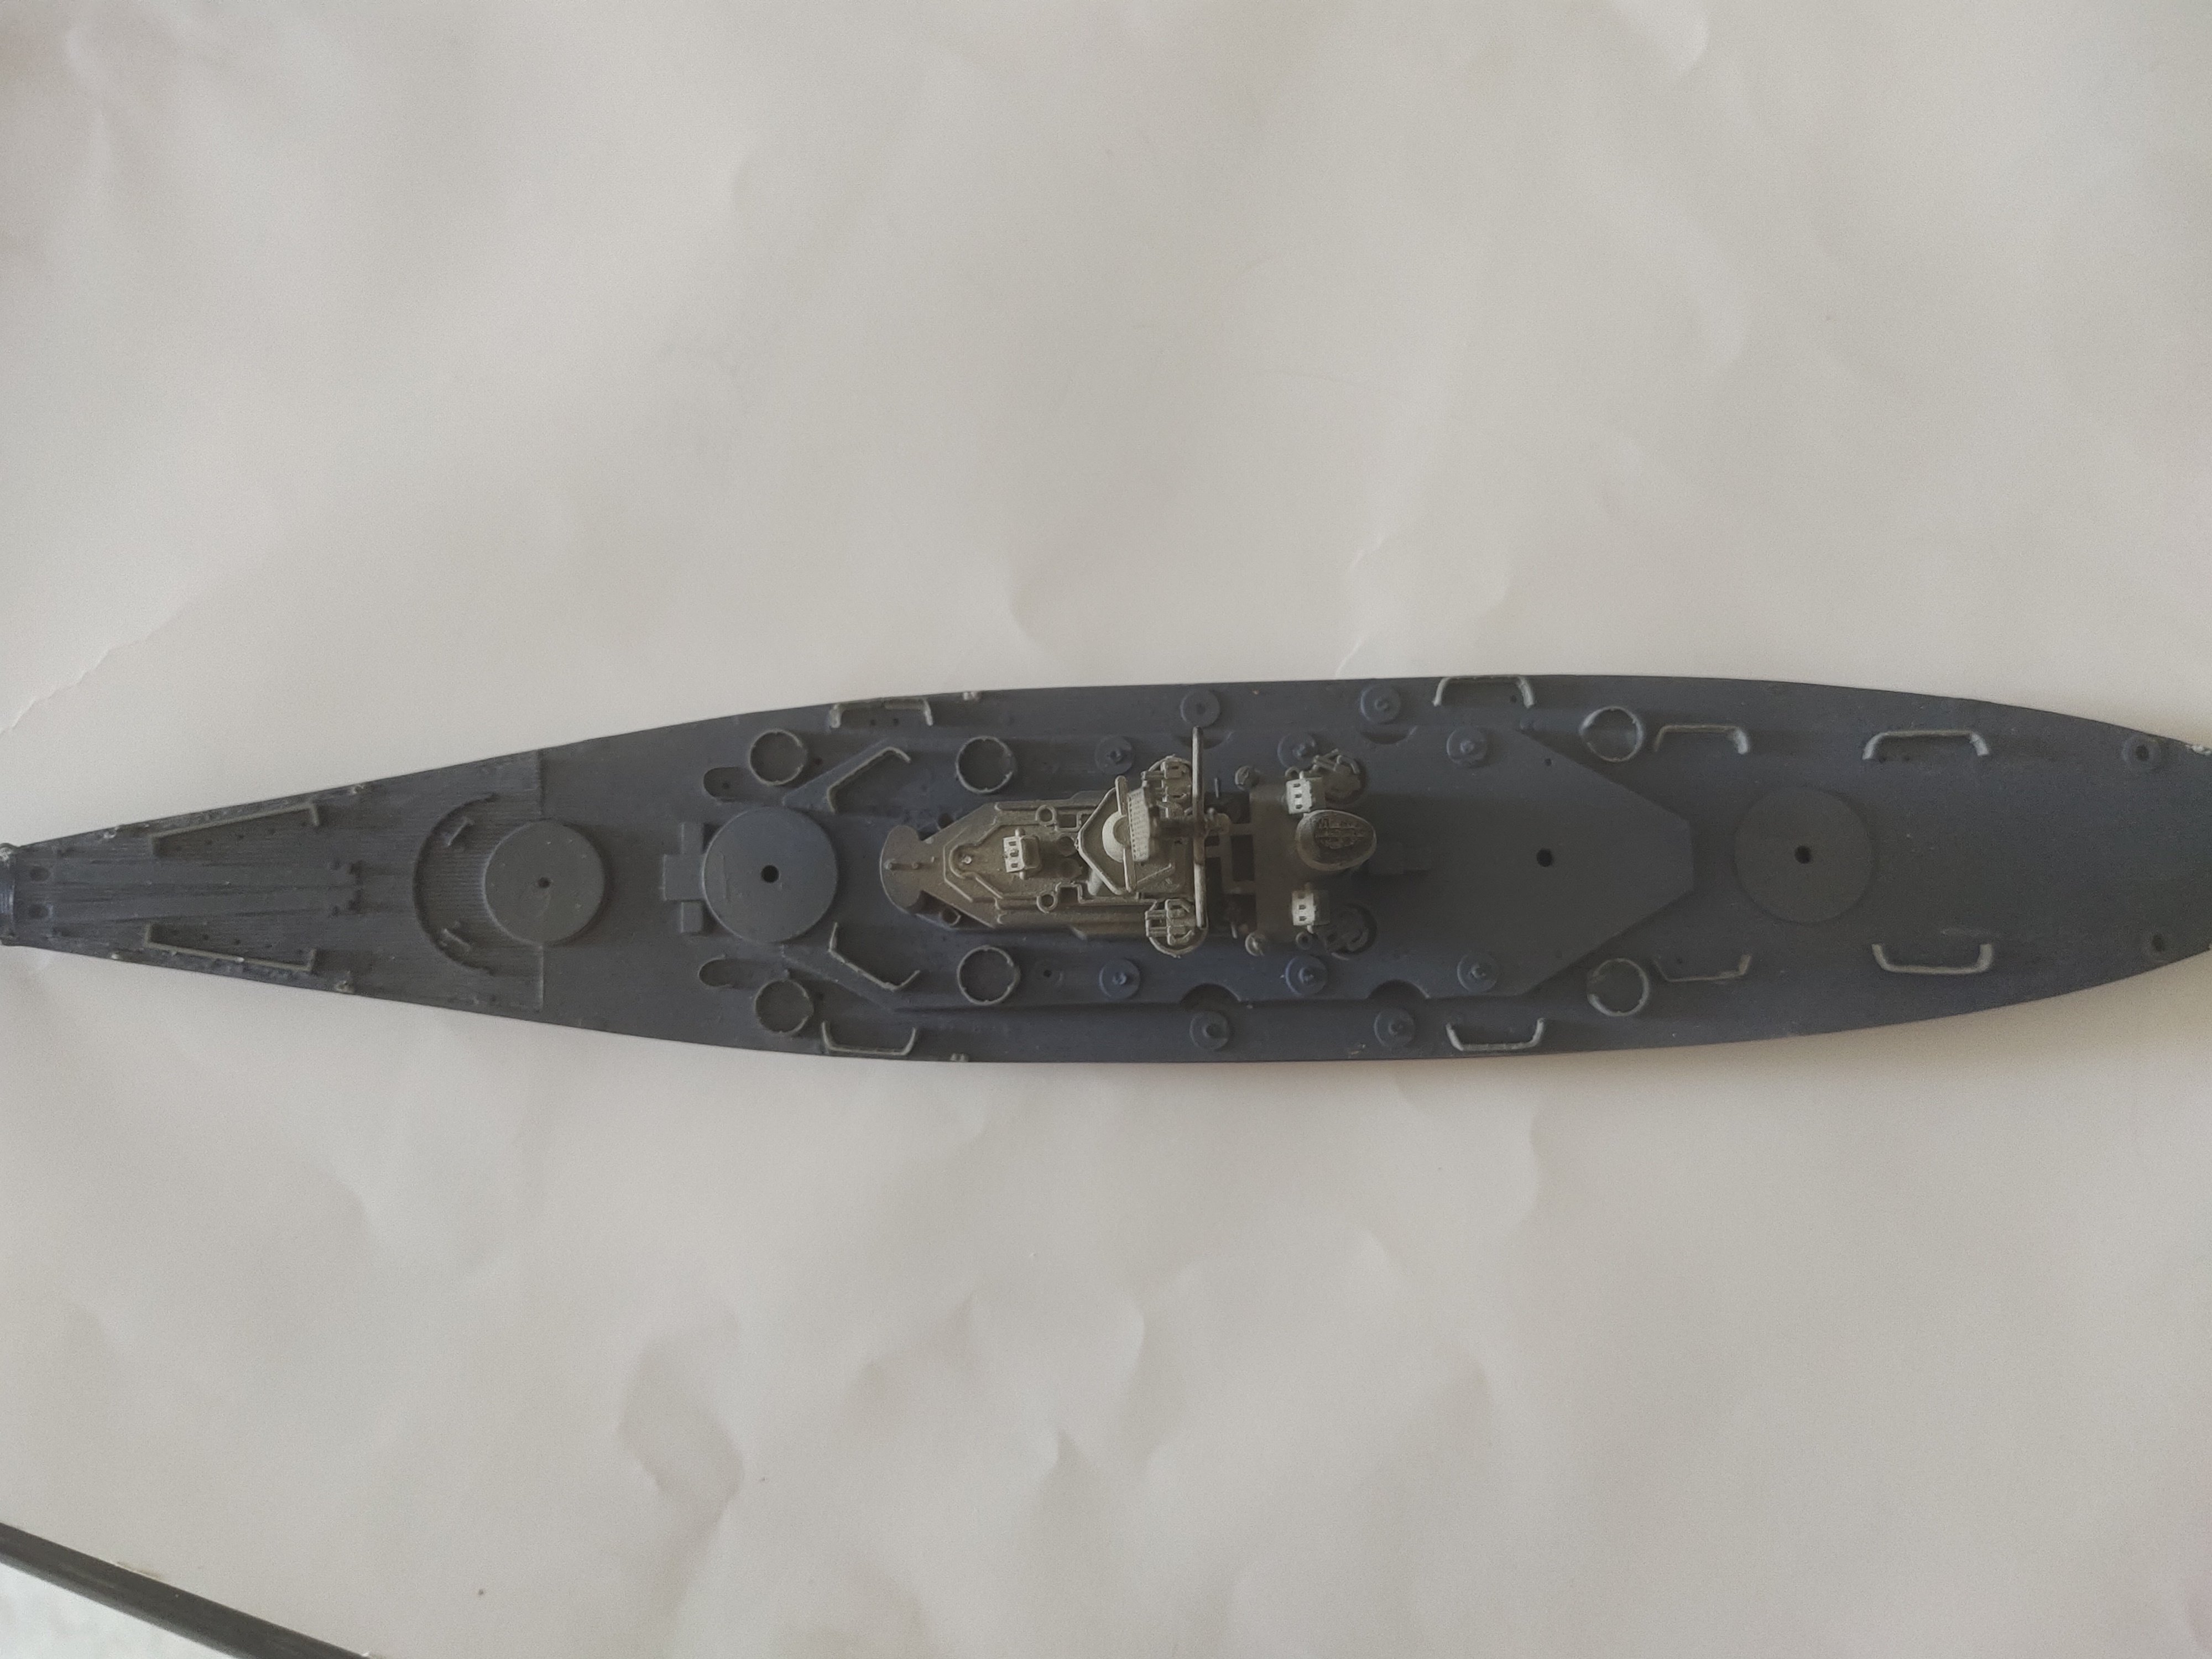
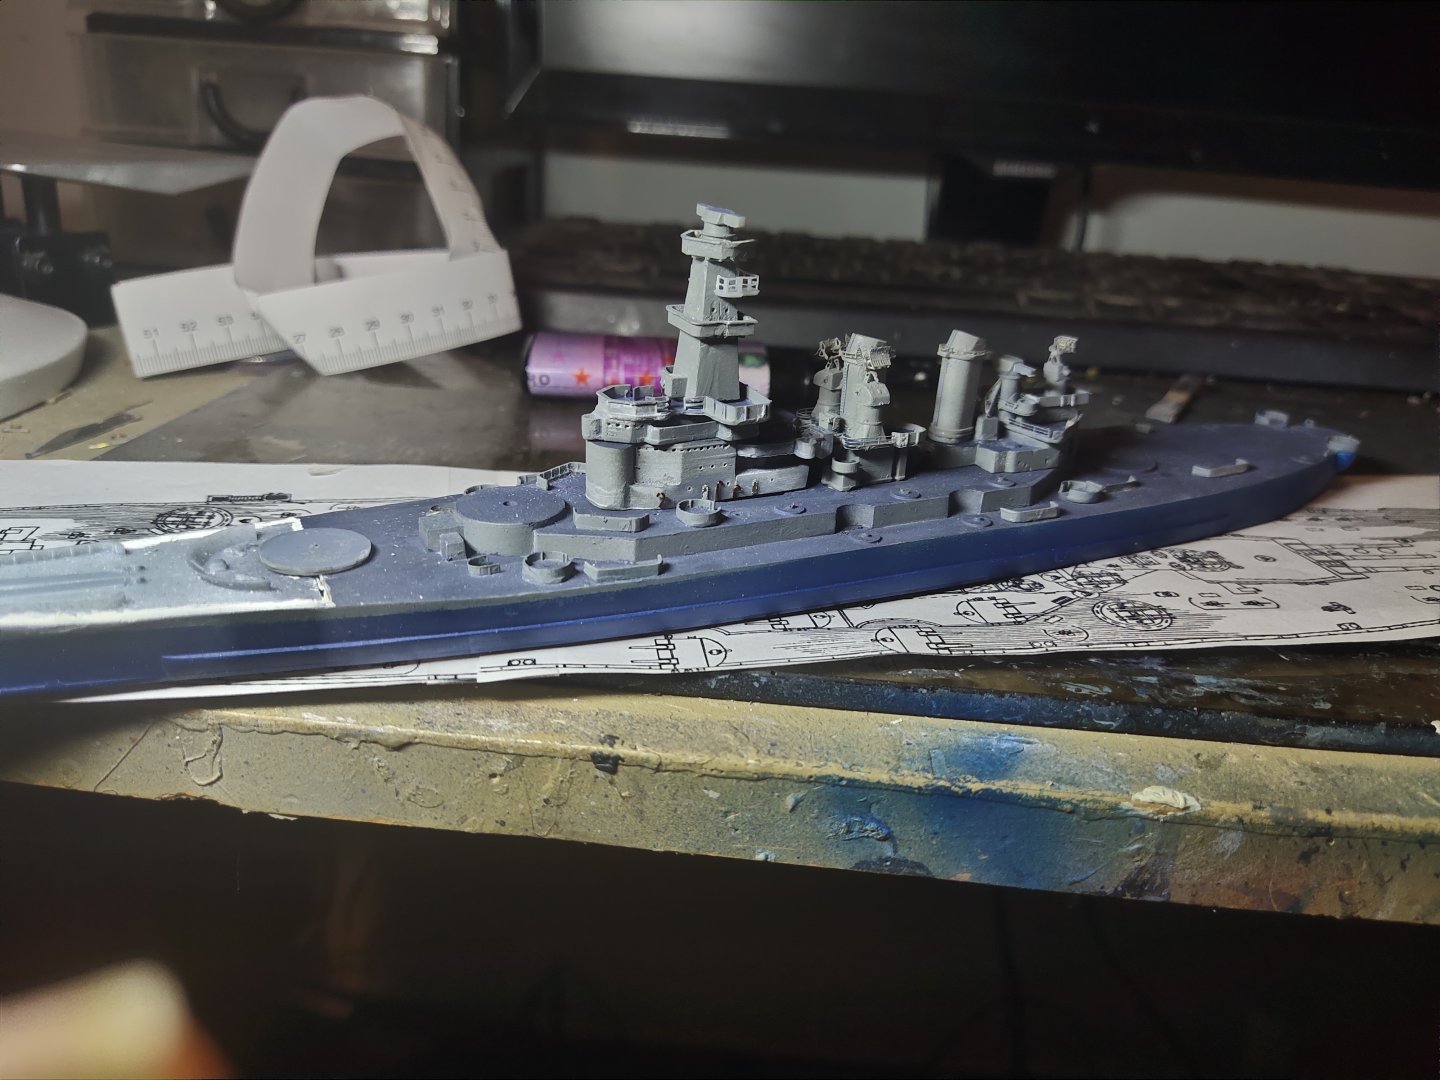
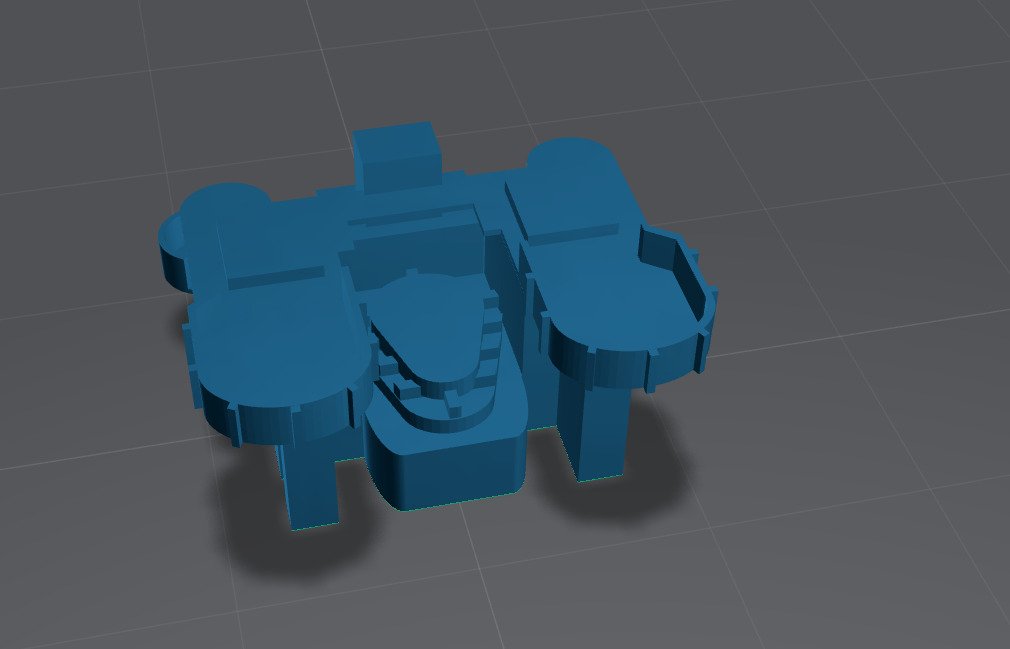
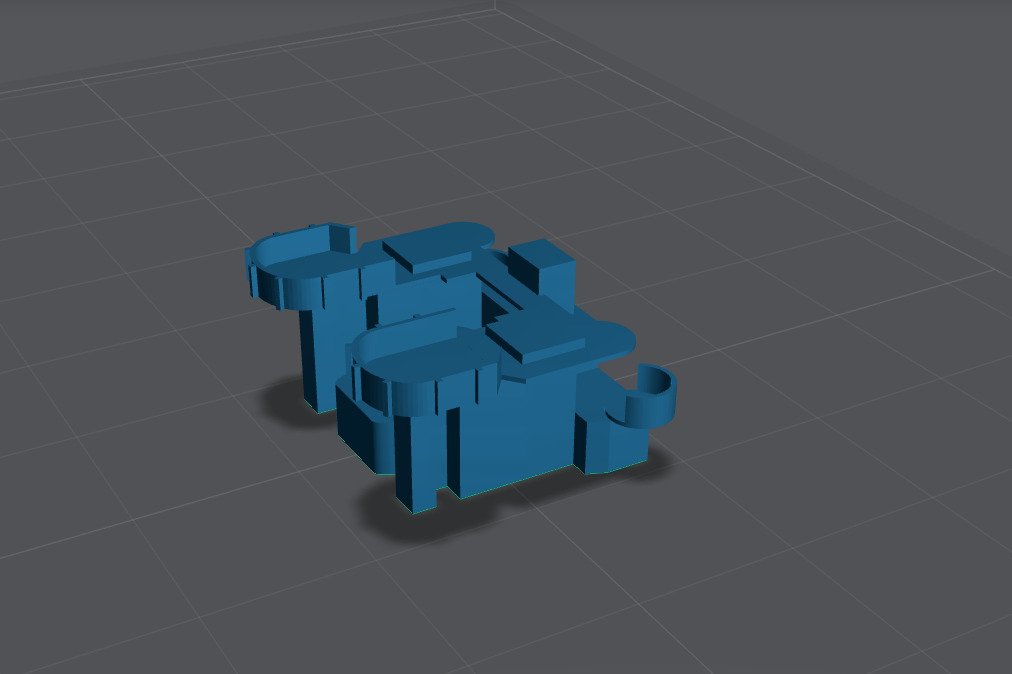
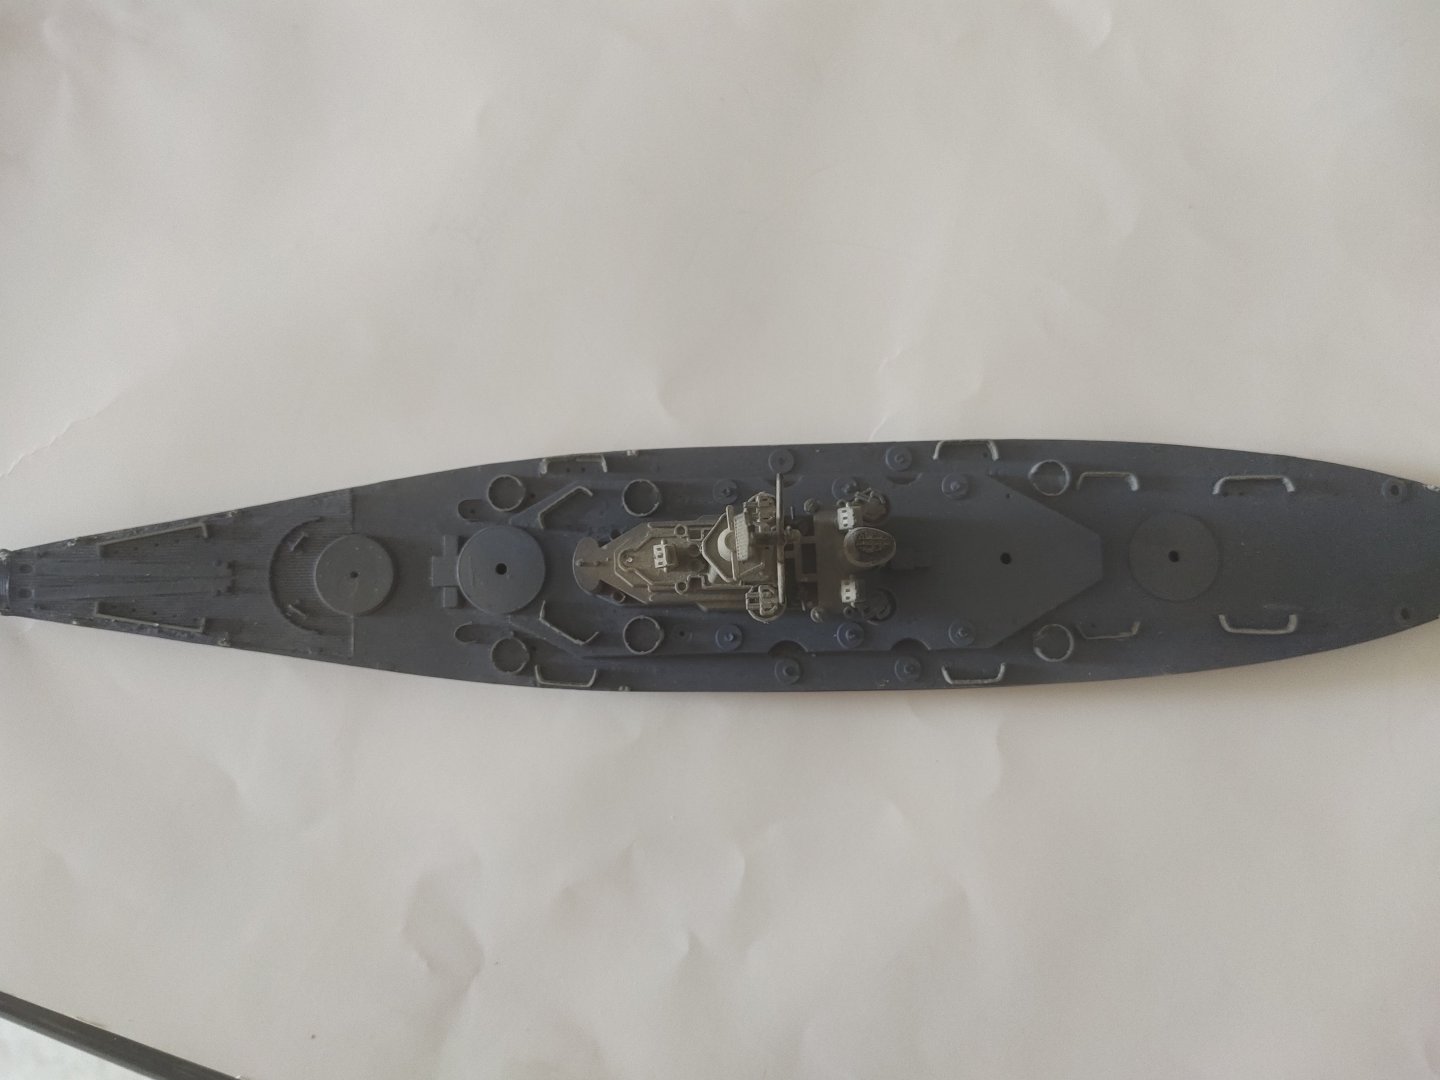
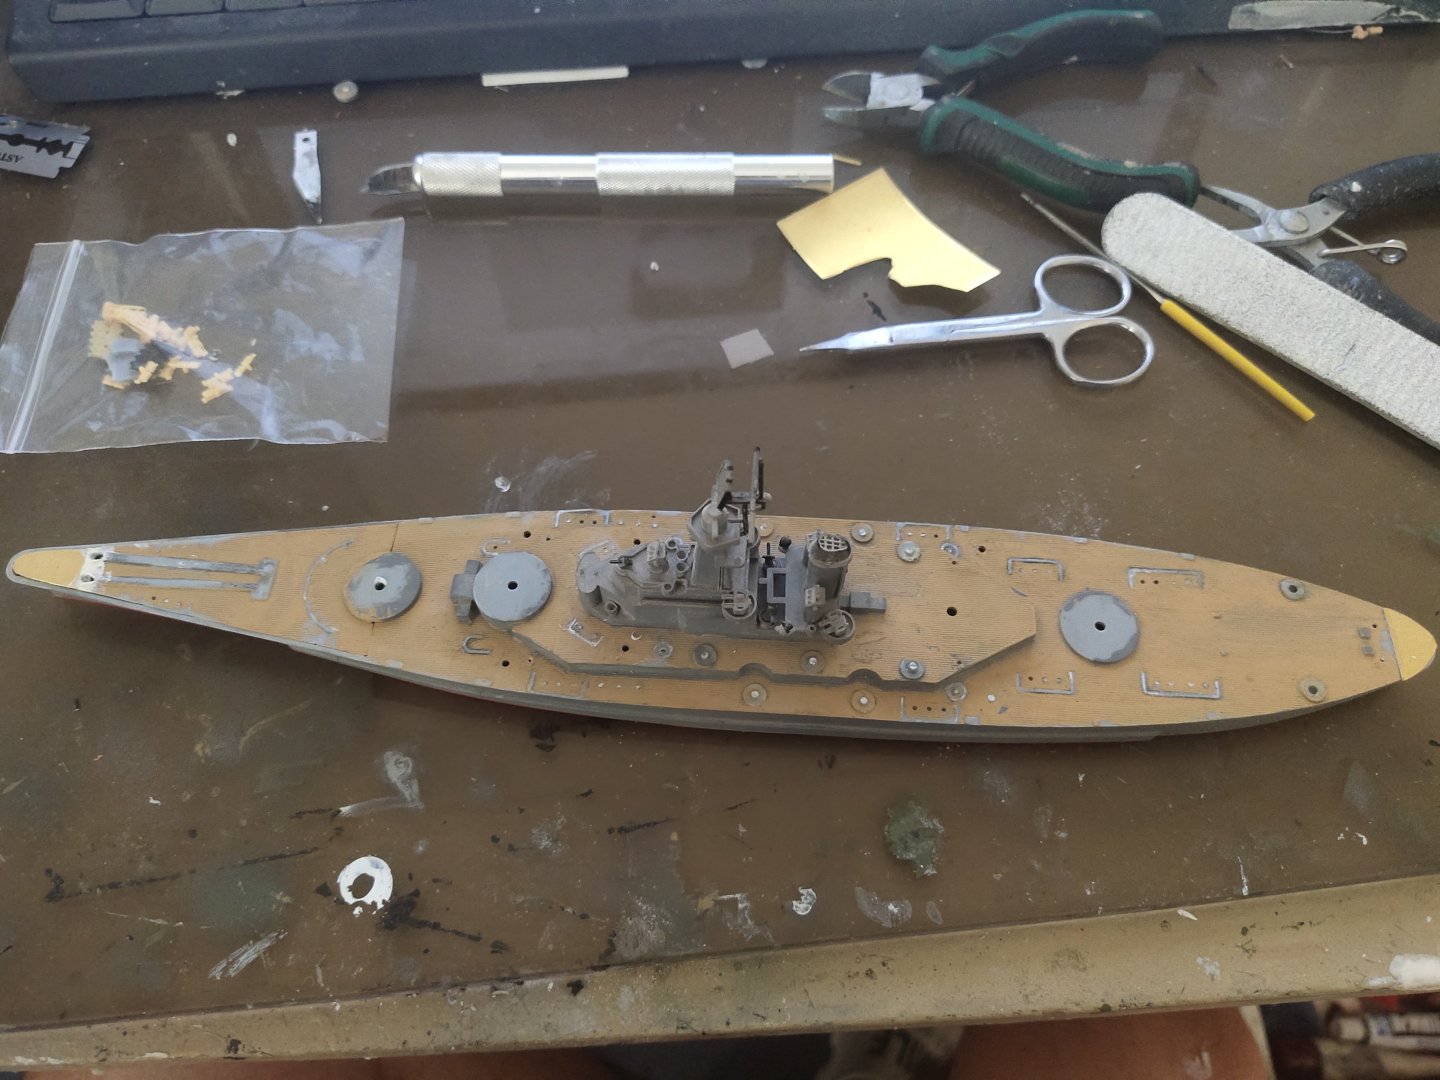
Lot of work, lot of study, little progress. Good thing I found a picture of deck layout on X and along with some drone footage of the real ship I managed to make the superstructure quite close to the real one or at least far better than the original part For the lower piece I cut the rear half, reprinted it modified and attached it to the front. I'm good on such operations. The other pieces designed separately and prepared to be fitted all together. Some details like ladders, hoses and door hatches were added at lower part. Will add on more on the way.


-
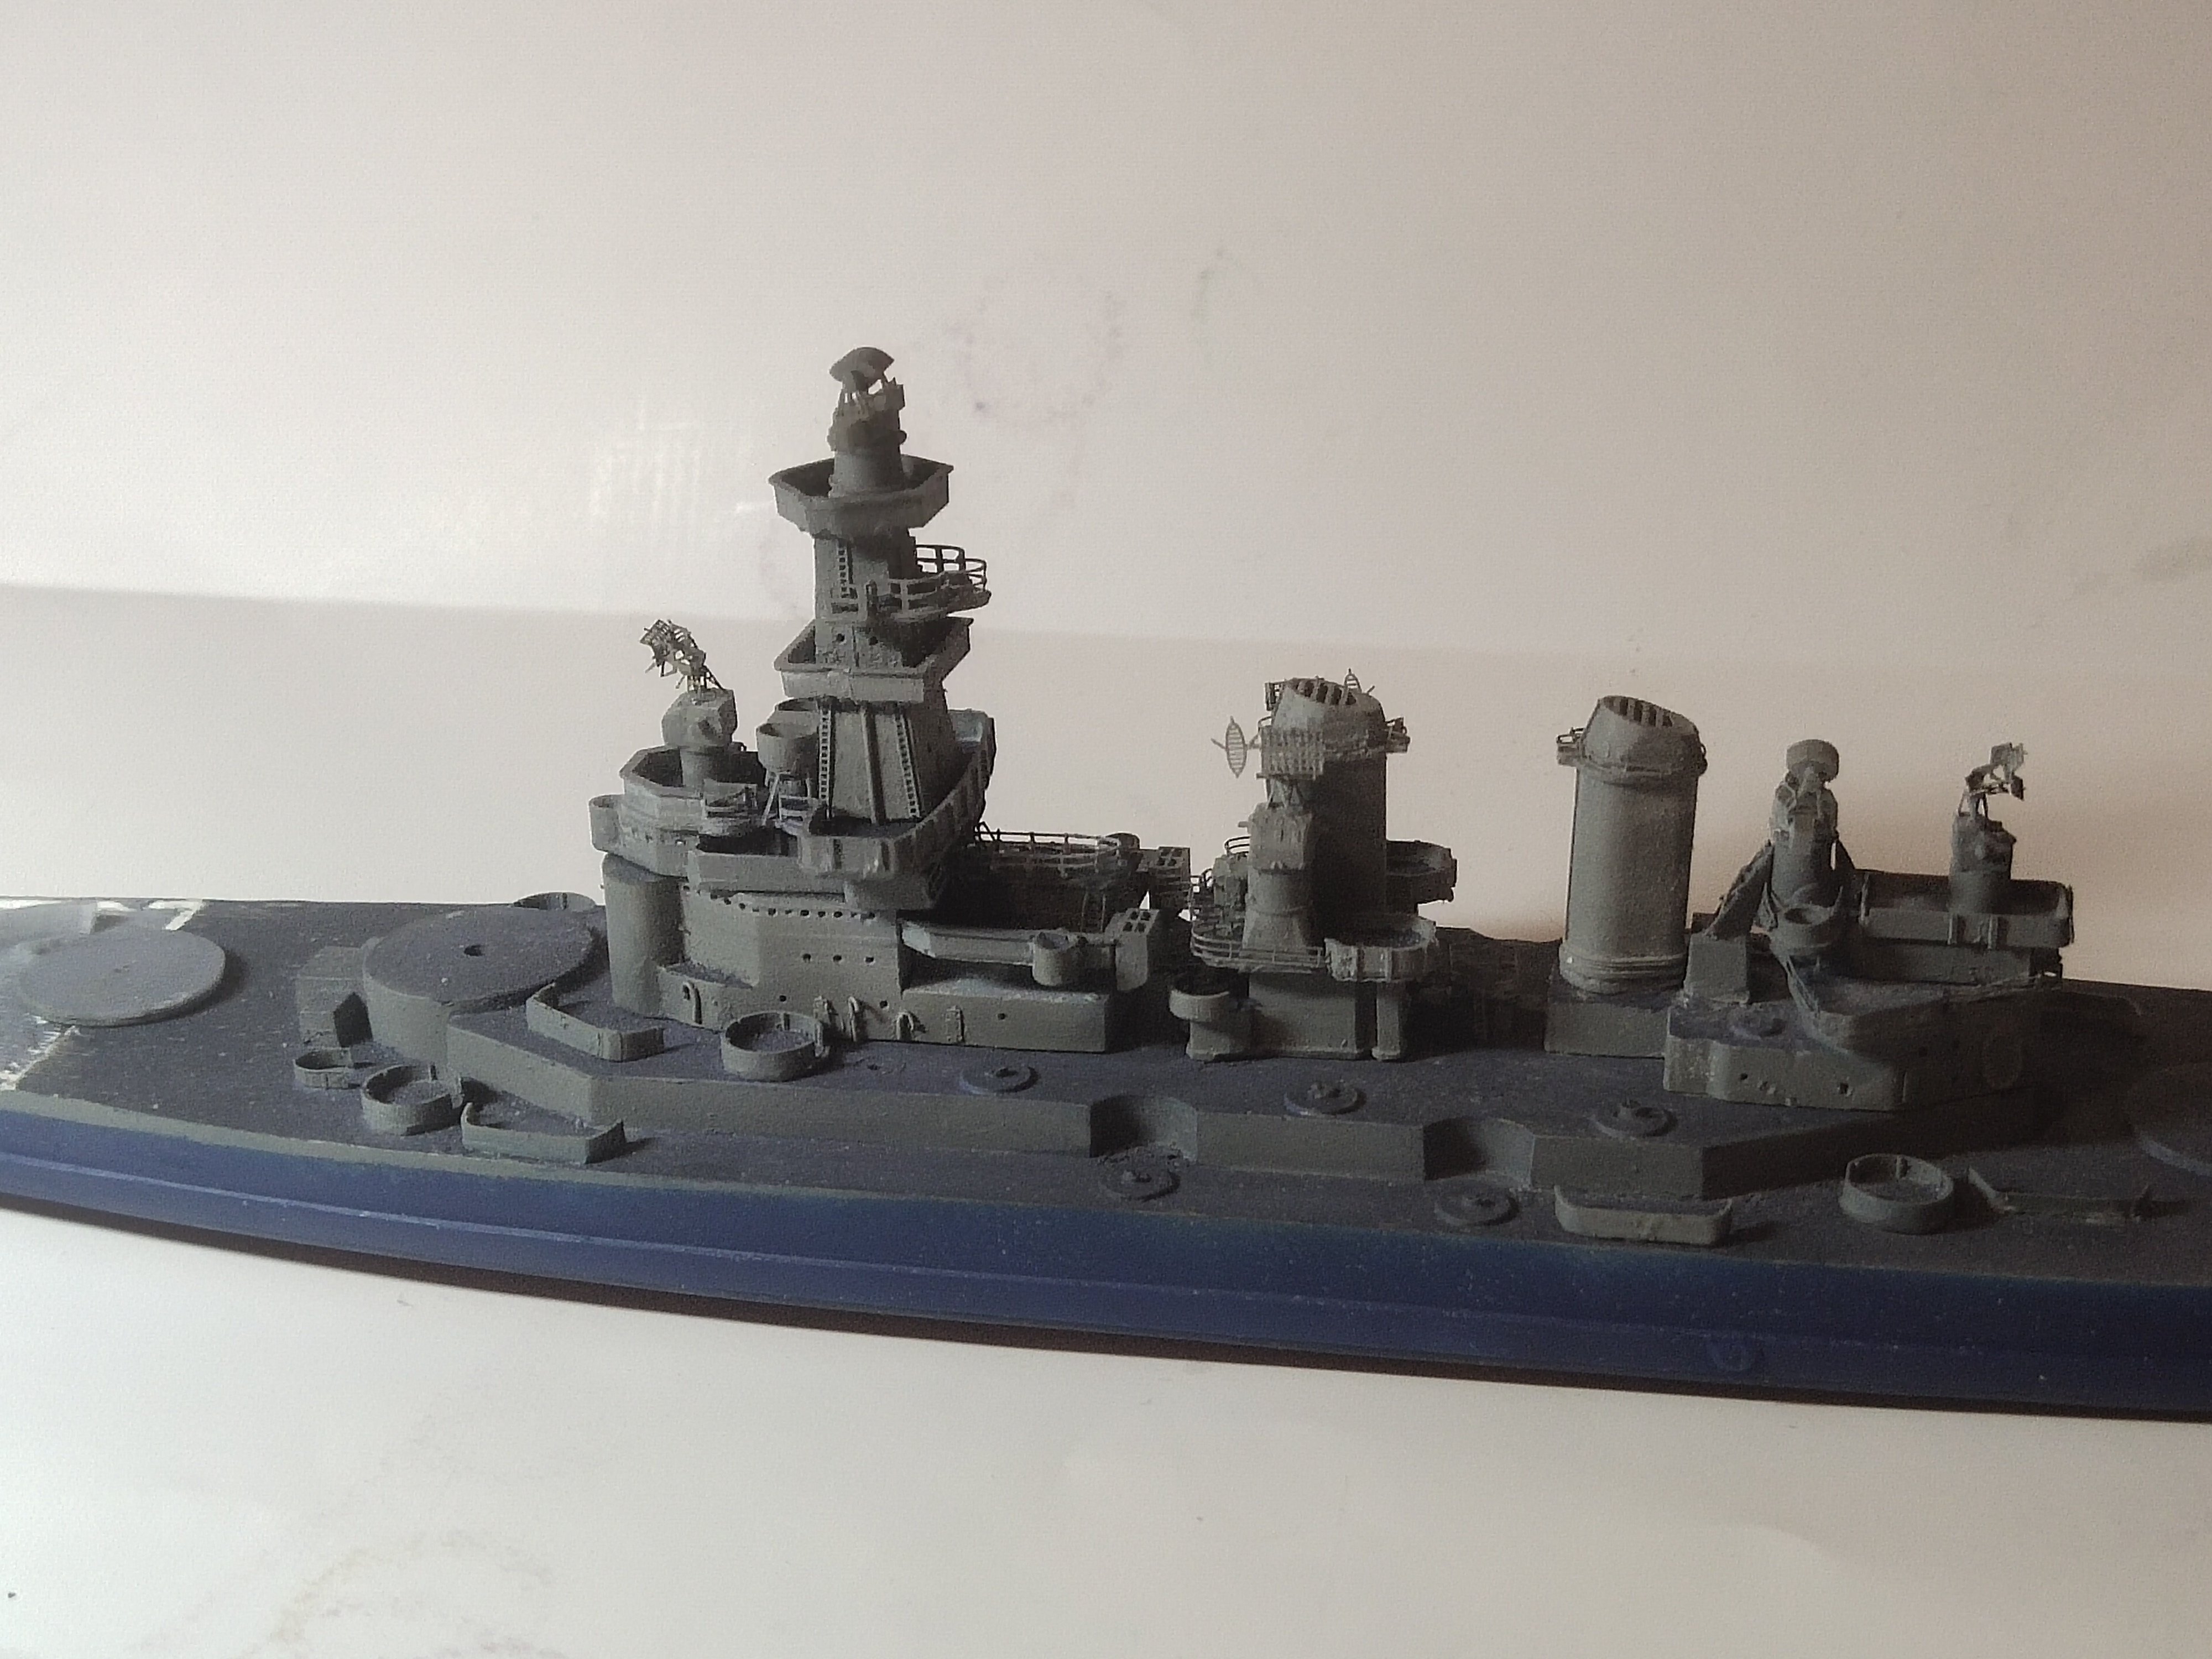
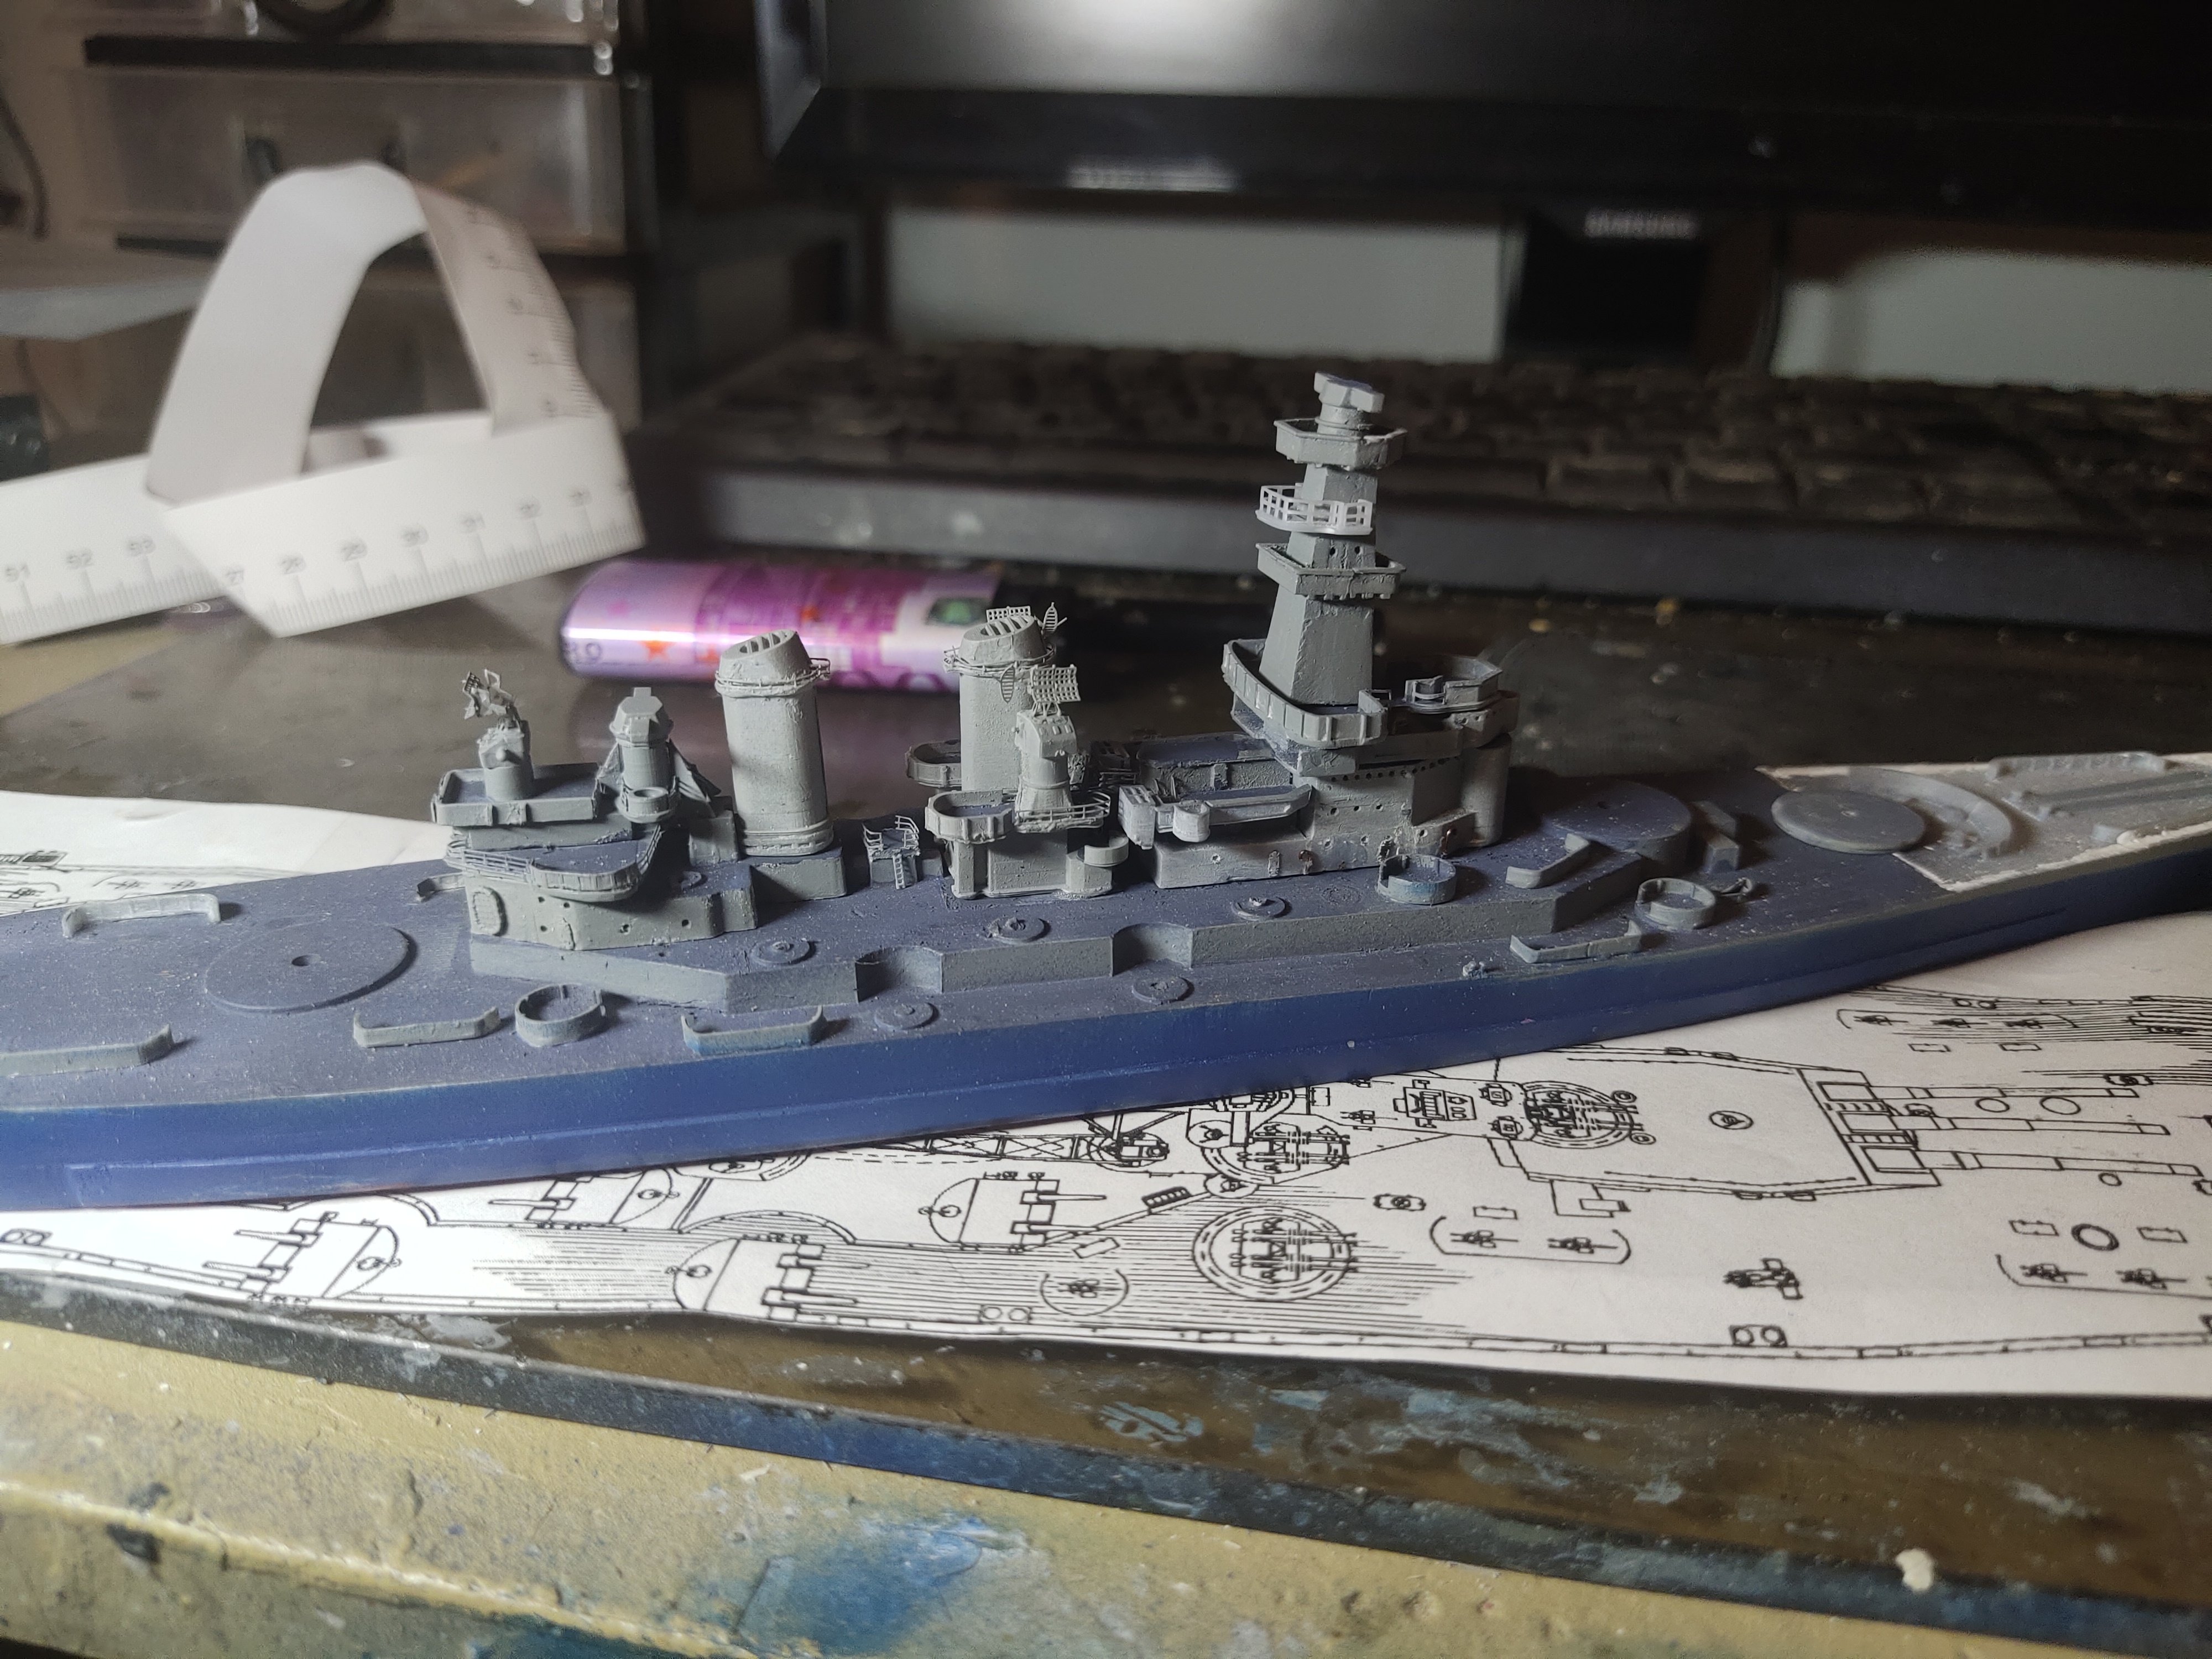
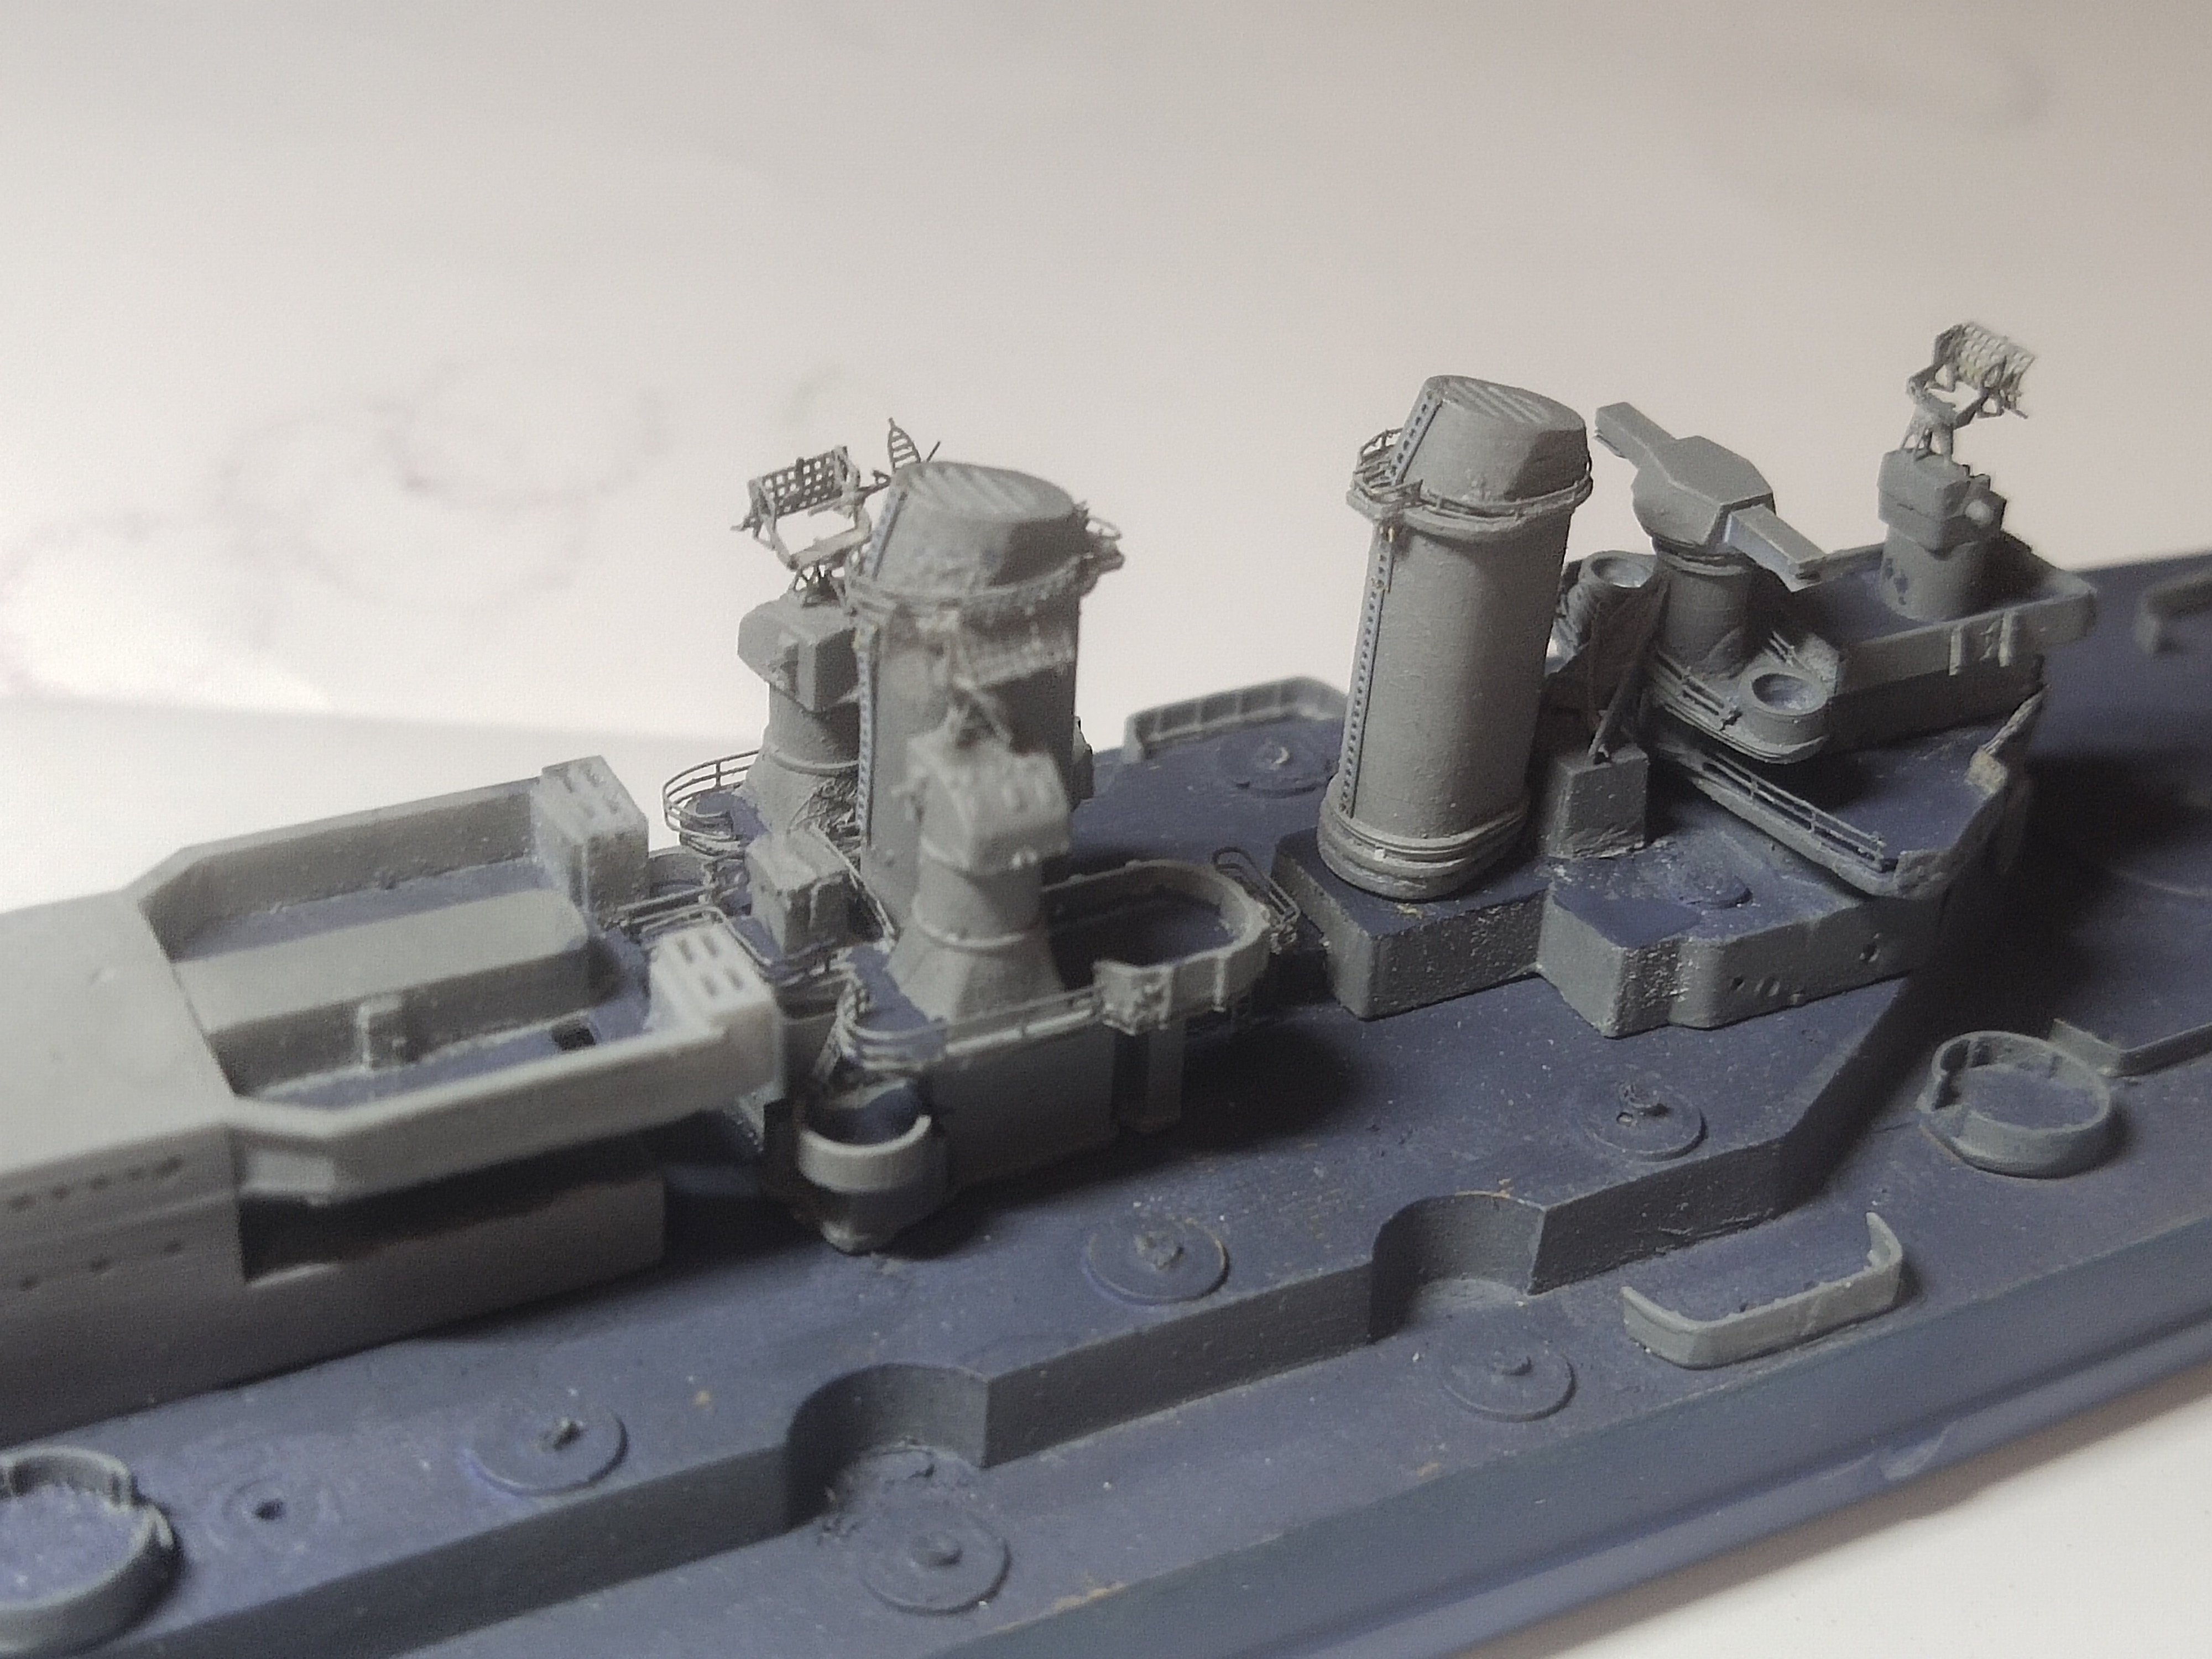
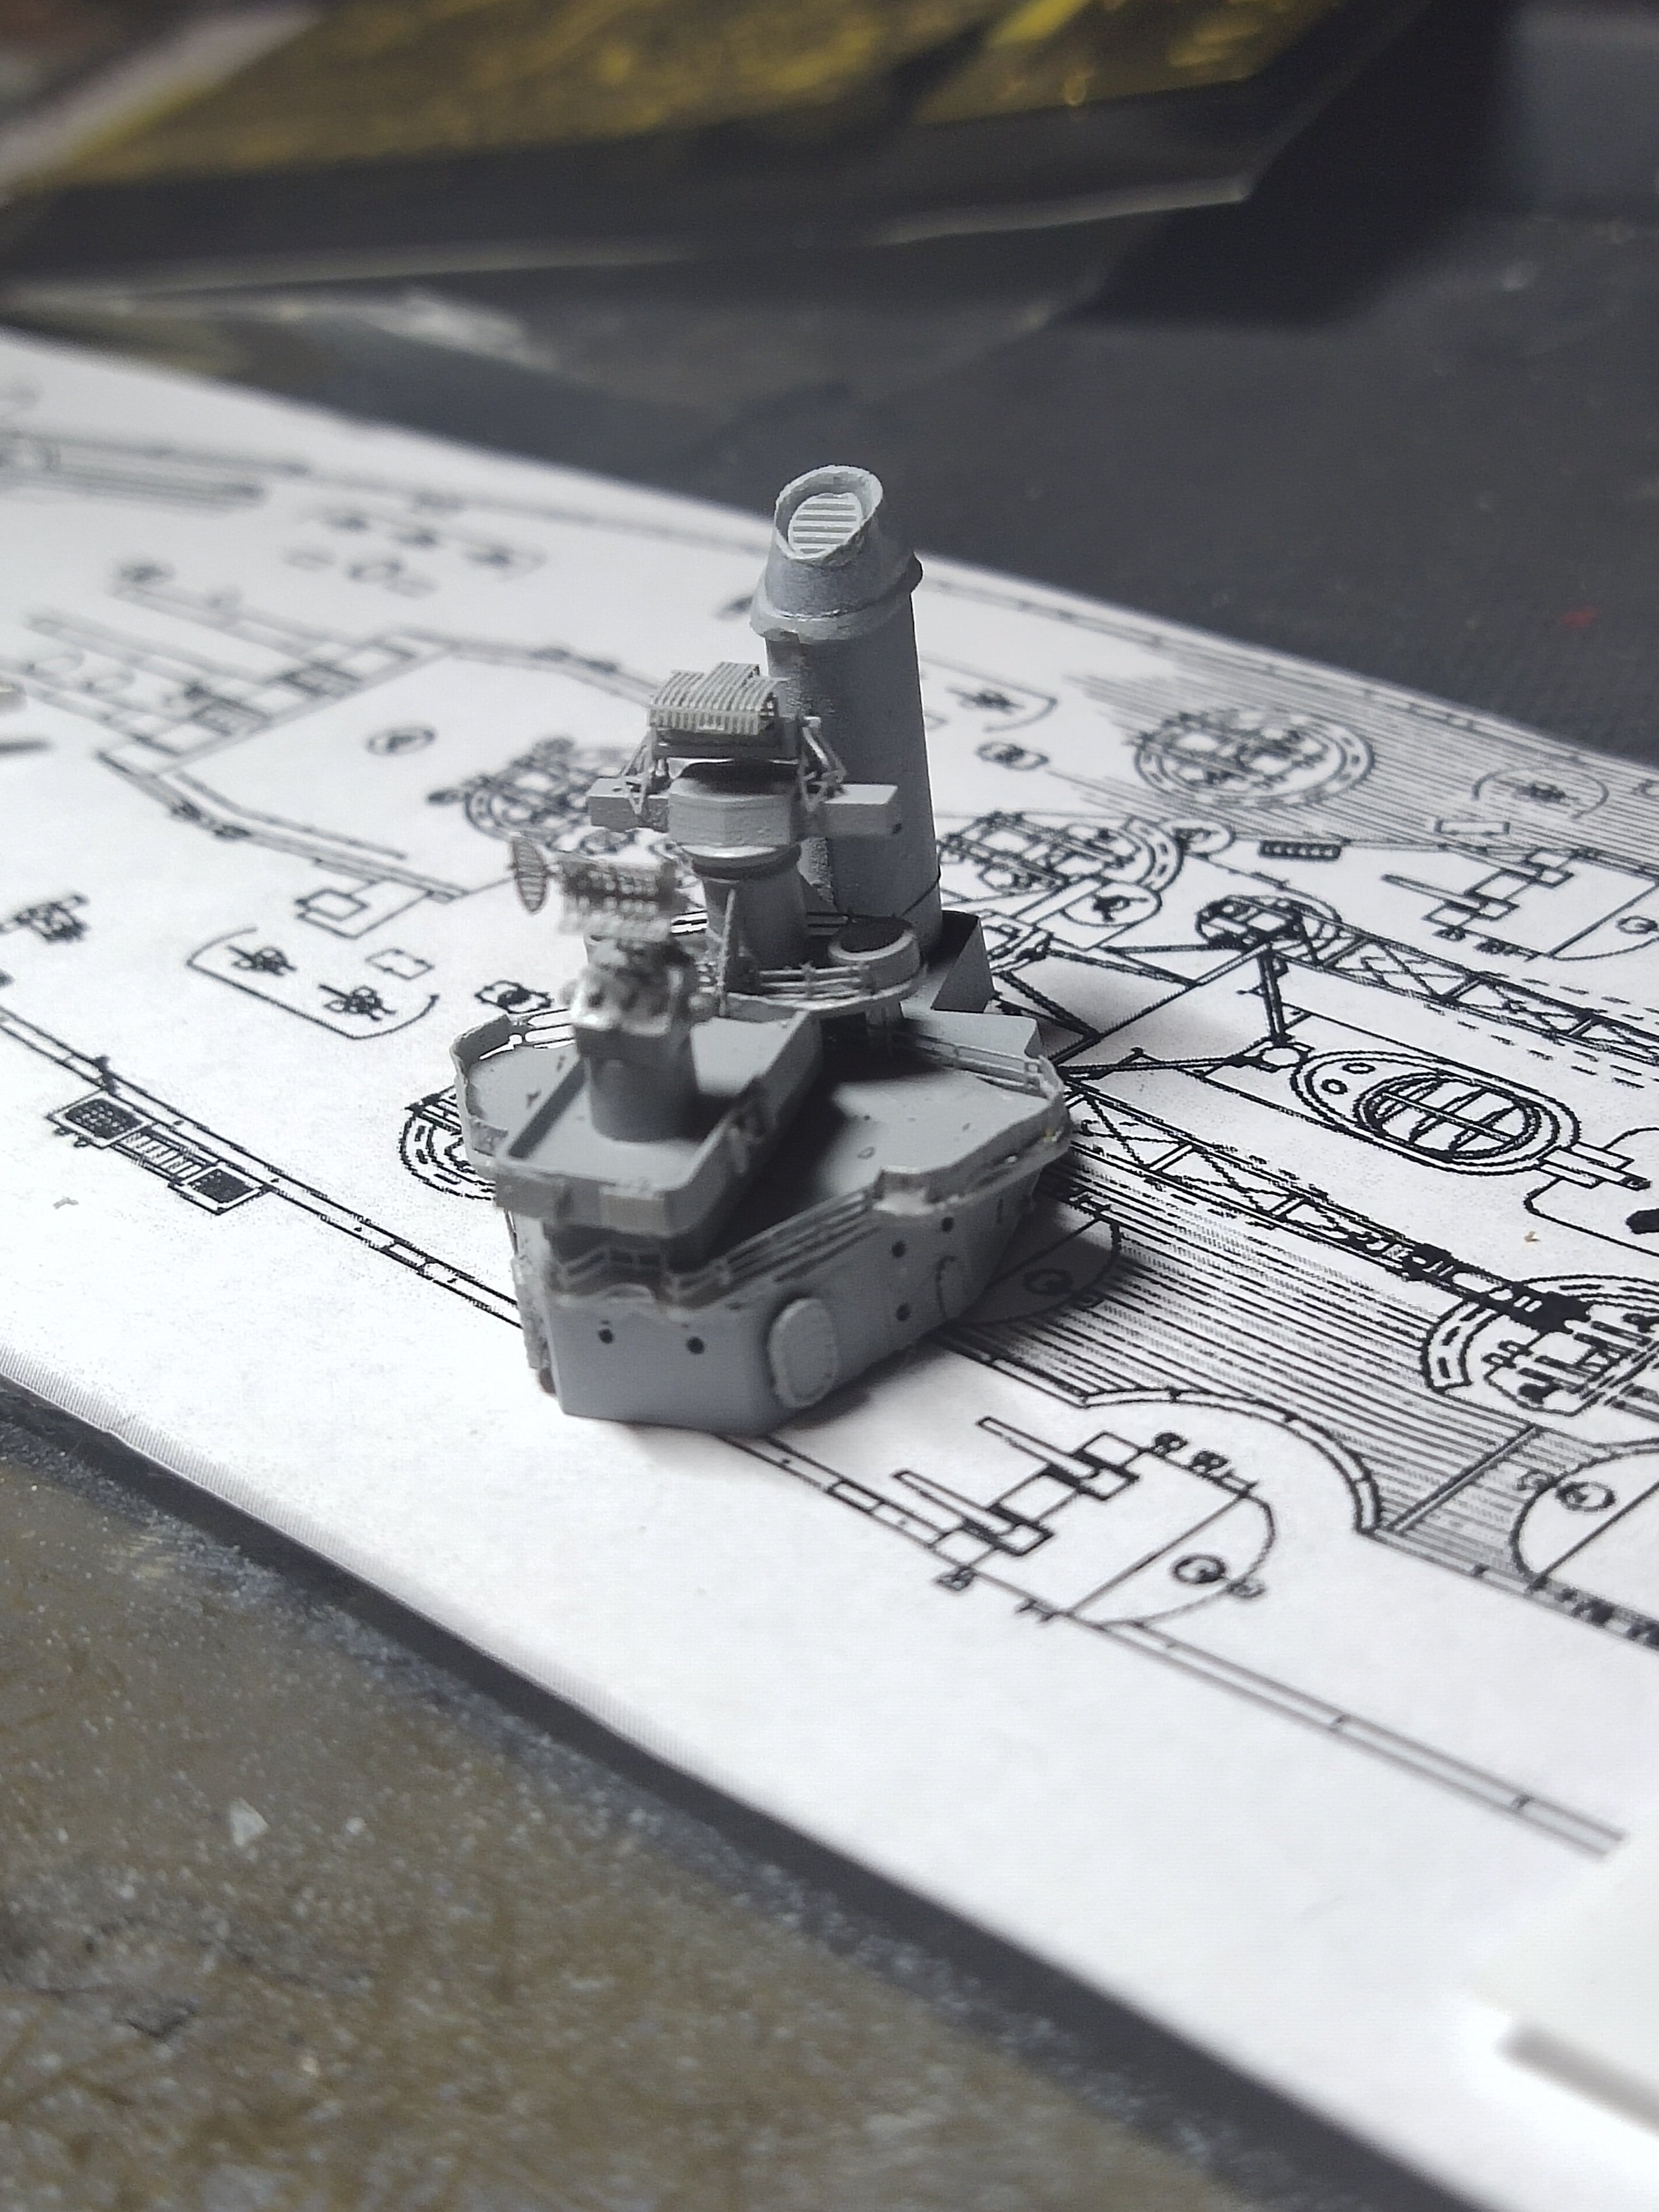
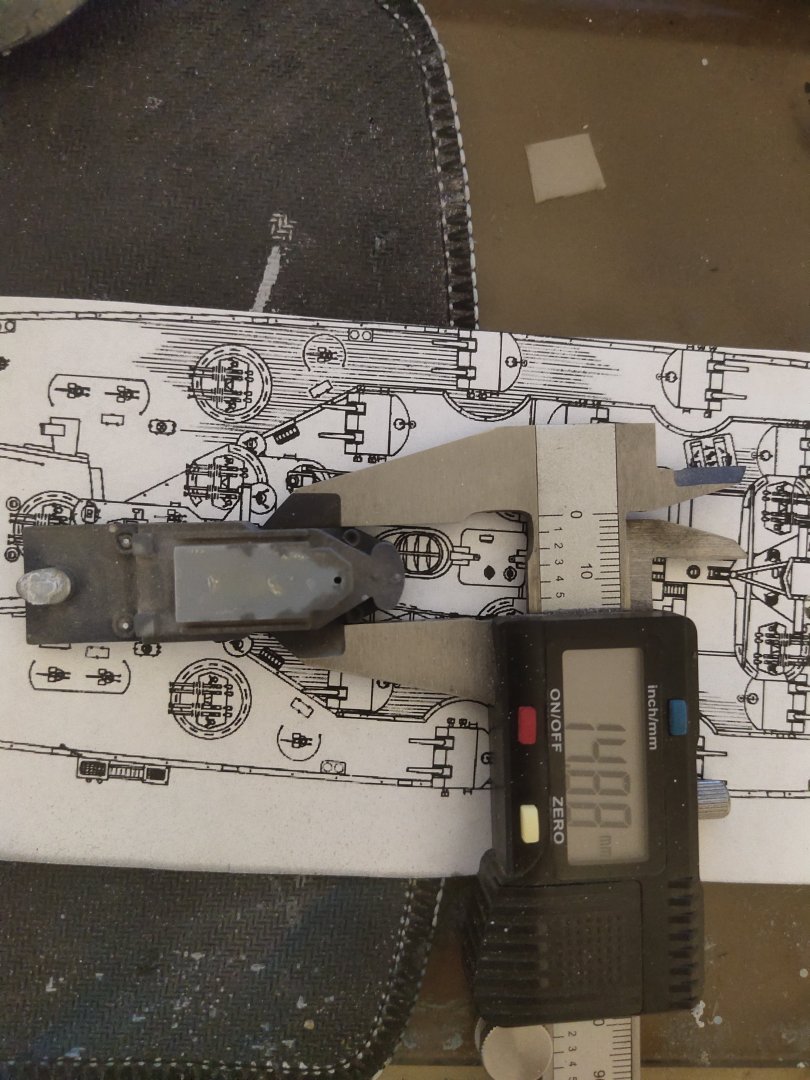
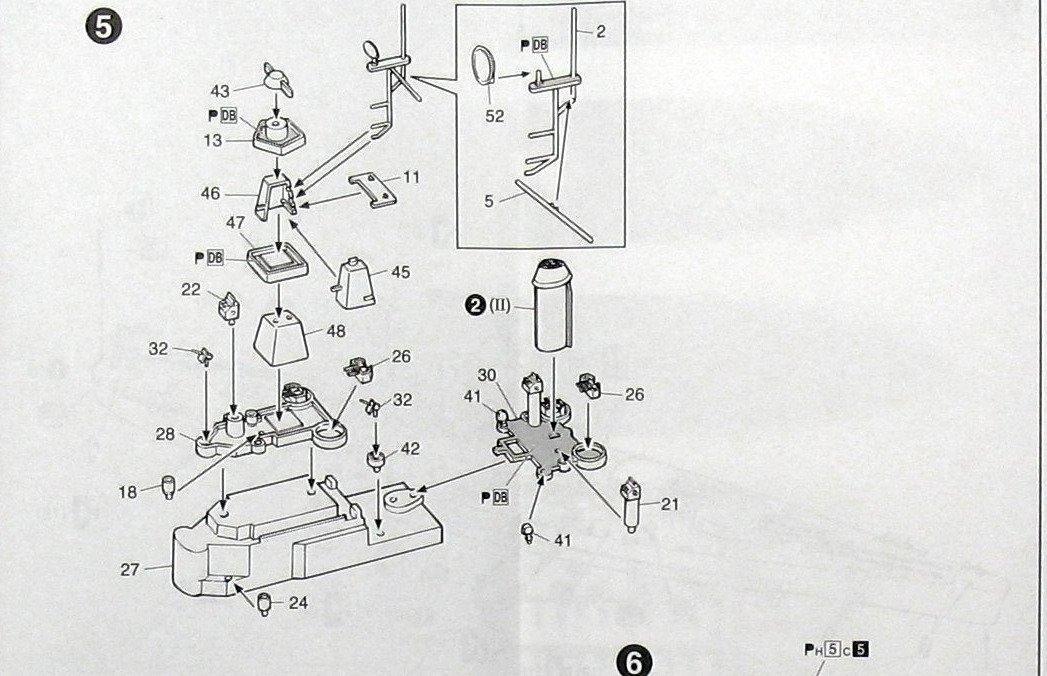
This method seems accurate and easy but its not. Making your own parts and fit them together requires a lot of tests and evaluation. In this scale every mm is crucial In my case though funnel height was calculated precisely they turned out somewhat sort. So I made new ones taller but shorter than the plastic ones. My reference point is the Mk 37 towers, they need at lower level than the funnel. I measured again and they proved to be 2mm longer, so I sanded them down. However after installing PE on them, they gained considerable height. Instead of making new funnels and wasting some hours I put an additional base made of 1mm thick plastic. Both parts were glued I only left the forward section unglued


-
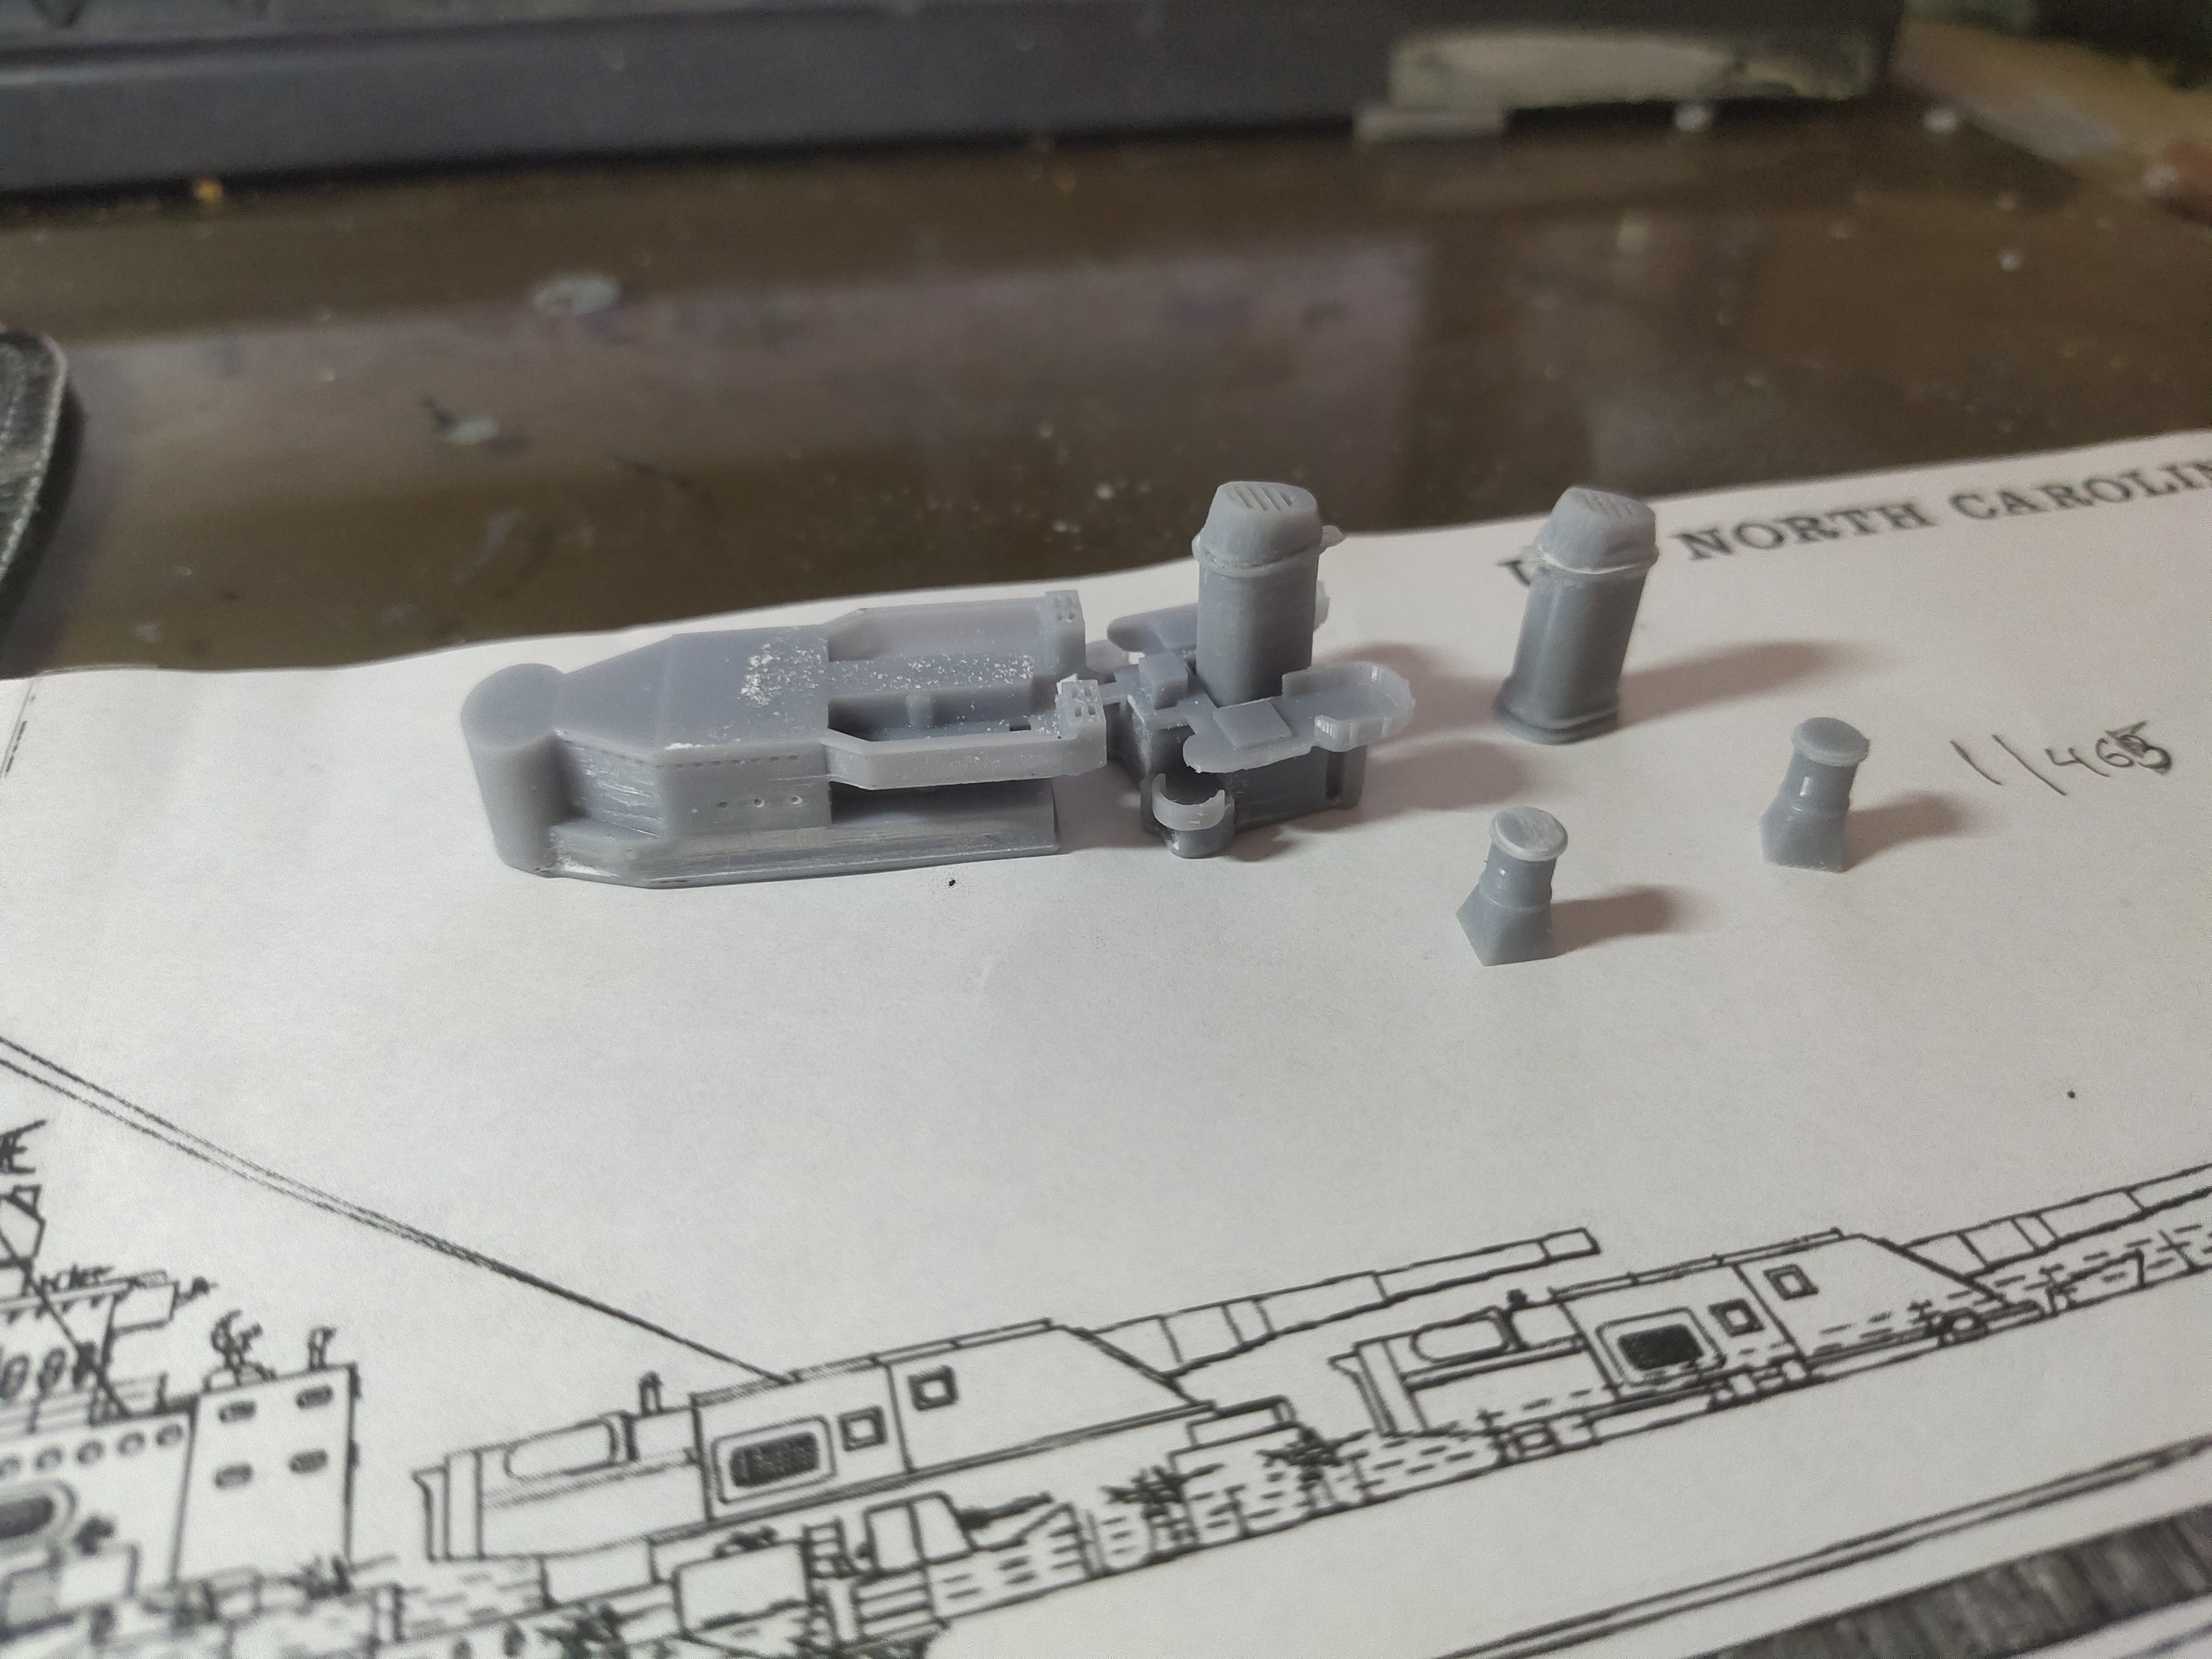
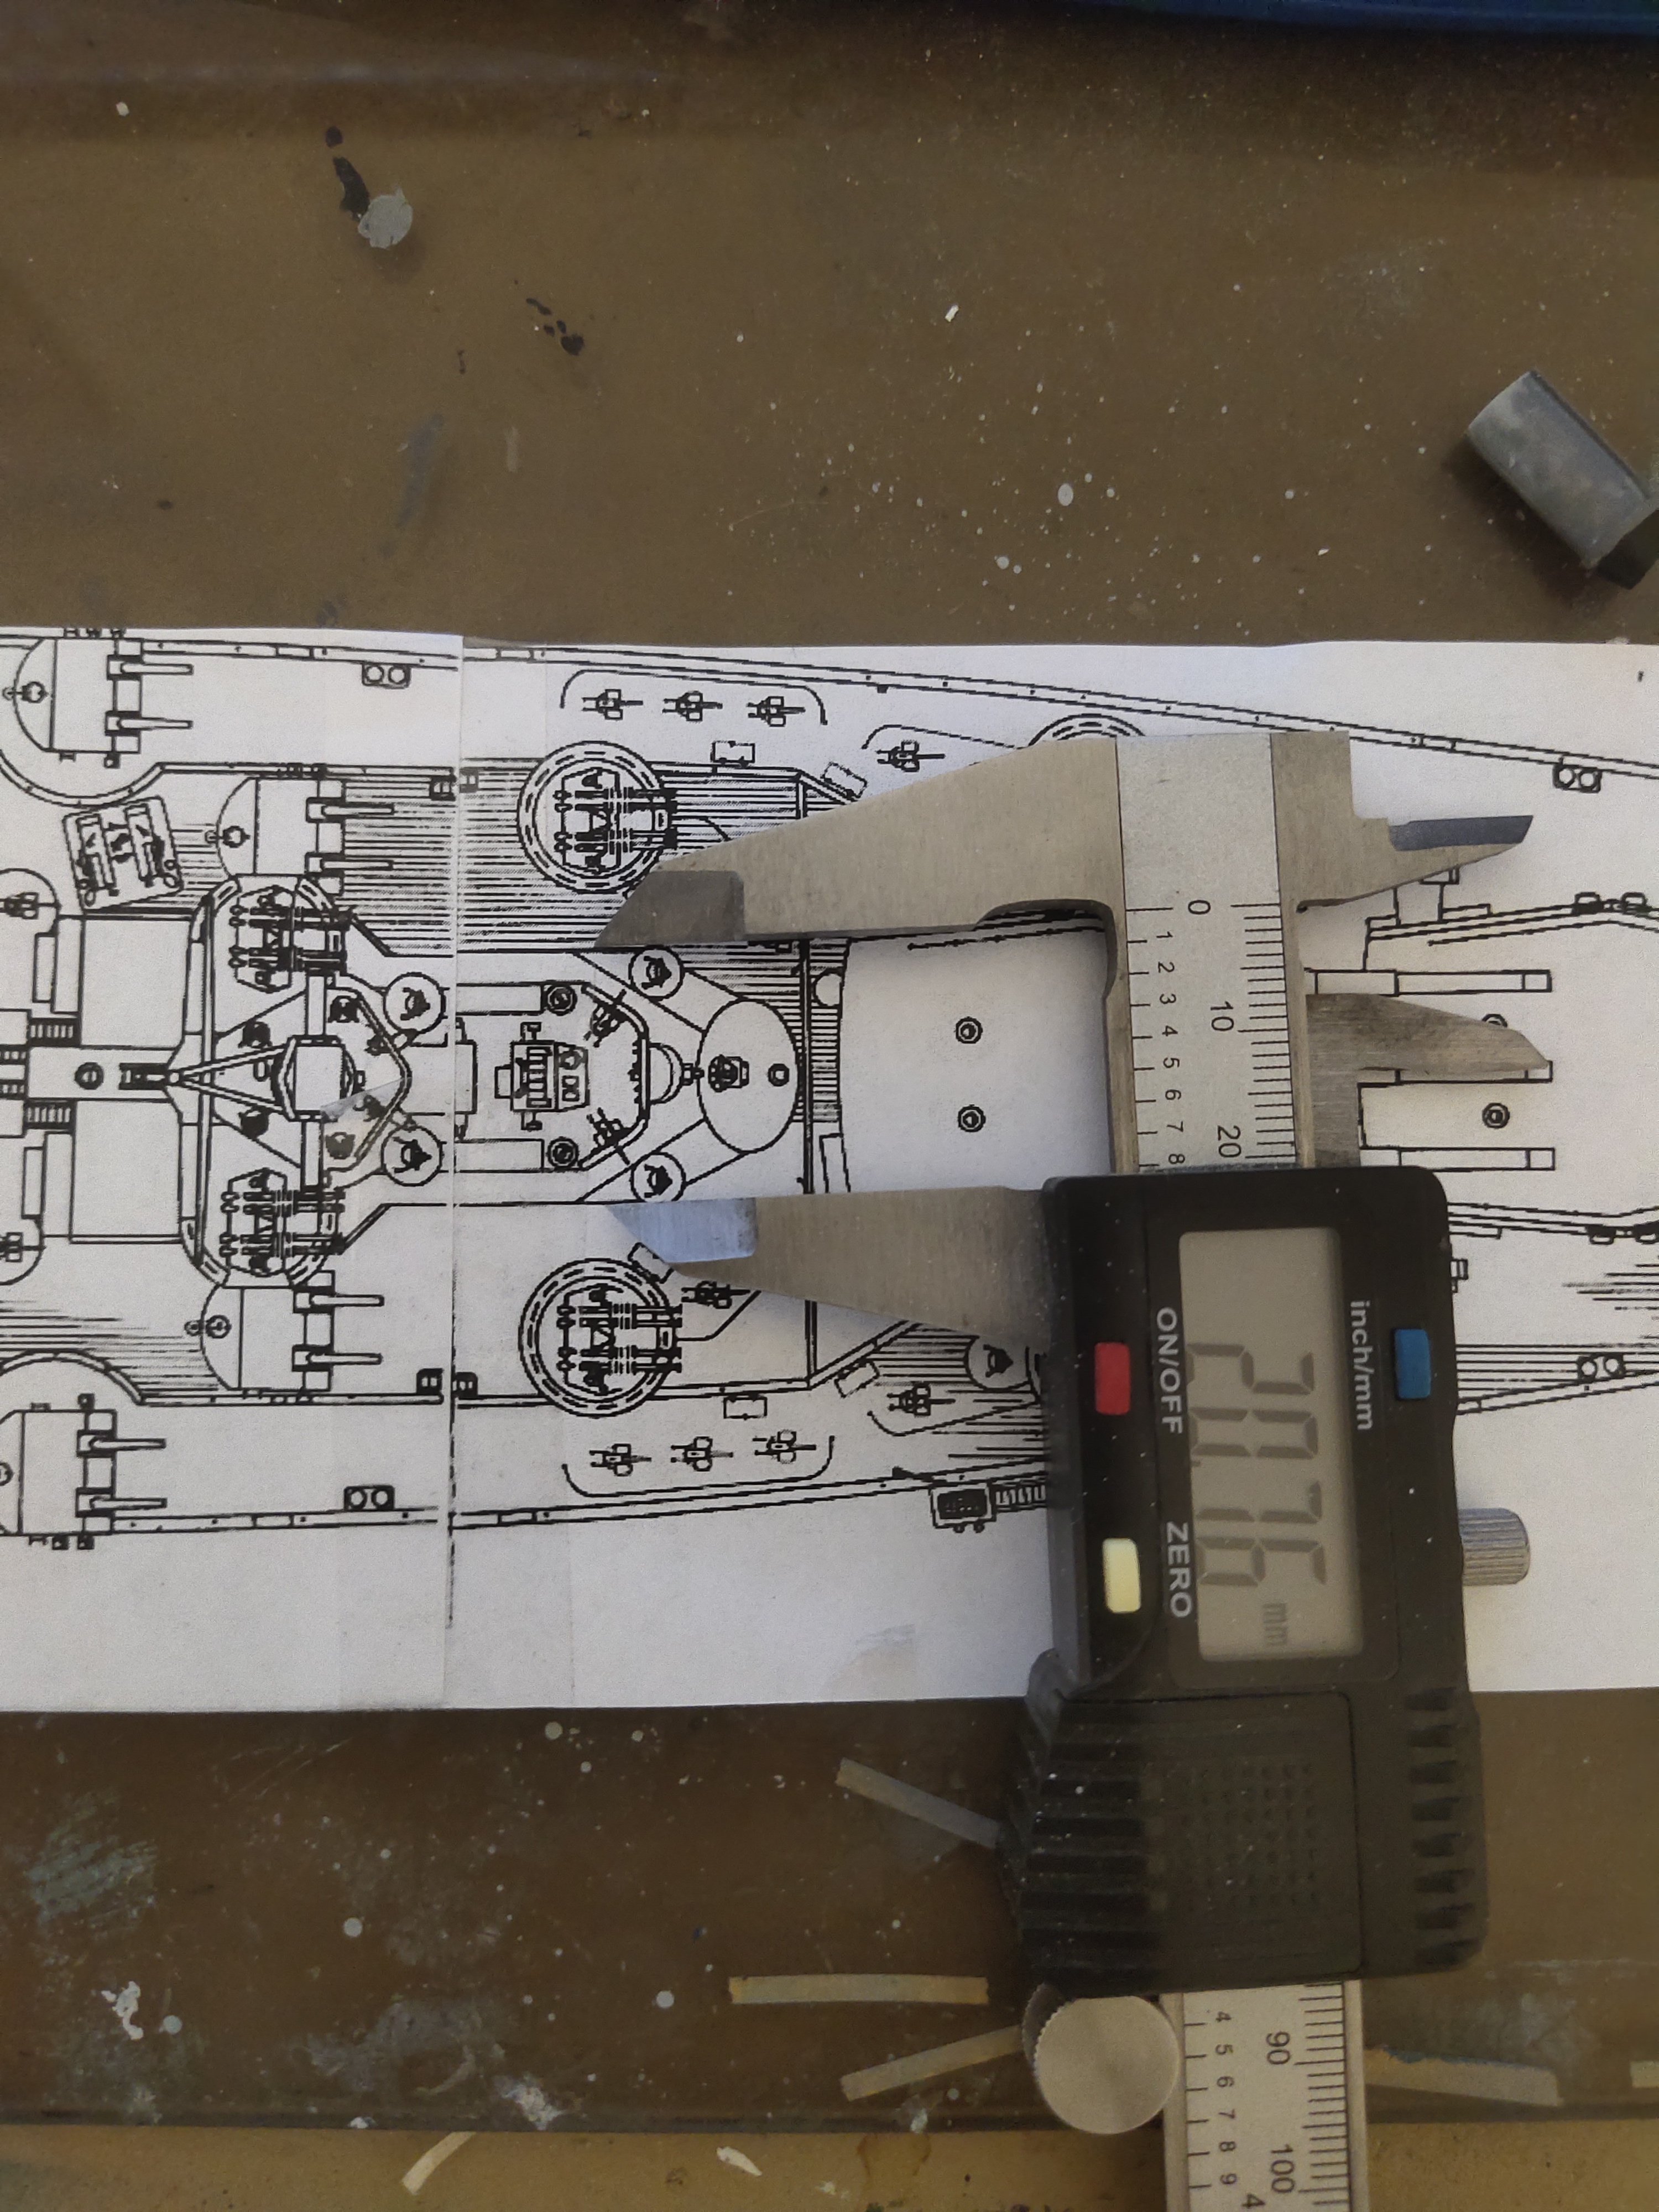
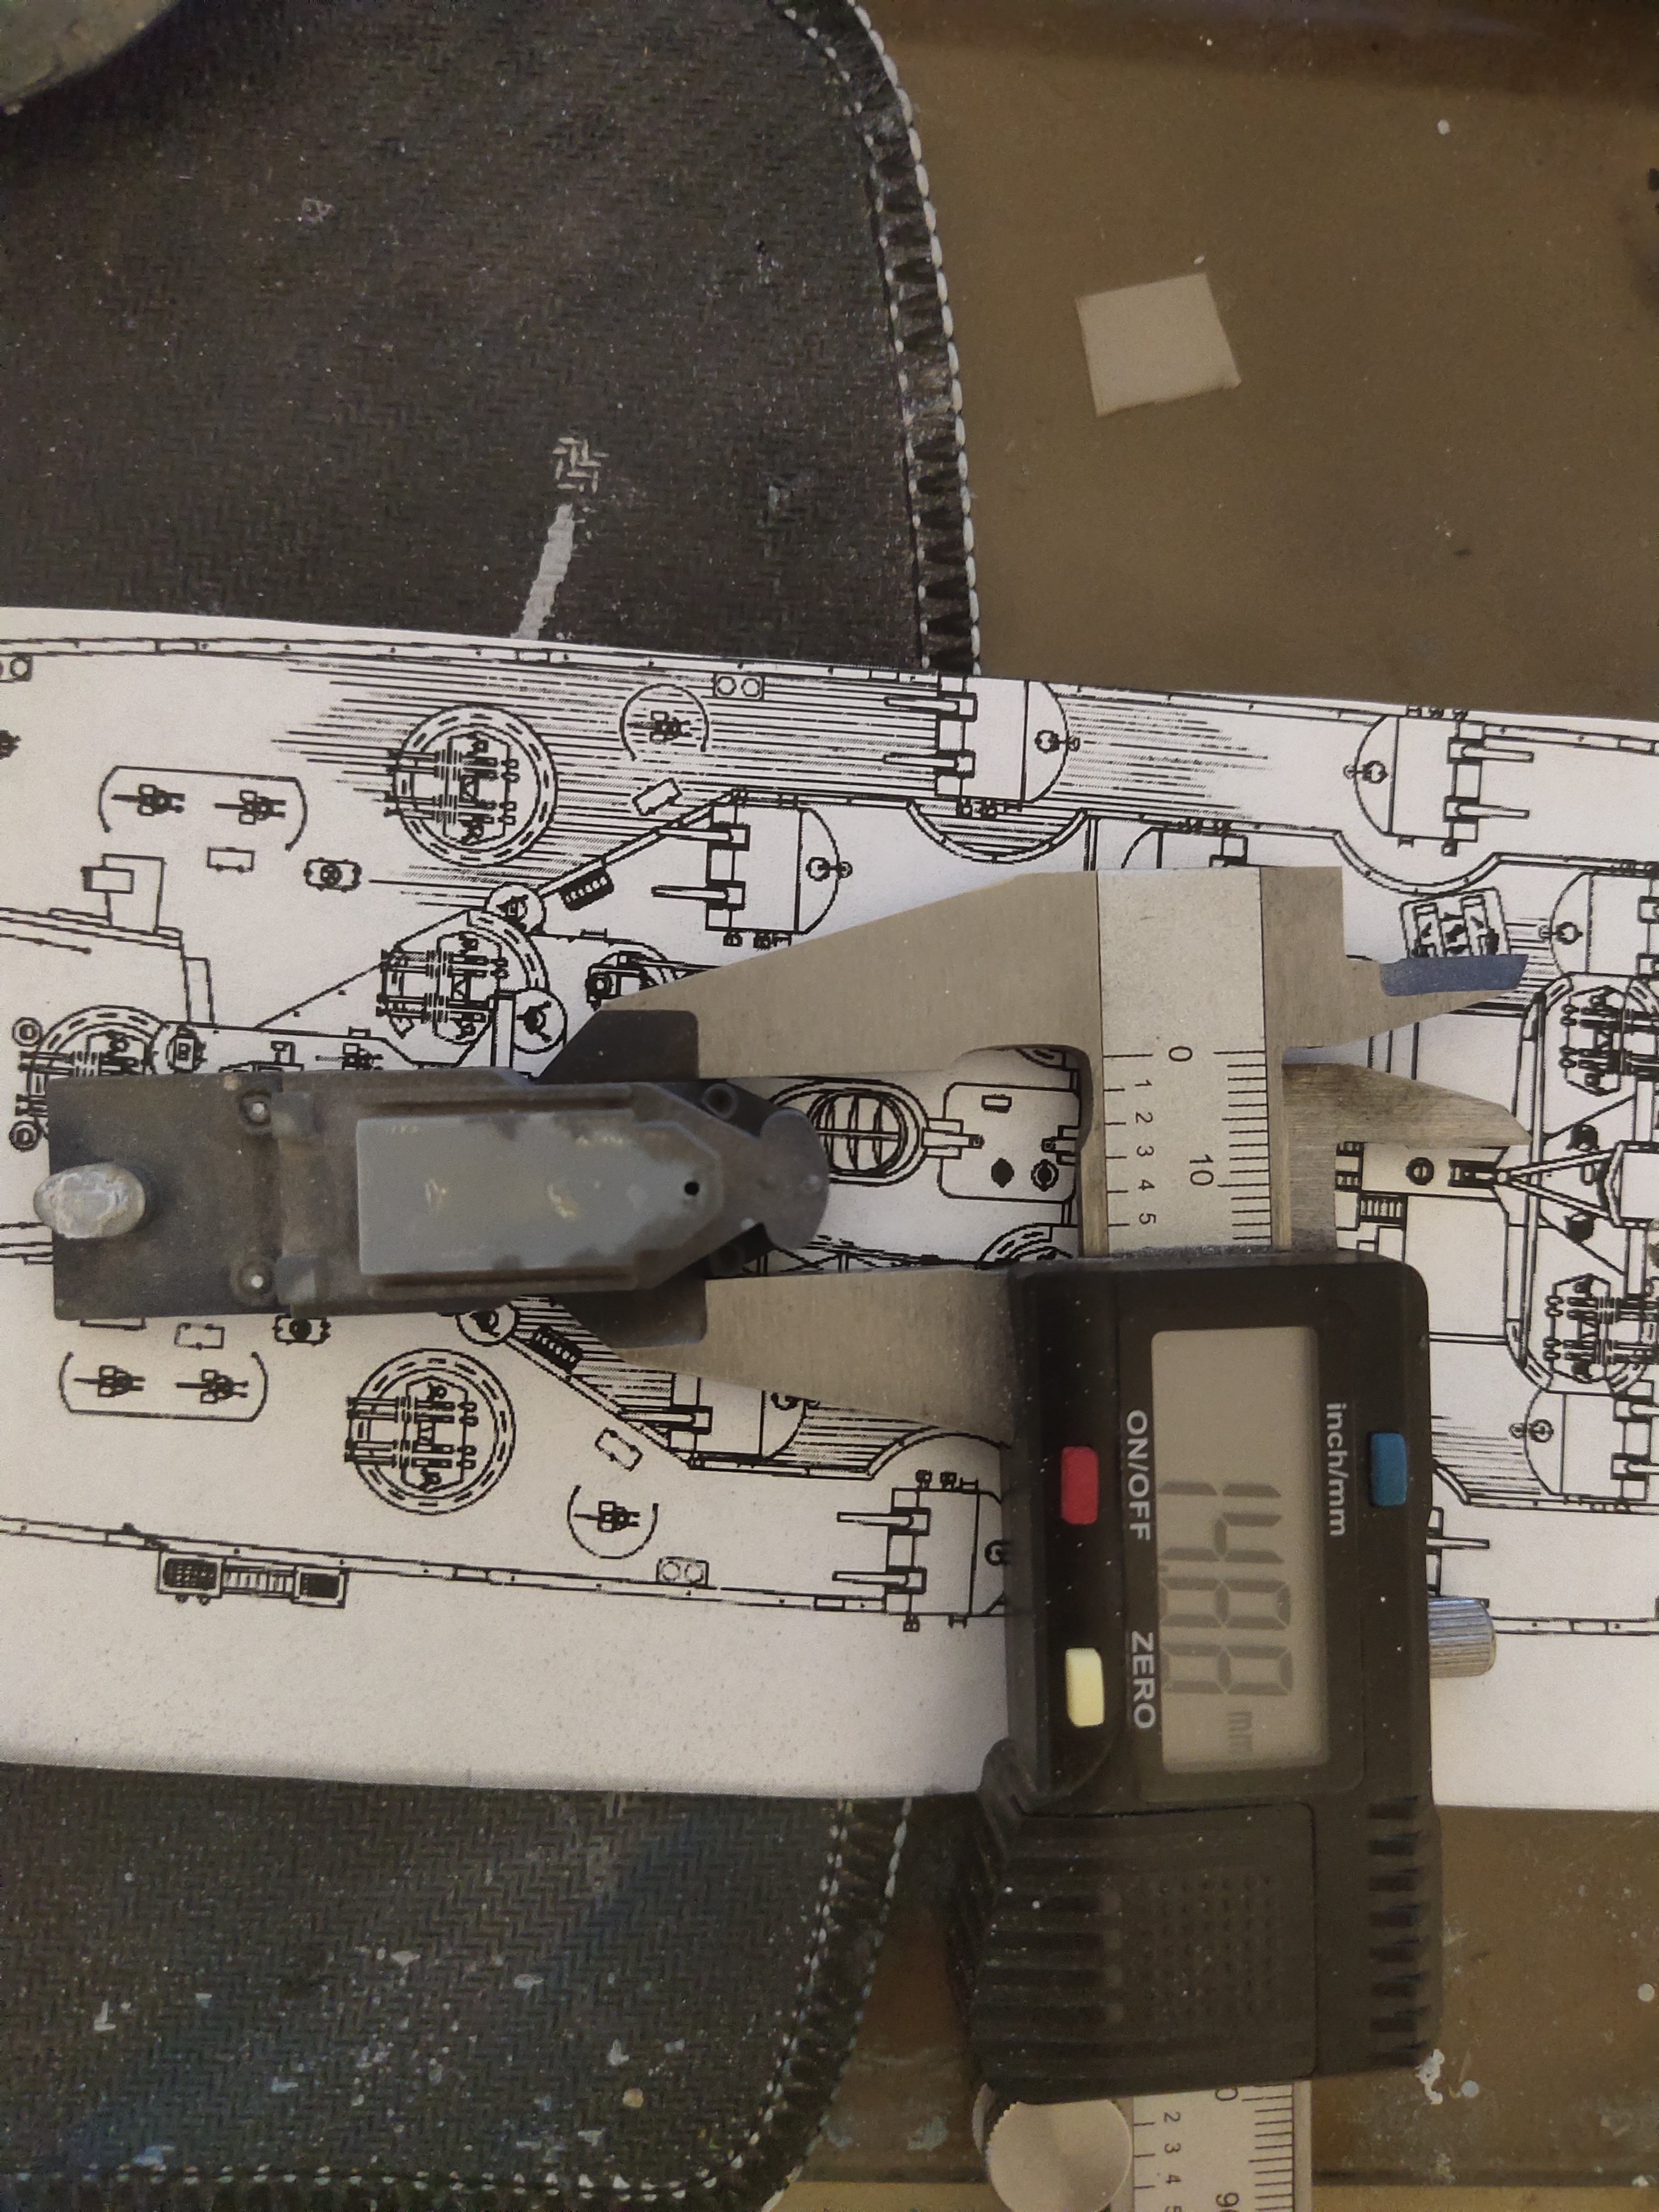
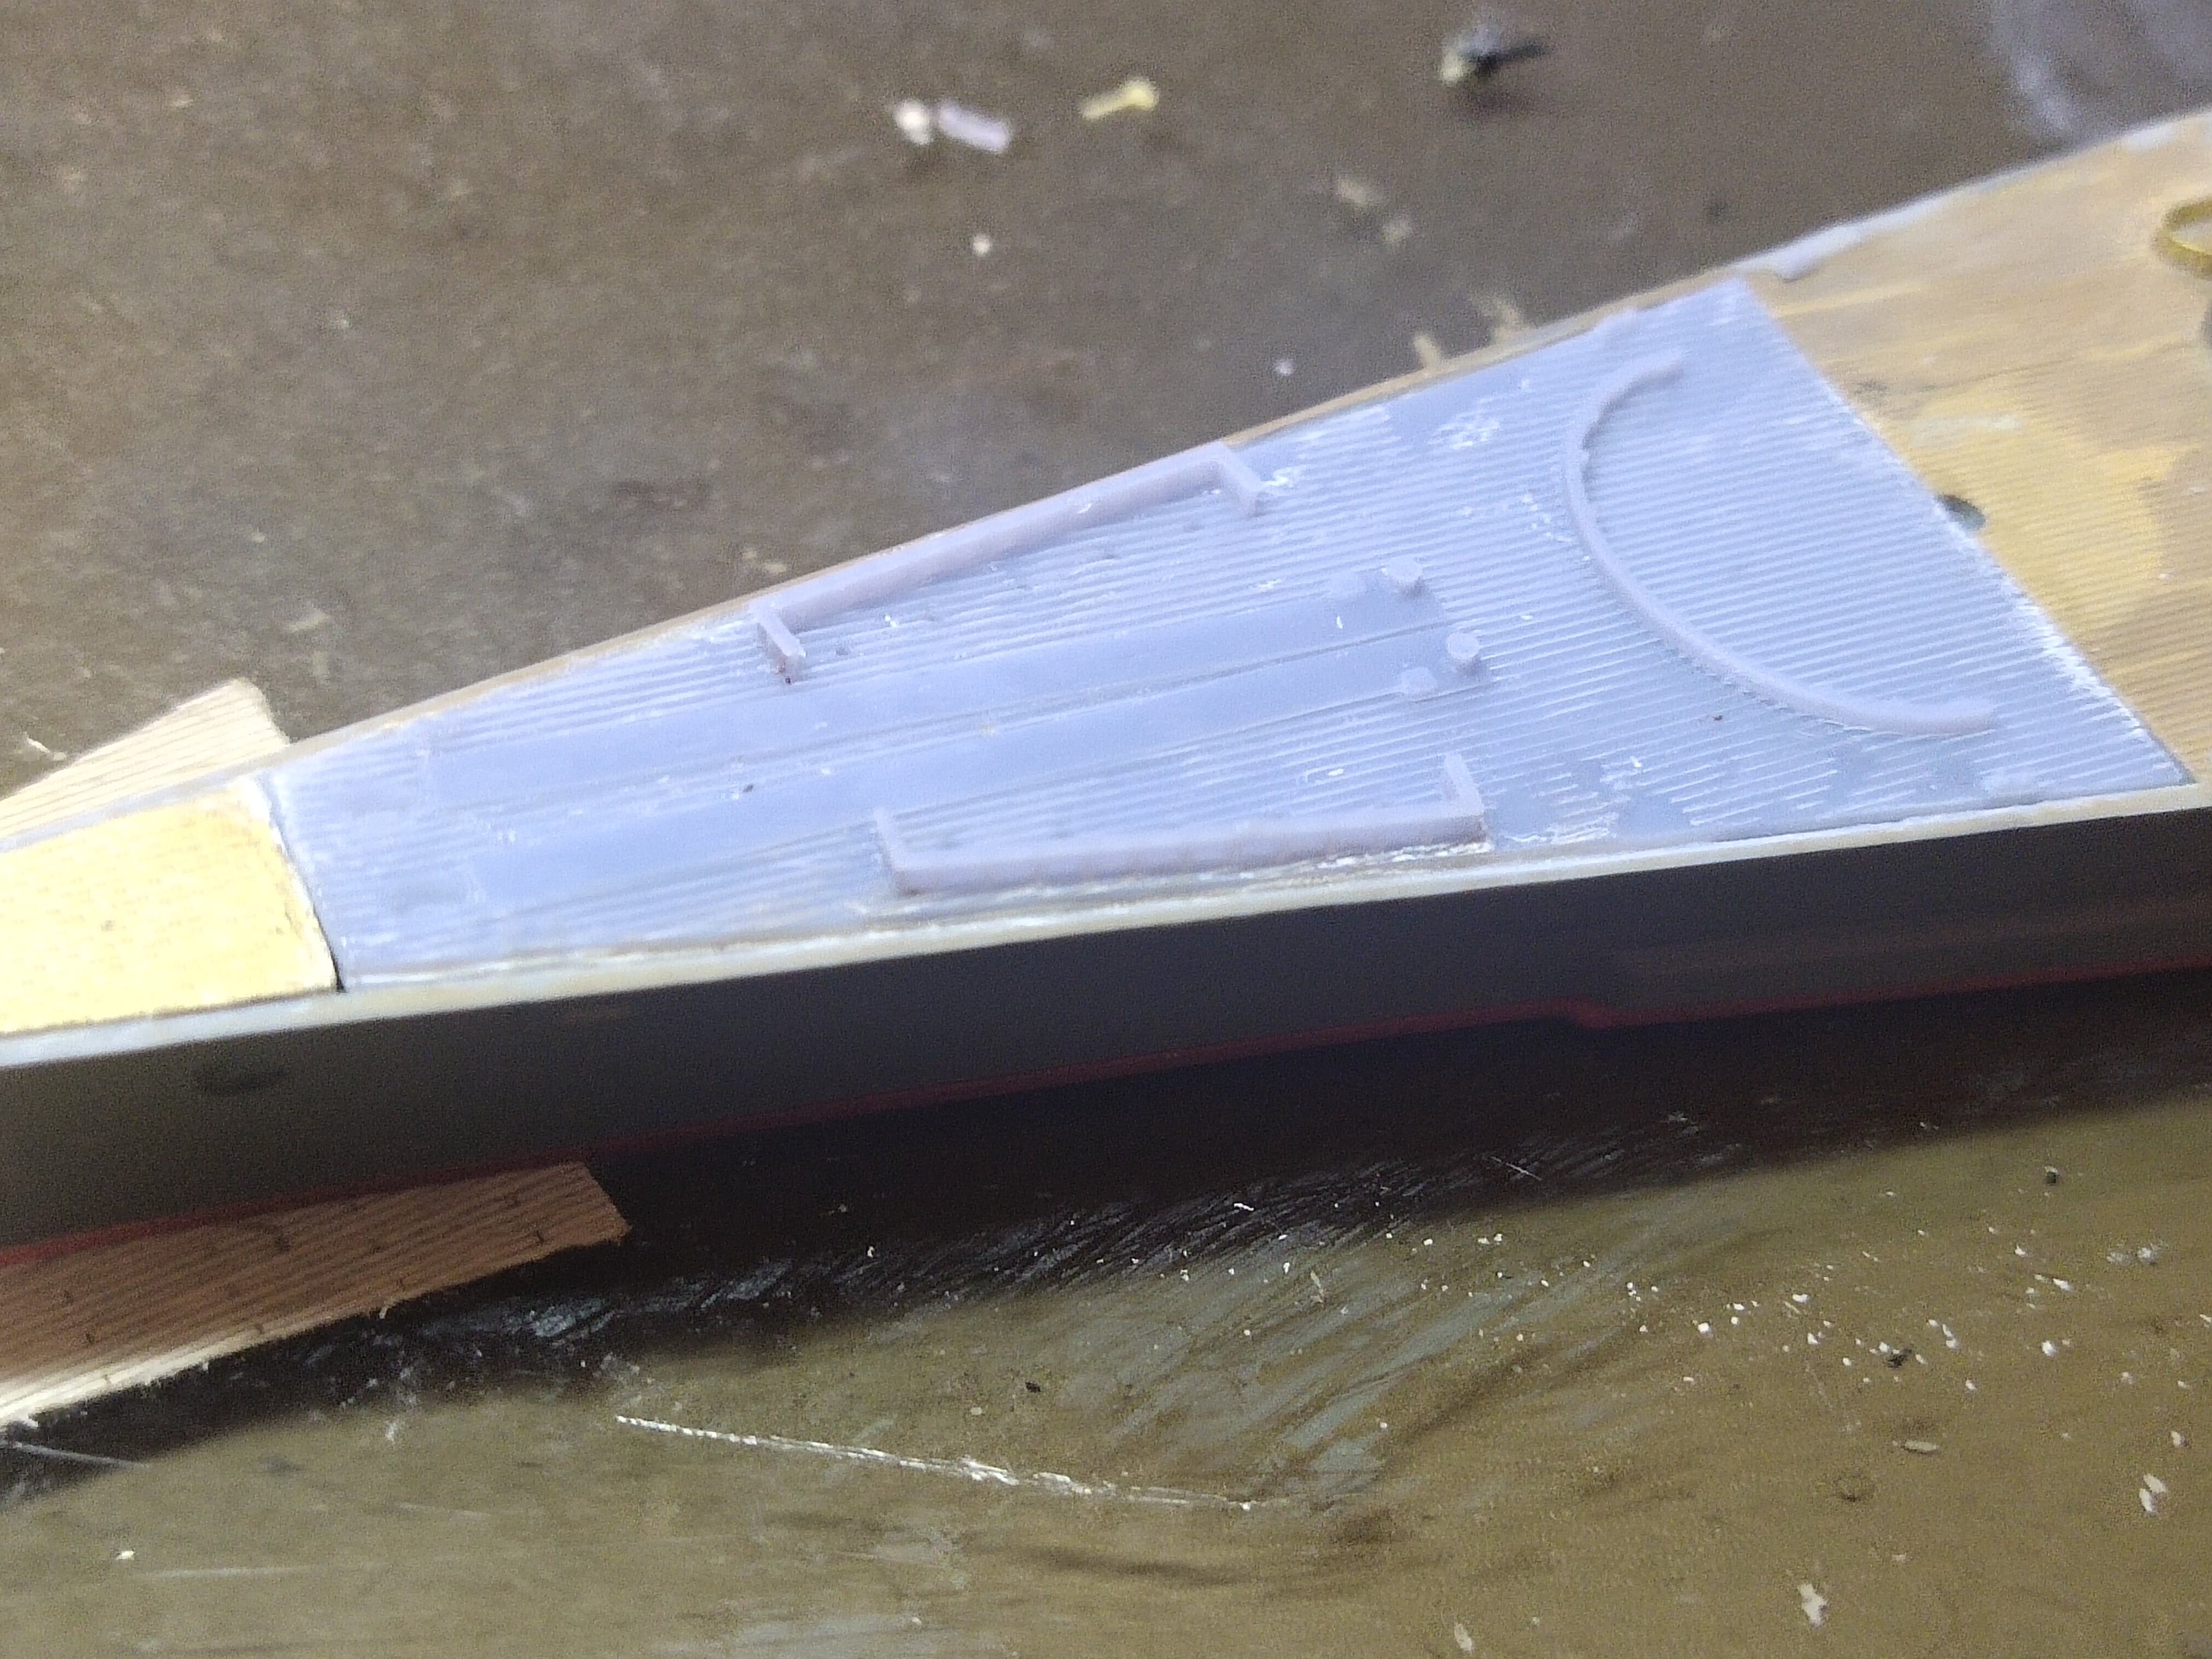
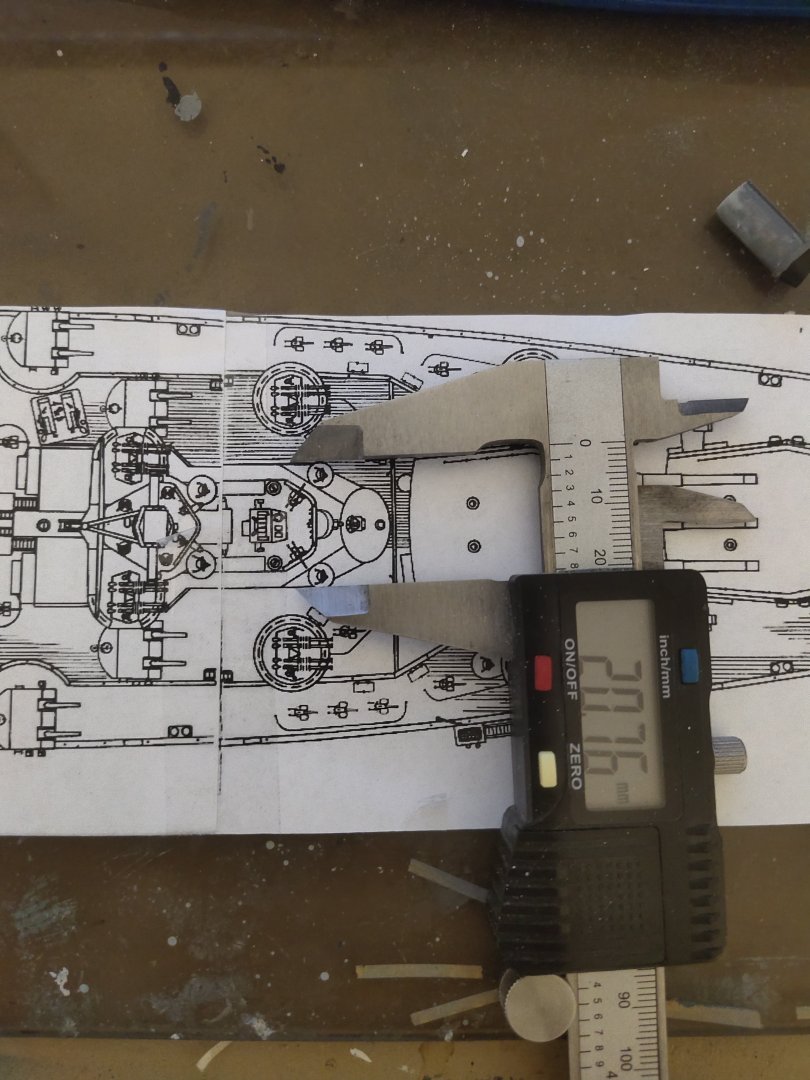
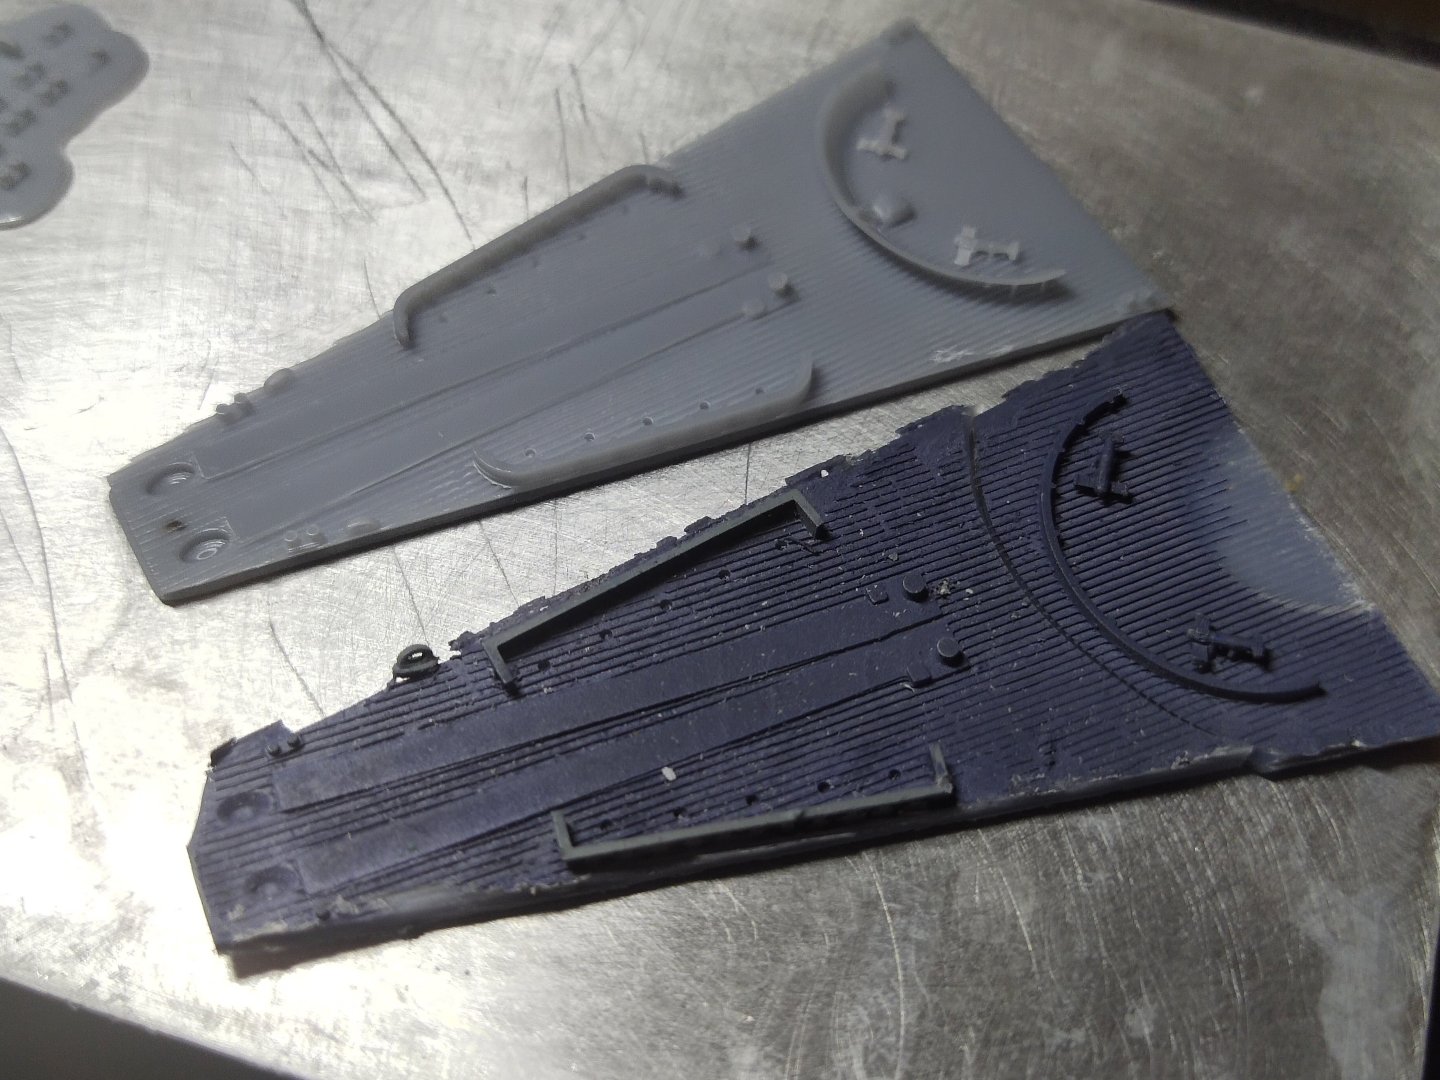
I used the above pics as a reference and designed a piece what it looks precise and definitely more accurate than the standard one. Its not huge just 20mm wide. Looking at the main superstructure part. There are some side bulges that are not appear in the real ship. Looks like all parts are faulty on this kit I have a layout in 1/435. I measured ther part width there at 20.76mm, That means 20.76 X 0.62 = 12.87 in 1/700. At its narrow point the width is 2 mm already thicker. However if I make it more narrow there will be left a large empty space on the deck with markings and glue leftovers, not easy to delete without damaging the deck lines. I'm thinking of making a part again at 12.8mm wide but without the side bulges

-
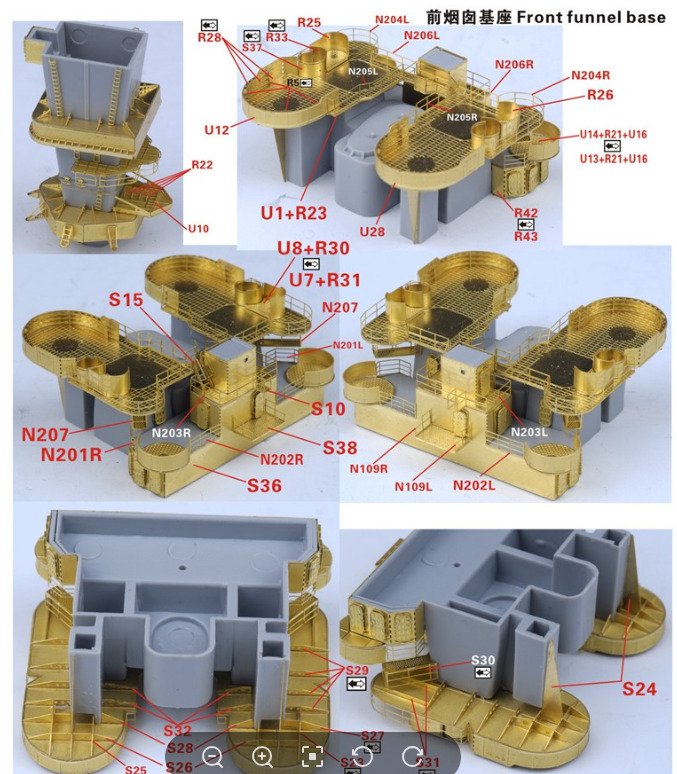
Yes but not for me as this is in 1/350. Randomly looking I found that this set cost around 350$. I think the Eduards option is far more decent for 100$ even less detailed.
-
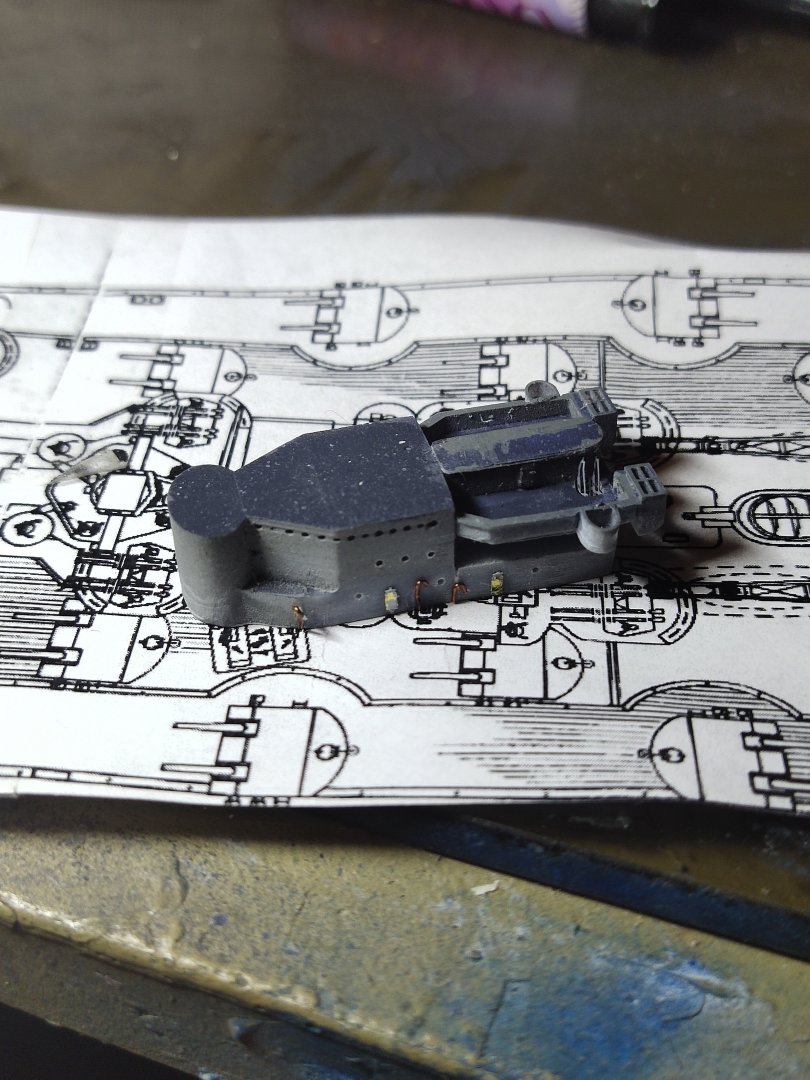
So my next work is on the middle platform. Maybe the worst part of the kit. The funnel seats on the platform but in reality its base is quite lower. The kit This is what I need to make. A separate from the superstructure base and a Π shaped gun platform, on the top. On the lower side there is another gun platform for 2 Oerlikons I think, at the corners.Note this is in 1/350 thus of so much detail. I moved on to remove carefully the main piece without causing damage And mark the area where needs to be cut but not before I make the central platform and see how will it fit in the middle


-
Perhaps. I am using complete models and 3d drawings mostly as a reference instead of old low res photos. https://www.artstation.com/artwork/nEnQ96 Such an old model can hardly be accurate.
-
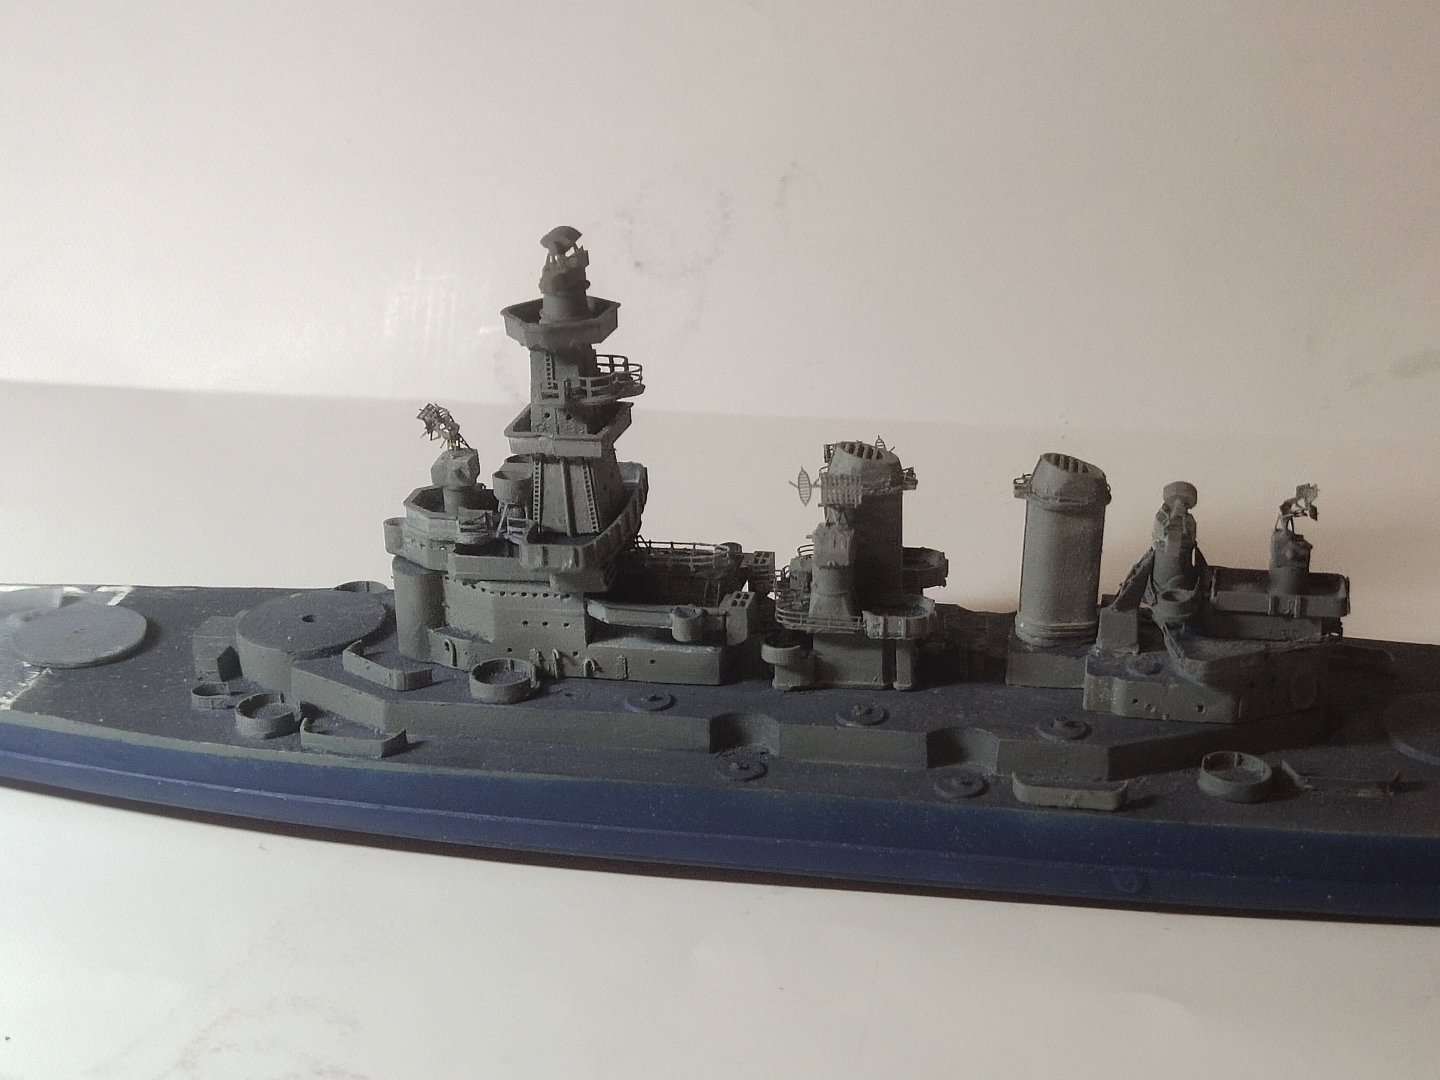
I worked at the rear section, added as Mich details as possible.scratch built, 3d print + PE work.


-
Trumpeter has good detailed and reasonably priced kits. Great Value for money. The selection of kits also is getting better every year
-
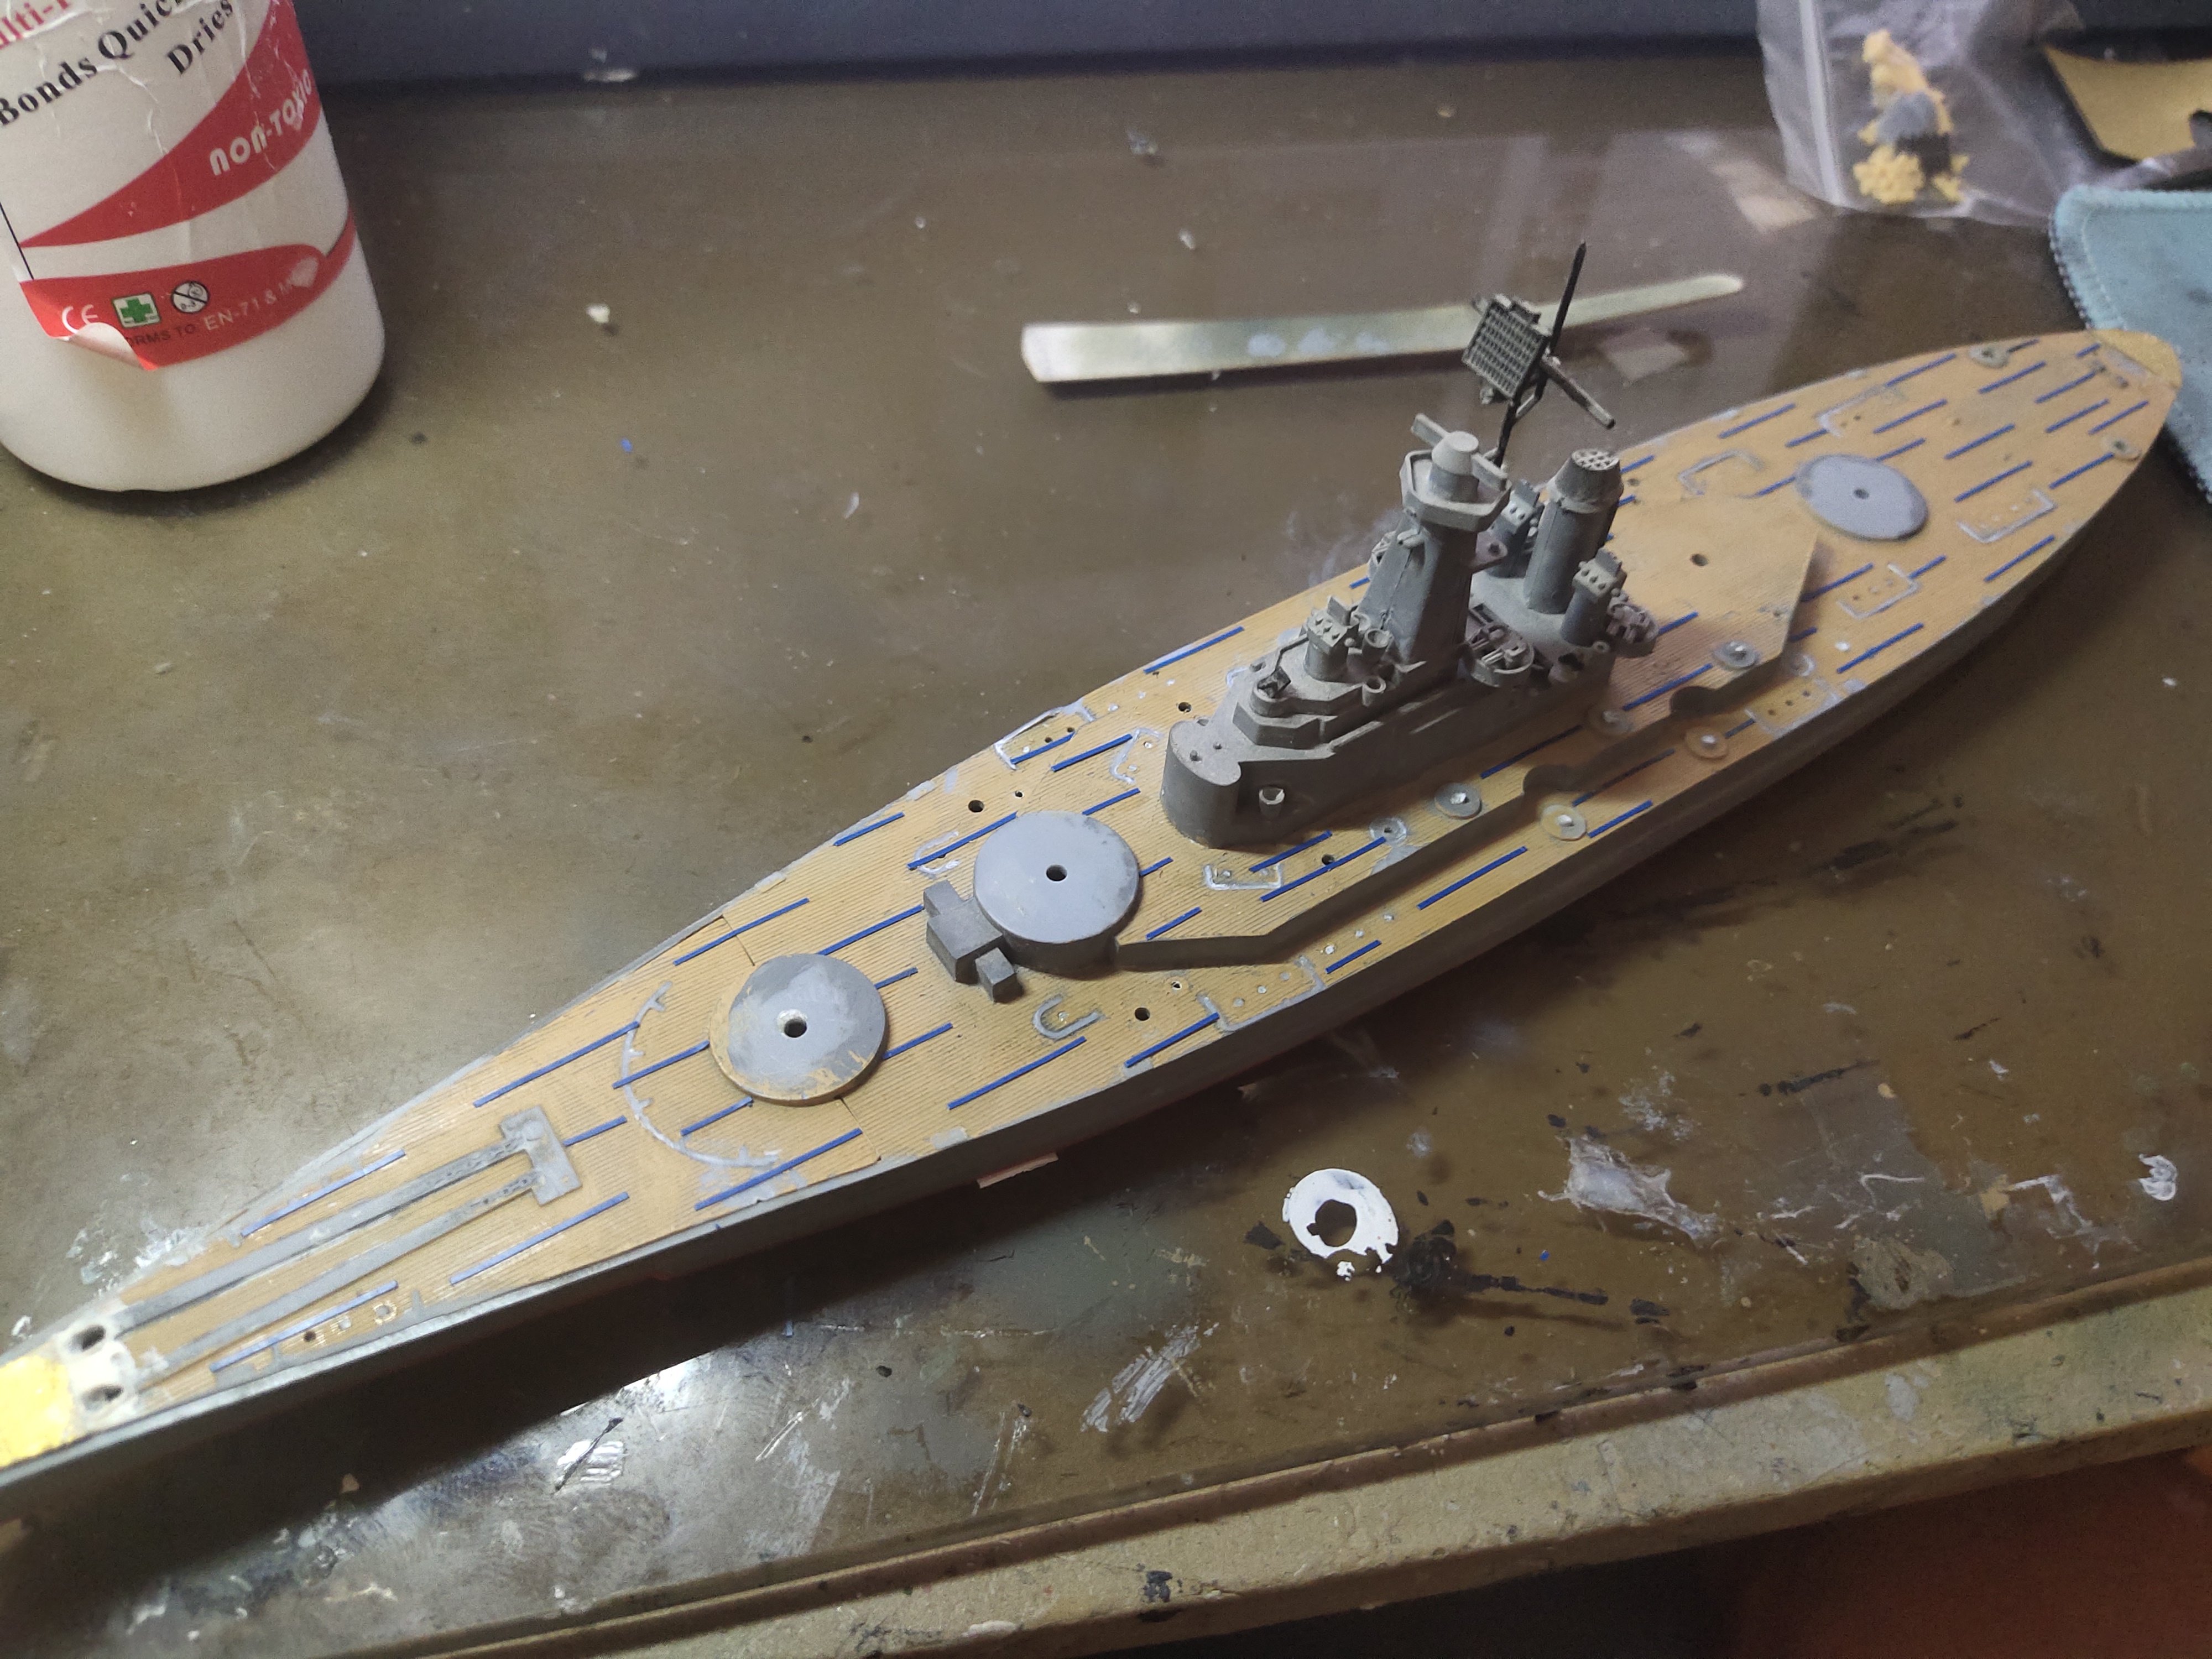
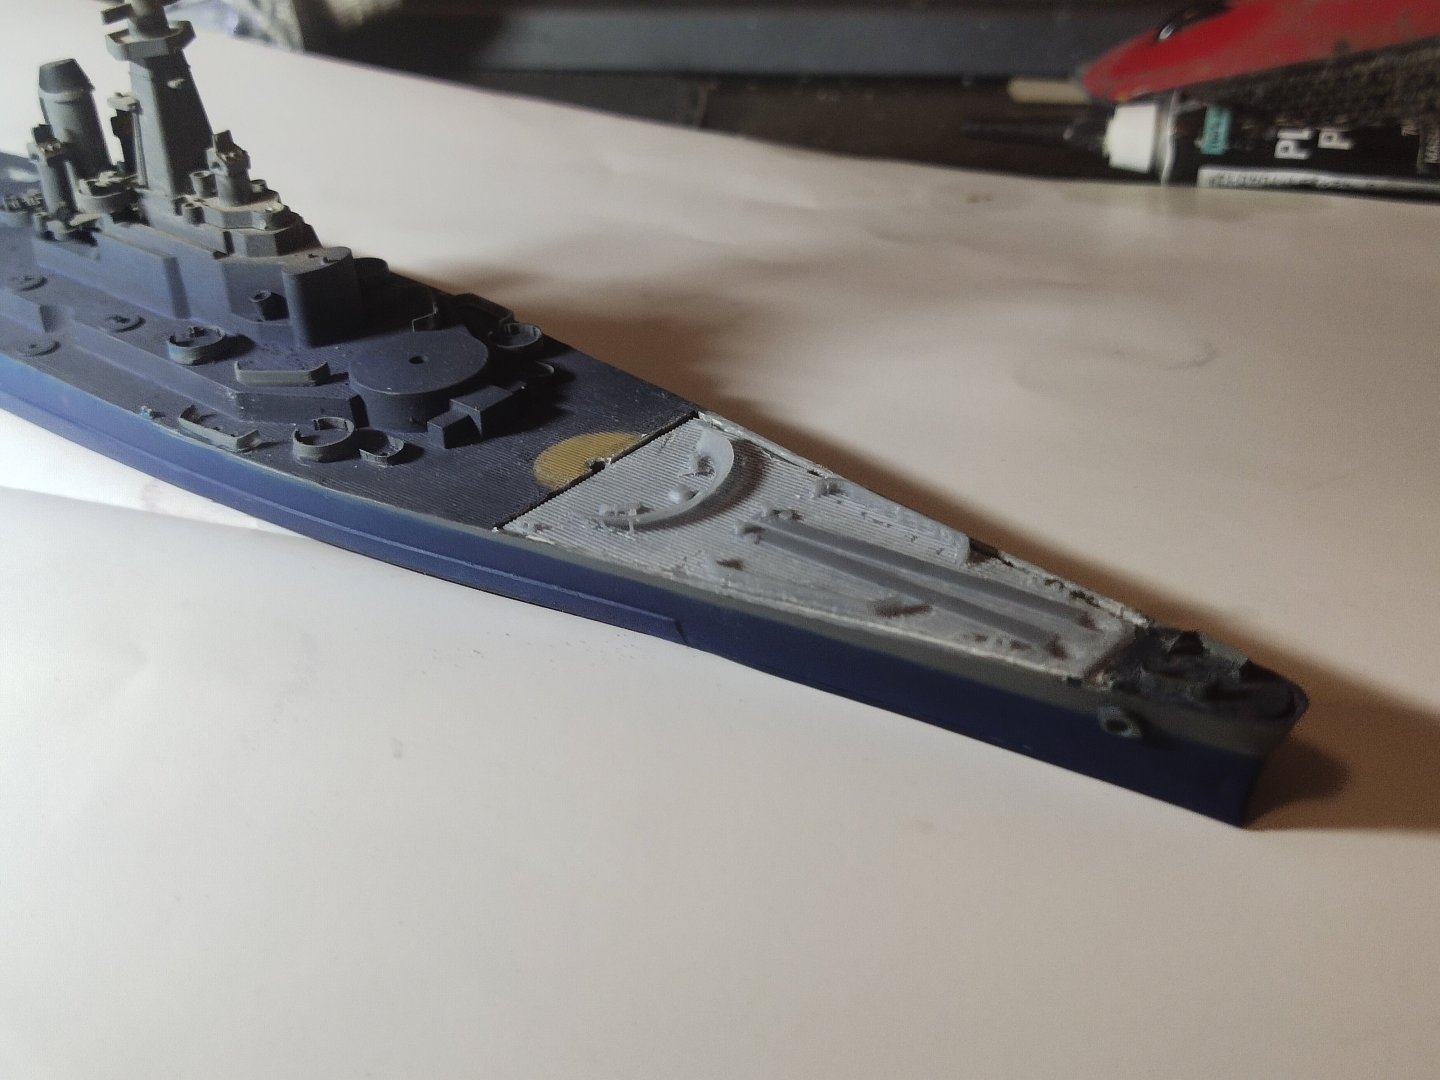
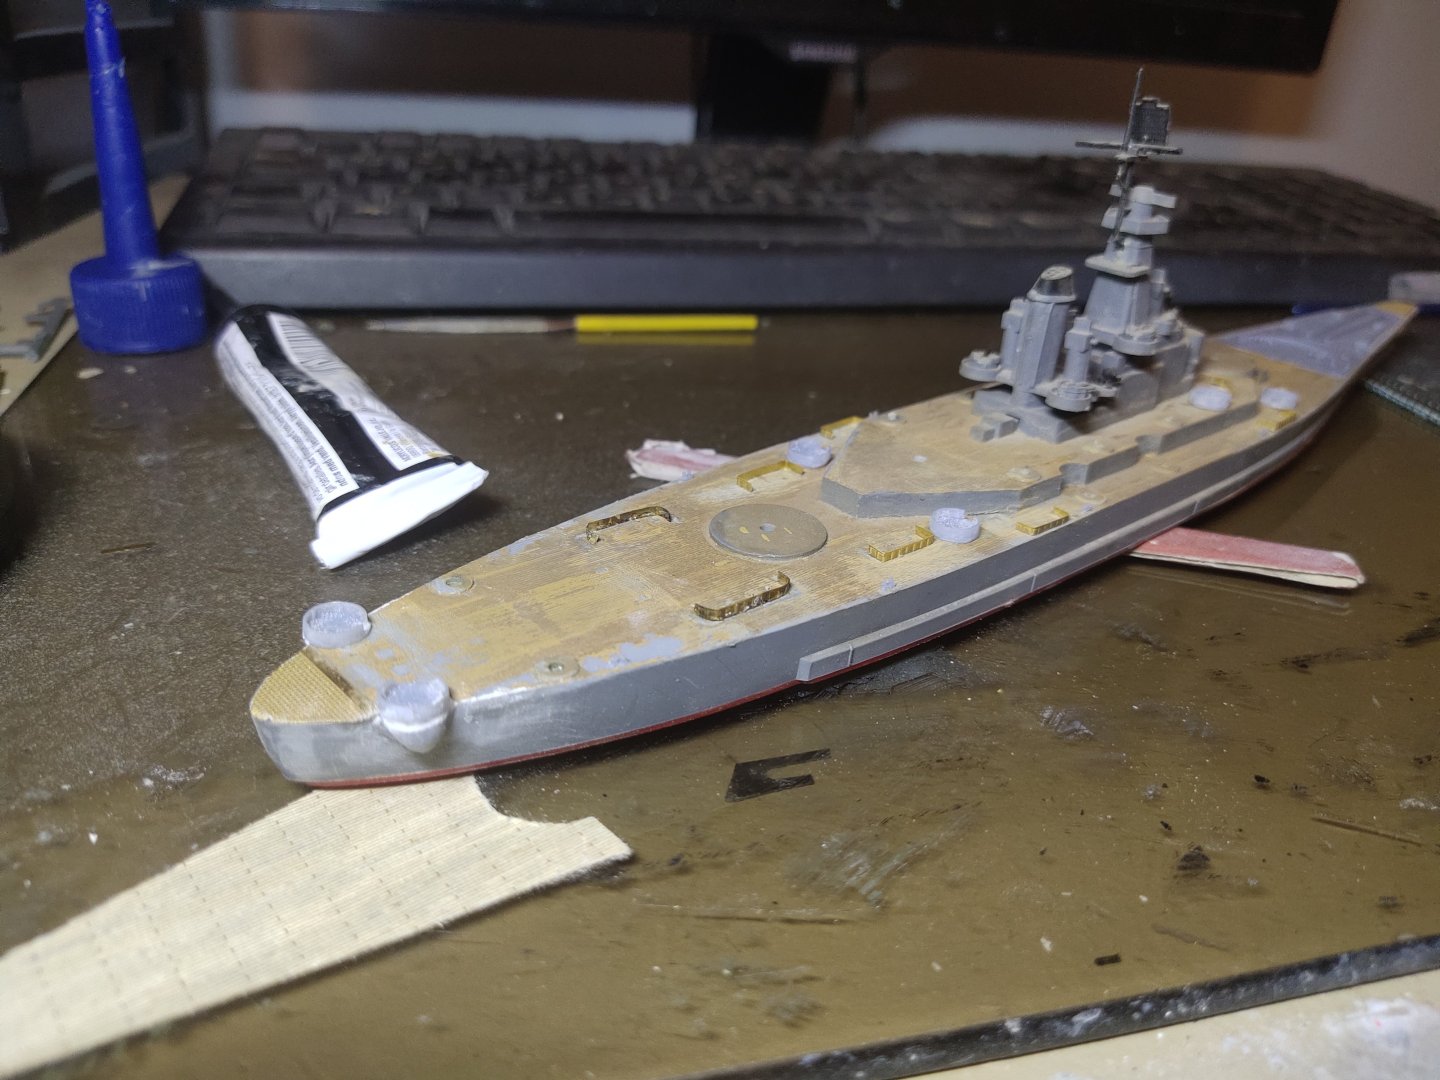
Another day with lot of work but zero progress. The resin foredeck got warped. Not much, but I decided to replace it with another one made from less flexible resin, also got the chance to work on the gun shields, giving them a more realistic shape. Of course this didn't came with out damage. But I'm good on such kind of surgeries. The foredeck is glued on a 1mm plastic to improve stiffness, left overnight under pressure. It will be installed permanently on a later stage, want to make sure that it won't warp again.


-
I continued painting the hull. Googling for color codes AI interacted and suggested than in 1/700 colors should be mixed with 20% white. Sounded reasonable but I prefer to cover apply lighter shades upon completion before oil weathering

-
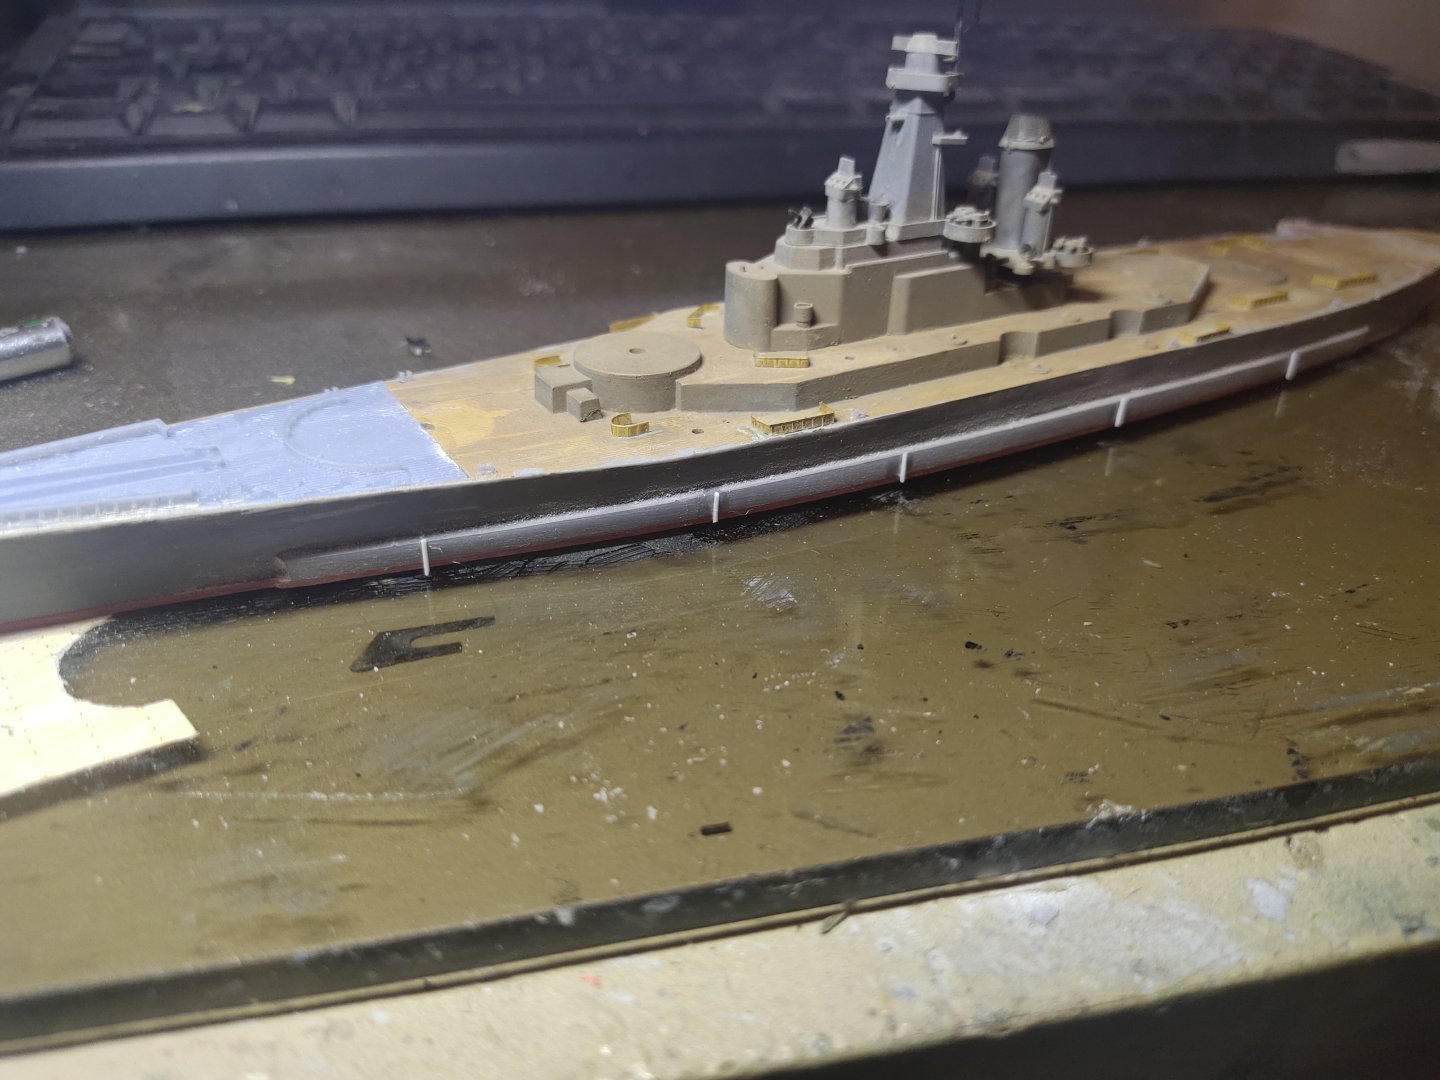
With 39°C impossible to airbrush. Paint would get dry instantly. Therefore I finished the job on the right antitorpedo belt this using a more powerful tool. Result with some had work came pretty nice, much better that the original Today painting was possible. The PE guns shields proved too fragile and hard to be glued on deck. I removed them and replaced them with 3d ones I made, bit thicker with reasonable detail. Unfortunately some glue spots and scratches on deck are visible. Some can be covered but few will remain visible on close looking


-
this makes all plastic models useless
-
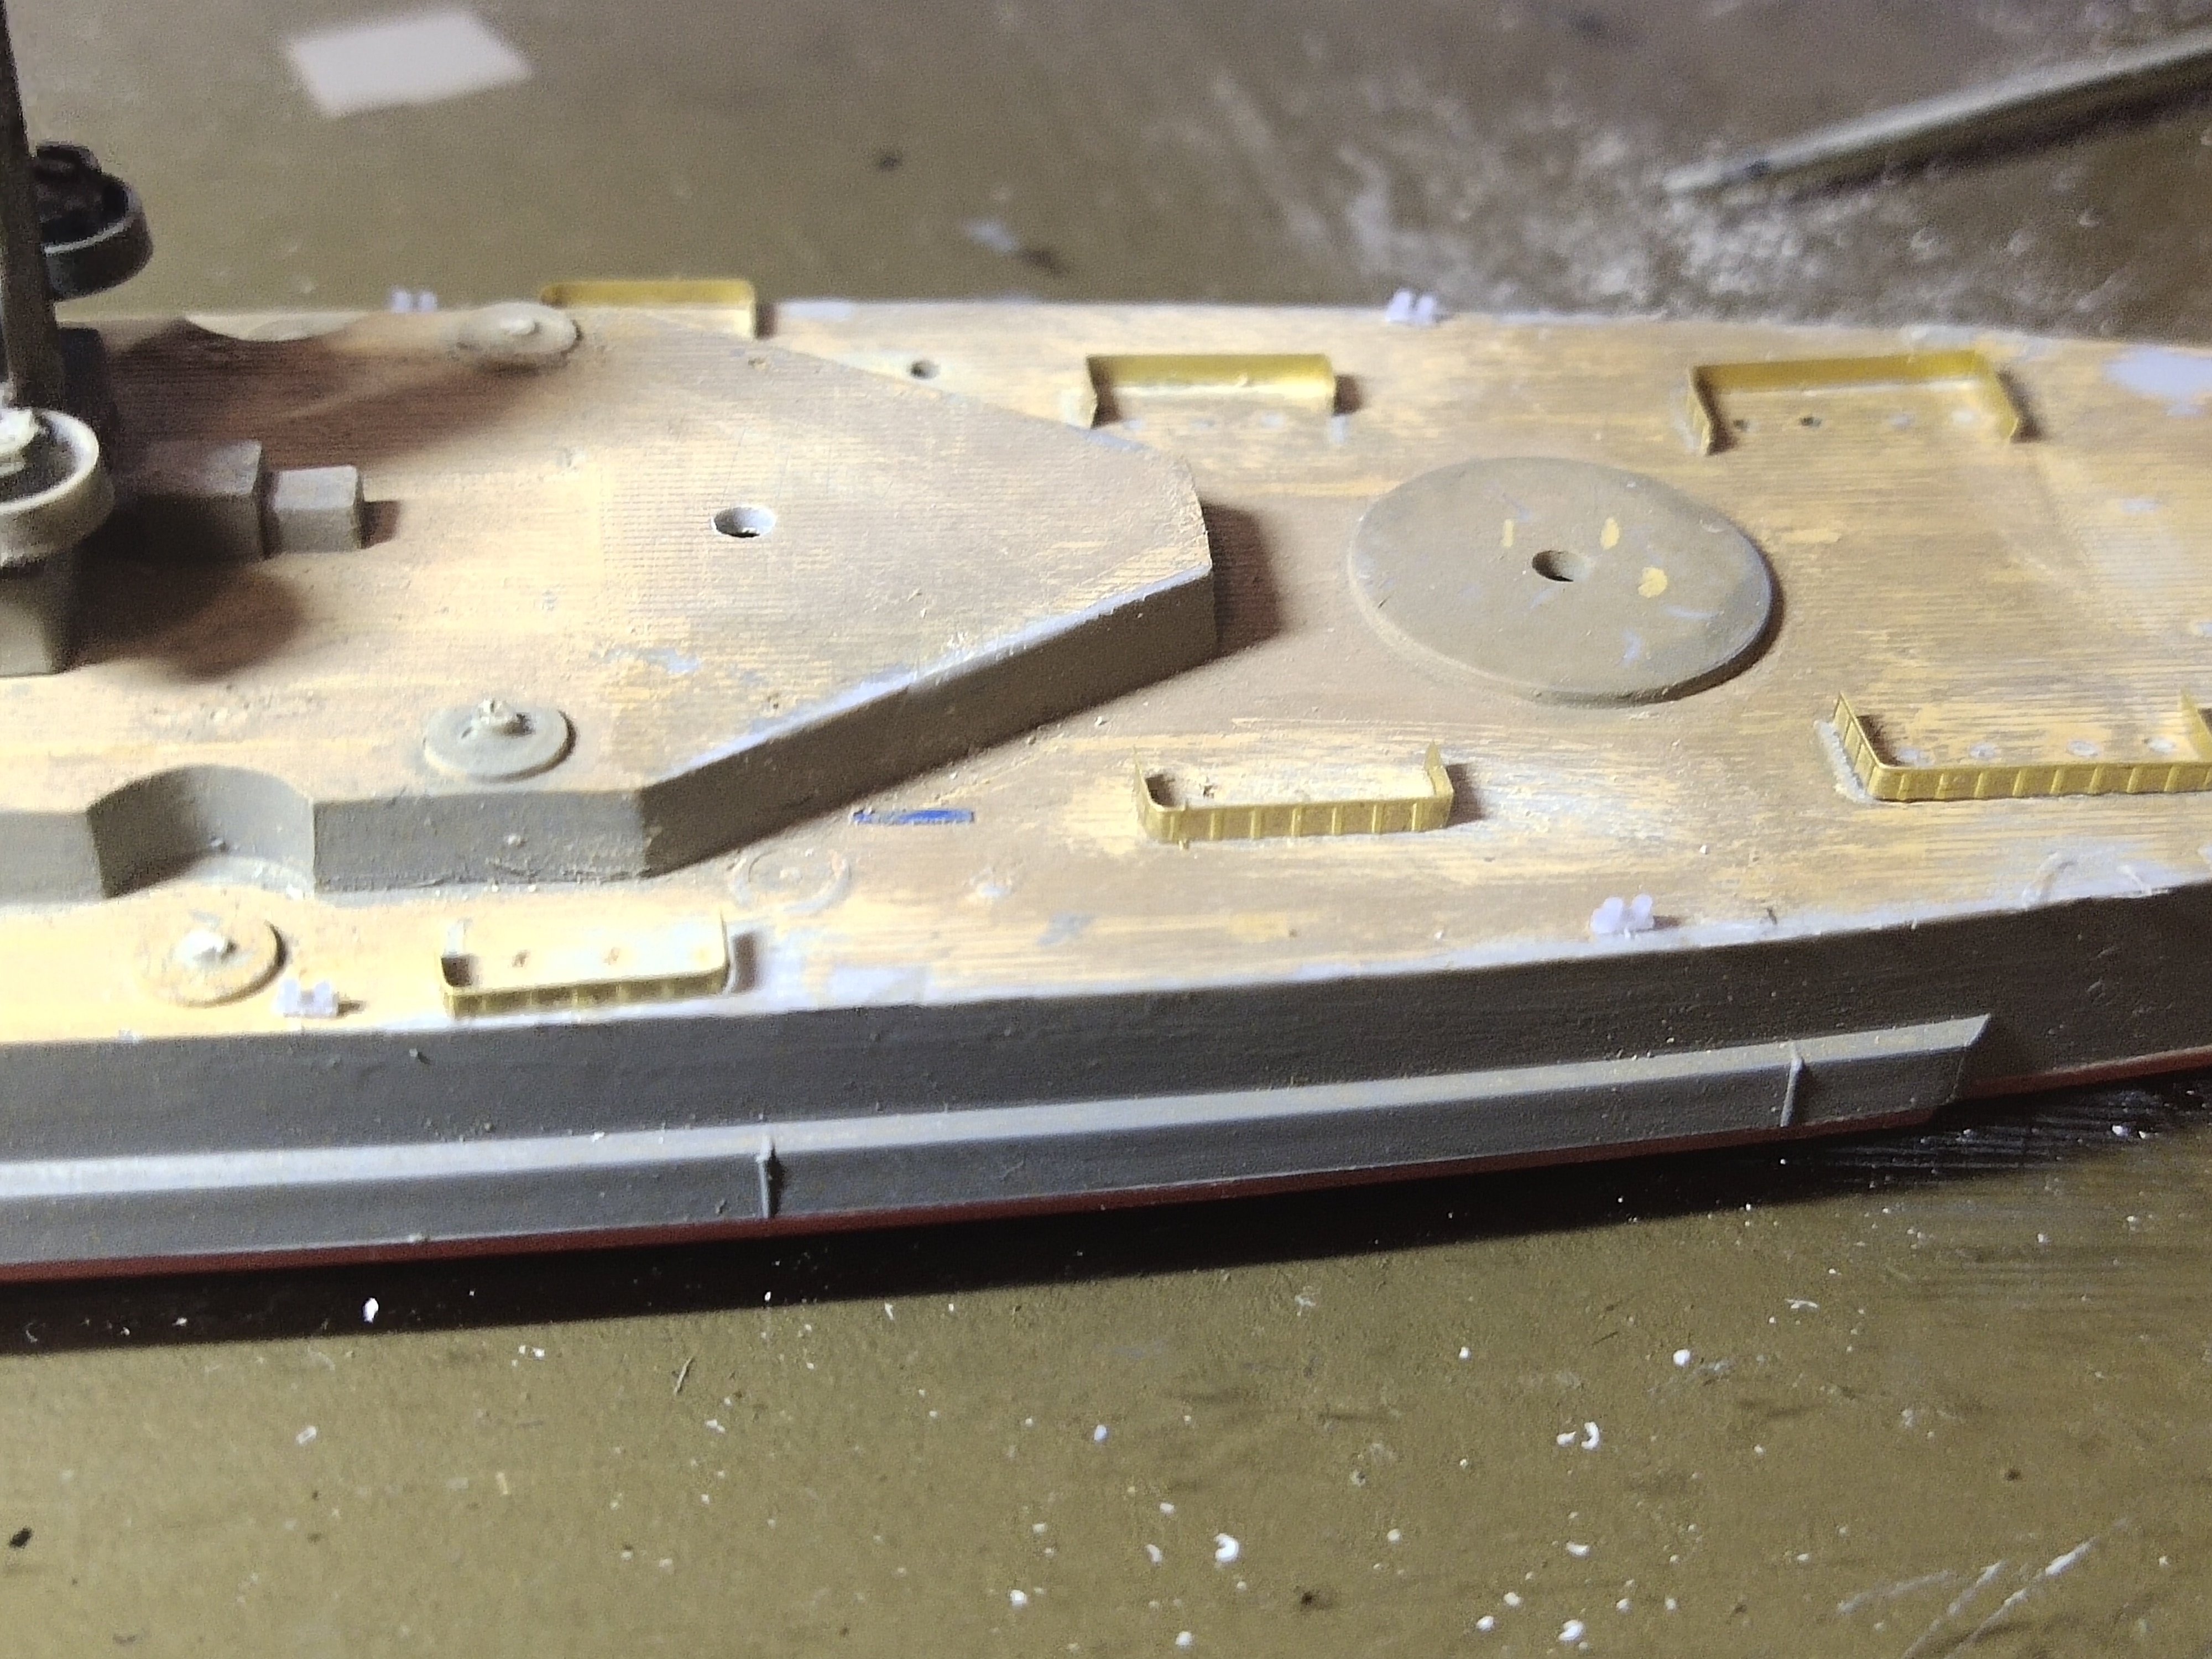
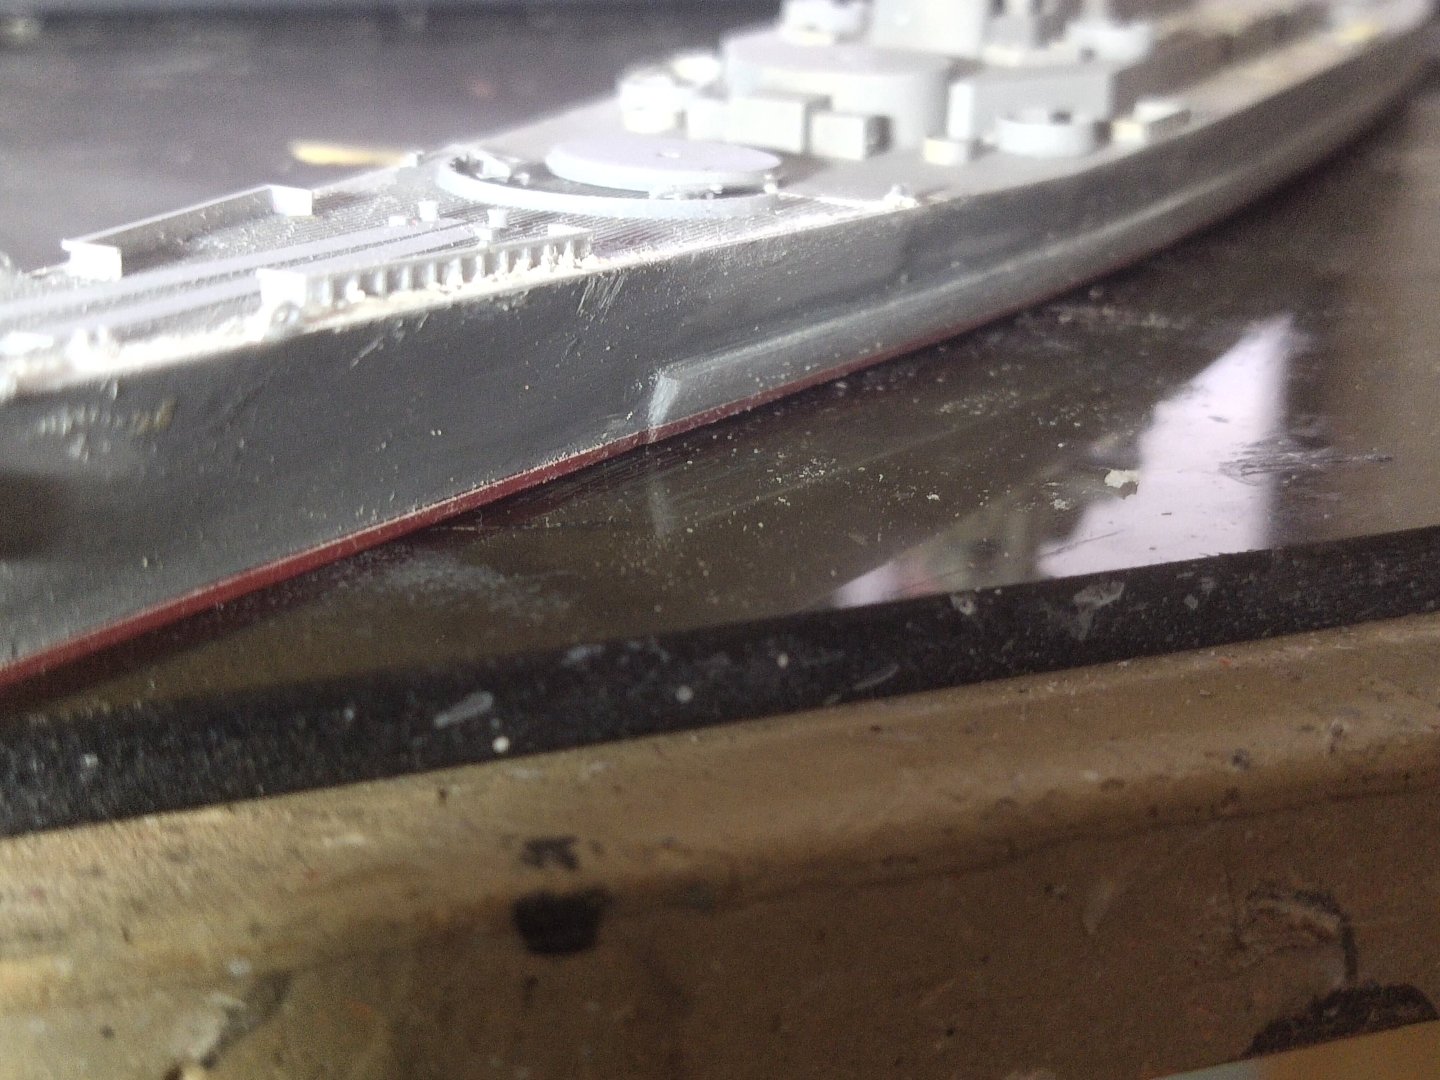
I trimmed down the belt at an angle. Using a proper tool I created a slopping effect which is only visible only at close distance. Left side, done need to work at the right. Then I added new bases for the 40mm guns. Those at the bow did not exist at the original model so I added myself


-
These old kits doesn't refer the time period but I expect to put 40 Oerlikons which means 1944? So you mean in 1/700 the ideal belt thickness is 0.5mm? That means I need to remove more material
-
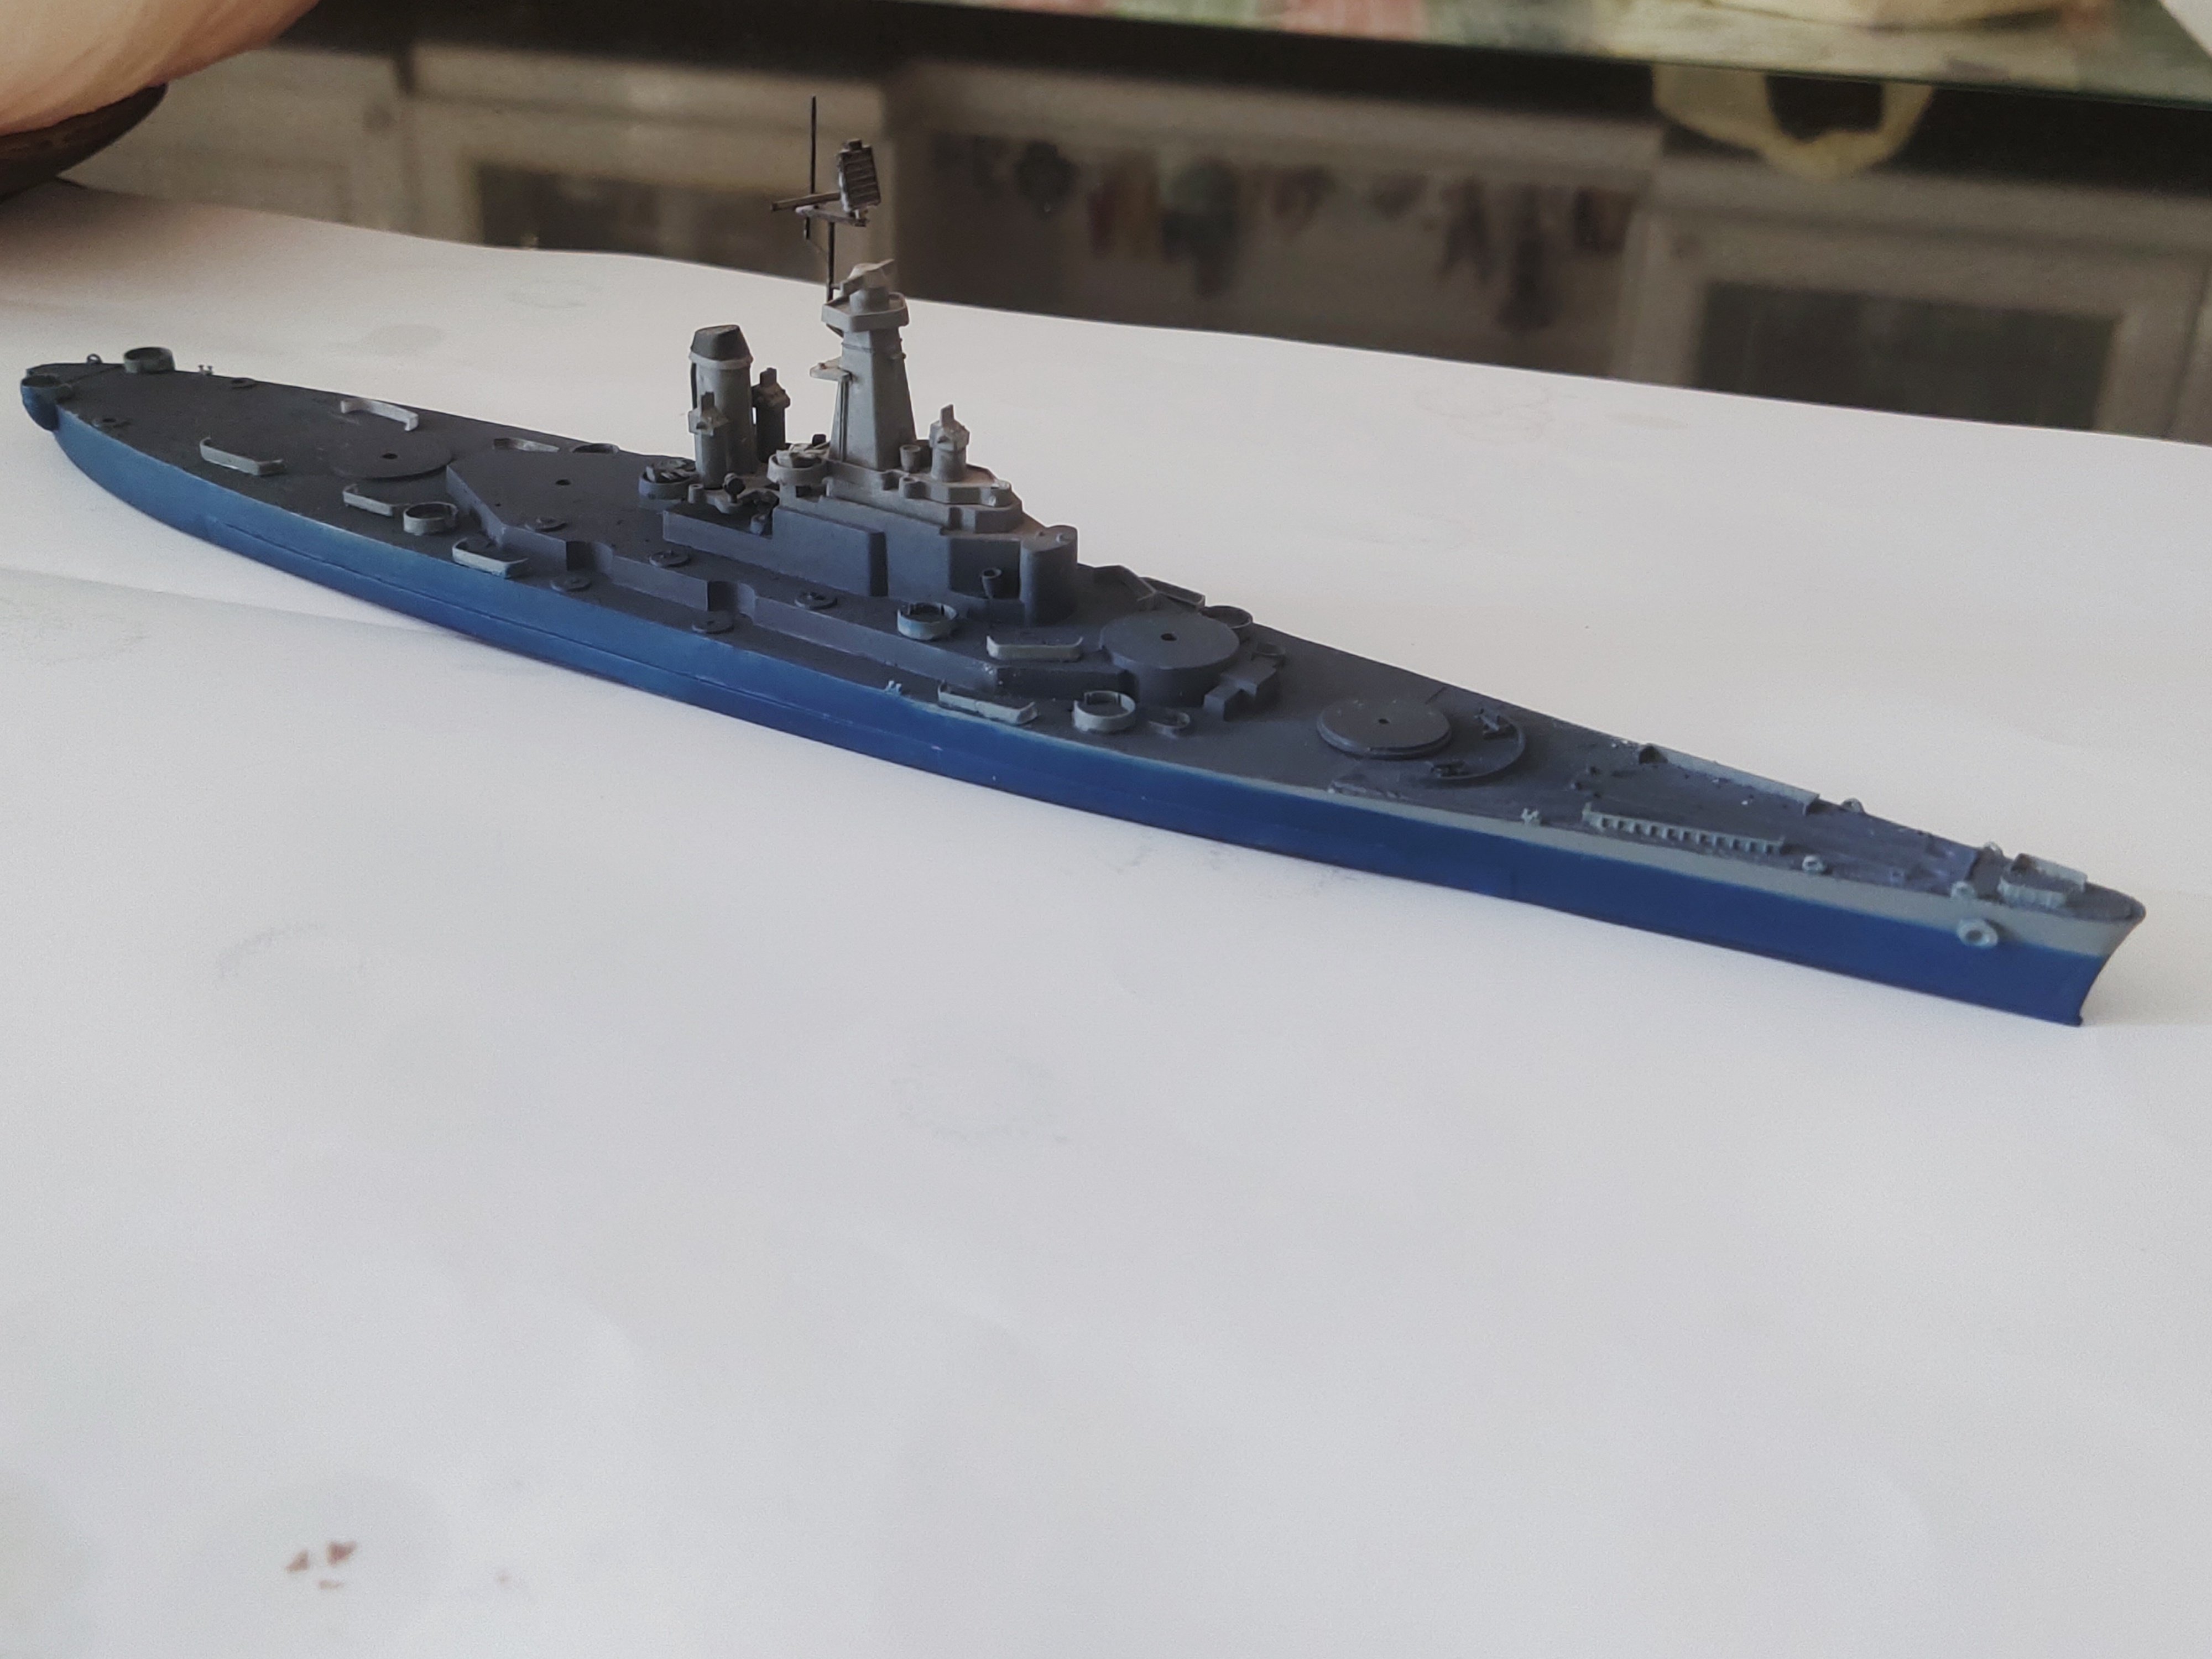
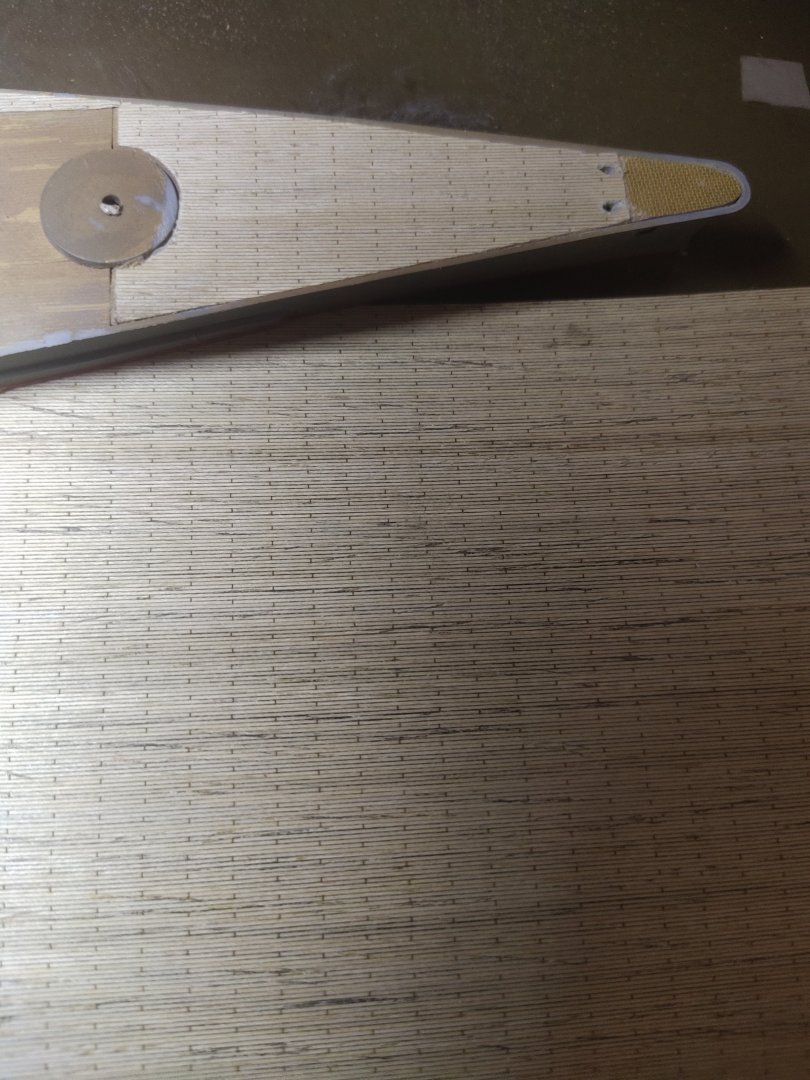
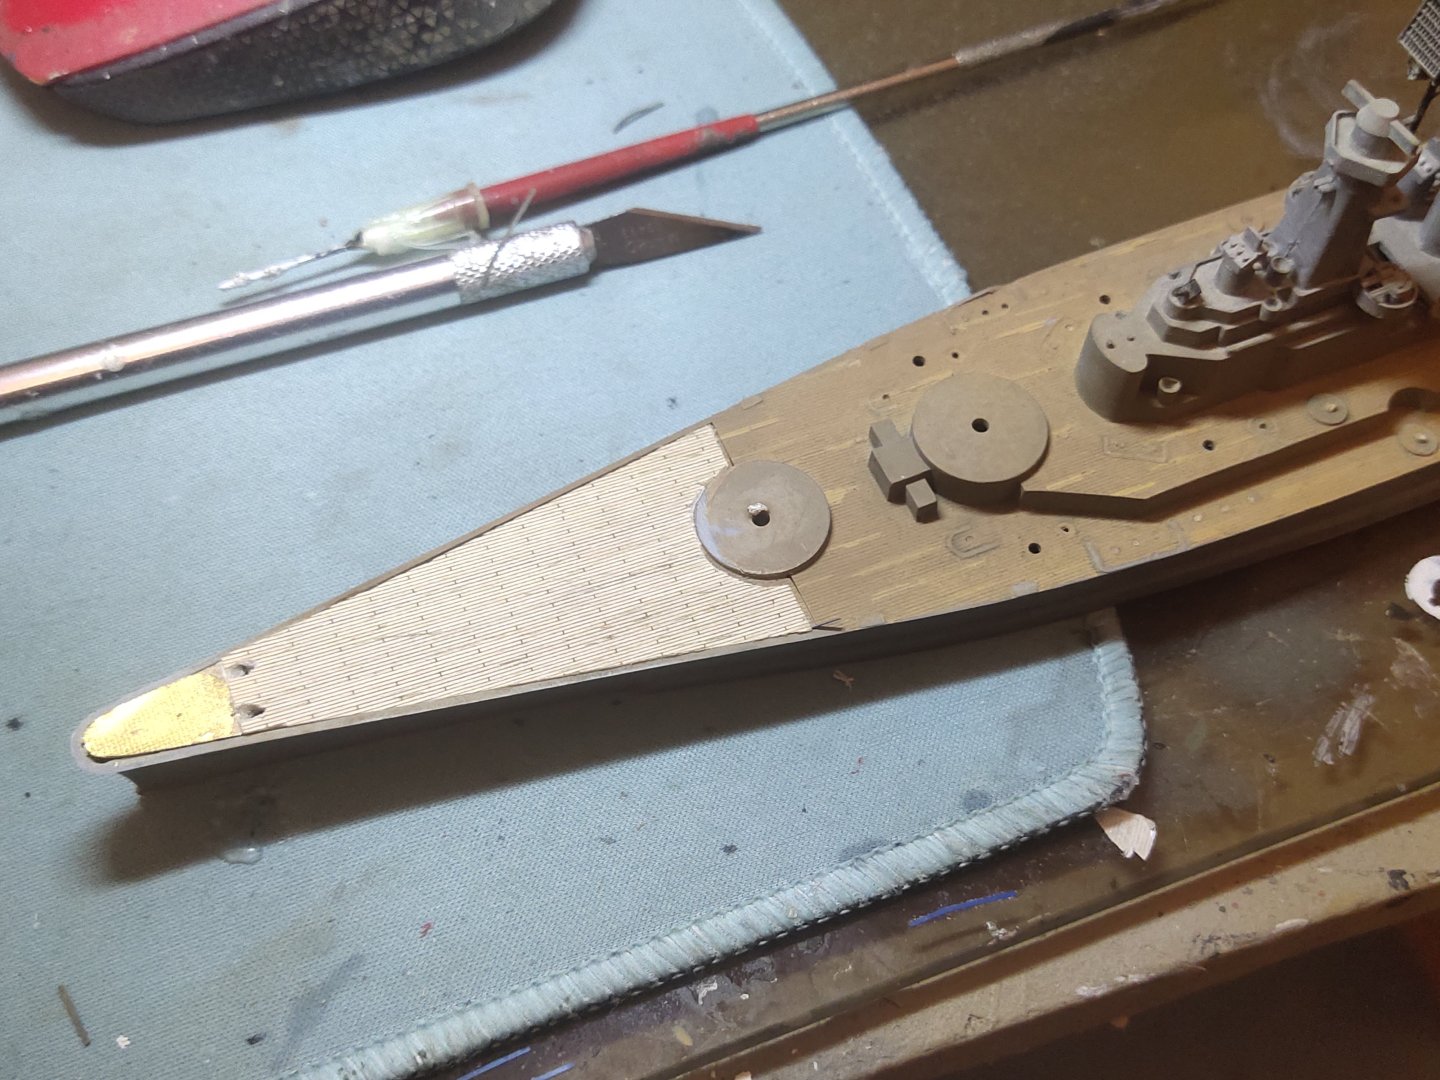
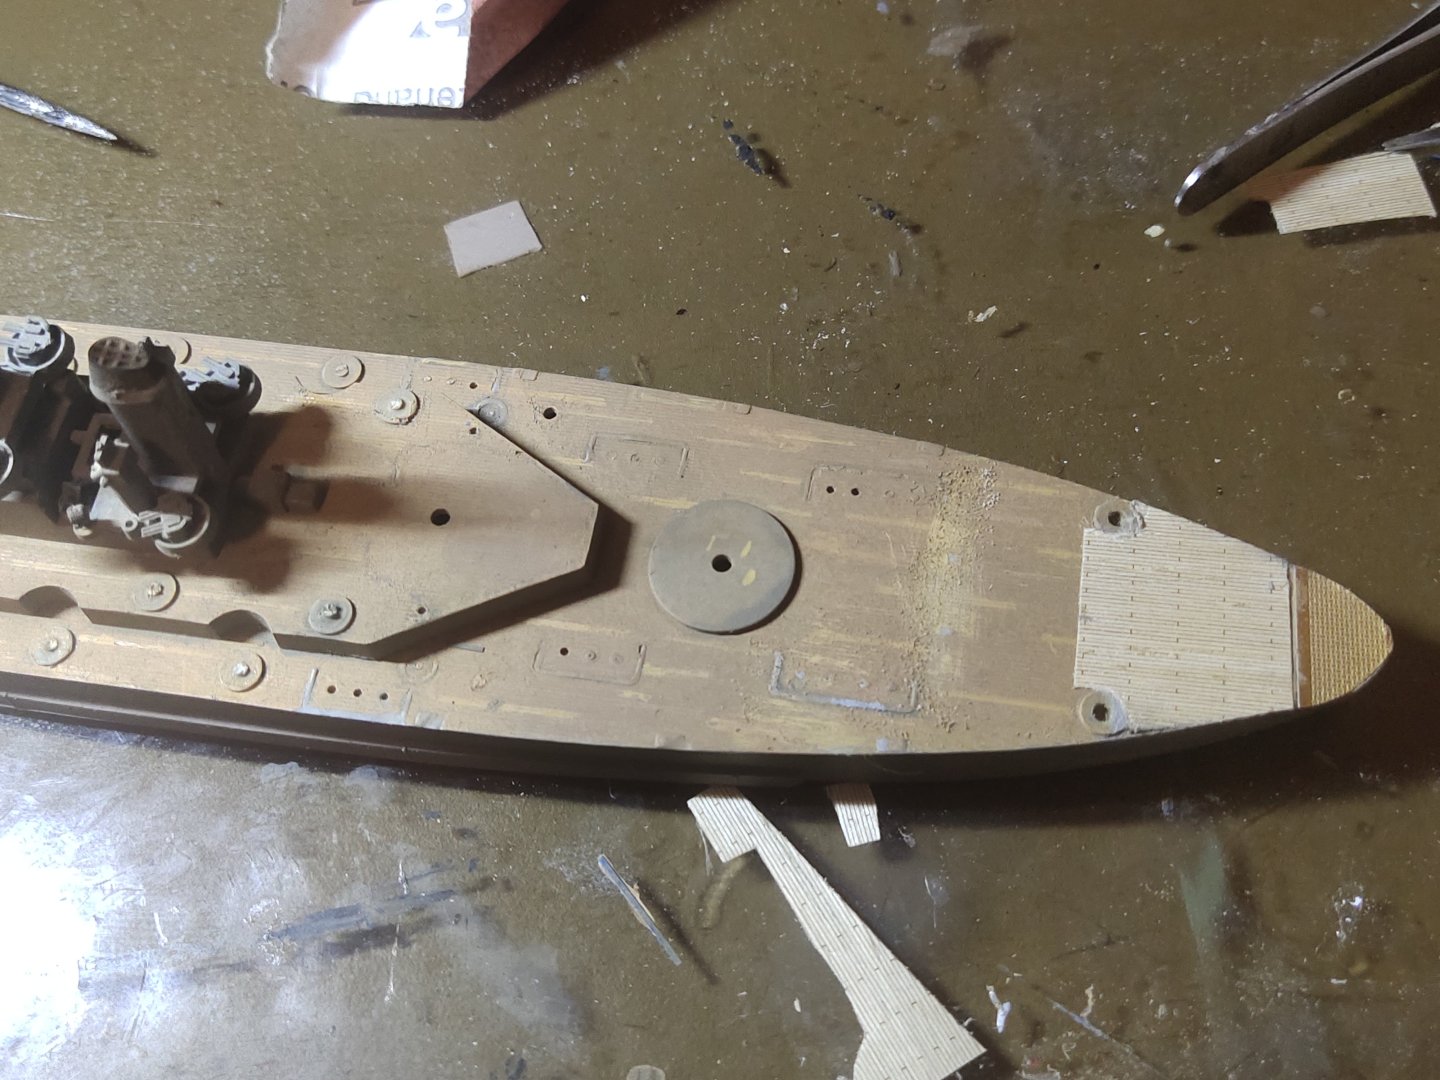
Unfortunately the wood deck I bought from the same manufacturer was of lower quality this time, somehow deteriorated. Studying about the painting schemes I found out that the deck could be painted with Navy Blue under Measure 22 system or something like this.That would be easier to do.However because of the sanding the lines on forward part of the deck had been gone. So designed one and printed it out . some PE details were added, bollards and a few other soon. Finally I sanded the side belt, it looked too thick perhaps one meter in real scale


-
Next theme North Carolina by Aoshima I wash and remove the unwanted parts. Deck was covered by dozens of tape pieces 0.6 x 10mm before spray. That would give a planking effect. The result wasn't the desirable. Some corrections by hand didn't make the situation better. I decided to use sticker wooden deck which I usually keep for carrier decks. So much time wasted today on painting. Enough for today. Time to study some books


-
Great work. Too much paintwork for me to deal with. Did you use brush only on airbrush too?
-
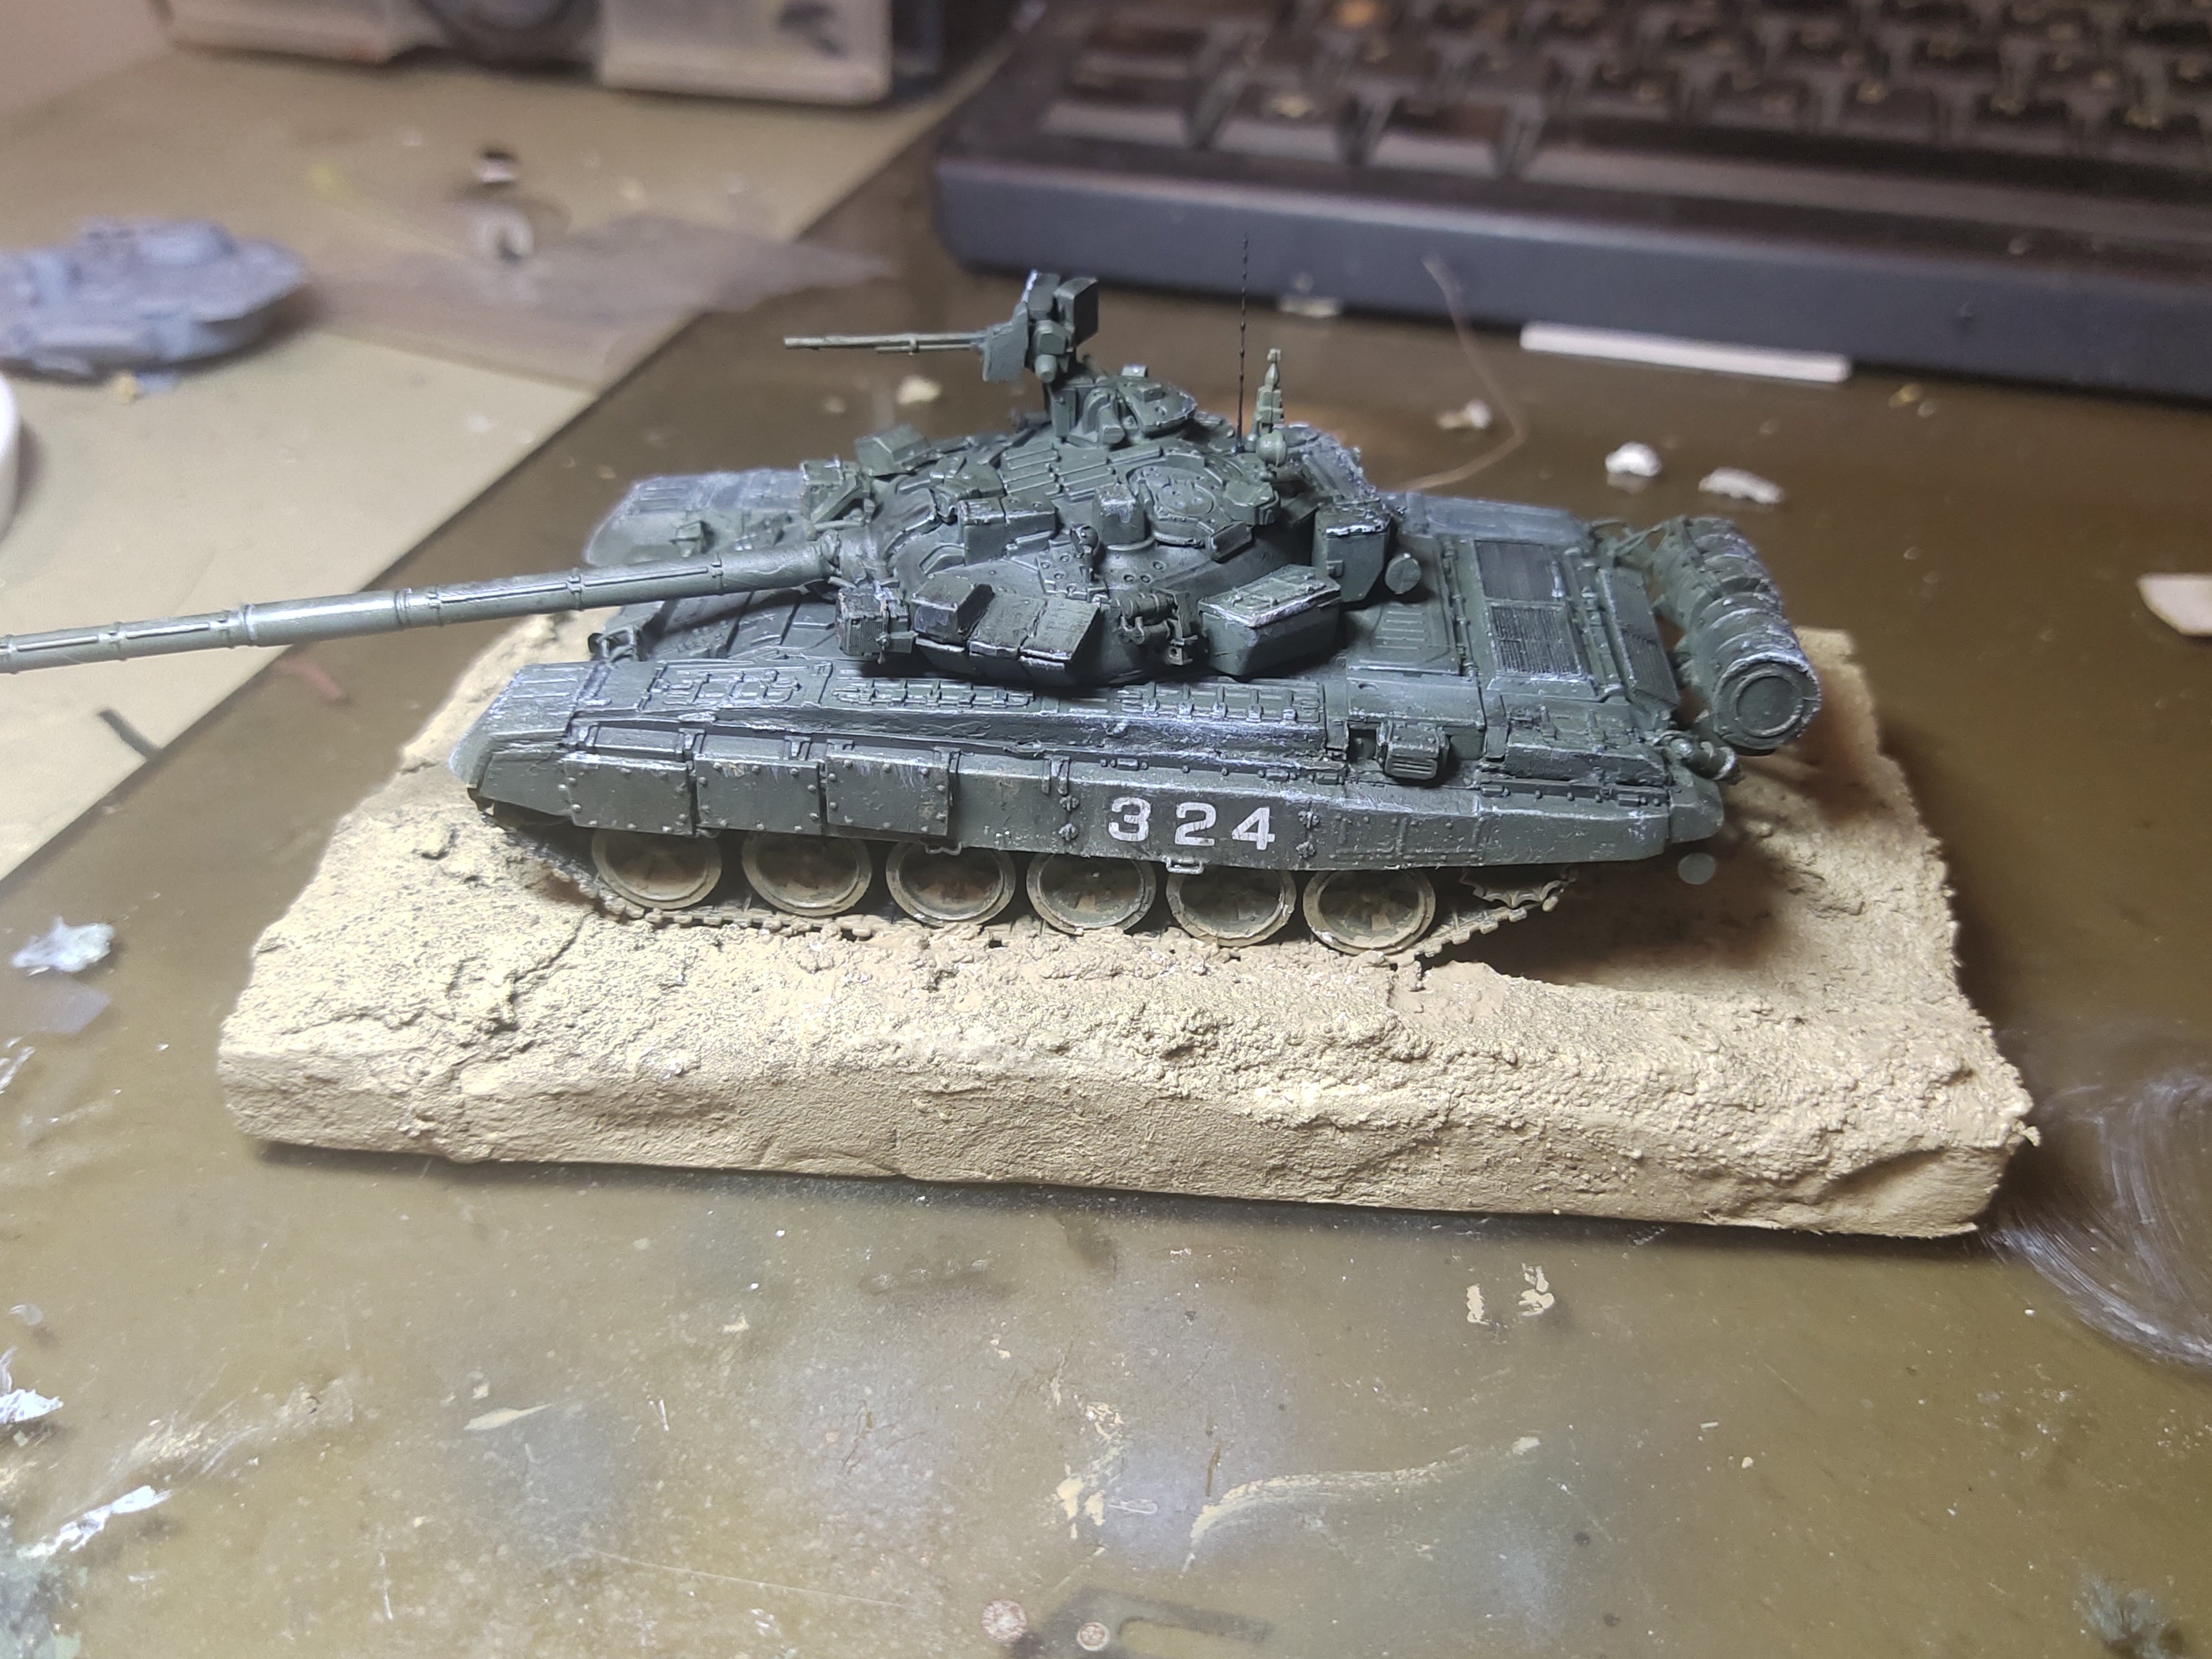
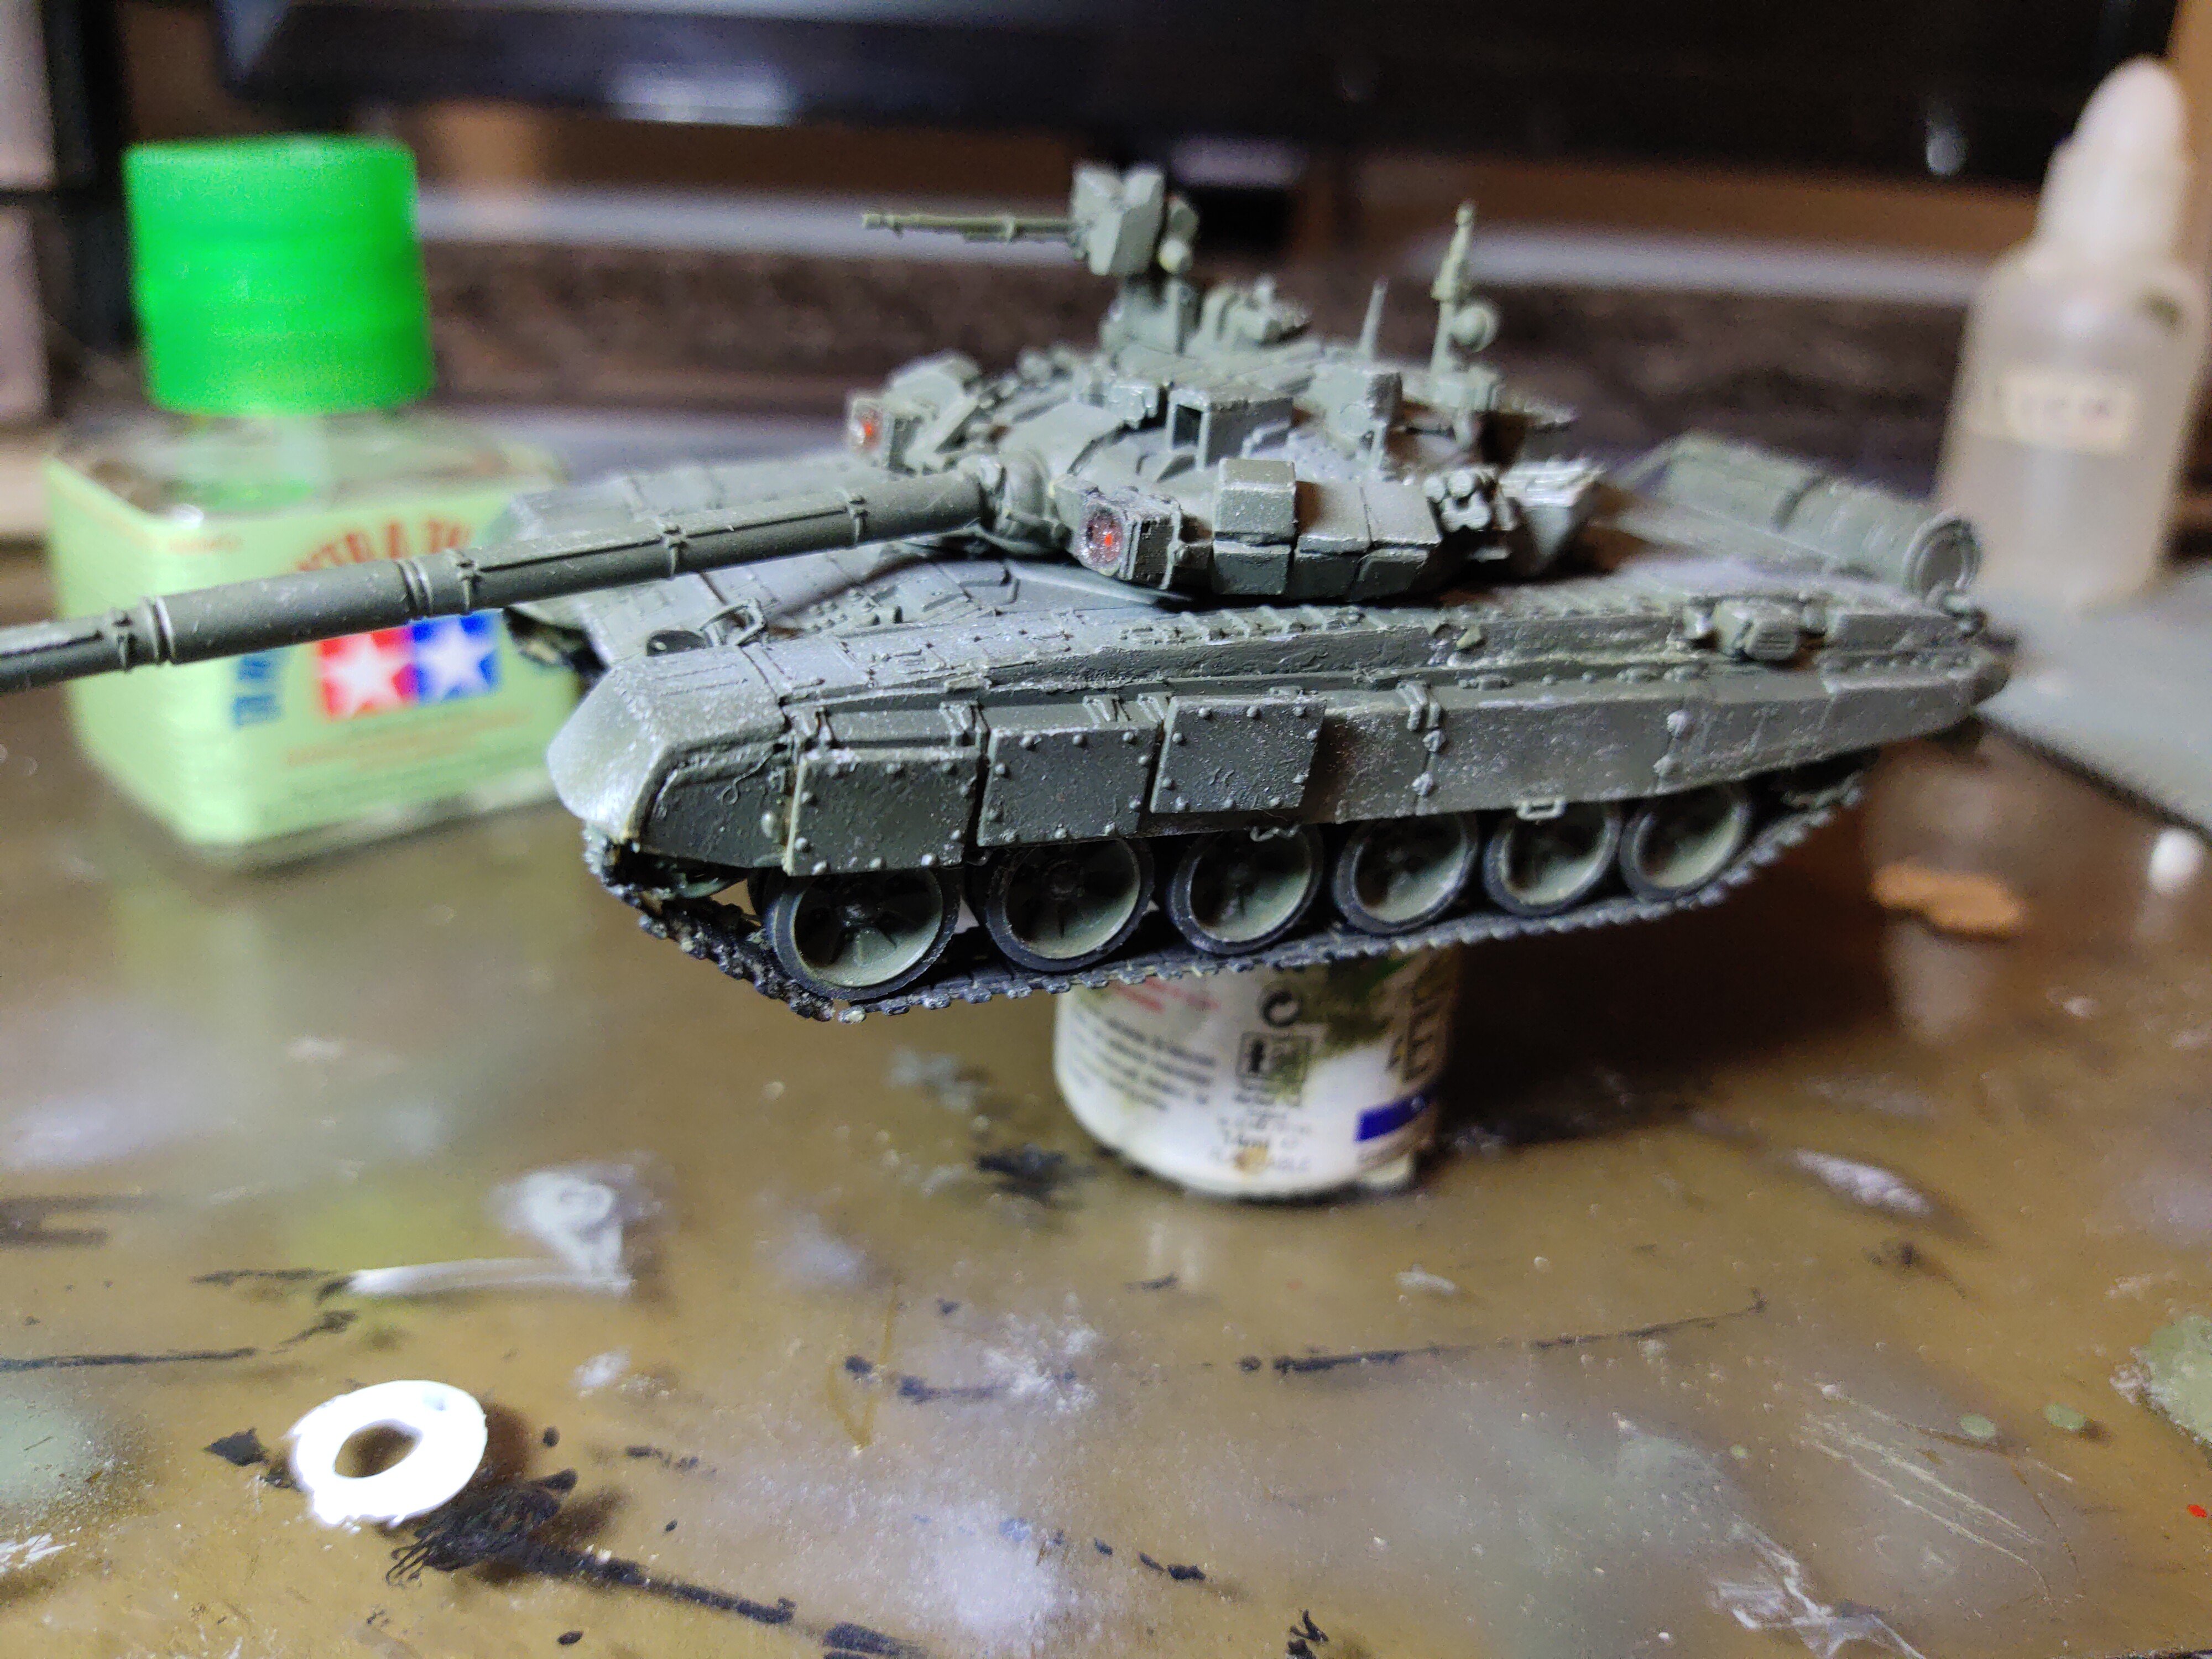
T-90 by Mikegr - FINISHED - AM - 1/72 - PLASTIC
mikegr replied to mikegr's topic in Non-ship/categorised builds
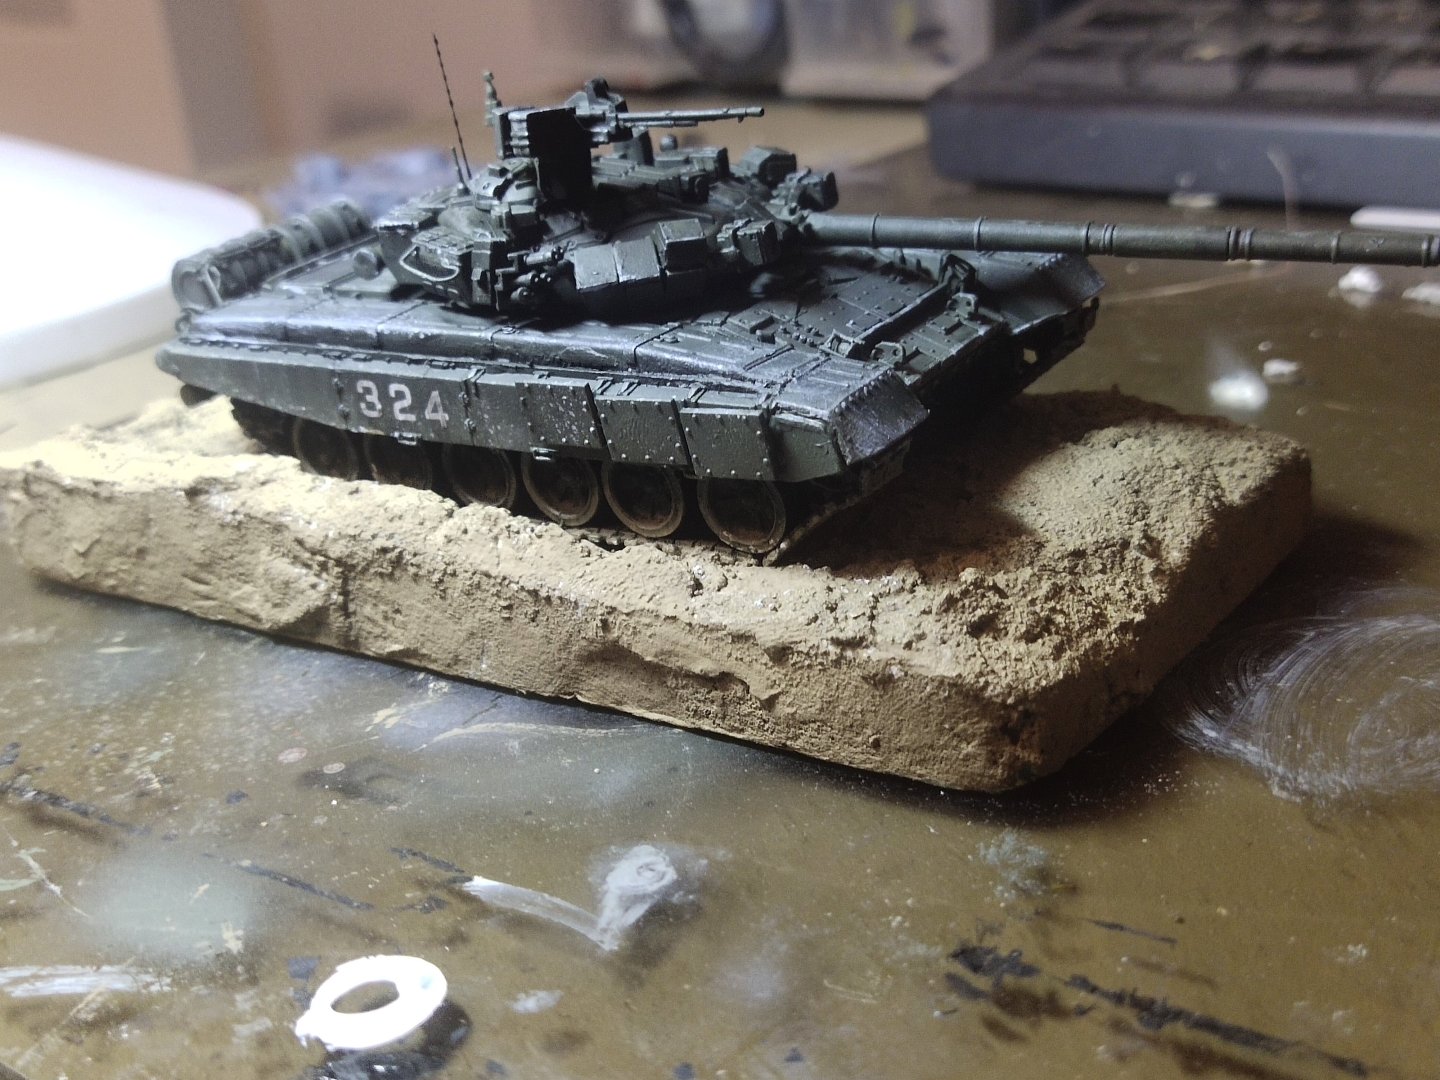
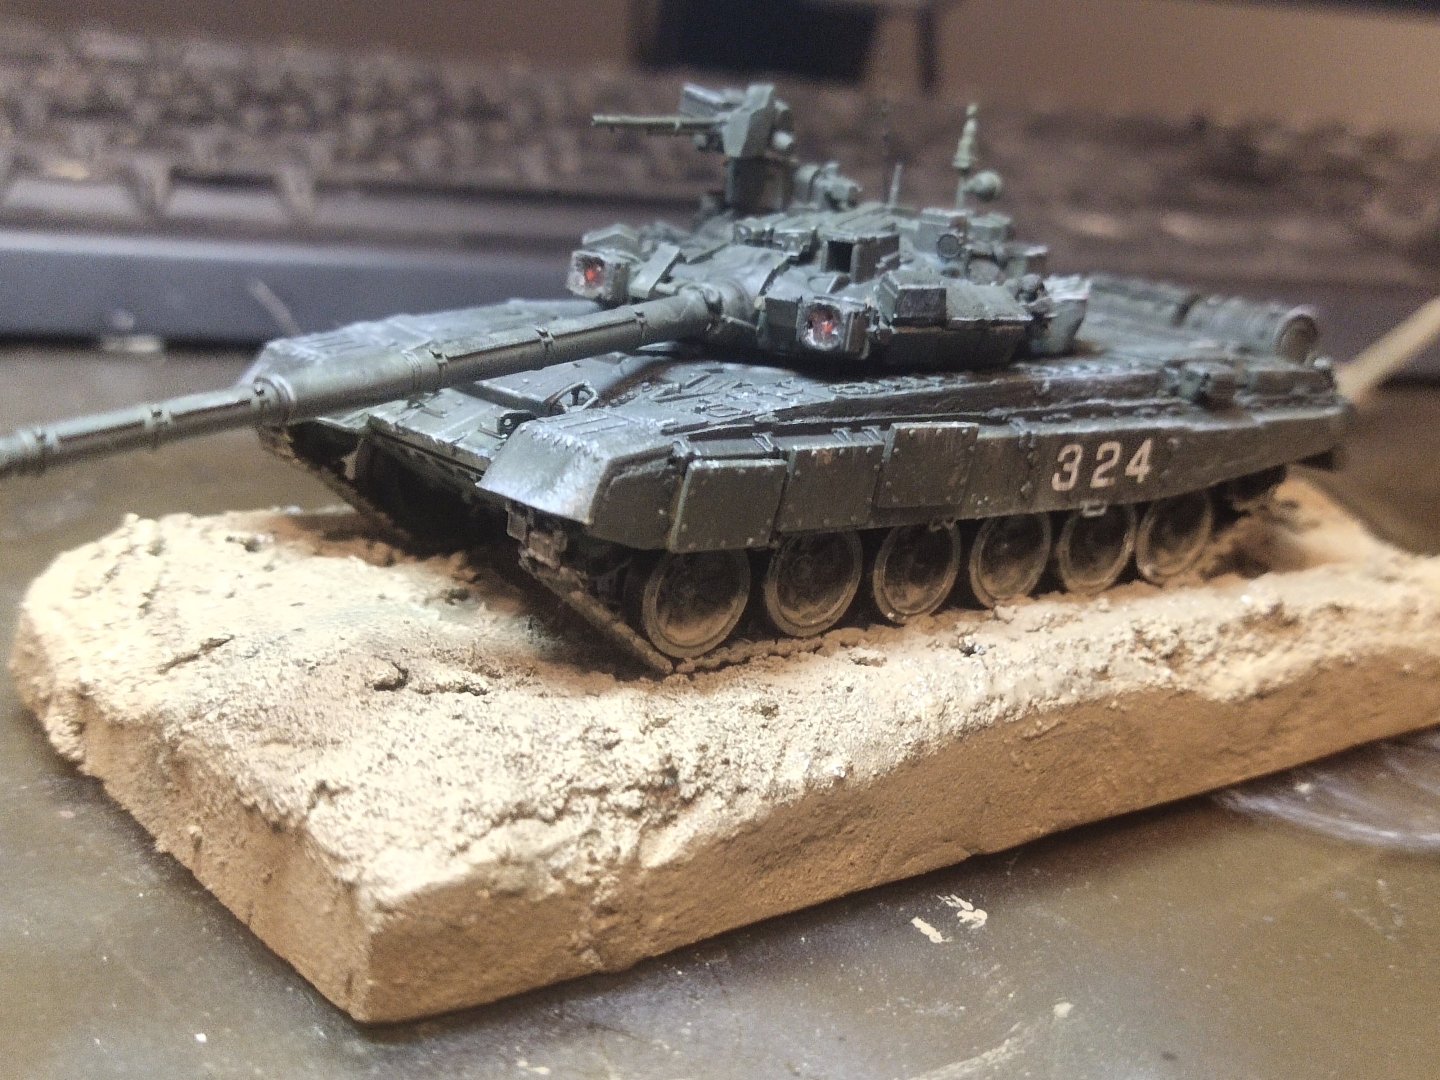
It is done. I added a simple base, nothing to be proud of, but the overall look turned ok


-
T-90 by Mikegr - FINISHED - AM - 1/72 - PLASTIC
mikegr replied to mikegr's topic in Non-ship/categorised builds
Thank you That would be a fascinating built. I have the Revell Leopard 2 but I'm hesitant about the camouflage painting -
The detail is spectacular
-
What a remarkable job
-
T-90 by Mikegr - FINISHED - AM - 1/72 - PLASTIC
mikegr replied to mikegr's topic in Non-ship/categorised builds
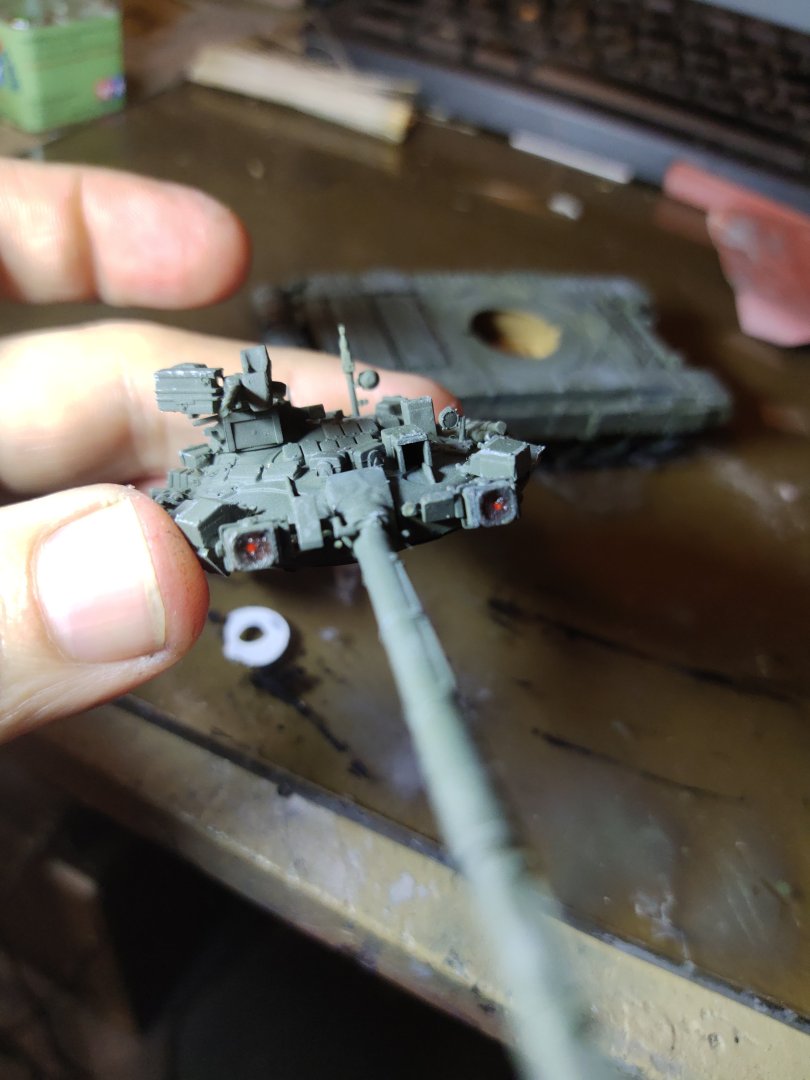
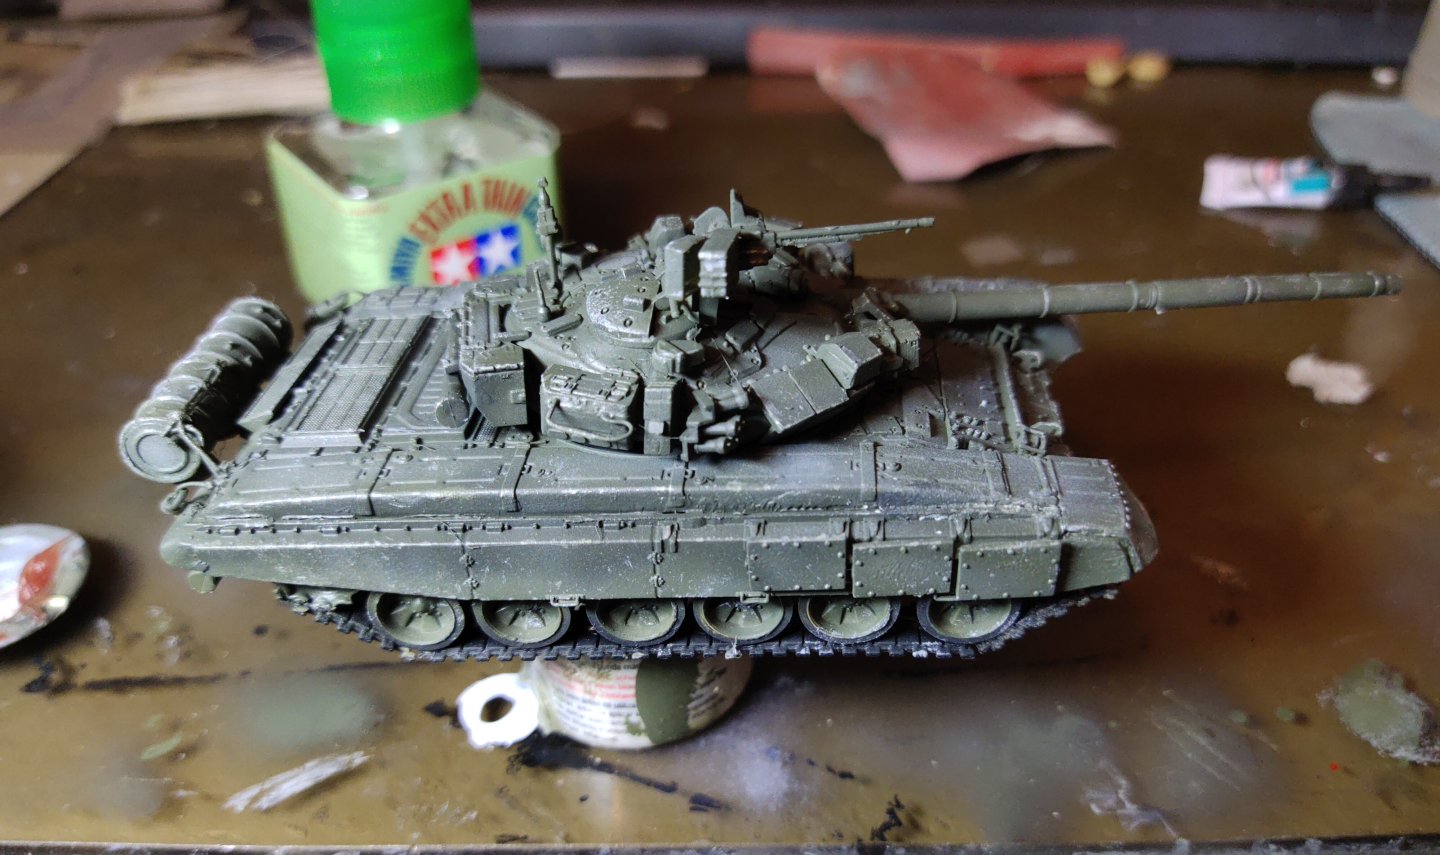
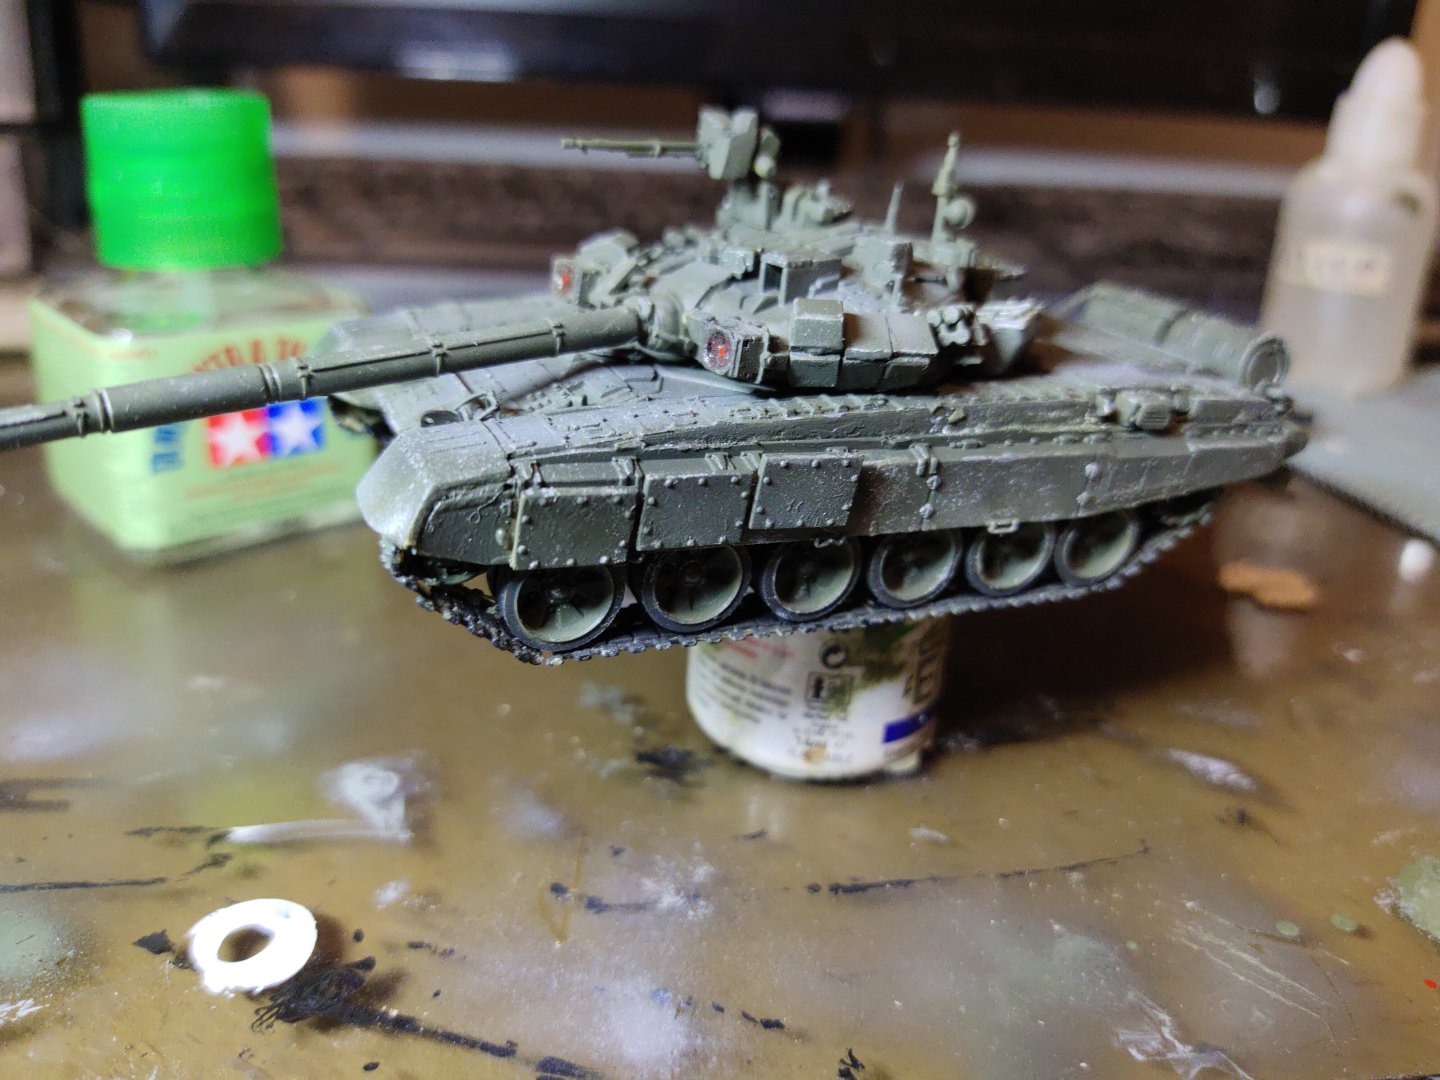
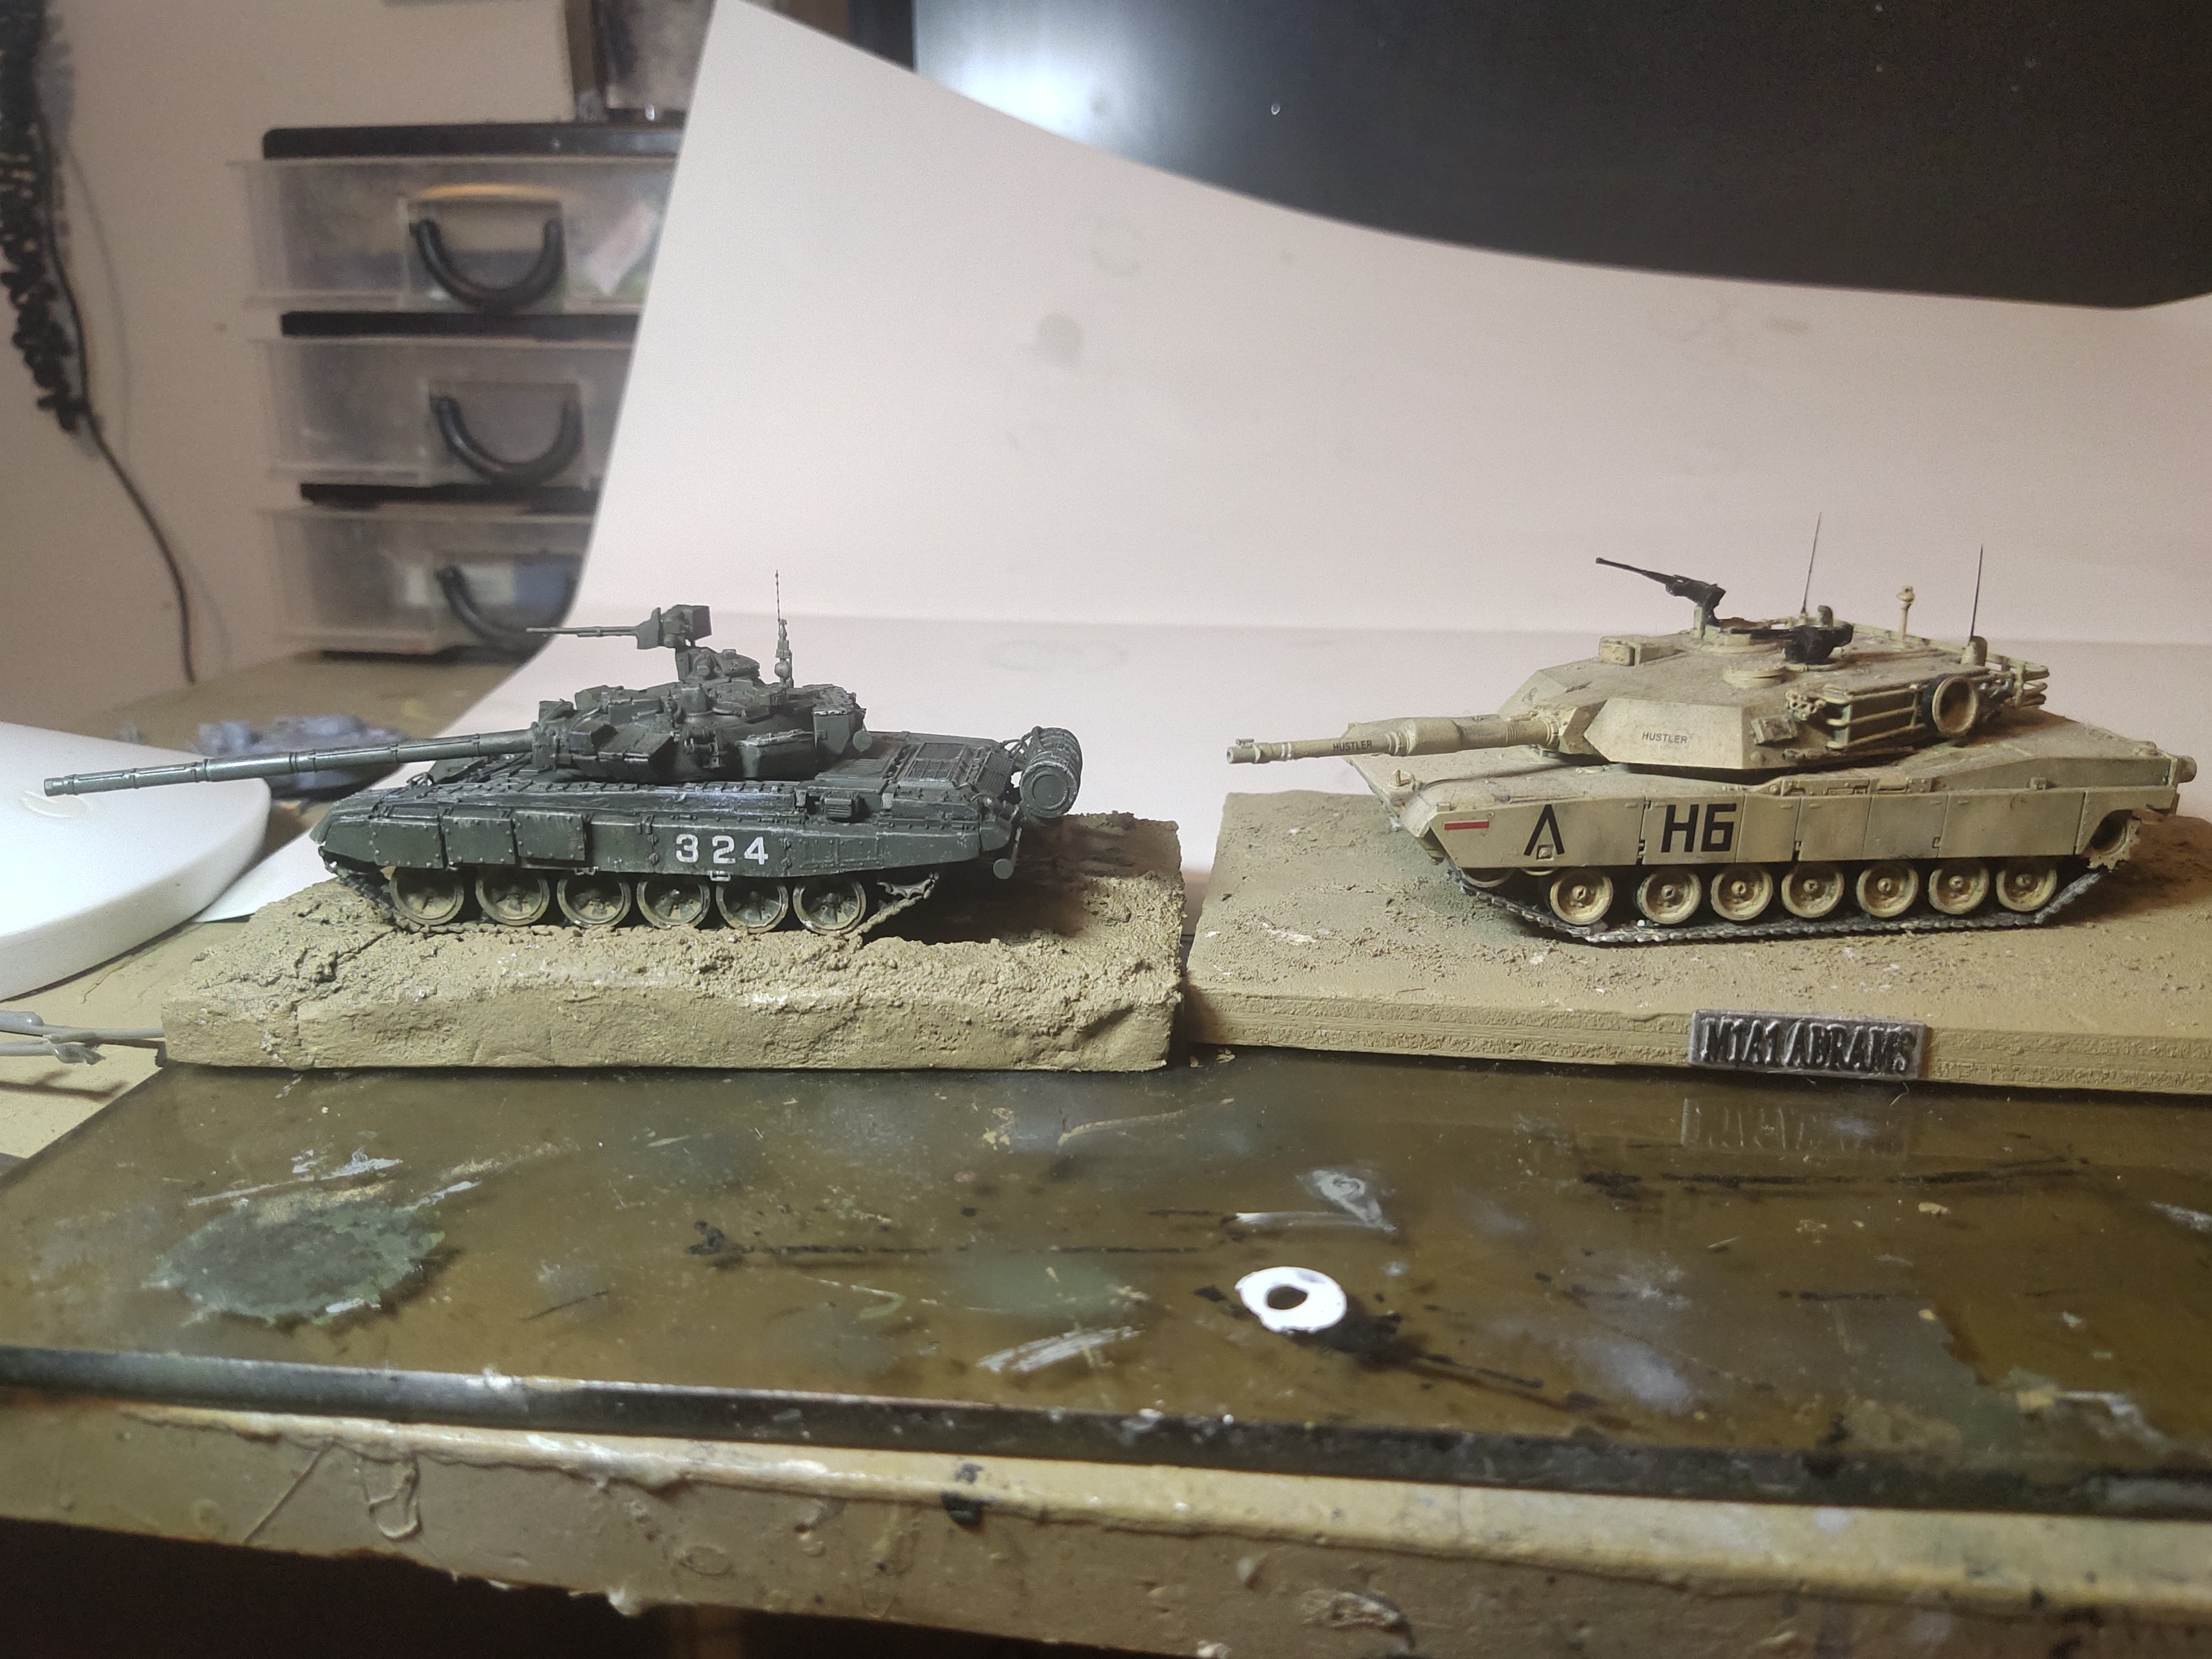
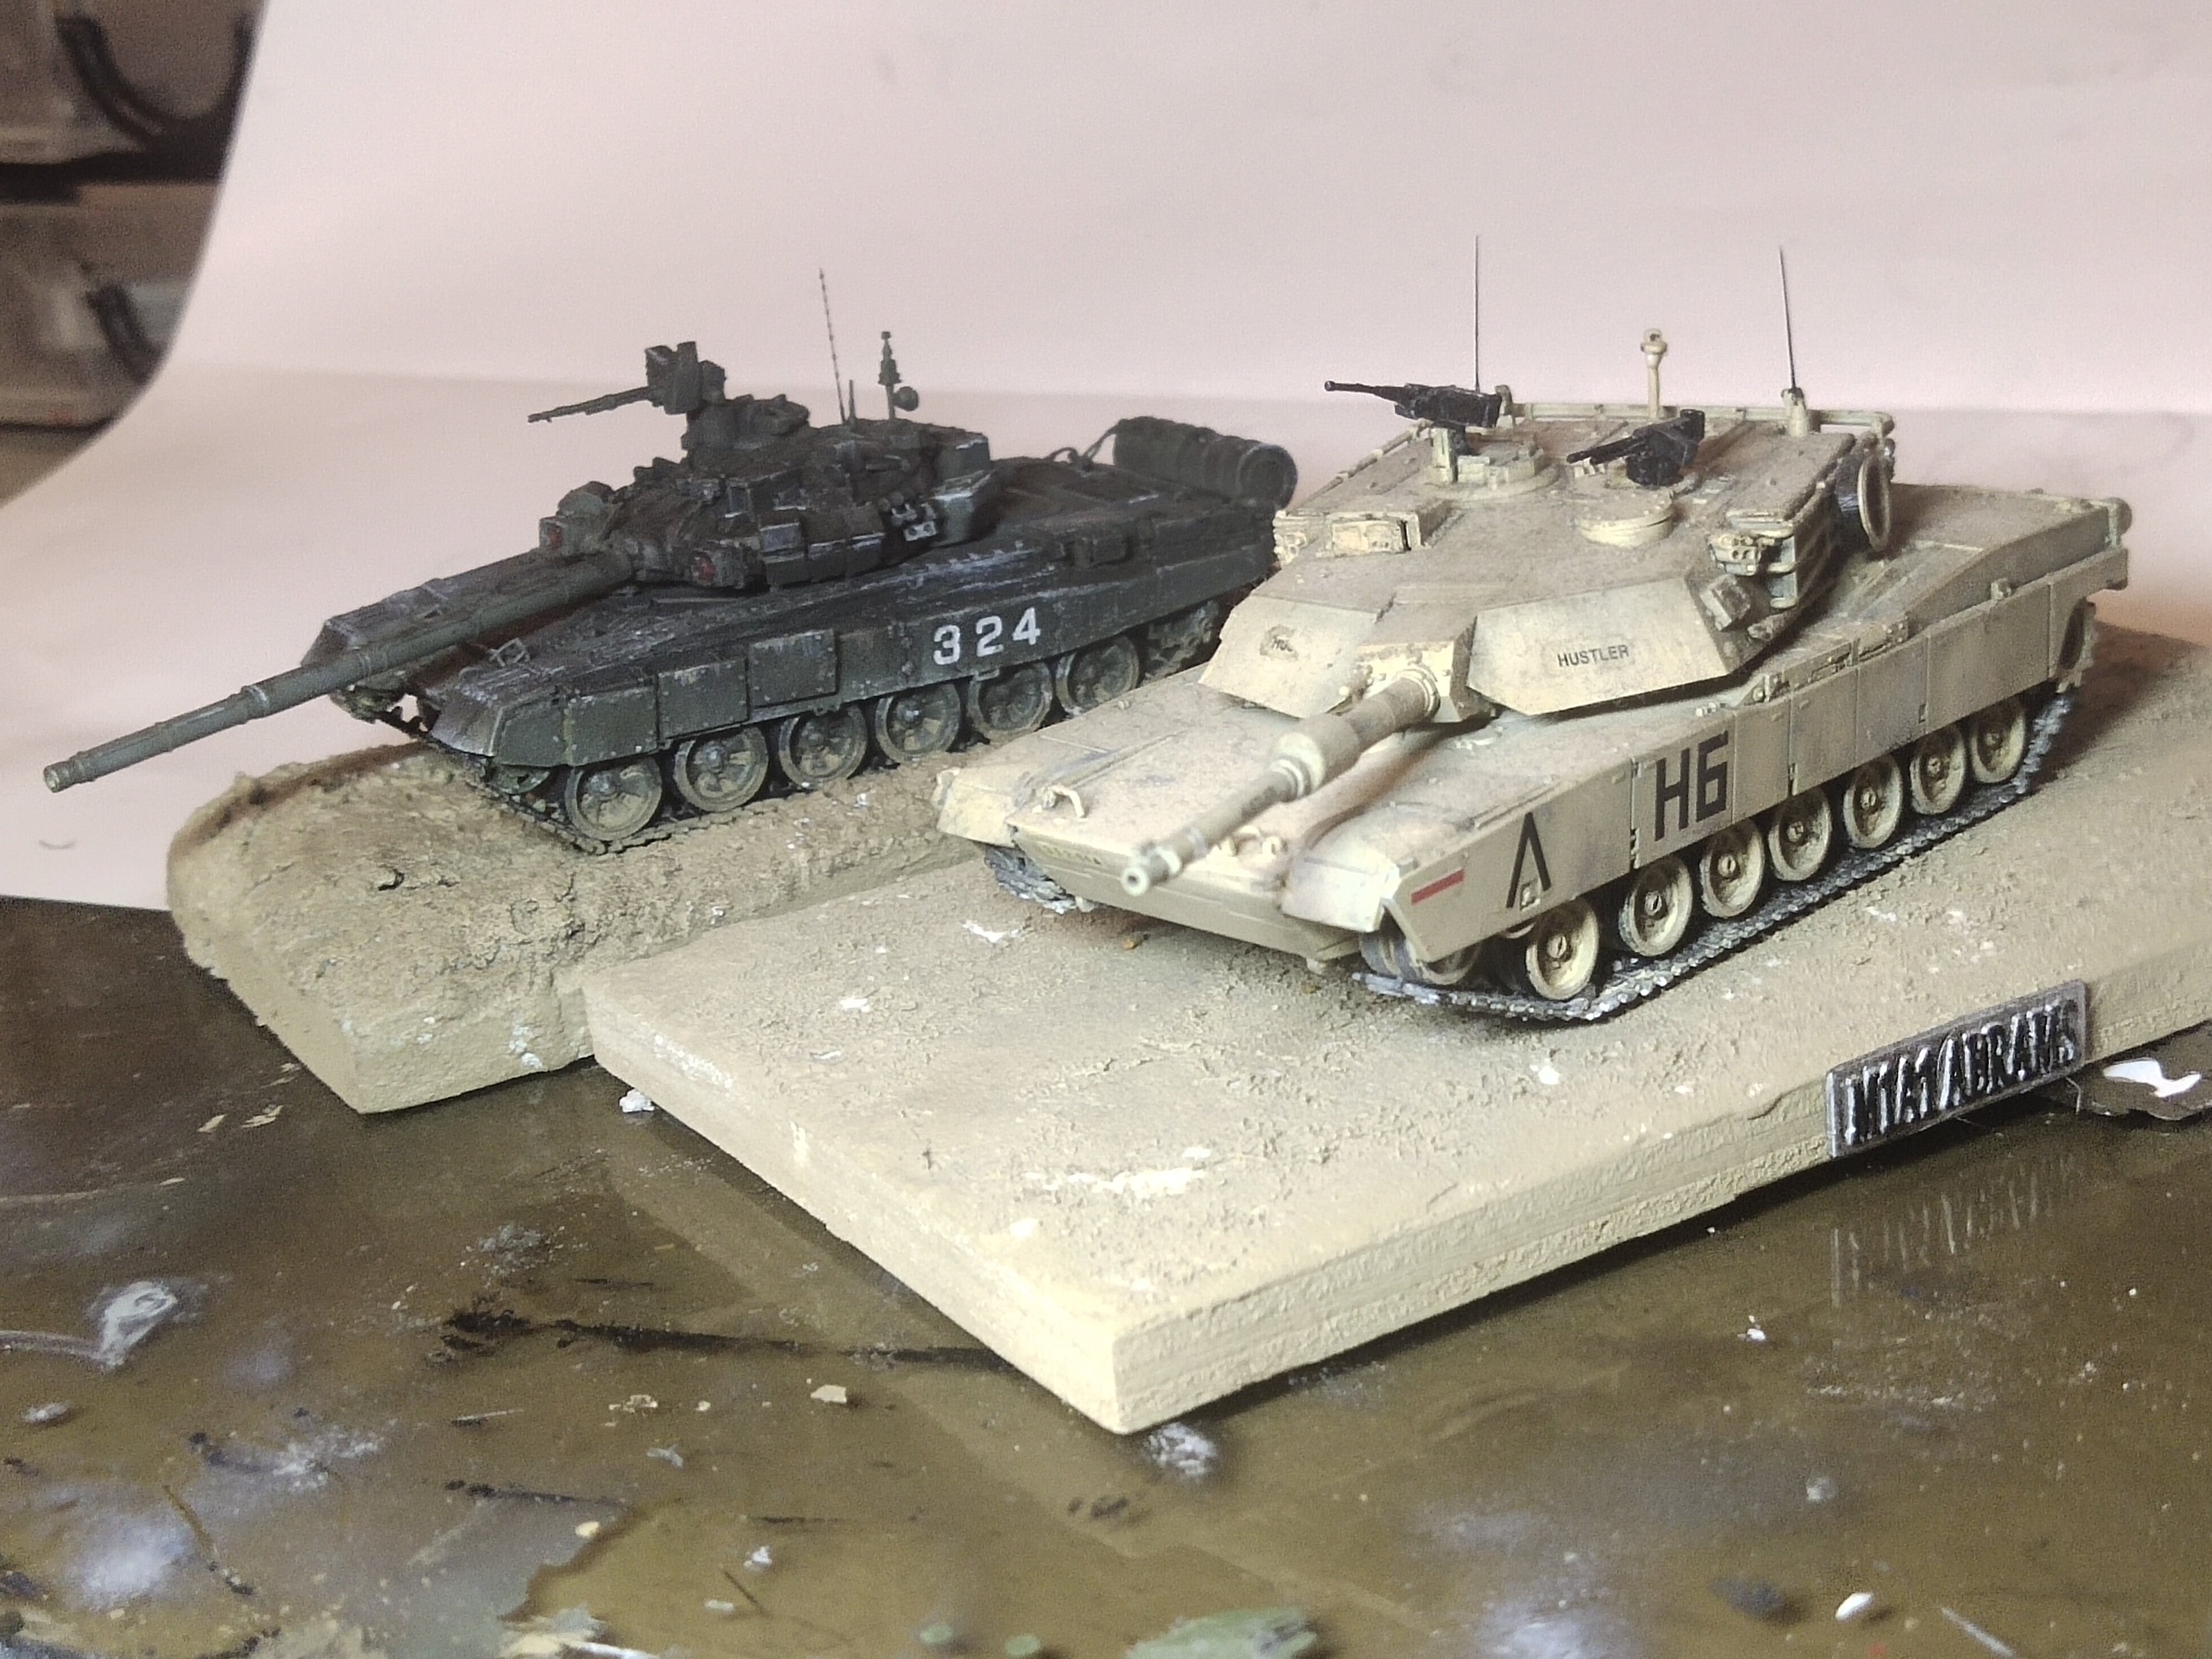
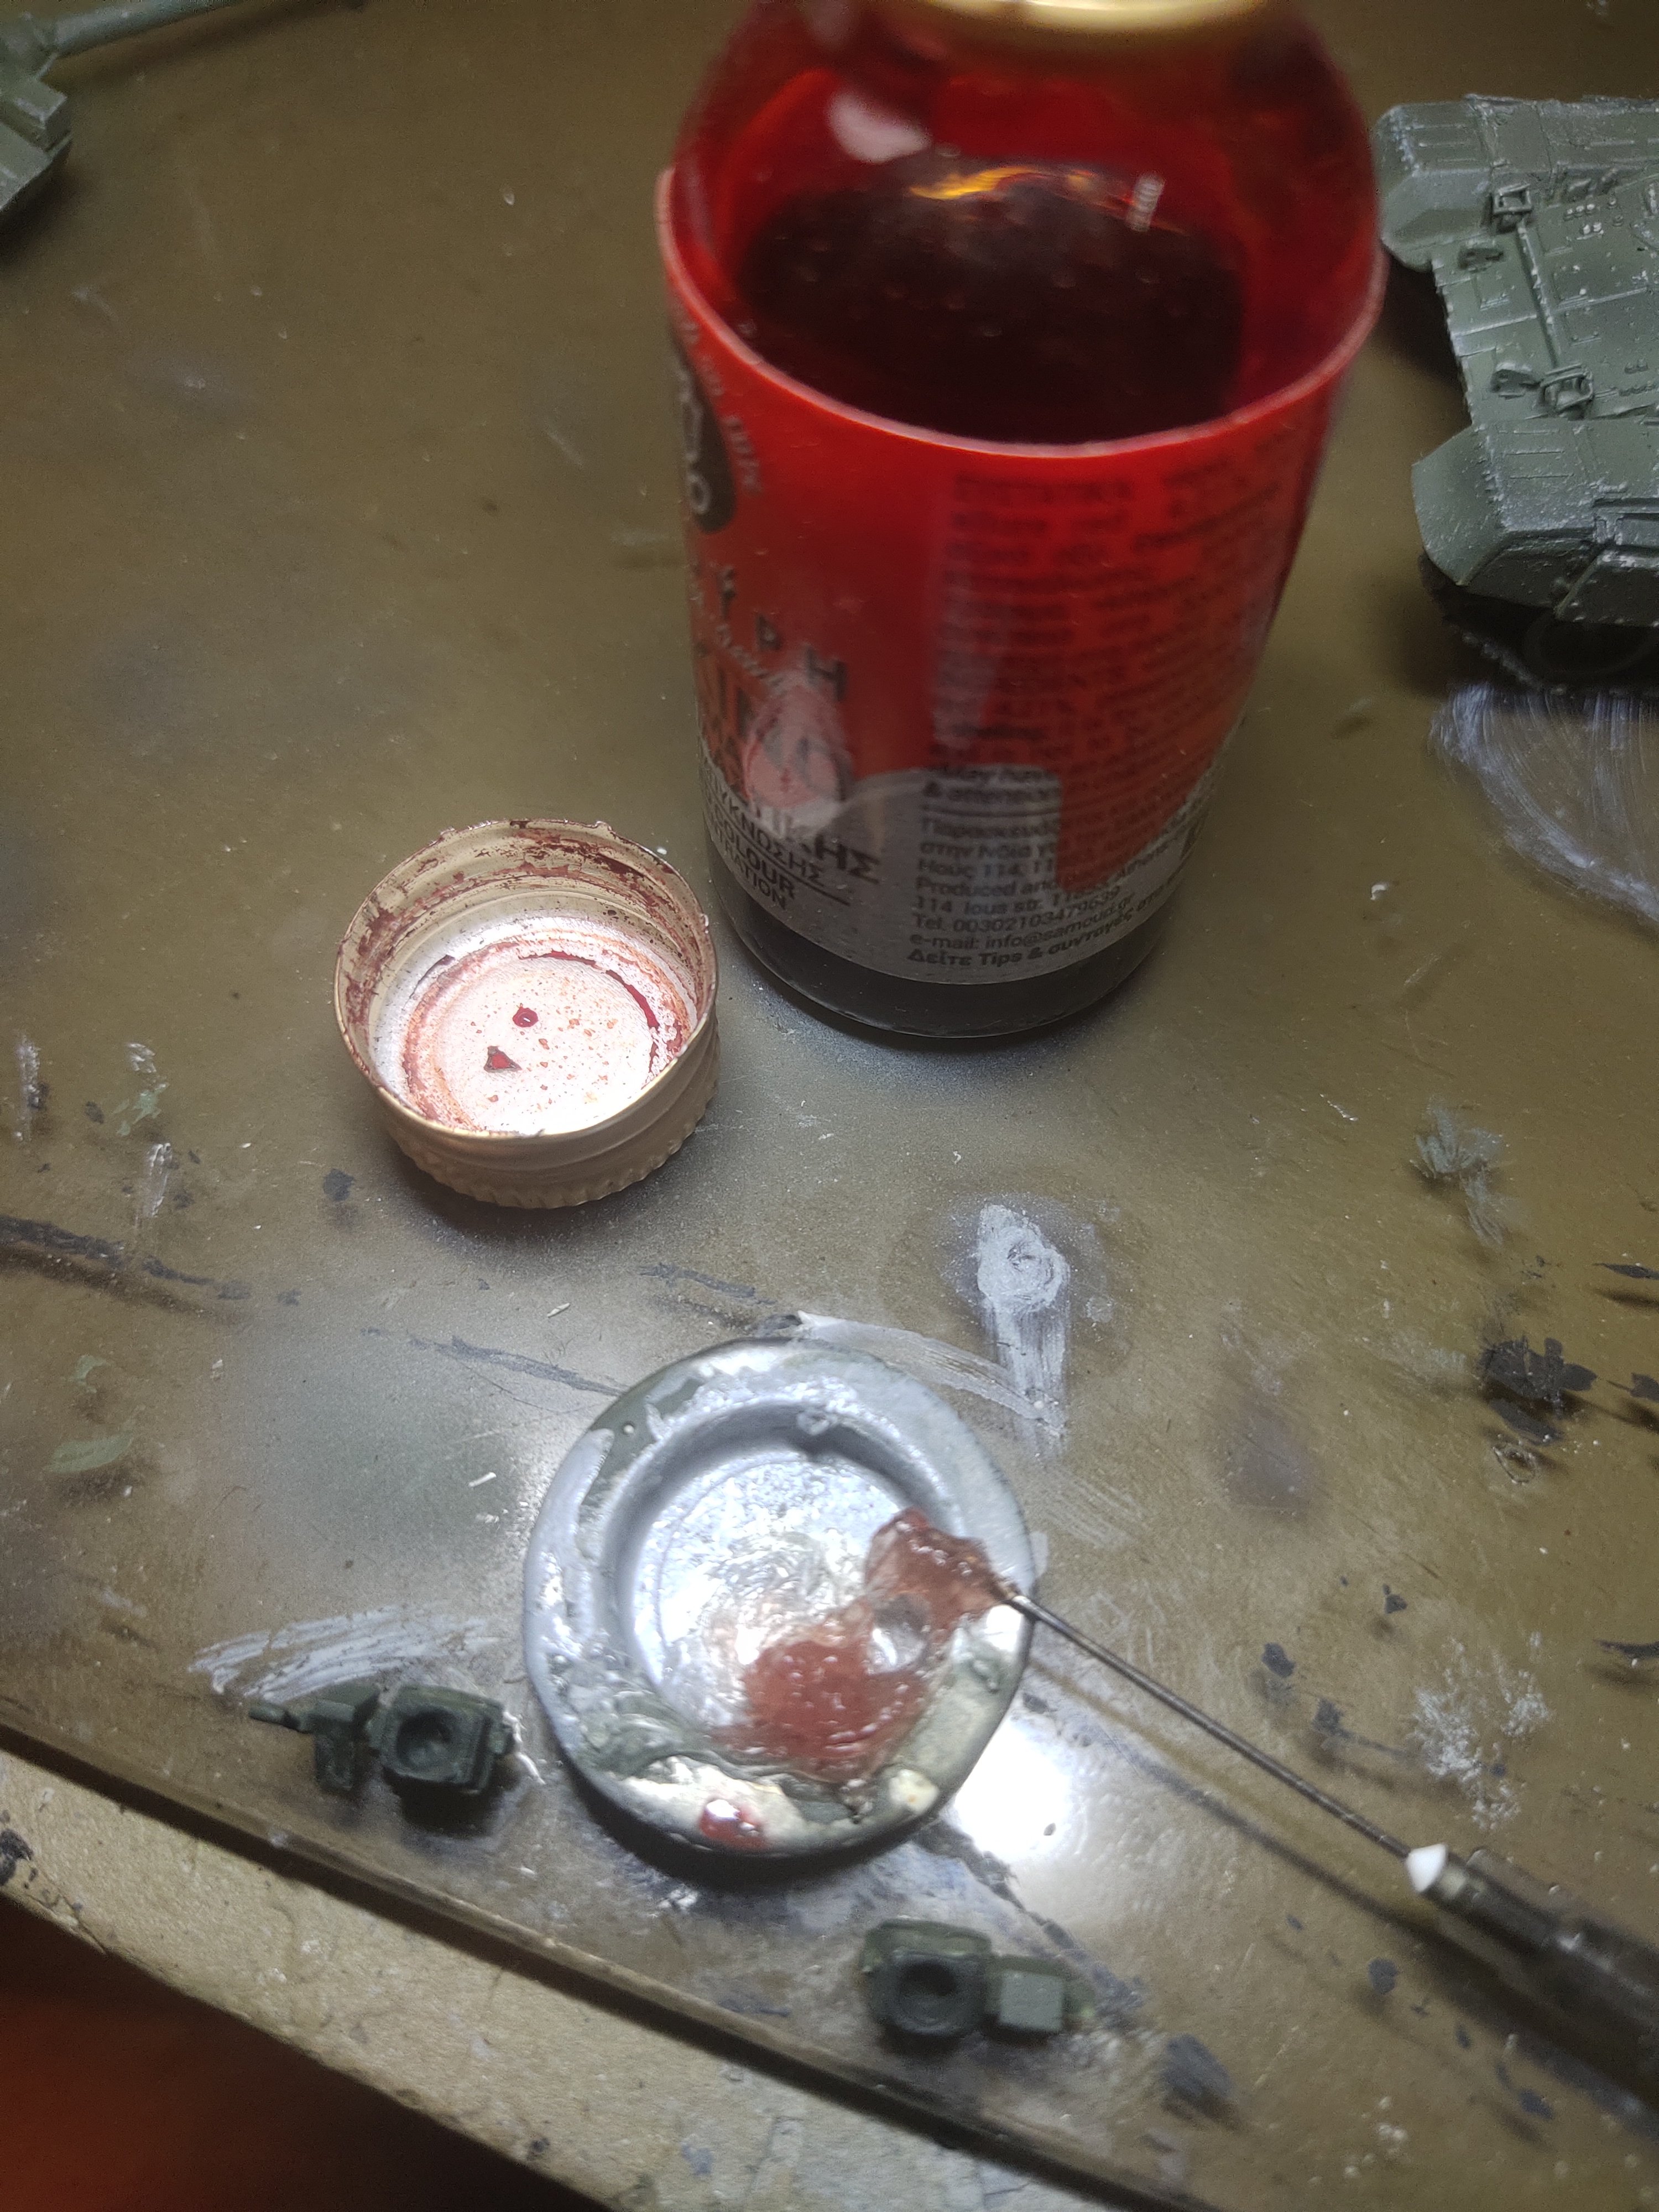
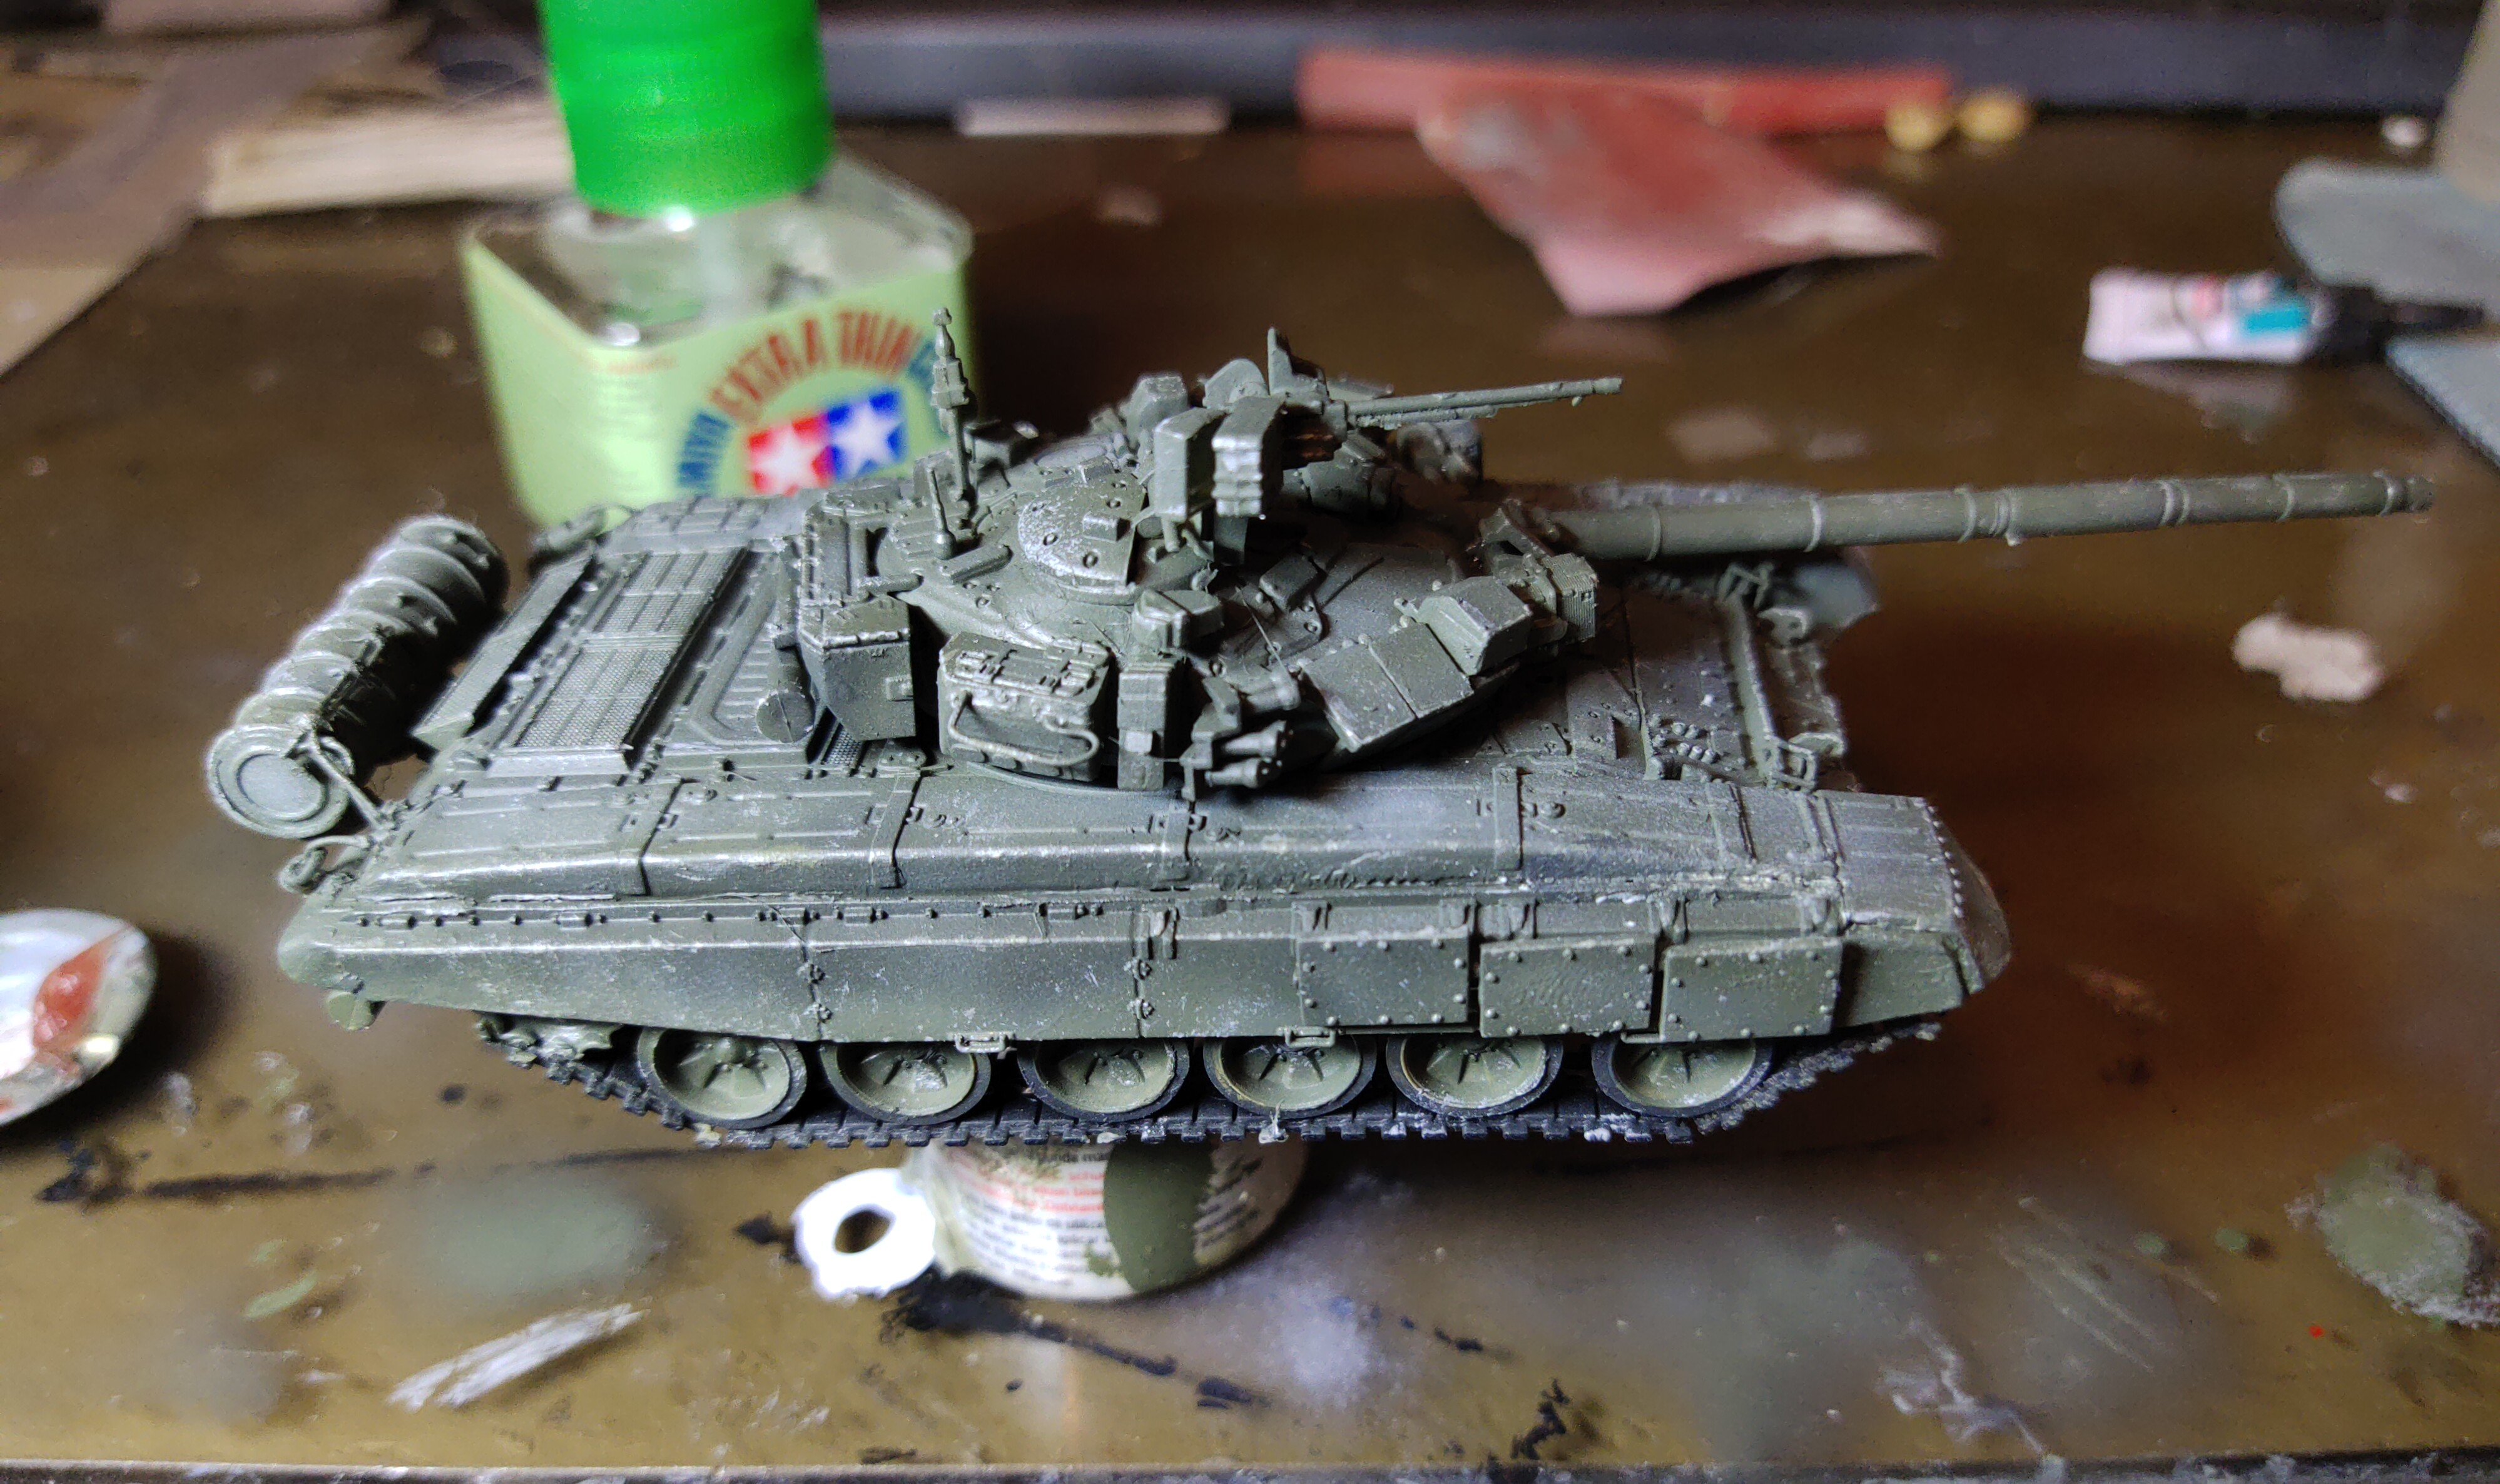
I improved the "eyes" of the tank, using 3 mm drill. Then filing with silicone to have the glass effect. Silicone was painted with red food coloring. One single brush hair was used for the red dot. I brushed many times with light color then darker, to make the weathering. Some chipping applied. Next will be oii washing, before I paint the tracks