mikegr
-
Posts
827 -
Joined
-
Last visited
Content Type
Profiles
Forums
Gallery
Events
Everything posted by mikegr
-
Cap San Diego by mikegr - 1/160
mikegr replied to mikegr's topic in - Build logs for subjects built 1901 - Present Day
Small update is to replace the railings with PE ones. Not the best quality, too thin. But the difference is noticeable
-
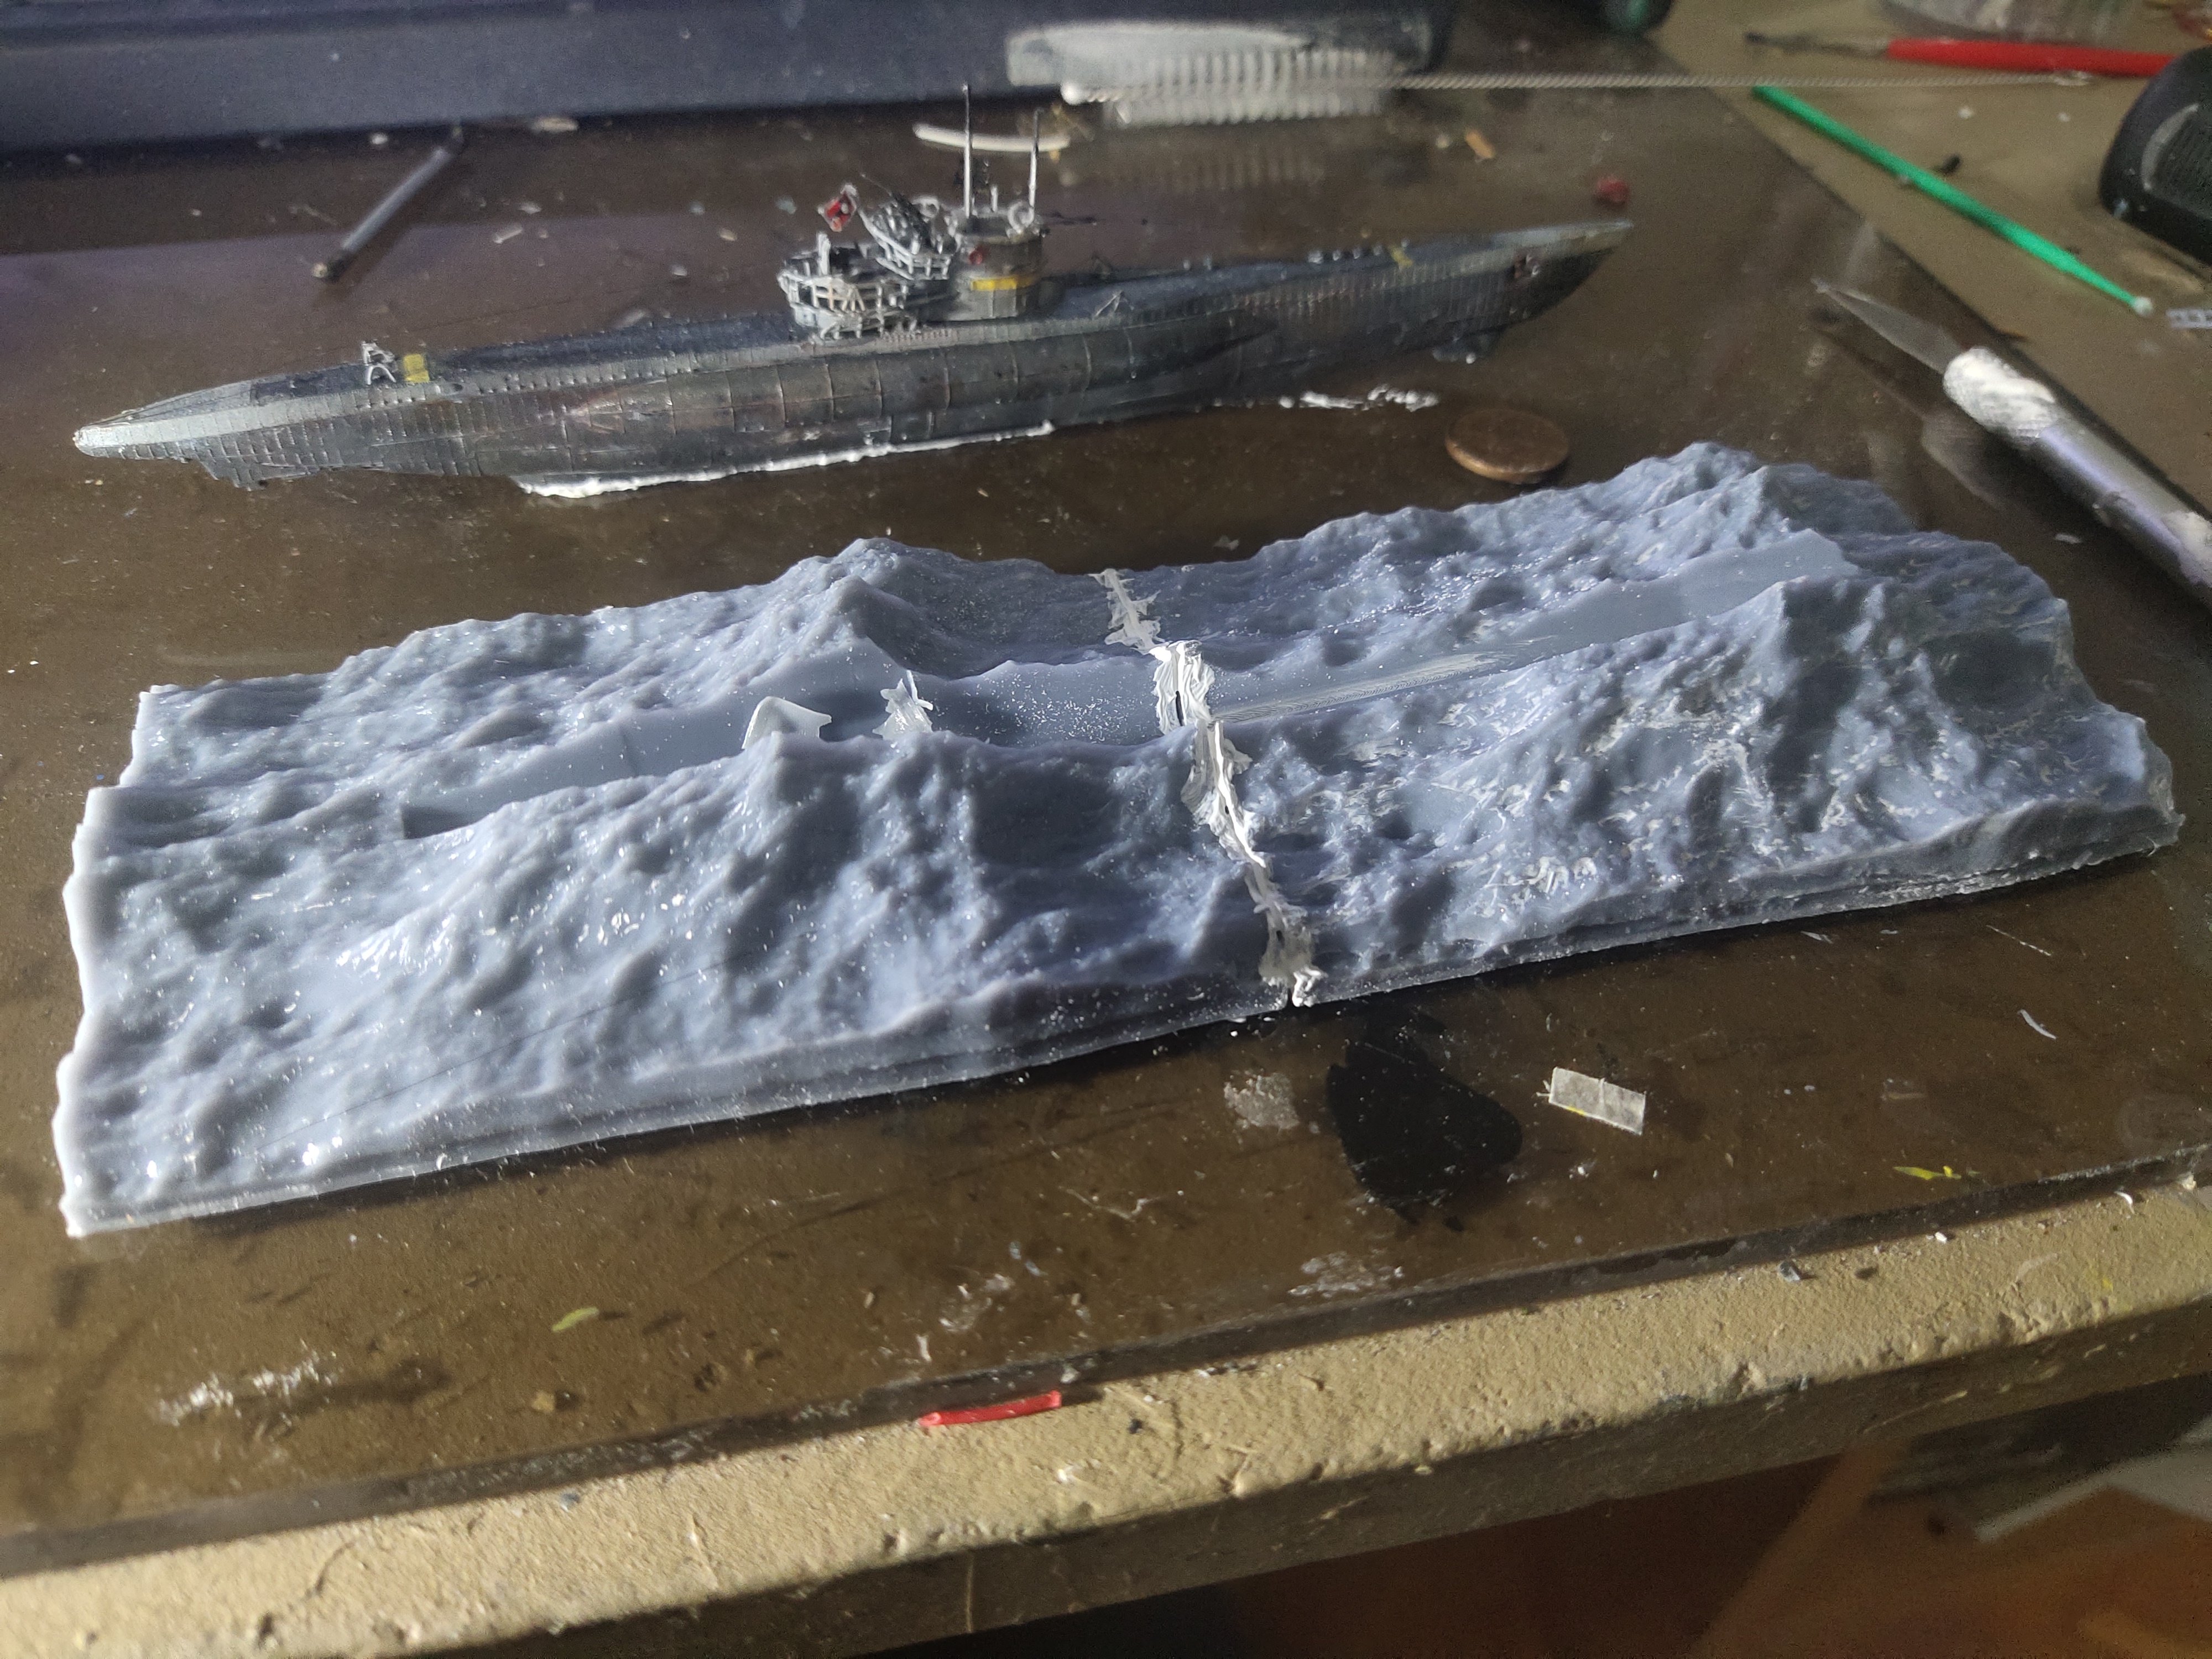
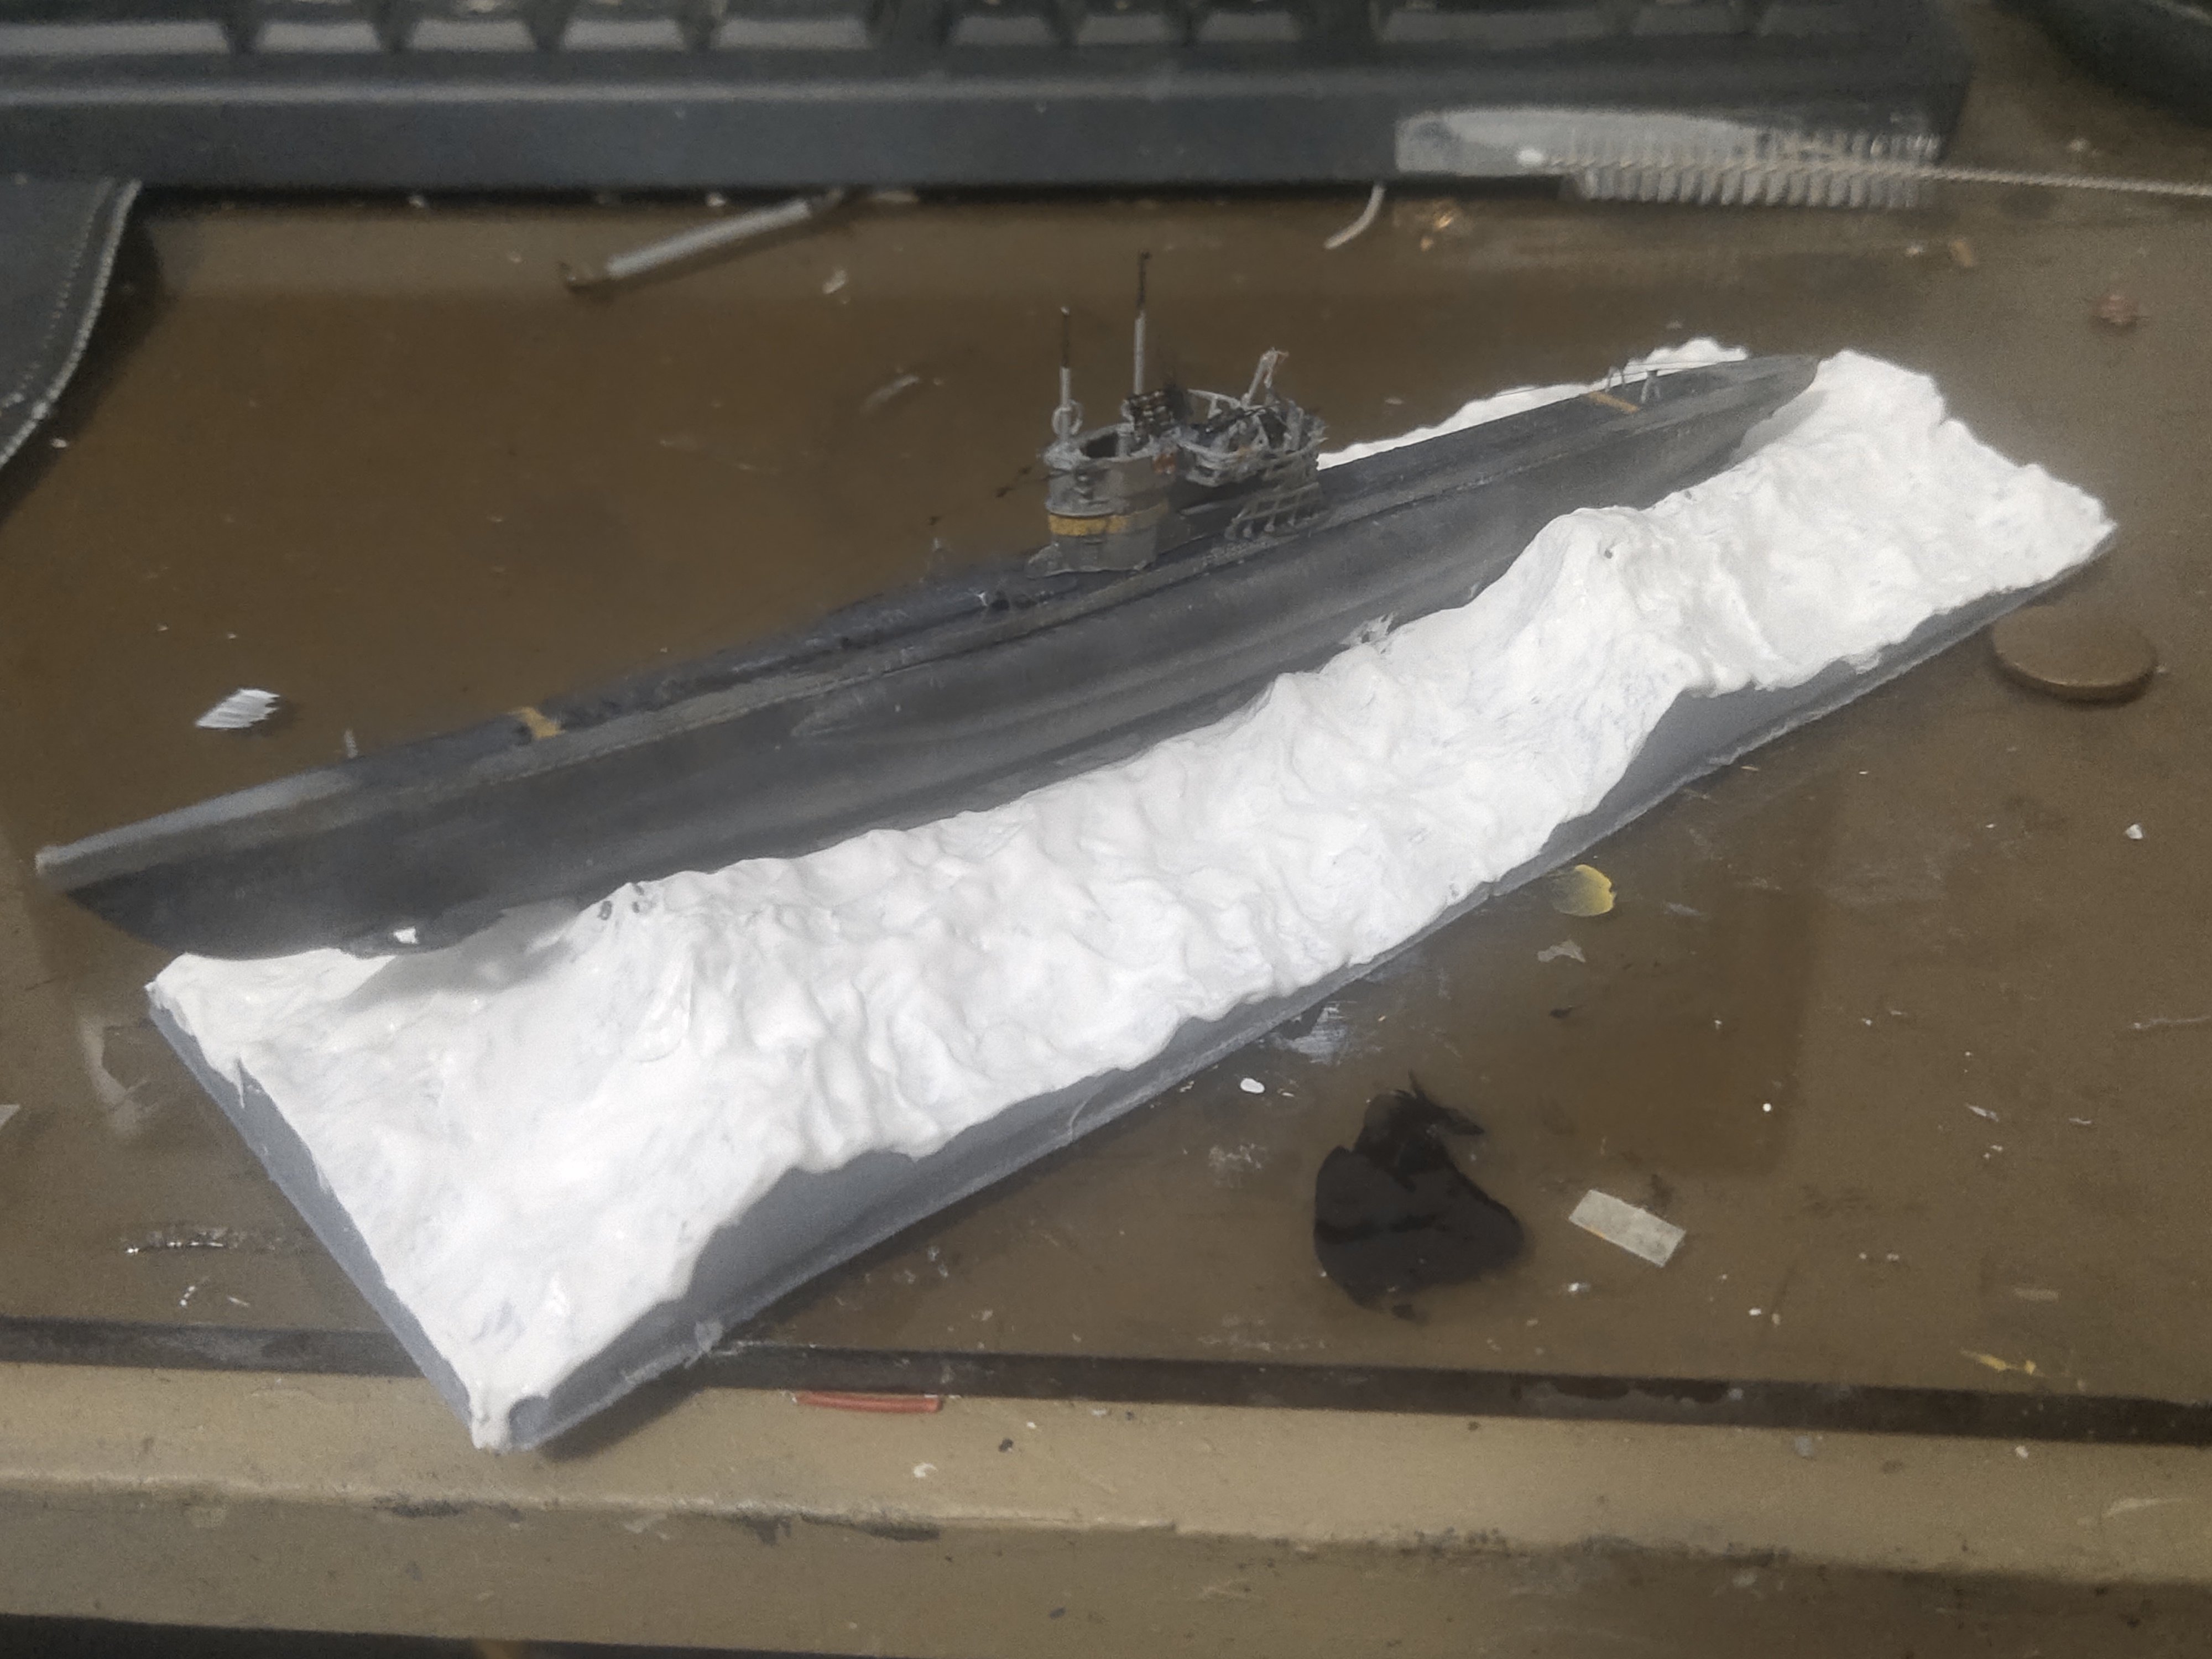
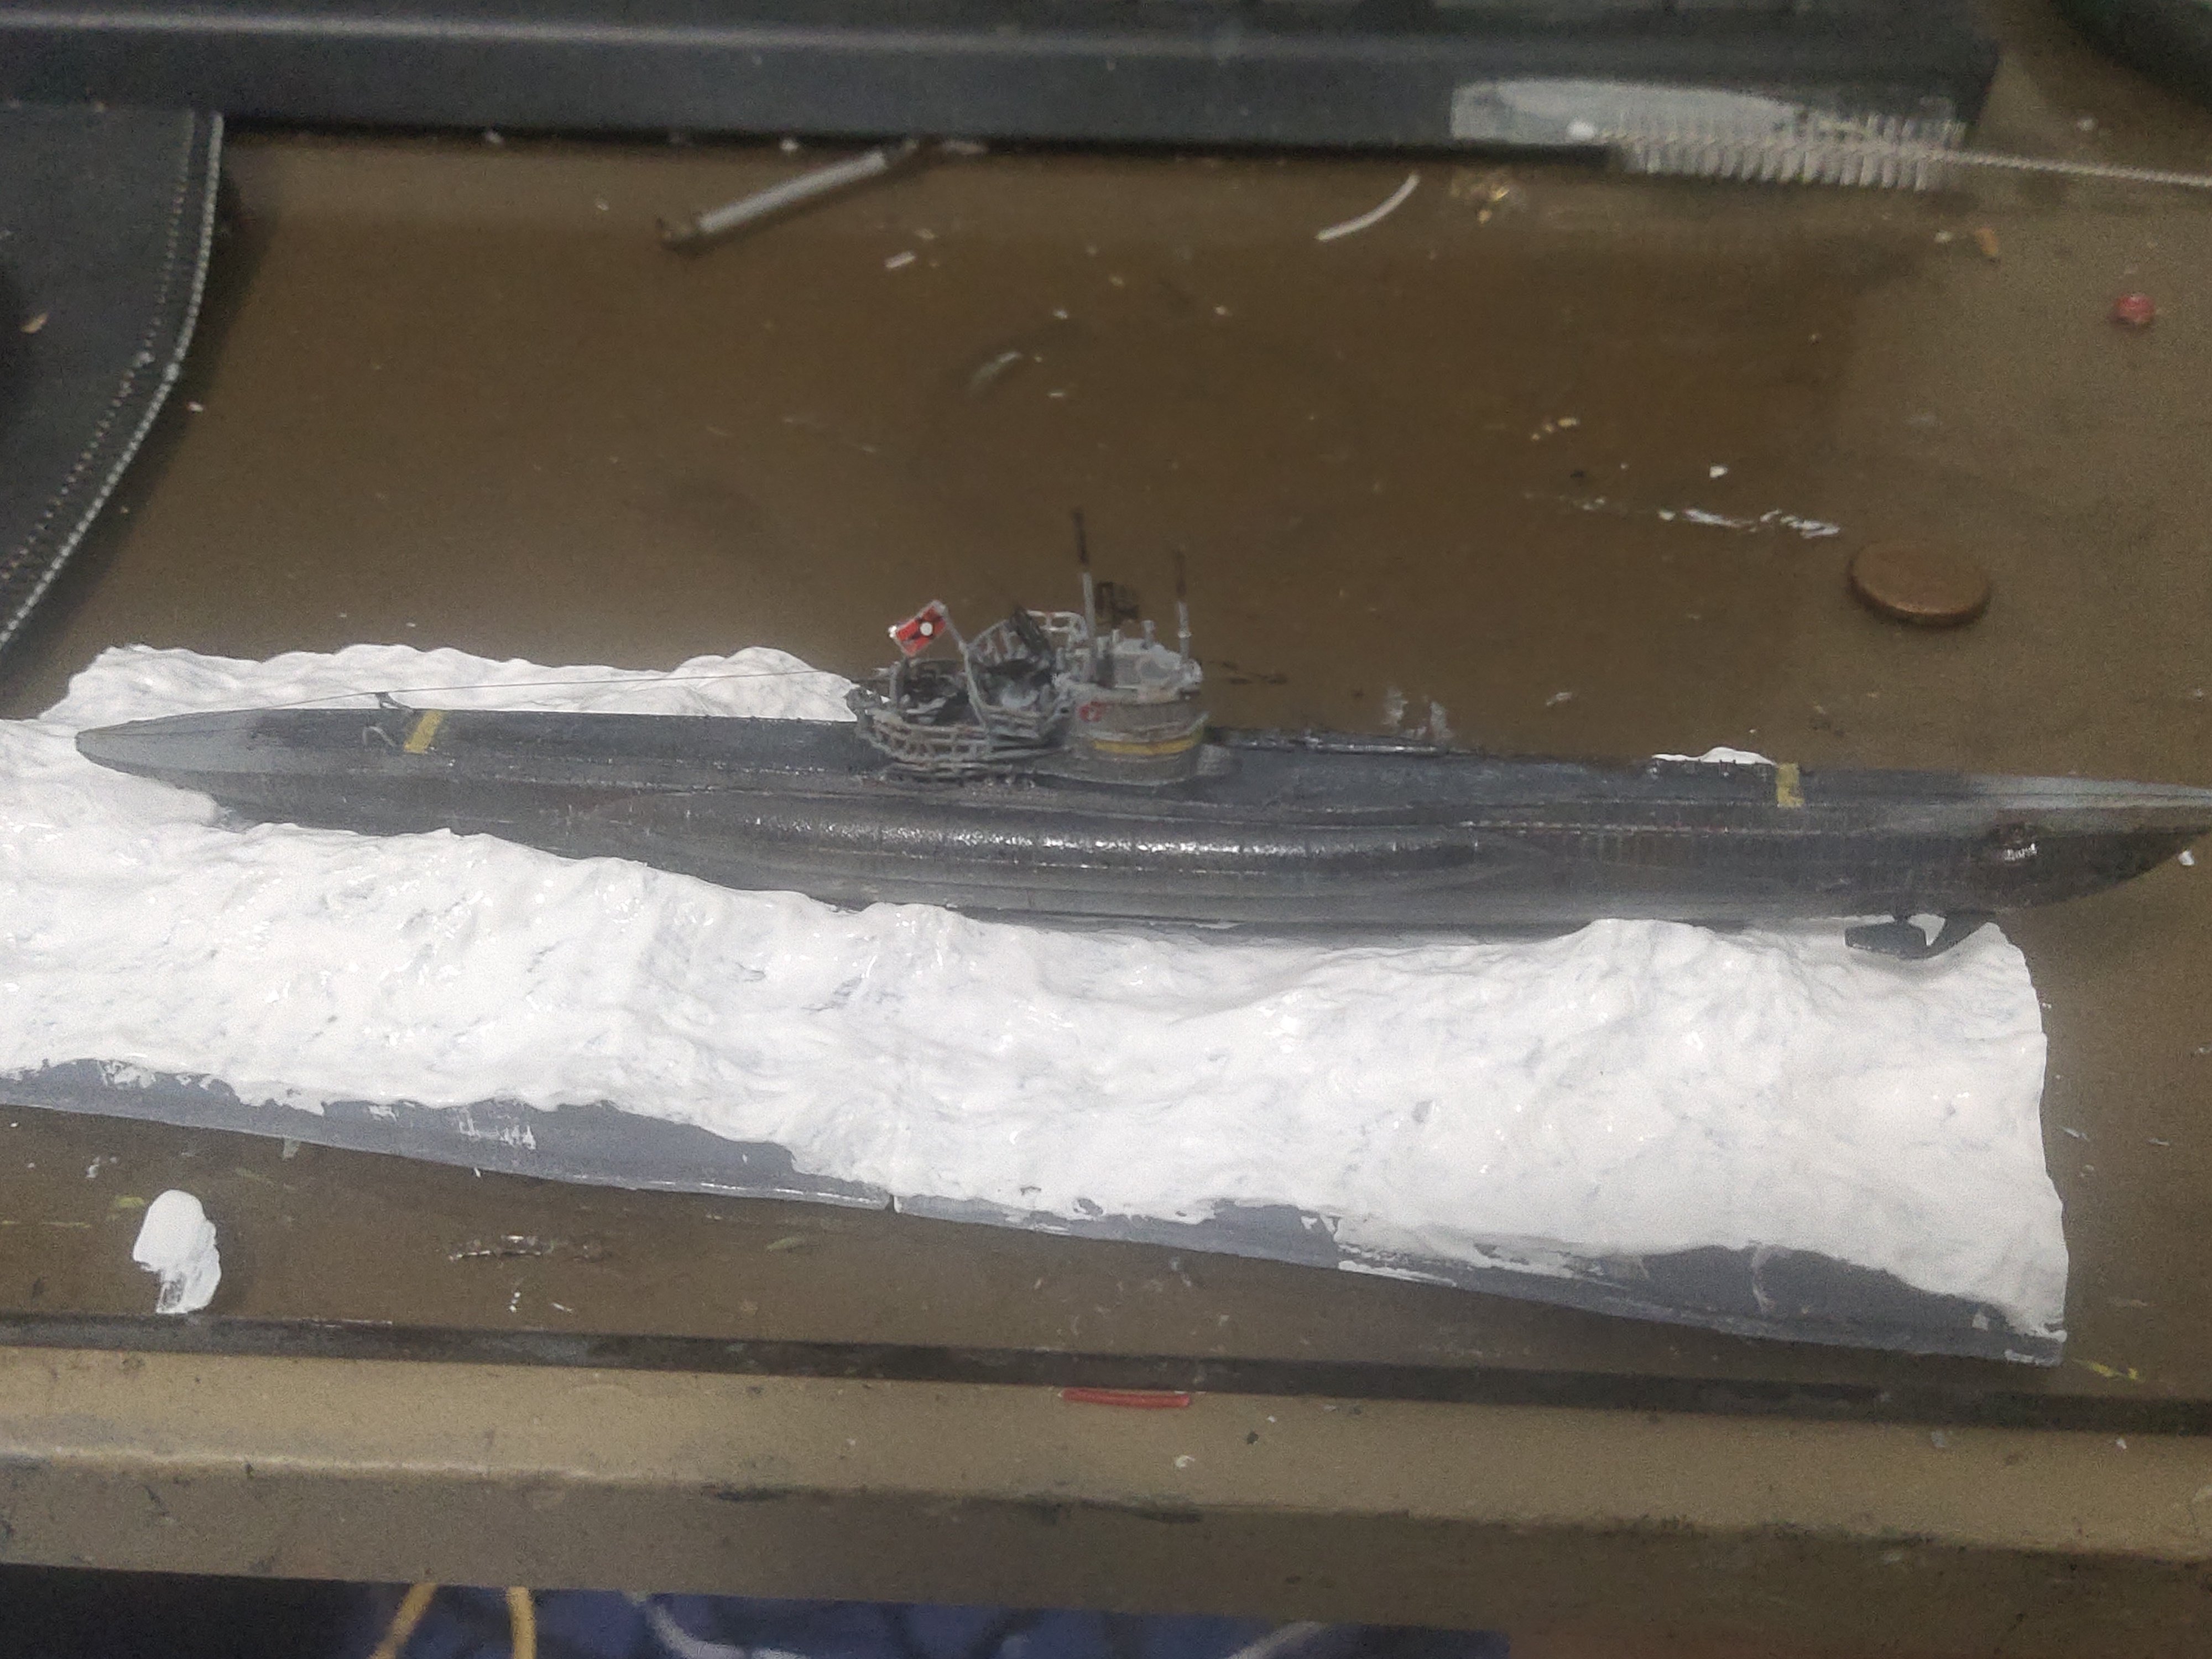
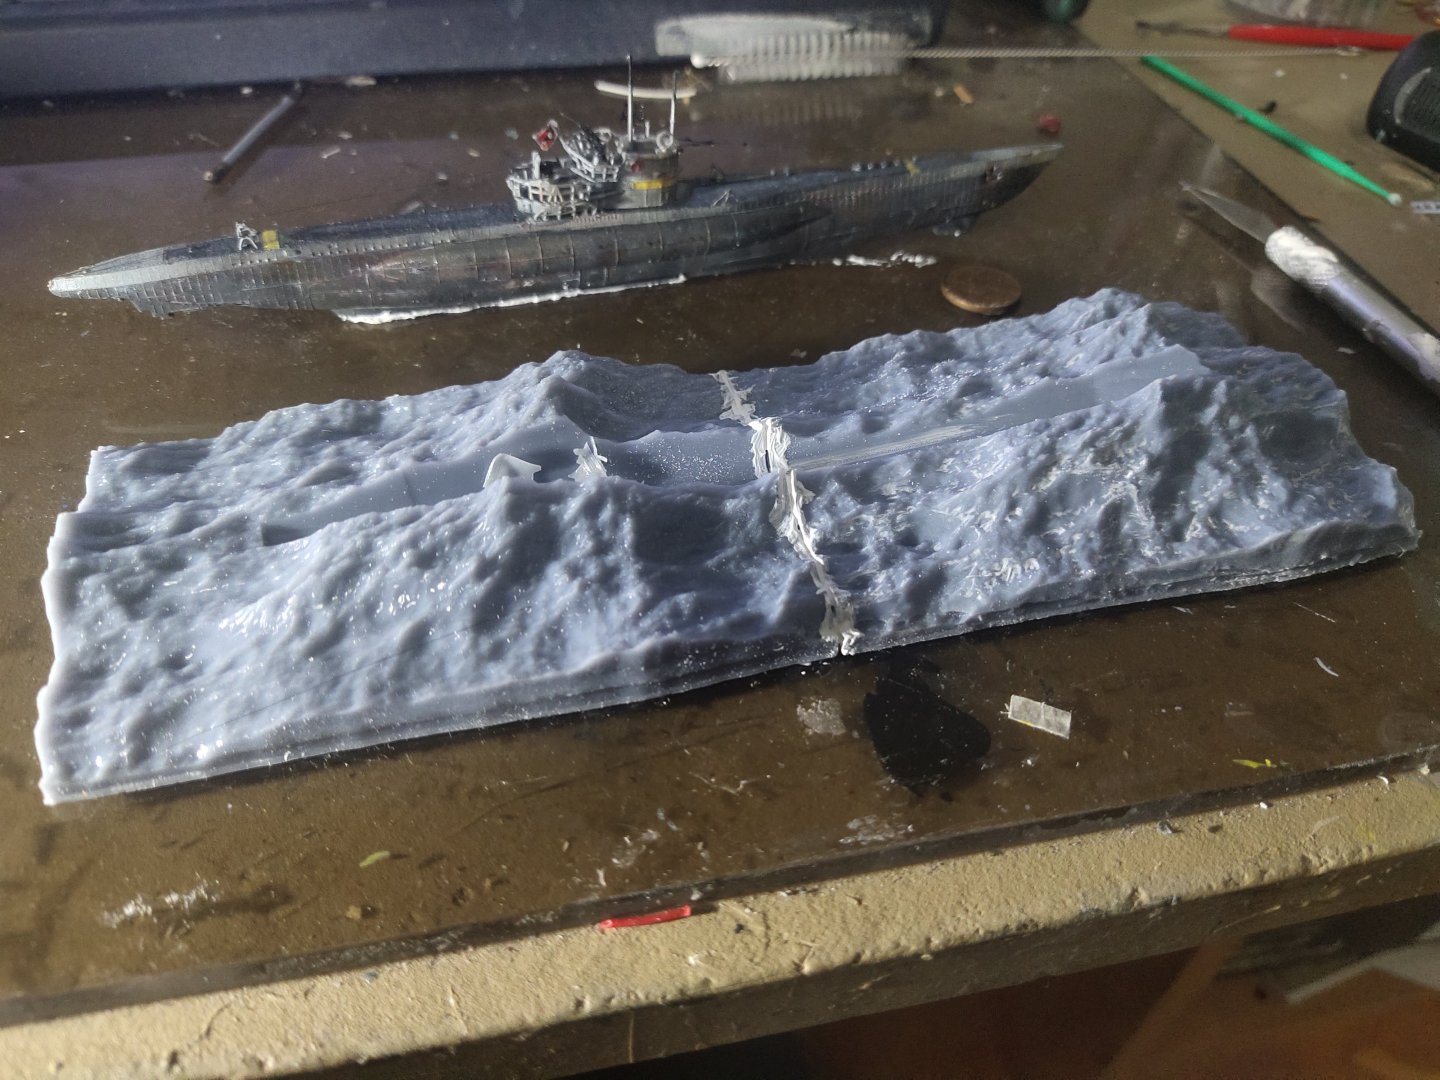
I want to build a nice diorama. But feel lazy and running out of space. After research, I found a sea template file. After few hours of process, it turned to a printable seabed suitable to work with. It was printed in two pieces and glued together. Most u boat layouts out there are in rectangle space but because of limitations both in available space and printing capacity it came at 7 cm wide After a more digging with a dremel and two layers of gesso it looked like this I think the stern need to go lower a bit more to highlight the "U boat riding the waves" scene. Then paint the base with basic blue, attach the kit by filling the gap with a material and go for the final details.


-
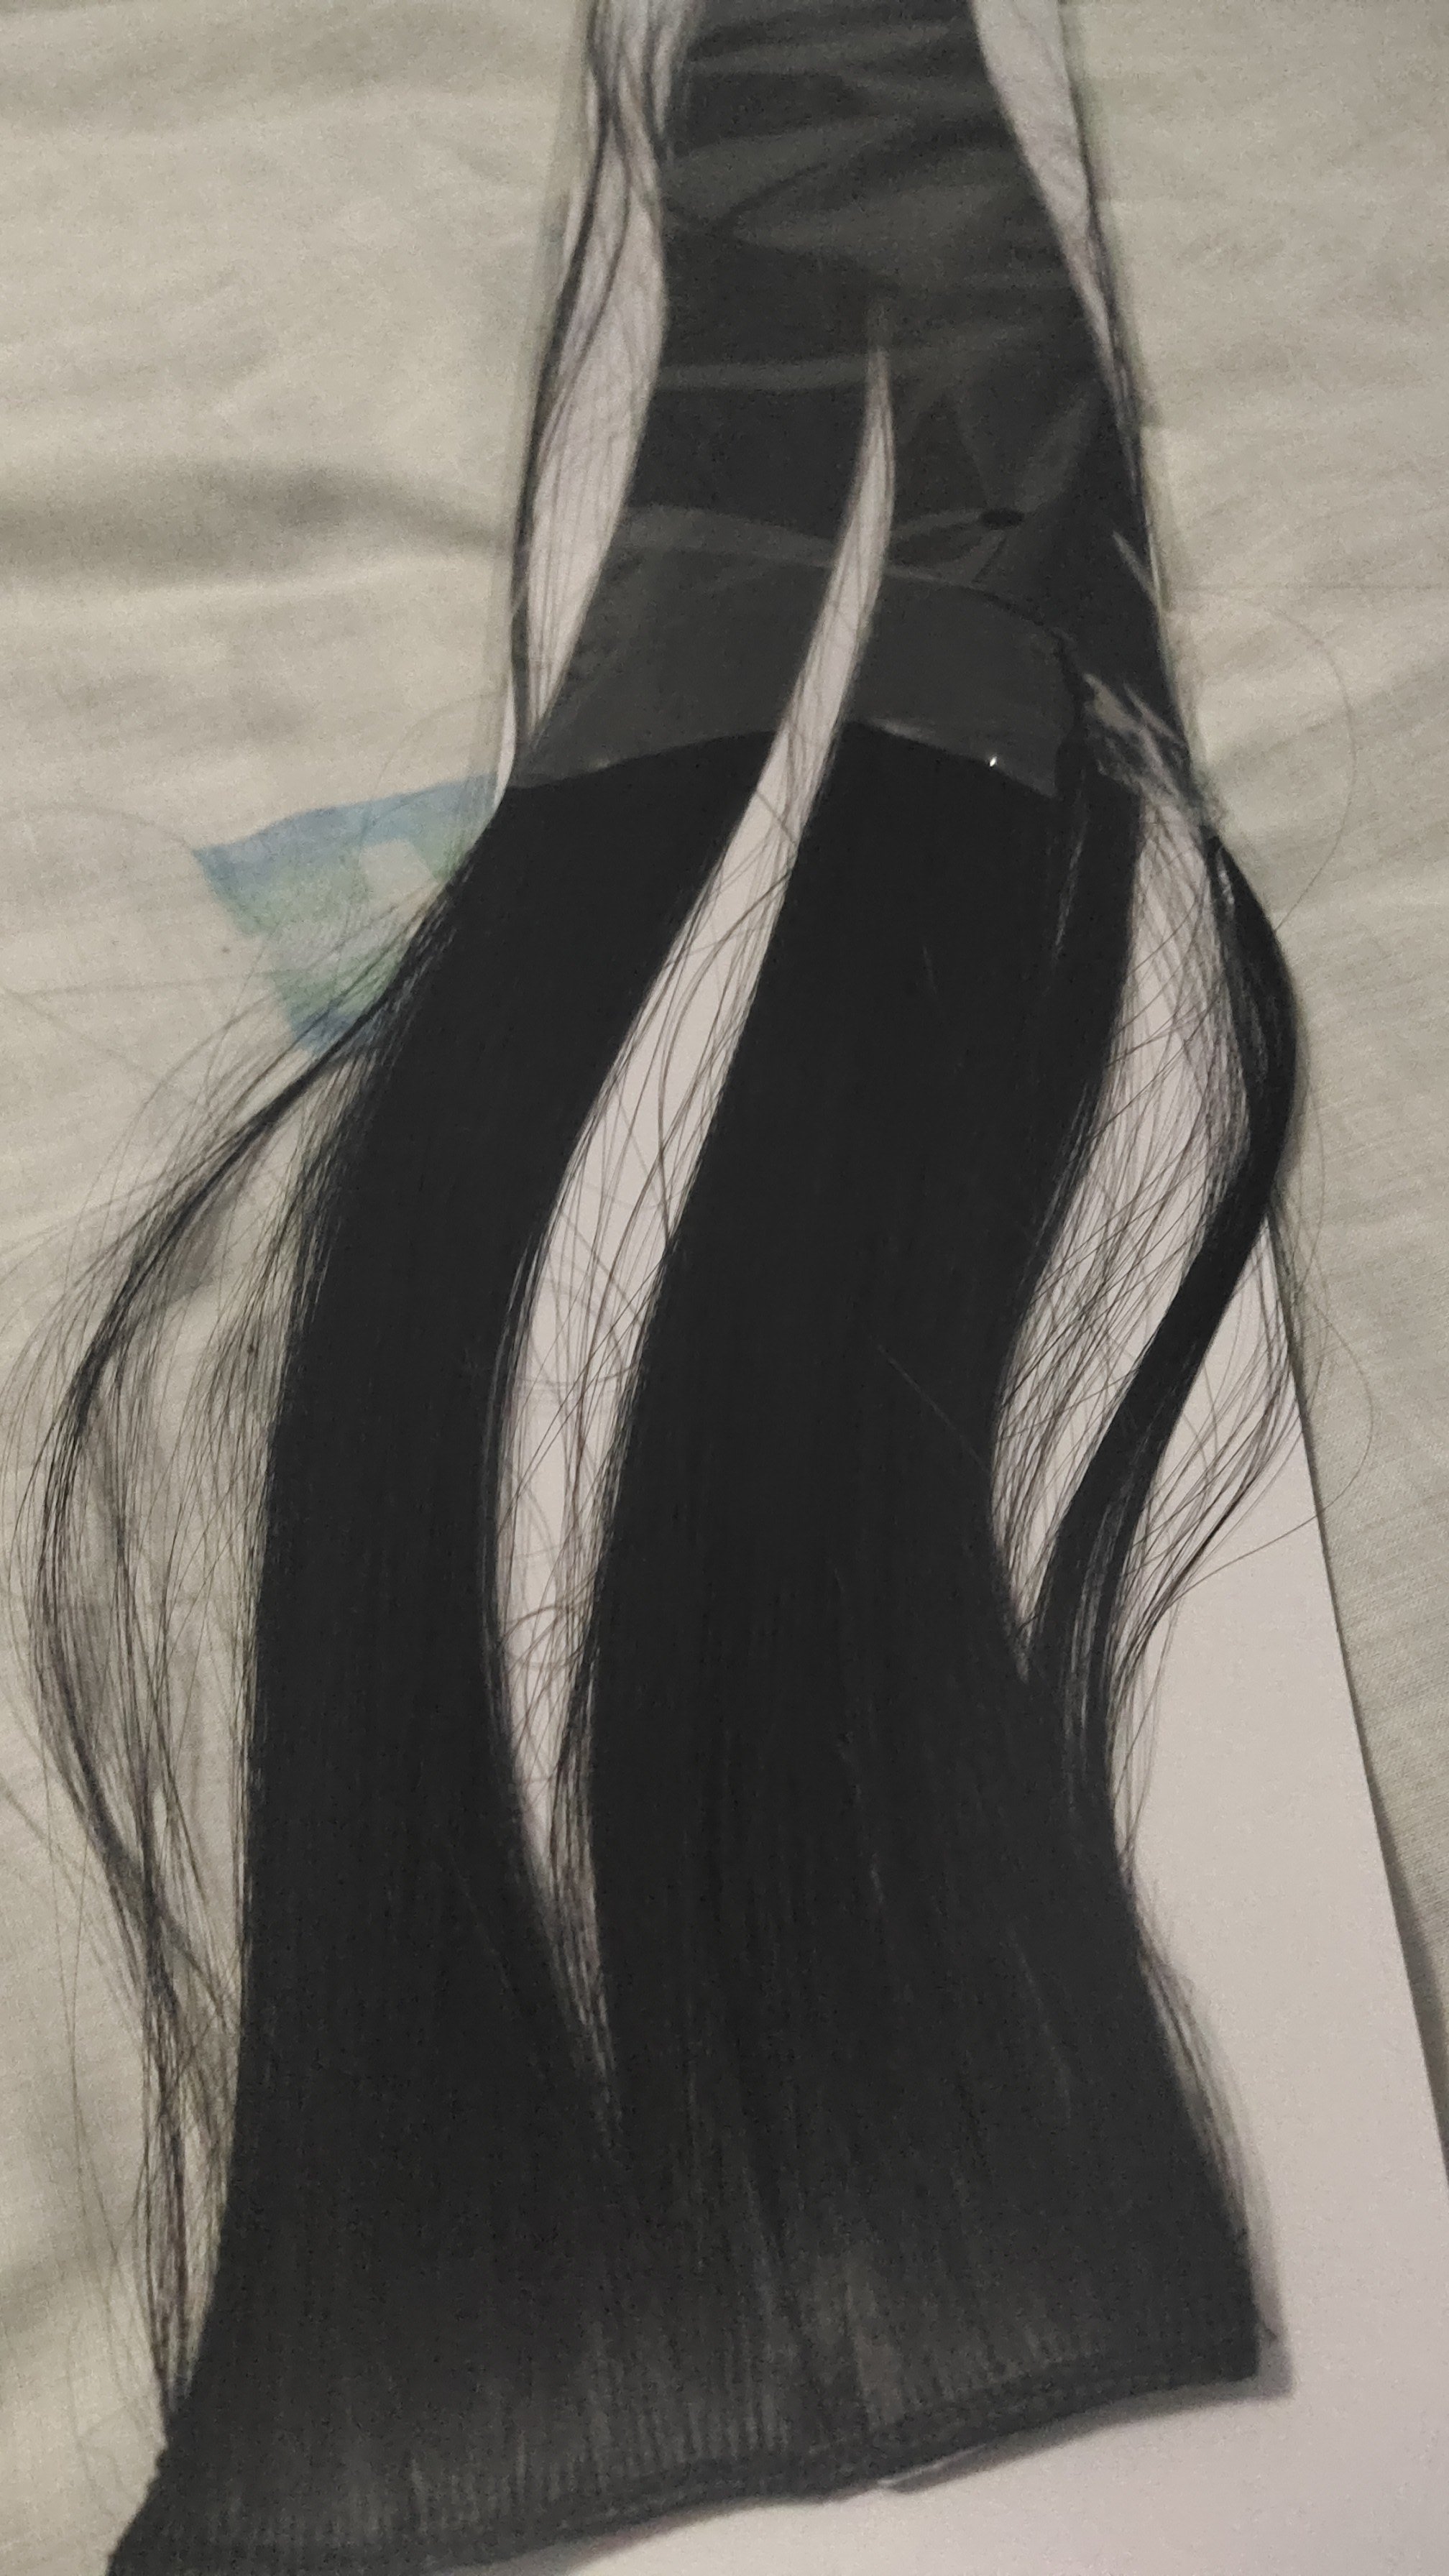
Thanks for the comment Indeed I used a new material, fake hair. Got a got a huge amount for 1.99 and most important the thickness is ideal for both 1/350 and 1/700. Very thin but quite visible because of the black color.

-
another masterpiece
-
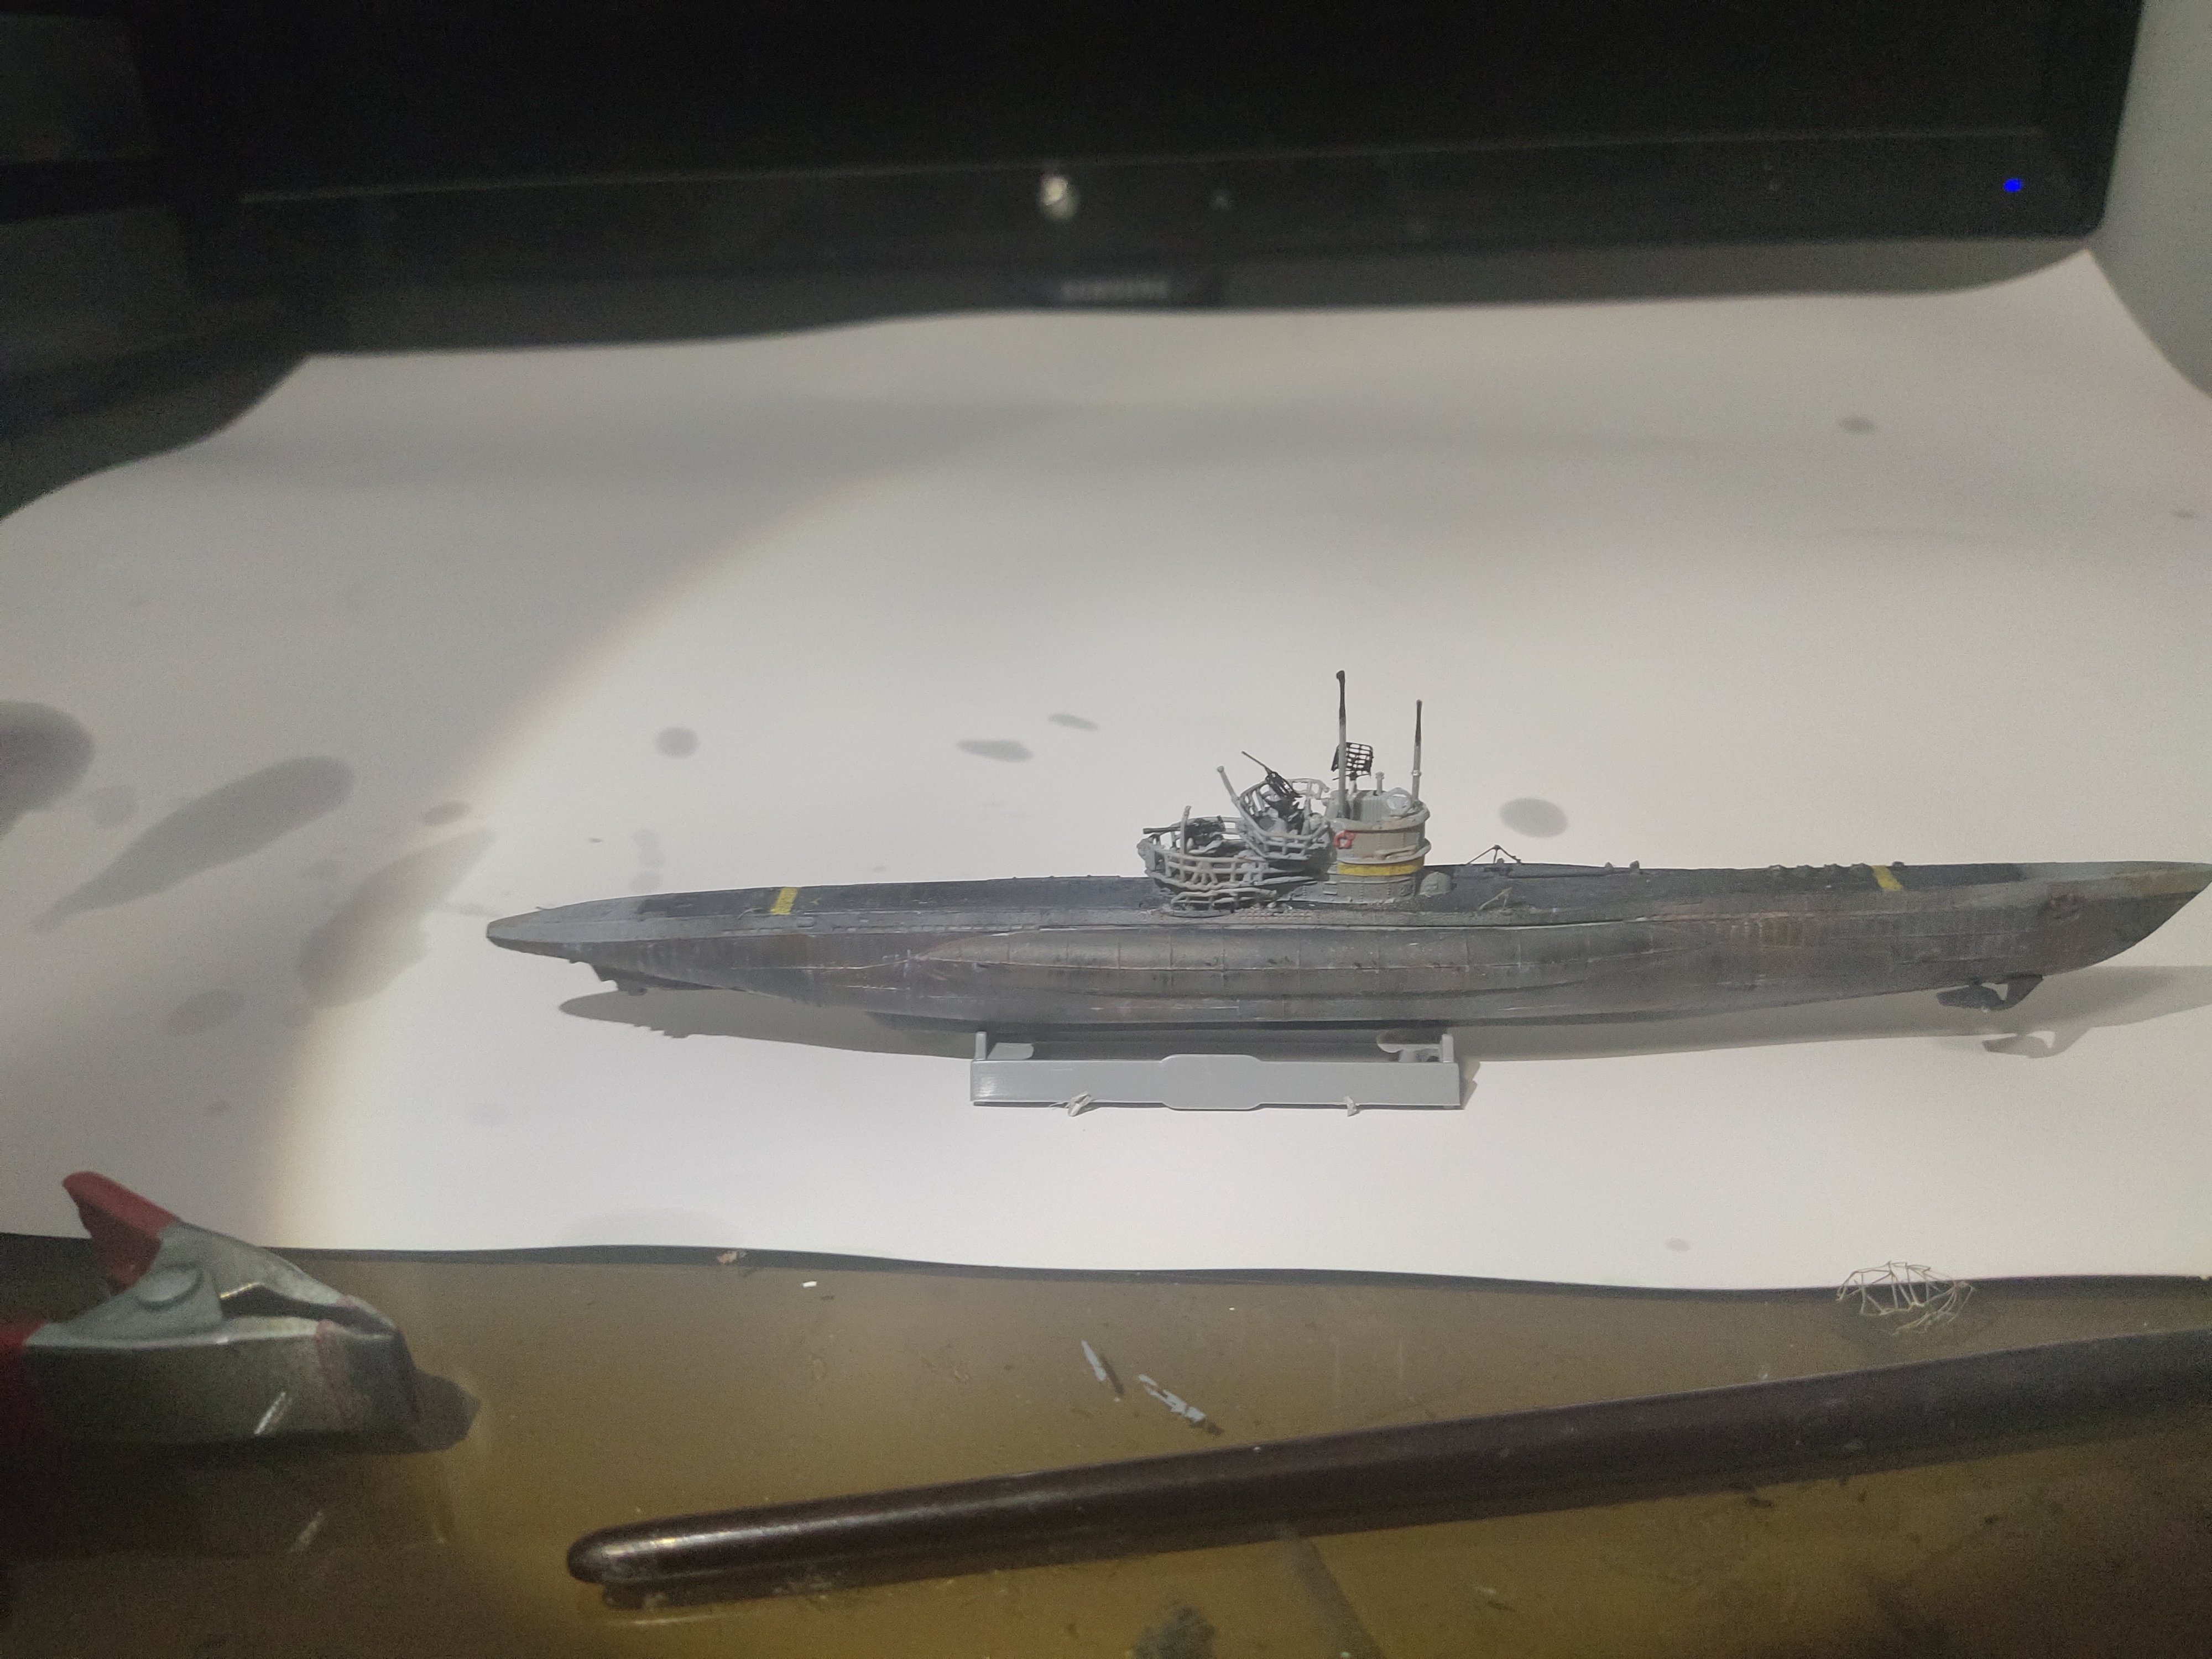
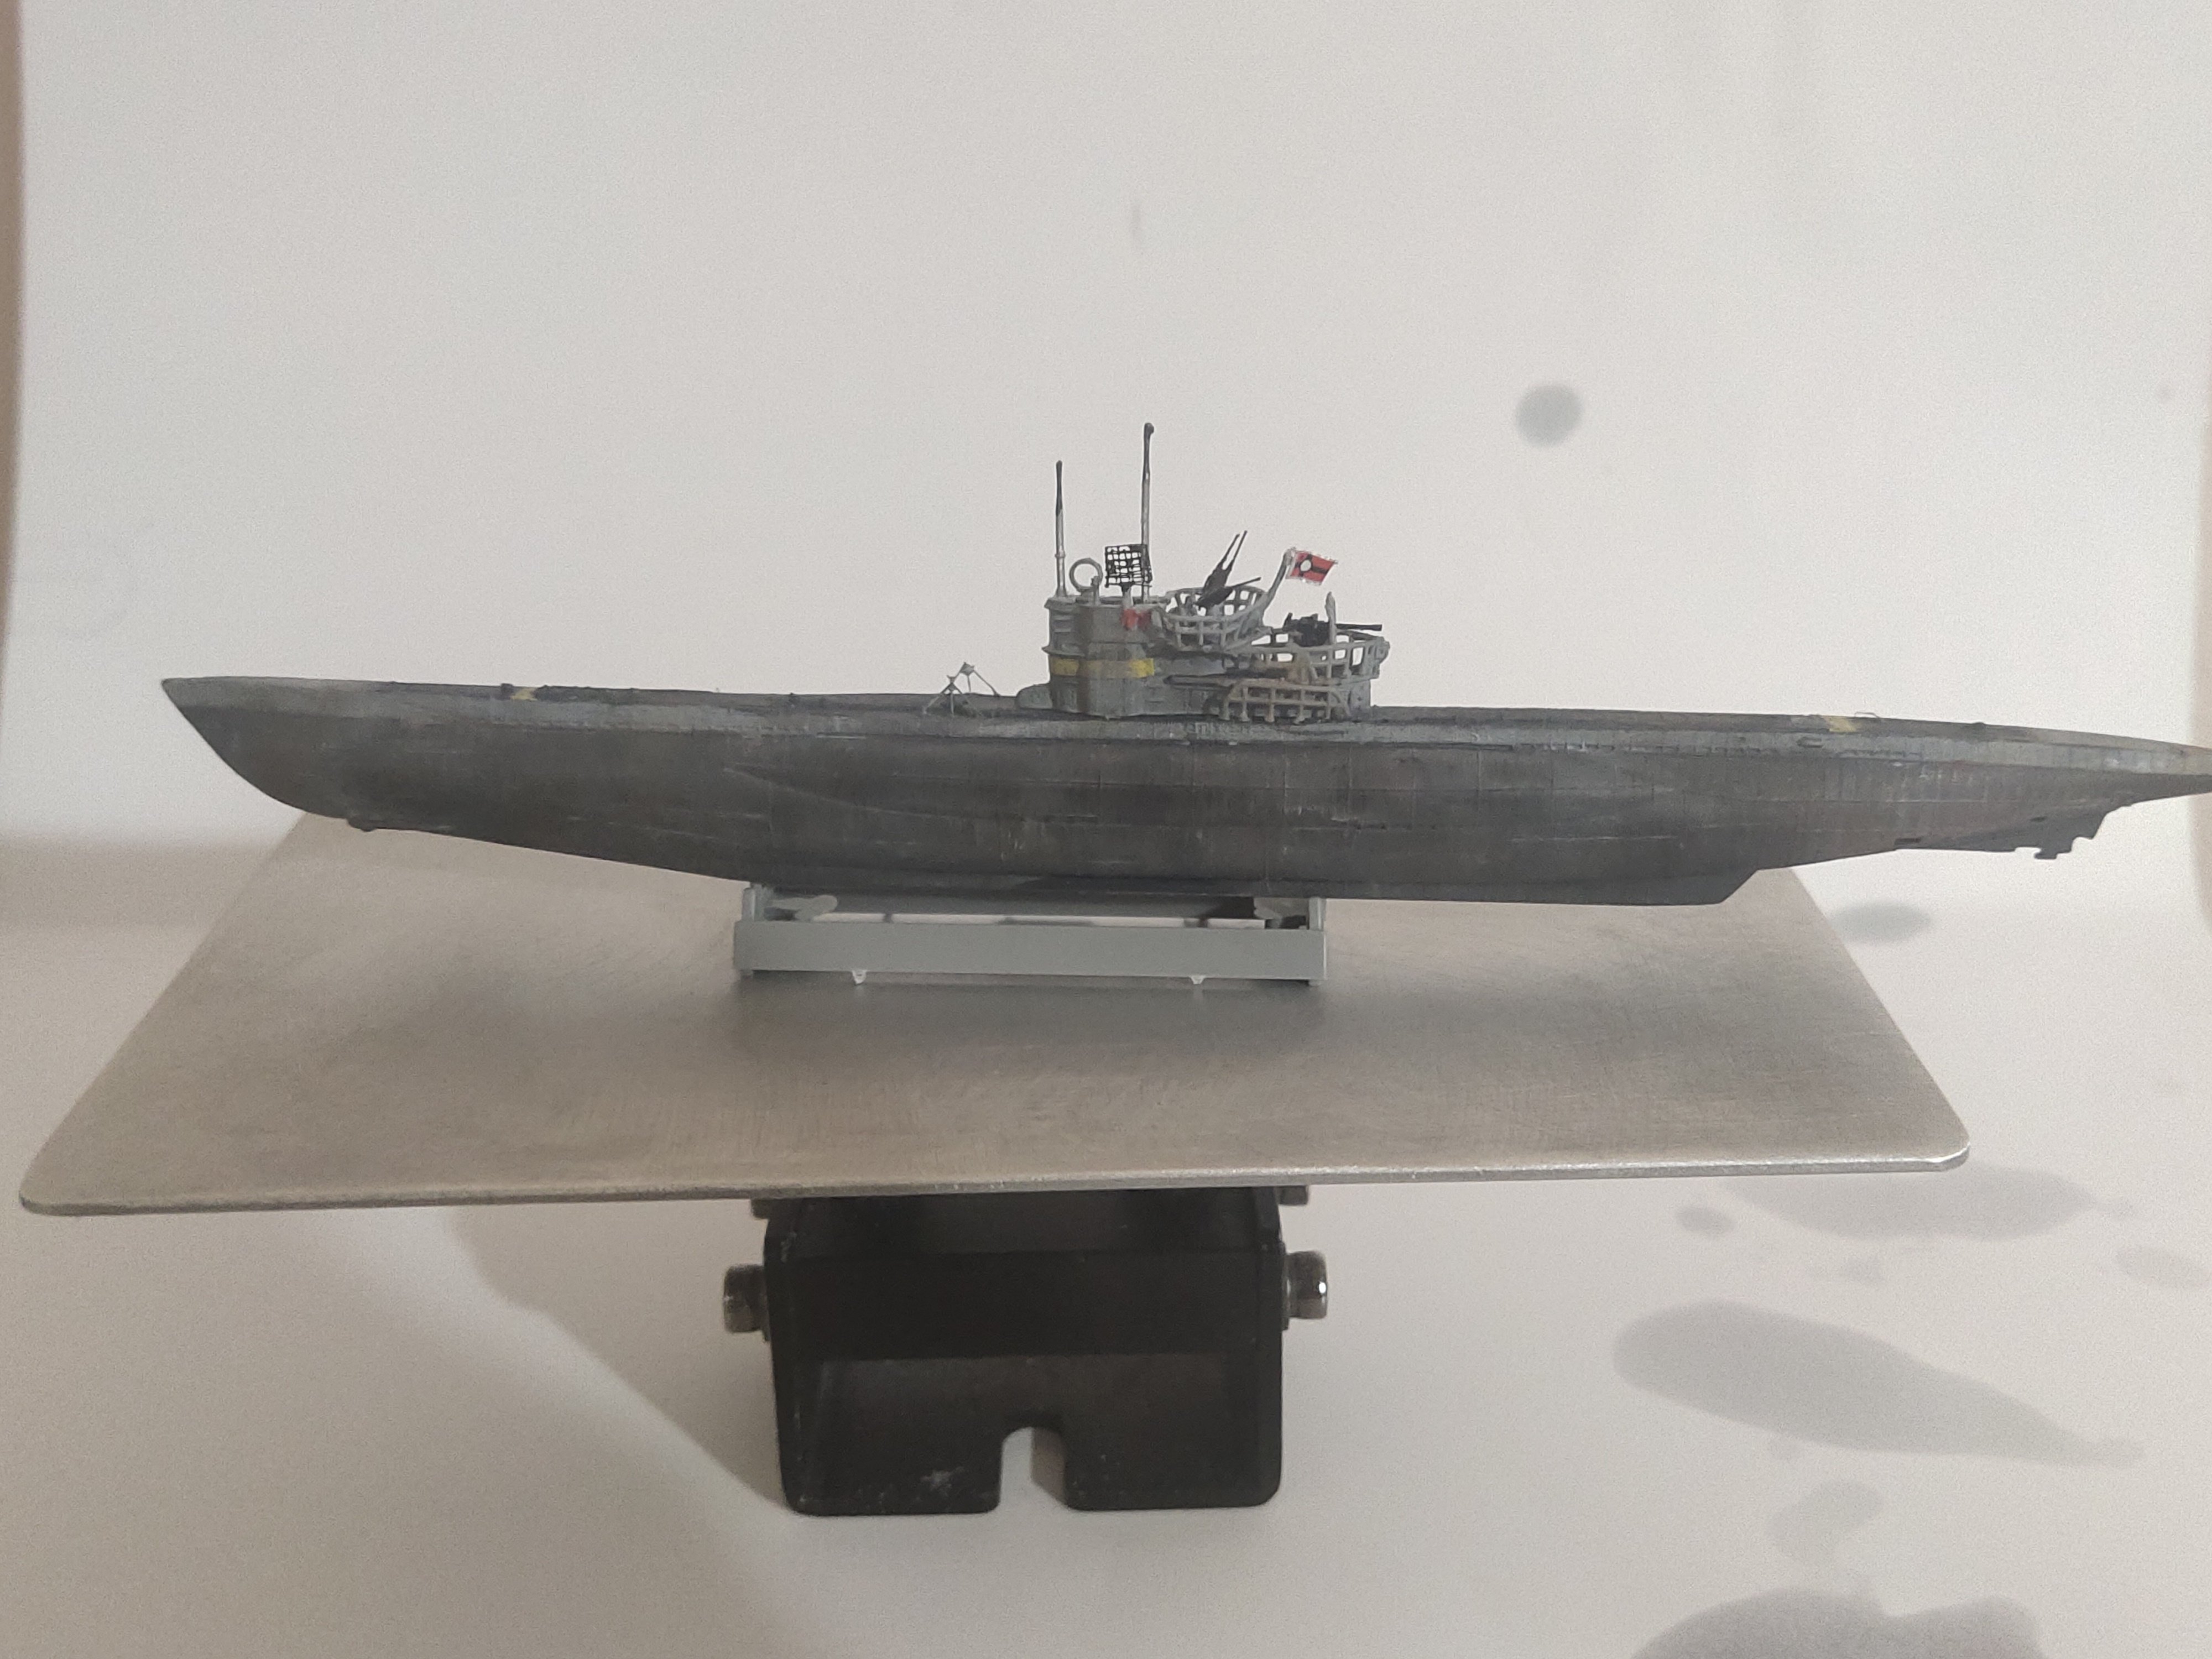
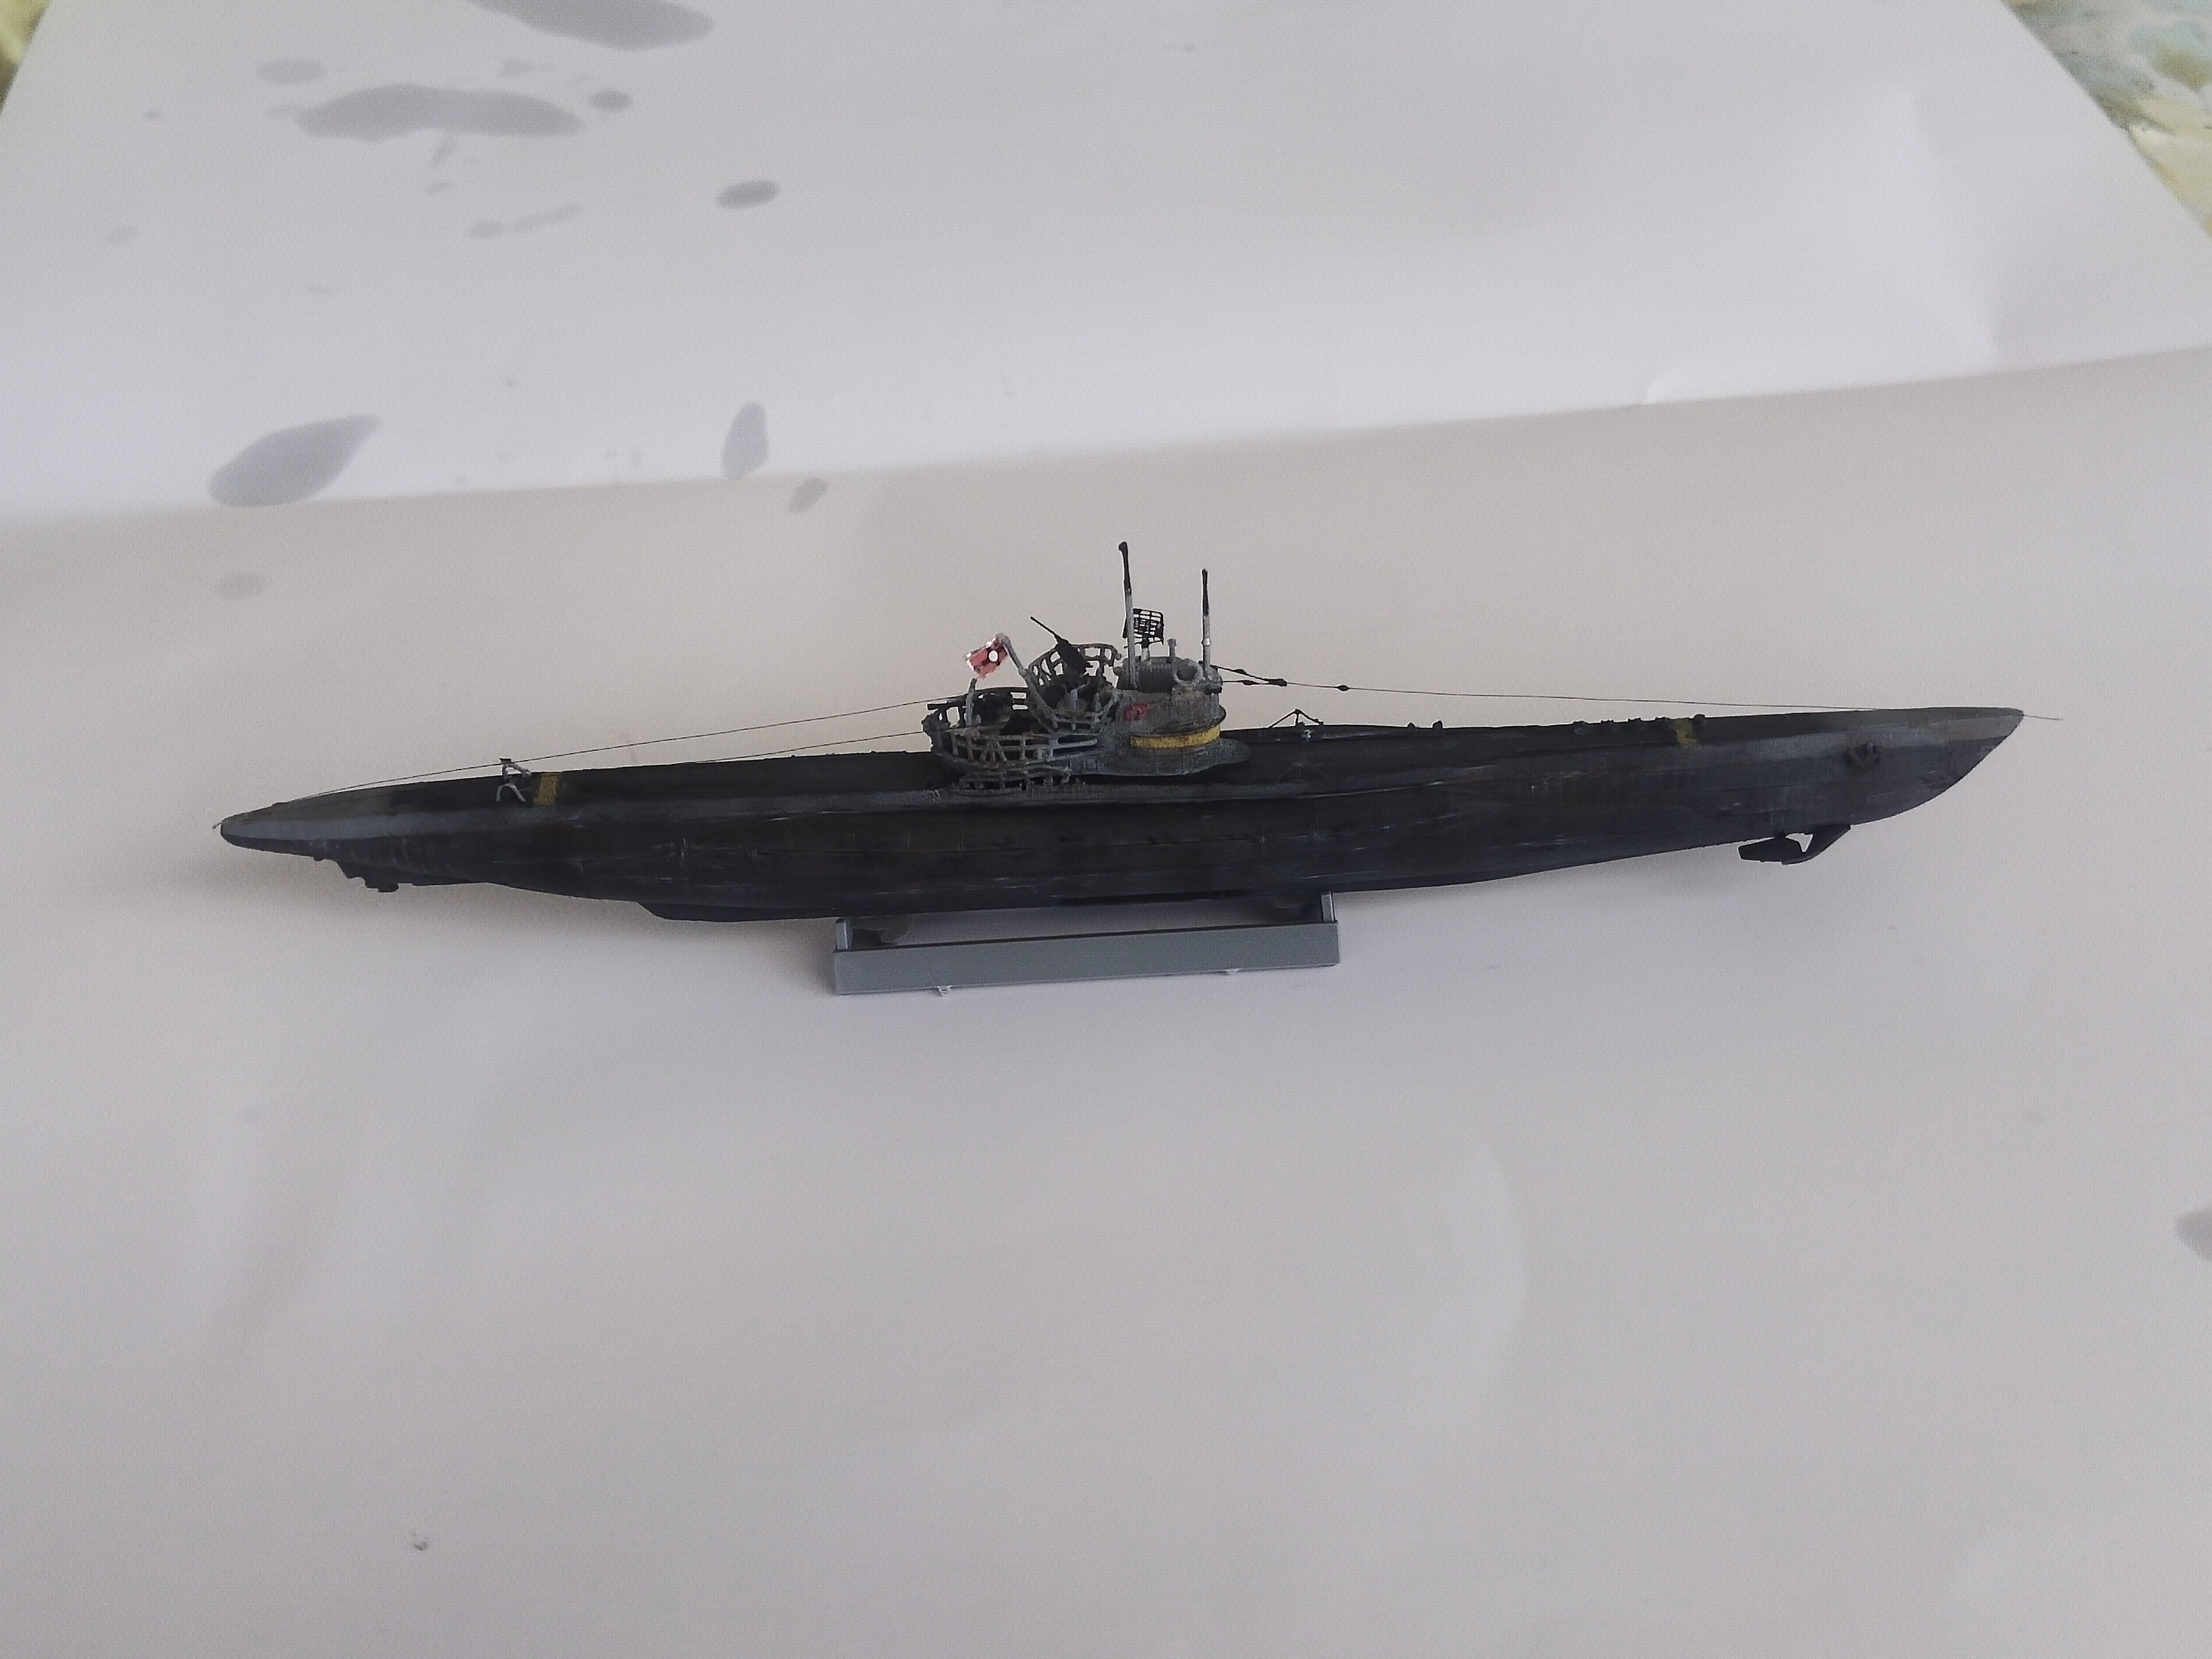
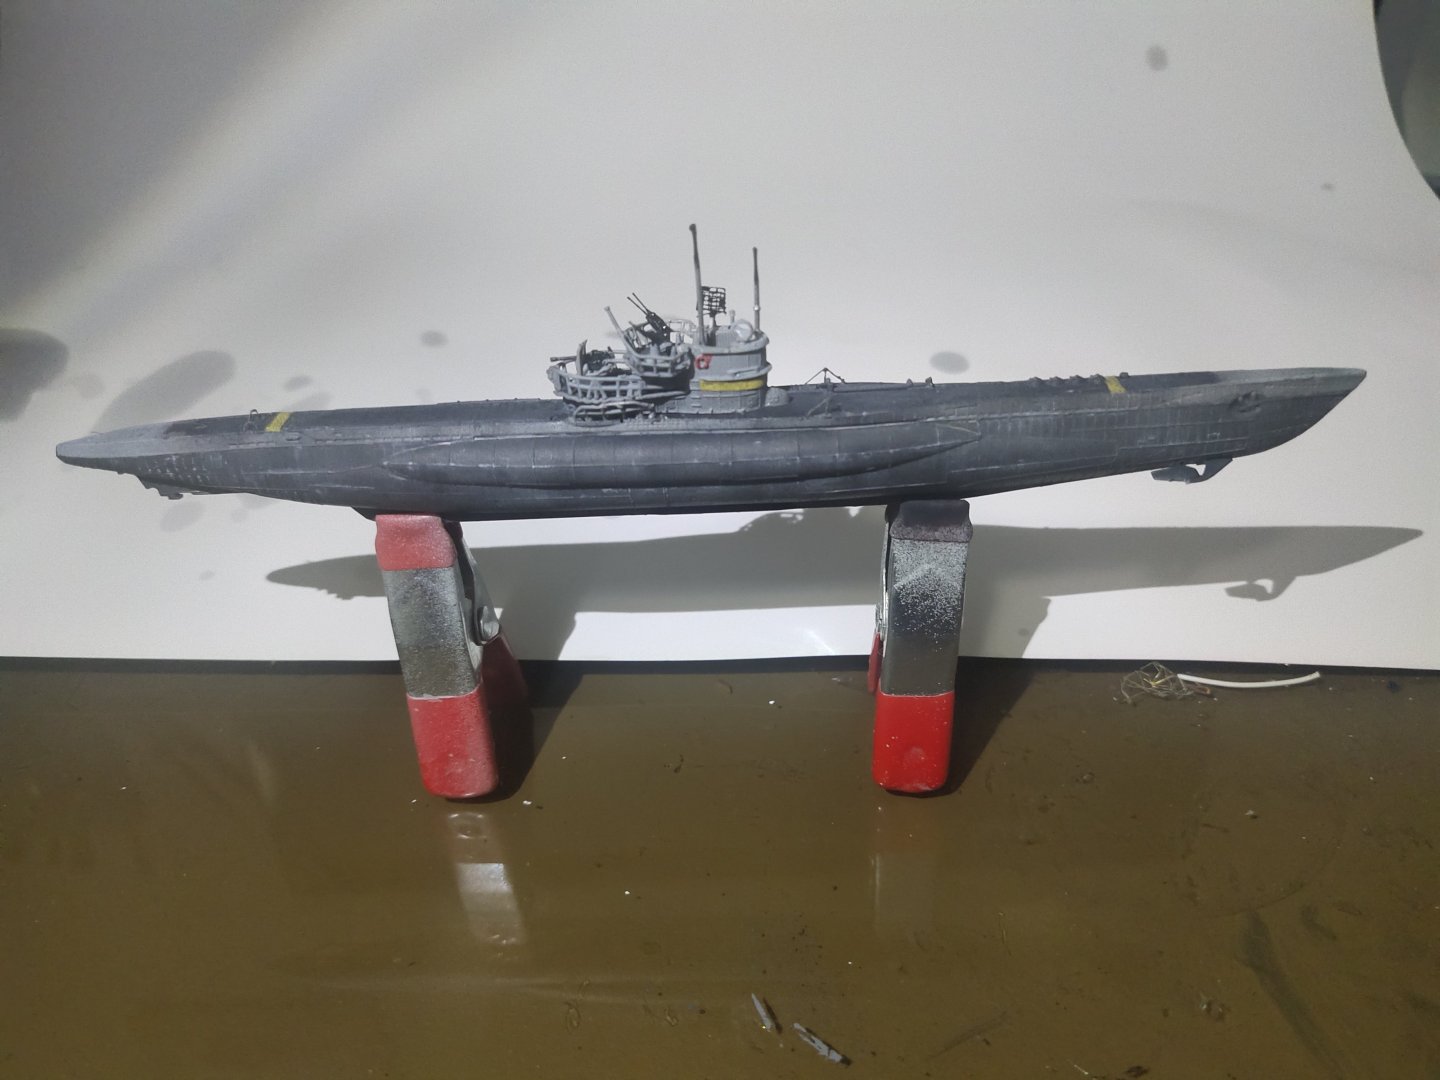
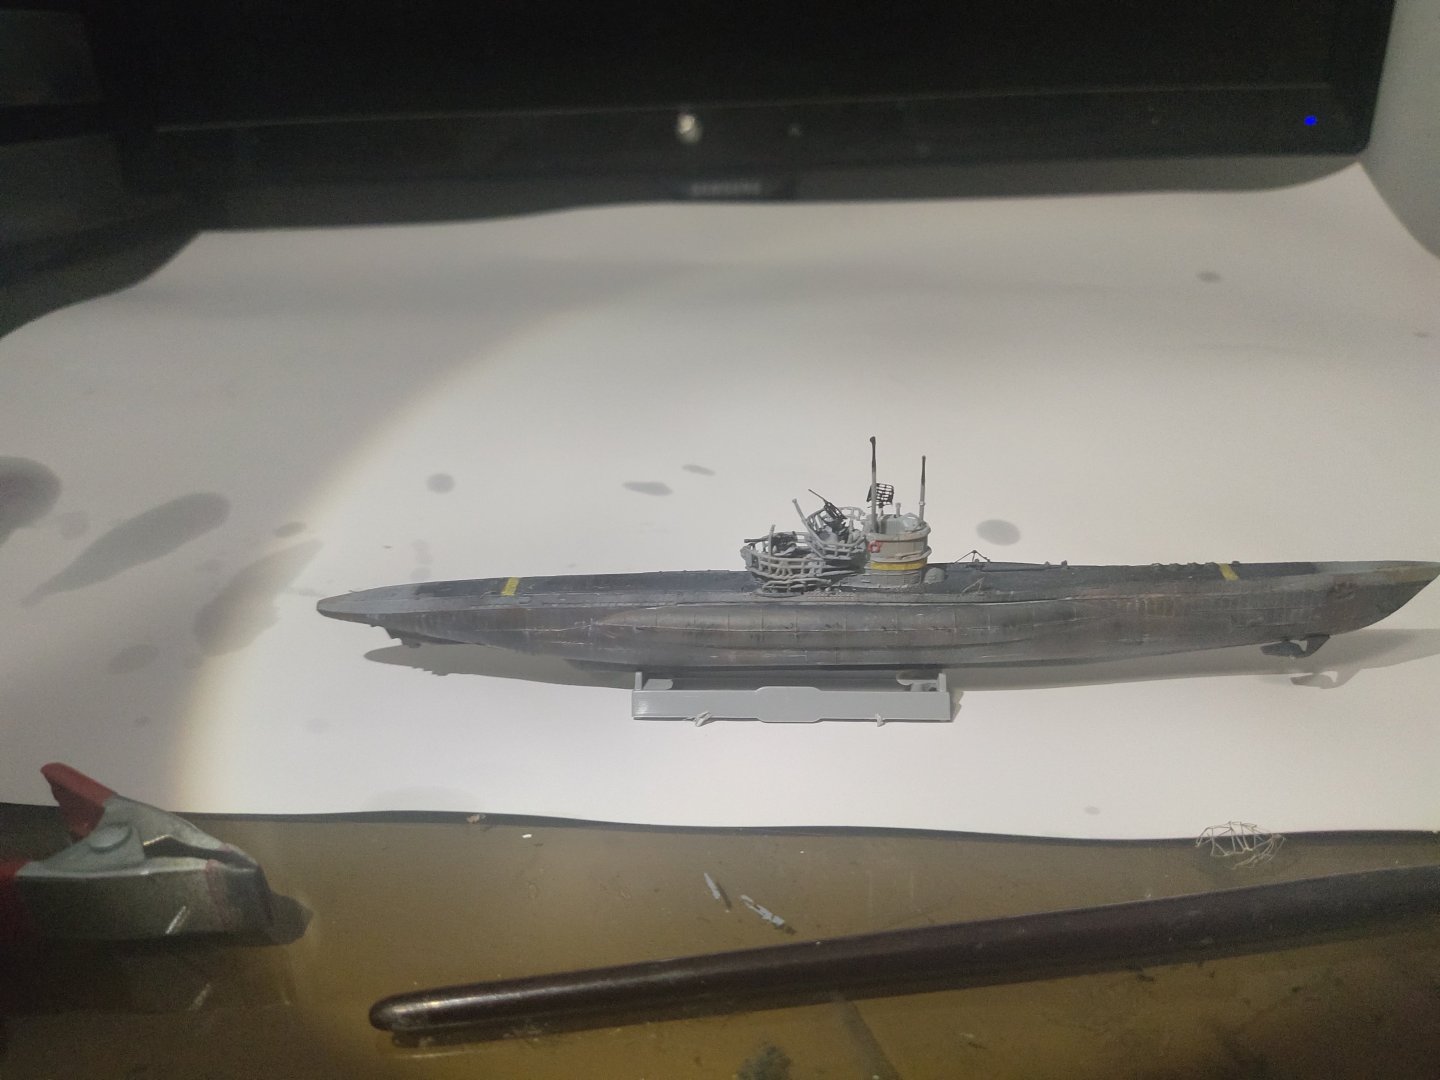
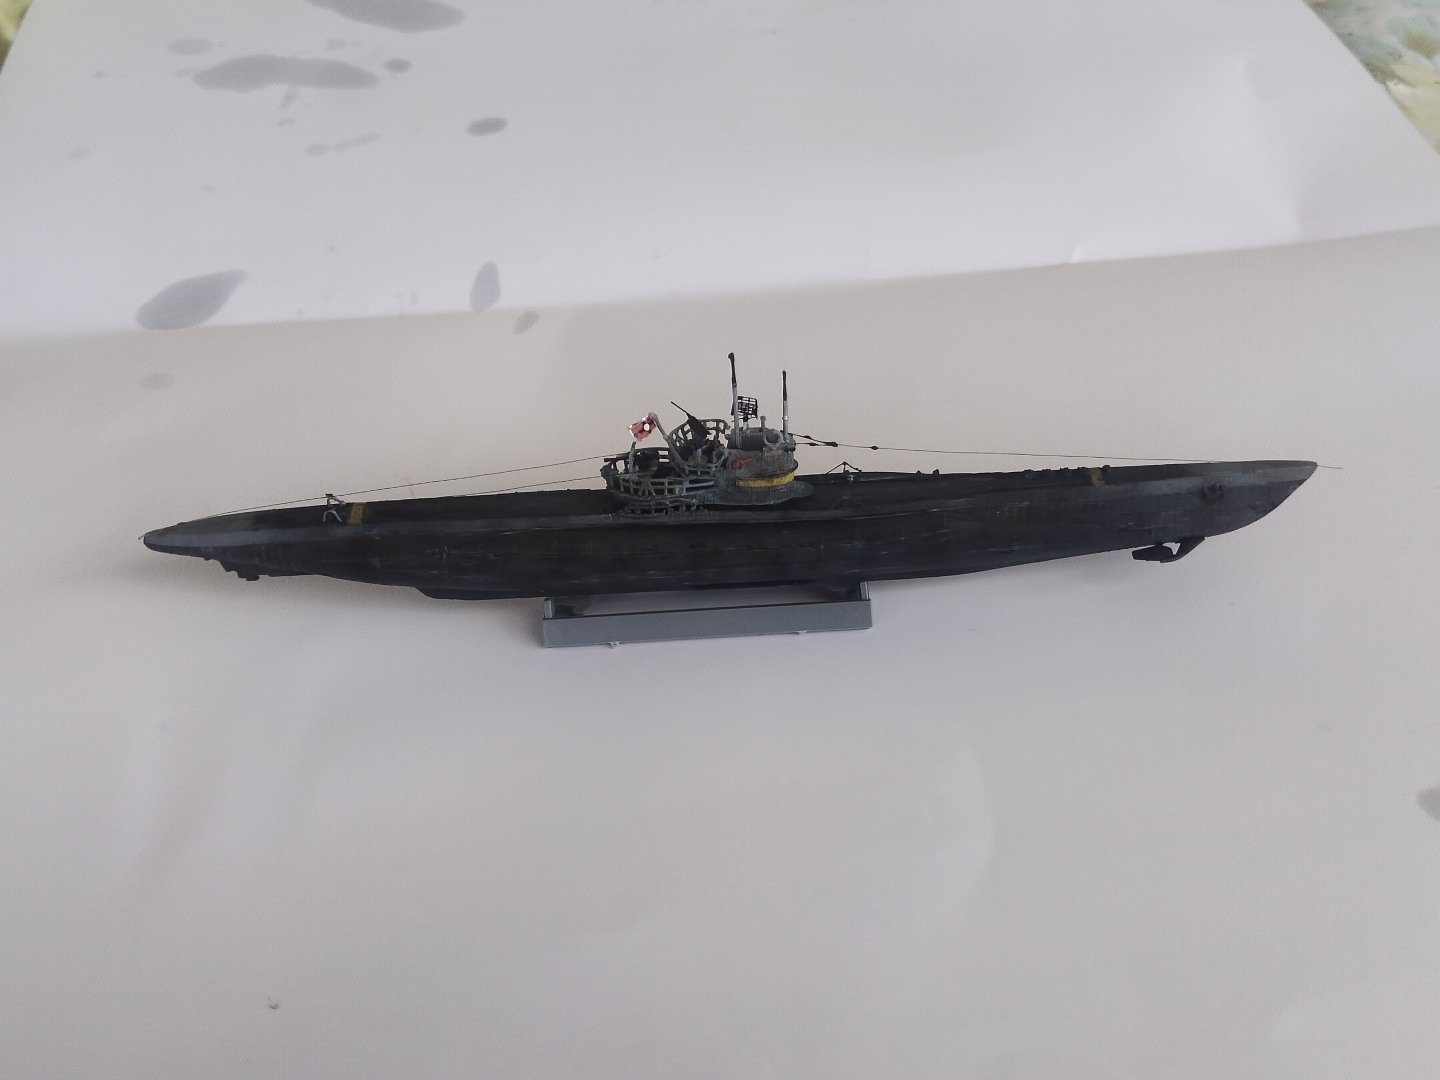
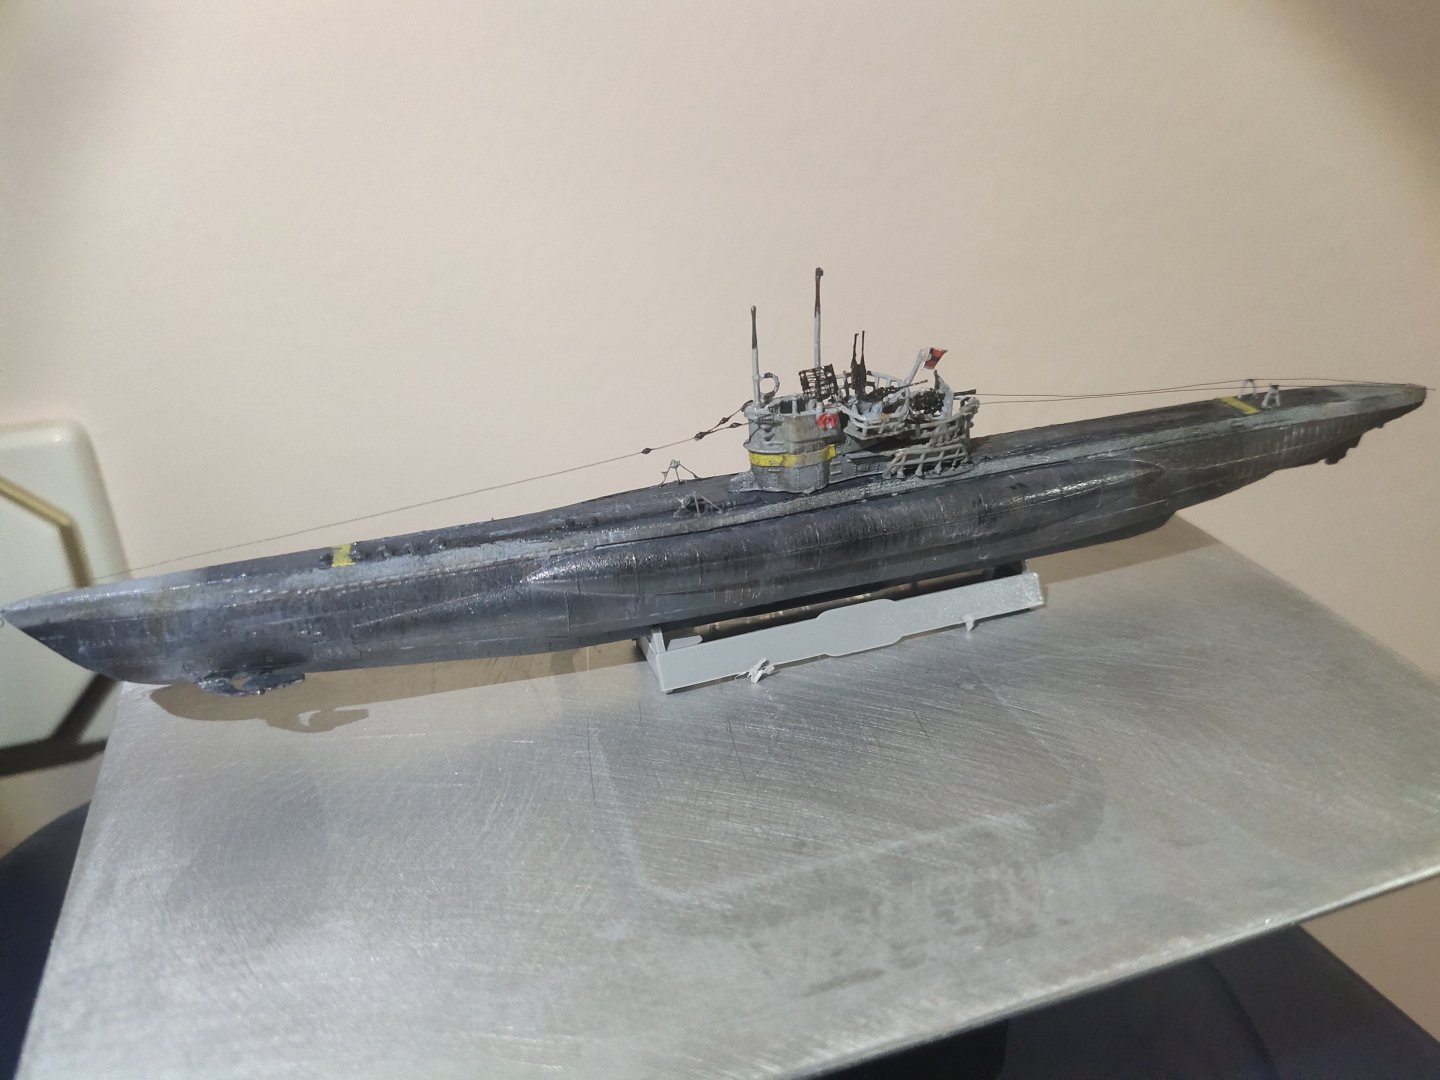
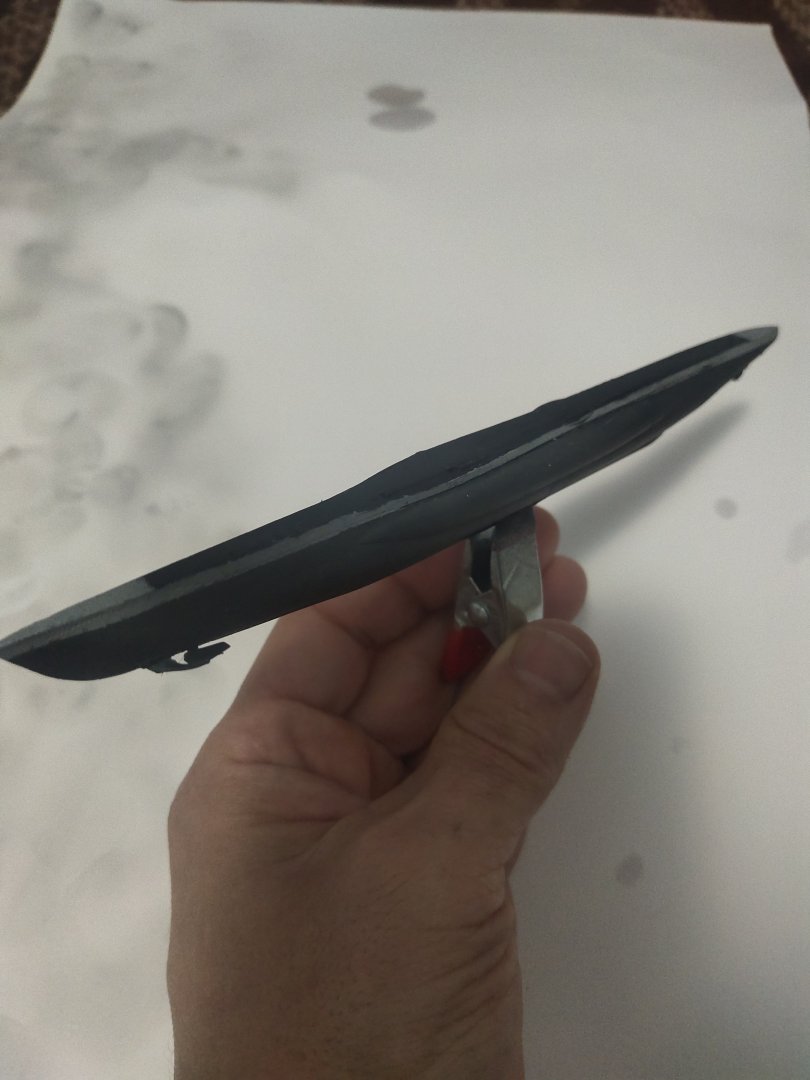
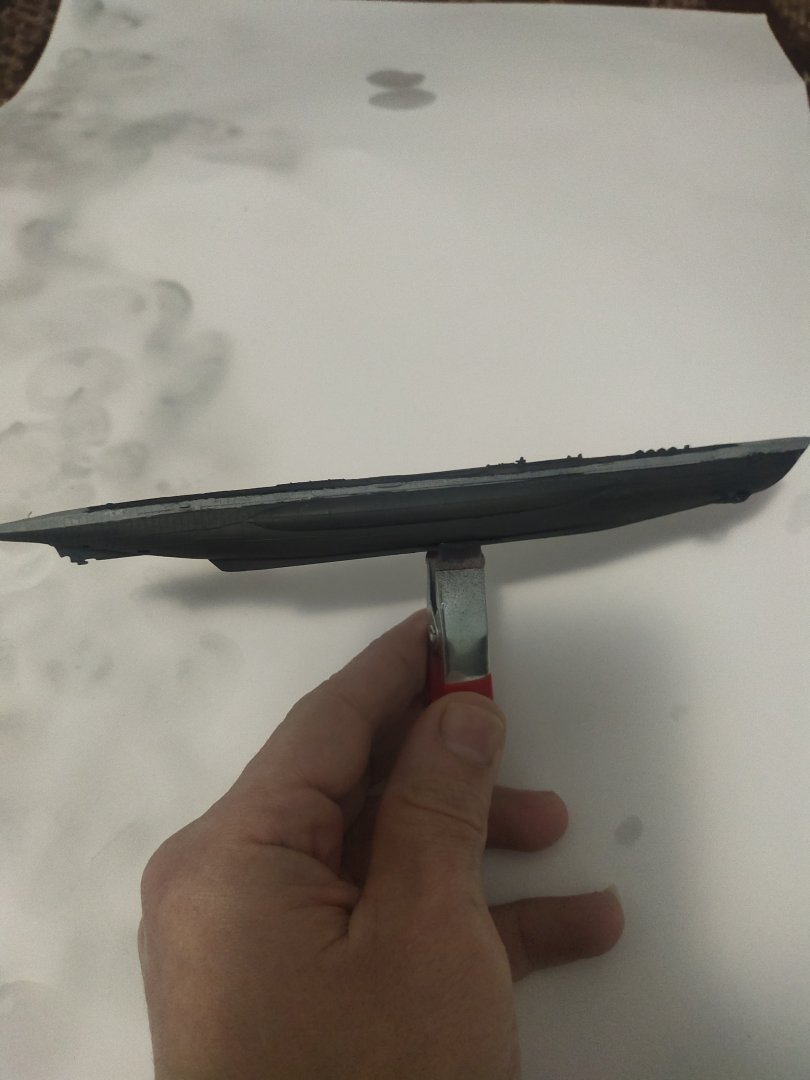
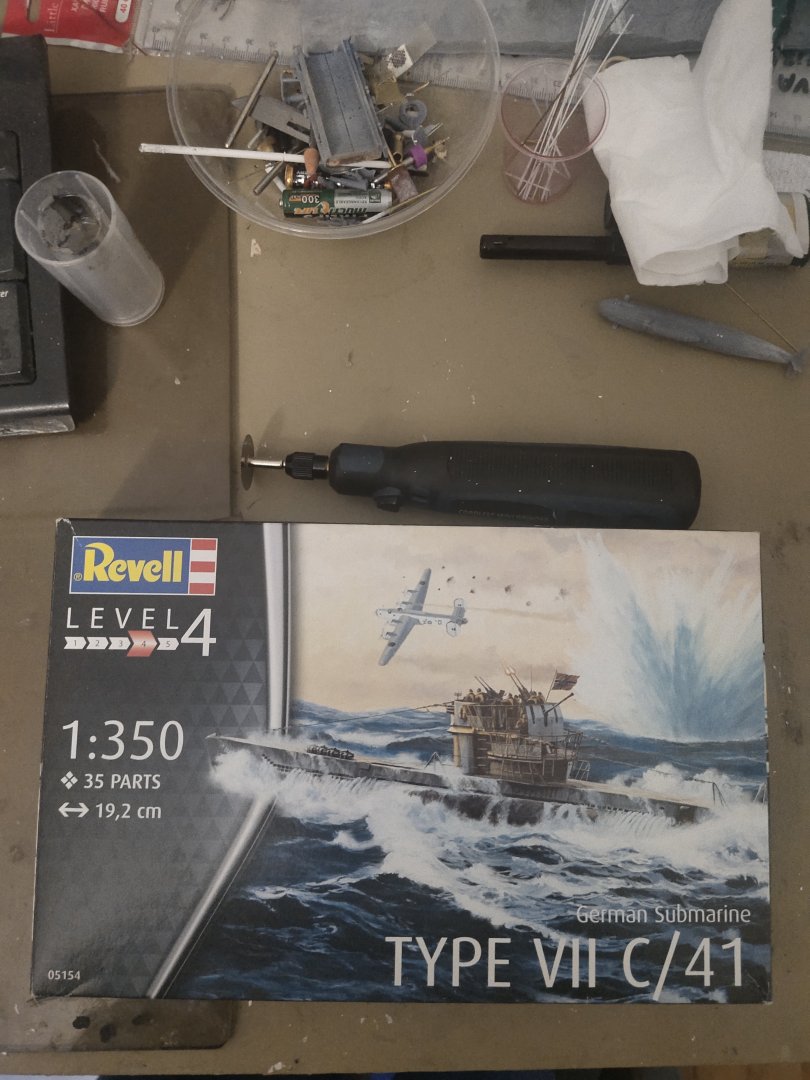
I came across this model randomly, thought it as a quick build as I'm not fan of WWII submarines. However I decided to make a rough sea diorama even I have limited space available. So assembly was done. Next was the paint fading effect. I sprayed vertically the hull with light gray, then dark again, light etc. About 4-5 times. Then acrylic pencil was used for salt effect as well as rust effect in 3 tones. Because of the rough hull texture and the lines, the effects were applied easily and successfully. Next day added a bit or rigging. Lastly, I sprayed over a glossy varnish as this is going to be a very wet boat


-
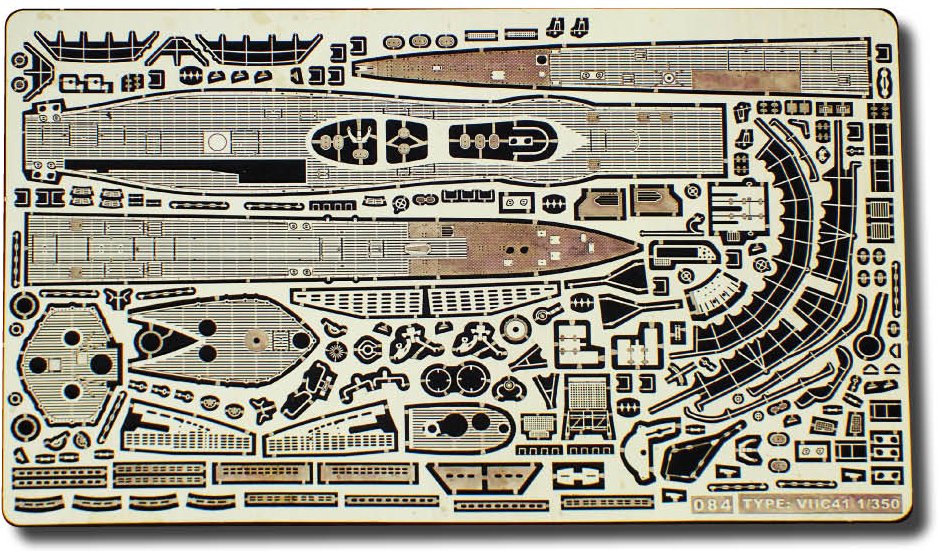
Here https://www.rcsubs.cz/index.php/photo-etched-sets/63-sets-for-kit-viic-viic41-1-350-revell There ate two full versions for Revell C and C41 editions
-
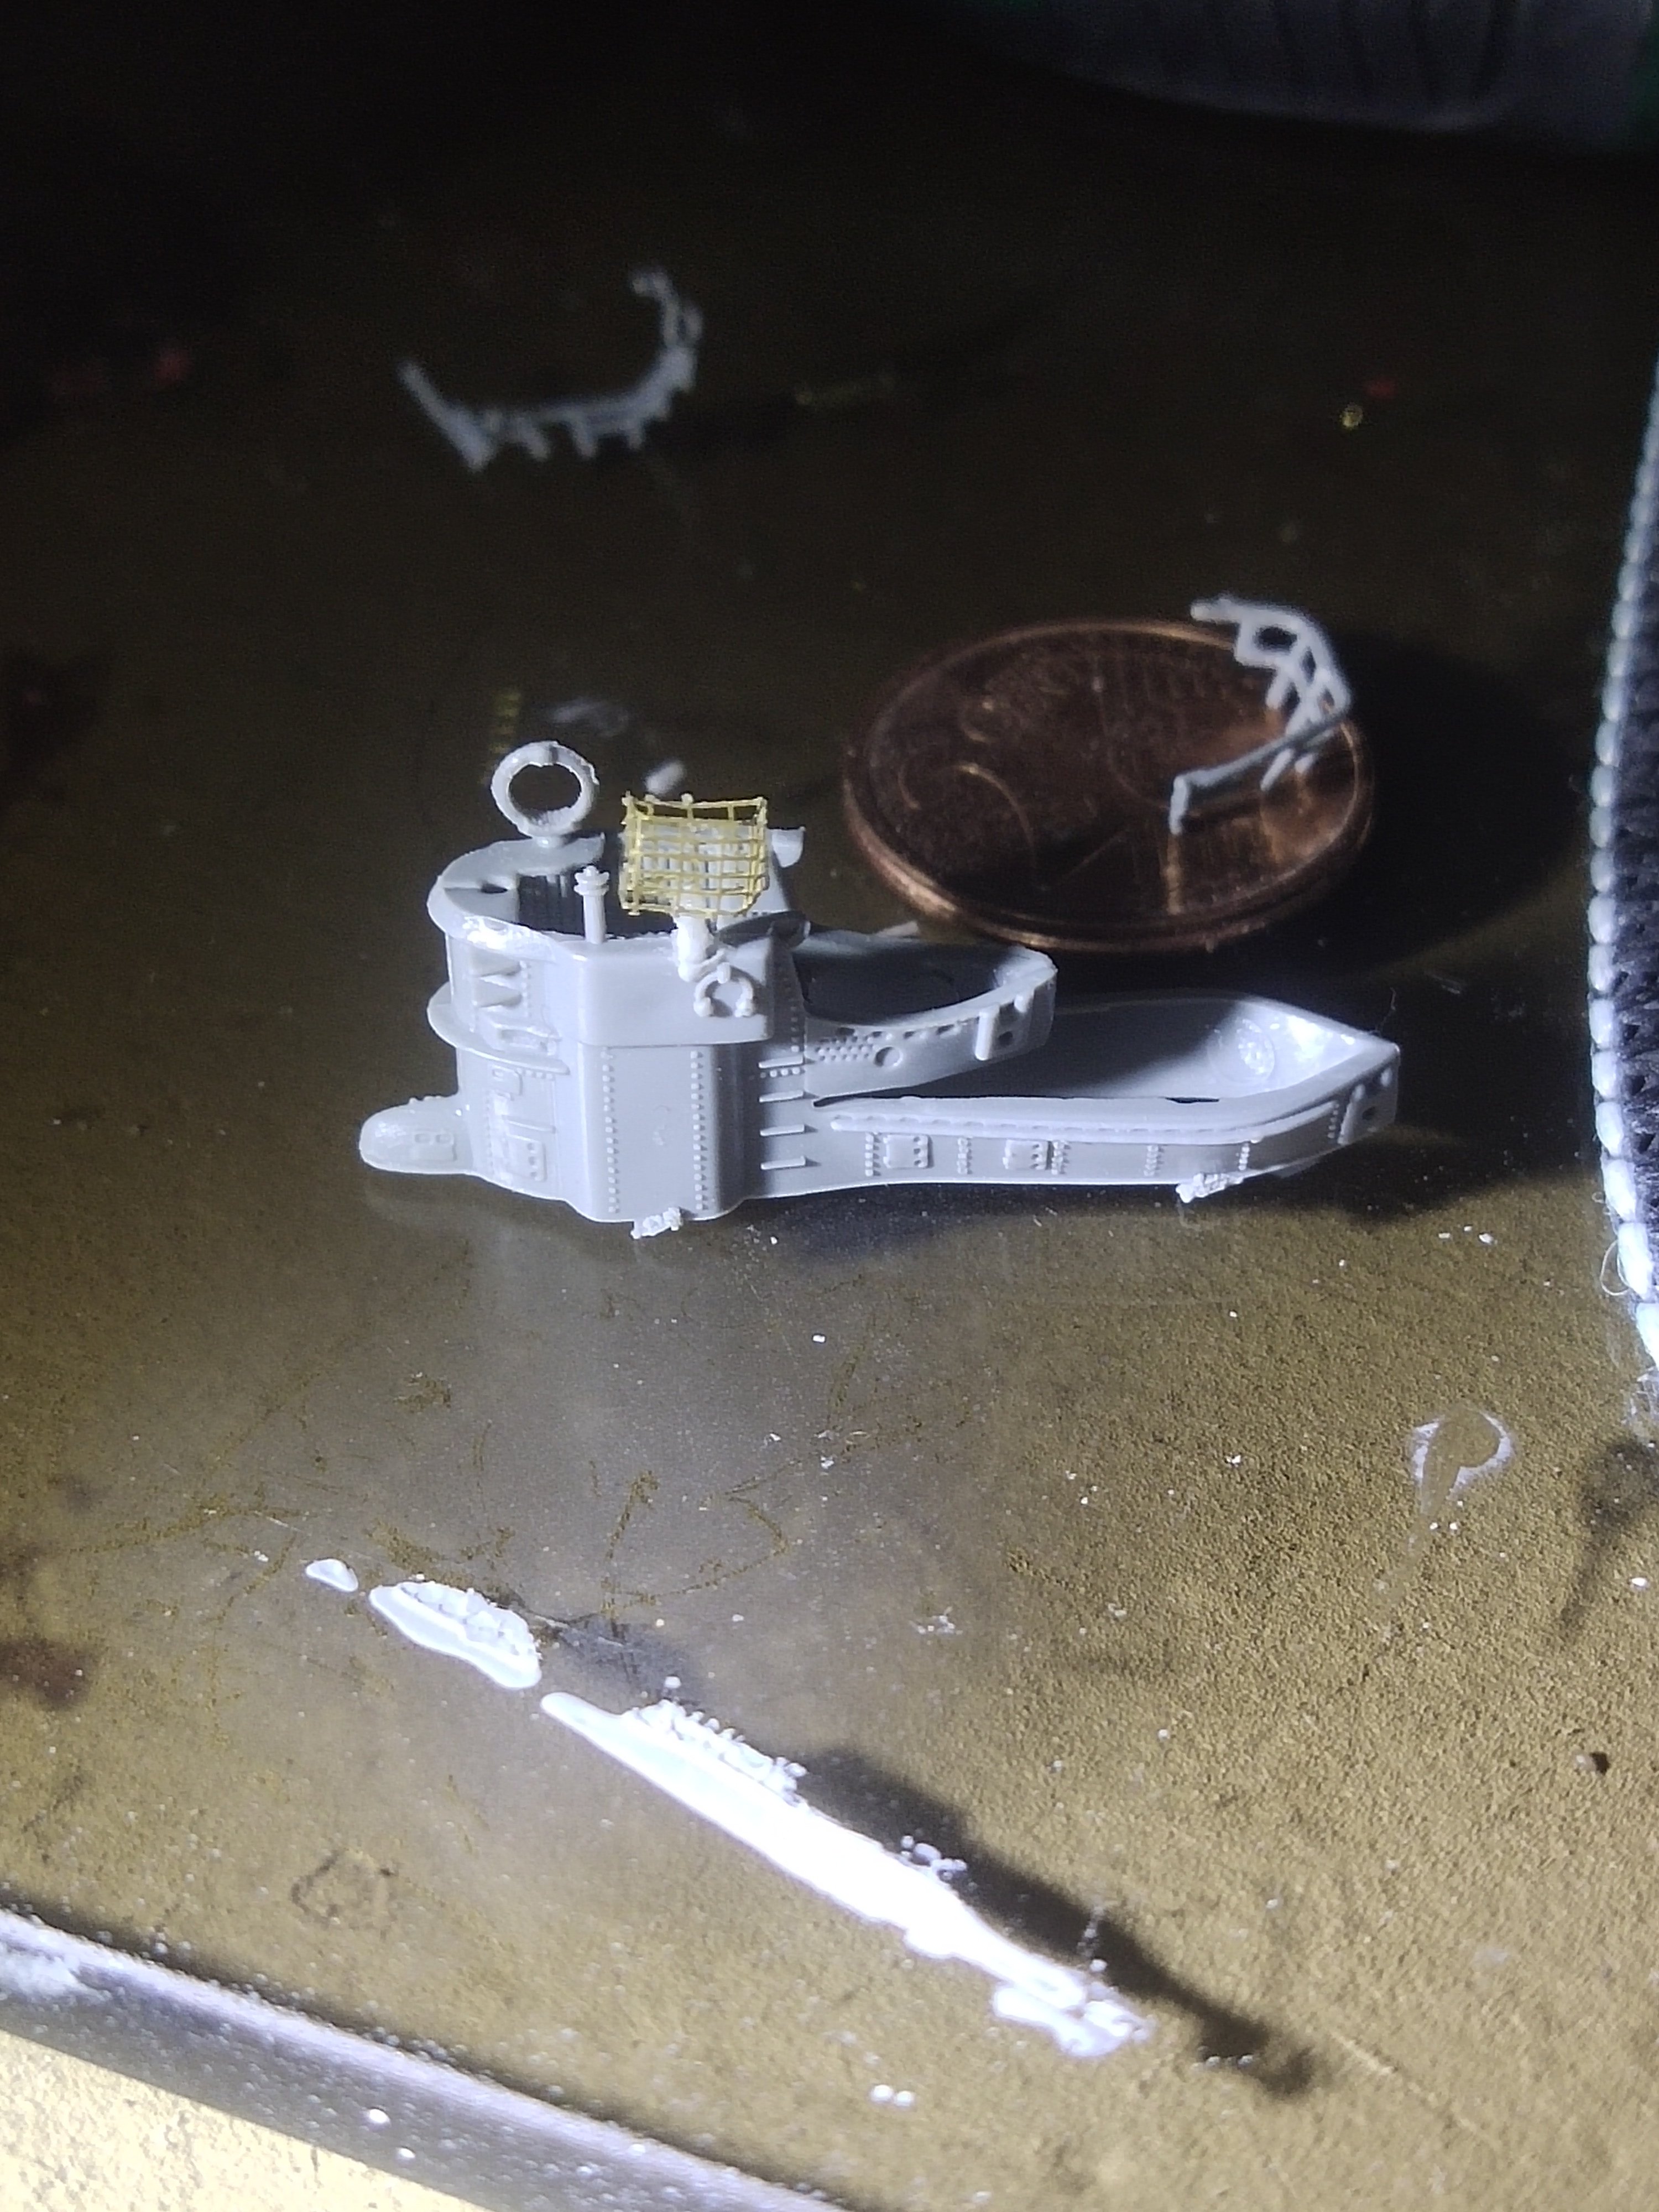
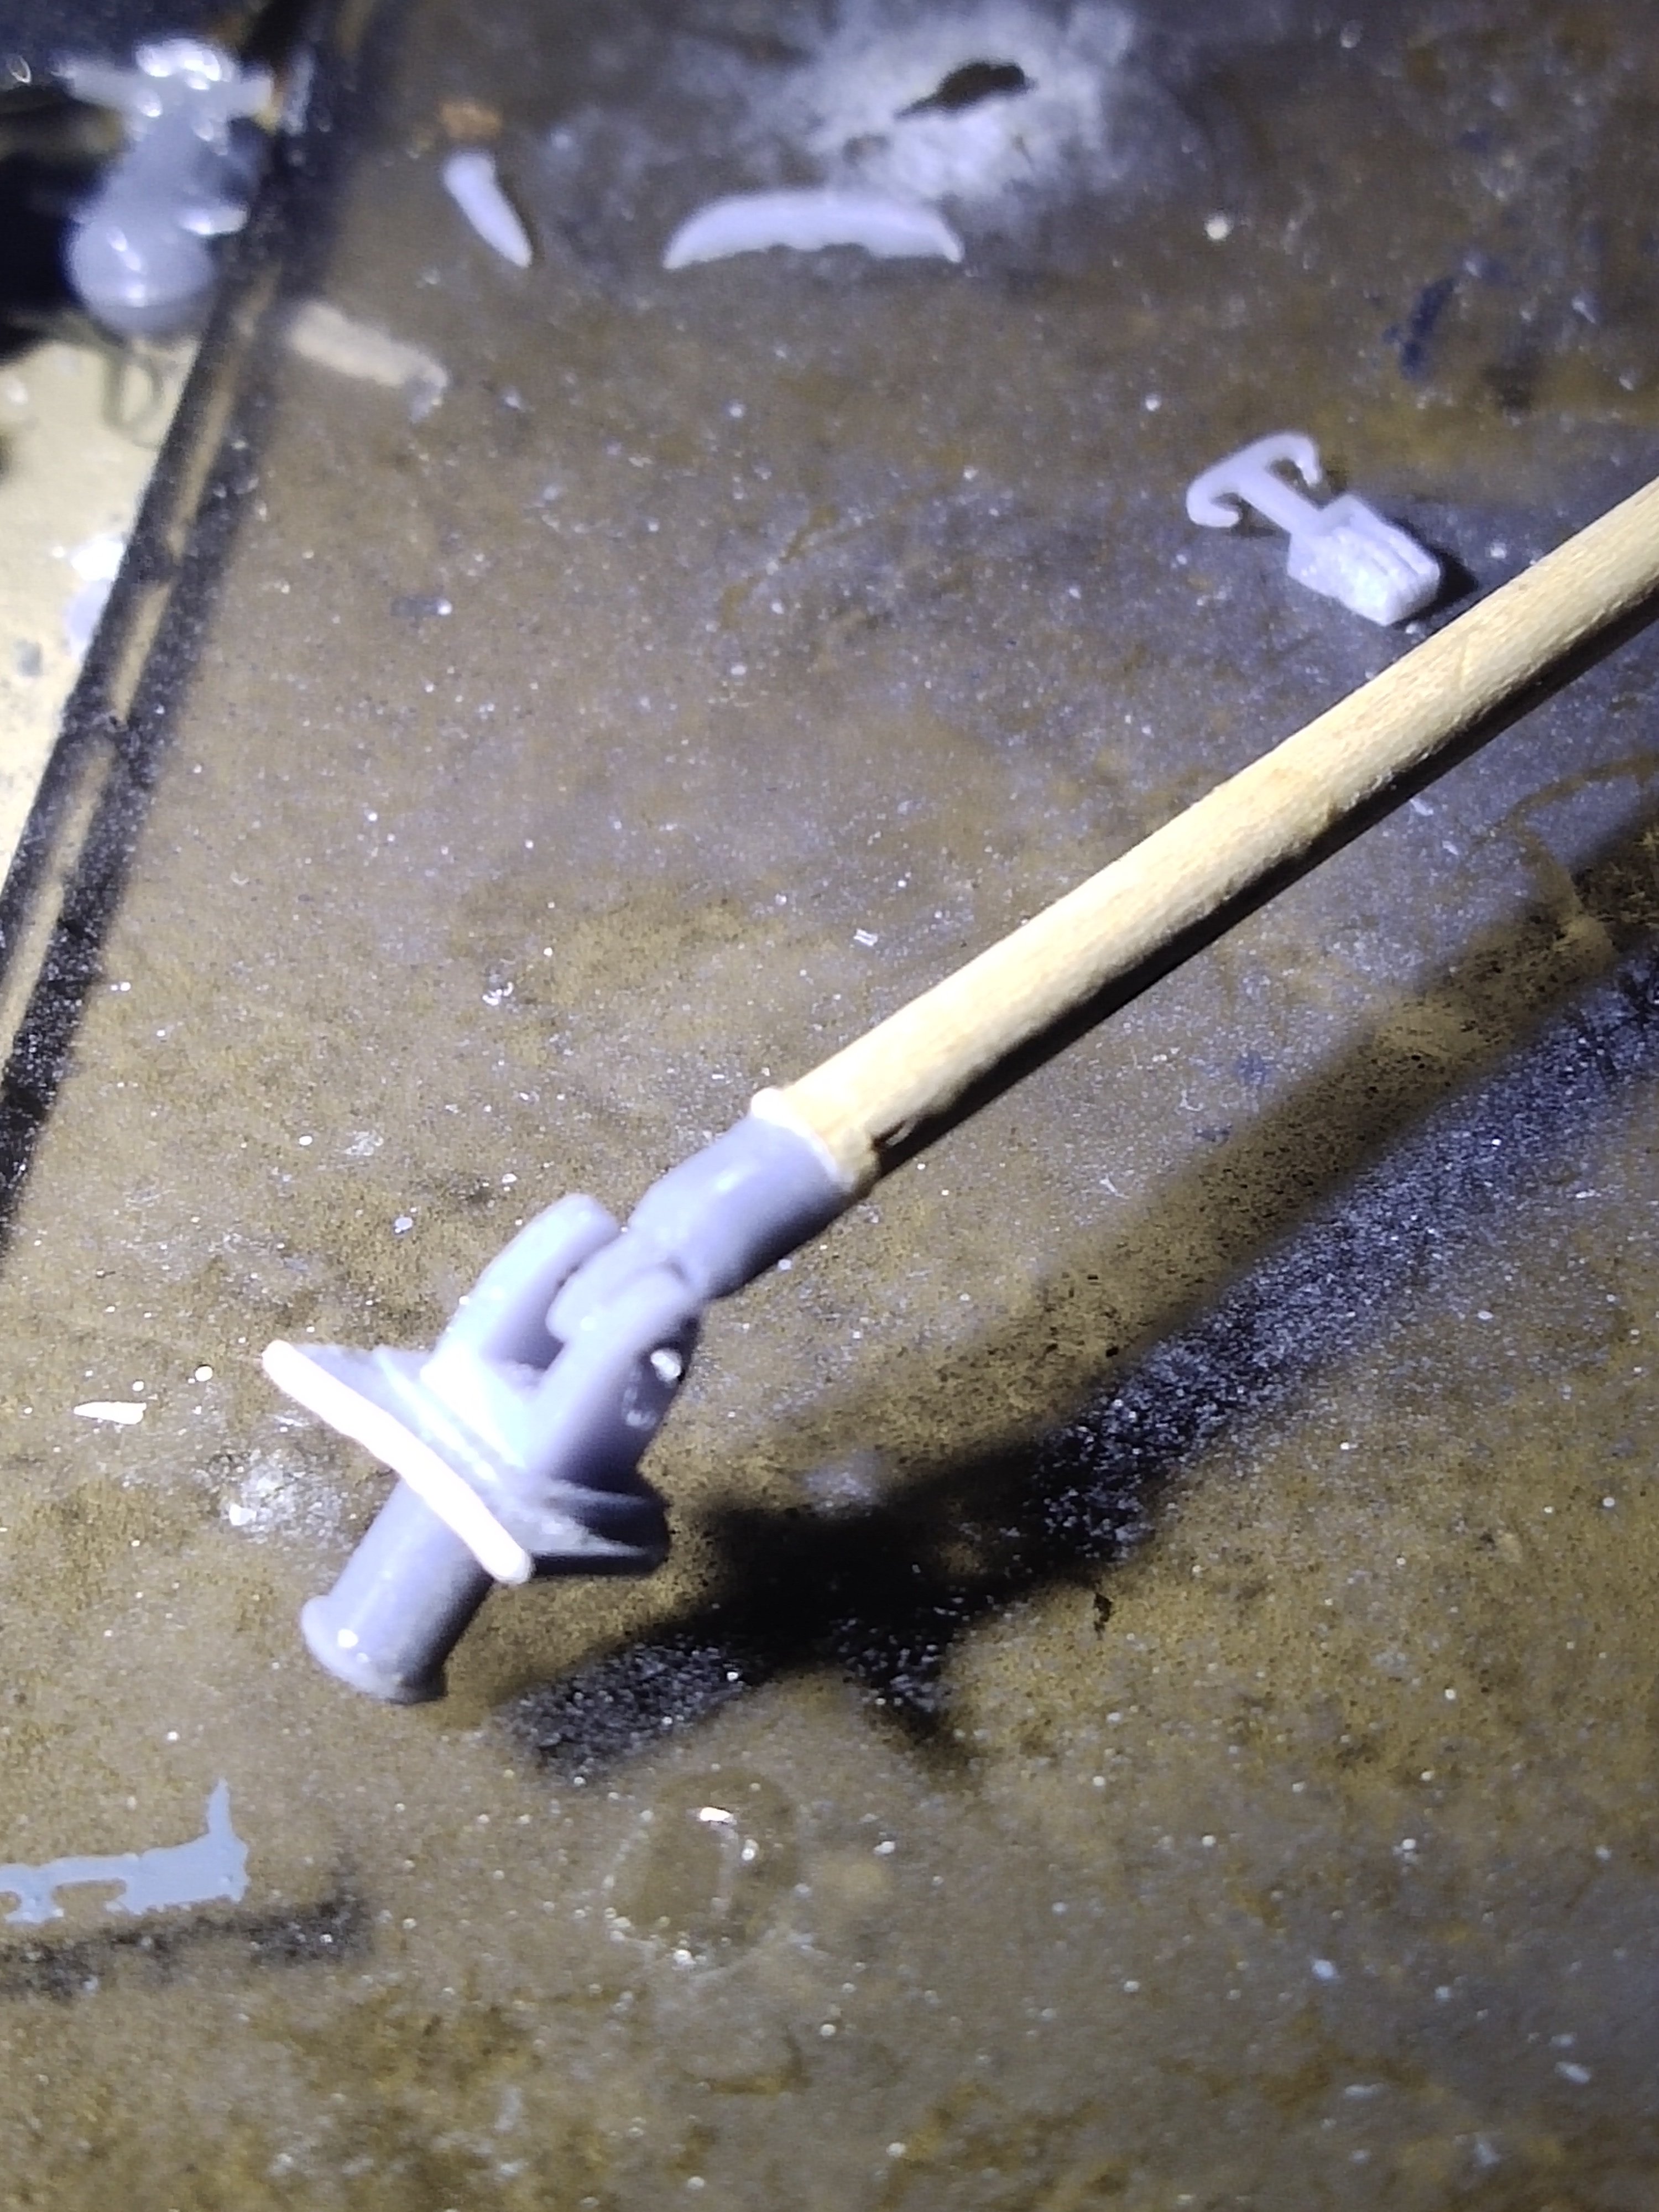
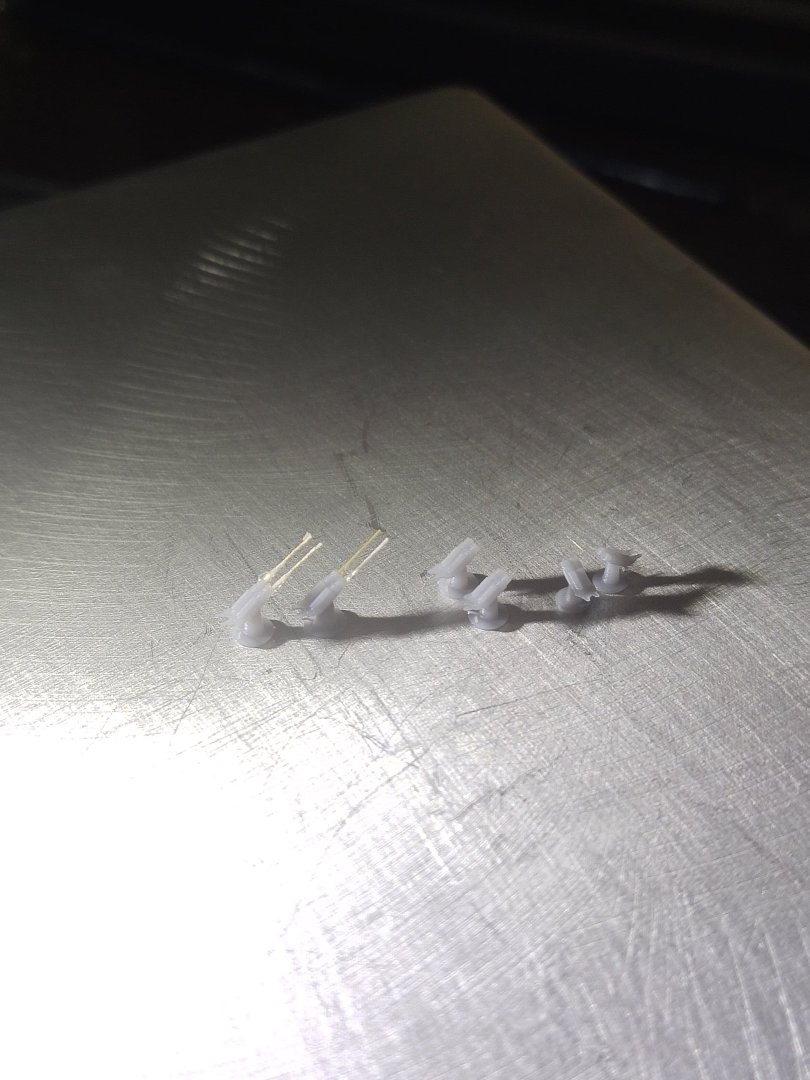
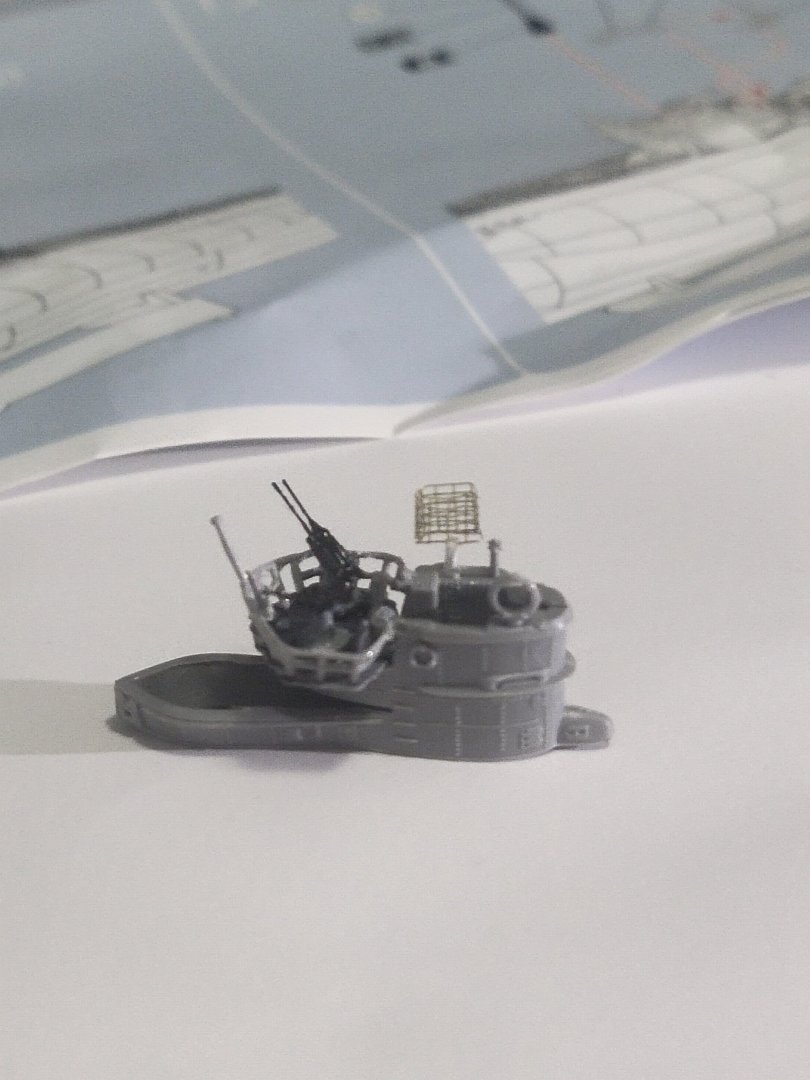
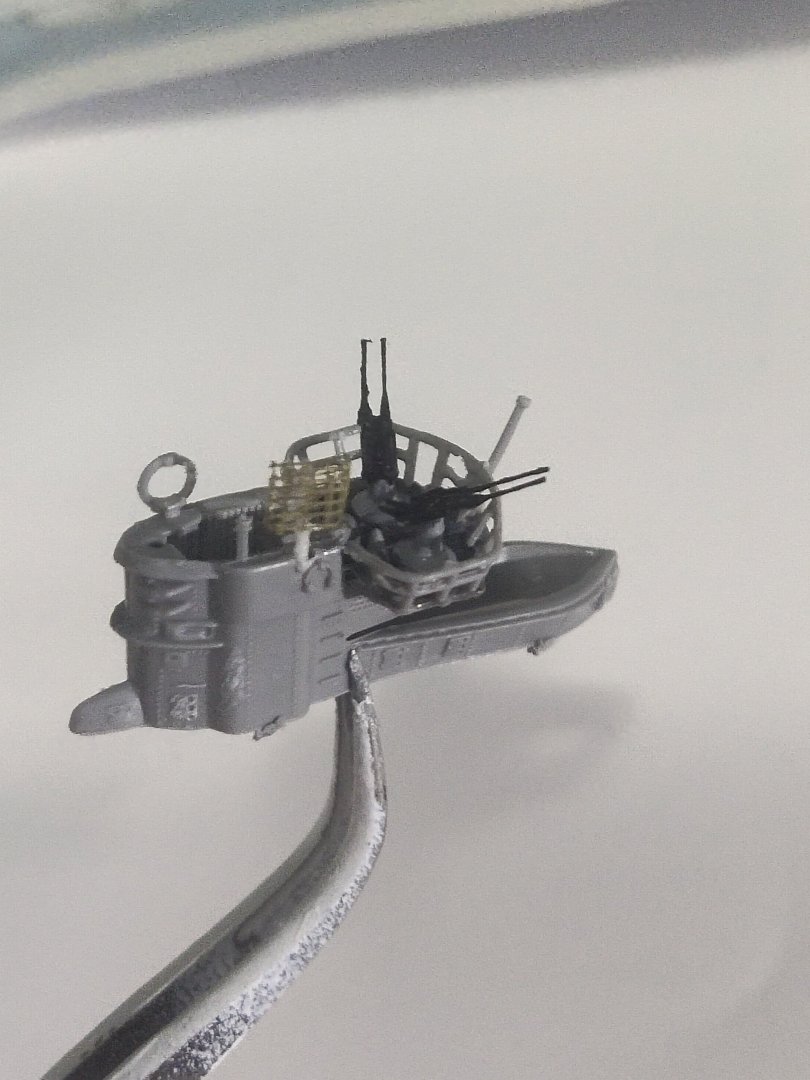
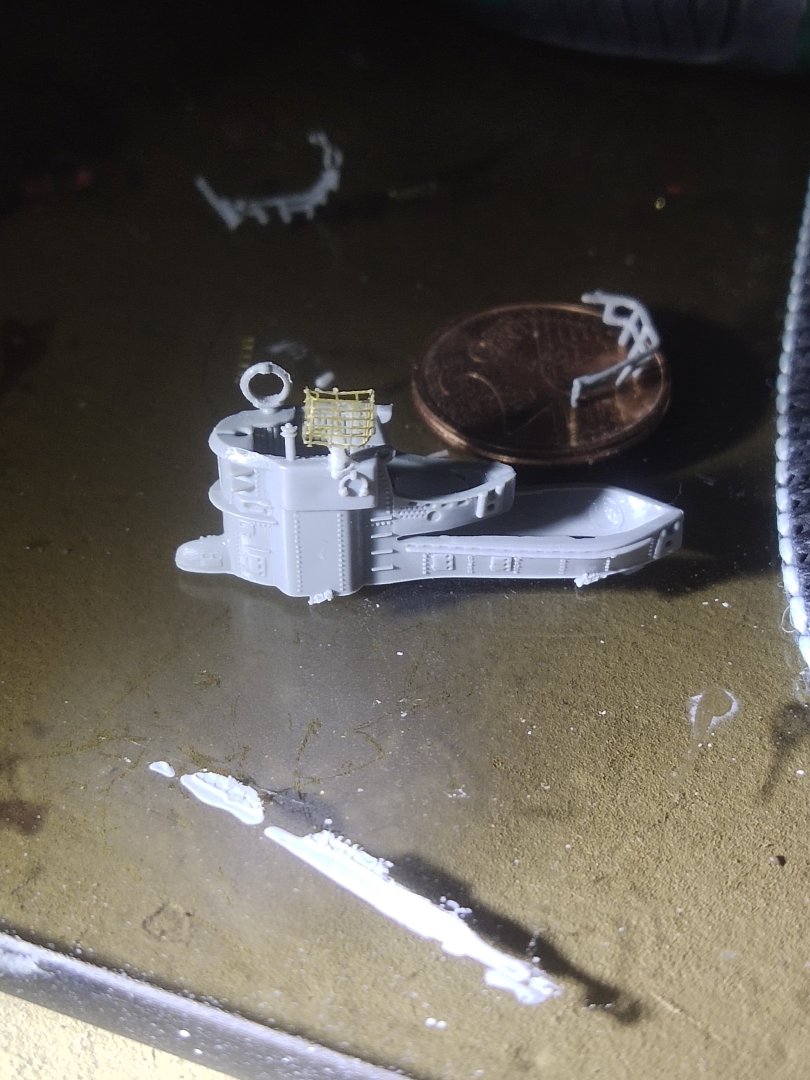
For those into subs there is a Czech specialized seller, from little 1/700 models to 1/72 RCs as well as PE set for every kit. The one available for my kit is far better that Eduards Anyway, one AA gun was lost. I designed it on my printer. The barrels were made of hard paintbrush hair. Paint was done by my enamel without primer. Little job done today but nice detail added.

-
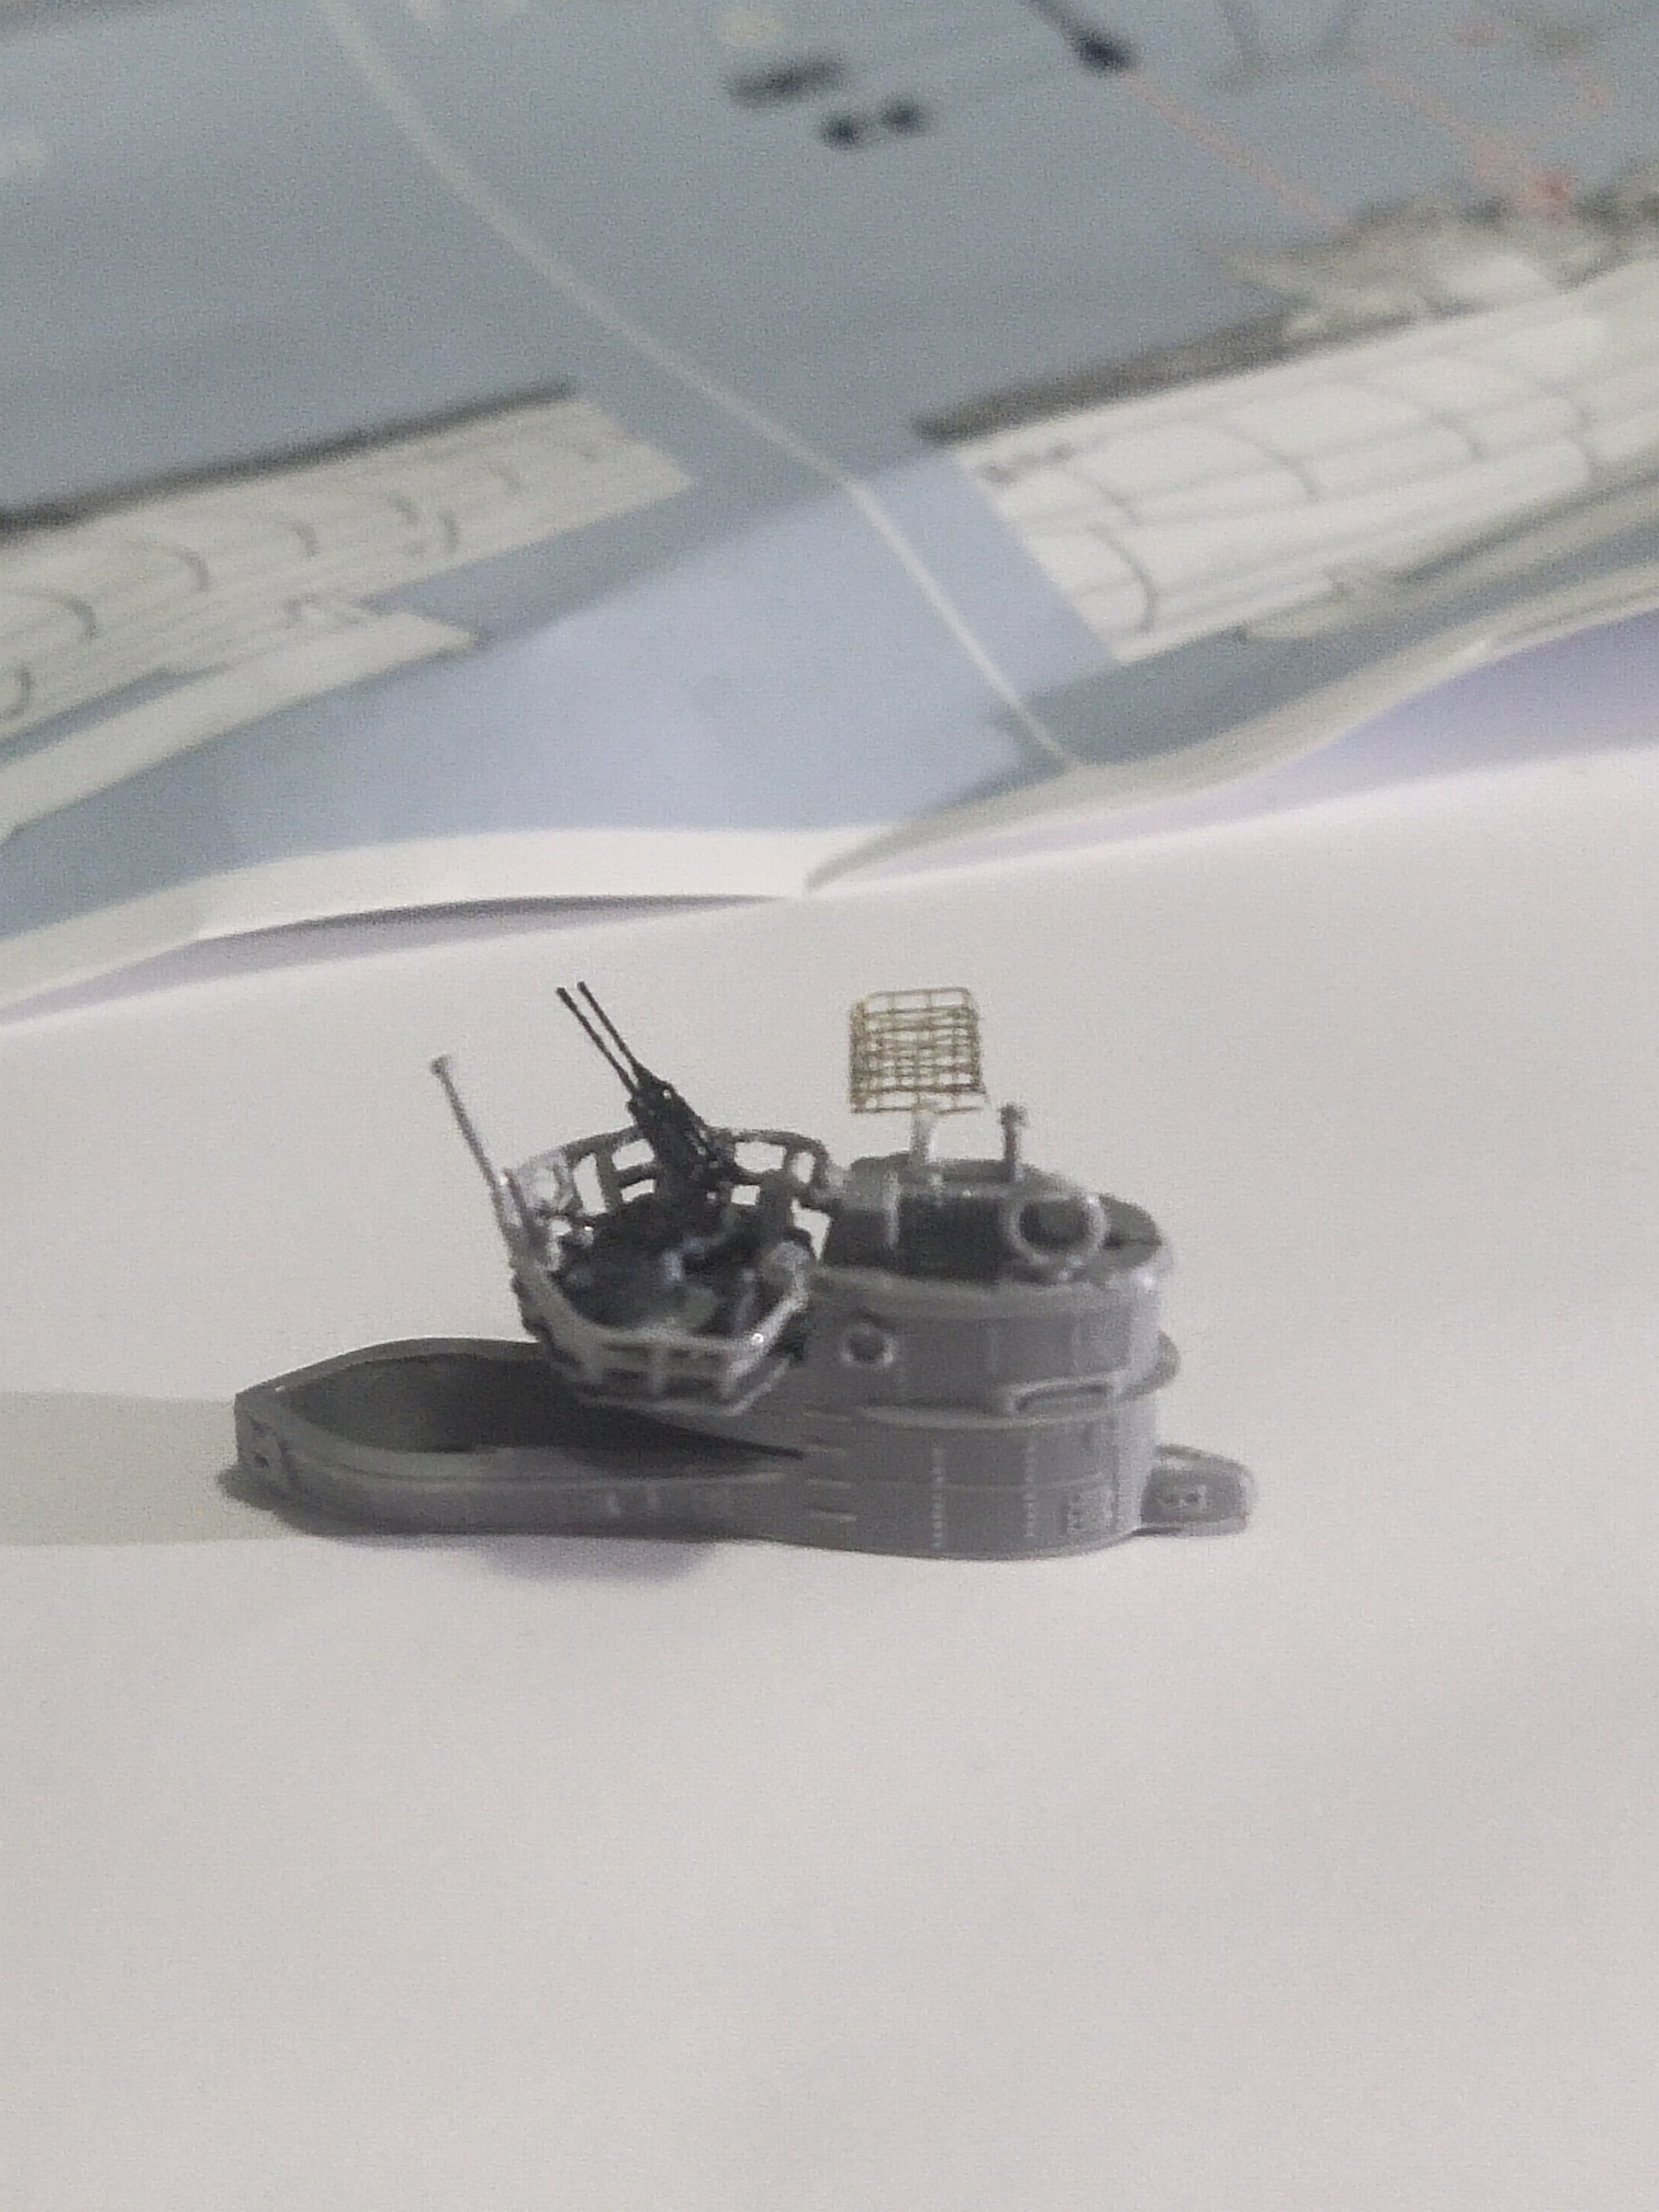
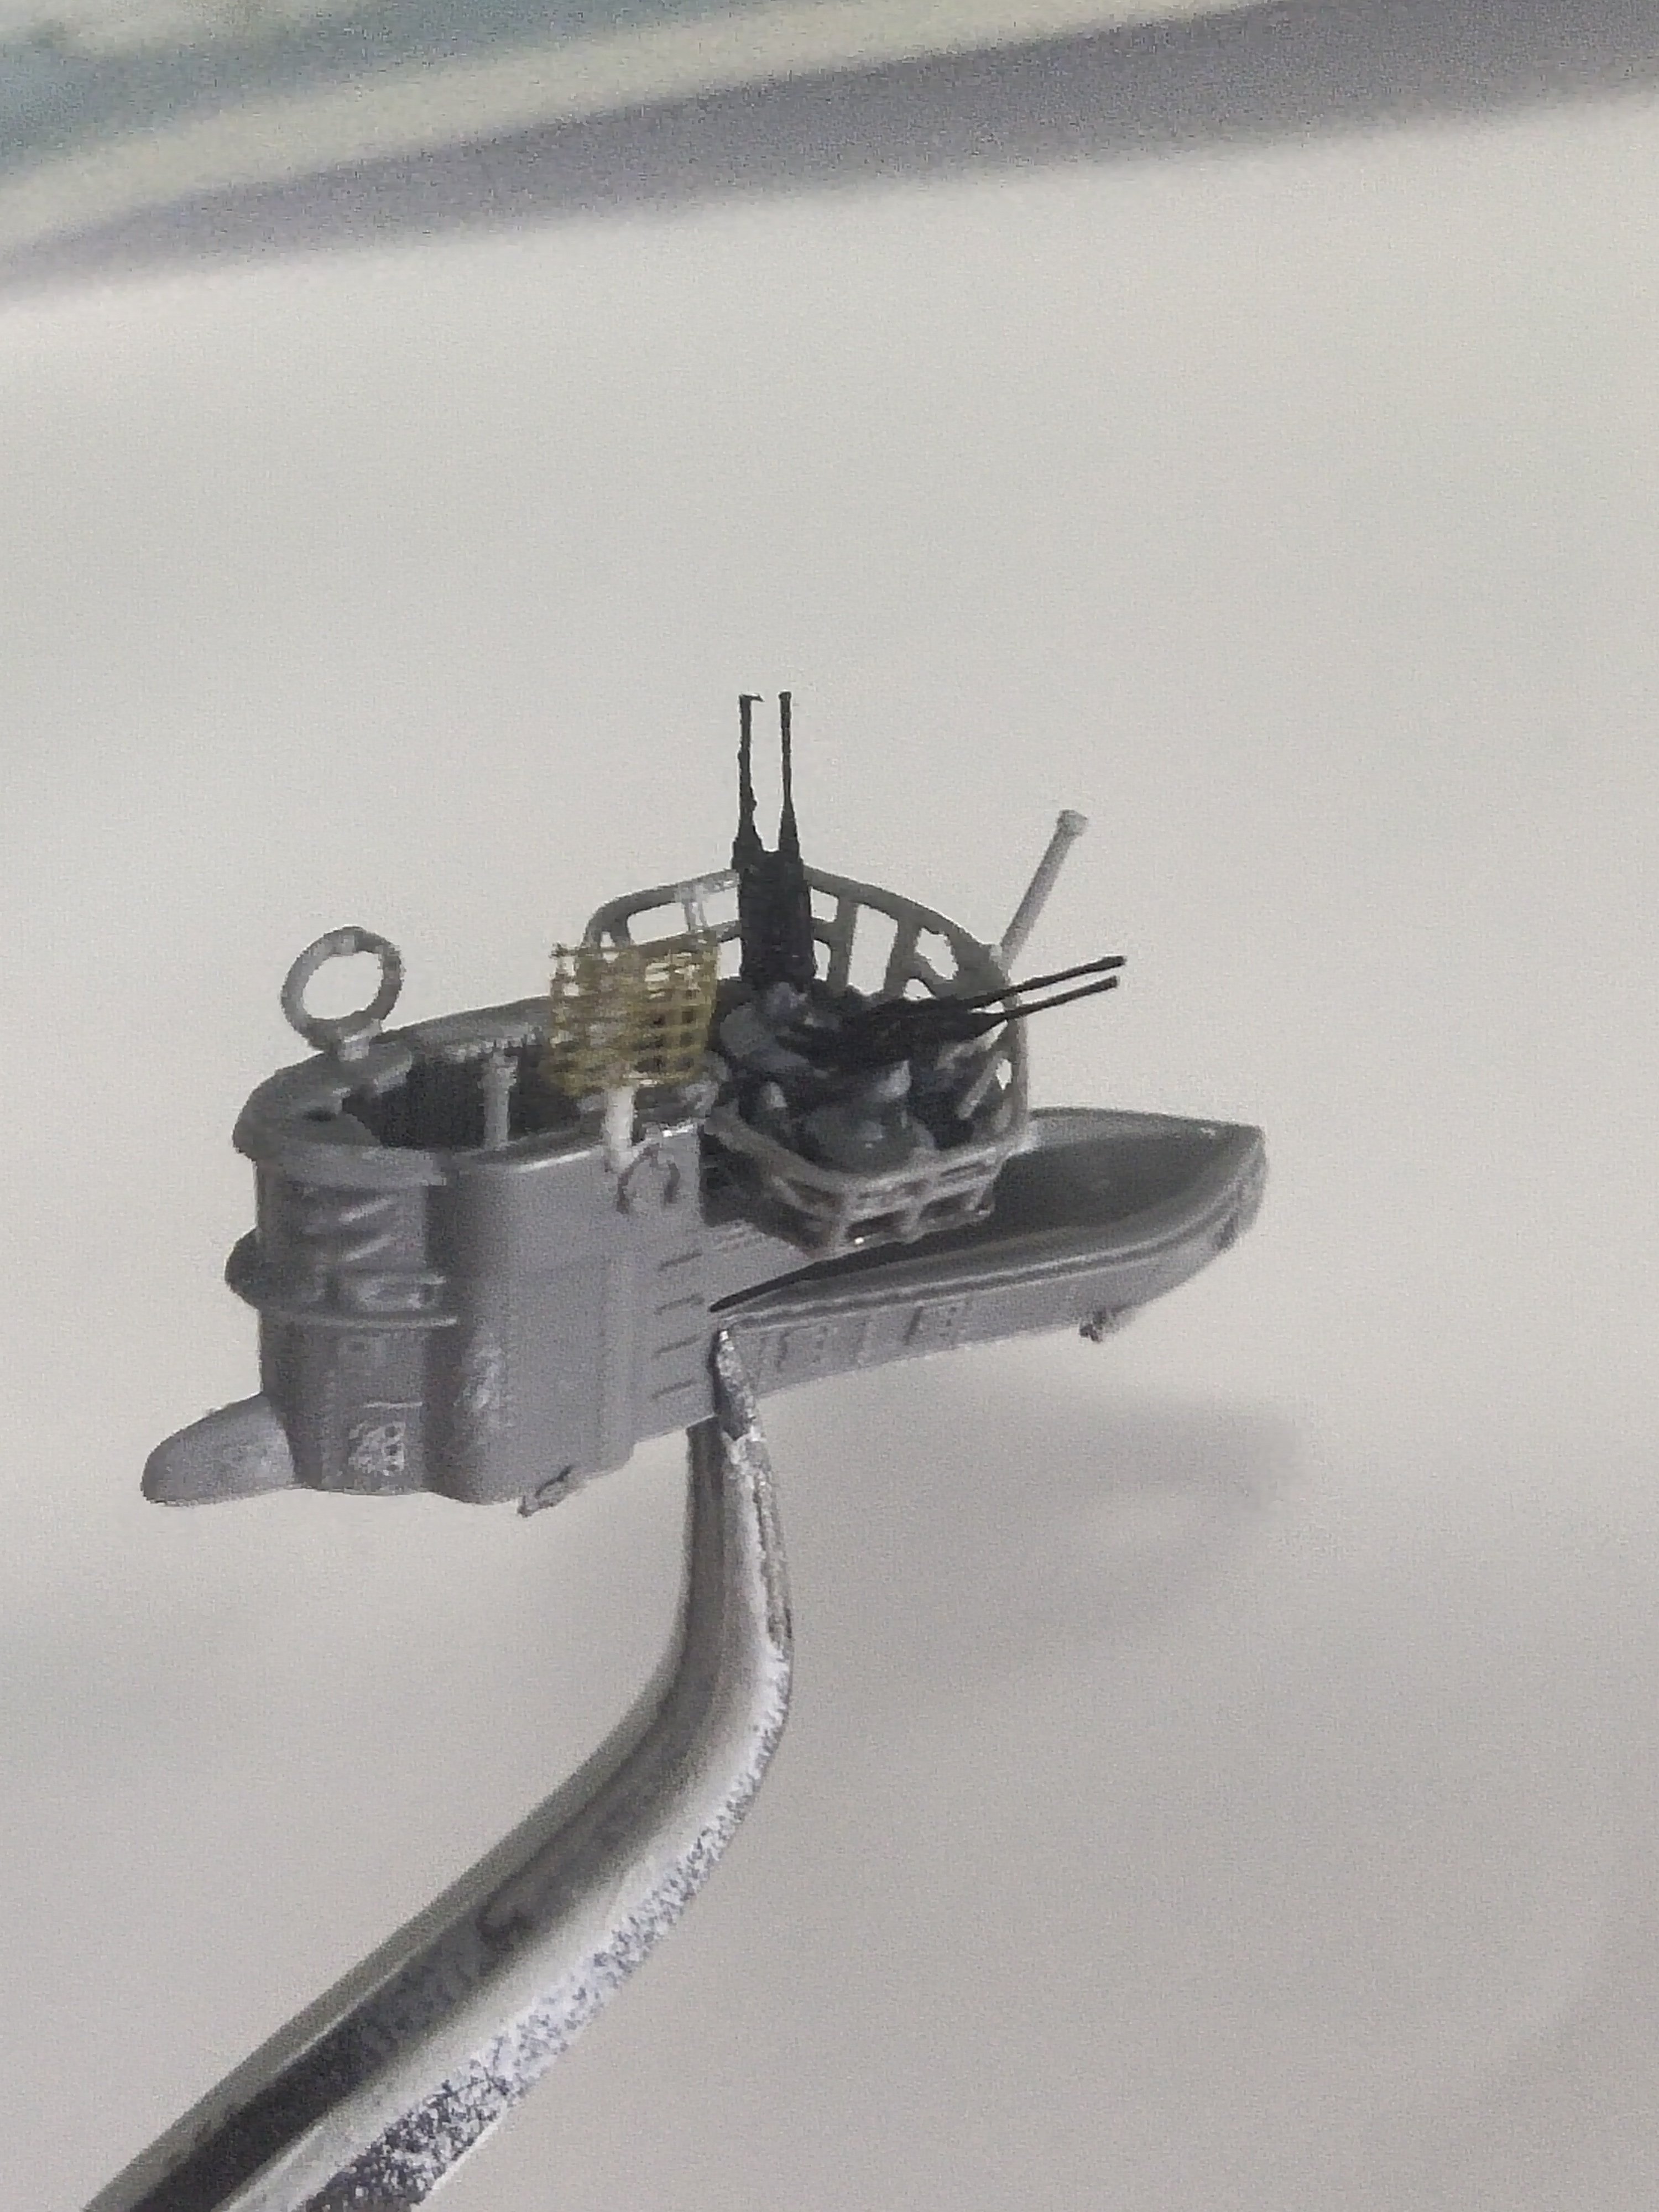
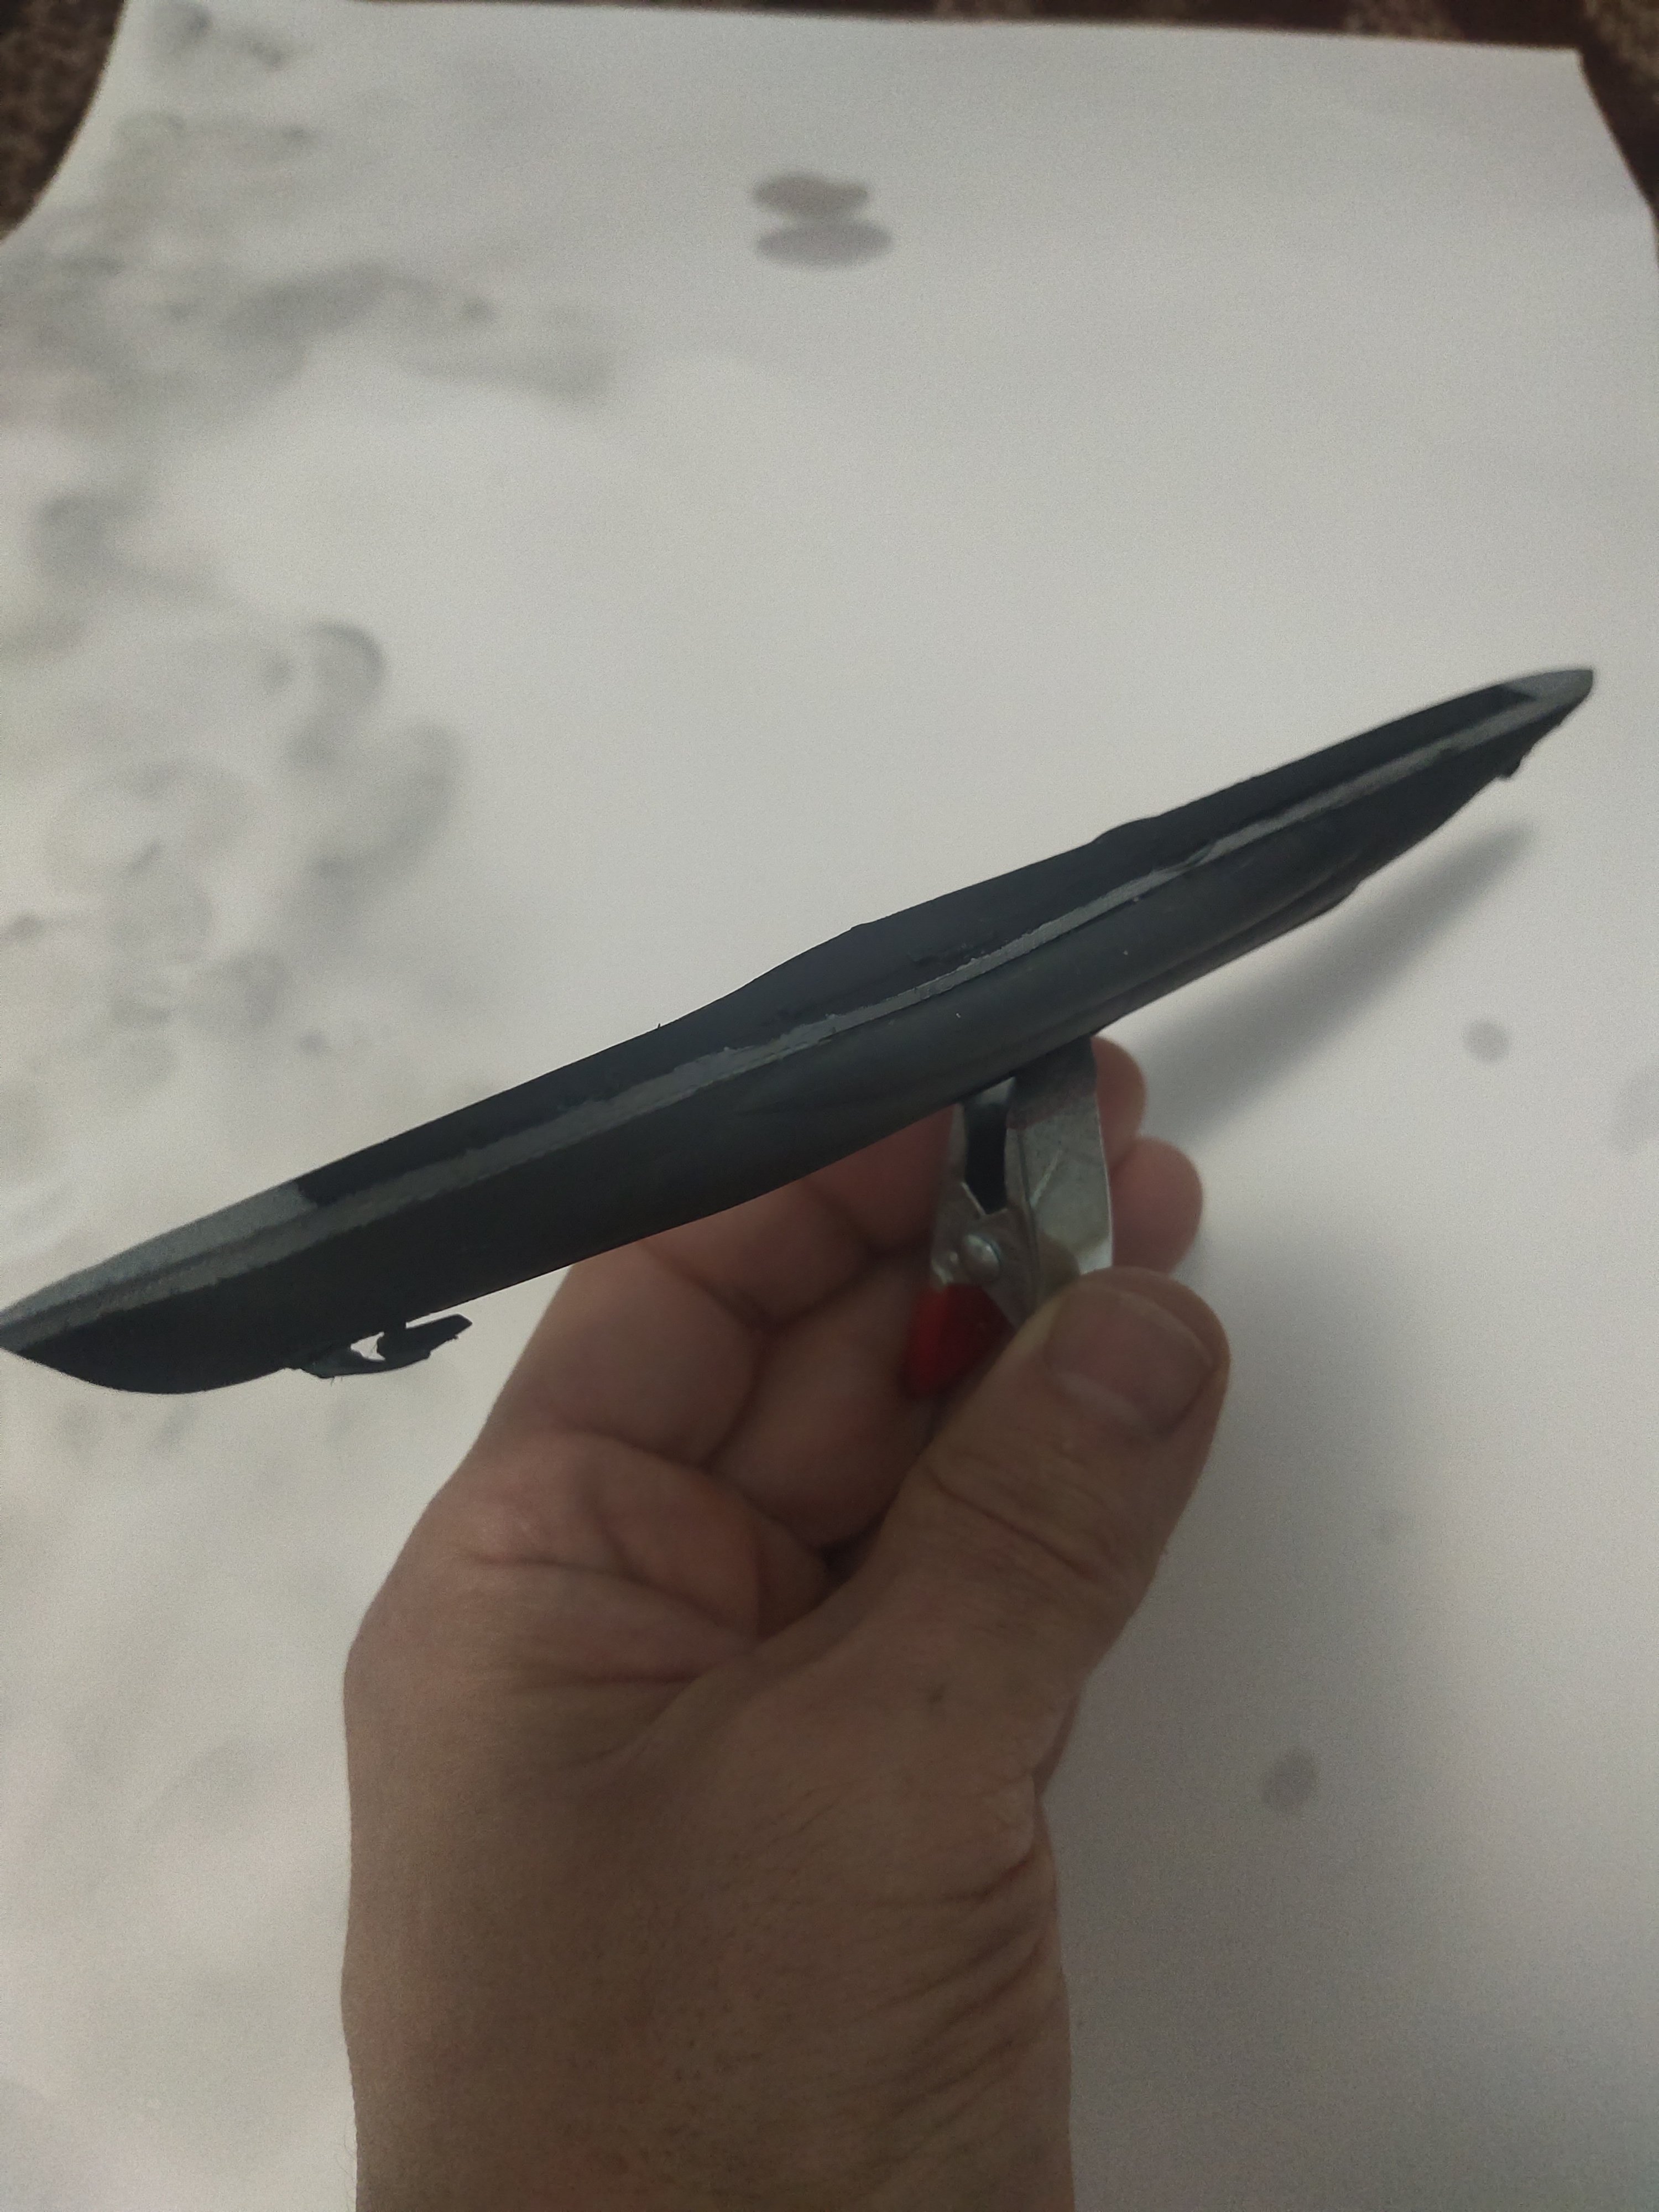
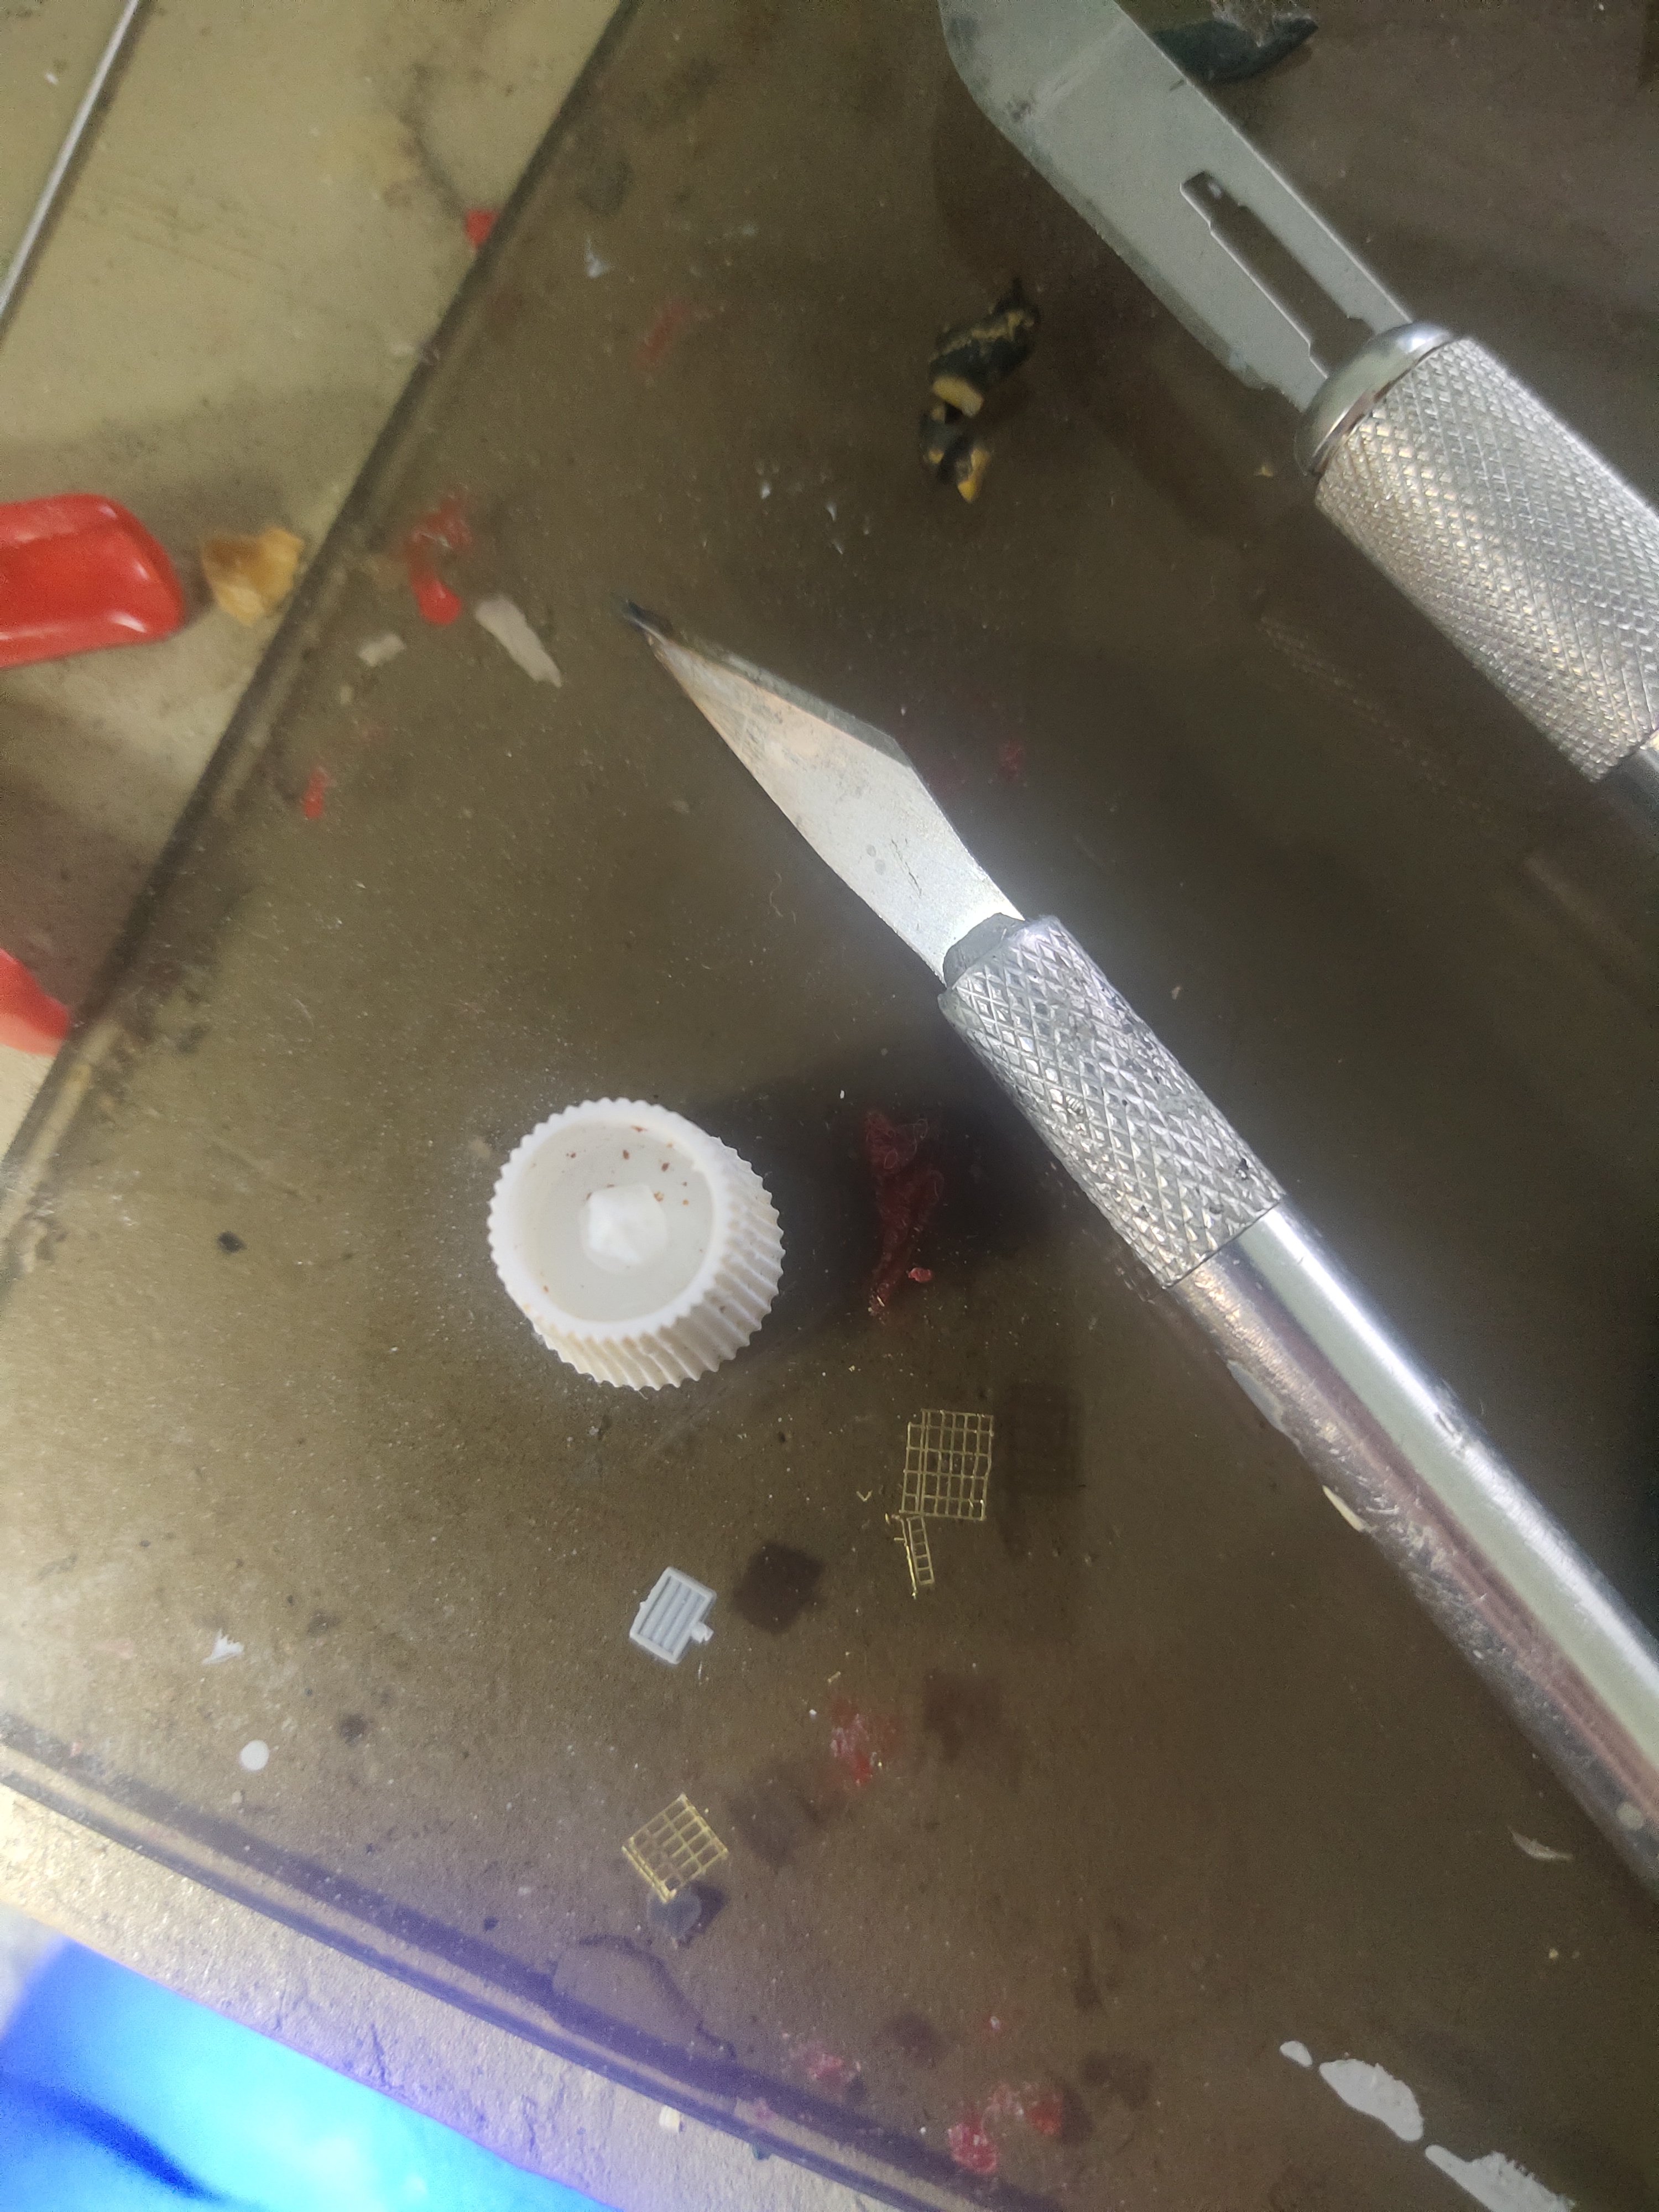
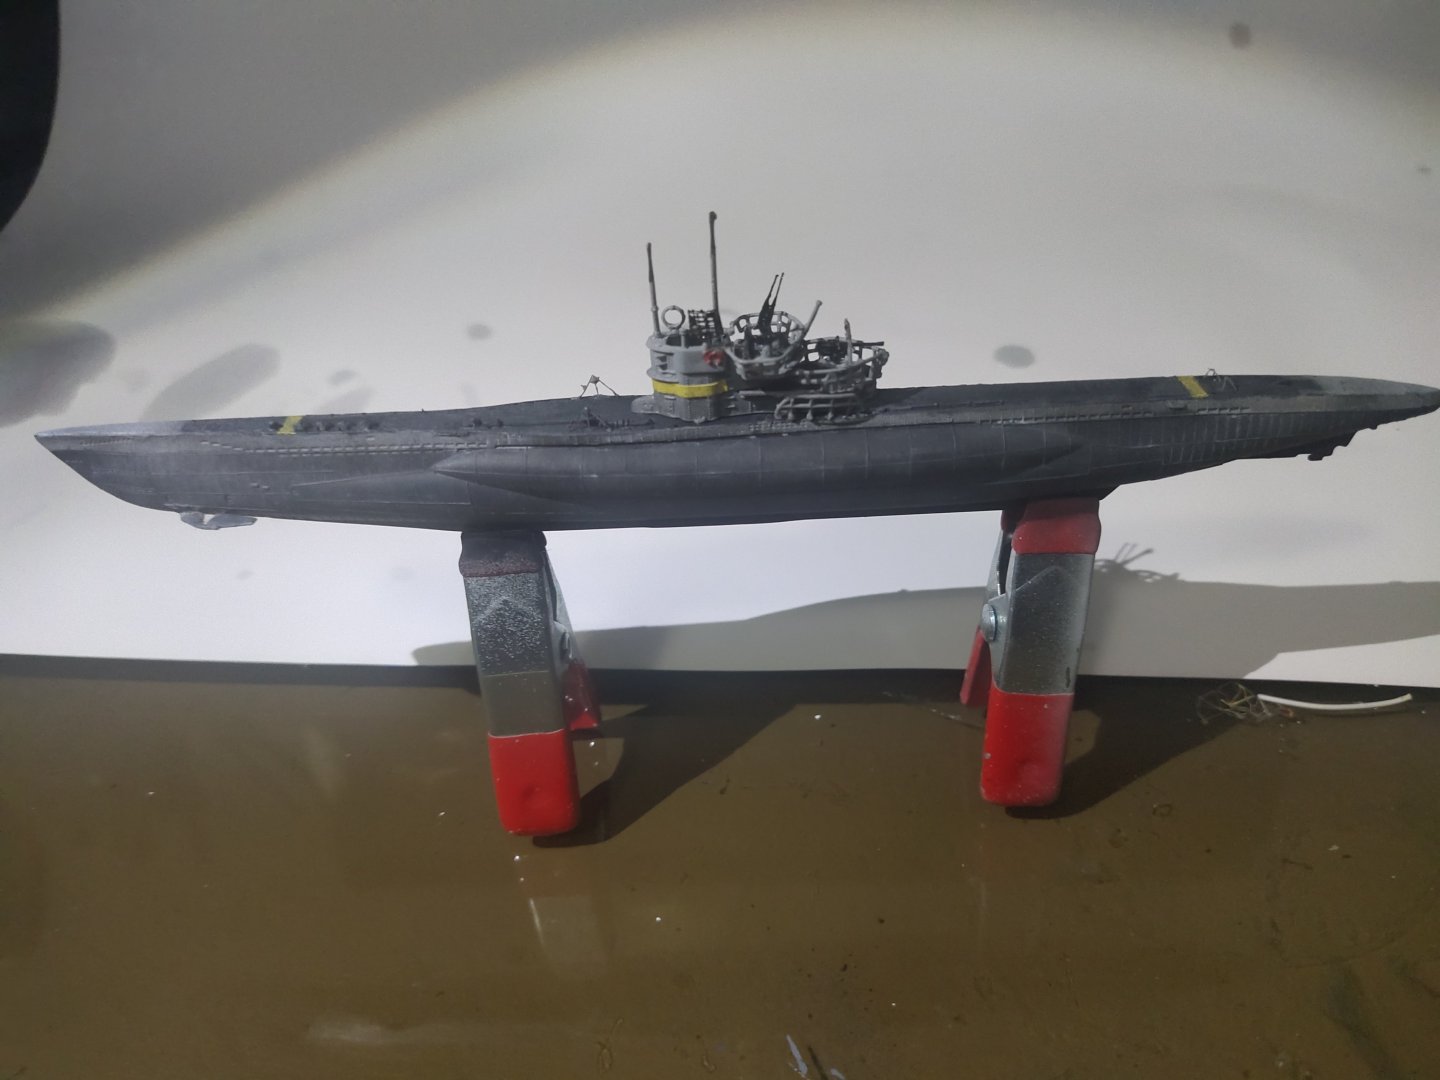
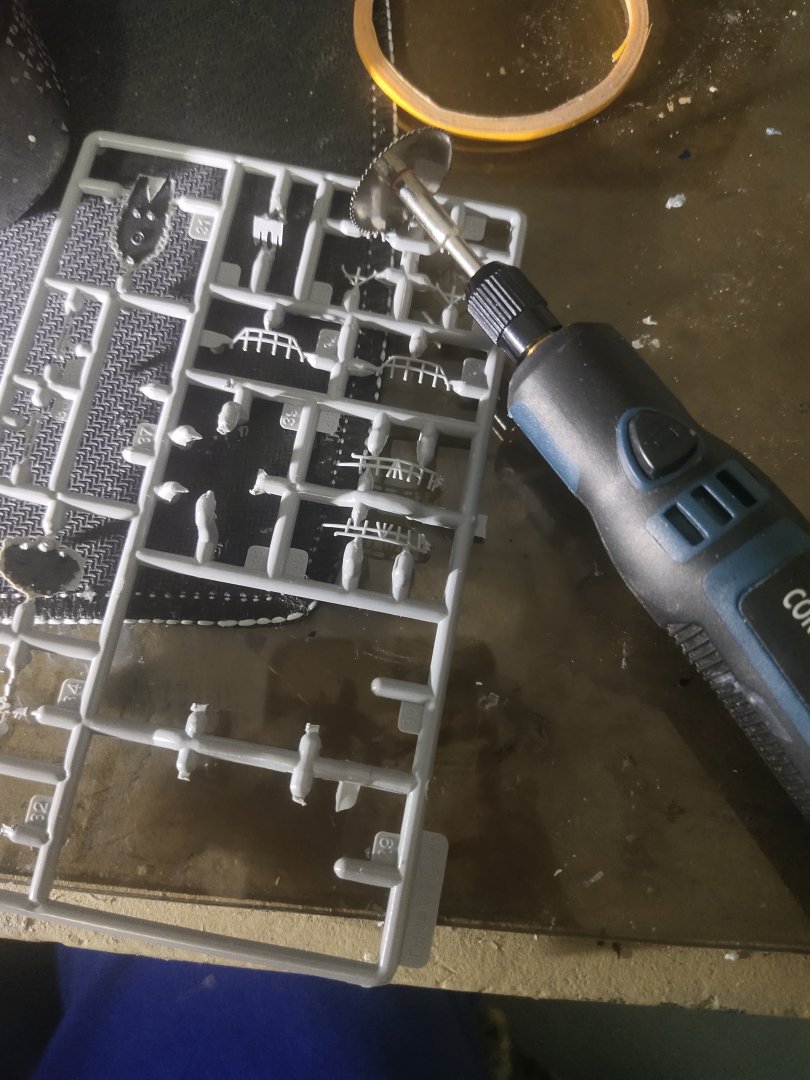
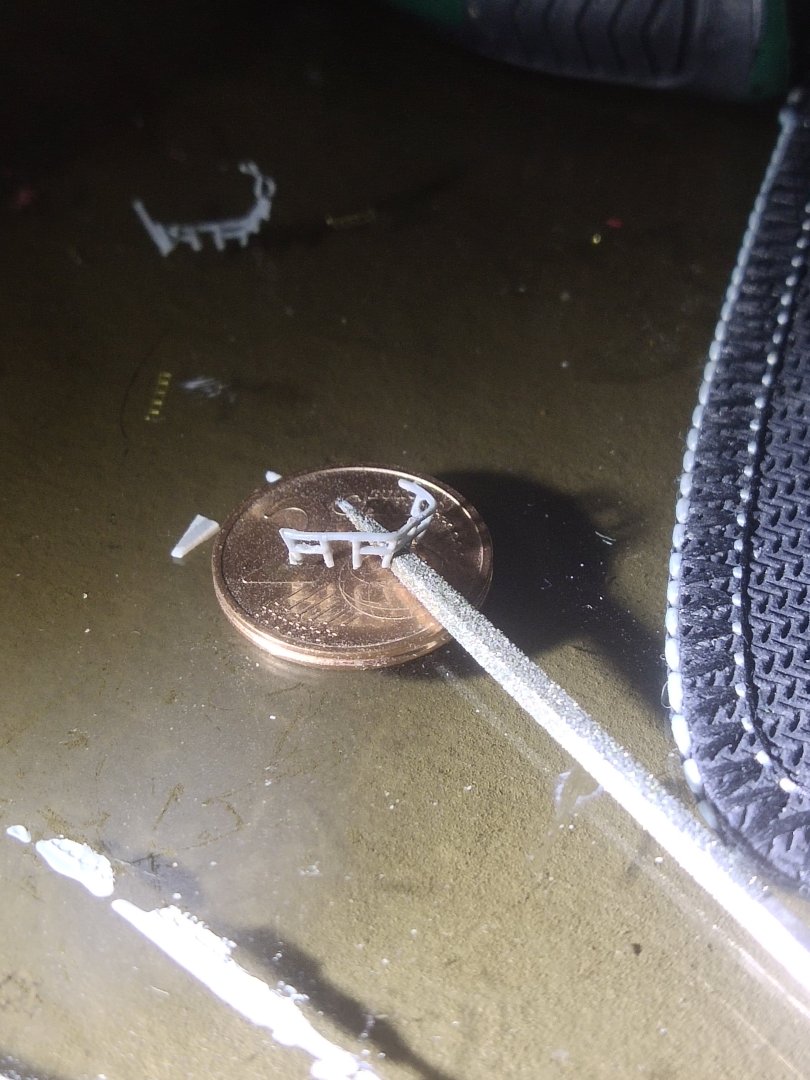
Priming with airbrush began. Or I thought so. After half a bottle spended, airbrush would only spit paint, or spray on watery consistency. For a 2 minute job it took me two evenings to solve it. Steps taken. -all gun parts clraned -needle changed twice -nose changed -Airbrush changed None of the above worked. Miraculously after changing the nozzle cup and polishing the needle tip with a rotary tool airbrush worked like new at even lower pressures.By then, deck has been done by brush already. I focused on the tower. Using a low rpm rotary tool again I cut the fragile pieces. This thing is amazing useful for 8$. There's no available PE set the mini one from Eduard doesn't worth 16$ nor the 10 days waiting for delivery. I had to improvise. With a mini file set I trimmed the railings and removed some imperfections Most noticeable detail was the radar. This was replaced by a IJN type 21 radar in 1/700. But it was 1mm wider so I cut 0.5mm from each side. The result was nice, made me almost happy. Ι do better with PE than painting.
-
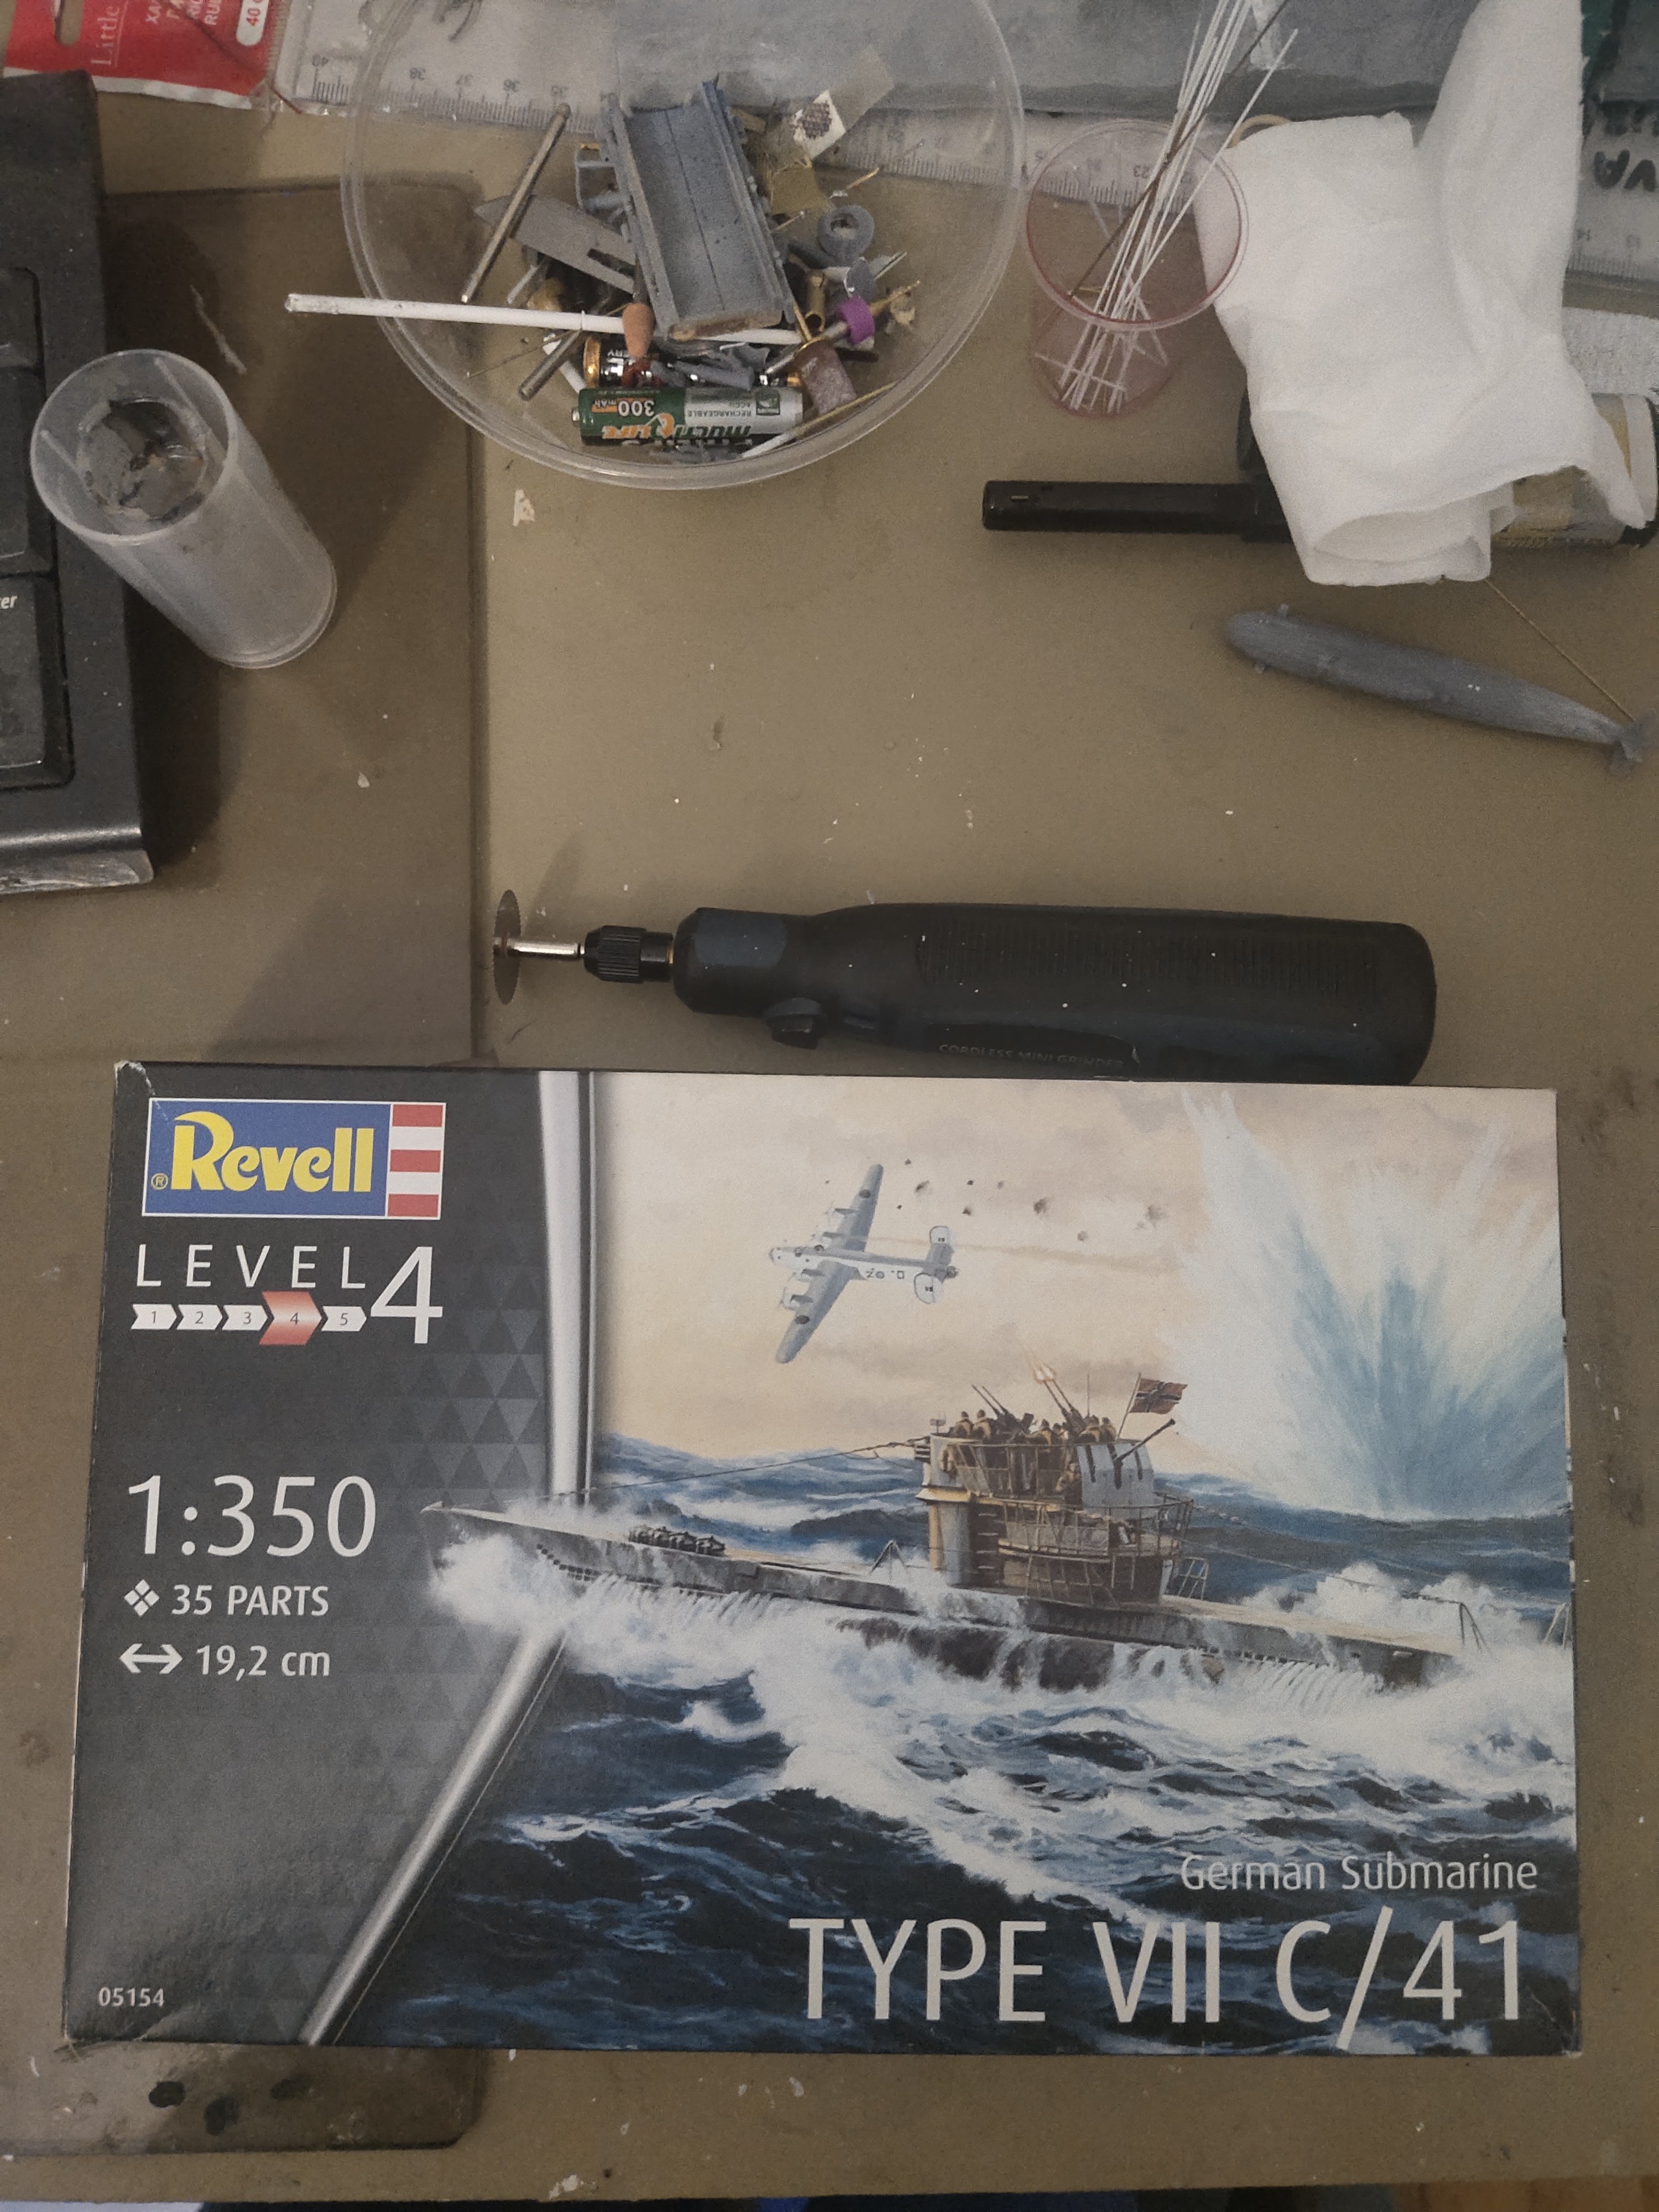
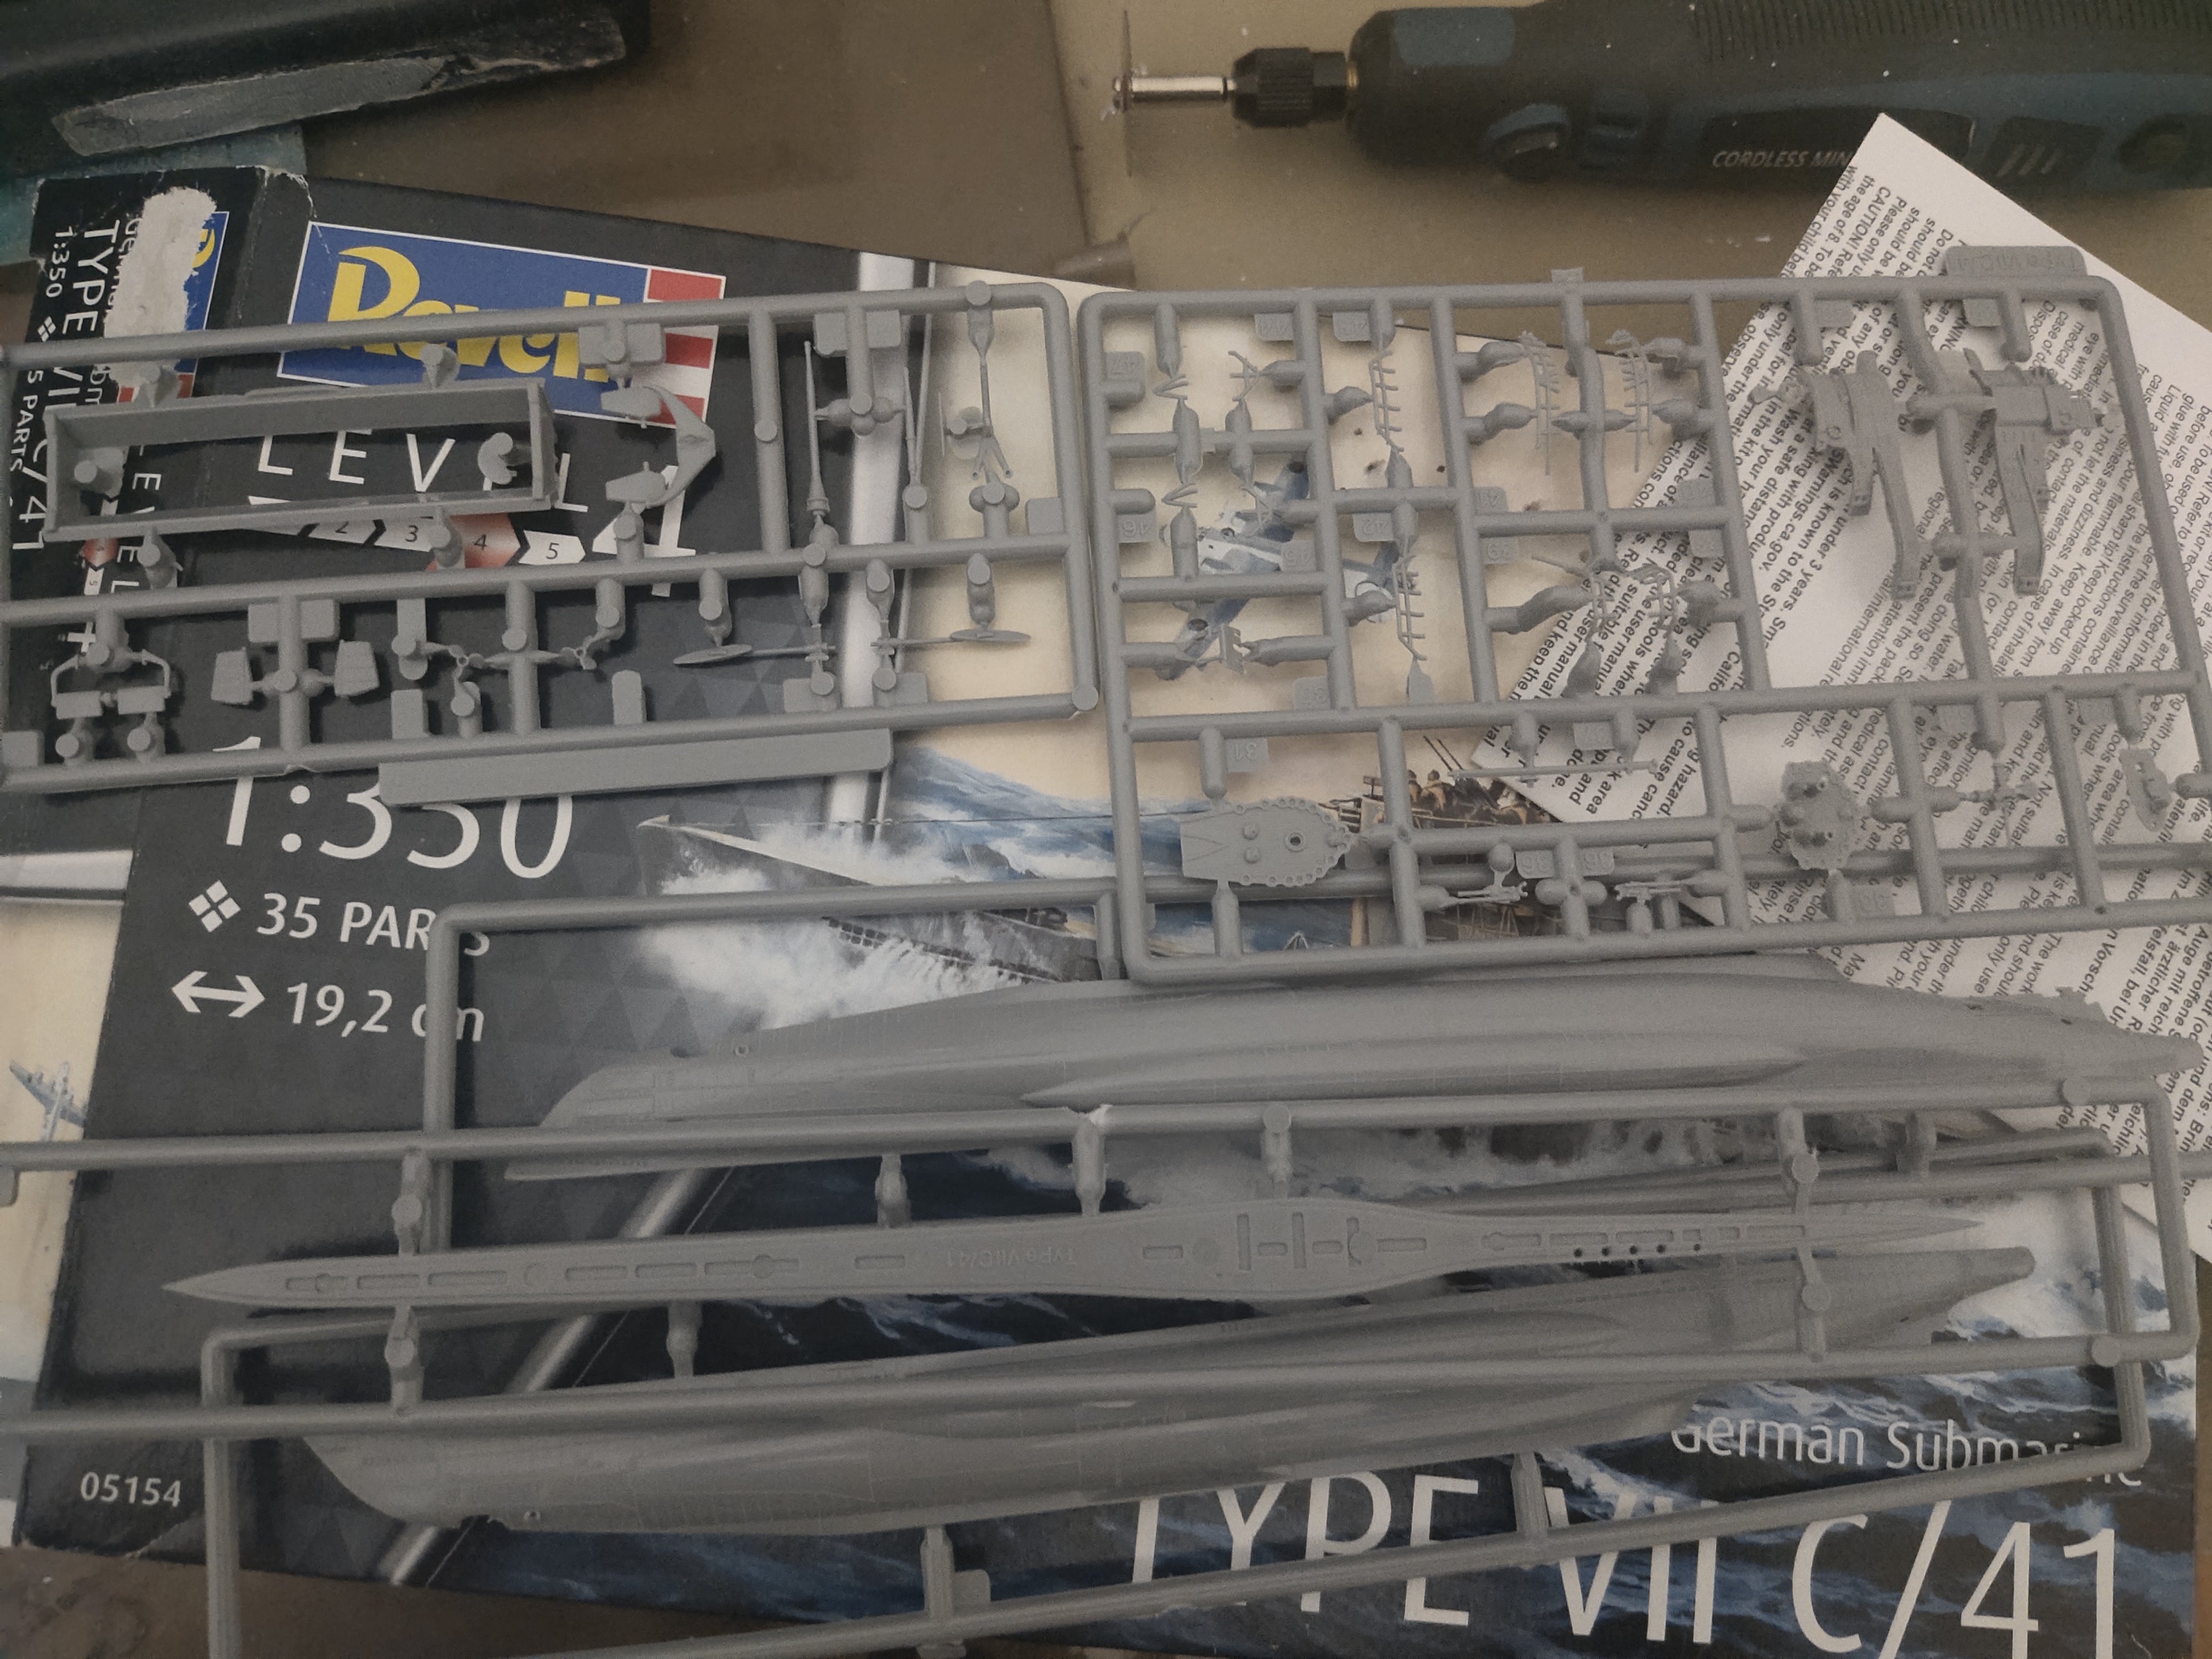
My first brand new ship kit assemby after 30+ years. I am taking it easy nowadays so a 35 piece model is all I need.

-
Beautiful example of the golden era of F1
-
Cap San Diego by mikegr - 1/160
mikegr replied to mikegr's topic in - Build logs for subjects built 1901 - Present Day
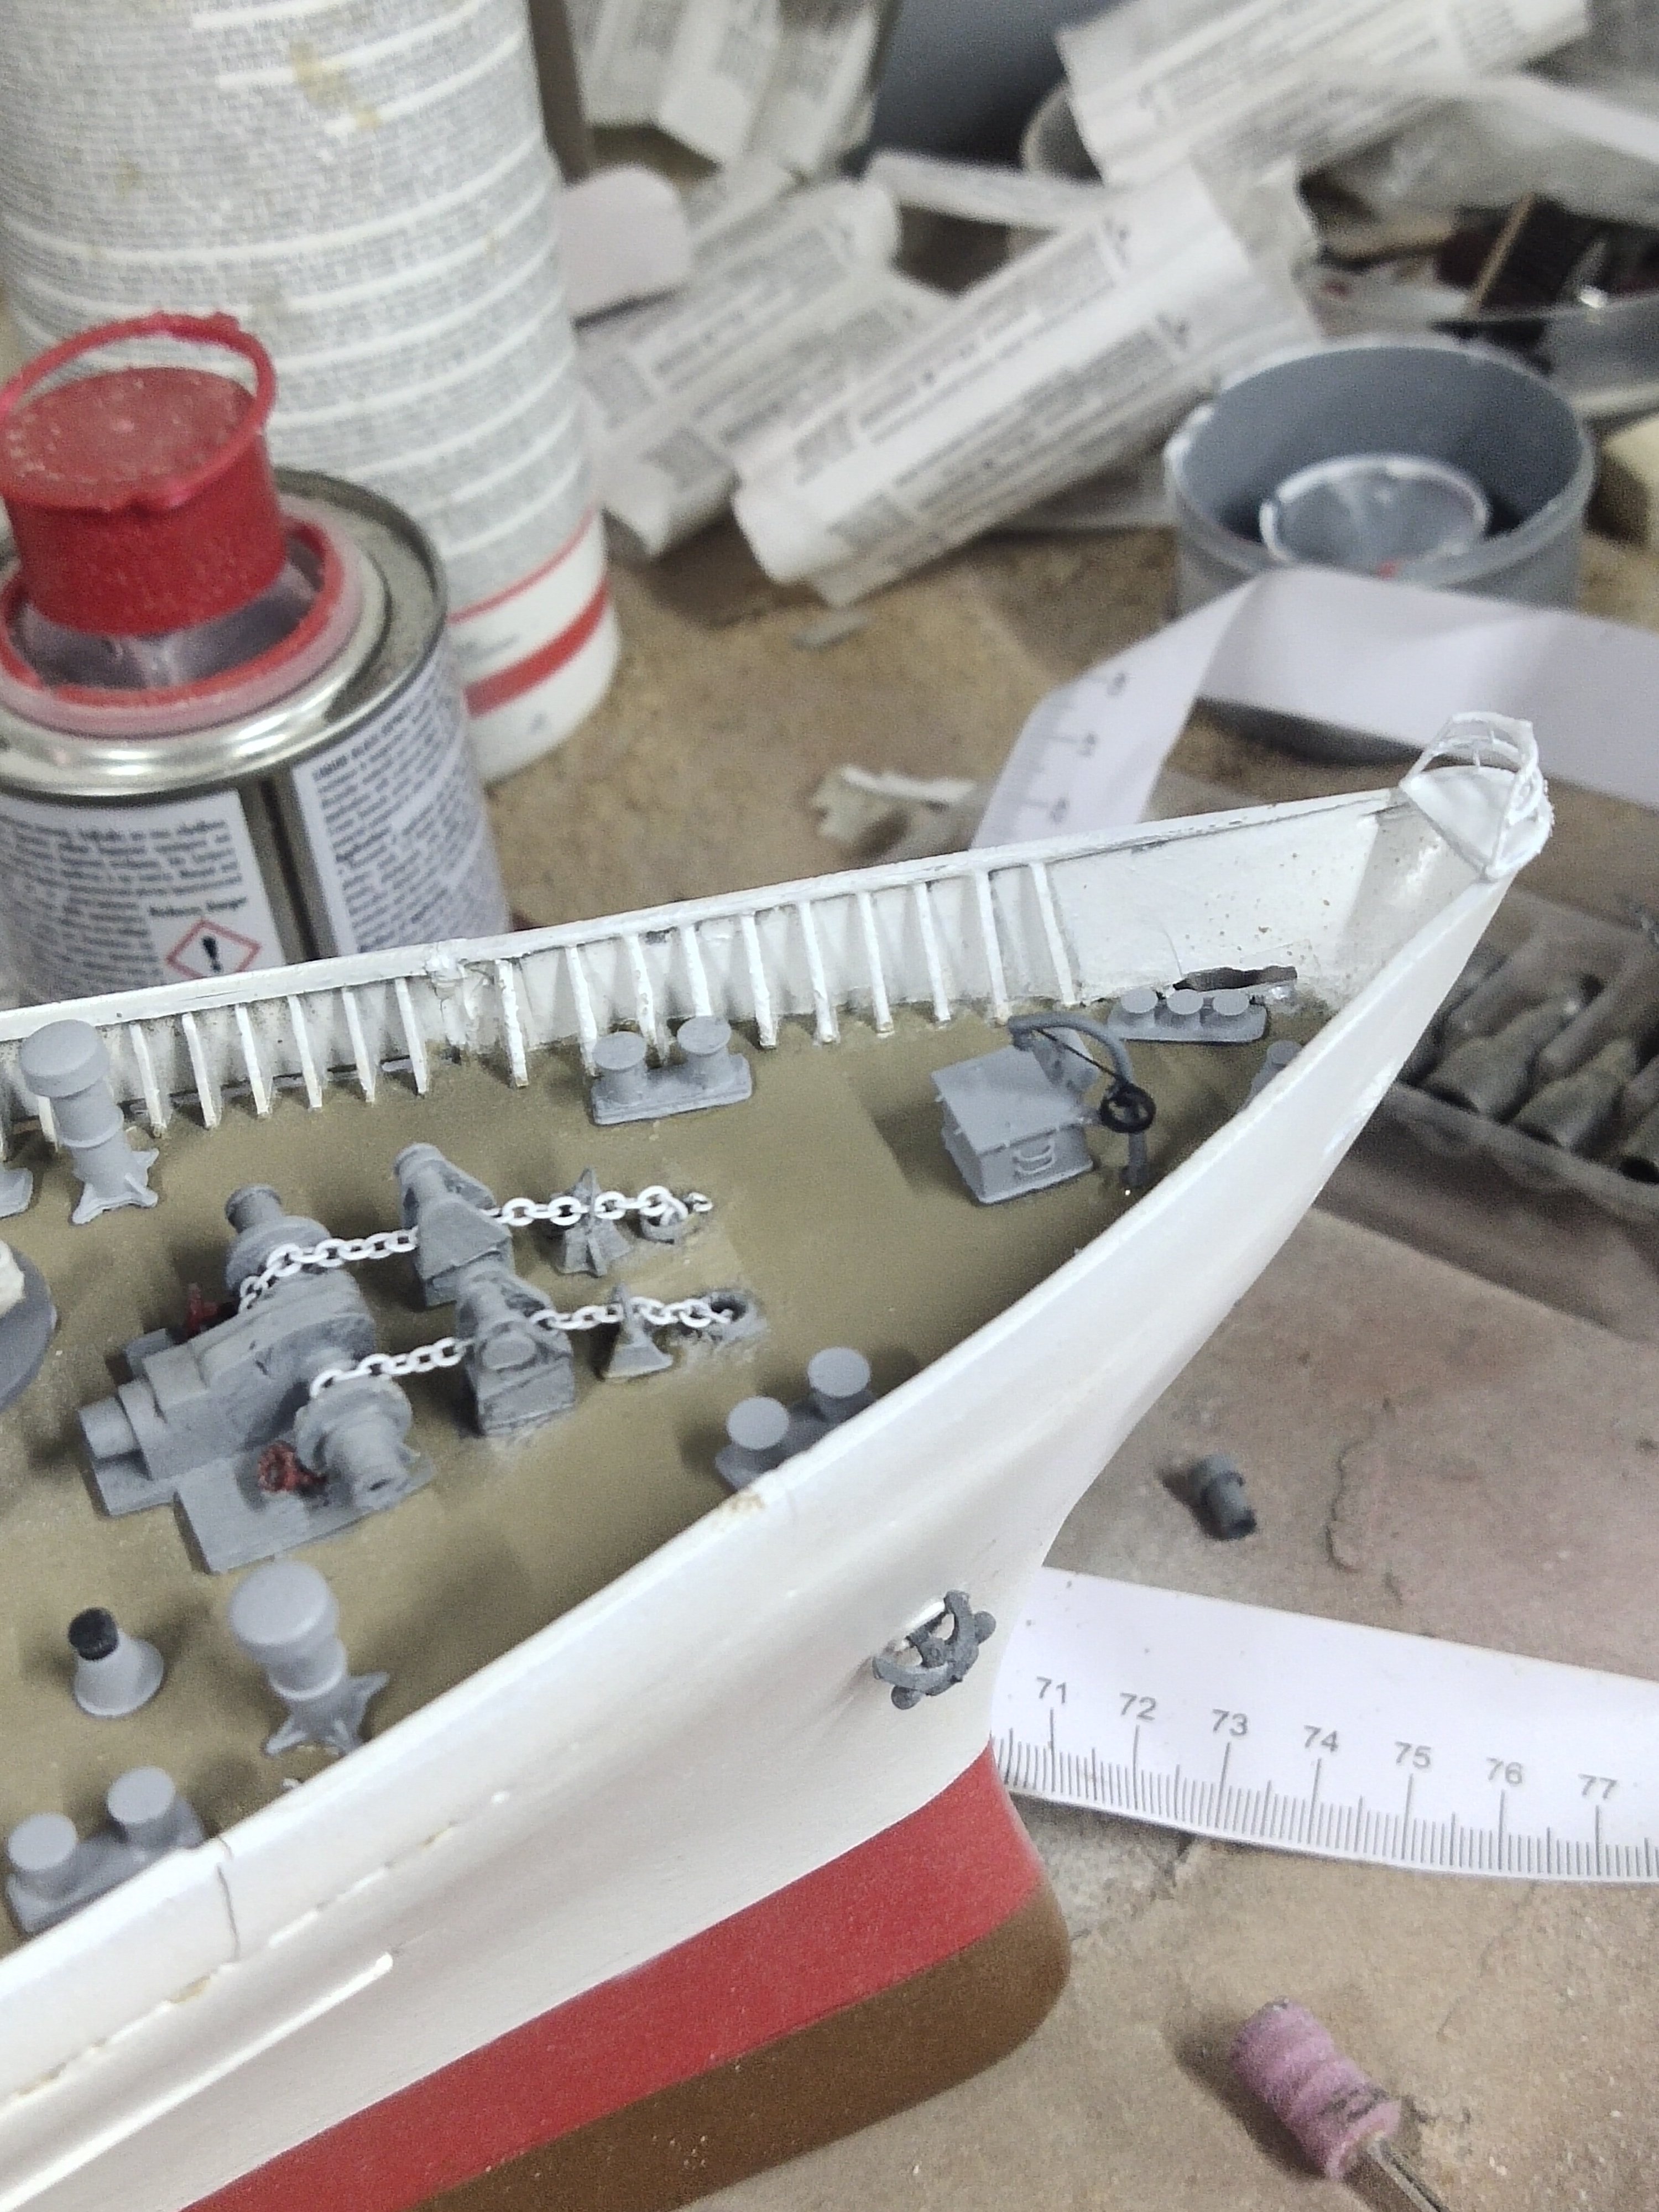
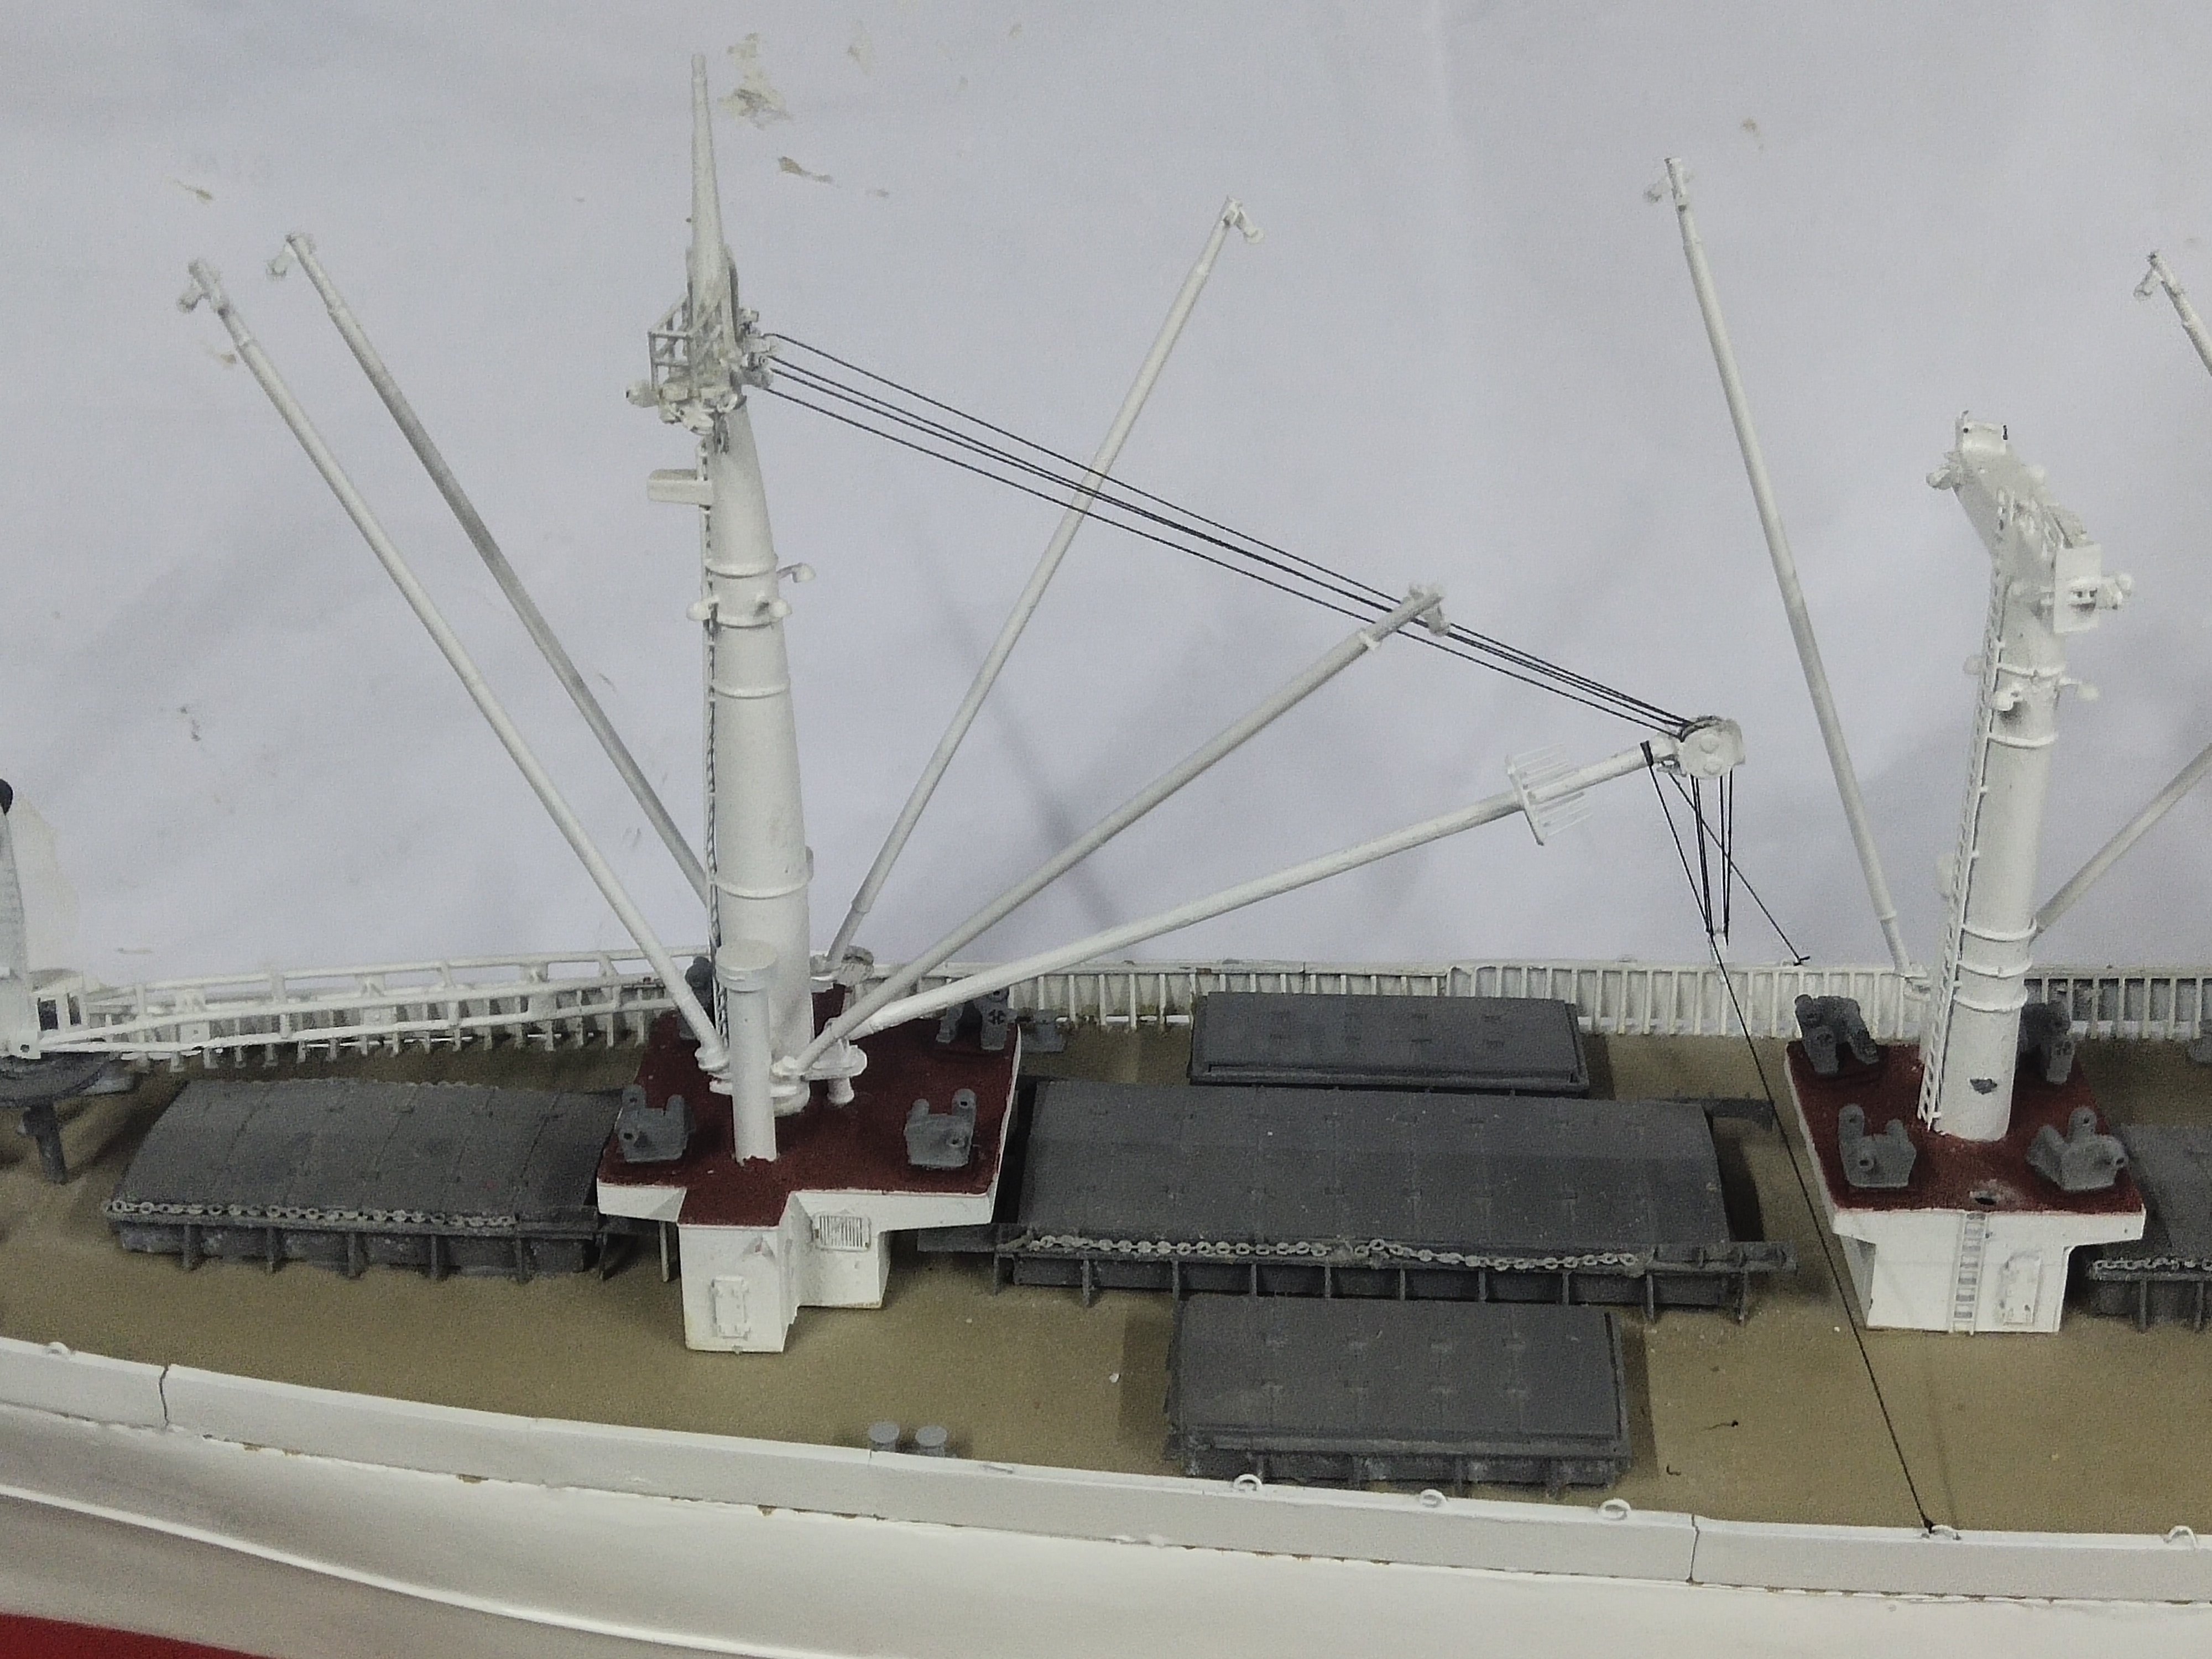
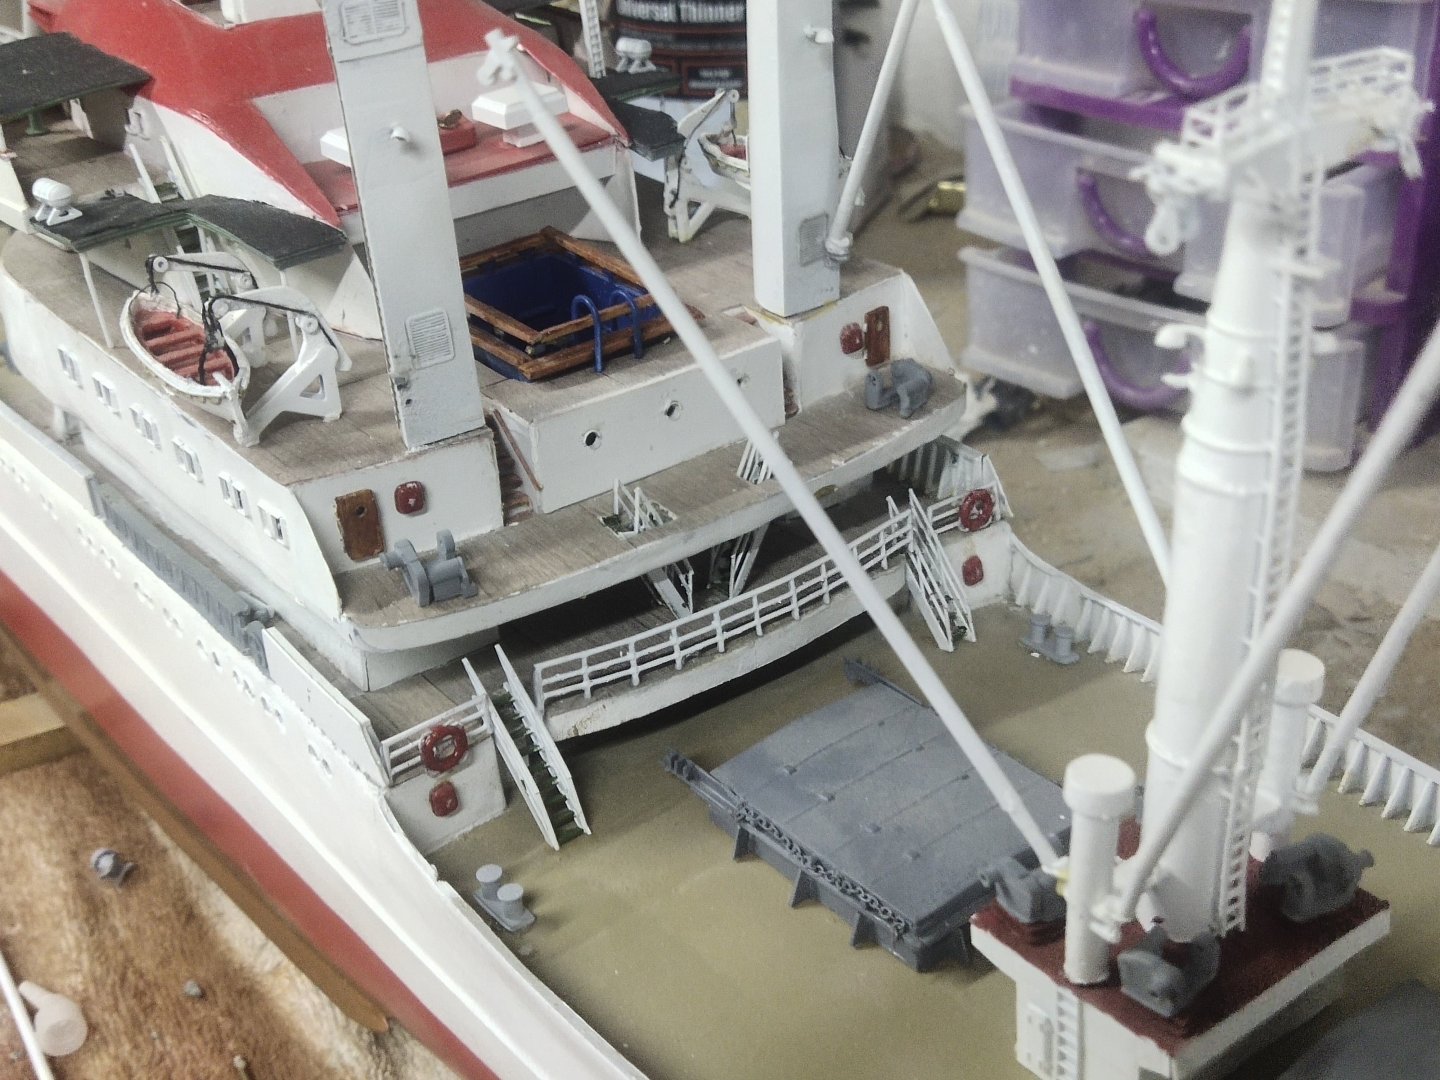
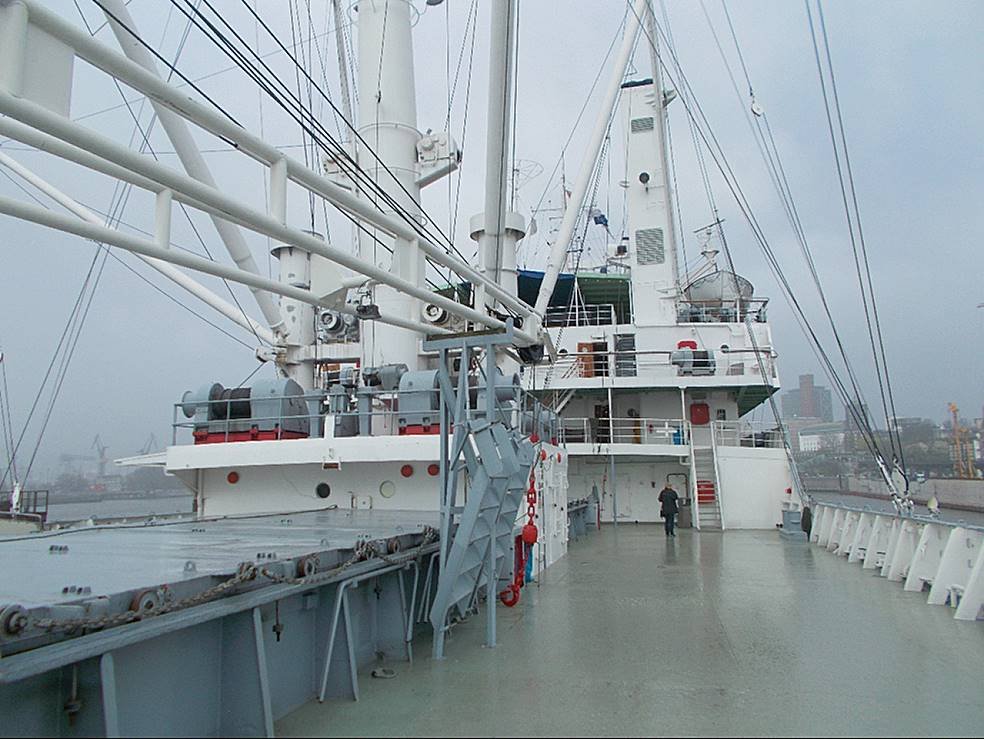
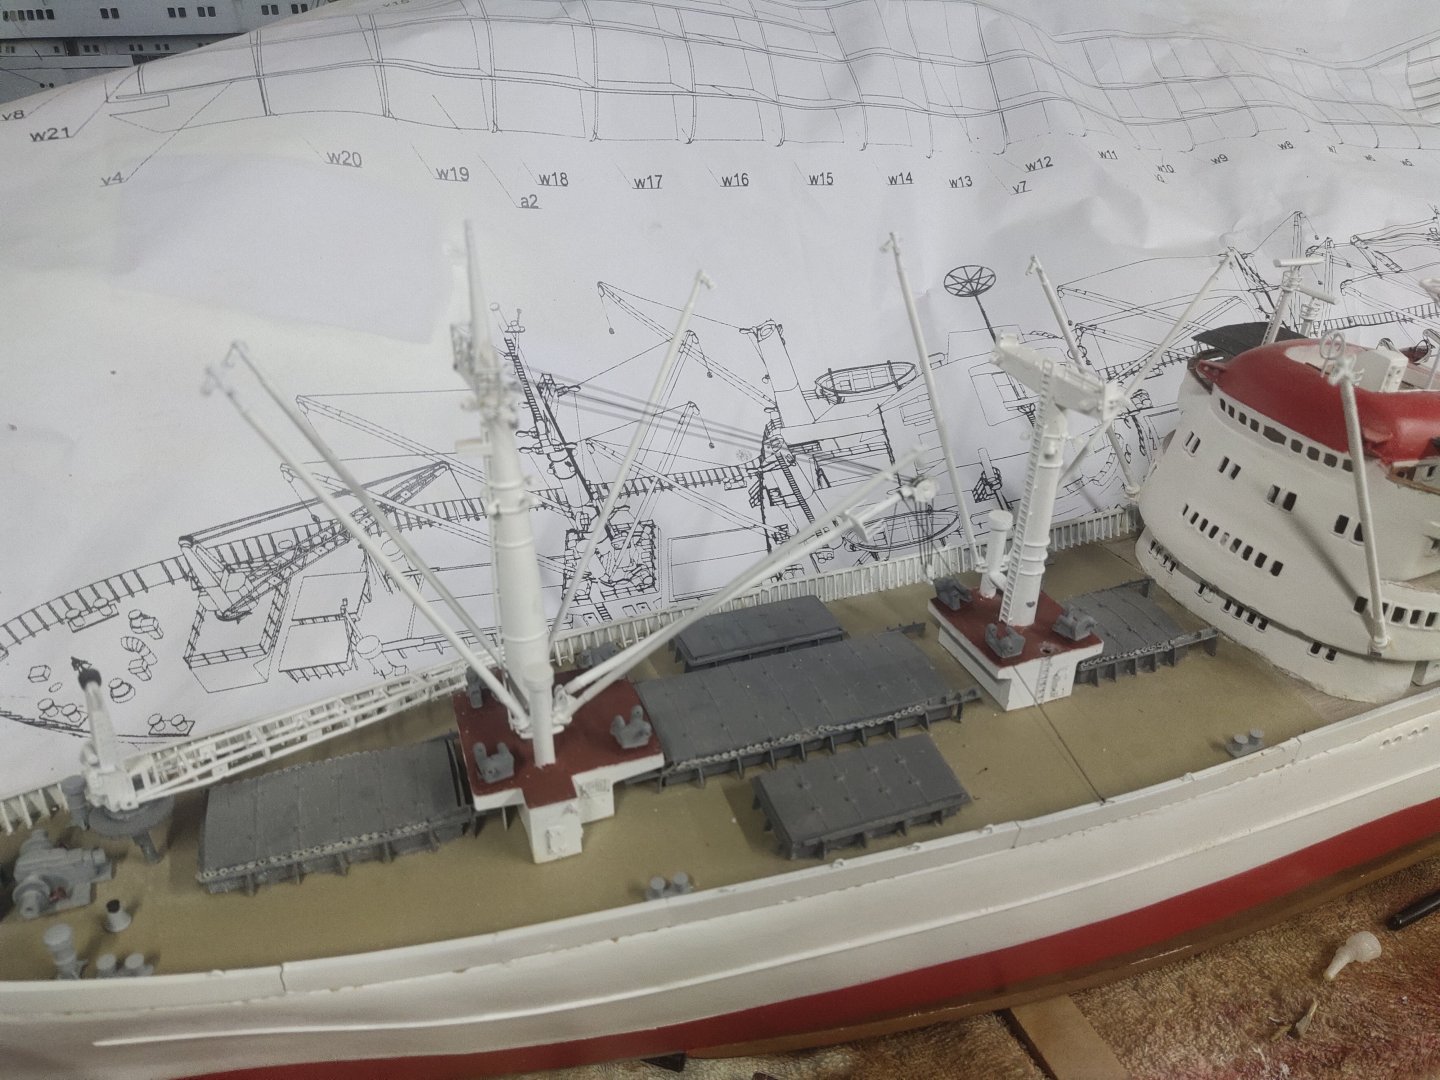
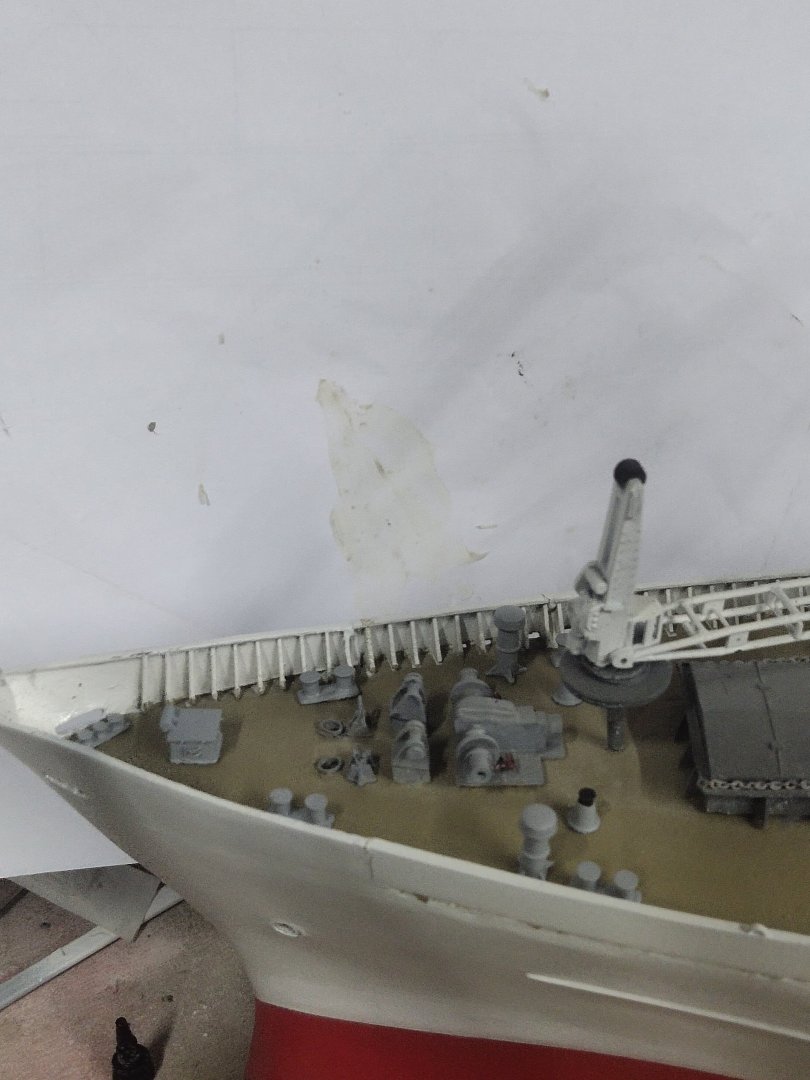
The bow section is almost complete. At the rear I begin to add rails. As this is a cargo ship there are rails only on accommodation area and on crane platforms. There is a lot ofmini paintjob repair to do when done adding parts.
-
Cap San Diego by mikegr - 1/160
mikegr replied to mikegr's topic in - Build logs for subjects built 1901 - Present Day
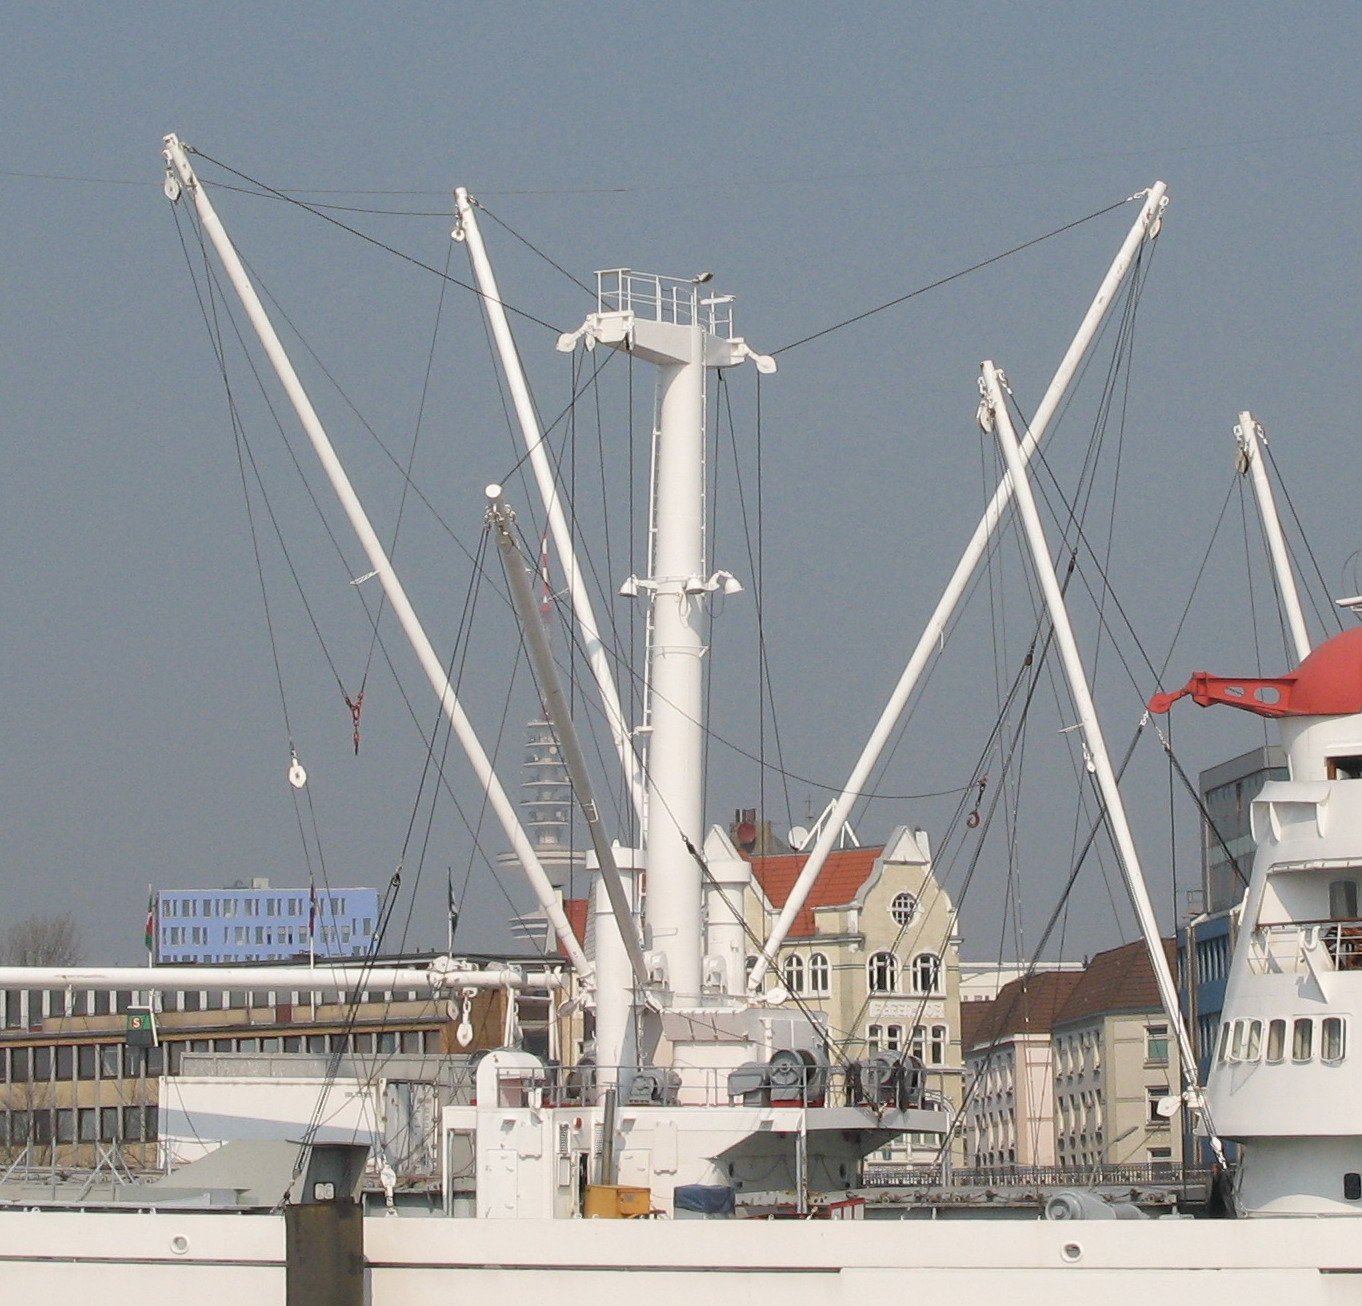
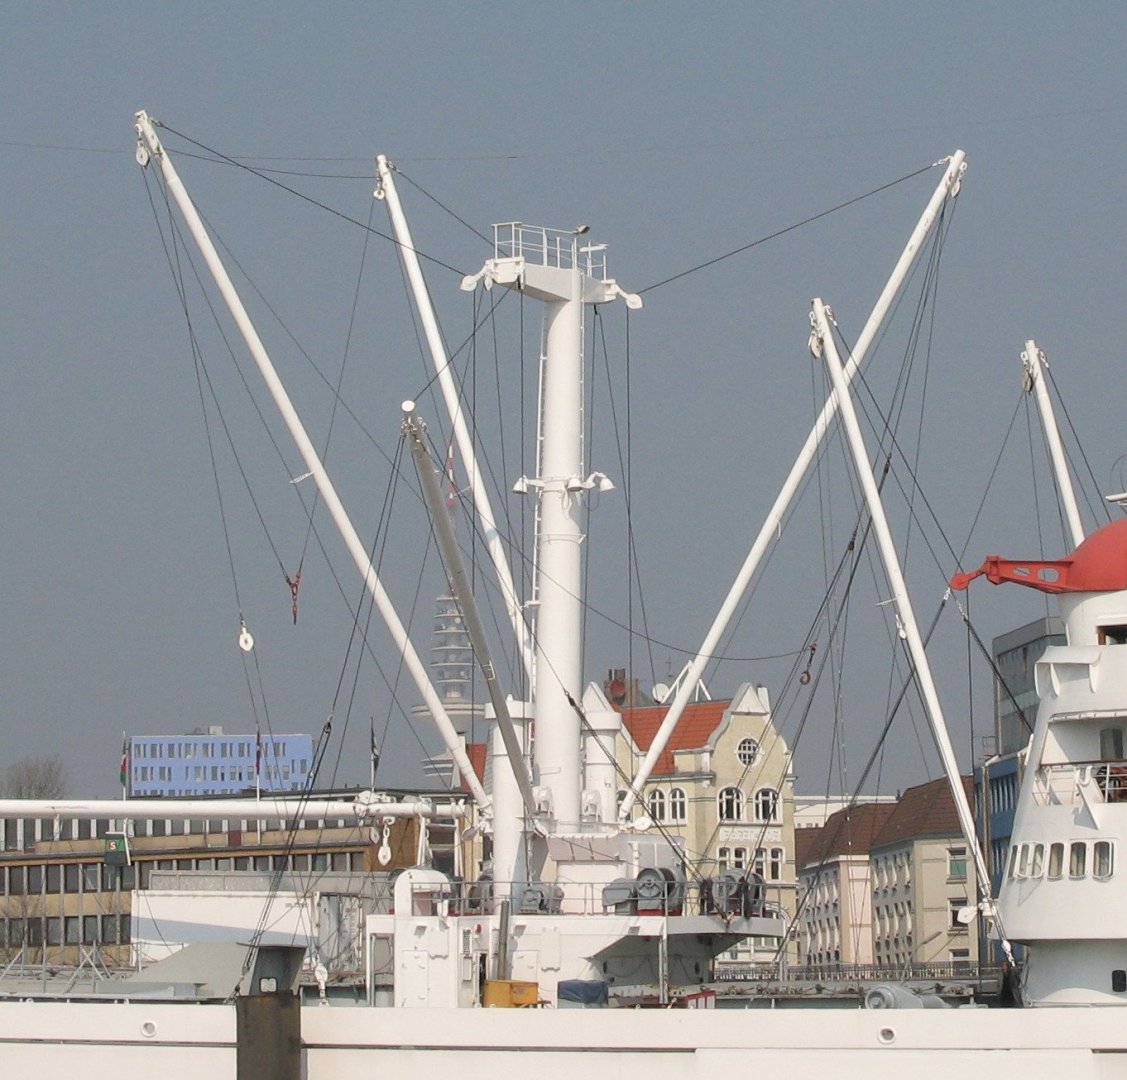
it seems that when its not in use its kept vertically as seen on this photo, with a cover for the top end it seems also that other crane mast are securedwith ropes to the bulwarks In the future i will follow the model instructions for rigging as real one is highly complicated. I was about to visit myself Hamburg In November and takes pictures but because of my mother's health issues my travel postponed to next April, too late by then.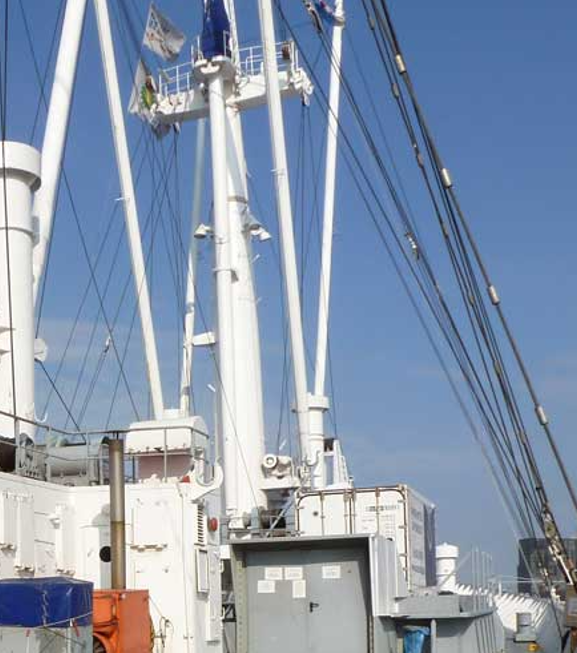
-
Cap San Diego by mikegr - 1/160
mikegr replied to mikegr's topic in - Build logs for subjects built 1901 - Present Day
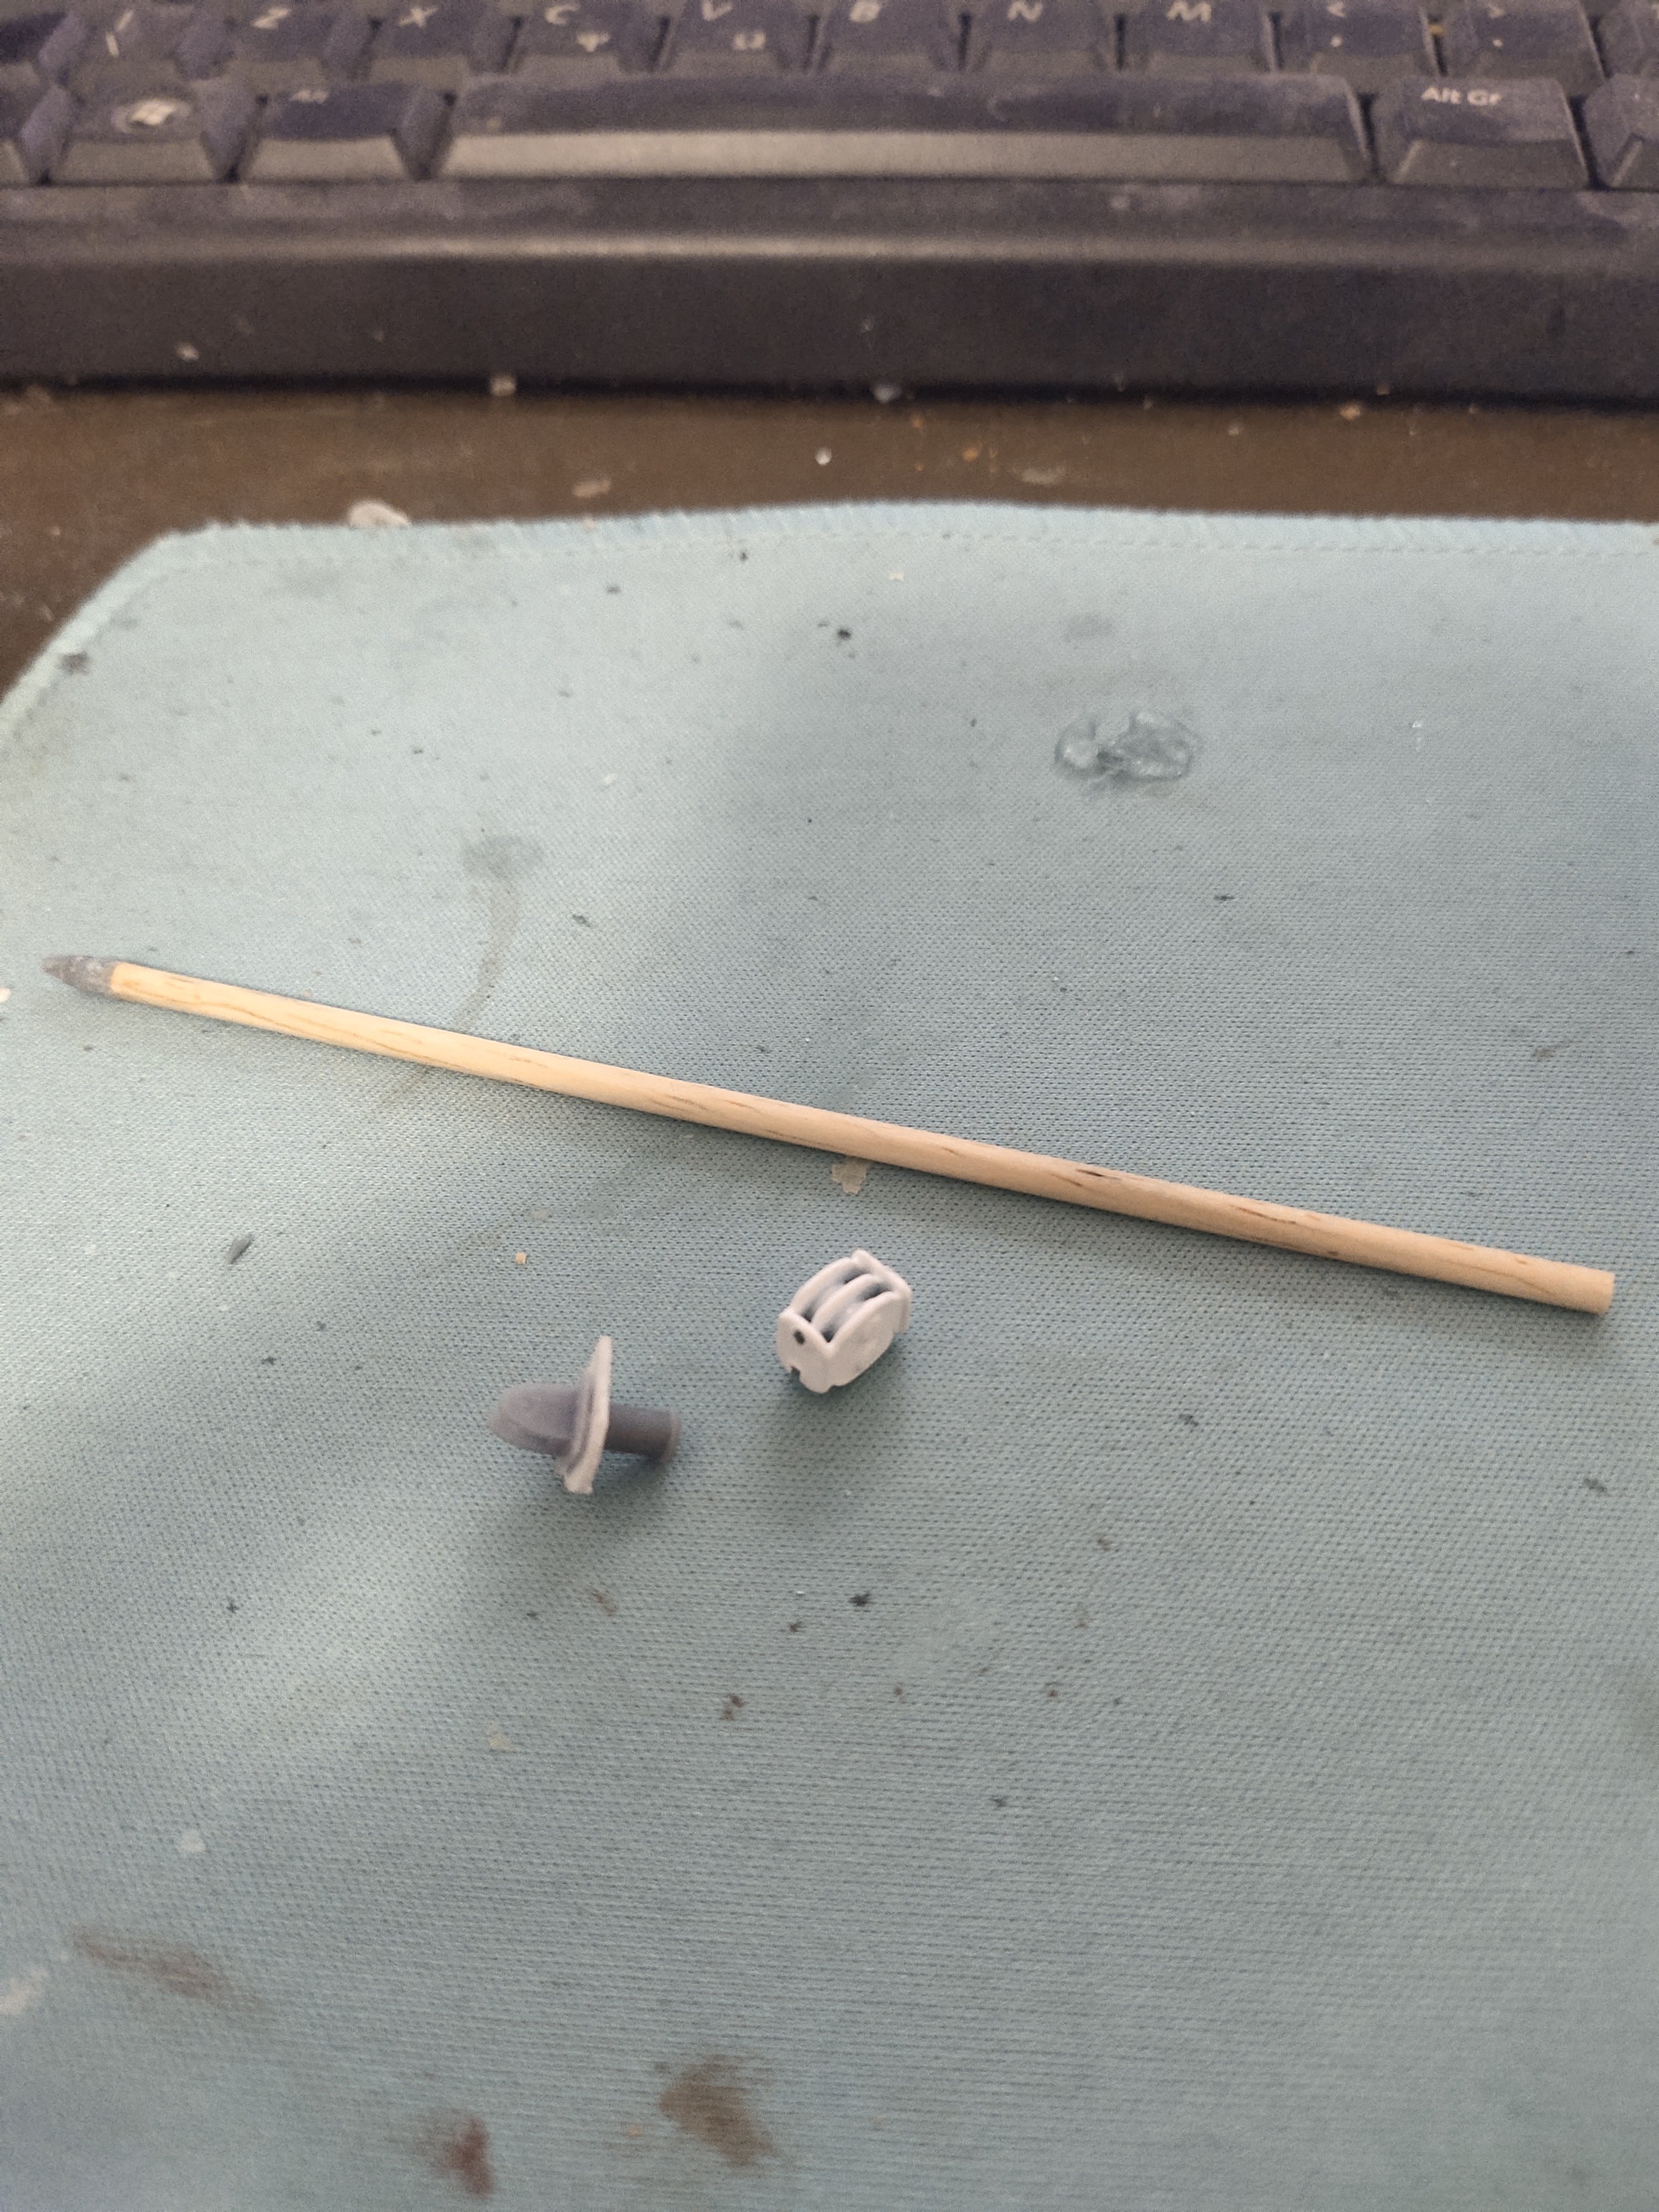
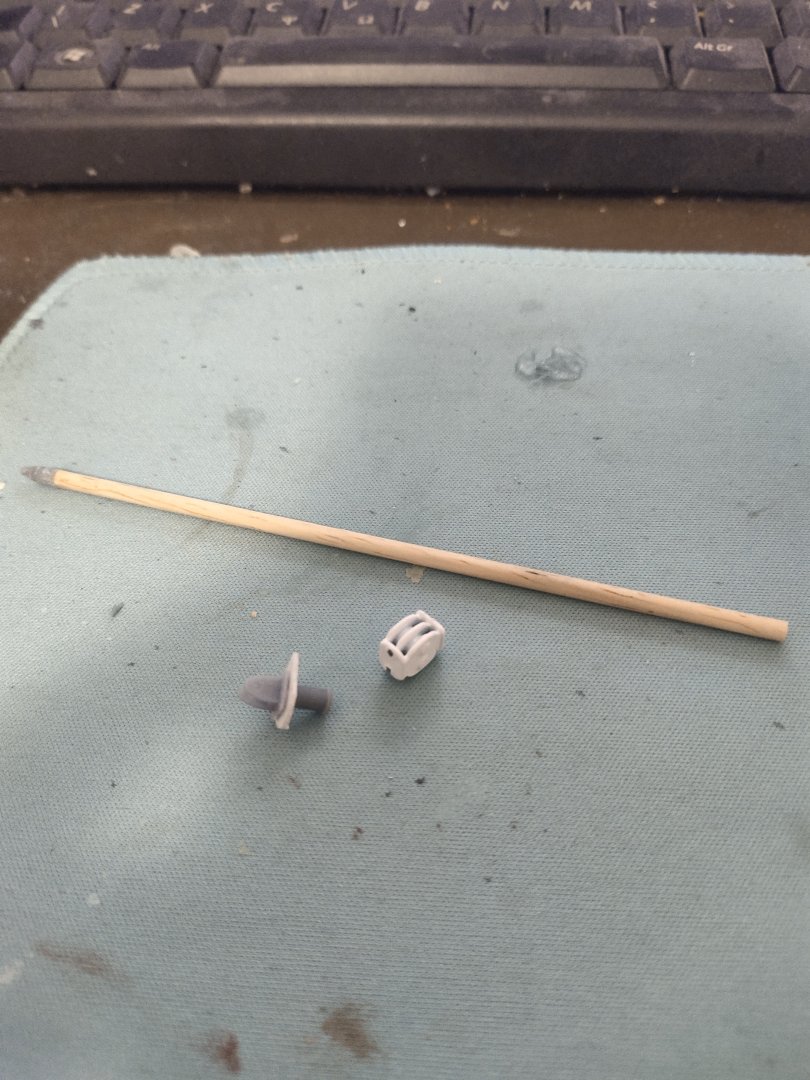
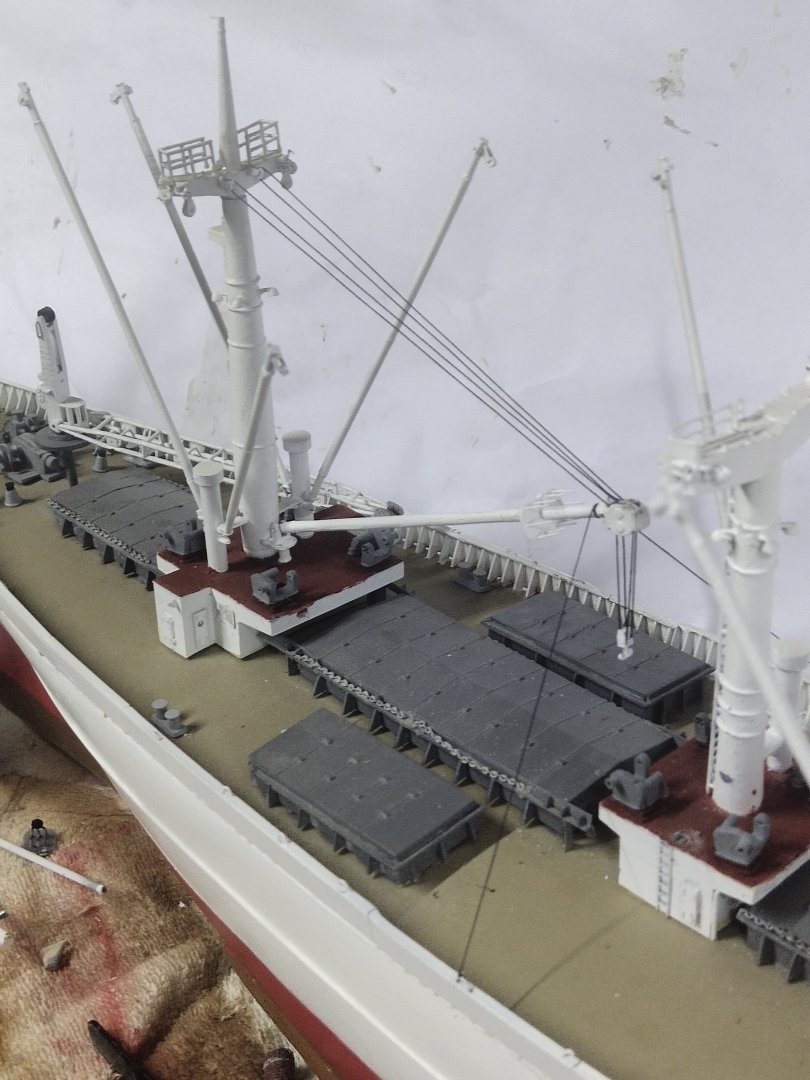
I forgot to make a whole mast. Its thicker that the others and has has a big pulley. Lower tip and pulley were made with 3d parts. The base and the main part were made of plastic and wood respectively.I even managed to make it movable up and down. Not that its important, I just wanted to do it. After assembling the parts it was time to put it in place. I decided to try my luck in rigging. What a painful experience it was. Trying to give the right tension was quite difficult. A big respect to those who deal with rigging at wooden sail ships. Maybe this 1/160 scale make things more tricky, Note the wire crossing the deck and over the crane. This is what I call, faulse rigging. This does not exist on plans. Its purpose its to give the right tension to wires from pulley to the main mast. If brass had been used instead of wood, the increased weight may have done this job. A lesson for the future. However its not that unreal as many other cranes are tighten in this way according to my reference pictures. But enough rigging for now. Last progress was in bow section, only anchor and chain is to be added.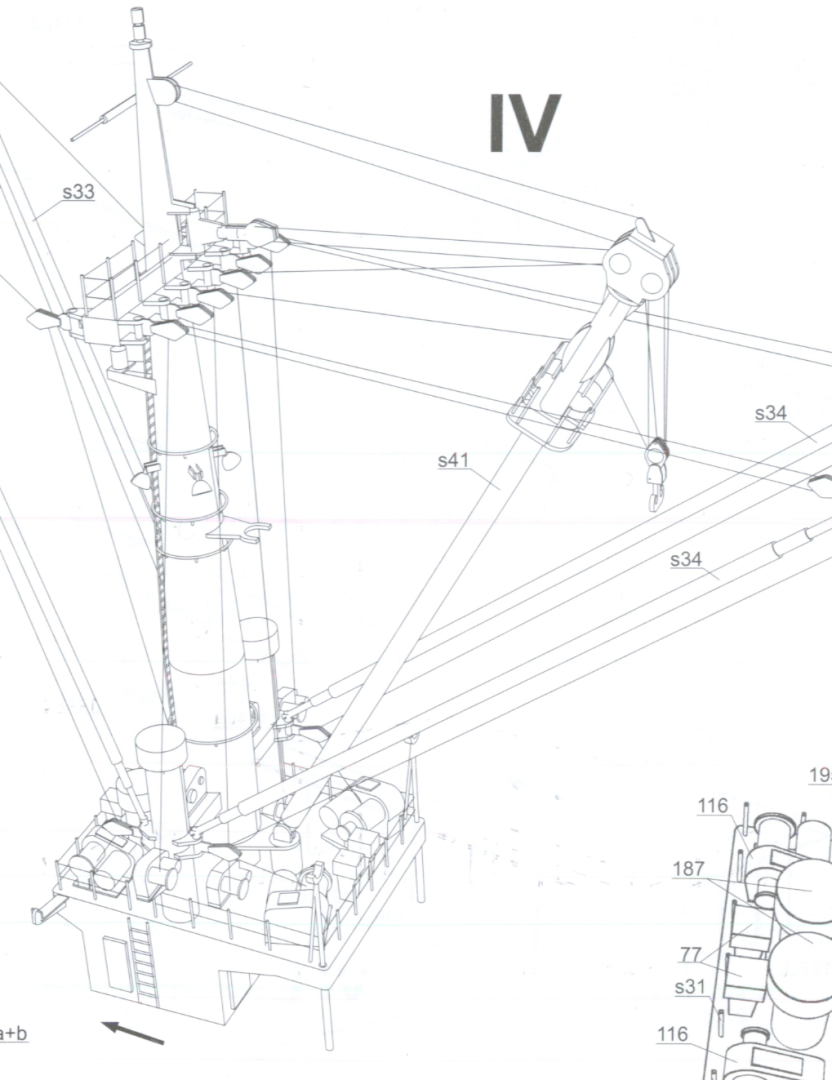


-
If you are not familiar with resin better stay away of such messy and big kits.
- 176 replies
-
- 4
-

-
- new orleans
- iron shipwrights
- (and 2 more)
-
Model monkey is a quite reputable designer/seller. He just needs to rename his business😁
- 176 replies
-
- 4
-
-
- new orleans
- iron shipwrights
- (and 2 more)
-
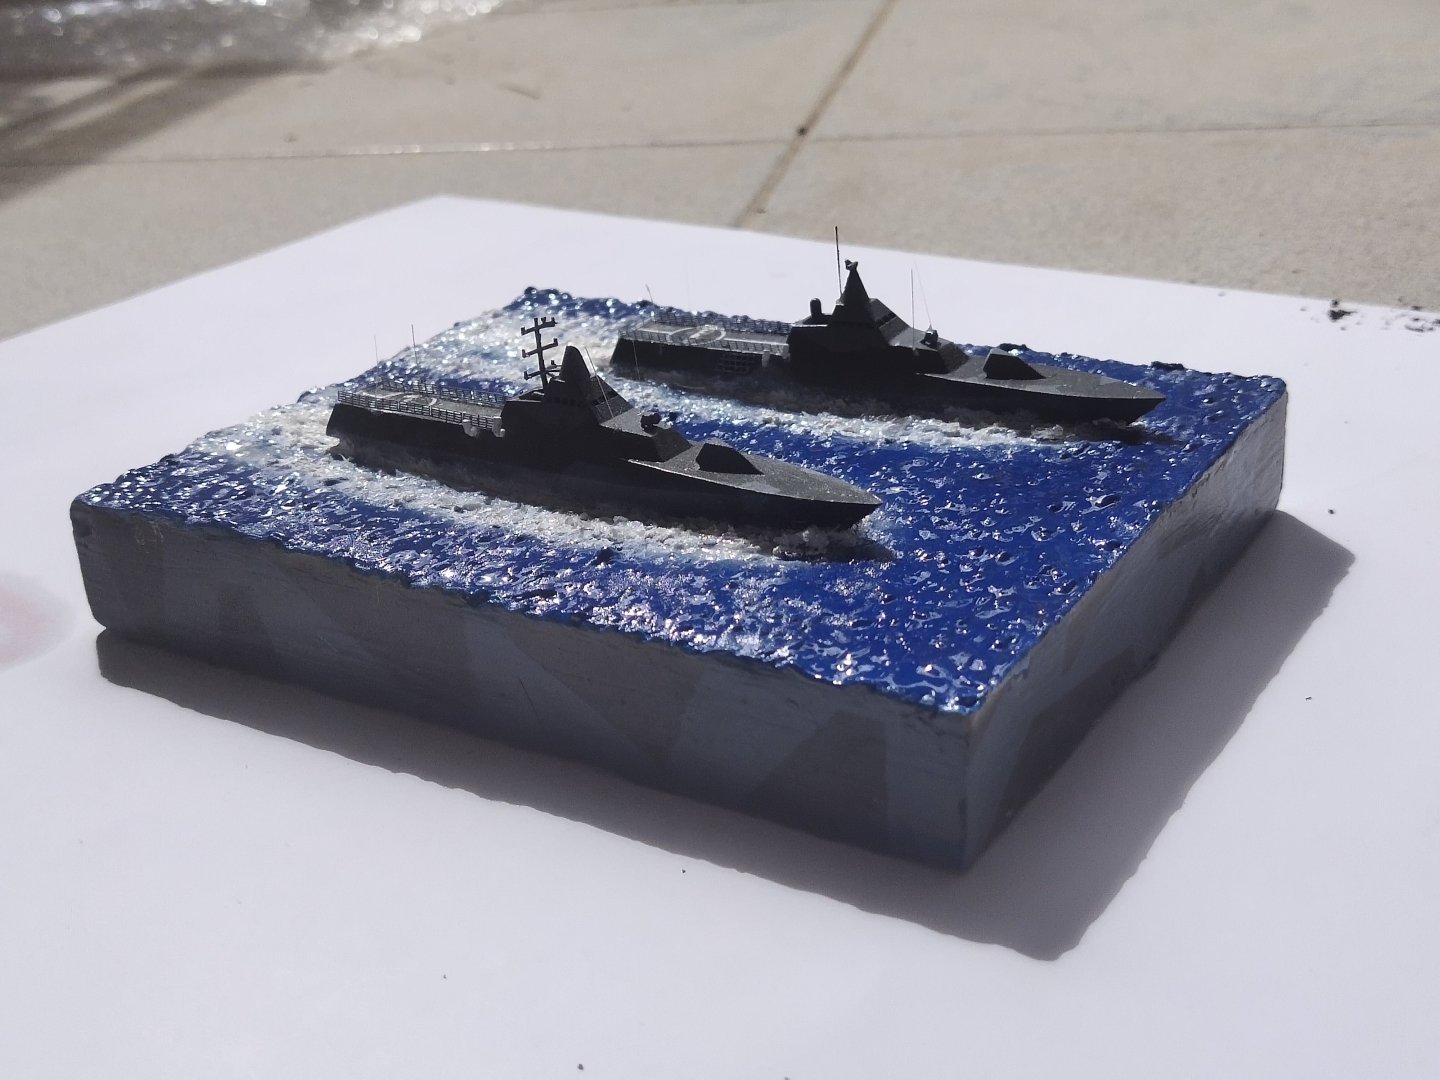
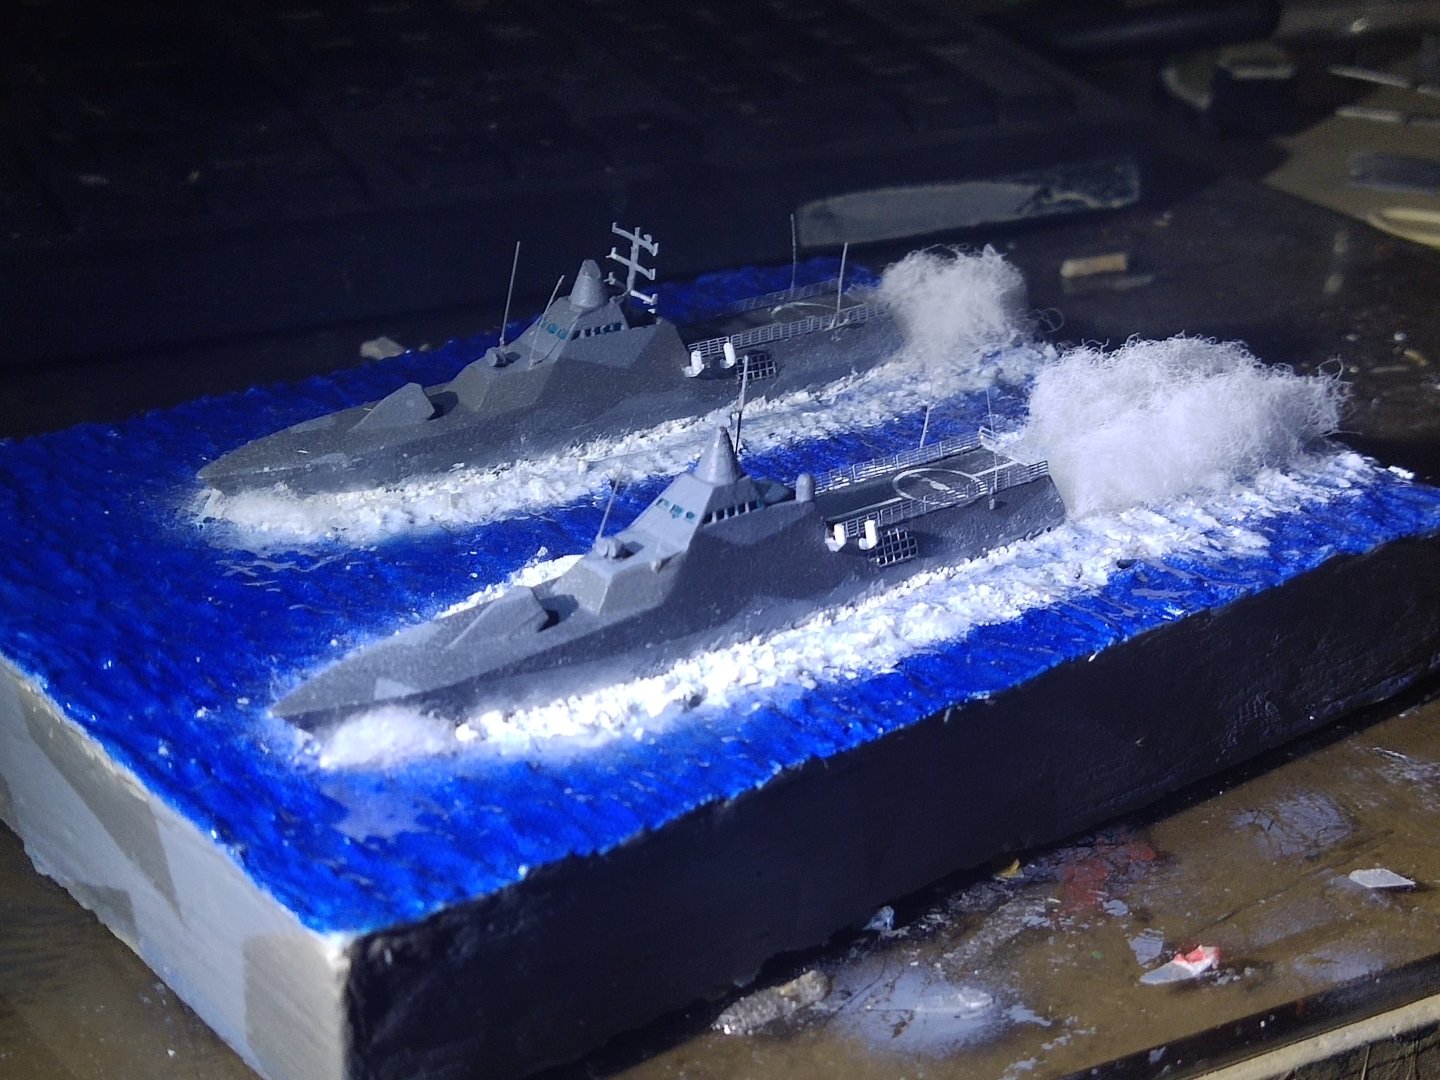
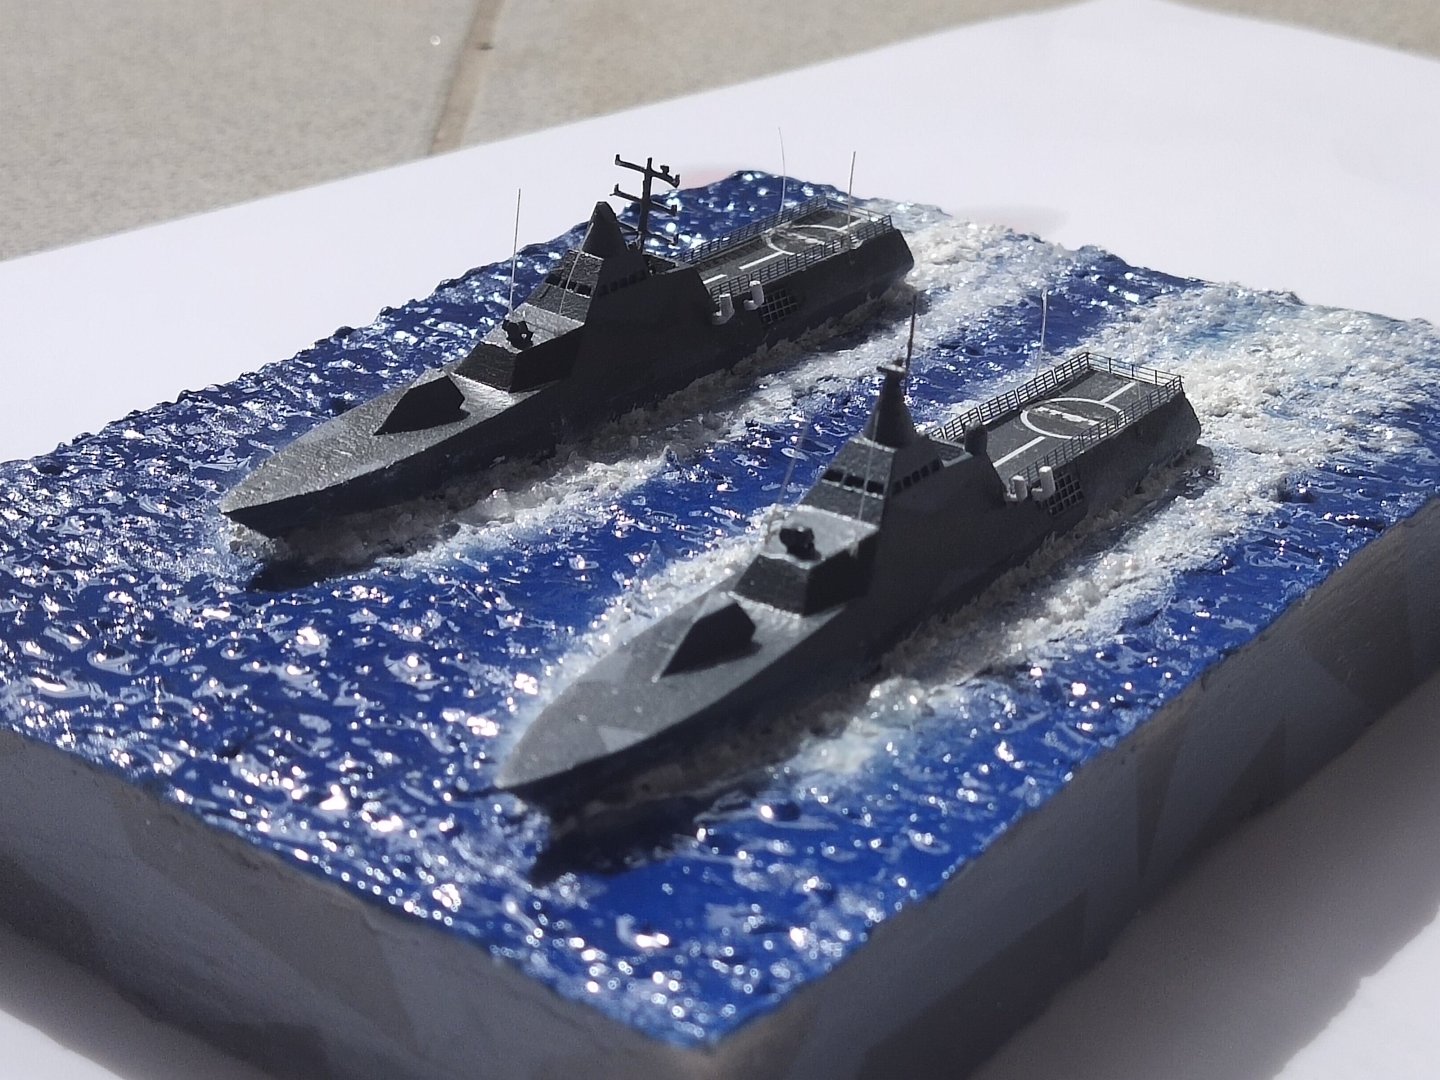
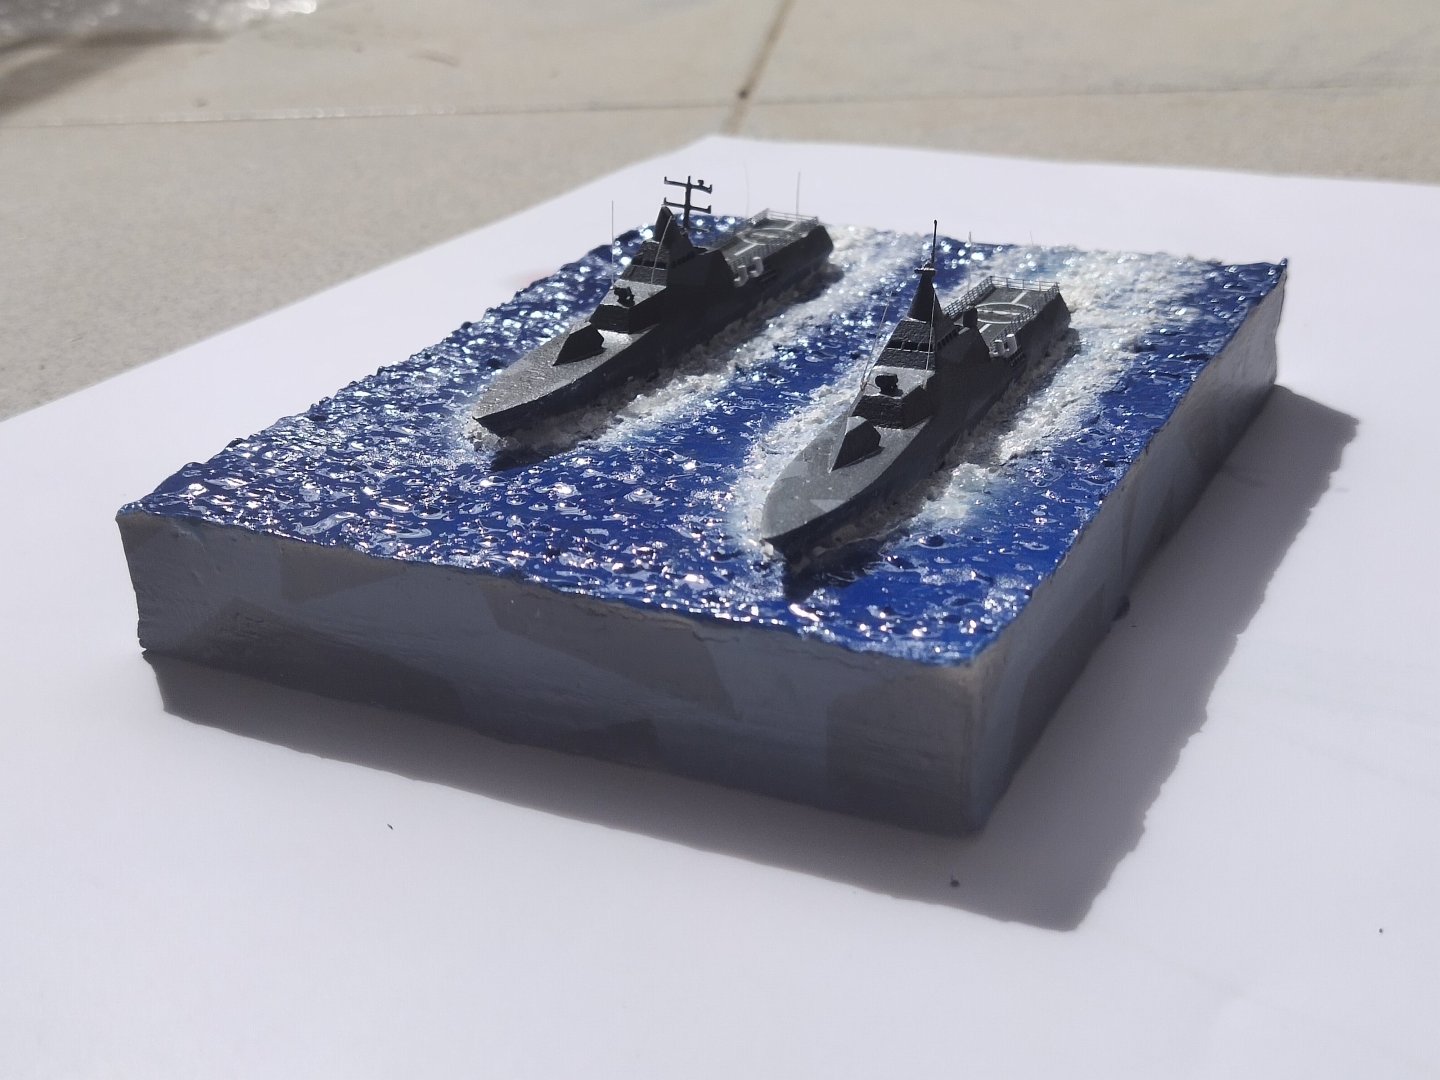
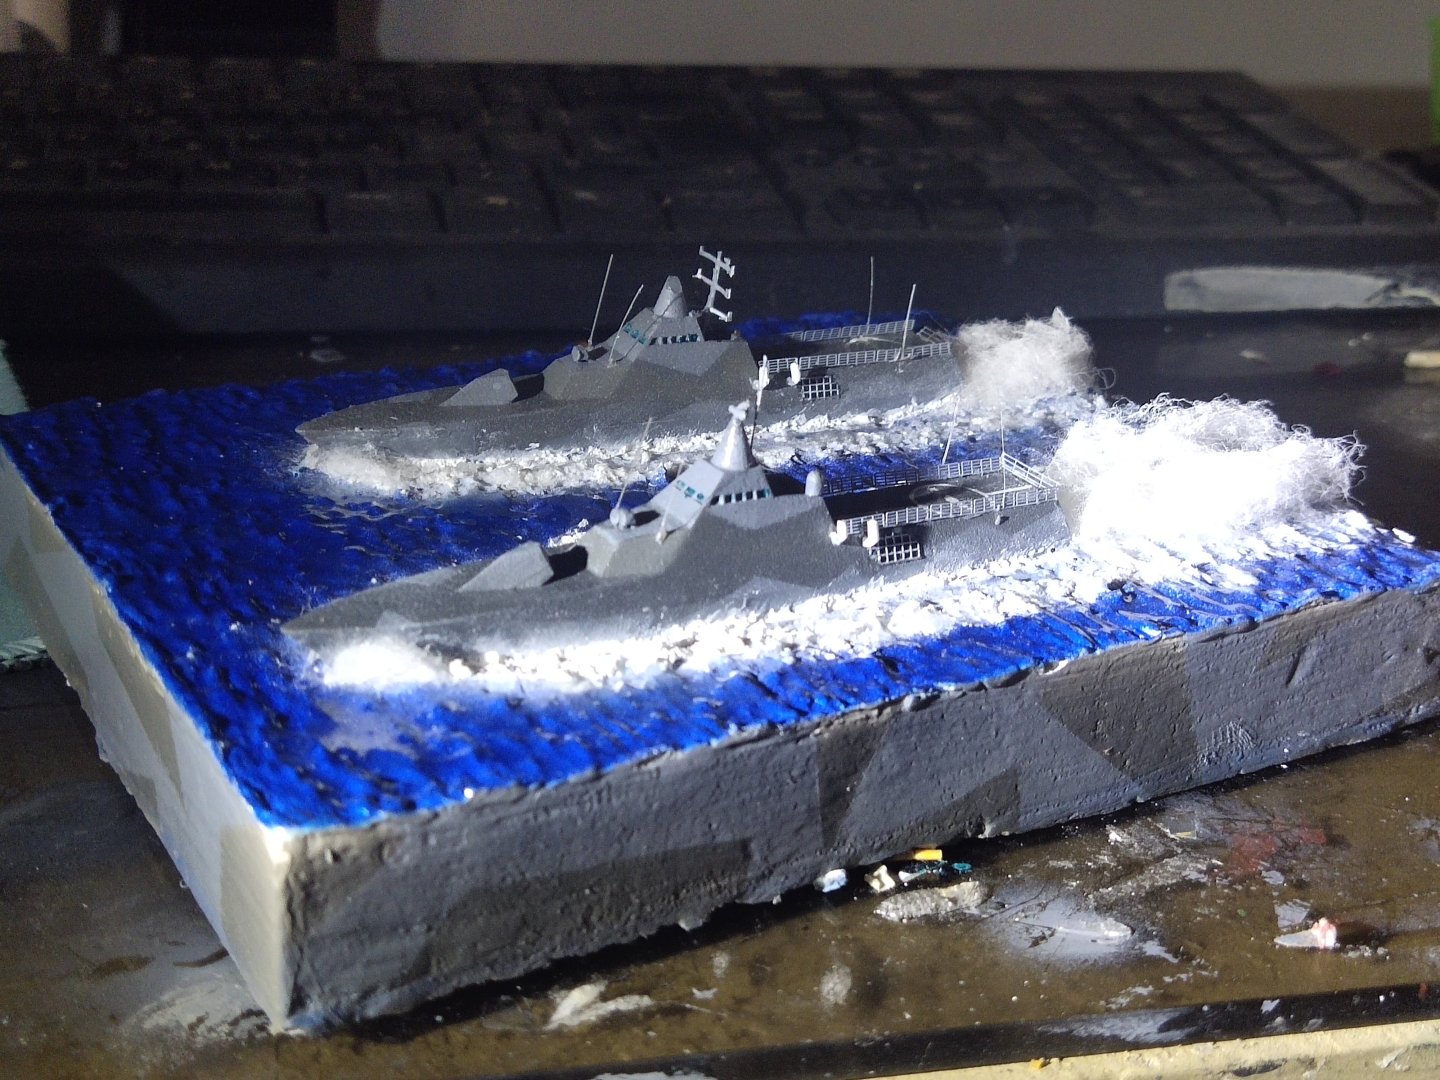
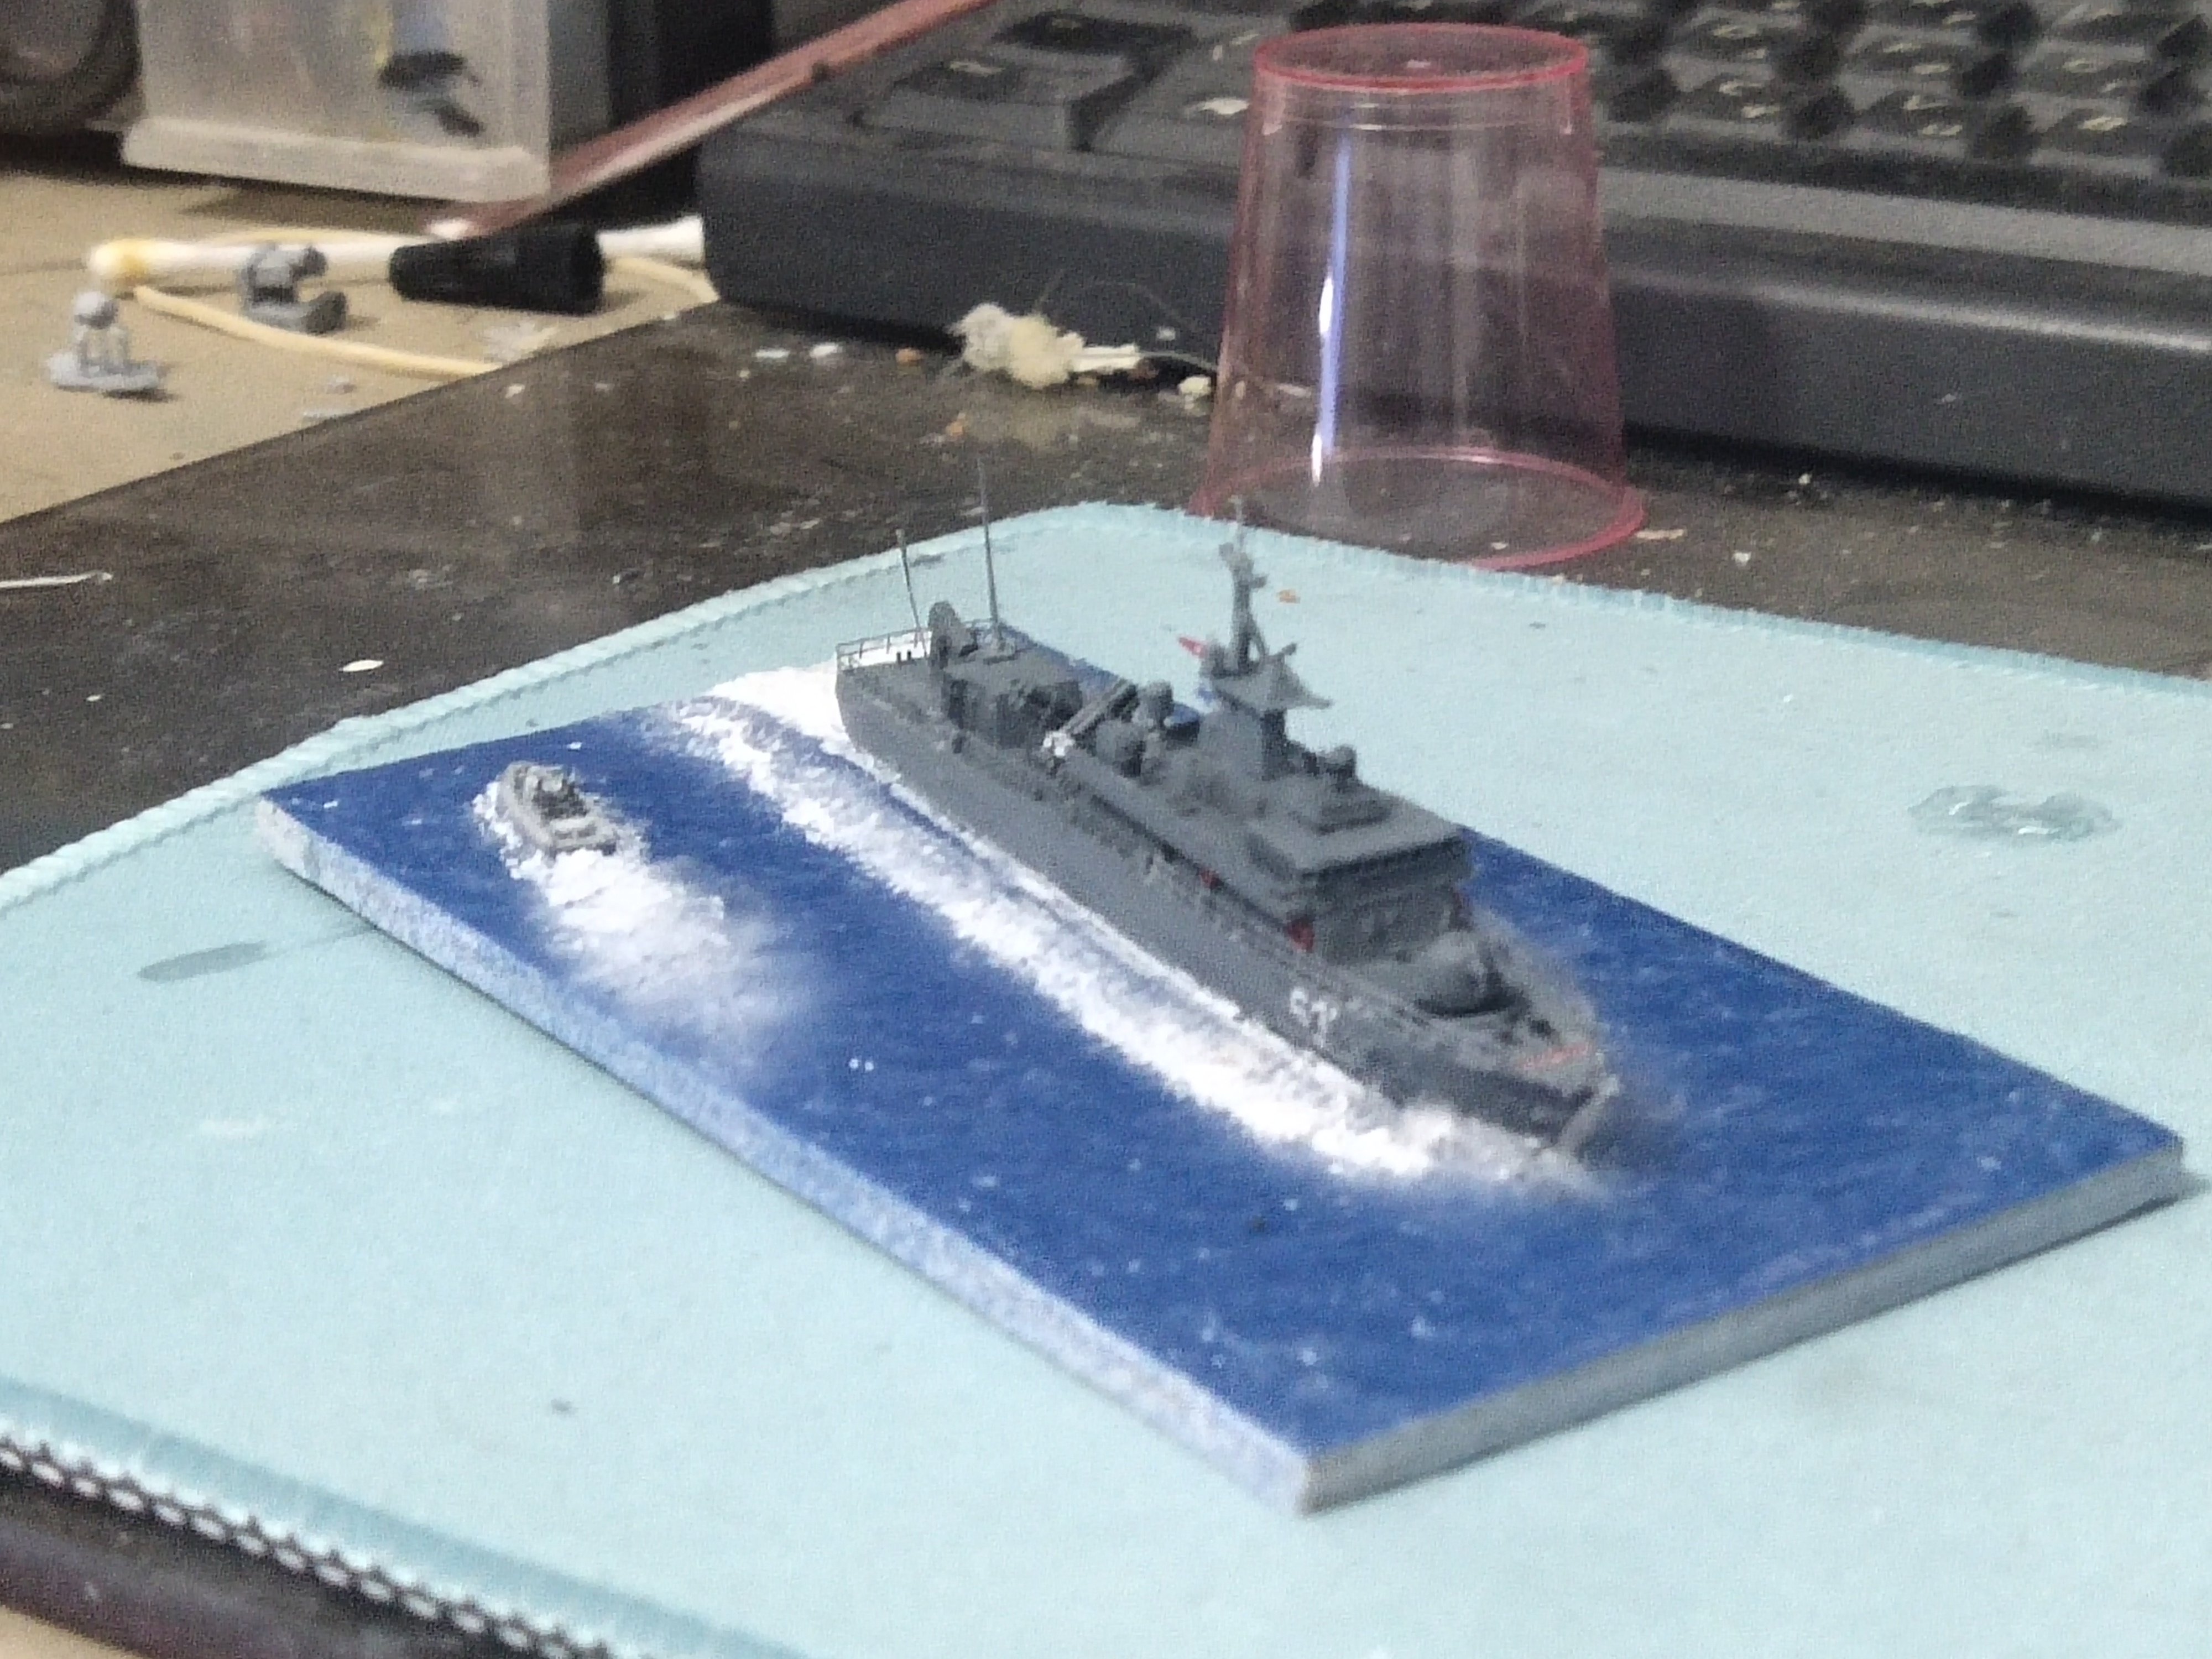
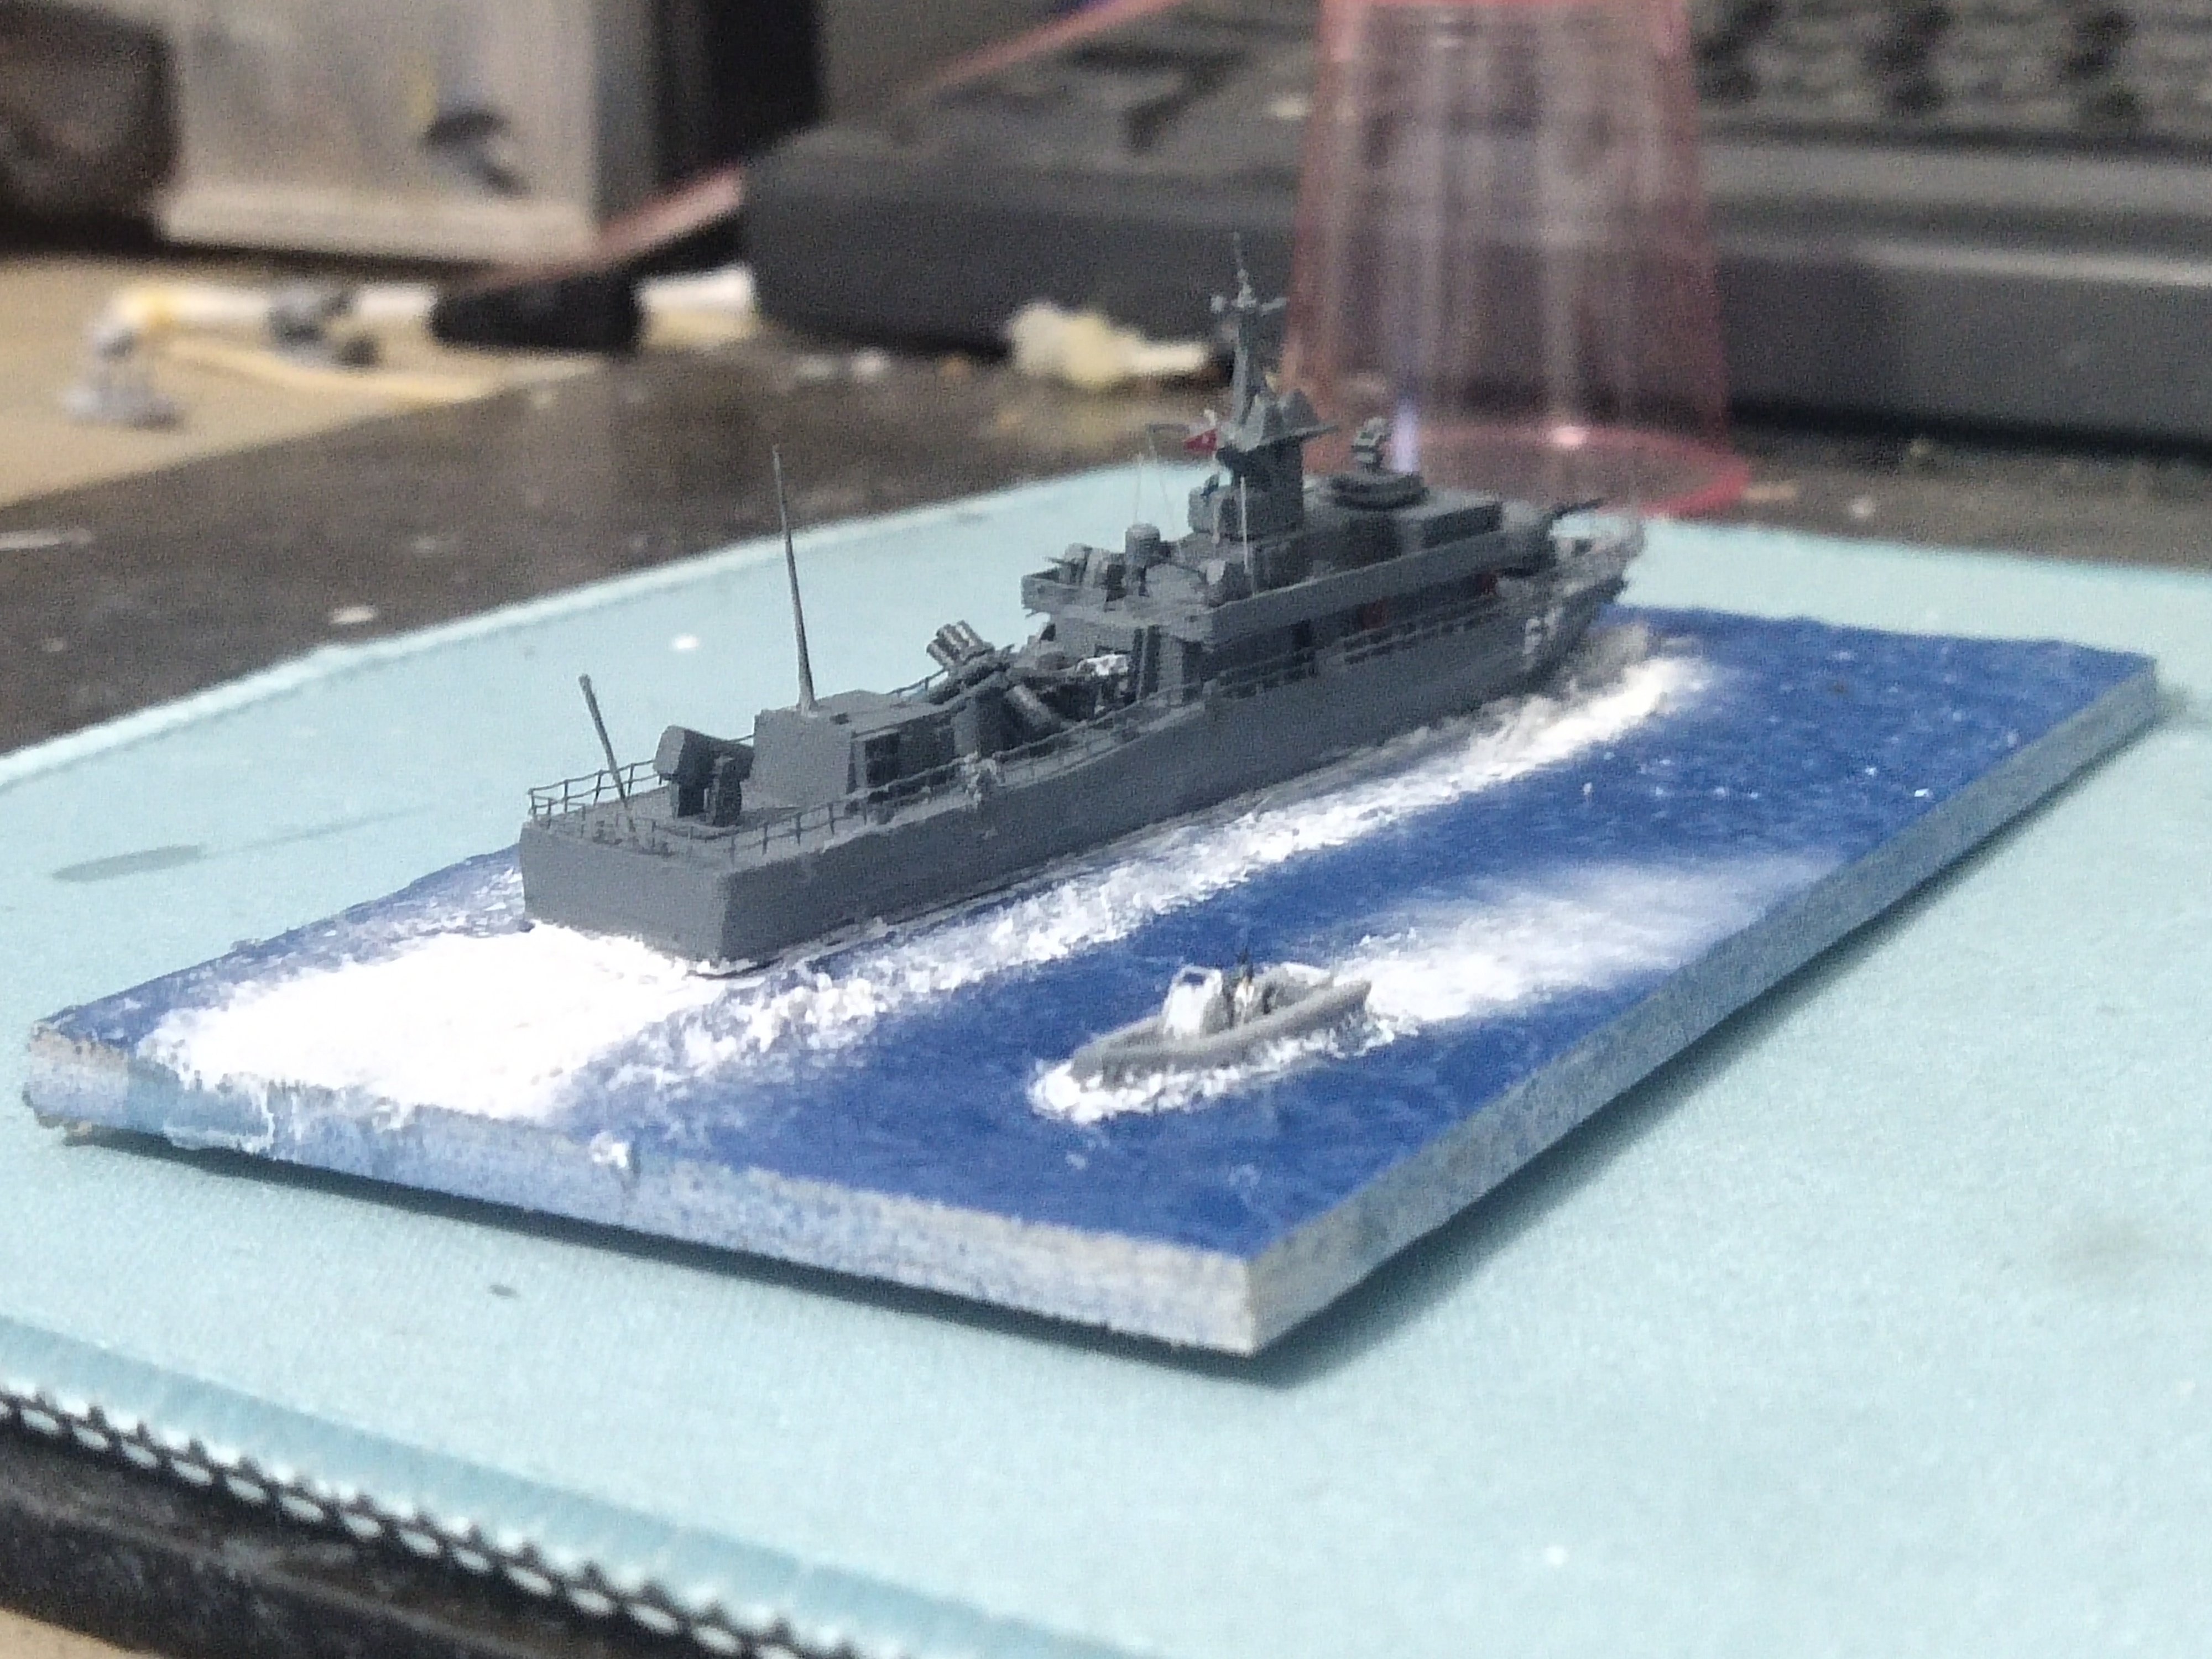
Very good result for the first time The best snow paste is the one you can make at home, because you can adjust the proportions of ingredients mixed, thus you can have a smooth form up to a coarse texture for a more foamy seascape
-
From the early stages of formimg waves this looked to be a promising project. Certainly gesso isn't foamy enough for a rough sea display. Especially in 1/350. Cotton and foam worked for me up to a point but I'm not talented enough to make extreme creations. Also it is very important to use a gel that won't turn yellowish over time. So I ended up using snow texture while keep looking and researching
-
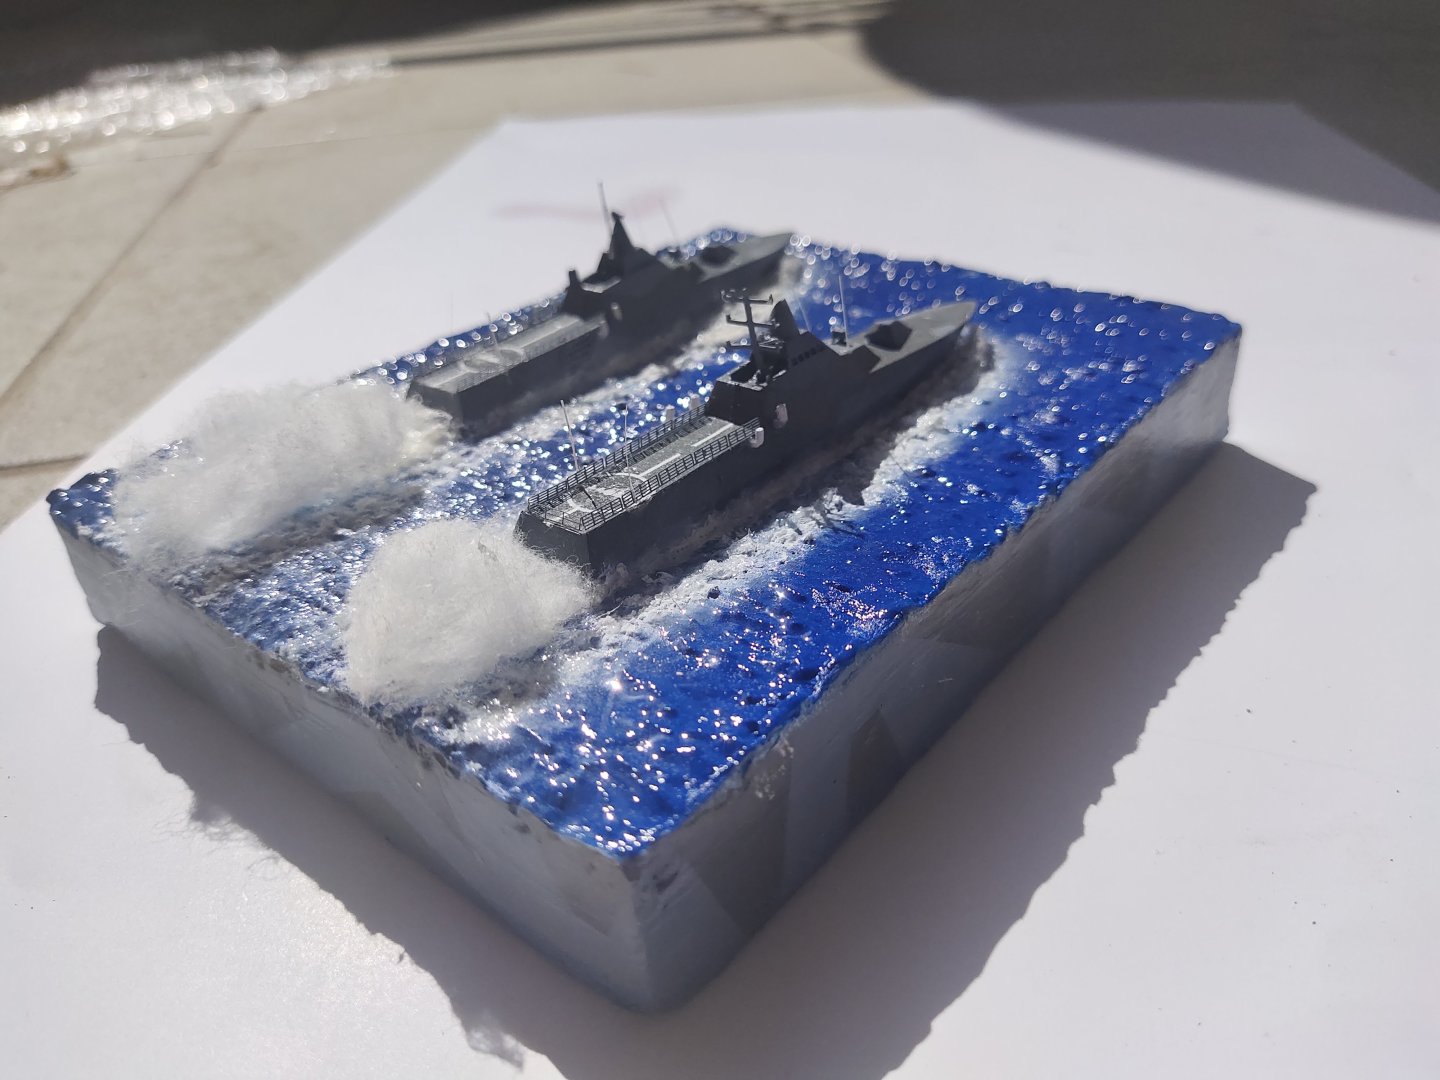
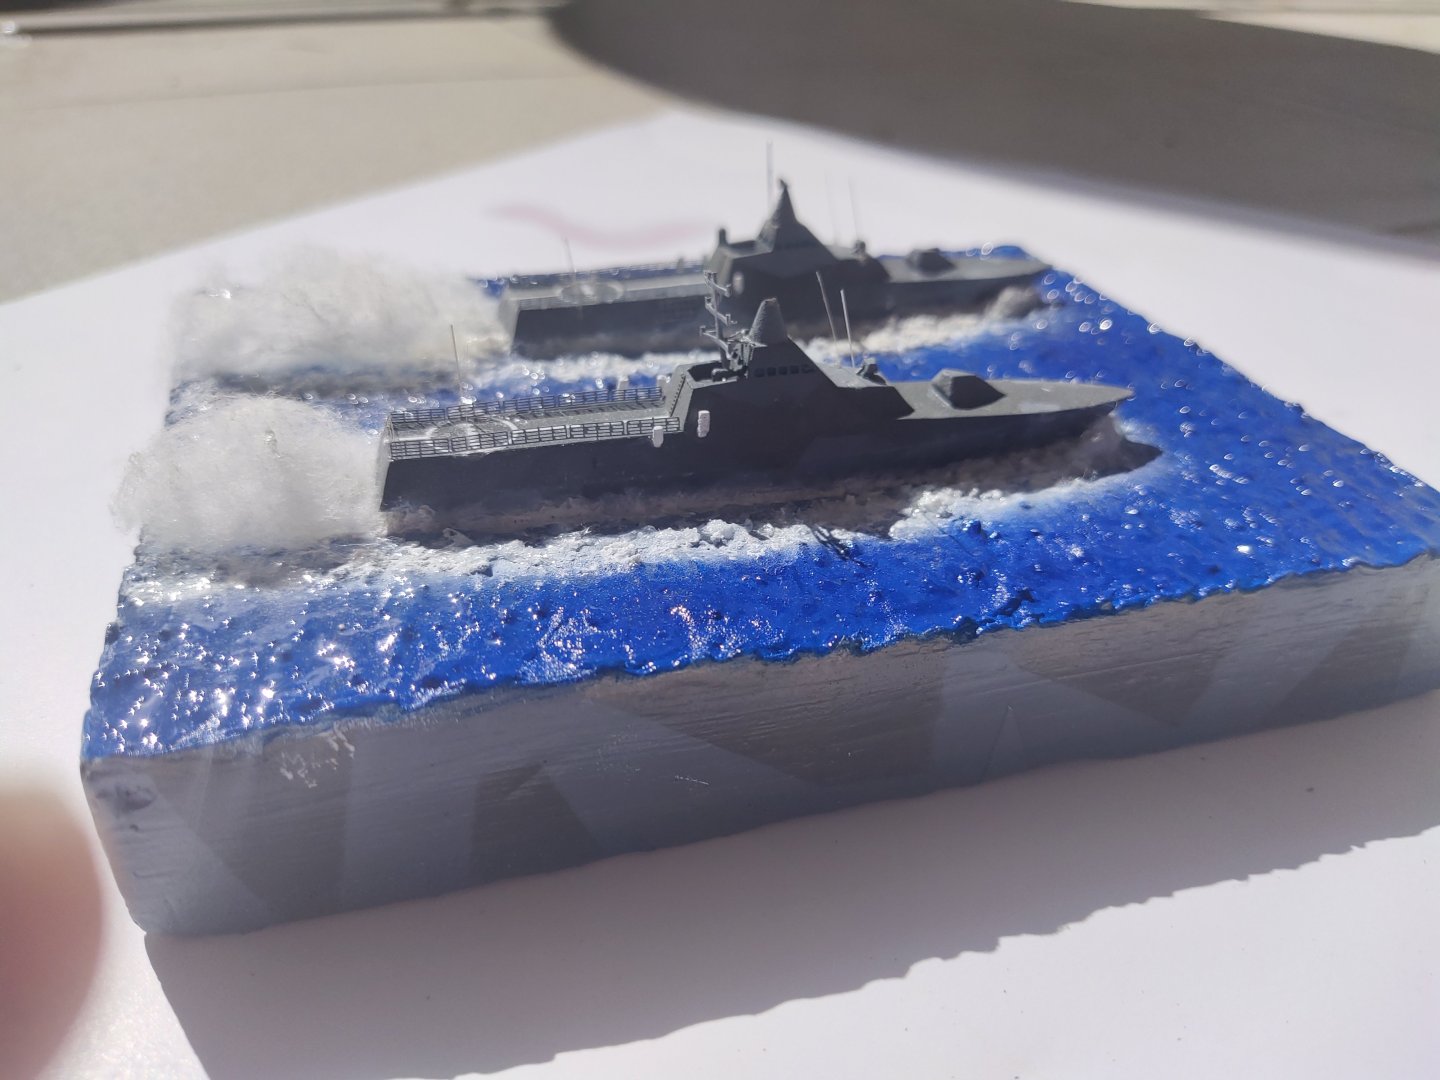
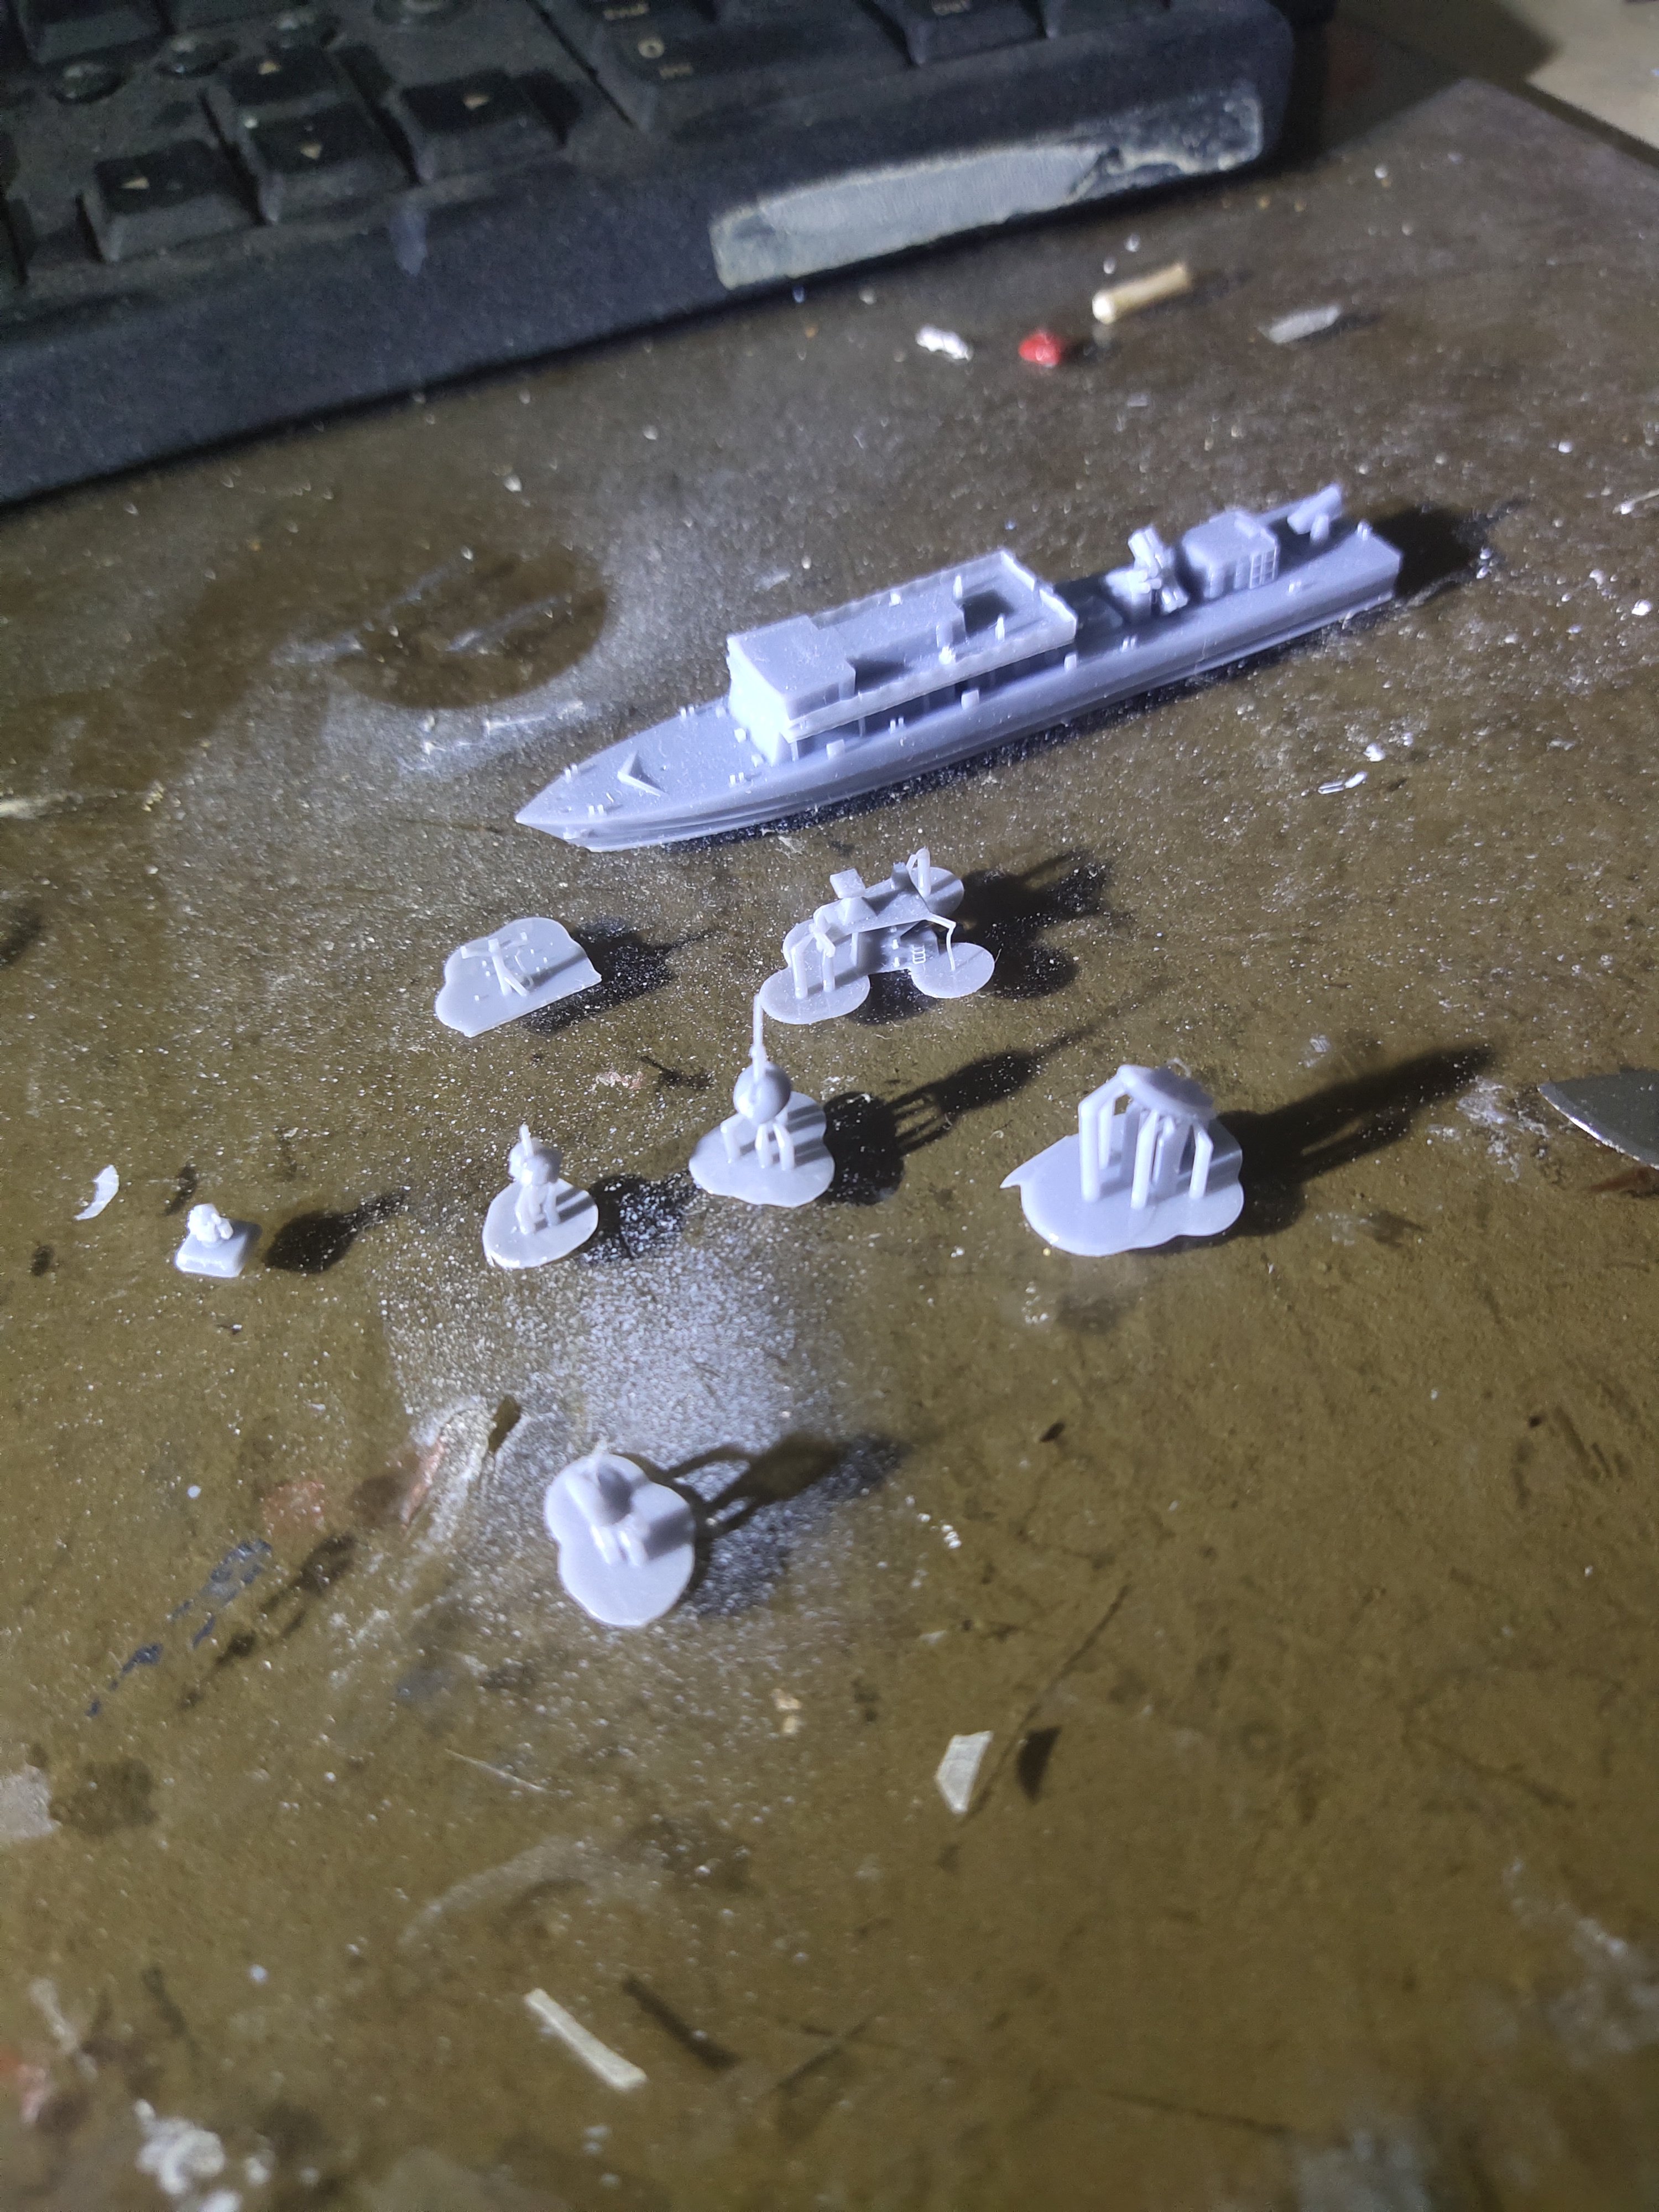
Thanks I'm kinda satisfied too with the detail given Next was the sea scape with the usual way except I use resin thiss time


-
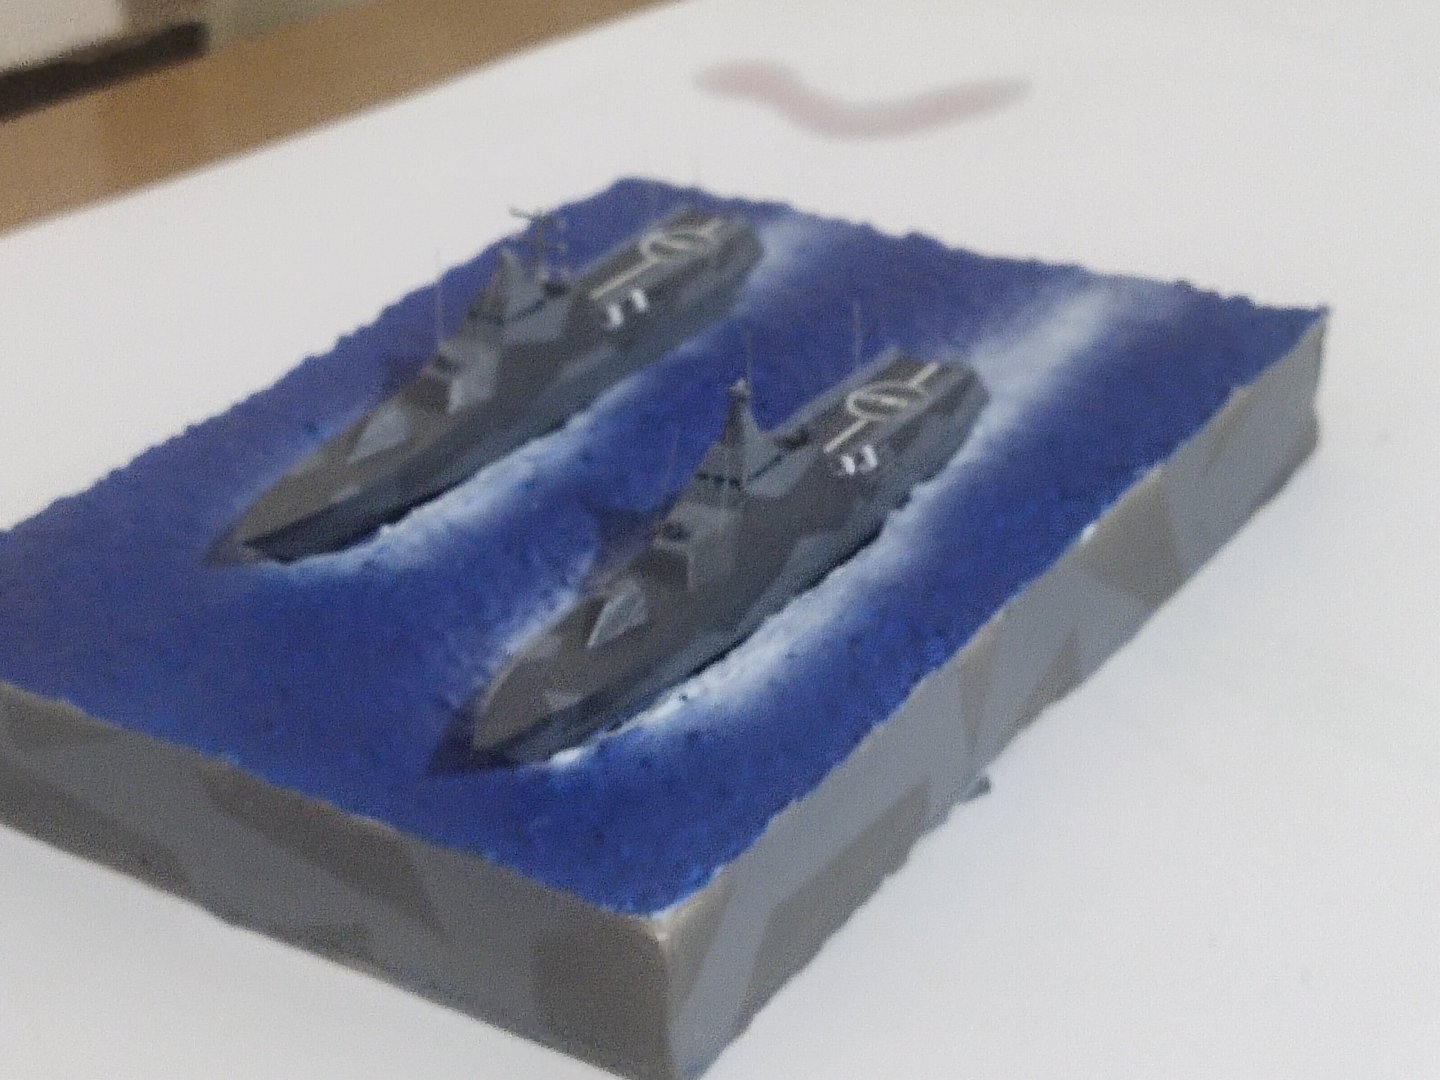
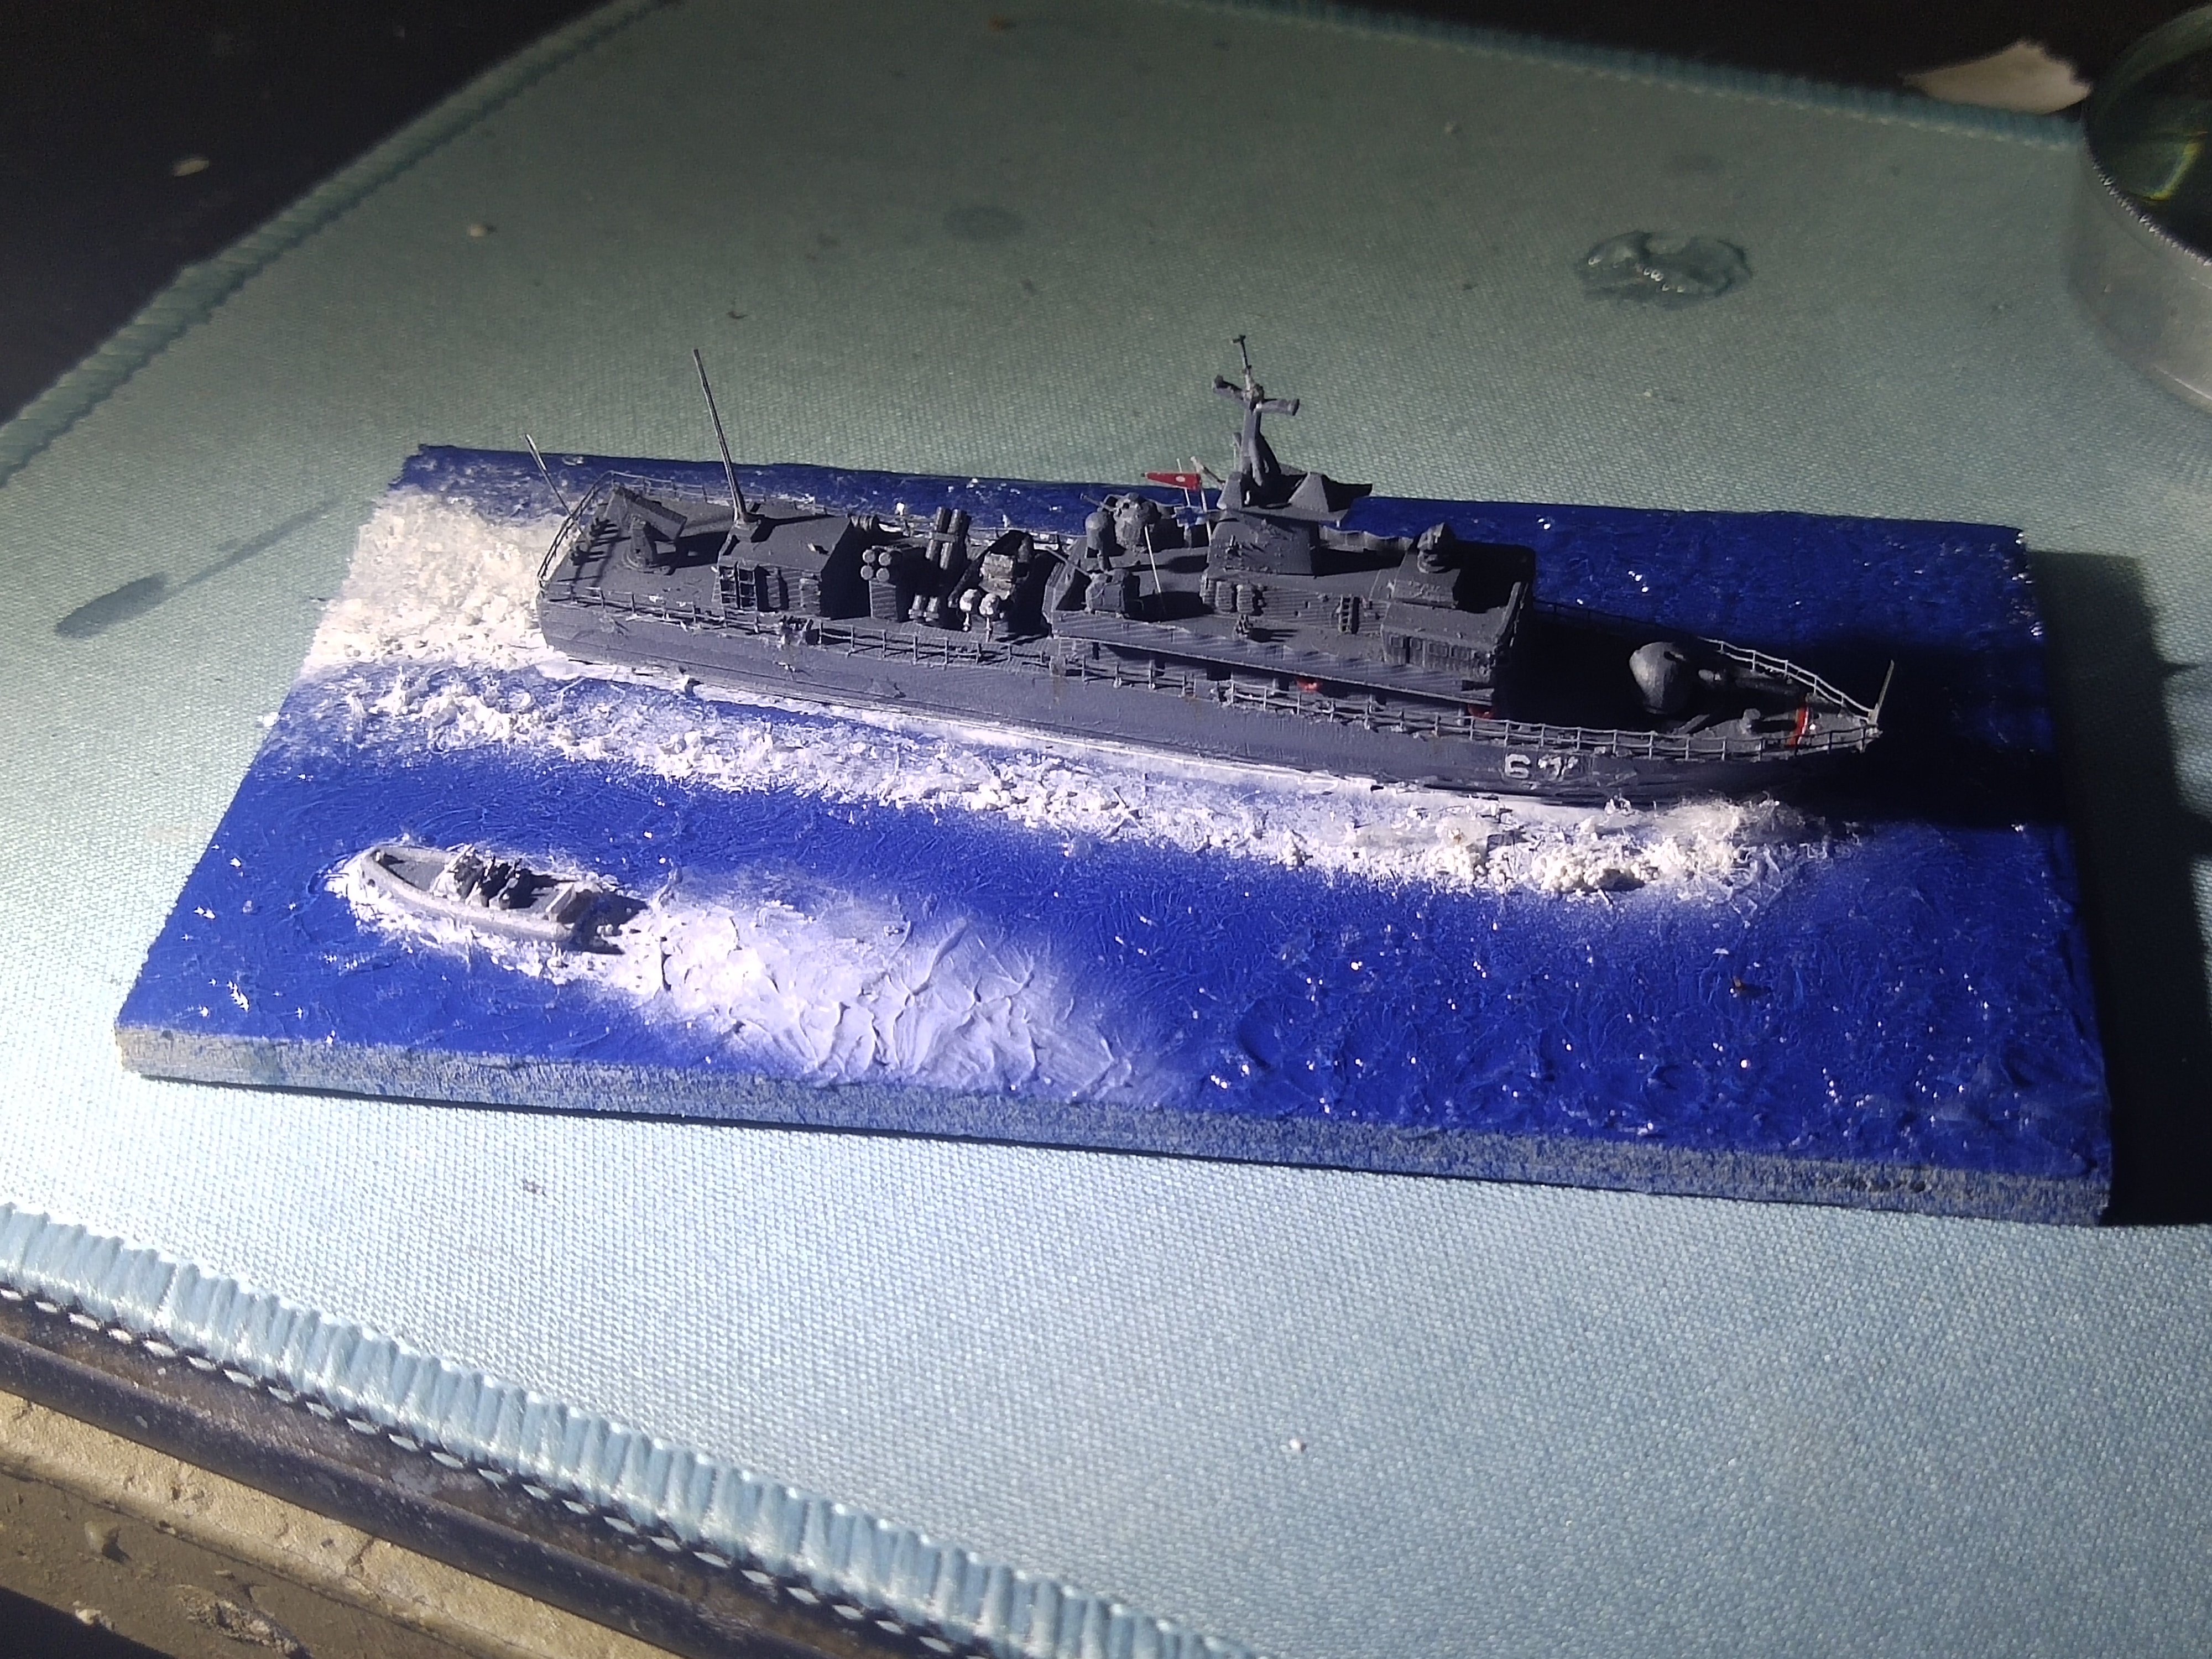
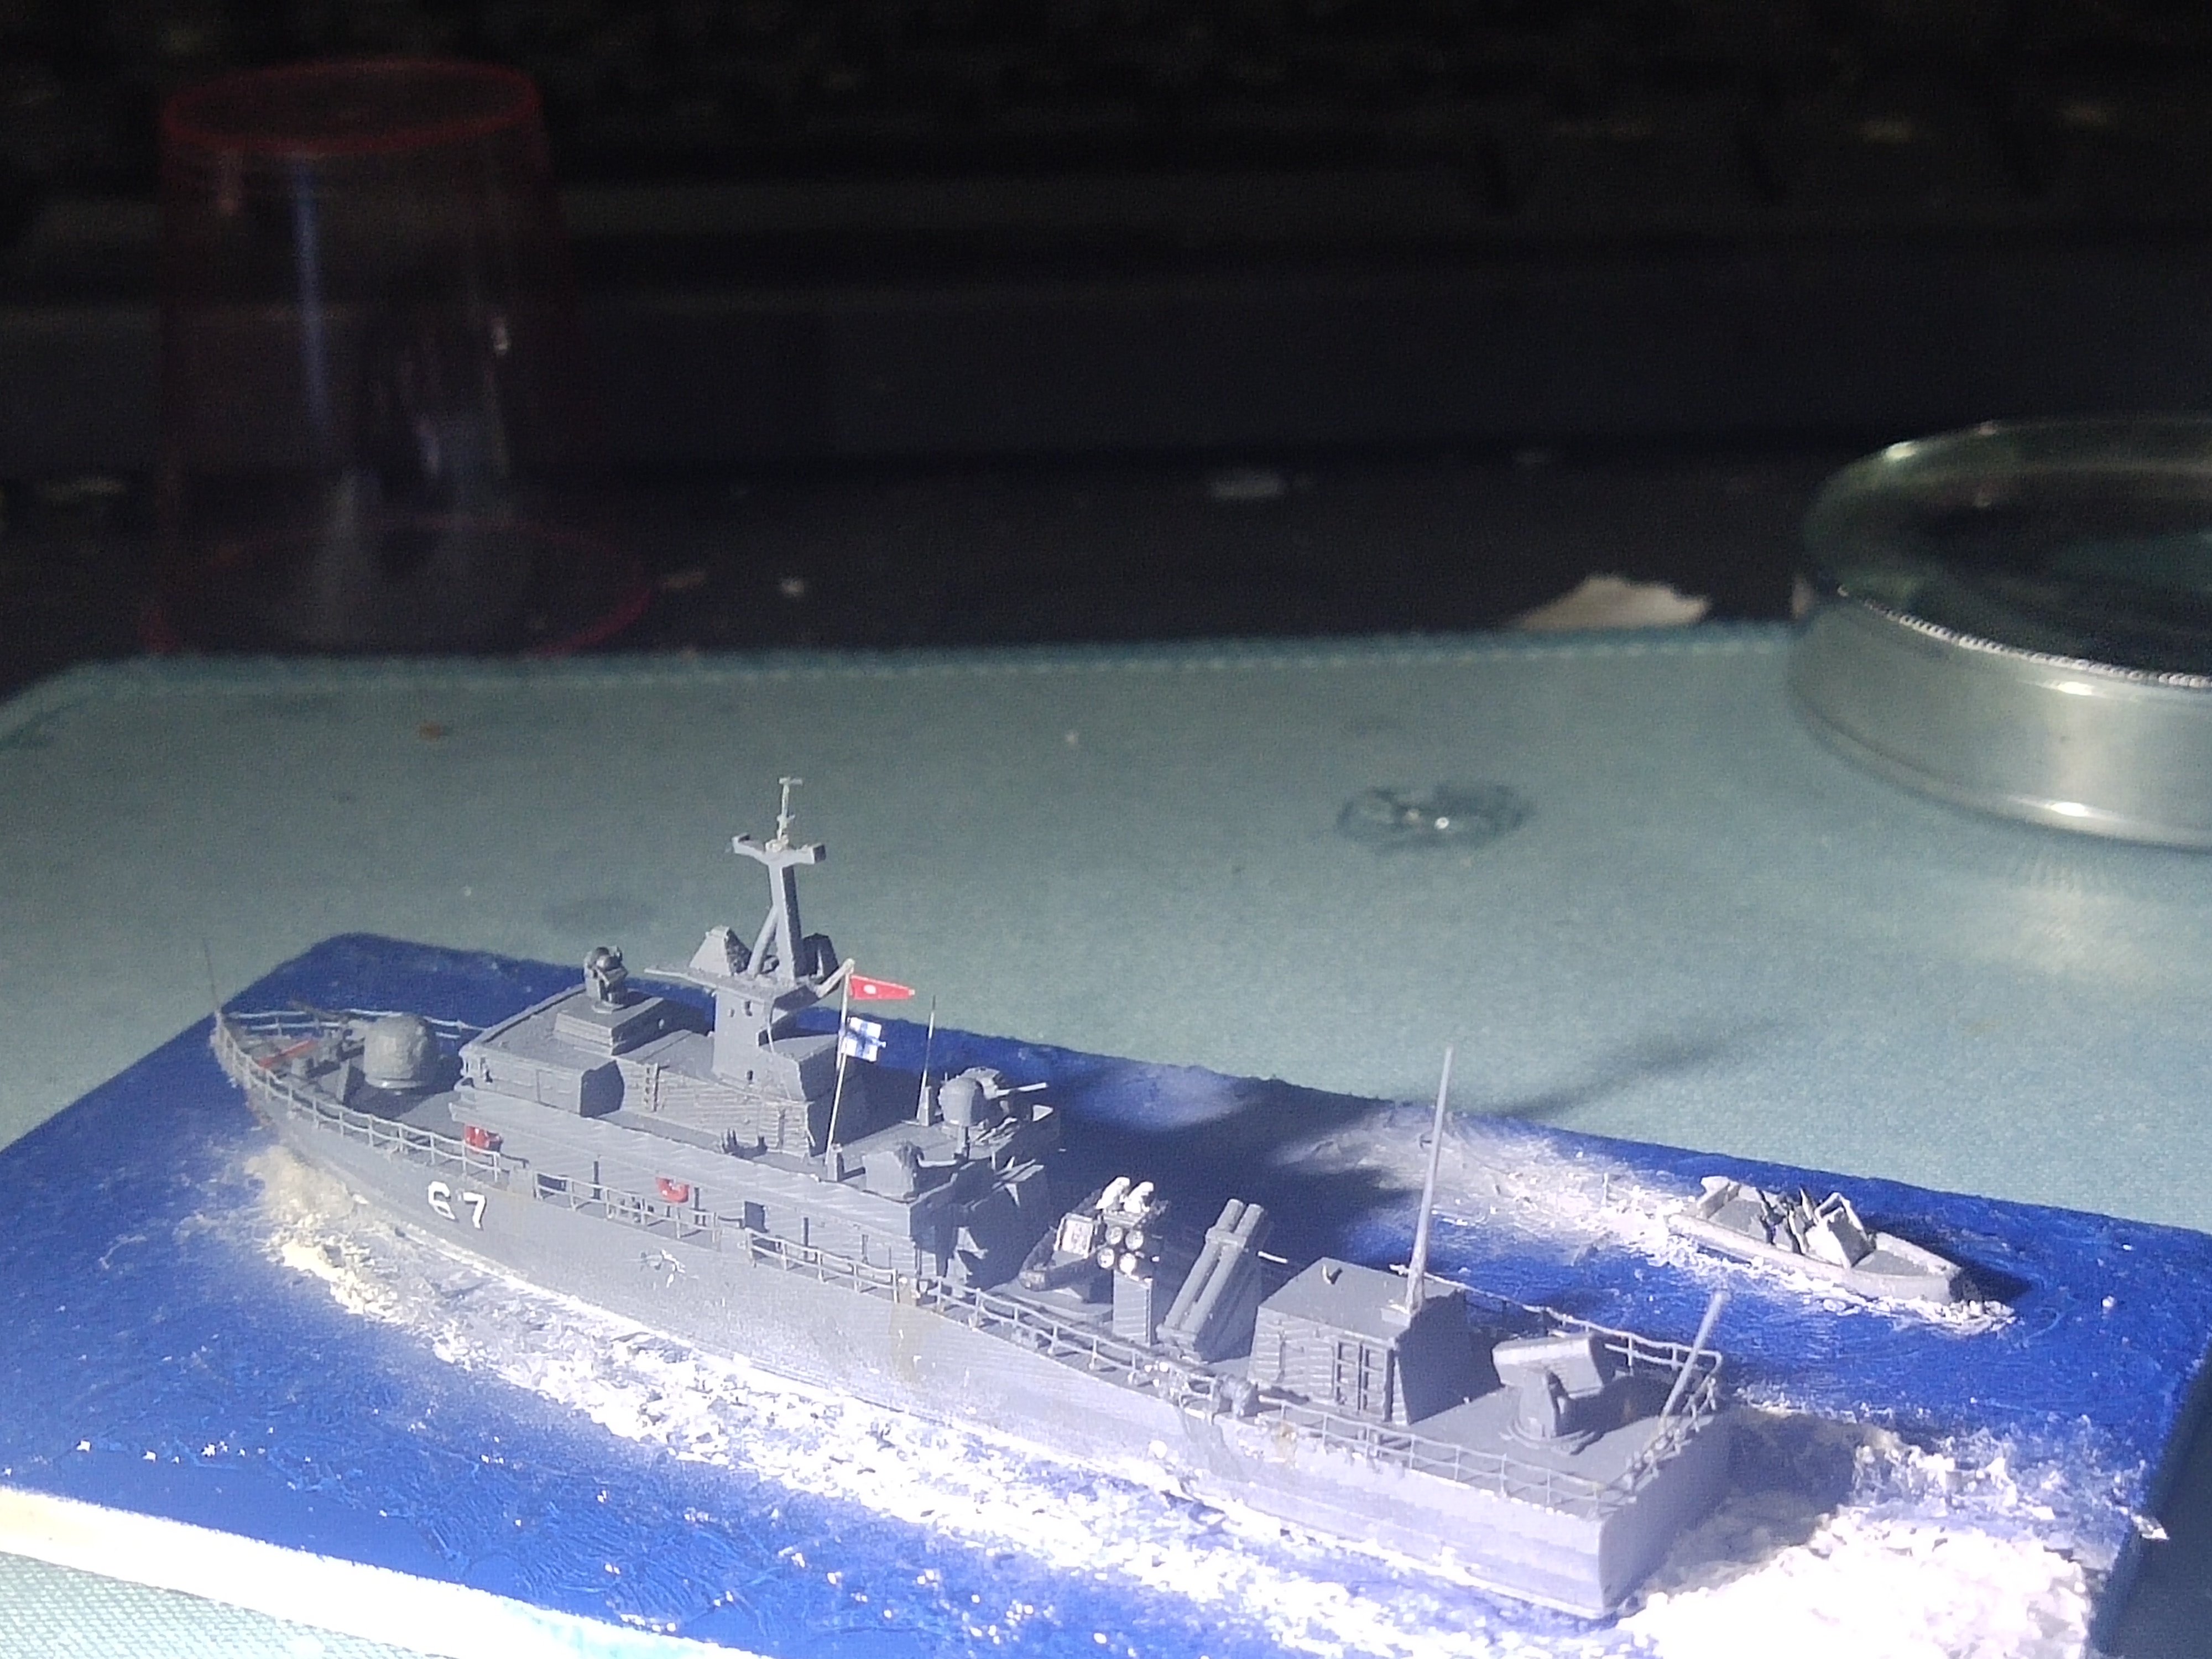
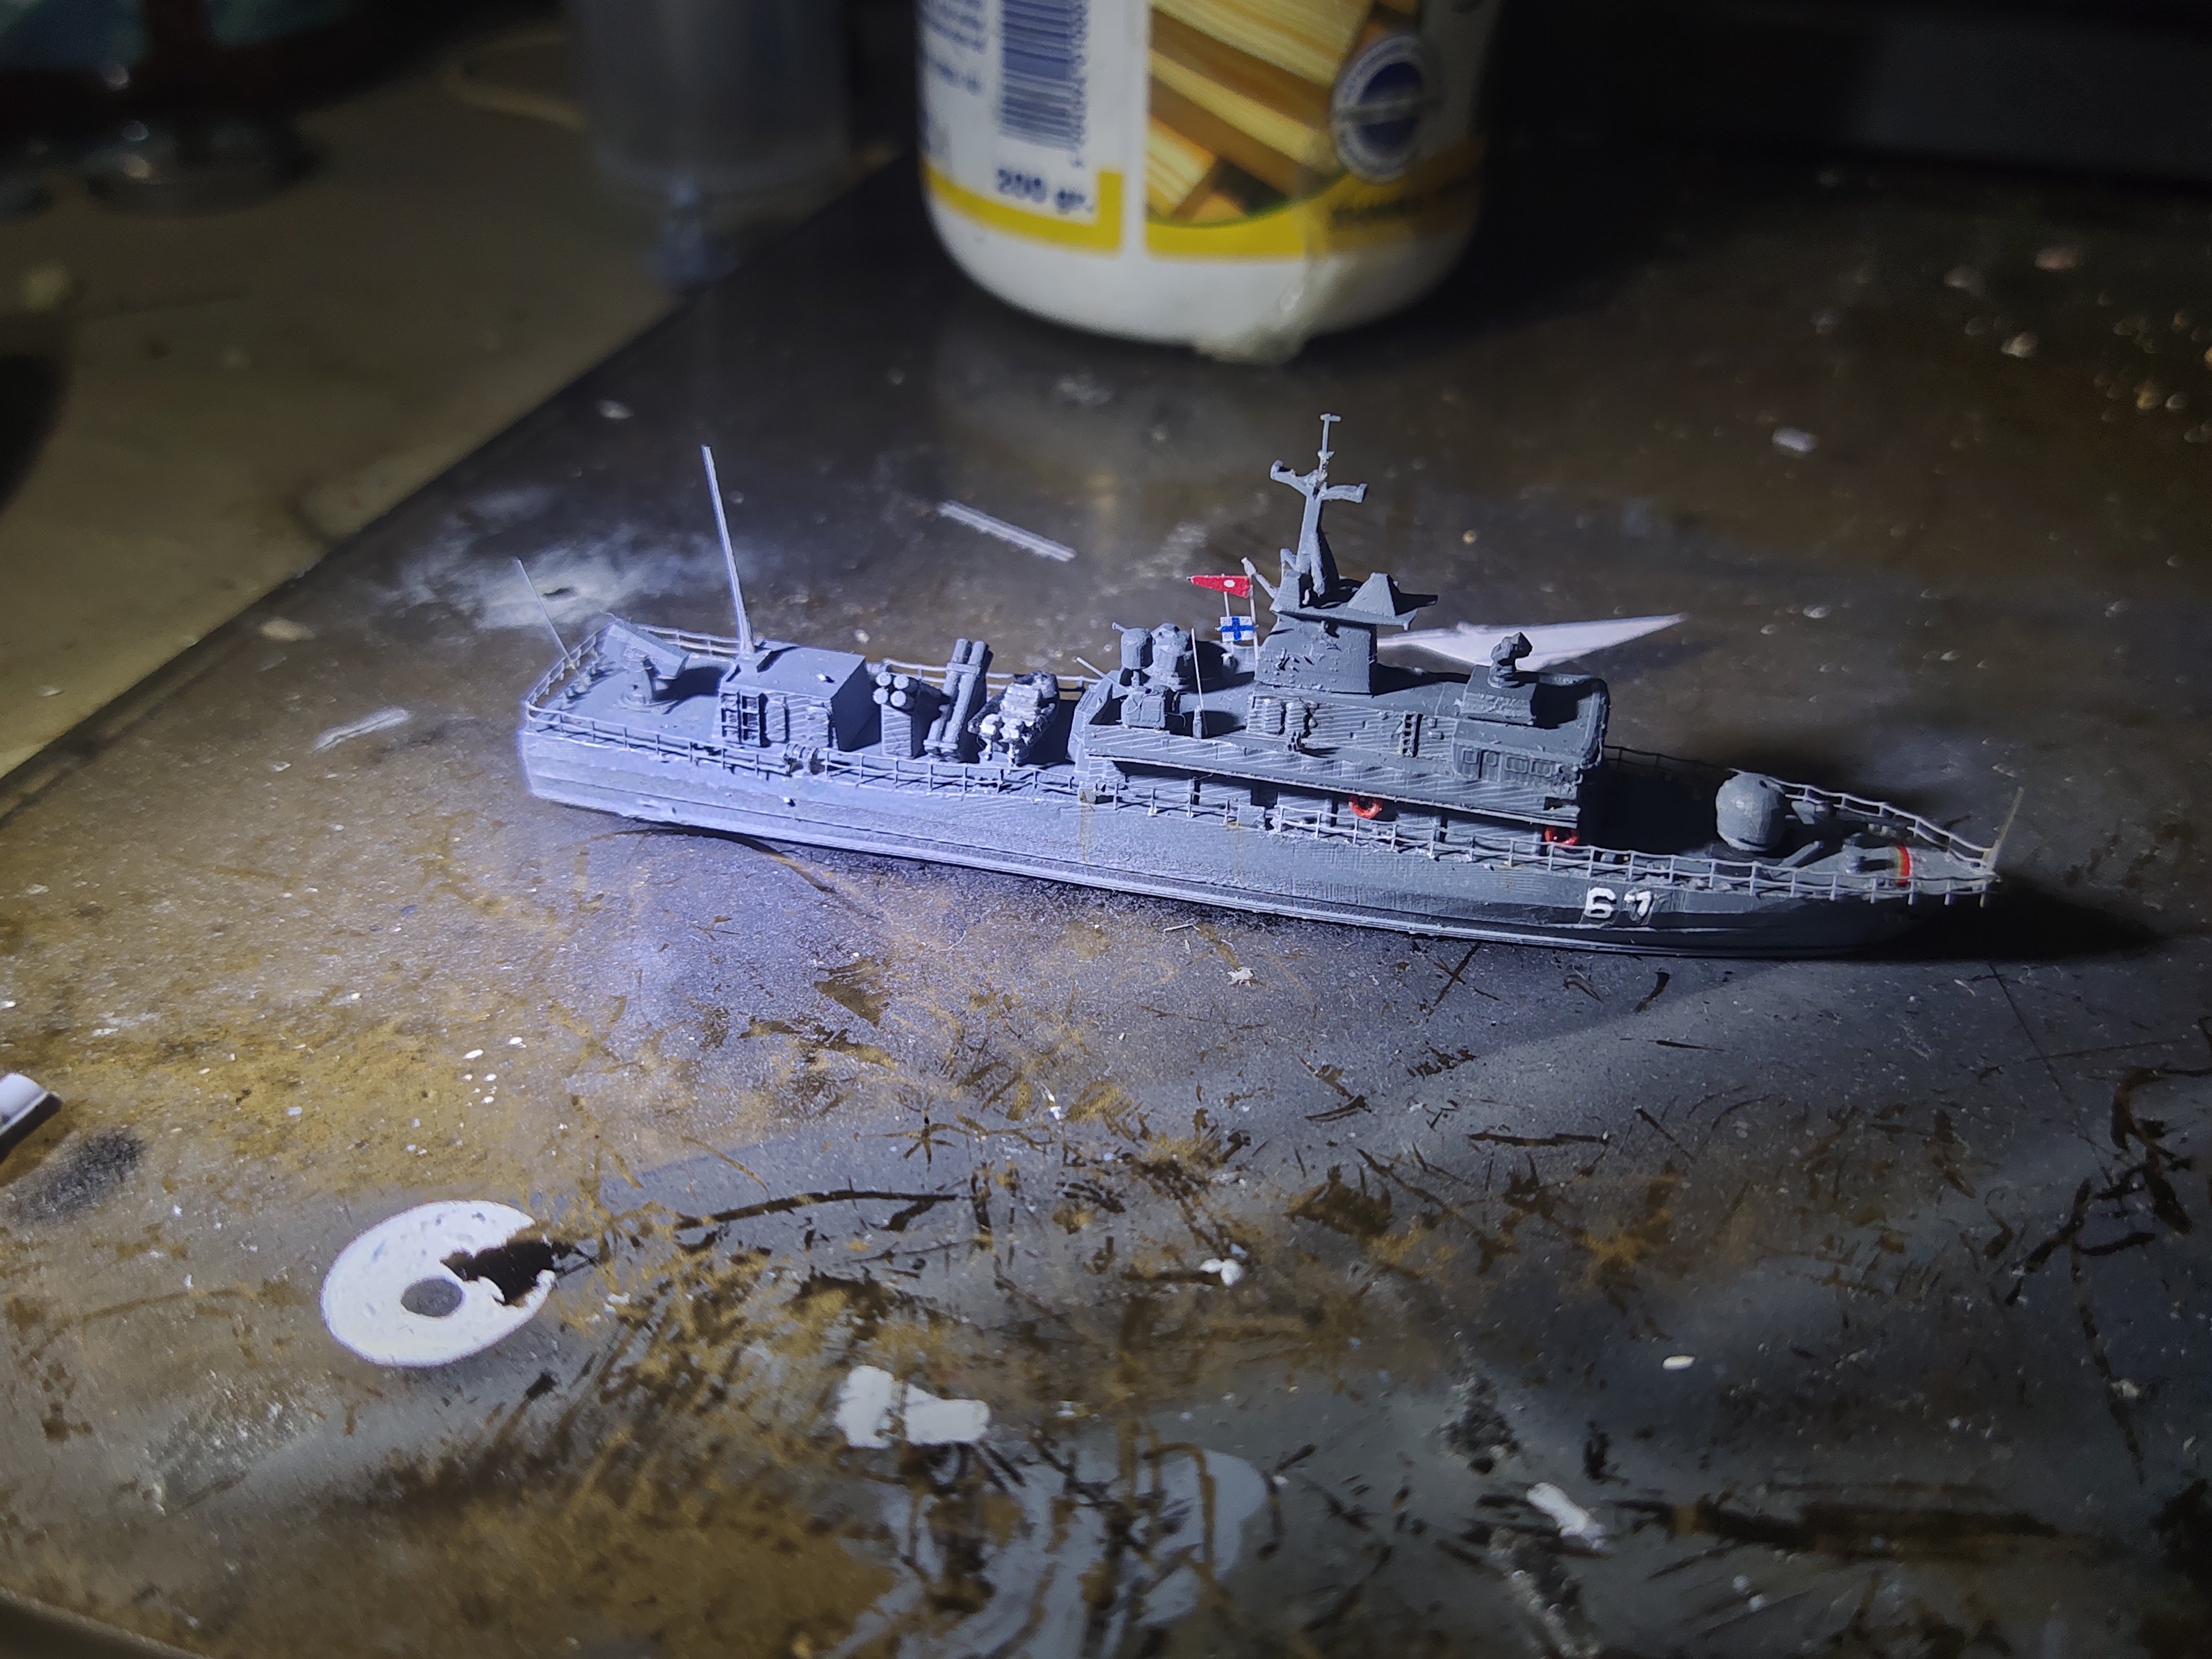
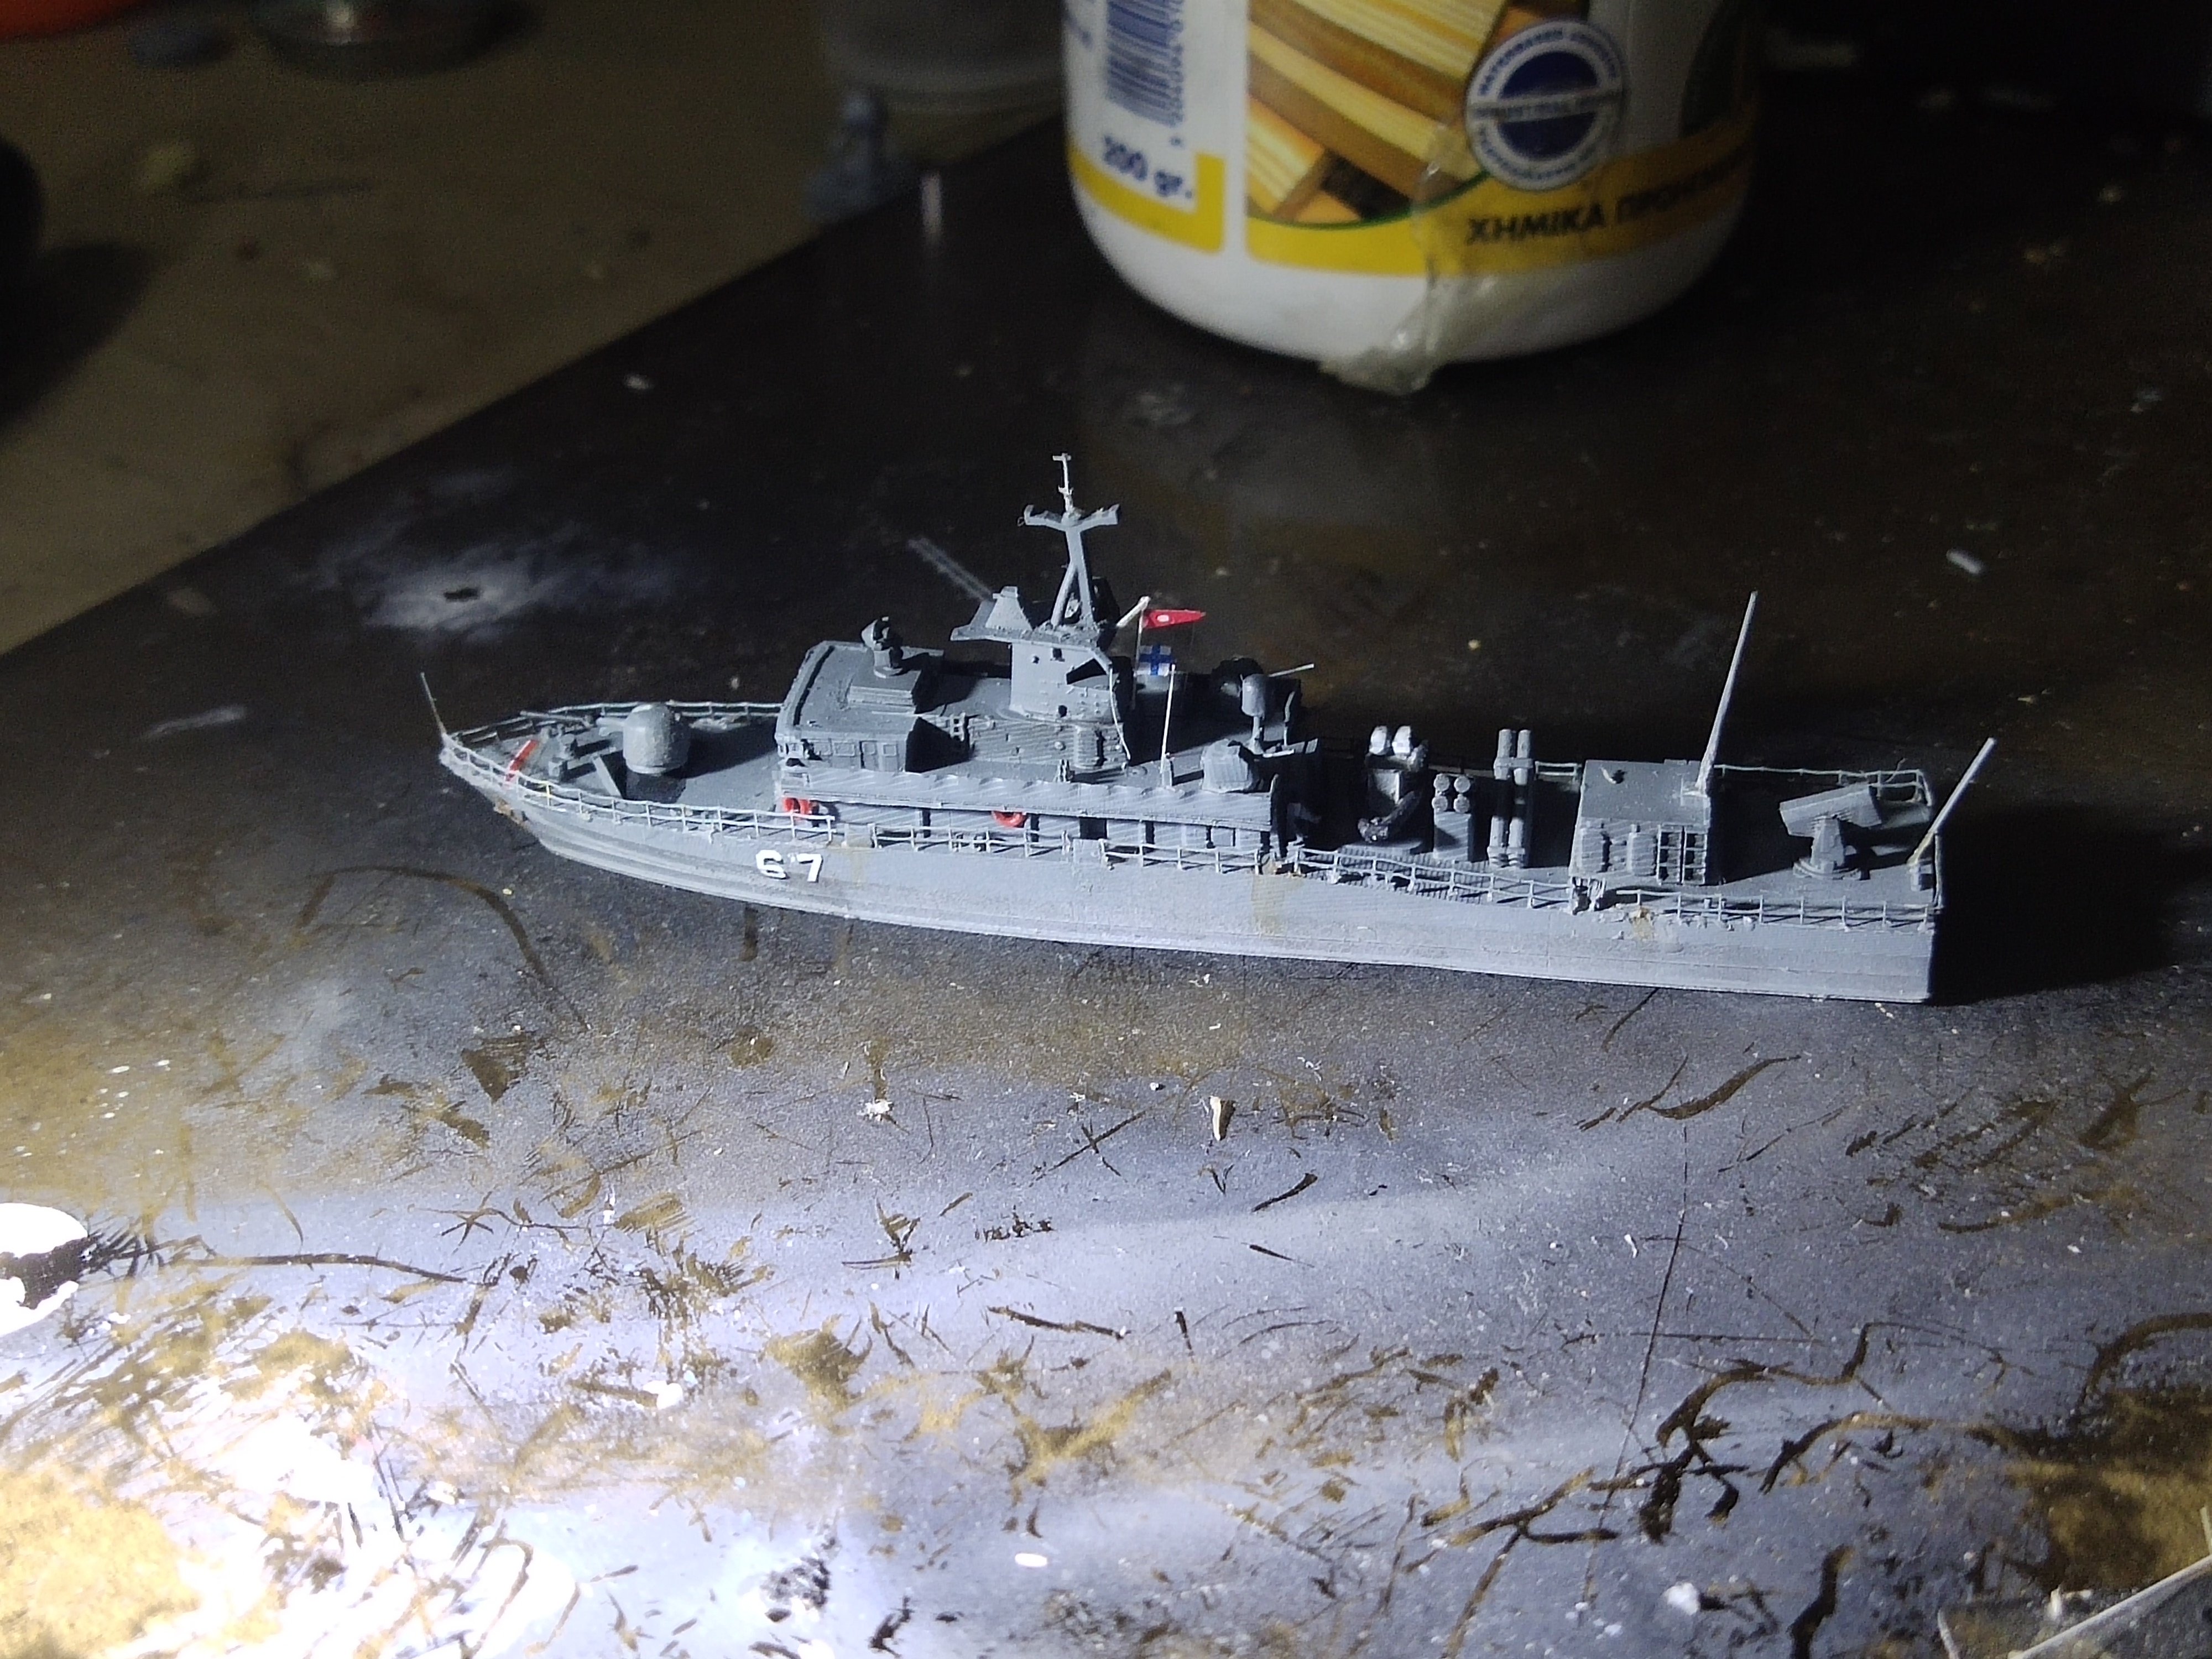
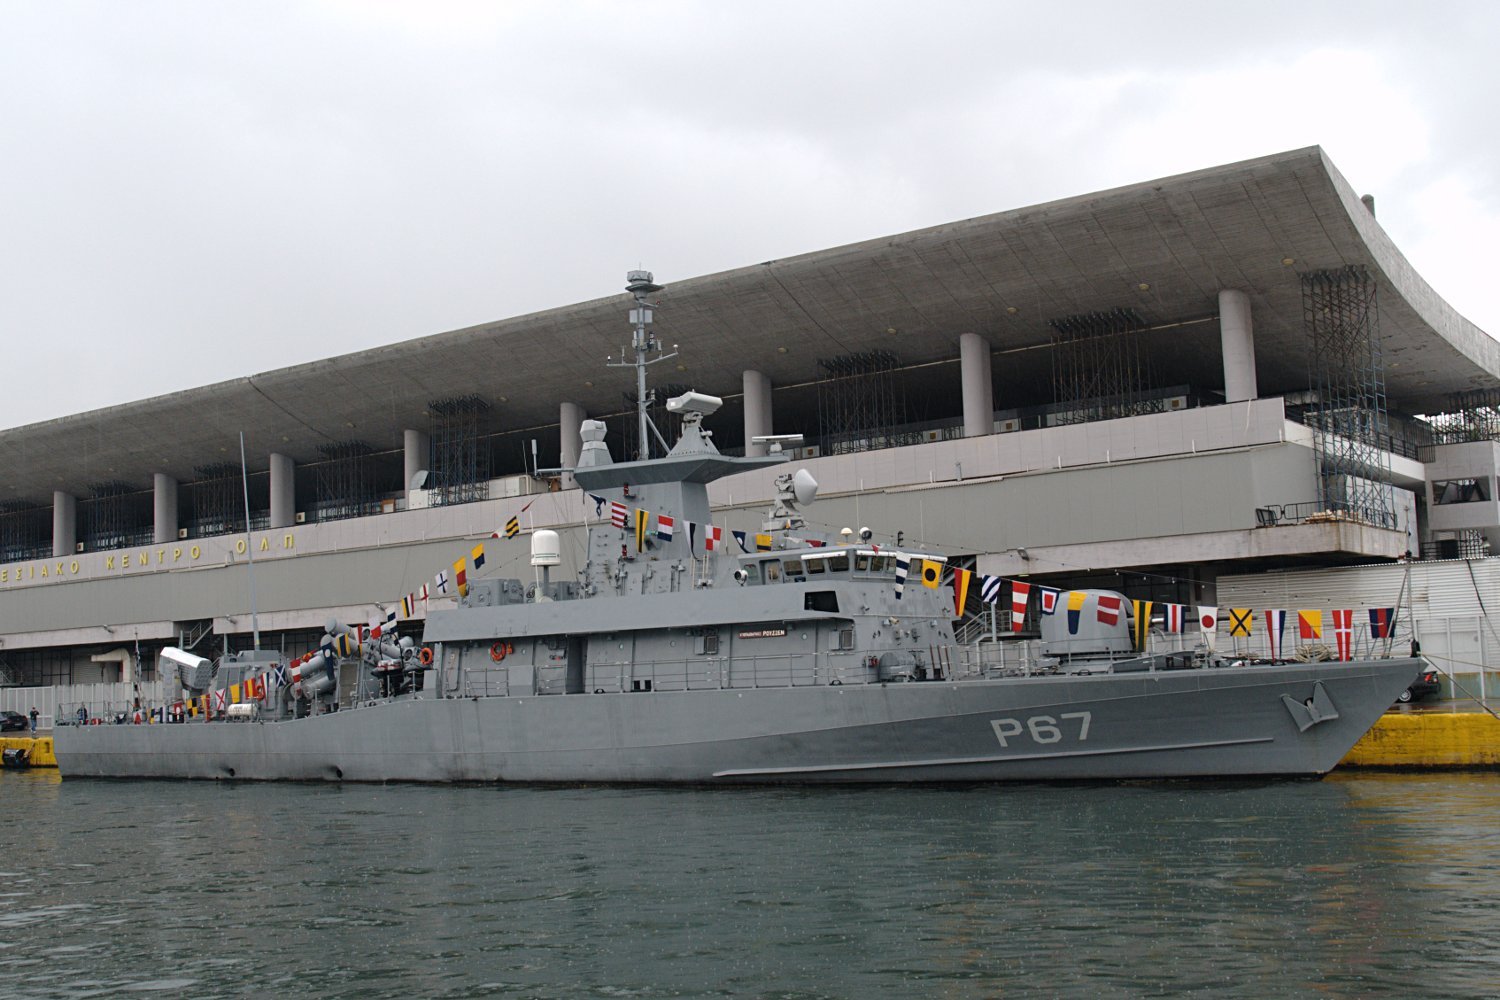
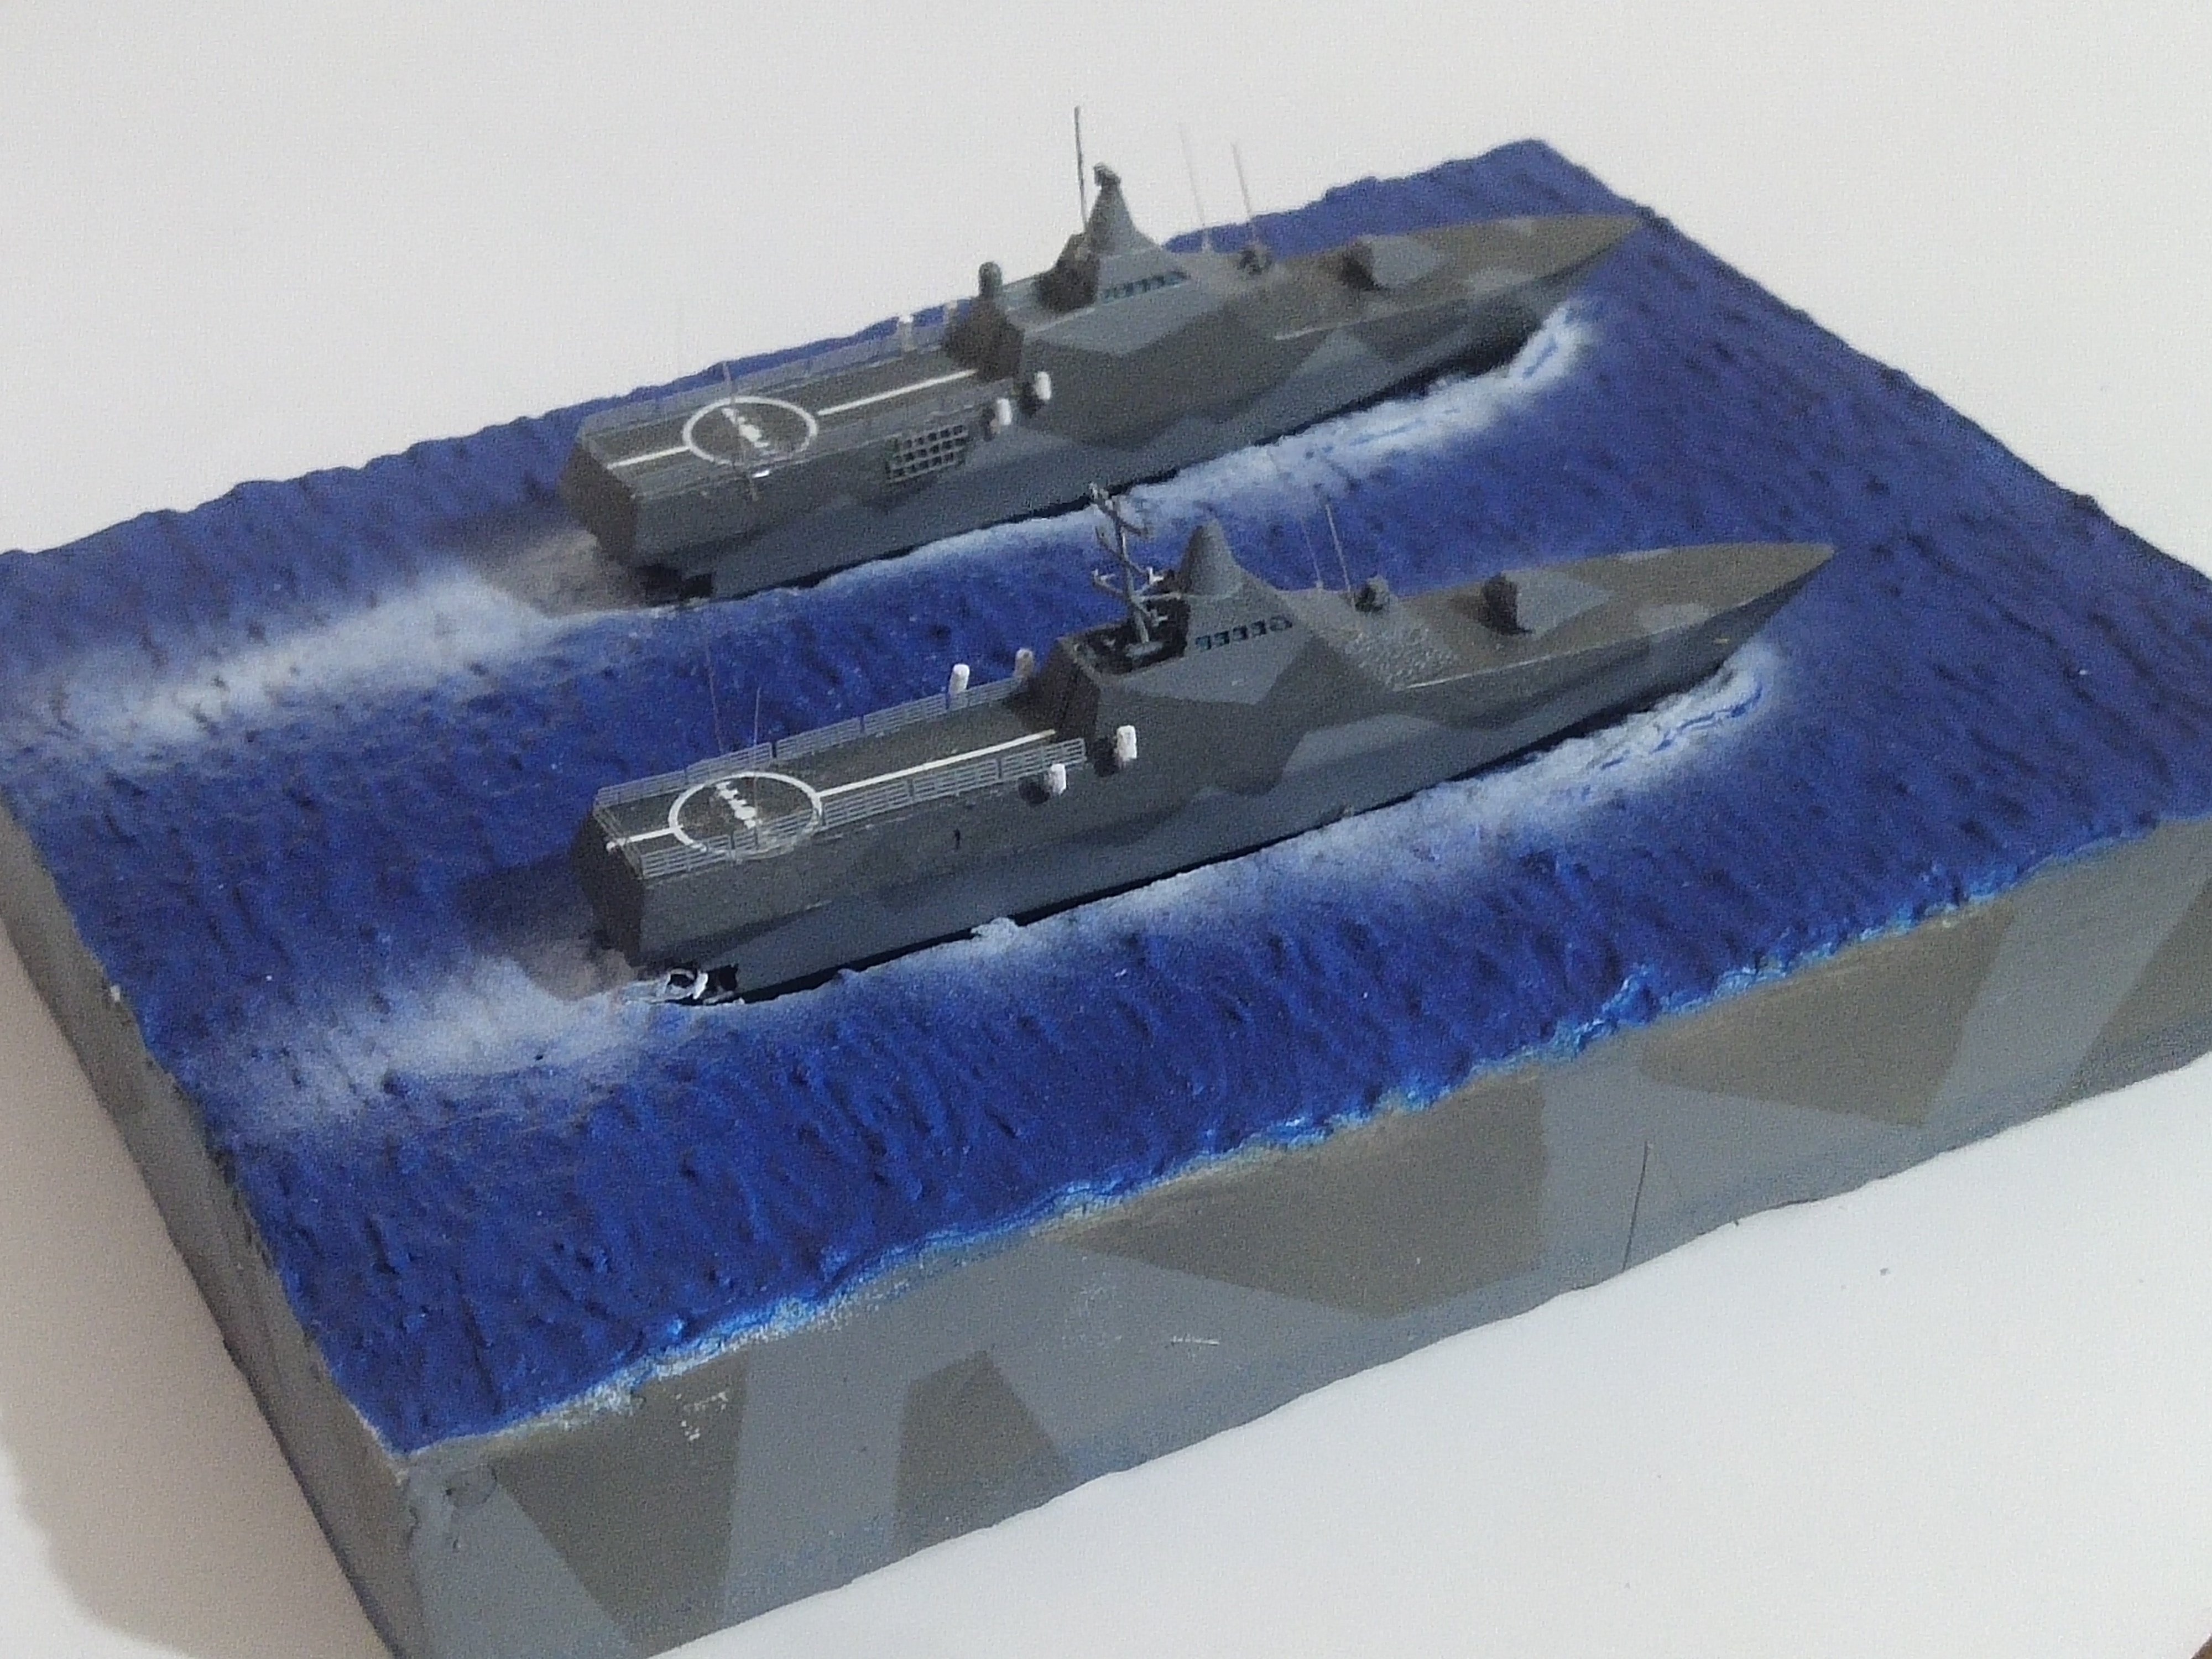
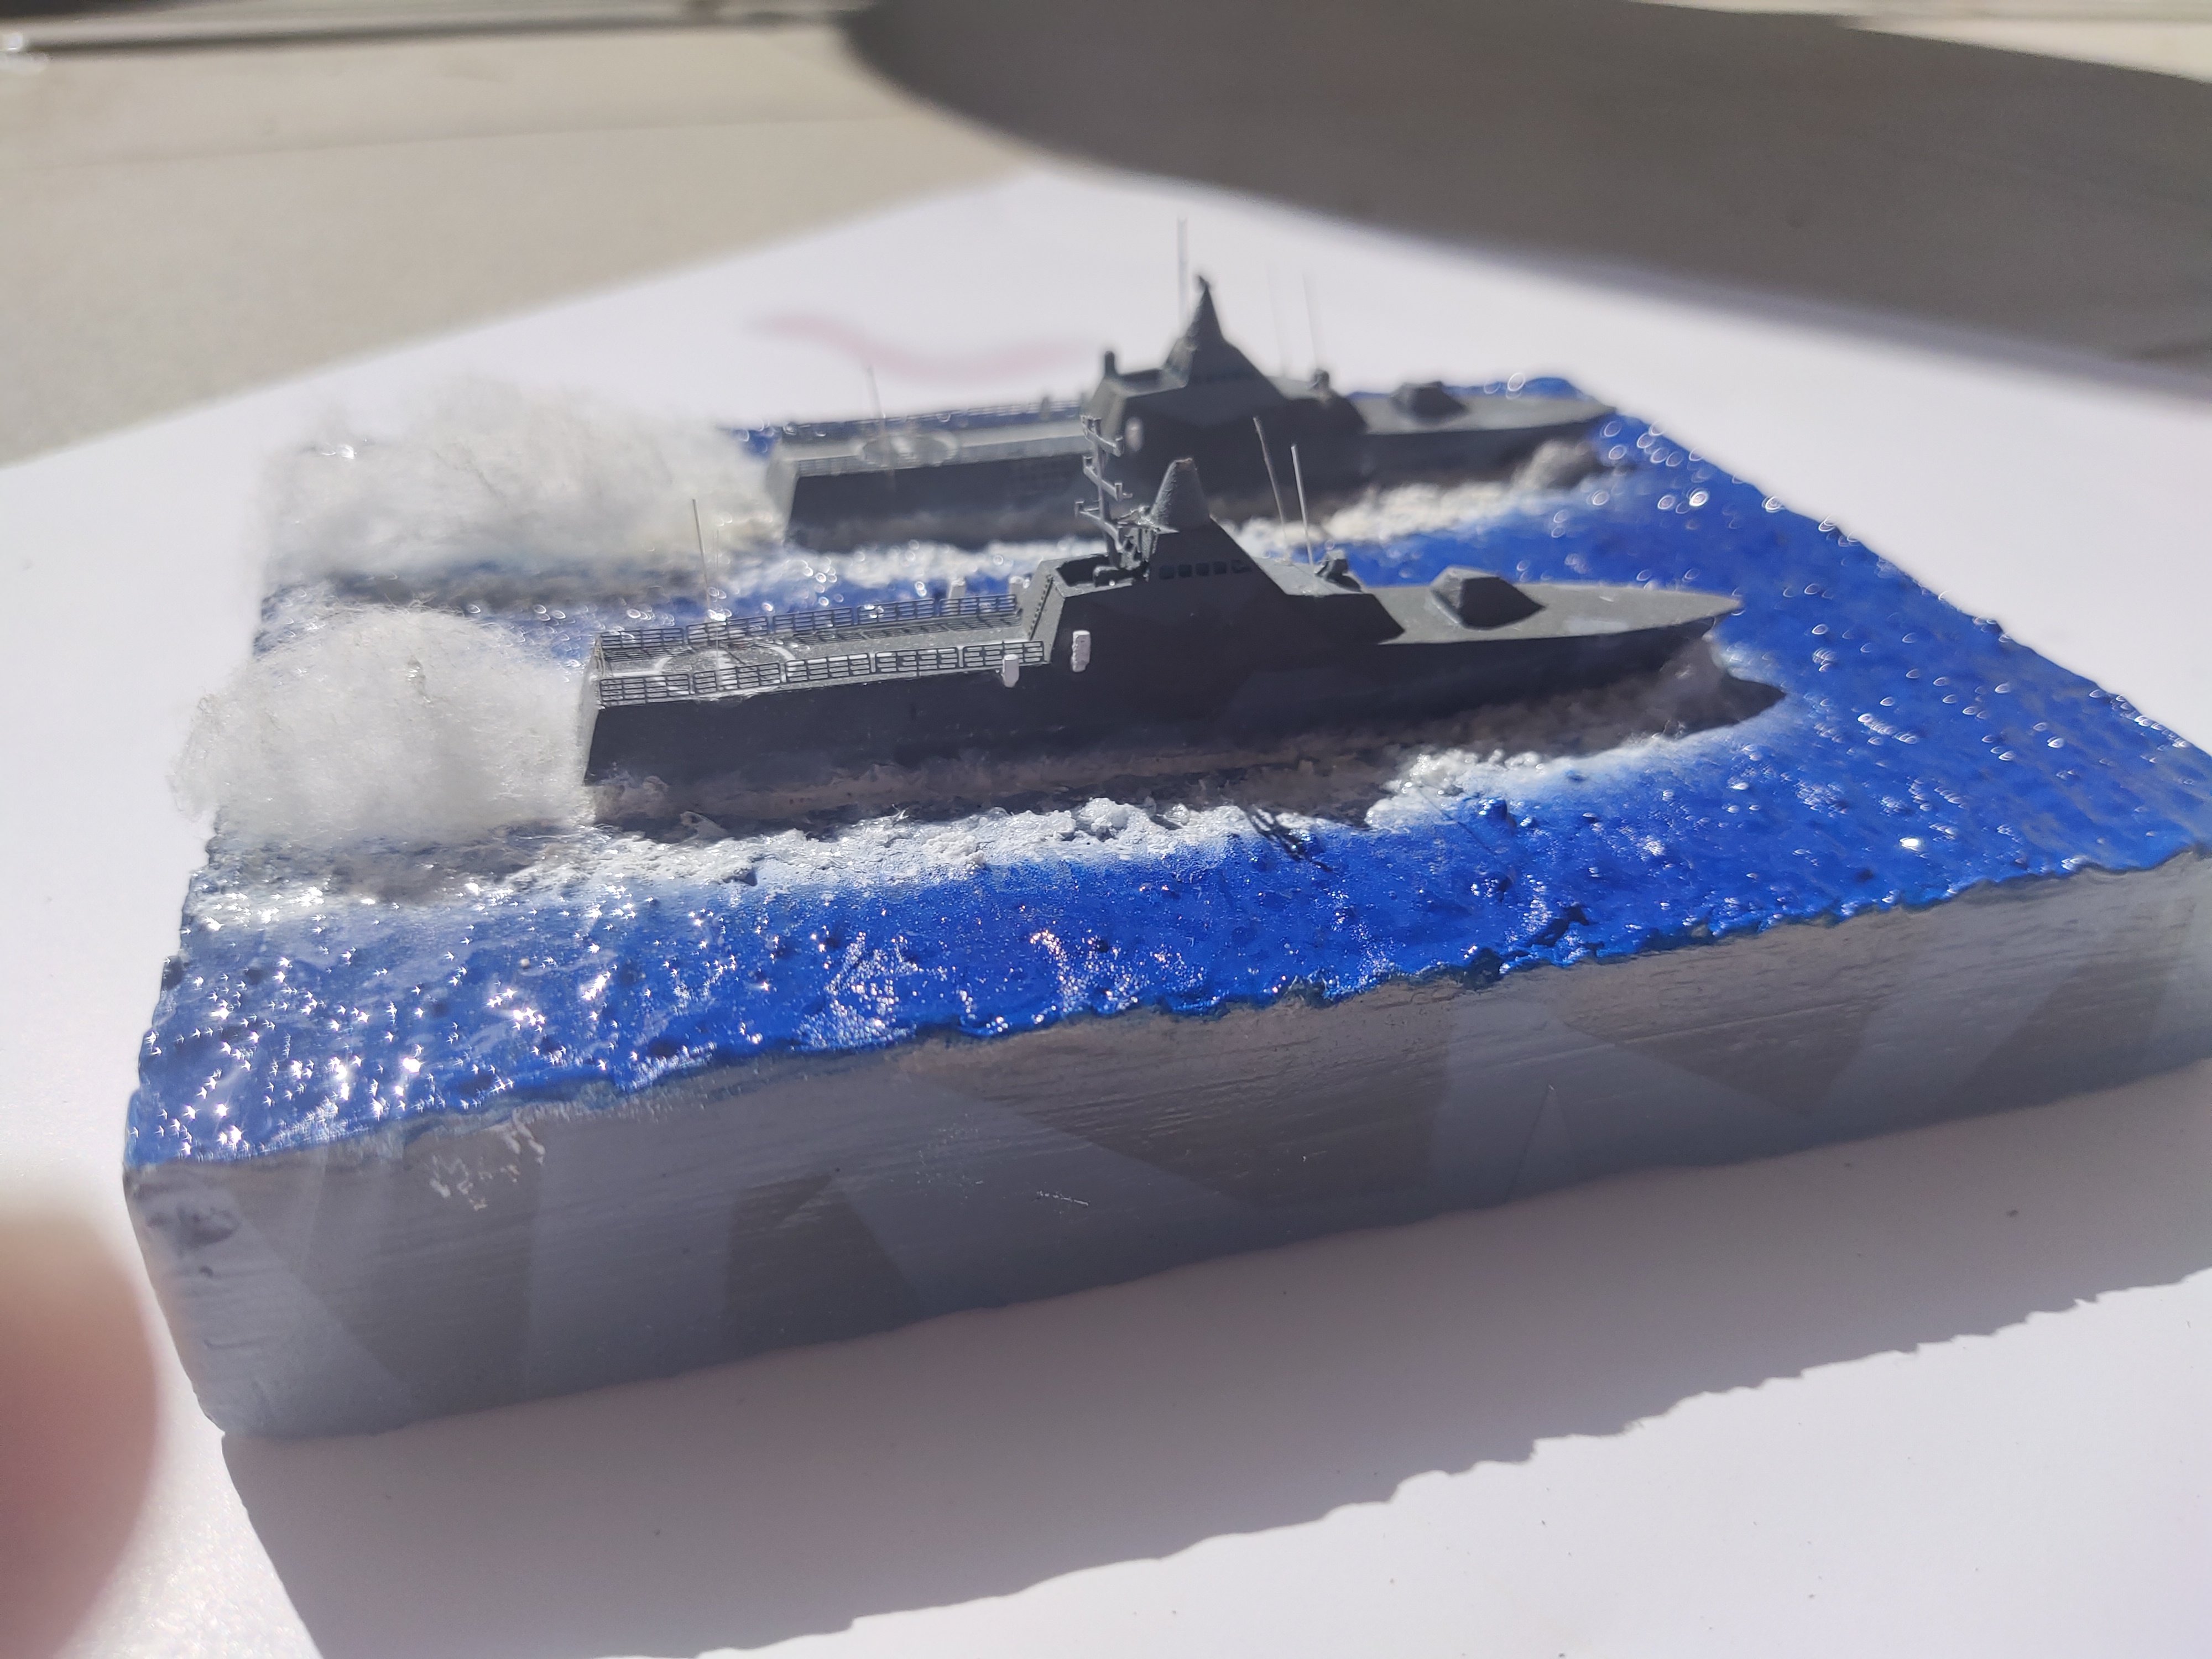
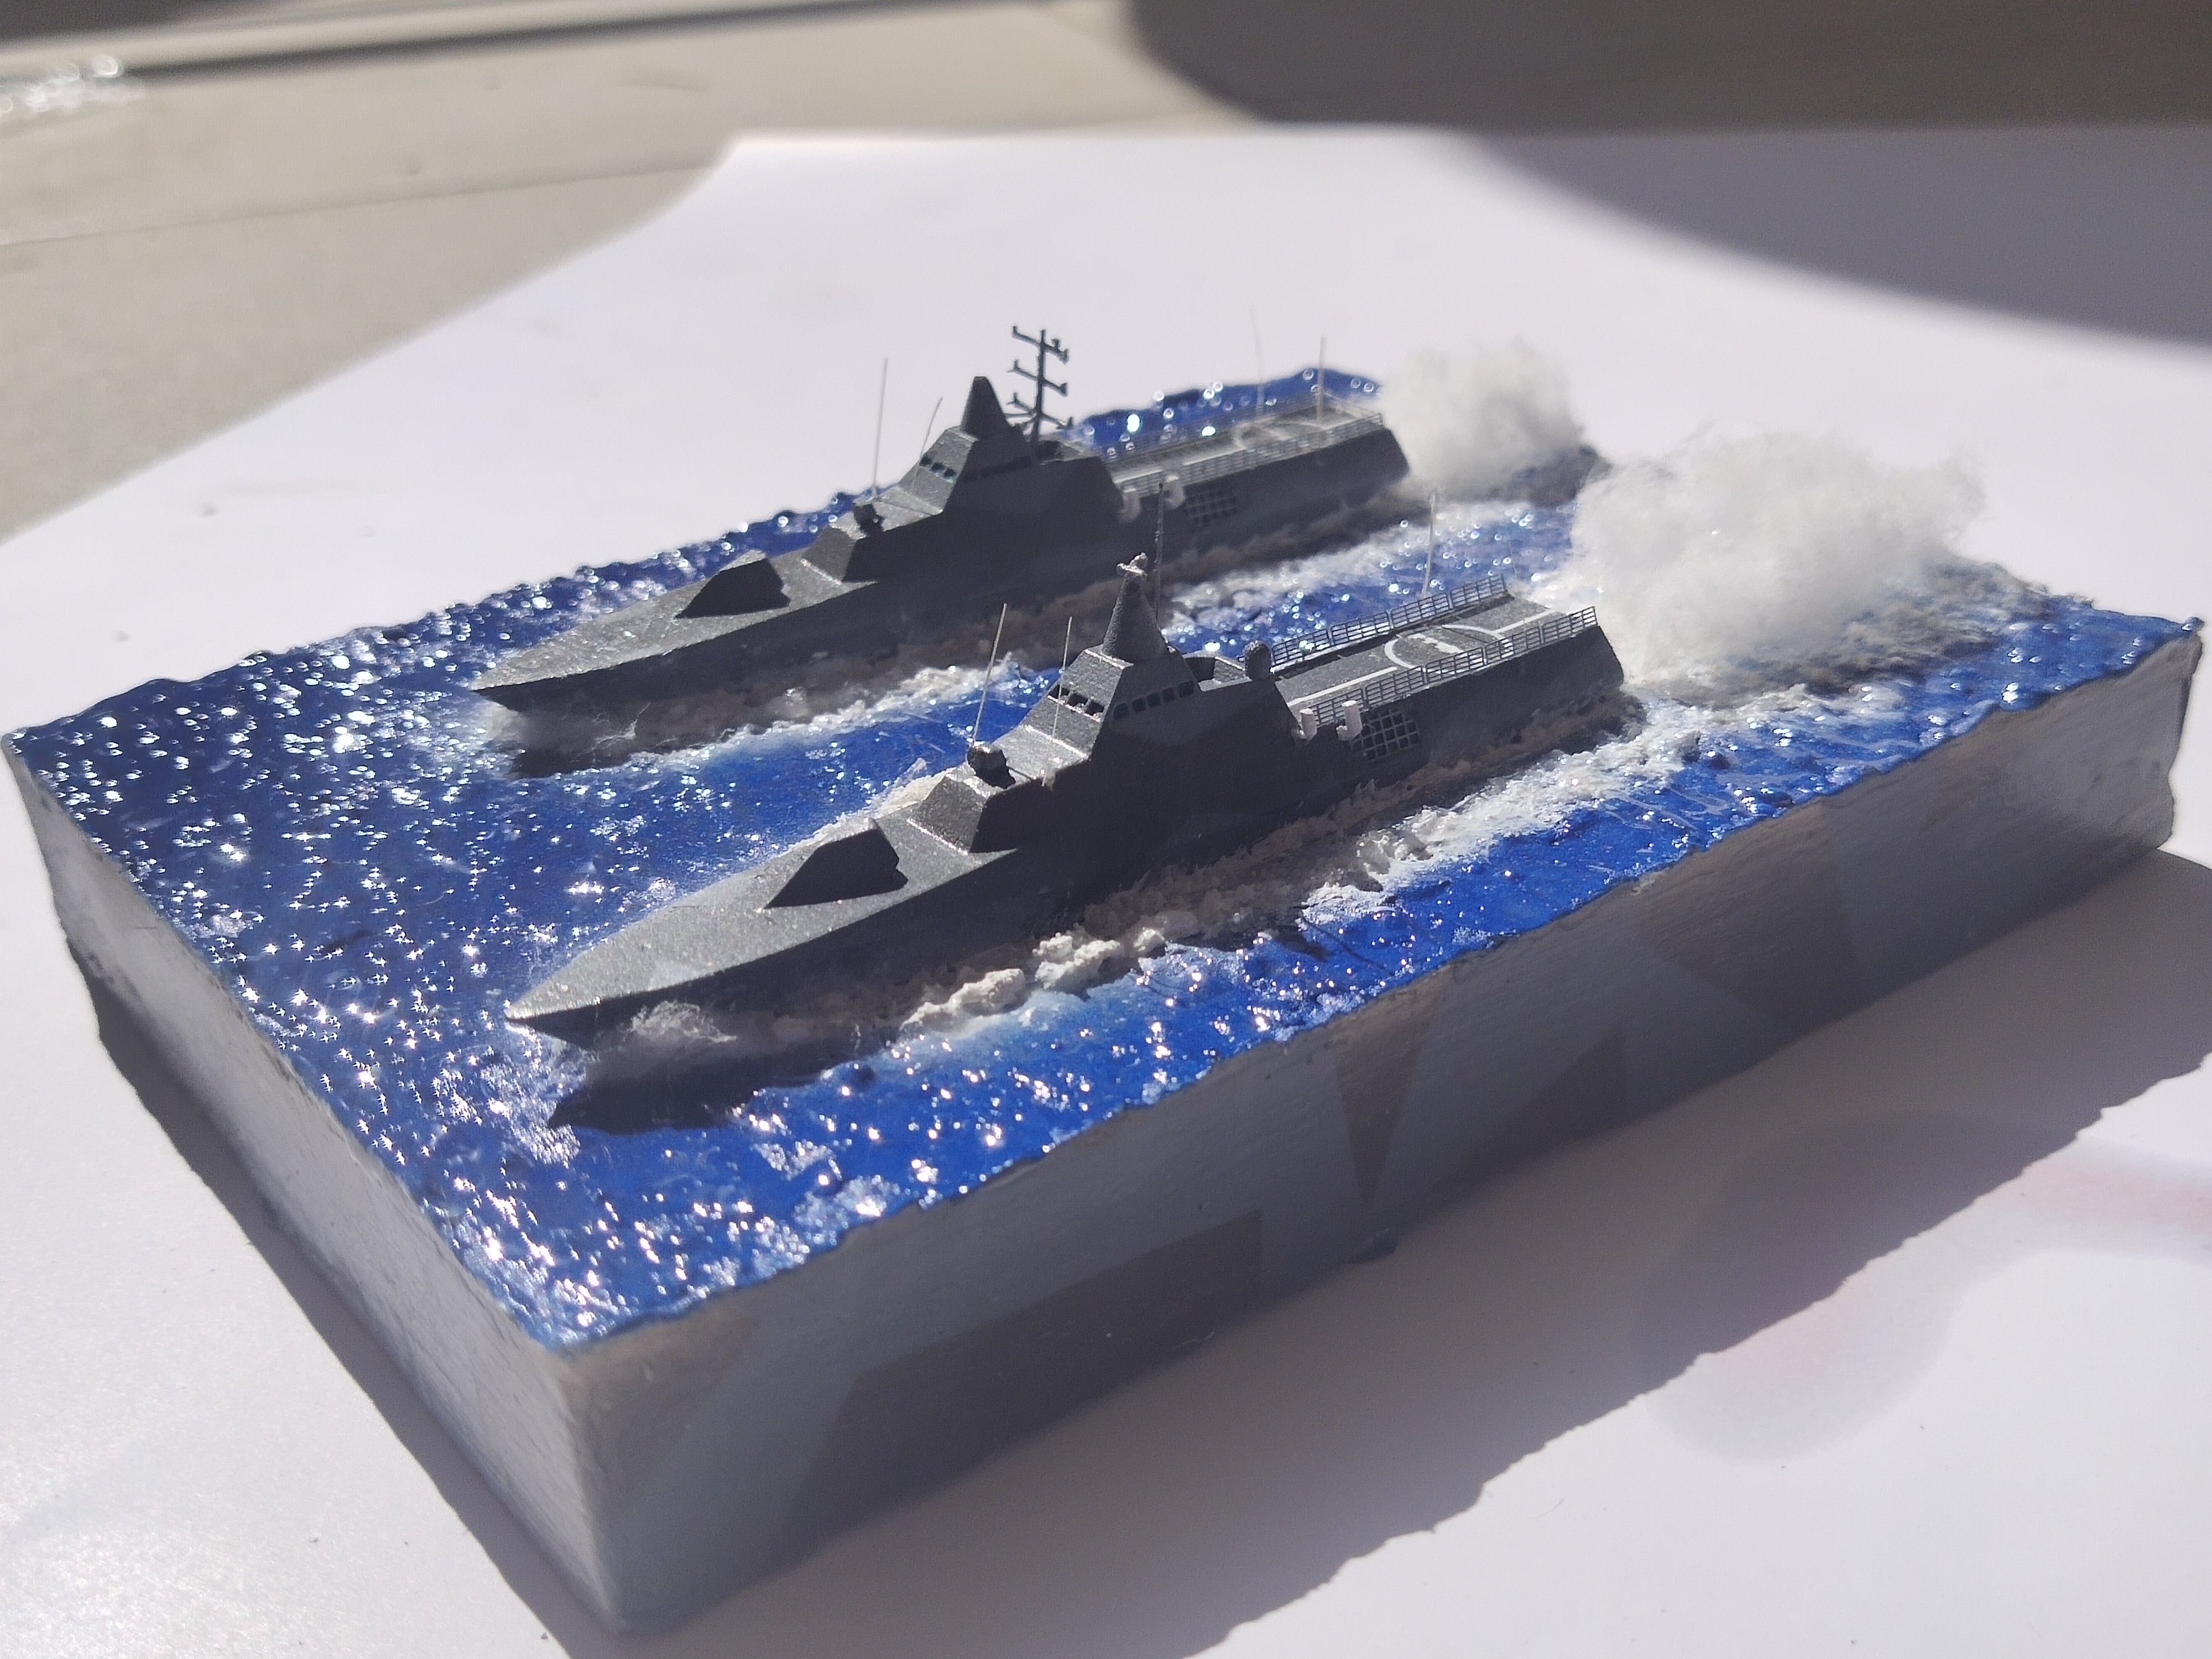
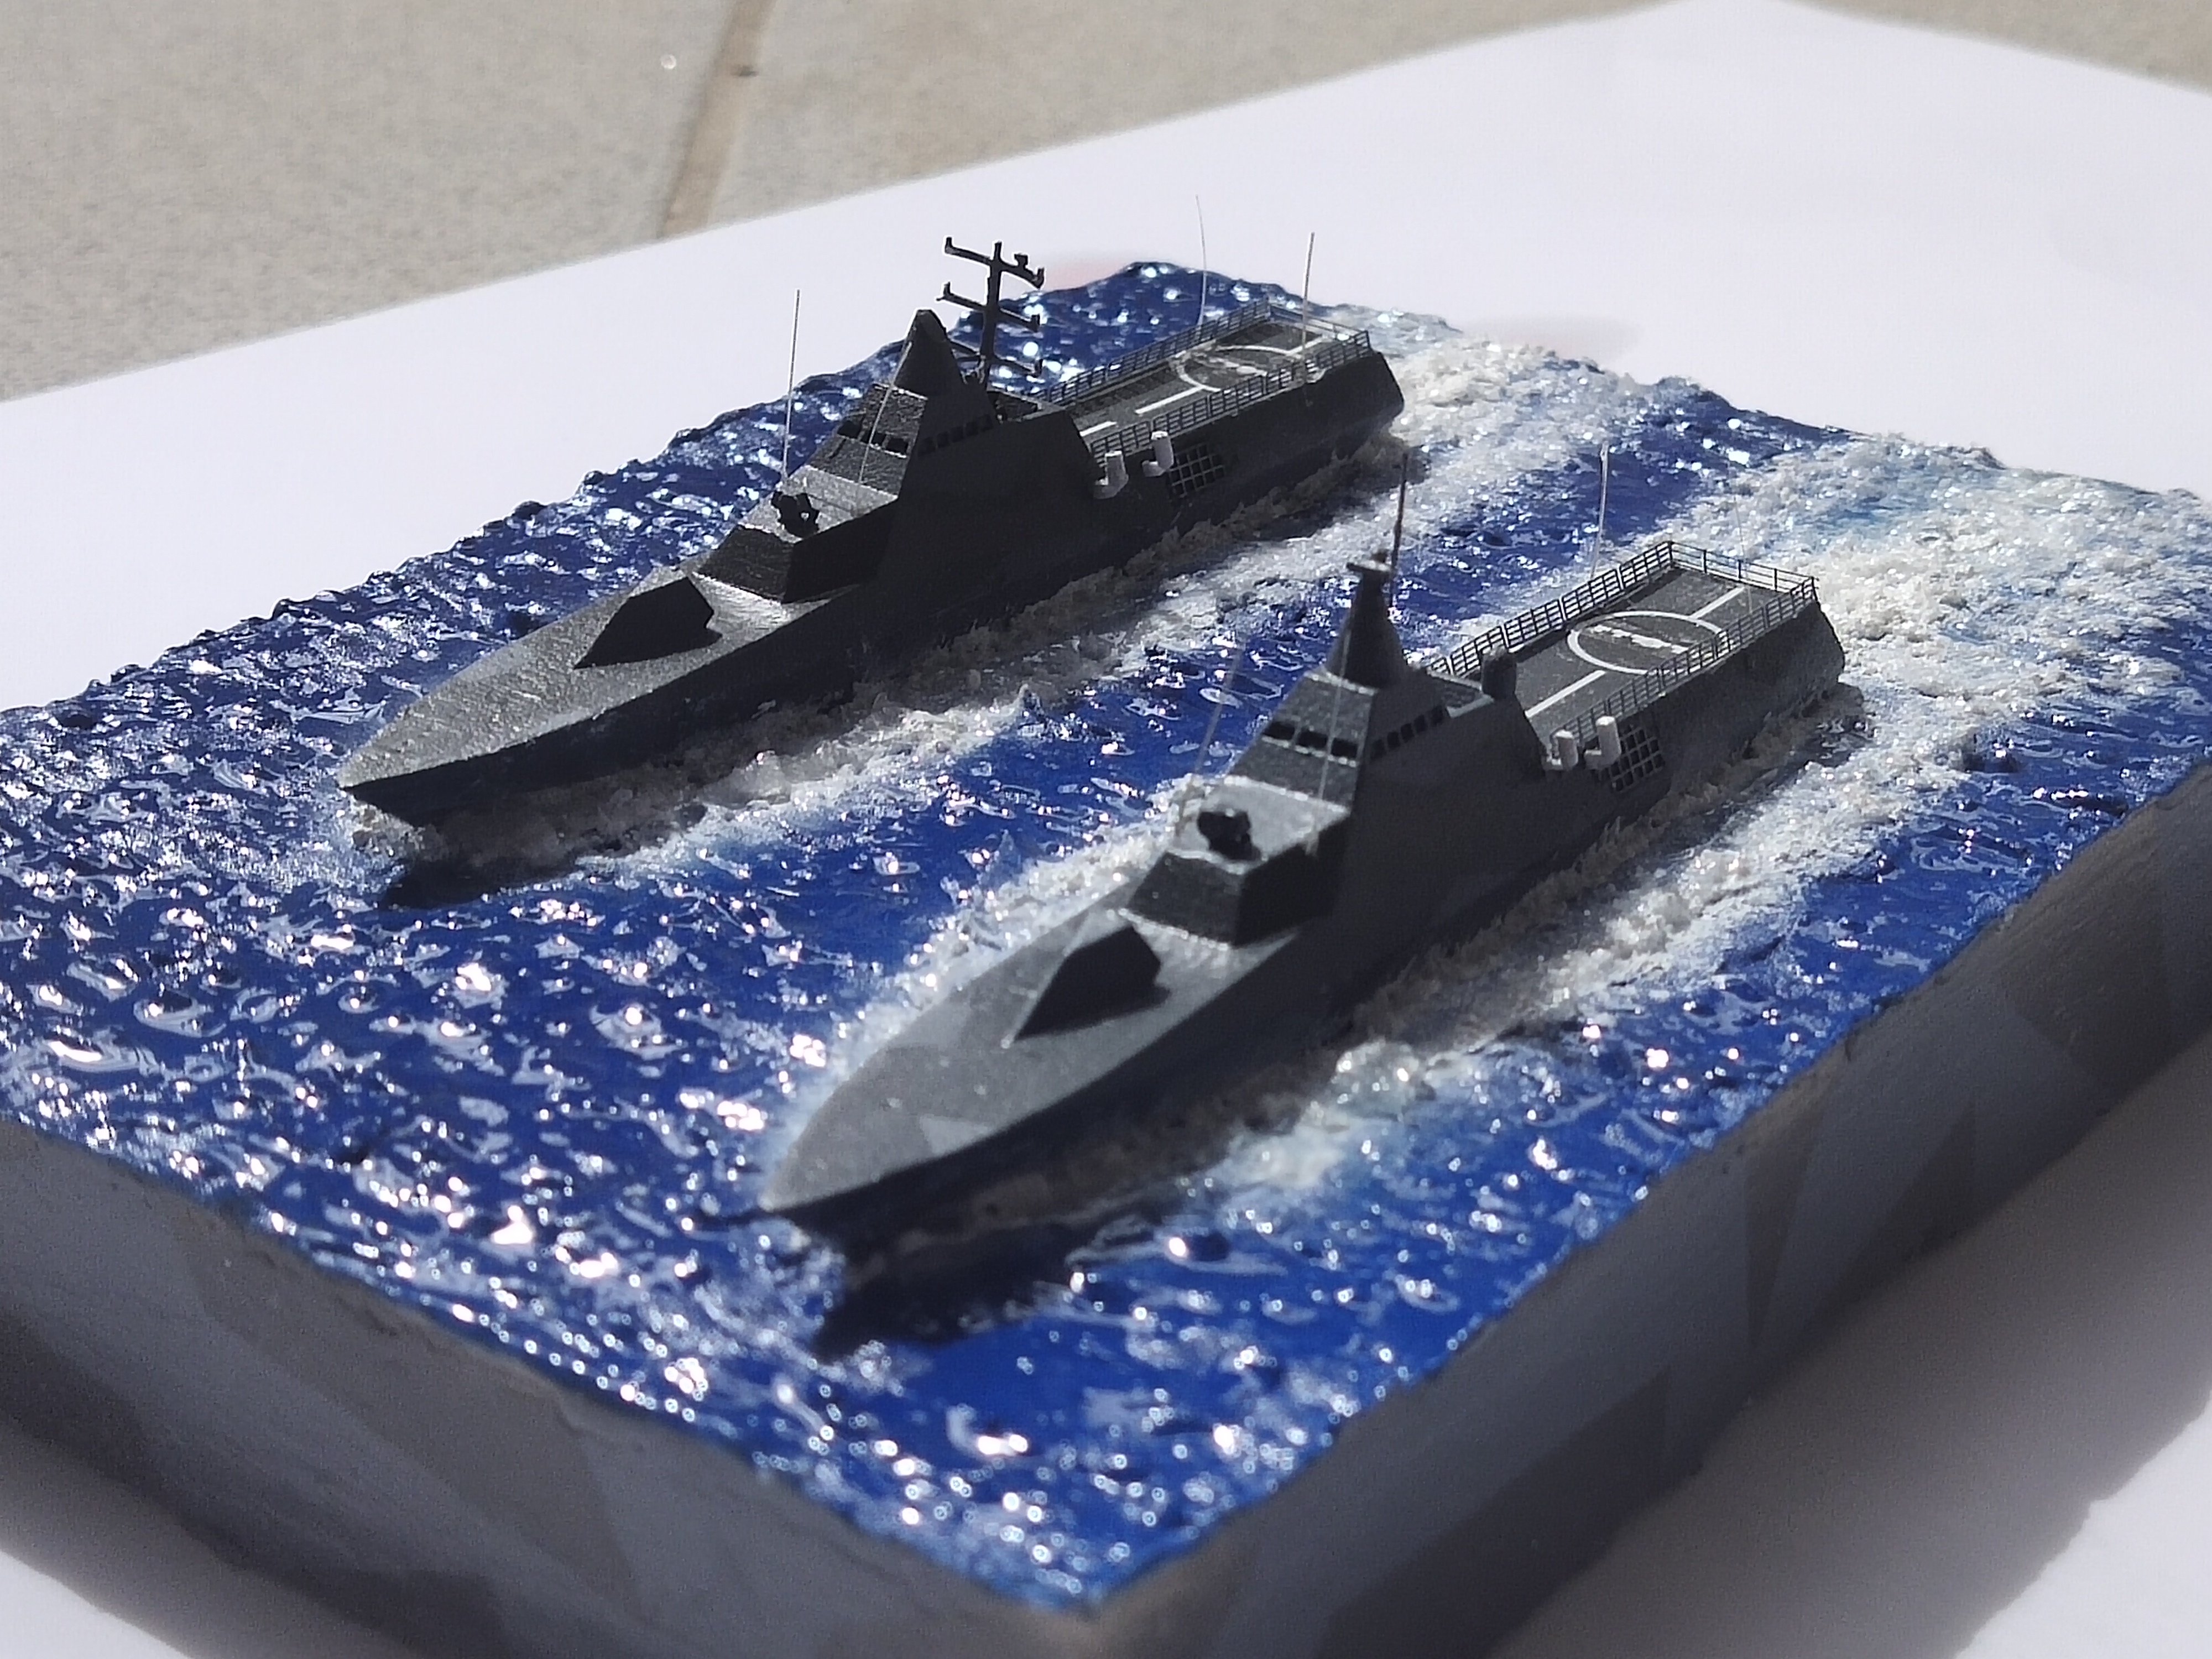
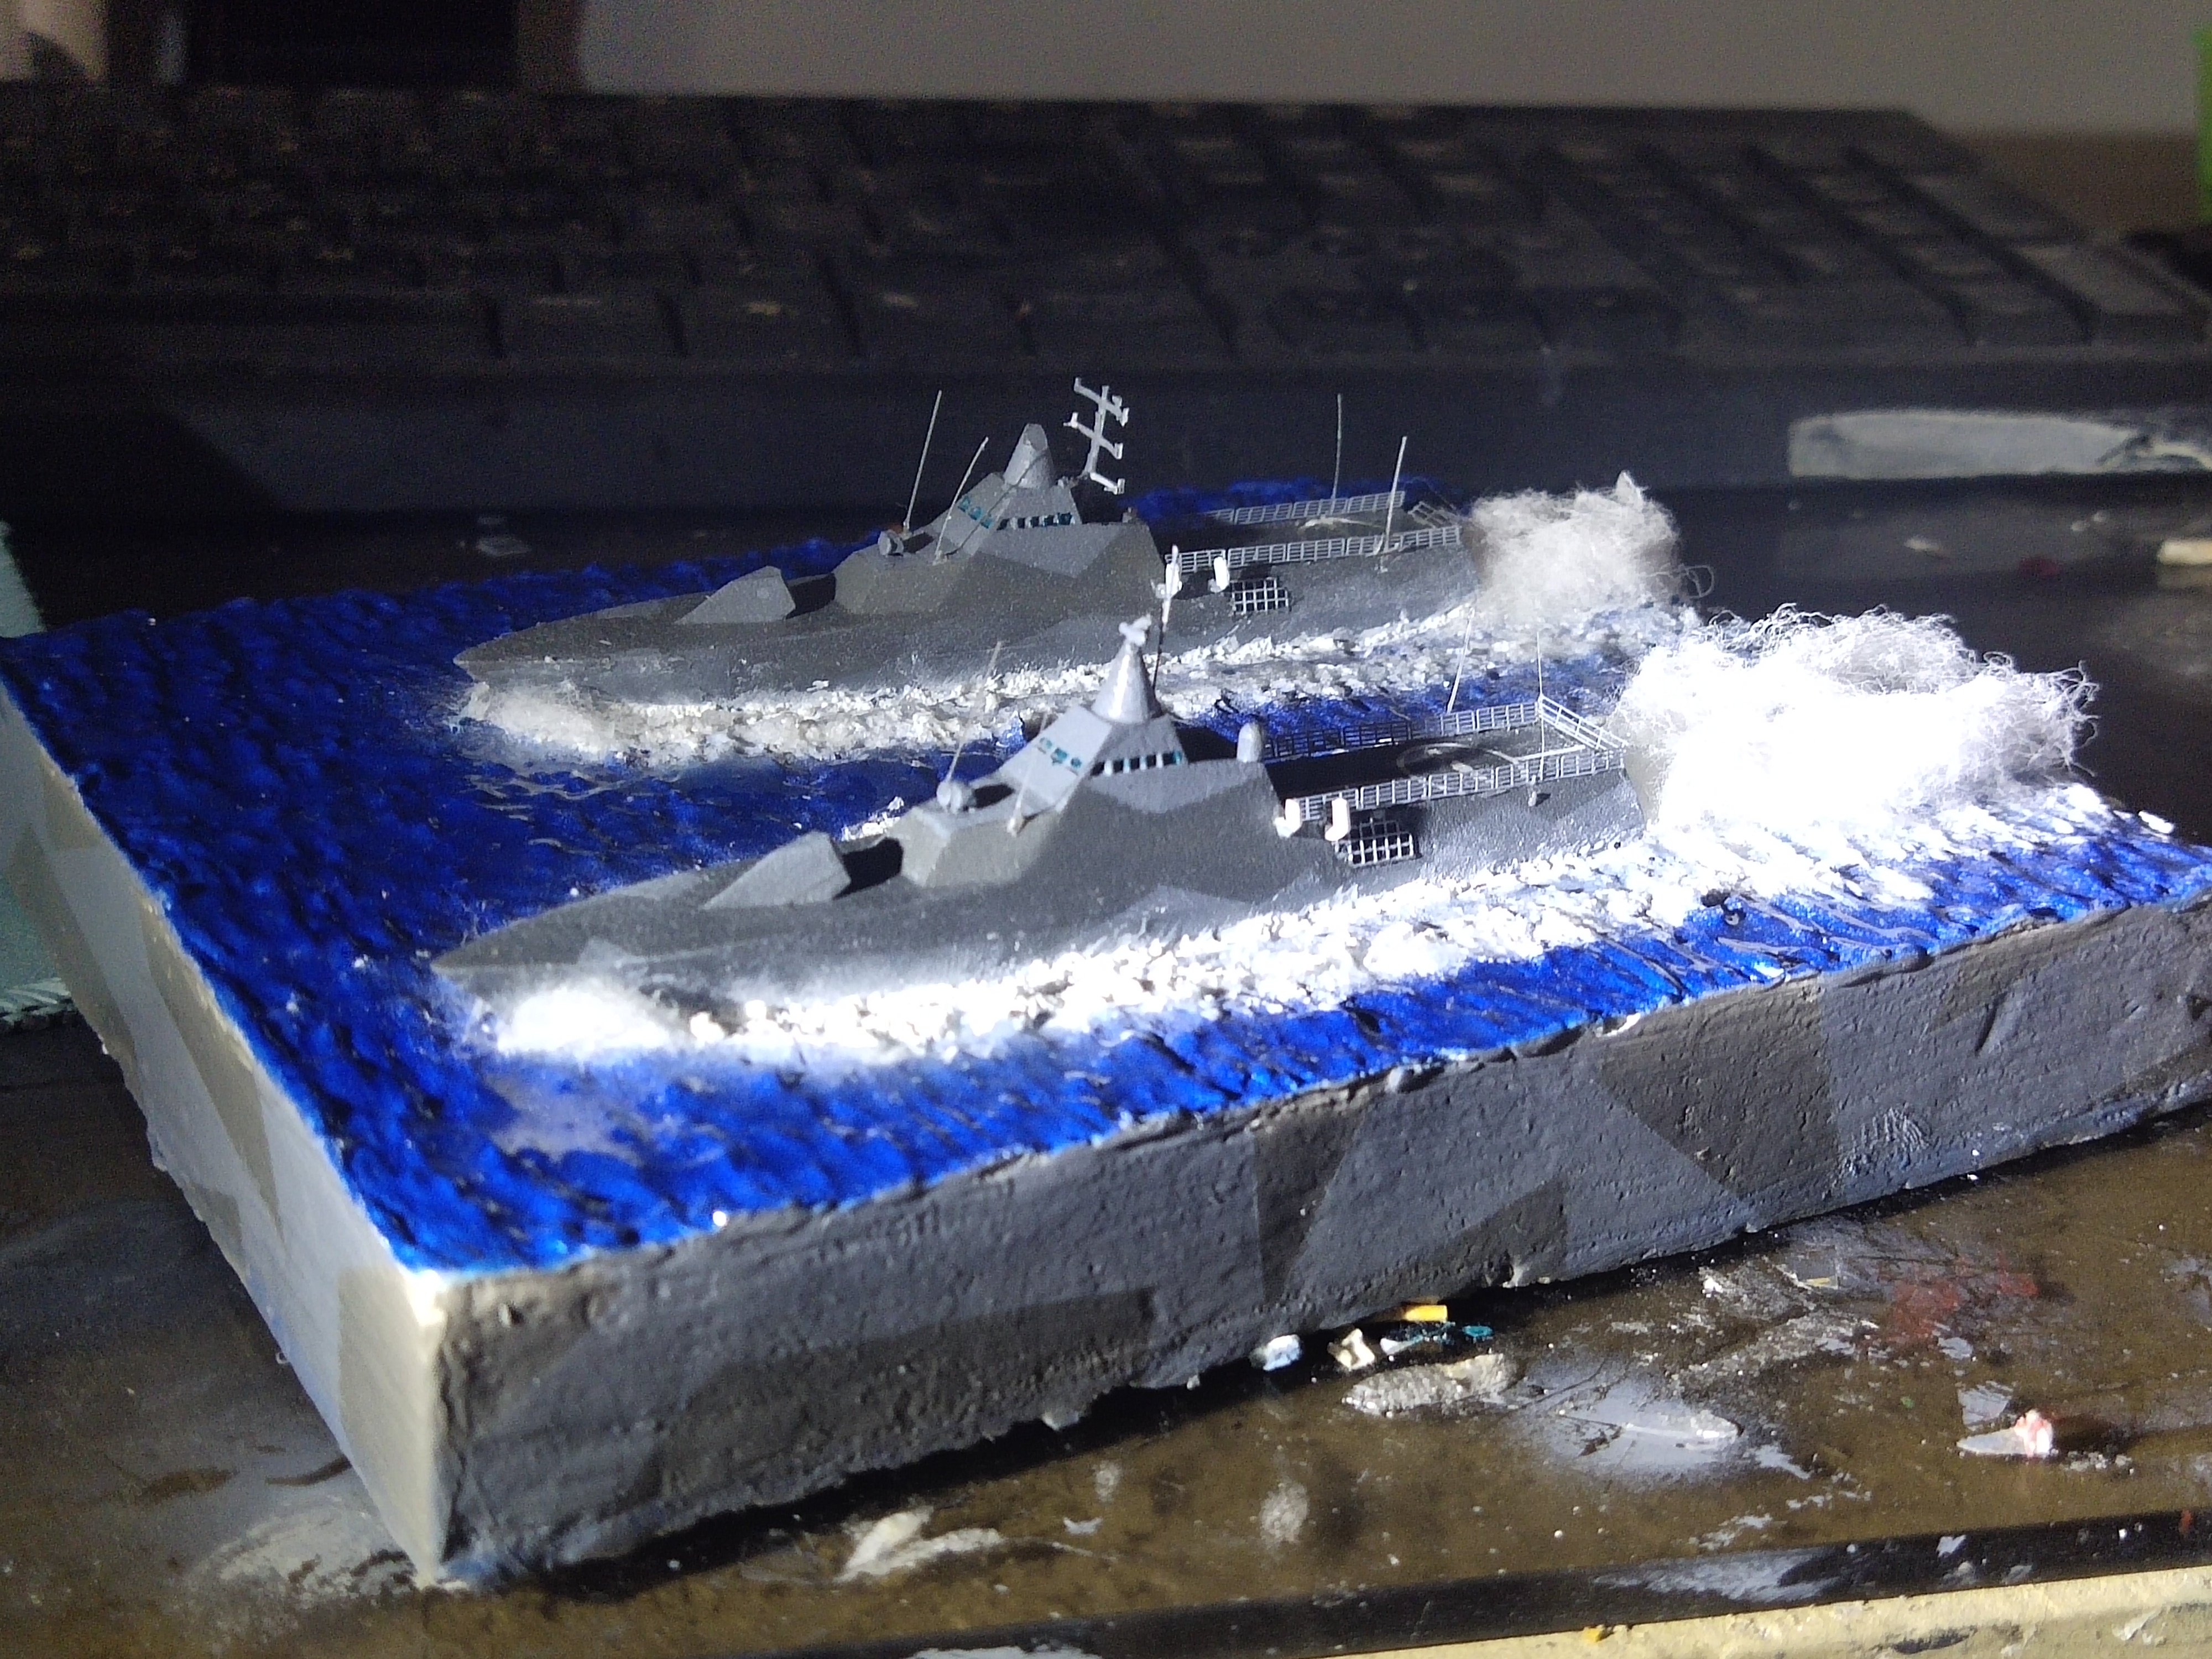
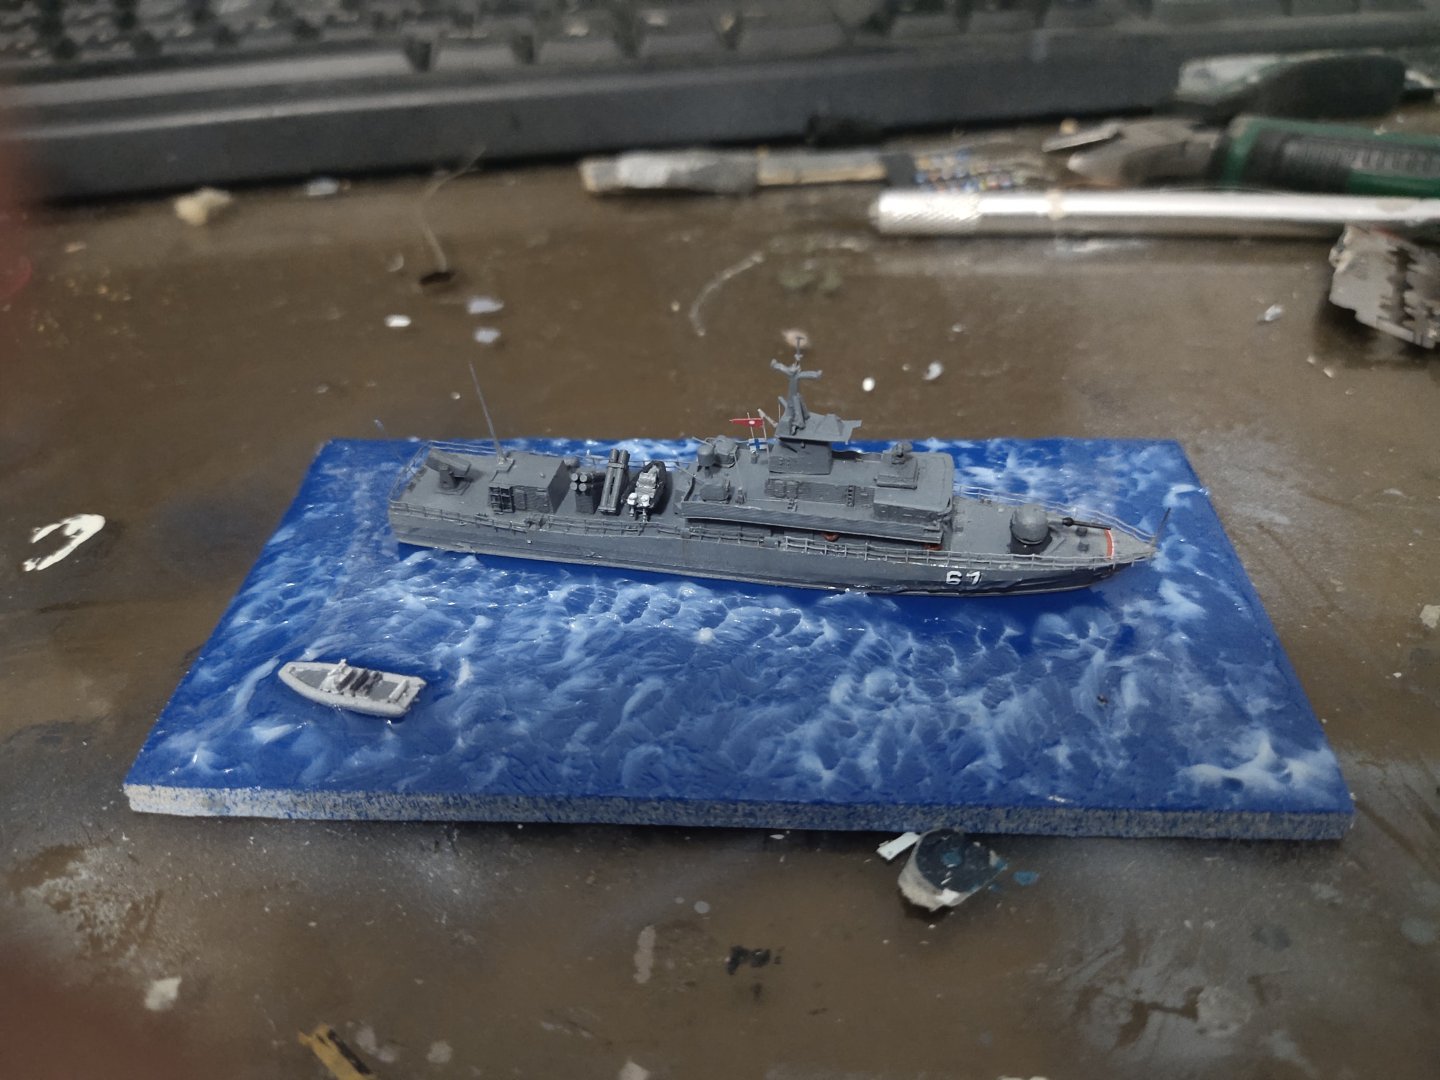
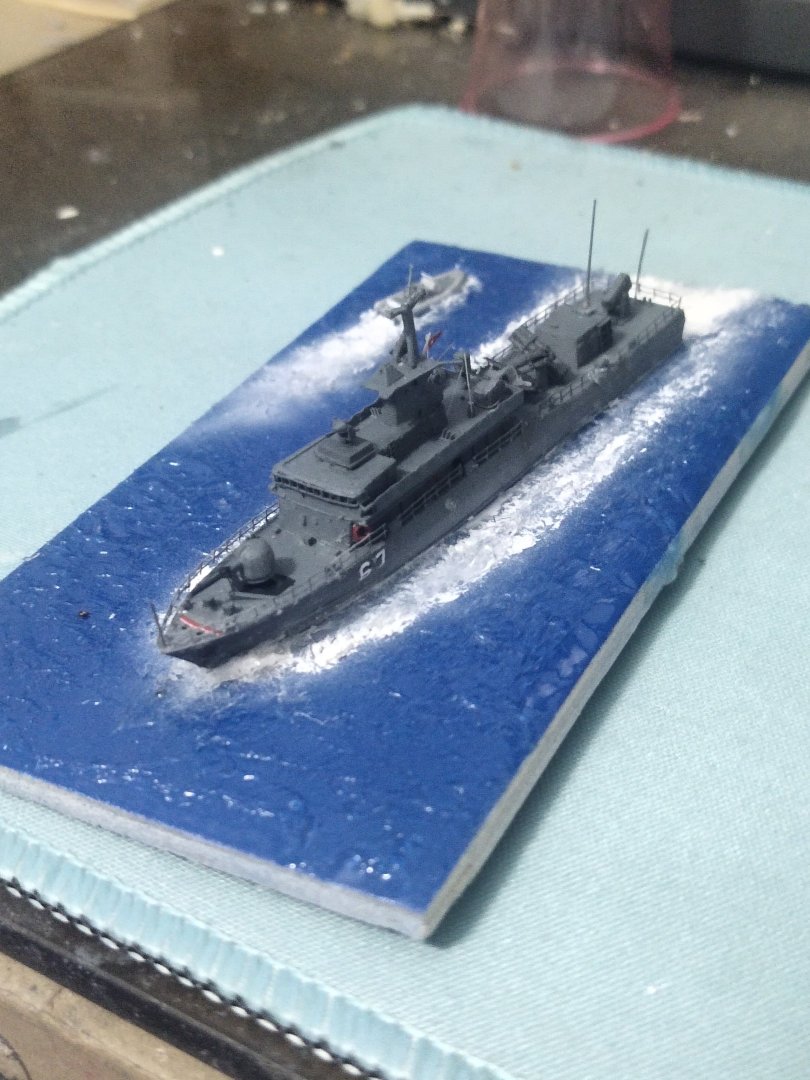
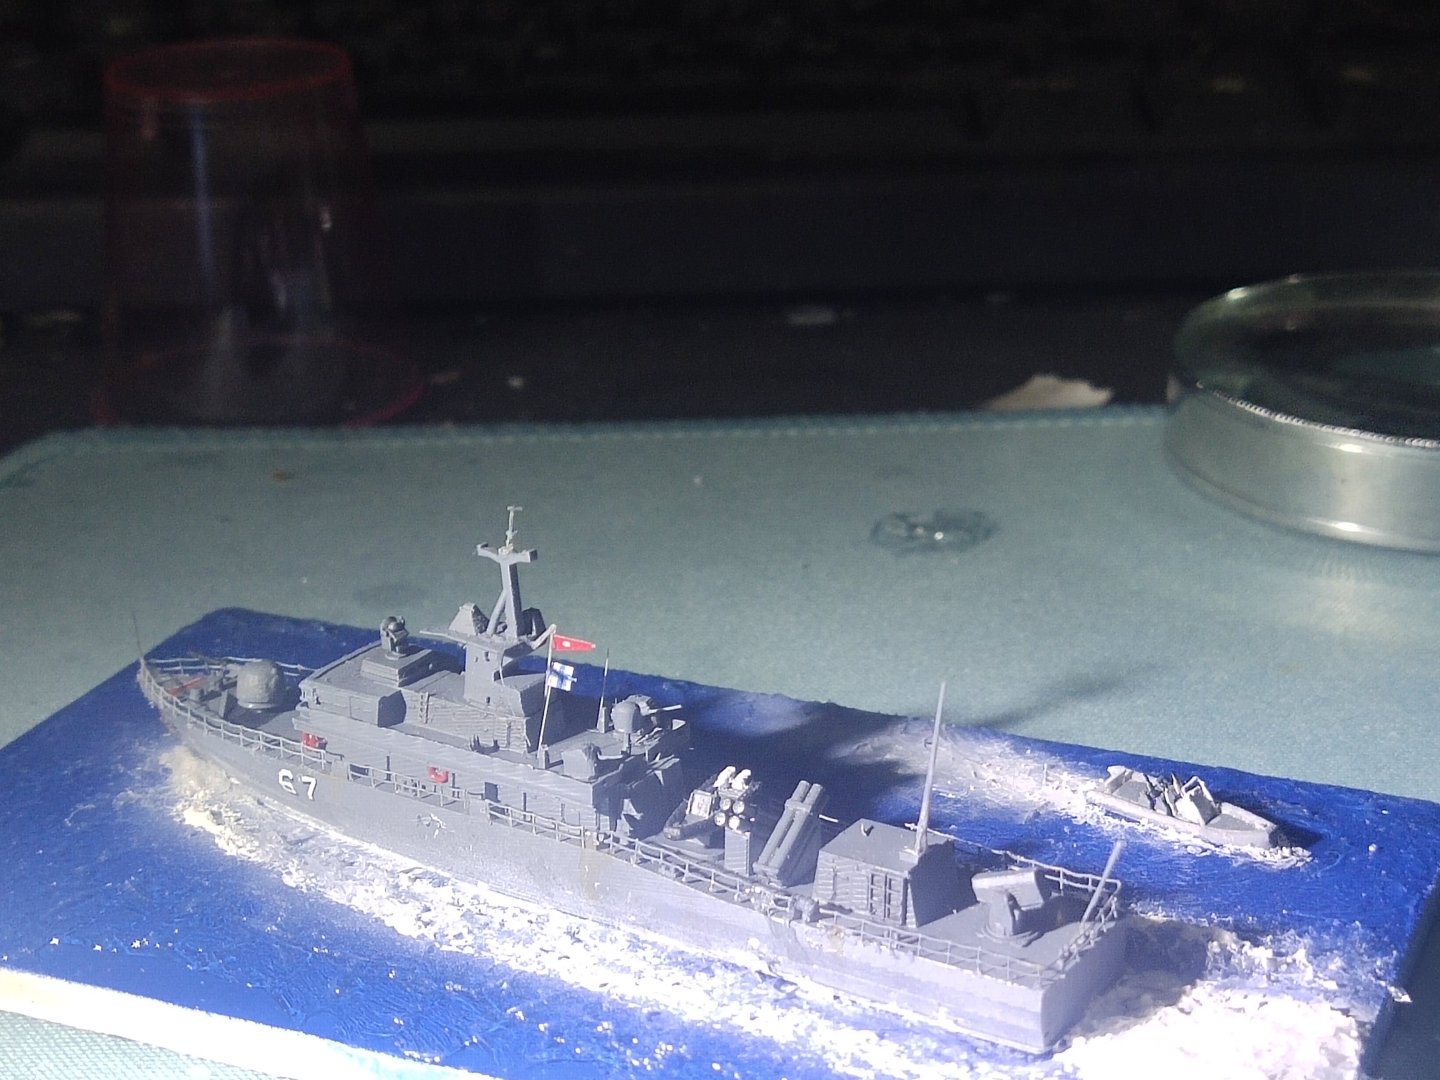
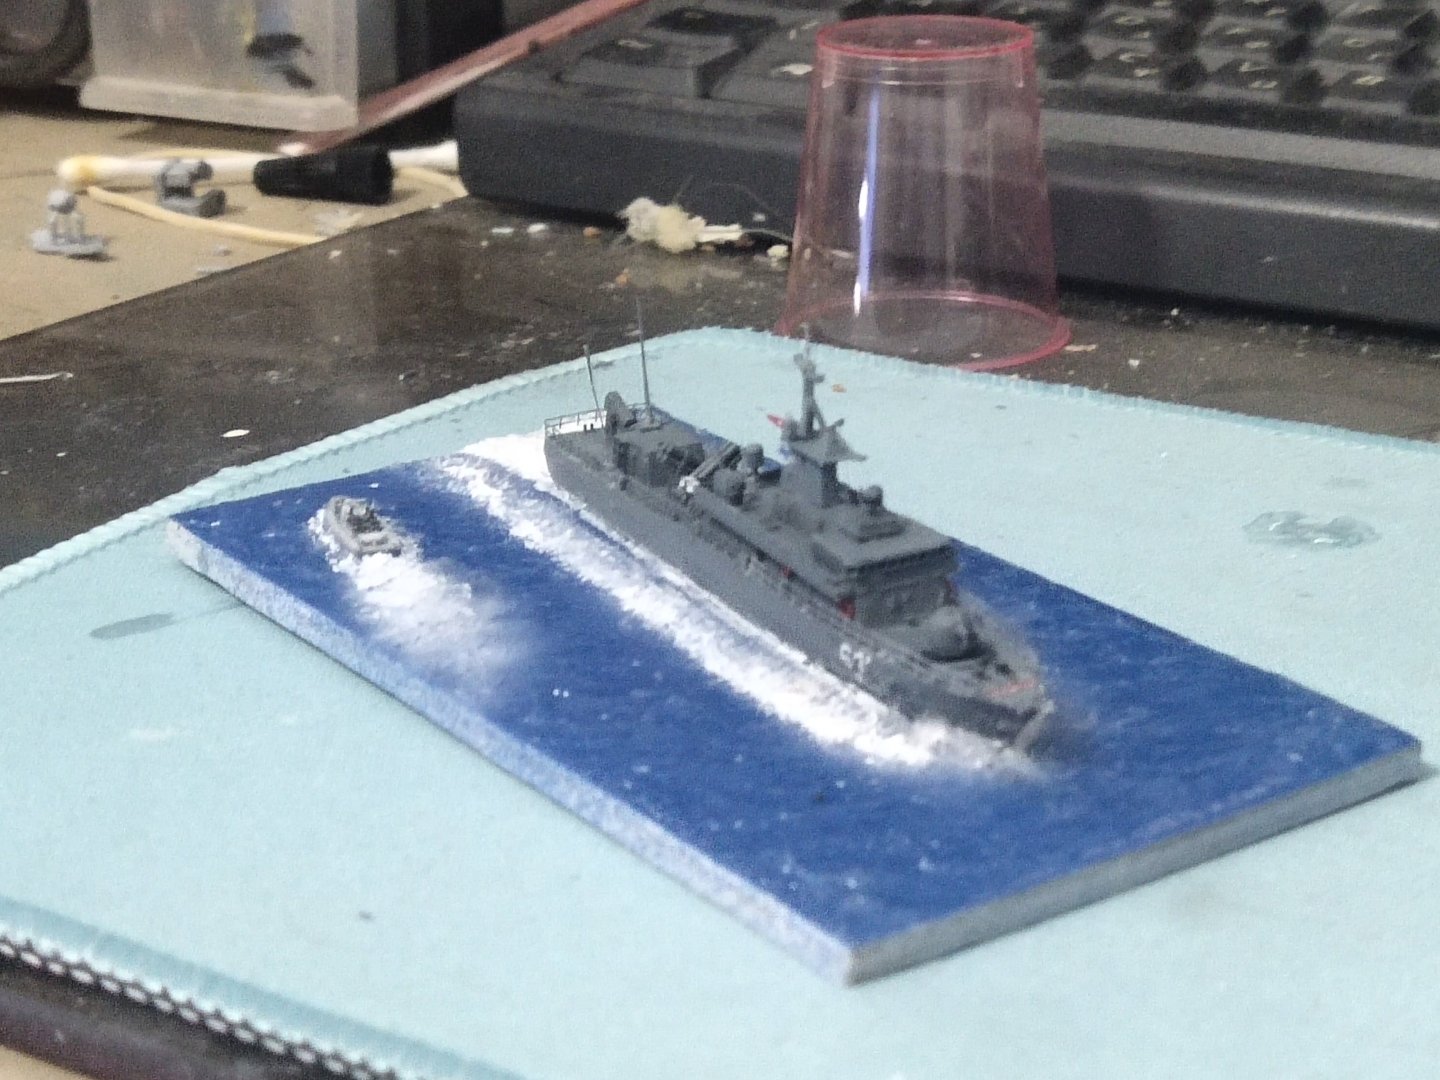
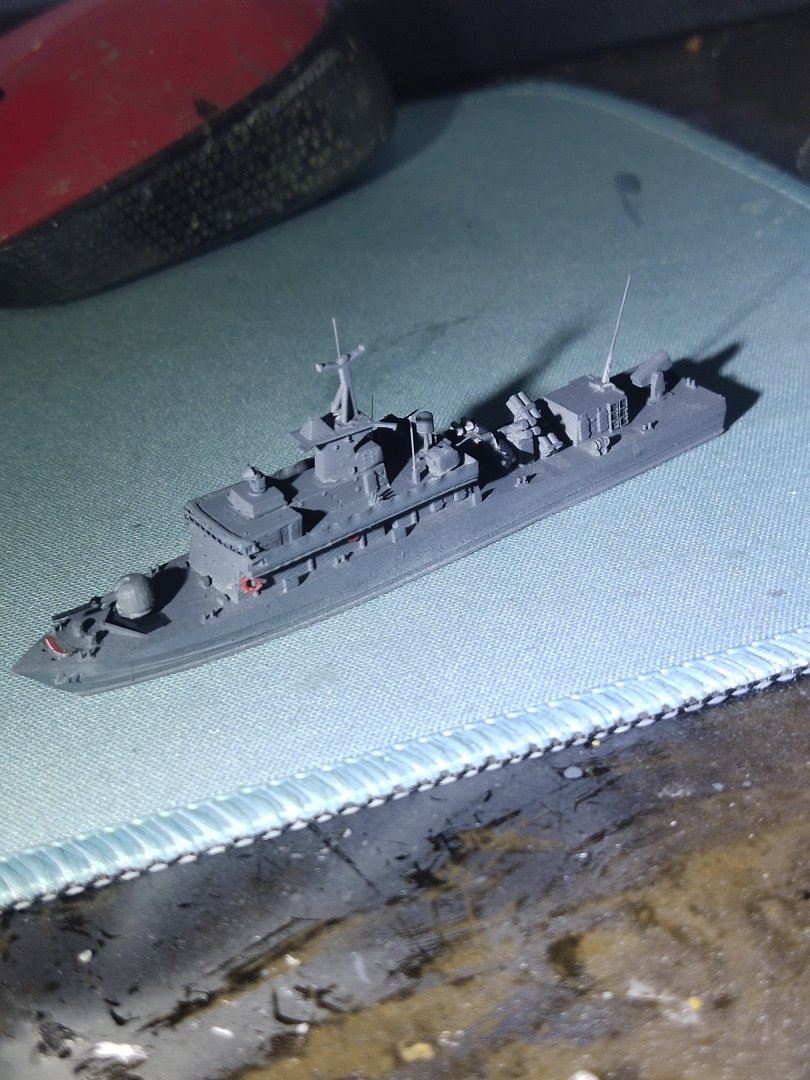
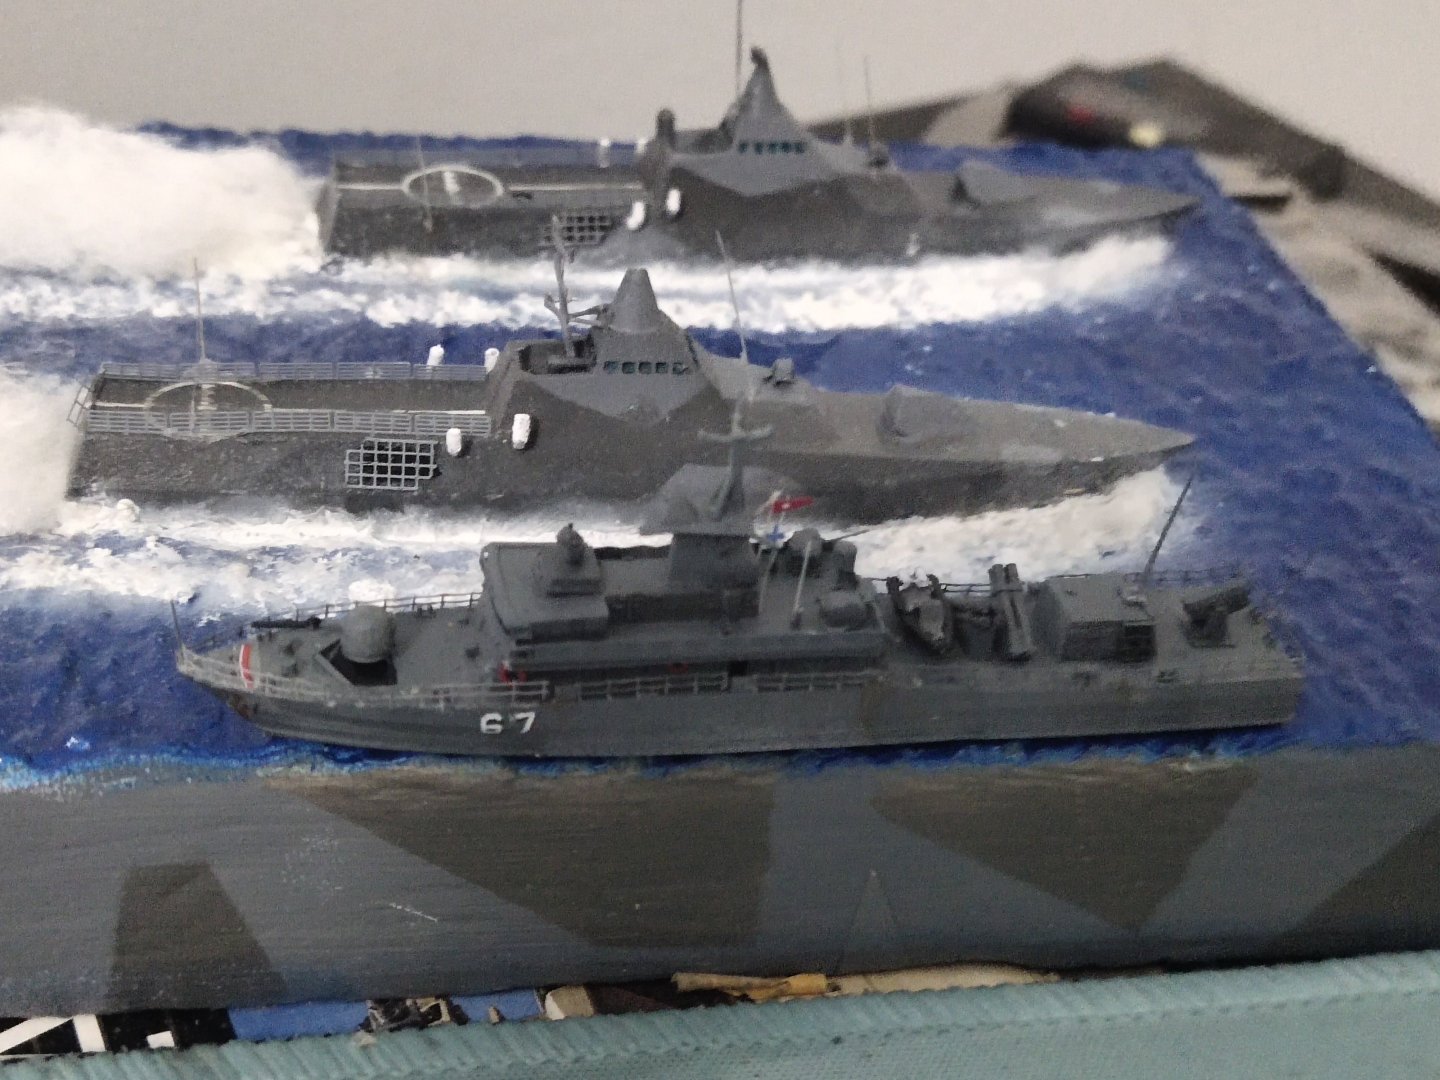
A big thanks to the mod for editing the title. The name of this model is Roussen. The Lt Troupakis i mentioned is a missile boat of an earlier class but as I get older i confuse things. The assembly had been done. Bit wiring, few decals and bit of weathering. Ready for a sea base


-
Another snack built of an unpopular vessel, a British made Super Vita fast missile boat. At 62 meters length these boats are armed with Exocet SSM and can reach 35 knots. I'm building the Greek version named Lieutenant Troupakis.


-
I procced in the same way as usual. Only difference this time I extended the use of silicone to all white areas to avoid the "dry" looking of my previous themes. The whole thing was covered with 2 ingredient varnish like these used on automobile industry. Then i decided to add smoke as a final touch Small built but with noticeable effect