mikegr
-
Posts
827 -
Joined
-
Last visited
Content Type
Profiles
Forums
Gallery
Events
Everything posted by mikegr
-
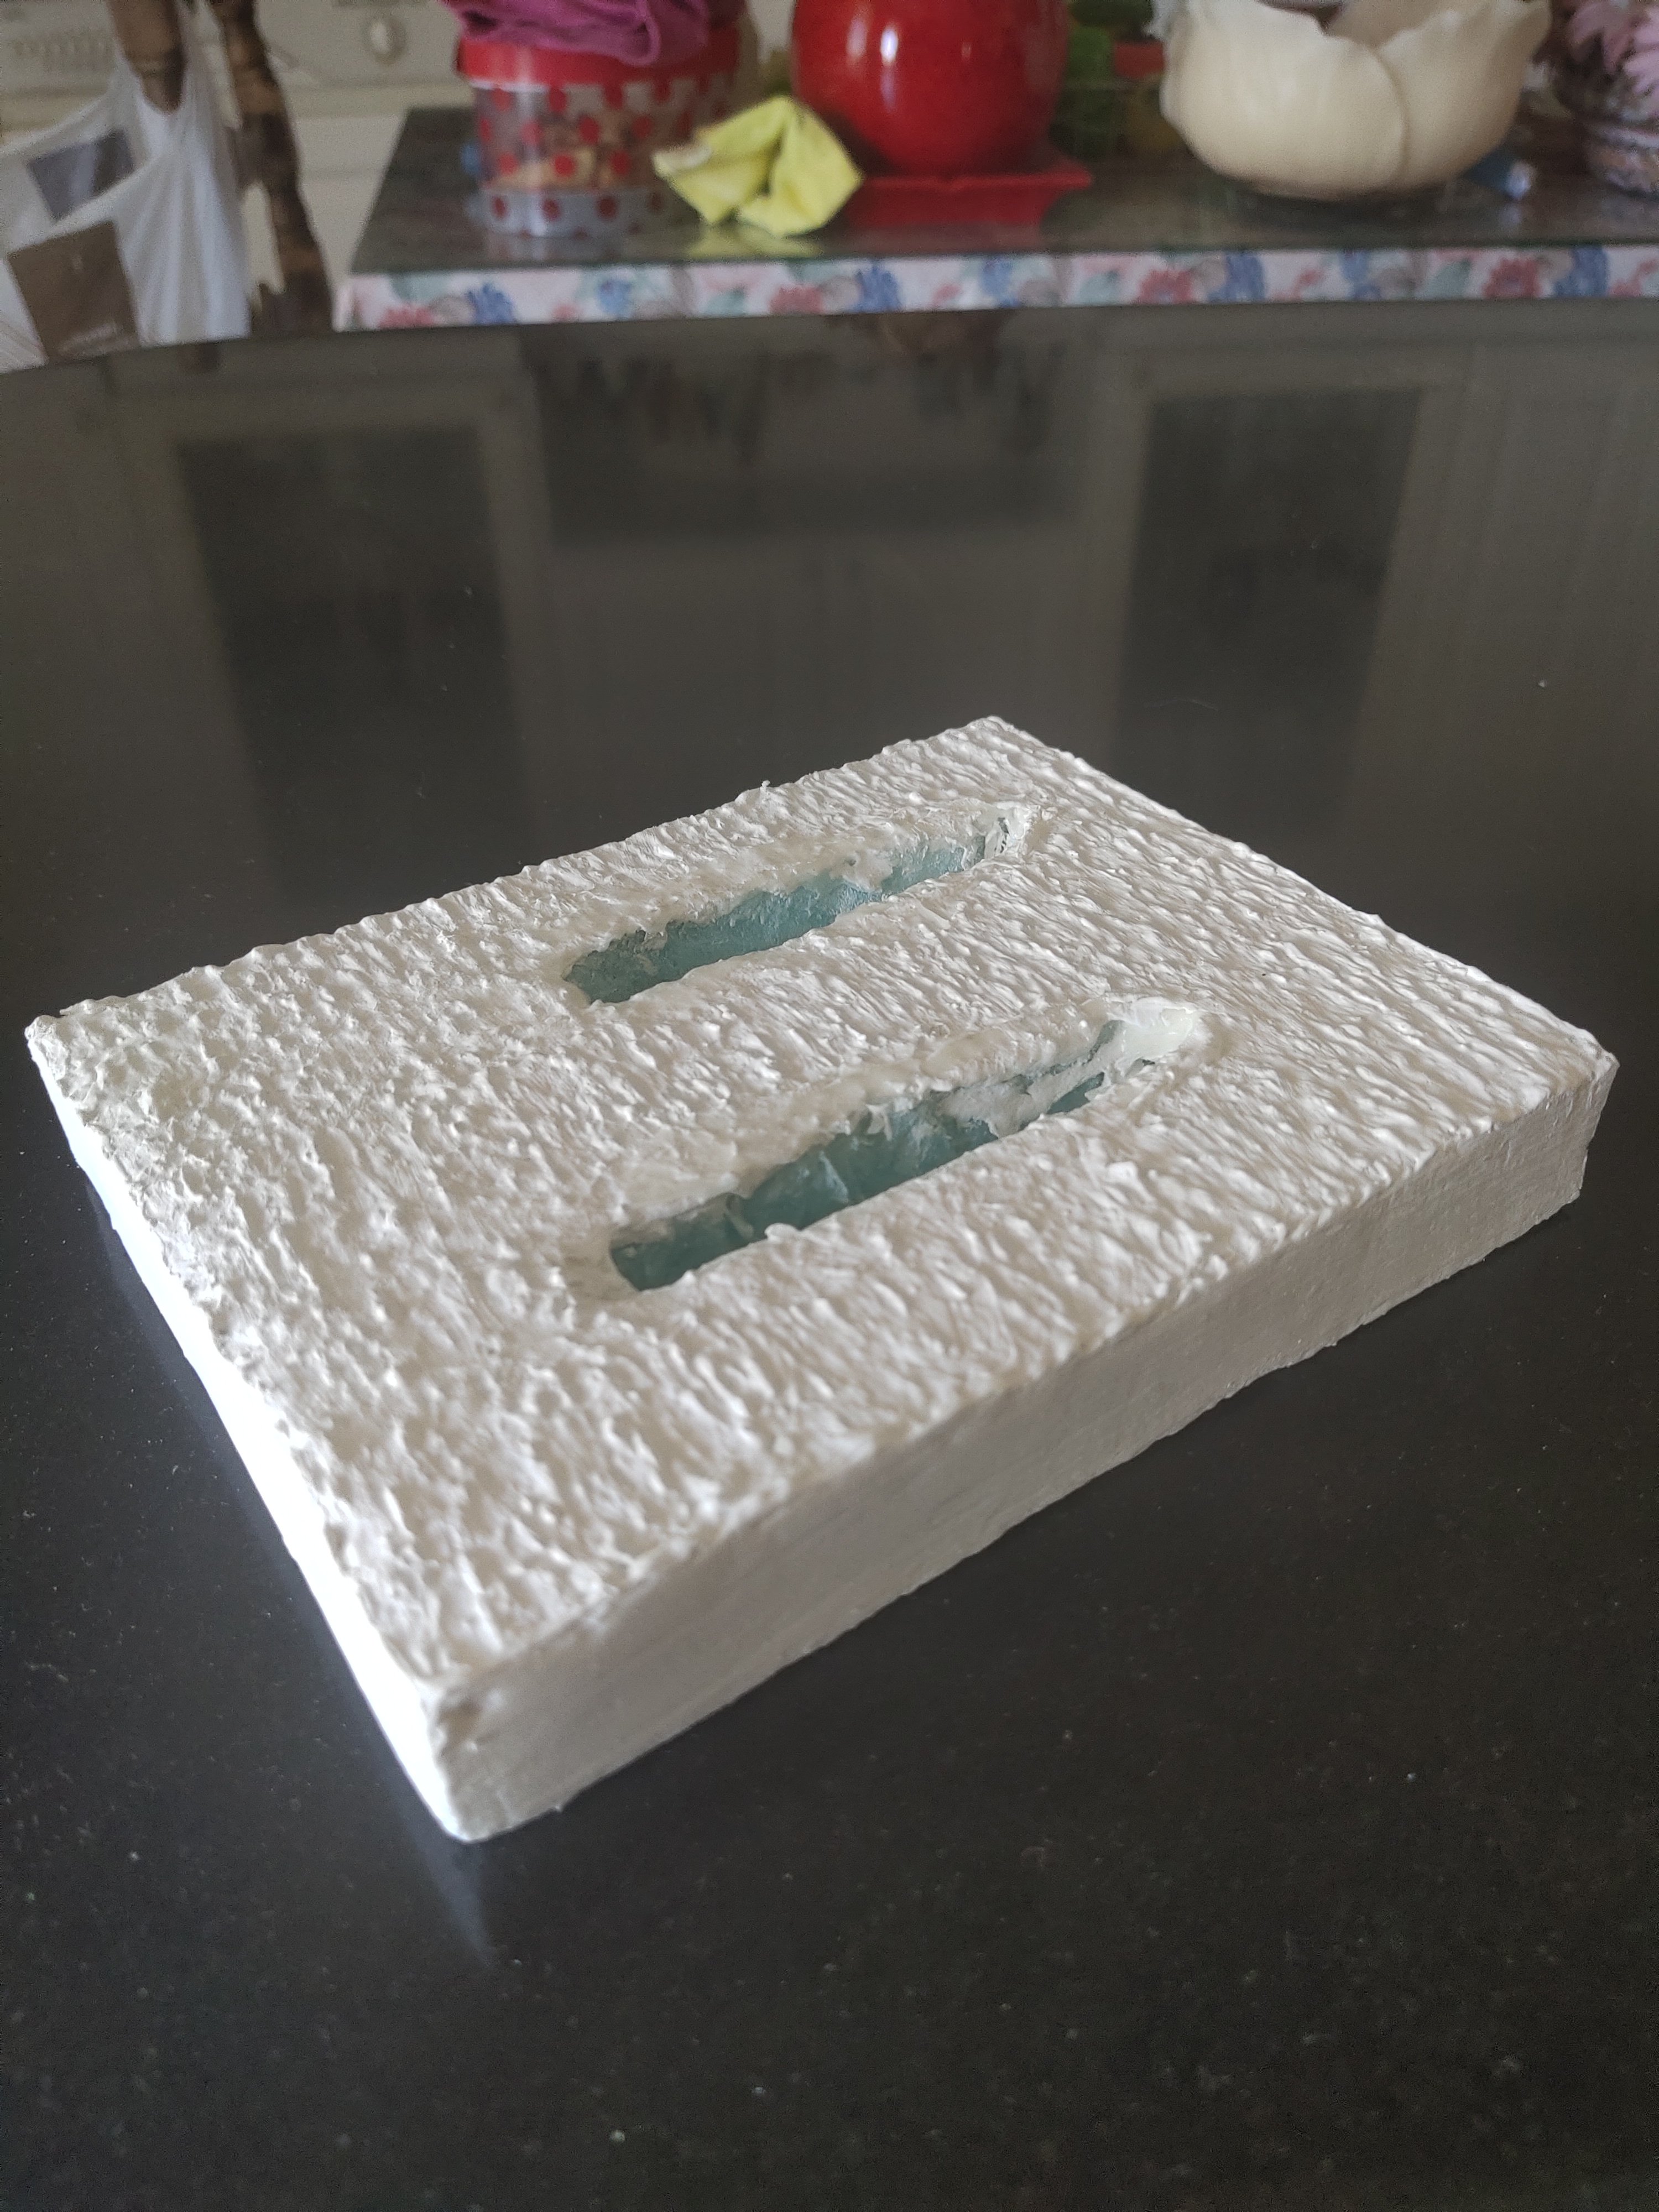
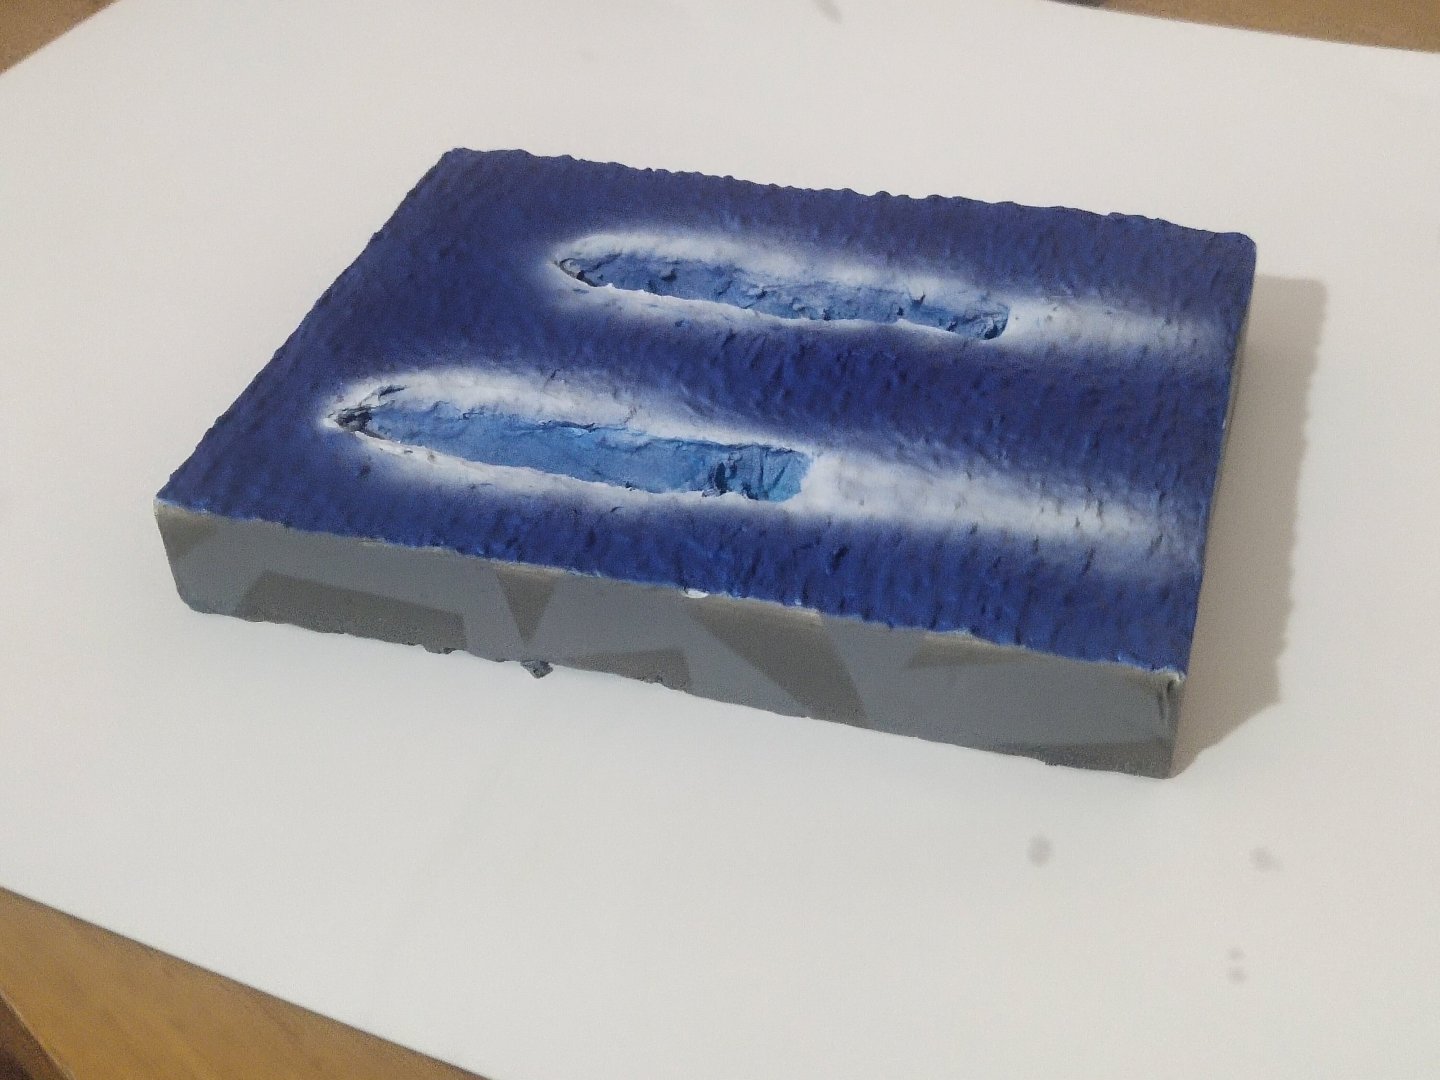
The base. Sided were primed and painted in the same camouflage scene. Styrofoam with heavy gel on top. I used a tooth pick making parallel lines to form waves. Then applied few gesso layers to smoothen it a bit. Around where boats will be placed, I spread with my finger some gel to make a smooth surface. Then sprayed blue. Then Tamiya clear blue. Then some white preshading. Ready for boat instalments and final work.


-
Cap San Diego by mikegr - 1/160
mikegr replied to mikegr's topic in - Build logs for subjects built 1901 - Present Day
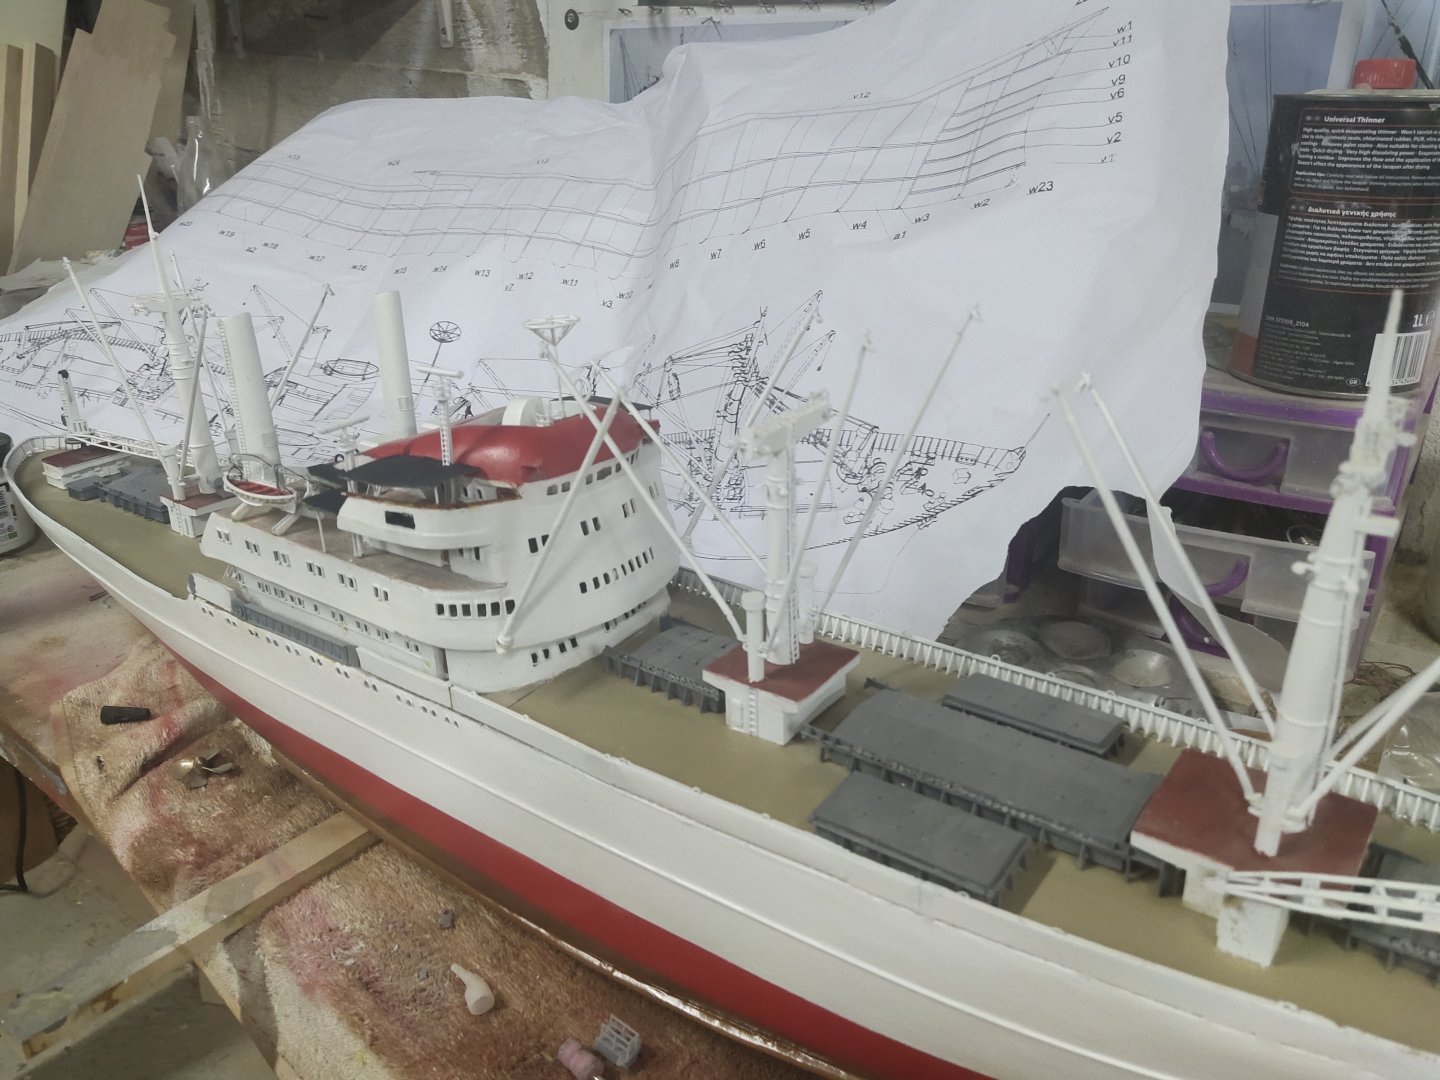
Small update on the rear side of the accommodation deck. Ladder added, fireplaces and some wooden doors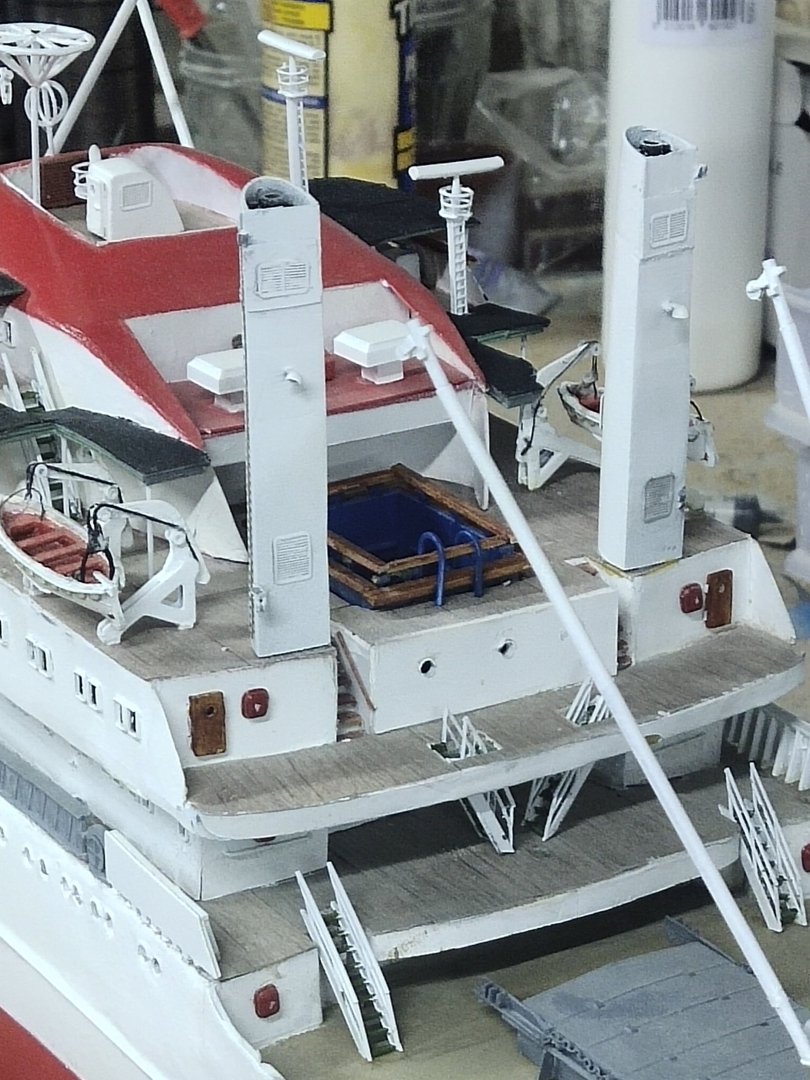
-
Nice built and great presentation
-
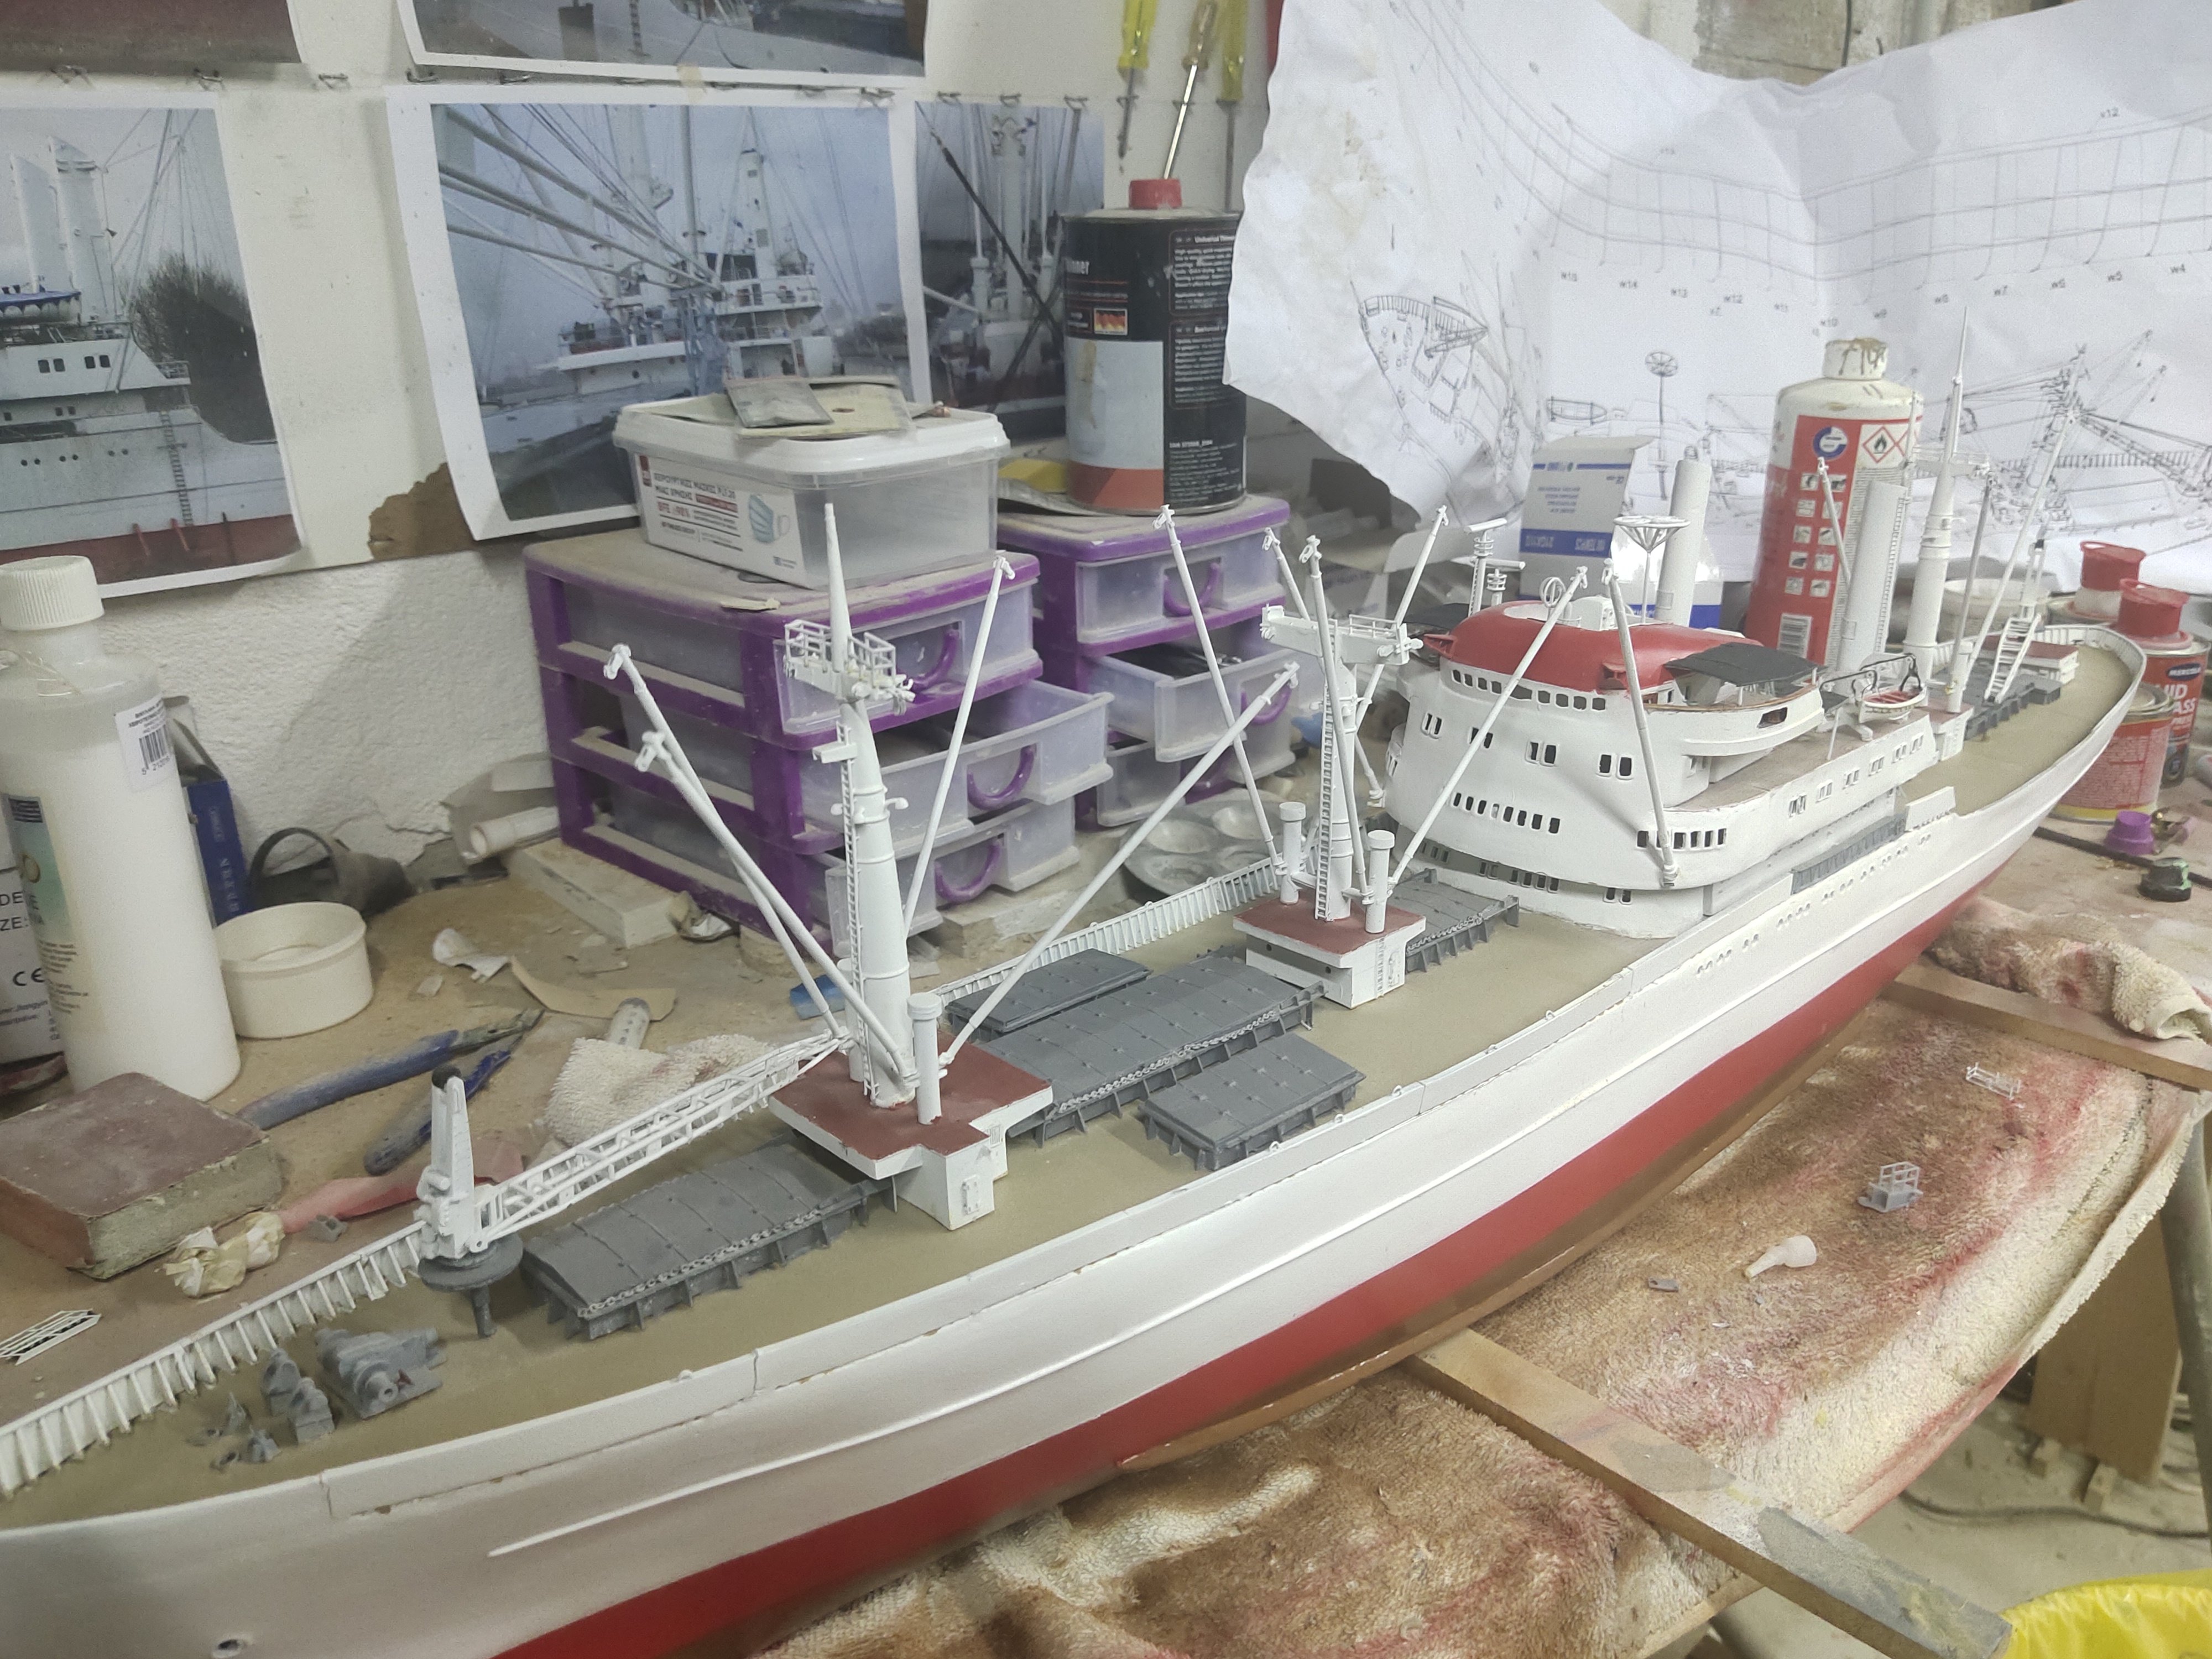
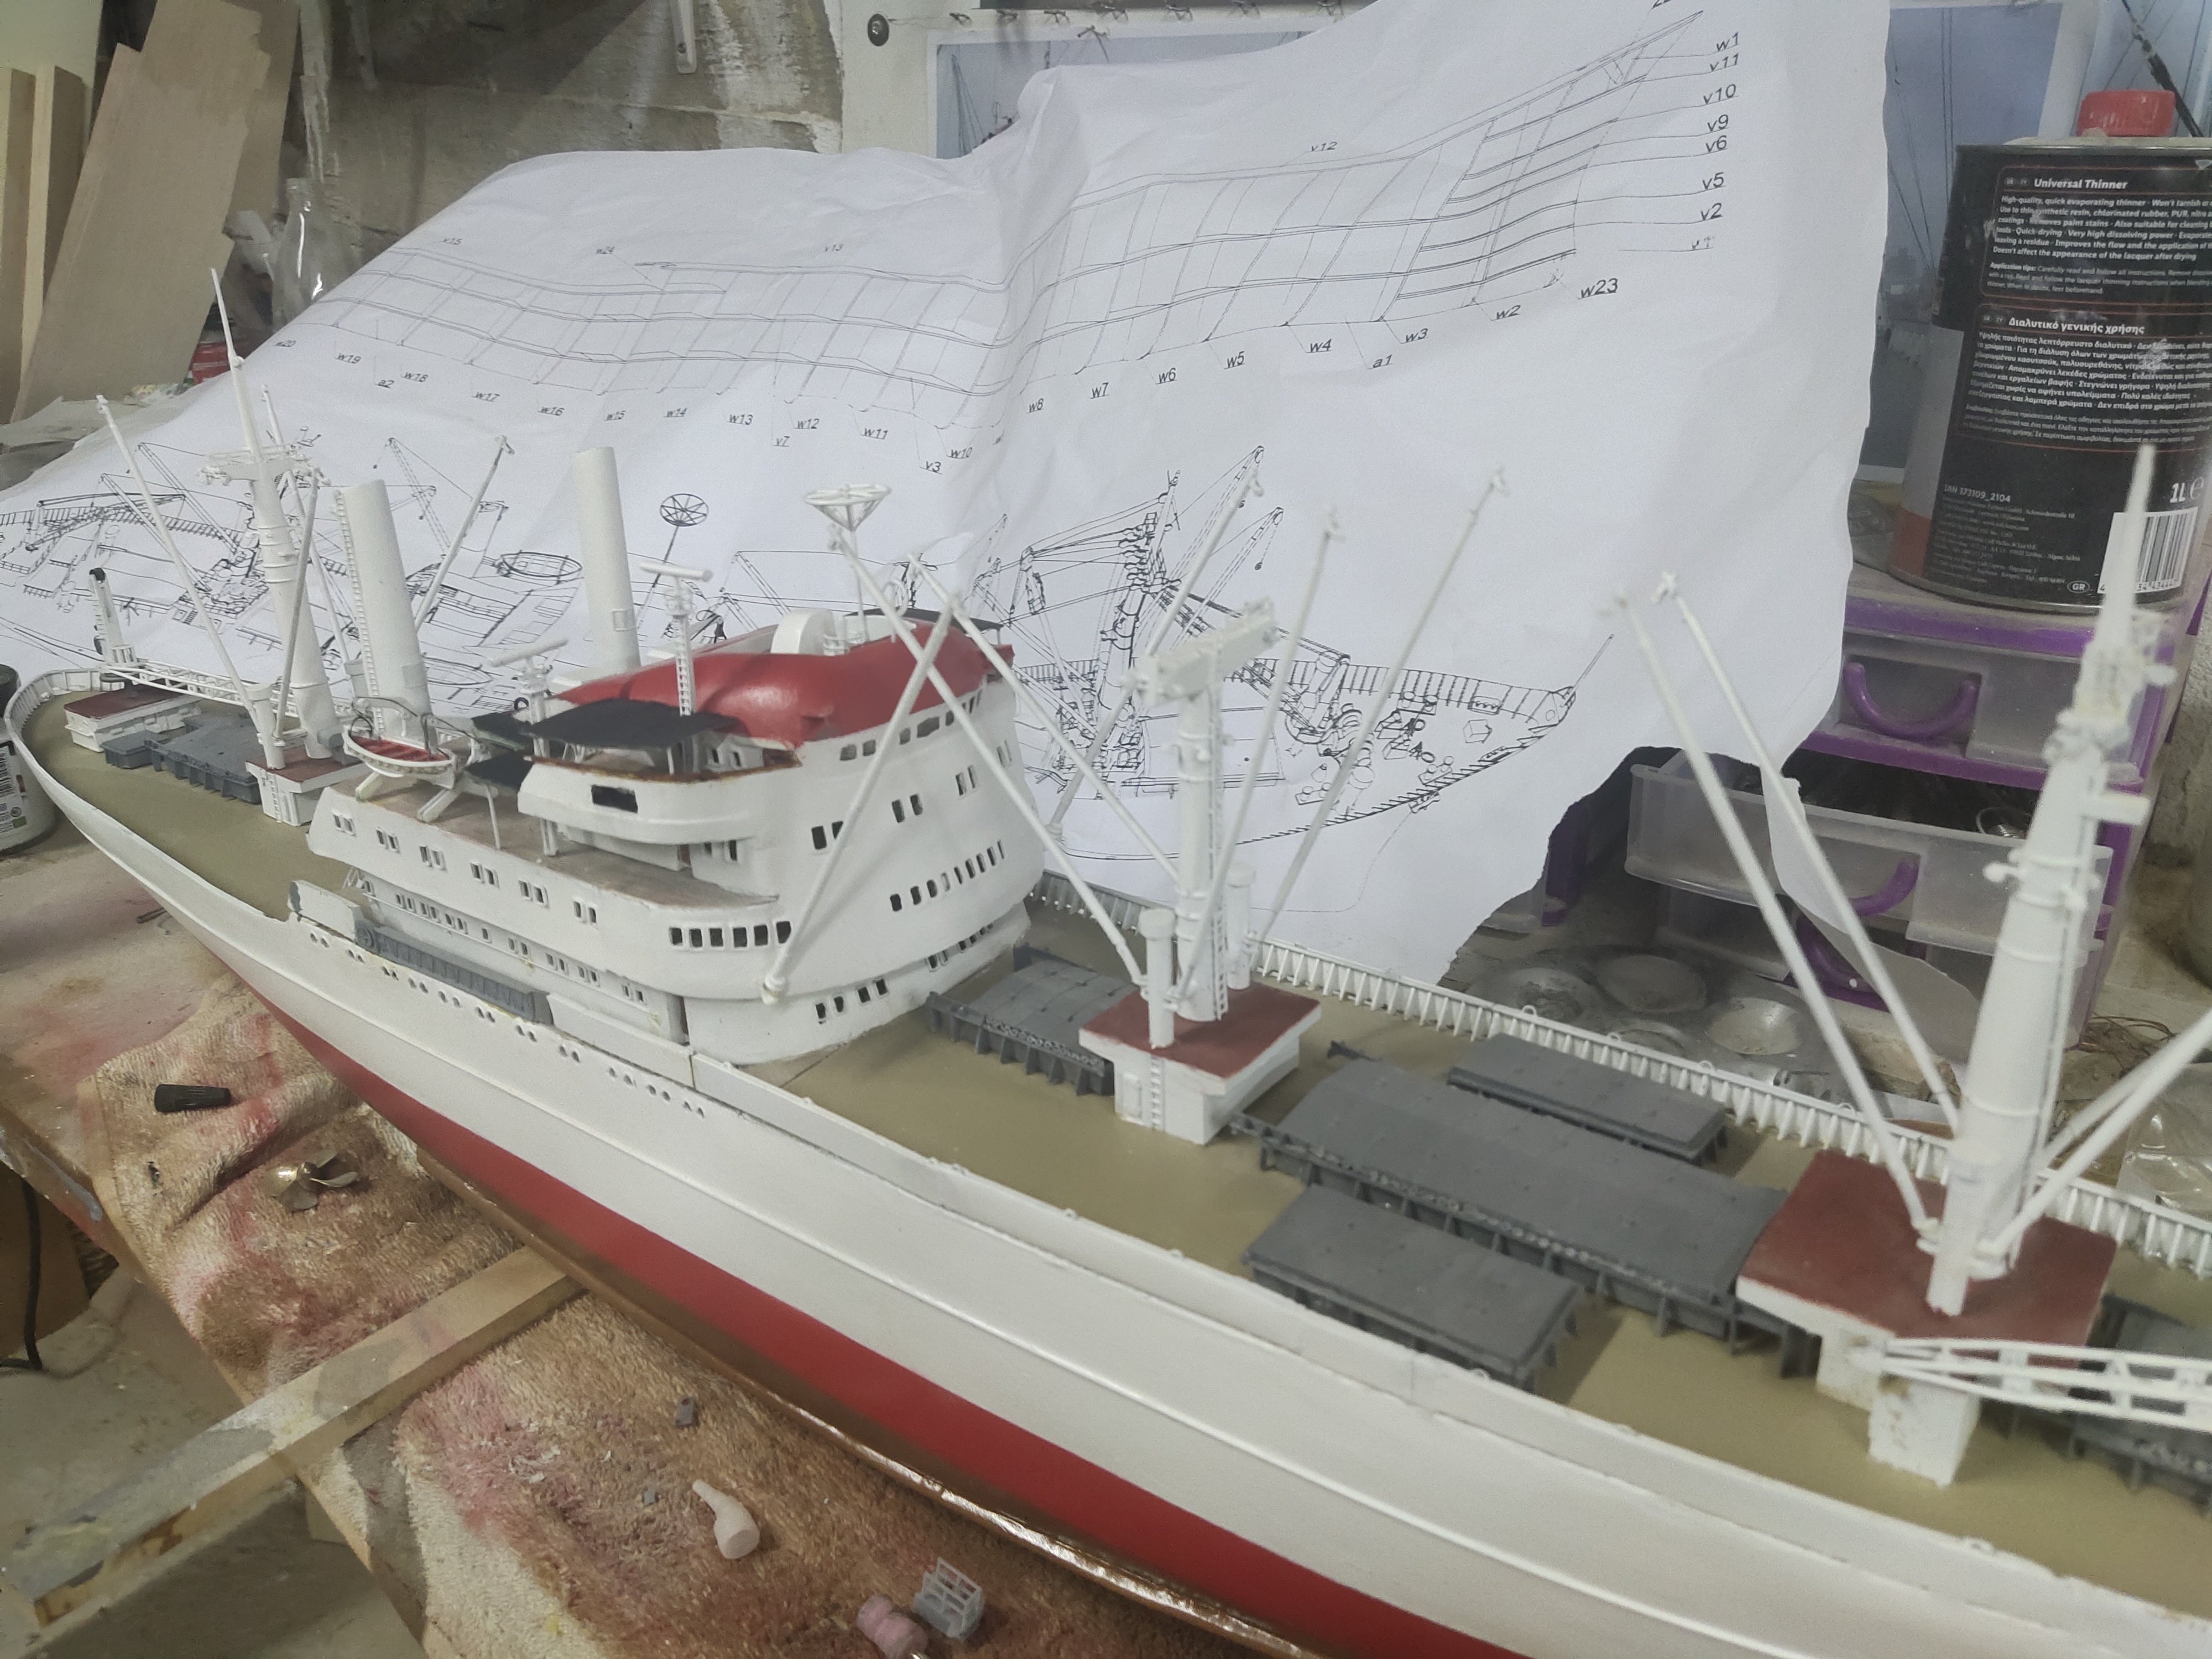
Final details added. I need to spray with varnish, add decals and add guard rails at the rear section

-
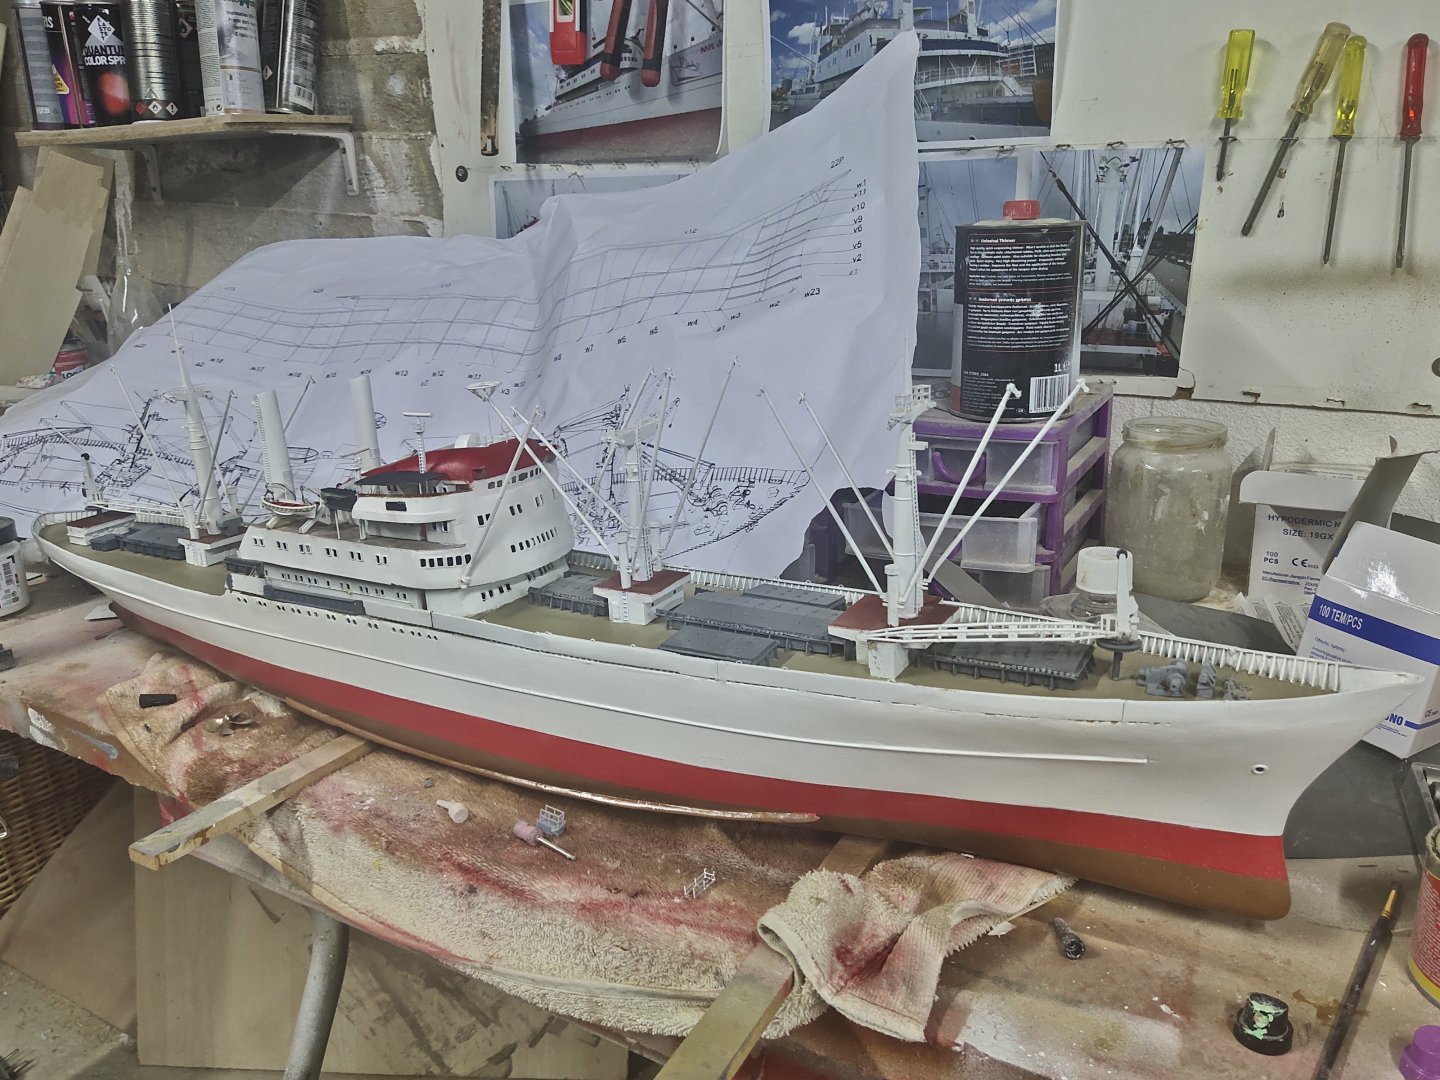
It took me sometime but paintjob was done. I need to add a few details, decals and some PE work

-
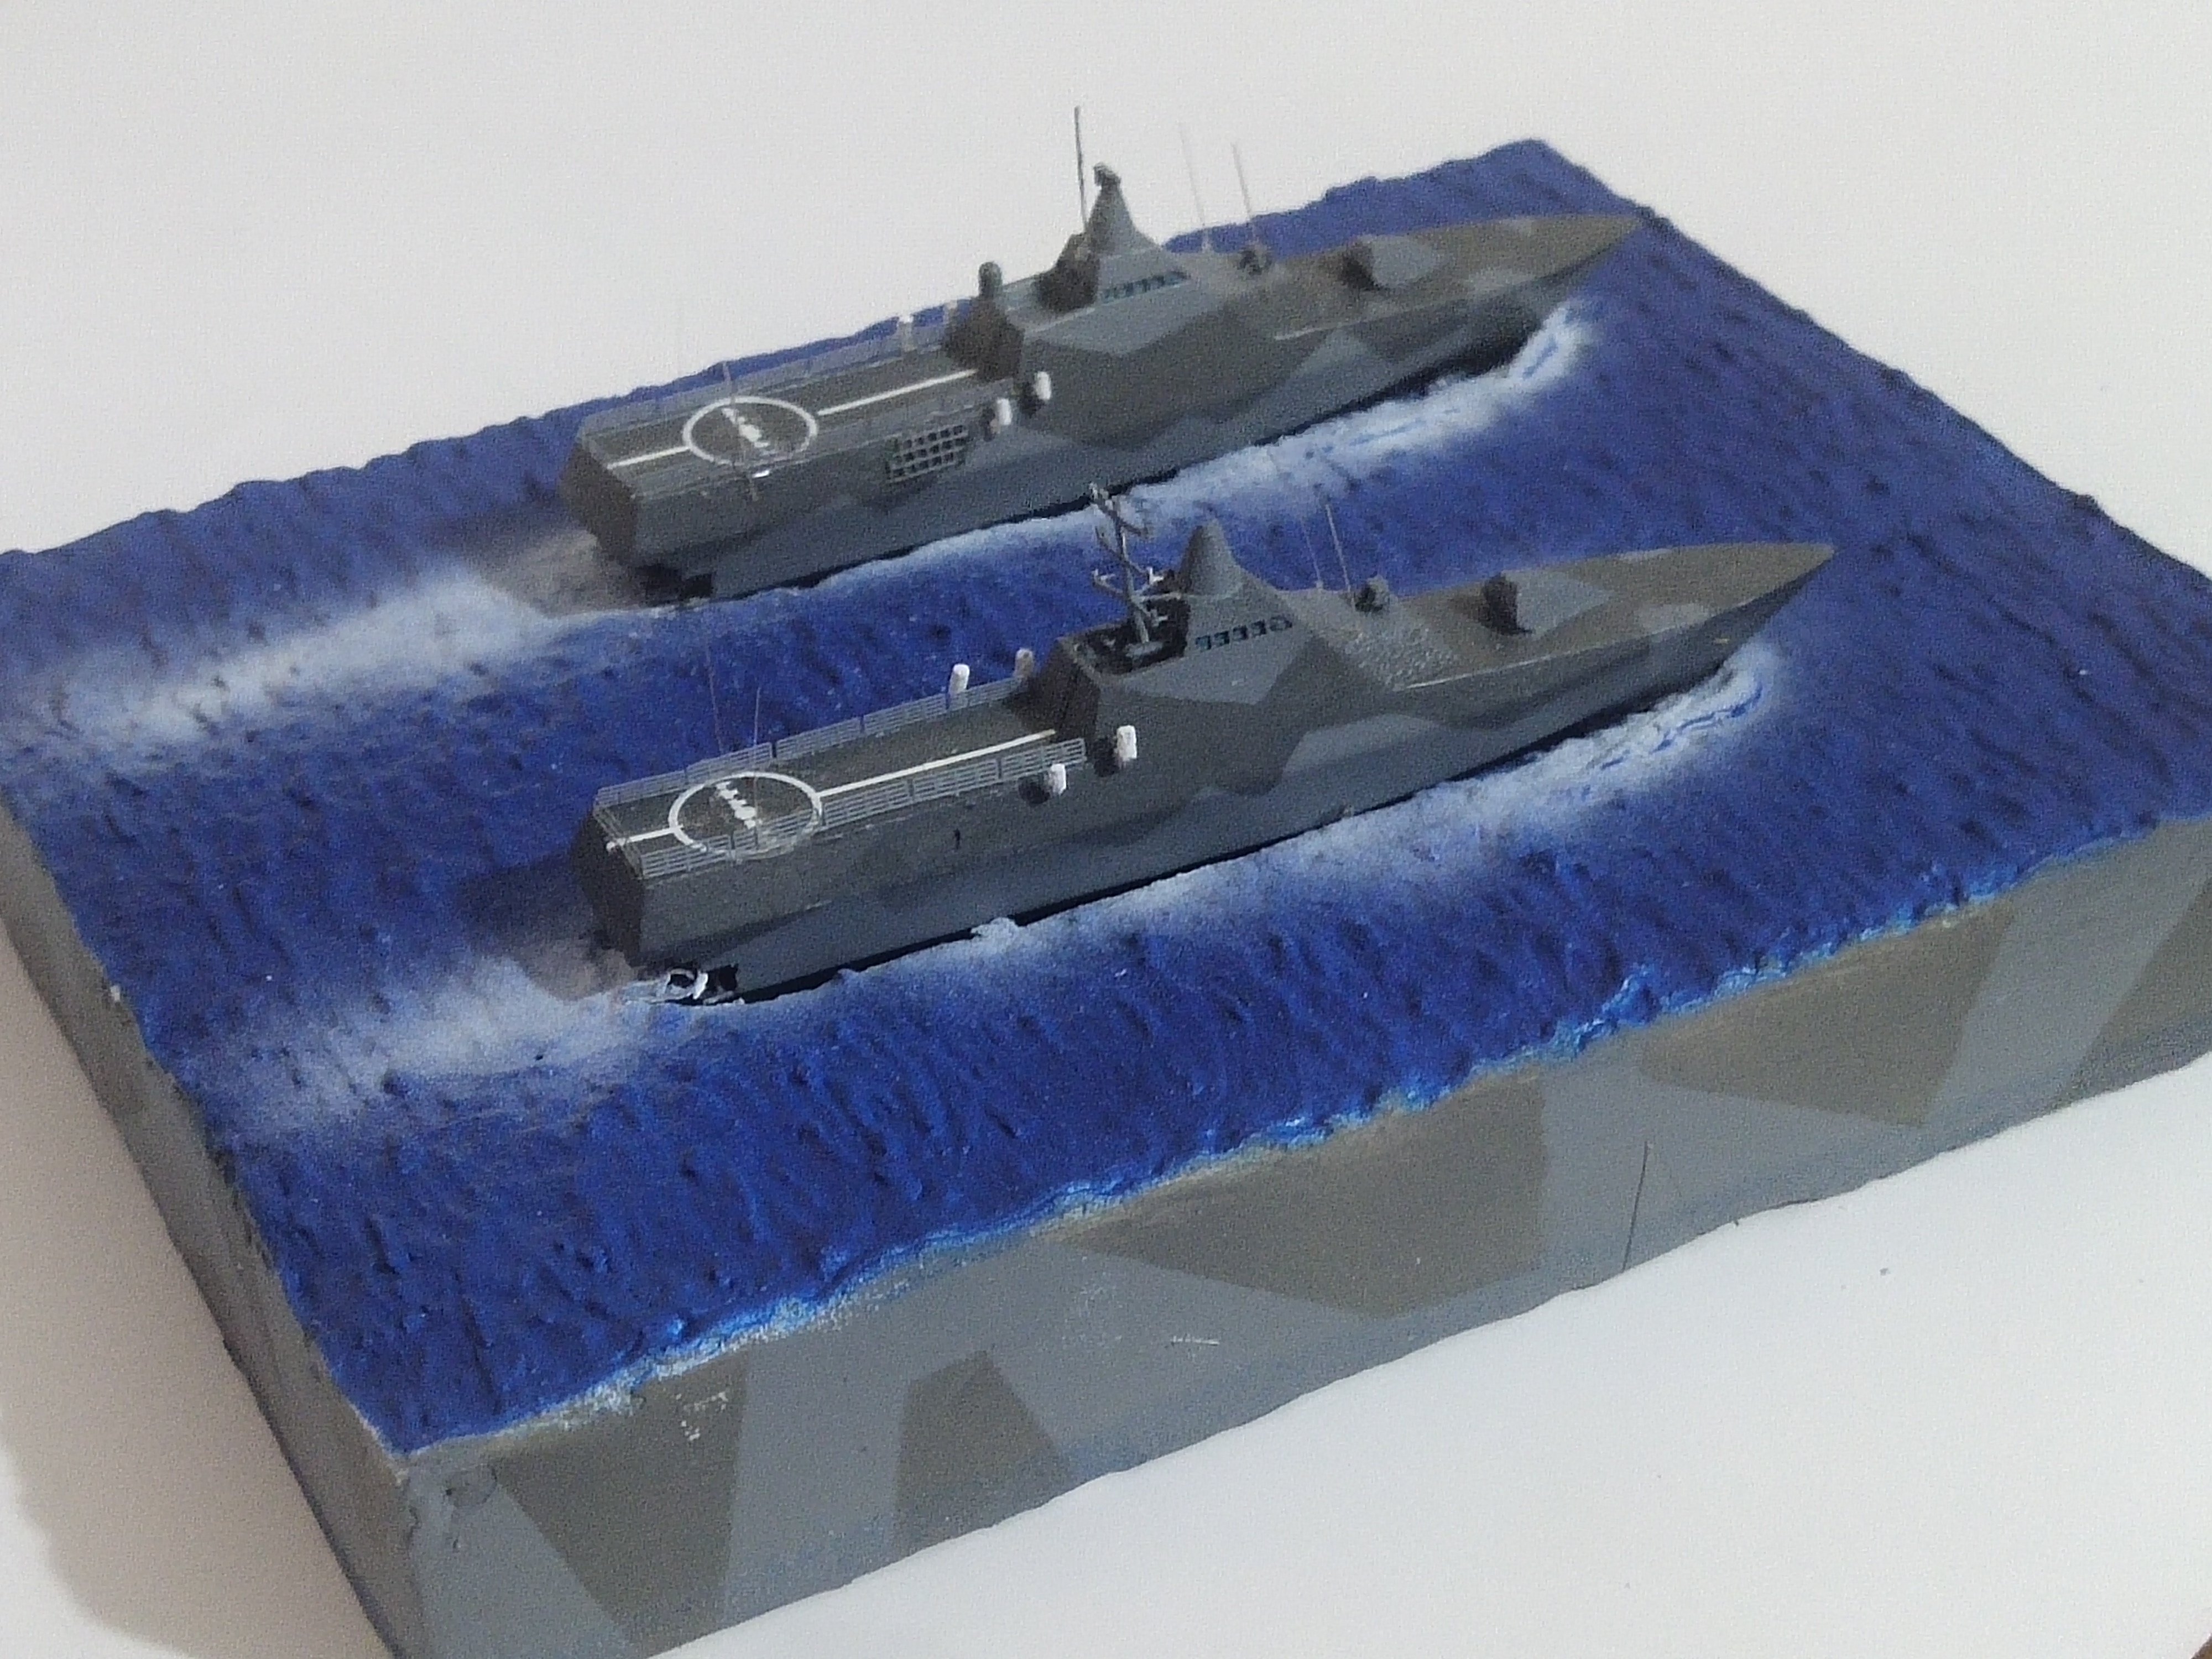
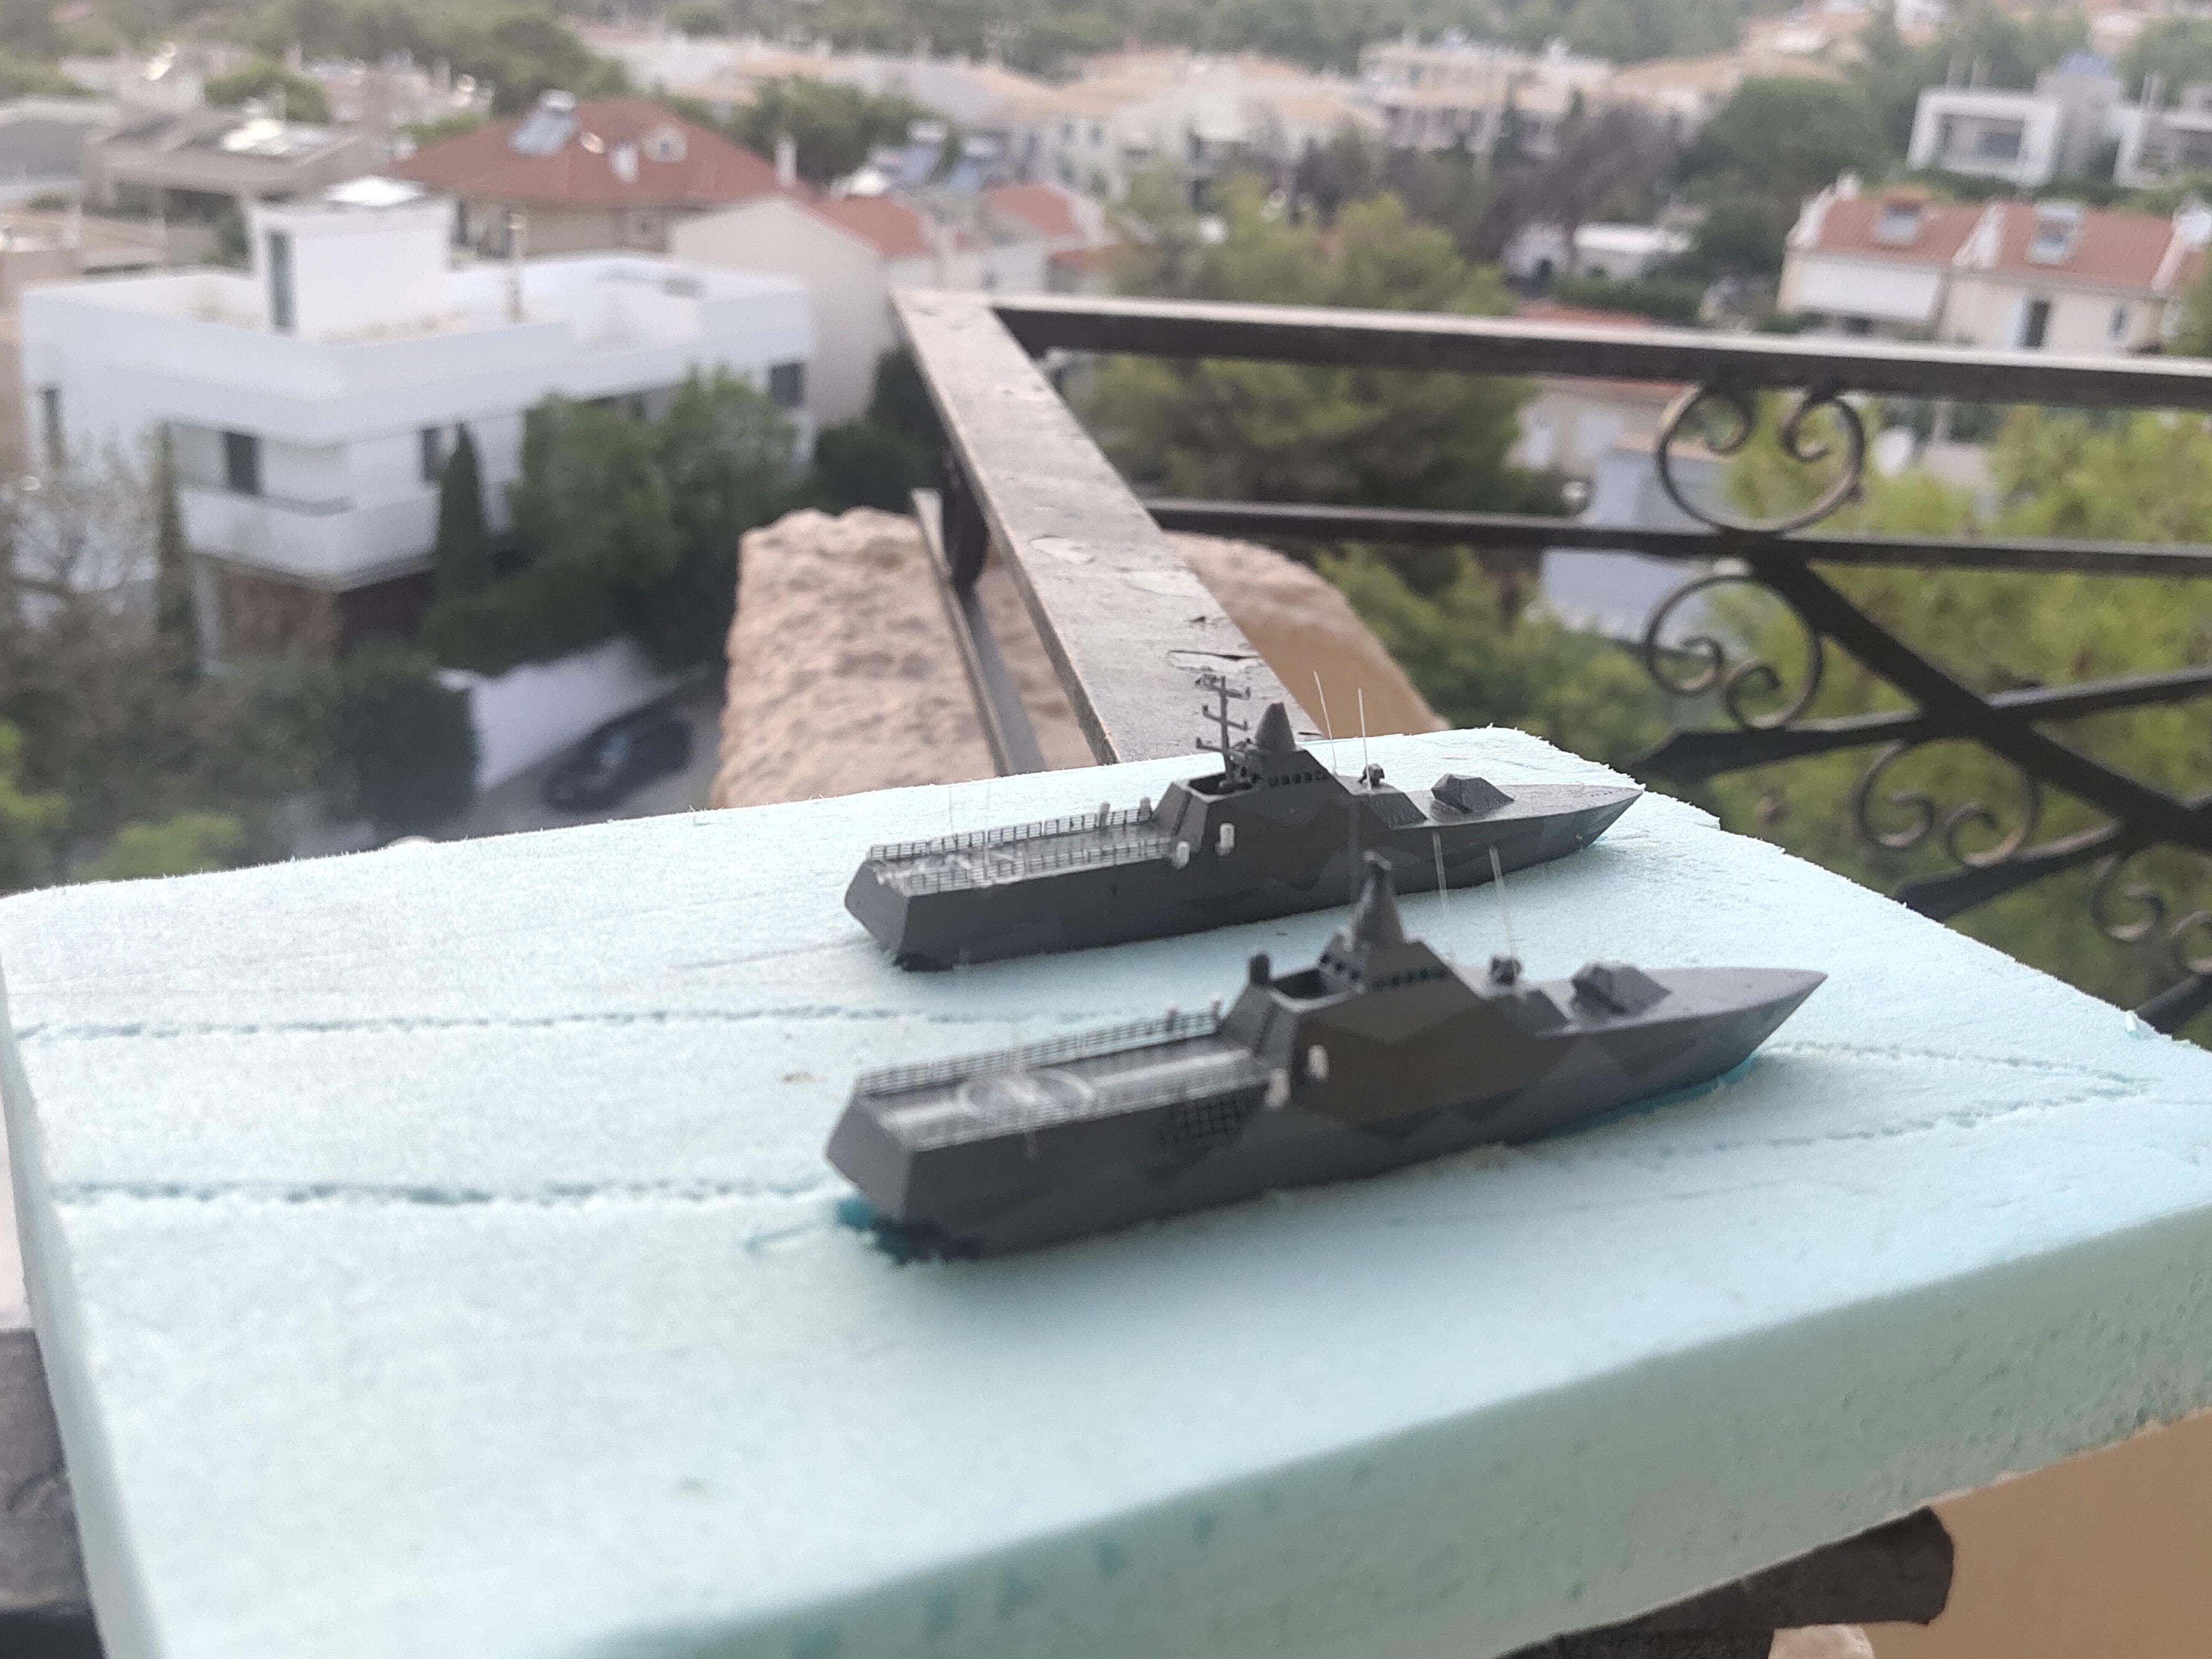
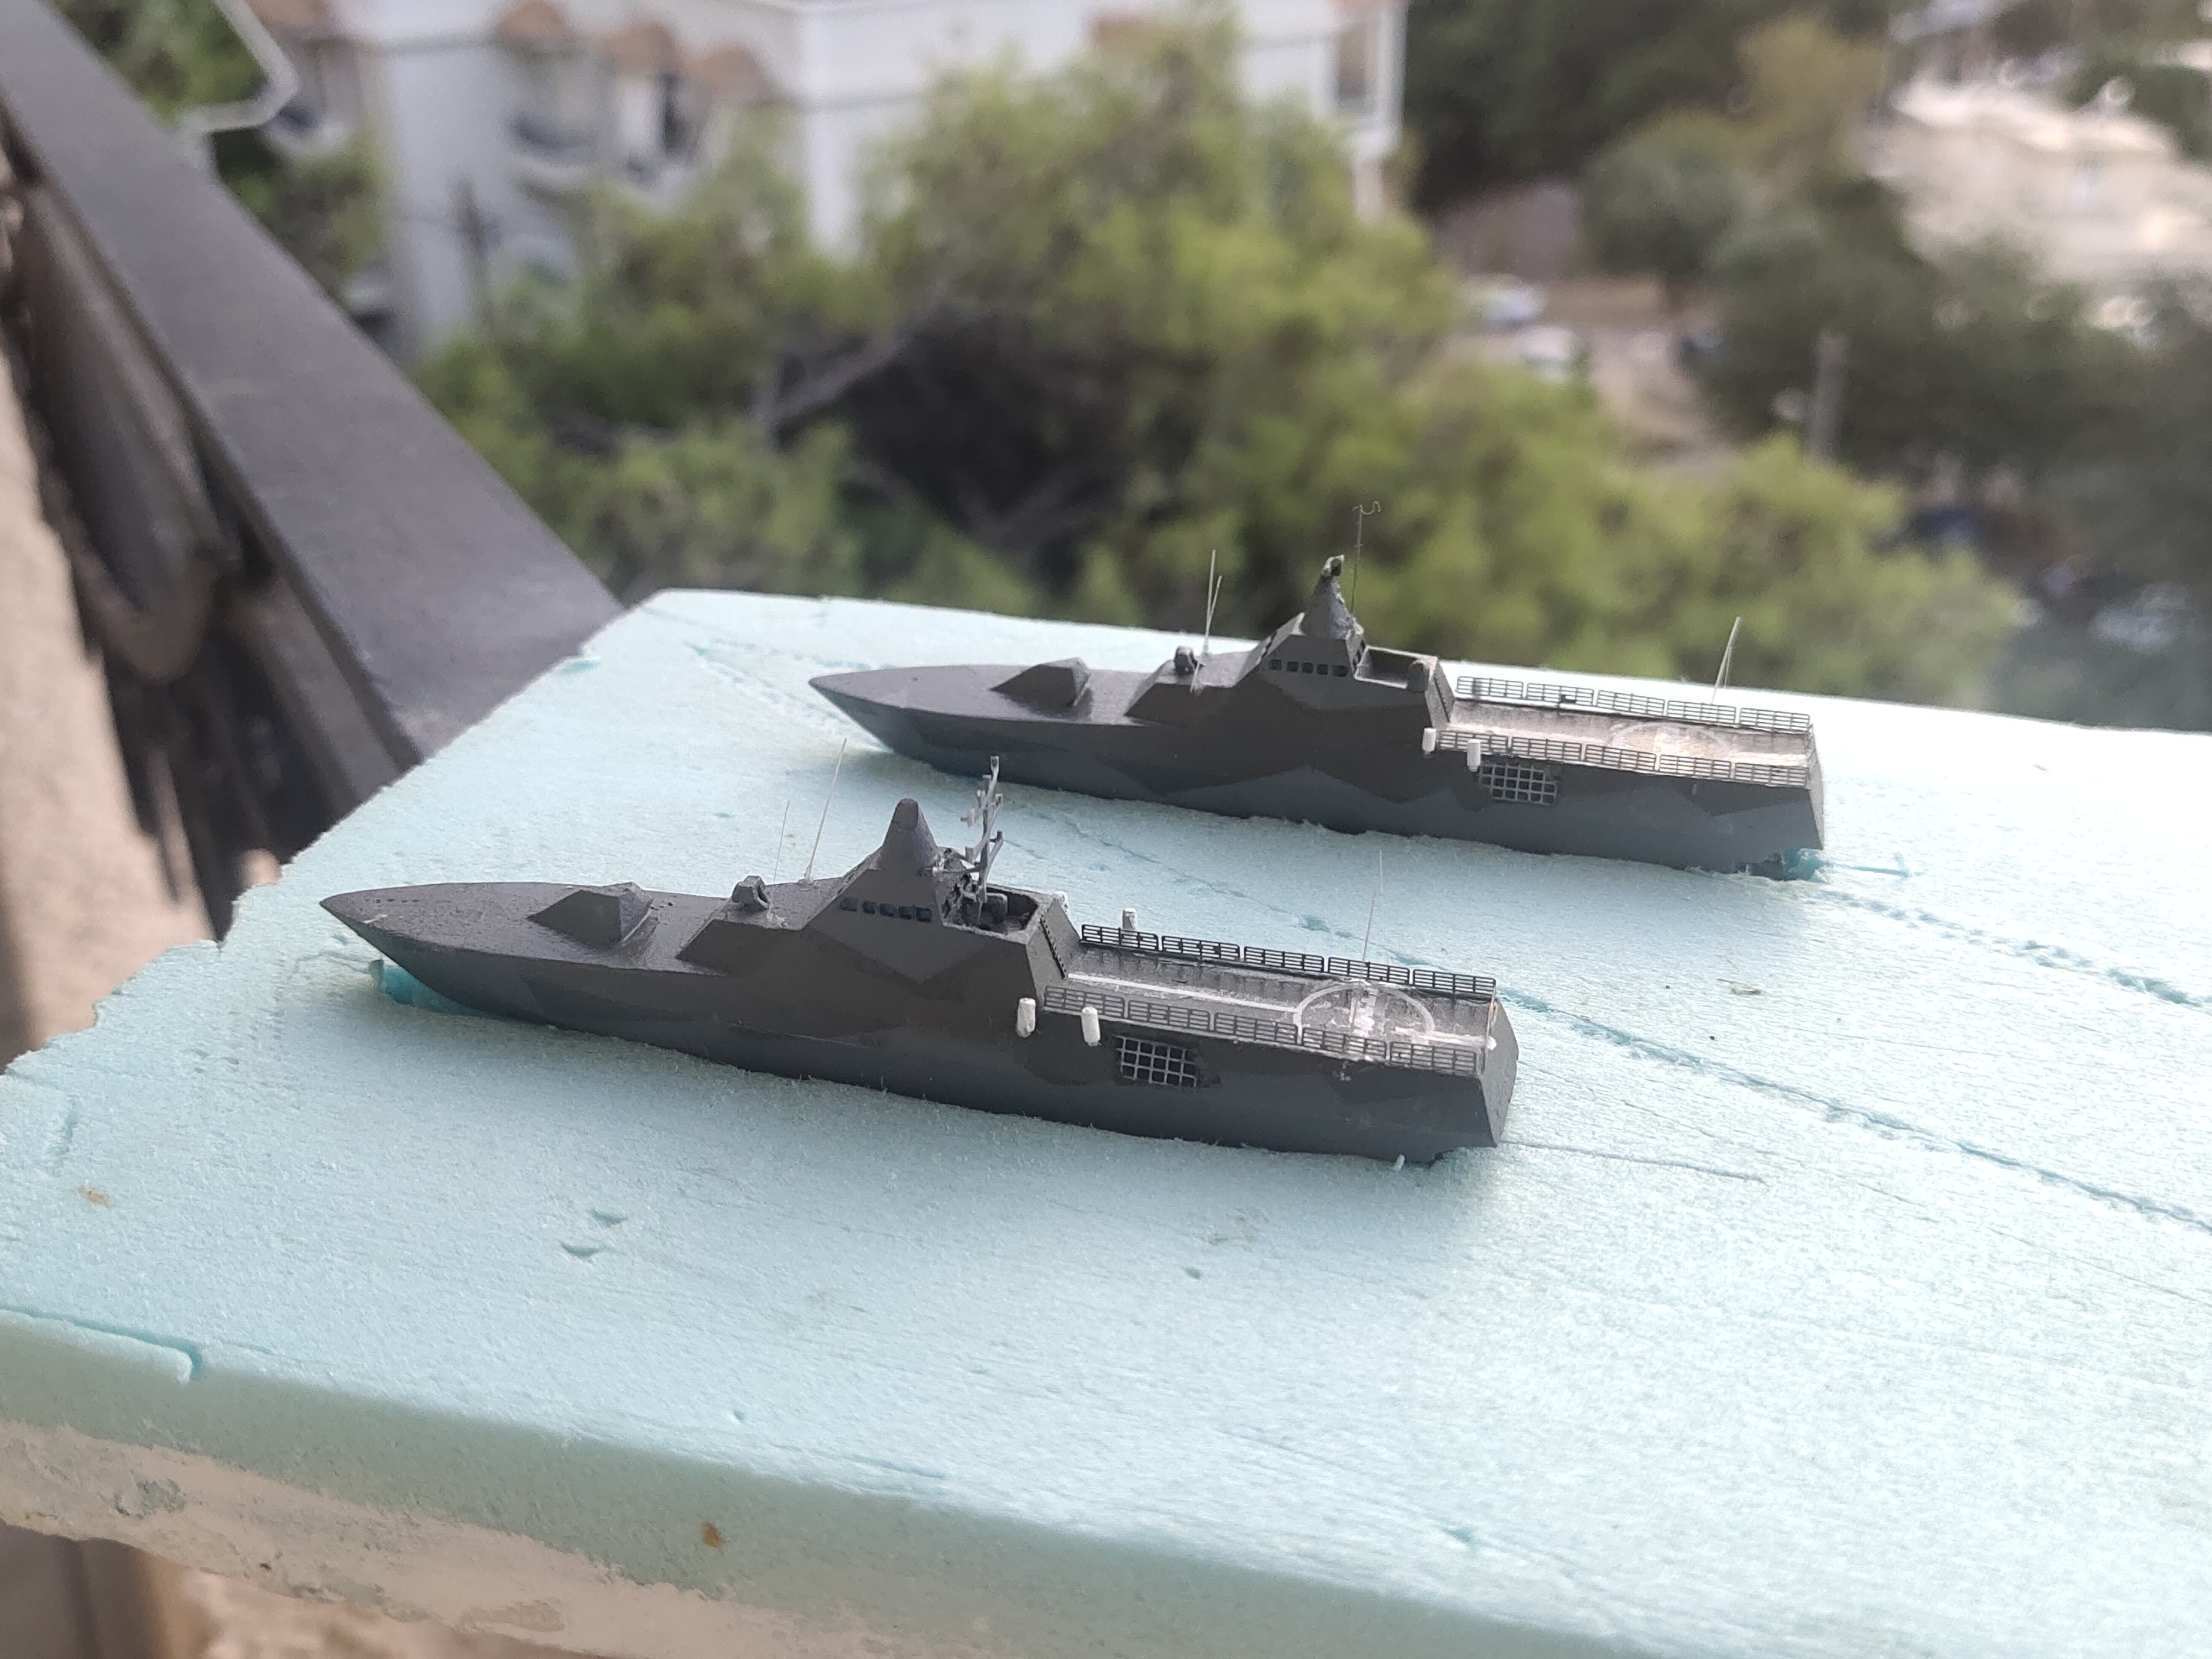
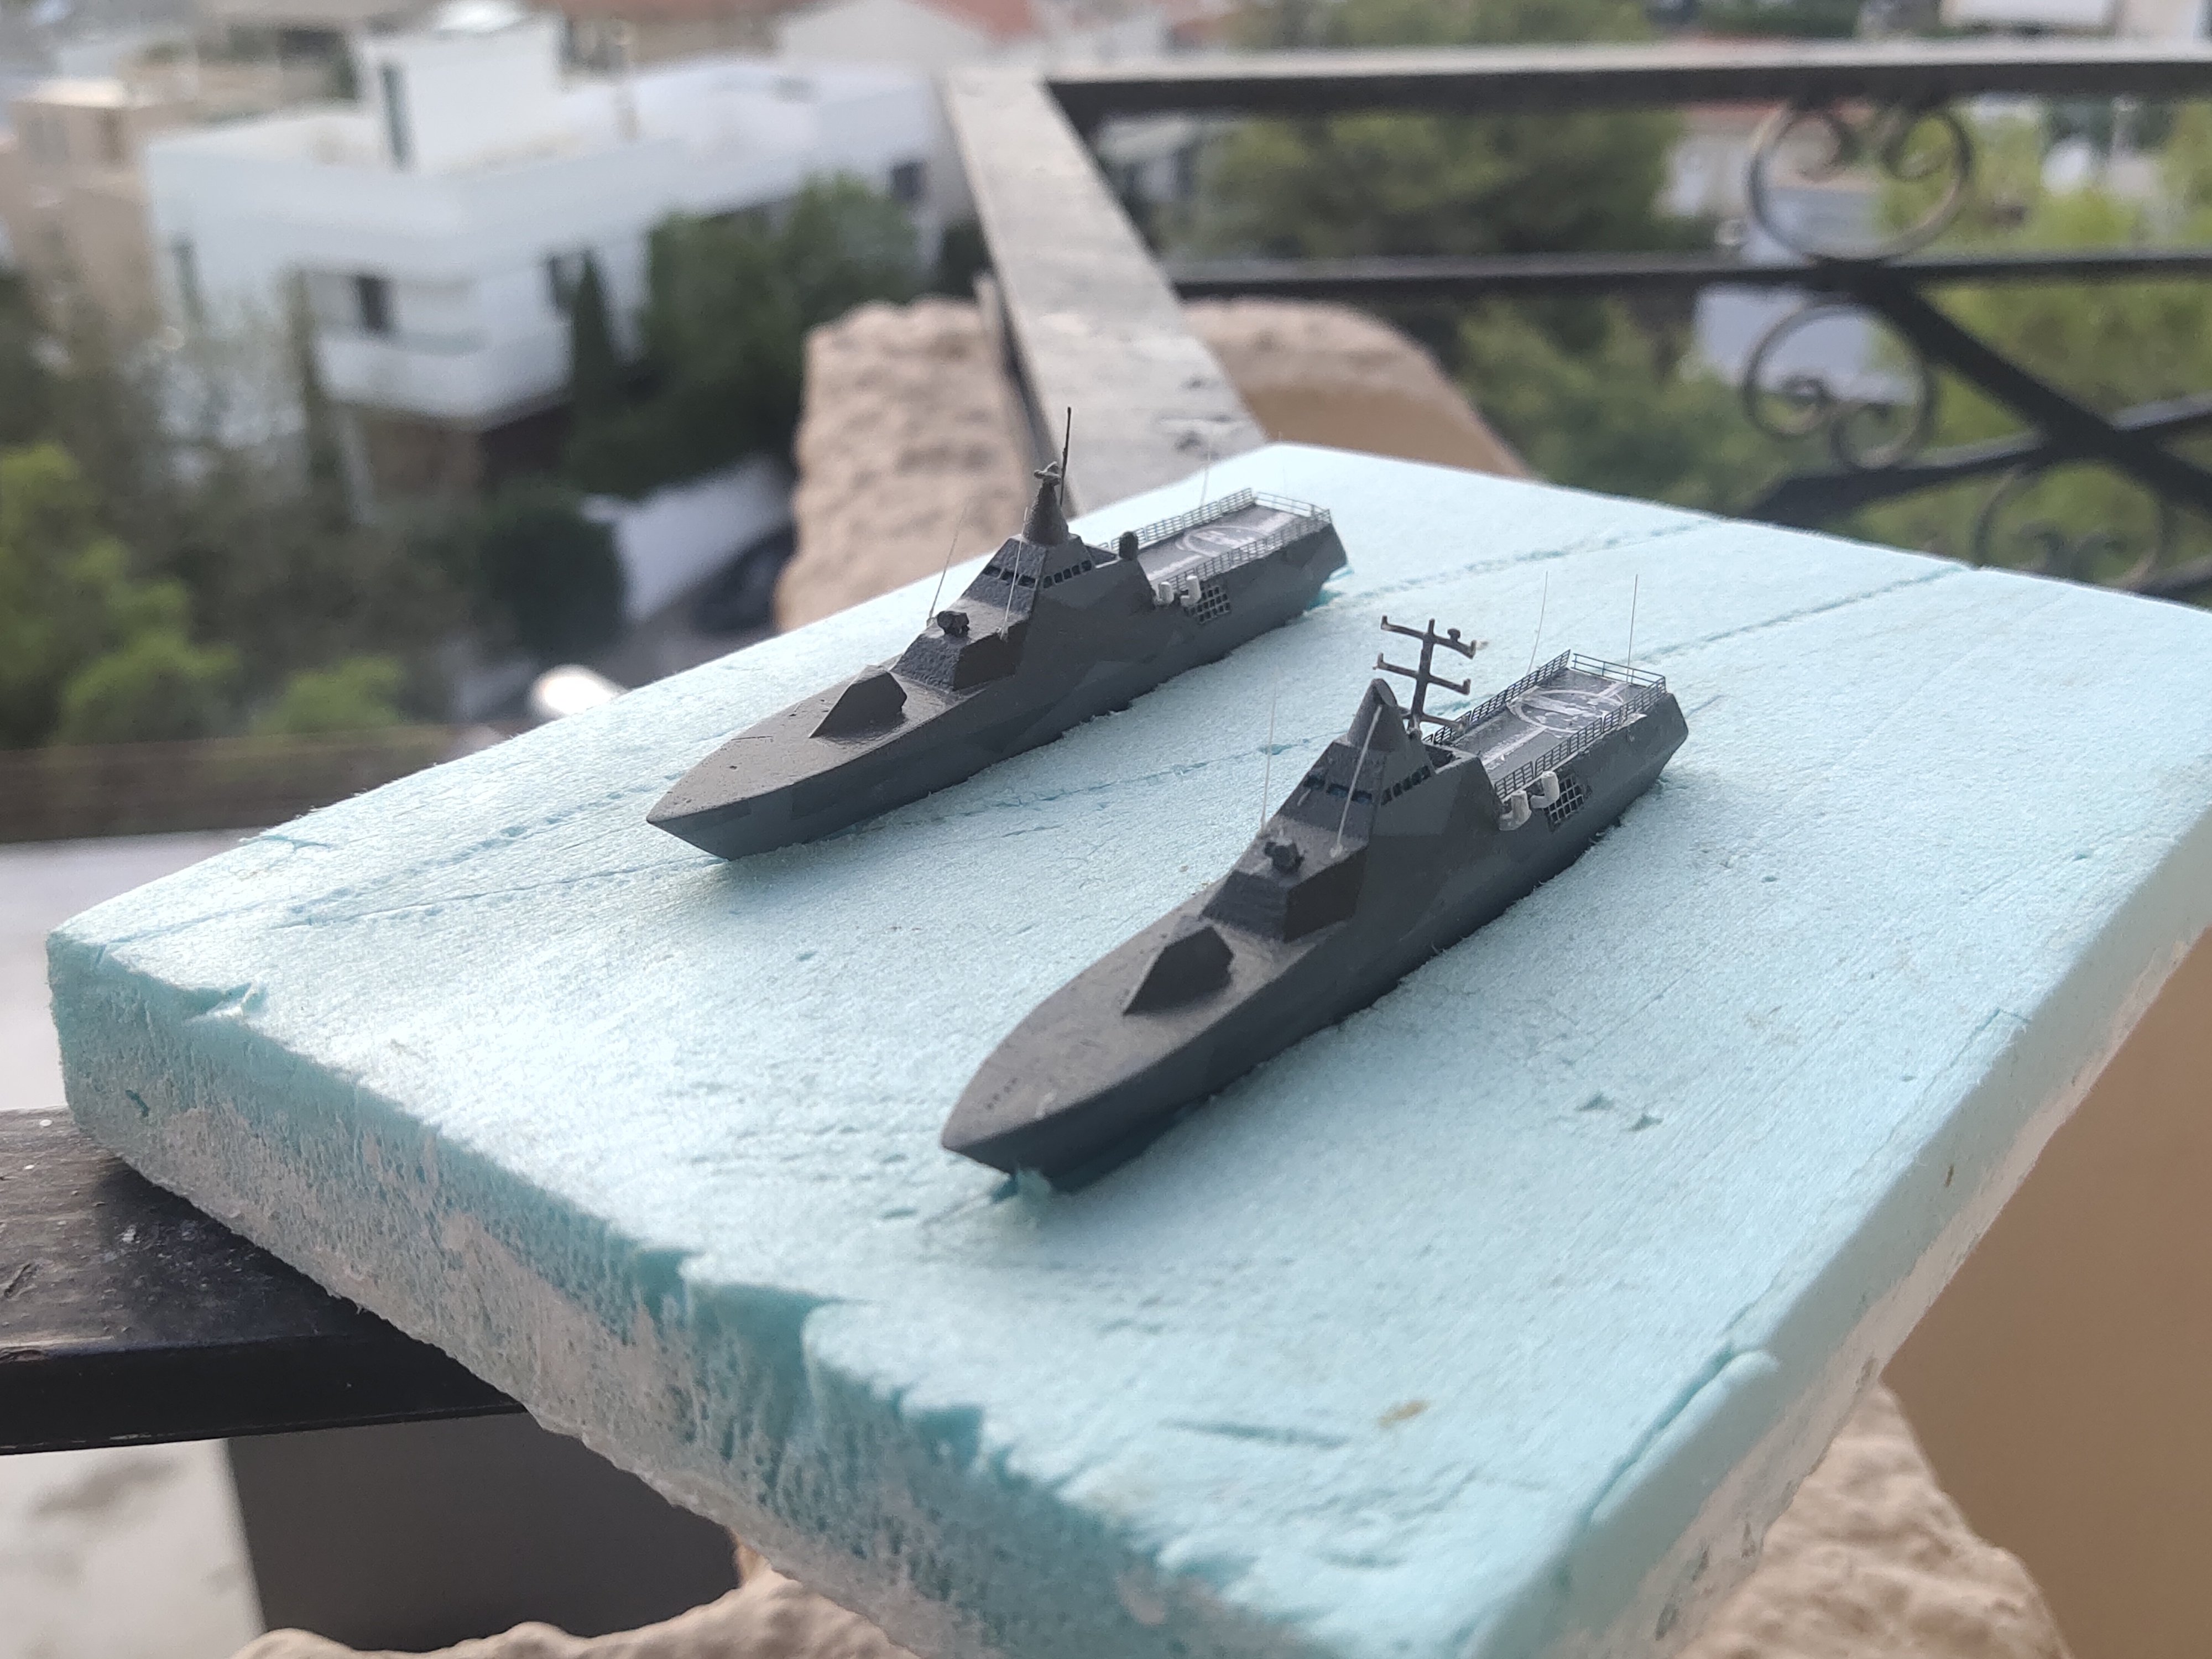
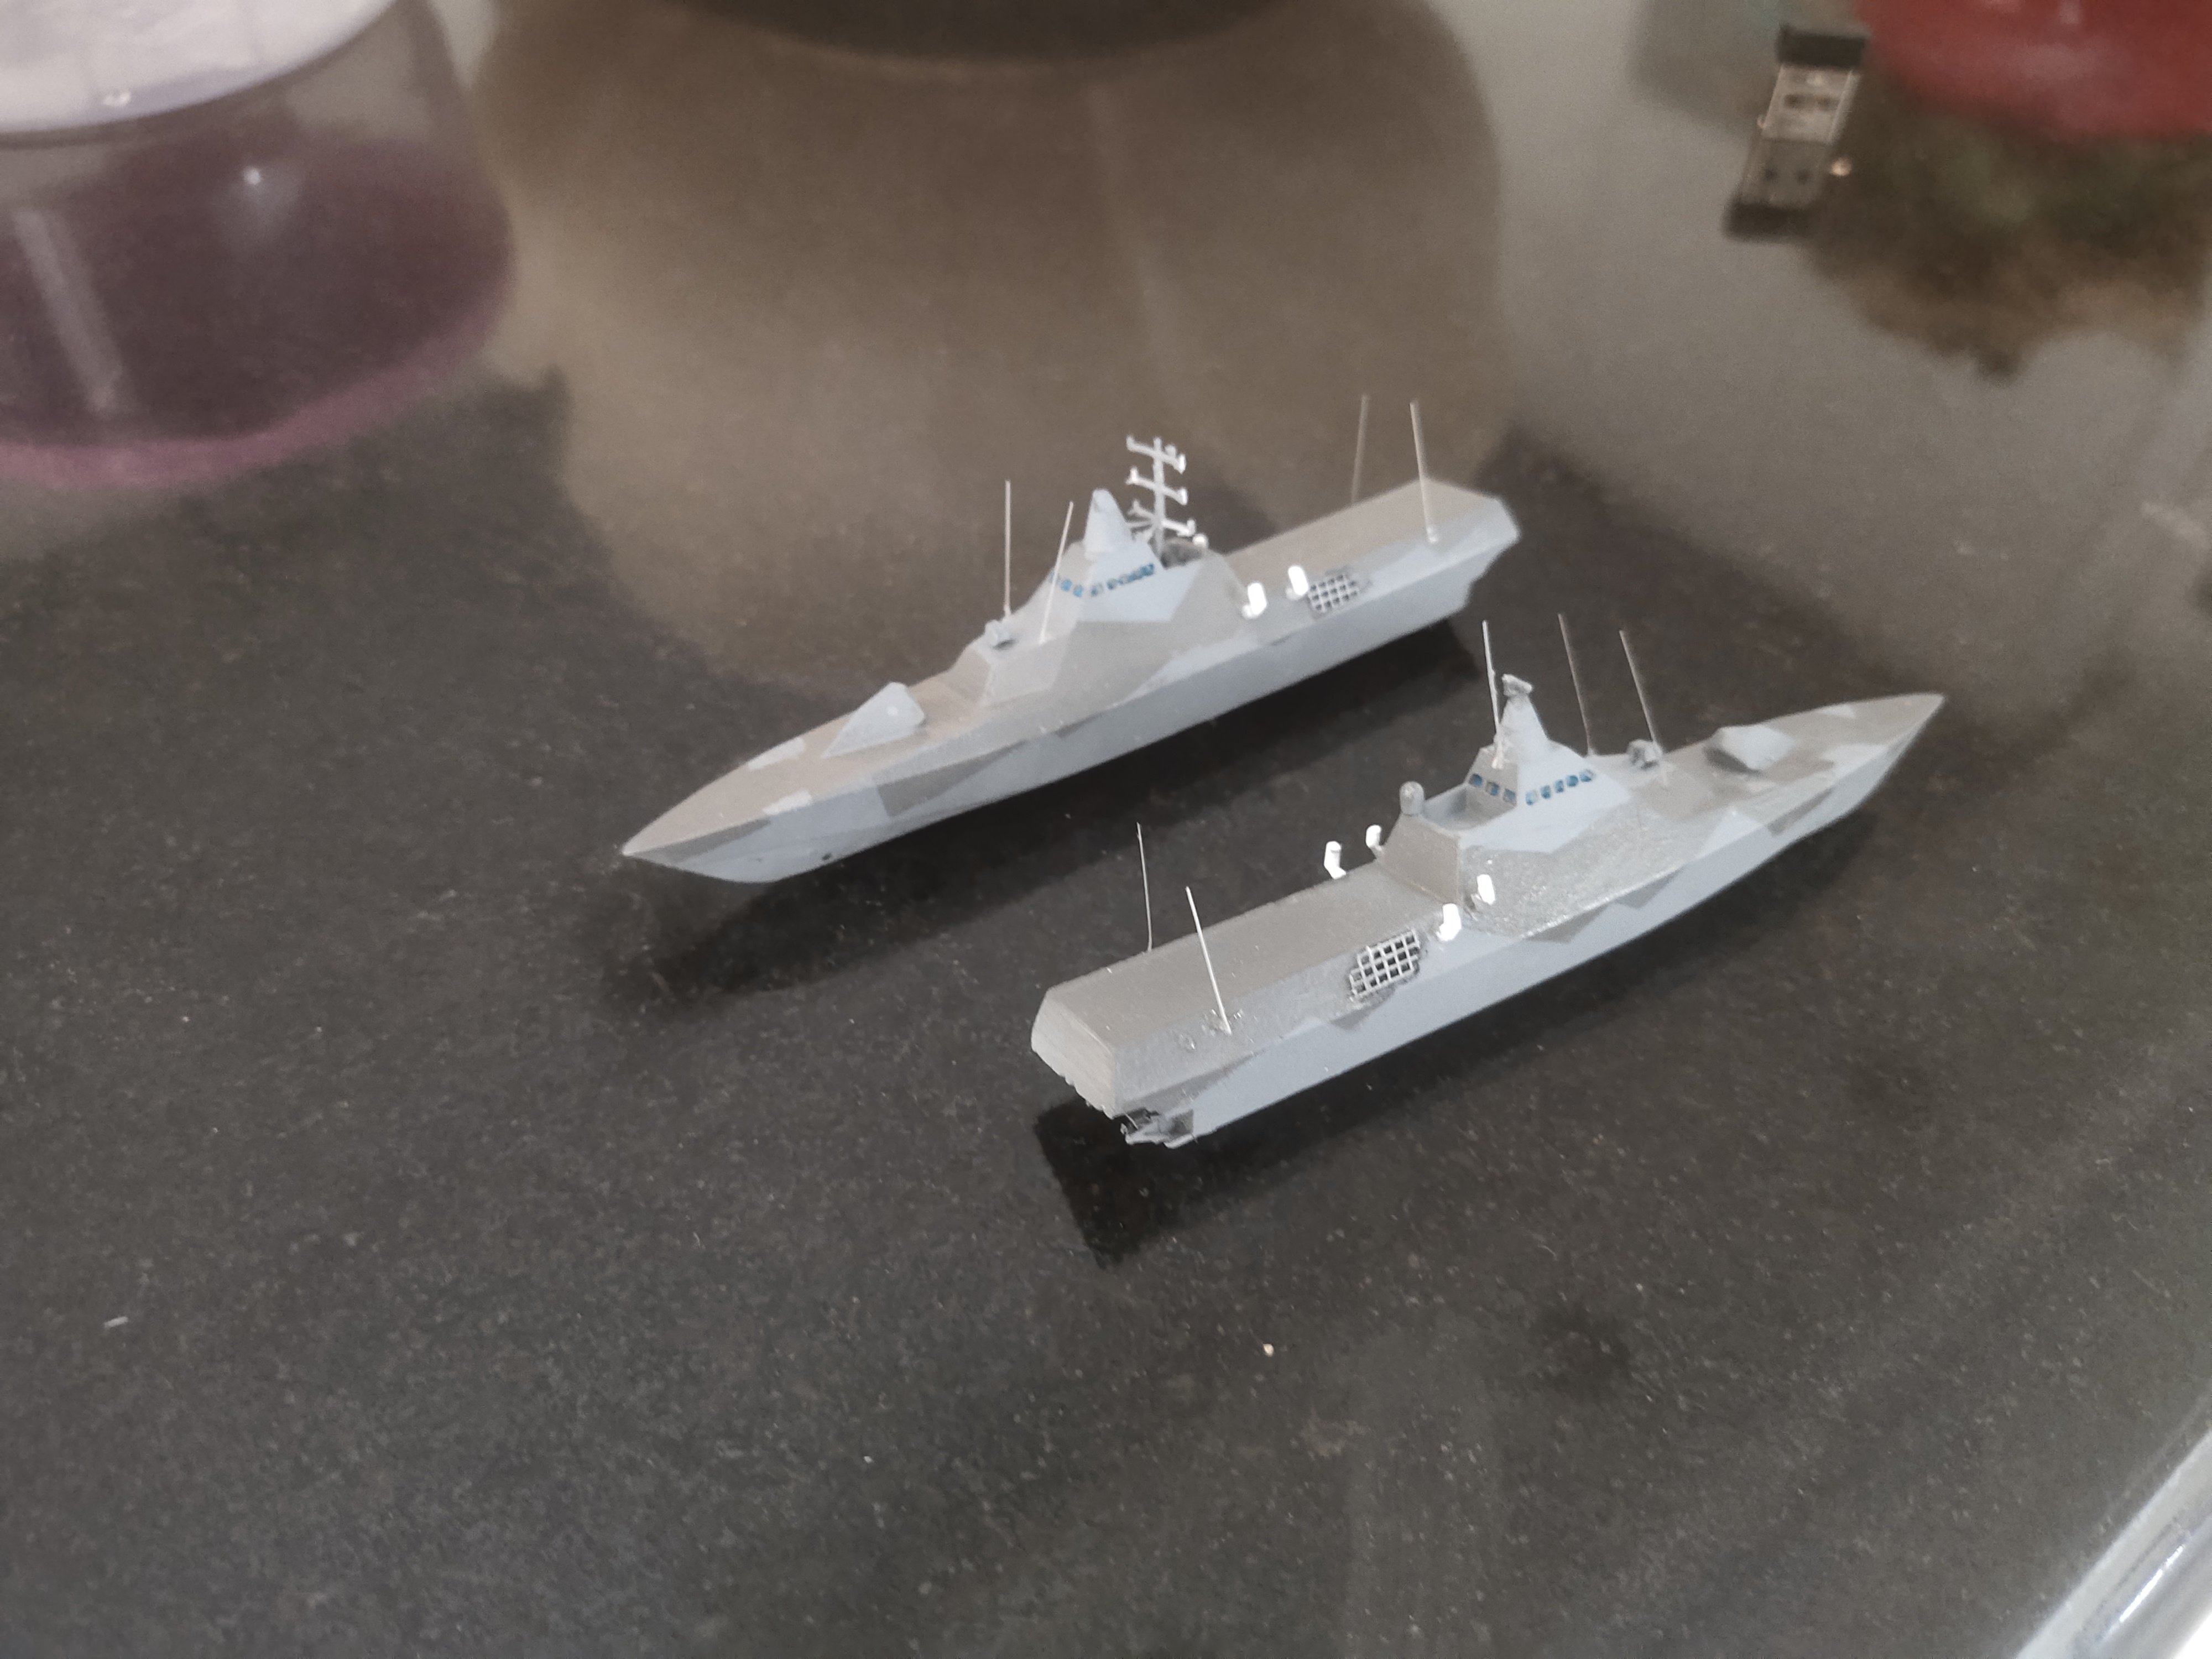
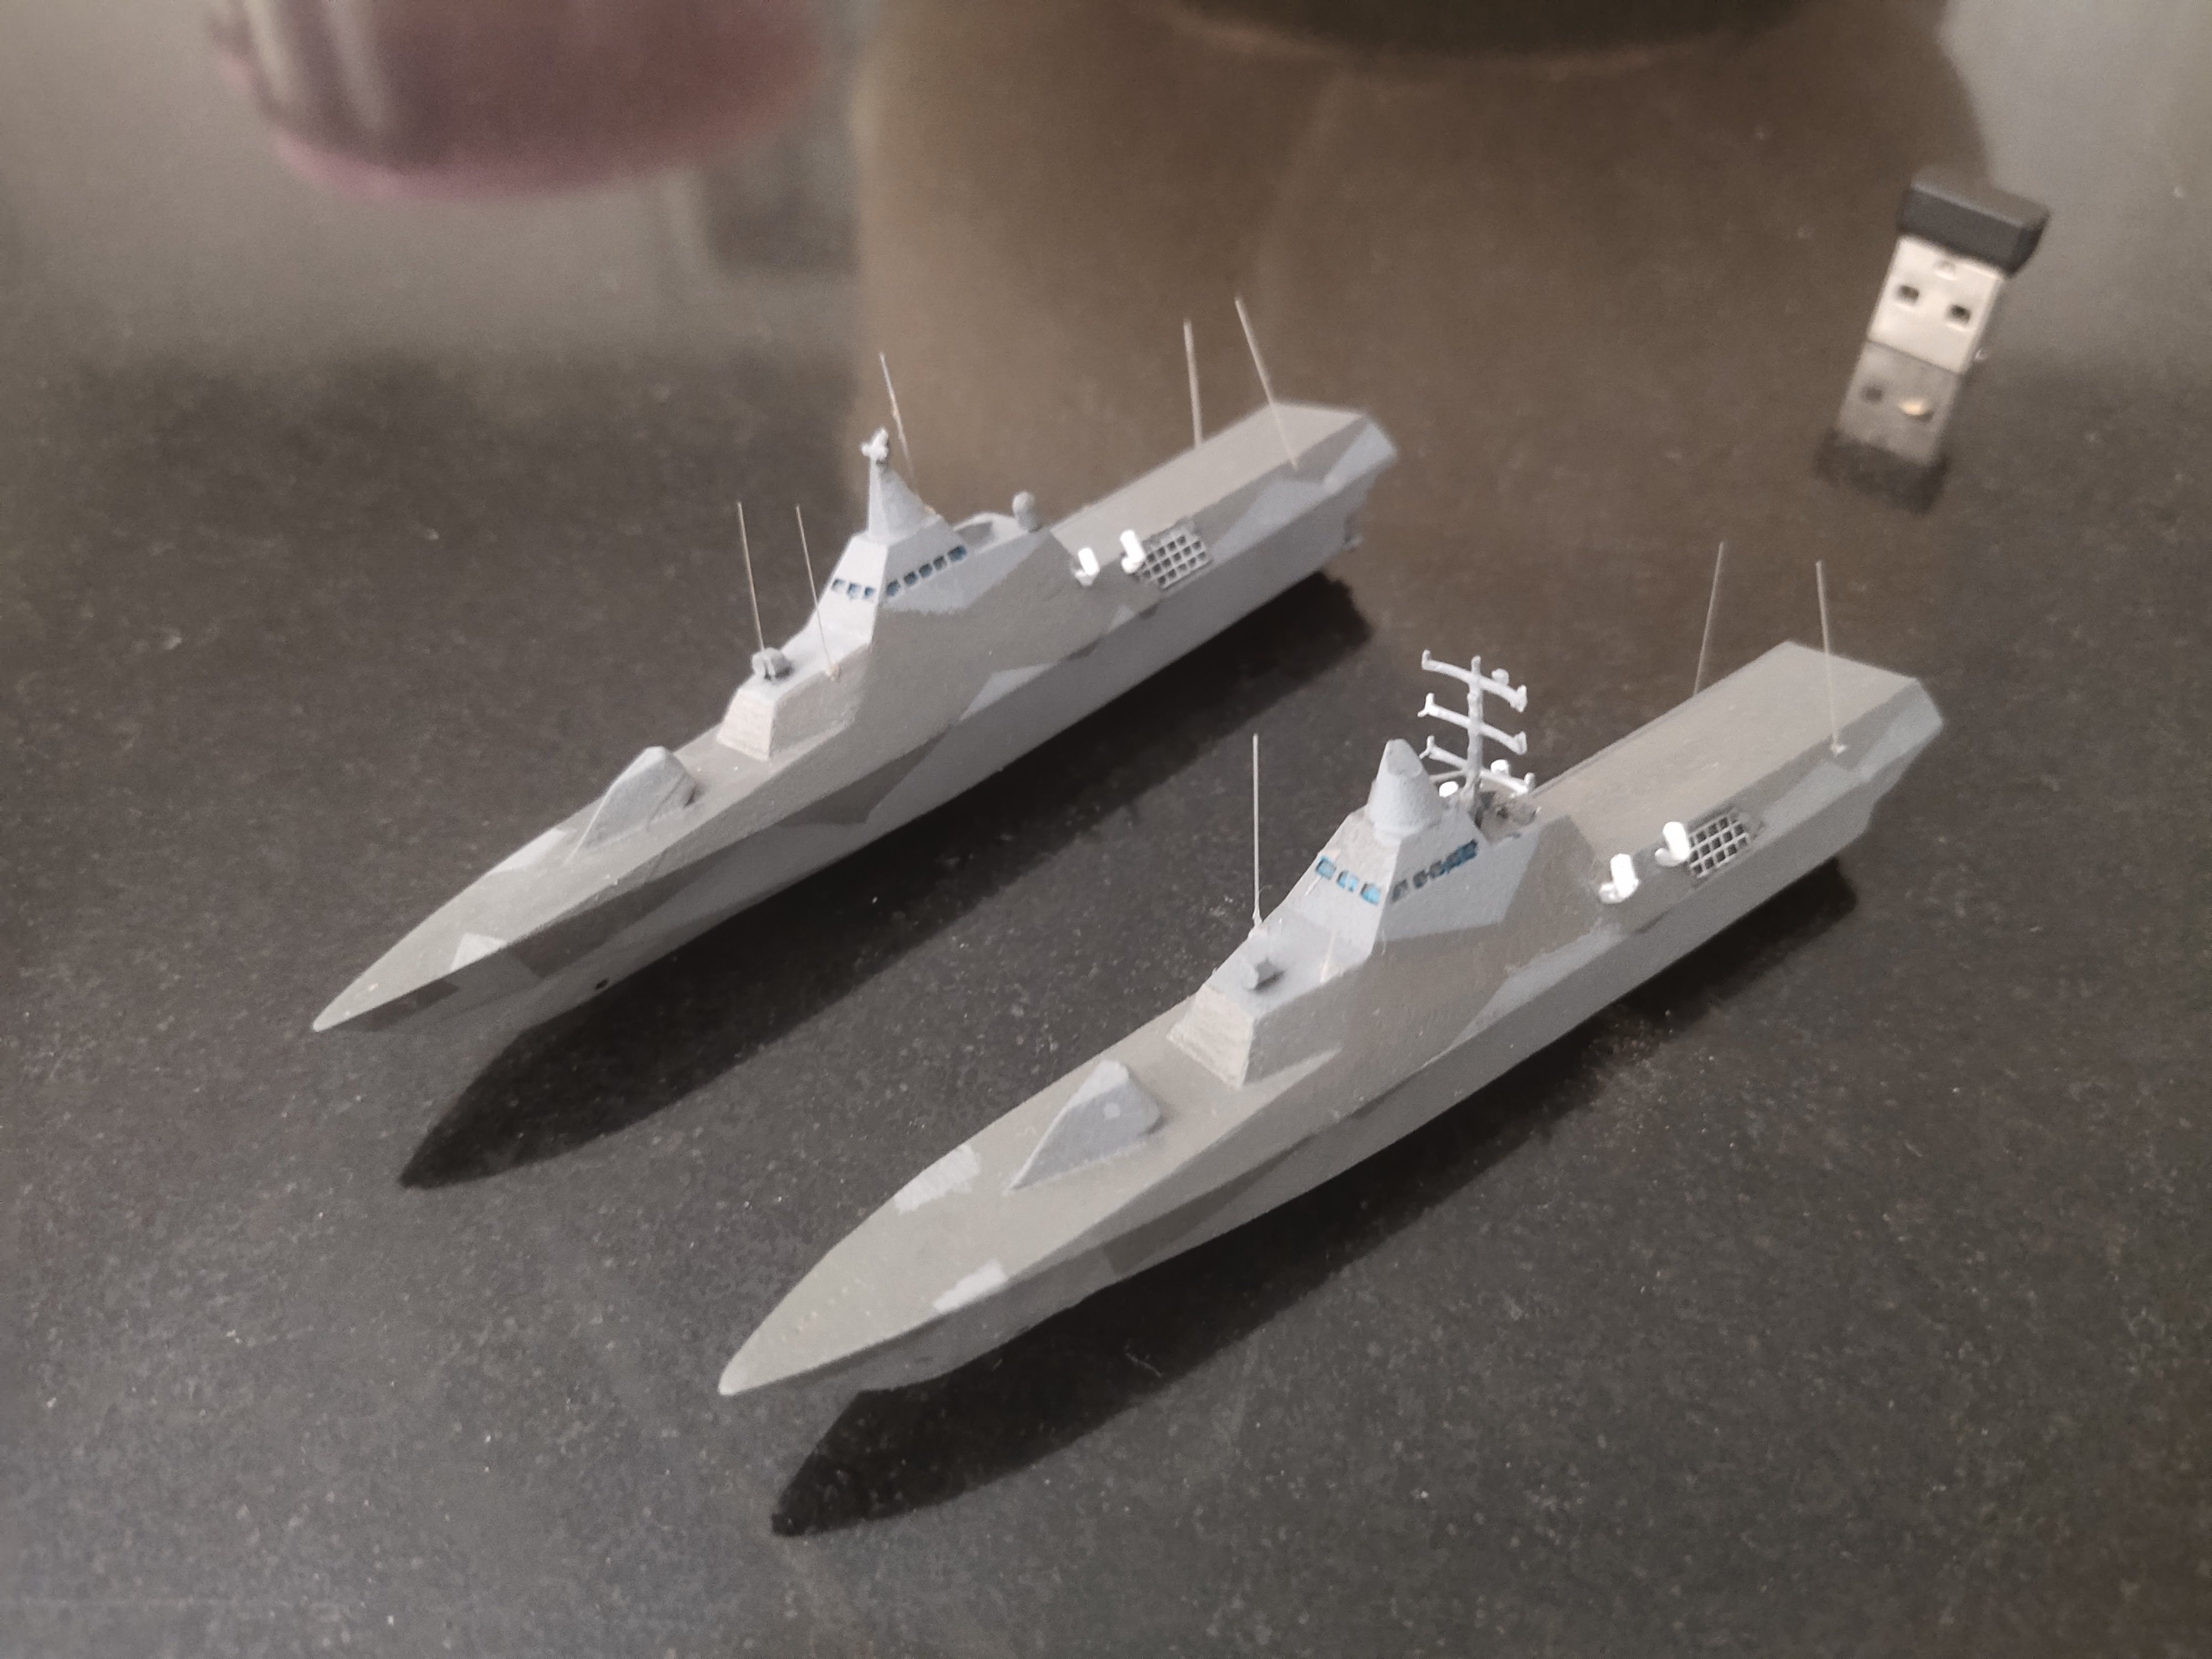
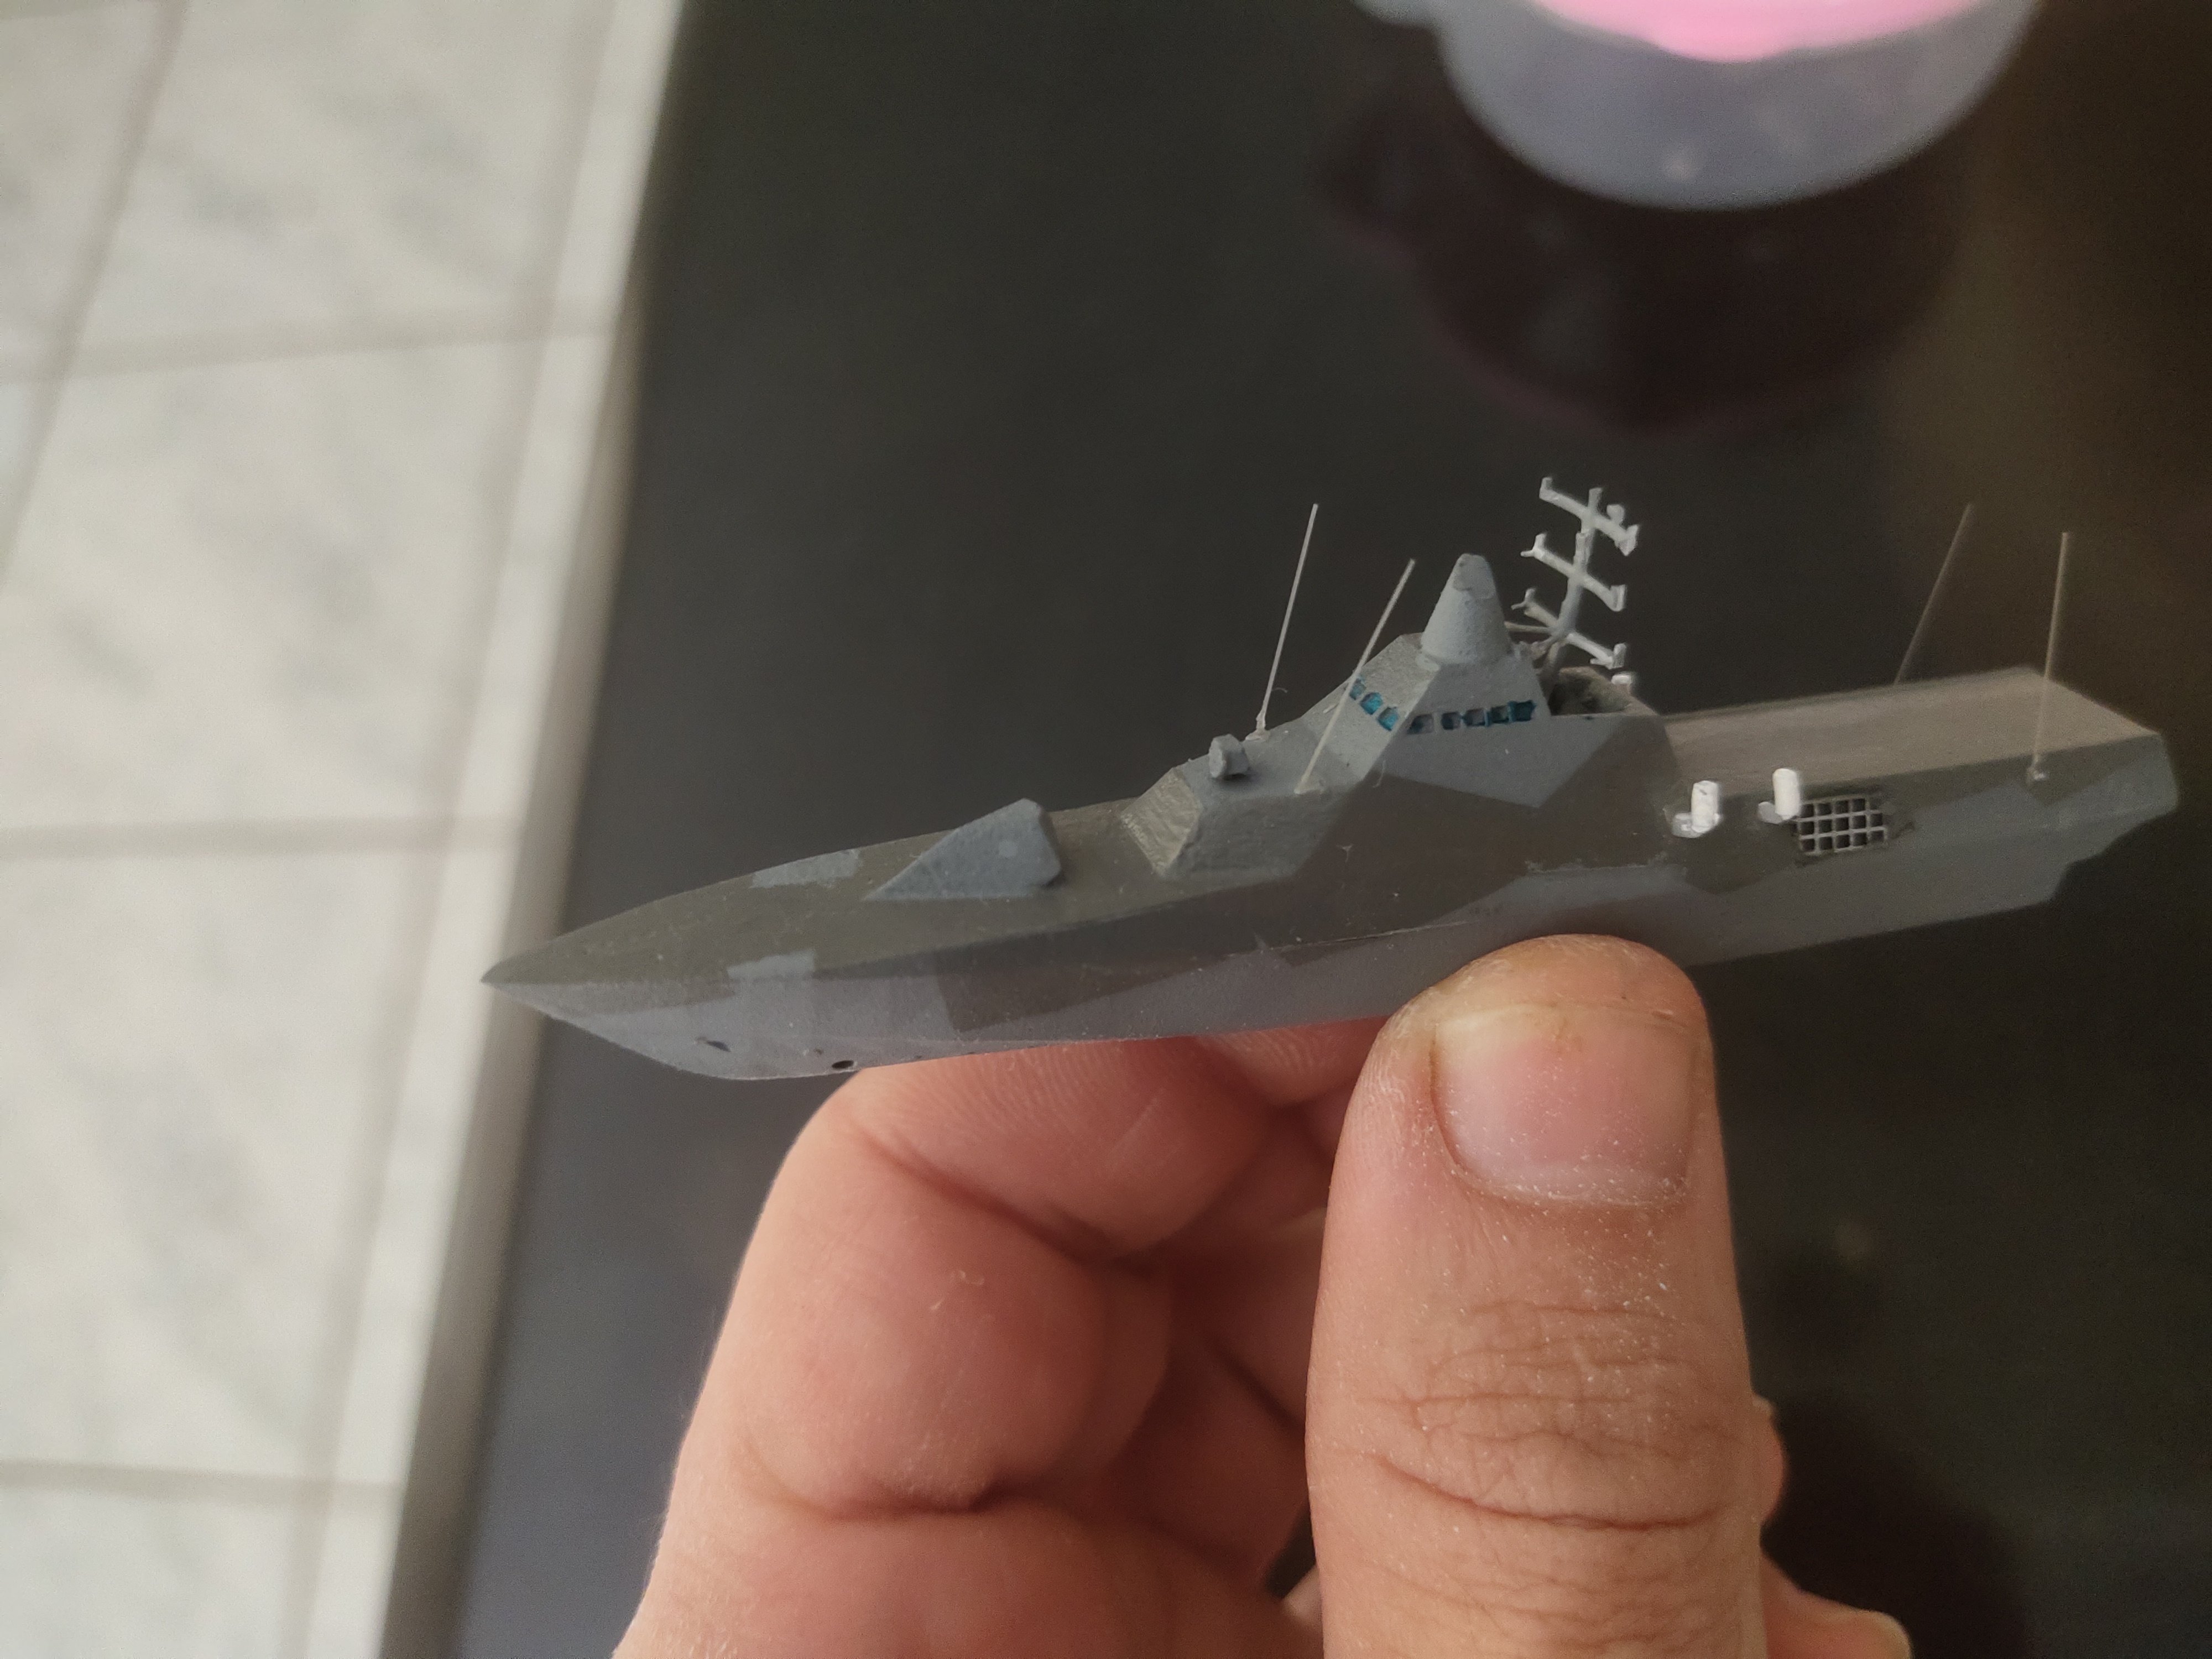
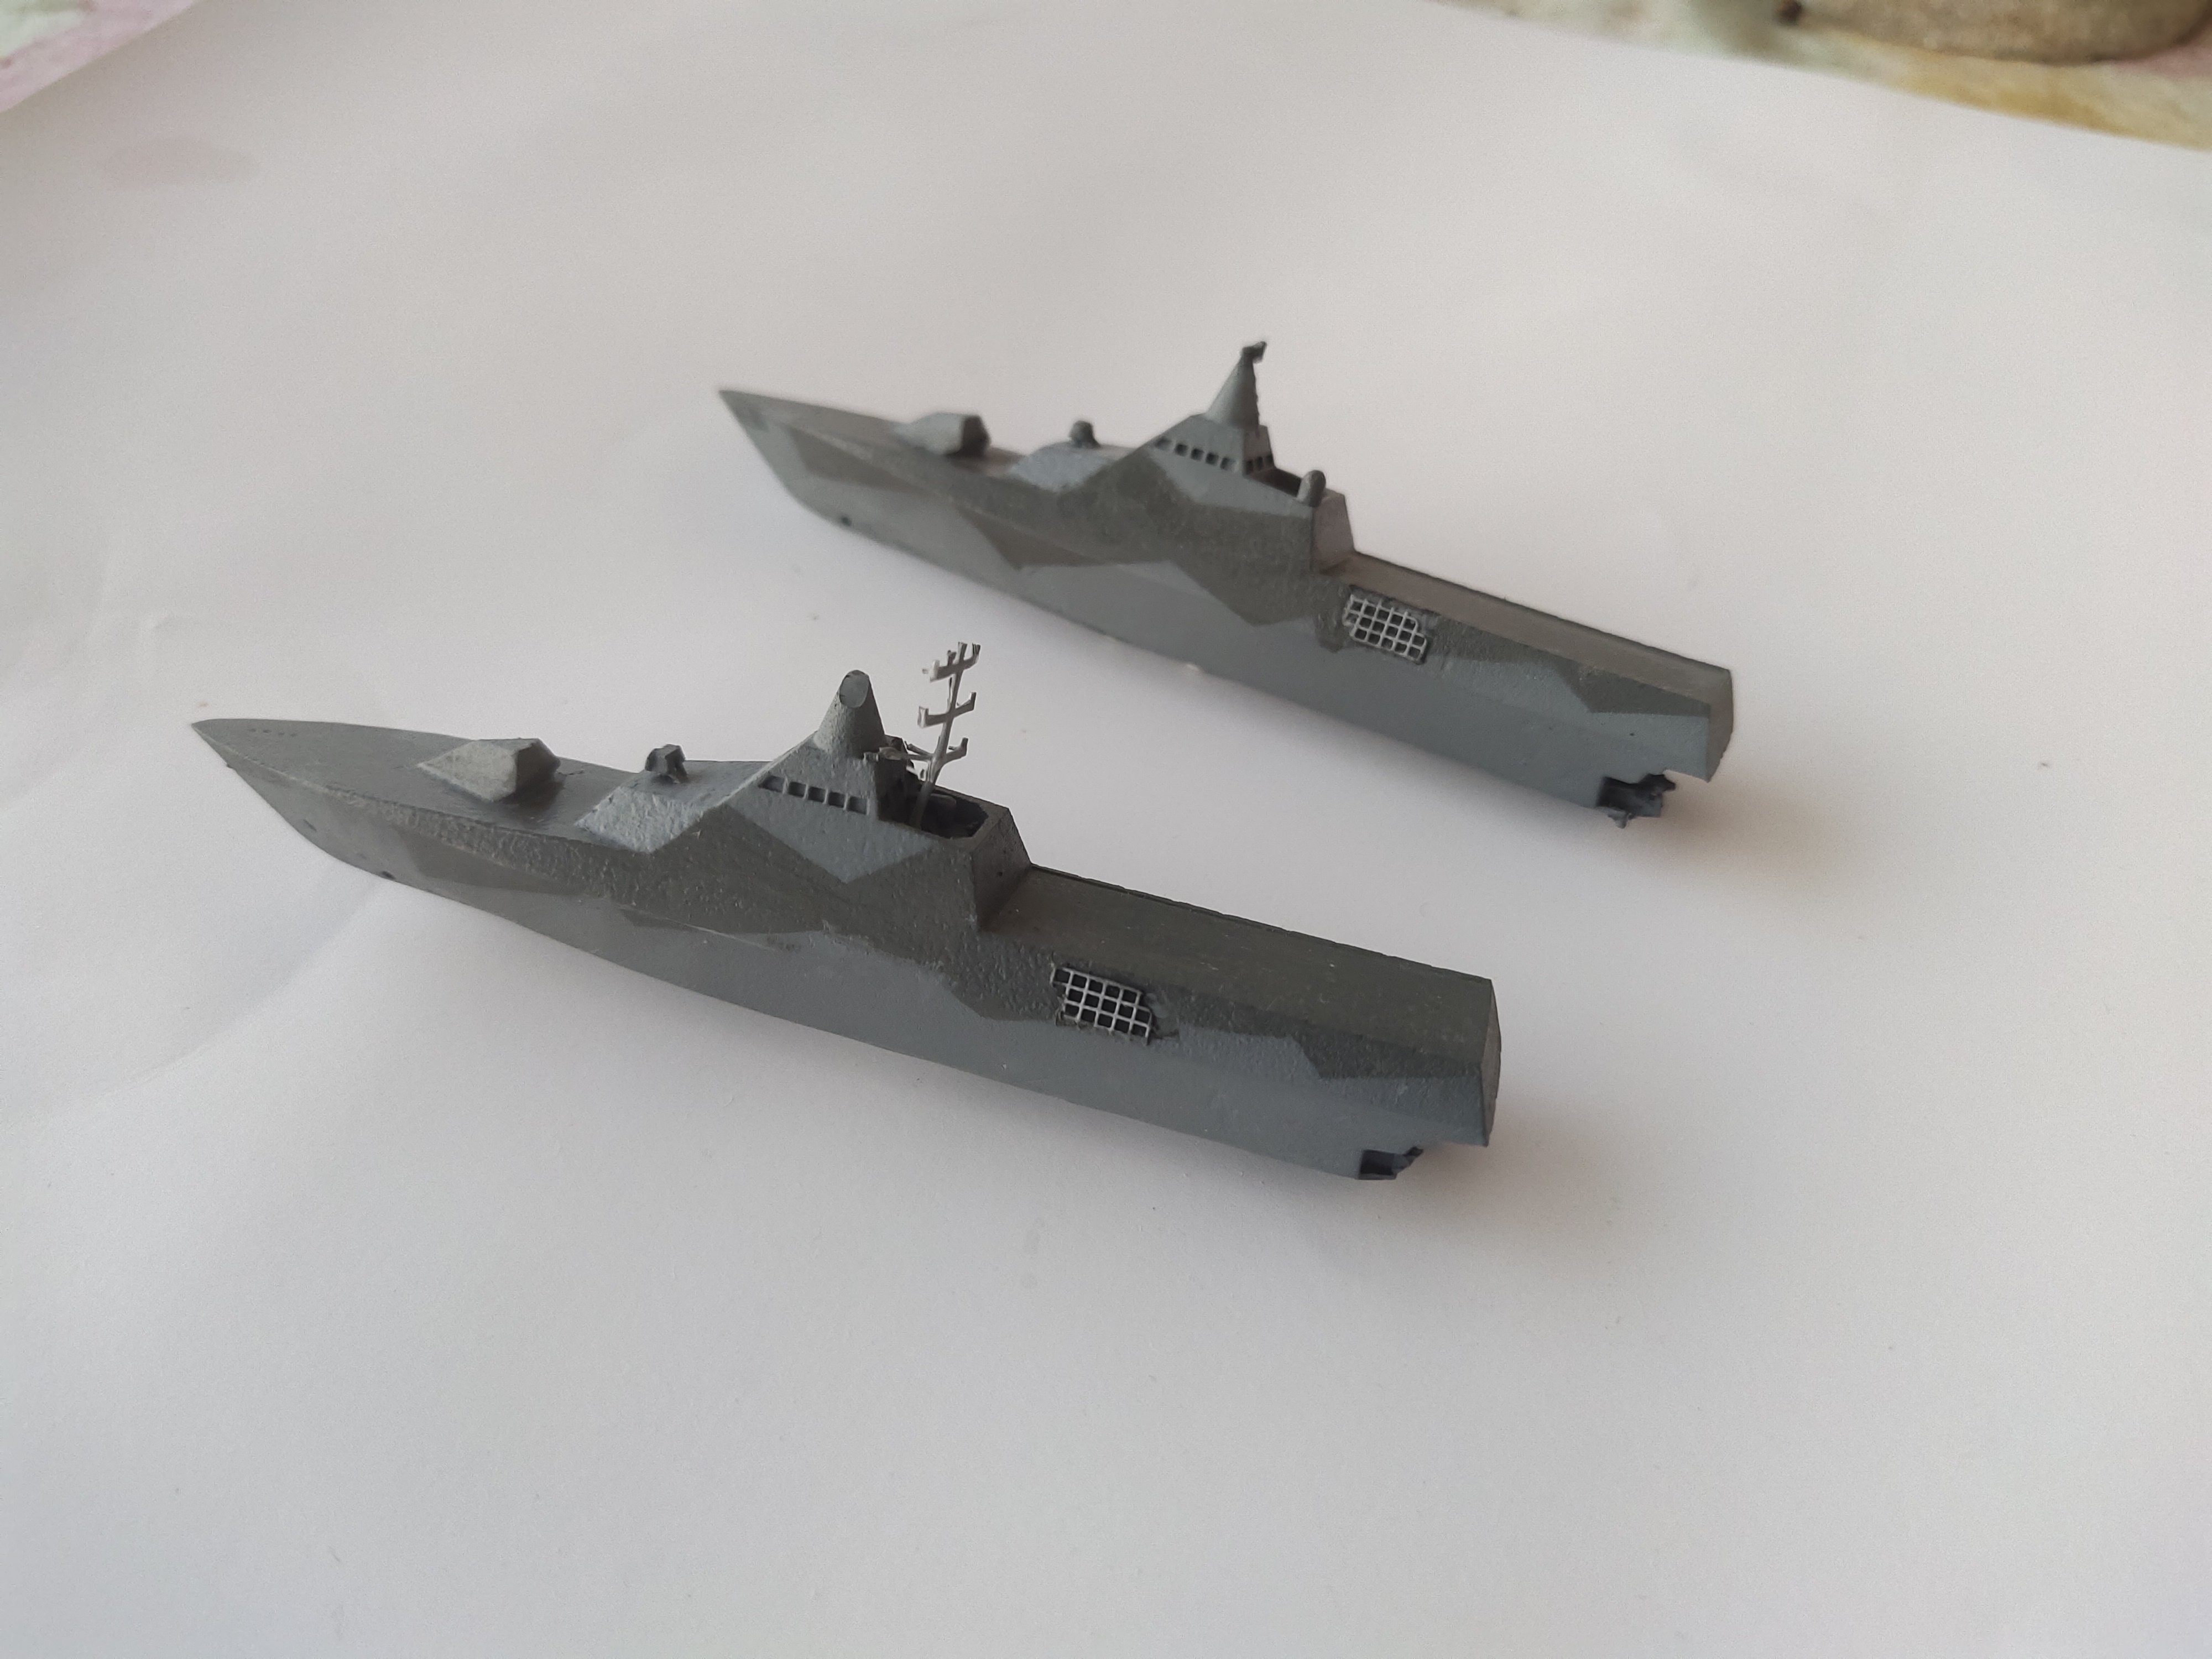
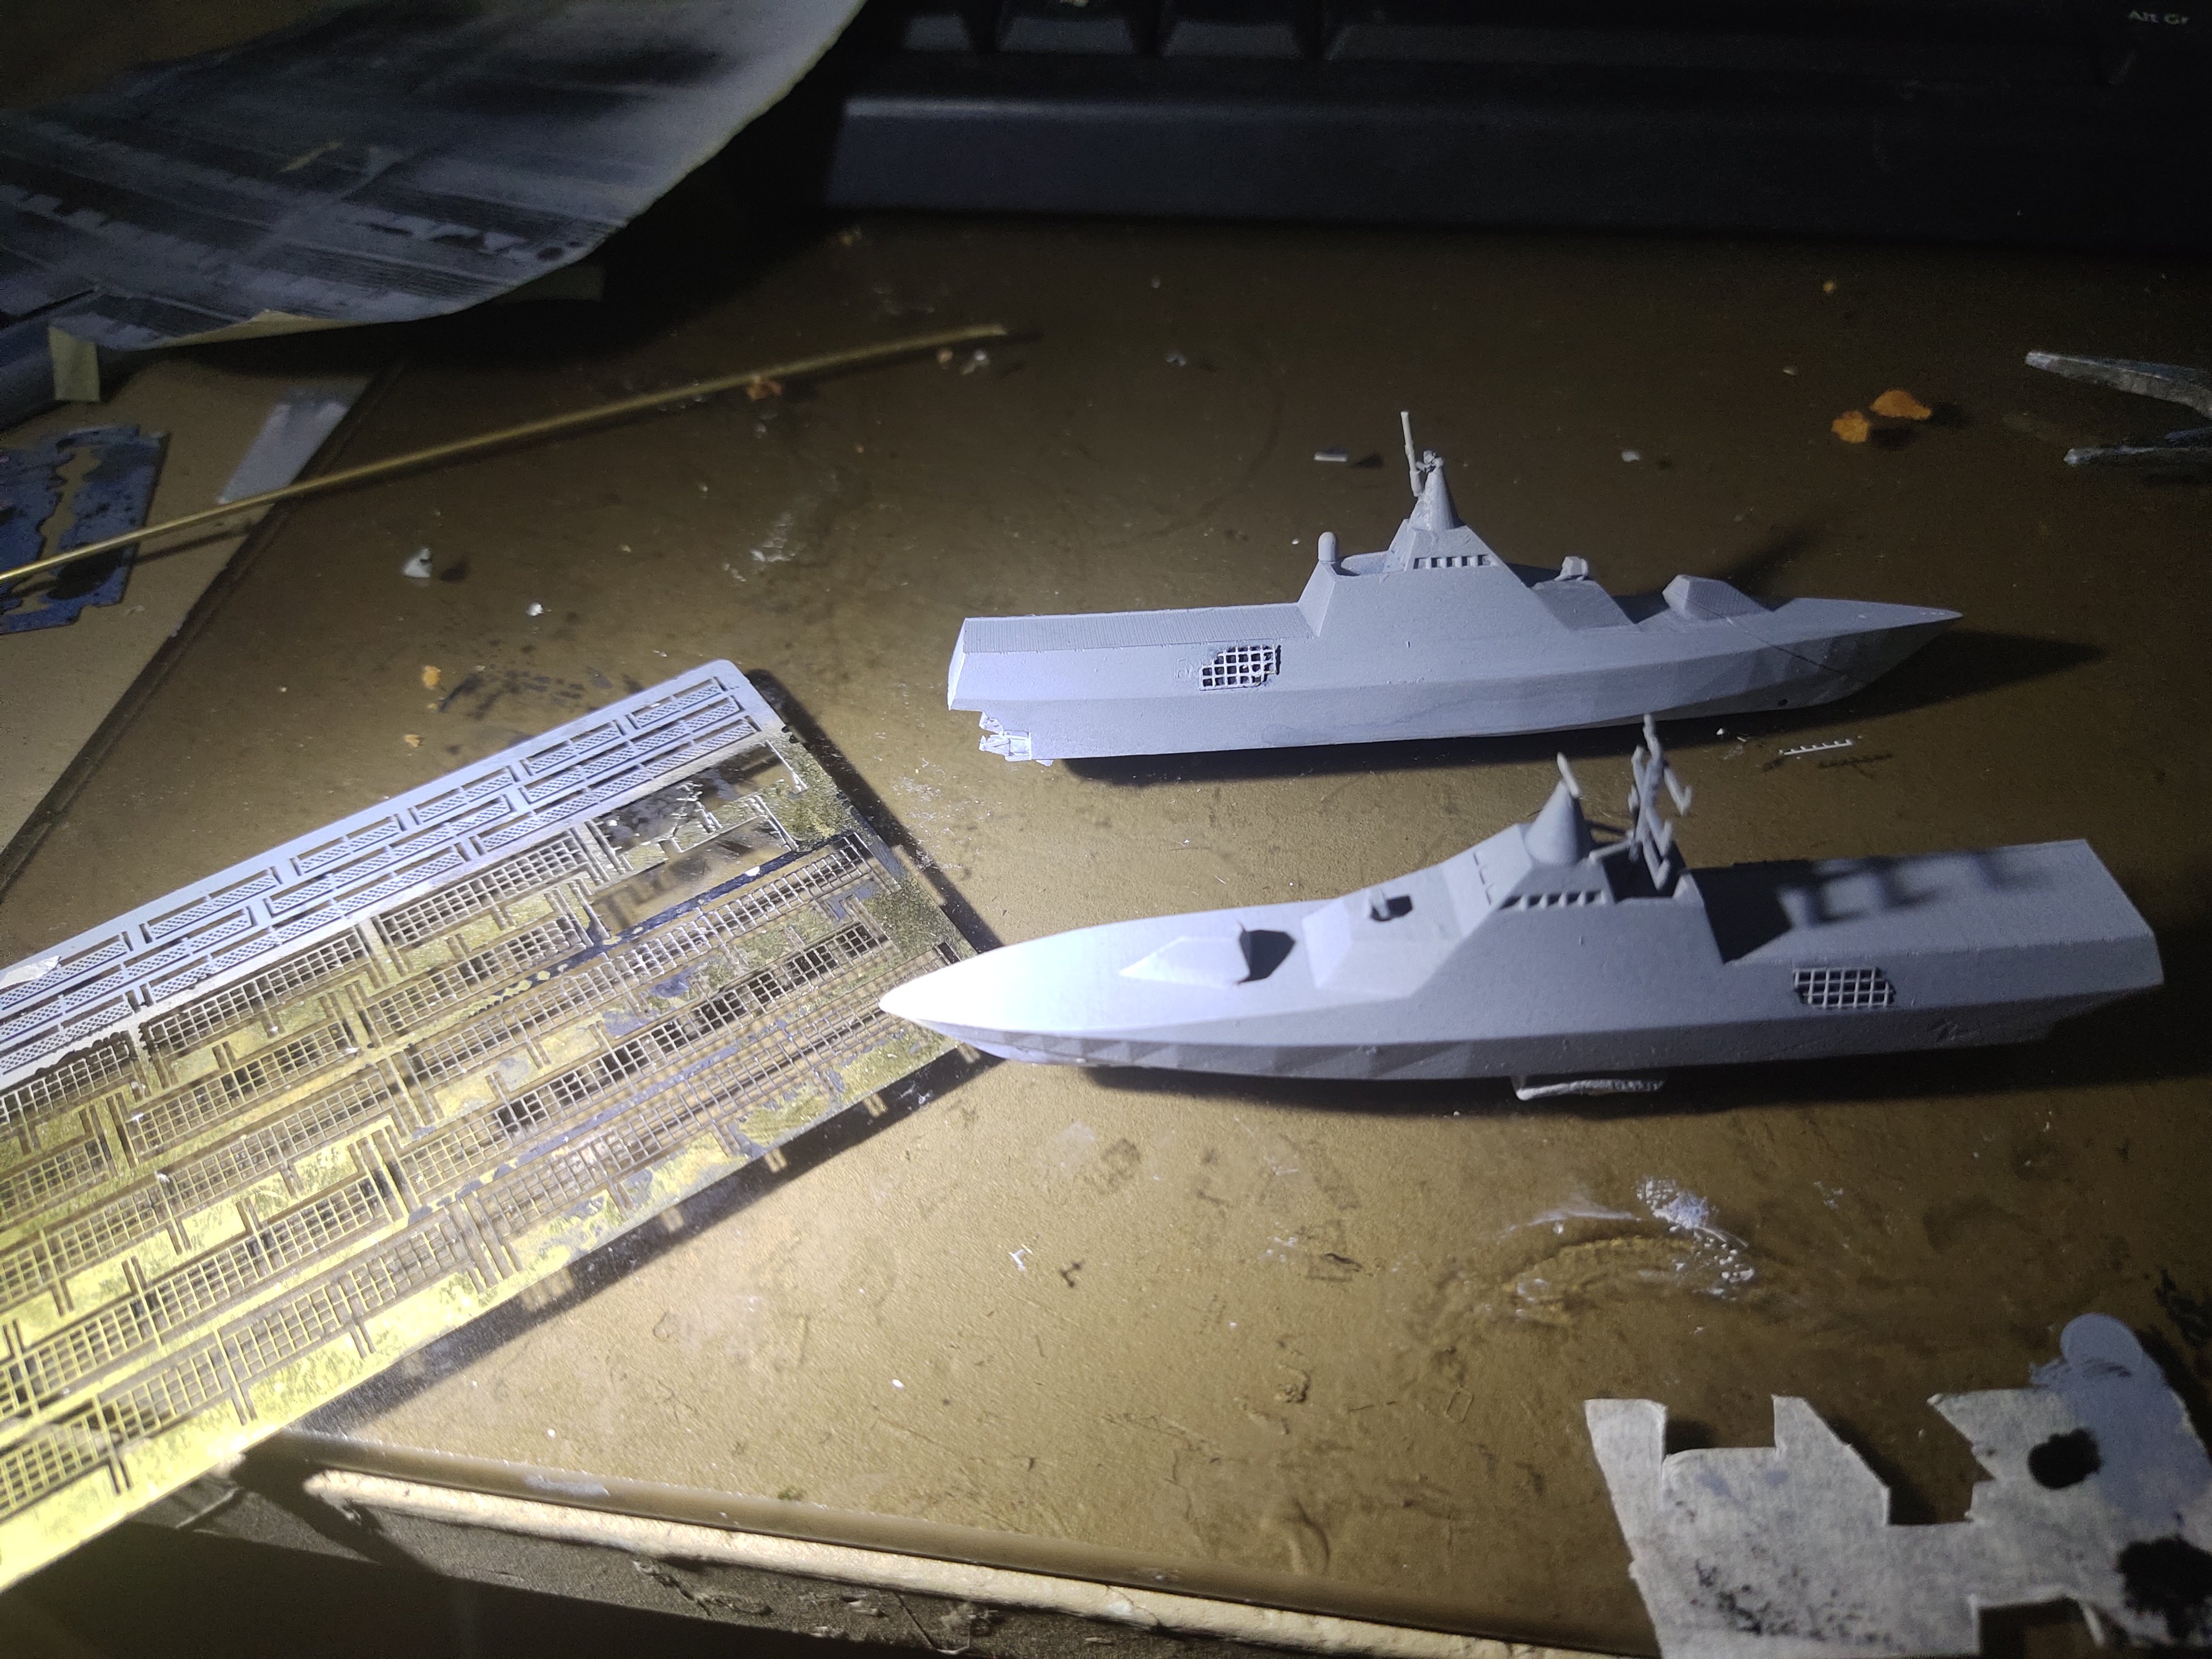
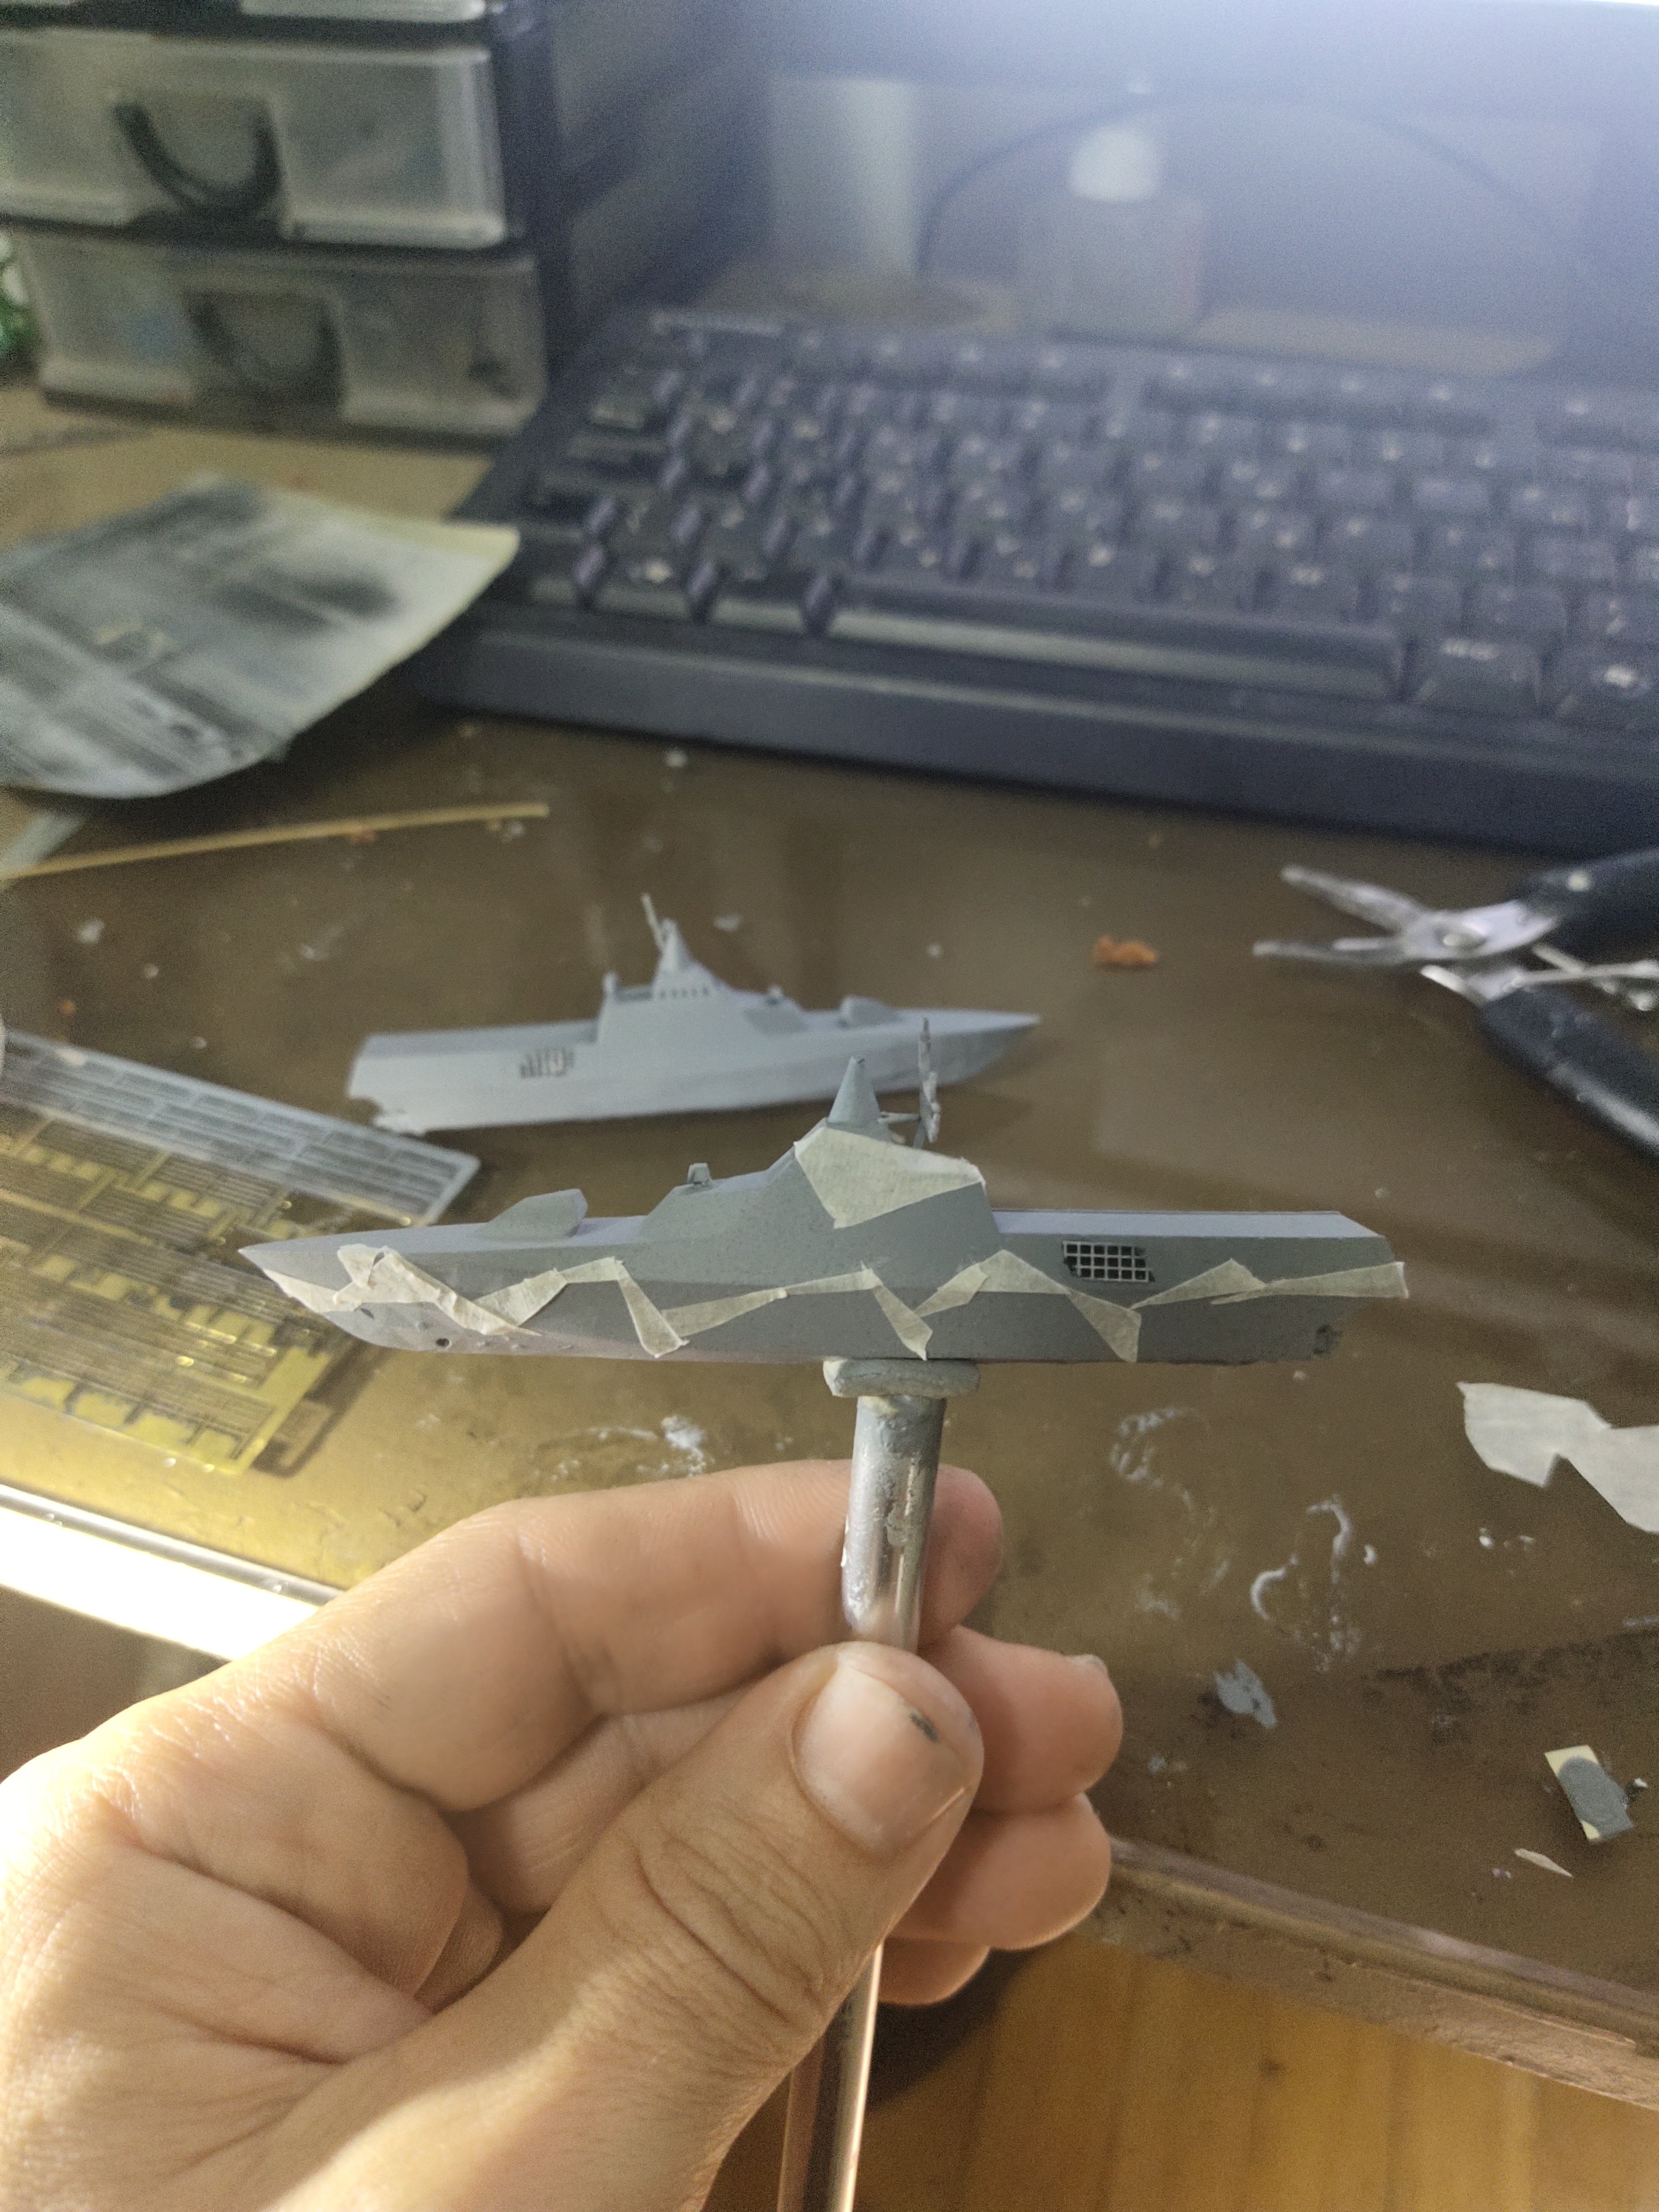
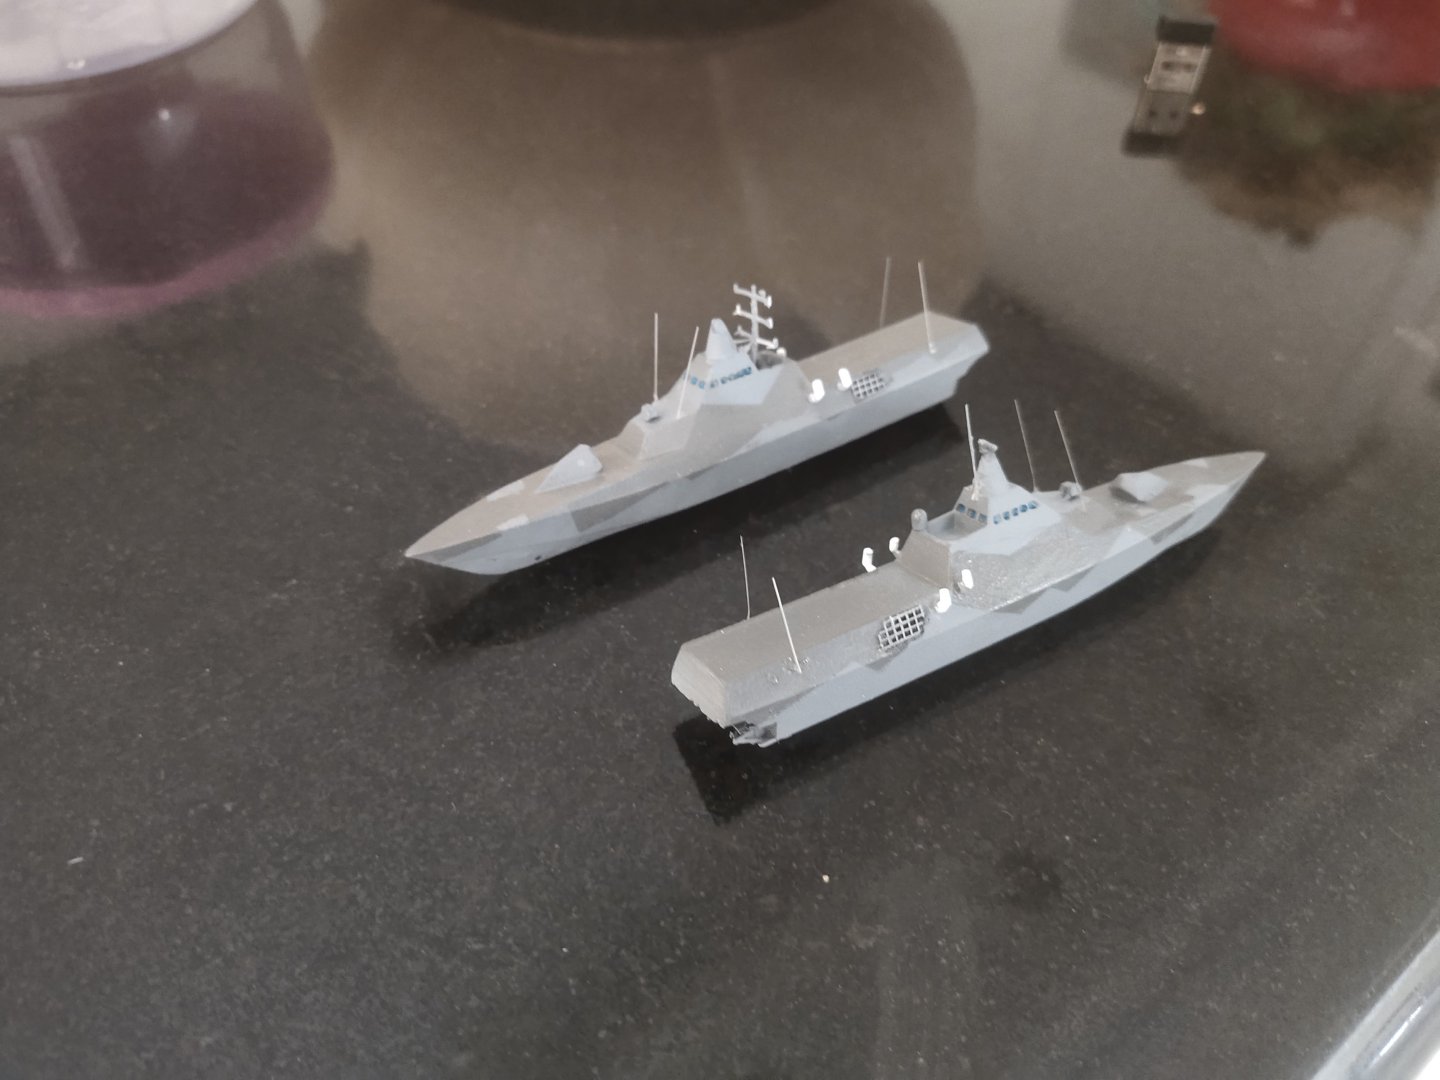
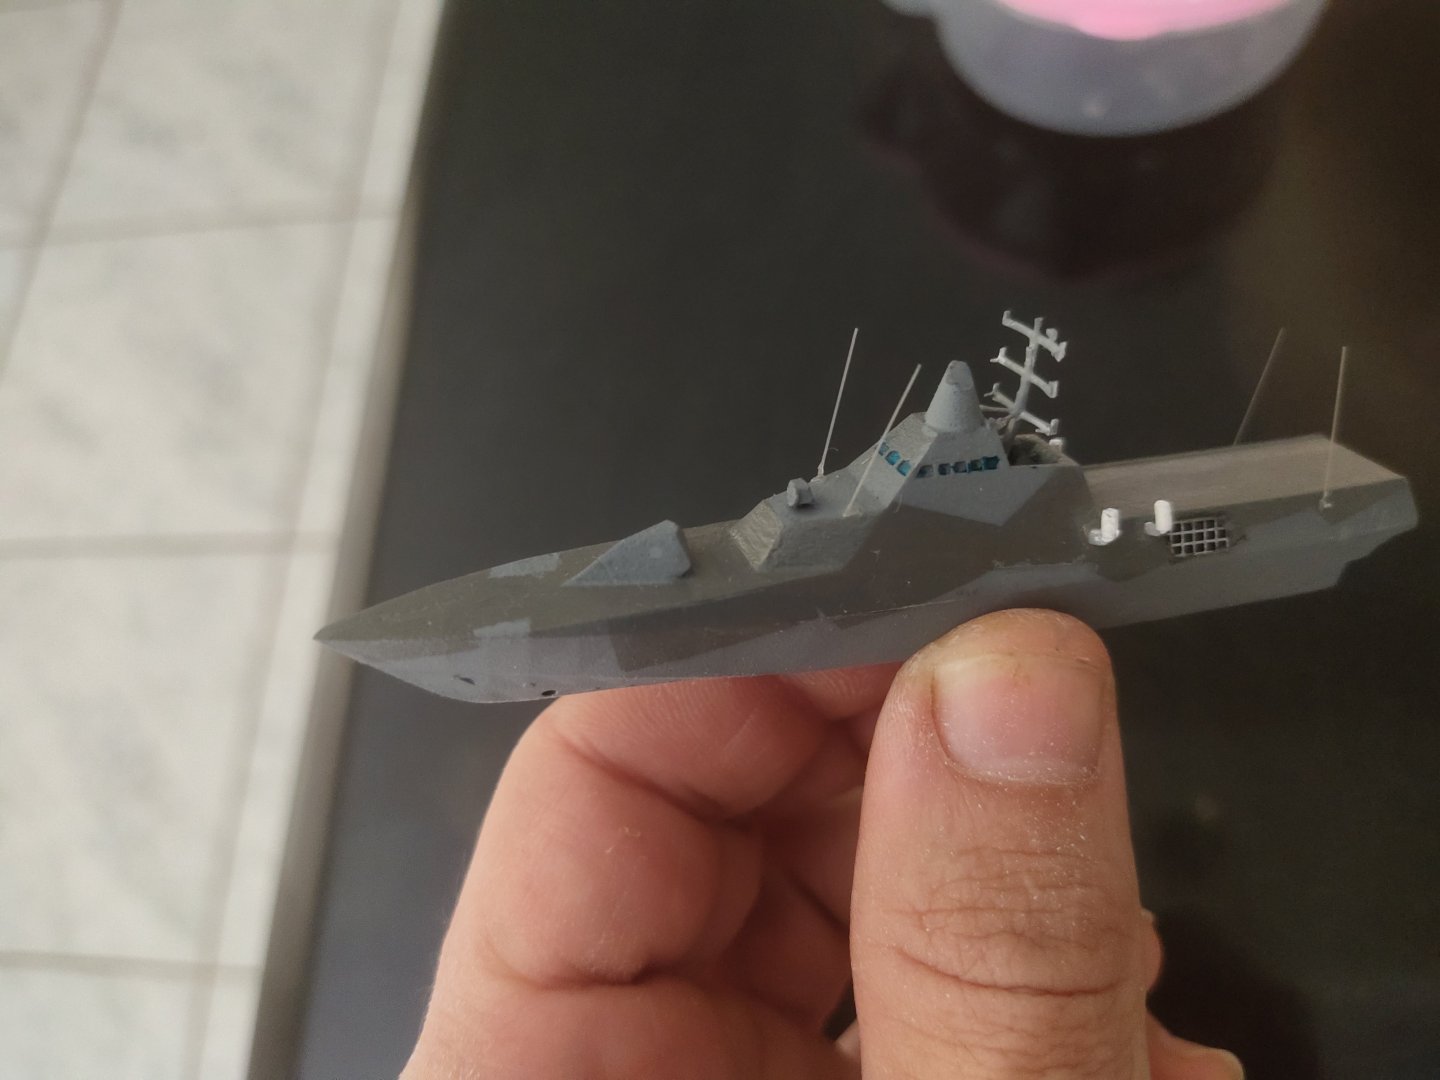
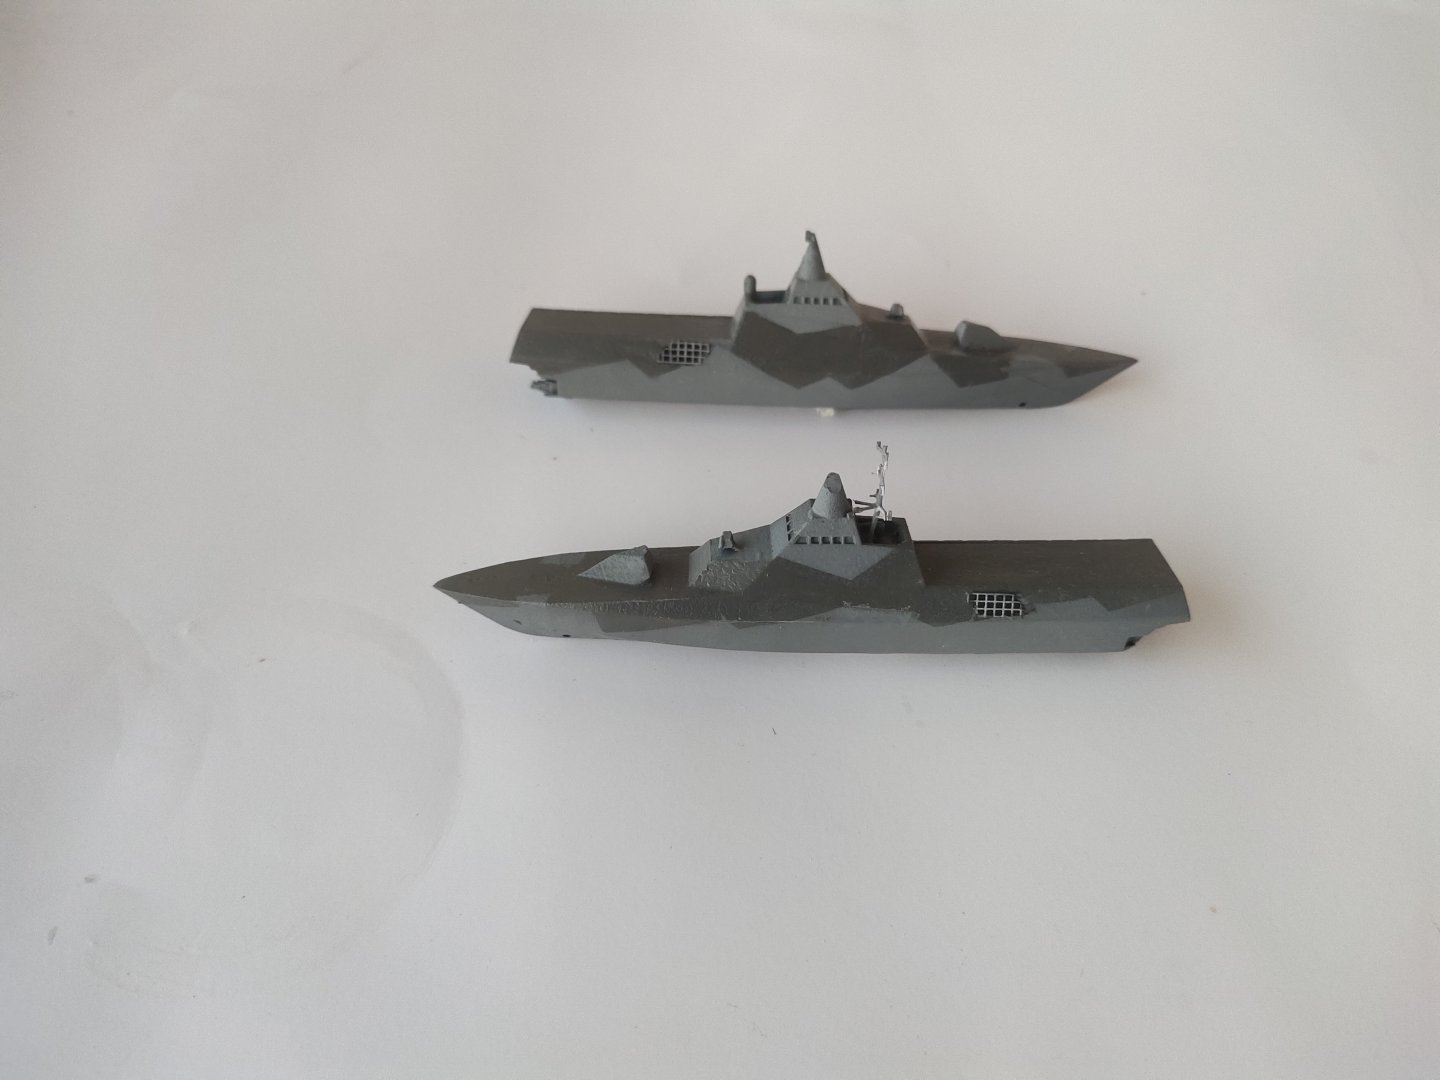
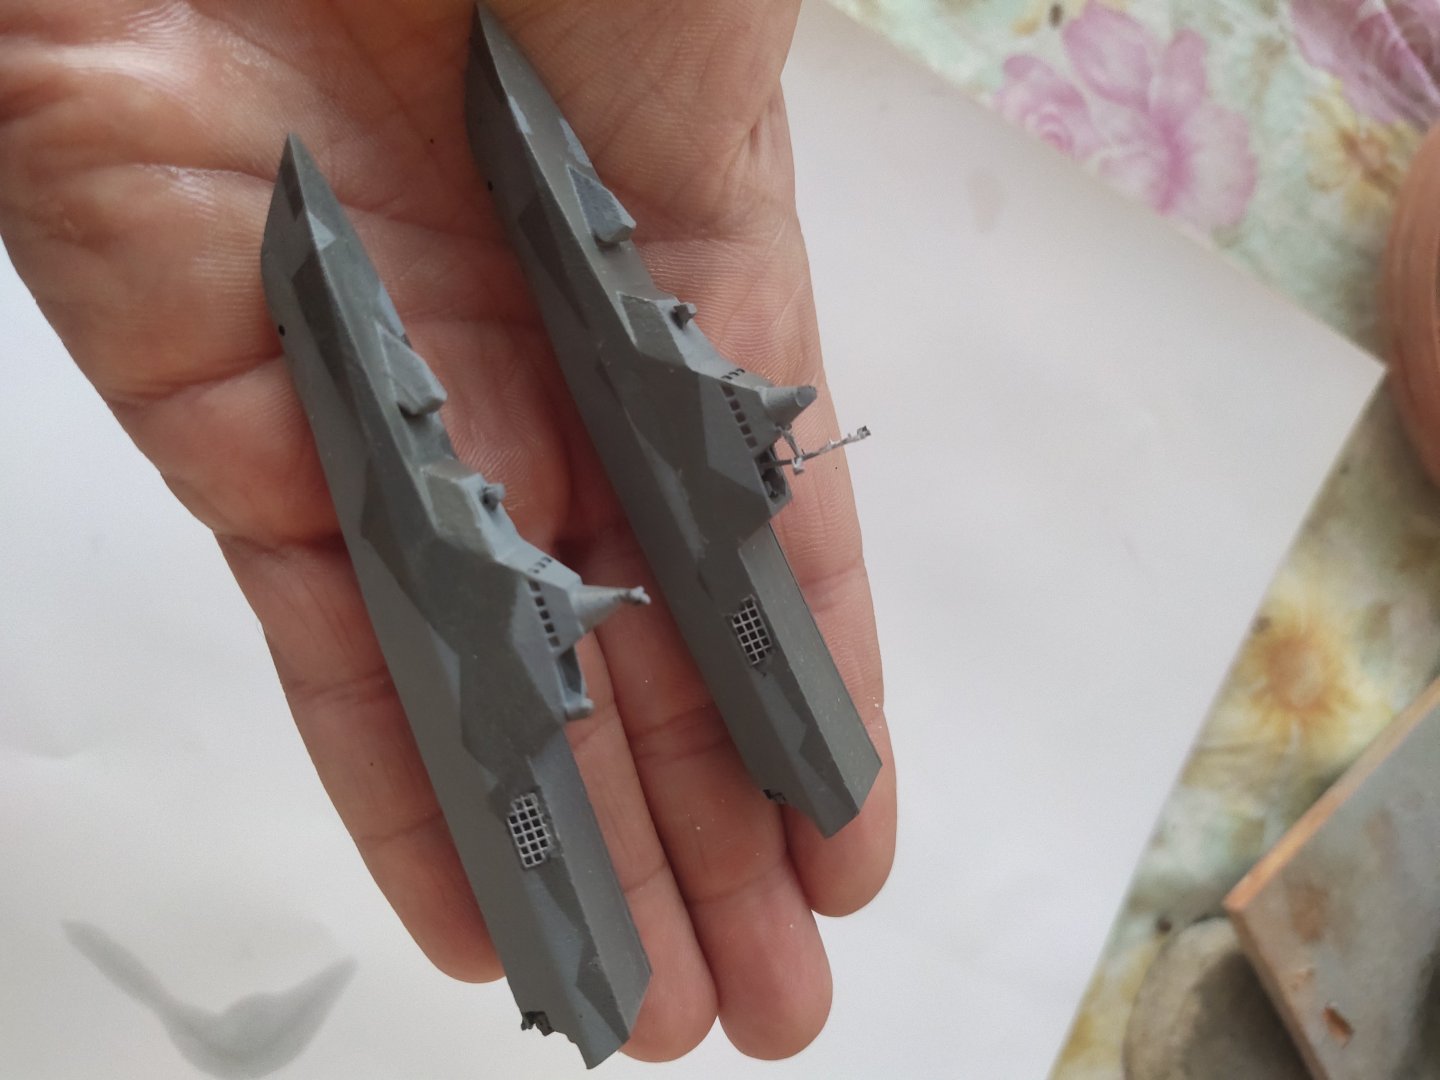
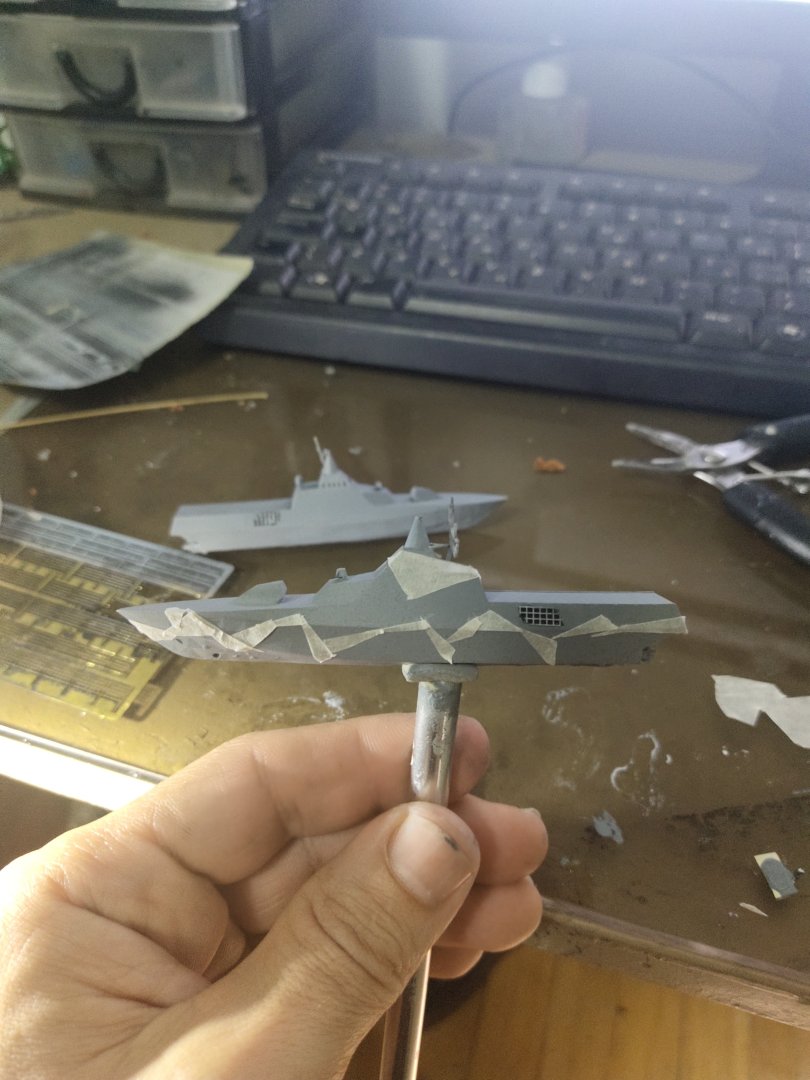
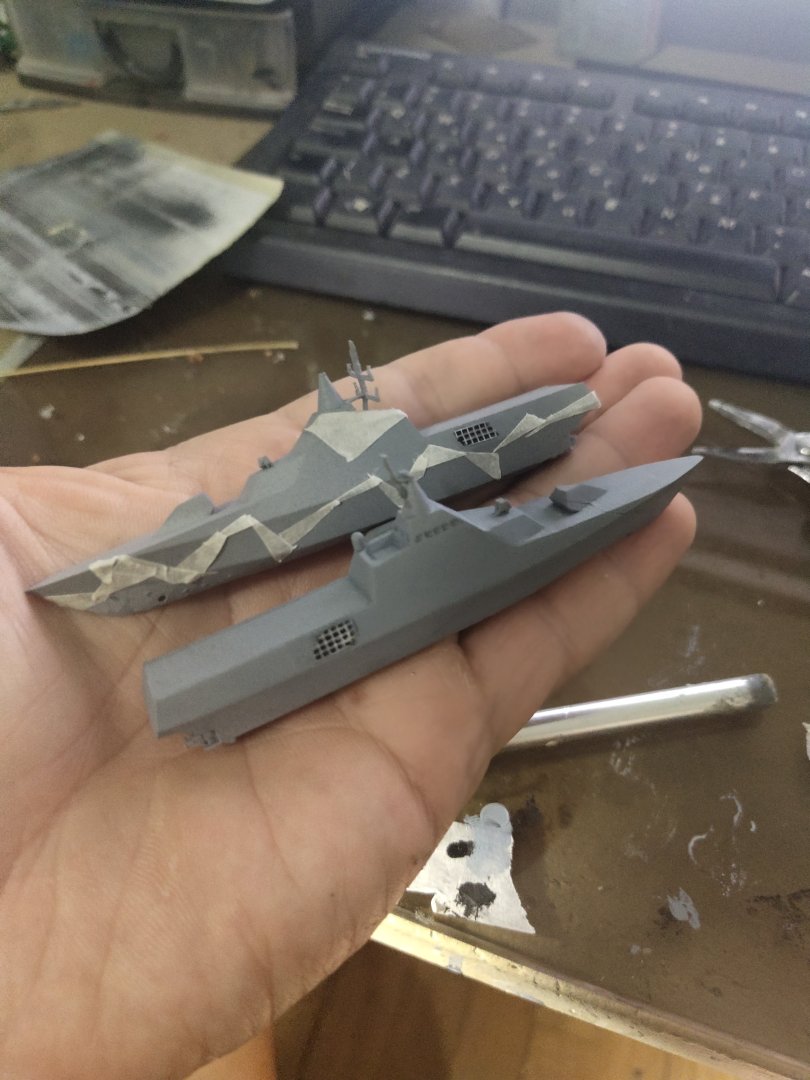
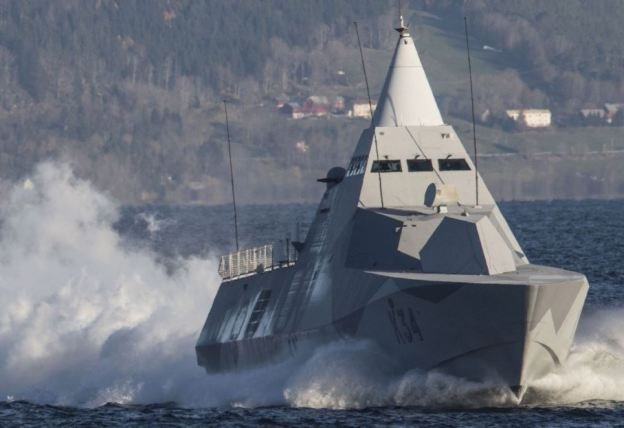
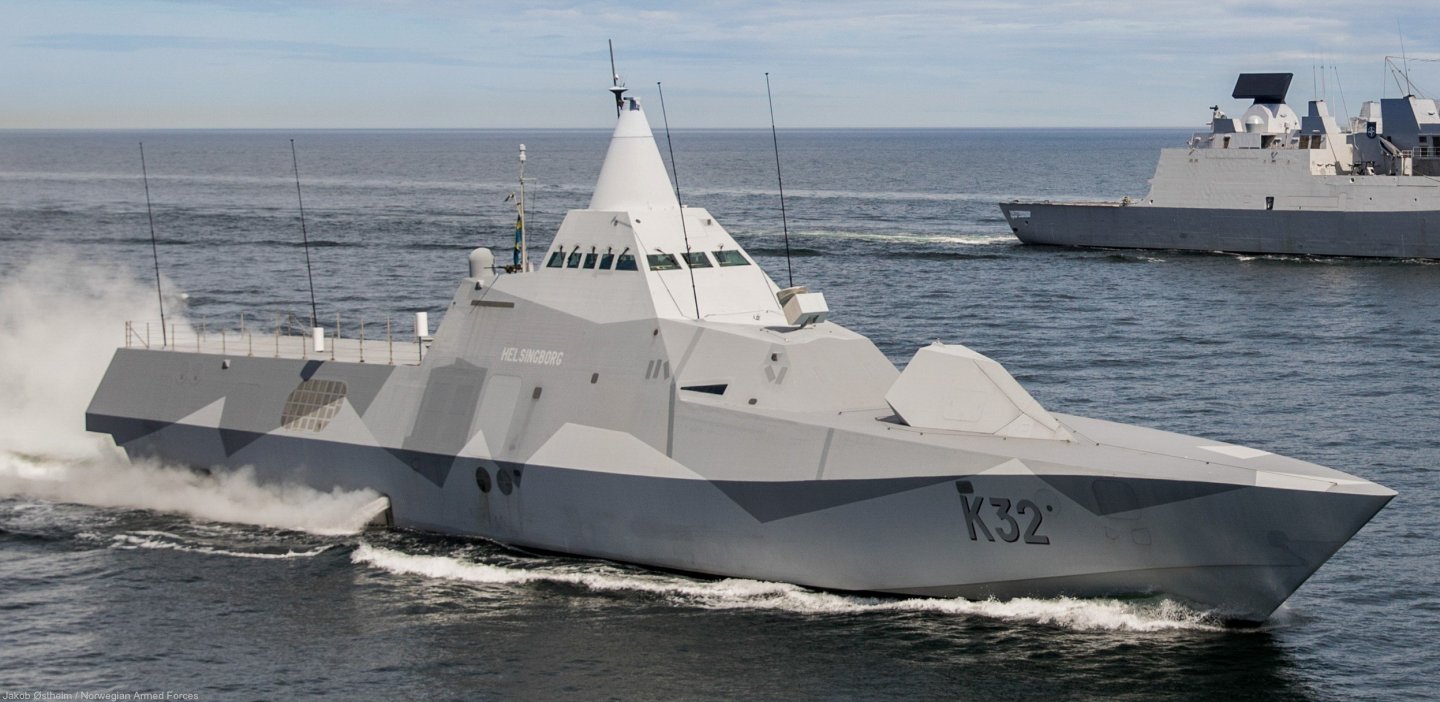
Visby is the one with the single antenna on top whileH ärnösand is the other with the upgraded radar mast. After a coating of neutral grey it was to start masking for spraying the darker grey. The side grills were made with carrier fishnet cut in oval shape and glued on a black area for maximum contrast. It was the closest thing to the real that I could think of

-
Cap San Diego by mikegr - 1/160
mikegr replied to mikegr's topic in - Build logs for subjects built 1901 - Present Day
I am using ABS like Anycubic. Its far more forgiving than the standard. Water washable only. Sometimes I add 20-25% of this https://www.resione.com/?srsltid=AfmBOor4fbt1yKBu436_fjSO-zH-xqWDL-jqFQZXMiapGbvLijodaTKF This is even more elastic any gives smooth plastic feel texture. Its also very quick maybe 1-1.5 sec per layer. However if you want to print long and thin items like masts, gun barrels most probably these will bend after curing so its not always the best option -
Cap San Diego by mikegr - 1/160
mikegr replied to mikegr's topic in - Build logs for subjects built 1901 - Present Day
Lot of work small progress. Bridge part fell off, many pieces broken especially those made from older resin with 0 elasticity. All repaired, added communication antennas and radar masts. All cranes in place except those at the funnels. These are fragile need to tighten down with rigging.
-
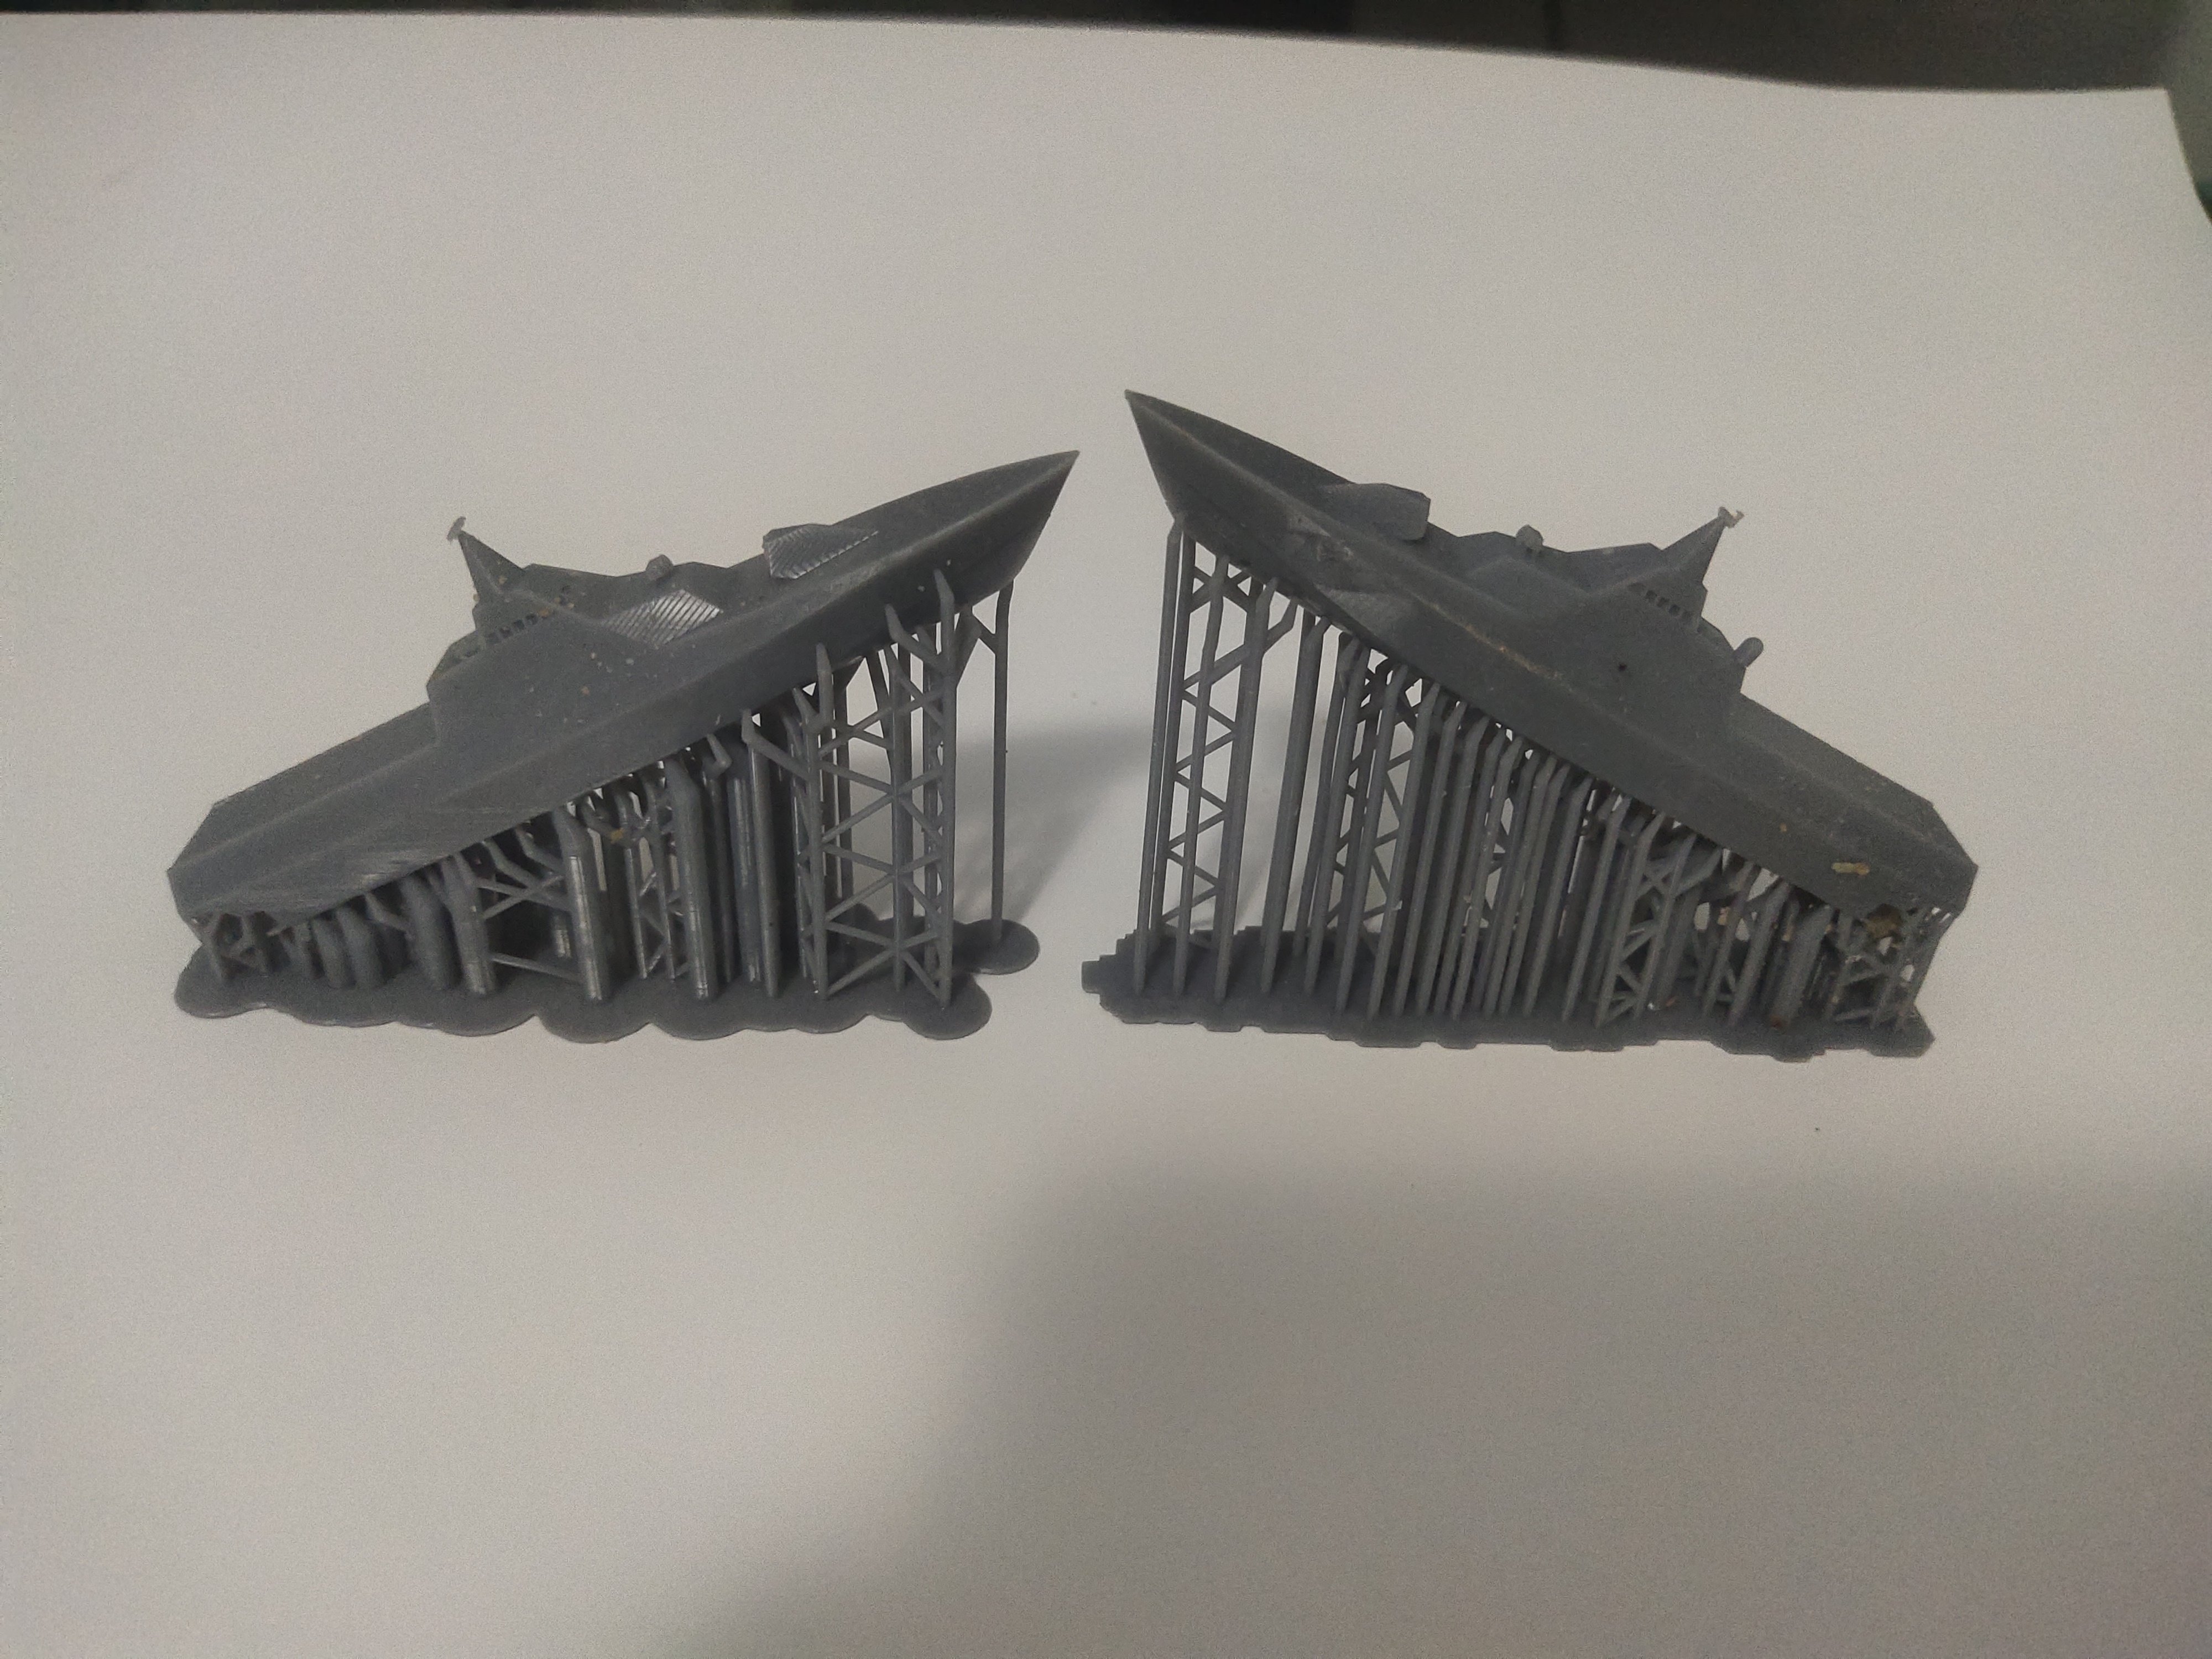
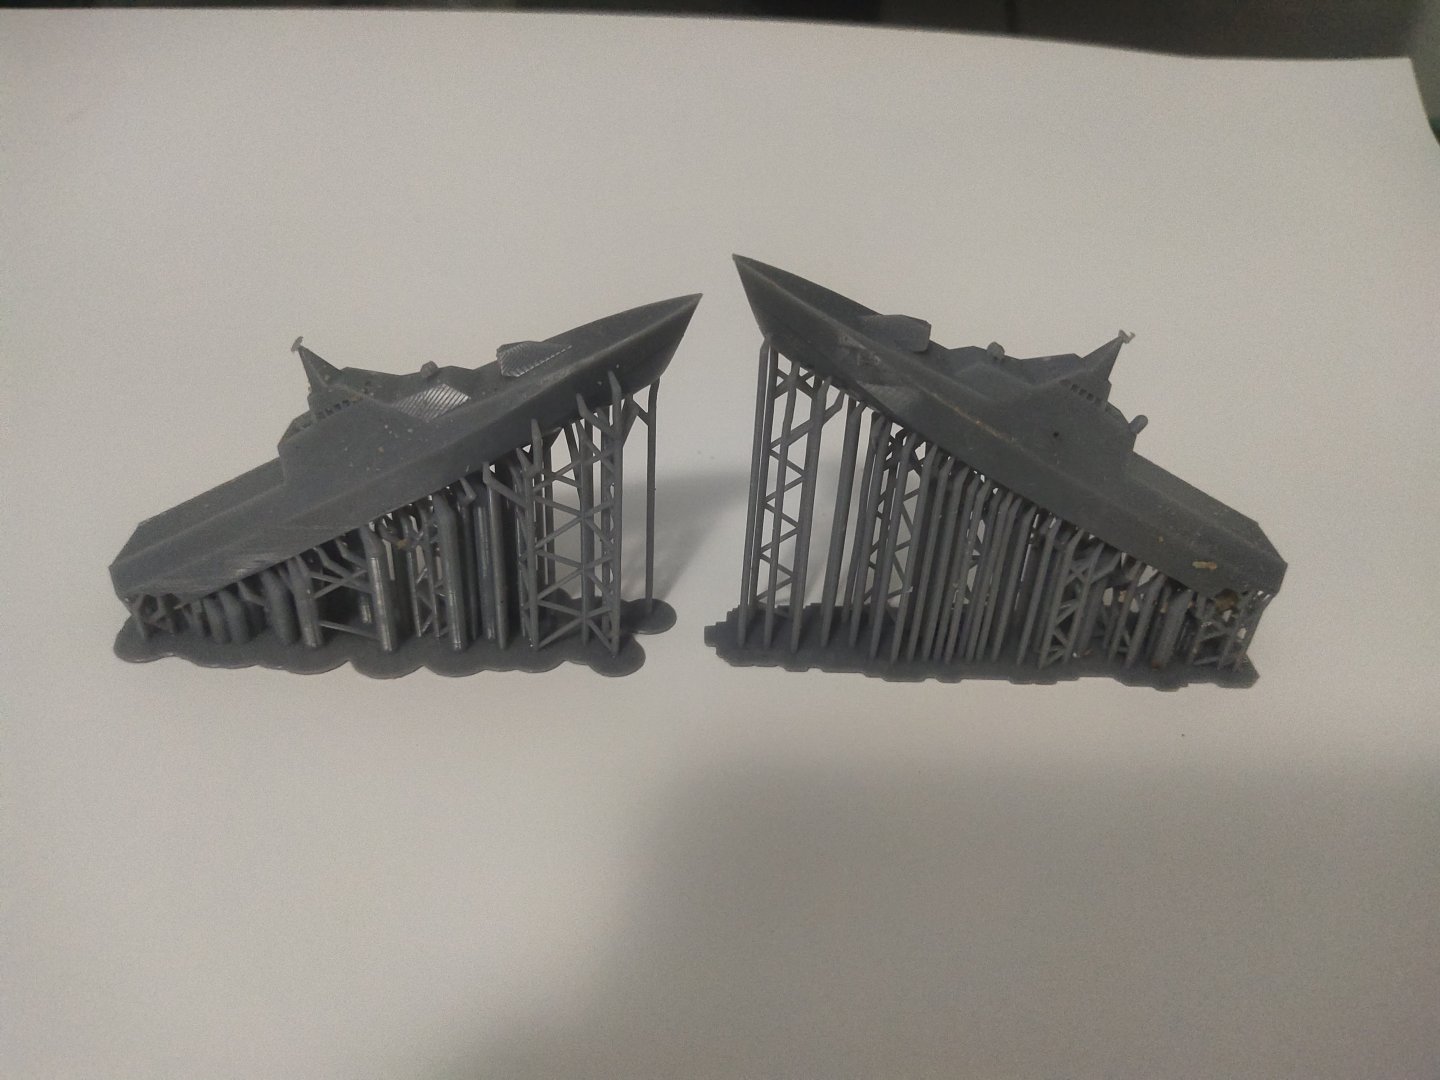
These are two models of the Swedish Visby class corvette. I bought this design but had to make some modifications to print it in 1/700. Even at first attempt they printed great. Will enchance the model with PE and bit of work. I think with proper paint job will look nice on a sea base display
-
looks great I had a B58 Italery with Eduards PE but got rid of it. Definitely a lot of metal paintjob and shades.
-
now looks even better
-
Is there a dent on the hull or is just a photo issue?
- 176 replies
-
- 4
-

-
- new orleans
- iron shipwrights
- (and 2 more)
-
That is what I do. I strip down a 1 dollar paint brush. Use the hair for paint as well. Some can be tear apart to 2 or 3 sections . can't find anything thinner than this.
-
I'm glad I helped. I remember artist Chris Flodberg mentioned the usage of gesso even to a dozen of layers to get the desired effect. While forming the big waves is relatively easy and can be achieved with different materials and ways, making the actual surface texture in accordance always with the scale is trickier. The Korean artist you are watching in you tube is I believe the finest in the world. However his skills are unreachable for the average modeler. Lately he has released a series of simplified versions of his works. I also found the epoxy putty quite pricey. Therefore I switch to resin, not only more affordable but also for its transparency. But also has its limitations. Of course you can't create a heavy sea with resin.
-
Maybe use some thick gesso layers instead of gel to smoothen up things. Its really easy to work with
-
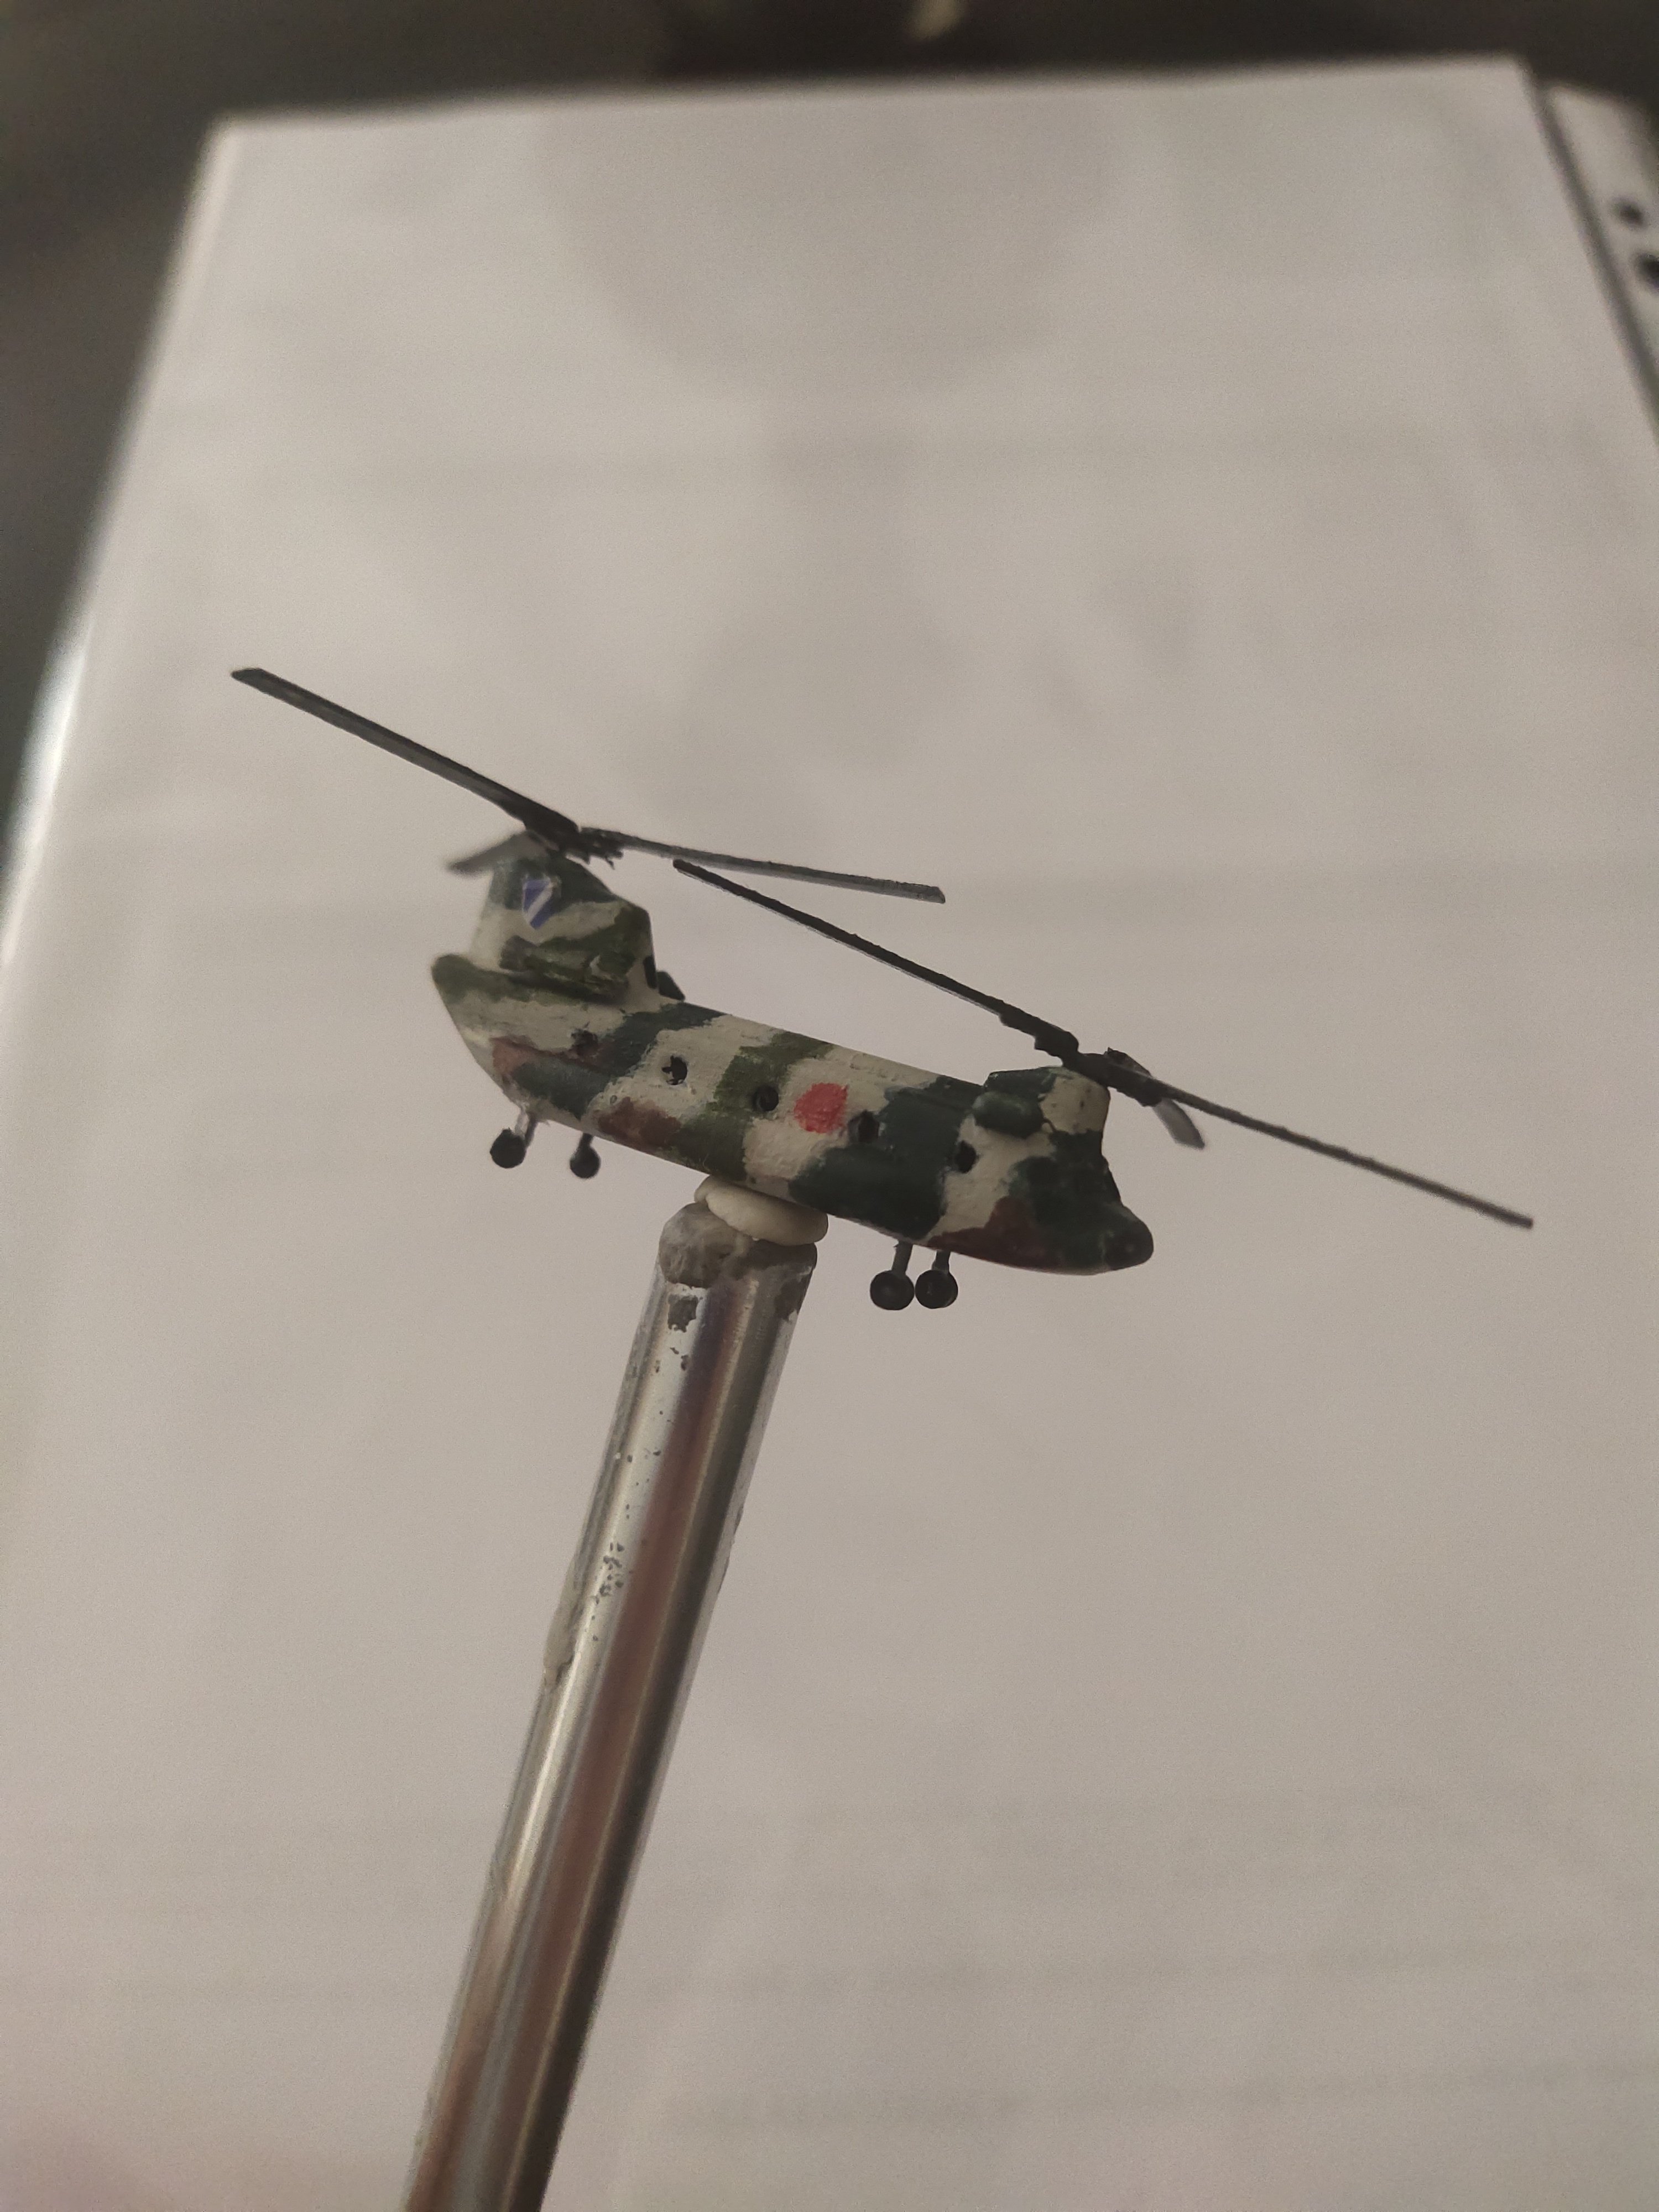
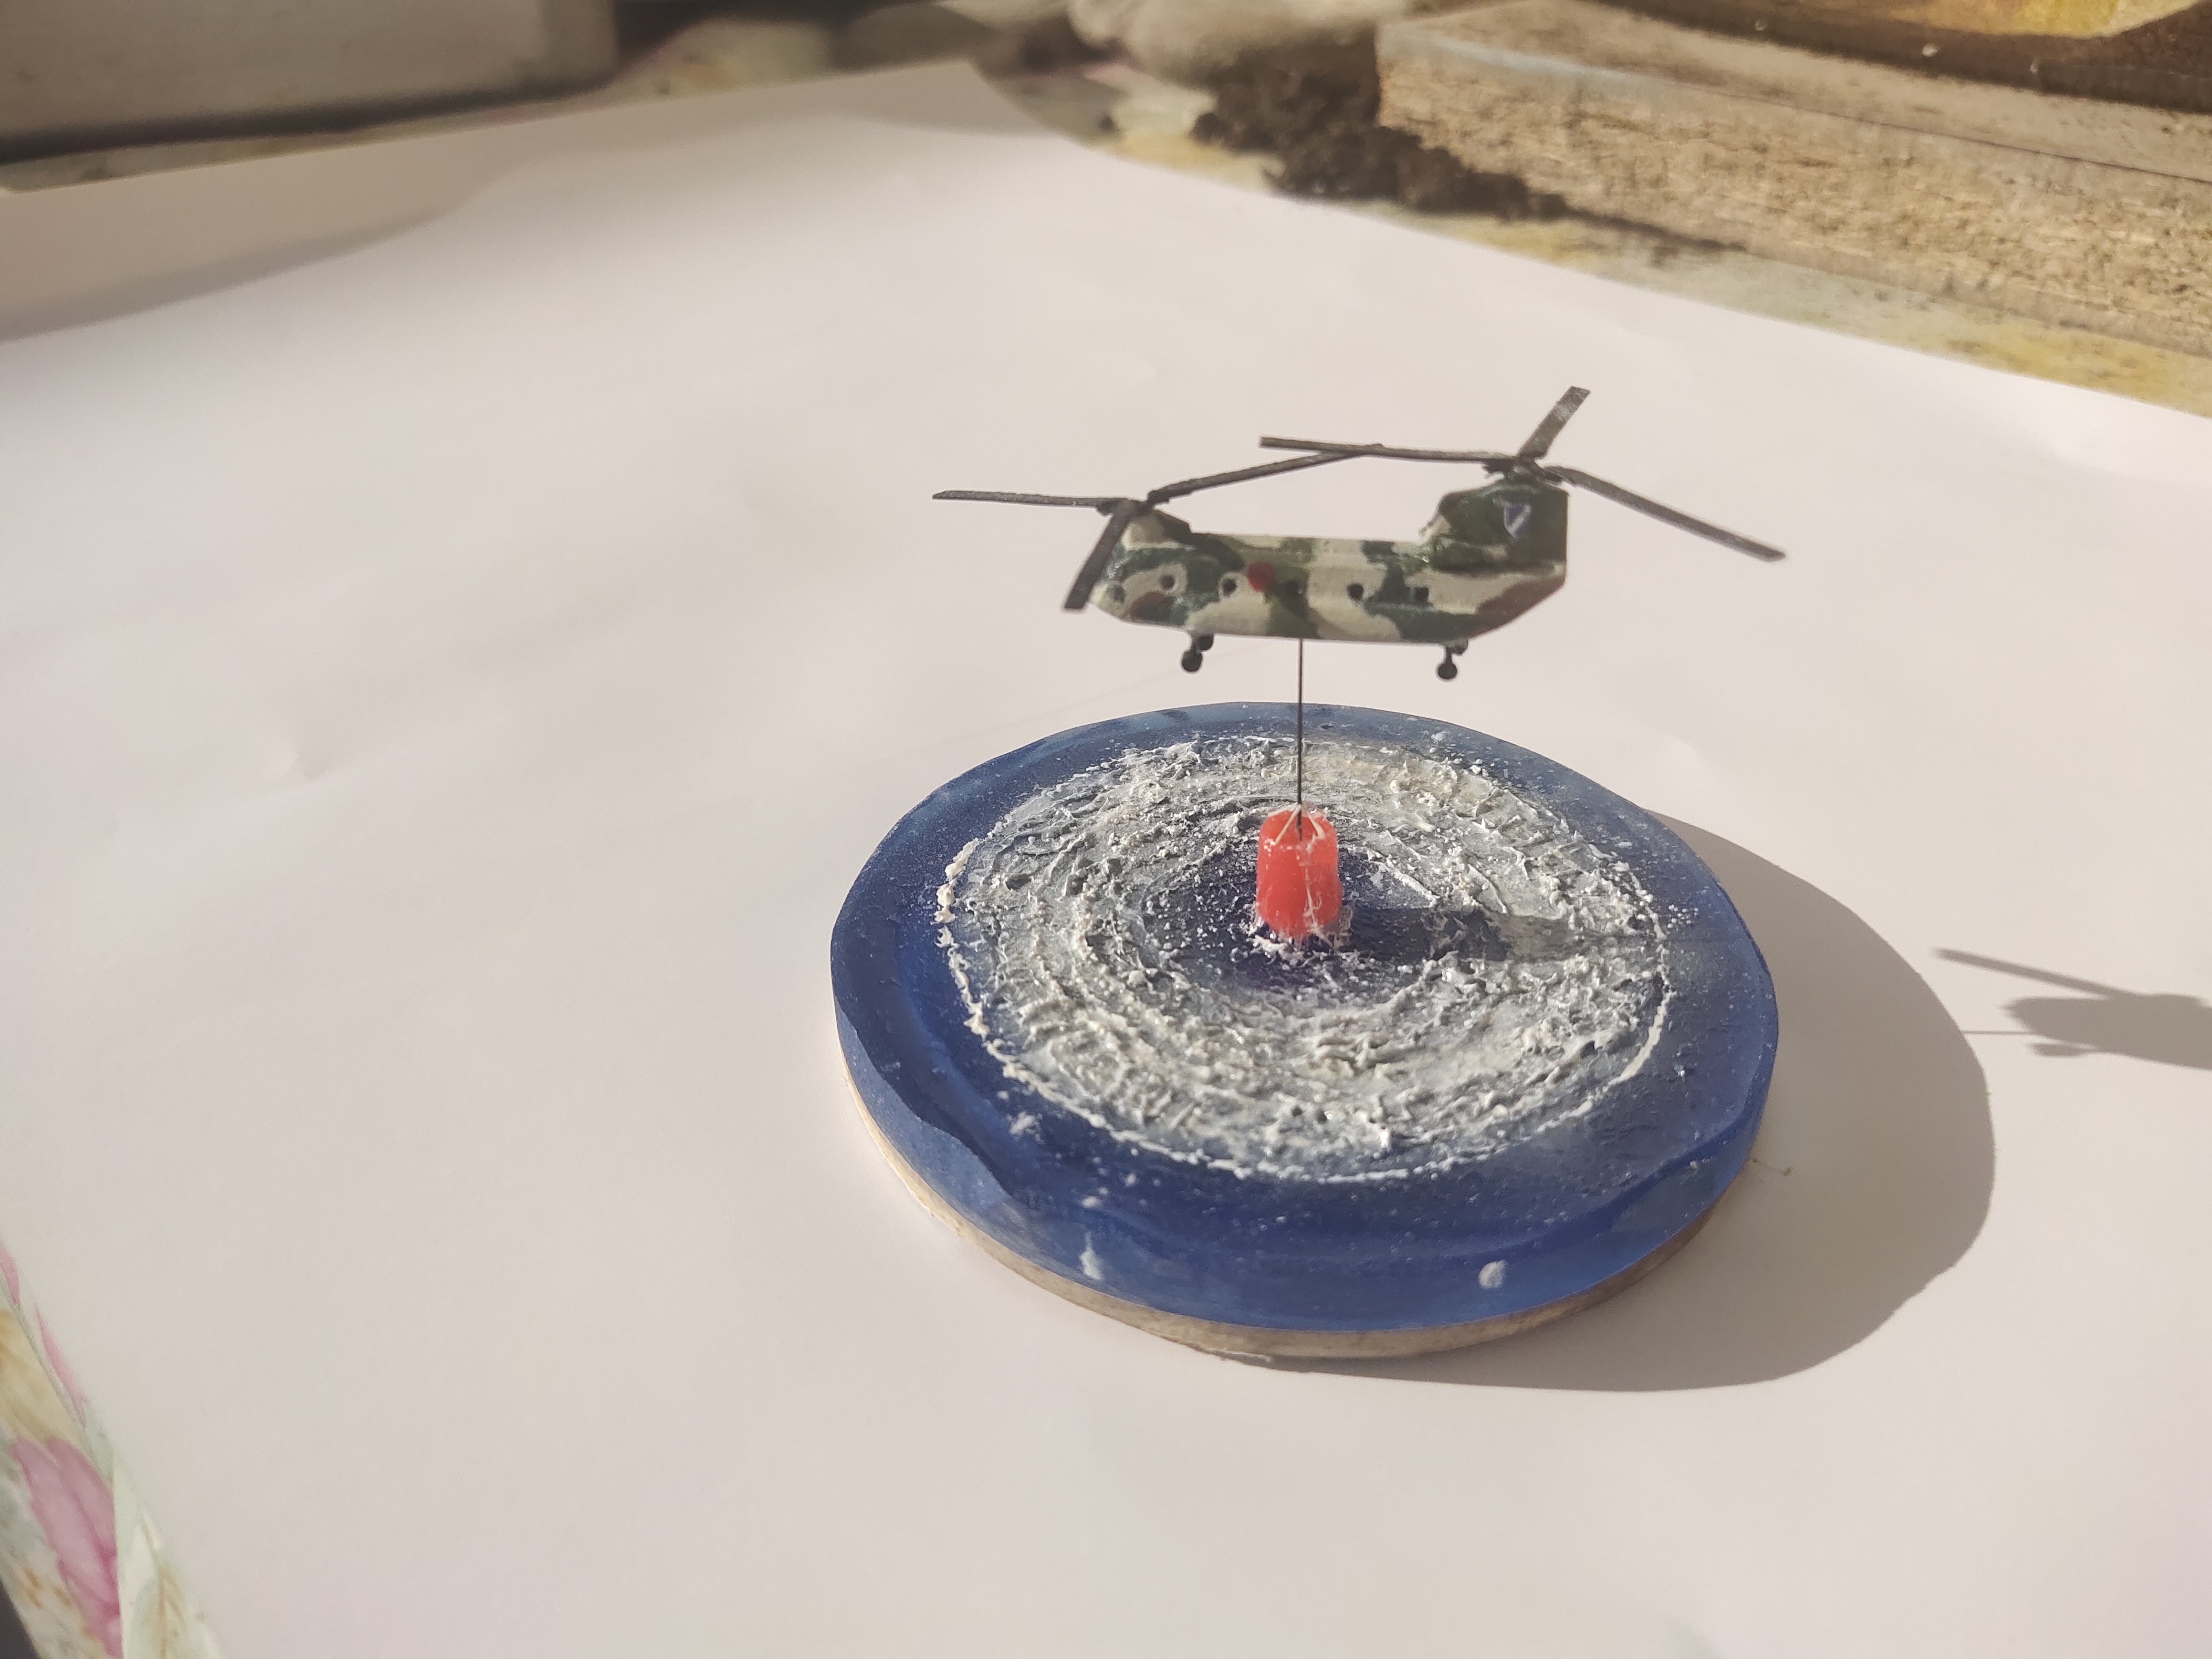
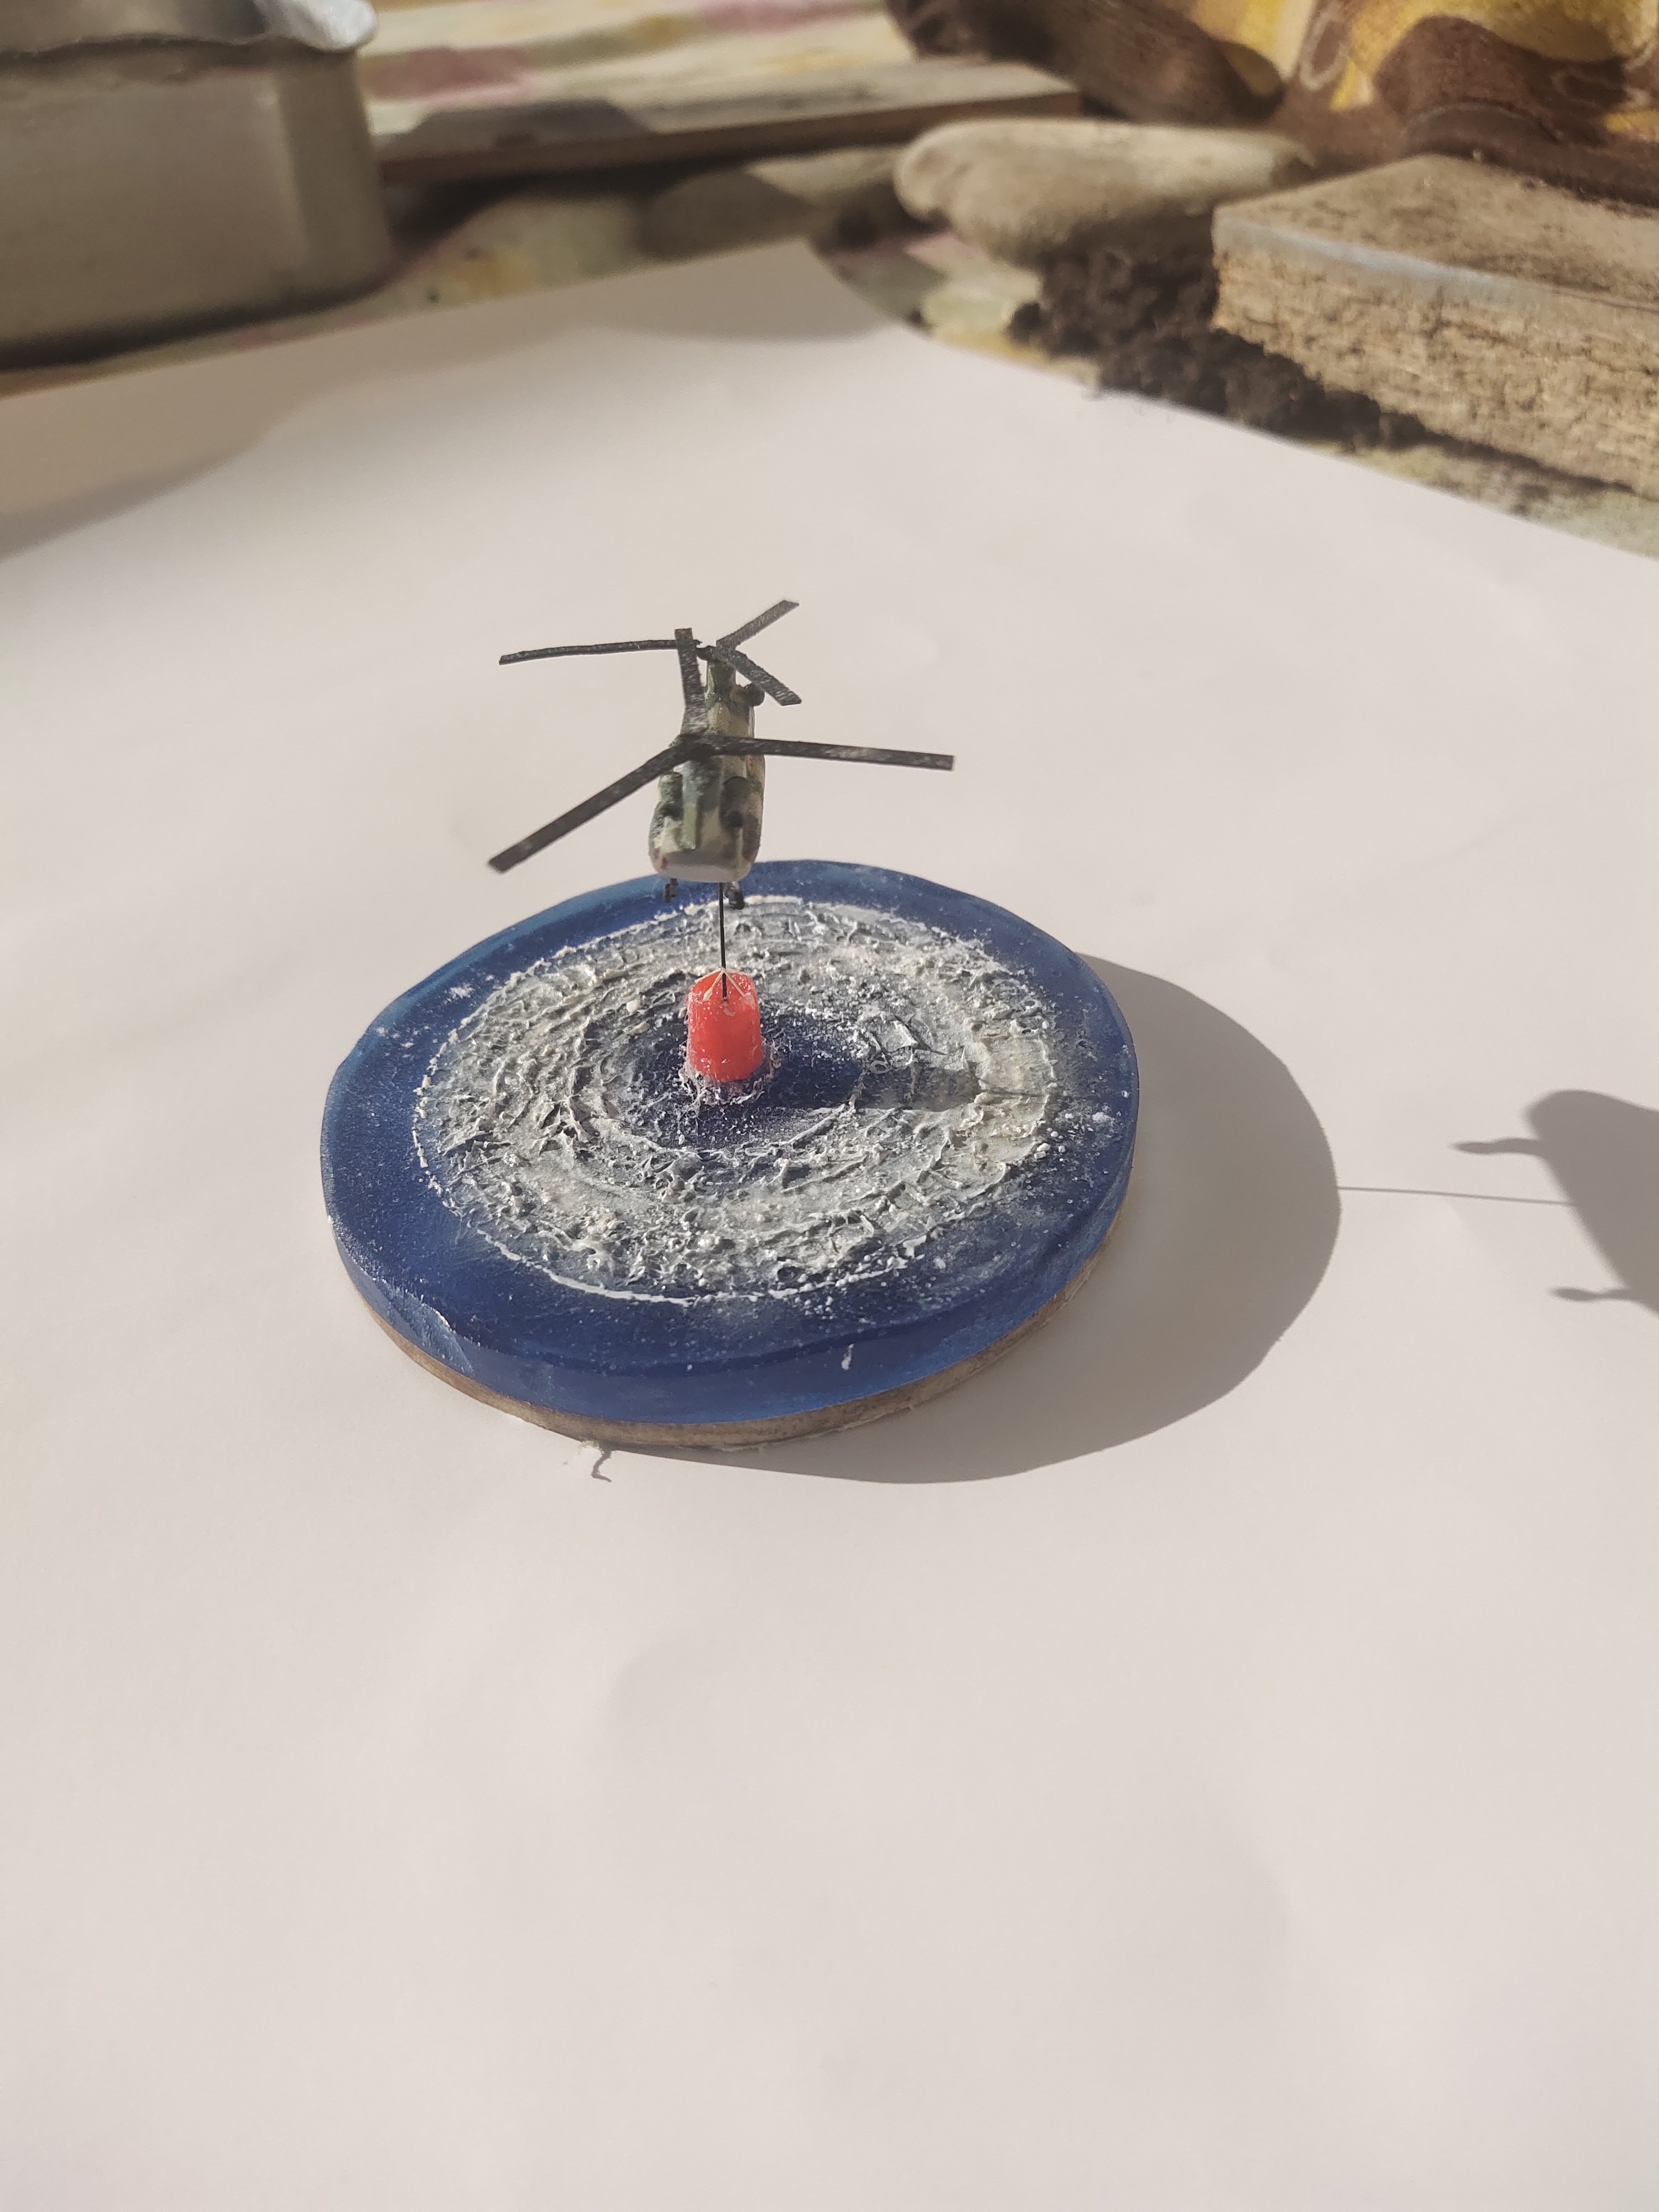
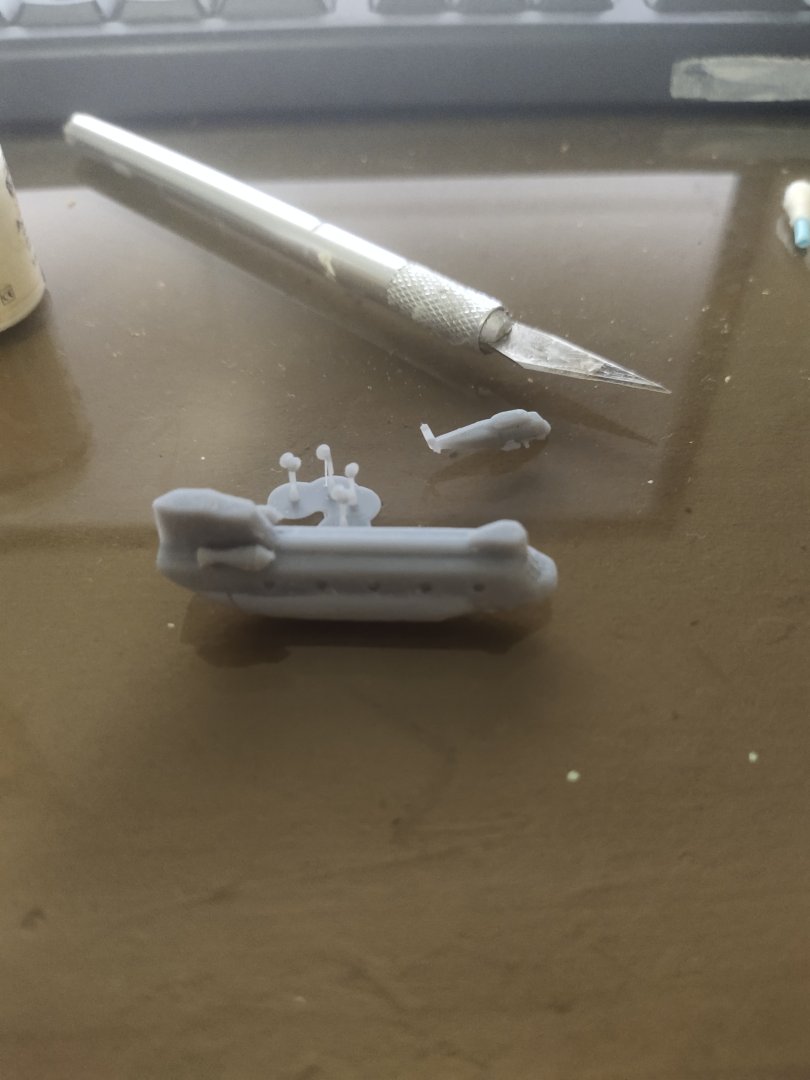
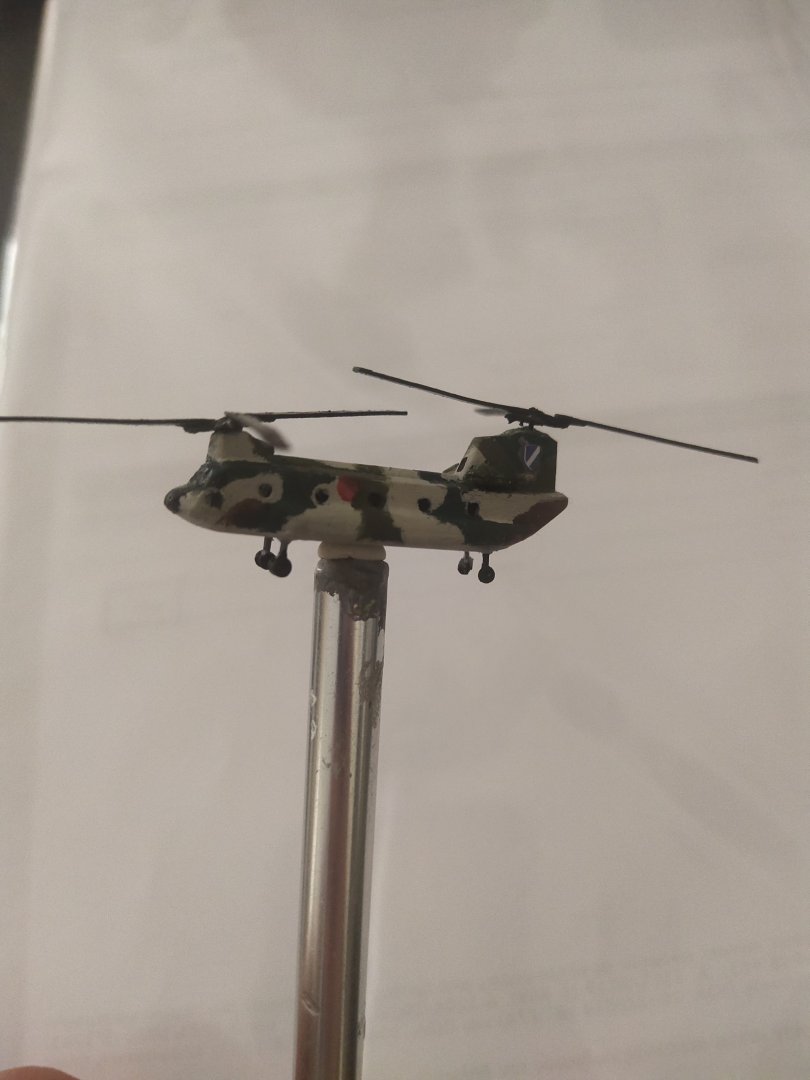
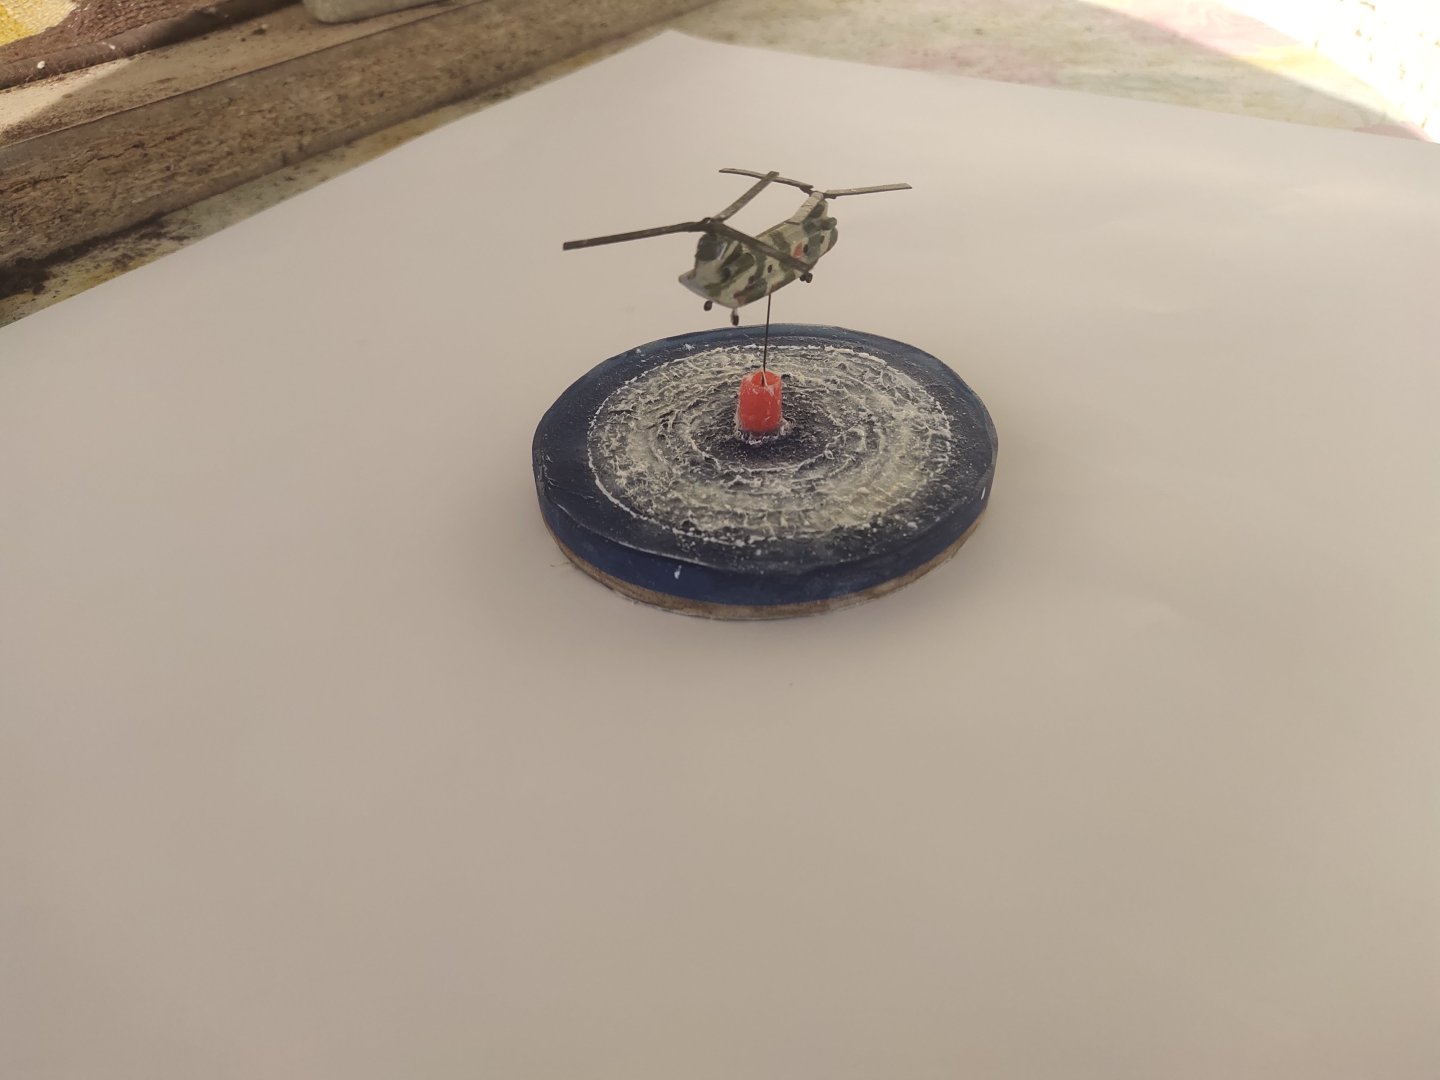
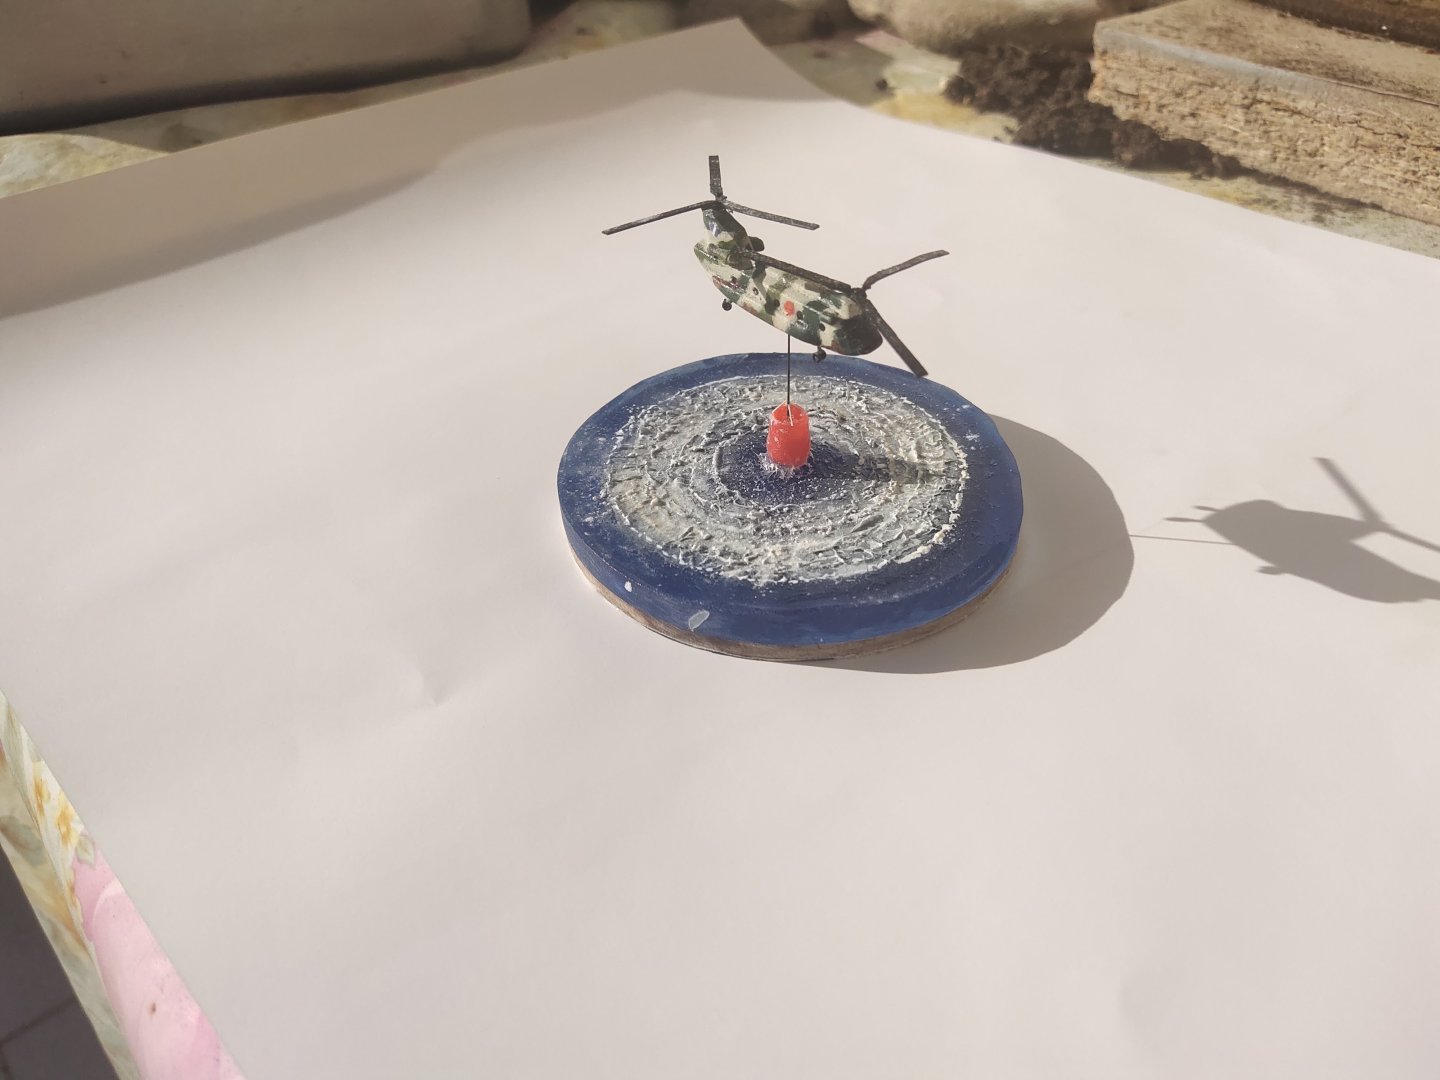
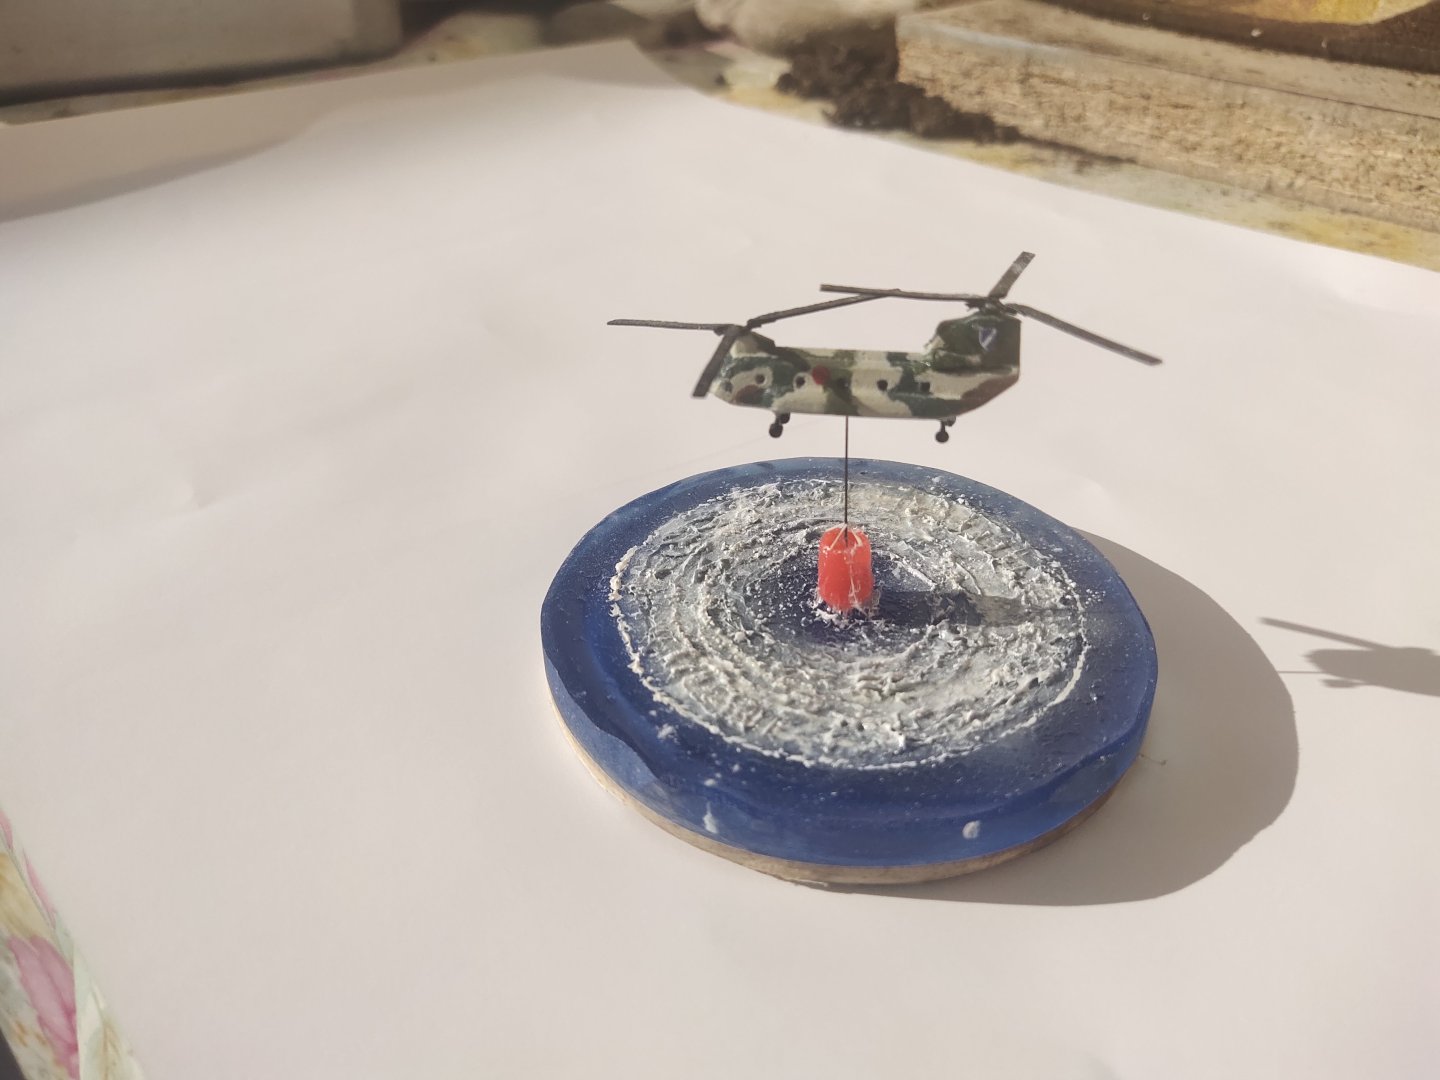
I 3d printed a model of a Chinook helicopter which founded online, after doing some necessary modification. I confused the fuselage length to the total length which include the blades. So after doing my maths at 43mm fuselage length it turned to be in 1/372 scale. Nevertheless instead of throwing it away, I made a simple diorama. The blades were scratched. The resin wasn't polished because this had to ended today last day before my 3 weeks leave. Pics were also taken in a hurry. Fortunately I didn't miss the ferry im actually on board as I'm posting it.


-
i see some white spots. Is this a desired a effect? If not may need to regulate your airbrush possibly the spitting effect is created by thick paint
- 27 replies
-
- 4
-
-
- Holland class
- plastic
- (and 2 more)
-
Nice I'm going to present my own collection of less famous, smaller vessels soon. Some are 3d printed.
- 27 replies
-
- 4
-
-
- Holland class
- plastic
- (and 2 more)
-
Thank you. This is actually the first part of the trilogy. In the future a Spruance and a Burke will be added so I can have a complete collection Thanks as always for your support and dedication