mikegr
-
Posts
827 -
Joined
-
Last visited
Content Type
Profiles
Forums
Gallery
Events
Everything posted by mikegr
-
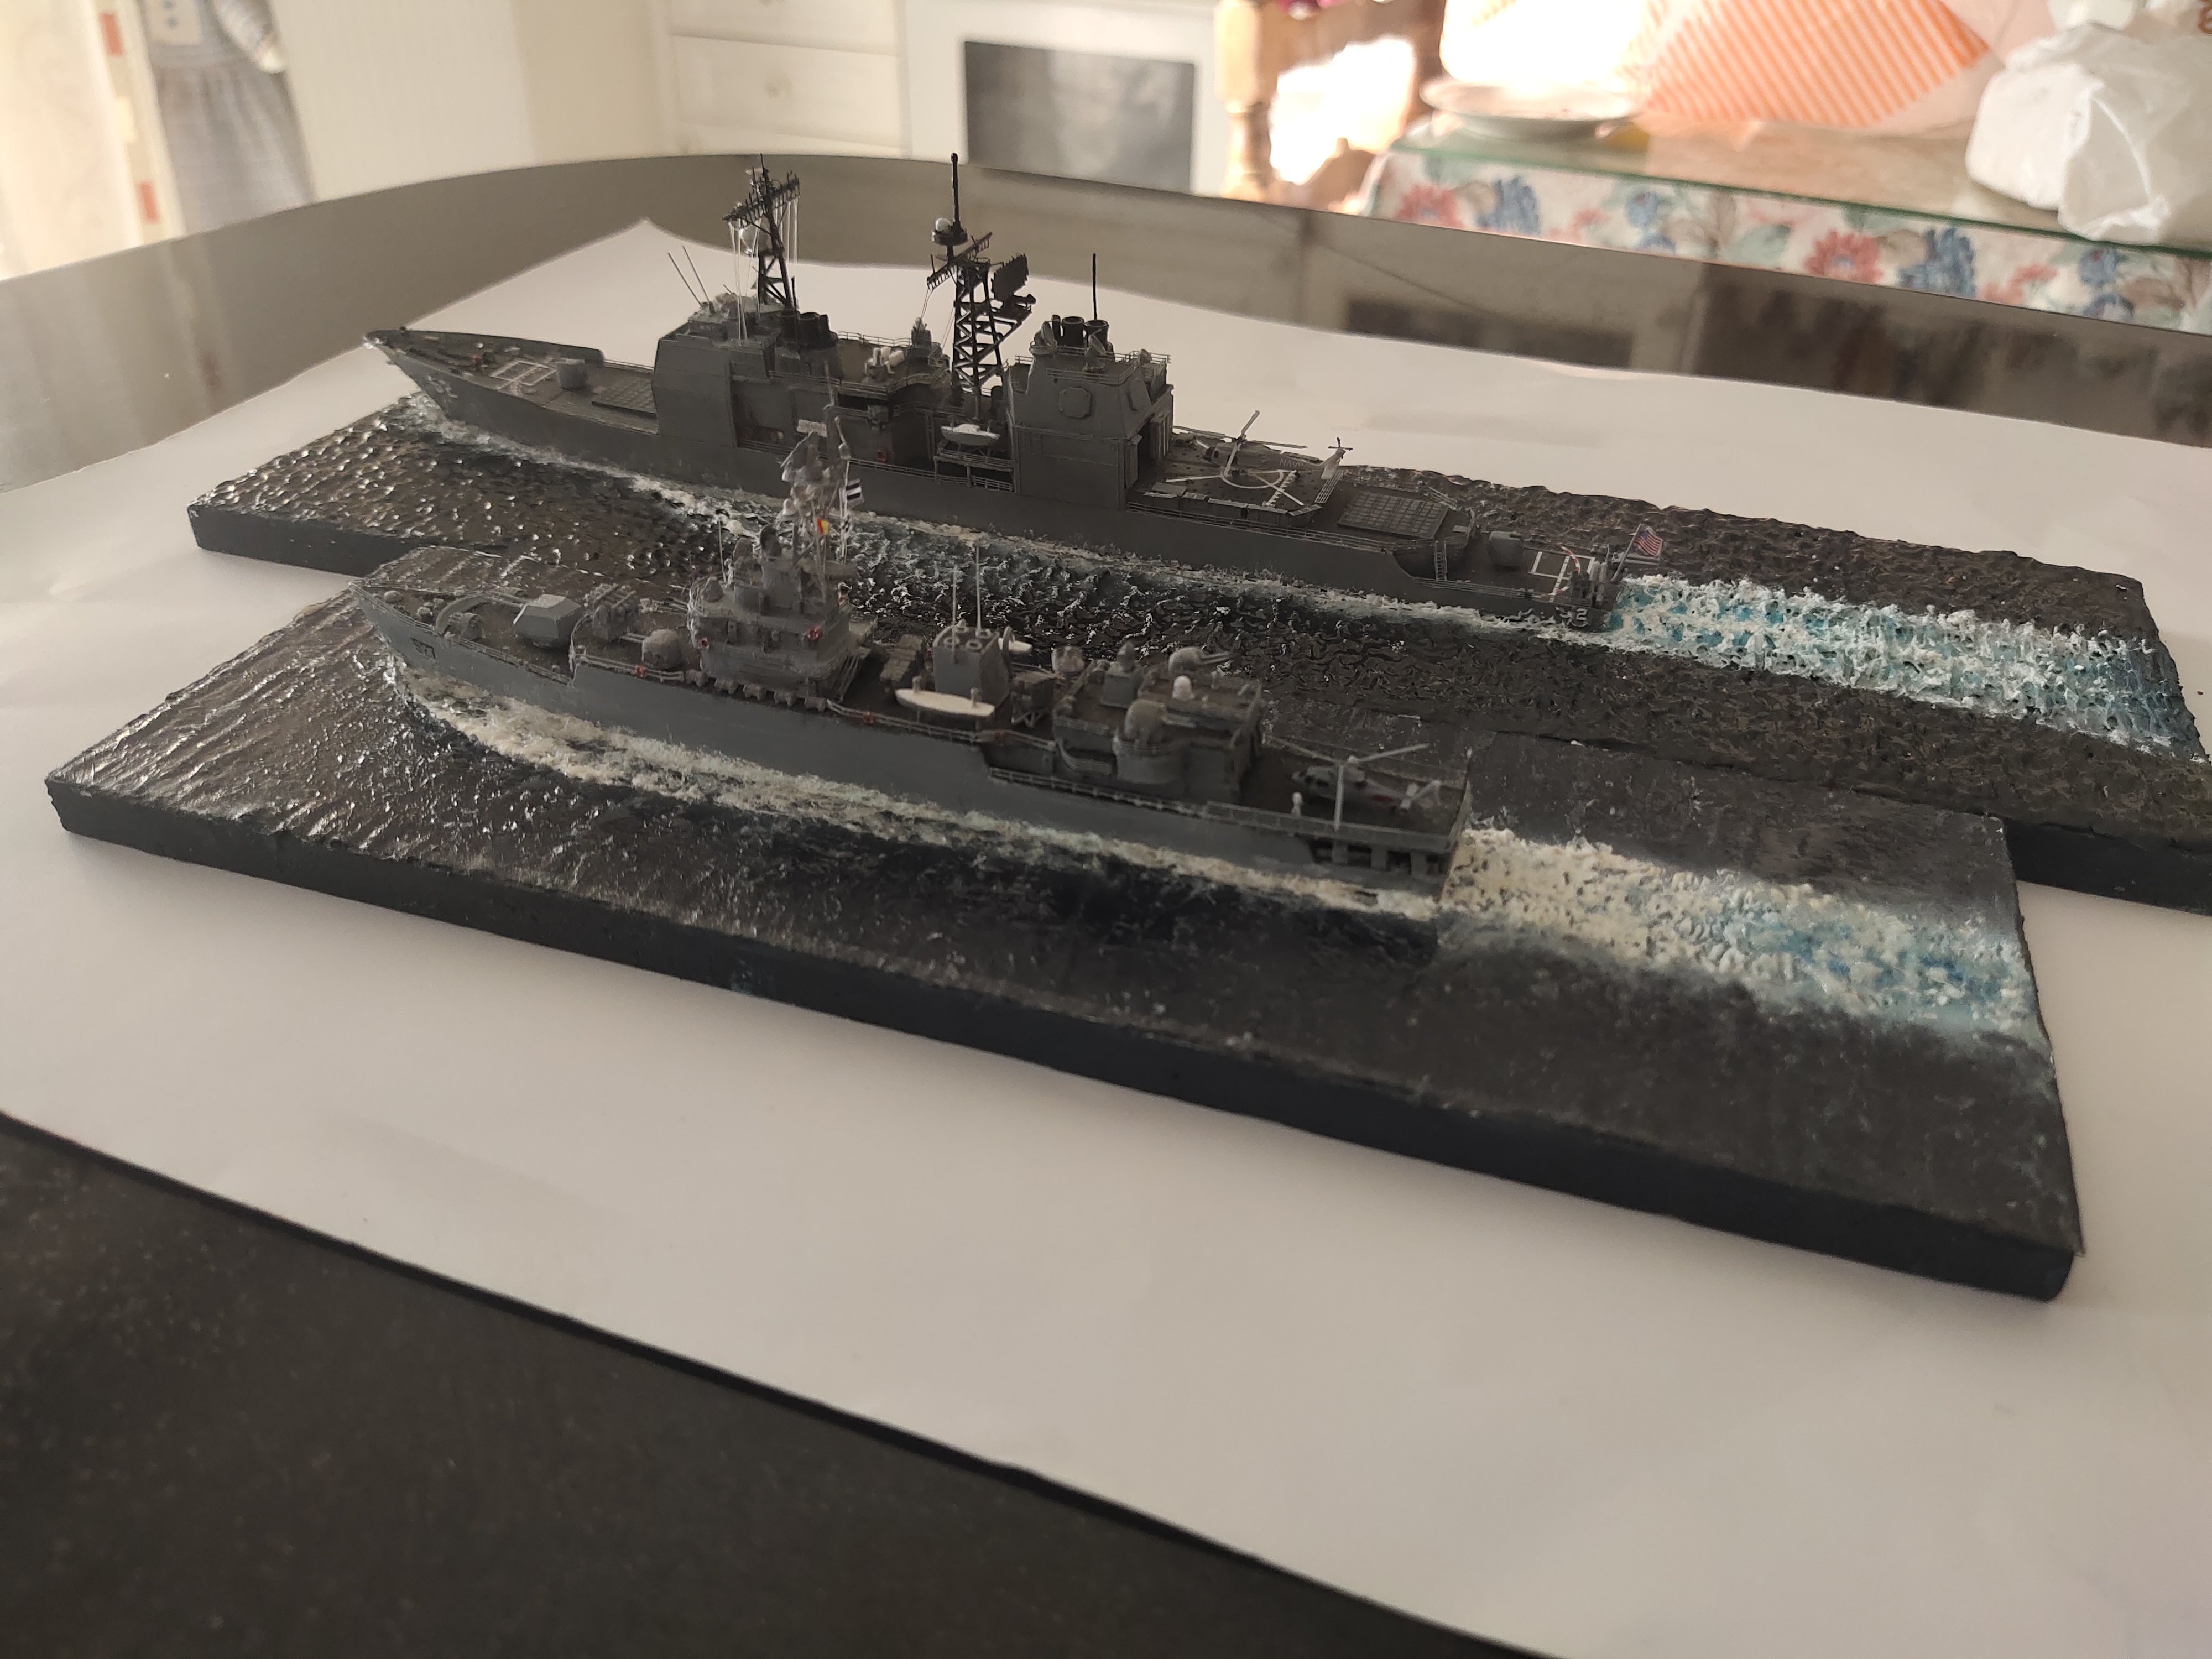
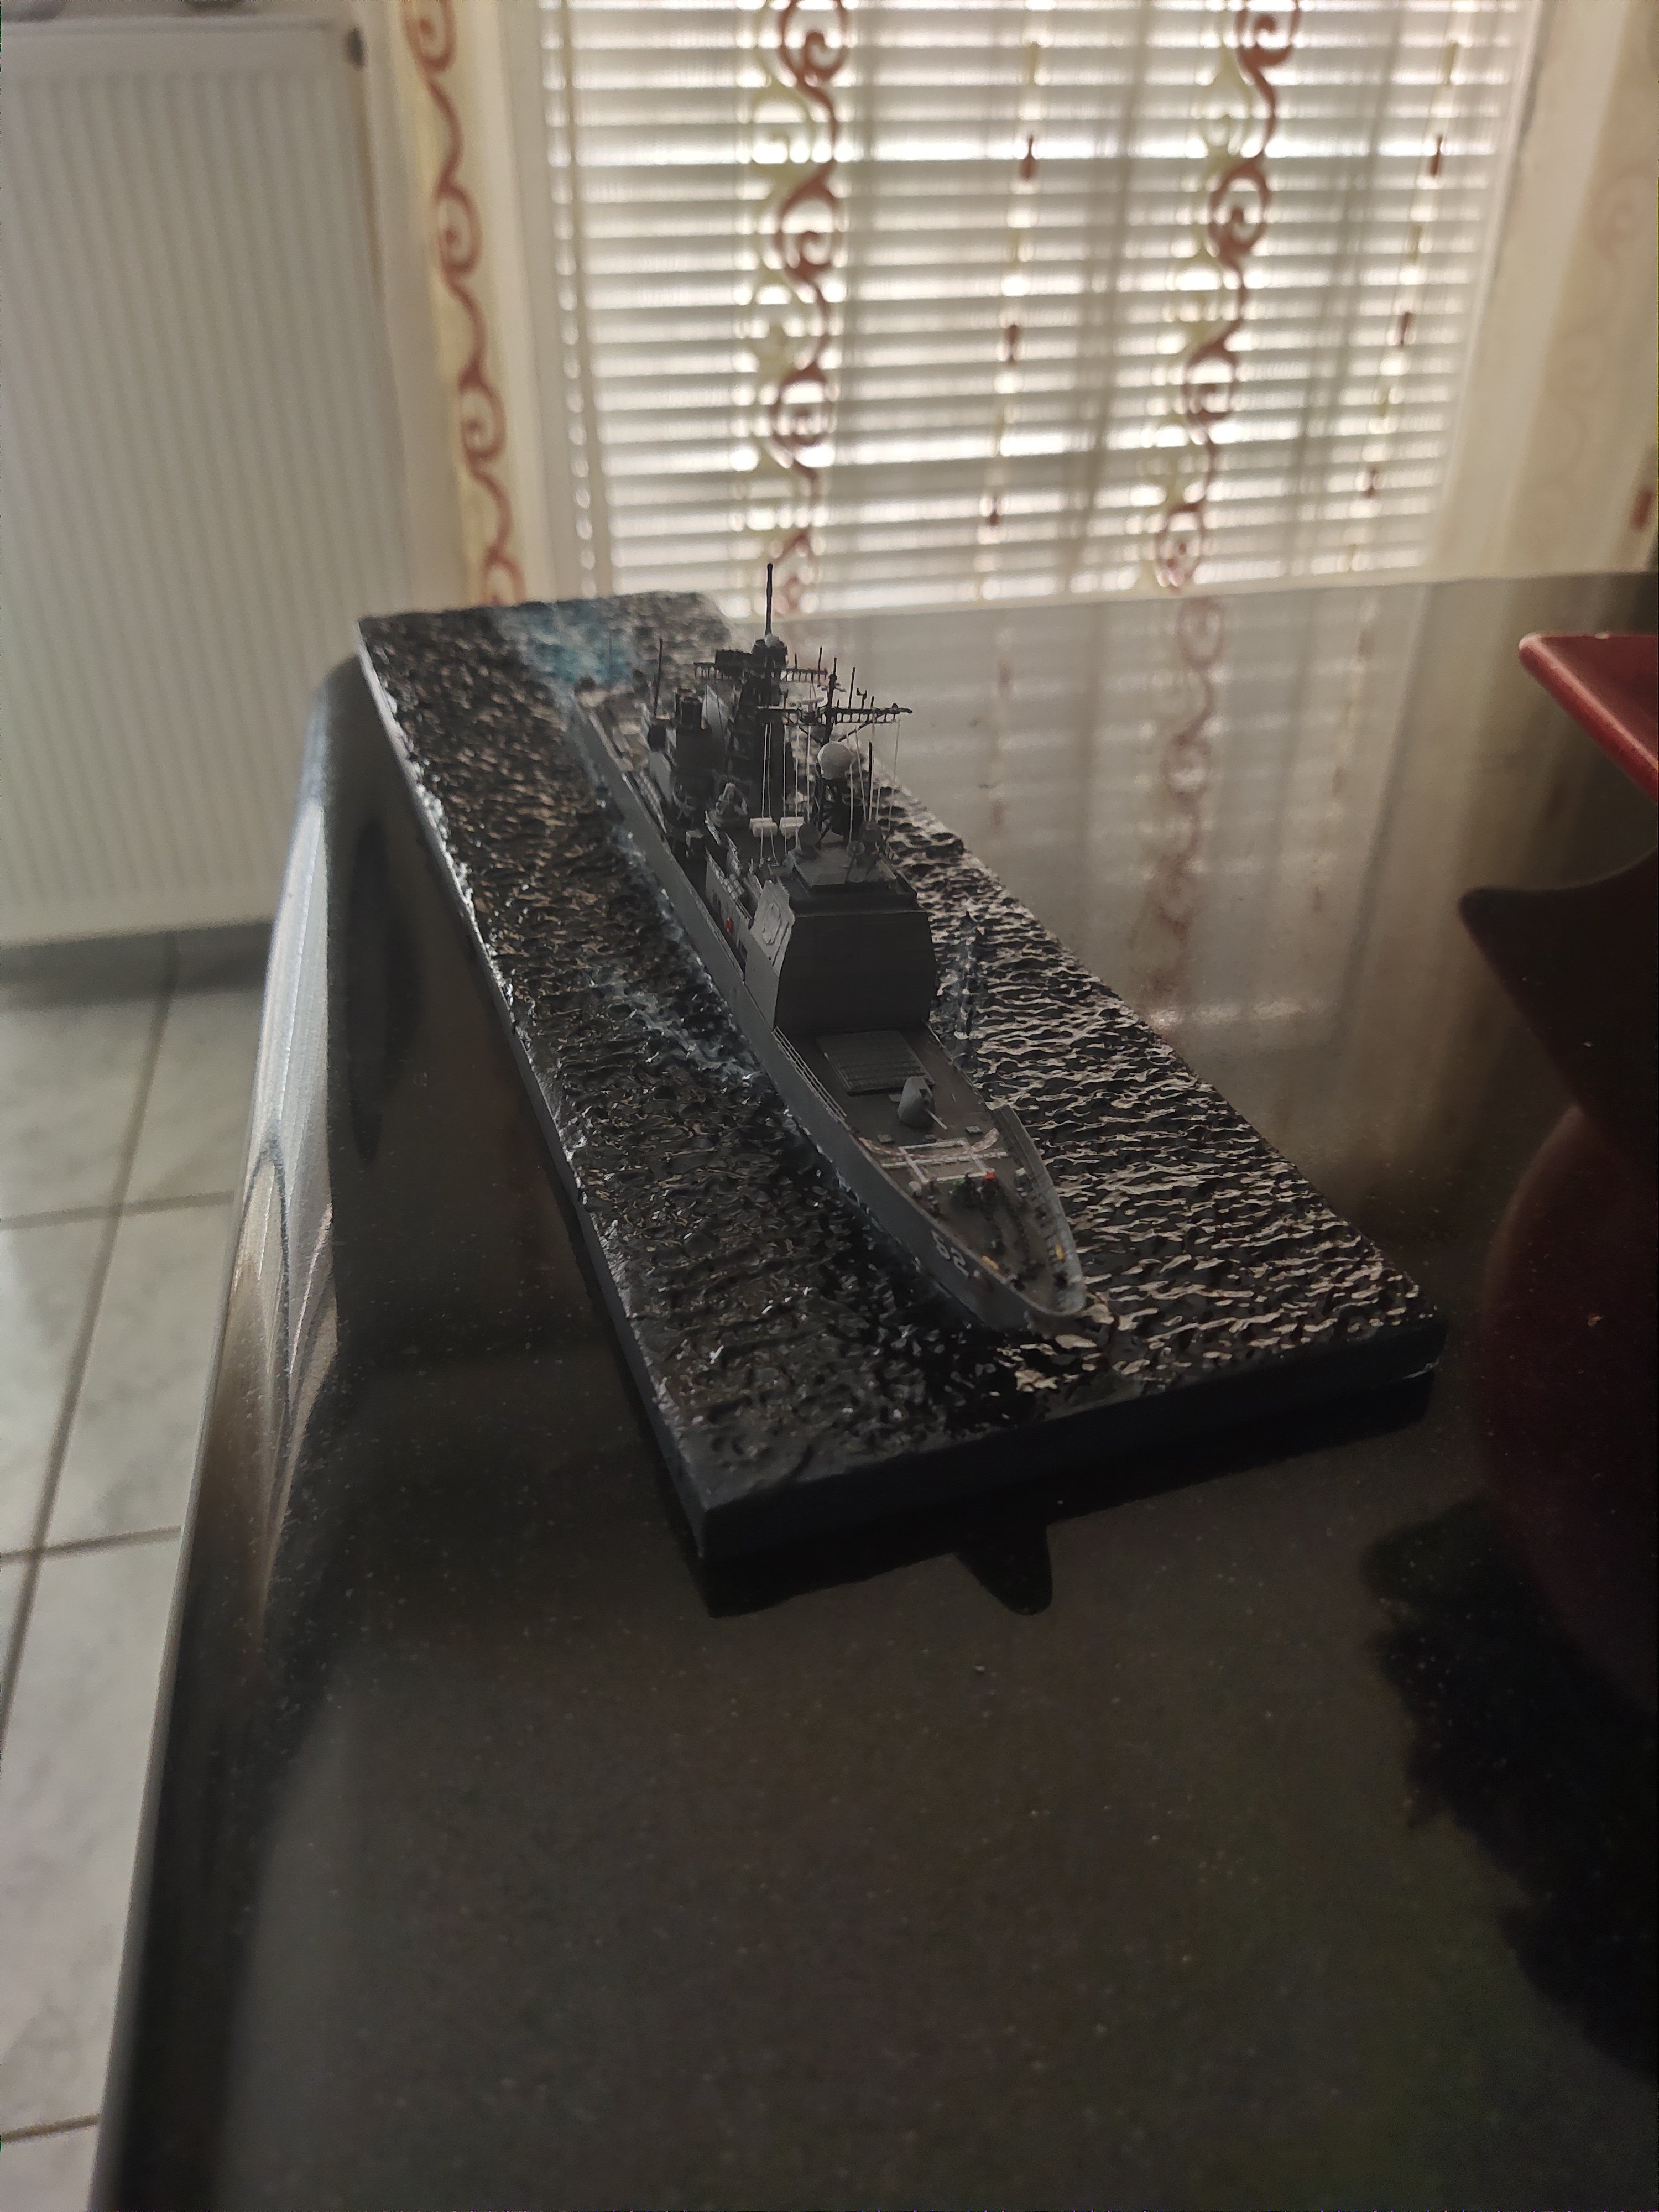
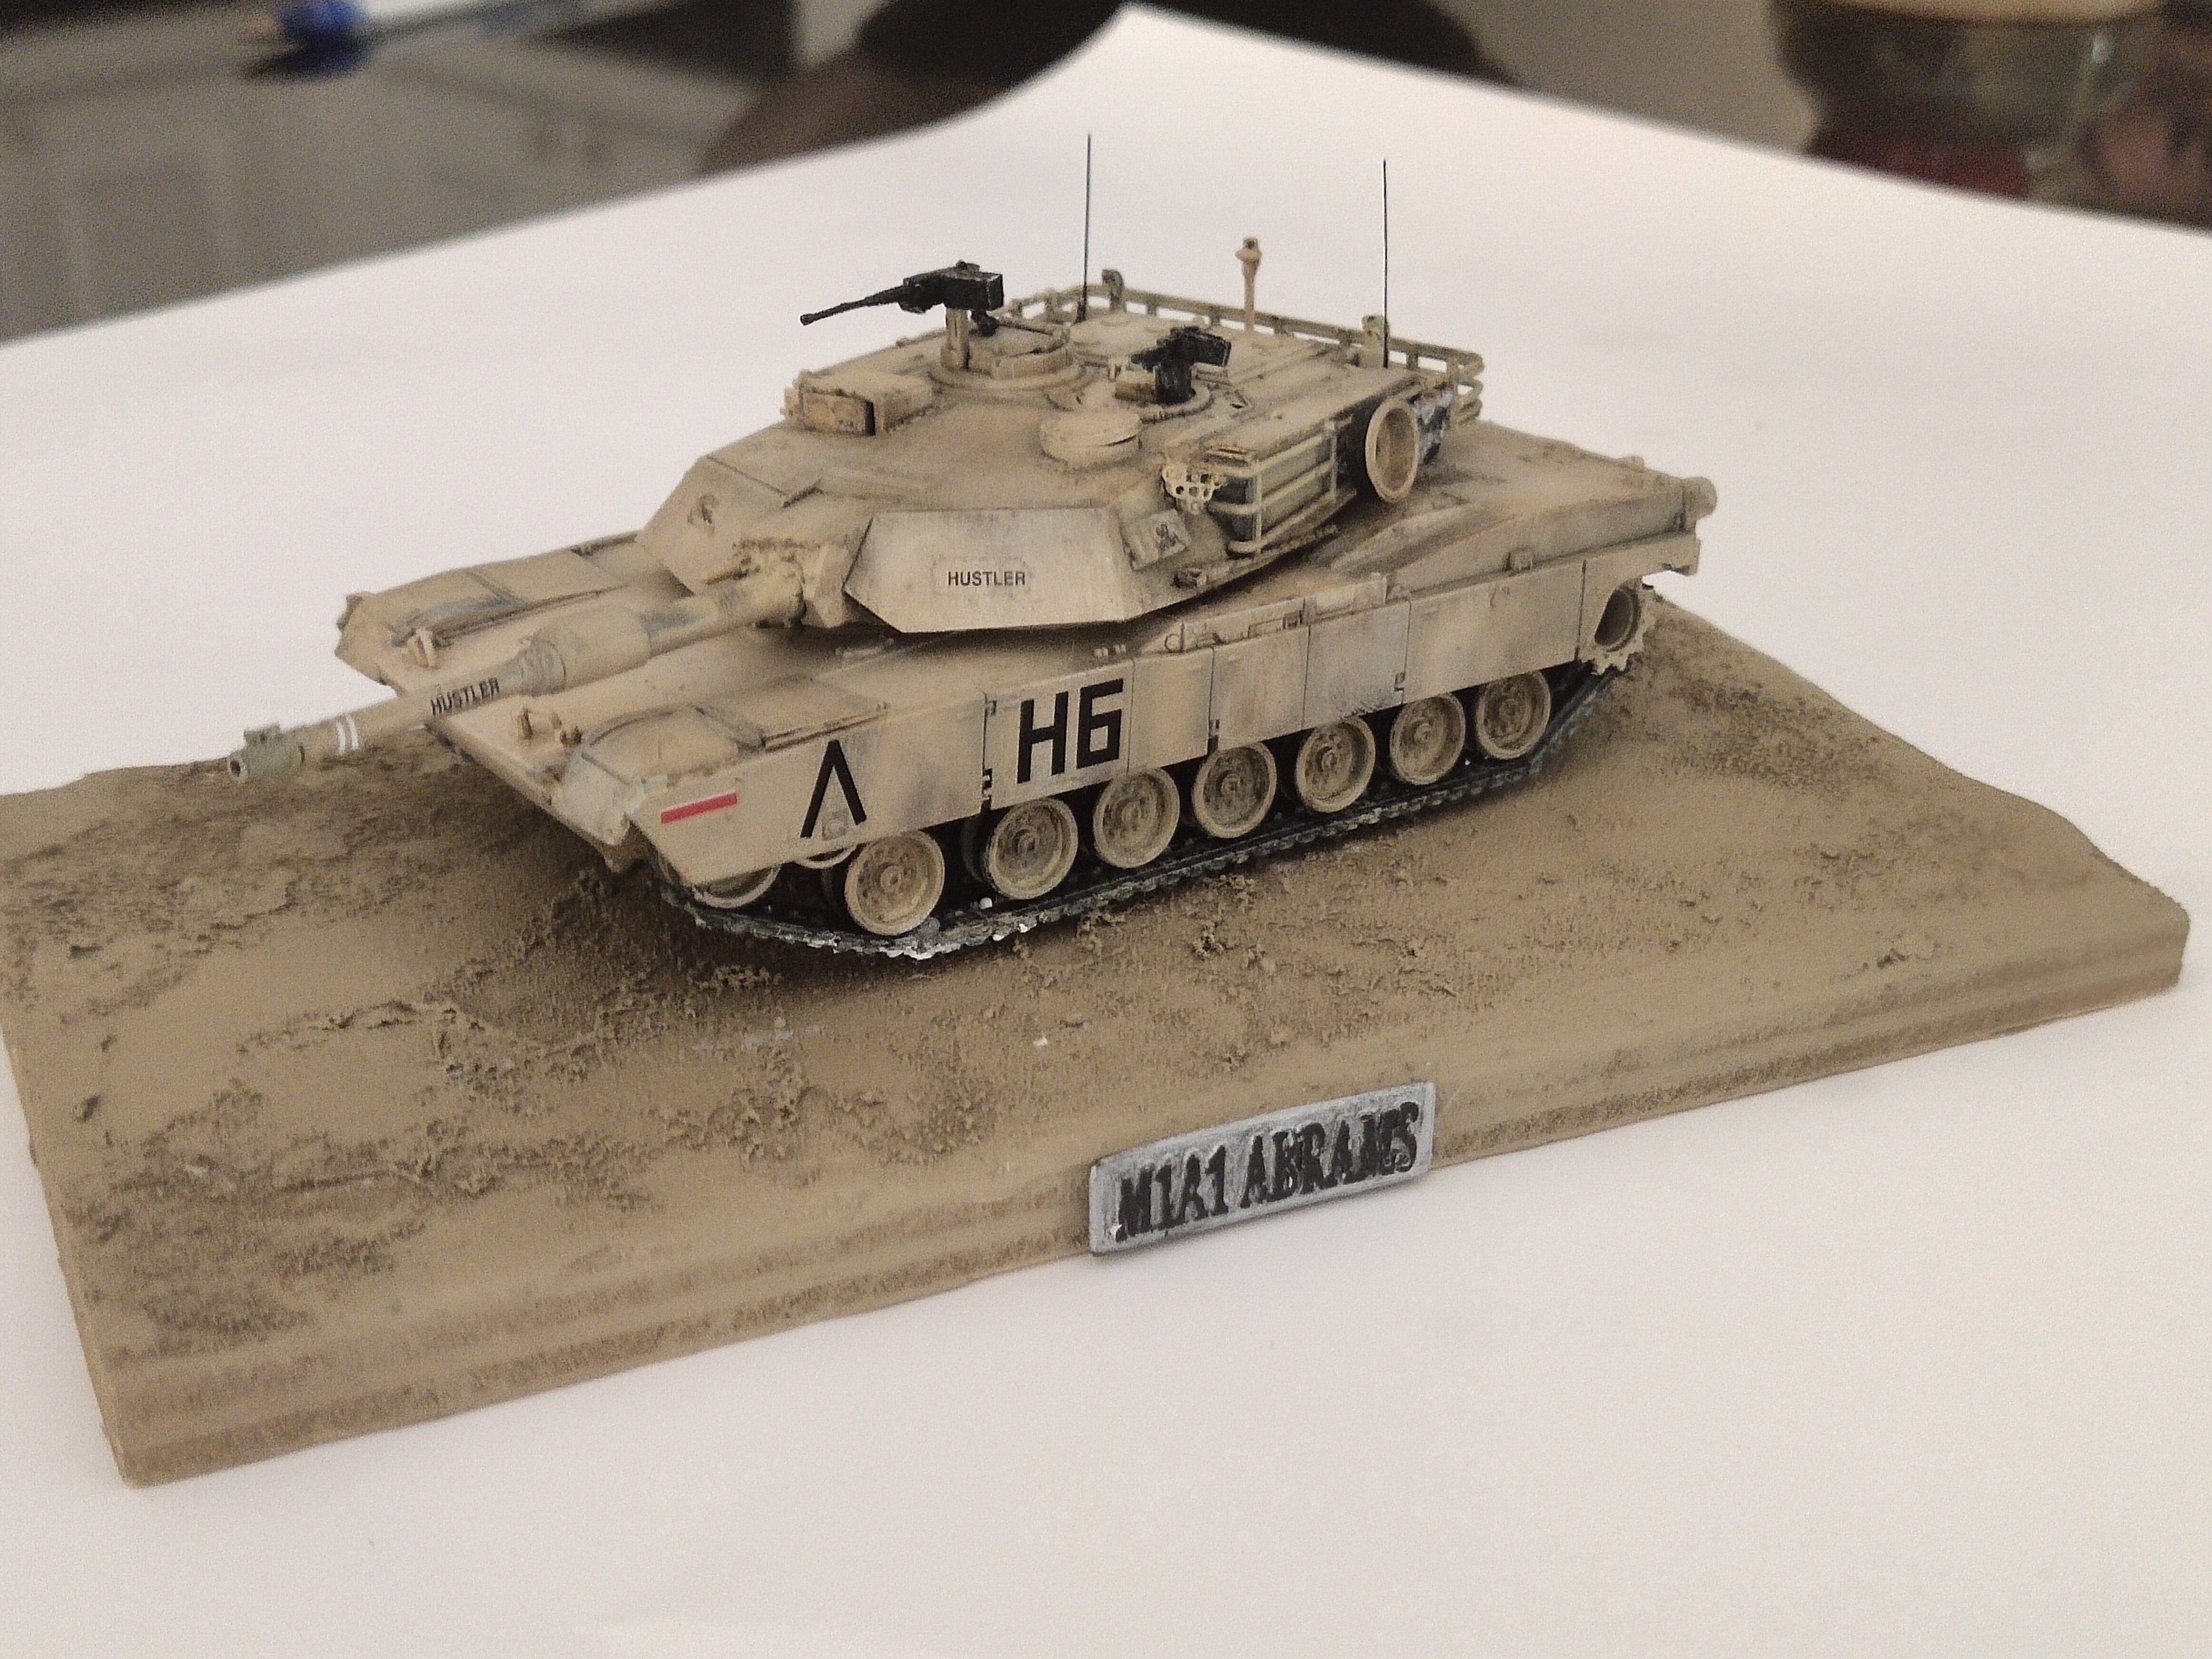
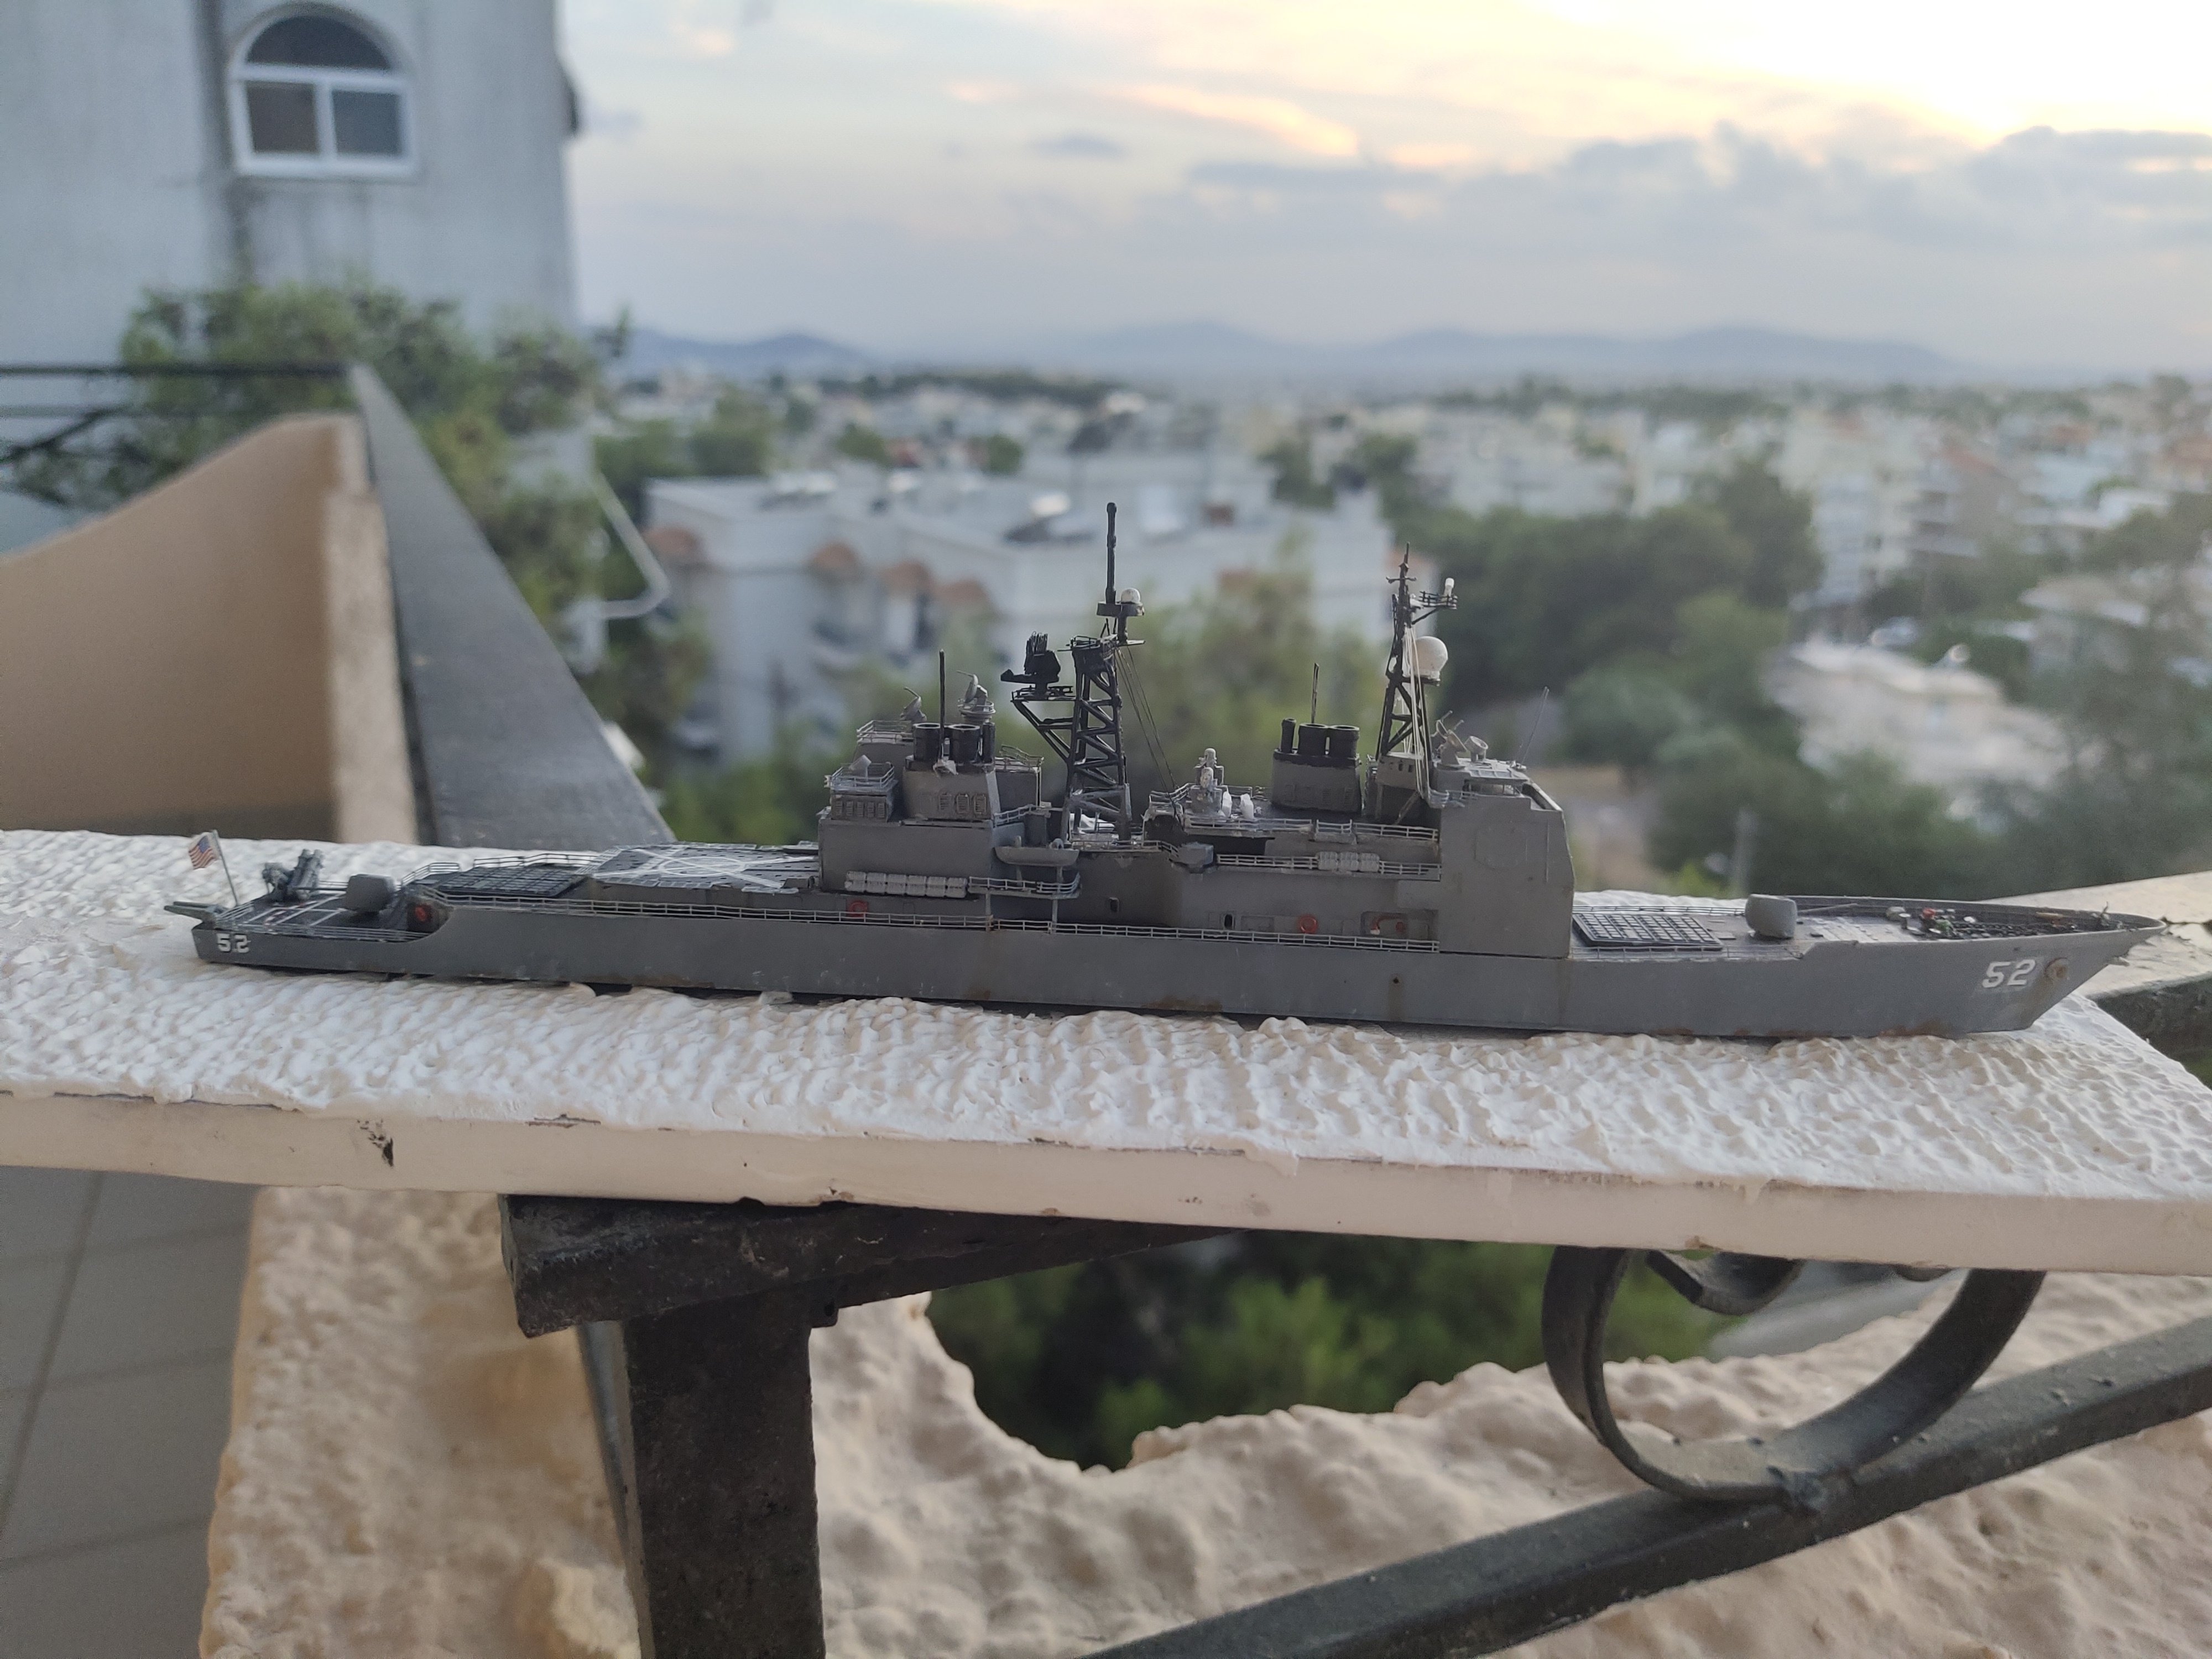
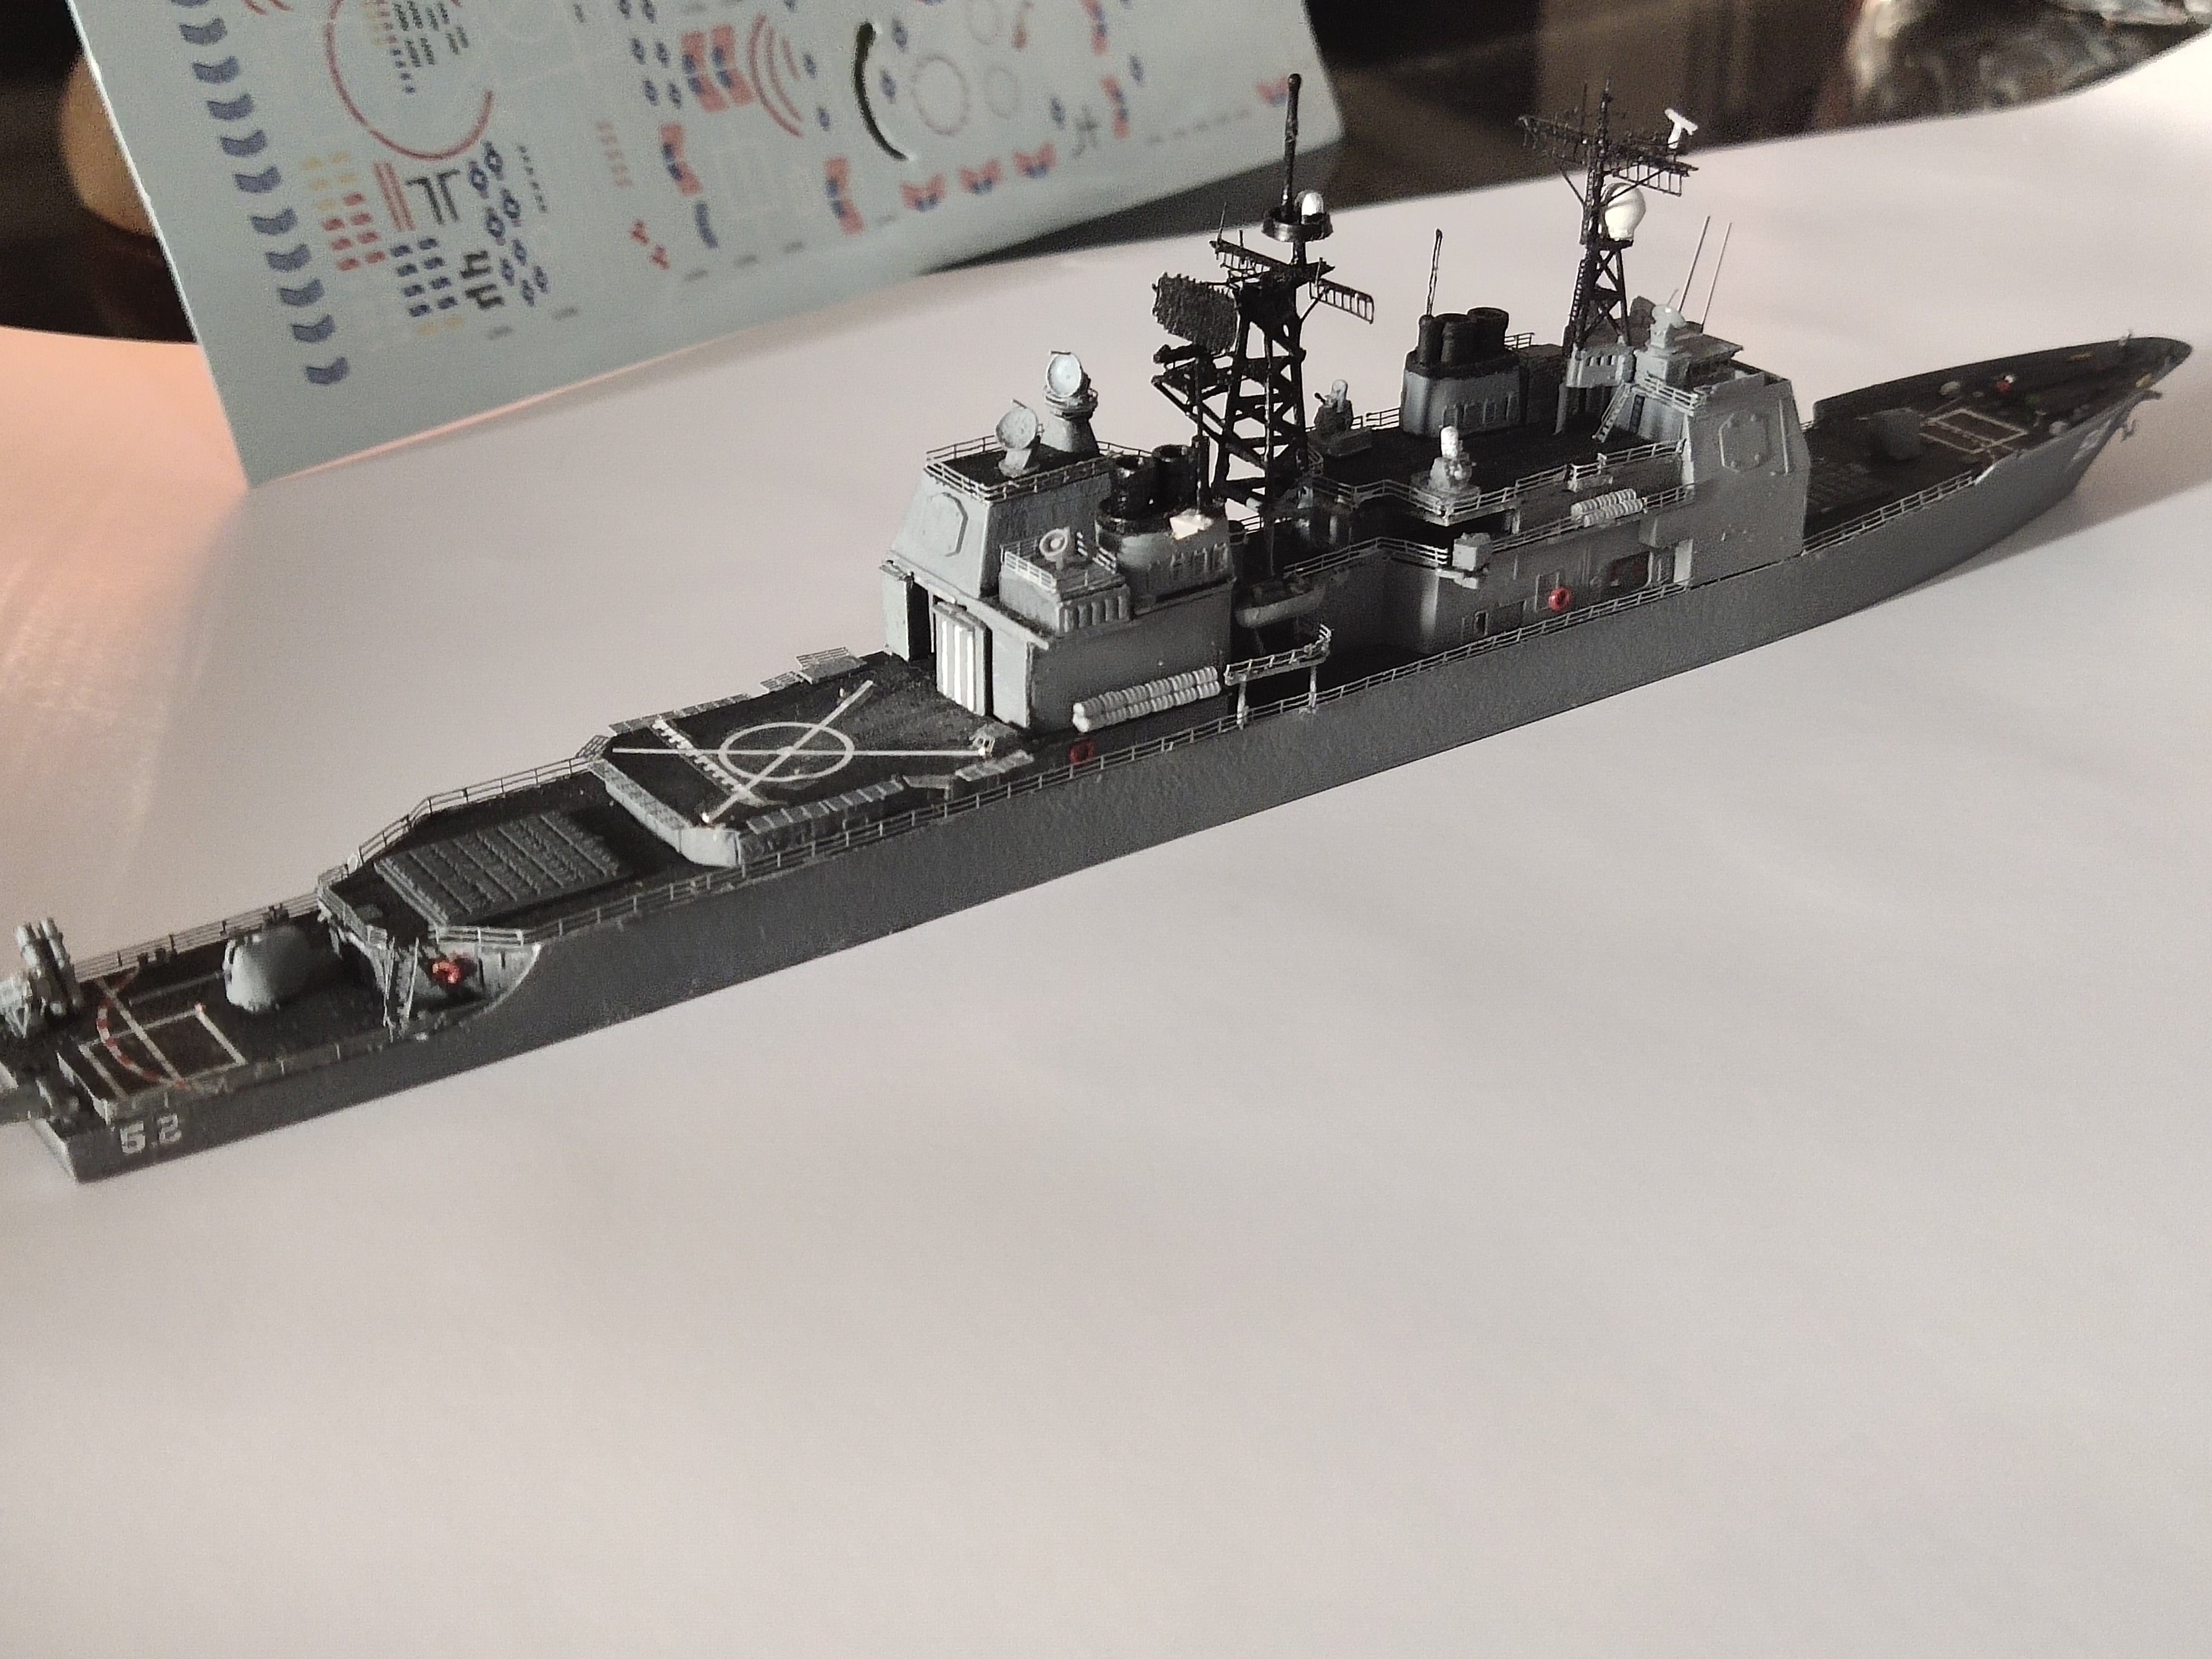
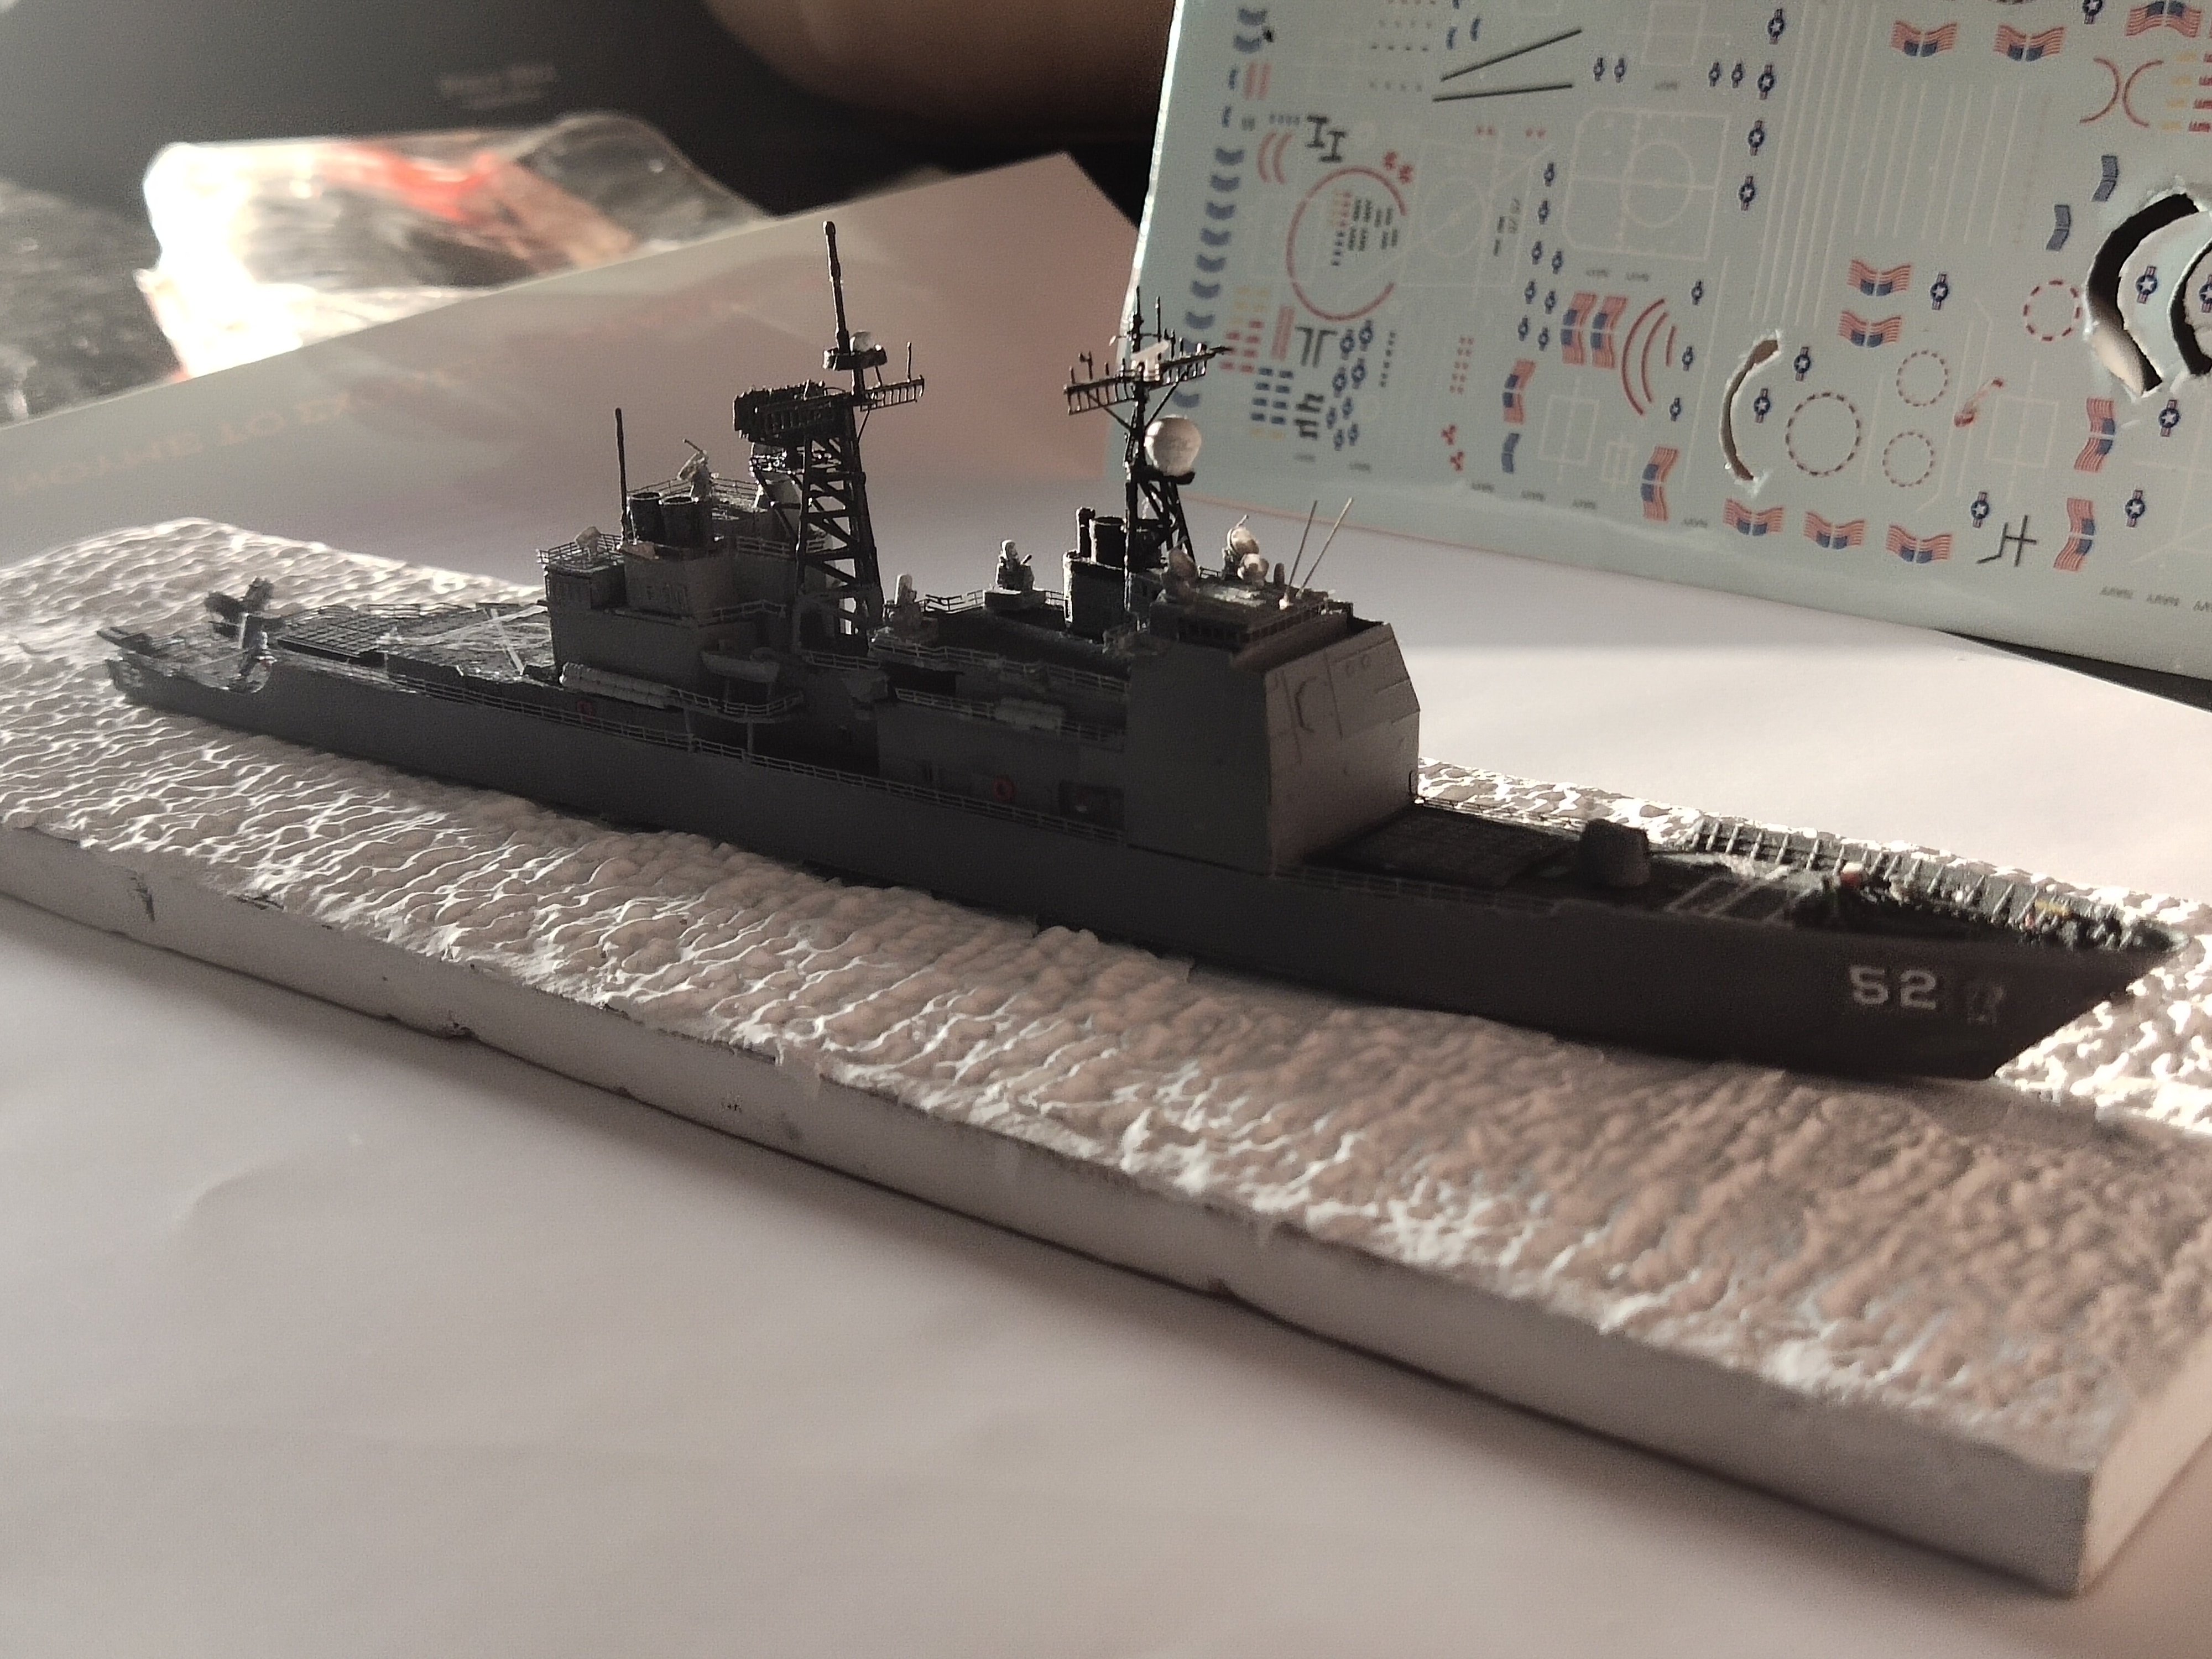
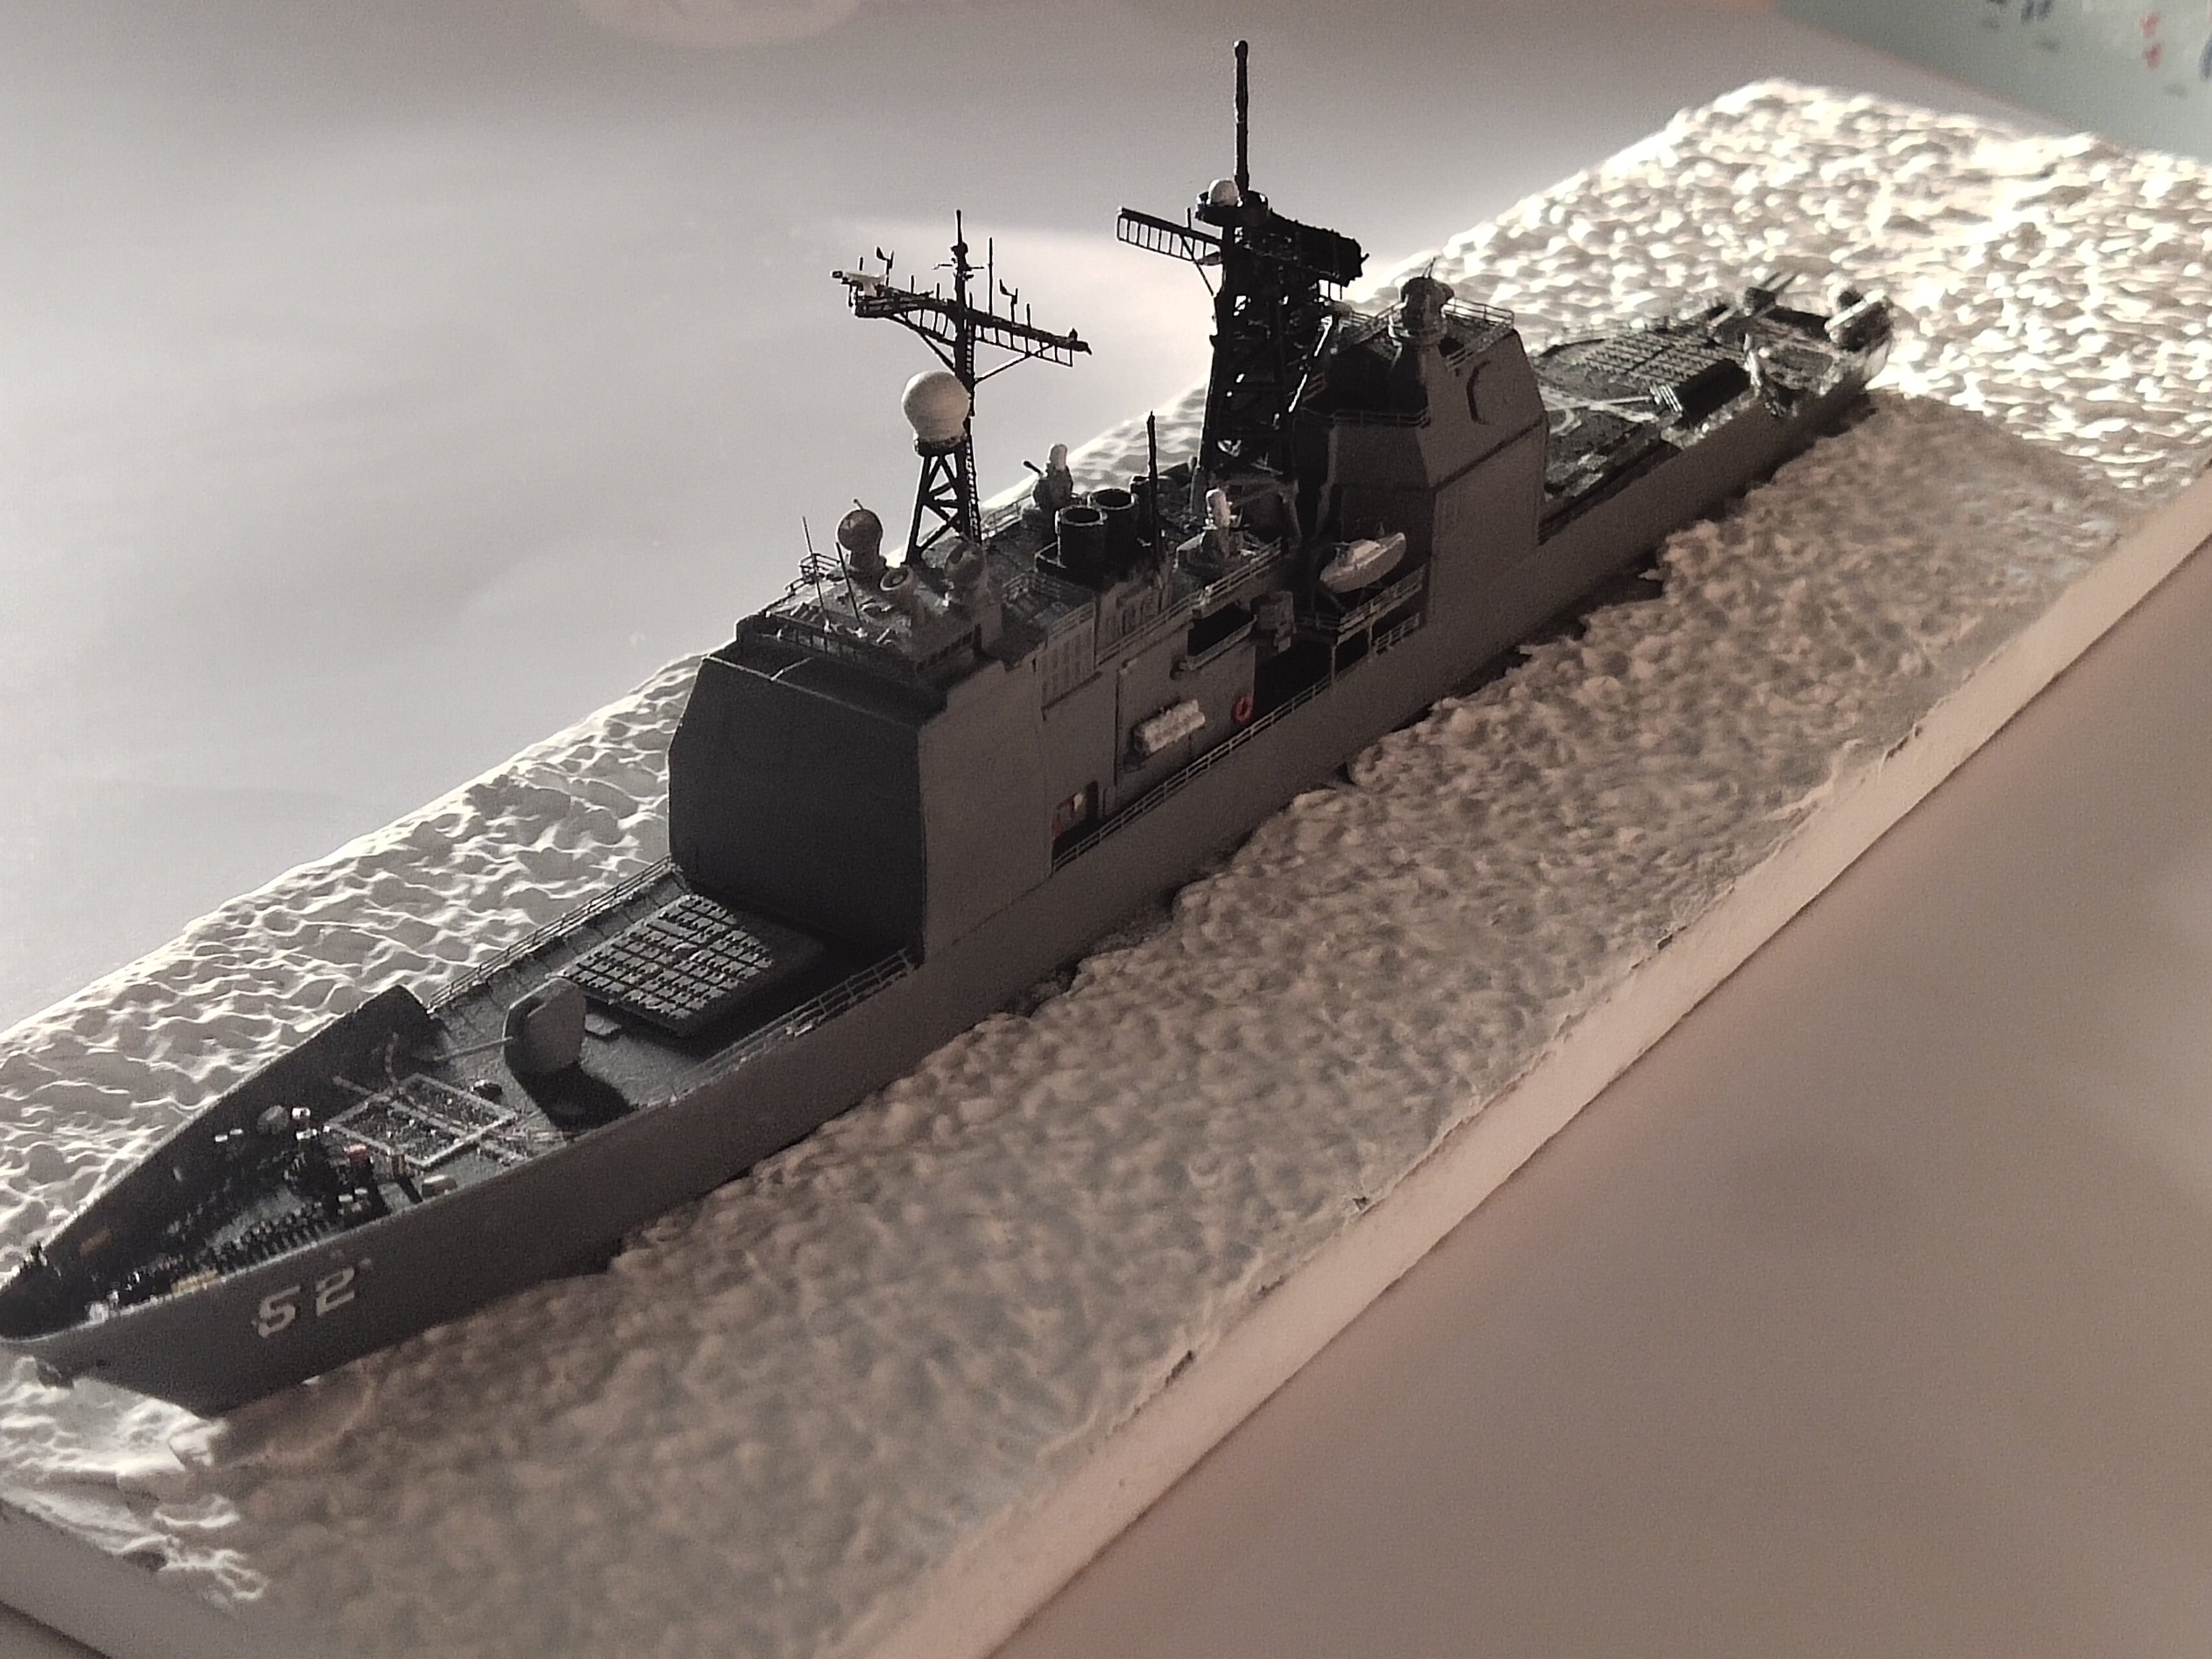
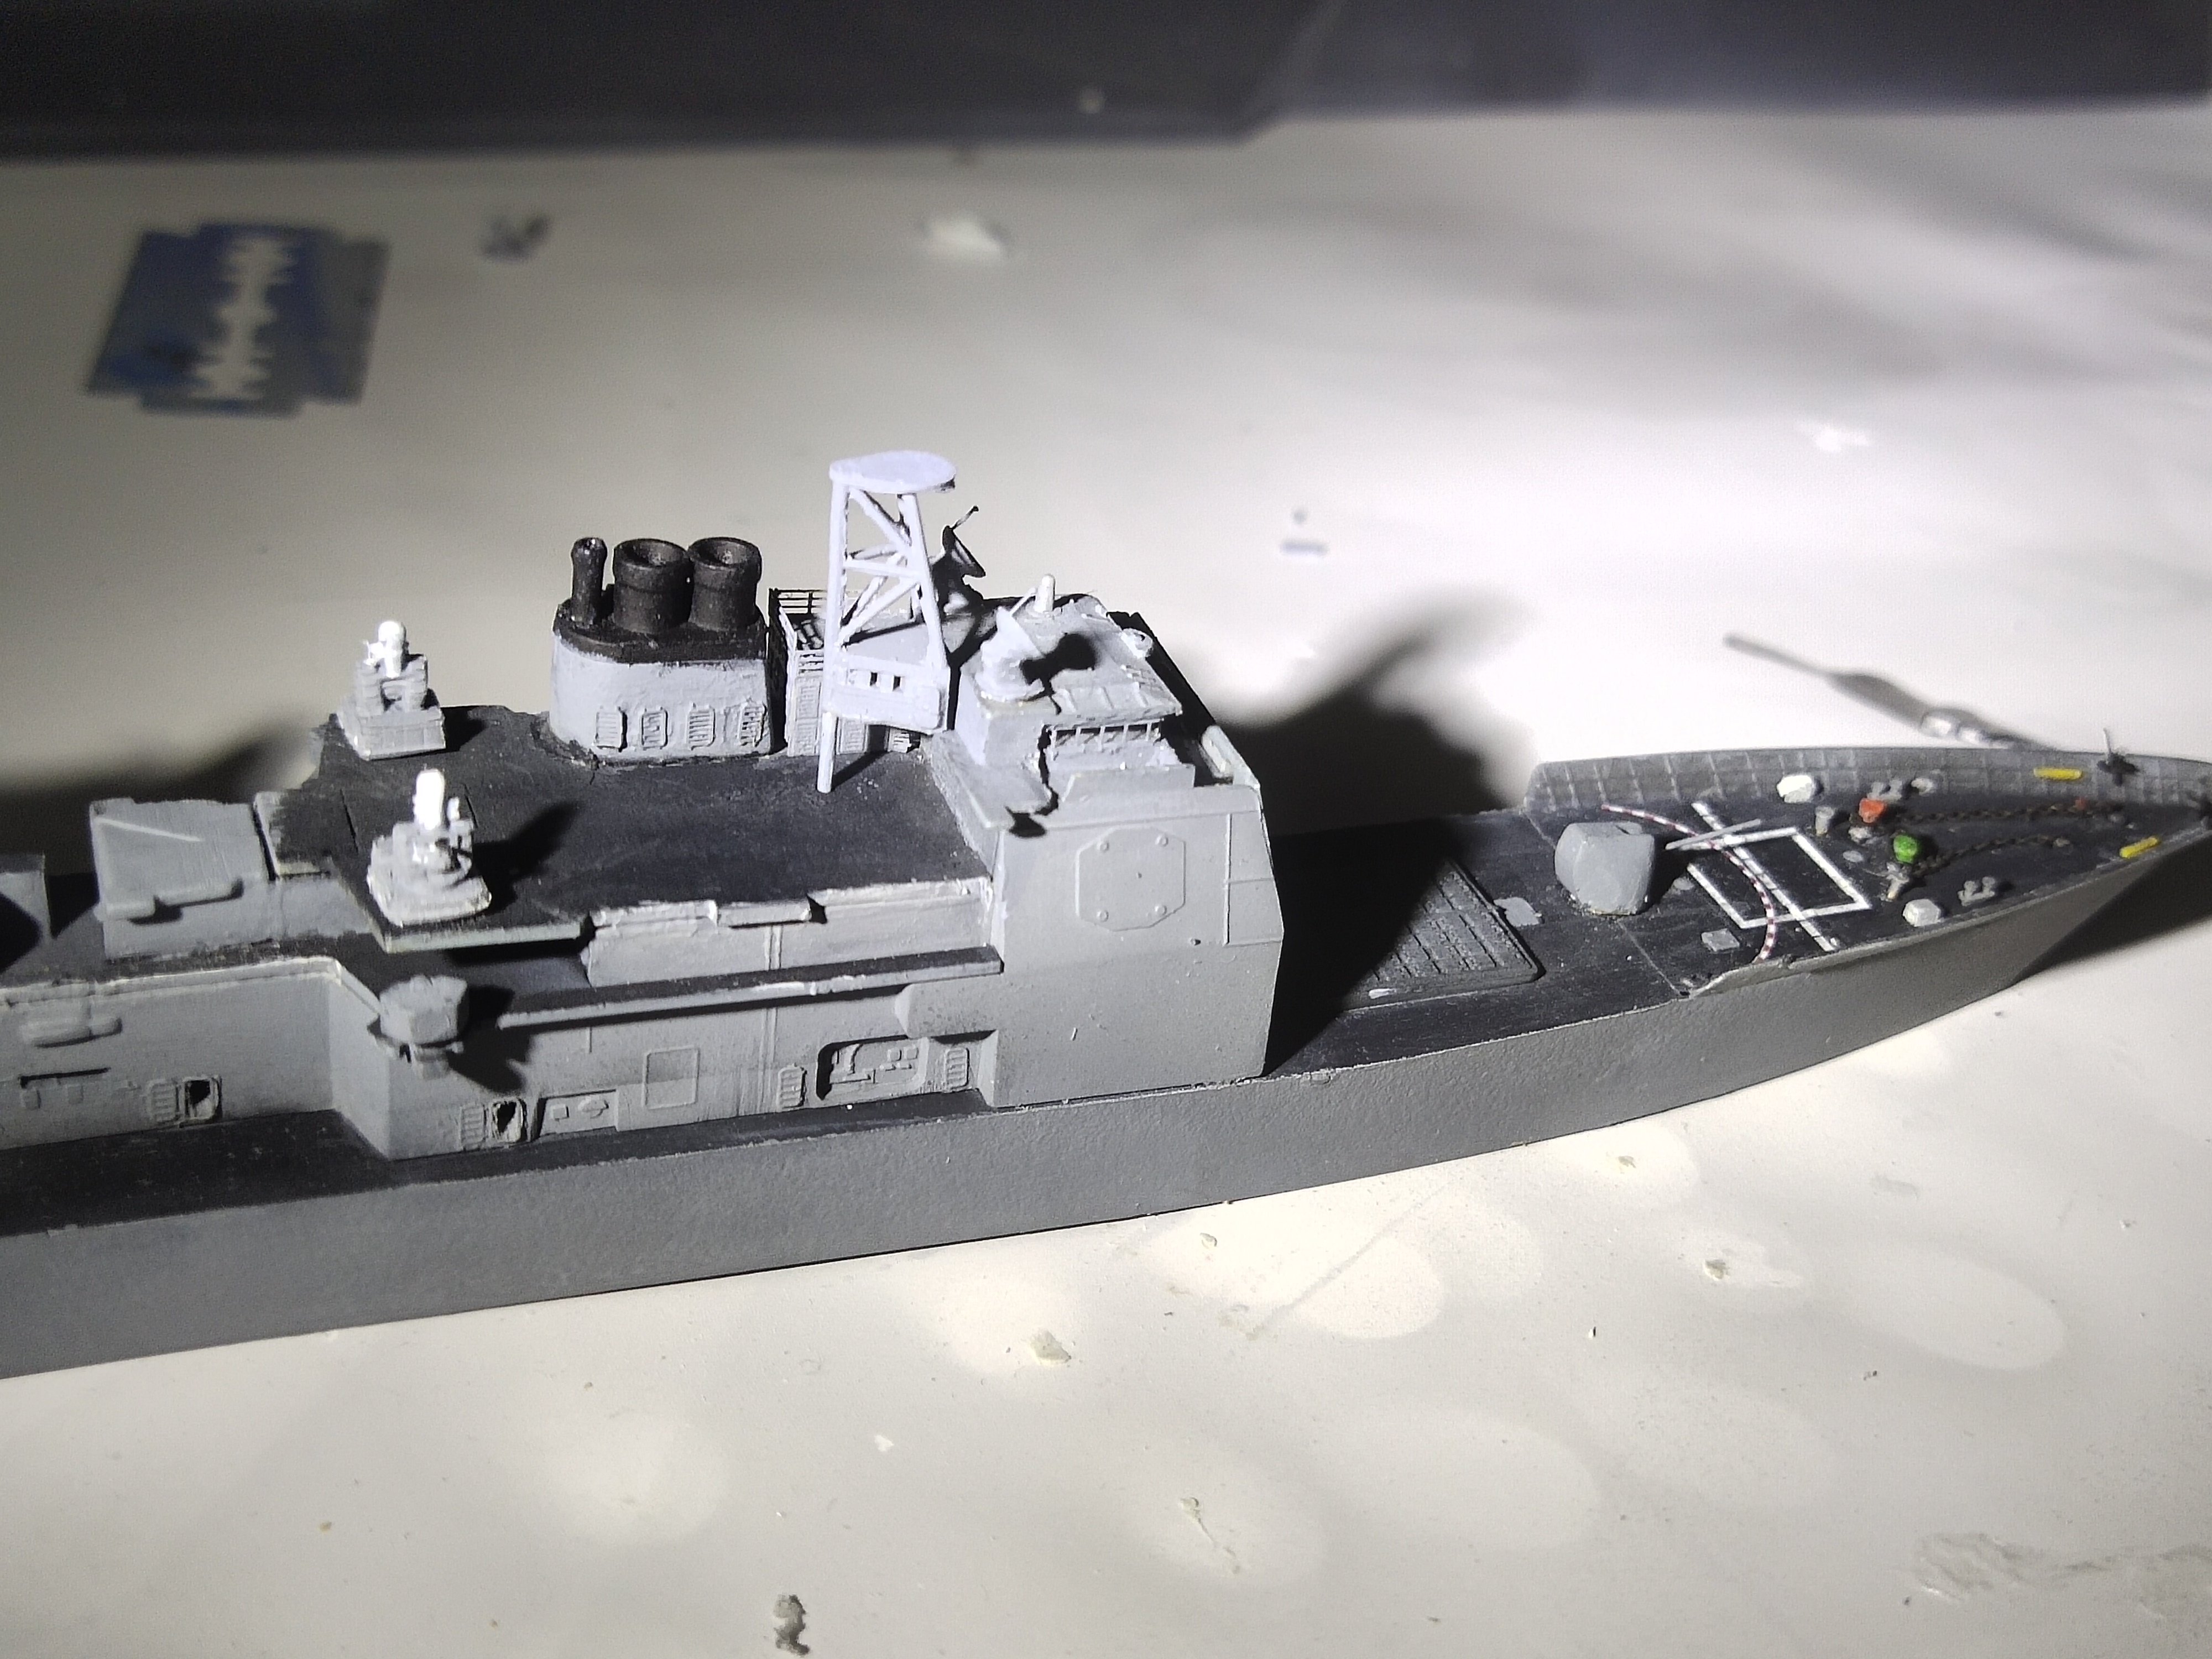
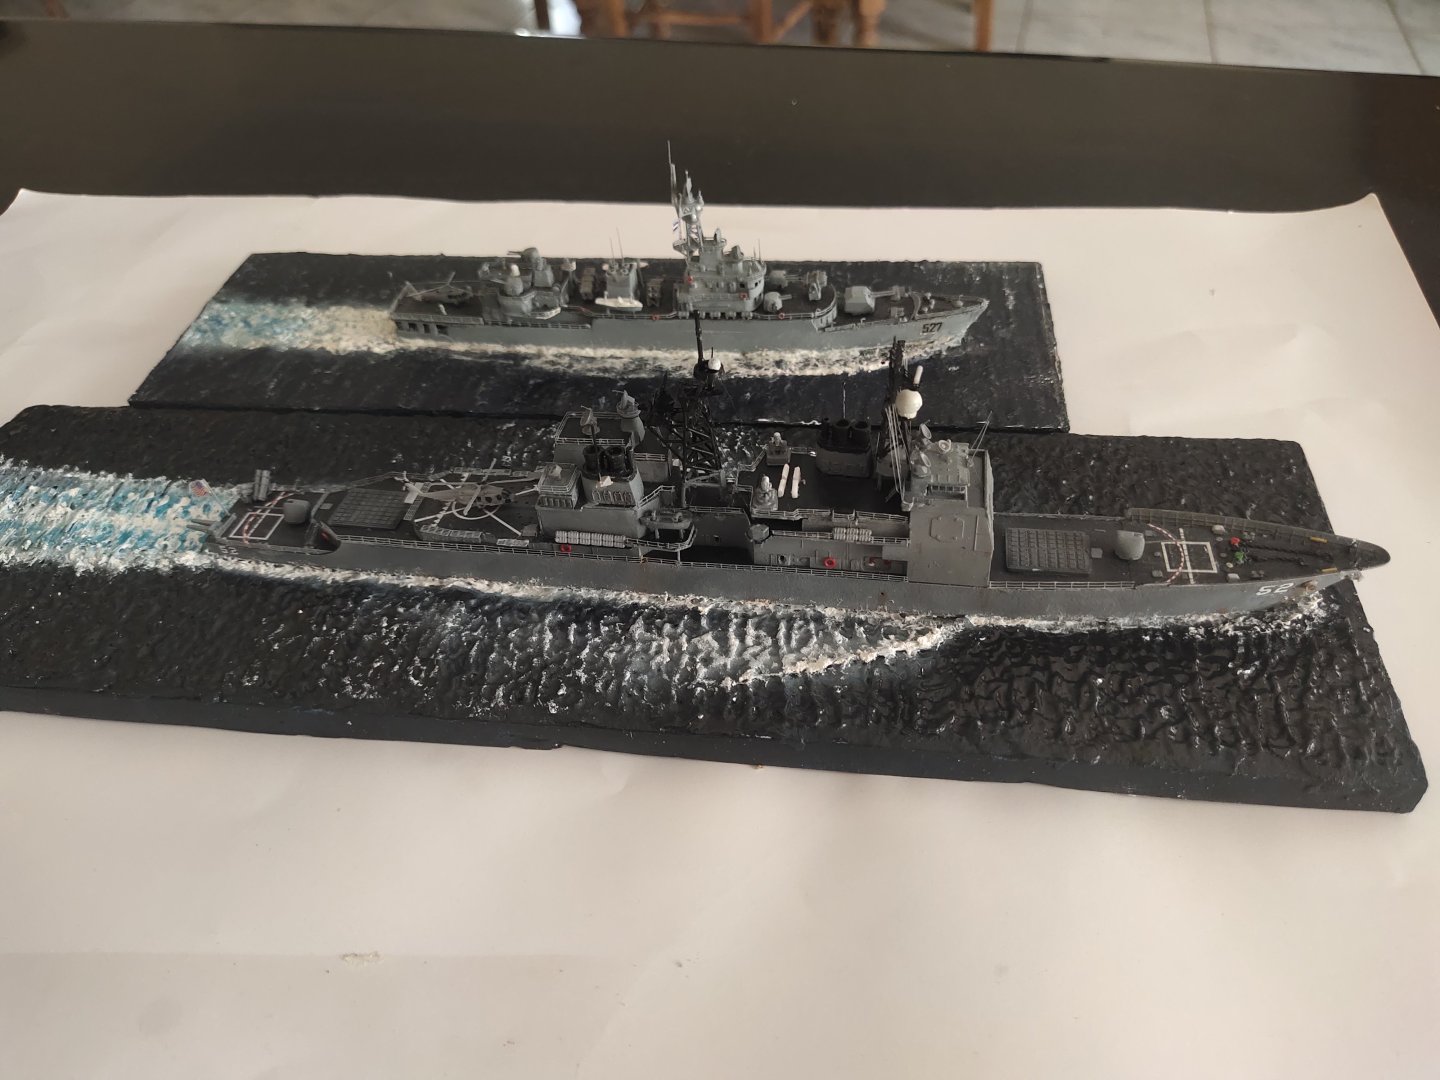
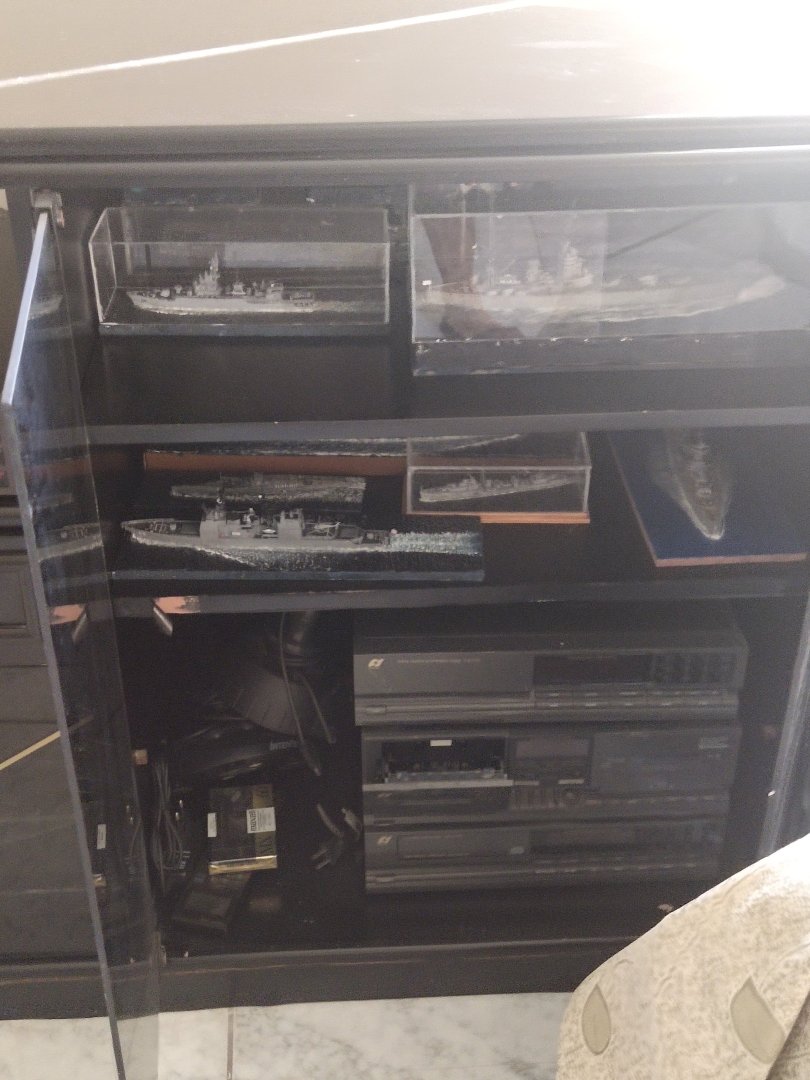
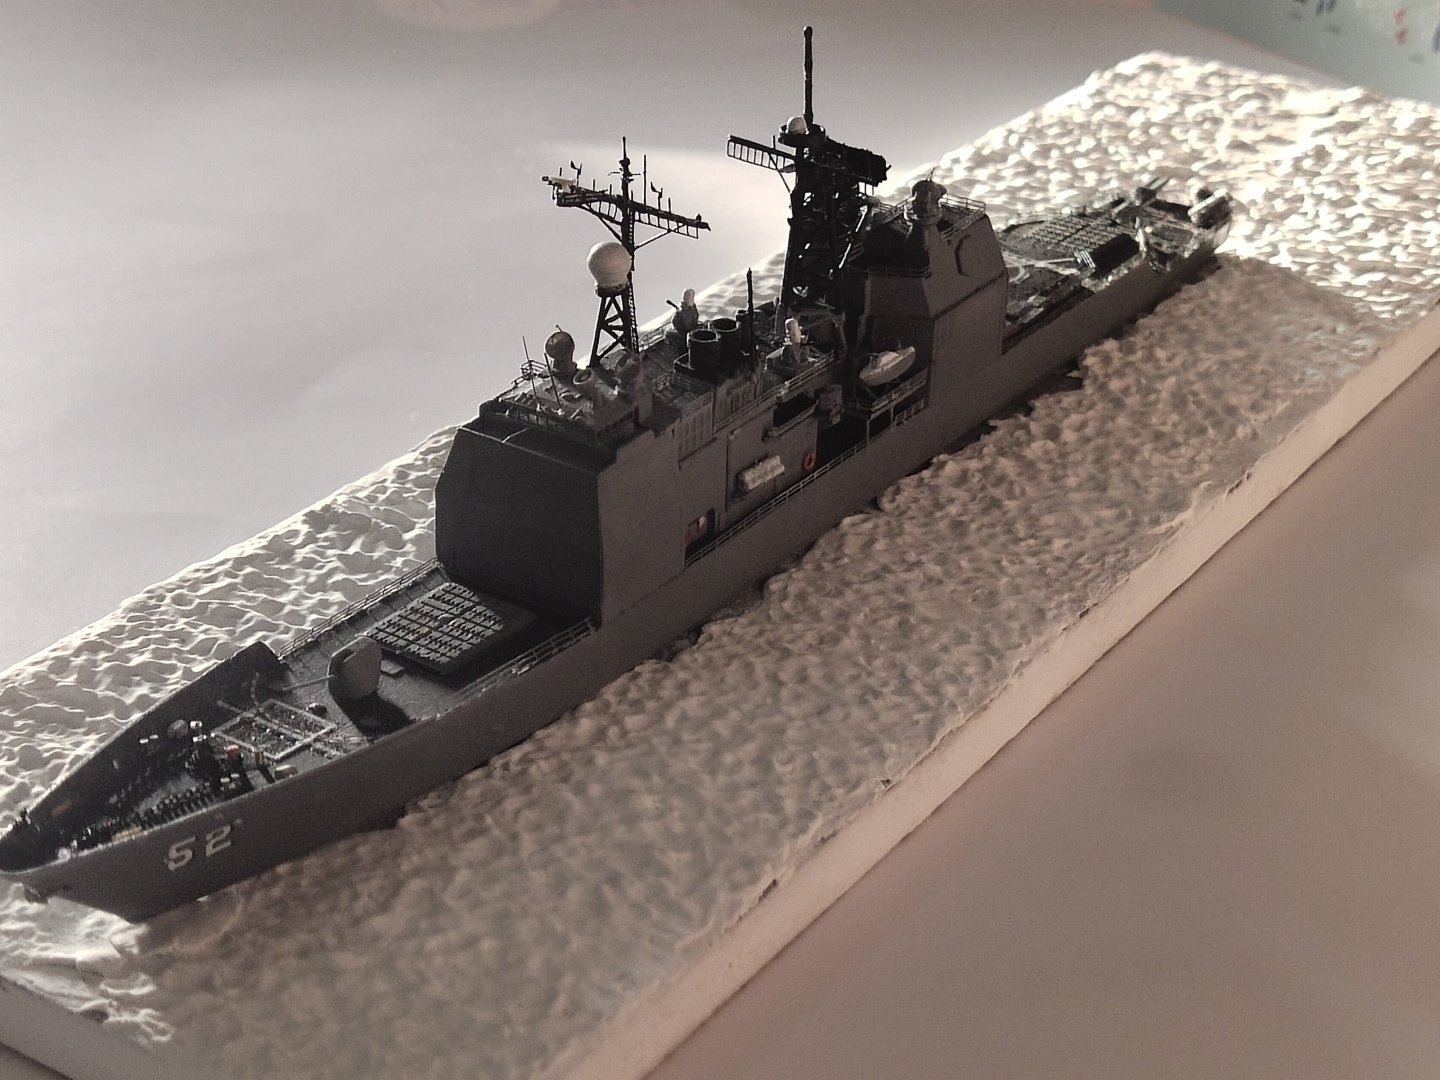
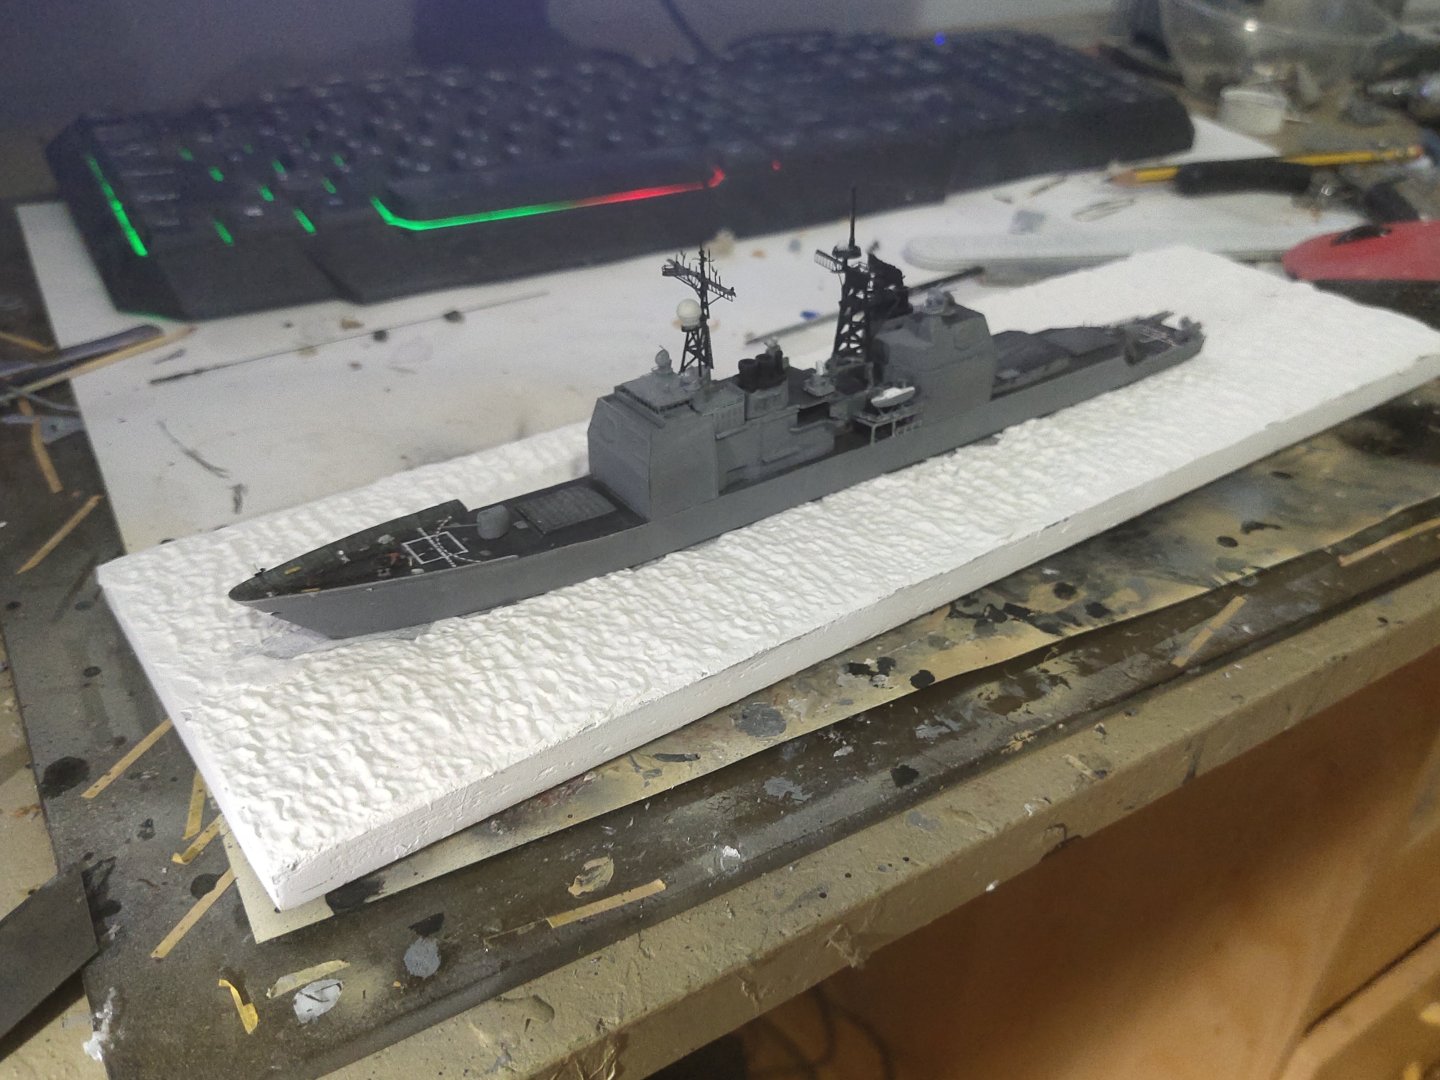
Work proceeded in the usual way. A comparison with a scratch built type 53H3 PLA frigate Definitely not the most practical place to store but at least it keeps the dust away. Maybe I should put some lights


-
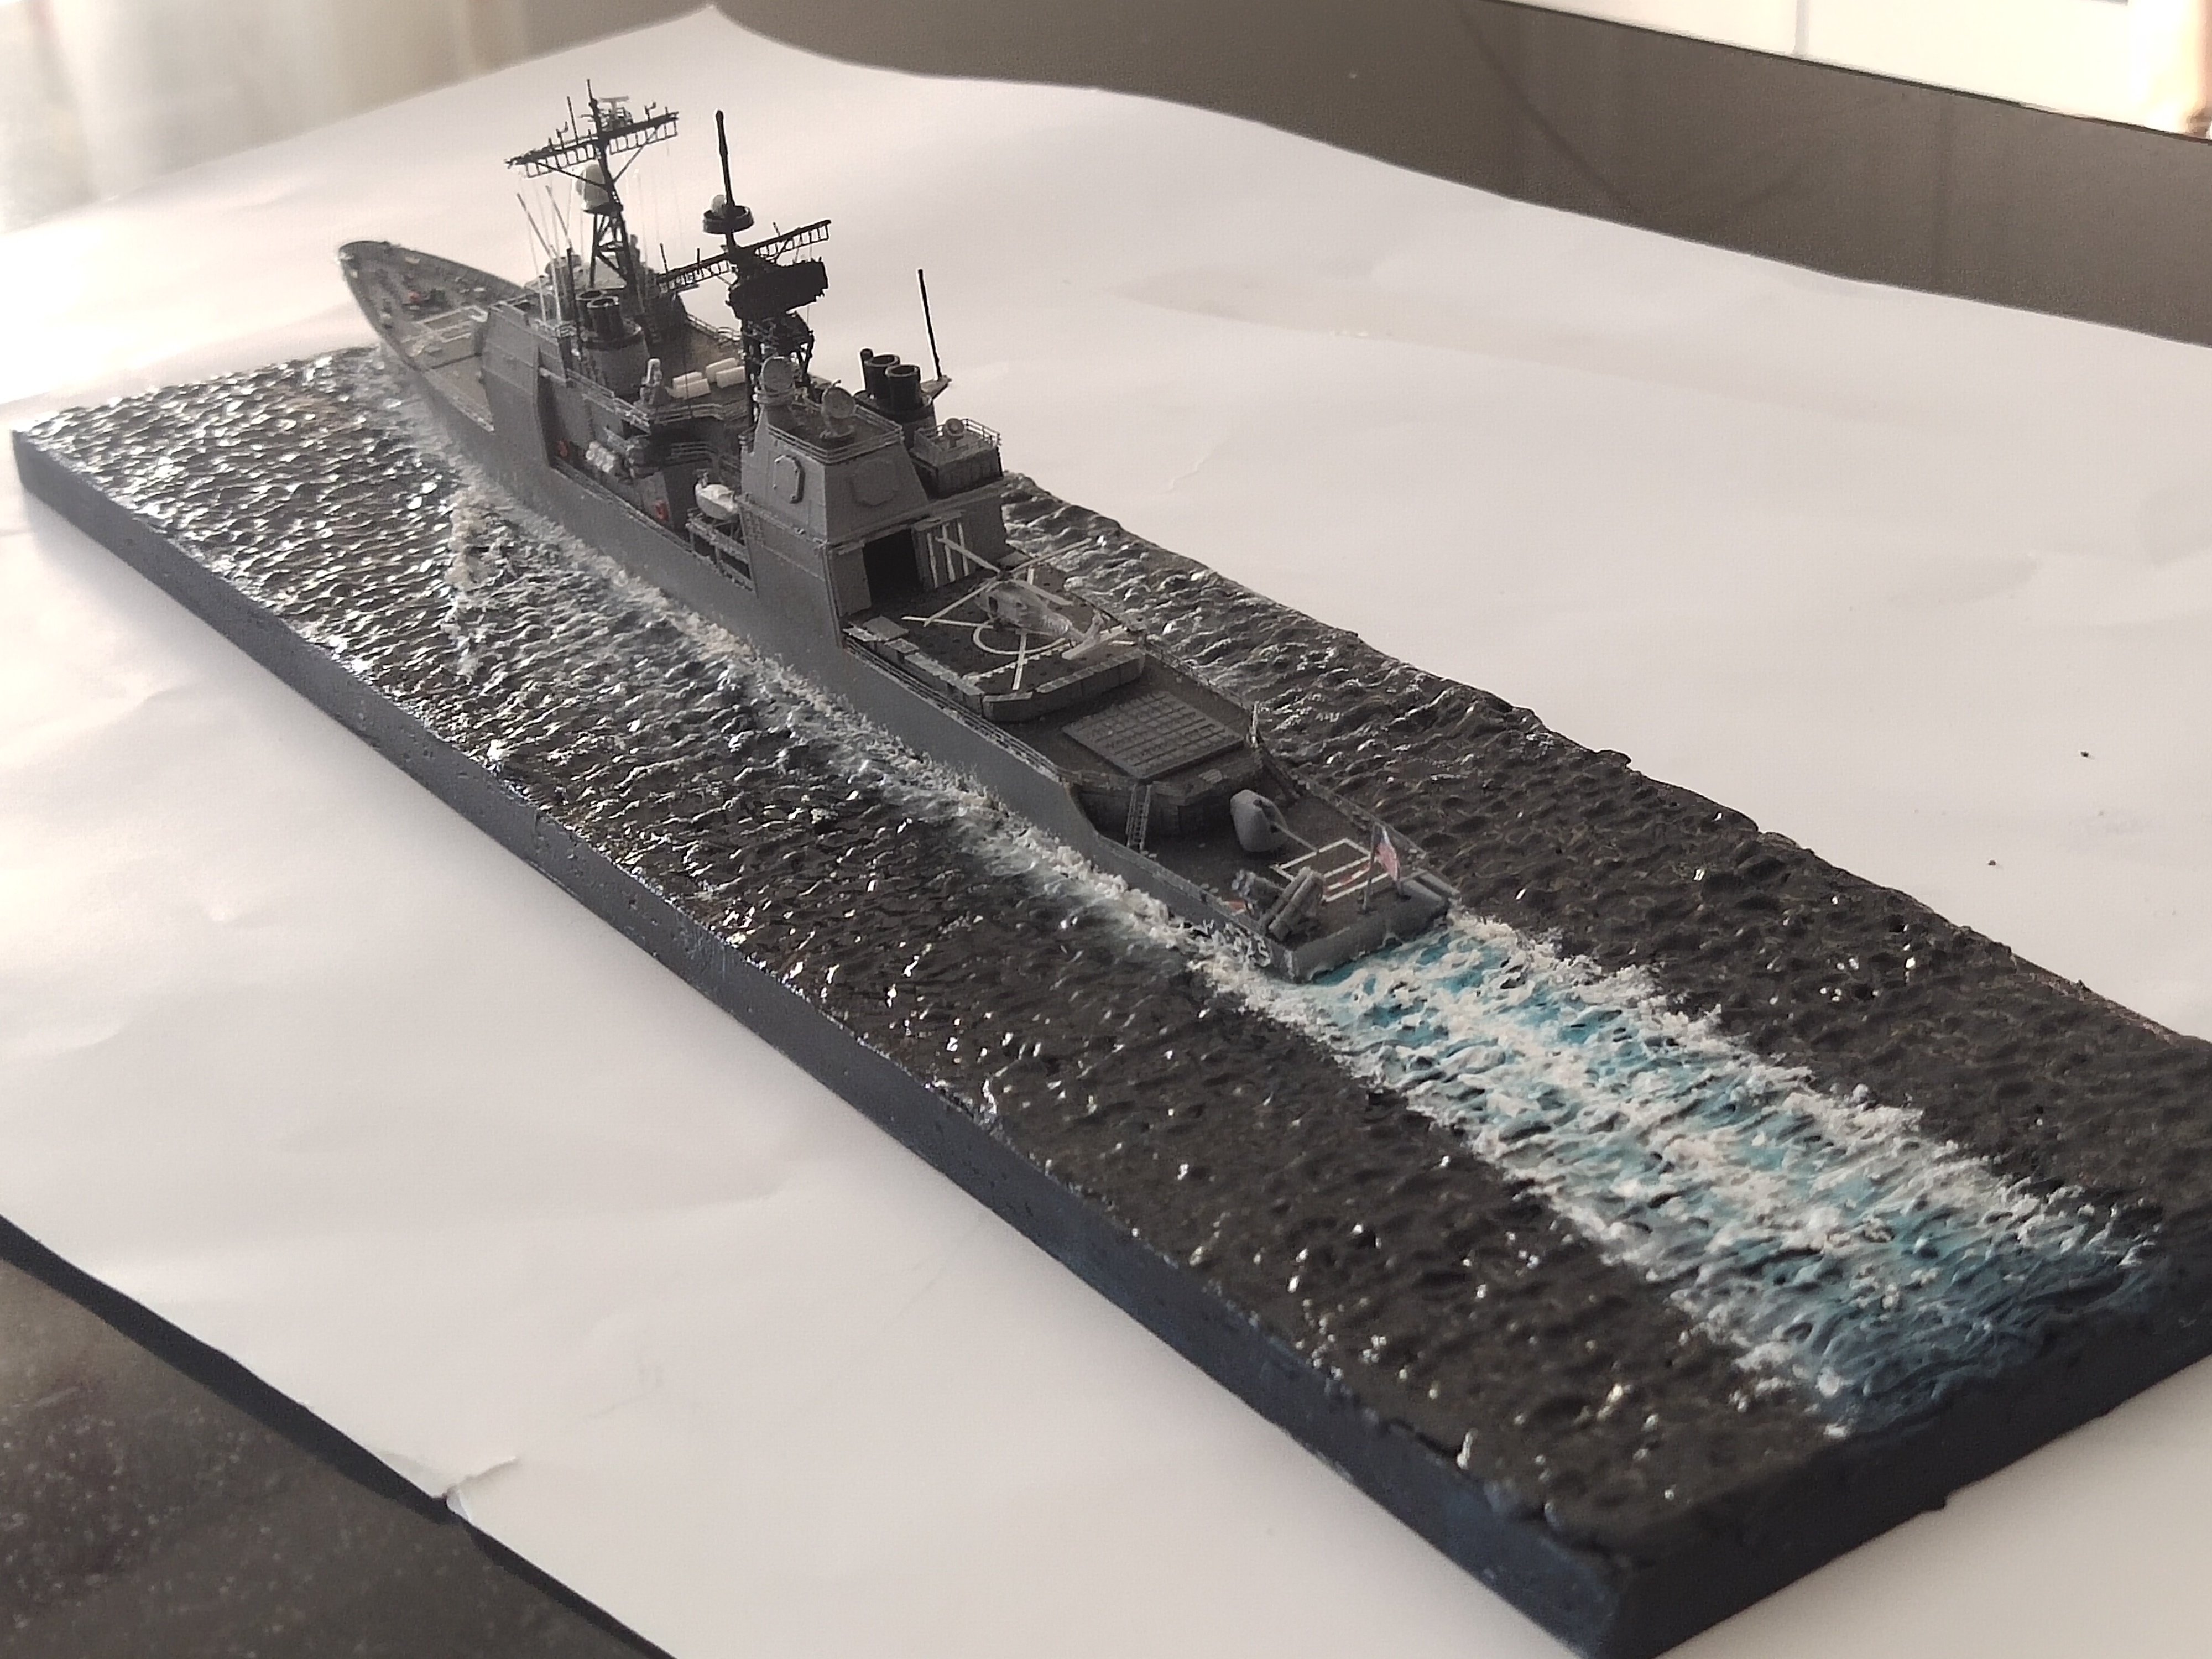
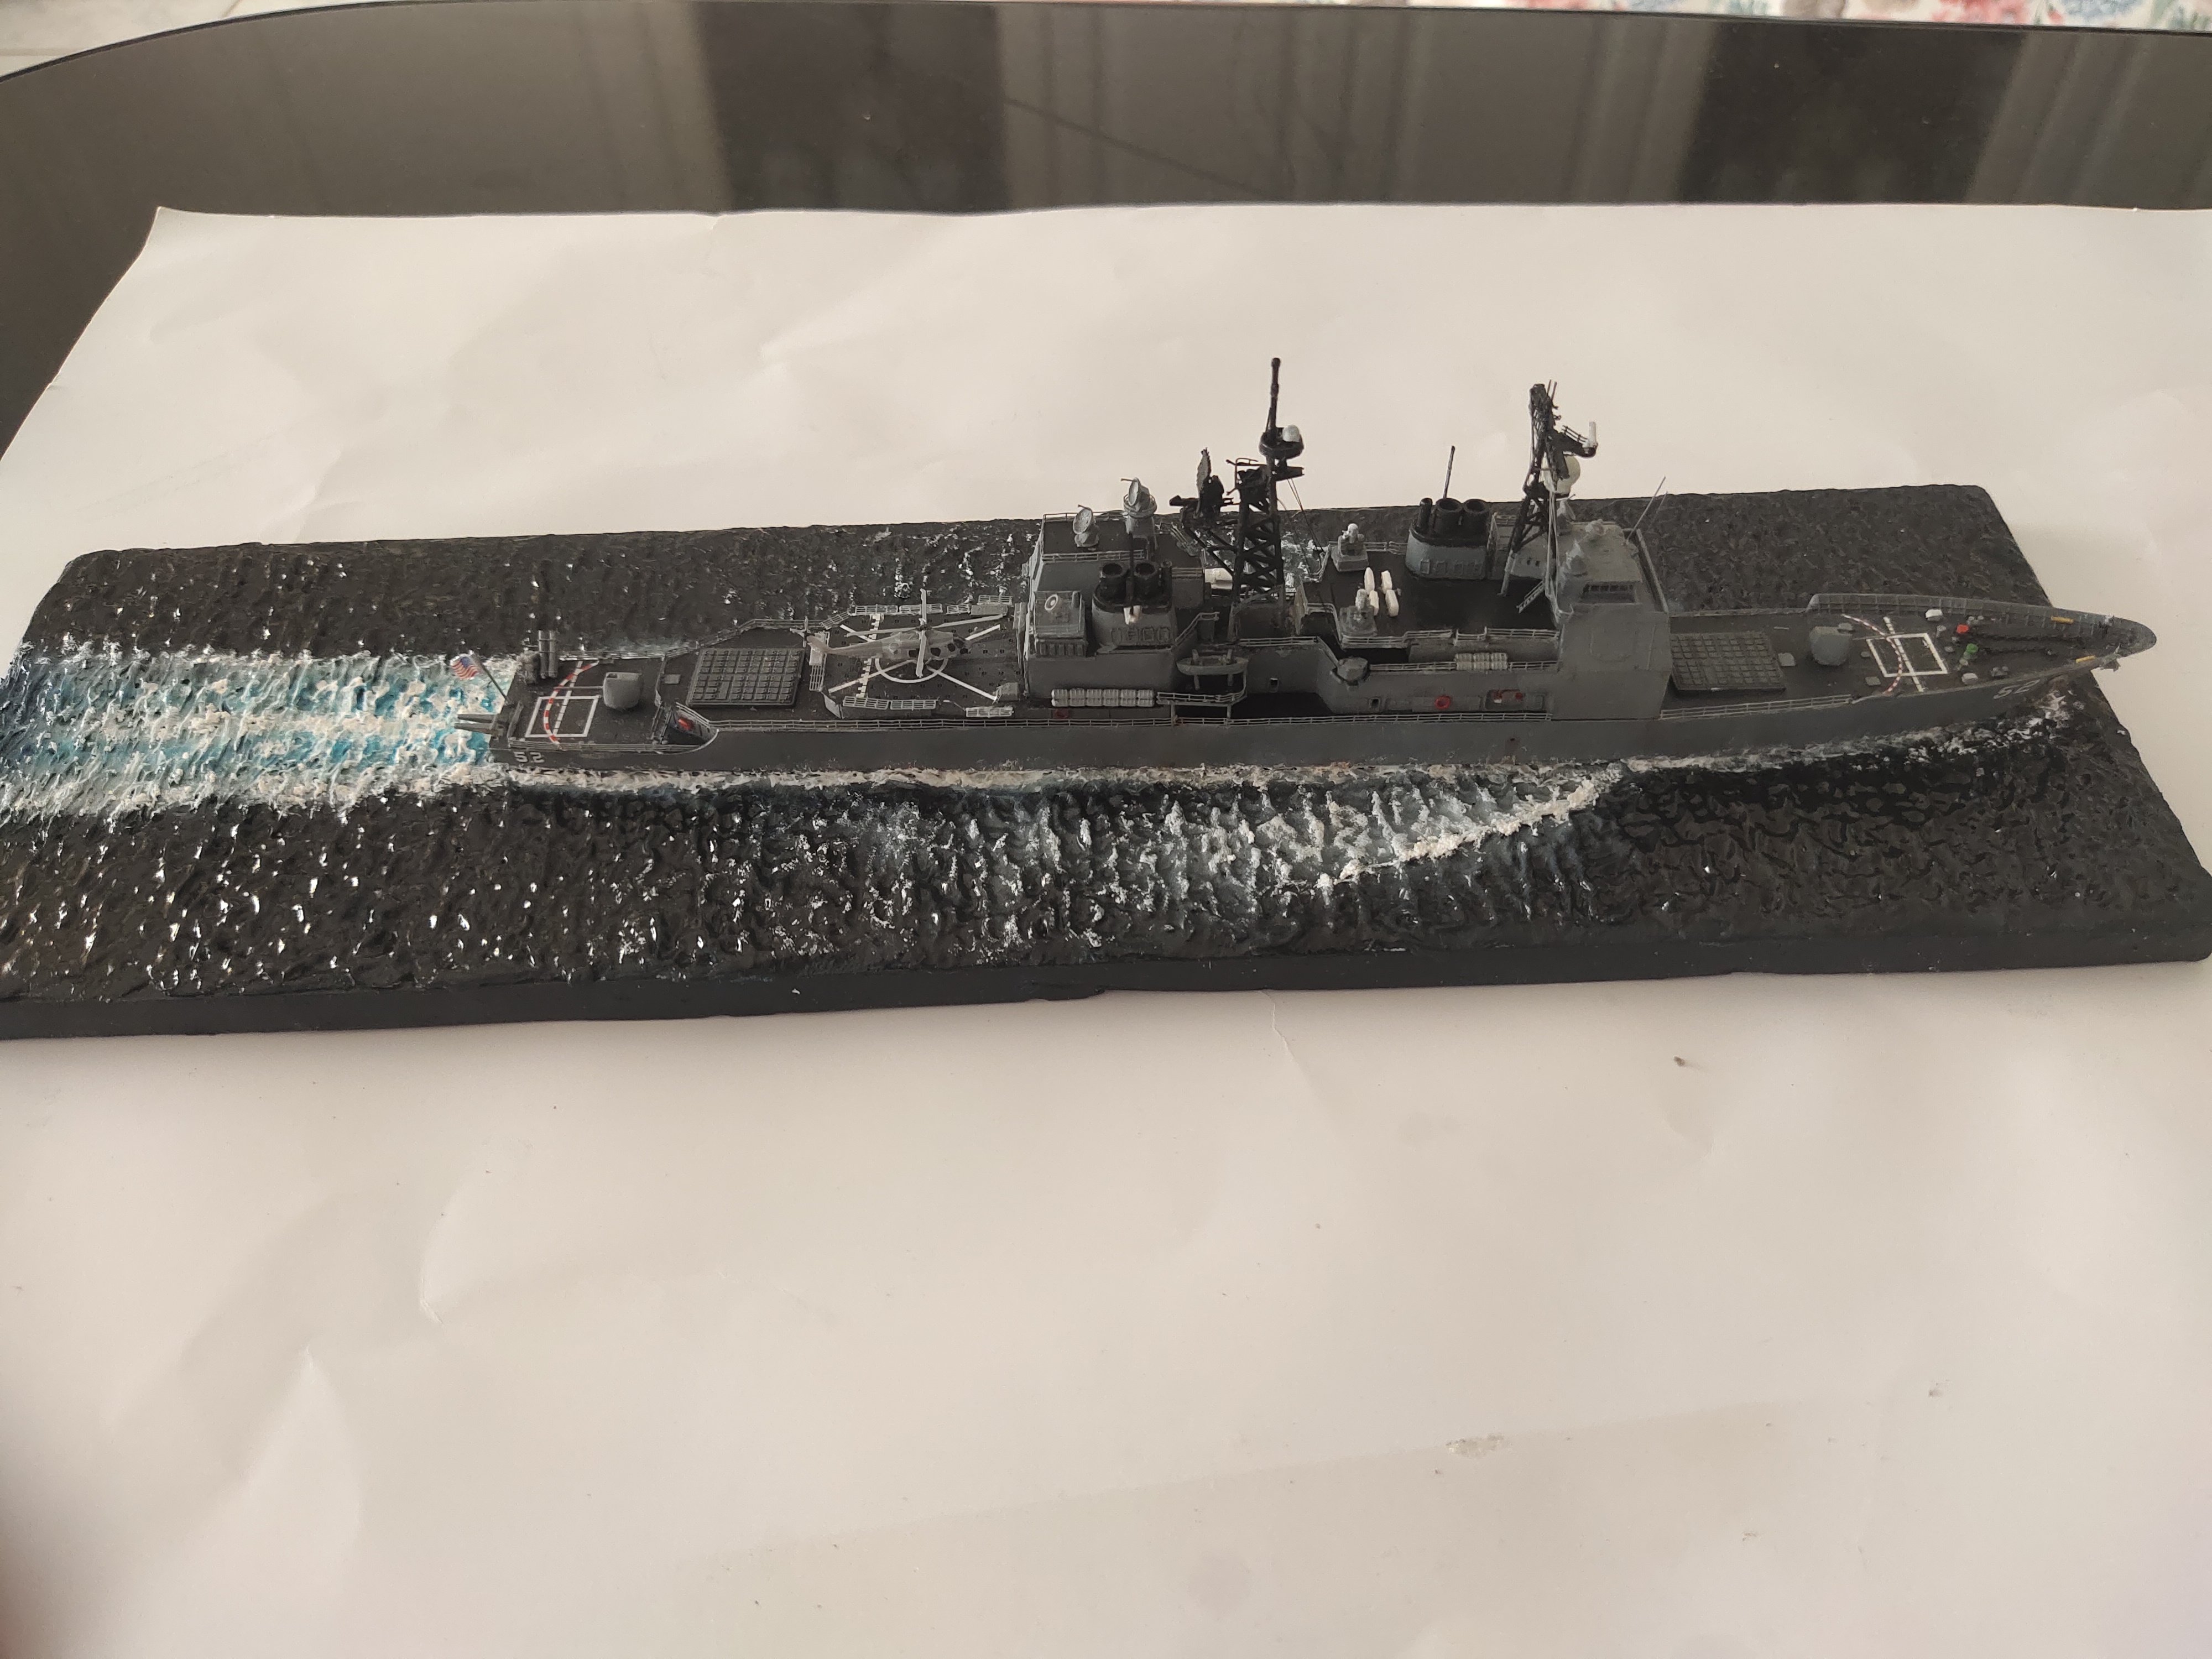
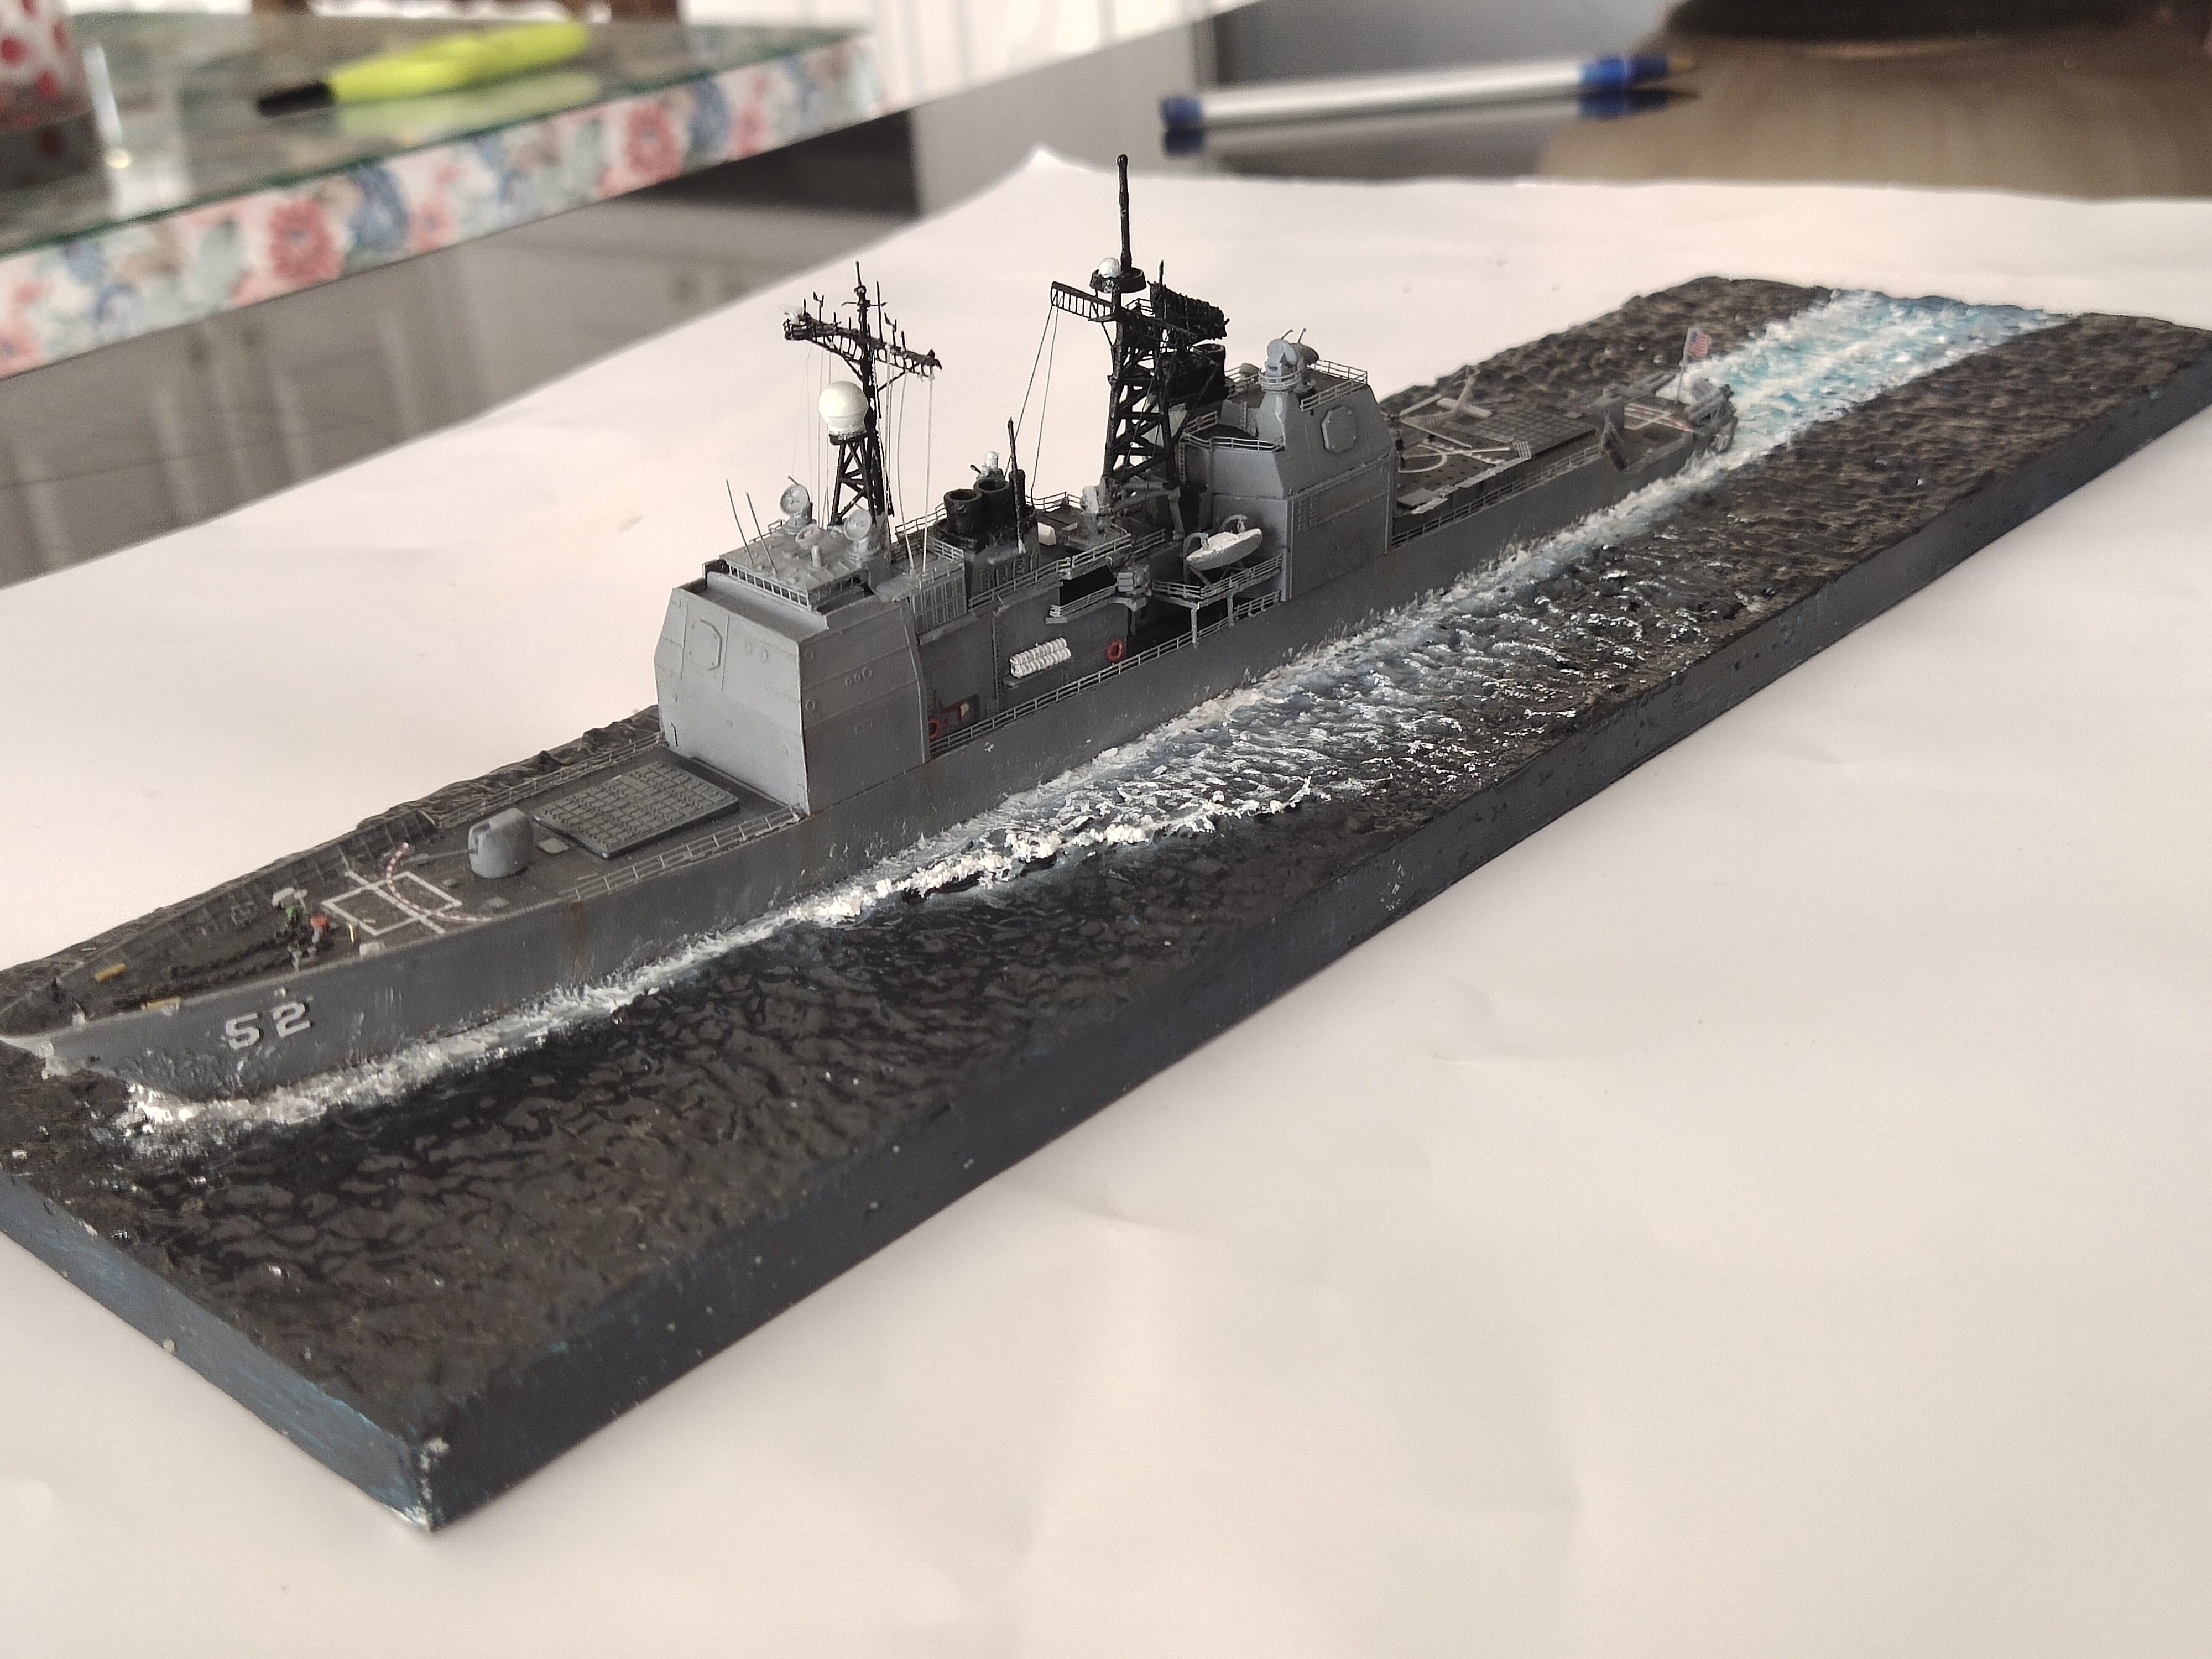
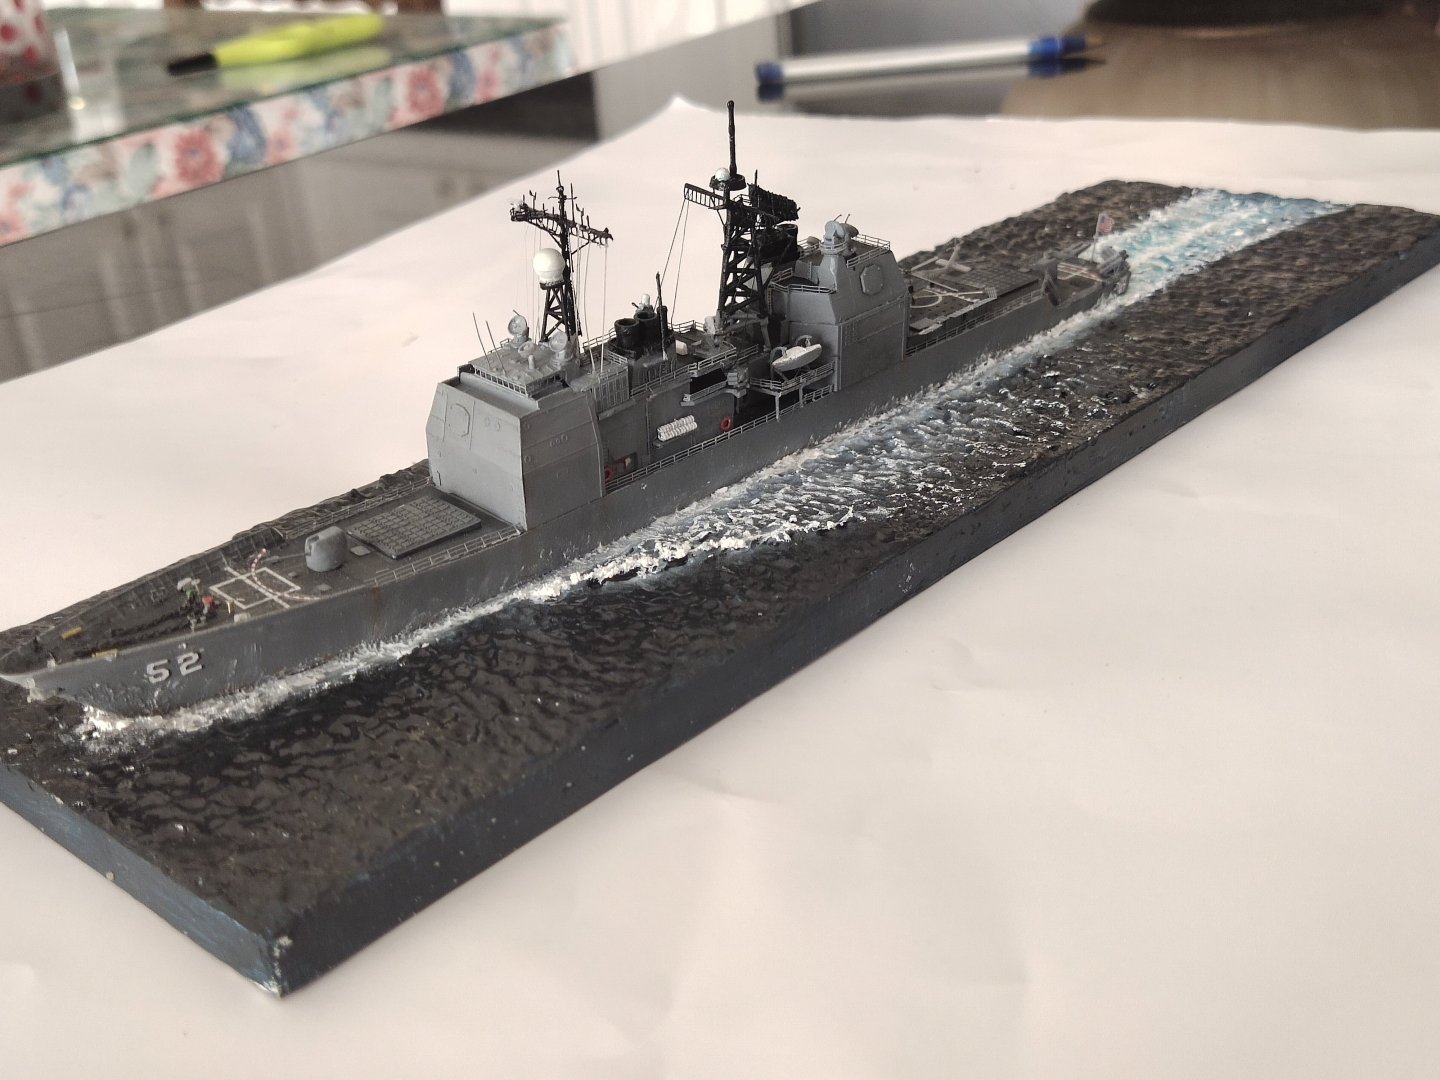
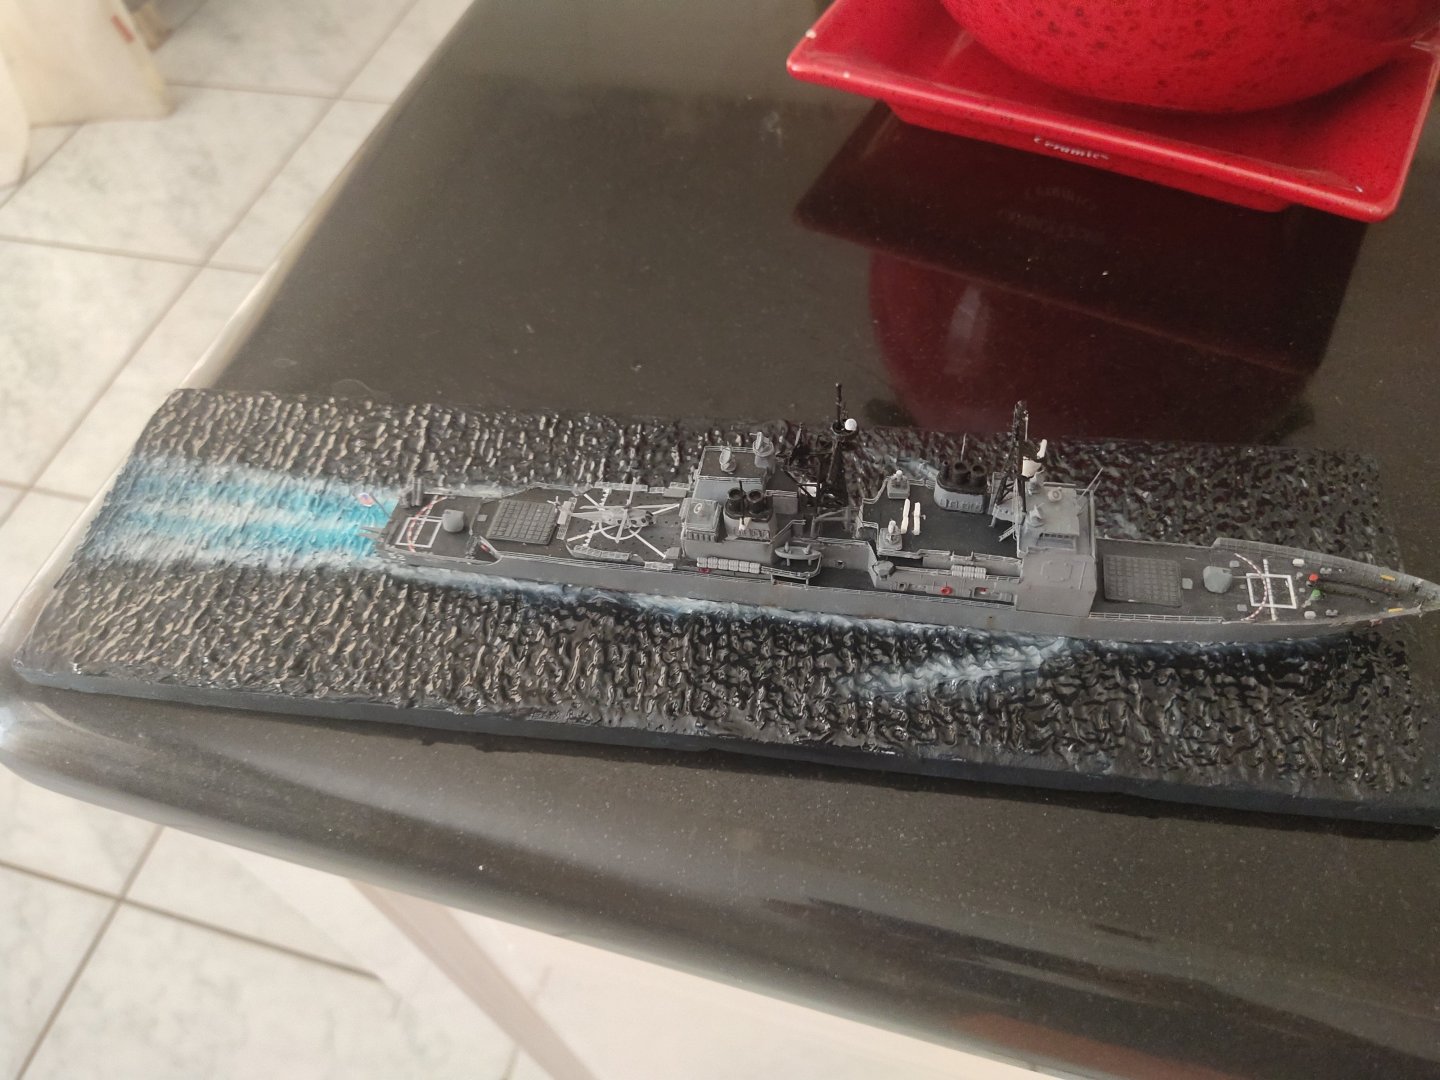
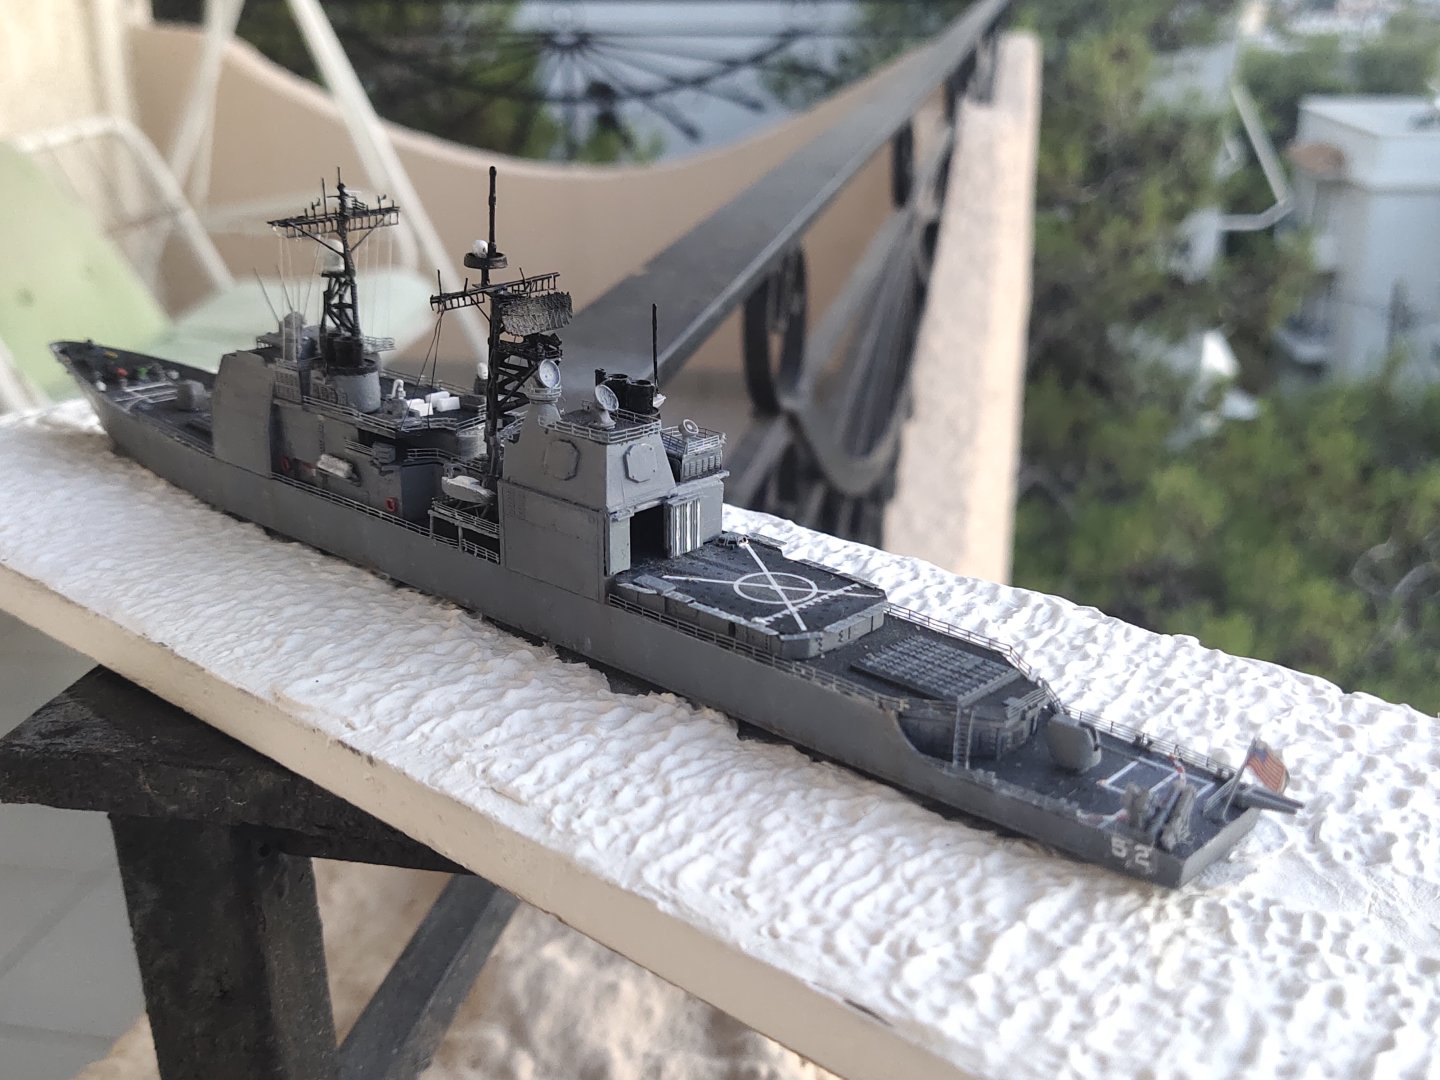
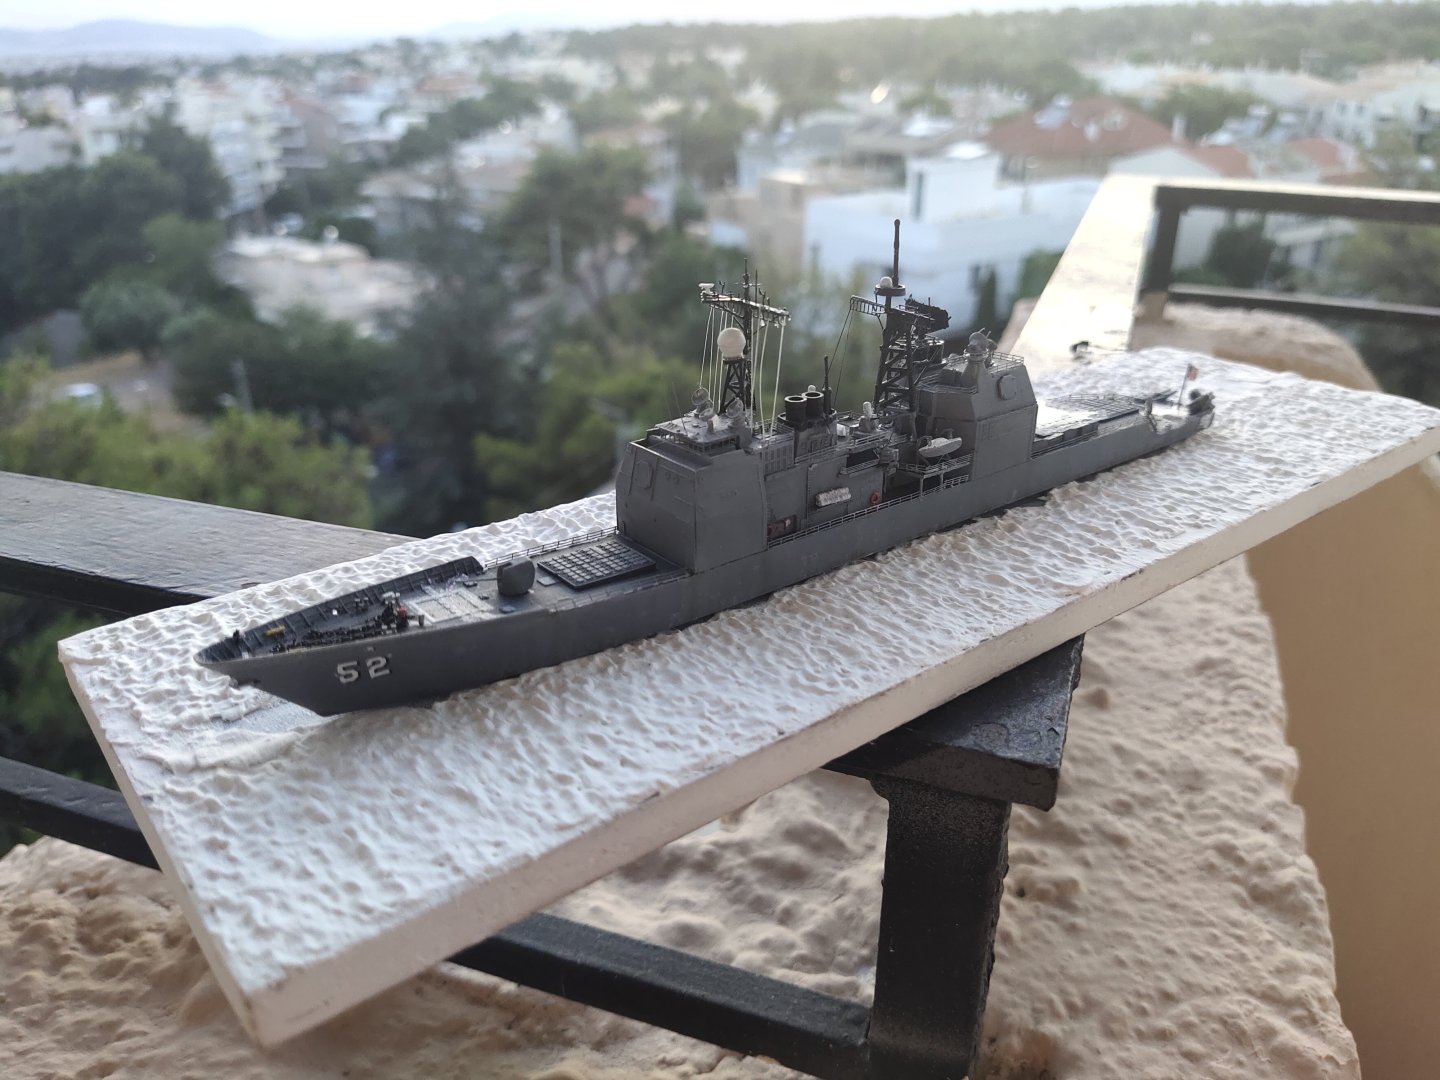
Spent an evening to paint a few black dots and add few decals. Helicopter was landed safely. Then I followed the trusted method of making sea bed. This time the model shut forward with lot of space aft so I can work better the rear wakes


-
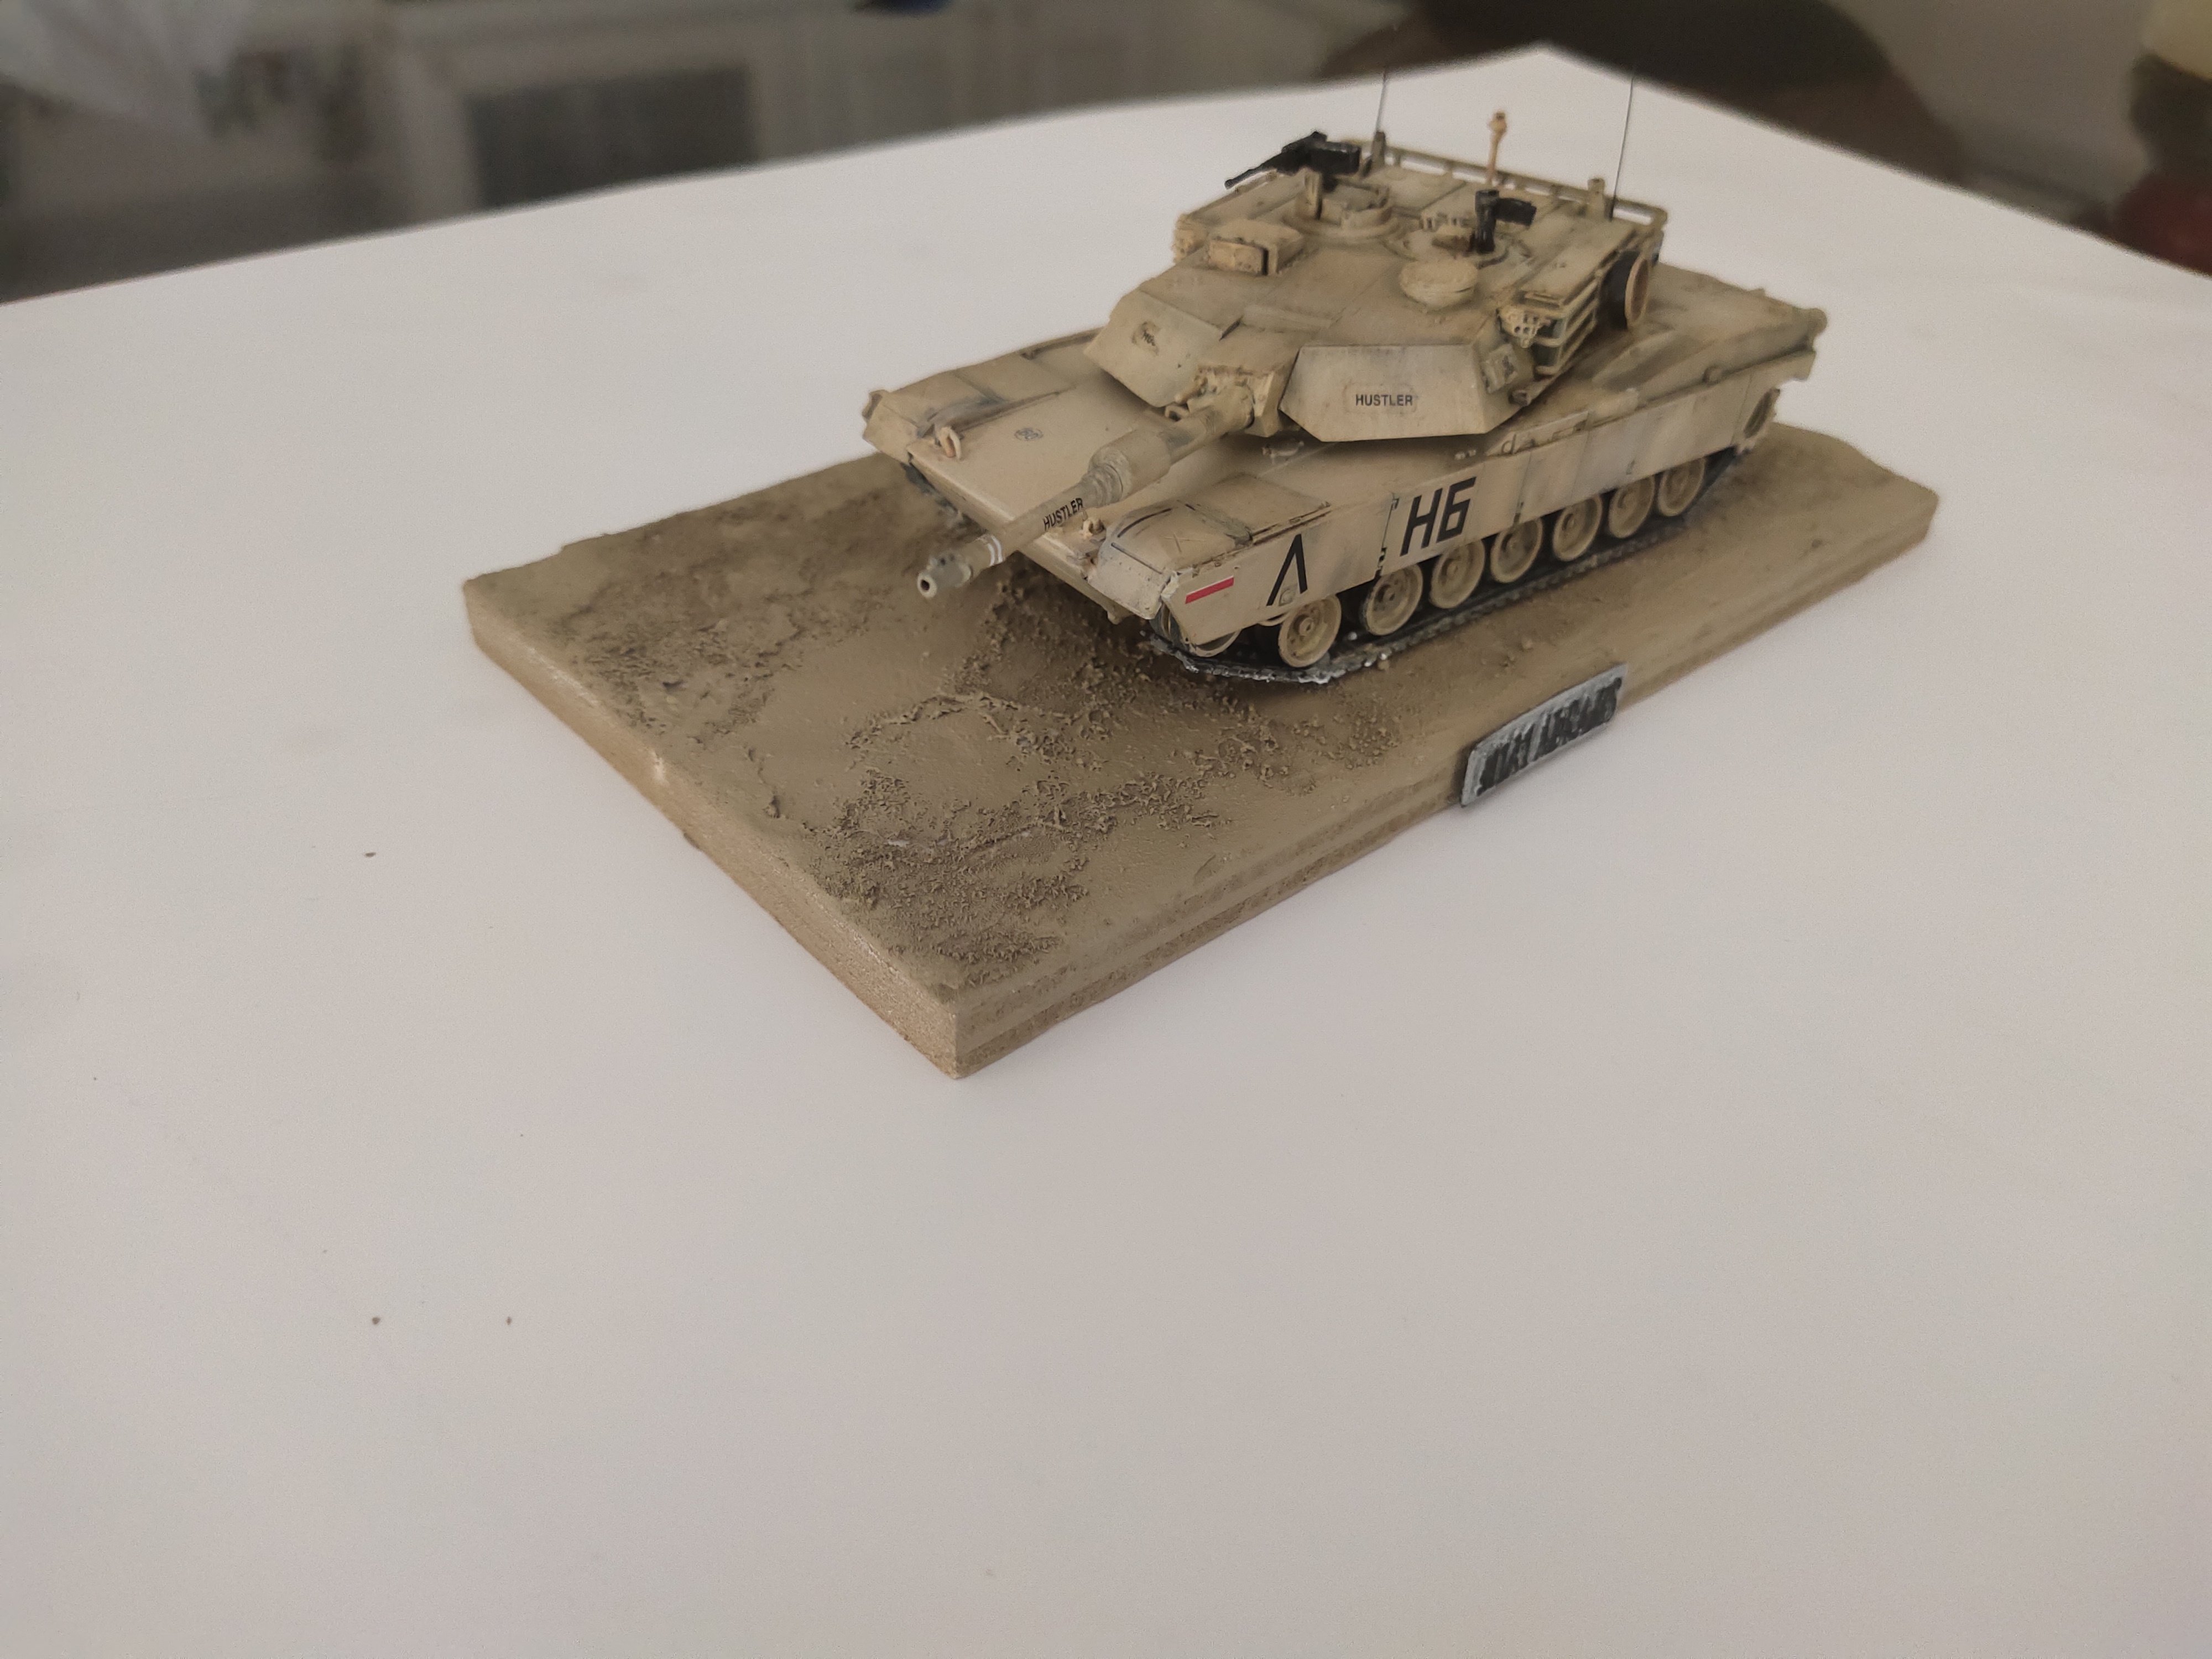
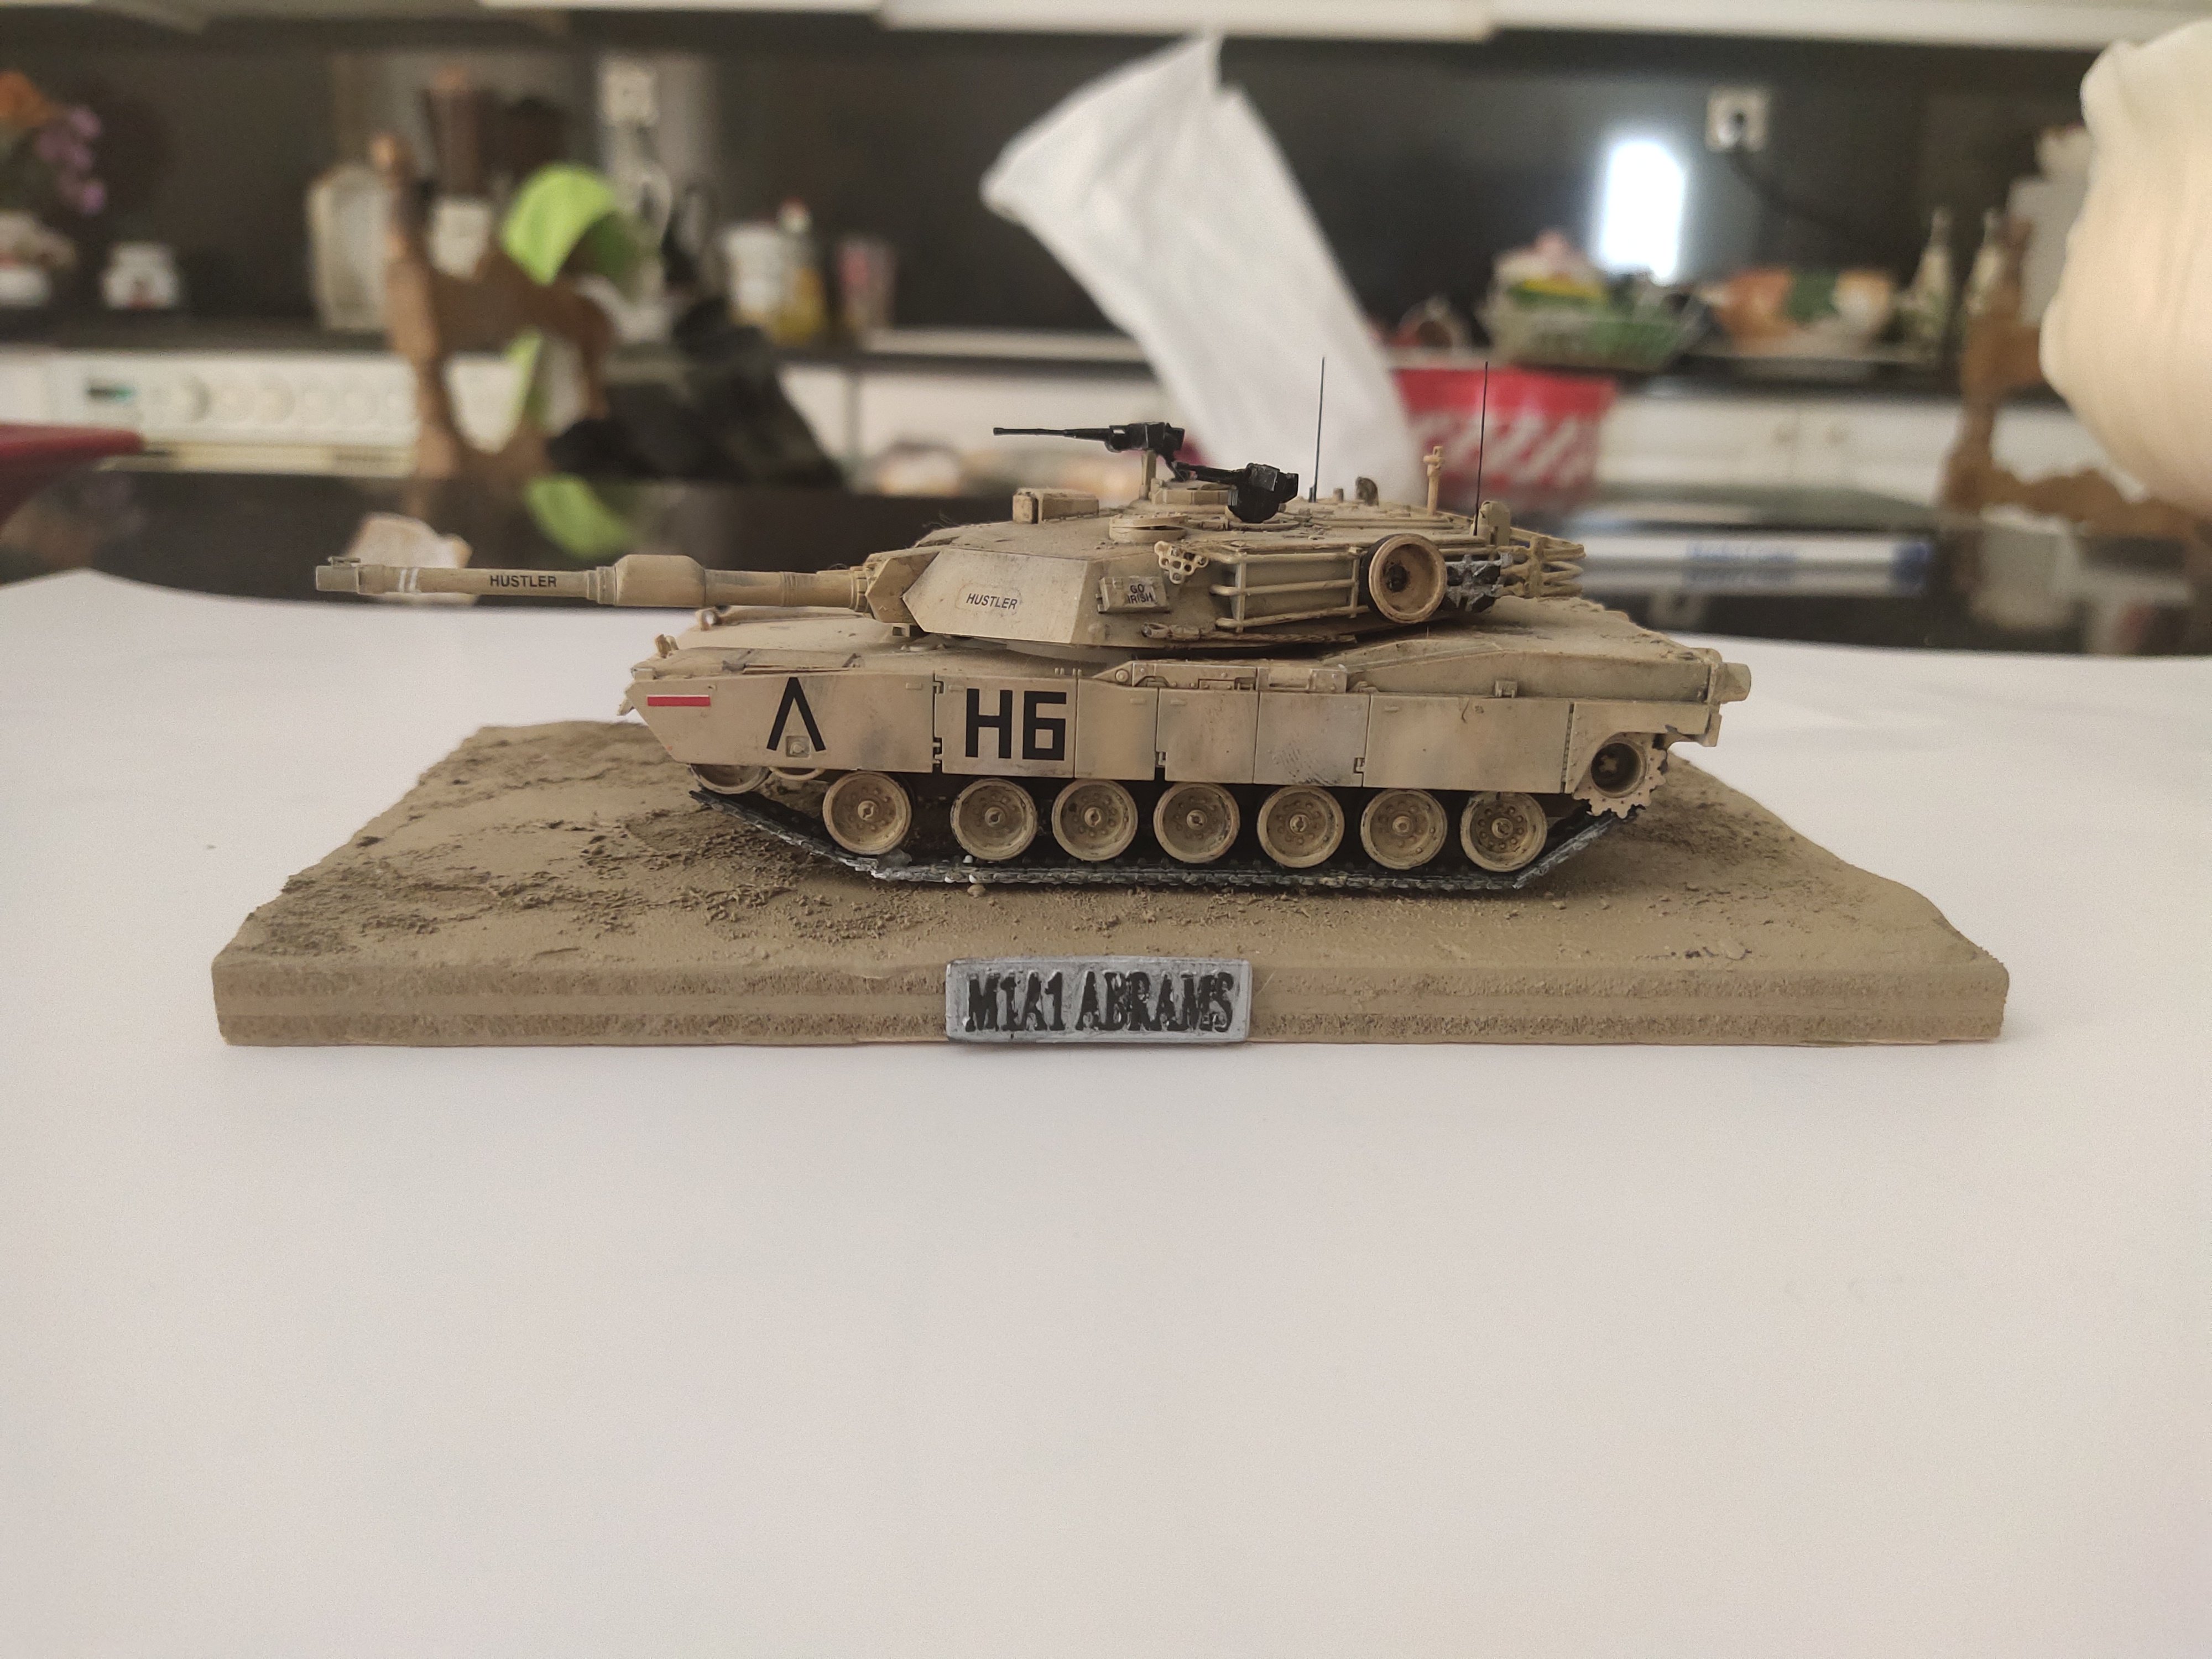
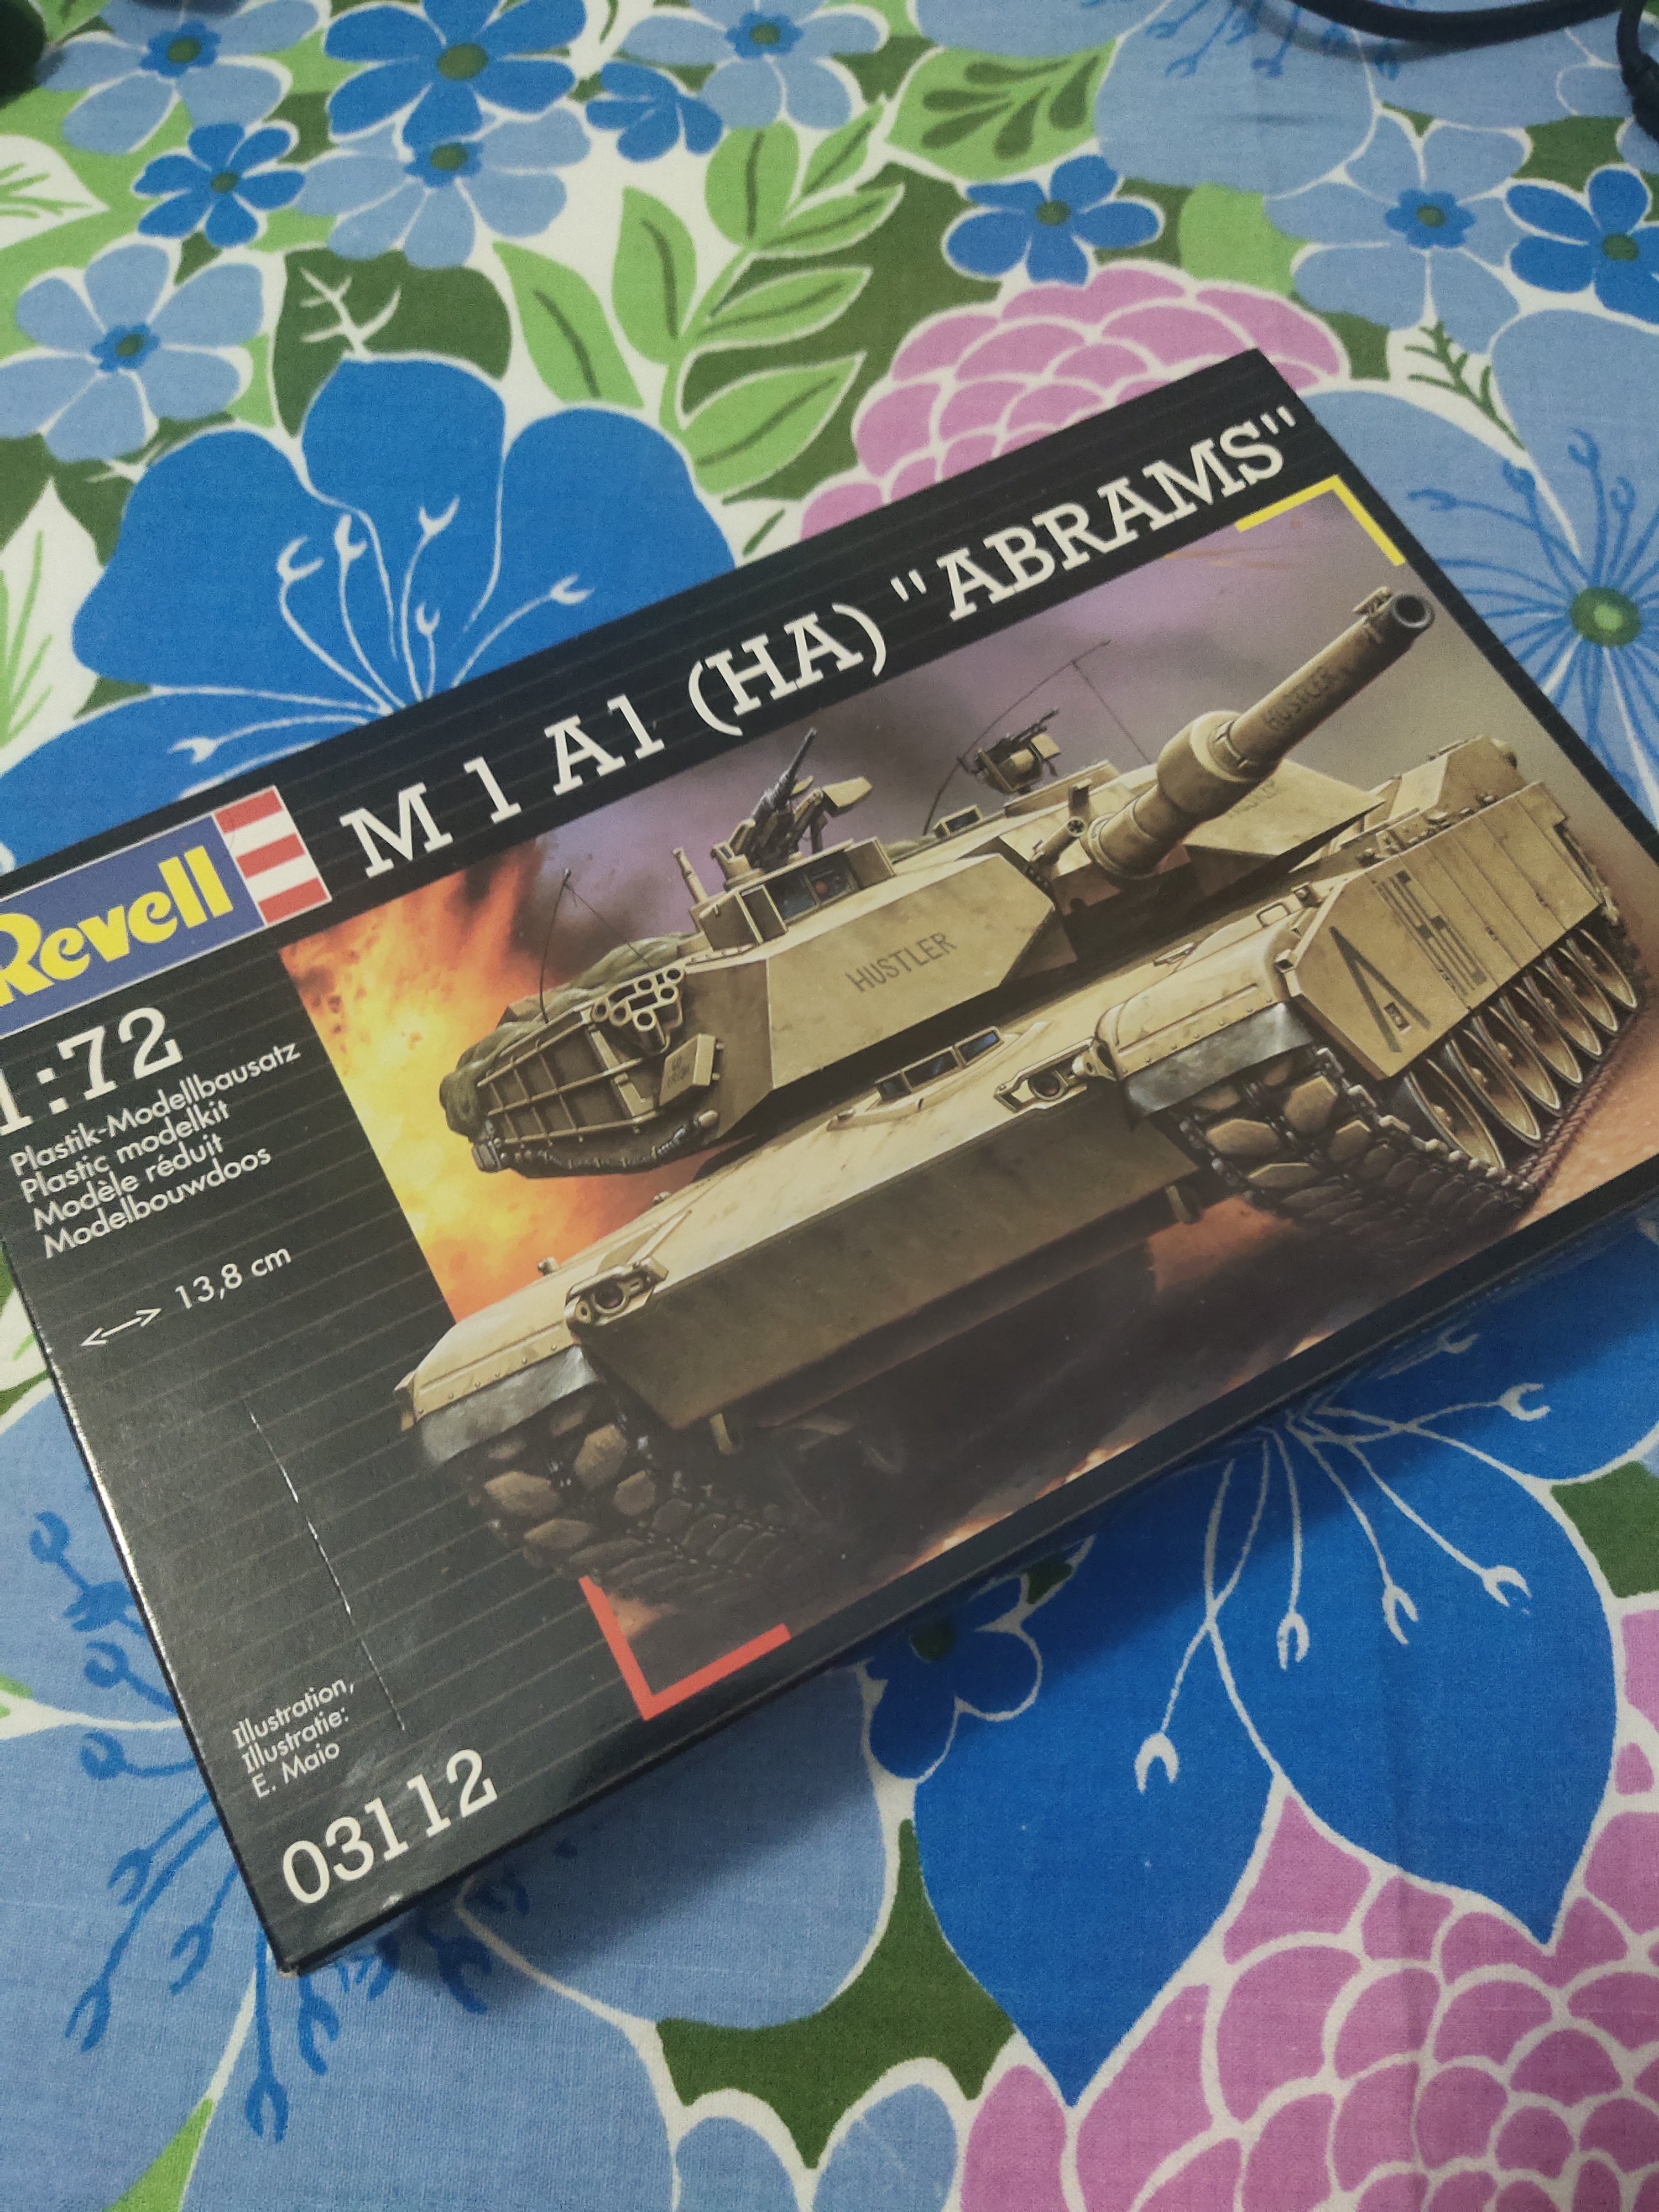
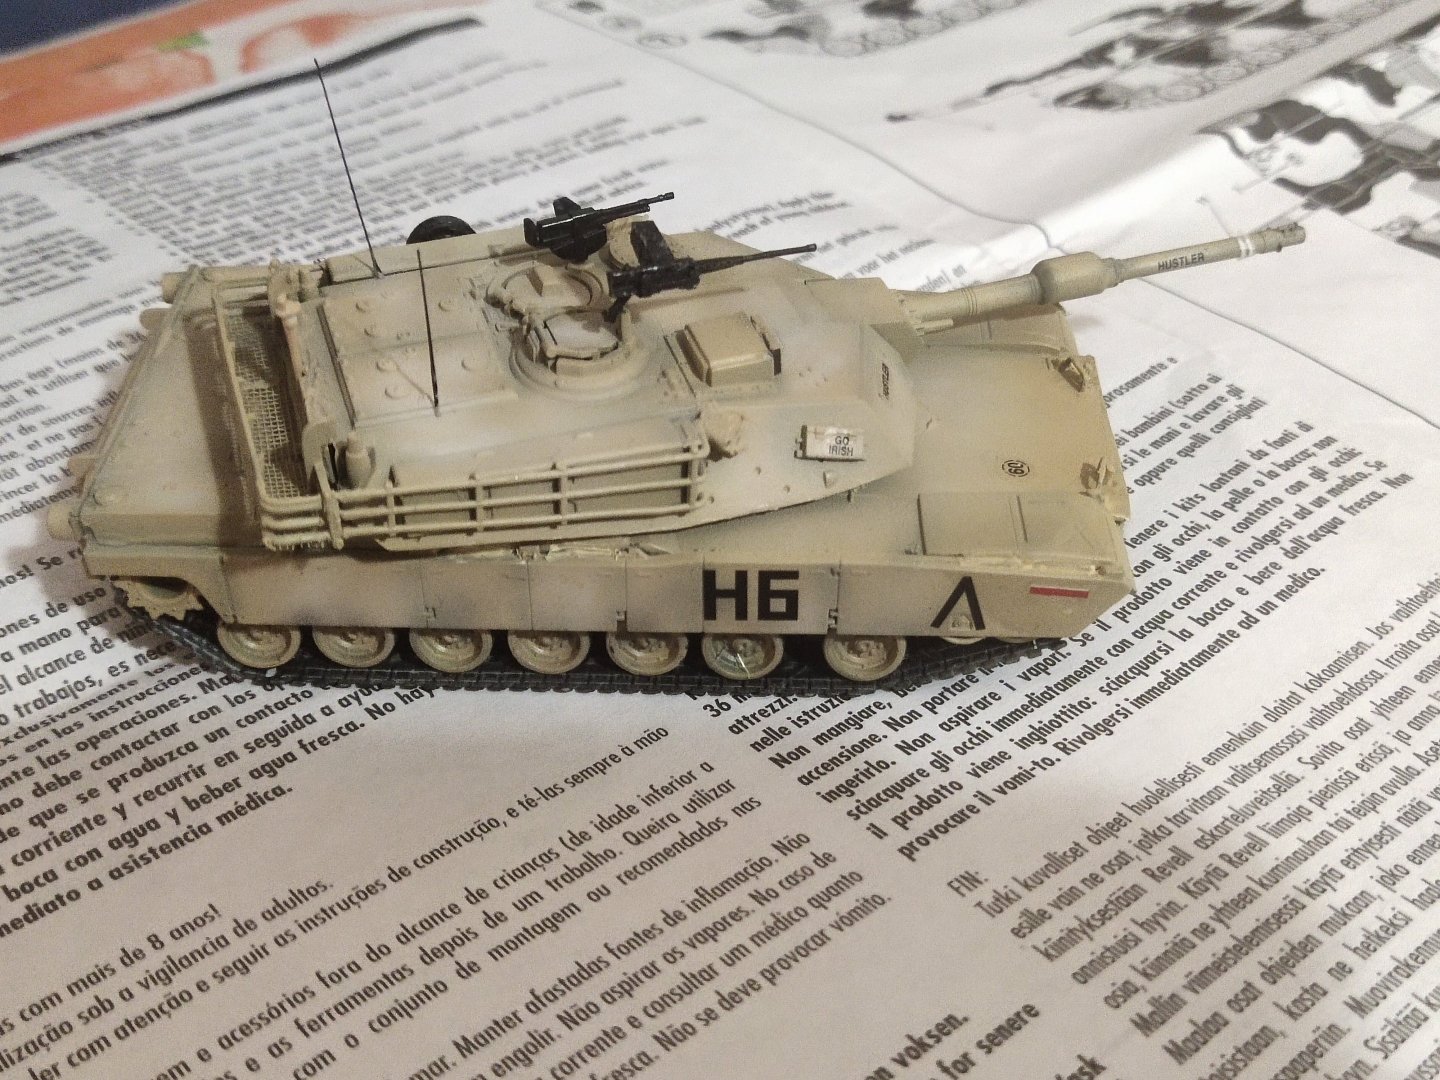
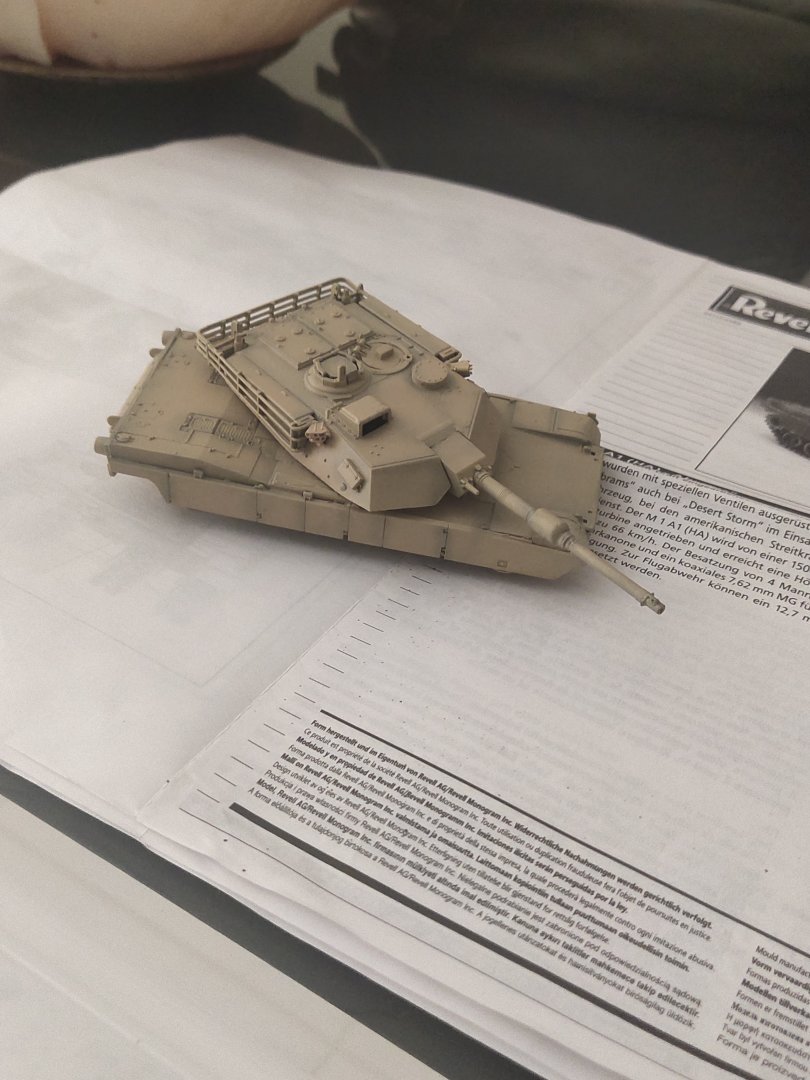
M1A1 ABRAMS by mikegr - FINISHED - Revell - 1:72 - PLASTIC
mikegr replied to mikegr's topic in Non-ship/categorised builds
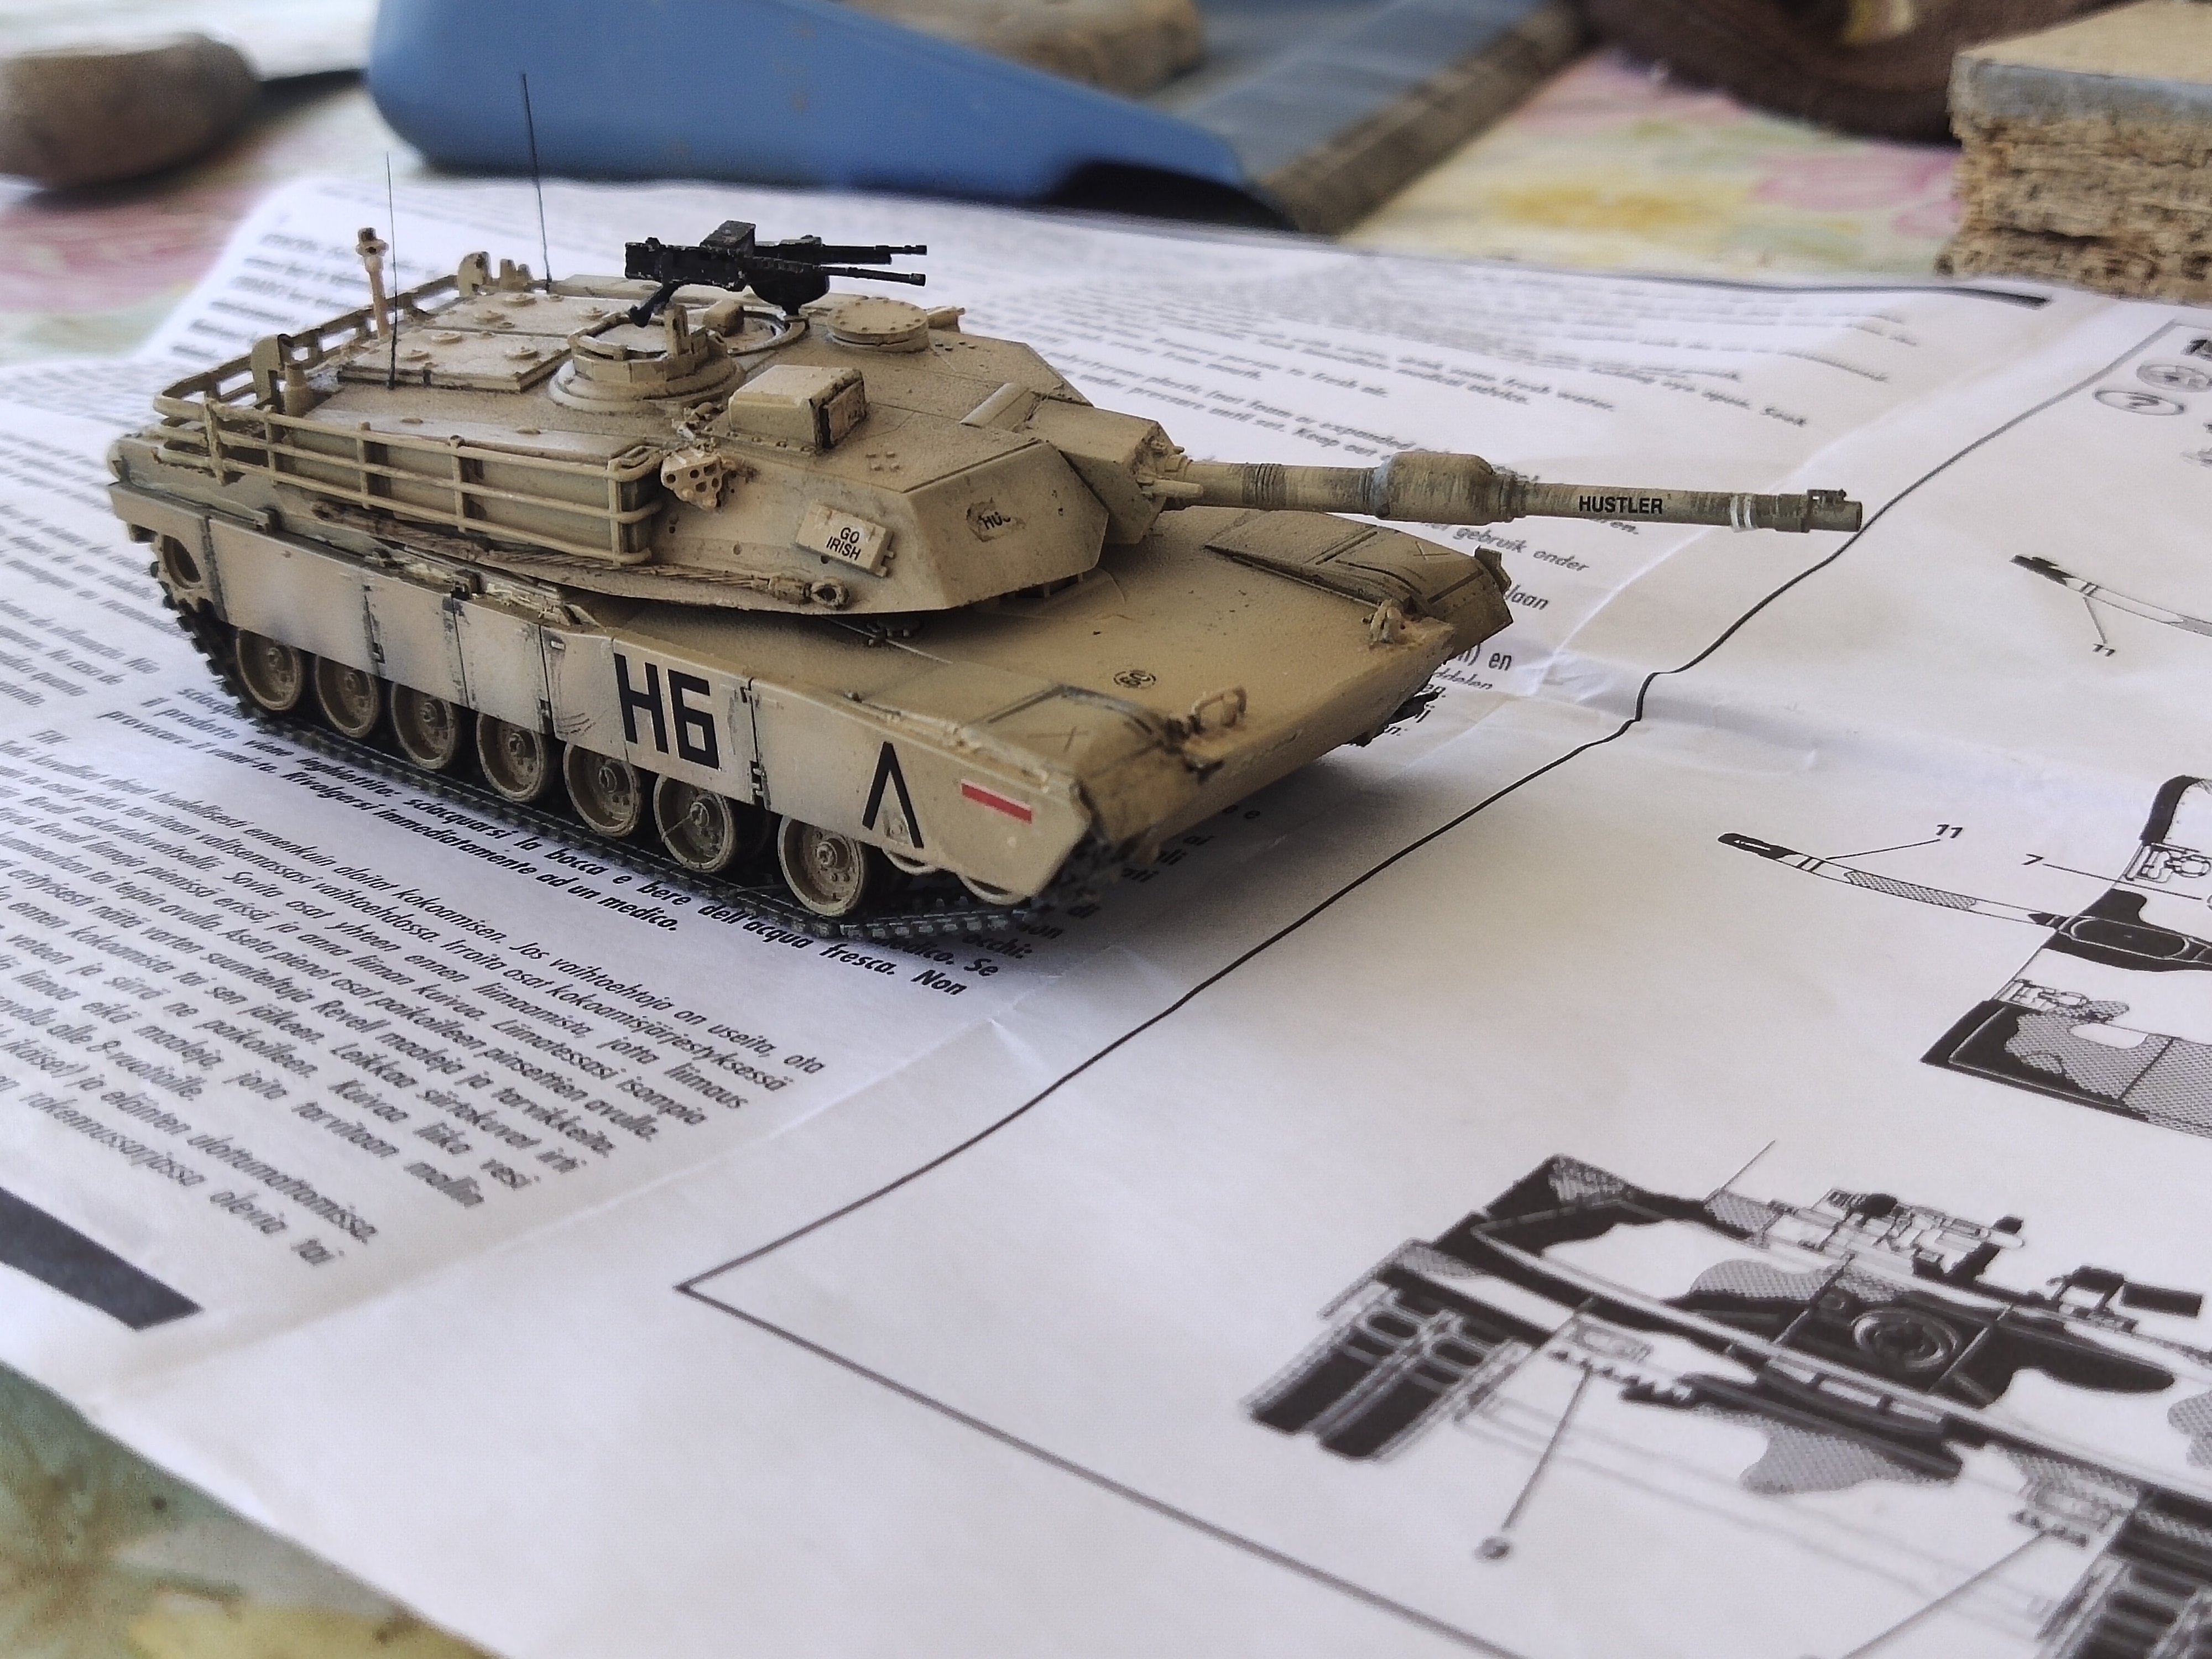
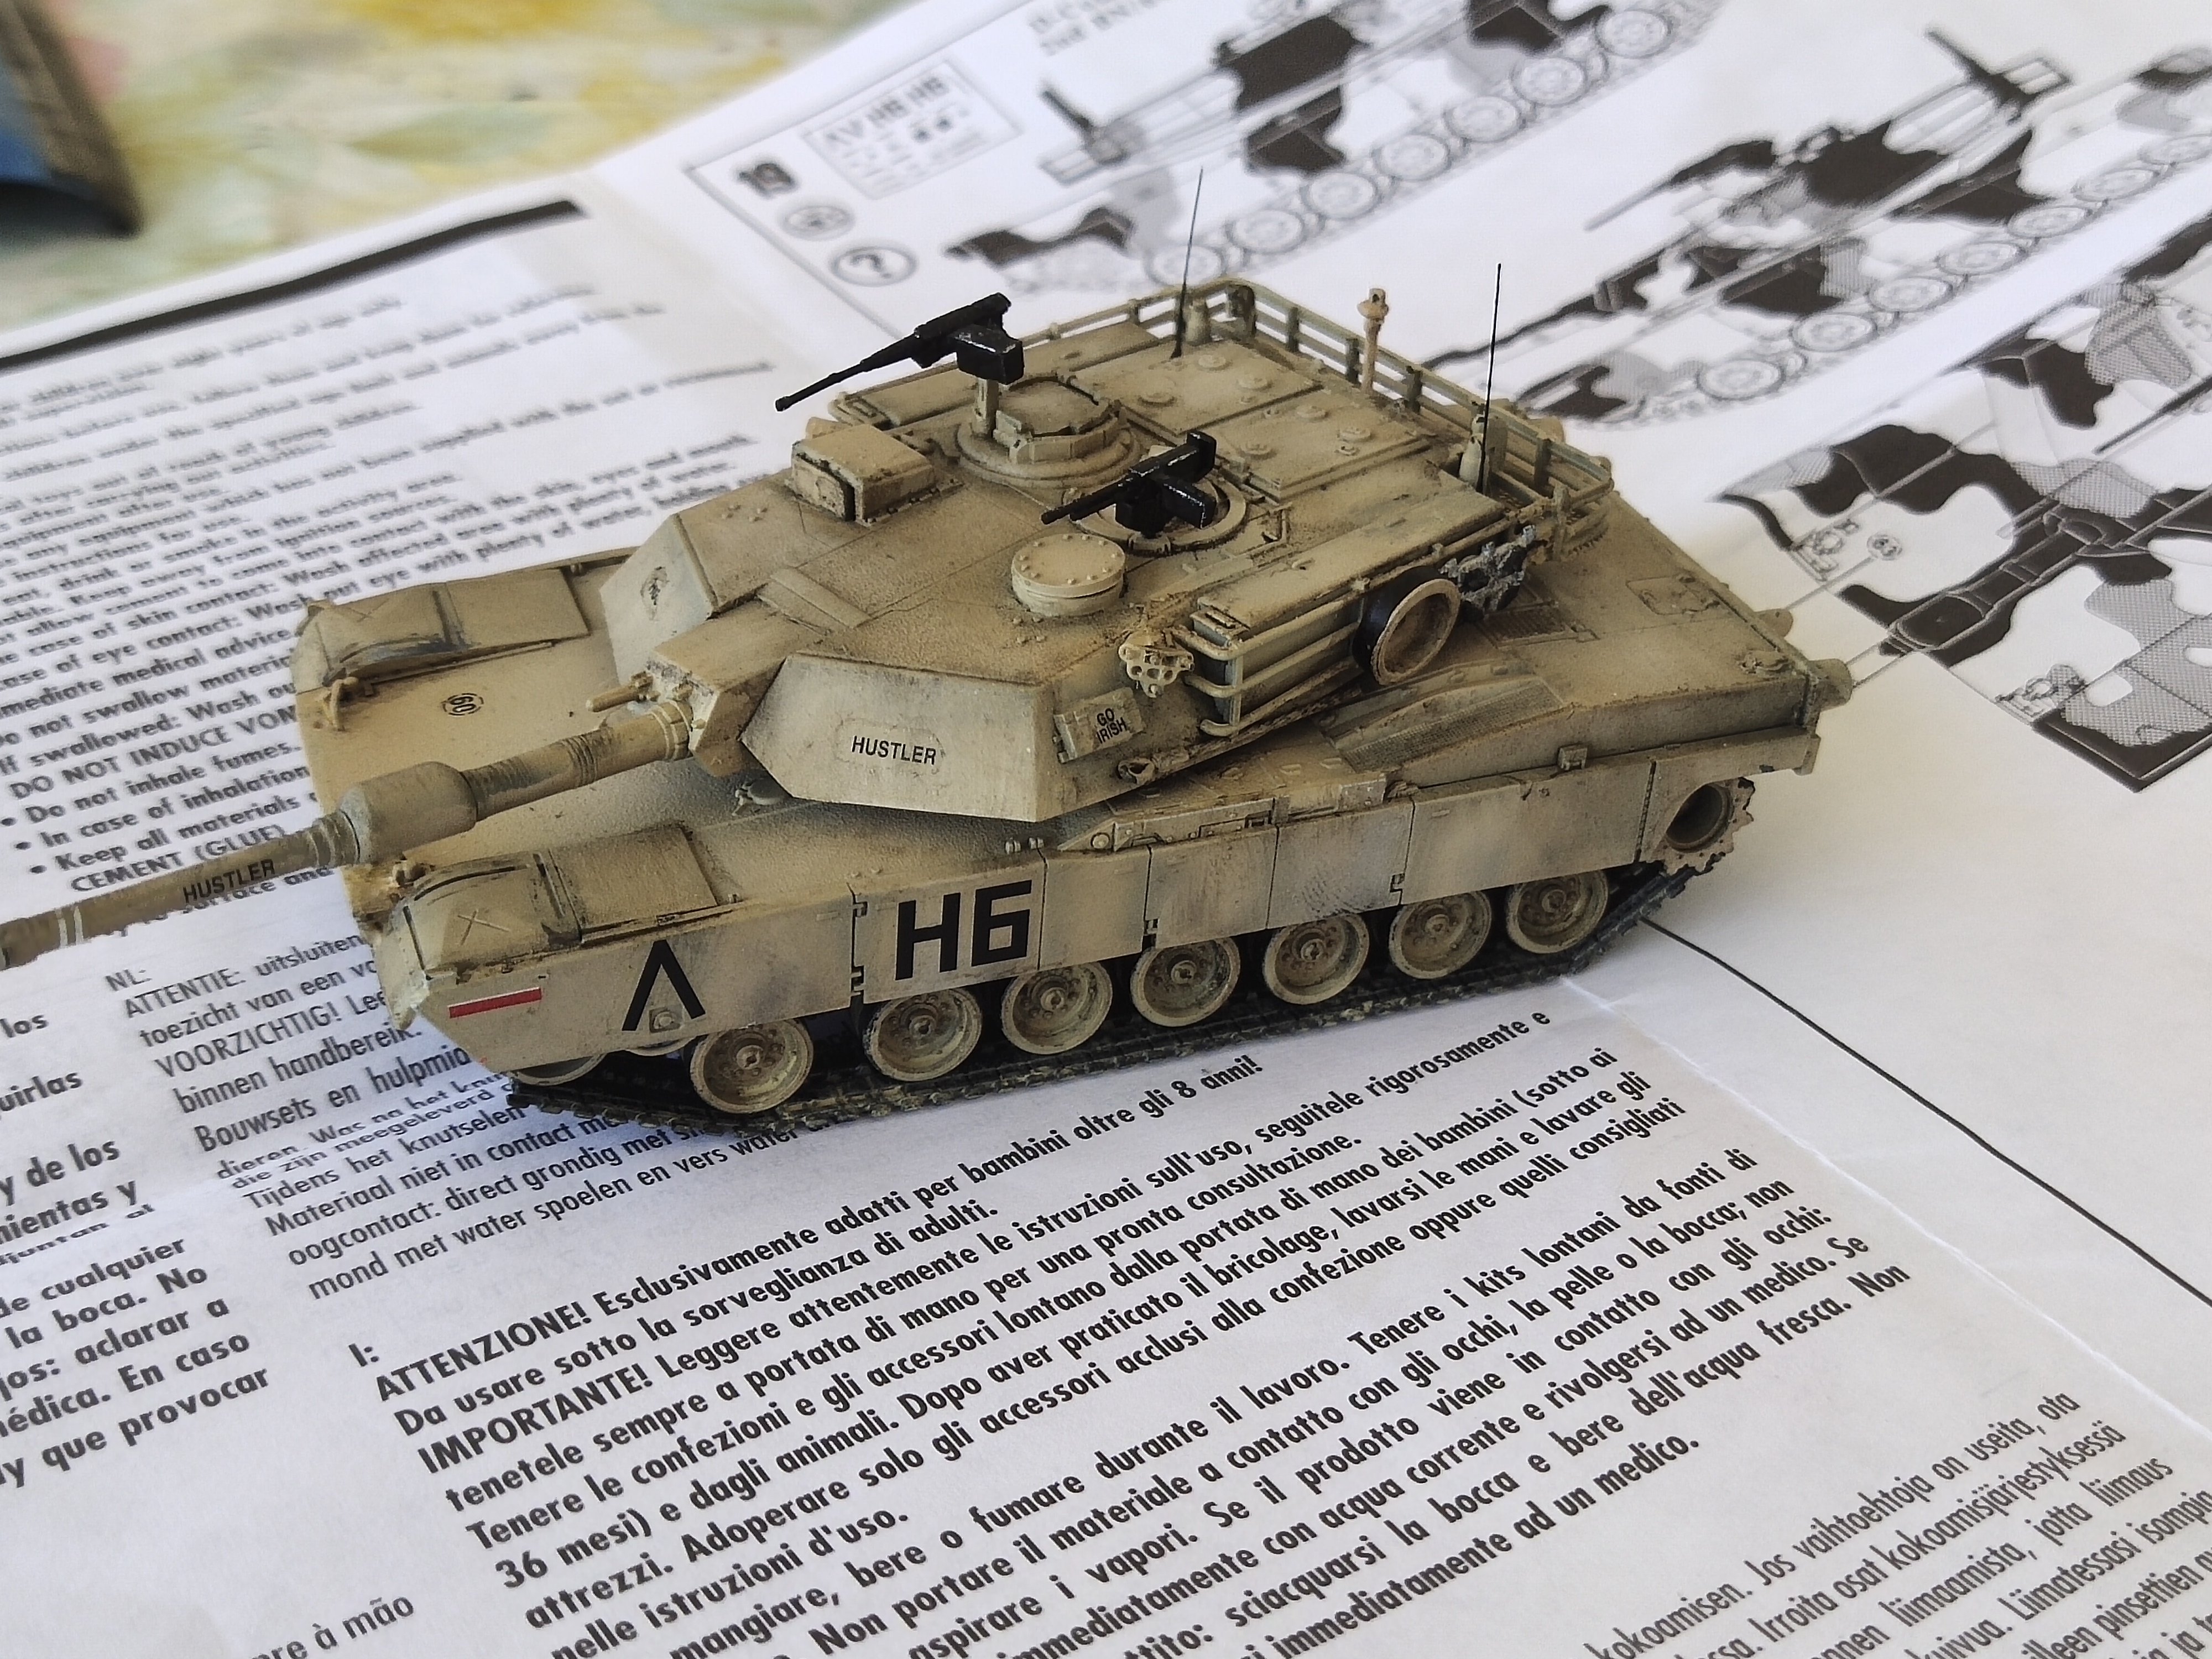
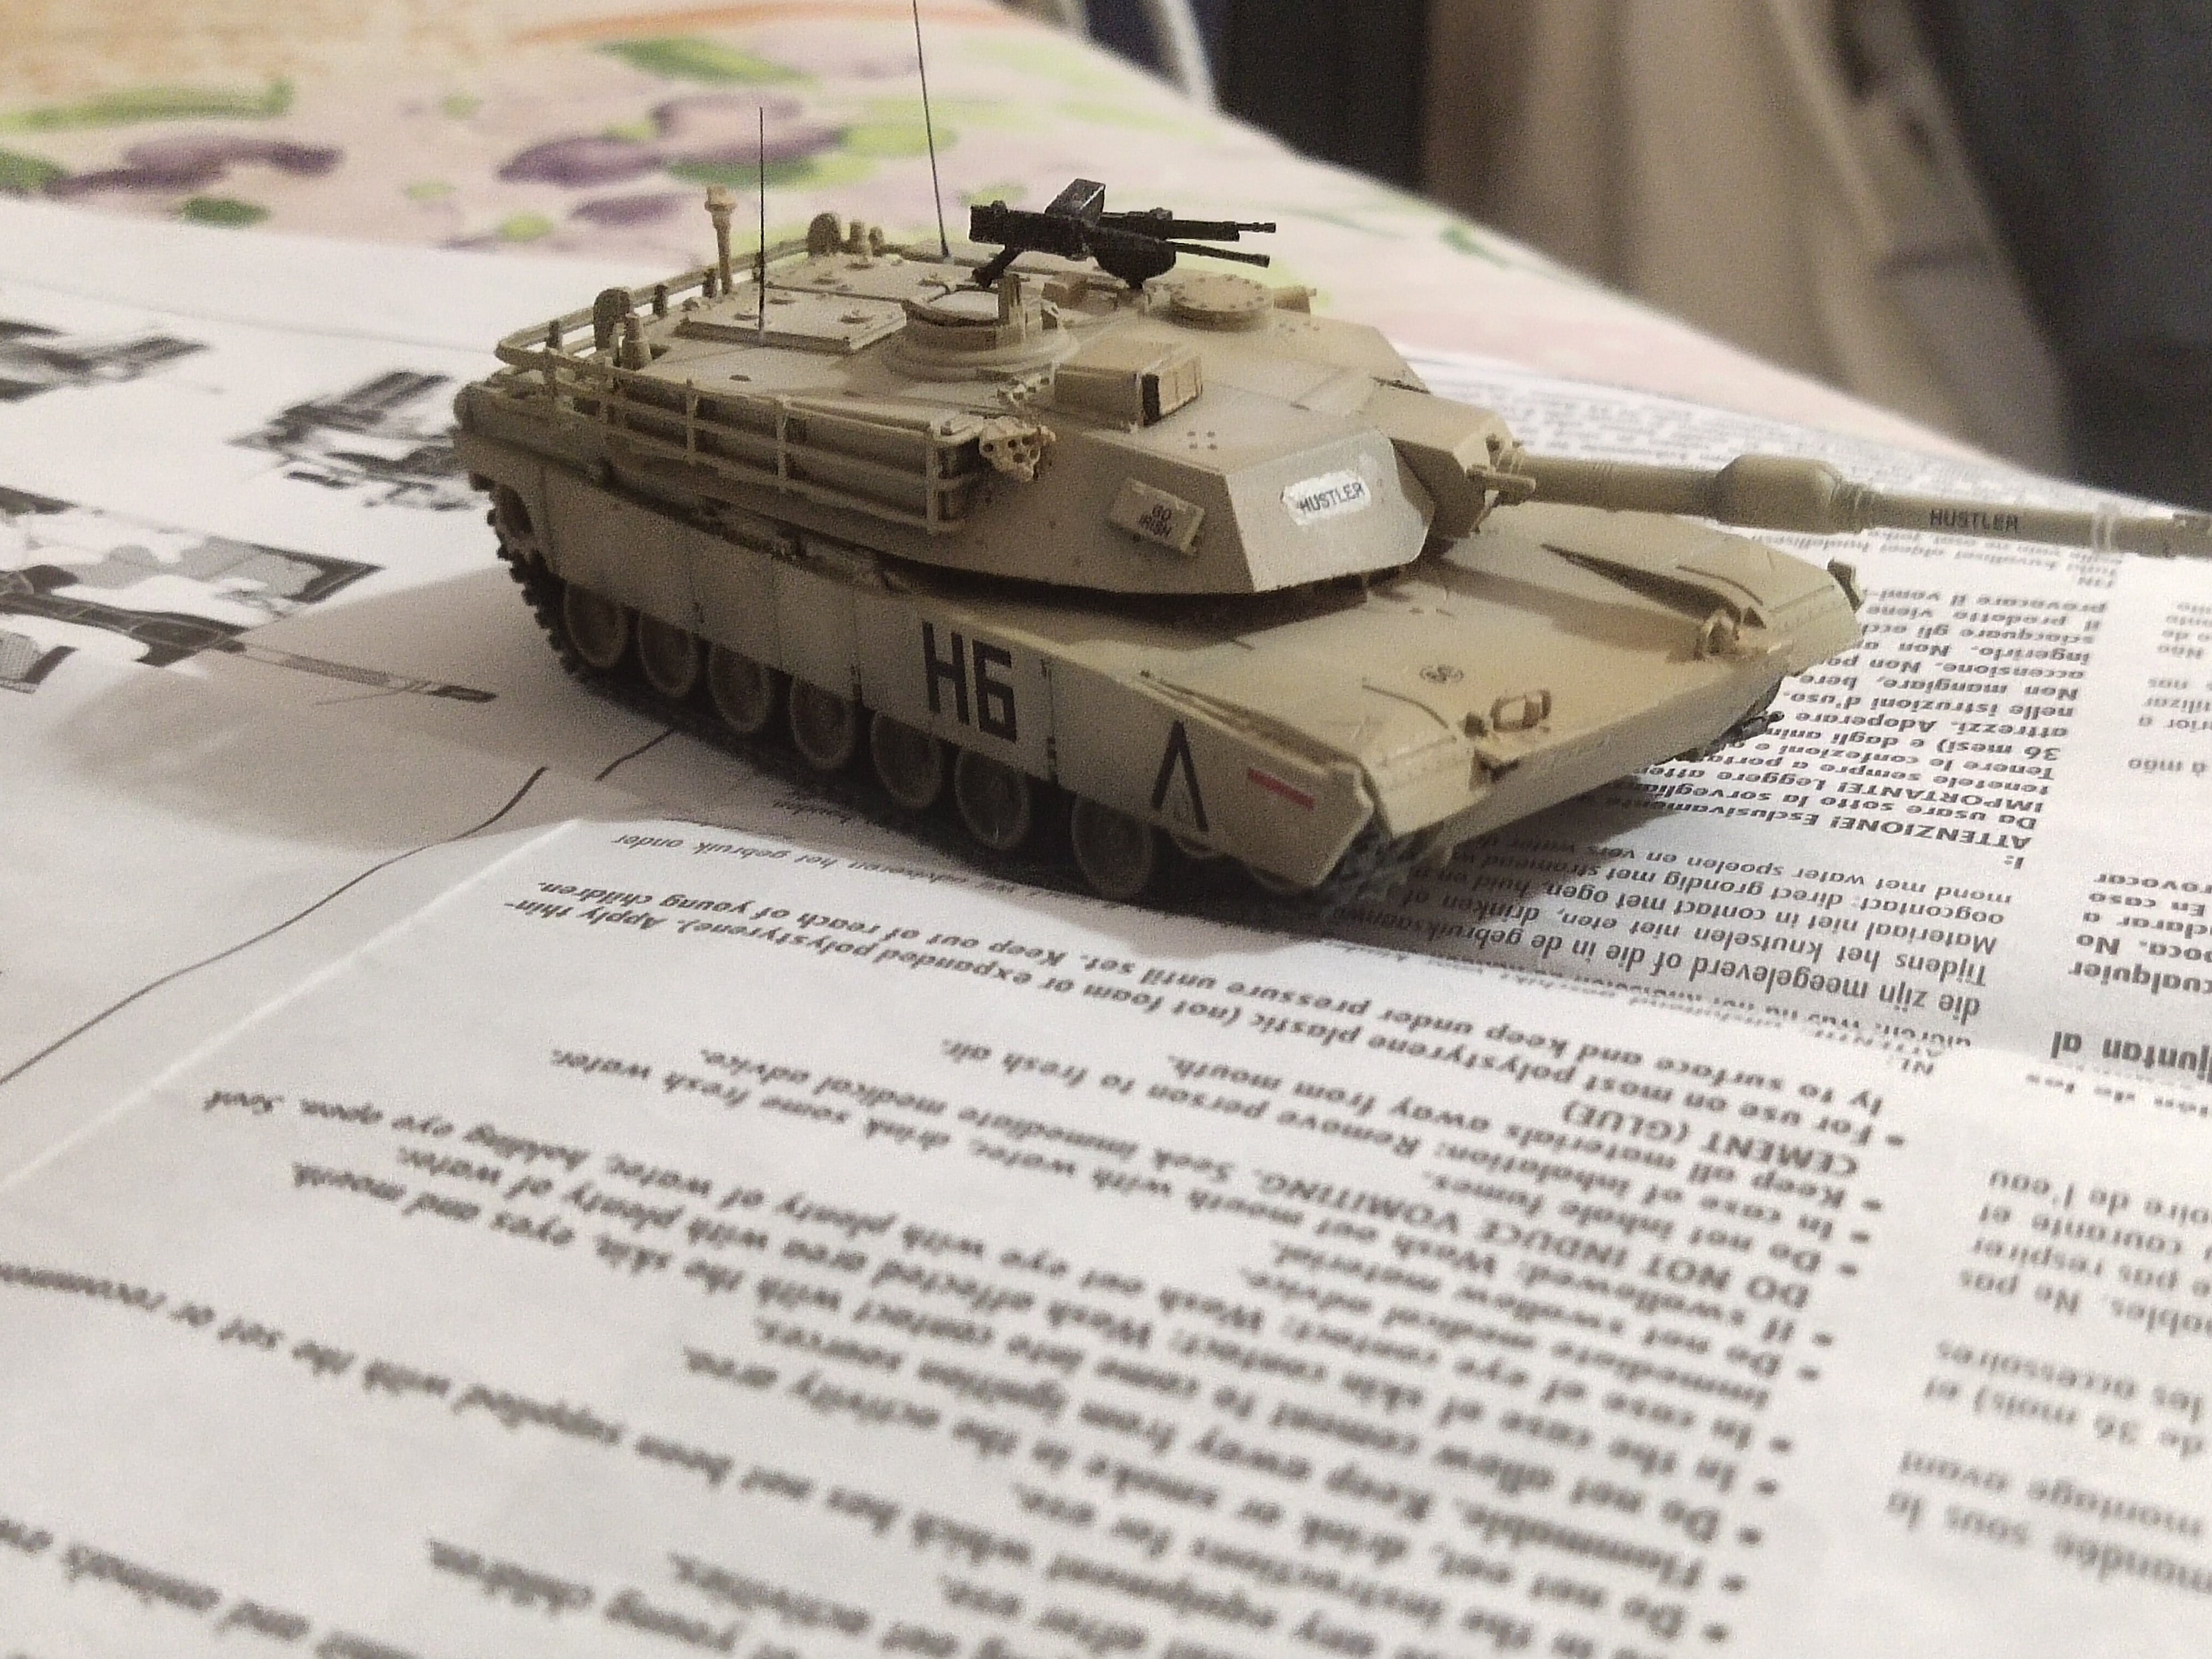
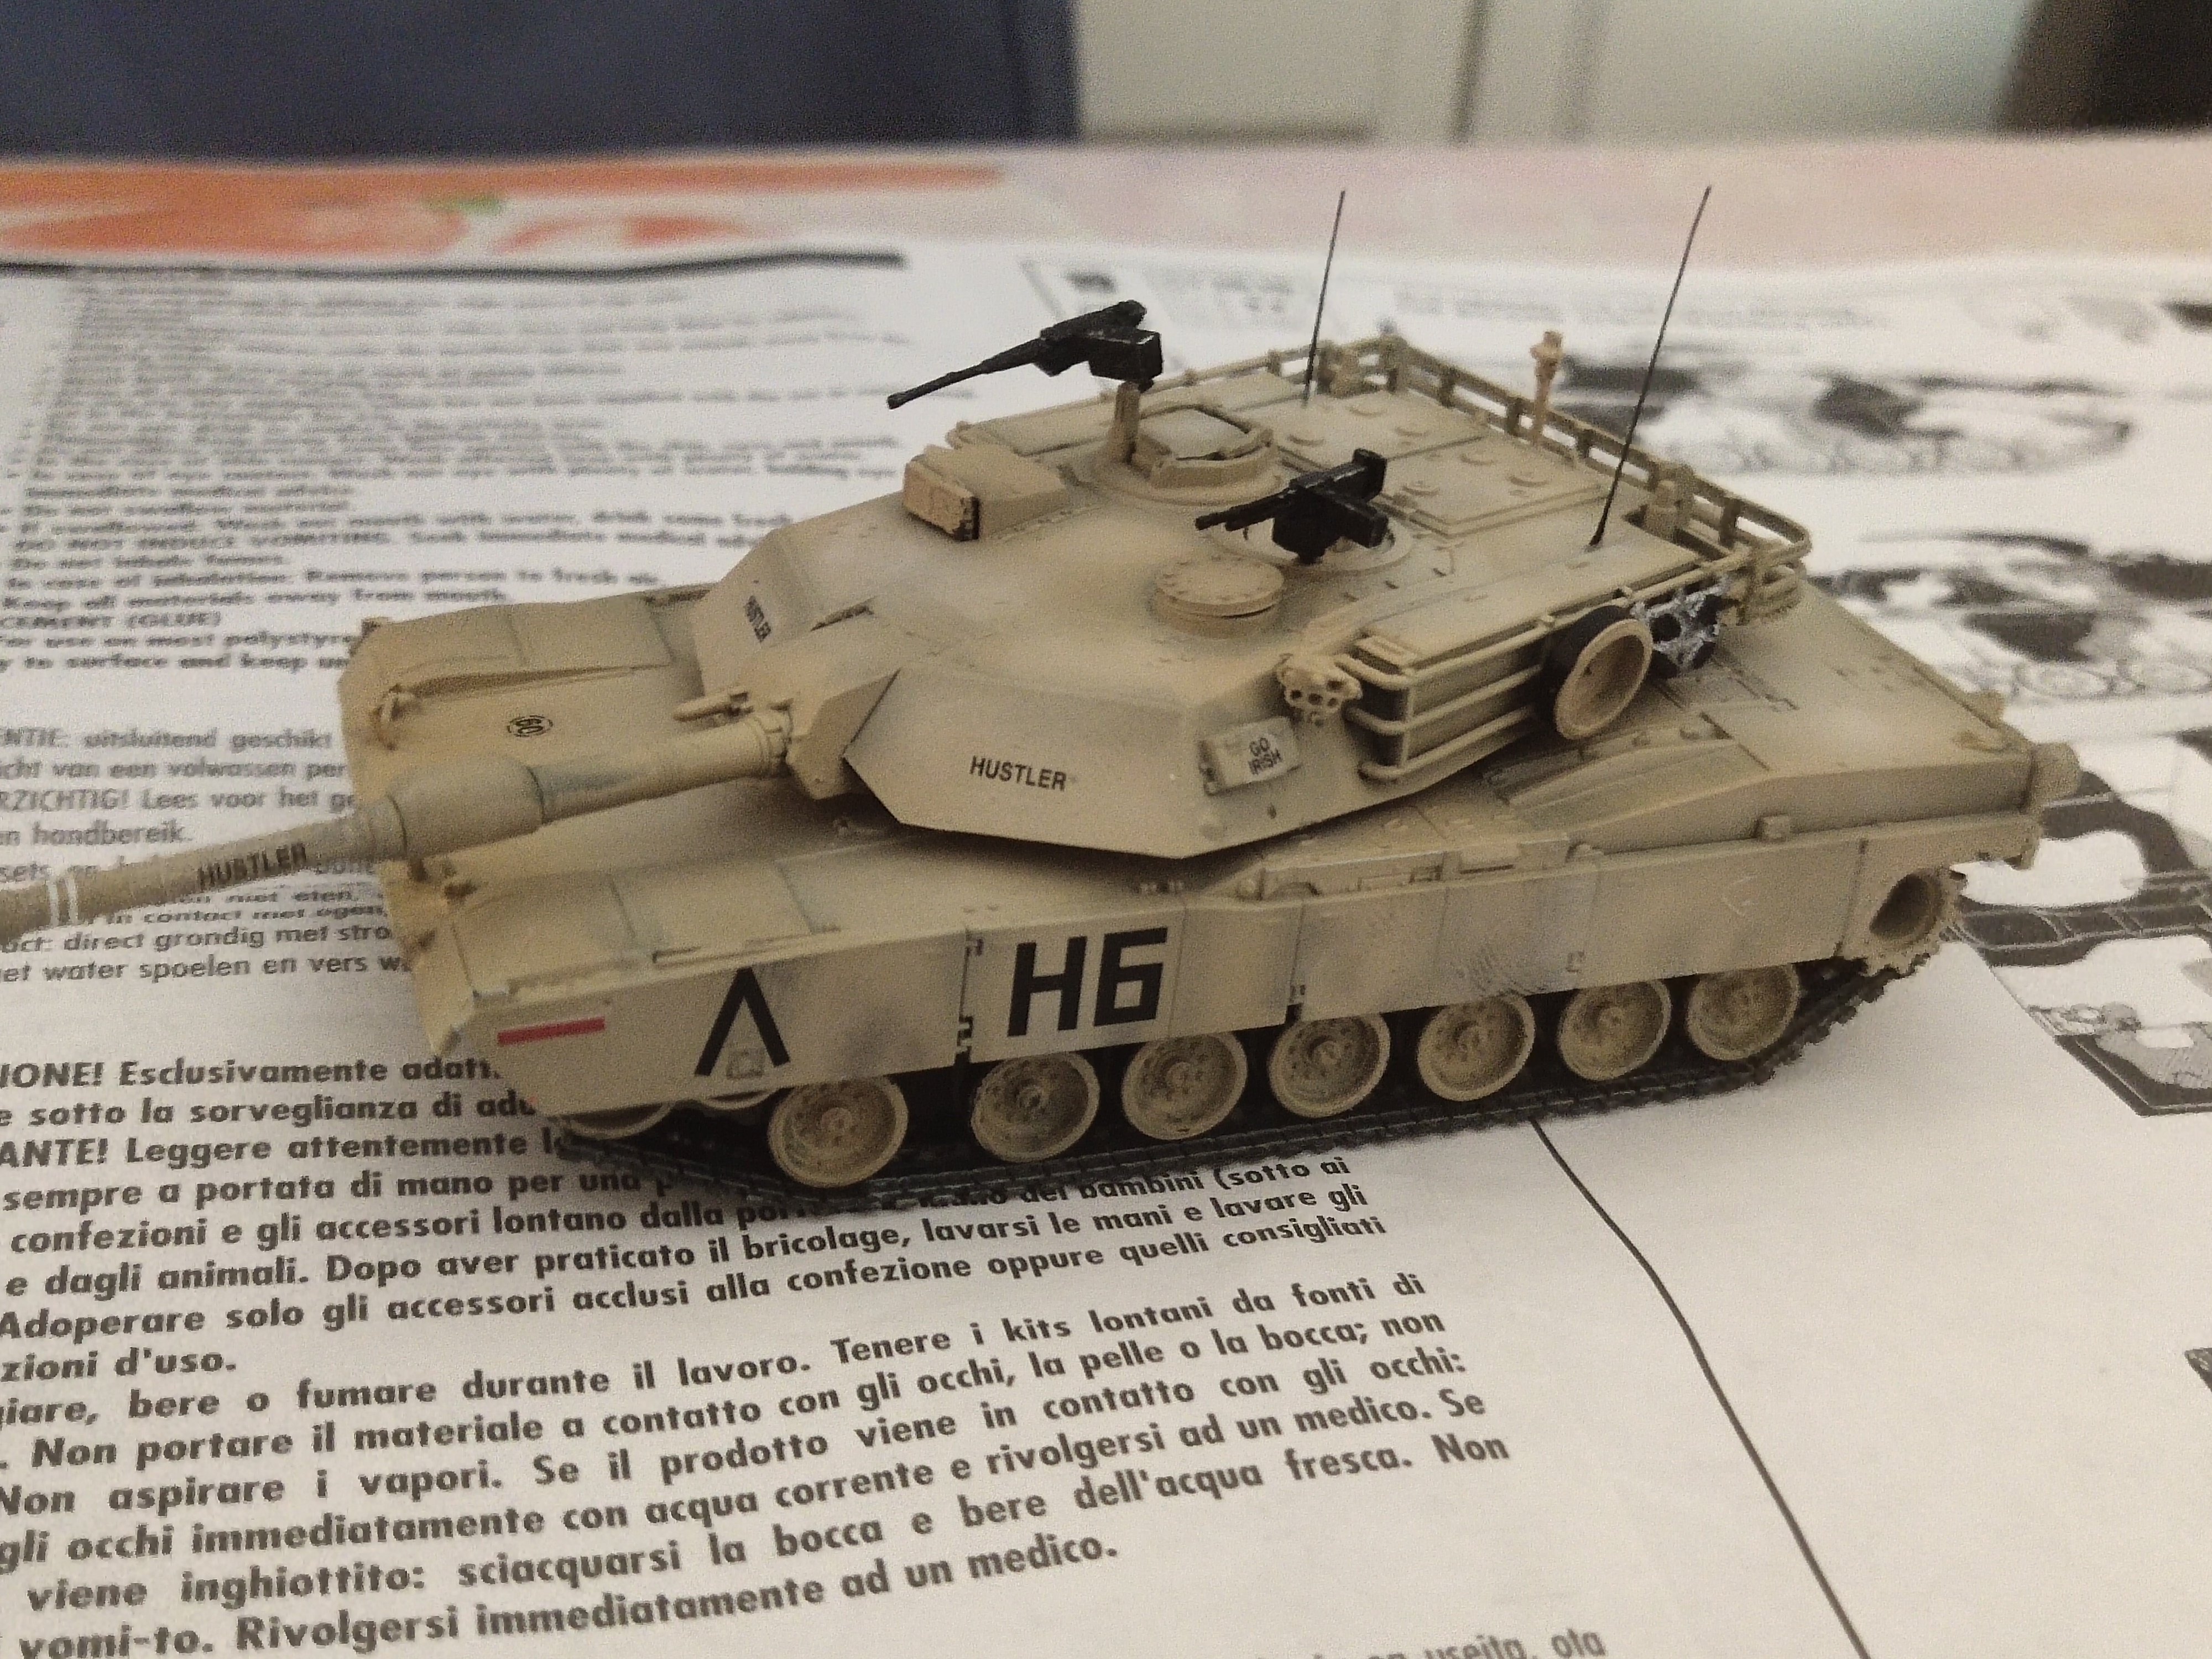
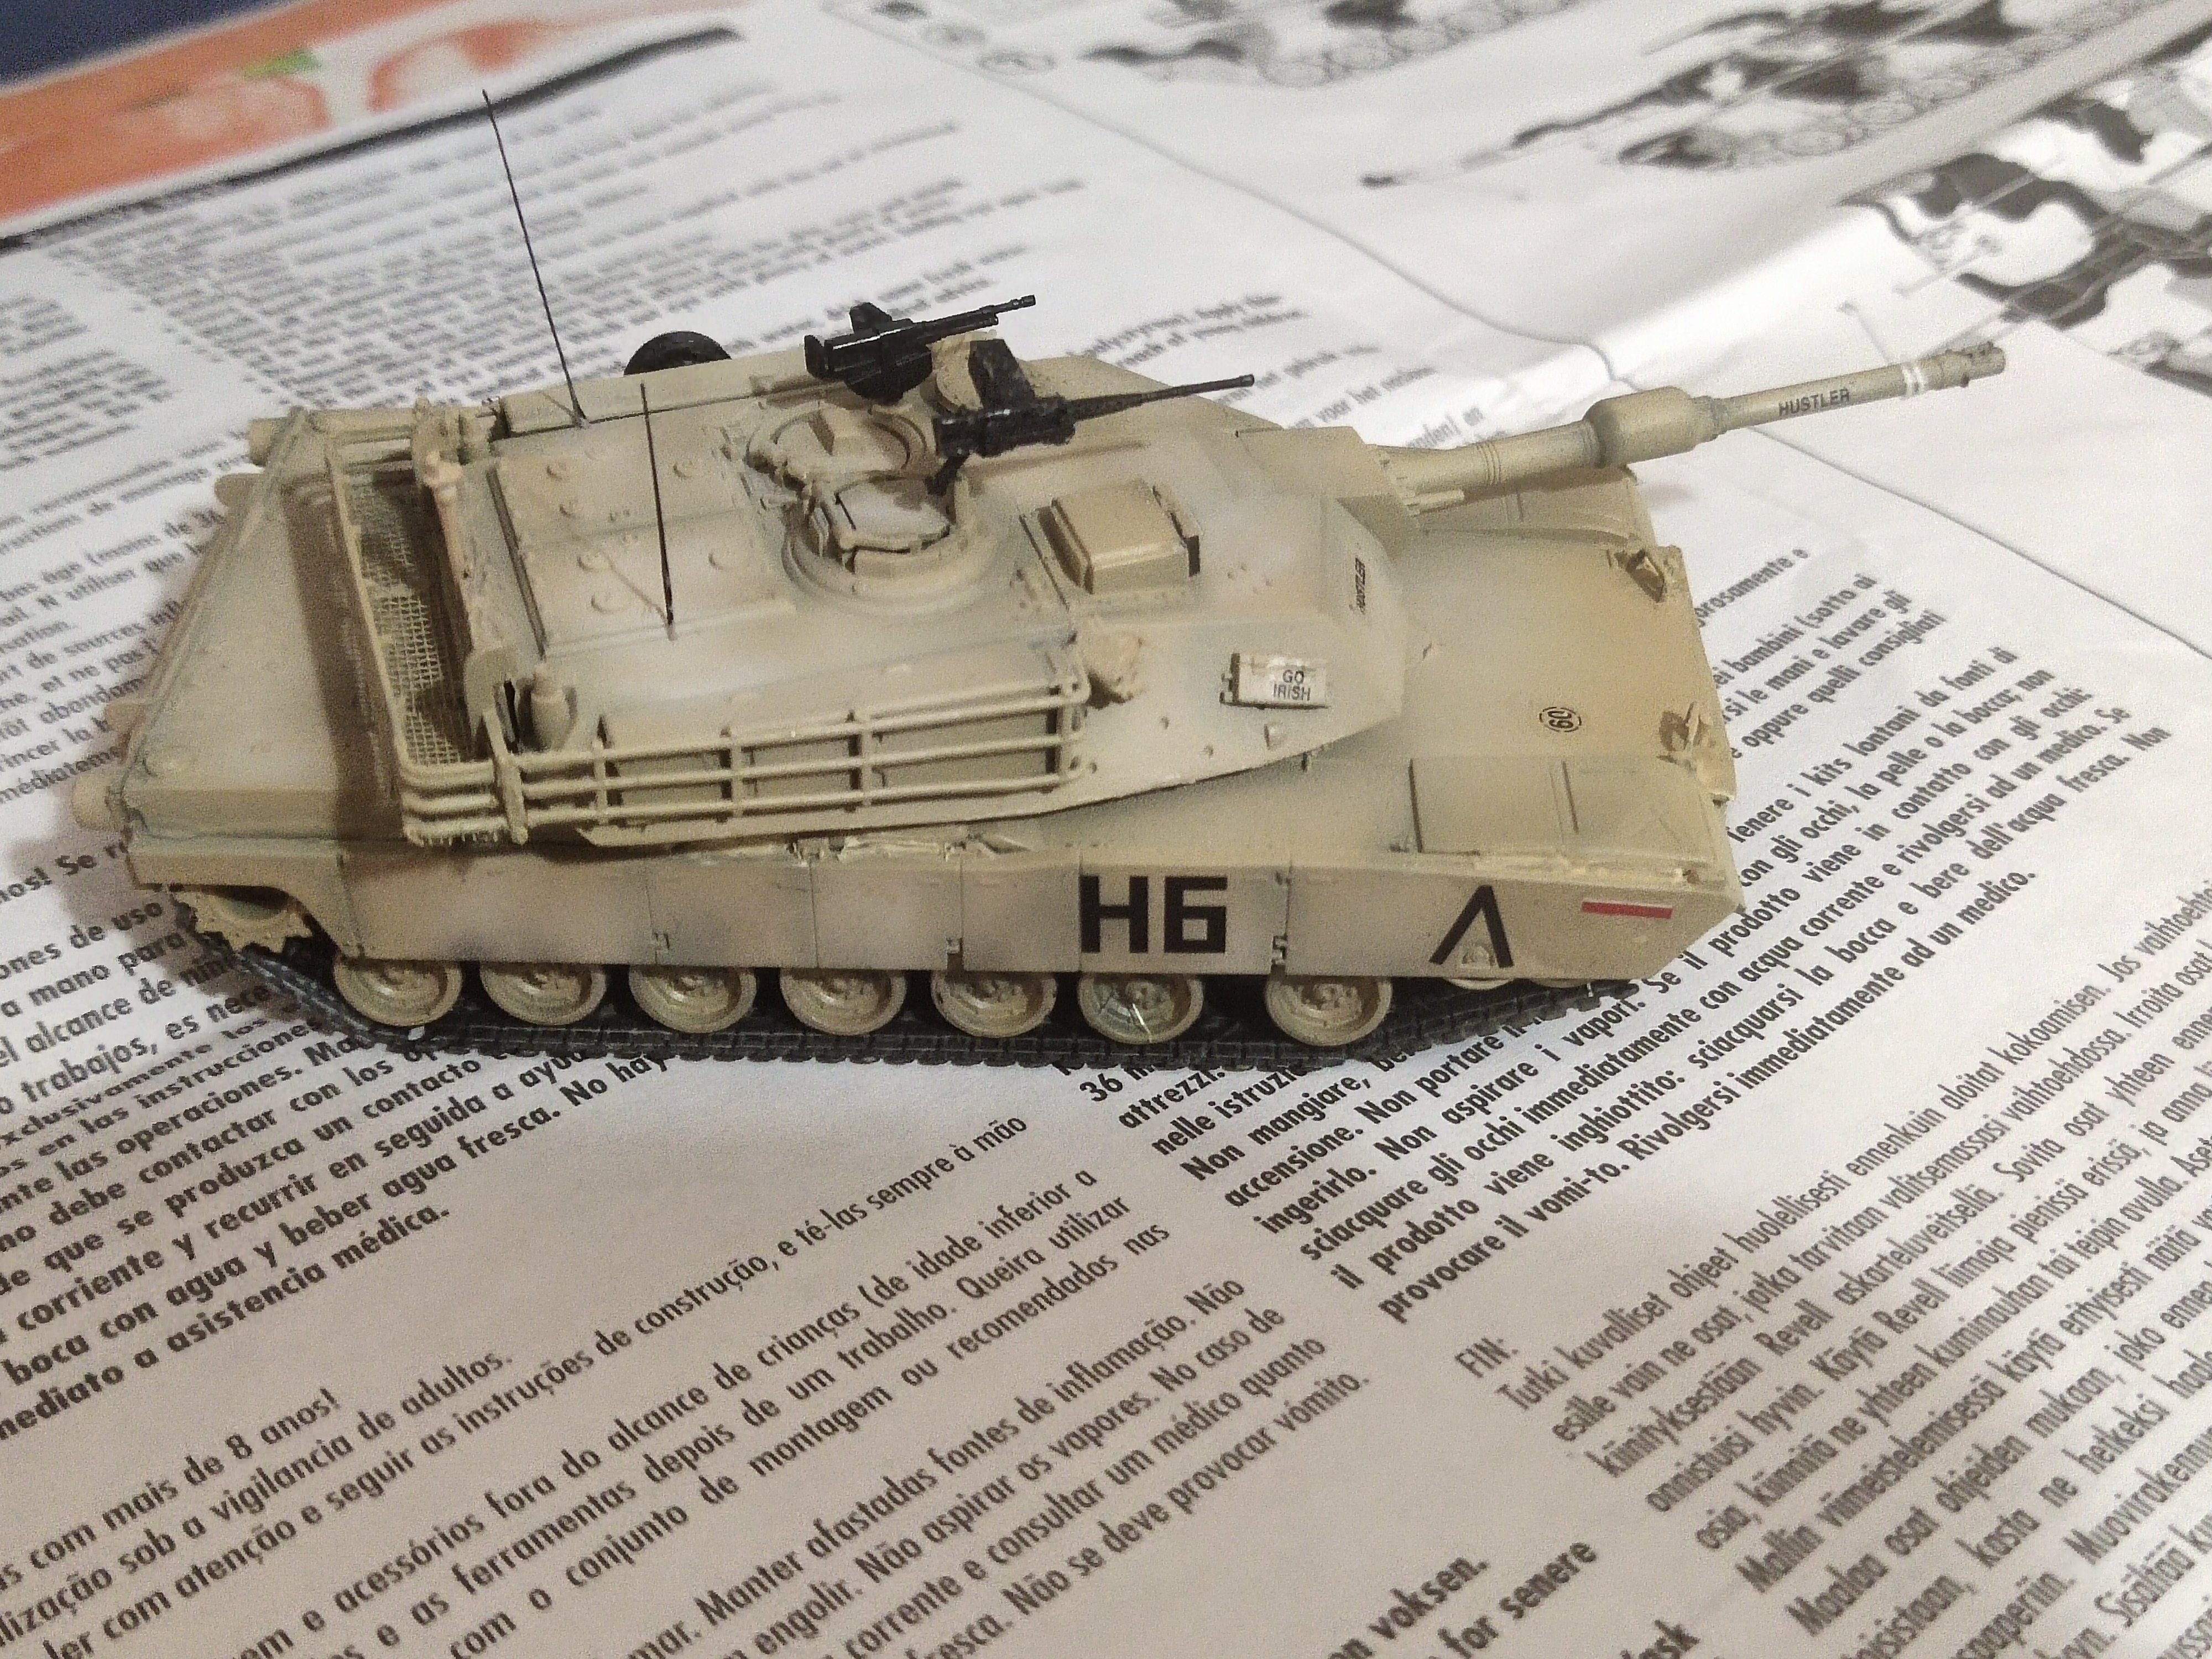
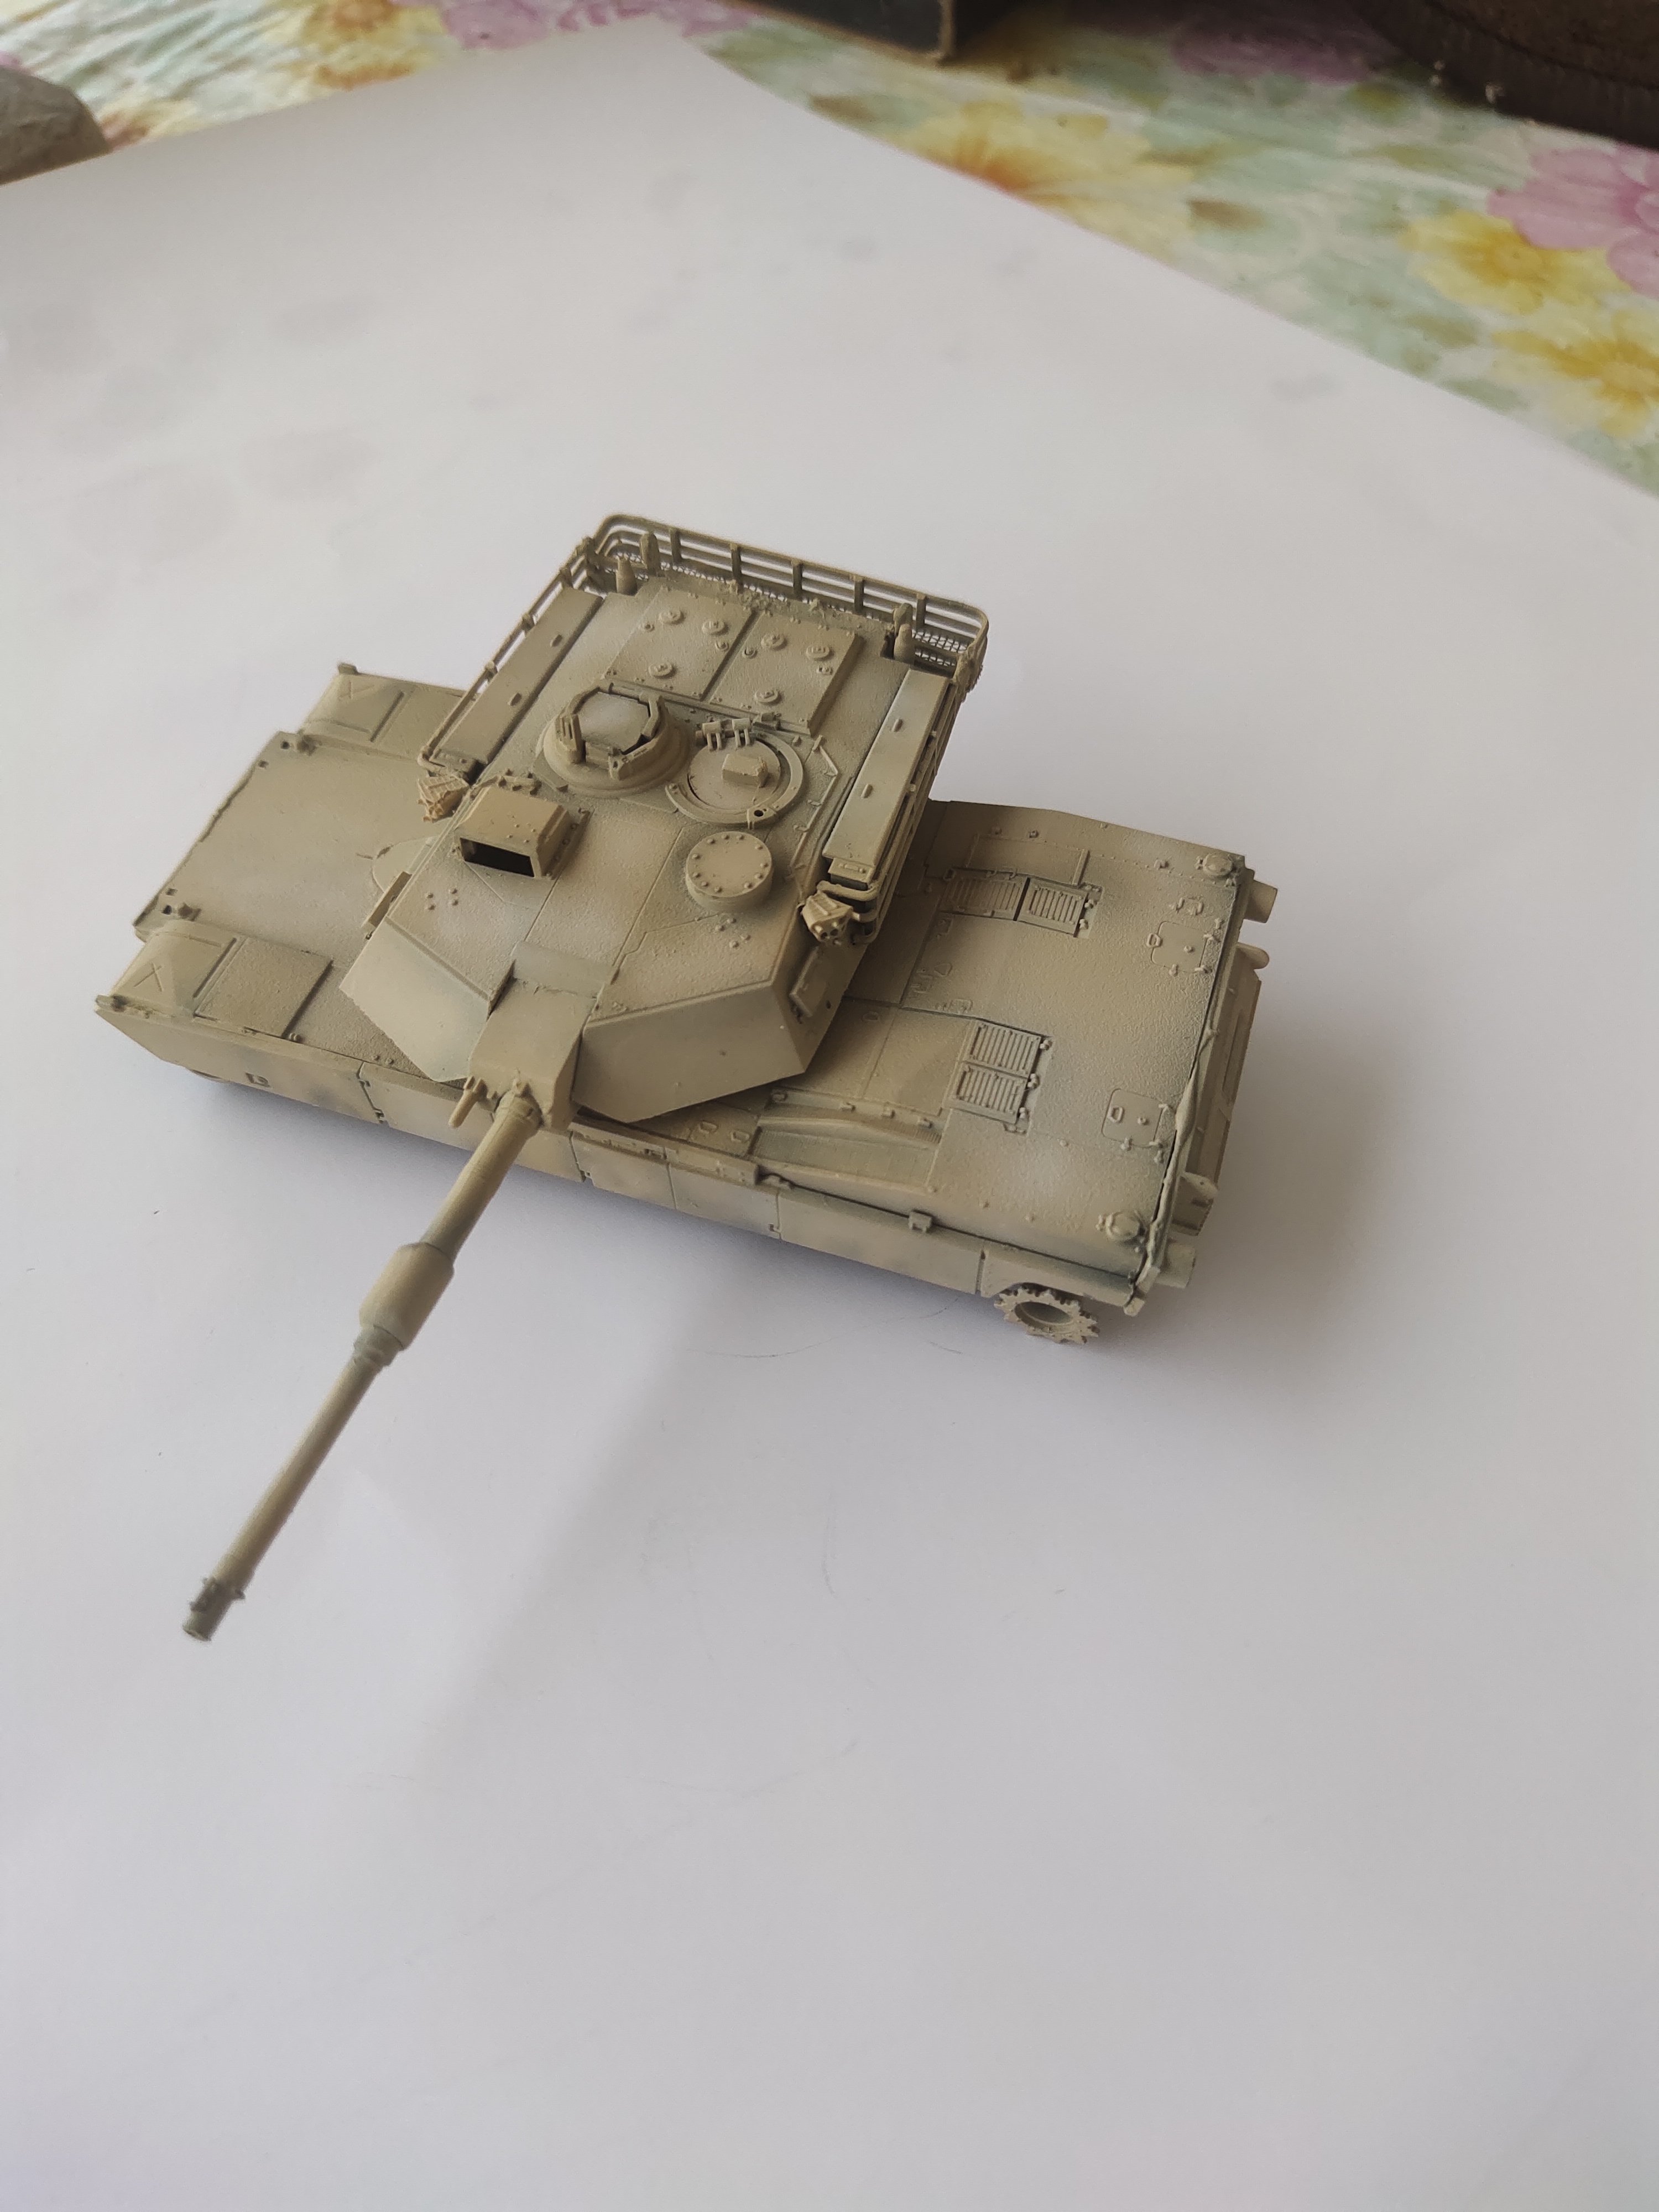
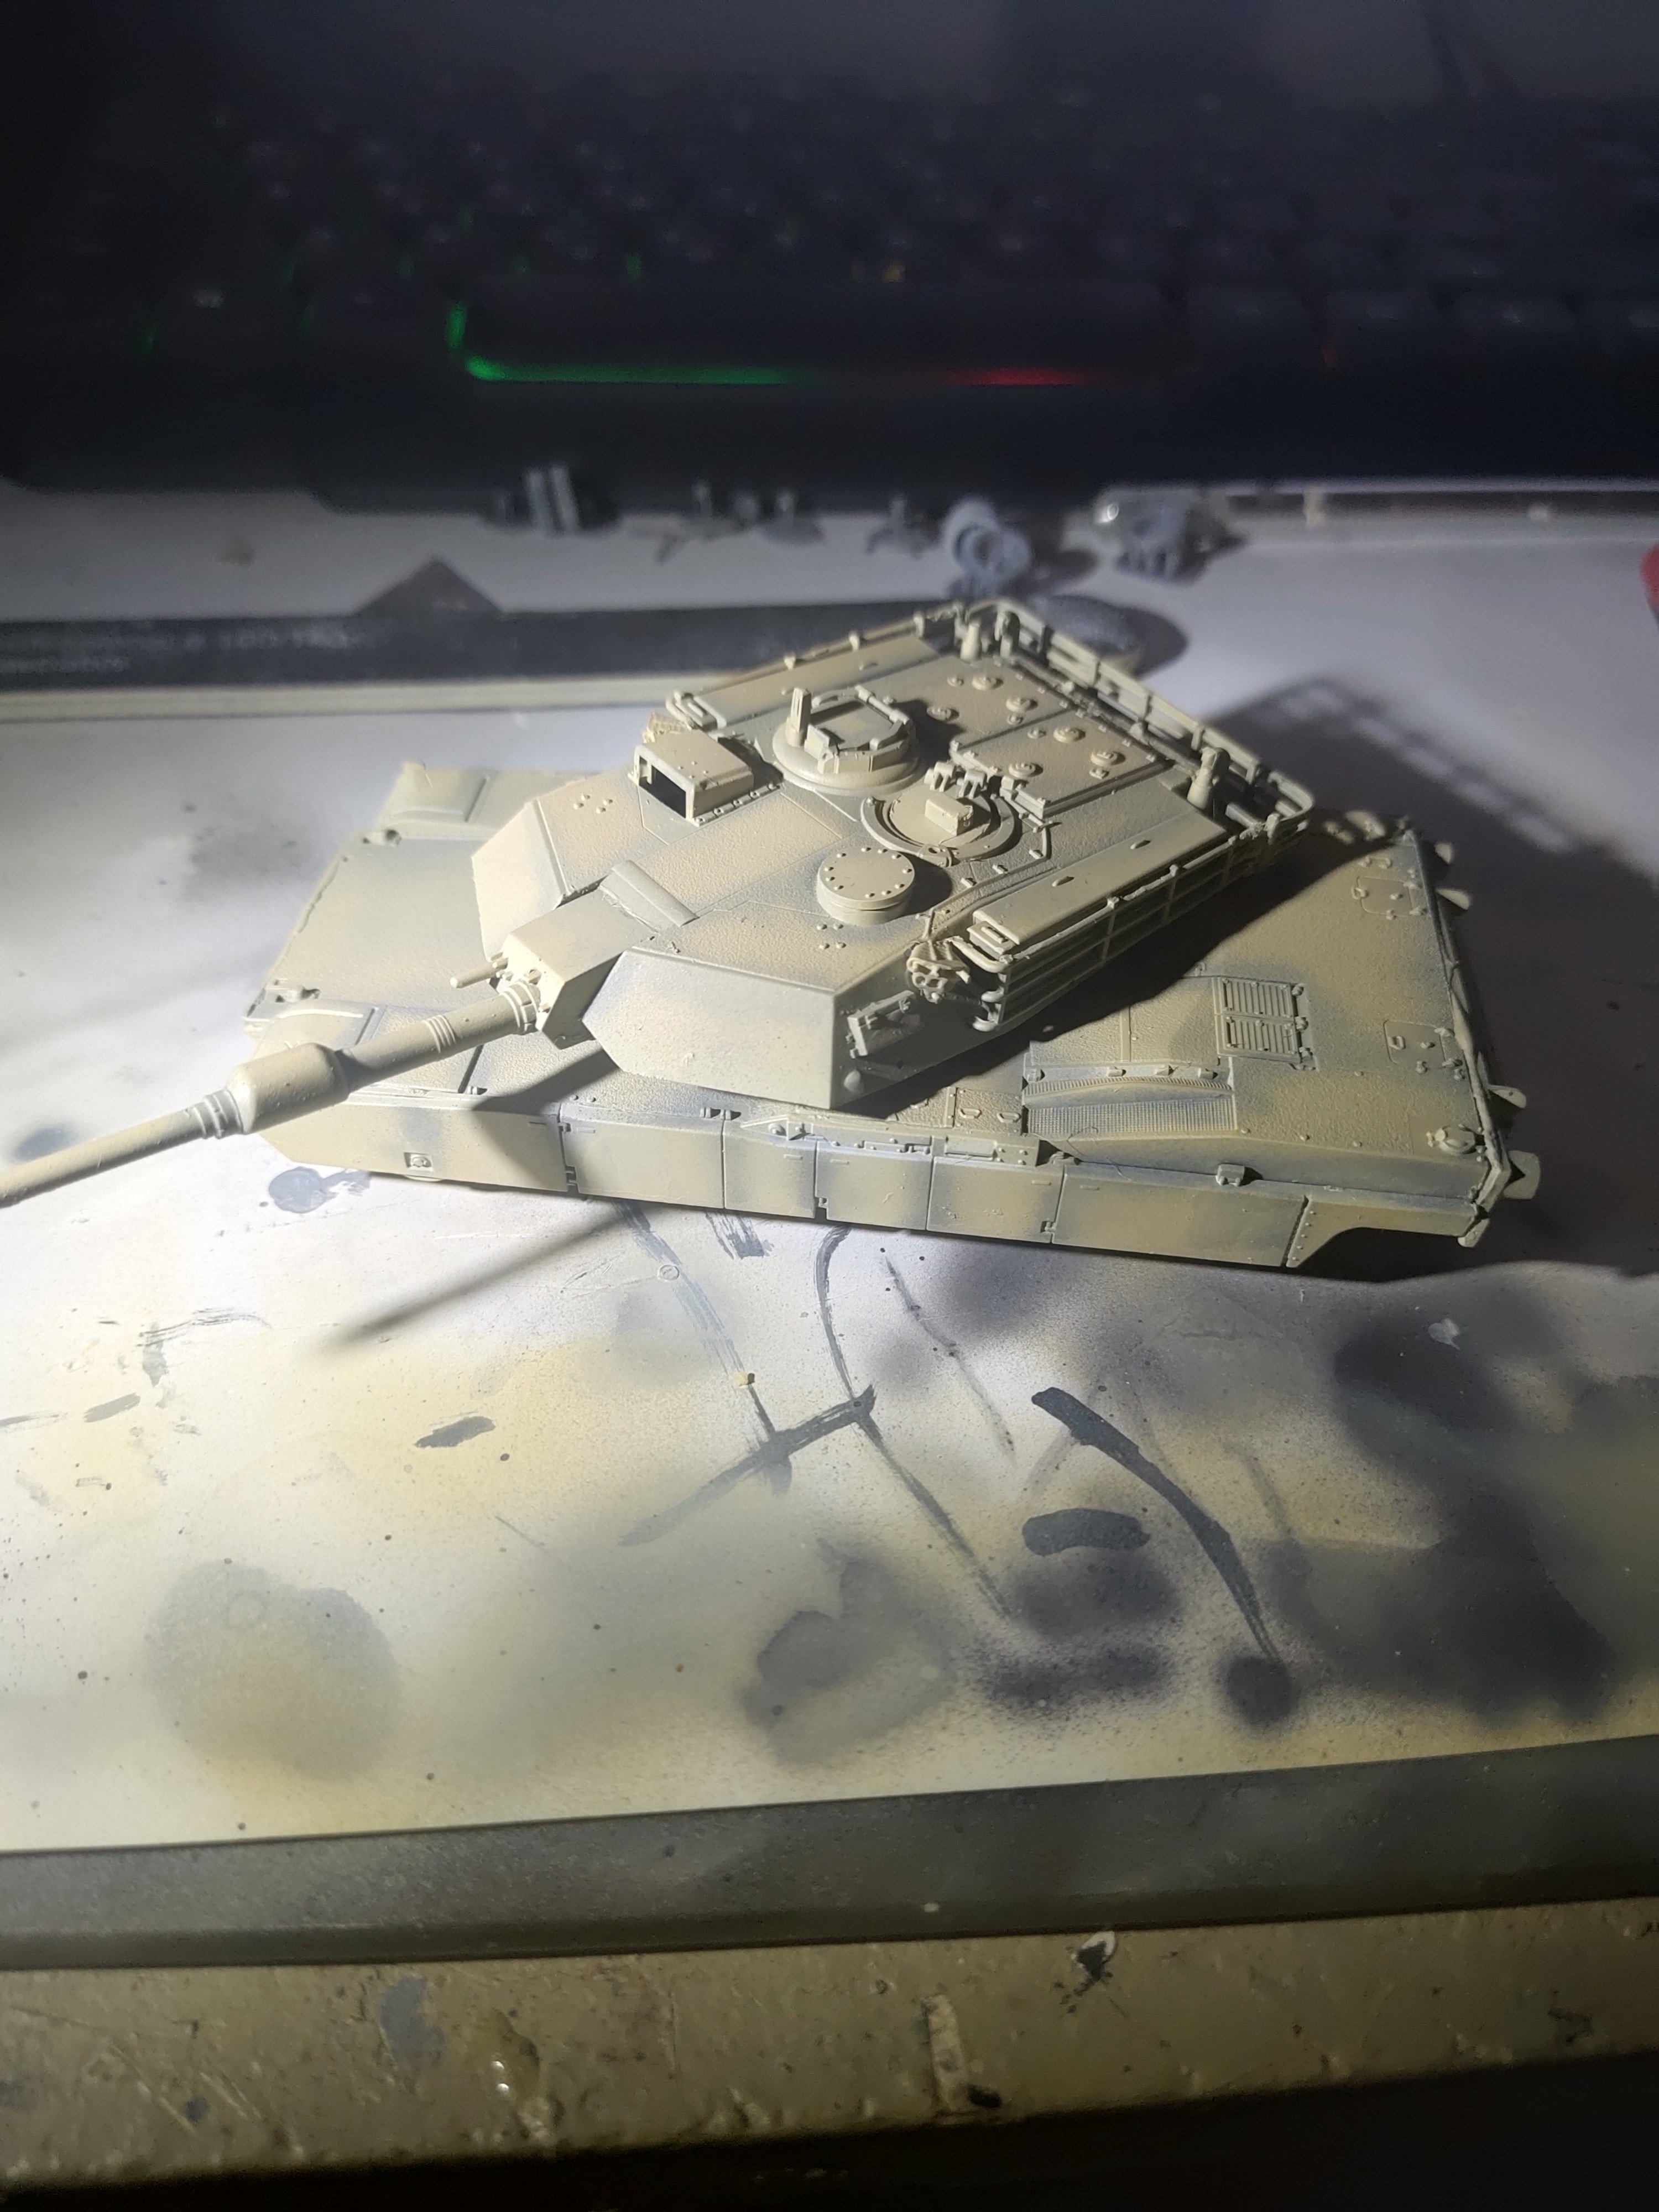
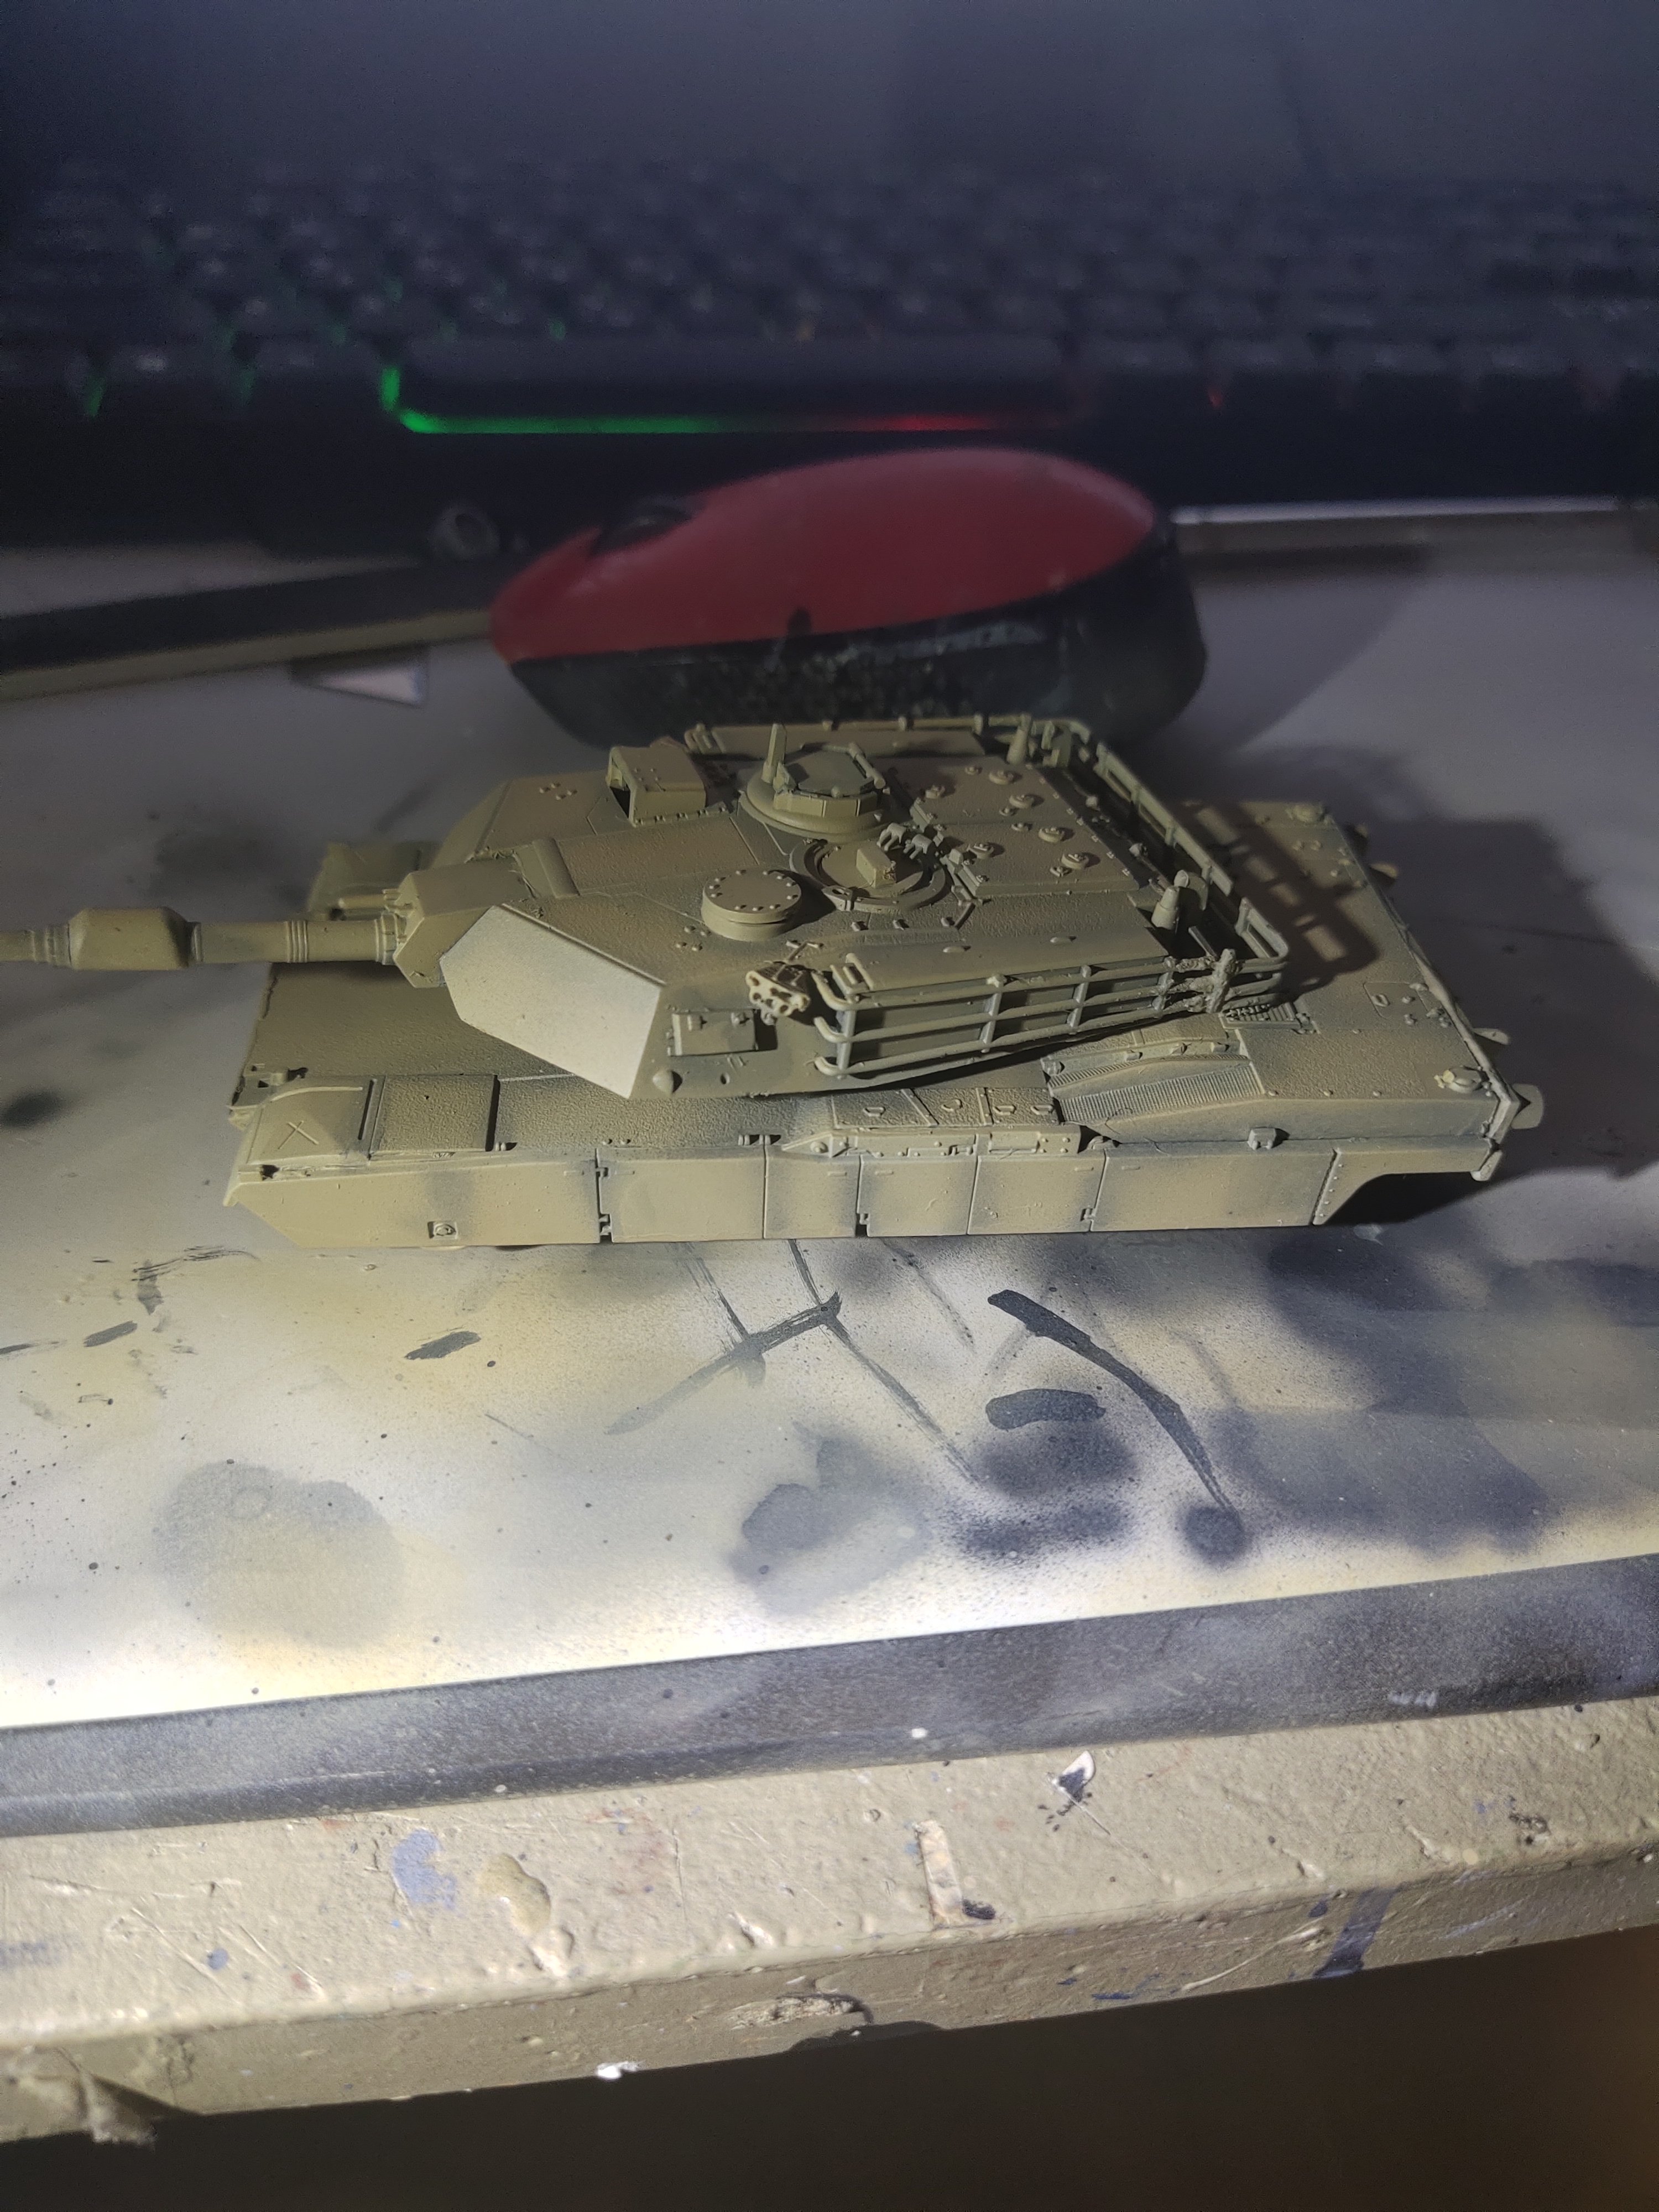
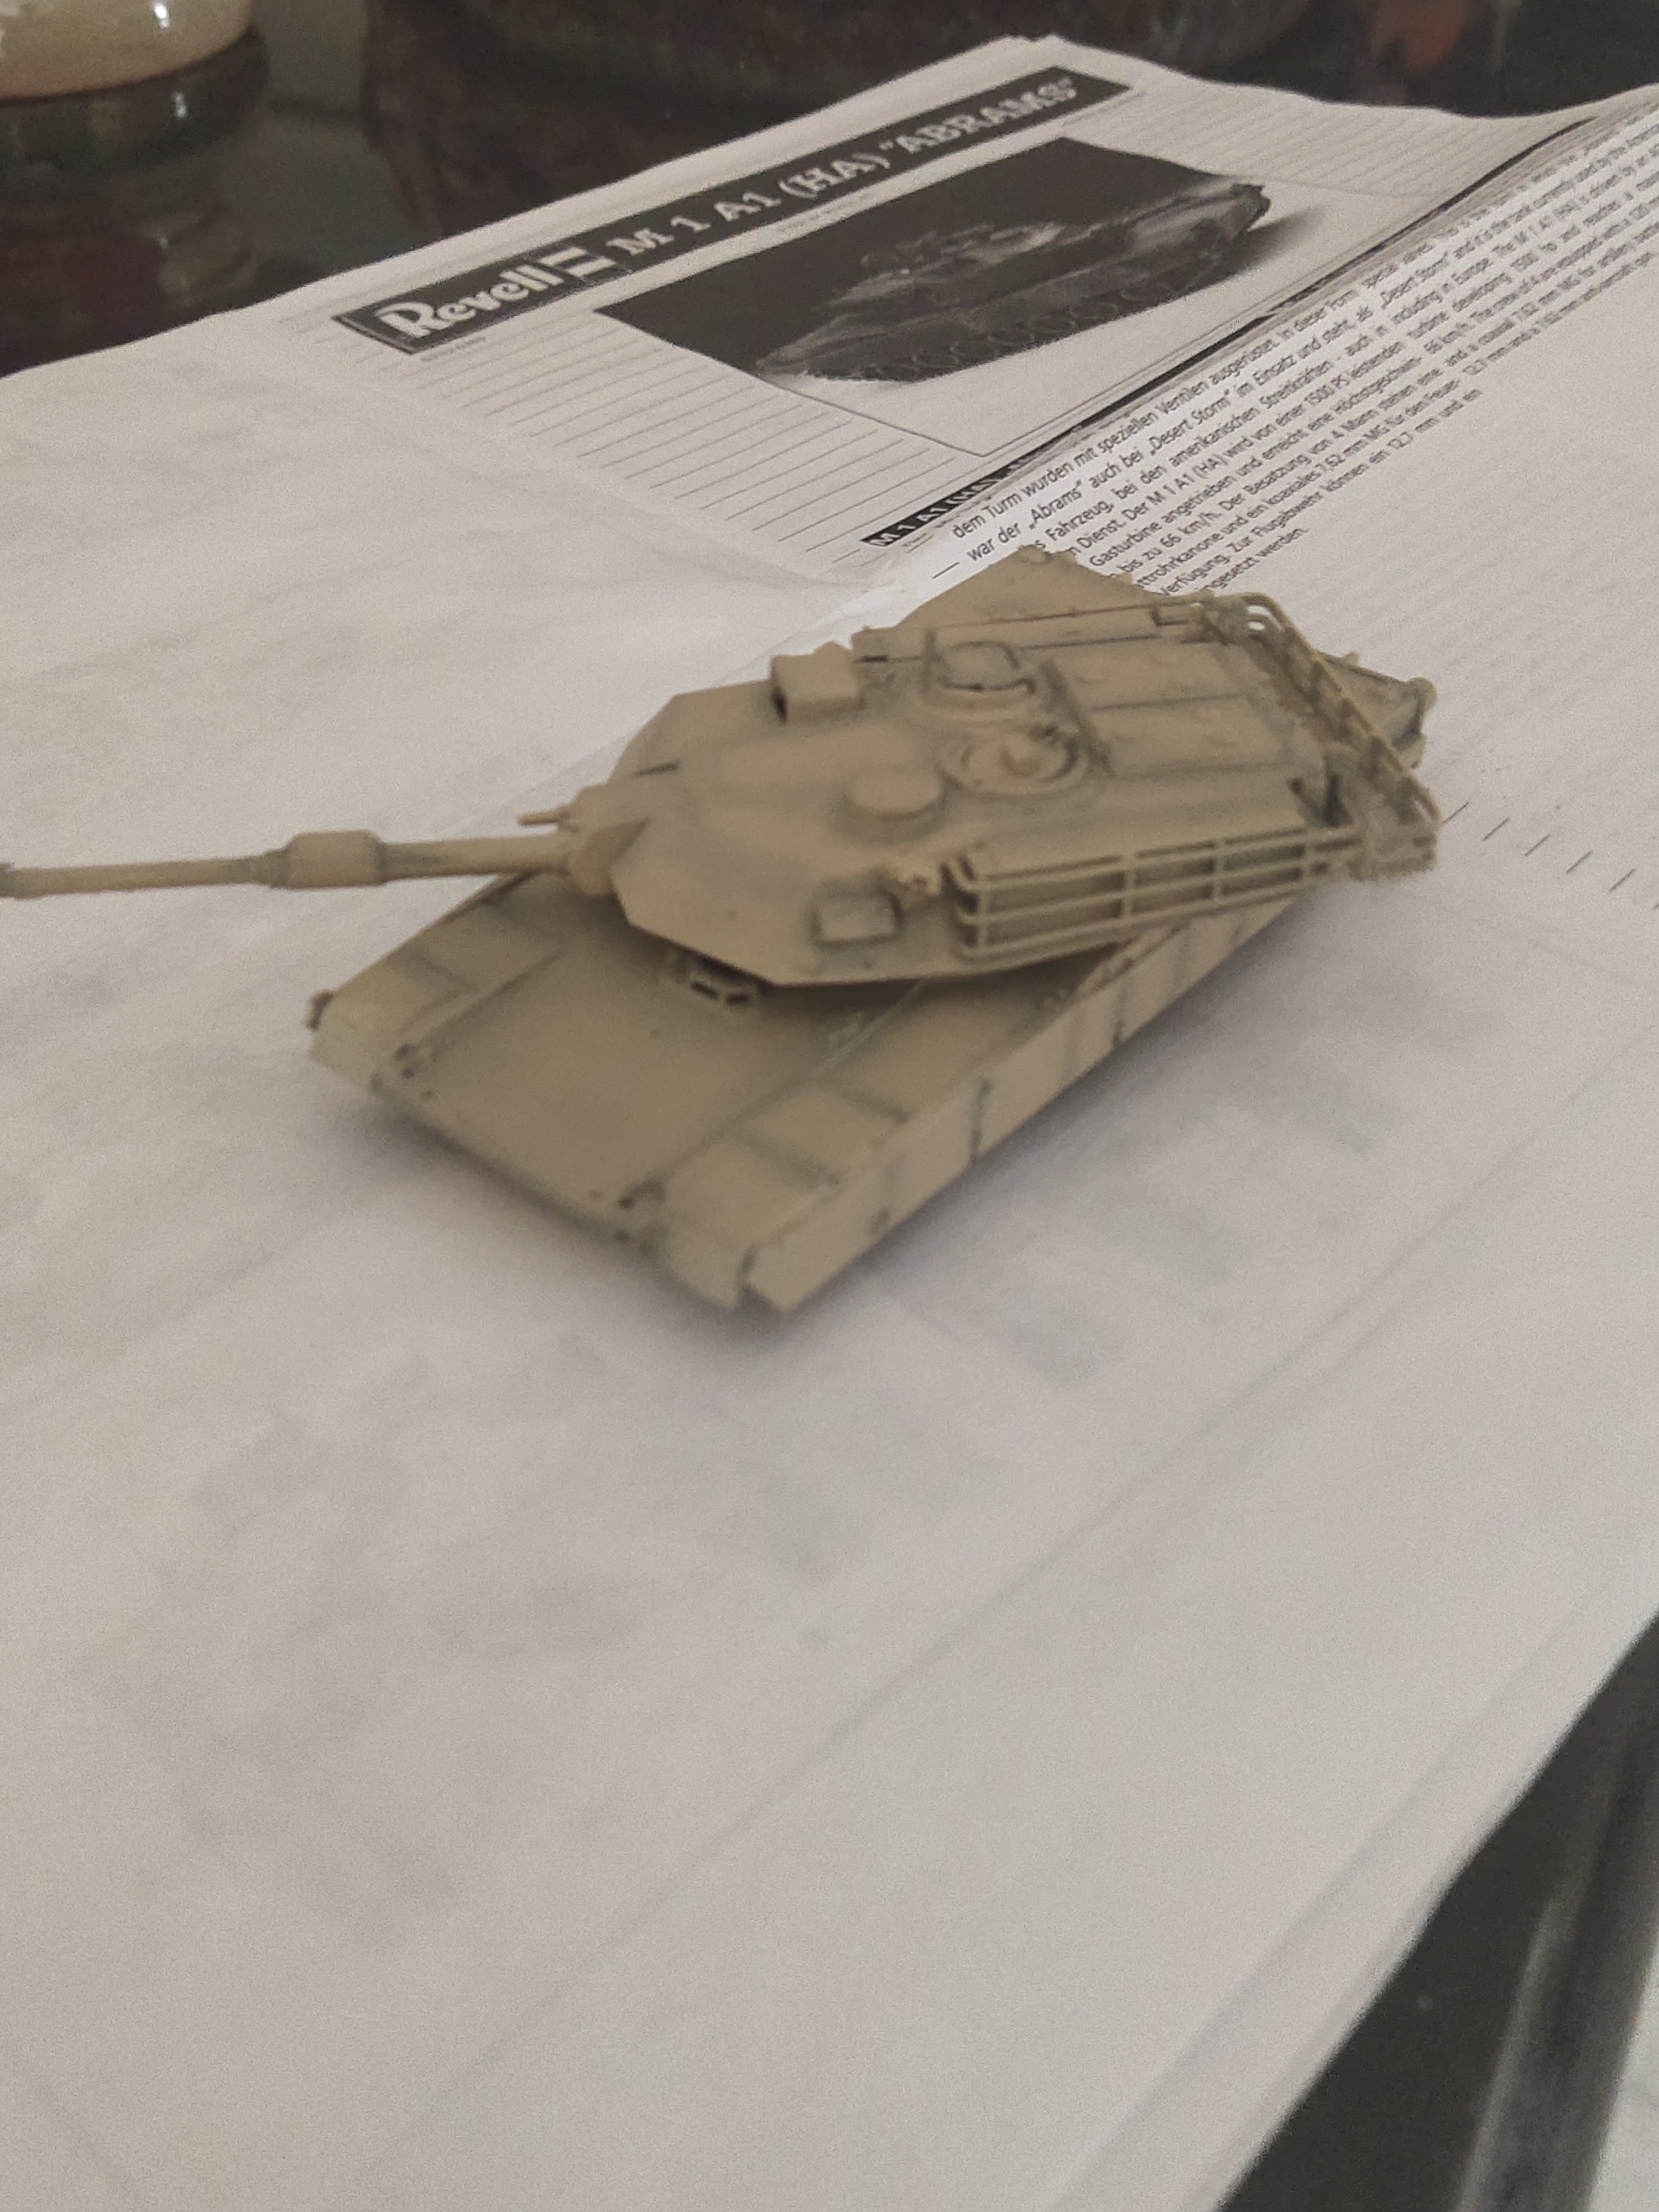
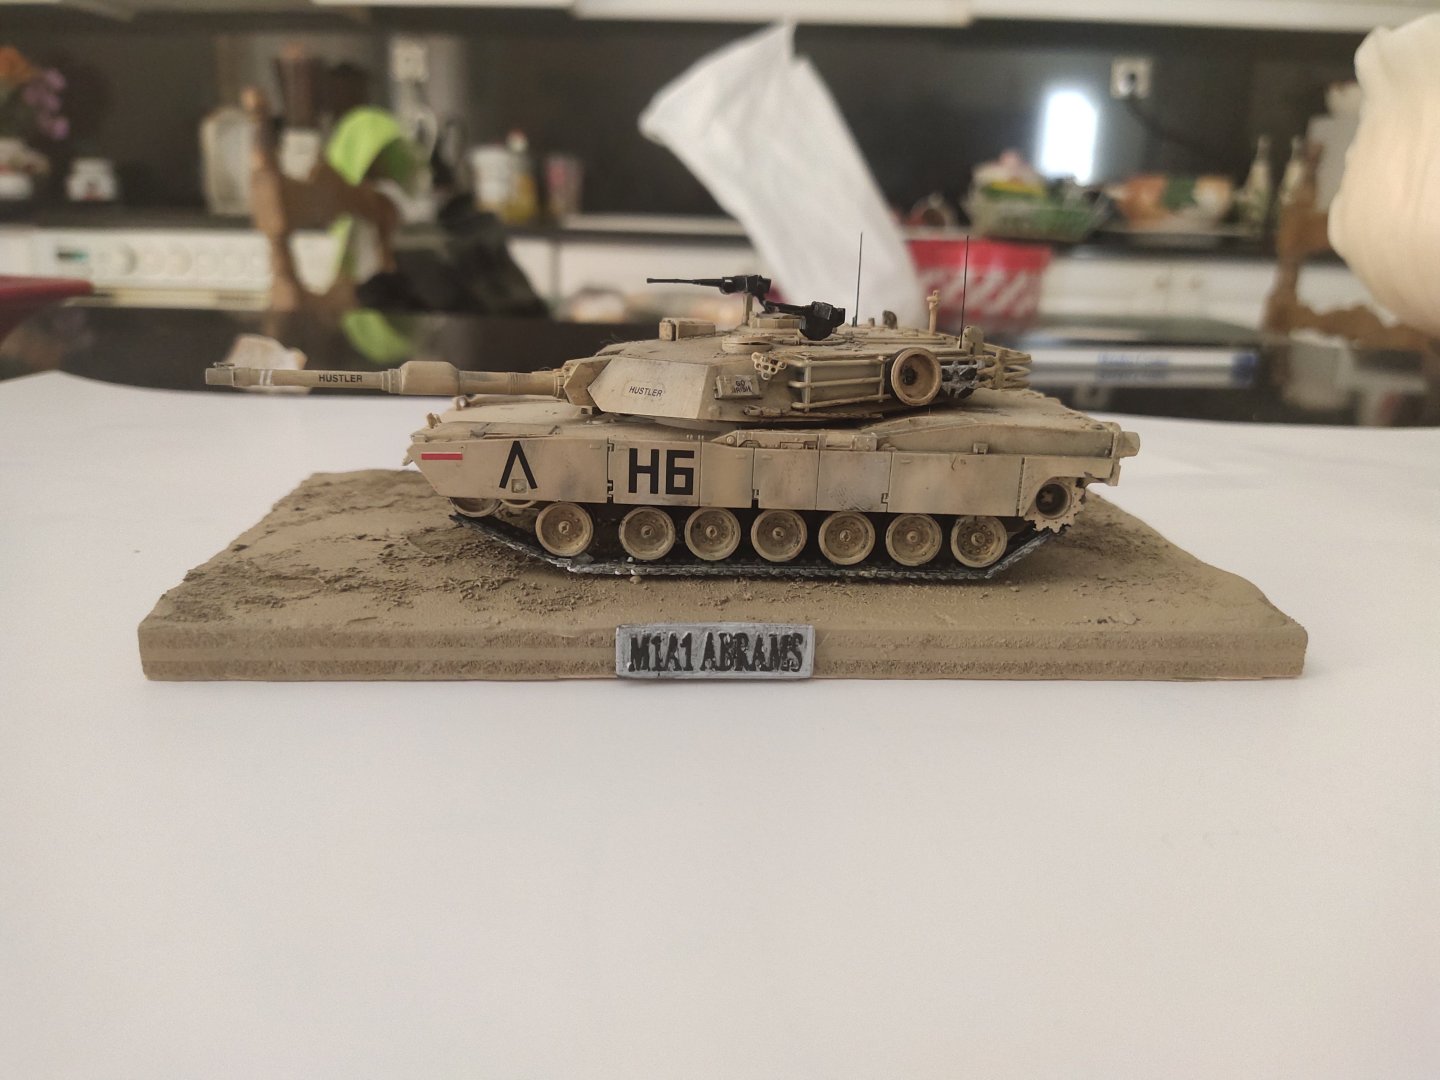
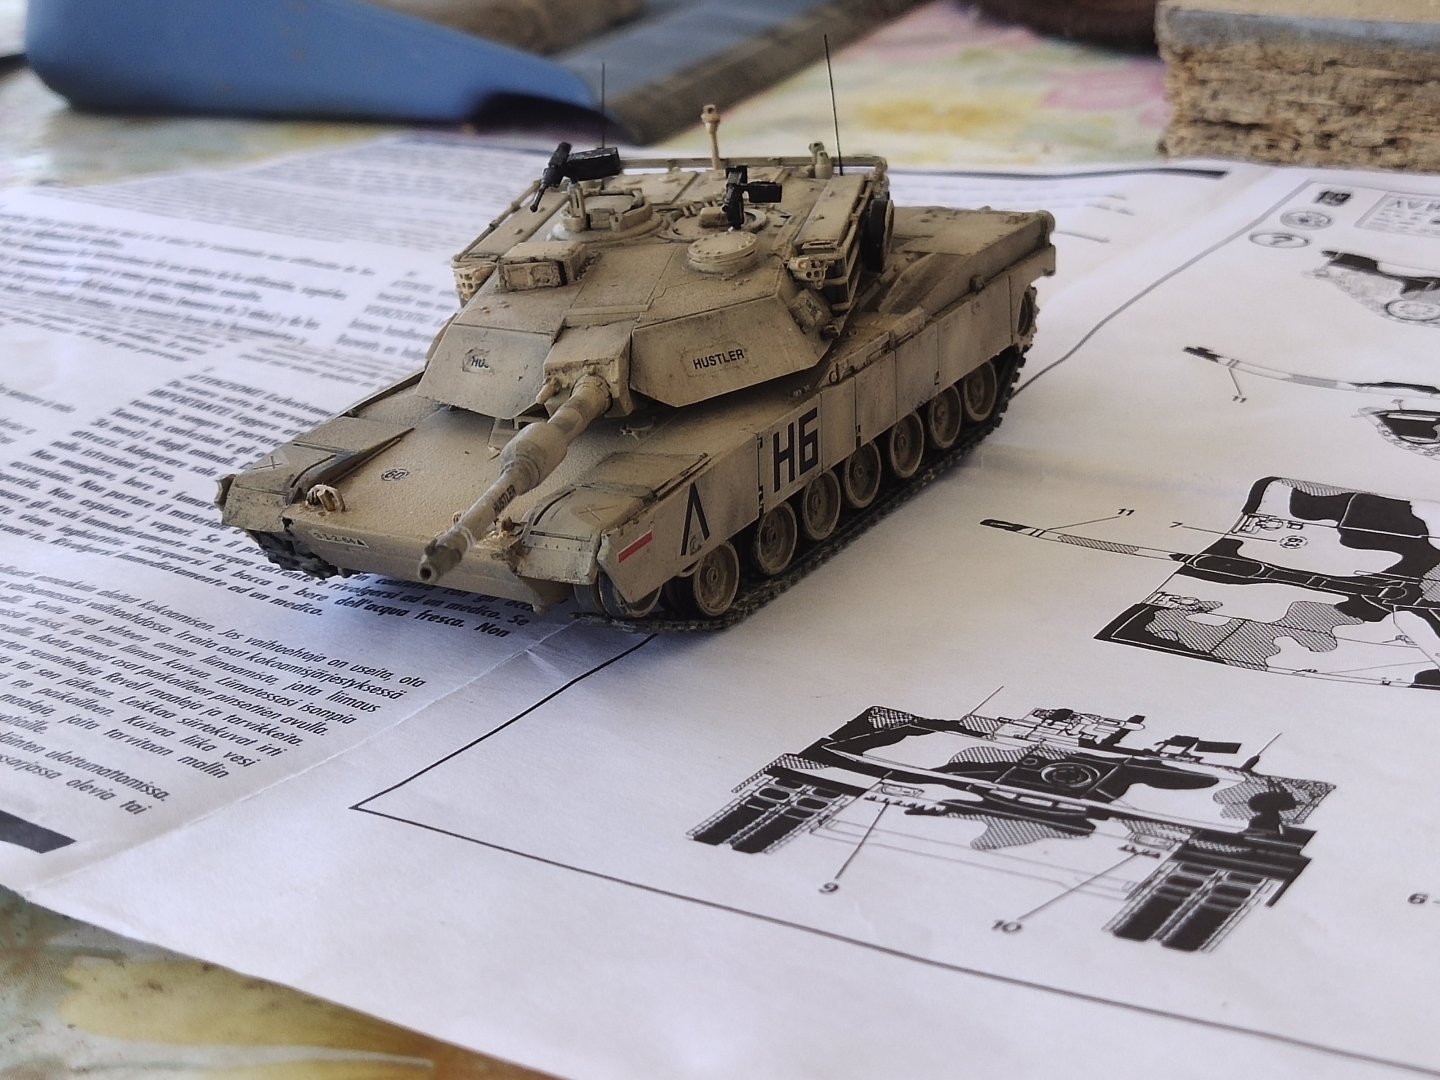
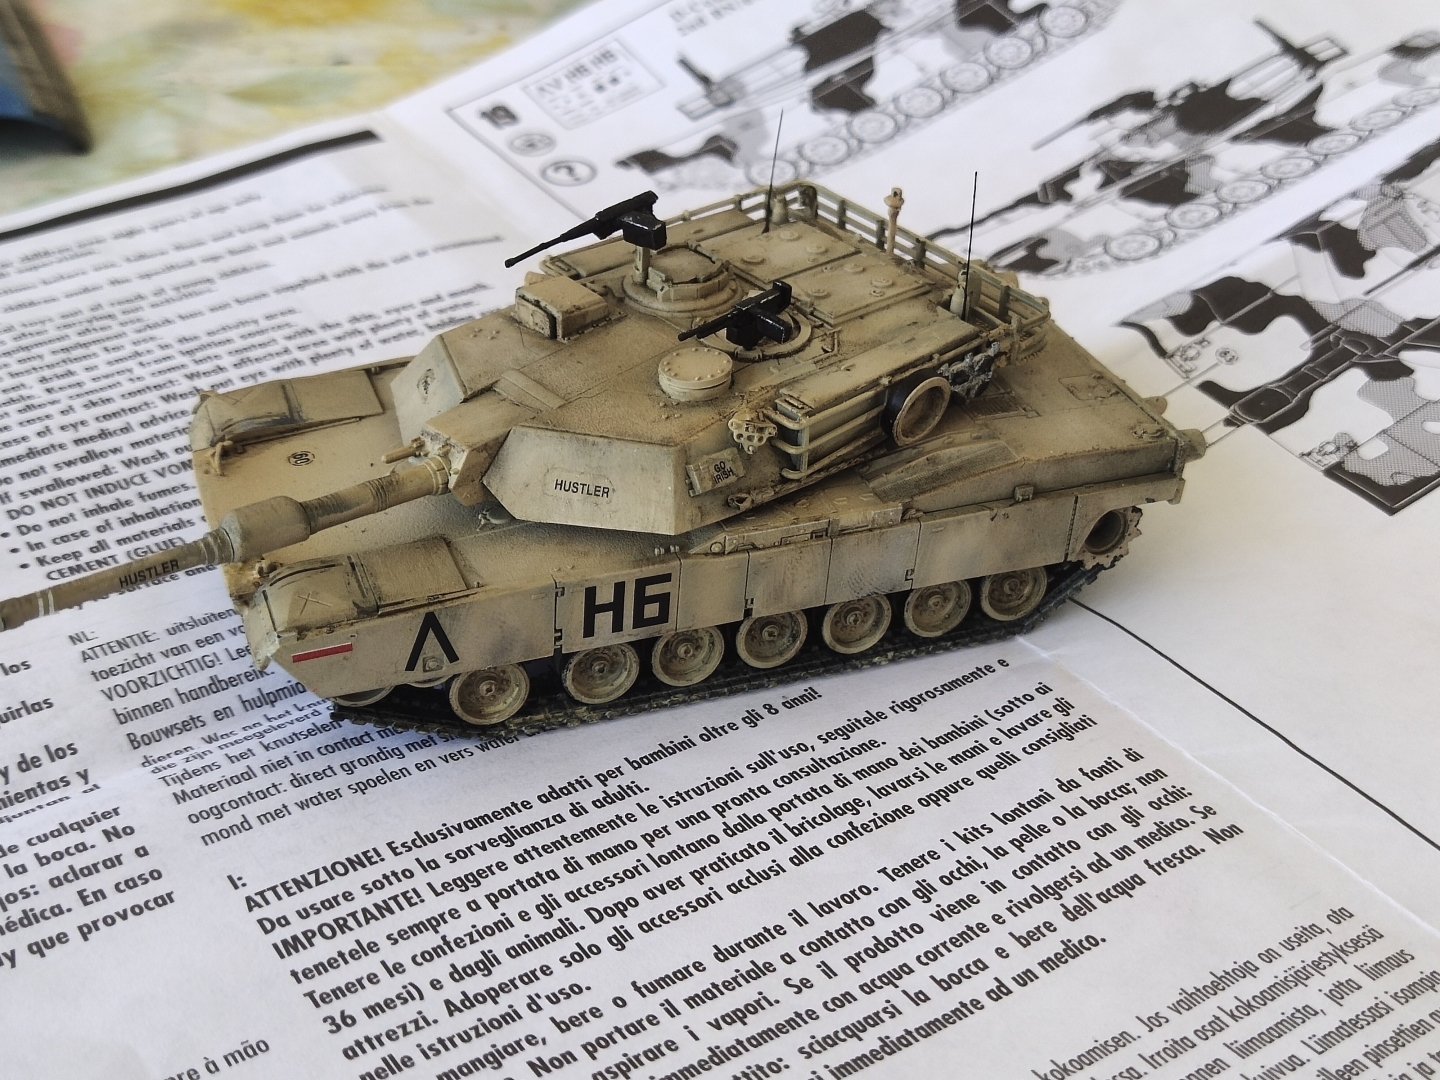
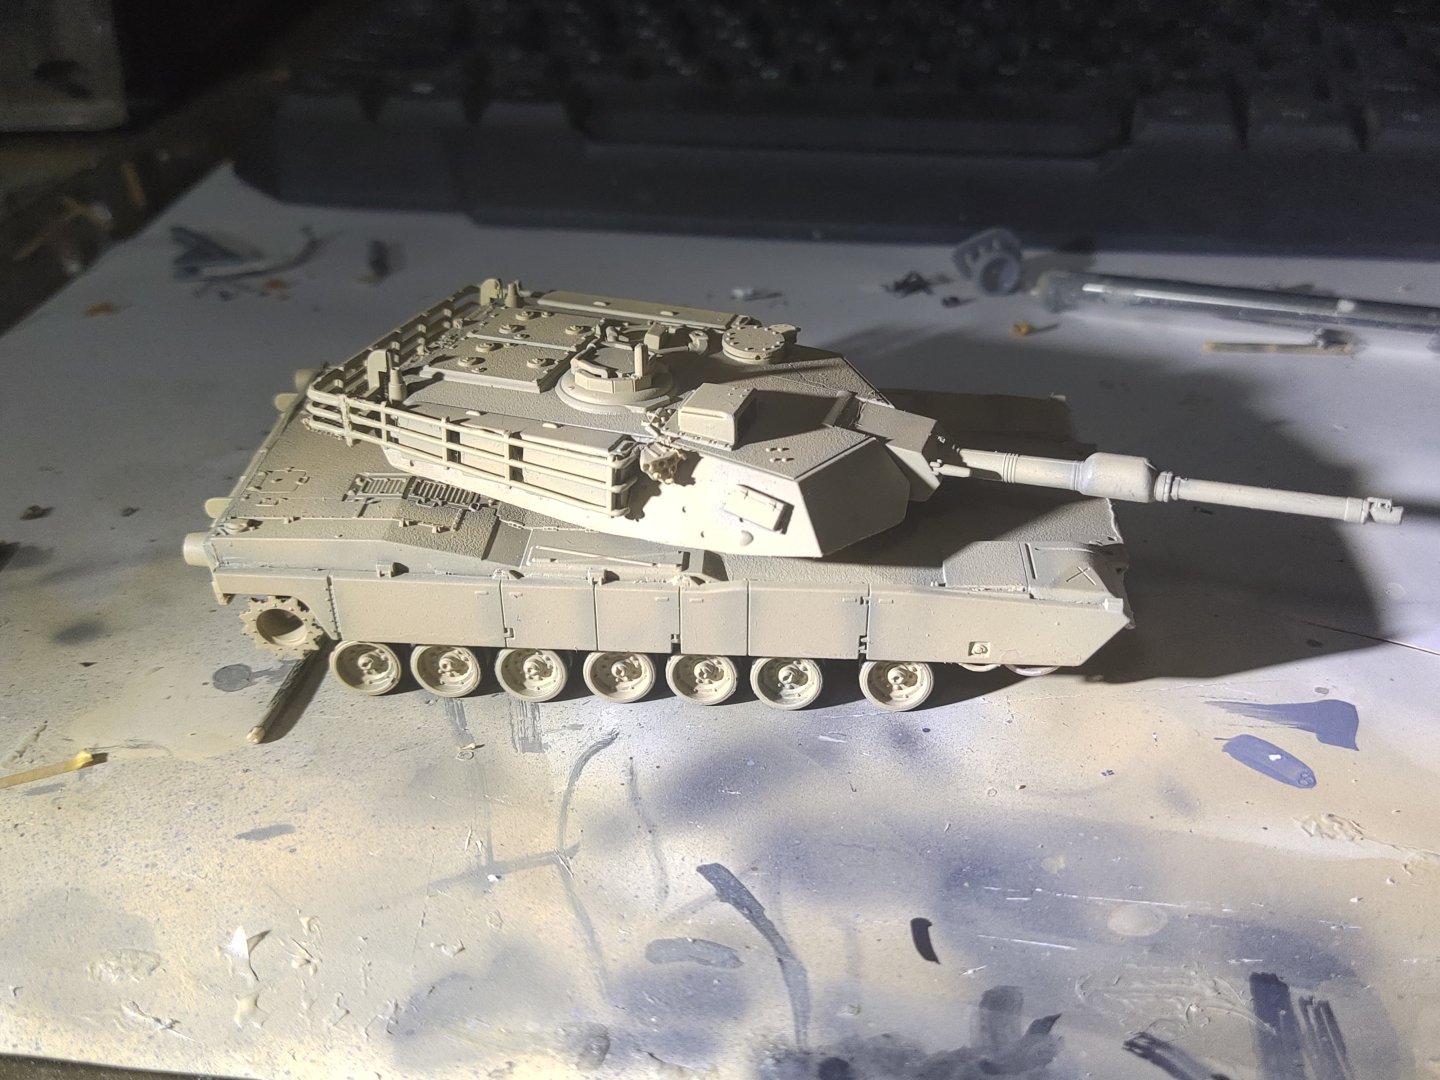
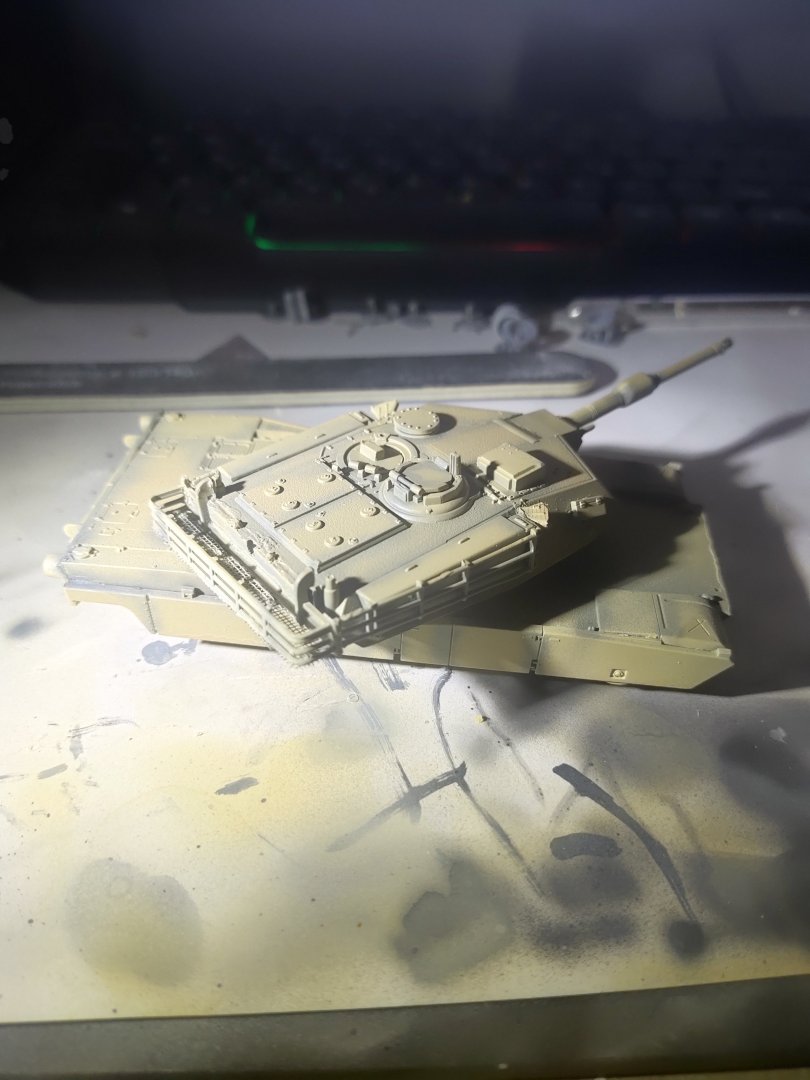
Be hold the mighty Abrams, the king of the dessert! I was quite satisfied considering the effort I spend, no PEs, just a bit of scratch built add on. Not the best M1 model out there but I will definitely repeat. This time with another dessert rat, the Merkava, by Revell too, rated at skill level 5. I will make a small collection including T-90MBT and a Leopard II.


-
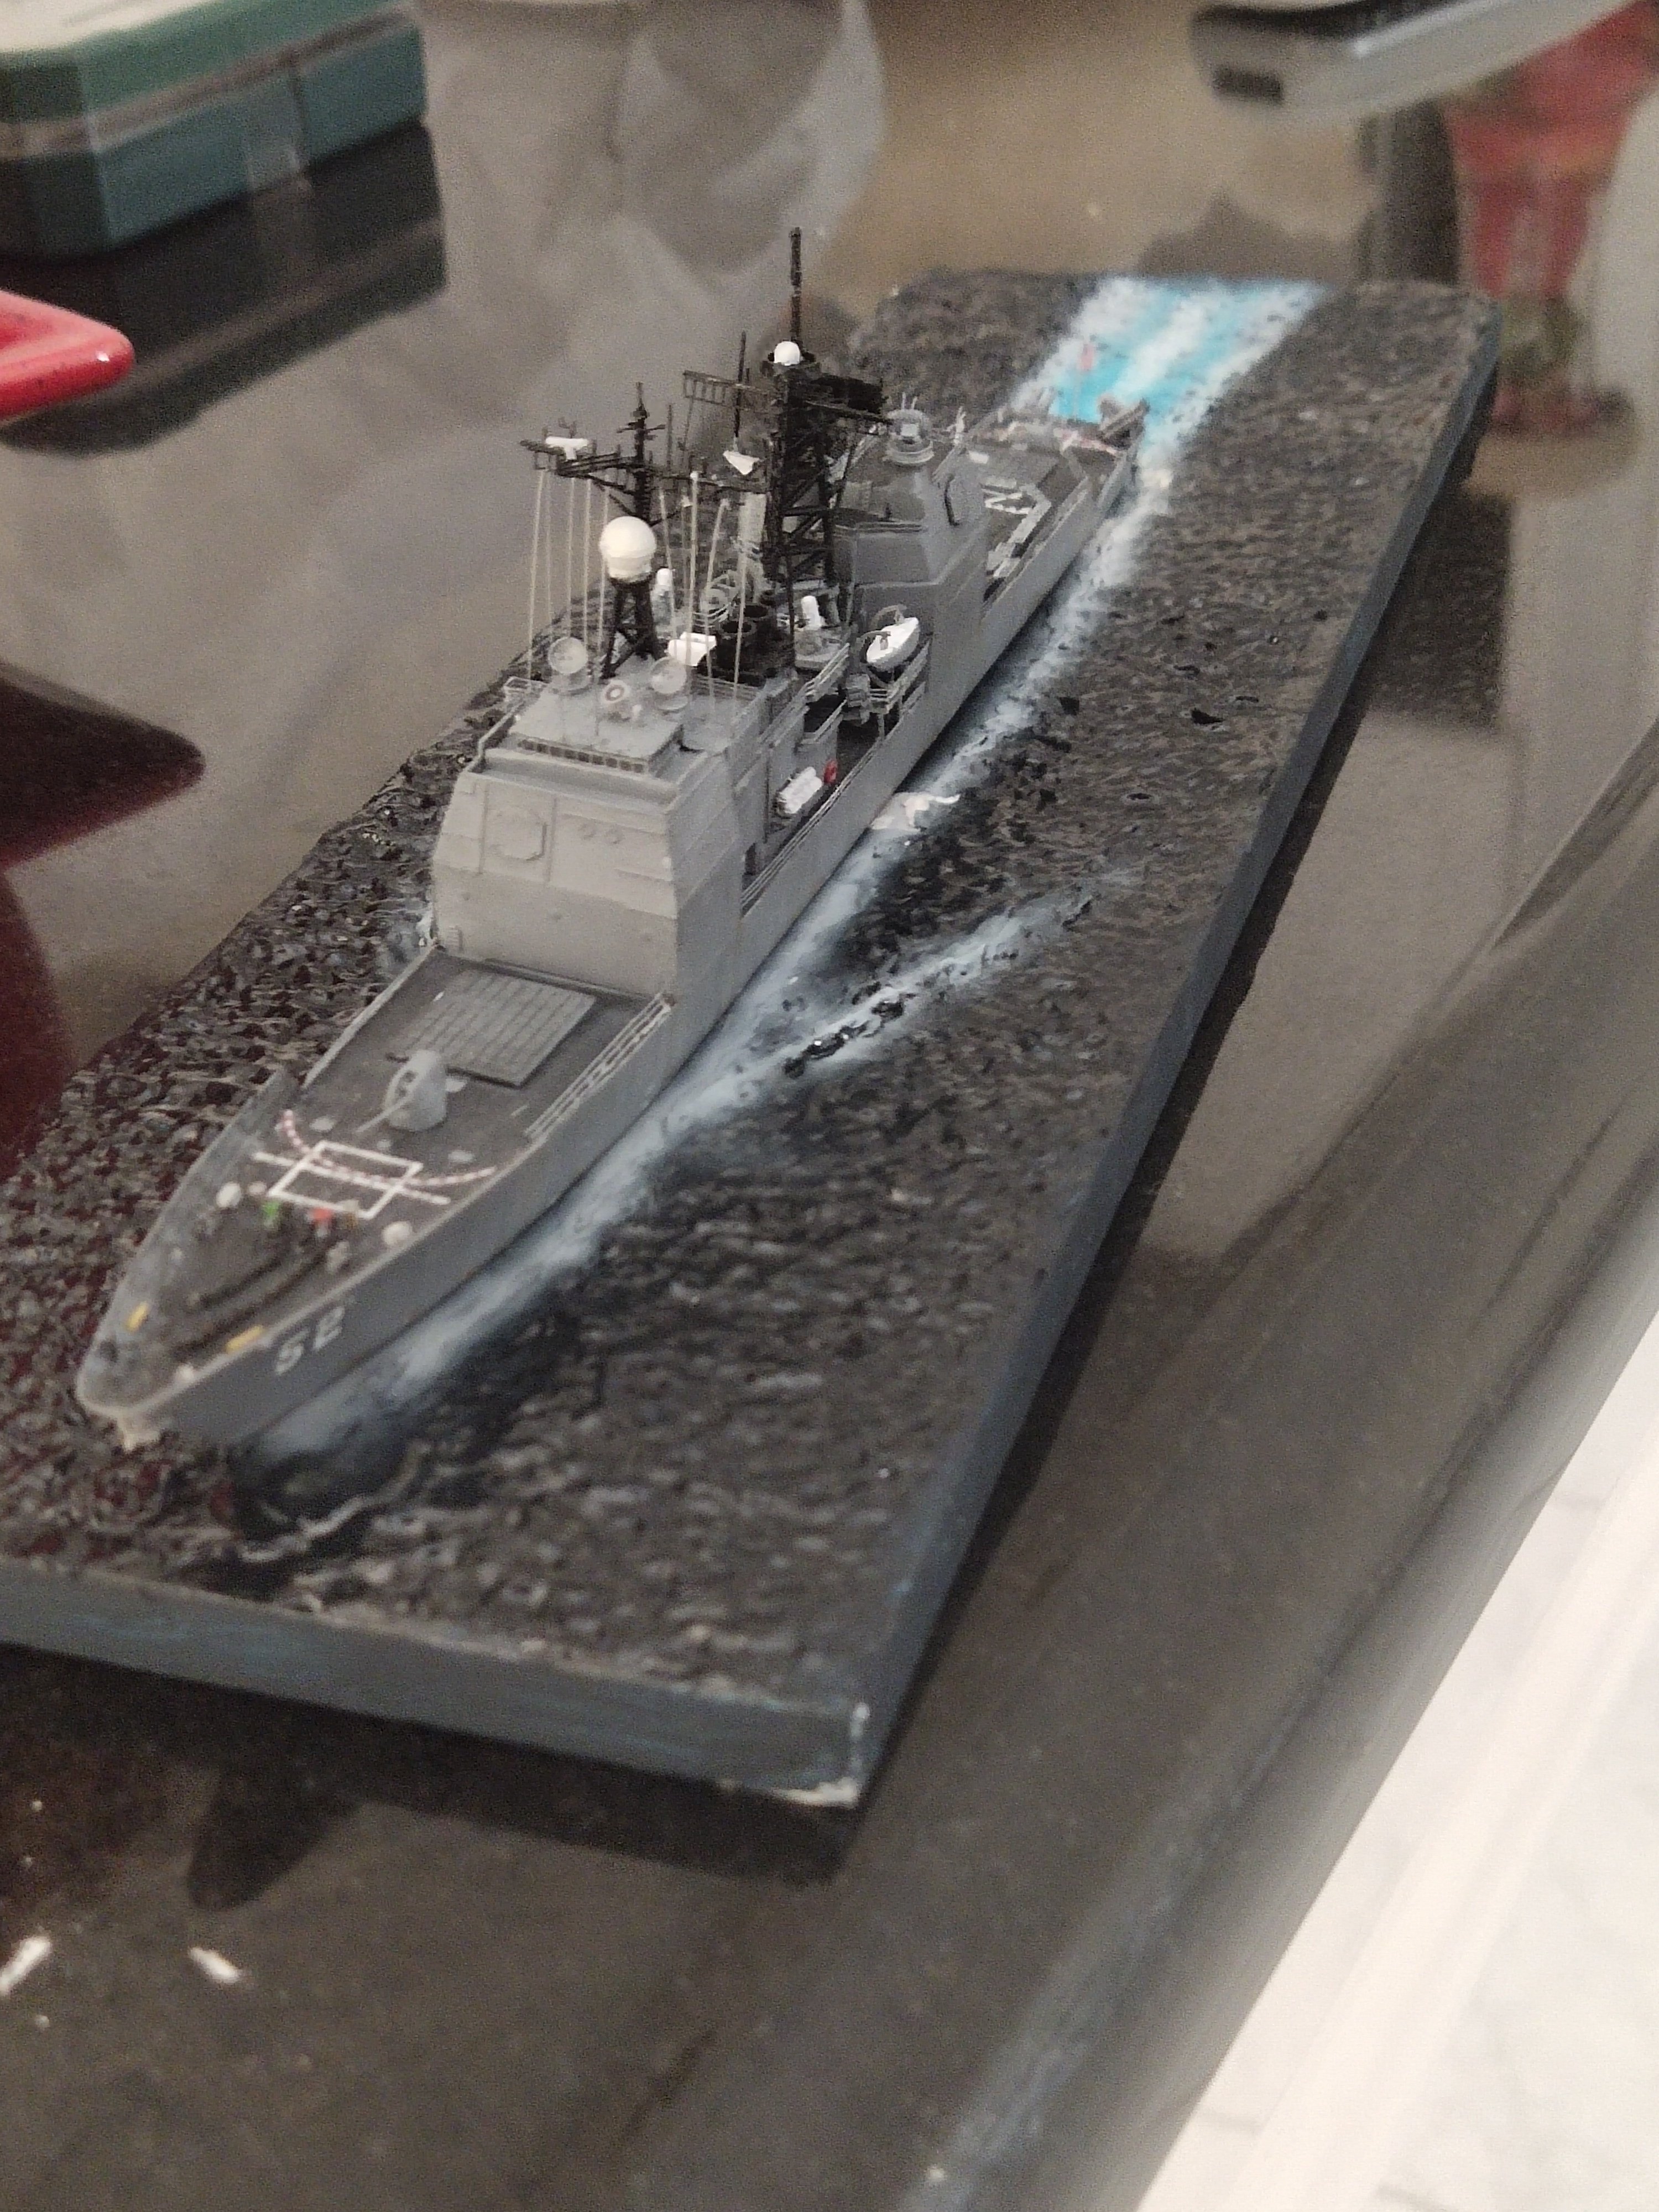
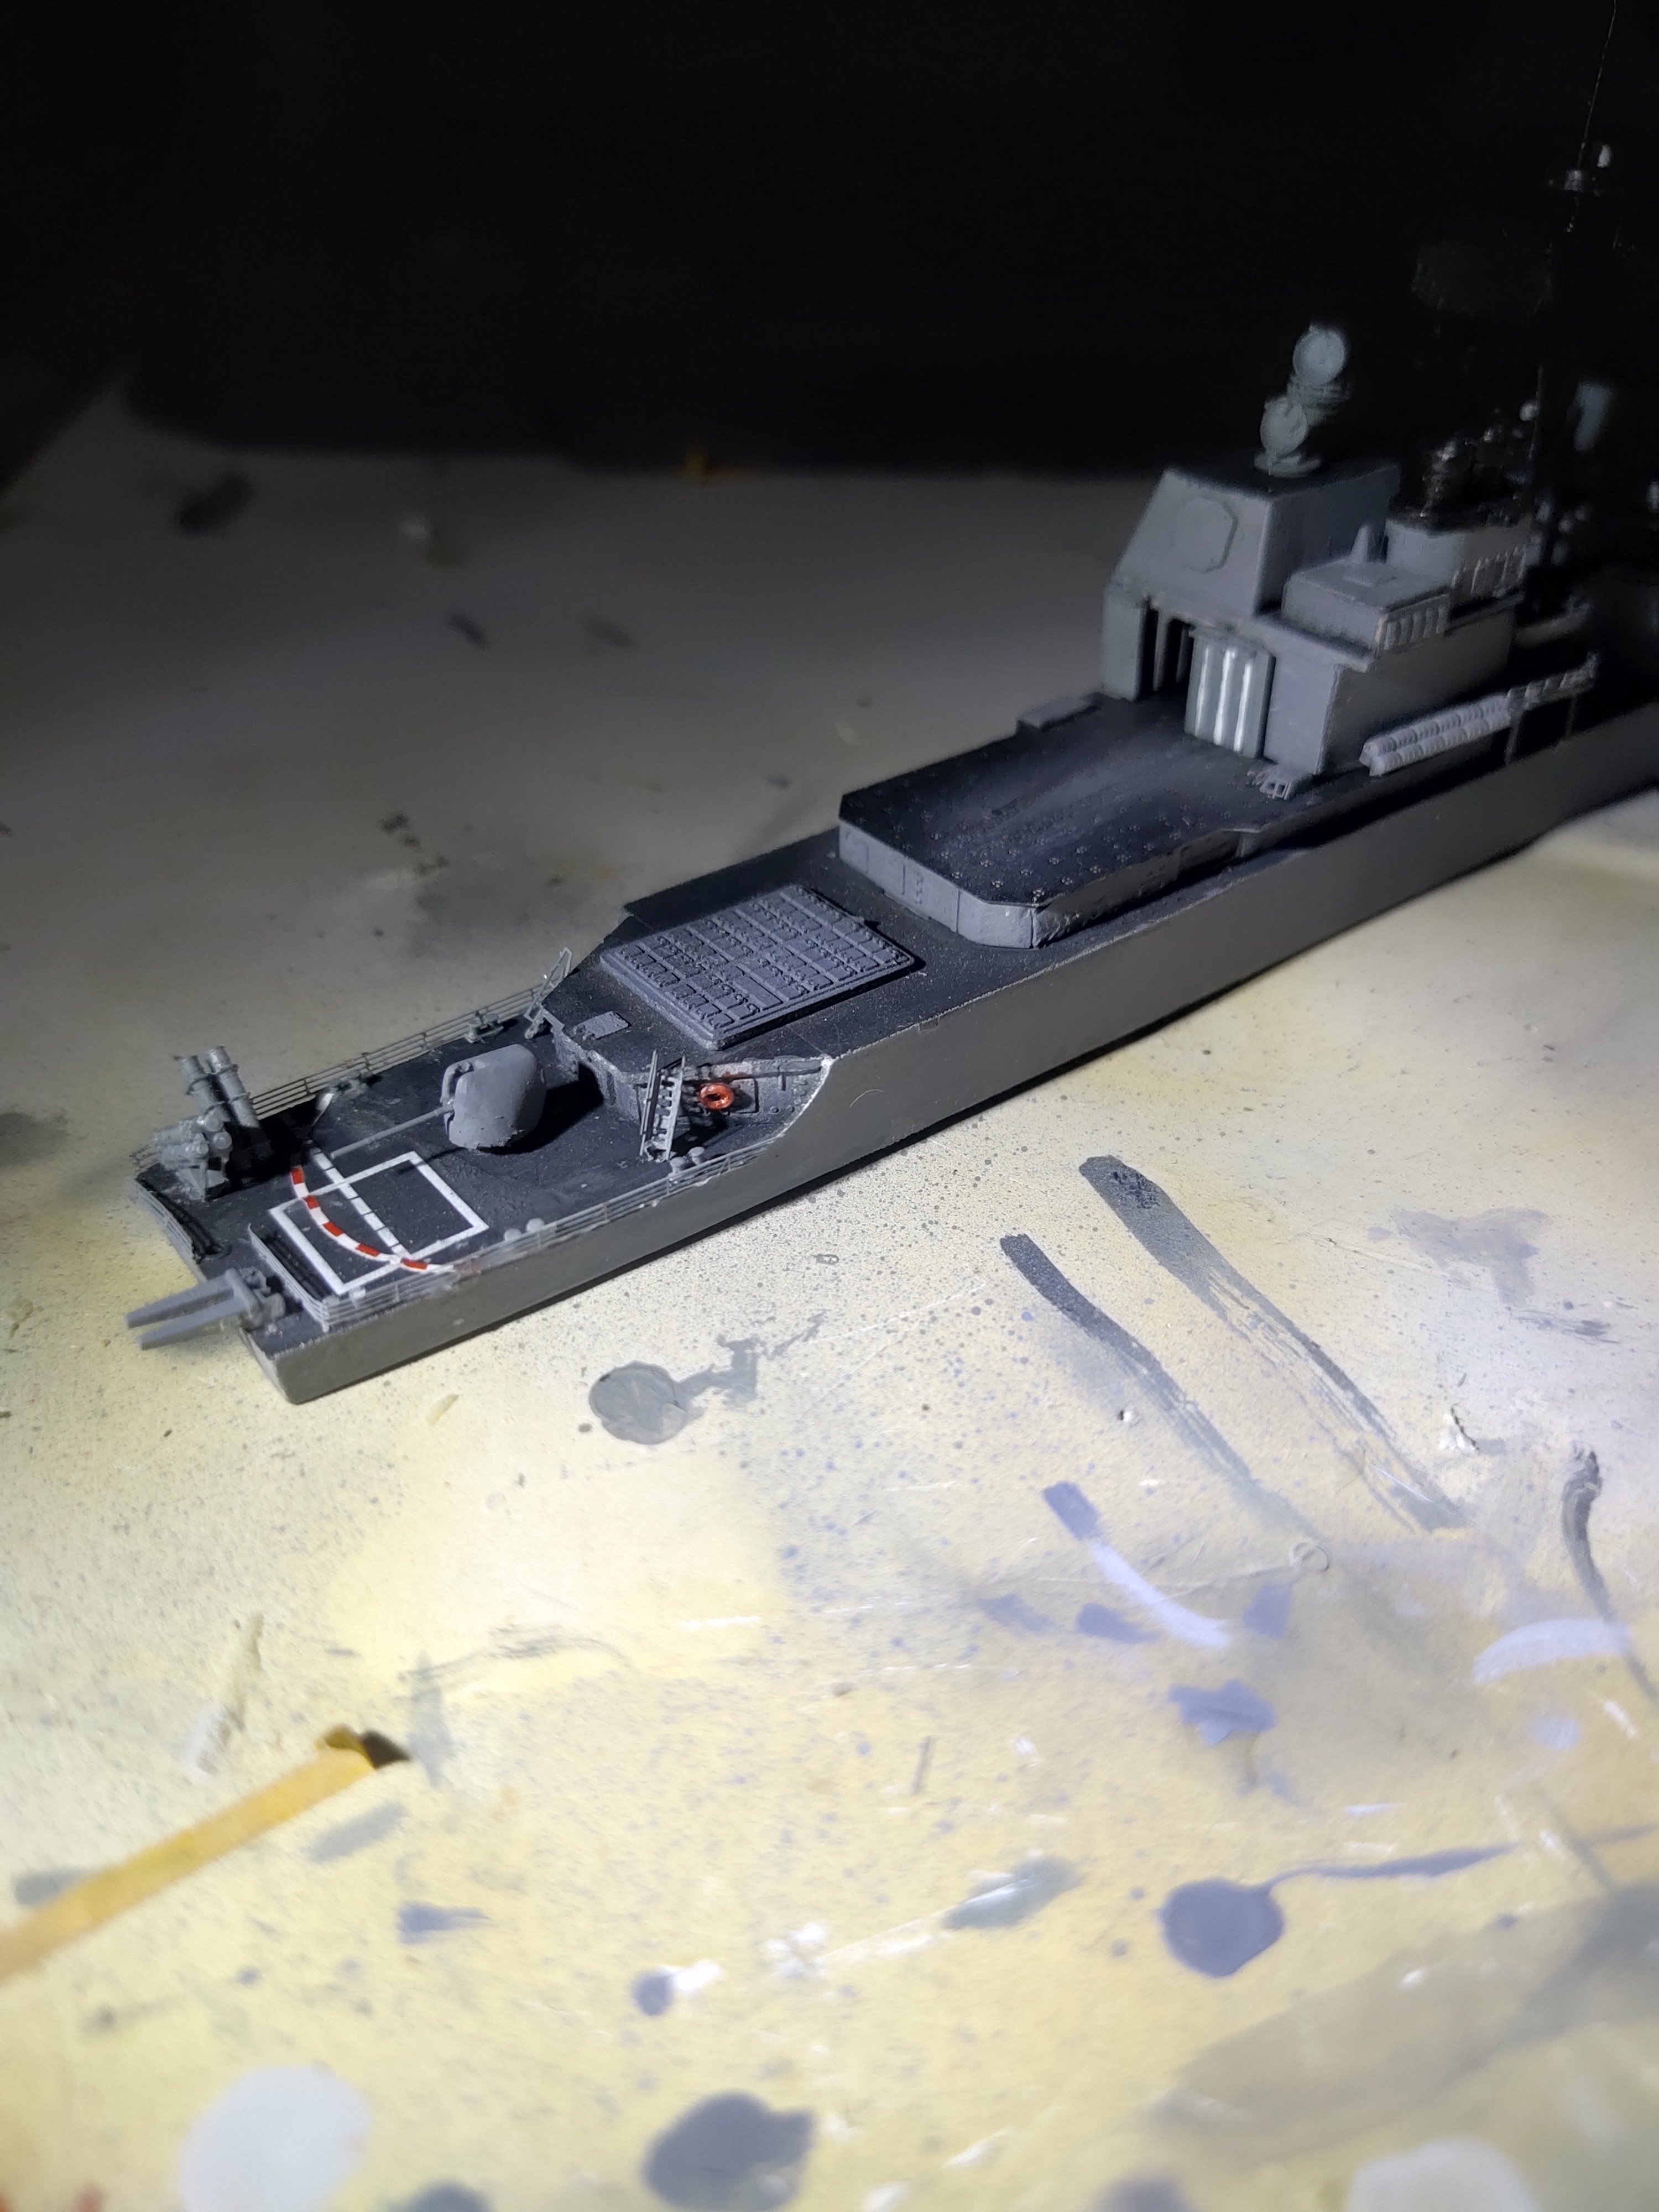
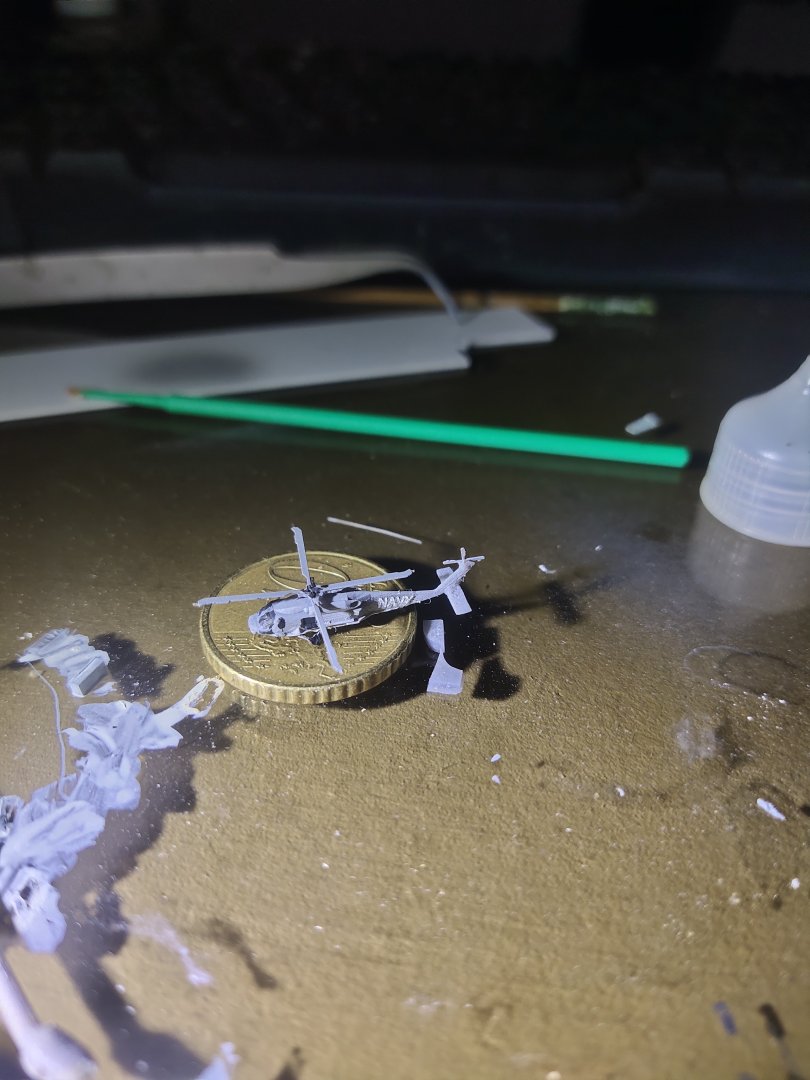
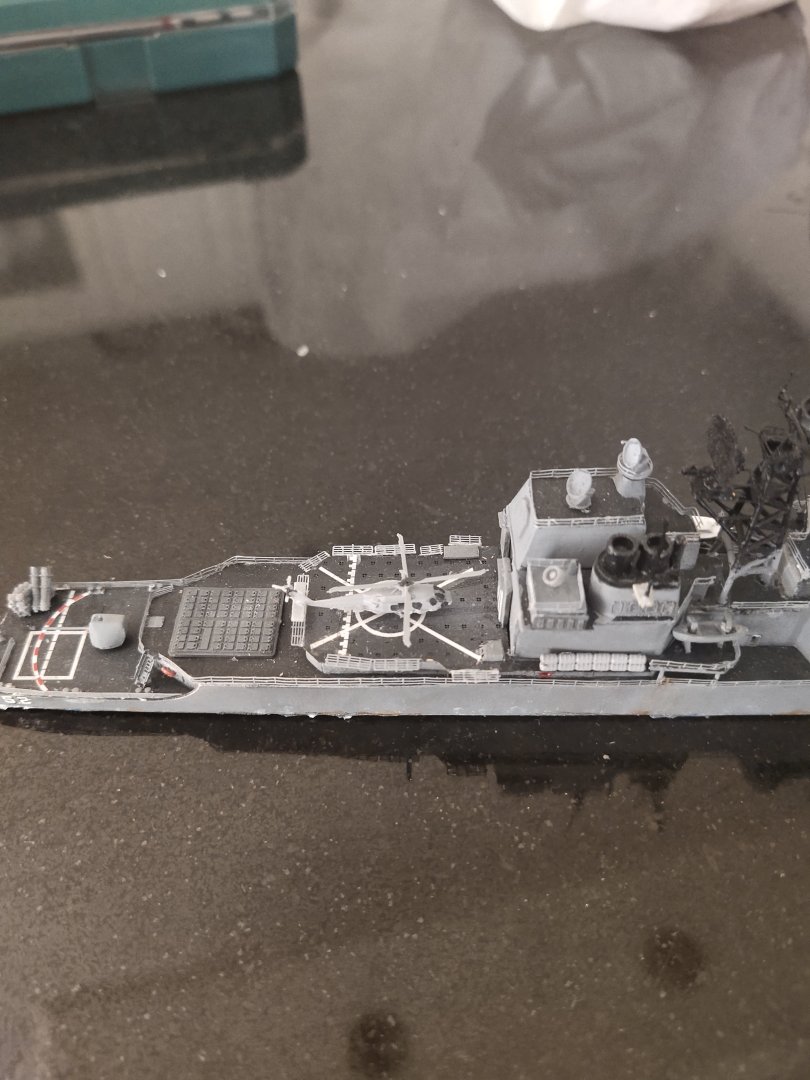
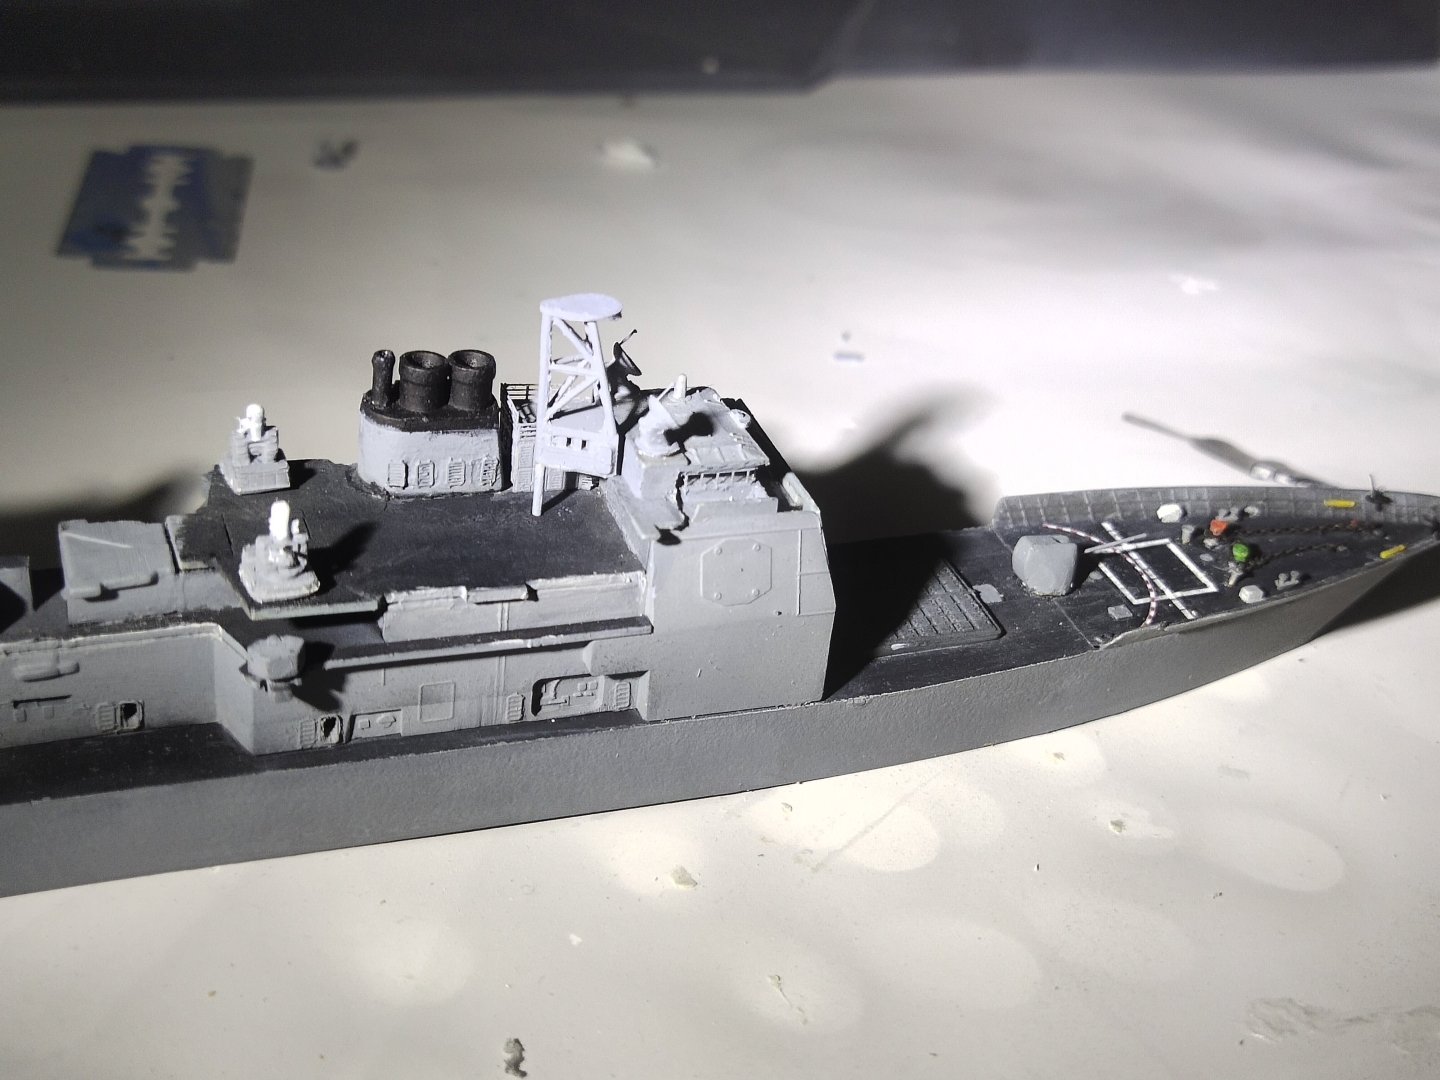
Thanks for the supportive comment. I have now finished the rigging. Added few details and some light-moderated weathering and a bit of dark oil washing. Final step before seamaking is the SH60 helicopter. Again a 3d printed item enchanced with PE rotor blades. For the landing system I modified a ww2 gear set, in V shape and glued the smaller wheel, on the rear.

-
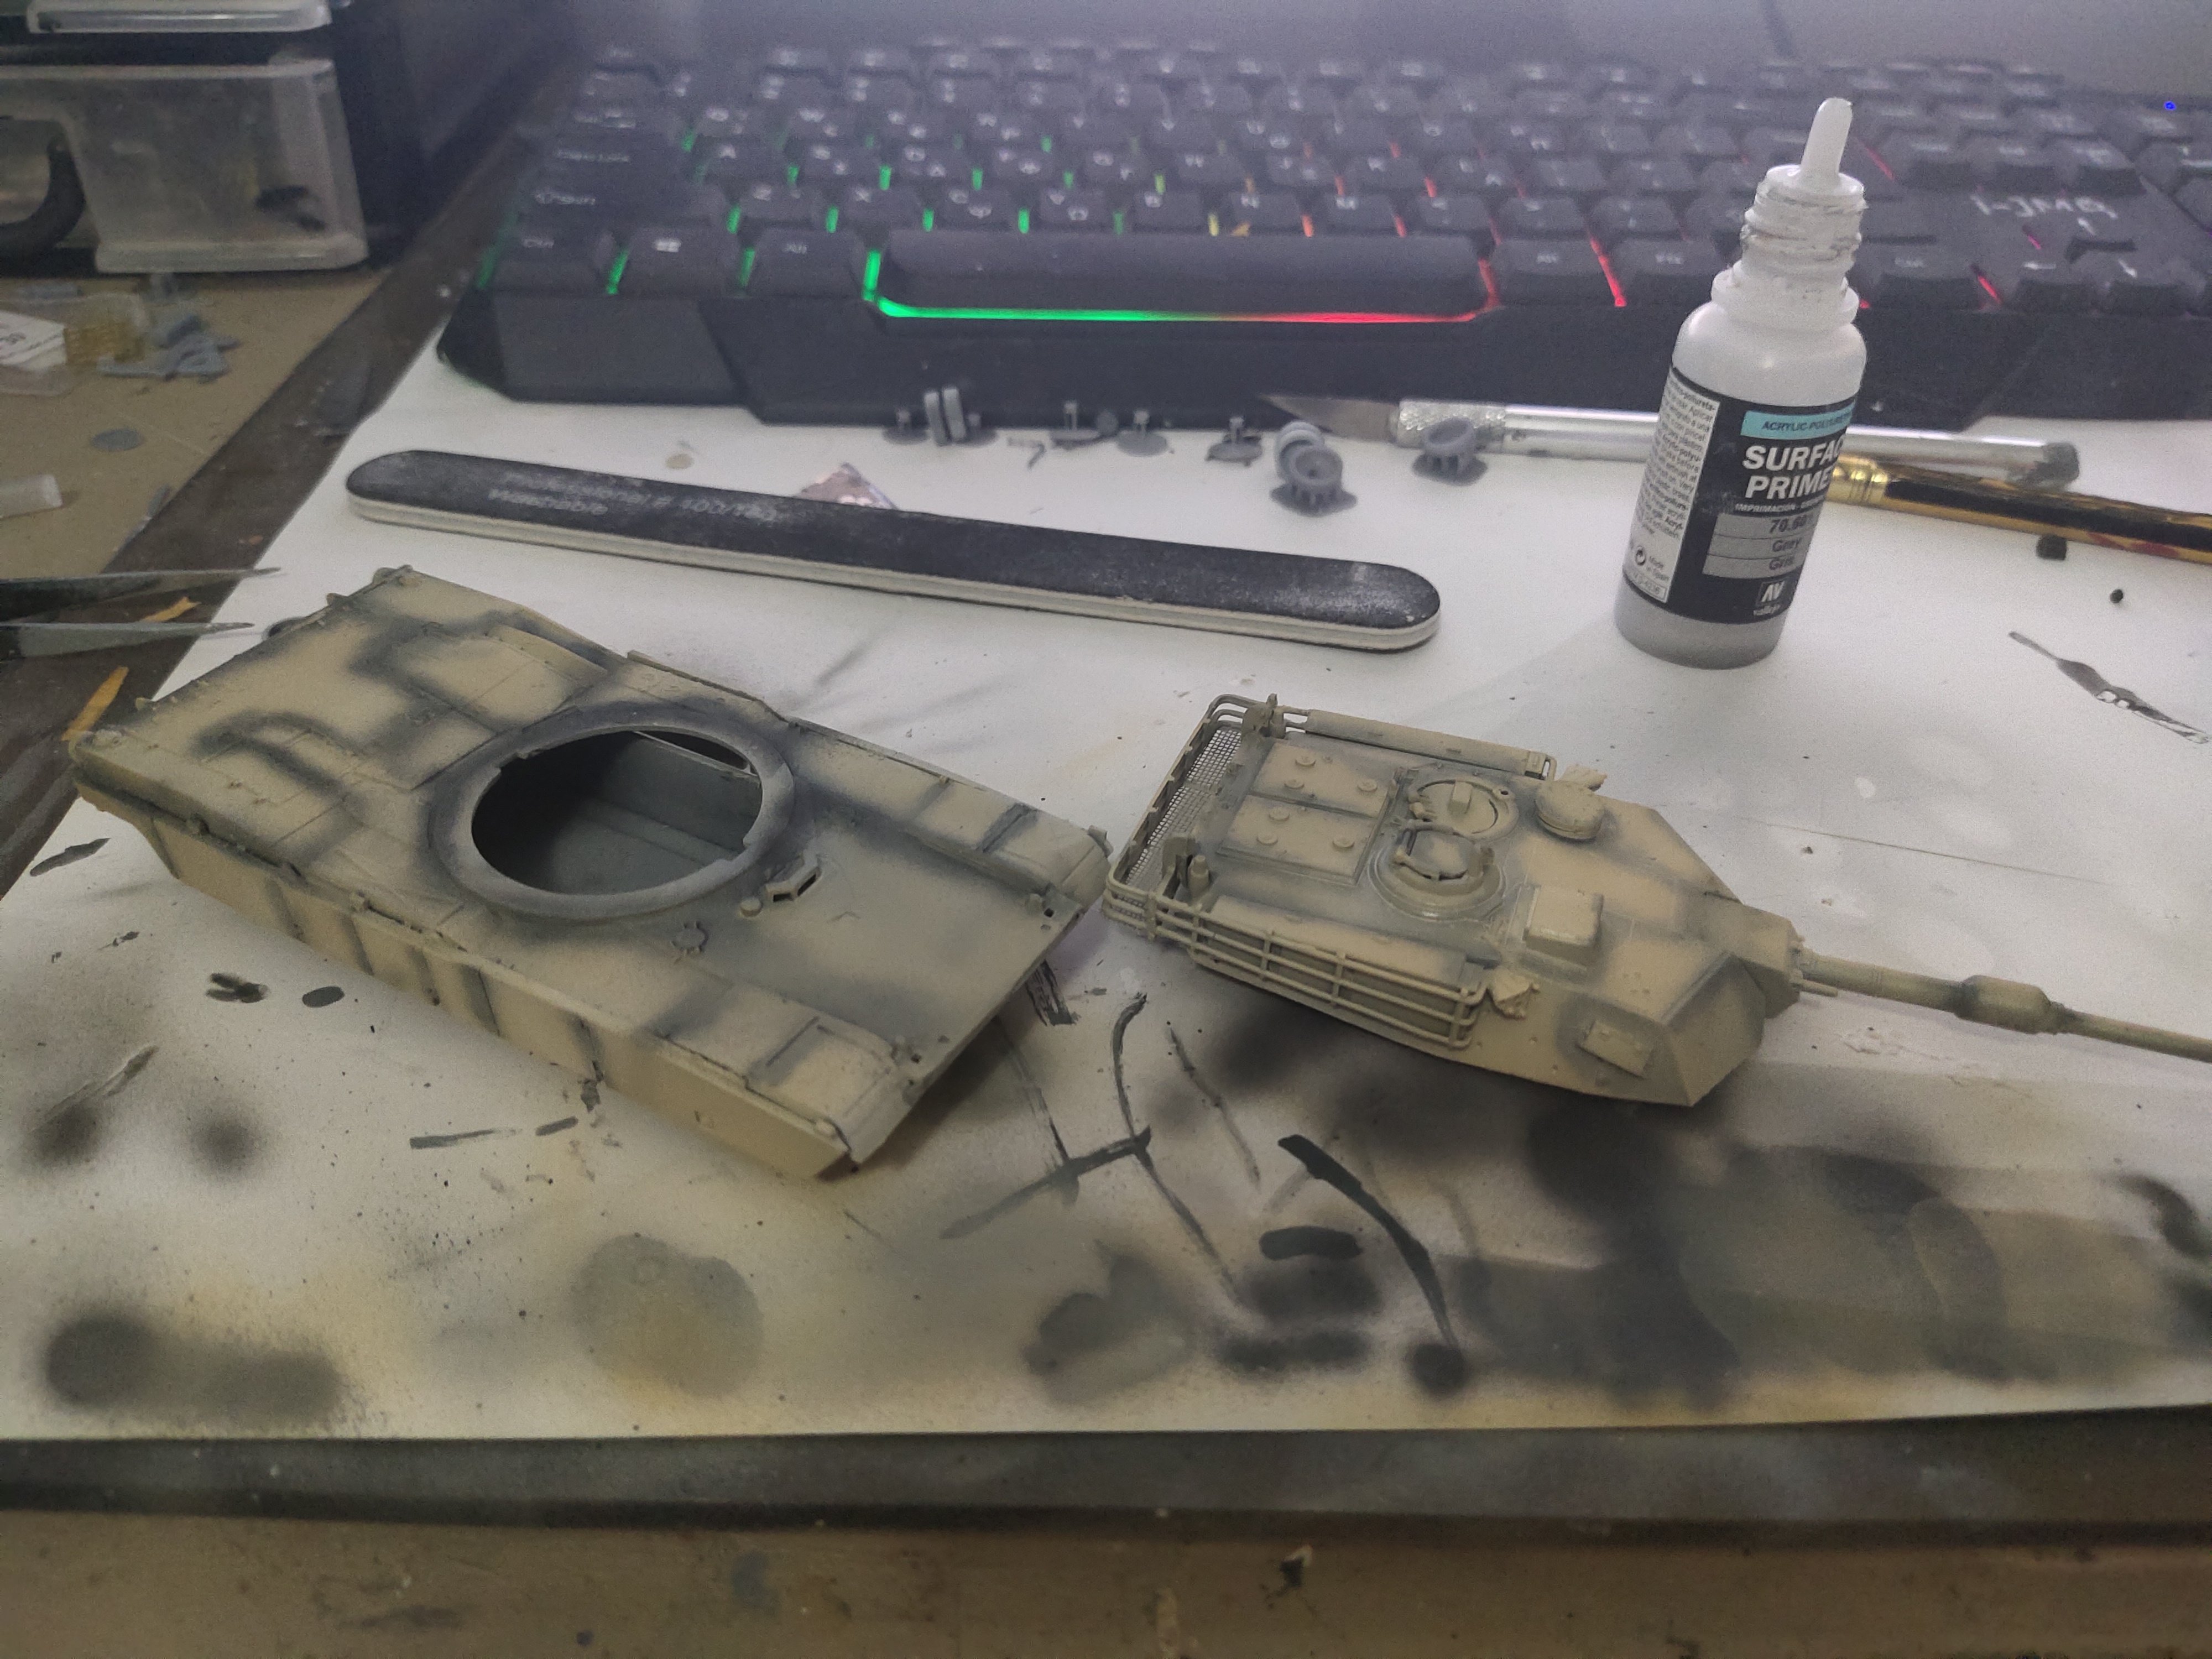
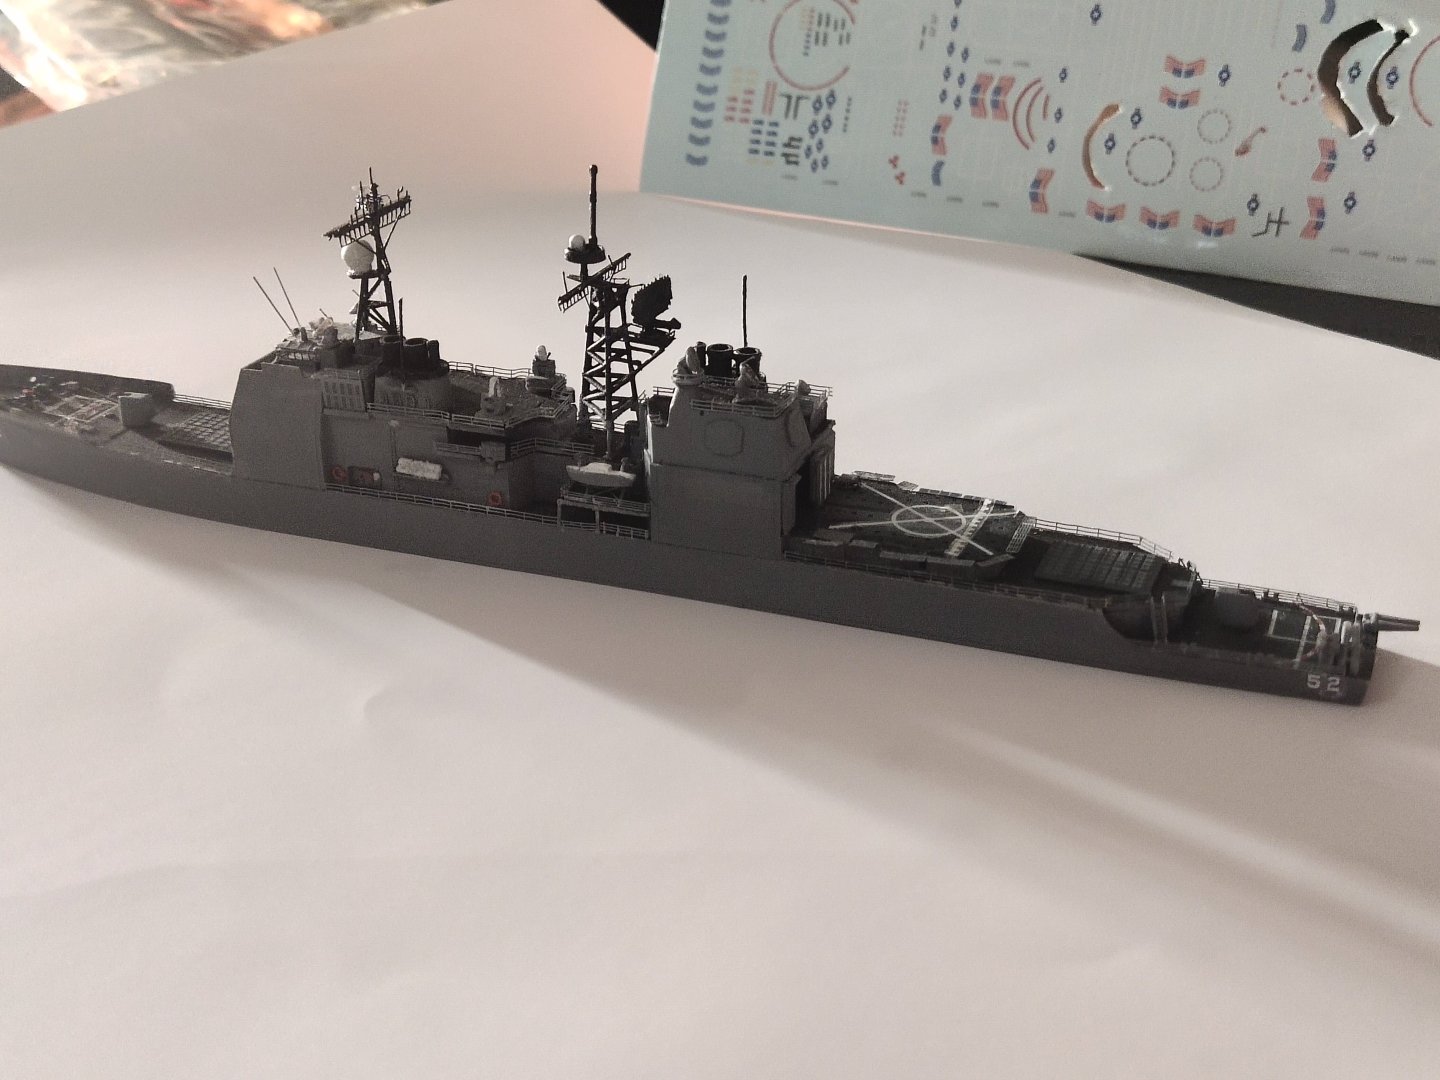
The model is almost done. Need to erase some imperfections especially shinny bits of PE parts, I can't get rid of them. Rigging and oil washing is the next step. A helicopter will be added also


-
M1A1 ABRAMS by mikegr - FINISHED - Revell - 1:72 - PLASTIC
mikegr replied to mikegr's topic in Non-ship/categorised builds
Work started. I'm not experience on this had to apply thinner to correct mistakes. One small decal melted. I should have put them after oil washing. Nevertheless the overall result is satisfied, I only made one tank model this was 30 years ago and with out any paint just assembly out of the box. A kinda overused Abrams but ok it's an old A1 version. Next week I will make a display base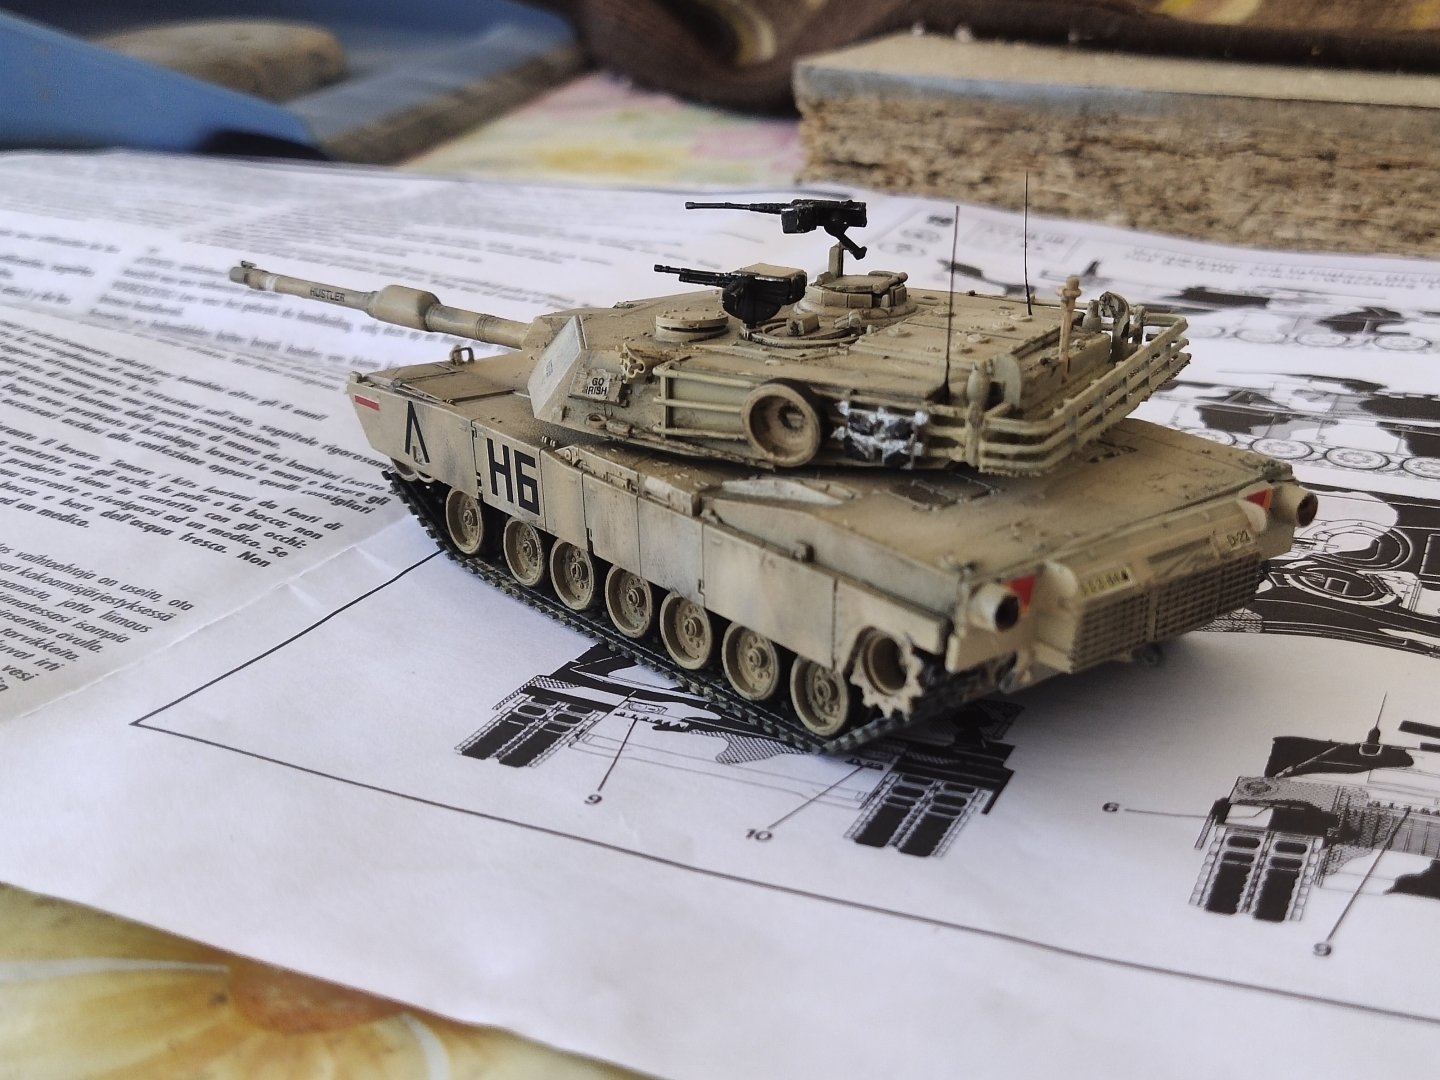

-
Sometimes it take me a century to move a small step forward. The boat sections on both sides are rebuilt from zero. I lost one boat so I took one from my stash, I cut it shorter and with sanding it took the desired space. Fitting rail bits was time consuming also. At least I had made some progress on my layout base
-
M1A1 ABRAMS by mikegr - FINISHED - Revell - 1:72 - PLASTIC
mikegr replied to mikegr's topic in Non-ship/categorised builds
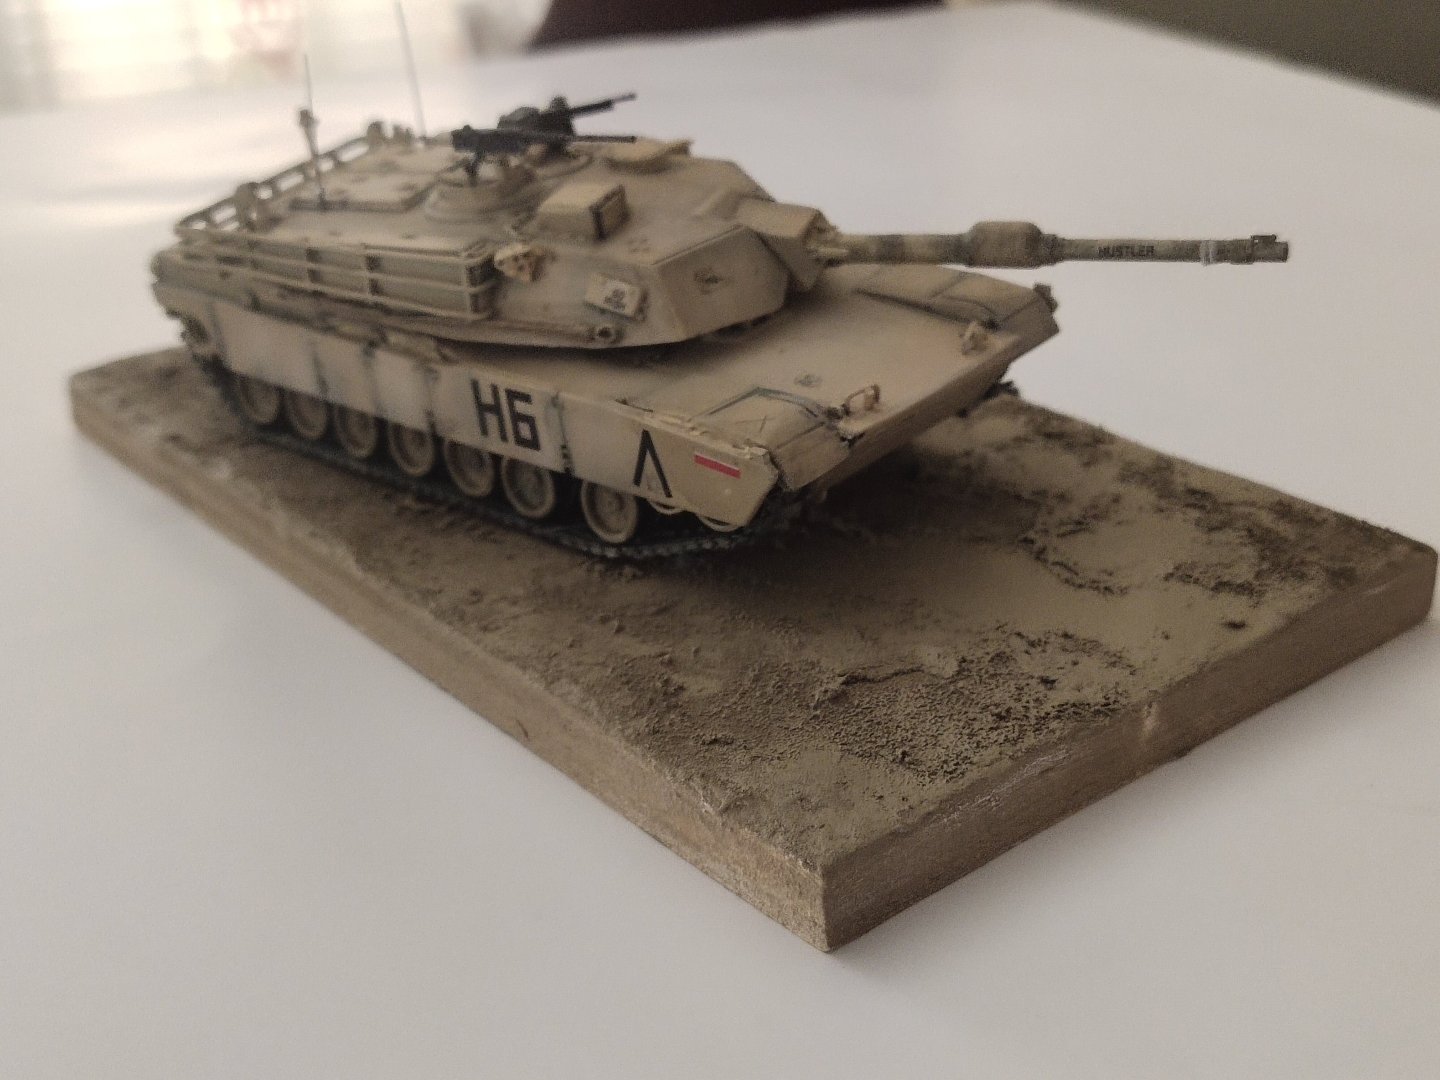
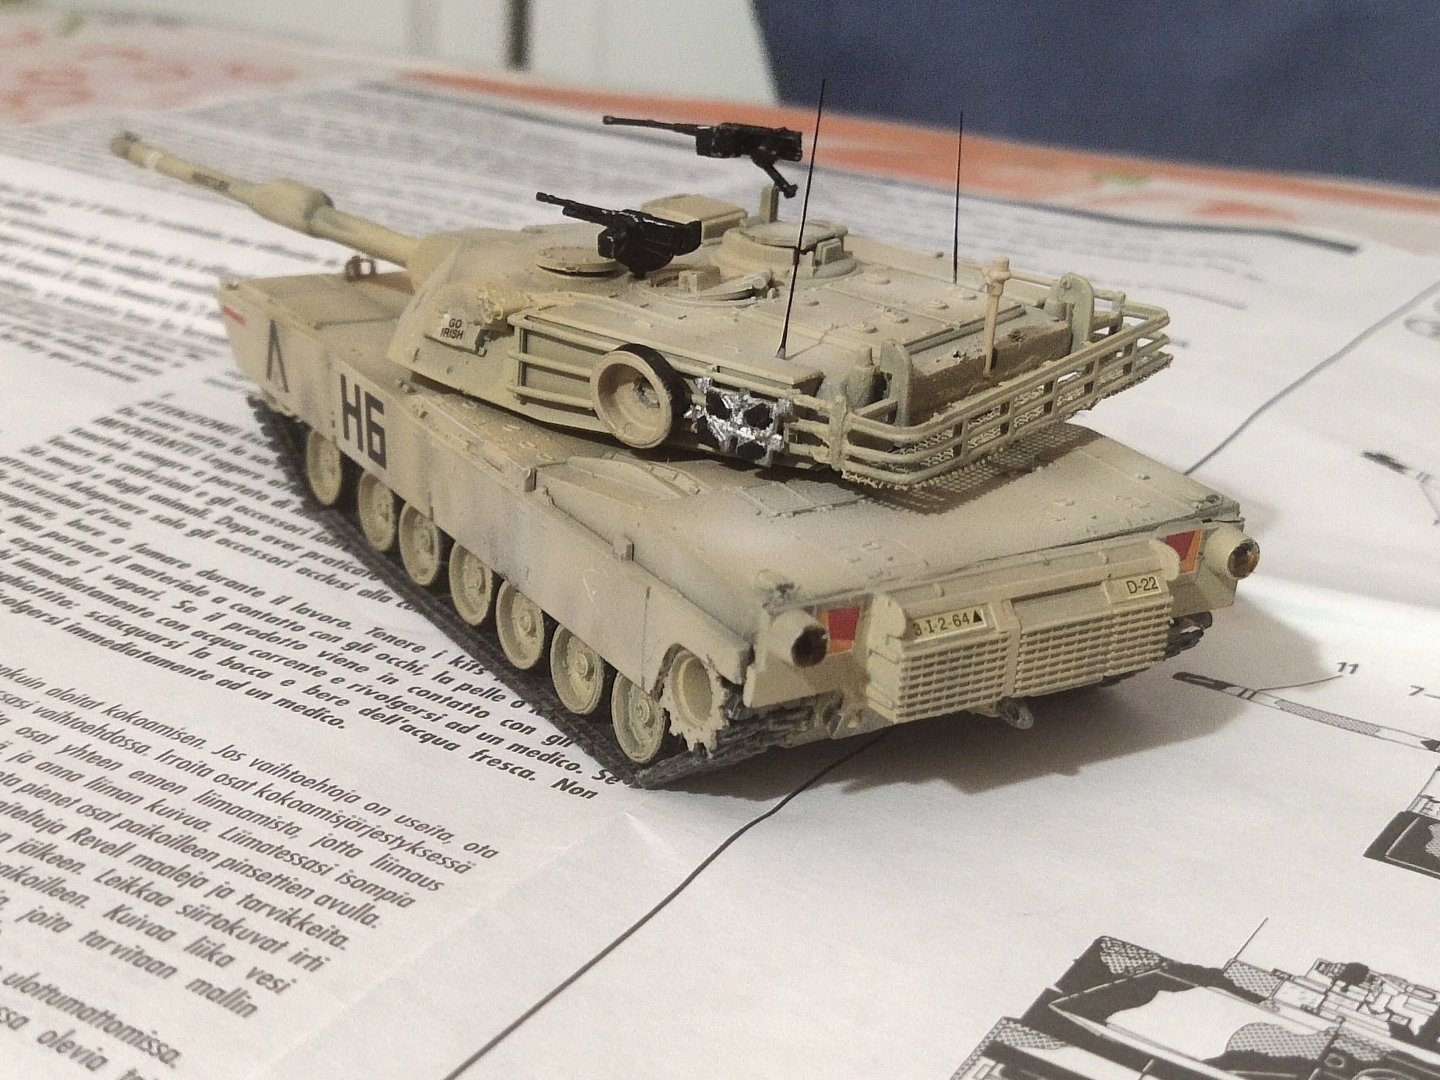
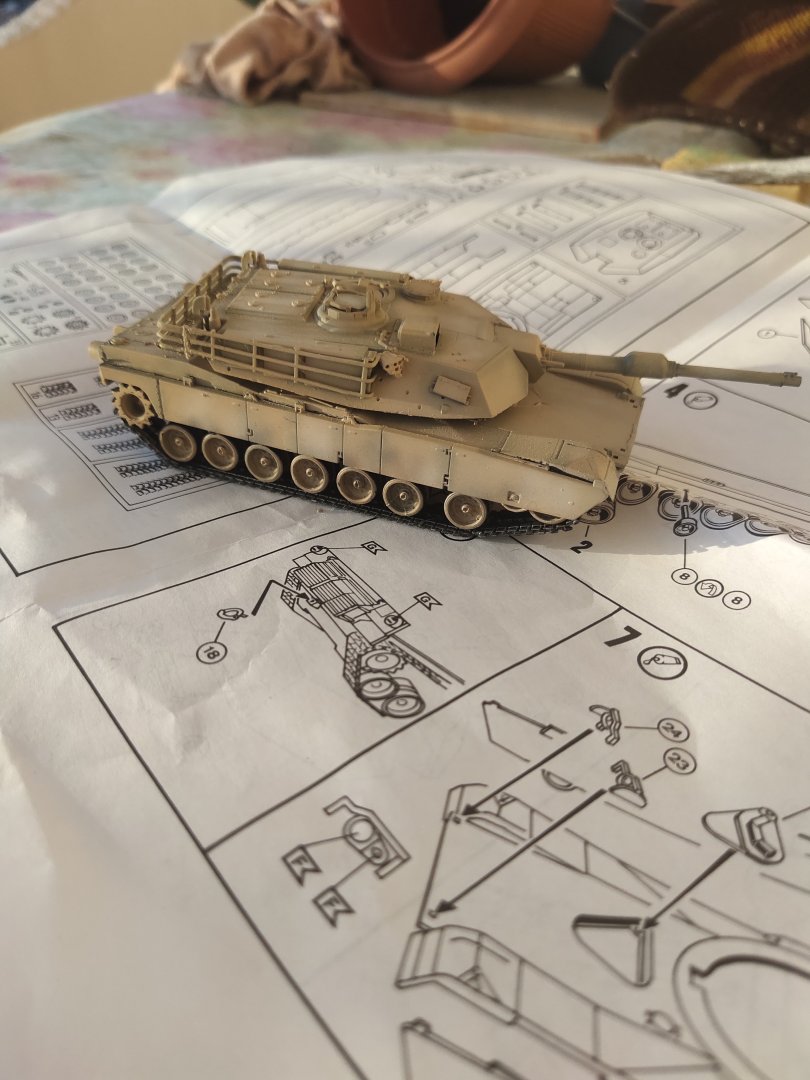
Final details -rear lights drilled filled with silicone and painted clear red. -Antennas installled. -Spare wheel and track added. -Secondary guns added -Decals Ii gave it a coat of clear varnsih before applying some oils.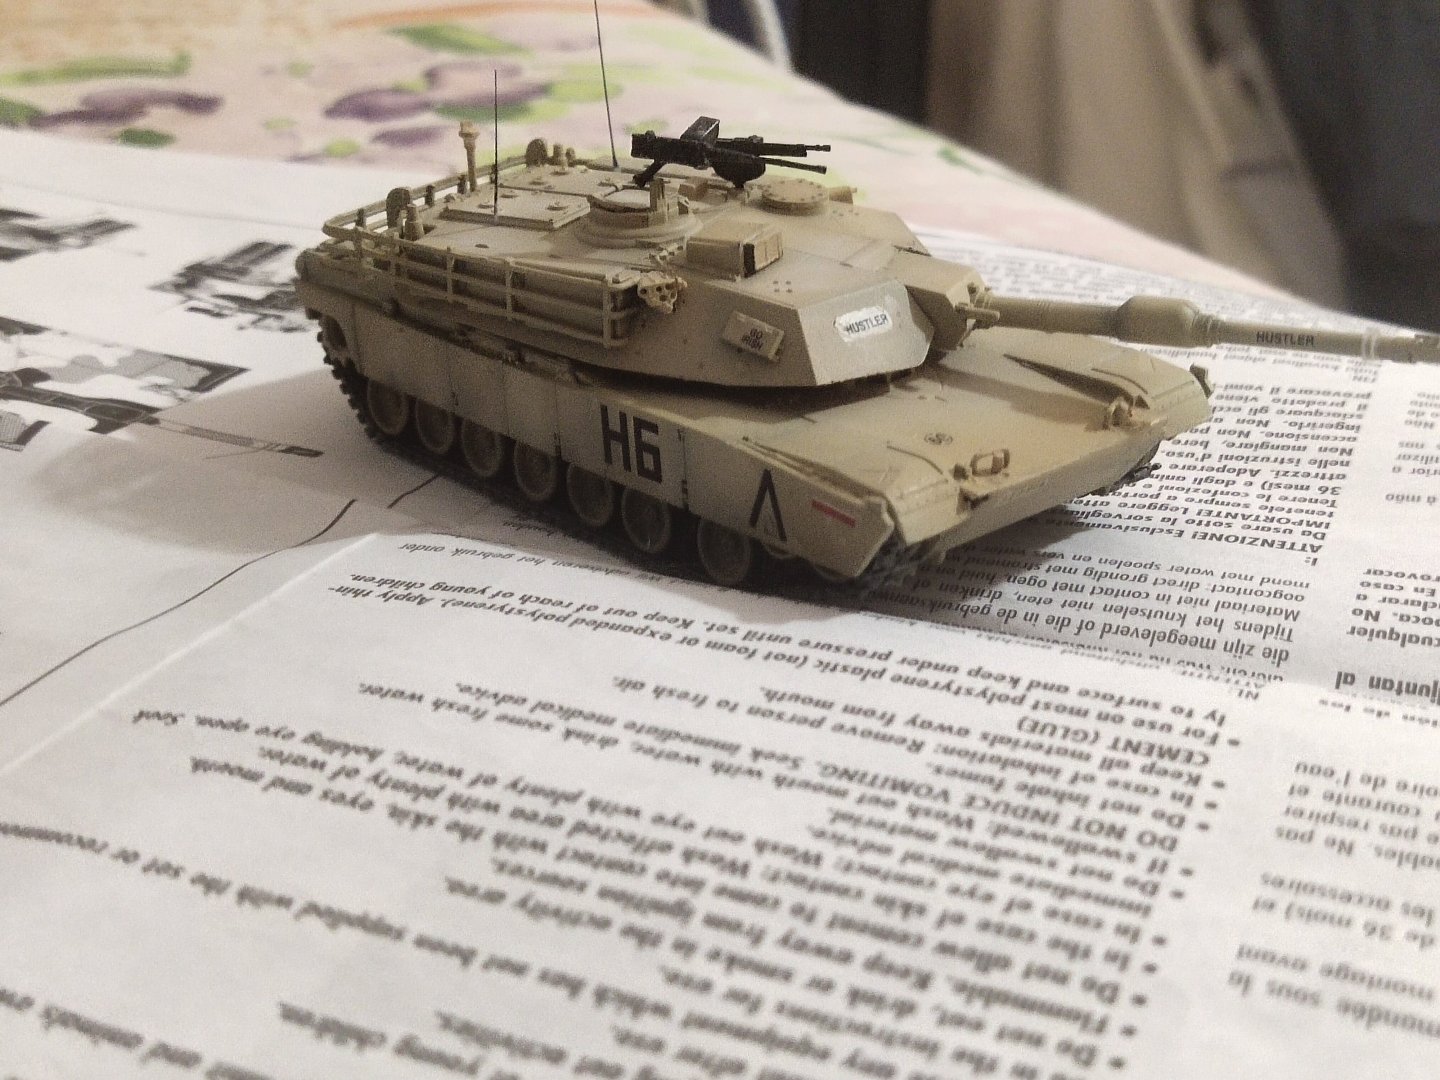

-
M1A1 ABRAMS by mikegr - FINISHED - Revell - 1:72 - PLASTIC
mikegr replied to mikegr's topic in Non-ship/categorised builds
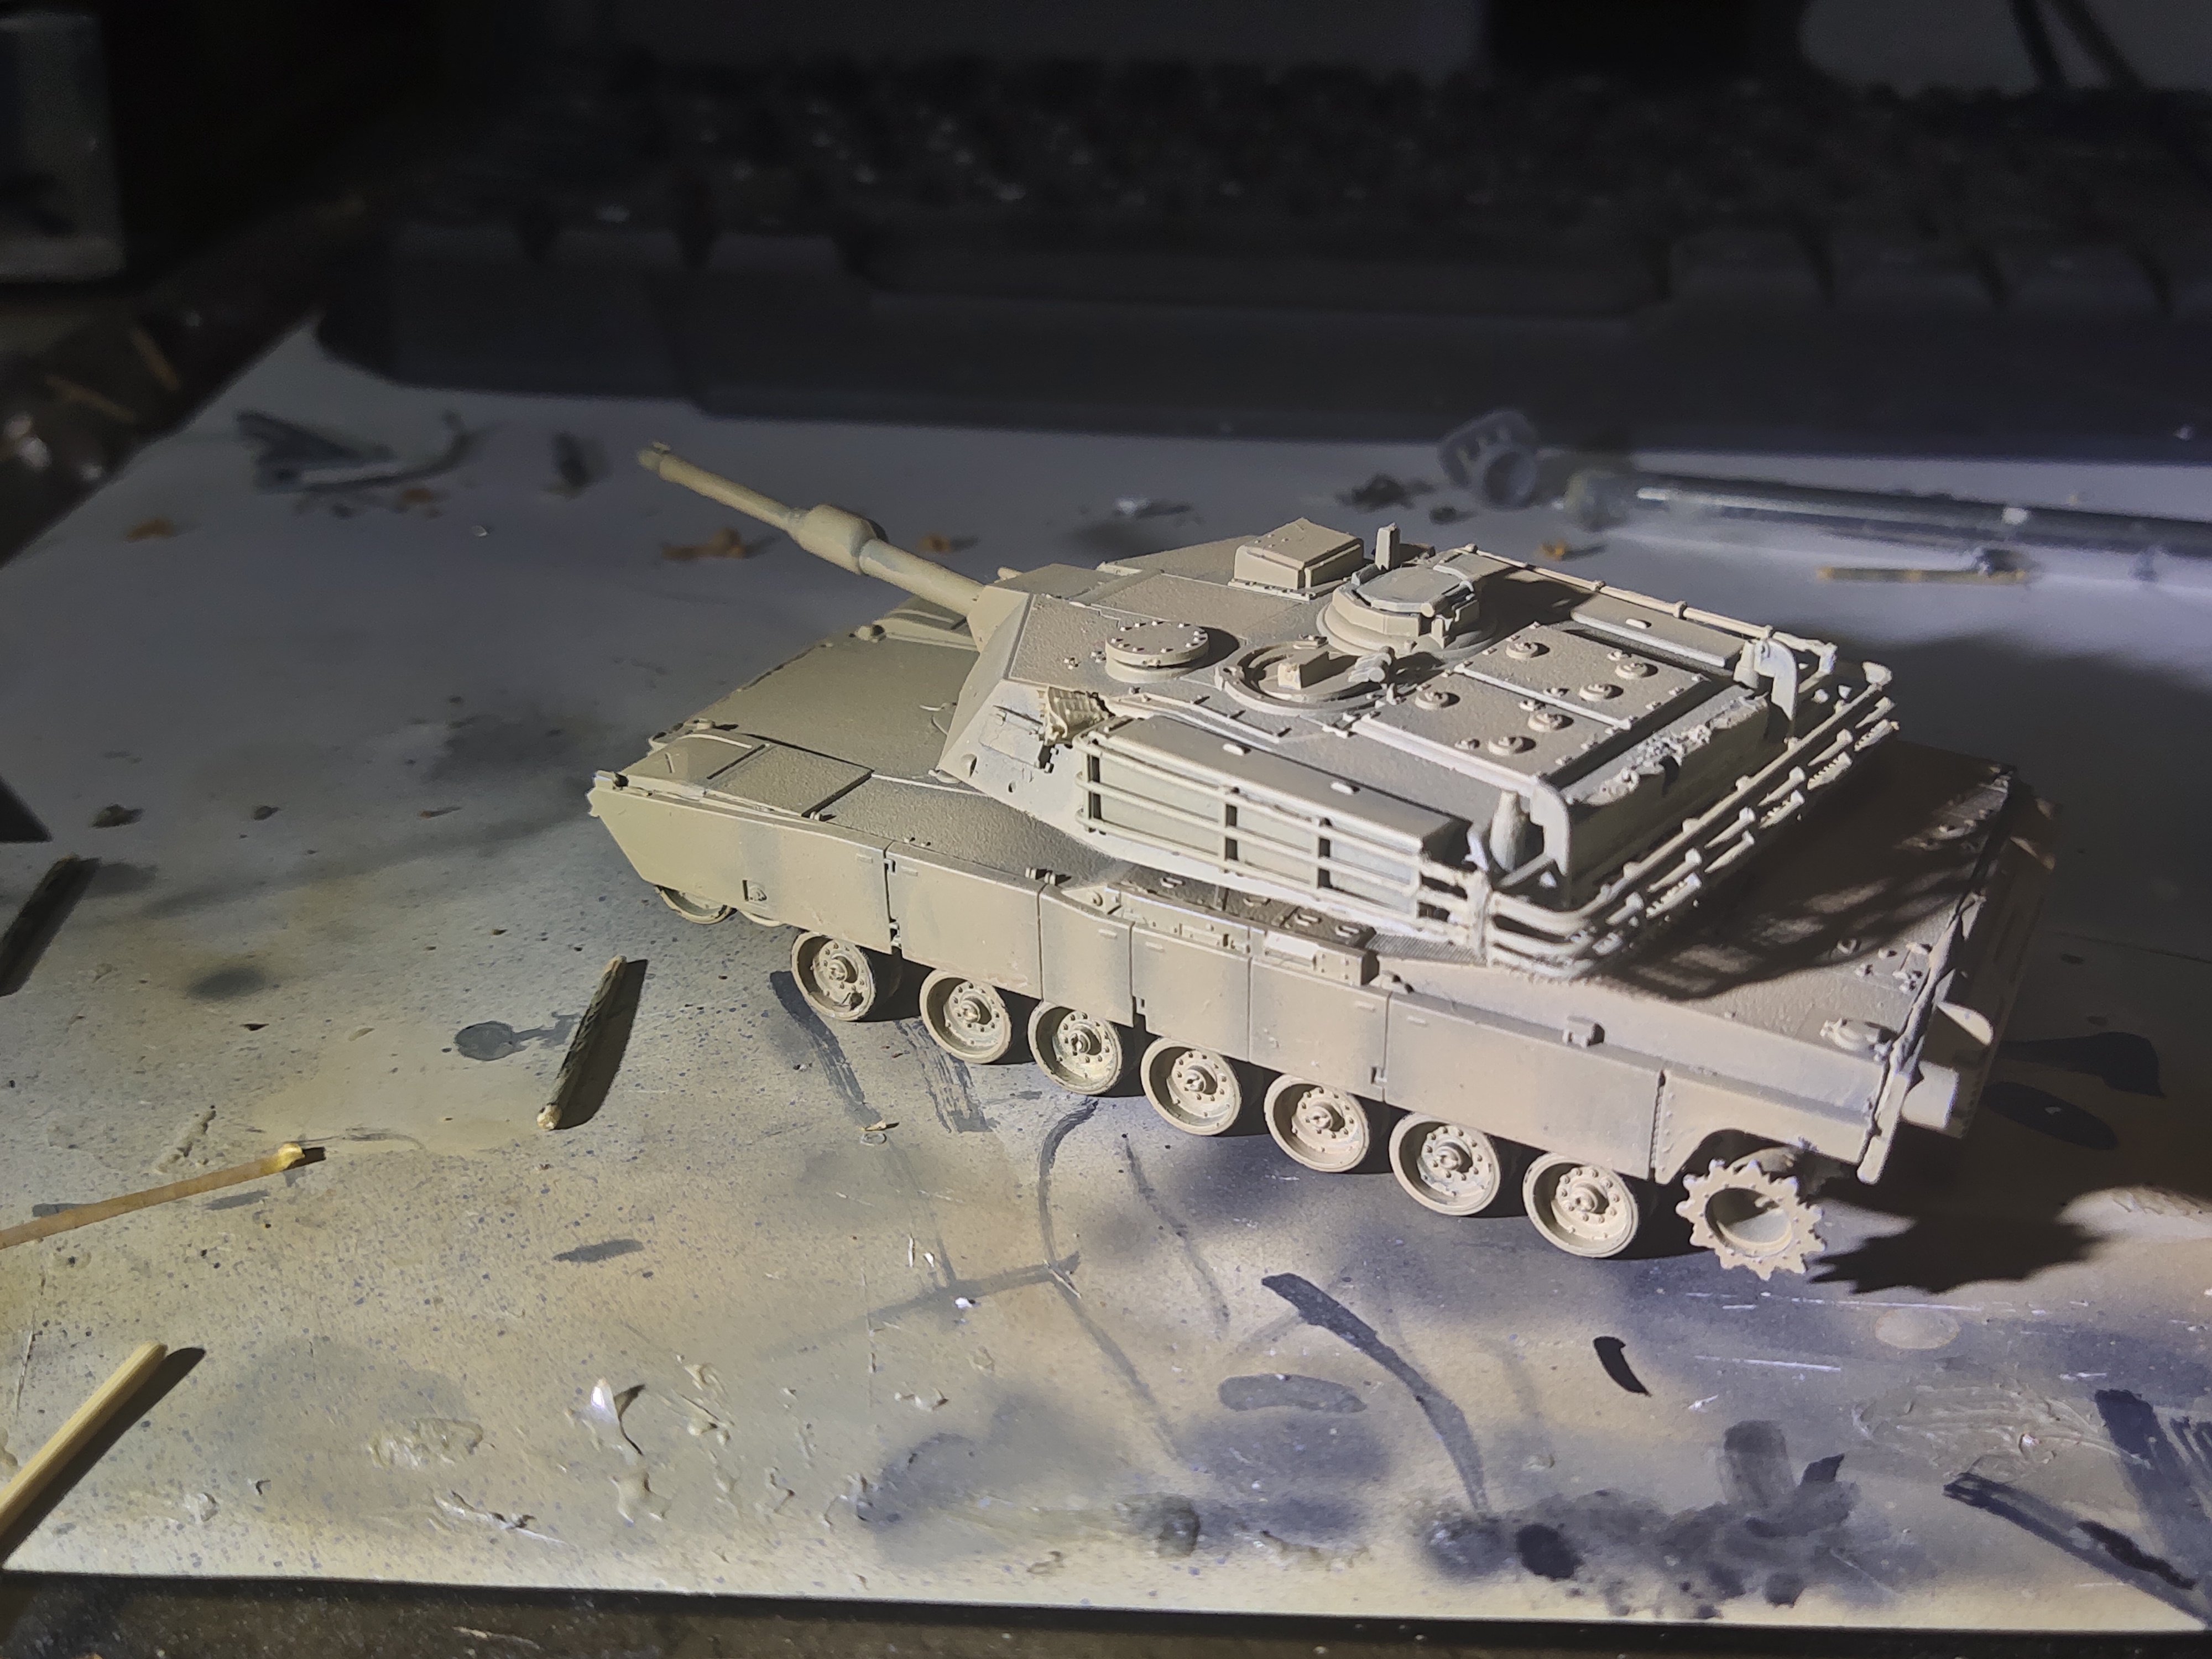
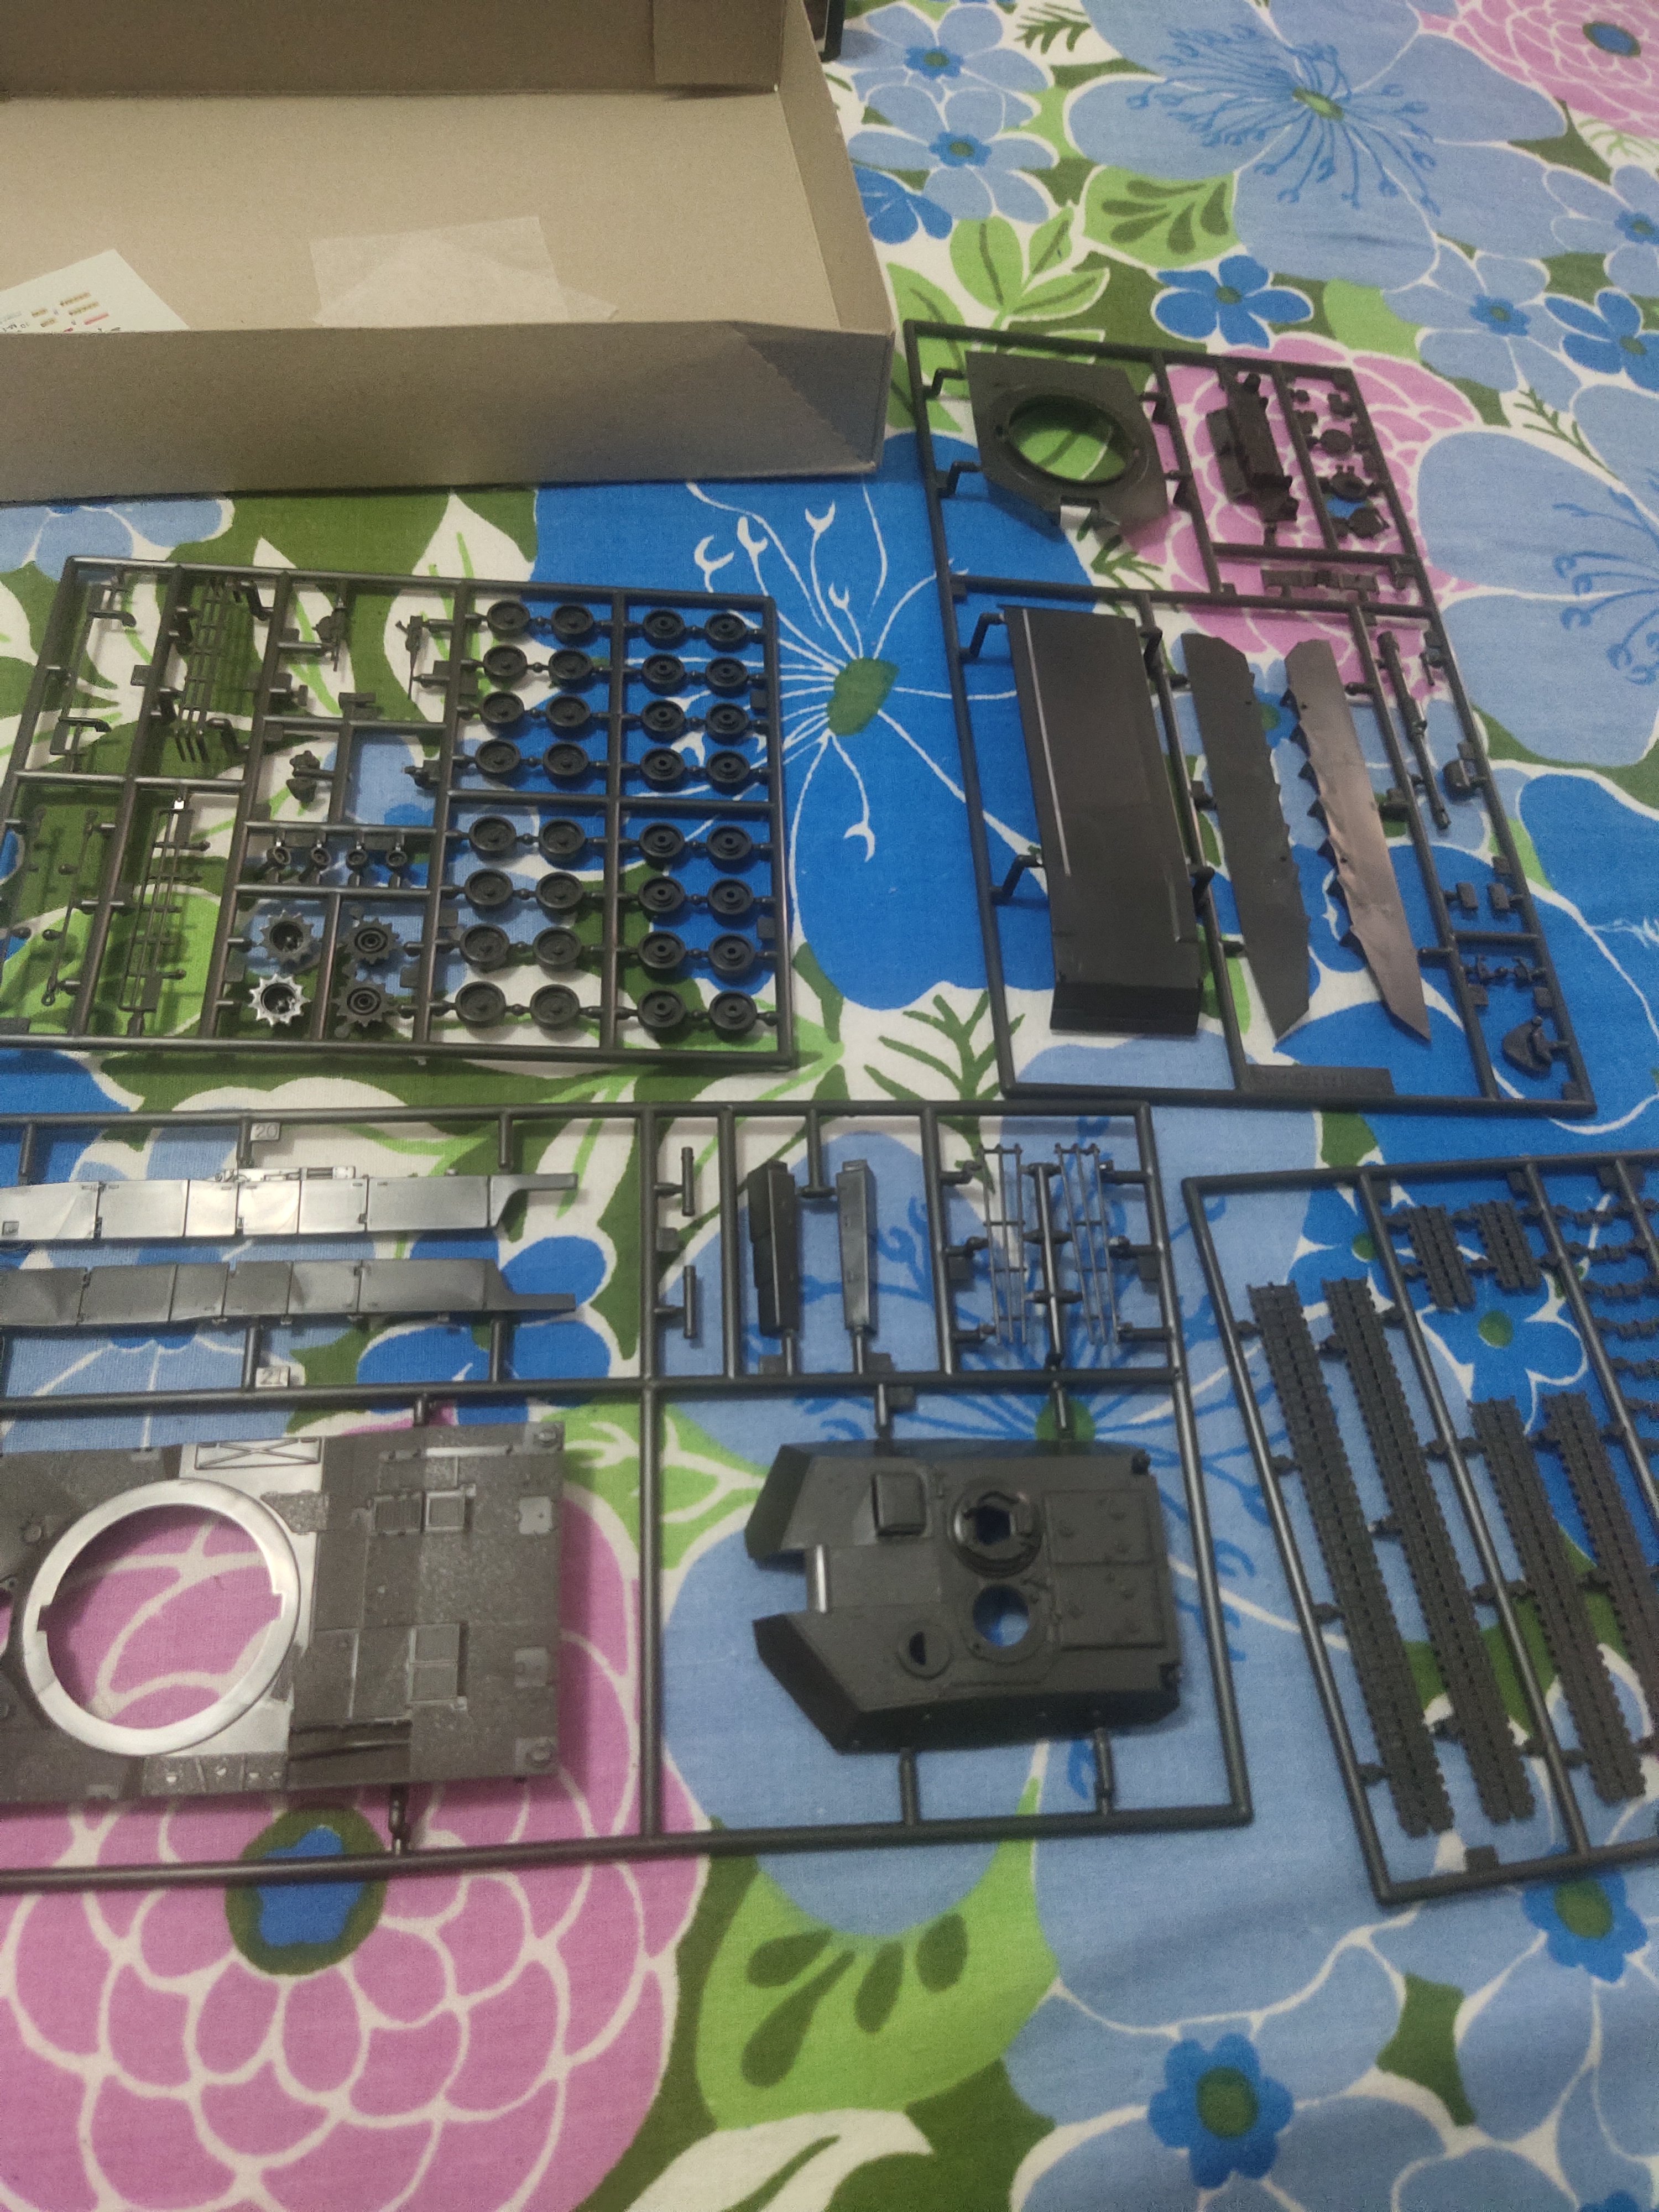
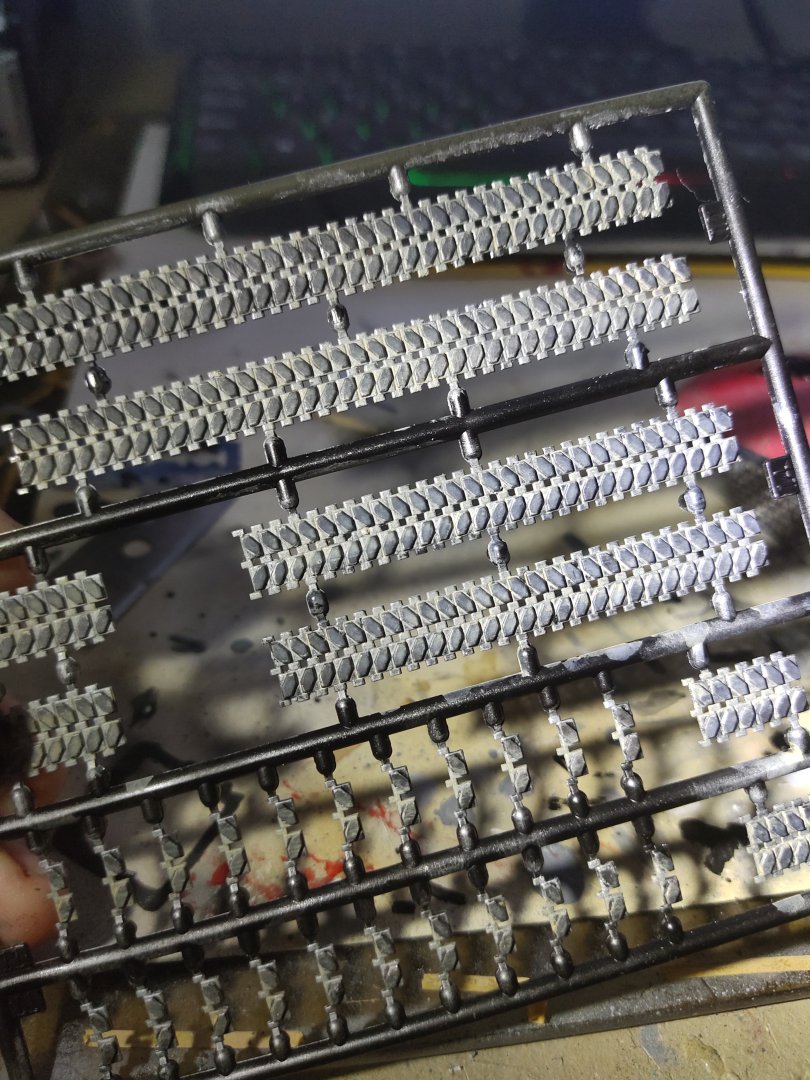
Fitting these tracks was the most troublesome job of this project. Now I realize how painful is to assemble these one by one piece even in larger scales. The result was bad at the round cornern but hopefully was hidden under the side skirts
-
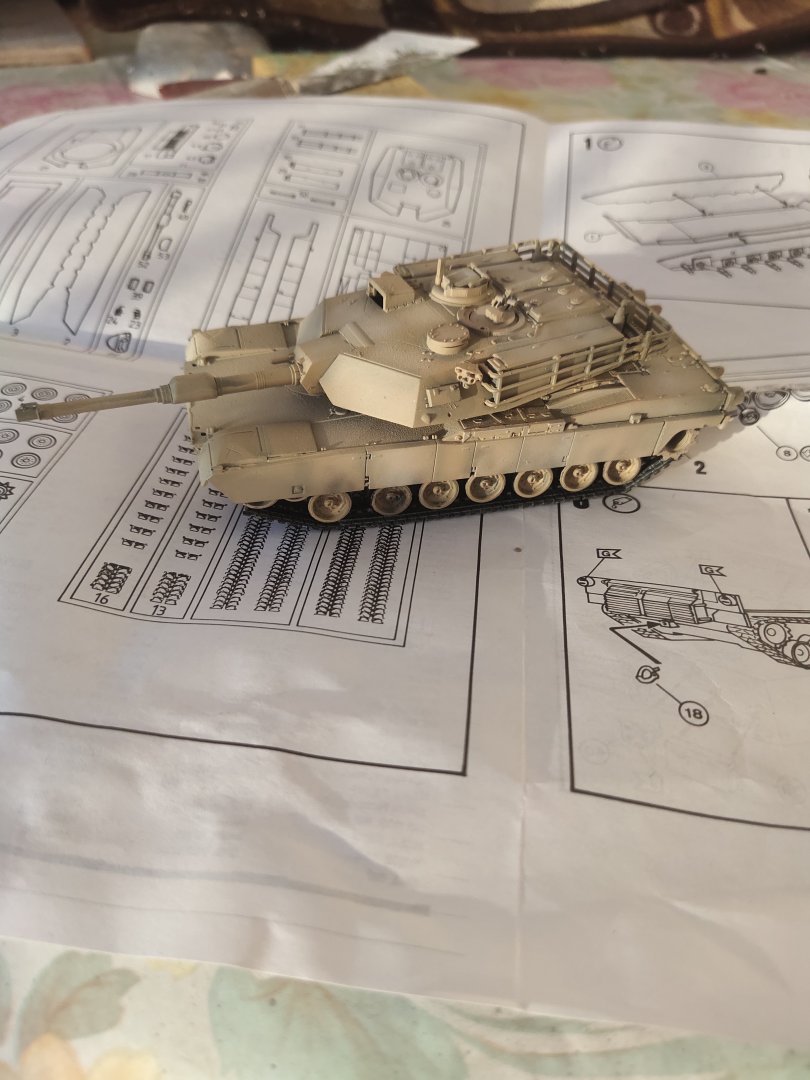
M1A1 ABRAMS by mikegr - FINISHED - Revell - 1:72 - PLASTIC
mikegr replied to mikegr's topic in Non-ship/categorised builds
I painted the tracks. I wasn't sure about the color as they were many options. I chose silver metal as a base color the black on top. Finally added some sand wash effect.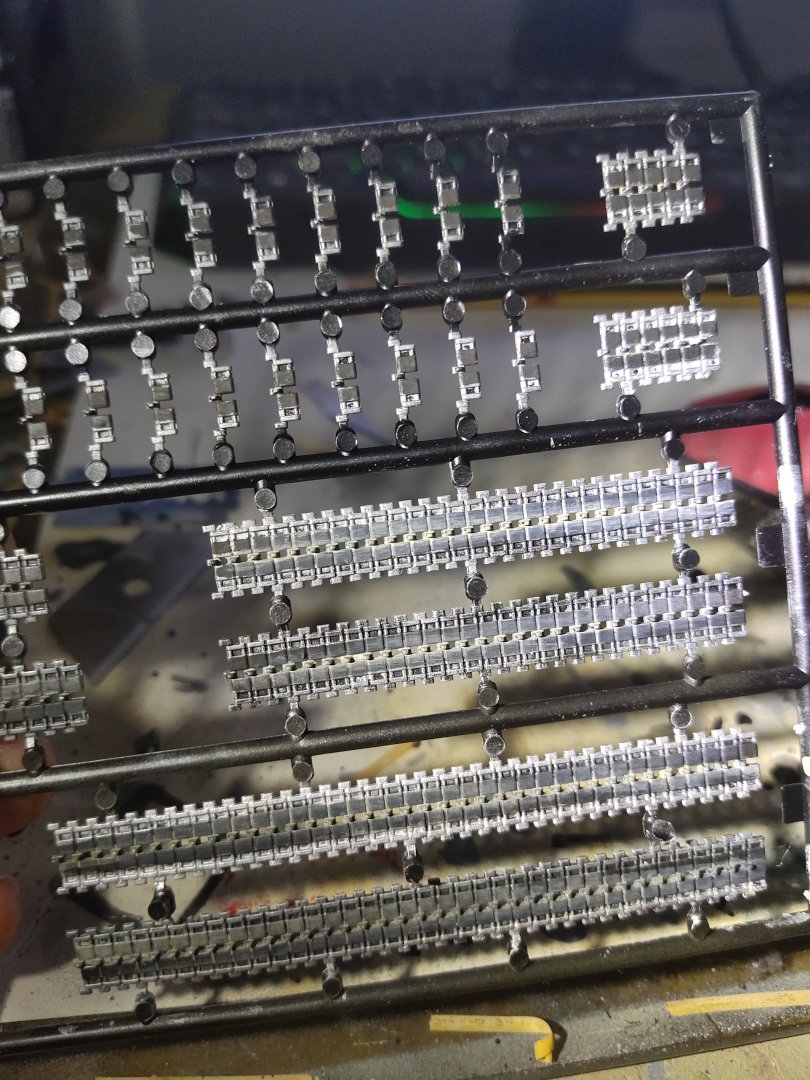
-
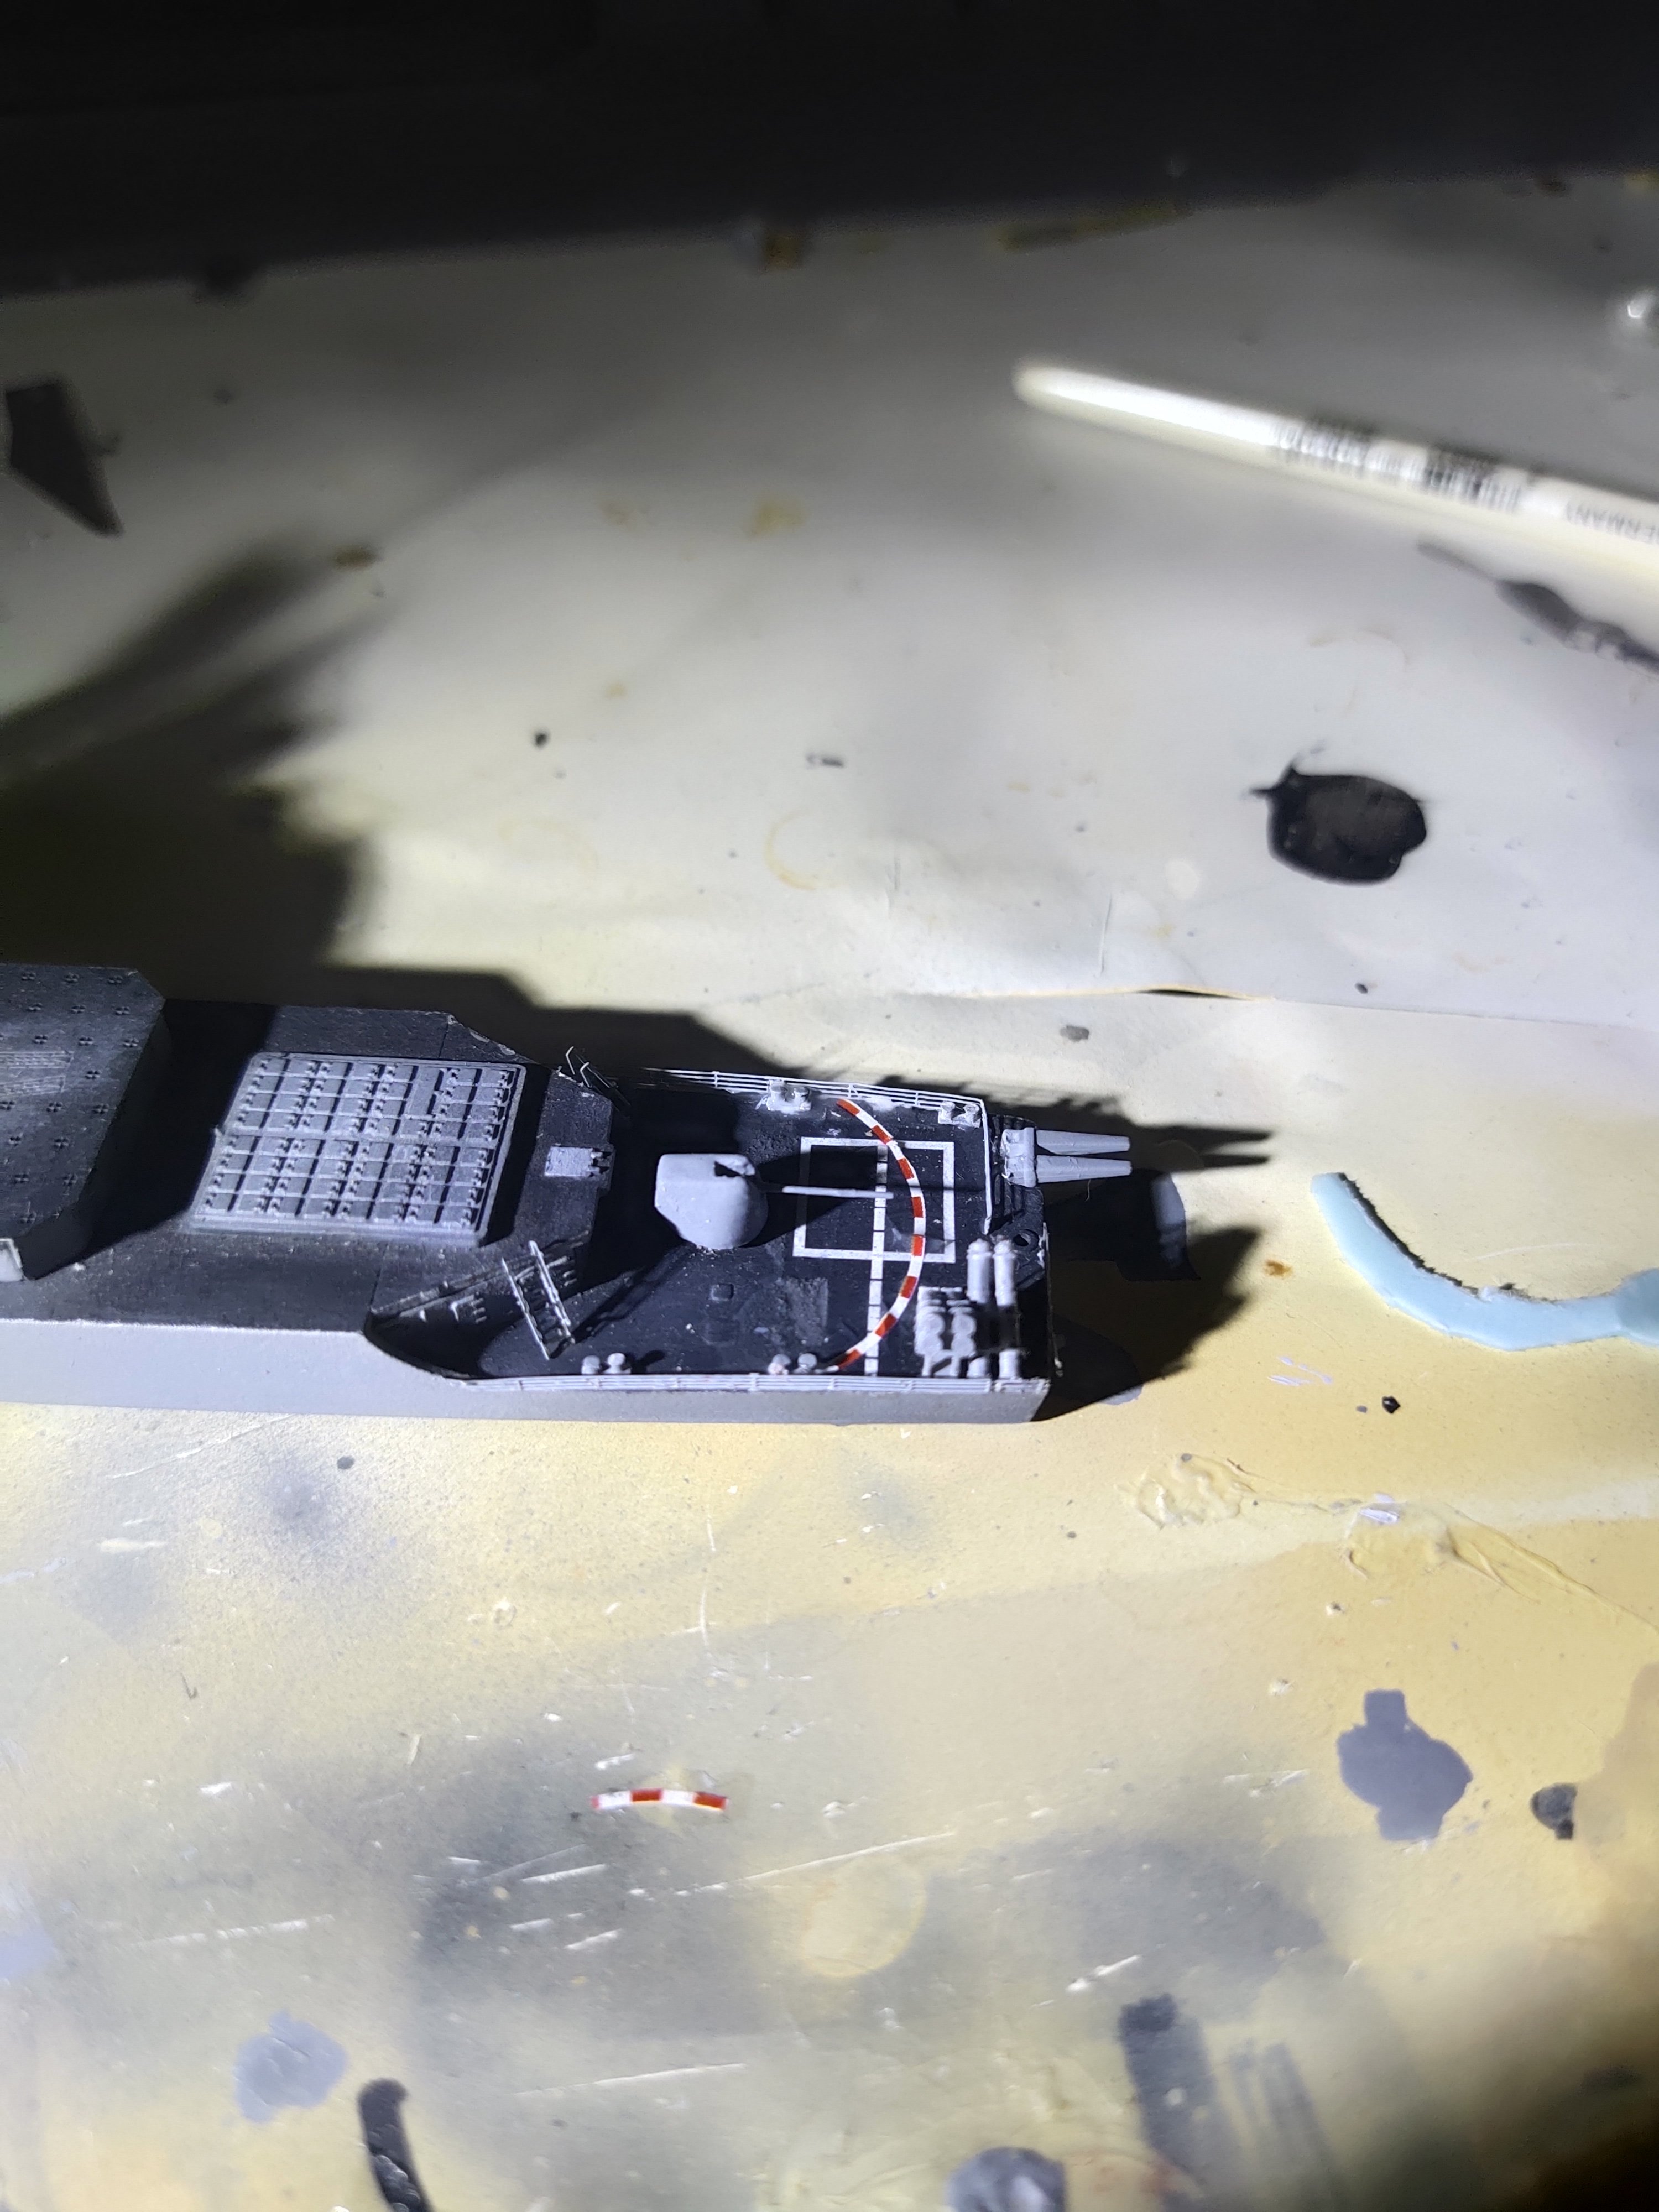
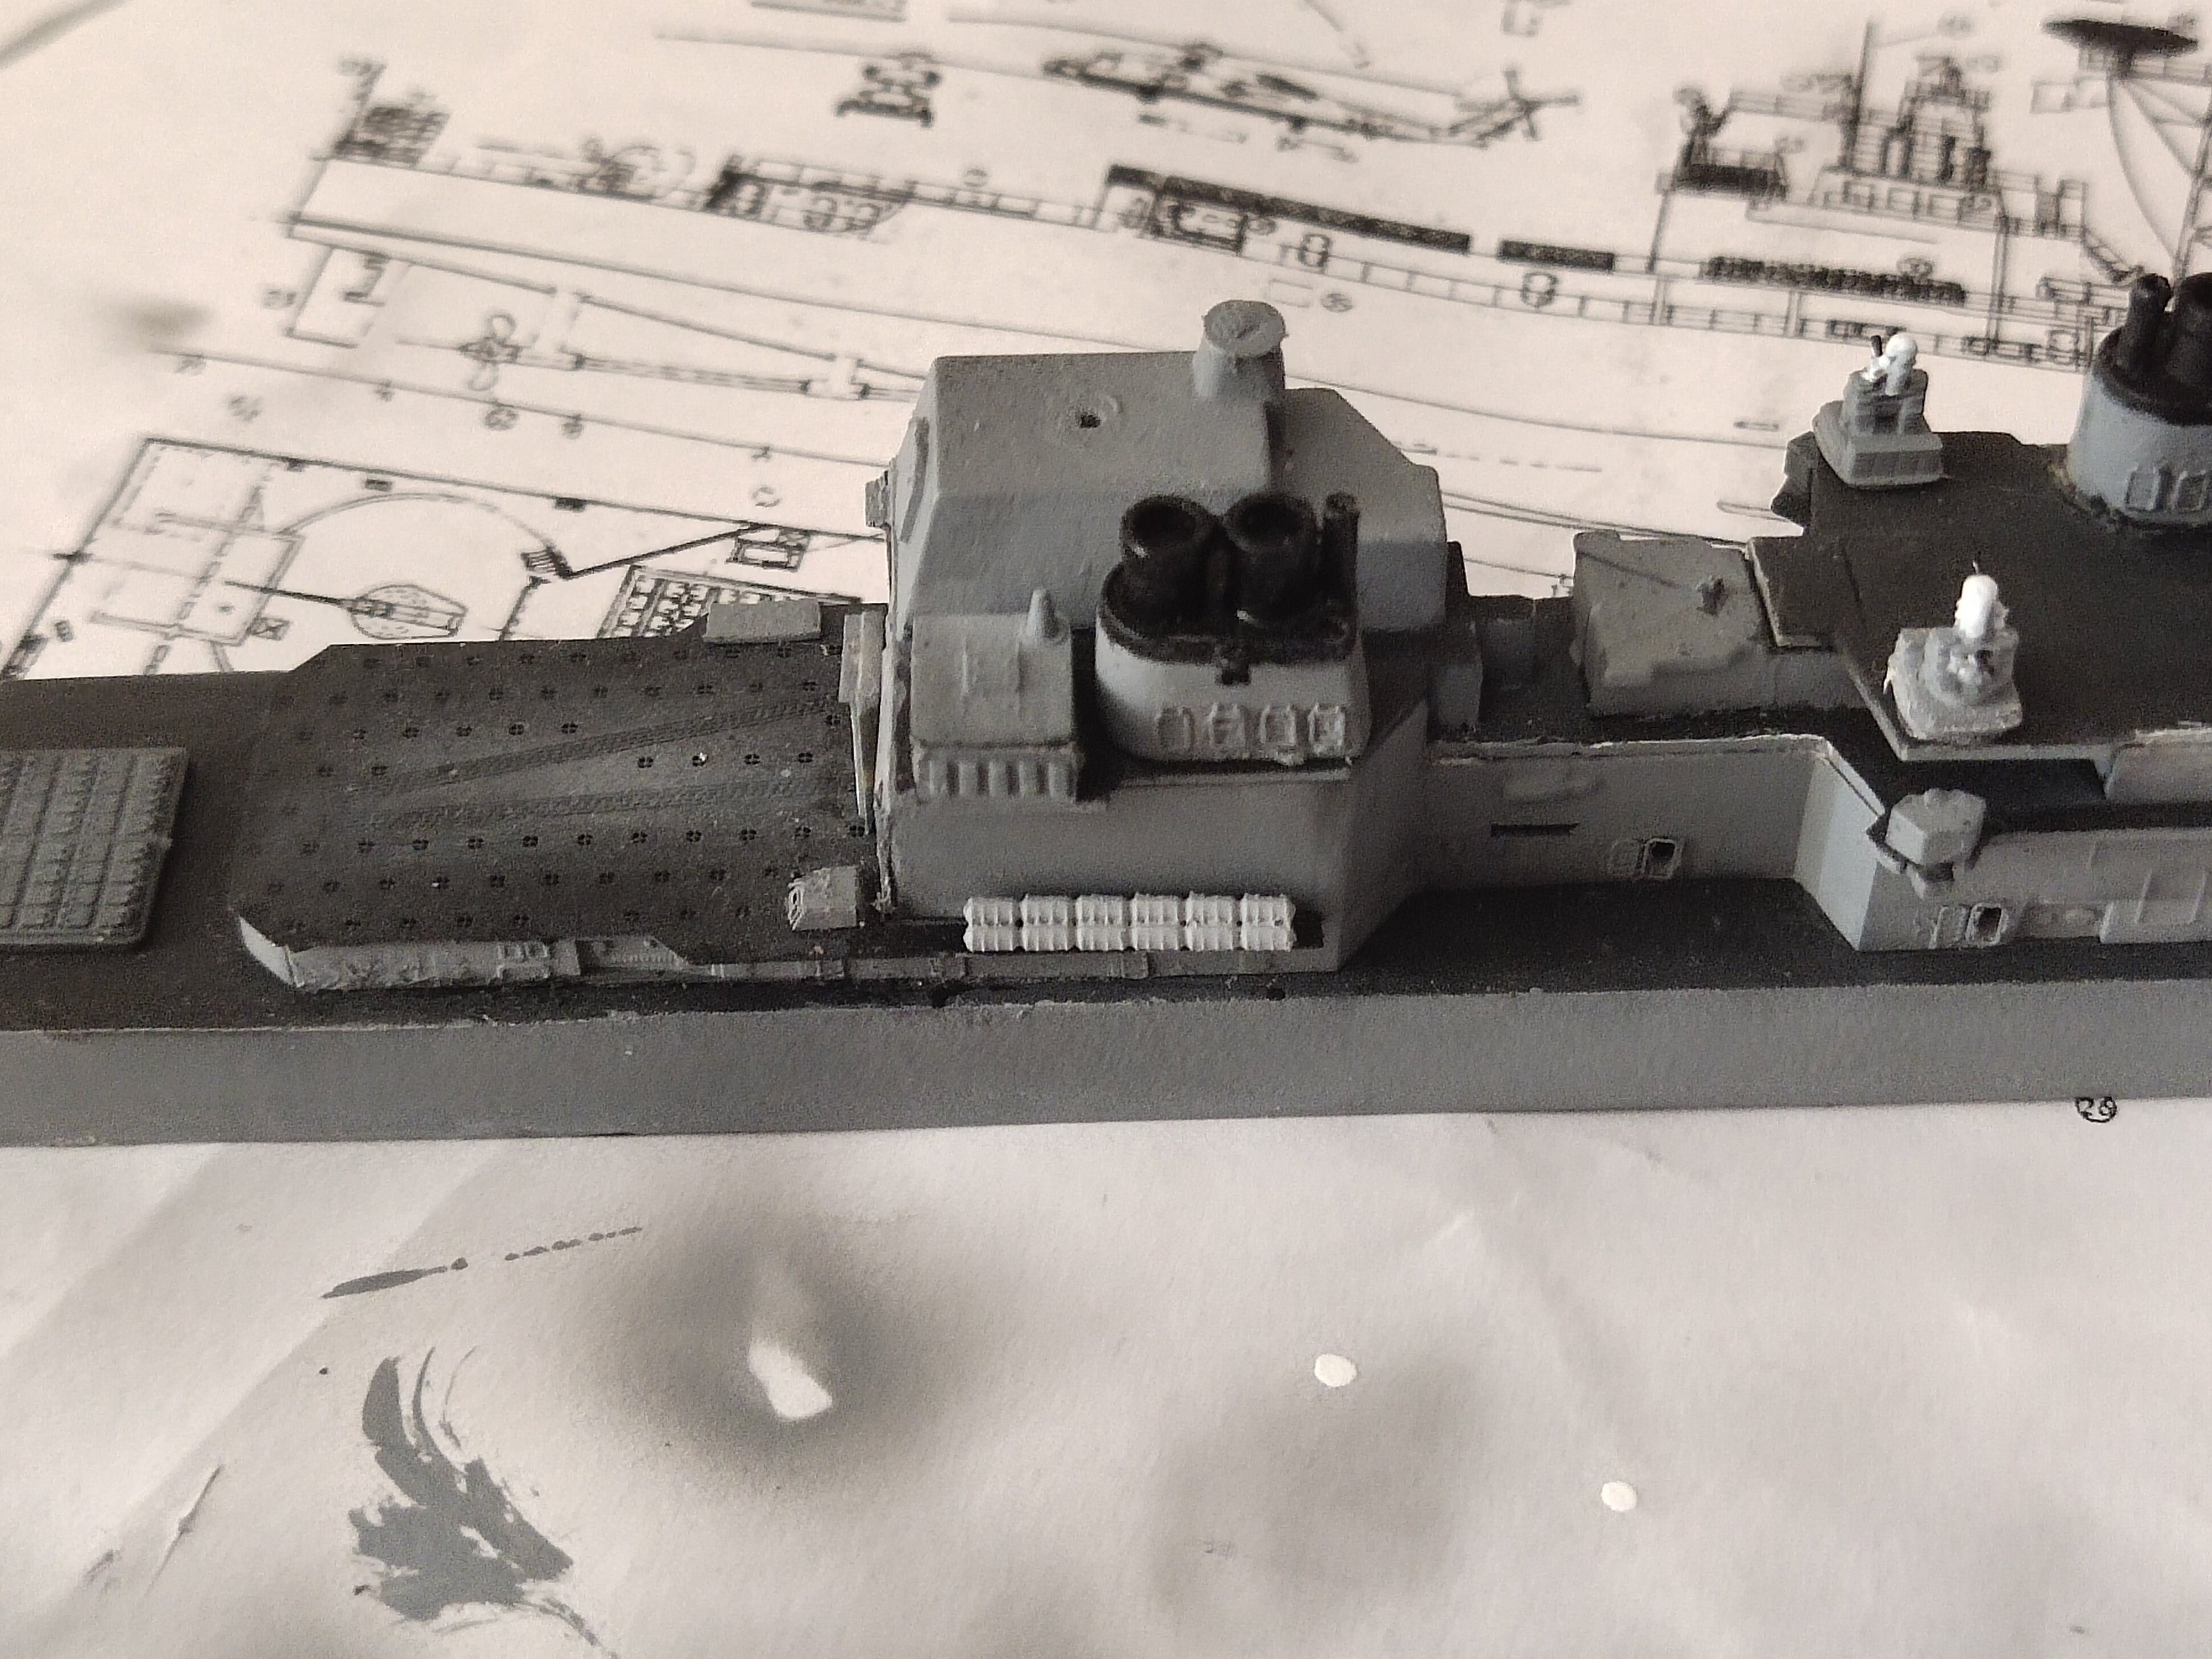
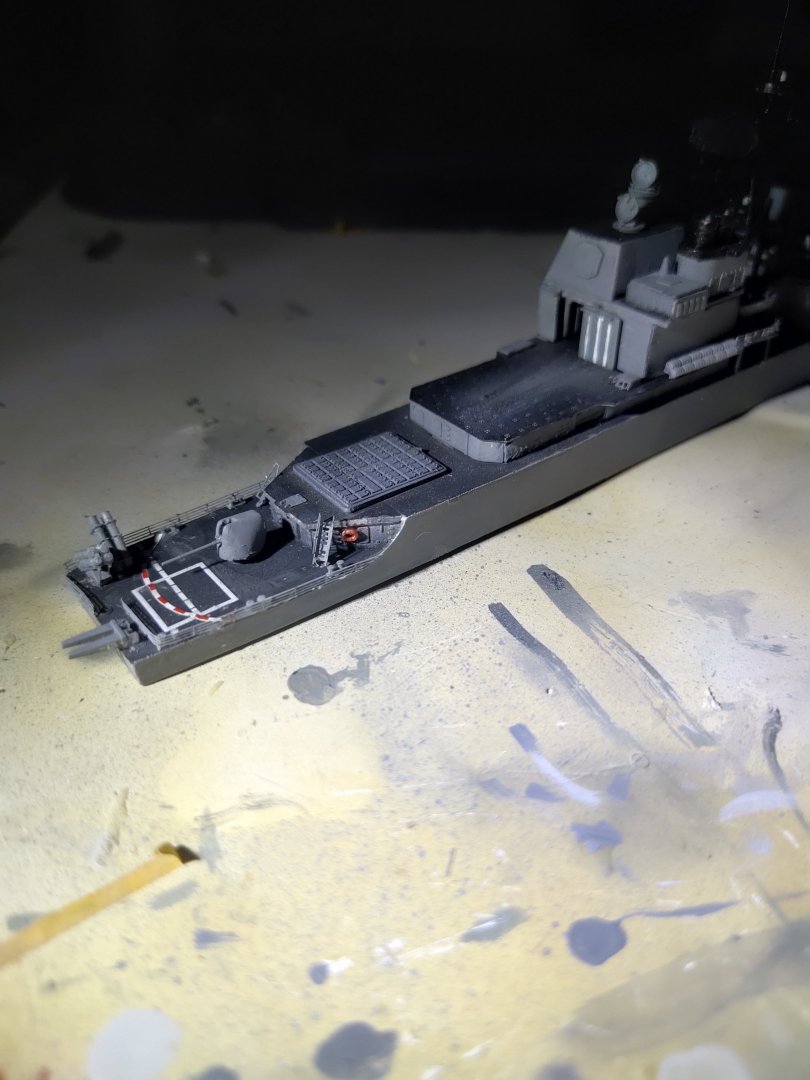
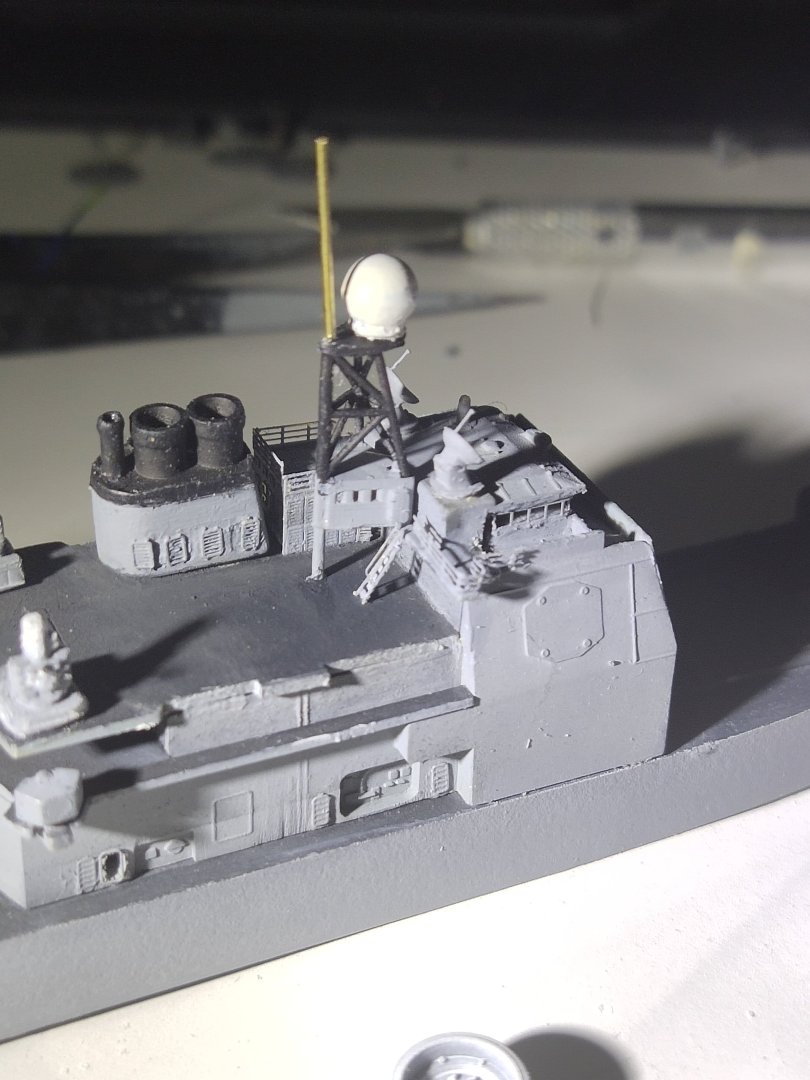
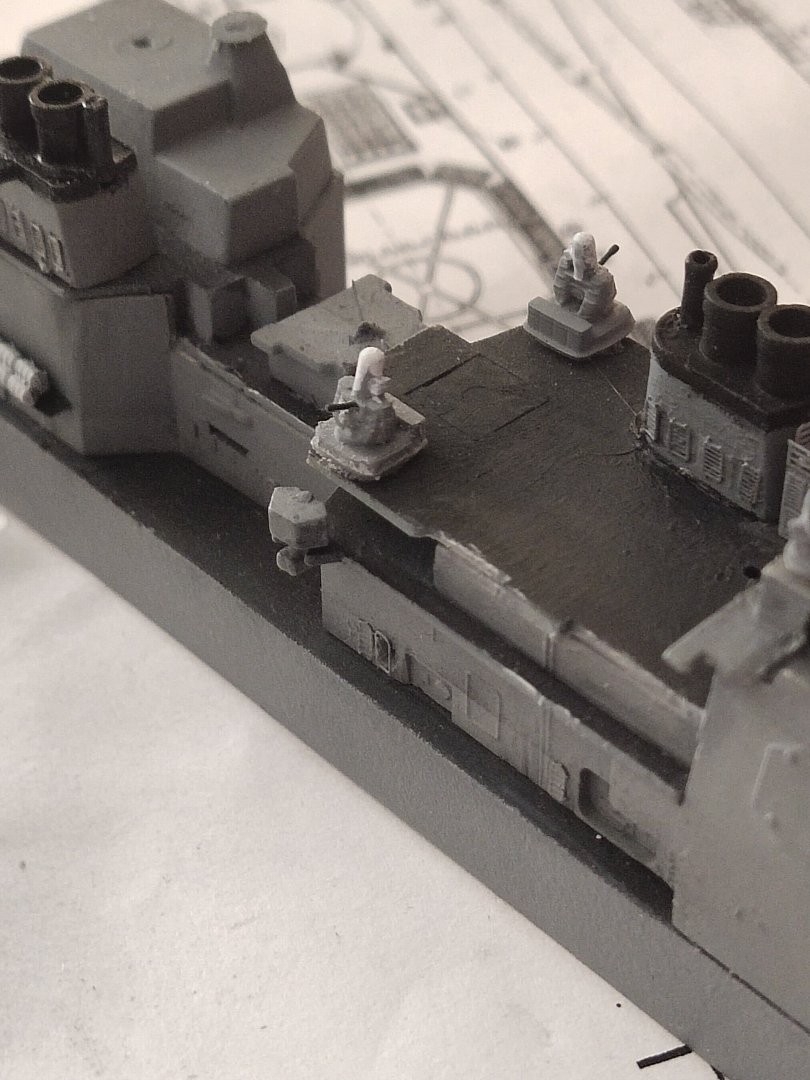
I worked on the rear section adding details. In this interesting picture you can see the natural wear of the deck color along with some rust. Finally I managed to print some life rings with tripod base and rope


-
M1A1 ABRAMS by mikegr - FINISHED - Revell - 1:72 - PLASTIC
mikegr replied to mikegr's topic in Non-ship/categorised builds
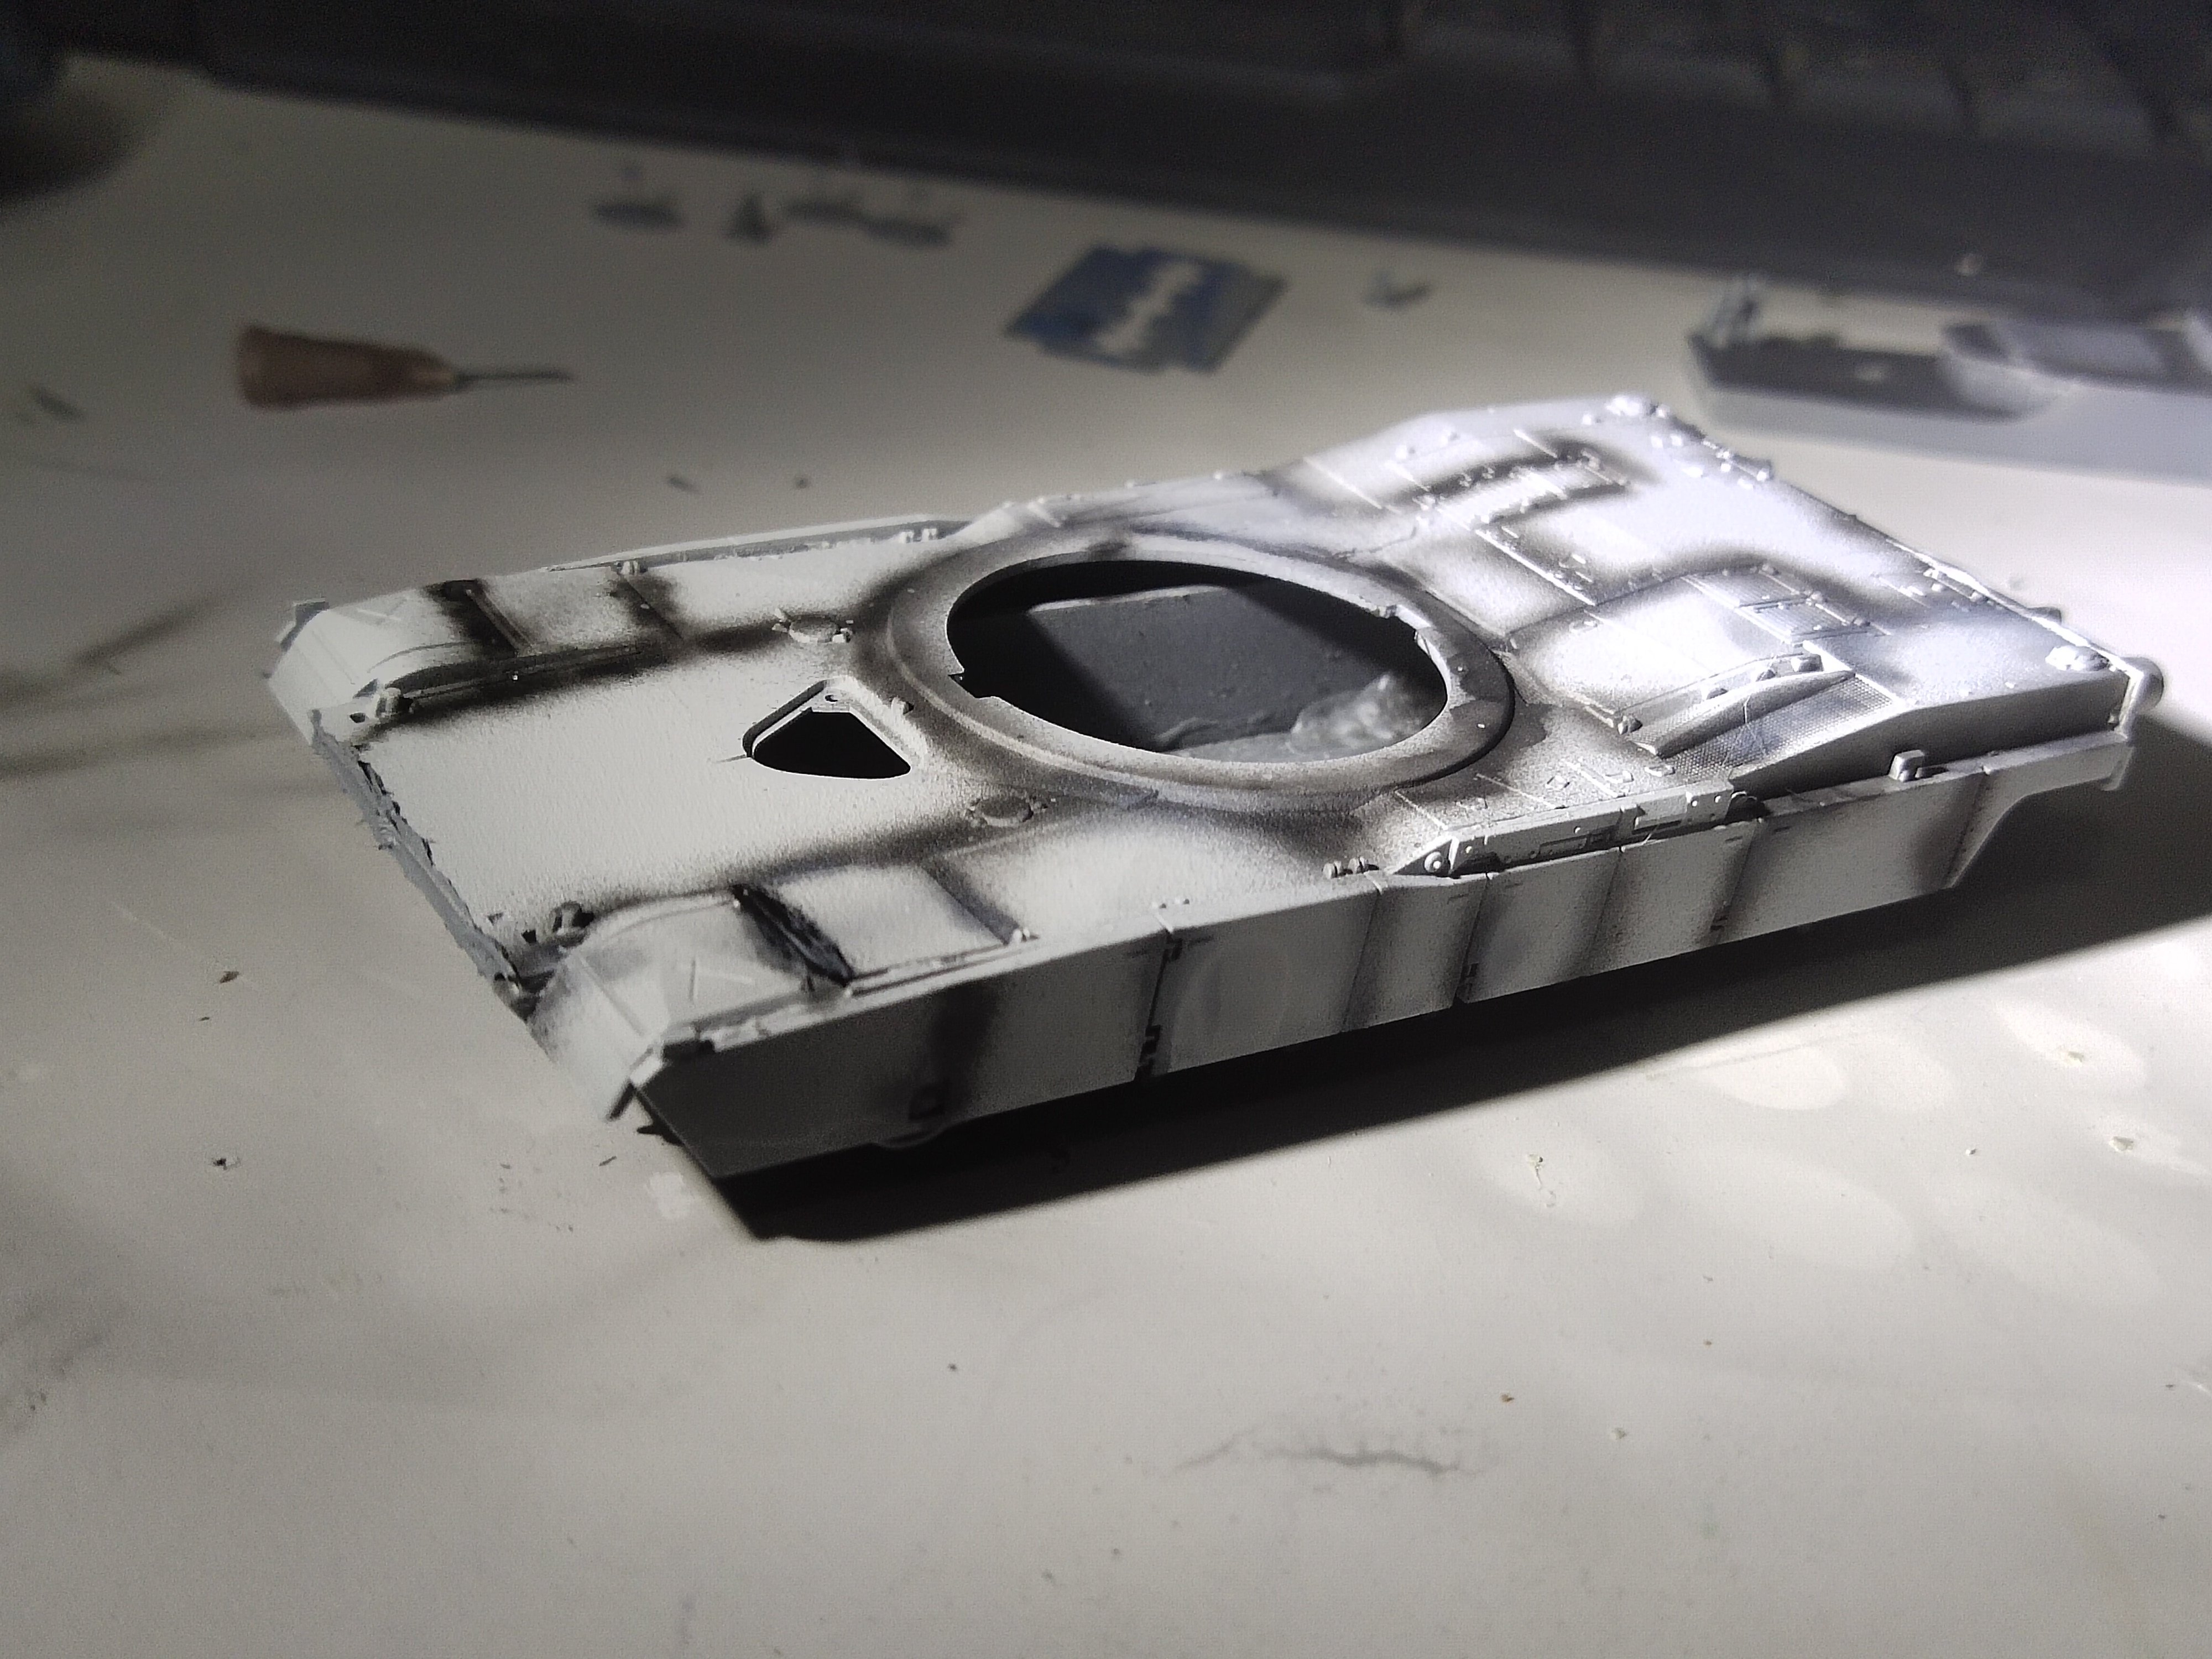
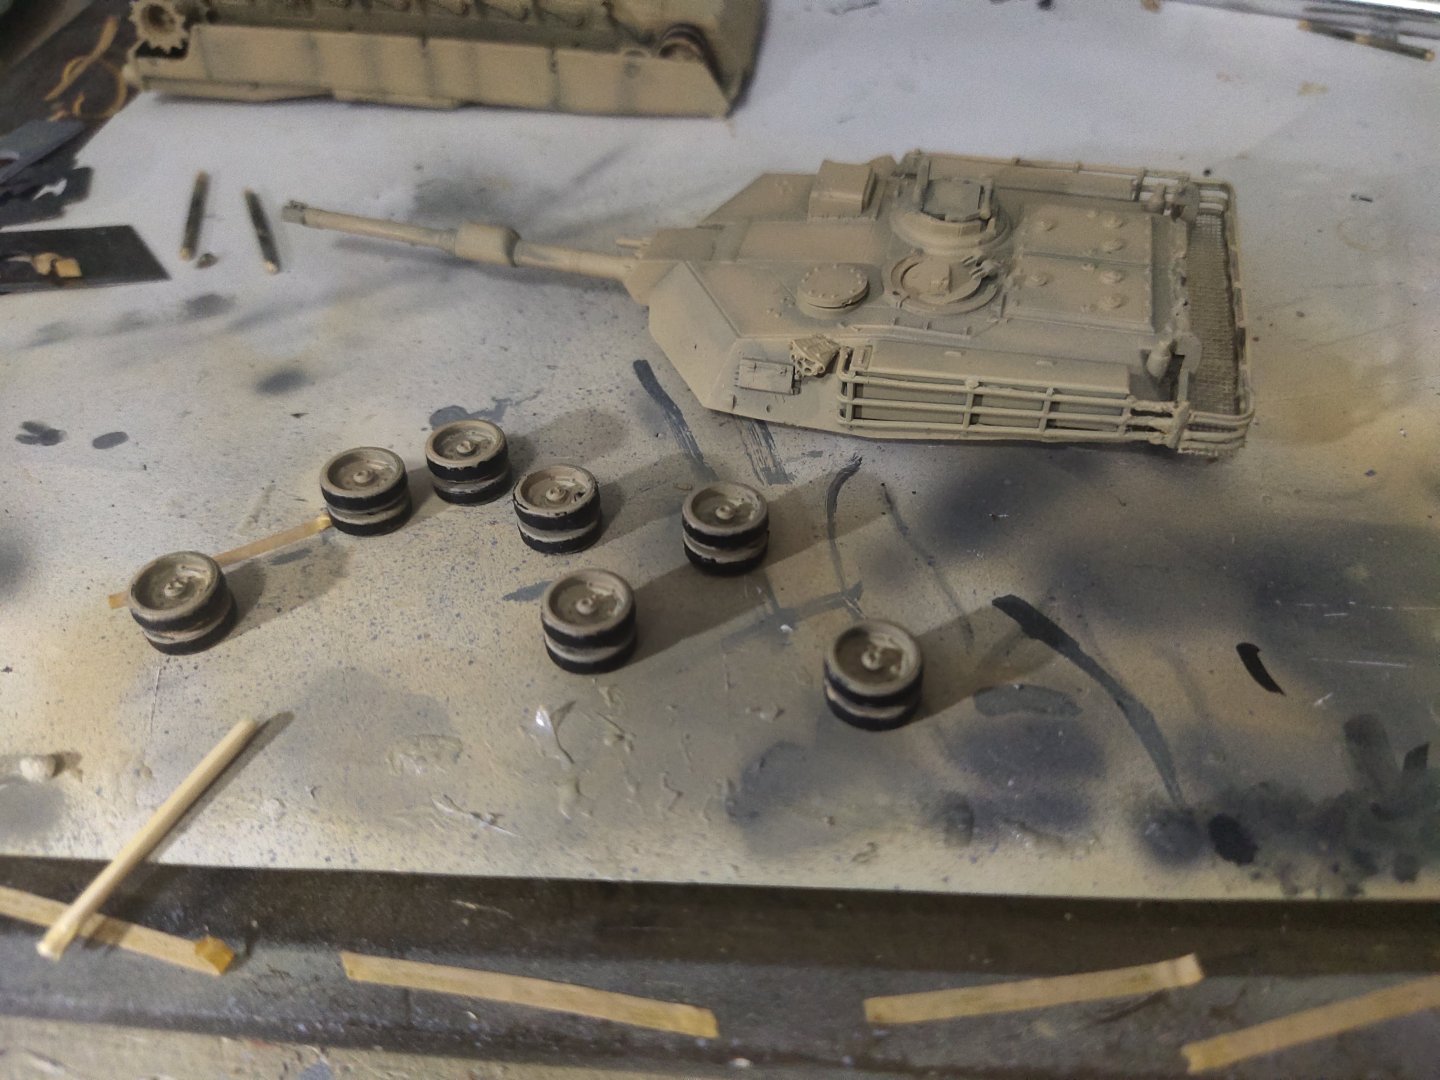
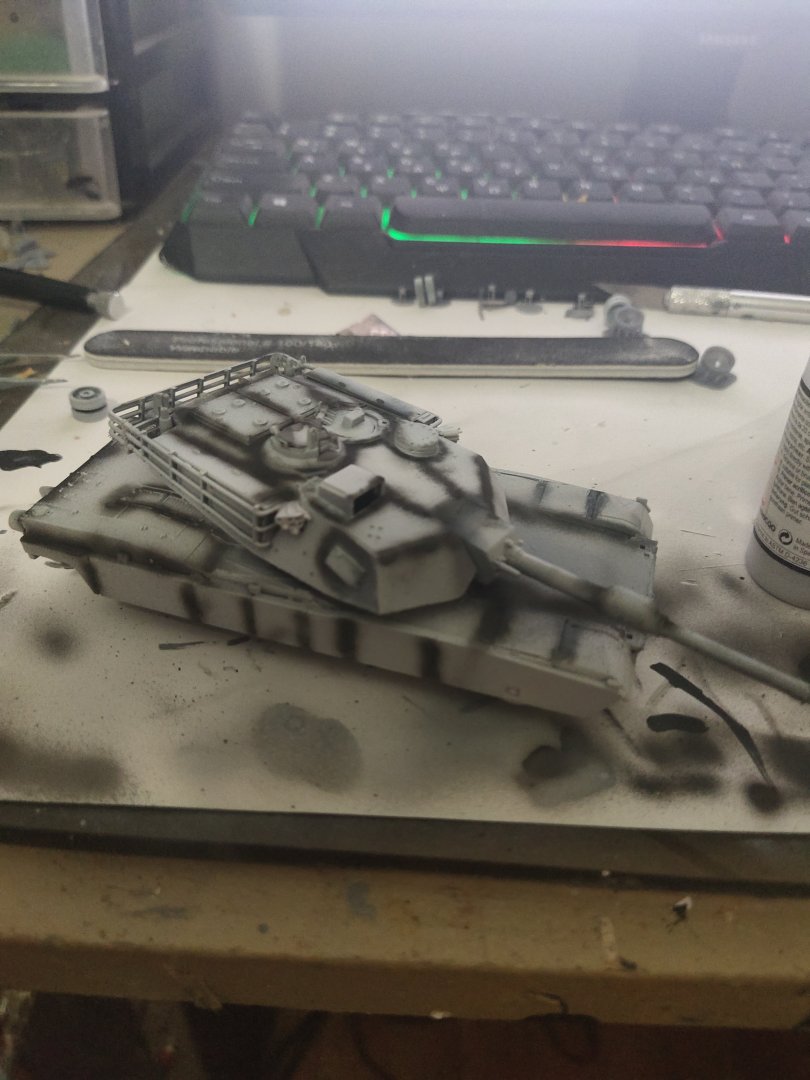
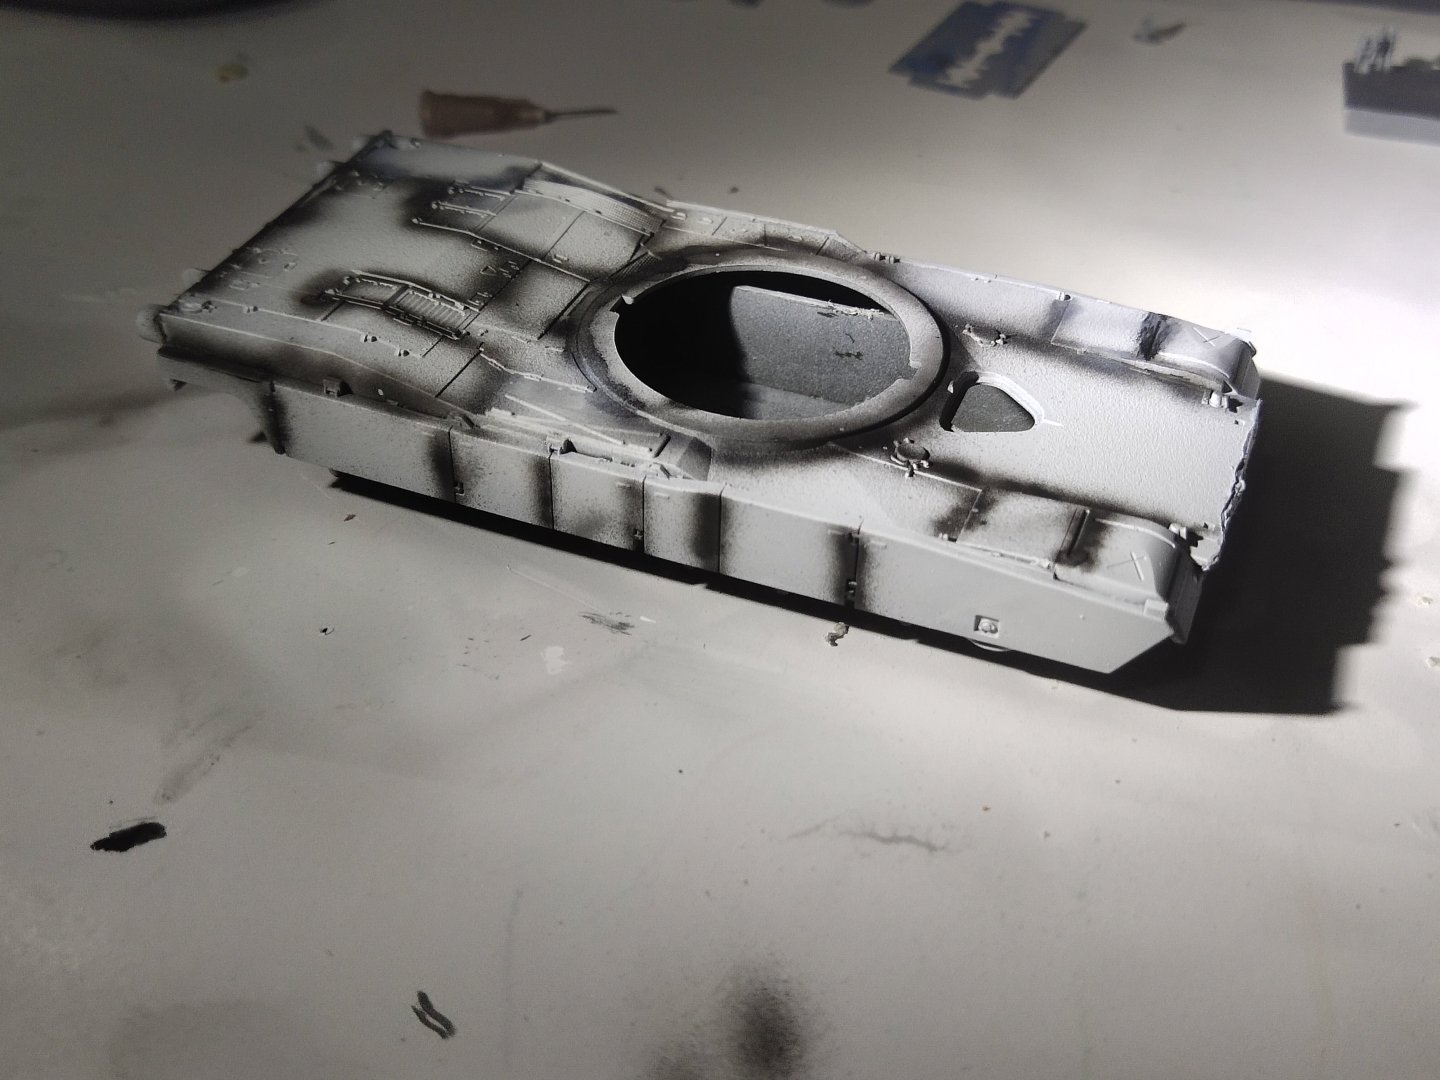
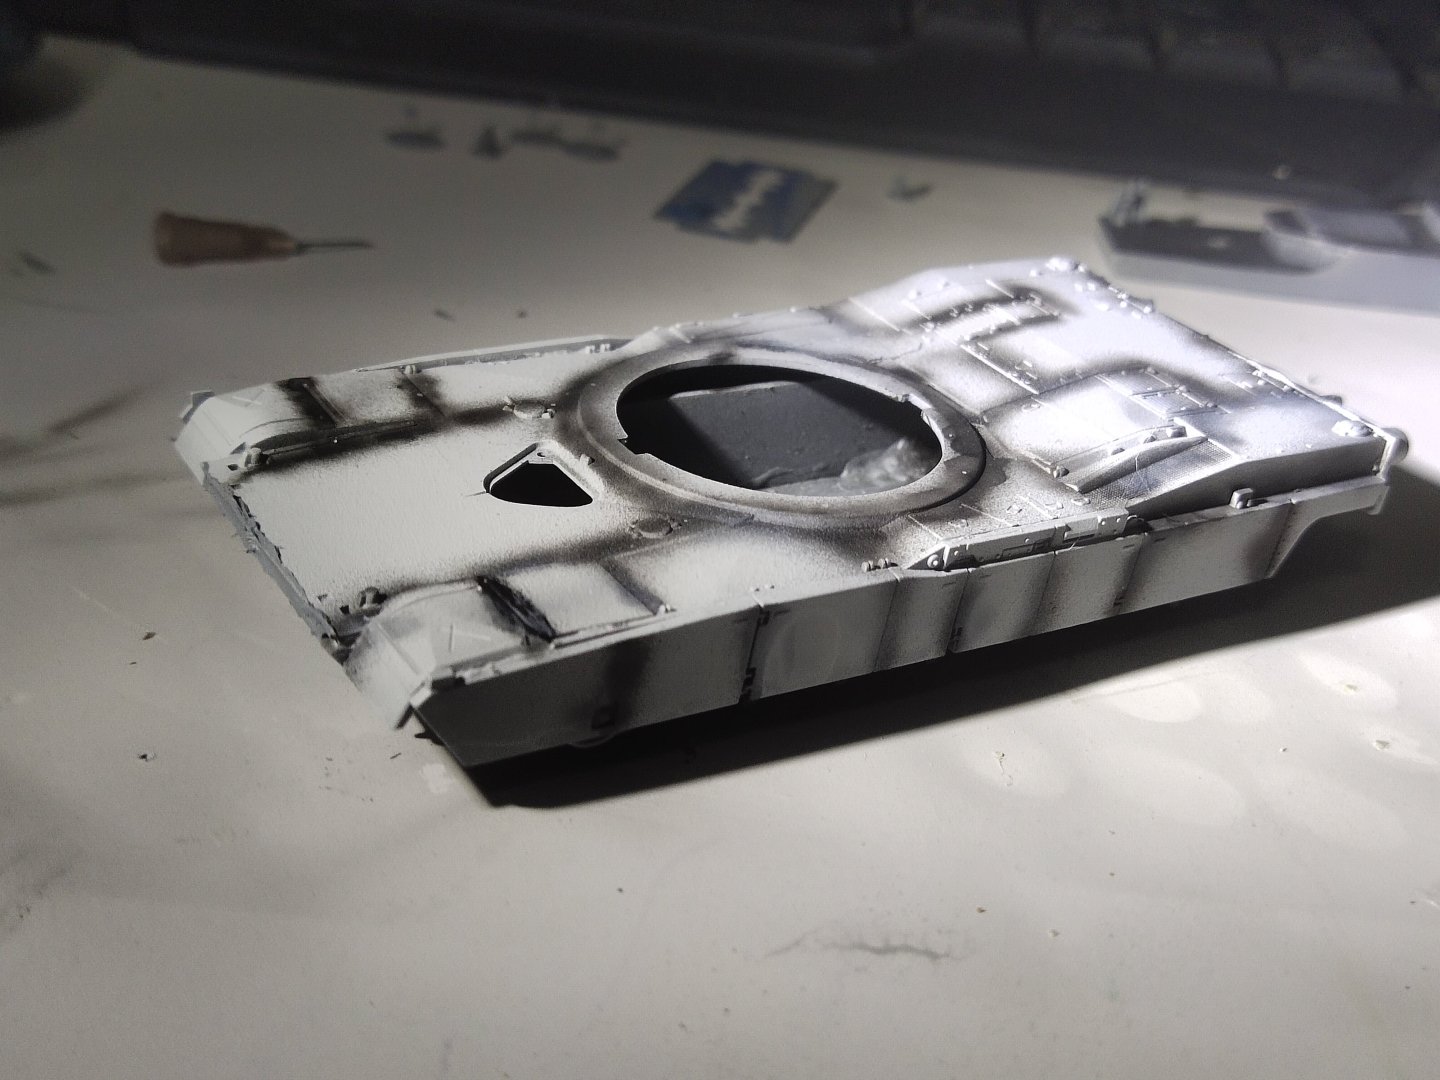
So I finish painting the model using lighter shades to give a color deterioration and dirt effect. Some dark color lightly sprayed over wheels. On a later phase I will use wshing oils to finish it


-
M1A1 ABRAMS by mikegr - FINISHED - Revell - 1:72 - PLASTIC
mikegr replied to mikegr's topic in Non-ship/categorised builds
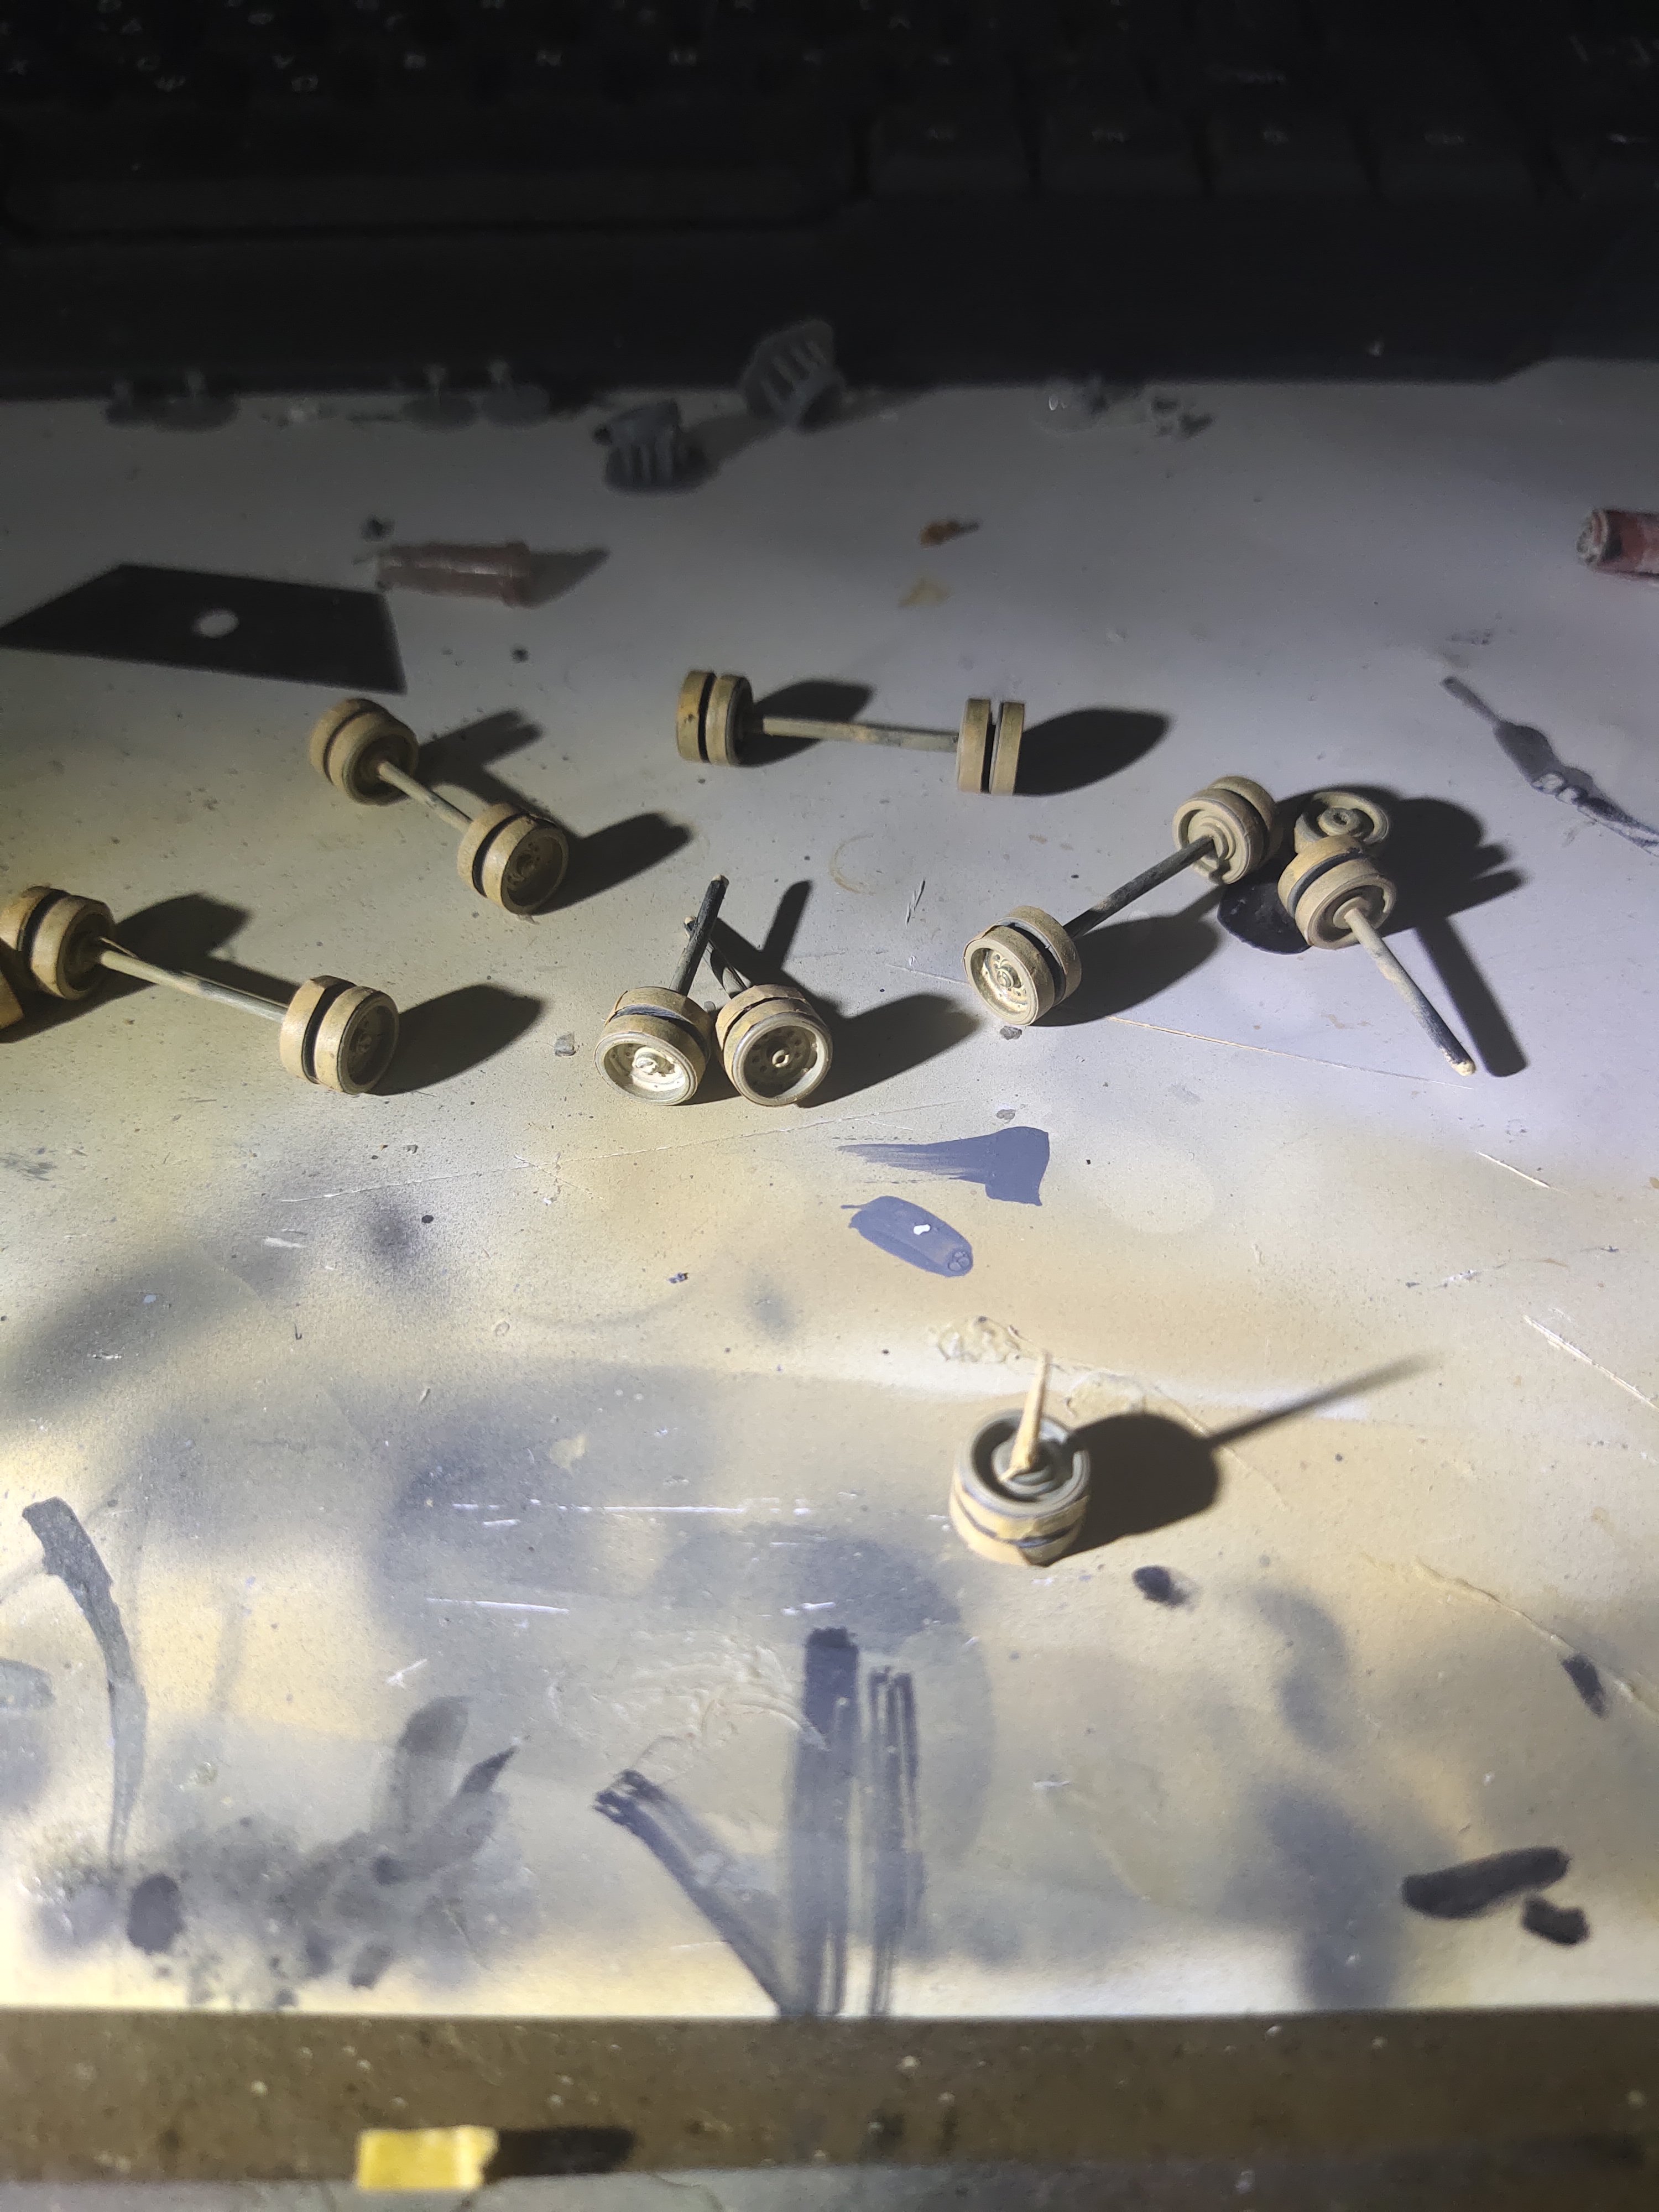
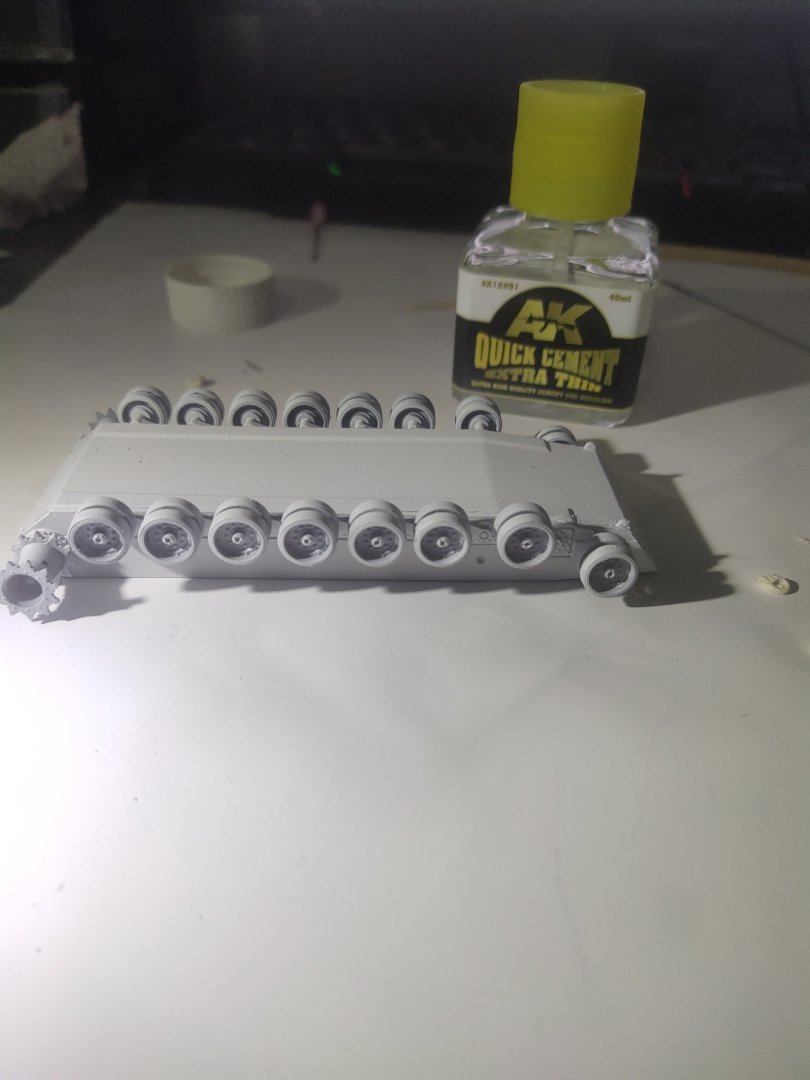
I sprayed the wheels and made some corrections with mini brush. Perhaps it should be better if I had sprayed them before glued in one piece. Too late. Hopefully the way I put them in place and the side skirts along with the tracks and usage of oil washes will minimize the imperfections. Side skirts also may need to be removed for positioning the tracks easier. Will see.

-
M1A1 ABRAMS by mikegr - FINISHED - Revell - 1:72 - PLASTIC
mikegr replied to mikegr's topic in Non-ship/categorised builds
Looks like the 500$ Iranian drones worked pretty well against the M1A1 in Ukraine. Of course this is a downgrade version but Ukrainians did also improve it with additional armor. For a 10 millions a piece you can have 20.000 drones instead. The gun of the M1 is no doubt a success thus the powerful and accurate shots. But its a German one by Rheinmetall, same mounted on Leopard. A verified Leopard shot at the target at 5.8 kms, back in 2017 proves this. I have worked on these during serving but on a 30mm AA guns, pretty impressive back then. A think the new M1 need to be equipped with self defense active system like Merkava, Leopard, T14s, even the new Turkish Altai has a domestic produced one. The passive armor protection belongs clearly to the battleship age, though its useful for protection against smaller caliber. Needless to say at the moment, companies are working on anti drone mini weapons, Rheinmetall has already produced the SADM, (Small Anti Drone Missile) with more to follow. -
M1A1 ABRAMS by mikegr - FINISHED - Revell - 1:72 - PLASTIC
mikegr replied to mikegr's topic in Non-ship/categorised builds
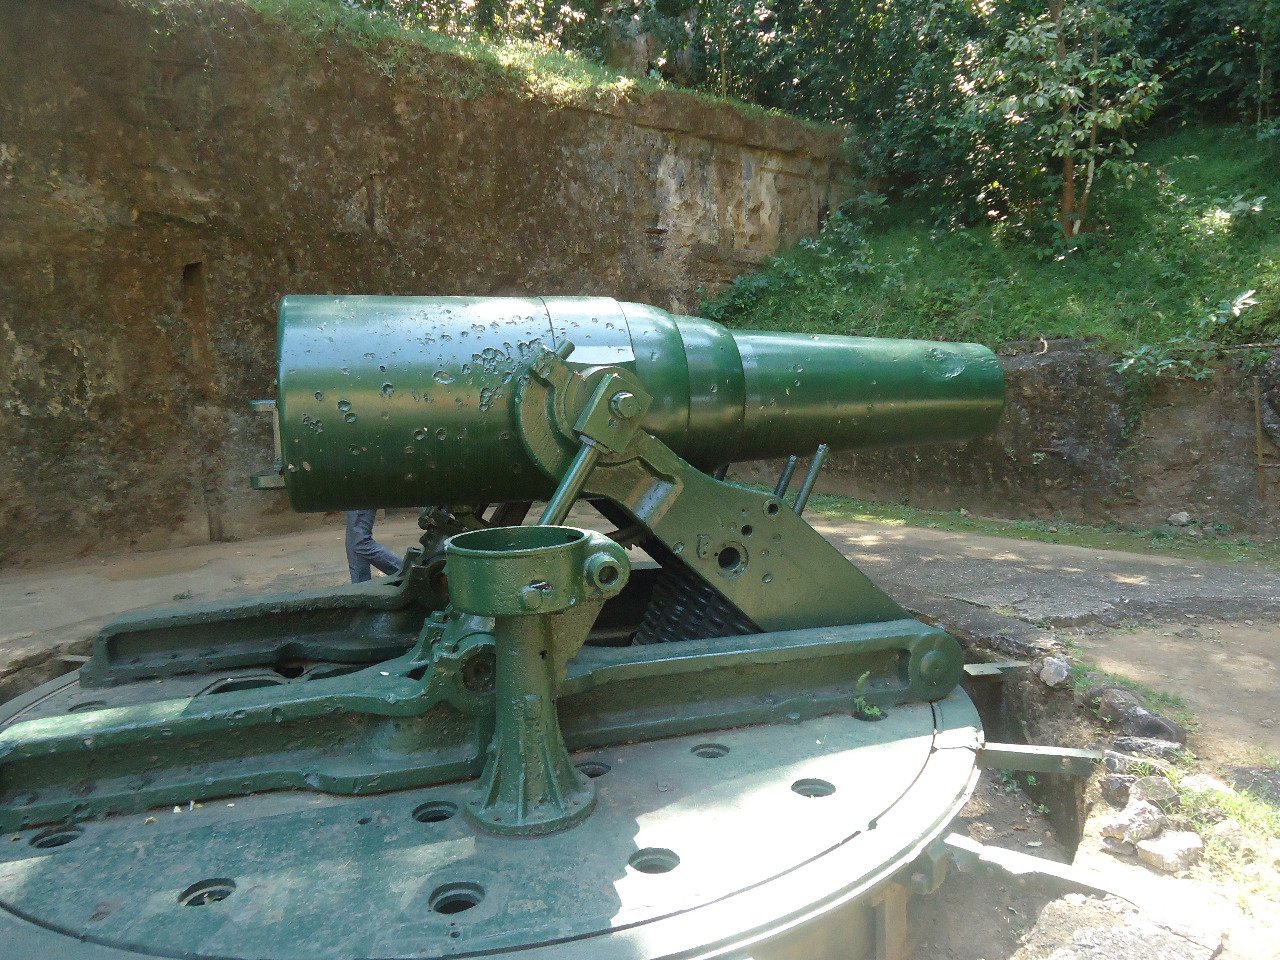
Thank for the comments about the model and pictures. Here are a few more from Corregidor. Was there in 2014. There are 11 or 12" mortars. You can see the marks from the bullets shot and realize how close was the combat. Best sightseeing in Manila is actually off Manila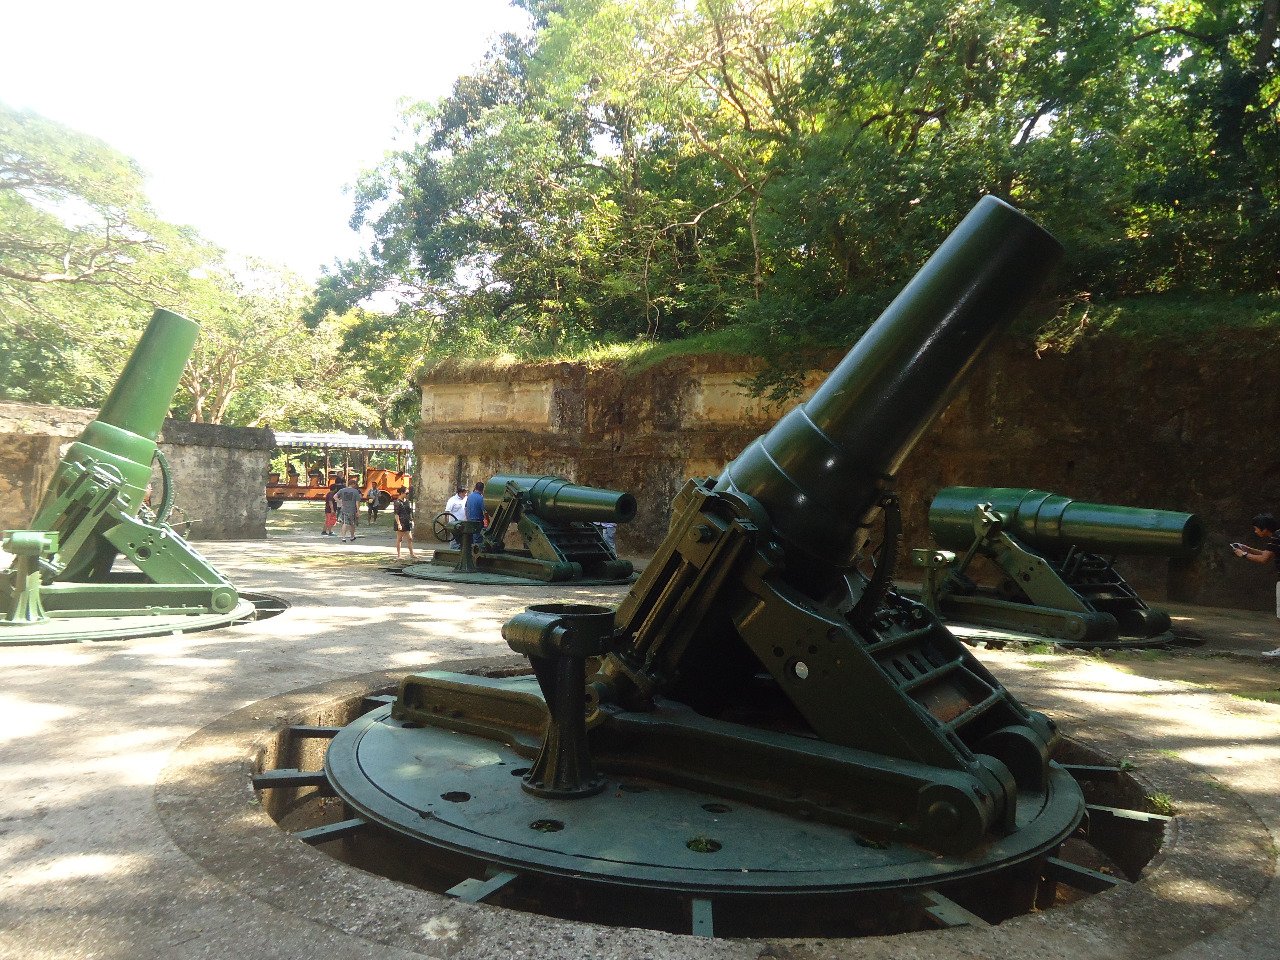

-
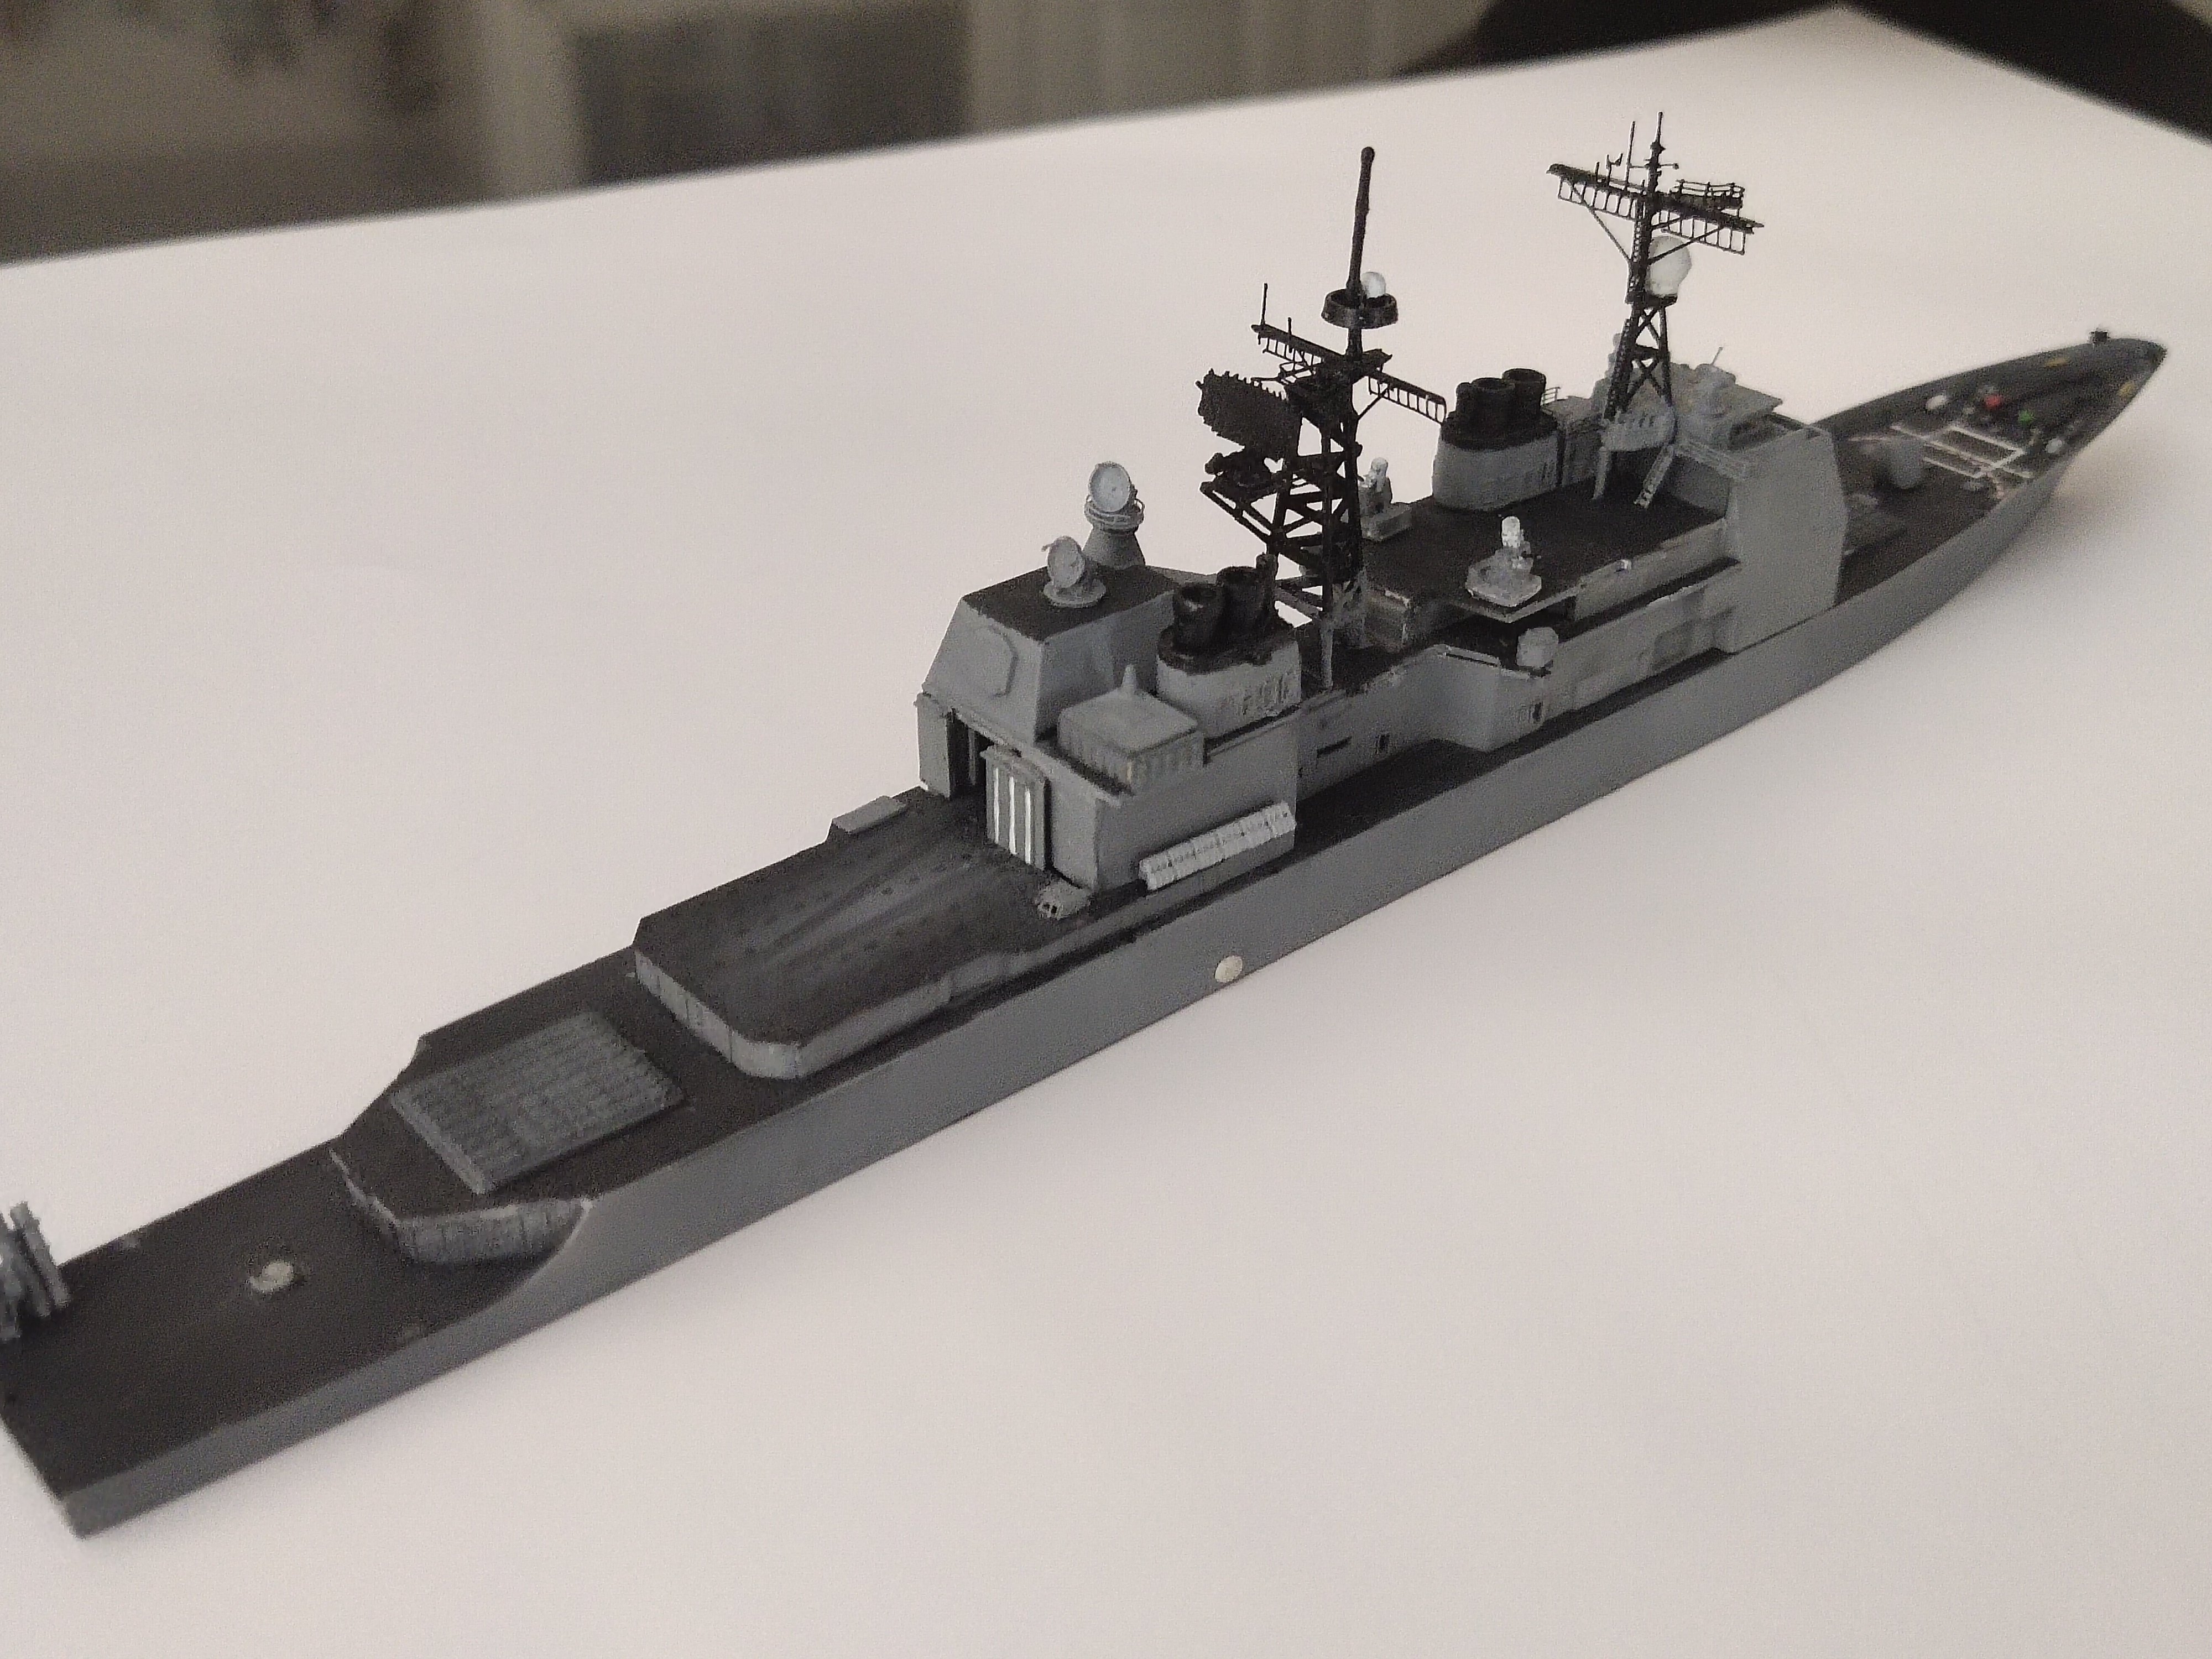
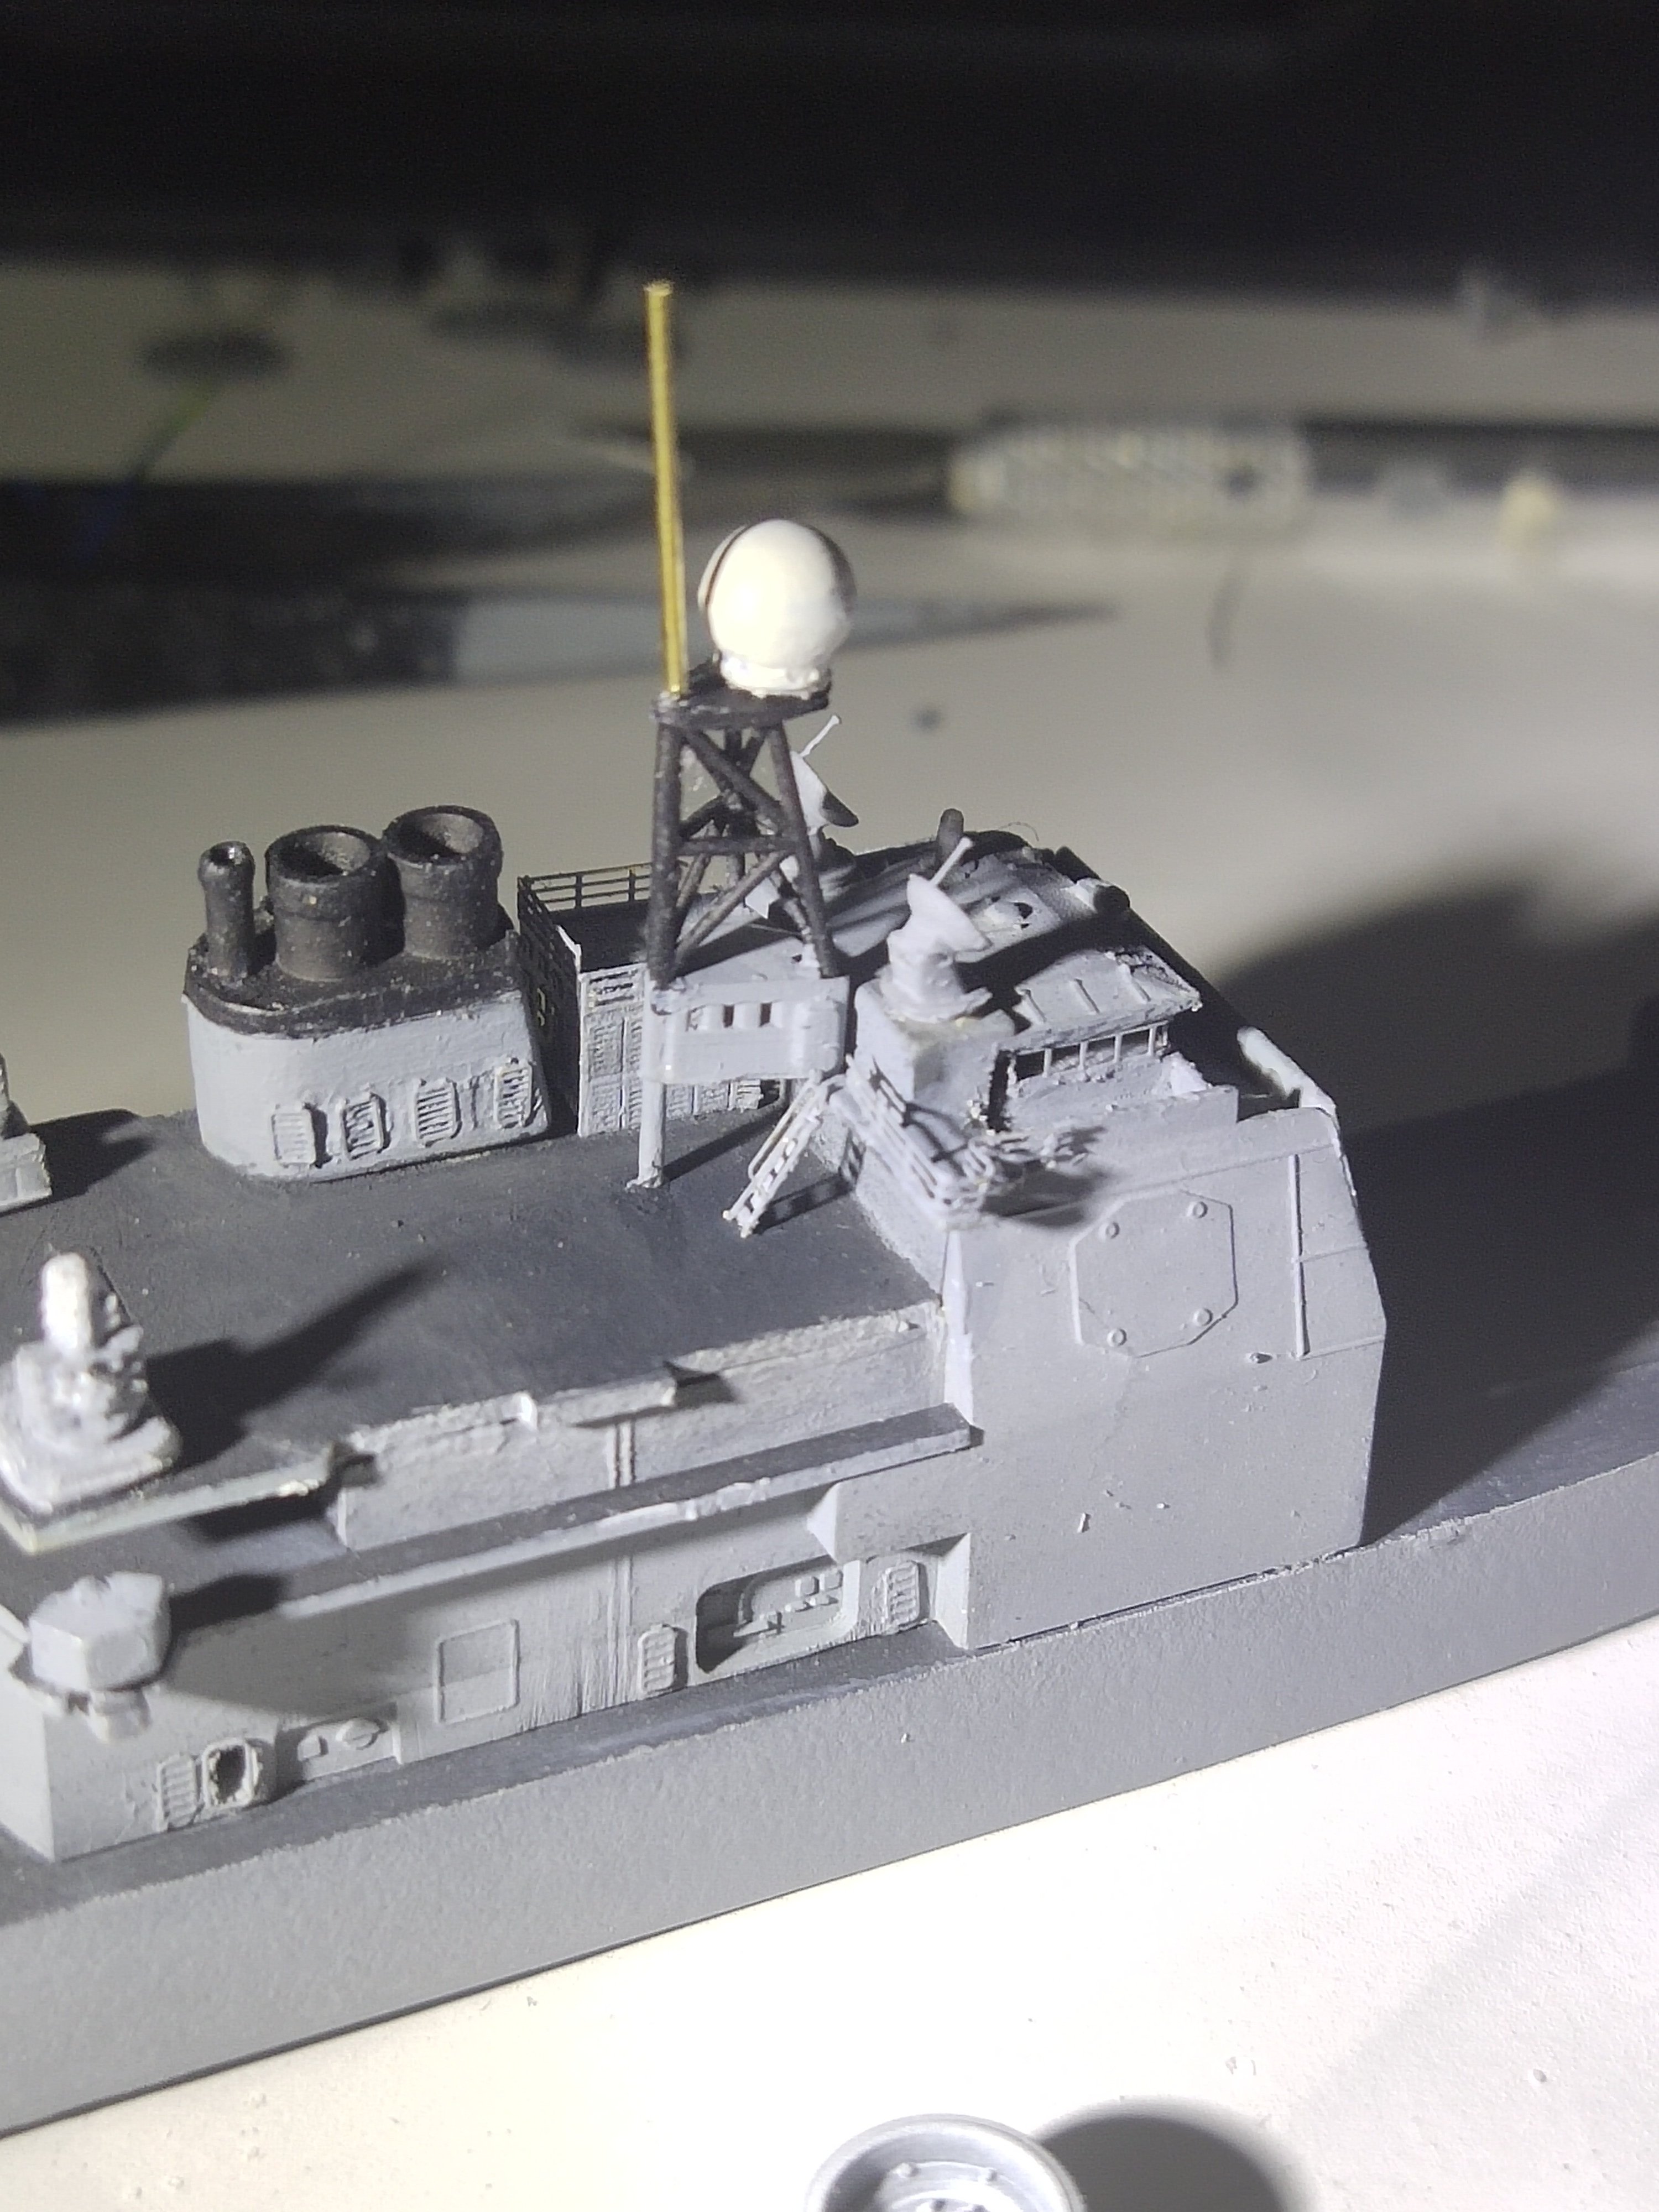
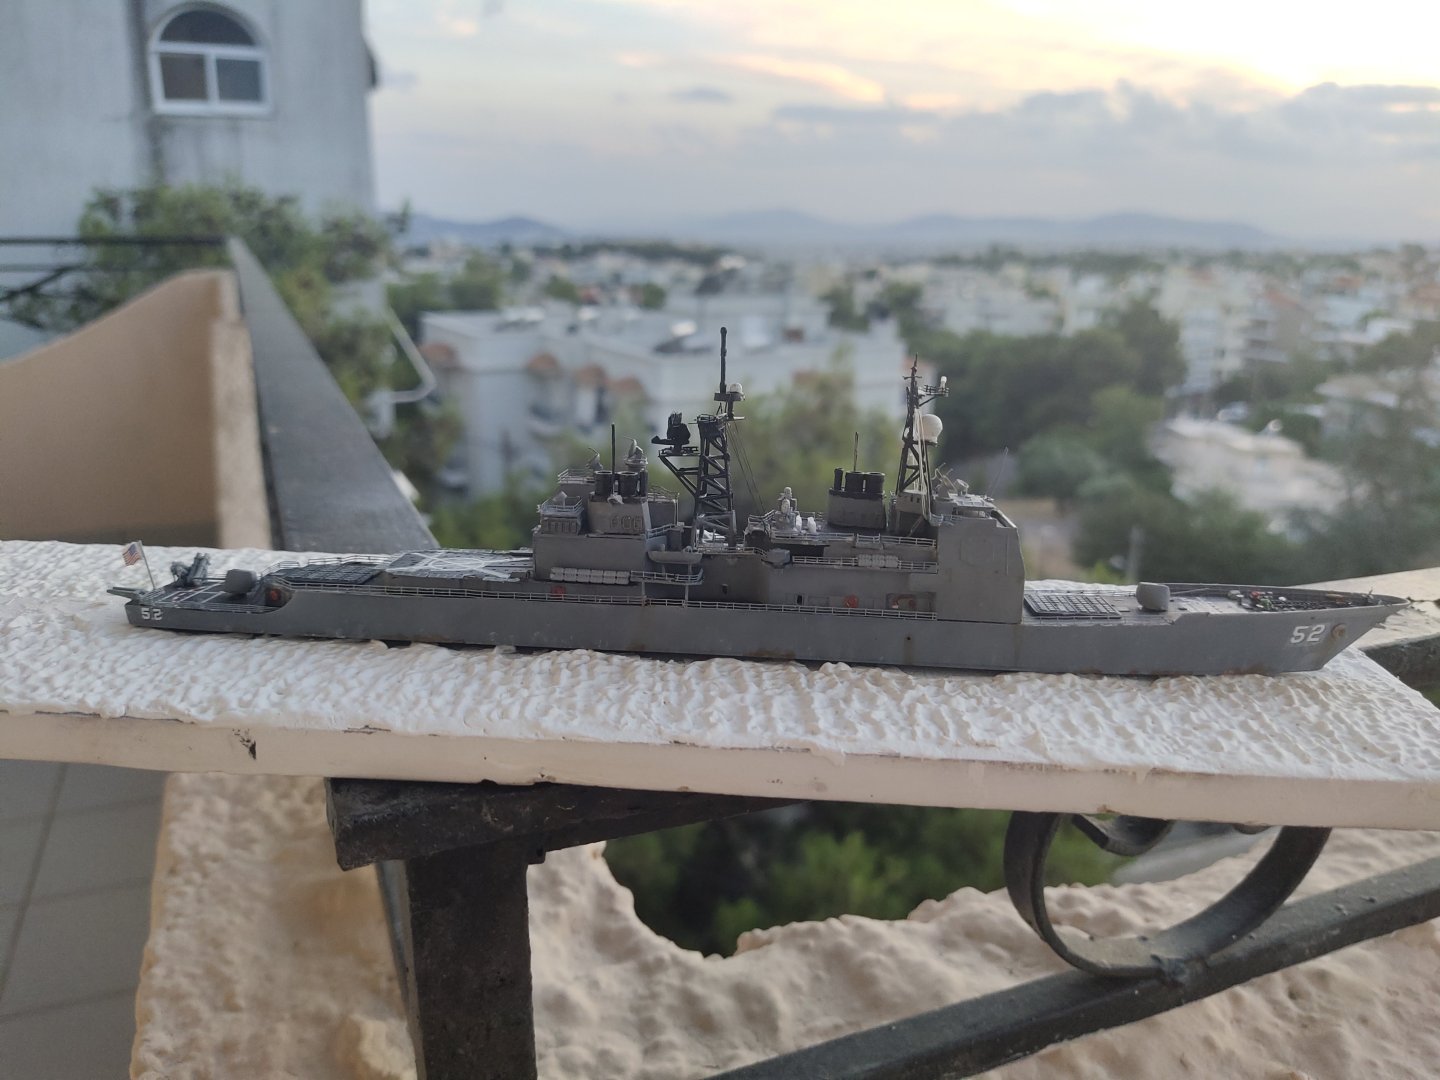
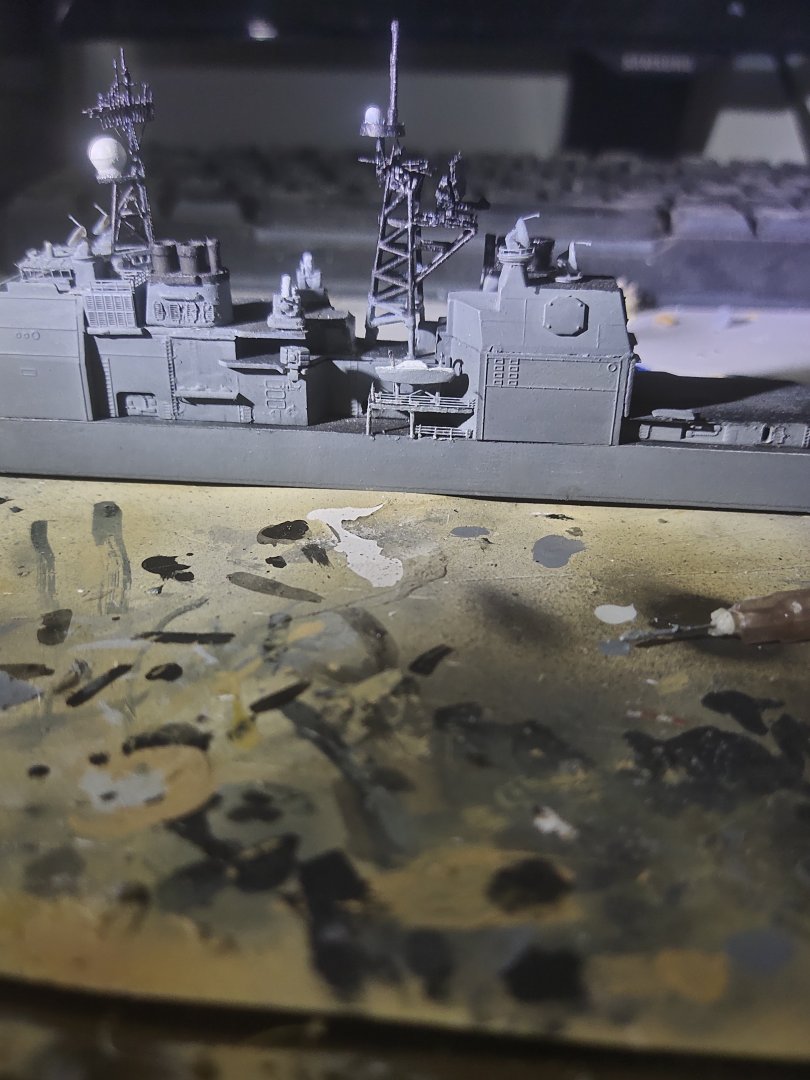
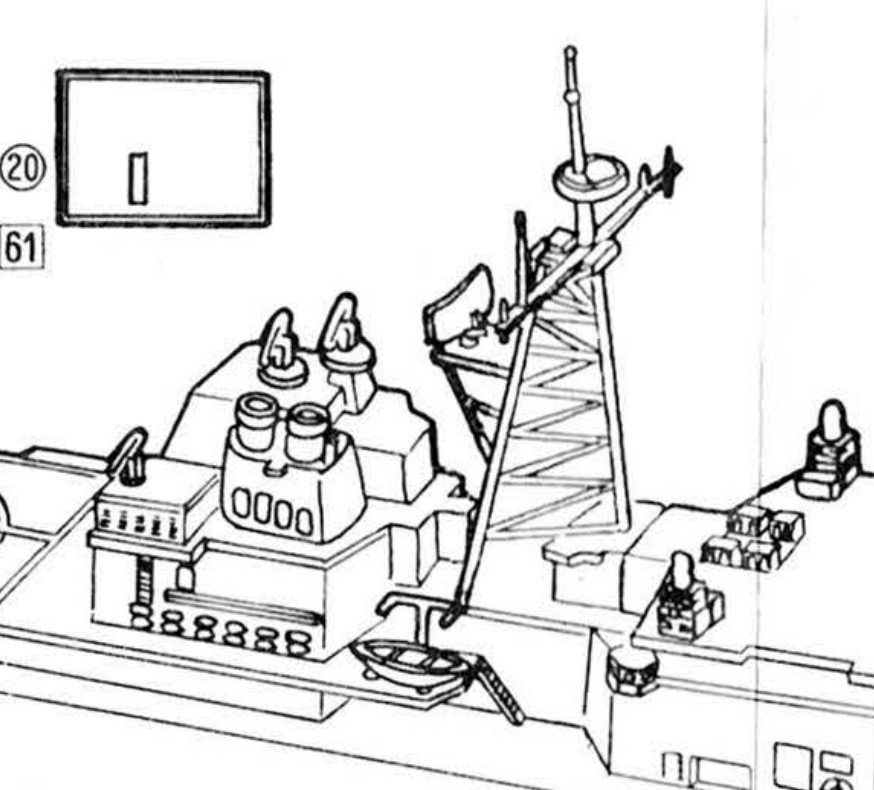
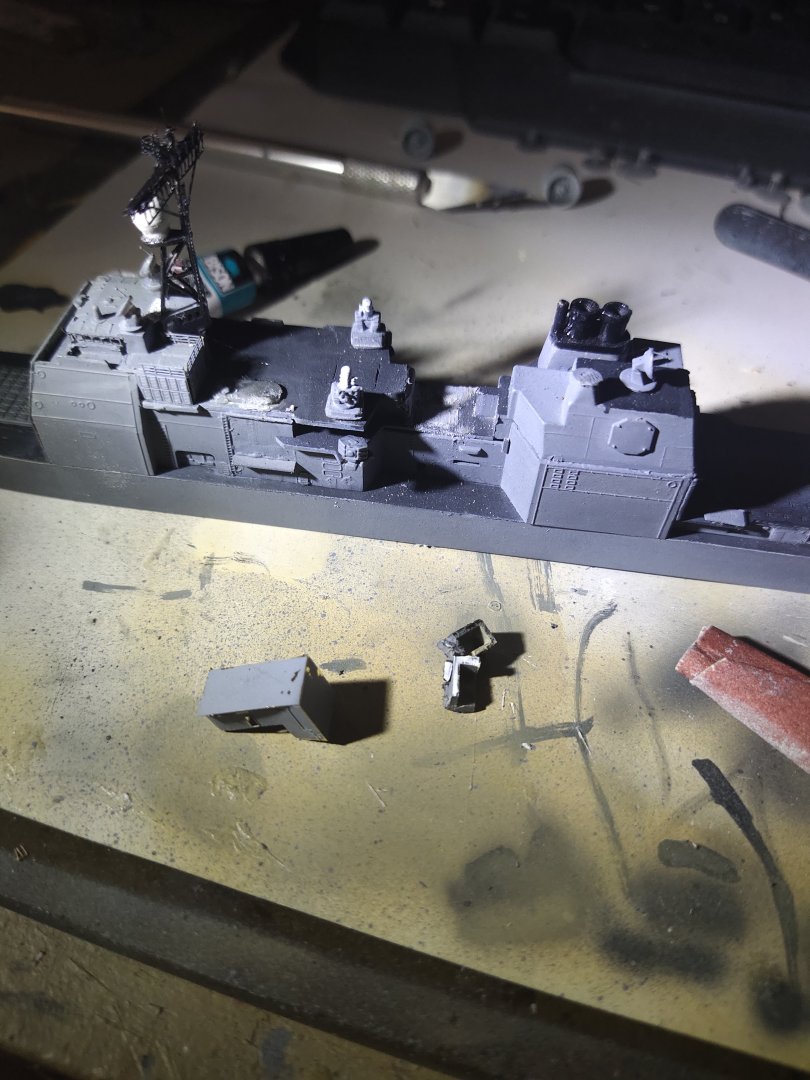
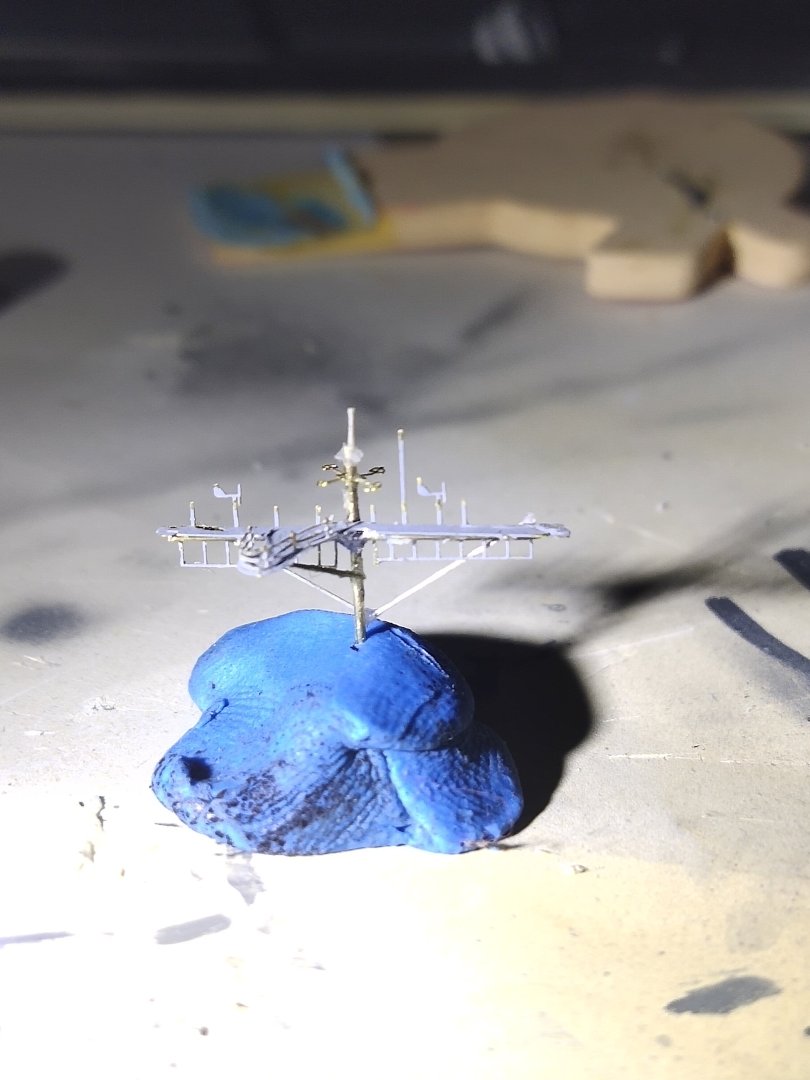
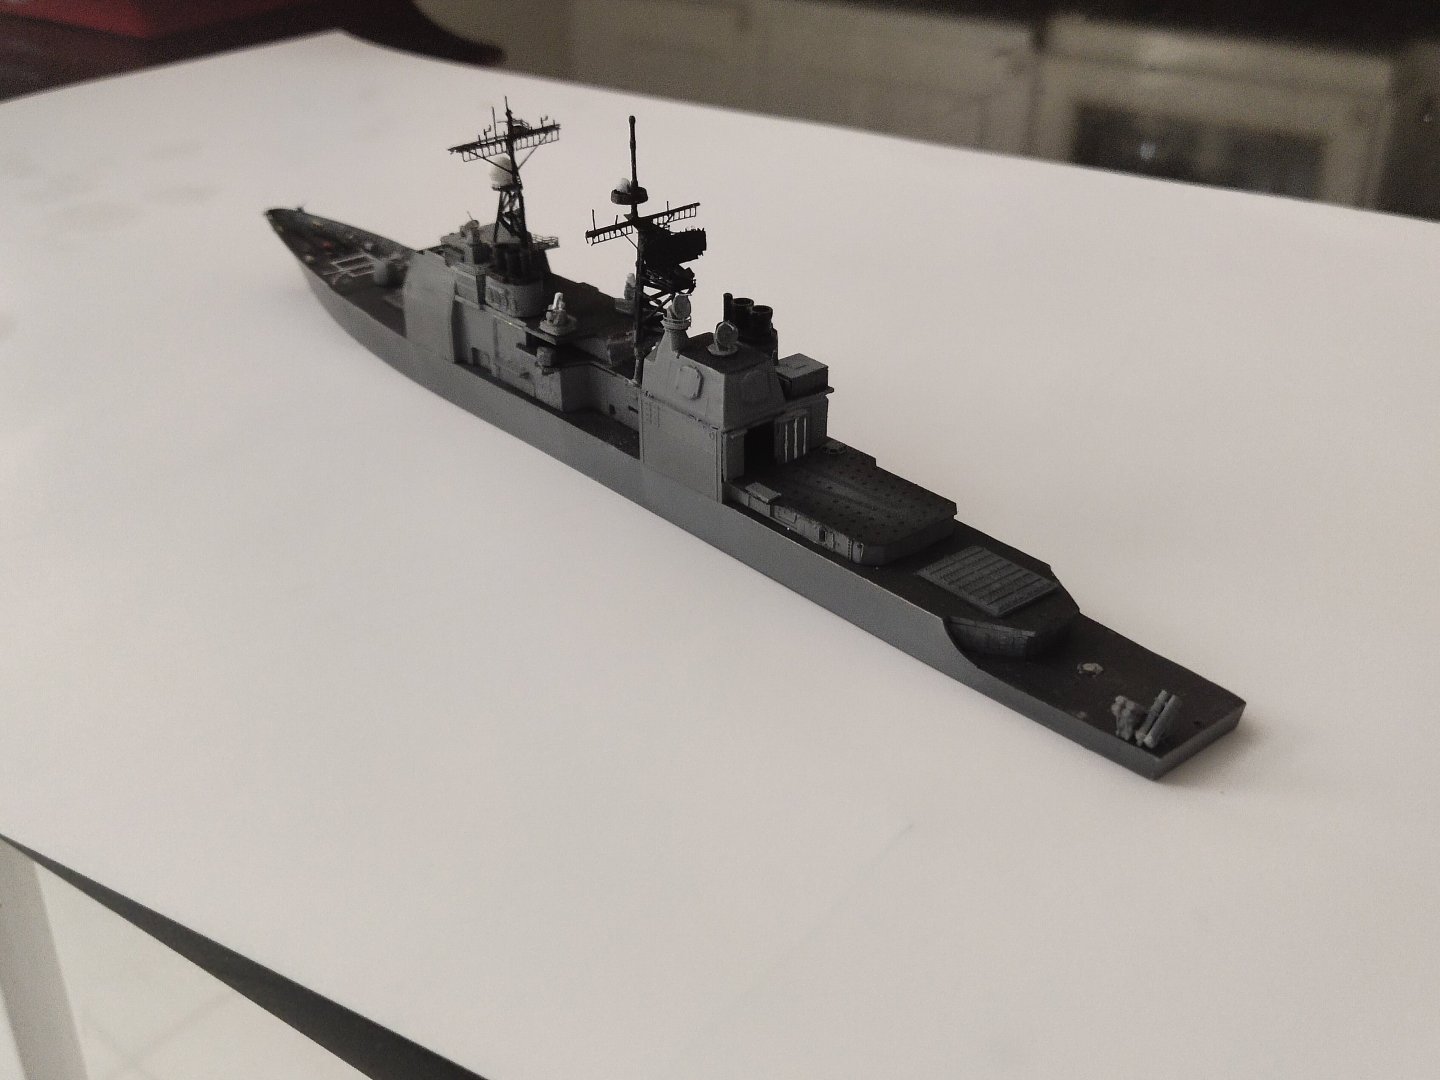
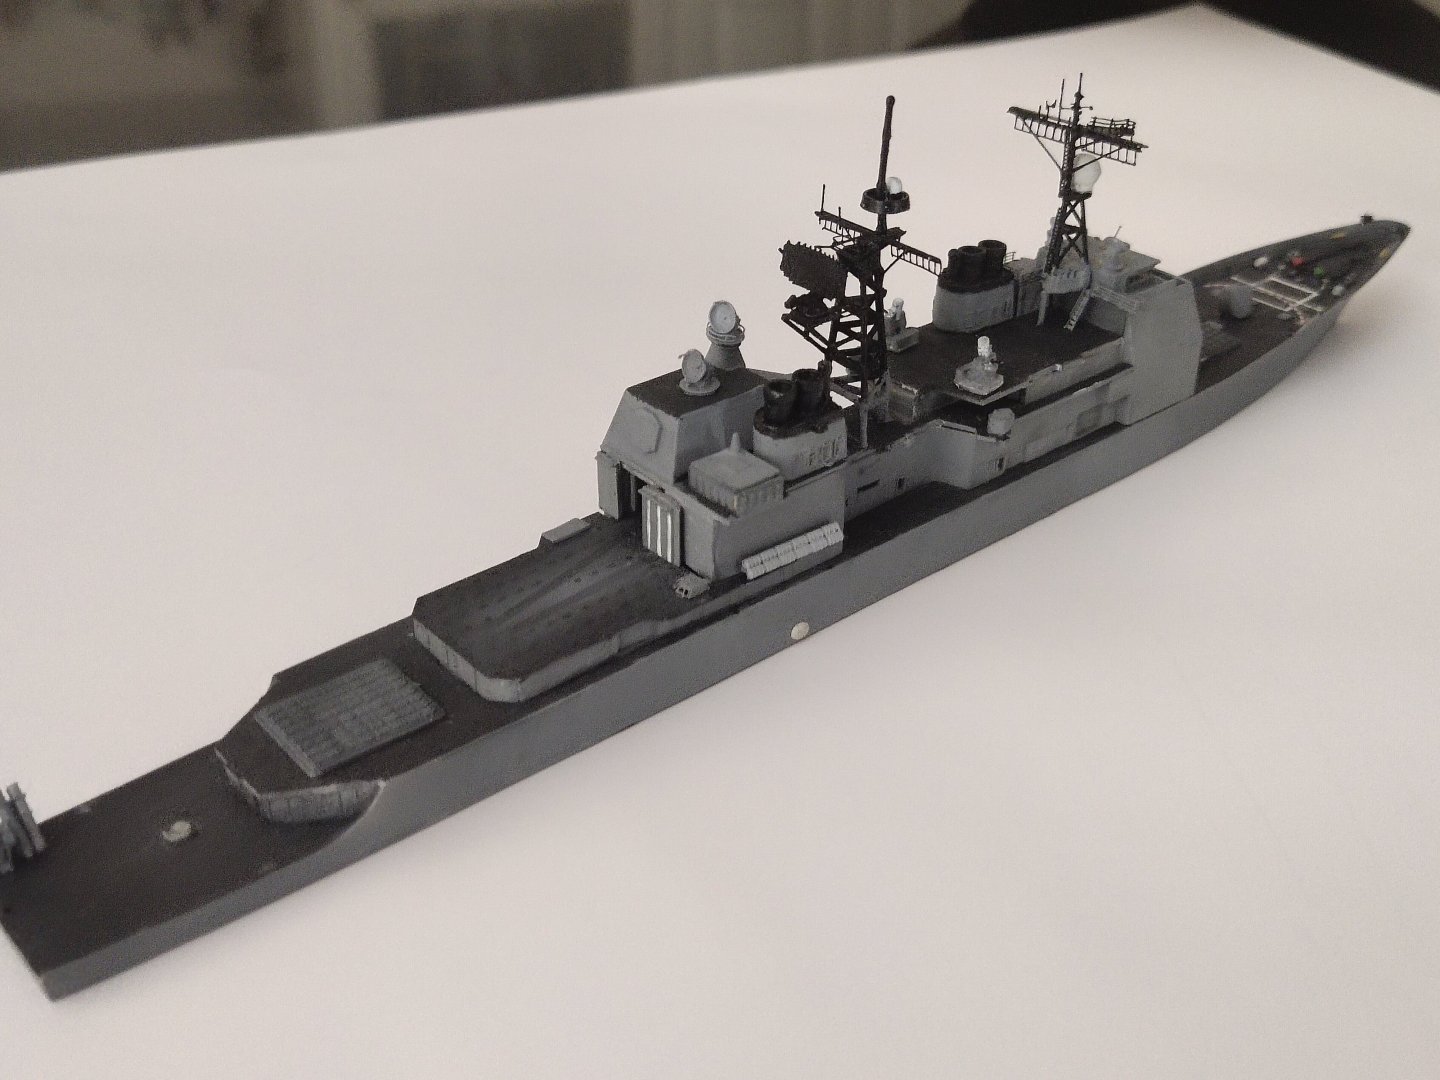
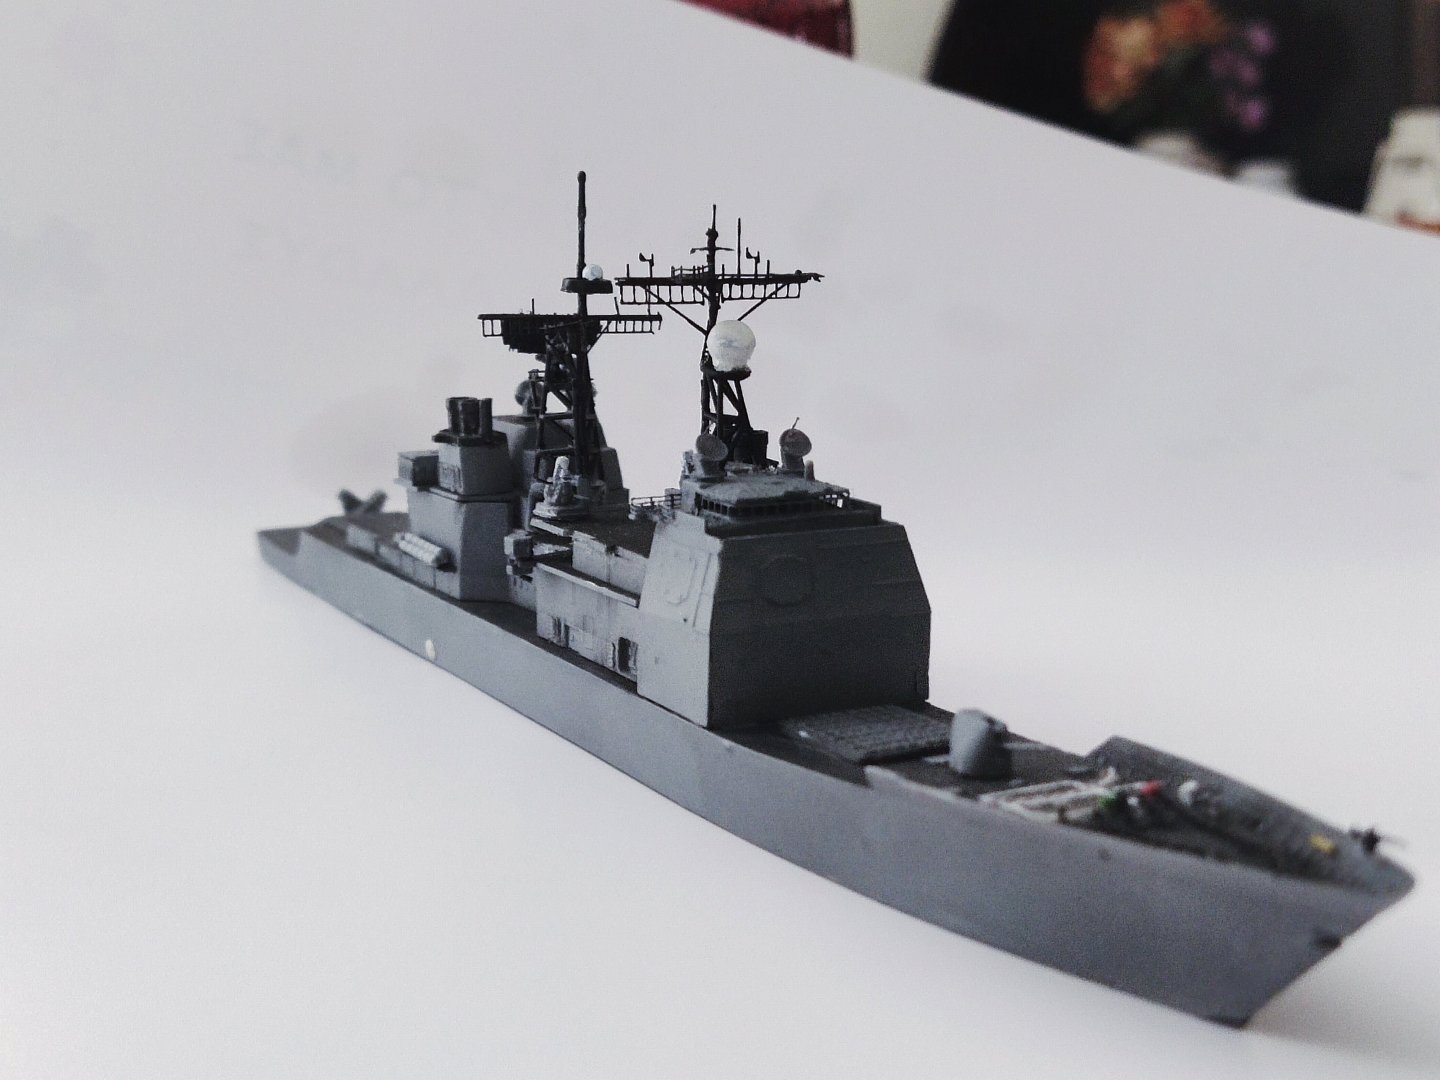
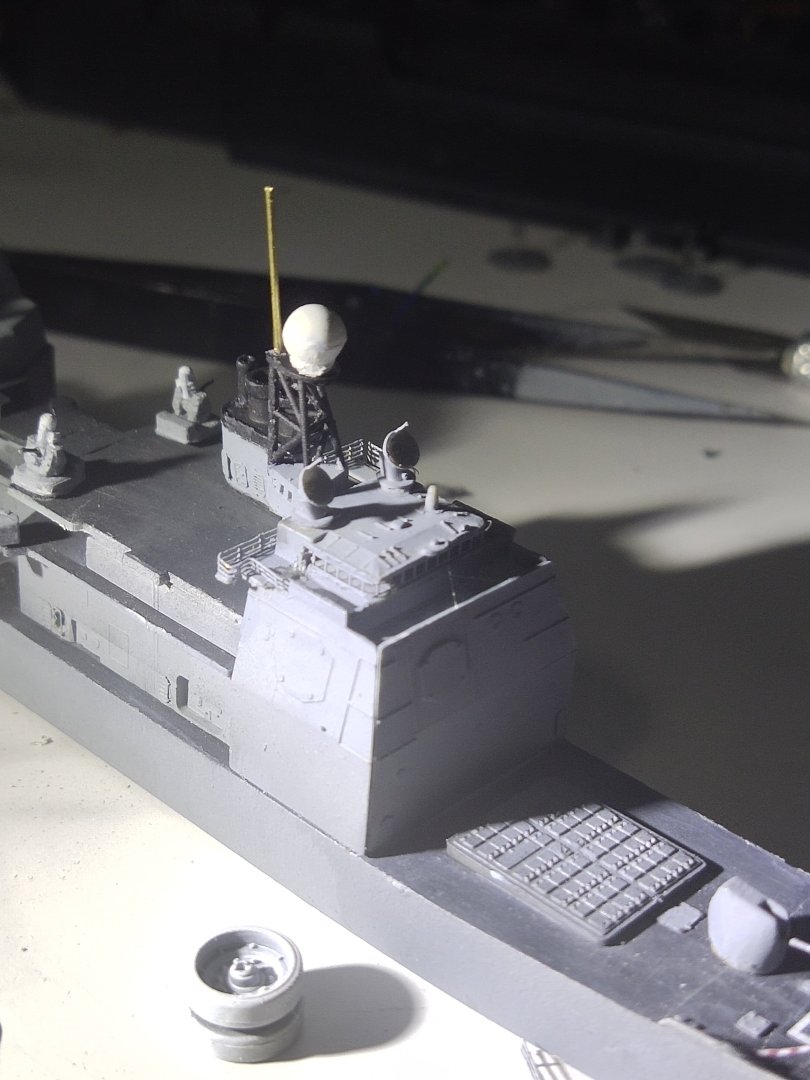
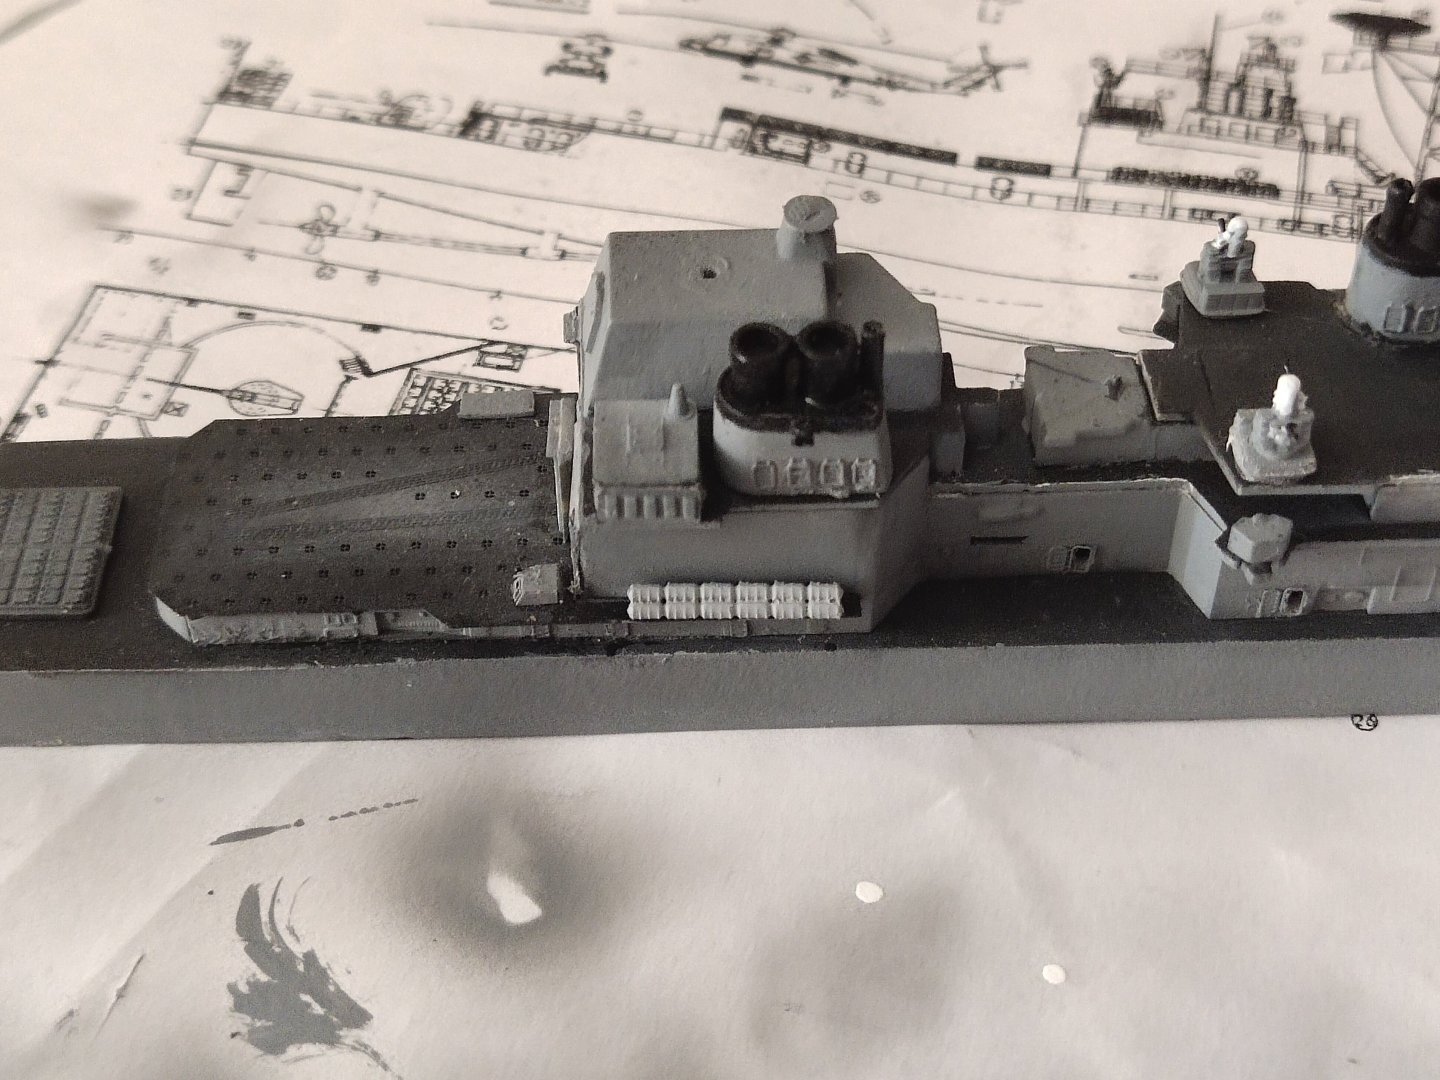
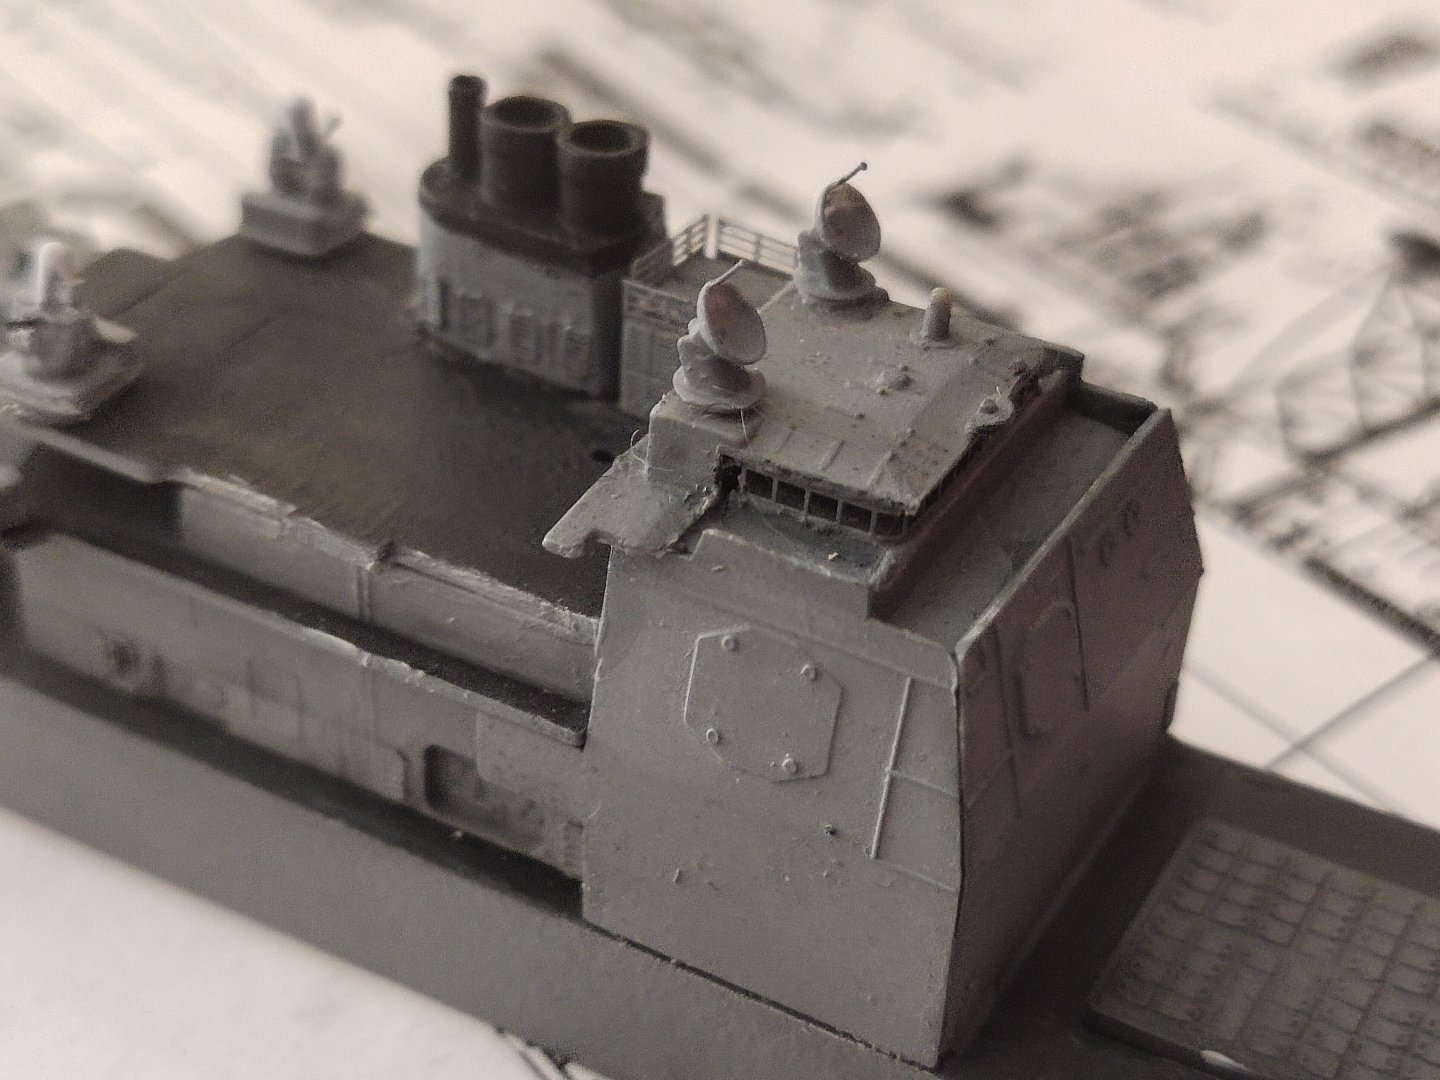
I can't understand why the orgininal instructions showed the forward leg of the main mast rest on the deck. Time to make some space and fit it properly The forward mast was made with the usual material, pe, plastic, brass, hair. I'm glad with the result but I can still work to improve my pe handling skills When the masts glued the model looks like a proper Tico cruiser.
-
M1A1 ABRAMS by mikegr - FINISHED - Revell - 1:72 - PLASTIC
mikegr replied to mikegr's topic in Non-ship/categorised builds
Painting started with careful moves not to delete the dark shades After 1rst coat After 2nd After 3d After the last one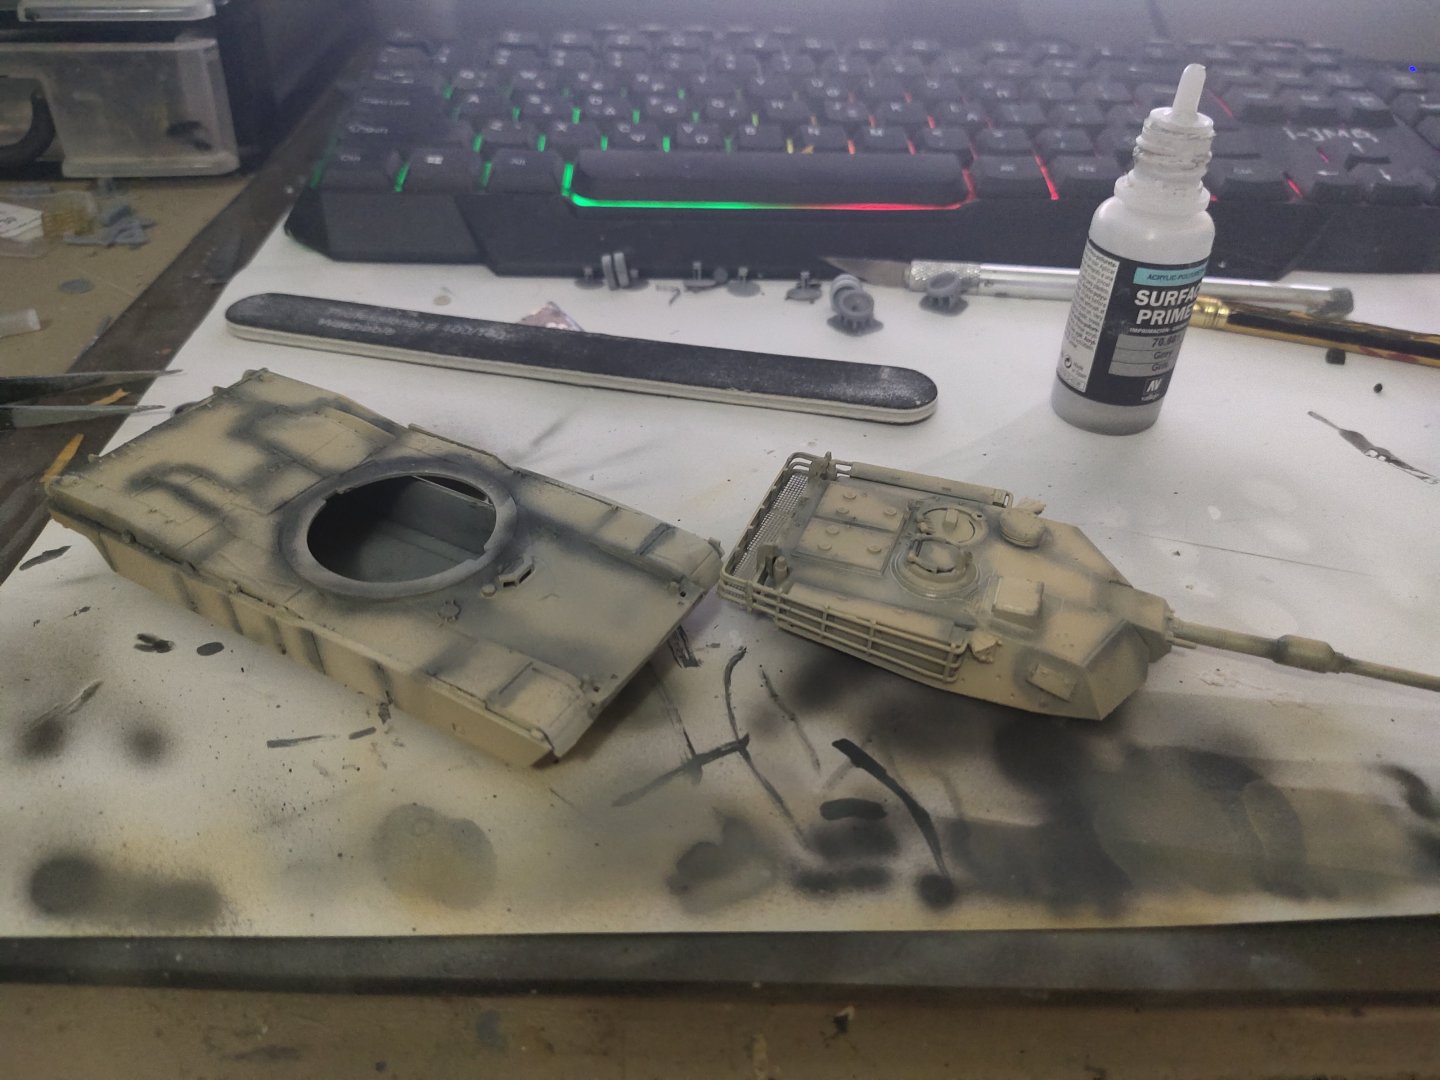


- 24 replies
-
- 11
-

-
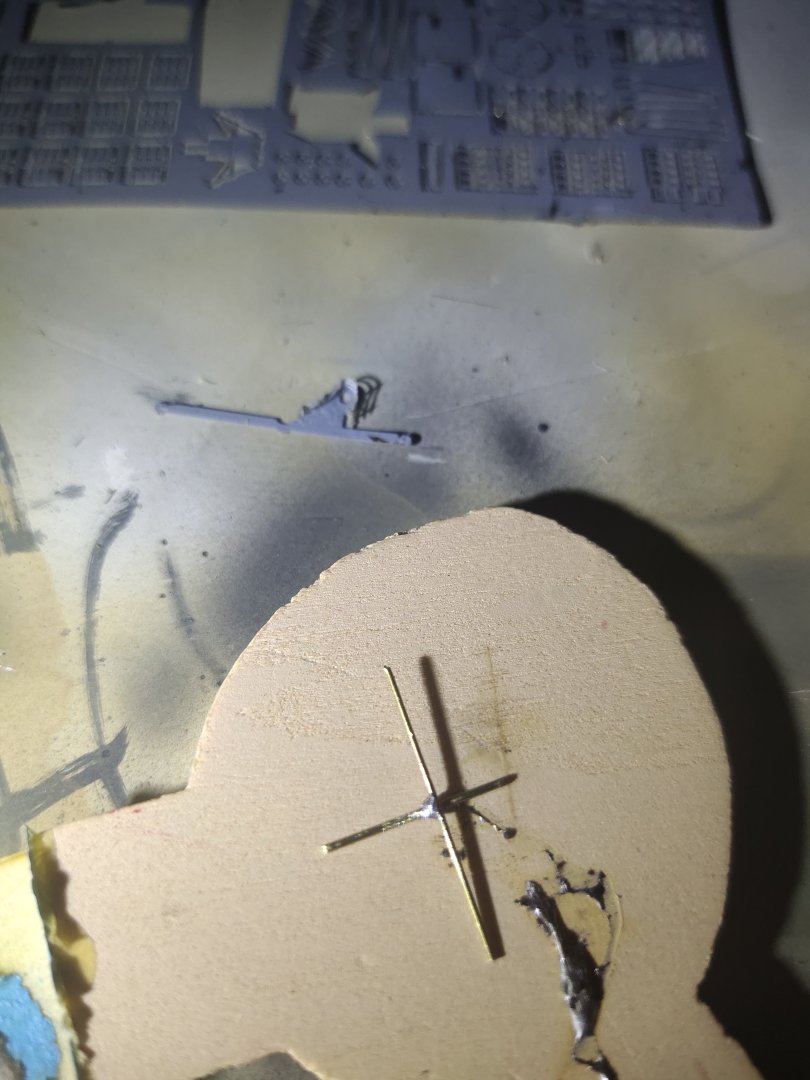
Small update While working on the mast I managed to fiinish the area around the forward mast adding some details
-
M1A1 ABRAMS by mikegr - FINISHED - Revell - 1:72 - PLASTIC
mikegr replied to mikegr's topic in Non-ship/categorised builds
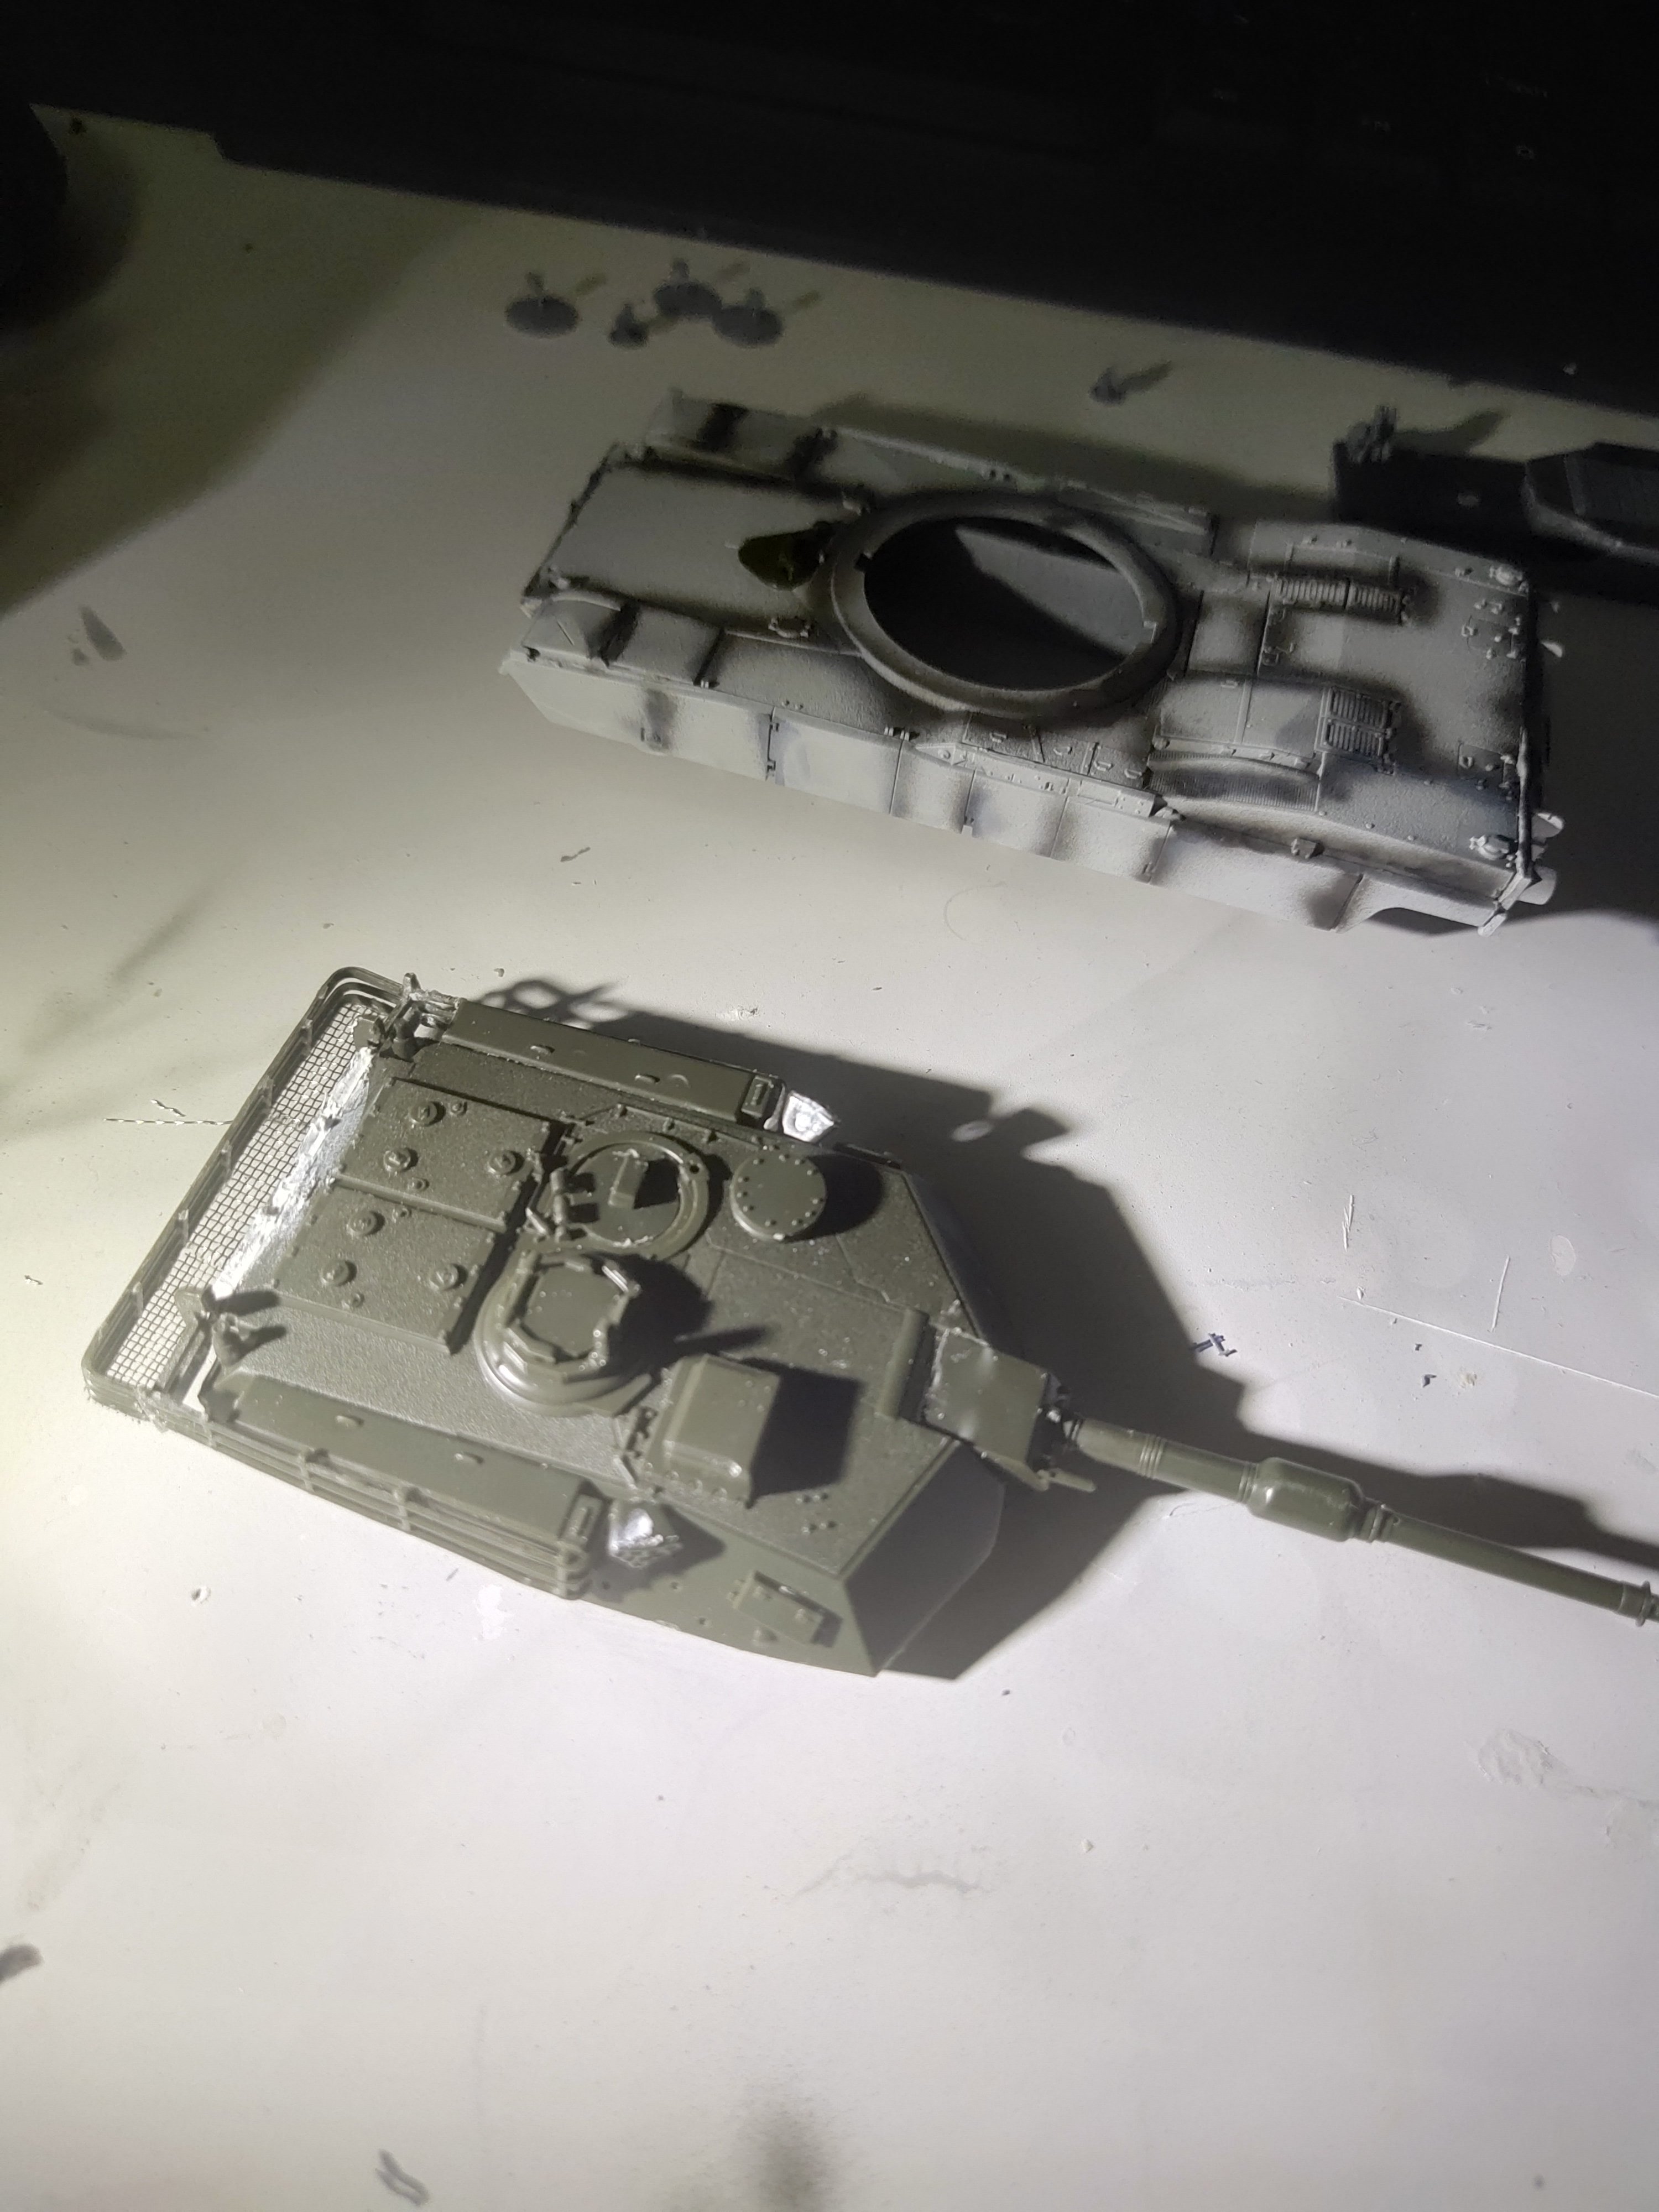
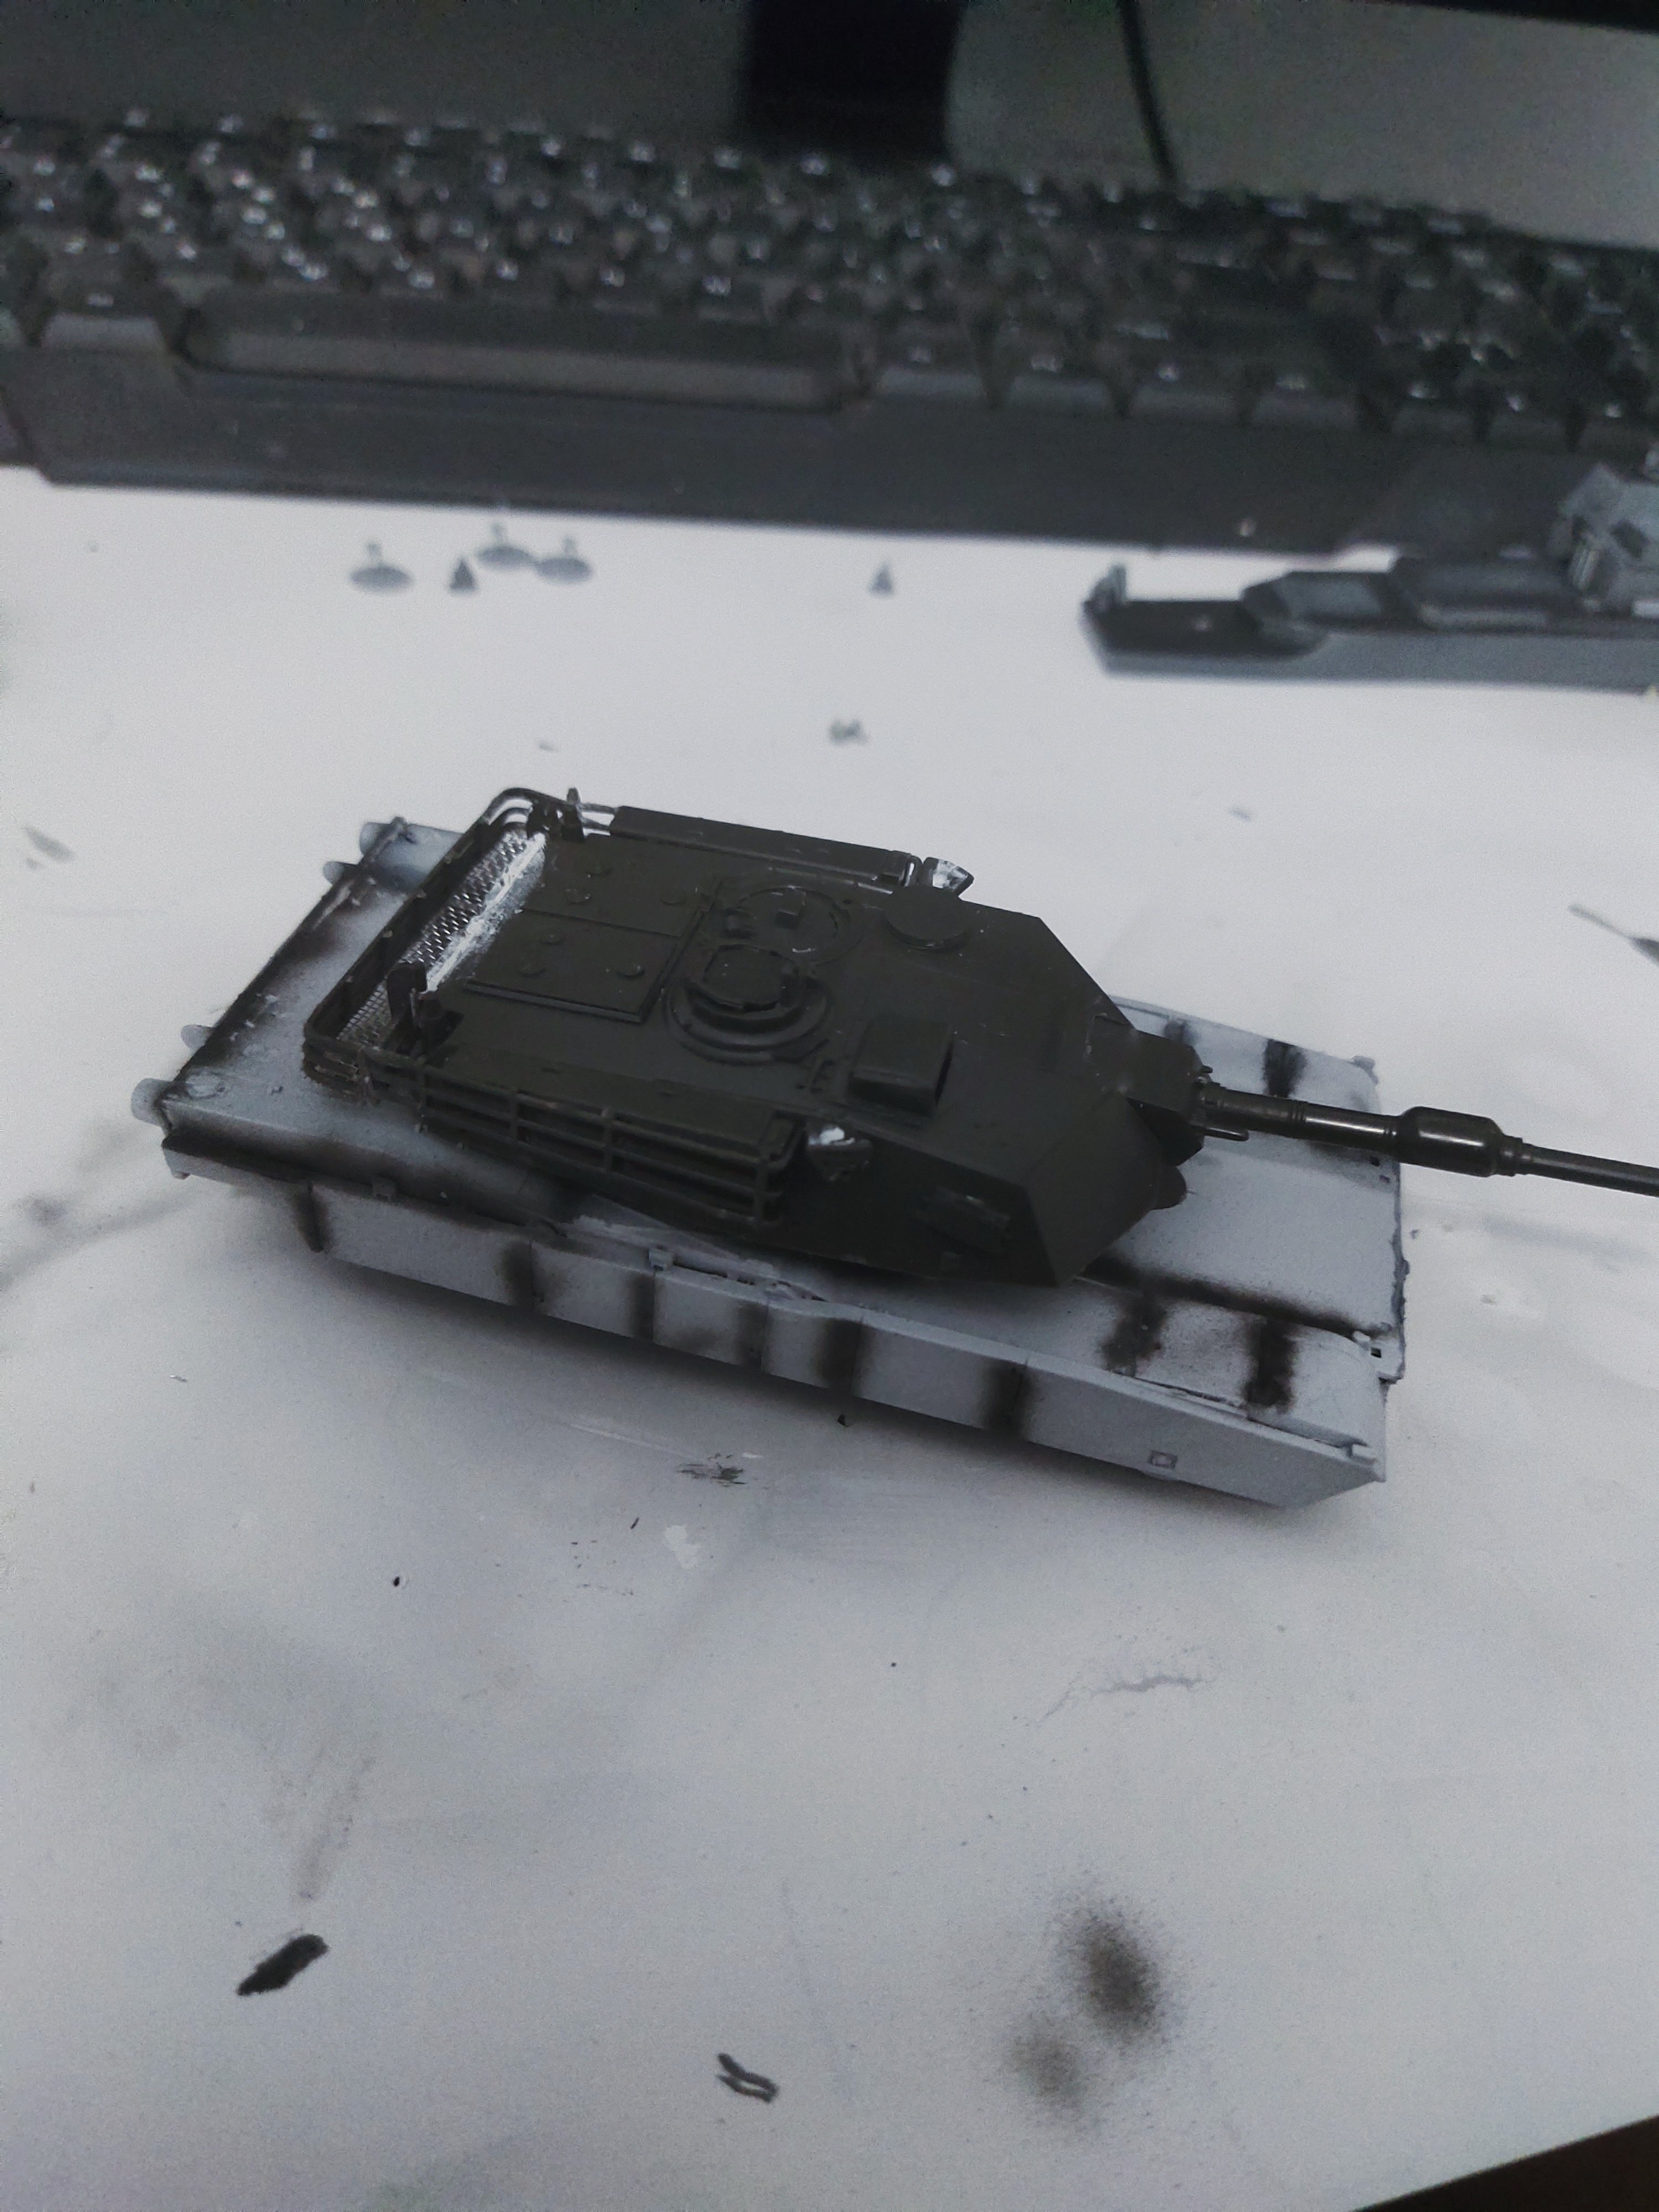
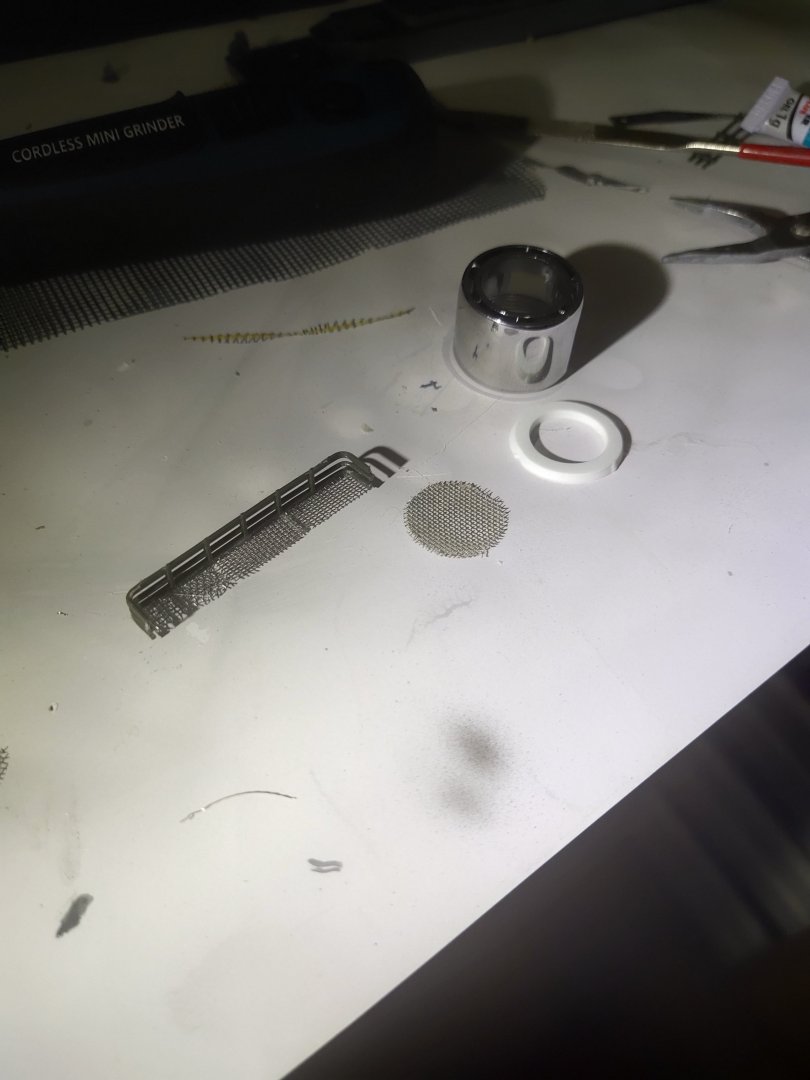
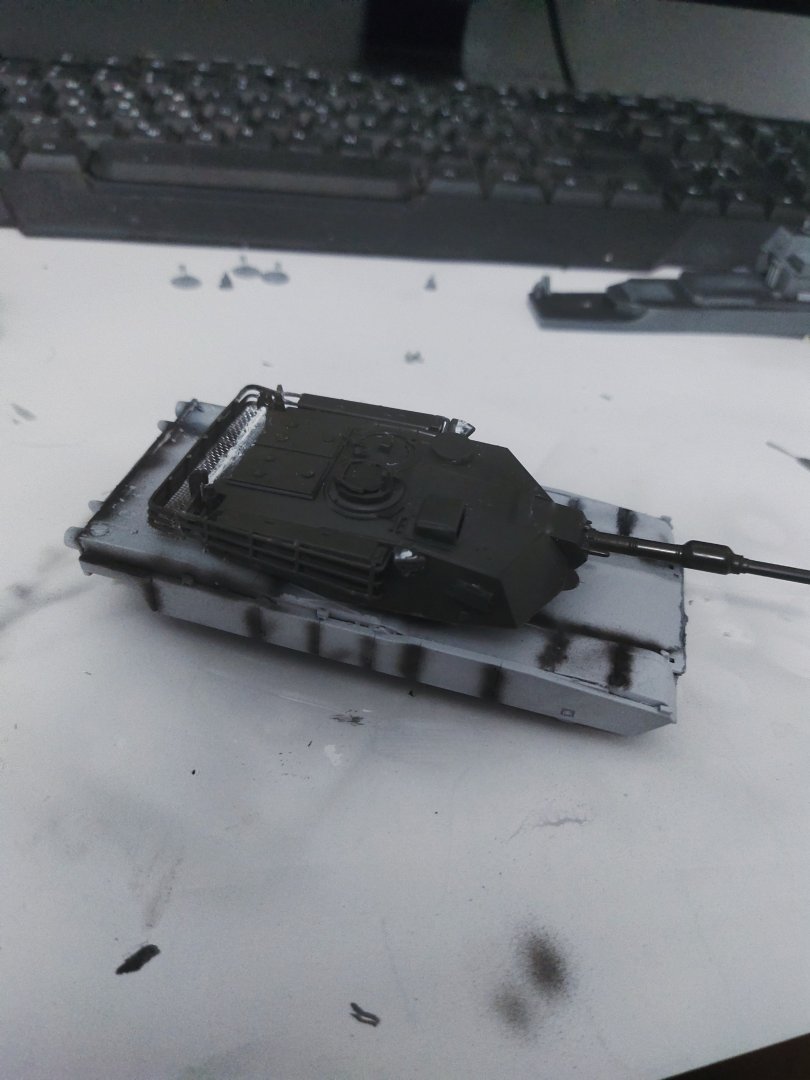
The turret was easy to built. I did some improvement, drilled the barrel and put some grill behind the gun house. For this I used 3 pieces of tap mini filter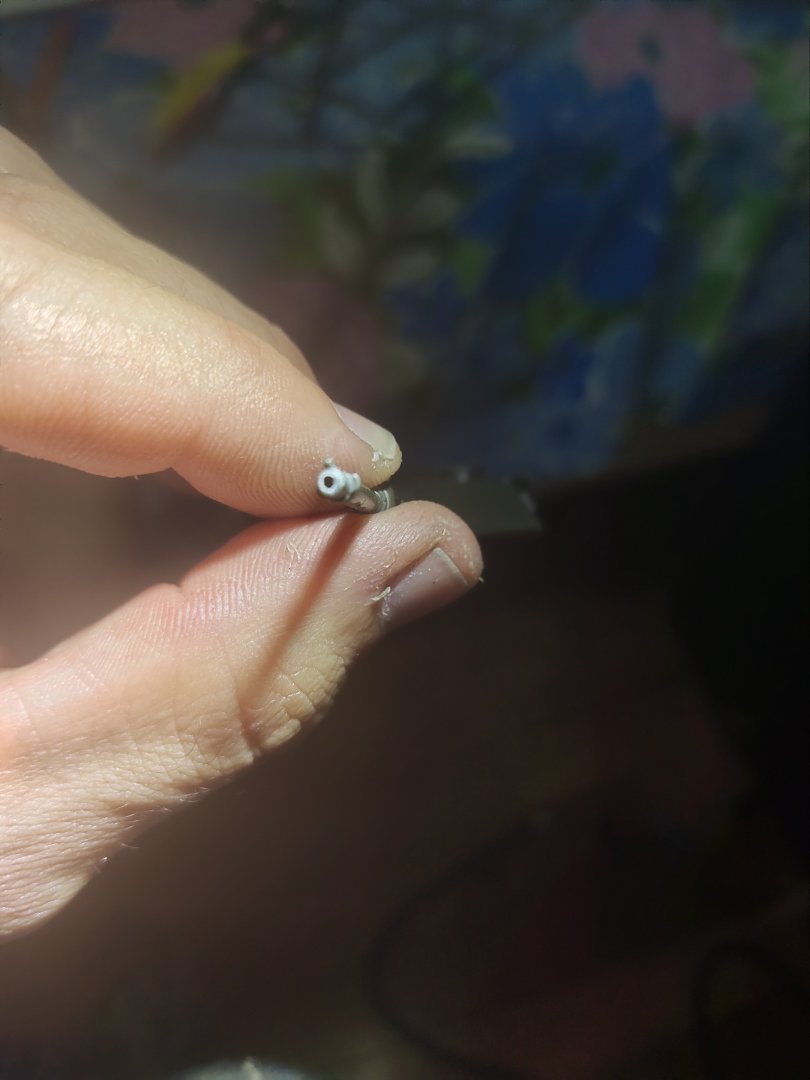
-
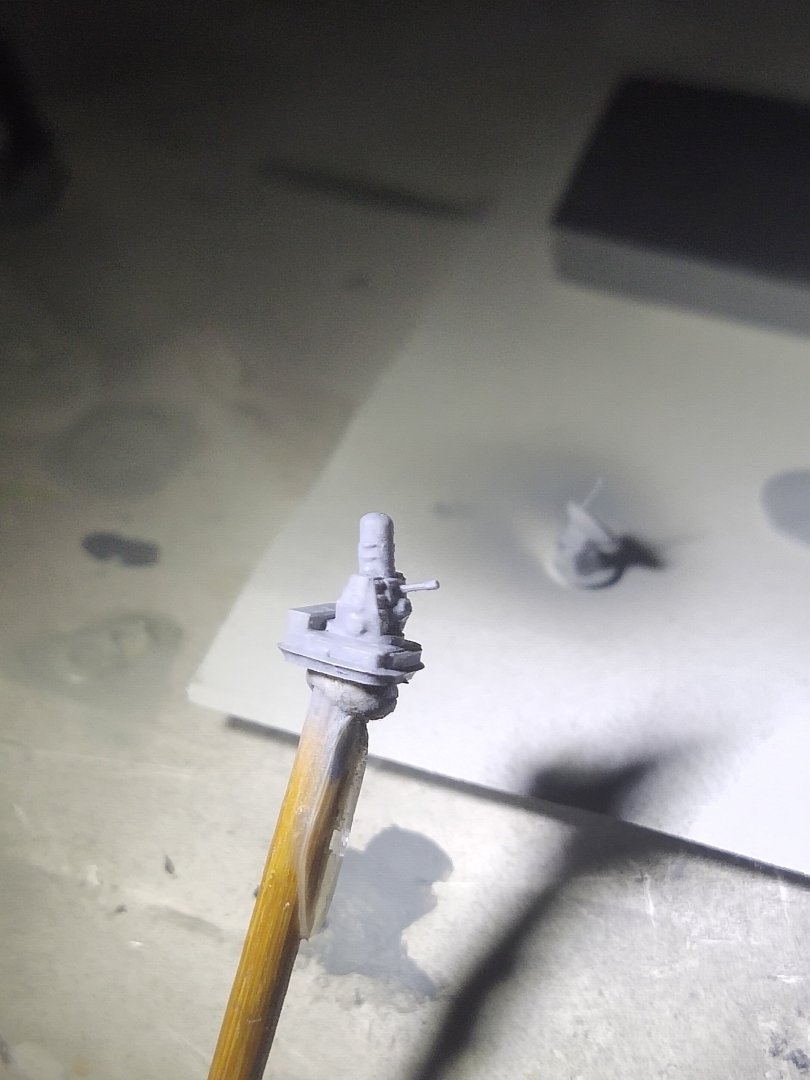
Next part was the new set of Harpoons and the forward radar mast. I made only the complex lower part to save printing time, the upper I can built later. It was my surprise to find that it fitted perfectly.


-
M1A1 ABRAMS by mikegr - FINISHED - Revell - 1:72 - PLASTIC
mikegr replied to mikegr's topic in Non-ship/categorised builds
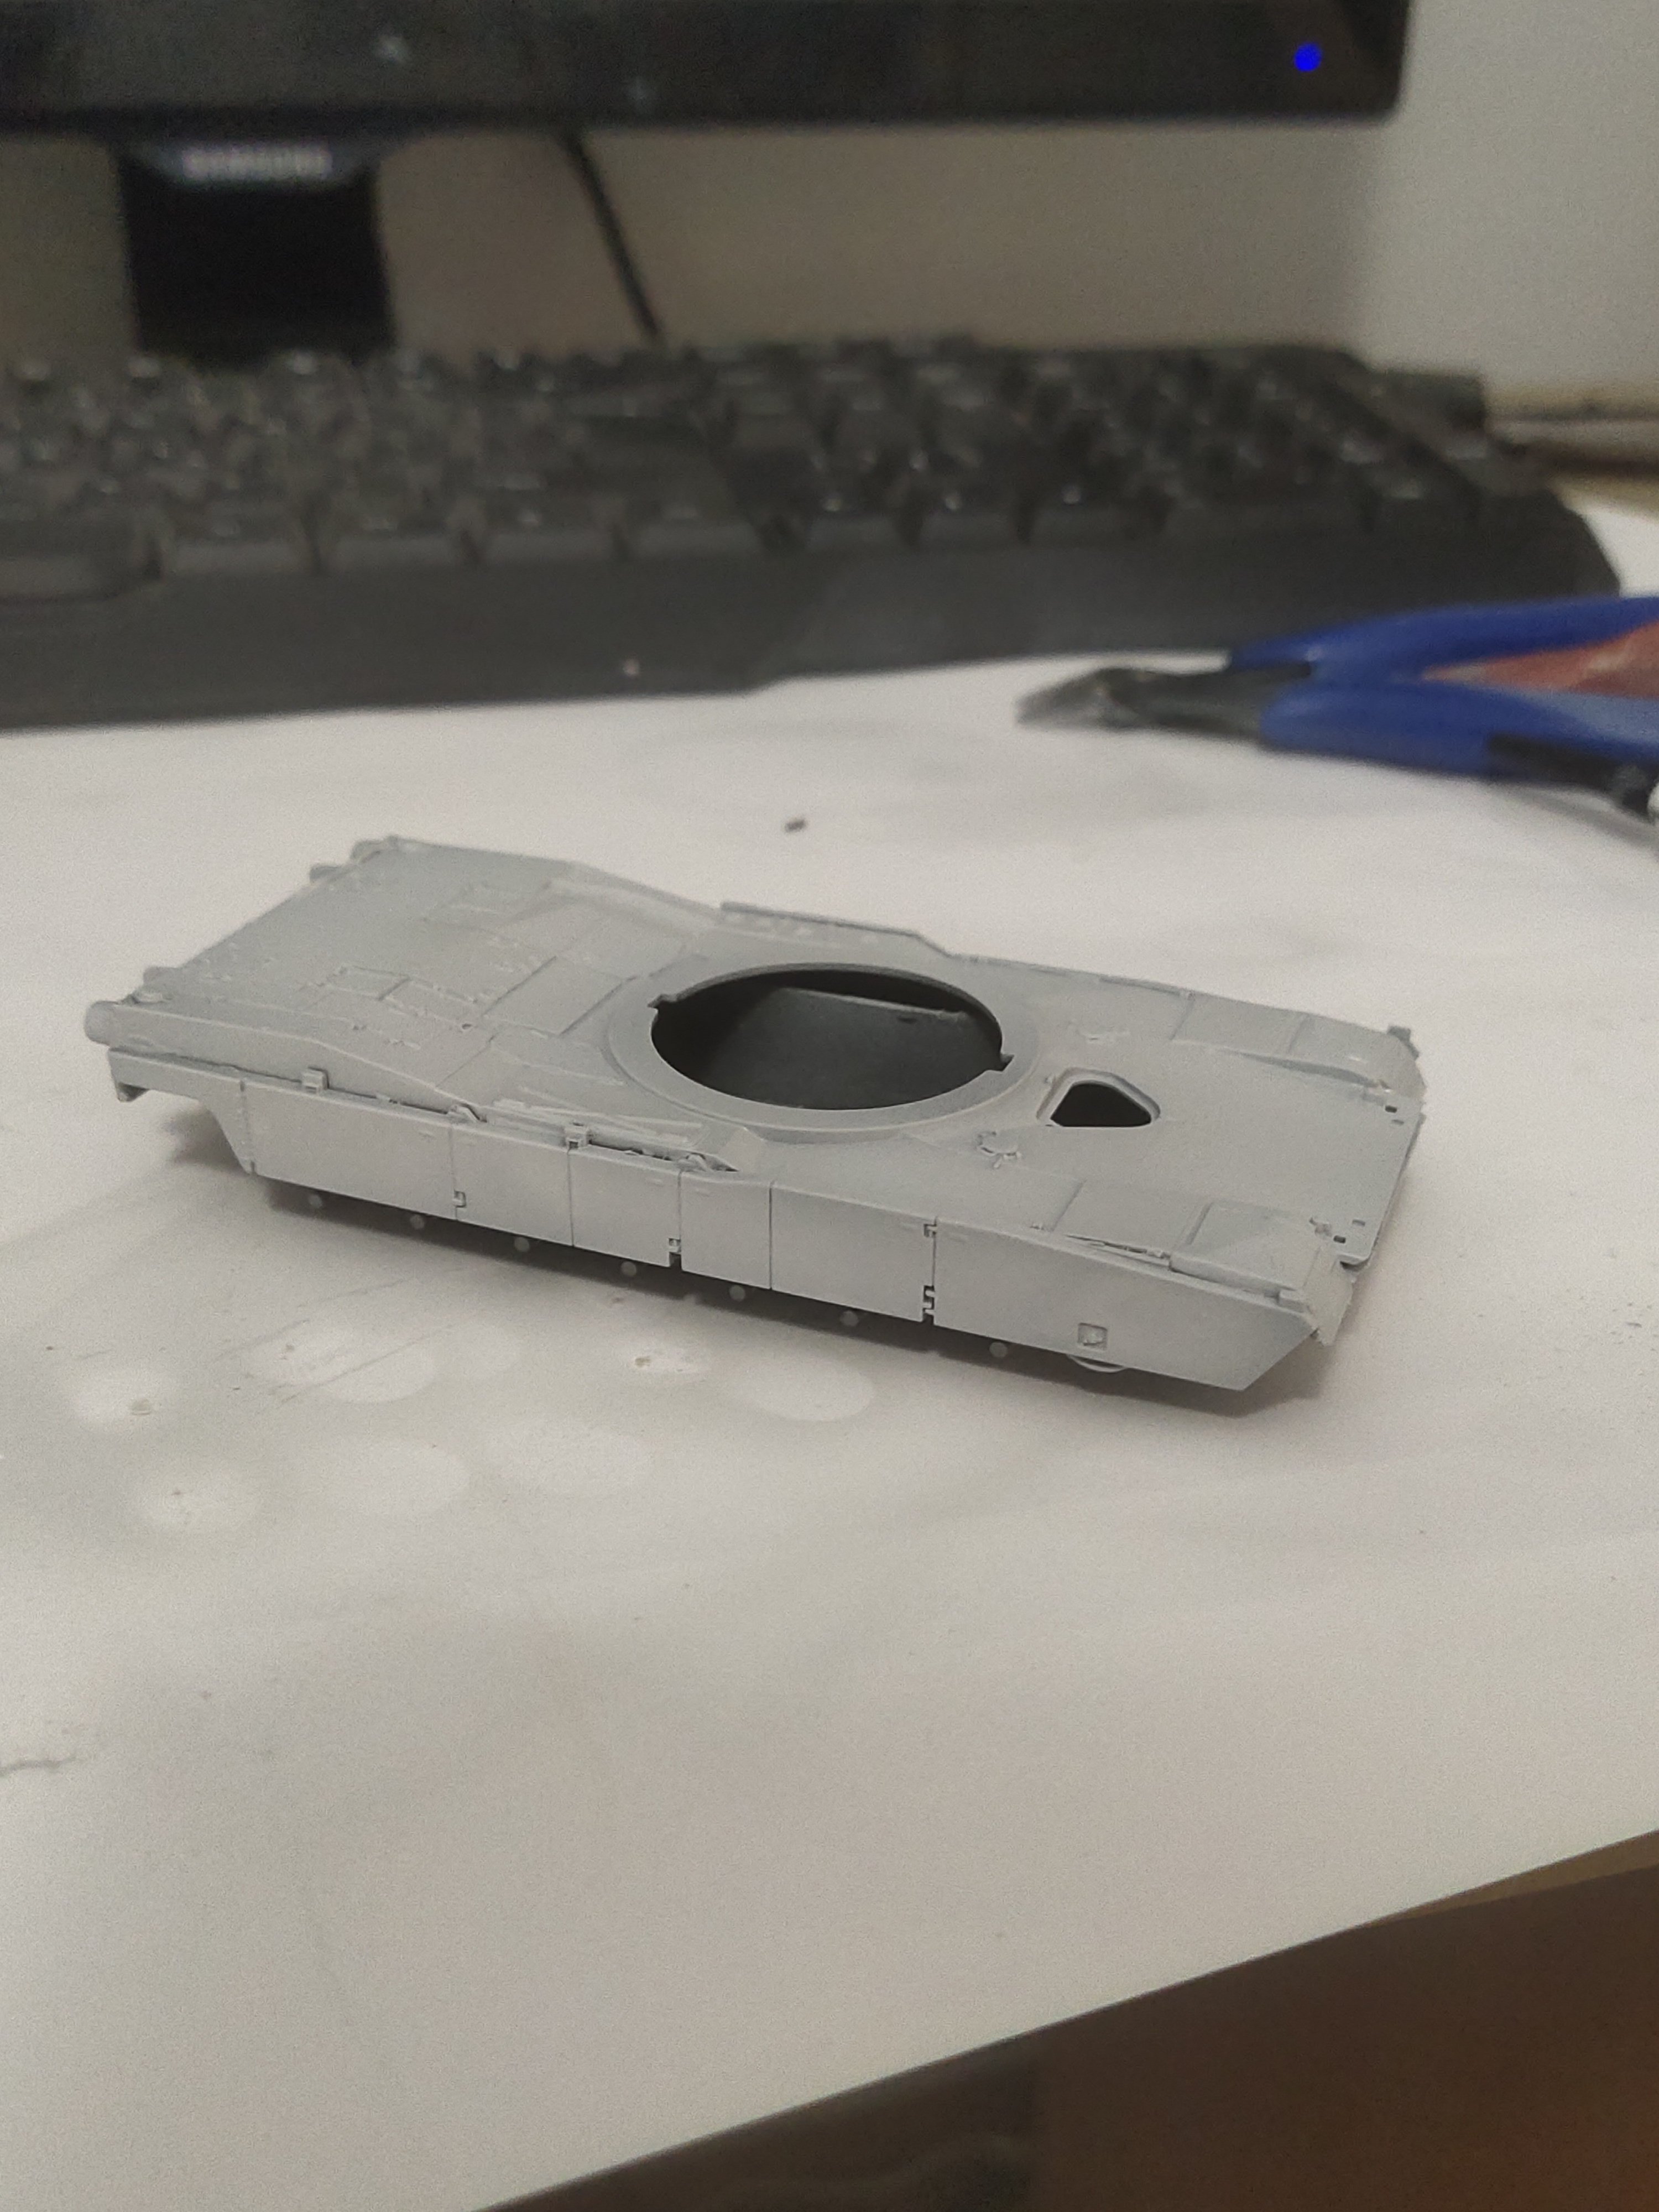
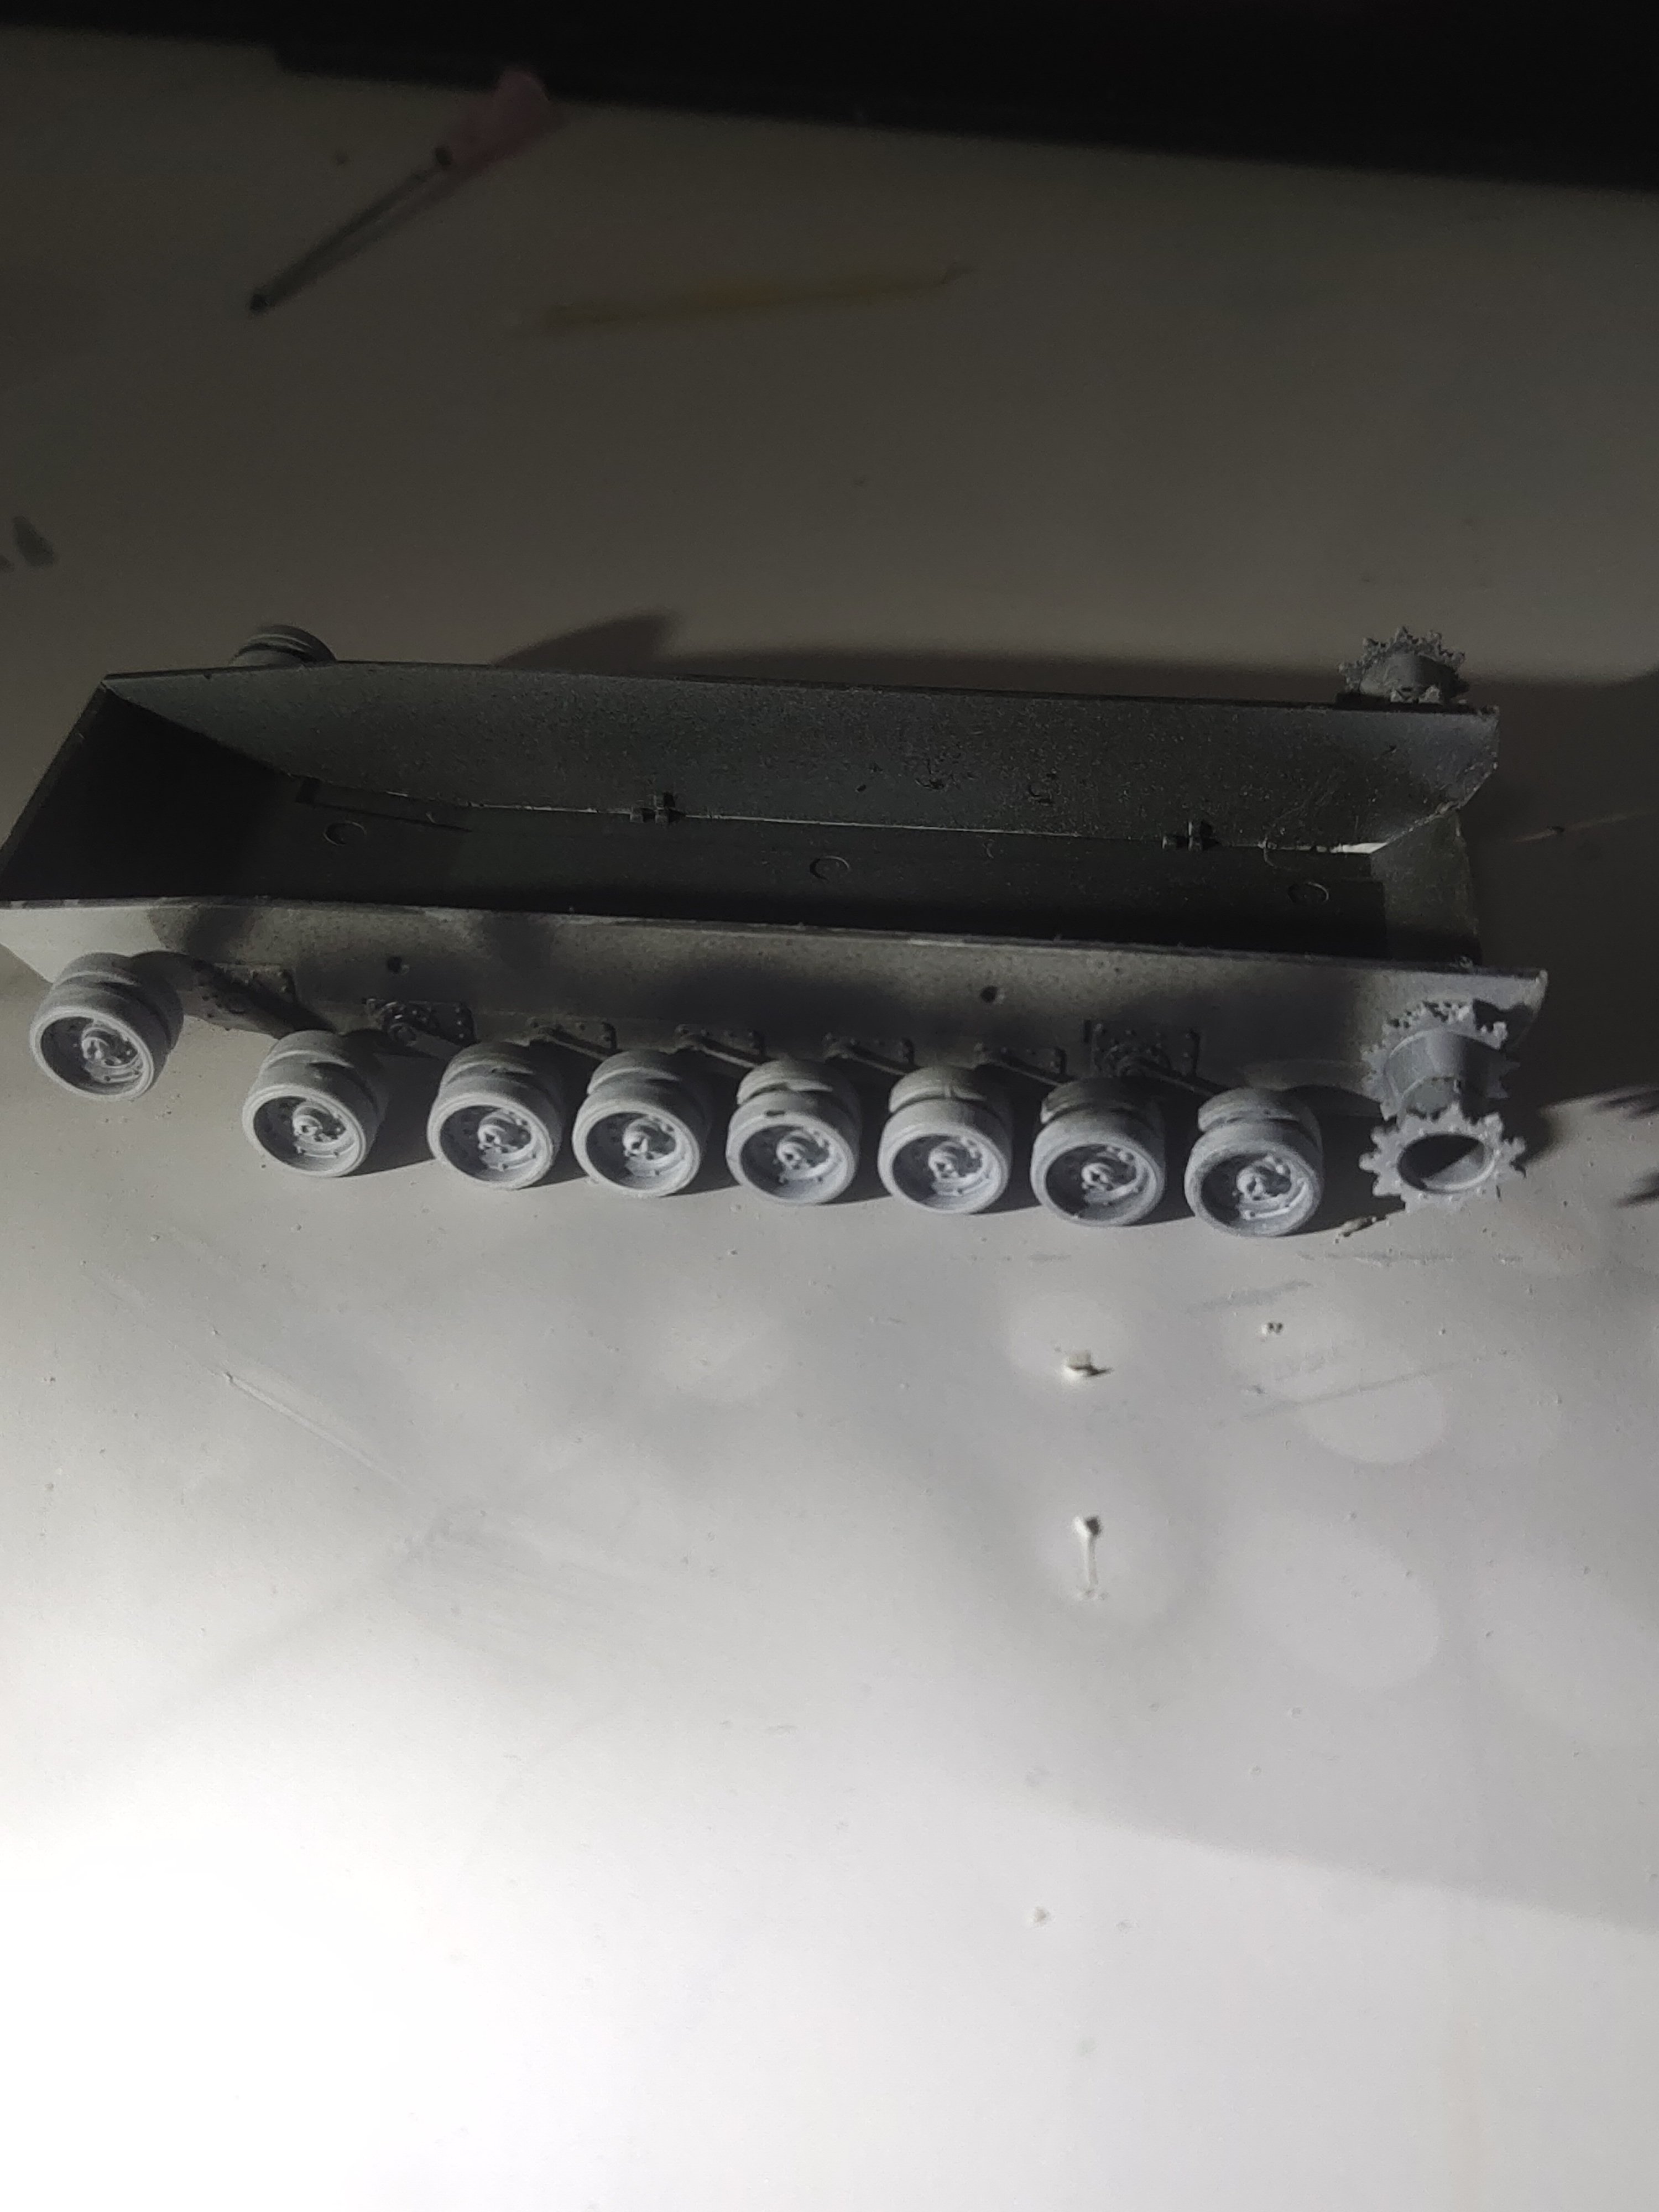
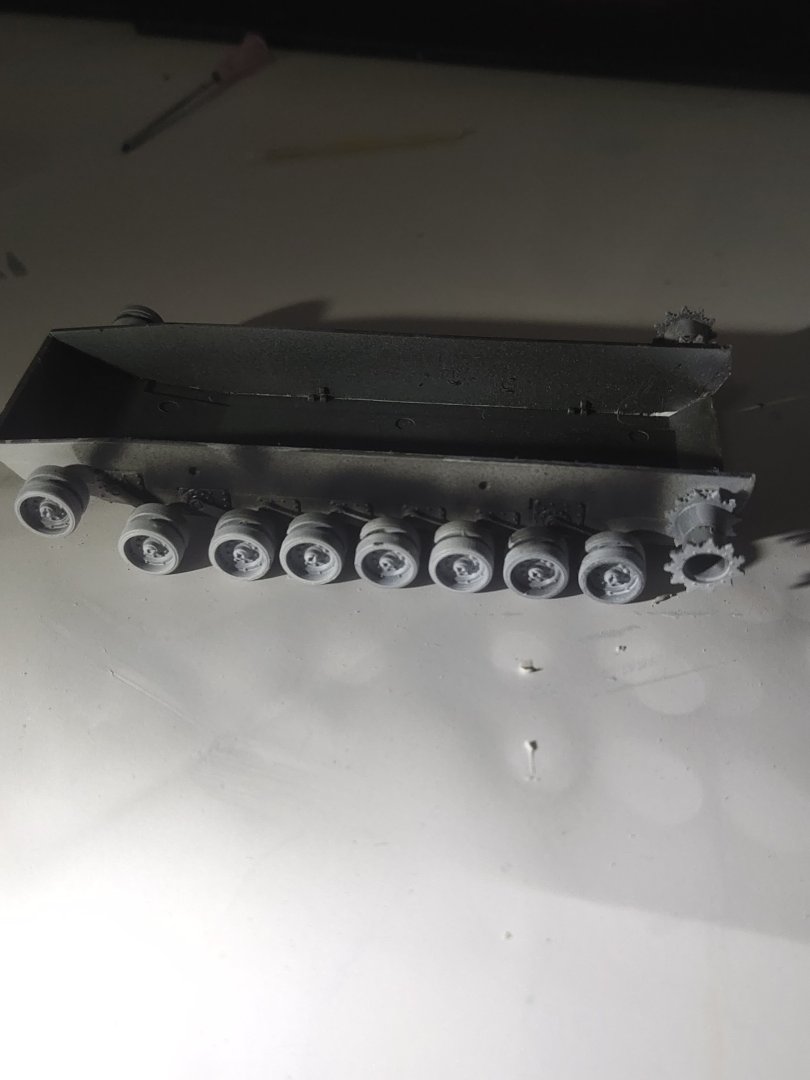
Though it is a simple kit my inexperience cause me some troubles. The structure of the exact squared box chassis wasn't easy. Finally before give up and doing a lot of online research I manage how to fit the upper part without gaps. Note that if this doesn't match perfectly it wont allow the right wheel alignment.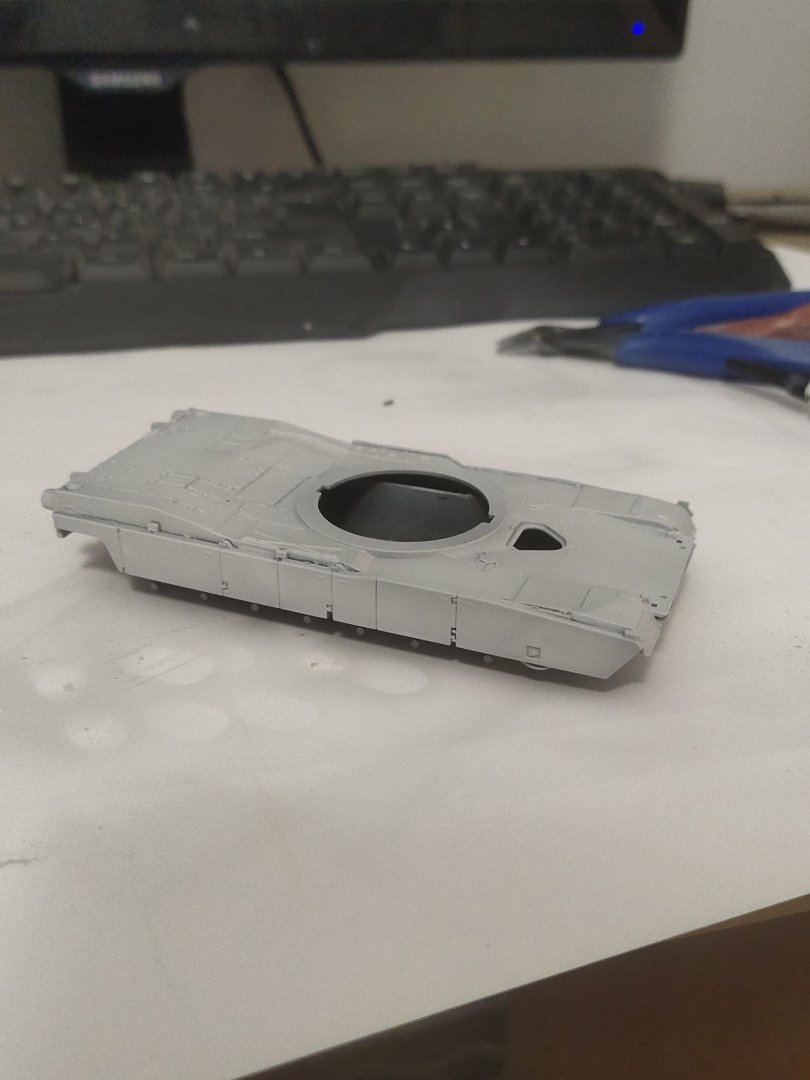
-
M1A1 ABRAMS by mikegr - FINISHED - Revell - 1:72 - PLASTIC
mikegr replied to mikegr's topic in Non-ship/categorised builds
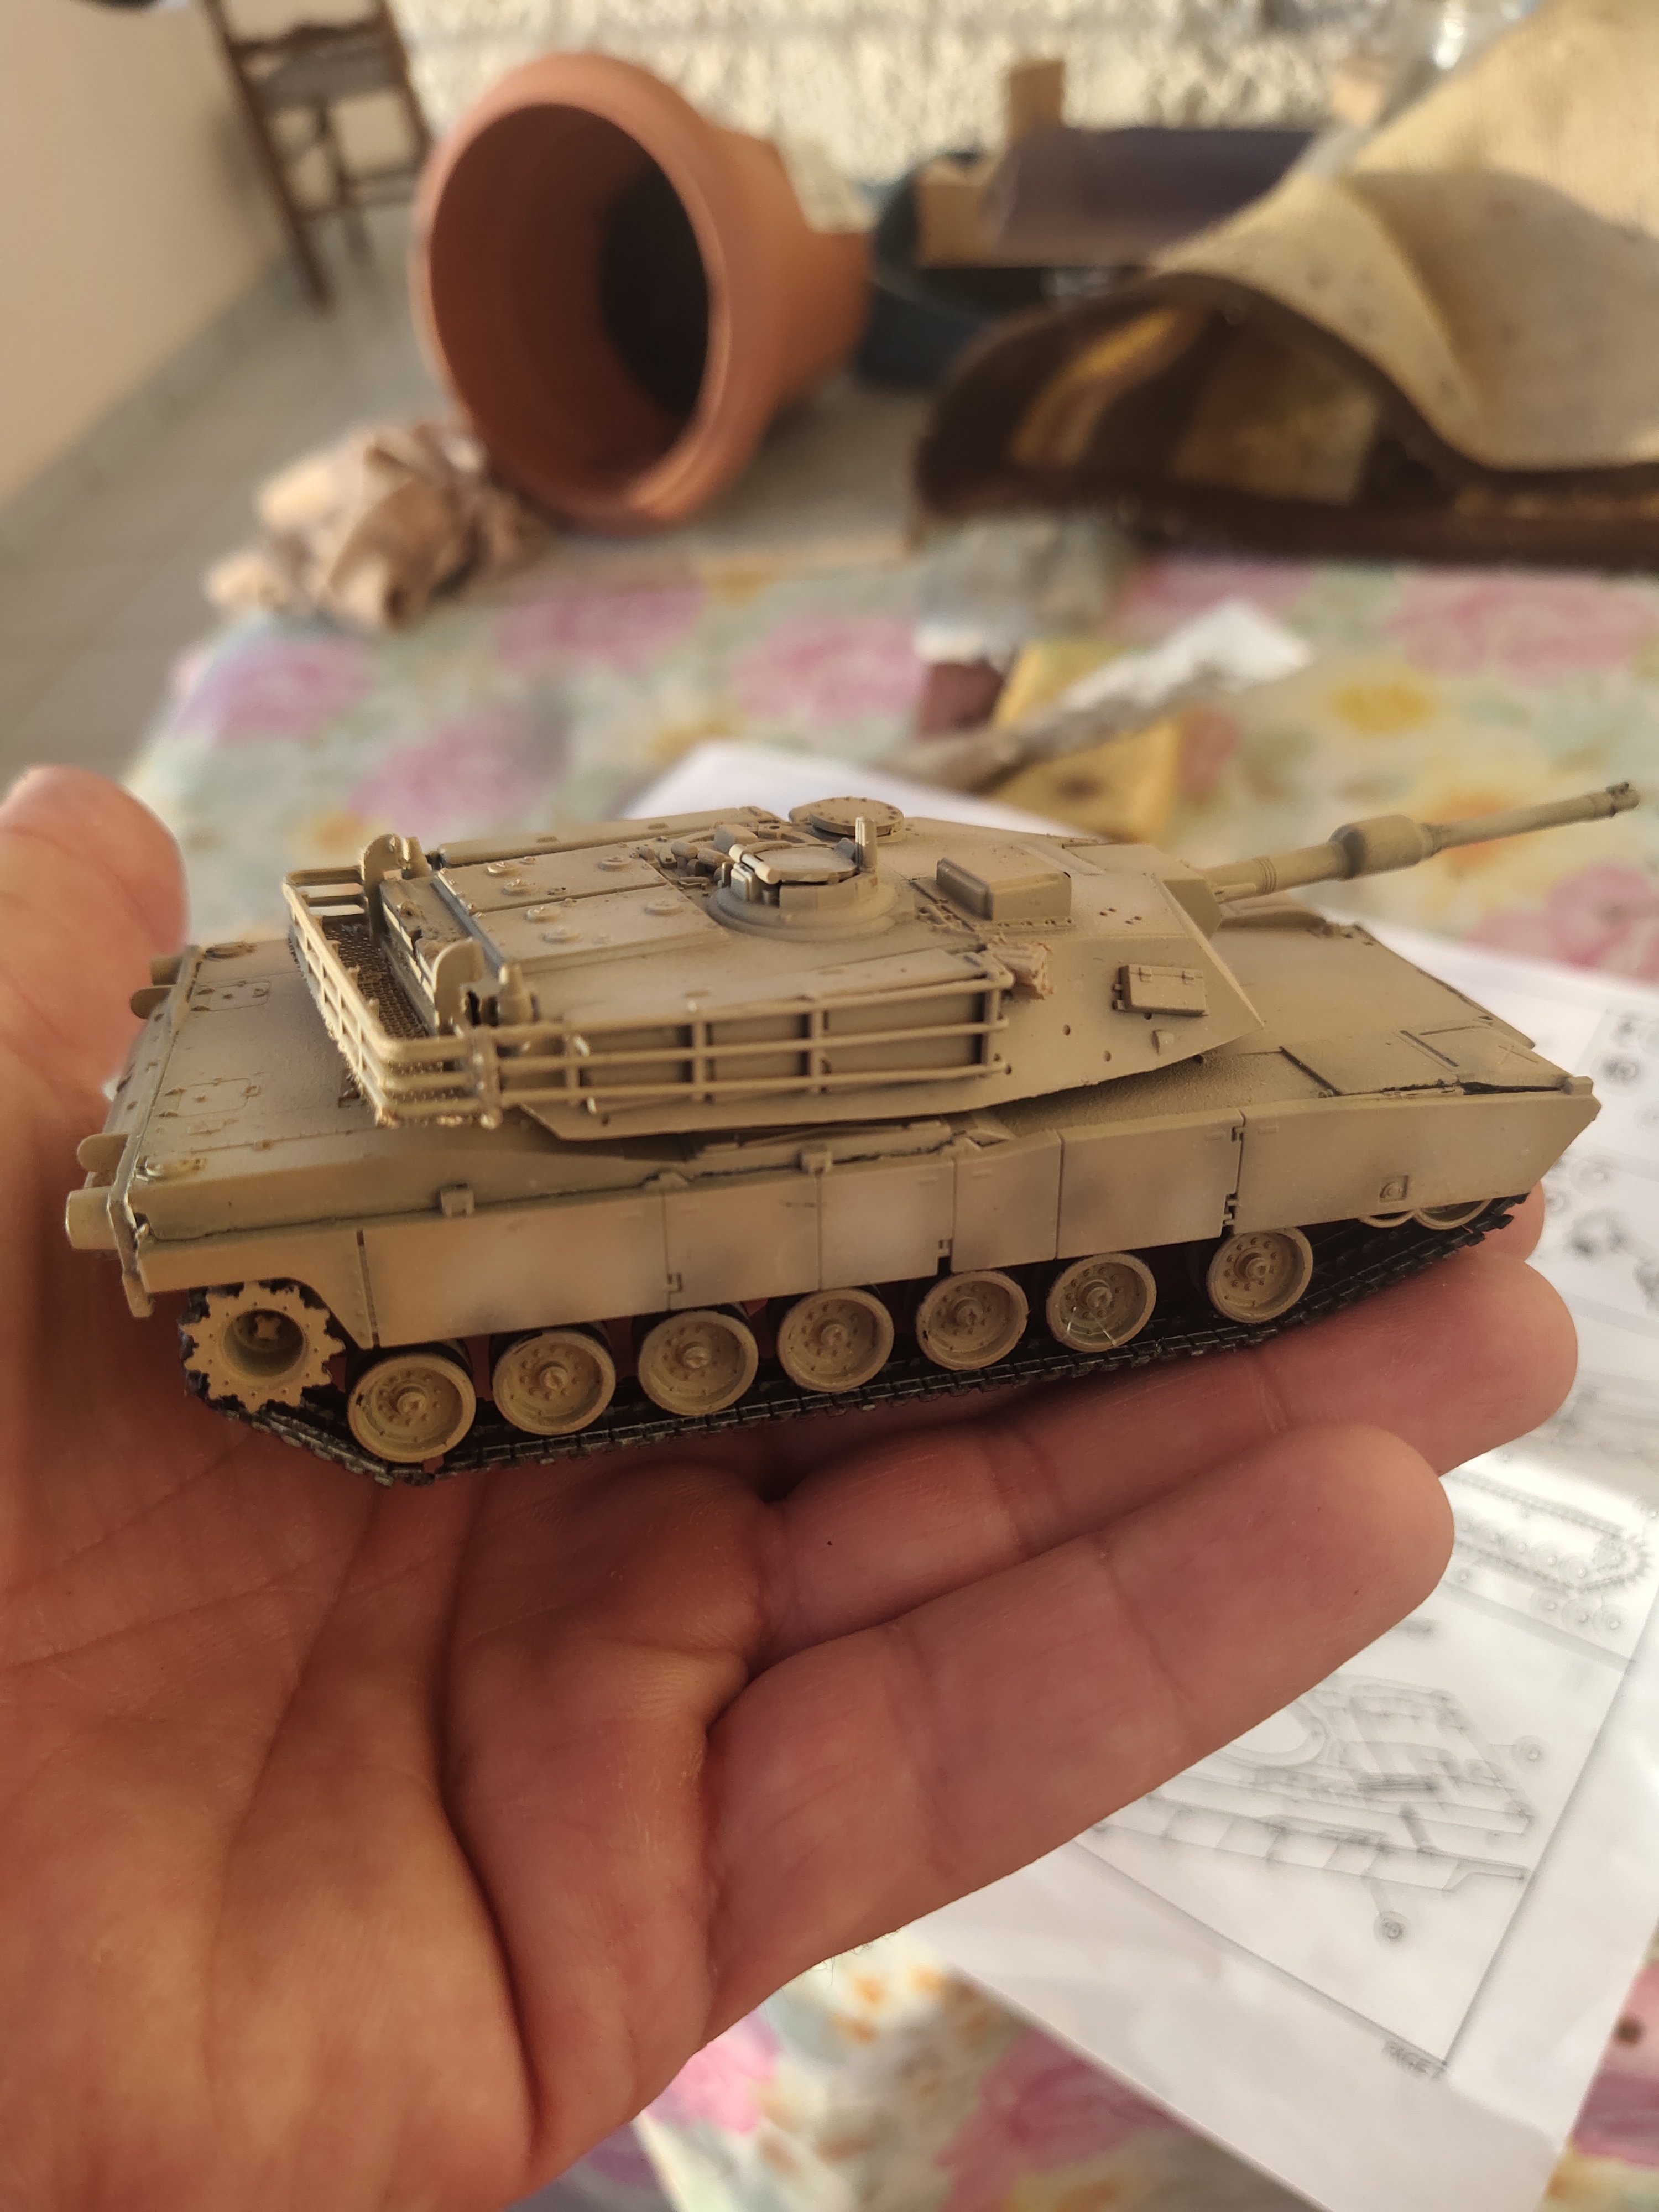
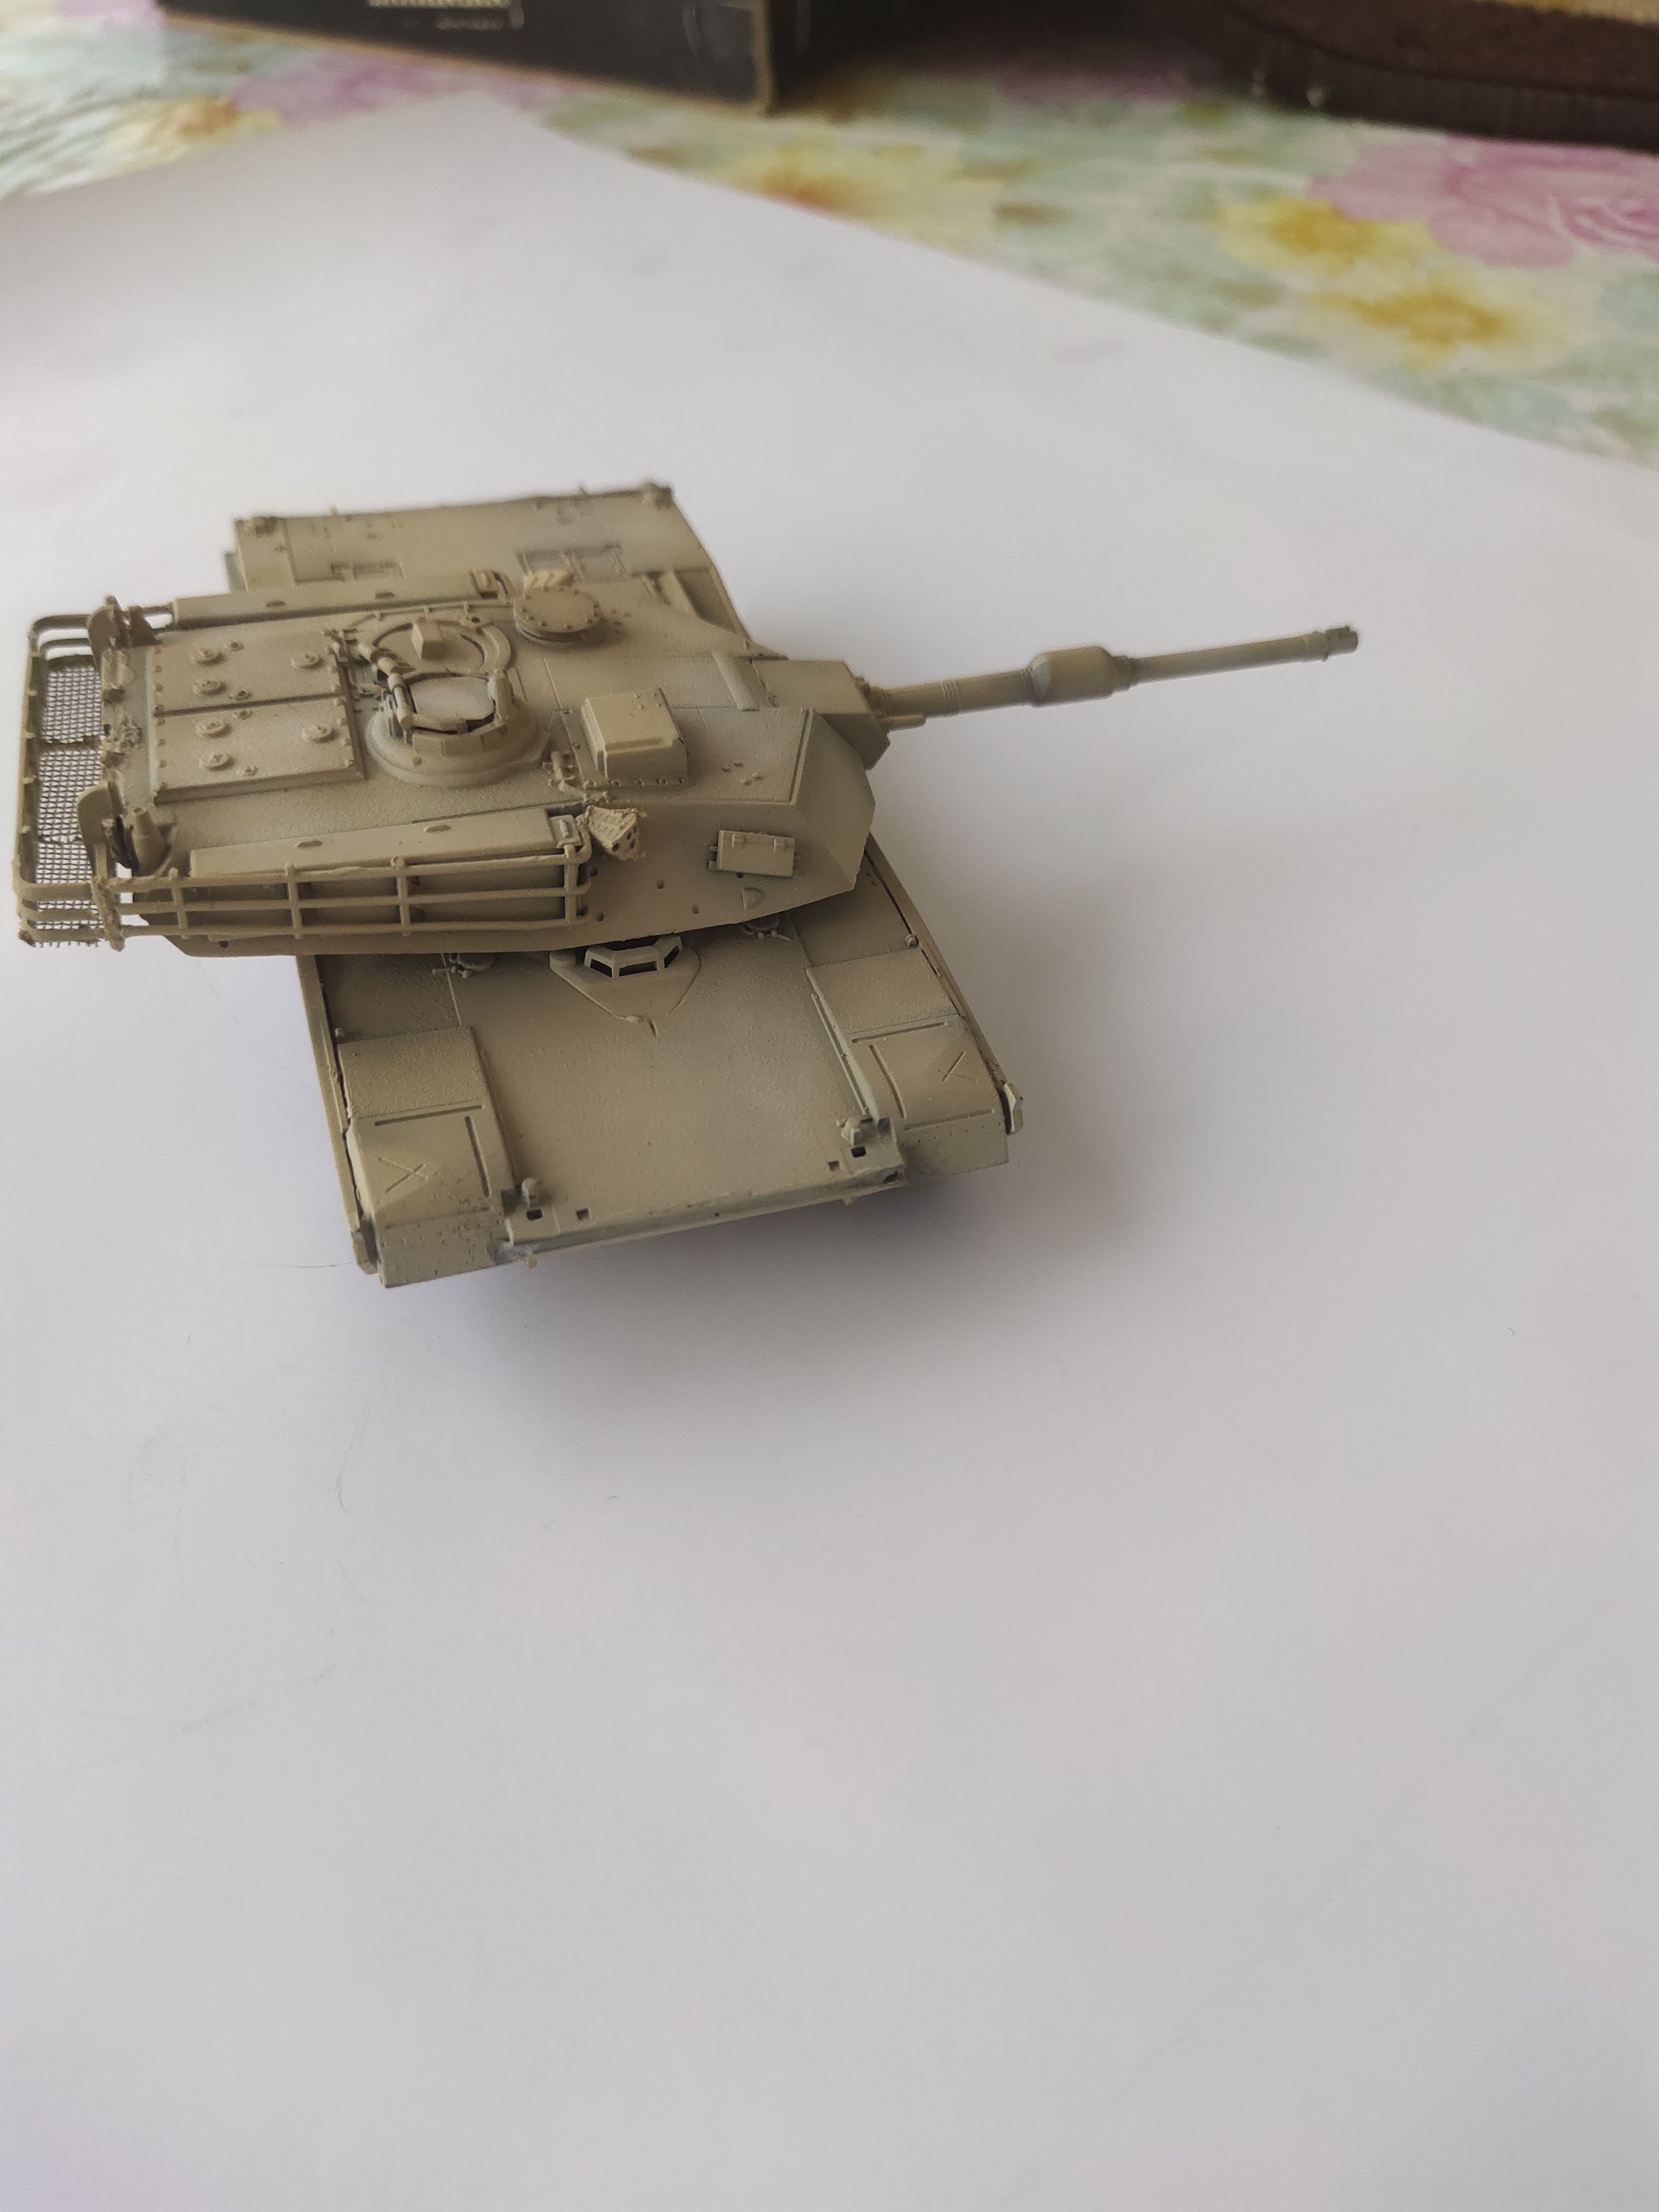
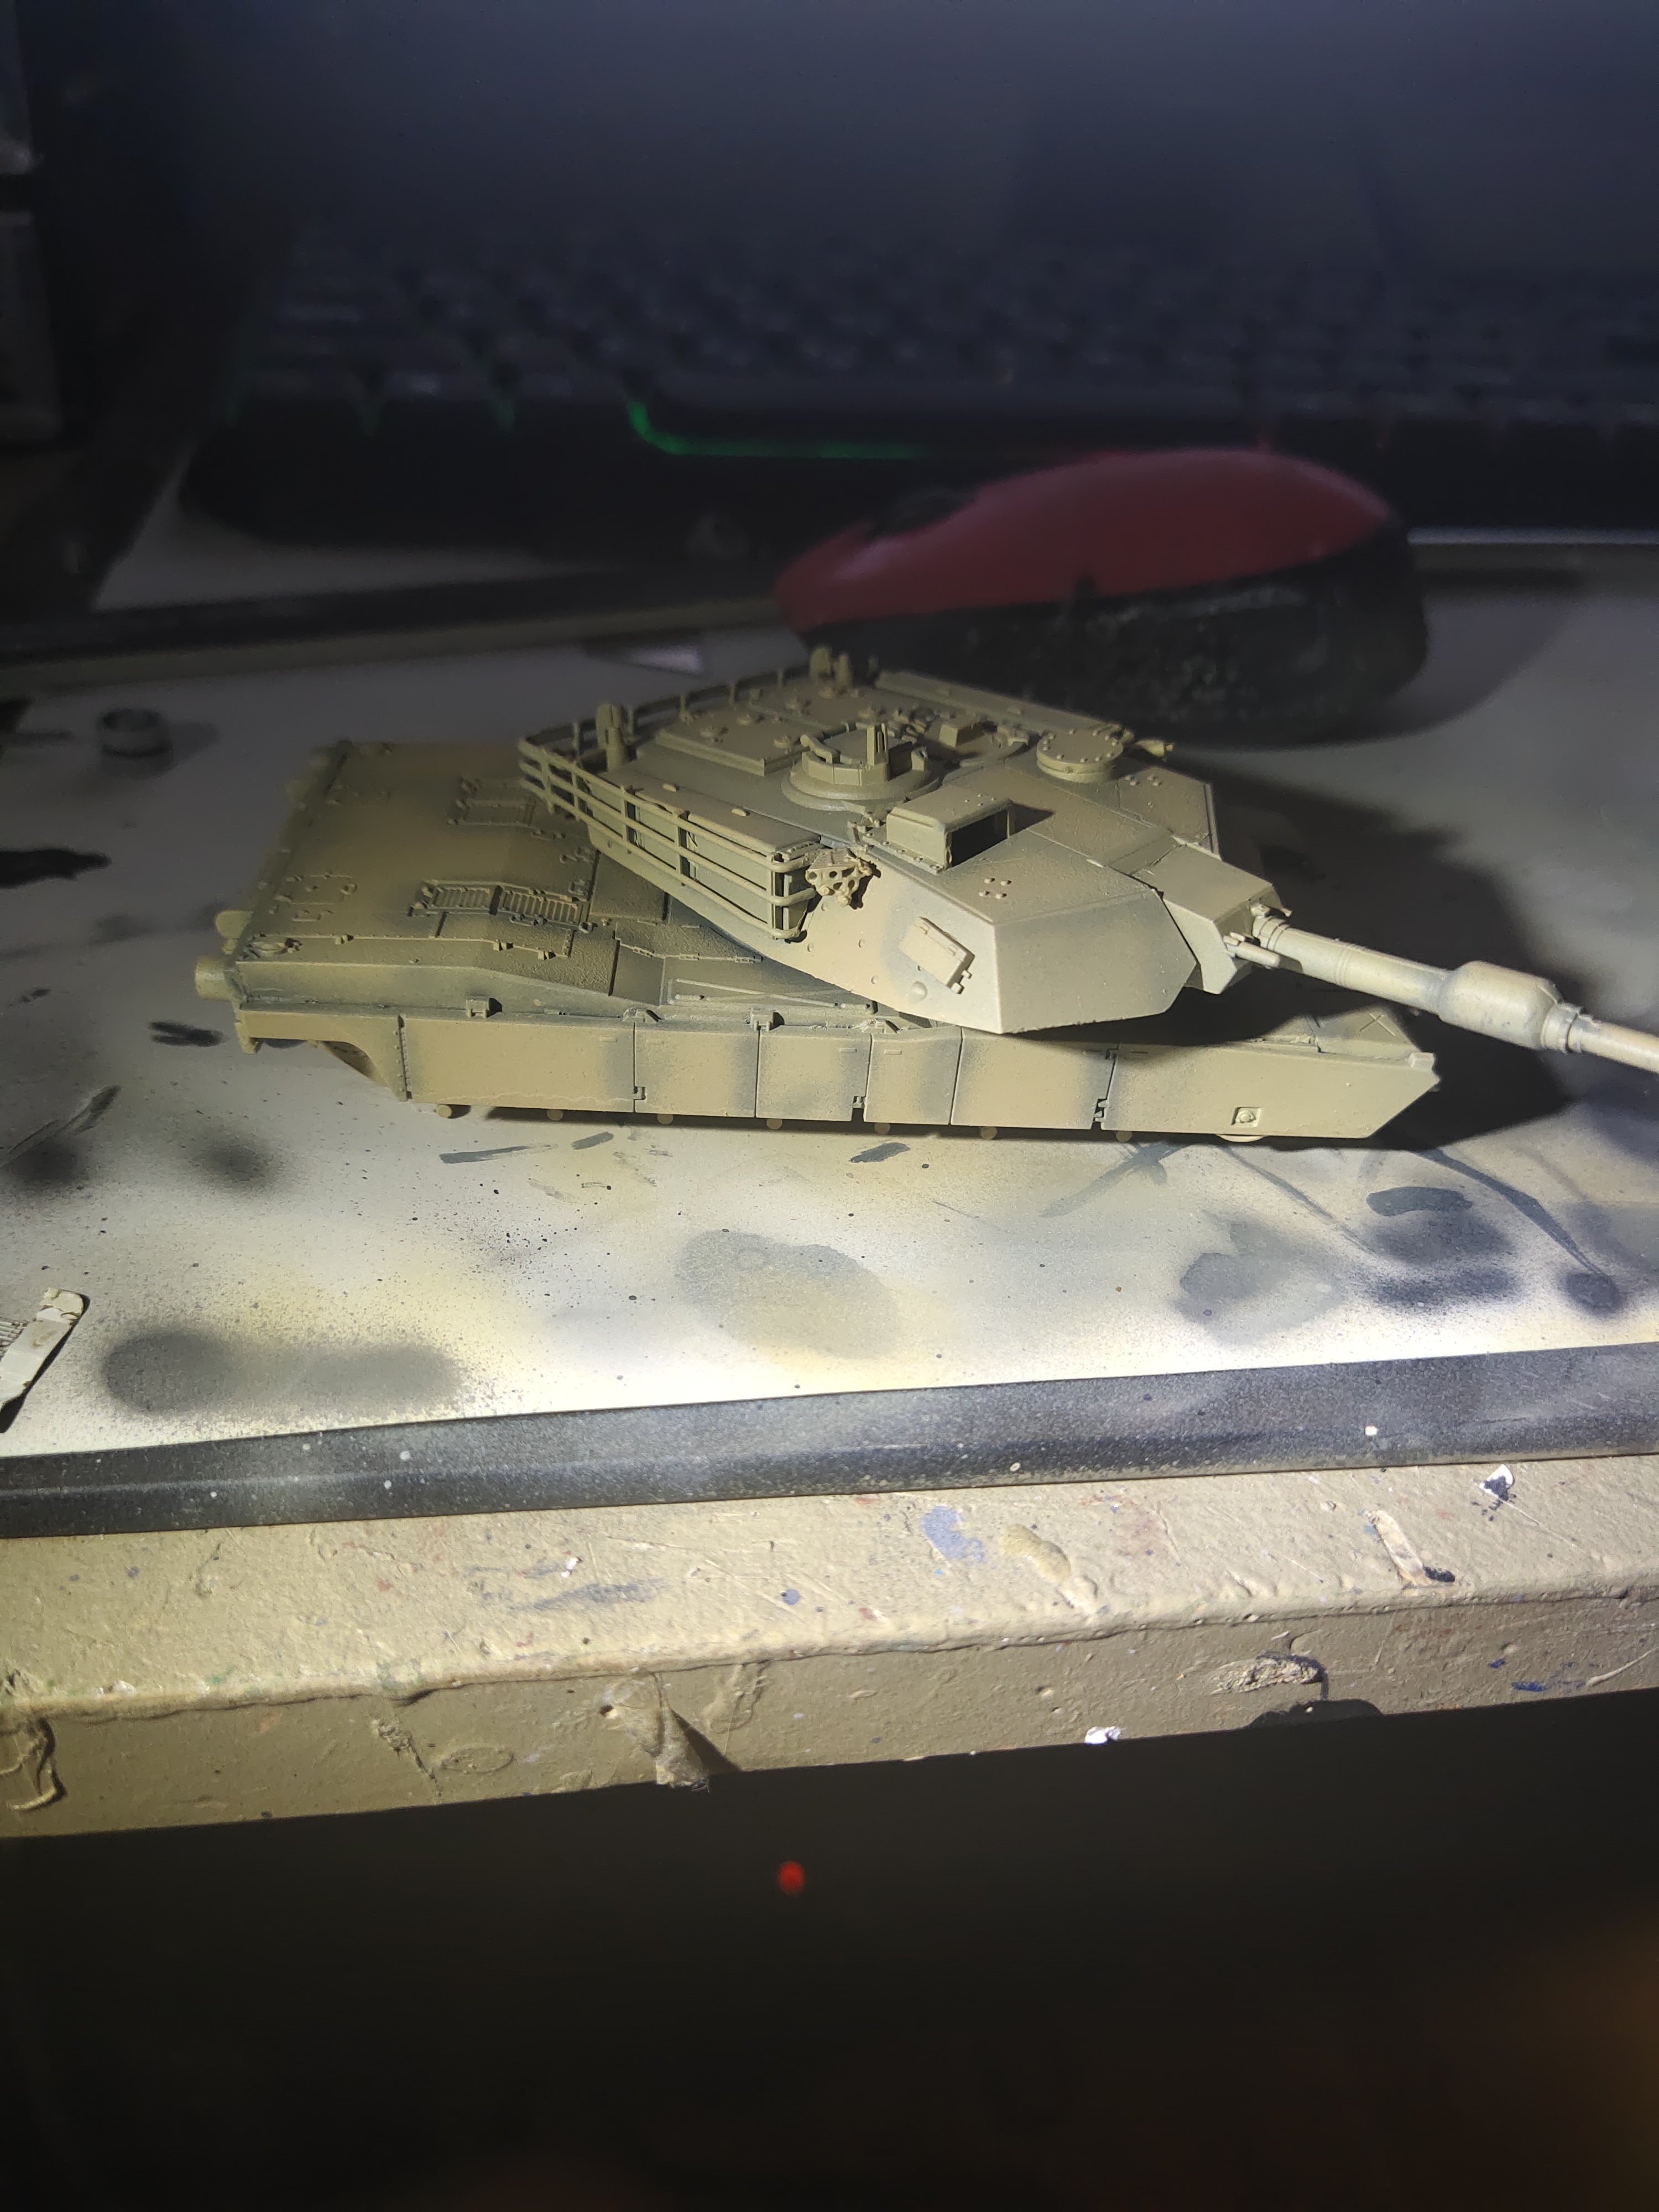
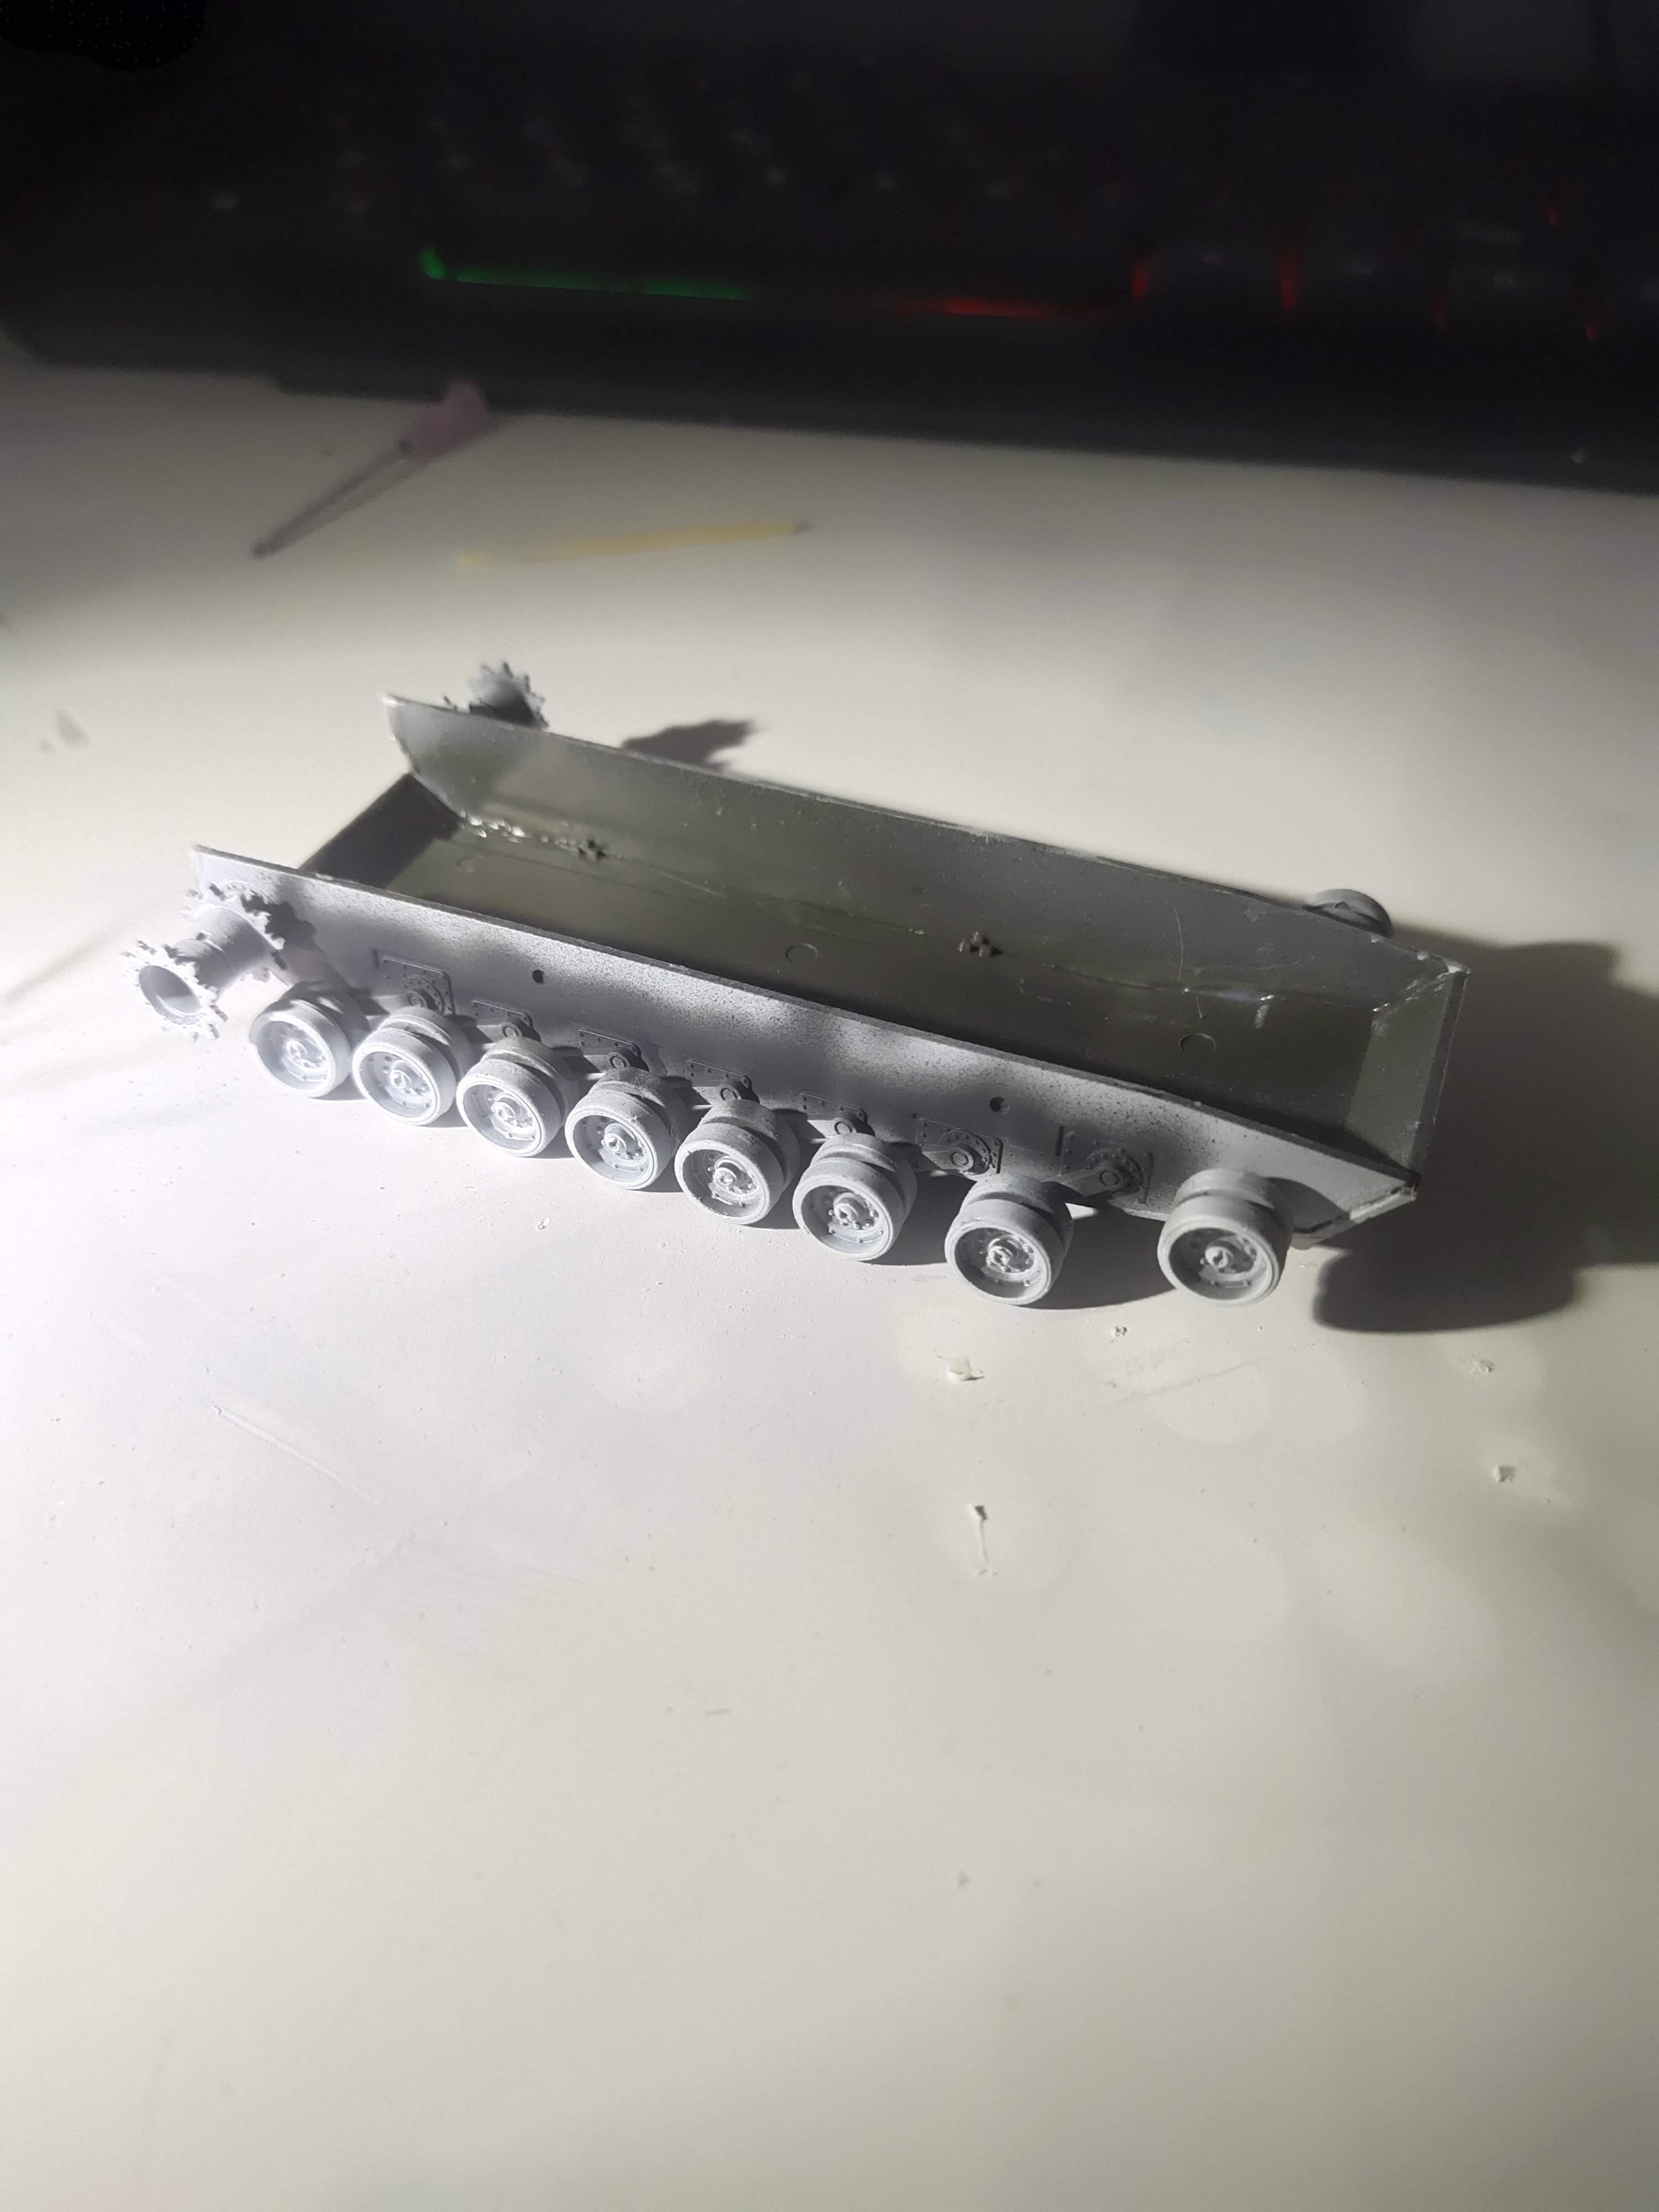
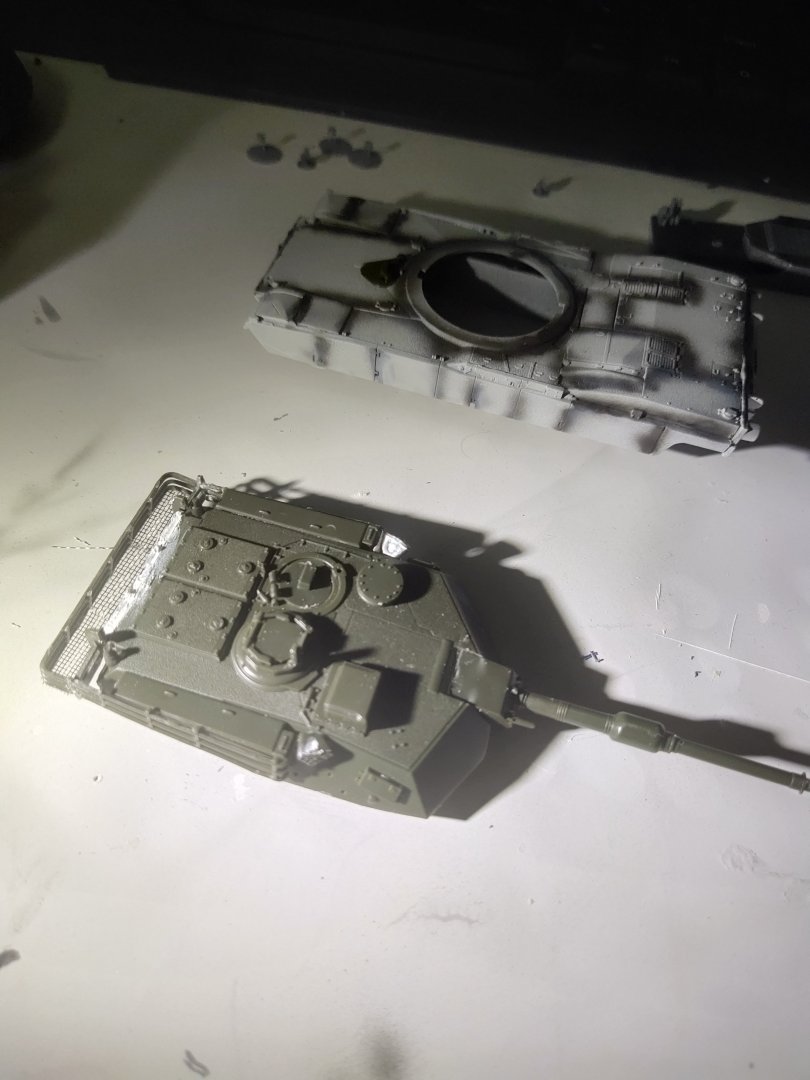
The reason I choose this model is because its easy to paint with one color only. The details on the main body surface are crispy. The tracks are flexible easy to bend not plastic I am following a video of a similar Flyhawk model assembly. There are two main pieces the body and the turret. I start making the body. Then the wheels. They primed separately and glued together. Then I preshadow the darker areas behind the fenders before I place them

-
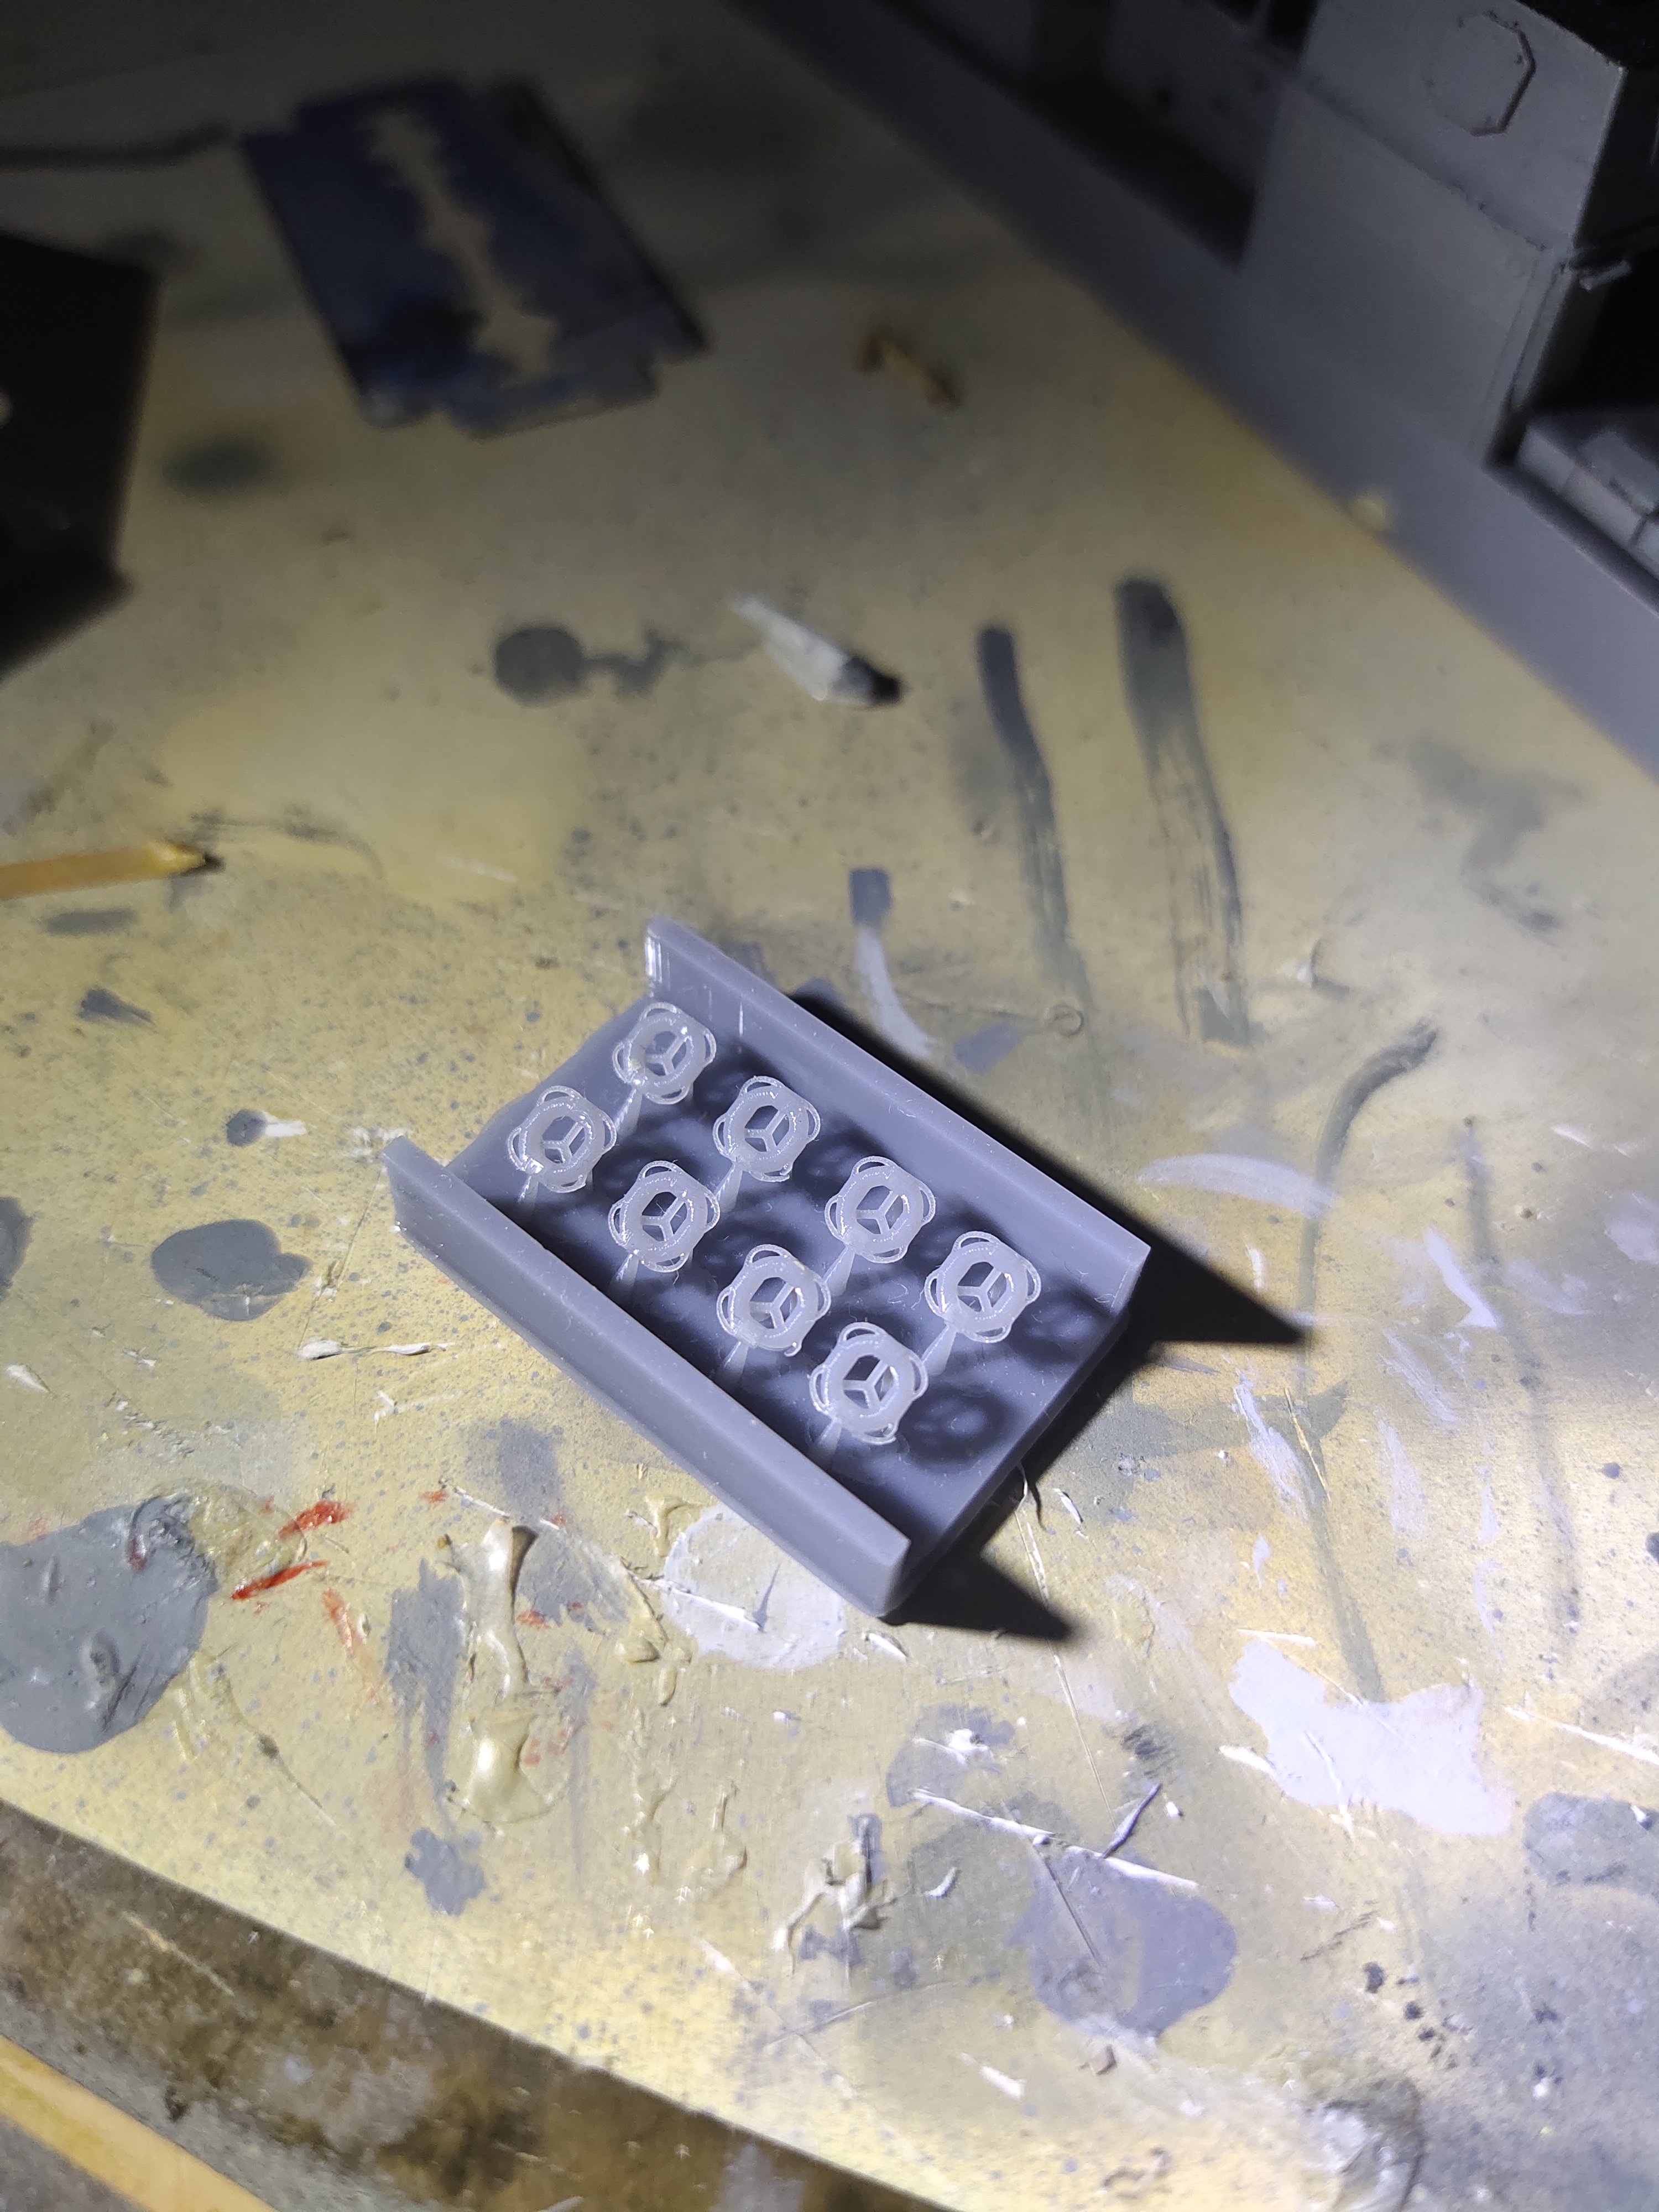
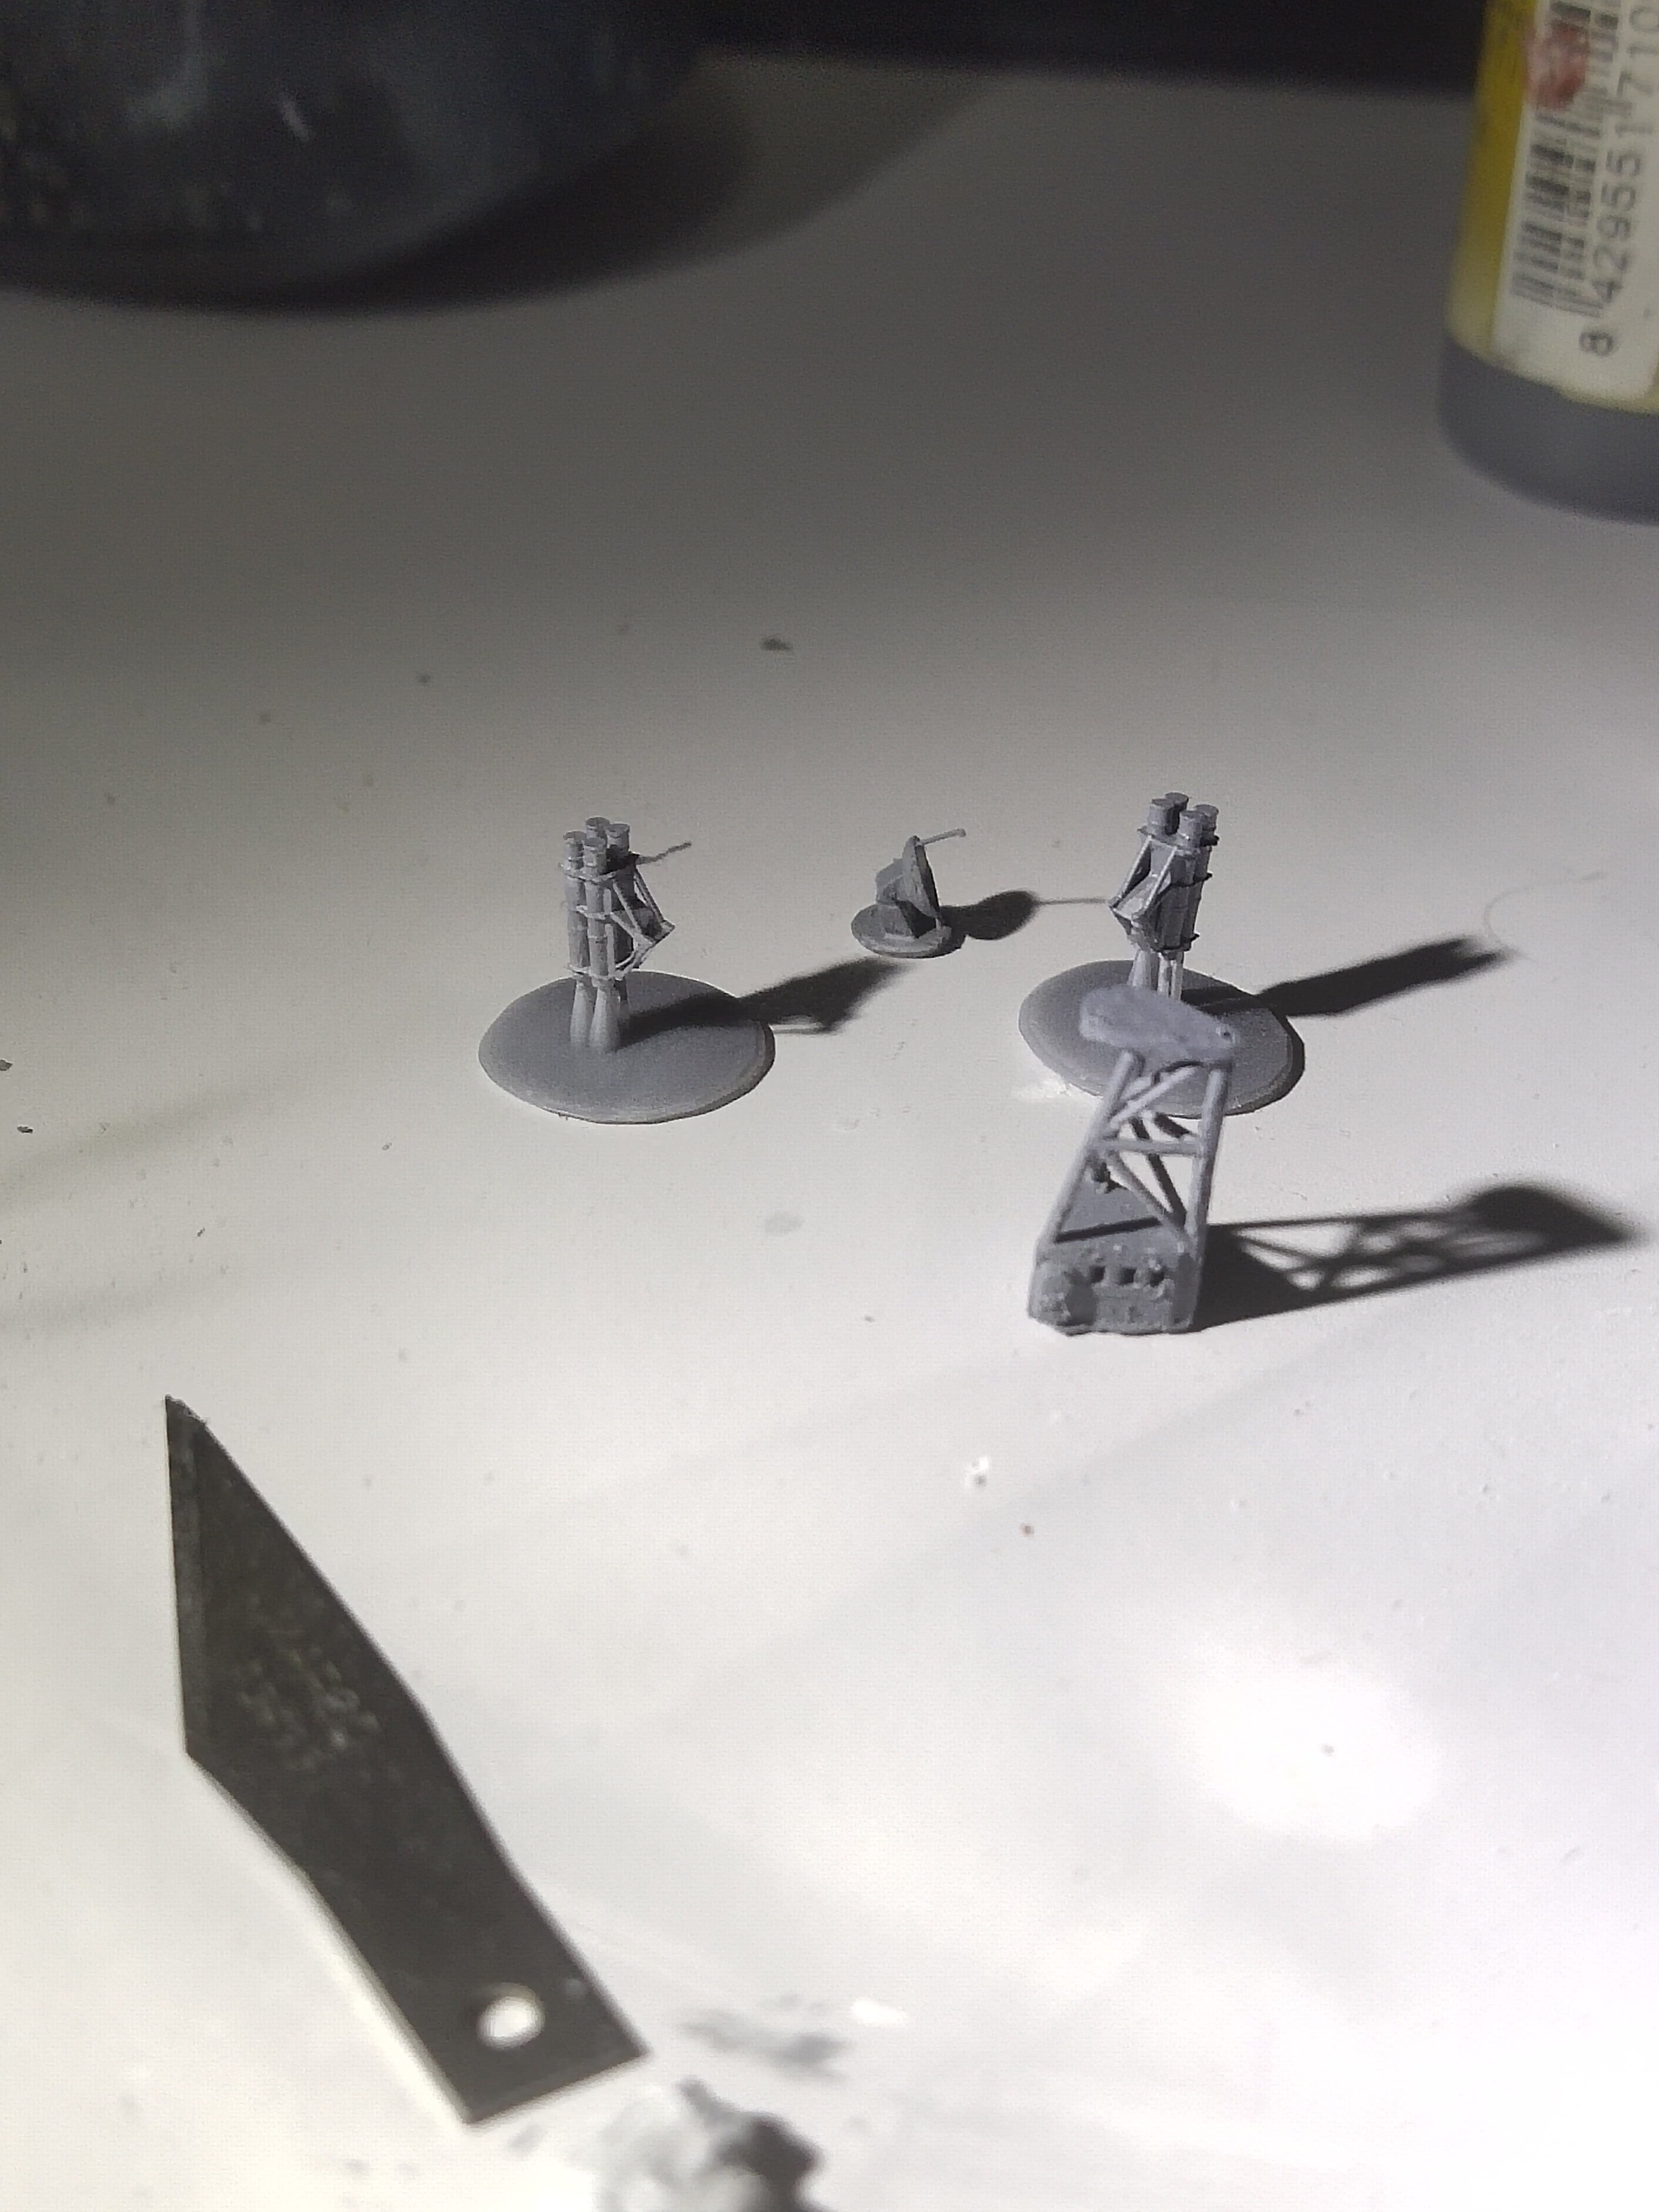
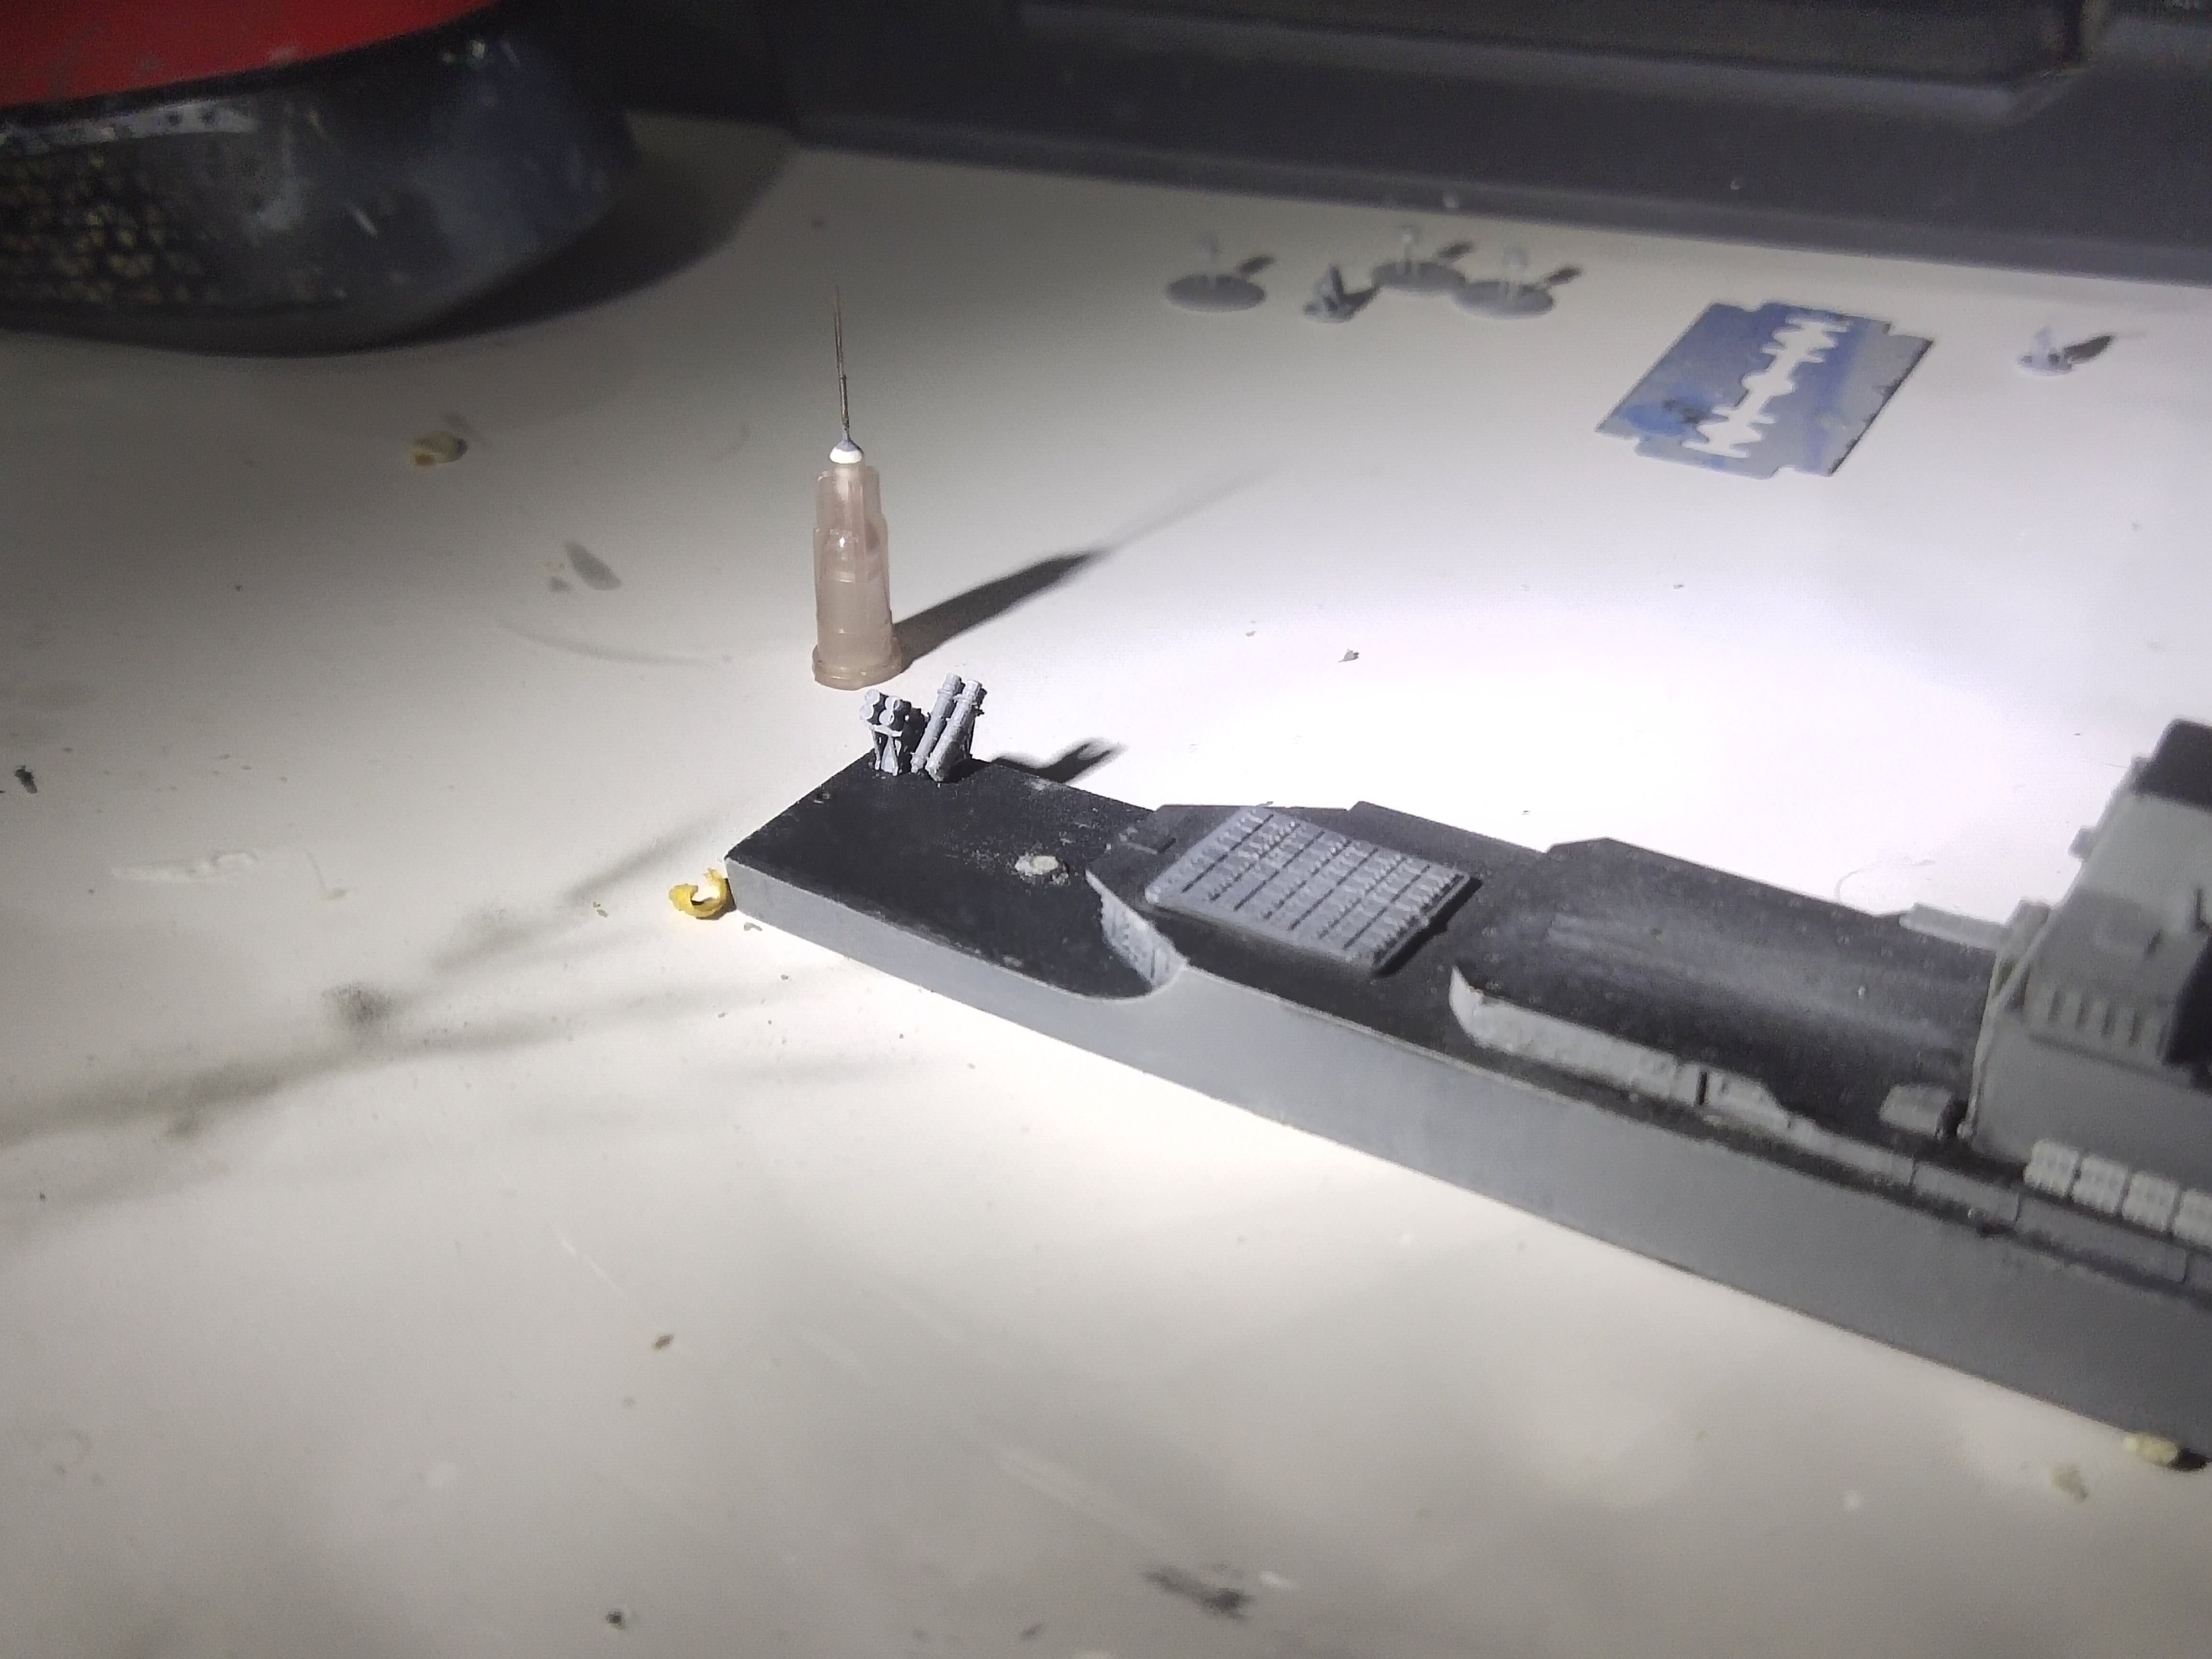
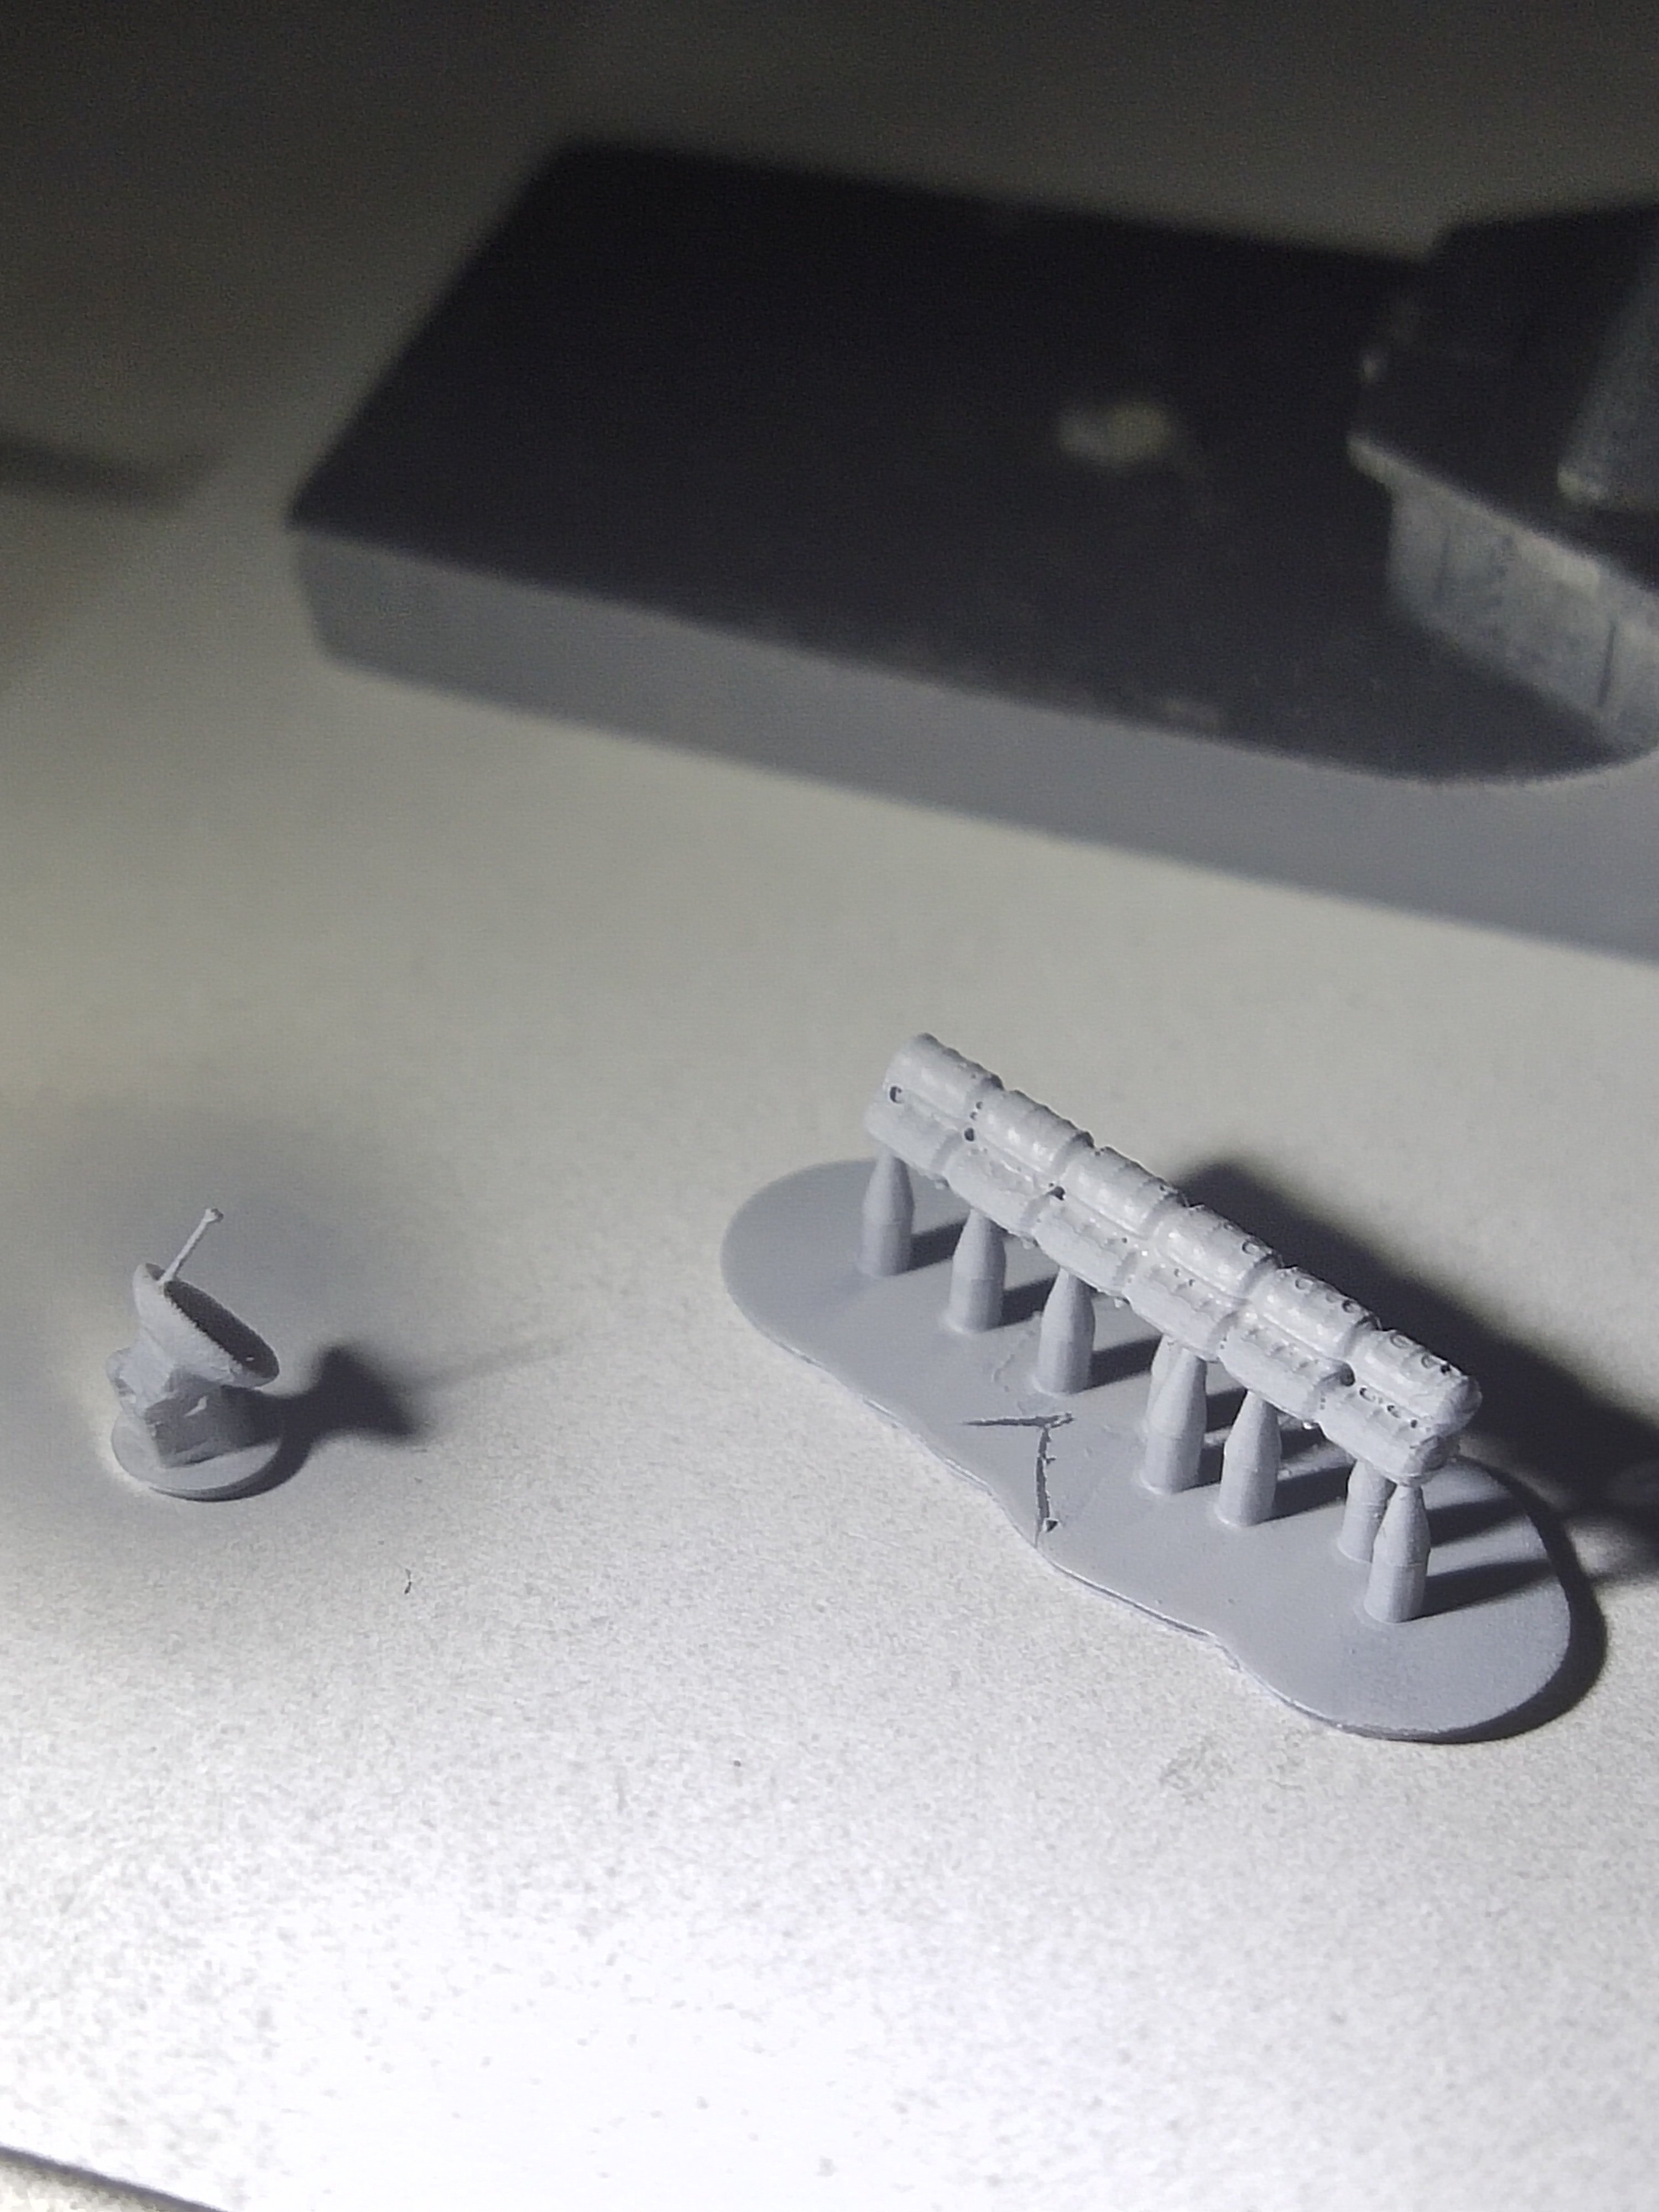
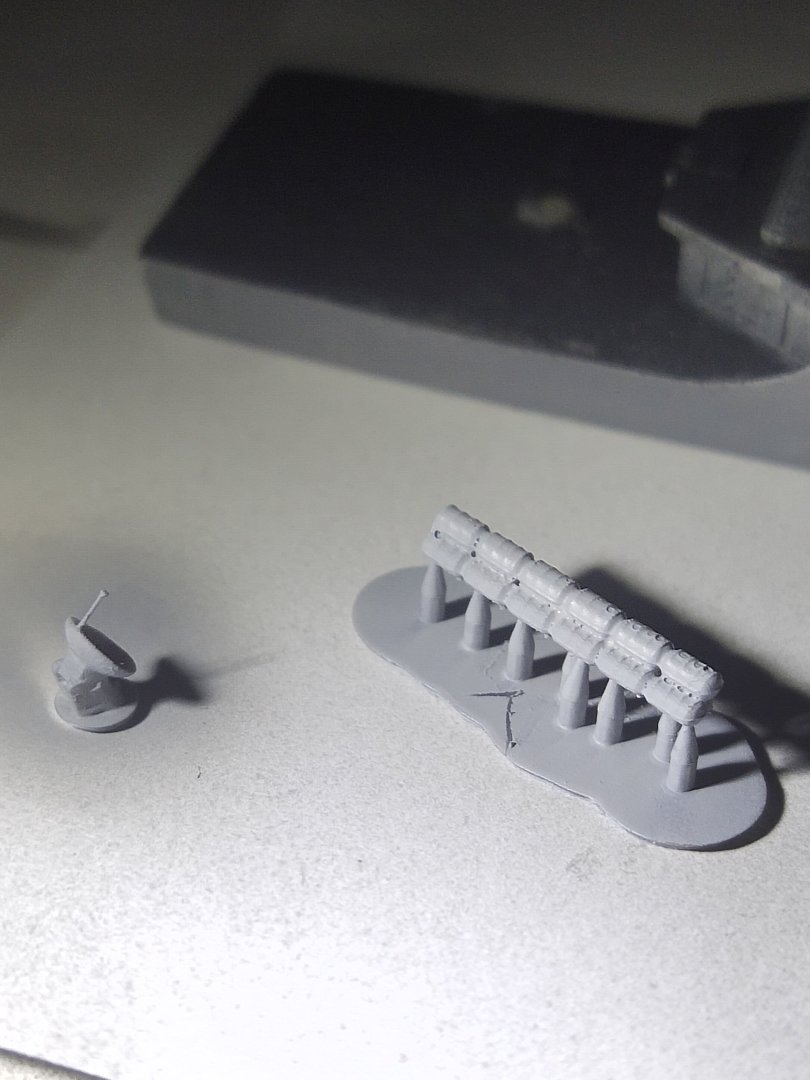
I printed some parts with my new machine. Turned out nice. SPG 62, Phalanx and barrel rafts Then I installed them
-
M1A1 ABRAMS by mikegr - FINISHED - Revell - 1:72 - PLASTIC
mikegr replied to mikegr's topic in Non-ship/categorised builds
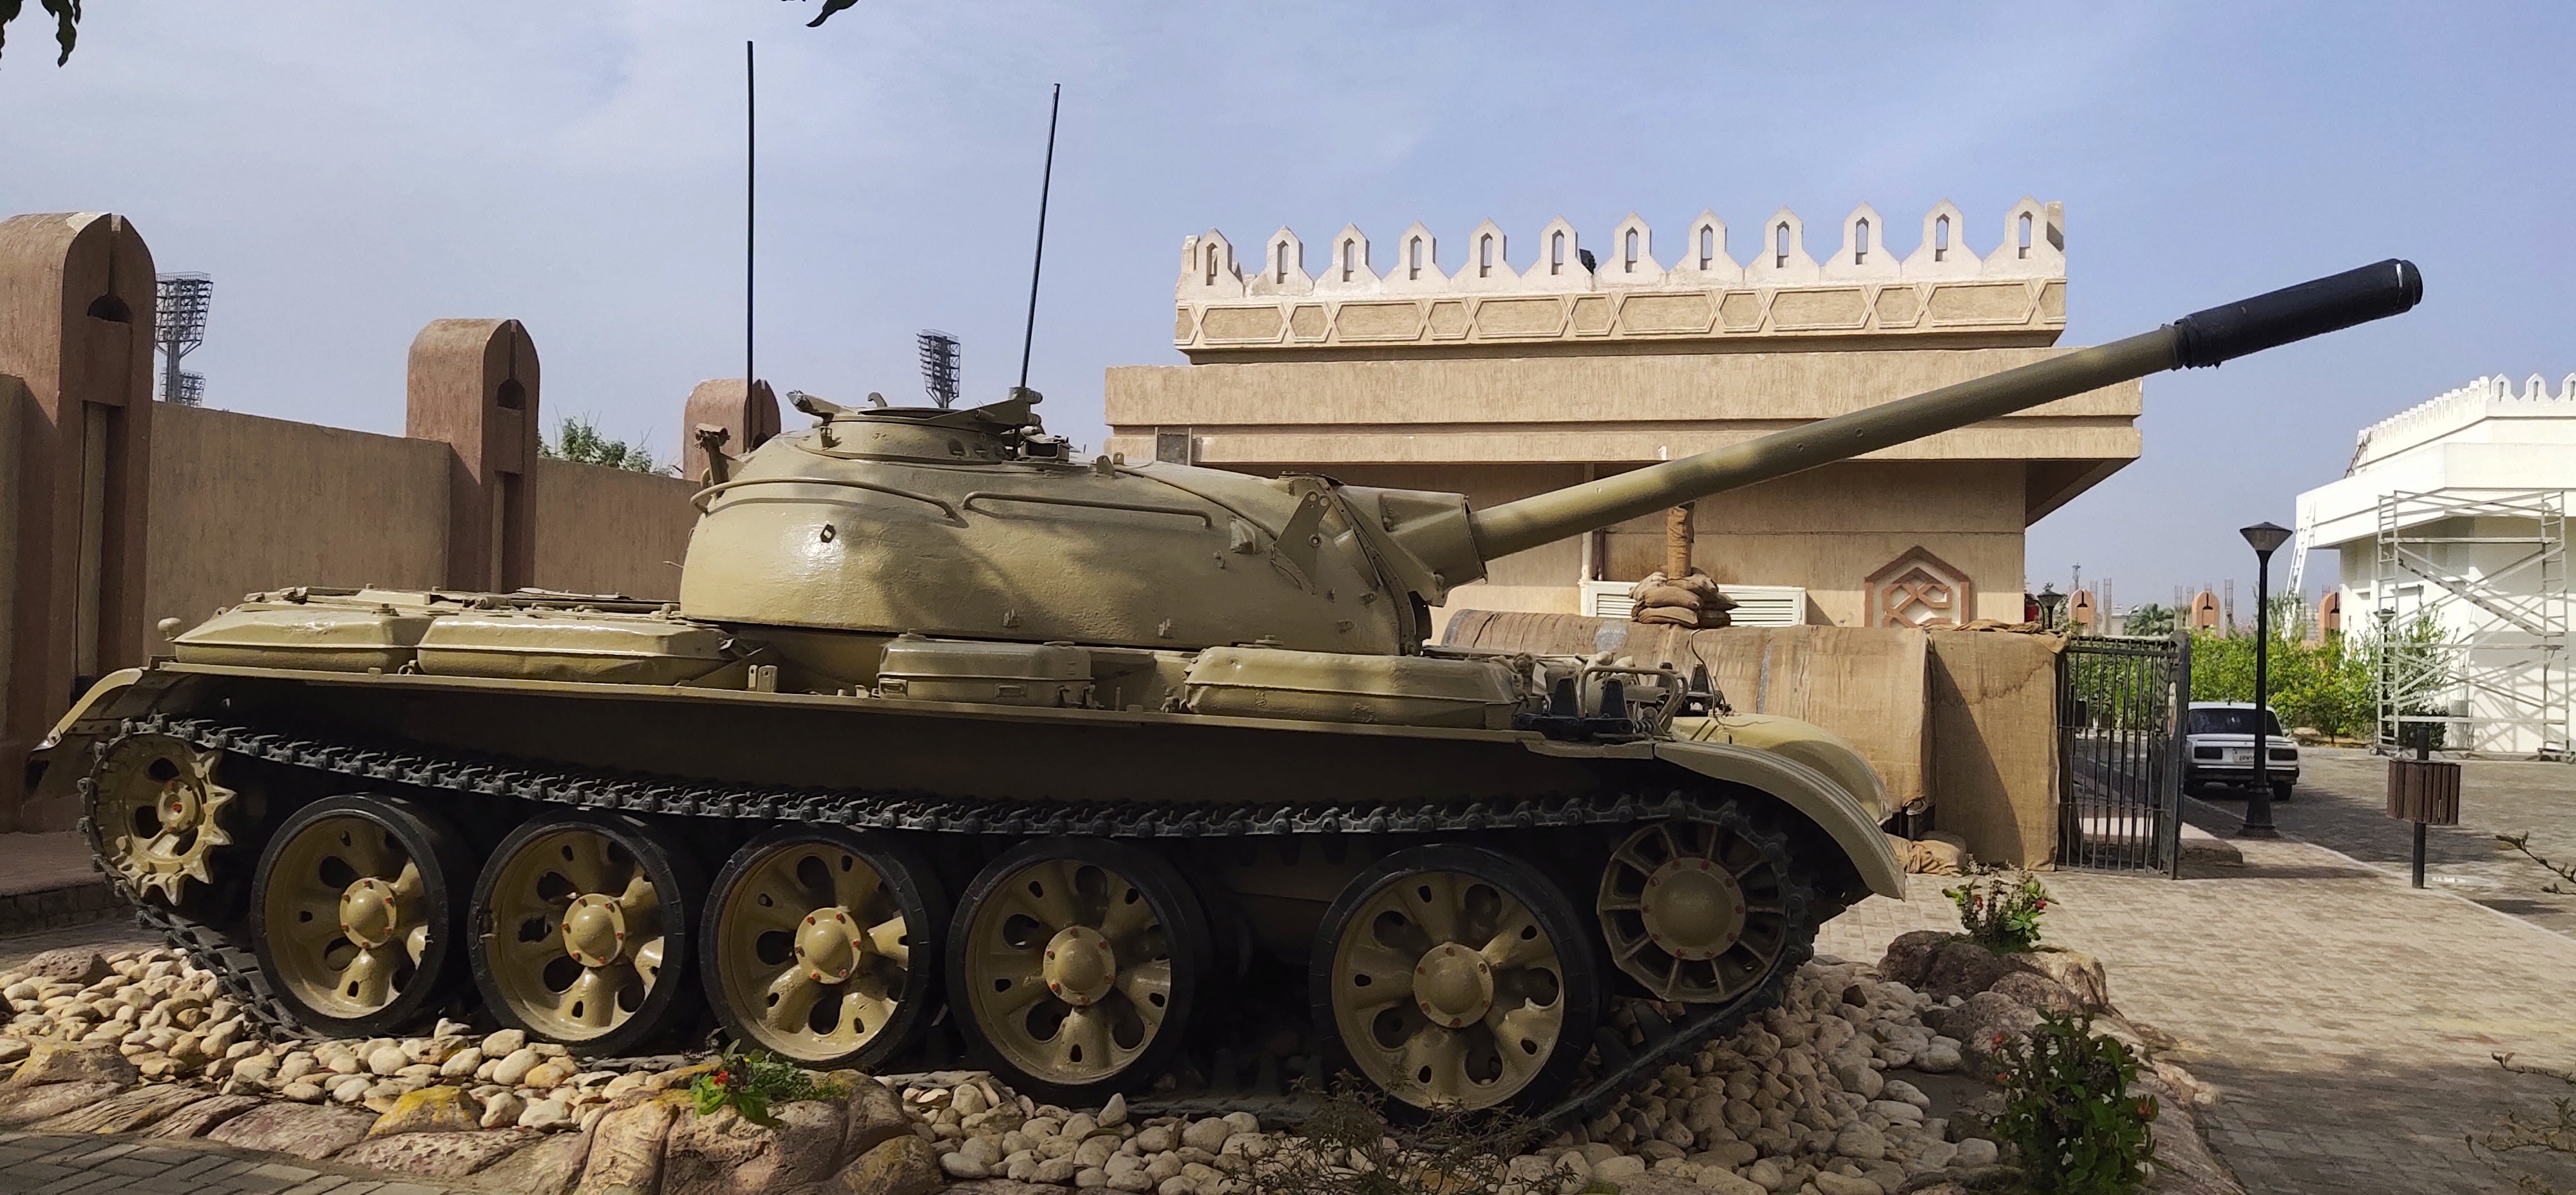
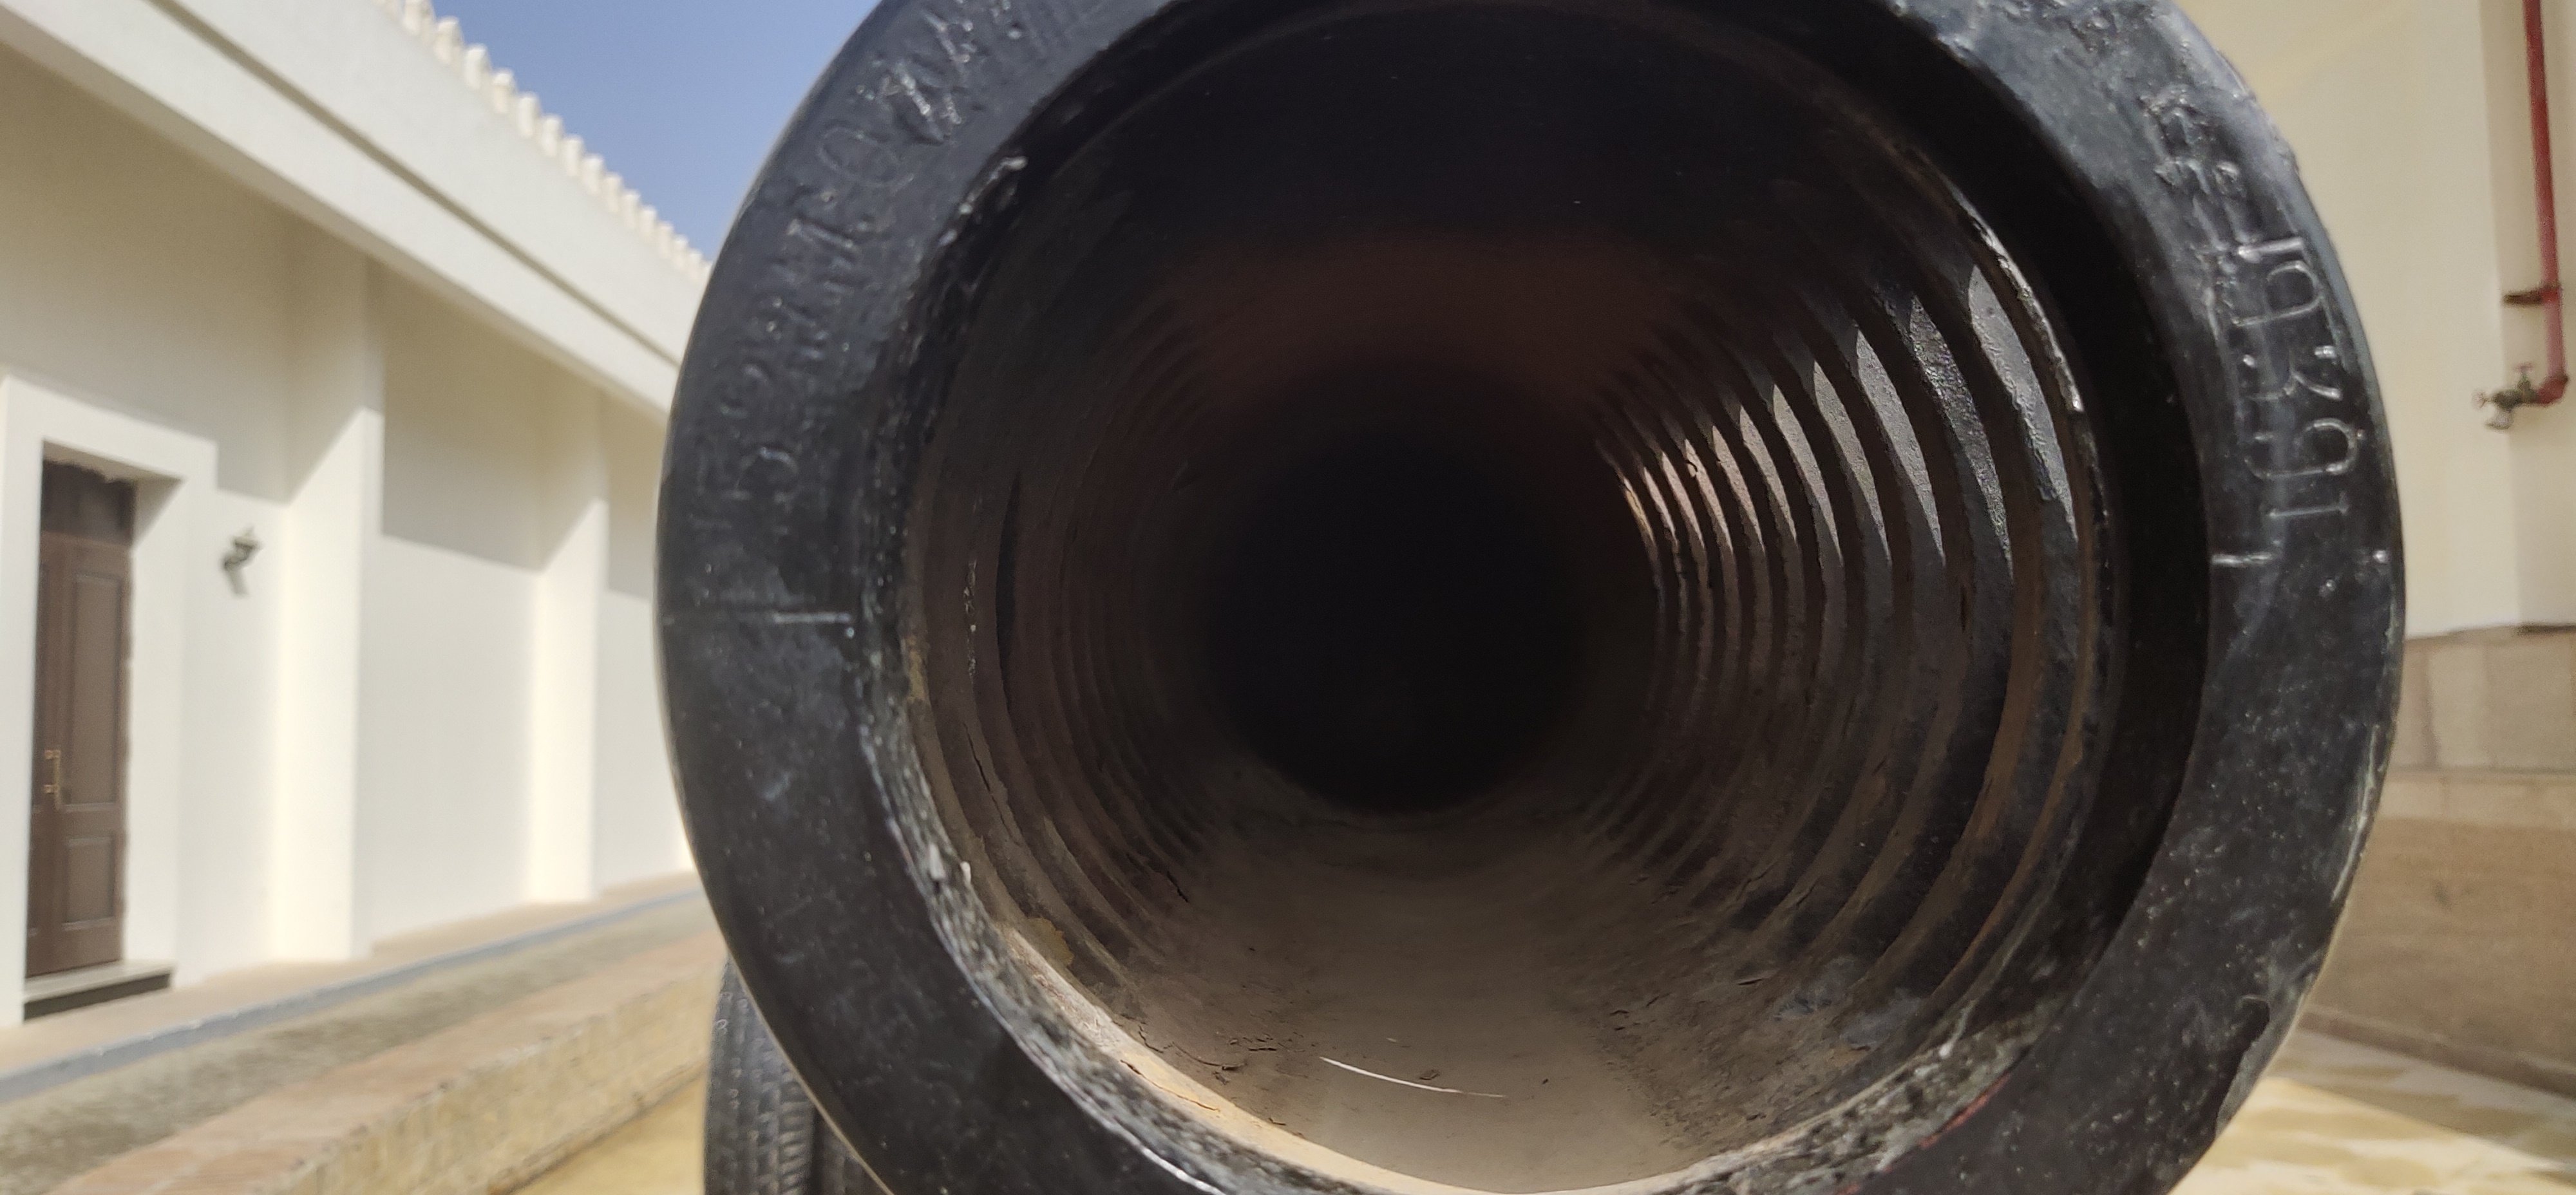
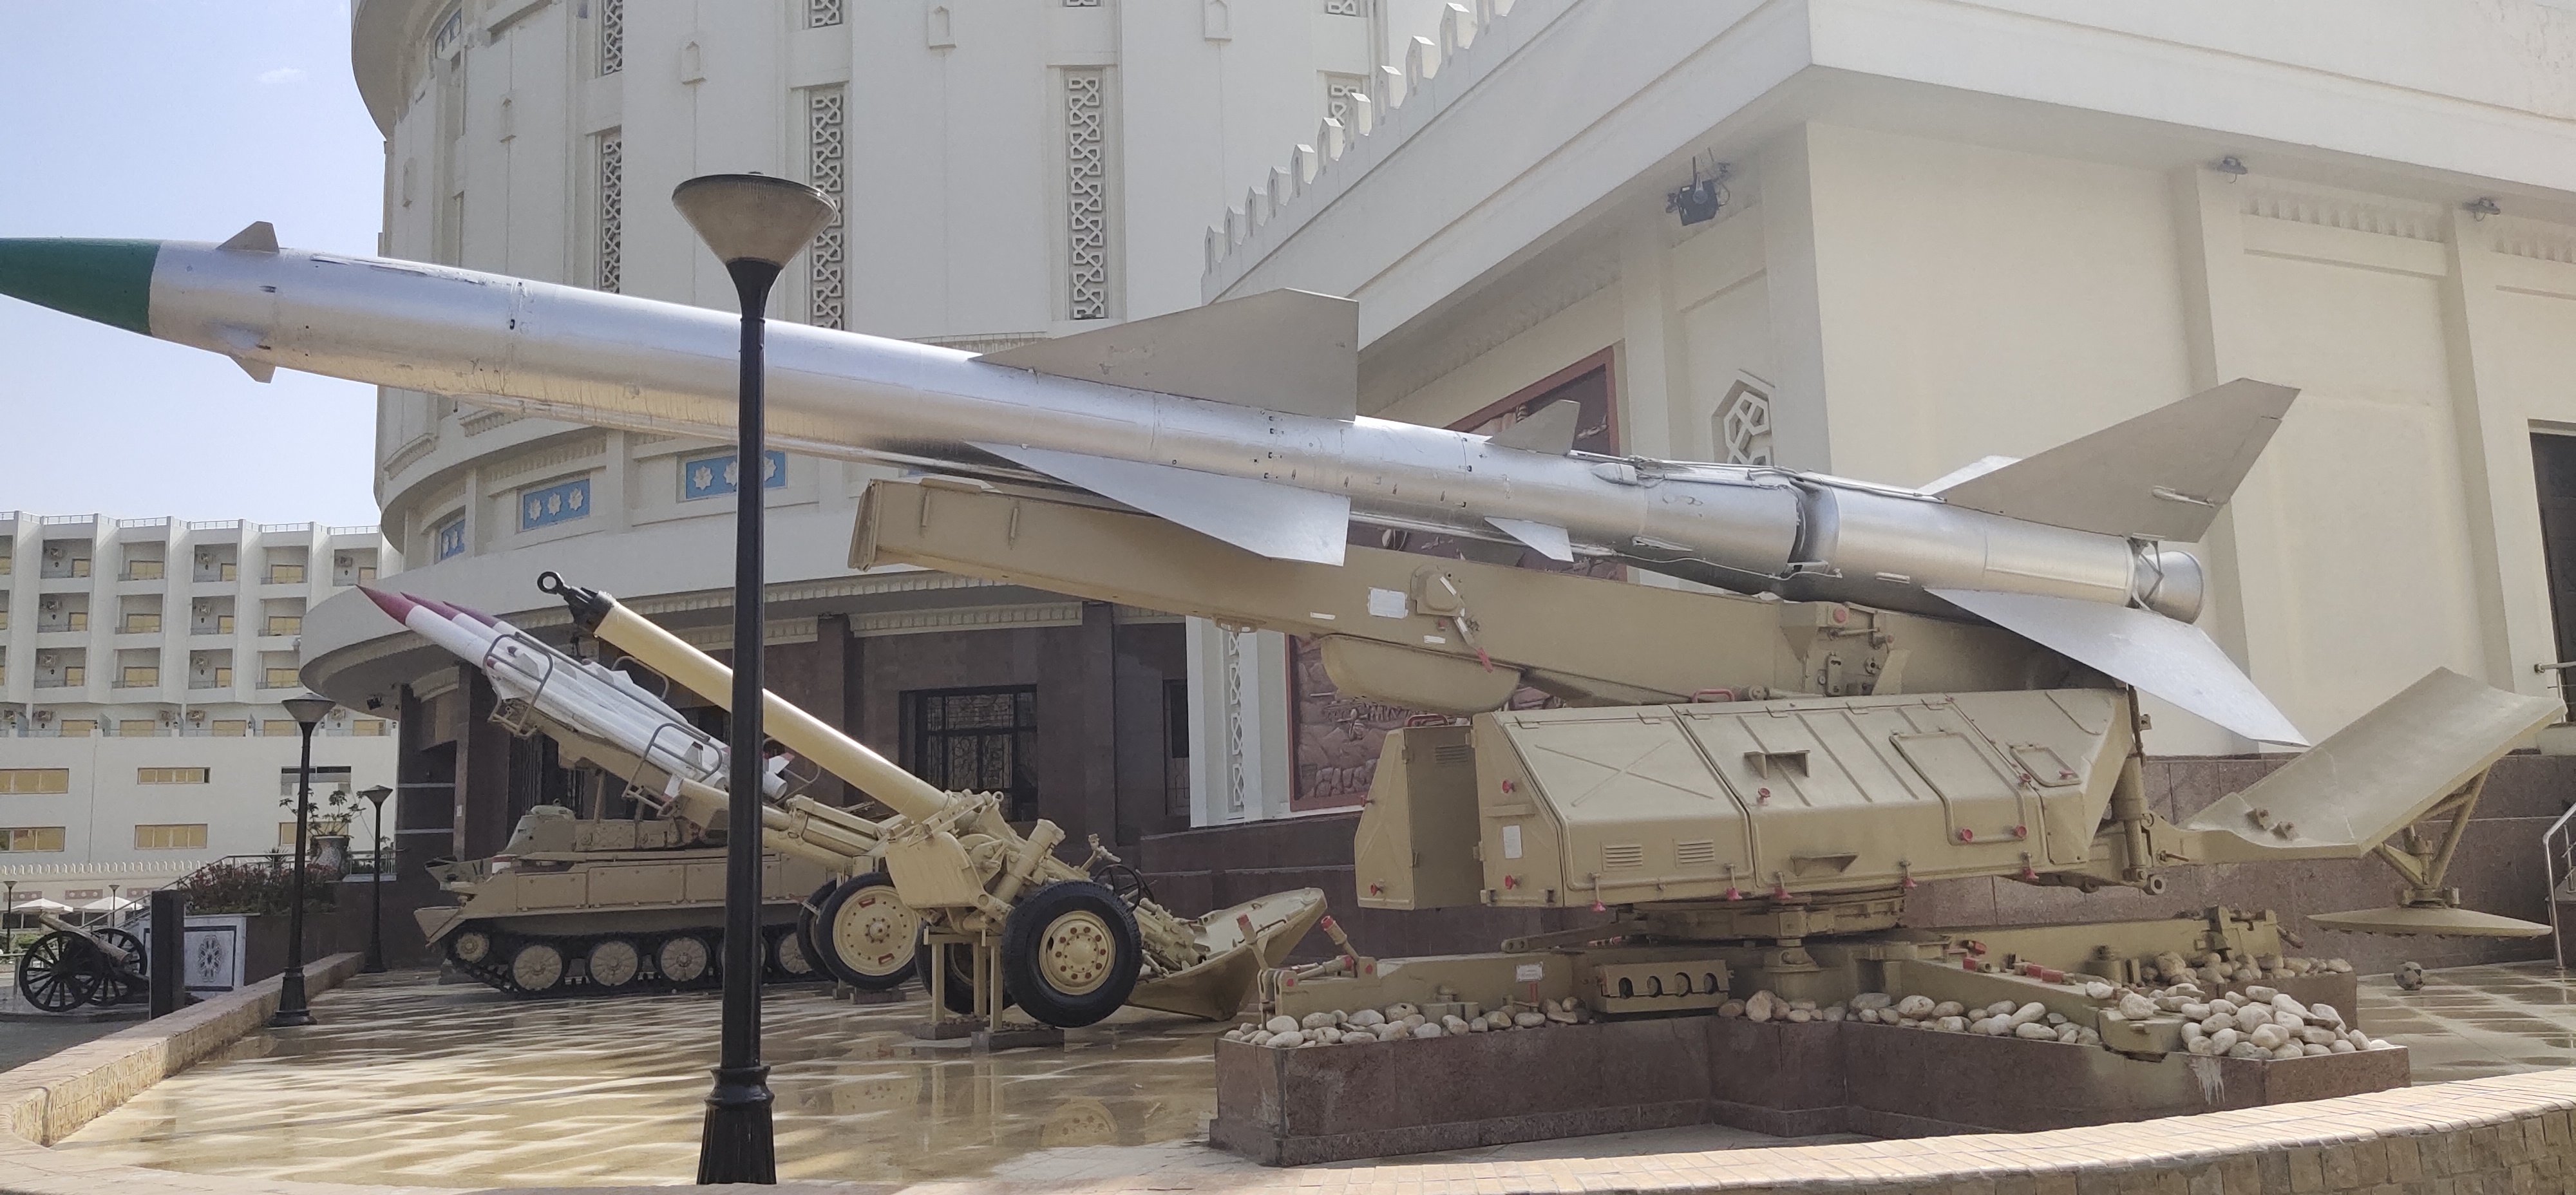
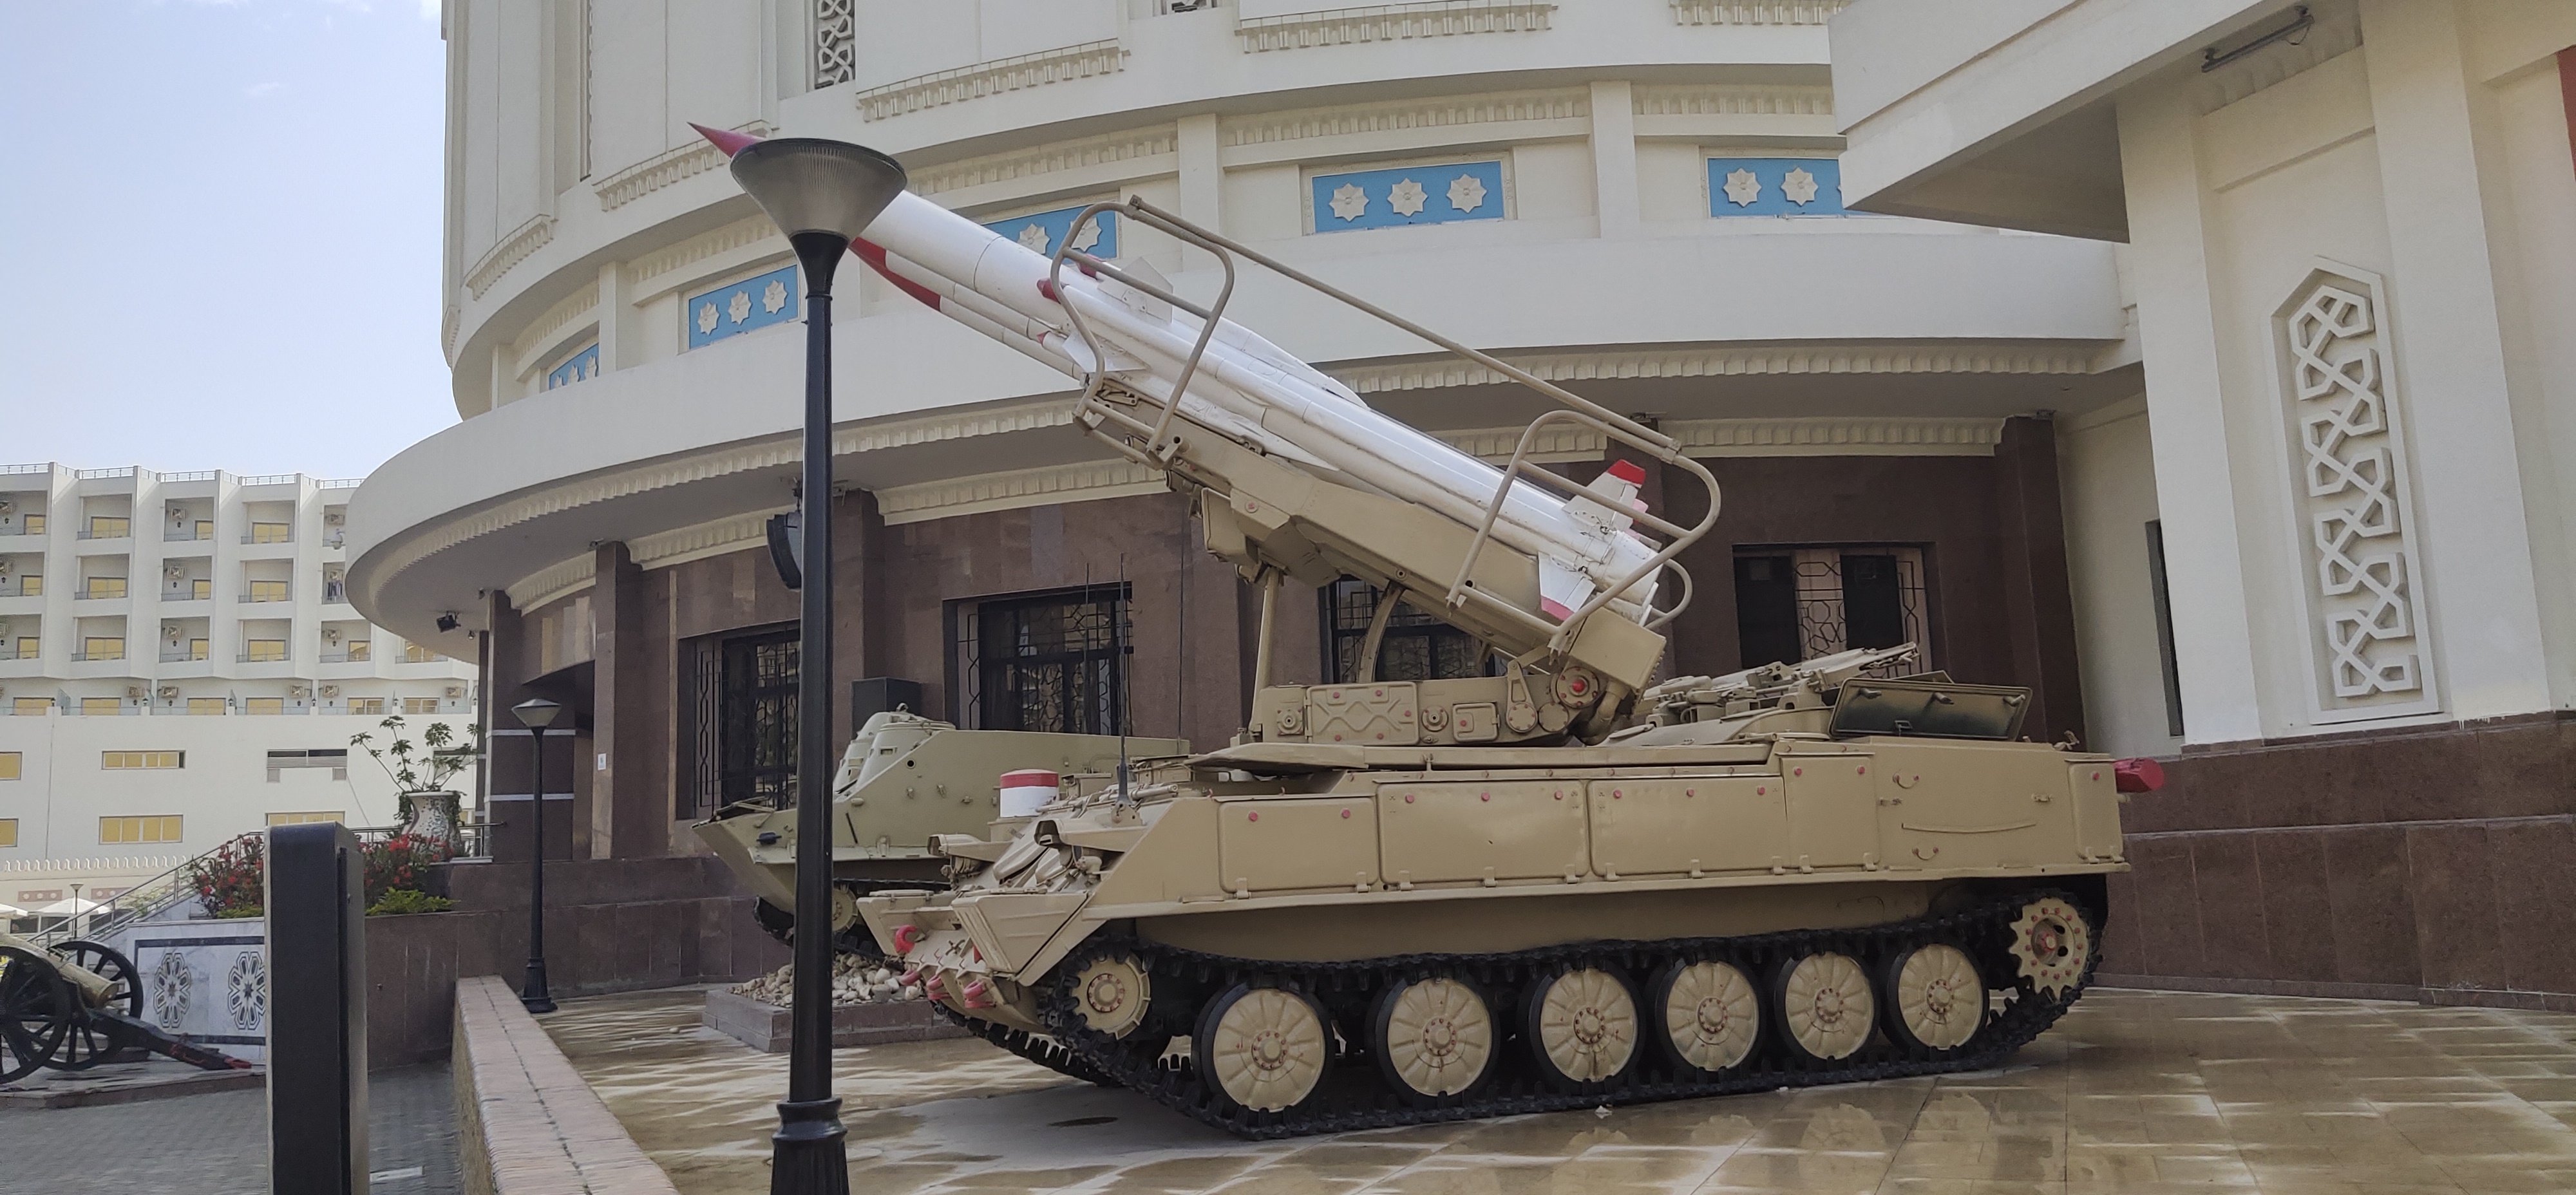
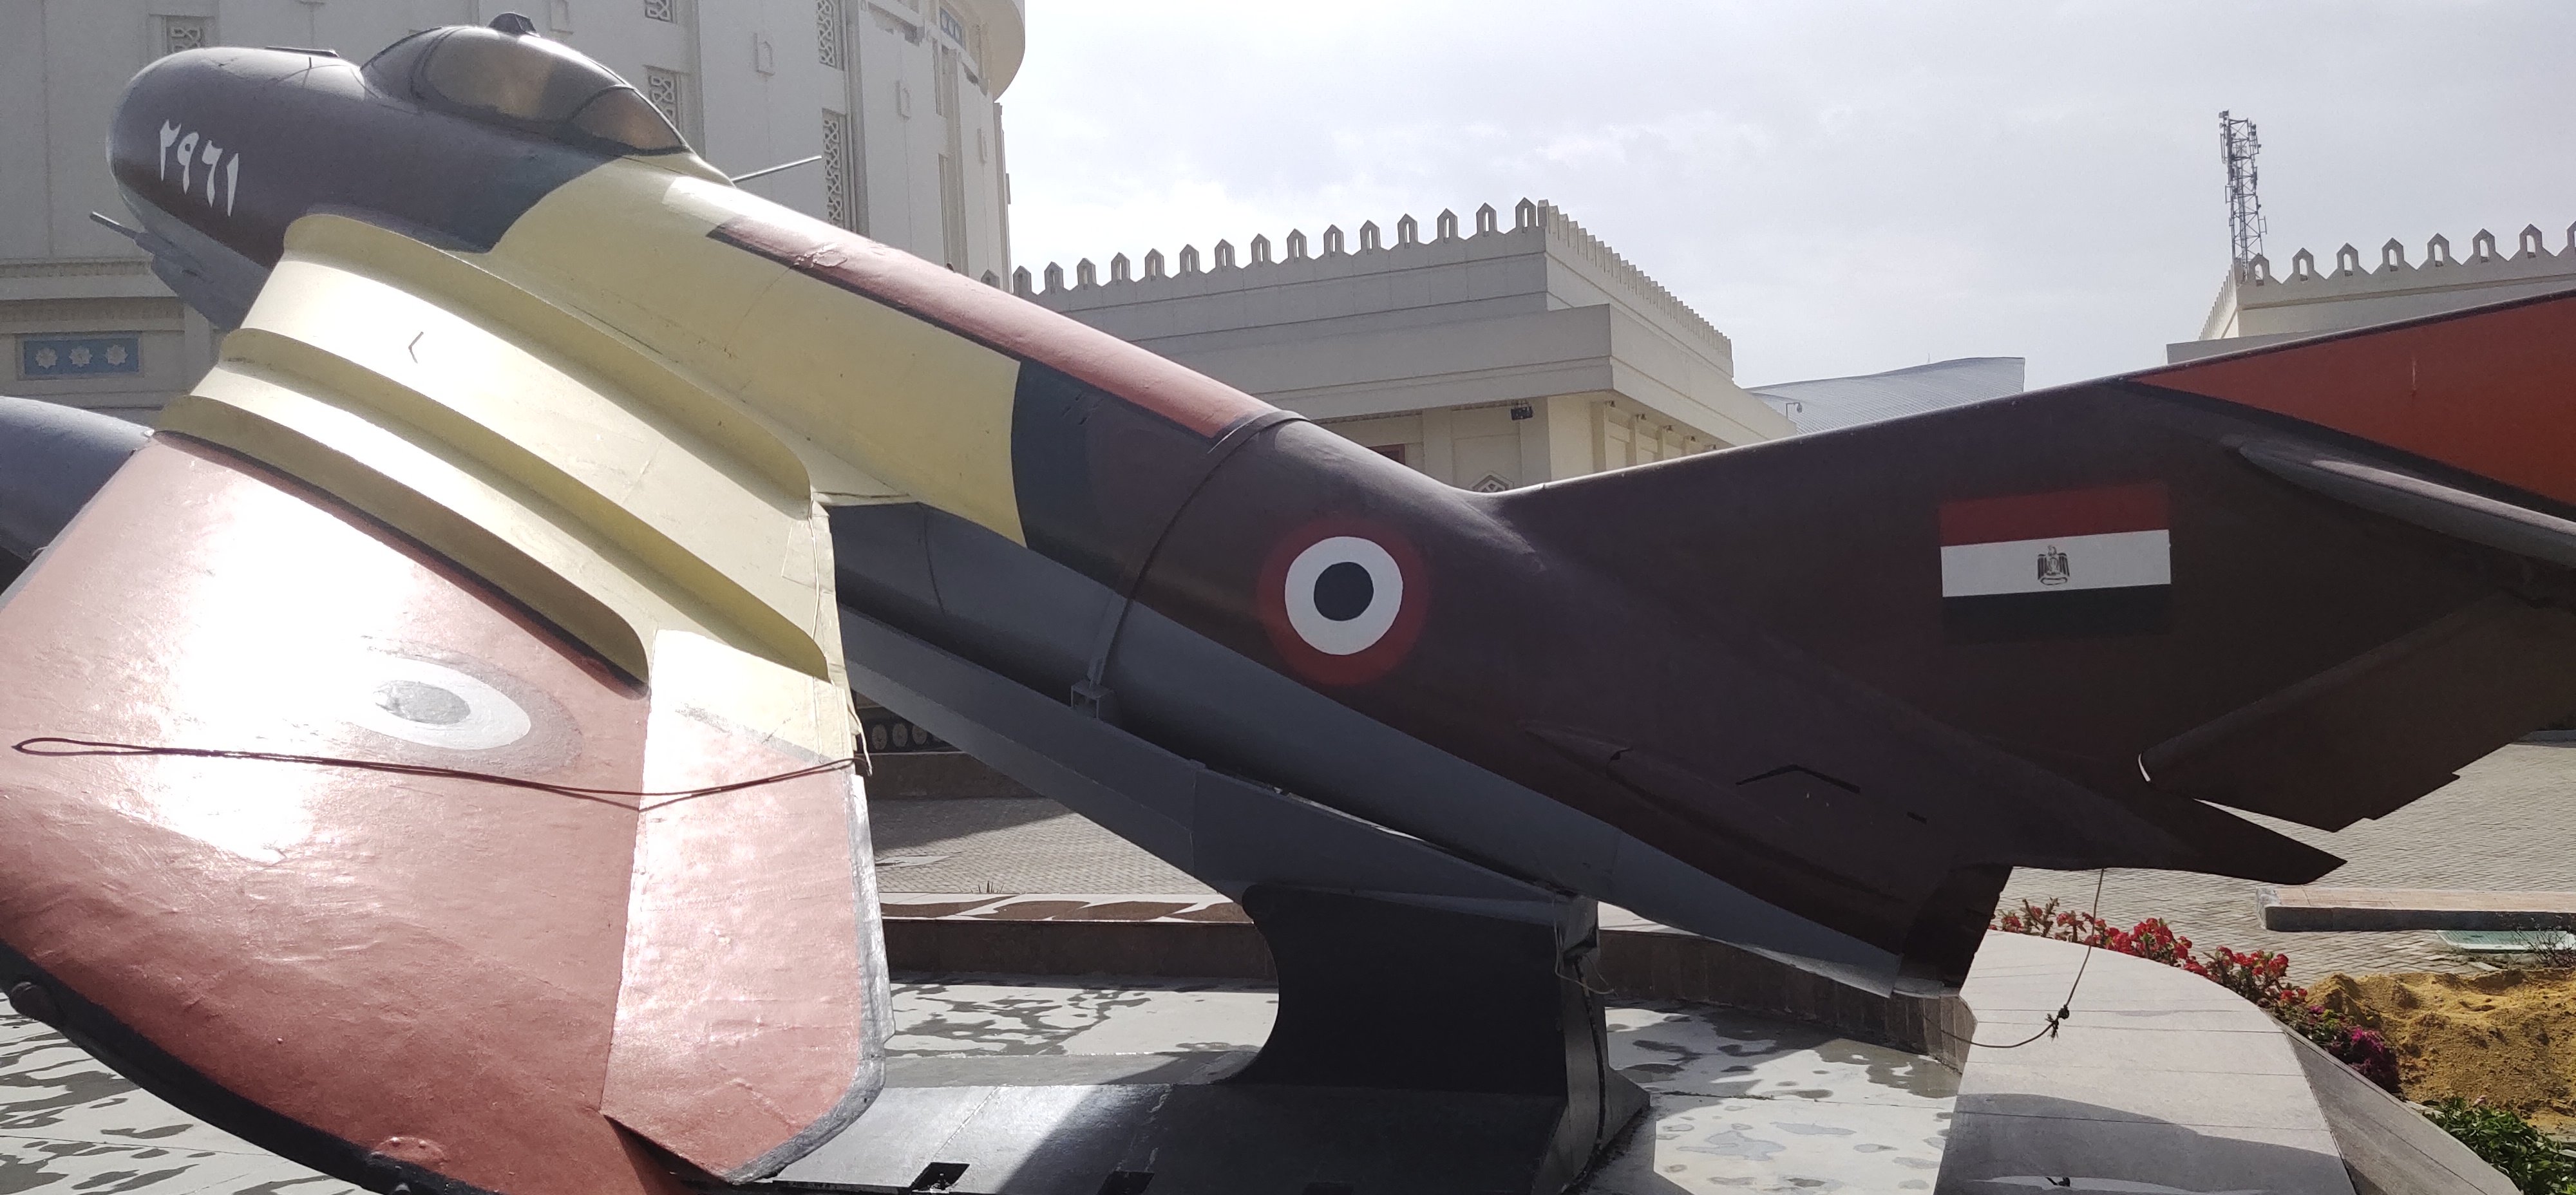
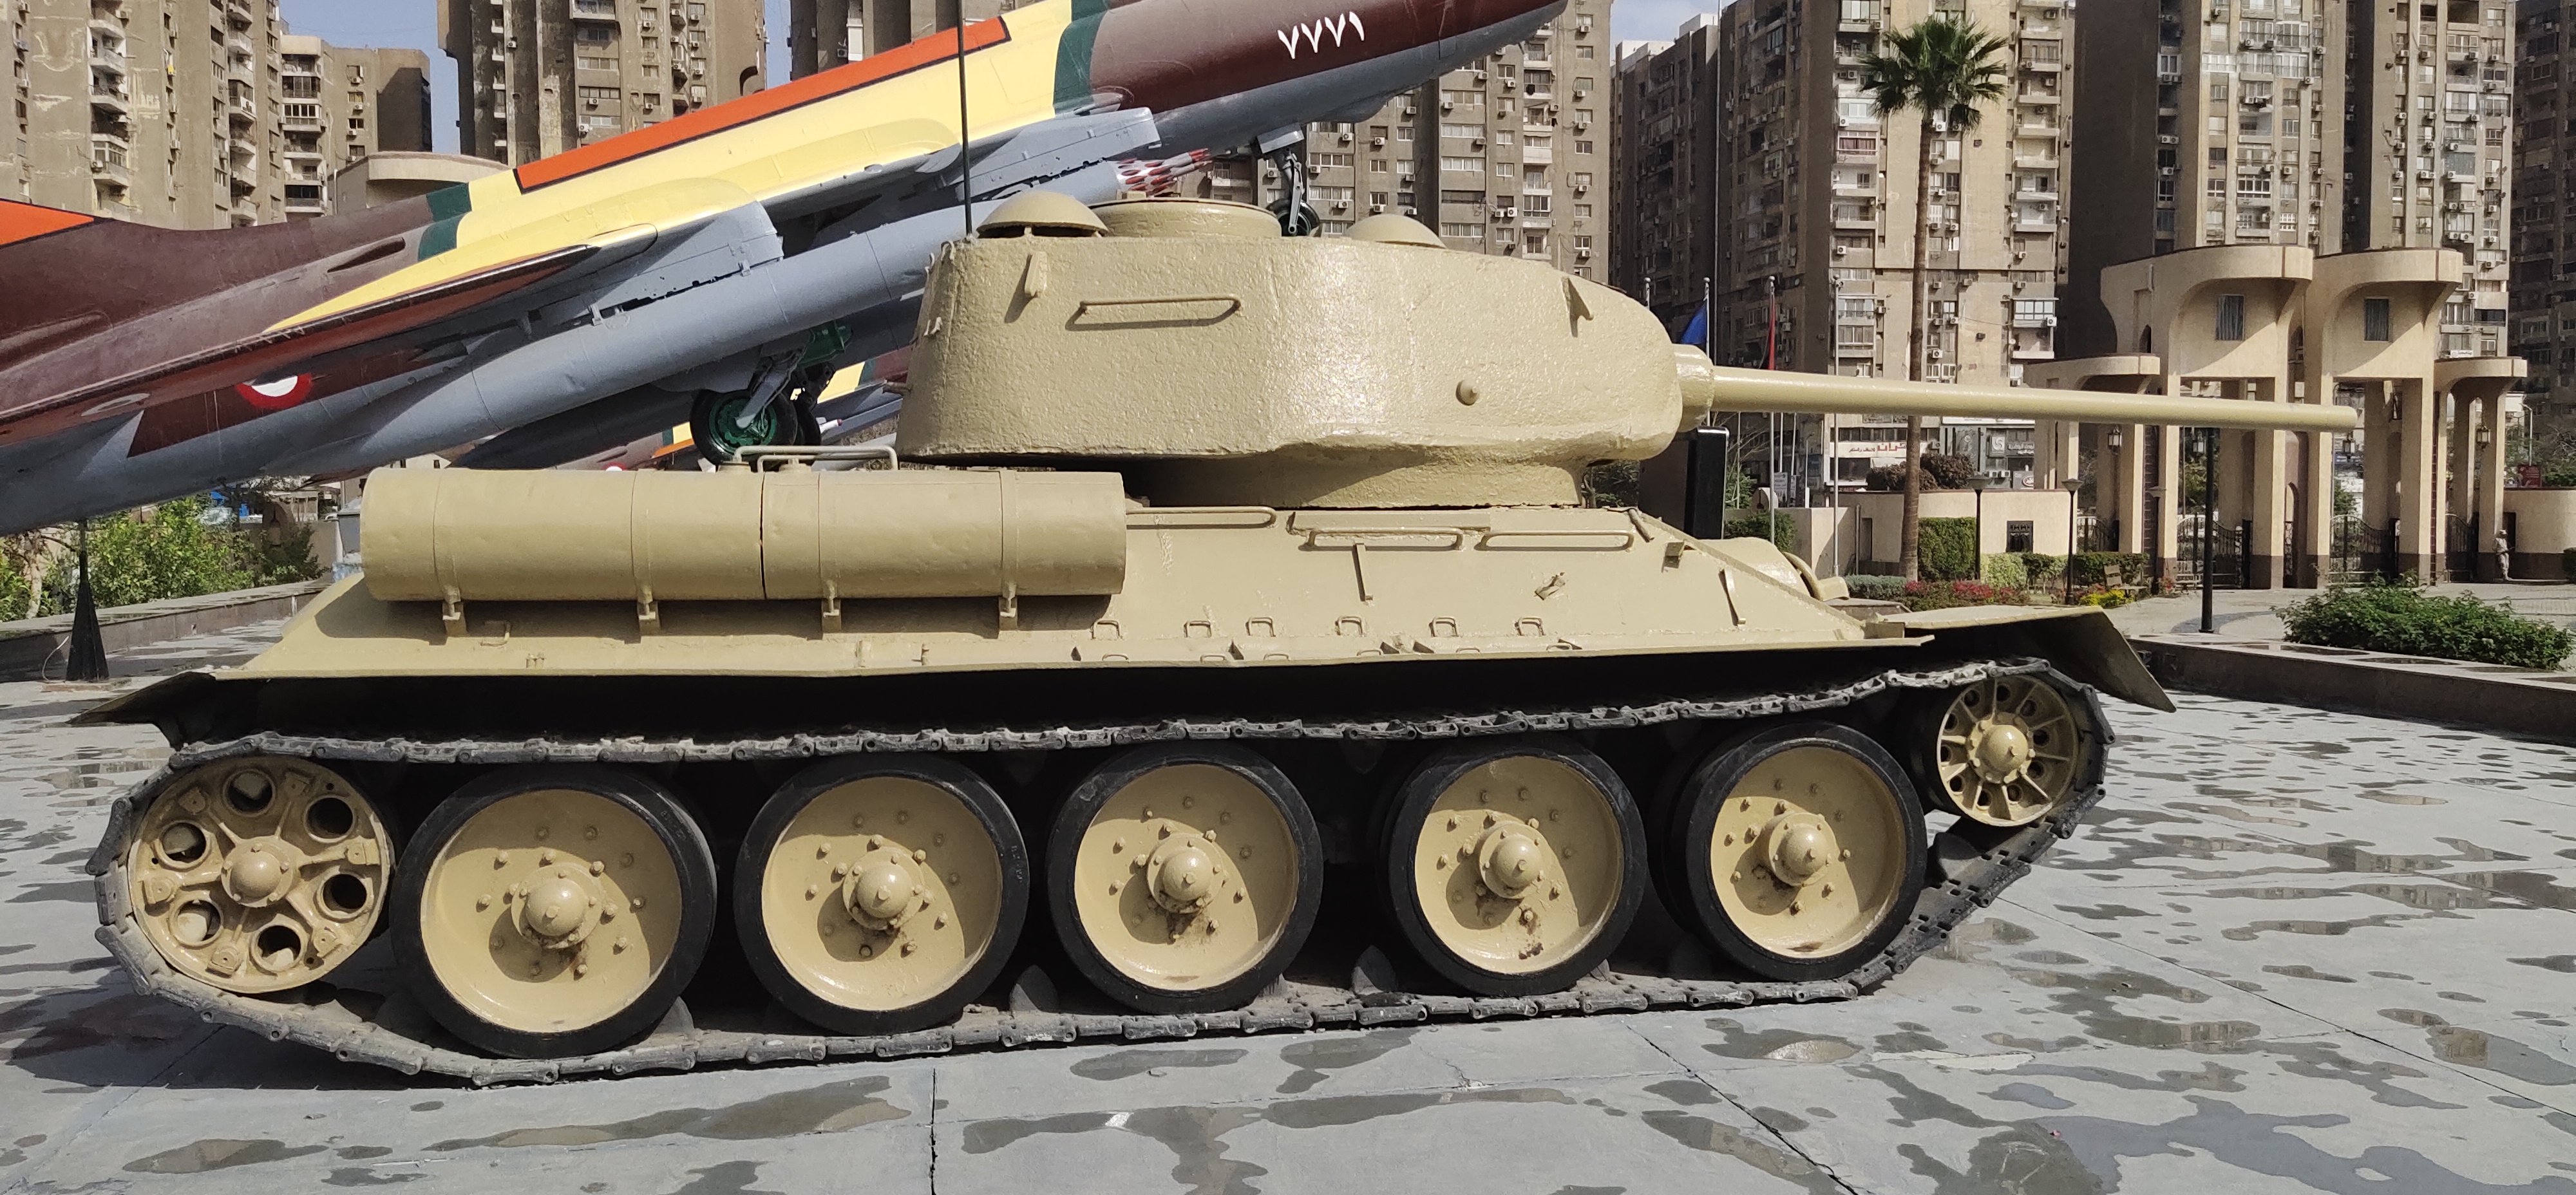
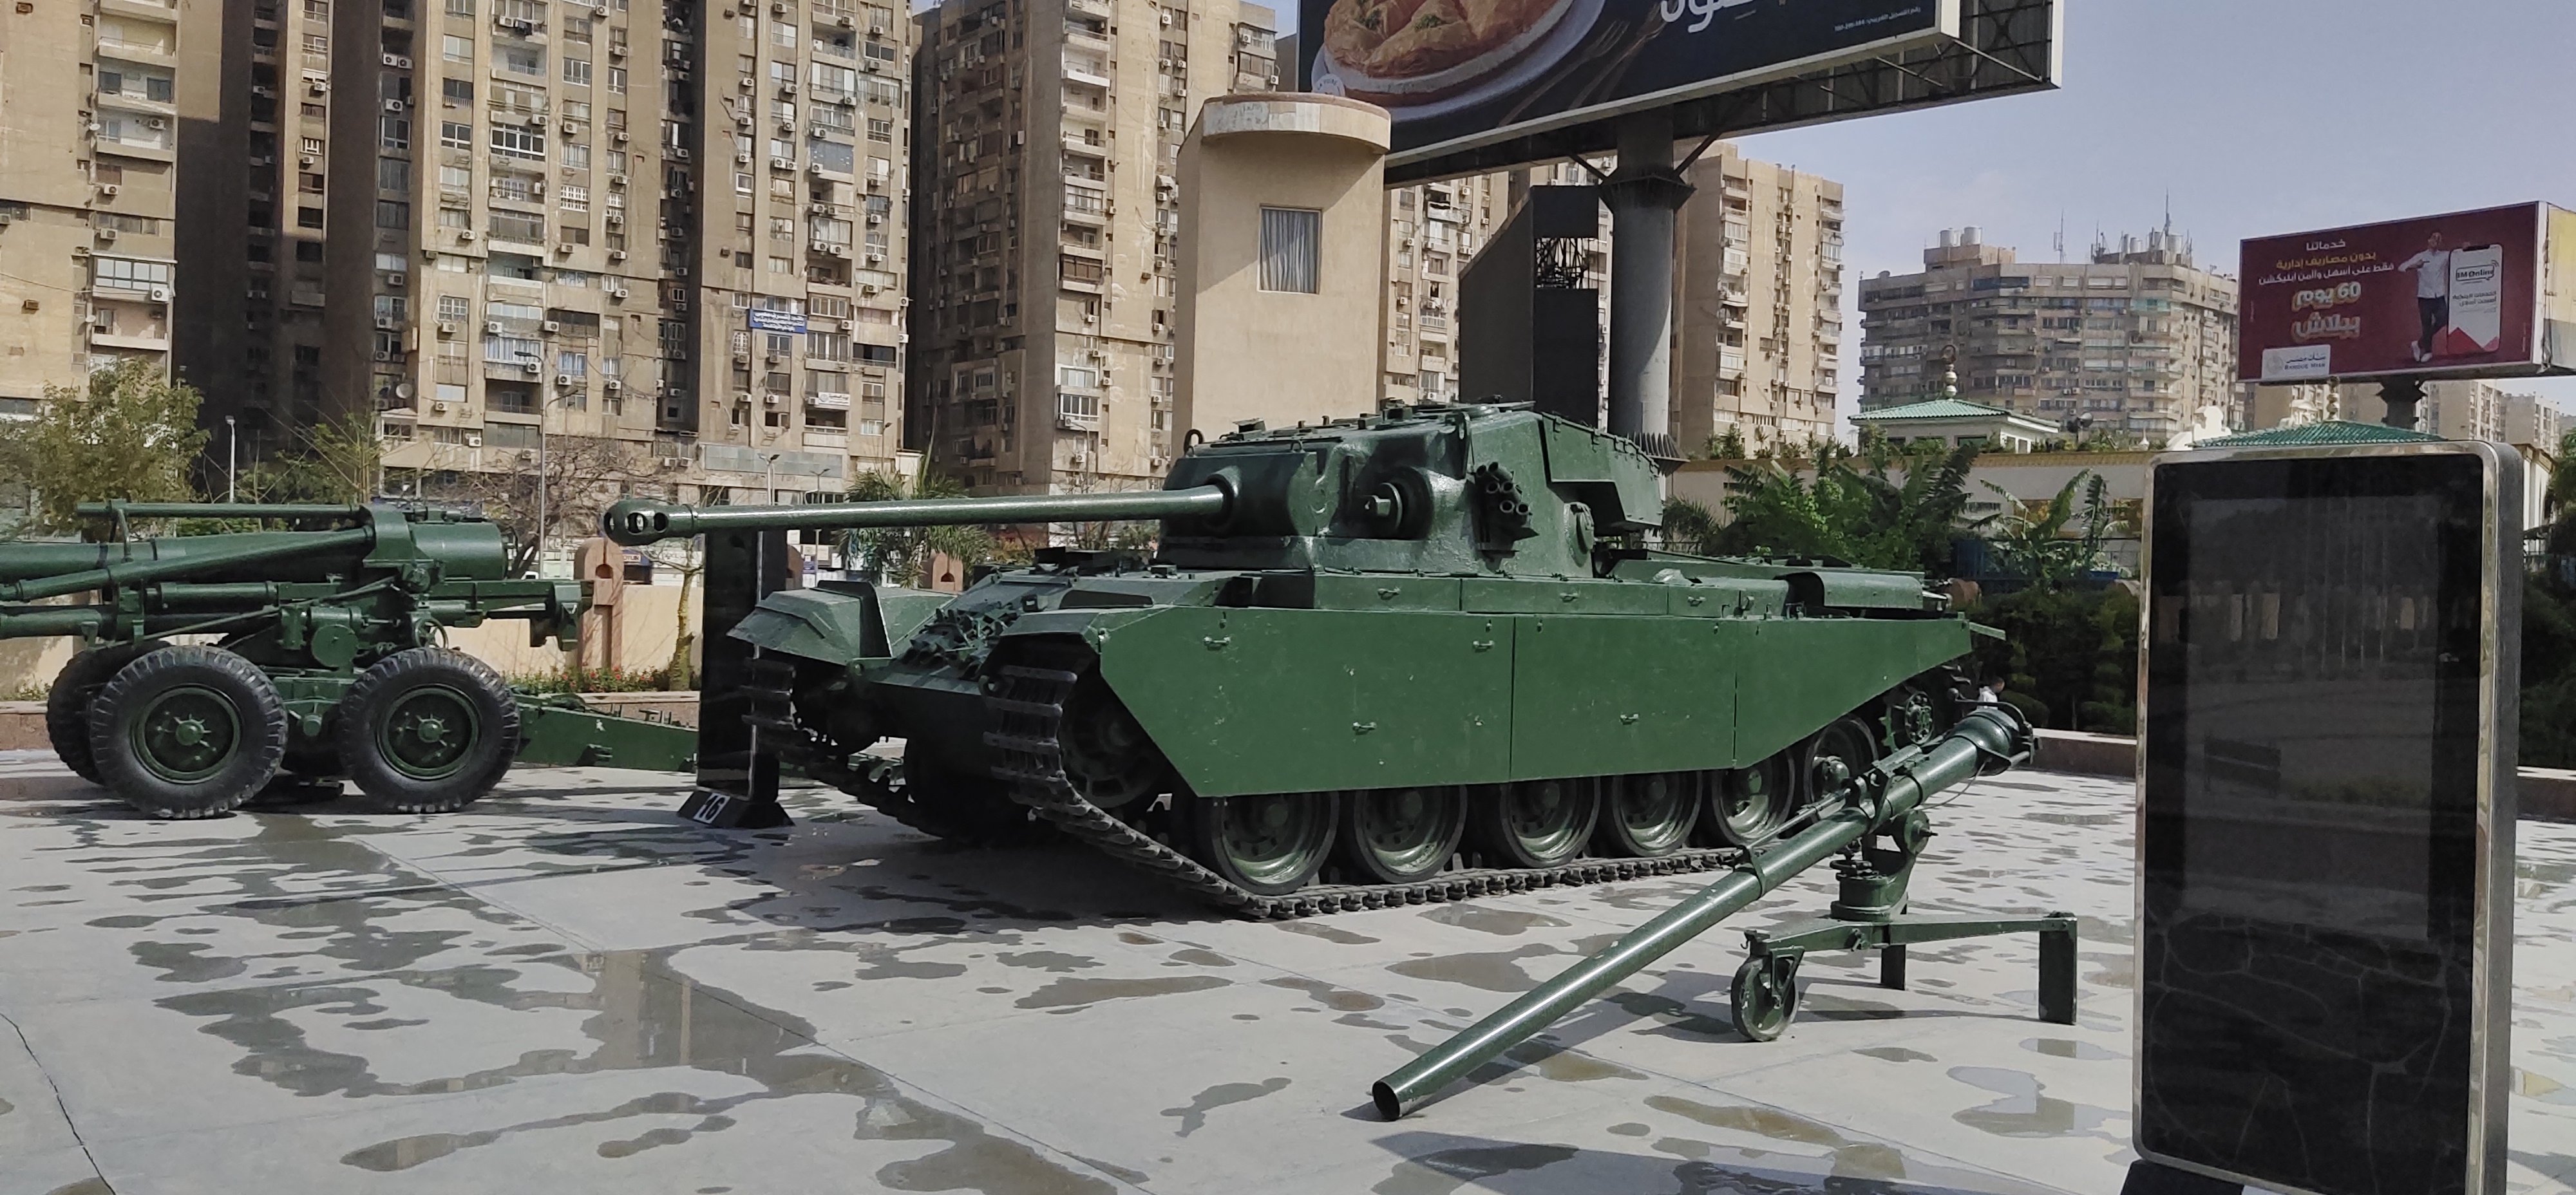
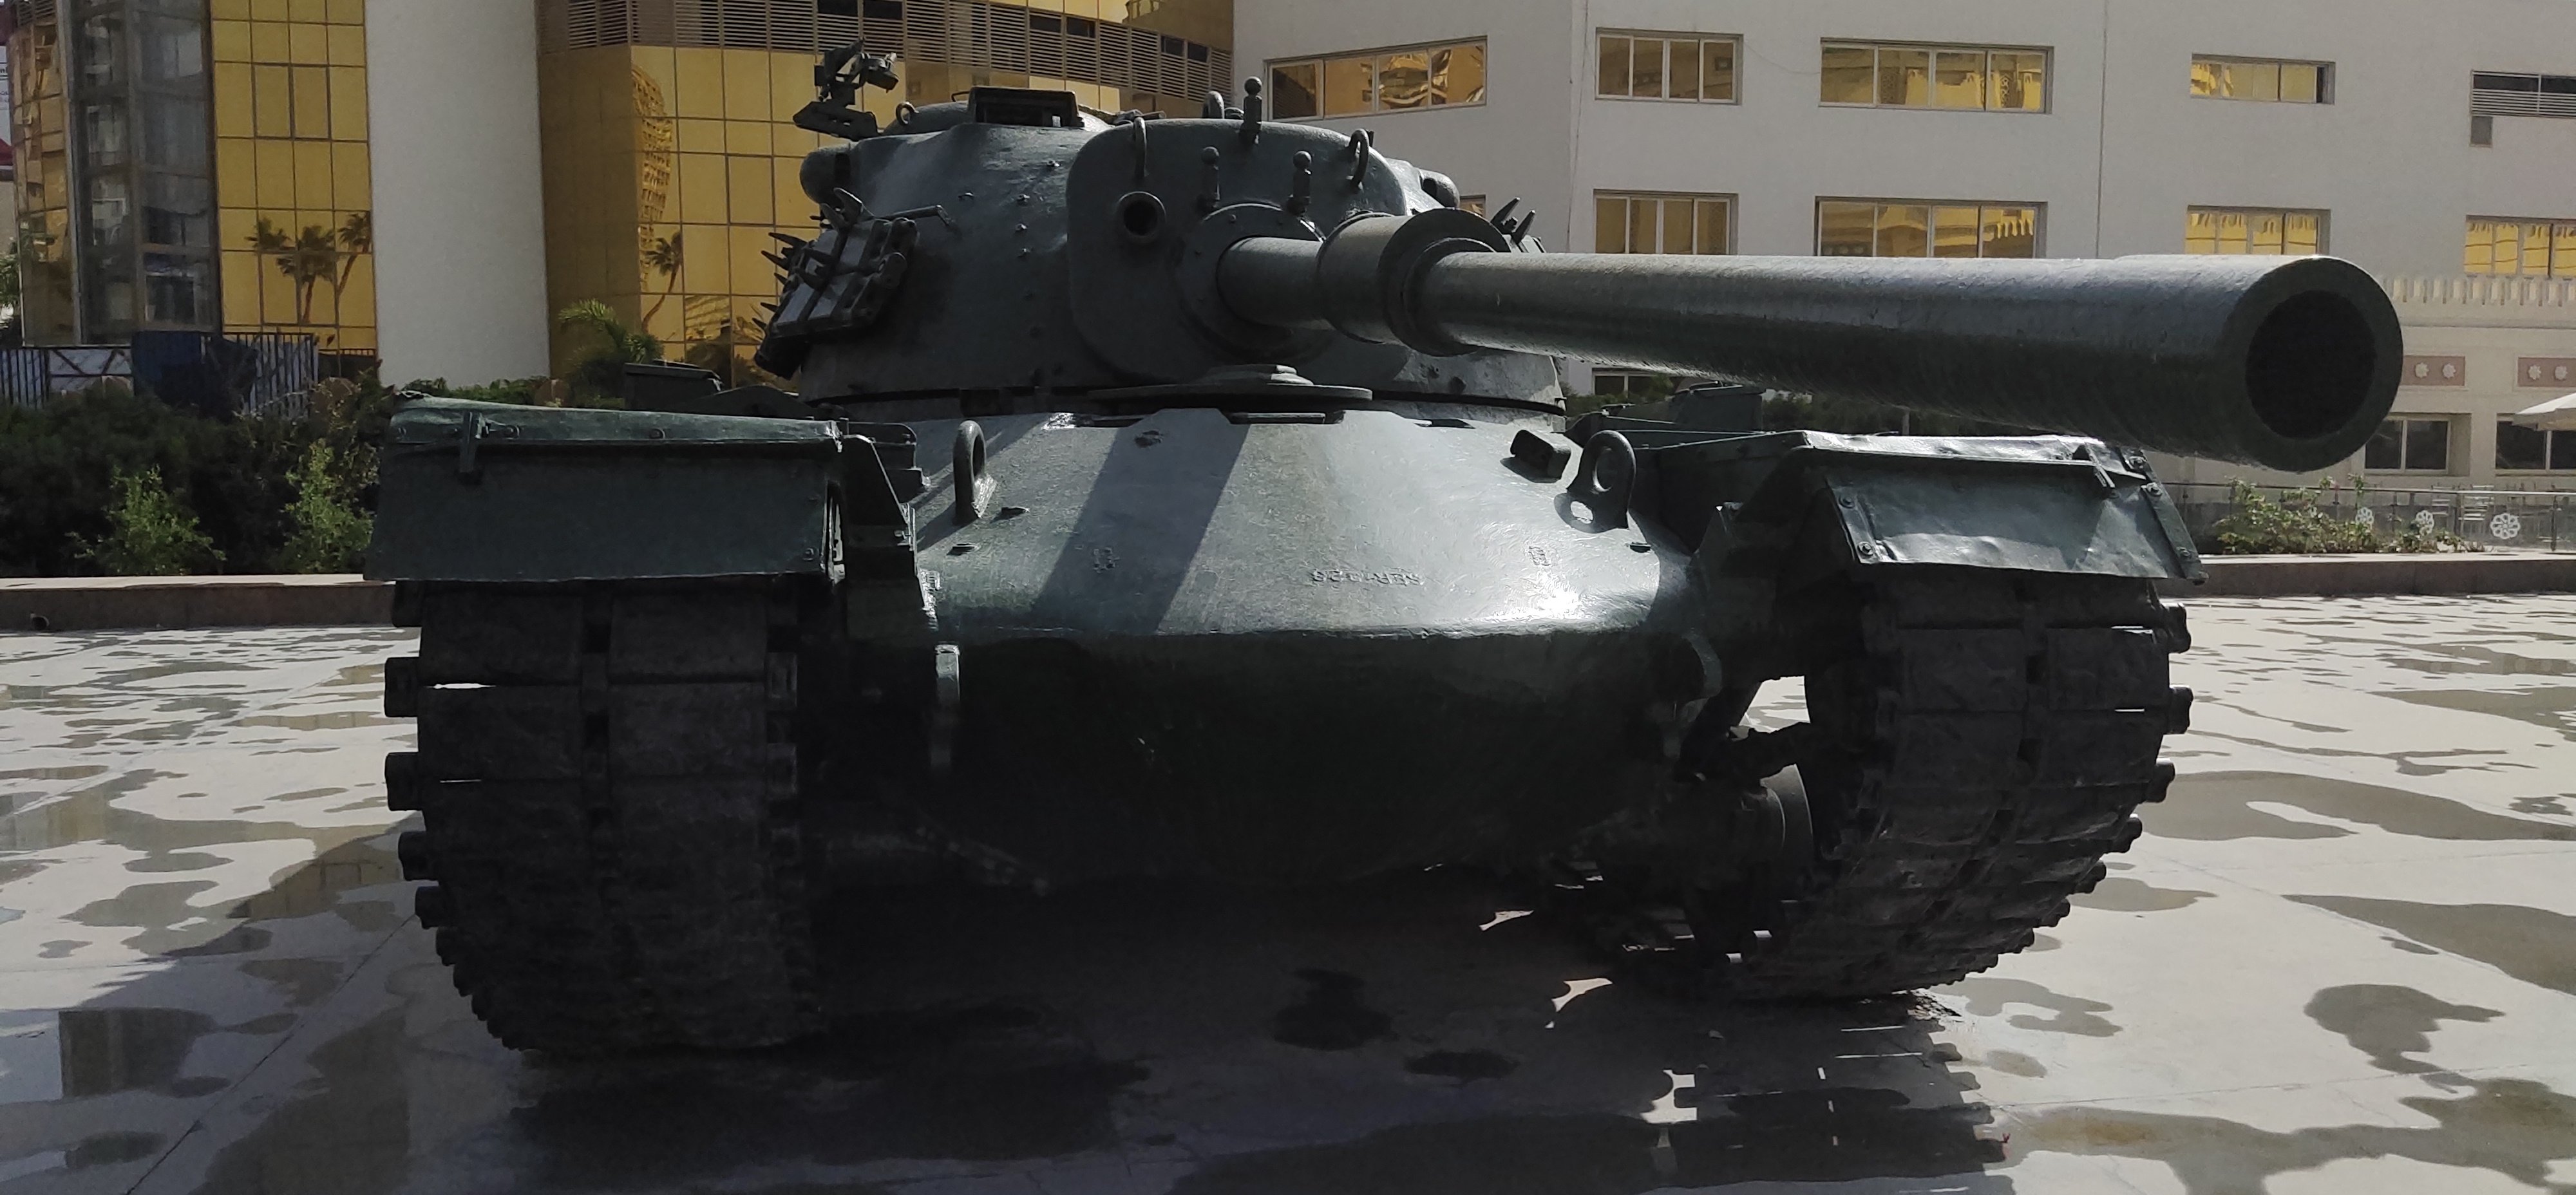
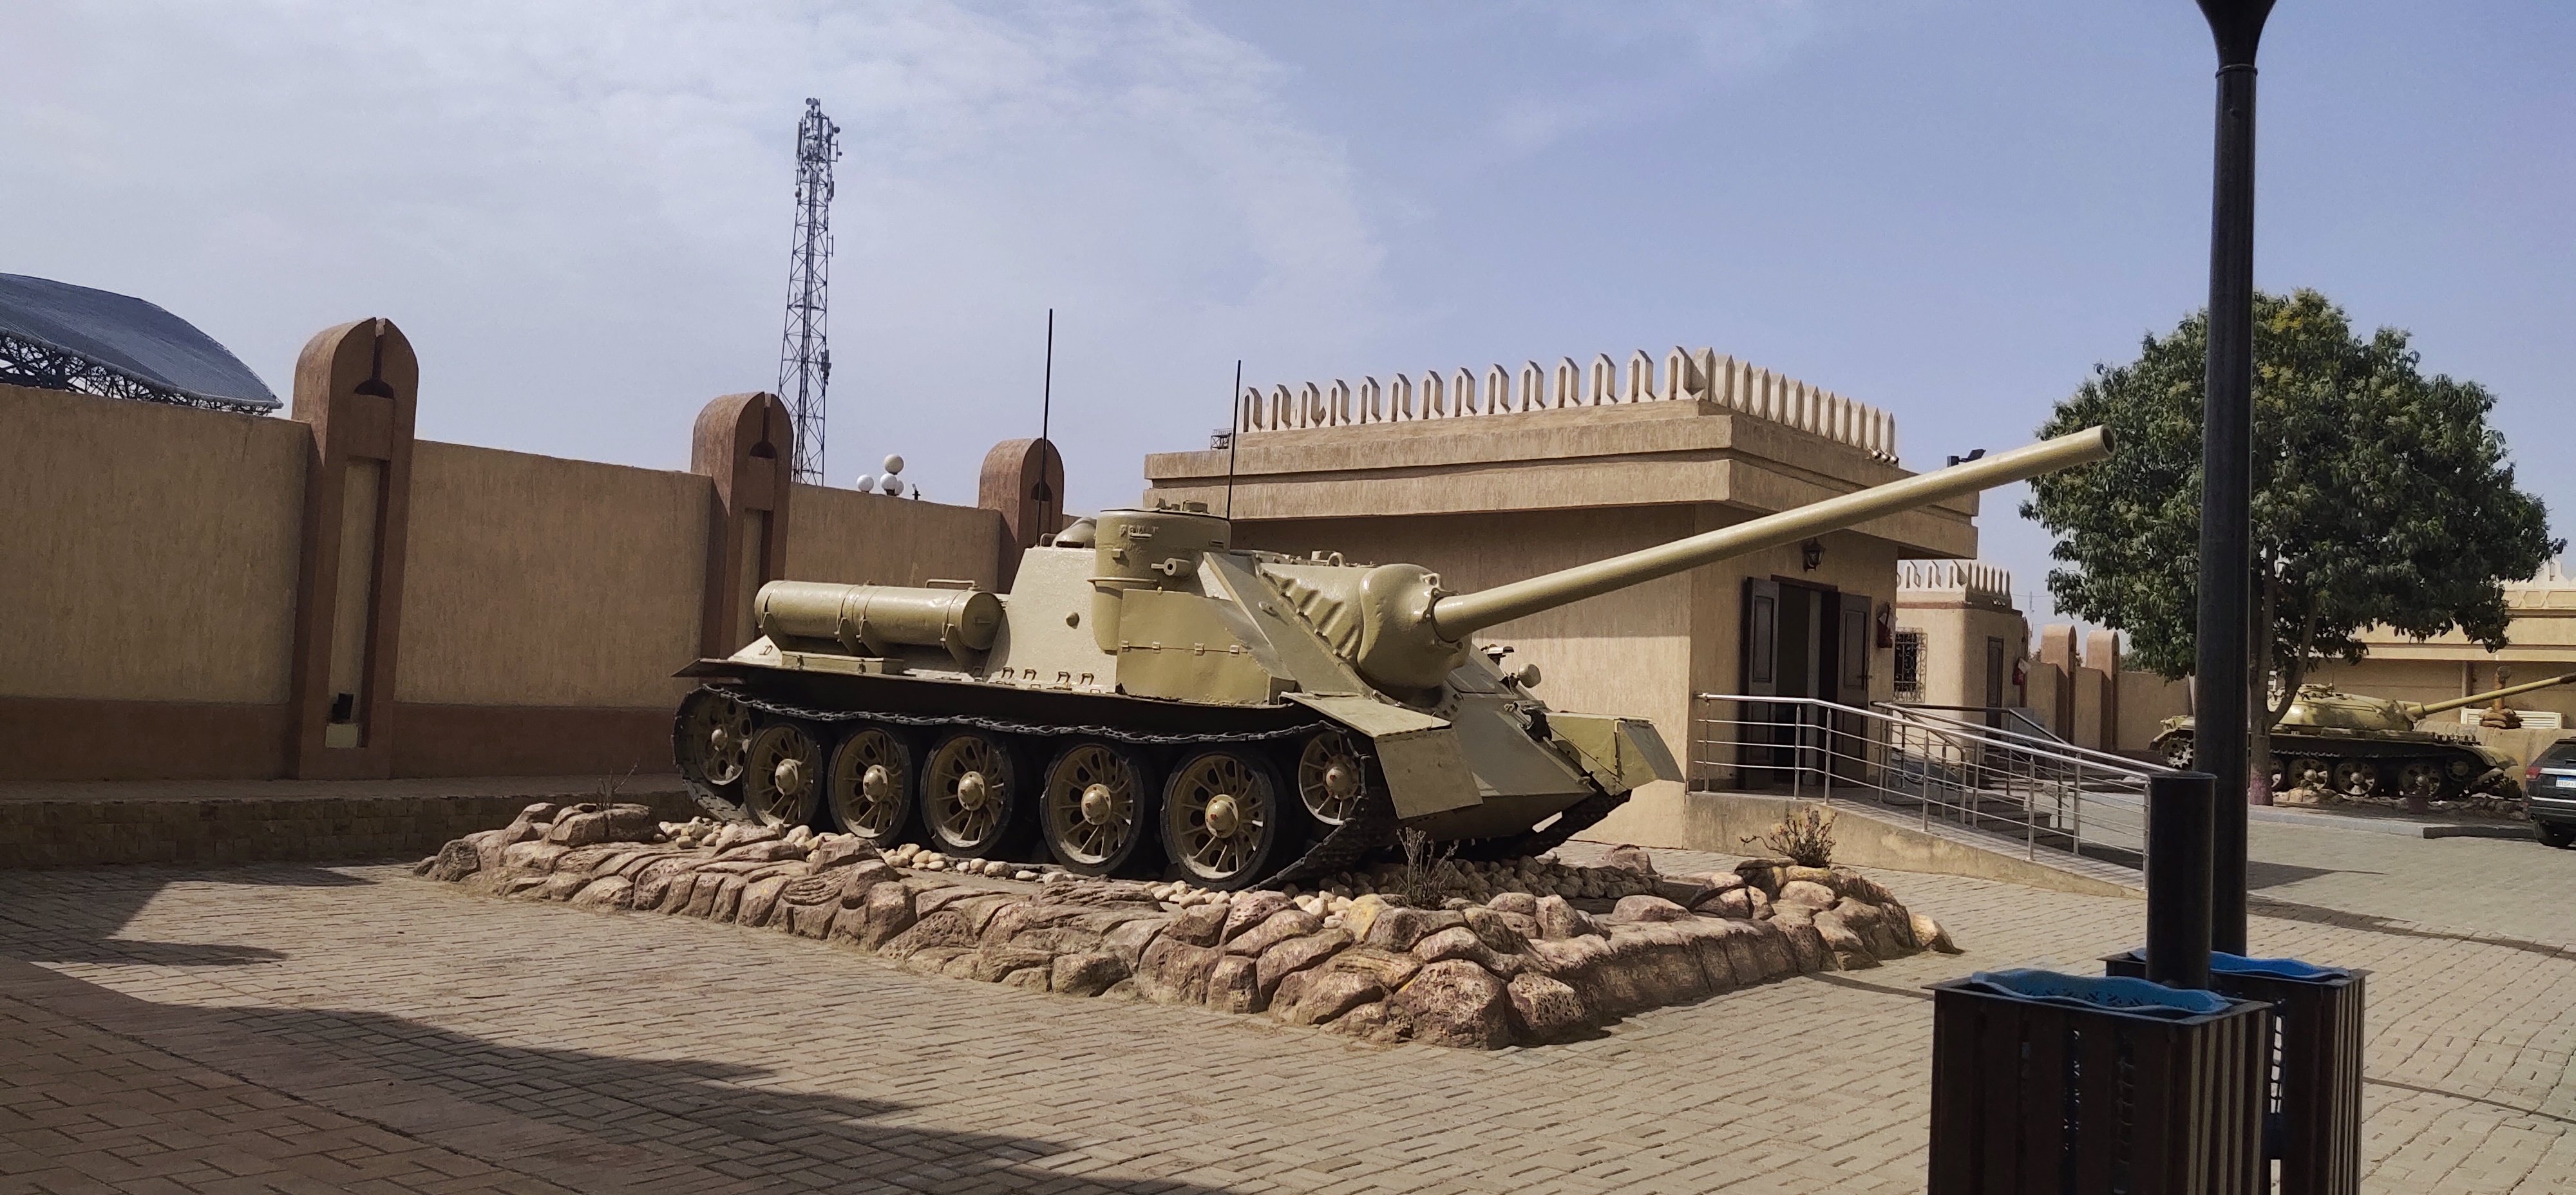
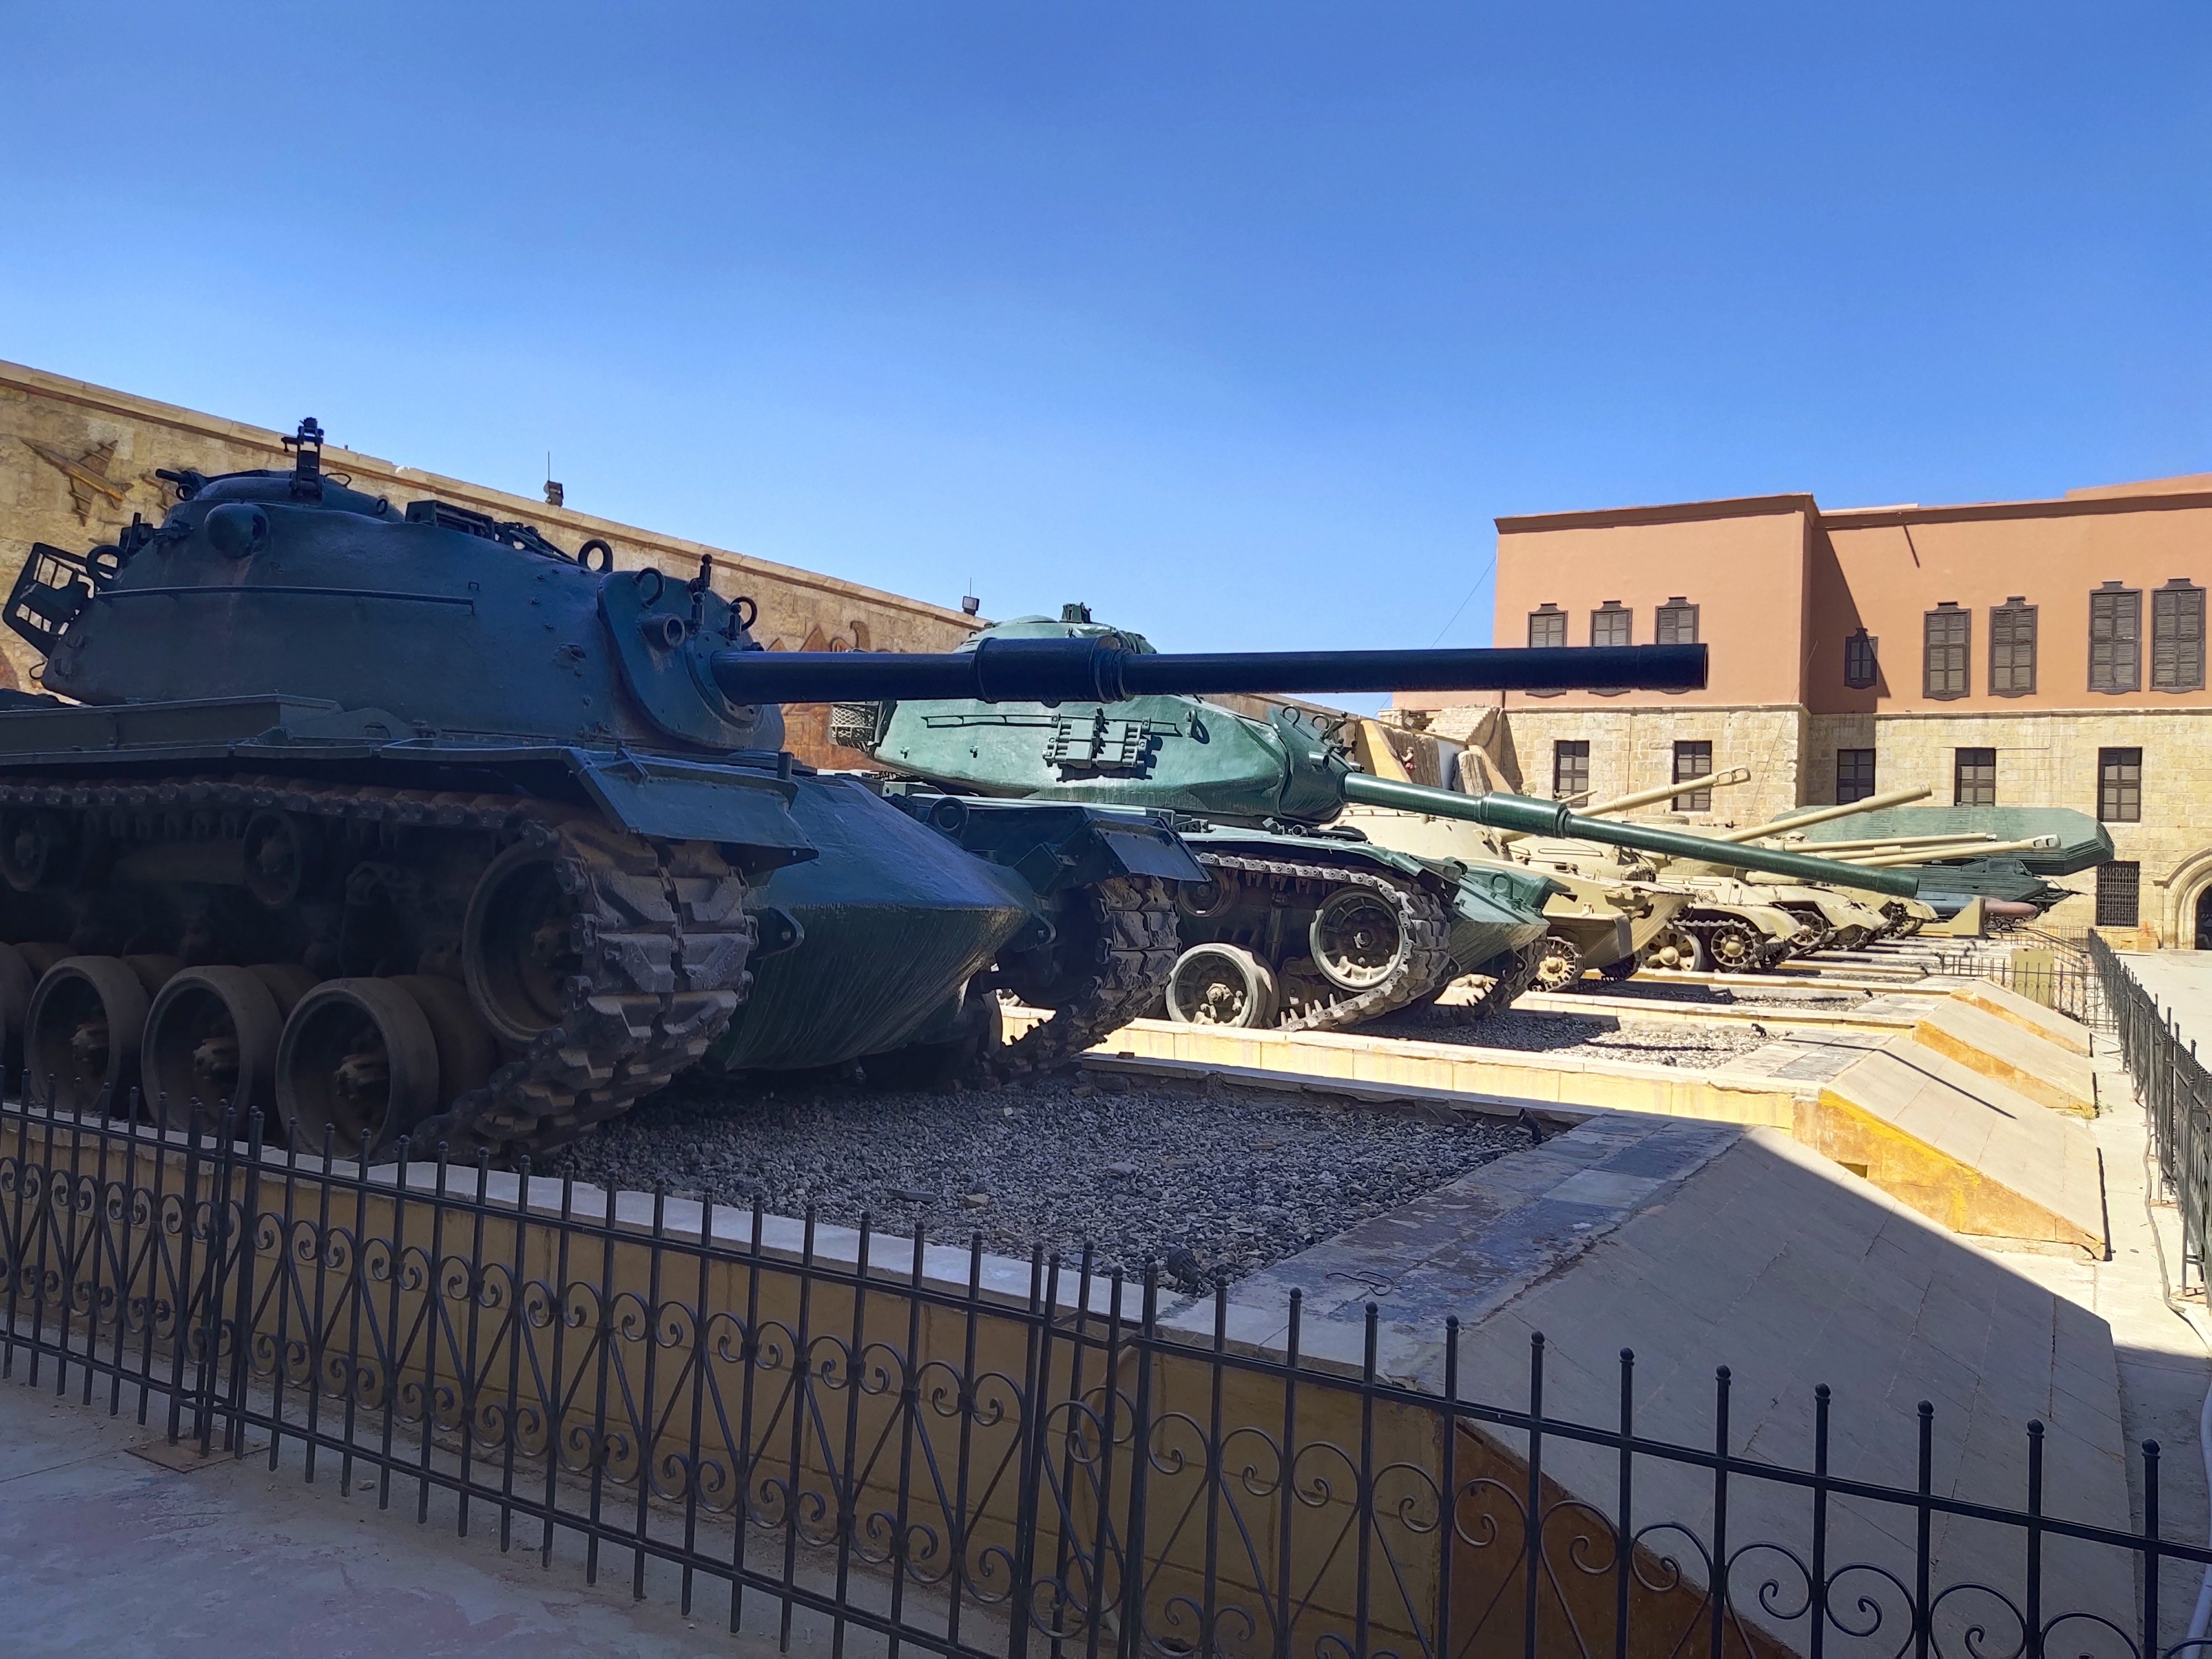
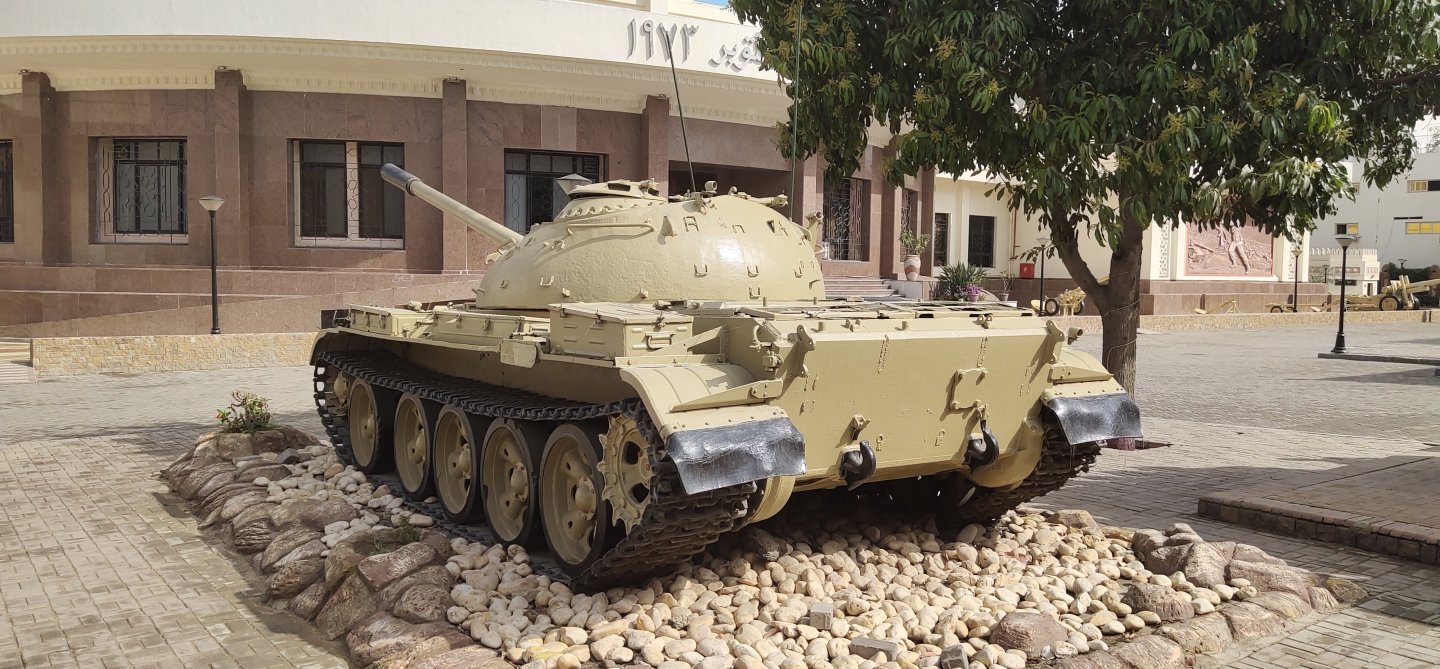
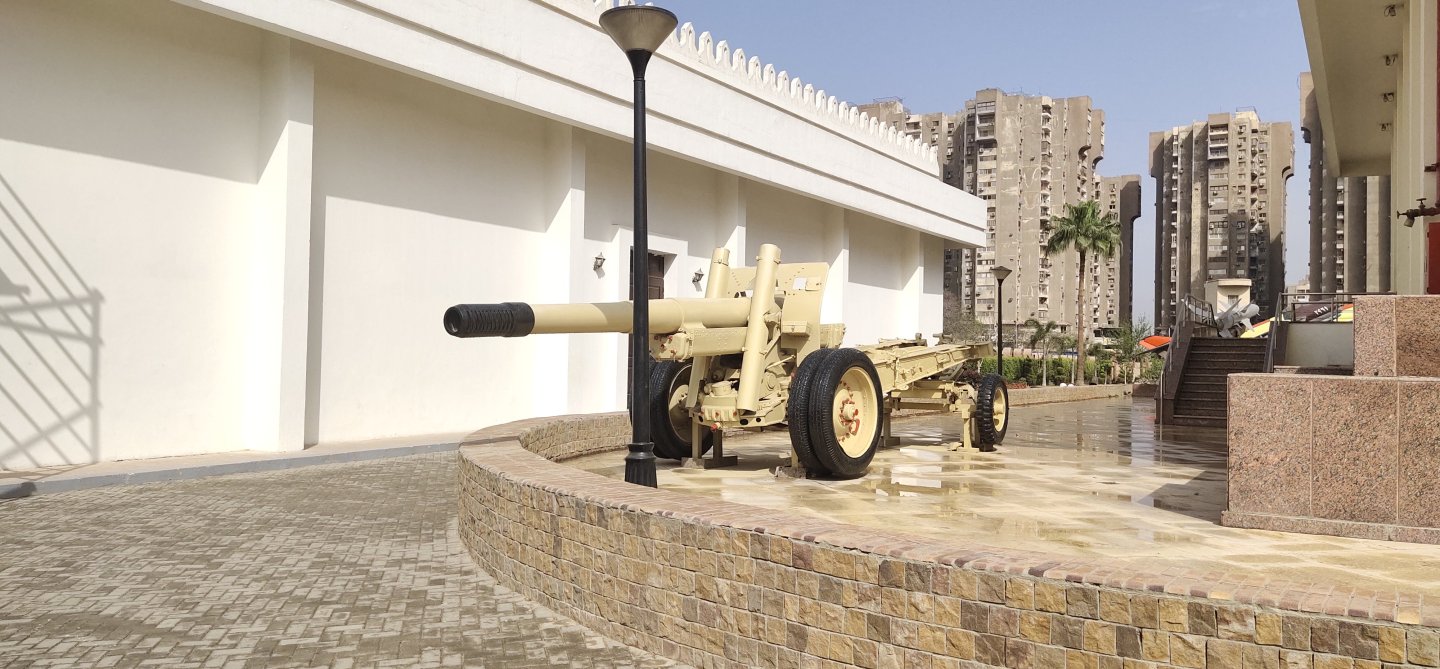
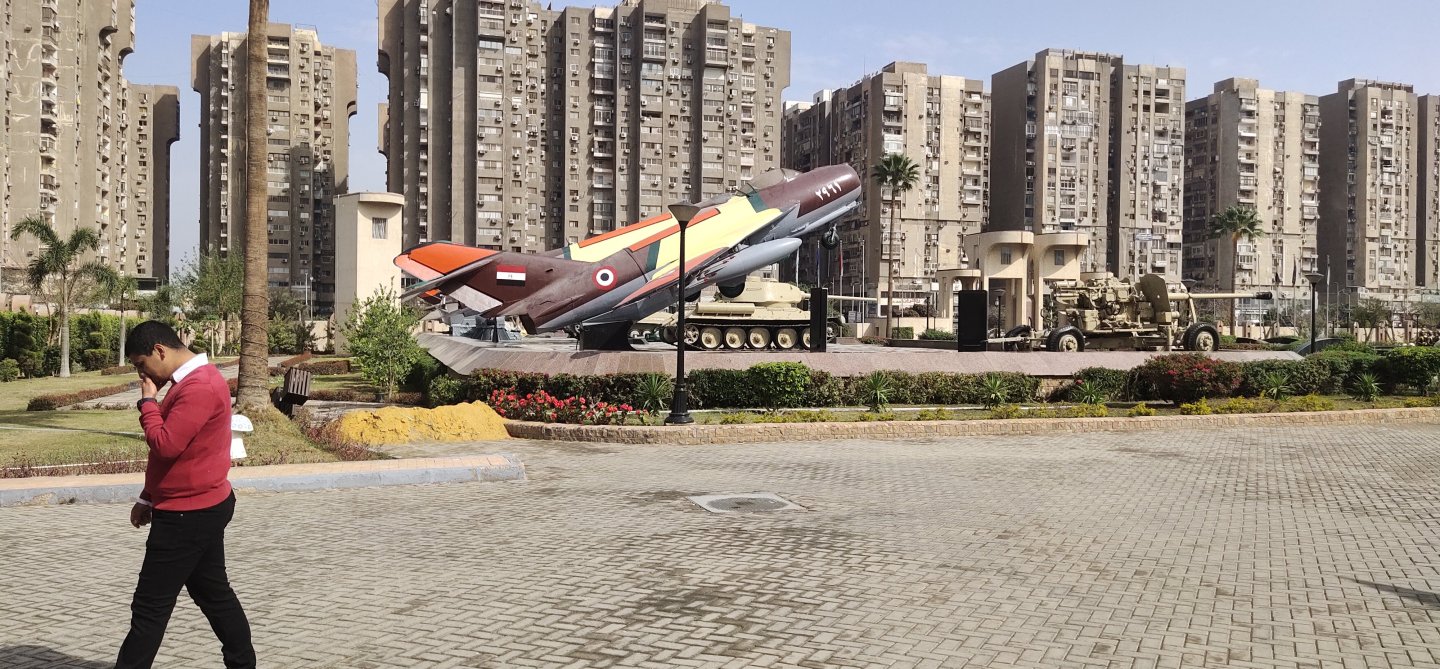
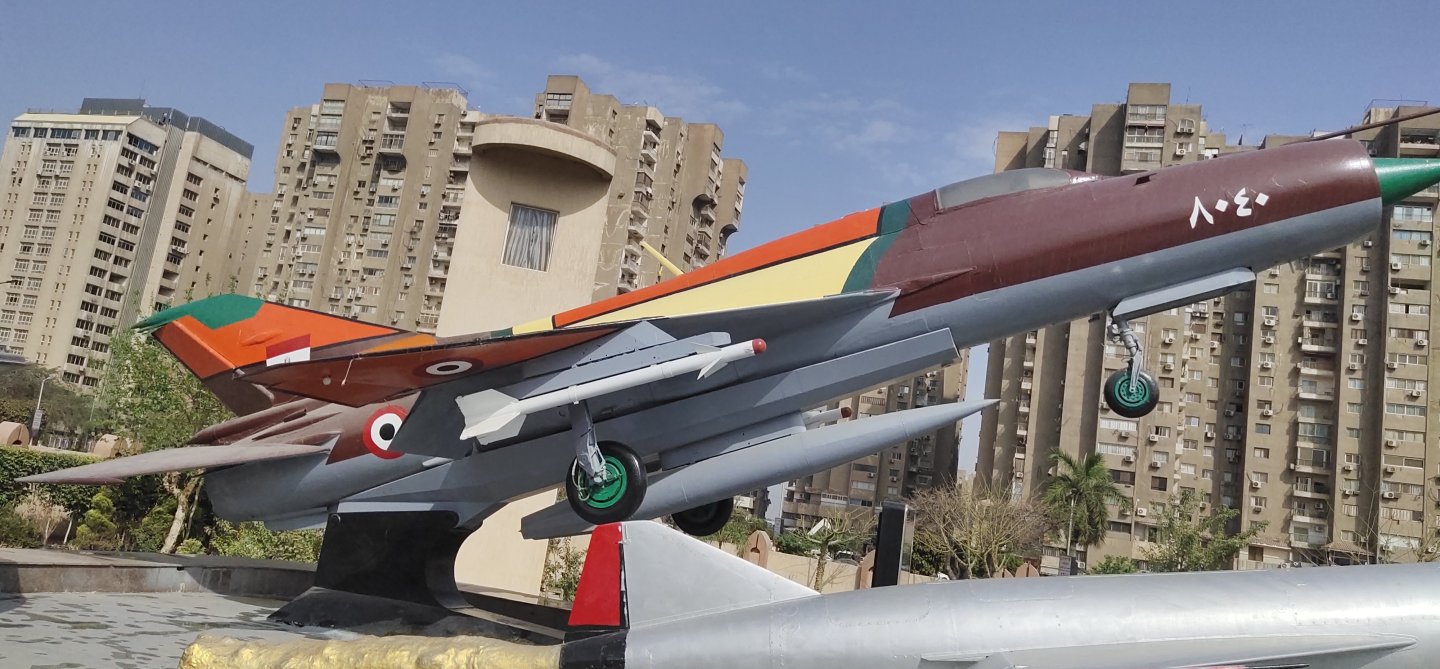
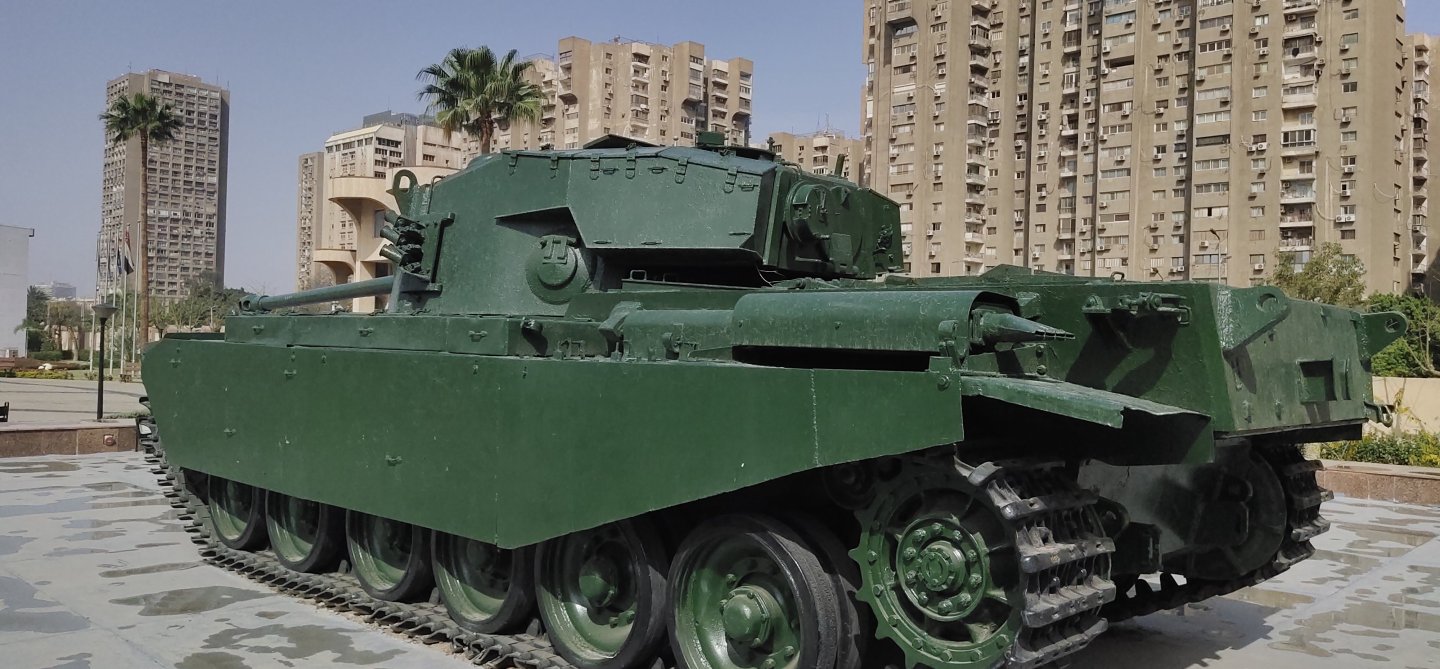
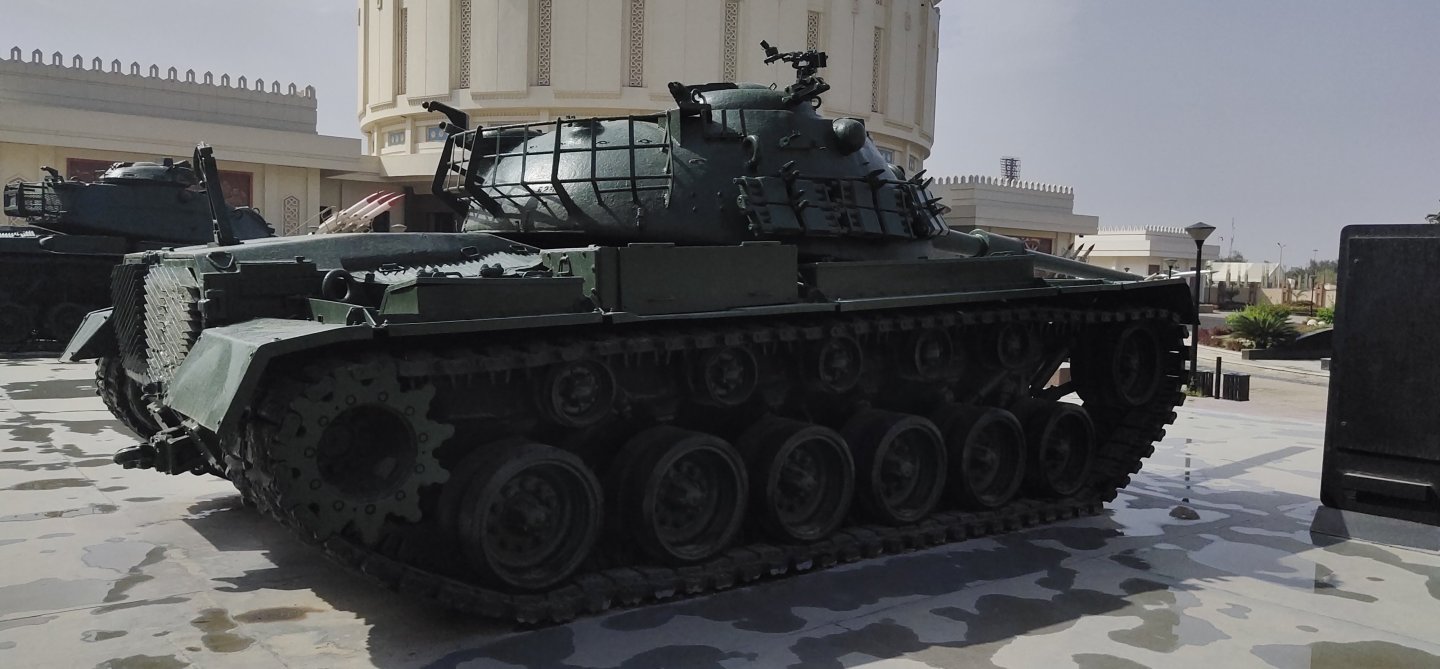
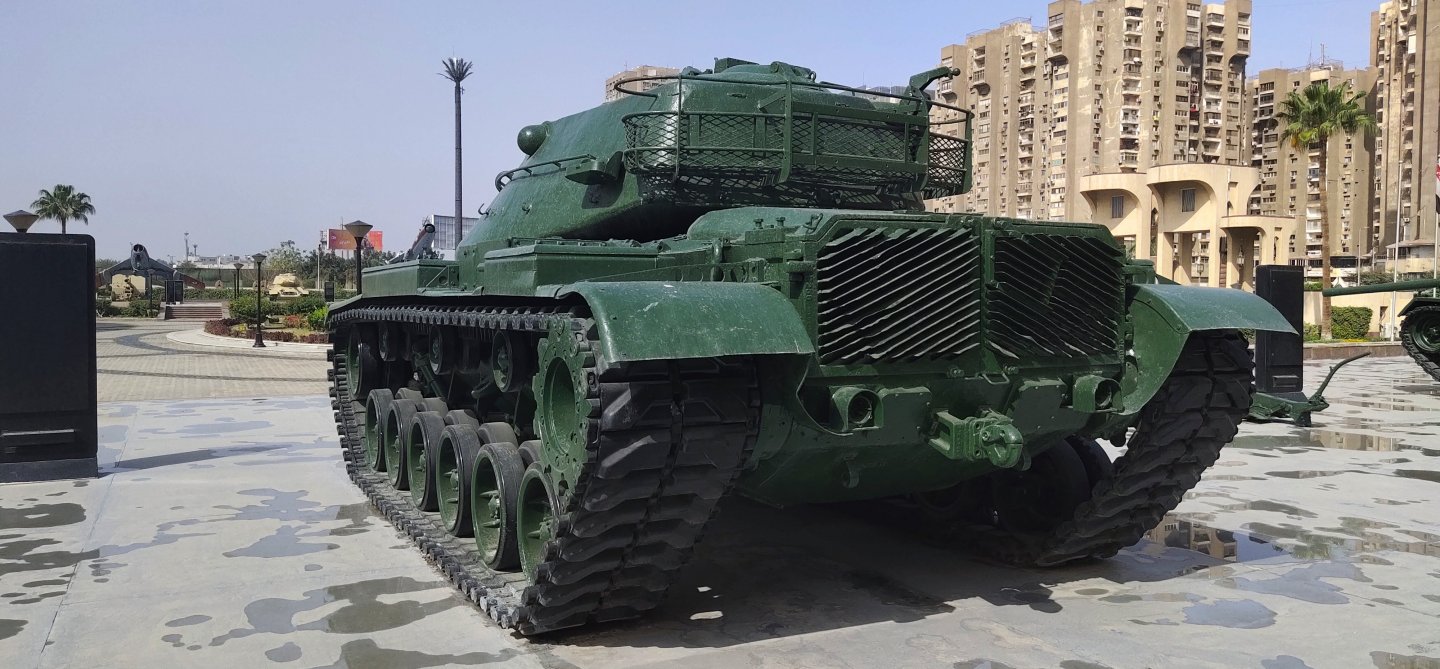
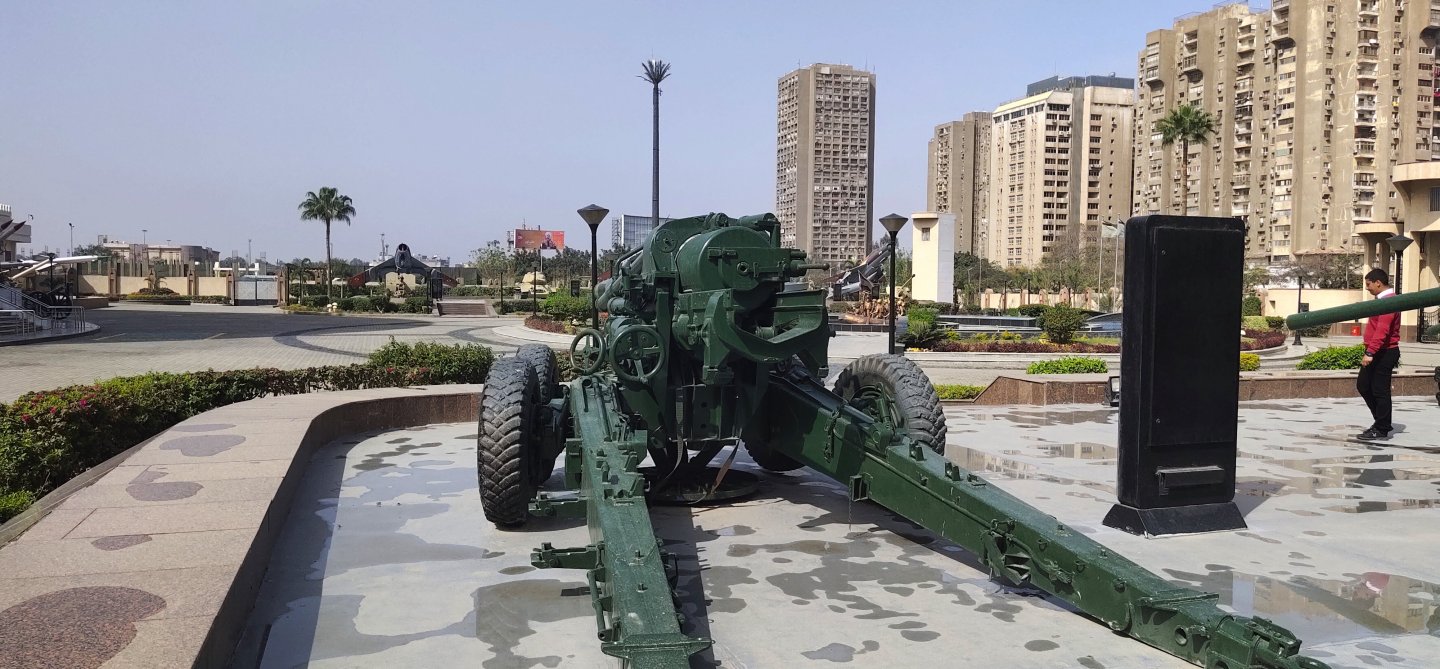
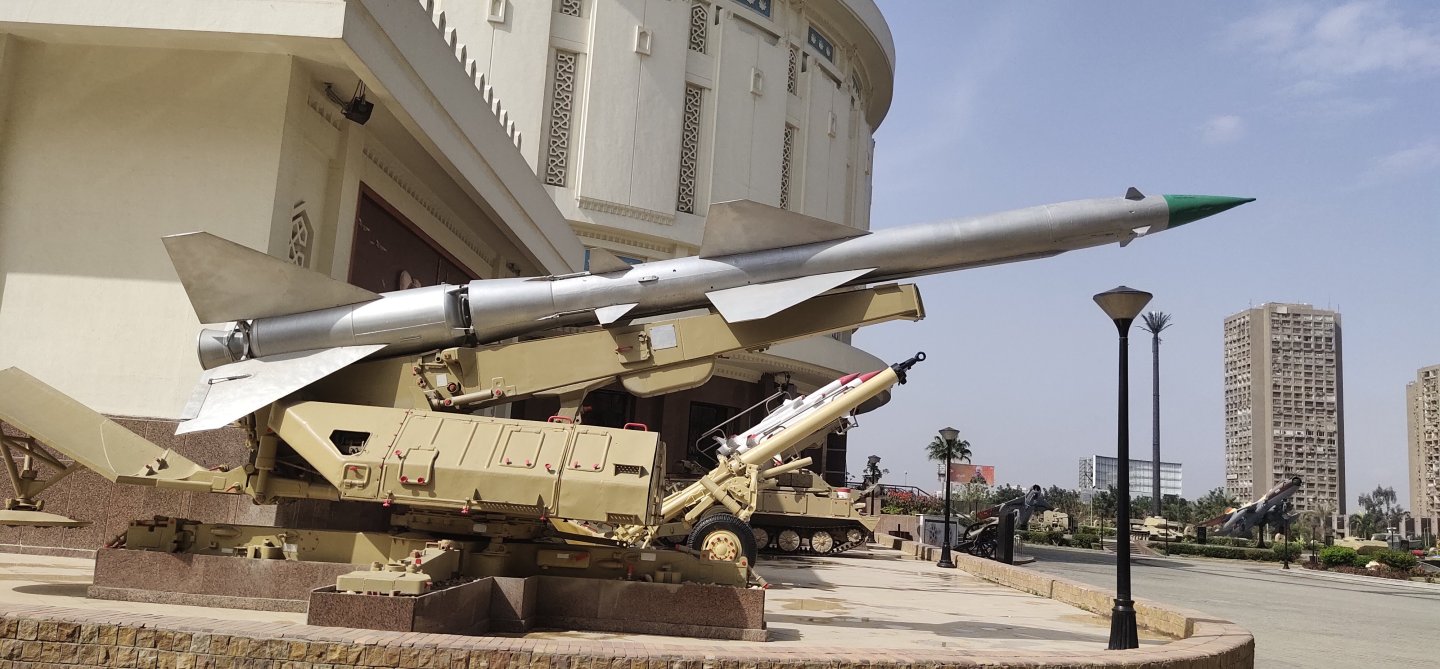
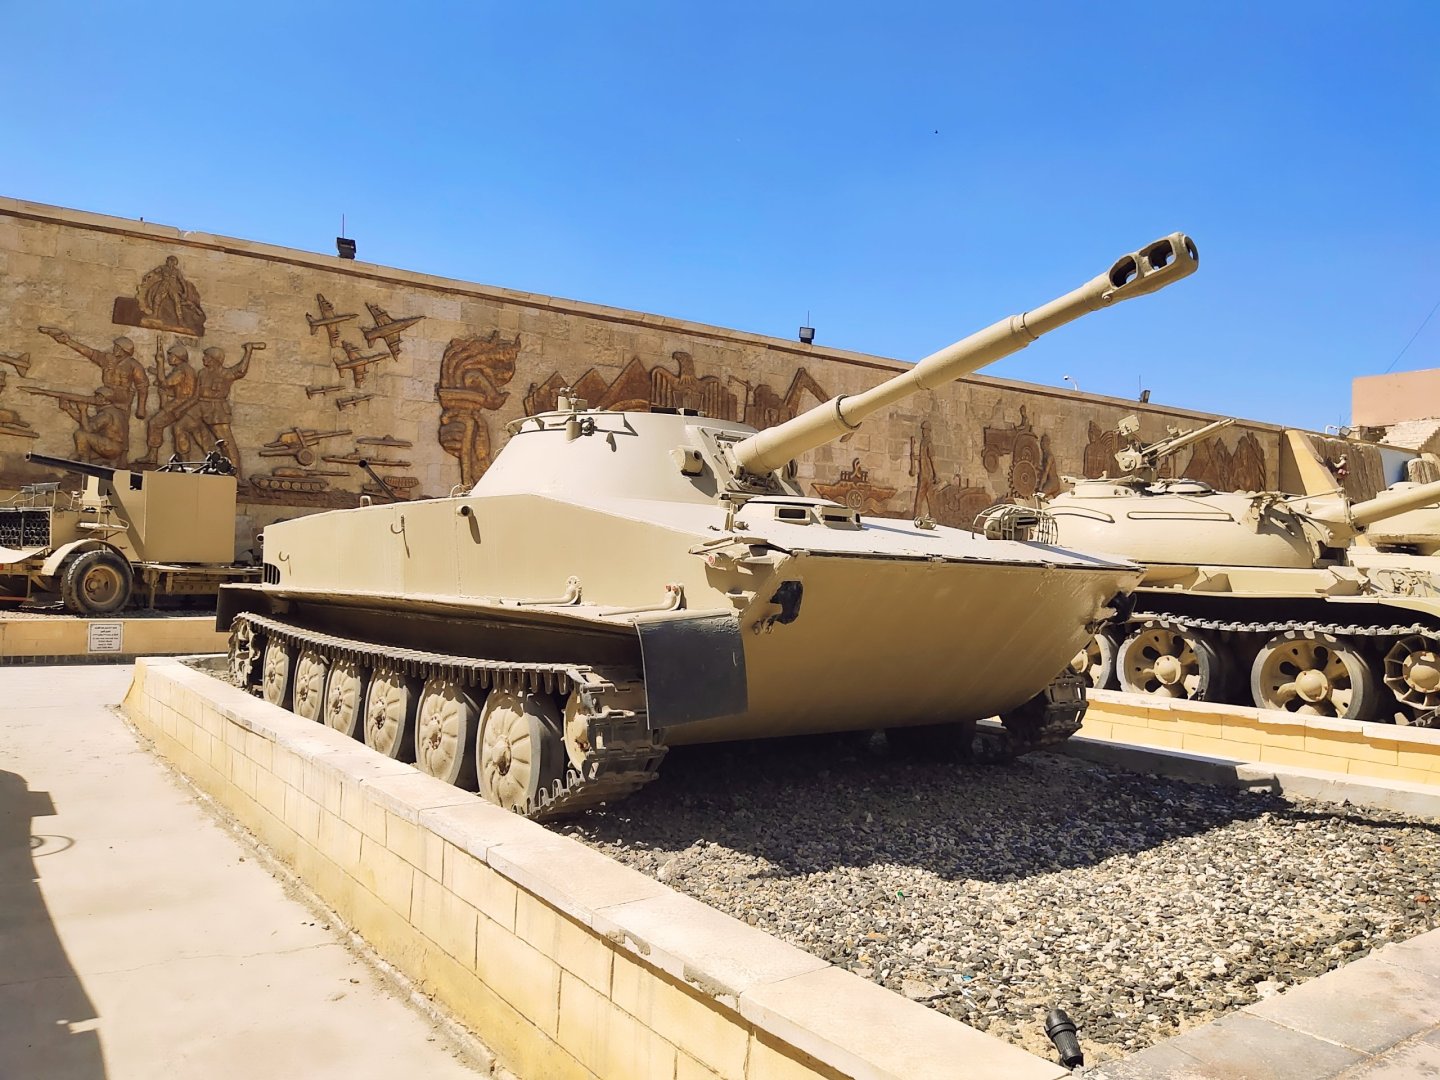
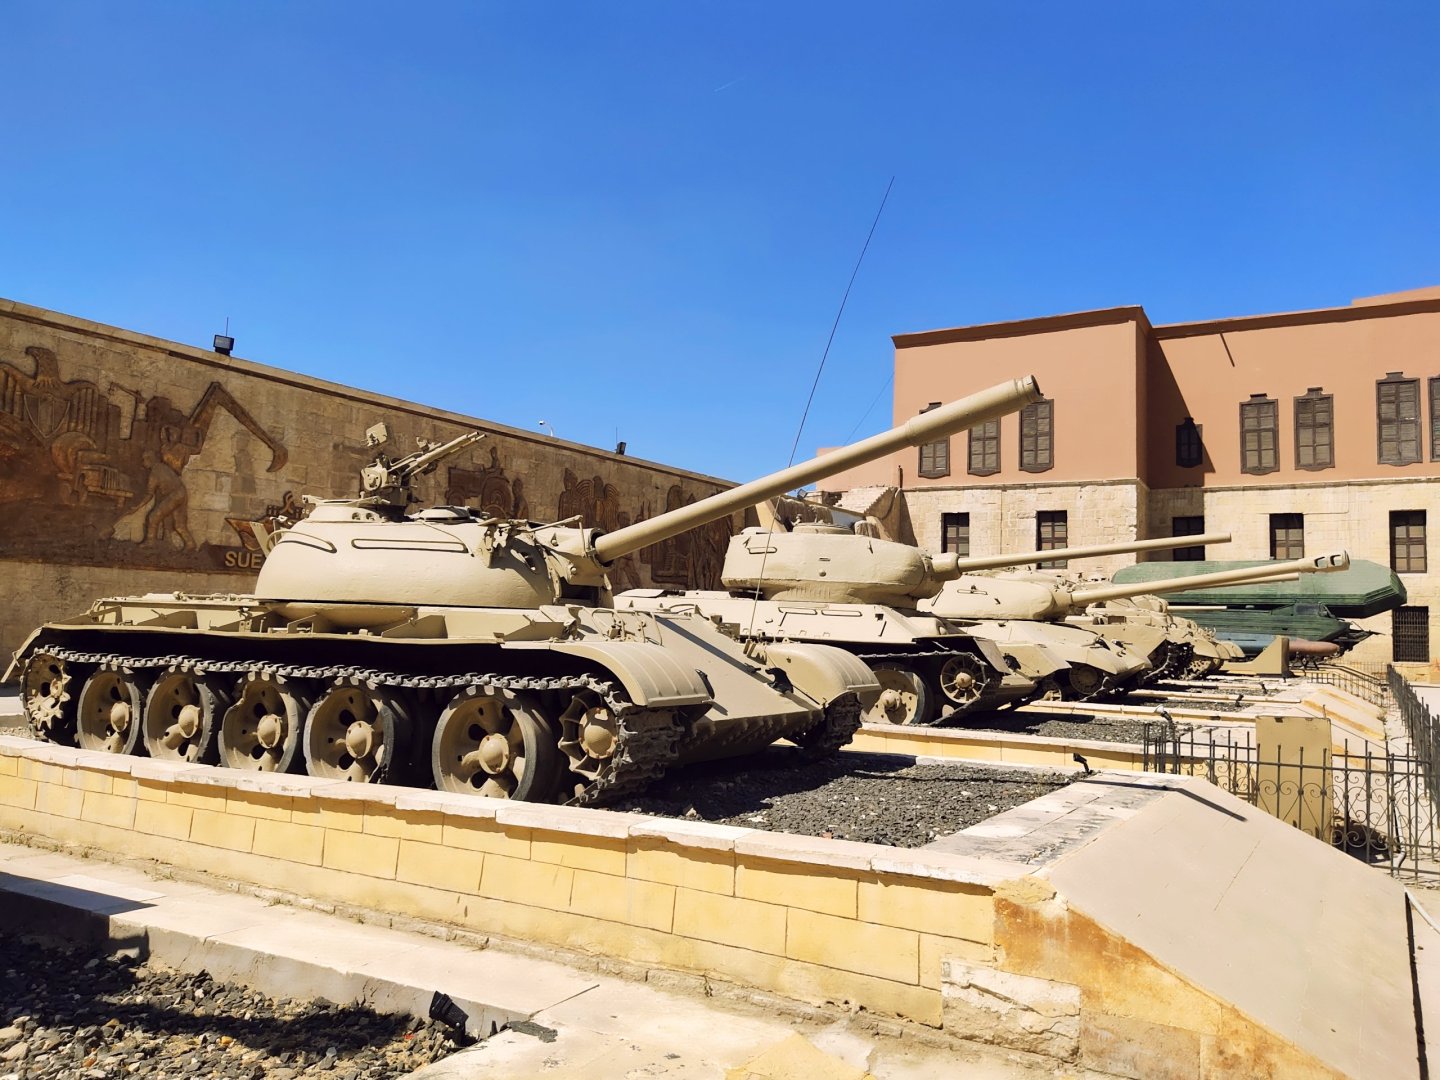
Before model introduction I will post some pics of my visit at the Panorama museum in Cairo. Cairo isn't all about Pyramids, it has many sightseeings within the city center like the Saladin Castle which also has a big mosque, a police museum and other modern fighting machines like aircrafts, howitzers and tanks. And from the Castle of Saladin What is impressive is how these metal beasts are made. Makes you wonder how these super heavy vehicles can develop decent speeds. What makes me wonder though is what is the great force required them to blow them in pieces like we have seen in the documentary films. Especially in the modern warfare days, the challenge of survival among new threats like guided missiles and UAVs is definitely rough. However seems like there is some future left for these battle machines. We can imagine a fleet without carries but we cannot imagine a modern army without tanks.


-
While I feel tired and bored to build a plane model I'm excited to build a simple tank diorama in the humble but still efficiently detailed and space saving, 1:72 scale. The reason I picked this model is to avoid camouflage patterns. A single colored vehicle in the dessert scene. Let's see how invisible I can make it.