mikegr
-
Posts
827 -
Joined
-
Last visited
Content Type
Profiles
Forums
Gallery
Events
Everything posted by mikegr
-
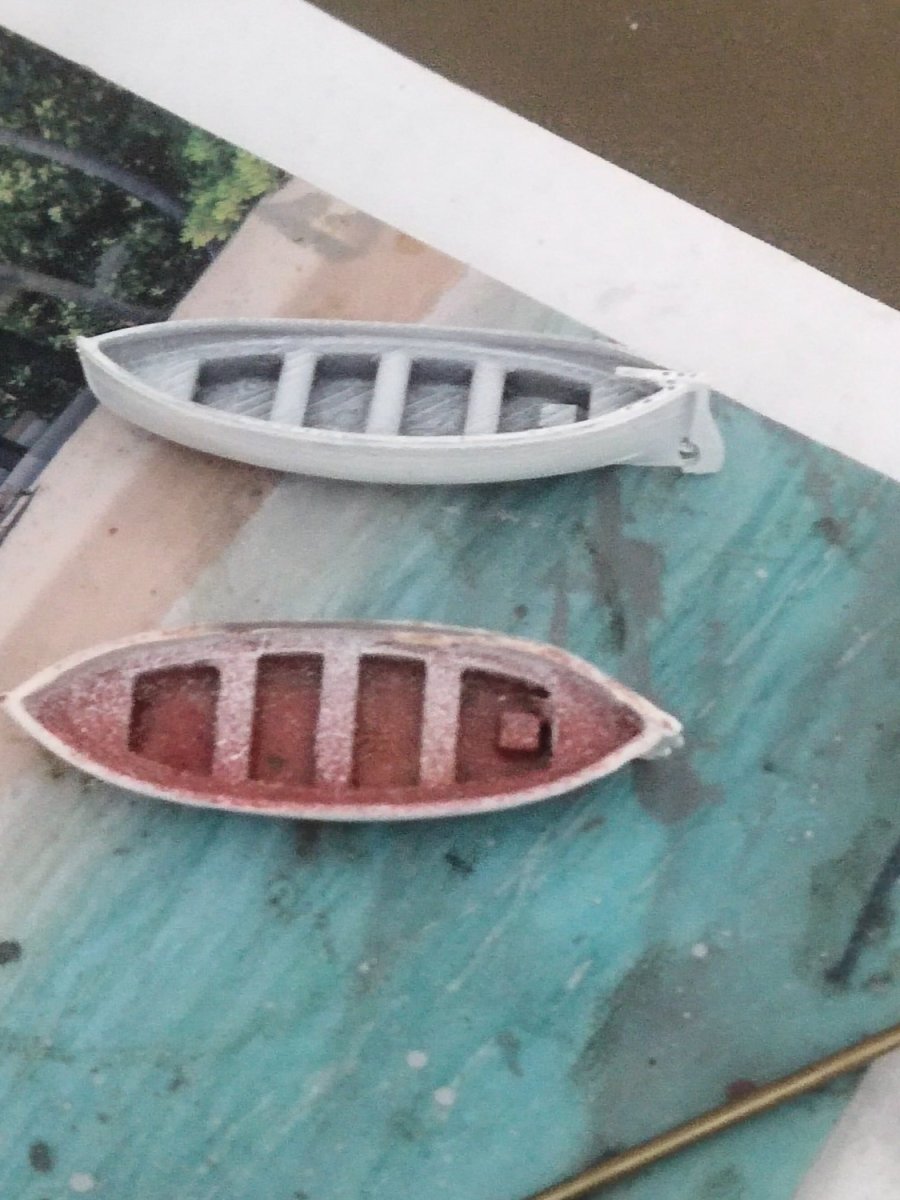
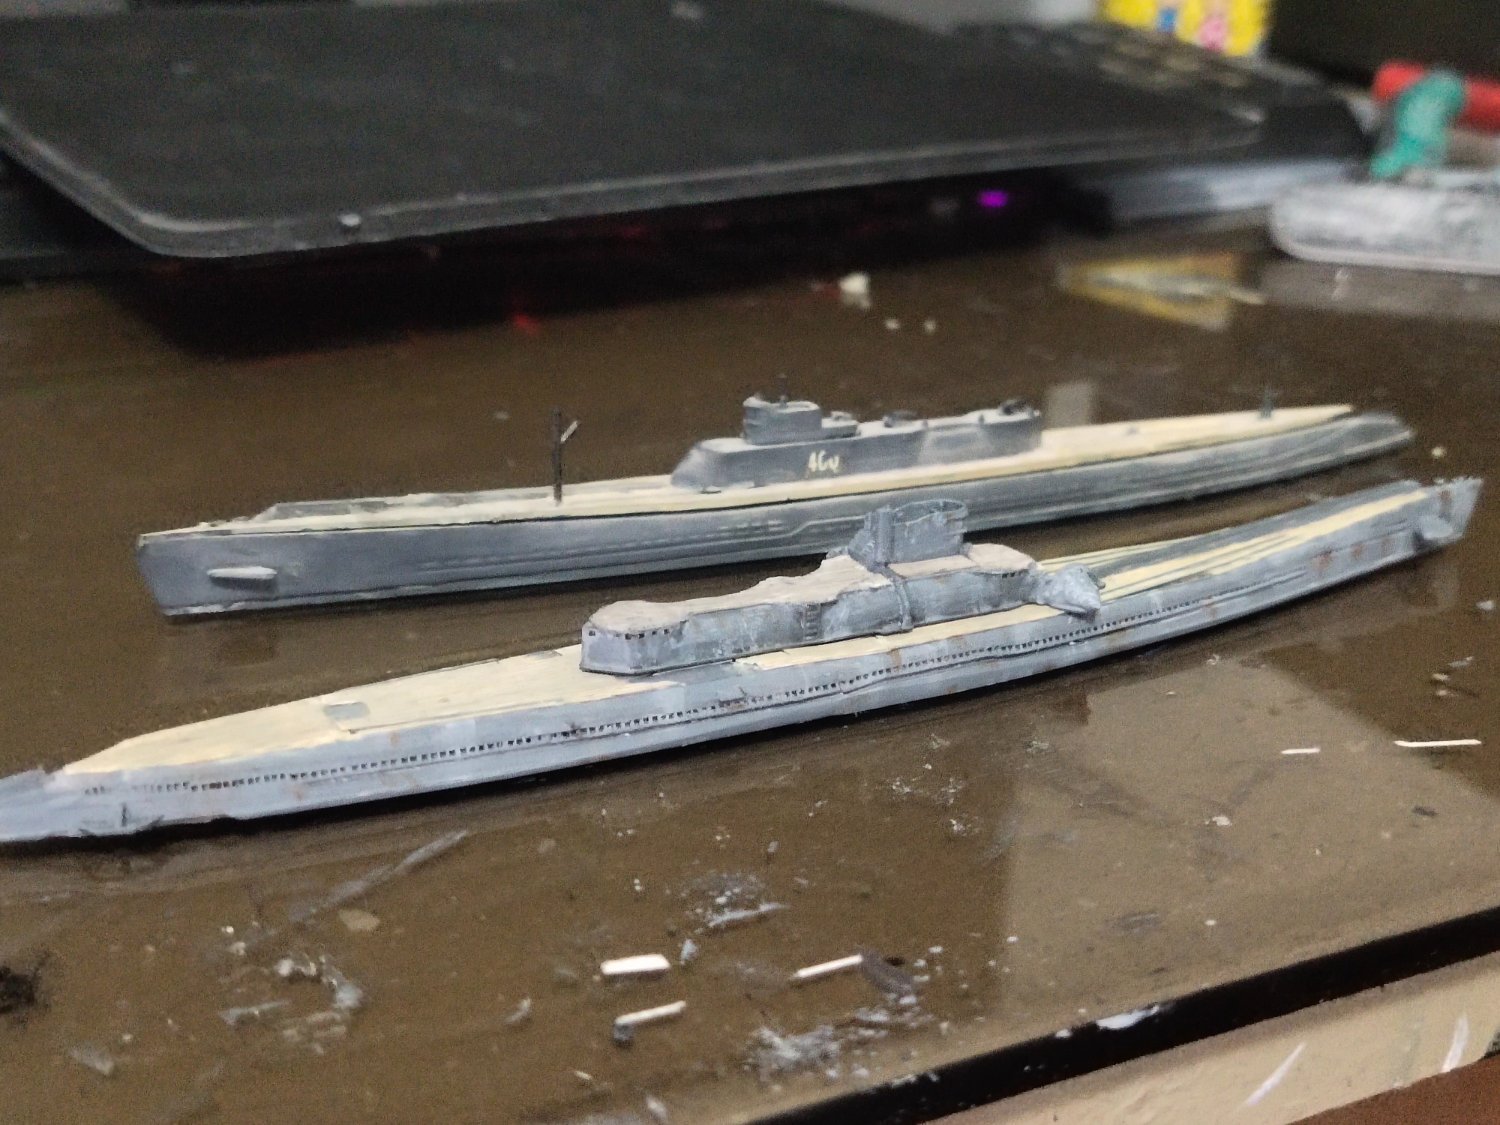
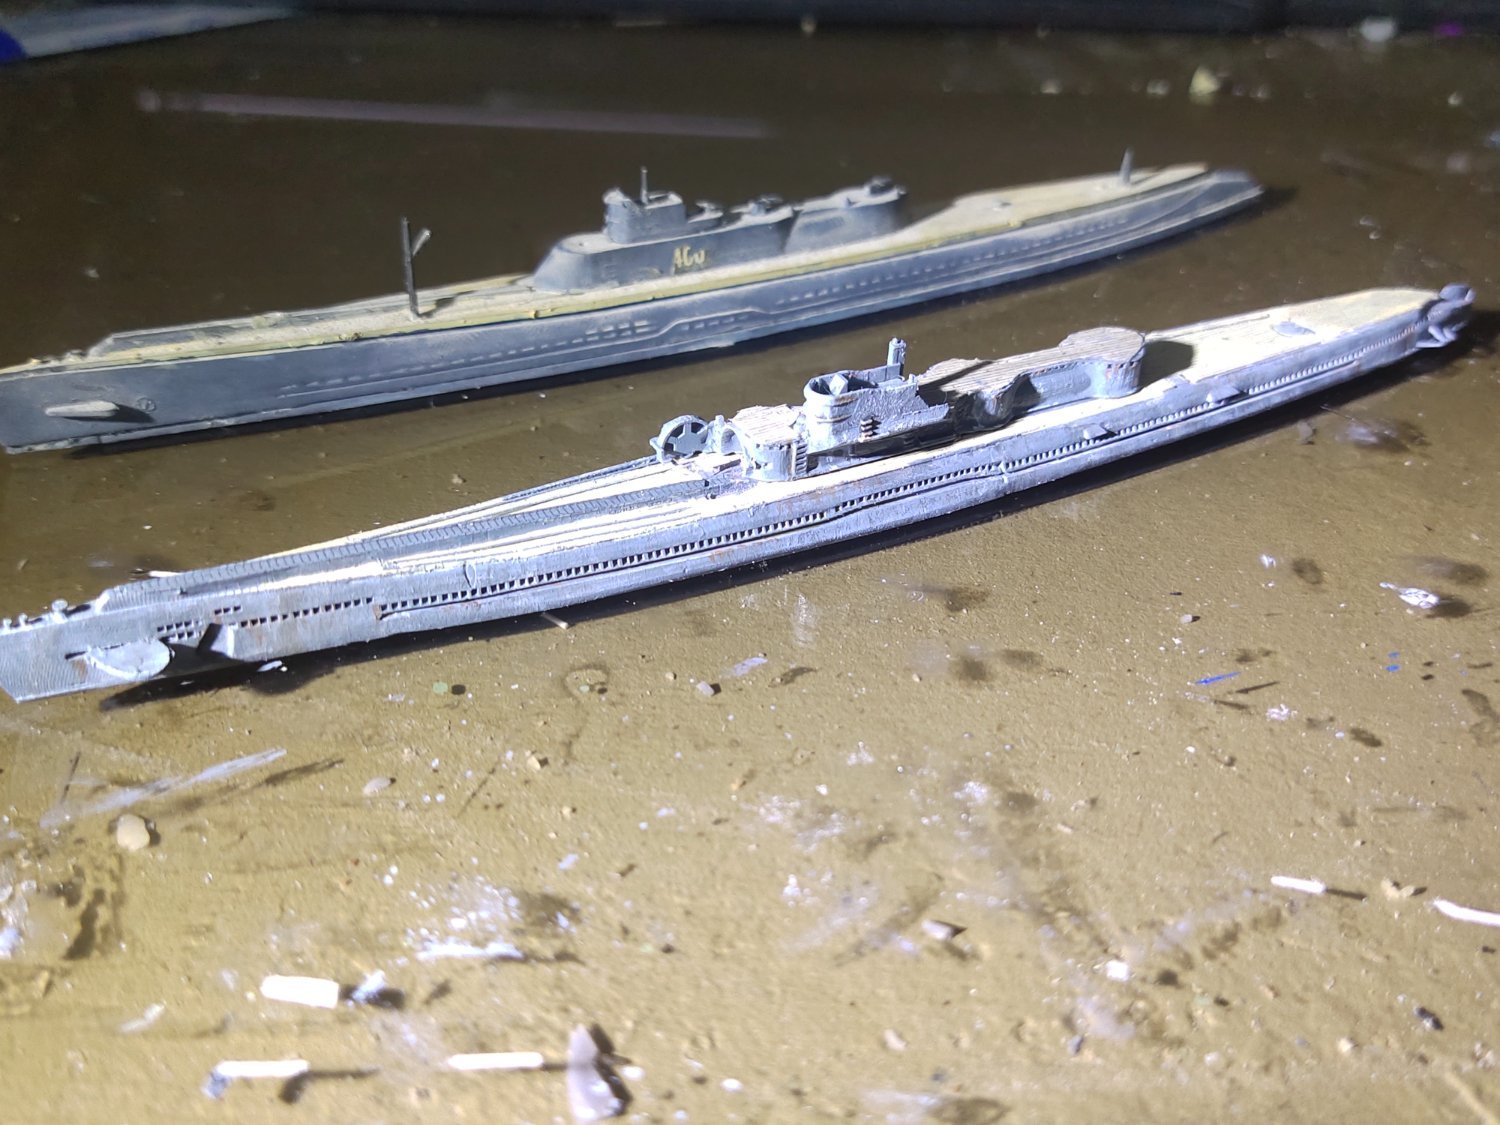
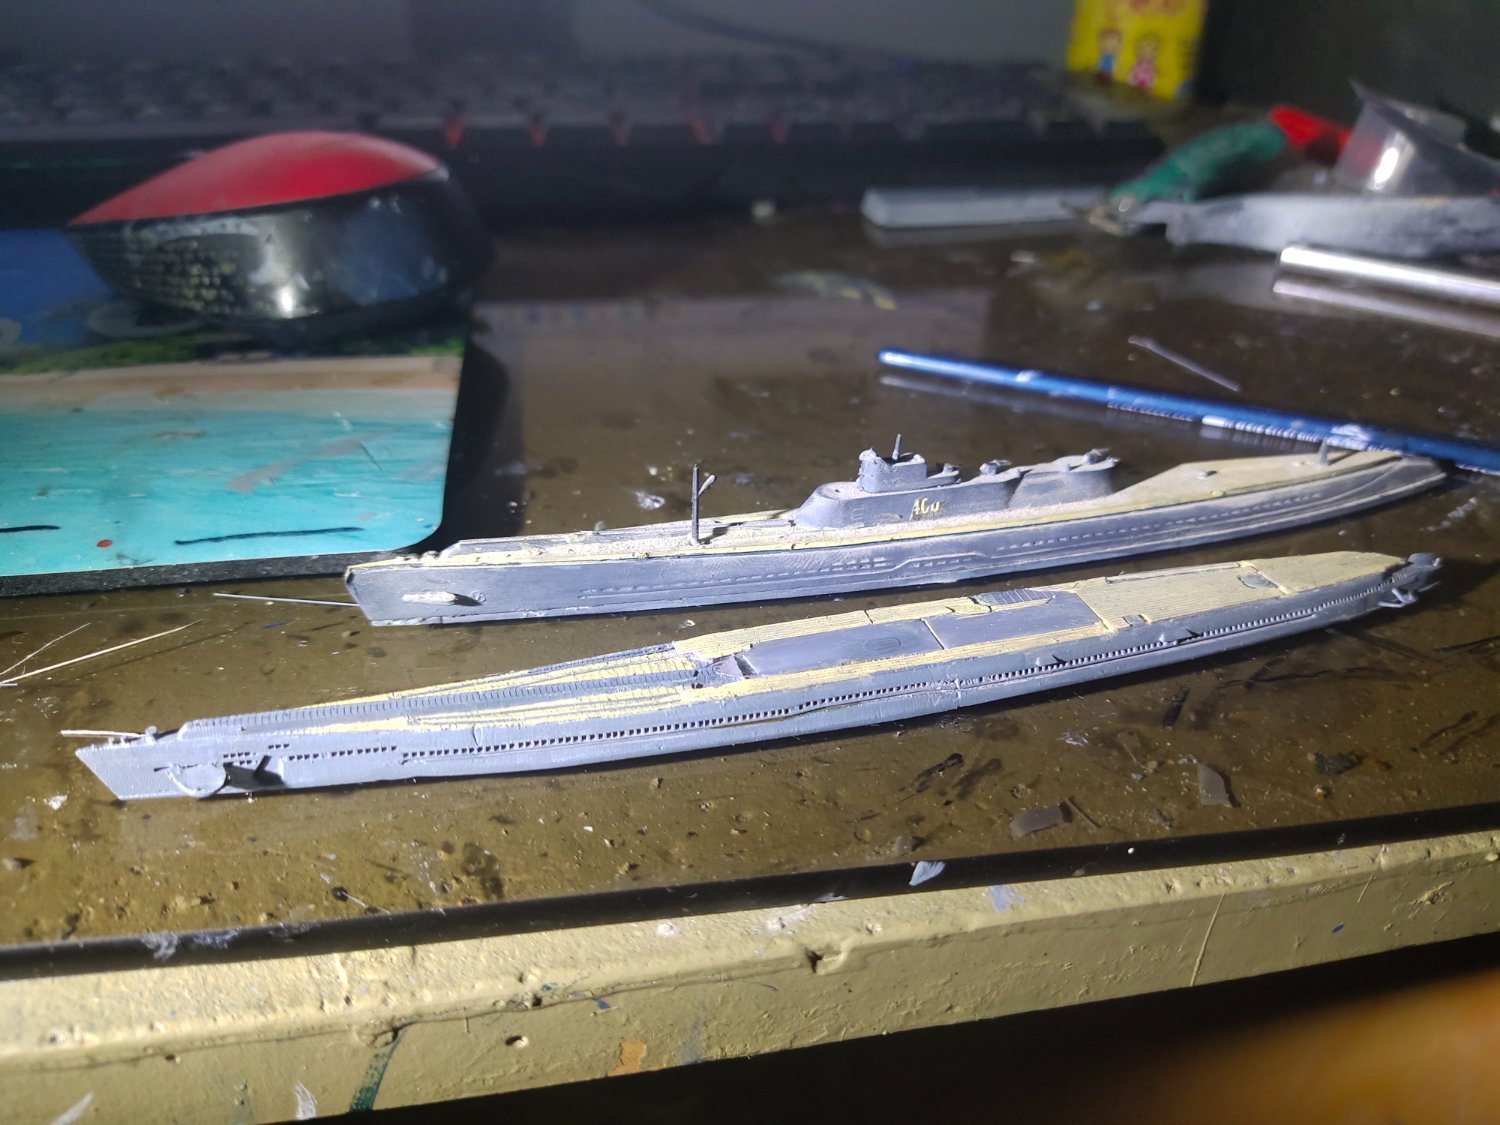
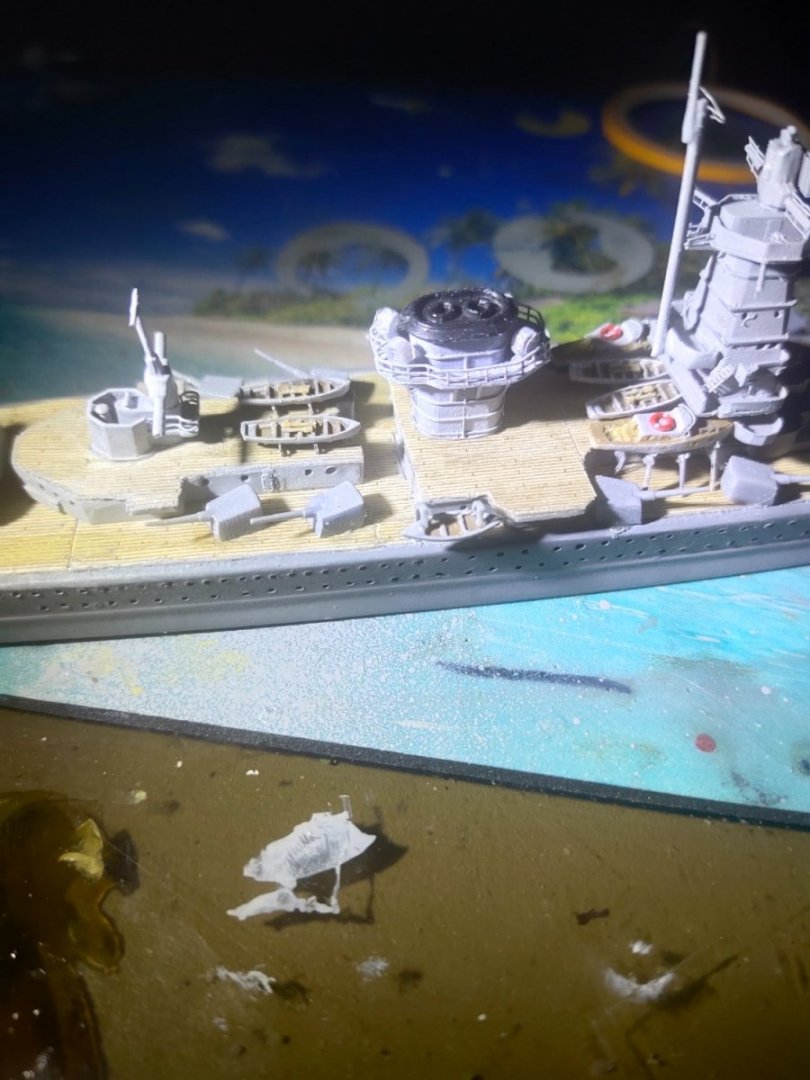
This old kit has two of these boats and only one "open type" as you mentioned. However most plans shows two motorboats and two crew boats around the funnel. What I did is to get these two motor boats and drill them from the back with 1mm drill, something which is hardly visible on the pic. For the color you are right I don't know how I came up with the desicion to paint the house grey, maybe tomorrow I remove the lifering and correct it.
-
Just finished with boat instalment. Next was to repair the mast while working parallel with a bigger scale project. I used PE parts, plastic rods and melted sprue

-
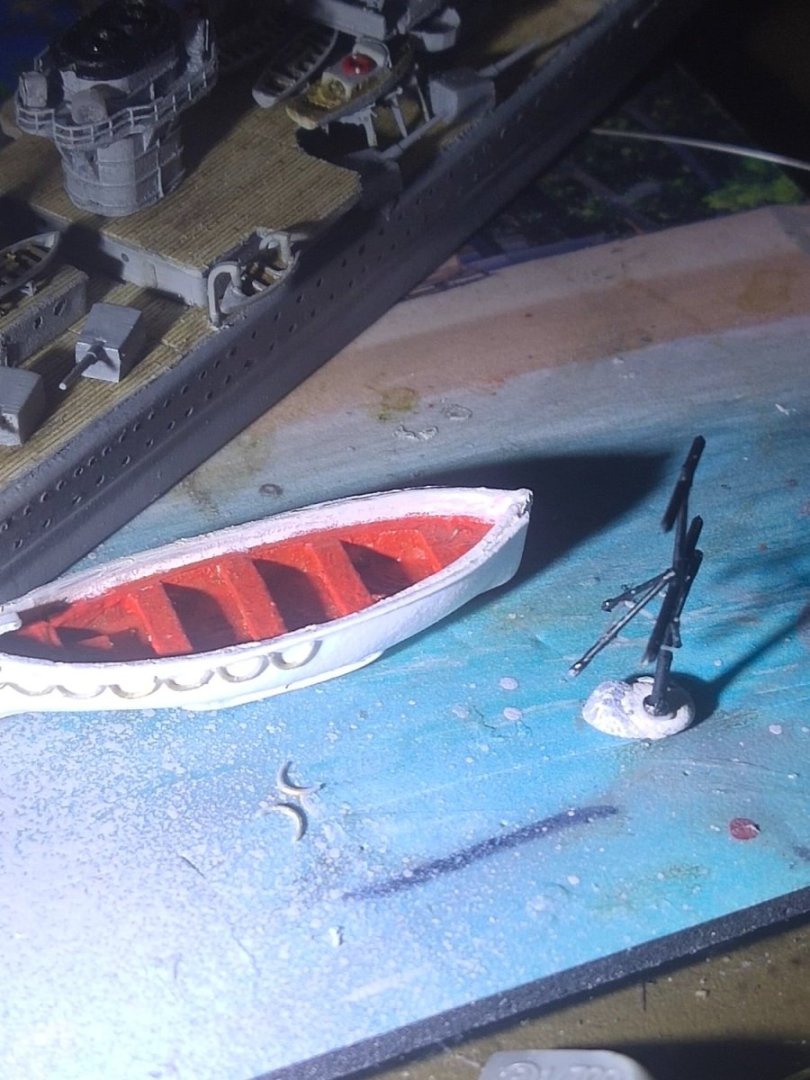
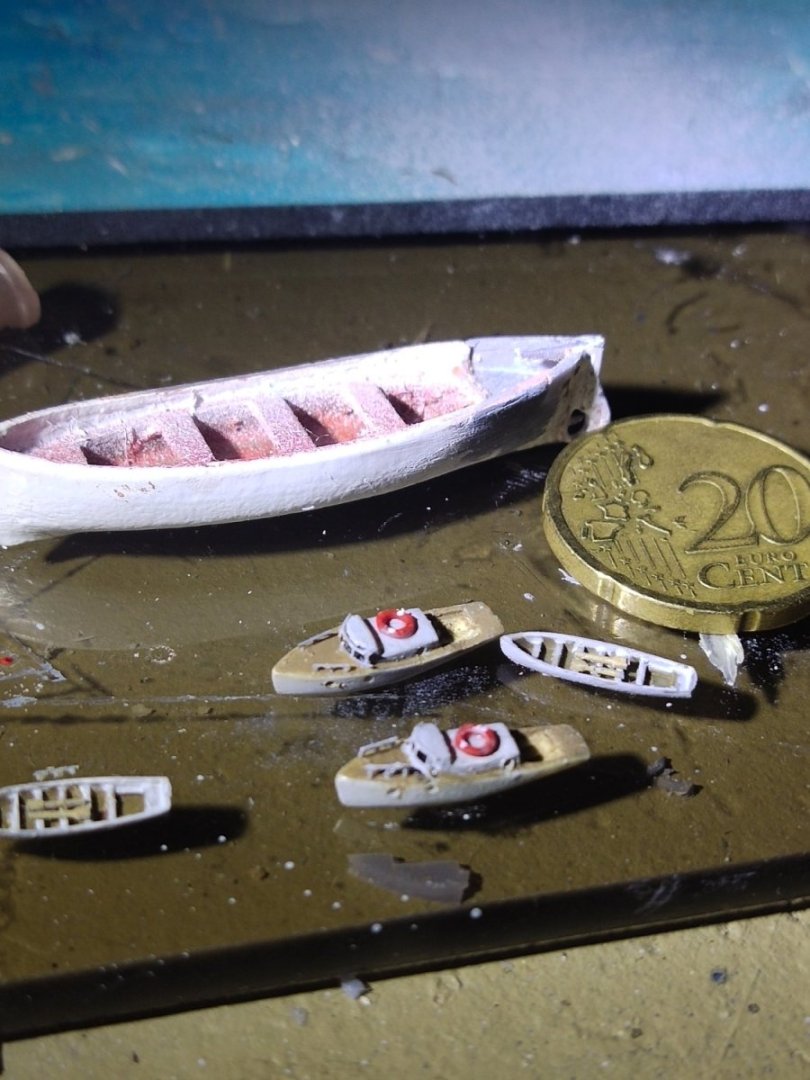
Next, I proceed with detailing the boats by adding oars, life rings and some PE which I didn't use for the funnel.
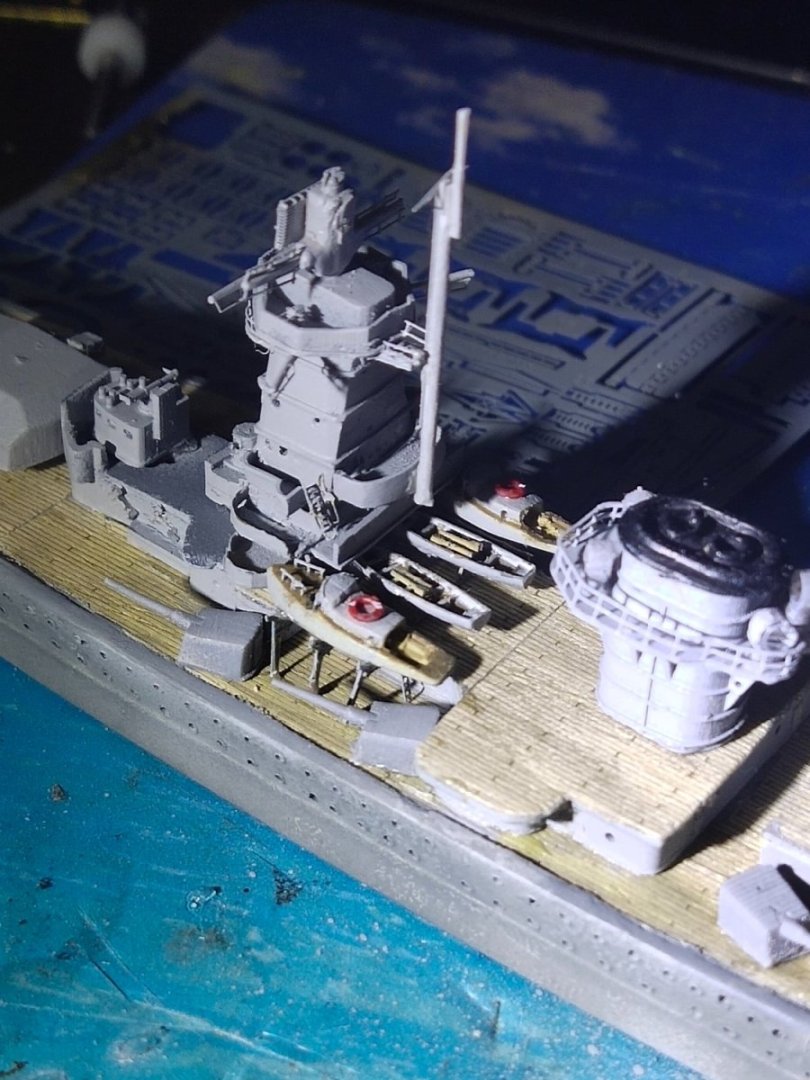

-
Cap San Diego by mikegr - 1/160
mikegr replied to mikegr's topic in - Build logs for subjects built 1901 - Present Day
I made the rest of the cranes. All were put in place except those based on the rear sides of the funnels. The model almost has taken its shape except some radar masts and smaller details like winches etc. I ended up with the most messed workbench in the world but in return I got a model of a fine looking vessel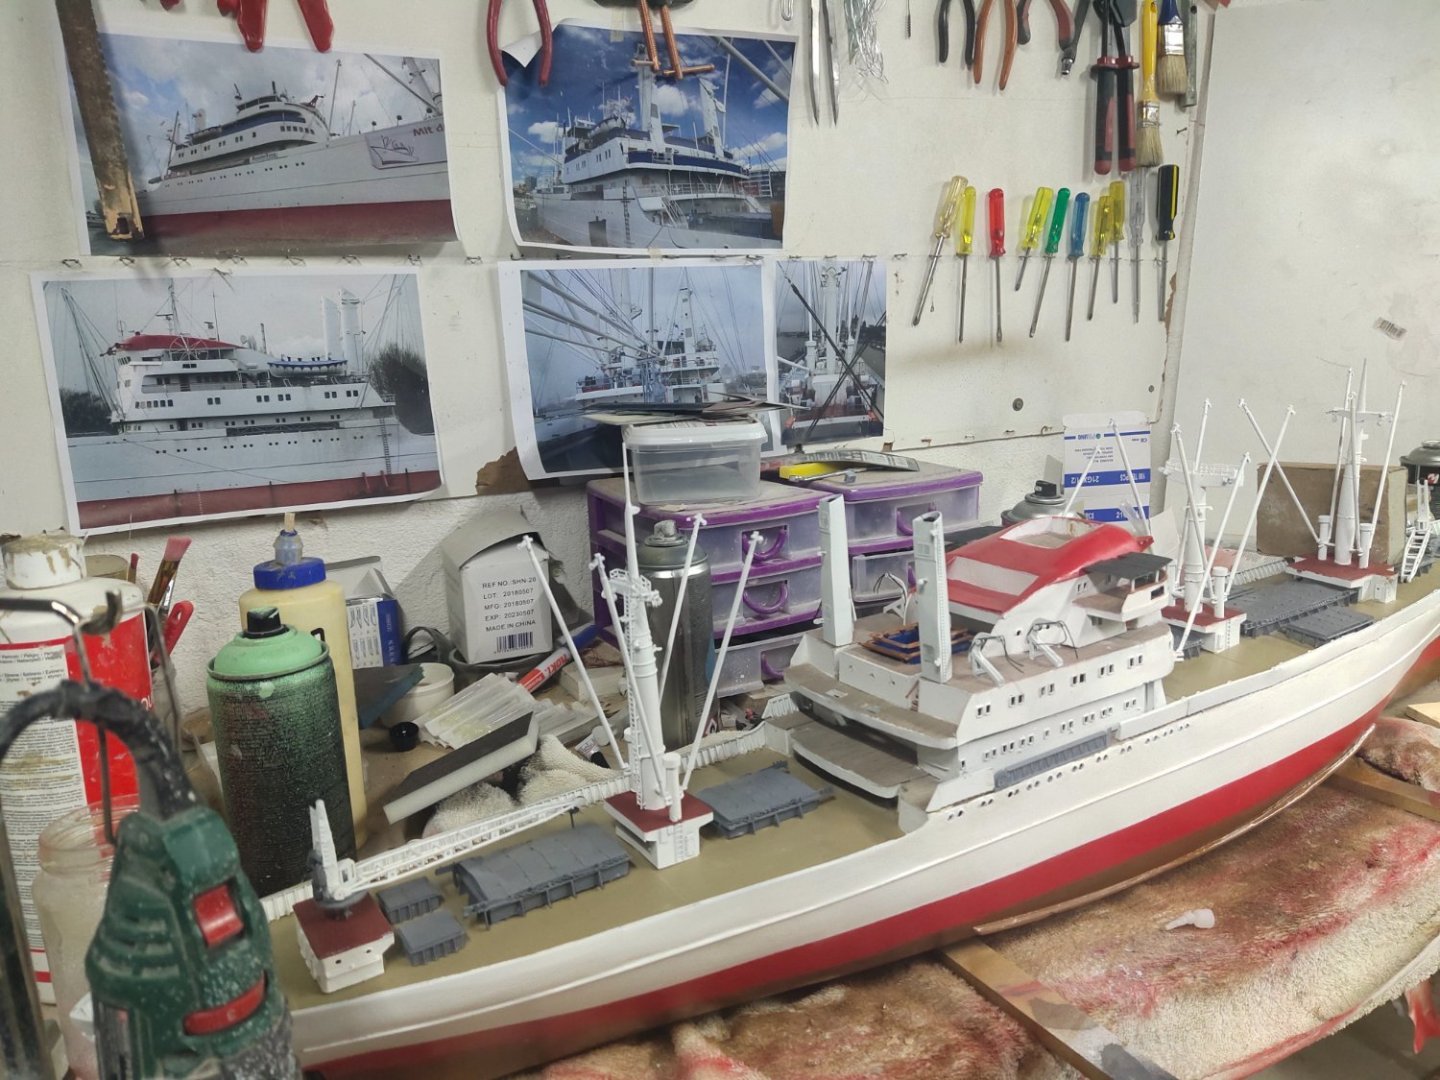
-
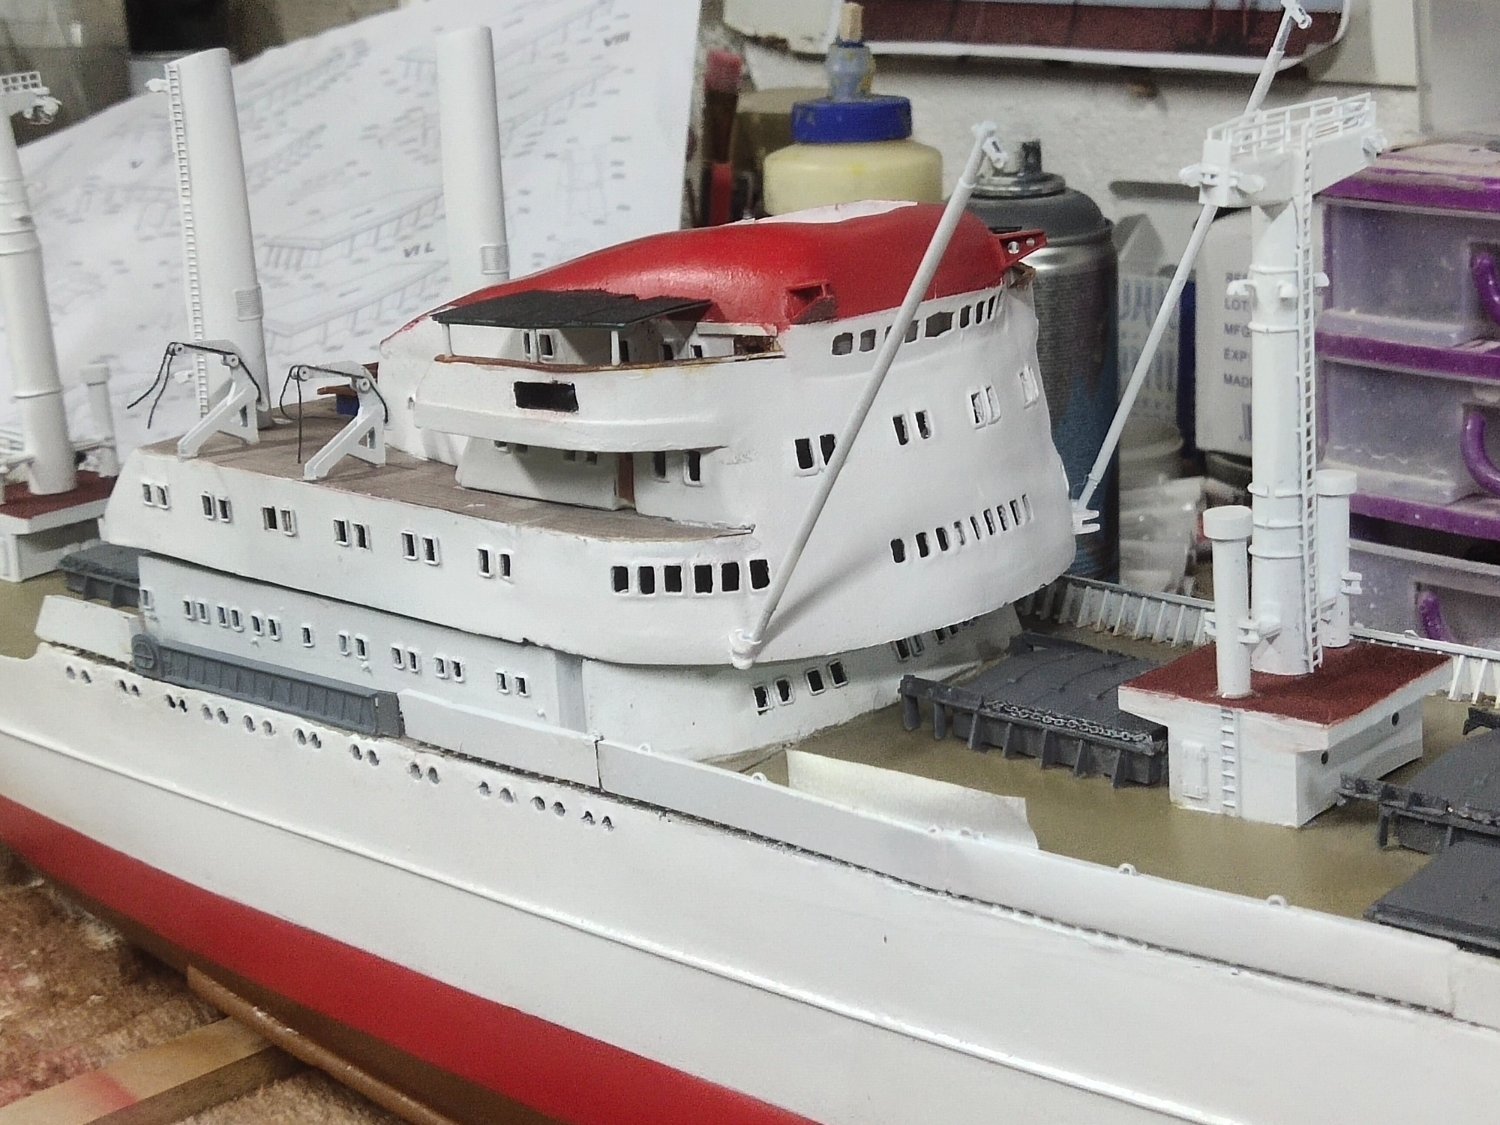
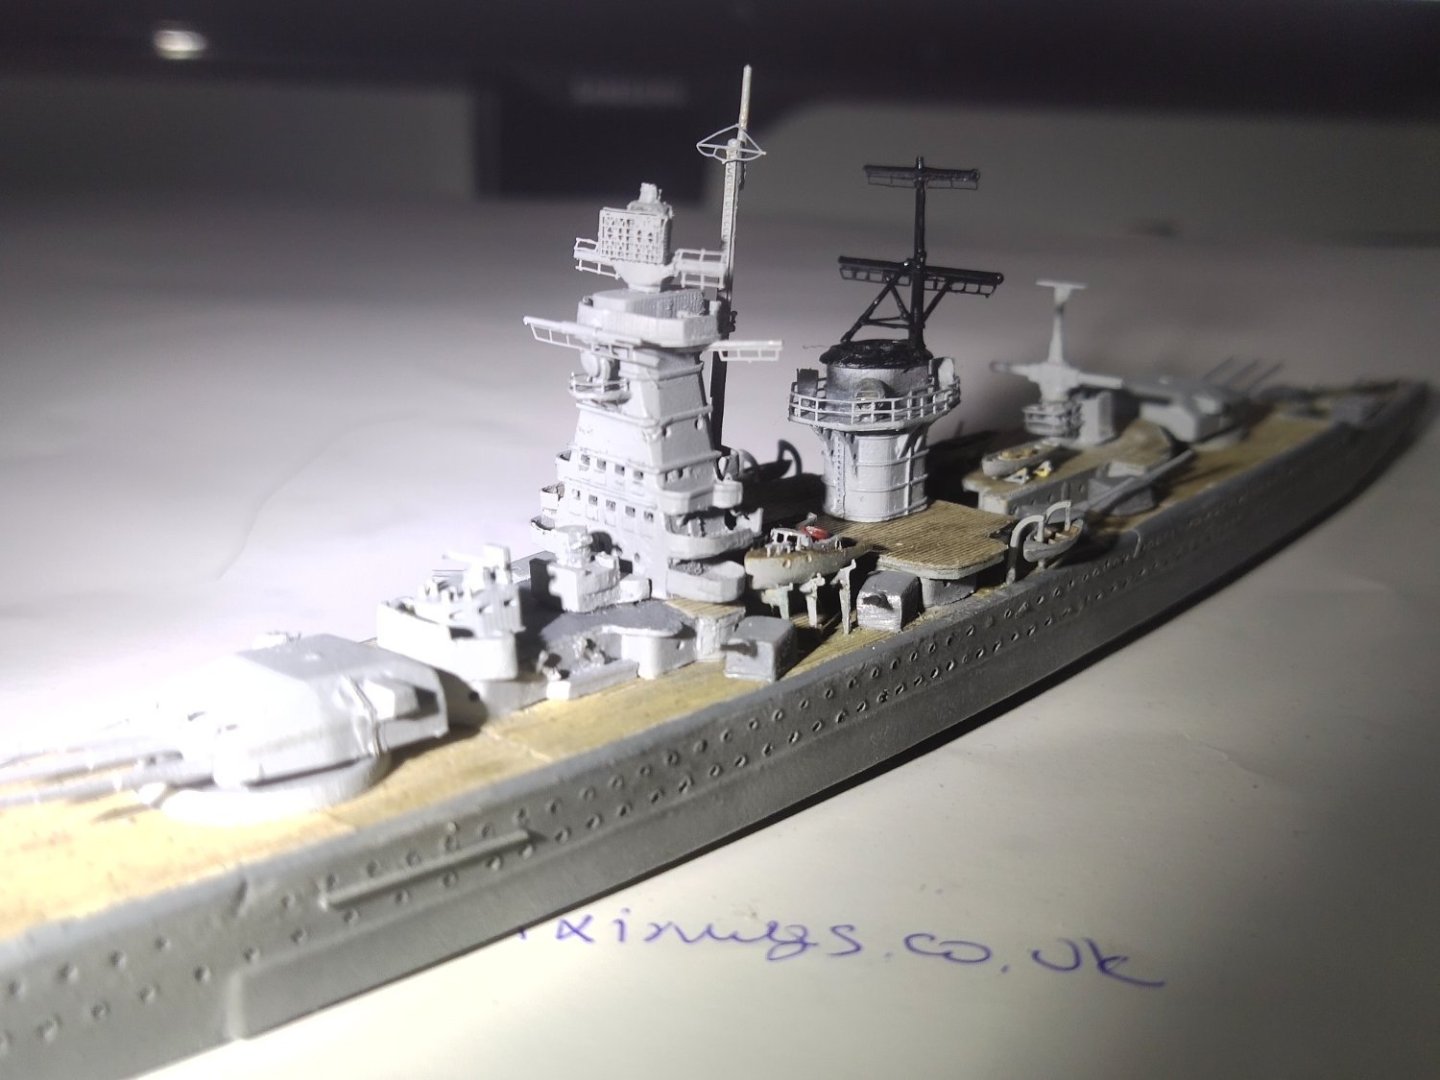
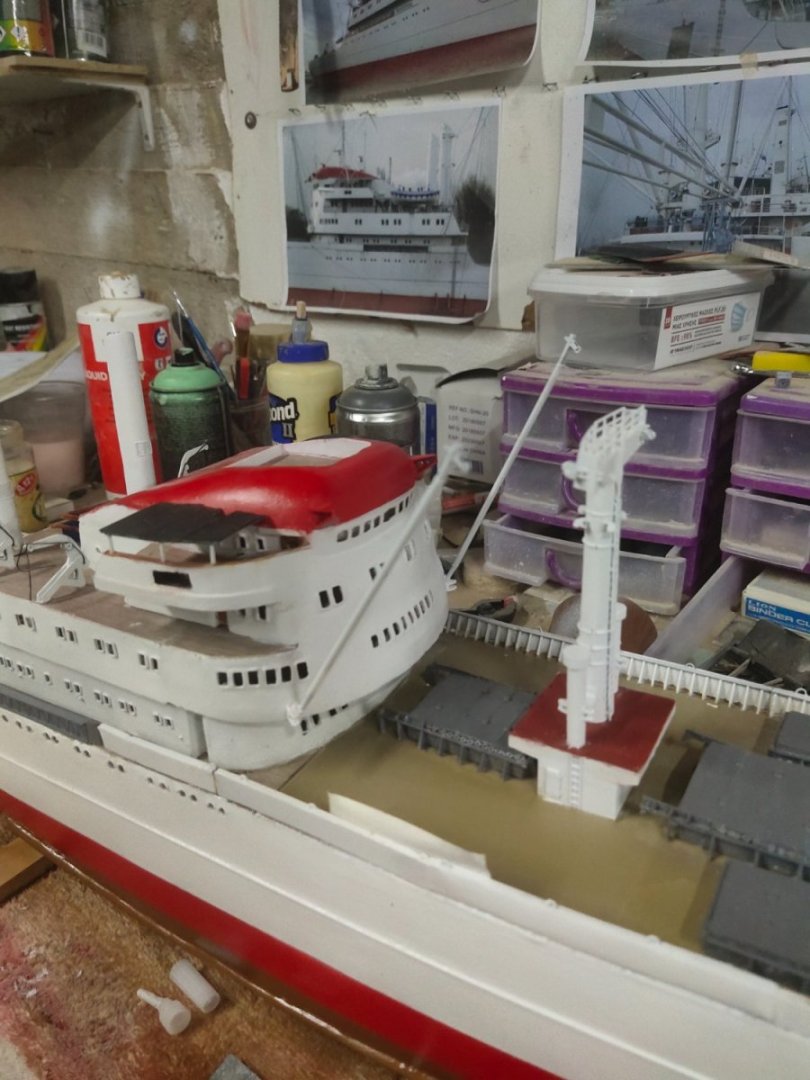
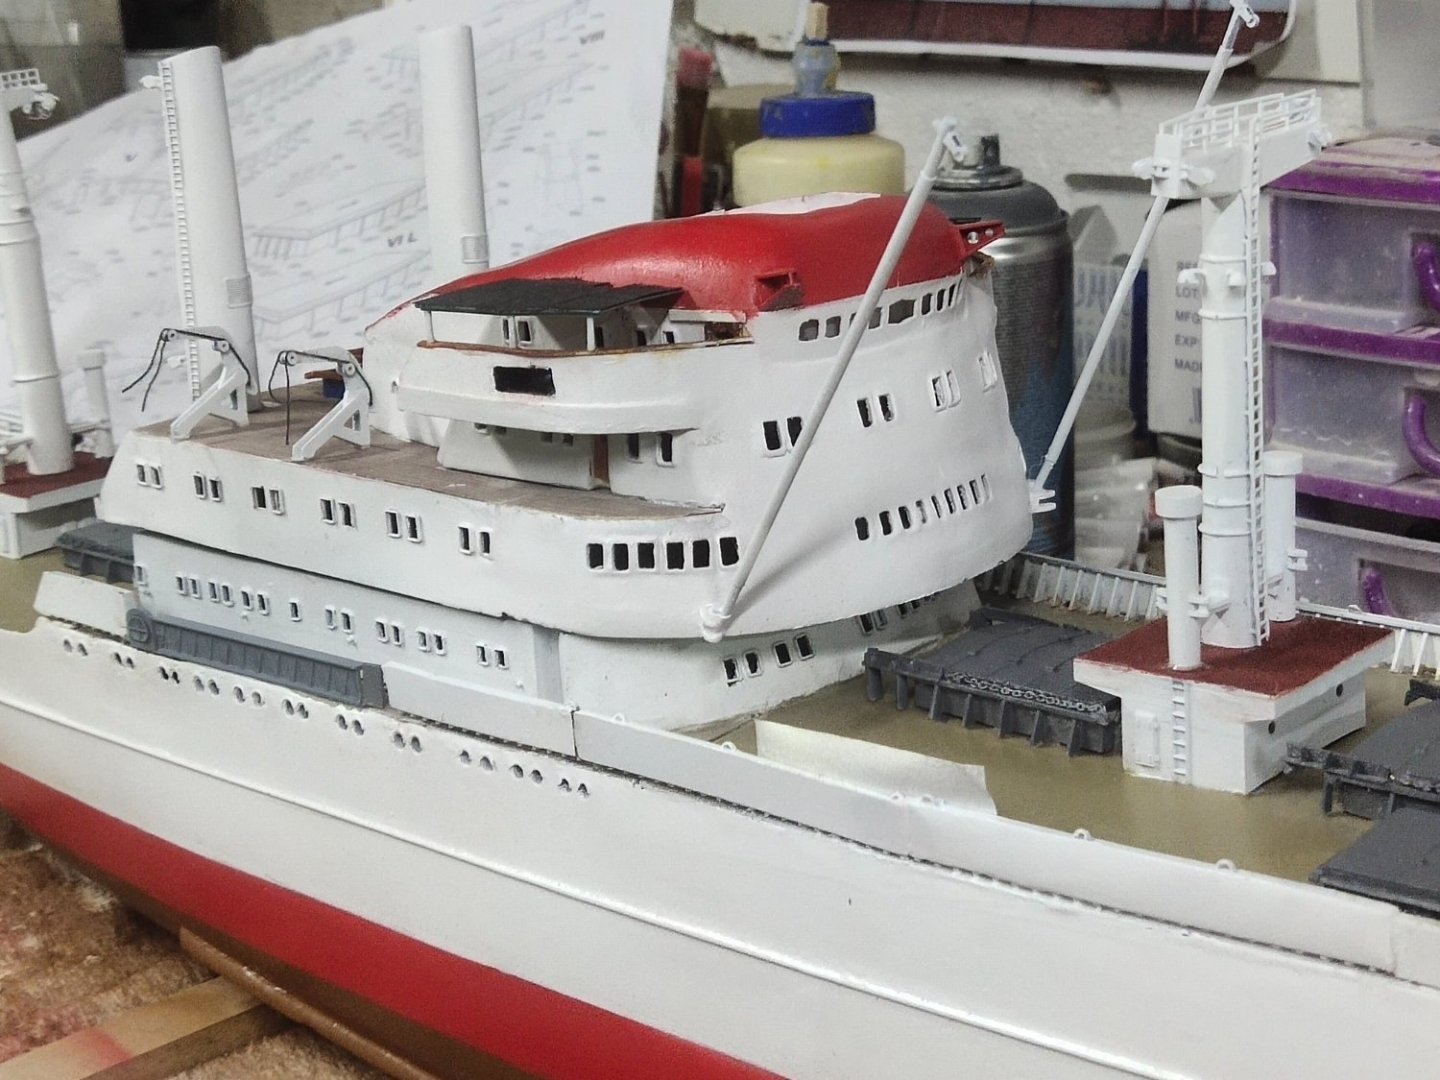
I completed the bridge with some modifications. It was glued in place and added the mast.


-
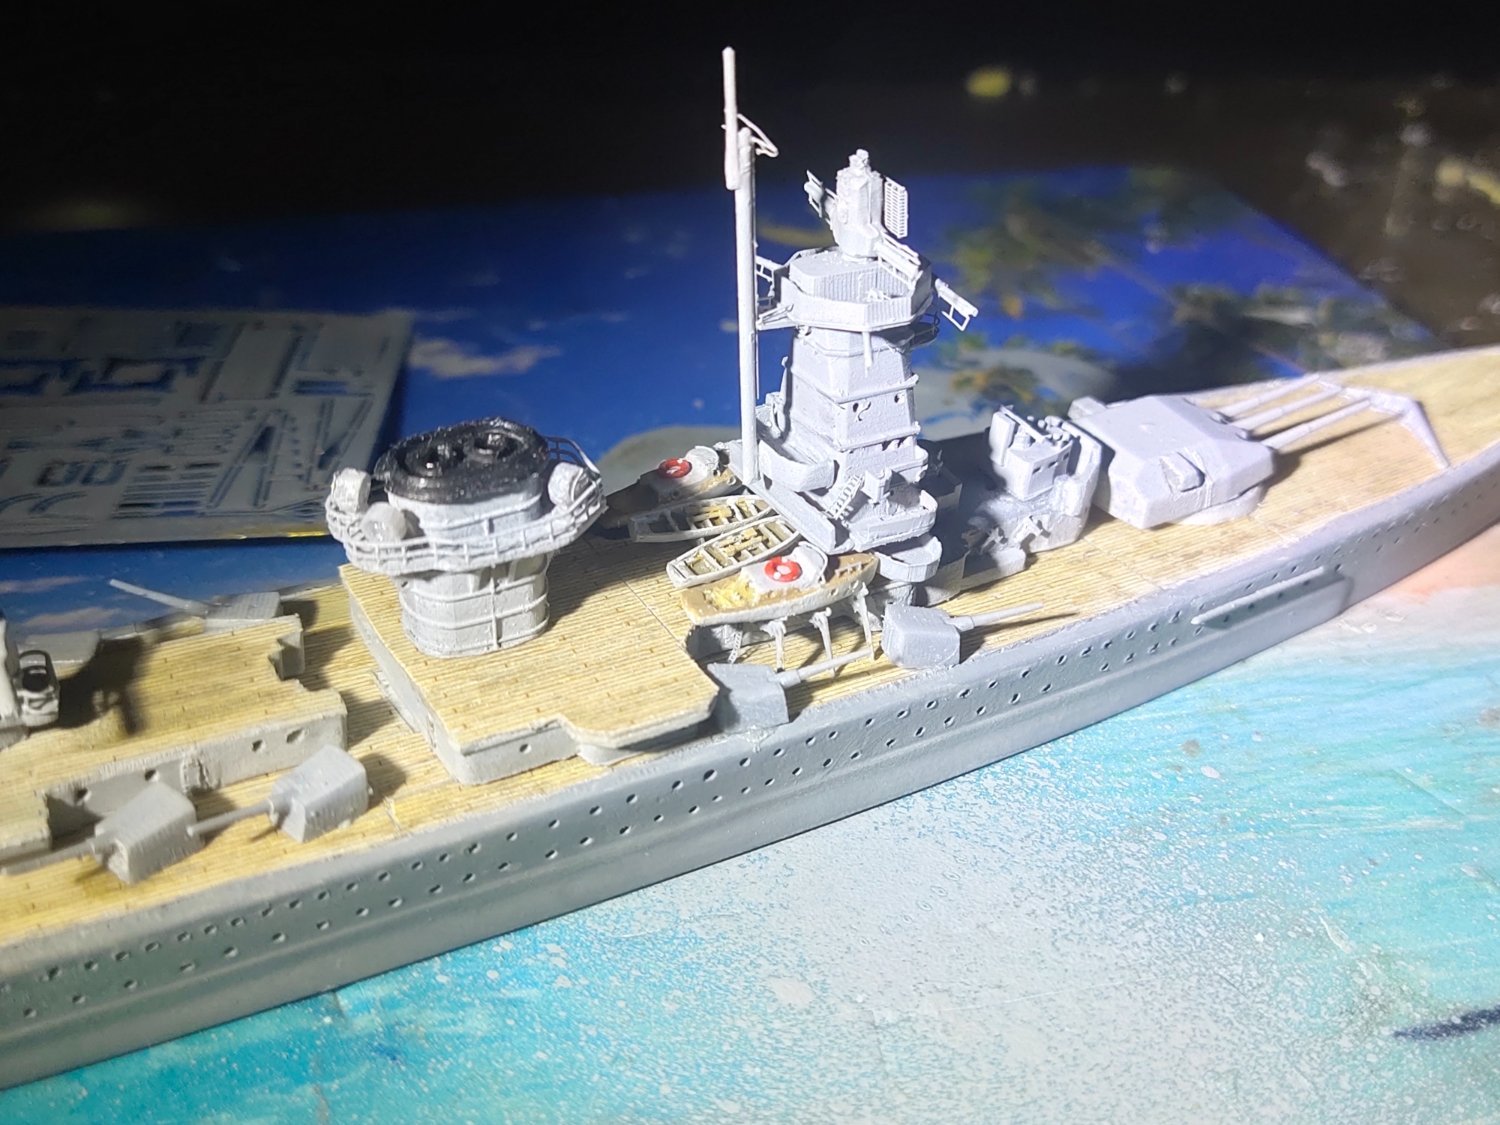
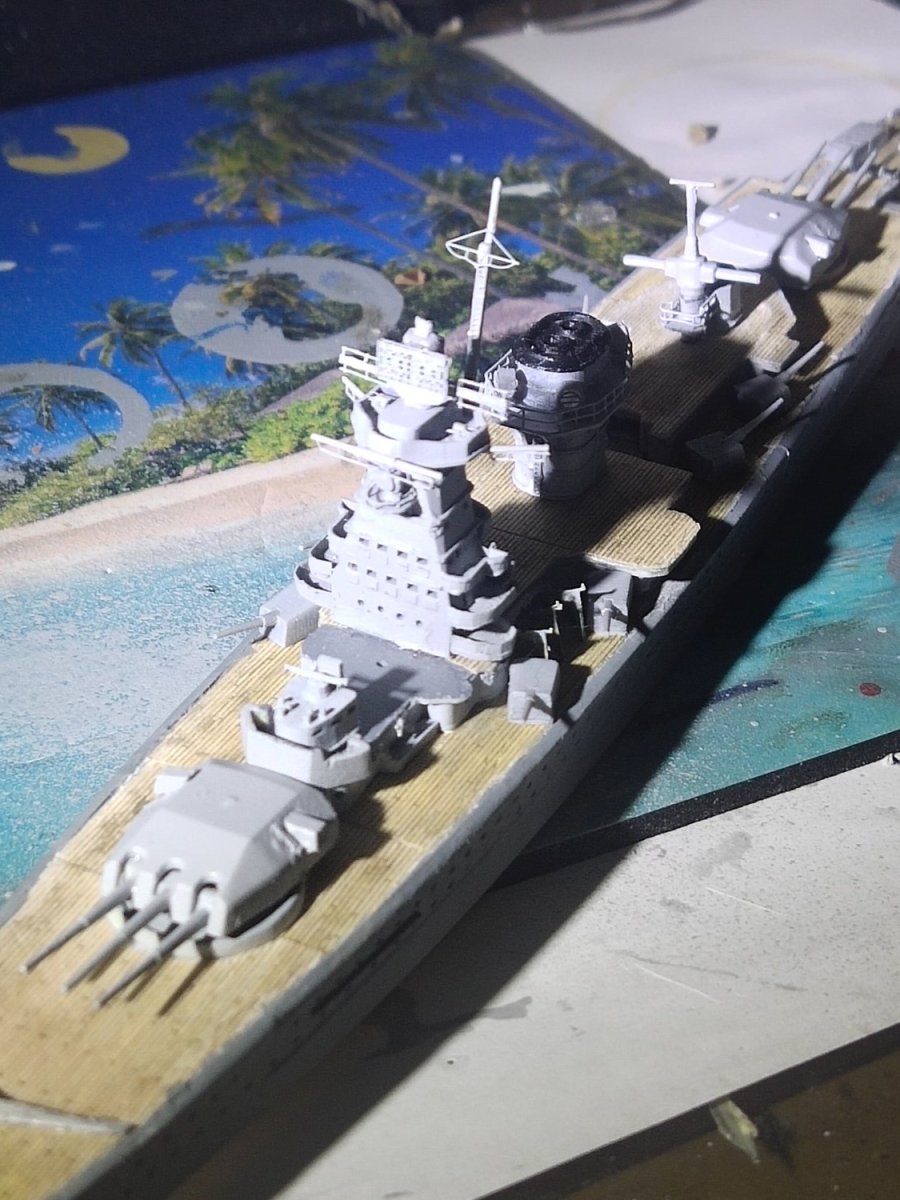
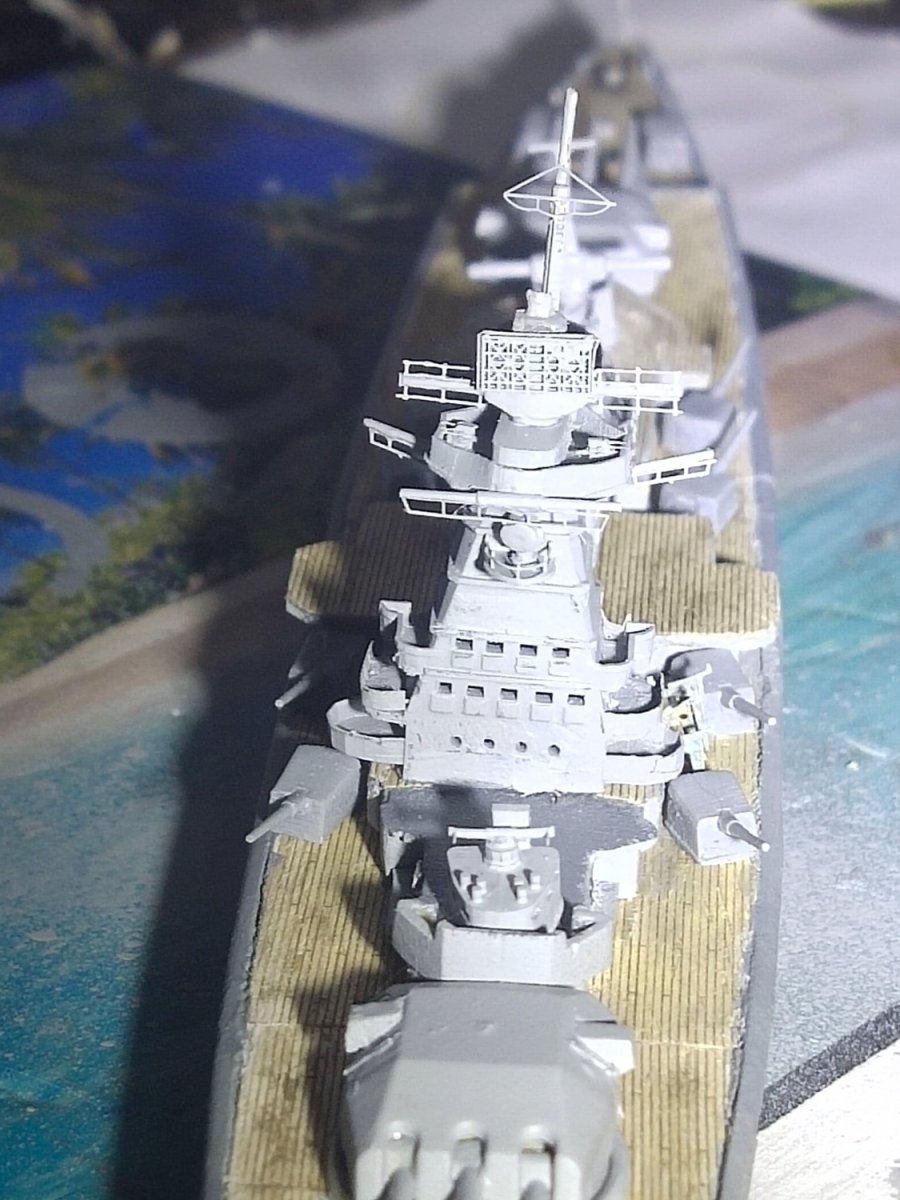
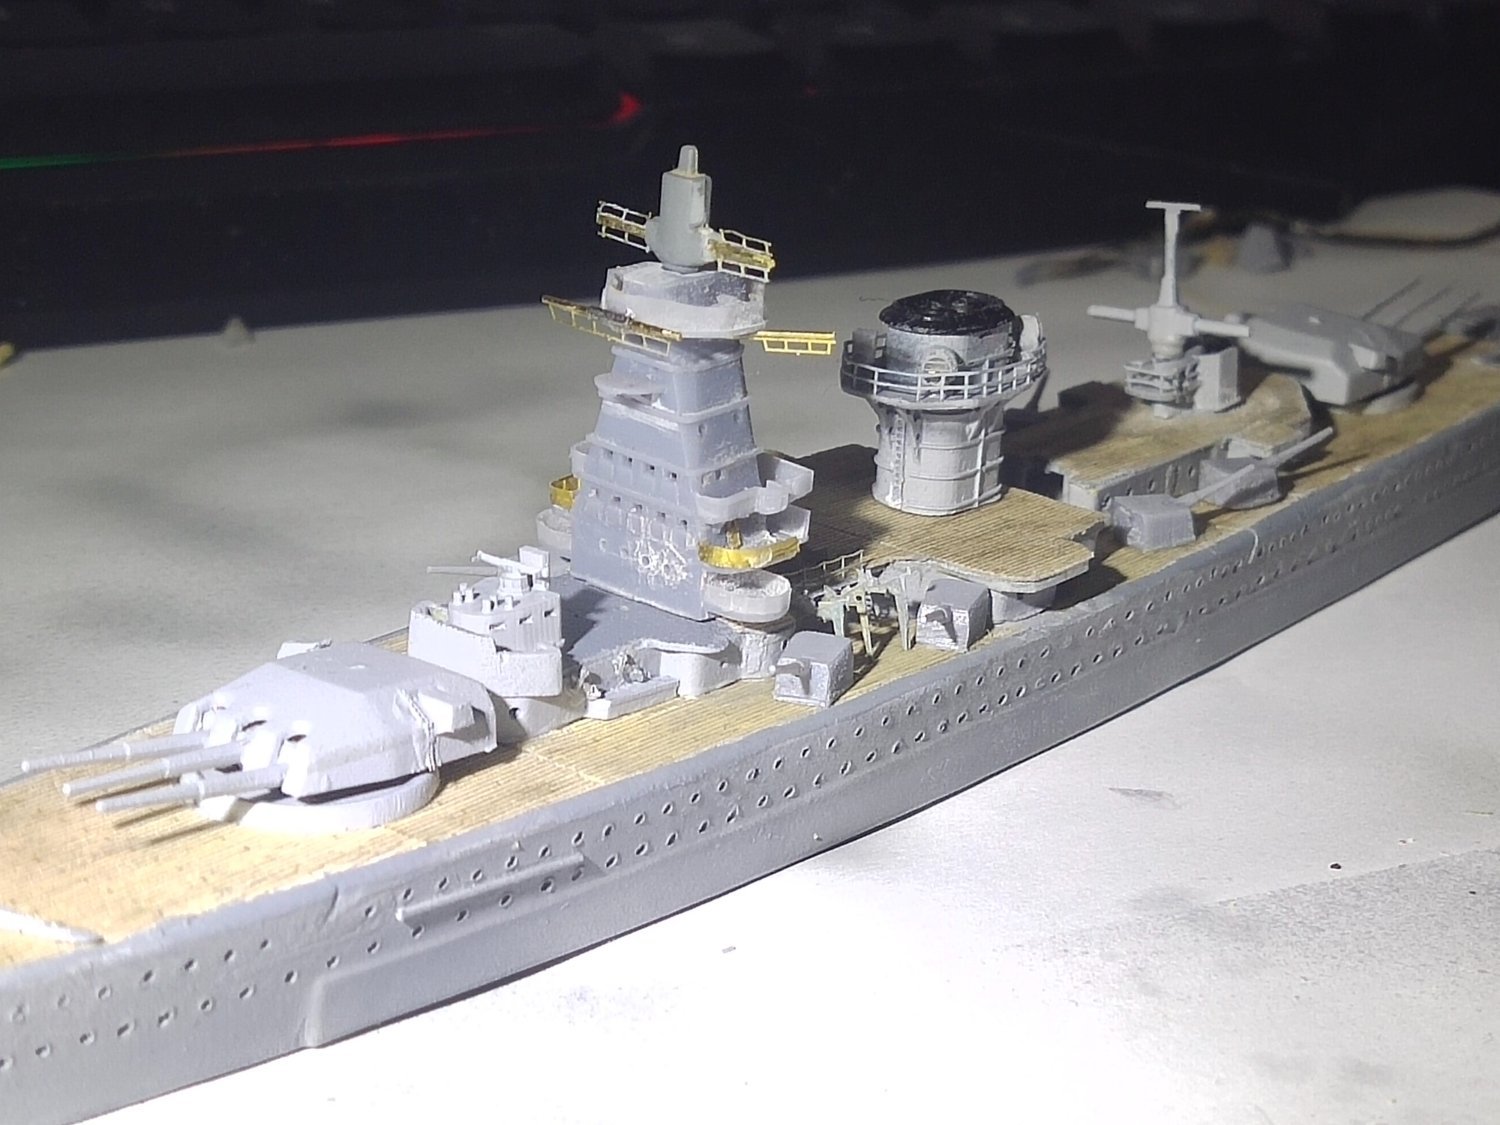
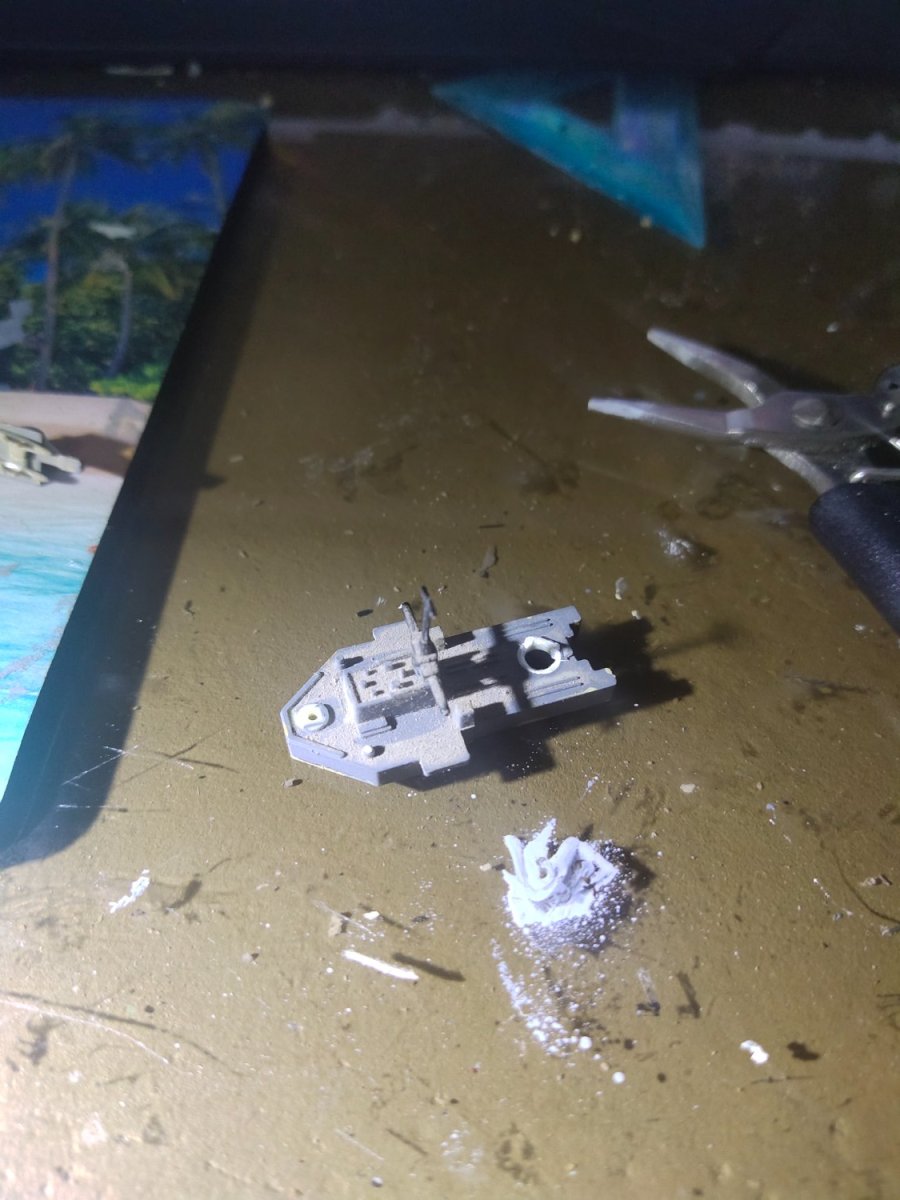
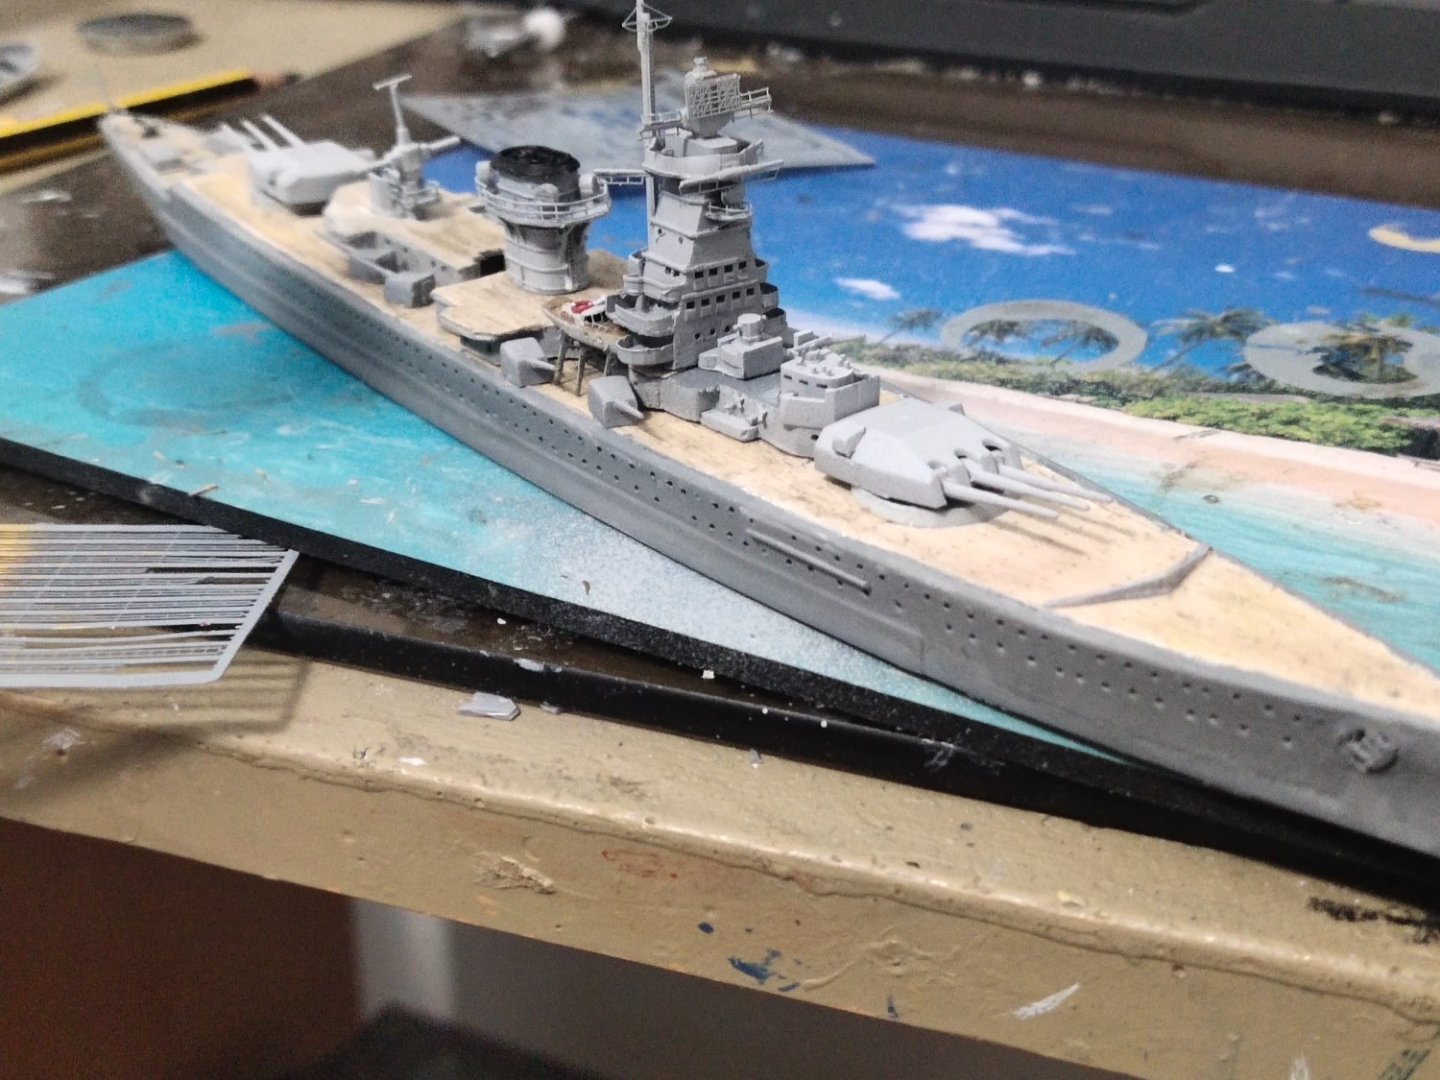
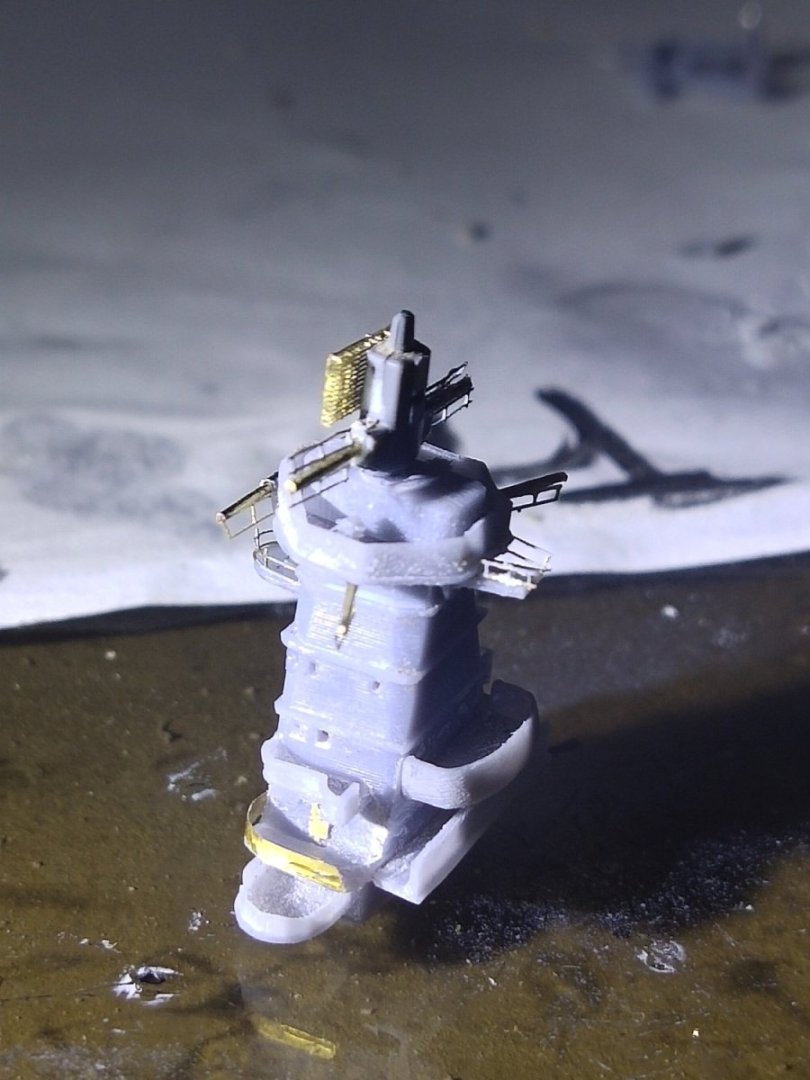
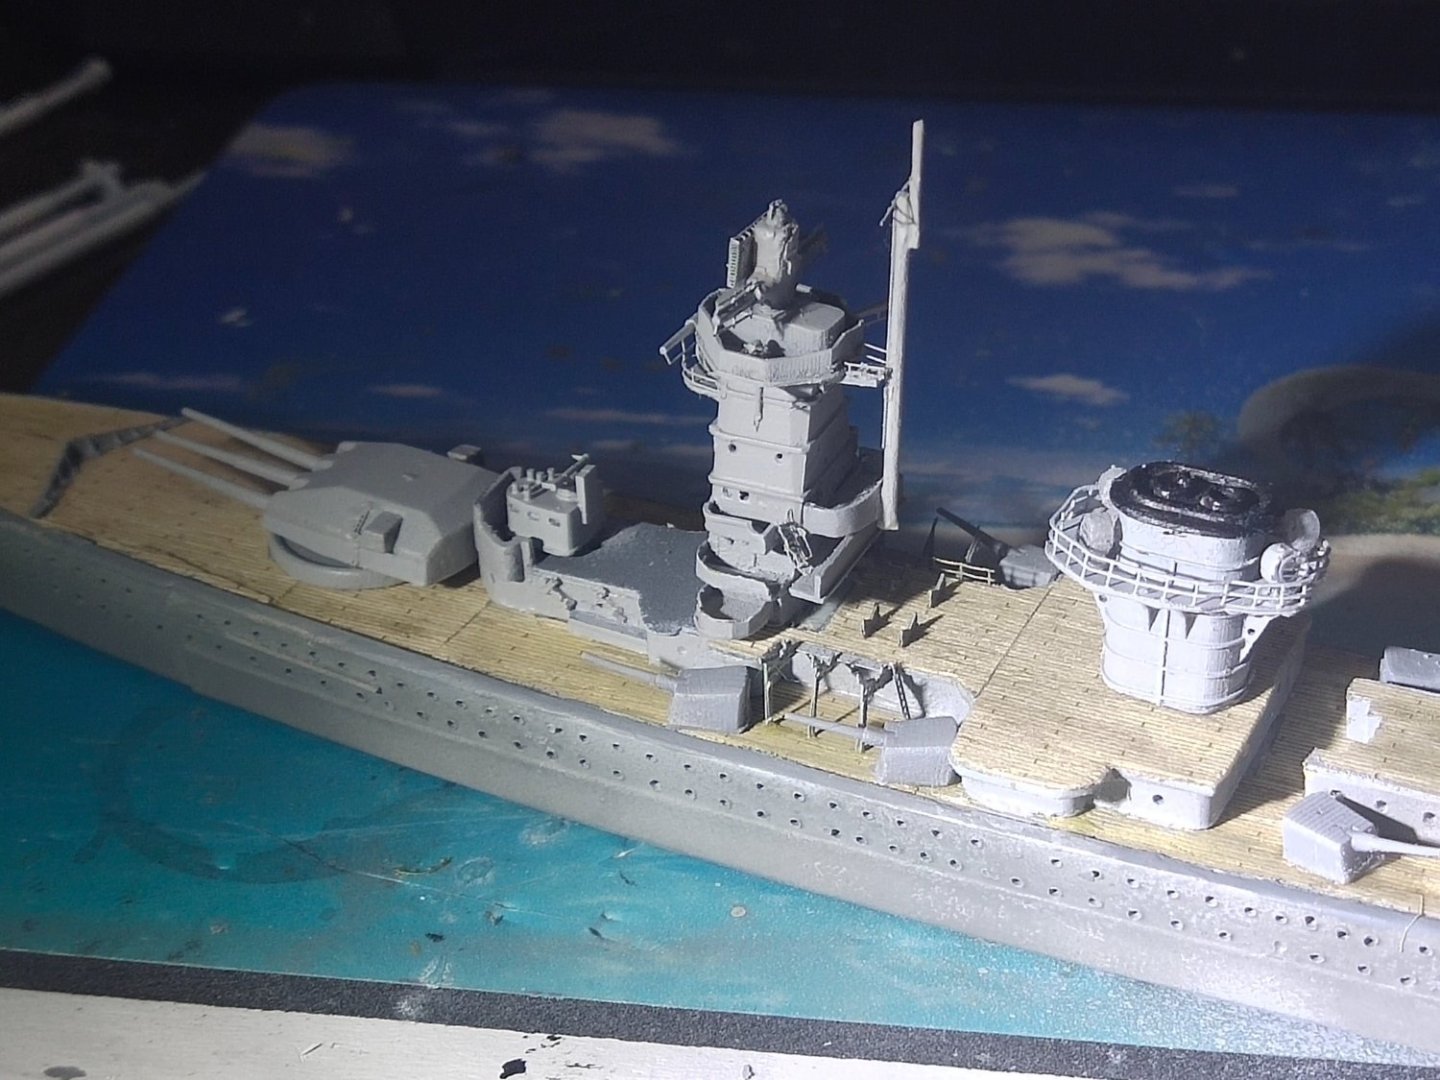
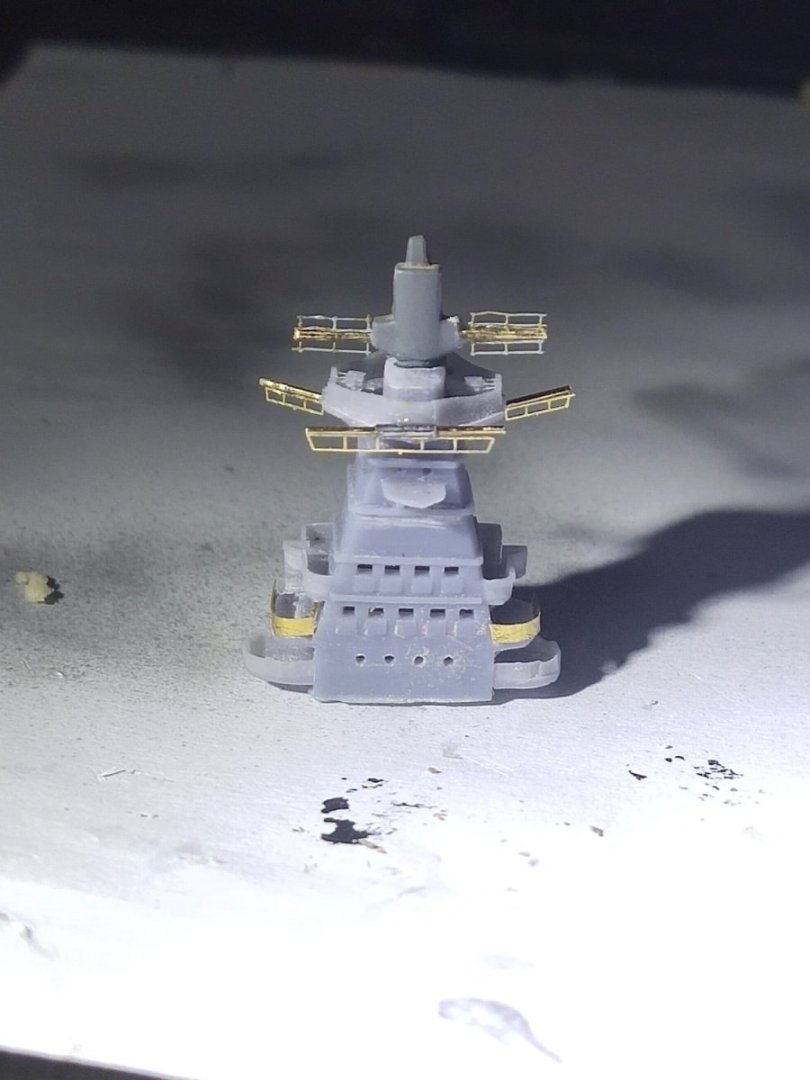
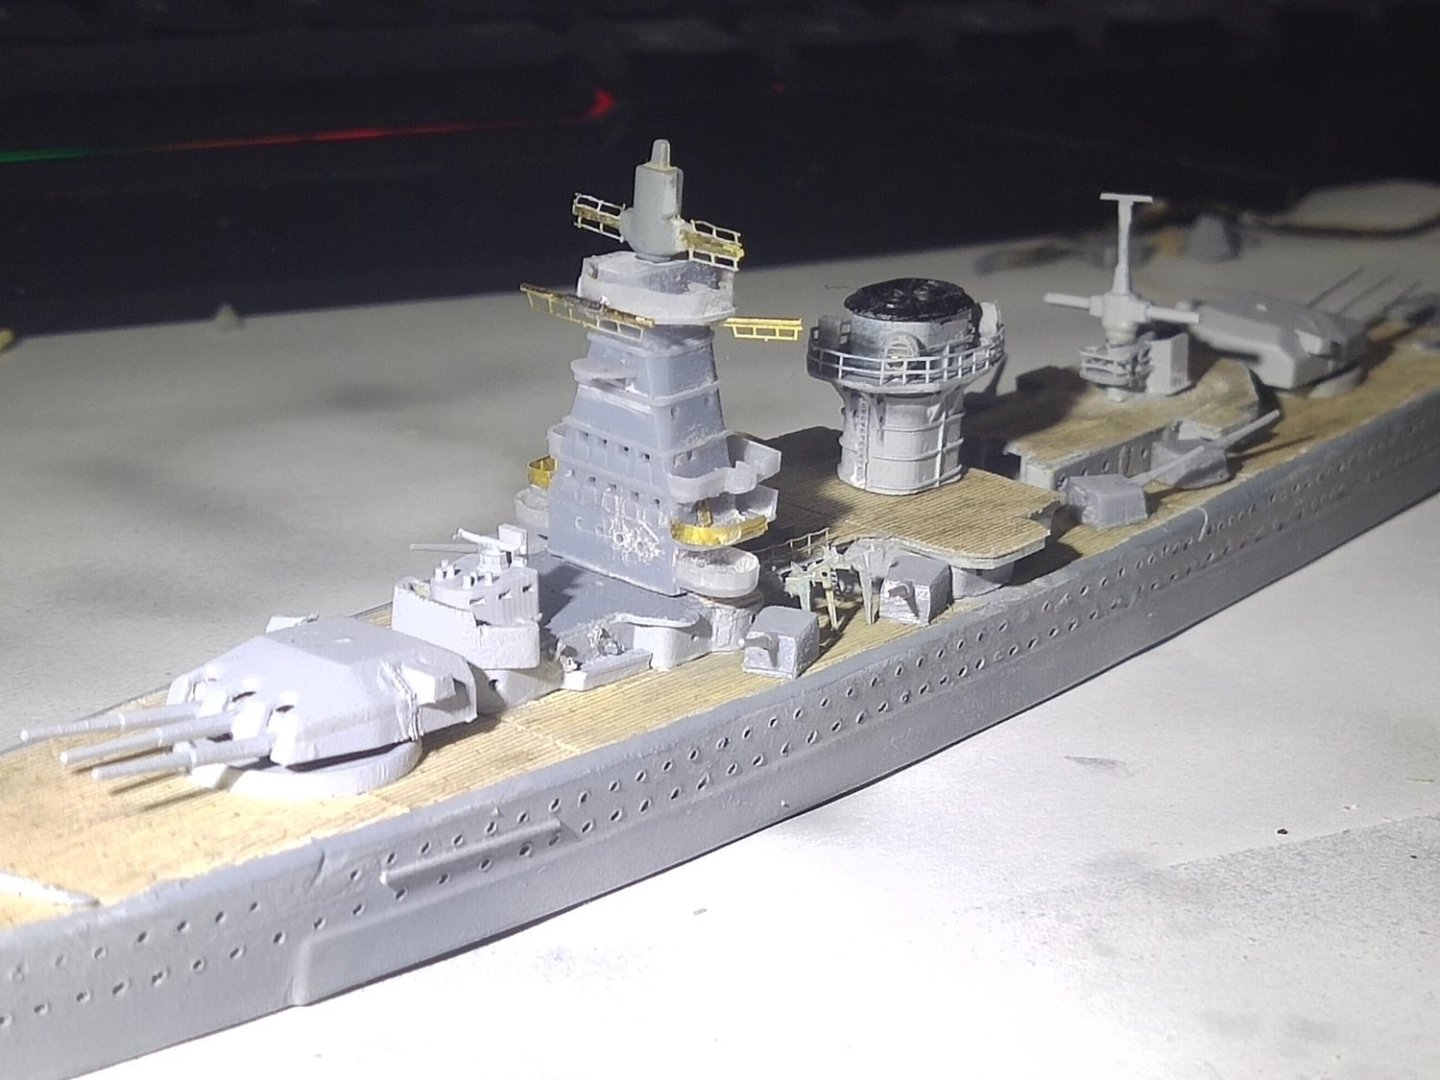
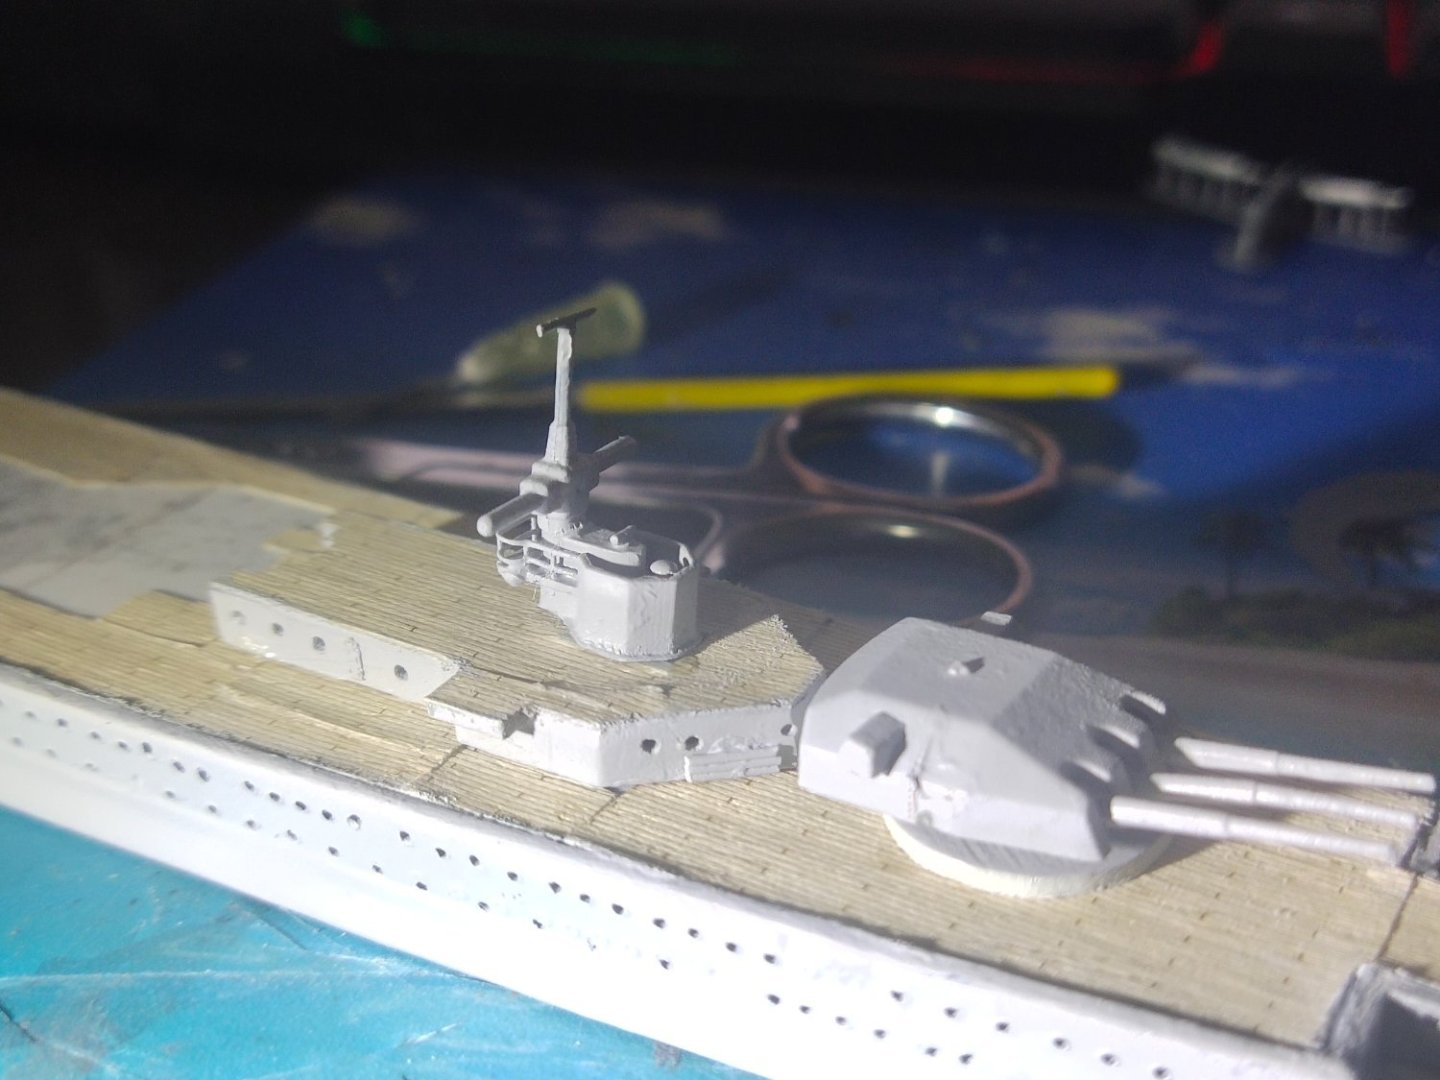
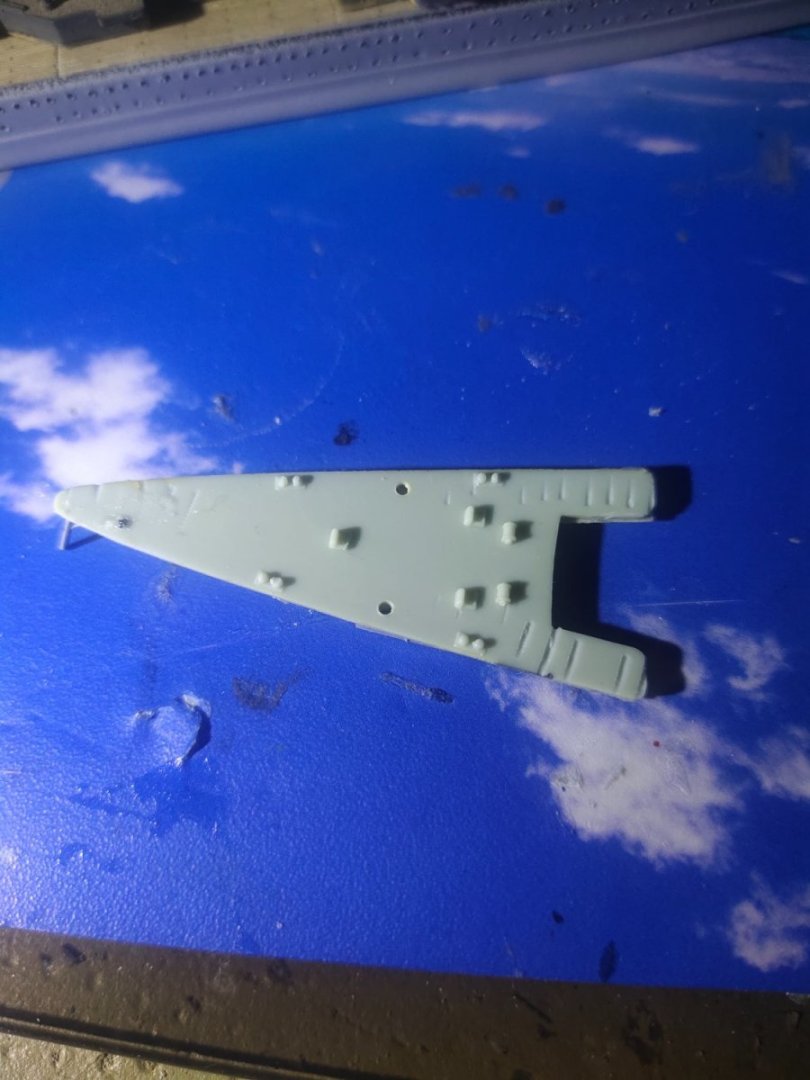
I printed a new superstructure more correct. But it was hard so I had work around it a bit. PE added. New front tower also ahead of it, just behind the triple main turret
-
Cap San Diego by mikegr - 1/160
mikegr replied to mikegr's topic in - Build logs for subjects built 1901 - Present Day
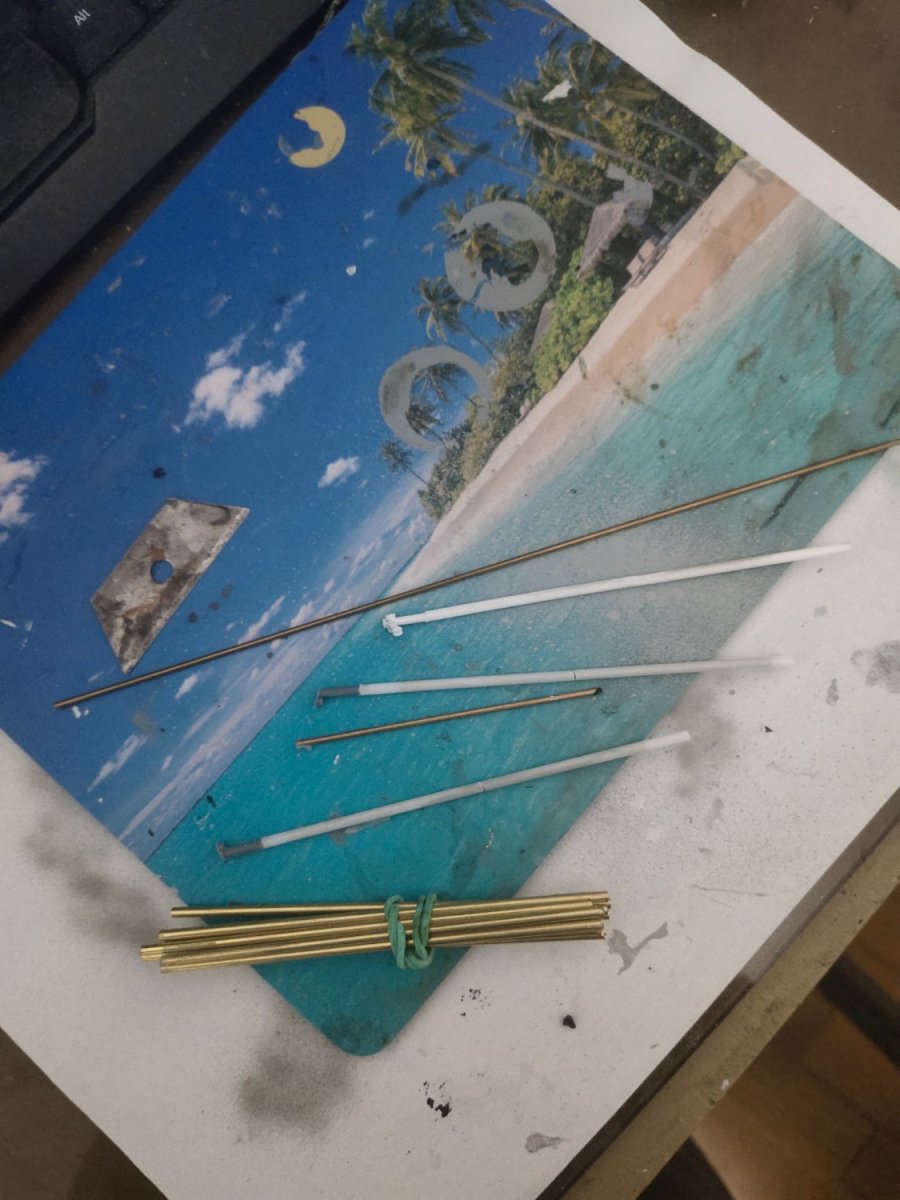
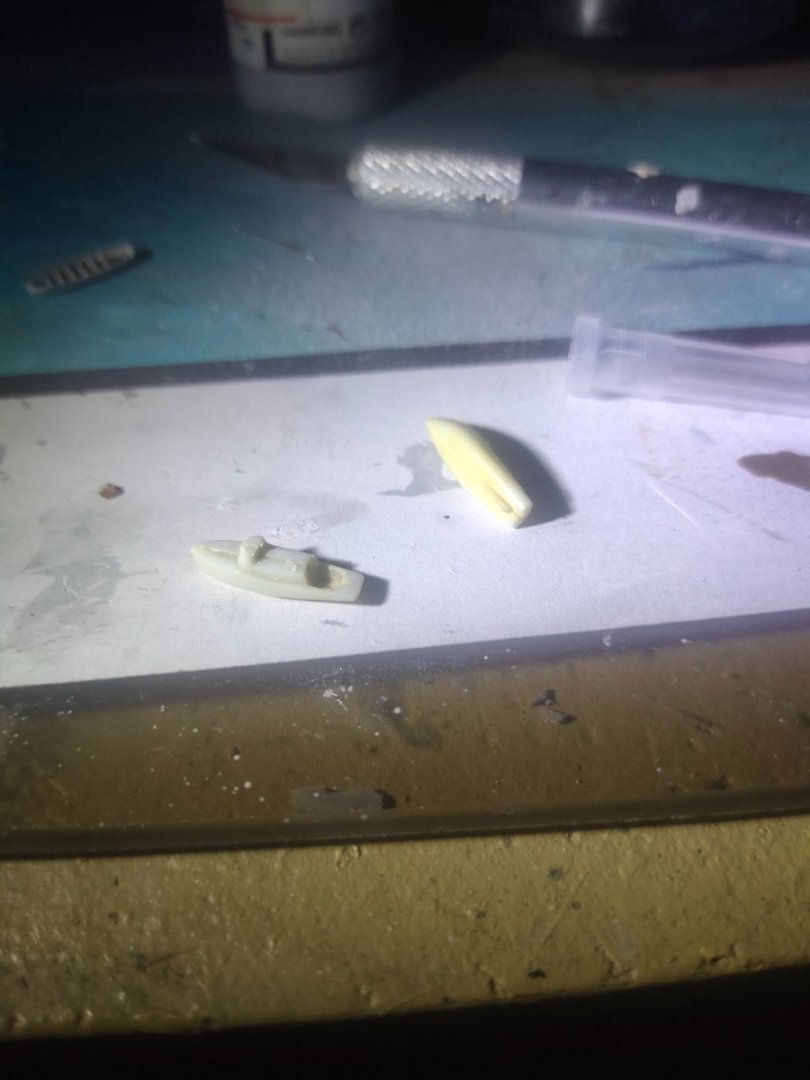
Last 2023 update. I was looking for a way to make the cargo masts. I opted for a durable material so I skipped plastic over brass. The ends were a bit thinner and these were designed and 3d printed. The 2.5mm brass tubes had thick walls and proved to heavy for the resin base tip. So I took some 2.5 mm plastic tubes and reinforced them by putting a 1.5 brass piece inside them. Then resin edges were glued. Therefore a desirable stiff part was created without being extra heavy. Finally I printed a pair of life boats and started the paint job

-
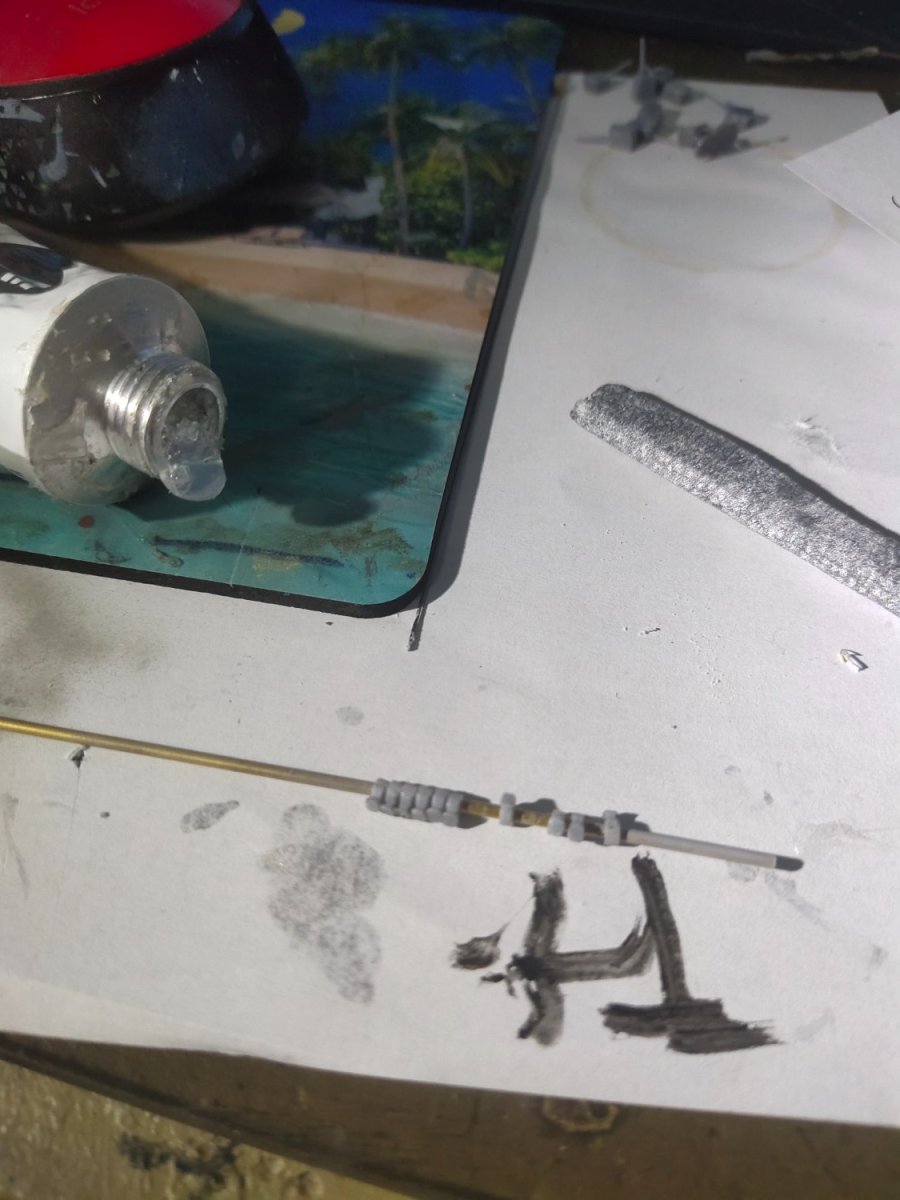
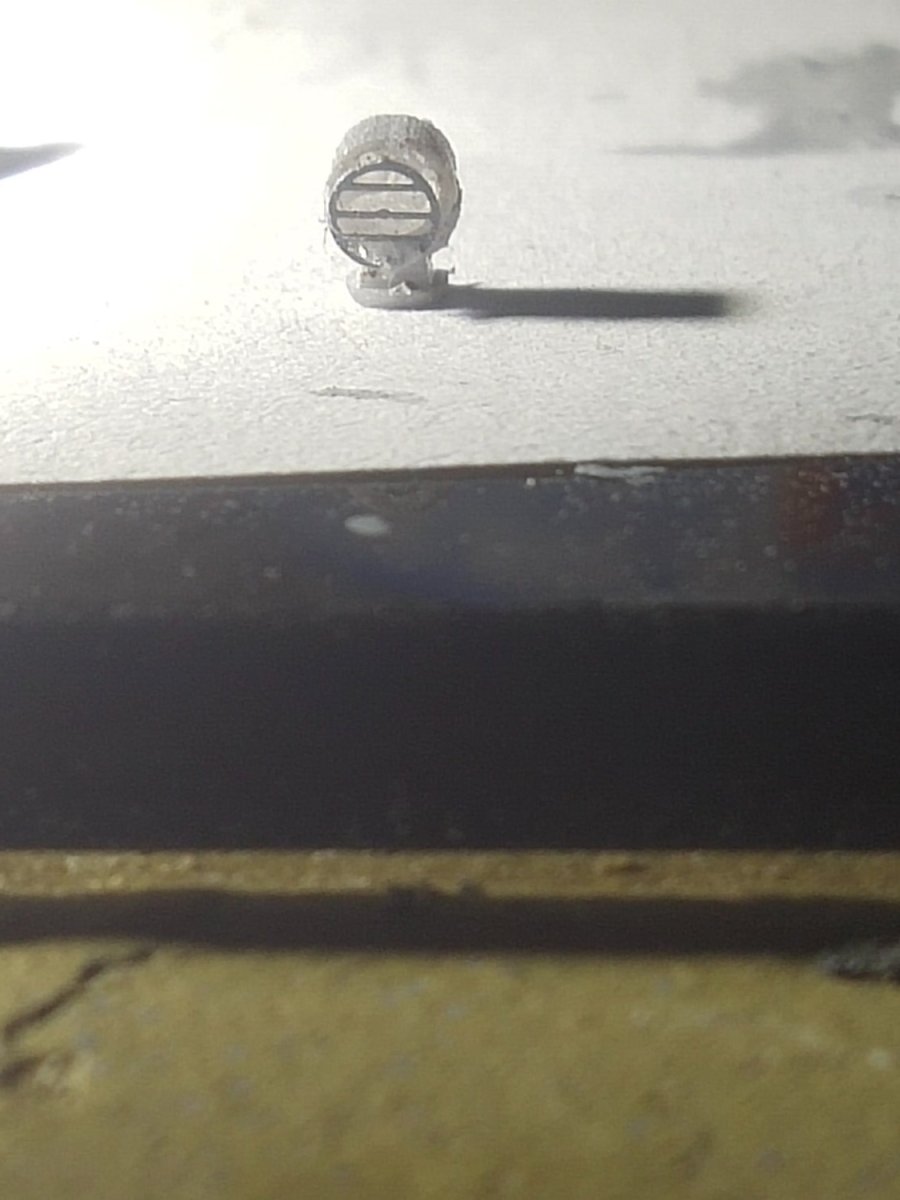
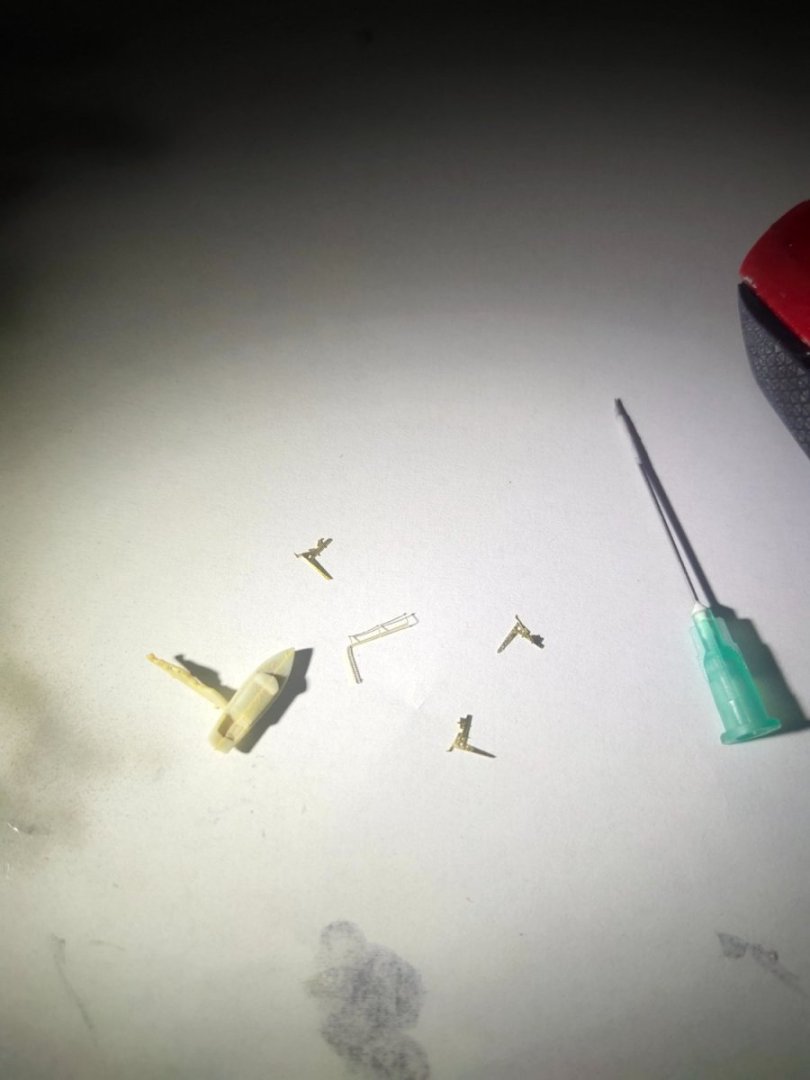
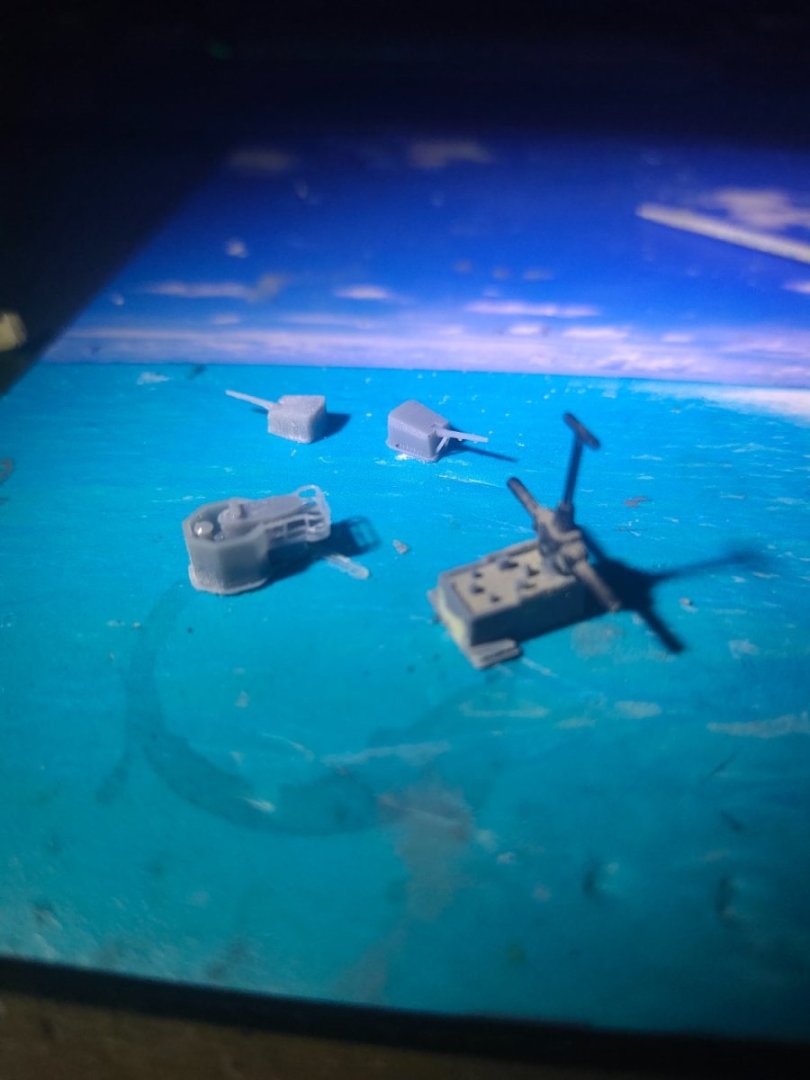
I printed searchlights. Like rings. I filled them with silicone to look transparent like glass. Then added PE grills. The back side was painted grey


-
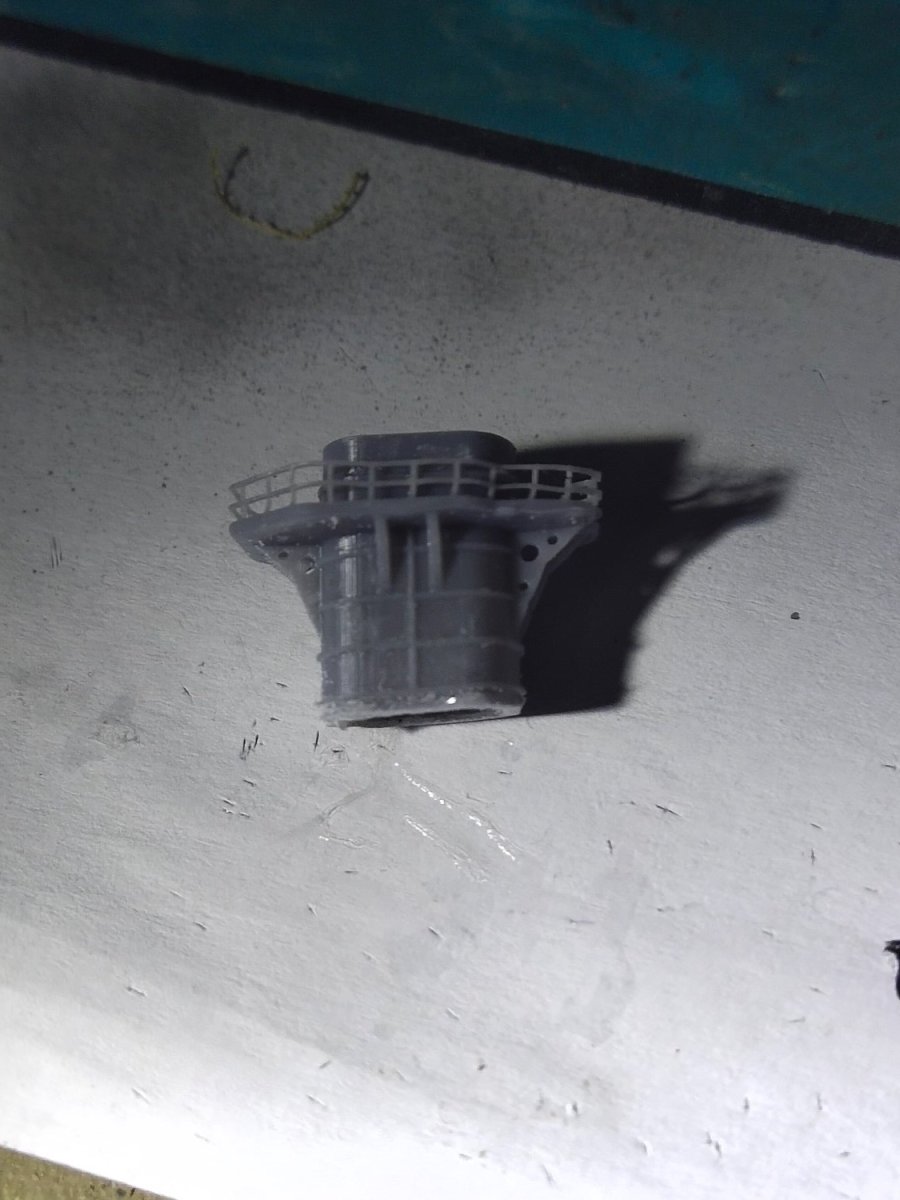
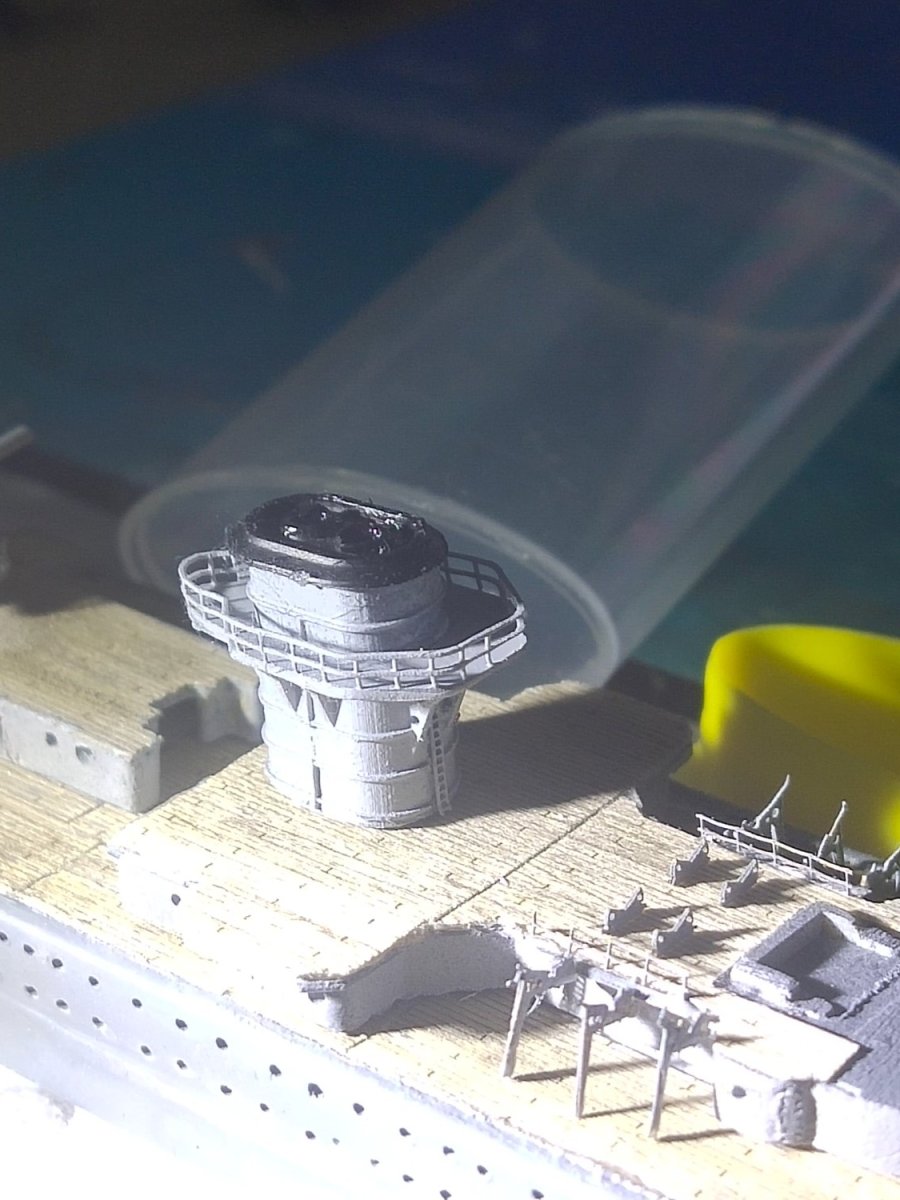
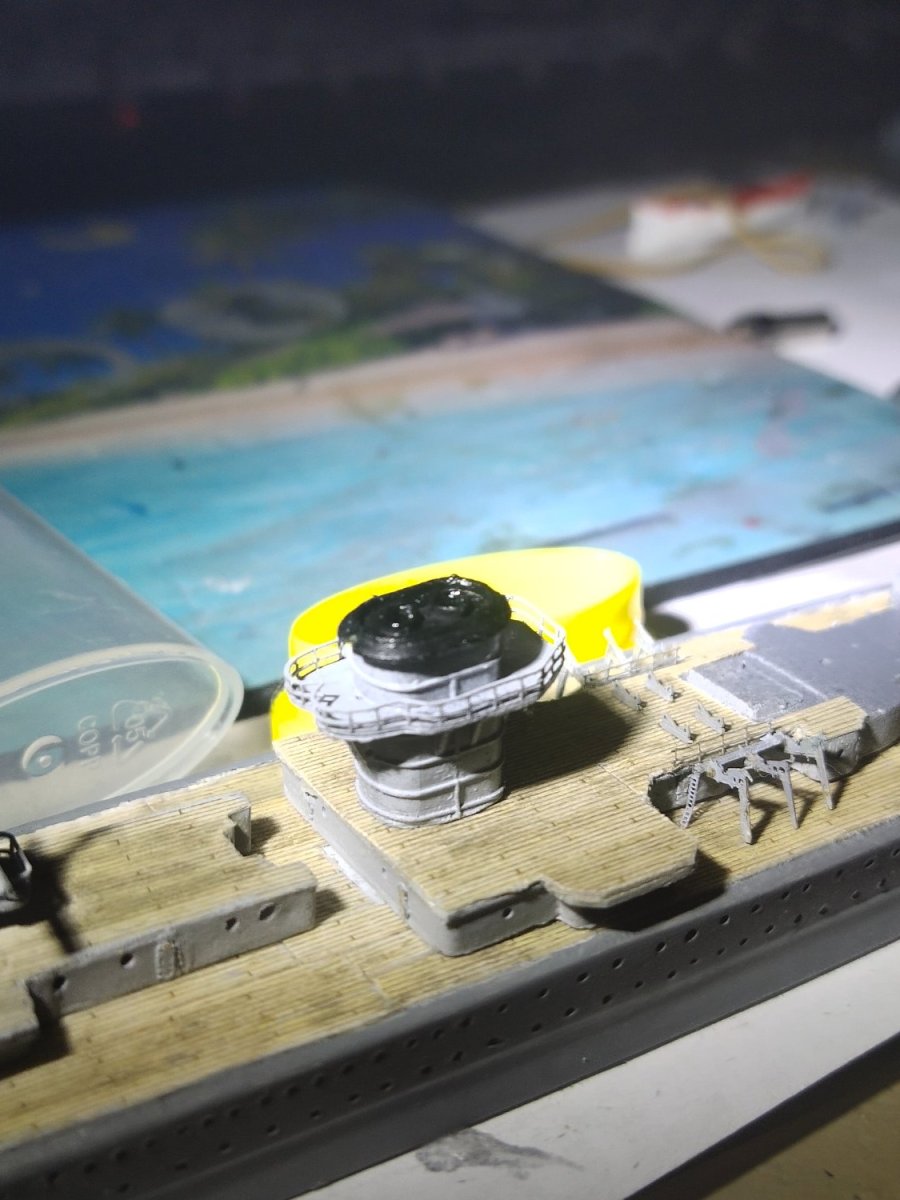
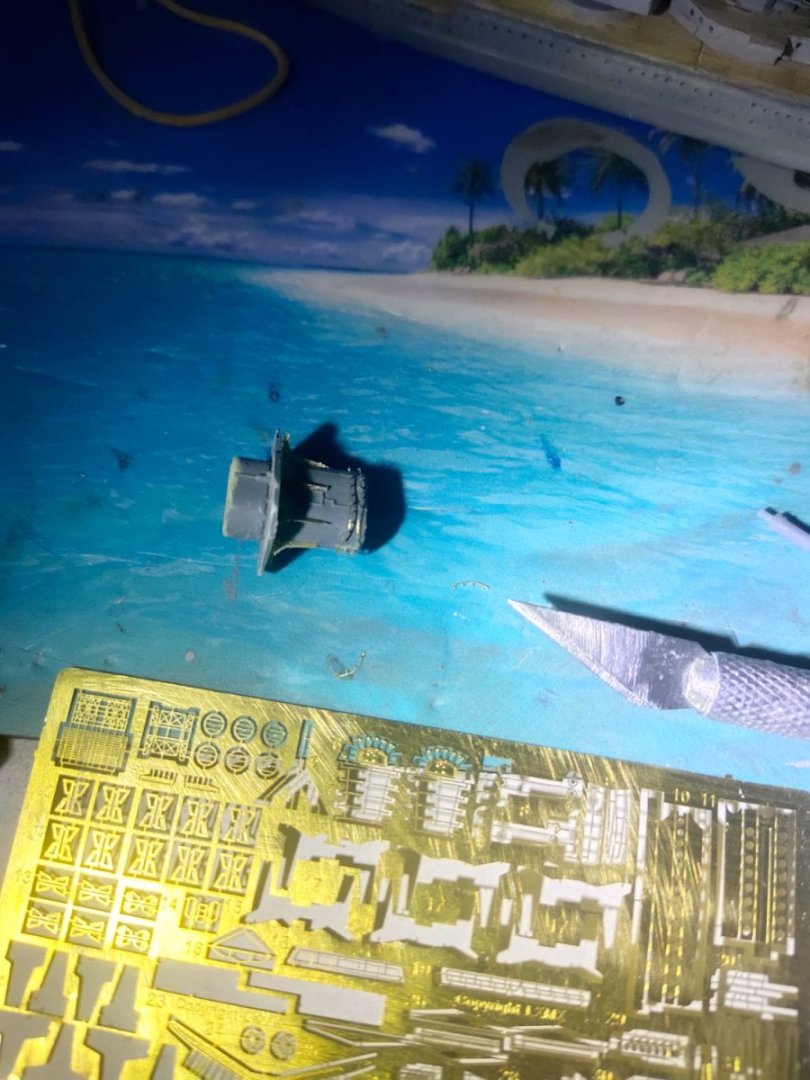
I tried to fit tiny PE pieces to the funnel. The smaller ones were hard to glued on and job became messy. Also, because of the wrong shape of search lights platform, supports didnt fit well. So I designed and printed my own funnel with corrections including details. I only added the hand rails and the funnel cap from the model


-
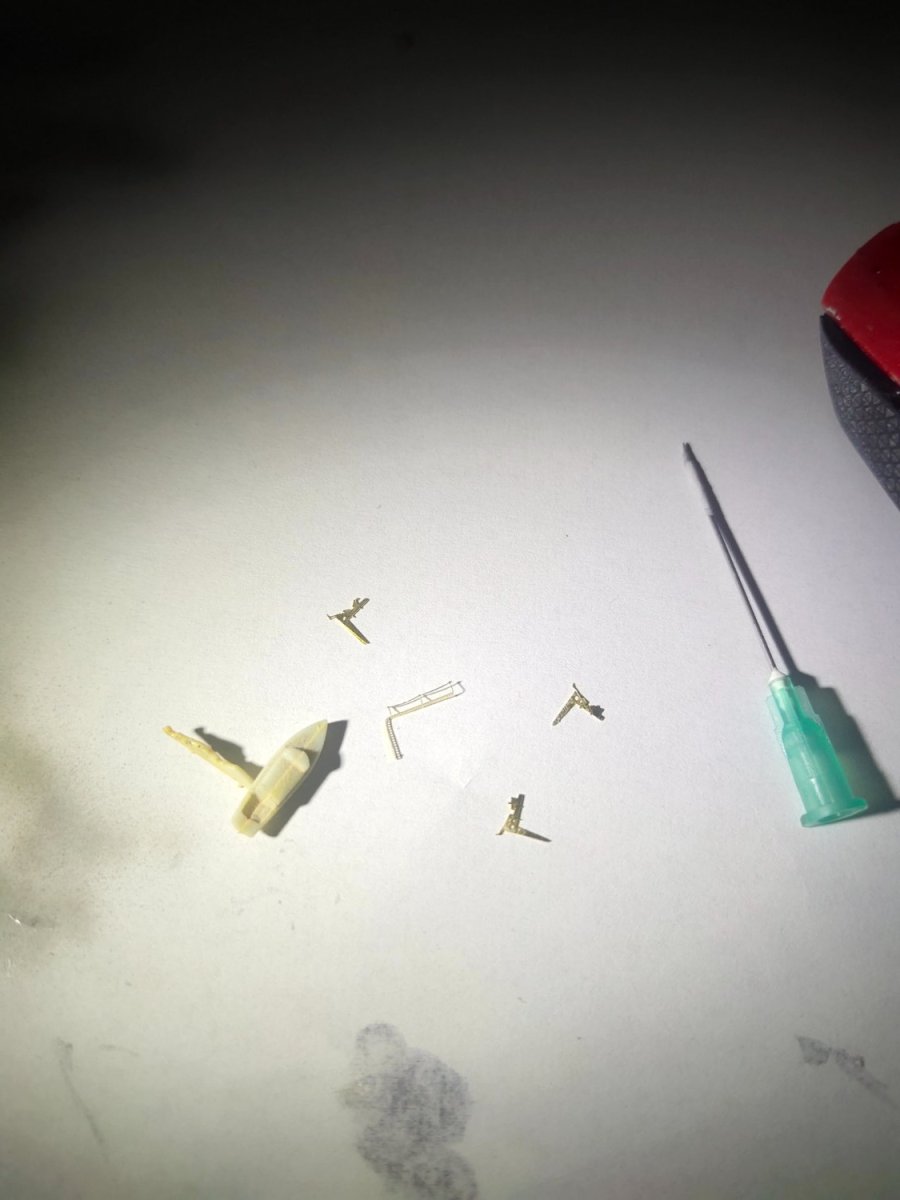
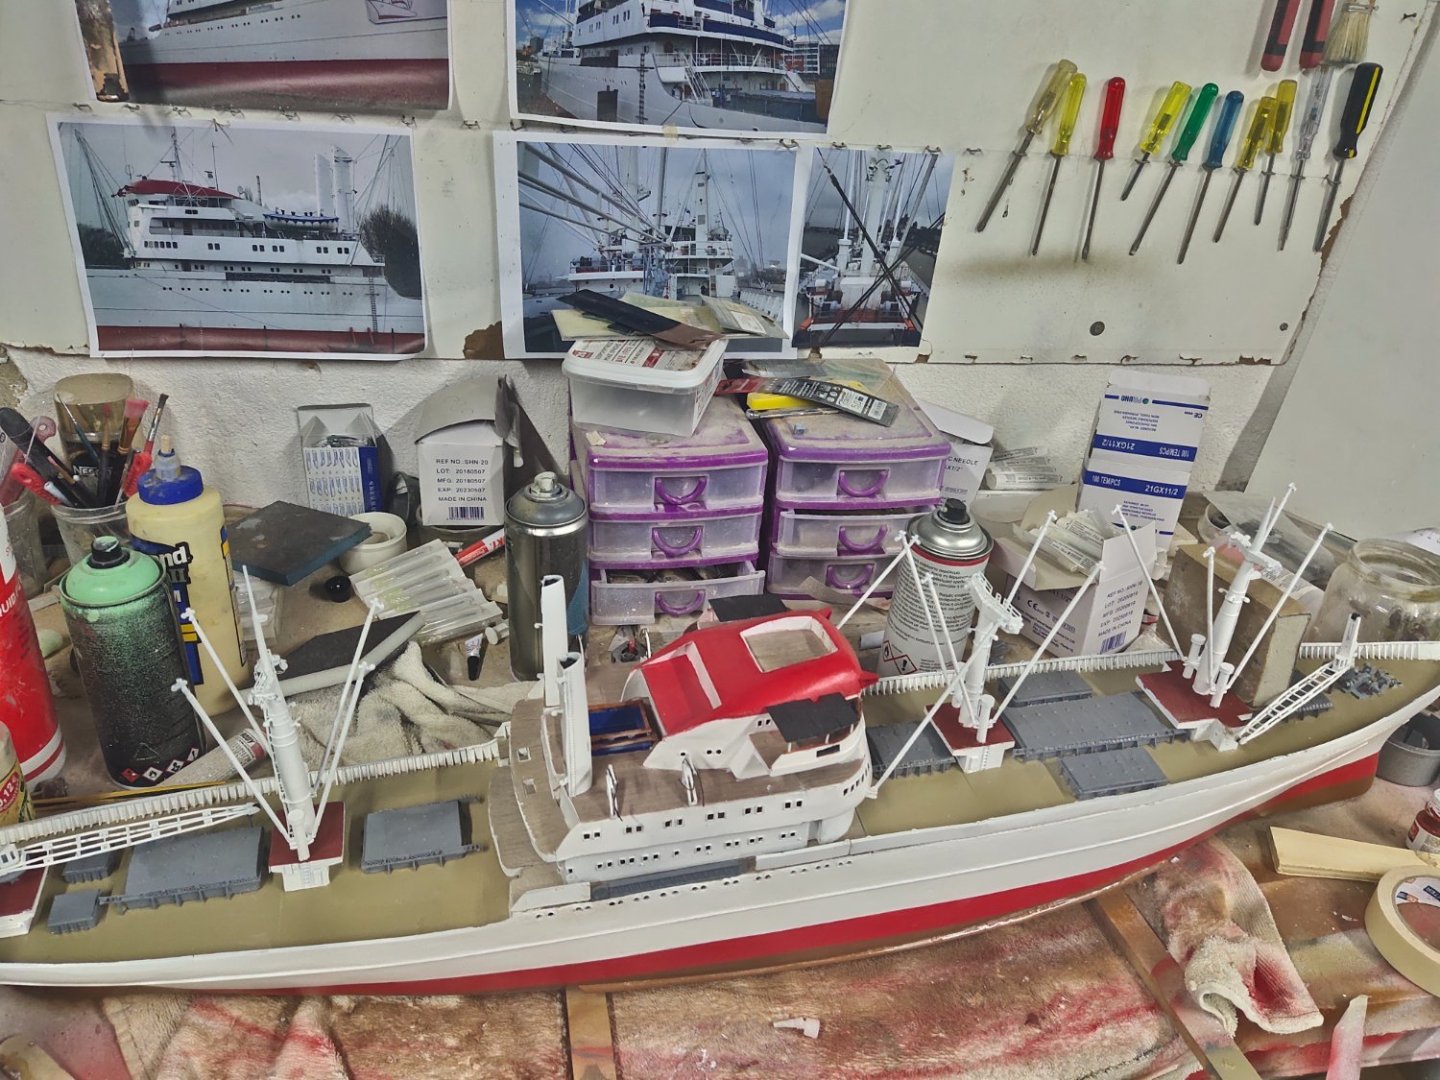
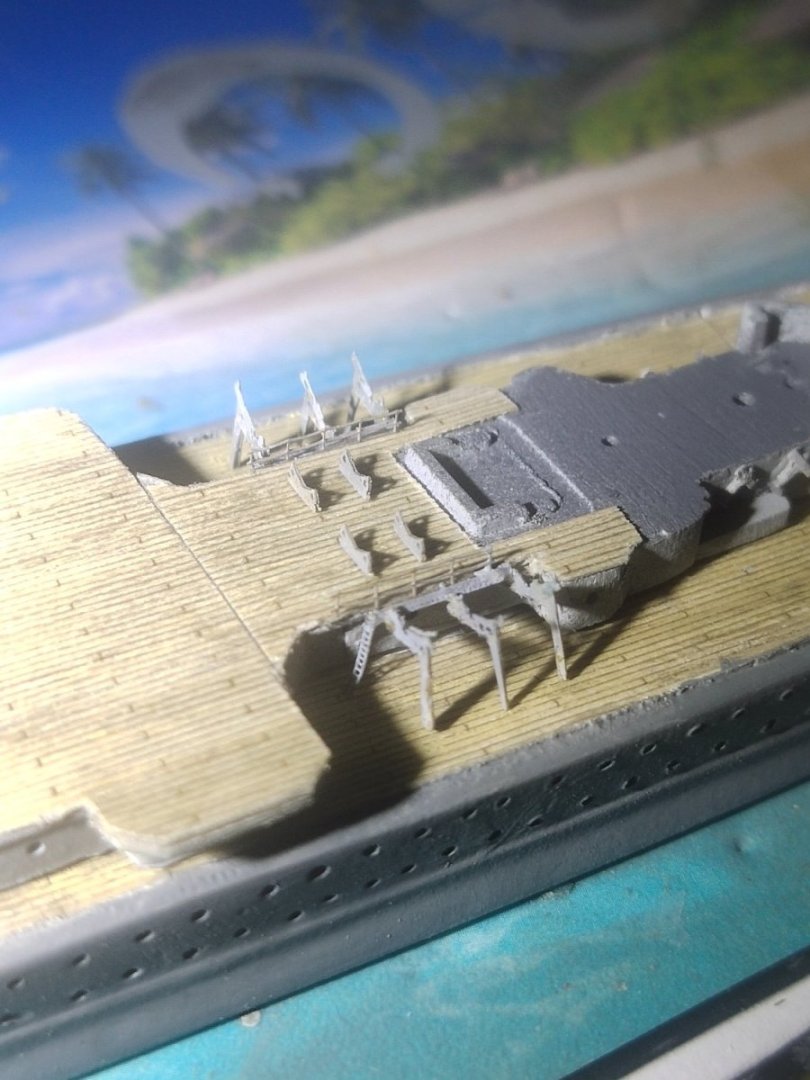
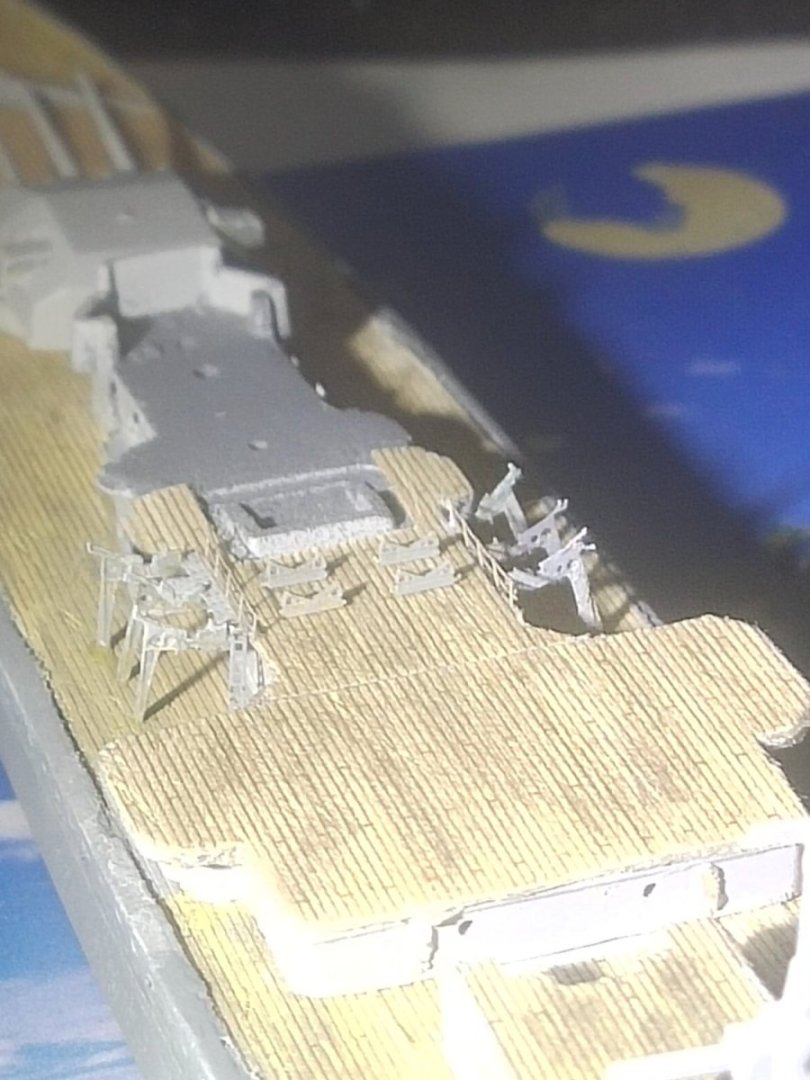
Another day with lot of work but small progress. I worked on the boat area behind the superstructure. Lots of tiny pe parts had to glued together. I lost a couple, one was replaceable the other was not. So after one hour or searching it was found.
-
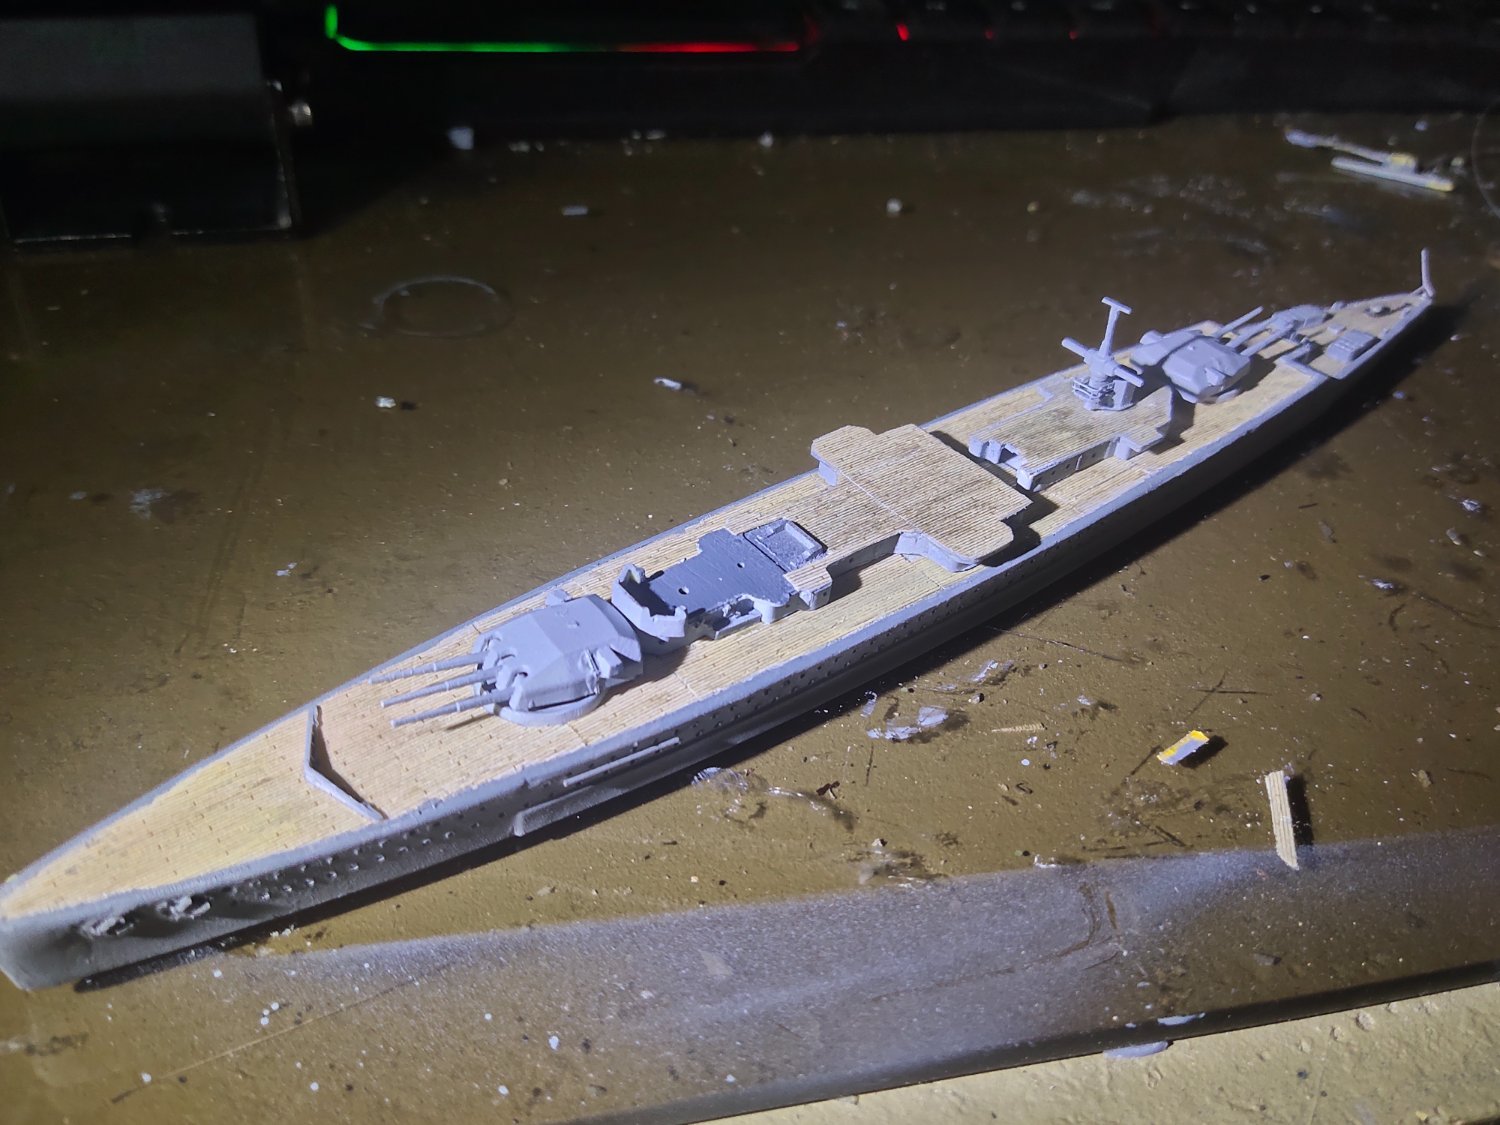
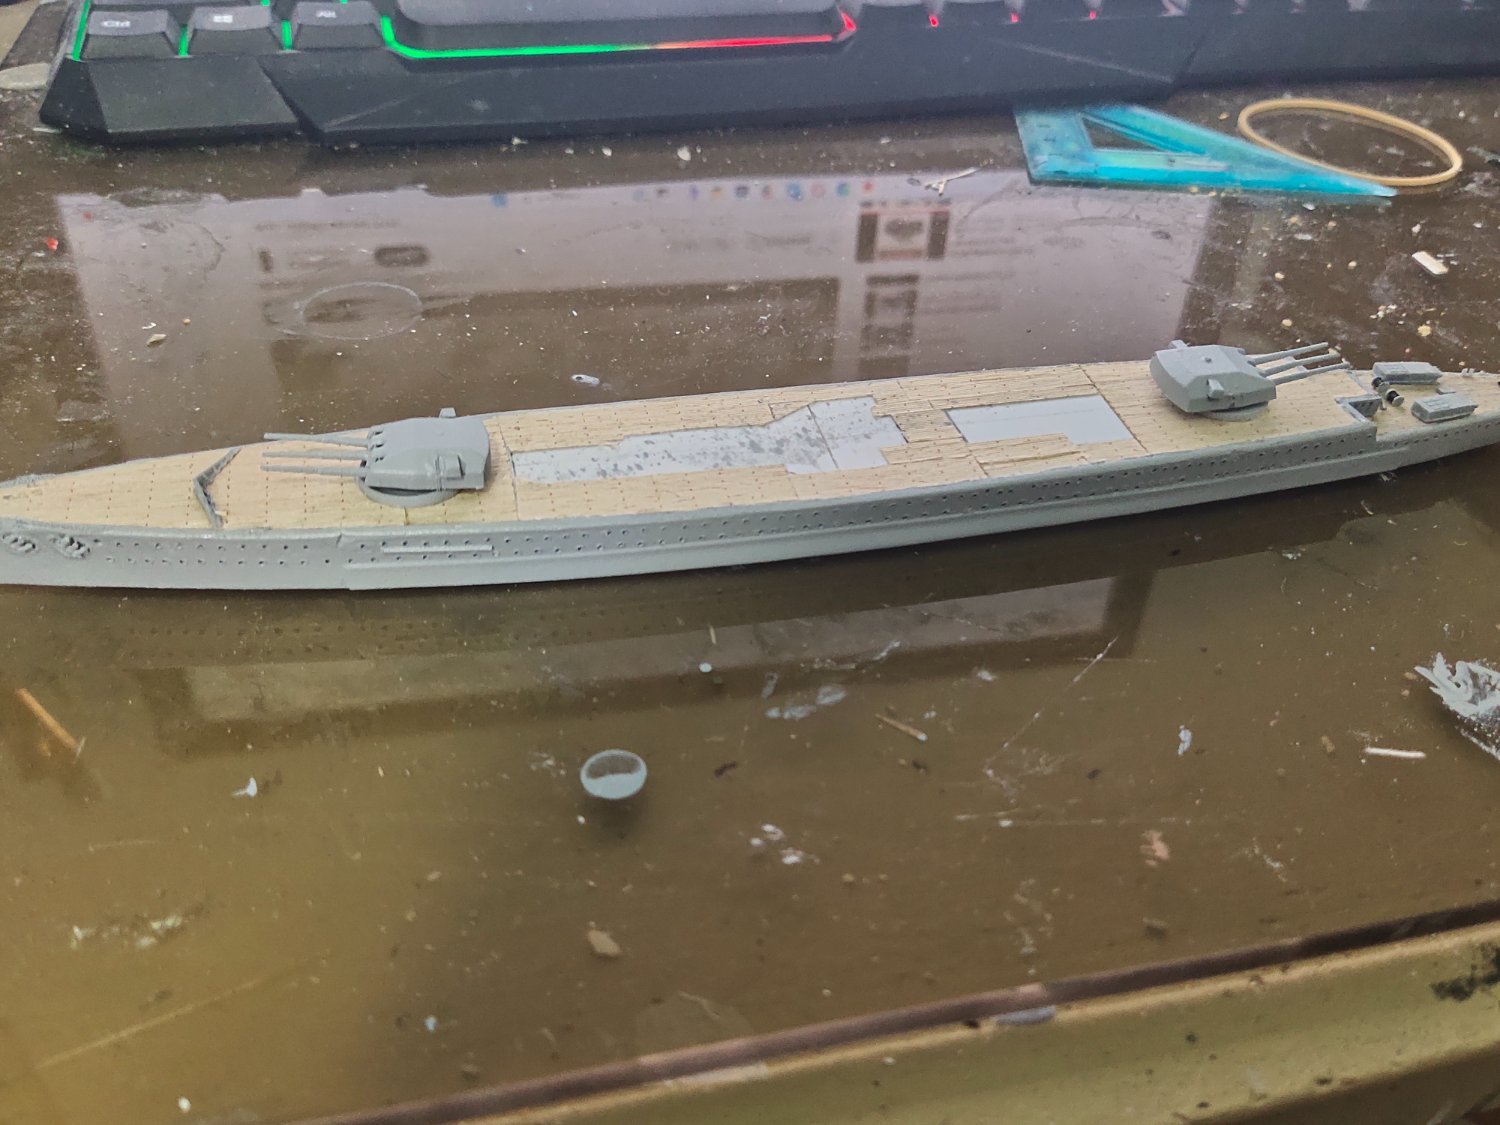
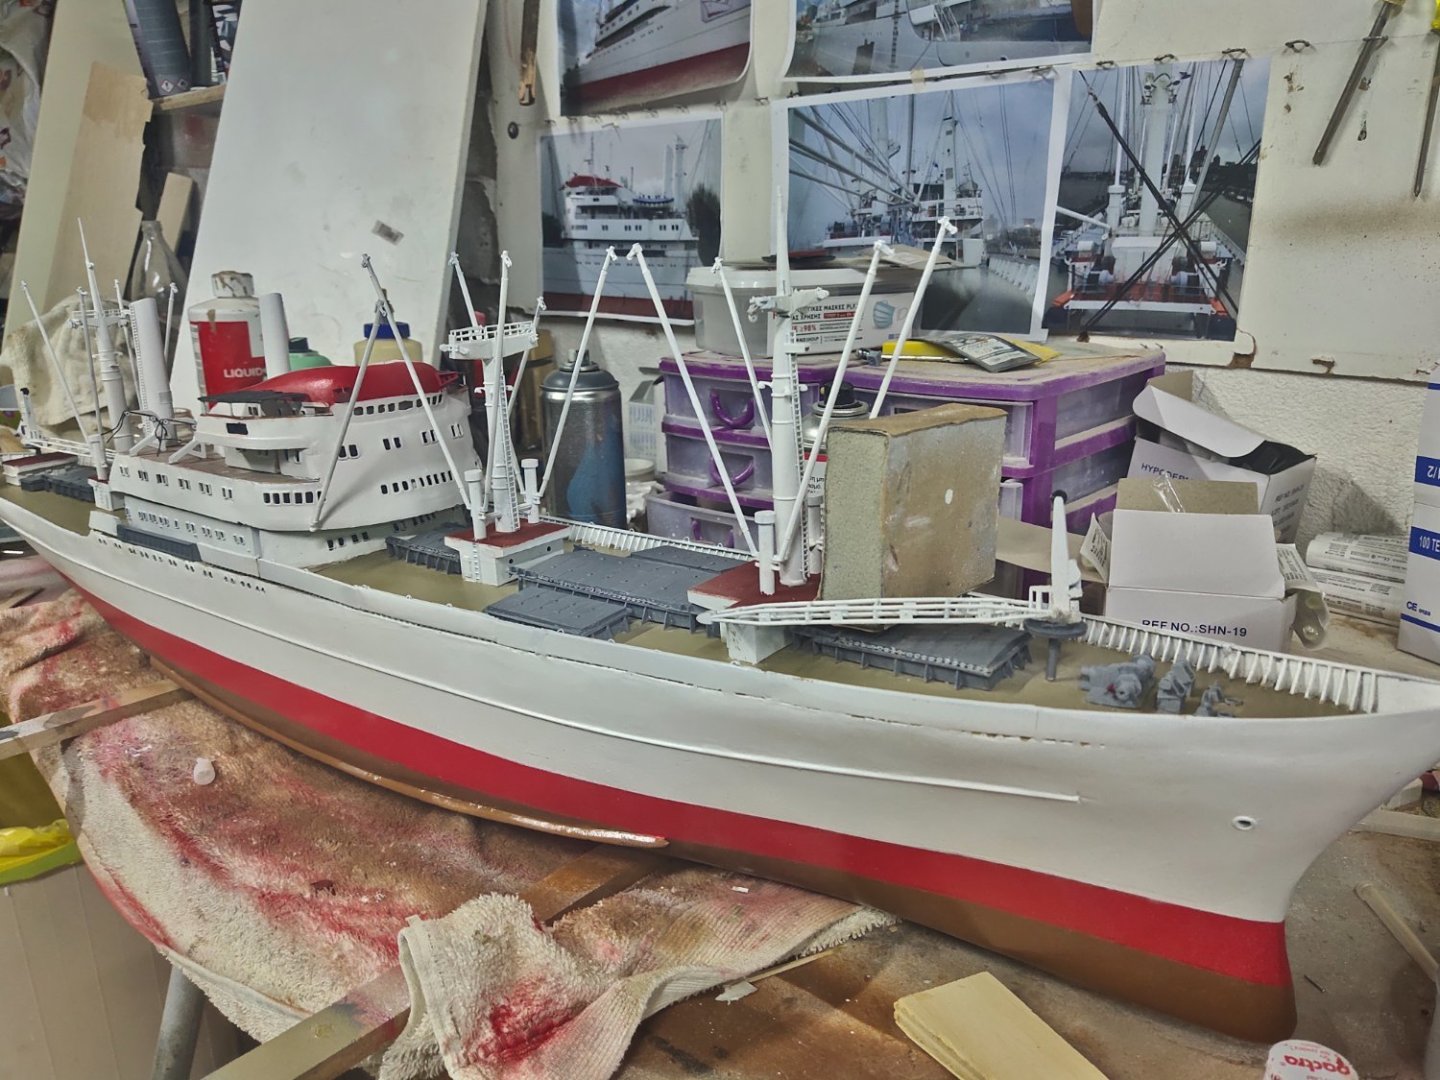
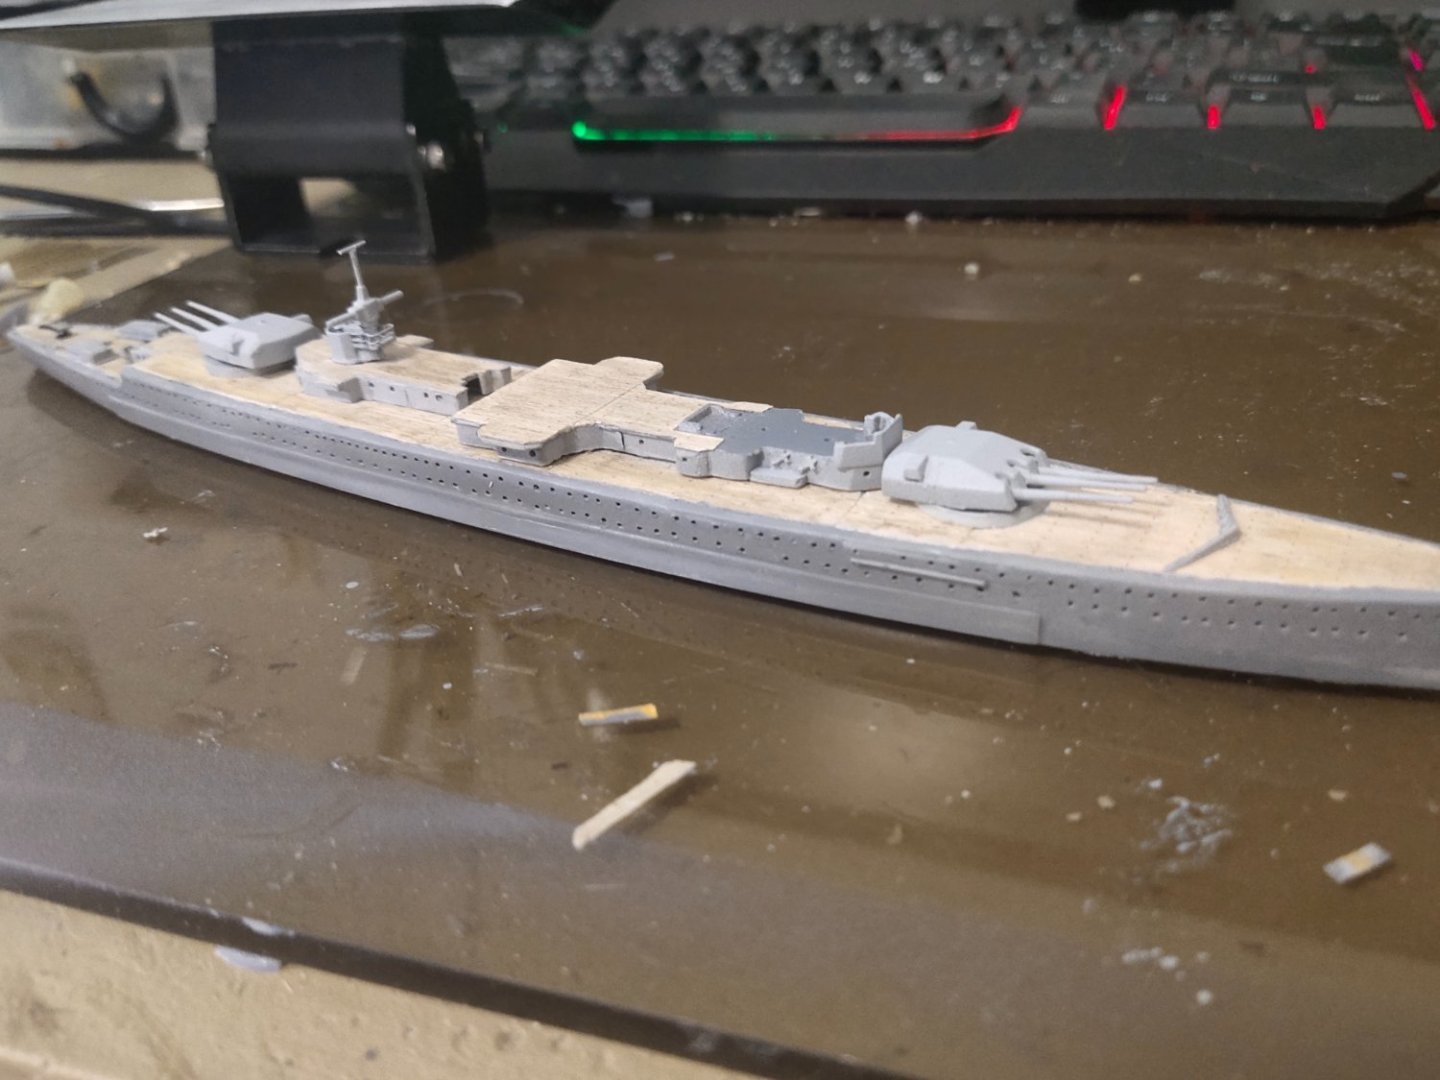
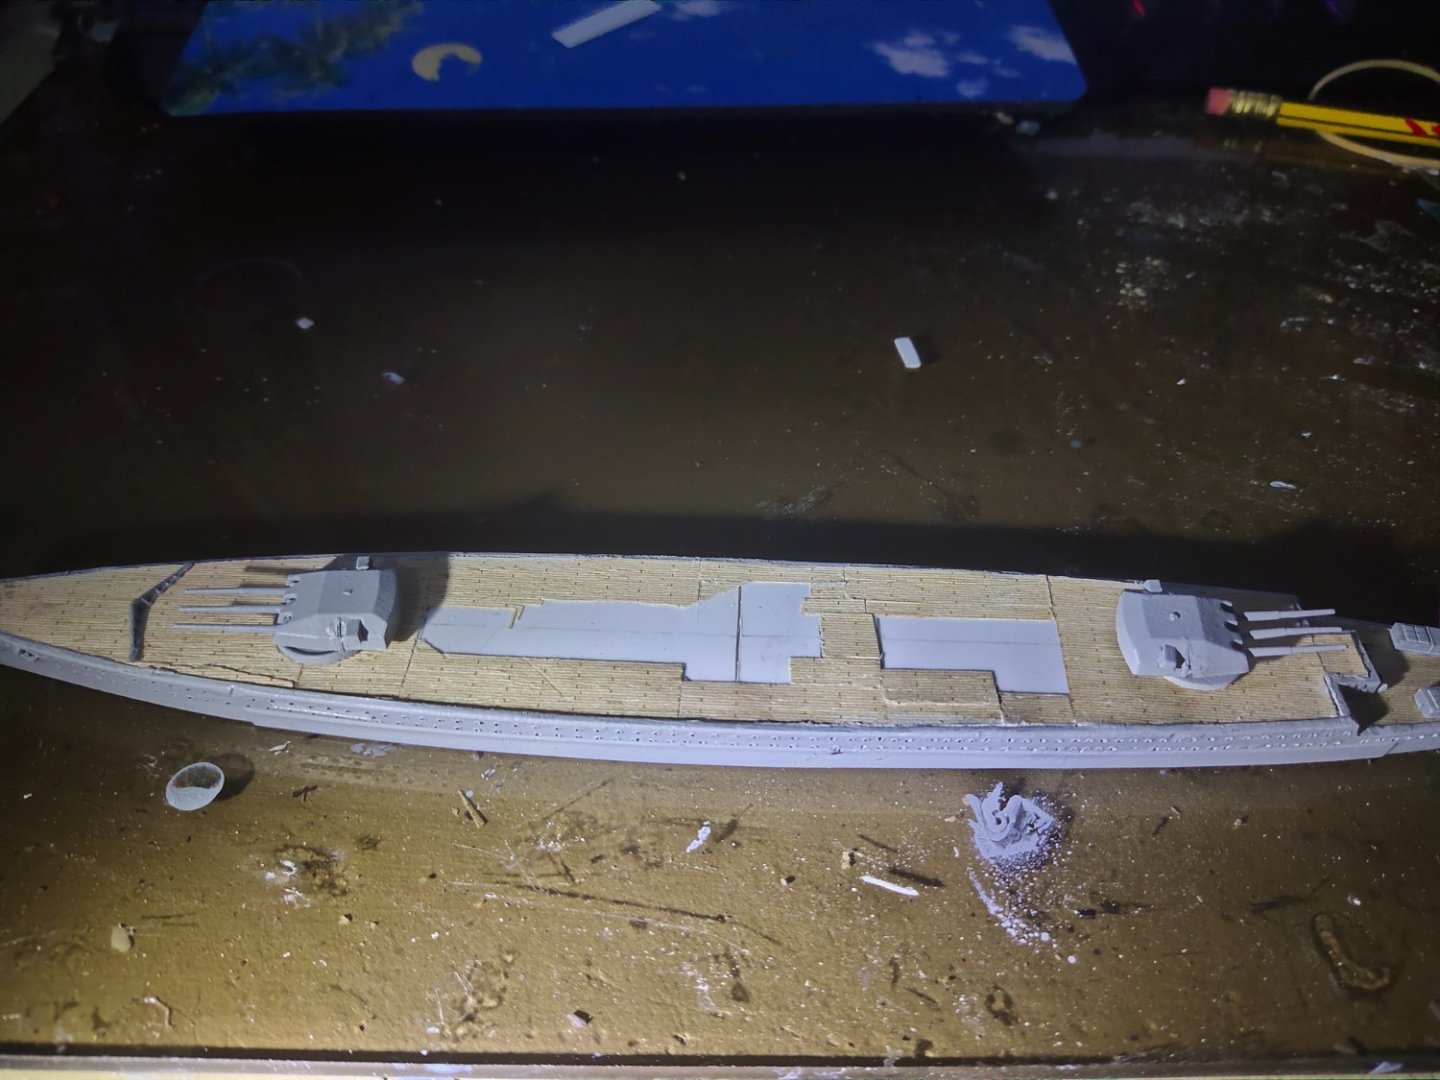
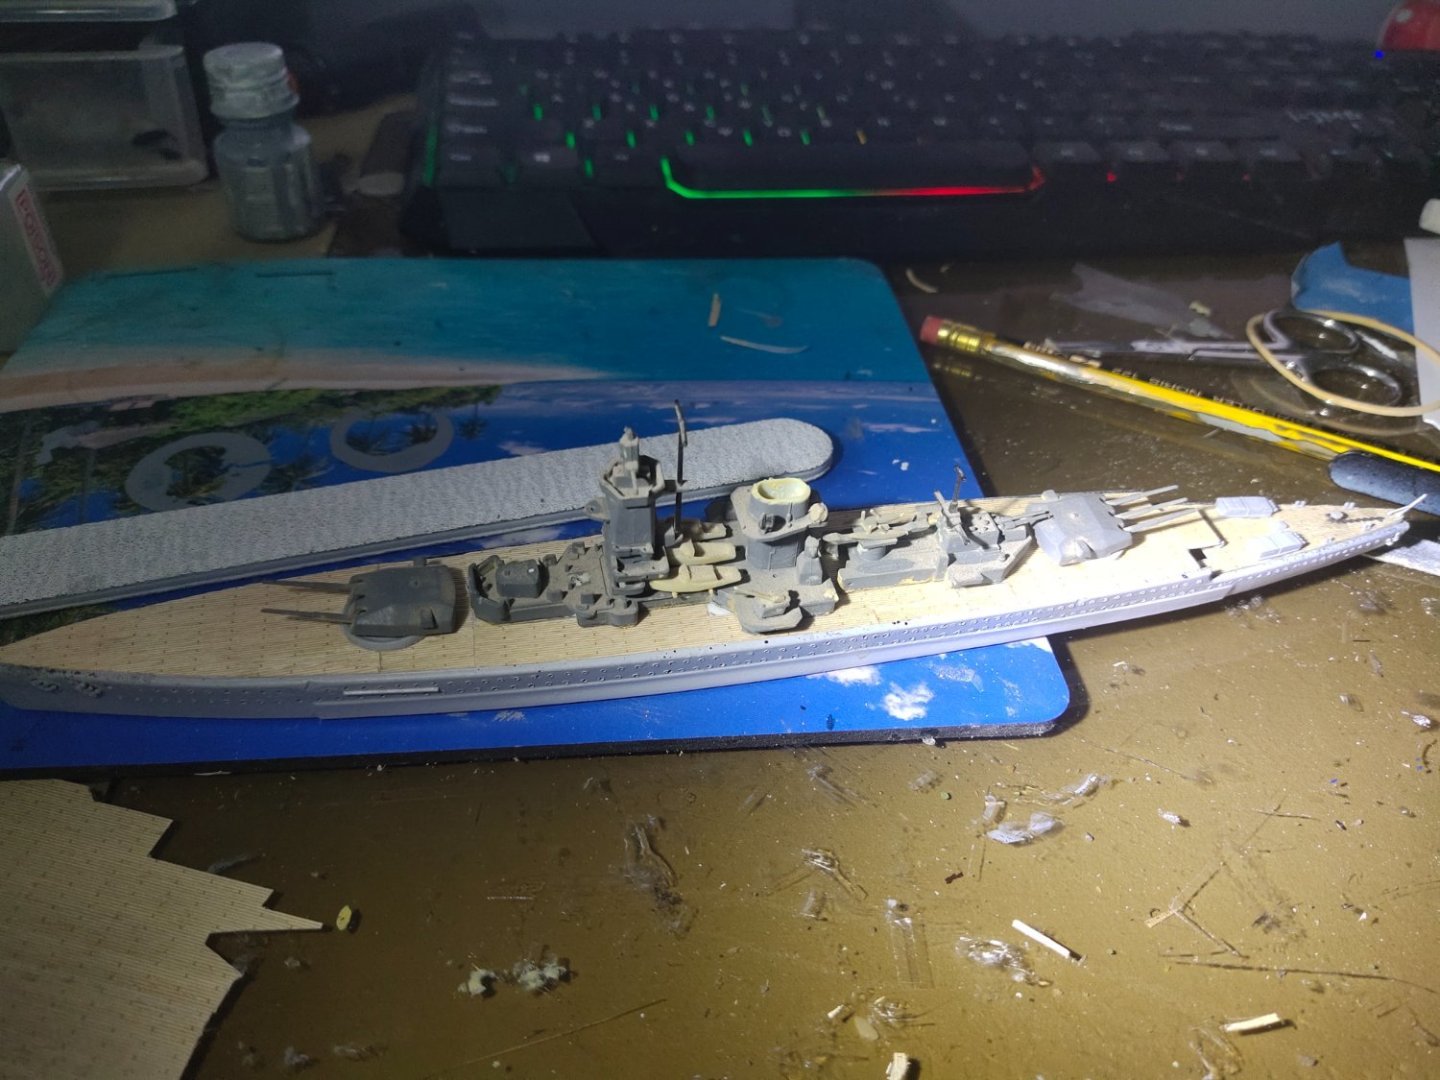
Move on to the front area. Added some side skirts to correct the shape. Paravanes were designed and printed because those on my stash were too big. Portholes, doors and paint. Wooden deck added and glued. I decided to weather the deck. This film however absorbs oil washes too quick, was quite hard to remove excess quantity even with the use of nitro thinner. So I tried to correct it with light tan wash color using dry brush method and careful brush movement. With a new airbrush I have the hull sides a darker grey tone. Some imperfections but will be covered during weathering procedure.


-
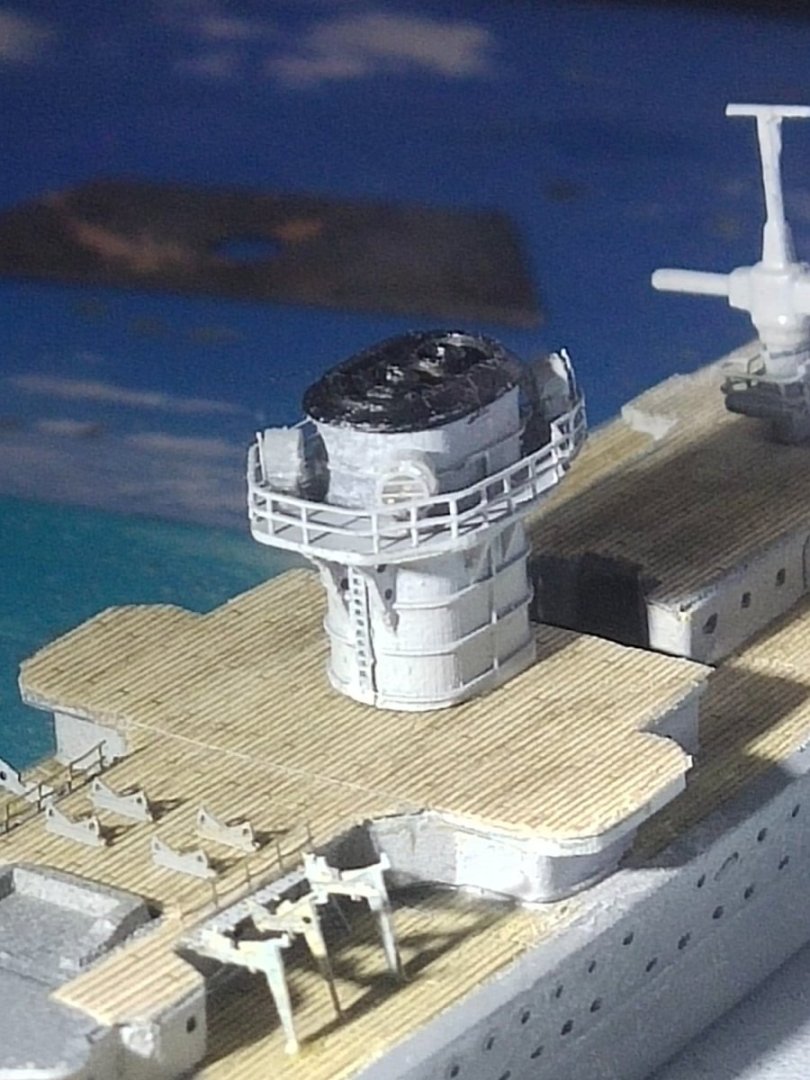
Thank you for the encouraging comments. I worked on the smaller part in the same way. Portholes, doors and wooden deck added. I didnt like the detail of the conning tower. After long confusing research o designed my own along with rails to avoid messy work. The antenna is from the older part. Secondary guns are also test printed

-
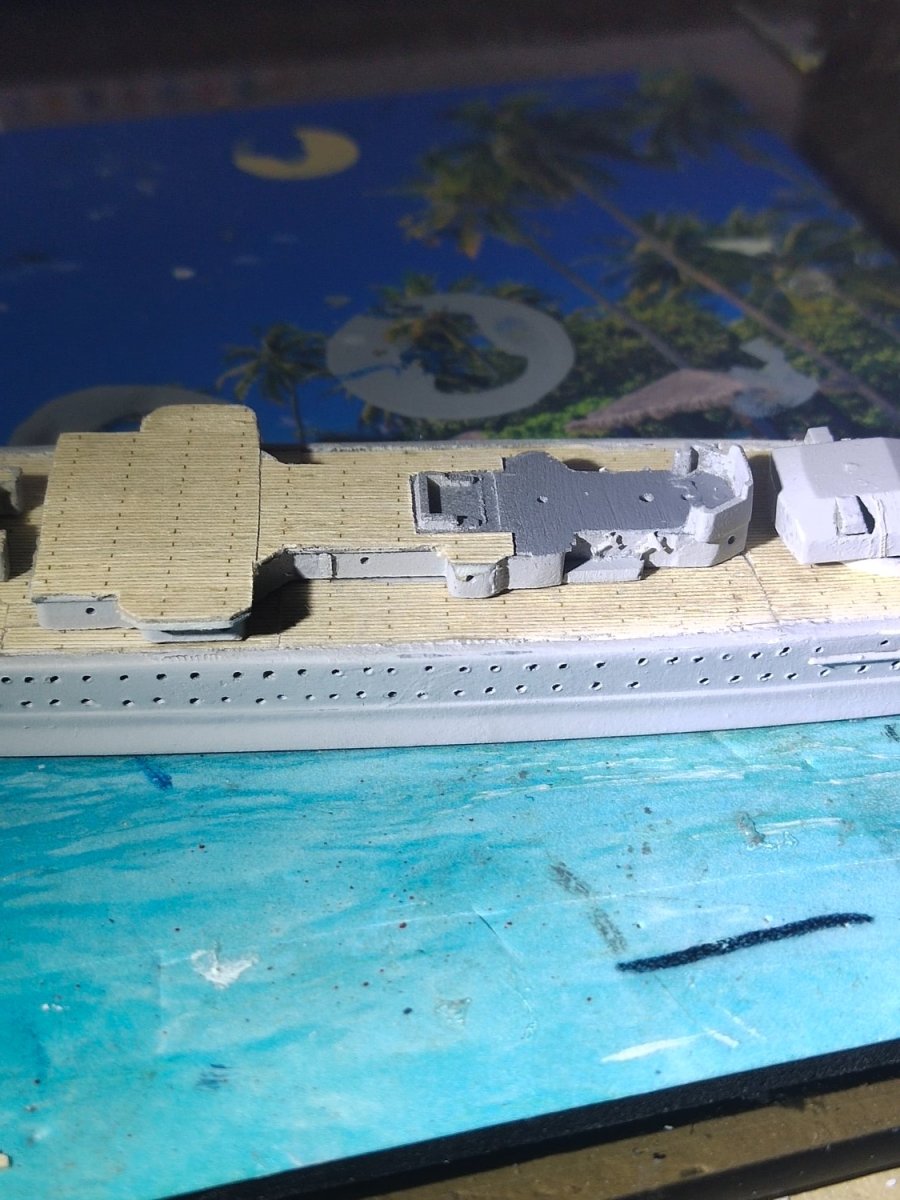
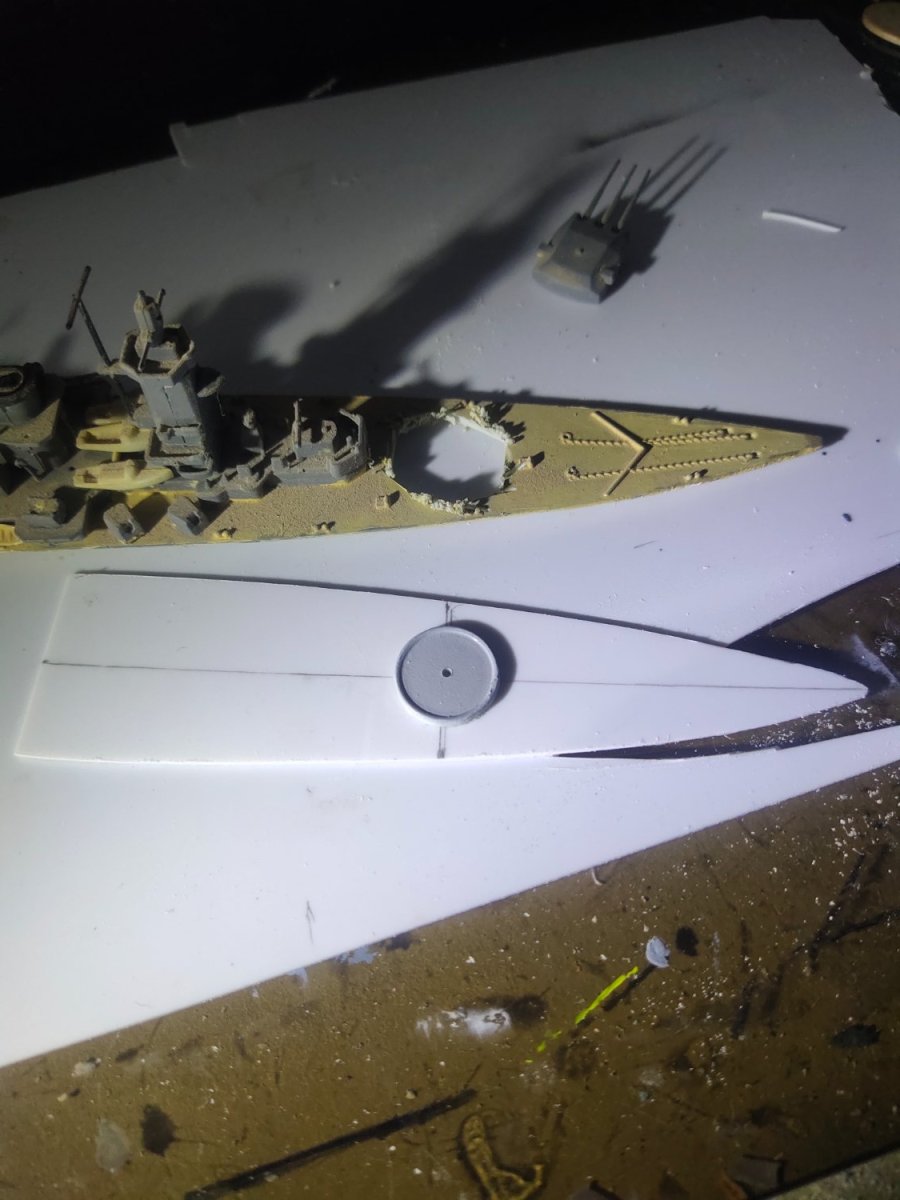
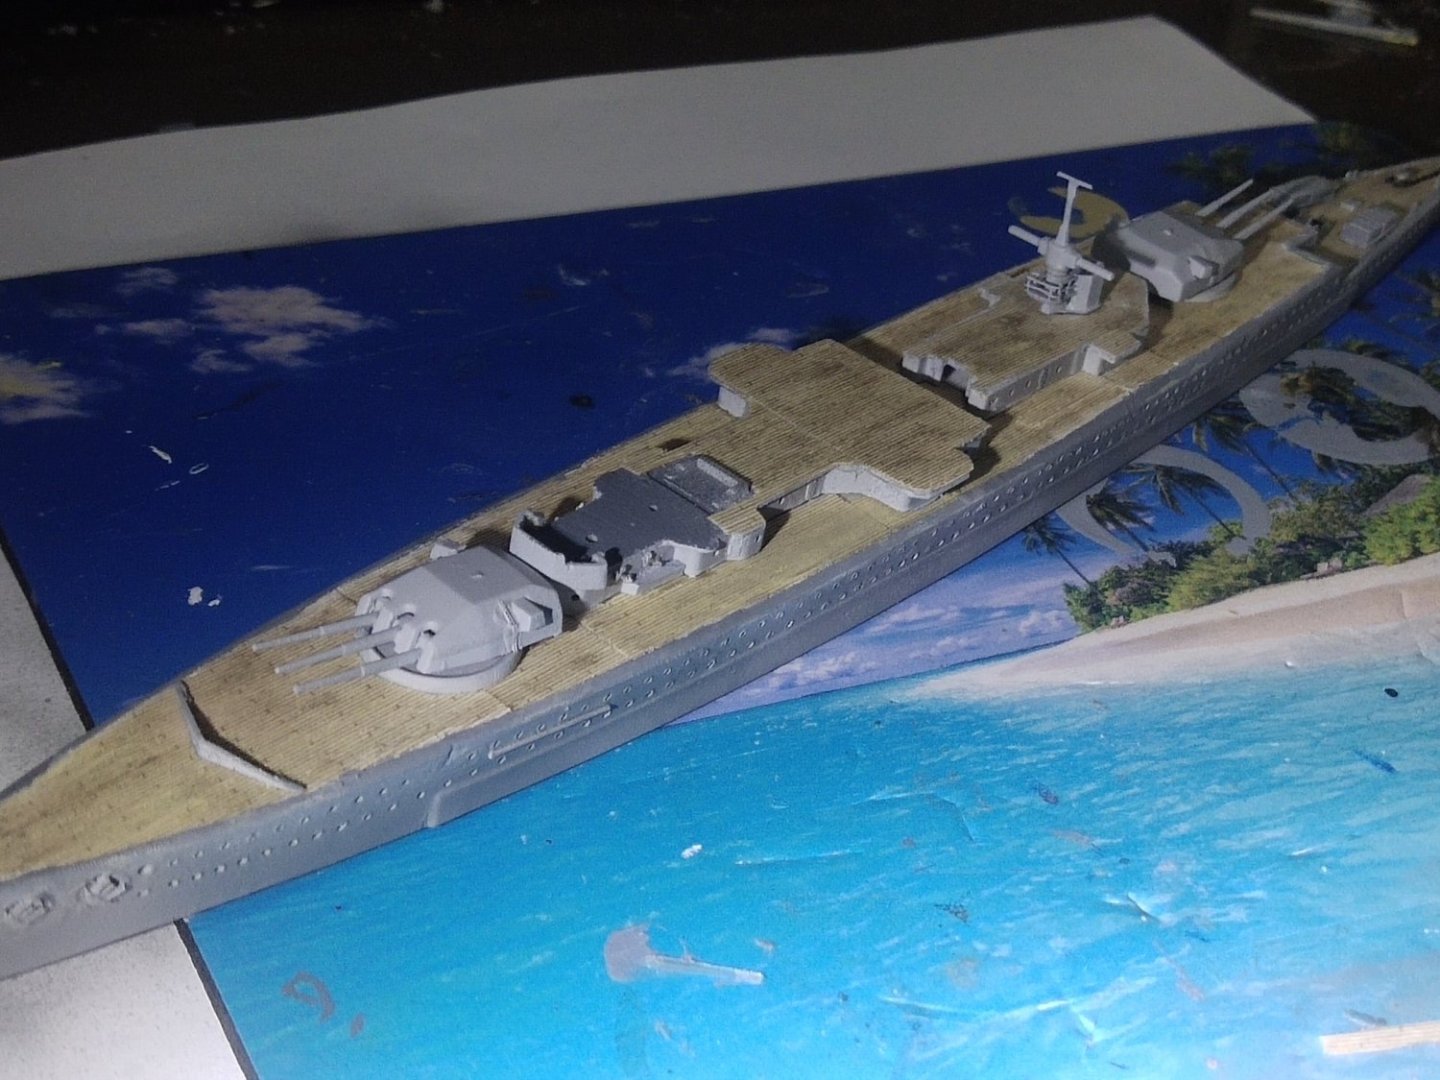
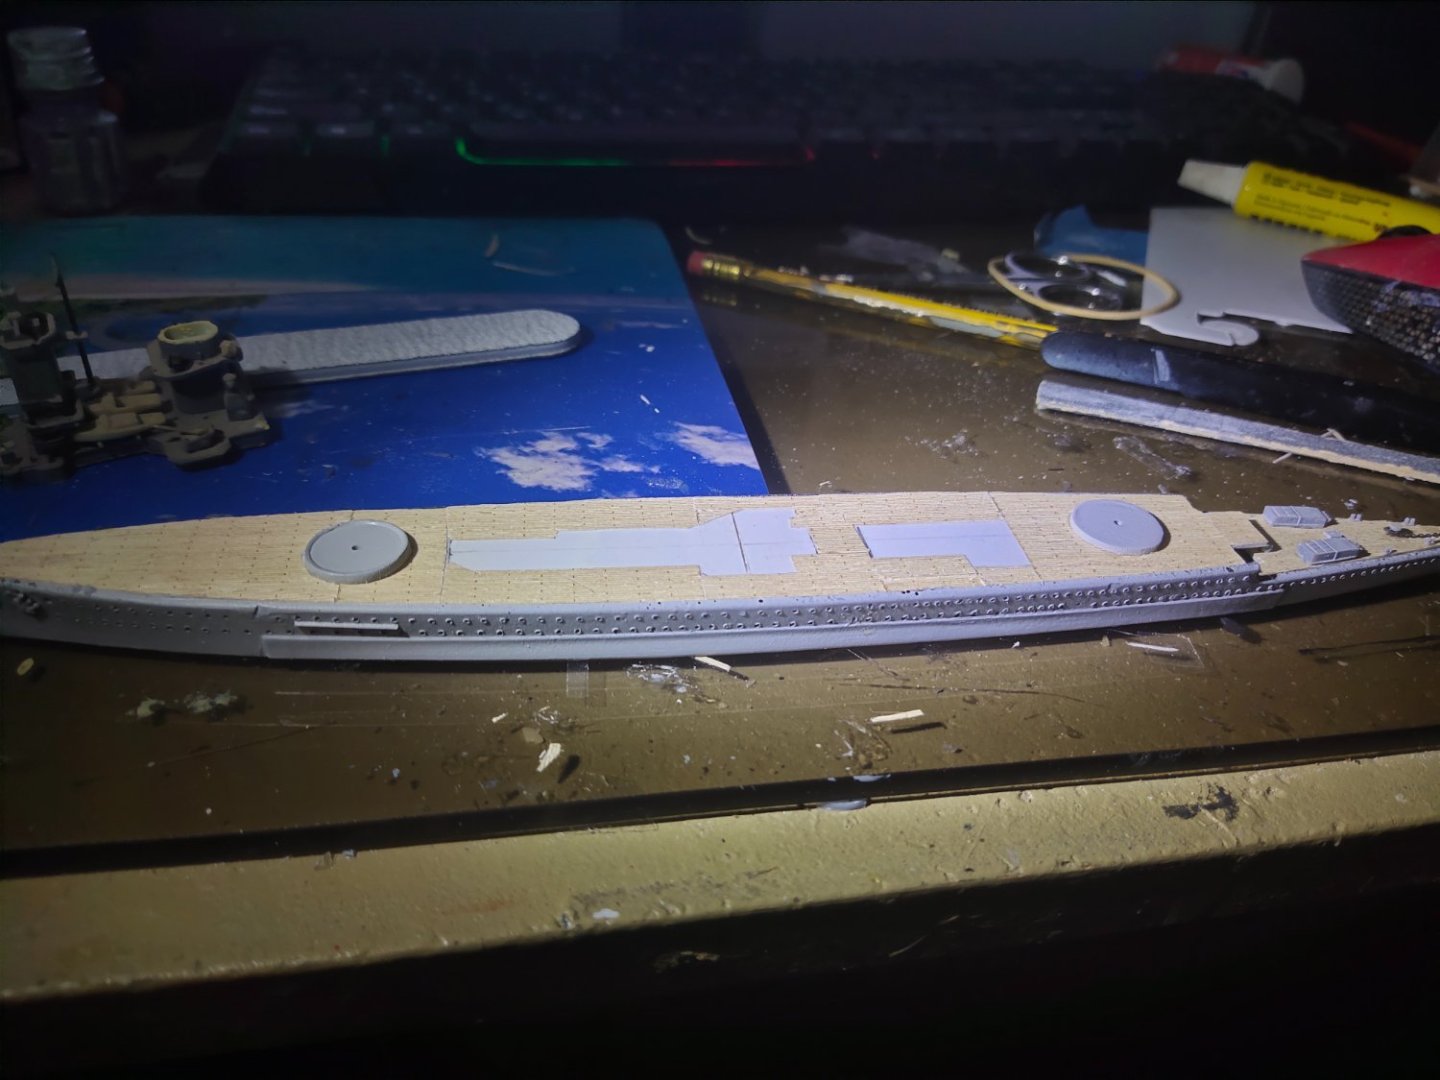
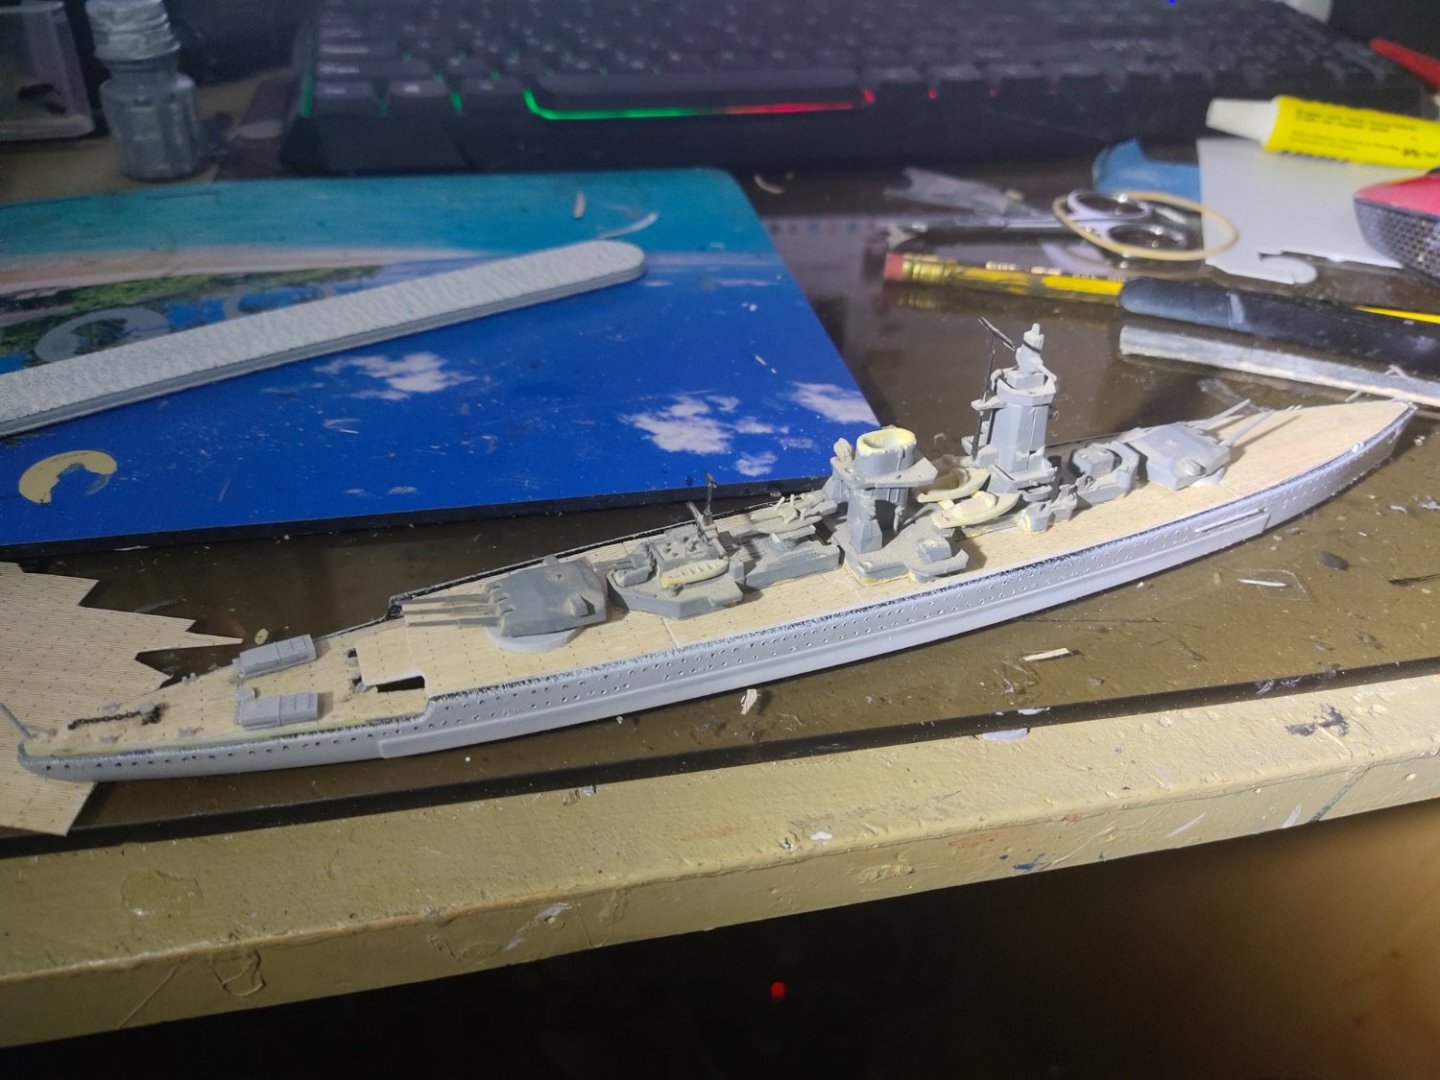
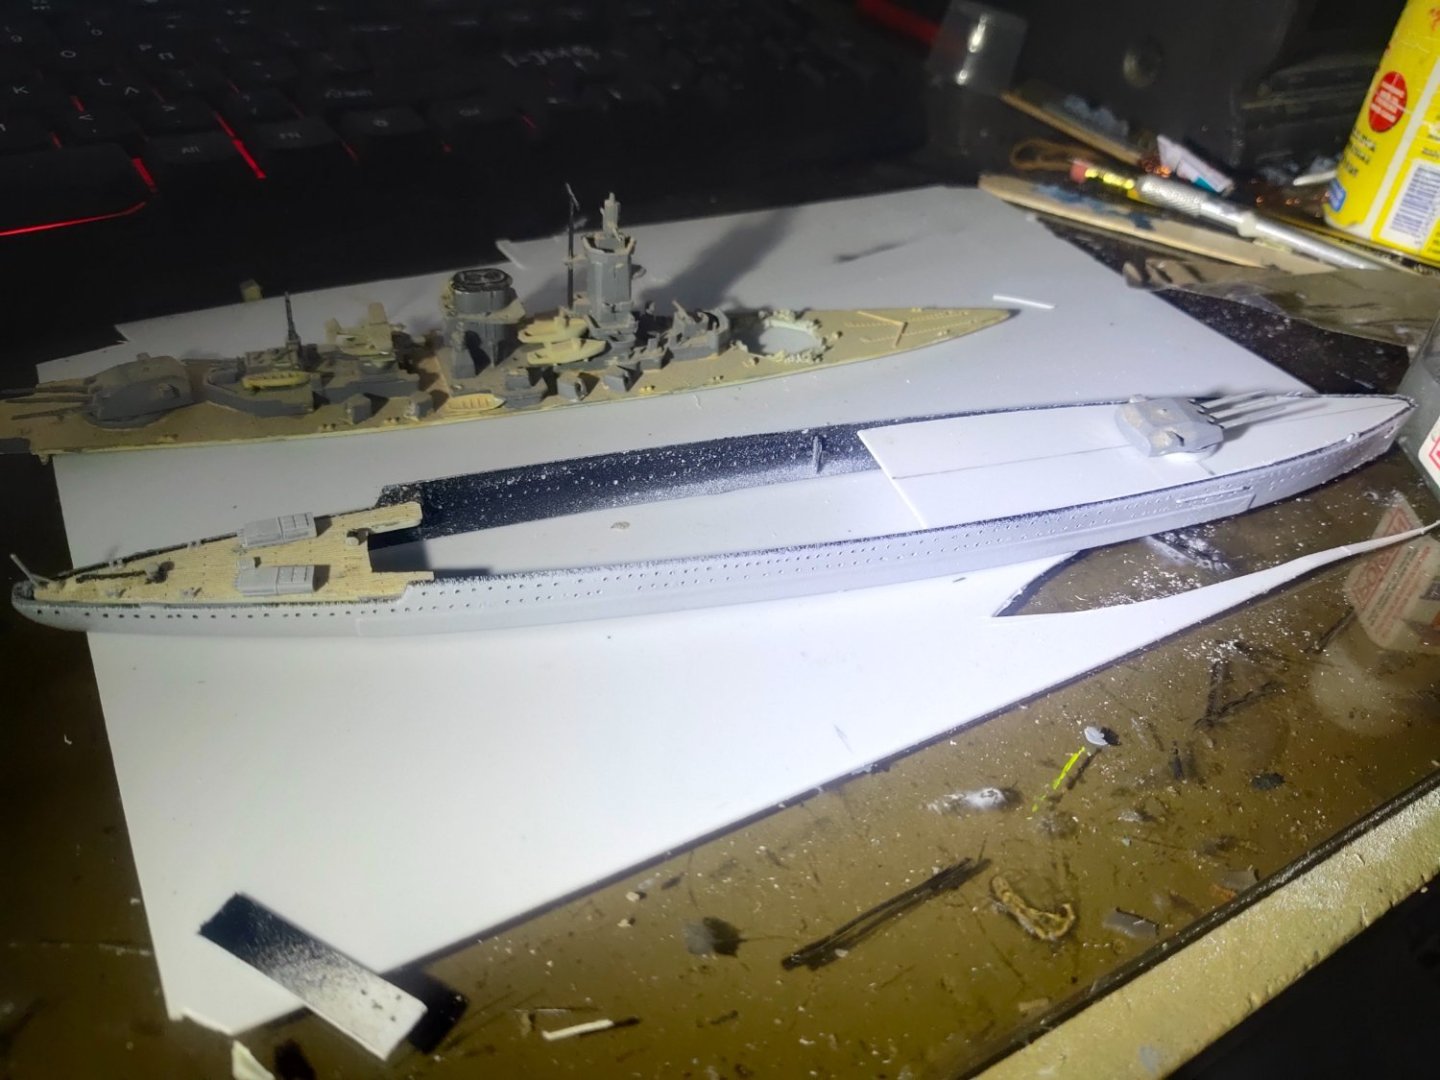
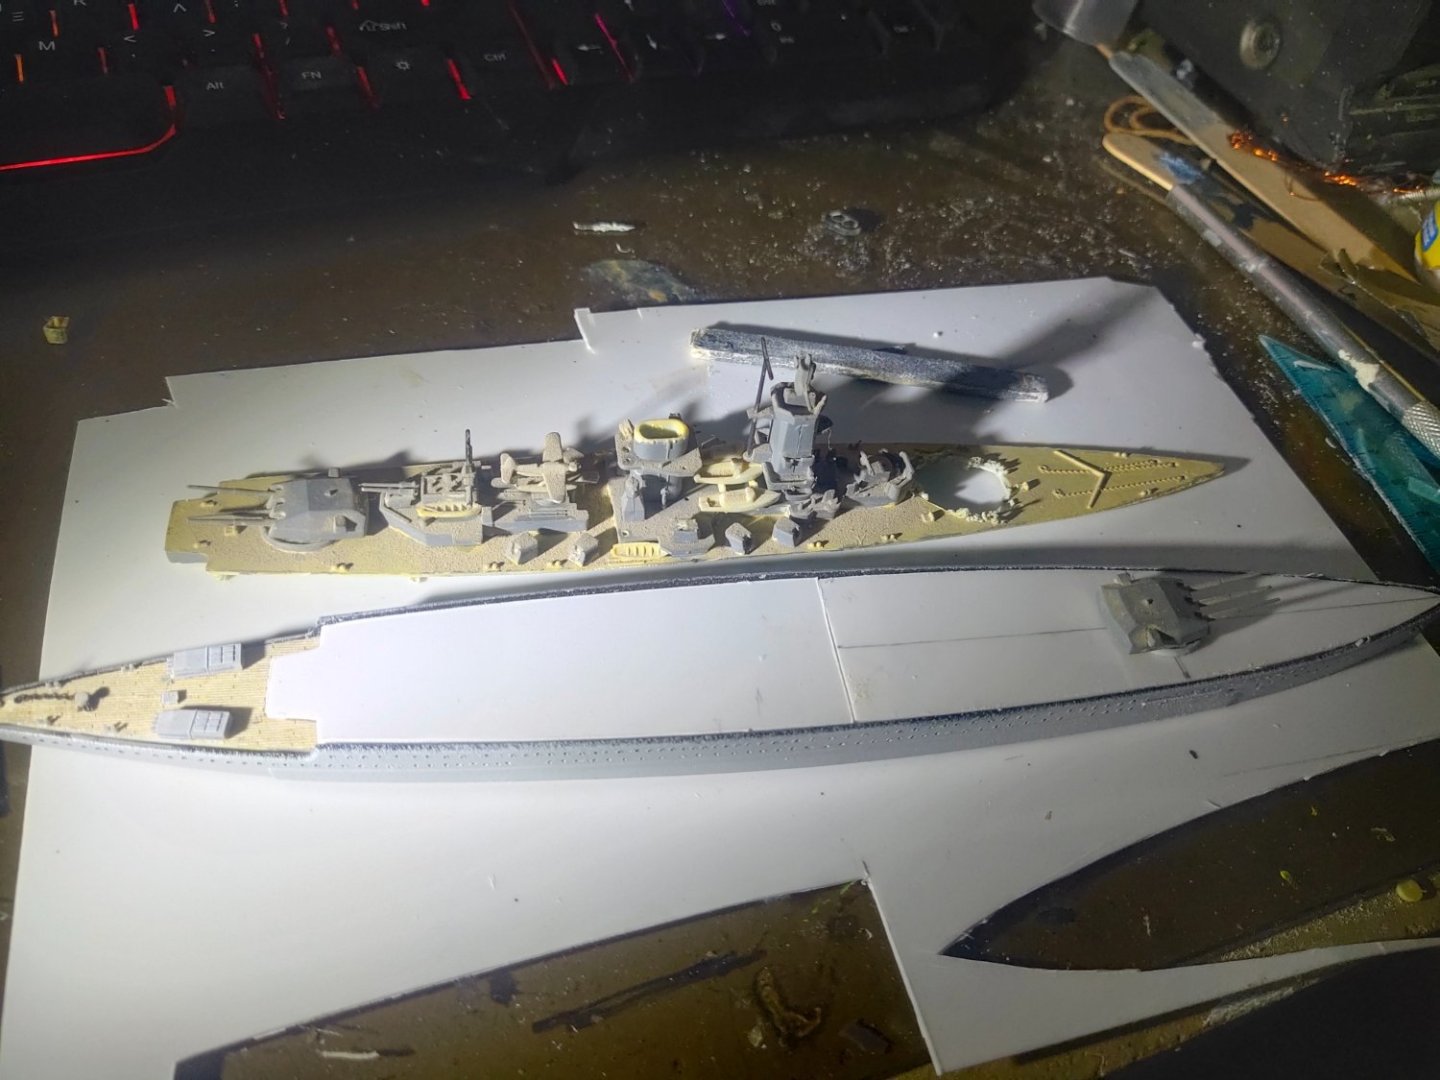
Working on the rear section i printed the housing for the area that quarterdeck meets the main deck. Then I test fitted only to see that there are quite a few issues. People complain about fiitng problems on kits but when comes to scratch built things are more challenging. I made a second piece 1mm lower and manage to fill the gap with a small 0.5 mm thick plastic piece. Some weathering on deck to cover the joining points. Next was to sand and fit the new deck. The two long side hull pieces were miss aligned by 1mm when glued with CA. So I had to apply putty and sand both at the bow and stern until they would join properly. Work on quarterdeck is done only rails left to be added. Main guns glued, i only put some tiny rails on rear sides. Overall a not easy job to match together these old parts


-
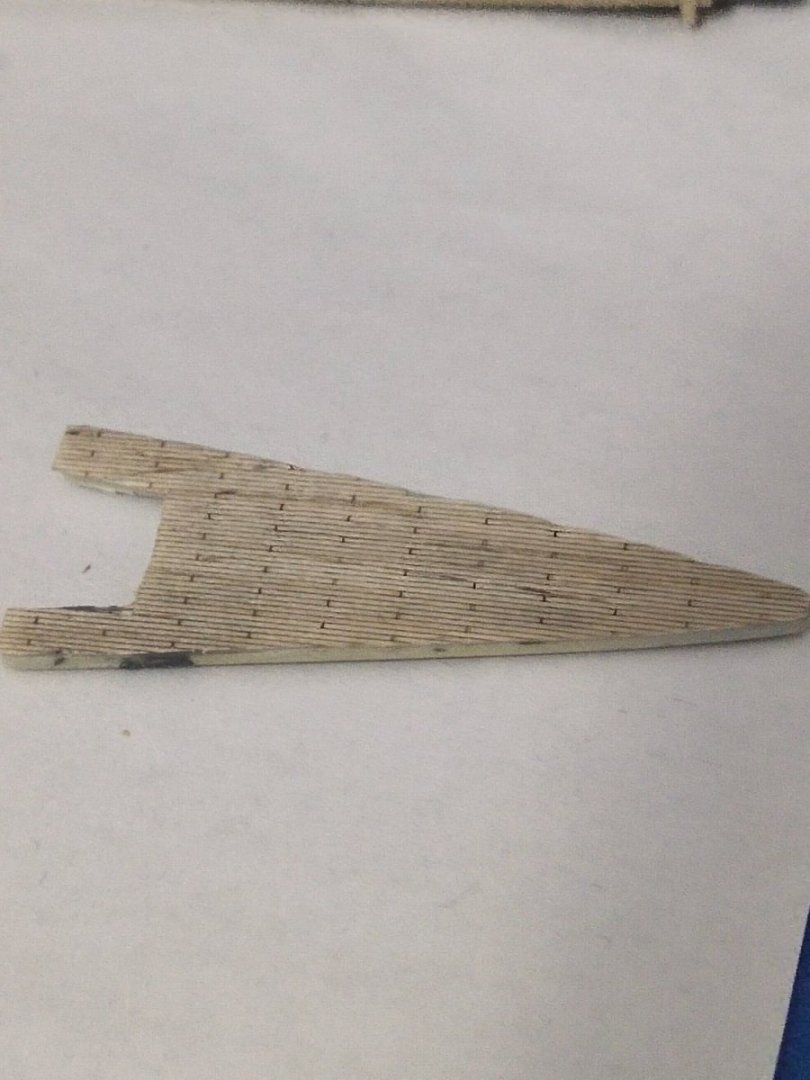
Thanx Working on small pieces was tricky especially while trying to remove the rear film before gluing. But it worthed the effort. You can see the part on the original form and how looked after the wood treatment upside down

-
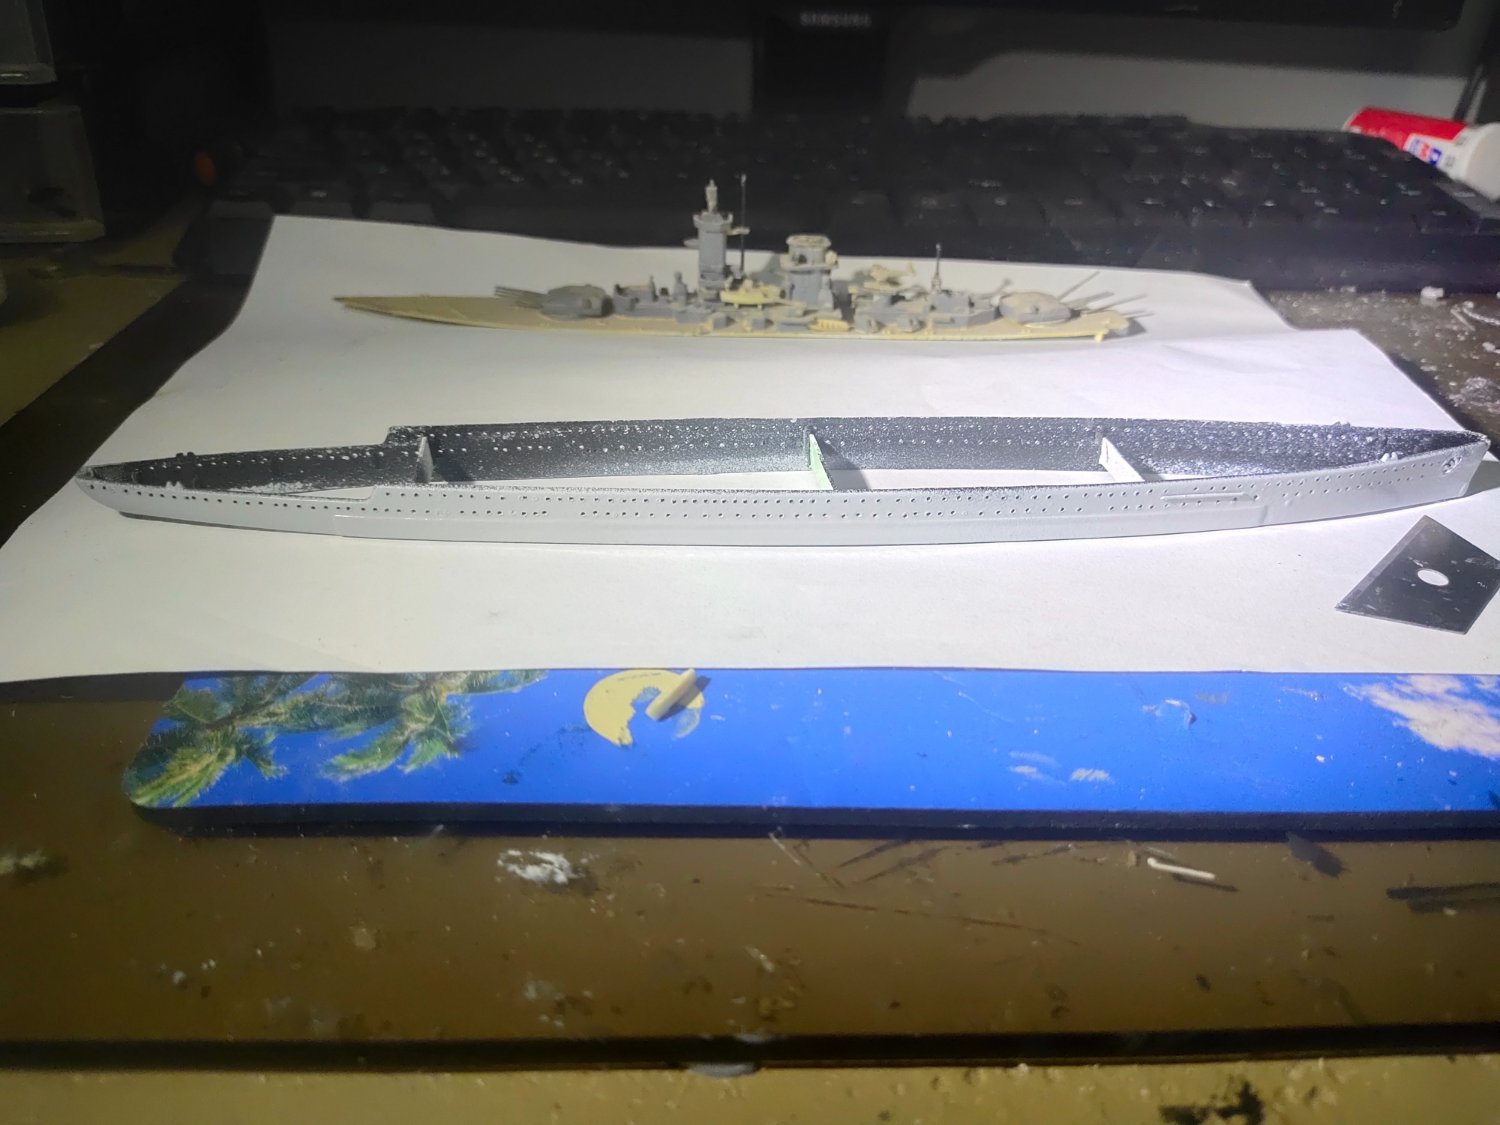
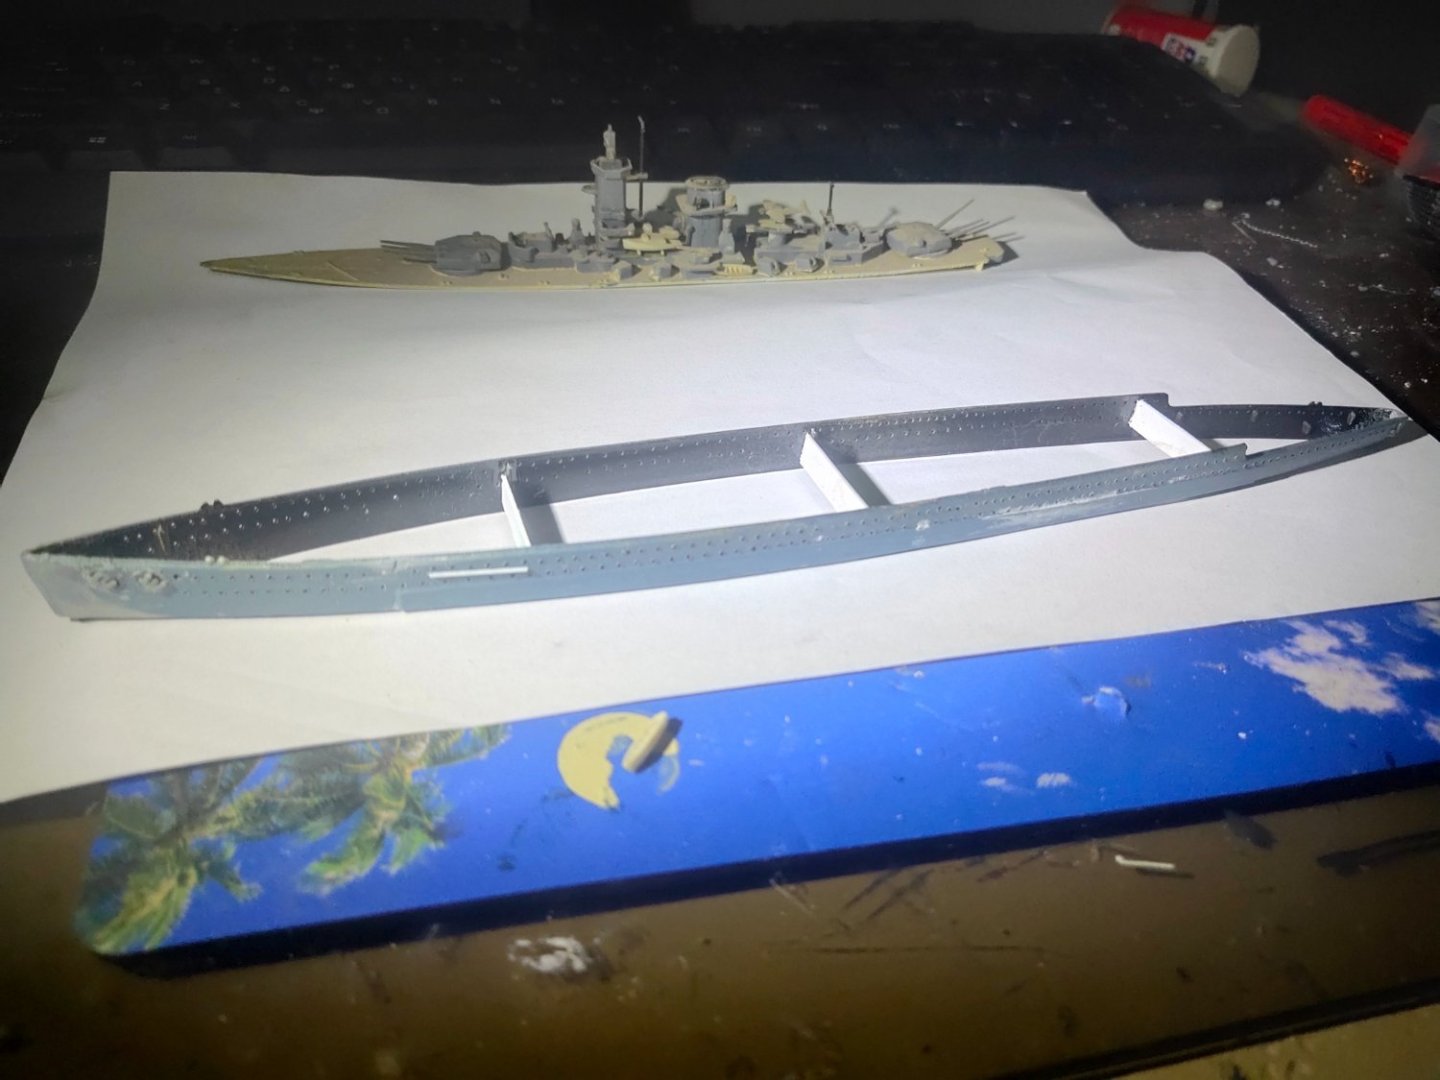
Deck day today. I covered it with wood sticker and test fitted the old parts to see If there are any gaps..
-
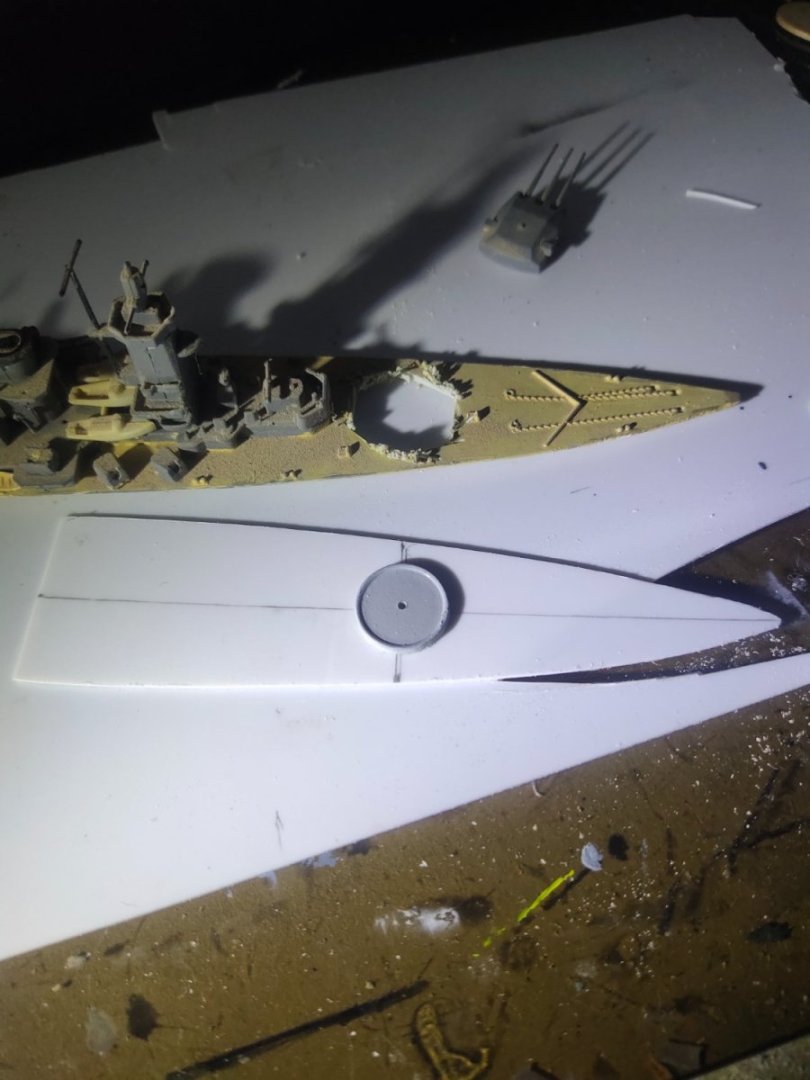
Next I start work on the quarter deck only to find out that it was glued upside down 30 years ago. I removed the torpedo tubes and layered a wood sticker. New 3d printed torpedo tubed added and some other details like bollards. I realized that the easiest way to cover wood film on the main deck is to scratch build a new one and to add after the application the main pieces along with the smaller ones like anchor chain, bollards etc. Then I will work my way upwards to the bridge and masts

-
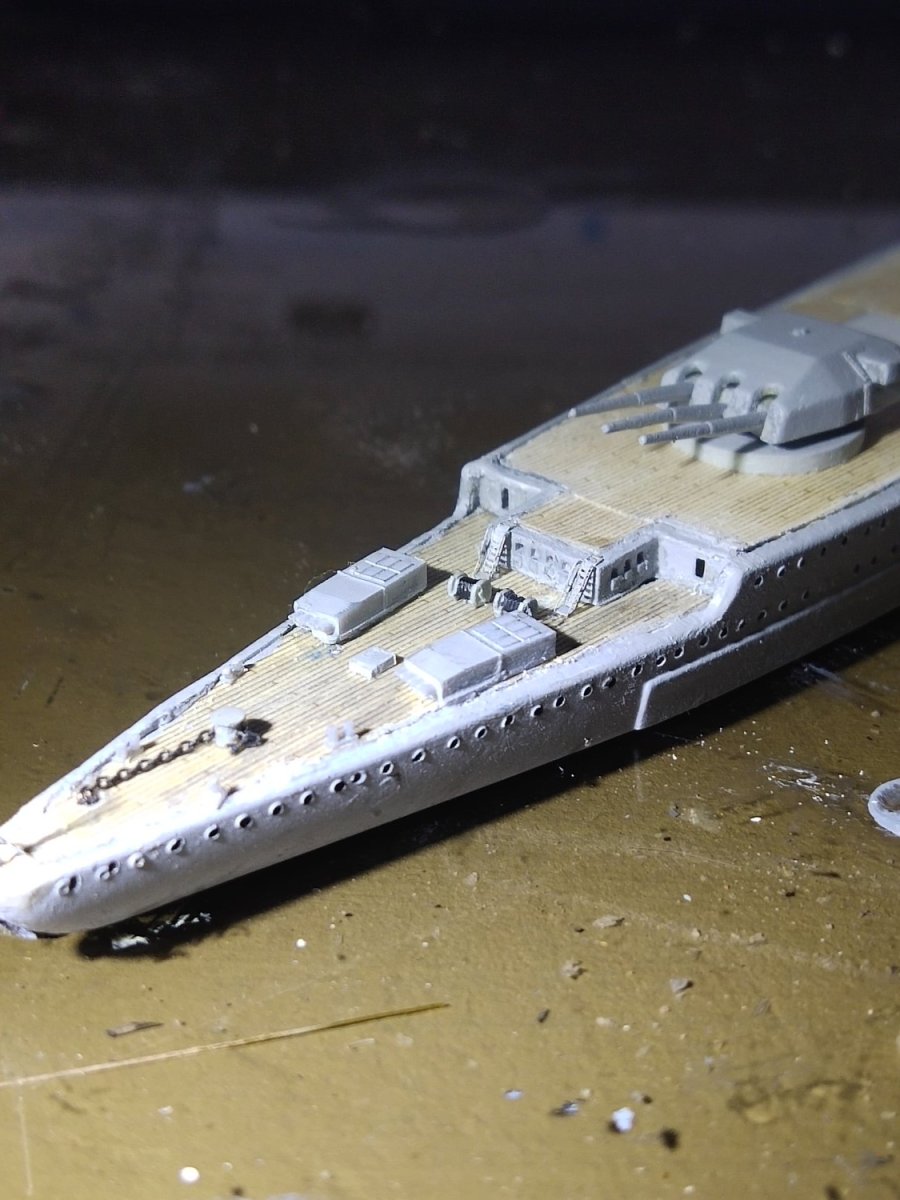
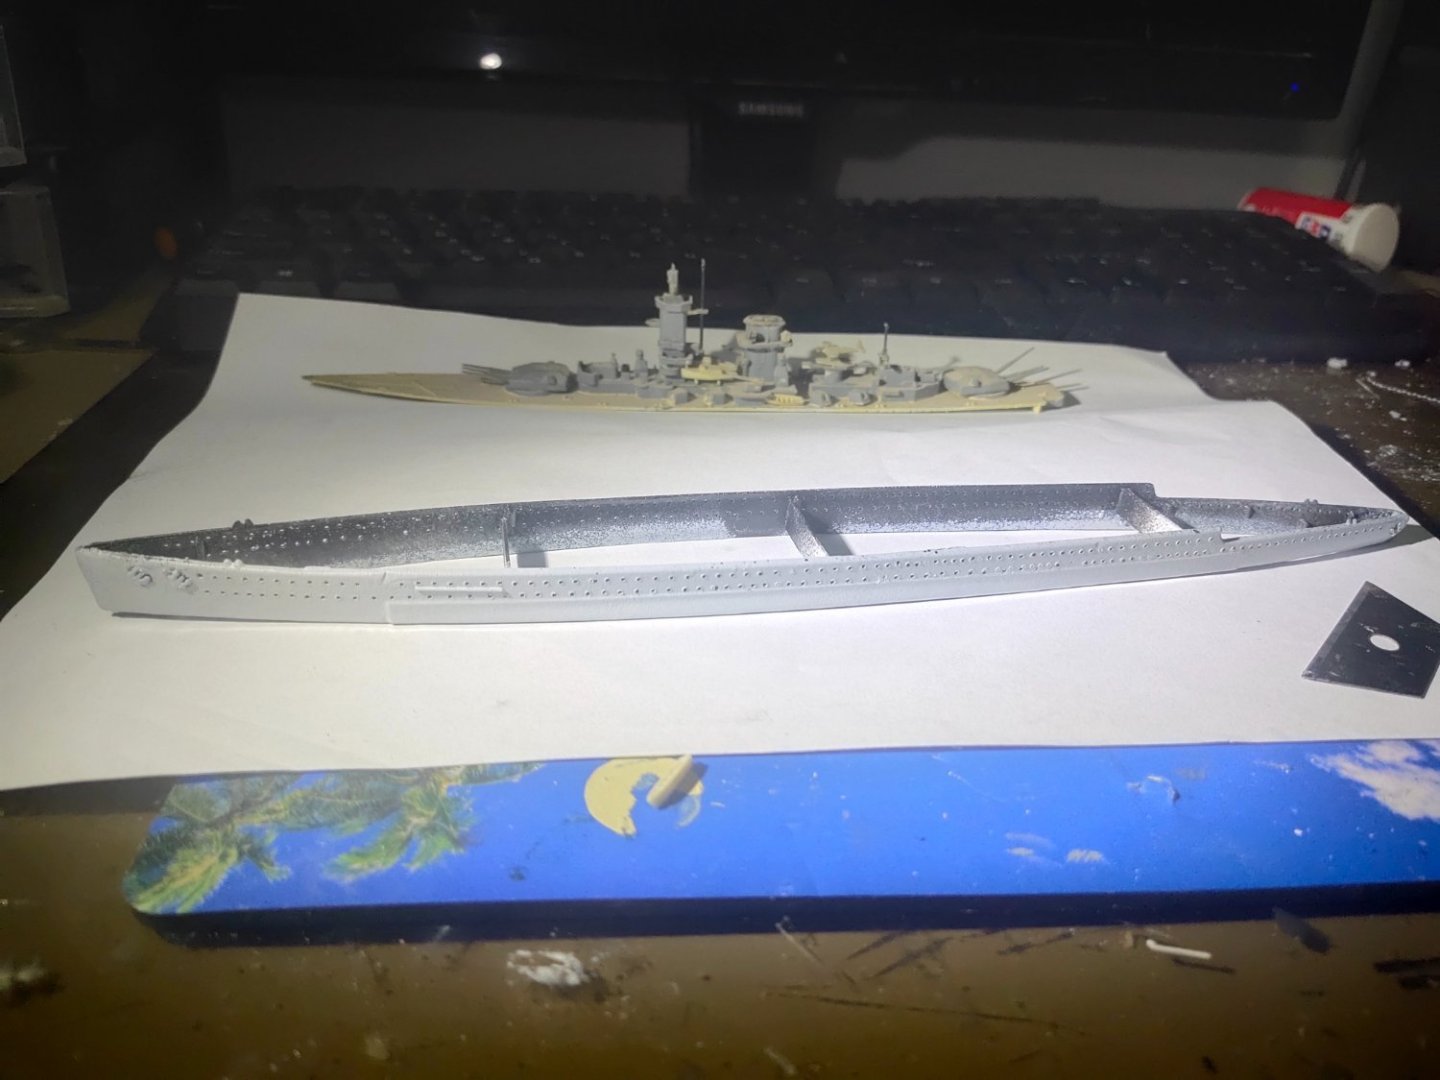
First job was to drill the portholes. Though they were premarked it was a tricky process and few were misaligned so i filled them with putty instead. To make the tiny holes more visible I sprayed the inside with black, thus creating a contrast. New anchors installed and the embled in front of them was deleted as it will be replaced by decal. Finally as I don't have a bottom, support frames added to increase the gluing strength. These plastics are quite old they are as flexible as potato chips. Finishing with grey color

-
Next. Admiral Graf Spee from Matchbox. I'm not fan of German ships but I got a PE set for a dollar so I decided to give it a shot

-
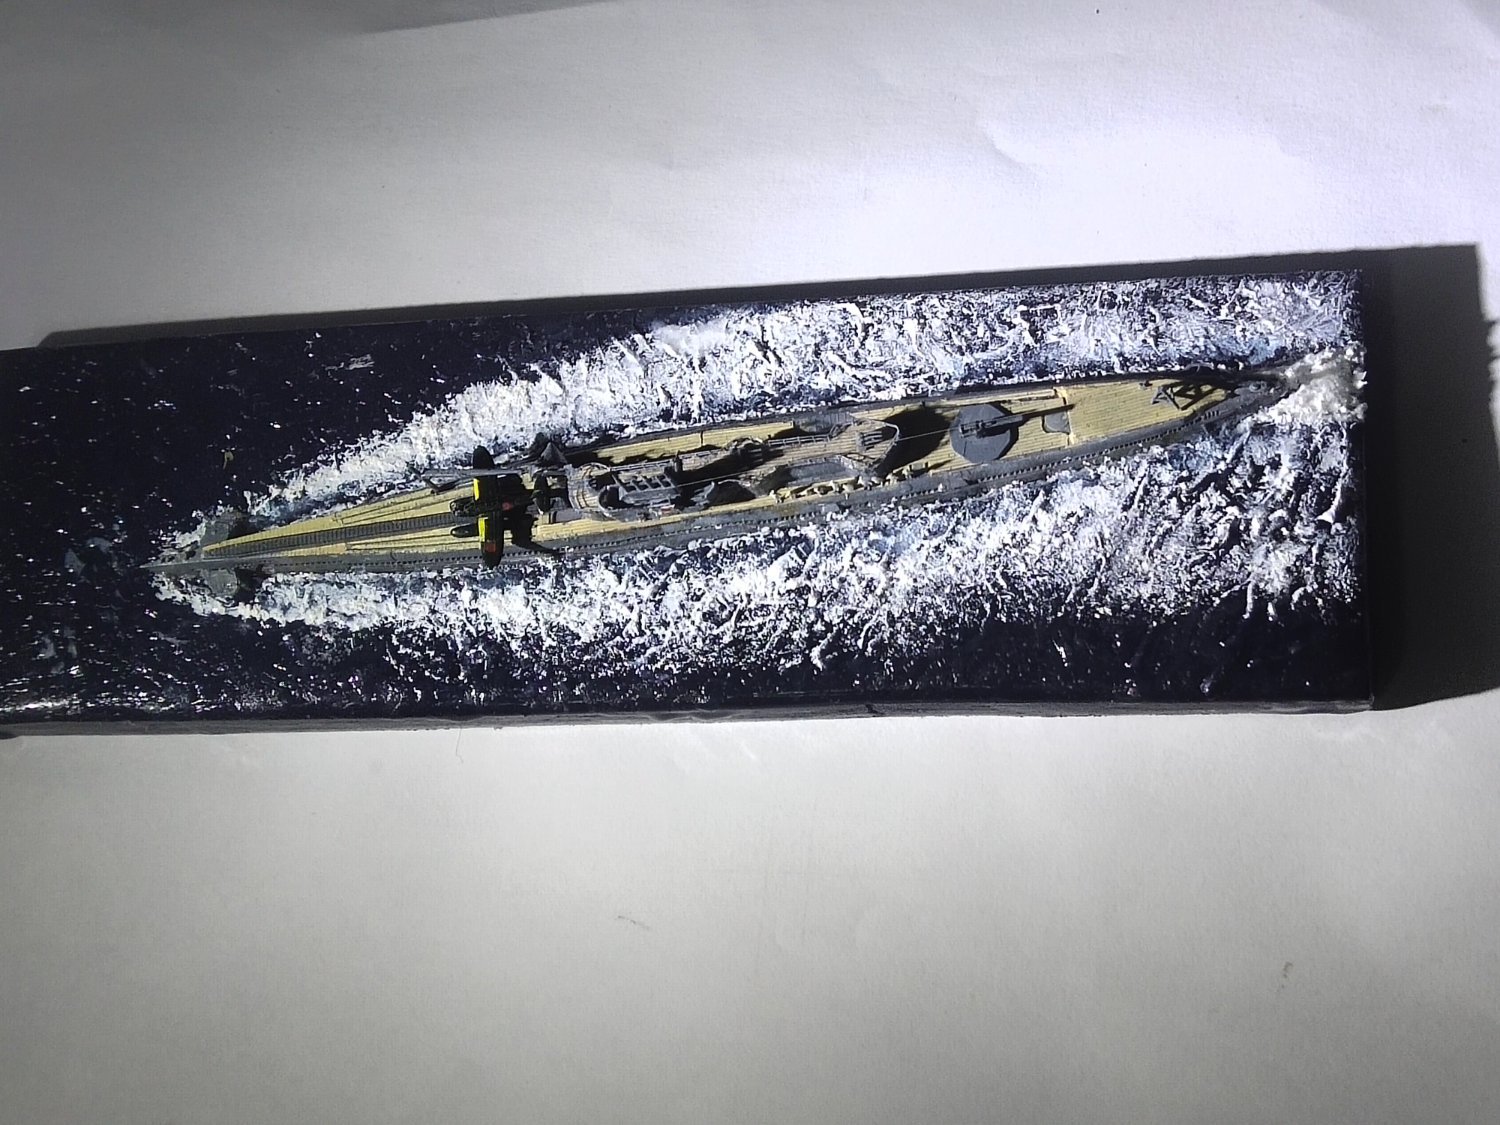
I applied the water splash effect gel and have it 48 hours to dry. Not all of it became transparent, maybe for the thicker areas more time is needed, the weather is humid also. Next I formed the waves by adding snow paste like previous time. A bit of glitter on the white foamy areas to give a bit shiny effect and its over


-
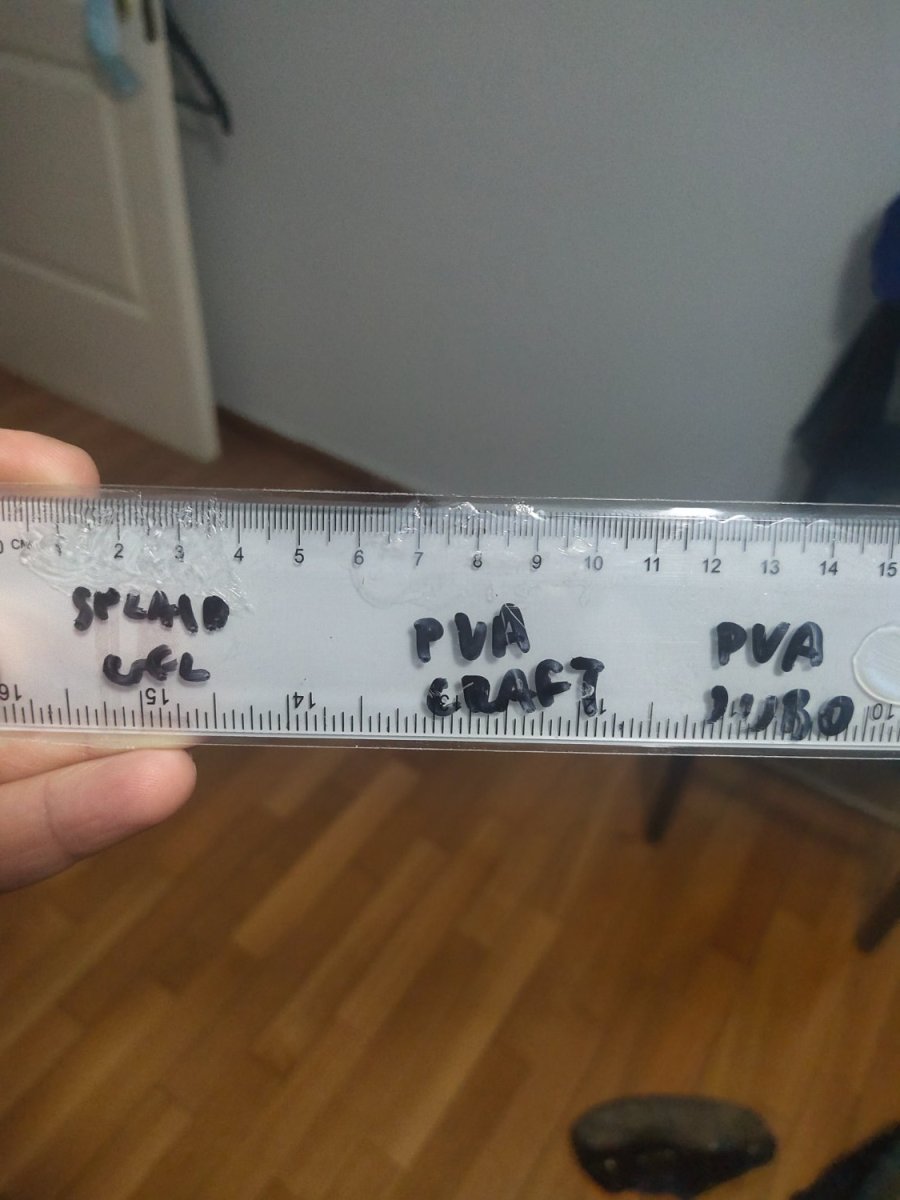
What's the point of using crystal clear resin if the material above its not transparent enough? I did some test with materials on hand. Over a nylon ruler case I layered the materials and tried to see how the clear the numbers look underneath Splash effect on the left, PVA and cheap PVA on the right Water splash and cheap PVA gave the clearest effect. Heavy gel on the other wasn't that clear. While trying to configure the materials used, I simply sealed the hull with acrylic putty


-
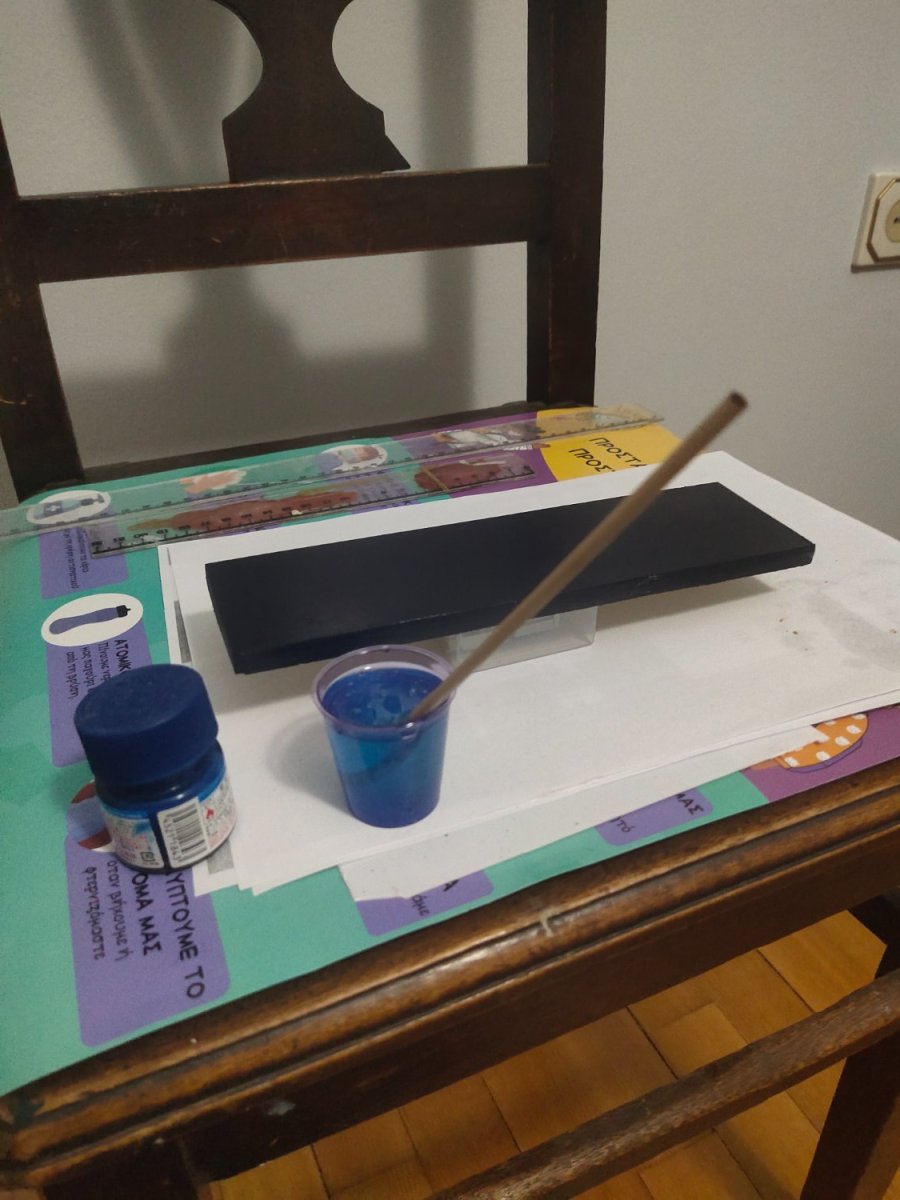
Resin preparation. Surface leleved and raised. Underneath some paper to avoid spill accidents. Resin preparation in accurate proportions. A bit of Tamiya clear blue paint is added. This will add depth to the resin without loosing transparency. On thin layers like this however won't play significant role, mostly on thicker resin layers. After pourung the mixture the model was placed. Some material was displaced. Ancient physics. I Checked for air bubbles and placed a fiberglass cover. Will rest over night this is a normal drying time, material

-
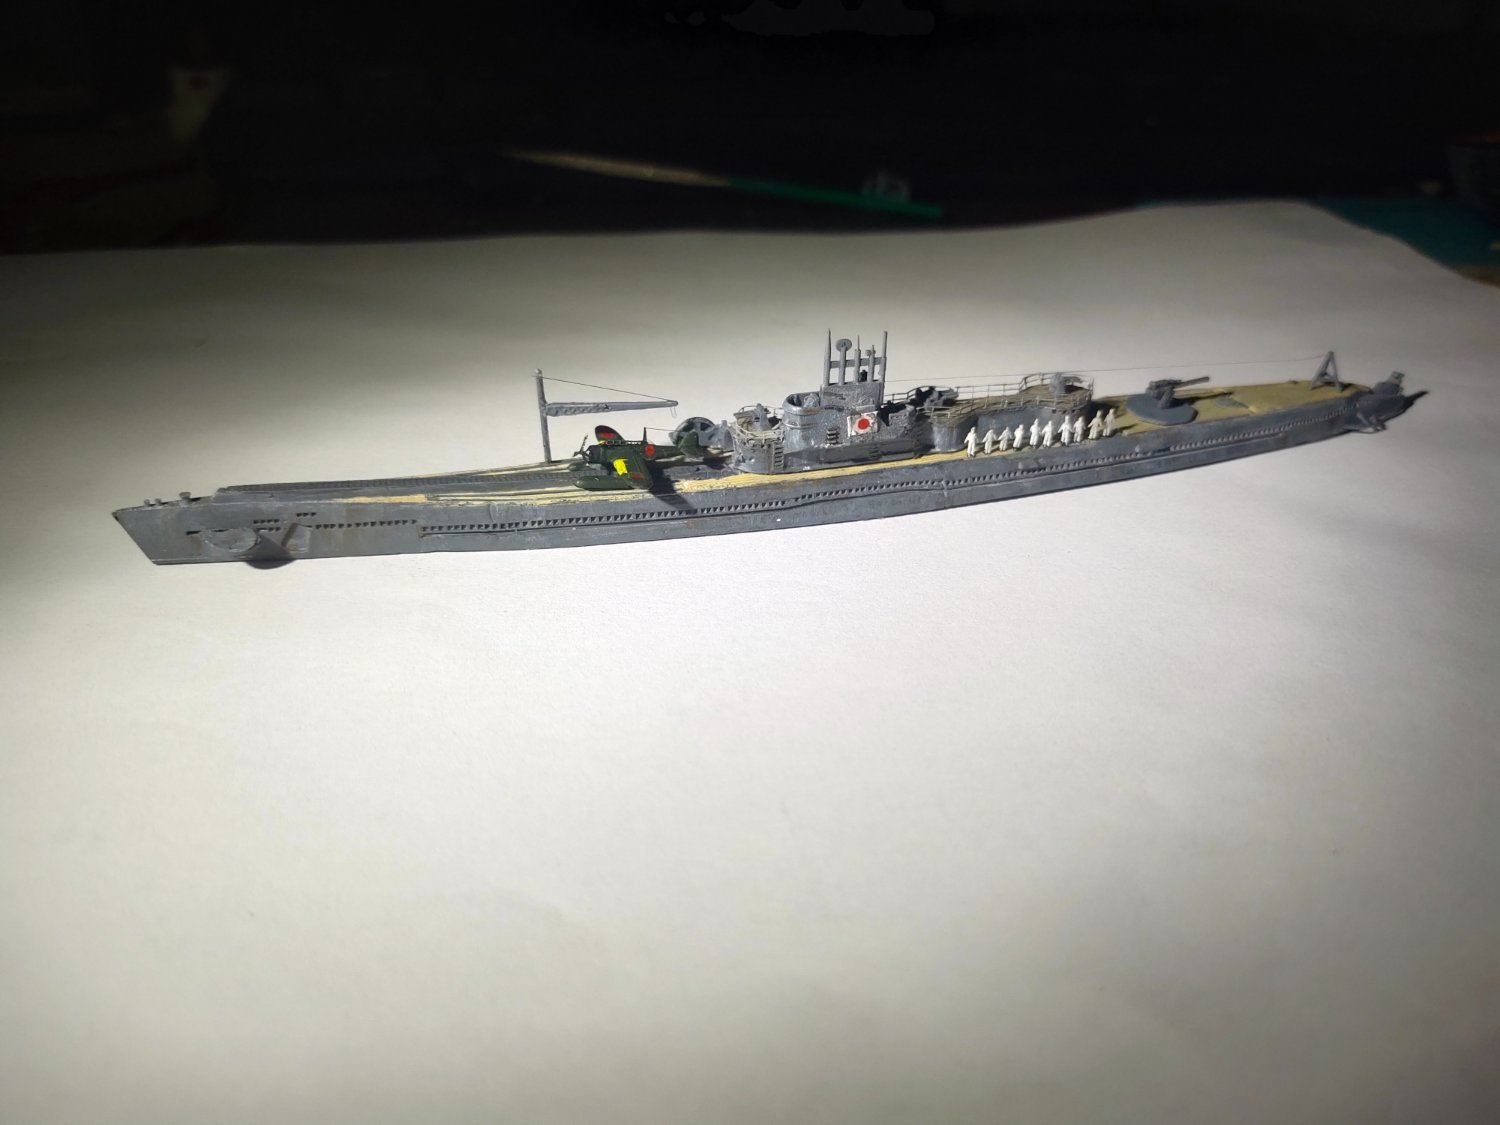
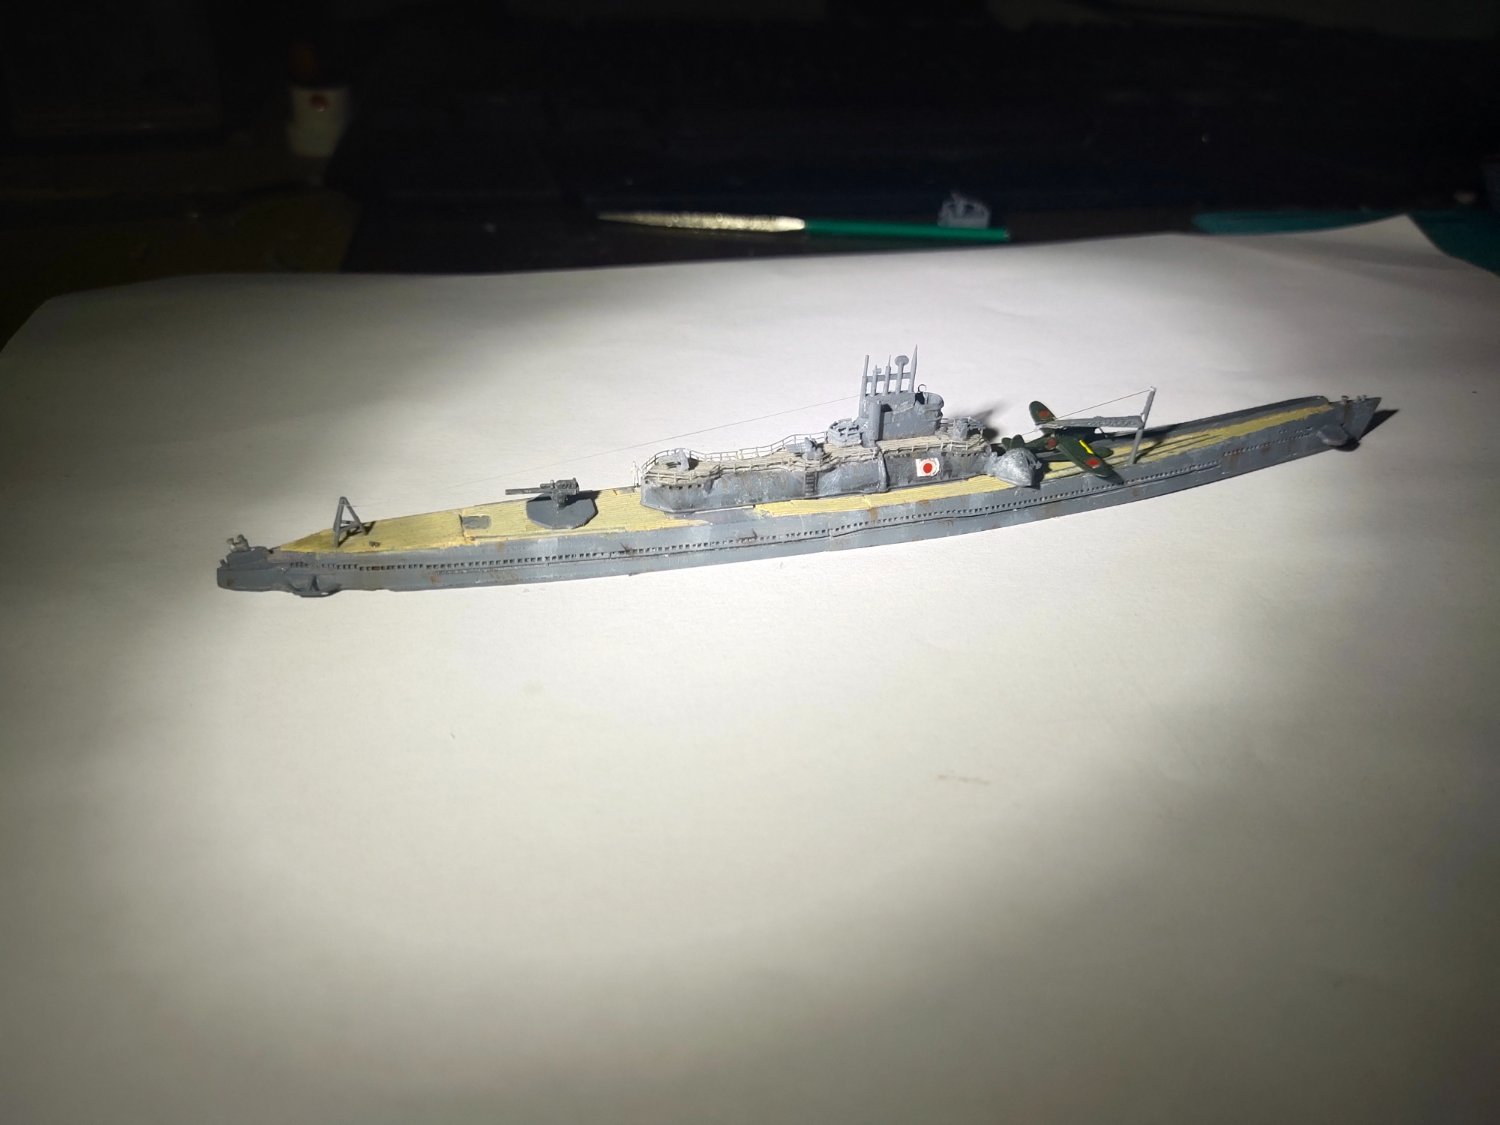
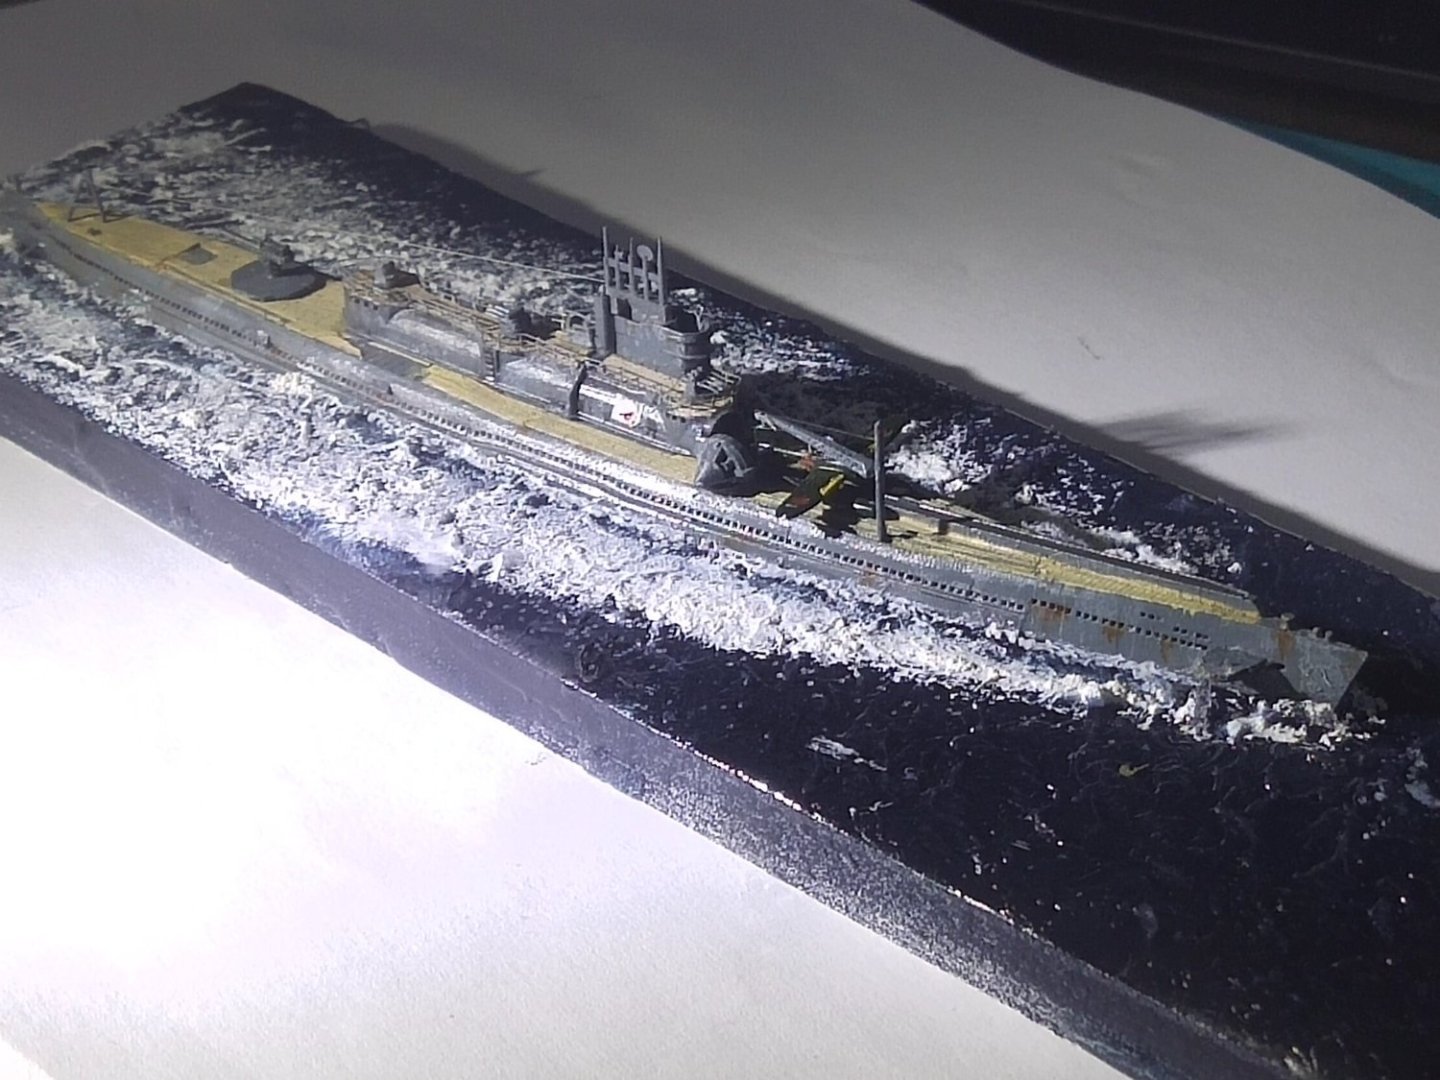
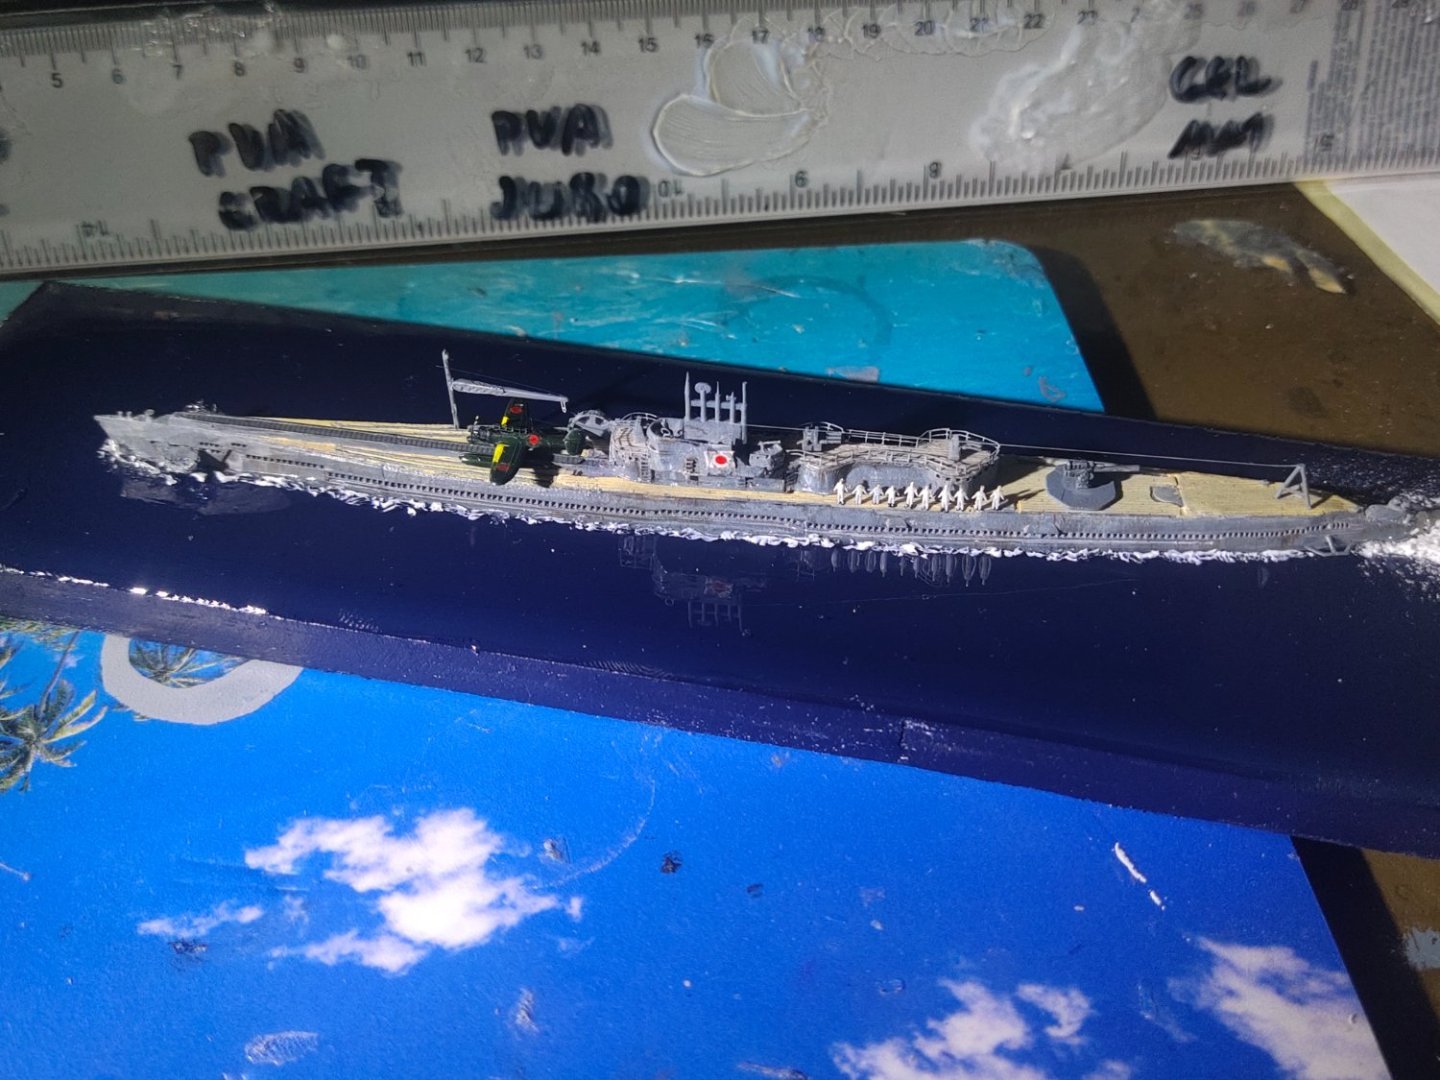
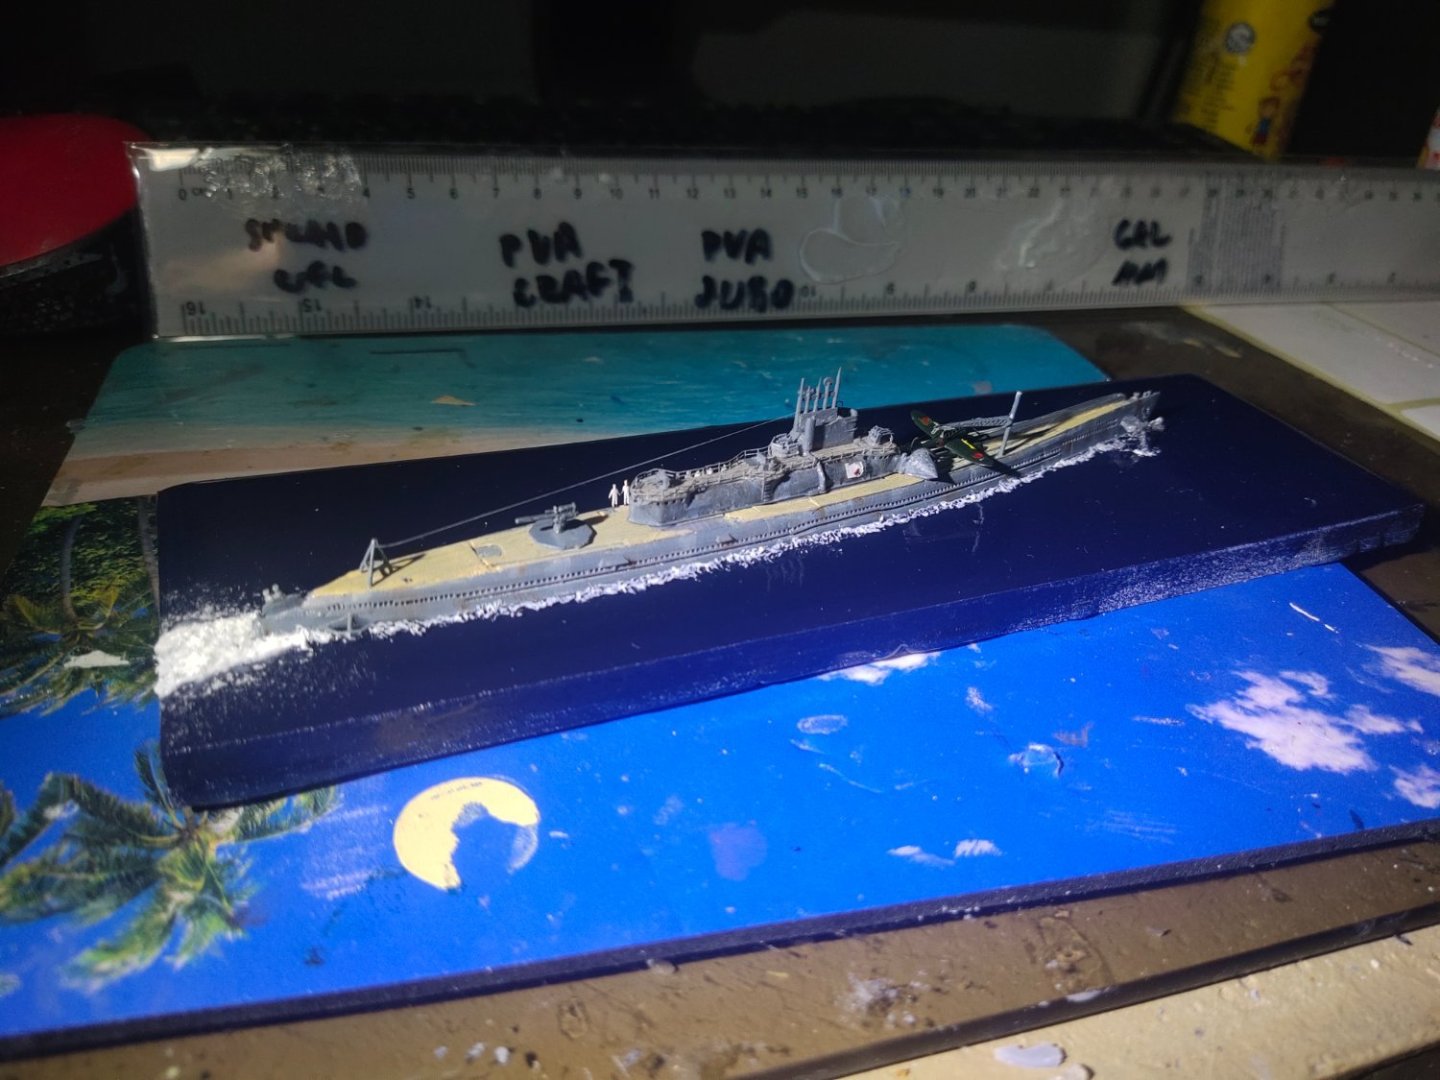
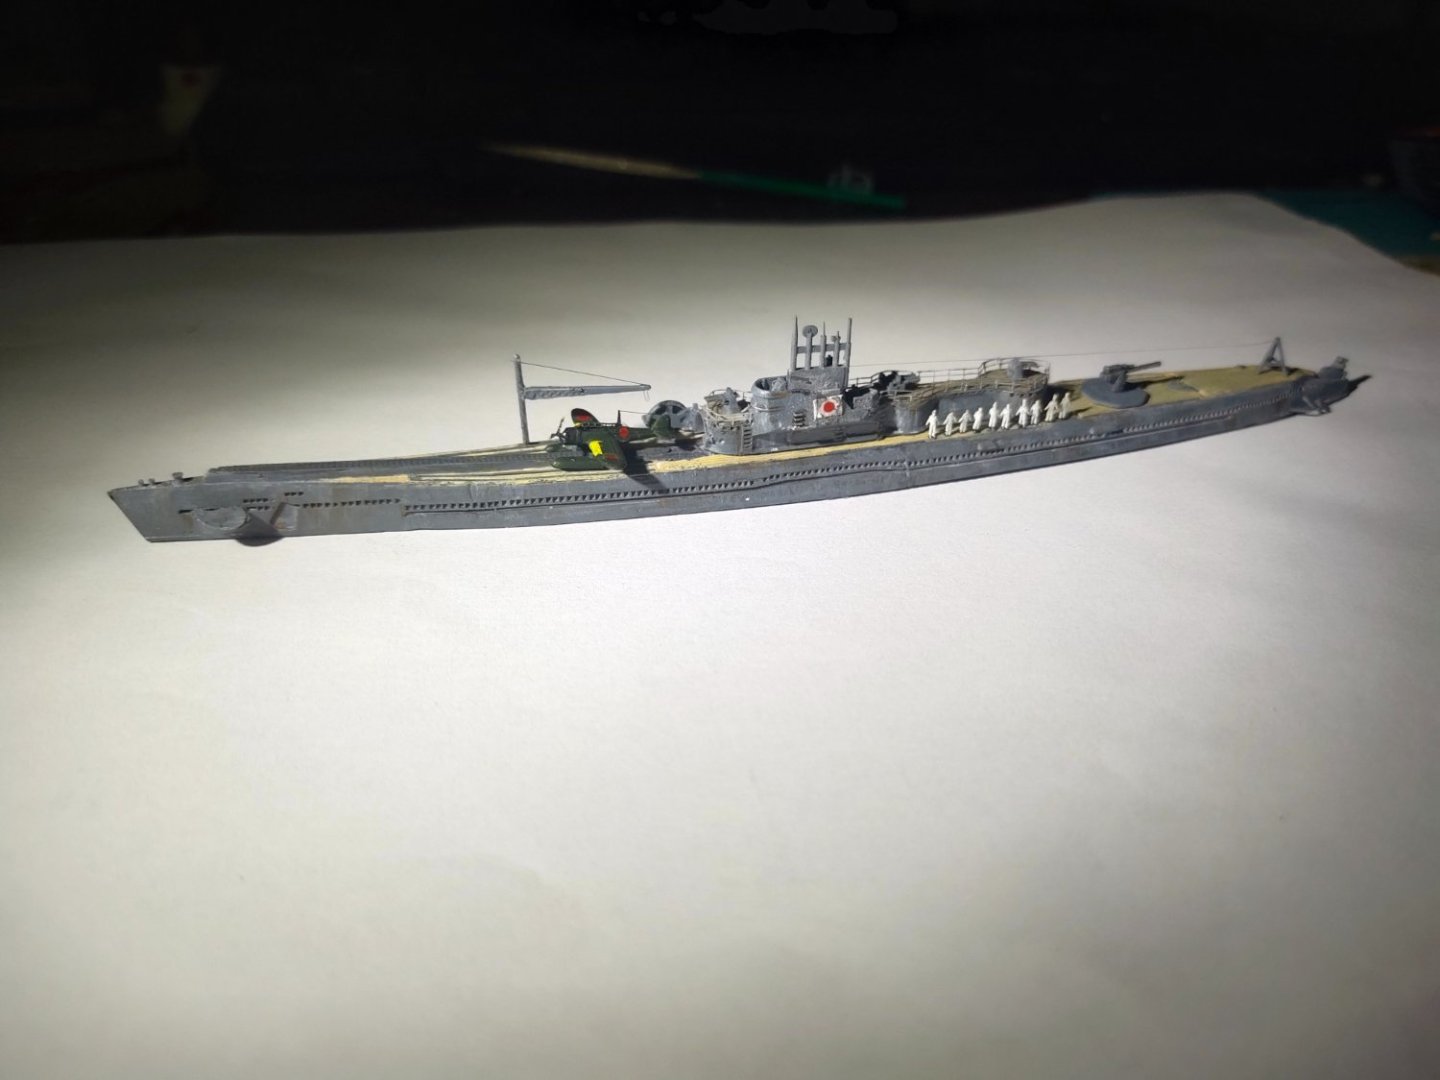
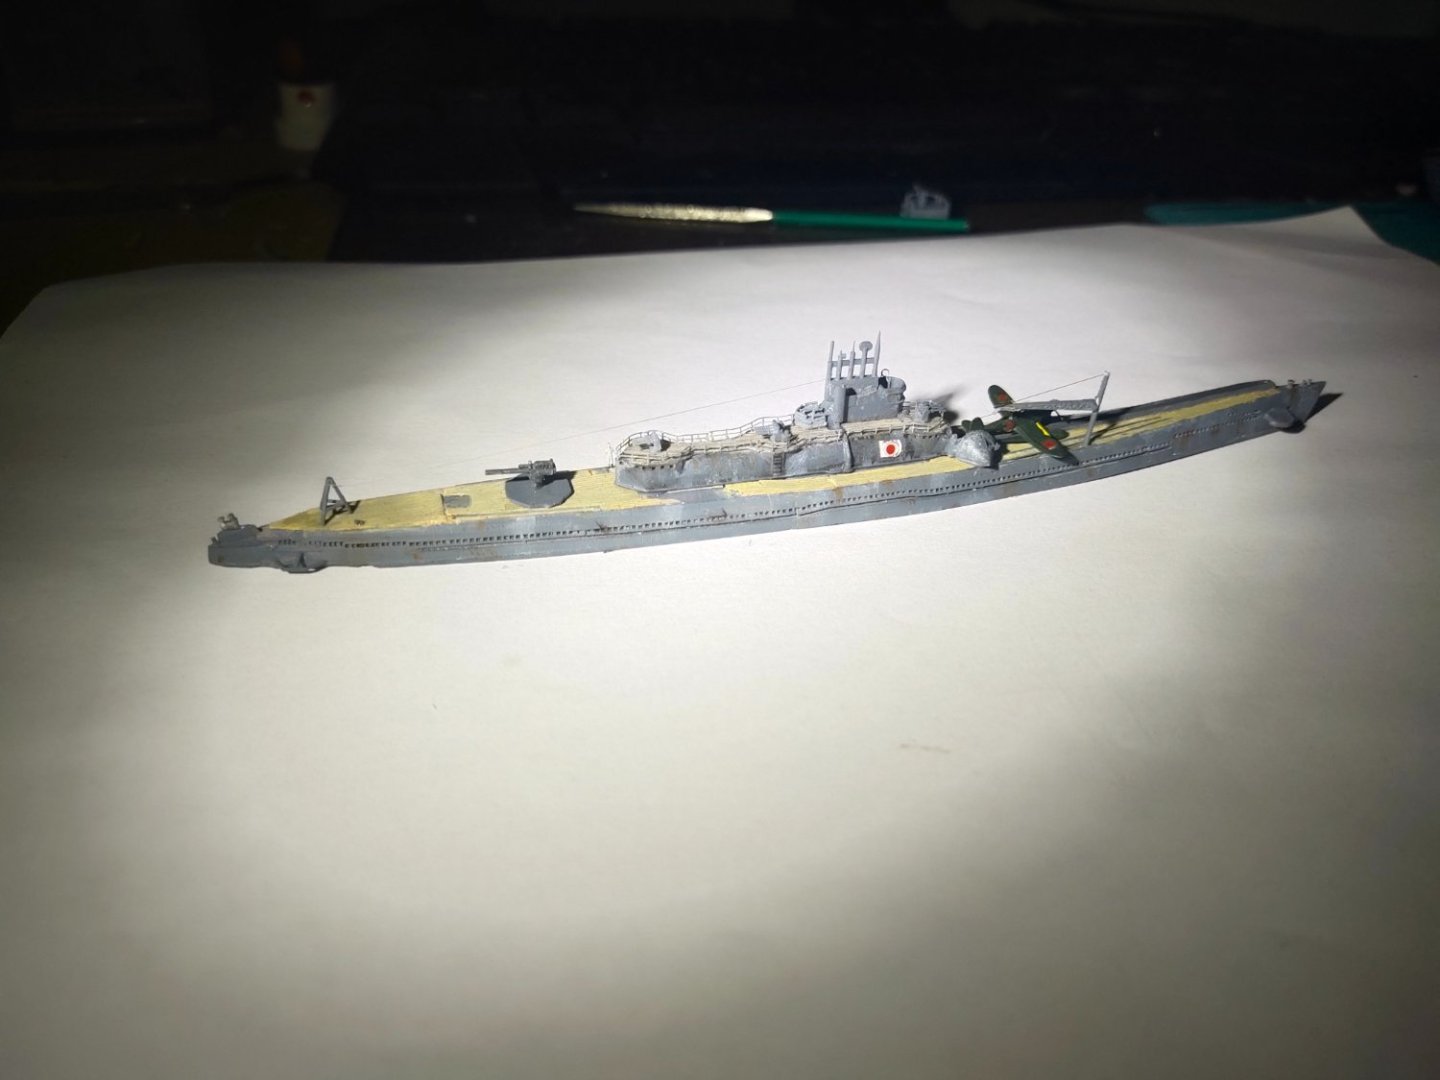
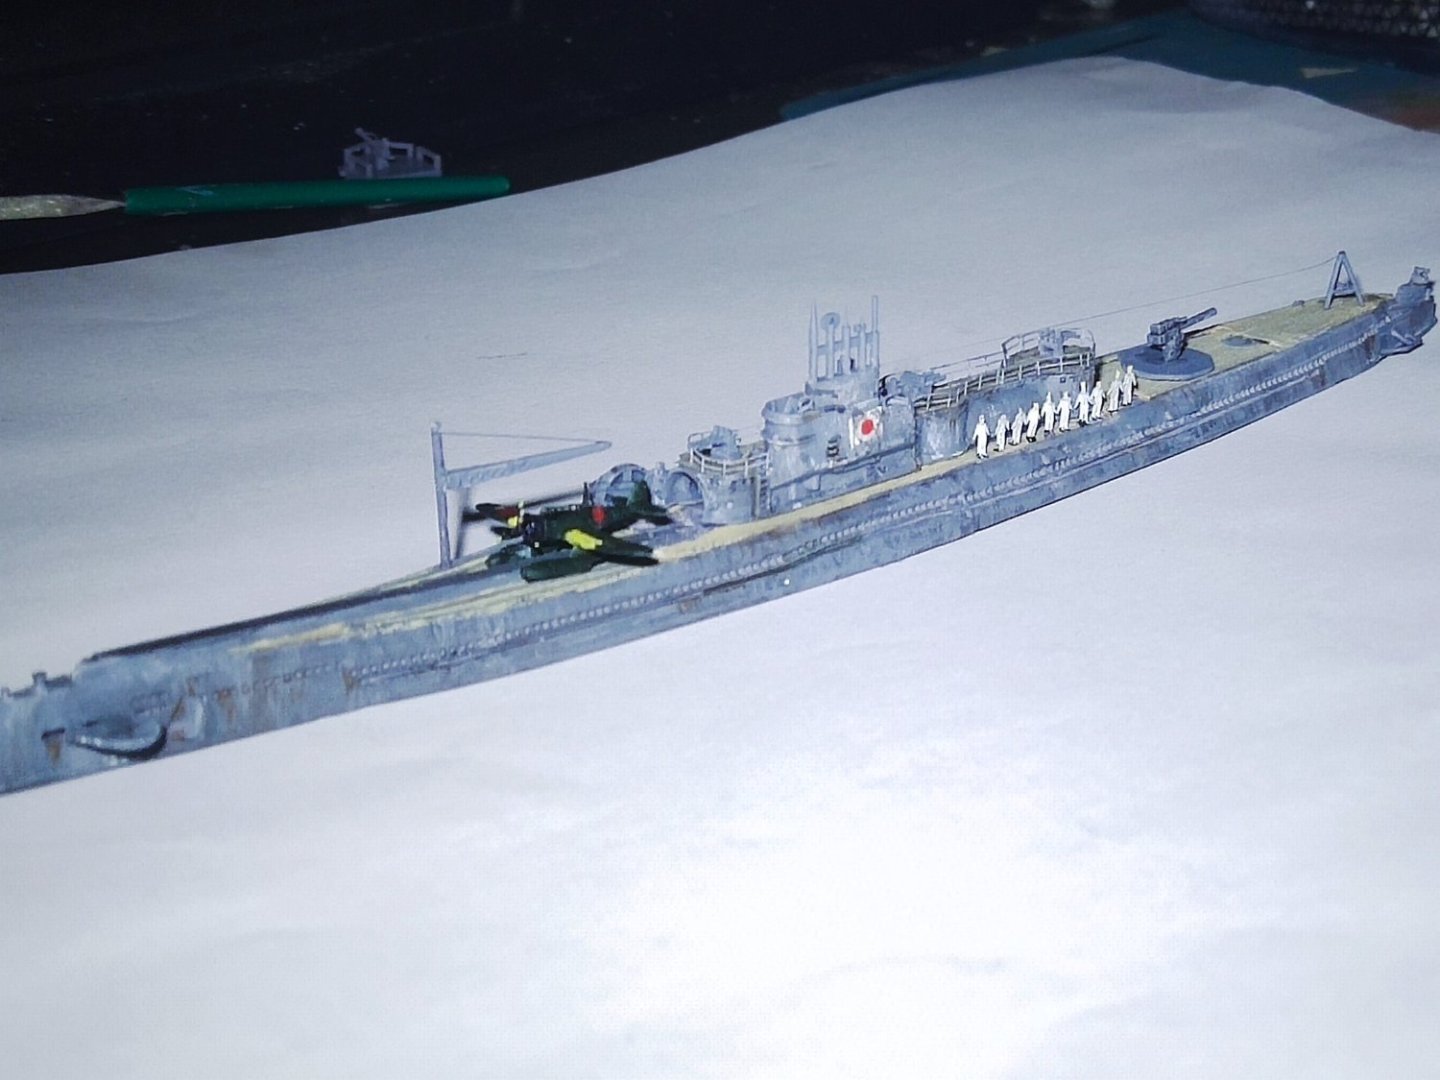
Time to add the final details The plane, the crane. The armament and bit rigging. The Japs are 3d printed. Everything except the massive rear gun. I will work a bit more on the model and make it available for anyone wish to download First I will need a sea for this
-
I have worked with several automotive industry putties. There's a German company that makes a liquid easy to apply product like a toothpaste thick. Easy to work with, zero shrinkage and smooth finish. Need good effort on sanding but grip is also great
-
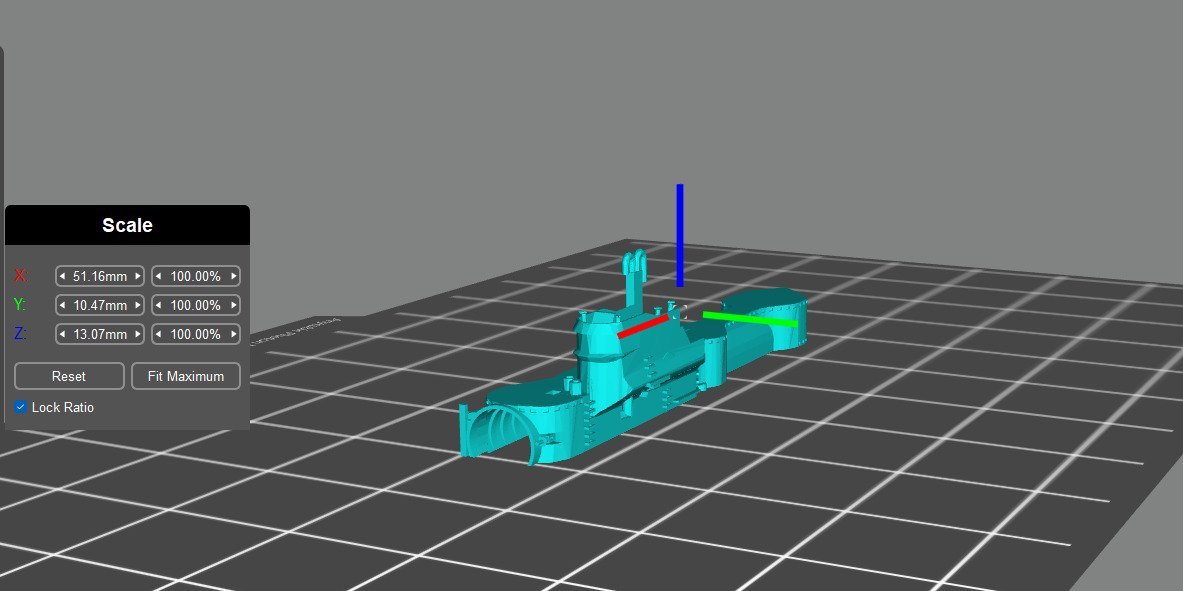
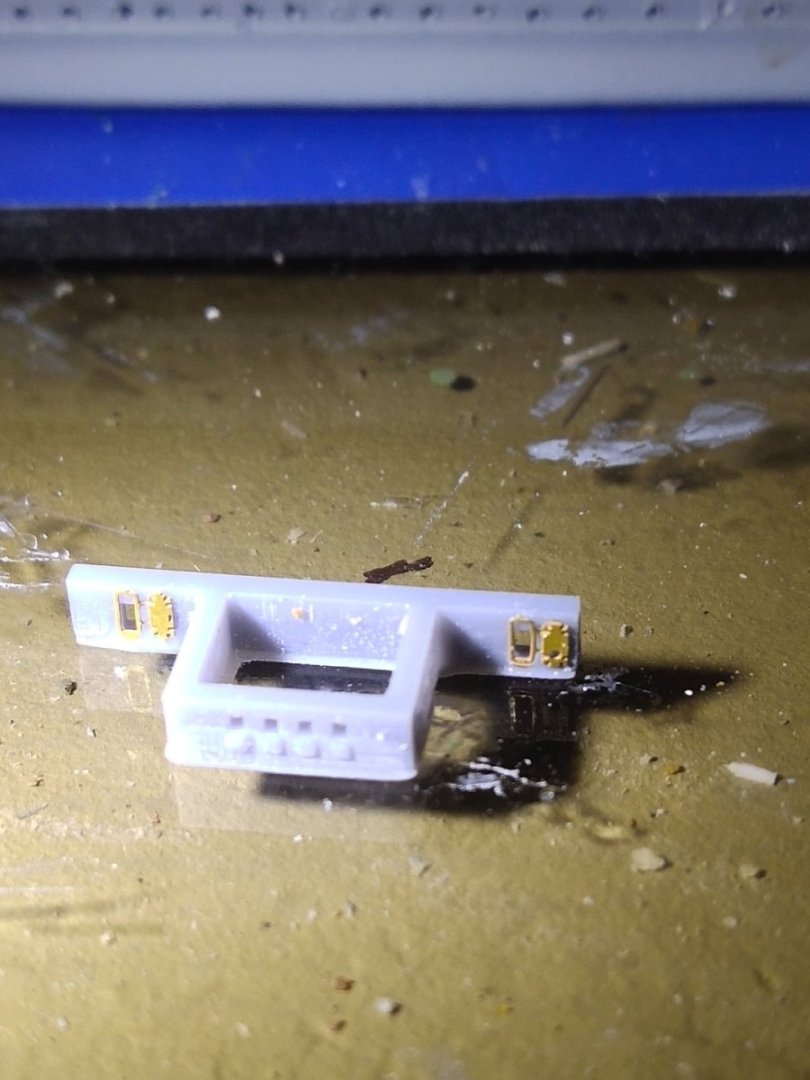
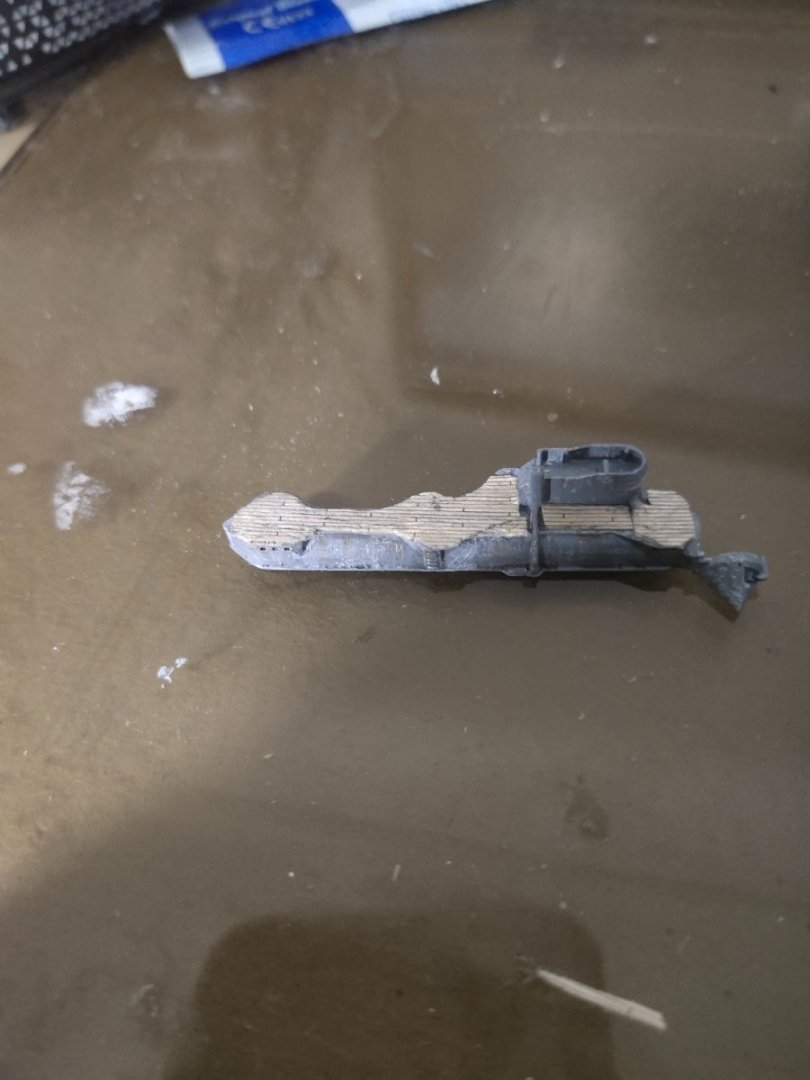
I printed the the part after the 3rd attempt. I painted it, added some chipping effect and oil washes. Test fitted on the boat relatively well. Next step is the add of periscopes, guns, crane, planes and railings


-
After priming and painting the wood like sticker deck was attached.I had to add it in pieces. Used tiny bits of putty to fill the gaps then painted with tan color. I used the same color for oil washing along with some black.I will do the same for the hull will working on the bridge part