


PopDavid
-
Posts
44 -
Joined
-
Last visited
Content Type
Profiles
Forums
Gallery
Events
Everything posted by PopDavid
-
 Definitely soak the strips in water. One hour minimum, I have read that some people soak their strips overnight. Experiment for best results. A plank bending iron is handy. I have also used an adjustable temperature Mono-coat iron, (RC plane covering material). Look at the planking forum listed on the Home page. Also, any number of good books on model building and planking are available. Spilling the planks already mentioned.
 -
What do the plugs for deck fasteners really look like? Troll through You Tube videos of tours of real ships. I recommend sea sickness medications before watching too many videos at one time.
-
Those were the days! I would recommend cutting and sawing until you get close, but not into the printed lines. Then sand and file as needed to fit. Sand any left over ink off. I never did figured out whether to finish to the line, middle of the line or all the line. Any other opinions out here?
-
Converting a Backyard Shed into a Model Workshop
PopDavid replied to Hank's topic in Modeling tools and Workshop Equipment
Deer are much better then the family of skunks that live under the neighbor's 40 ft shipping container behind us. Keep up the good work, Hank. -
I downloaded the instructions for this ship from Model Expo the other day. They are excellent. Really show the different timbers going into a ship. I recommend them as one of your first reference book for first time builders. Price is right!
-
This is so true. Dry a plaster mold until you run out of patience, then dry it so more! Many, many years ago I made a plaster mold in an old coffee can to cast my ducks (spline weights 3-4 pounds 1.3-1.8k) to do some yacht designing. It was still not completely dry for the first couple of pours. Exciting! I use a small cast iron frying pan, BBQ brickets, and a vacuum cleaner (Hoover) hooked up as a blower. To all who may what to cast their own, there are many educational home foundry and pattern making videos on You Tube.
-
How about a handle for an #11 blade that does not get loose as you use it???????
-
I was looking for Enterprise plans online just now and found a build log running in another forum. "Ships of Scale", probably I will get demerits for consorting with the enemy. It is a new comer's account and was started several years ago and is still currently in use. I benched my 'Bounty' and went into my Constructo ' Enterprise'. I will go start a build log with all the horrors encountered.
-
Does anyone know if this size model should have a post between the mast step and the keel? Maybe I am too used to full size yachts with mast stepped on deck that do require a support. Lifetime experiences getting in my way, no support was the first thing I saw in the picture of the mast step and I worried the cabin and deck would deflect downwards under load.
-
I have been looking at SRC's log that Gregory listed. I am jealous, his kit is 2008/9 and has instructions with colored pictures! I don't think my fingers and eyes can do what SRC has done. Work to your own abilities. Try to do it and develop new skills. All the normal pep talk stuff. Great encouraging comments from all the other members.
-
I have just finished inventory my 'Enterprise', mostly the wood strips, and it seems ok. There are some wood pieces that I did not find on the parts list (first pass through the list). The packet of sailcloth has the sails printed on it. Per the parts list, there may not be enough single blocks. I have a Construto 'Halifax" kit that dated 5/97 on the price sticker. The box is a way-off lite white color It has 3 sheets and a booklet that has pictures. I,E, a reasonable amount of information. I have two Constructo kits that are in black and dark red/maroon boxes. They where purchased late 1999/2000. The instructions are as previously discussed (cussed). The first planking layer is 2 x 6 mm. I could not get it to bent without breaking on the 'Halifax'. Will soak it longer for the next try. I will float the idea of simultaneous builds.
-
Well, my kit was purchased in the 90's,and just sitting around on a shelf, so it is probably not up to date with the newer kits. From the build logs, I have noticed my older kits do lack in some areas. again all purchased in the 90's when I was planning on a quiet retirement.
-
Practice with your 'on hand' stains on some short pieces of wood stock. Almost always enough deck and hull planks in a kit. Then buy, if you need another color.
-
Are you still needing this information? I have this kit and there is no sheet 3. There is barely any instructions.
-
Converting a Backyard Shed into a Model Workshop
PopDavid replied to Hank's topic in Modeling tools and Workshop Equipment
Hello Hank, Talked about walk ways on Friday. Then comes Saturday morning! Damp, wet, snowy 🙀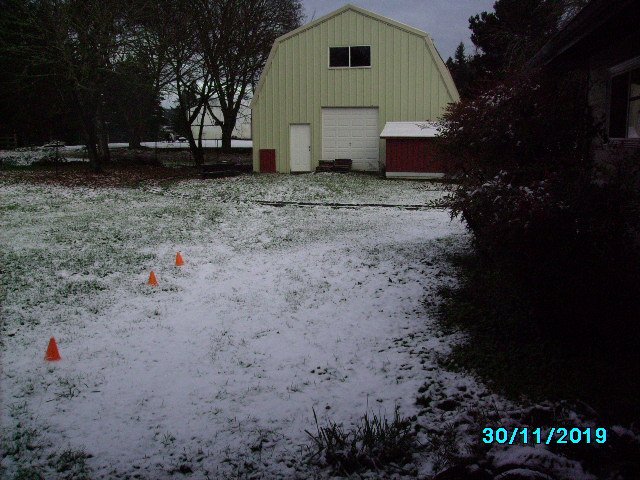
-
I think I found the answer. The rigging would catch the gun whenever recoil pushed it. Training would include " see the scuff marks and scratches on the deck. Don't stand there when we light this puppy off"😀
-
I mean like the drawing from Backer. Where the bow and stern curve up, the deck slants down towards the middle of the ship. The gun would have left-right tilt on one side and the opposite on the other. The x-y motion of the carriage for aiming is rotated or tilted. When the gun is fired and recoils inward, it would want to slide in and down hill. Unless restrained by something to prevent the downhill motion, yet allowing the inward motion. I will try not to think about aiming and hitting a specific target with a gun mounted this way. Operation should be better down in the center of the decks. left-right is leveler. The gun port have parallel sides, as they should. To match the gun to the port, it would need different size wheels or be on a leveling platform to keep its x-y axles aligned with the opening. Maybe just a case of too much education, the lesser schooled gunners would just step up and fire way. Then muscle the reloaded gun back into position pointing out the port and wait. Target is close enough! Not considering ship motion at this point.
-
I live with snail mail and just got my invitations. Sign me up! There is a You Tube series by the Sampson Boat Co rebuilding the SV Tally Ho. These guys are doing this full size. Worth a visit.
-
A moving helms person. I would use a separate channel or if your radio has it, a two position on-off switch. Just don't let him get fouled in the sheets. My Dad and I where running second in a local Windmill (15 1/2 foot one design) class boat race. Dad ordered 'come about'. Jib sheet fouled, I got stuck crossing over. By the time I stood up, the starboard rail was in the water, and the boat was on it's side. End of race!
-
Nice work, Pat.. I have an Endeavor by AS in my retirement stash. My fingers will be 75 by the time I get it started. I will use you build as a reference. My old flying club had a fire pit near the flight line, saved hauling all those little bits home.
-
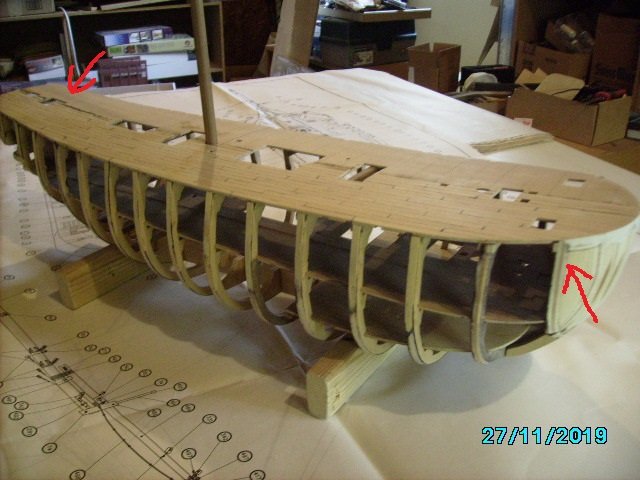
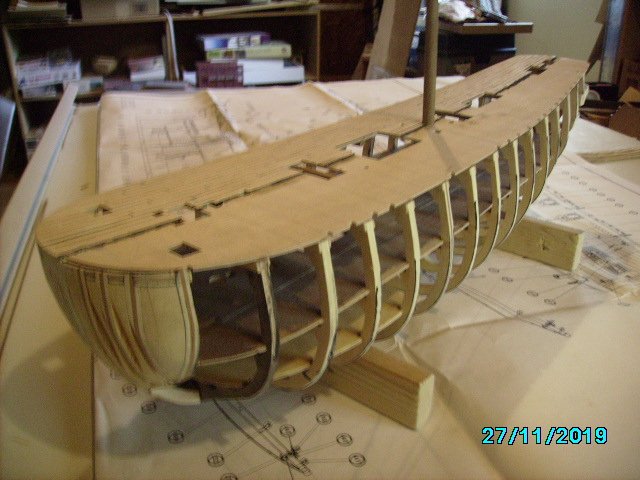
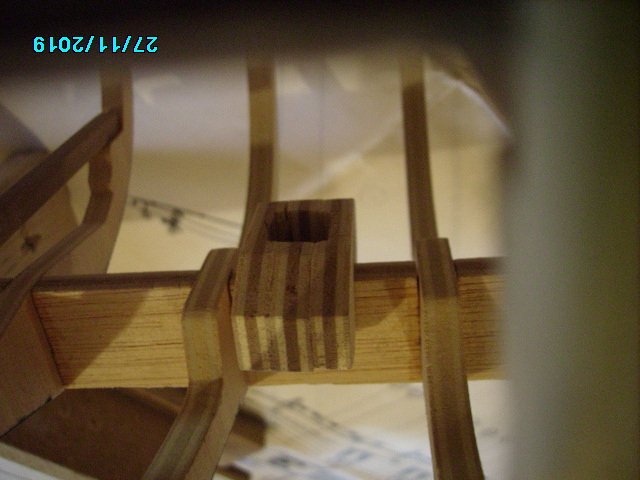
I have settled on the Bounty as a back-to-ship-building after starting several other kits from my retirement stash. They were to get my fingers back into practice and to see if they could still do the work. Ok, so far!! First off, I like the large scale. I can still see what I am doing. I made the decision to not do the cut-a-way. I feel the kit sorely lacks accuracy in this area. It would take an admiralty model to do interiors satisfactorily, in my thinking. The correctly number and spaced frames for starters. I did some planking on the lowest forward deck (practice and caulking). I make the mast steps with packing spacing the double-ers (spell check does not like that one at all) so that the hole is a square, equal to the mast diameter. The mast, once made, can rotate when mounted. Making a tendon step is just to far in the future for me to plan. This brings up the first challenge, put three decks and a step together ( 4 holes in a straight line) so that the mast ends up in the correct position. All was good until the main deck was added. Generally, my paper plans cross-sections are long compared to the ply wood parts. Almost, 1/8", 3-4mm longer. Dry fitting the main deck with the notches hooked on the last frame, the first frame notches show the gap. Red arrows in picture. The mizzen and main mast aligned OK, but the fore-mast, not even close. Move the deck hole and cover with deck planks. I mounted the middle deck to help align the frames. This was a easy keel/frame assembly to bend. The main deck came out slightly off center to the frames. Fill strips on one side and sand the other. I will made some better set up jigs for the next one. For some reason I could not see the bow curves, so I filled in the bow frames (mostly(. I slotted two scrap pile pieces of wood to fit the false keel for a building stand. No patent, free idea for the general public. My son works with the Free Software Foundation, so I freely offer most of my tips.😊 I will get the next installment, now about three down on "The List" eventually! I will update next Friday, when I learn when they are doing my other knee. Twenty steps up to the shipyard. Could be a problem, Houston.
-
Converting a Backyard Shed into a Model Workshop
PopDavid replied to Hank's topic in Modeling tools and Workshop Equipment
I retired with a separate shop building since our down-sized new house is smaller (considerably smaller). I am still making plans for a covered walkway. Occasionally, it is a damp and sometimes a cold and snow covered path to the "Shop" here in NW Oregon. -
What was done to make a cannon mounted on the skyward curving decks of the early galleons to keep it in place? If the deck angles sideways, what stops it from sliding downhill? How could it ever be fired or aimed? Randoms thoughts after looking at the 18th/19th century flatter gun-decks. Maybe no one has ever though about this. I am building the Artesania "San Fransisco" galleon kit. The gun-ports are square to the deck and this looks off. It is an early issue from the 90's and I am less than happy with it, struggling. I have seen the various build logs.
-
This build looks like more effort than building from metal parts. Really great work! Just one small observation. Under the Whyte classification system it is a 2-12-4. Only one set of cylinders. Under what seems to be an European system only one side is counted, thus the package reads 1-6-2. 🚆 My other hat.
-
I wonder what Mr Smeed shows on his other yacht plans. I would have to look back through my "Model Boat" collection to see what winches where operated and made back in those days. It could be since no interior views are shown, it was just a quick way to illustrate the rig. Certainly, is not practical. My "Model Boat" free full size plans for Starlet are sitting here on my desk within easy reach. Somehow it does not look as big as the pictures. Laying around my shipyard is a false keel and a pile of frames that long ago must have been a building start. May have to rethink that project to offer the grand-kids an option to trains. How do you plan to make the keel weight?
