Mirabell61
-
Posts
7,418 -
Joined
-
Last visited
Content Type
Profiles
Forums
Gallery
Events
Everything posted by Mirabell61
-
 Congrats to your new camera Bob, the way of creating JPG files of pics so fast and easy provides much fun and they can be posted or attached to emails as you desire... Your "Hermione La Fayette" has had a great start, and the planking Looks very nicely done, will like to see more soon Nils
 -
Hi Dimitris, Thanks for your words, I saw from all your "likes" that you had a thorough look at the early and recent Posts, thanks a lot for dropping in, you`re always wellcome, and I`m glad you found this interest in the build..., Stay tuned... Nils
- 2,625 replies
-
- 4
-

-
- kaiser wilhelm der grosse
- passenger steamer
- (and 1 more)
-
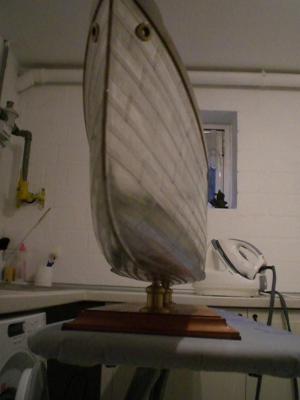
Thanks Marc, for your nice words. Before I started sewing my own sails I had neighther experience with the sewing machine, nor doing narrow hems. One day I had the idea of using the zic-zac stitch function, by laying the "bolt rope" in the middle of the foreseen zic-zac layed over the rope, and then folding it in the produced hem area. It took some Trials practicing the correct Parameters of the stitch Settings, but then it worked out fine. Wish you good success with your sewing of the next sails Nils
-
Thank you very much Dave and Grant, and all the"likes" appreciations... I`m glad that this build finds so much interest, as it is (to my knowledge) not so often found as a model Nils
- 2,625 replies
-
- 2
-
-
- kaiser wilhelm der grosse
- passenger steamer
- (and 1 more)
-
David, thanks to you, she was awarded the blue ribband due to the speed, which again was a result of good design engineering, but she was also subject to negative rolling performance with the narrow beam Nils
- 2,625 replies
-
- 4
-
-
- kaiser wilhelm der grosse
- passenger steamer
- (and 1 more)
-
Thank you so much Mark and Patrick, for your nice words, very much appreciated... Nils
- 2,625 replies
-
- 2
-
-
- kaiser wilhelm der grosse
- passenger steamer
- (and 1 more)
-
Many thanks to SAL, and Crackers, and all "likes" for the many nice appreciations foir the KWdG build... Nils
- 2,625 replies
-
- 1
-
-
- kaiser wilhelm der grosse
- passenger steamer
- (and 1 more)
-
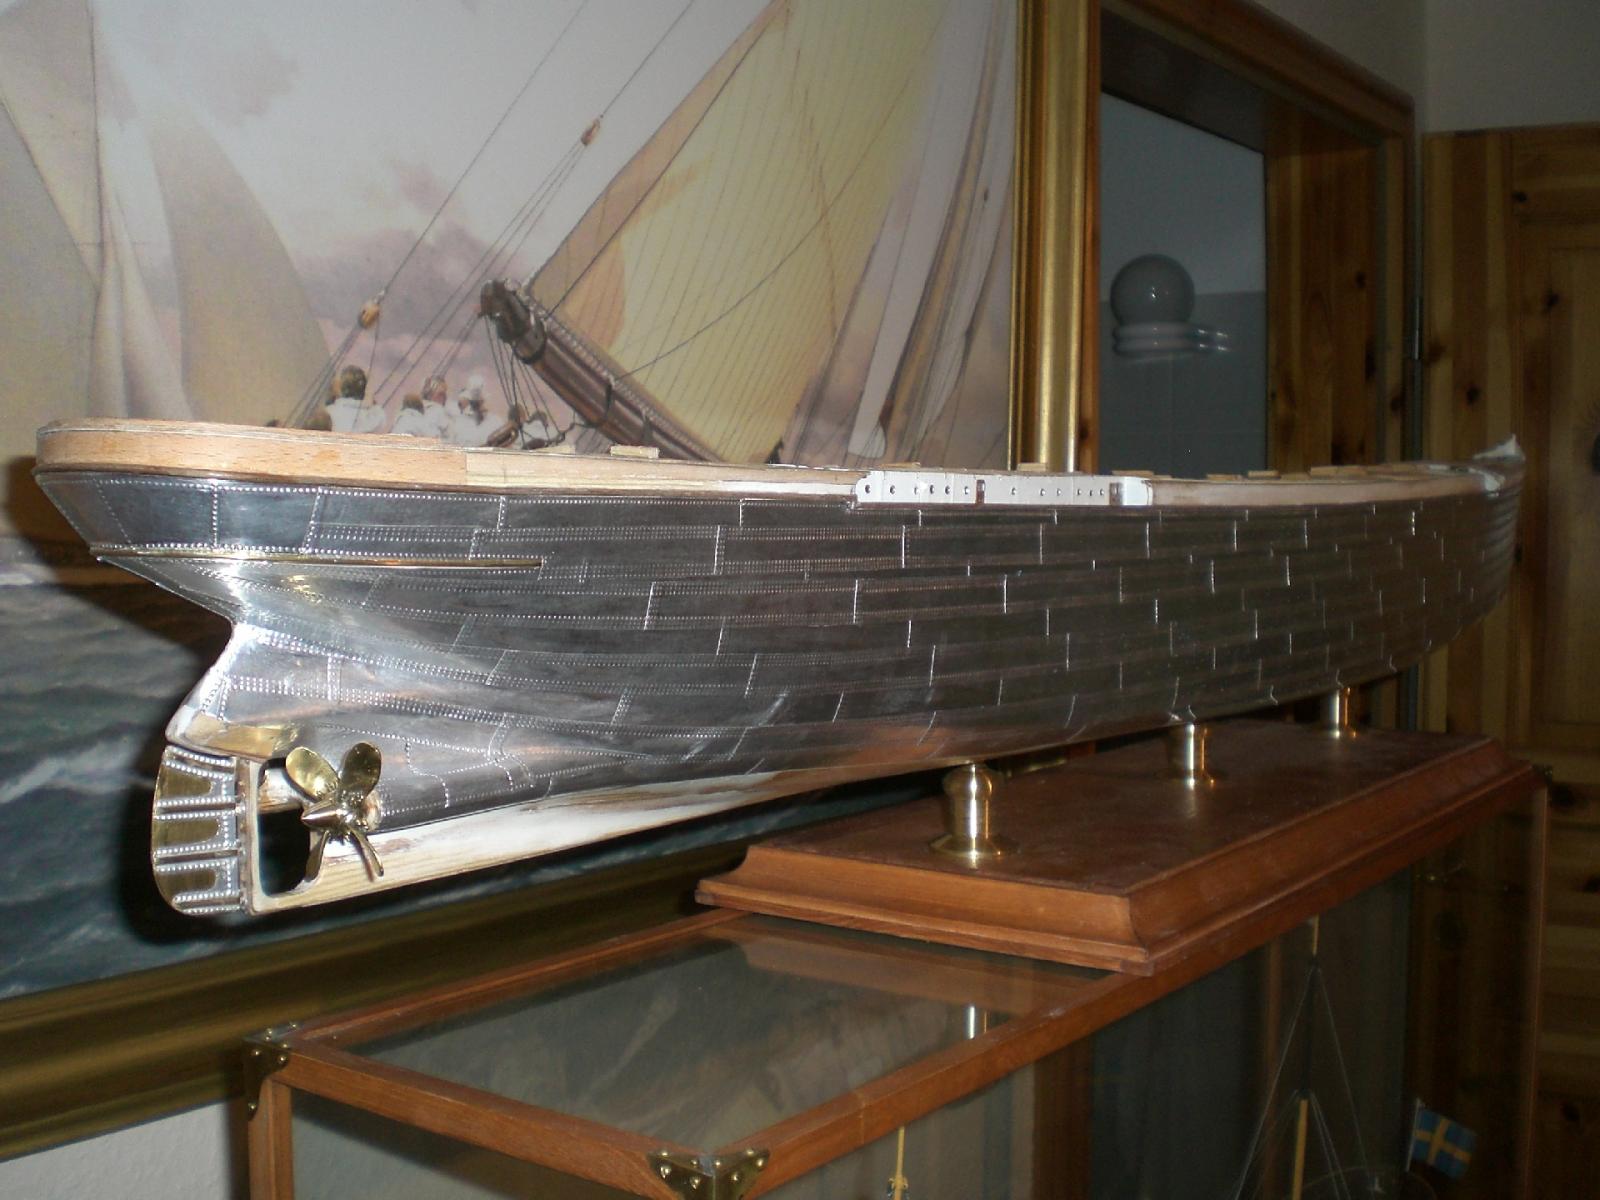
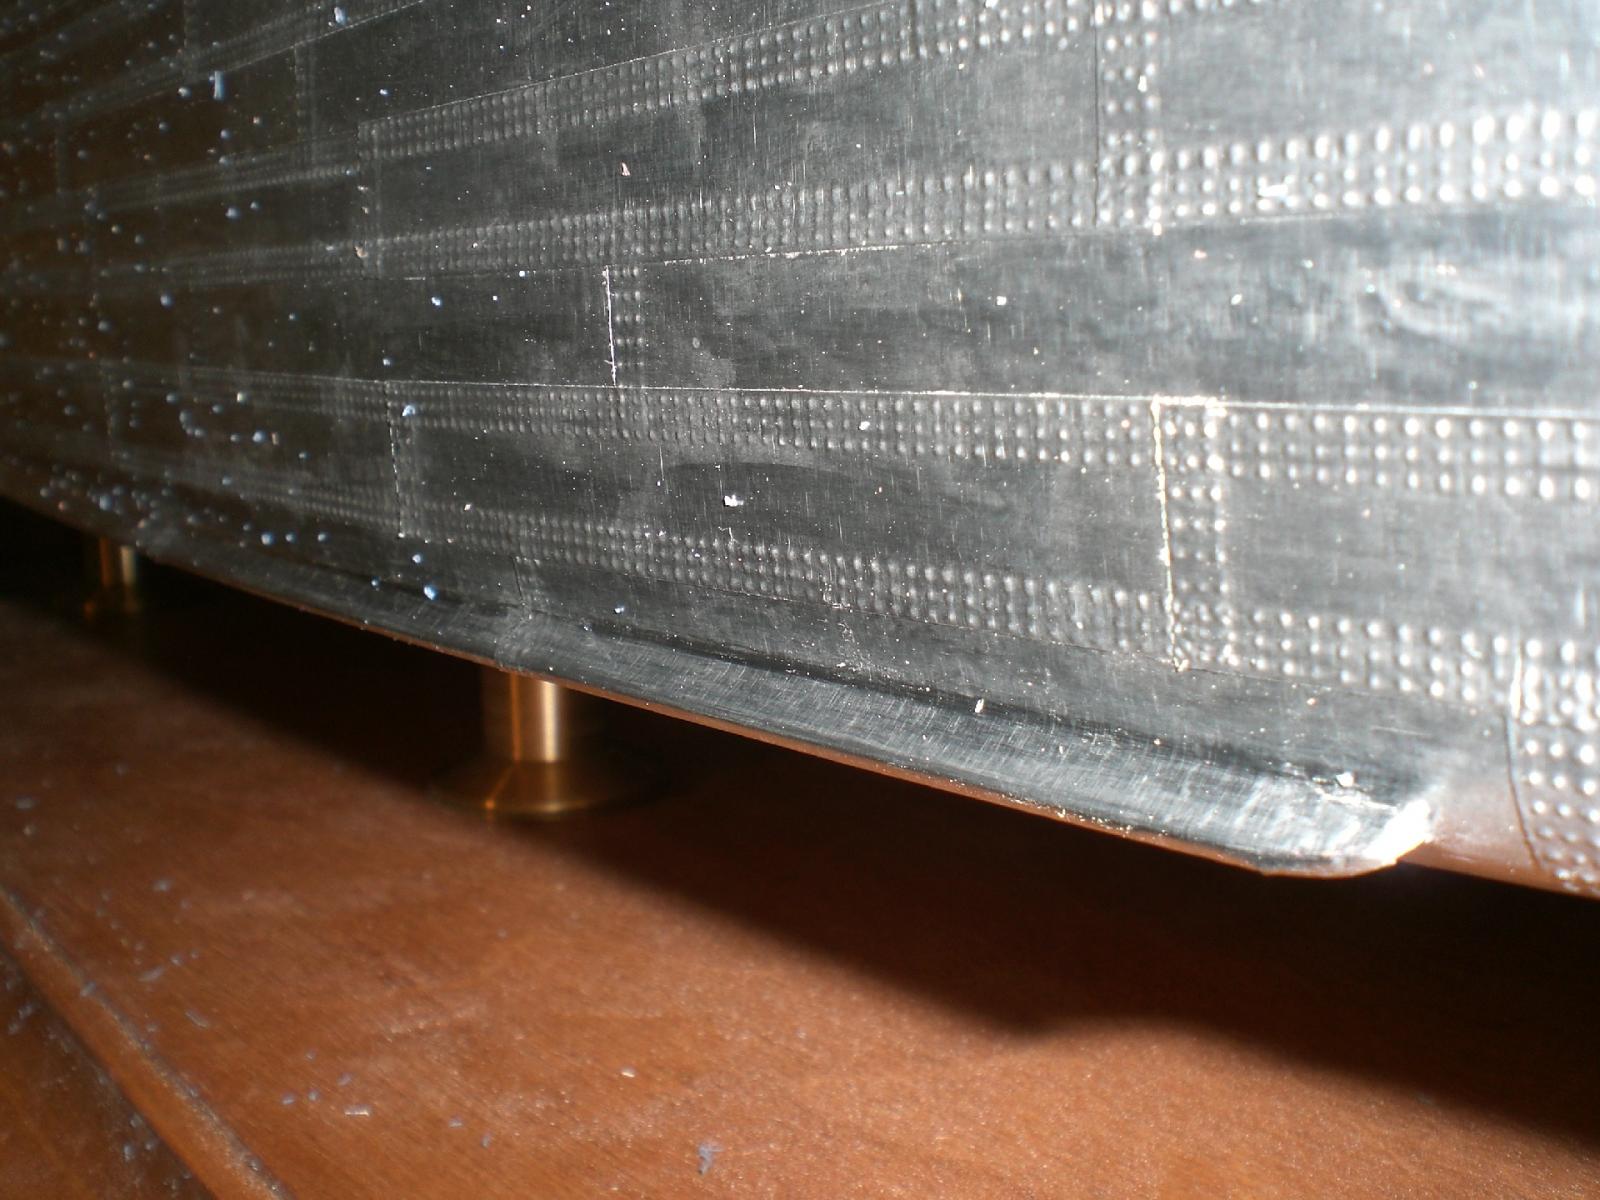
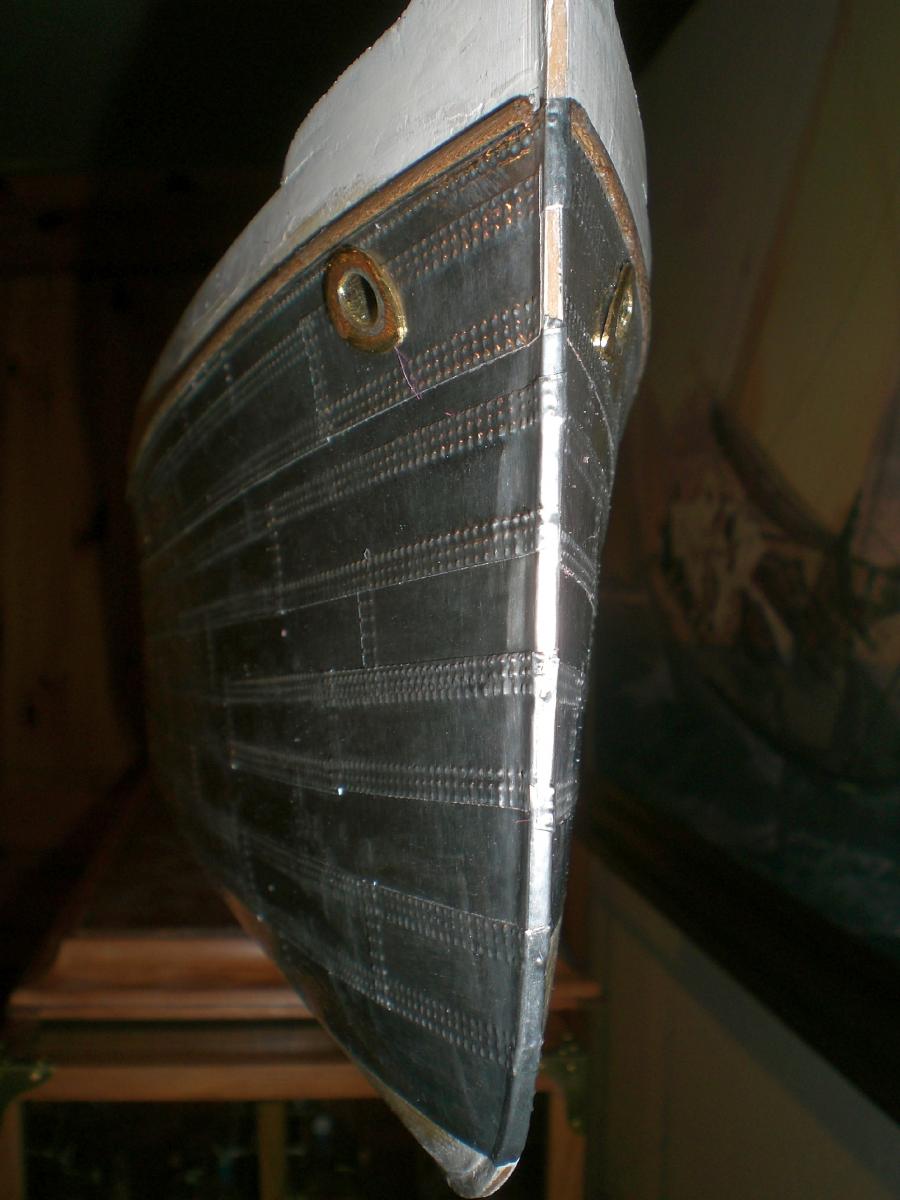
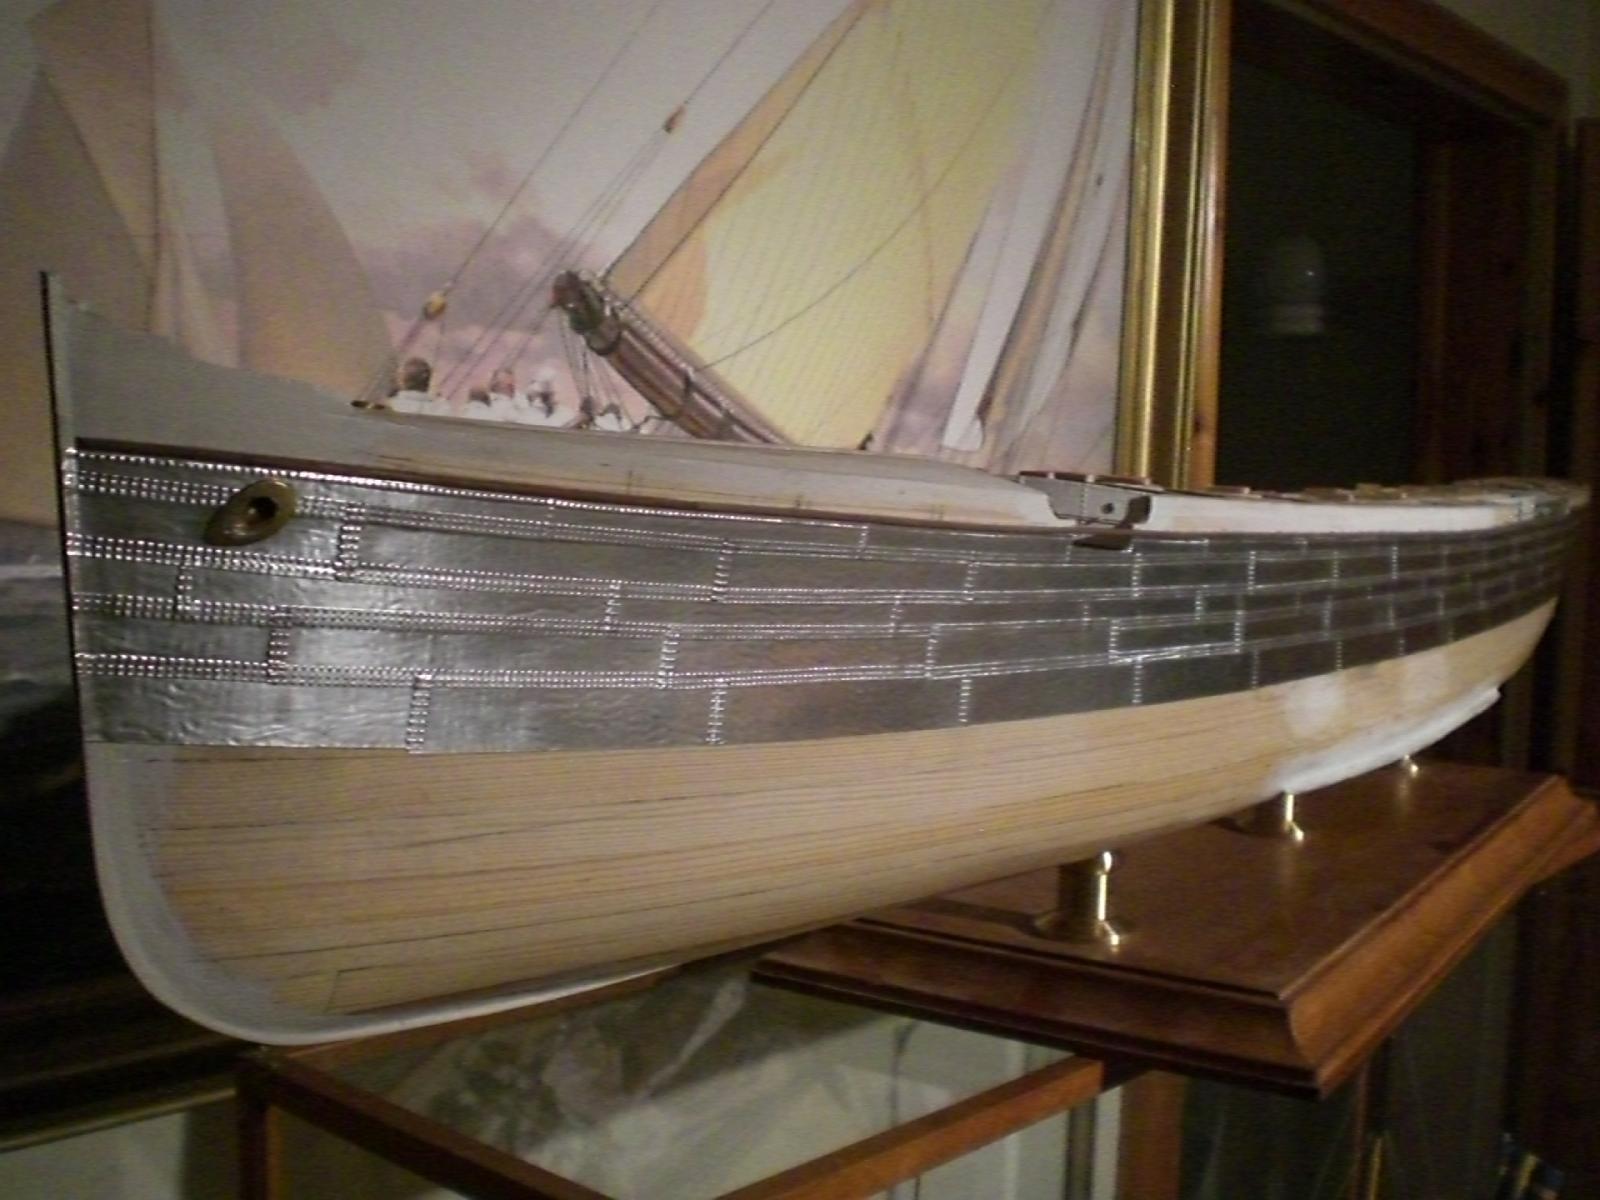
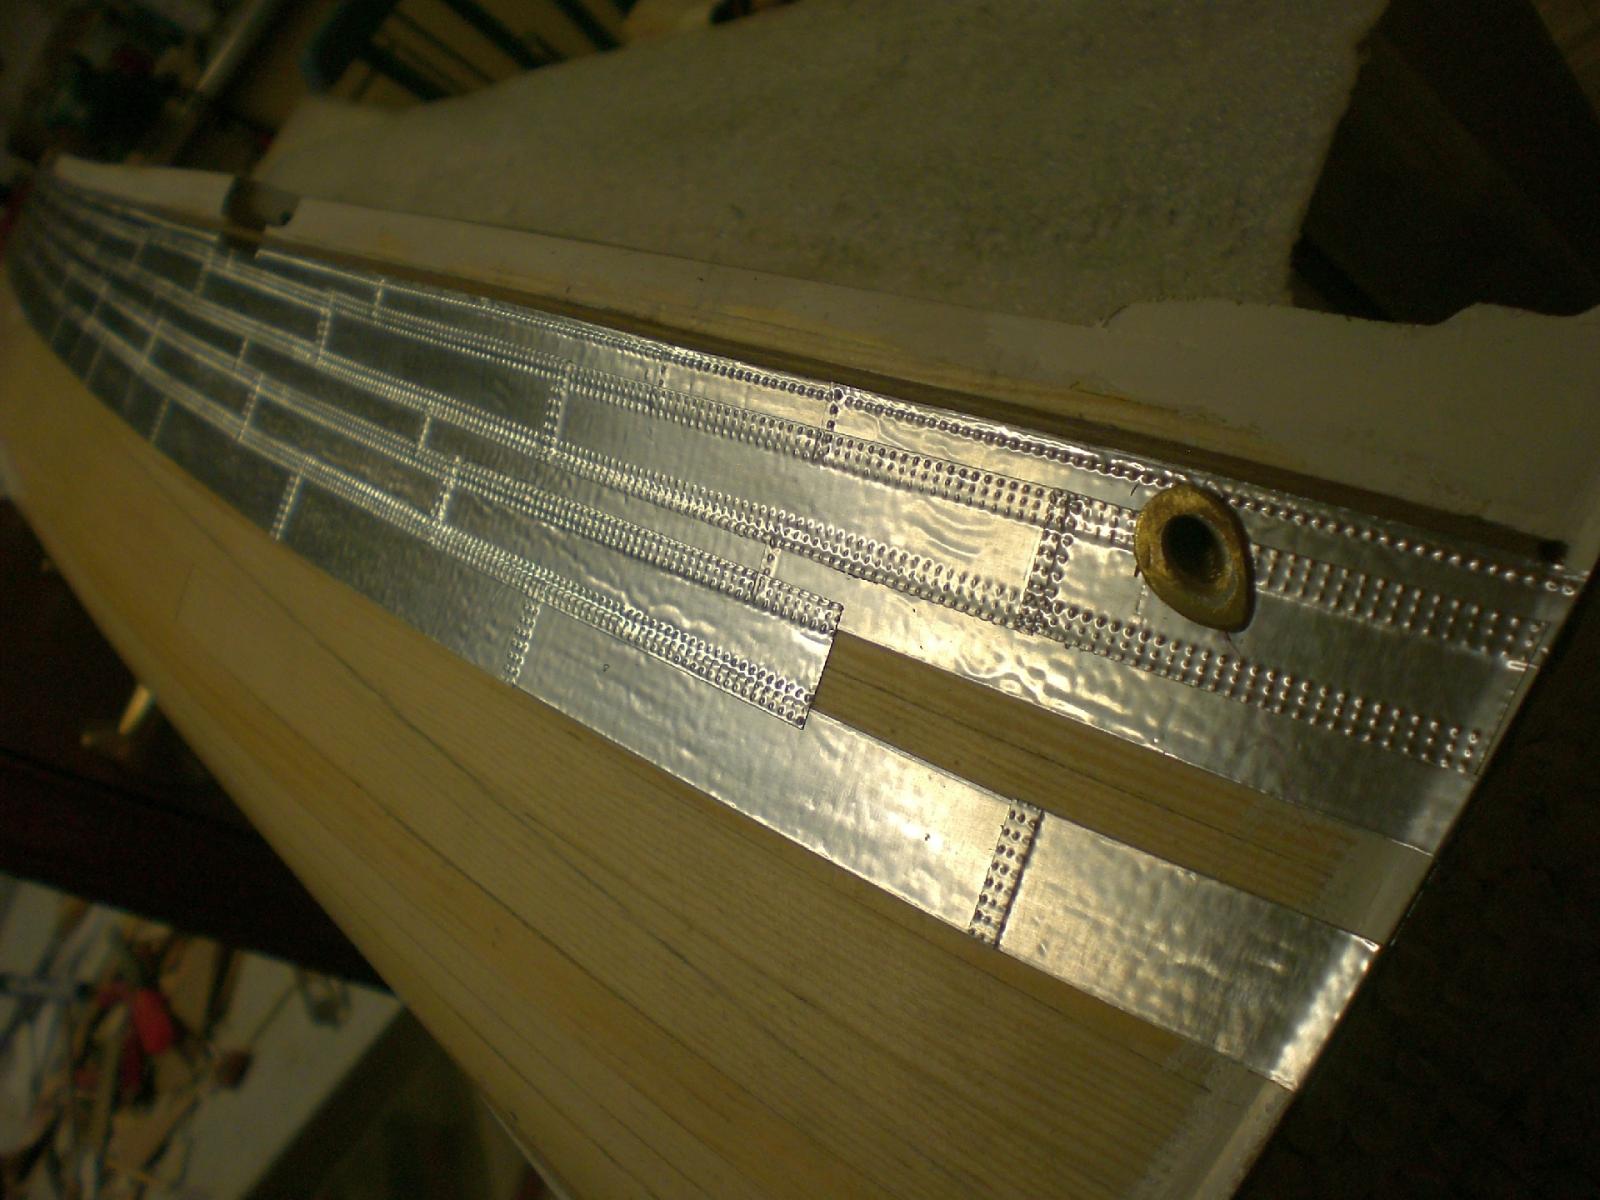
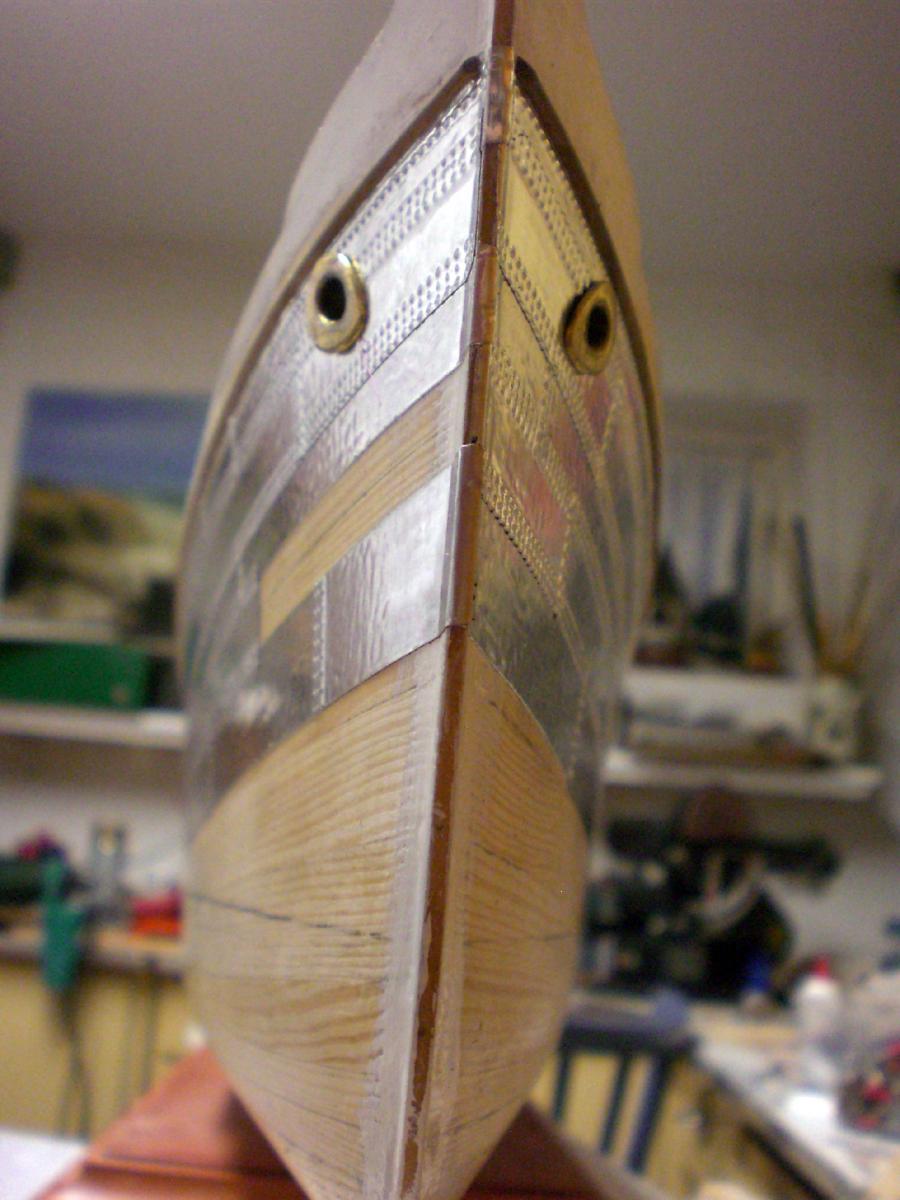
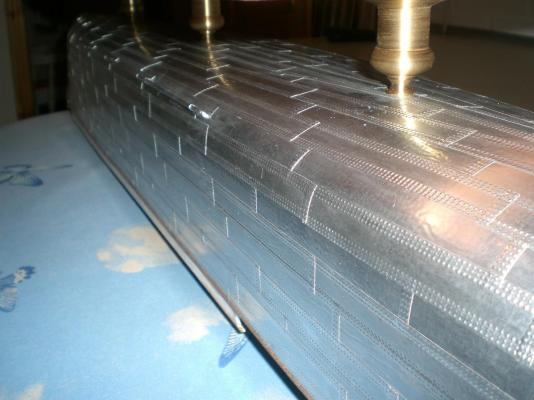
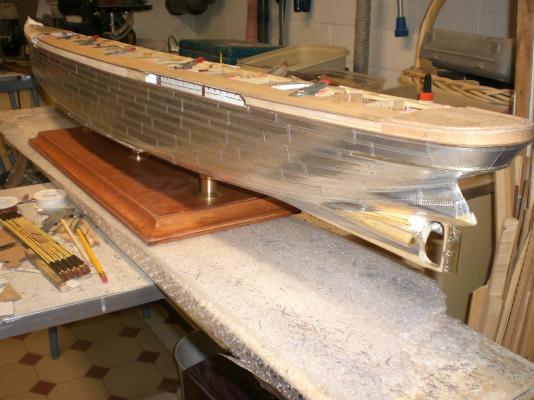
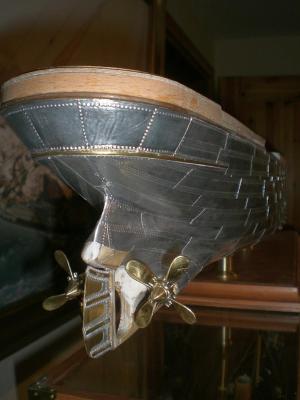
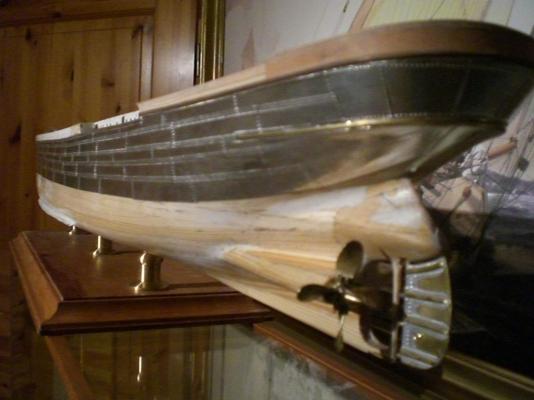
Hello Mick, thanks for your nice comment. Have just finished the bottom plating and put the hull back on the stand again. There still remain some small areas at the stern to be plated... Nils removed the stand plate, and left the 3 spindles standing the last bottom plate was put on this afternoon.. here the staggered vertical joints can be well seen...


- 2,625 replies
-
- 25
-
-
- kaiser wilhelm der grosse
- passenger steamer
- (and 1 more)
-
Patrick, good luck with your surgery my freind, hopefuly you`ll be freed from that pain the Stone causes asap. Wishing you a speedy recovery, and get well soon... Nils
-
Bob and David, thank you very much for nice comments, I think one more day and the plating will cover the entire hull.. Nils
- 2,625 replies
-
- 2
-
-
- kaiser wilhelm der grosse
- passenger steamer
- (and 1 more)
-
Many thanks Grant and Nenad, for your nice compliments, they are much appreciated.. Nils
- 2,625 replies
-
- 2
-
-
- kaiser wilhelm der grosse
- passenger steamer
- (and 1 more)
-
thank you very much Nigel, for your appreciation and I`m glad you like the plating Nils
- 2,625 replies
-
- 3
-
-
- kaiser wilhelm der grosse
- passenger steamer
- (and 1 more)
-
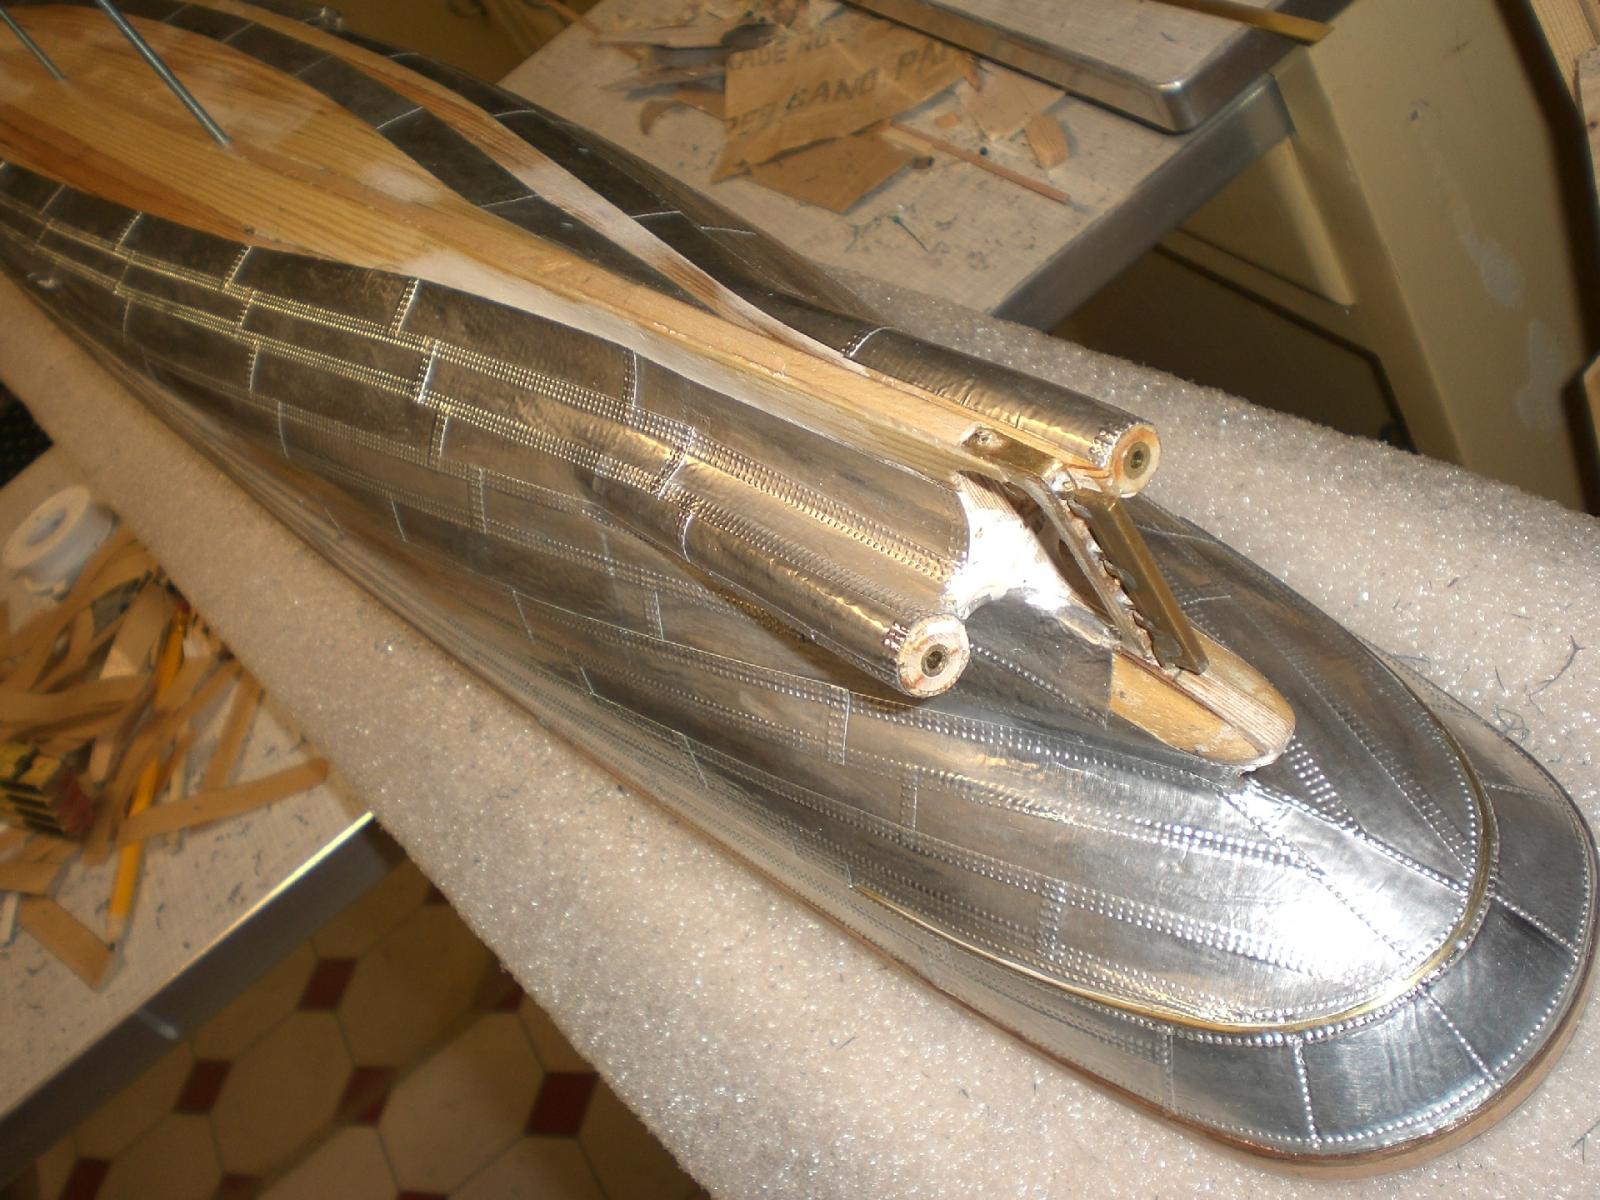
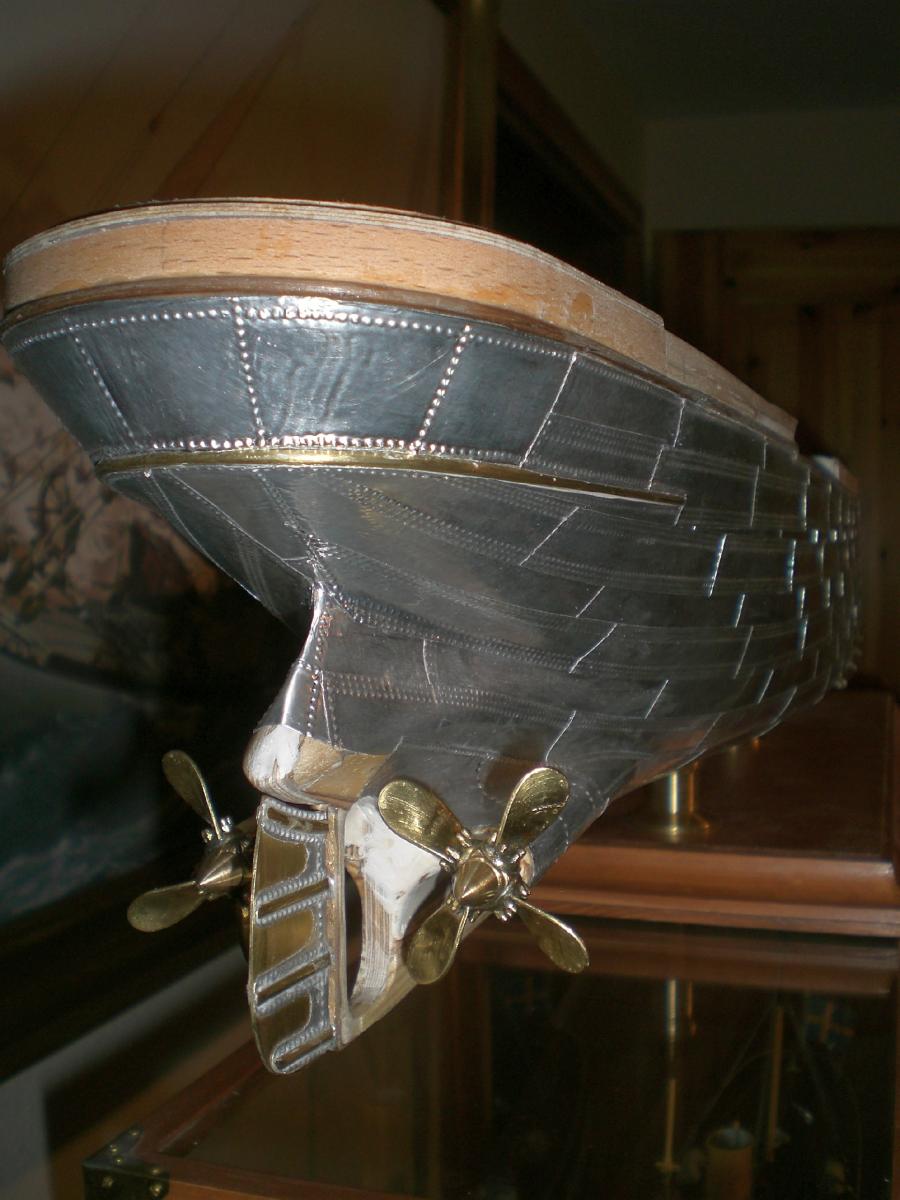
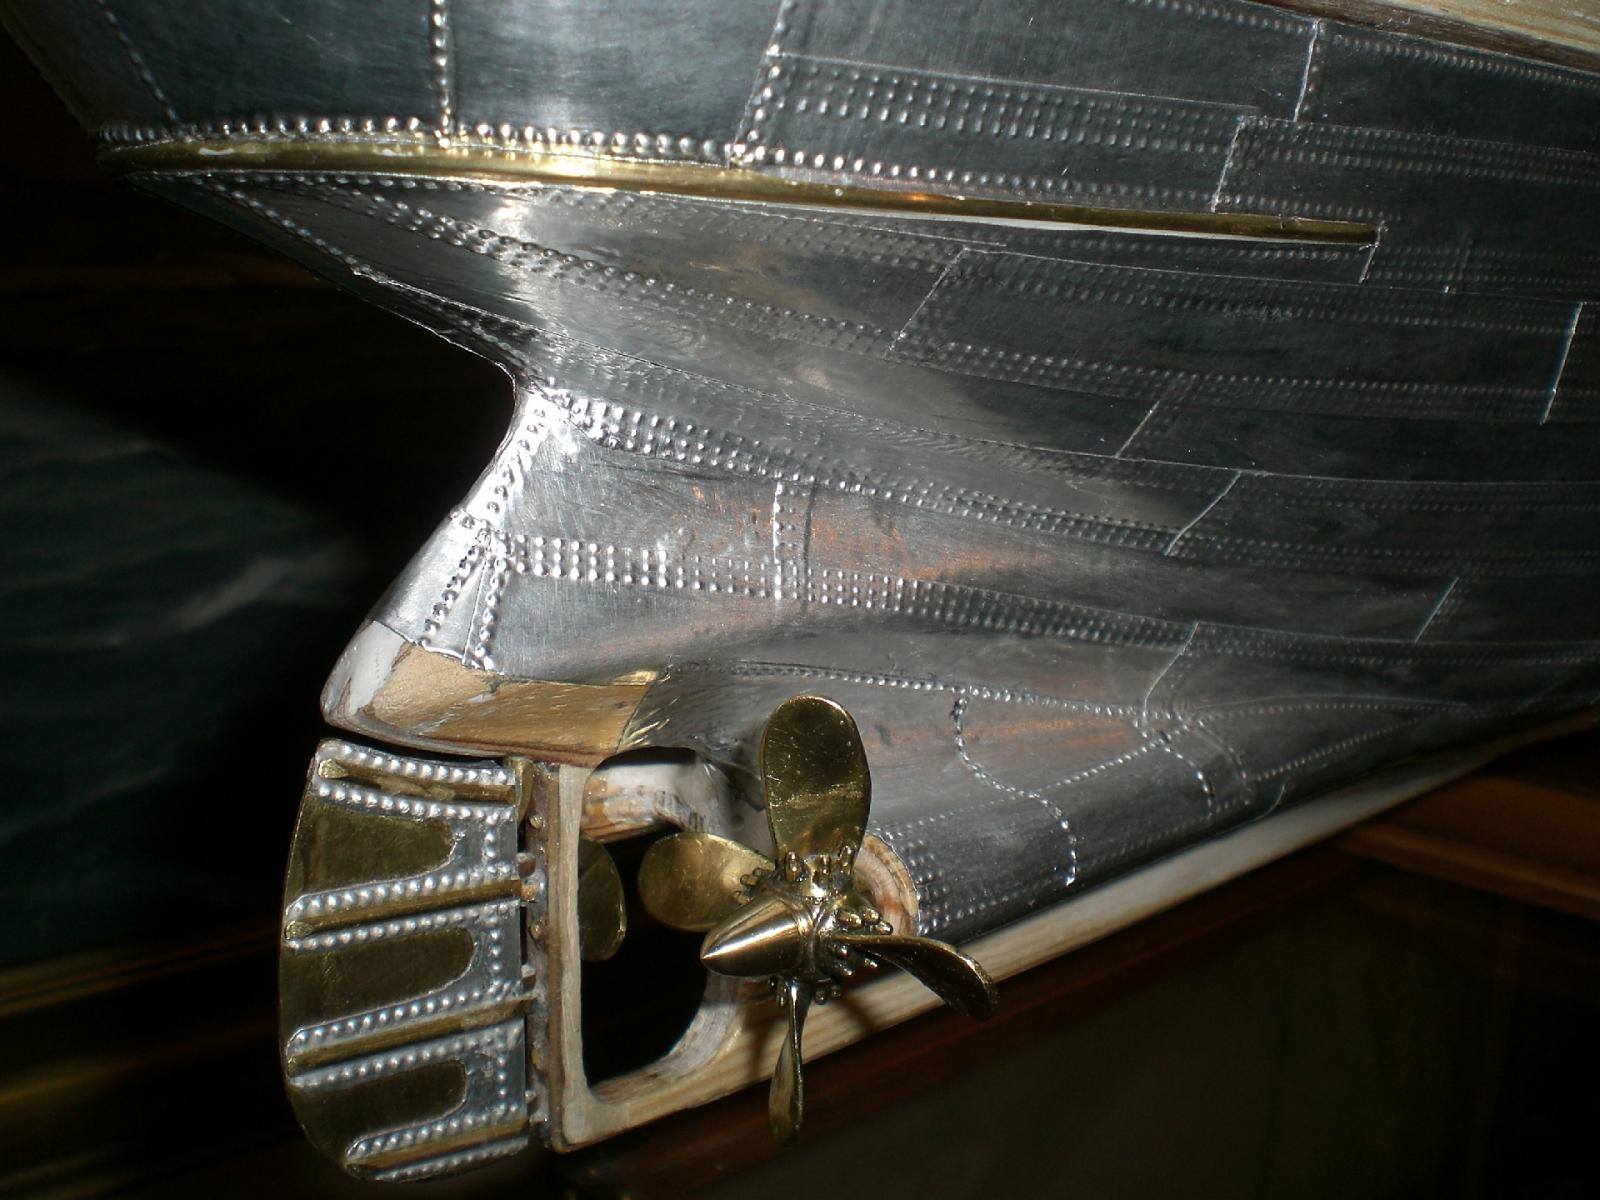
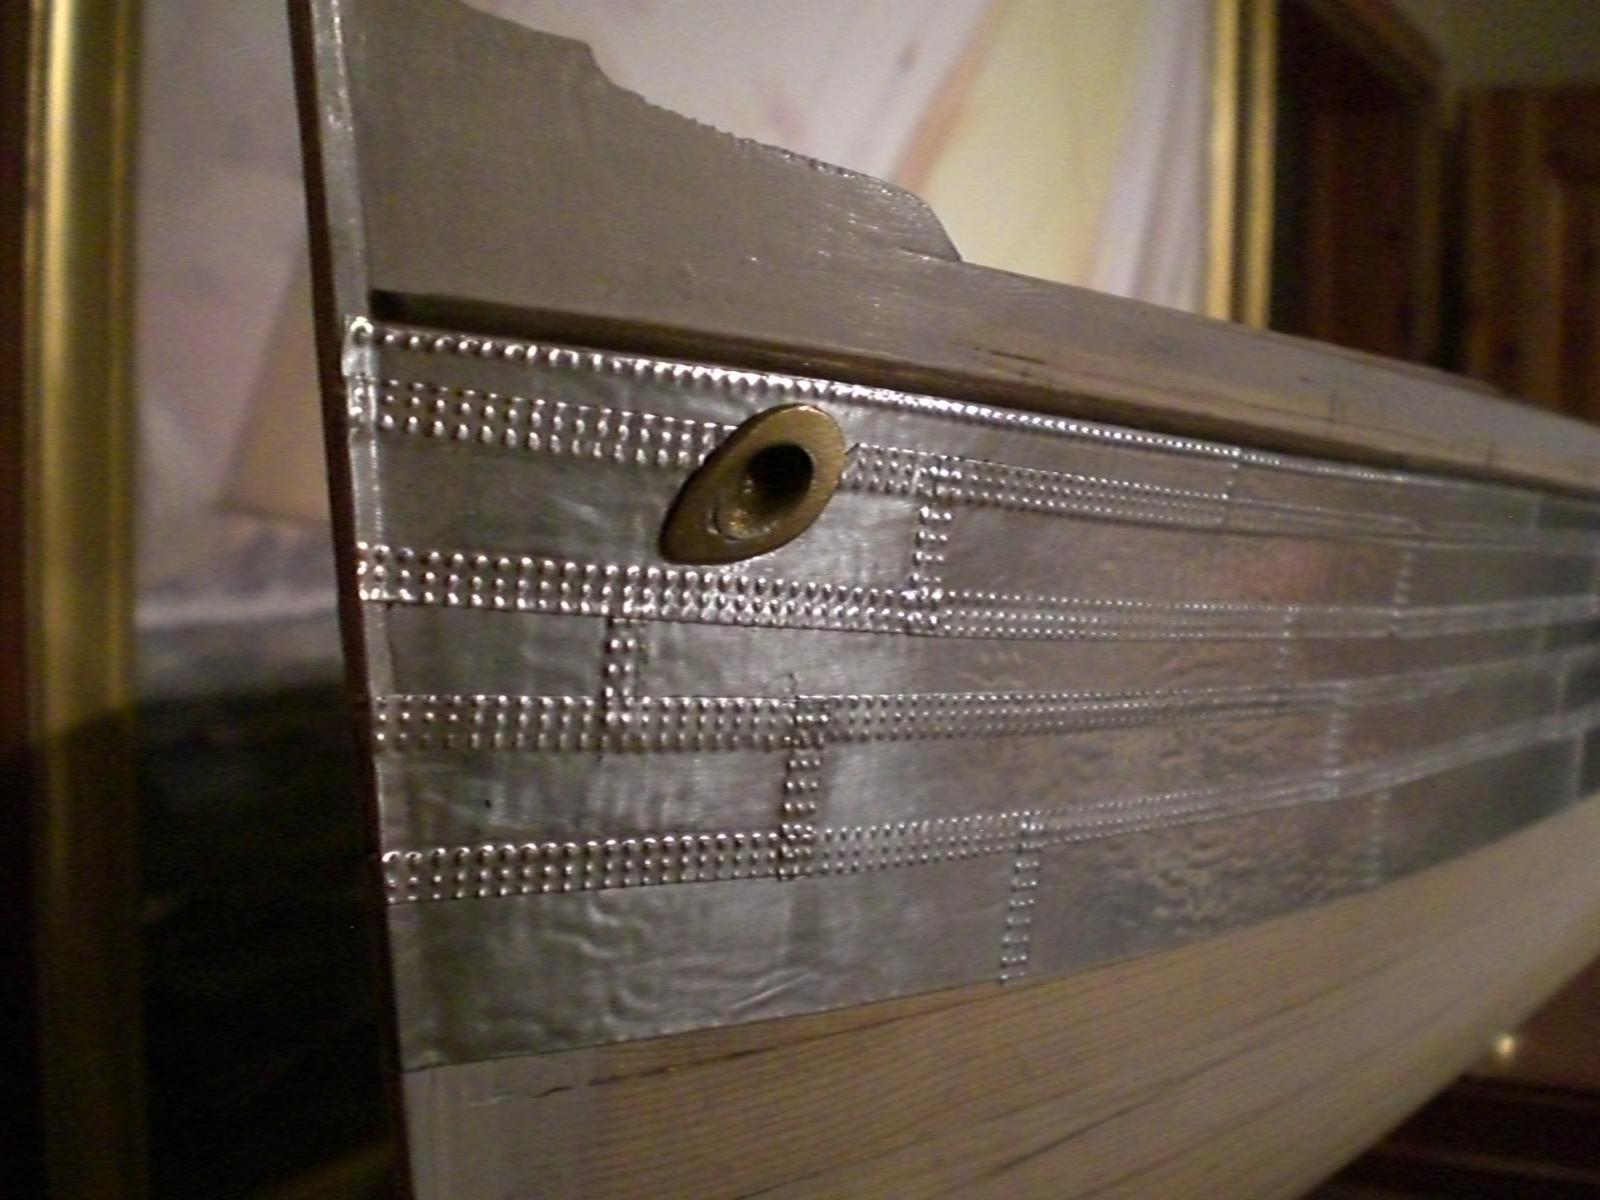
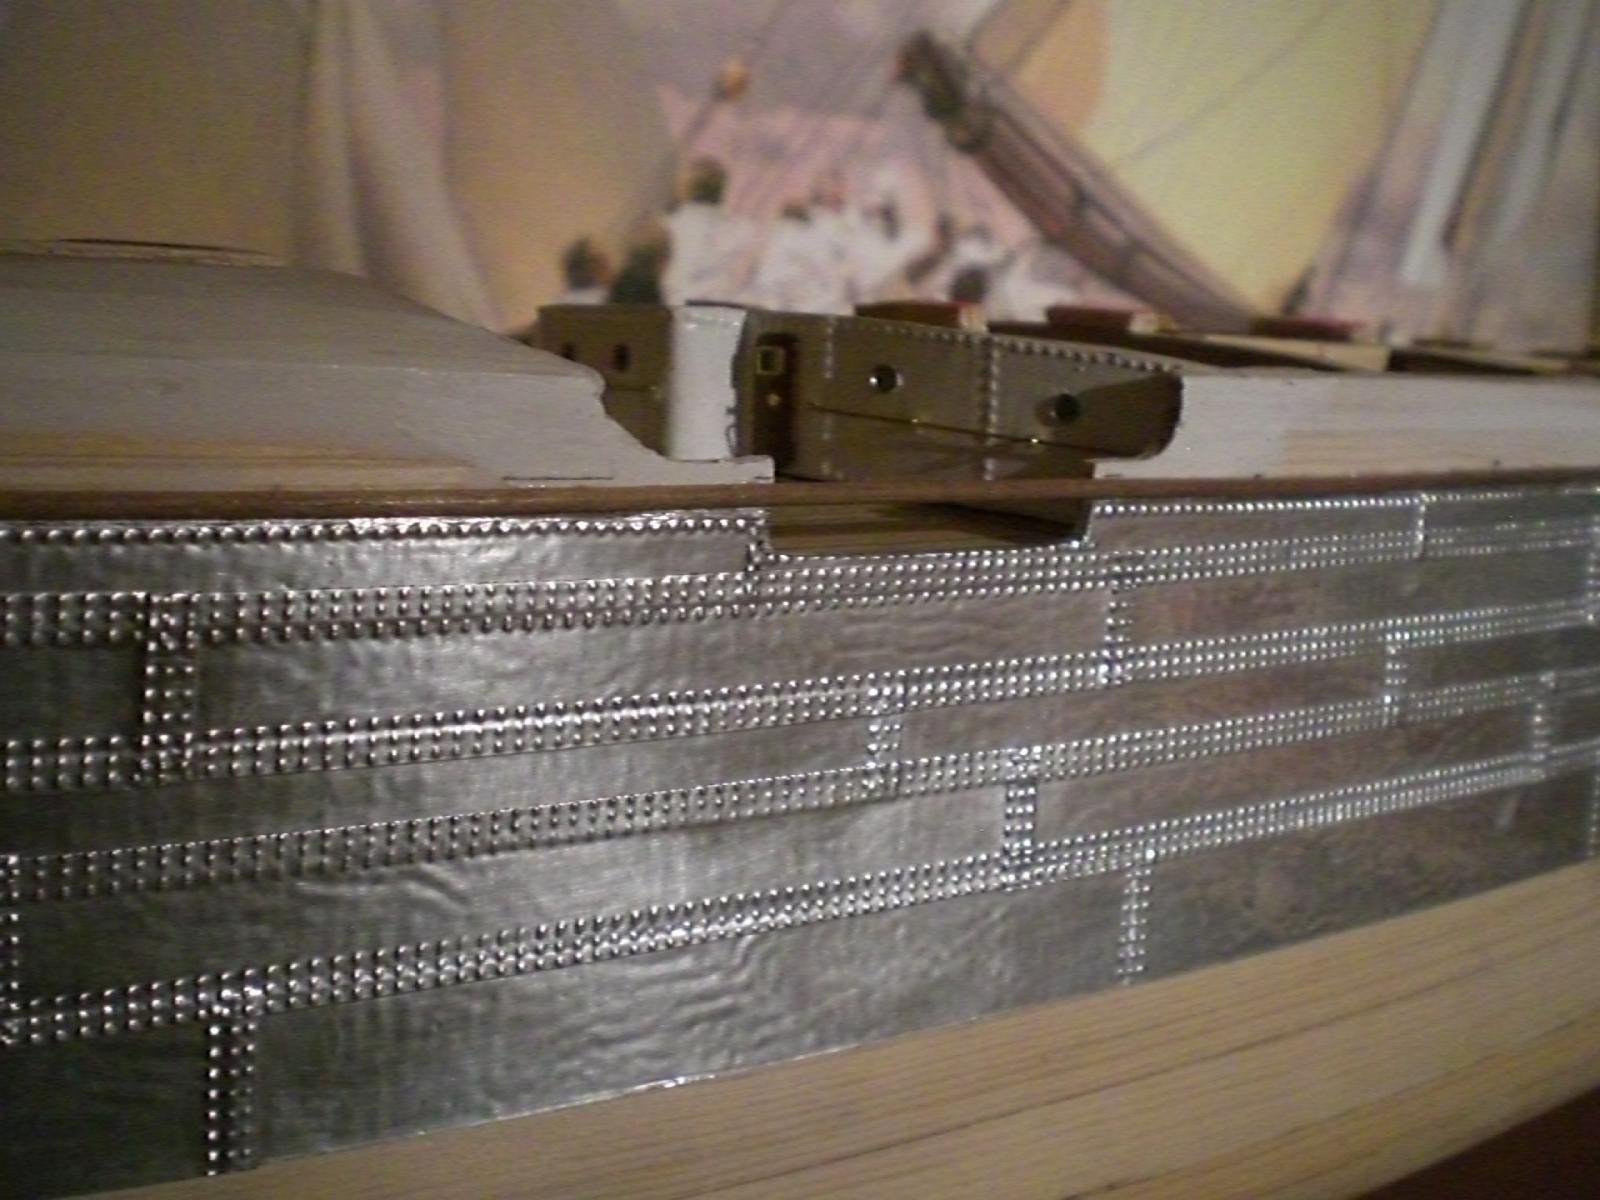
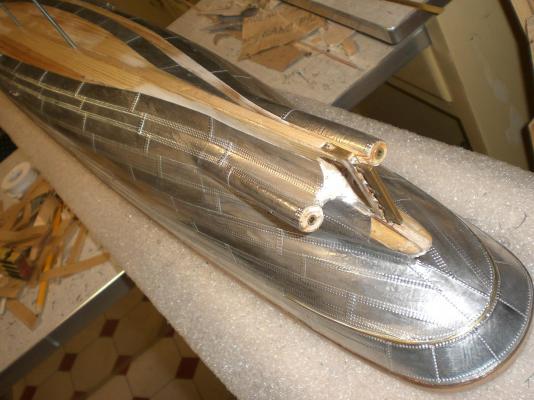
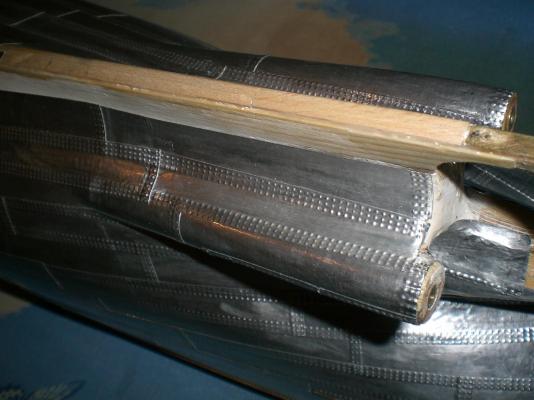
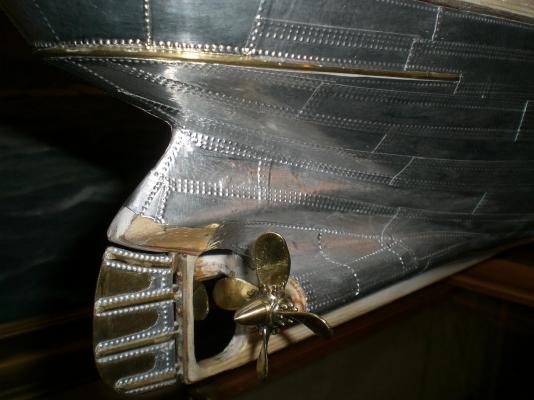
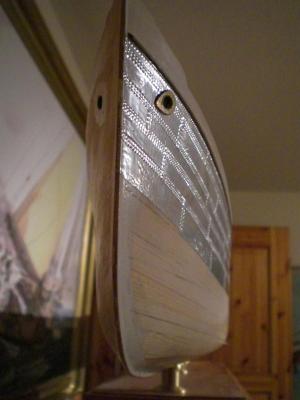
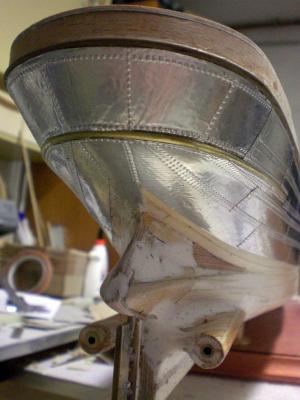
Good morning Denis, Thank you very much for your appreciation,... it takes some time to get all those plates in the right positions and in alignment, whereby the rivet joints must be stagered in vertical direction. Am now downwards at hight of the bilge keels... the shaft housings and the tailcone are a bit tricky.. Nils


- 2,625 replies
-
- 33
-
-
- kaiser wilhelm der grosse
- passenger steamer
- (and 1 more)
-
Hi Dave, many thanks for you nice words, you are very wellcome and I`m glad you are aboard.. Nils
- 2,625 replies
-
- 3
-
-
- kaiser wilhelm der grosse
- passenger steamer
- (and 1 more)
-
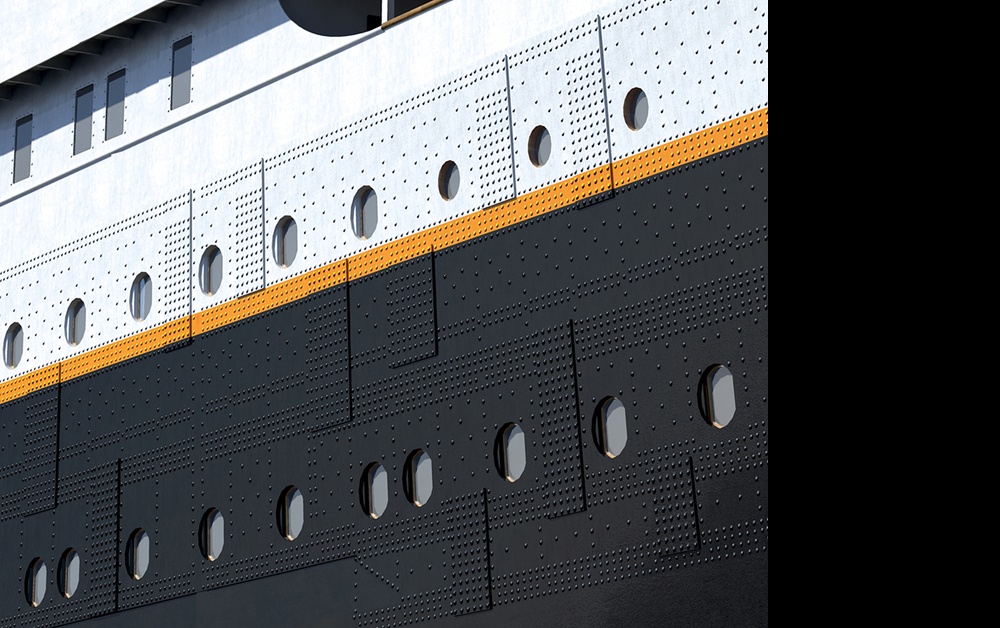
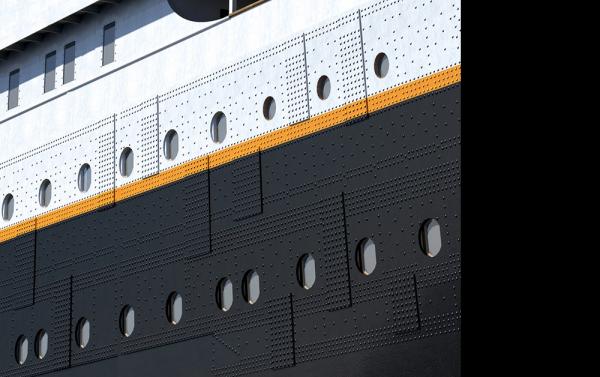
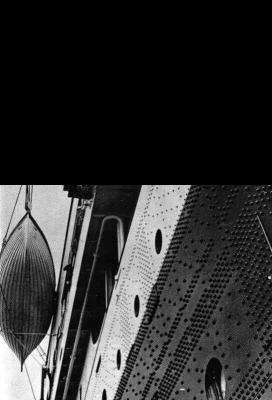
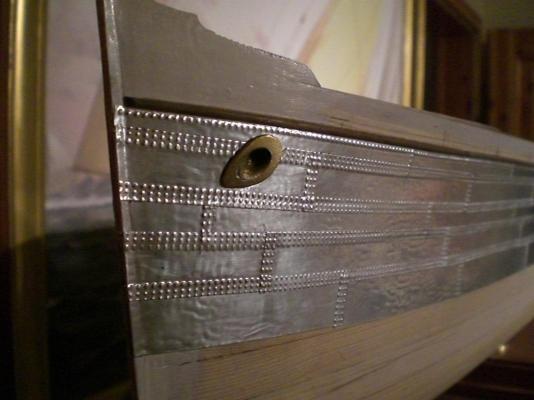
Thank you Michael, yes, the riveting / joining of those steel plates was probably the only technique 118 years ago for seagoing steelship building before the welding technique took over. I thought that somehow it should be possible ta catch a bit of that "atmosphere". Here are two samples of "Titanic`s" rivets...borrowed from the web Nils
- 2,625 replies
-
- 16
-
-
- kaiser wilhelm der grosse
- passenger steamer
- (and 1 more)
-
Many thanks to Bob (Rafine), Dan, Bill, and Bob (cap`n), and all the "likes" for your appreciations and your nice and encouraging comments... Bob (Rafine), Thanks, the hull painting session wo`nt be so far away. I`m trying to evaluate if the underwater part should rather be in a brownish copper Color or in brick red, and the overwater hull in black or rather in anthrazit (dark Grey, like charcoal), All Colors in dull surface appeal Dan, Thanks for your Input relating to the foil in copper material. I have now, in order to avoid this uncertain Situation (enough or not) , unrolled the remaining stock on the roll and 99% find it will be enough left, if I avoid to produce much scrap Bill, you`re very wellcome aboard the KWdG`s shipyard, I`ll be happy having you supervising the build from Idaho Bob (cap`n) thanks for the Information, the foil has to be a certain thickness (withstand poncing without penetrating) , and the gluefilm is a very Special one that holds on "like hell", once applied to the Underground. I just had bought a small roll of self adhesive Aluminium tape from my regional Aldi-Market, to try it out, but that stuff is unfortunately too thin, and the glue dos`nt suit my requirements Nils
- 2,625 replies
-
- 7
-
-
- kaiser wilhelm der grosse
- passenger steamer
- (and 1 more)
-
Hi Patrick, I`ve been thinking, just for that reason, of spray painting several times already, but spraying from a pressurized can now and then sprays little drops of paint, that do`nt vaporize sufficiently. I also made some trials with resin based dull surface and soft brush application, that drys down to a smooth homogen surface. Will probably do it that way..., also you may have experienced yourself already, that a little too long duration on a surface area brings "running leak noses", and removing these is very frustrating. For this build I intend to spray on a special clear color primer bonder, that is supposed to bring a super bonding of paint on (even shiny) aluminium surfaces without special pre-surface-treatment. If that works out like it should I`ll be be totally happy. A little care is necessary with the masking (hull waterline) in places where the masking covers the plating overlapping edges. In that case I use special thin paper based, self adhesive, soft lining tape, so far with good results Nils
- 2,625 replies
-
- 5
-
-
- kaiser wilhelm der grosse
- passenger steamer
- (and 1 more)
-
Thanks S.Coleman, welcome to the build, glad you like it... Nils
- 2,625 replies
-
- 2
-
-
- kaiser wilhelm der grosse
- passenger steamer
- (and 1 more)
-
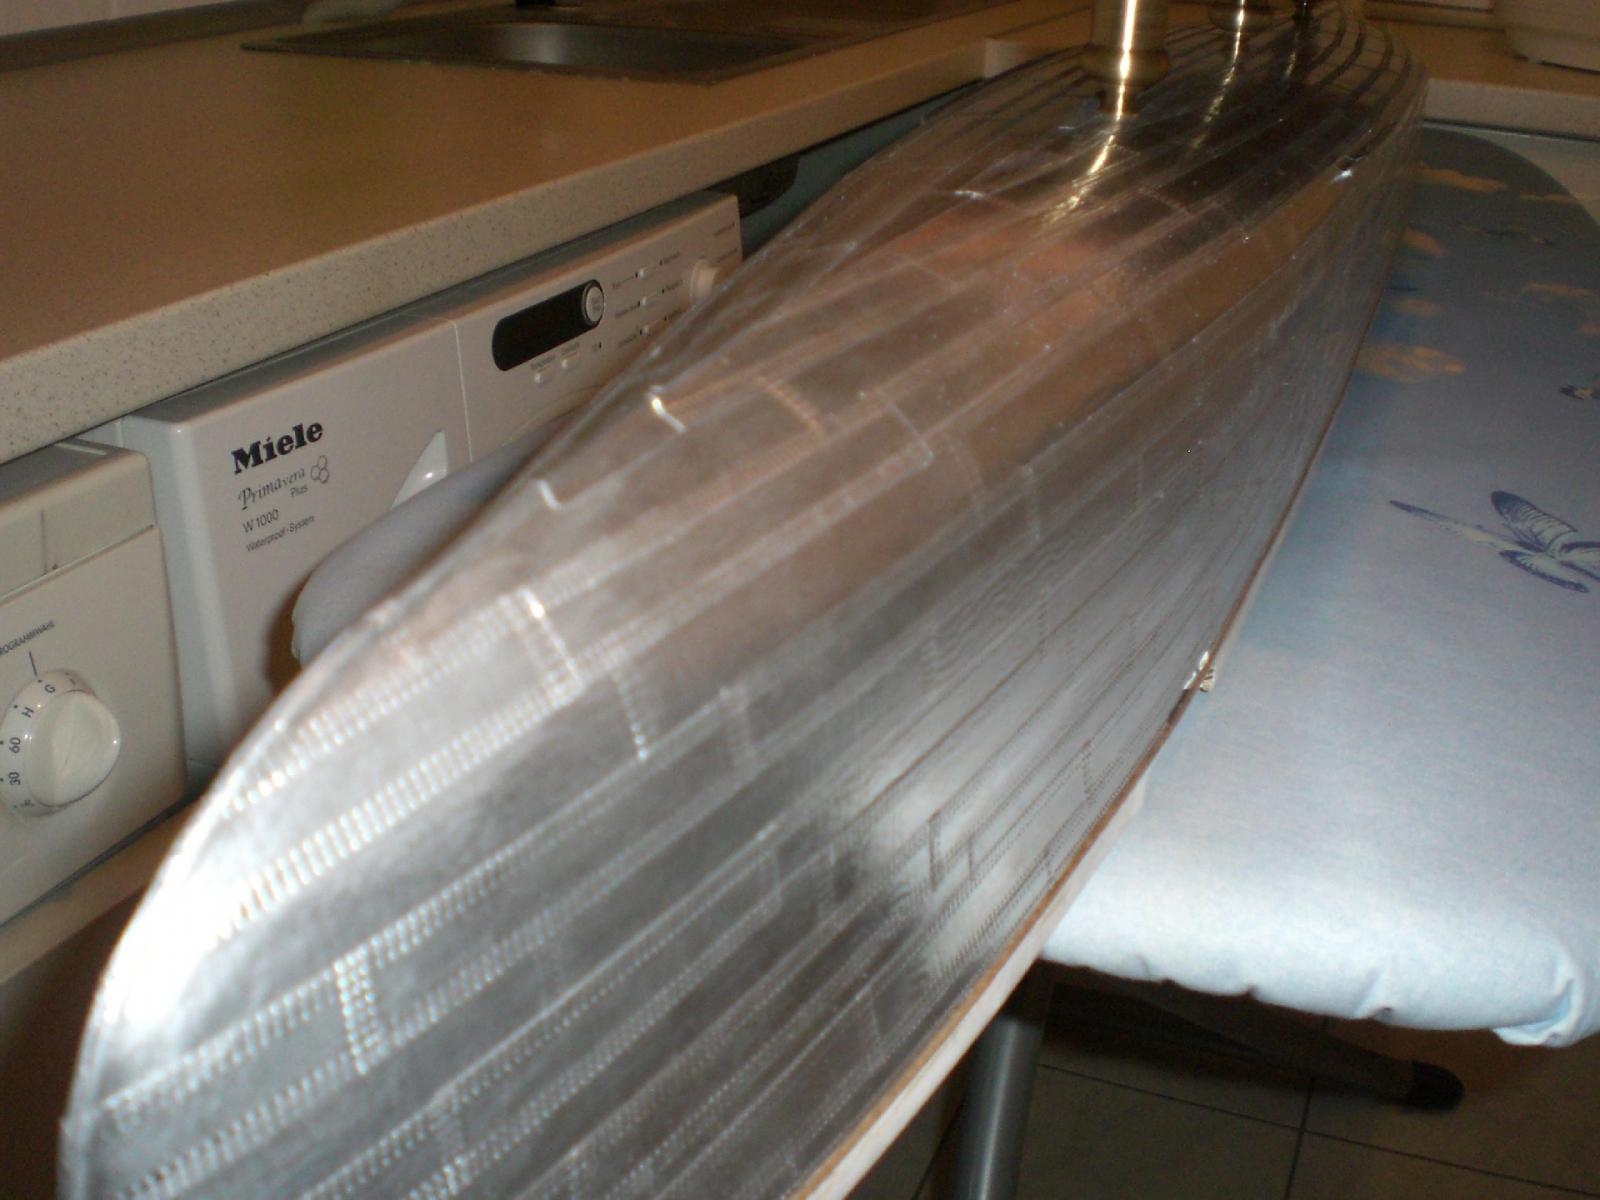
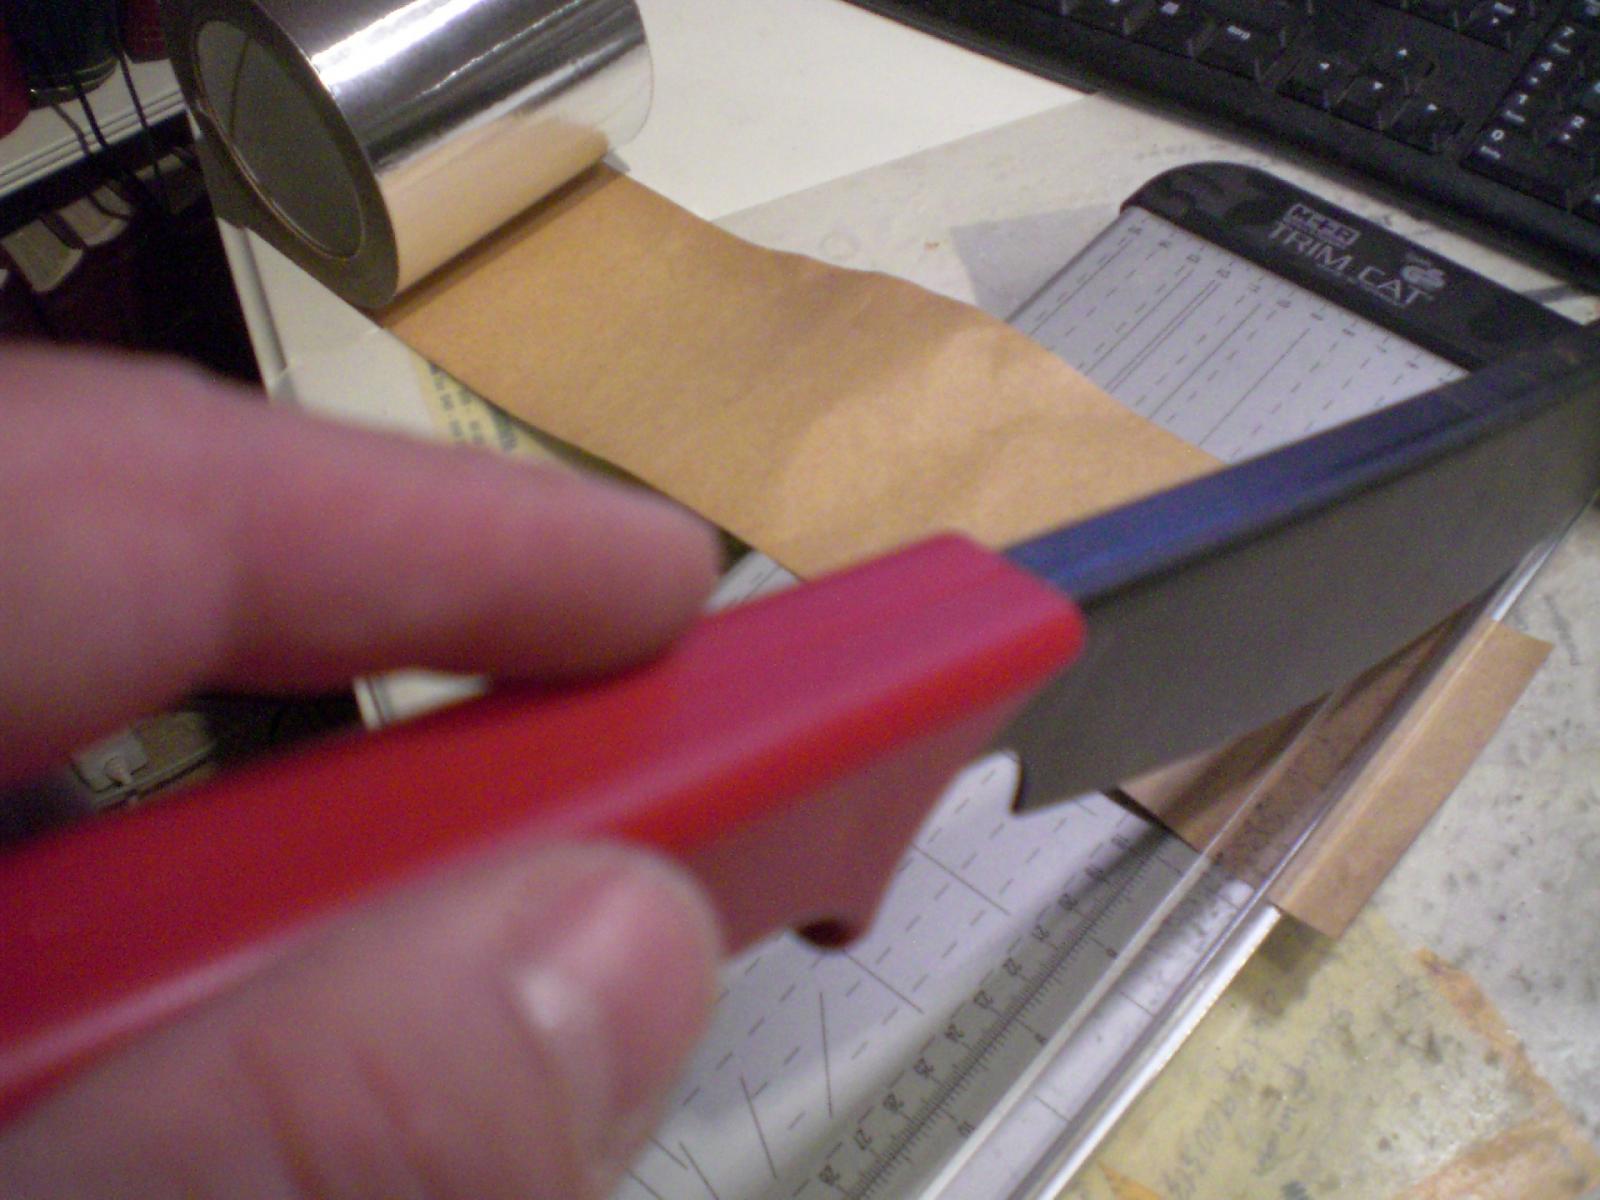
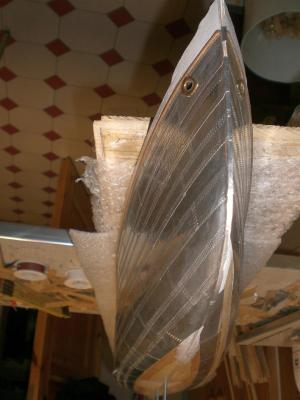
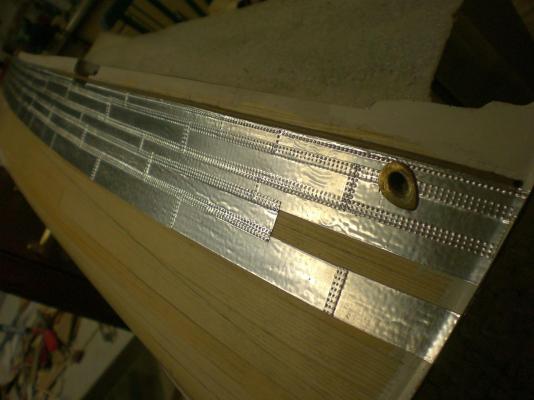
A little update on the plating job.... the plates are are rubbed down on the wooden planking by meams of a soft erazor untill all the overlapping joints are thoroughly pressed down, so there will be no trapped air-boils underneath, The rubber debris from the erazor is then wiped away with a soft brush, before the next stripe goes on Nils The table guillotine is very handy for straight, clean cuts


- 2,625 replies
-
- 36
-
-
- kaiser wilhelm der grosse
- passenger steamer
- (and 1 more)
-
Thank you very much Matija, your nice comment is much appreciated..., yet the model is not completed, but not far to go any more Nils
-
Thank you very much Bob, I`m a bit anxious because the adhesive foil is slowly coming to an end and I have`nt managed to get appr. new foil yet. Will Need to do some telephoning in the coming week Nils
- 2,625 replies
-
- 2
-
-
- kaiser wilhelm der grosse
- passenger steamer
- (and 1 more)
-
Thanks Mike, very nicely said......, it gives me a little encouraging uplift under the wings again, Dankeschön Nils
- 2,625 replies
-
- 5
-
-
- kaiser wilhelm der grosse
- passenger steamer
- (and 1 more)
-
Thank you Kester, in answer to your question and the damaged KWdG, I borrowed this information from the web`s available "Norway Heritage Site".... Description of the collision between the Kaiser Wilhelm der Grosse and the Orinoco off Cerburg in November 1906: On November 21st, 1906 the Kaiser Wilhelm der Grosse (Capt. O. Cuppers) which was bound from Bremen to New York, called at Southampton, and then crossed to Cherbourg, where 170 1st class passengers were embarked. When she left Cherbourg shortly after 8 o'clock, she carried 330 1st class, 350 2nd class, and 700 3rd class (steerage) passengers. The Orinoco, bound from Southampton to the West Indies and New York, had 60 1st class passengers, and four in the 2nd cabin. After leaving Cherbourg she was to call at Vigo to embark a number of emigrants for the West Indies and South America. According to one account there was a dense fog, and the Kaiser Wilhelm der Grosse steamed slowly through the channel leading out of the roadstead, in charge of the French pilot, who was to be dropped off the Casquets. According to another report the Kaiser Wilhelm der Grosse was rounding the head of the dyke when her Captain perceived the Orinoco and gave two blasts of his whistle as a signal for the Orinoco to keep to starboard. The Orinoco, the report ads, did not respond and the signal was repeated from the Kaiser Wilhelm der Grosse, but still the Orinico did not change her course, and almost immediately afterward crashed into the Kaiser Wilhelm der Grosse's starboard bow. The Kaiser Wilhelm der Grosse was according to the report going at a rate of 18 knots, while the Orinoco was only steaming 3 knots. Capt. Cuppers of the Kaiser Wilhelm der Grosse was also blamed for discharging the pilot before the vessel was clear of the harbor. The majority of the 3rd class passengers, who were berthed forward, had gone below to arrange their belongings, and many had already retired in anticipation of sea-sickness in the Channel. The 1st class passengers had finished dinner, and many were on deck. Suddenly the outlines of a steamer loomed through the fog on the star board bow of the Kaiser Wilhelm der Grosse, not more than a hundred feet away. The Kaiser Wilhelm der Grosse instantly altered her course, but the vessel, which proved to be the Orinoco entering the harbor, kept steadily on, and crashed into the Kaiser Wilhelm der Grosse with terrific force, driving her steel plates inward and killing four emigrants who were lying in there bunks. So powerful was the impact that the bow of the Orinoco remained locked in the side of the Kaiser Wilhelm der Grosse for several minutes. When the liners finally drew apart, it was found that a great hole had been driven in the side of the Kaiser Wilhelm der Grosse, while her plates were twisted and bent for a considerable distance along the starboard side. The bow plates of the Orinoco were likewise broken for a distance of five feet, but the damage was much less Nils
- 2,625 replies
-
- 9
-
-
- kaiser wilhelm der grosse
- passenger steamer
- (and 1 more)
-
Good work Dimitris, it must be fun to add and shape all those Details (and there are plenty of them...) Nils