Mirabell61
-
Posts
7,418 -
Joined
-
Last visited
Content Type
Profiles
Forums
Gallery
Events
Everything posted by Mirabell61
-
 Denis, nice Progress there, I`m admiring that you have the Patience to thorrowly do all the small Detail work, the painting of pipes and deck Fittings etc. and get all These parts to look so fine before you start with further Assembling. The result proves you are doing it absolutely right - a beautiful ship- Nils
 -
Moin Hartmut, Thank you very much for your Kind words, I`m very glad the KWdG model finds your interest in this log... Nils
- 2,625 replies
-
- 2
-

-
- kaiser wilhelm der grosse
- passenger steamer
- (and 1 more)
-
Thank you very much Bob, I`m trying to Keep the upper hull rails clean and in natural wood appeal whilst applying the black paint without messing, and with help of the Tamiya tape masking it really works very well... Nils
- 2,625 replies
-
- 26
-
-
- kaiser wilhelm der grosse
- passenger steamer
- (and 1 more)
-
Gerald, your work Looks fantastic, and I presume that a lot of your fellow builders on this site would love to see more of your beautiful and precise work. A steel plated ("riveted") model or a cross section made in build-log steps, in the way you present it on your own site would be great. Trust that this thread ought to be moved (perhaps by moderator) to a new place / Topic "iron and steel ships" or so ... Nils
-
Many thanks to Dan, Patrick, Pete and John, and all the "likes", for your appreciations, Dan, he`s just calling the dry dock crane Operator for Attention...... Patrick, nice comment, thanks... Pete, I do hope that the badges will not fade out (UV light) on the photo paper.. John, yore always wellcome John, glad you like it.. Nils
- 2,625 replies
-
- 5
-
-
- kaiser wilhelm der grosse
- passenger steamer
- (and 1 more)
-
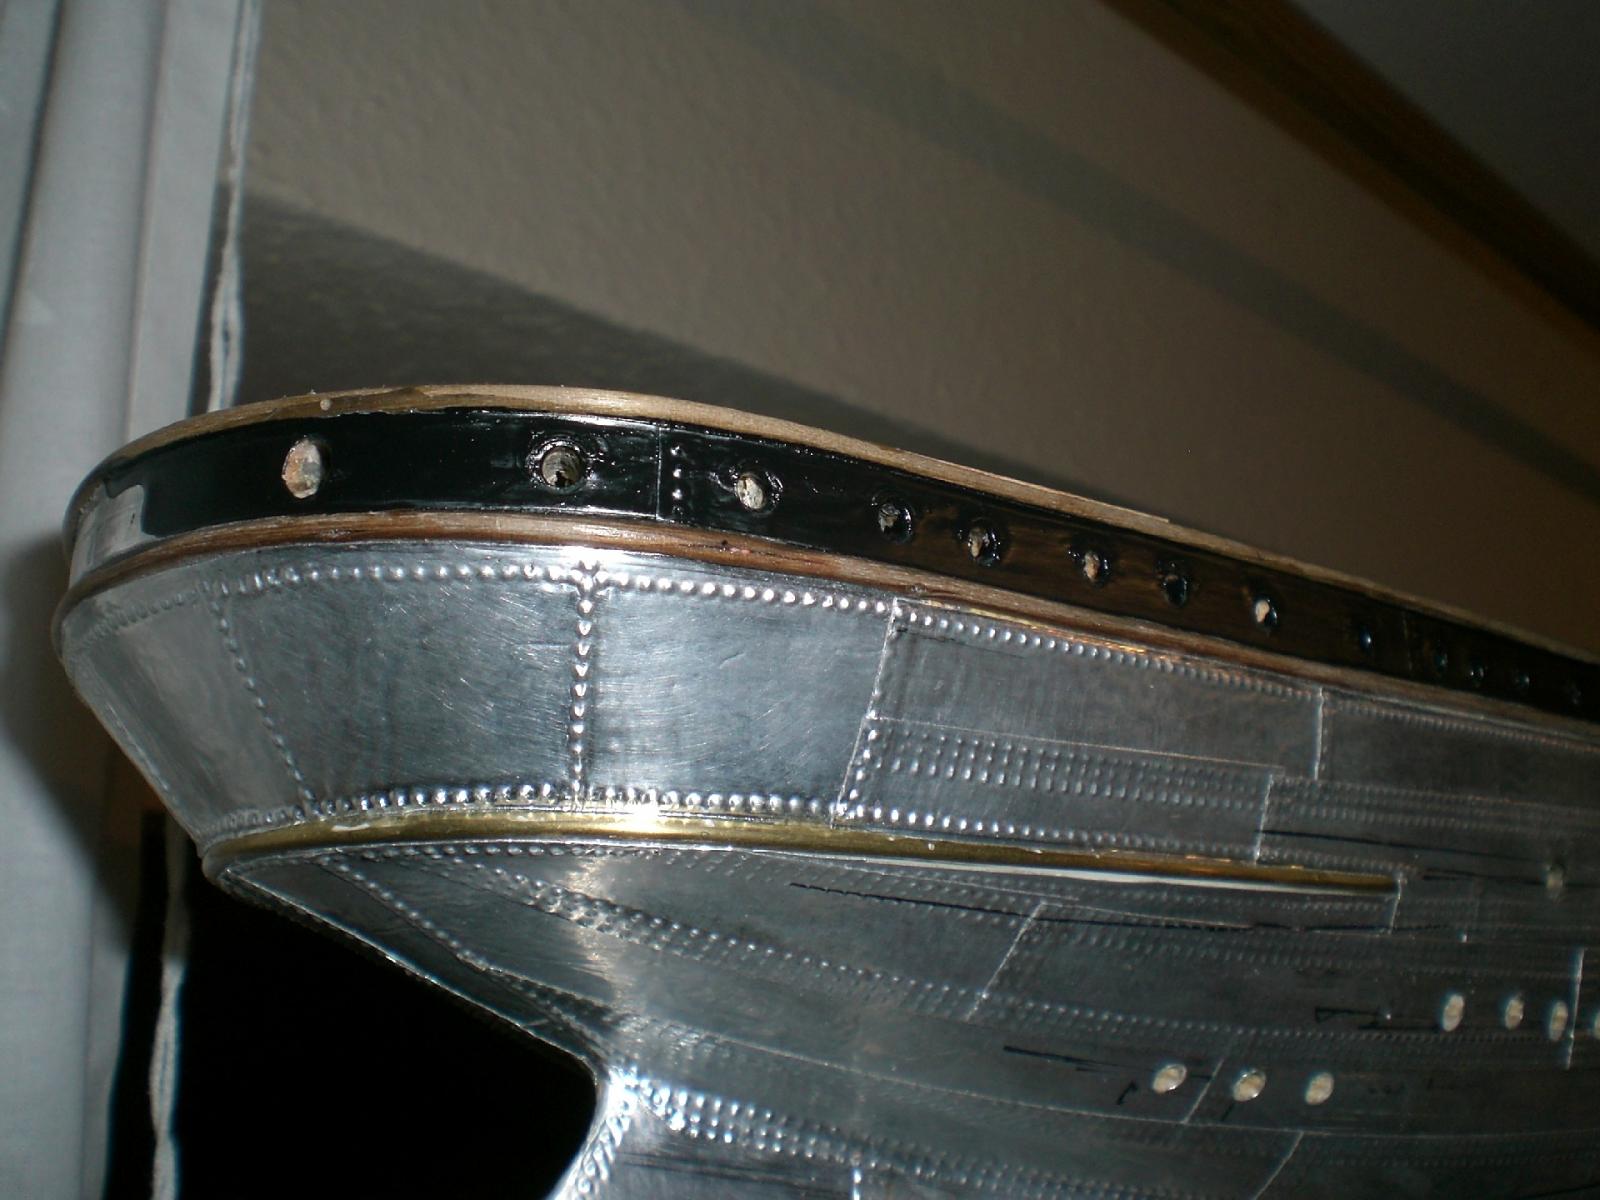
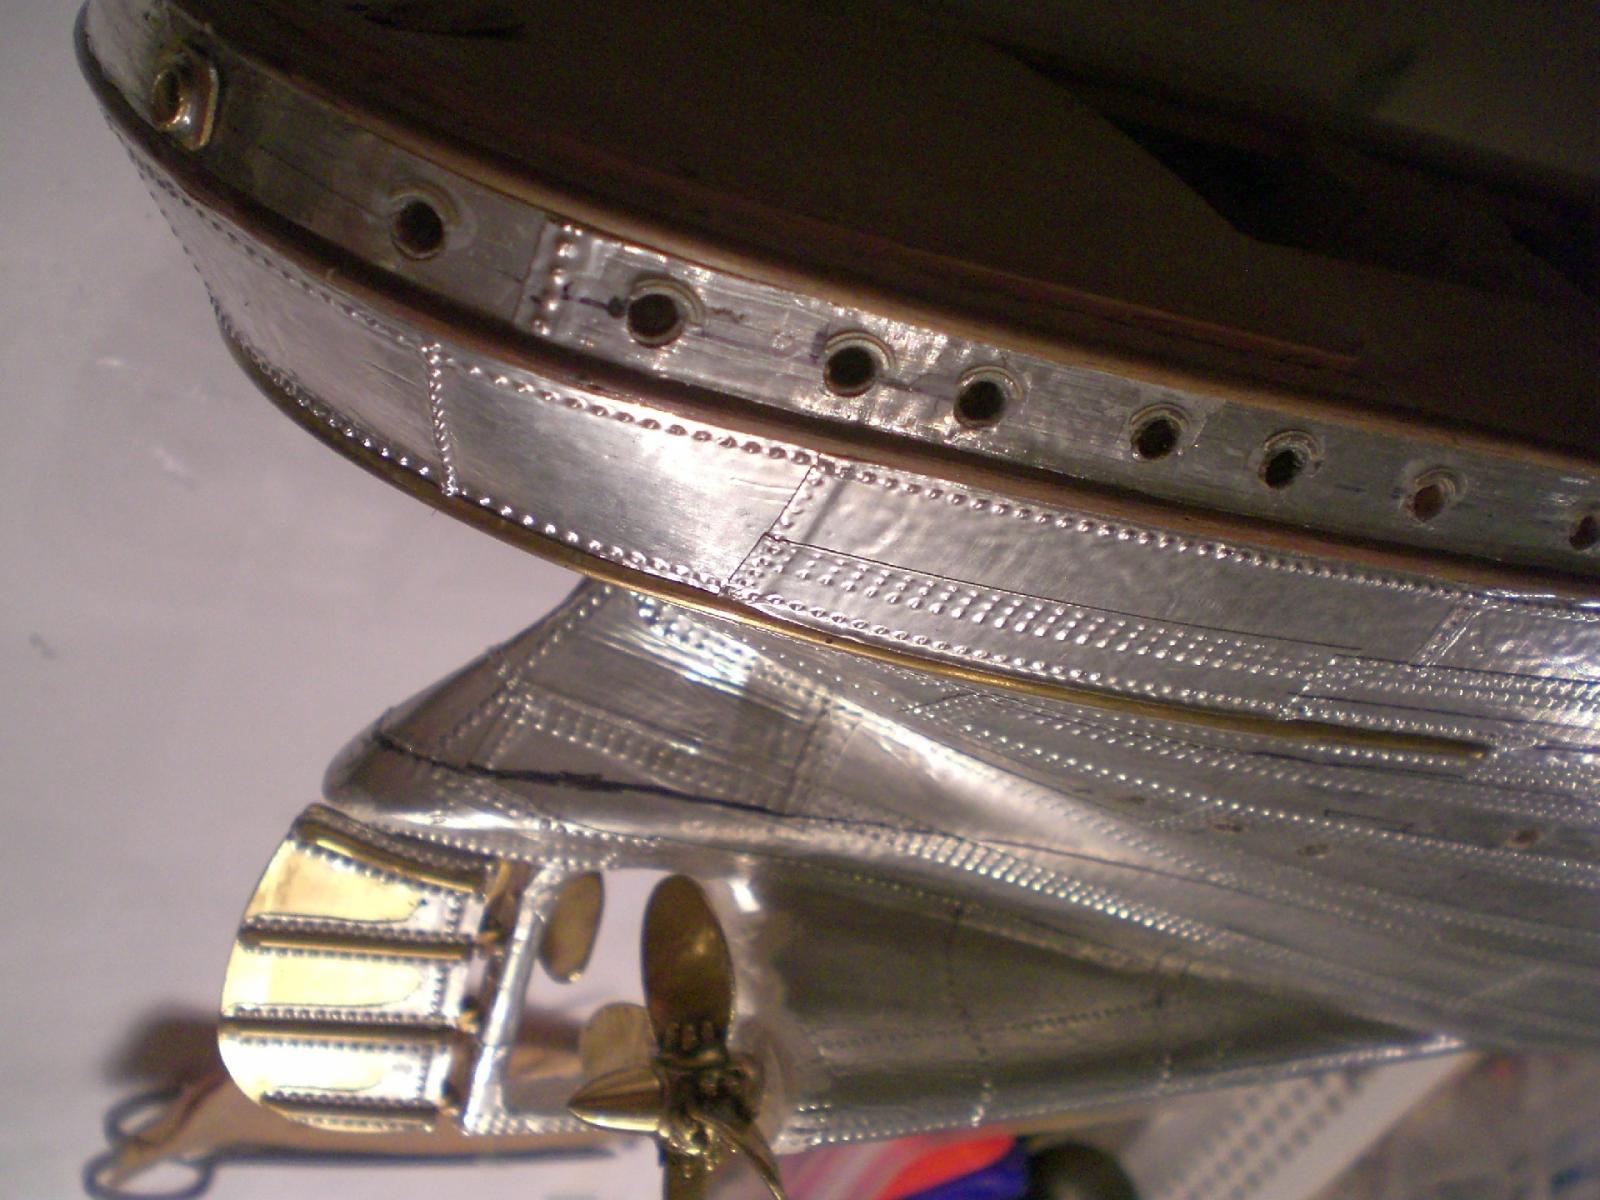
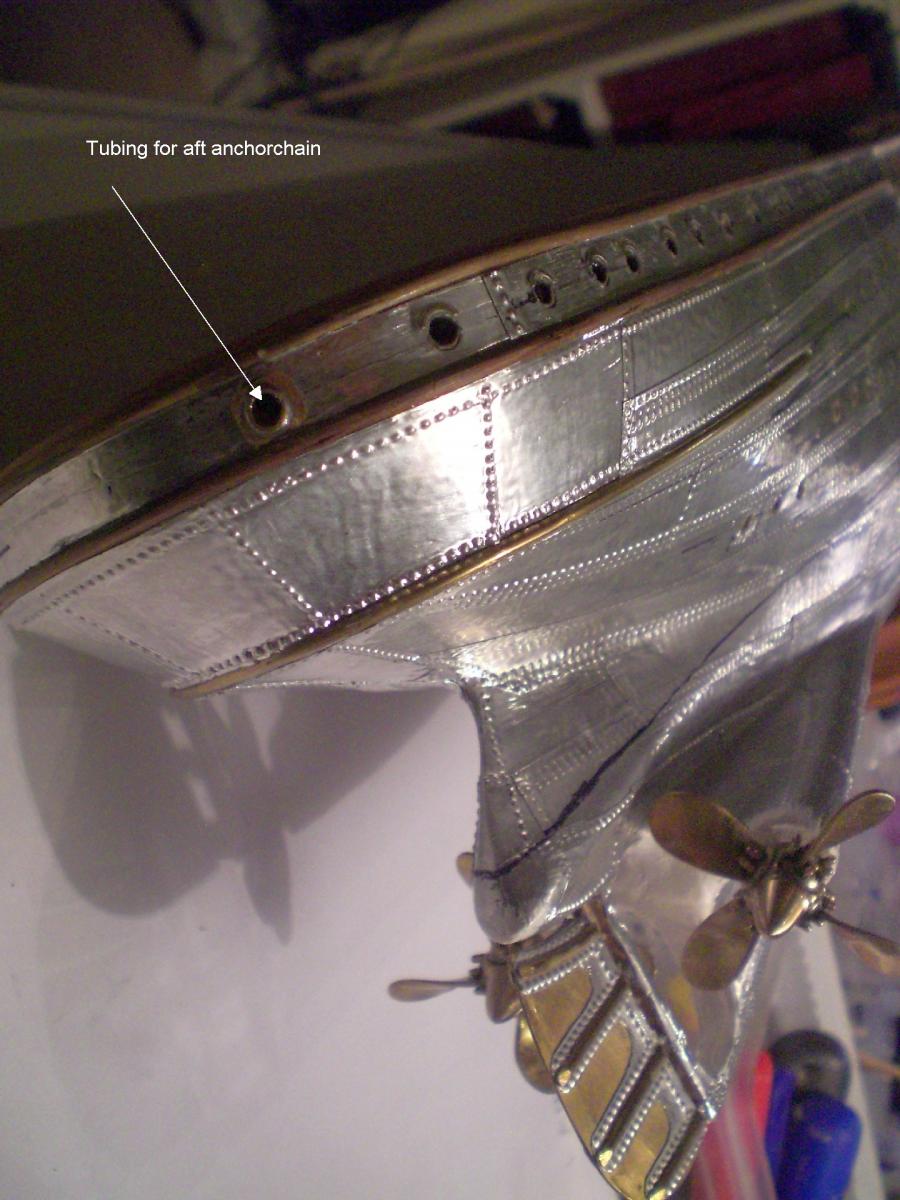
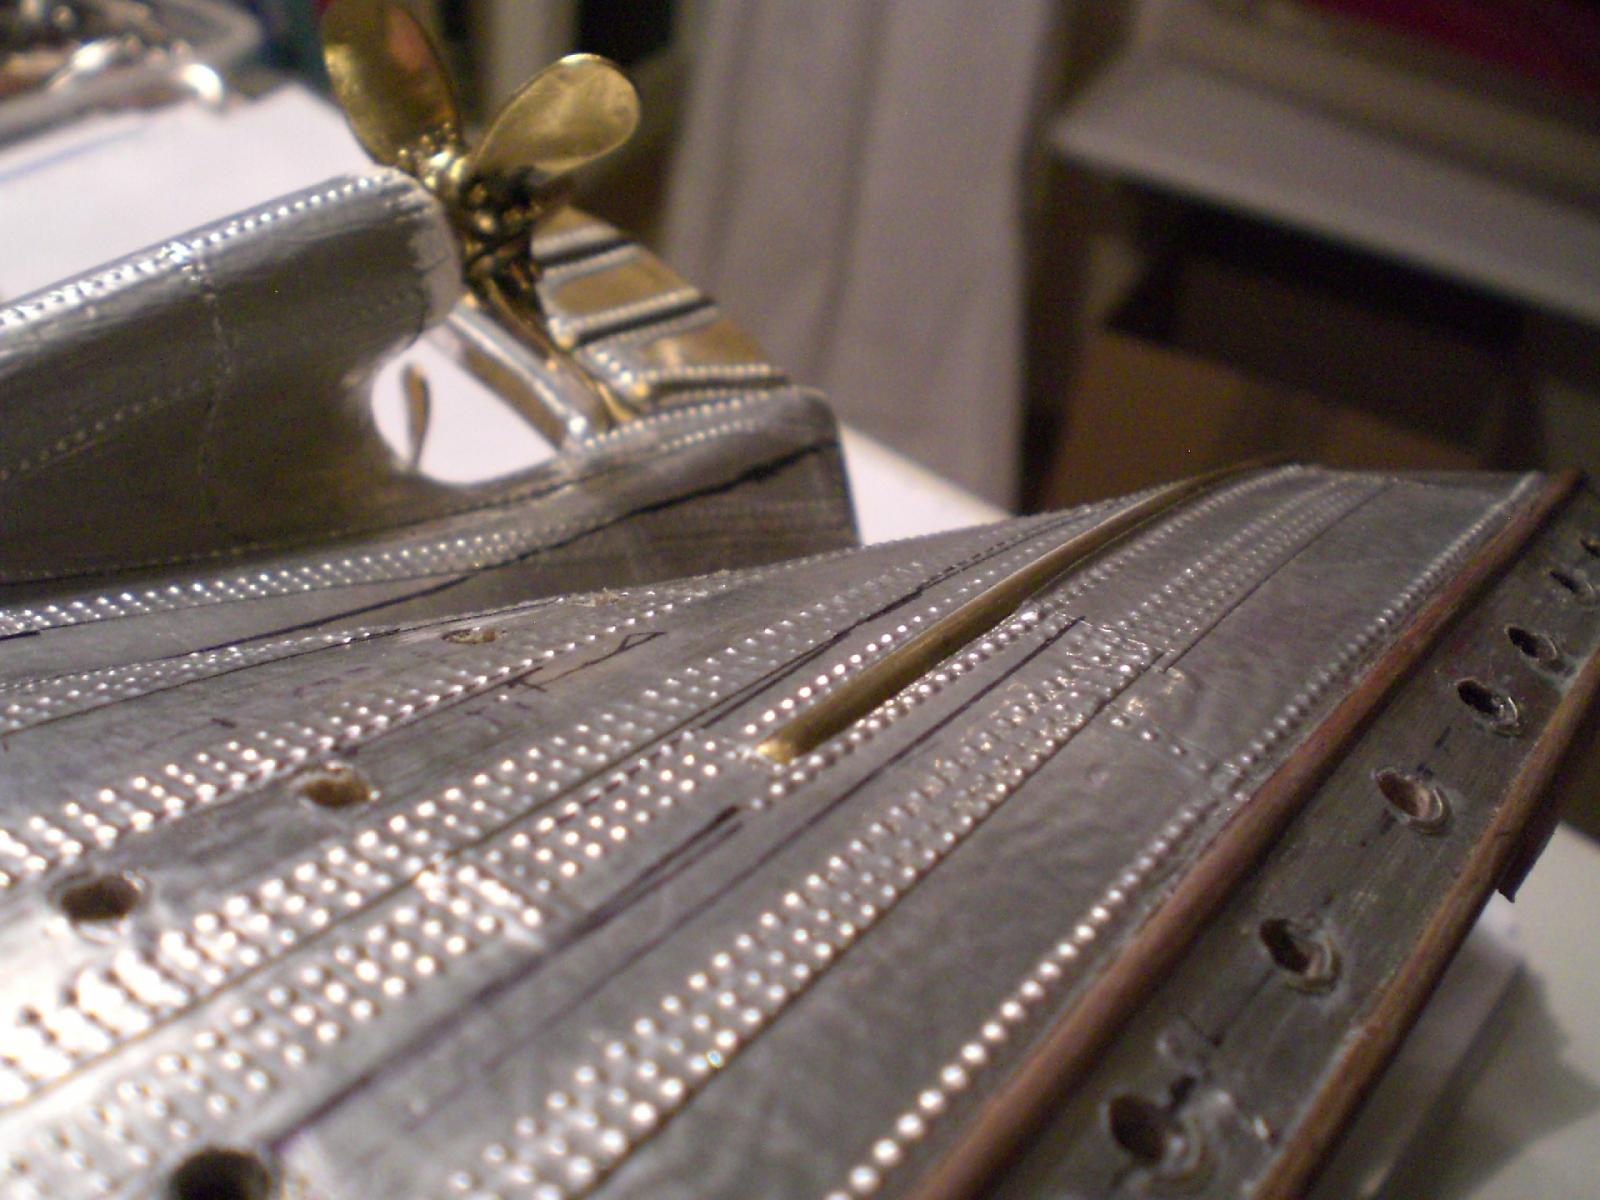
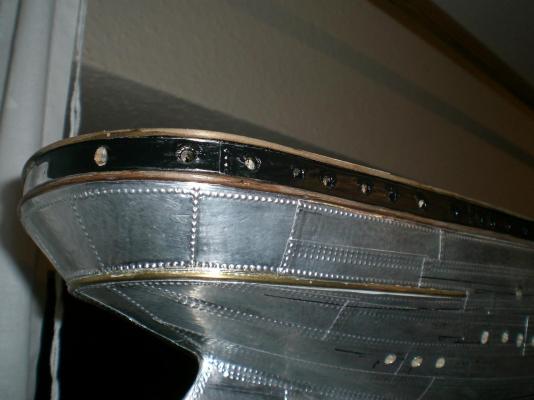
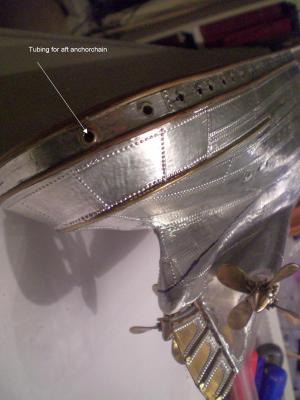
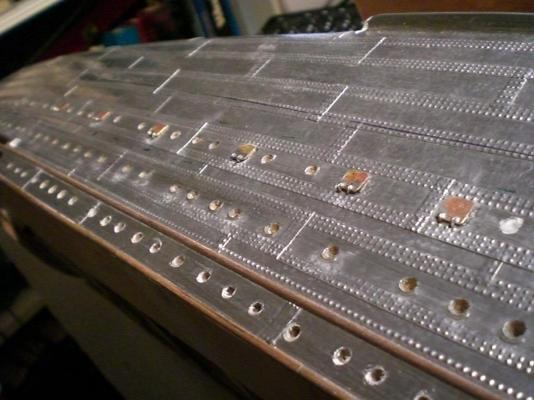
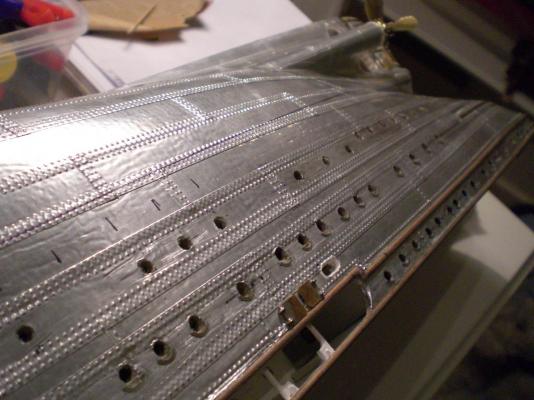
Build log part 25 the portholes are not fitted yet, (to be mounted after final painting of hull), but the hull is drilled in the oppropriate places, and the upper two rows will have "eyebrows", to keep the porthole glasses clear The unsymmerical tubing for the aft anchorchain is set and stb-side has the upper bow-decoration attached Nils I am satisfied with the dull black hull color front bow decoration as shown / made in the last post the number of portholes and positions are corresponding with the overview drawing


- 2,625 replies
-
- 38
-
-
- kaiser wilhelm der grosse
- passenger steamer
- (and 1 more)
-
very nice work Hartmut, also quite a pace in Progress, all Looks great Nils
-
Many thanks for your Kind words, Pete, Michael, Crackers and David..., and all the "likes" Pete, the typical "Herreshoff" logo, because its too Long, unfortunately could`nt be rounded in order to fit onto a round badge, would take an oval badge base... Michael, many thanks for your appreciation Crackers nice comment , thanks very much David, many thanks to you, glad you like it Nils
- 2,625 replies
-
- 5
-
-
- kaiser wilhelm der grosse
- passenger steamer
- (and 1 more)
-
congrats to keel laying Bob, all Looks good, and the Stern filling is shaped also.... Nils
- 348 replies
-
- 2
-
-
- pequot
- cable ship
- (and 1 more)
-
Johann, plug and Framework for pinnace fabrication are fantastic ! Nils
-
Thank you very much Pete, perhaps we`ll find a nice "Herreshoff" badge for your models..... Nils
- 2,625 replies
-
- 6
-
-
- kaiser wilhelm der grosse
- passenger steamer
- (and 1 more)
-
Hi Bob, the change to scale 1:96 is a good choise. Have you decided if you build in horizontal layers, or on frames / bulkheads ? The later will be a nice planking job to do, but the twin screw hull surely will look great with it`s 527 mm length Nils
- 348 replies
-
- 2
-
-
- pequot
- cable ship
- (and 1 more)
-
Many thanks to Grant - Patrick - Bob - Dimitris - Sal - Boyd, and all the "likes", for their appraisals and appreciations Grant, thanks for you nice comment... Patrick, it. was an idea and it worked out quite well.. Bob, I thought about how to do a badge with a surface that resembled enamail a little bit.. Possibly this may be a way that also fellow builders could do historic badges and emblems for their ships Dimitris, yes, the portholes take their time to do, I`m still stuck in producing over 450 of them alone on the hull The most tasky side of it is doing all those drill holes without misdrillng or too much unplaned offset SAL, the CA was only to glue the photopaper emblem on the brass badge plate. In this case I unfortunately do`nt know how long the glossy photo side wil stay shiny and keep the colors. (may need to be replaced after some years) Boyd, Thanks, I also love helpful comments from fellow builders, many thanks to all, for example the highly appreciated way to do the paint borderline over riveted structure, as by Dirk`s ( Dubz`s) suggestuion, that was a complete new one to me Nils
- 2,625 replies
-
- 6
-
-
- kaiser wilhelm der grosse
- passenger steamer
- (and 1 more)
-
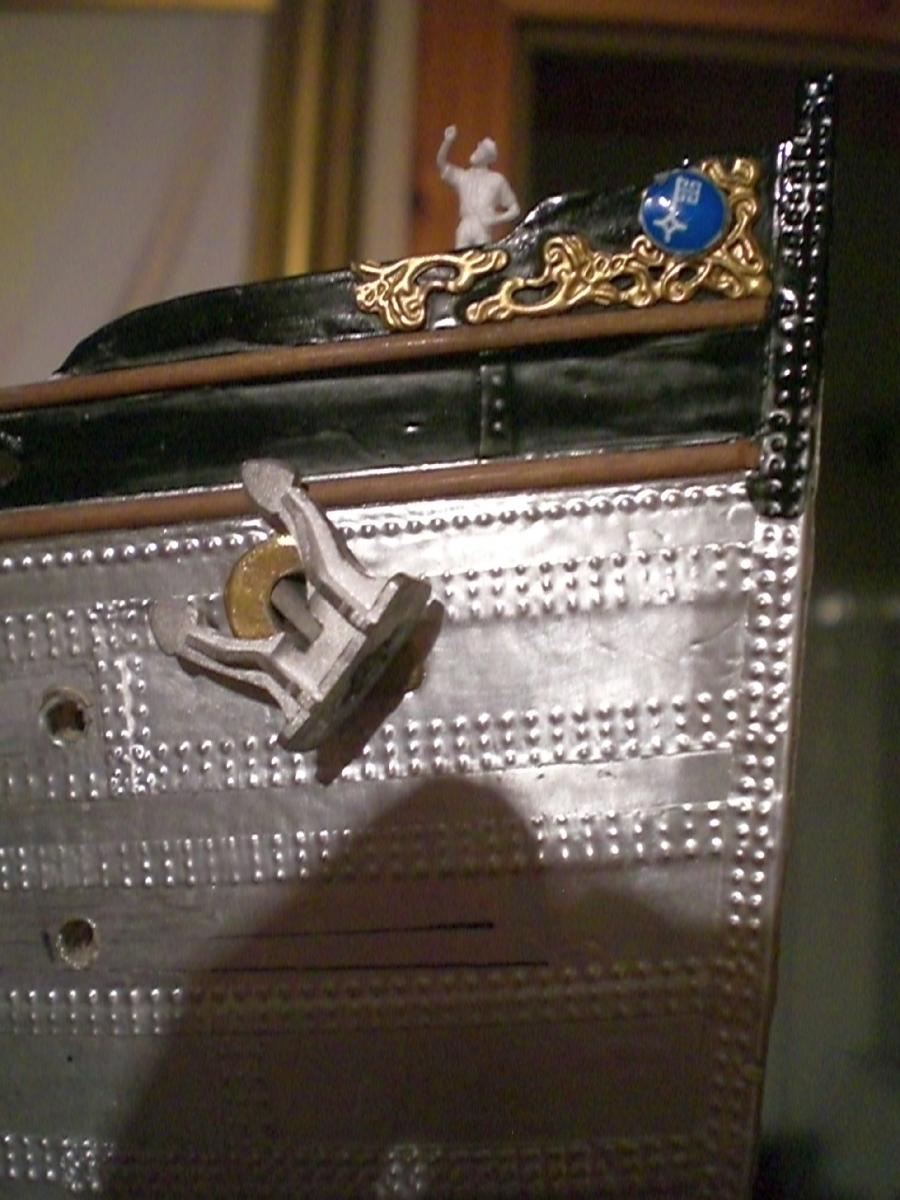
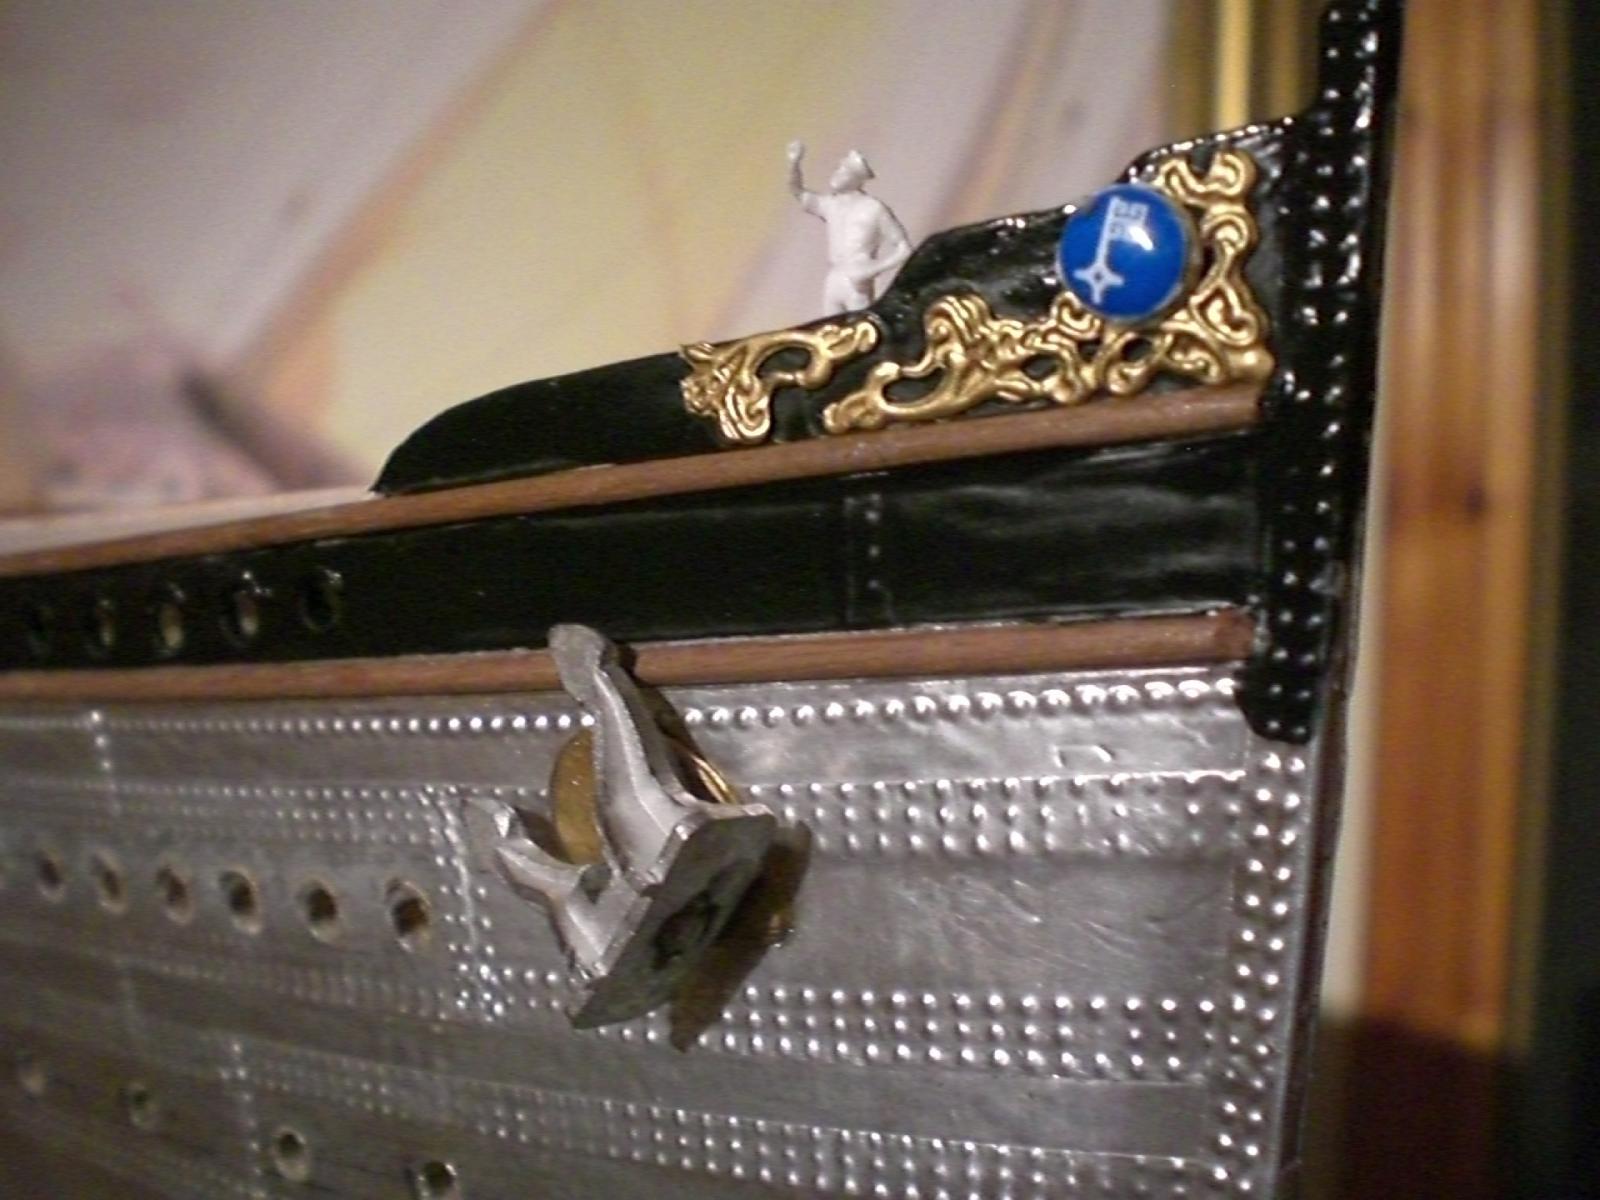
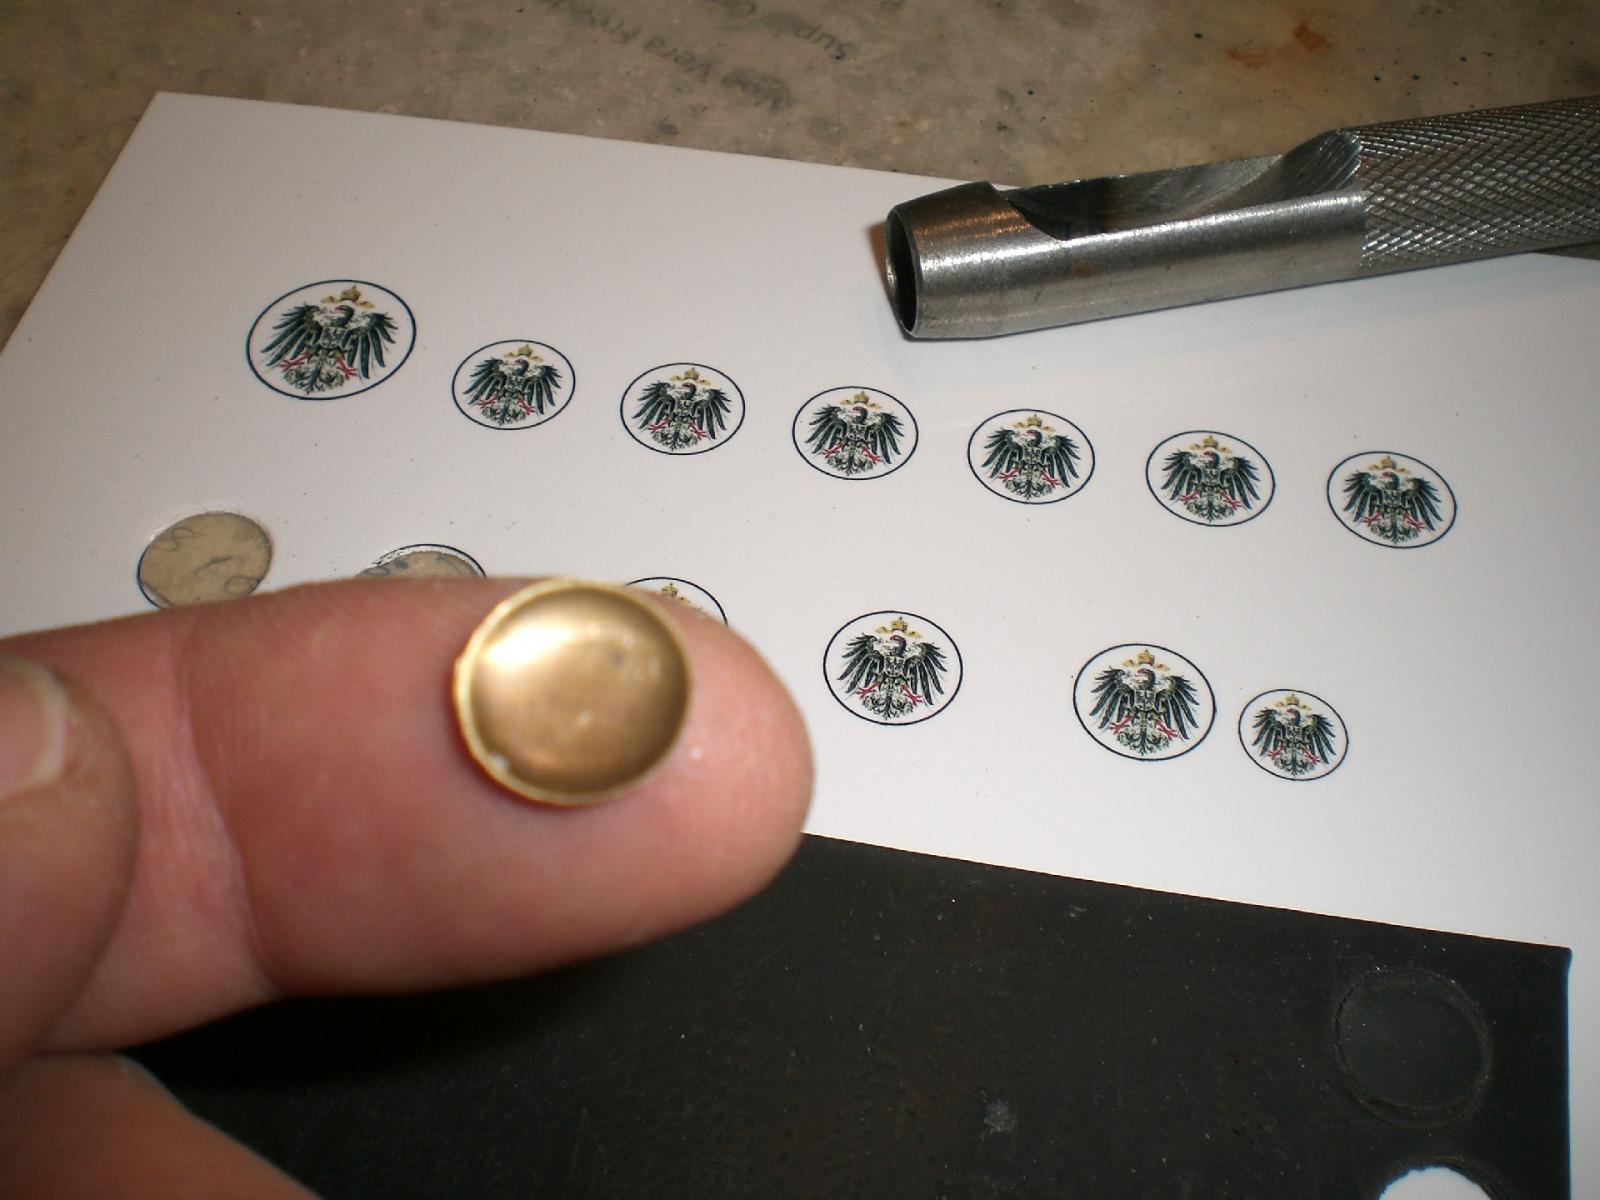
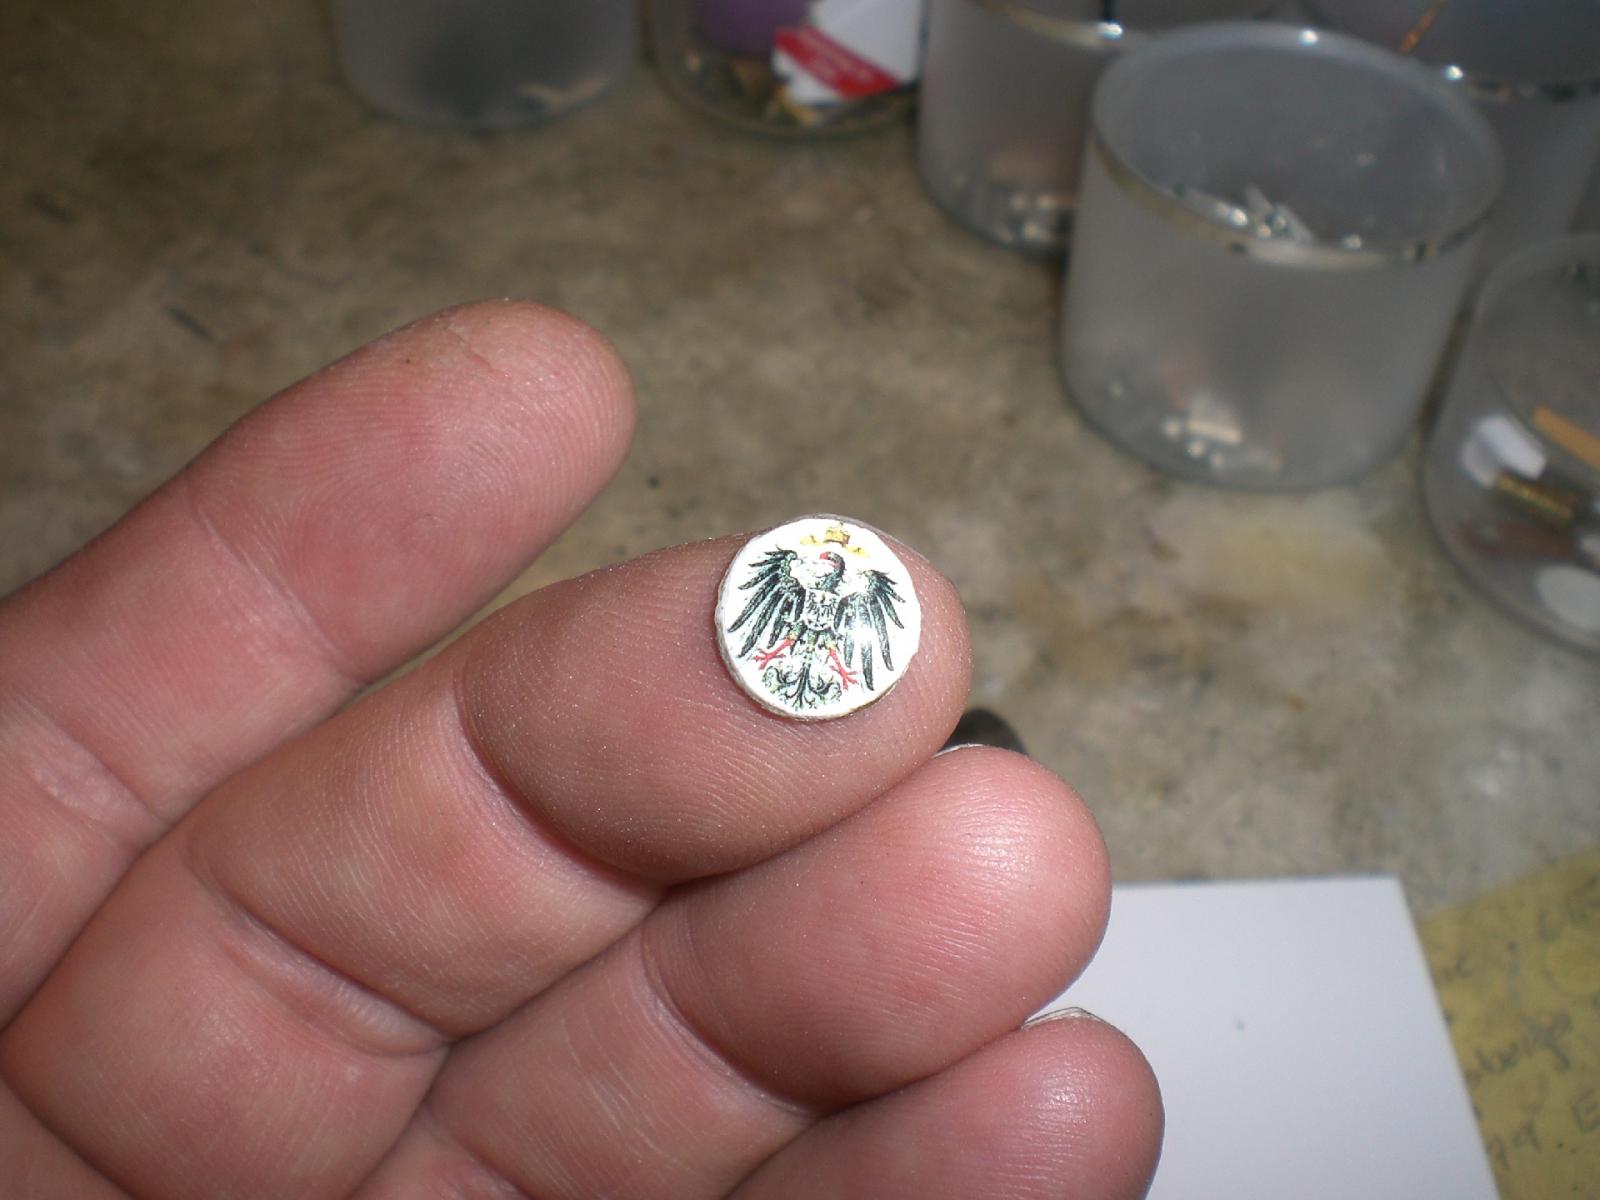
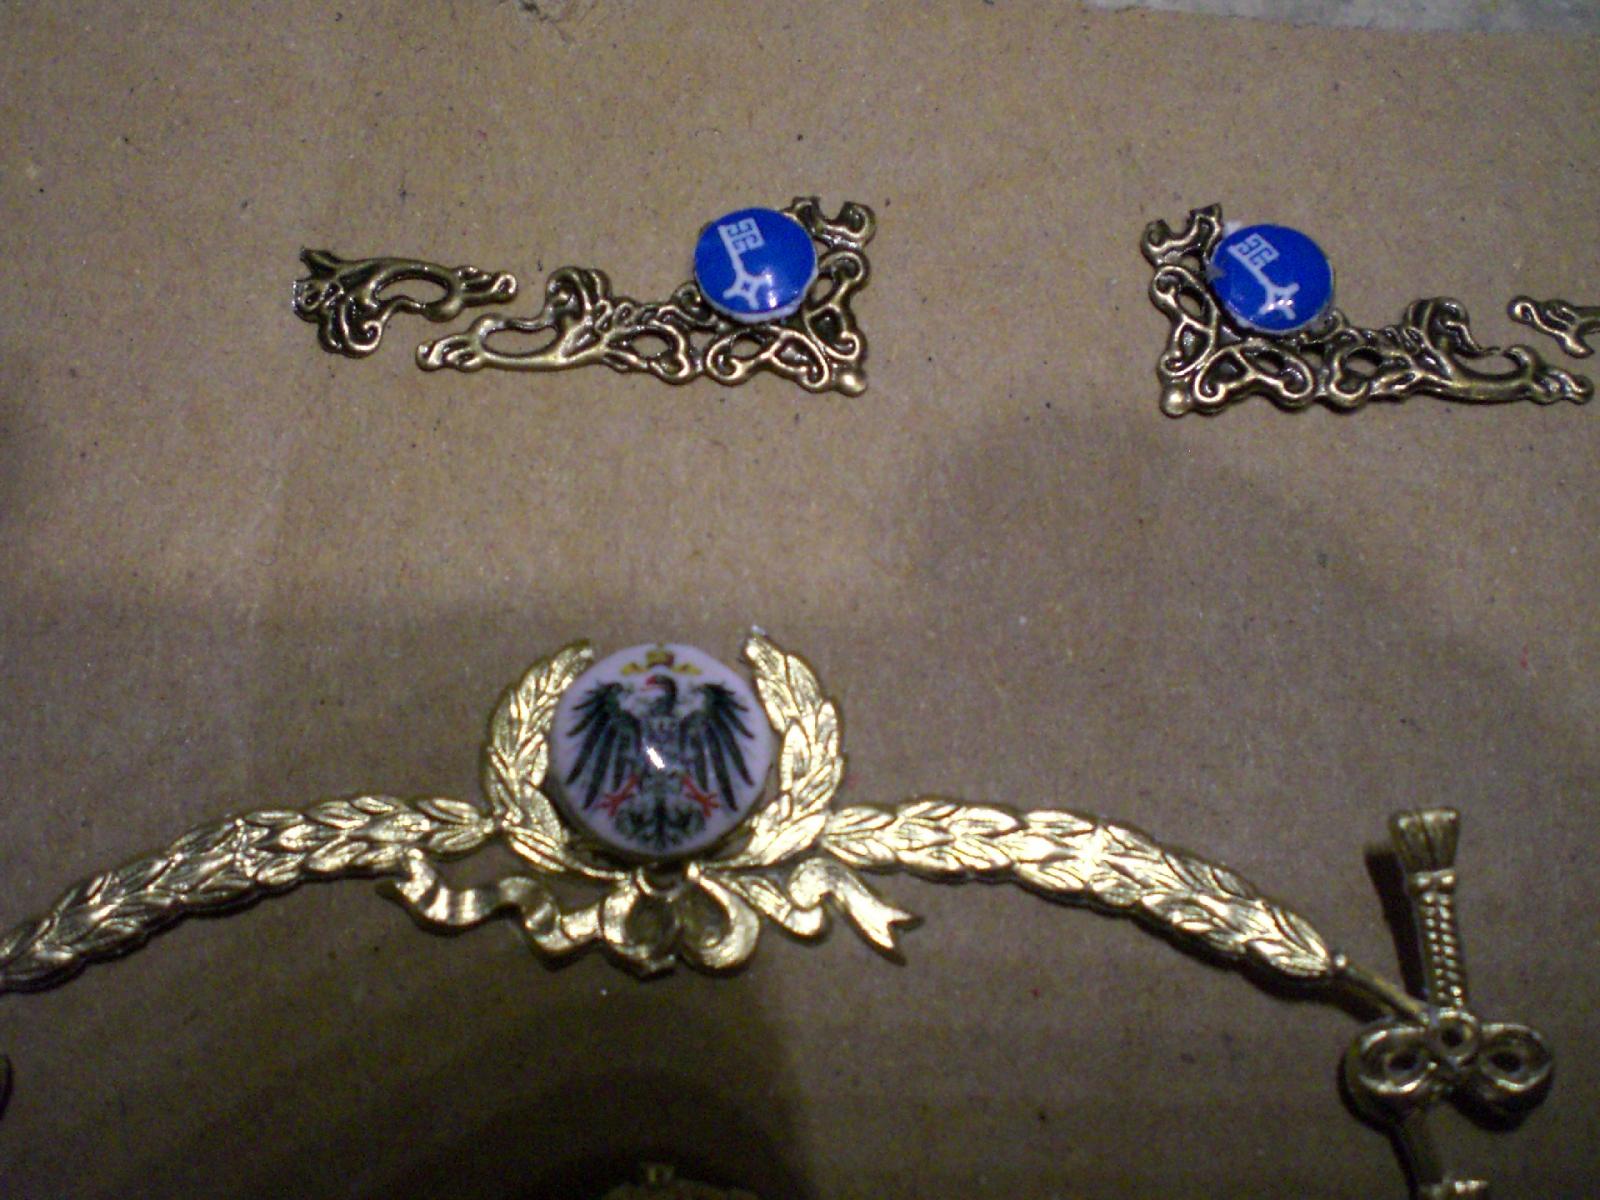
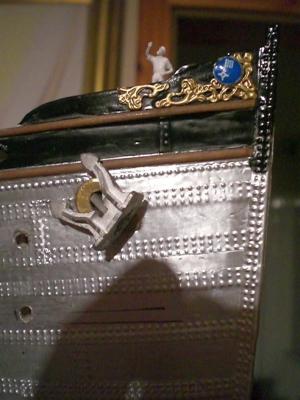
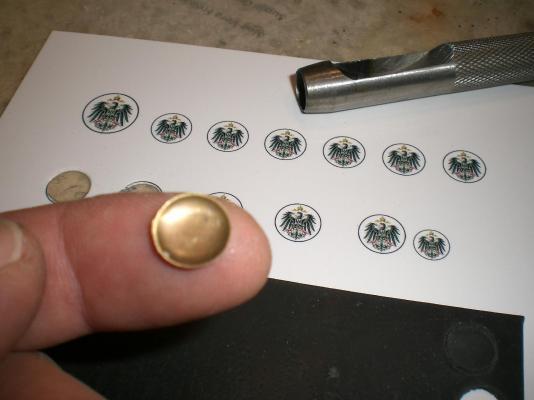
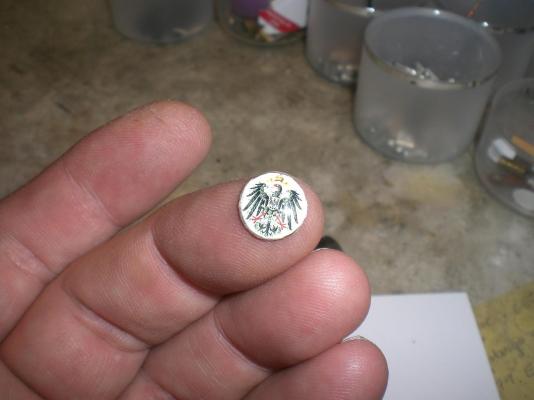
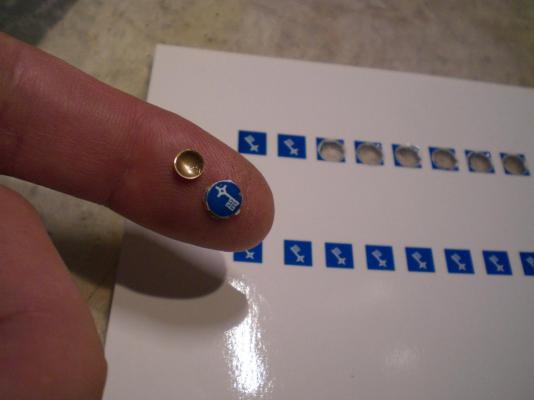
Update parts (some) of the decoration for bow and stern..... (first trial...) Nils up and in the centre of the golden decoration at stern is the badge with the "Kaiser.Eagle". This is printed in appr. scale on Photopaper, and the badge baseplate is cut out with a hole-punch tool. Because of the rubber plate under the soft anealed brass stockplate the edges become that rounded badge character a small drop of semi-thickened-viscosity CA mounts the emblem to the badge base, so it looks like a small button the upper bow decoration gets the mini-badges with the state Bremen`s "Himmelsschlüssel" (sky key), which the NDL line showed on their liners. The metal antique bronze decor base parts will be goldened as well the little blue "sky key" badges are made in the same way, but smaller in diameter

- 2,625 replies
-
- 33
-
-
- kaiser wilhelm der grosse
- passenger steamer
- (and 1 more)
-
off with a good start Pete, all Looks well, will be a beautiful boat to join your fleet Nils
- 258 replies
-
- 4
-
-
- buzzards bay
- herreshoff
- (and 1 more)
-
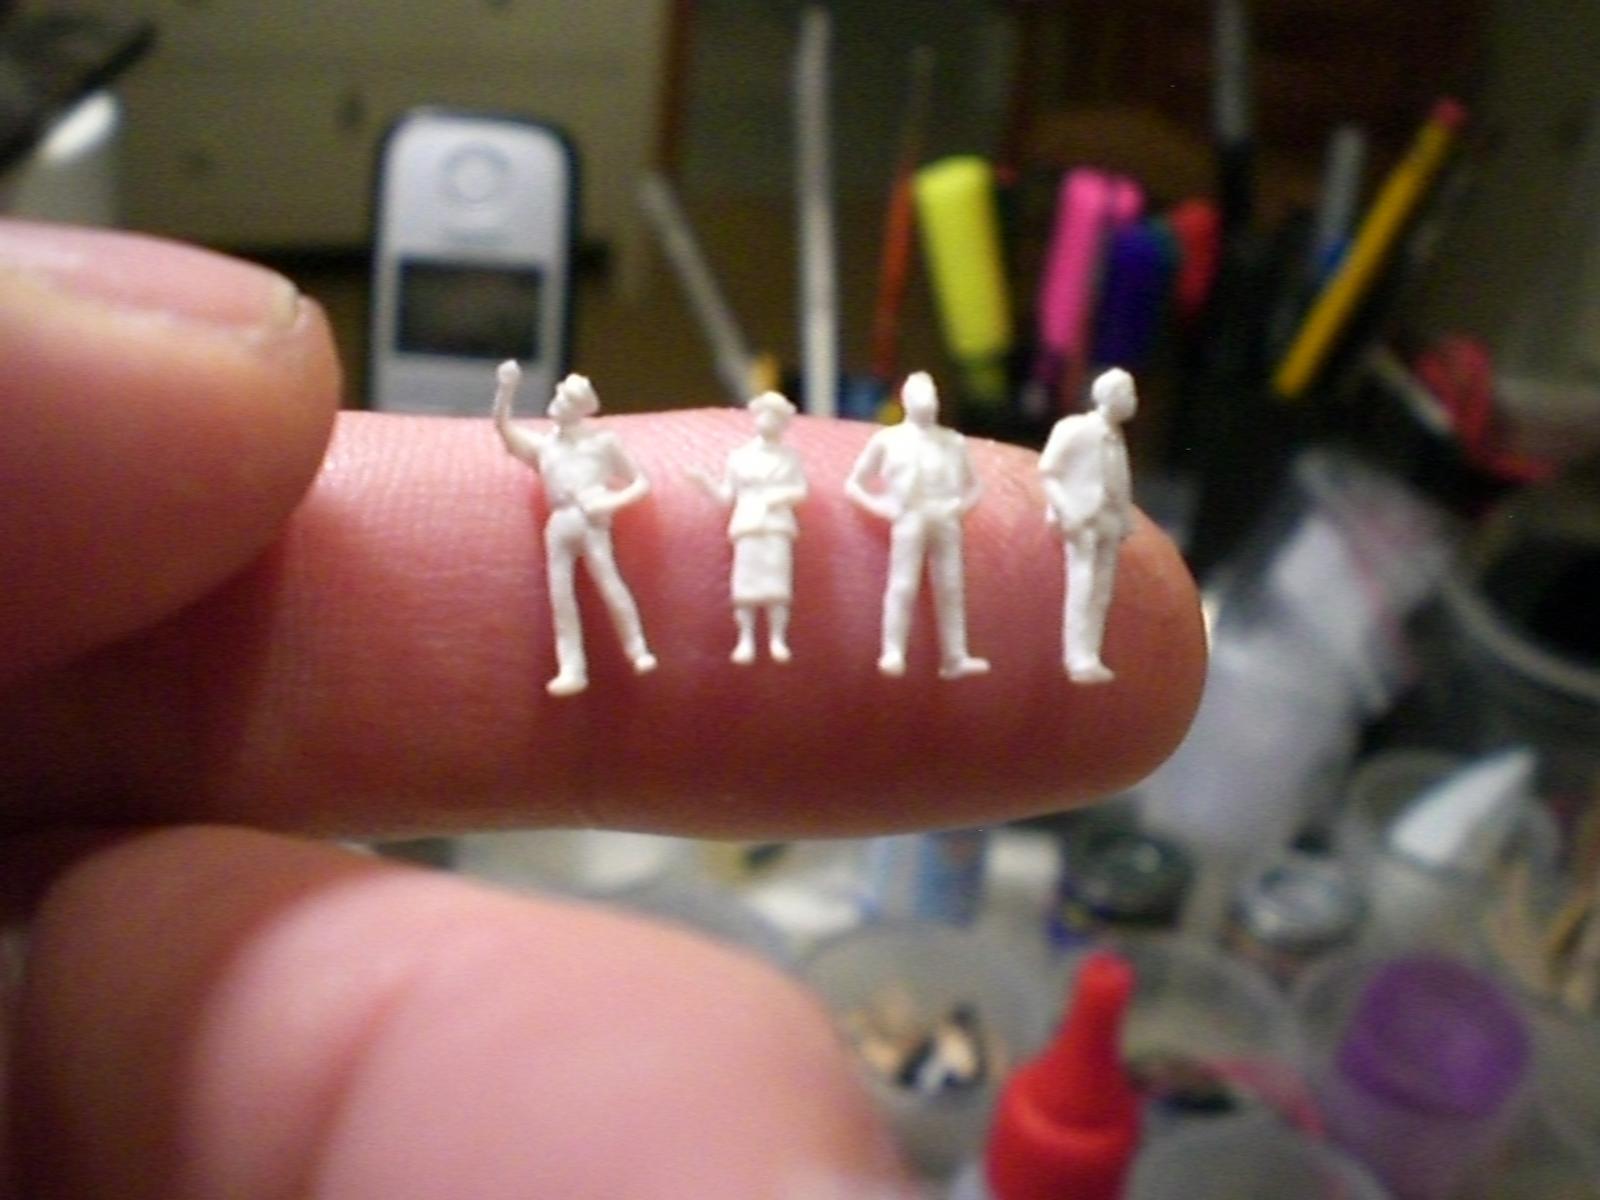
Many thanks to Mark, Crackers and Bill, Mark, I just had some luck on the web Ebay-fleamarket with Scale N (1:60) figures, a Family around 1900. Thanks for your helpful tip. I thought 1:160 would be too small, but the figures (grown ups) measure 13 mm hight, and that is just like Preiser`s scale 1:144 Crackers, thanks again for your Kind help, Those metal figurines certainly shall be interesting for a vintage ship-model builder doing scale 1:100 Bill, thank you for your Input here, trust there are some 1:160 figurines in appr. the same hight as nominal 1:160 Nils
- 2,625 replies
-
- 6
-
-
- kaiser wilhelm der grosse
- passenger steamer
- (and 1 more)
-
Bob, I just took another look at the plans and views you are going to base your new Pequot model on (General Mills). It really is a good choise, and congrats, you have great luck to have detected these fab. supporting documents with your web research (pics and drawings). Trust there will be all you need for a wonderful model. The scale 1:200 is quite an ambitious one, but your need for smaller models at limited space is well understood Nils
- 348 replies
-
- 4
-
-
- pequot
- cable ship
- (and 1 more)
-
beautiful work Thomas, Nils
-
WUNDERBAR ! Johann, love this build... Nils
-
Thank you very much to Druxey, Tom and Crackers, and all the "likes" Druxey, yes I thought about modifying the 1:144 figurines already, but then gave up, because they are just too small. Second thought was if possibly it could be done to scan in larger scale figurines and reproduce in any desired scale with a 3D printer, although I have absolutely no experience with that Tom, thanks for joining in to this log, and for your appreciative words Crackers, wonderful figurines, I agree, they would be perfect, if in the correct scale. Presume they are about 19 mm high (H0 scale), which is too high for my application, but good to know....., may I kindly ask where you have found that source, even if not available in Germany ? Nils Just a reminder... the scale 1:144 figurines are only of this hight (relation to my pointer finger)

- 2,625 replies
-
- 12
-
-
- kaiser wilhelm der grosse
- passenger steamer
- (and 1 more)
-
Good Progress Dimitris, the time for starting the masting and the rigging is coming nearer..... Nils