Mirabell61
-
Posts
7,418 -
Joined
-
Last visited
Content Type
Profiles
Forums
Gallery
Events
Everything posted by Mirabell61
-
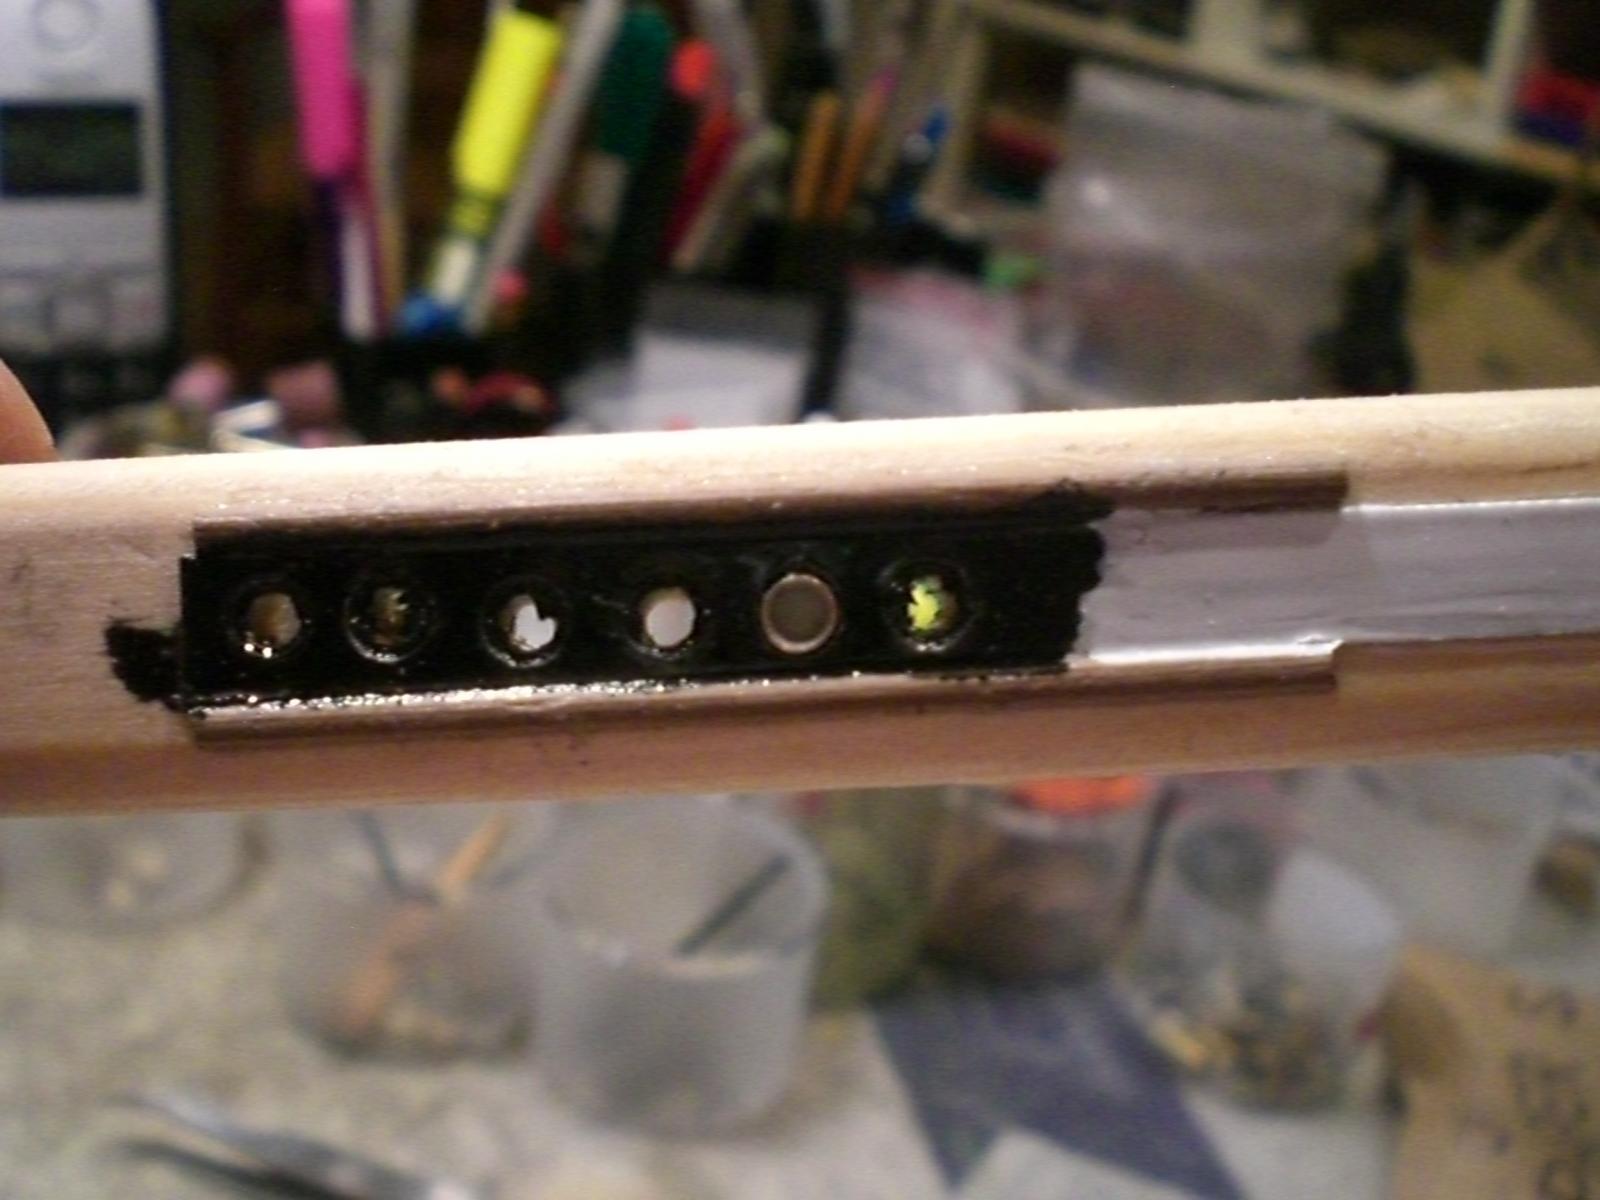
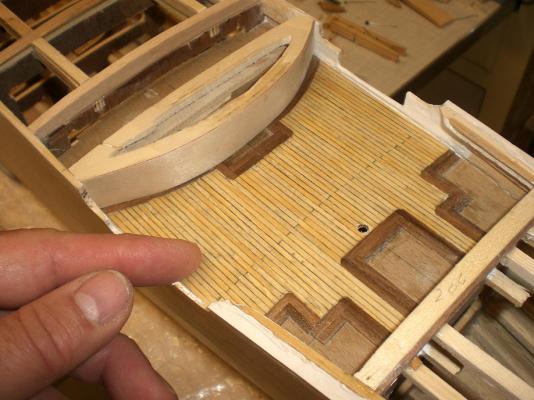
 Hello Paul, for the KWdG porthole arrangement I have here this pic where she is in the drydock. The portholes are actually flush with the hull, no flange, the "eyebrows standing out, to lead rain- and splashwater around the porthole. I made a little mock up in order to see how the critical porthole section just beneath the forecastle deck shall work out, leaving a minimal space just above the porthole for the eyebrow placement ( second hole from the right, with brass insert and "glassing") Nils (ups, here are the pics.....)
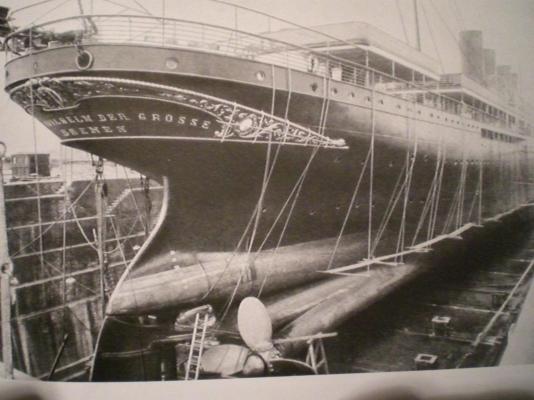

- 2,625 replies
-
- 19
-

-
- kaiser wilhelm der grosse
- passenger steamer
- (and 1 more)
-
Many thanks Paul, your explaination is fully understood, much appreciated, and provides an excellent handling of These small eyebrow pieces. I`ll be Standing before this Task as well and have been straining my mind already, was thinking if I could place them into the wet paint. Your hint with the optical "last correction" possibility in alining the portholes is a valuable Surplus Information, Thanks again.... Nils
-
very impressing work Paul, and so much self made wonderful Details, amazing that you still have the overviewfor the logistic of all These parts. I have a question.... how do you fasten the eyebrows over the portholes to the hull..., (a drop of CA would probably be too messy ?) Wish you further good success for this great model Nils
-
Many thanks to Tony and David, and all the recent appreciative "likes"... Tony, wellcome to dropping in, glad you find interest in this model. There was a fantastic card-model (to be built) of this liner on the market in scale 1:250, unfortunately sold out, but which can be found at Ebay with a bit of luck. Would like to see your Gorch Fock 2 Progress to date, any pics available ?, I looked up your last postings of August 2014 David, I`m not familiar with resin casting, making moulds for this purpose and using Silicone rubber, guess I Need to dig into this sooner or later Nils
- 2,625 replies
-
- 3
-
-
- kaiser wilhelm der grosse
- passenger steamer
- (and 1 more)
-
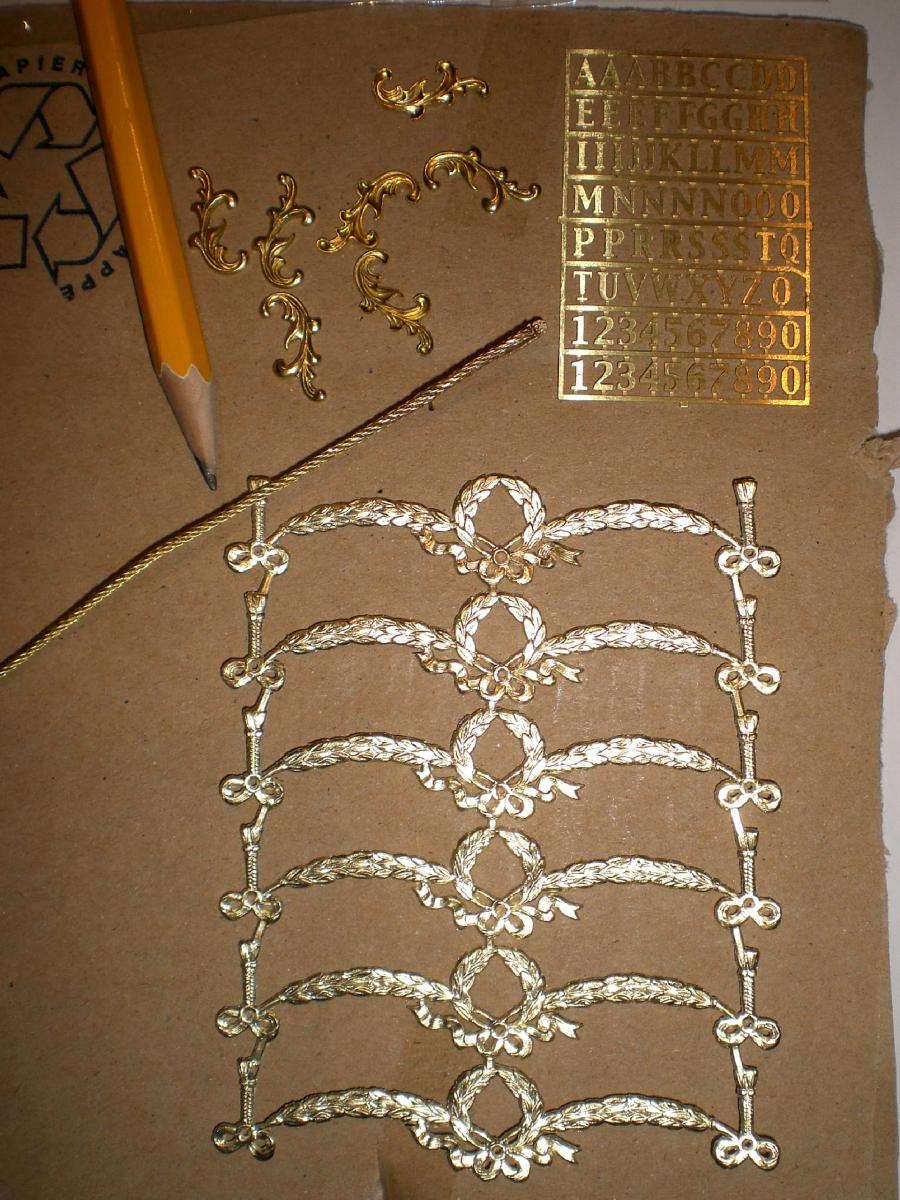
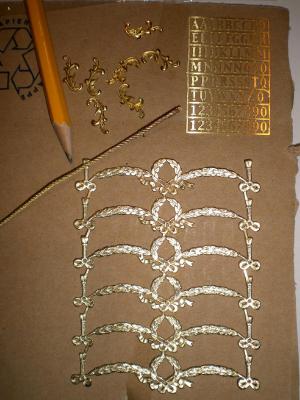
Thanks Patrick, for the decoration I searched the Ebay for Gold Color pressed metal decoration. The larger one is of Card and can be found at Ebay for "Dresdner Ornamente" The letters are etched brass from my Hobby shop, and the twisted brass wire is for hanging oil painting Frames to the wall Nils
- 2,625 replies
-
- 7
-
-
- kaiser wilhelm der grosse
- passenger steamer
- (and 1 more)
-
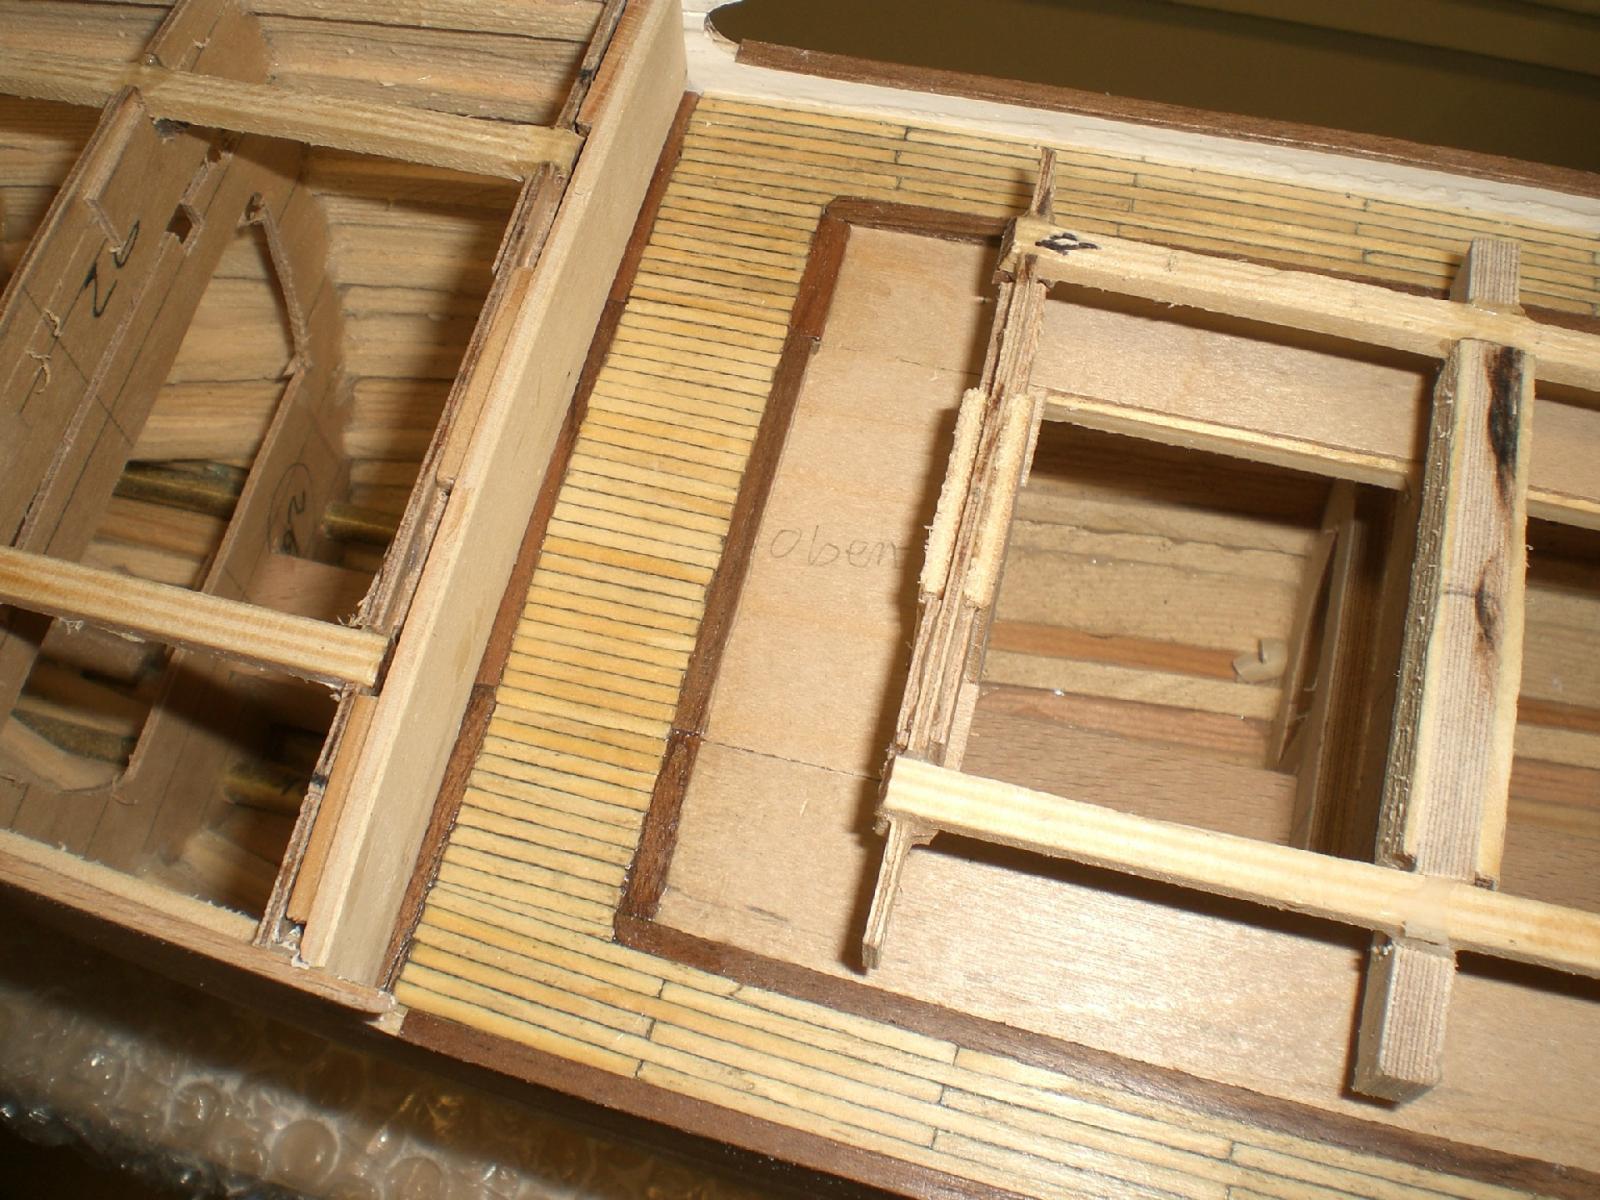
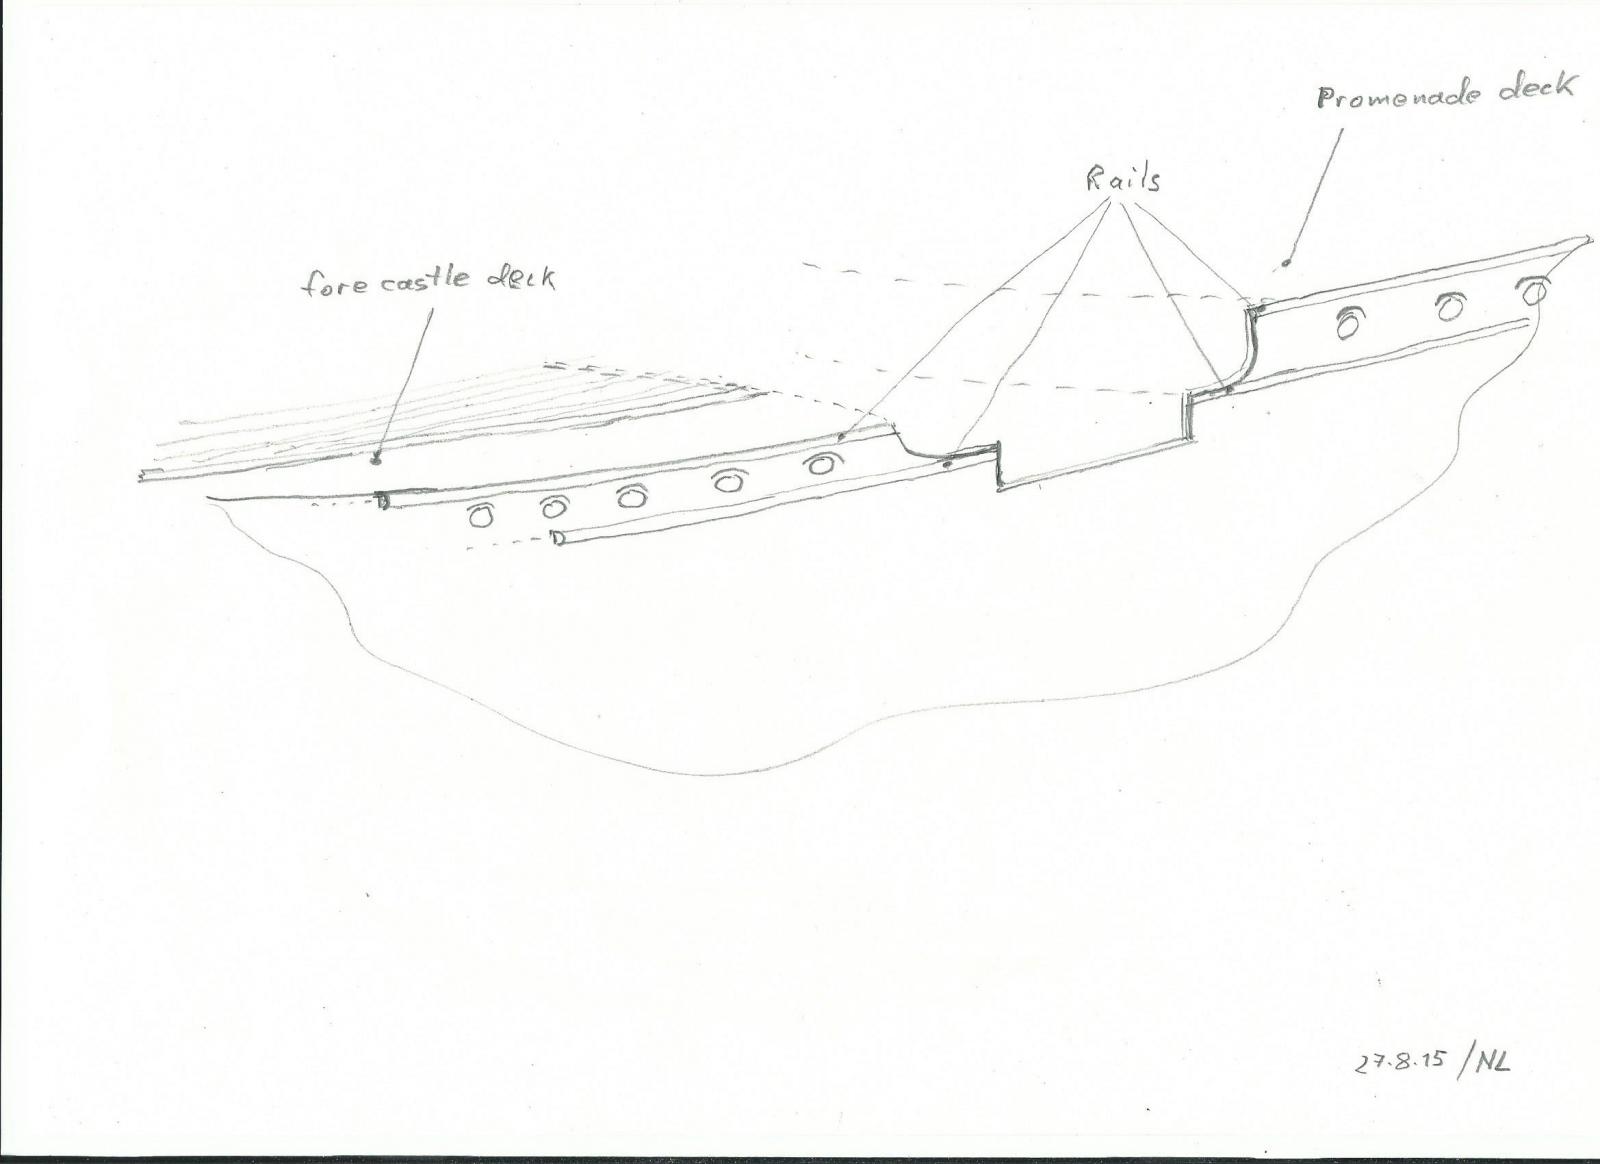
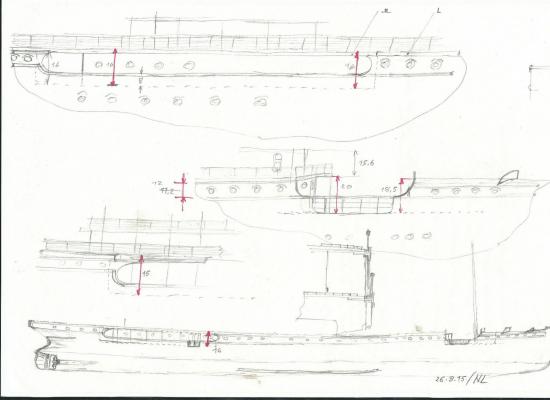
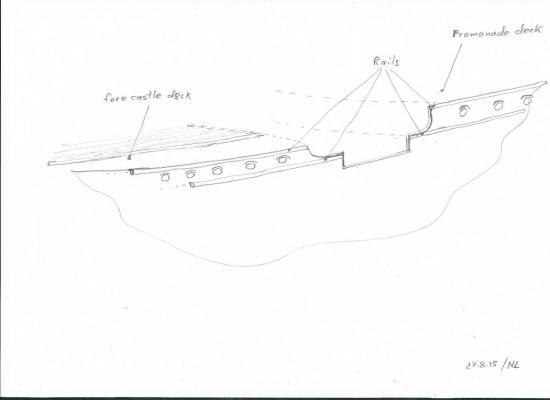
a little update..... now need to plank and mount the forecastle deck and the long promenade deck, before the most upper hull rails are mounted to the sides. Before this the metal plating can not start Am also making thoughts of the stern decoration and ornaments, and been gathering what I feel may suit this job.... Also am meantime thinking of how to do the 3 different types of lifeboats in repeatable way of production (probably resin cast from prototypes and master moulds) Nils front waist deck is permanently glued on, small centering hole for frontmast is set and bulkhead for step to promenade deck is dry fitted traffic corridor port to stb on aft waist, deckstripes permanently fitted, raw bulkhead piece for step to poop deck dry fitted and inner bulwarks painted white and mahagoni handrails put on the handscetch helps to get overview of the elevation dimensions ( slight changes to suit the requirements pending...) these hull rails go on when the forecastle. and promenade deck are planked and put on. Before that the metal-plating of the hull can not start some of the decoration and ornaments intended to use, especially for the stern

- 2,625 replies
-
- 28
-
-
- kaiser wilhelm der grosse
- passenger steamer
- (and 1 more)
-
Patrick, The light-build cockpit roof fits in very nice with all the other fine details of this ship. Thanks for the pics... Nils
-
HMS Alert 1777 by Jaekon Lee - 1/64
Mirabell61 replied to Jaekon Lee's topic in - Build logs for subjects built 1751 - 1800
What a beautiful cutter Lee, Your handcraft skill is amazing love this boat... Nils -
Patrick, that will look very good when the two masts are rigged.. Do you have a more close up pic of that White cabin Roof ? Nils
-
excellent Igor ! Nils
-
Hi Revier, I`m happy if this has been of help to you.... Nils
- 2,625 replies
-
- 2
-
-
- kaiser wilhelm der grosse
- passenger steamer
- (and 1 more)
-
Hi Revier, nice that you and your Family have a relation to this 118 year old Atlantic liner.... I`ll send you a length-cut cross section in pdf-formate per PM (To open with Adobe Reader) Regards, Nils
- 2,625 replies
-
- 3
-
-
- kaiser wilhelm der grosse
- passenger steamer
- (and 1 more)
-
Good work Nigel, "Mordaunt" is coming on very nicely.. Nils
-
Cutter Cheerful 1806 by rafine - FINISHED
Mirabell61 replied to rafine's topic in - Build logs for subjects built 1801 - 1850
beautiful treenailing and planking Bob, very clean and good looking hull ! Nils- 525 replies
-
- 3
-
-
- cheerful
- Syren Ship Model Company
- (and 1 more)
-
many thanks for your comments, Michael, Bob and Christian, Micheal, in this small scale its not so easy to work out the fine details. I`ve seen that professional model builders often have a certain experience with details, but they also have special tools and techniques I`m not familiar with. Windows, portholes, etc. are sometimes only painted on, but in high precision... Bob, I was also thinking of low meltpoint metal (have already bought some like used for melting luck charms on new year), together with a Silicone mold. The only reason for hesitating so far, was because I like the surface appearance of shiny brass. Also the post Treatment of such Little castings takes much time in fairing, removing burrs, etc.. Thanks for dropping in Christian, and for your comment.. Nils
- 2,625 replies
-
- 6
-
-
- kaiser wilhelm der grosse
- passenger steamer
- (and 1 more)
-
Thank you Danny, for this wonderful authentic detailed "Swan Class" model, and the so well made and organized build log Nils
-
Thanks for your comments Bob and Druxey, and the "likes"..... Bob, the production does go a bit quicker now than with the first ones... (learning curve sets in ...), and I`m by far not through yet Druxey, Yes, I had thought about it, I unfortunately have no own experience with the technique of casting brass parts, probably then I would have to make wax Patterns and stick These to a wax-tree as for Investment castings. There would be a Chance though, if they are made by a small foundry that can do cast parts in a suitable way... Nils
- 2,625 replies
-
- 3
-
-
- kaiser wilhelm der grosse
- passenger steamer
- (and 1 more)
-
a beautiful build Robert, hull, fitting out, masting and rigging excellently done Nils
- 66 replies
-
- 1
-
-
- bluenose ii
- artesania latina
- (and 1 more)
-
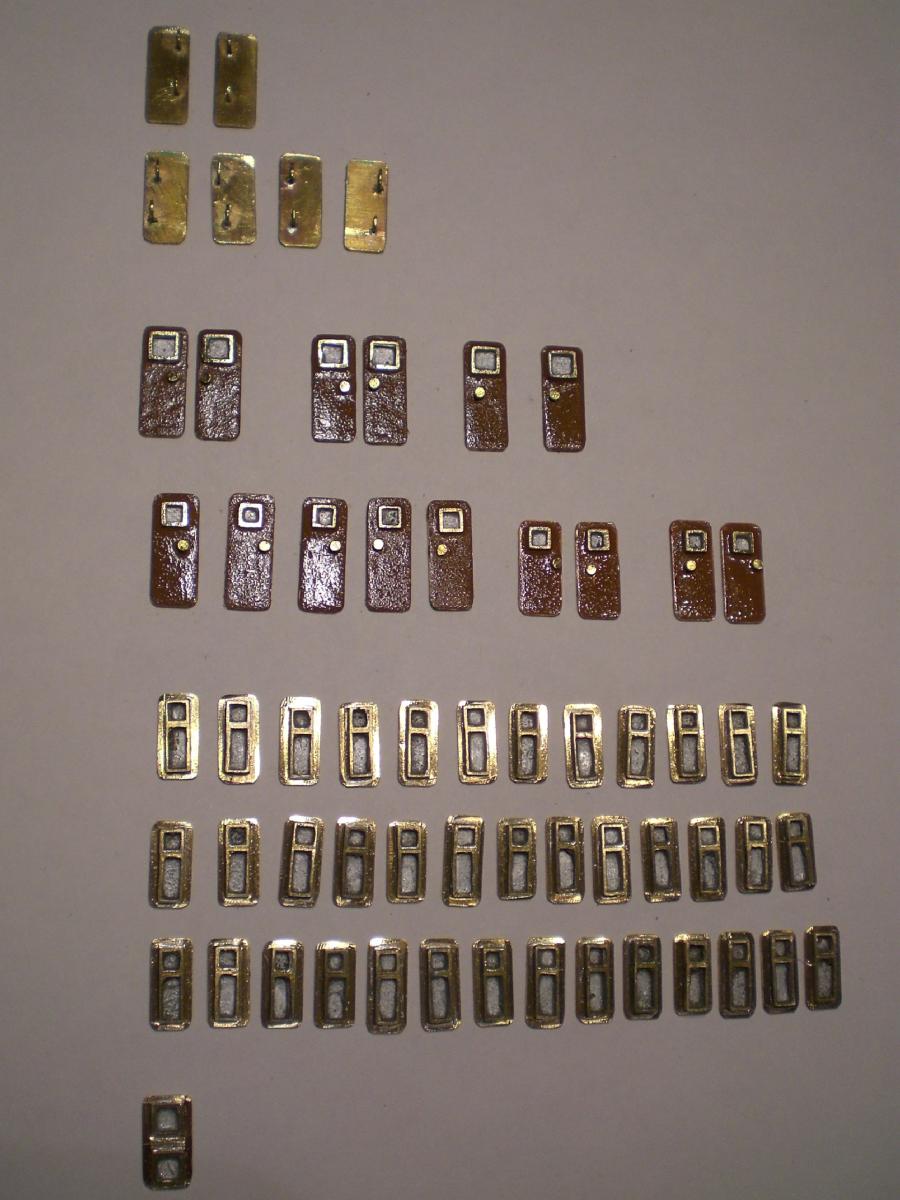
Thank you Patrick, when making all these small parts a milling machine would be of advantage for the sake of better uniformity, but when mounting these parts I will choose the most uniform ones laying next to one another Nils
- 2,625 replies
-
- 3
-
-
- kaiser wilhelm der grosse
- passenger steamer
- (and 1 more)
-
Lovely work on the lantern braces Danny, and very nice geometry on the lanten fastening to the hull, itb looks great in side- and aft view Nils
-
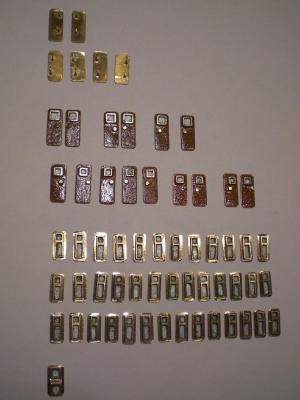
Little update... have been producing some of the doors in different hights and with different size windowframes, also some forecastle doors, and about half of the double-story promenade deck windows Nils the window frames have been sprayed with dull clear varnish in order to keep the brass shiny. the 4 doors for under the forecastle deck (with each two locking levers) will also be painted
- 2,625 replies
-
- 21
-
-
- kaiser wilhelm der grosse
- passenger steamer
- (and 1 more)
-
Cutty Sark by NenadM
Mirabell61 replied to NenadM's topic in - Build logs for subjects built 1851 - 1900
Very nice Nenad, I like that deadeye Chart, giving the overview of what sizes and quantities go where ? Nils- 4,152 replies
-
- 5
-
-
- cutty sark
- tehnodidakta
- (and 1 more)
-
Nice Progress Frank, also masting and spars, booms and sails are well under way, good looking ! Nils
-
very good fairing Job Ed, also those Tools are just right to achieve the best results. That hull Looks perfect ! Nils
- 191 replies
-
- 3
-
-
- young america
- clipper
- (and 1 more)
-
beautiful lines Mark, trust These full curves are characteristic for the French design of that period Nils