-
Posts
7,403 -
Joined
-
Last visited
Content Type
Profiles
Forums
Gallery
Events
Posts posted by Mirabell61
-
-
Bob, thanks for updating and sharing this log
I can well imagine that this masterly built model is one of your favorites, its beautiful from hull to Fitting out and rigging, I love this ship
Nils
-
very nice built model Danri
also the self made coppering tiles with the nail pattern Looks great
Nils
-
-
thanks a lot B.E.
an approval from your side for this solution means a lot, I know we both exchanged thoughts on this some time ago, versa your Version with the plankways both sides, which also Look good, but now was the time it could be done.
The to be cut deckbeam in that Position was supported from beneath with two pillars. Perhaps I shall leave away the ladder on the port side.
Nils
-
Jason,
I`m using the RB article 005 1449 It is declared scale 1:72 but is f
itting wonderfull with 8 or 9 steps from deck to deck for models in scale 1:64 ( step to step is 3mm = 192 mm actual))
Nils
-
thank you Jason,
unfortunately I have no milling Equipment for such precise ladder making, so I buy little ladder kits (material for two ladders per kit) from RB-Models web shop. The mini kits are comprising the cheeks and the steps that have to be inserted and glued into the Slots, all in several different scales
Nils
-
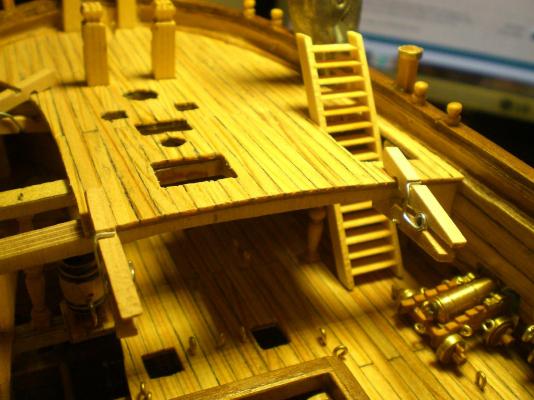
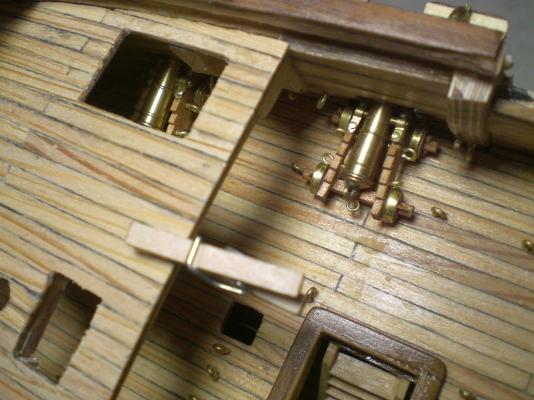
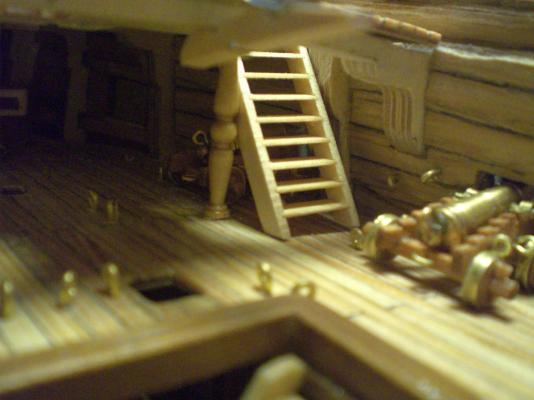
Today the Access ladder to the forecastle deck is fitted for Position check
I know this may not be historicly wise correct, but I just could`nt mount those Little "pigeon-ladders" the way the plan shows. Leaving awy the forecastle bulkhead anyhow, the underneath area would be open, and the captain claimed a propper stair there after slipping off the foreseen ladder of the plan several times
The ladder now neatly fits in between the first and the second starboard gun, without hindering the tackles there
Nils
-
she is looking good Mike,
nice clean planking Job...
Nils
- Eddie and Mike Dowling
-
 2
2
-
-
She`s coming on very nicely Pete
Nils
-
Thank you very much Peter,
you are reflecting exactly my thoughts I have in mind....., thats a nice Picture resembling a great Inspiration for sail Setting on a model, probably I´ll go for a good compromize solution like that. Your own rigging with partial furled and hauled up sails is also a good Version for orientation...
Nils
-
Accidentally found a photo of Oliver Cromwell model (unfinished), planked in same style:
Looks interesting actually!
Thanks for sharing the pics Mike,
a very fine and interesting looking model
Nils
-
your Mayflower is looking great Dave
Nils
-
-
Cut in the scuppers and added the timberheads along the bulwarks.
I drilled the scupper slots as described in the practicum and filed the openings smooth. One thing in hindsight that I should have done differently is not to have installed the waterway until after cutting in the scuppers. I would have set the waterway in place to get the correct location of the scuppers but then removed it so as not to damage it while drilling the scuppers. I used the manila folder paper as described in Chuck’s practicum for the waterway.
The timberheads went in easily. Cut them all a little long and then sanded them down to the height of the bulwarks. I also pre-painted the wood to keep down the number of coats I would need to give them in place. One thing about the bulwarks though, they seem to keep growing. I thought I had sanded them down pretty thin but every time I look at them they get thicker and thicker. Have to stop looking.
love your Pilot boat Sal,
deck an Cockpit look very nice
Nils
-
beautiful ship Mick,
lovely model and very fine built, a delight to see...
Nils
-
A wonderful built ship Ilhan,
it is exiting to go through your build log, all Details are masterly built. Very clean and pricice built hull and planking. My congrats to this great acheavement. I admire your Talent for doing the blocks and the metalwork as well as the sails, they look great and the ships boats are superbly built
in all very well done !!
Nils
-
-
Hello Peter,
nice to hear from you again, and thanks for your words...
I had really planed to do full rigged sails, always hoping that the one or other of the fellow builder would set sails to a good breeze well ahead of me, so I can see what it Looks like. In my mind I see a White swan blustering its feathers a bit, drifting over the lake in a gentle wind. I also remember That Danny (his wonderfull Vulture 1:48) once mentioned that too many sails would hinder the sight into the outcut hull and -decks and I share his opinion there.
For the standing and possibly the running rigging I trust and hope there shall be some very well done presentations on the Swan Classes rigging on MSW in due time, and last not least with aid of the Amati plan. When the time for rigging is reached, I will have to groove myself in first anyhow. I think Glen Barlow once mentioned that he spent so much accureness and functioning ropes into the running rigging Detail, that the ship could be sailed if magnified to actual size.
Cheers
Nils
-
-
Some progress on the Brodie stove.
Photo 1 shows the completed base. The brick pattern was produced using an old "Linka" set. The set consists of rubber molds and a powder similar to plaster of Paris. Top right in the picture is a white block of brick produced in a mold. I needed two of these to make the base. Where they joined left some small holes which will be covered by the drip tray when everything is finished. I painted the brick block over all dark grey. When this was dry I dry brushed the bricks with red bauxite colour. If this is done carefully it leaves the "mortar" between the bricks a grey colour.
The base was completed with a walnut surround attached with PVA glue.
A quicky was the drip tray which appears in the bottom left of the picture. I was feeling lazy so I used a piece of brass channel (top left). This was the right width but slightly too deep. The ends were over size pieces of 0.4mm brass. I soldered these on the ends then filed them down to size. Finally I filed the whole tray down to the correct height.
The down side of using channel is that it has rounded edges - some careful filing can disguise this.
Photo 1
love that stove Ian,
also the challenge of consequently soldering instead of glueing parts on...
respect, very well done !
Nils
-
Tom,
the praises are all well deserved on your beautiful model, also please accept my congrats to the proud builder and his very special ship
Nils
-
looking pretty sweet Nils!

Thank you Popeye,
I hope that I can get the forecastle deckrails (without a roughtree rail) done in the same way, but would have to Change some of the already neat Fitting glued on parts (hopefully without destroying anything else in doing so)
I`m glad I did`nt fit the catbeams and the upper bow rails yet
Nils
-
Hi Nils -- At long last I've come across your log, and have to say that you're building a beautiful ship. The detail is lovely.
Martin
Hello Martin,
thank you for visiting my log.
At the beginning of my own decision for a "Swan Class vessel making" (Fly or Pegasus)I was also a bit irritated by the Amati kit contents such as castings for quarterbadge and sternplate. After asking the Amati dealer, I was told that the Pegusus had no metal castings but layer photo-etched brass sheets that would give a halfway 3D effect. I found this very interesting, because never seen before, and the result from MSW fellow builders Pictures encouraged me then to purchase the Pegasus plan together with these etched parts and to do a scratch-build Version. What I like with some of the HMS Fly Models displayed, is the creme-White Sub waterline paint finish. Maybe yours shall show this as well.
Wish you ongoing good success with yours and much fun as I am having in setting her together, also getting all this inspitation that MSW comunity provides...
Nils


HM Bomb Vessel Granado by jwvolz - FINISHED - Caldercraft - 1:64
in - Kit build logs for subjects built from 1751 - 1800
Posted
A pleasure to watch your buildlog Joe,
nice and clean build to date, I`m looking out towards your next Progress...
Nils