DONATION DRIVE - SUPPORT MSW - DO YOUR PART TO KEEP THIS GREAT FORUM GOING!
×


Mirabell61
-
Posts
7,410 -
Joined
-
Last visited
Content Type
Profiles
Forums
Gallery
Events
Everything posted by Mirabell61
-
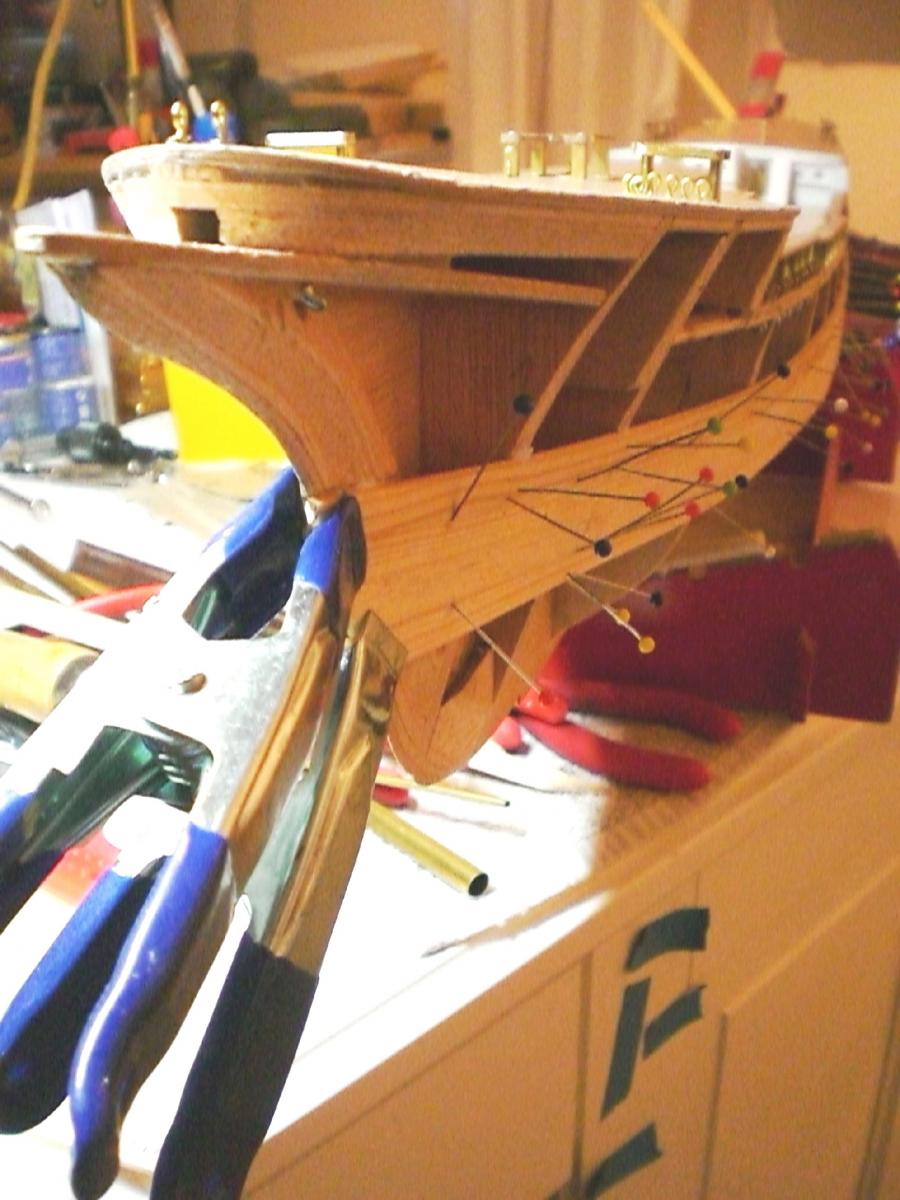
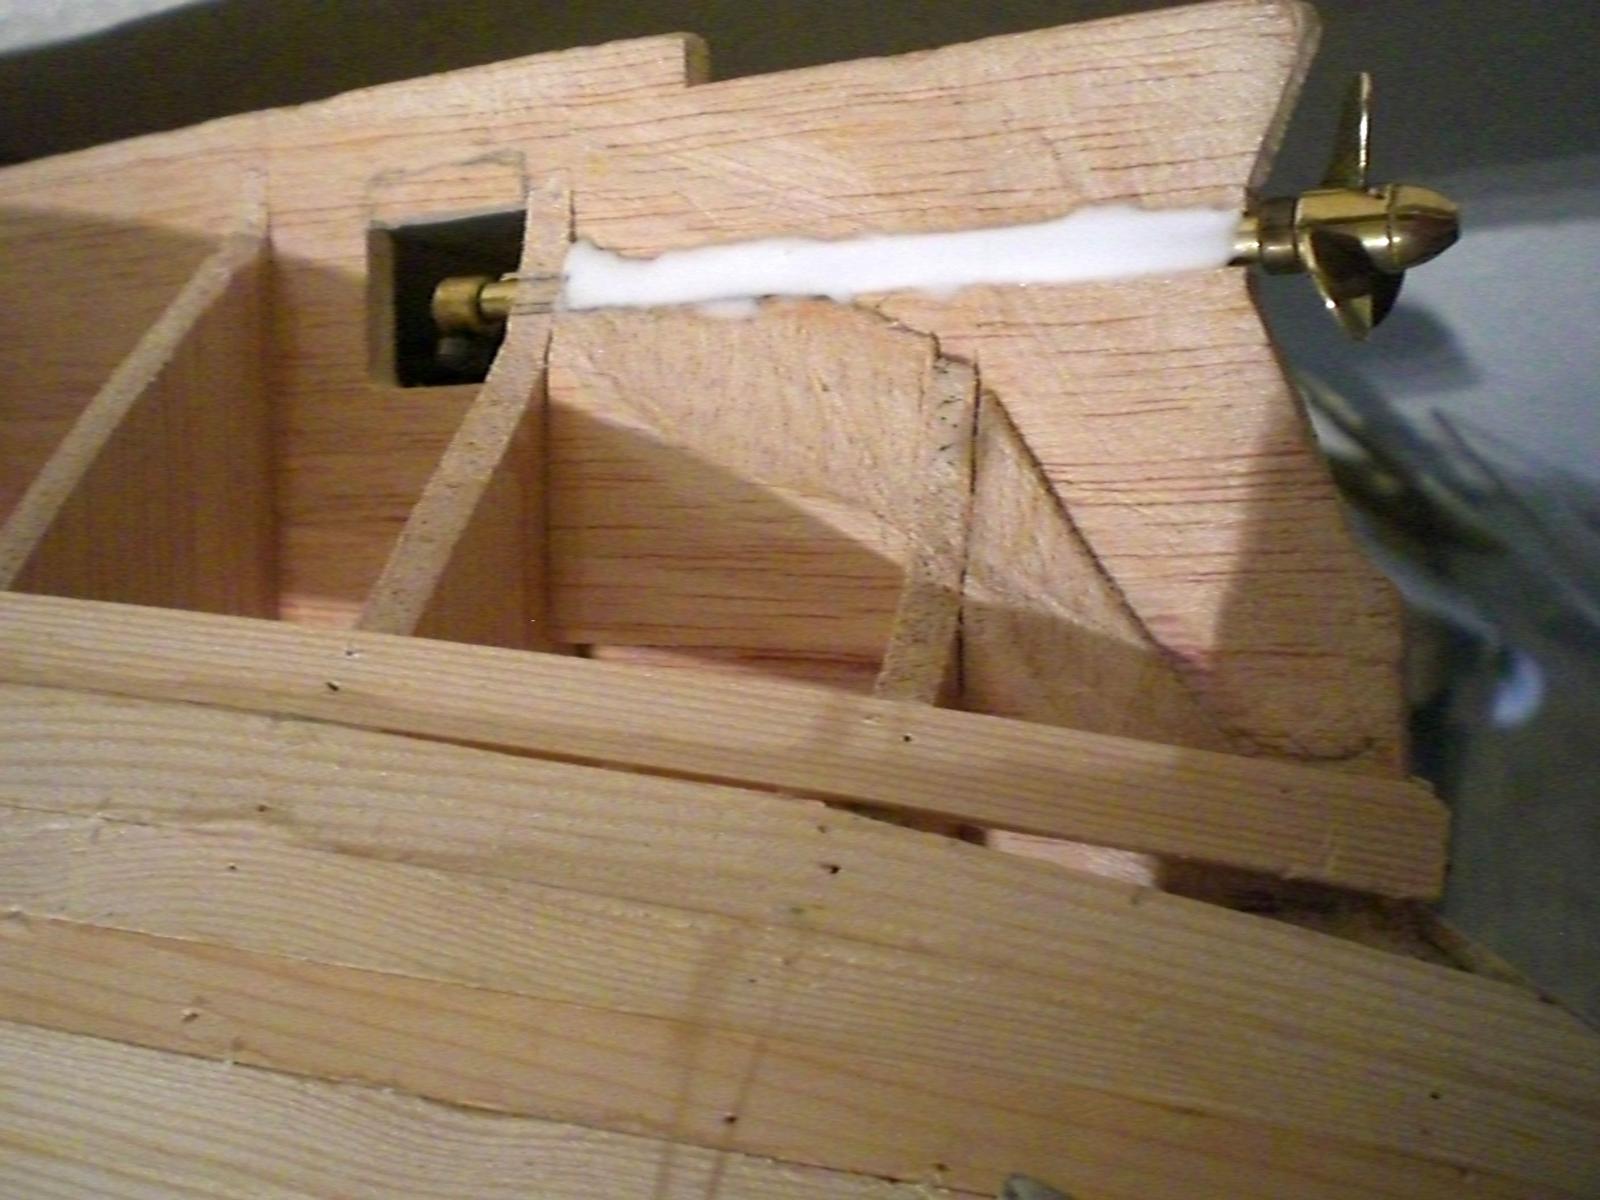
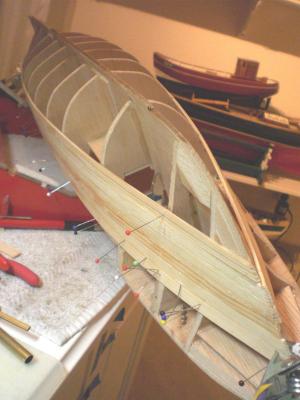
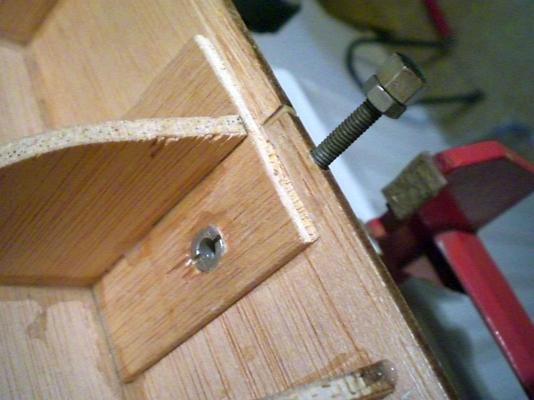
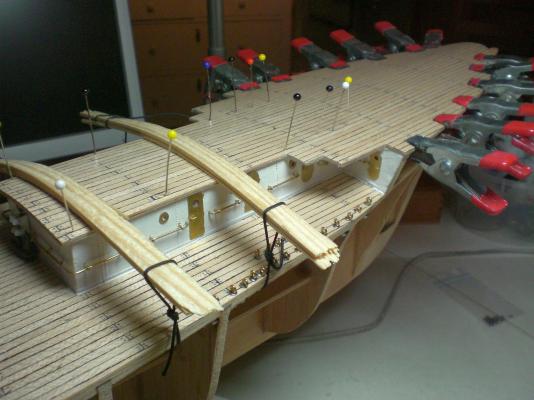
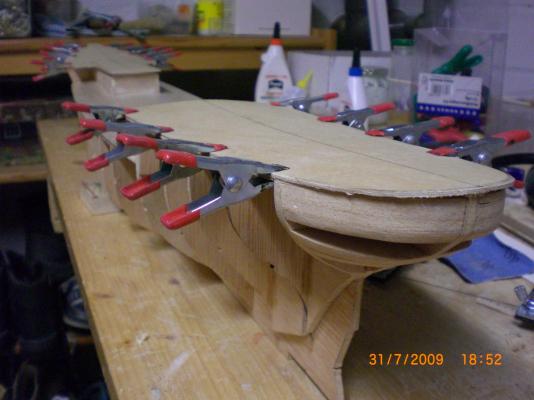
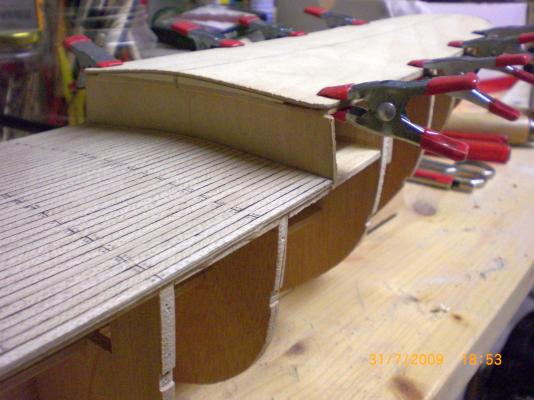
 Build log part 5 the first portside plank, pine 2 x 10mm, is fixed against the Frames to find the best fit in its gentle natural curve following the hull lines and then glued on permanently the second plank follows willingly on this build I am not using additional stringers the same done on starboard side to avoid possible Twist in the hull the Gorch Fock is a fine model to plank, no risky bends, no watering of planks the 2mm thick planking will allow sufficient material remaining after sanding later on having no Problems with the planking short propshaft in sleeve tube M3 thread for prop (the brass prop to be Exchanged against a larger one later on, because I cold`nt find a 28-30mm diam. brass prop with M3 thread in the hub) Counter device for stand bolts with reinforced keel sides there Build log part 6 to follow... Nils
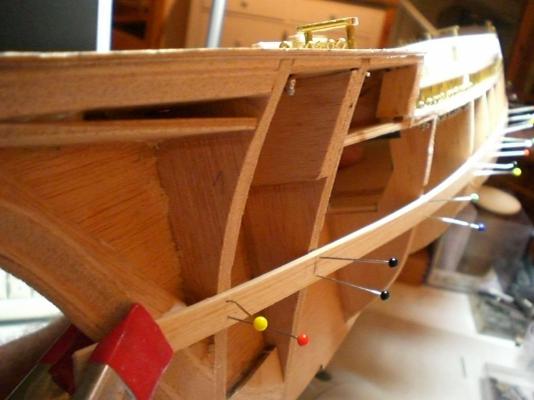


- 222 replies
-
- 6
-

-
- gorch fock
- barque
- (and 2 more)
-
very nice work Michael Nils
-
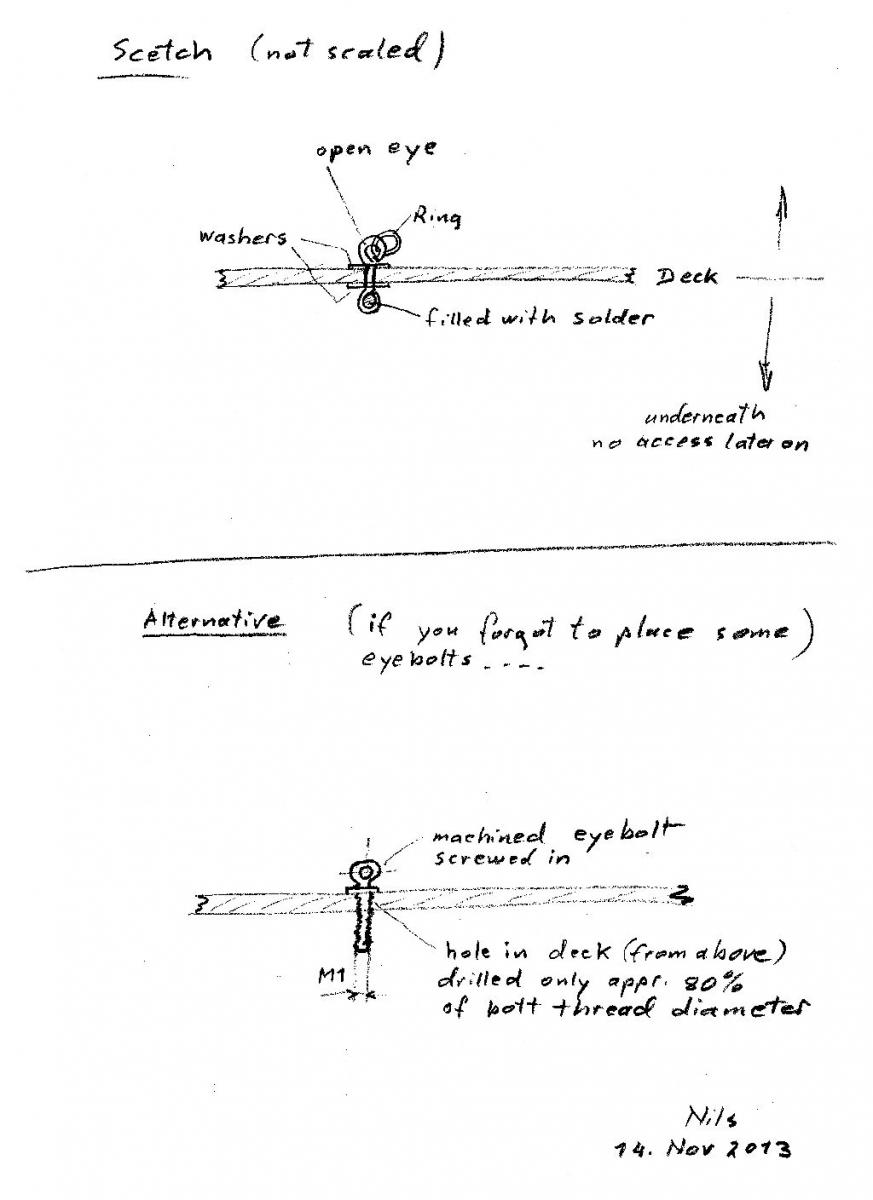
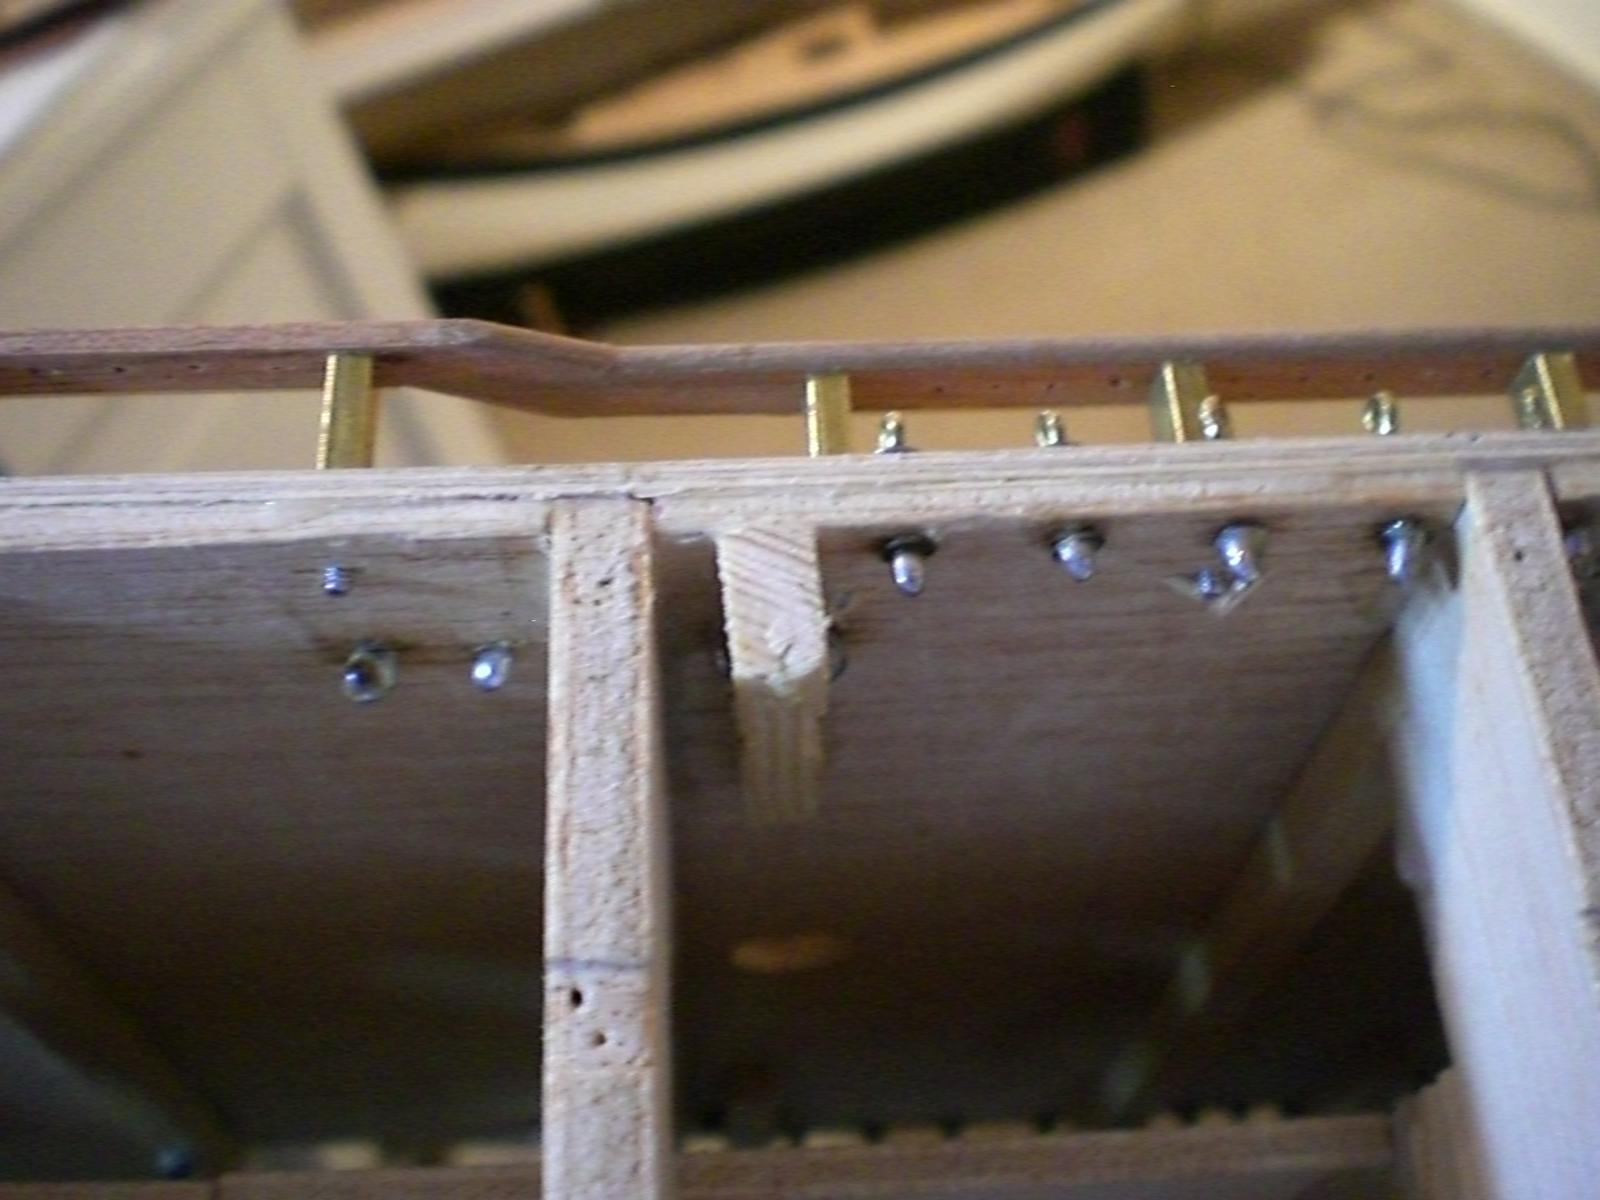
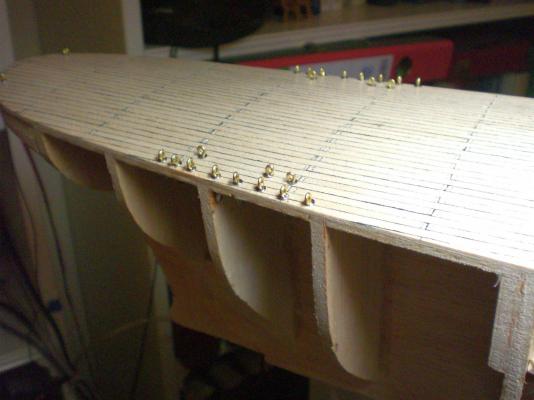
Bob, I leave the most upper sideplanks just below the deck away as Long as possible, just in case and order to have Access to the decks underside for counterfastening whatever Needs to be fastened from above. If I should have Forgotten to set and fasten an eyebolt, I do it per enclosed scetch... Nils

-
beautiful work Jerry, the model Looks very impressive so far, next to the hull I love the work on the shrouds, to what extent will you do the rigging (also running rigging, perhaps even sails ? ) Nils
-
ROYAL CAROLINE 1749 by Doris - 1:40 - CARD
Mirabell61 replied to DORIS's topic in - Build logs for subjects built 1501 - 1750
Oh Doris, what a treat to watch that build of yours... Nils- 883 replies
-
- 1
-
-
- royal caroline
- ship of the line
- (and 1 more)
-
Thanks Greg, ...learnt something new to it, shall have to remember PE=photo-etched Cheers Nils
-
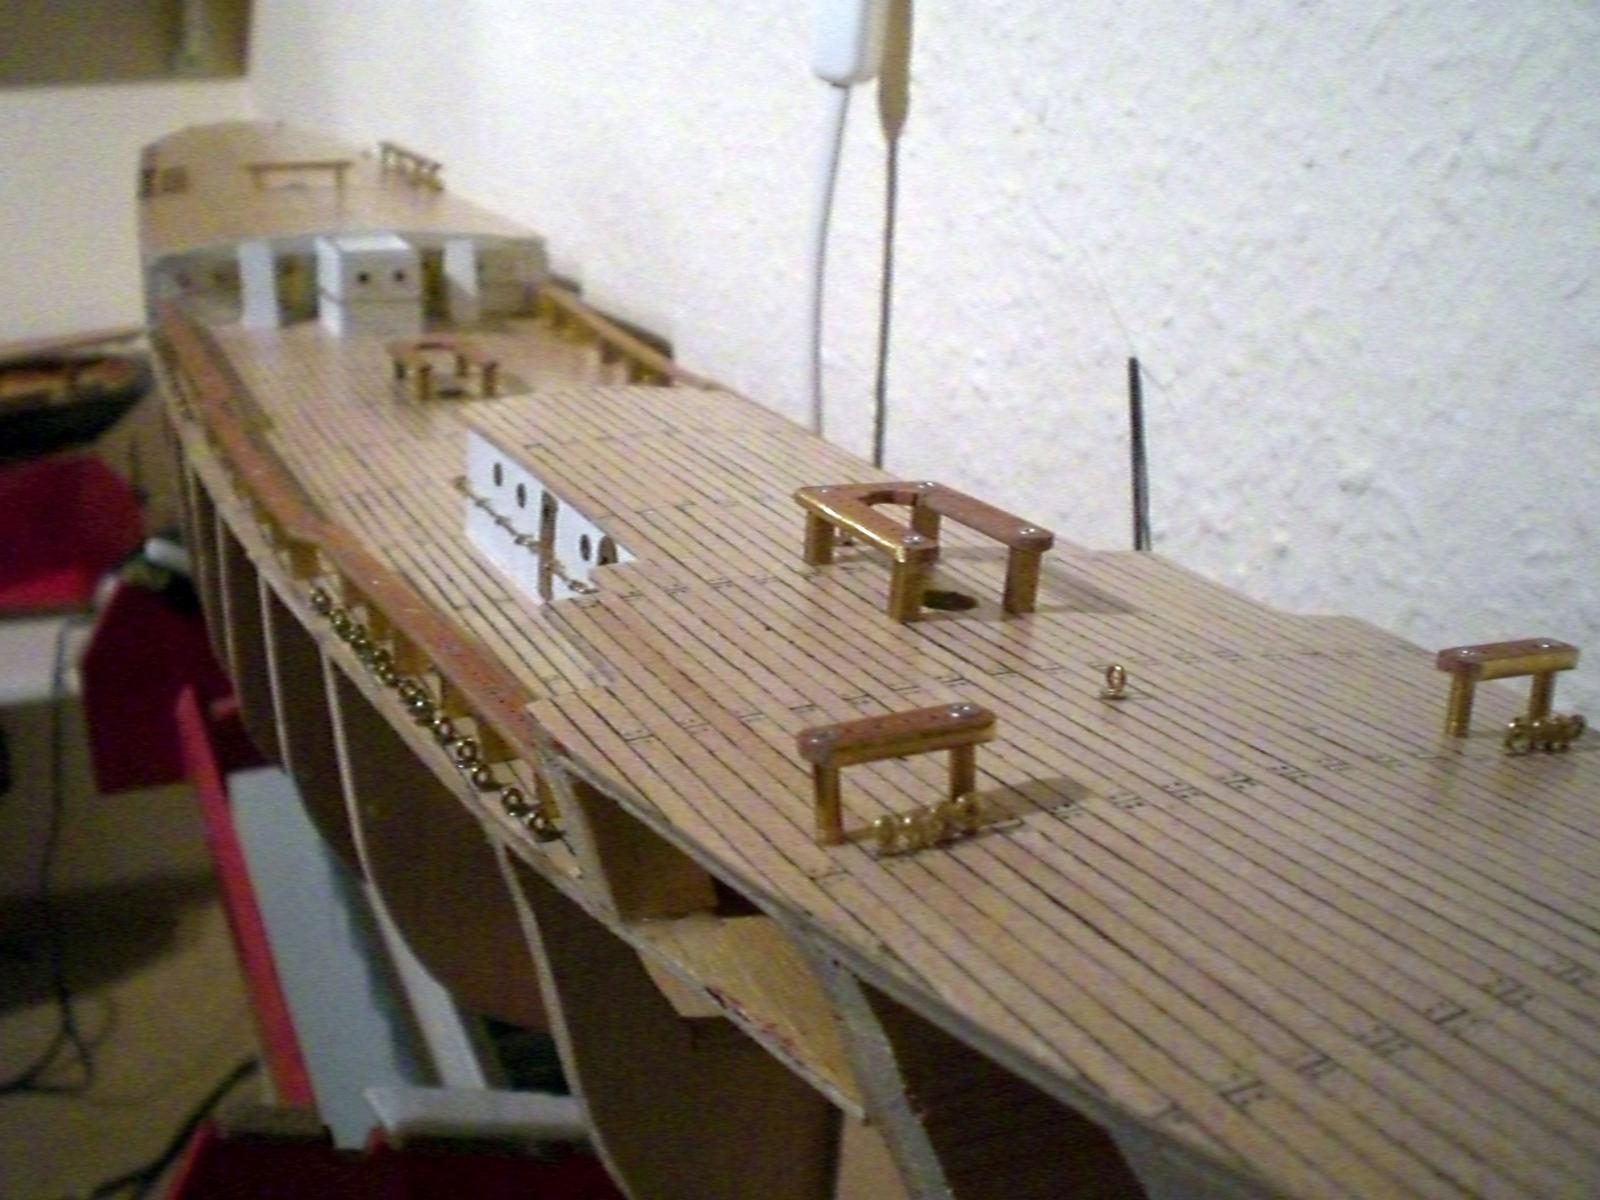
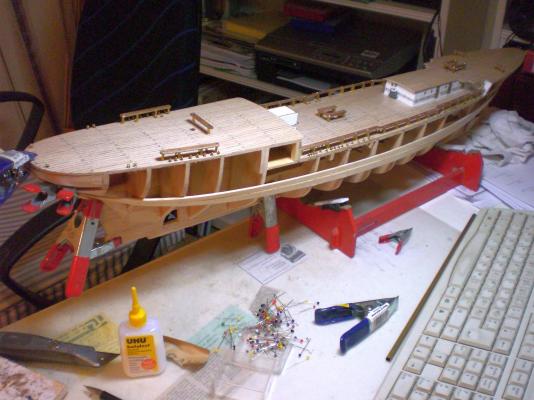
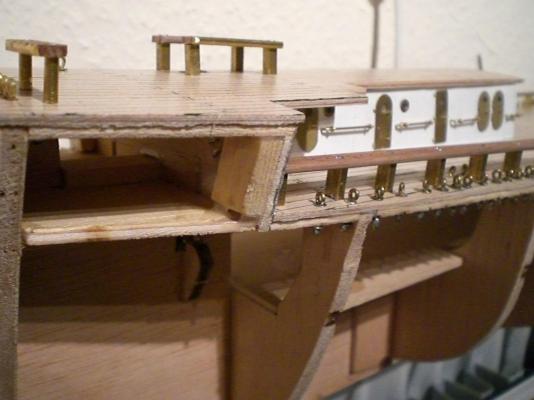
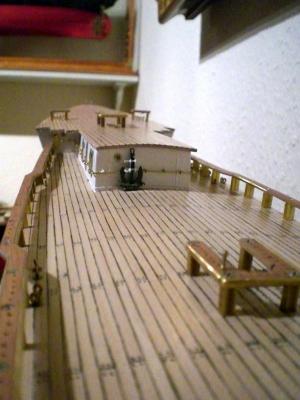
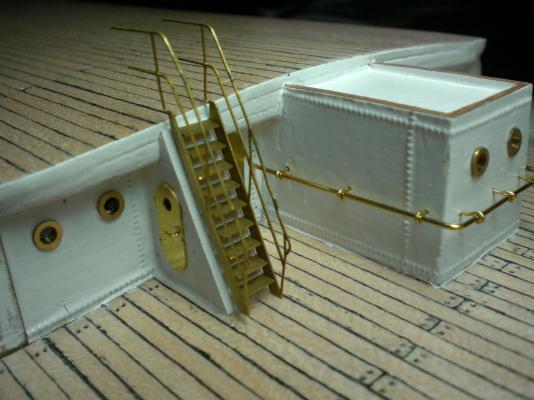
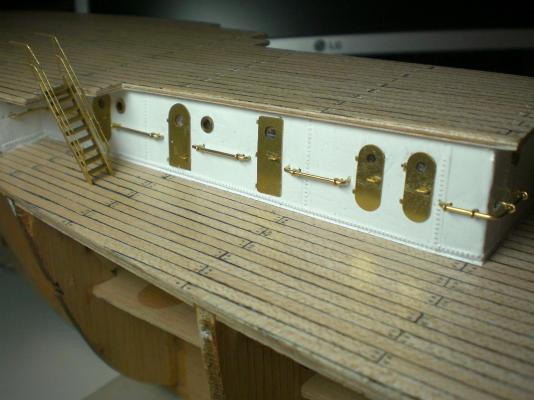
Build log part 4 view pinrack section the holes for the masts made and a spare anchor lashed to the foreward deckhouse the triangle like parts are lockers at the poop bulkhead and are taperd because they fit underneath stairs from well- to poopdeck mastgarden and other pinracks fitted eyelets for ropeguide Tacklings and pinracks on forecastle deck for the each 4 jib-sails sheets Build log part 5 to follow.... Nils


- 222 replies
-
- 7
-
-
- gorch fock
- barque
- (and 2 more)
-
yes Kester, thats right, I have never sailed on her yet, but had the Chance to look around onboard. In the ports there are always many public visitors and so everthing is utmost tidy, brass is well pollished up, all ropes are belayed in perfect condition, or coiled on deck Nils
- 222 replies
-
- 1
-
-
- gorch fock
- barque
- (and 2 more)
-
Popeye, if I am correct PE is the short for Polyethylene, but no, its etched brass sheet for stairs, doors, hatches,etc., in general available in various scales for use on all types of models Nils
-
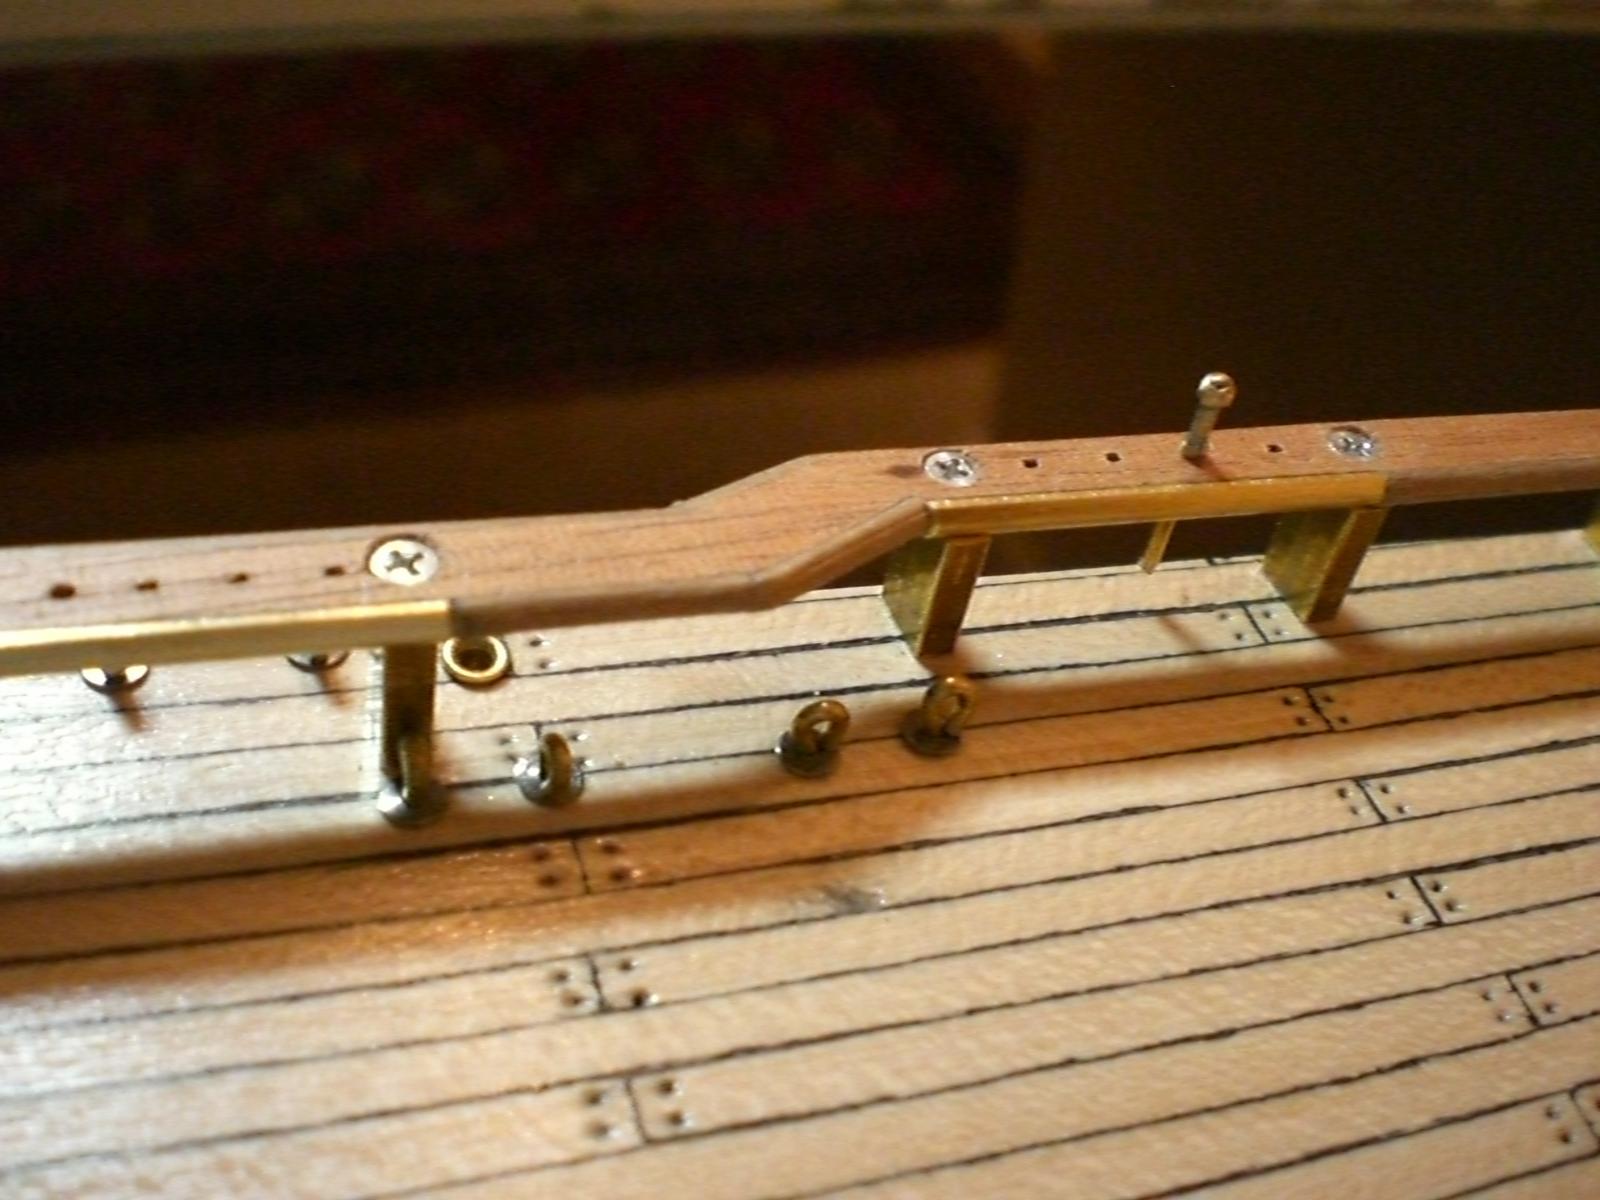
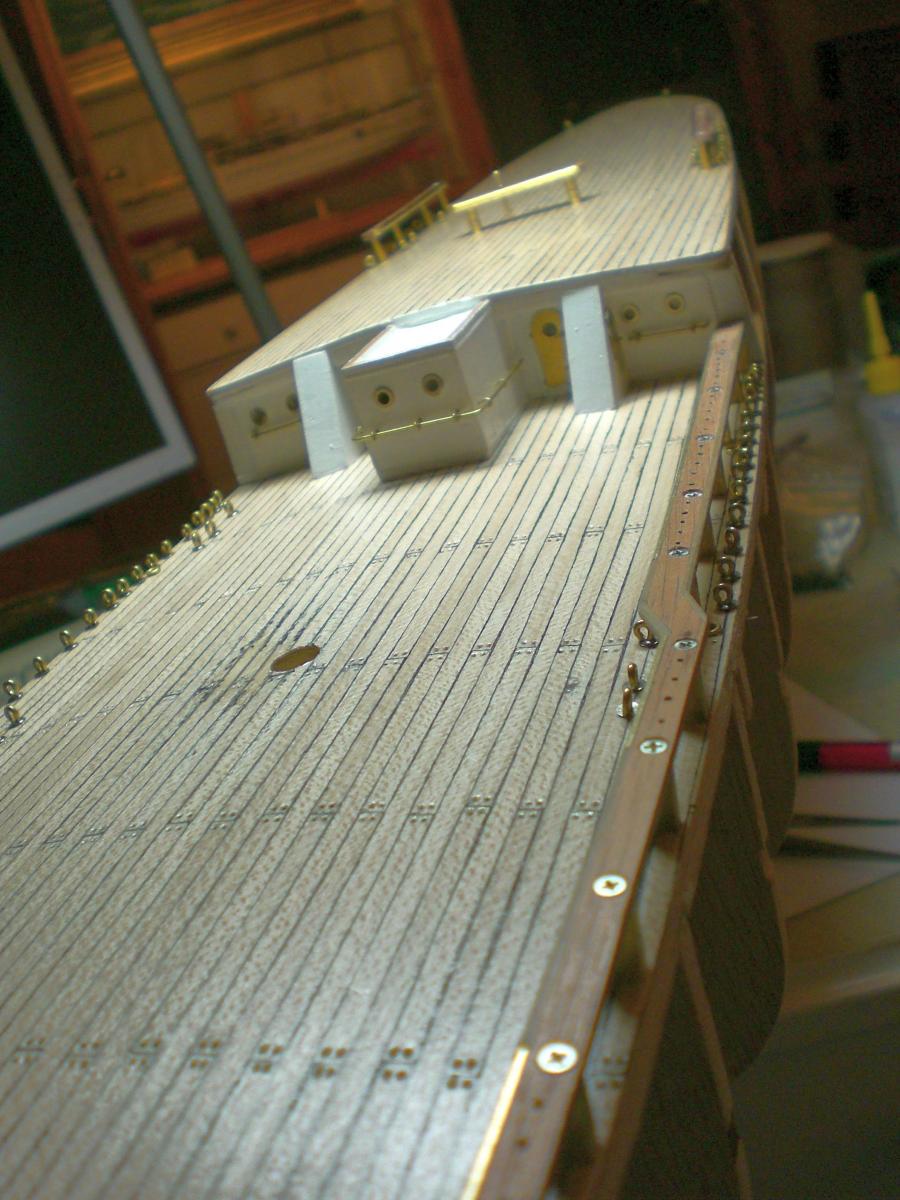
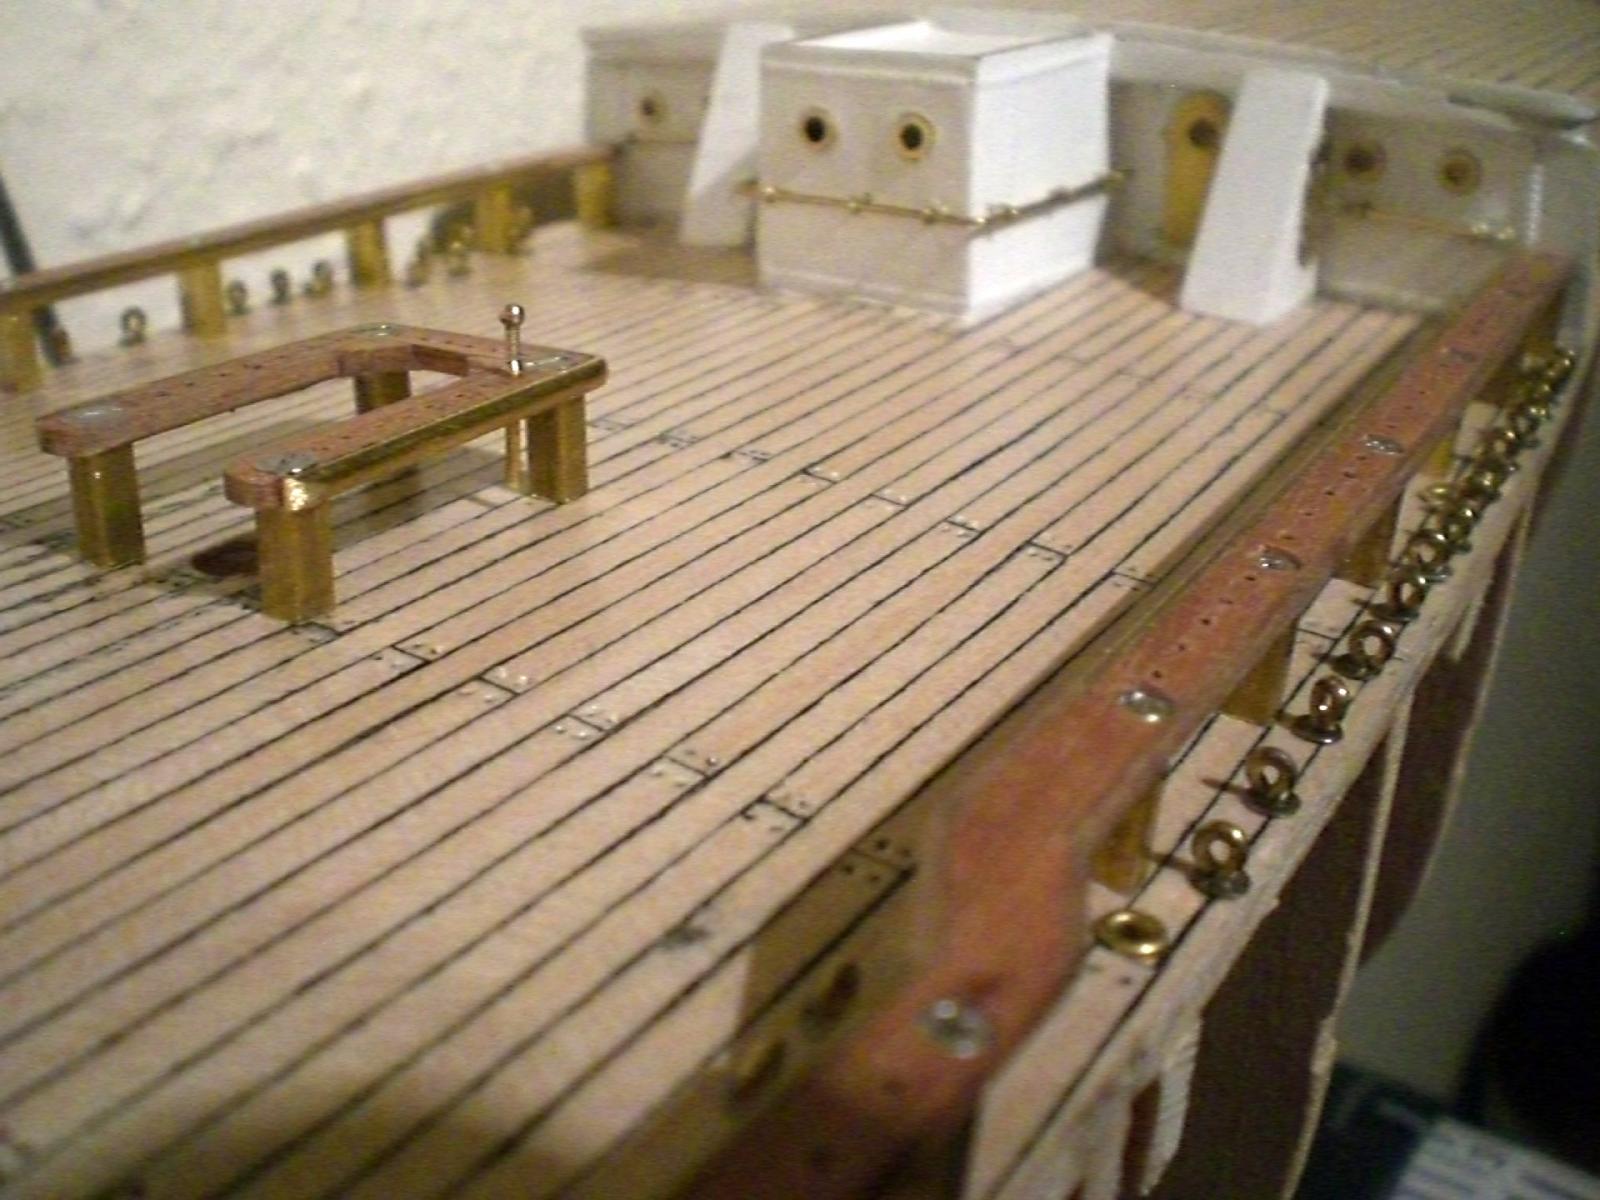
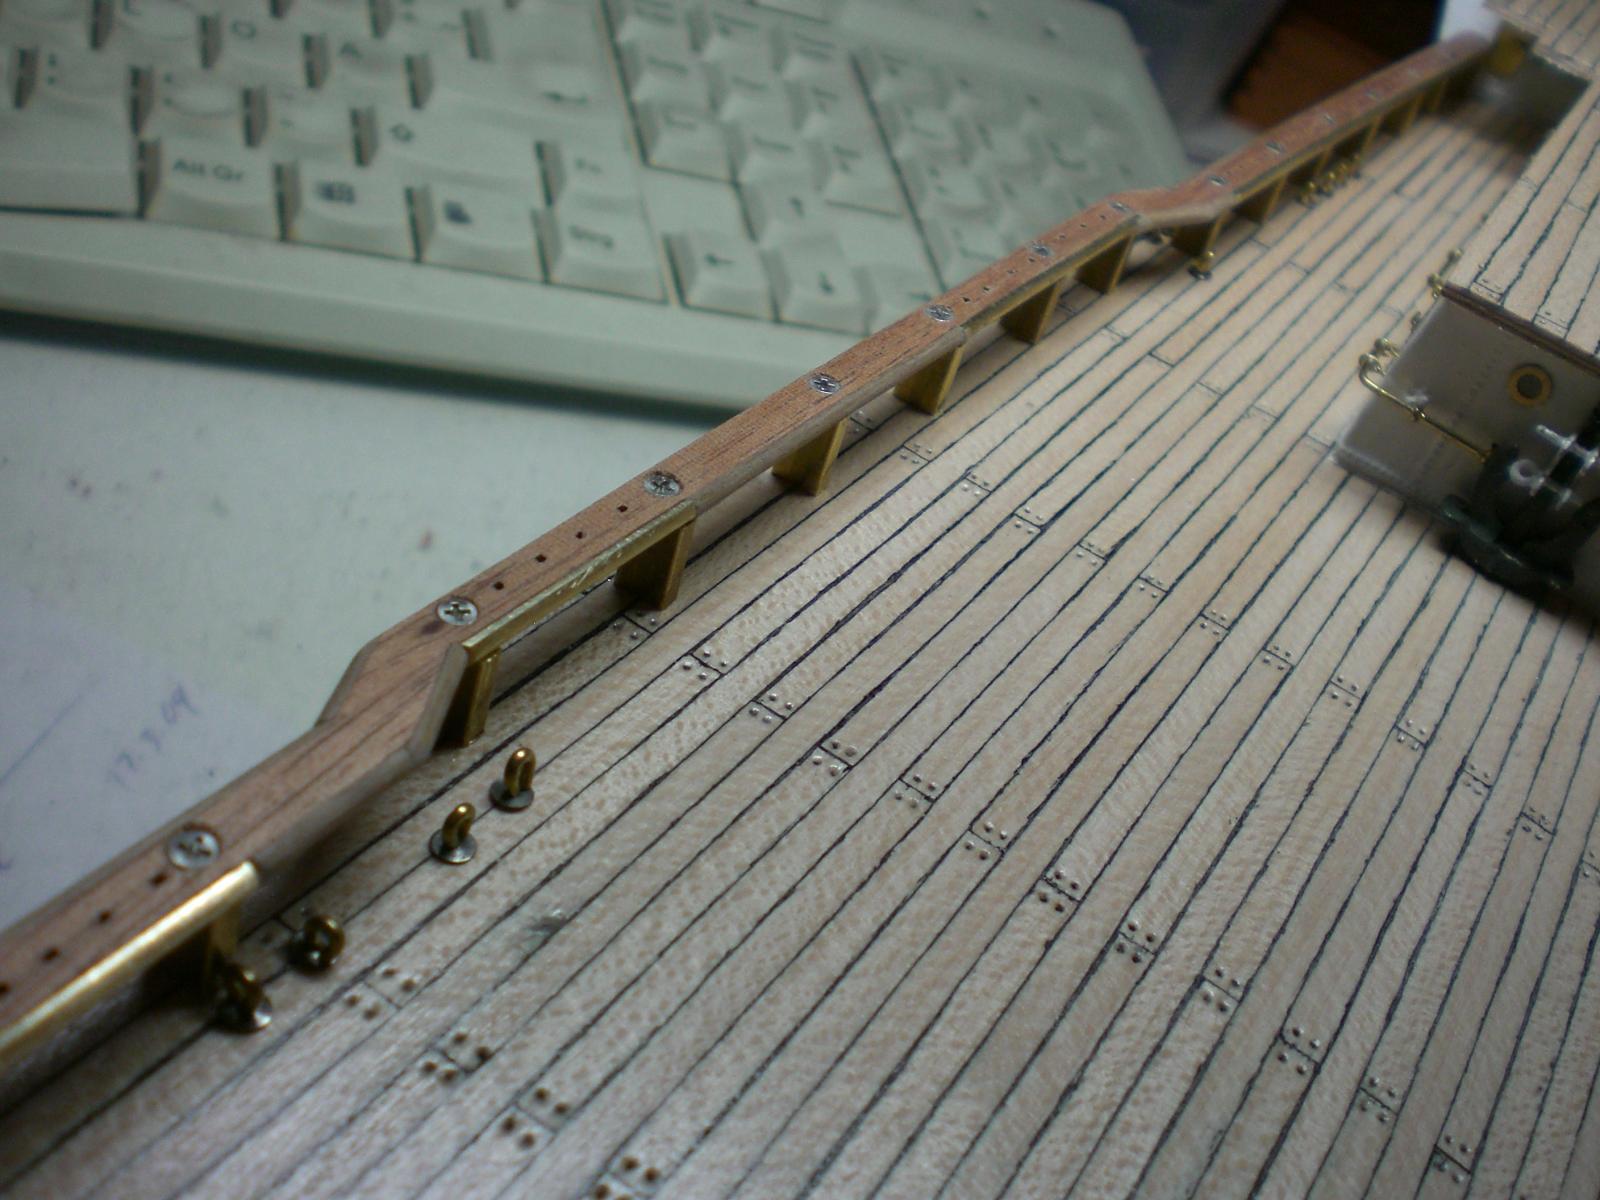
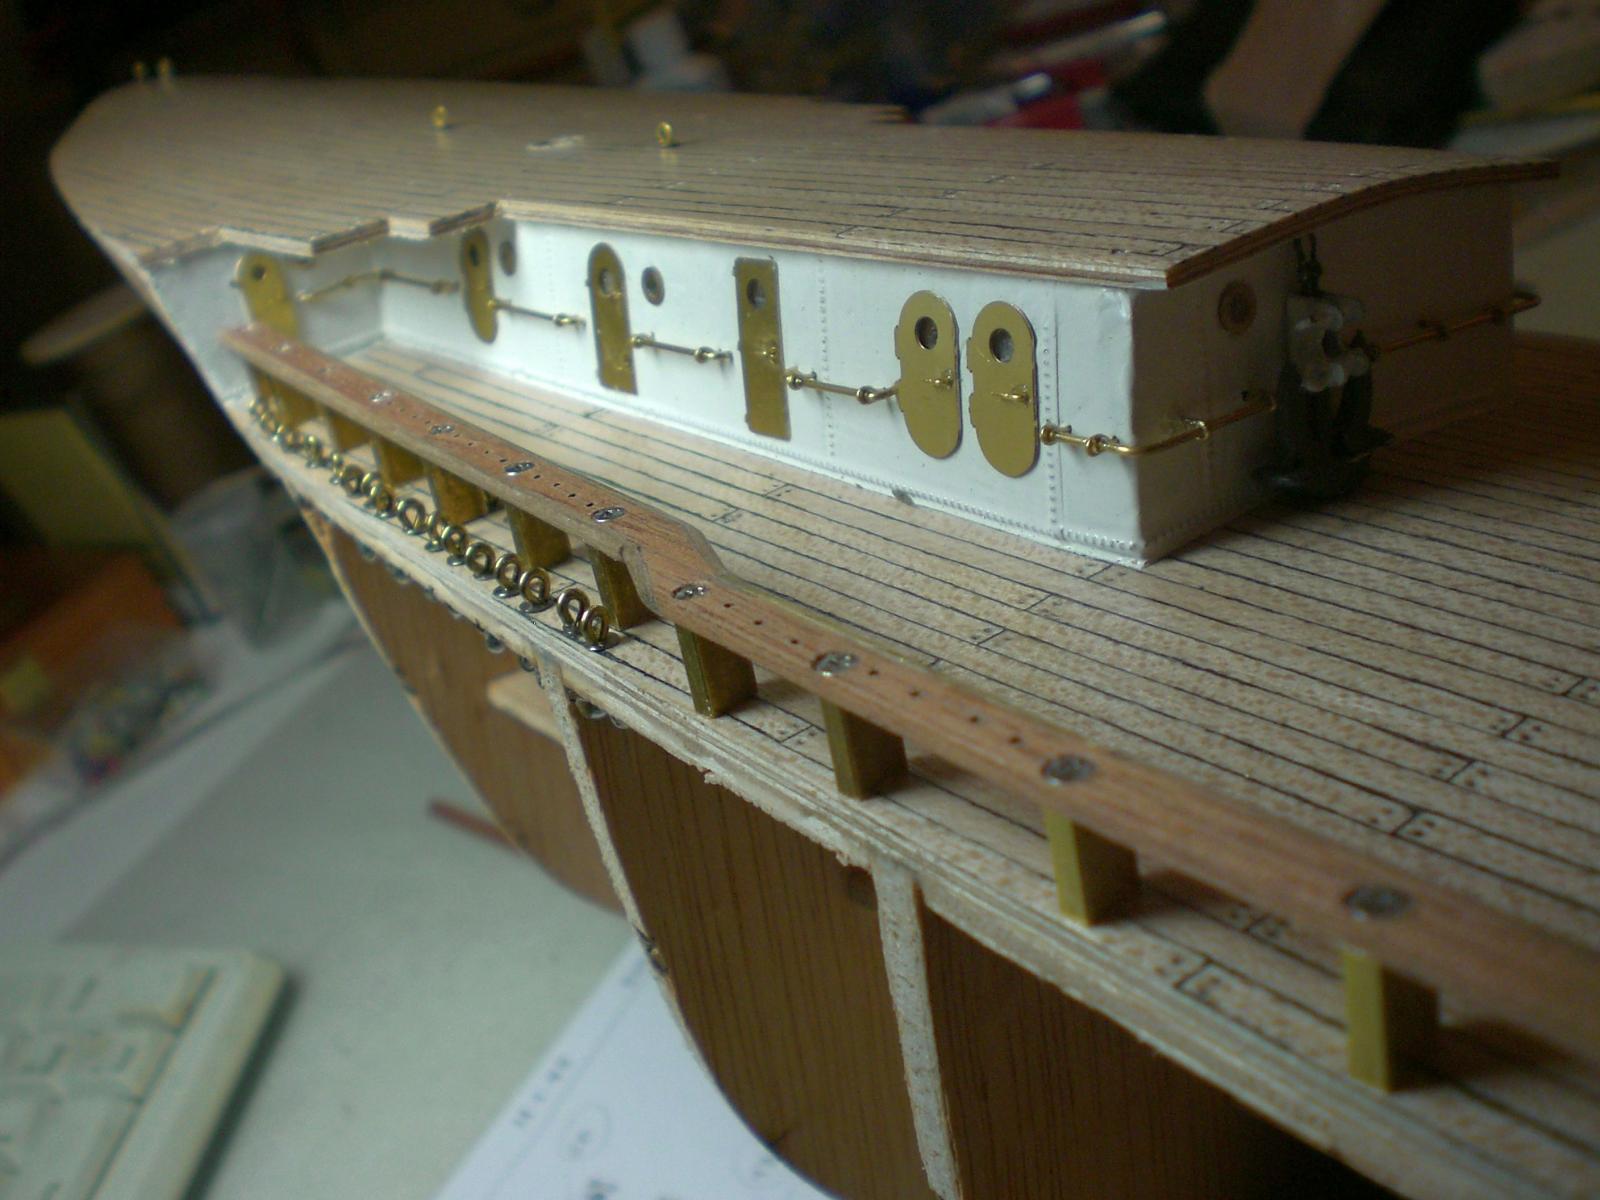
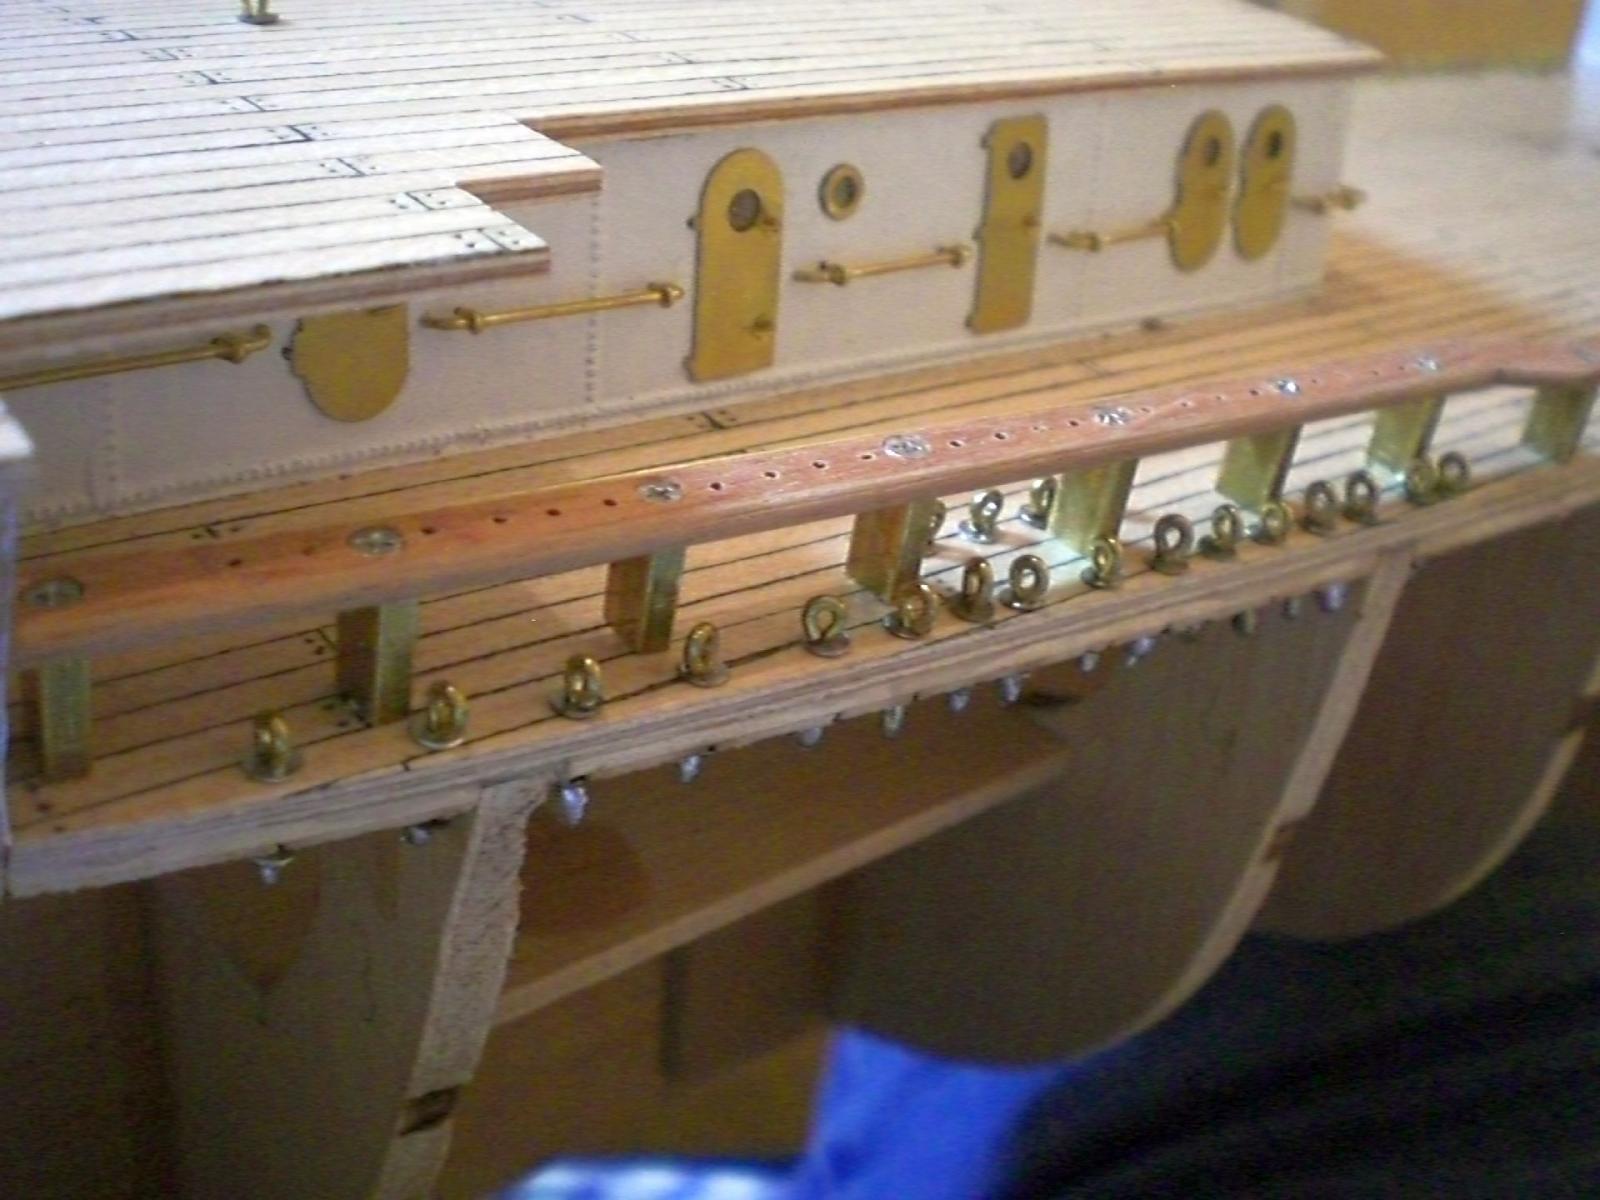
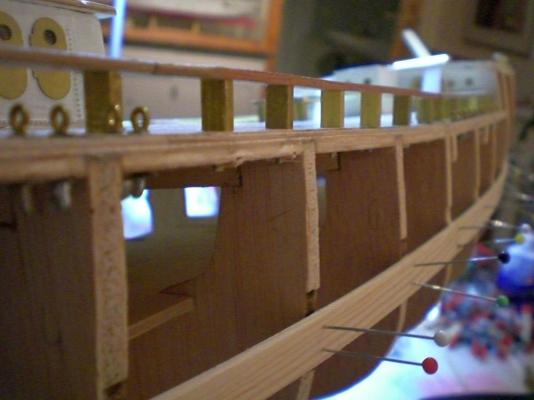
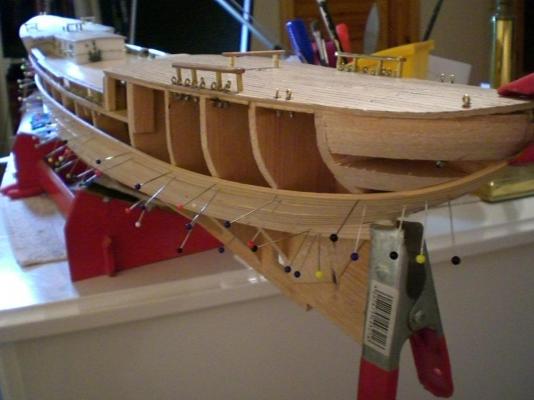
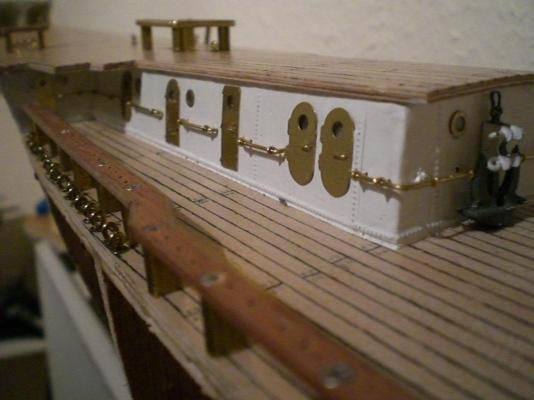
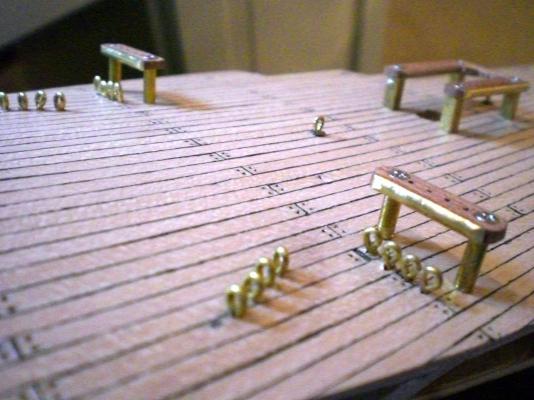
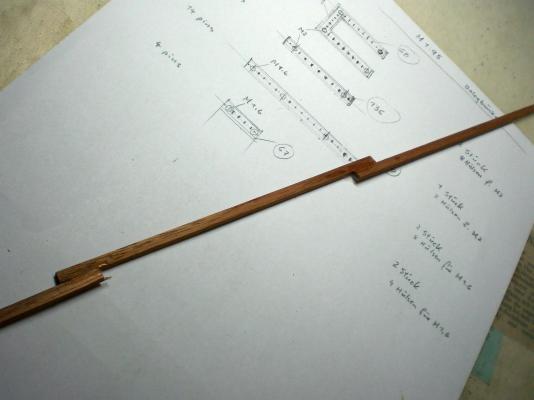
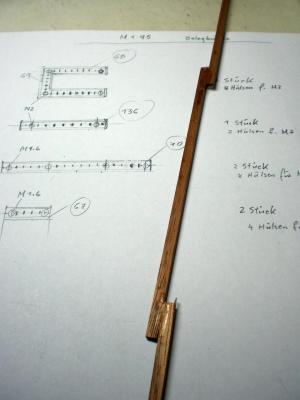
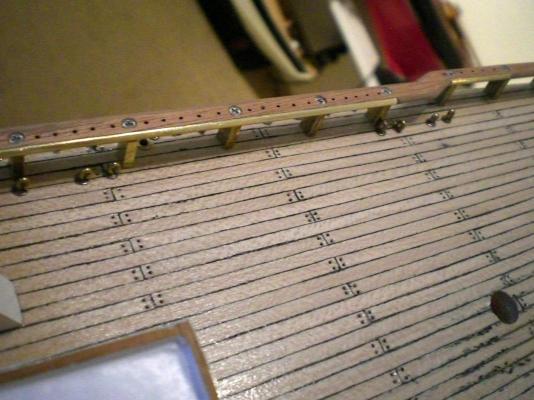
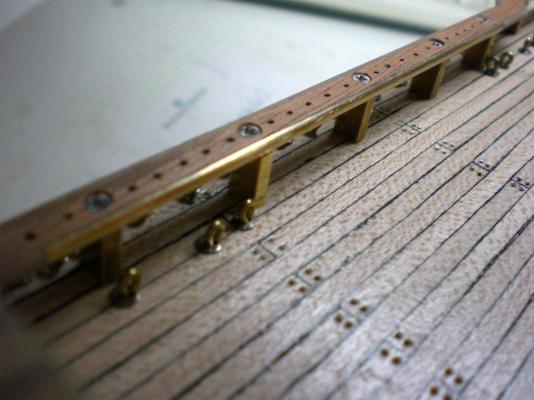
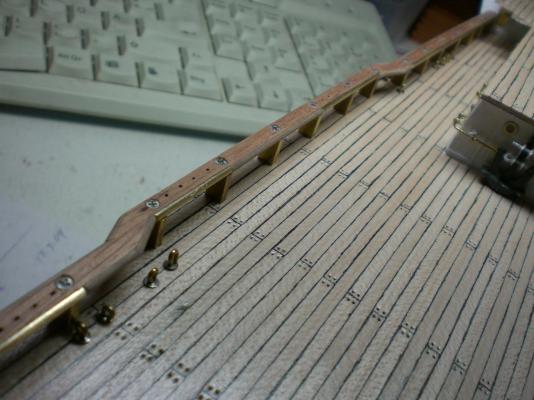
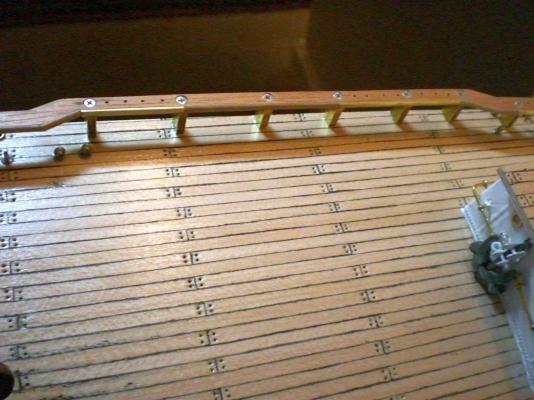
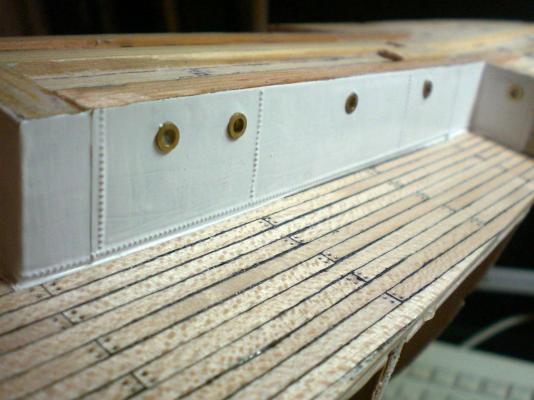
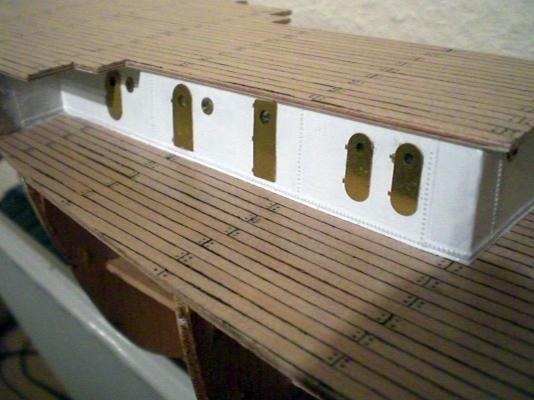
Build log part 3 poopdeck eyelets preparing for the welldeck pinrails These pinrails are designed to withstand Forces initiated by the later rig wear sections of the pinrails bear brass inserts eyelets for foremast shrouds and backstays especially the eyelets for the shrouds and backstays have to be well countered from beneath the decK Build log part 4 tofollow.... Nils


- 222 replies
-
- 11
-
-
- gorch fock
- barque
- (and 2 more)
-
Nenad, John, Bugra Thanks for joining in to watch the build ... Nils
-
thank you Bob and Crackers, I sighted quite an extensive documentation (photos) for this build, it was probably the first time my digitible camera realy came to use, so there is plenty to come... Nils
- 222 replies
-
- 2
-
-
- gorch fock
- barque
- (and 2 more)
-
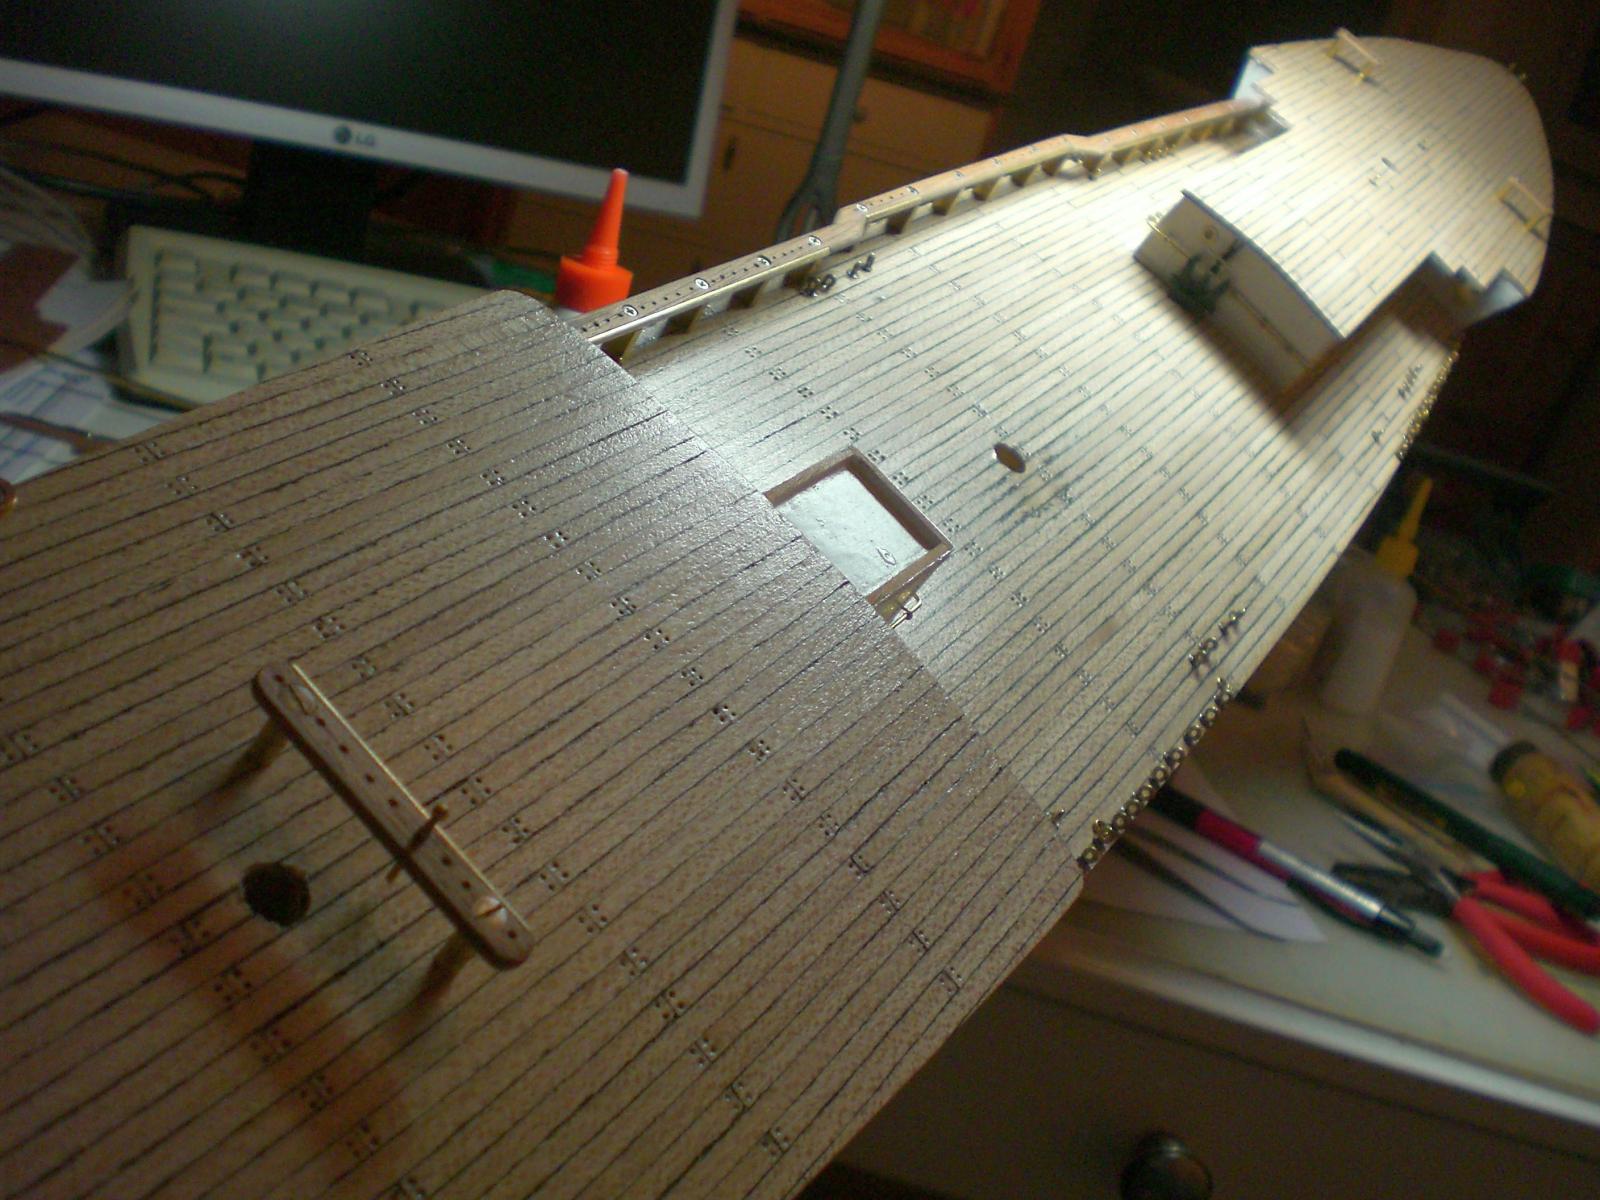
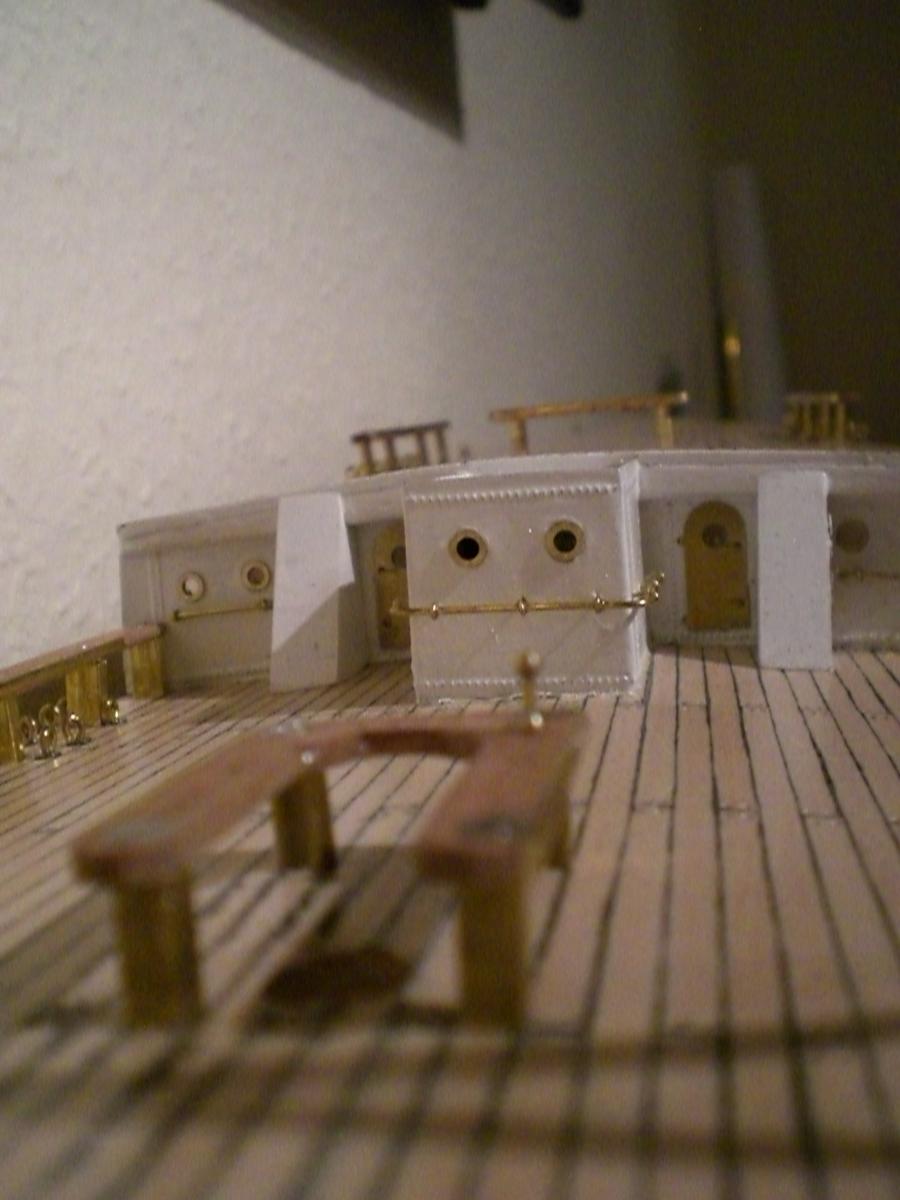
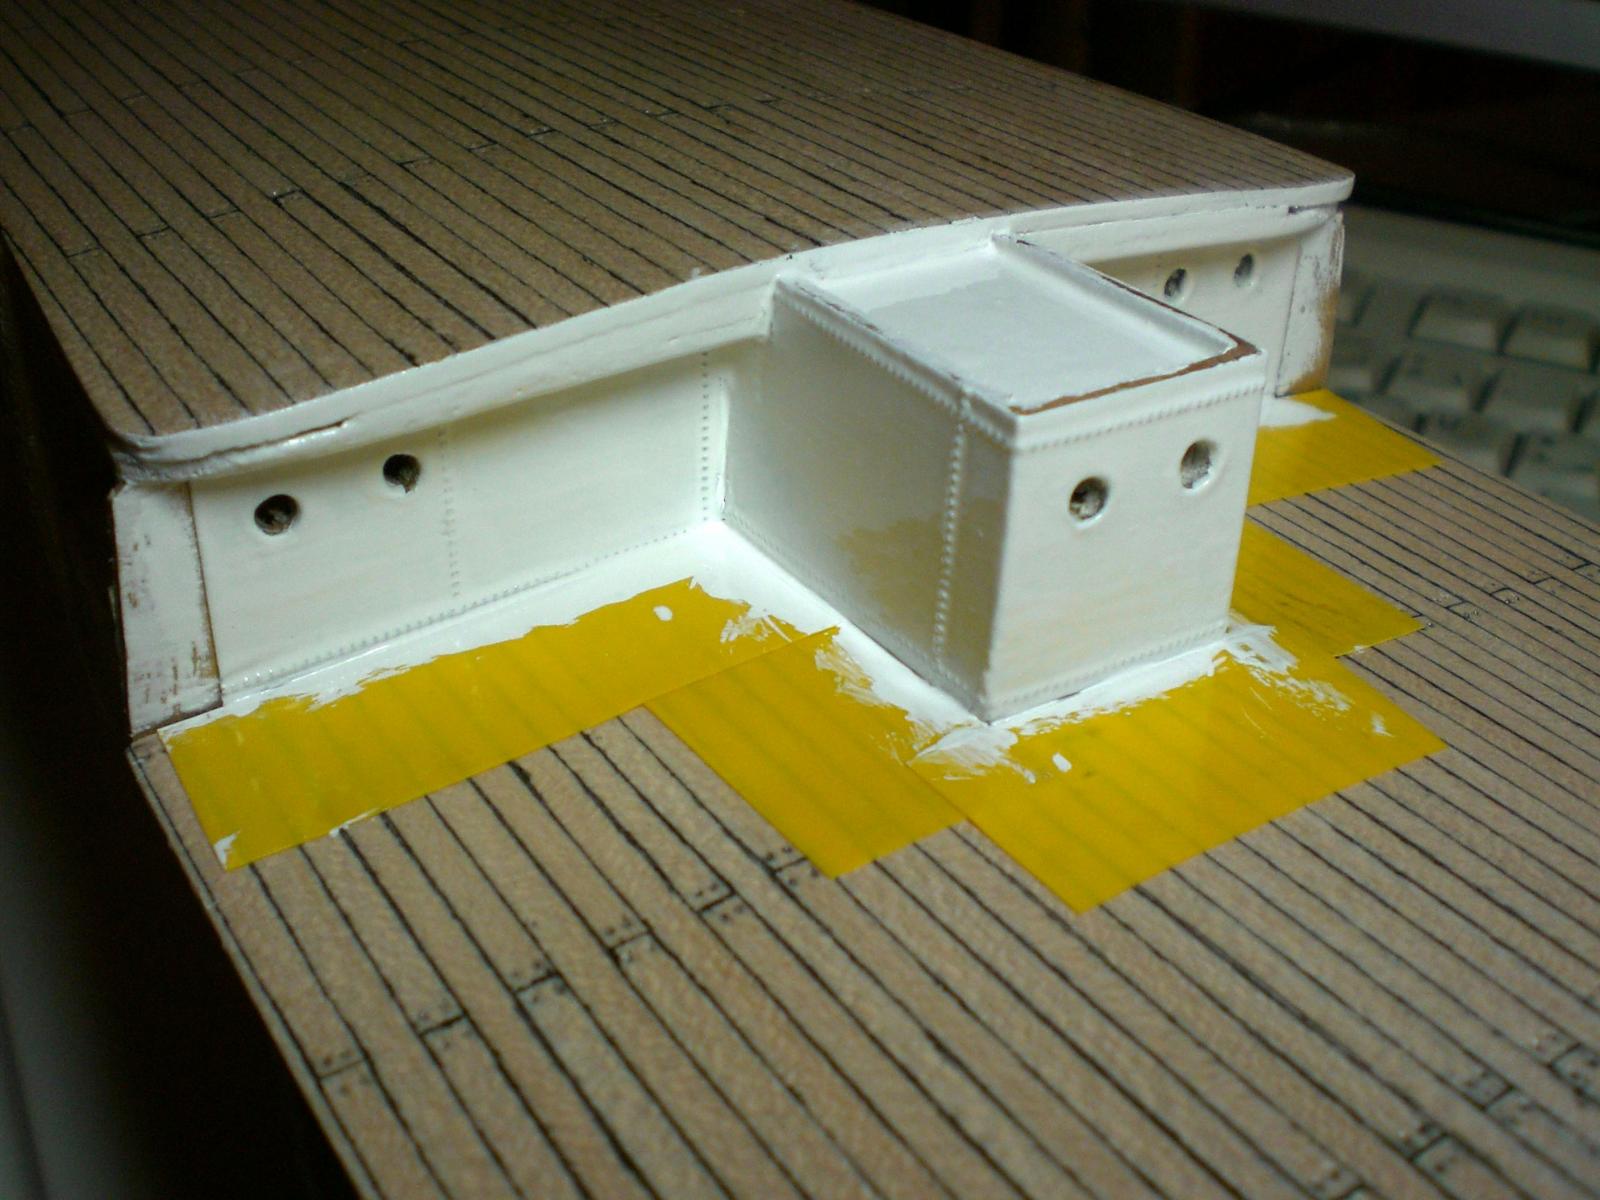
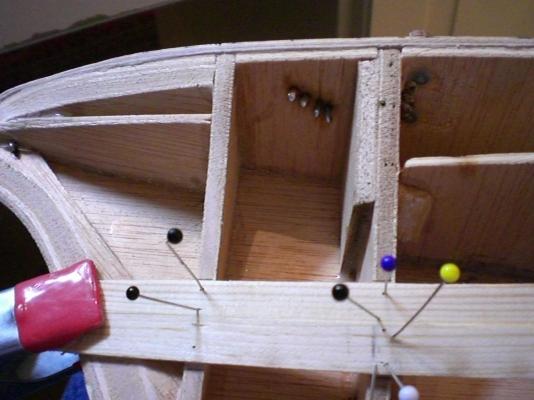
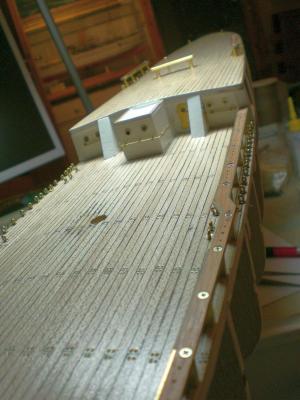
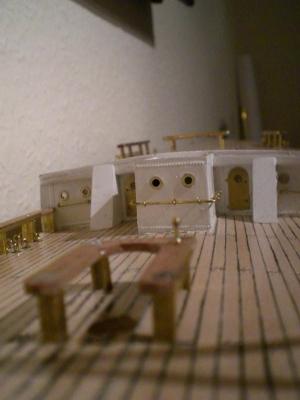
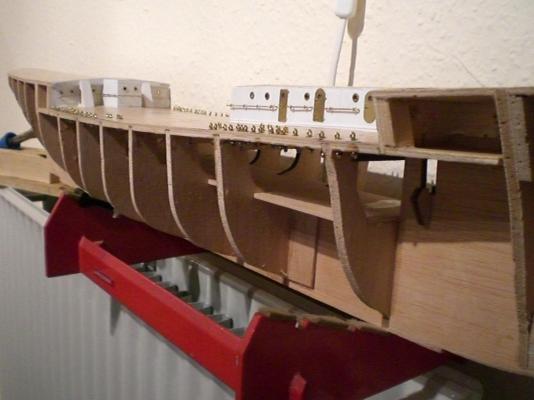
Build log part 2 the decks are checked if all Planks are free of marks and checked for fit in the foreseen places poopdeck bulkhead and midship deckhouse get paint and portholes stairs checked, doors, handrails mounted the many eyelets are placed and secured from under the decks Frames look OK so far mantaining the deck curvature while the glue is curing Build log part 3 to follow.... Nils

- 222 replies
-
- 18
-
-
- gorch fock
- barque
- (and 2 more)
-
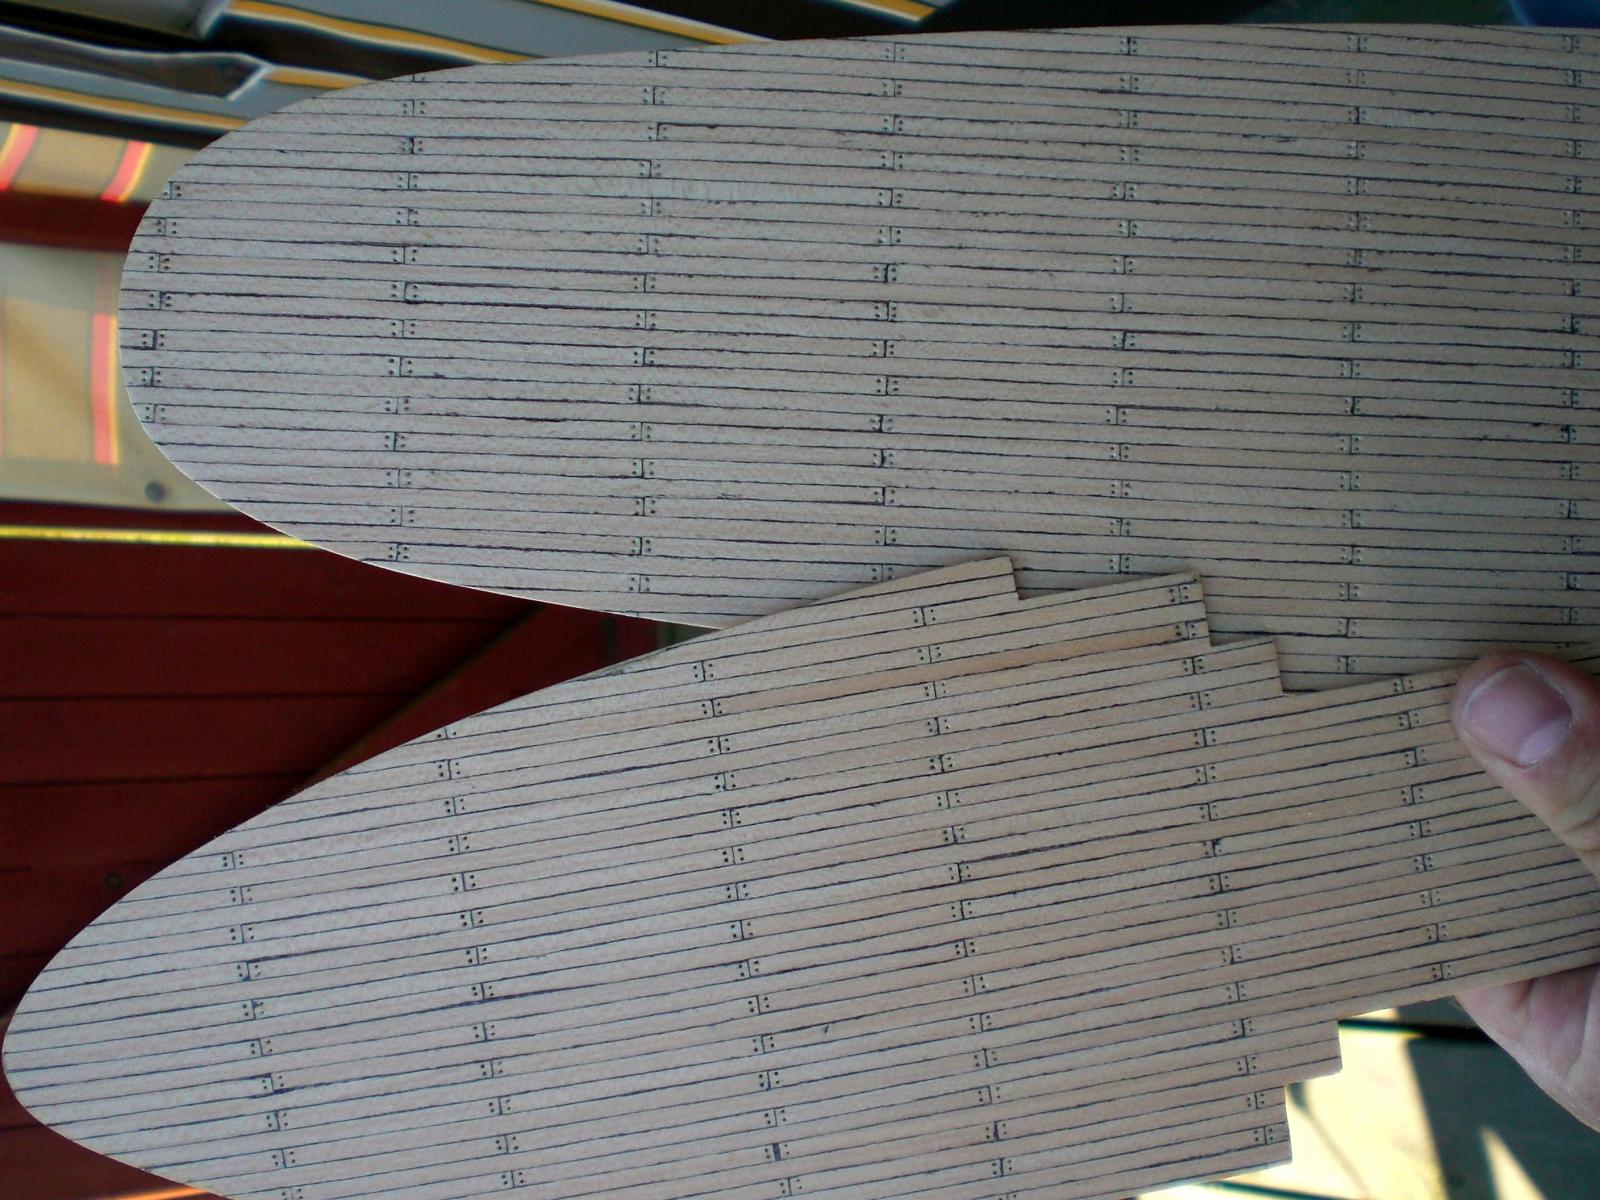
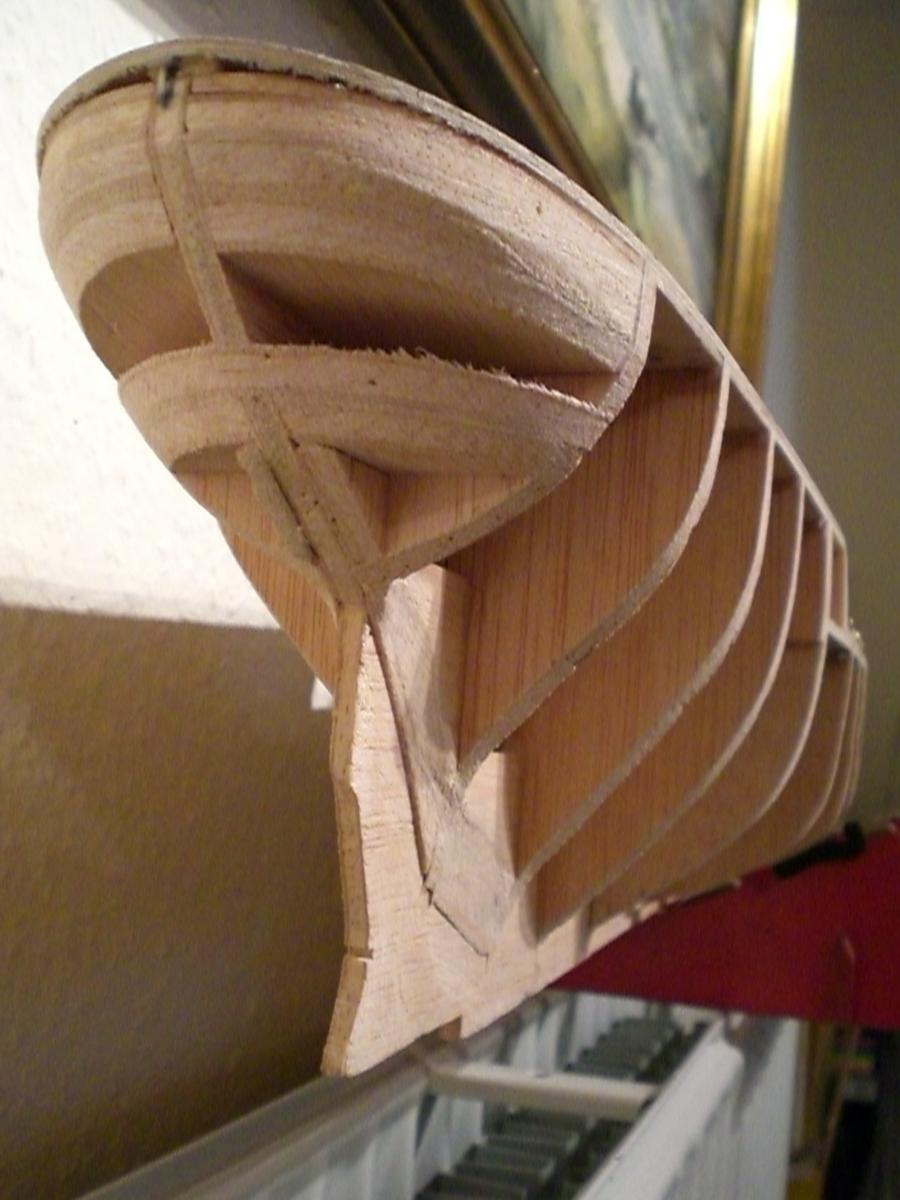
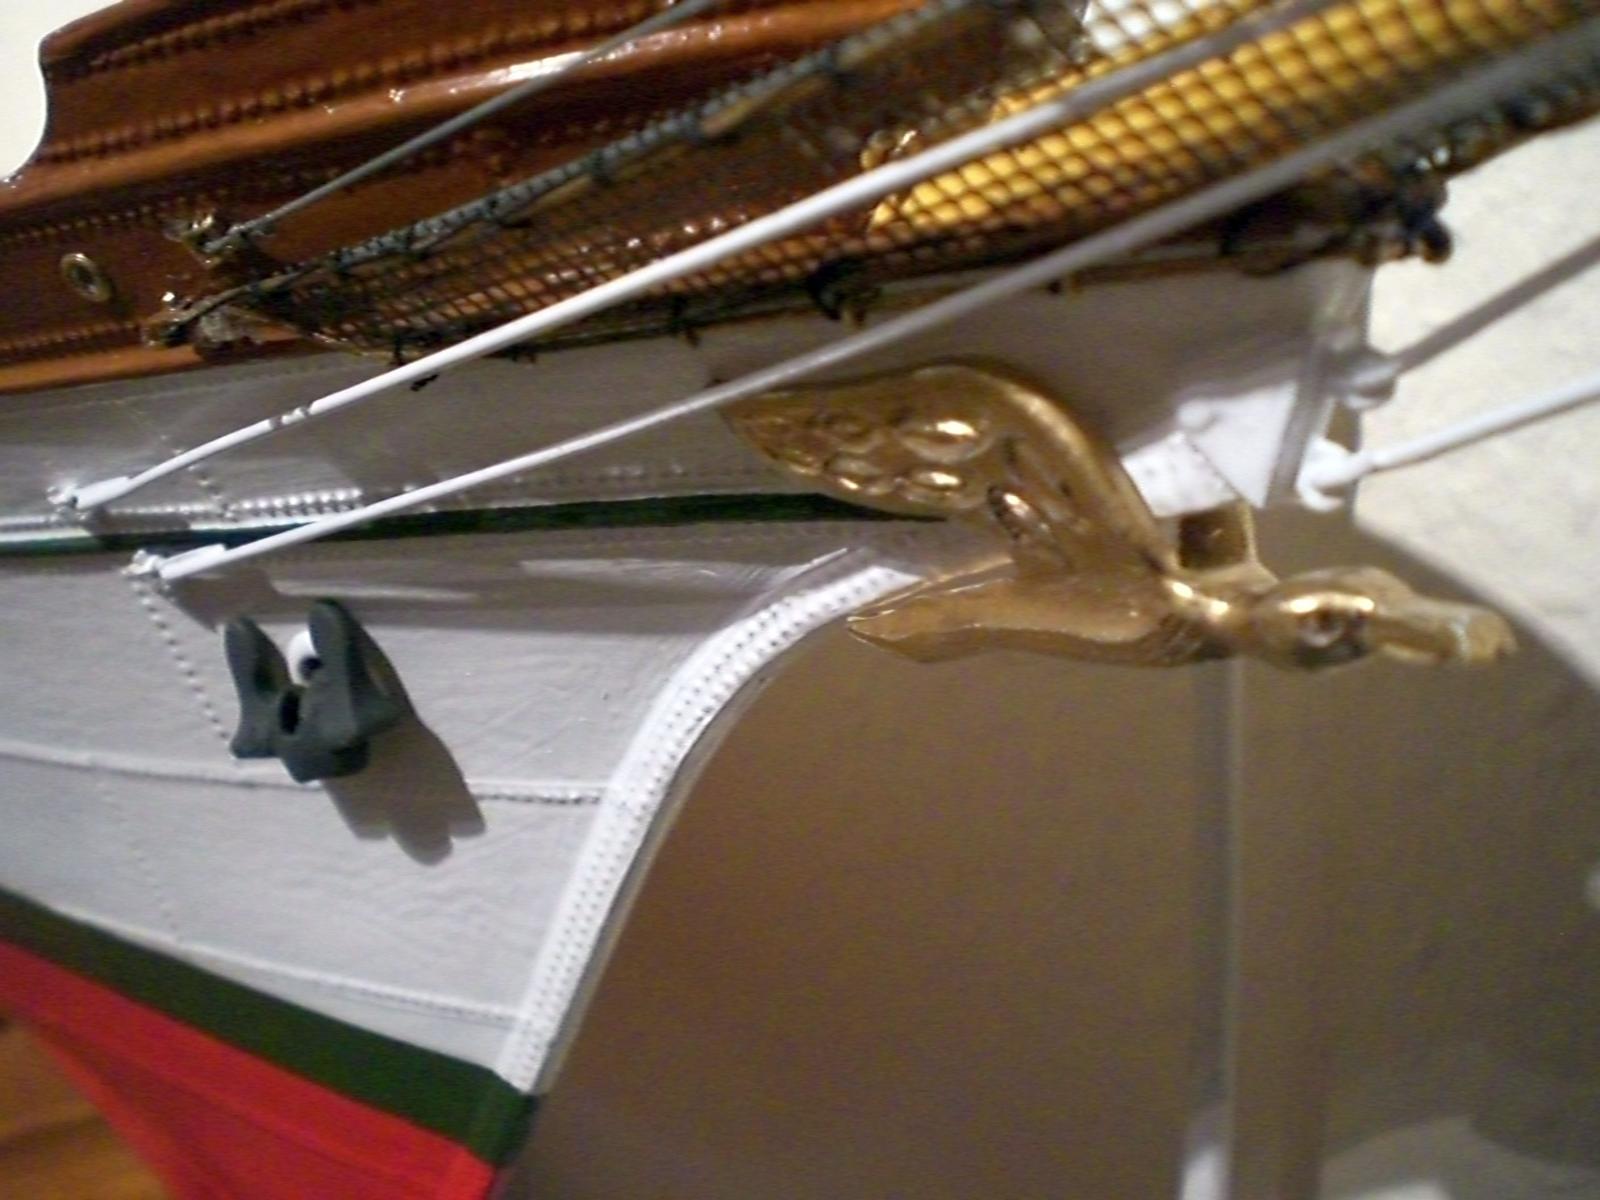
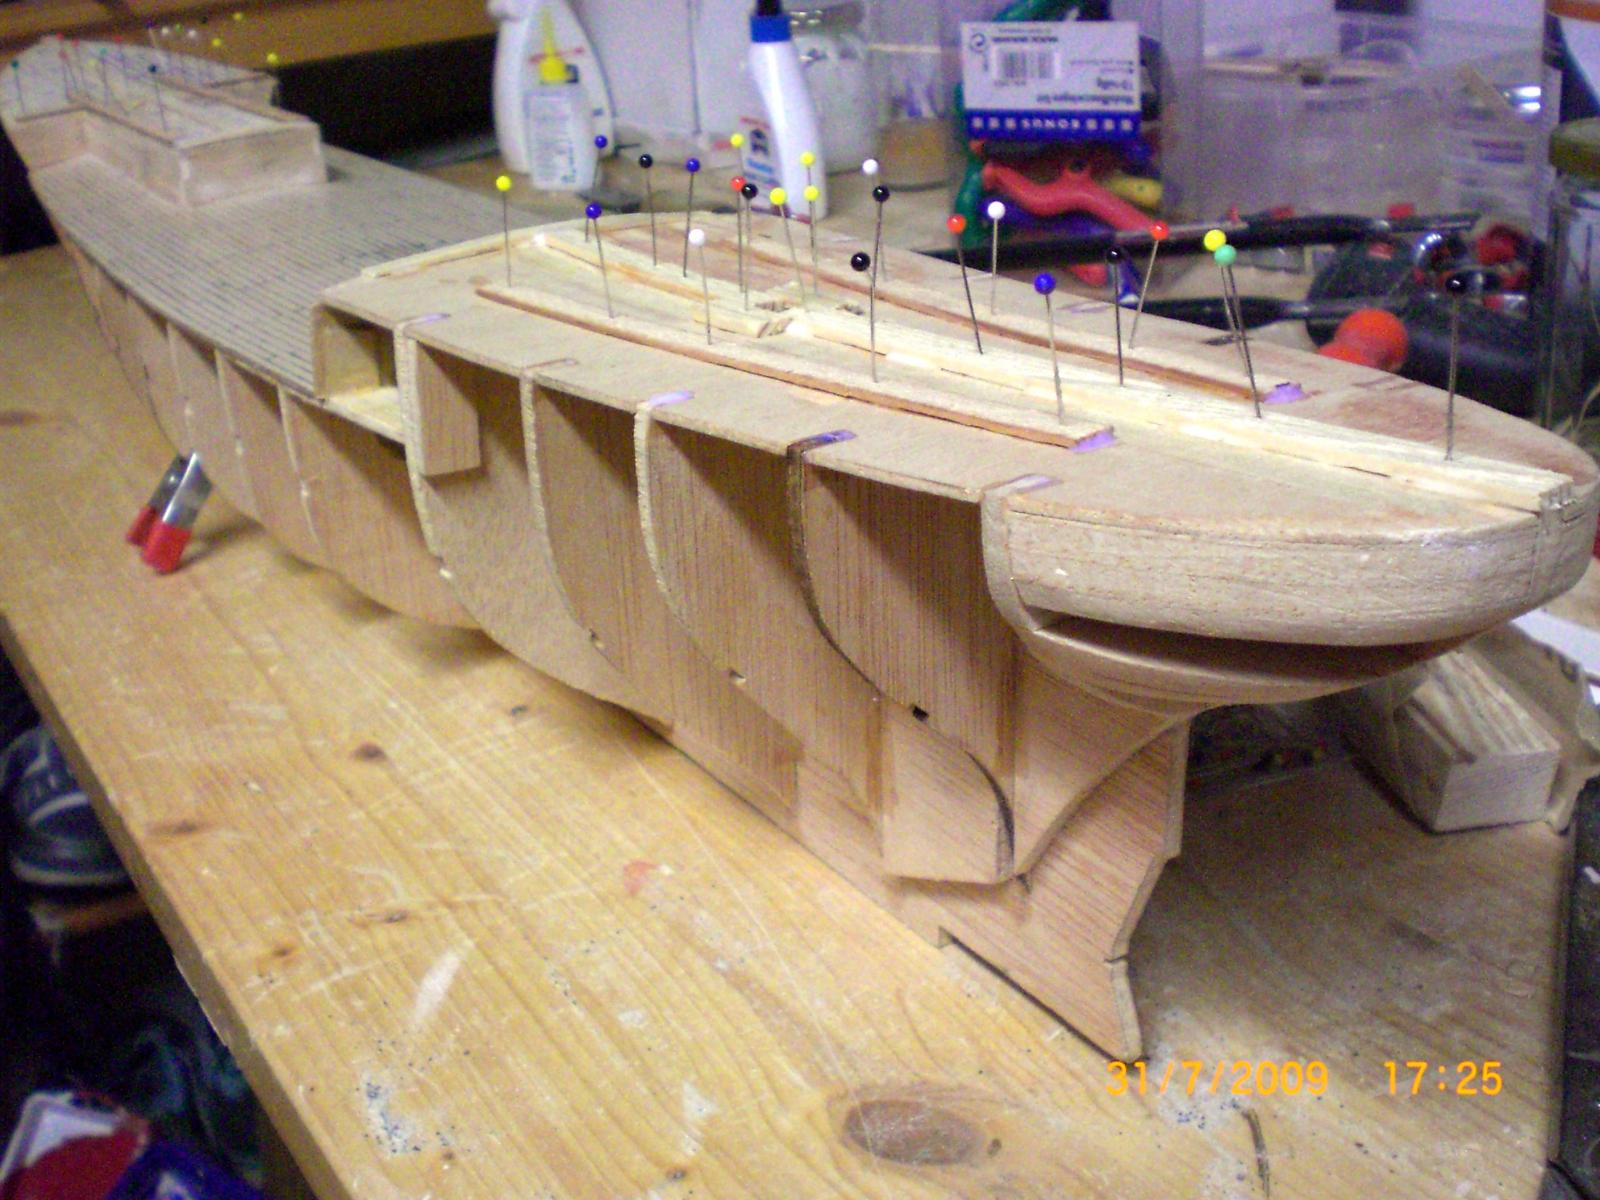
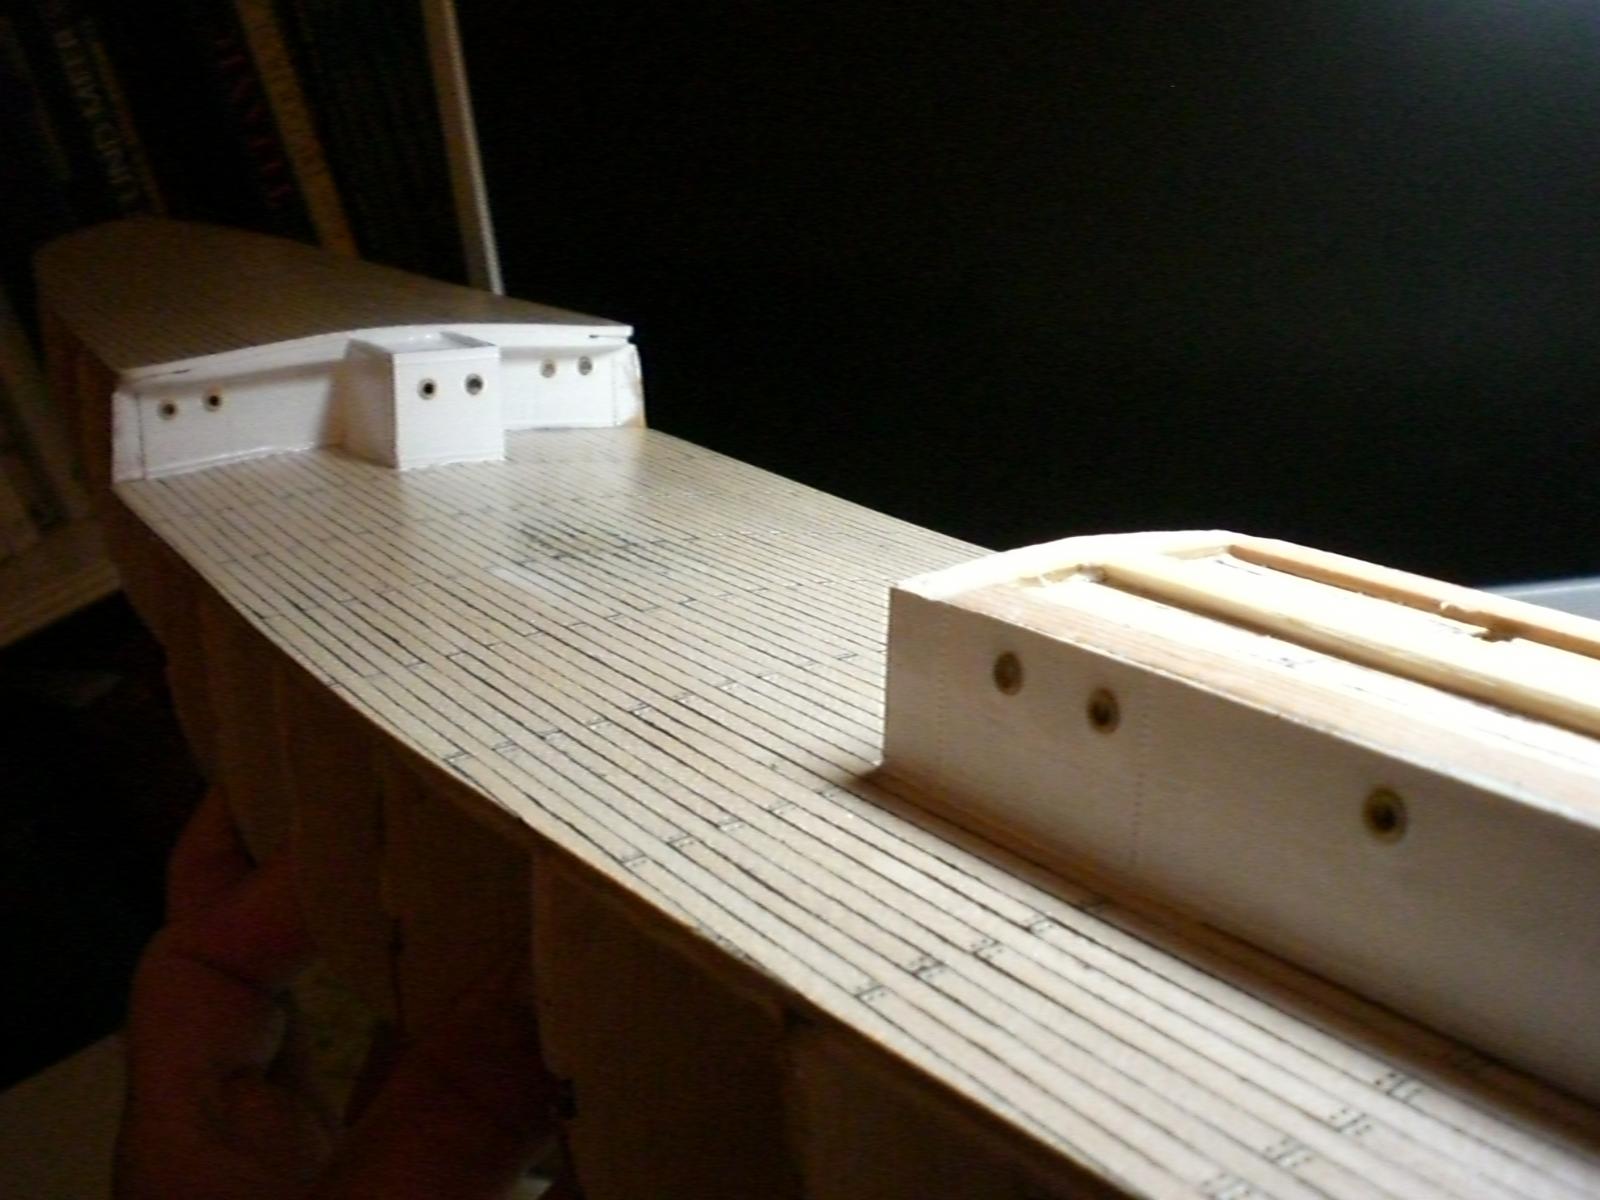
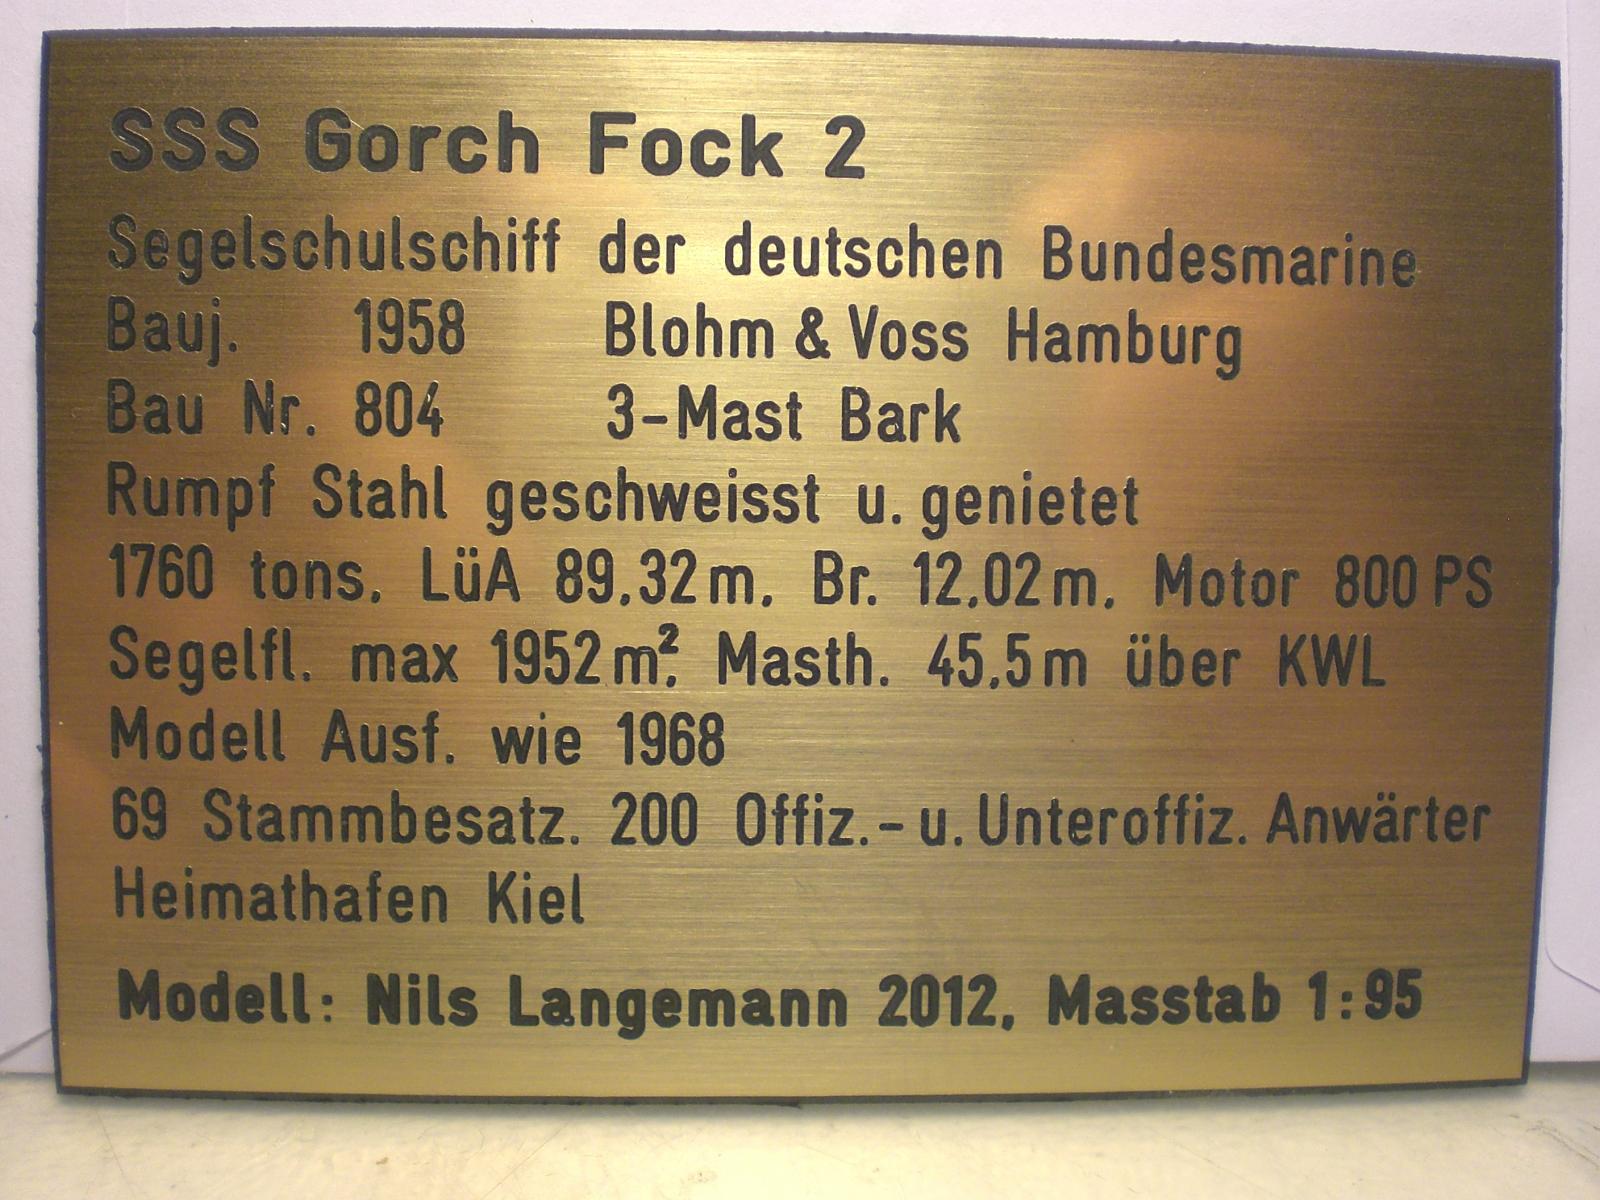
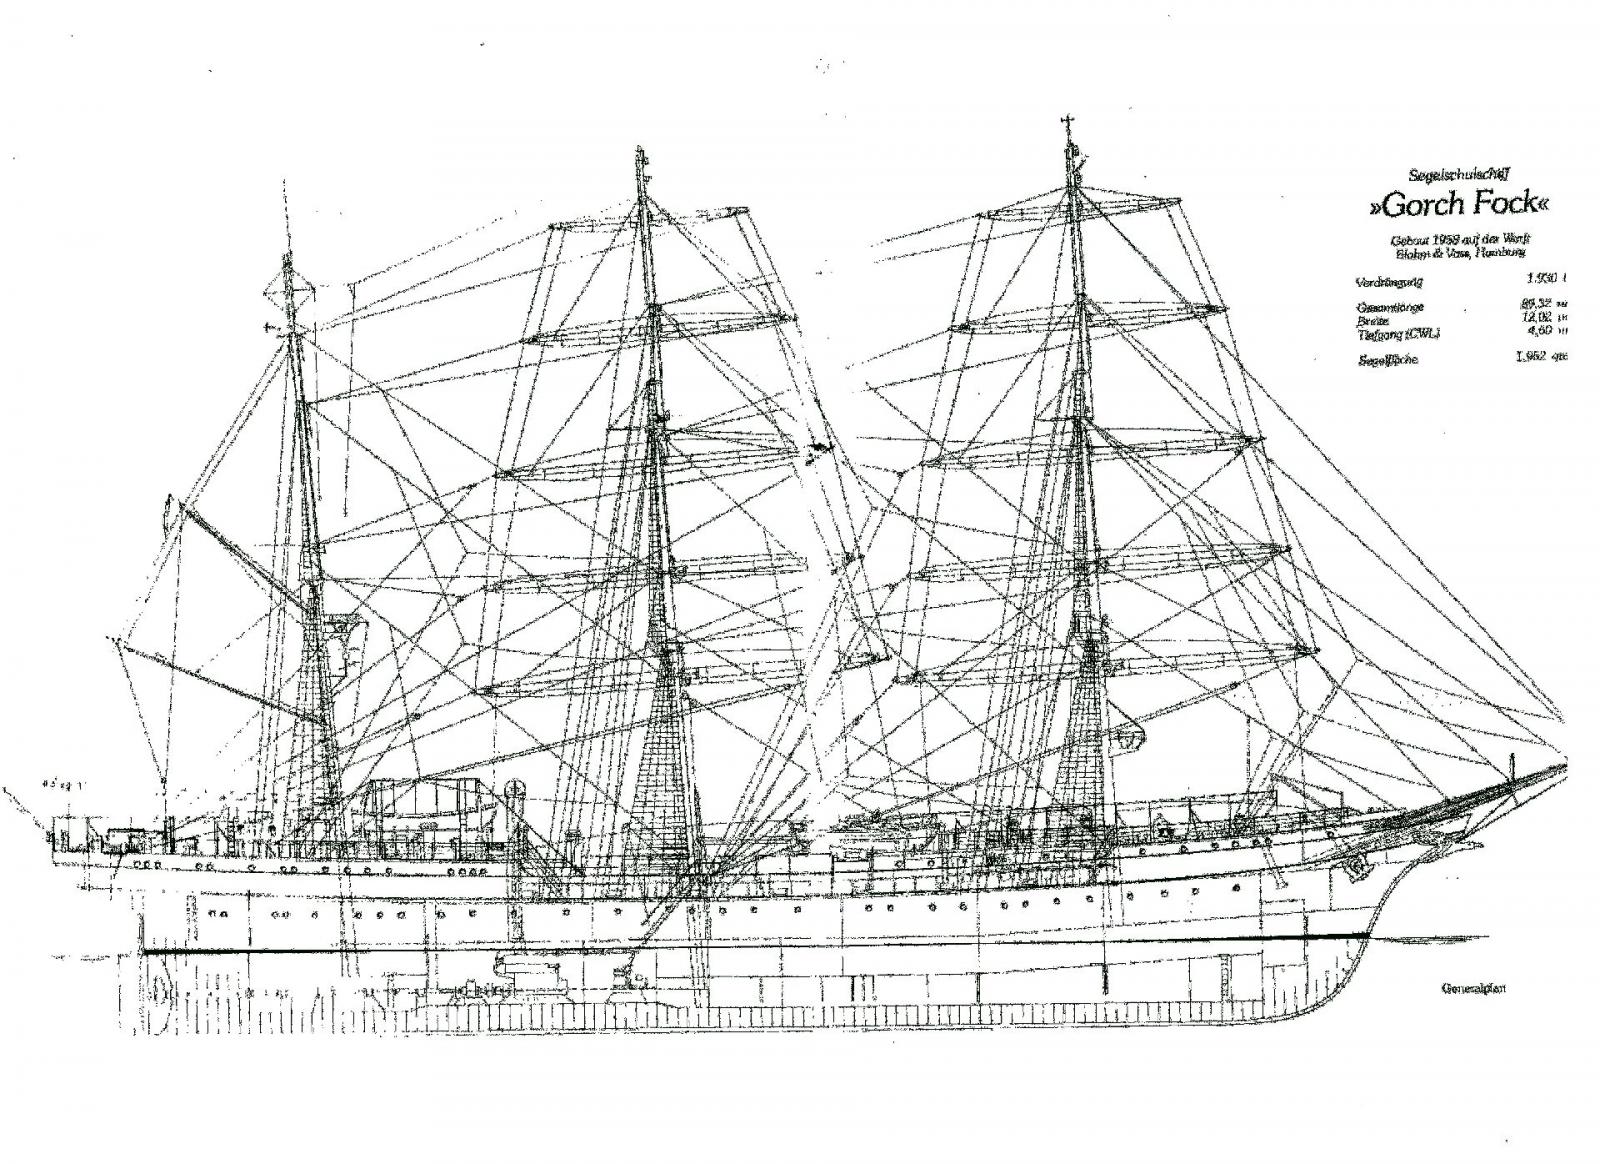
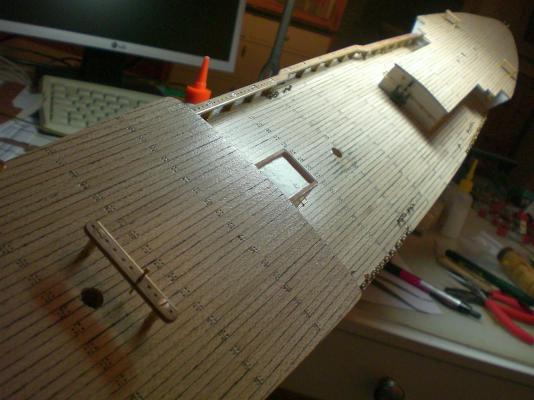
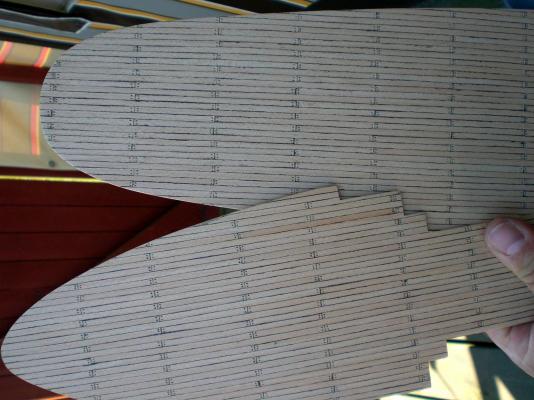
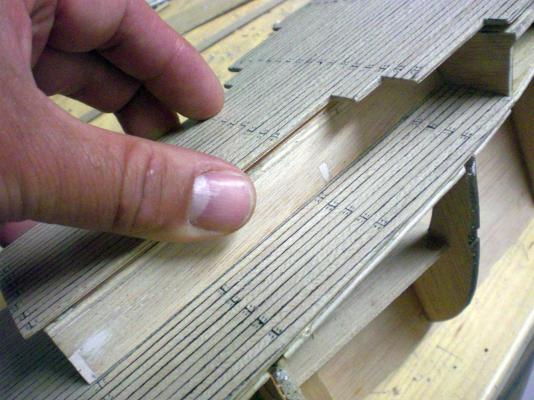
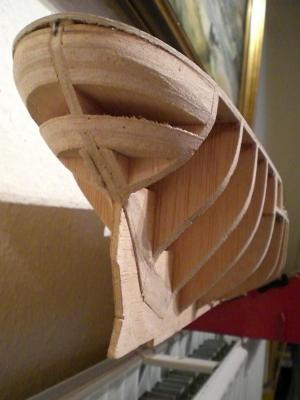
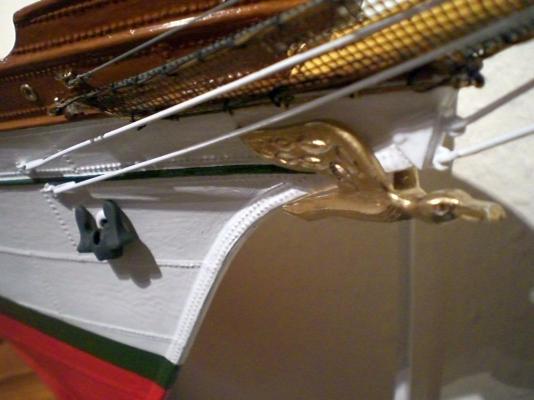
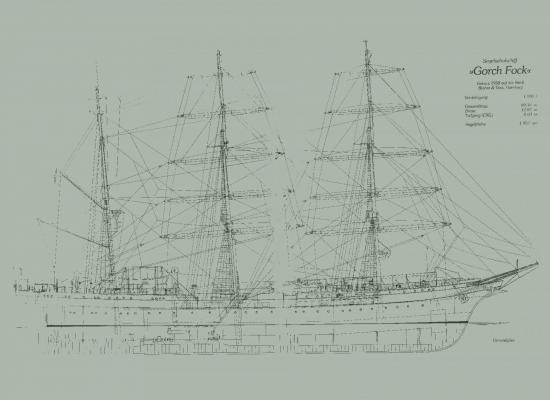
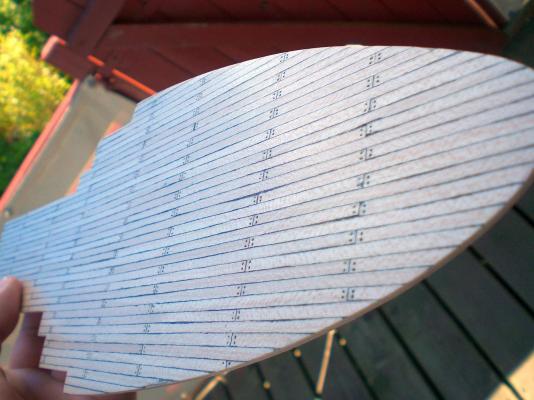
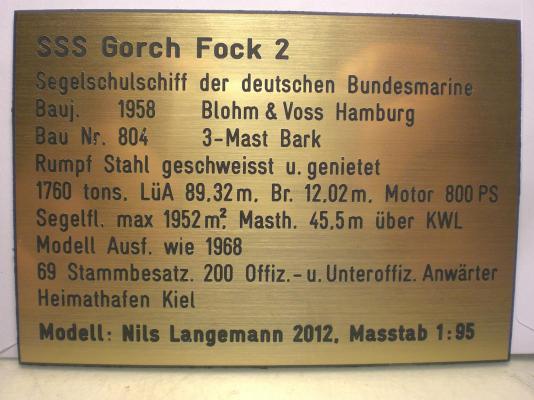
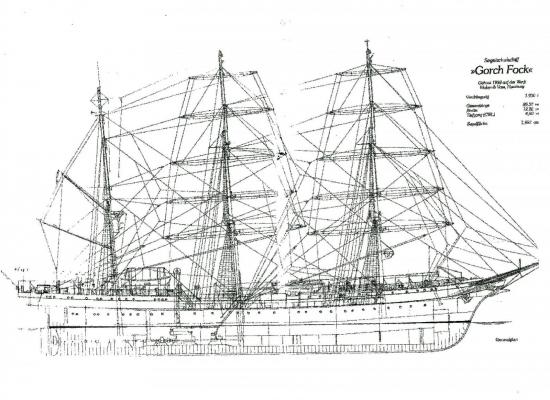
Sailing ship, threemast-barque Gorch Fock 2 in scale 1:95 Introduction to this build by Nils Langemann When choosing my first tallship for modeling, the choise for either Gorch Fock 2 or for Pamir was not so easy, so finally I decided to build both, the Gorch Fock 2 to begin with, and the other to follow on in staggered time schedule. The Gorch Fock 2 is the follower of the still existing german Gorch Fock 1 and bearing the original Name again (ex russian Tovarisch, now towed to the pier in Stralsund harbour, Baltic sea), which had several sisterships, one of them being the still serving USS Eagle of the US Coast Guard. GF 2 was launched 1958 at Hamburg Blohm & Voss shipyard, build N° 804 and to be used as a cadet training ship for the German Navy, Bundesmarine. She since then, and after several updates in look and techniques does her duty bravely. She is well known on the seven seas and in many ports. She is also participating in many “Operation Sail” events and to be seen amoungst other tallships. Compared with the ultimate version of today I preferred to model the 1960 ties version for its more interesting look, with the more nostalgic looking boats and the motorized commanders launch. The model should be carrying all 23 sails and be fully rigged, if I would manage to do so. The ships hull in actual and in model is representing more the look of a large yacht, because of the slim fine lines and the missing cargo holds. The ultimate version differs in color, has a larger oval shaped funnel, more modern navigation equipment, a variable pitch propeller, larger portholes (safety reasons, allows a man passing through !!) and modern rescue- and lifesaving equipment. Also a side-thrust prop was fitted in the bow Sub waterline section, as well as many inside fitting out updates. When looking out for a suitable plan to build the model from scratch, I found a lonesome set of frames in correct scale at an Ebay auction and decided to trim and update these for my project. I saved myself some plywood-cutting-out right at the beginning, that gained some time for doing other things. The other data and rating I found in some GF2 related books, and besides that at that time, I still had a wonderful rare scale 1:150 GF 2 Kit in Plastic by Revell, that had never been built nor started, but representing a very useful pattern for enlargement to scale 1:95 (rating wise) I started gathering all information and pictures of details I could get, and started to lay the keel. It should take me appr. 1,5 years to finalize the model. Many experienced techniques could be addopted to the Pamir build whereby not so good results on GF2 modeling techniques could be avoided or improved. Have fun in exploring this build log Nils unmistakeable, the white barque with the golden flying Albatros figurehead, which had to be replaced several times when going lost in rough trips The since WW1 late german writer, Johann Wilhelm Kienau, pseudonyme "Gorch Fock" is the name giver to this vessel Build log Part 1 I tried to get a better print into this Formate, but not possible at this framerate SSS stands for Segel-Schul-Schiff on the nameplate the single Frames contours would not allow 2-dimentional deck curvature, so the Basic Support was done this way the decks are from 1,5 mm aero-plywood and preplanked (3 x 1mm stripes) before mounting (structure done by charcoaling plank edges with a masons pencil, before gluing to the deckplates stern fill blocks in multilayer ply, the deck Panels are checked for size with a Little surplus all around deck curvatures clearly to be seen here decks brought into shape with rough outer trimm poop bulkhead and deckhousings started Build log part 2 to follow.... Nils


- 222 replies
-
- 16
-
-
- gorch fock
- barque
- (and 2 more)
-
Popeye, that one will be the build I had completed a couple of months before the Pamir, (my first and "prototype" tallship) Nils
-
Crackers, I am writing on the introduction for my Gorch Fock 2 build log, and am sorting the sequential parts Shall post it tomorrow beginning with build log part 1 Nils German Navy (Bundesmarine) cadet training 3-mast barque Gorch Fock 2 in Version of the 1960 ties...
-
Thank you Lou, thats a nice one I must remember Nils
-
Nigel, my comment was neighther me"having a go at you" personally or anybody else on this Forum as I pointed out first Thing, nor have I "acused" you for having a Connection to the DVD pruducers. So why make a fuss of it ? On the other Hand it is and stays my opinion that the spirit of this Forum is of give and take, for tips, help sucessful practiced techniques, etc, and for sharing all this with others without cashing from fellow members. Everybody of course should have his or her own opinion and is always welcome and free to do so. Sorry if this has caused confusion between us. If you agree, we shake Hands and enjoy our Weekend... Cheers Nils
-
Thank you very much Mark, I realy feel quite flattered today from all those incoming appreciative comments.... Nils
-
John and Ed also to both of you my heartly thanks for your fine words, the pleasure was on my side as this build log was so much liked Nils
-
A fine comment of yours Bob, Thank you very much Nils
-
Bob, my thanks go to you, I`m happy that you had pleasure with the build log Nils
-
John, thank you very much for your appreciative and encouraging words, and this goes as well to all the many other fellow mates who liked the Pamir Build log as well. I feel very honoured for the results of my work being liked so much, and for myself it has been a great pleasure to share this with others. Maybe the one or other tip could be of use or inspirative, I also shall adopt likewise good tips out of this Forum. I have decided to post another complete build log, probably beginning in the coming week. Again many thanks John Nils