Mirabell61
-
Posts
7,418 -
Joined
-
Last visited
Content Type
Profiles
Forums
Gallery
Events
Everything posted by Mirabell61
-
 Crackers, B.E., Mark, Thank you all for those appreciative comments, I feel very honoured that my model is so much liked, there were times when I thought that the rigging would never end an I should have left away at least the sail relevant running rigging. Nils
 -
Hi Rob, the plates are all self made...., there is a Brief Demonstration how I did it, If you would like to see at the end of Build log part 2 for my "steamship Heinrich Kayser" in Topic scratch built models in Progress. There I used exactly the same procedure as for Pamir Nils
-
Thank you Michael Nils
-
Congrats to your very well done model Panagiotis, the model hull design was a bit strange to me in the beginning, but therefore such highly interesting to follow. You seem to know exactly what you are doing. A great build !! Thanks for sharing this beautiful model log Nils
- 116 replies
-
- 1
-

-
- kilkis
- mississippi
- (and 2 more)
-
Thank you for your word John Nils
-
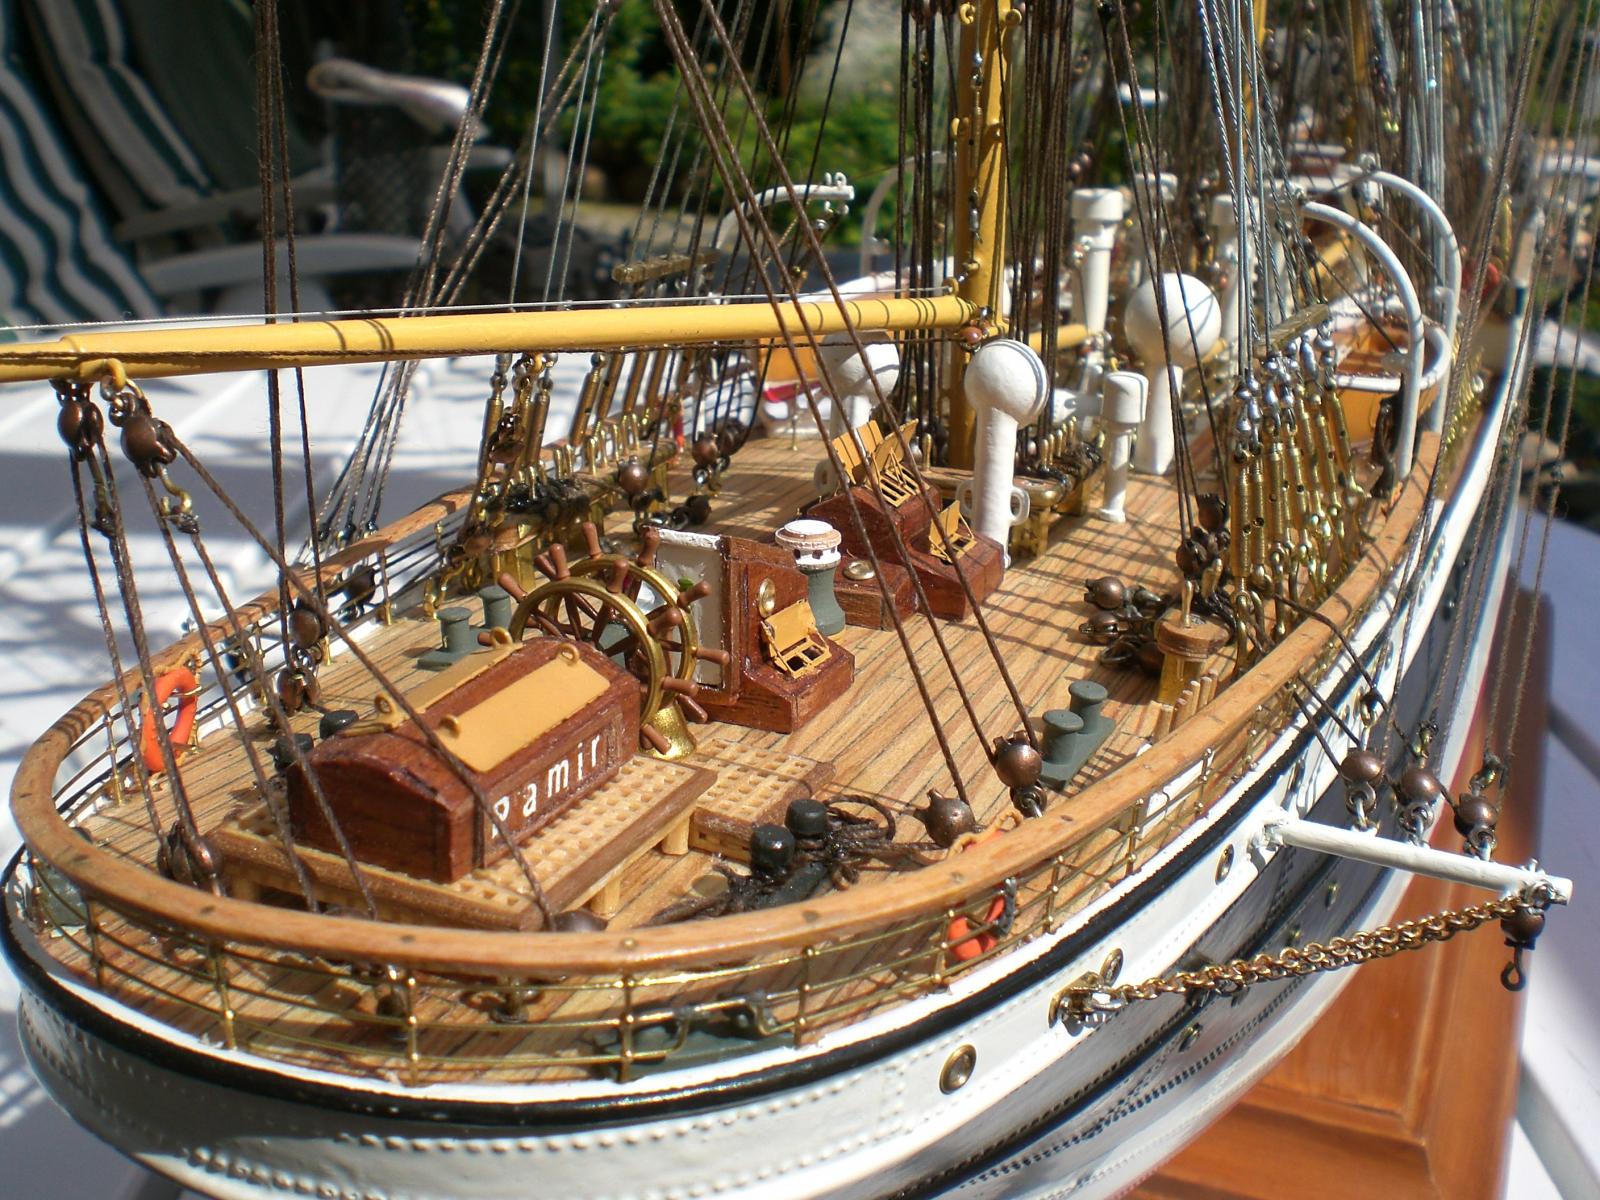
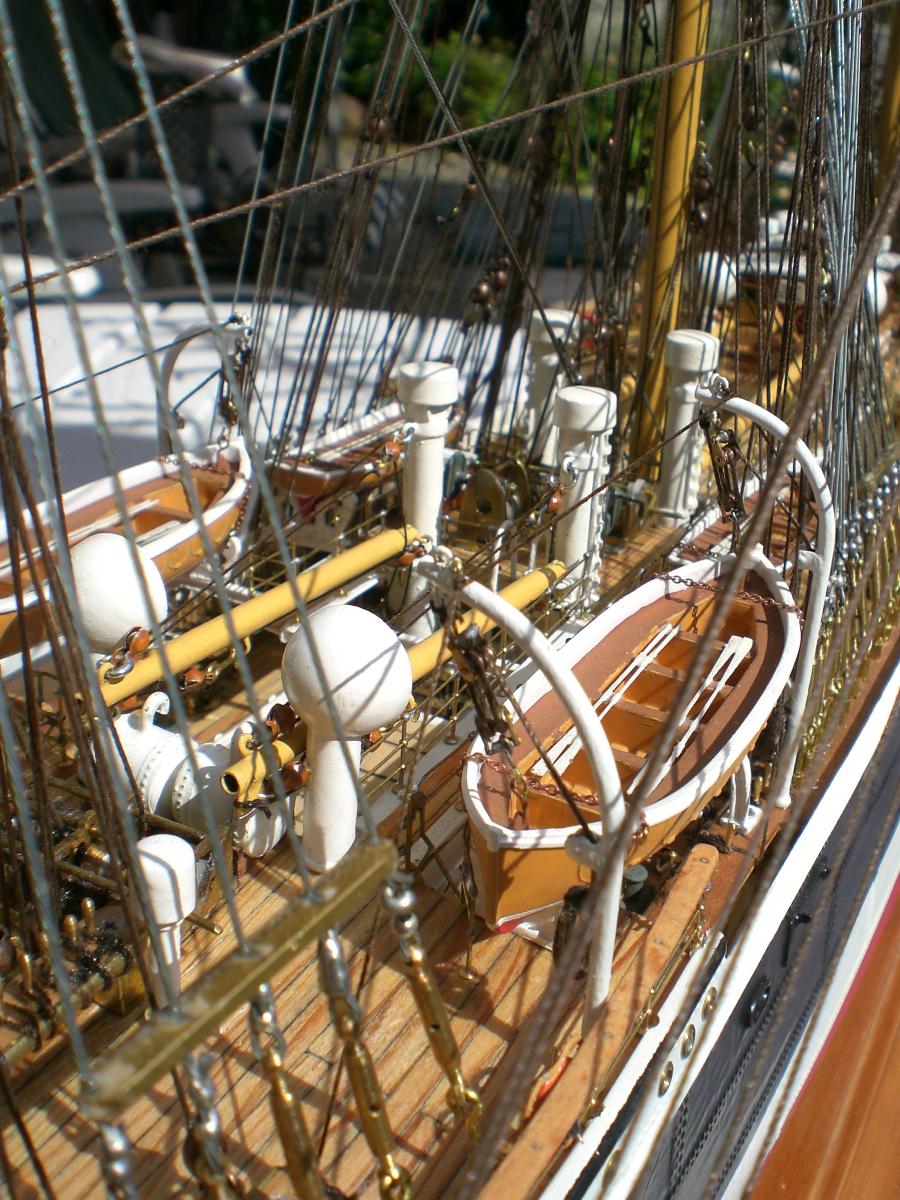
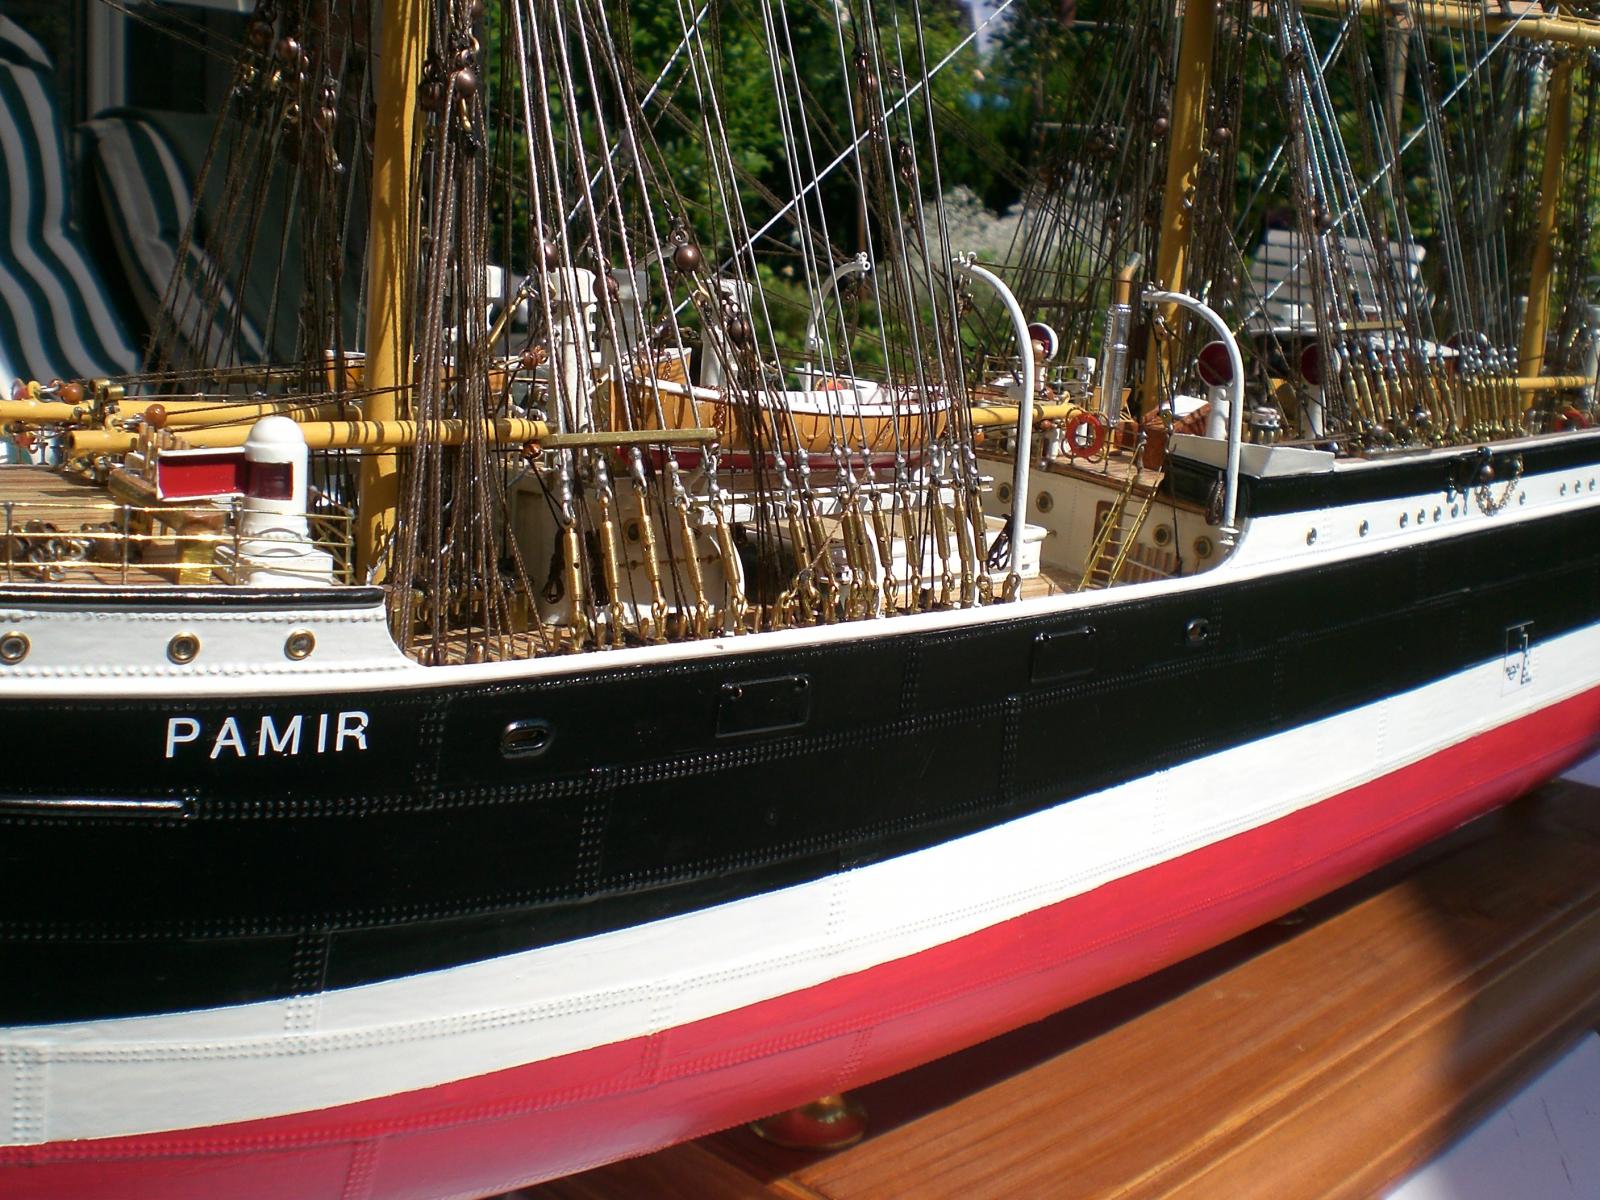
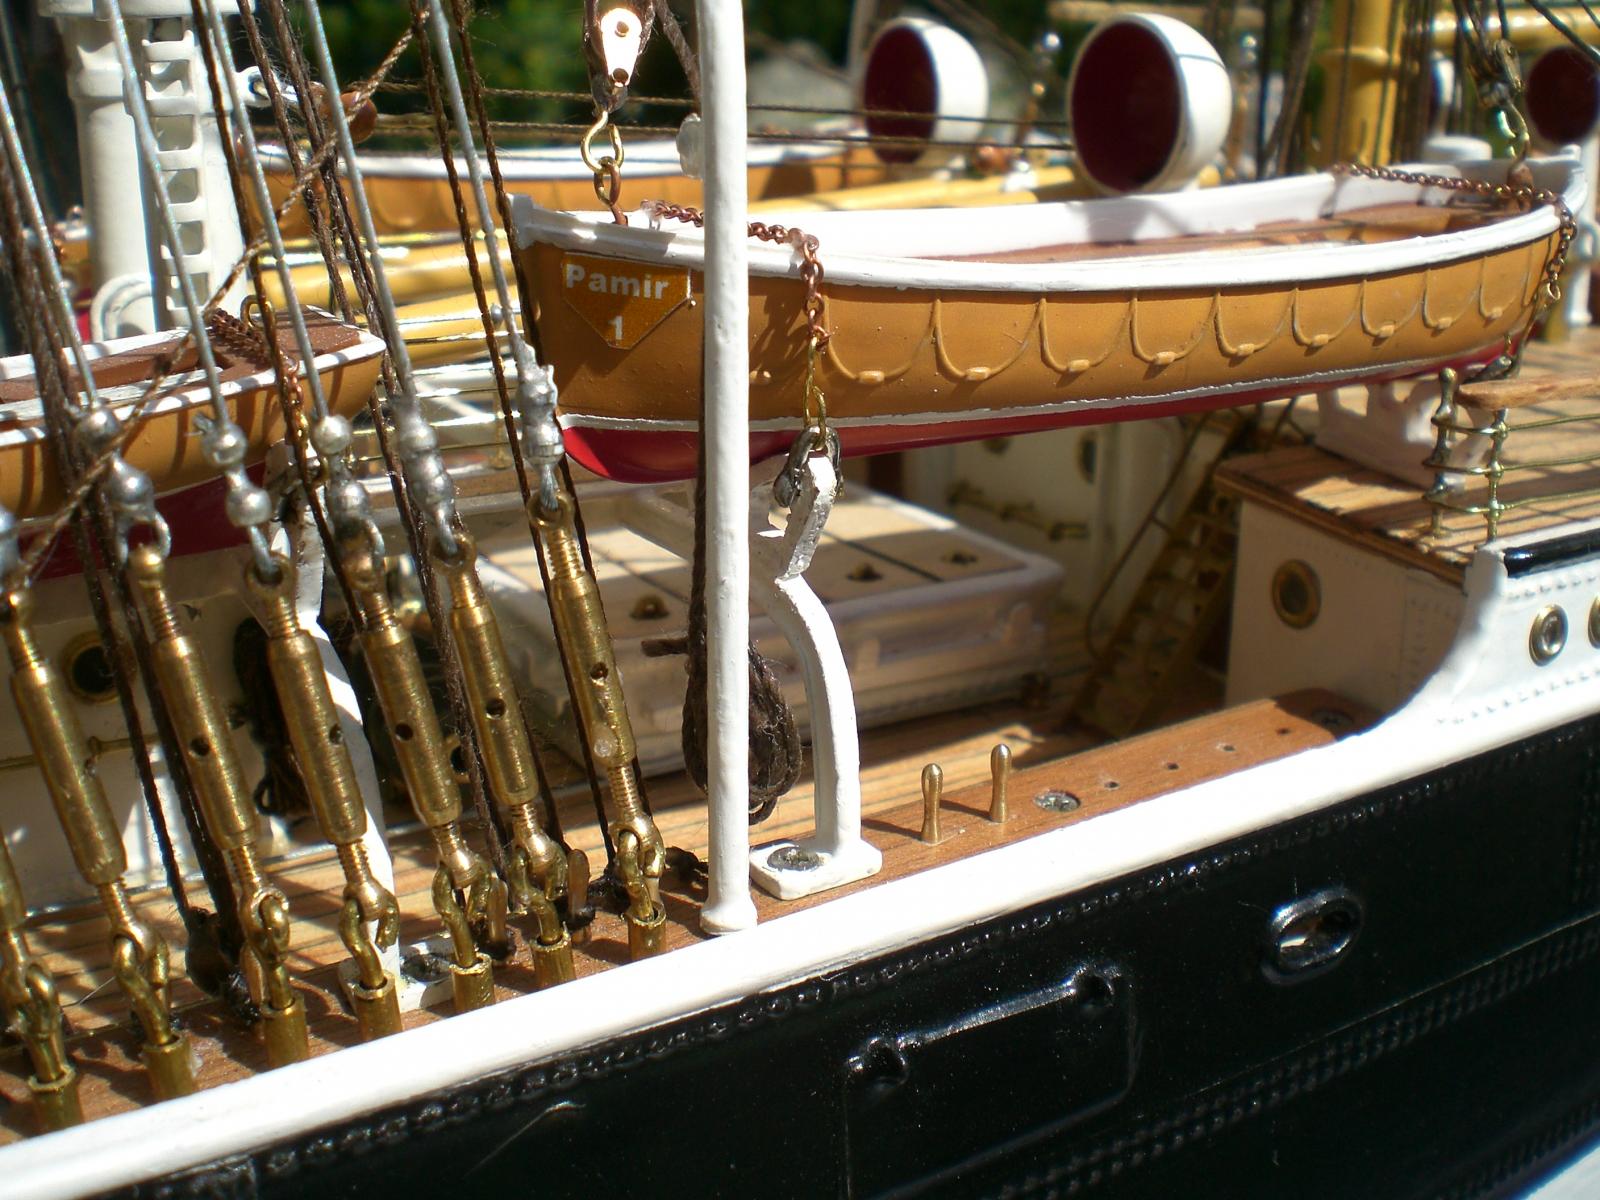
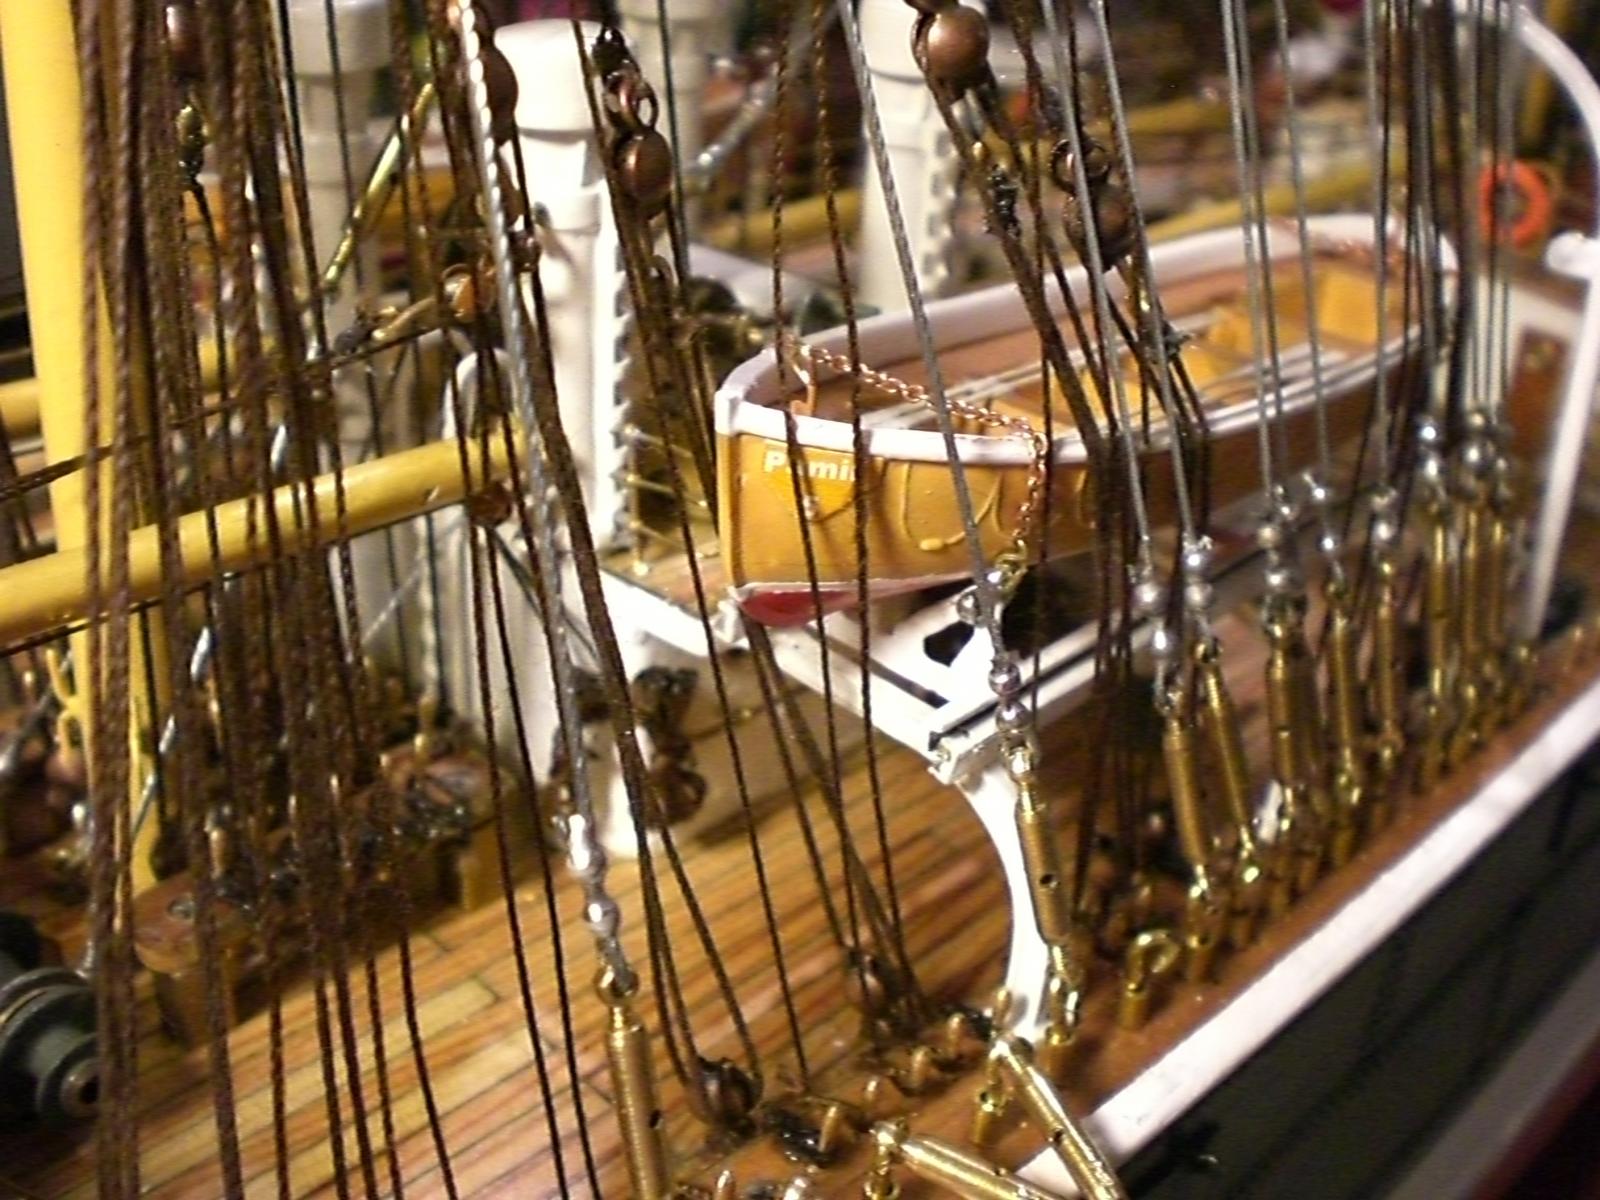
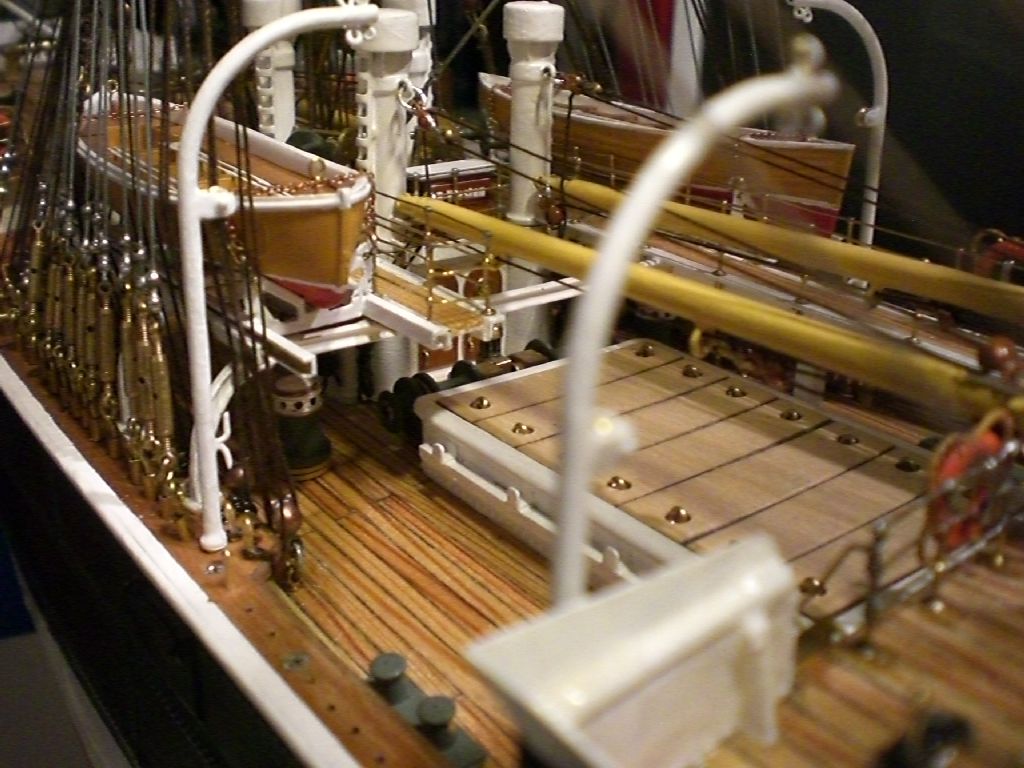
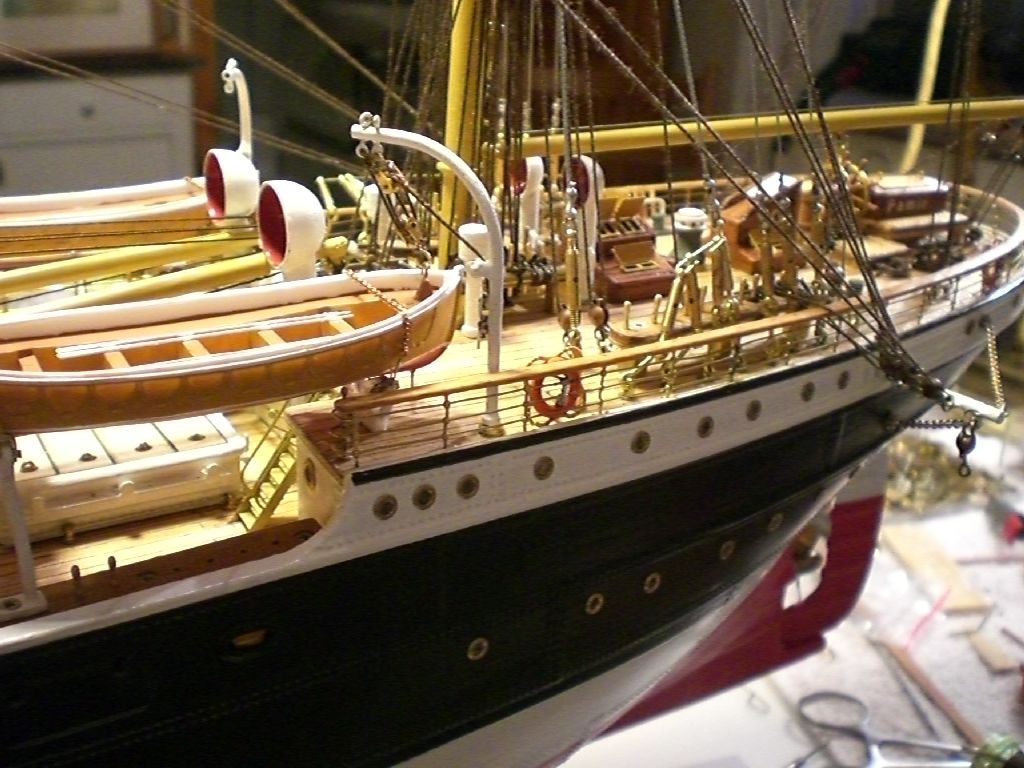
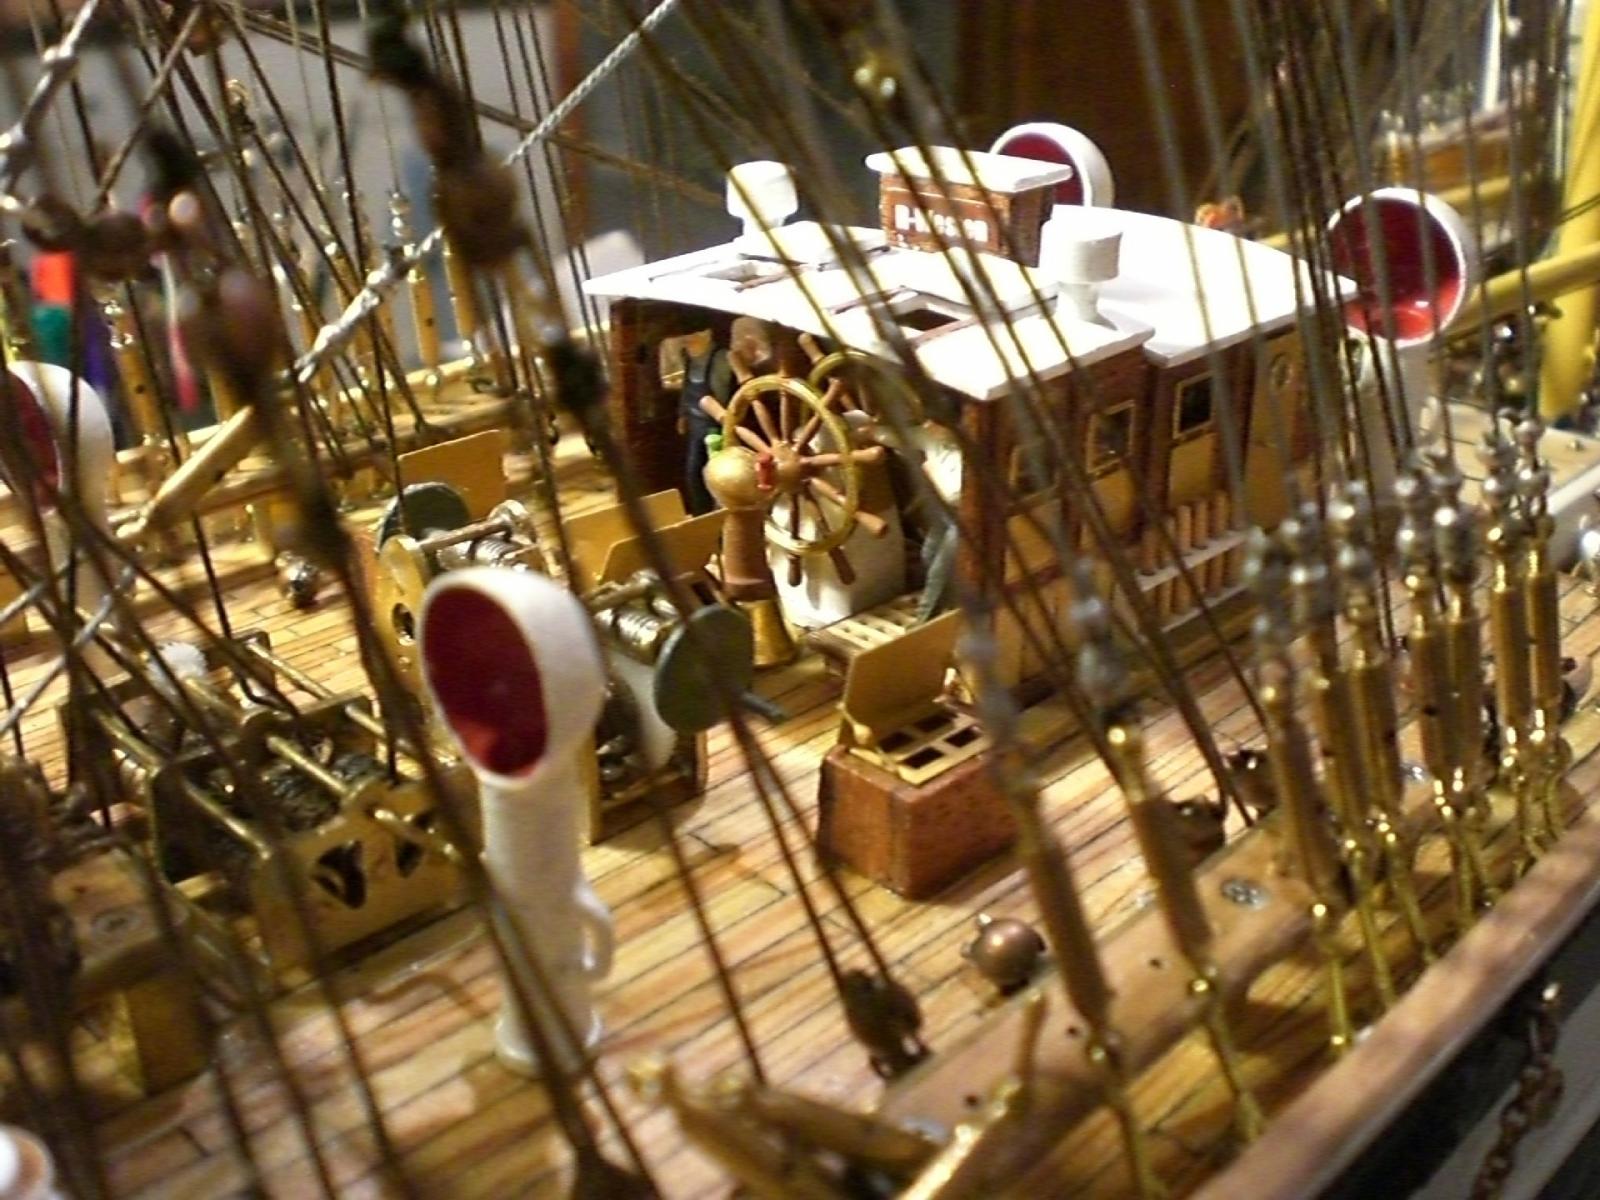
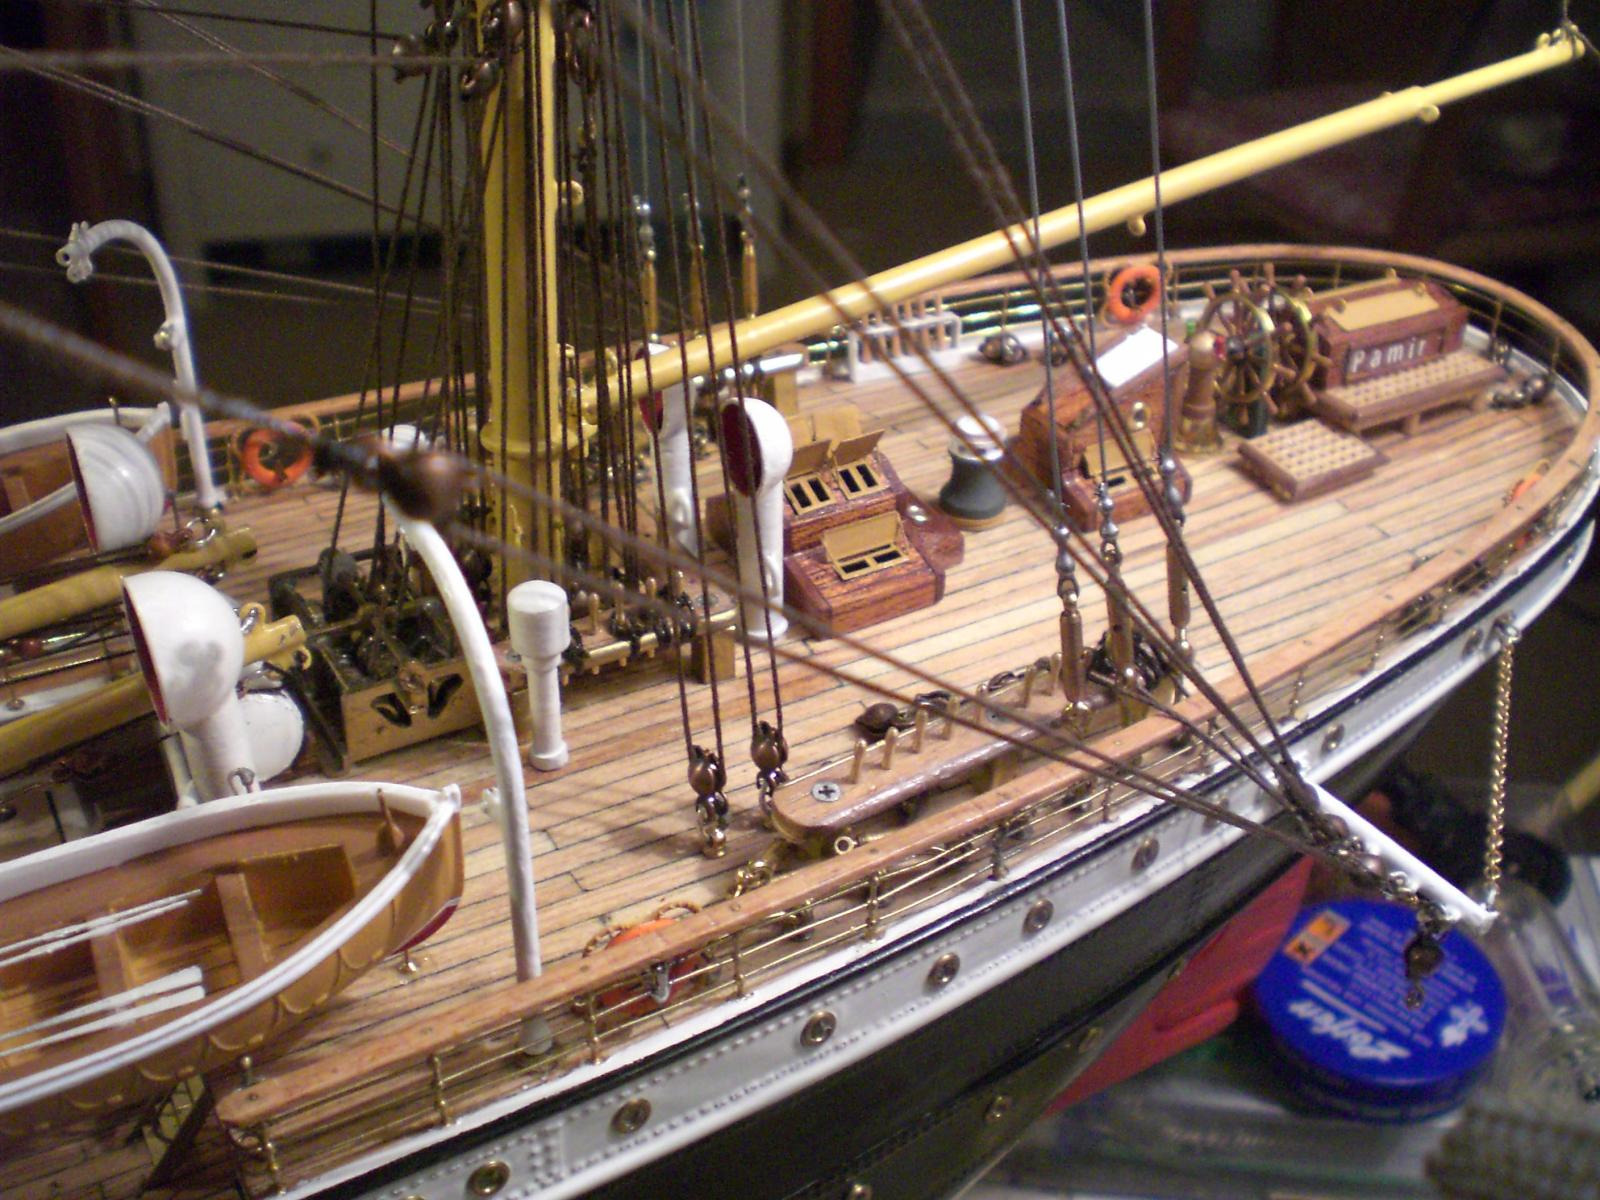
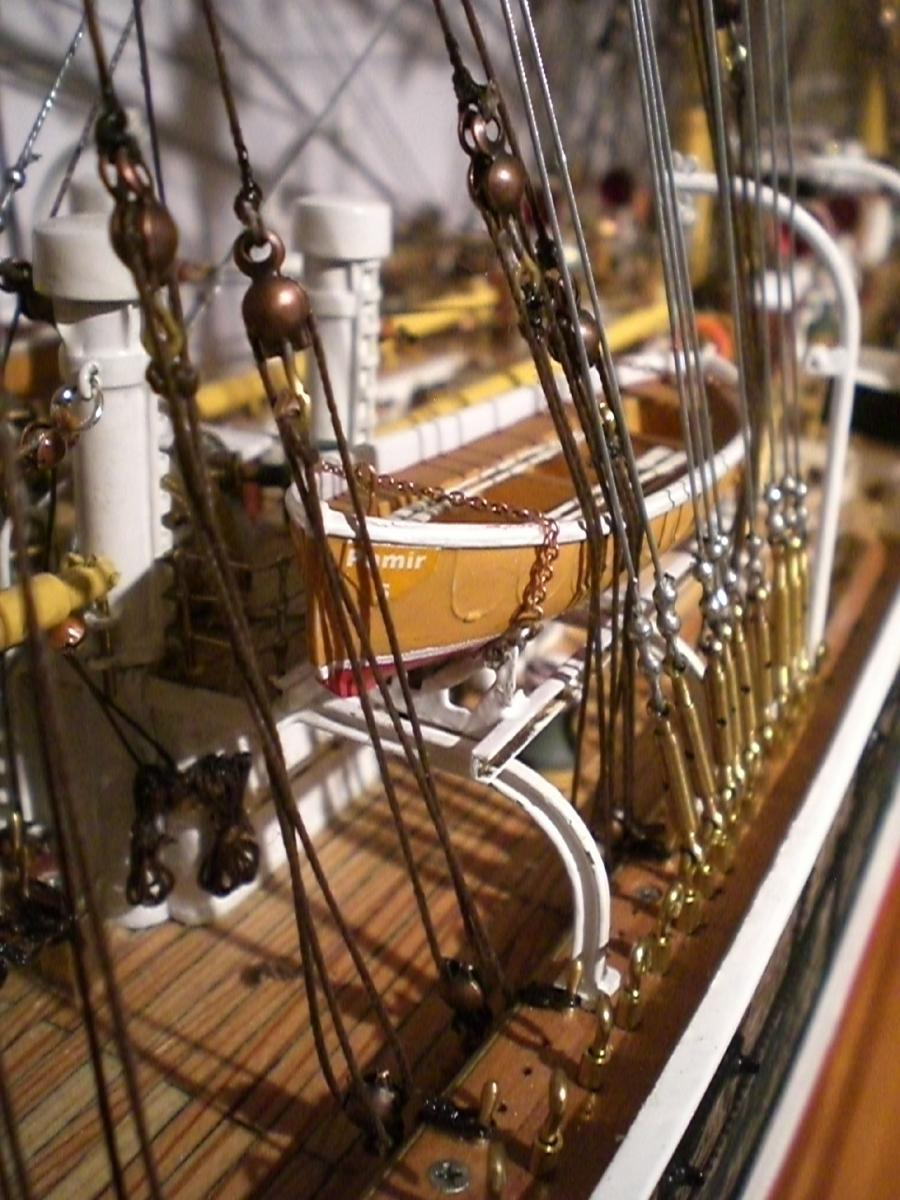
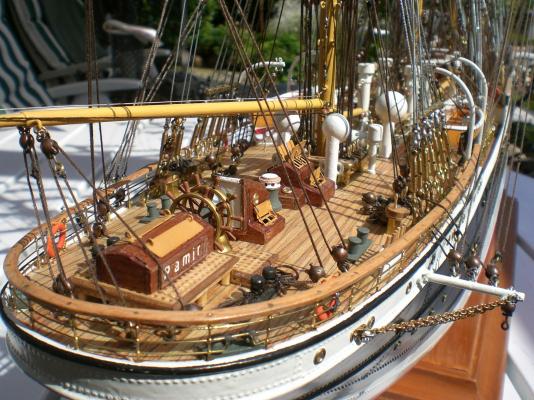
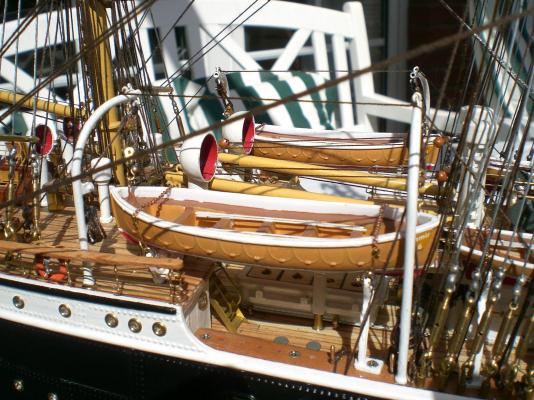
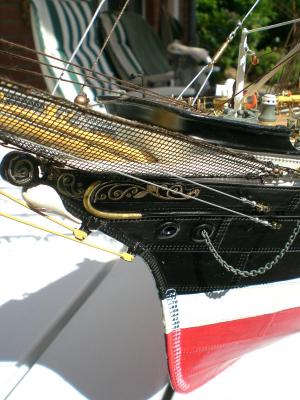
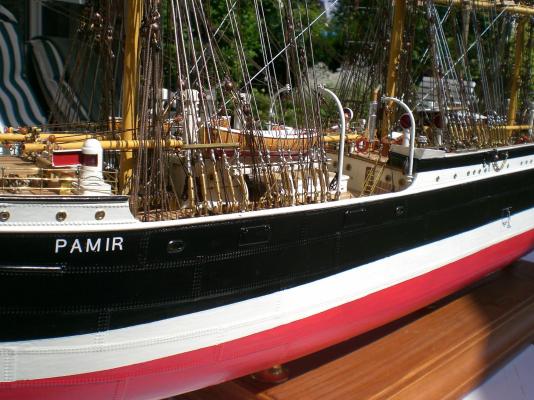
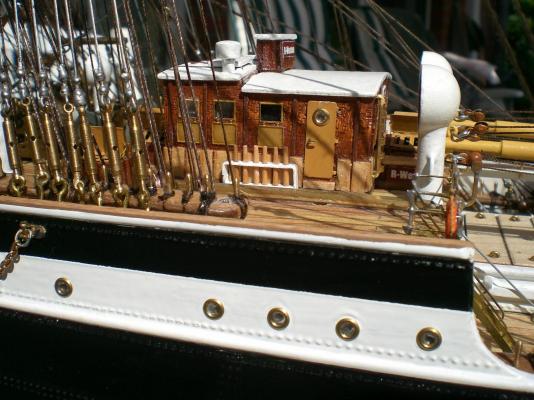
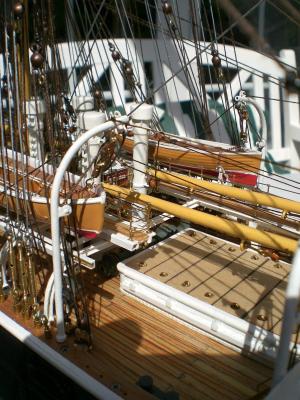
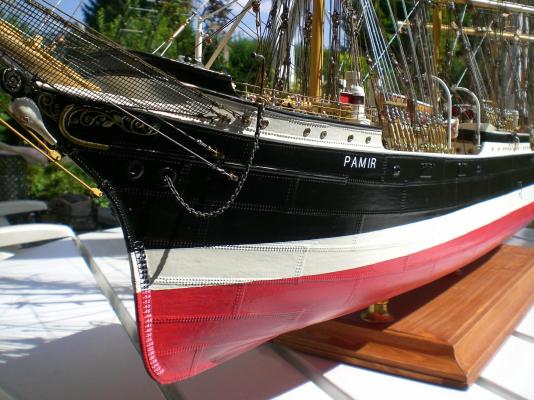
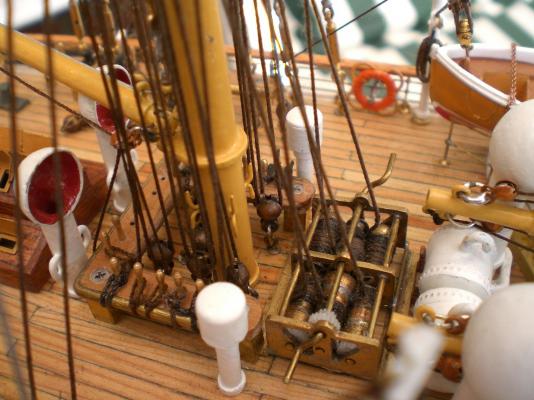
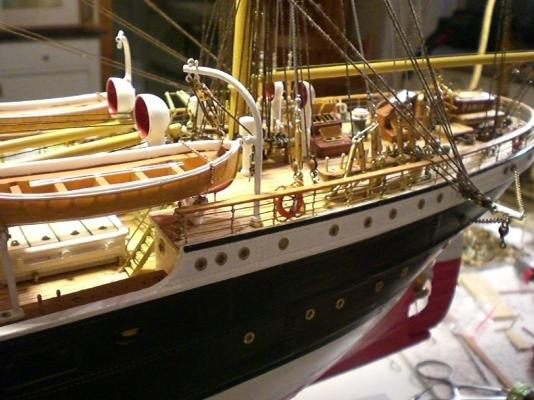
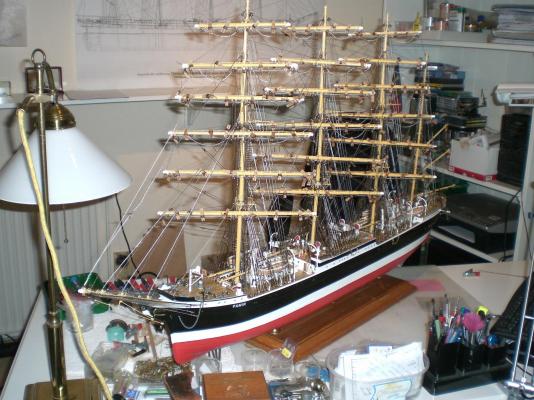
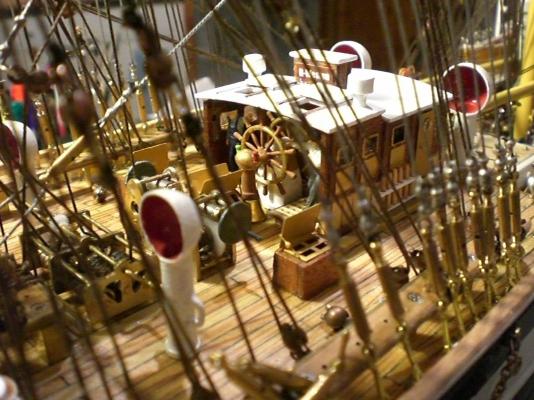
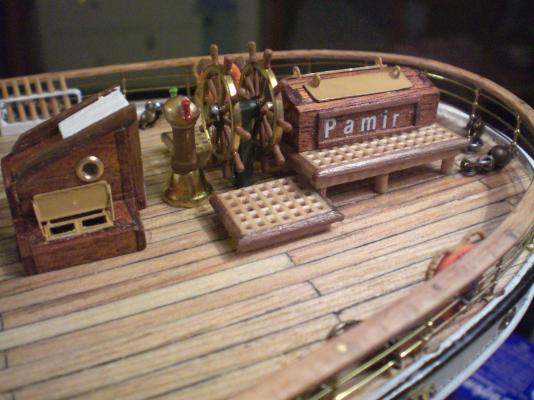
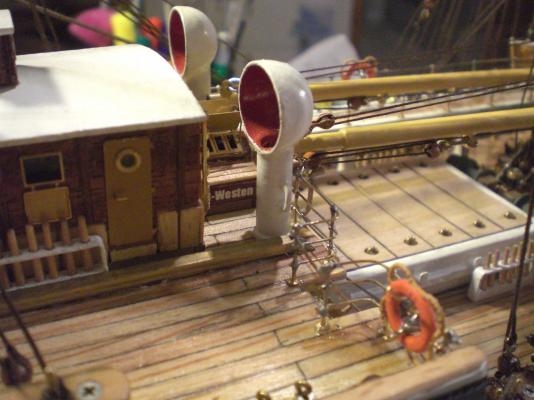
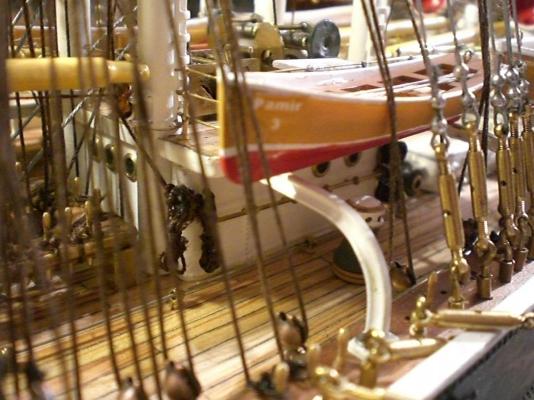
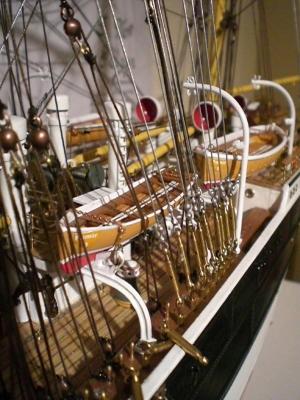
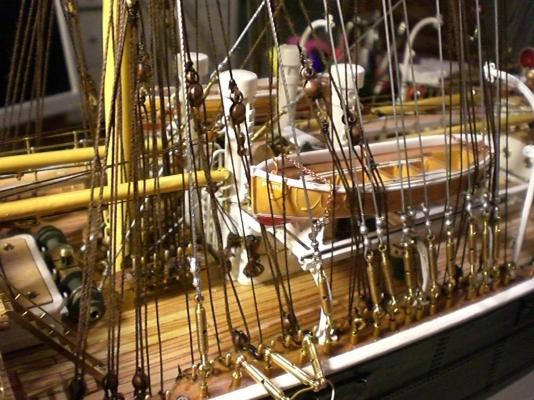
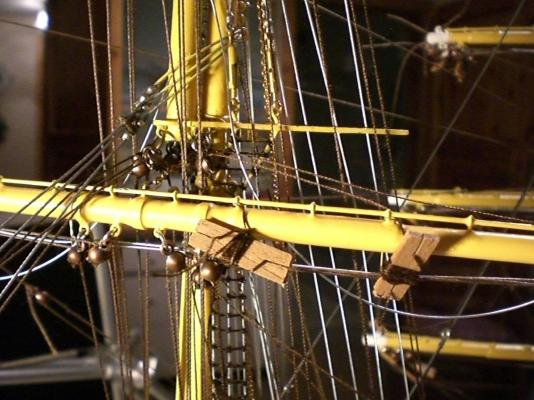
Build log part 38 Here come some Pictures I made whilst daylight ilumination, I find they are sharper and better in colour Quality than those made in the Hobby room Trust the sail making shall then start with log part 41 it has now nearly been 2 years since the Pamir was keellayed at Nils`s shipyard Deck has just been cleaned up for inspection the shrouds are fitted, but ratlines still missing tackled Davits at starboard aft boatstation, boats strapped down all bow stays set through tightly secured the day for relaunch after the 1951 changes is coming nearer day by day portside view to the ships comand- and control area on highdeck second hatch area on foreward welldeck portside aft boat on its cradles with functional strapp down device all paint touchups done view on the Jarvis winch for the third masts bracing tackle Build log part 39 to follow.... Nils


- 269 replies
-
- 10
-
-
Alexander, a "Masterpiece" is being created under your skilled Hands !! Well done Nils
-
That is absolutely correct Bob, I have been told that the Young lads had to learn by heart the Location of every single belaying Point so that even in the dark nobody would by mistake loosten the wrong line, which could be fatal for safety and lives Nils
-
Stuart, a great build and a pleasure to watch your log, shall stay tuned Nils
-
correct Steve, so we both go for "learning by doing".... cheers Nils
-
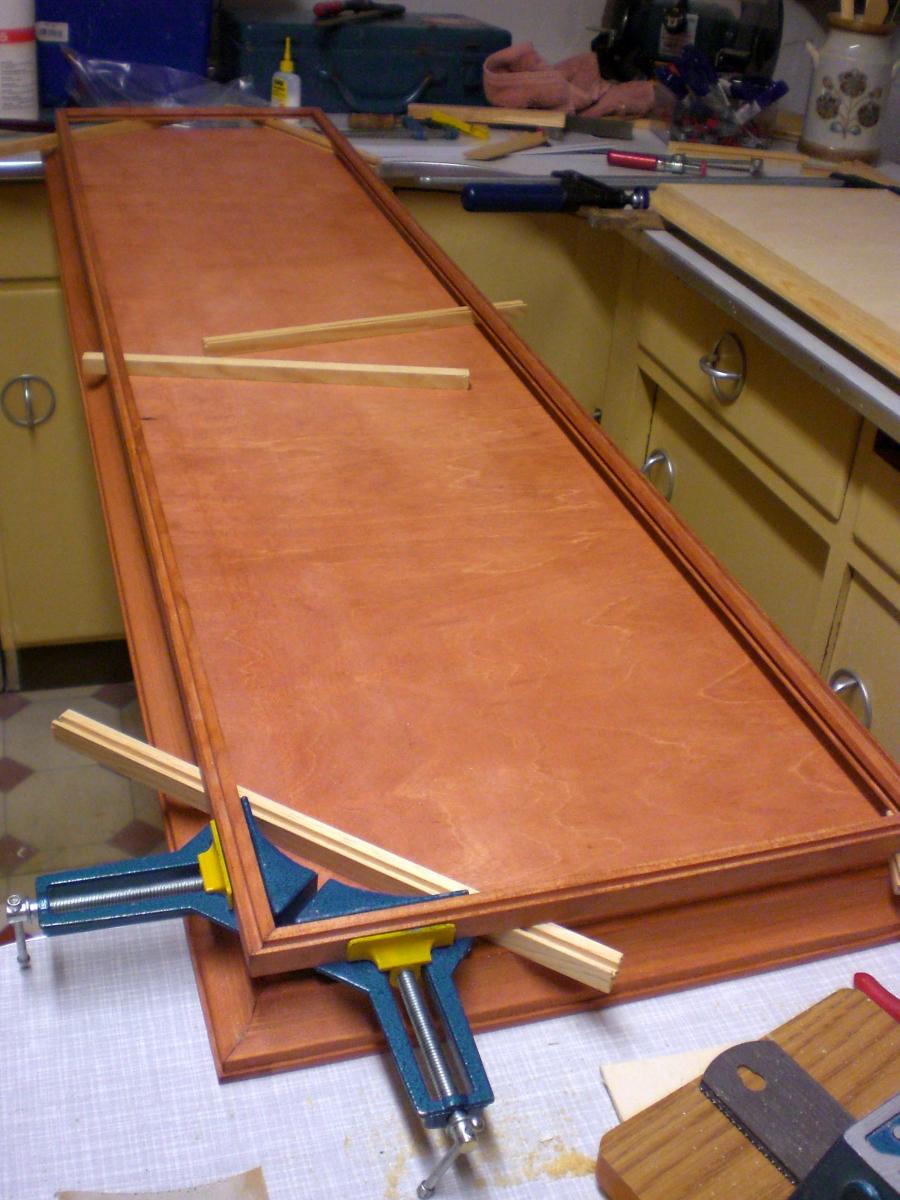
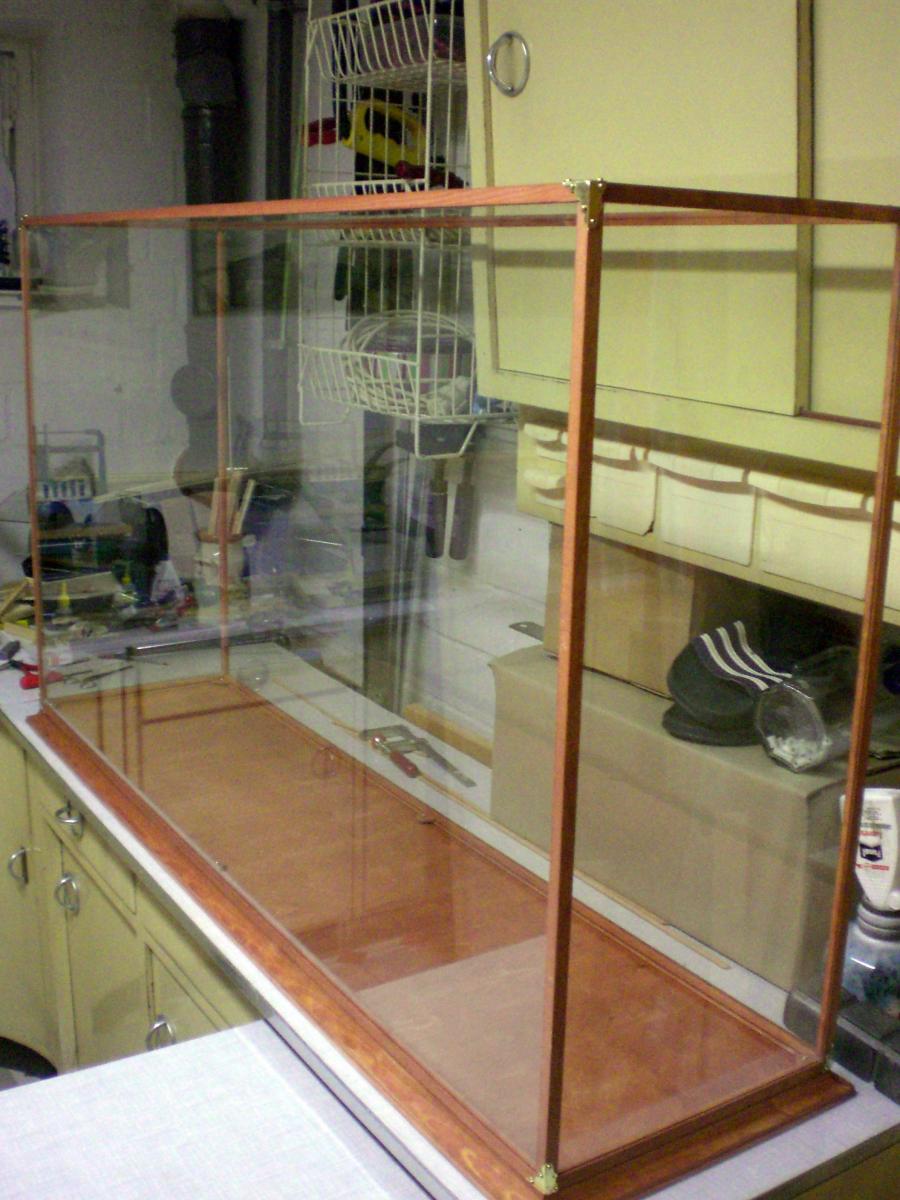
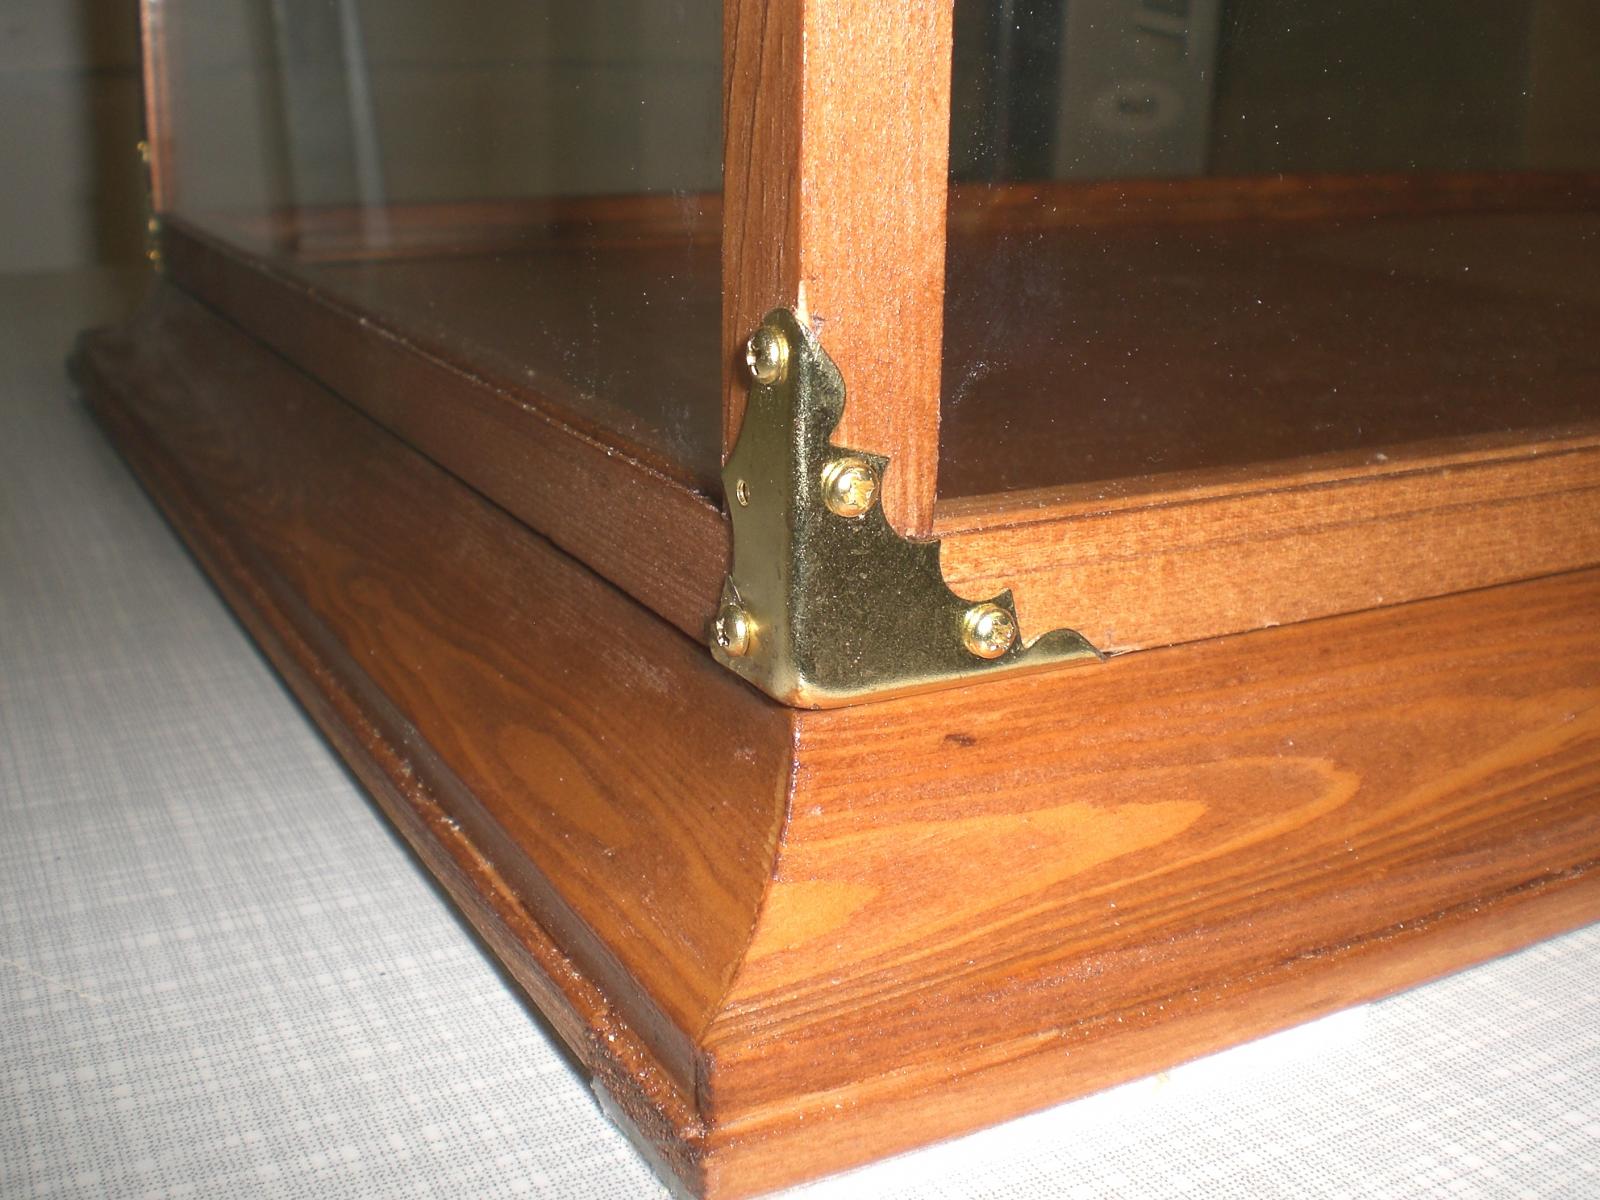
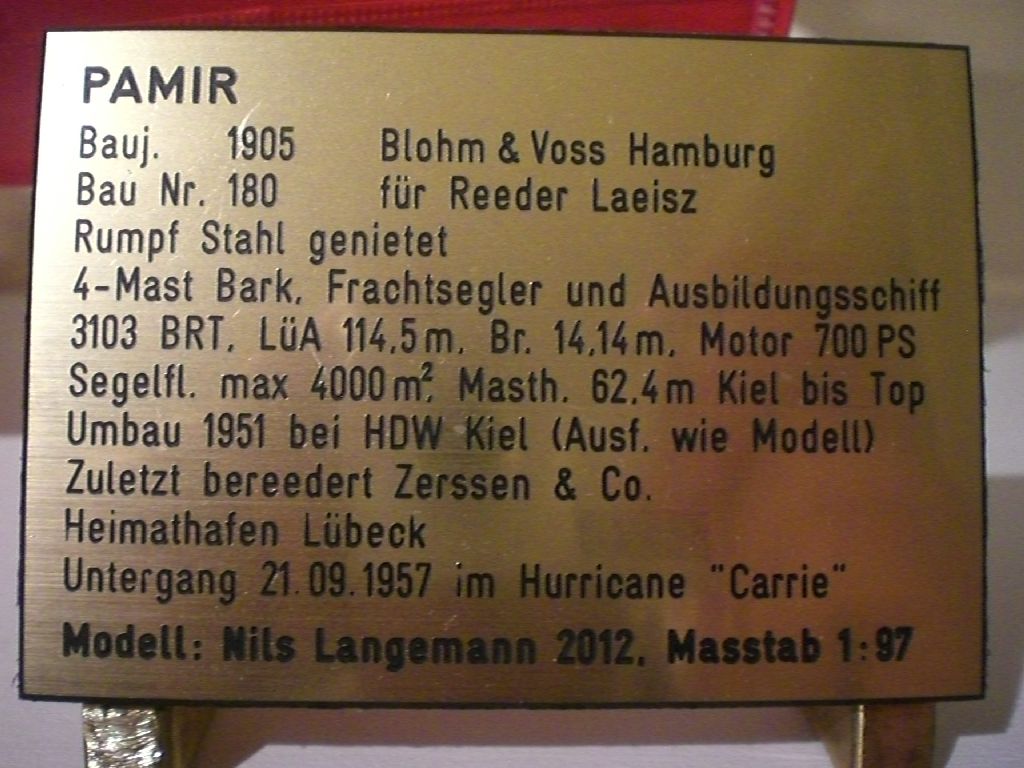
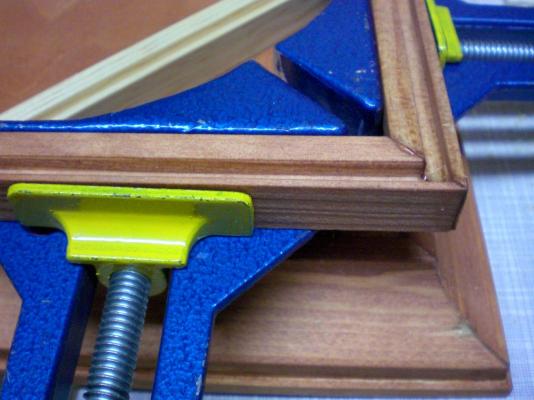
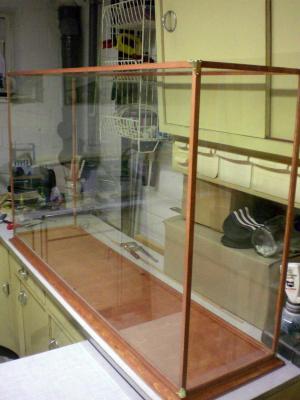
Build log part 37 self explaining, this and the two next pics now nearly ready for the sails set but first I have to begin the glass case the brass engraved nameplate, this shall go into the glasscase, attached on brackets before I move on to the sail making part, I have a set of Pictures taken with daylight ilumination which turns out a much better Quality than the hobbyroom lights. It shall show the ship ready to take on the sails. After that set of Pictures, I shall Show the results of my own sail making (and sewing) Trials, because I found nobody that would do it for me... Build log part 38 to follow


-
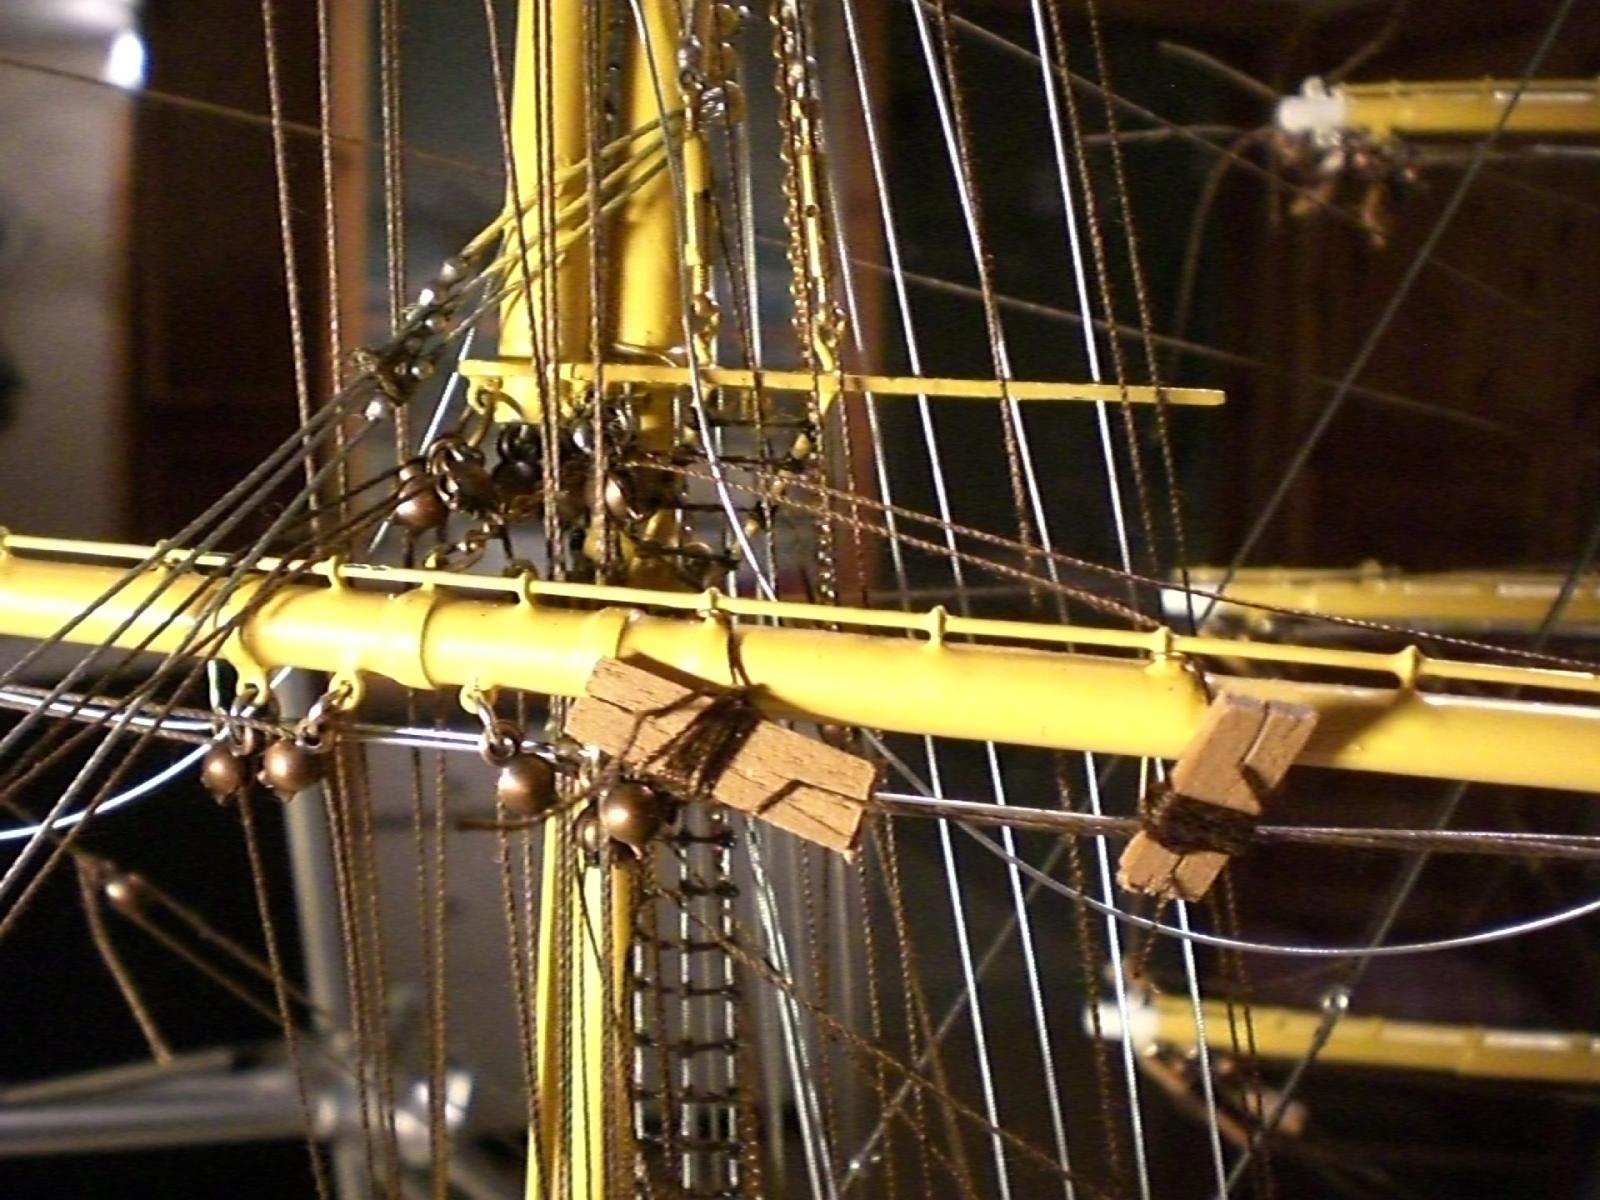
Build log part 36 front open wheelhouse placed over wheelstand time to get the mizzen mast shrouds started Pamirs auxiliary rudderstand spars for highdeck capstan in their rack capstan under boatstation foreward boat Station with skid cradles and functional boat strappng down aft boatstations beginning with the foretop shrouds, two wire chords already set and spanned running rigging ropes (Surplus length) coiled up on wooden bits partial view of the lowest mainyard Build log part 37 to follow.... Nils


-
Alexander, I admire your work, lovely model Nils
-
What a beautiful hull Giampieroricci ! lovely lines of that ship, and Iike the tones of the Wood used, it gives it all an authorised historic touch Well done ! Nils
-
Bob, I`m simply just happy for everybody who can or may find some Inspiration, perhaps by seeing the one or other Thing that could be used for his or her next build. This is what I like so much on MSW Nils
-
a Cutter !!, one of my Favorites is on your slipway, one could fall in love with a cutters lines, Great Little ship Steve she`s coming well, shall stay tuned as she goes Nils
-
Thank you Mauro Nils
-
I realy enjoyed your nice comment Doris, unfortunately I do not have the skill you are holding, to get own little figures done, that is a so wonderful extra Bonus on your models Nils
-
Very nice comment Bob, Thank you Nils
-
Very nice and thorrow Research on history, plans and fate of that ship E&T, also your introduction to this interesting and very promissing build I like, shall Keep tuned... Nils
- 346 replies
-
- 1
-
-
- terror
- polar exploration
- (and 2 more)
-
Very nice and tidy shipyard Albert, and so the rigging of the Frames for a great model, beautiful work, I like.. ! Nils
-
Hi Garry Thank you for looking in and for your appreciative words, the Crew I saw once at Ebay or at Amazon, They are in scale 1:87 (HO) and by make "Preiser" to be found under searchcriteria "Preiser Schiffsbesatzungen" Link: http://www.amazon.de/Preiser-PR10353-10353-H0-Schiffsbesatzung/dp/B004RNCPIQ Cheers Nils
-
For goodness sake David, Keep a cool head ! Thank you Nils
-
Marc very nicely built yacht, Looks great, would love to see the sails rigged Well done ! Nils
- 85 replies
-
- 1
-
-
- yacht mary
- mamoli
- (and 1 more)
-
Crackers your nice comment is very much appreciated ! Thank you Nils