HOLIDAY DONATION DRIVE - SUPPORT MSW - DO YOUR PART TO KEEP THIS GREAT FORUM GOING! (89 donations so far out of 49,000 members - C'mon guys!)
×


Mirabell61
-
Posts
7,409 -
Joined
-
Last visited
Content Type
Profiles
Forums
Gallery
Events
Everything posted by Mirabell61
-
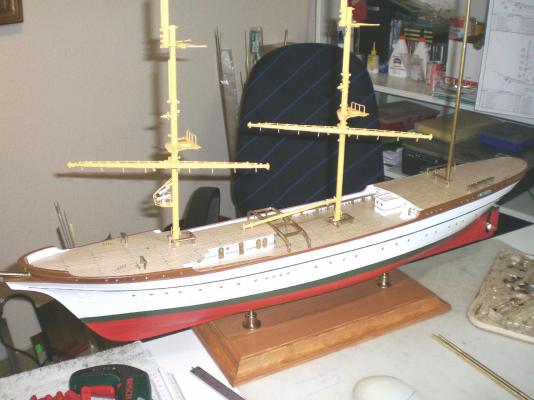
 Hi Nigel, thanks for your "likes" and for visiting the Gorch Fock 2 on my Yards slipway, and for your nice comments. The GF 2 I am doing is very much orientated to the 1:150 scale Version of that legendary Plastic kit from Revell. It resembles the Version of the late 60`s. Unfortunately it is not produced any more since many years, and one must have great luck to get such kit e.g. per Ebay auction. I had luck, and so had very nice samples for the Rating dimensions, wich of course had to be magnified to scale 1:95, and the parts had to be scratch built. Still the plastic model remained unbuilt, so the complete kit could be sold further on to another happy modeller Nils
- 222 replies
-
- 2
-

-
- gorch fock
- barque
- (and 2 more)
-
Thank you Mauro, I`m happy that you like the model Nils
-
Thanks David, same answer as to Michael today... The 2-componet resin I used is an ordinary liquid Polyester (like for car repair) mixed with appr. 3% hardener. It cures in about 15 minutes time and can then be removed from the mould Nils
-
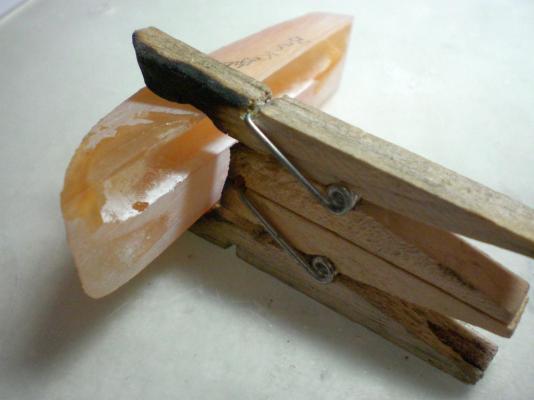
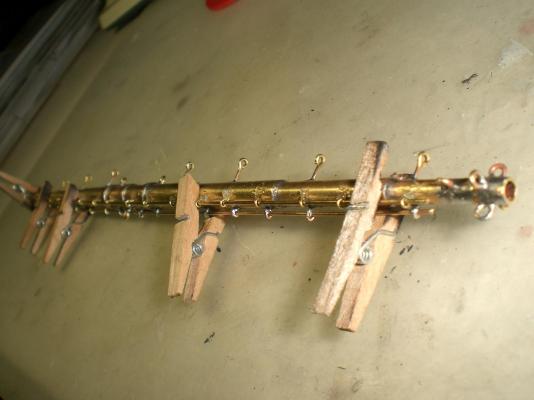
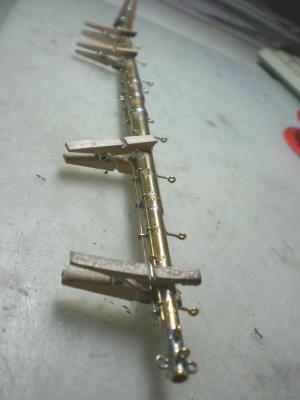
Bob, I was wondering if anybody would recognize that.... that double pin was not my own Invention, I saw it once somewhere in tips for modelling and also found it great and worth remembering. Meanwhile I glued some together and always have them Handy in order to clamp larger distances with more or less parallel closing in clamp-toungues Nils
-
A very beautiful built model Gregor, and a pleasure to watch your build log Well done ! Nils
- 210 replies
-
- 1
-
-
- Sherbourne
- Cutter
- (and 5 more)
-
S. Coleman, thank you for your comment Nils Michael, thanks for your comment. The 2-componet resin I used is an ordinary liquid Polyester mixed with appr. 3% hardener. It cures in about 15 minutes time and can then be removed from the mould Nils
-
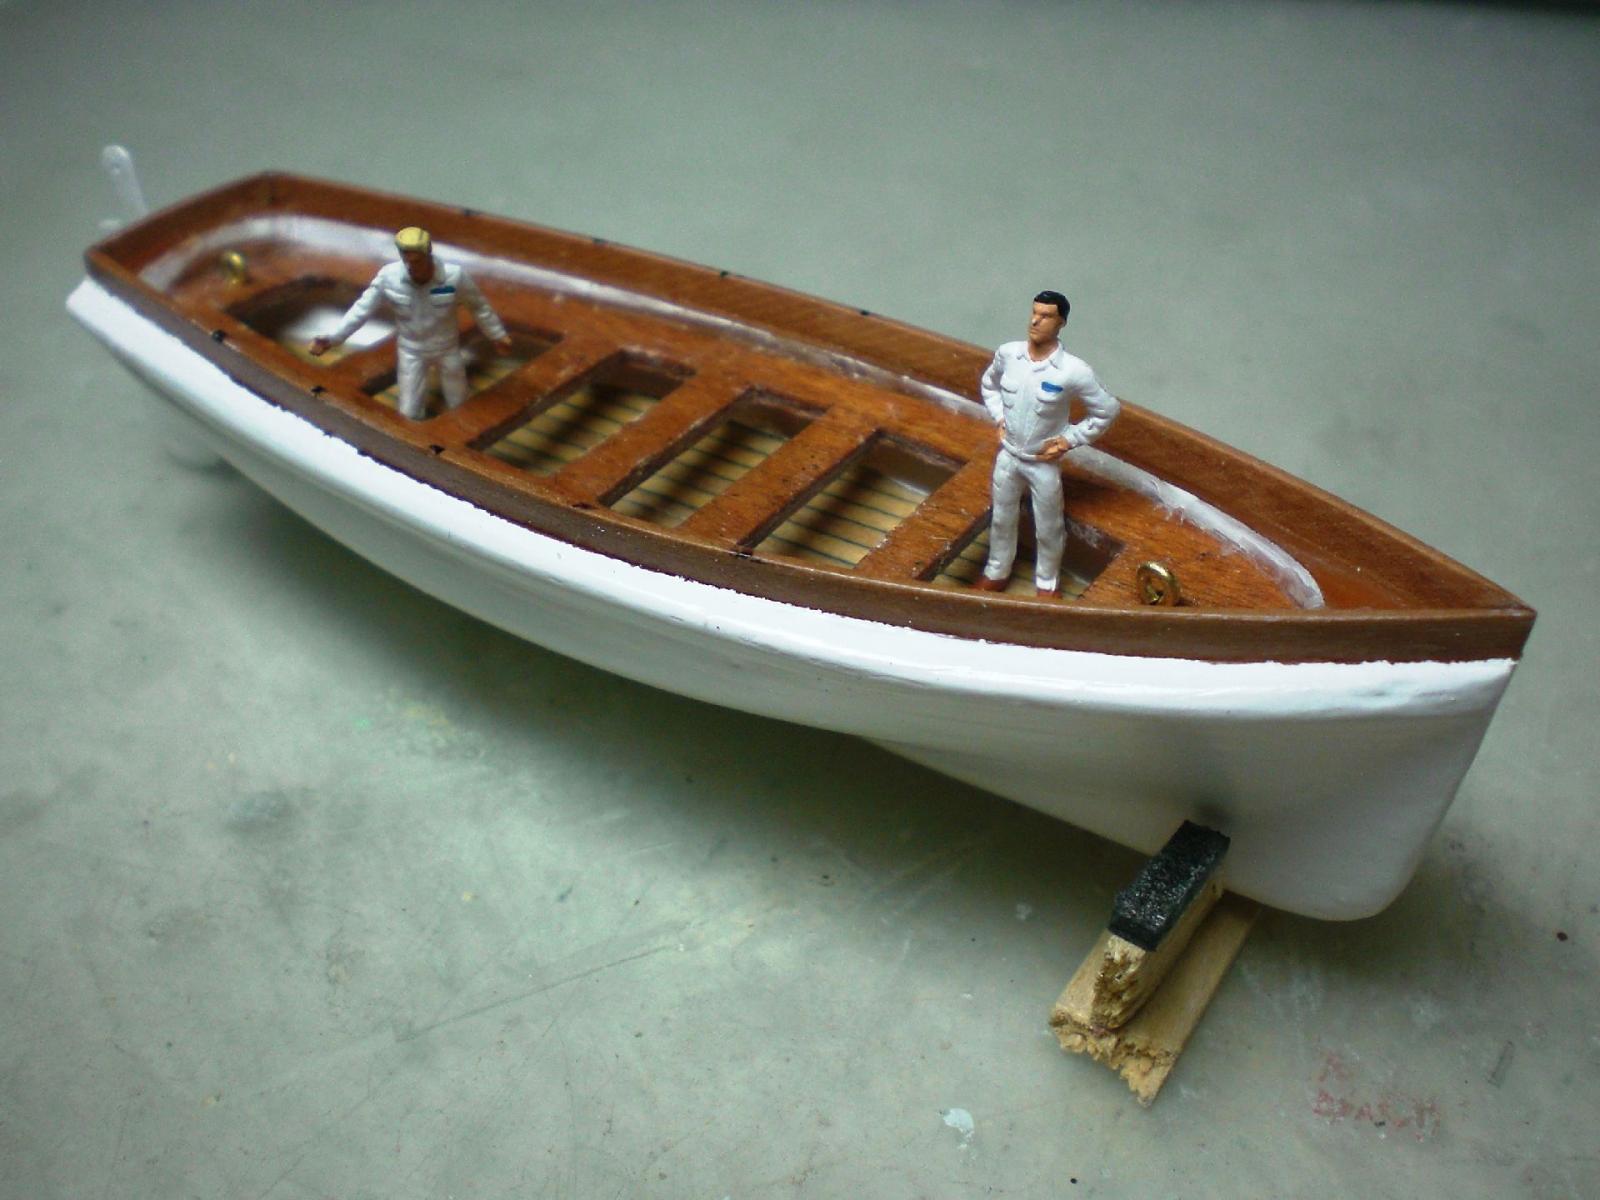
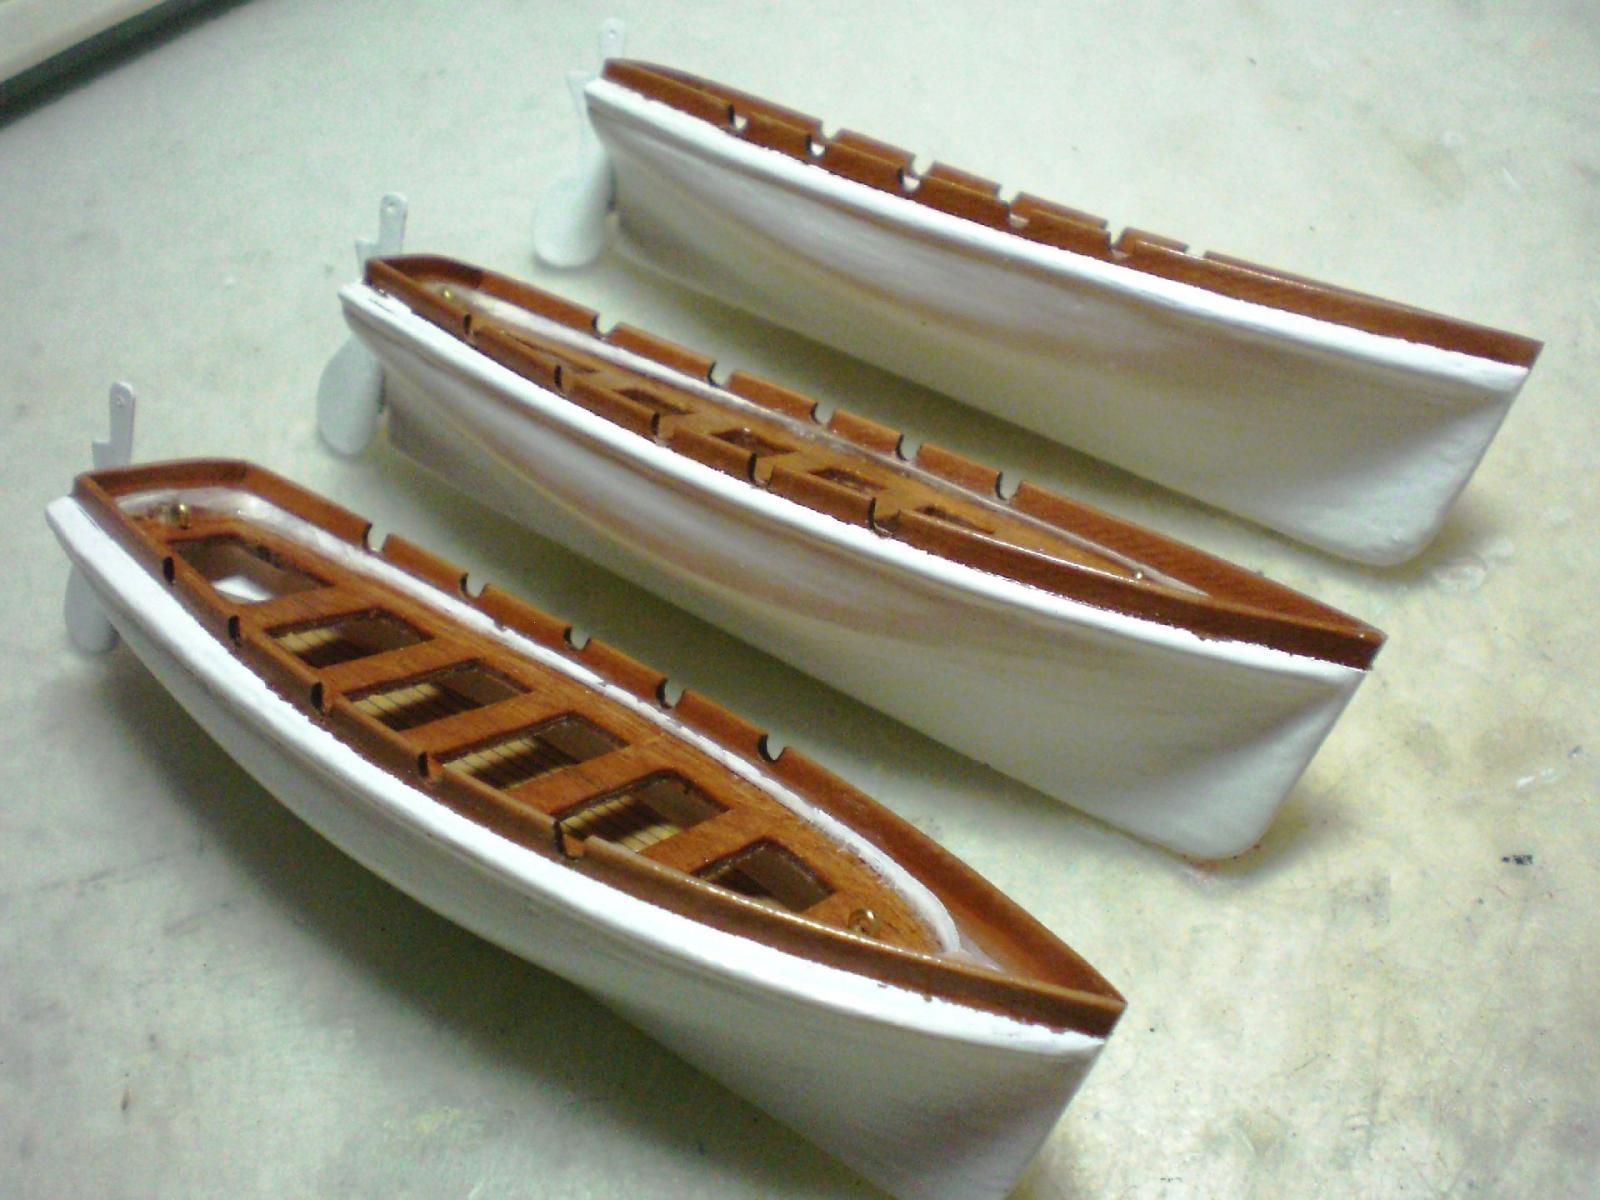
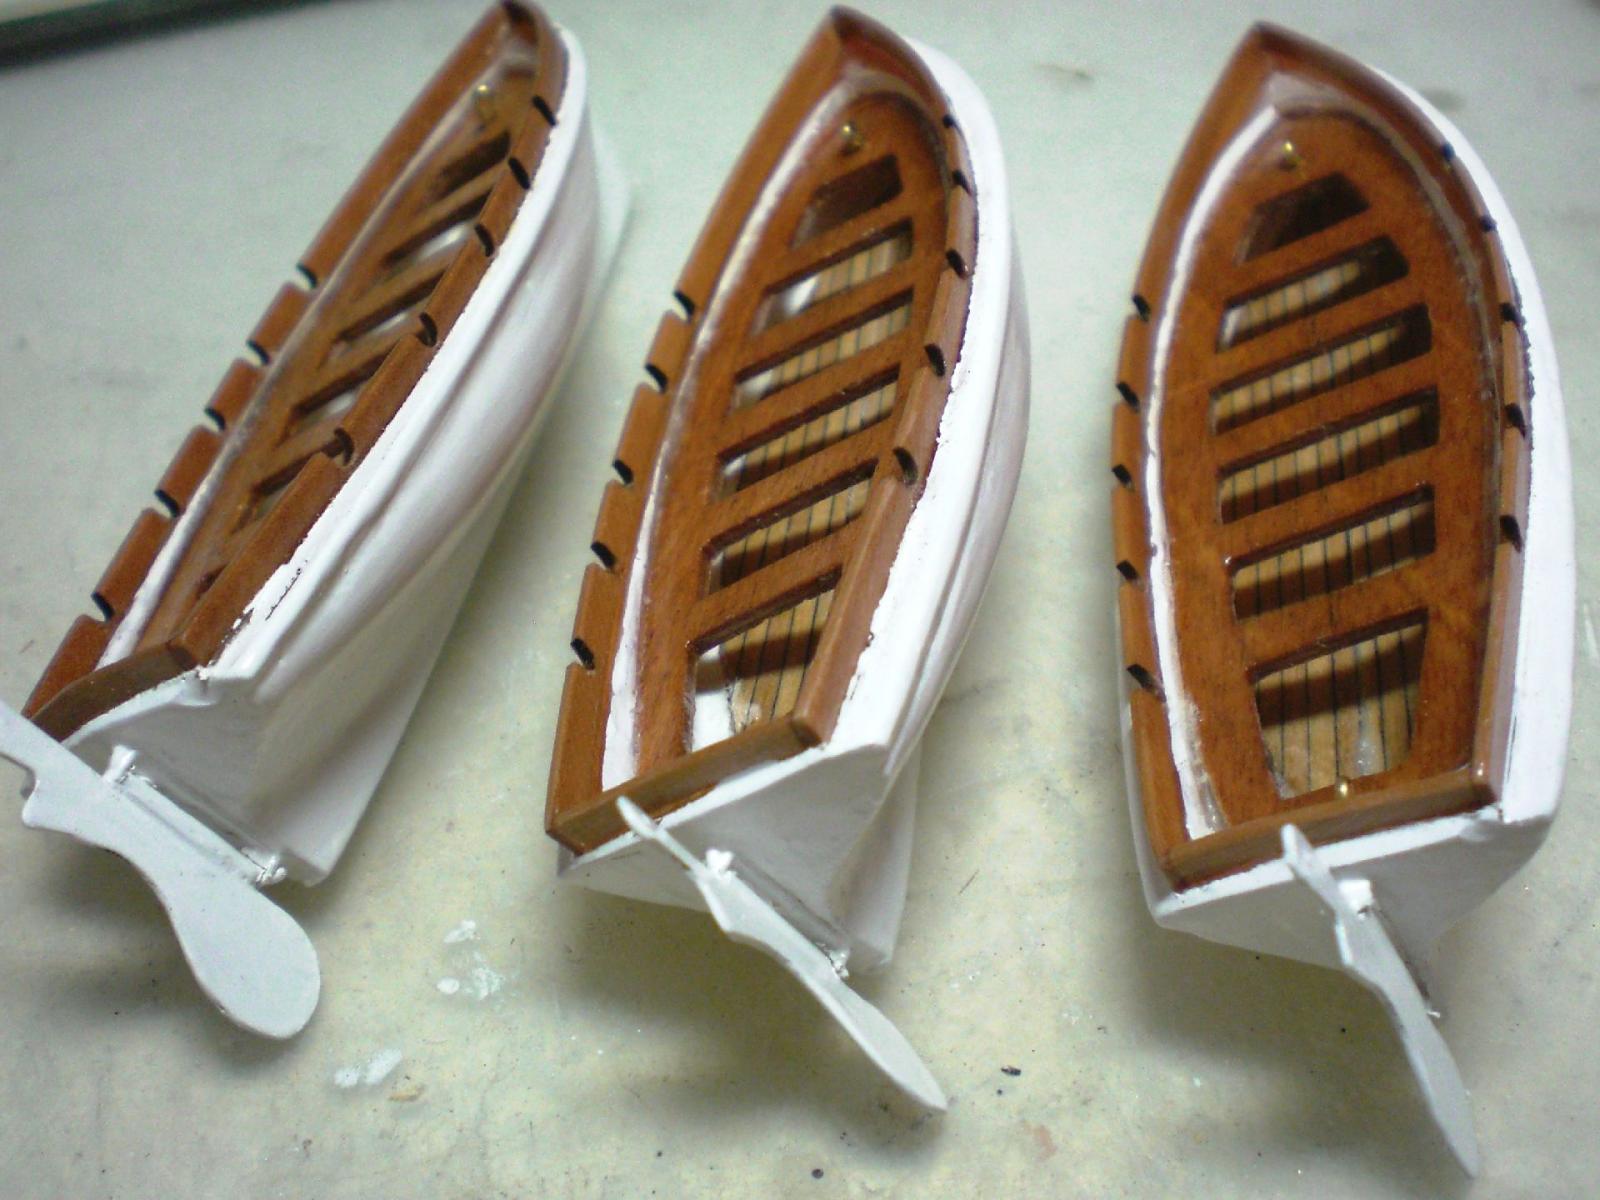
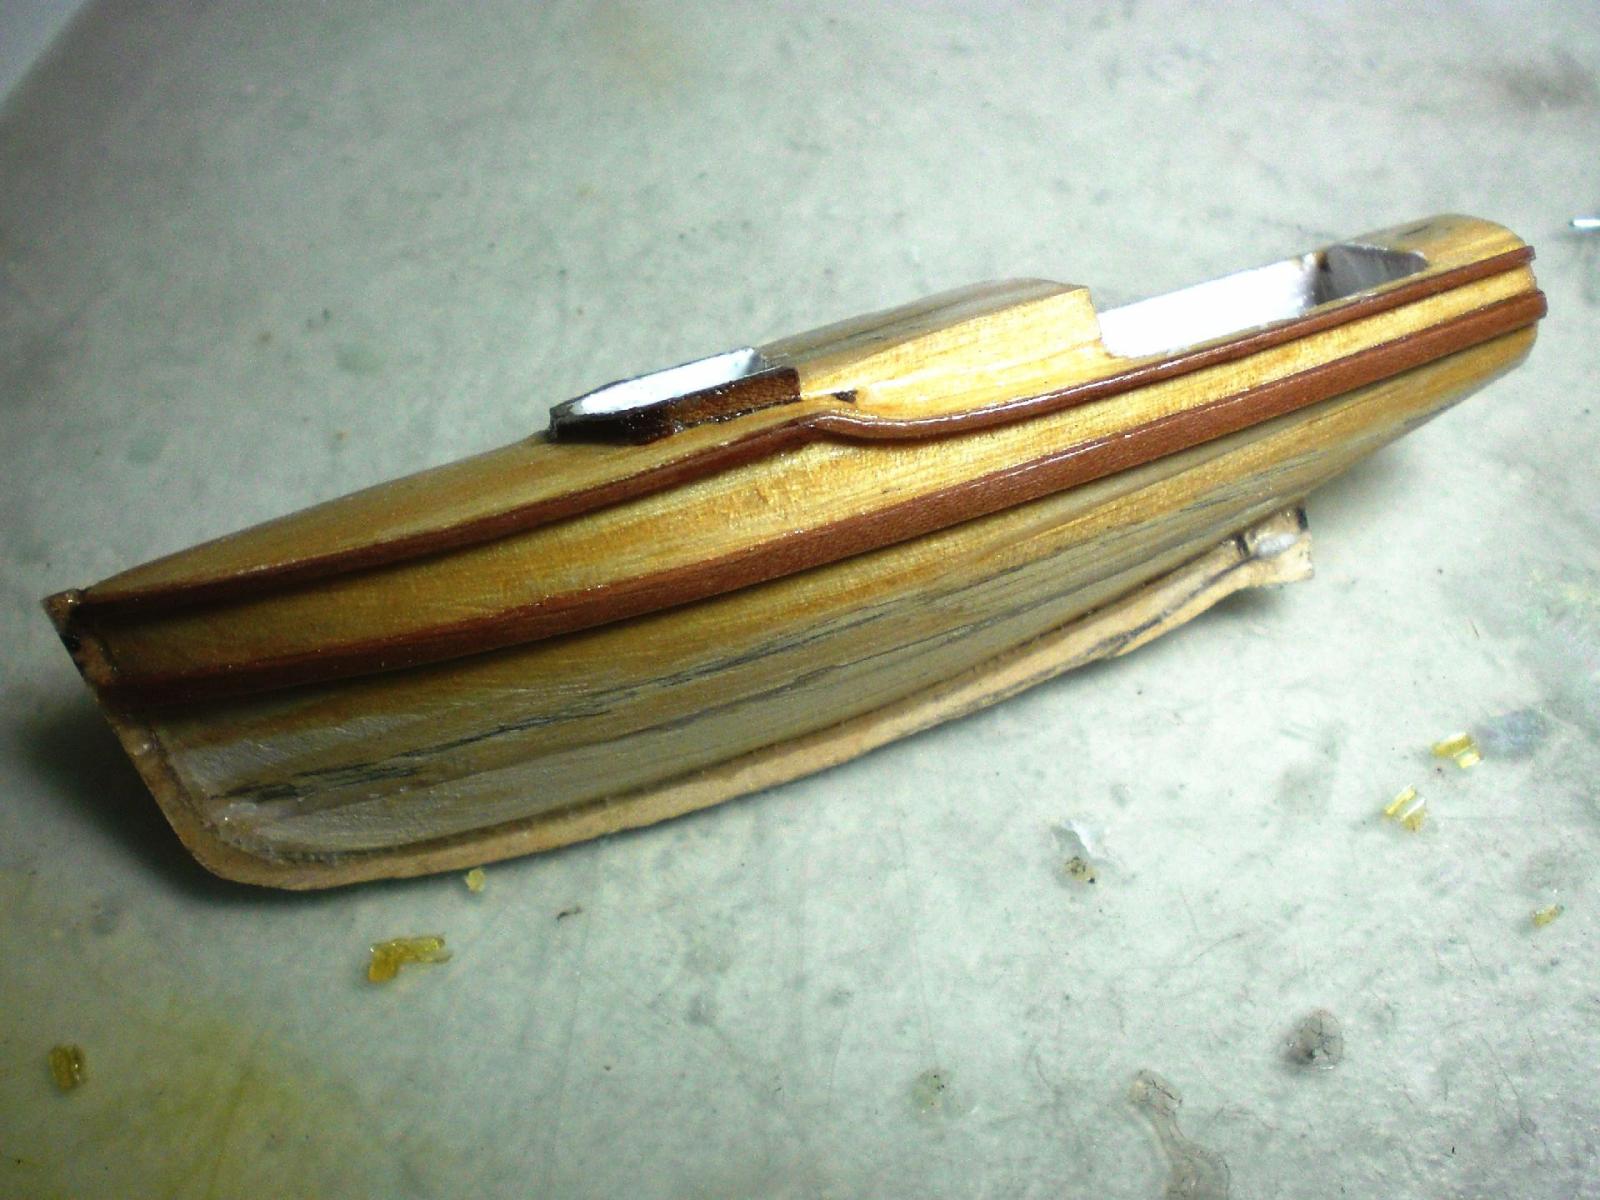
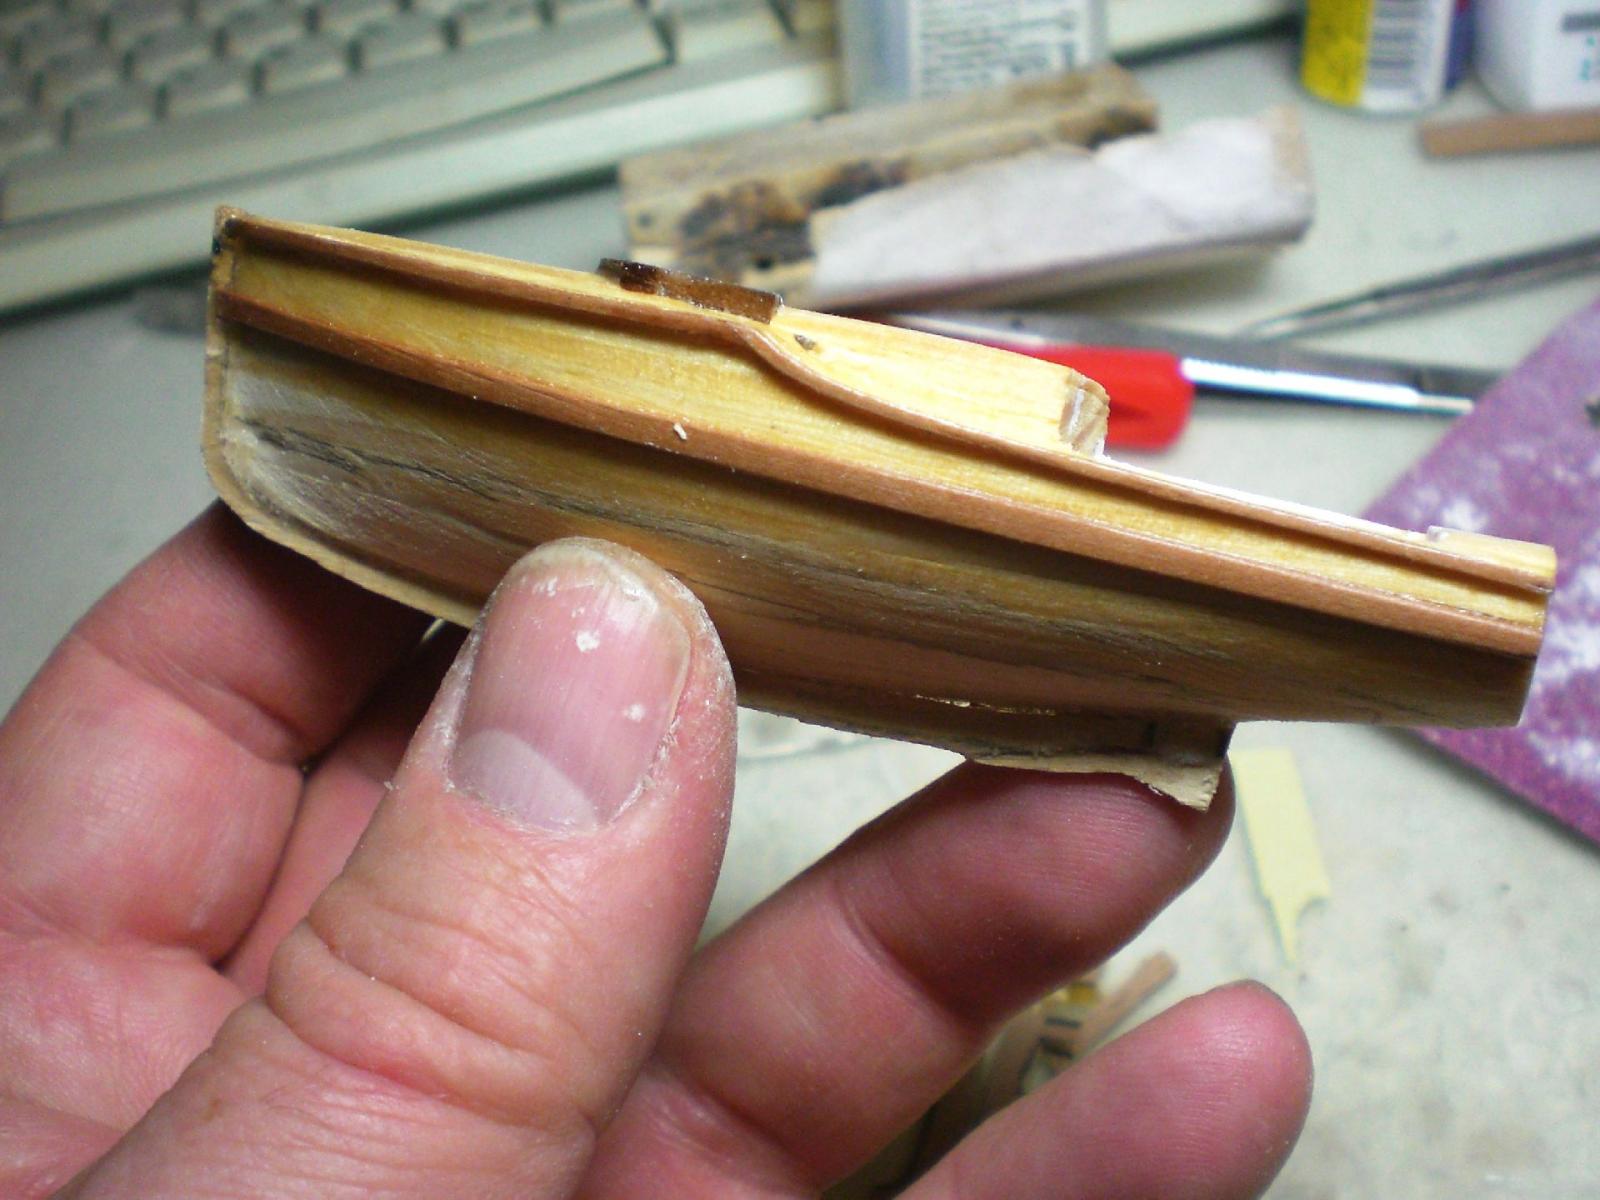
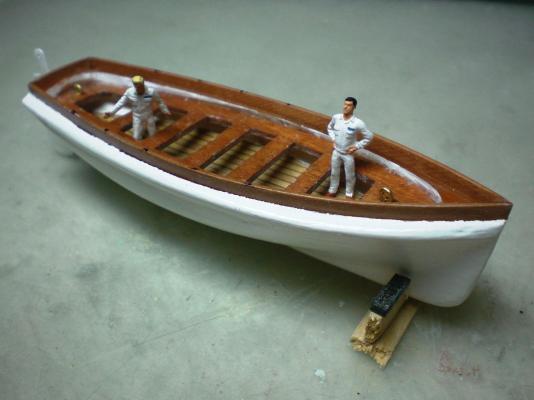
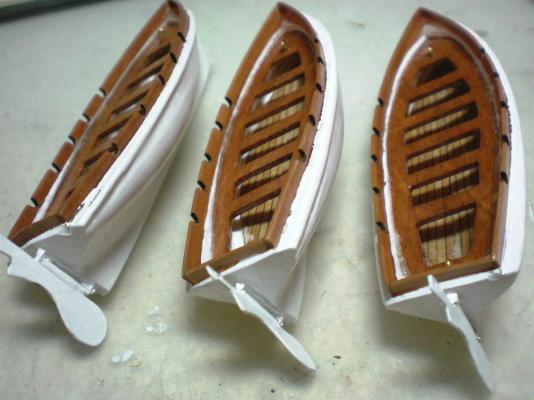
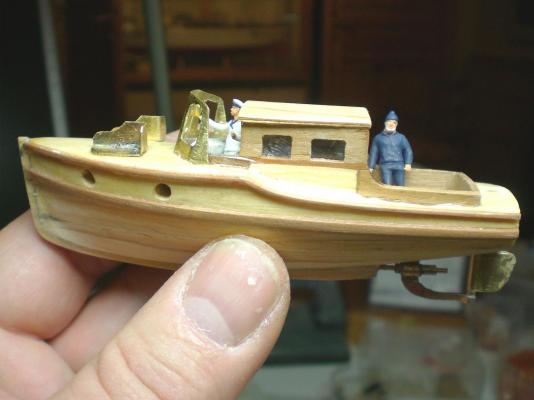
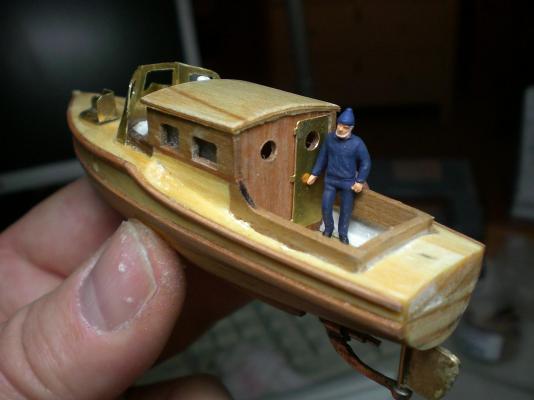
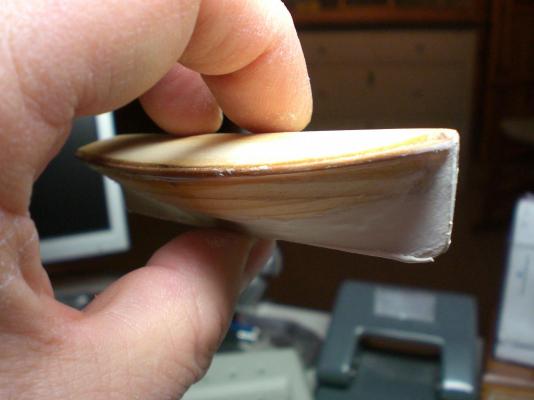
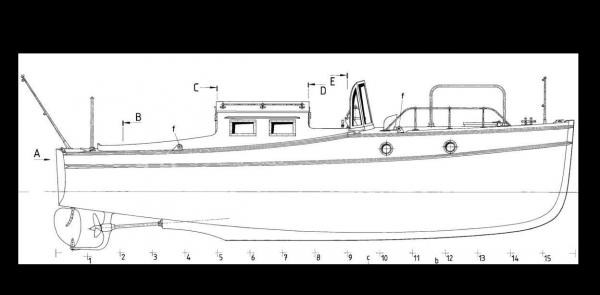
Build log part 28 bottom Planks an sitting benches fit well parts glued together and bulwark rails fitted a Little bit of painting done and rudder fitted the ouitcuts for the oars are done three simular boats completed the captains pinnace is done in wood Fittings attached the figure in the Cockpit is scale 1:87 (a bit too large) nav lights, bulls eyes and windowframes still missing Build log part 29 to follow.... Nils


- 222 replies
-
- 7
-
-
- gorch fock
- barque
- (and 2 more)
-
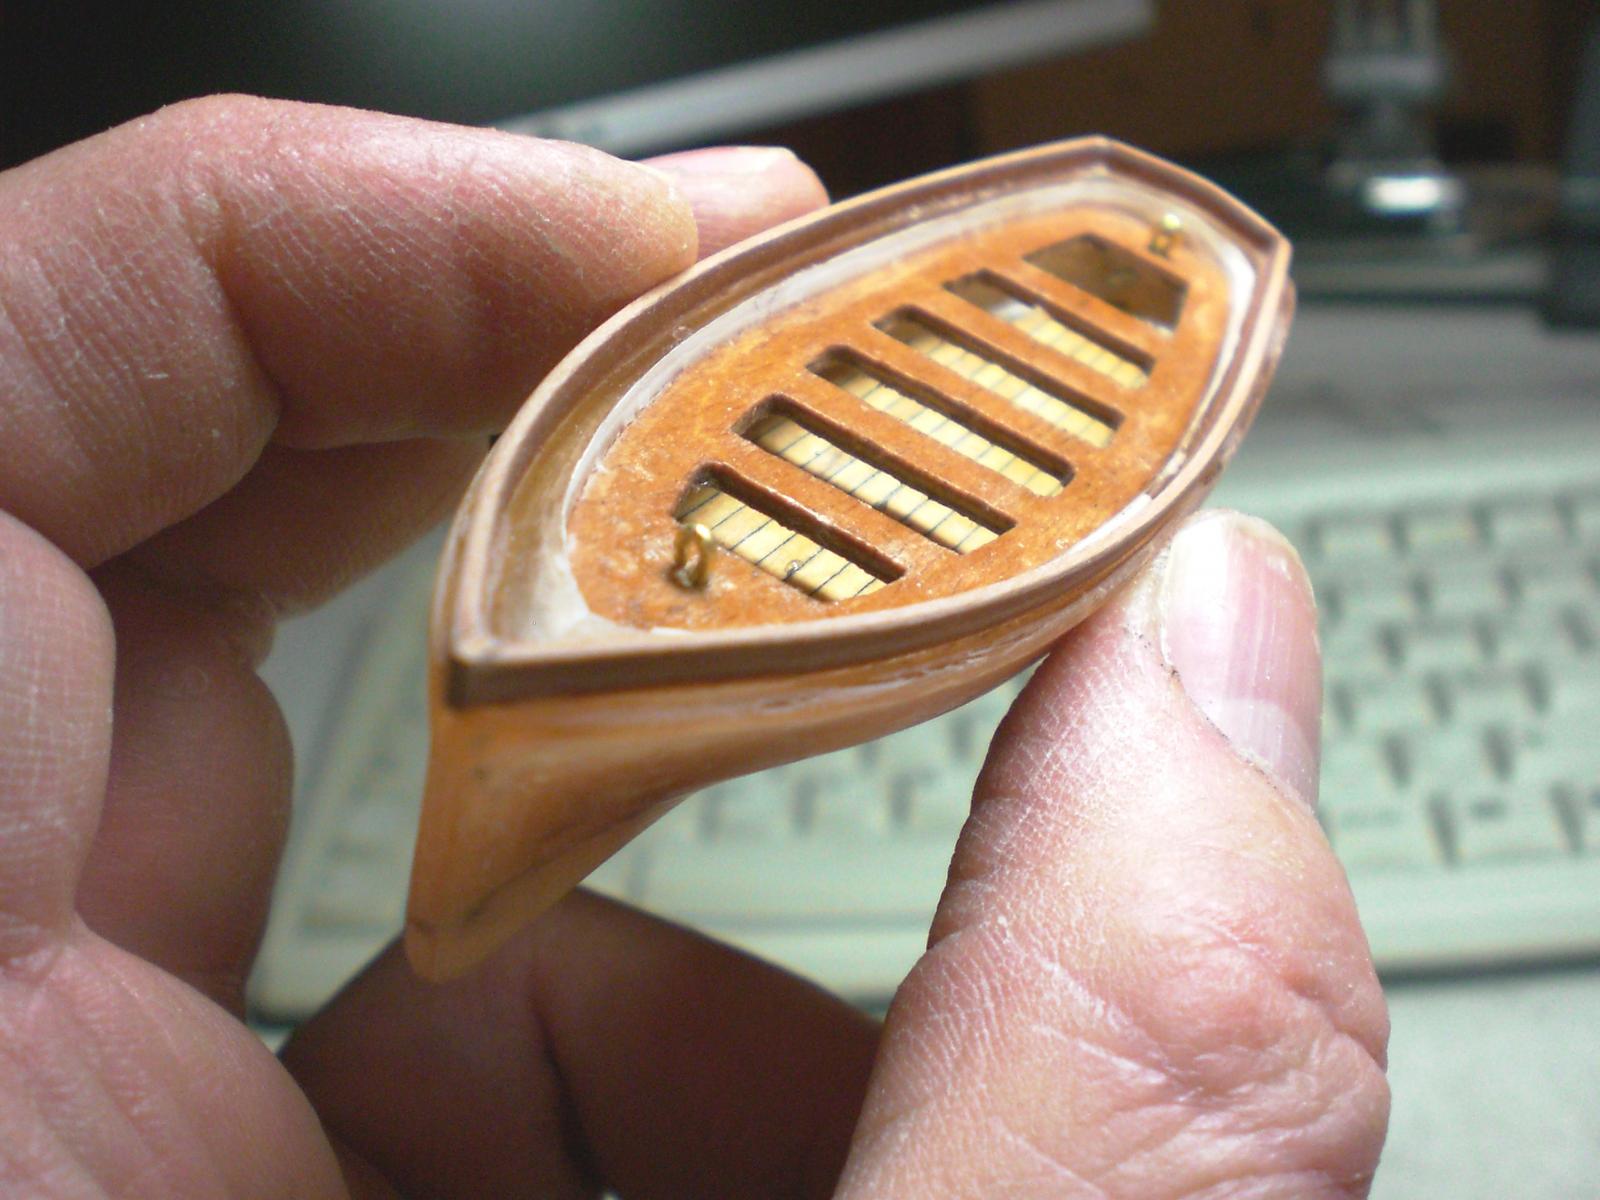
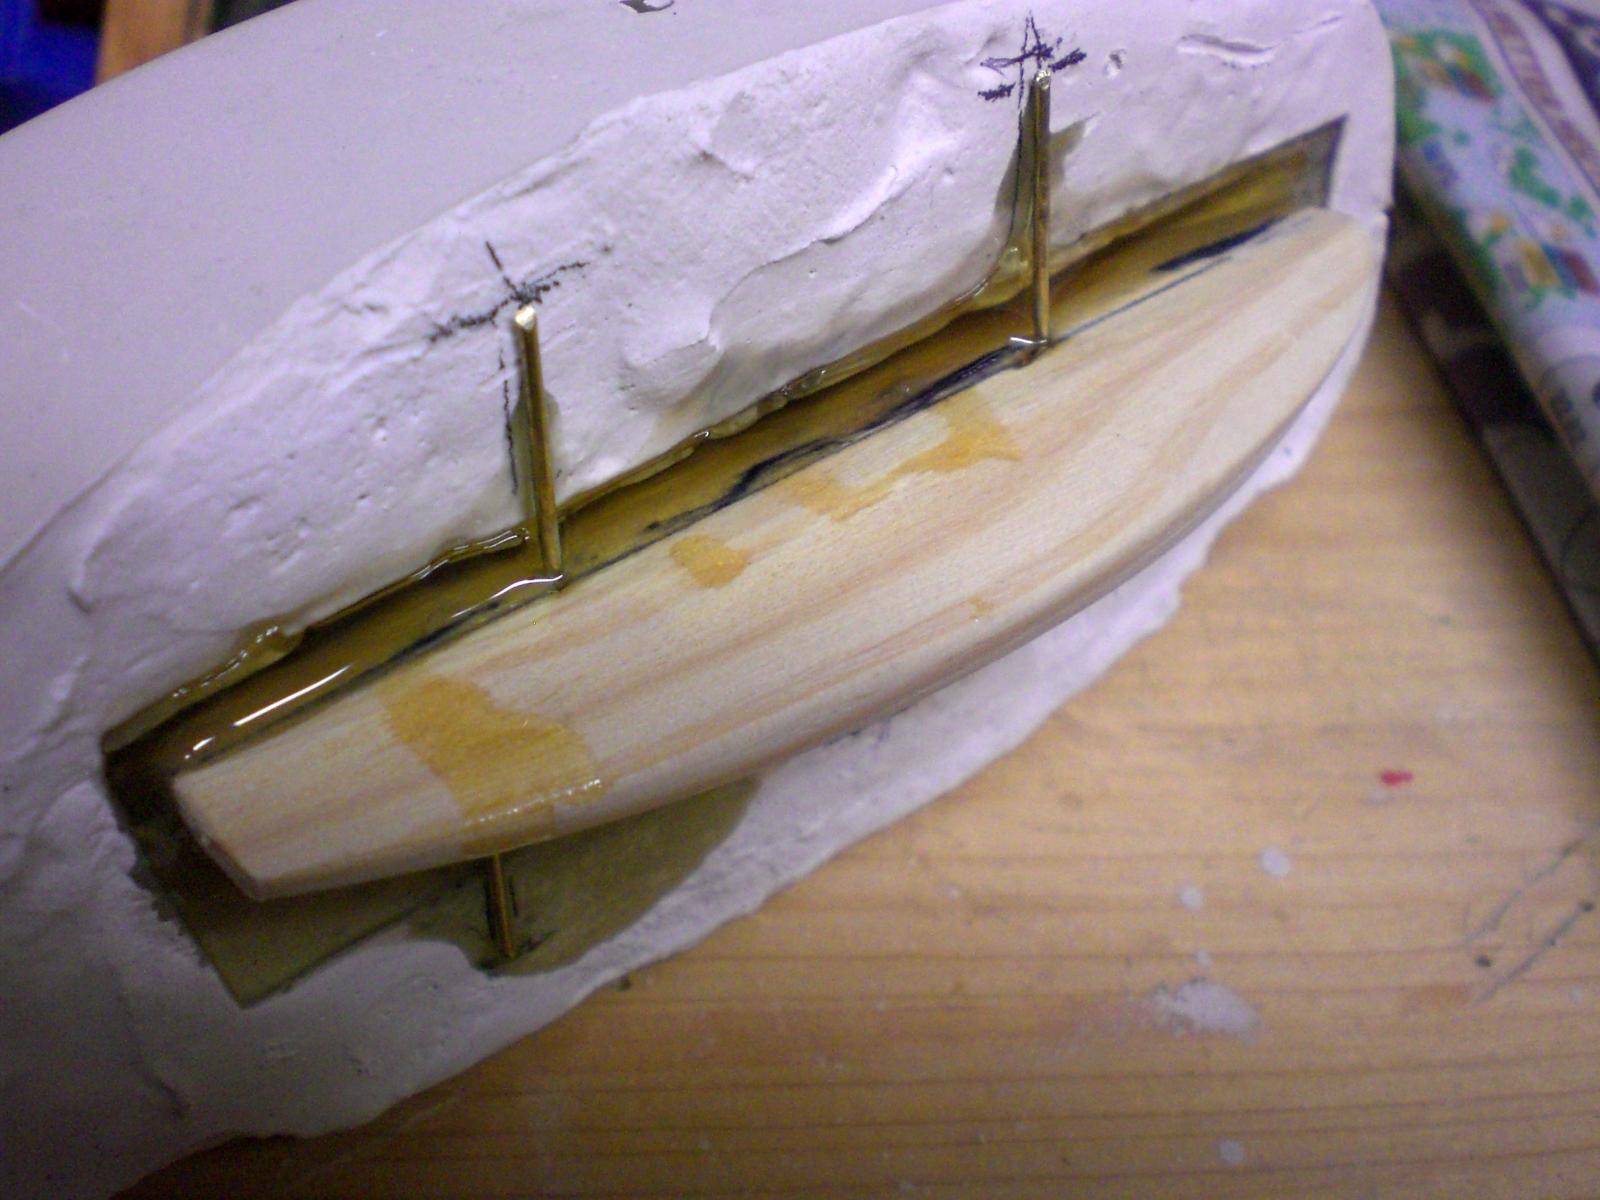
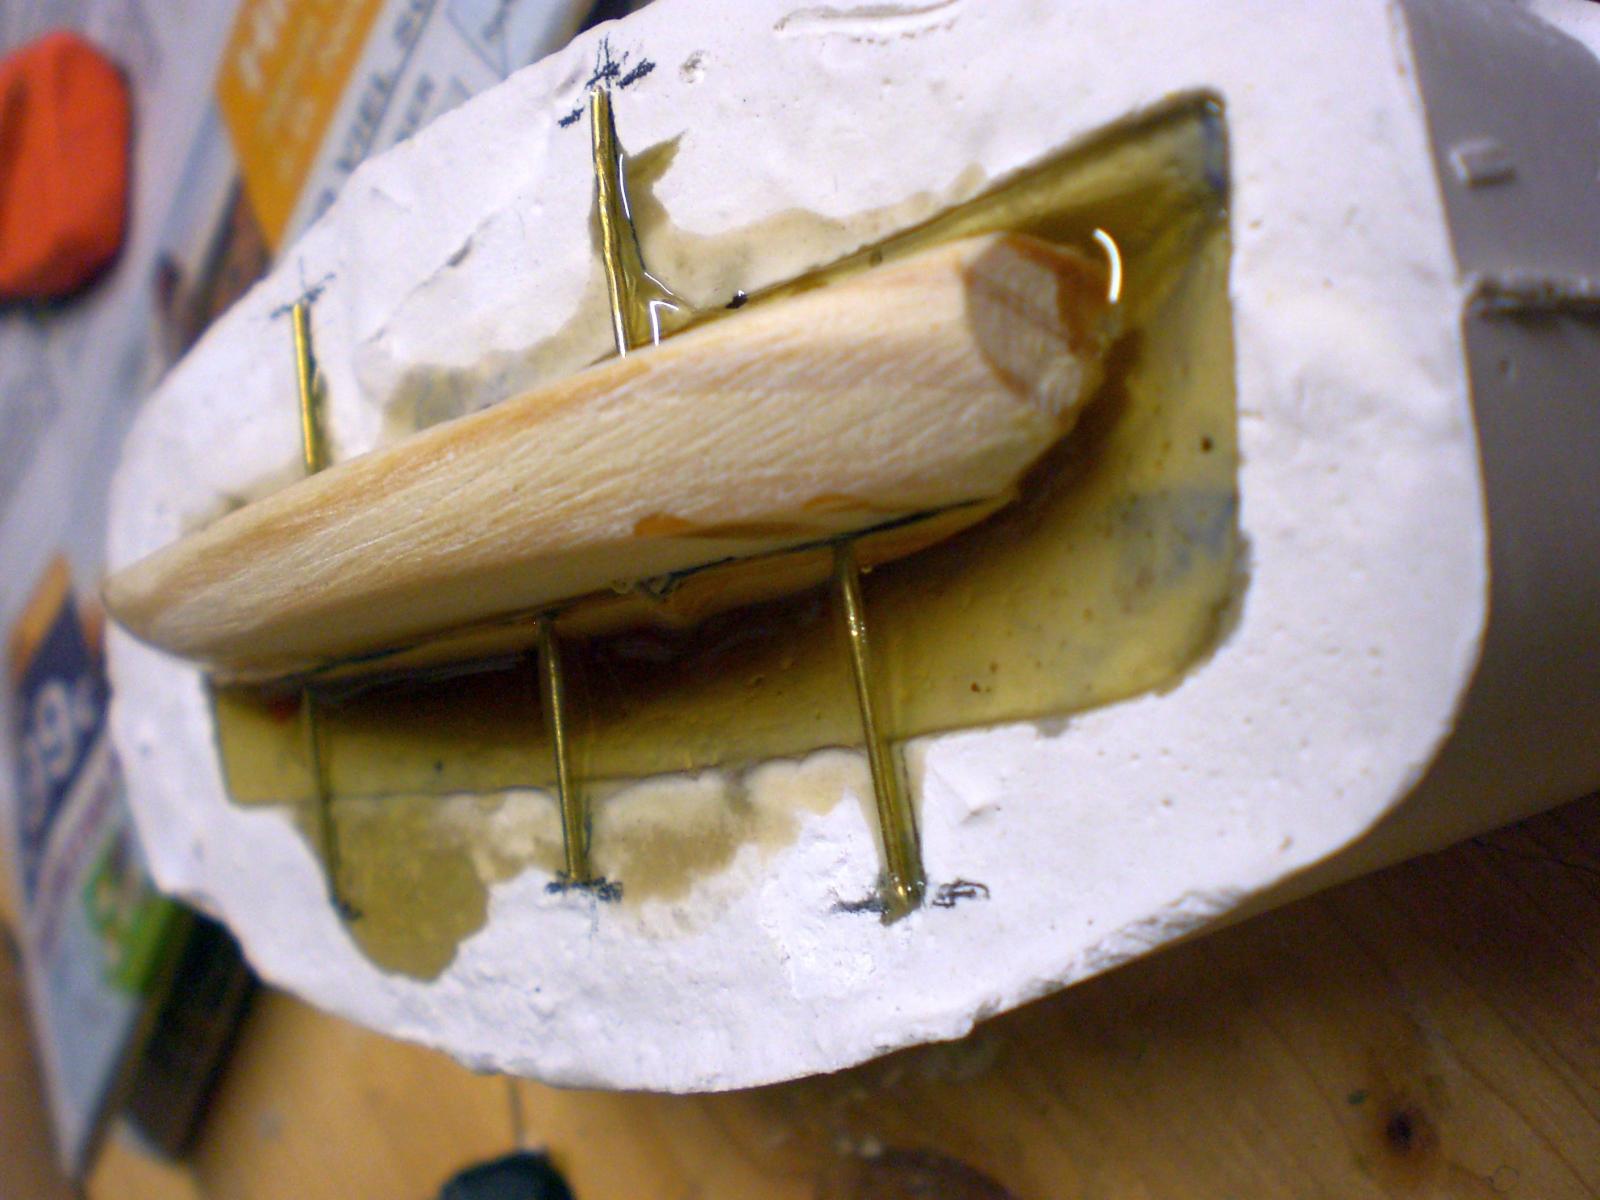
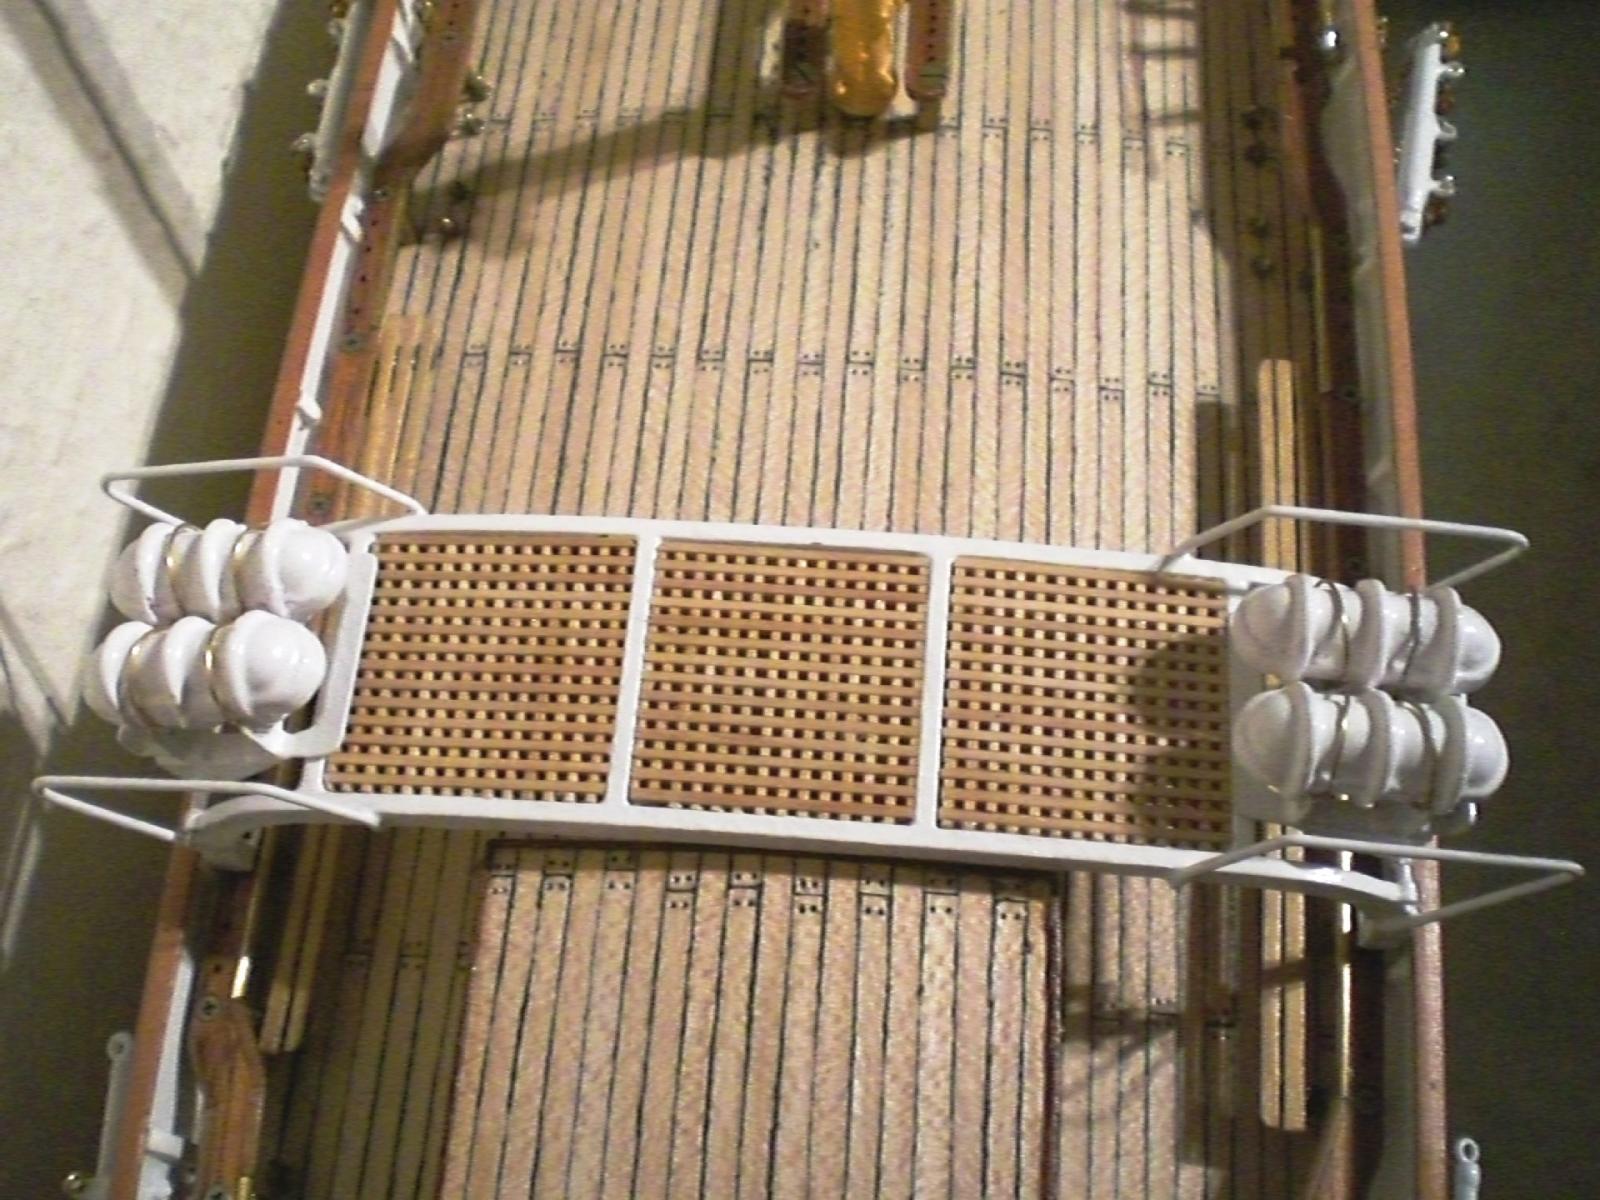
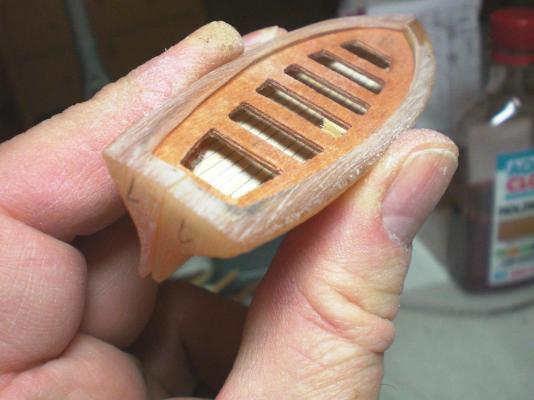
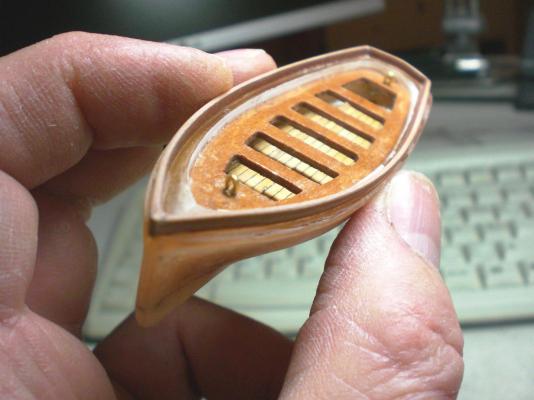
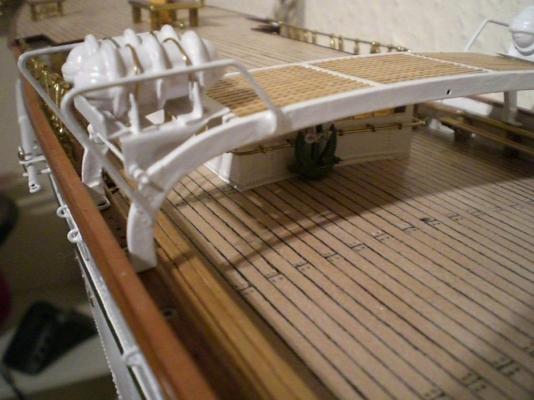
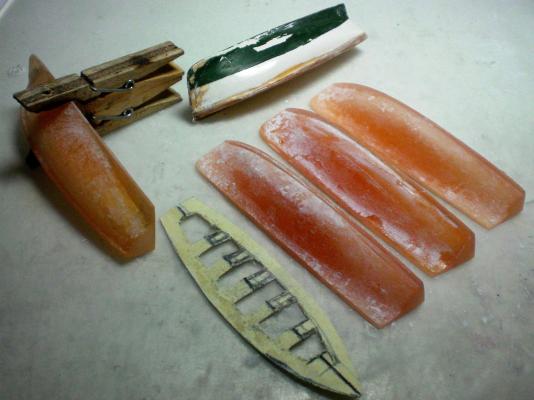
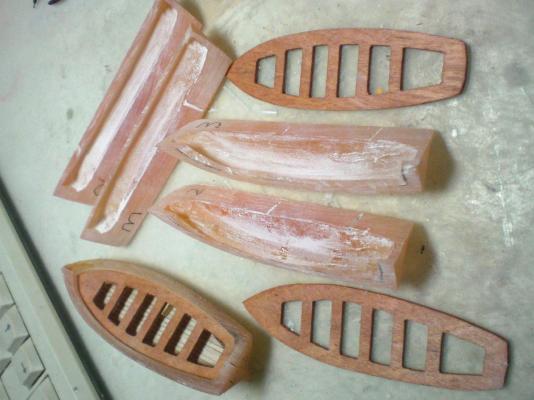
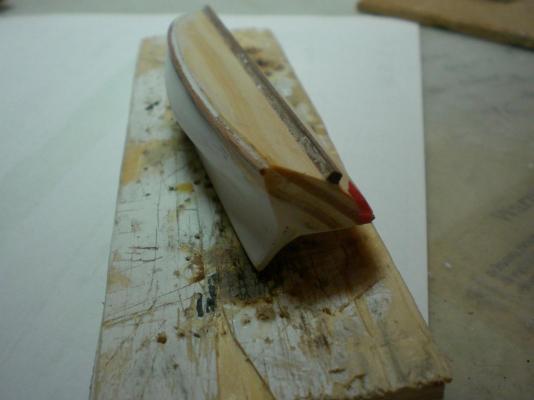
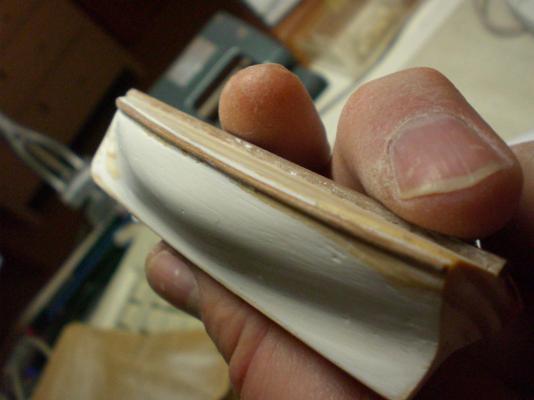
Build log part 27 this wooden form gives the inner space of the boat after removing it gratings for the boatrack aft bumpkins mounted middle bumpkins mounted produce 3 left and 3 right halves from the two moulds the deck inner portions are cut out made sitting Banks from Card templates and stained ply to match the boats interior contours ready for fit check Build log part 28 to follow.... Nils


- 222 replies
-
- 7
-
-
- gorch fock
- barque
- (and 2 more)
-
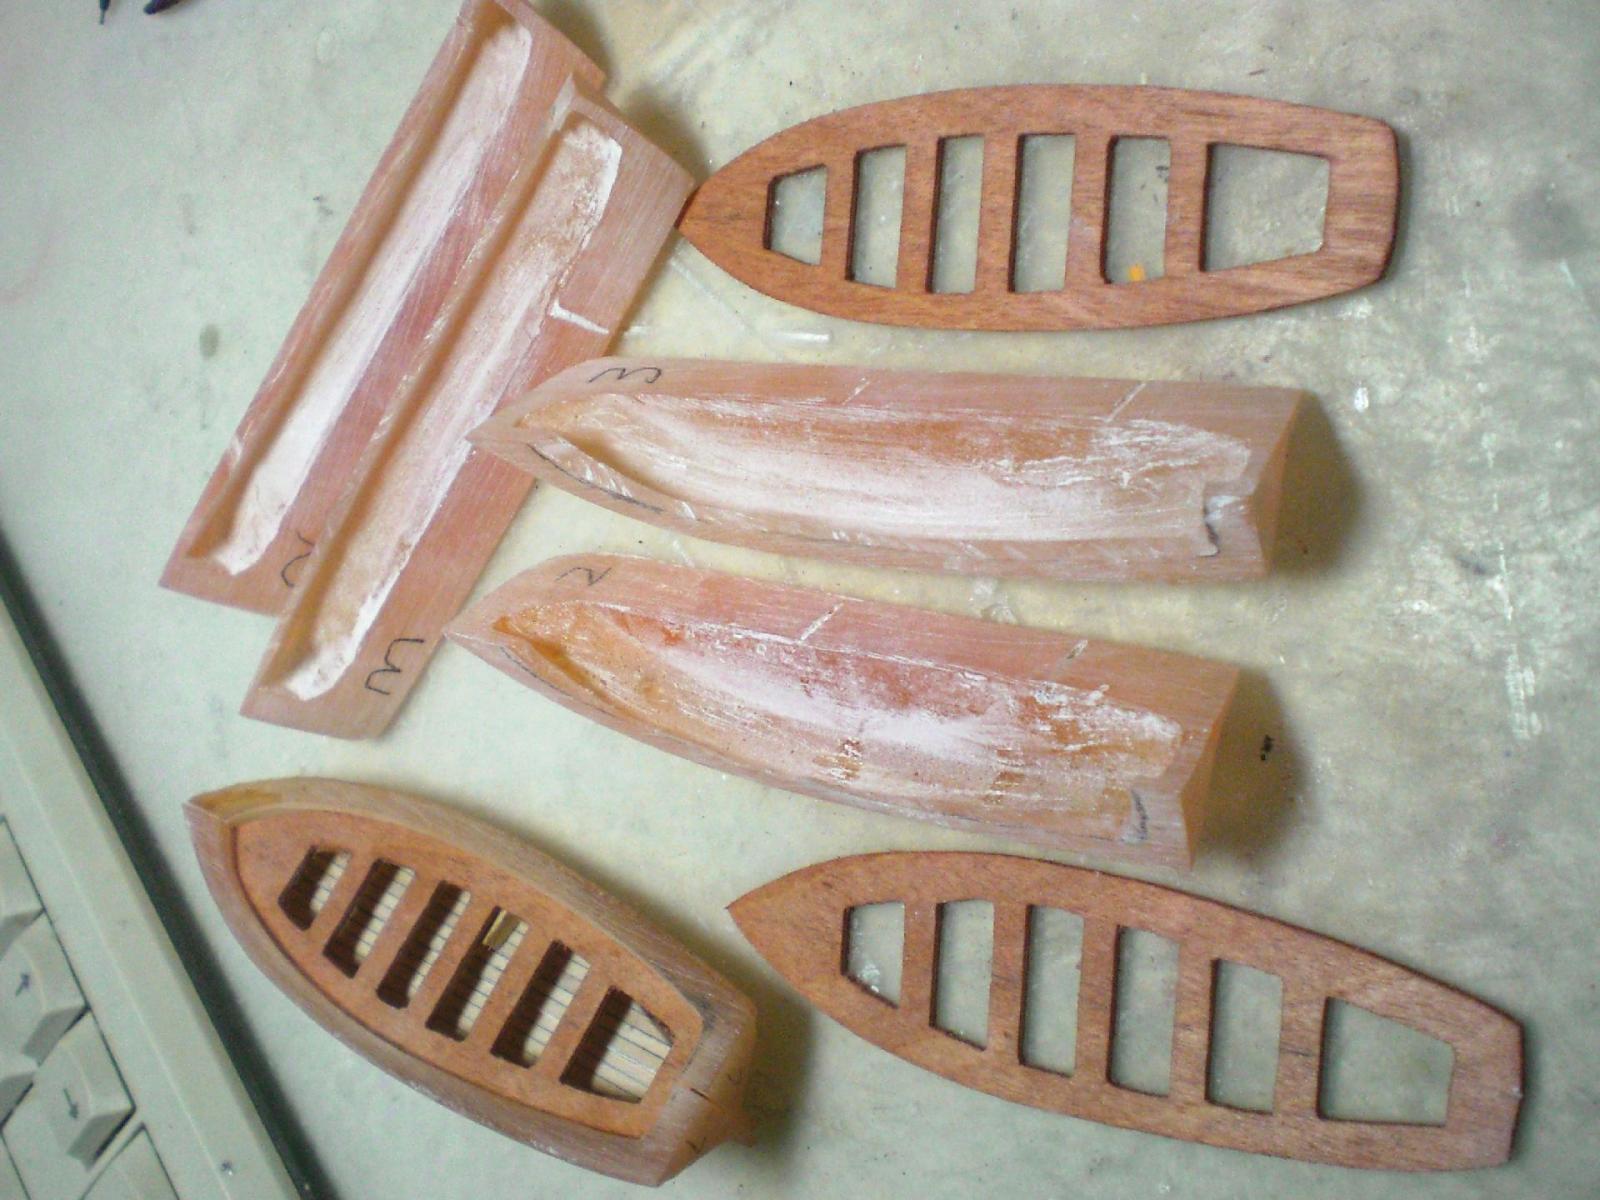
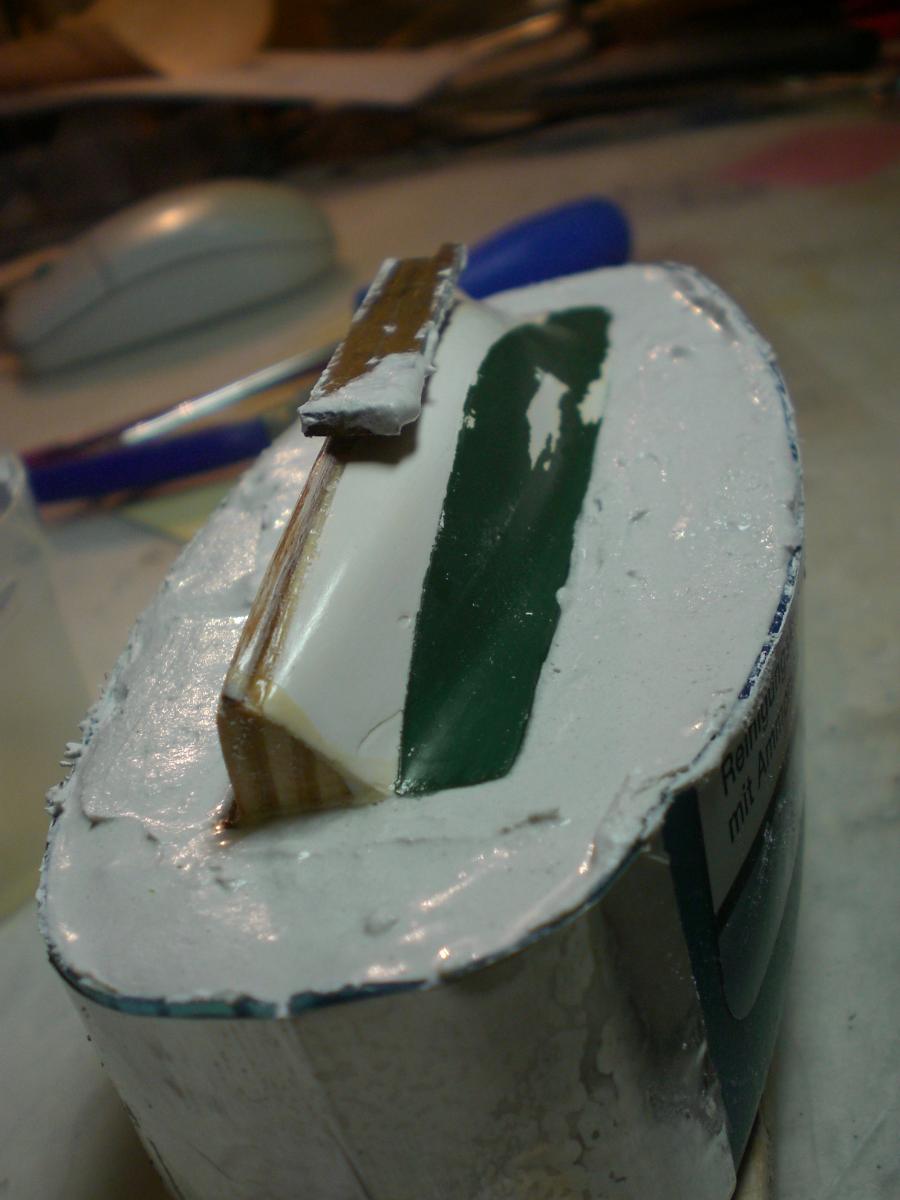
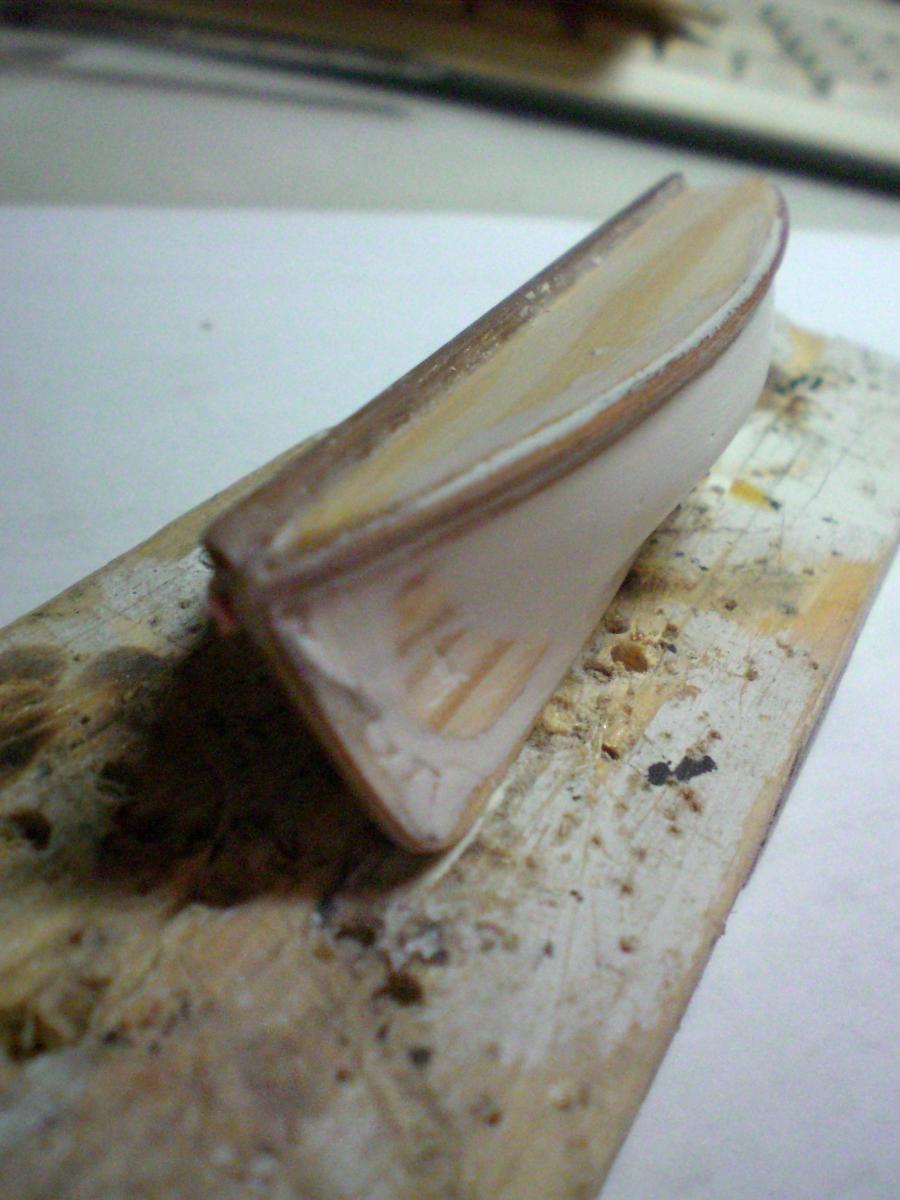
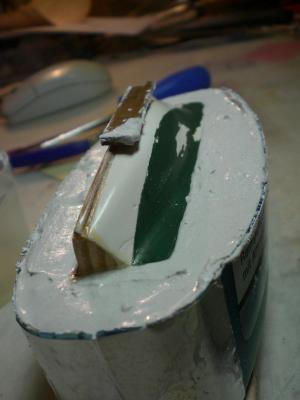
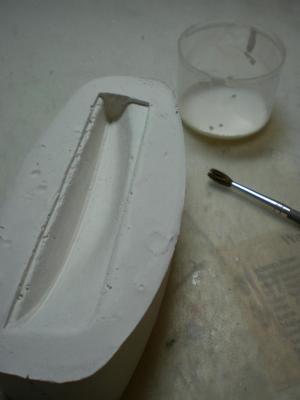
build log part 26 a boats model in Wood is built for making a mould the boatrack with the raft Containments is positioned two half-moulds are made from plaster for easy seperation I use car-wax before filling the Polyester in a inner form has to be placed half into the mould remaining Polyester is given into the clay moulds Build log part 27 to follow.... Nils


- 222 replies
-
- 1
-
-
- gorch fock
- barque
- (and 2 more)
-
thank you JesseLee Nils
-
Bob, within tomorrows Picture lot there will be be pics of the making of the boats, but for the capt`s. Launch in scale 1:95 please do not expect a seperate build log. Nils
-
Great lesson Buck, thanks for sharing, it is a lovely boat you are presenting to all of us Nils
- 515 replies
-
- 1
-
-
- artesania latina
- whaleboat
- (and 1 more)
-
Great work Danny, would love to see her fully rigged with sails Well done ! Nils
-
Michael, those shackles look great !! Nils
-
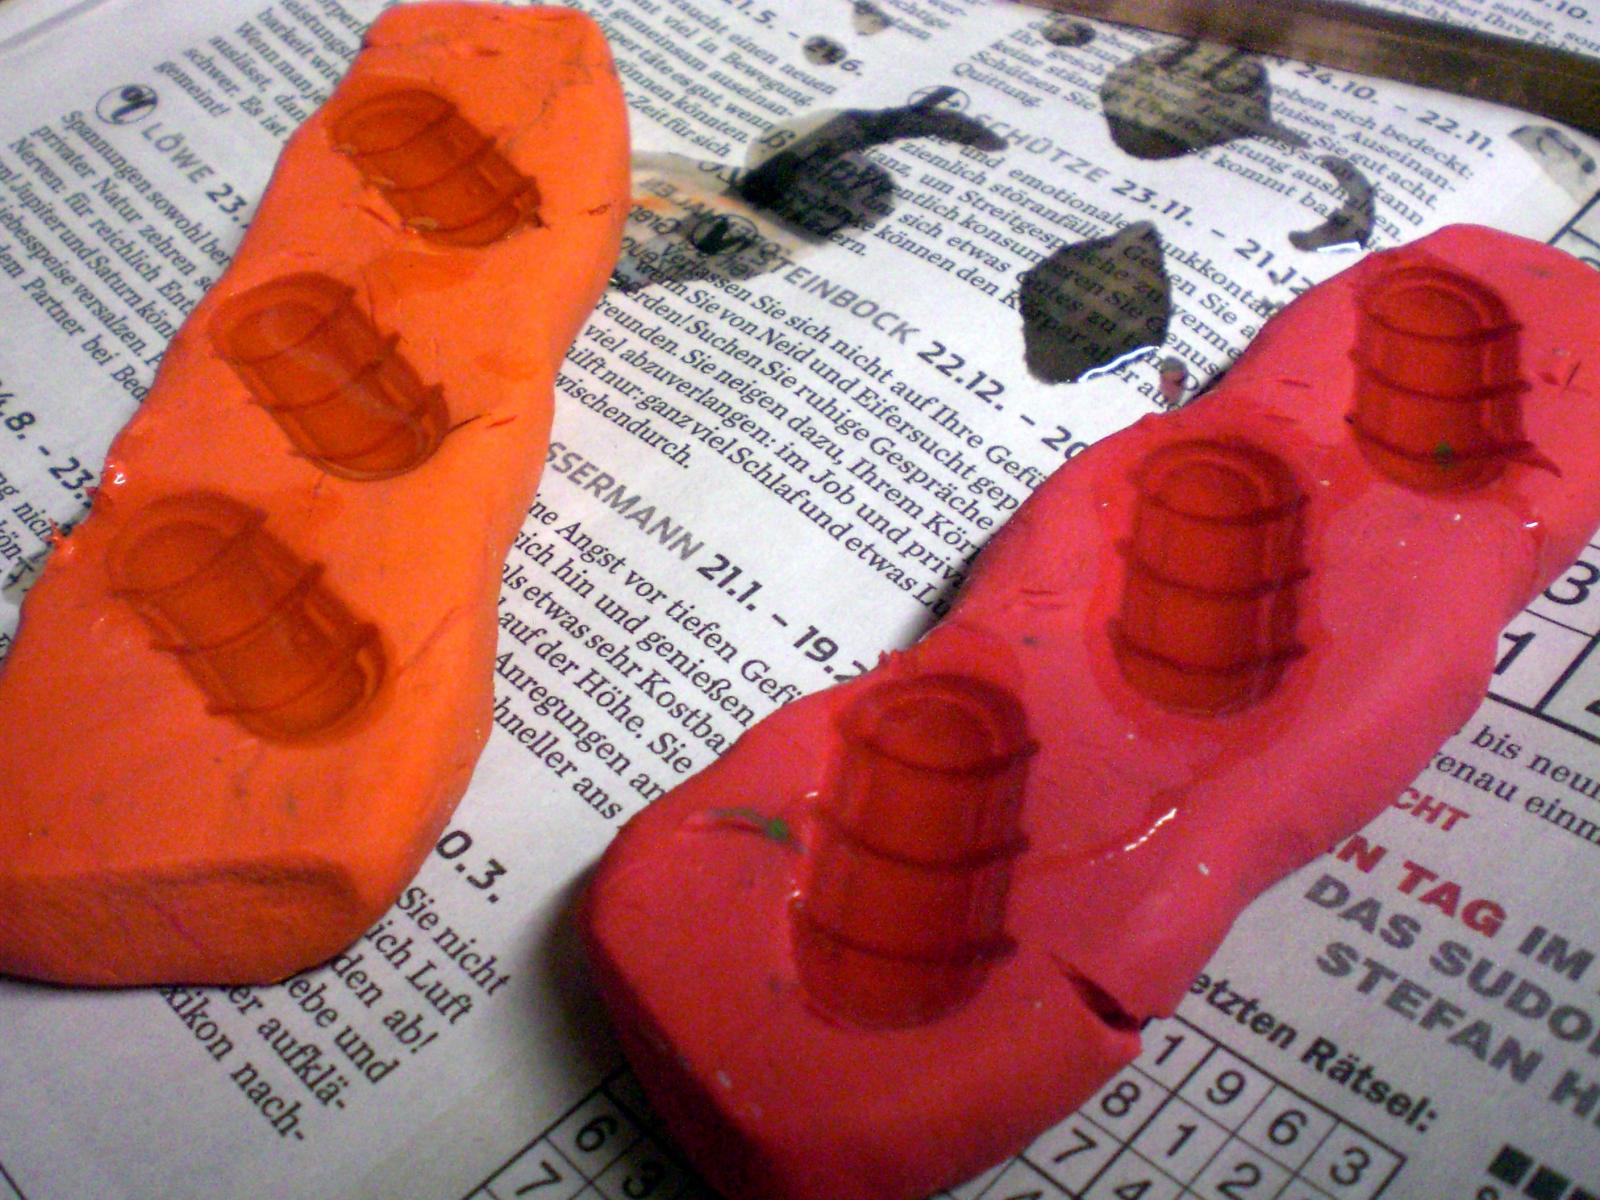
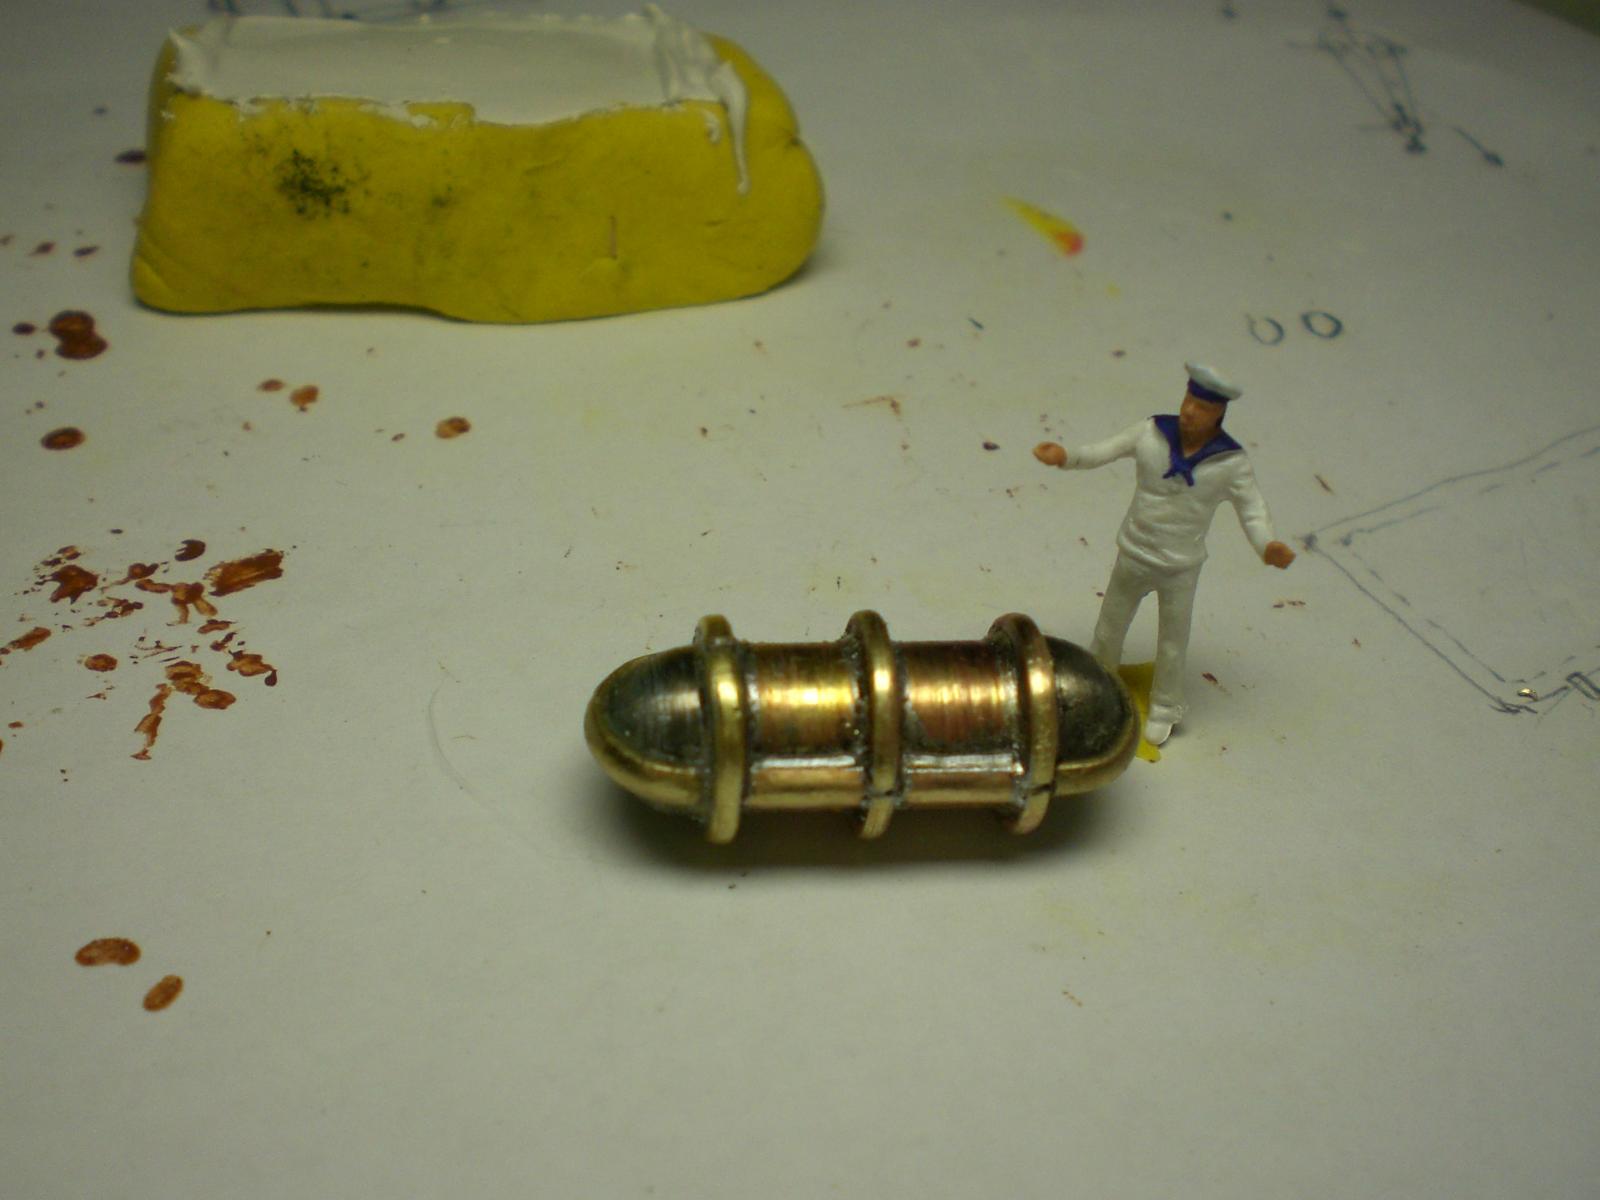
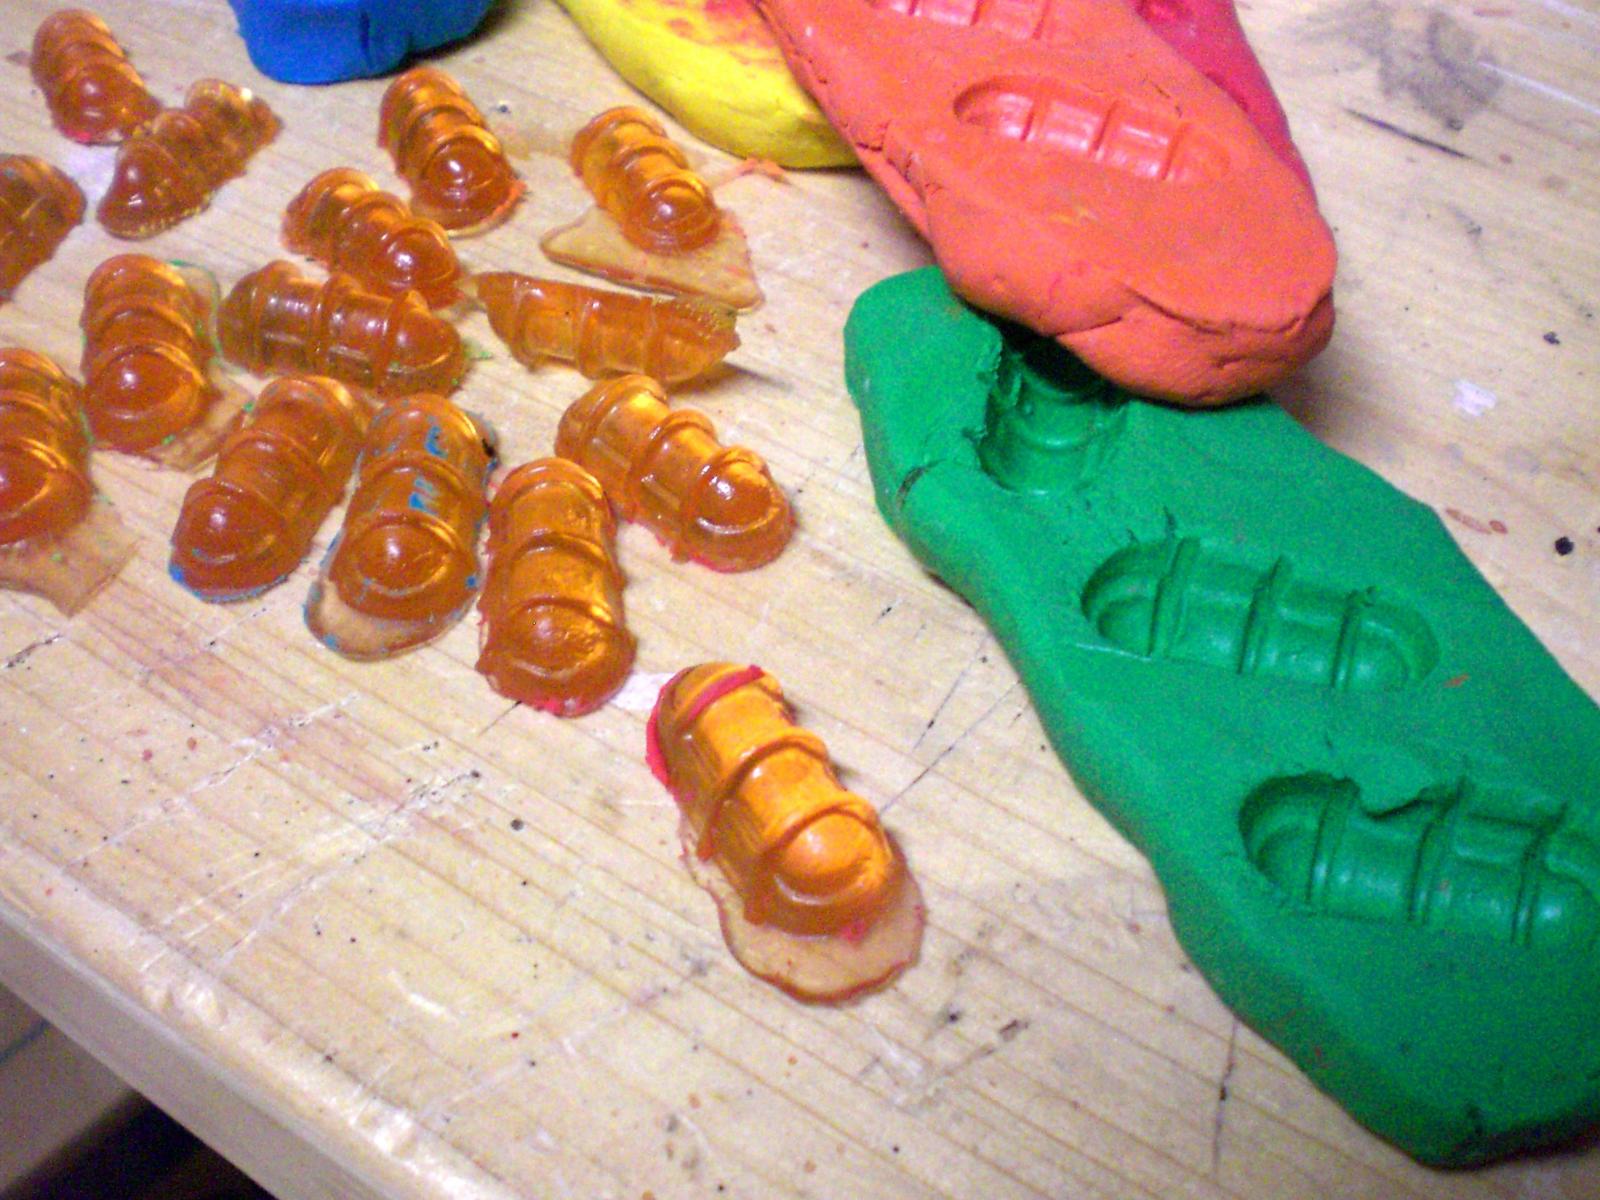
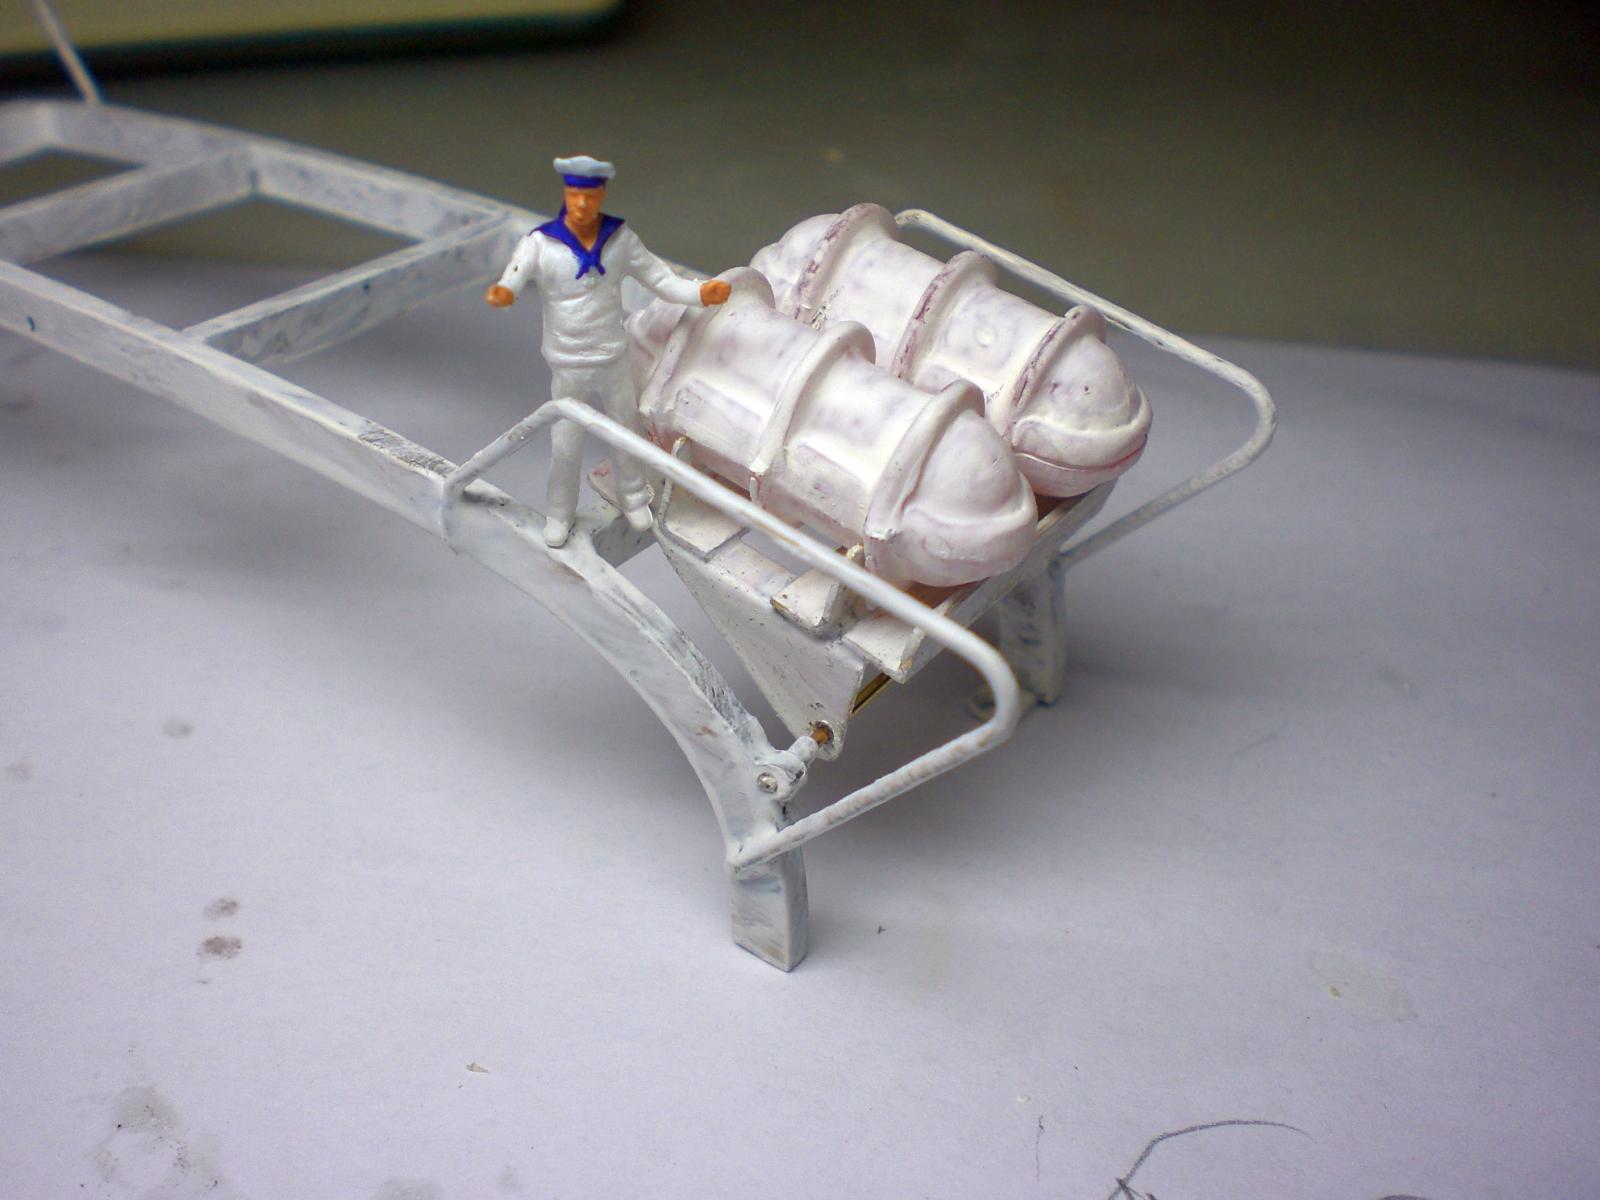
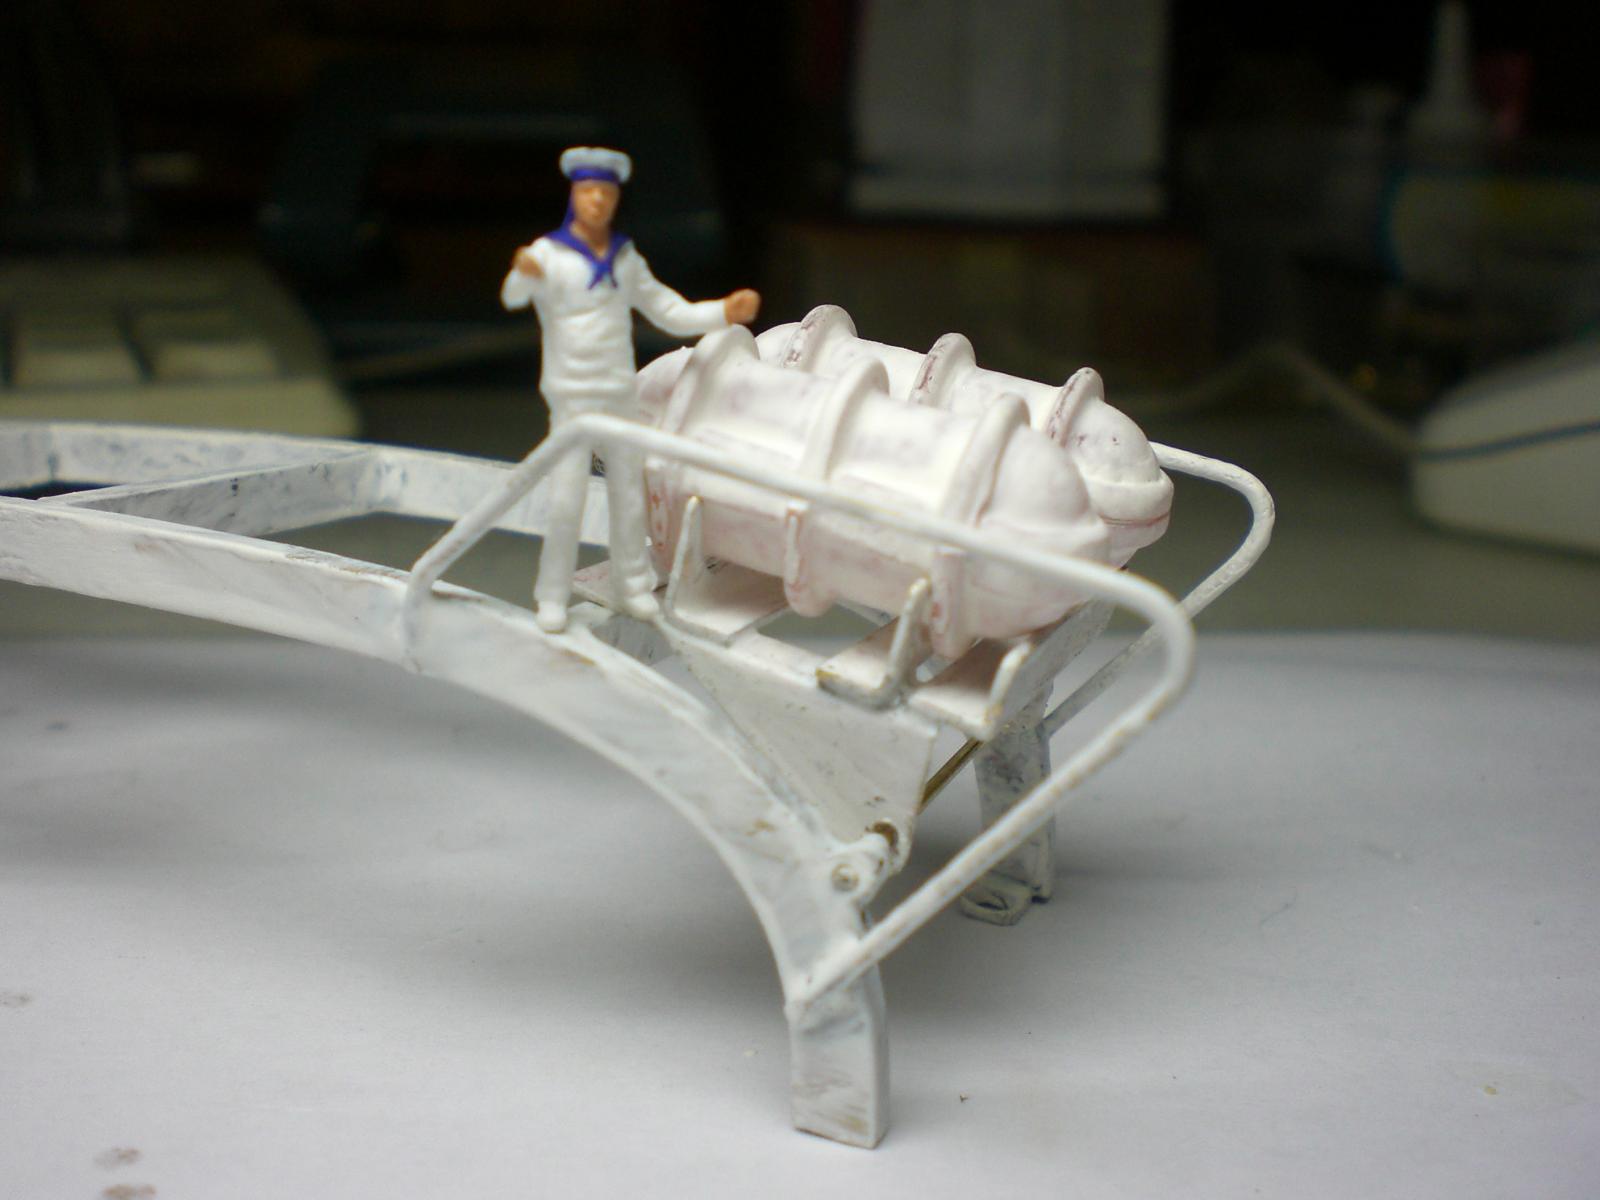
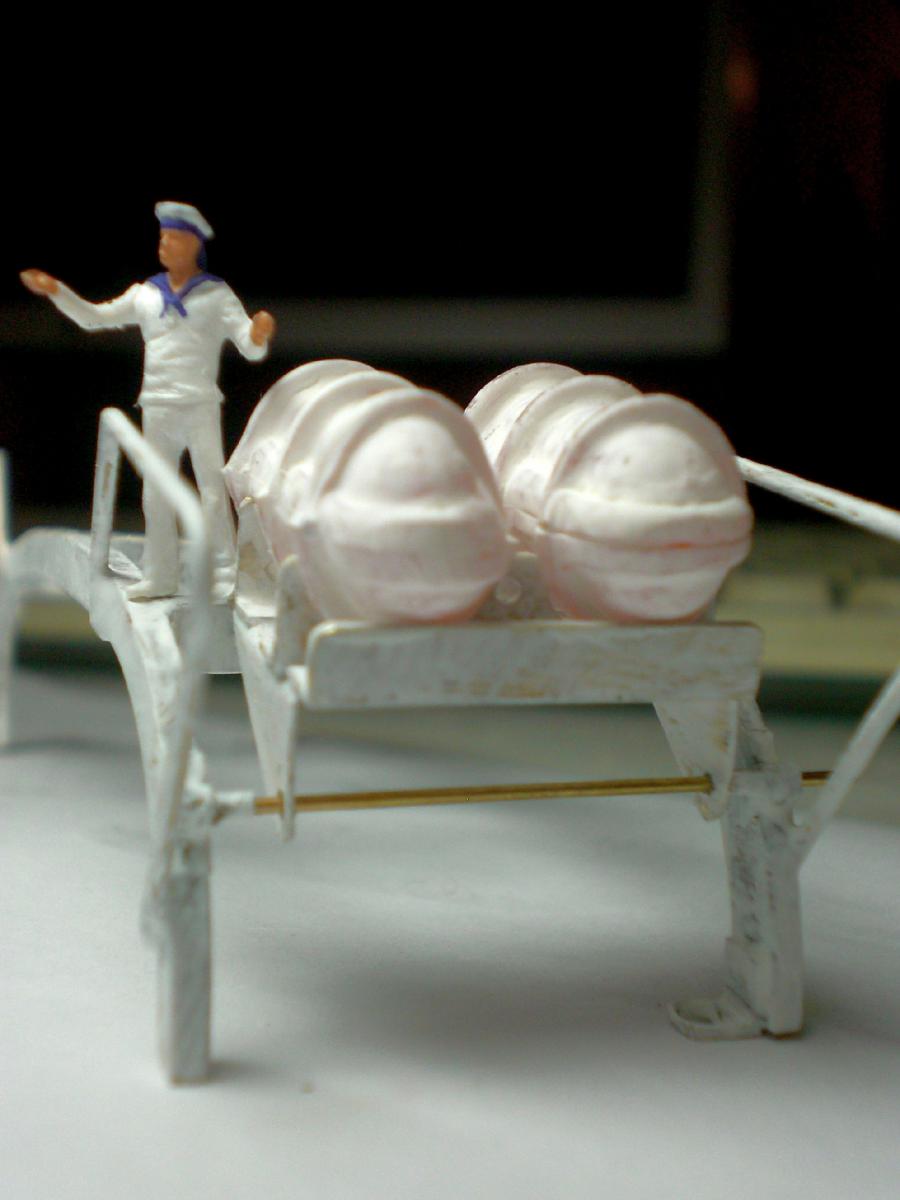
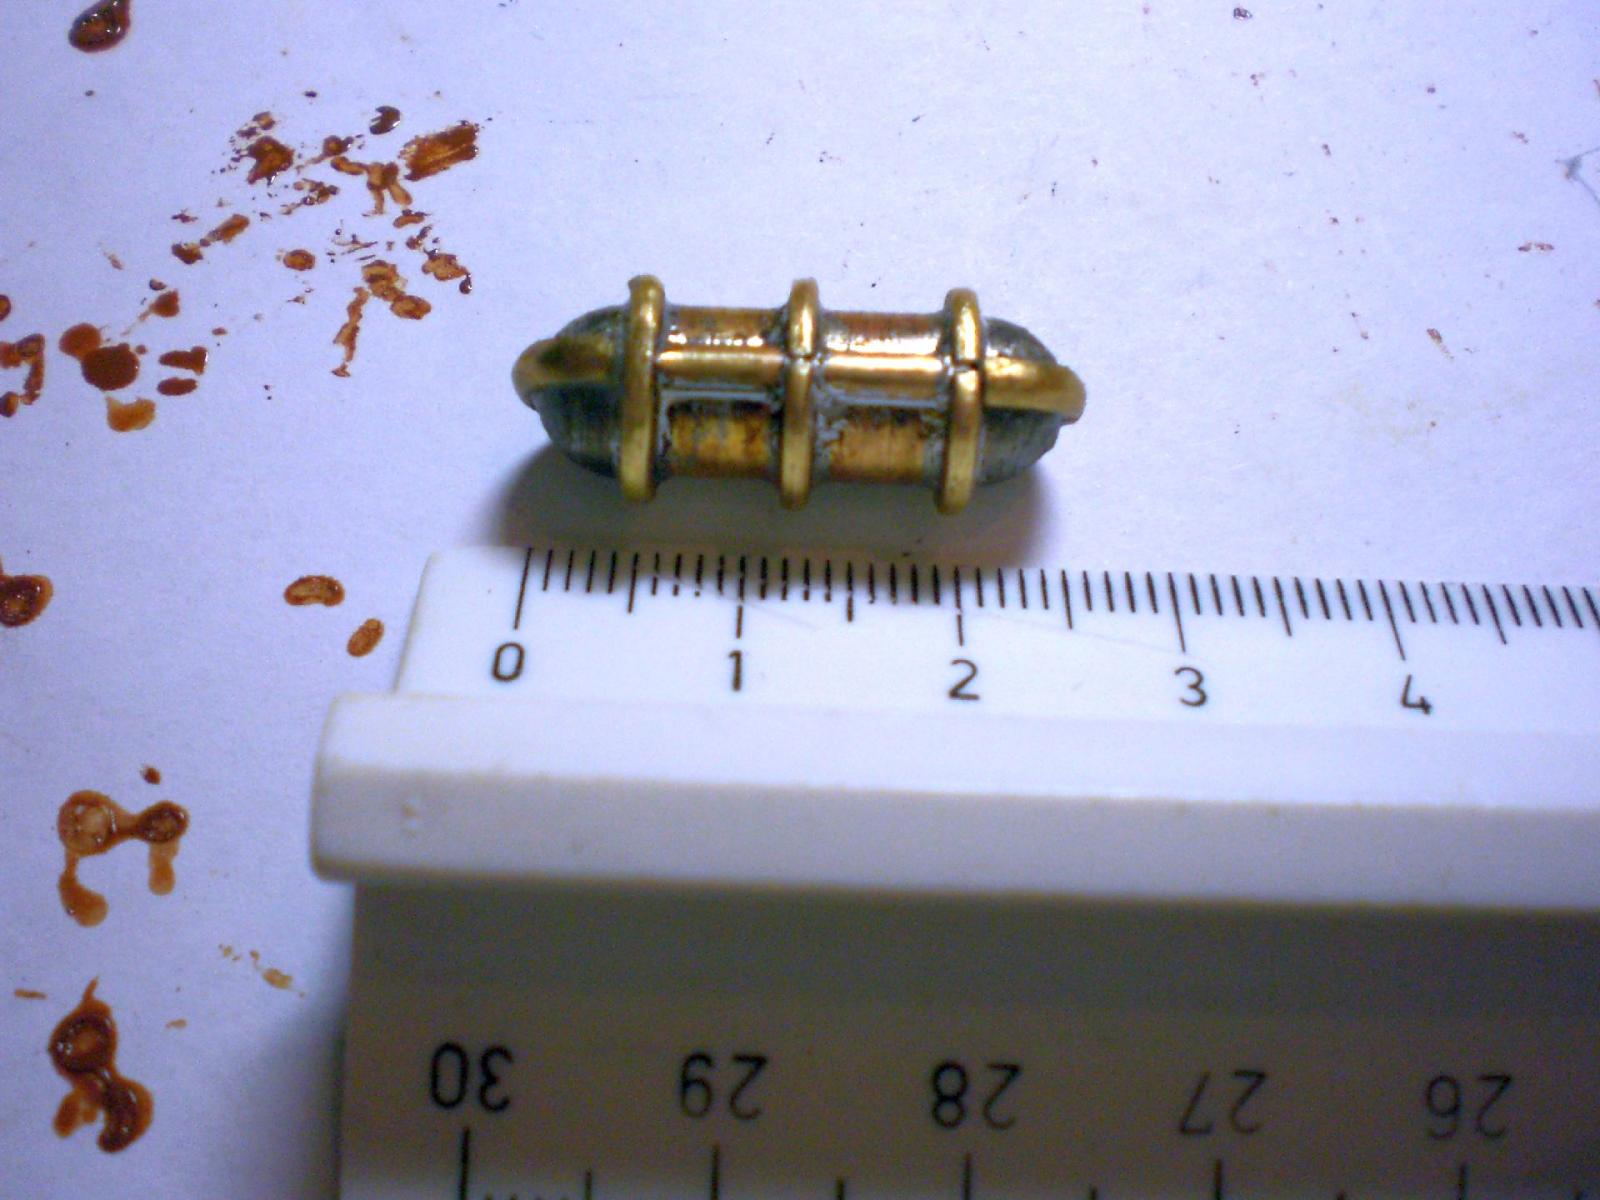
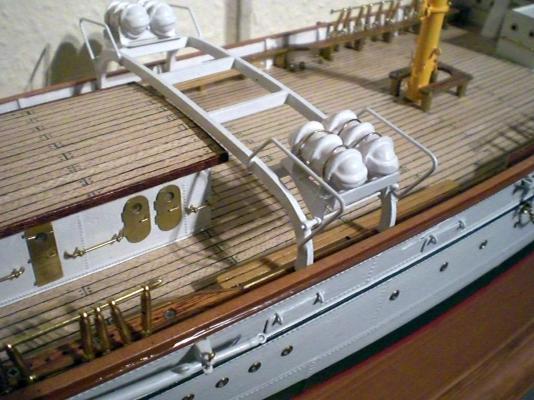
Build log part 25 Need 28 halves of this raft Containment, so ist worth doing a mould..... the half of the metal model is pressed into schoolkids clay, this being the mould (s) when making the boats there is always, before it cures off, some Polyester left, so is goes into the moulds (without wasting it) sanding, primering, Fitting of the halves, and preliminary mounting (some cradles to be made first) fastening with brass wire straps fitted on to the raft Container launching flipboards a wooden model is made for the three boats of the Gorch Fock. The making of the boats Pictures shall follow later on Build log part 26 to follow..... Nils


- 222 replies
-
- 10
-
-
- gorch fock
- barque
- (and 2 more)
-
a lovely model Kester, this type of cutter is one of my favorites anyhow, would love to see the further Progress when you`re back home Nils
-
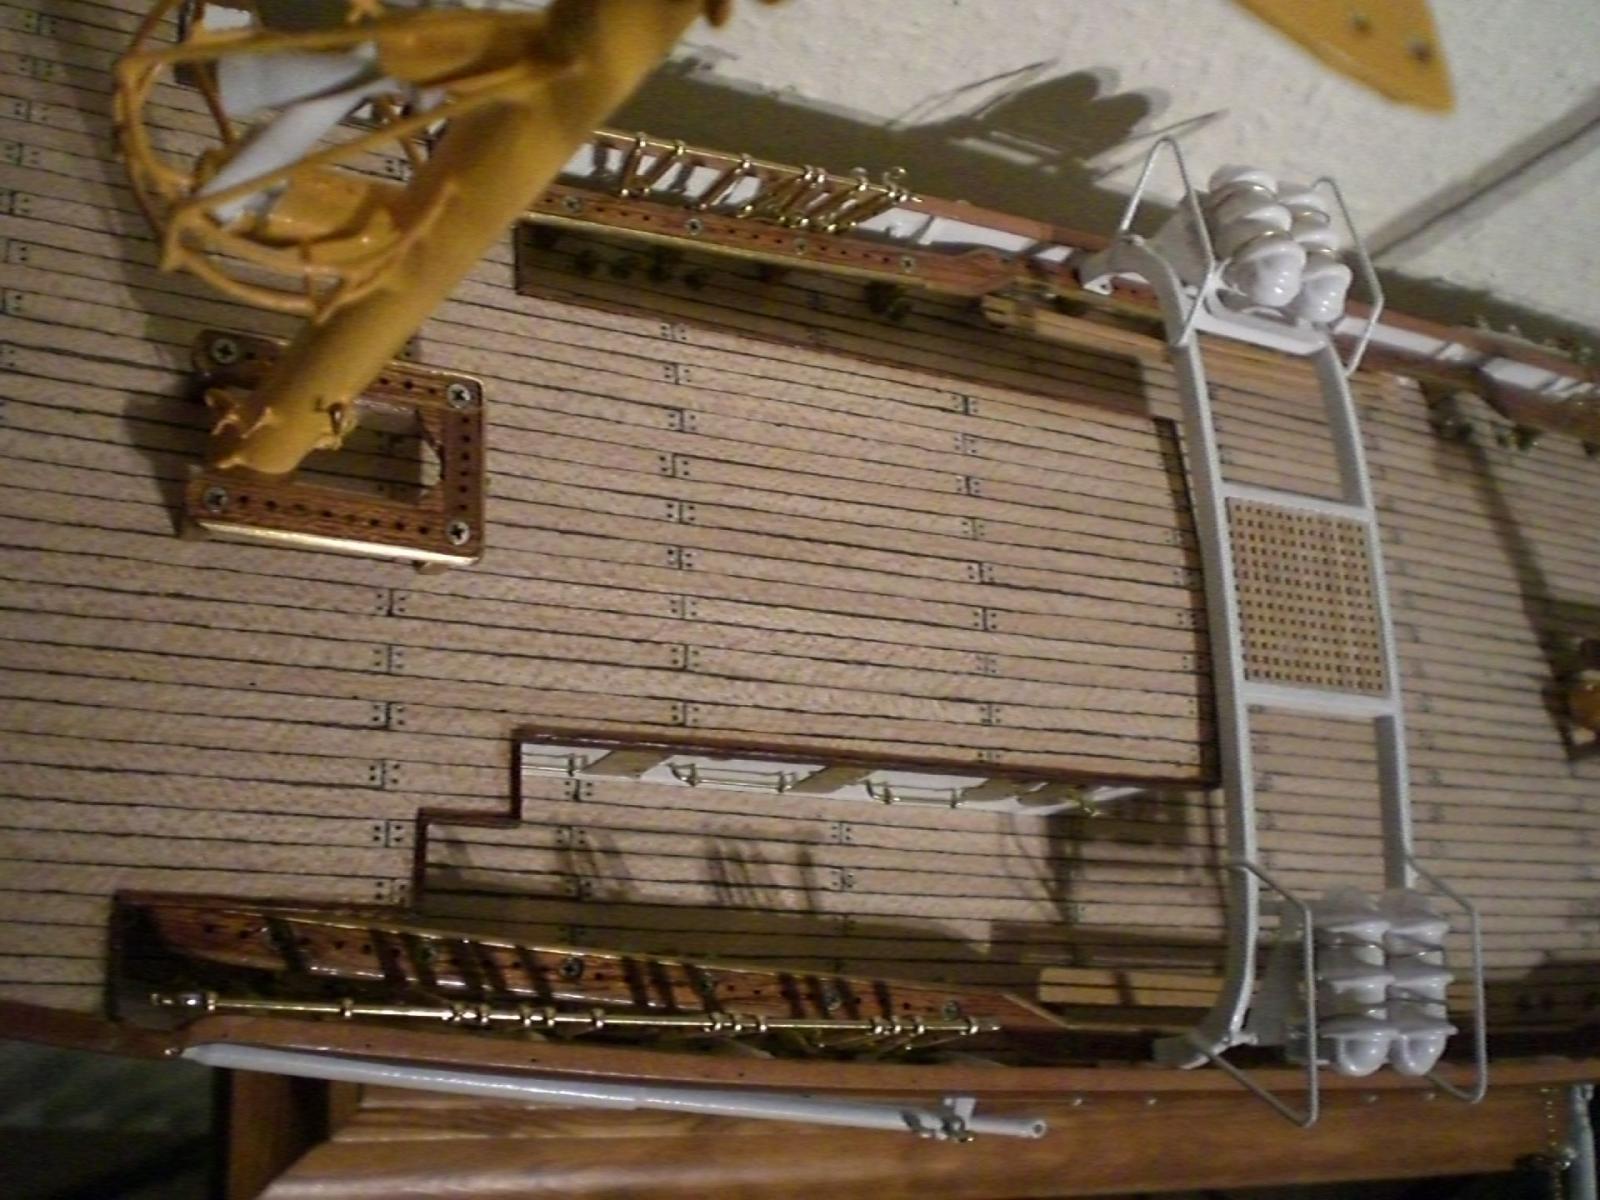
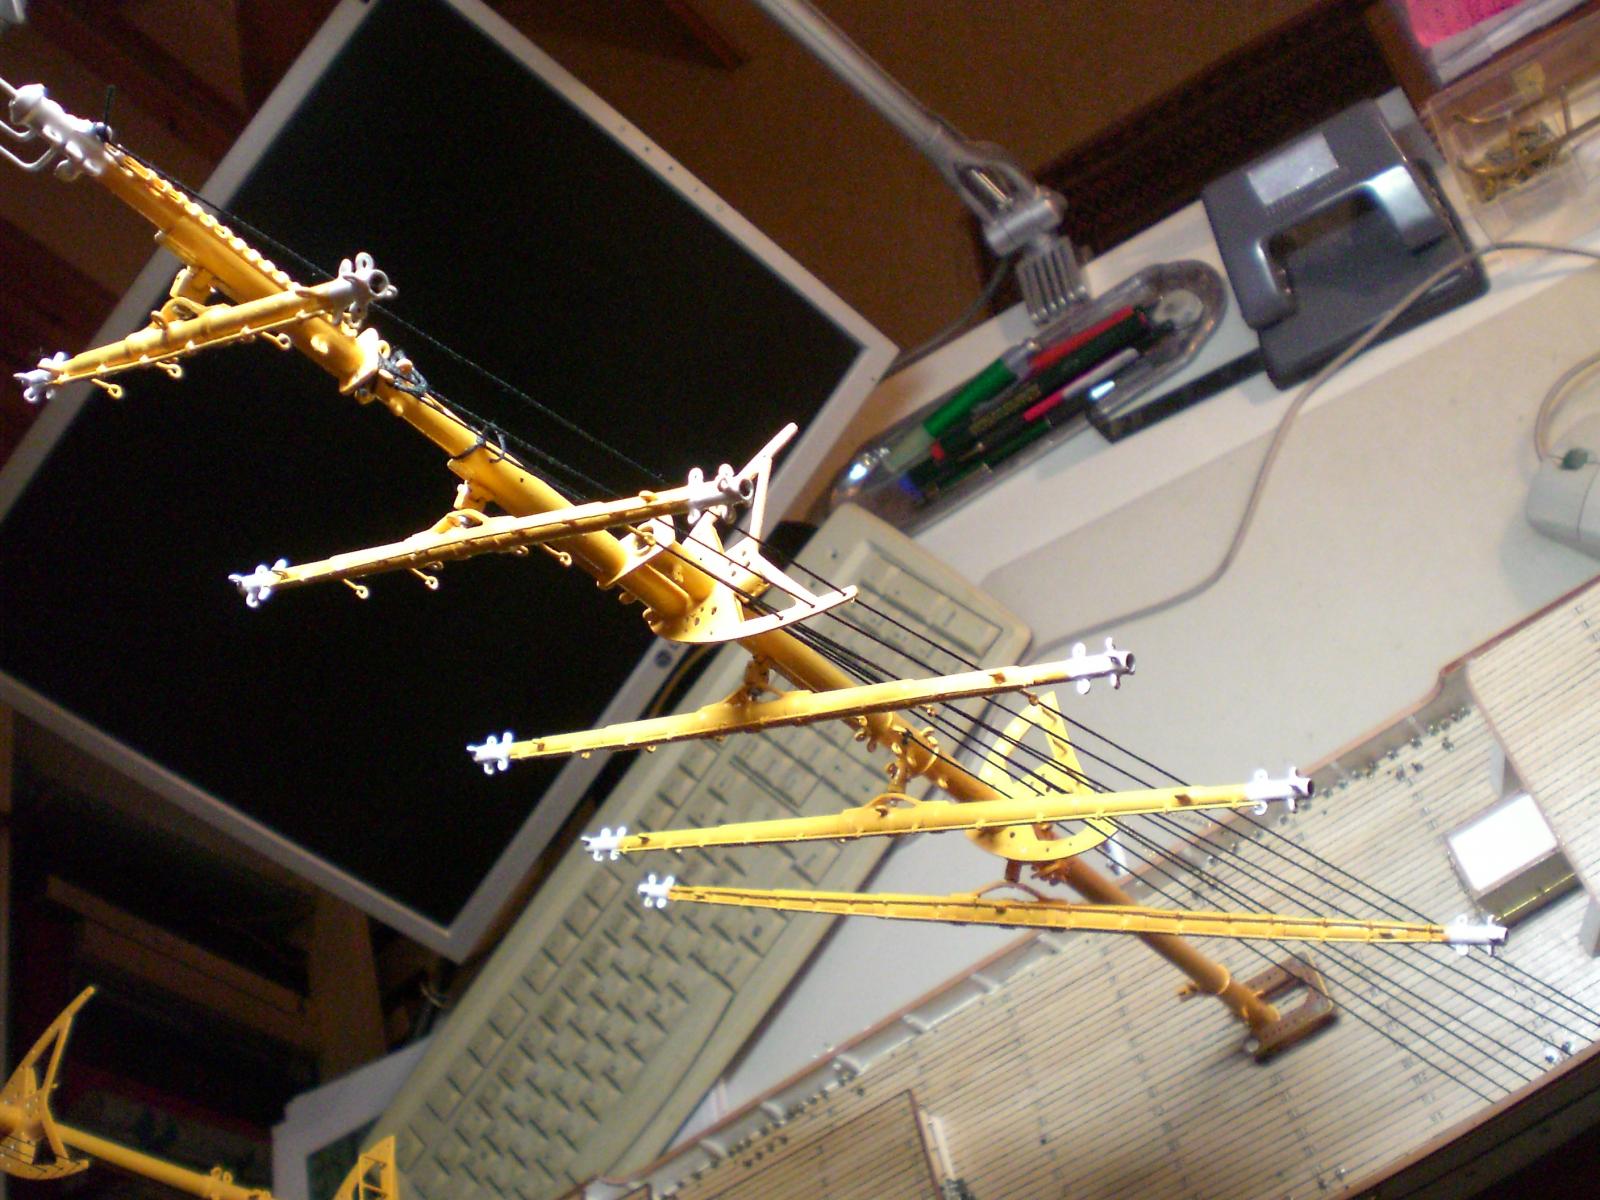
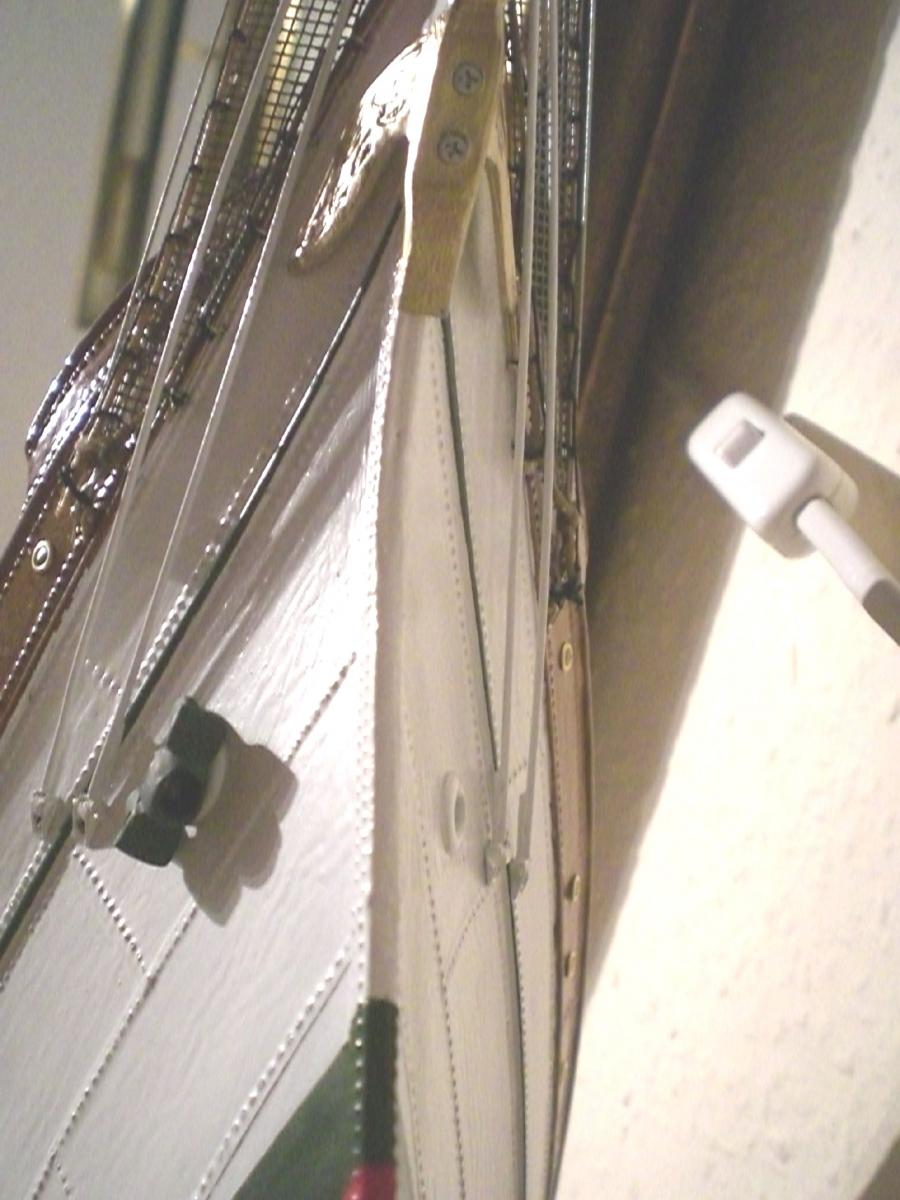
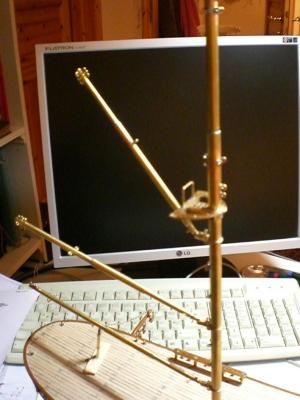
build log part 24 Preparing for the captains Launch (Pinasse 9,2m ) the Yards have to allow bracing to utmost Position before they touch the backstays checking alignment through topgallant platform before the final backstays are set the boats Derrick attached to the mainmast the mizzenmast bears no yards have the most masting parts done... the ventflaps for the scupper openings are attached my master raft Containment template for moulding the semi halves BUild log part 25 to follow.... Nils


- 222 replies
-
- 8
-
-
- gorch fock
- barque
- (and 2 more)
-
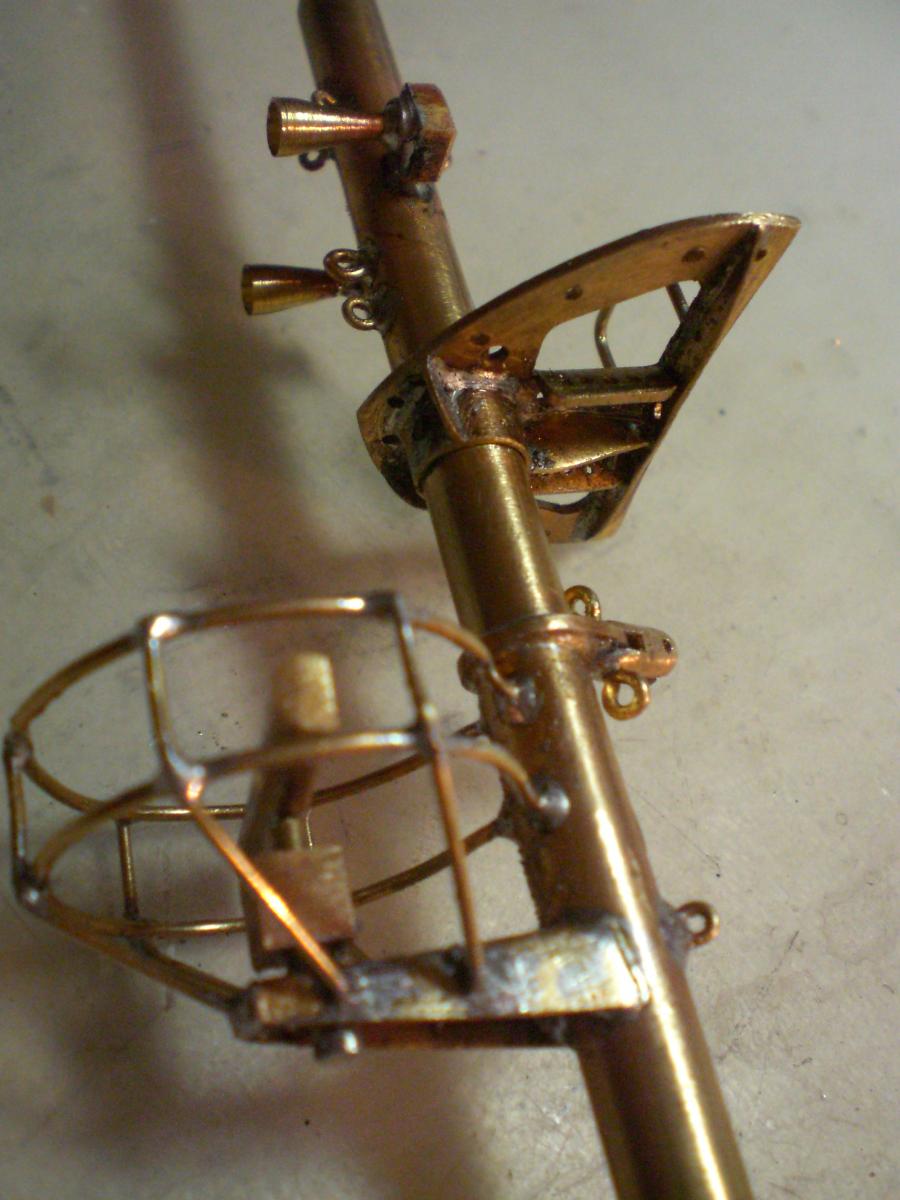
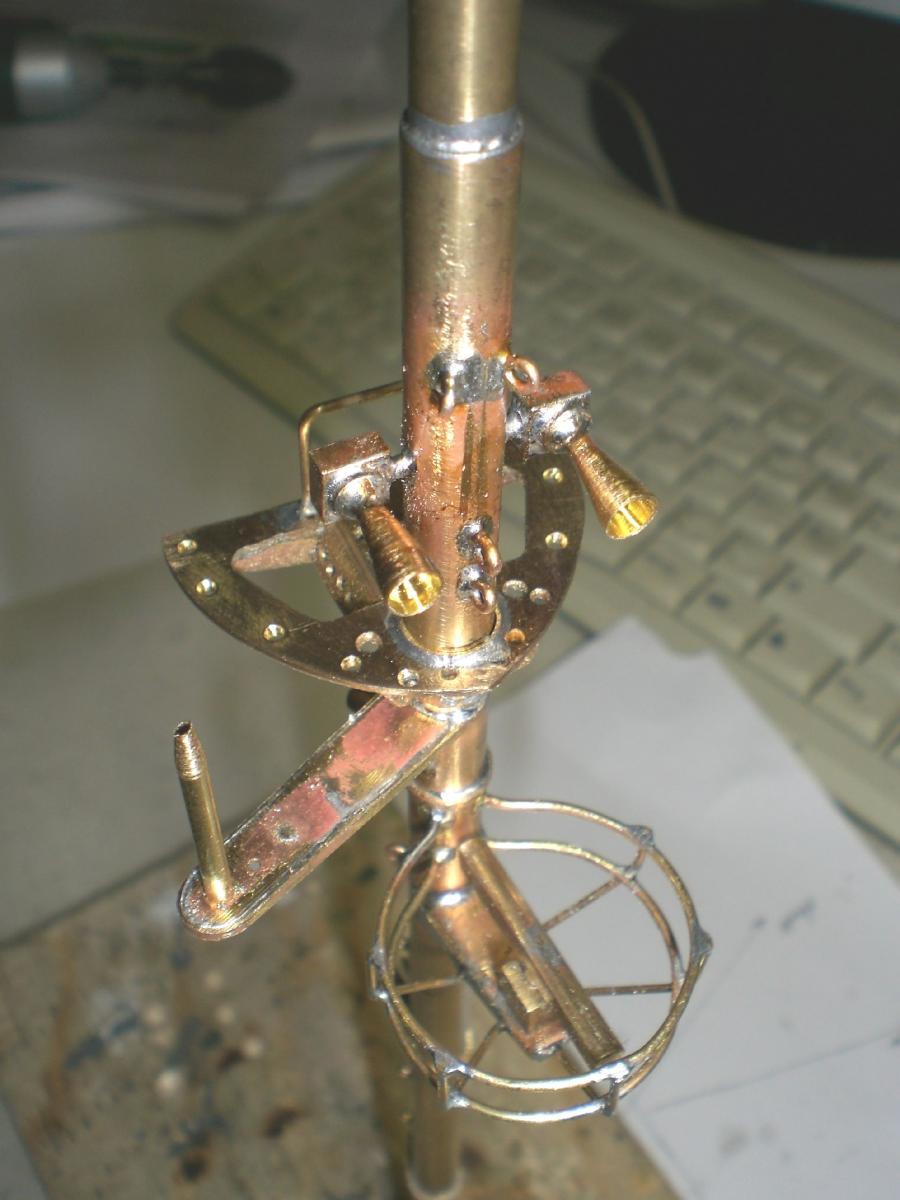
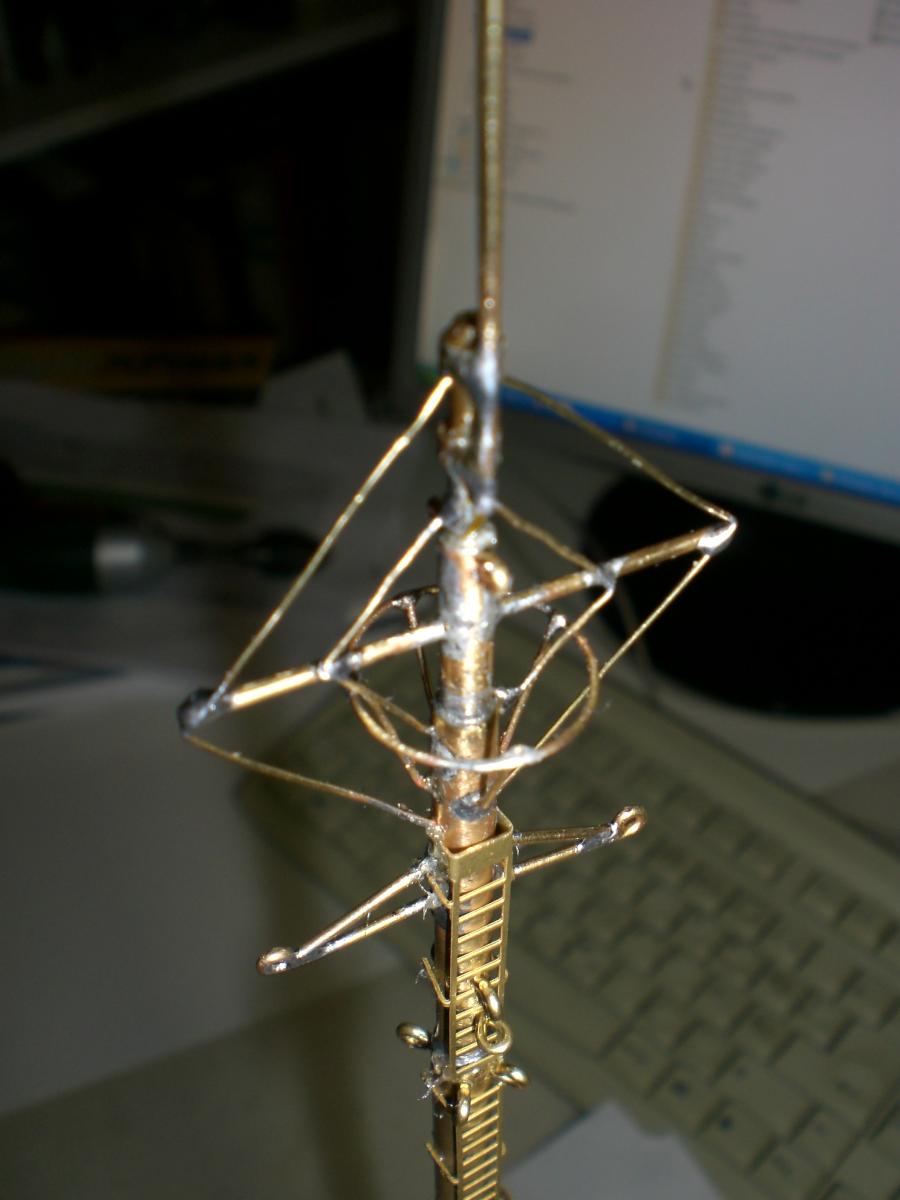
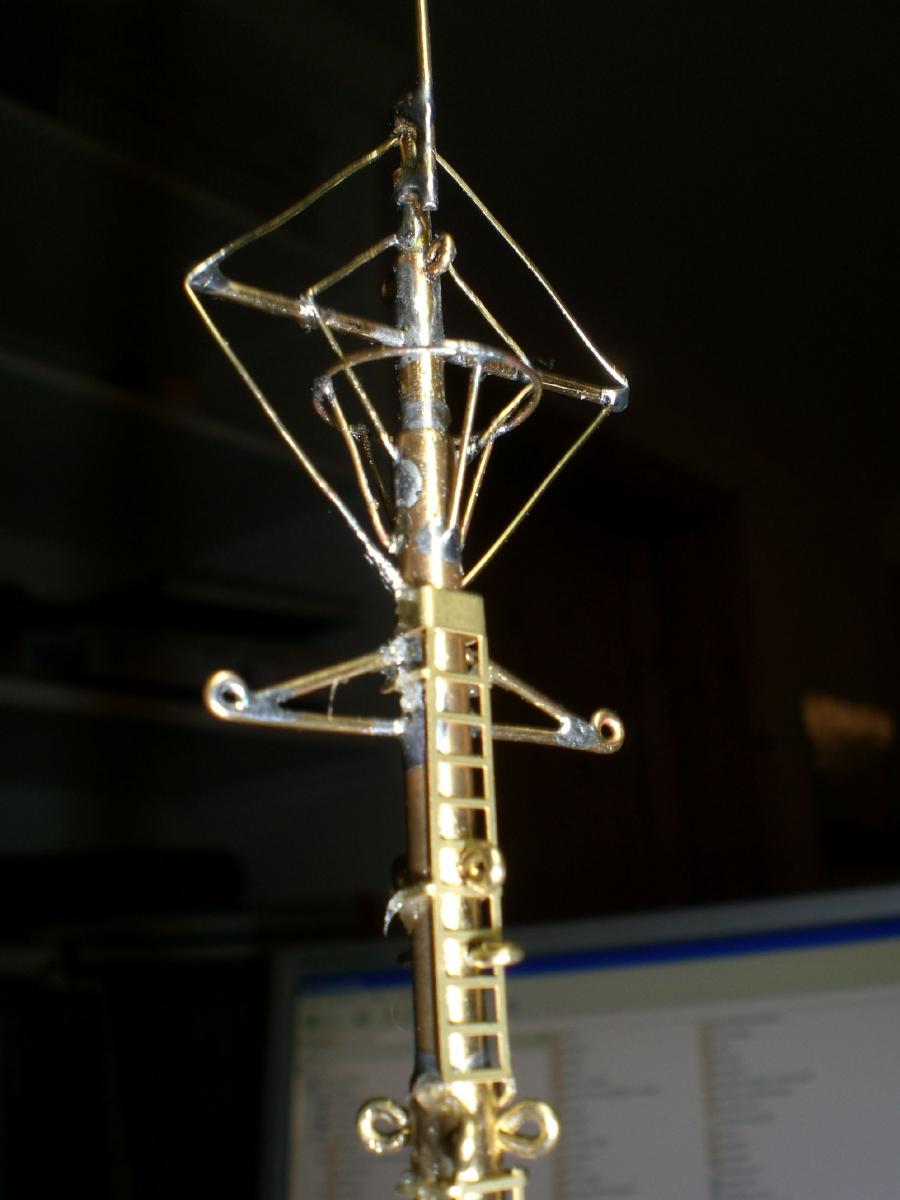
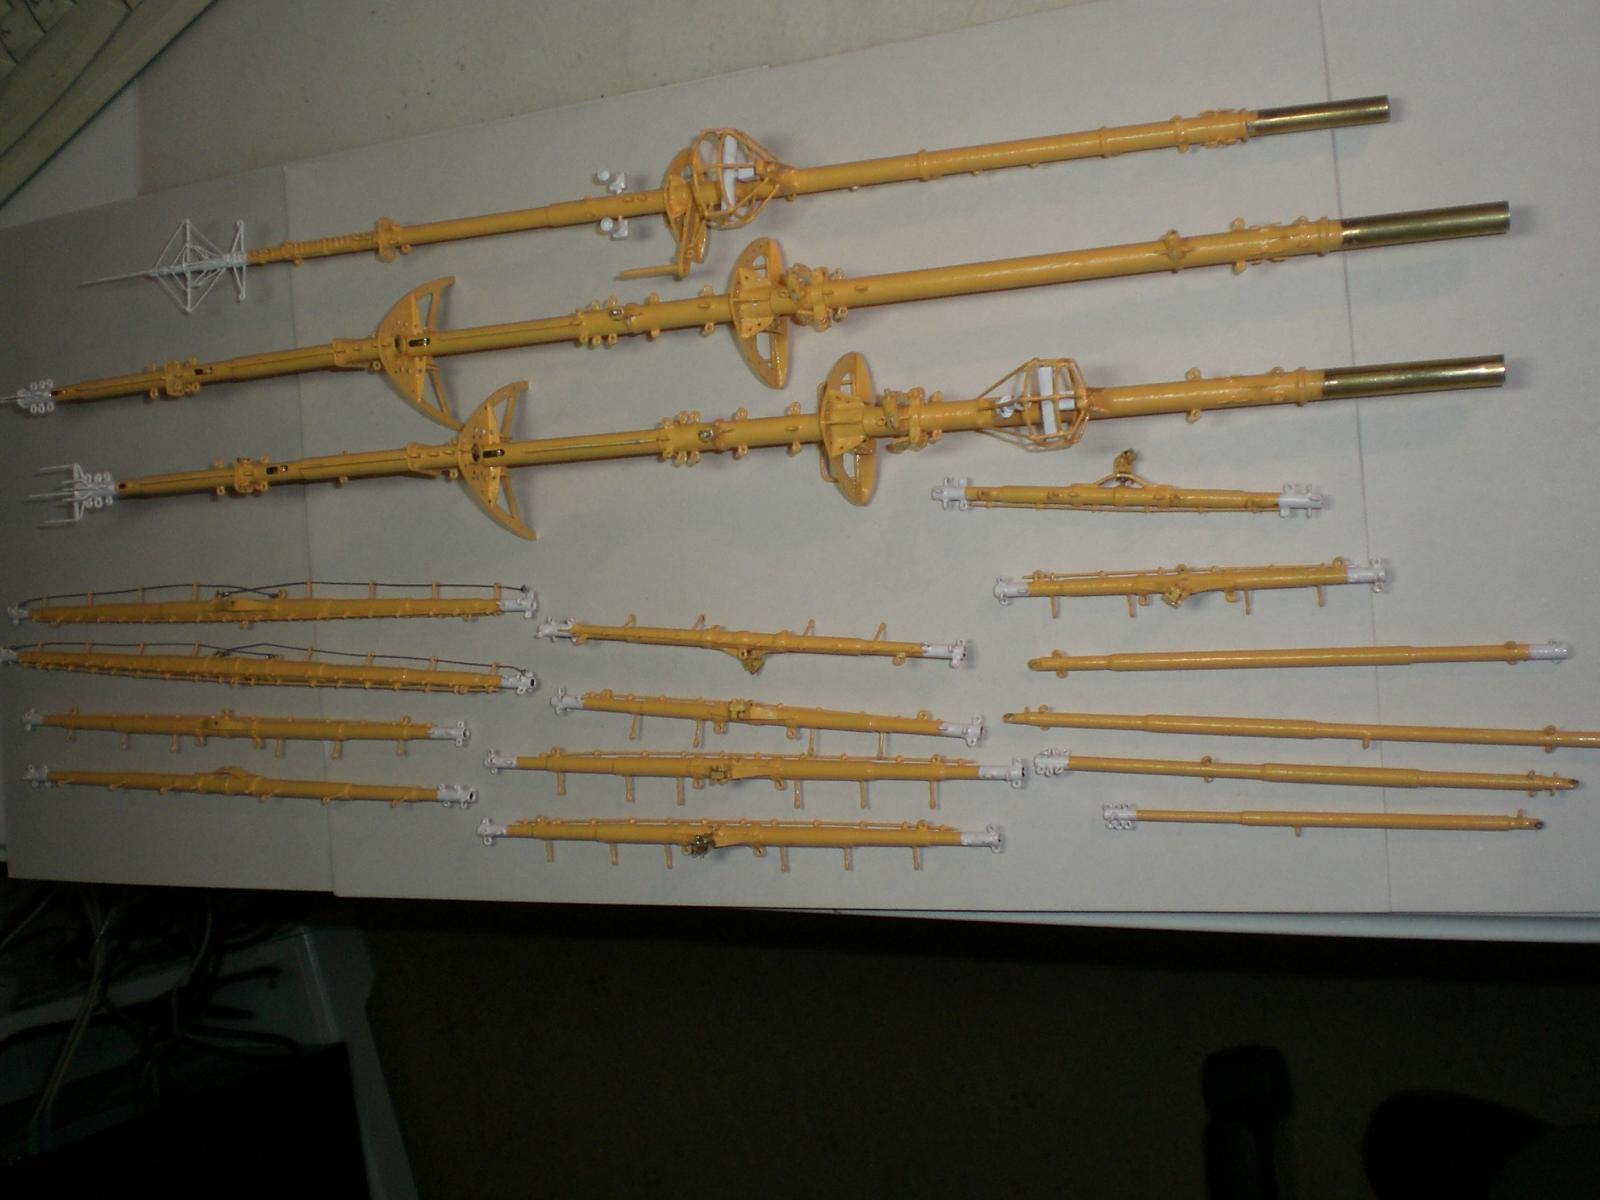
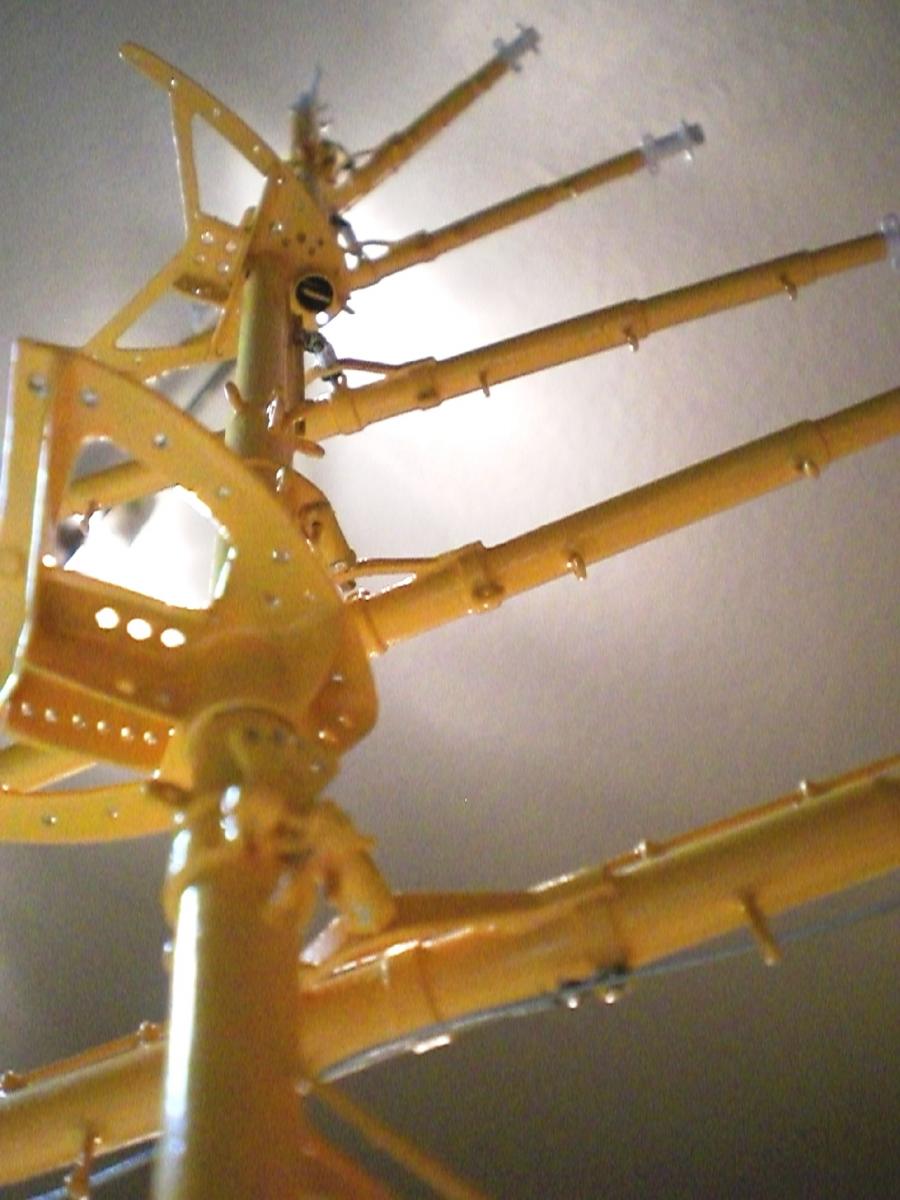
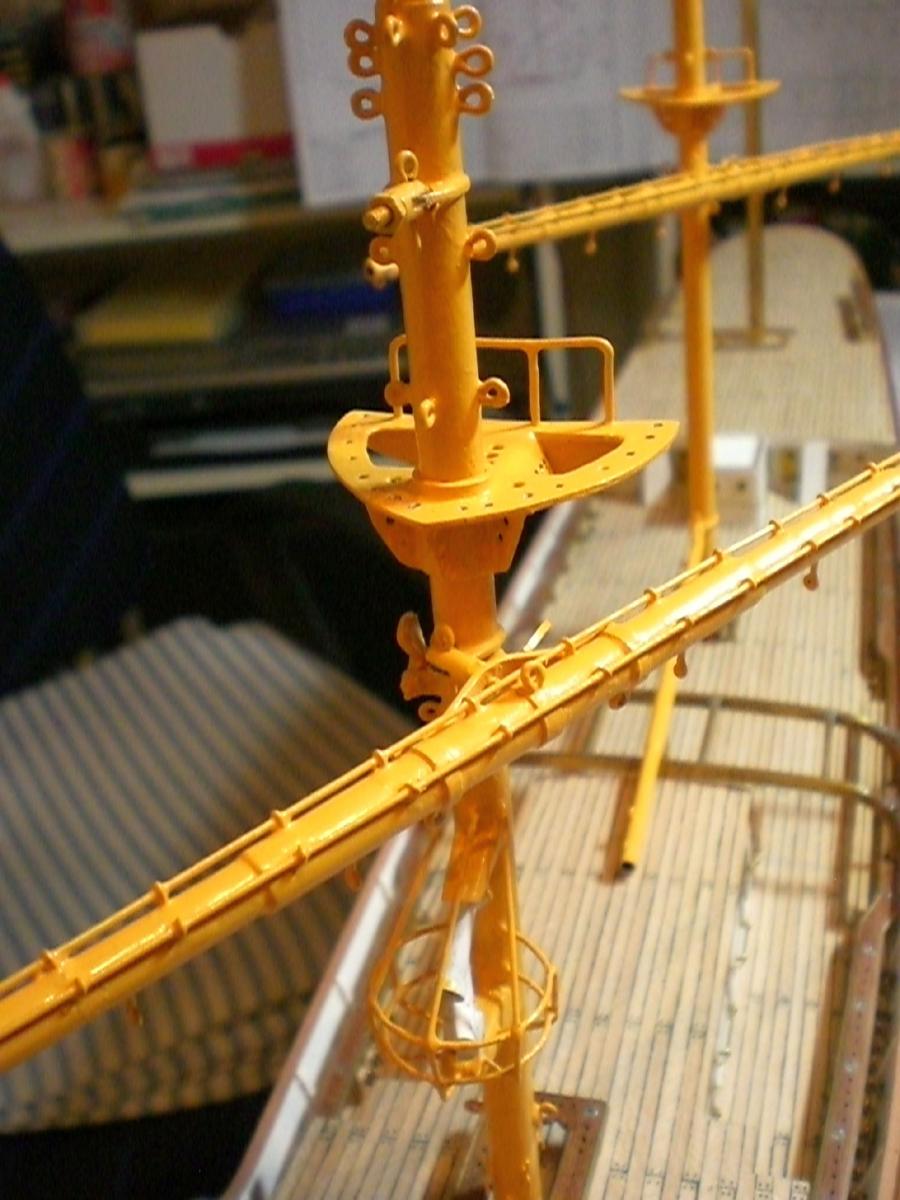
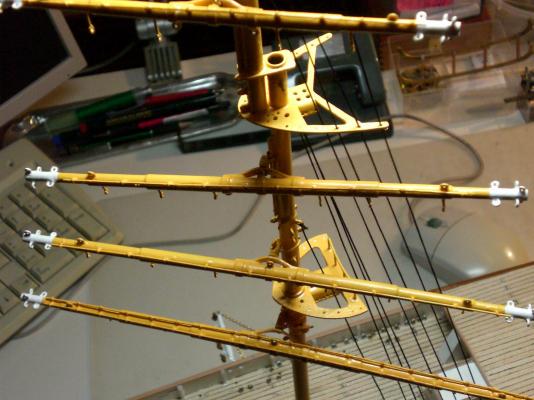
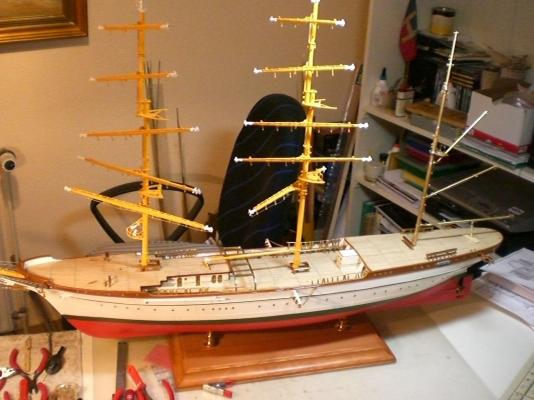
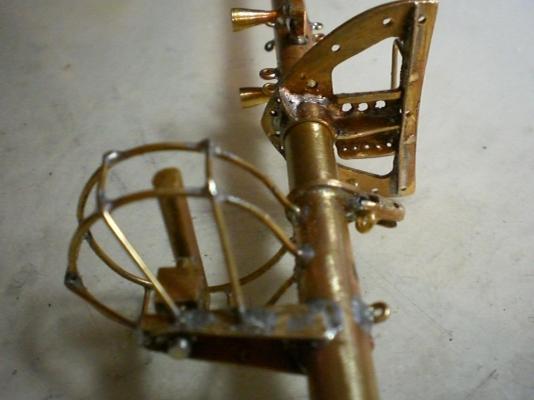
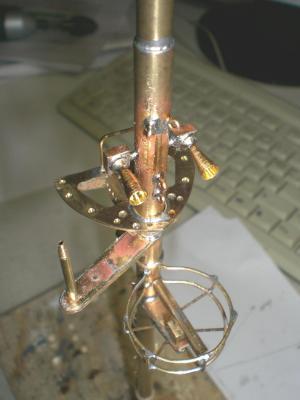
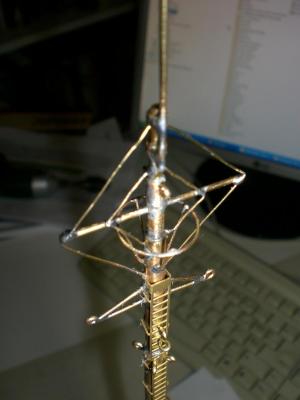
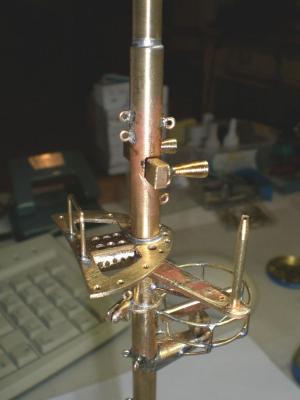
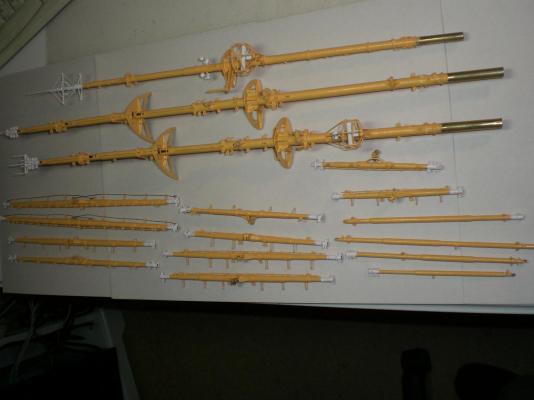
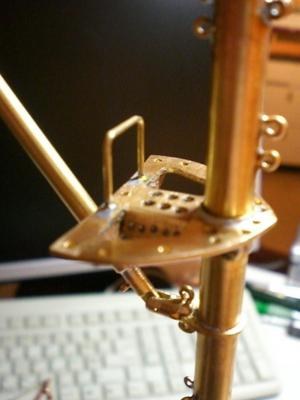
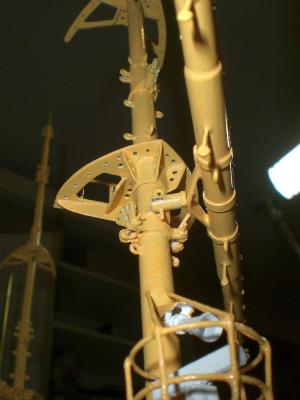
build log part 23 Here the mizzen mast unpainted.... hooters, Radar station lower platform antenna top antenna Mast top middle gaff boom bearing set of masts, yards Build log part 24 to follow.... Nils


- 222 replies
-
- 12
-
-
- gorch fock
- barque
- (and 2 more)
-
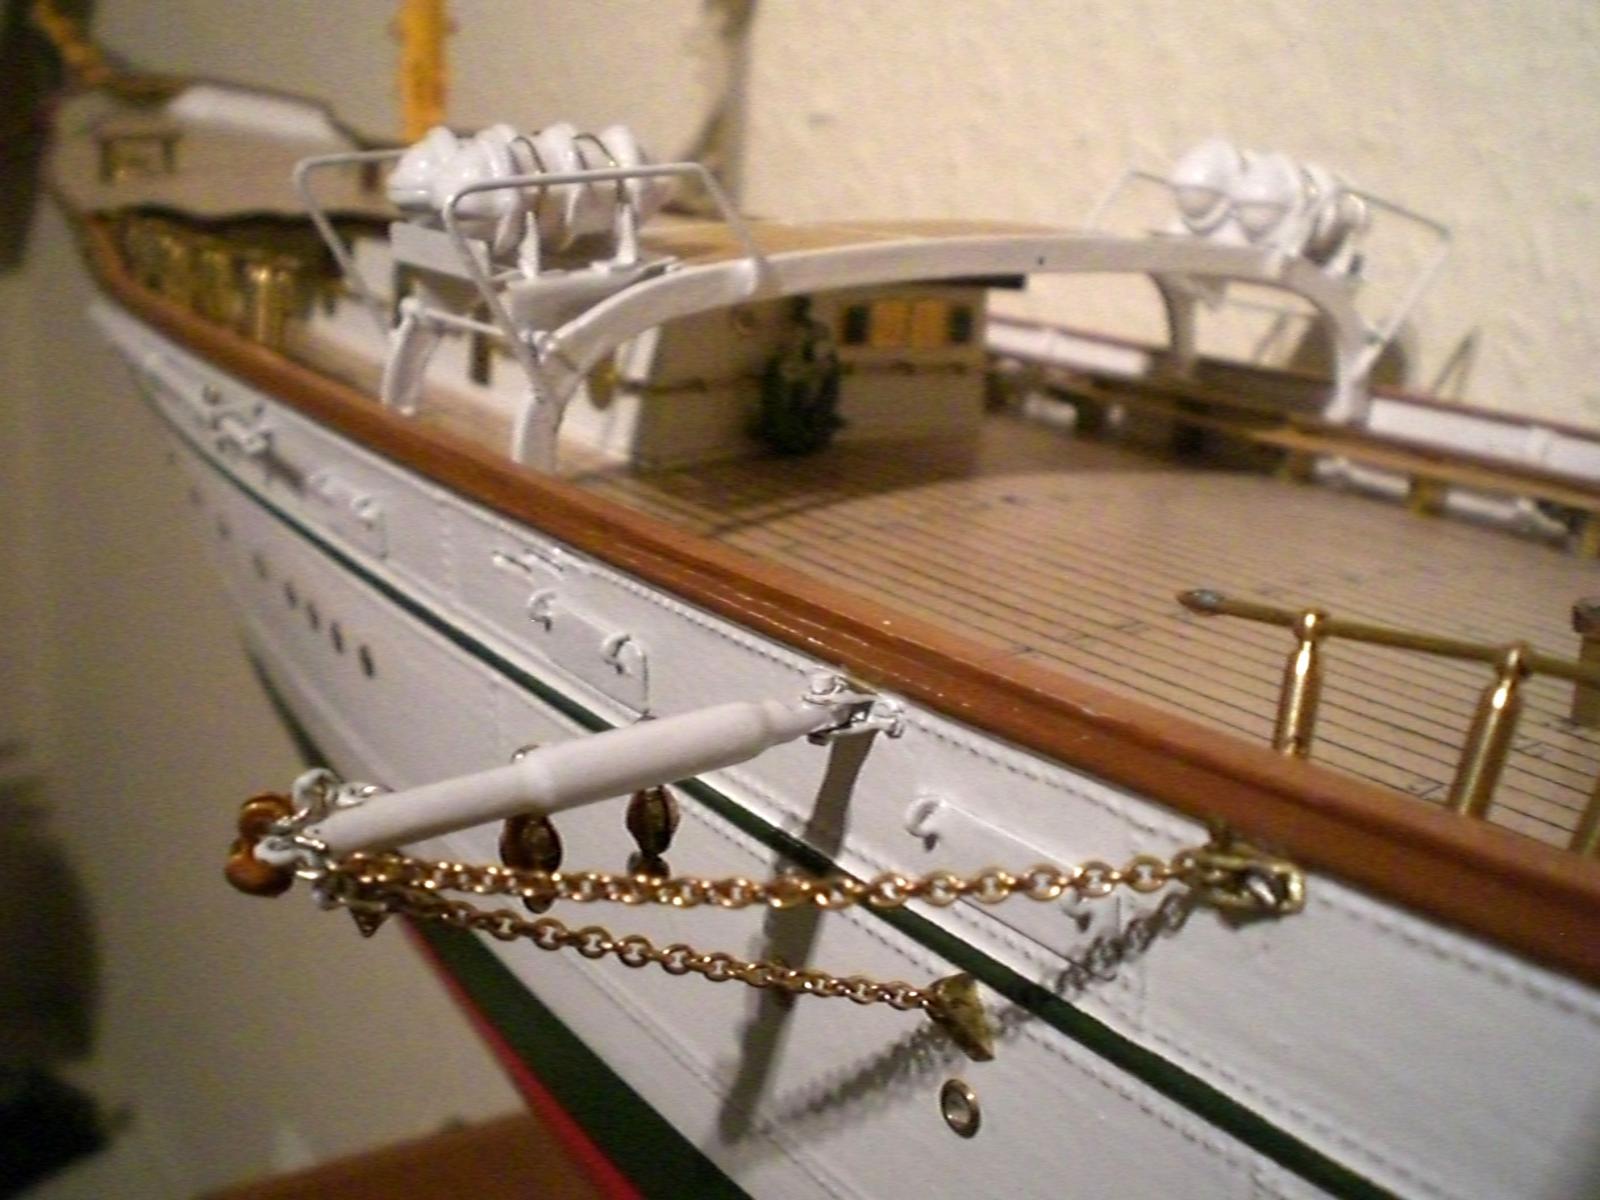
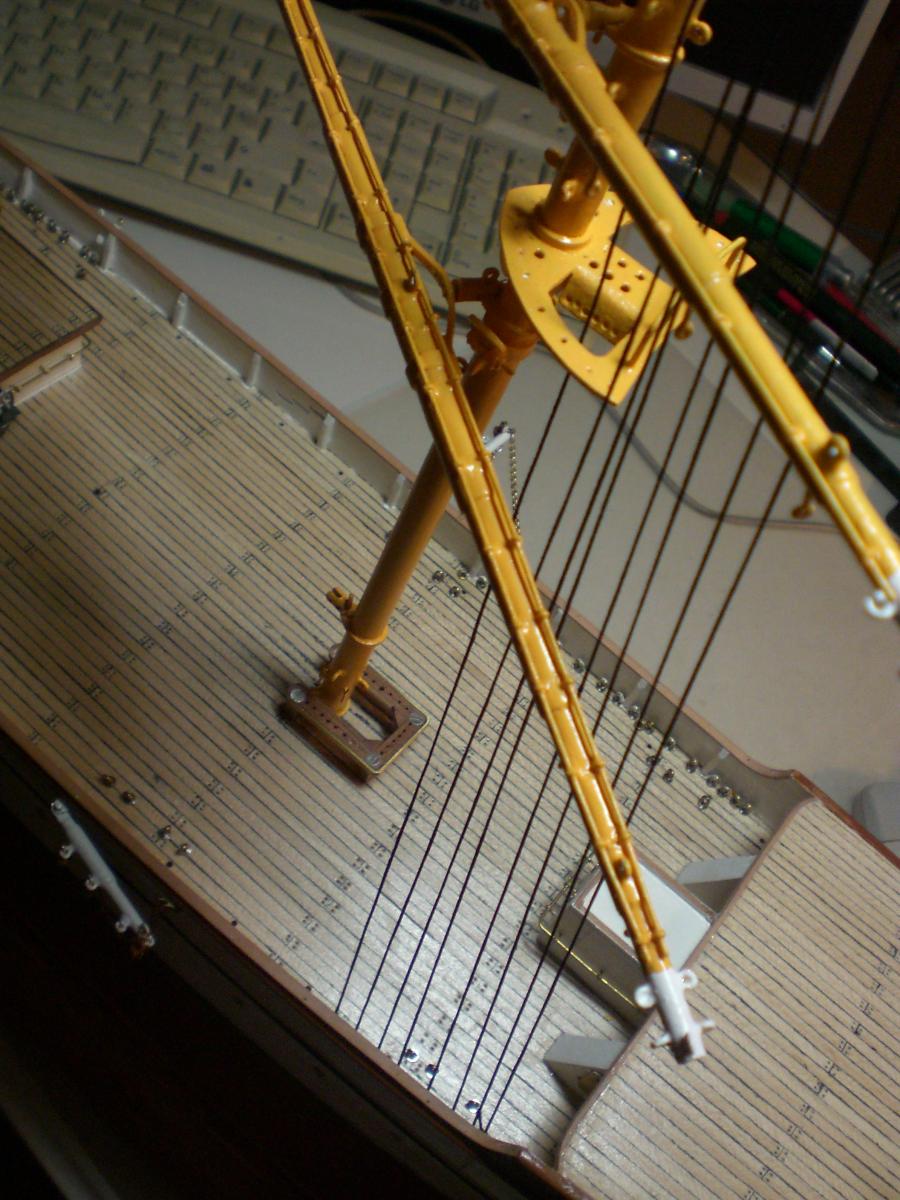
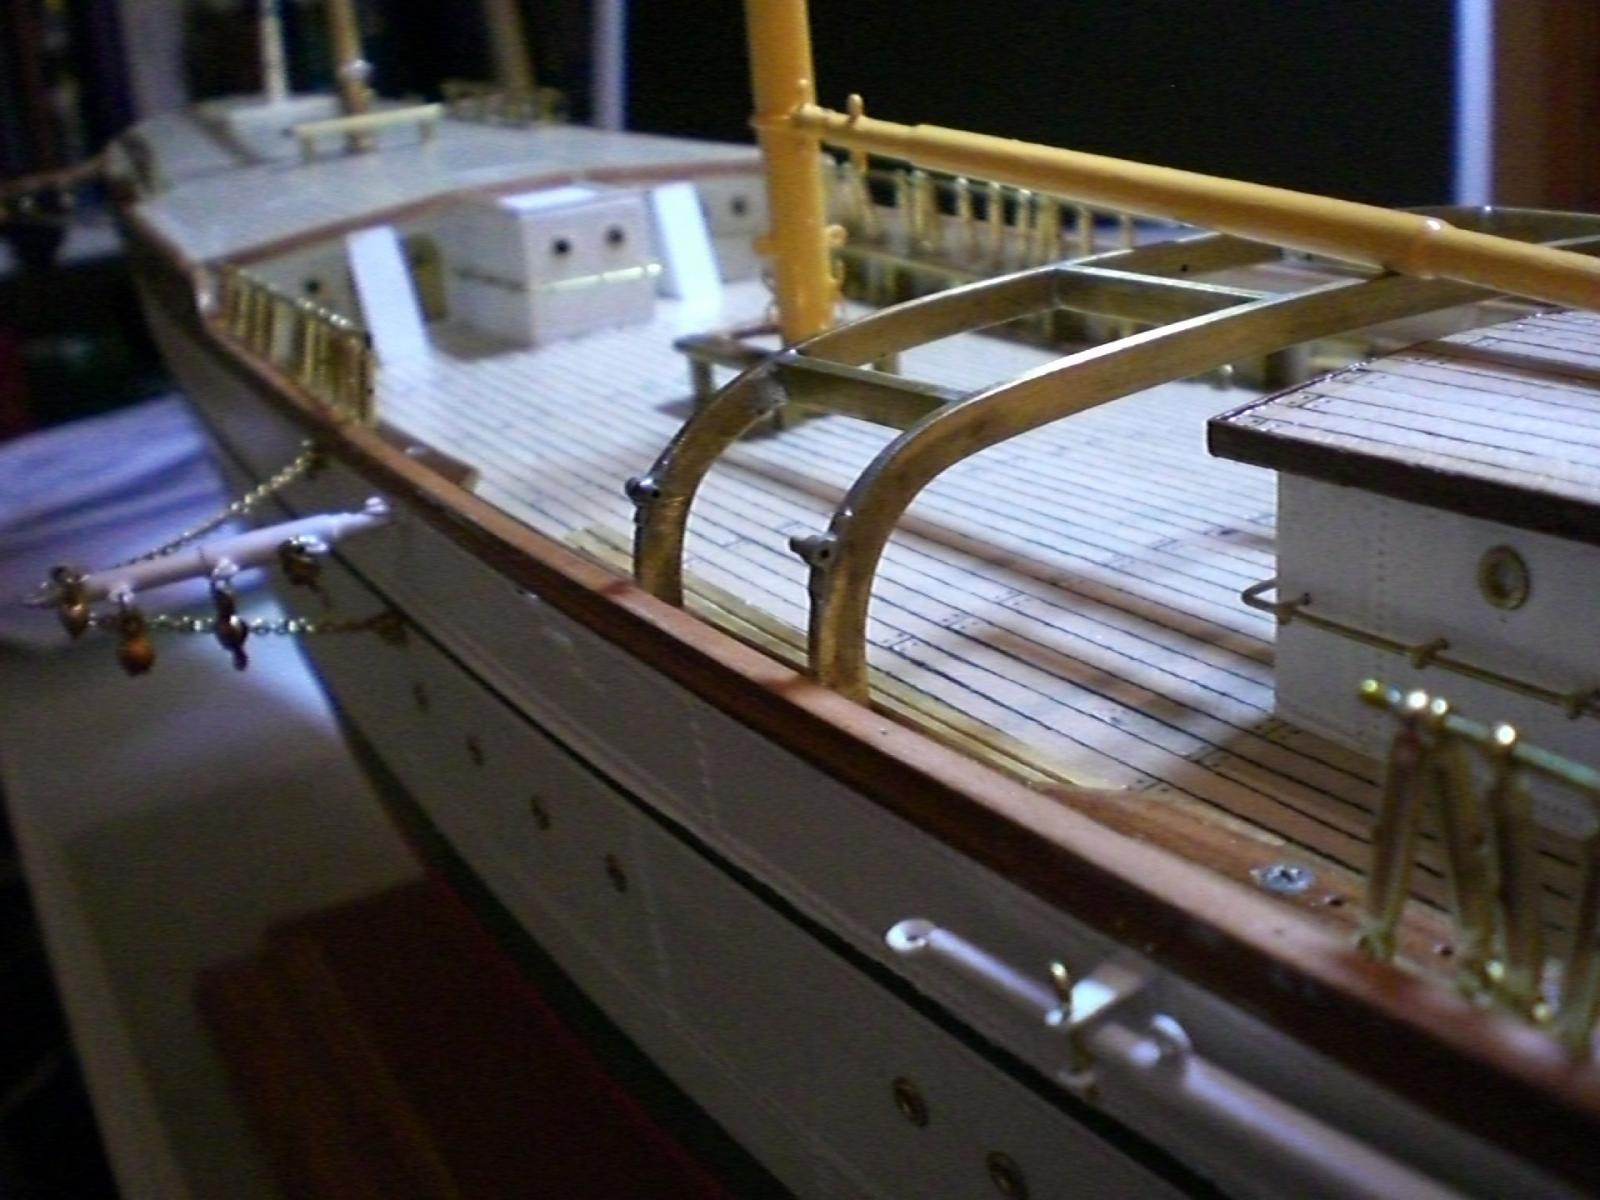
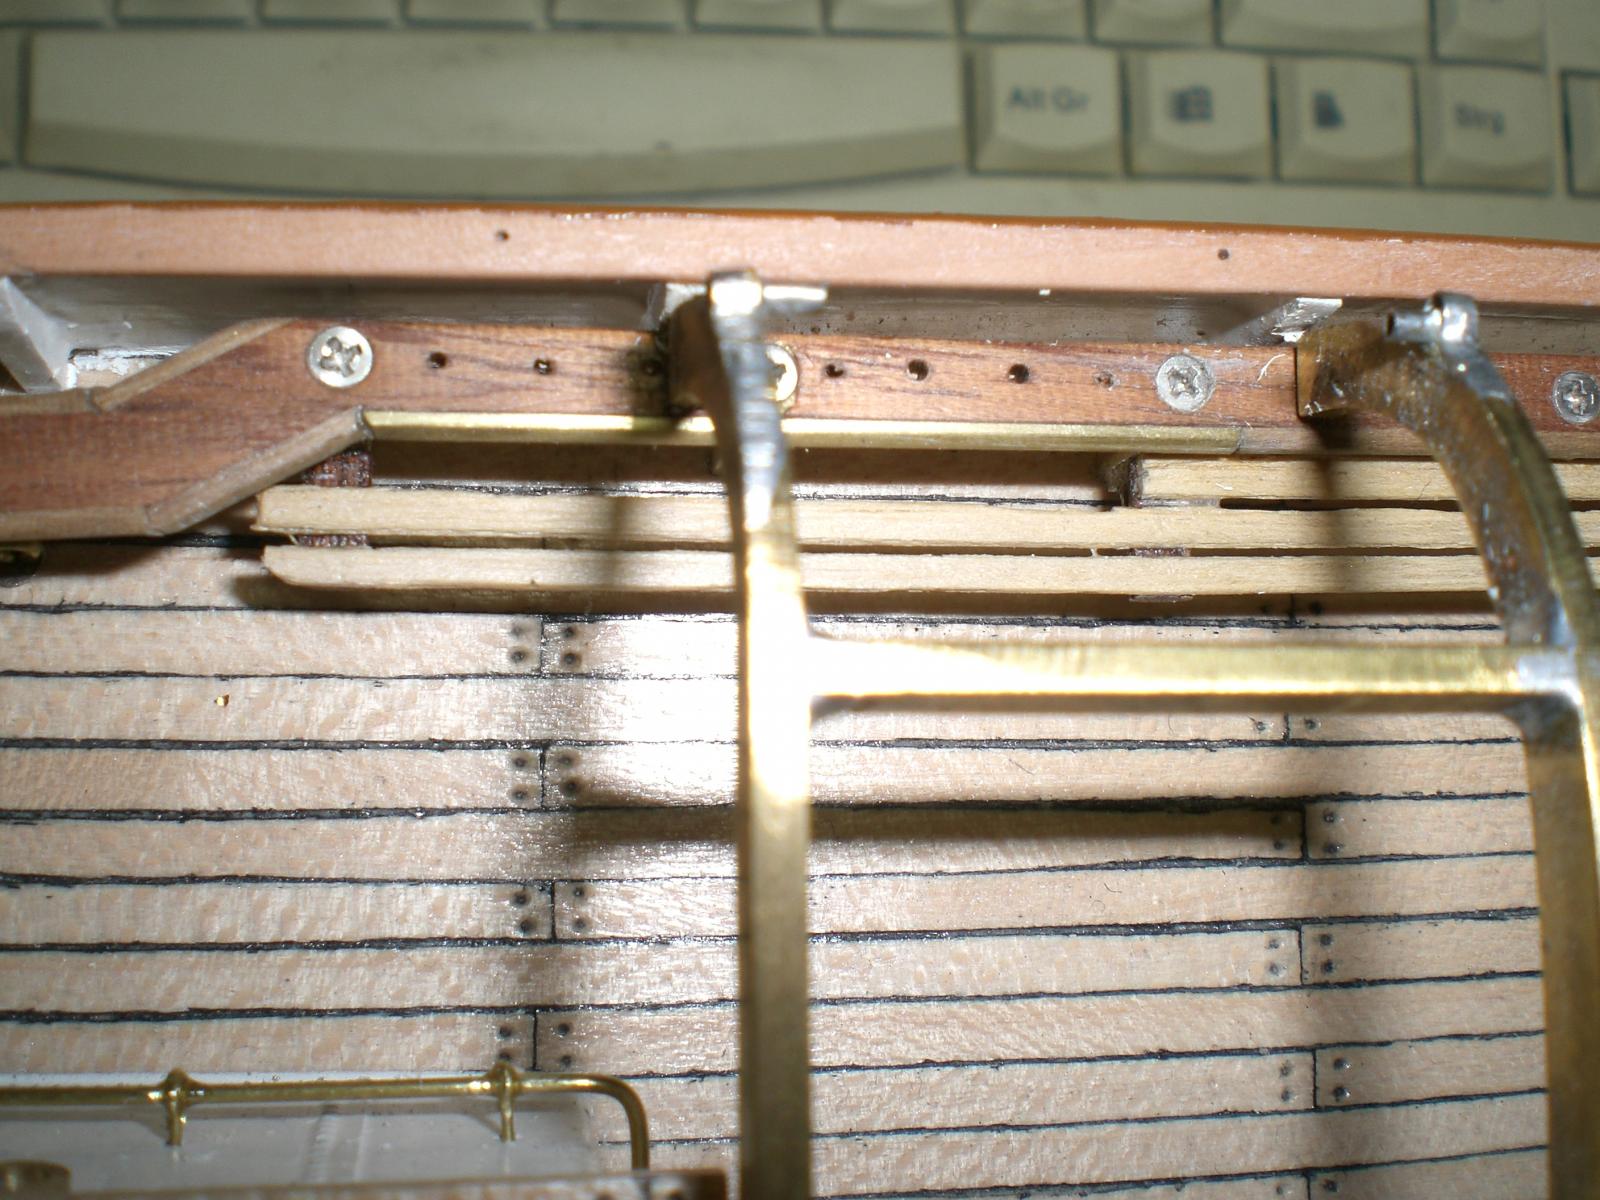
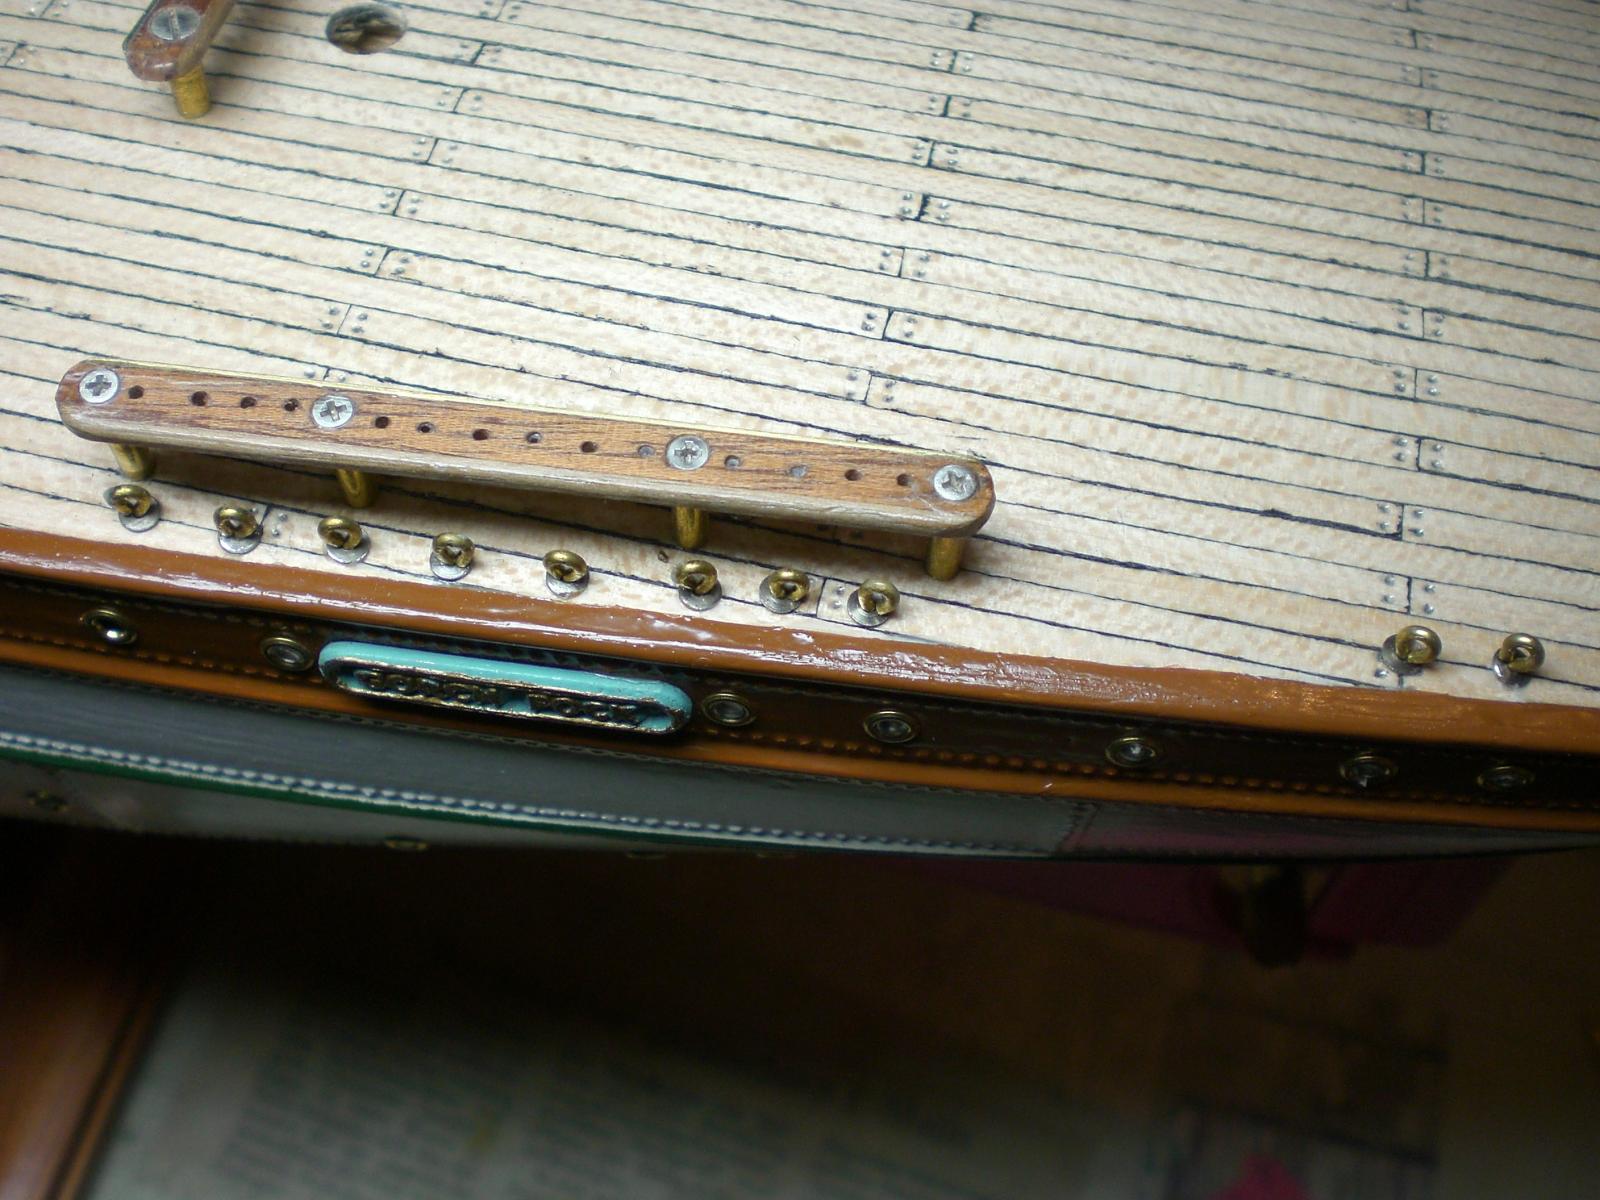
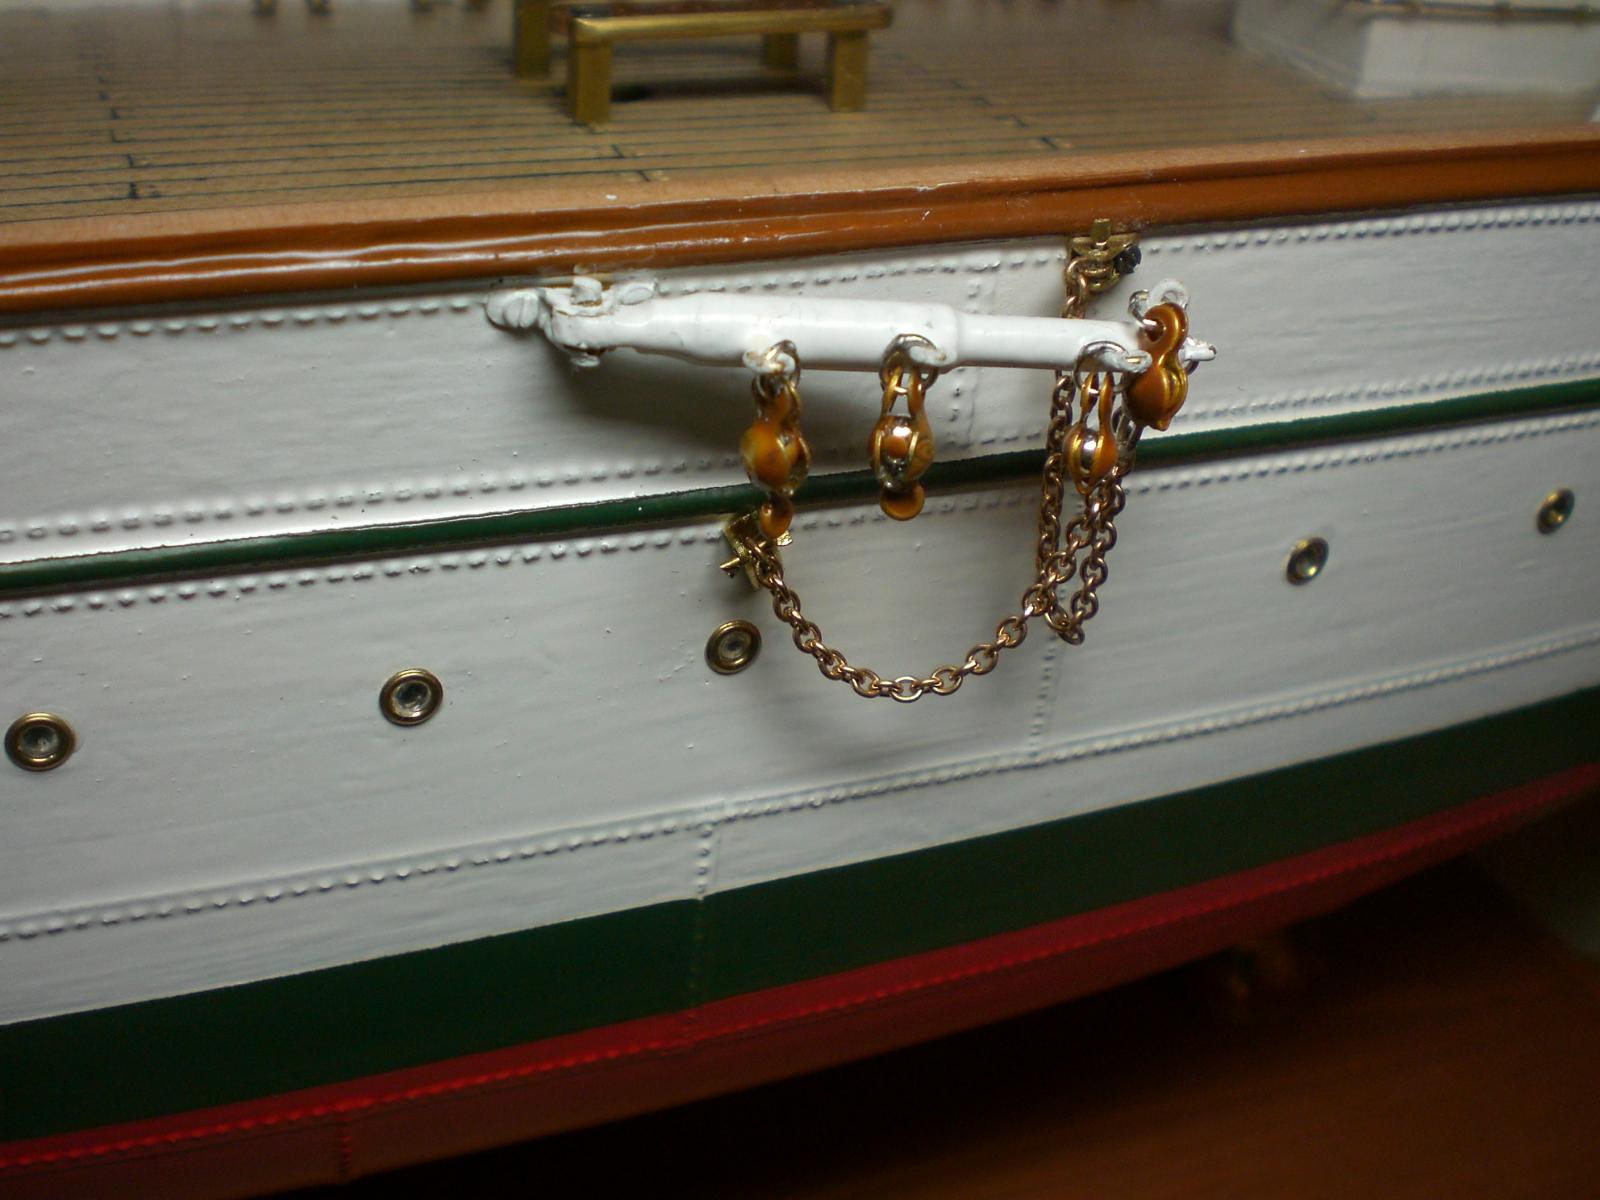
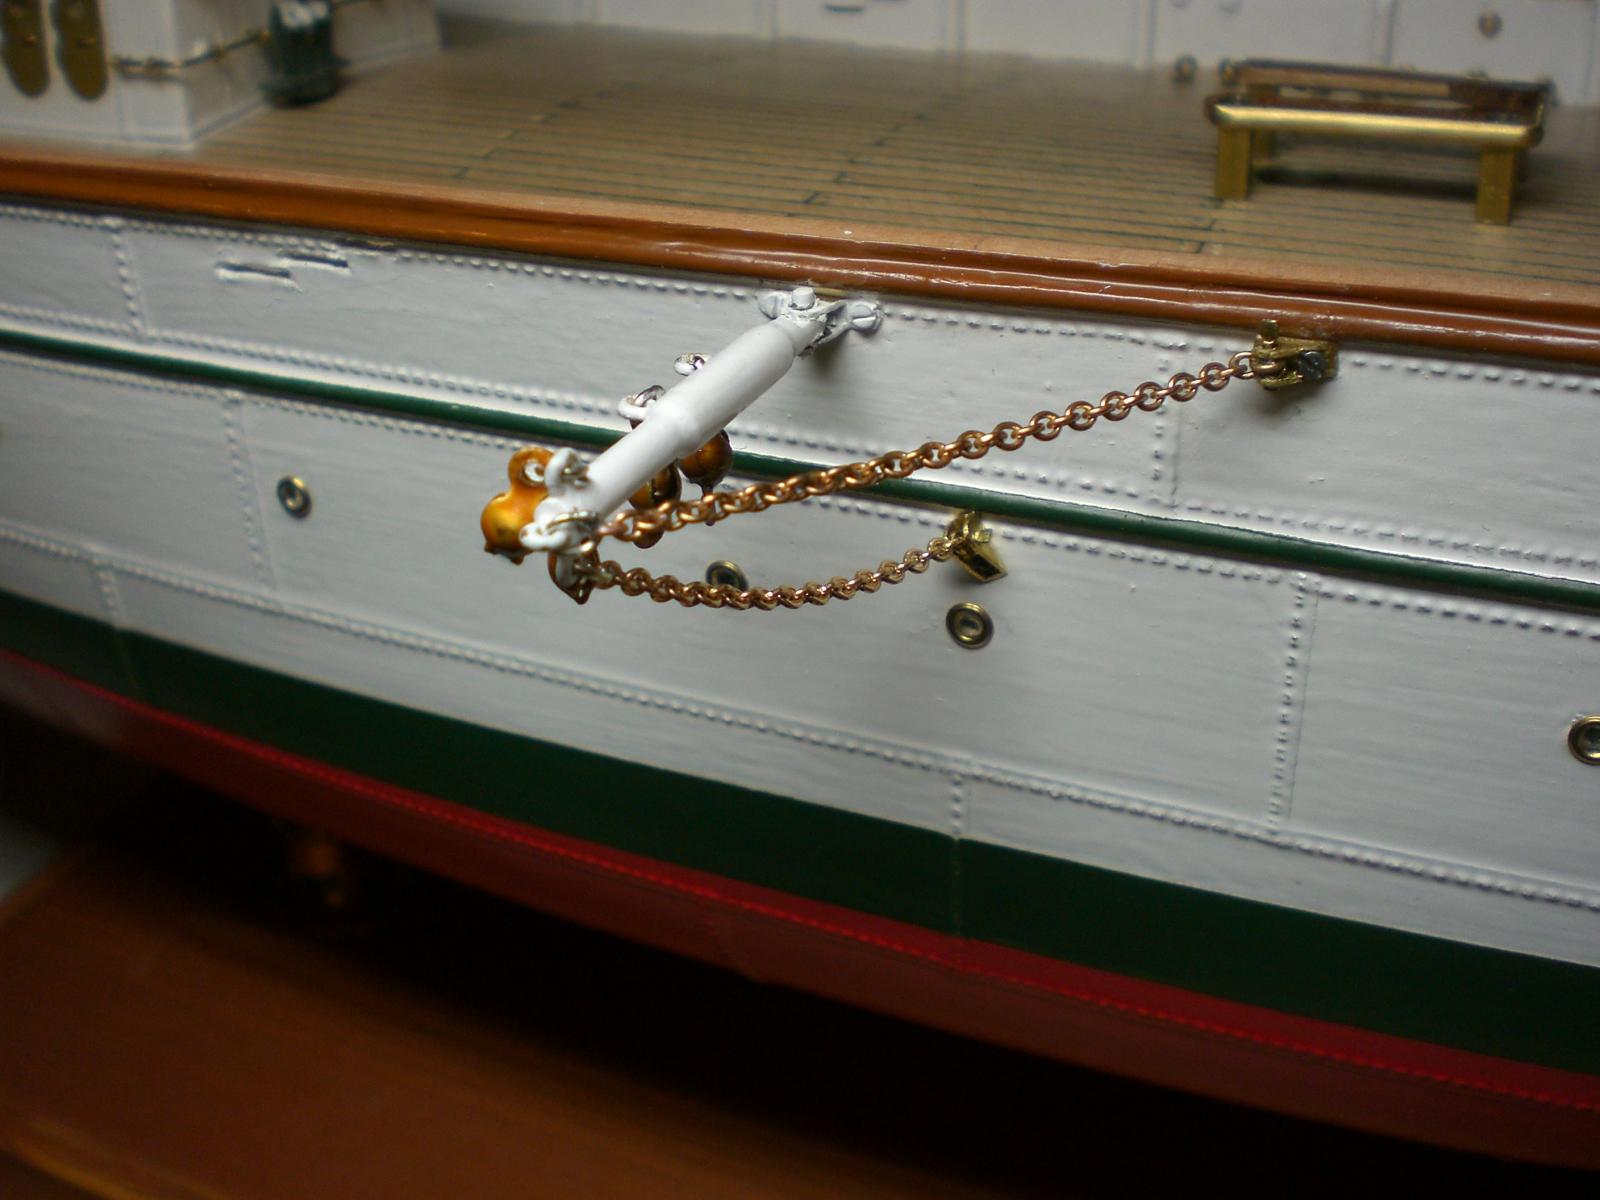
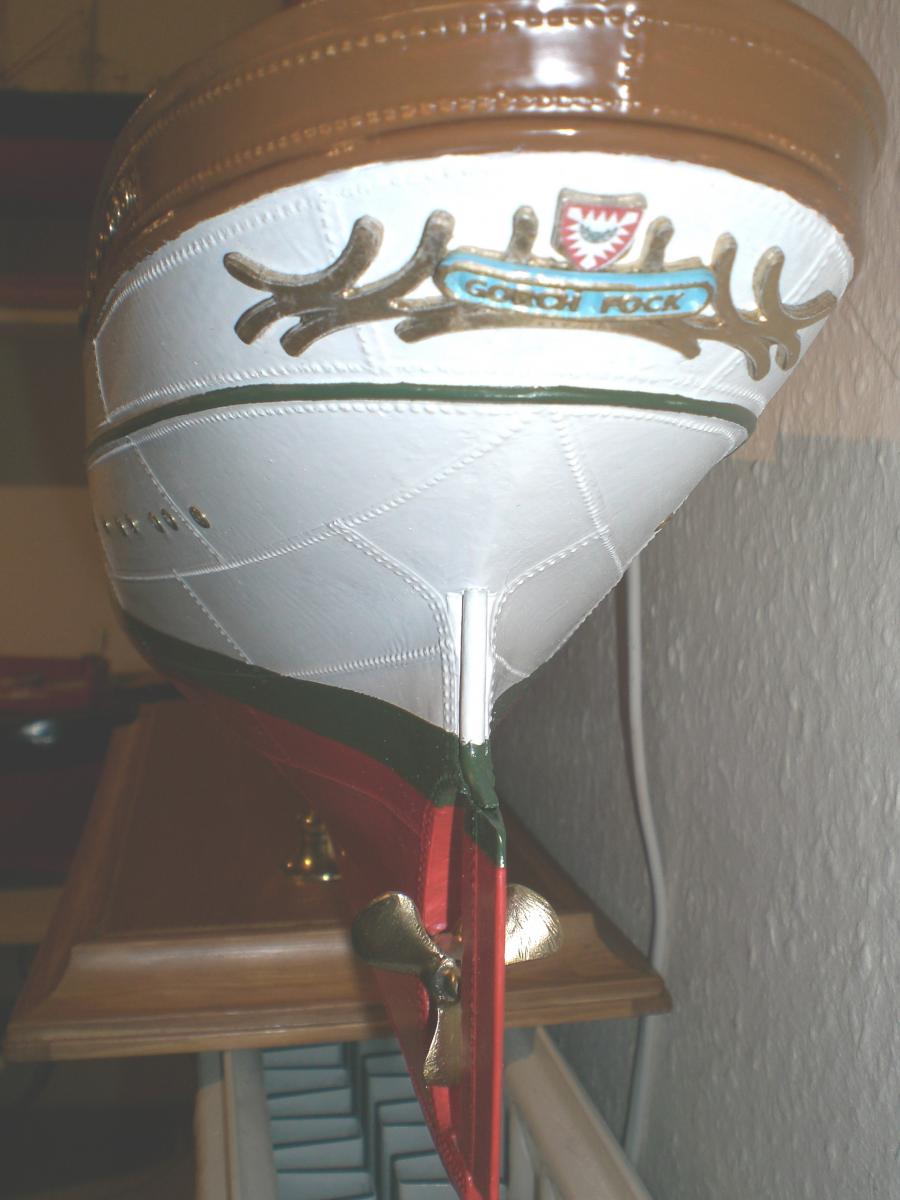
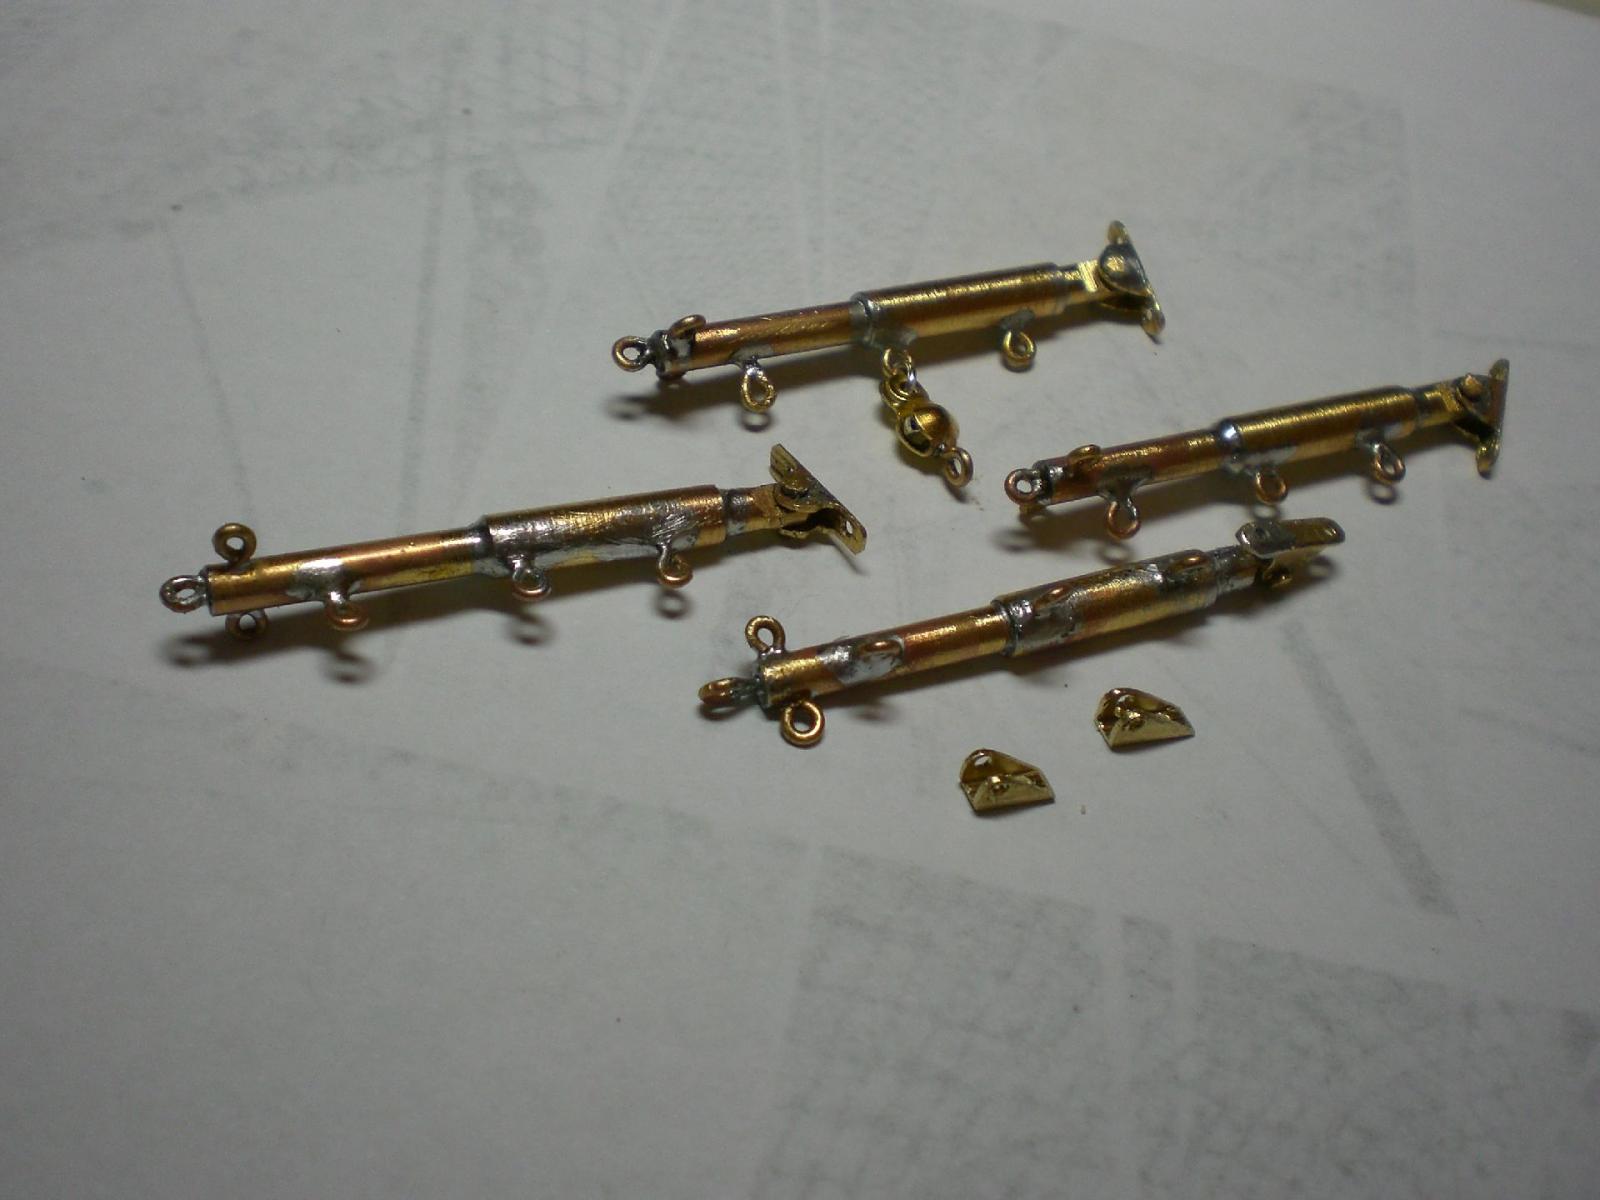
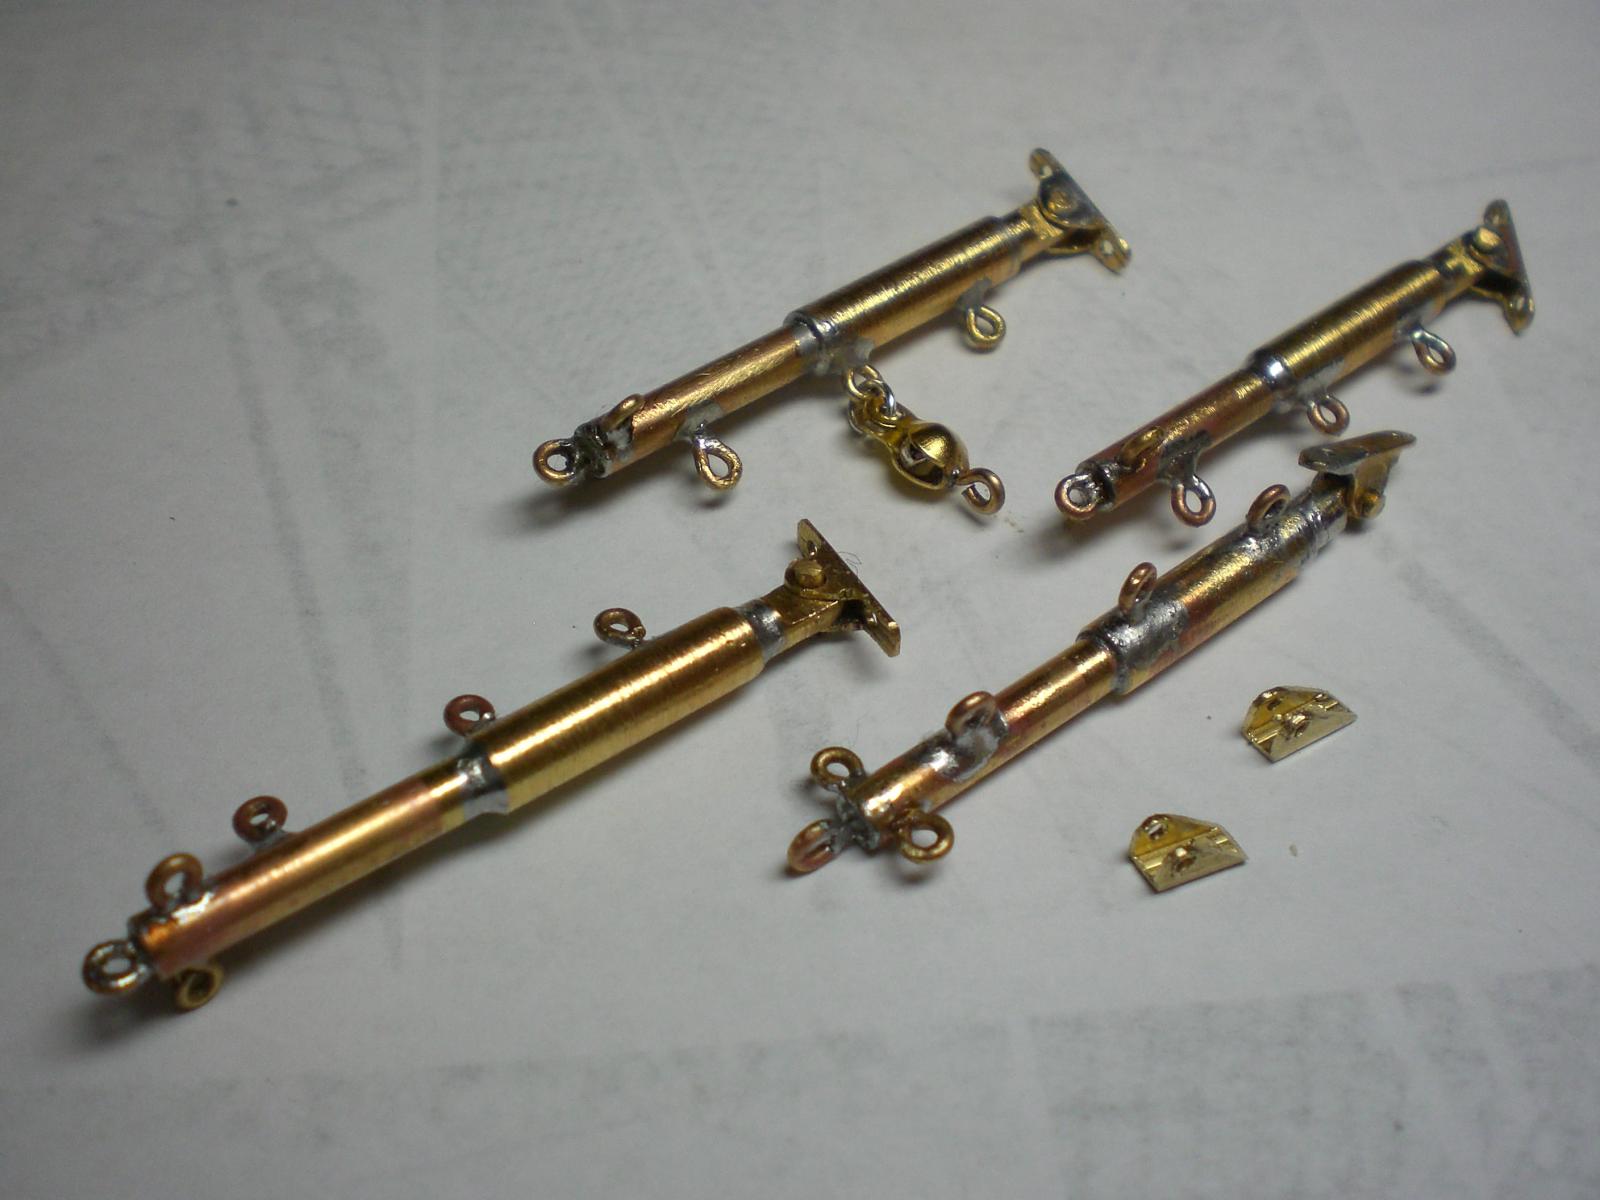
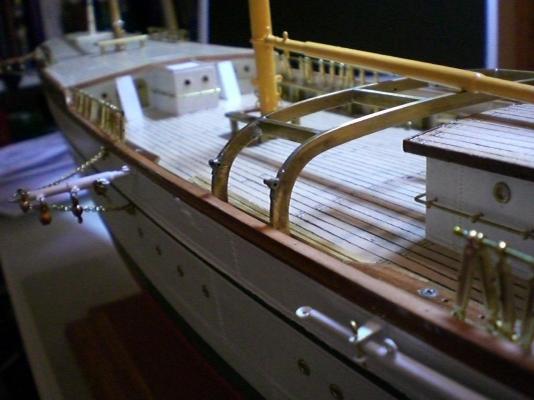
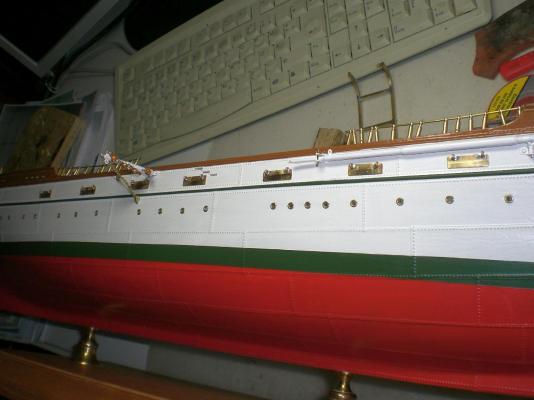
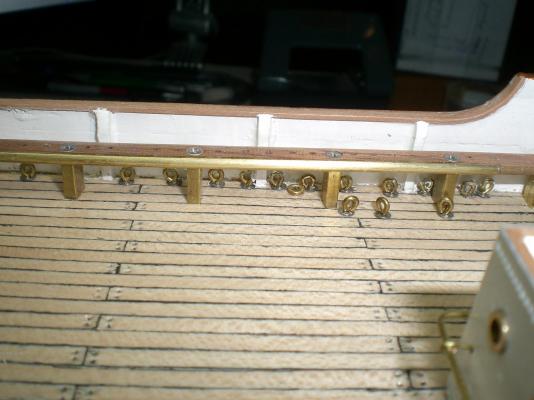
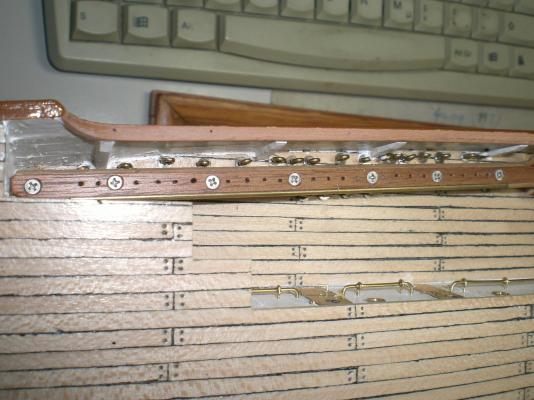
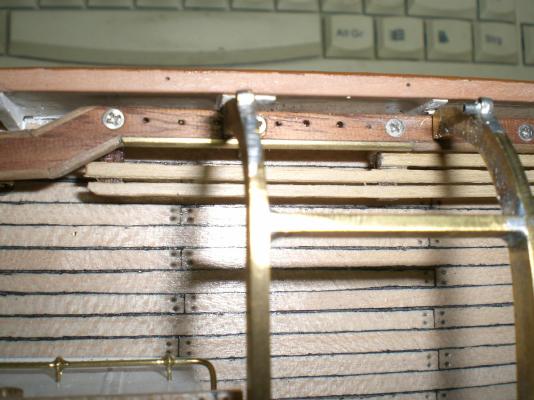
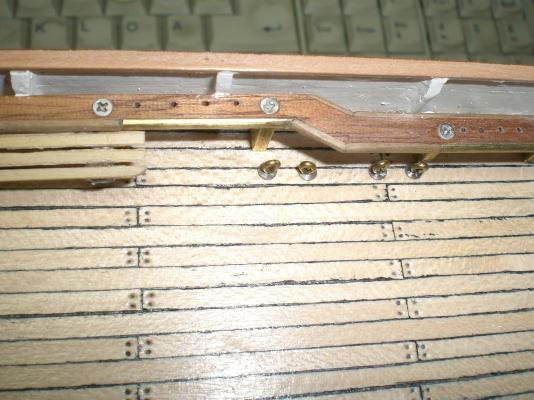
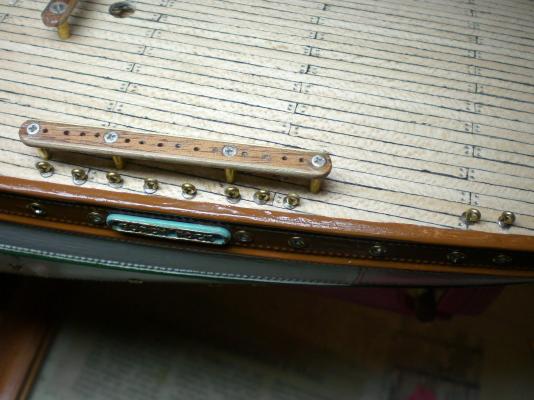
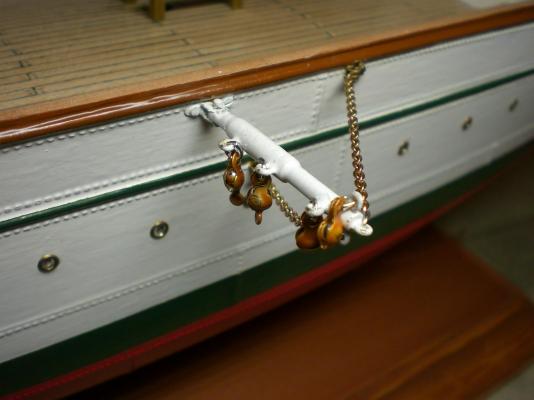
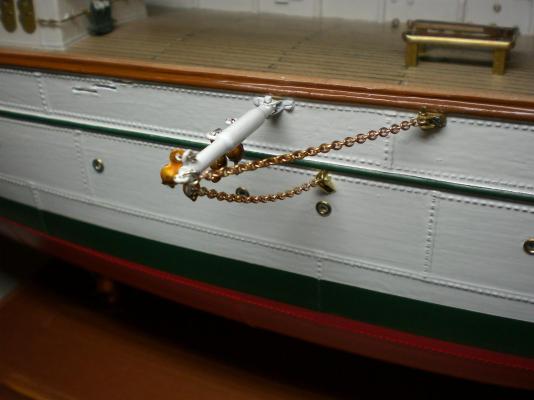
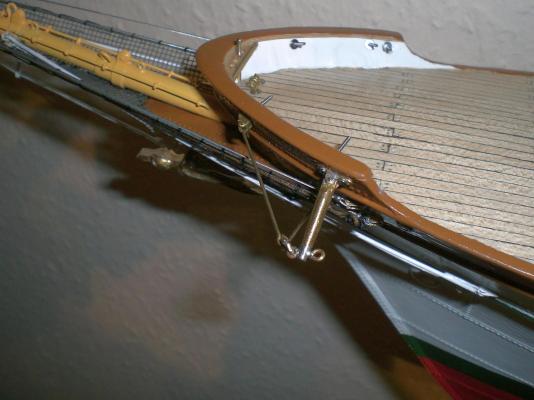
Build log part 22 the pinrails are removable for Access to the eyelets (shrouds and backstays fastening)in between mizzem mast pinrail, the nameplates are aside the poopdeck and at stern bowsprit netting swivible bumpkins for bracing tackle rope guides the tack Position of the Forward mast lower yard Build log part 23 to follow.... Nils

- 222 replies
-
- 7
-
-
- gorch fock
- barque
- (and 2 more)
-
thank you John, Nils
-
I admire your skills Alexander, Great work ! Nils
-
Spitzenklasse Drazen, I love your work on this great model, a delight to watch her grow... Nils
-
Ed and David, Thanks to both of you for your comments Nils
-
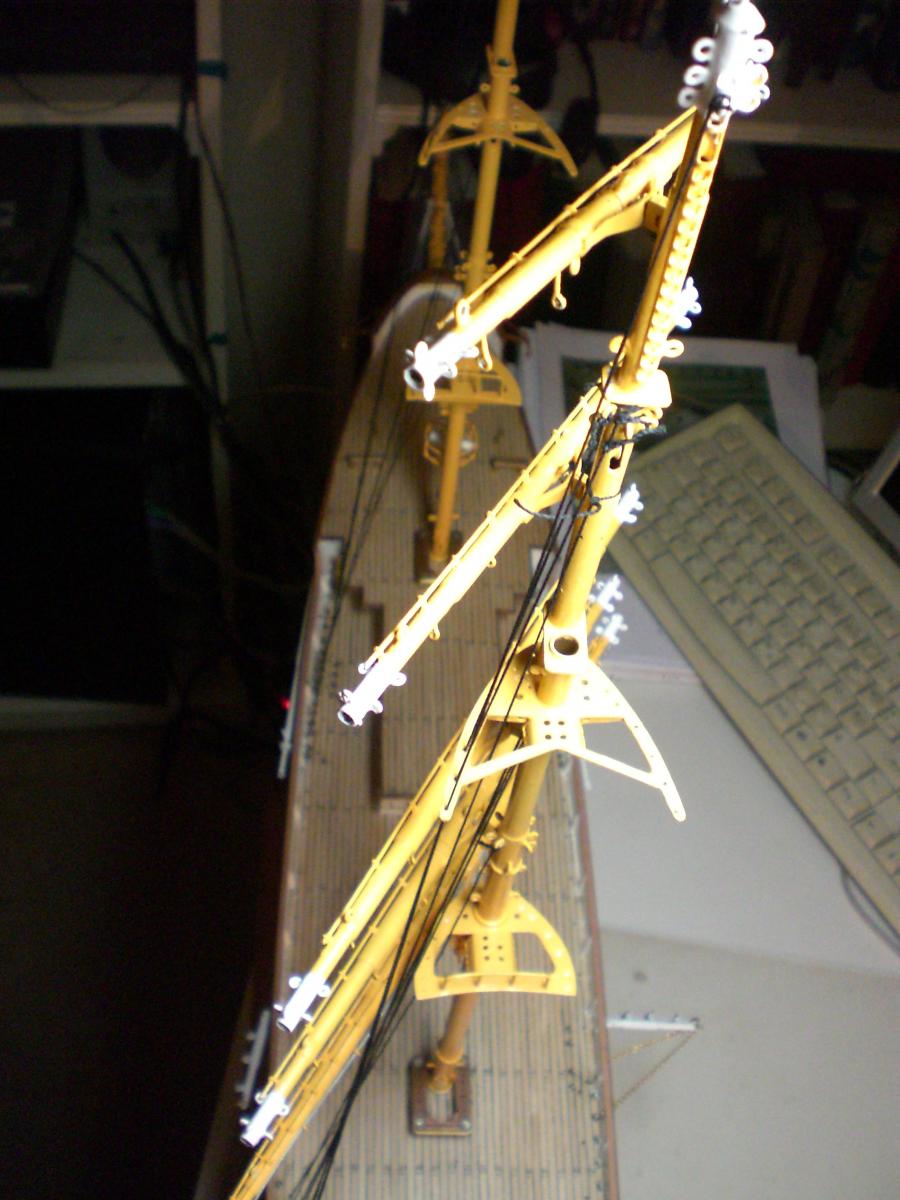
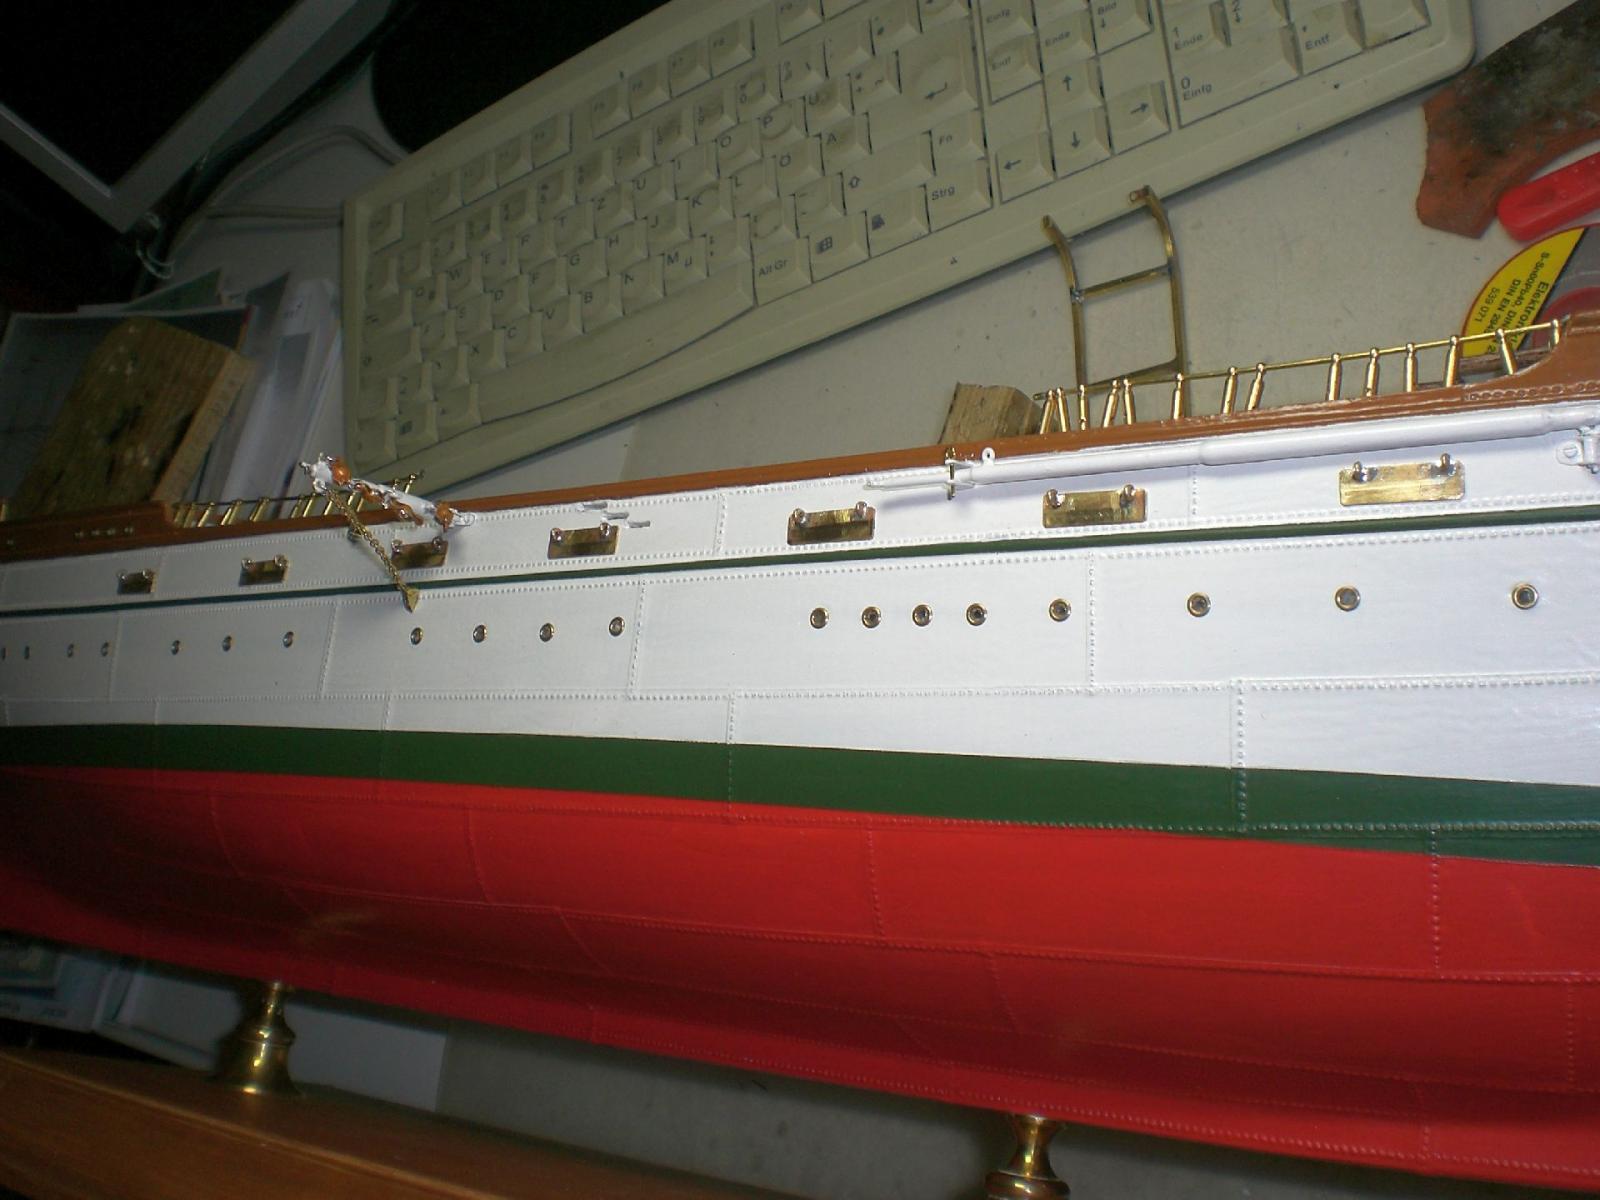
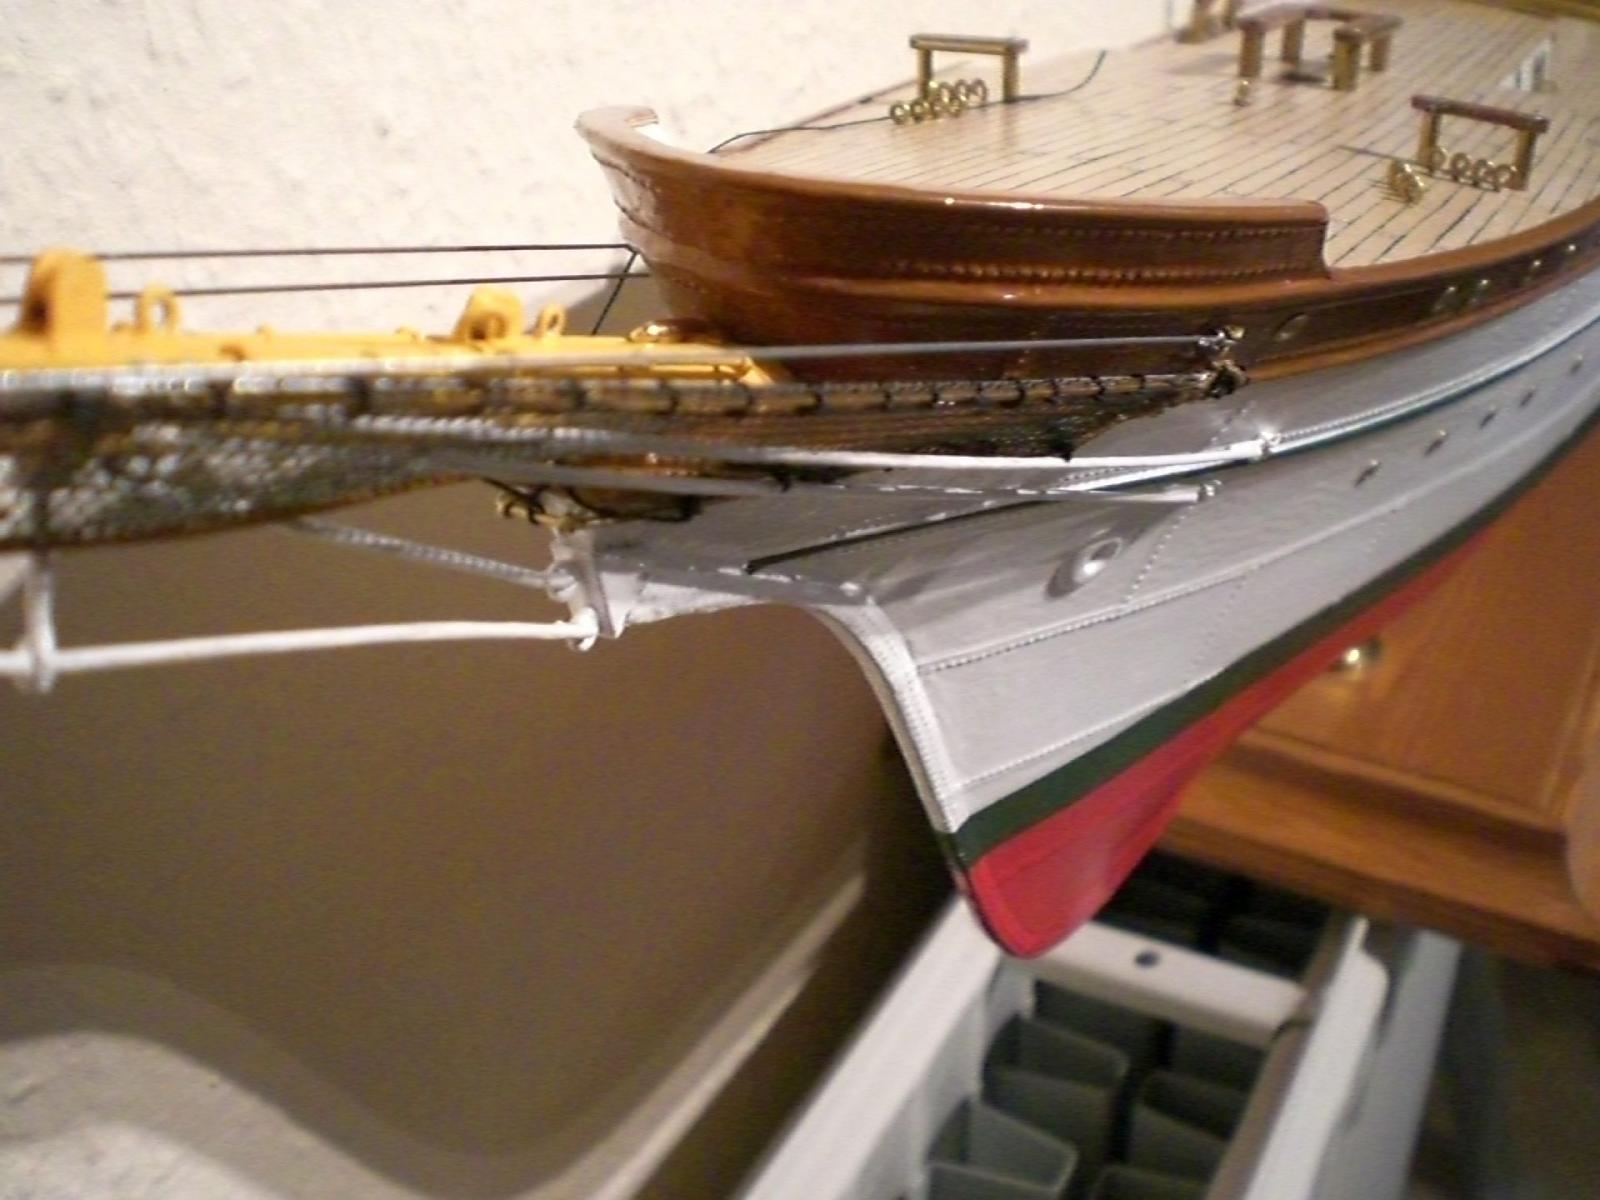
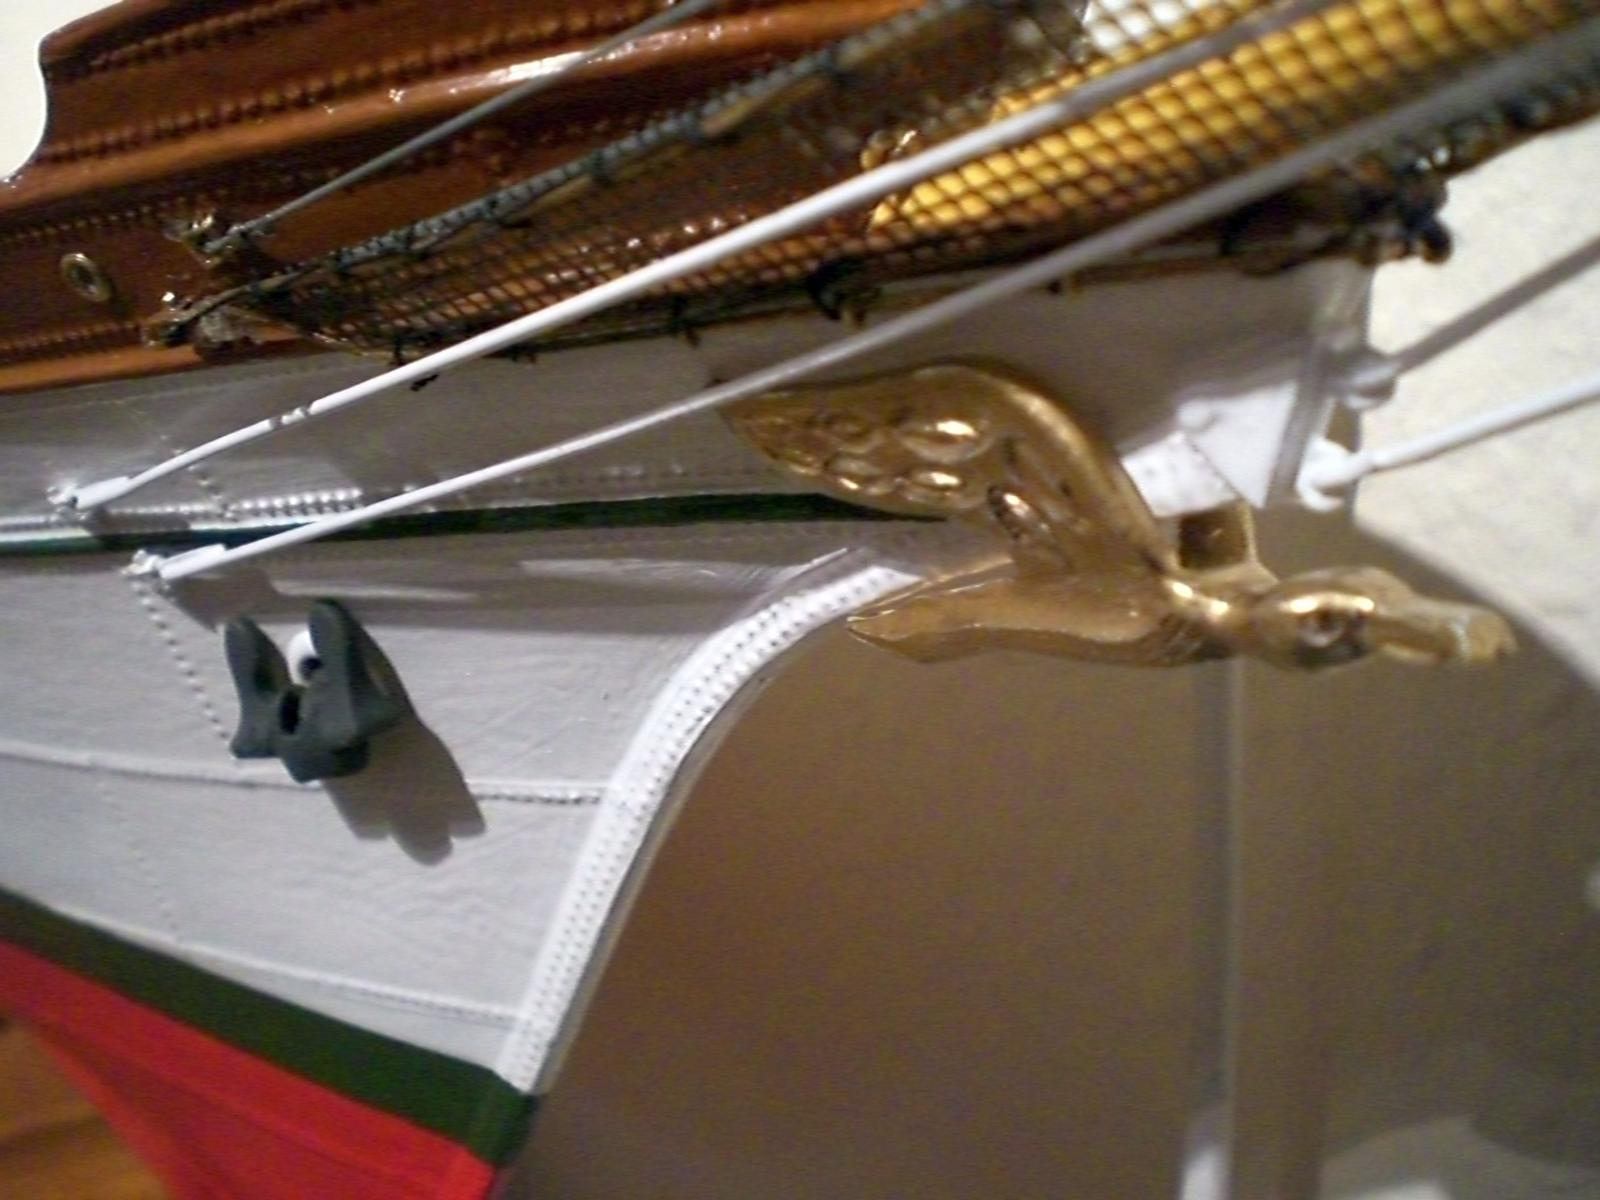
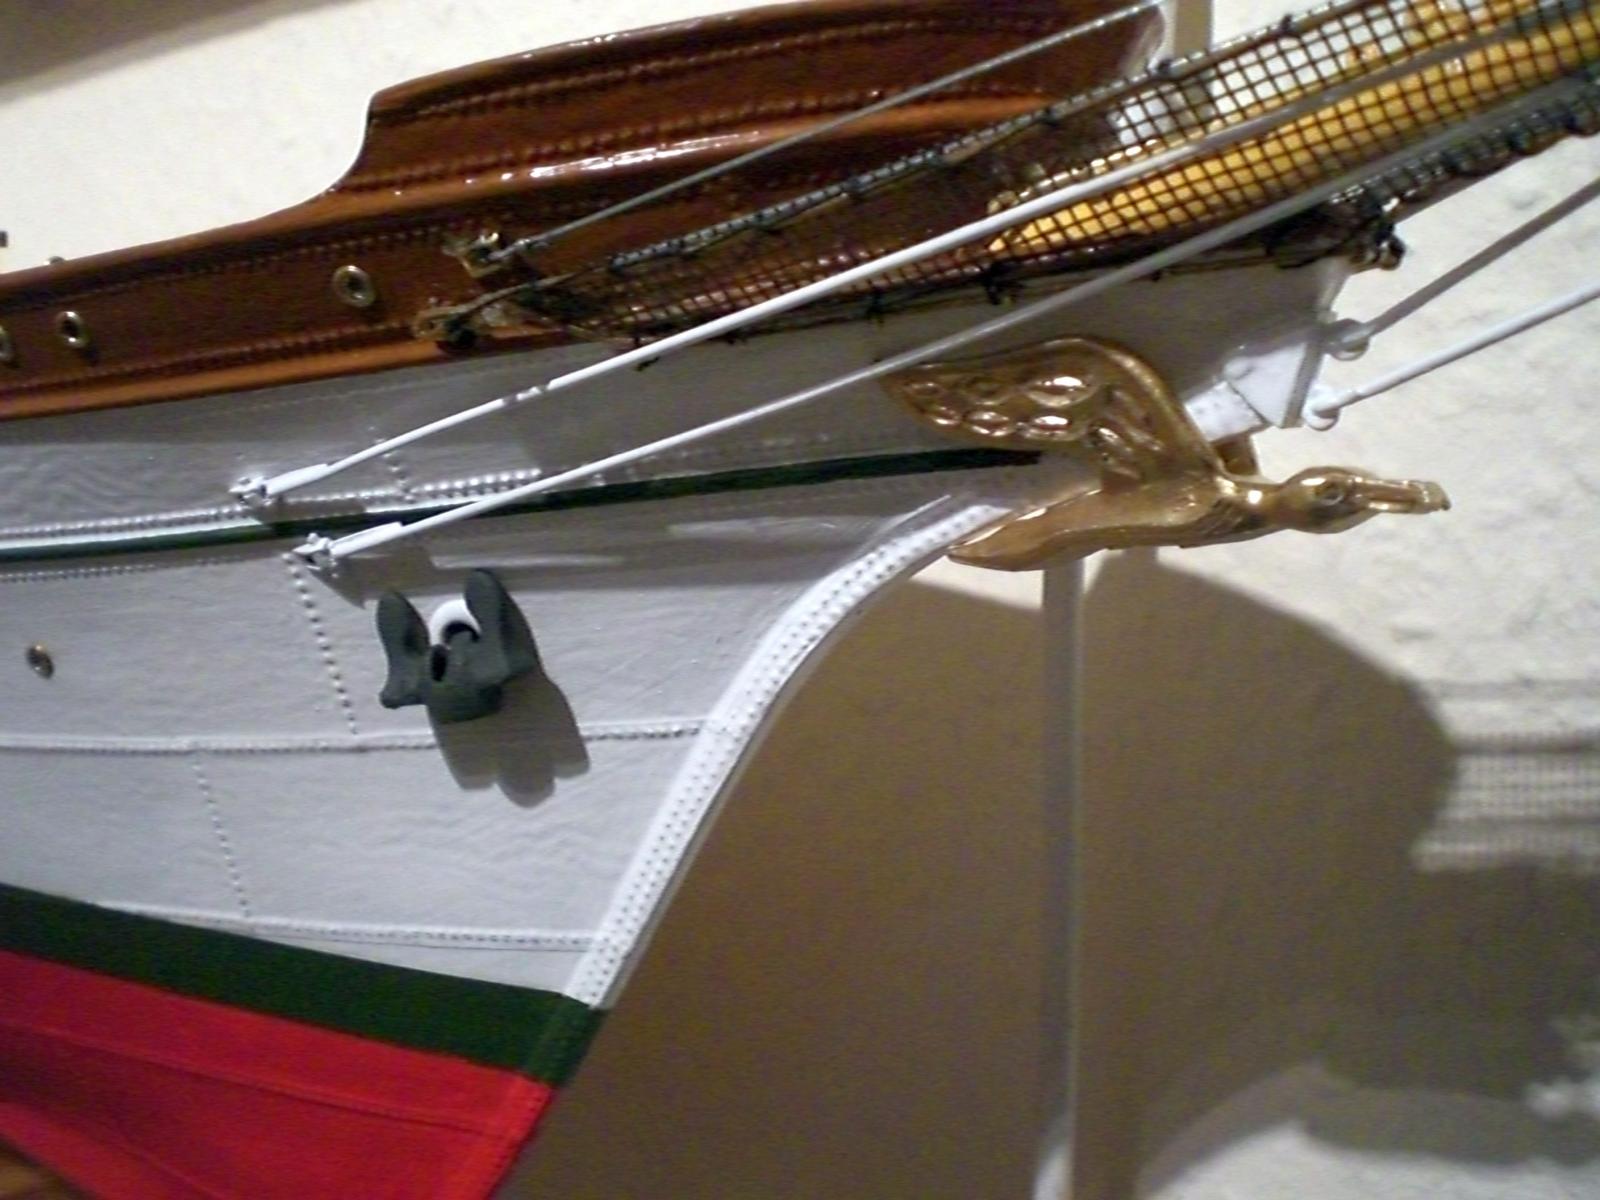
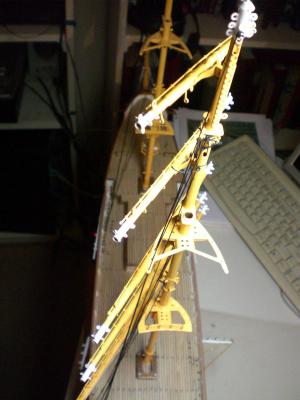
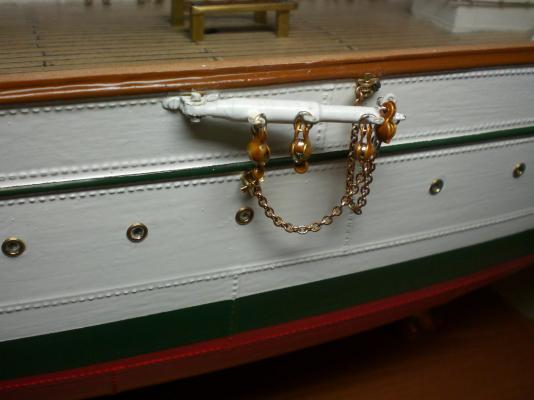
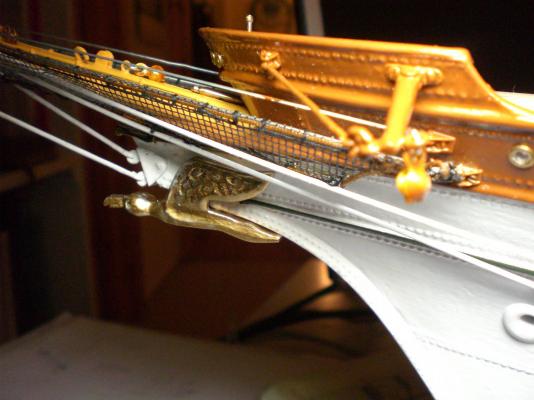
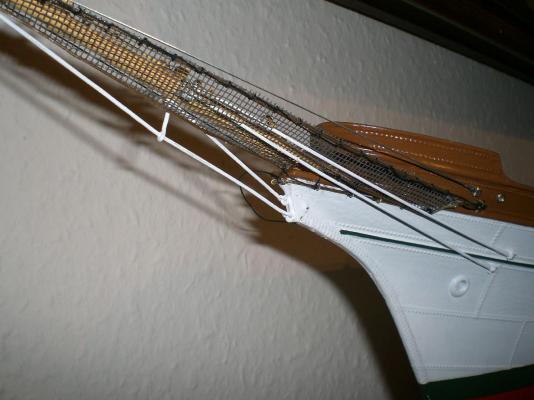
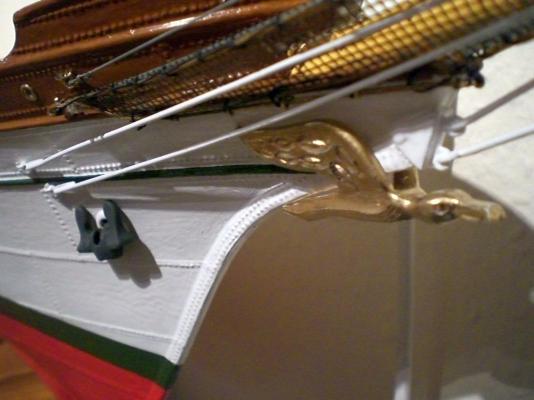
build log part 21 variety of Yards in different completion stages view skywards jib boom rigging done without figurehead Albatros at its place side hull bumpkins for bracing tackle bulwark bolts to be cut and nuts and washers to be painted white Build log part 22 to follow..... Nils


- 222 replies
-
- 8
-
-
- gorch fock
- barque
- (and 2 more)
-
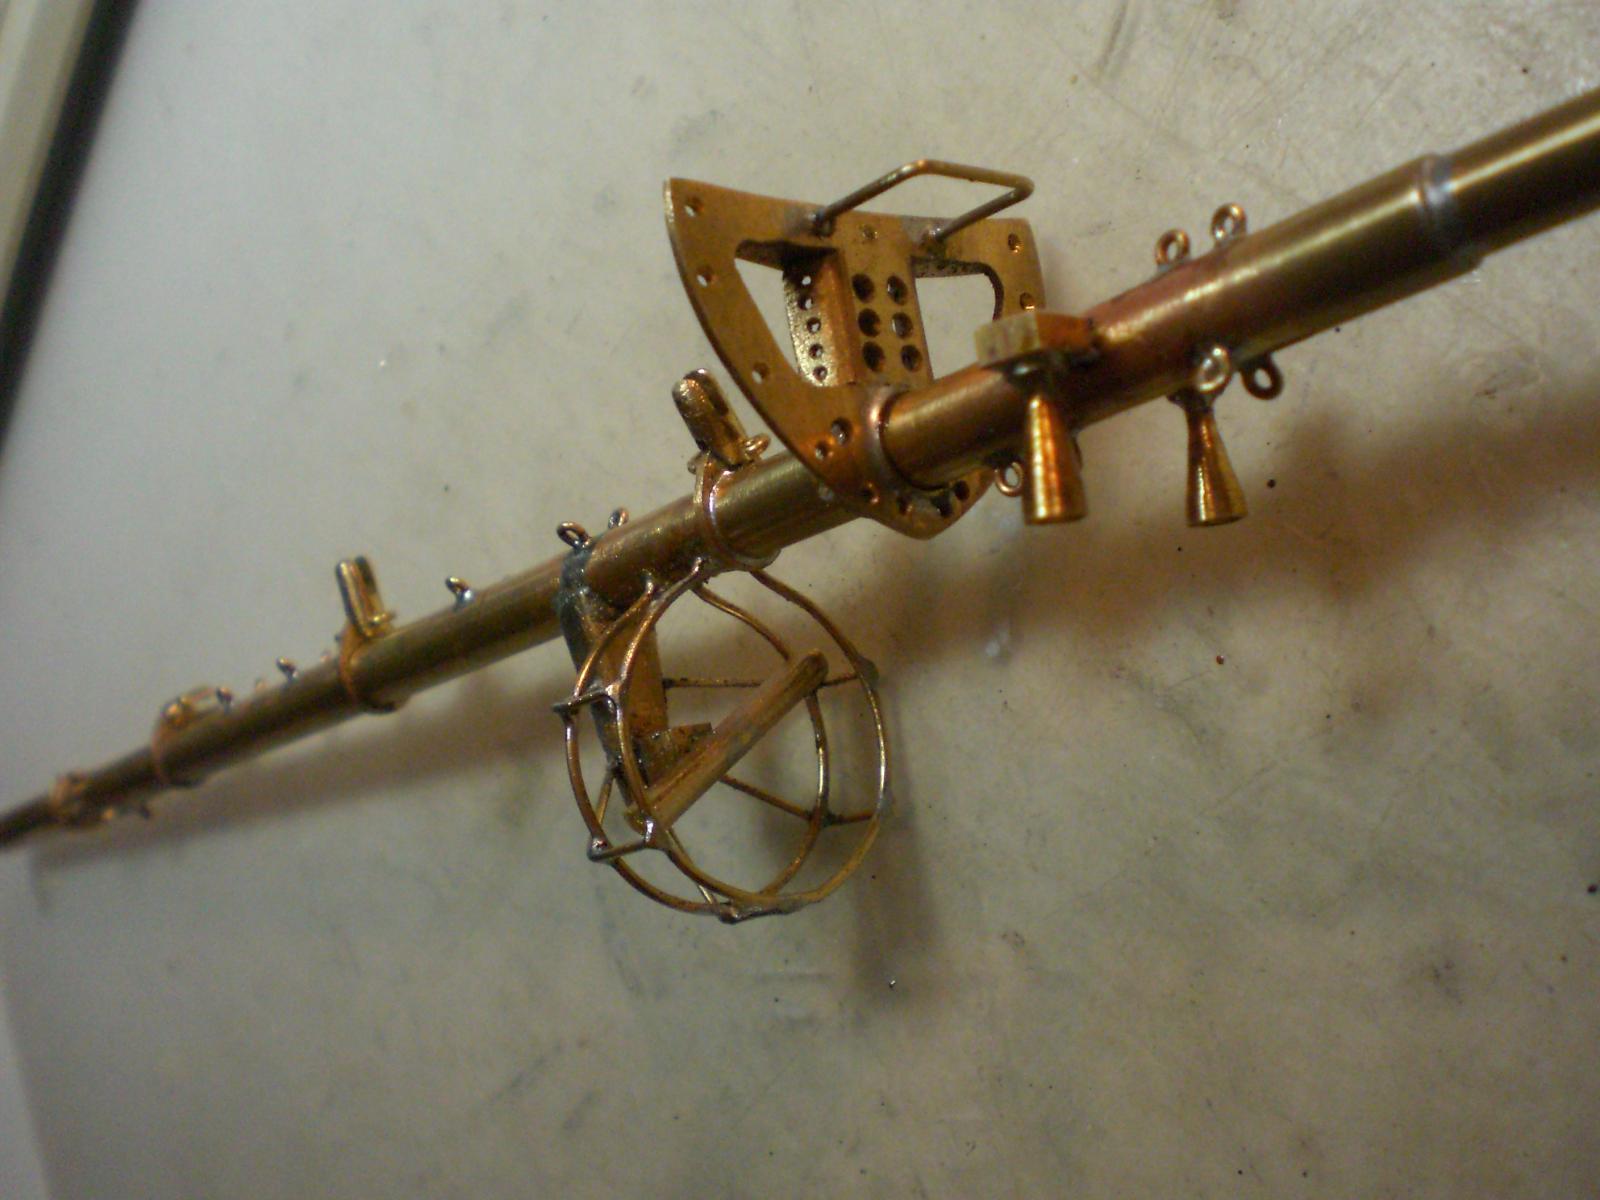
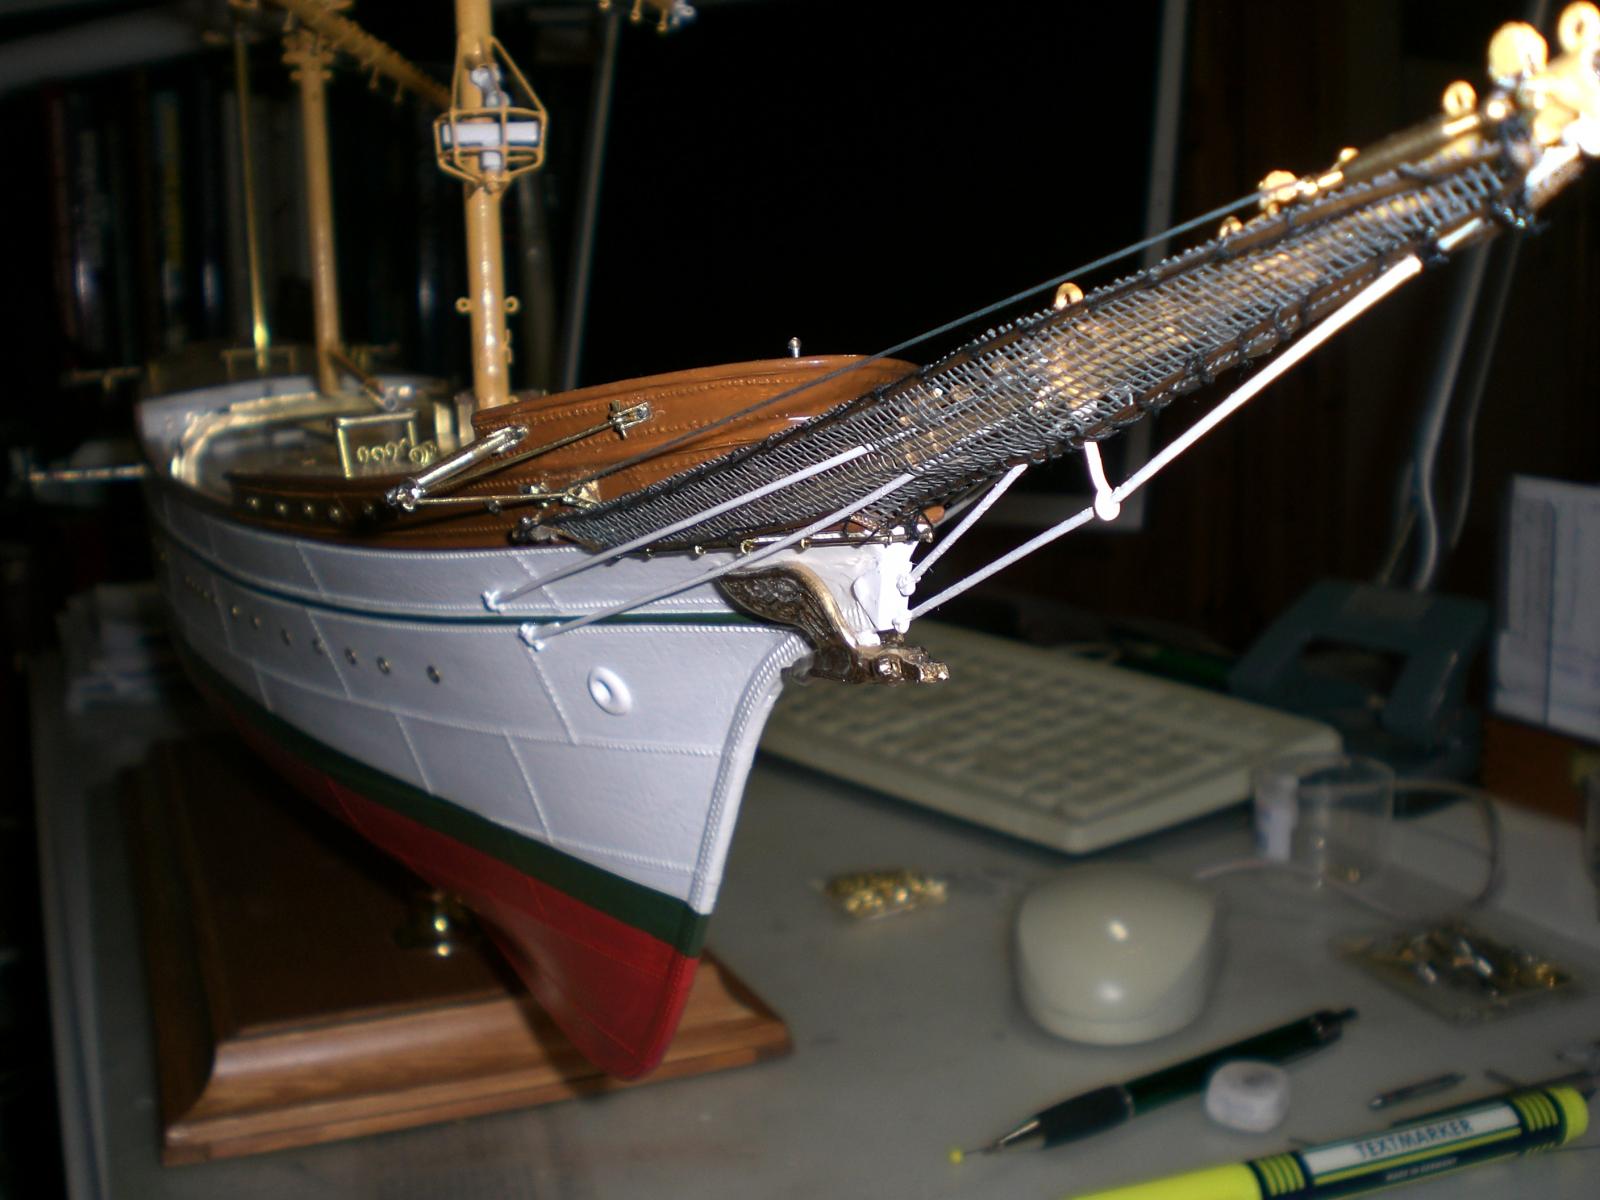
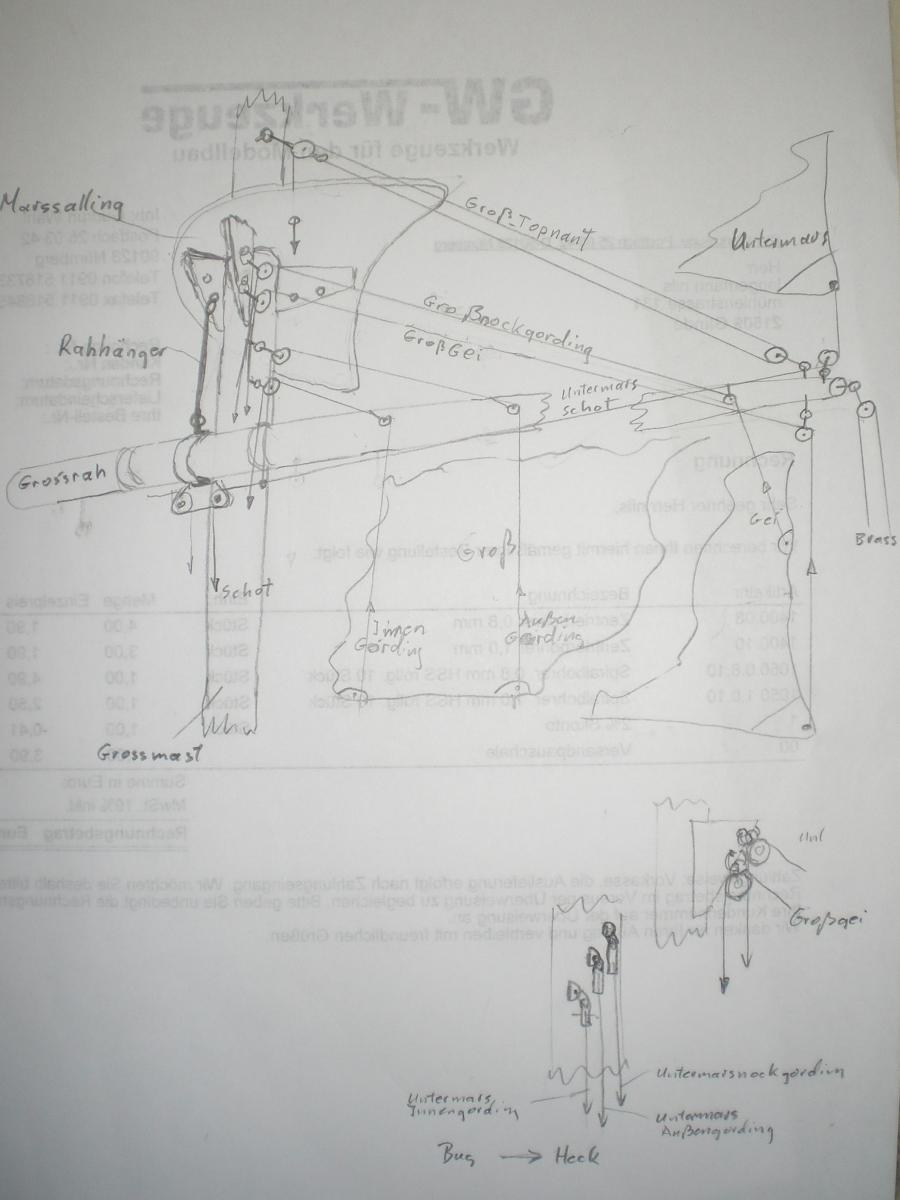
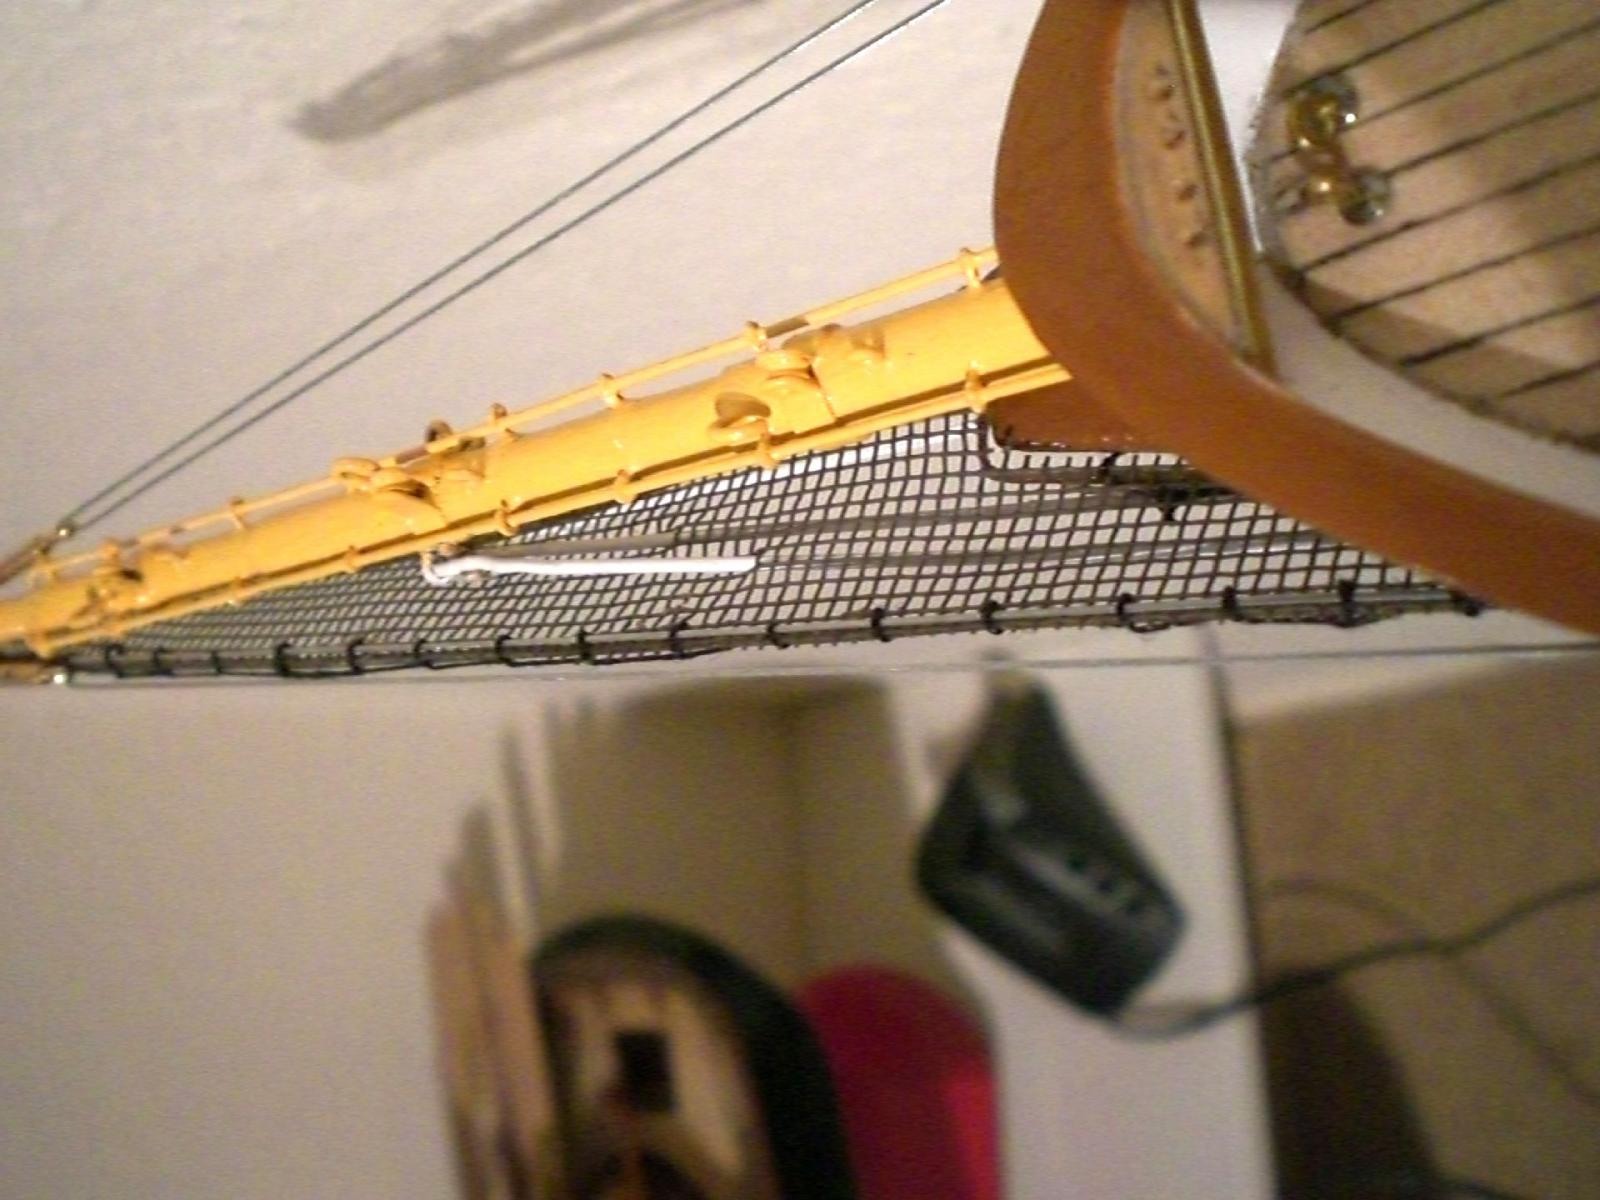
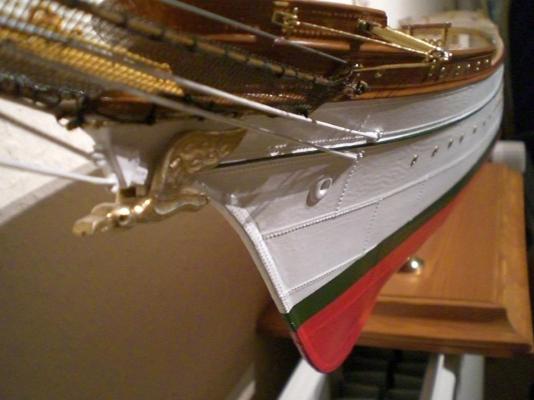
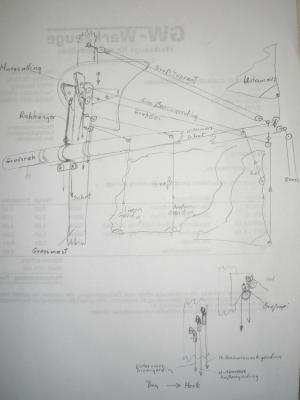
Build log part 20 scetch for Yard / block tackle at mast preparing for soldering jackstays to the lower yard on the next model I would`nt do the footrope (horses) holders this way, They would touch the yard tangentialy from the Yard aft side, and be attached to the second jackstay row checking the Yard swiviling capability the geometry of the yardracks must allow a Close as possible Position of the leeward yardend to the shrouds when full braced startig jib boom tackle and safety netting the solid bobstays are from brass wire the Albatros figurehead is attached removable Build log part 21 to follow... Nils


- 222 replies
-
- 7
-
-
- gorch fock
- barque
- (and 2 more)