HOLIDAY DONATION DRIVE - SUPPORT MSW - DO YOUR PART TO KEEP THIS GREAT FORUM GOING! (89 donations so far out of 49,000 members - C'mon guys!)
×


Mirabell61
-
Posts
7,409 -
Joined
-
Last visited
Content Type
Profiles
Forums
Gallery
Events
Everything posted by Mirabell61
-
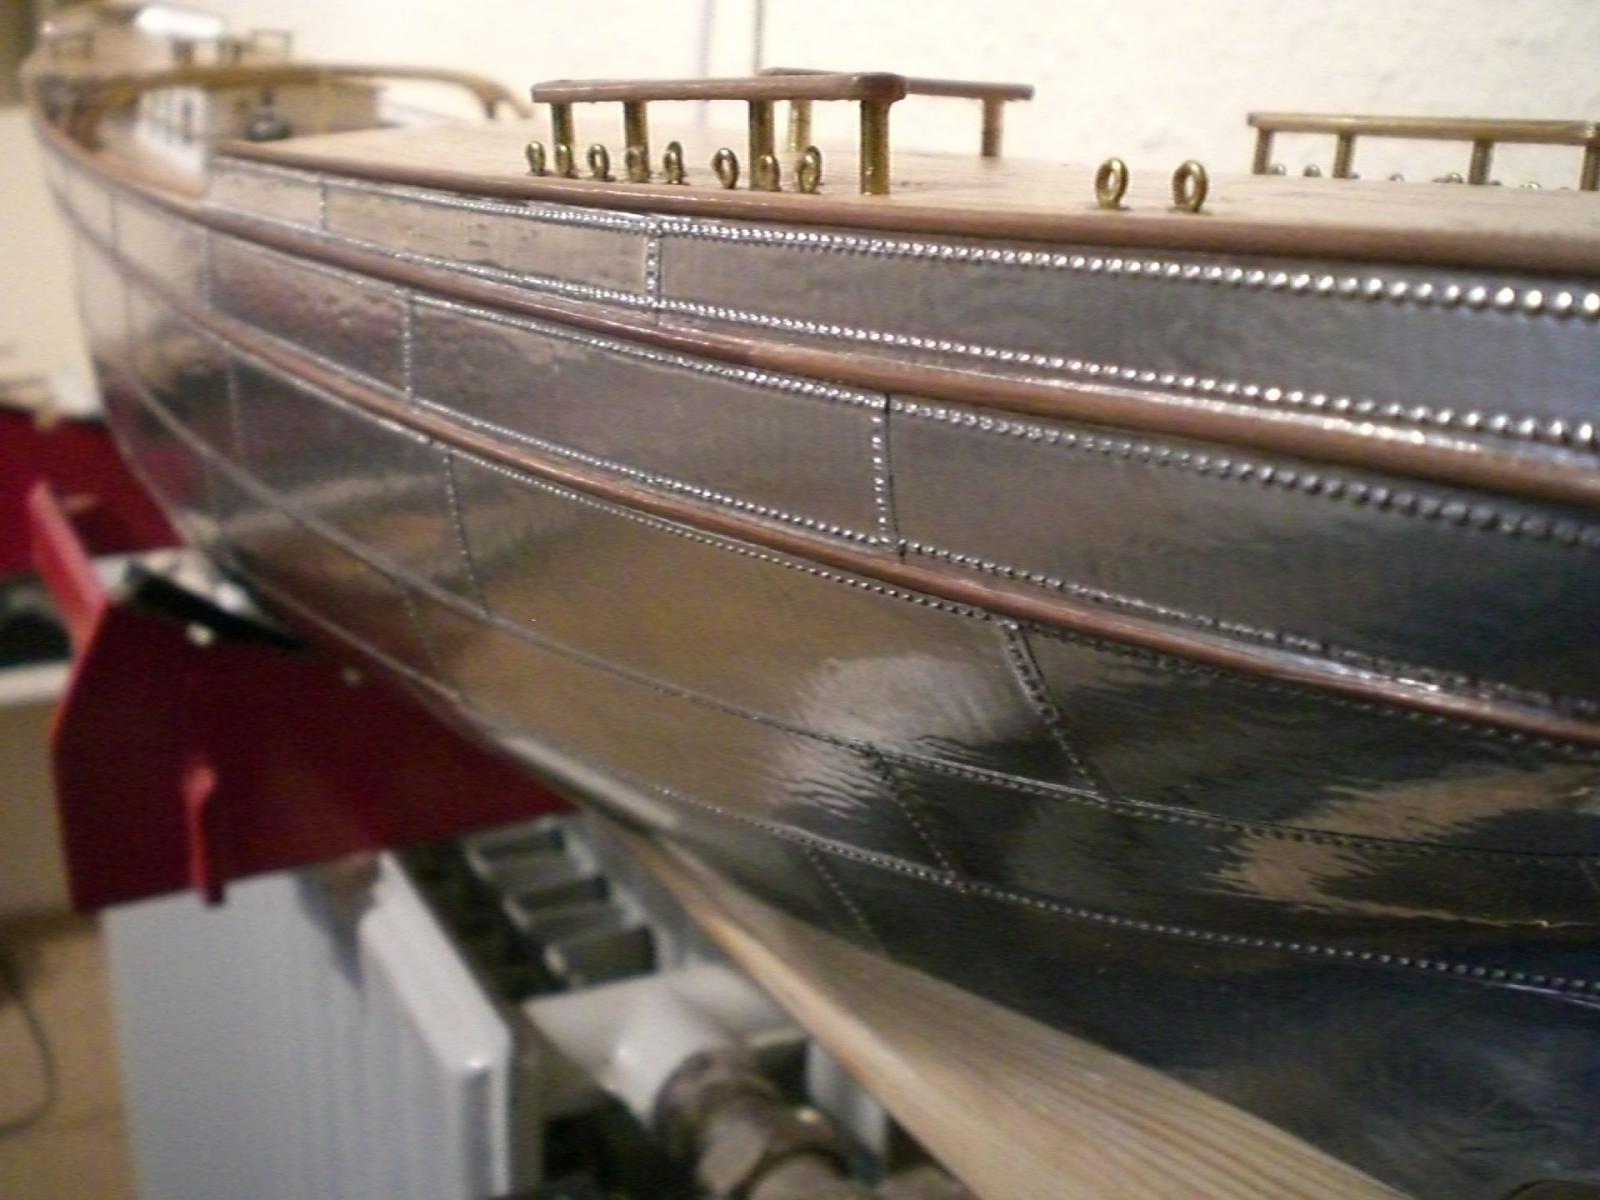
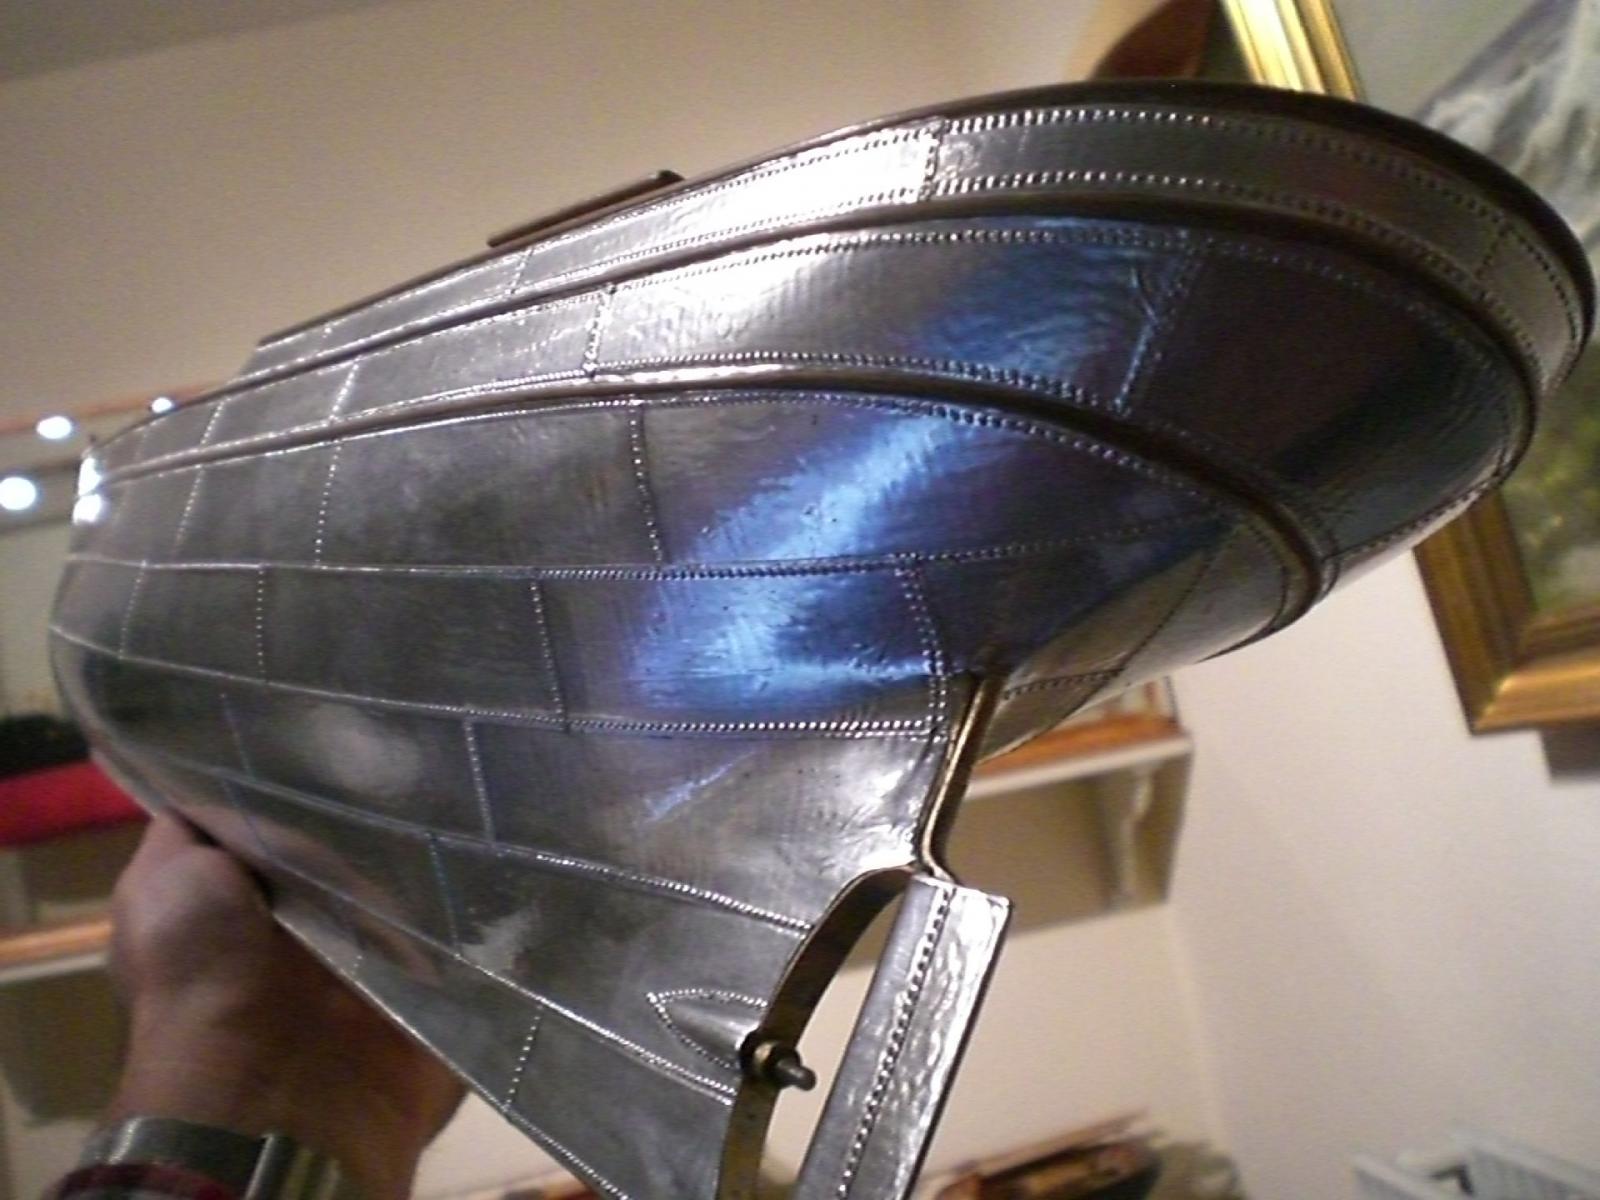
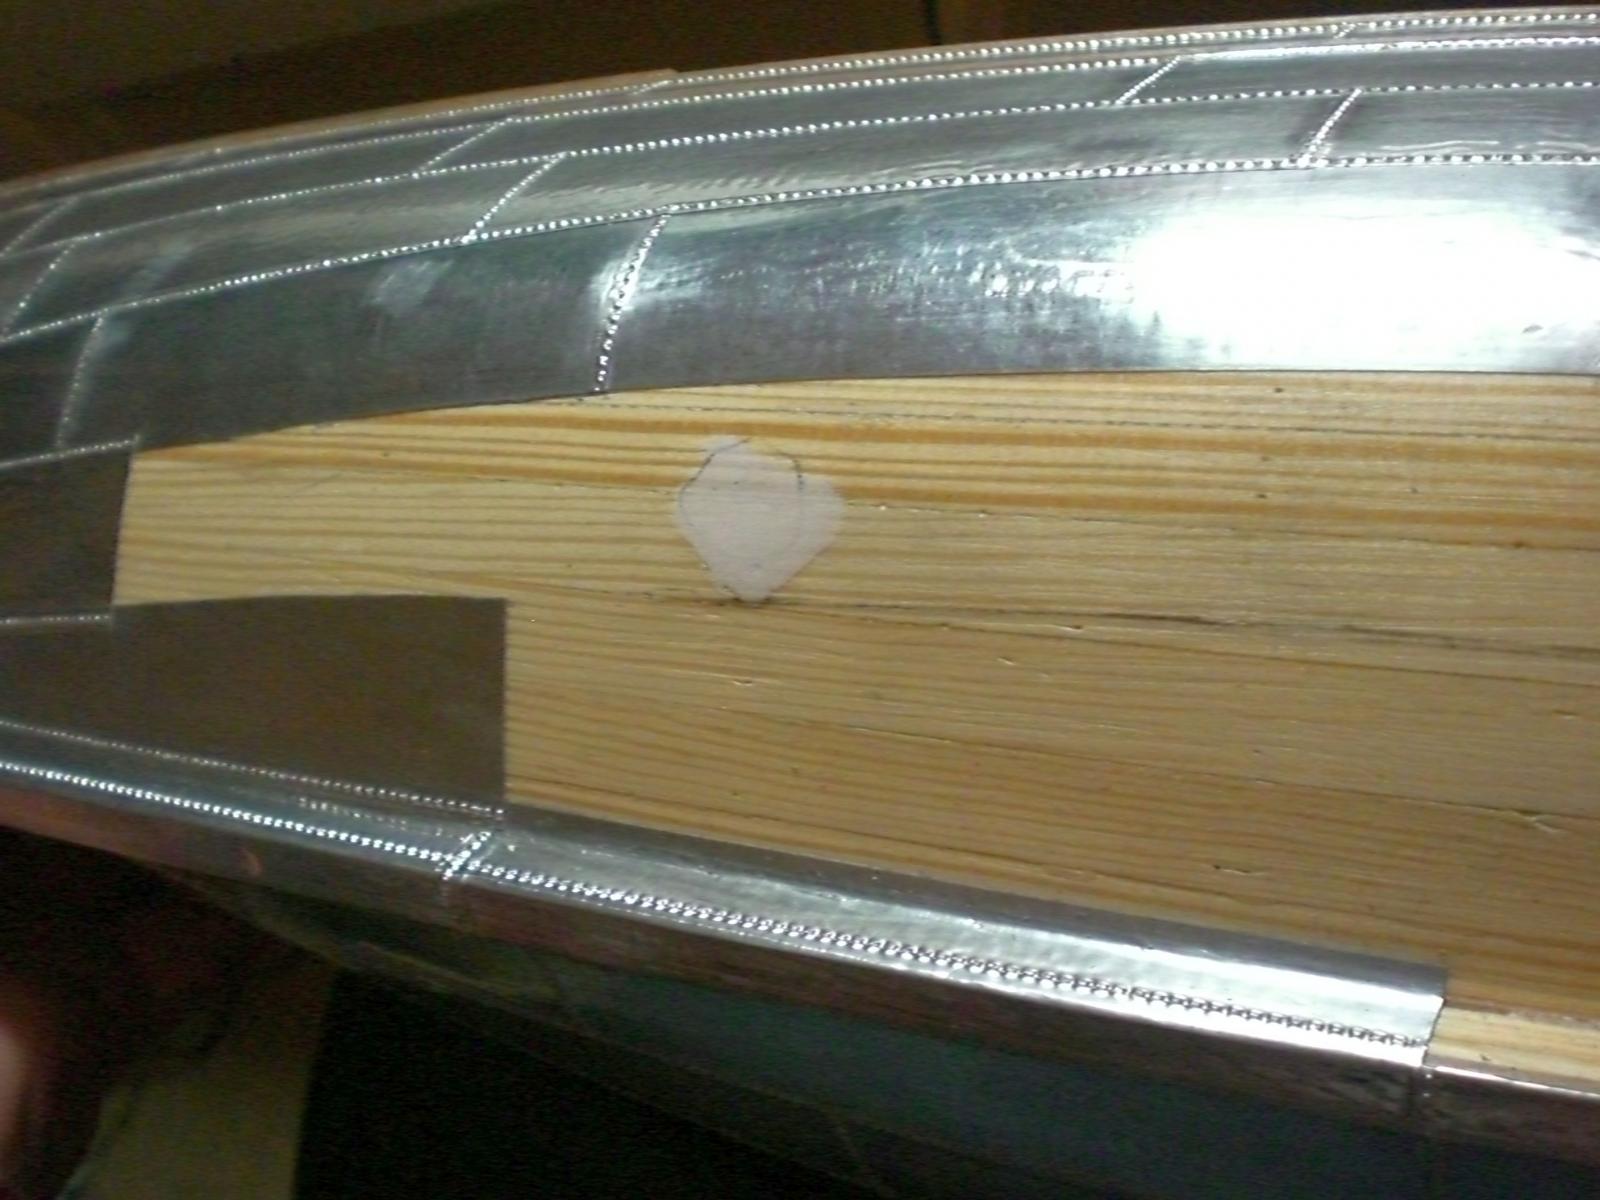
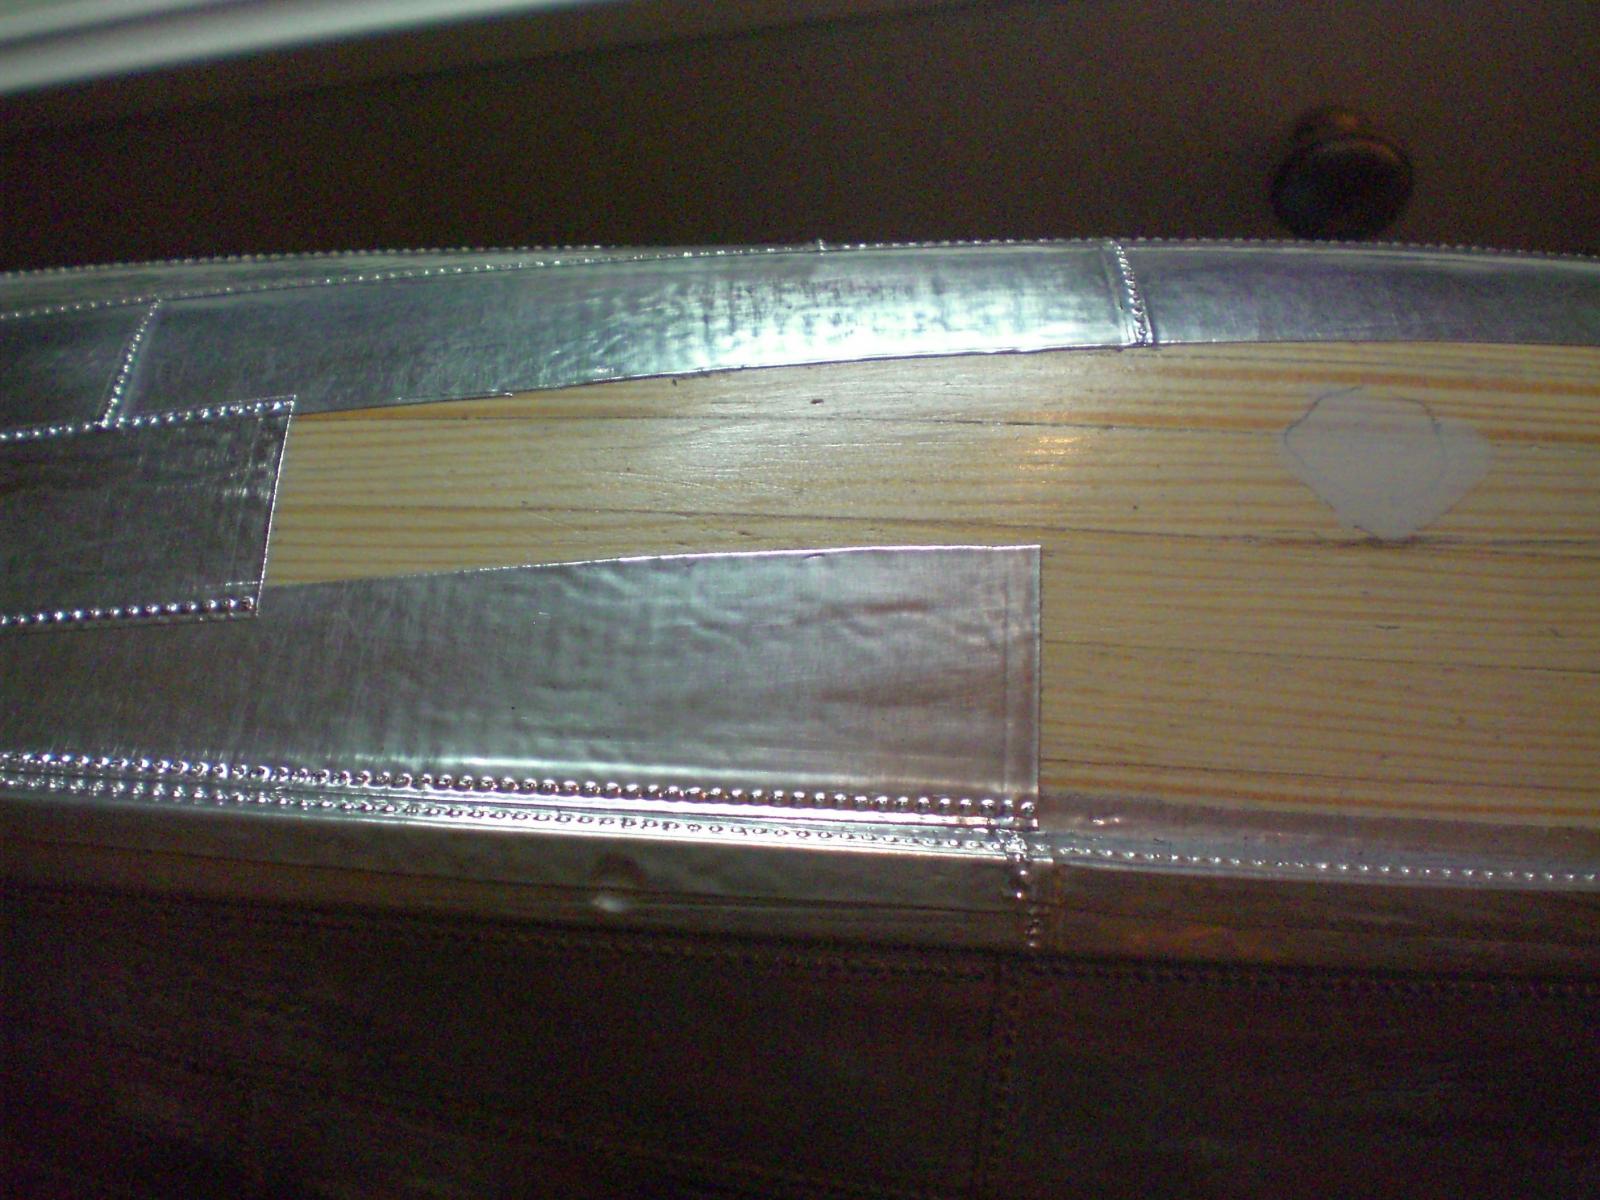
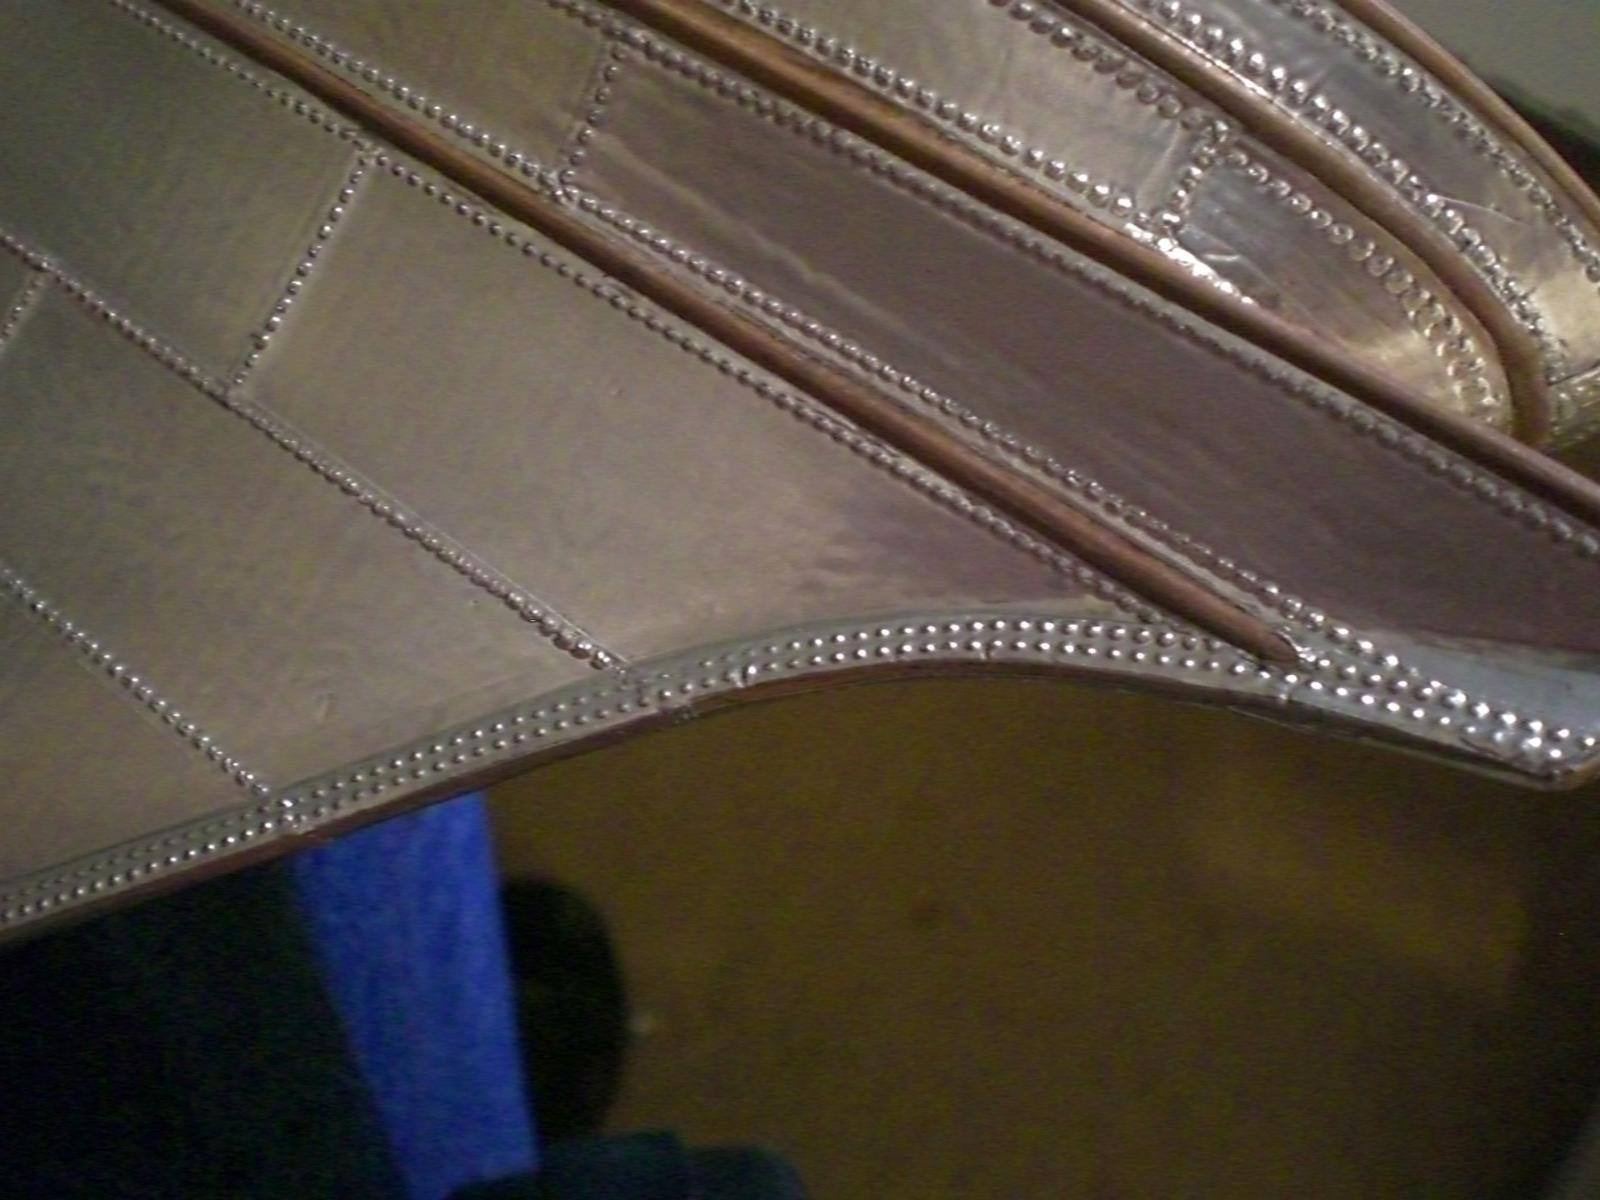
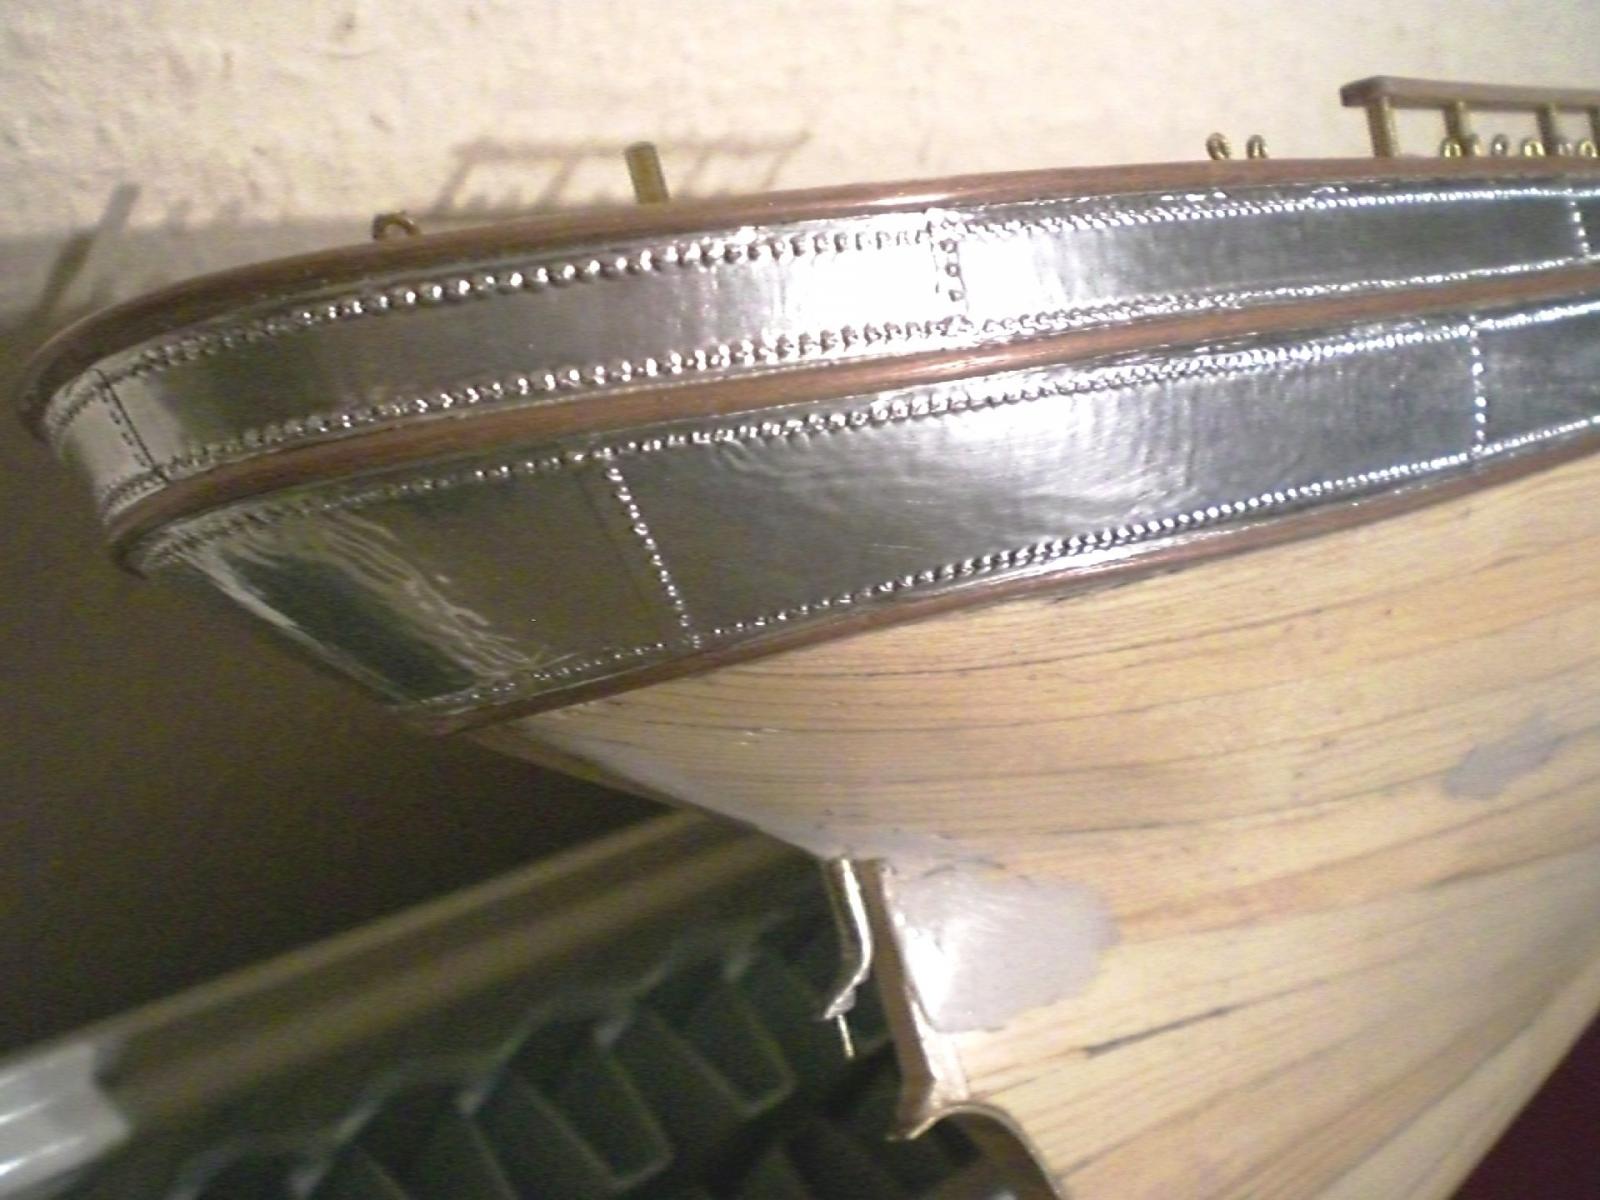
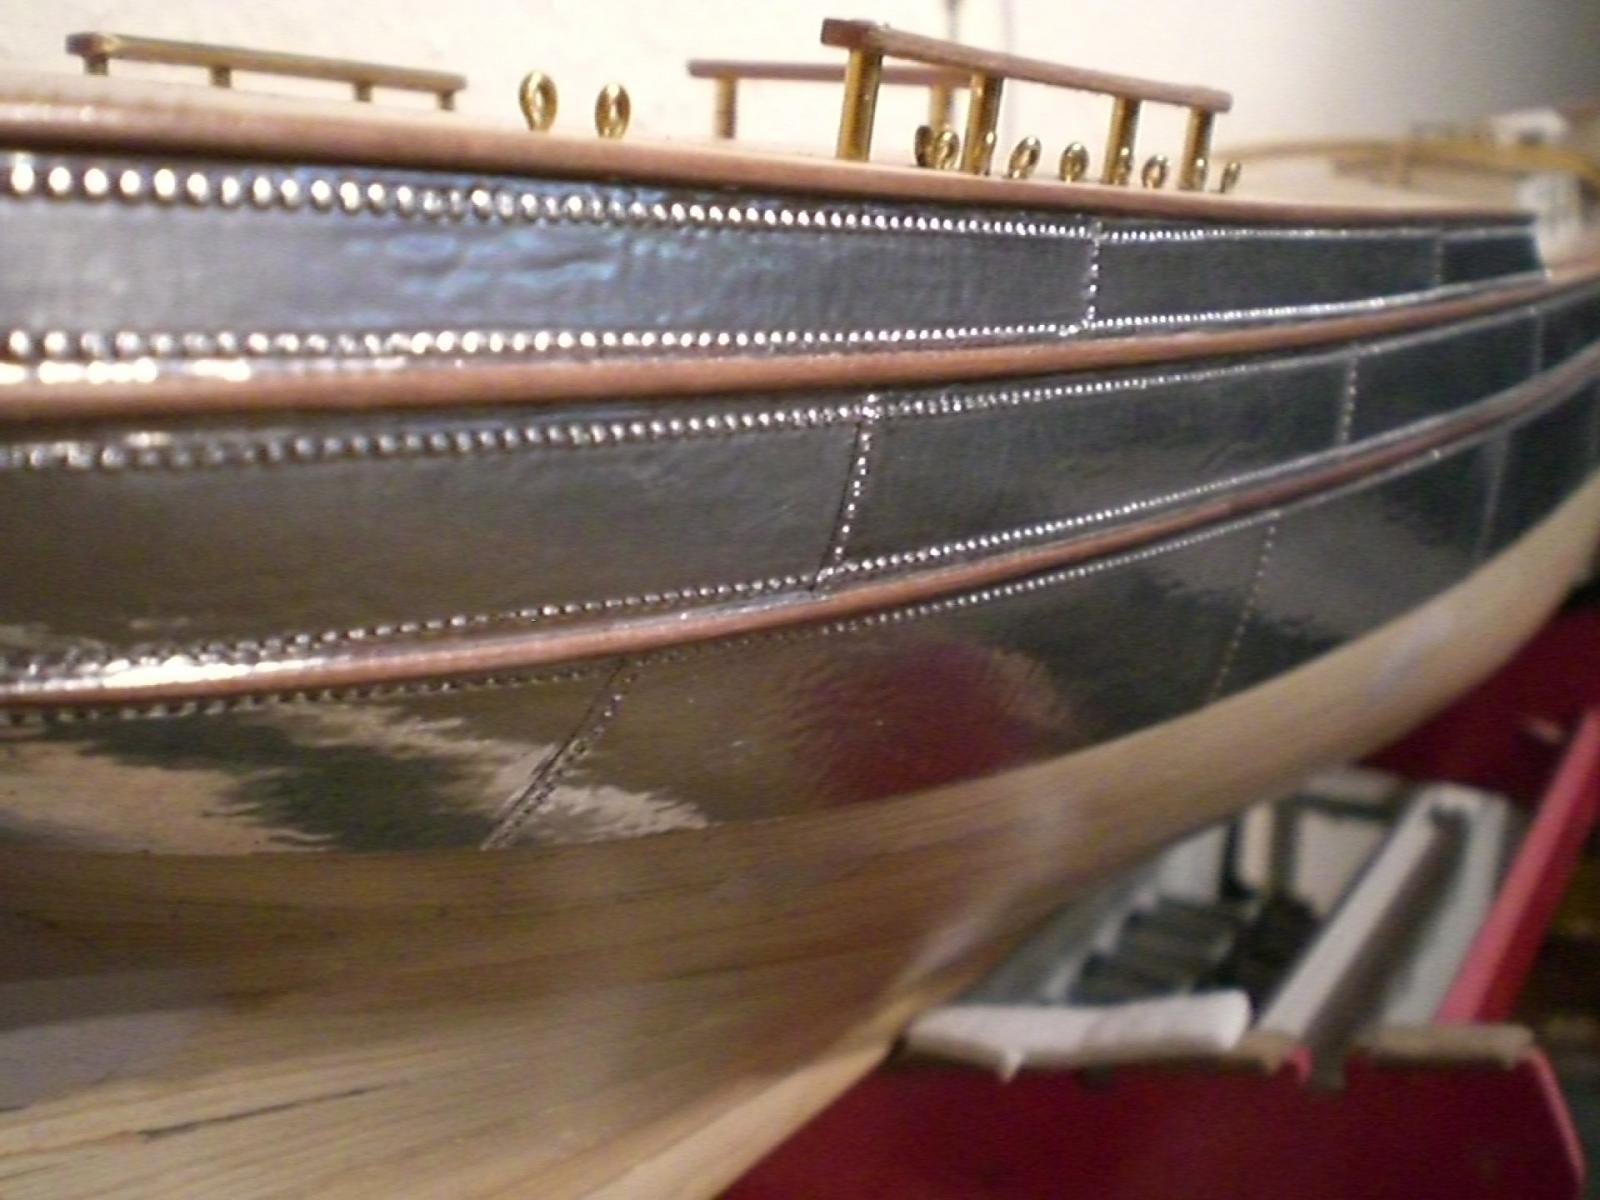
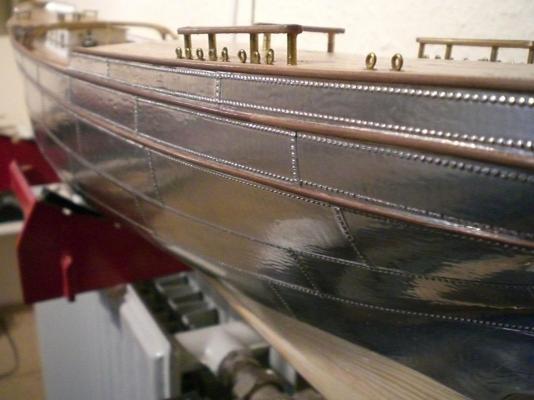
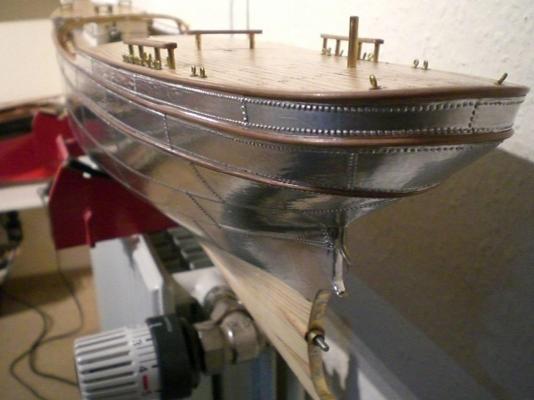
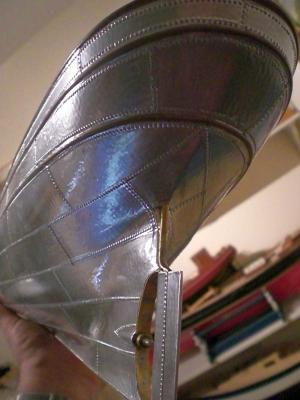
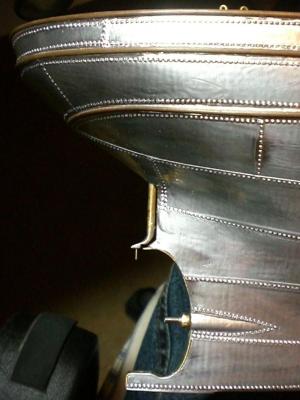
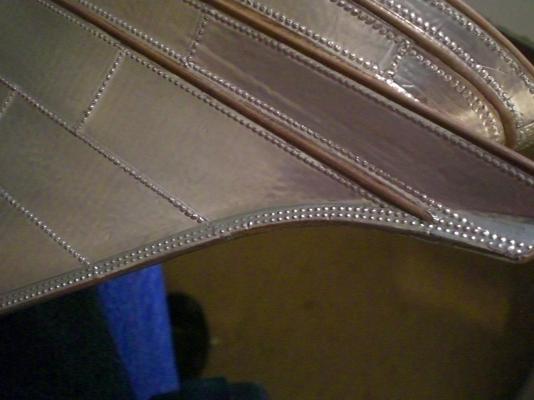
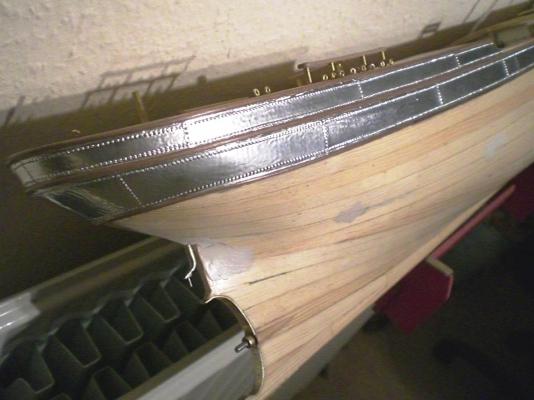
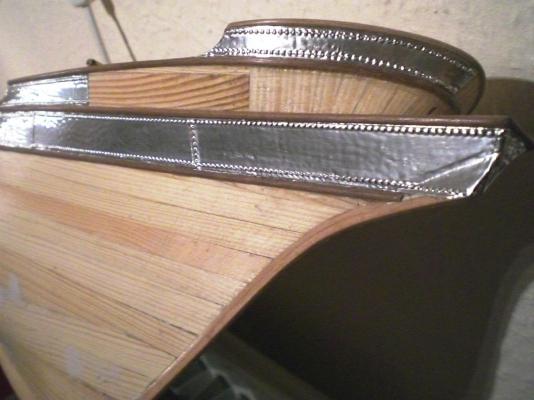
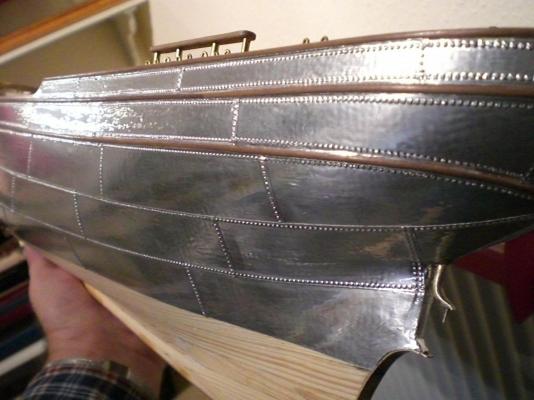
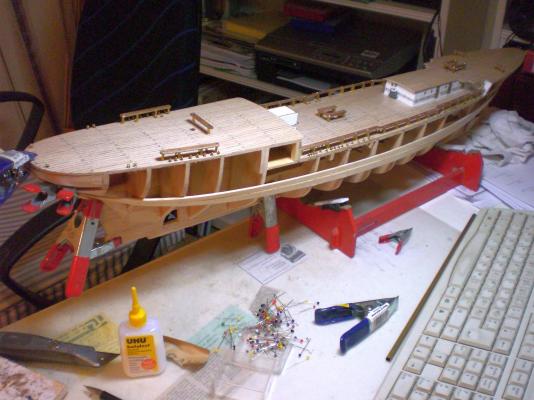
 Build log part 12 The ultimate GF 2 actual Version has rivited plates to the frames and also welded plates for horizontal seams. As I do not exactly know to what degree the riviting was in 1958 when launched, I "rivited" the entire models hull. Perhaps someone may now better... Build log part 13 to follow..... Nils
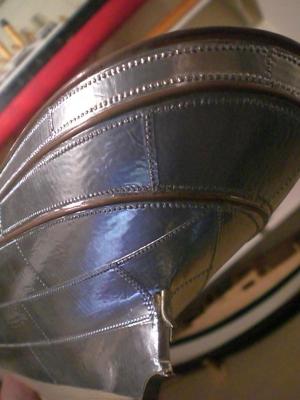


- 222 replies
-
- 10
-

-
- gorch fock
- barque
- (and 2 more)
-
lovely David, lovely Nils
-
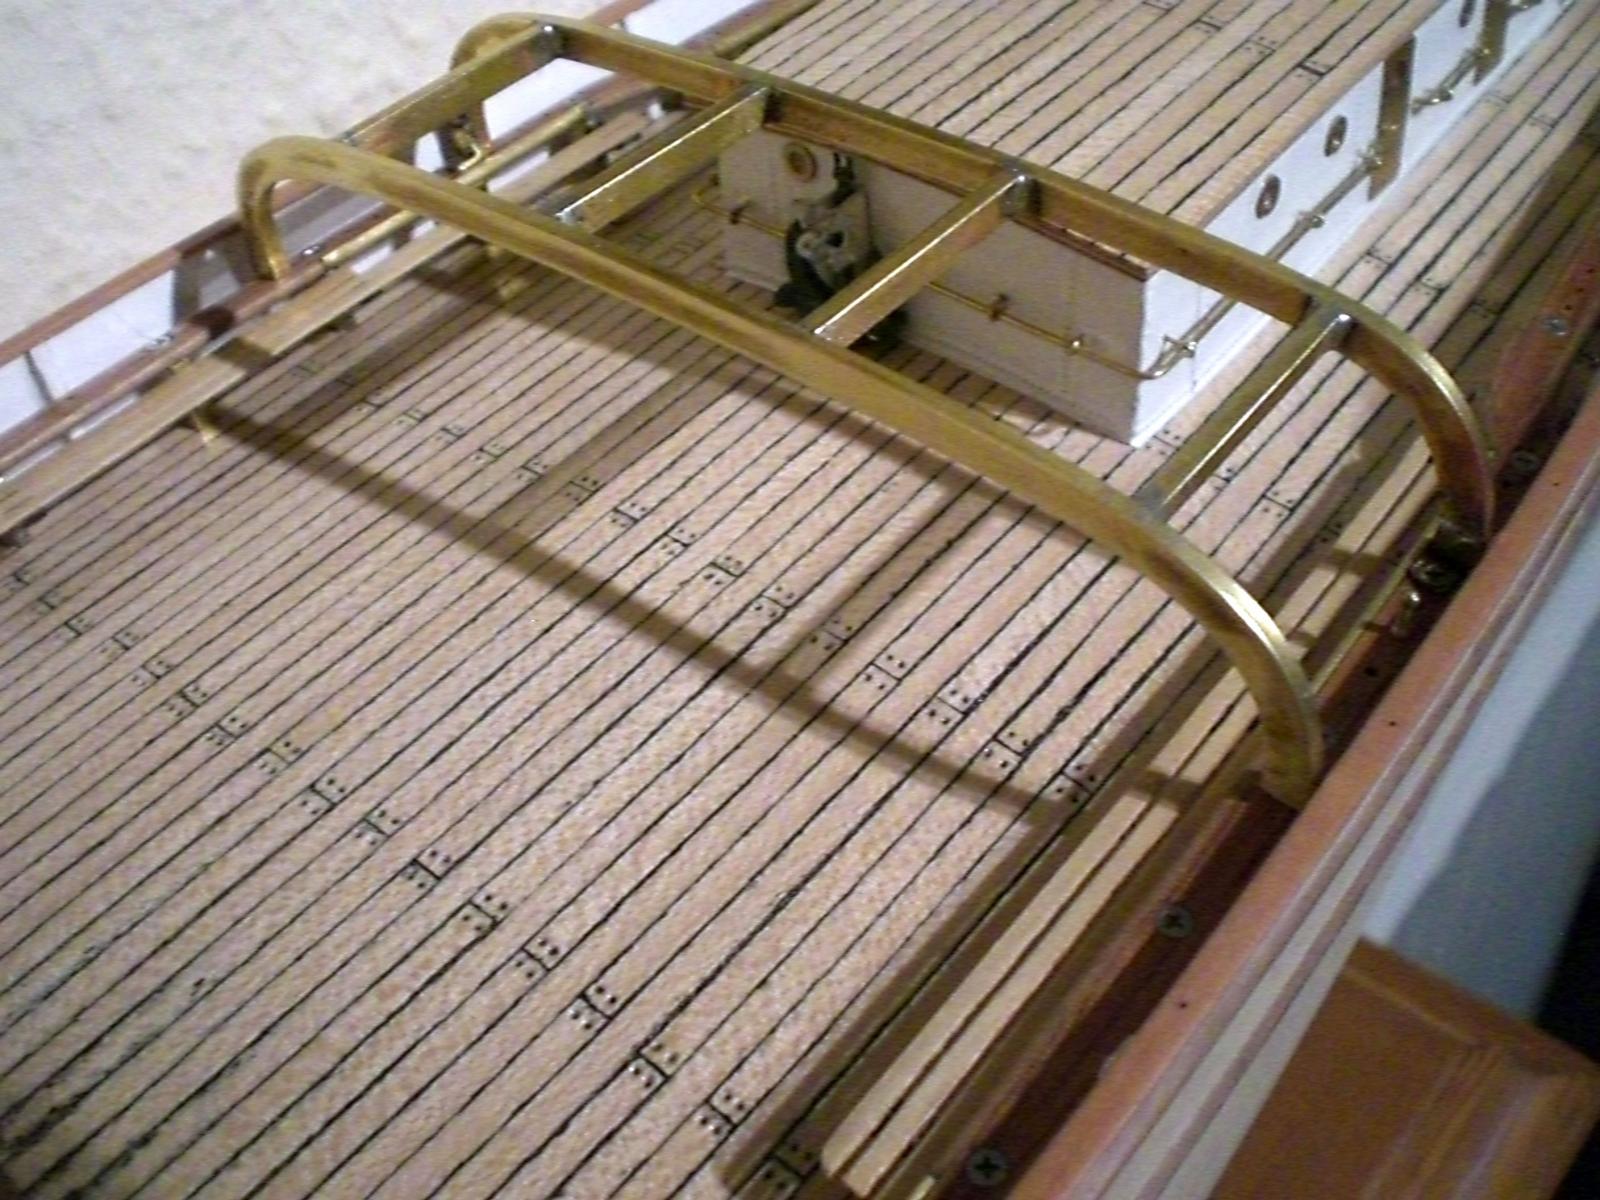
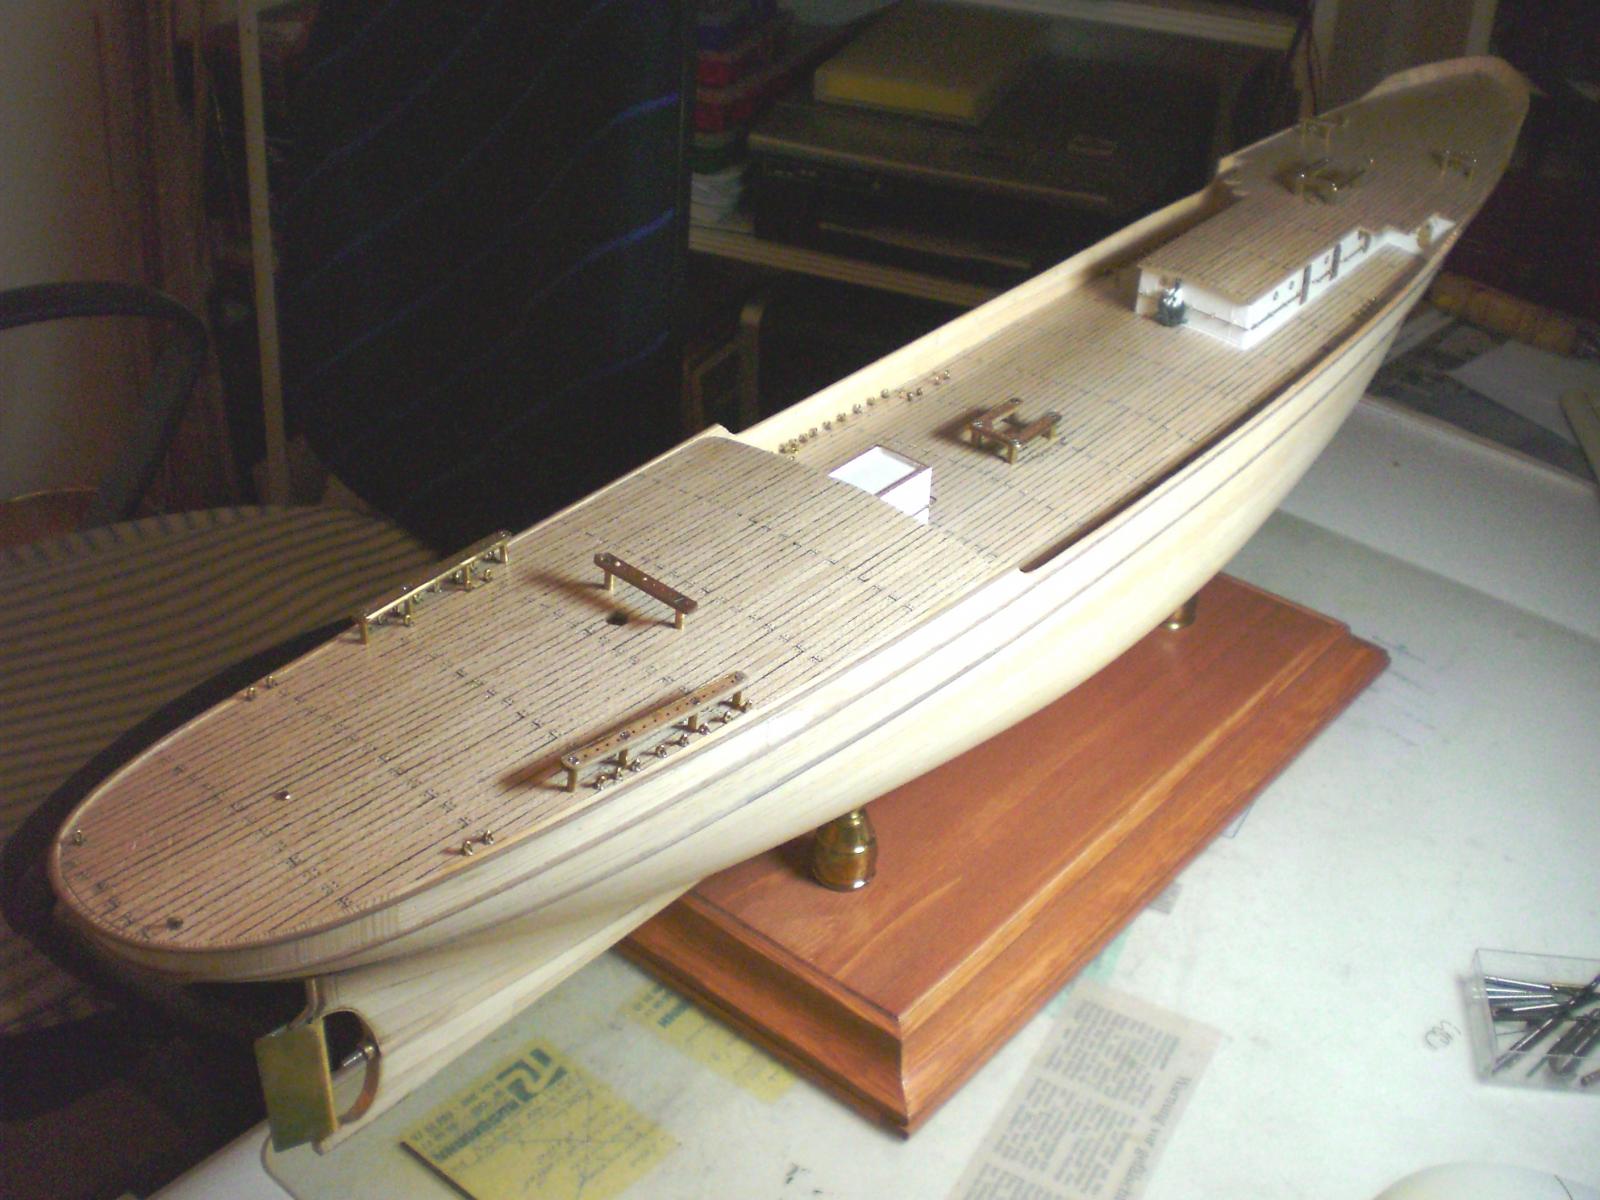
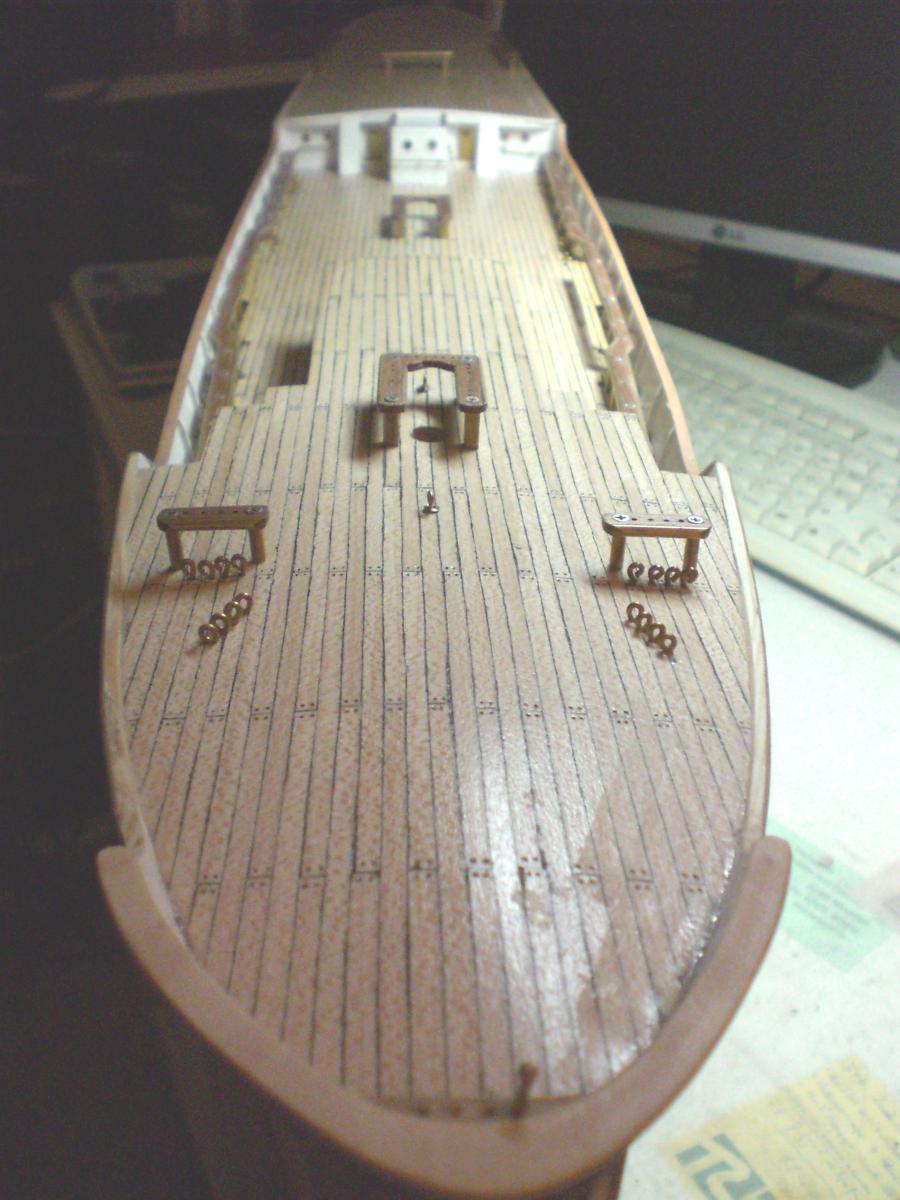
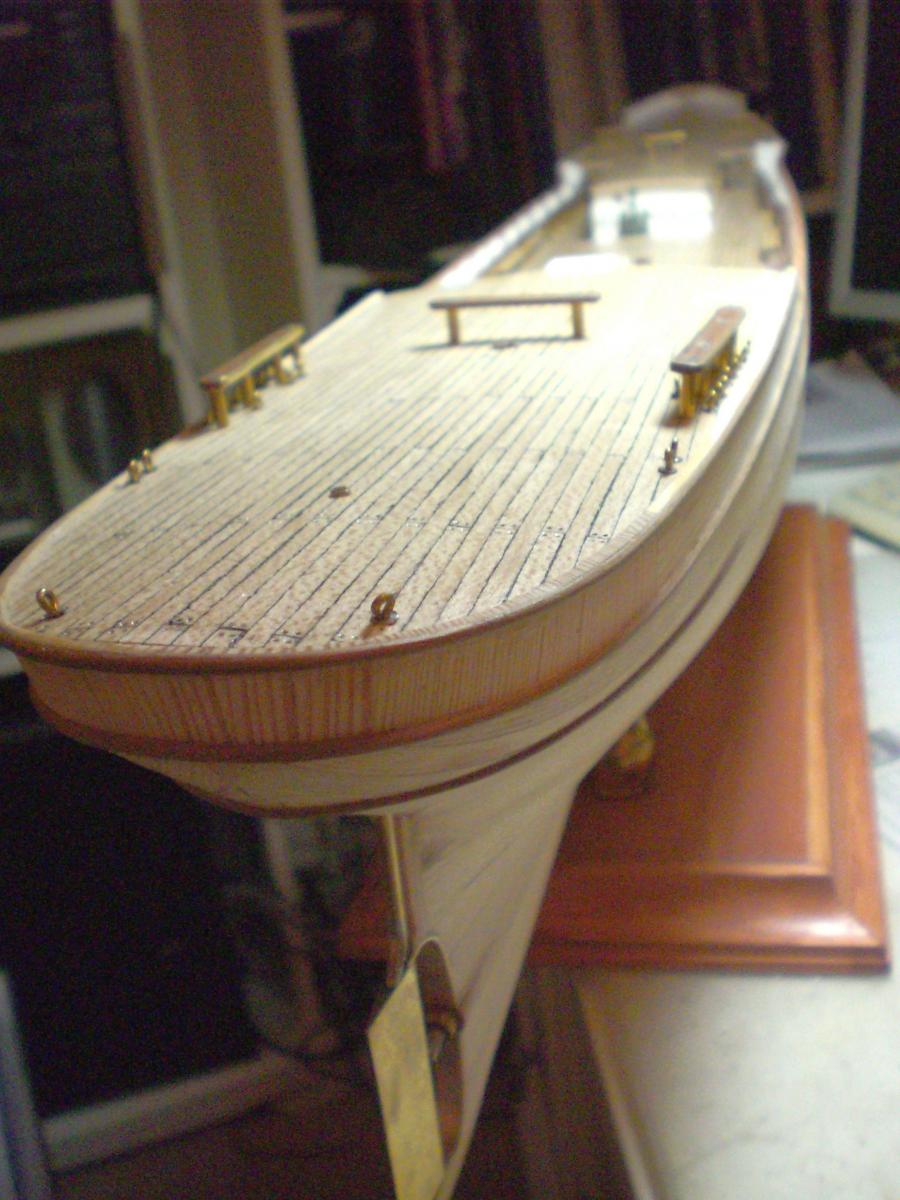
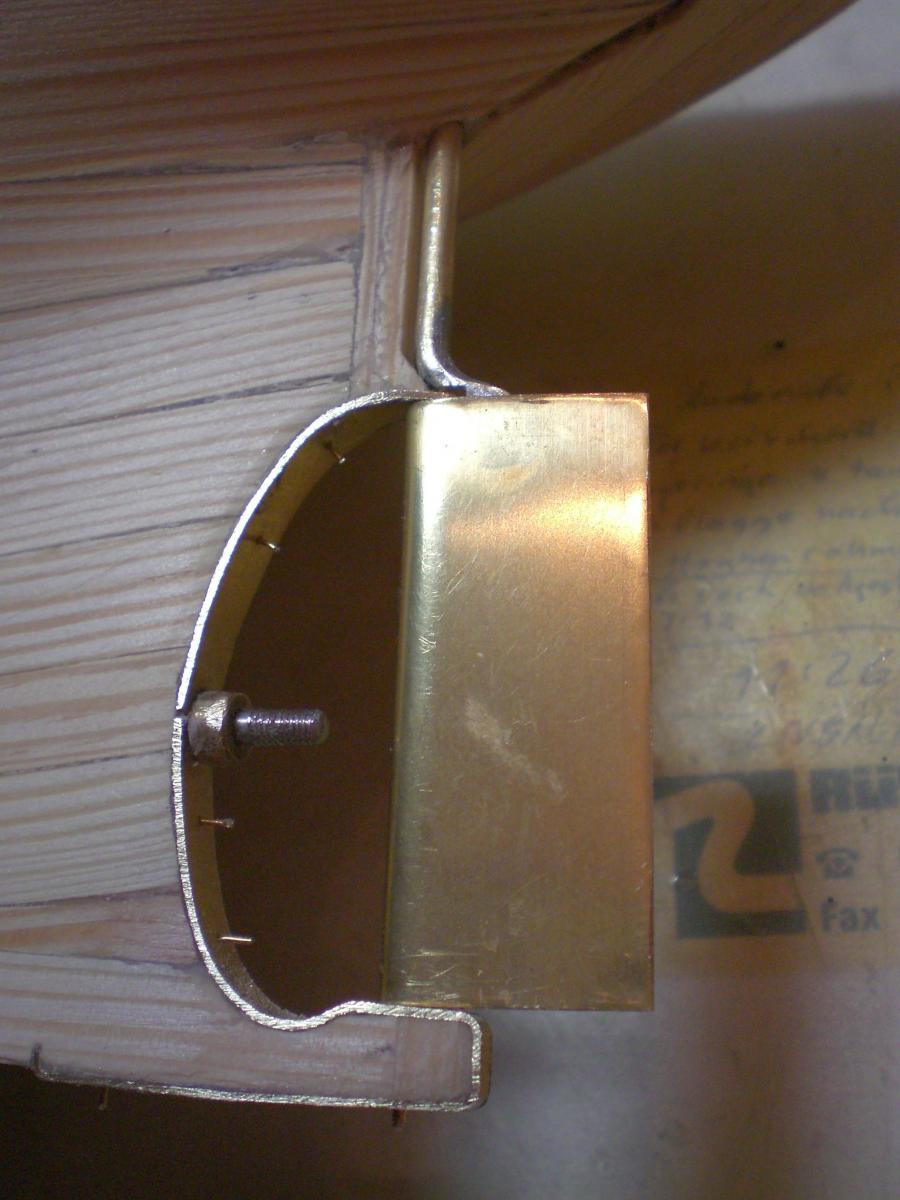
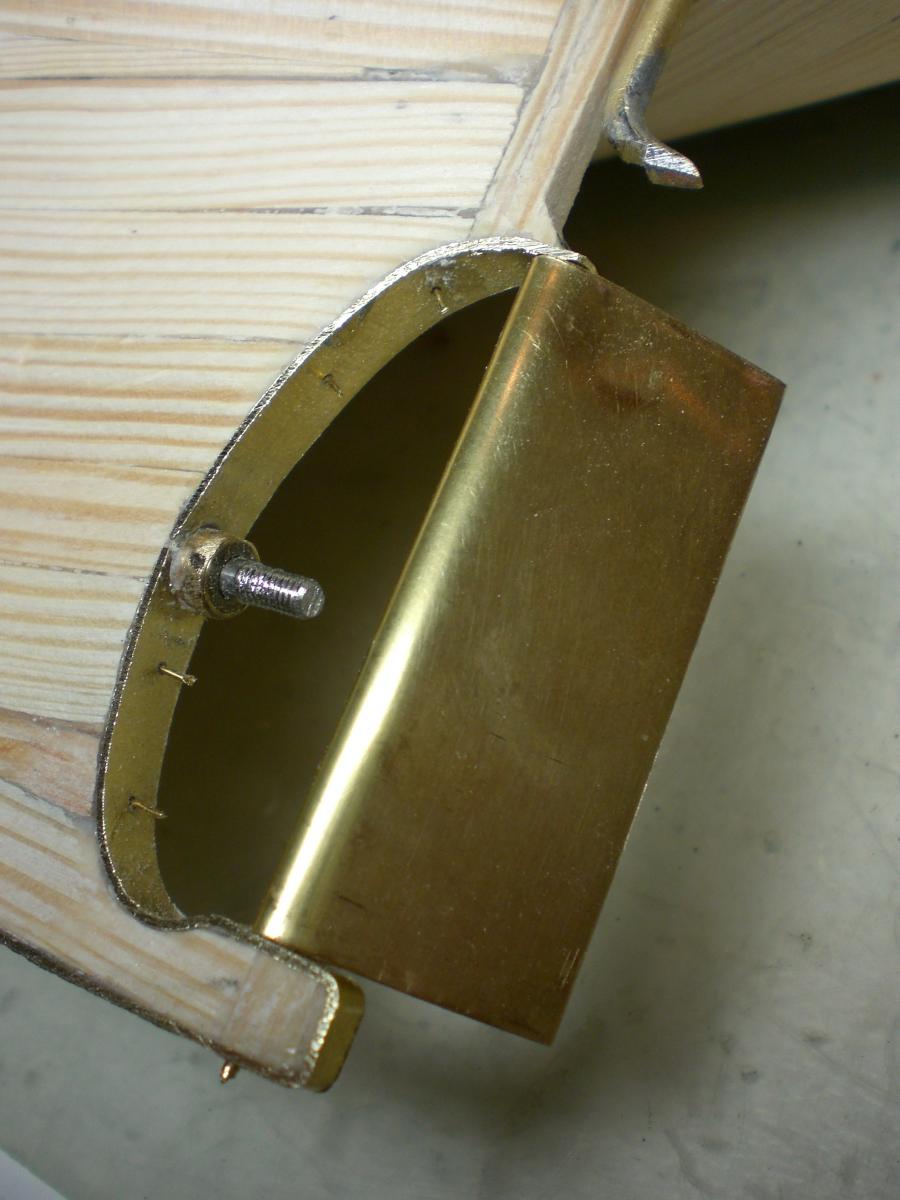
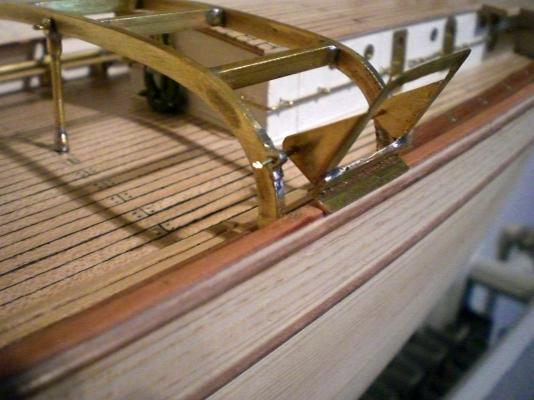
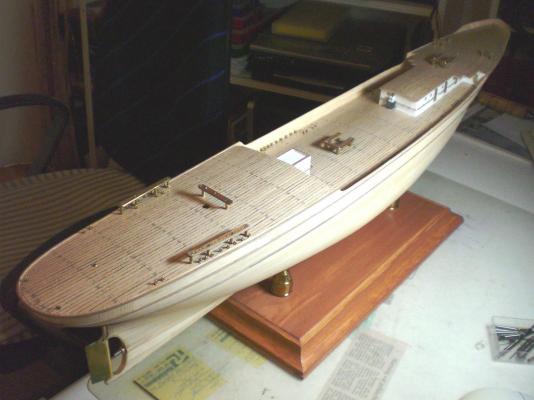
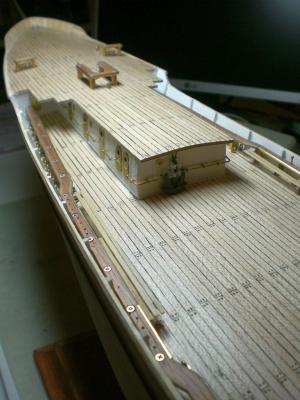
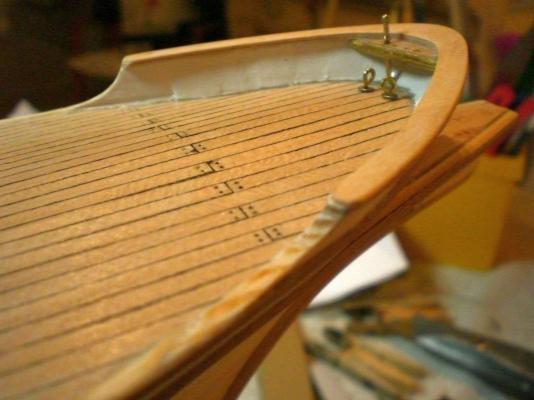
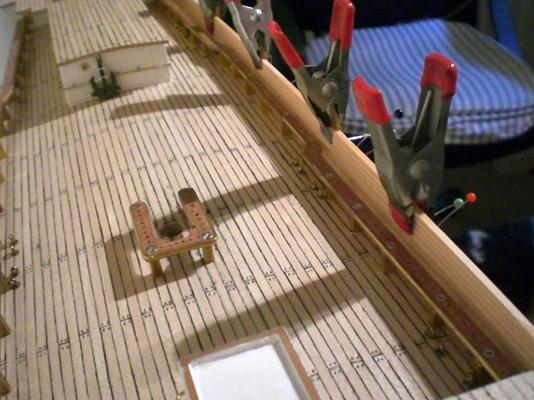
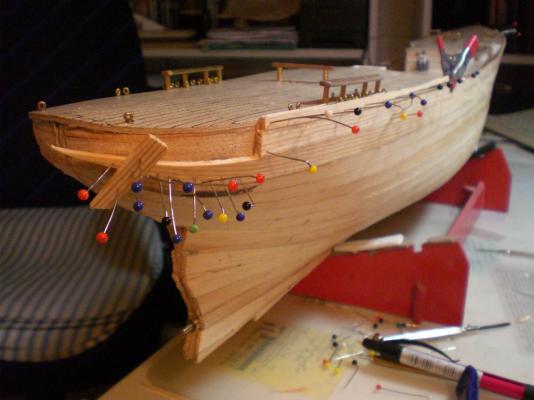
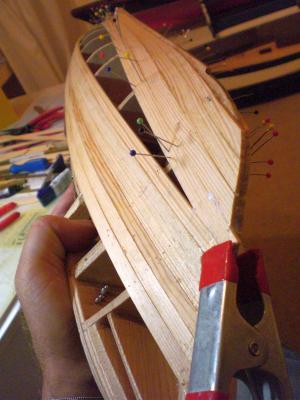
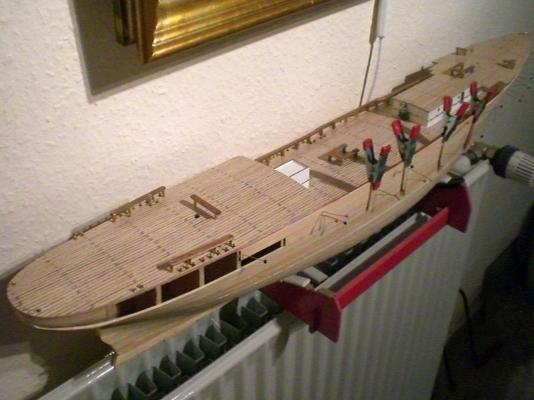
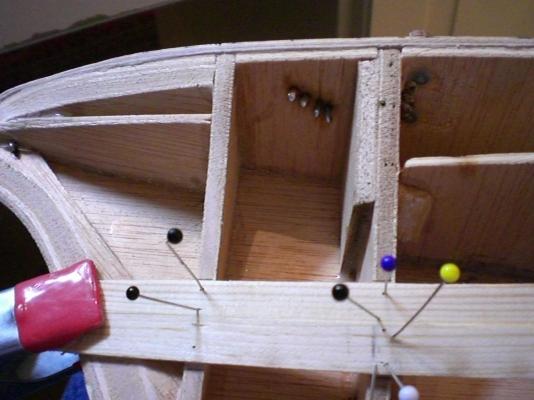
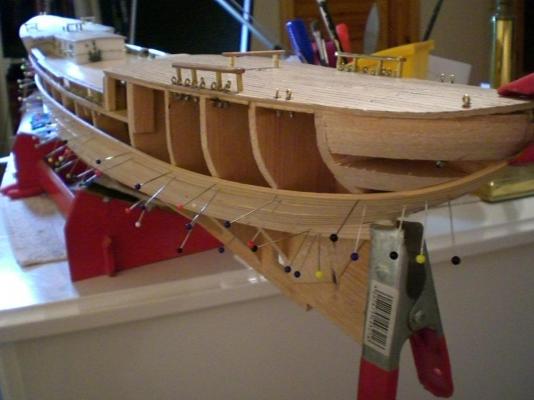
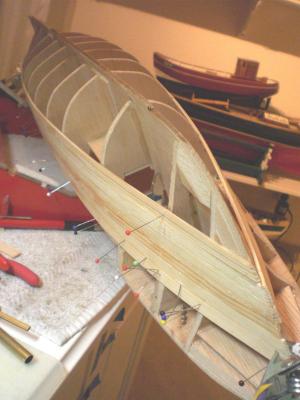
Build log part 11 the ladder like fields dimensions orientate on the grating (later fitted) measurements the boatrack supports are screwed done under the same screws as the pinrack rails welldeckview looking foreward the functional flip launching boards shall take up the inflatable raft Containers (here closed) here flipped open, also the Center Support deck to boatrack Support can be seen here the plating of the hull Begins. The main plating to be seen in the next build log part Build log part 12 to follow.... Nils


- 222 replies
-
- 10
-
-
- gorch fock
- barque
- (and 2 more)
-
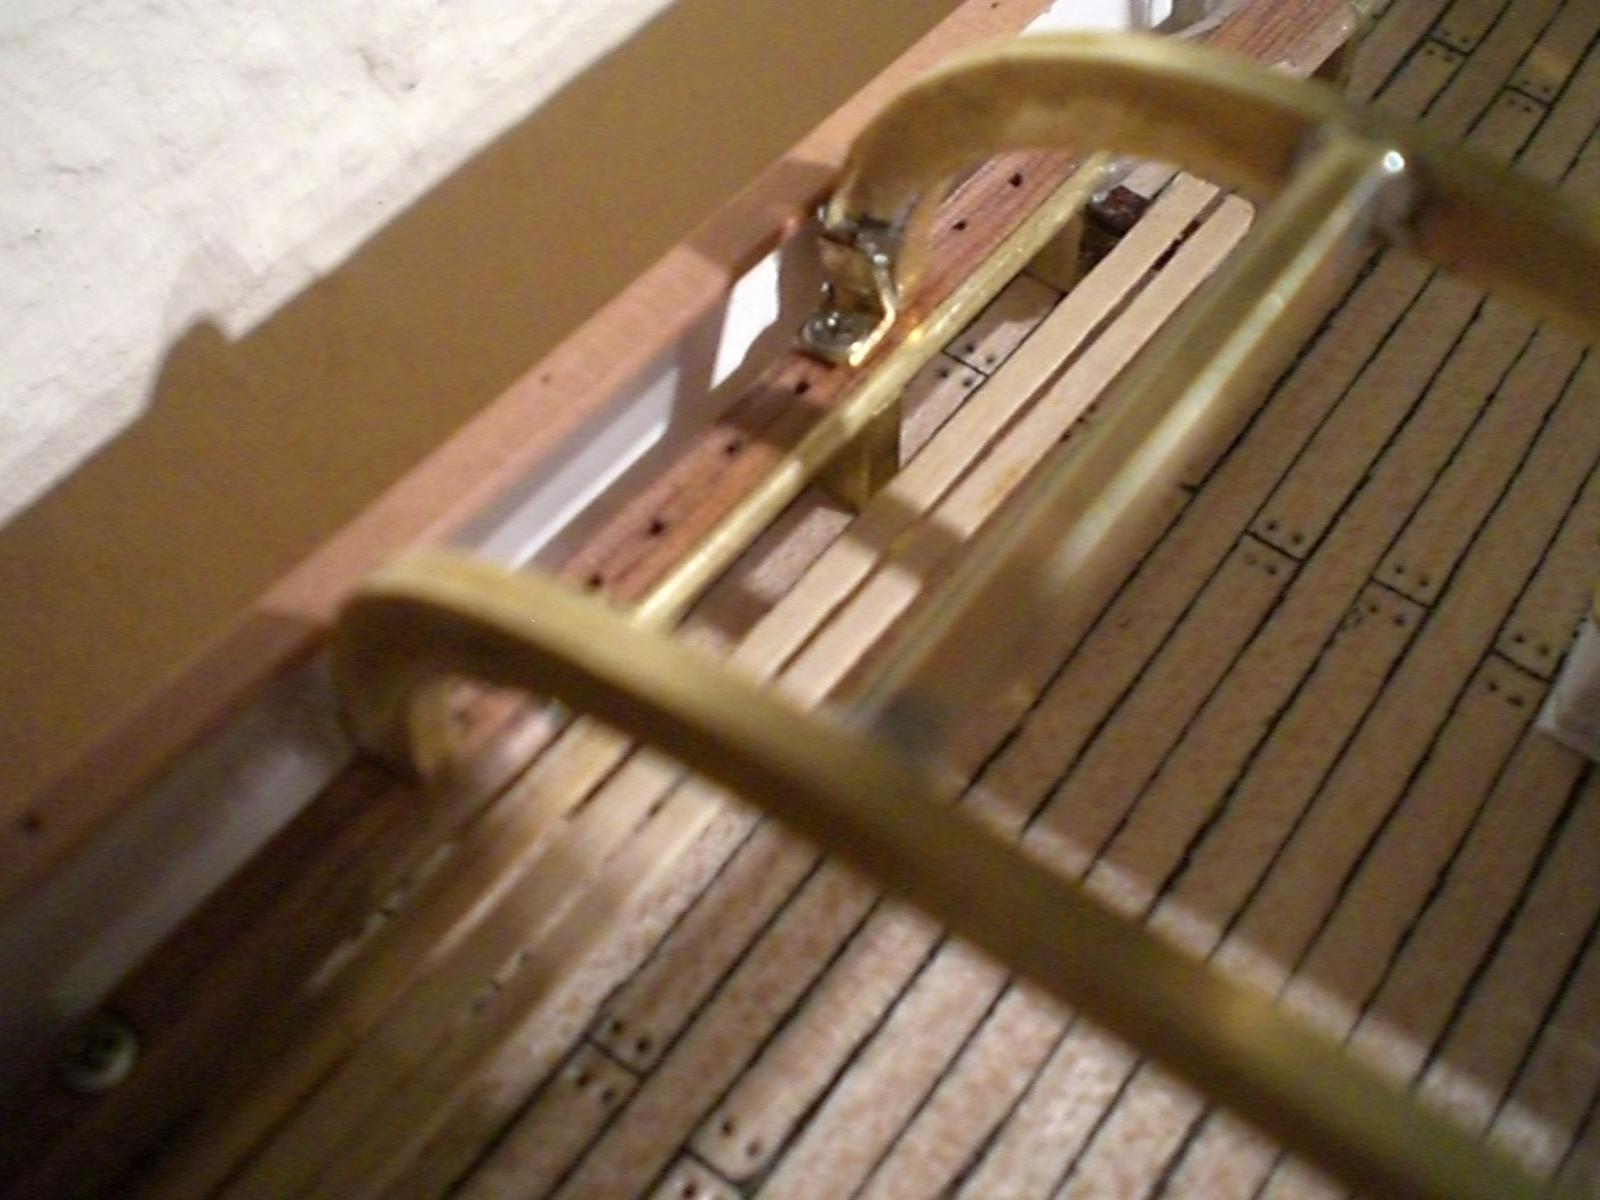
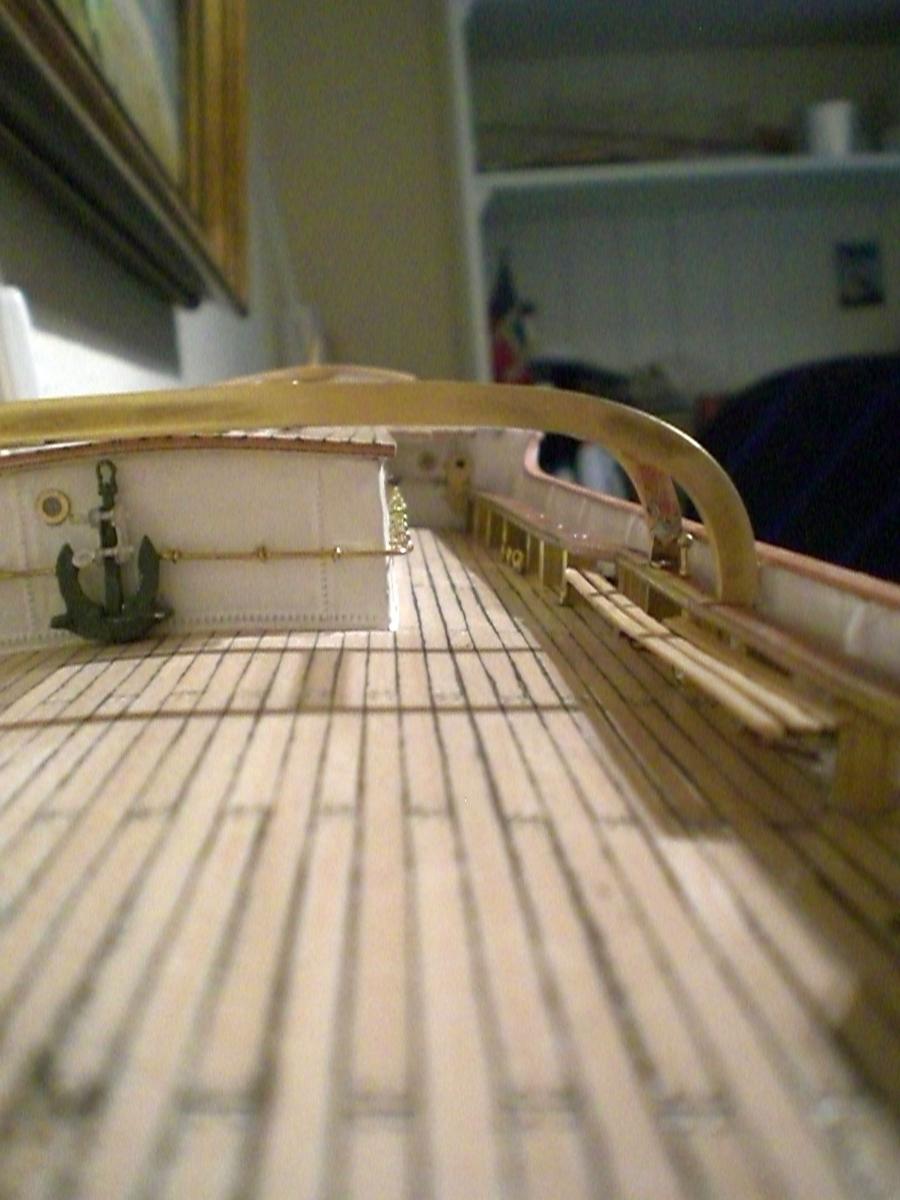
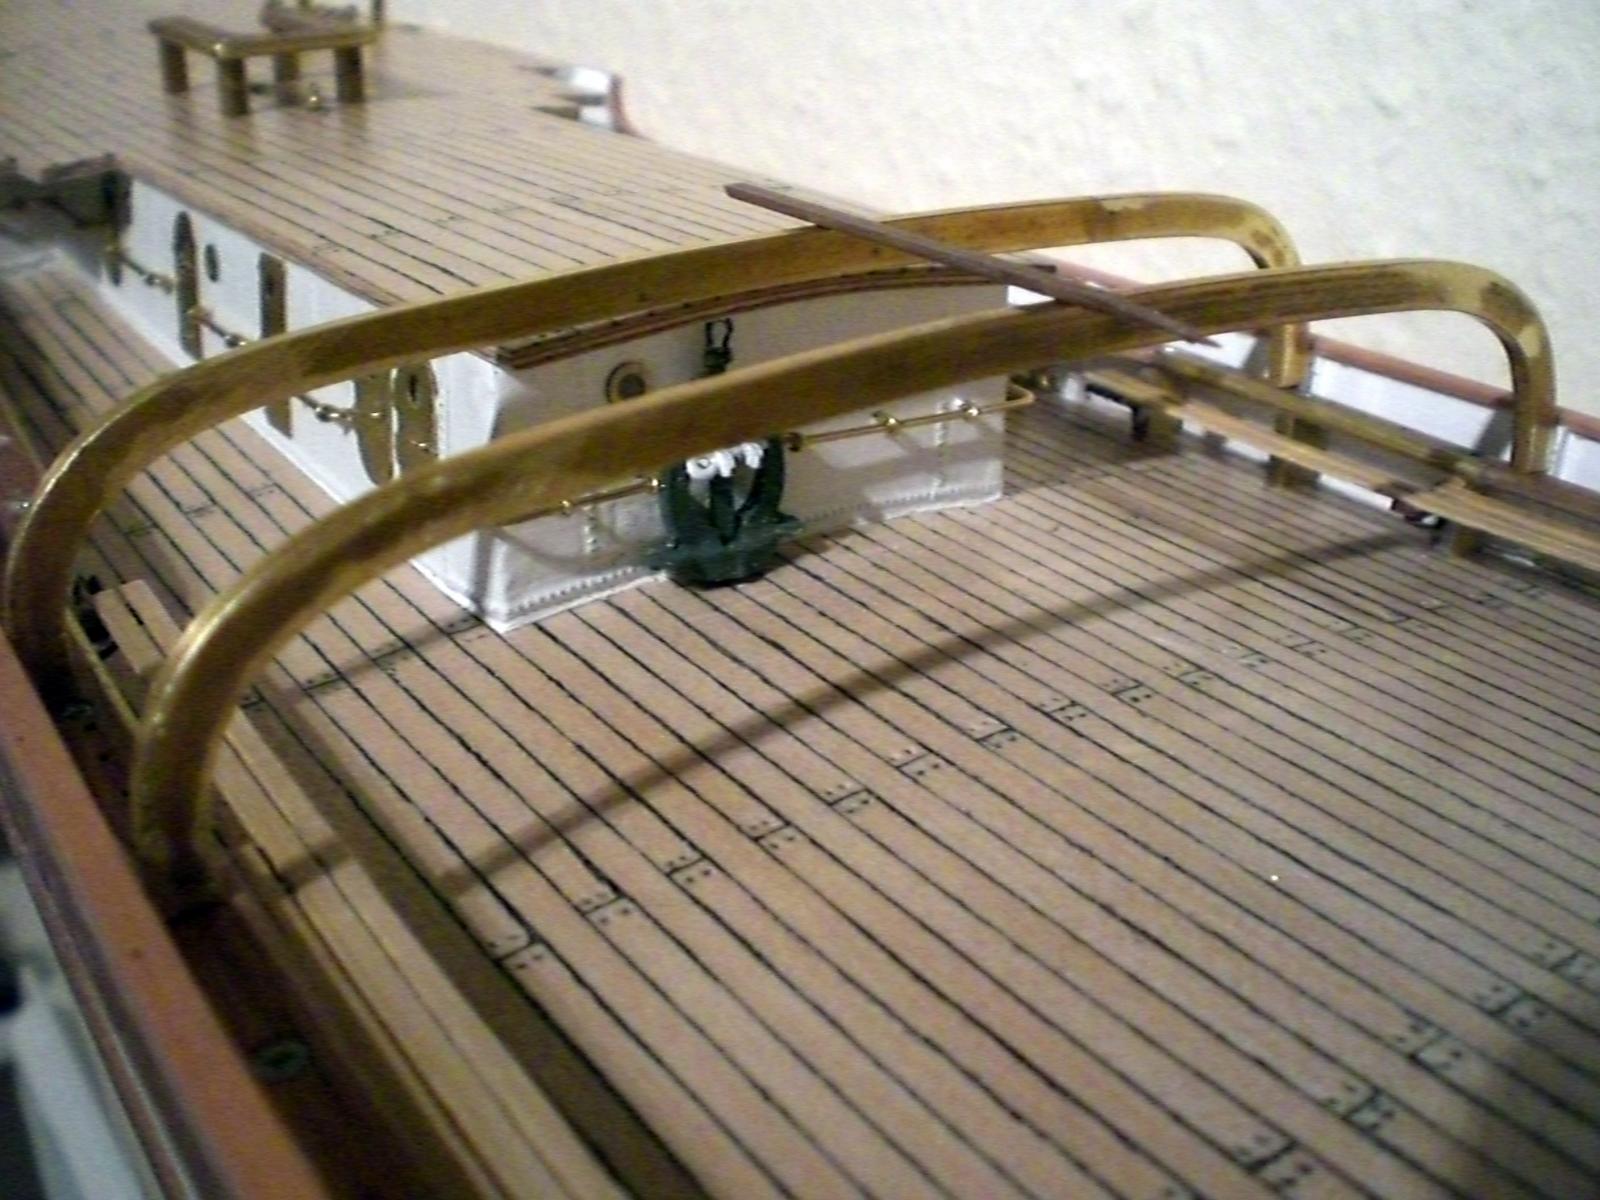
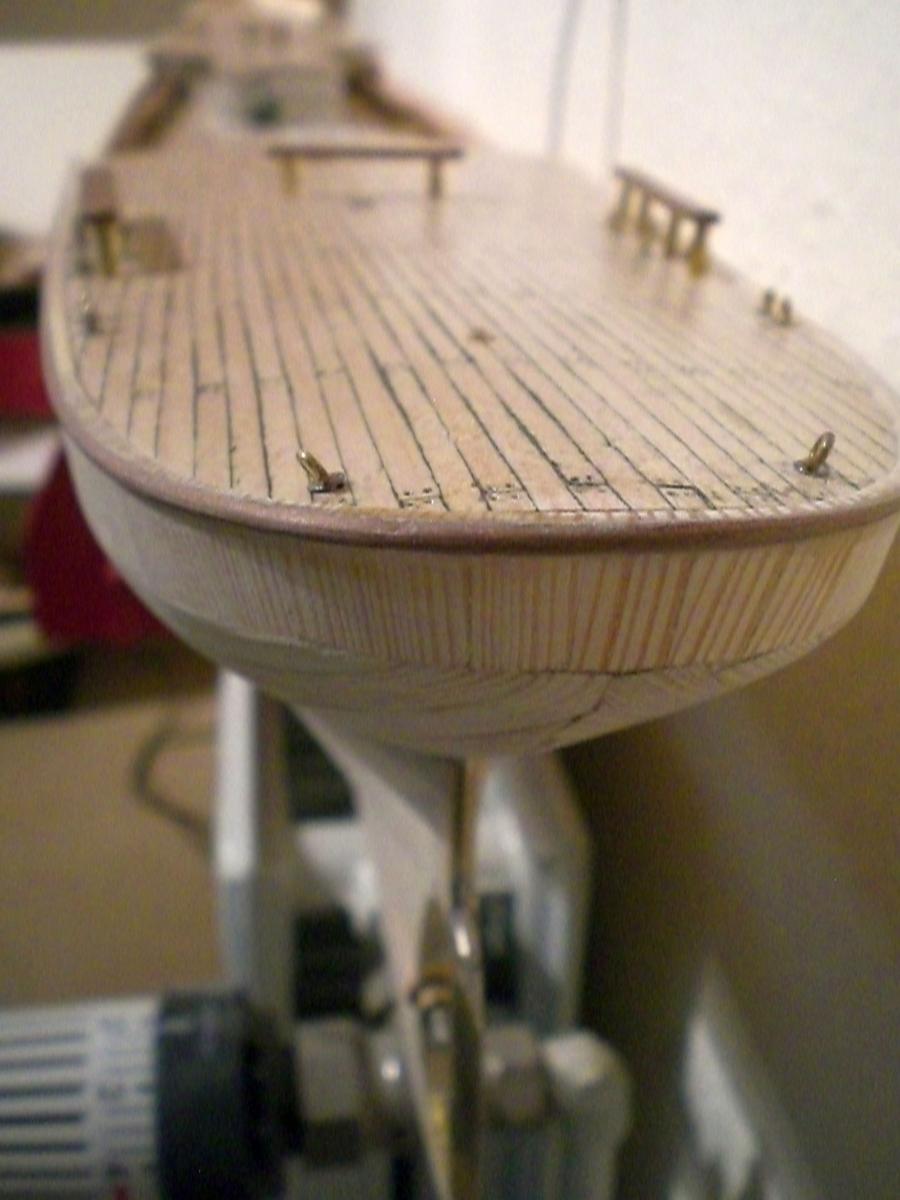
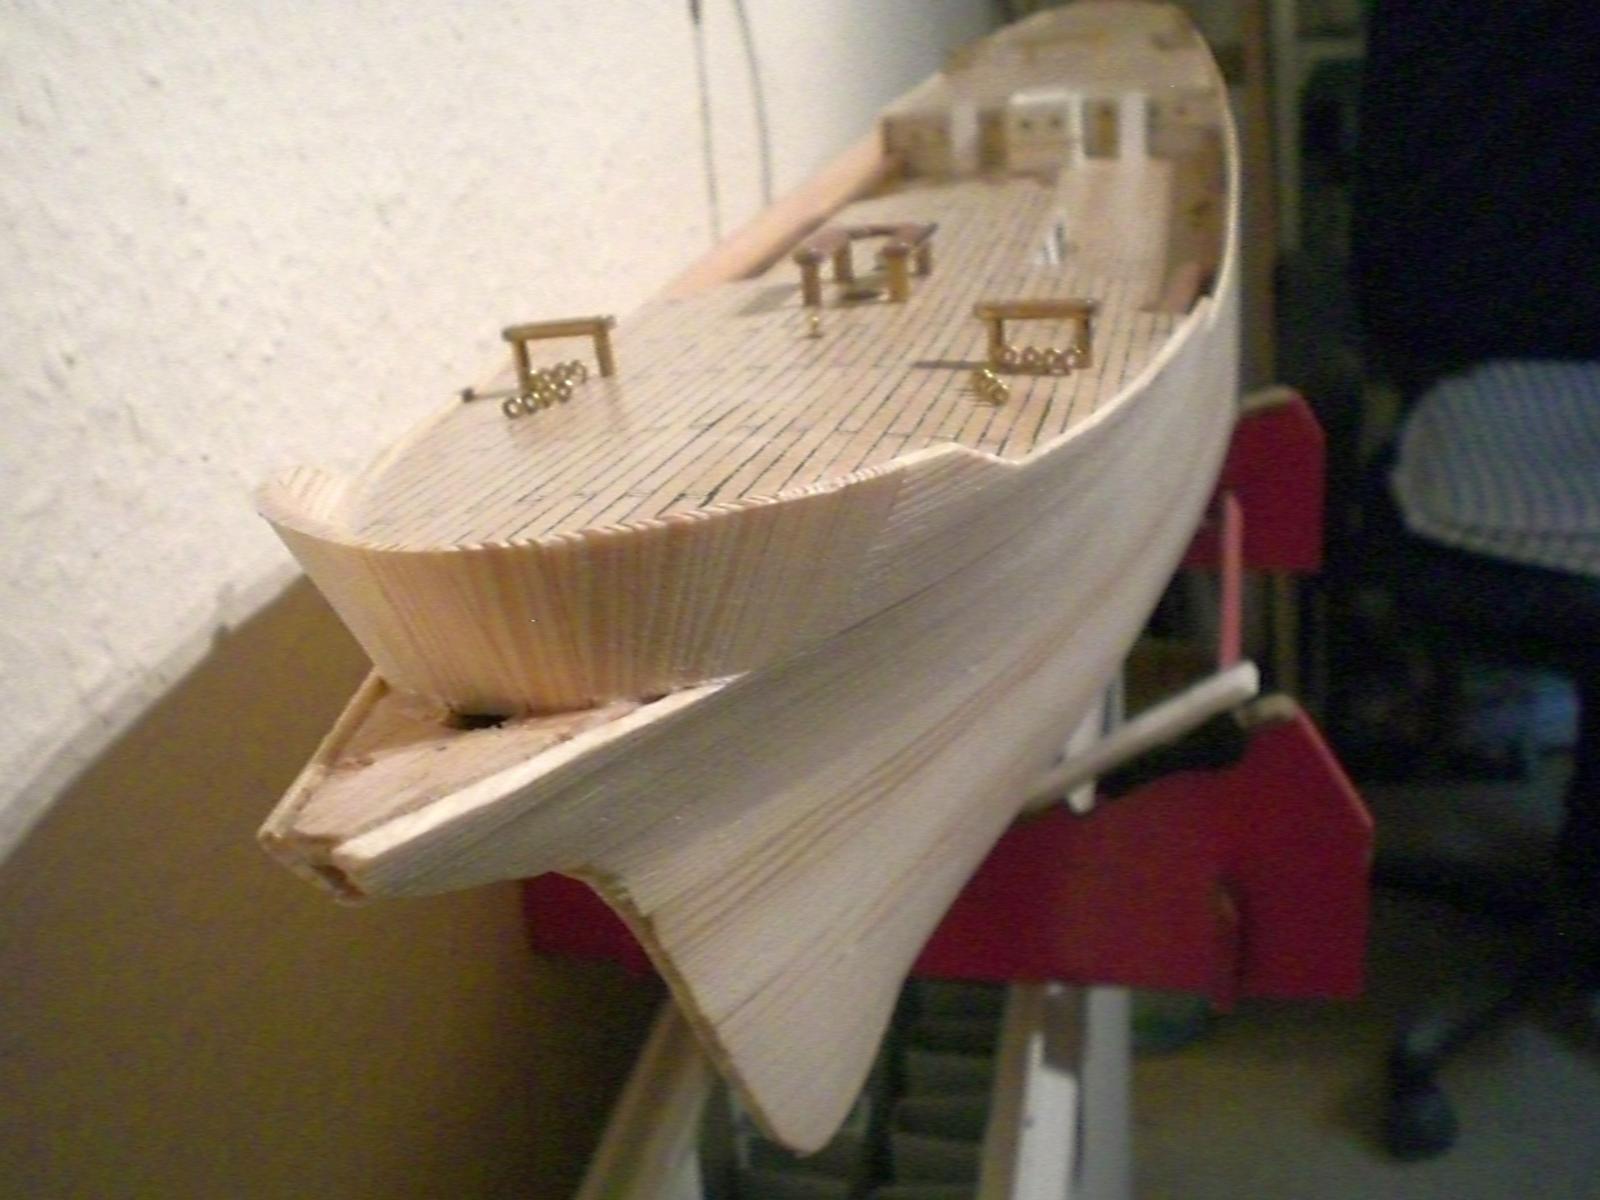
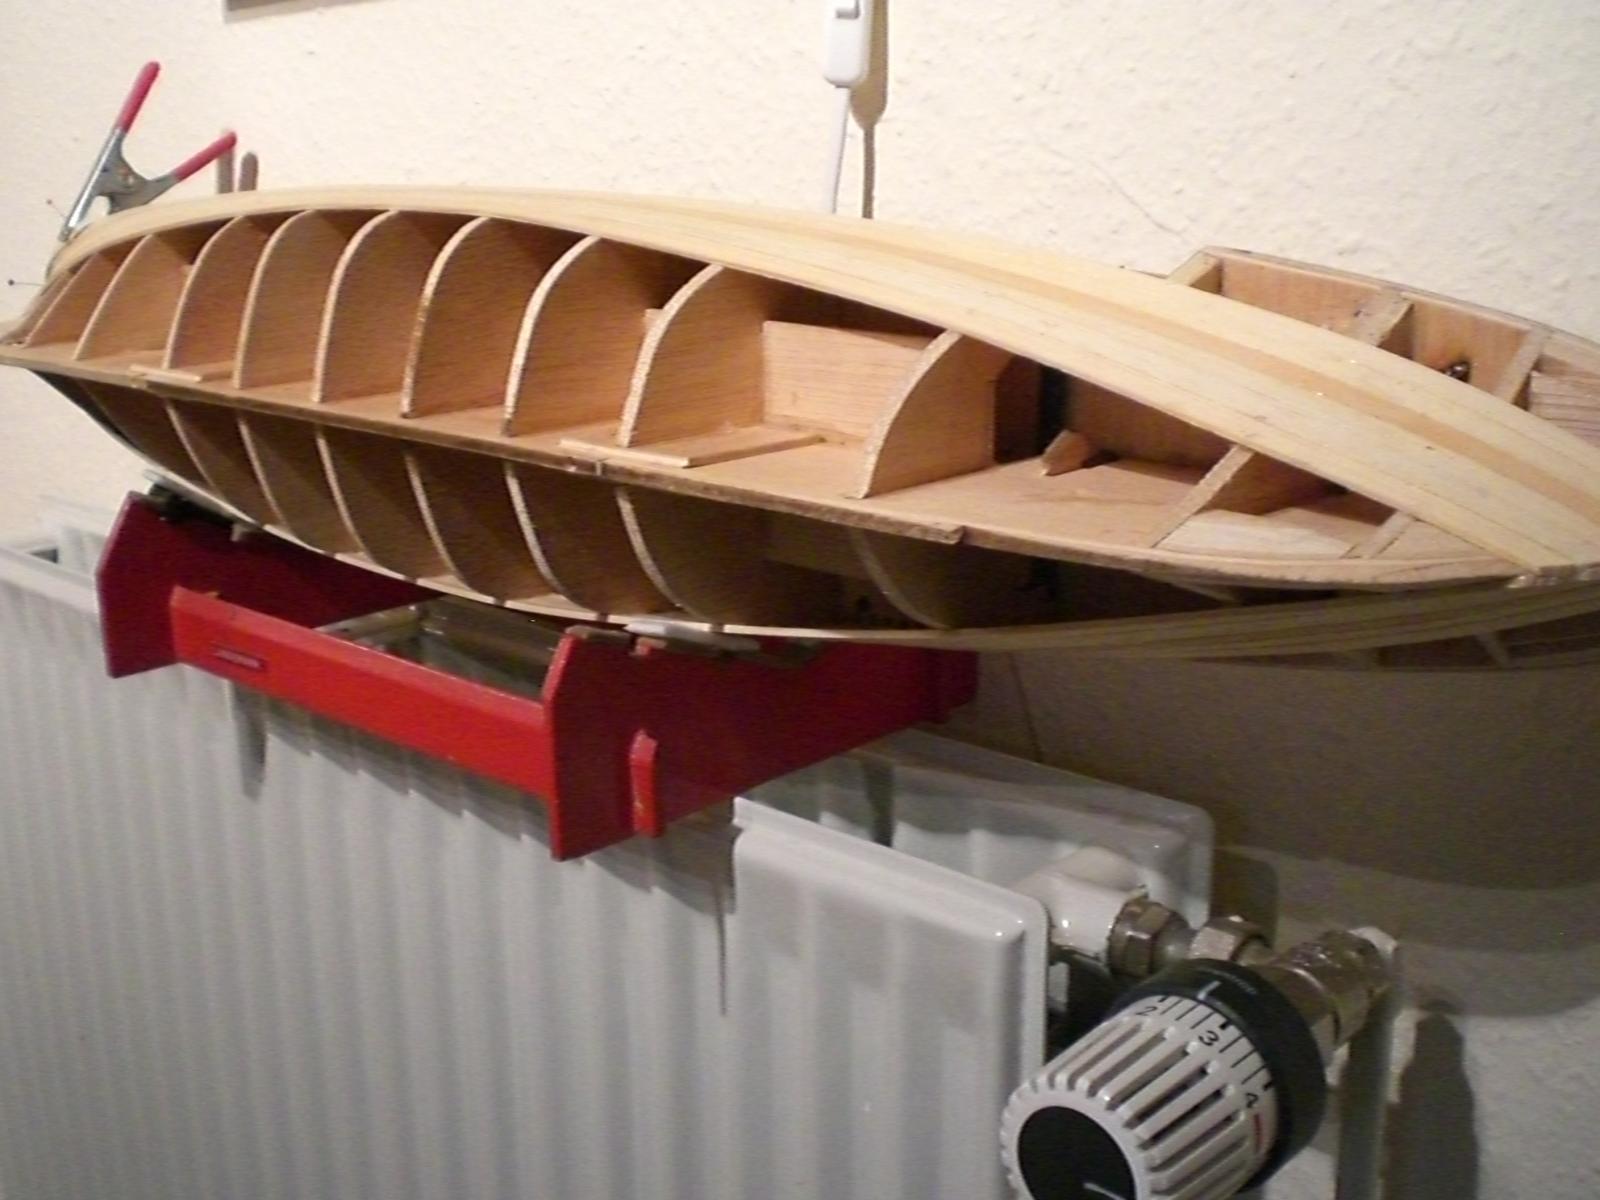
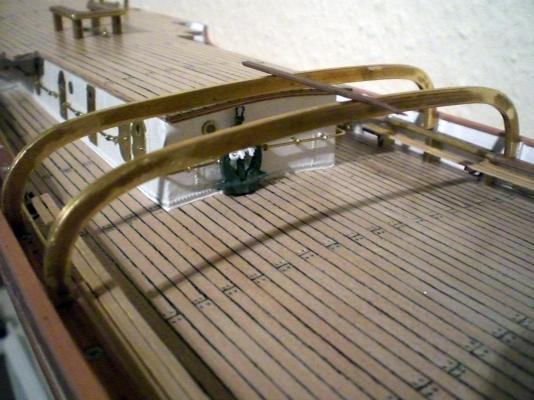
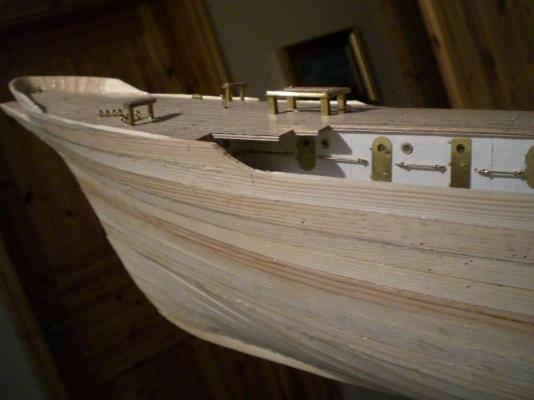
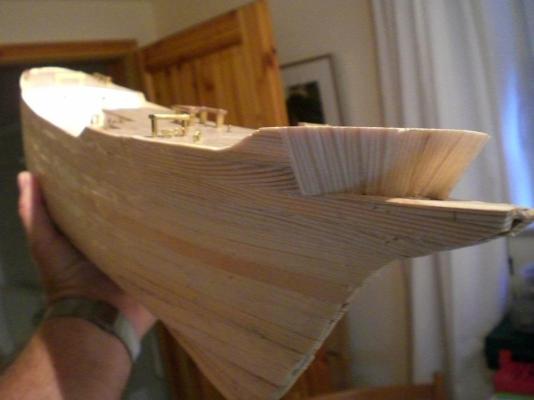
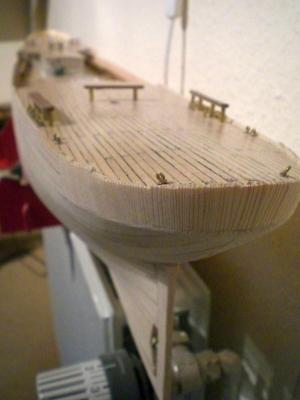
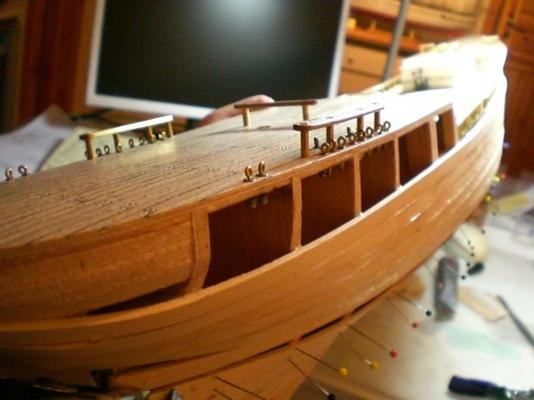
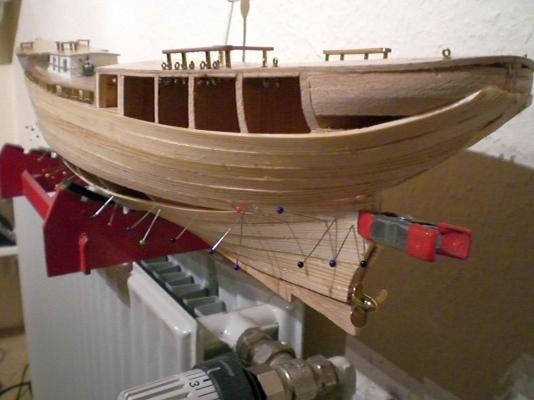
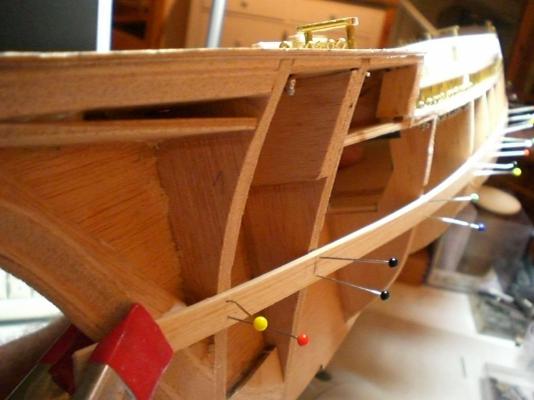
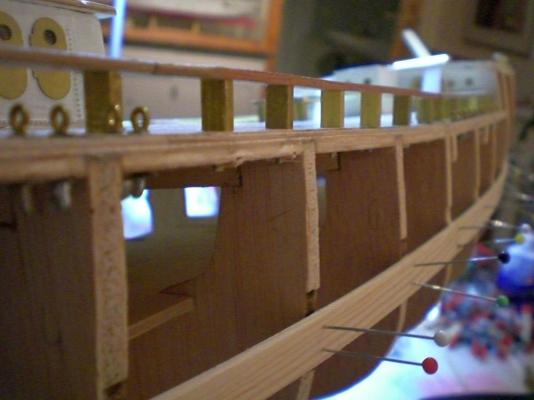
Build log part 10 main work on the hull done now, ready for the plating Crew rest racks bulwarks still Need upper handrails soldered brass jib boom fitted in and angle checked handrail for bow bulwark bow view of hull bump rails rather "empty" decks Fitting in for the racks of the boatstation Build log part 11 to follow... Nils


- 222 replies
-
- 9
-
-
- gorch fock
- barque
- (and 2 more)
-
Thanks for your word Piet, Nils
-
Thank you John Nils
-
Thank you Nenad Nils
-
David this may be source if you should`nt find beech elsewhere http://scale-modellbau-shop.de/Materialien/Hoelzer/Biegeleisten/?Materialien=Hoelzer&Biegeleisten=&cat=c361&cPath=69_82_361&page=2&XTCsid=eetd74jblirt8i6d0u0m3hk9r7 if you are looking for flexible beech, it is called "Biegeleiste" here Nils
-
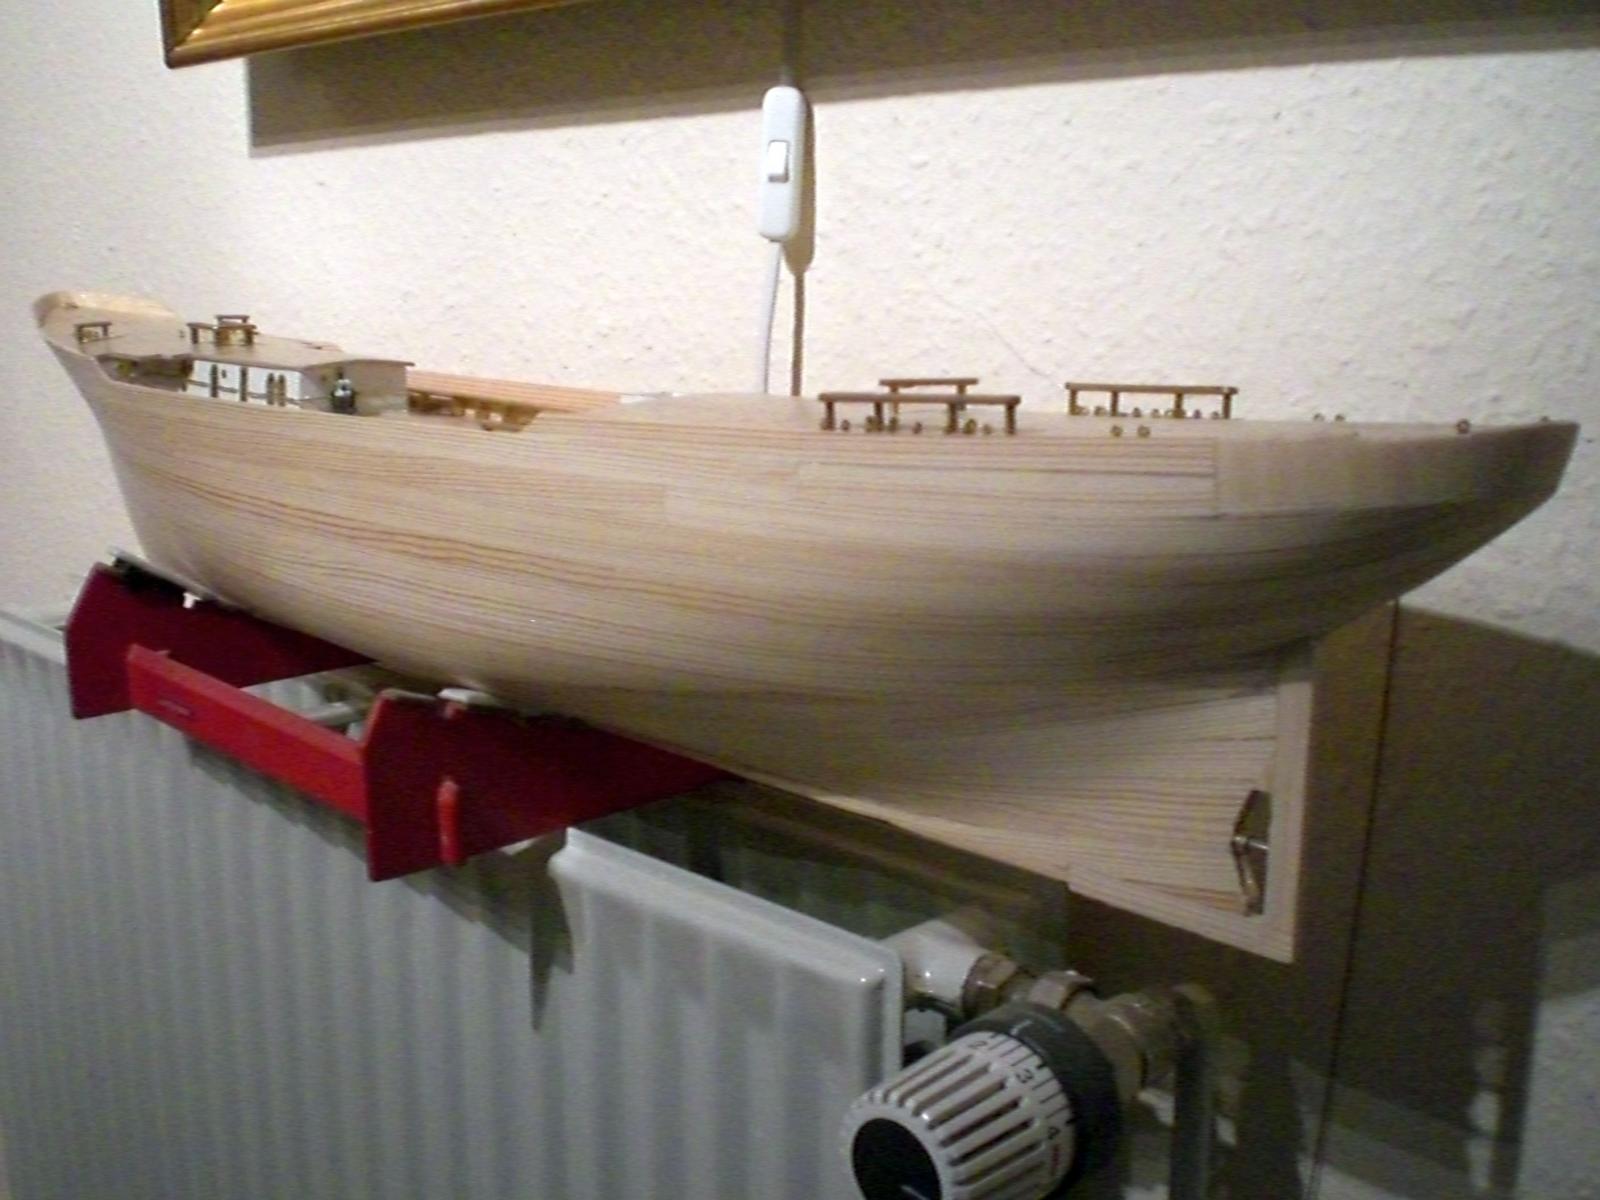
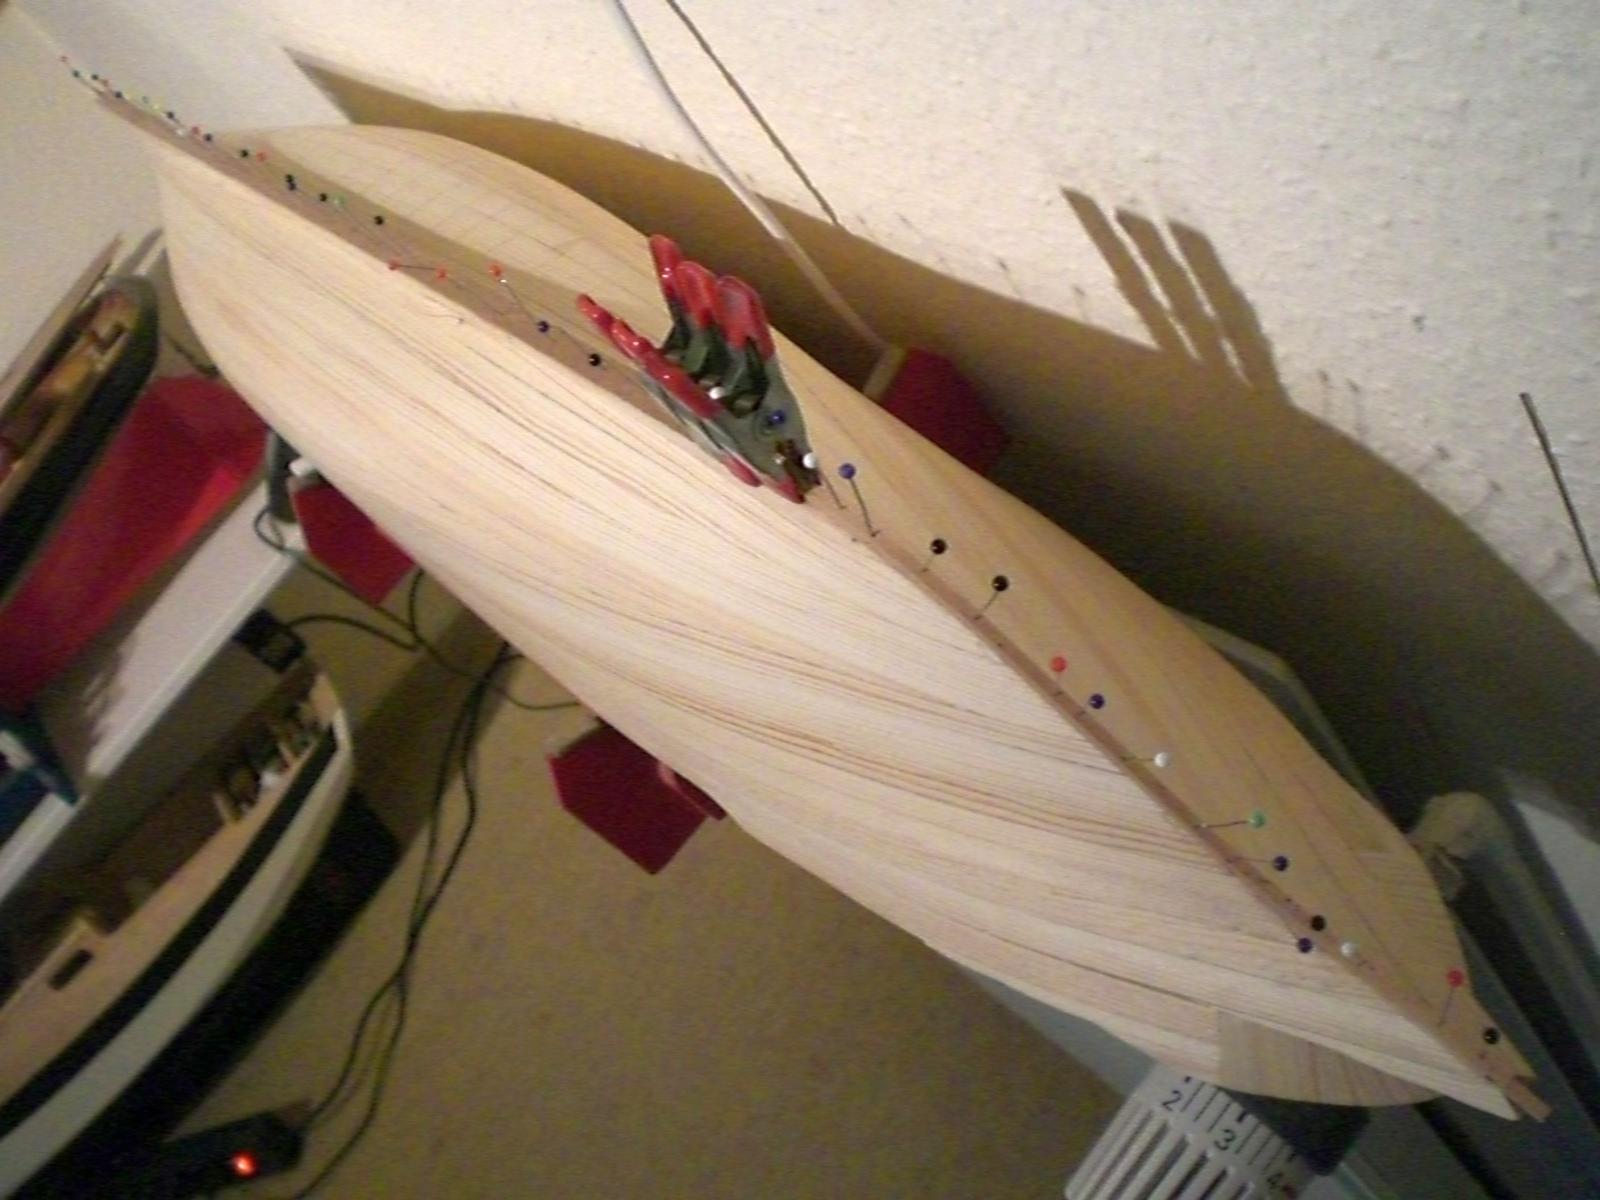
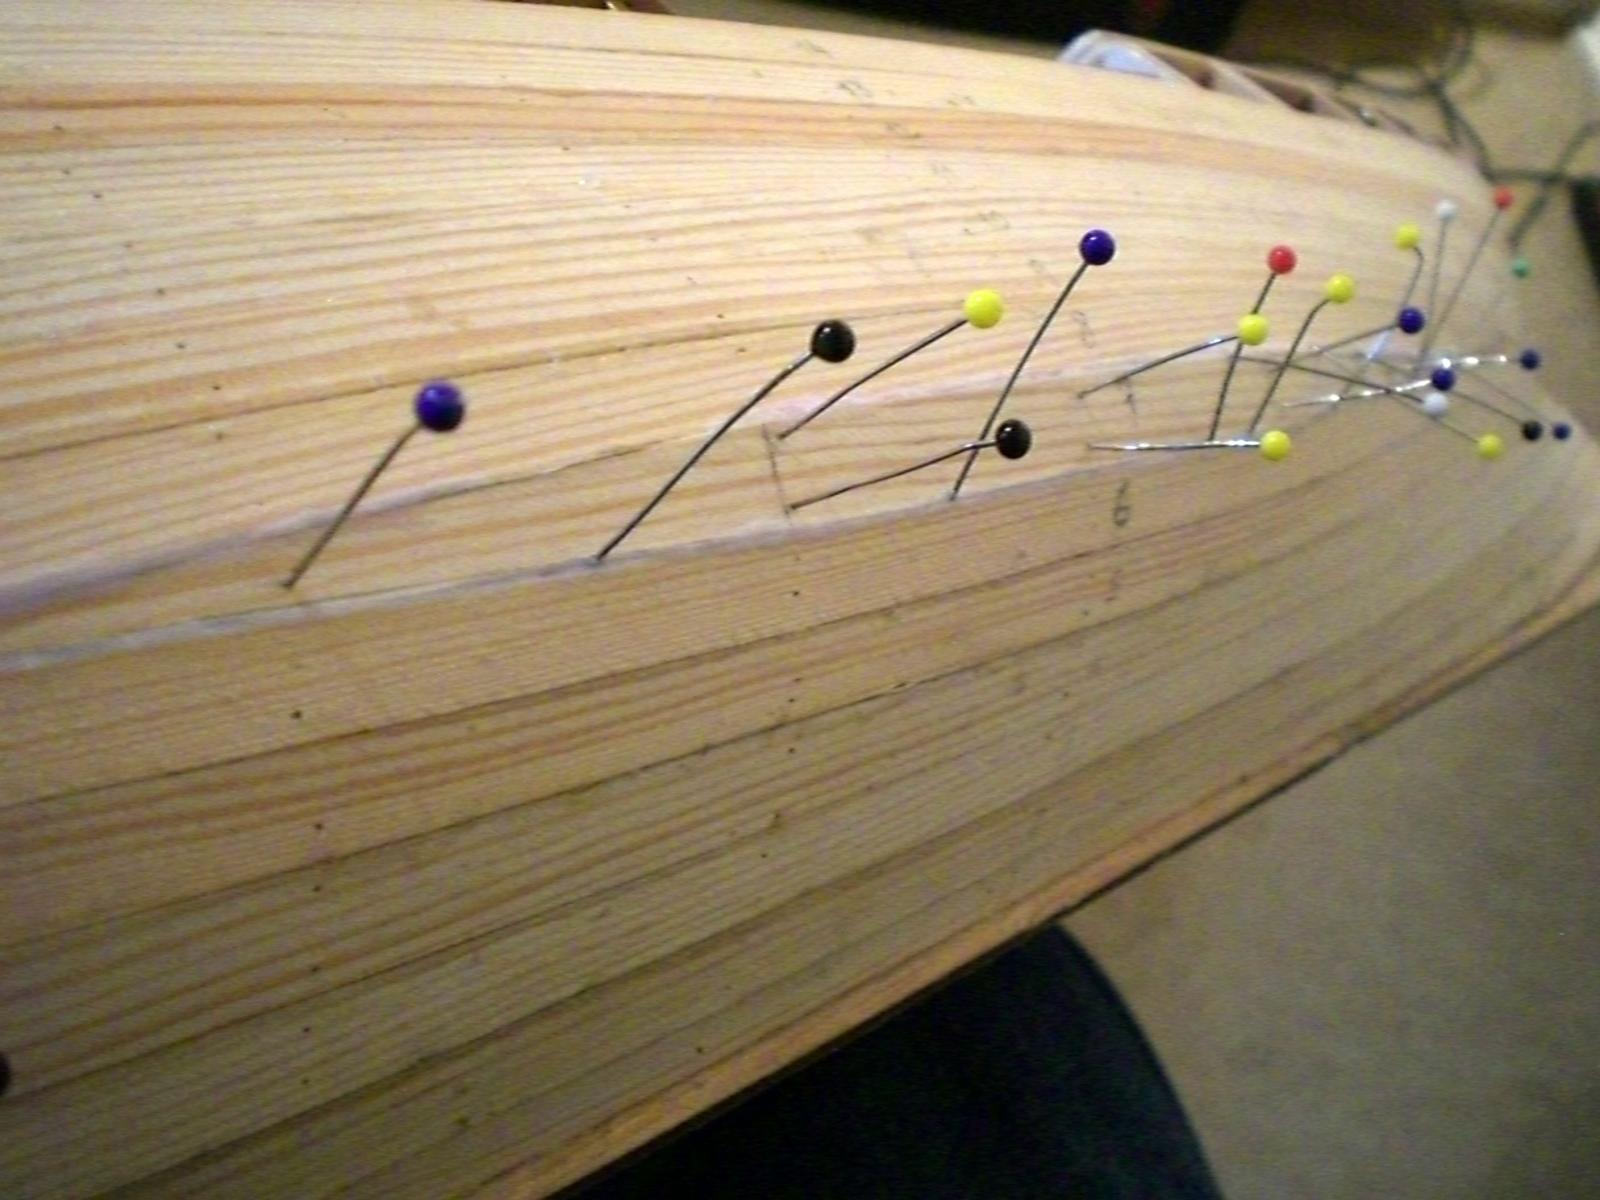
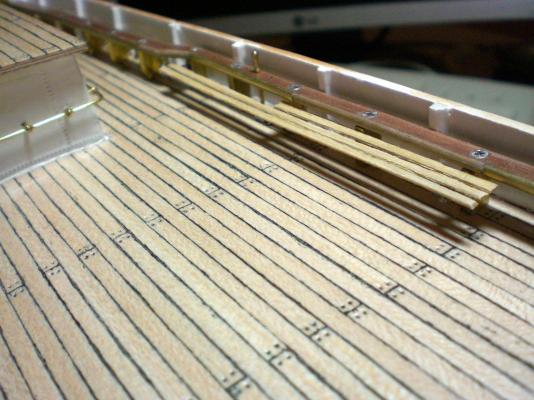
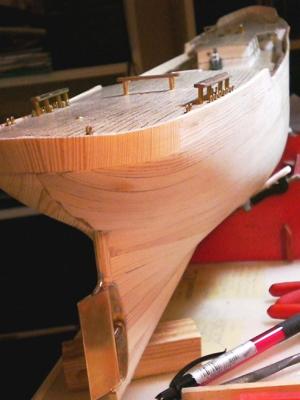
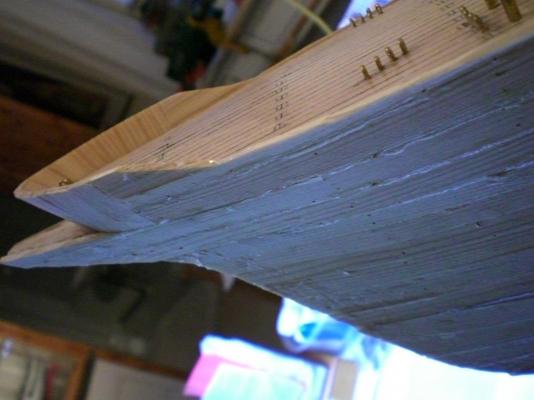
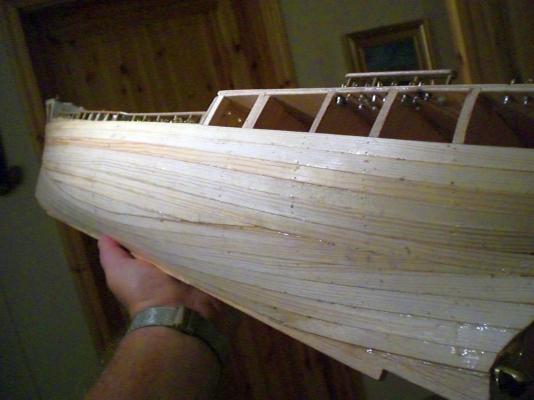
Build log part 9 time to do the hull outside rails, use semiround 1 x 2mm nutwood here gives o nice border to the deck get the parallel distance to the first rail the Pins do`nt go through the rails, because of using CA here there would`nt be enough time for pushing the Pins in after Fixing the position propshaft claddings attached the lowest rail is the most tricky one rails completed, hull not so naked anymore this is the actual stand Build log part 10 to follow.... Nils


- 222 replies
-
- 9
-
-
- gorch fock
- barque
- (and 2 more)
-
nice words Doris, Thank you very much Nils
-
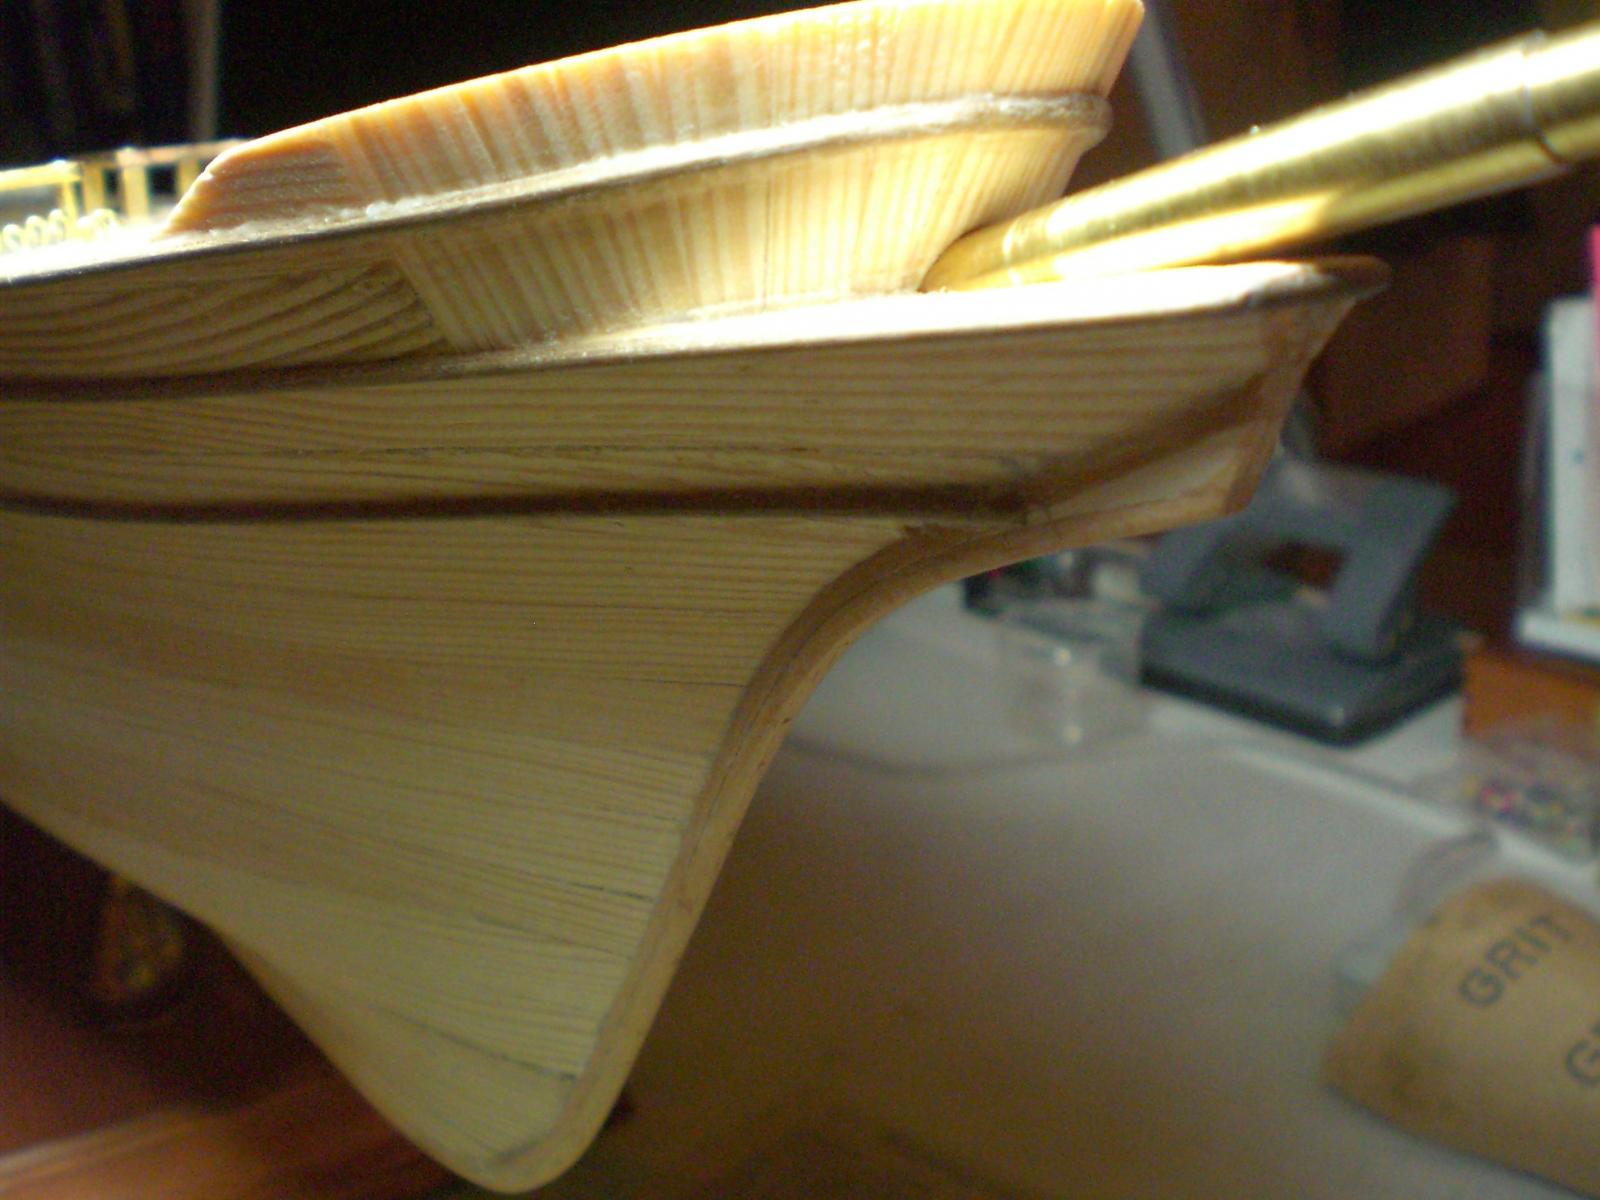
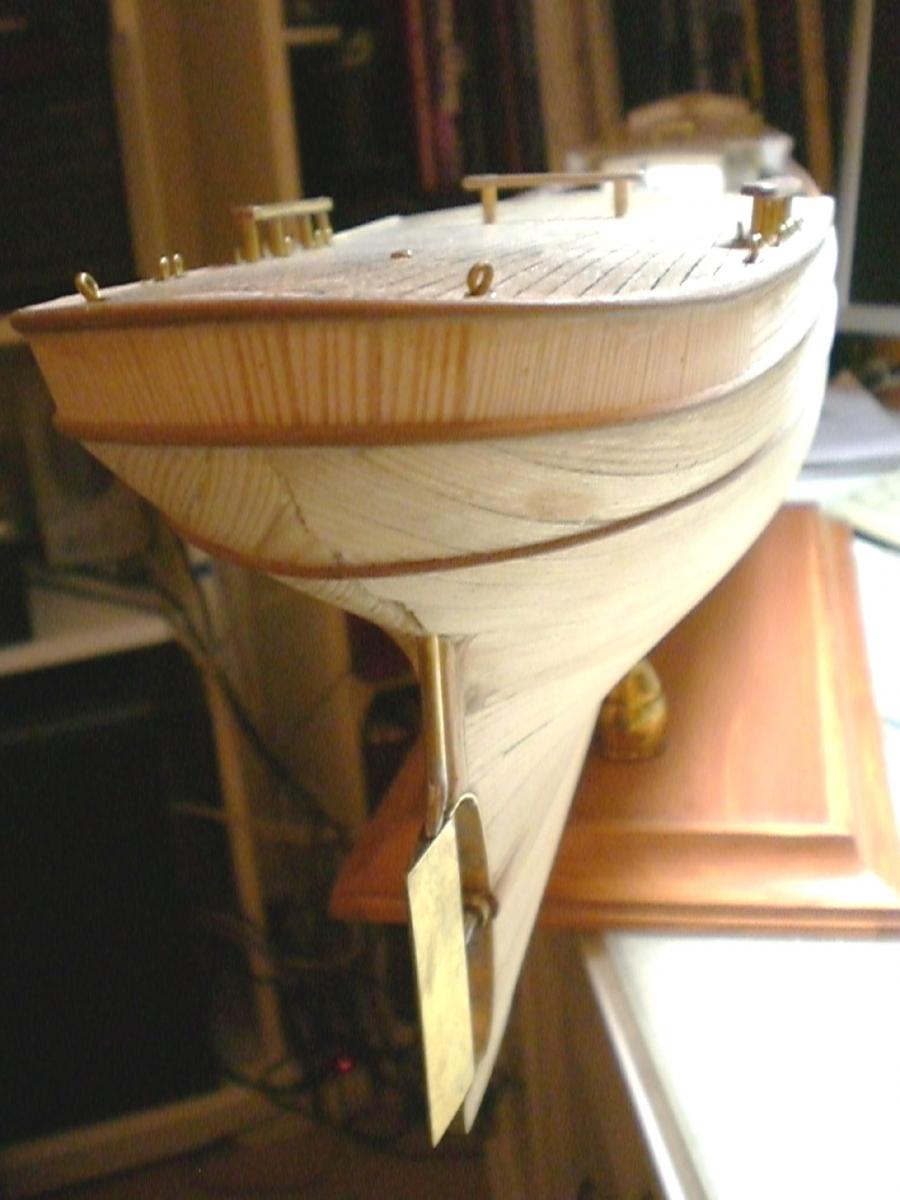
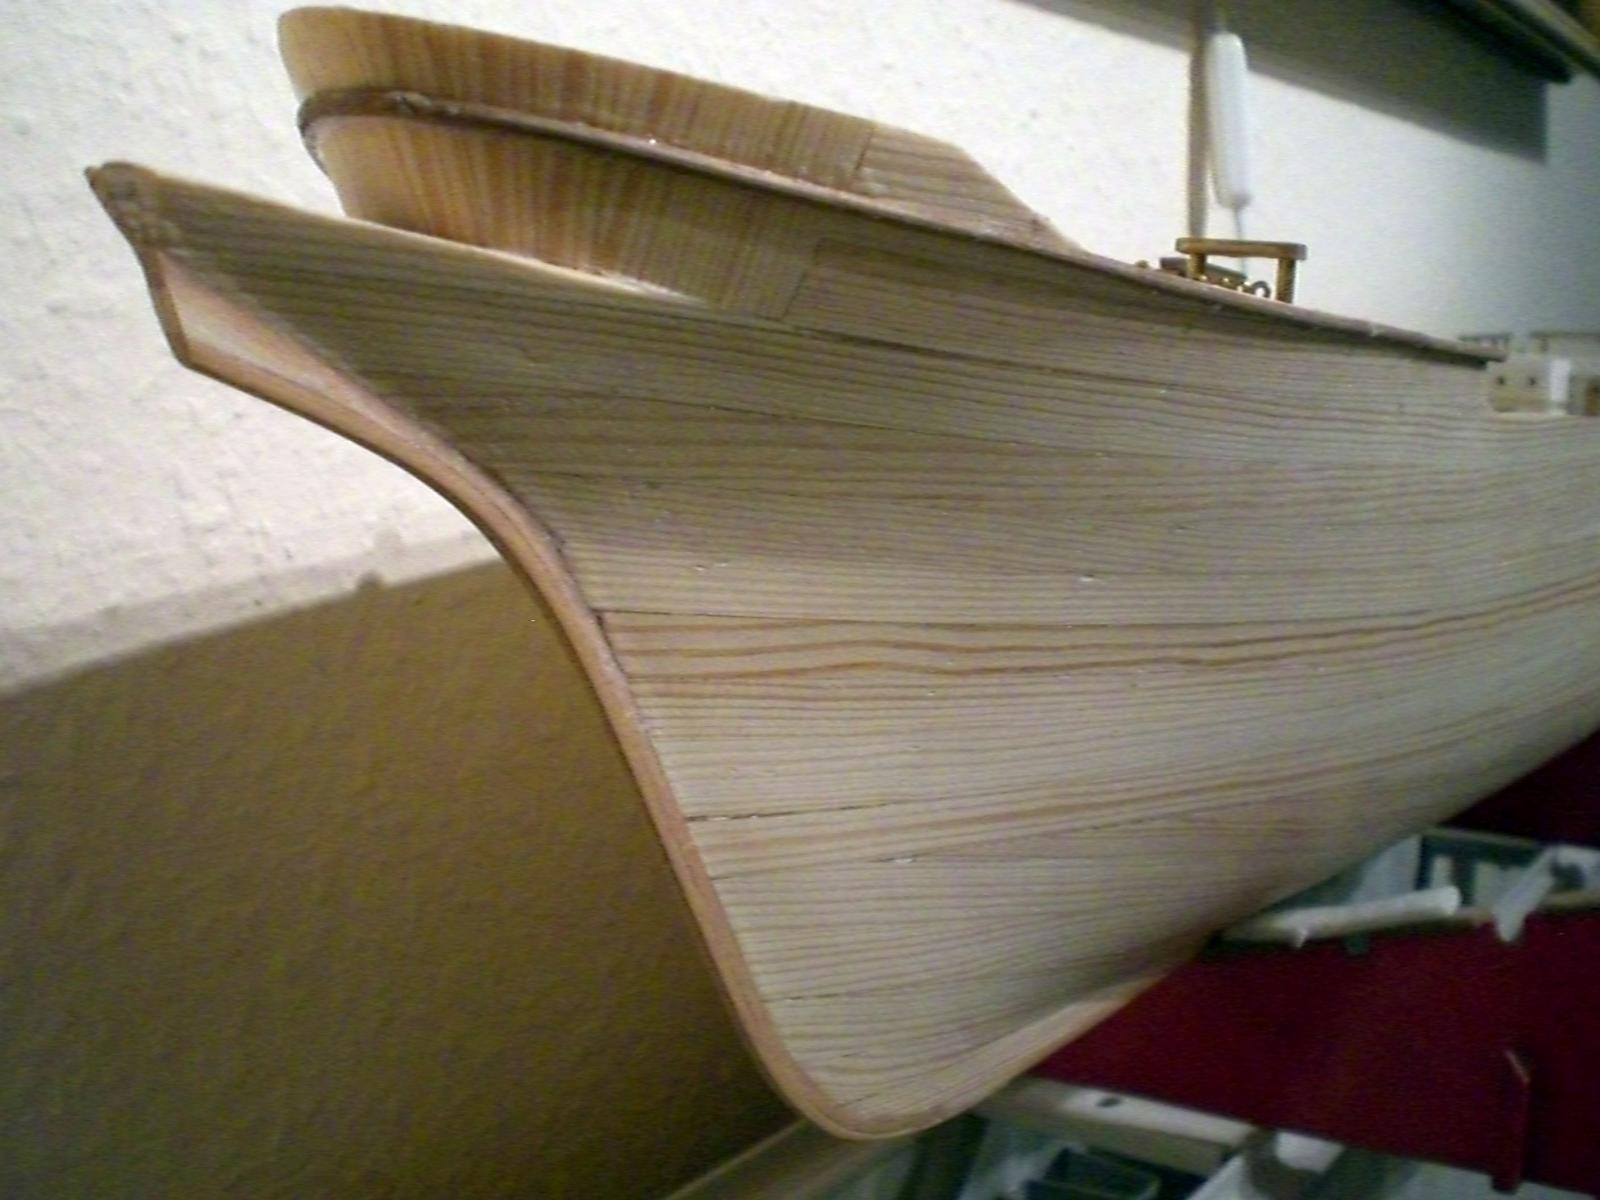
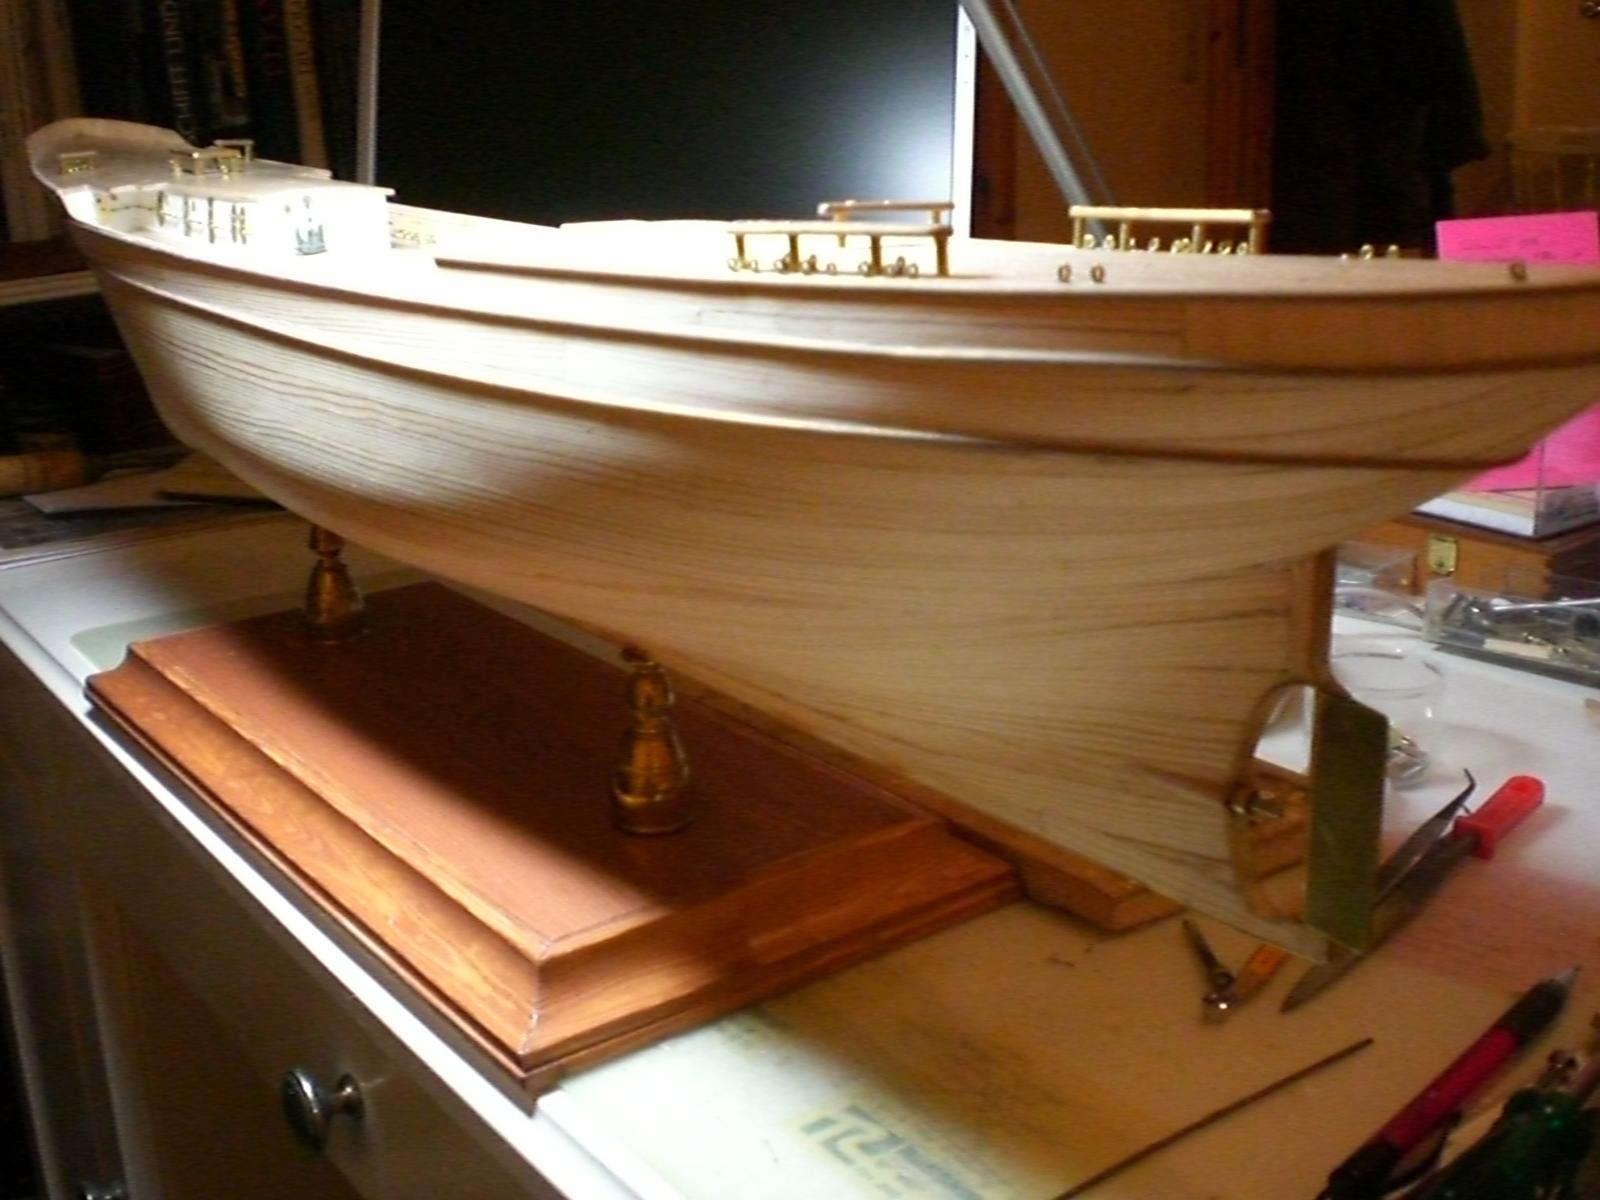
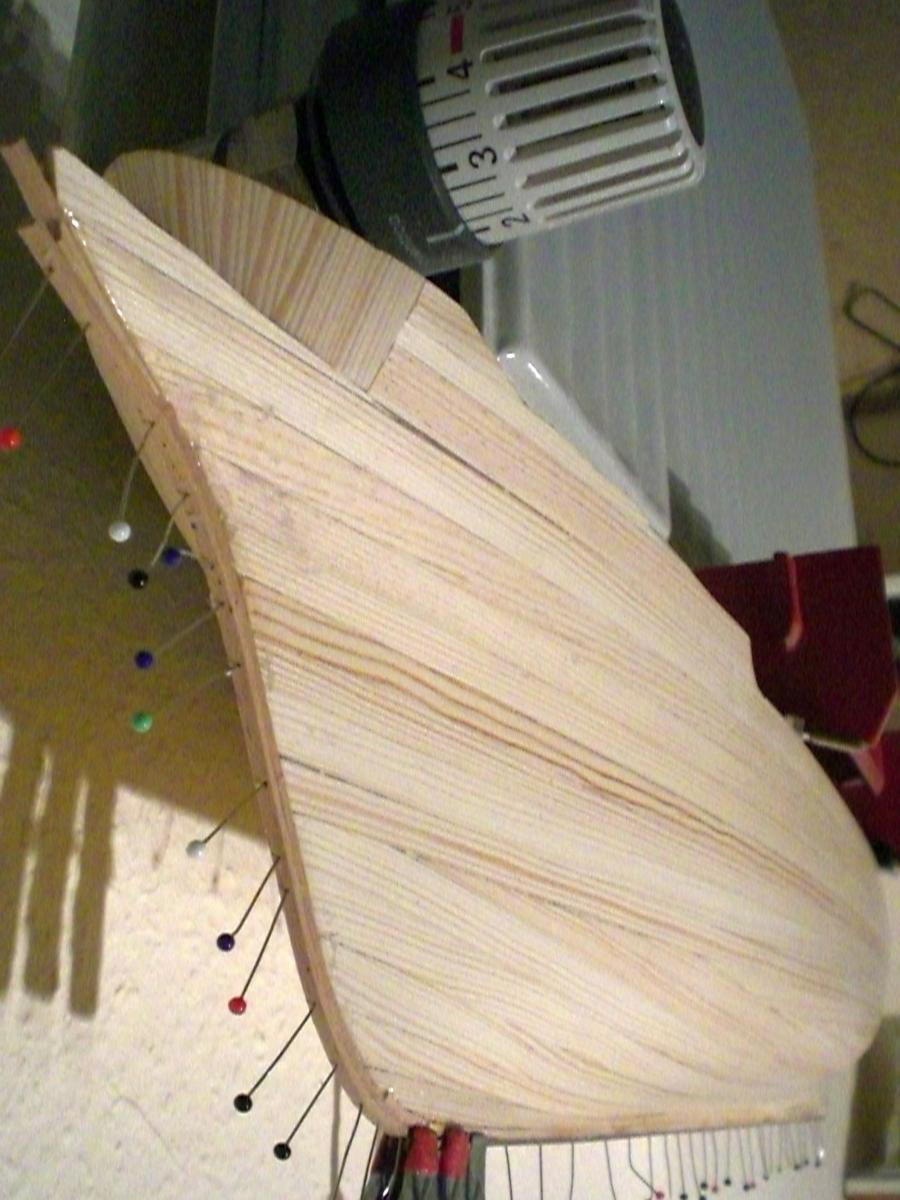
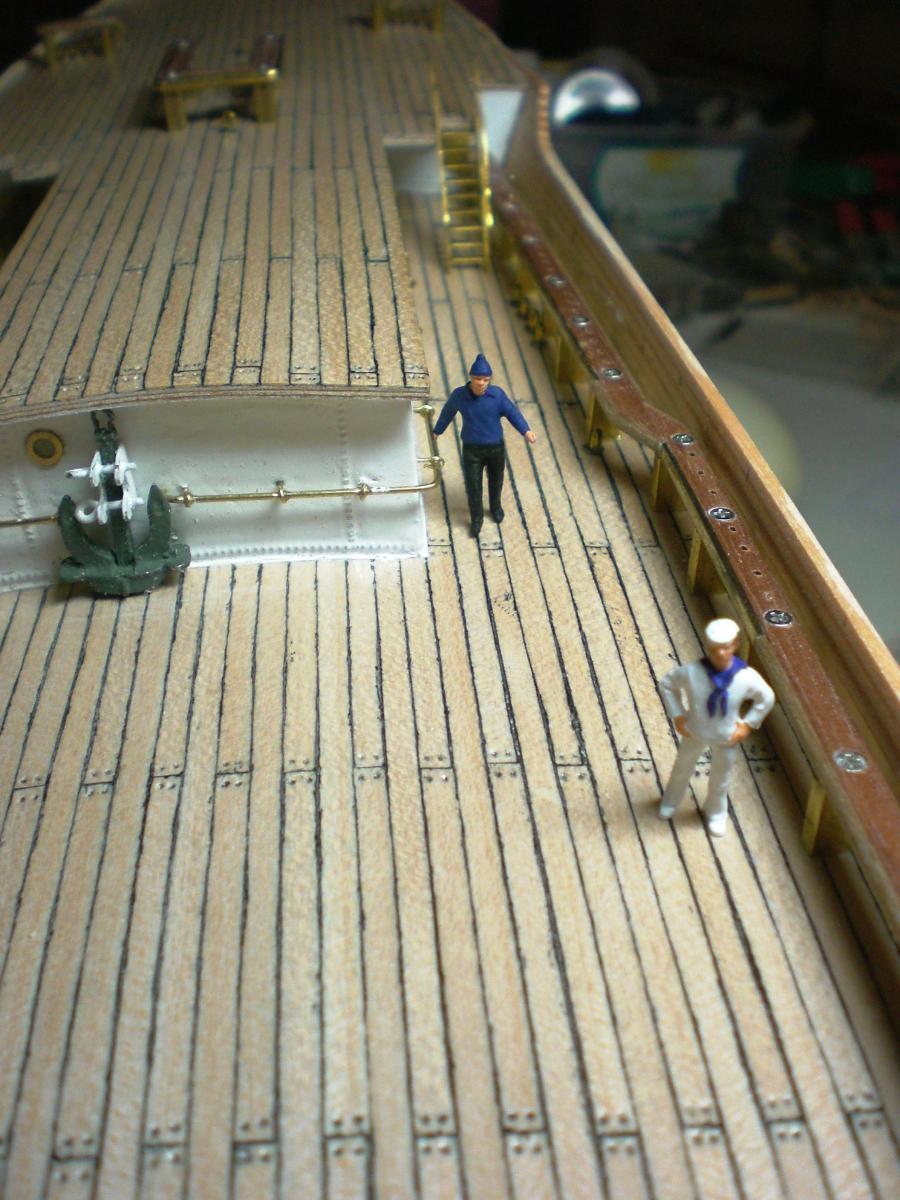
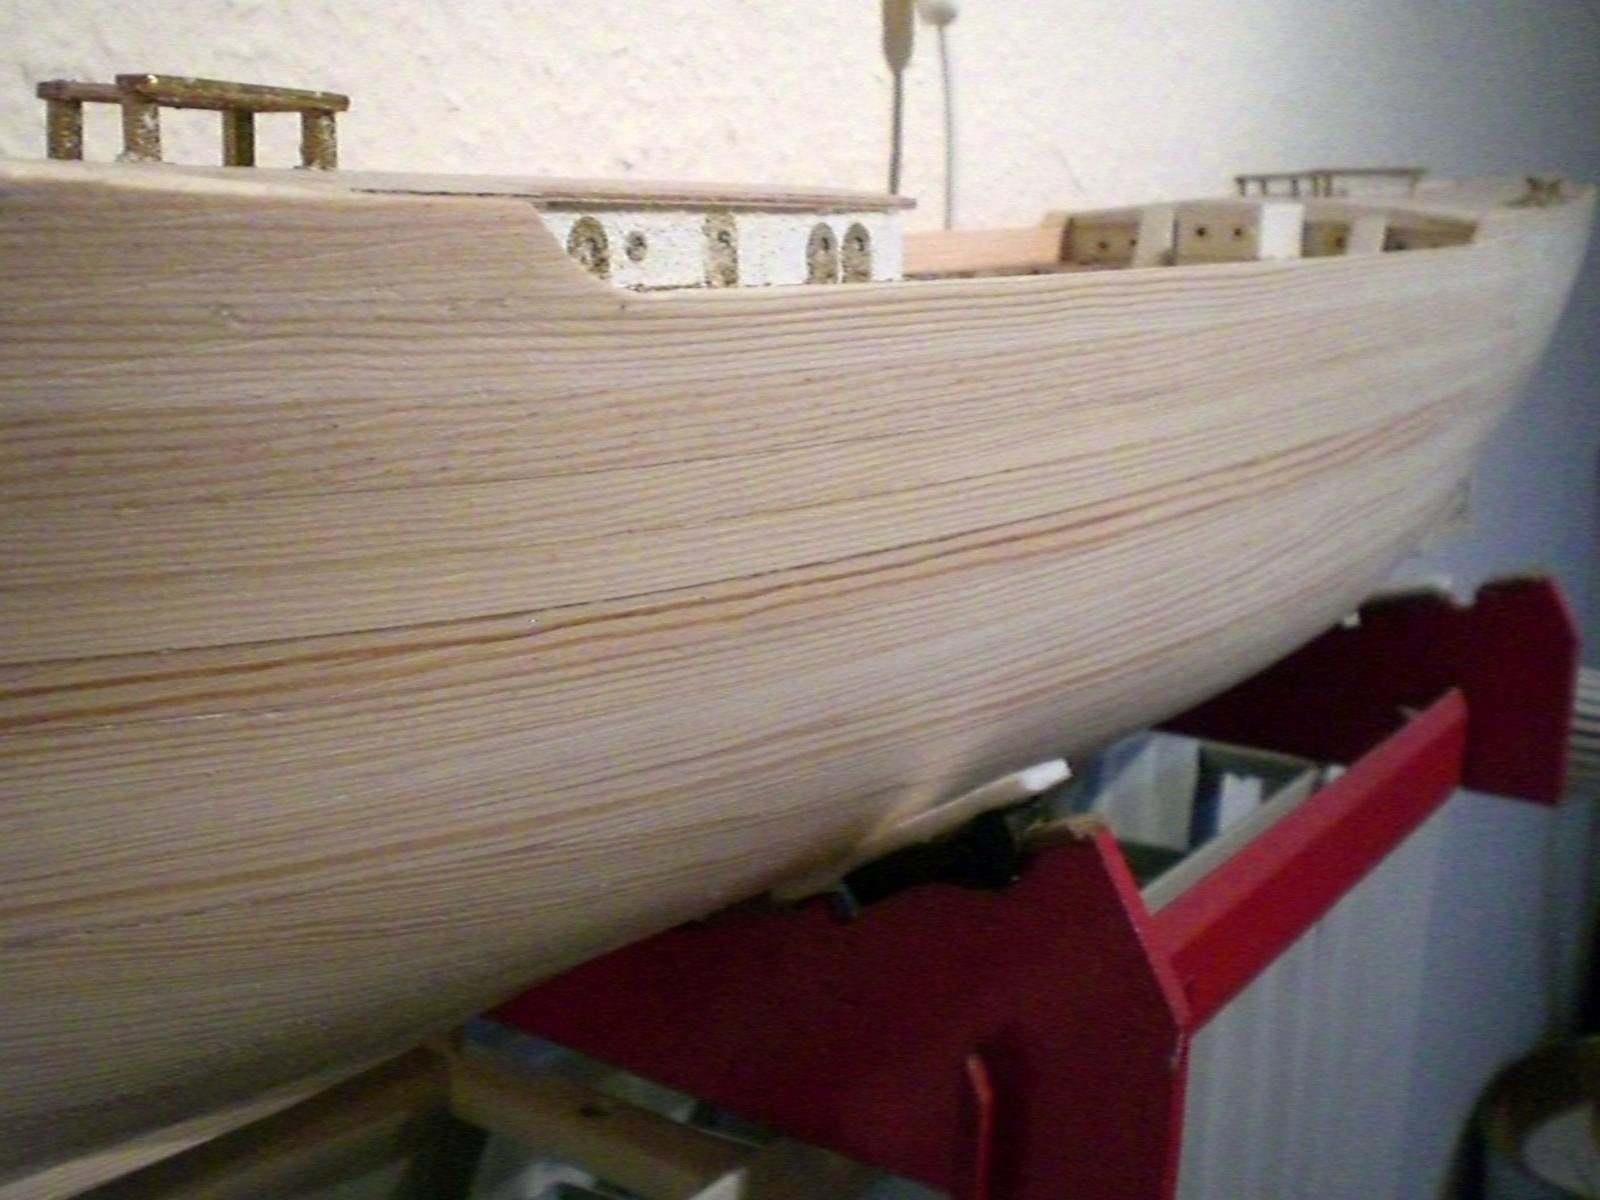
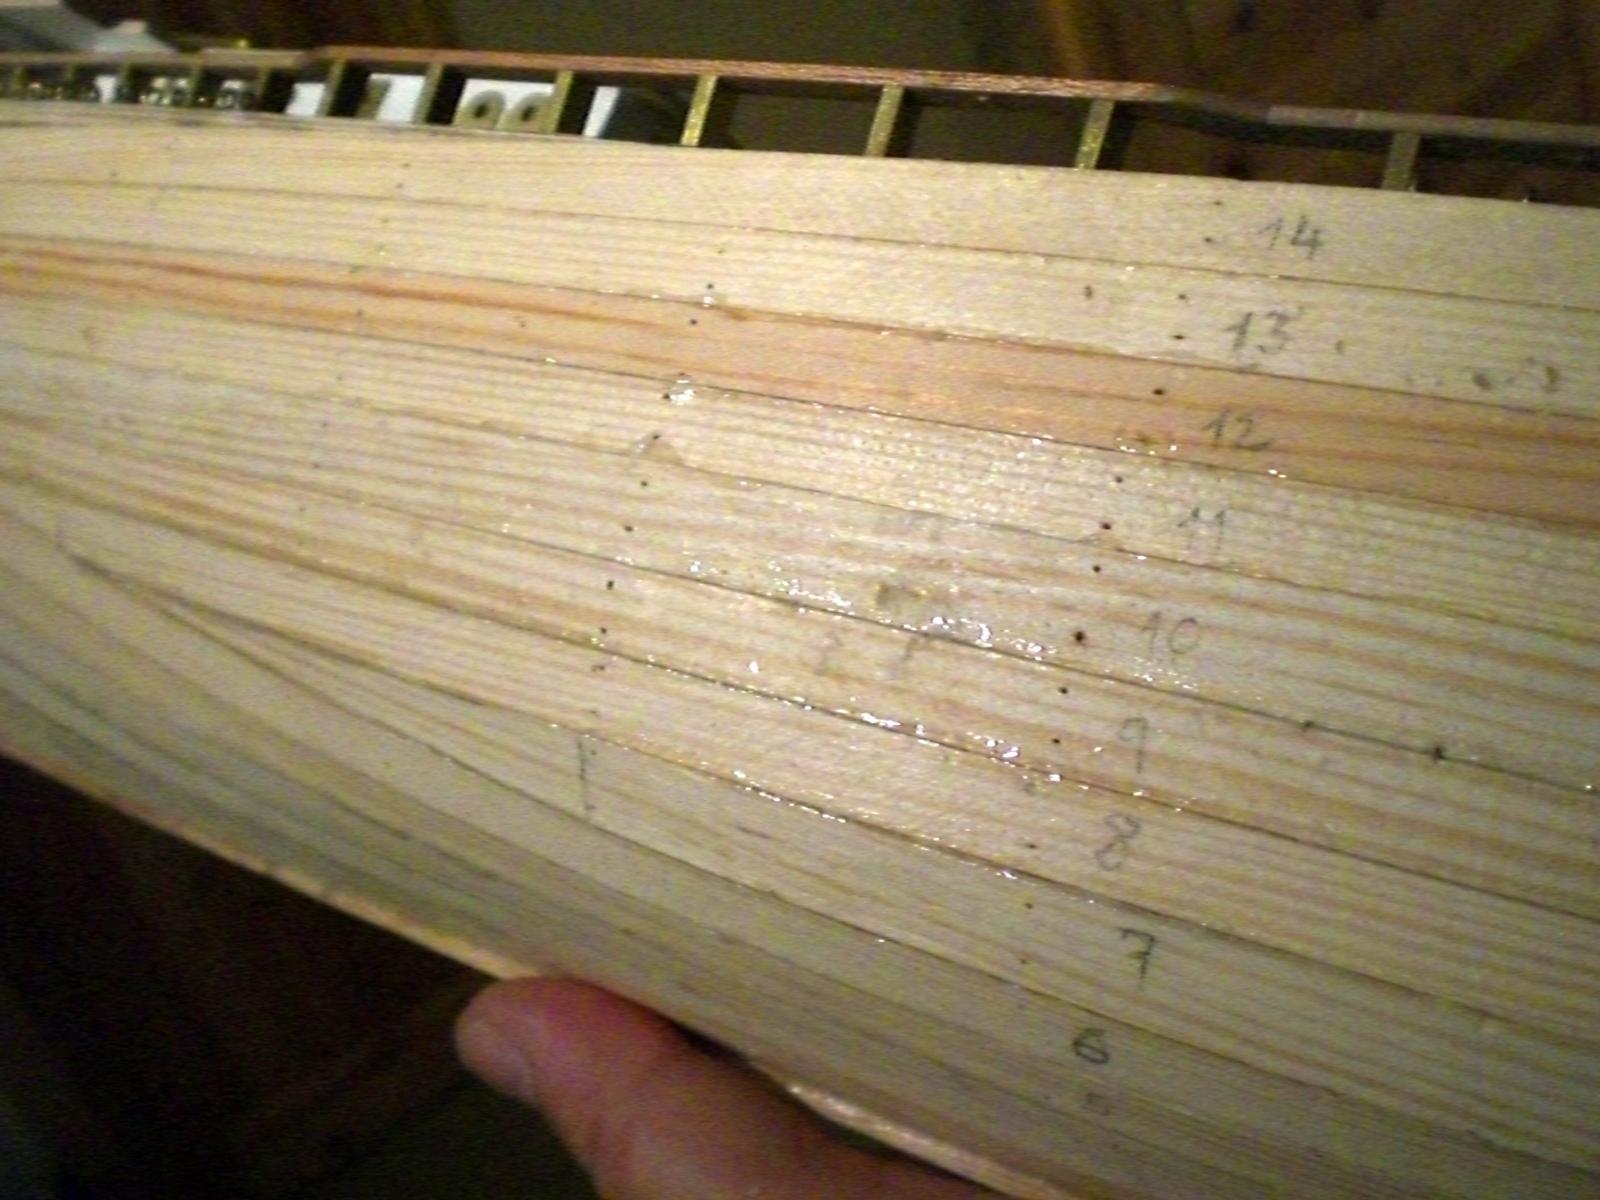
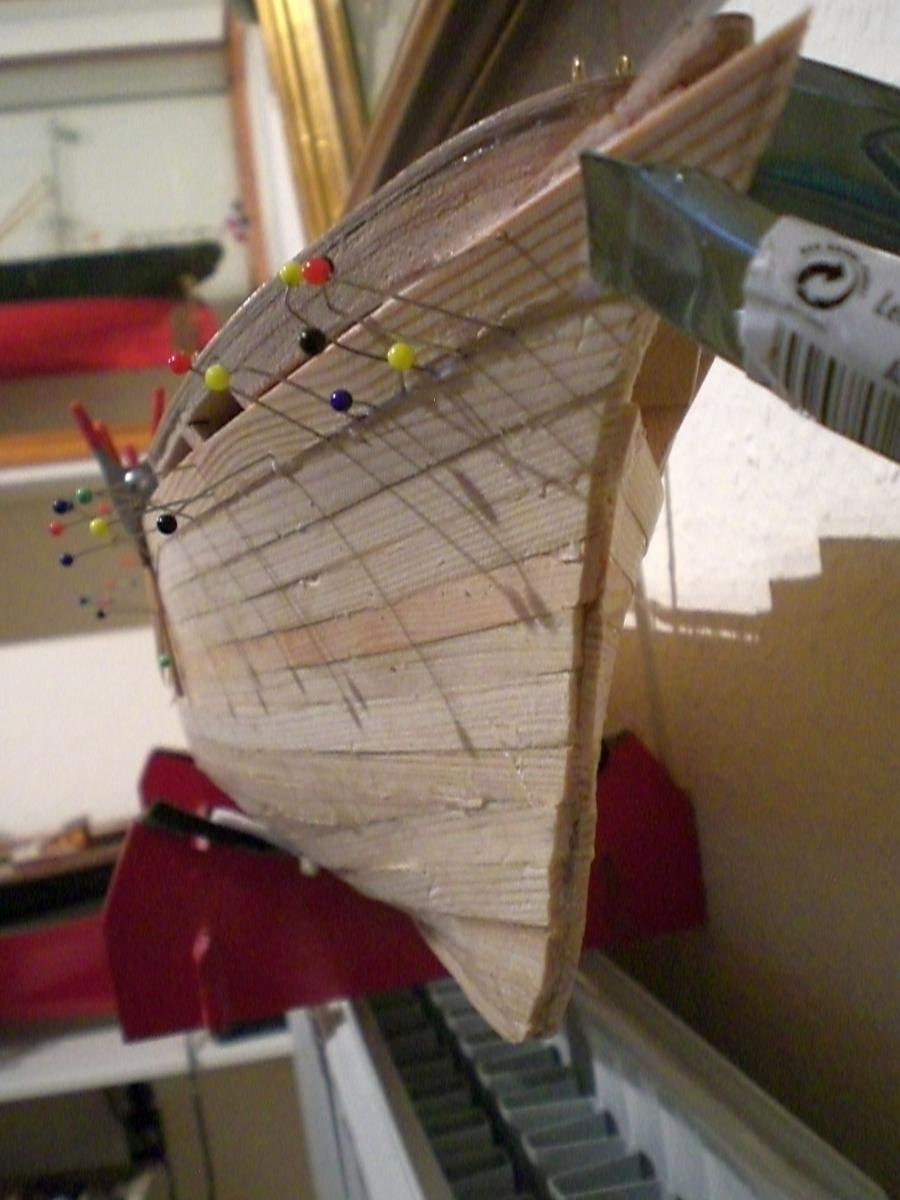
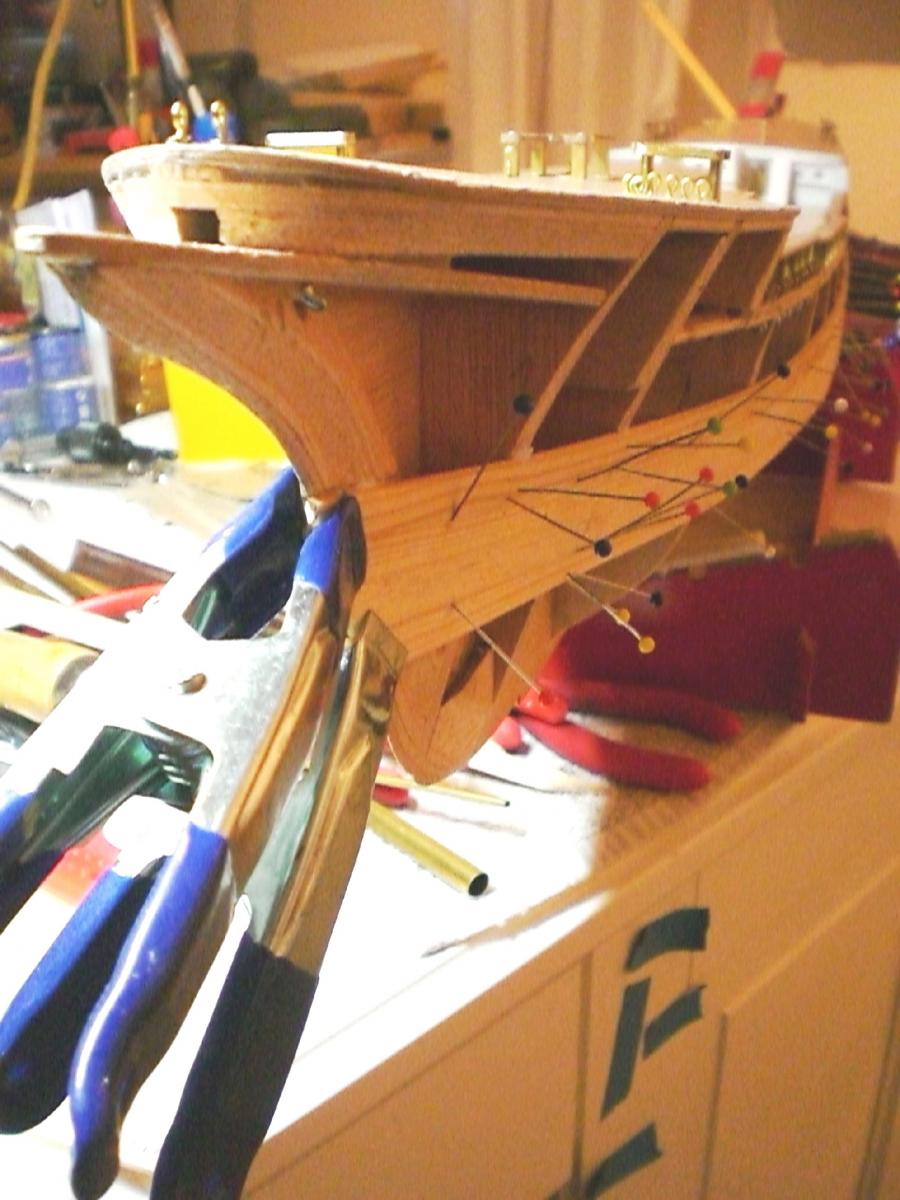
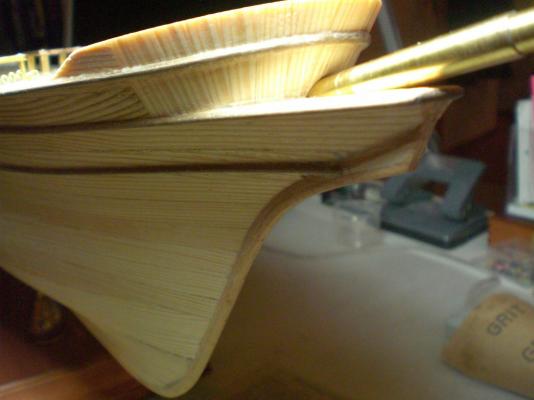
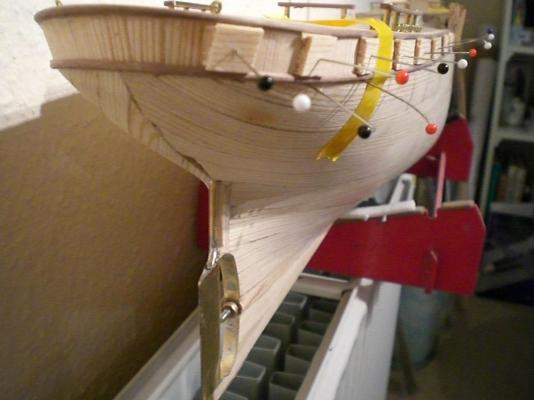
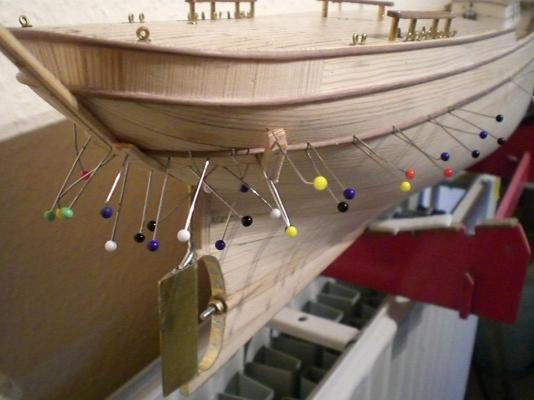
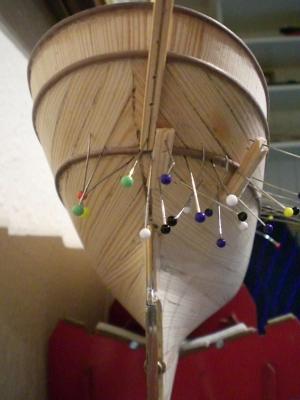
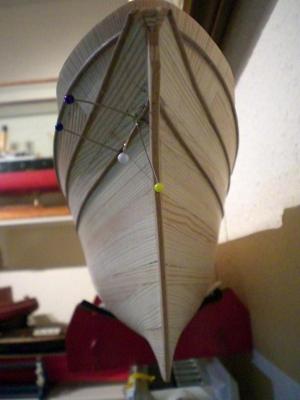
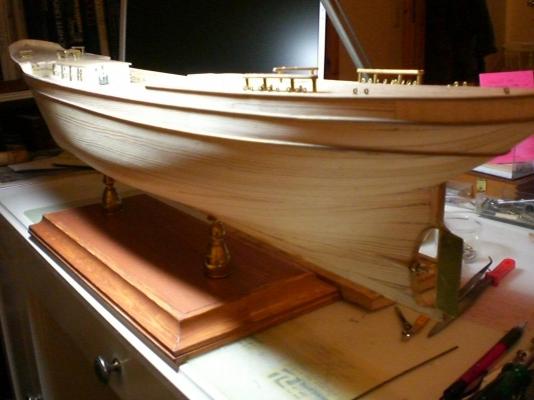
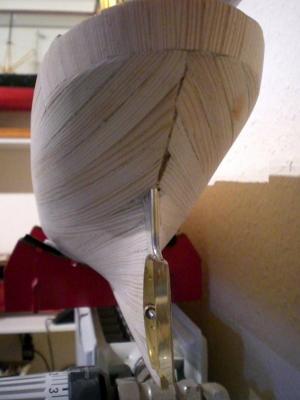
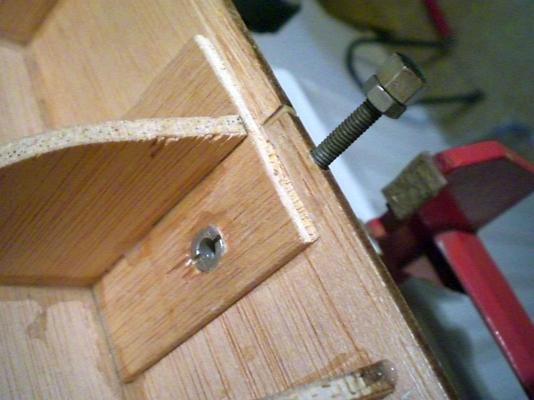
Build log part 8 planking and sanding done, but hull Looks a bit naked the stand is just a universal old one.... doing the bowpost using fexible beechwood ( is quite hard and flexible at the same time) further on to the mid keel it gets a bit broader in order to integrate the stand bolts safely propwindow, outcut reinforcement and rudder Arrangement with shaft going through to deck level the rudder remains removeable by pulling out the lower bearing pin, the shaft can be pushed up use figures in scale 1:87 (H0) Build log part 9 to follow... Nils


- 222 replies
-
- 8
-
-
- gorch fock
- barque
- (and 2 more)
-
Thank you John Nils
-
Hi Popeye, thank you... heres a WEB-shop place where one get good PE parts (go to category "Beschlagteile") http://www.mz-modellbau.net/ Nils
- 222 replies
-
- 1
-
-
- gorch fock
- barque
- (and 2 more)
-
Thank you Peter, .... on the running rigging actualy, no...., but a good Research on that will be one of the next "to does" steps as well Nils
-
Thank you Crackers, a nice comment of yours Nils
-
Thanks Bob Nils
-
Bob, what a lovely model ! I love everything on it, well done! Nils
-
Peter, I see great Progress on your fine model, wish I were so far with mine, beautiful work for all the rigging and sails Nils
-
Oh David, my wife has already told me something in that direction..., it is coming springtime here, and the garden Needs some care Nils Micheal, after this build-log it goes steady again... my still in the pipe HMS Pegasus Build feels itself quite stepfatherly cared for, so I Need to see what can be done about it Nils
-
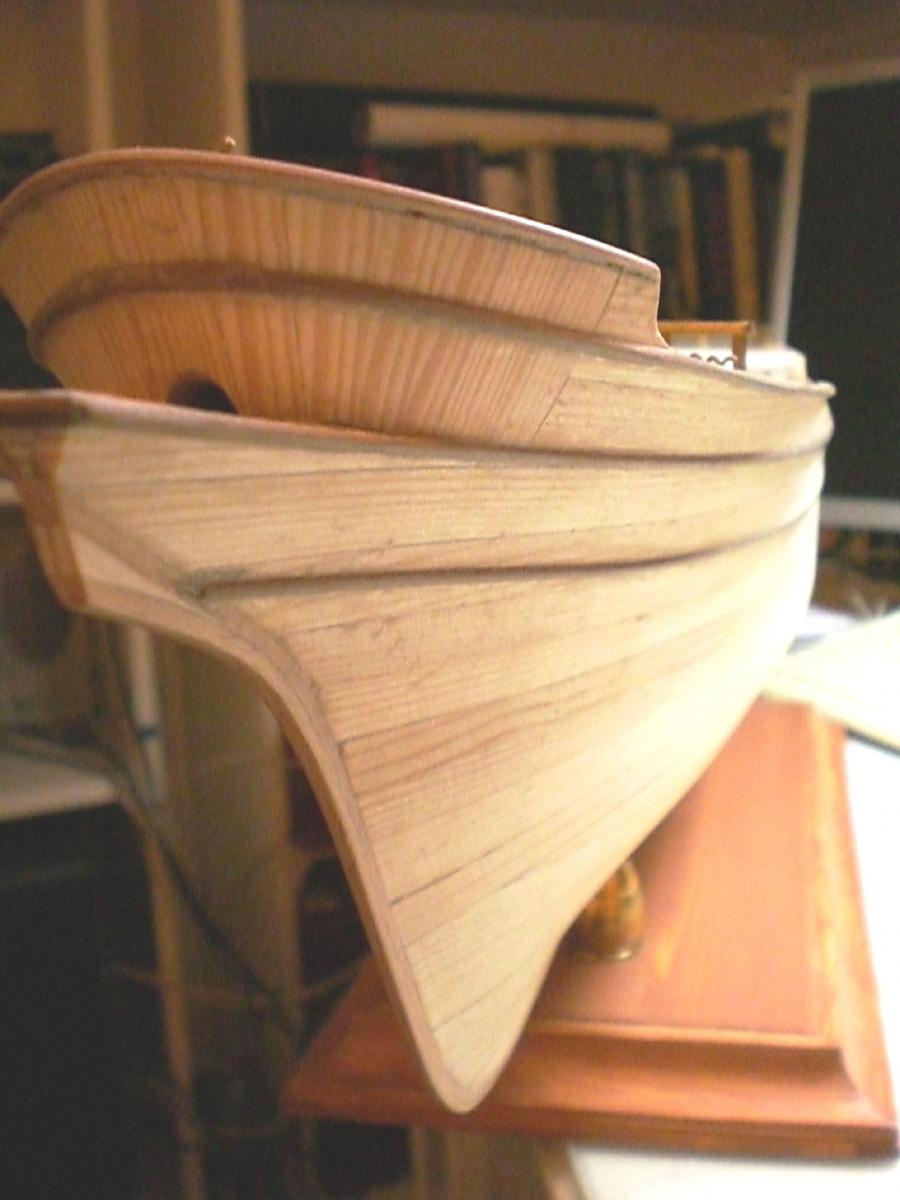
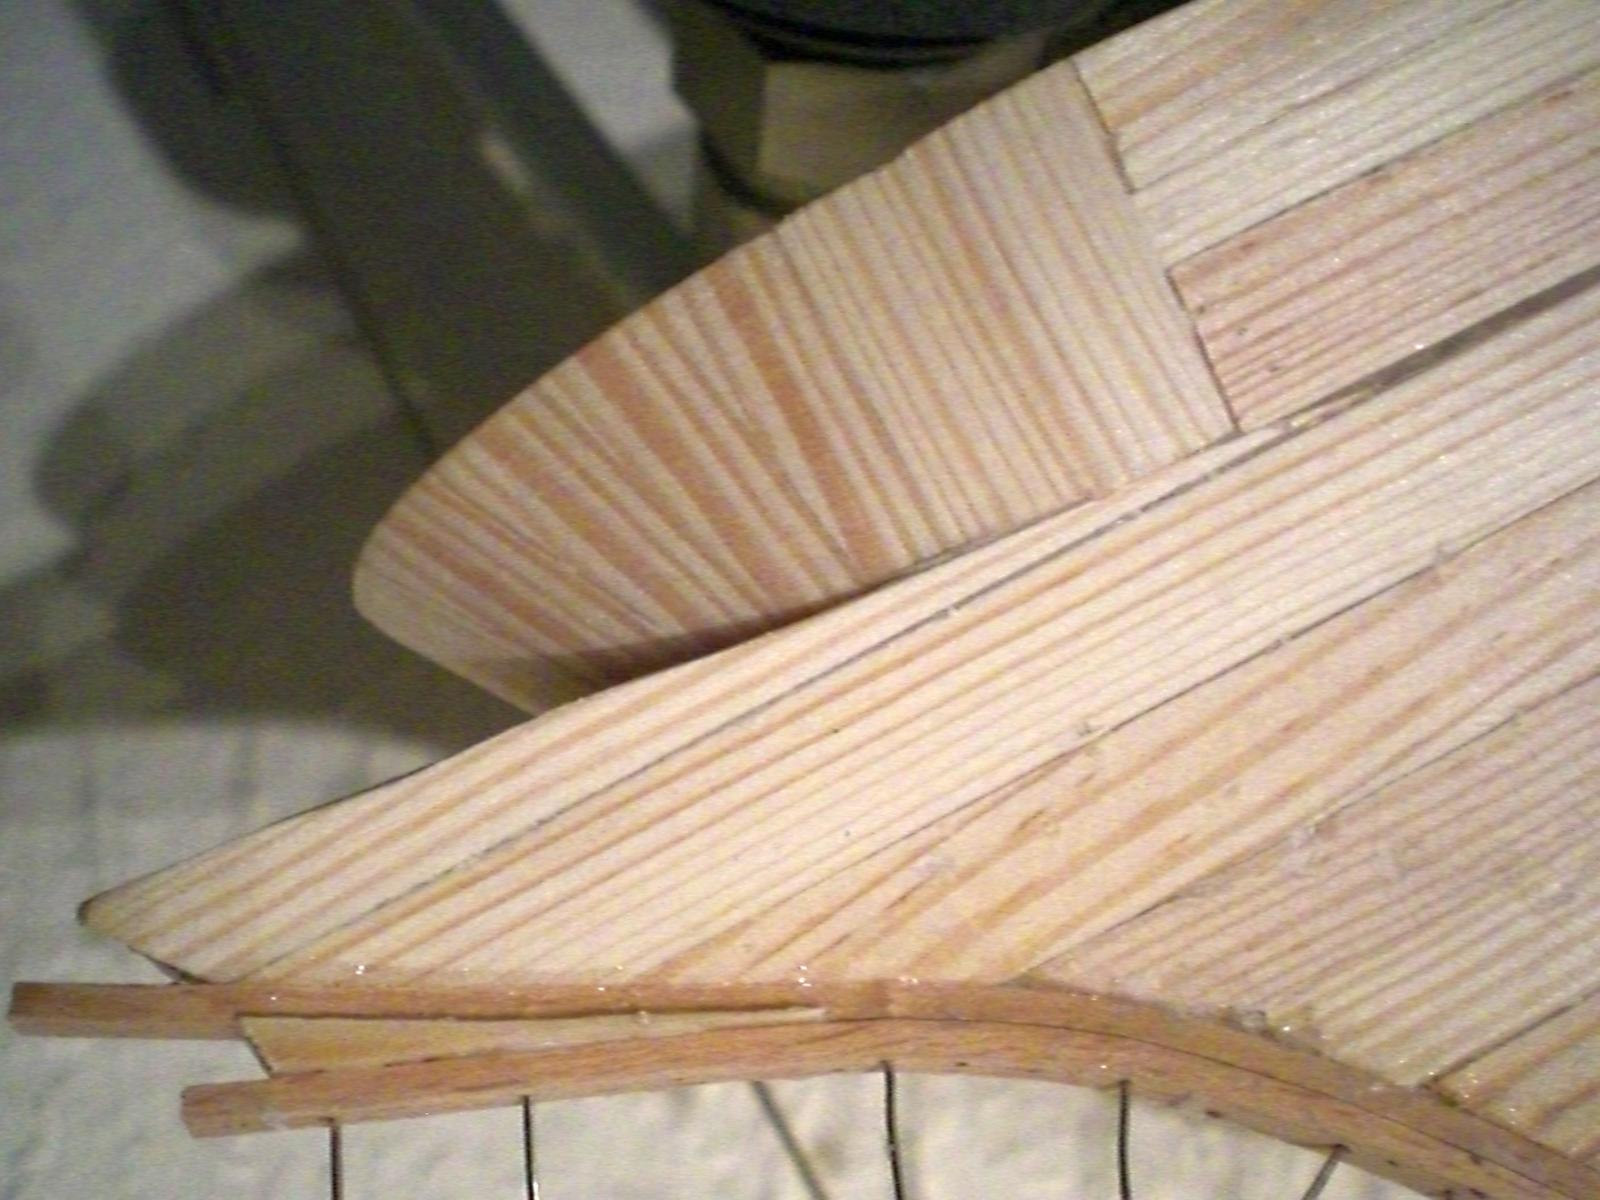
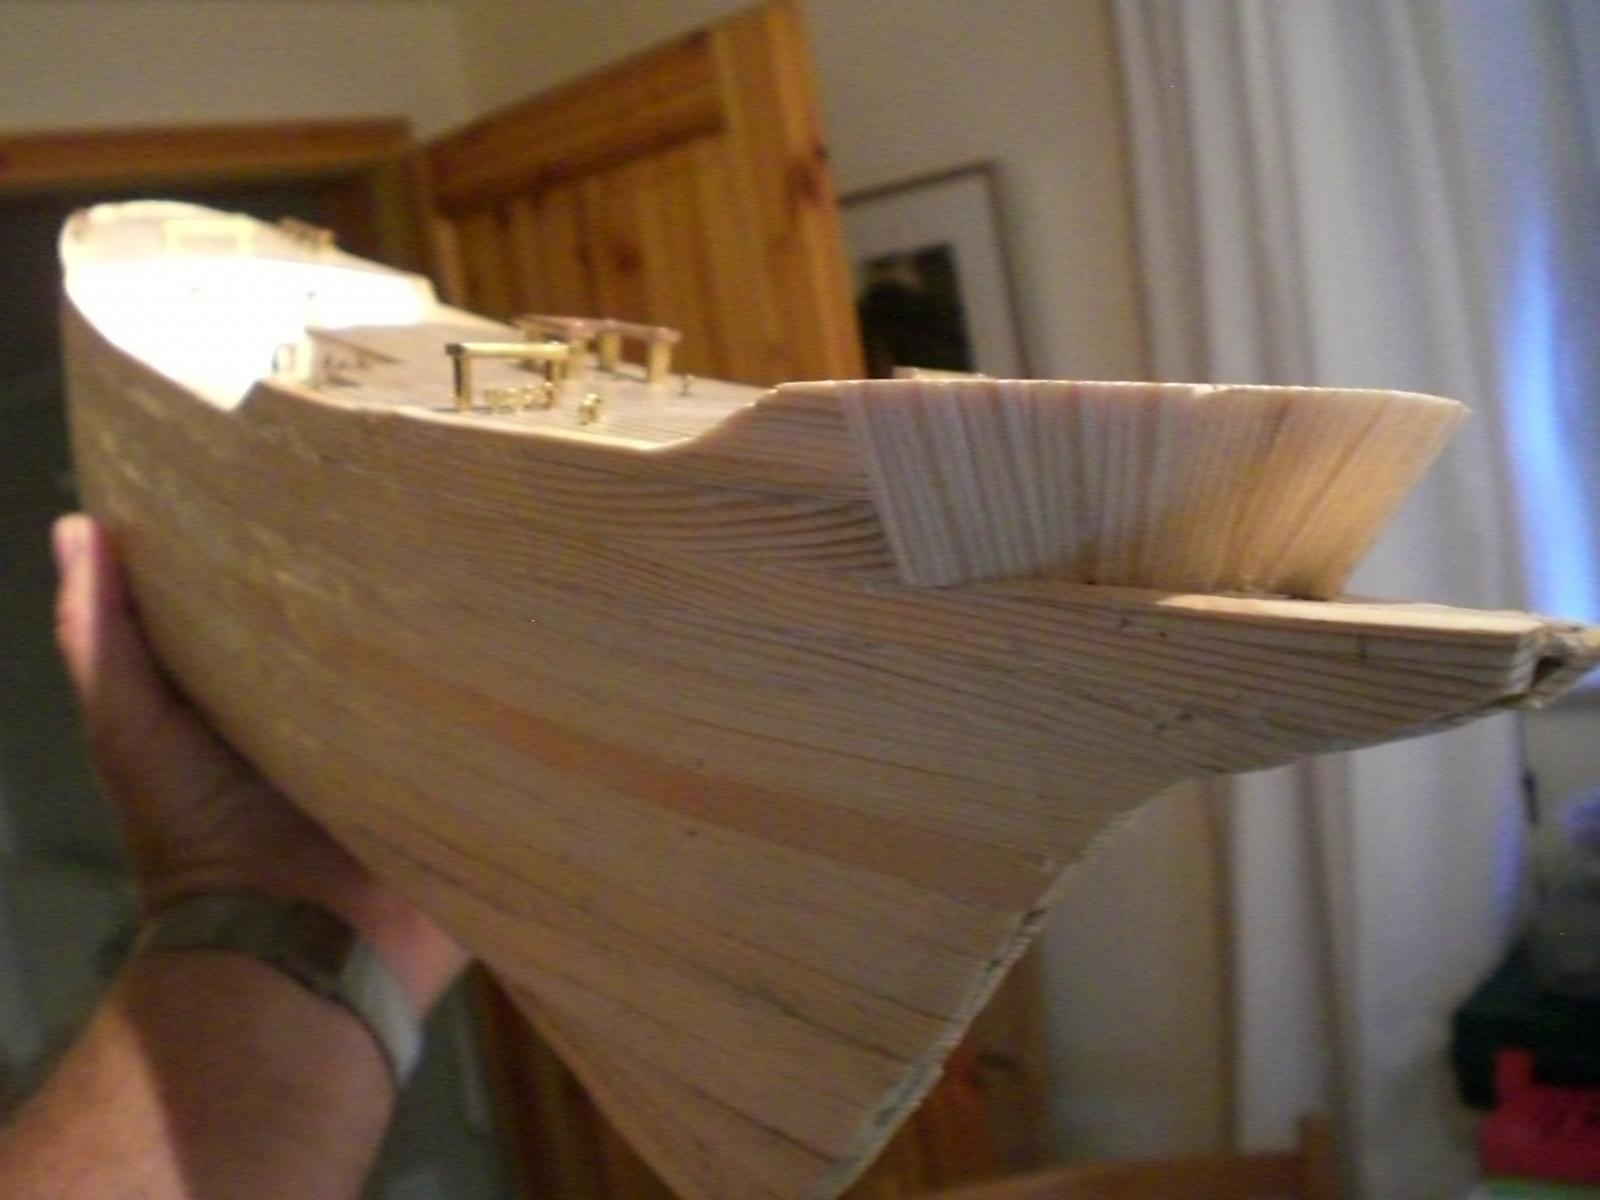
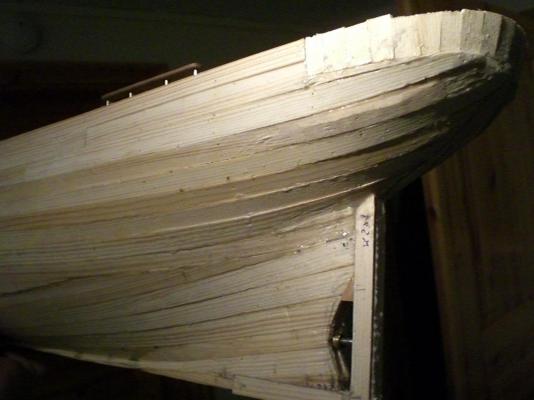
Build log part 7 building up the bulwarks and top Planks at forecasle Need to pull equal on portside as well the upper Stern Portion shall be planked verticly bow bulwark planked verticly and roughly trimmed all planking done, now the sanding can begin vertical planking provides nice following of the curves smooth finish, no dents, no scratches... remaining material on sternpost appr. 50% of the raw planking, other planking random about 75-80 % Build Log part 8 to follow.... Nils


- 222 replies
-
- 10
-
-
- gorch fock
- barque
- (and 2 more)
-
David, all Colors in in satin-dull tones the hull is basicly White, with chocolate Brown section line at sides of forecastle and poop, the waterpass is green and the Sub waterline hull is antifouling-red (These are the Colors of the 1968 look) Masts, Yards and booms in safran-yellow Nils
-
very nice build Patrick, impressive rigging, Looks great Nils
-
Thanks the warning Bob, glad you are OK, is the Producer still existing, you probably dropped him an email then. I know from experience that These plastic materials (flux bottle) should not be exposed to sunlight, the material becomes brittle due to UV Radiation (20 years as you mentioned is a Long time anyhow) Nils
-
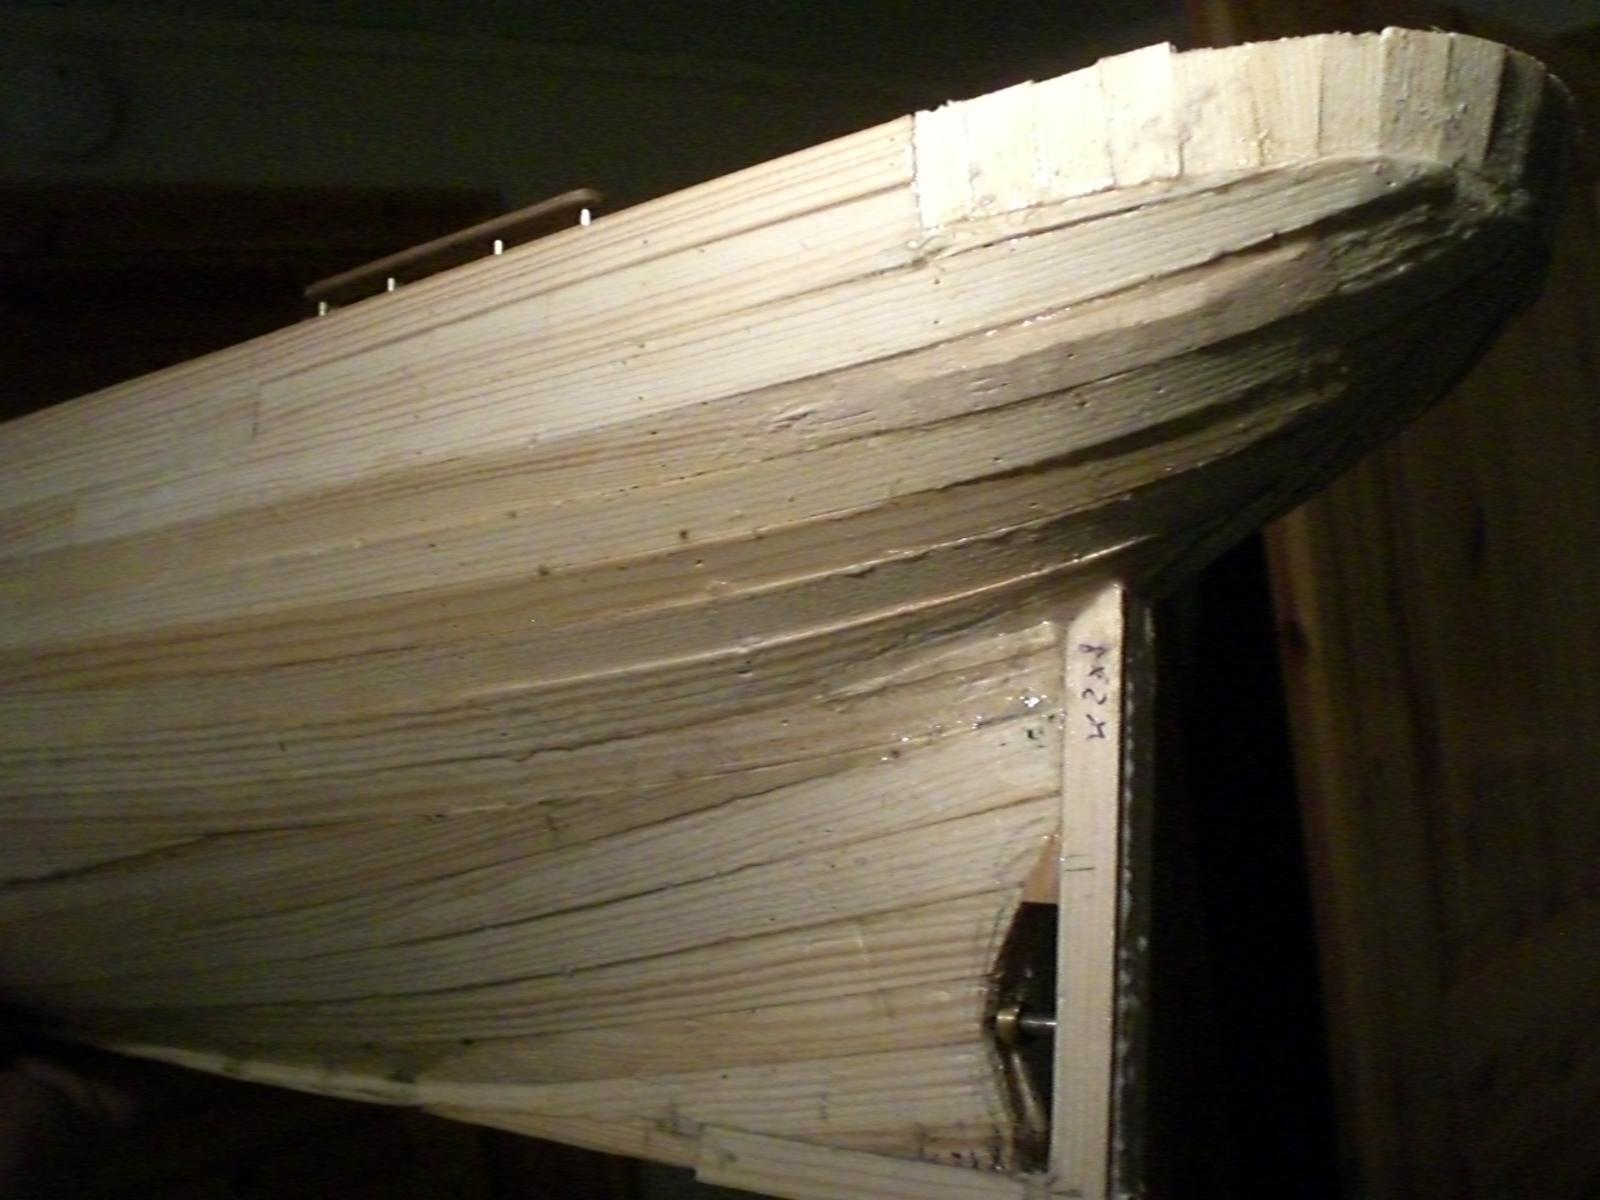
Build log part 6 this ship was not designed to be a cargo vessel planking good under way time for checking if no sub-deck Counters have been forgotten... finaly the last fit to size plank Closes the opening should be a fine base surface for sanding, due to the single layer planking, the Progress goes on quite swiftly 14 Planks per side, keel to welldeck still quite easy going.. The Planks that also form the bulwarks are mounted Build log part 7 to follow.... Nils


- 222 replies
-
- 12
-
-
- gorch fock
- barque
- (and 2 more)
-
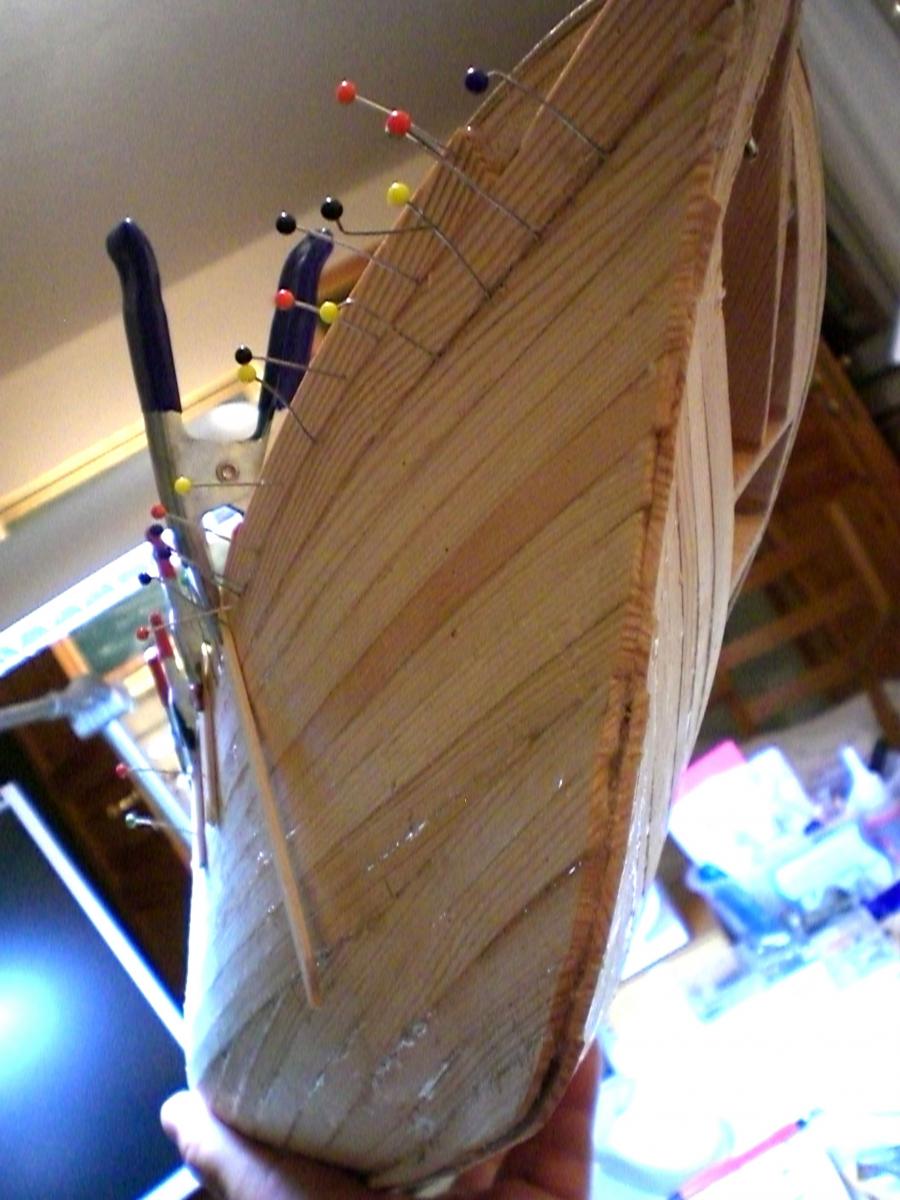
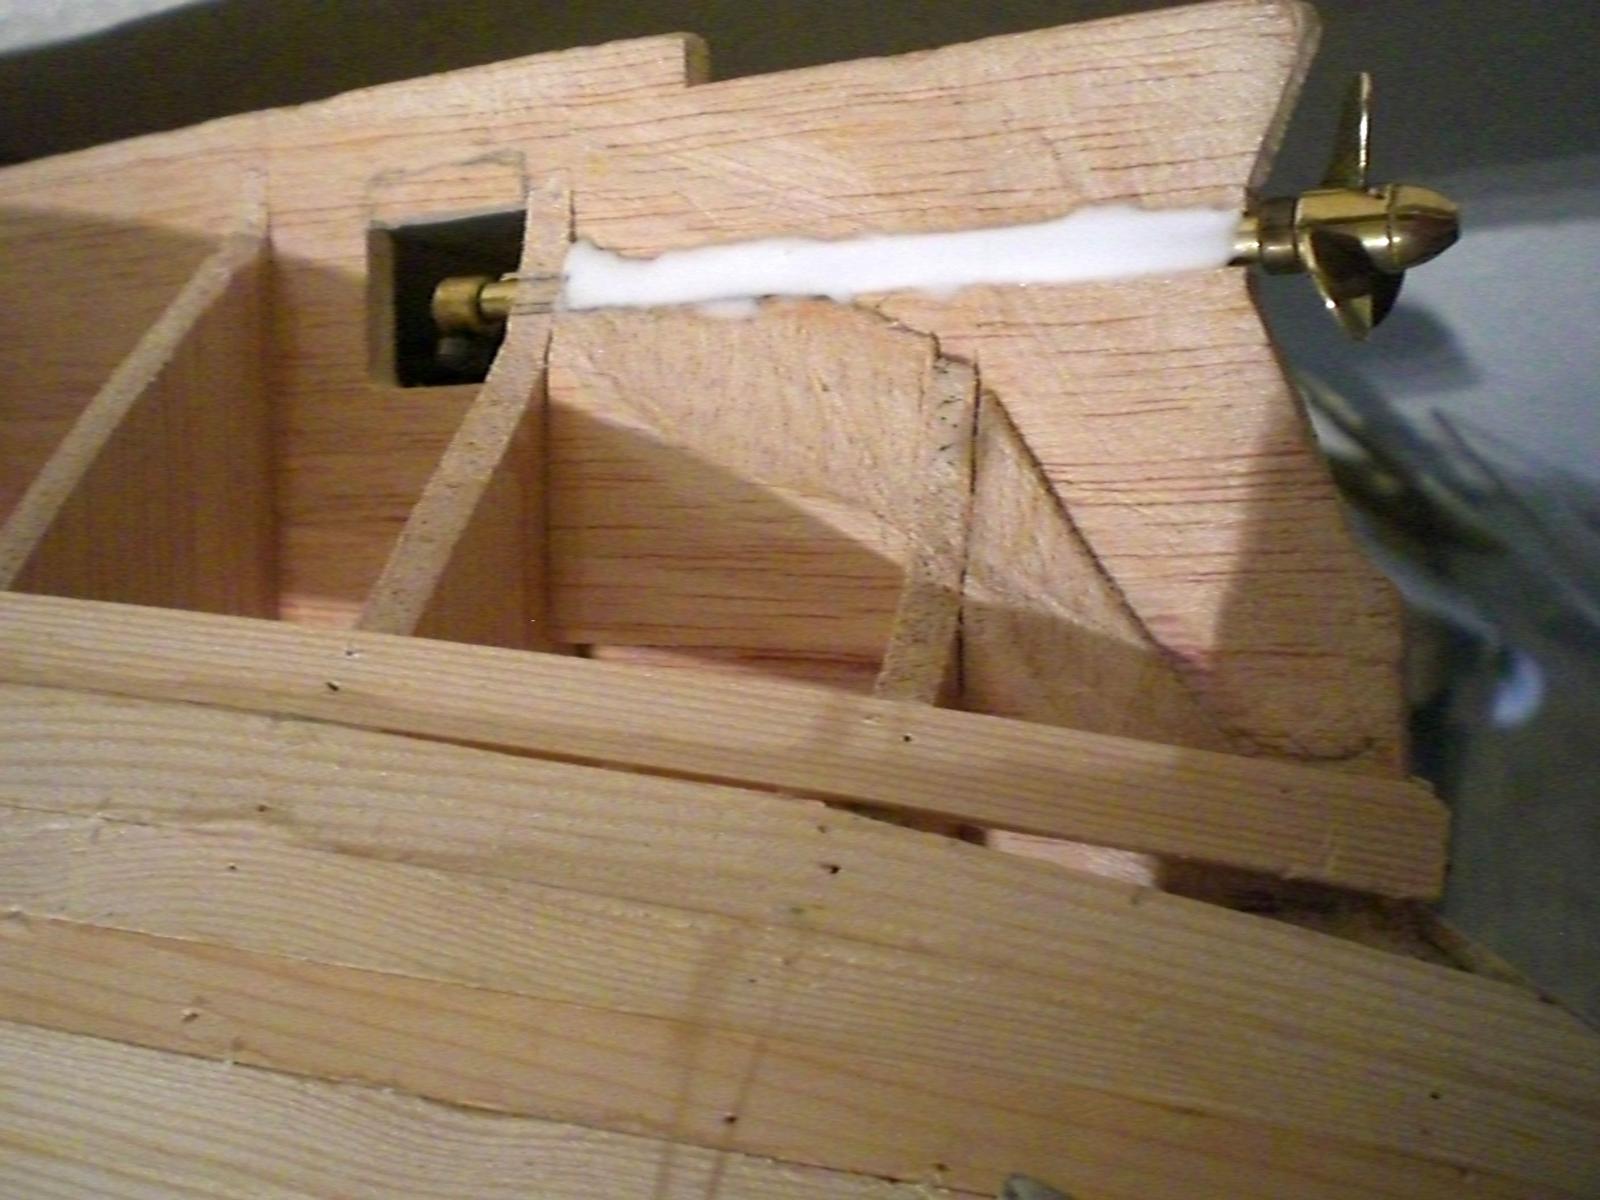
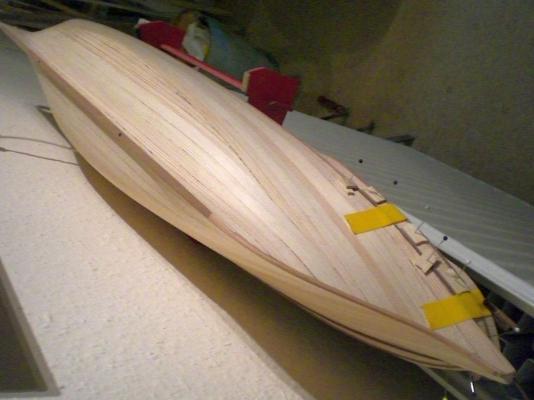
Build log part 5 the first portside plank, pine 2 x 10mm, is fixed against the Frames to find the best fit in its gentle natural curve following the hull lines and then glued on permanently the second plank follows willingly on this build I am not using additional stringers the same done on starboard side to avoid possible Twist in the hull the Gorch Fock is a fine model to plank, no risky bends, no watering of planks the 2mm thick planking will allow sufficient material remaining after sanding later on having no Problems with the planking short propshaft in sleeve tube M3 thread for prop (the brass prop to be Exchanged against a larger one later on, because I cold`nt find a 28-30mm diam. brass prop with M3 thread in the hub) Counter device for stand bolts with reinforced keel sides there Build log part 6 to follow... Nils


- 222 replies
-
- 6
-
-
- gorch fock
- barque
- (and 2 more)