HOLIDAY DONATION DRIVE - SUPPORT MSW - DO YOUR PART TO KEEP THIS GREAT FORUM GOING! (Only 20 donations so far - C'mon guys!)
×


Mirabell61
-
Posts
7,407 -
Joined
-
Last visited
Content Type
Profiles
Forums
Gallery
Events
Everything posted by Mirabell61
-
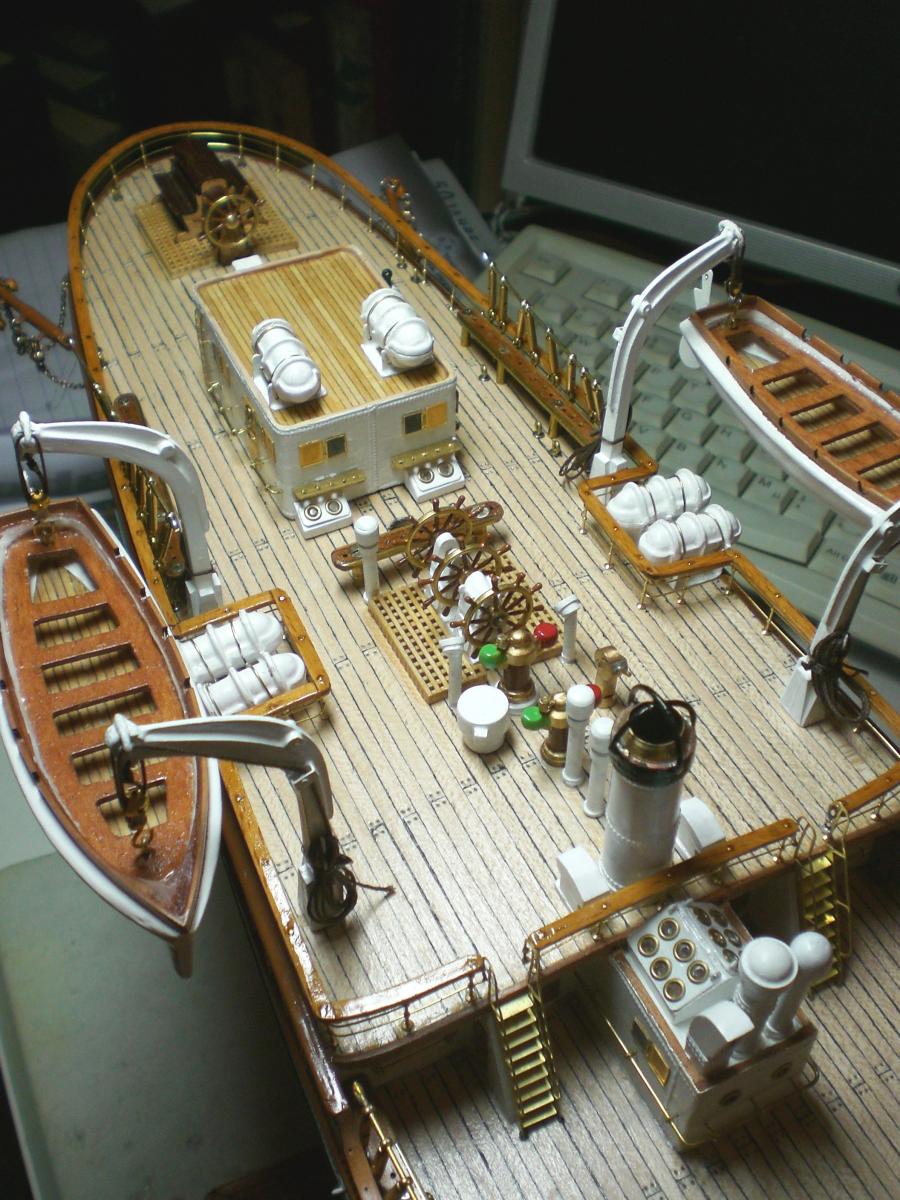
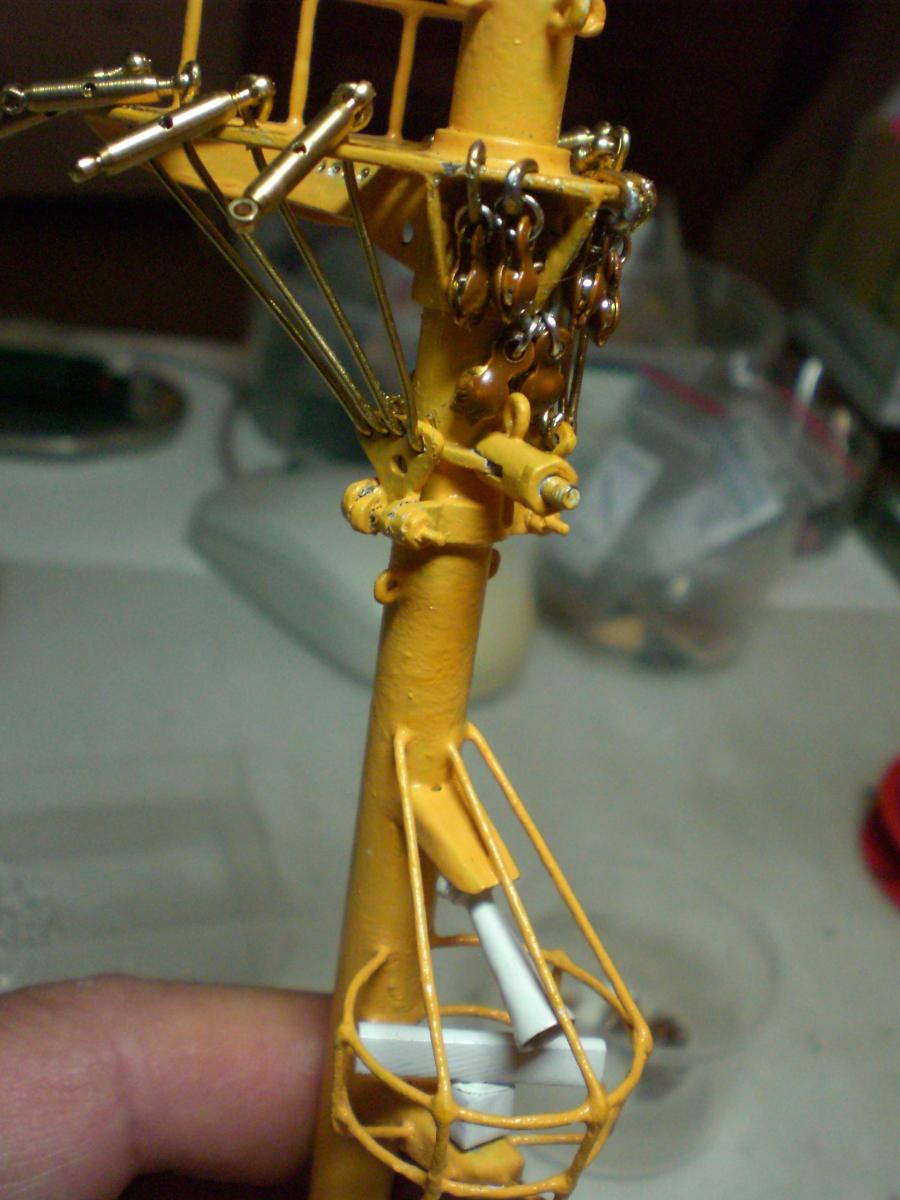
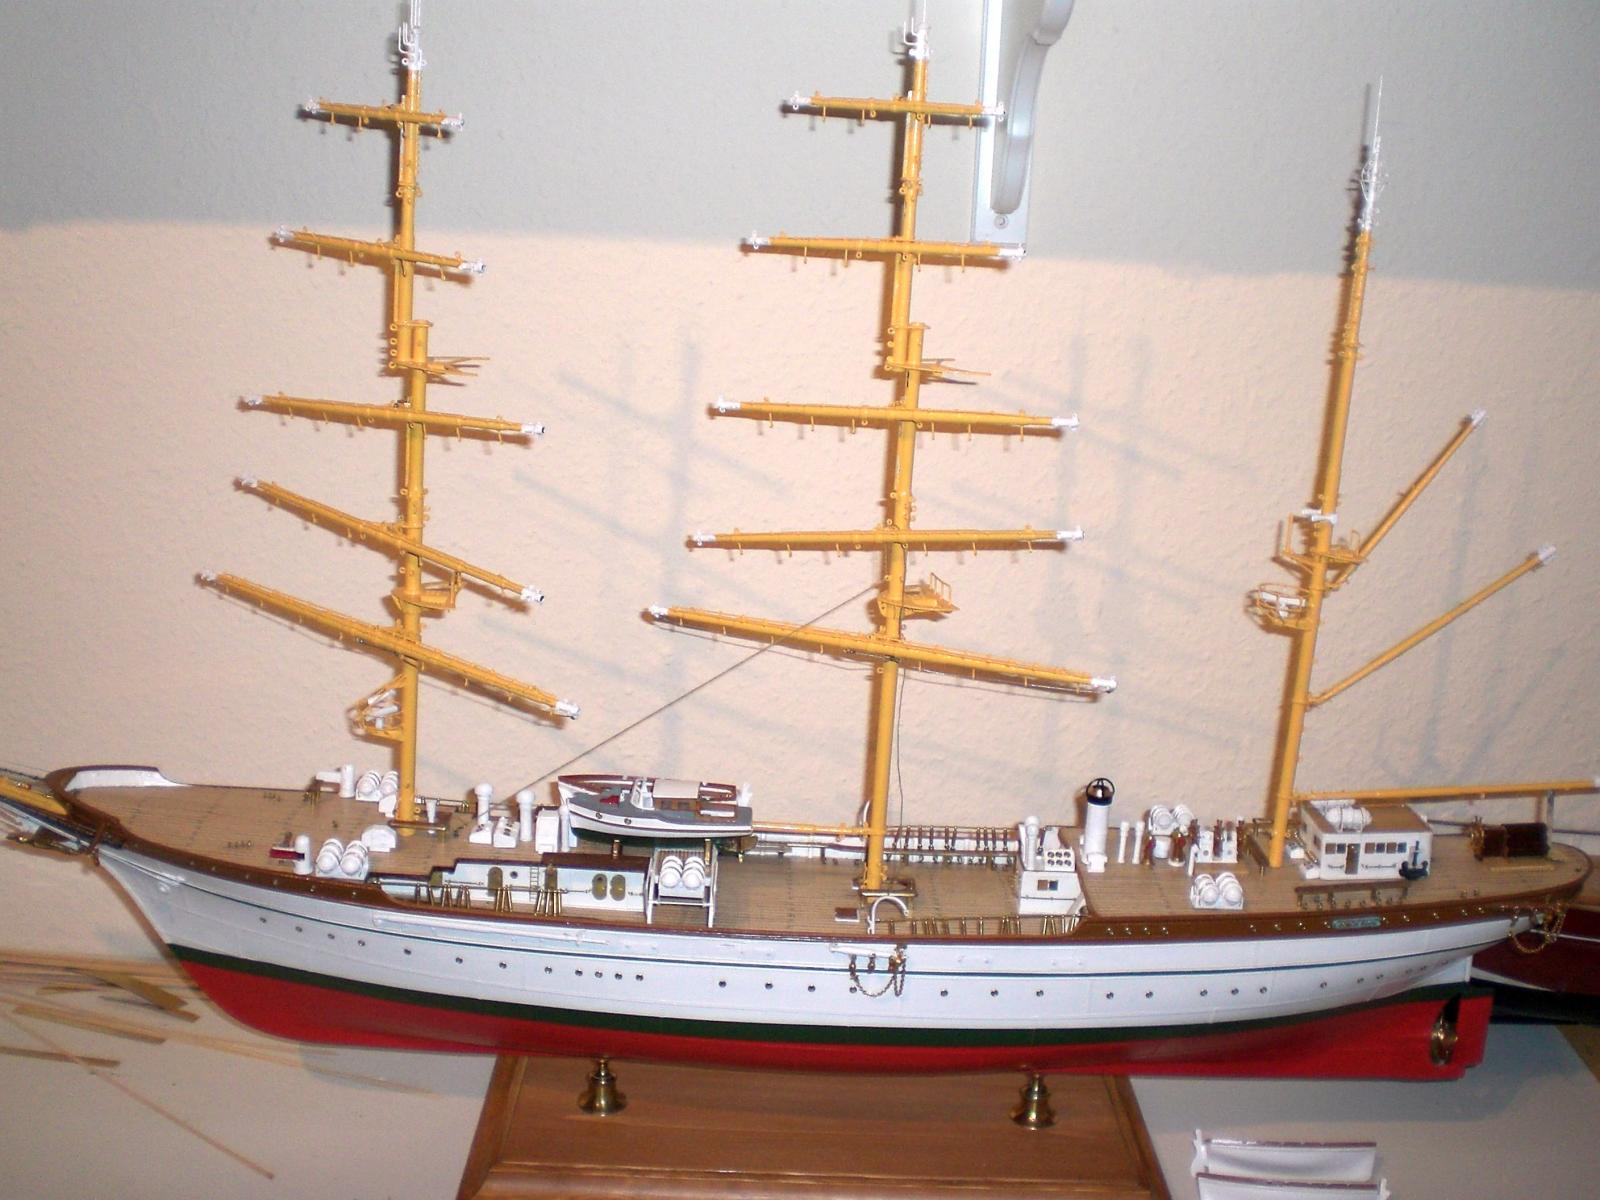
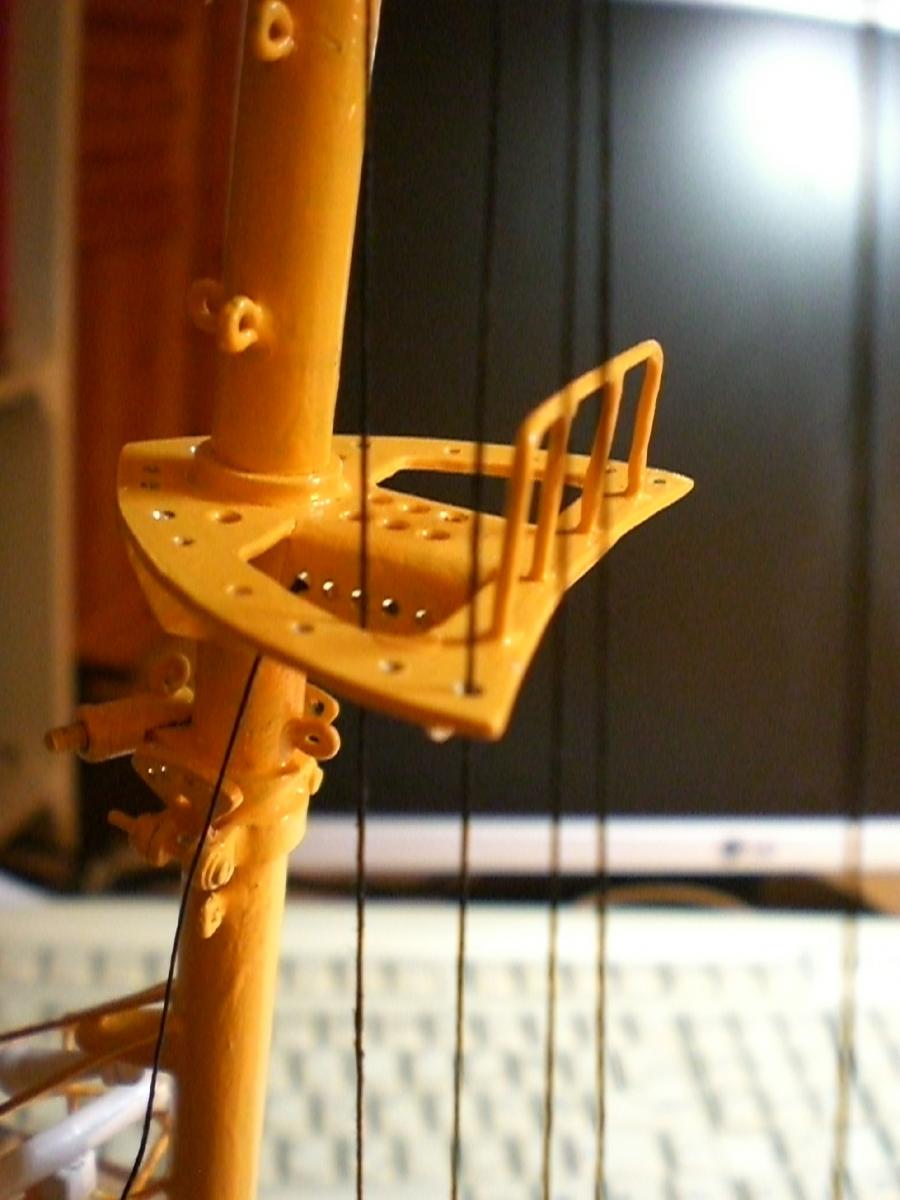
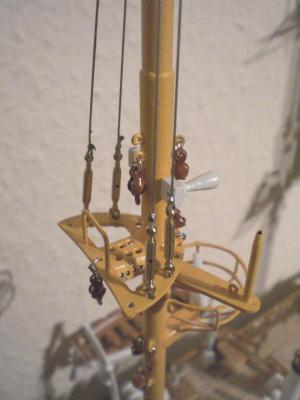
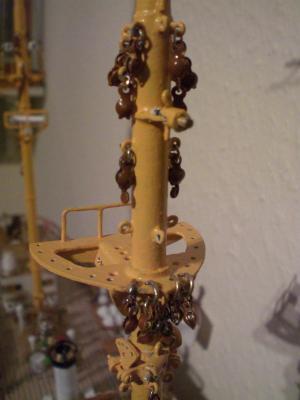
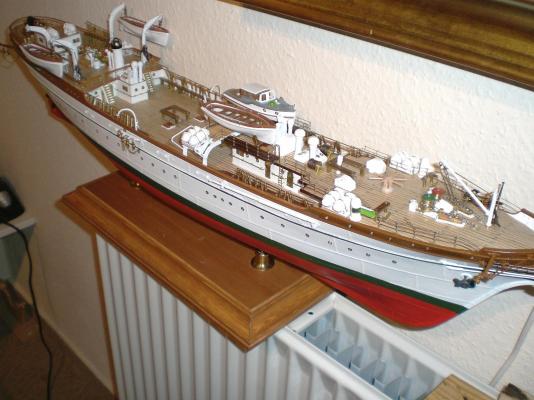
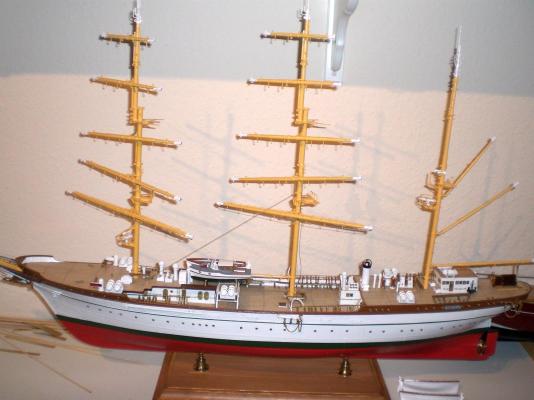
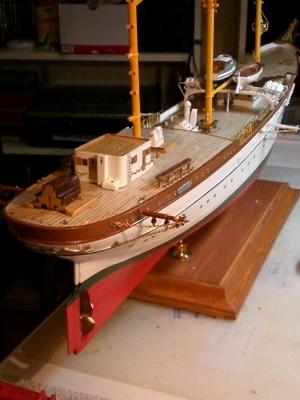
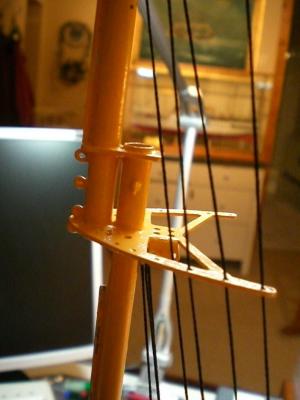
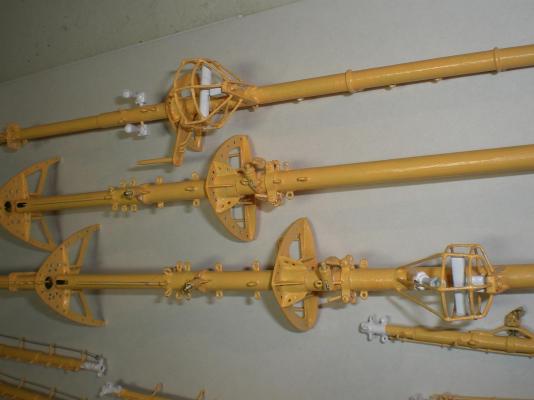
 Build log part 38 poopdeck handrail Prior to sanding and varnishing wheel to auxiliary rudderstand decks nearly completed nav sight-bearing devices on pods next to the raft containers handrails complete all around poopdeck mizzen mast top shroud wire chords a few hundred blocks (in total) for all the sail operating running rigging spanners for the upper shrouds of foremast Build log part 39 to follow... Nils
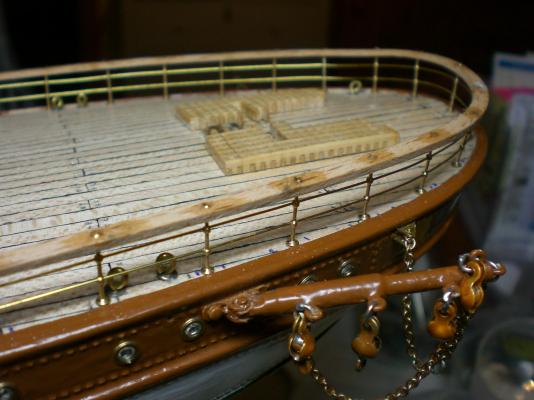


- 222 replies
-
- 6
-

-
- gorch fock
- barque
- (and 2 more)
-
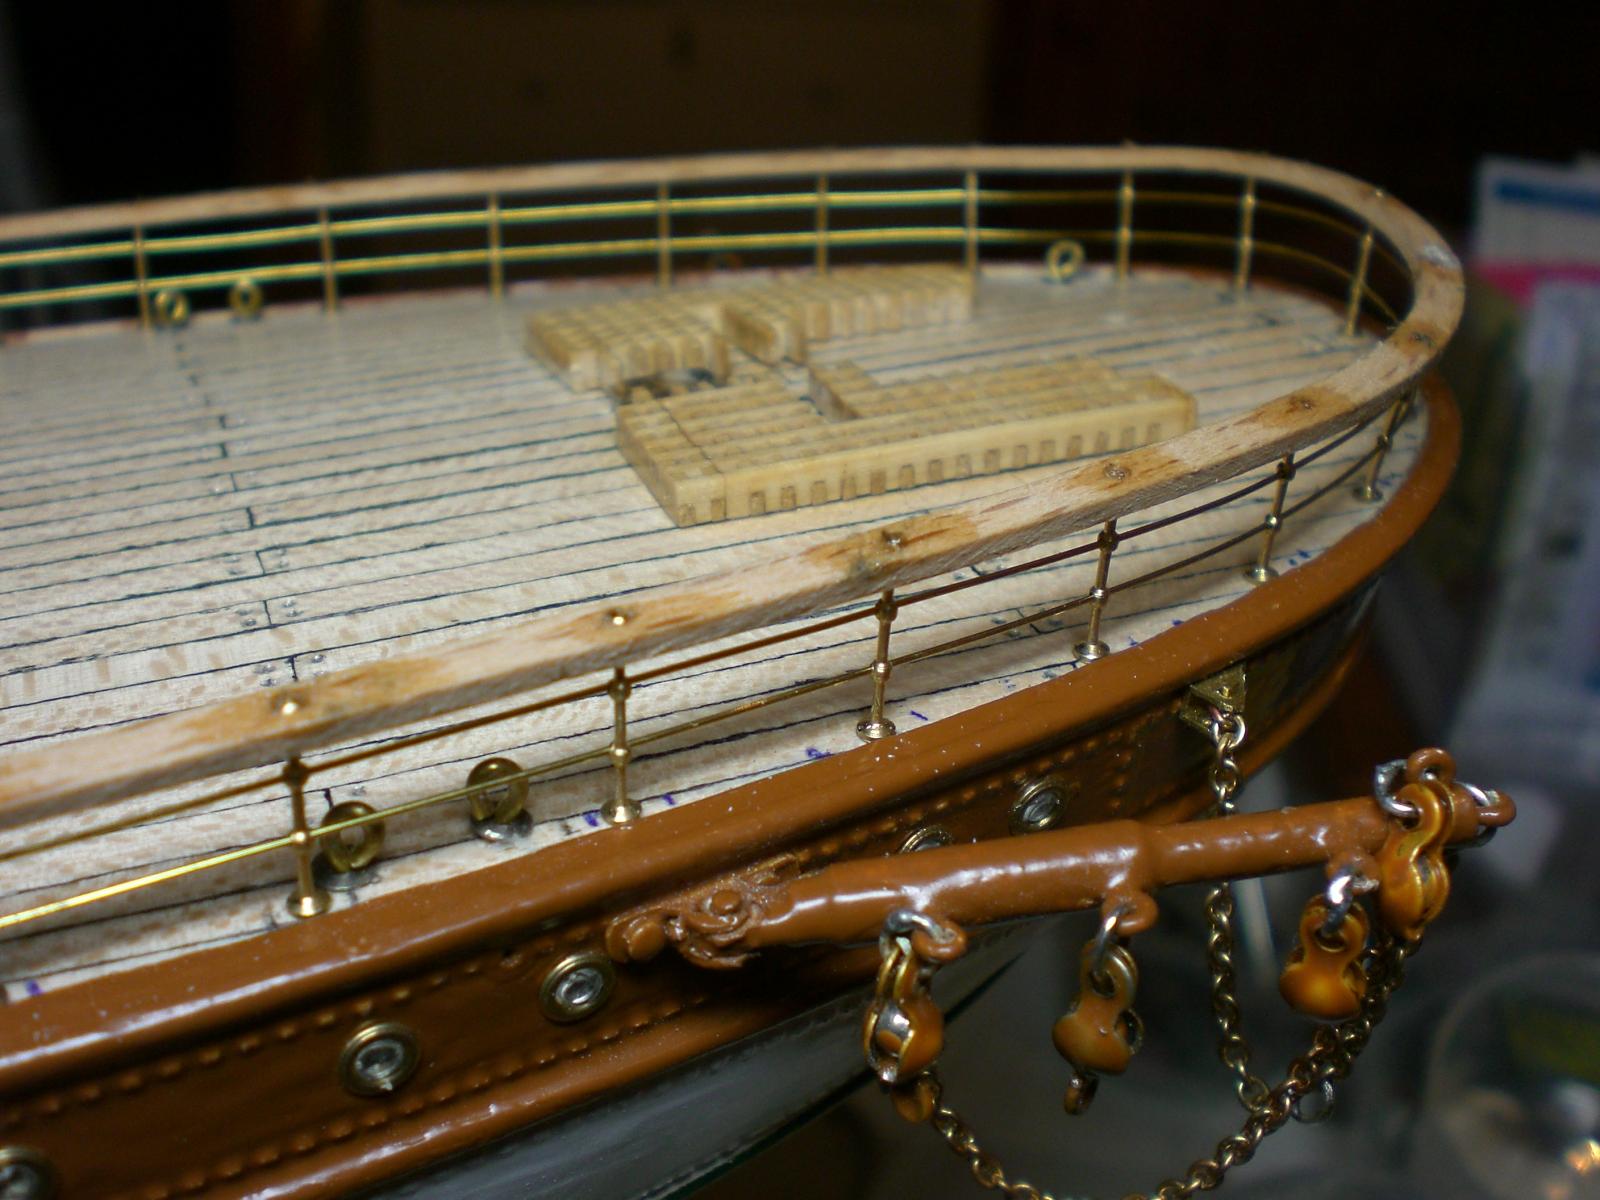
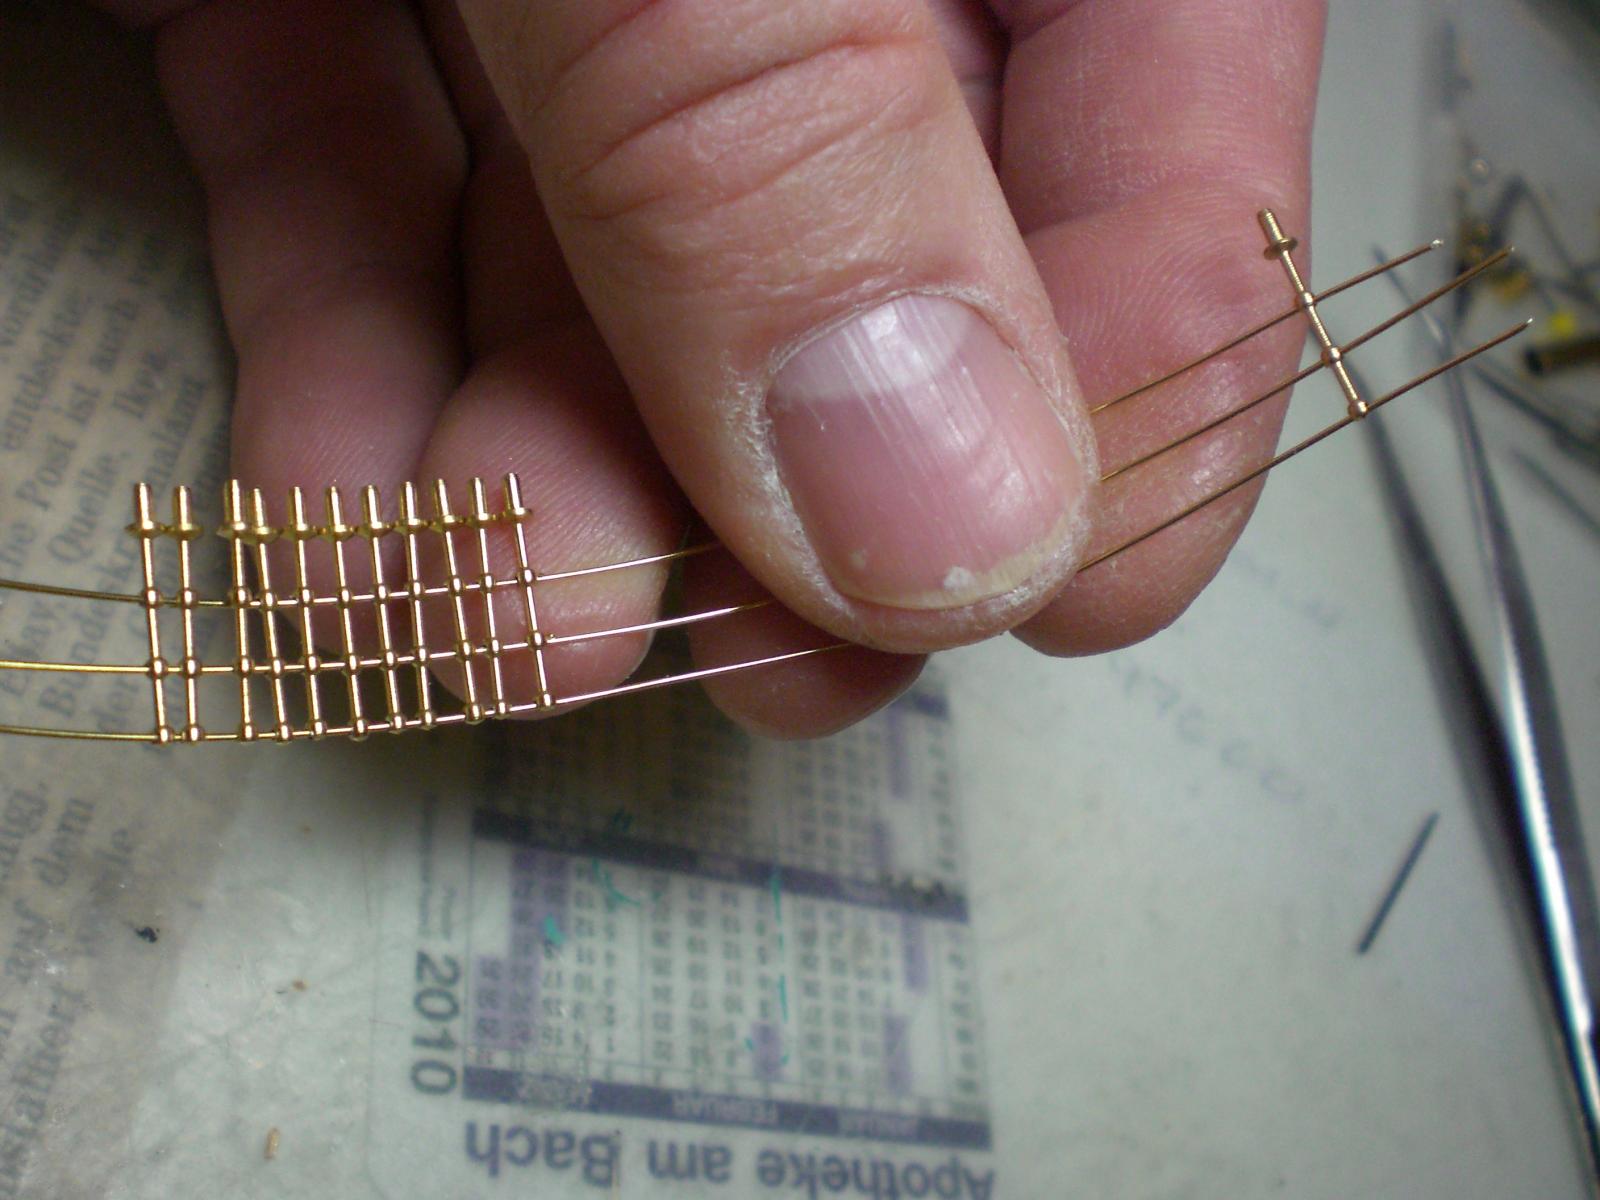
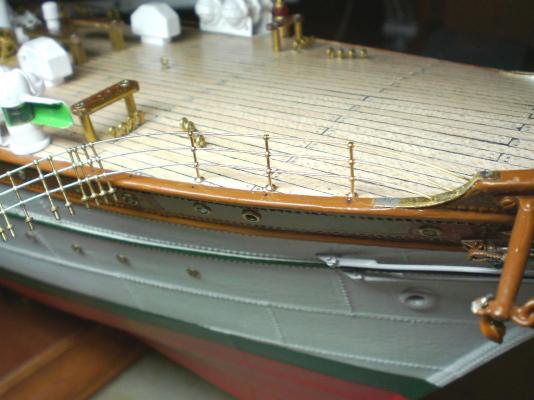
Popeye, the railing assembly is always quite a fiddeling session, and when those thin stanchions are bent too often they simply break off. I consider about 5-10% spare when purchasing... Nils
- 222 replies
-
- 1
-
-
- gorch fock
- barque
- (and 2 more)
-
Michael, in total it must have been appr. 1600 manhours, but not continously building, because the Pamir was pulled up inbetween, whilst the Gorch Fock stood waiting, so that both ships nearly had the same sequence Level and I could do common practice withe the sailmaking, etc... Cheers Nils
-
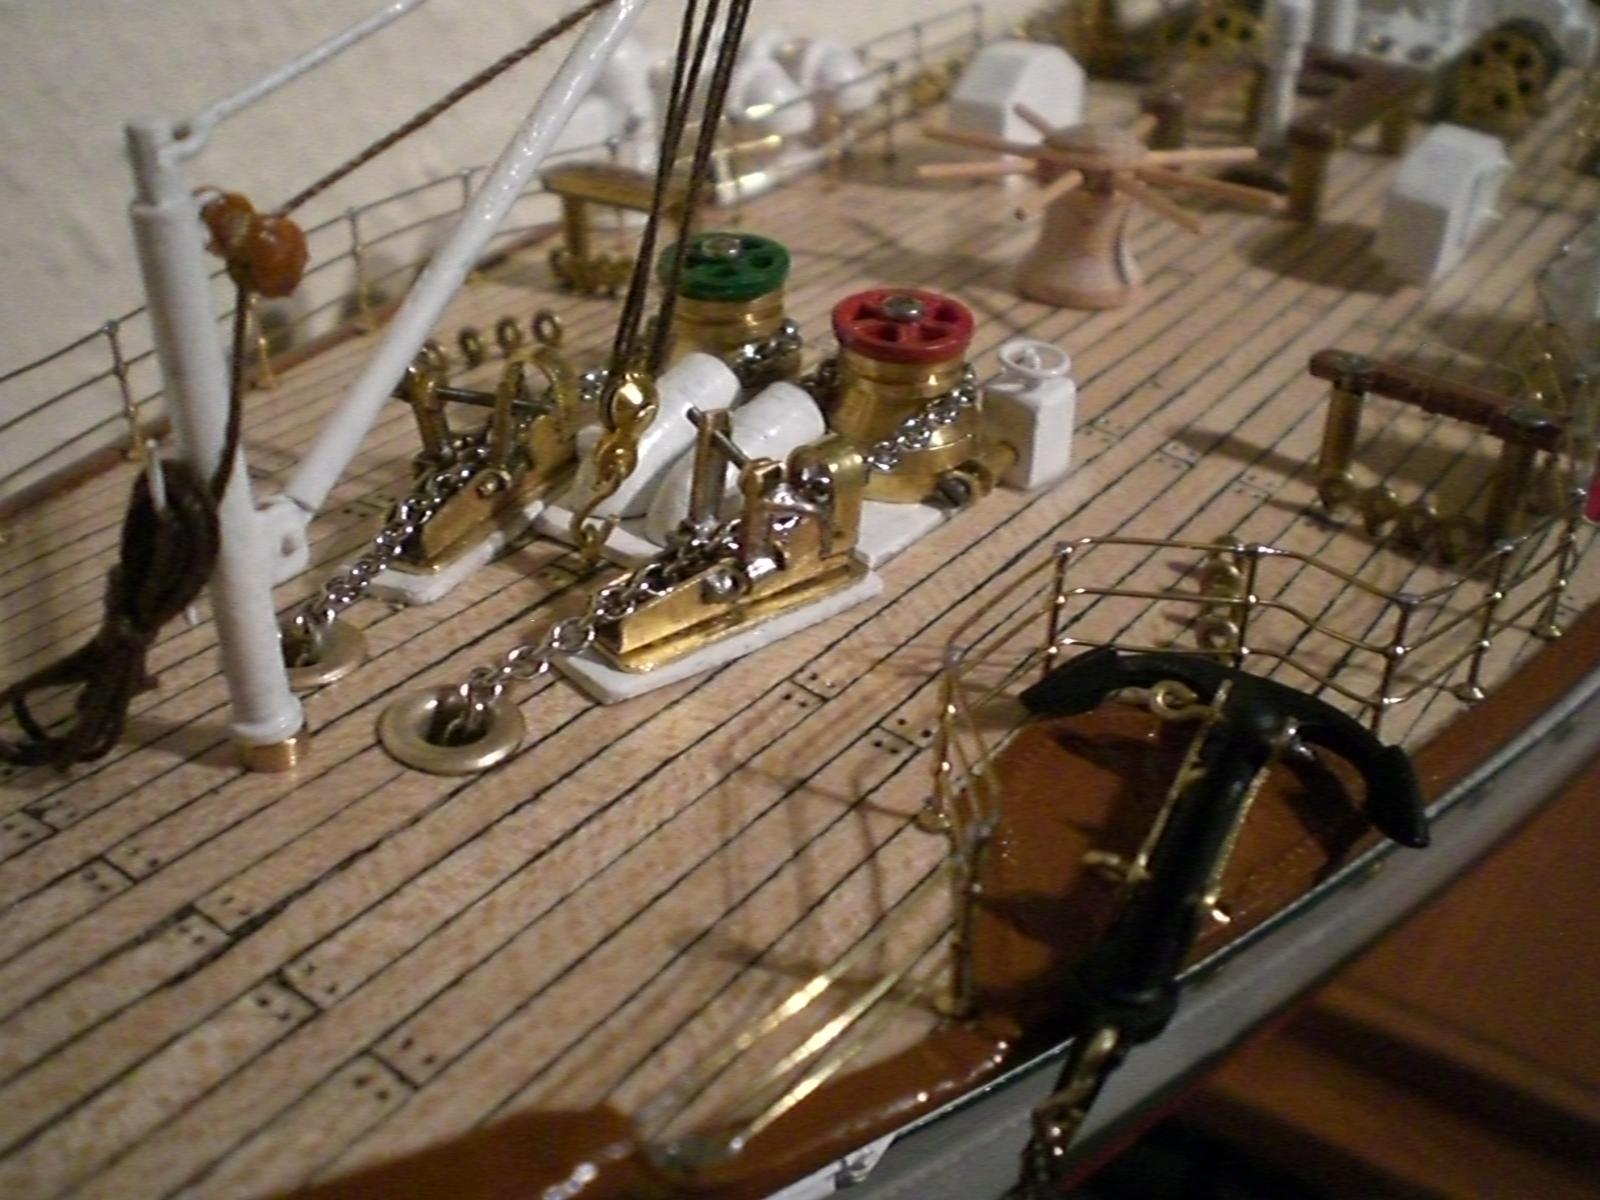
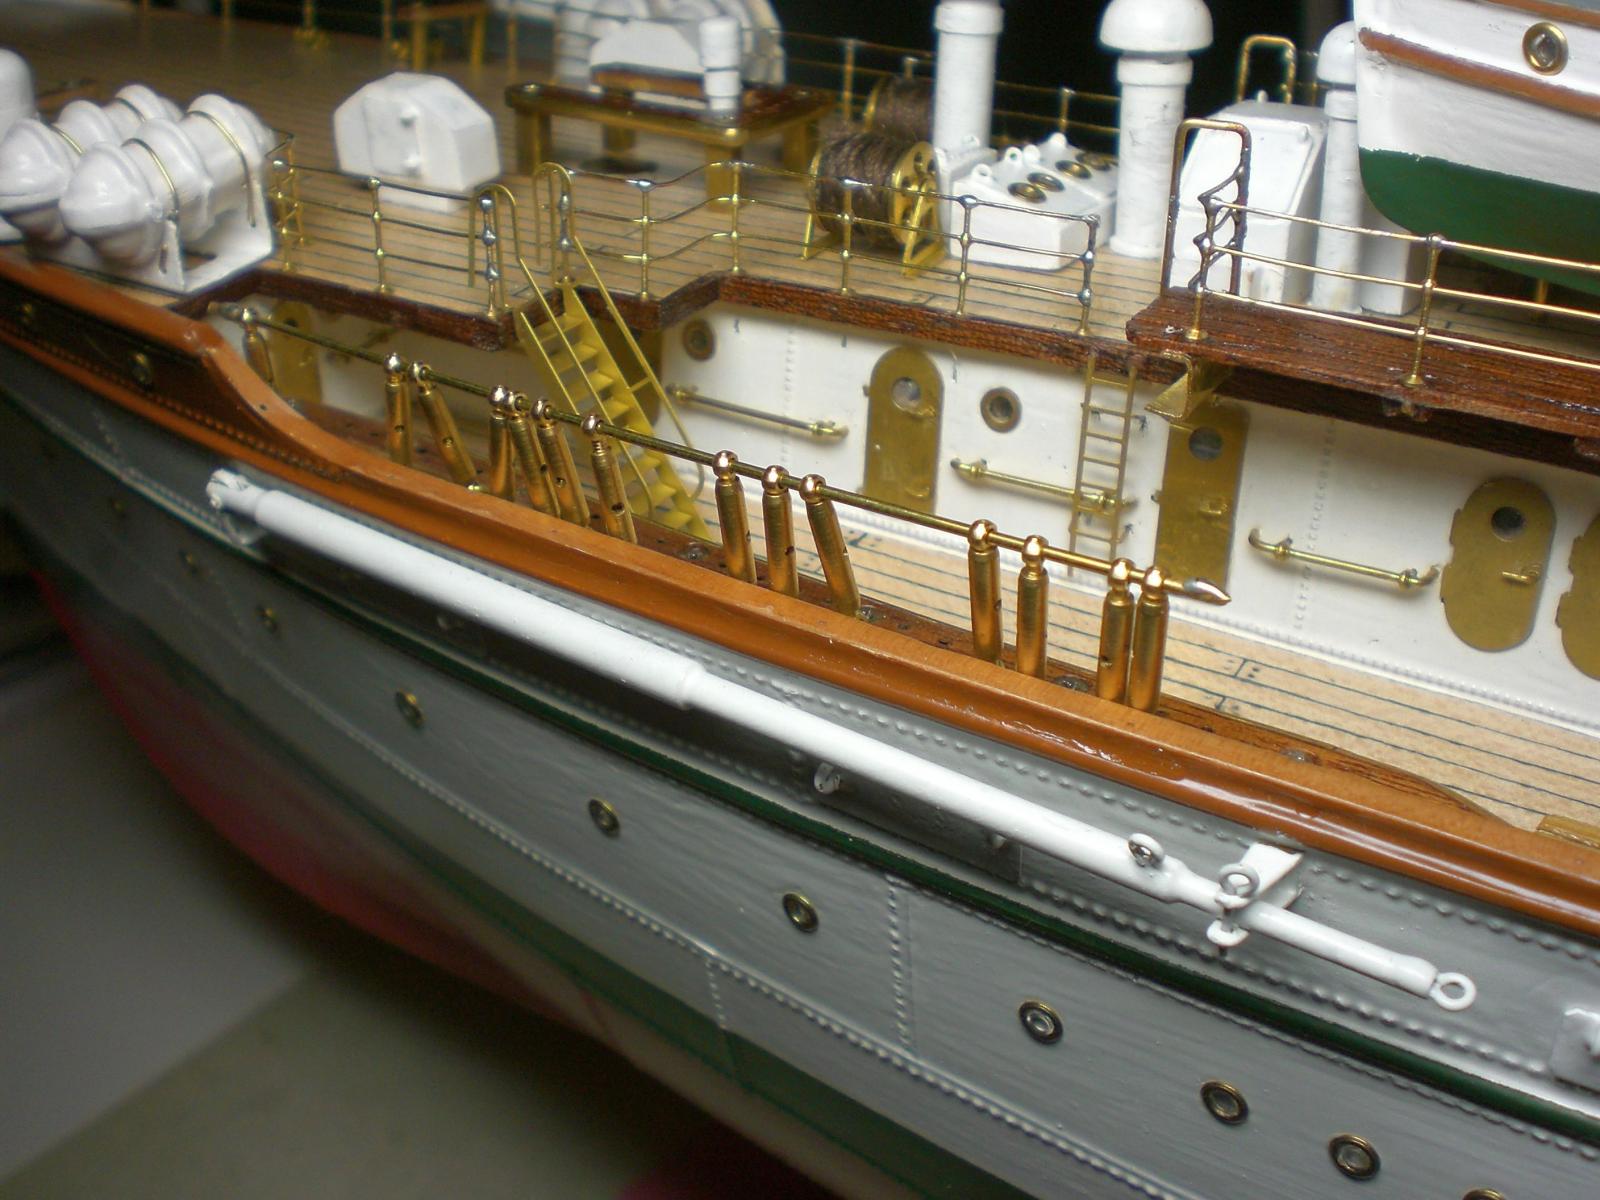
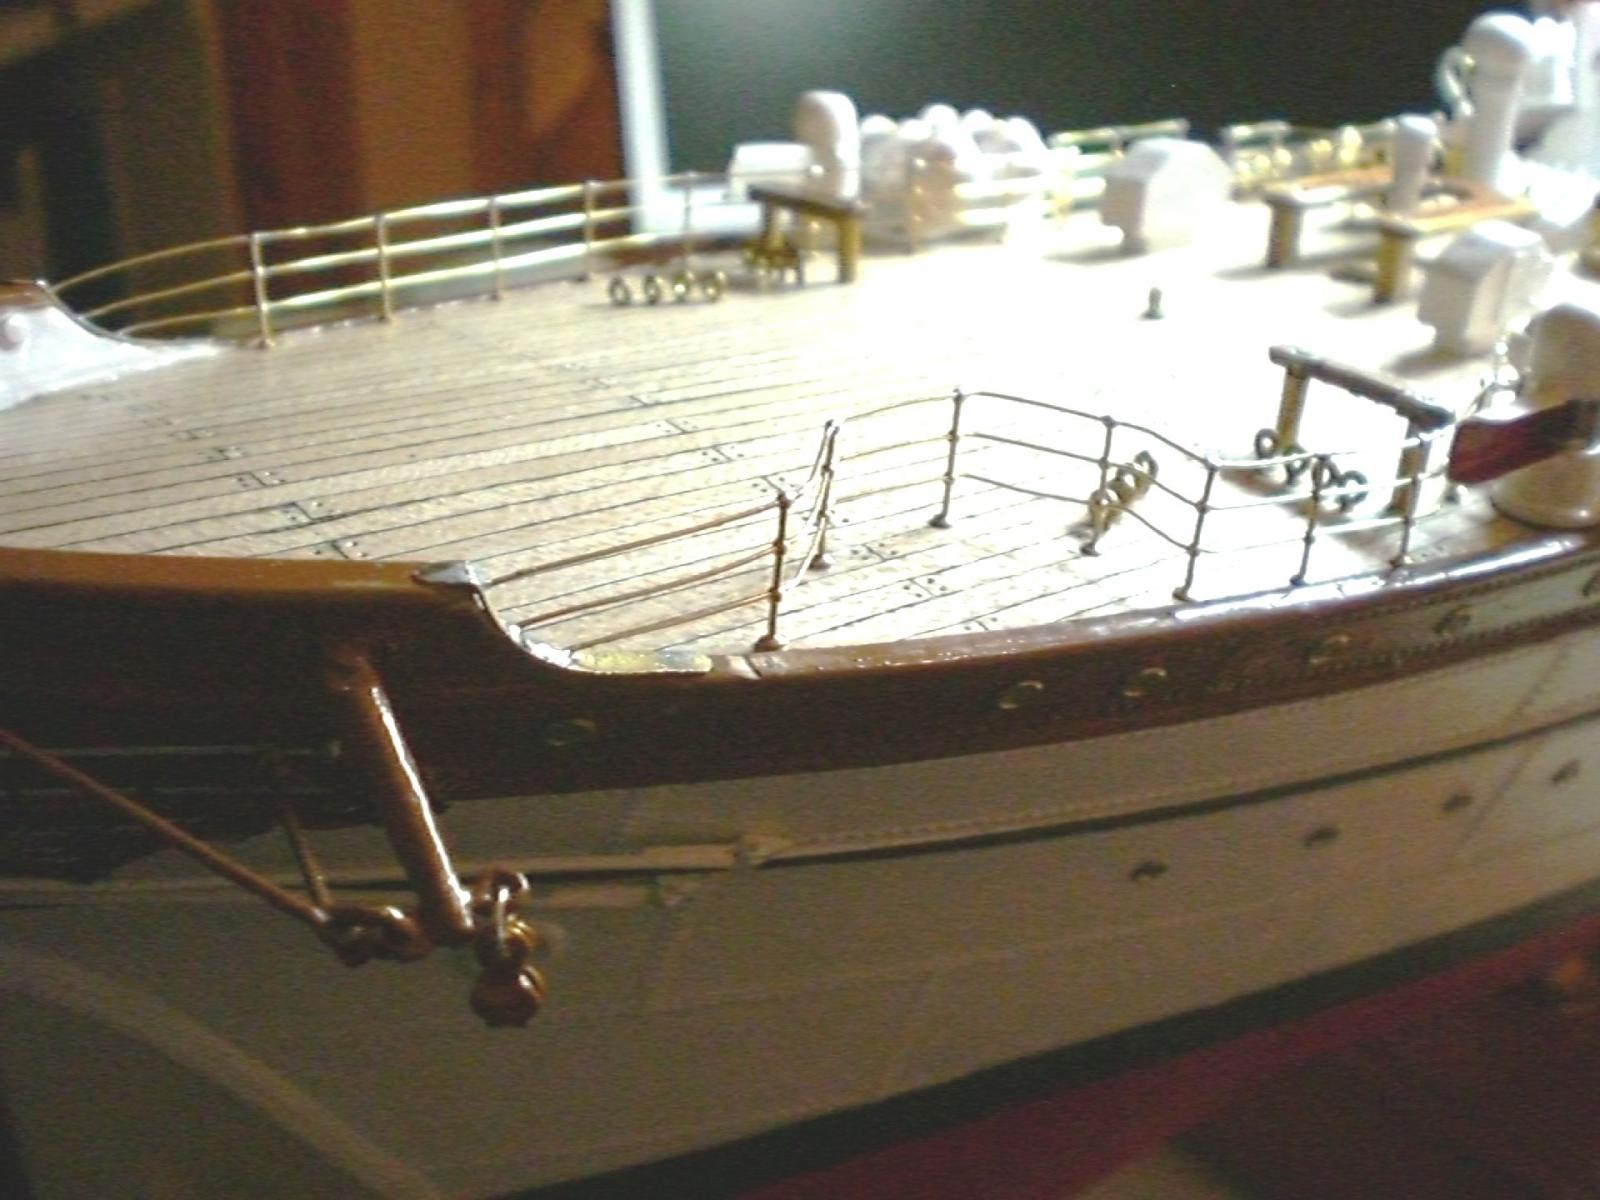
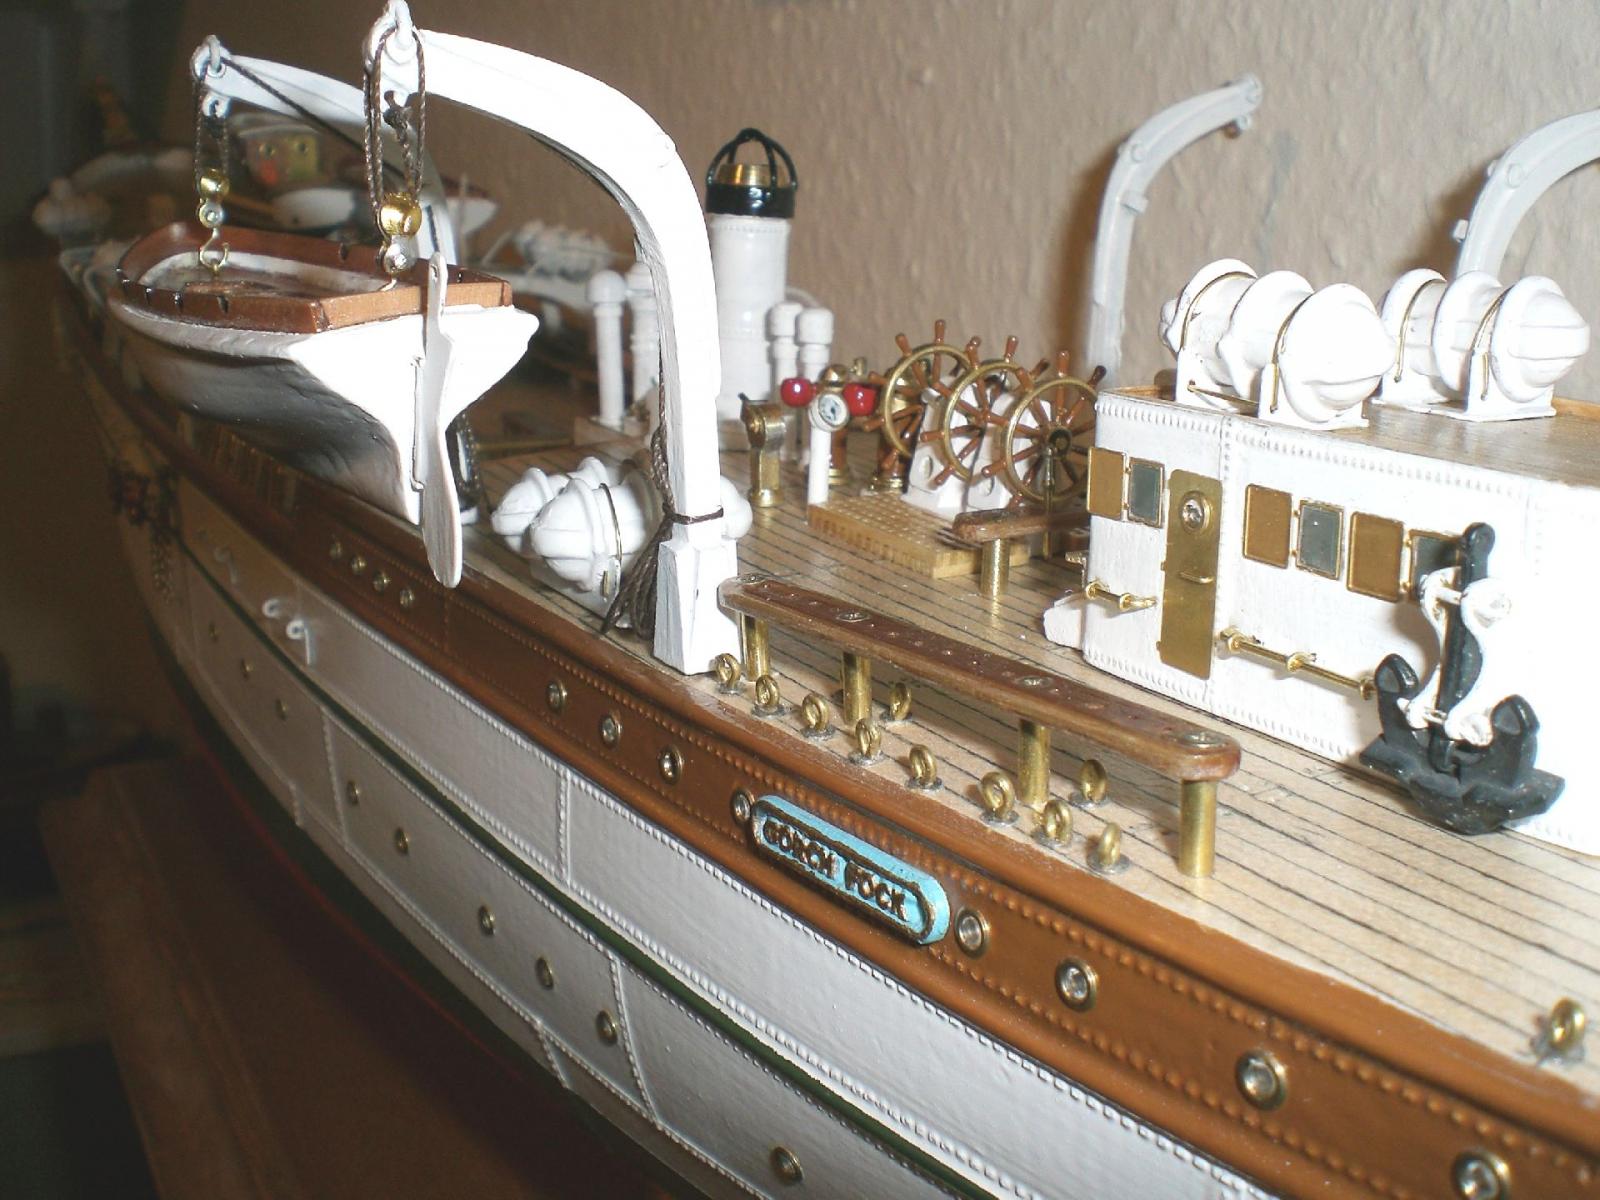
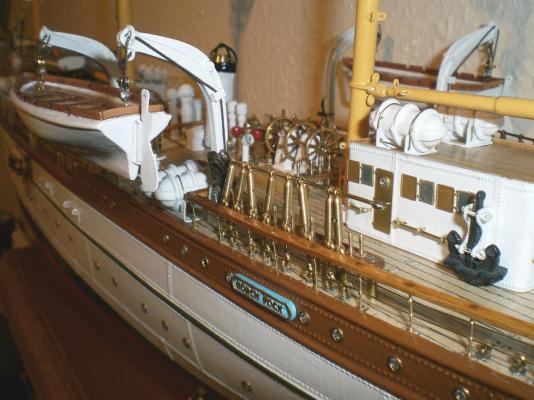
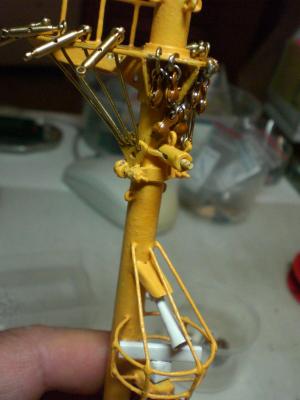
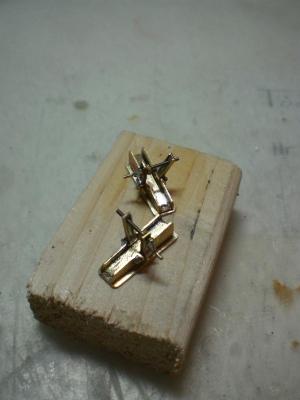
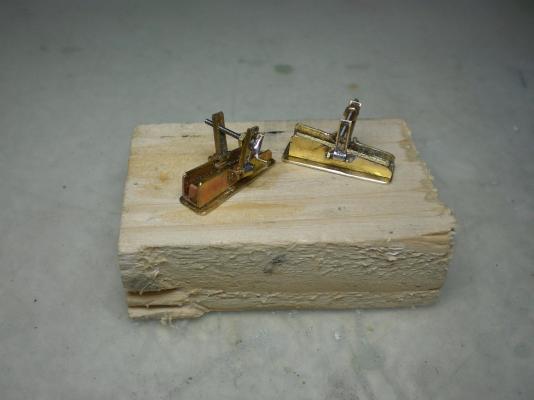
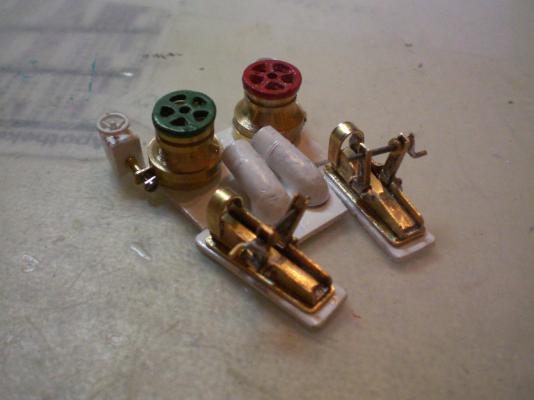
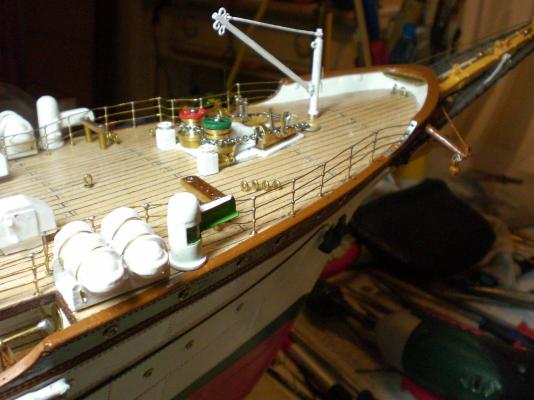
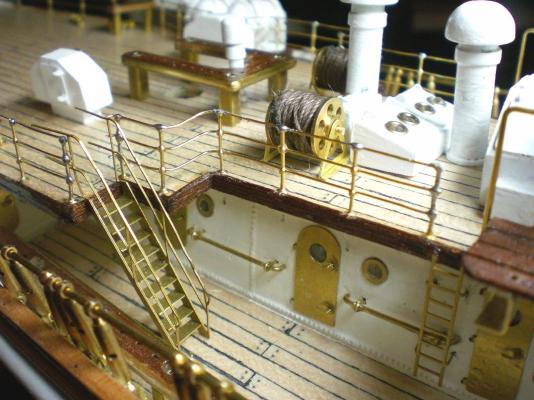
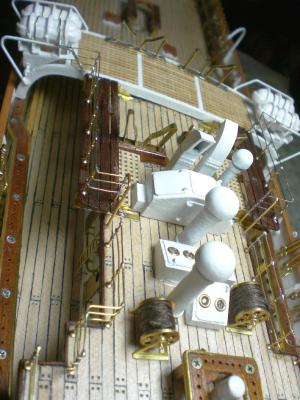
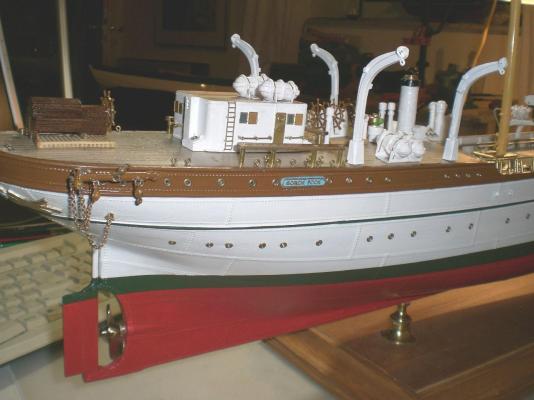
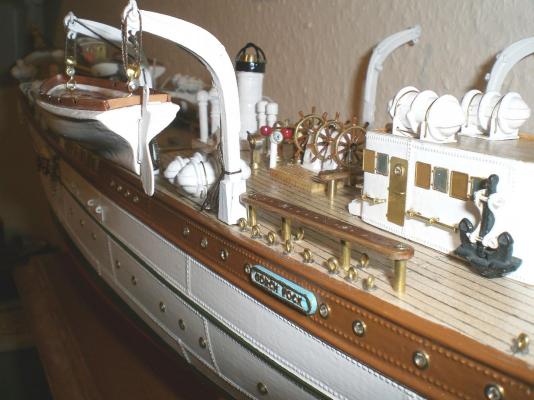
Build log part 37 the anchorchain-stoppers choke type, with spindle in combination with electric spills and Spill band-brake device forecastle deck now ready for operation Crew in Trial positions because of the Motor there must be an machine telegraph operator poopdeck railing nearly completed continous Progress.... Build log part 38 to follow.... Nils


- 222 replies
-
- 7
-
-
- gorch fock
- barque
- (and 2 more)
-
ROYAL CAROLINE 1749 by Doris - 1:40 - CARD
Mirabell61 replied to DORIS's topic in - Build logs for subjects built 1501 - 1750
Doris , Thanks so much for those Close up pics of those absolutely fantastic mystic figures, its like in fairyland even with my 66 years Nils- 883 replies
-
- 1
-
-
- royal caroline
- ship of the line
- (and 1 more)
-
congrats Karl, a great tool that Proxon lathe, someday I think I will invest in such myself Nils
- 662 replies
-
- 1
-
-
- bonhomme richard
- frigate
- (and 1 more)
-
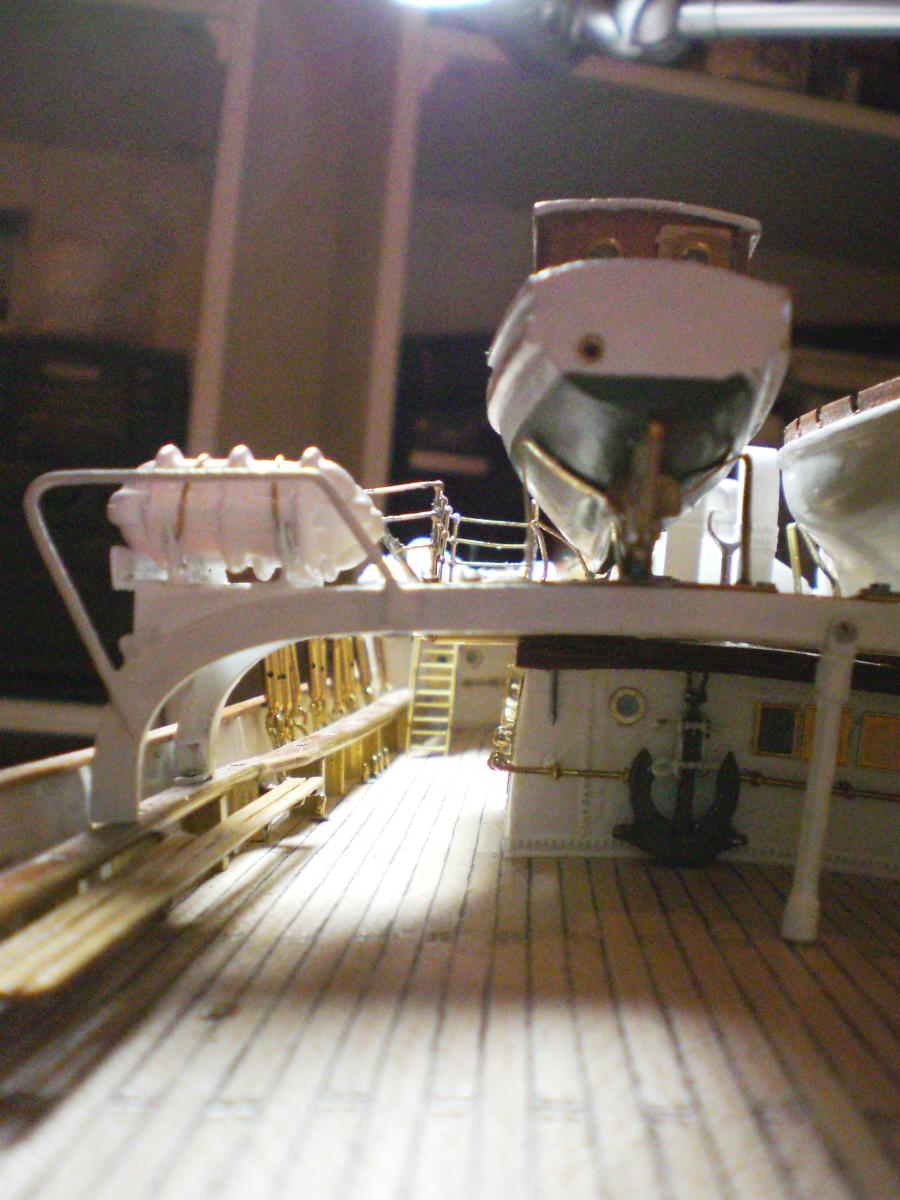
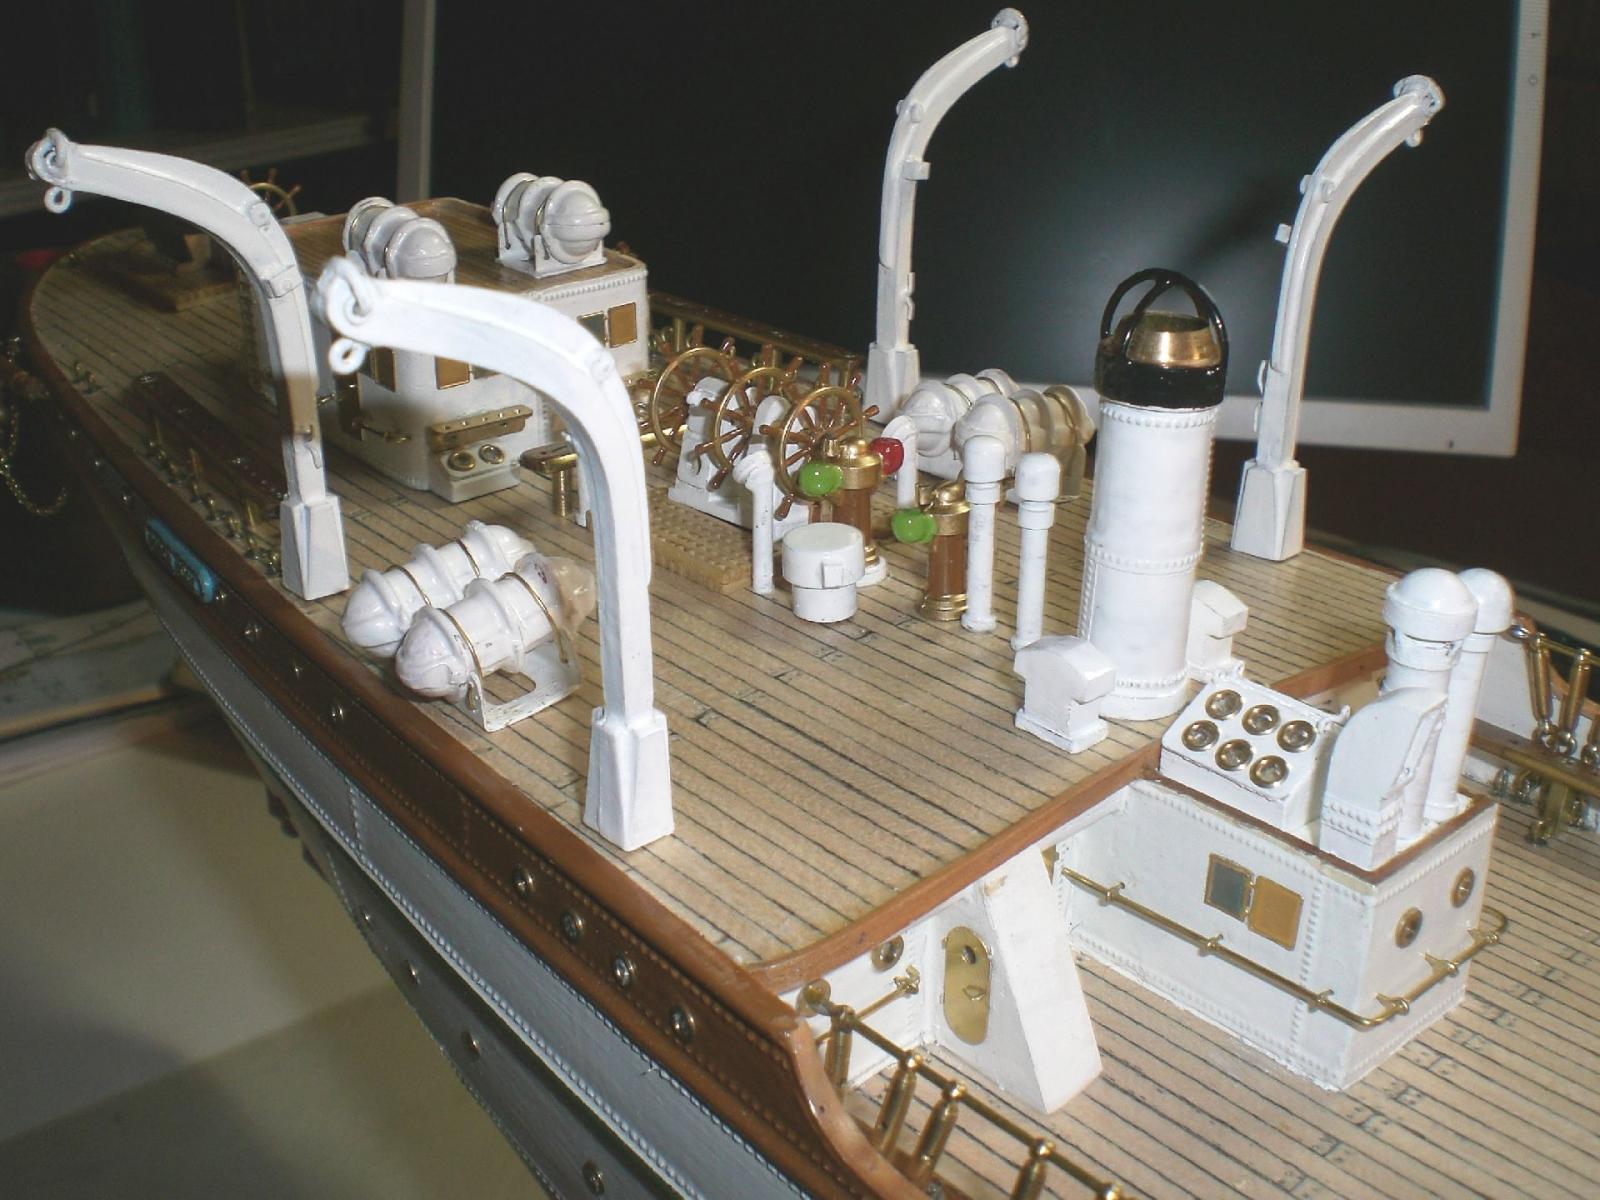
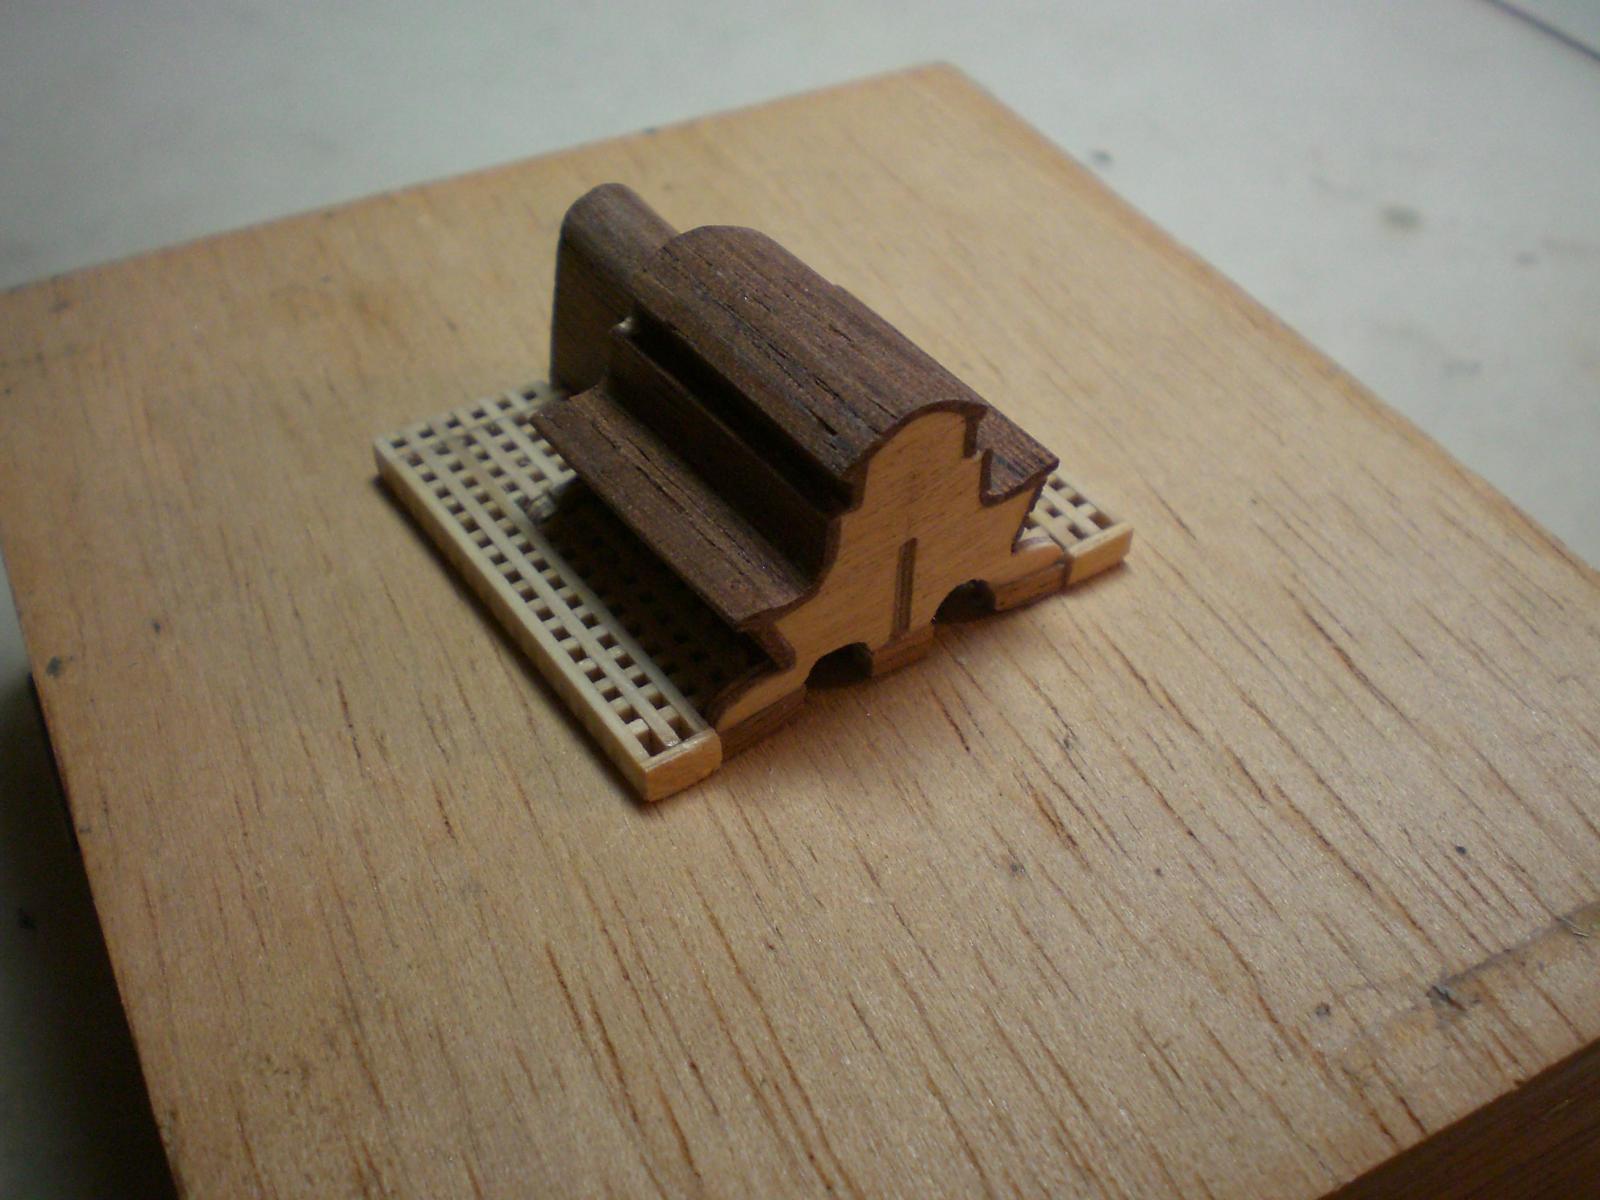
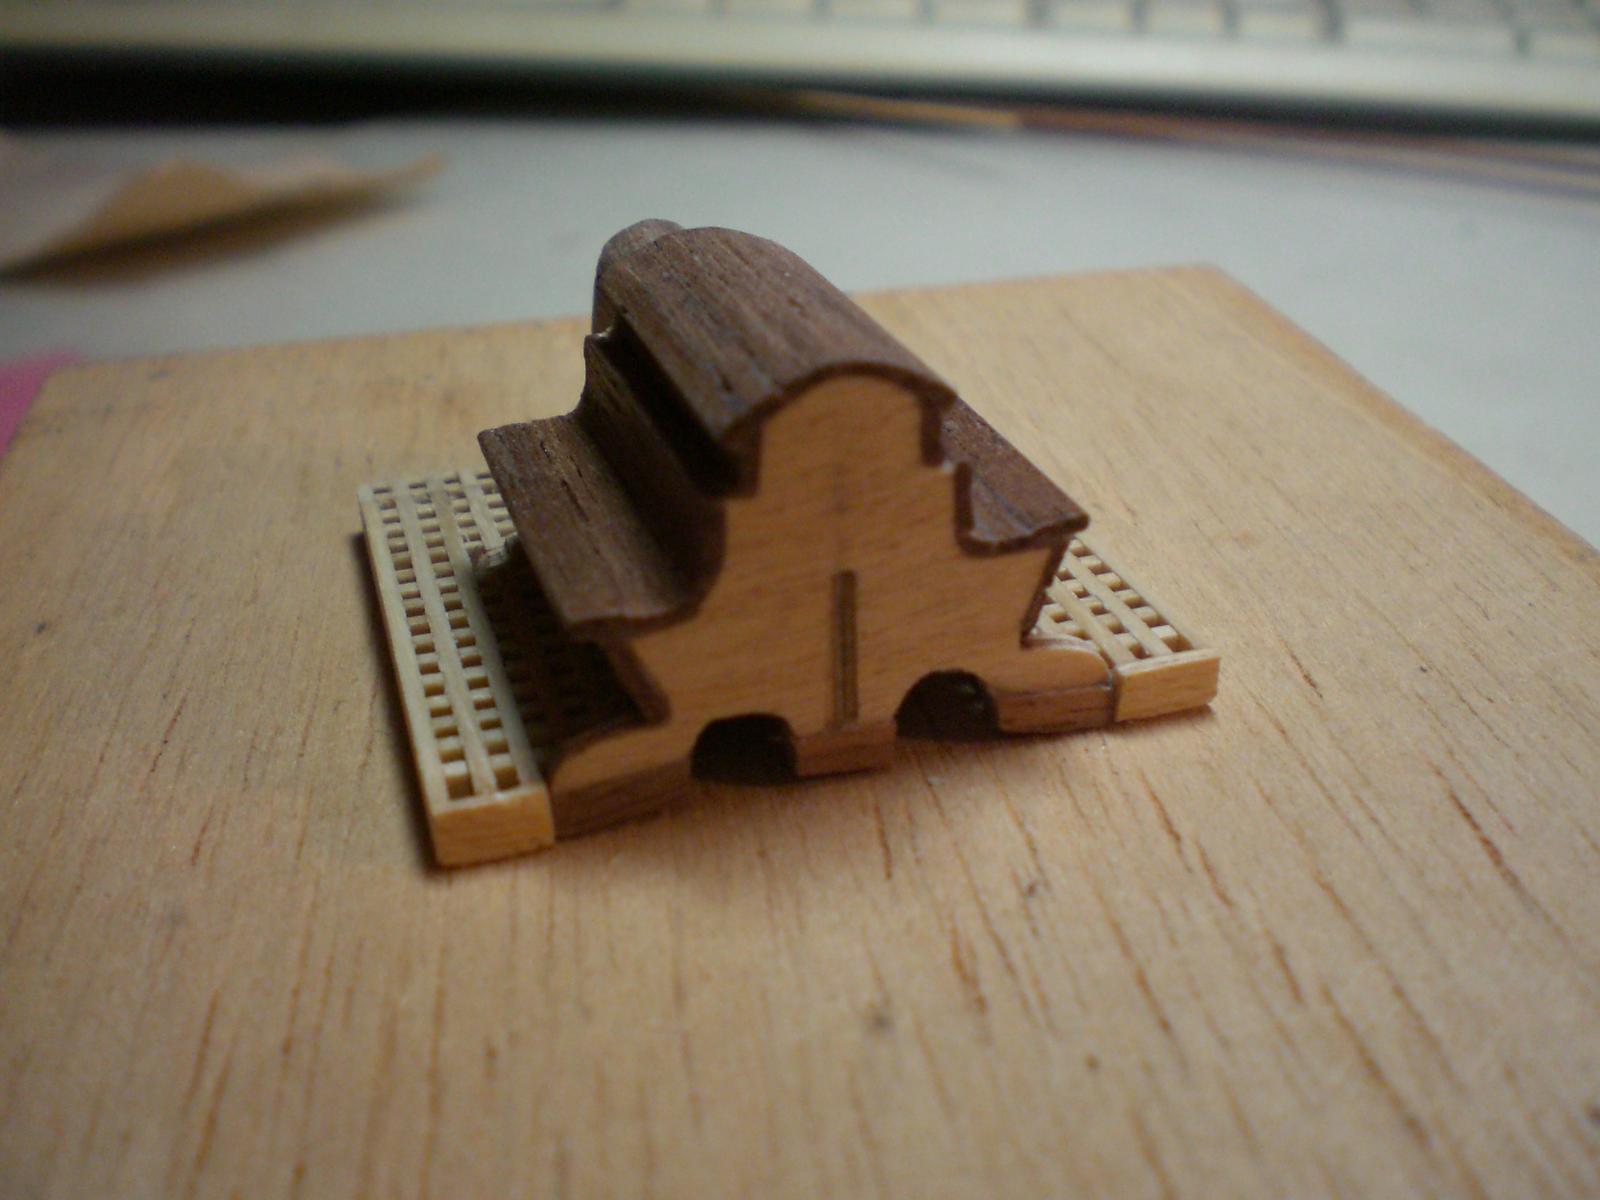
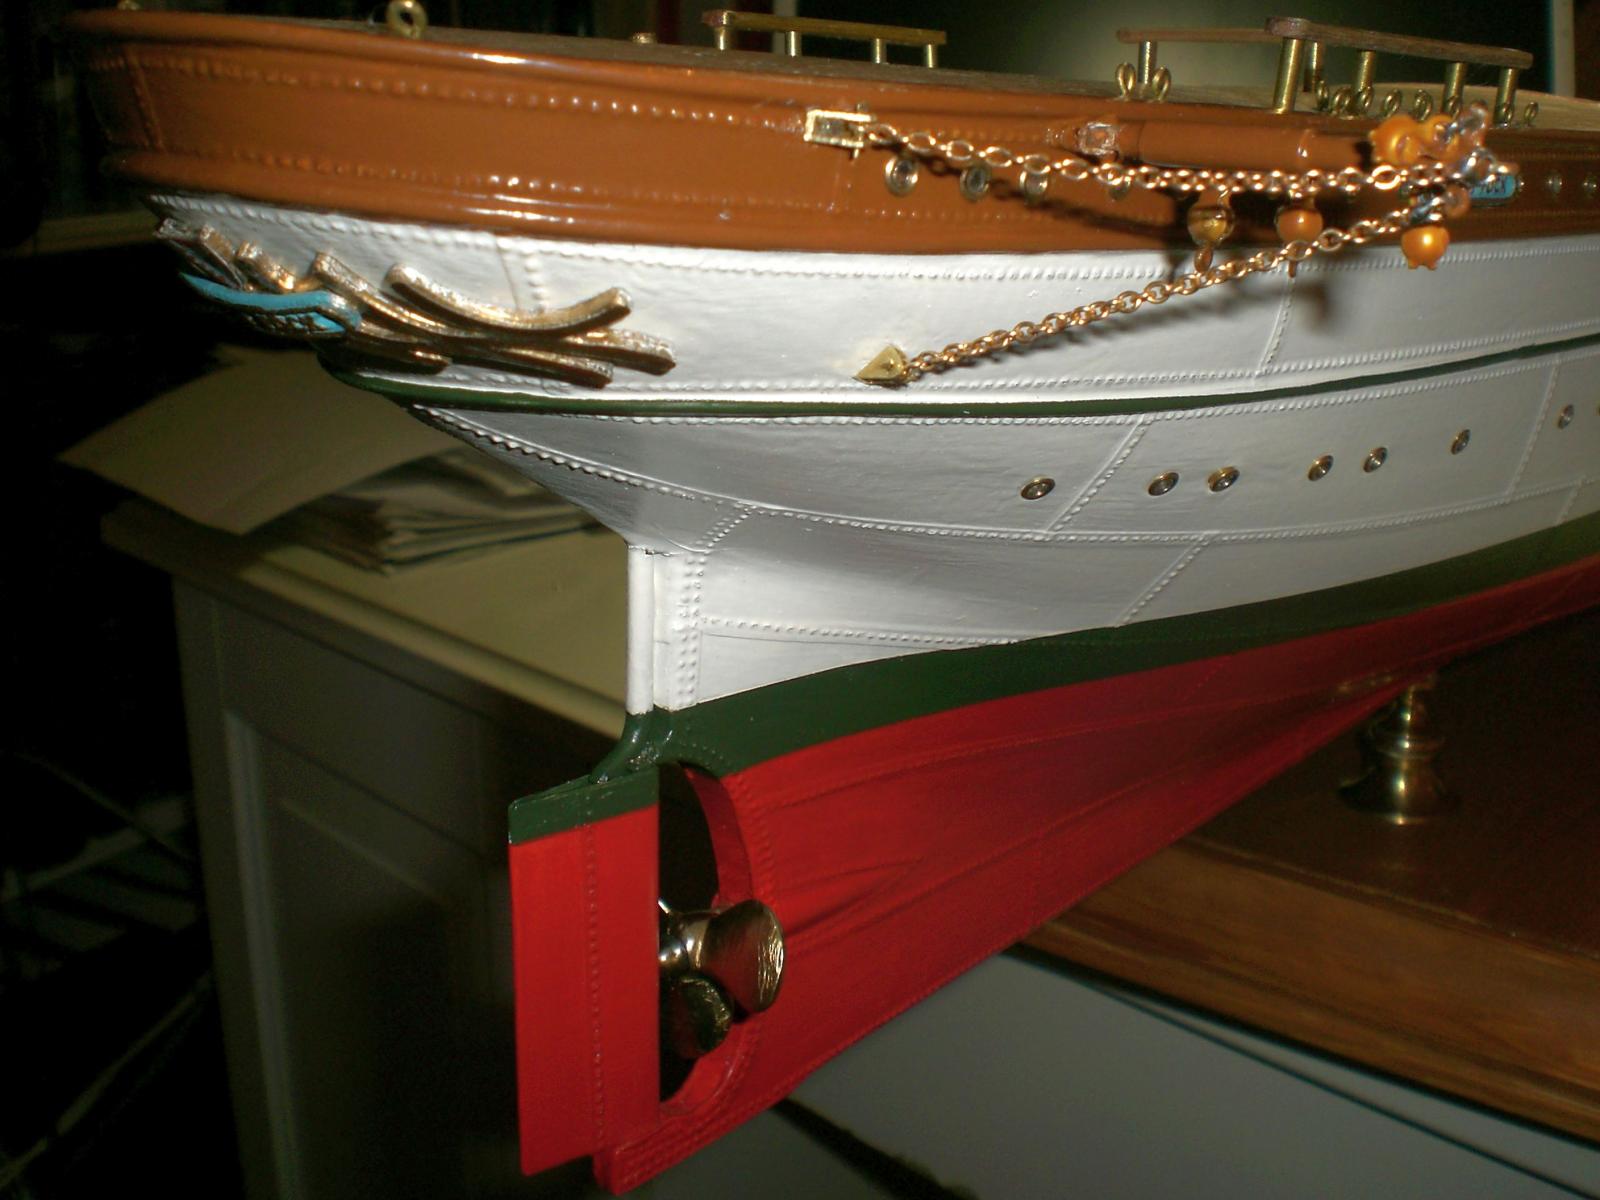
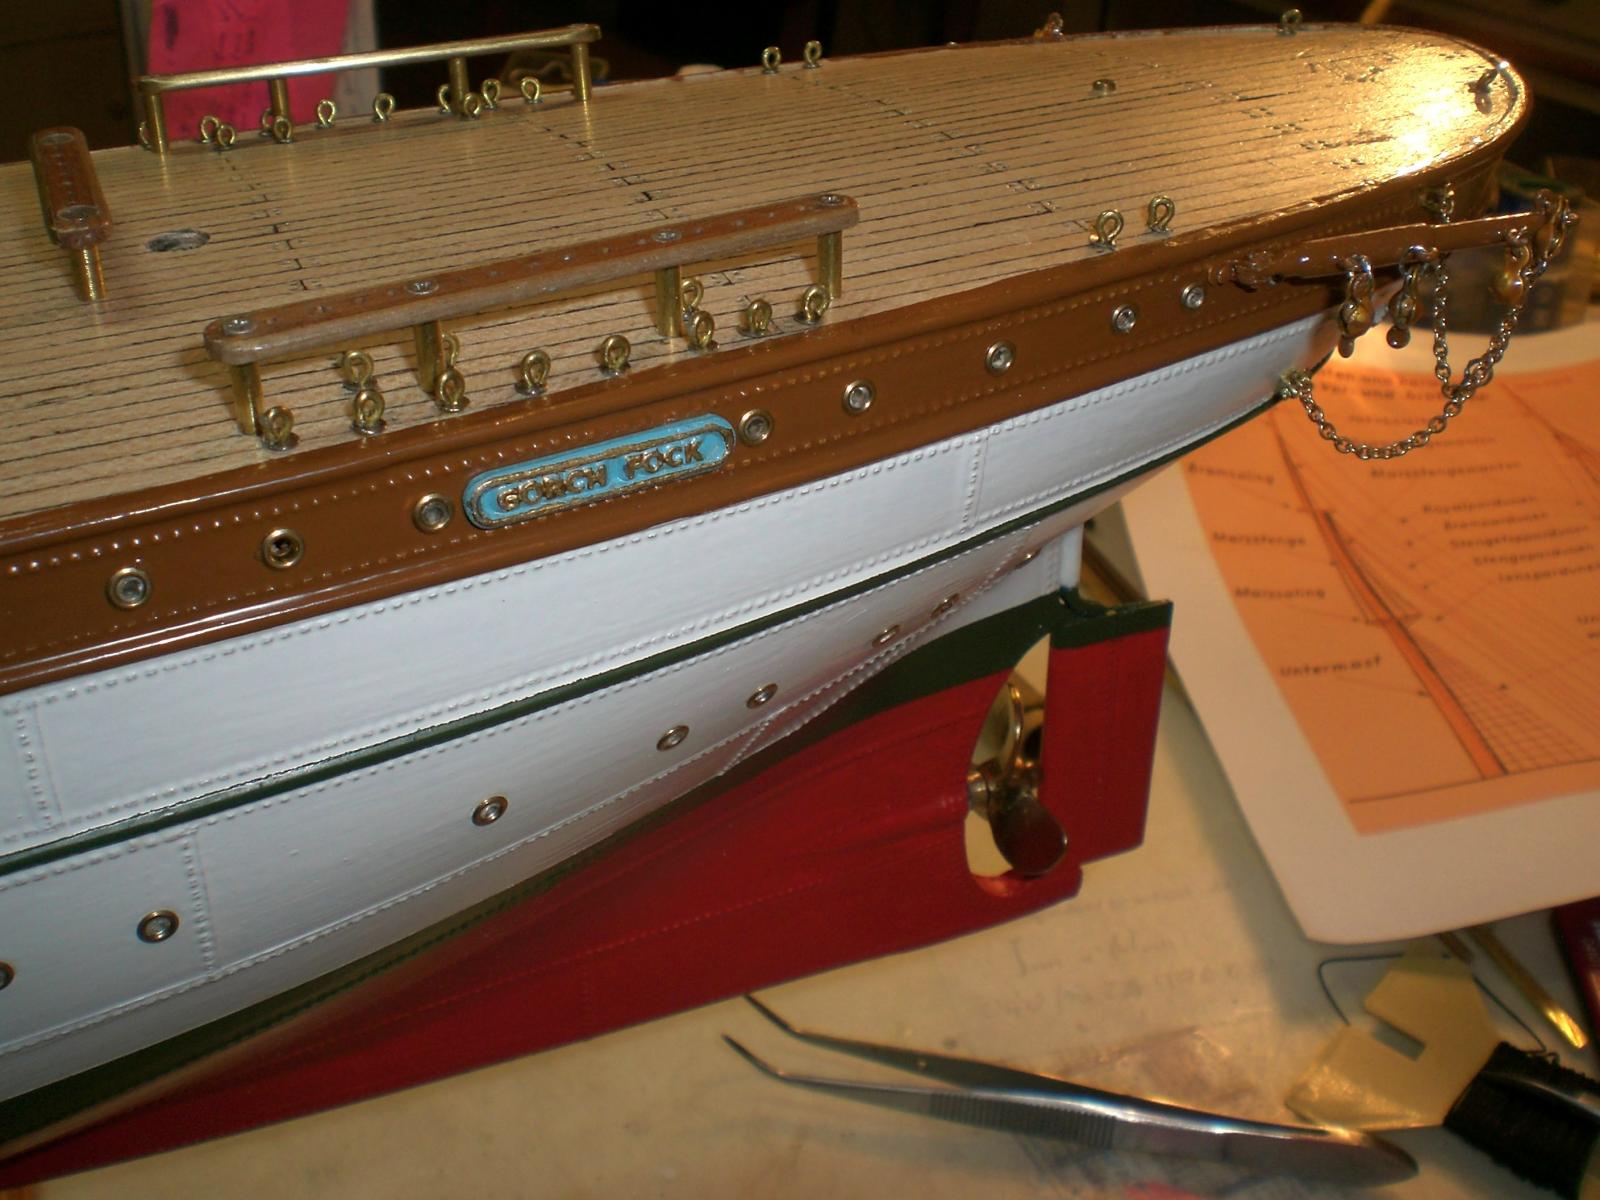
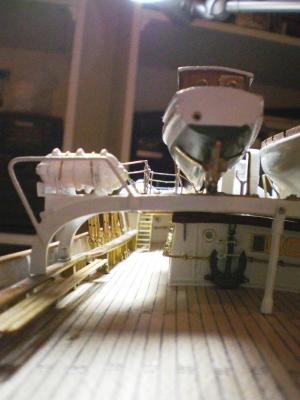
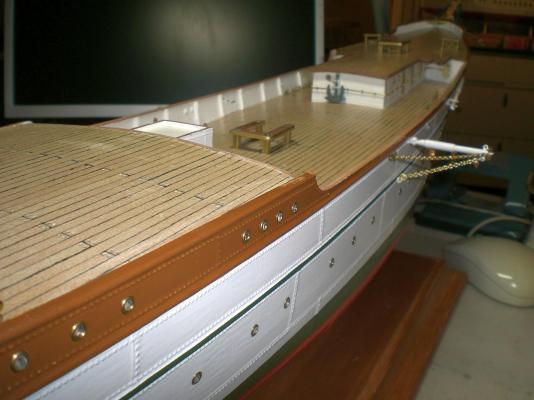
Build log part 36 the forecastle stairs will not be permanently fixed until the frontmast rigging in that area is done, due to Access Problems otherwise view without the boats uncomplete forecastle deck, the portside only bears an nostalgic admiralty type anchor shortcut Access to boatstations also directly possible from welldeck portside welldeck Forward view the stairs to poopdeck shall be integrated into the railing Build log part 37 to follow.... Nils


- 222 replies
-
- 9
-
-
- gorch fock
- barque
- (and 2 more)
-
Mauro, Plankings Looks good are you going to fill the plank gaps in some way when the Planks are all laid down ? Nils
-
she`s coming along very nicely Jack Nils
-
Popeye, nice work at the crows nest, the capstan and pump, Looks very goog Nils
-
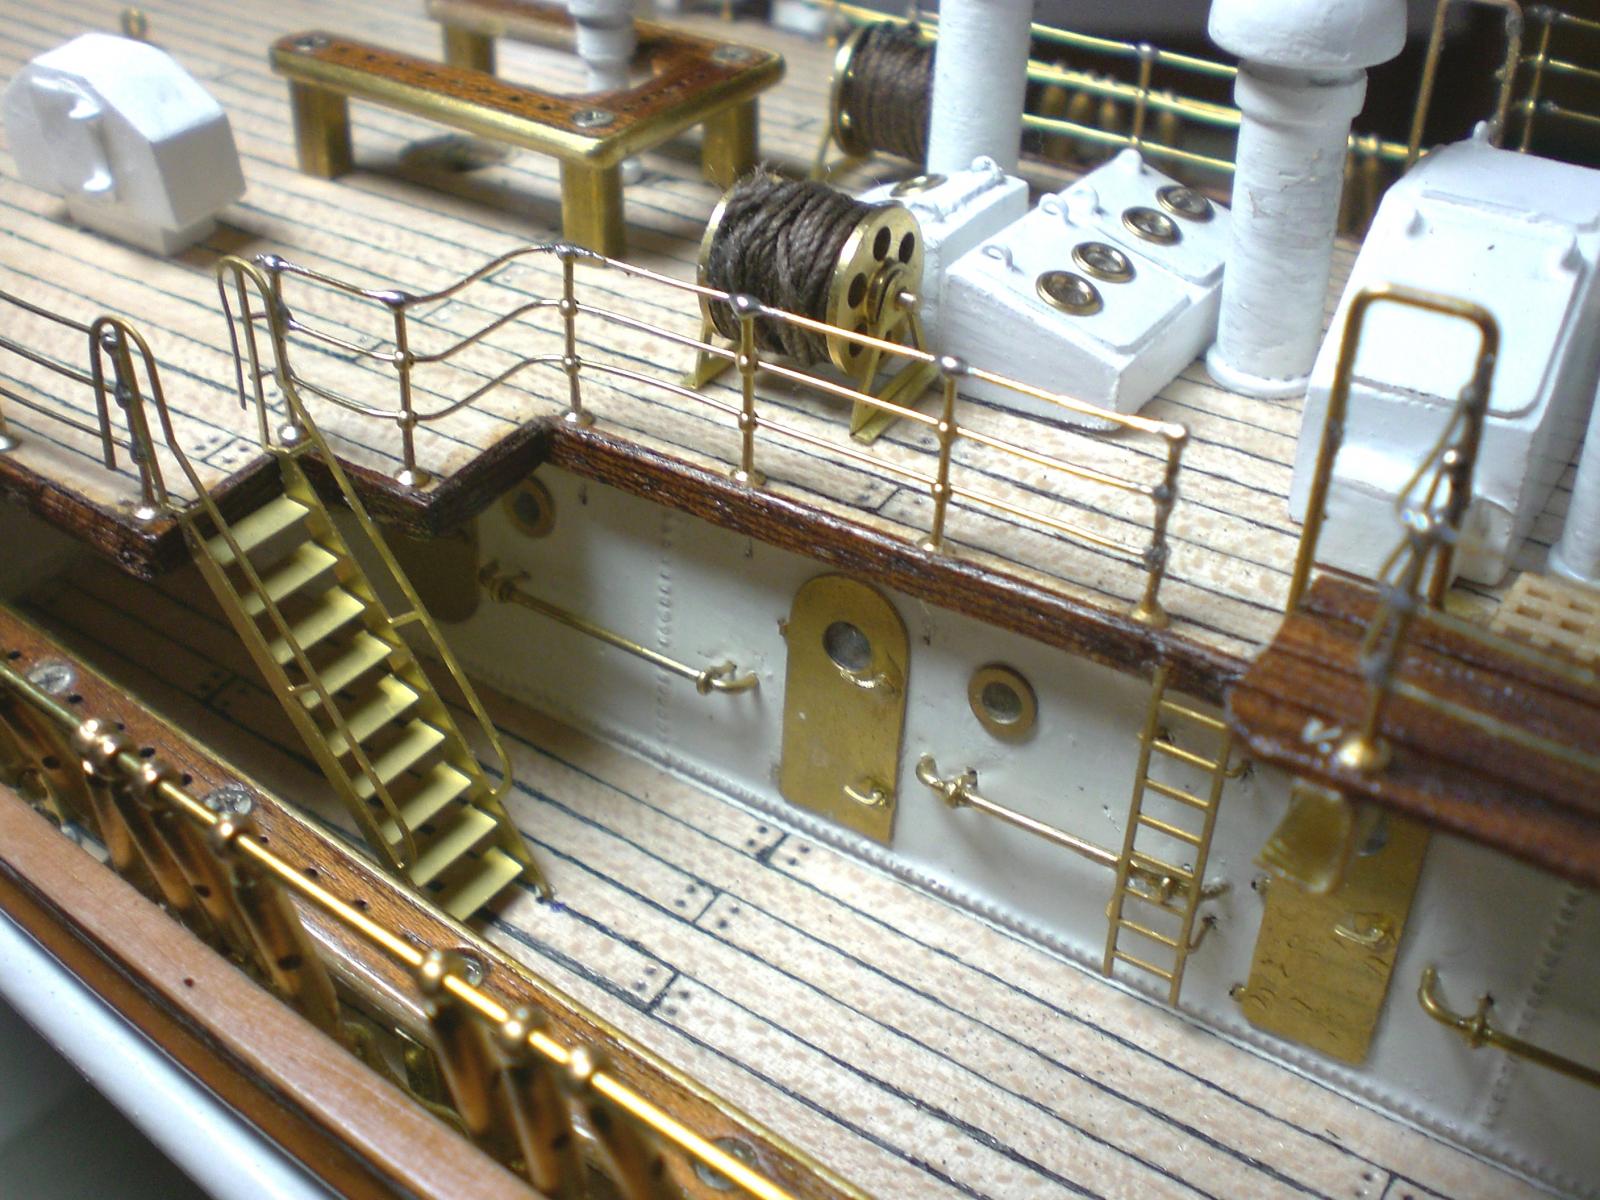
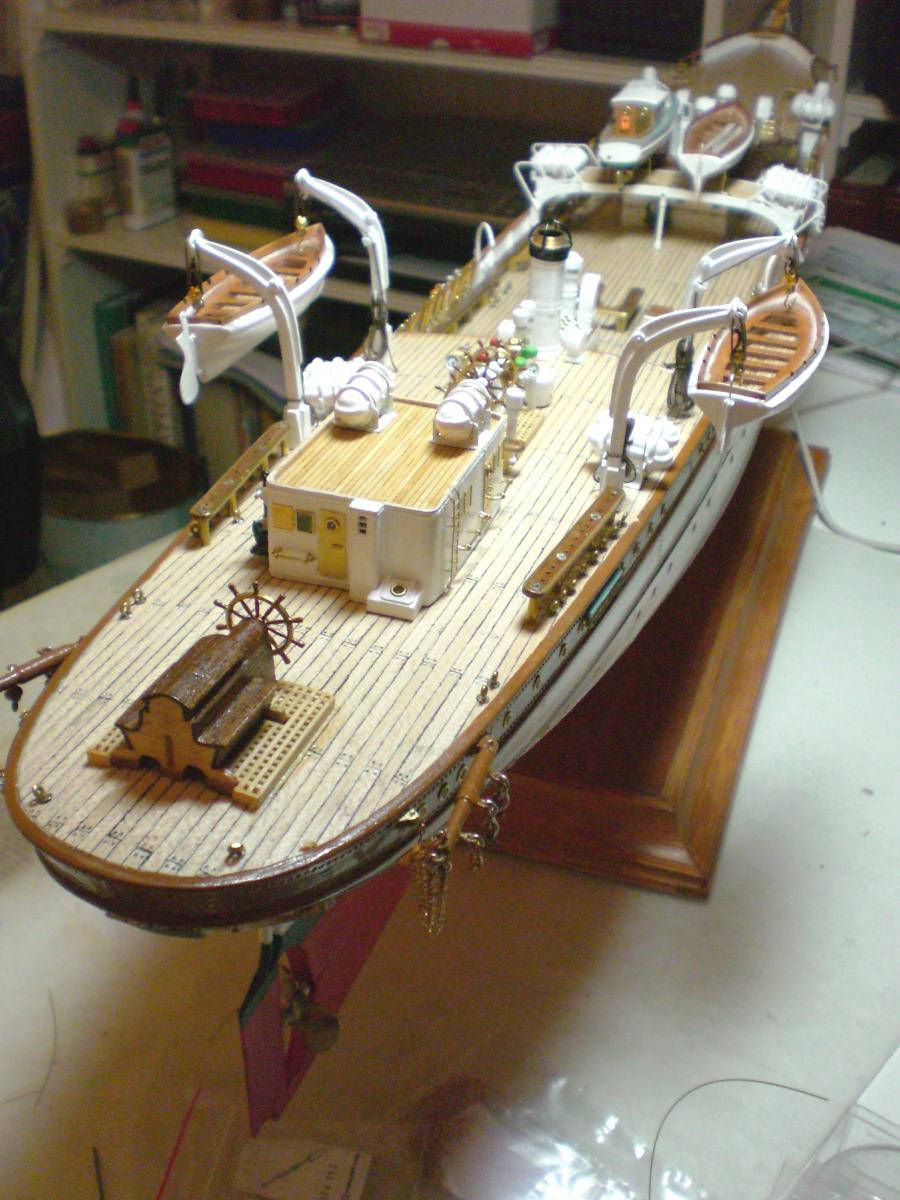
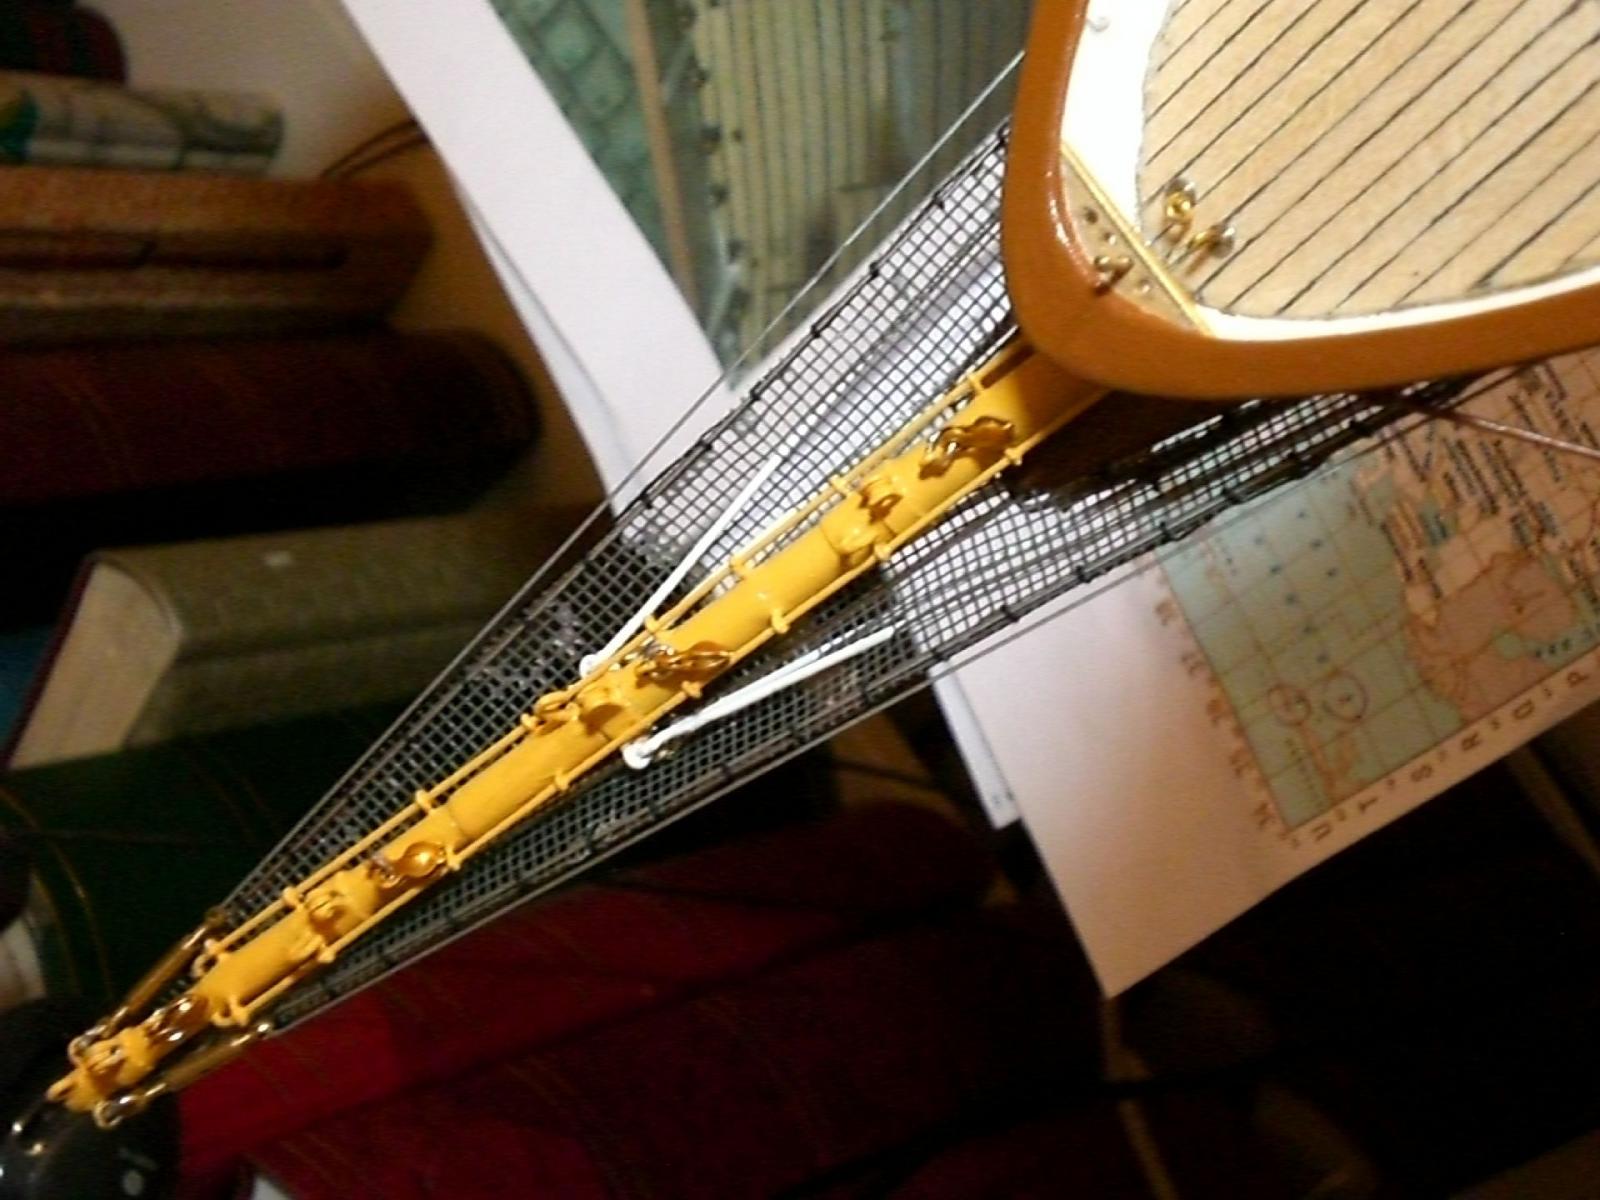
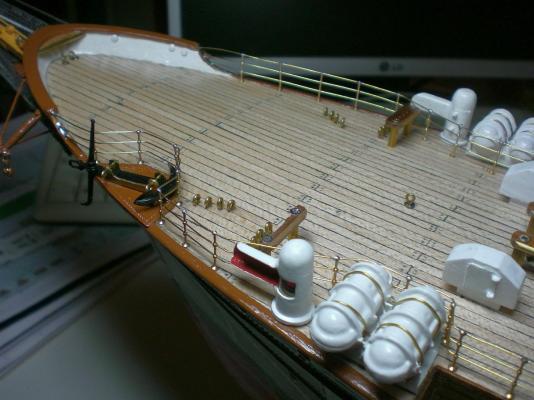
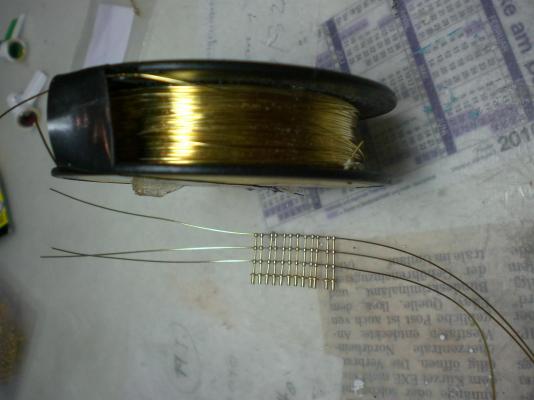
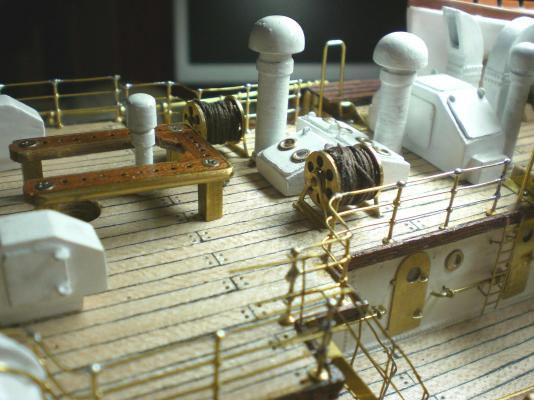
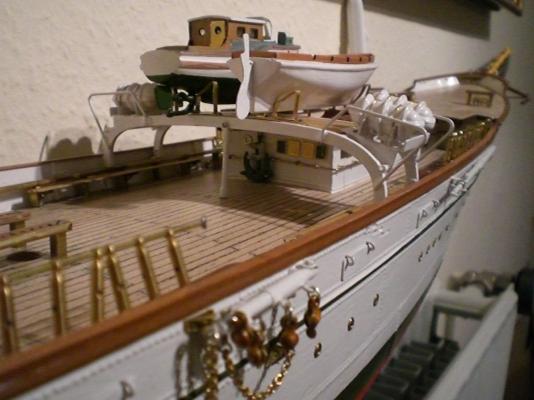
Build log part 35 starting the brass railings with 3 hole stachions and 0,4mm wire from the spool shaping a duct for the potside anchor ...and on towards the boatstations front mast goes through the deck here the two boats are hanging outwards but also can be swung inwards fit in the forcastle stairs (to be soldered with the railing, later on ropedrums attached railing continued around the boatstations and up to the liferaft containments Build log part 36 to follow.... Nils


- 222 replies
-
- 10
-
-
- gorch fock
- barque
- (and 2 more)
-
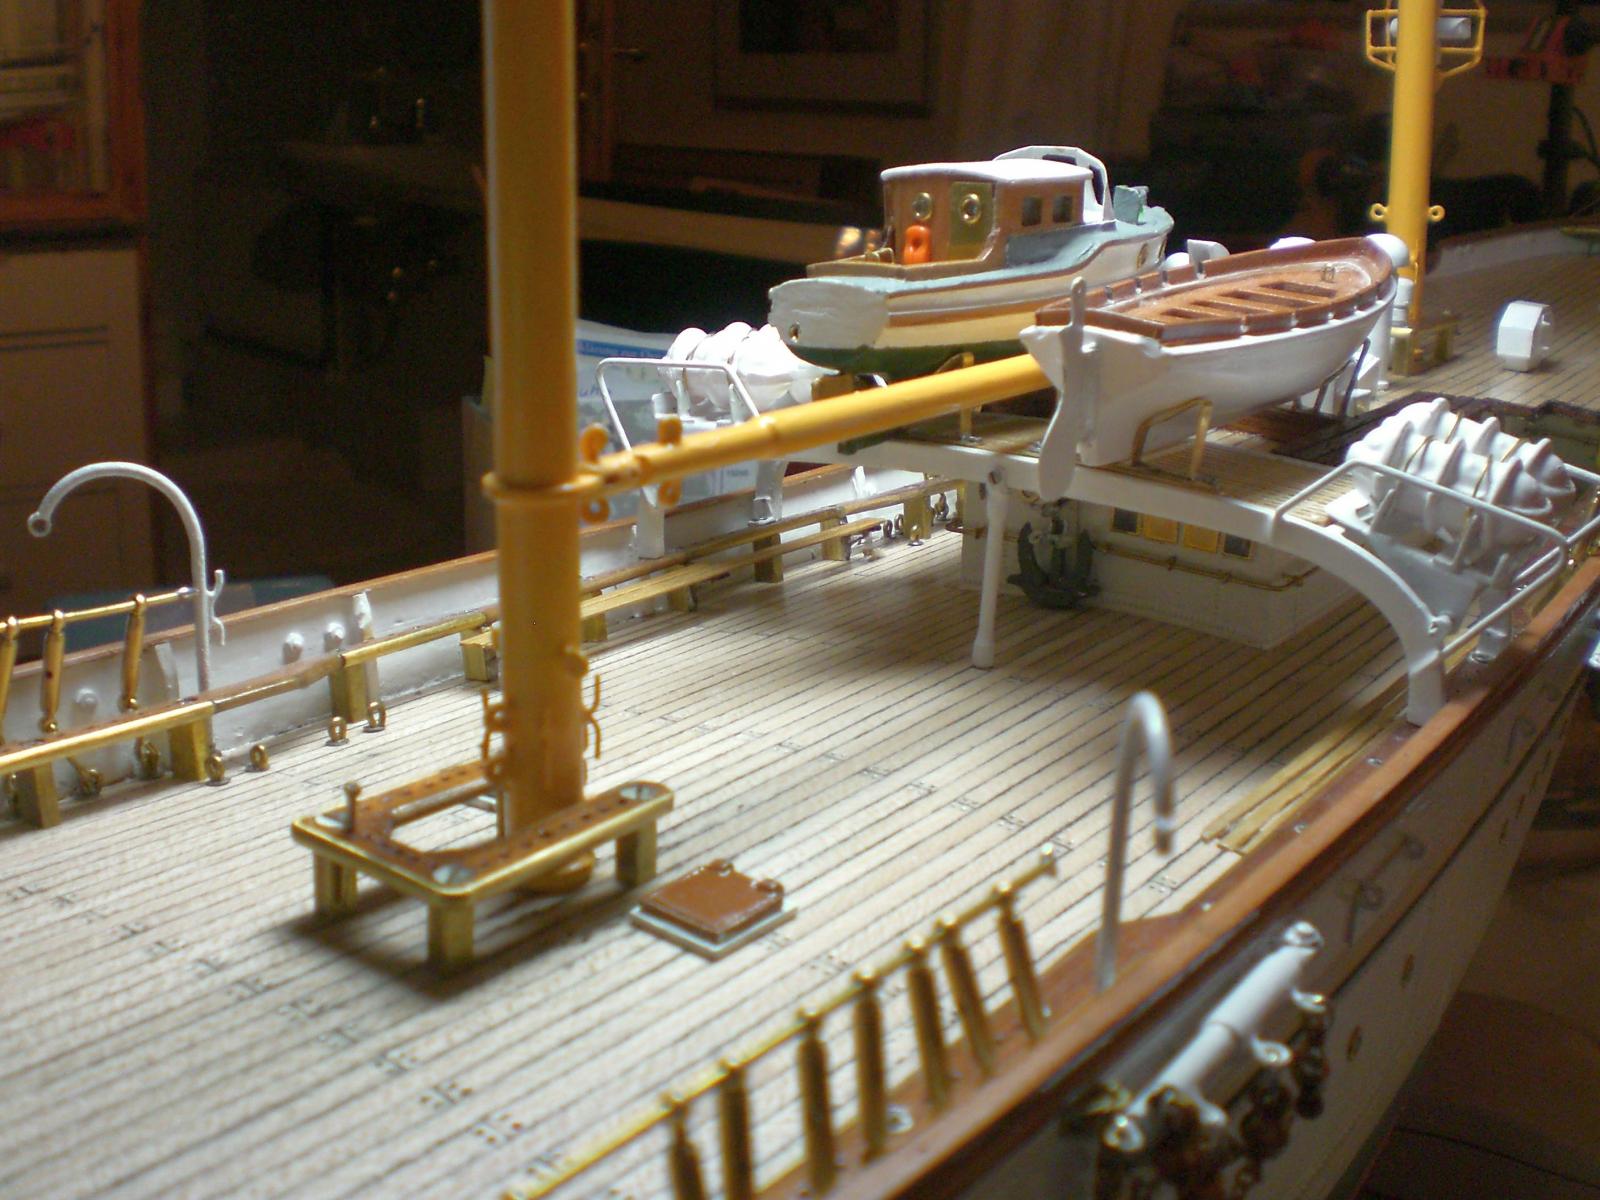
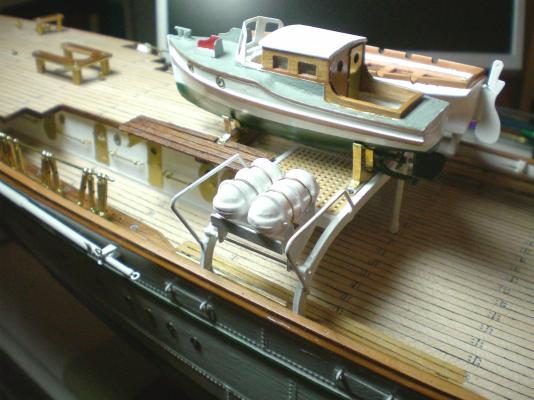
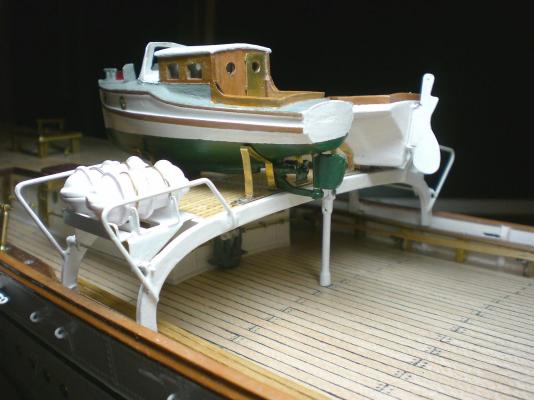
Build log part 34 Davits fitted on poopdeck walking Planks at boatstation again the wheelstand portside boat rigged all boats on... Build log part 35 to follow.... Nils


- 222 replies
-
- 9
-
-
- gorch fock
- barque
- (and 2 more)
-
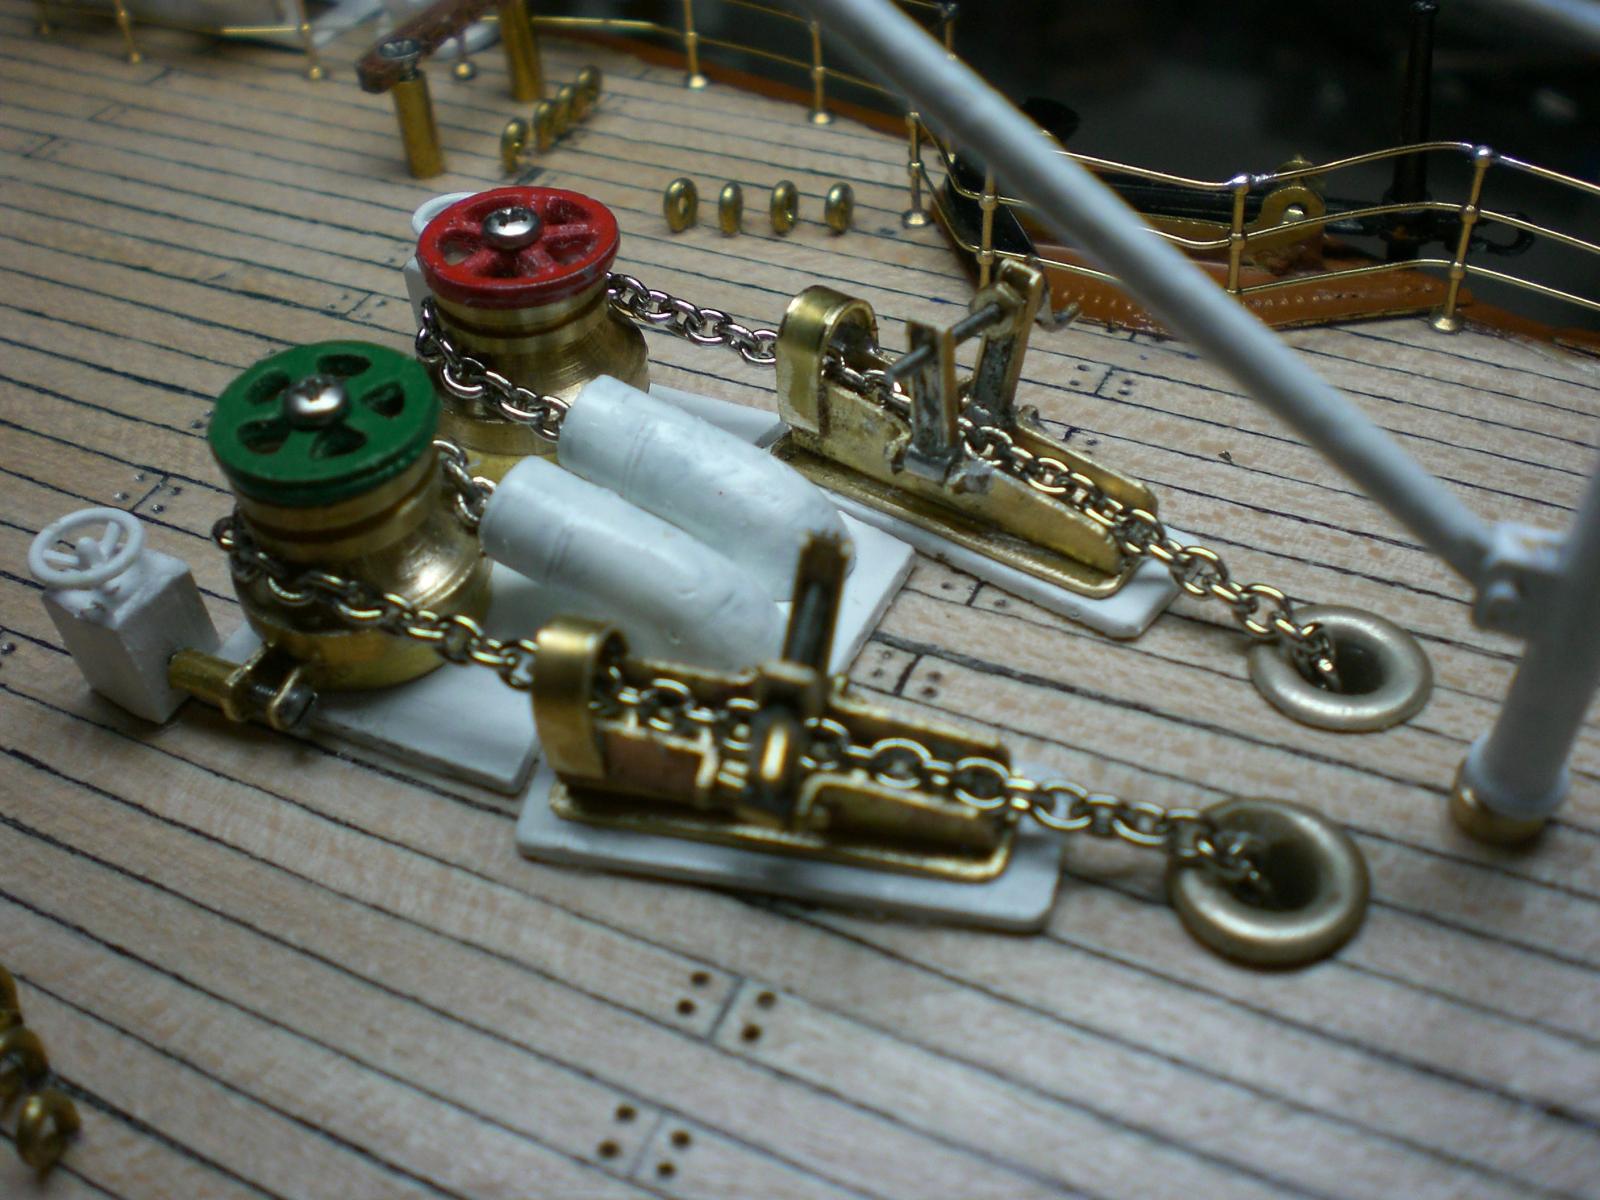
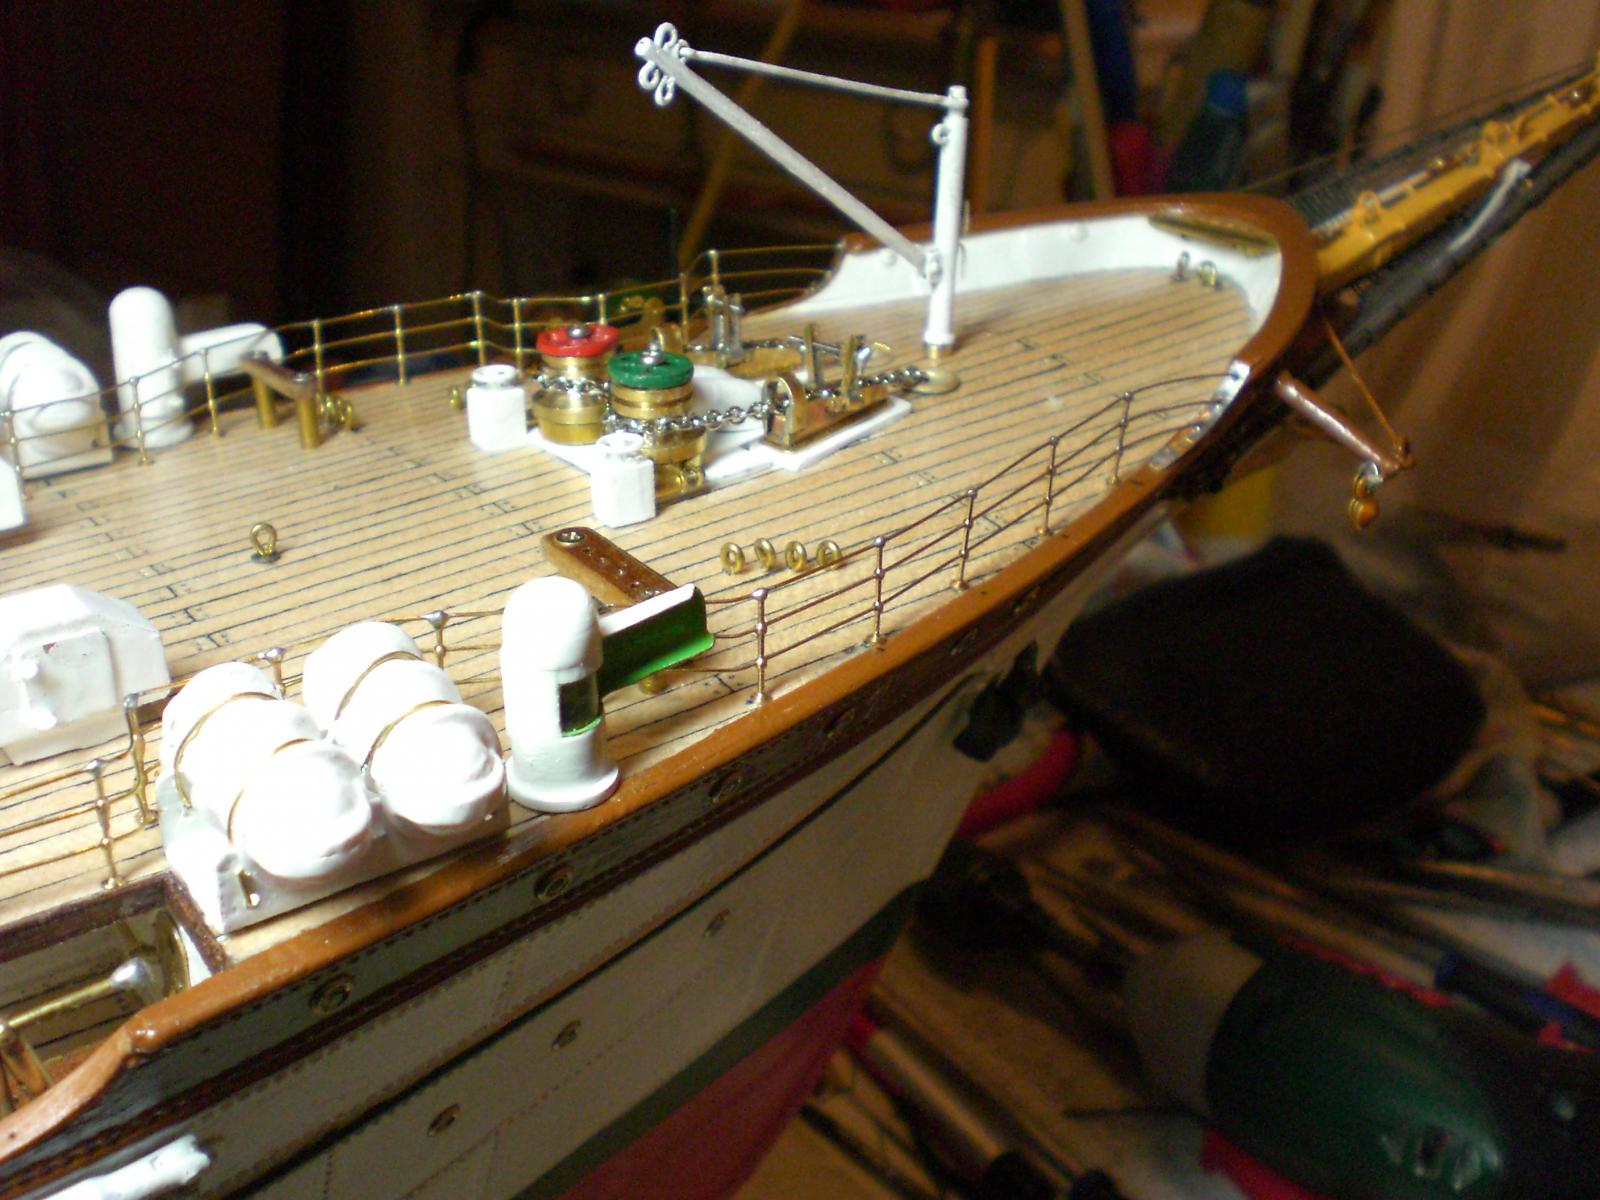
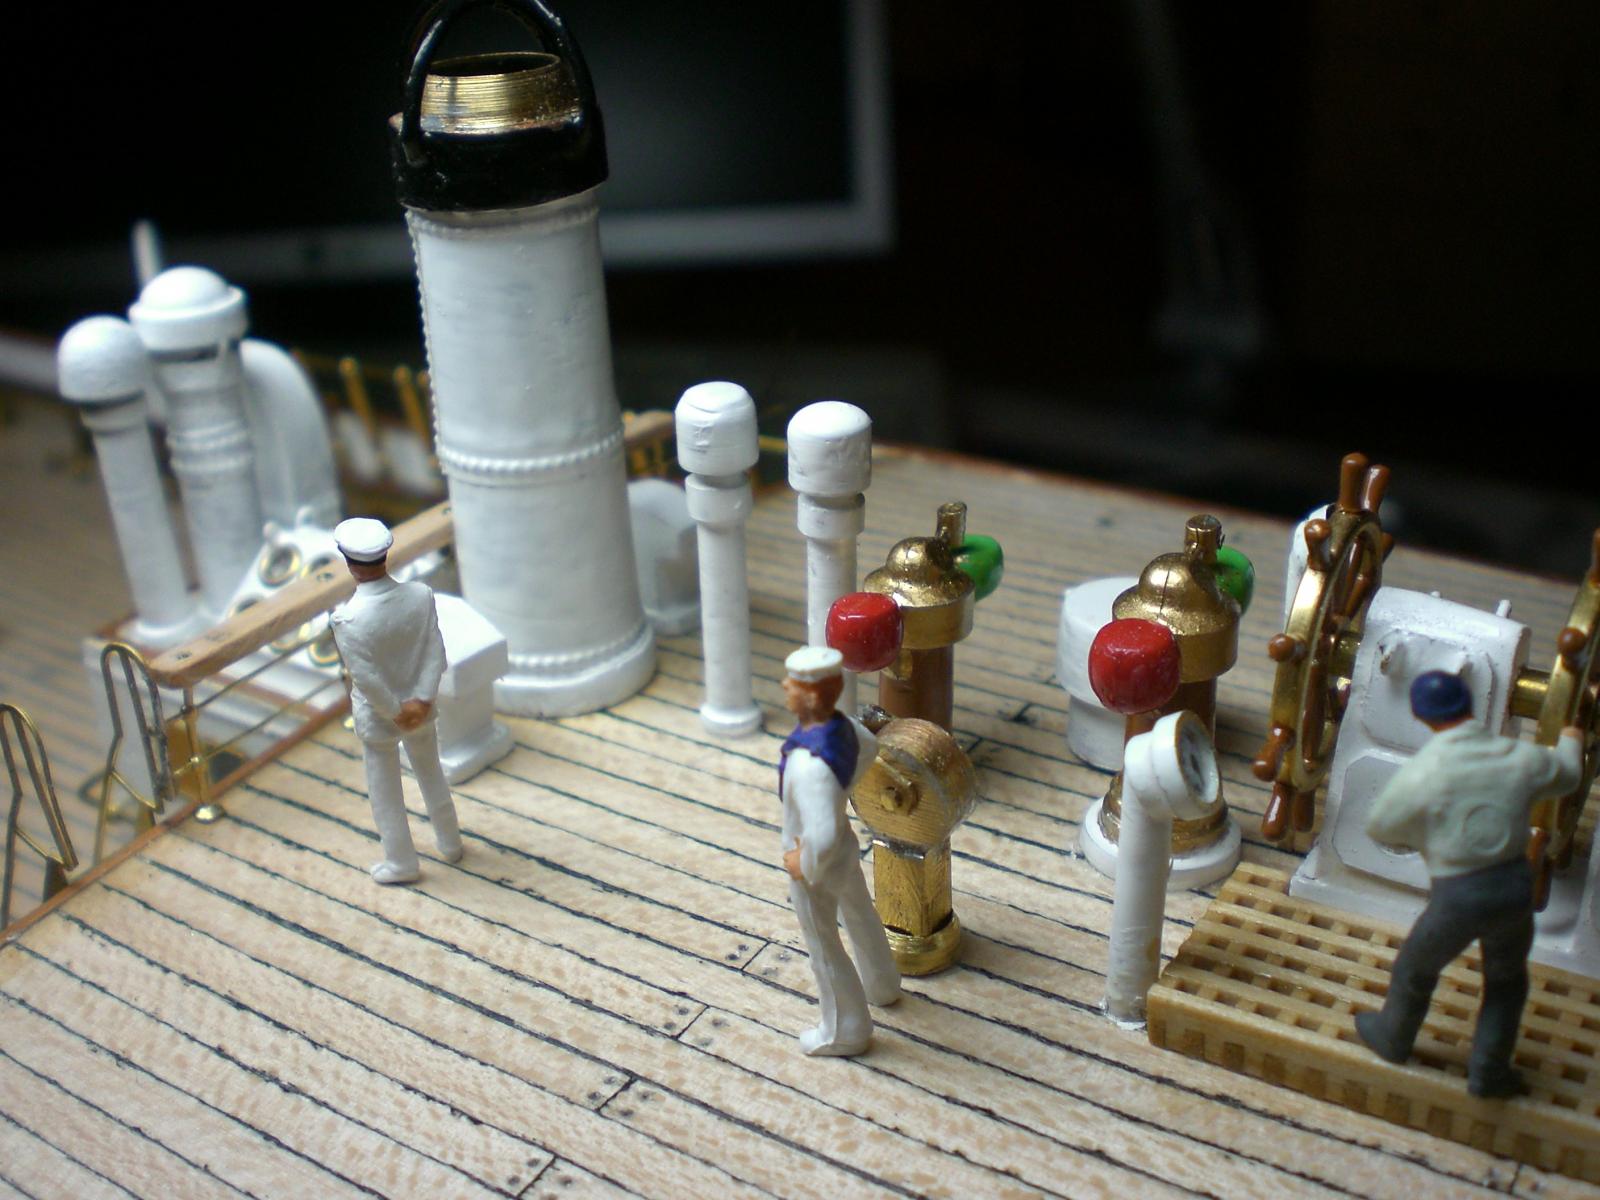
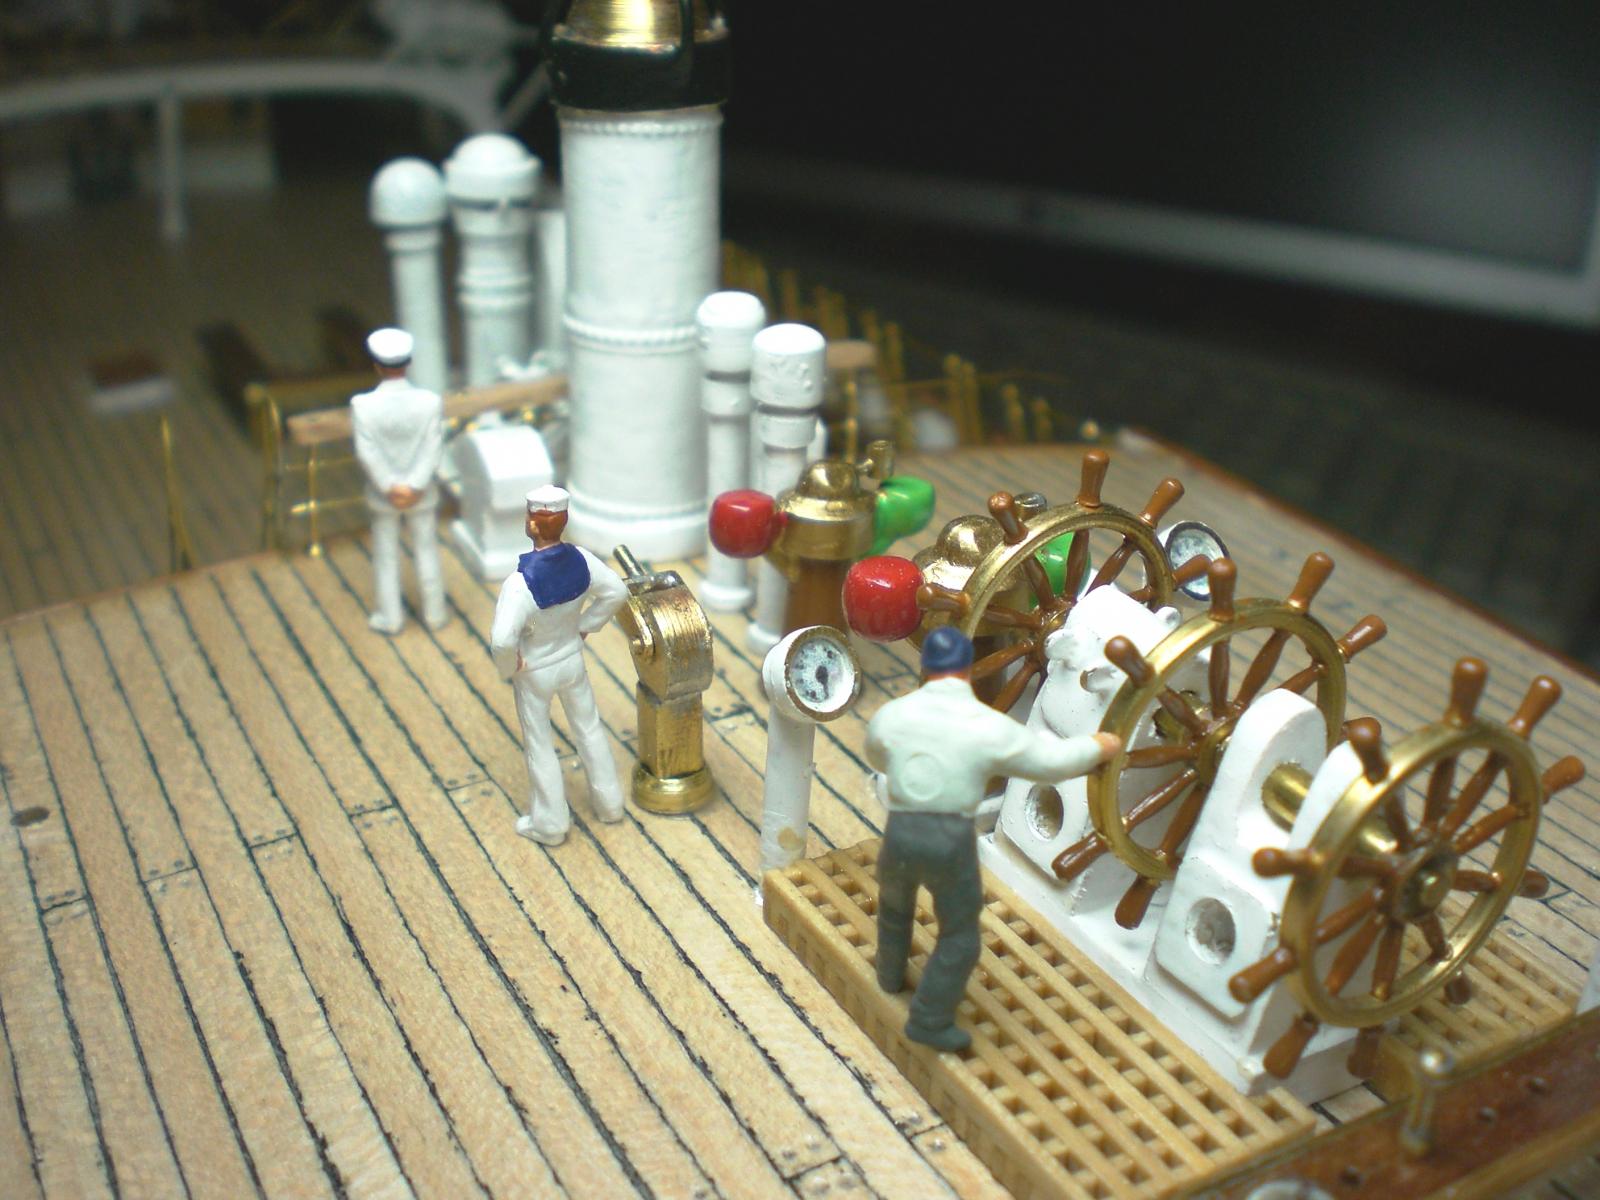
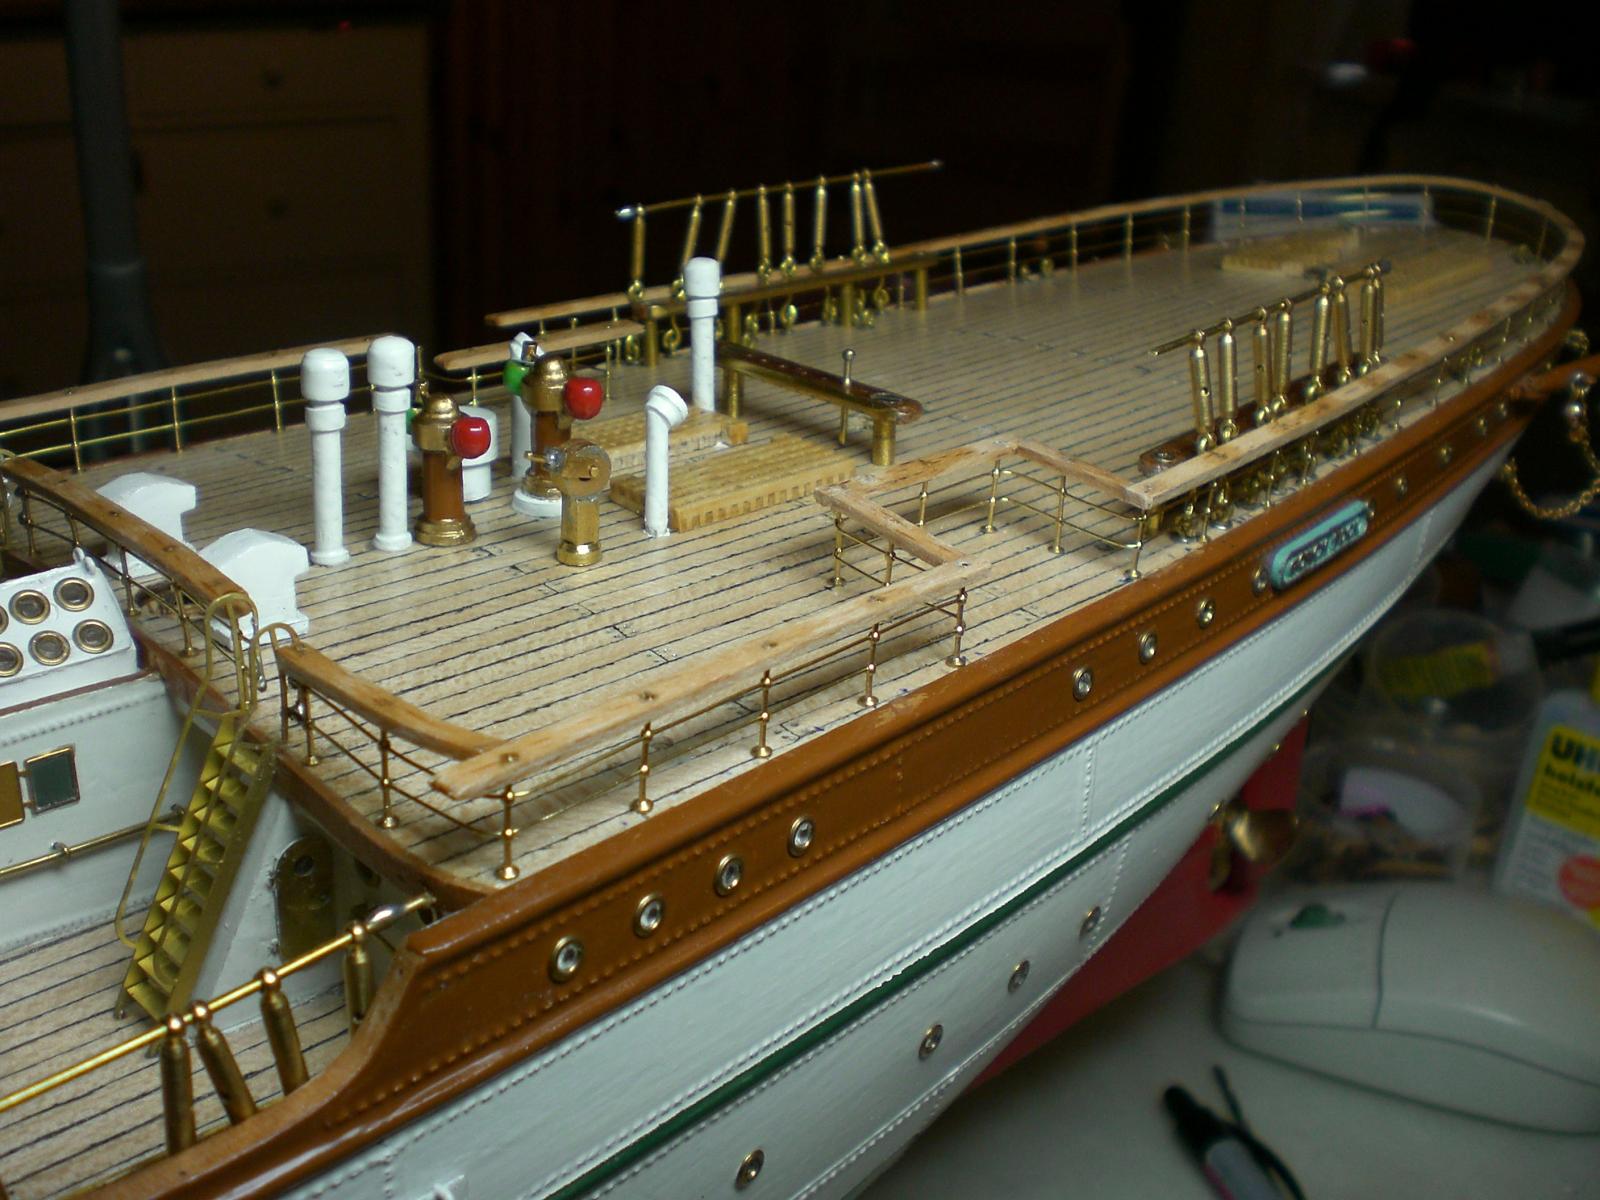
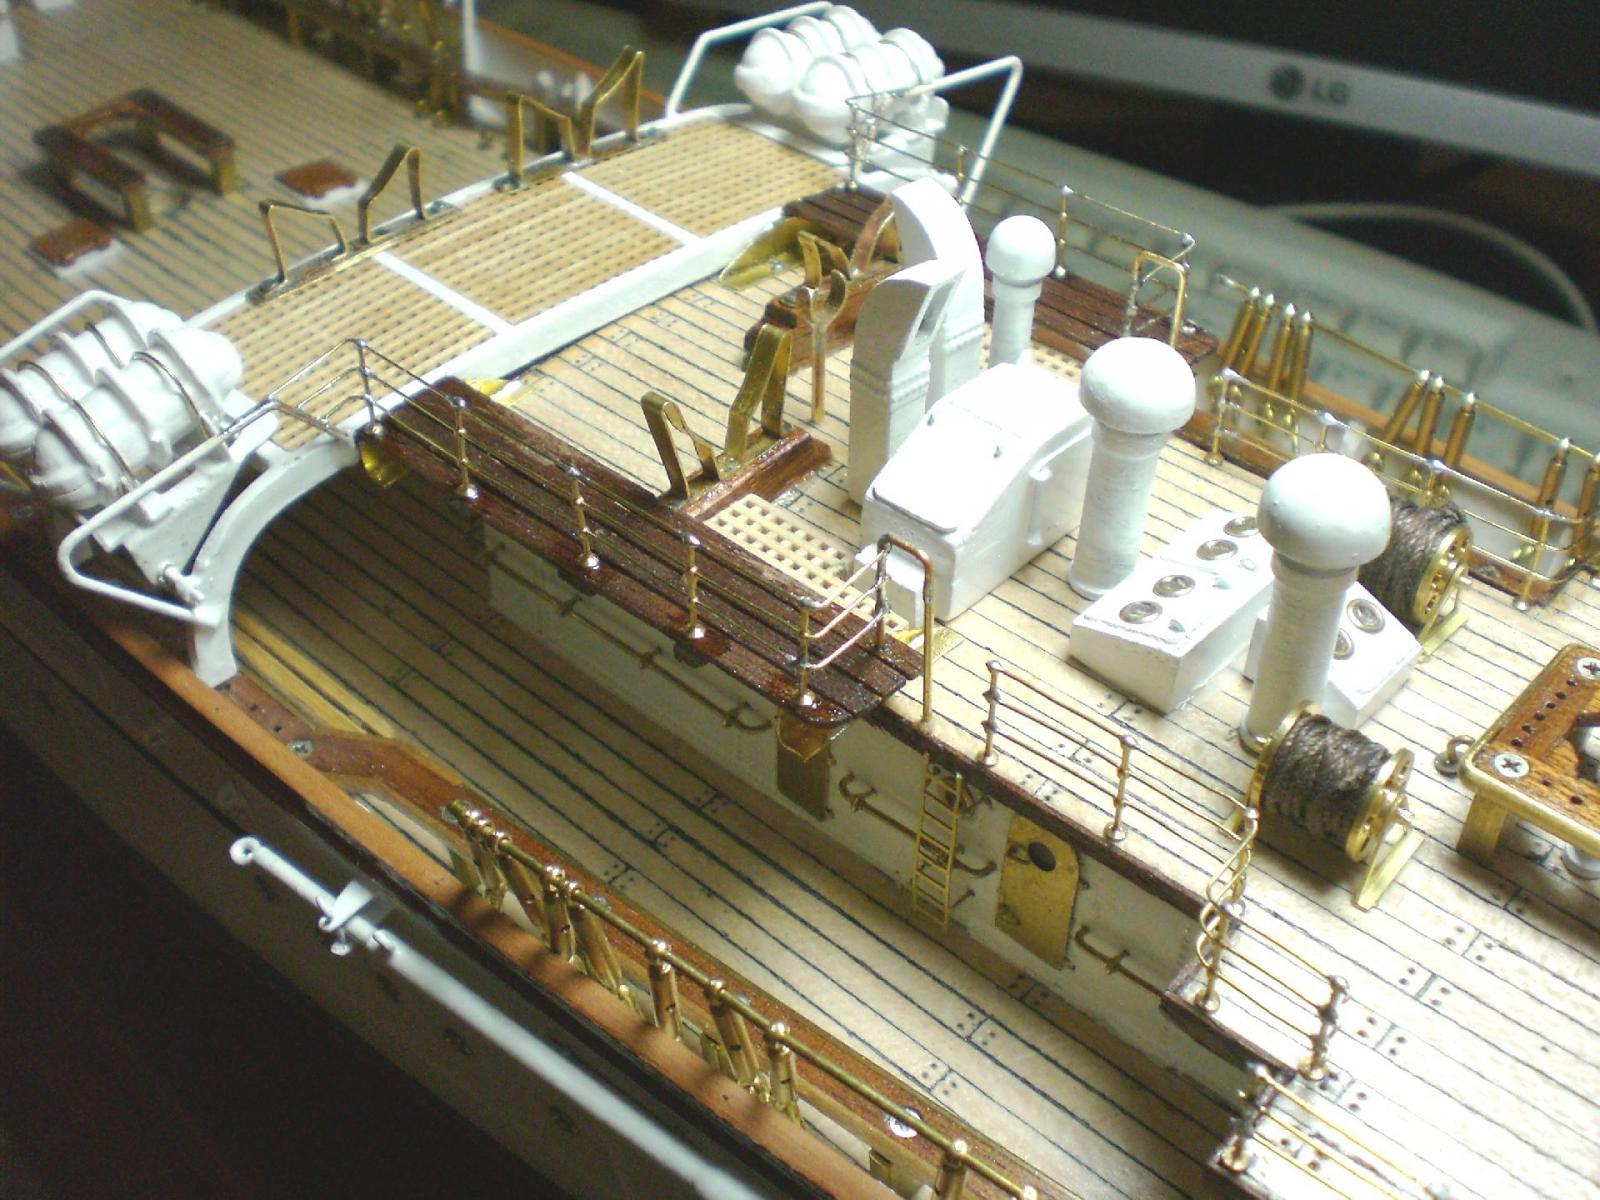
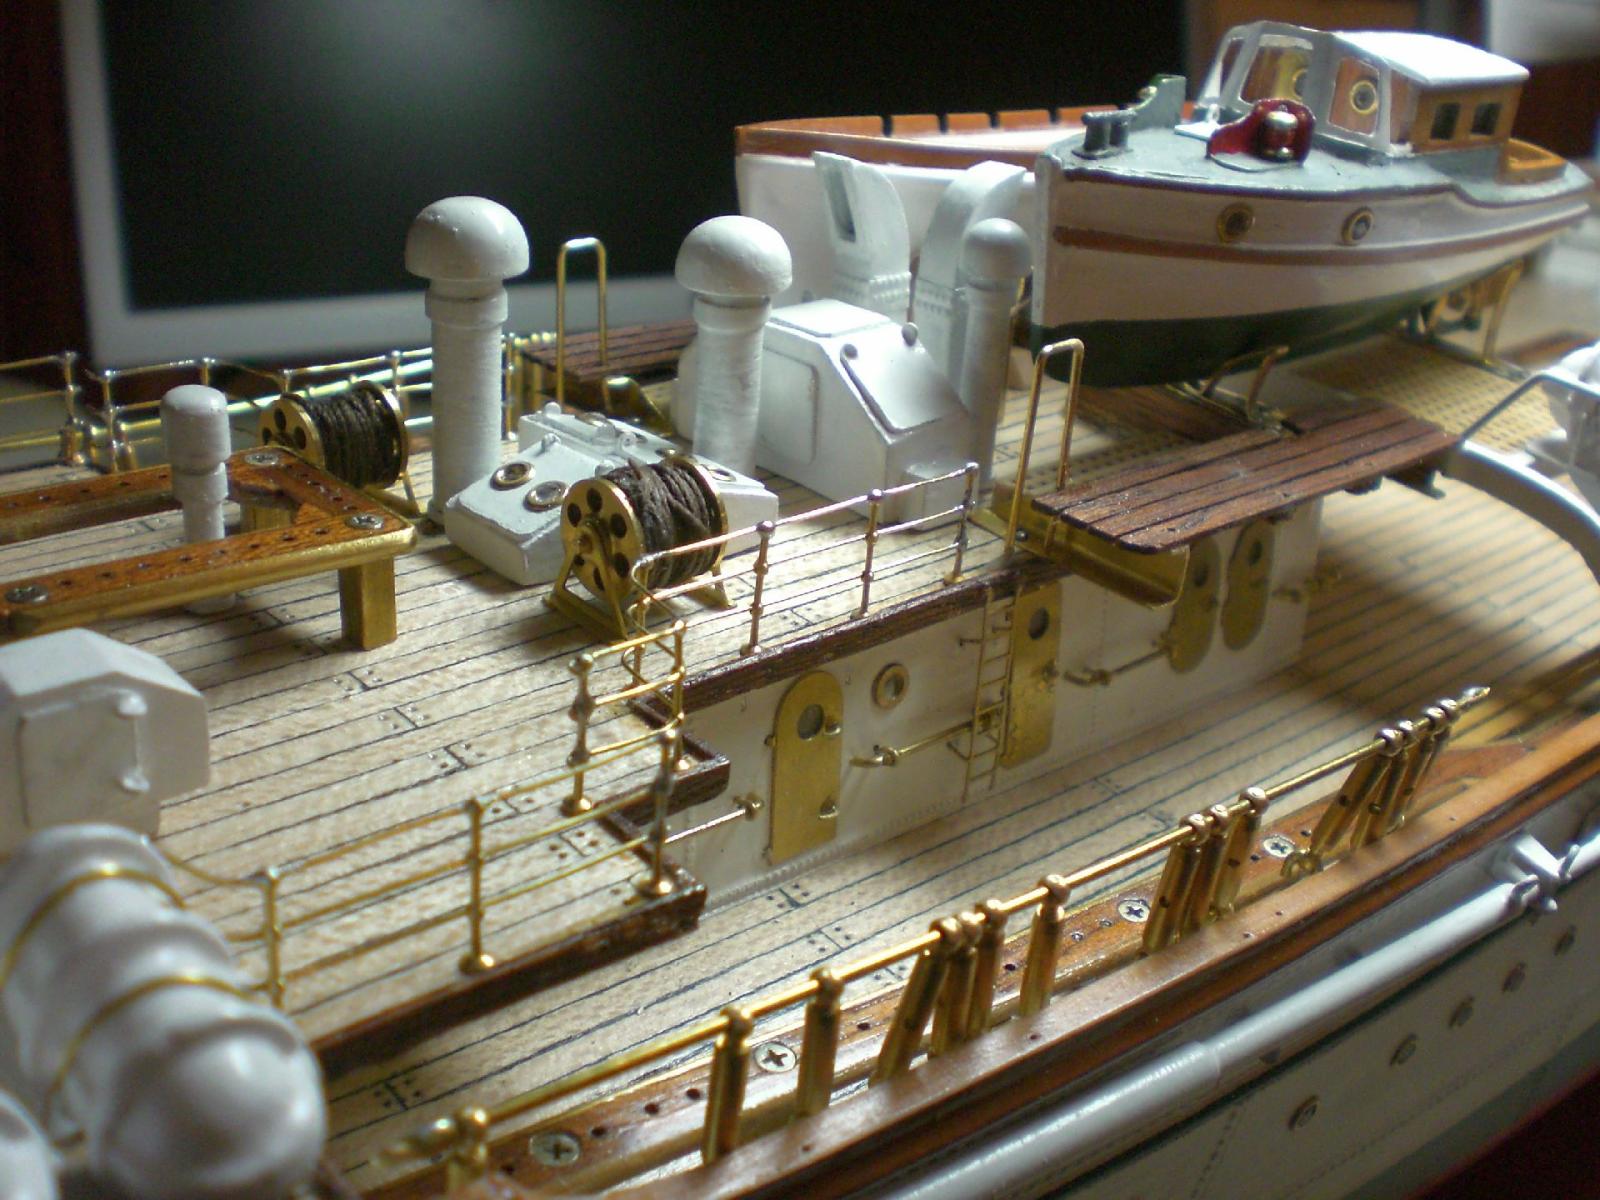
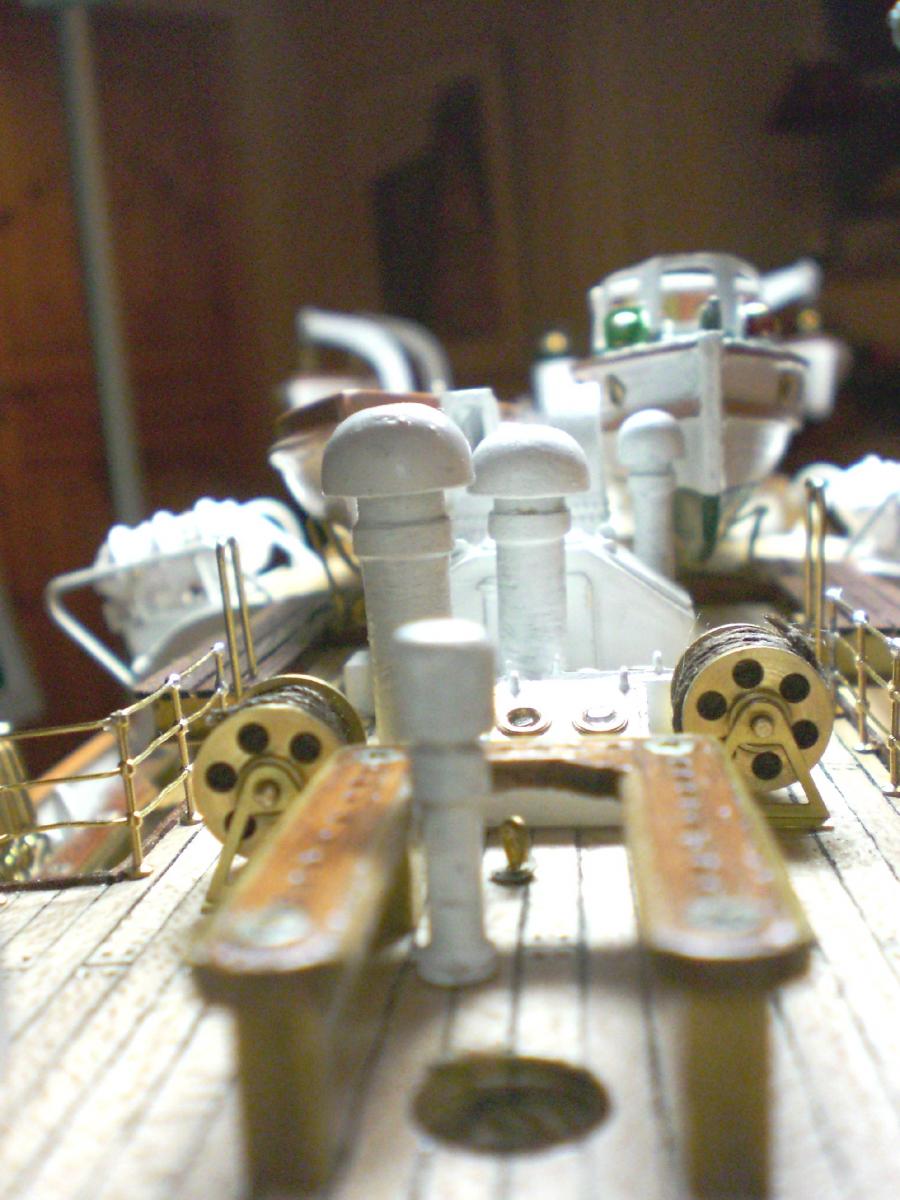
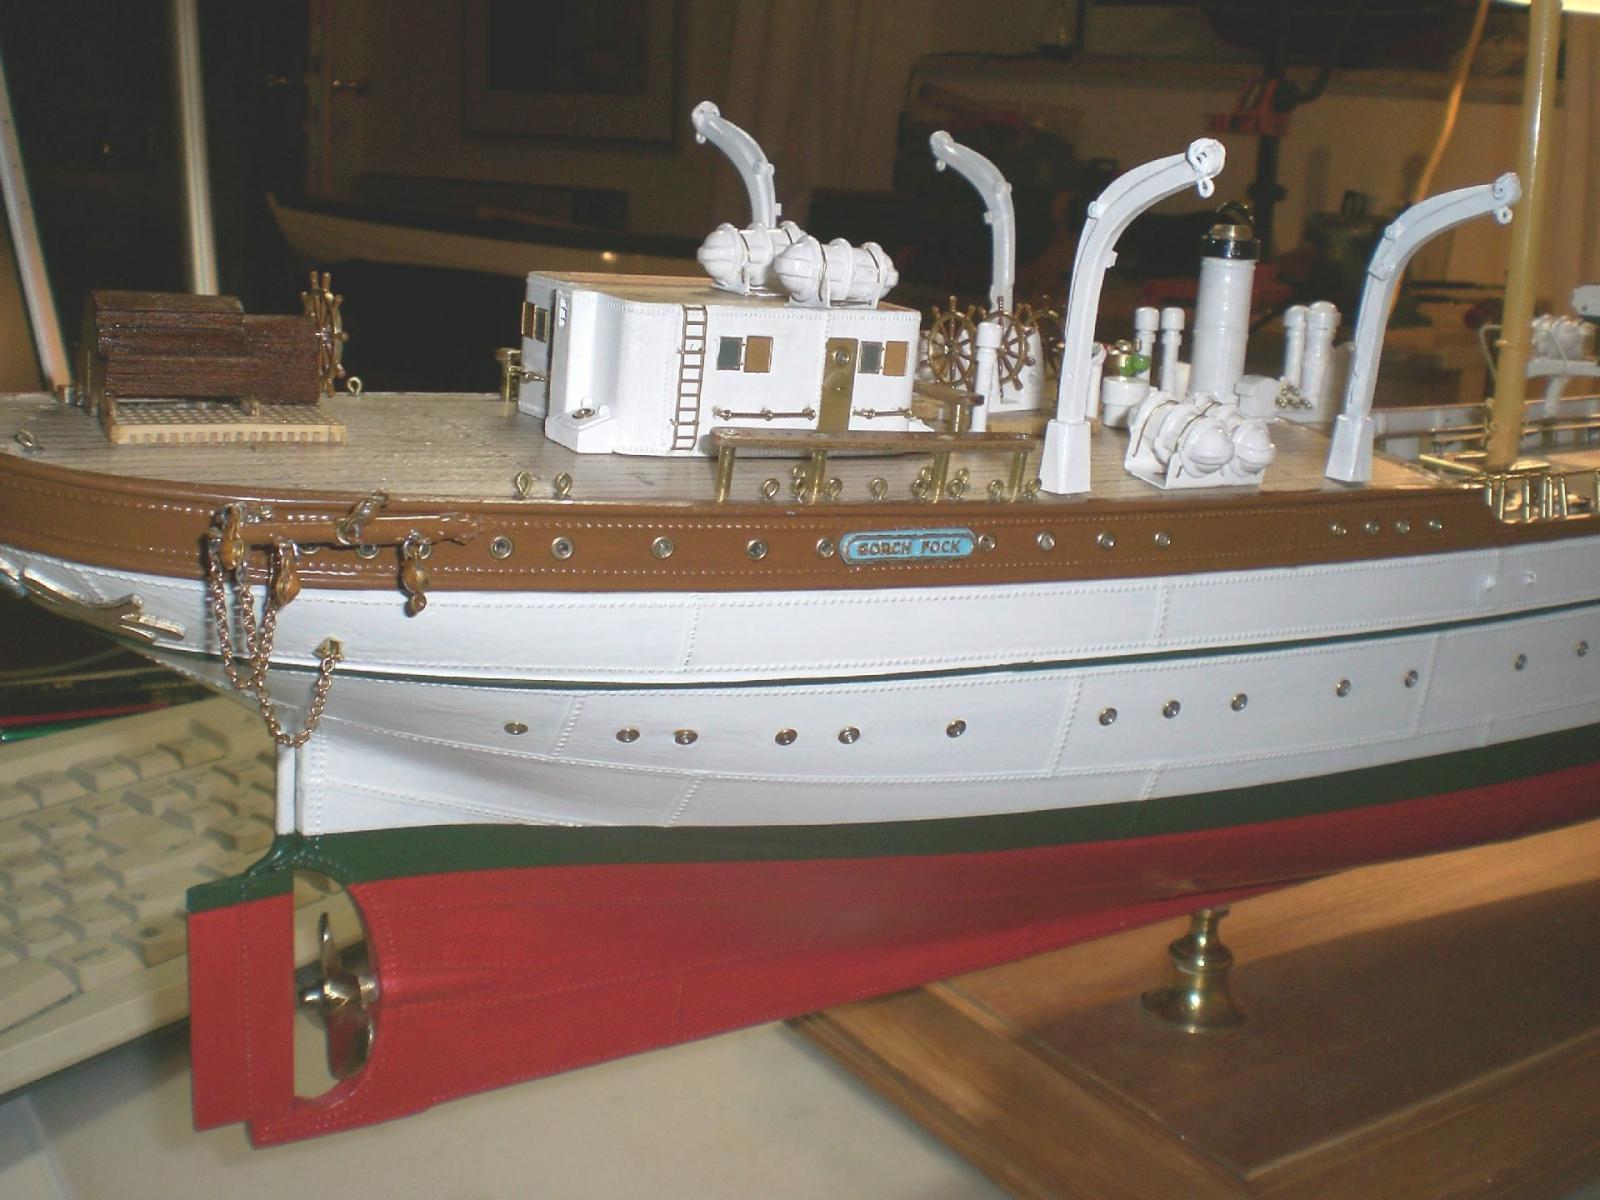
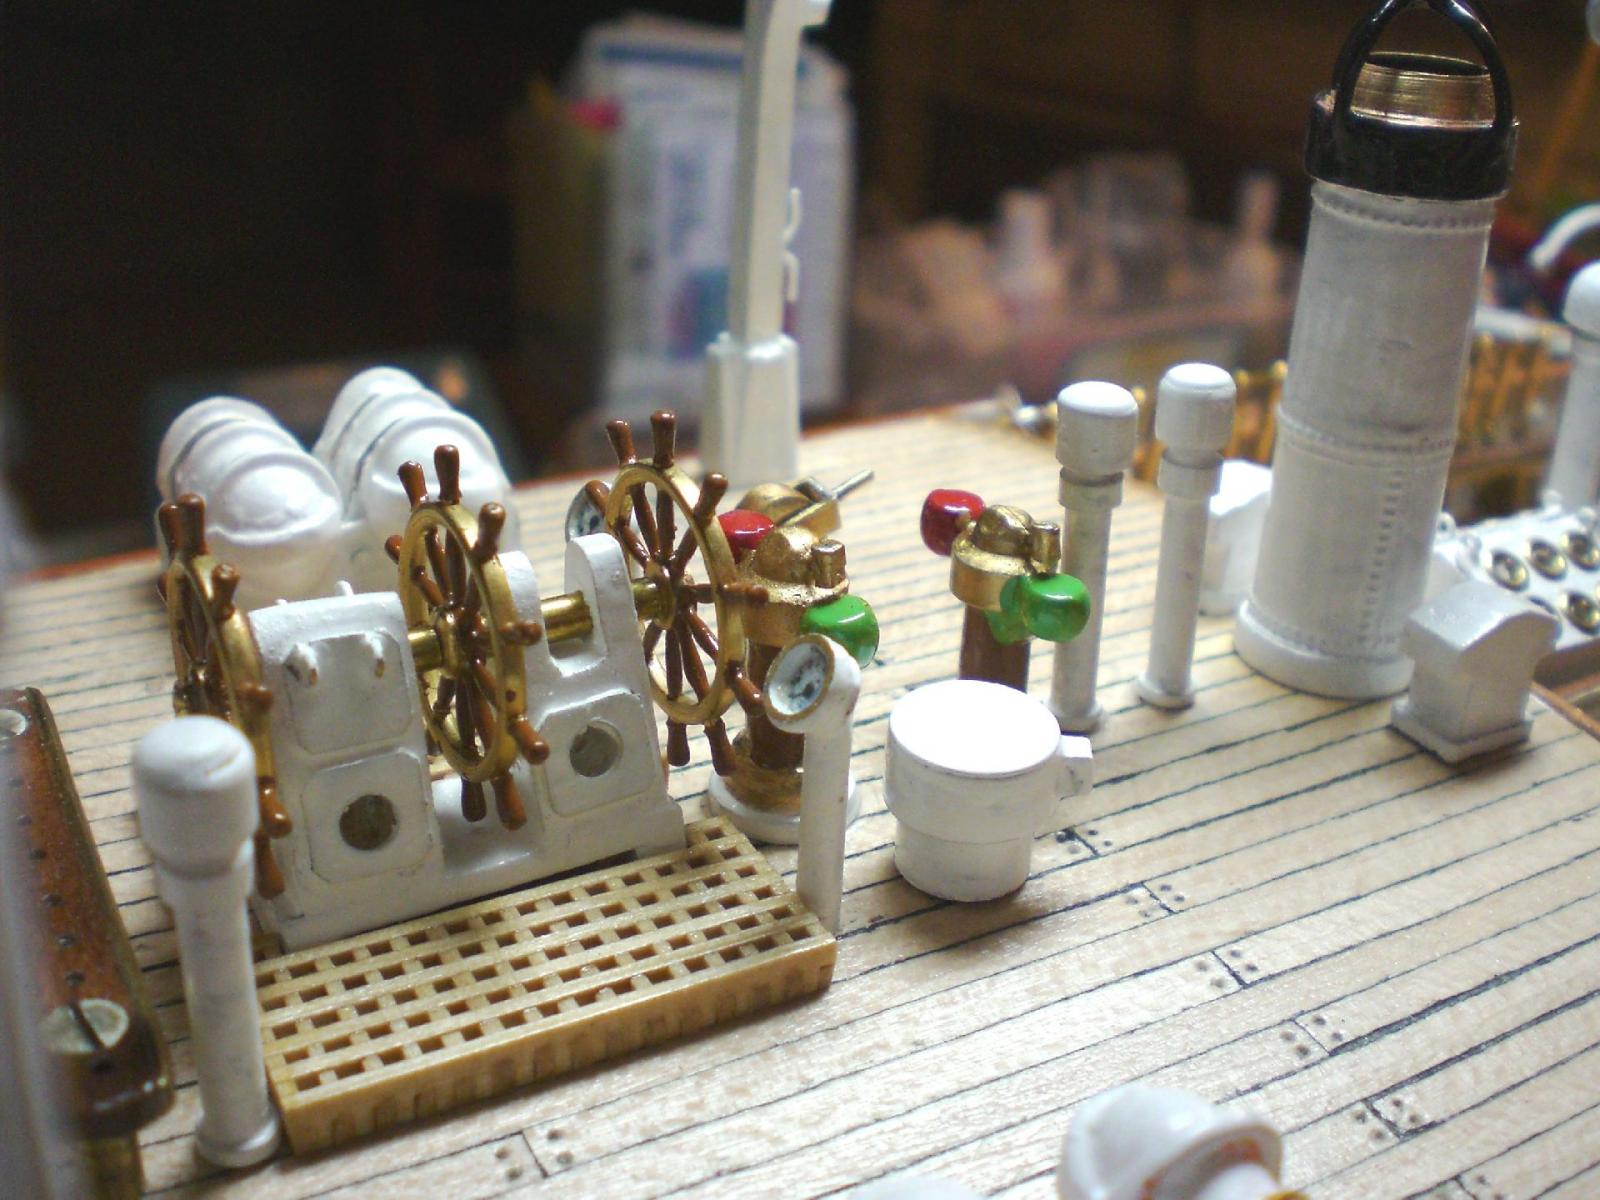
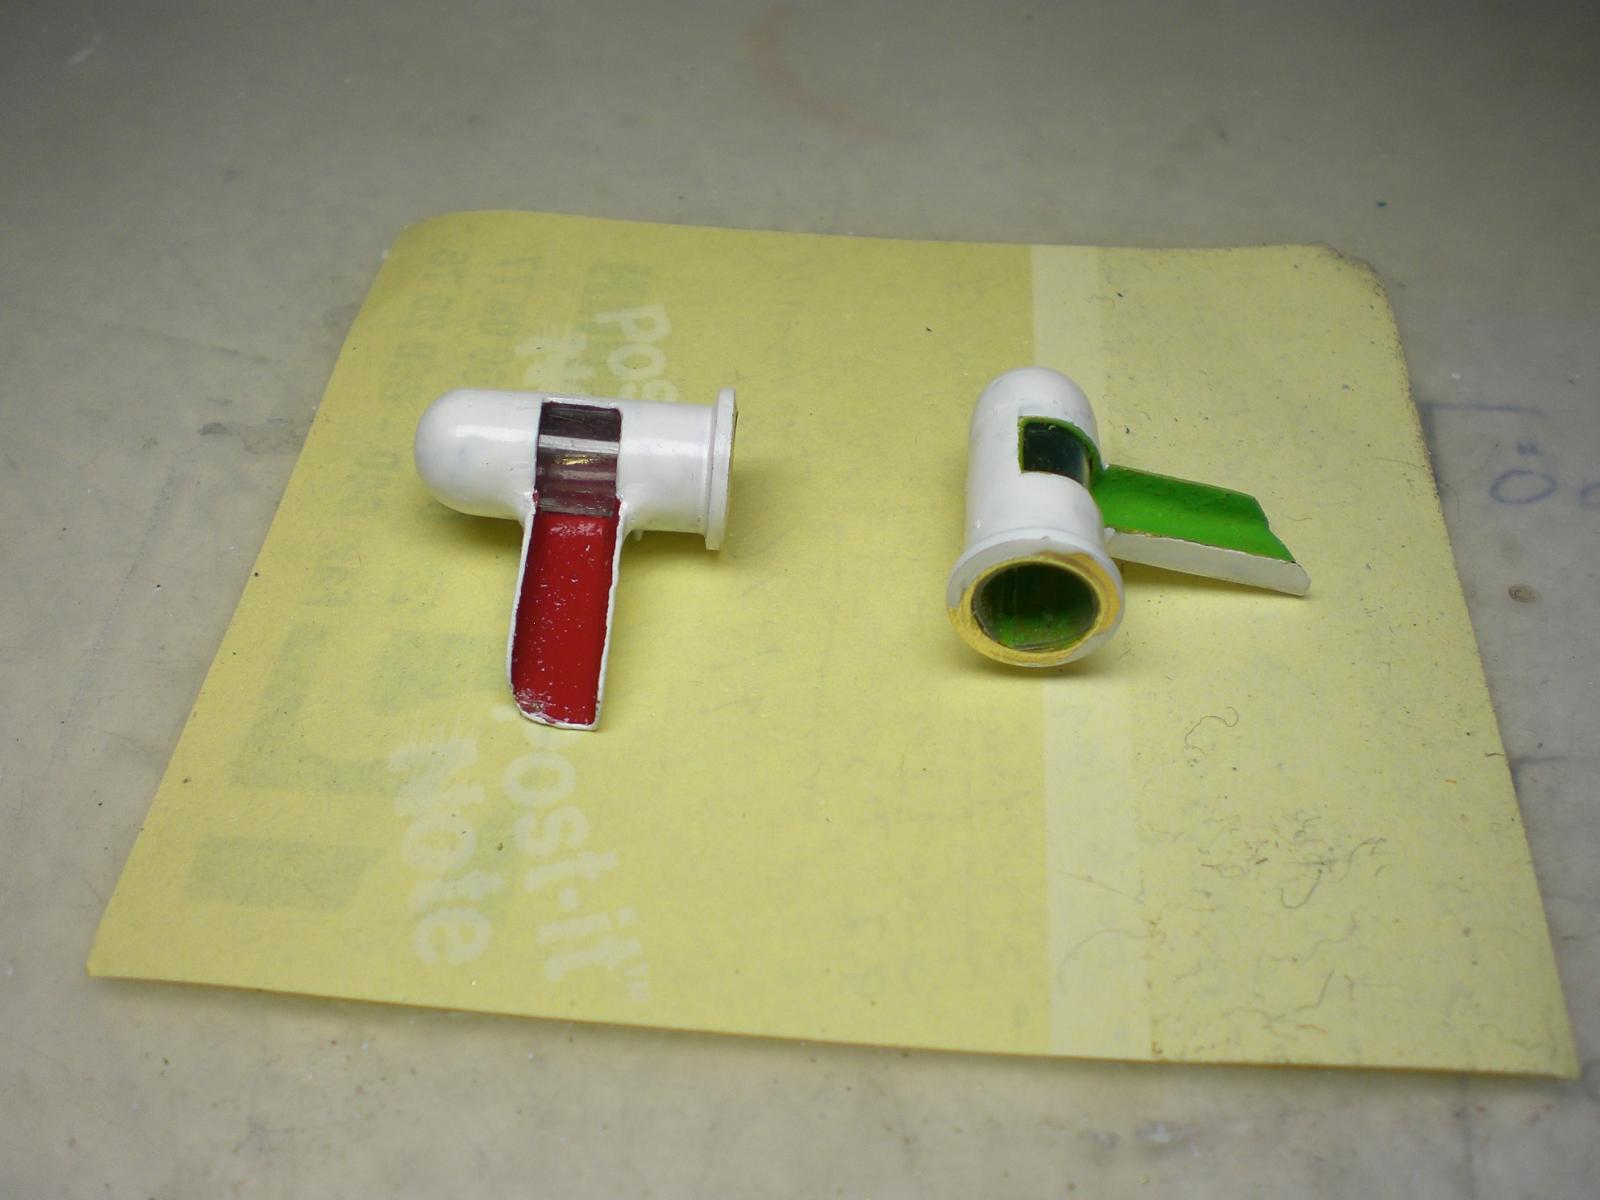
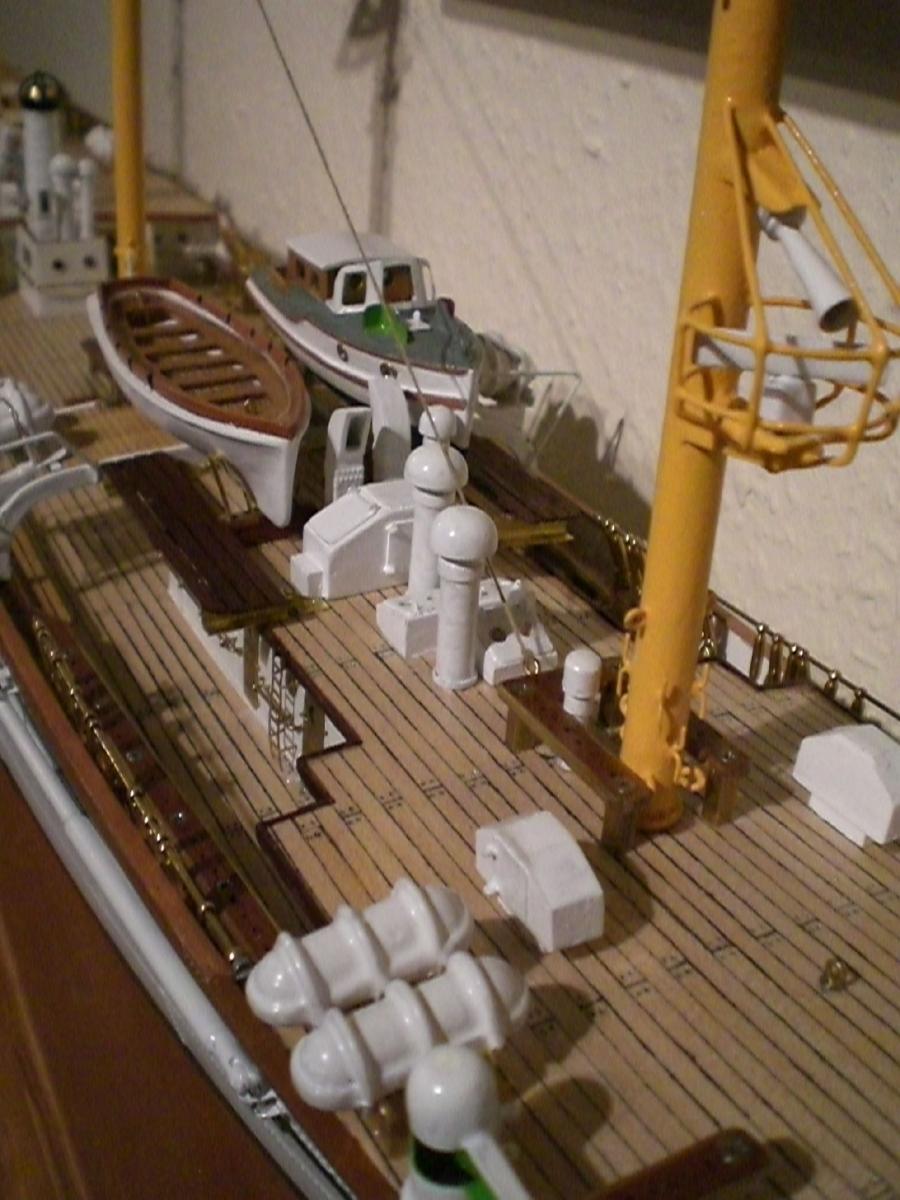
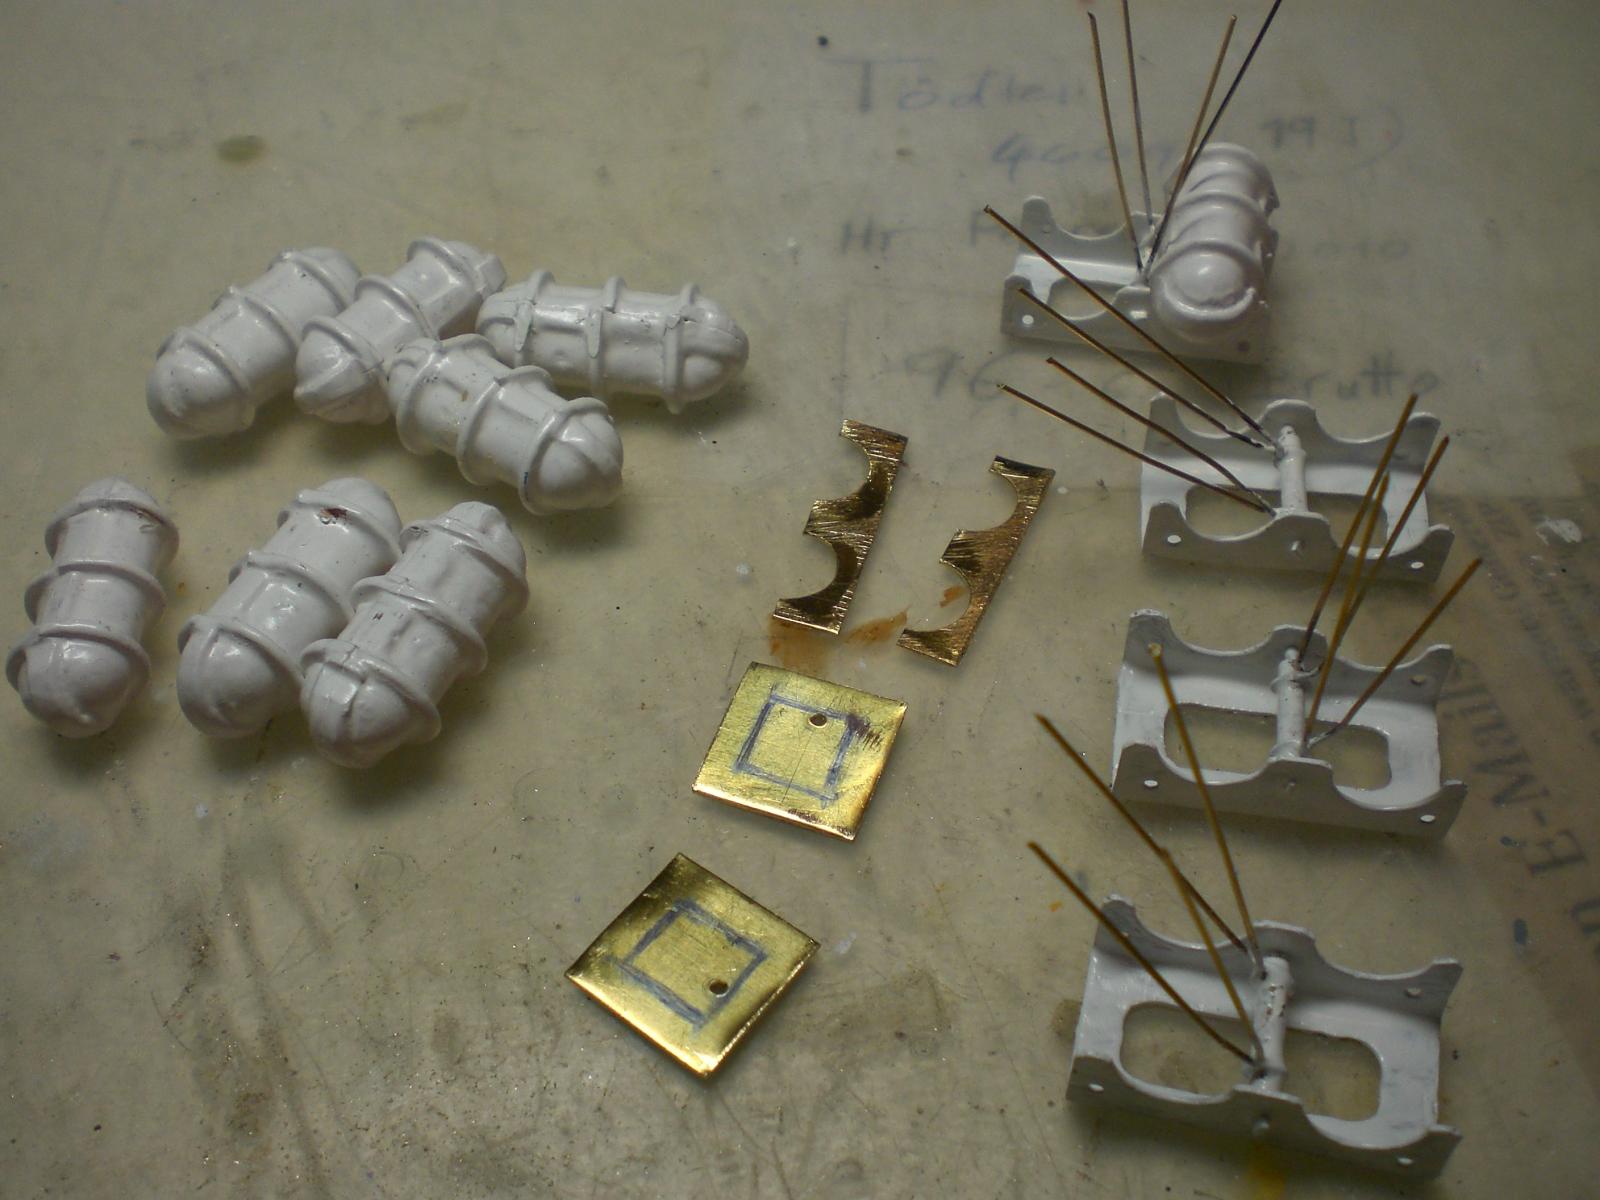
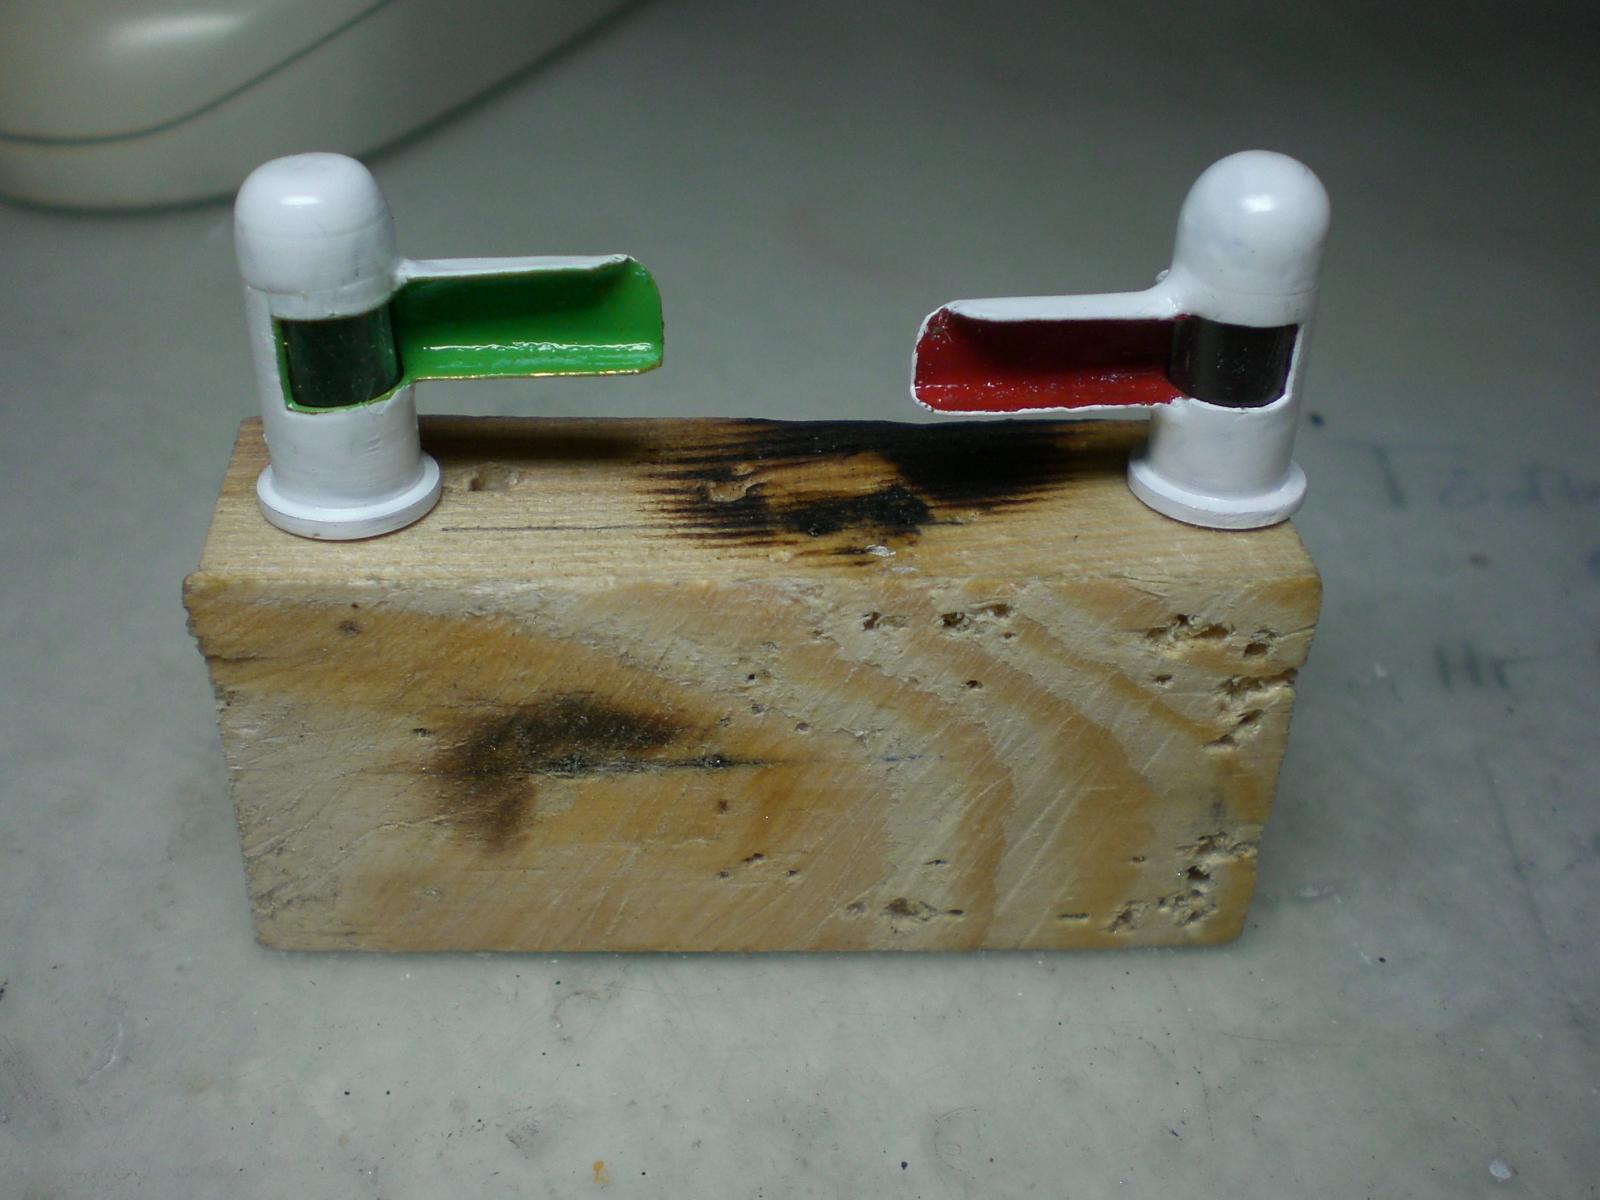
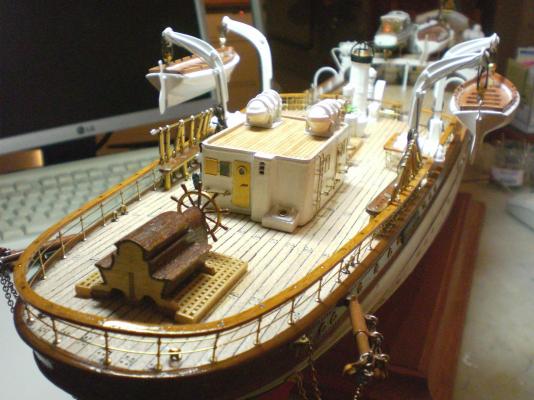
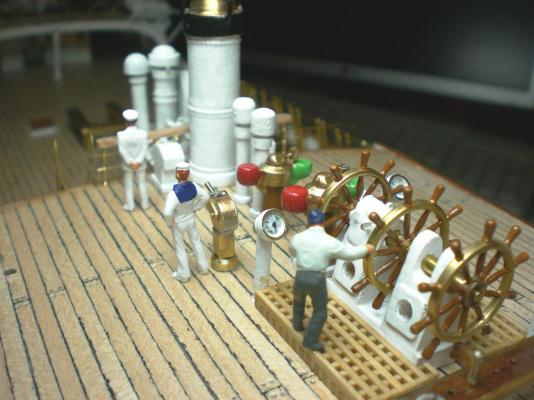
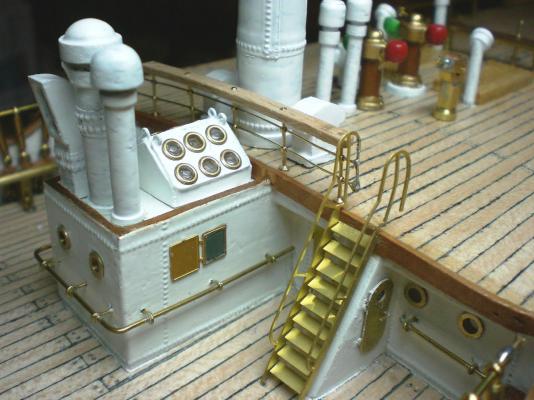
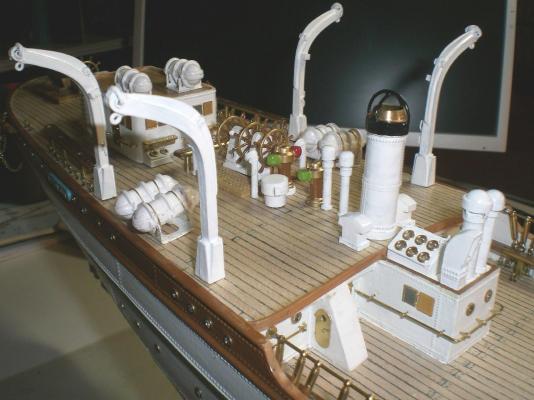
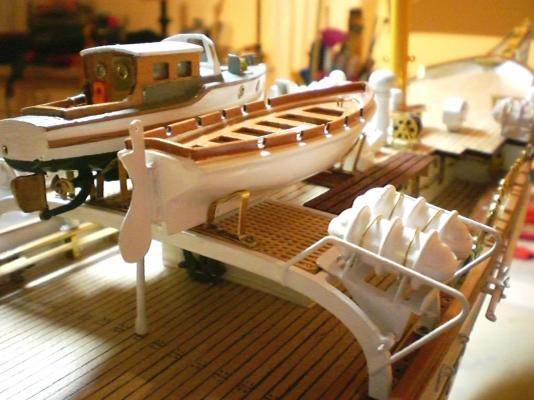
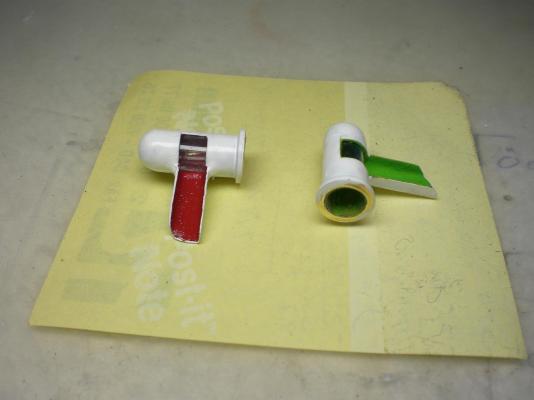
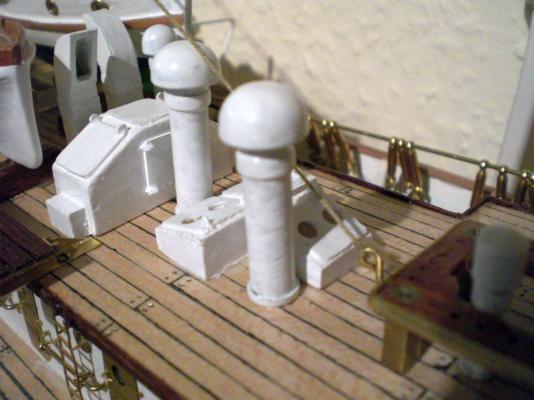
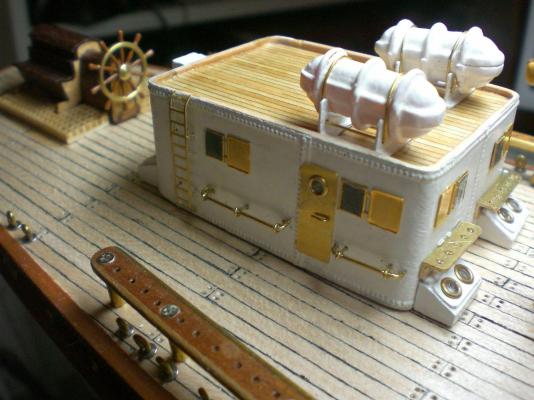
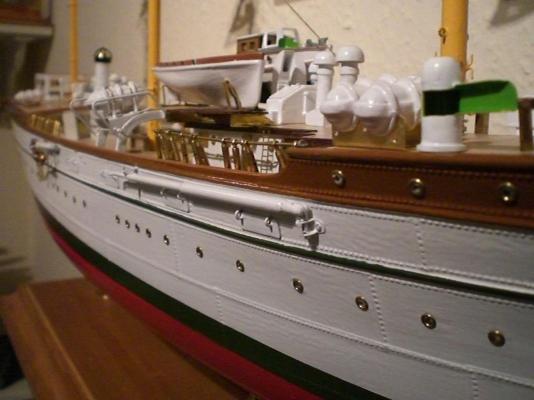
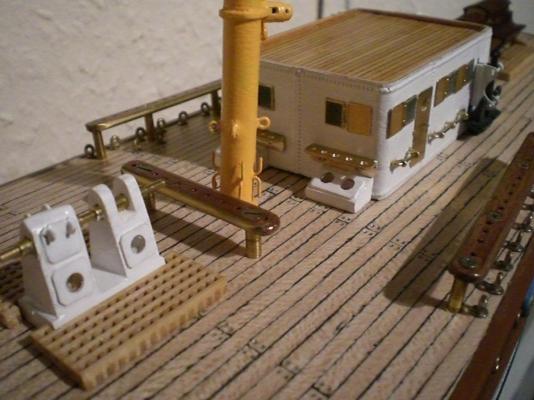
Build log part 33 nav. light containments mushroom type vents on the deckhouse top slowly having all deck Fitting-out placed front of poopdeck with main wheelstand two additional raft containers still lots of space on the welldeck the White round item is not the cooking pot, its the mother gyro-compas containment White tipped Ends... Builg log part 34 to follow.... Nils


- 222 replies
-
- 6
-
-
- gorch fock
- barque
- (and 2 more)
-
Thank you for your words Mauro Nils
-
very nice hull Bob, with her slightly higher aft deck, the fine elegant lines she reminds me of the gloucester fisher boats, as well as the fast Pilot schooners of that time in all great looking ! Nils
-
very nice work Mike, clean accurate and wonderful joining. I like the answer you gave as to your intended Planking already, and expect your model to be one of the great ones at MSW. Well done Nils
- 175 replies
-
- 2
-
-
- washington
- galley
- (and 1 more)
-
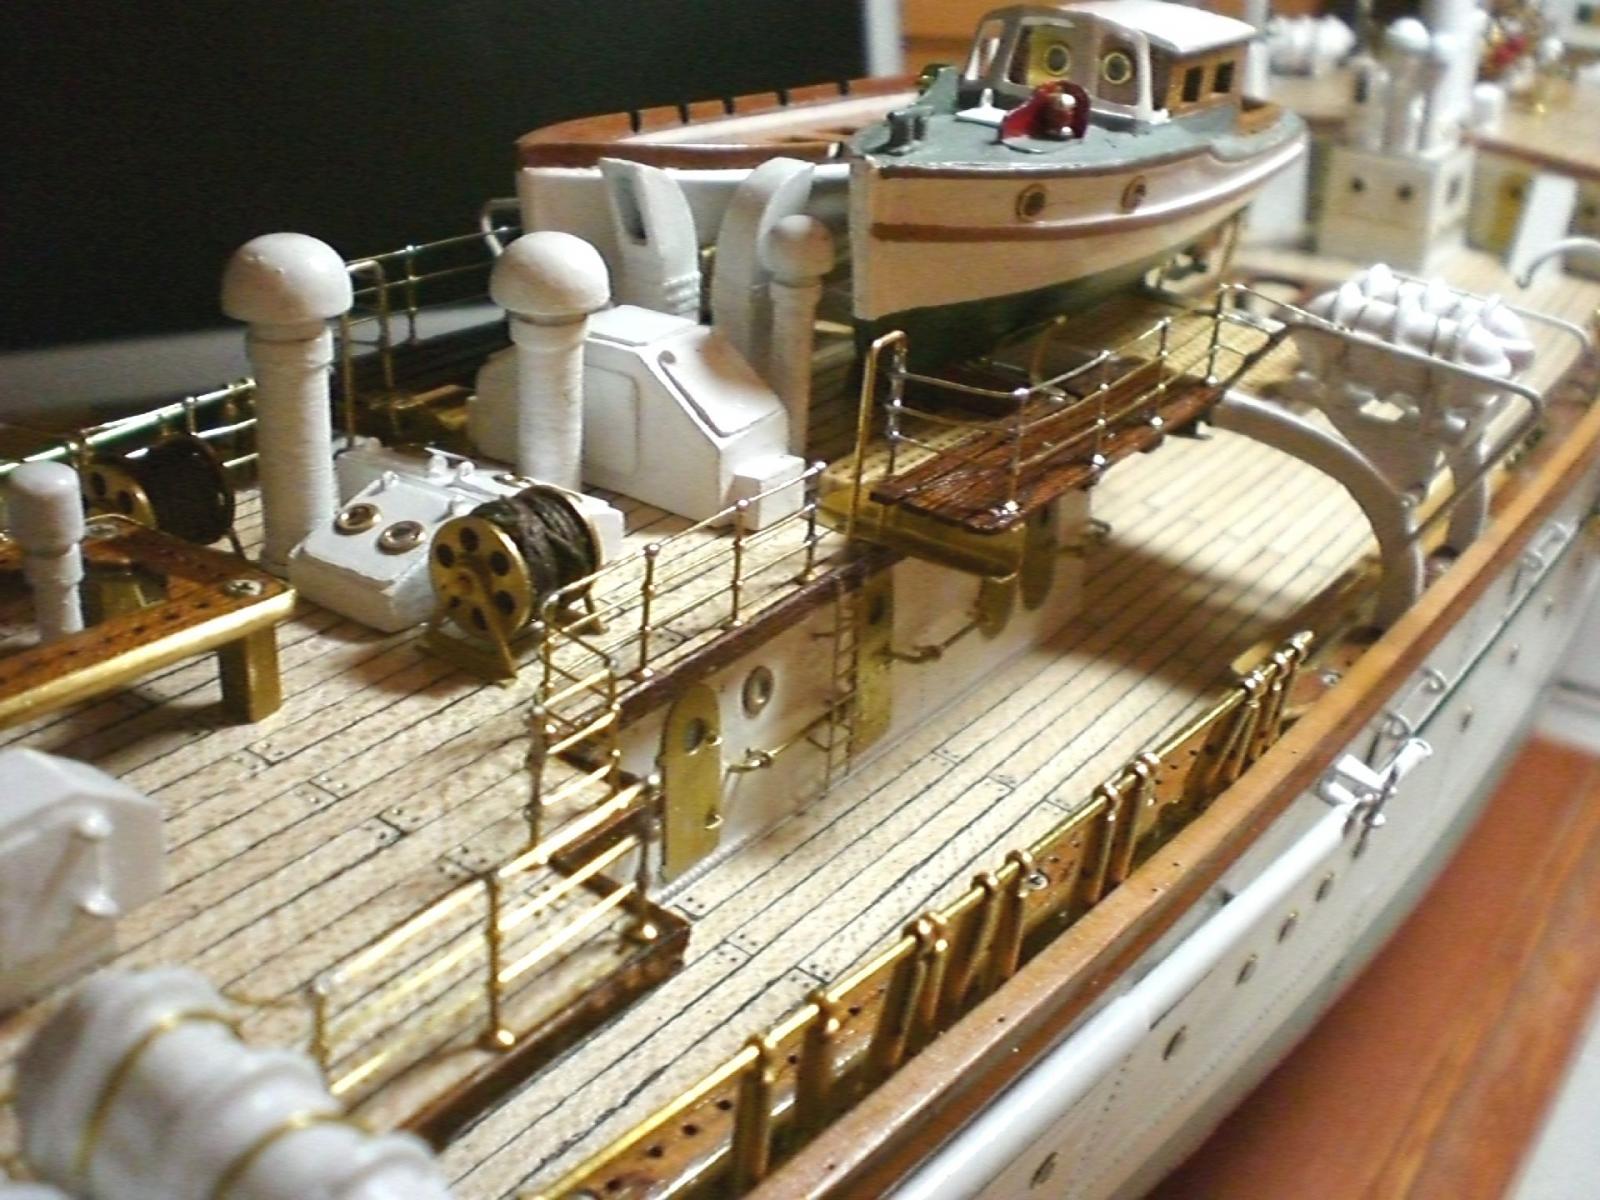
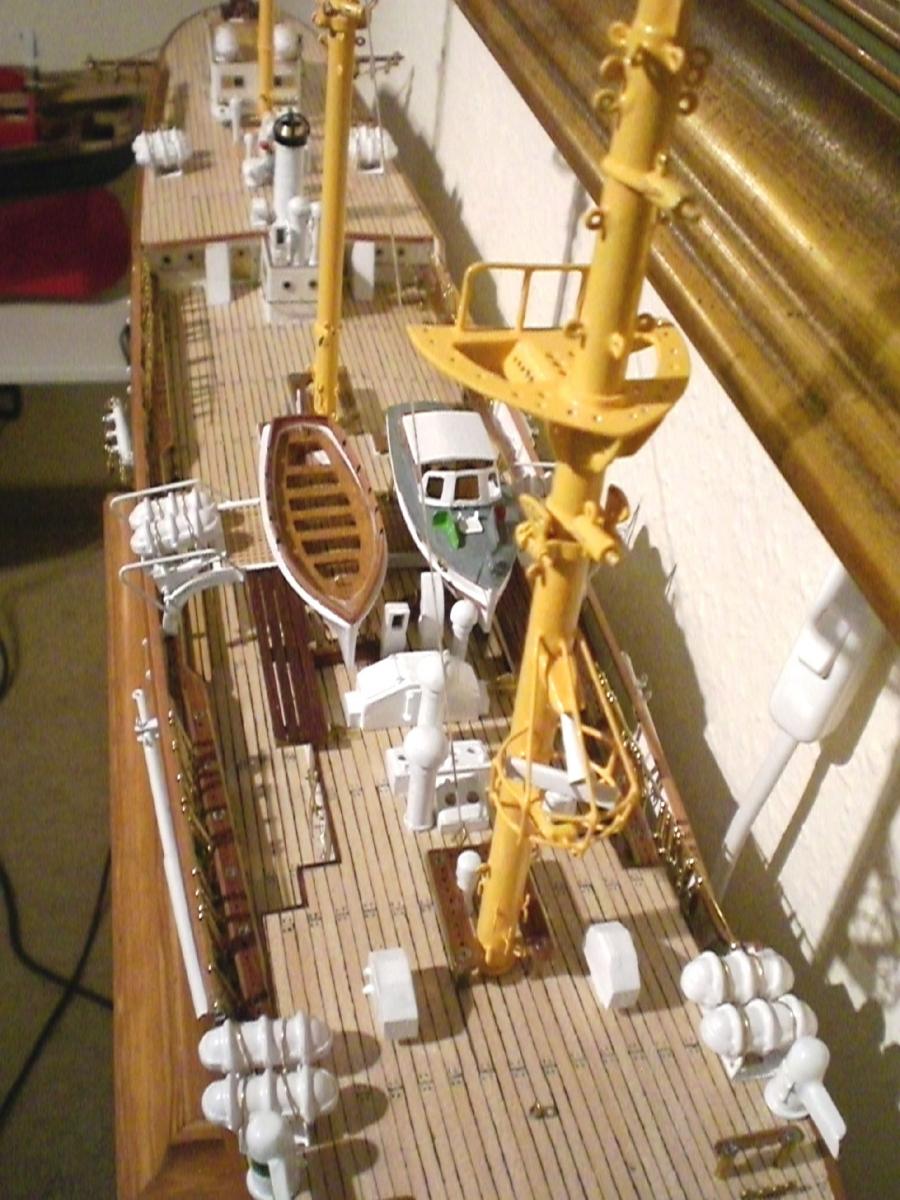
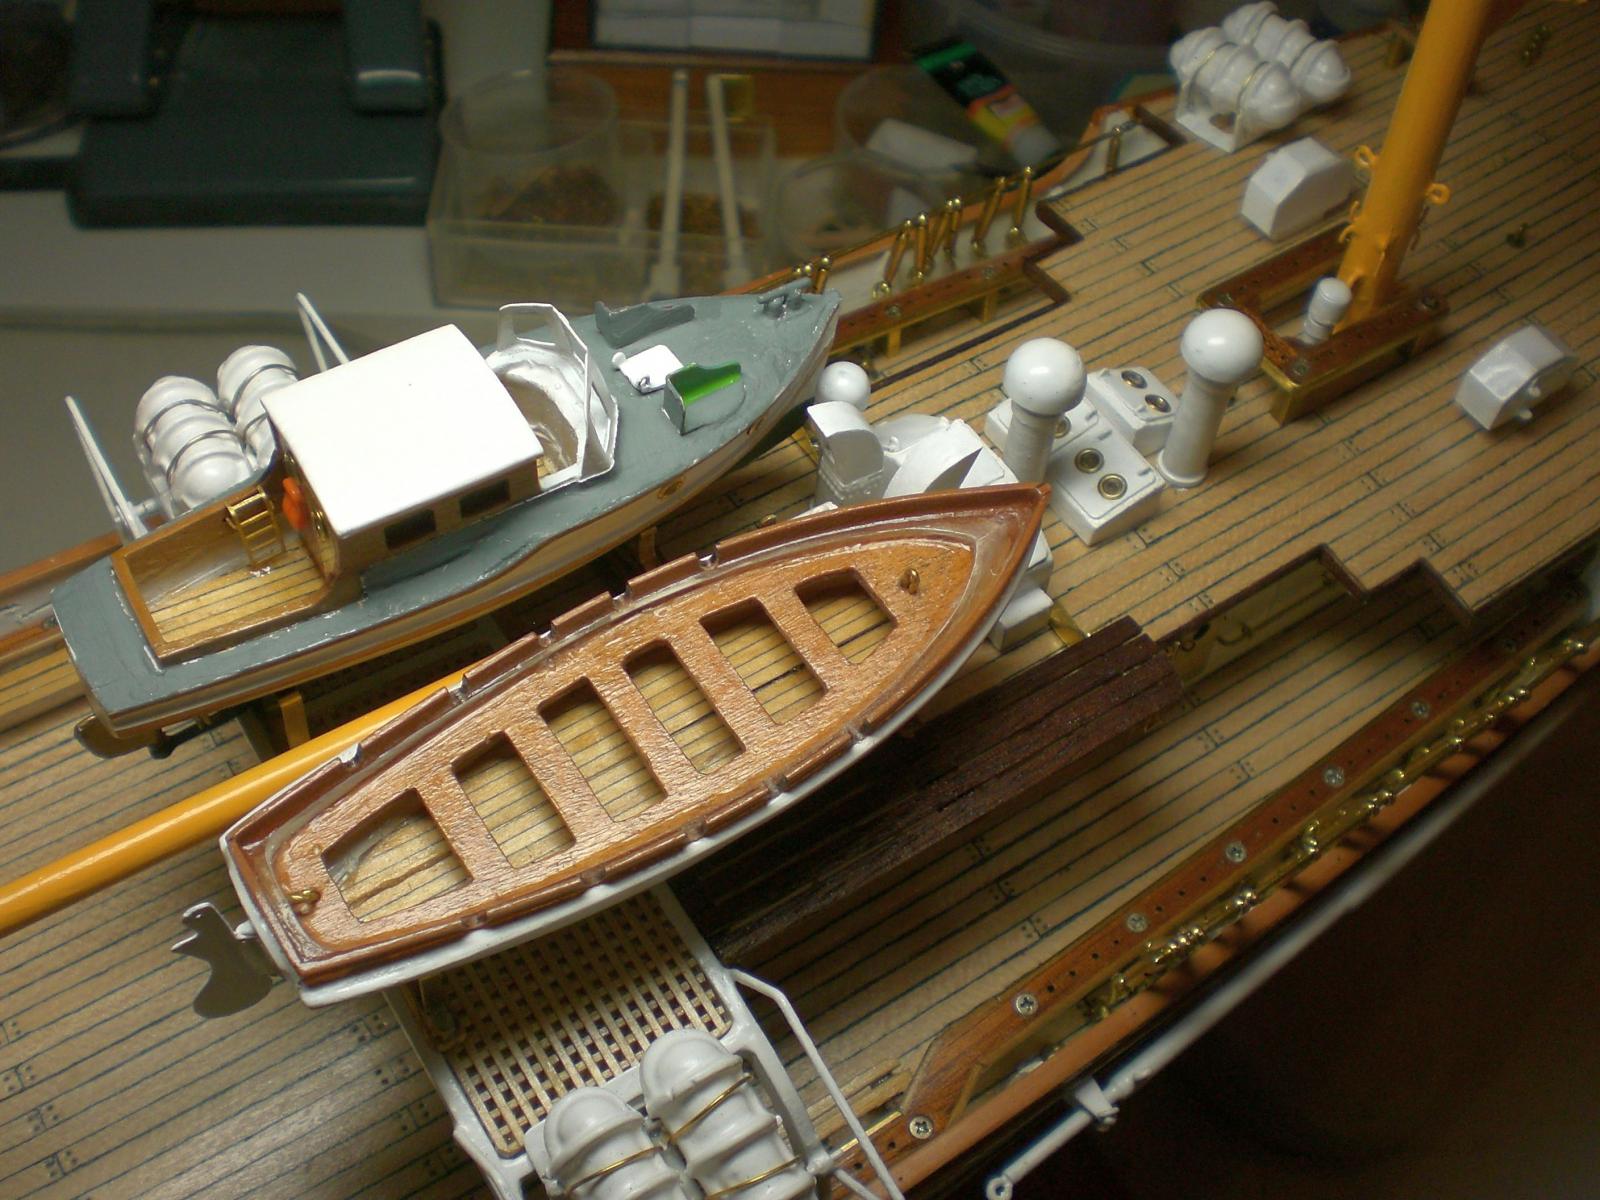
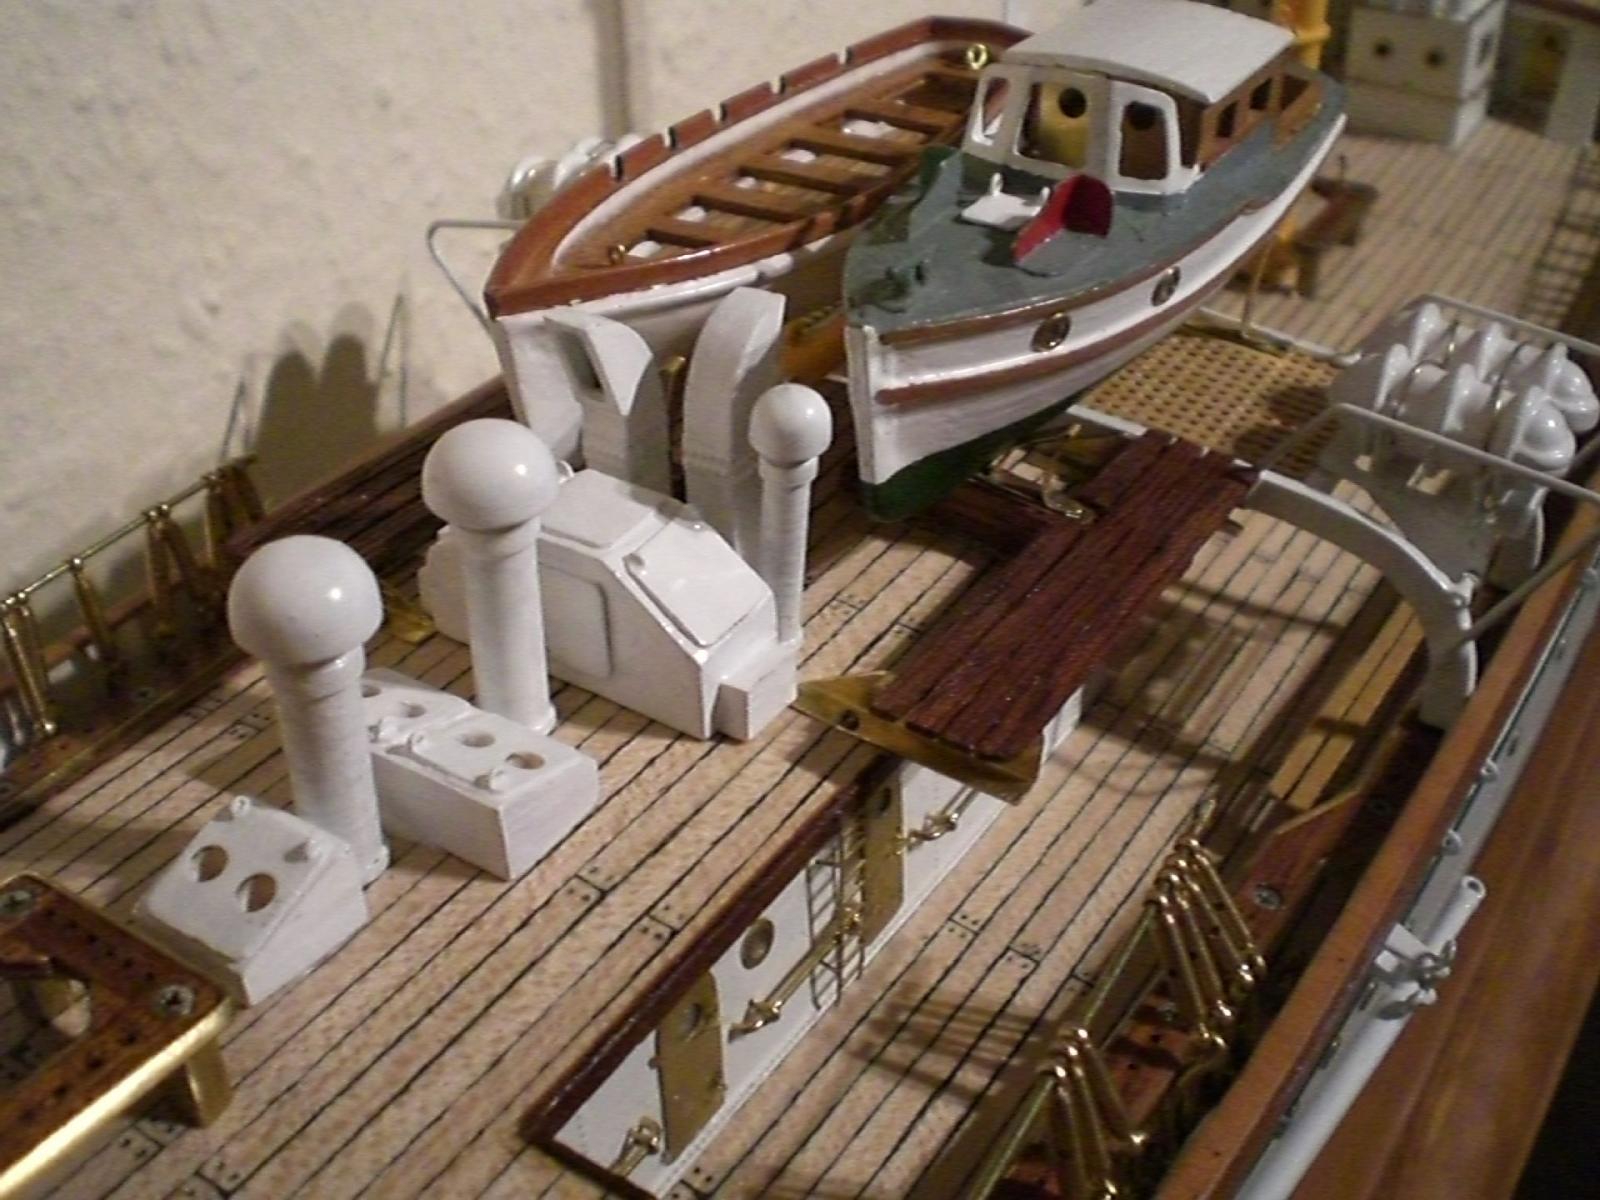
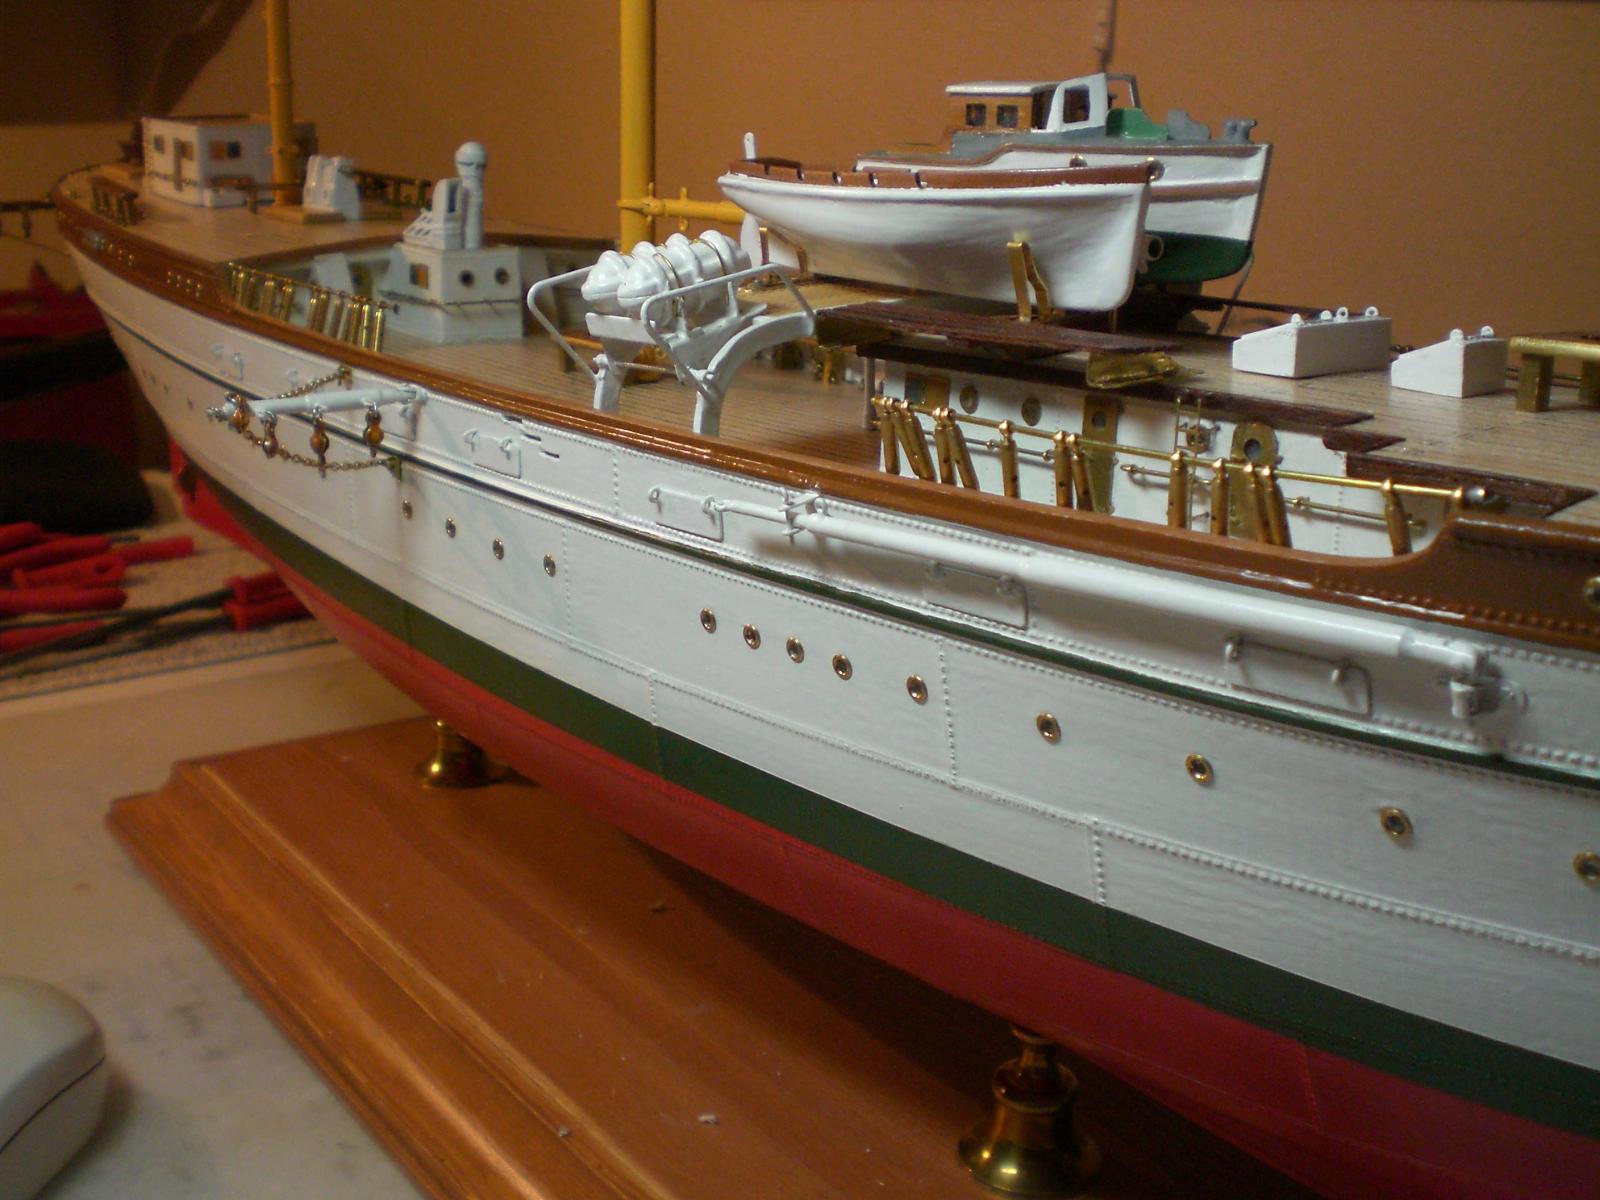
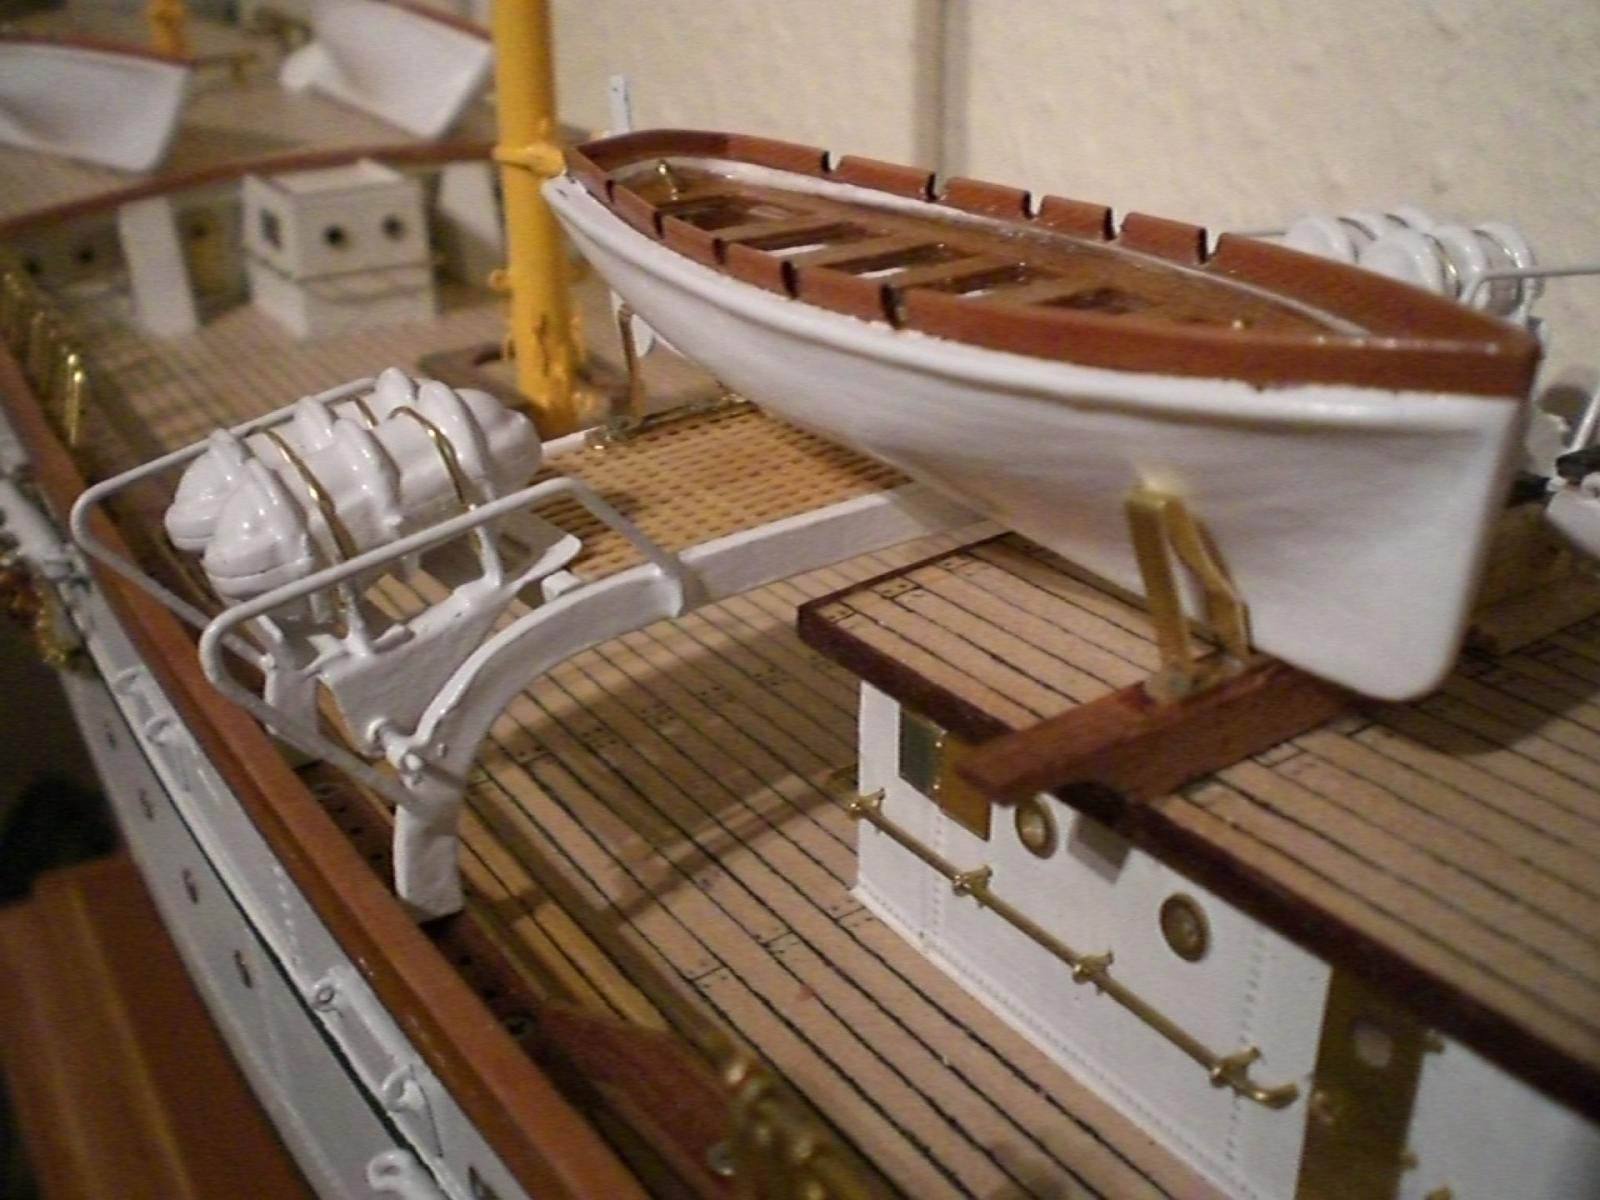
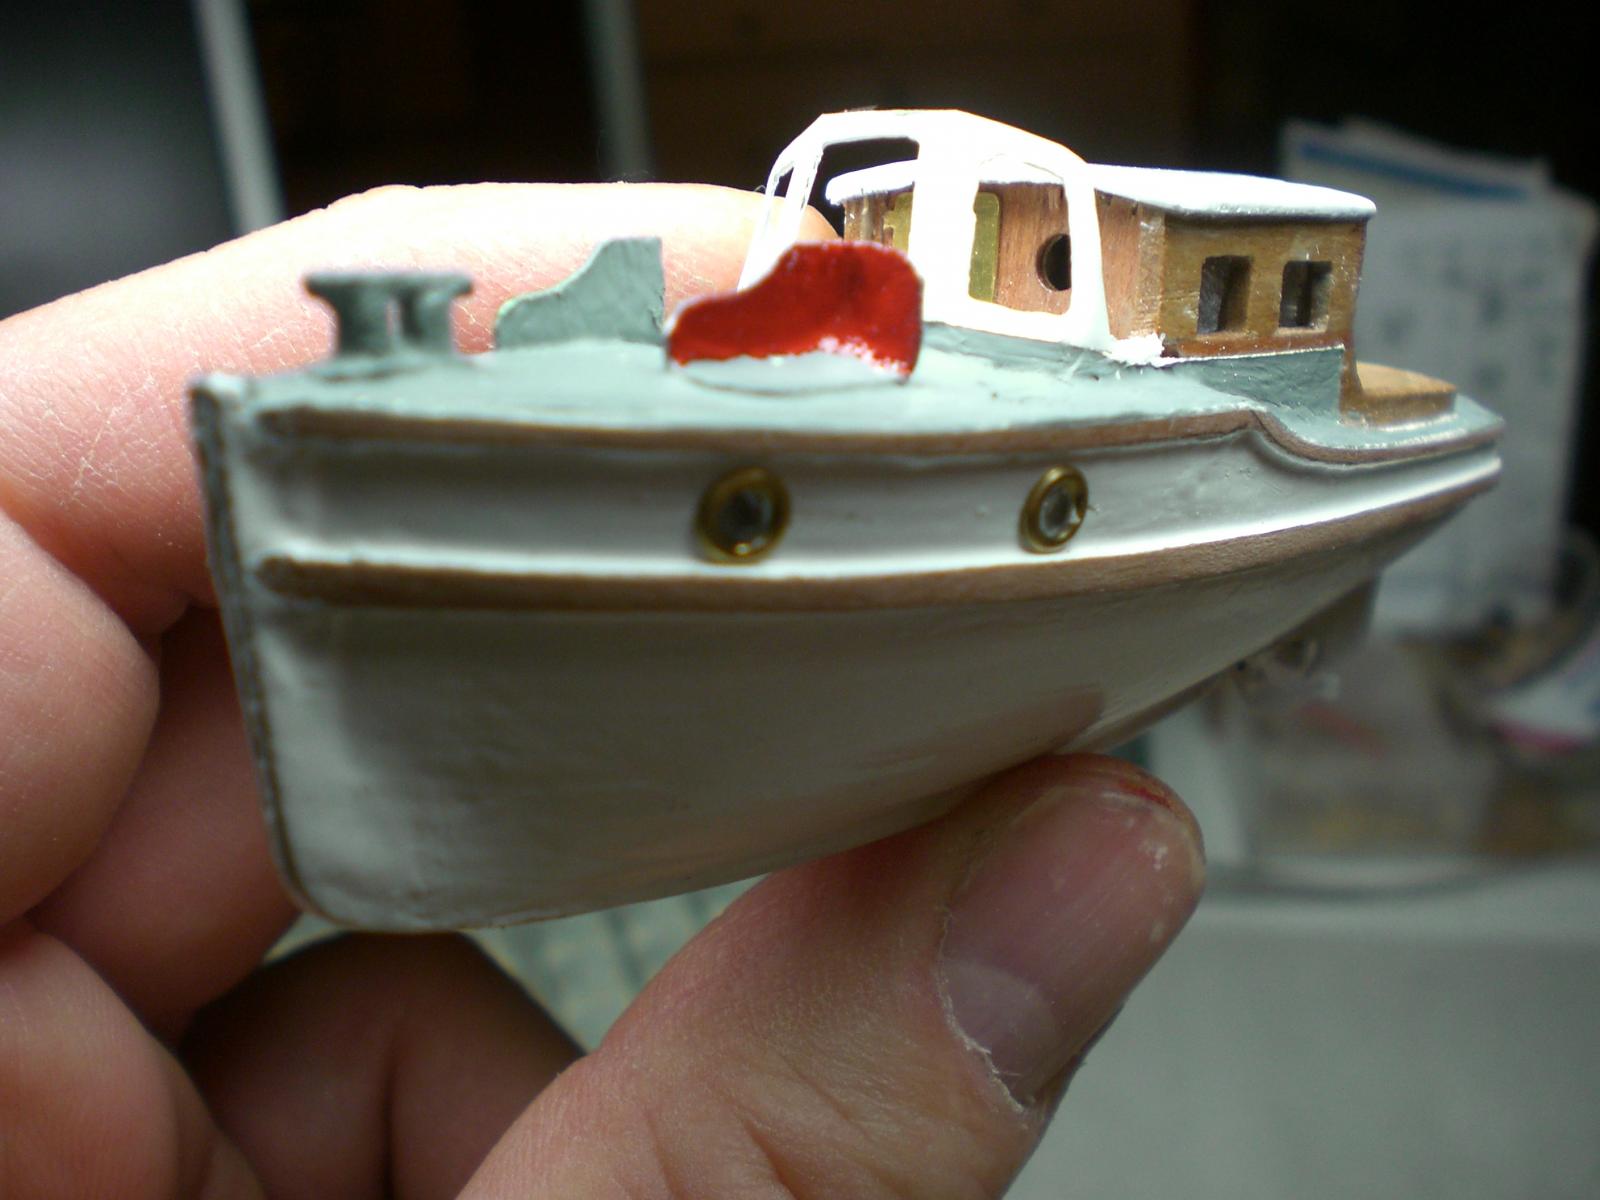
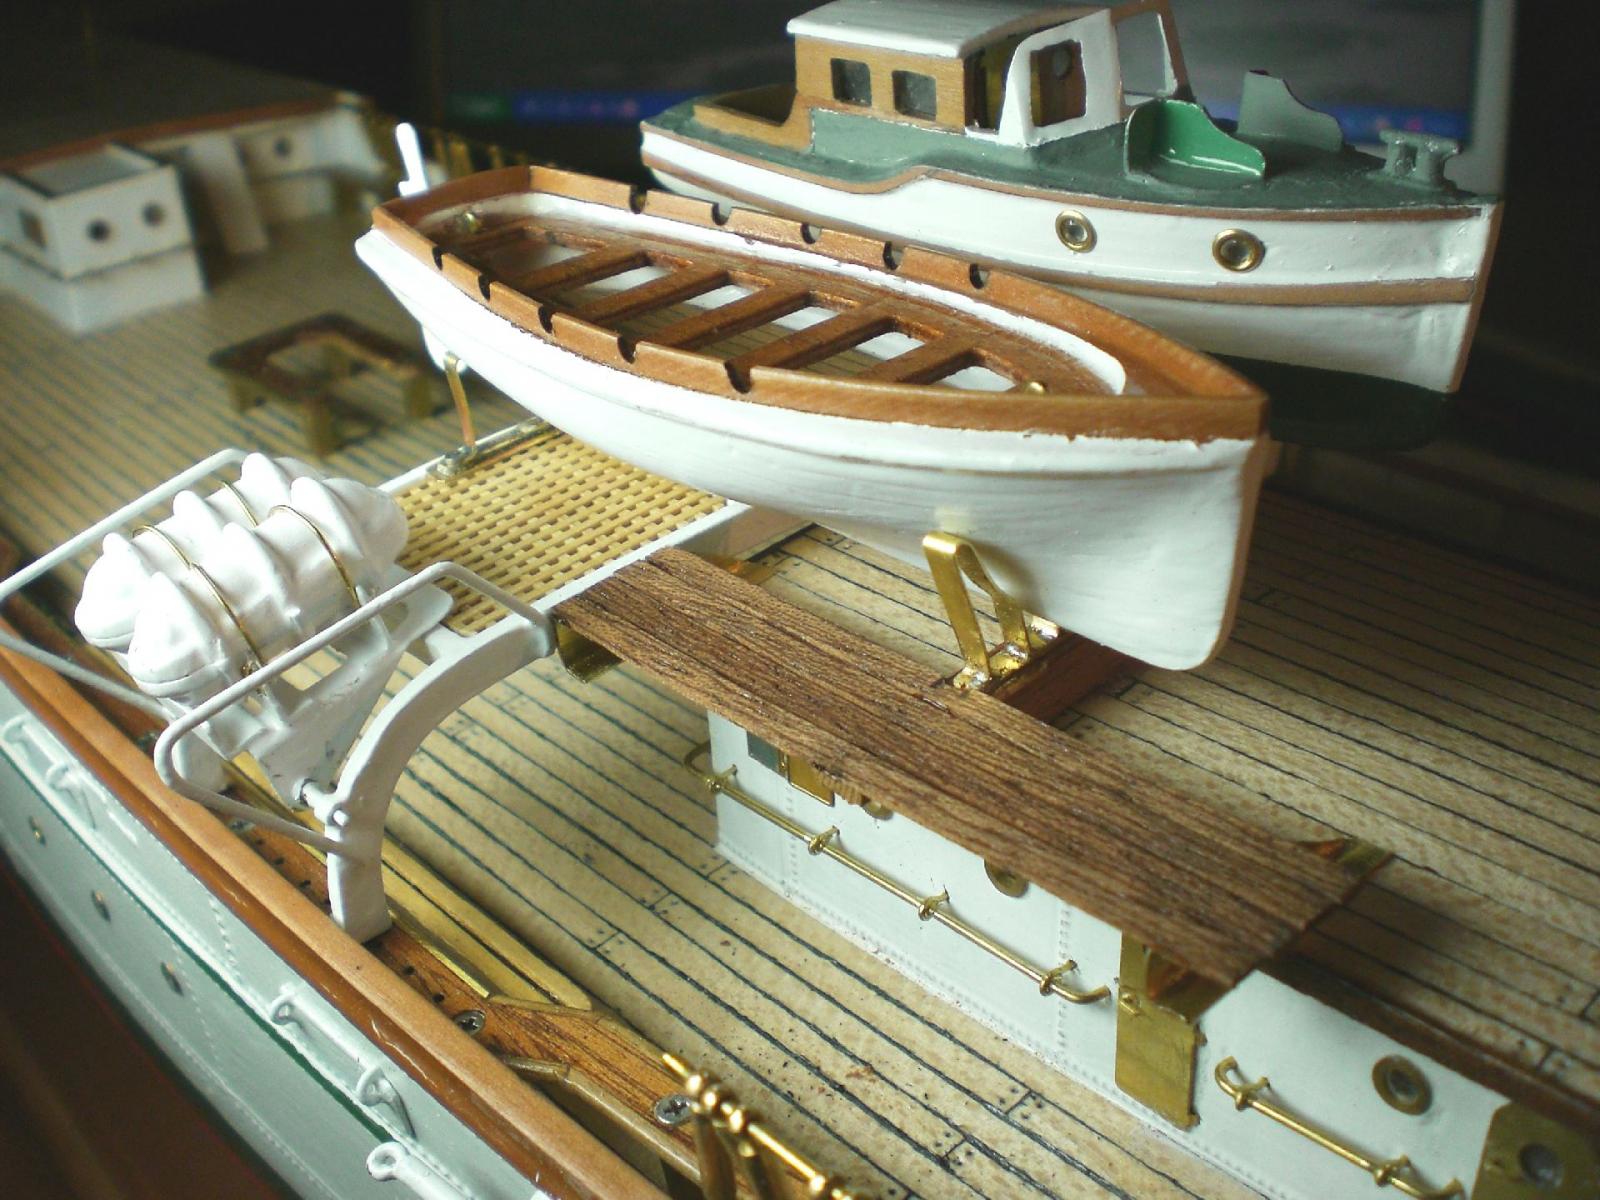
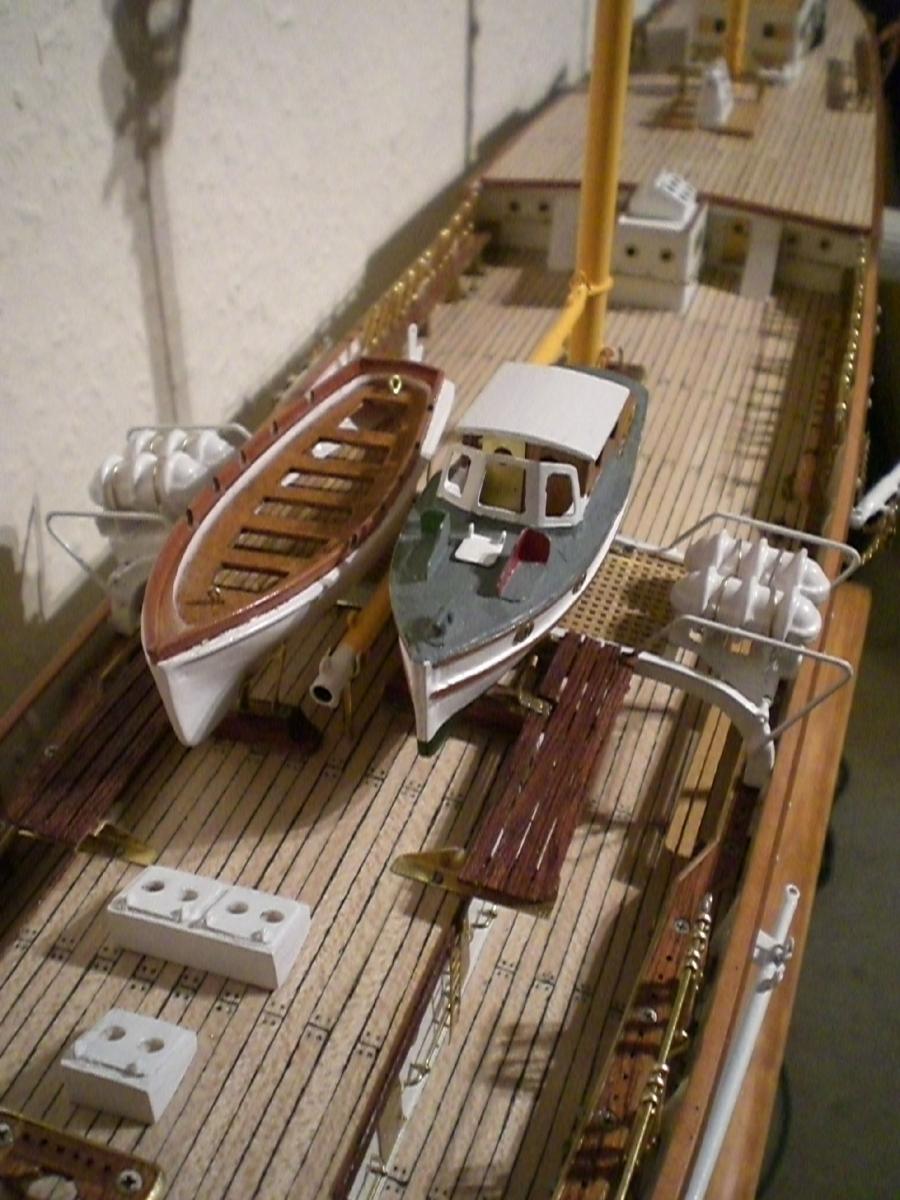
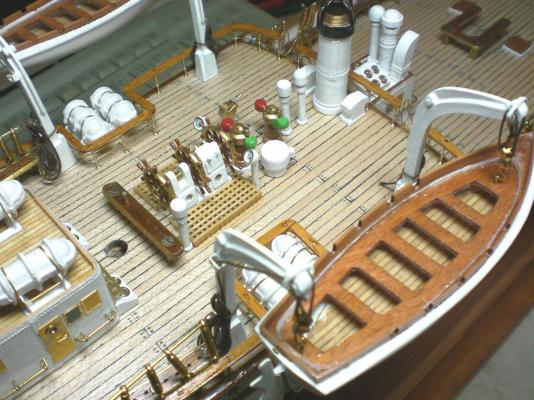
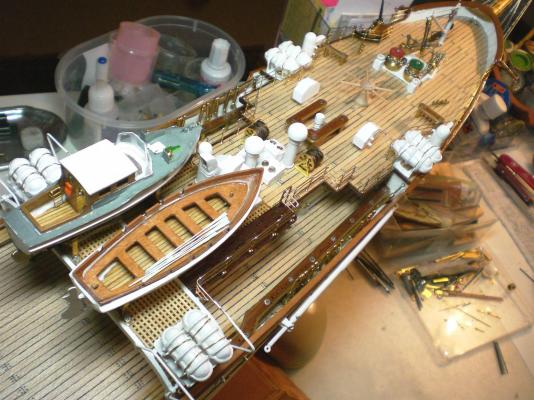
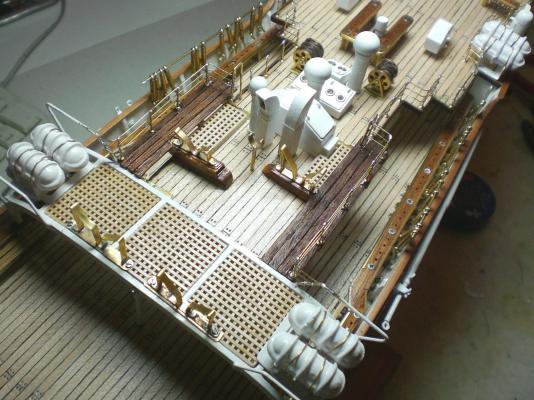
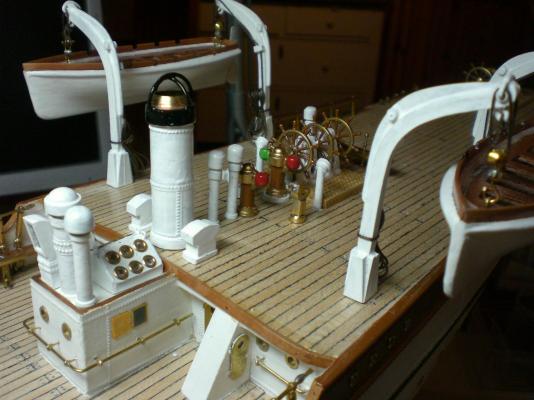
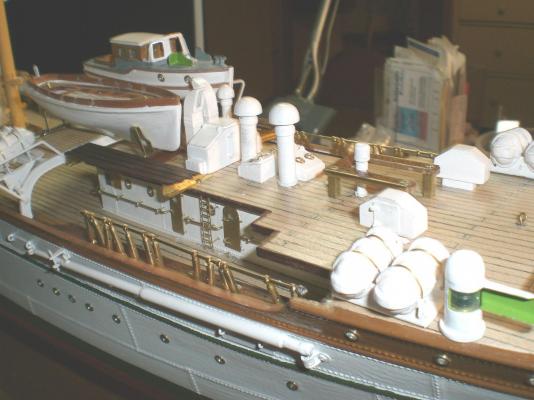
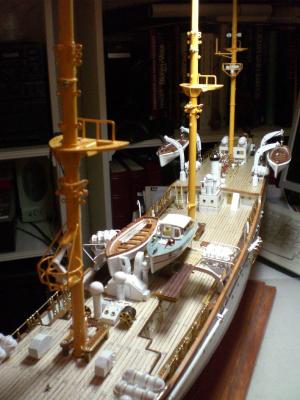
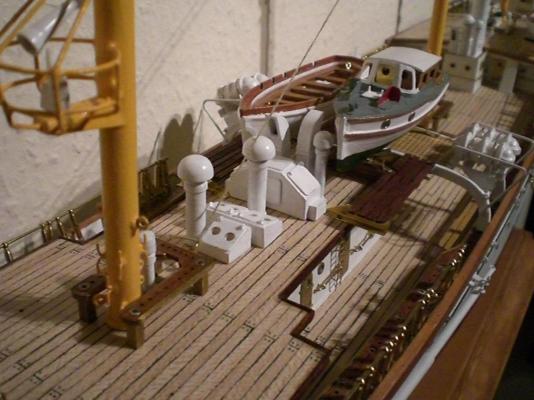
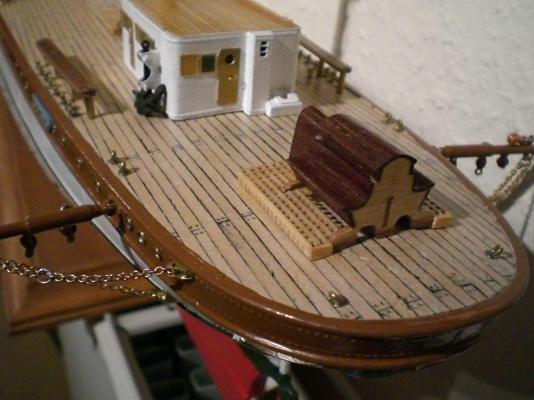
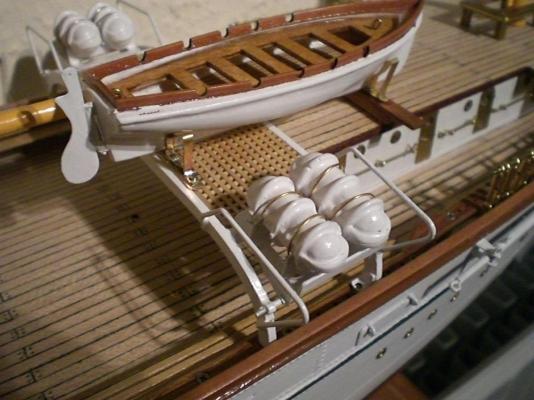
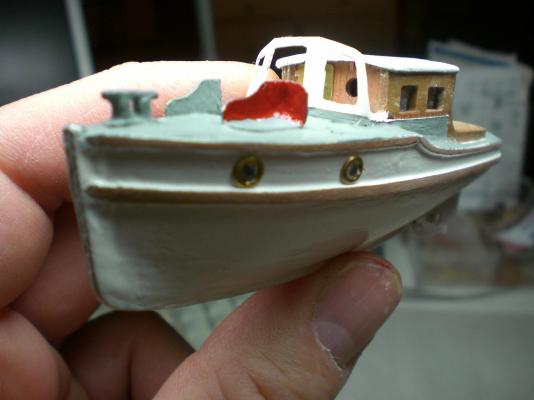
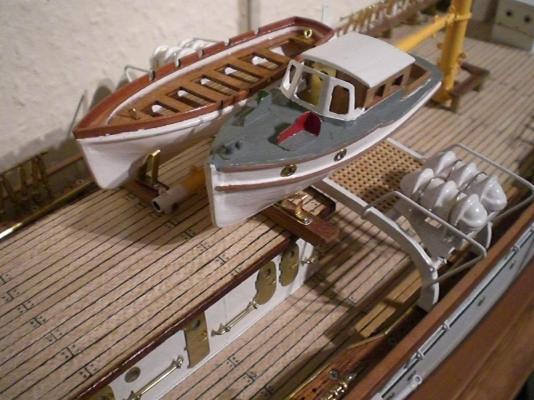
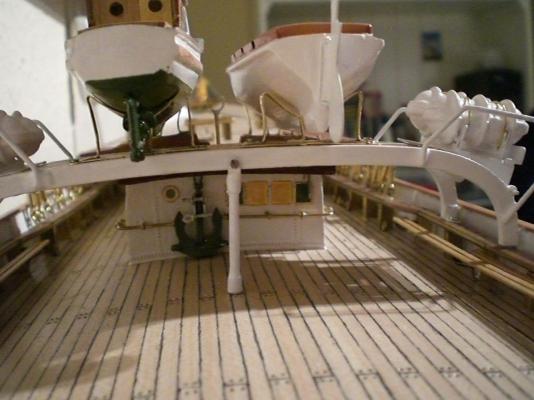
Build log part 32 Walking Planks at the boat stations, and further vents funnel, vents, wheelstand, two compas stands, Skylight and rudderposition indicators, the boat is just for checking available space in length nav light Towers (here still without lanterns) Forward vents, radar-bar, fog horn and forecastle raft Containments mounted cradle device for strapping raft containers navlight containments Build log part 33 to follow.... Nils


- 222 replies
-
- 14
-
-
- gorch fock
- barque
- (and 2 more)
-
ROYAL CAROLINE 1749 by Doris - 1:40 - CARD
Mirabell61 replied to DORIS's topic in - Build logs for subjects built 1501 - 1750
candy for eyes and soul Doris, you put so much love into every Detail... even the Little stand plate withe the Name and those great modelled (unicorns ?), do you have a Close up view ? Nils- 883 replies
-
- 2
-
-
- royal caroline
- ship of the line
- (and 1 more)
-
David, when the GF2 log is done I shall have to switch back to online actual-progress-posting. Unfortunately, when I built the live swedish museum Steamer "Bohuslän" I think Digit-cameras were not available at that time, so no pics from that build except for the last stage Fitting out ones. David sorry I did`nt answer the first part of your question..., it took me 1,5 years to make Nils
-
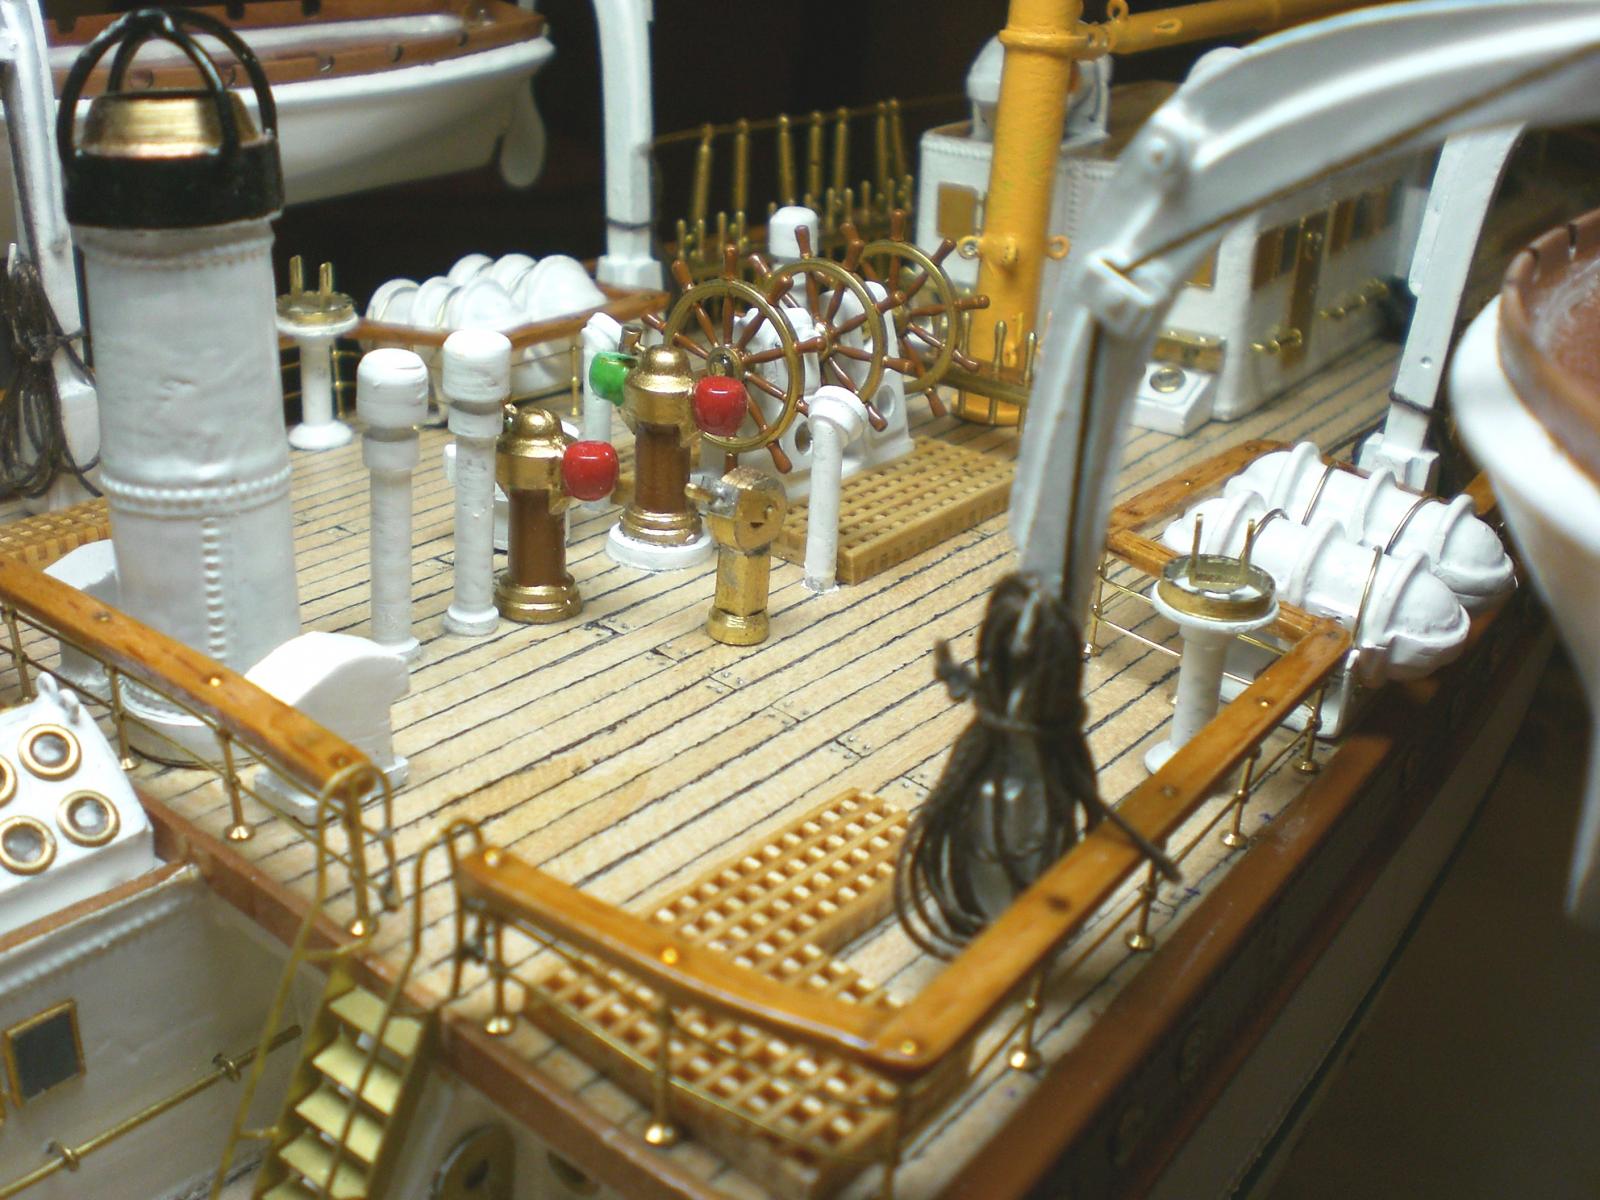
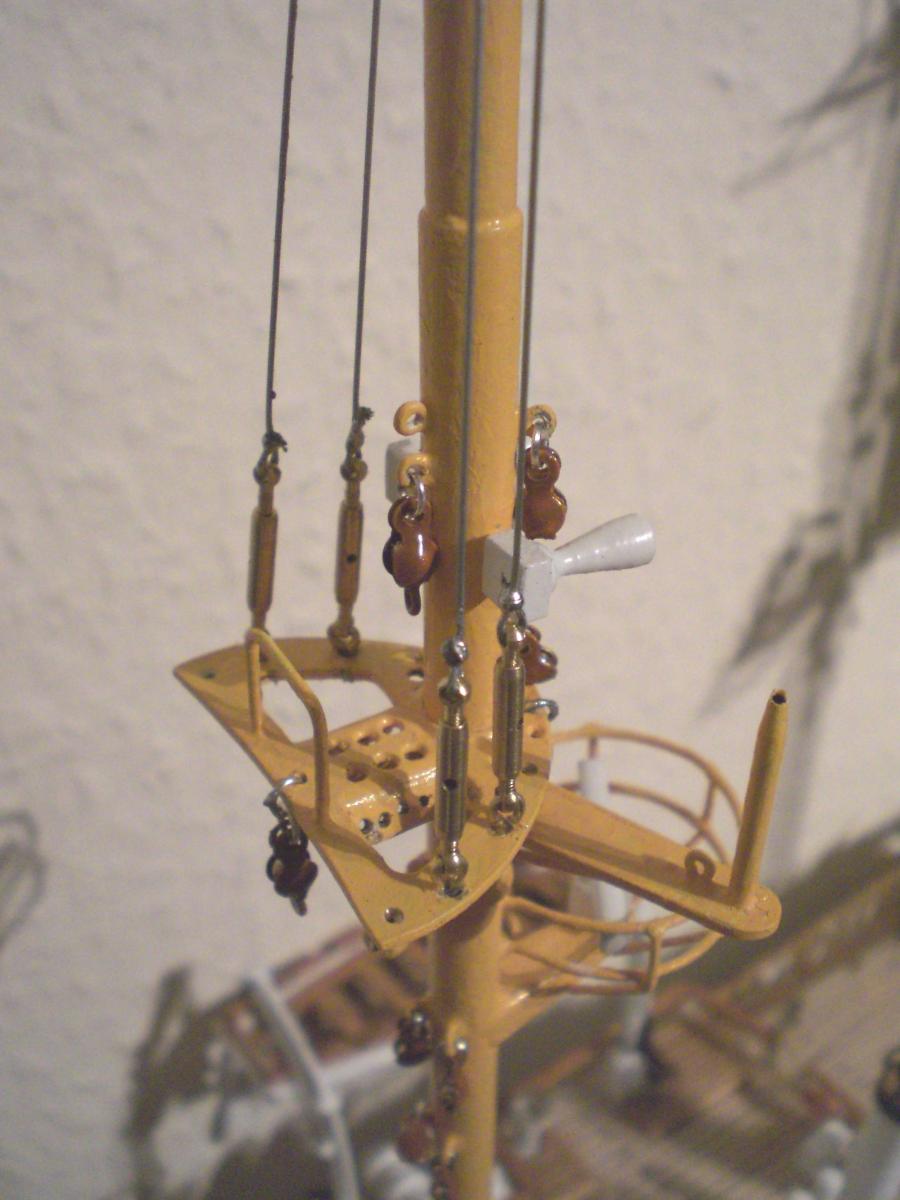
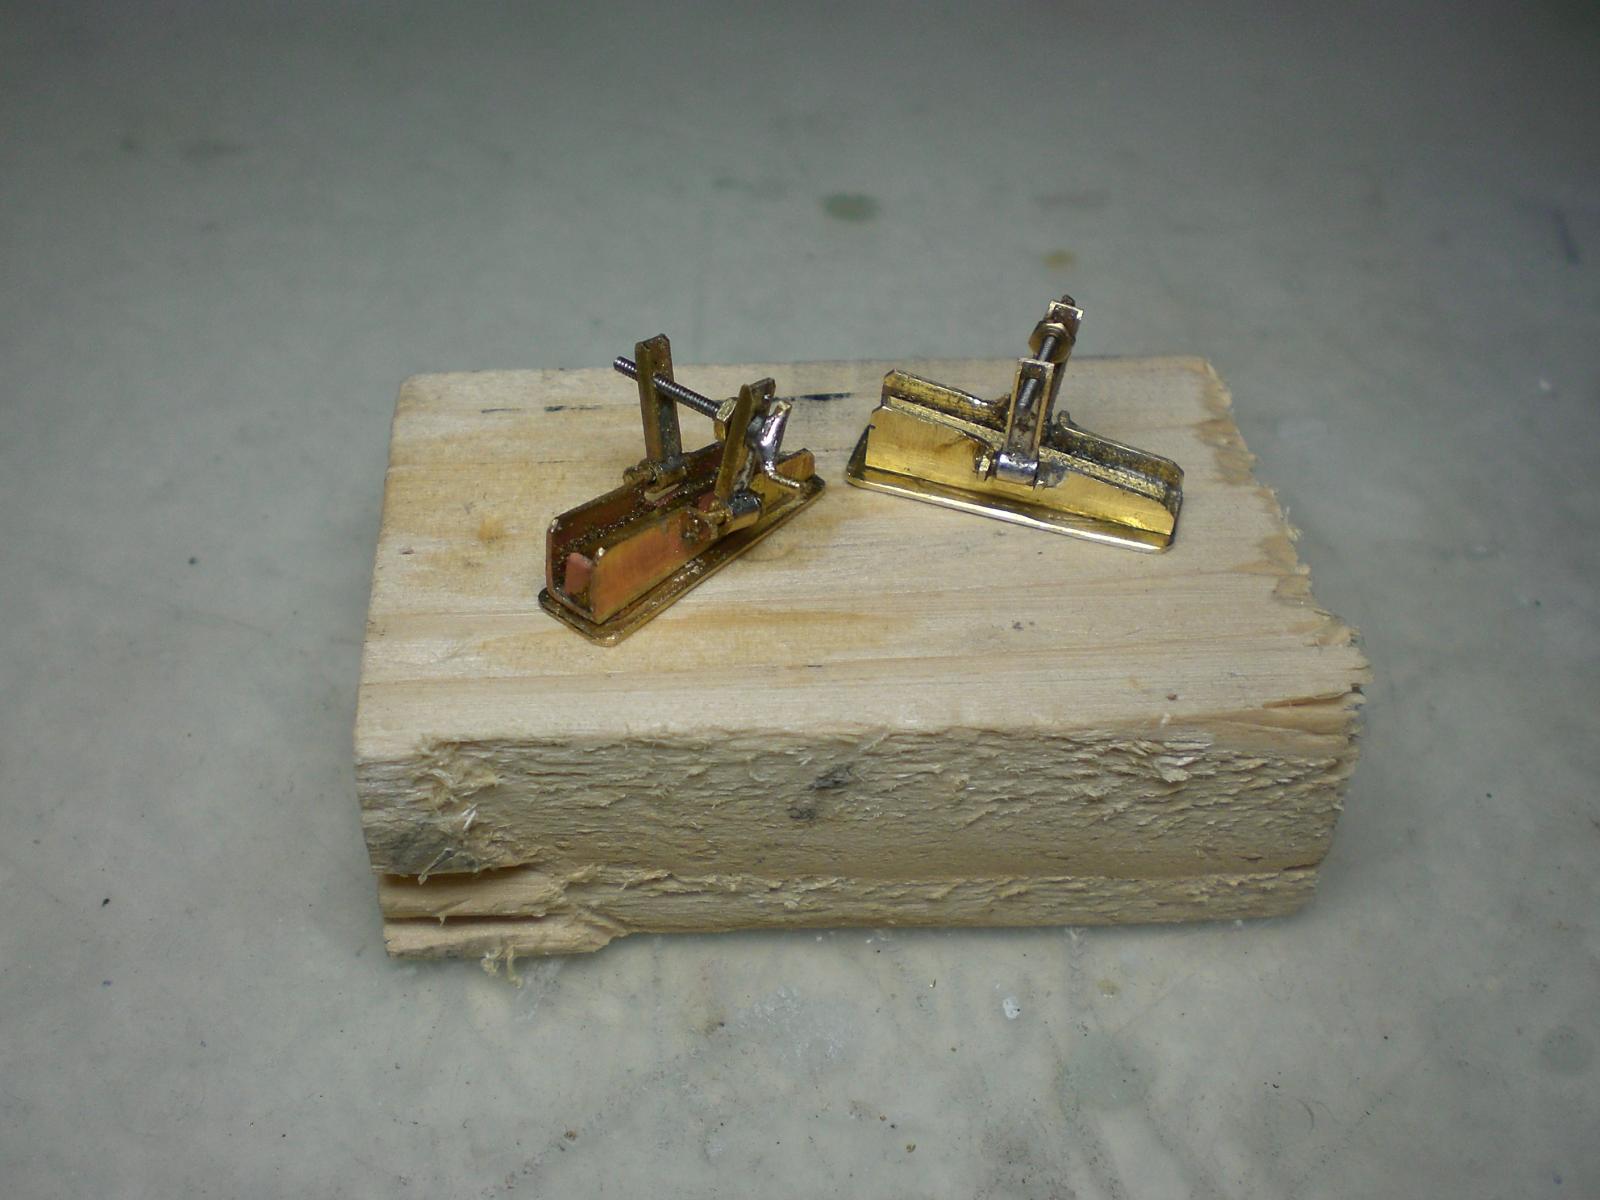
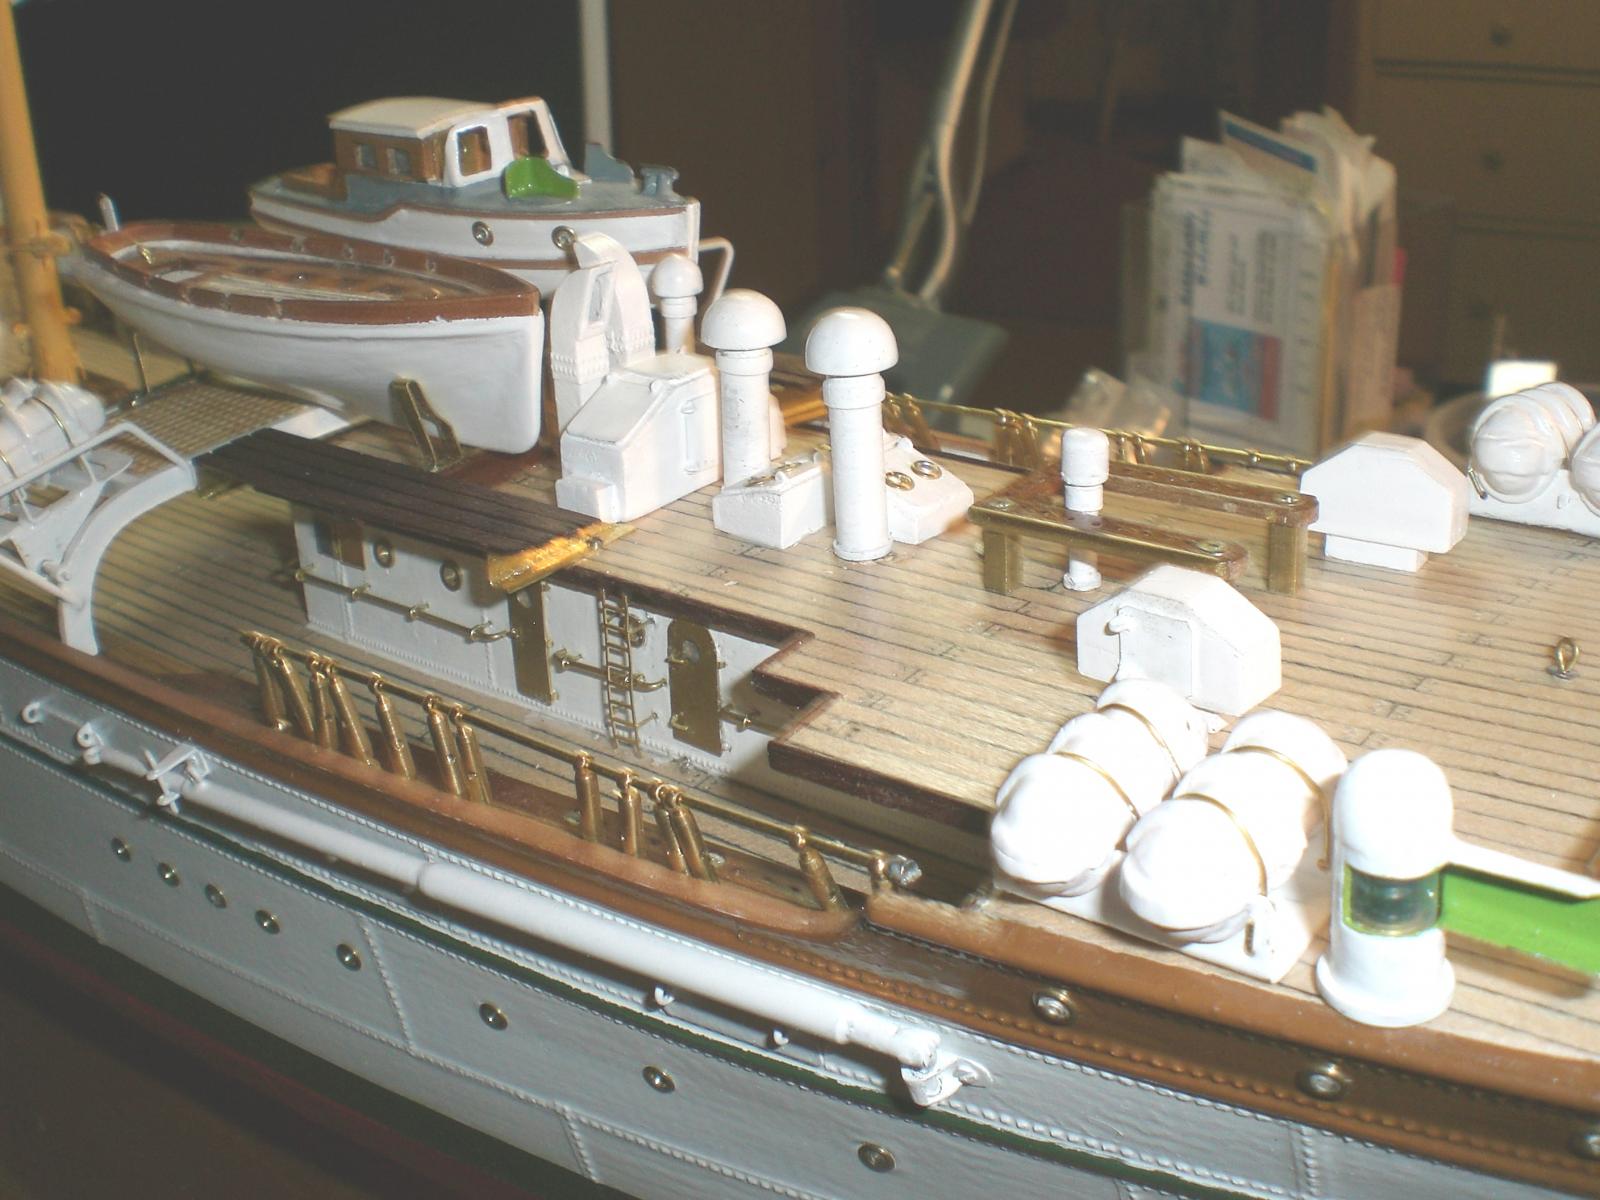
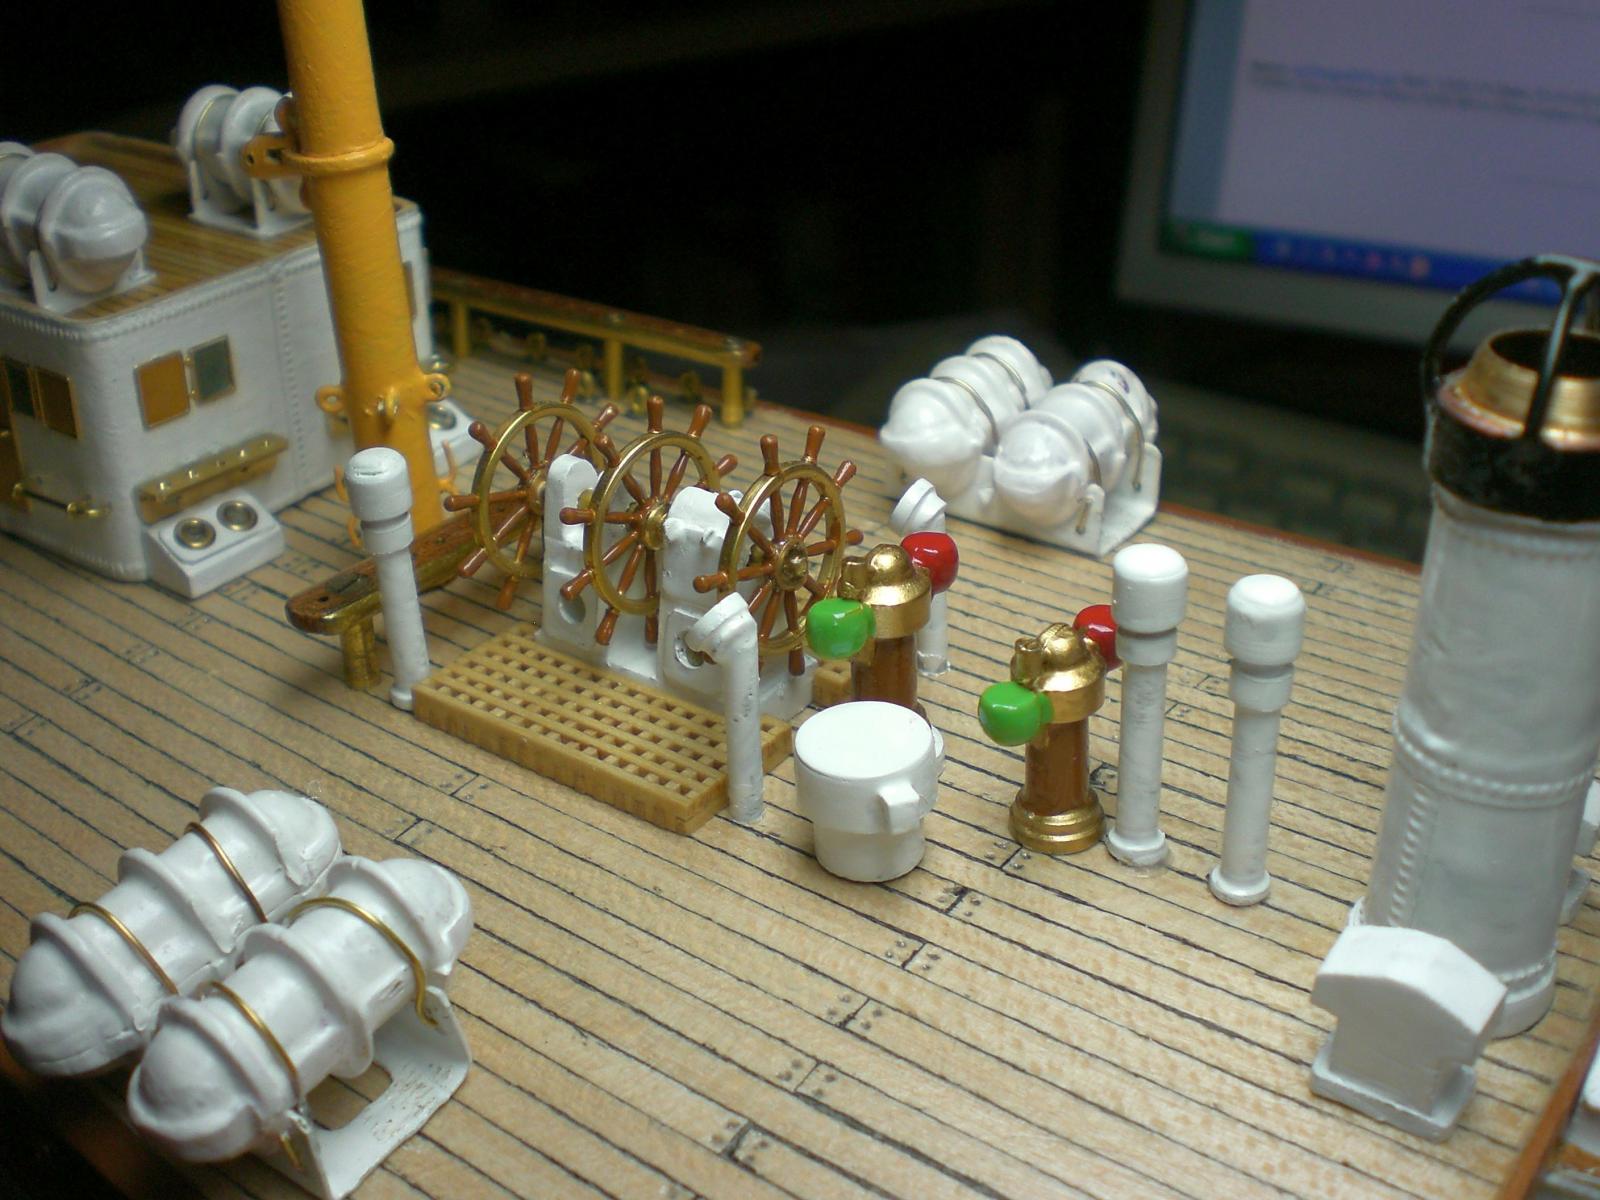
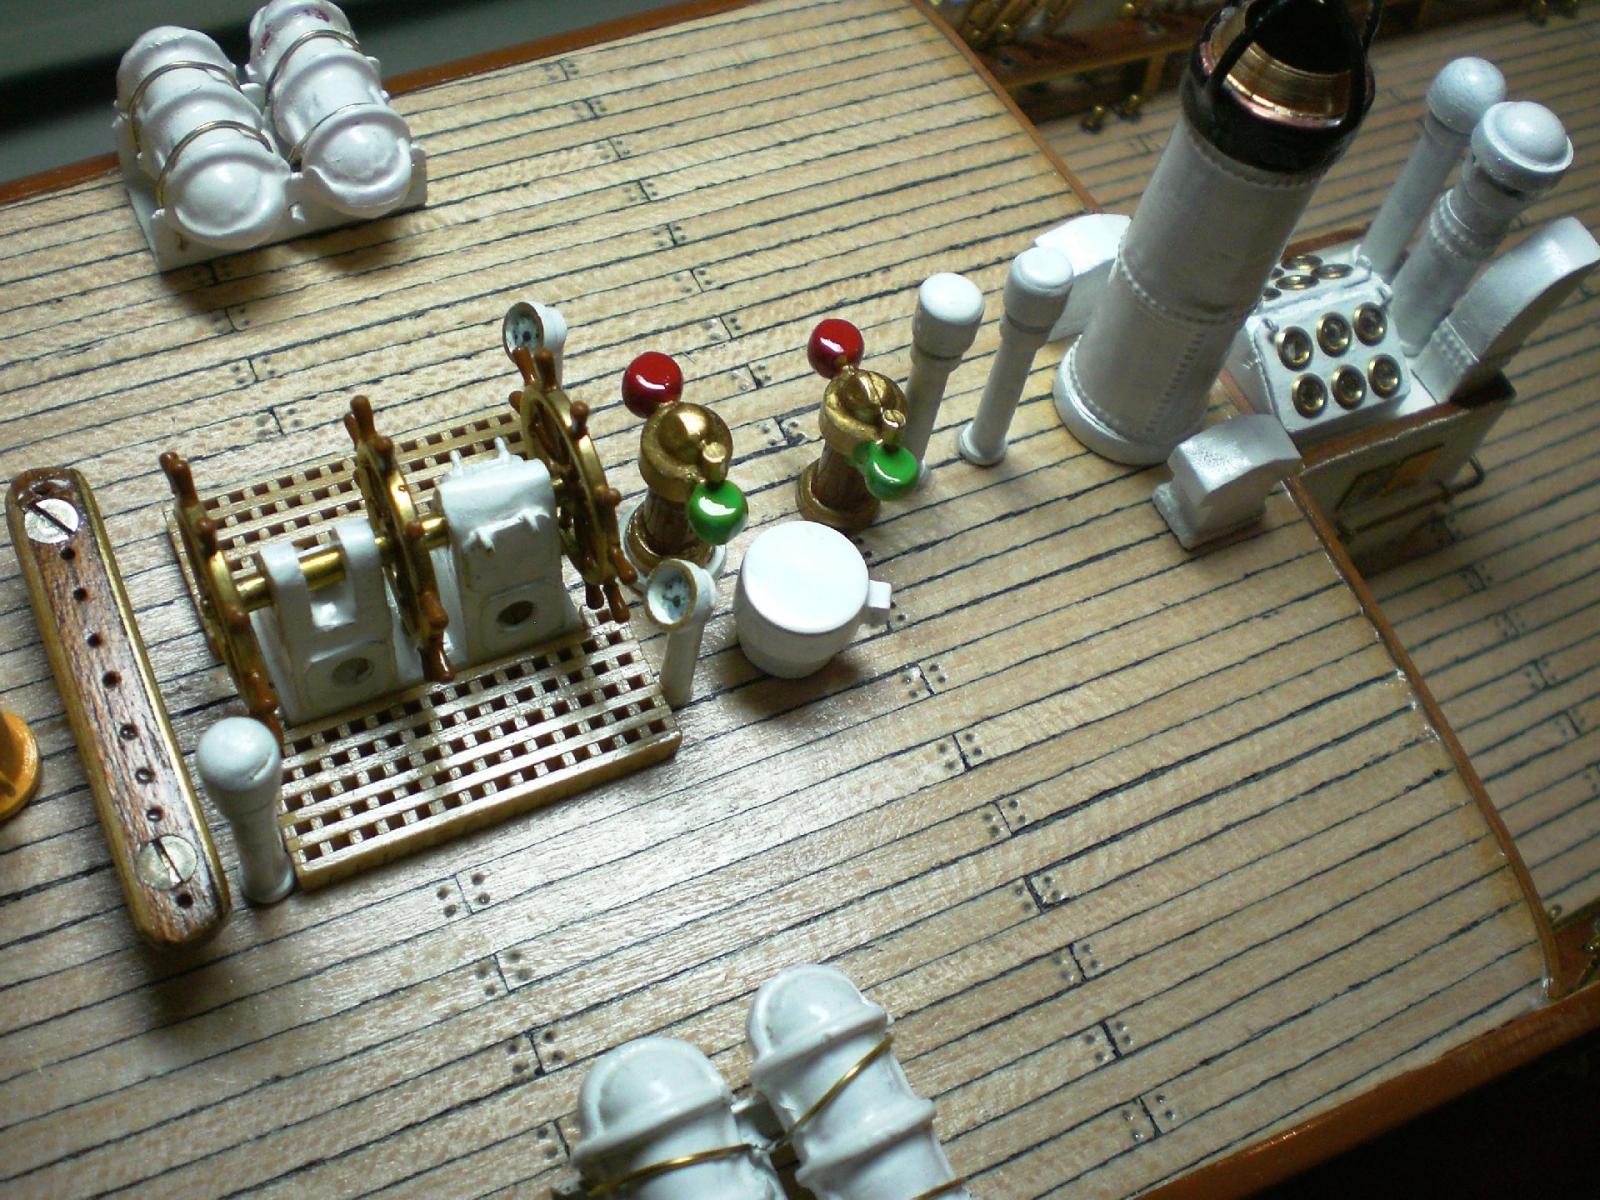
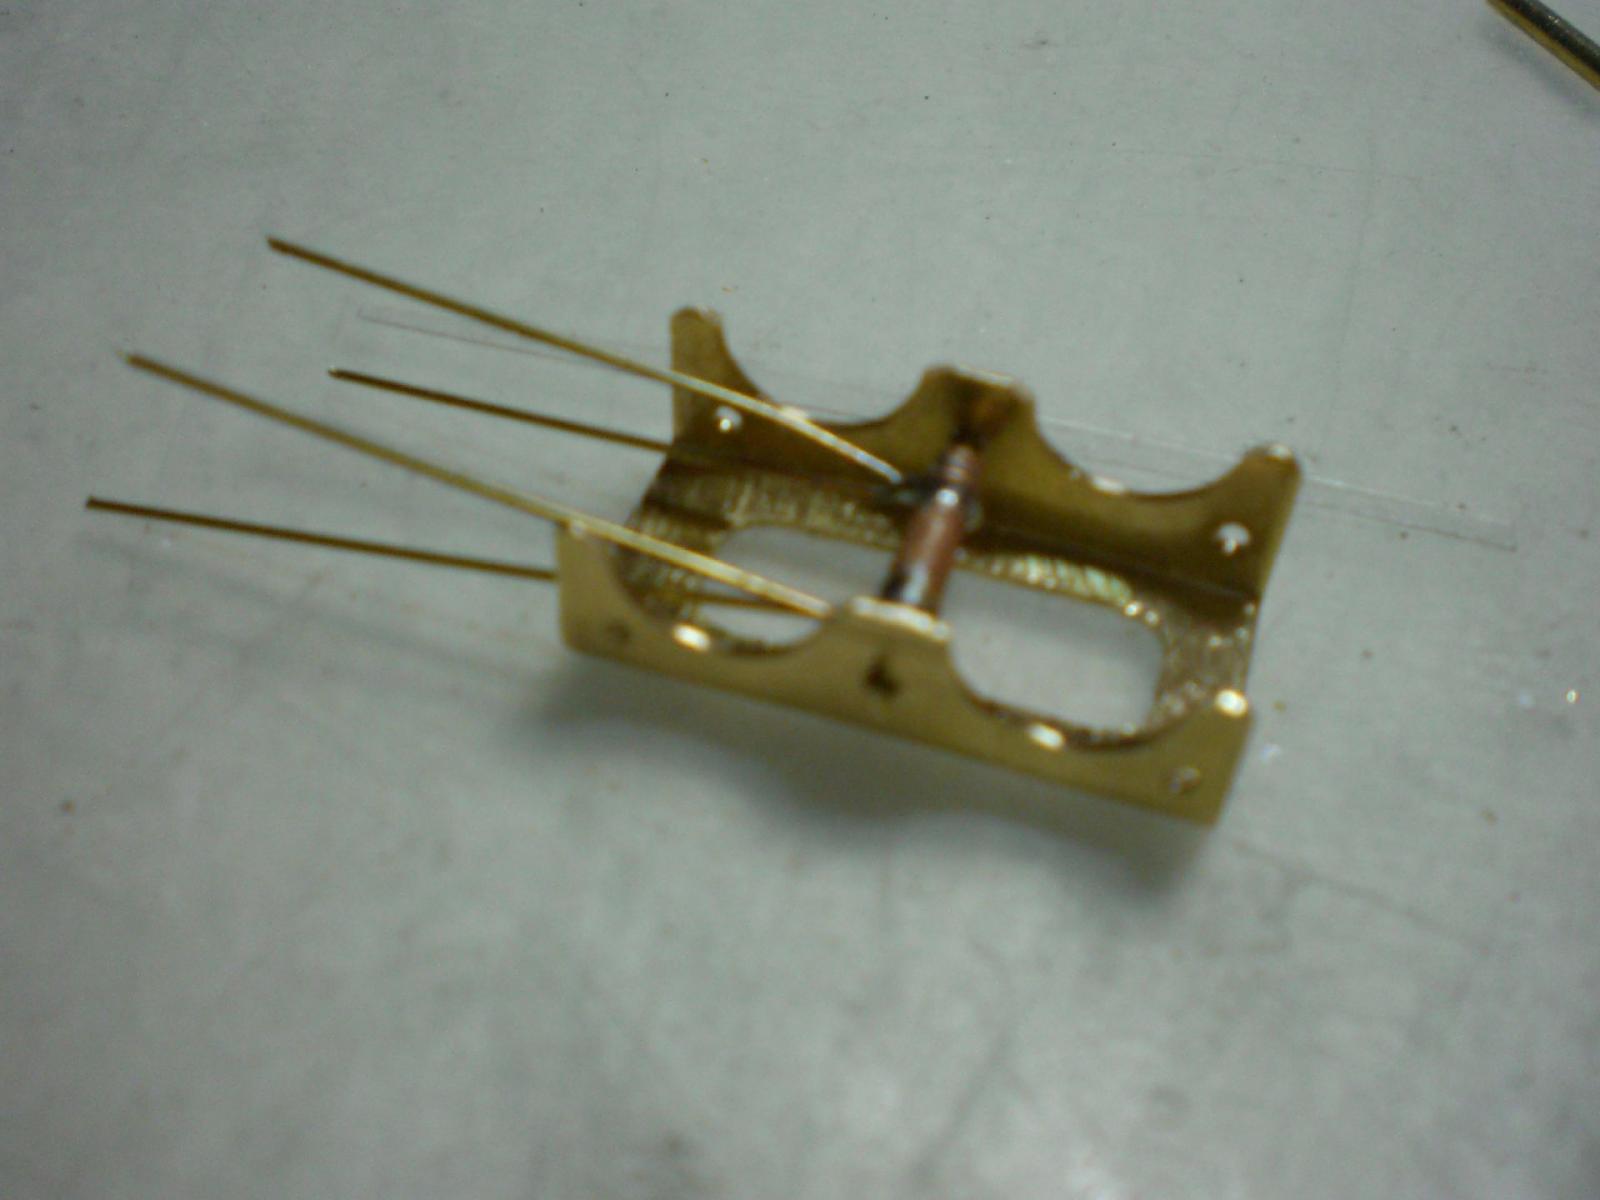
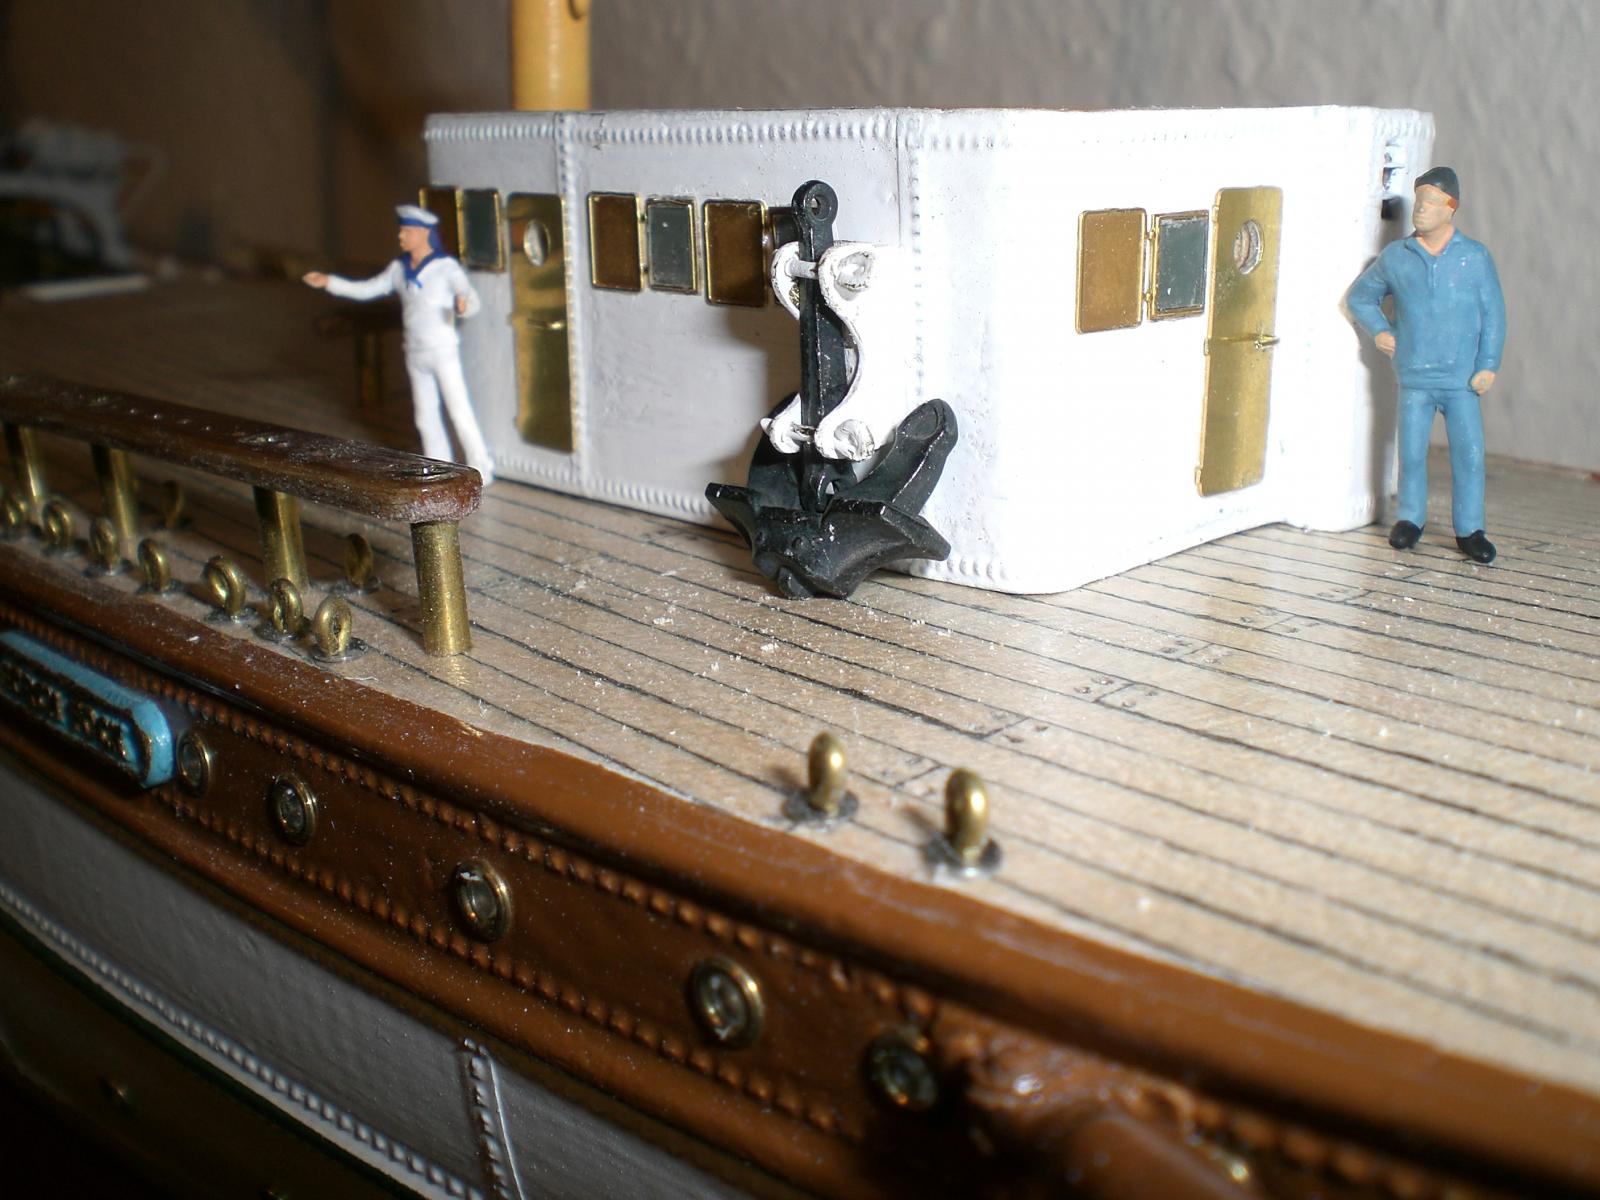
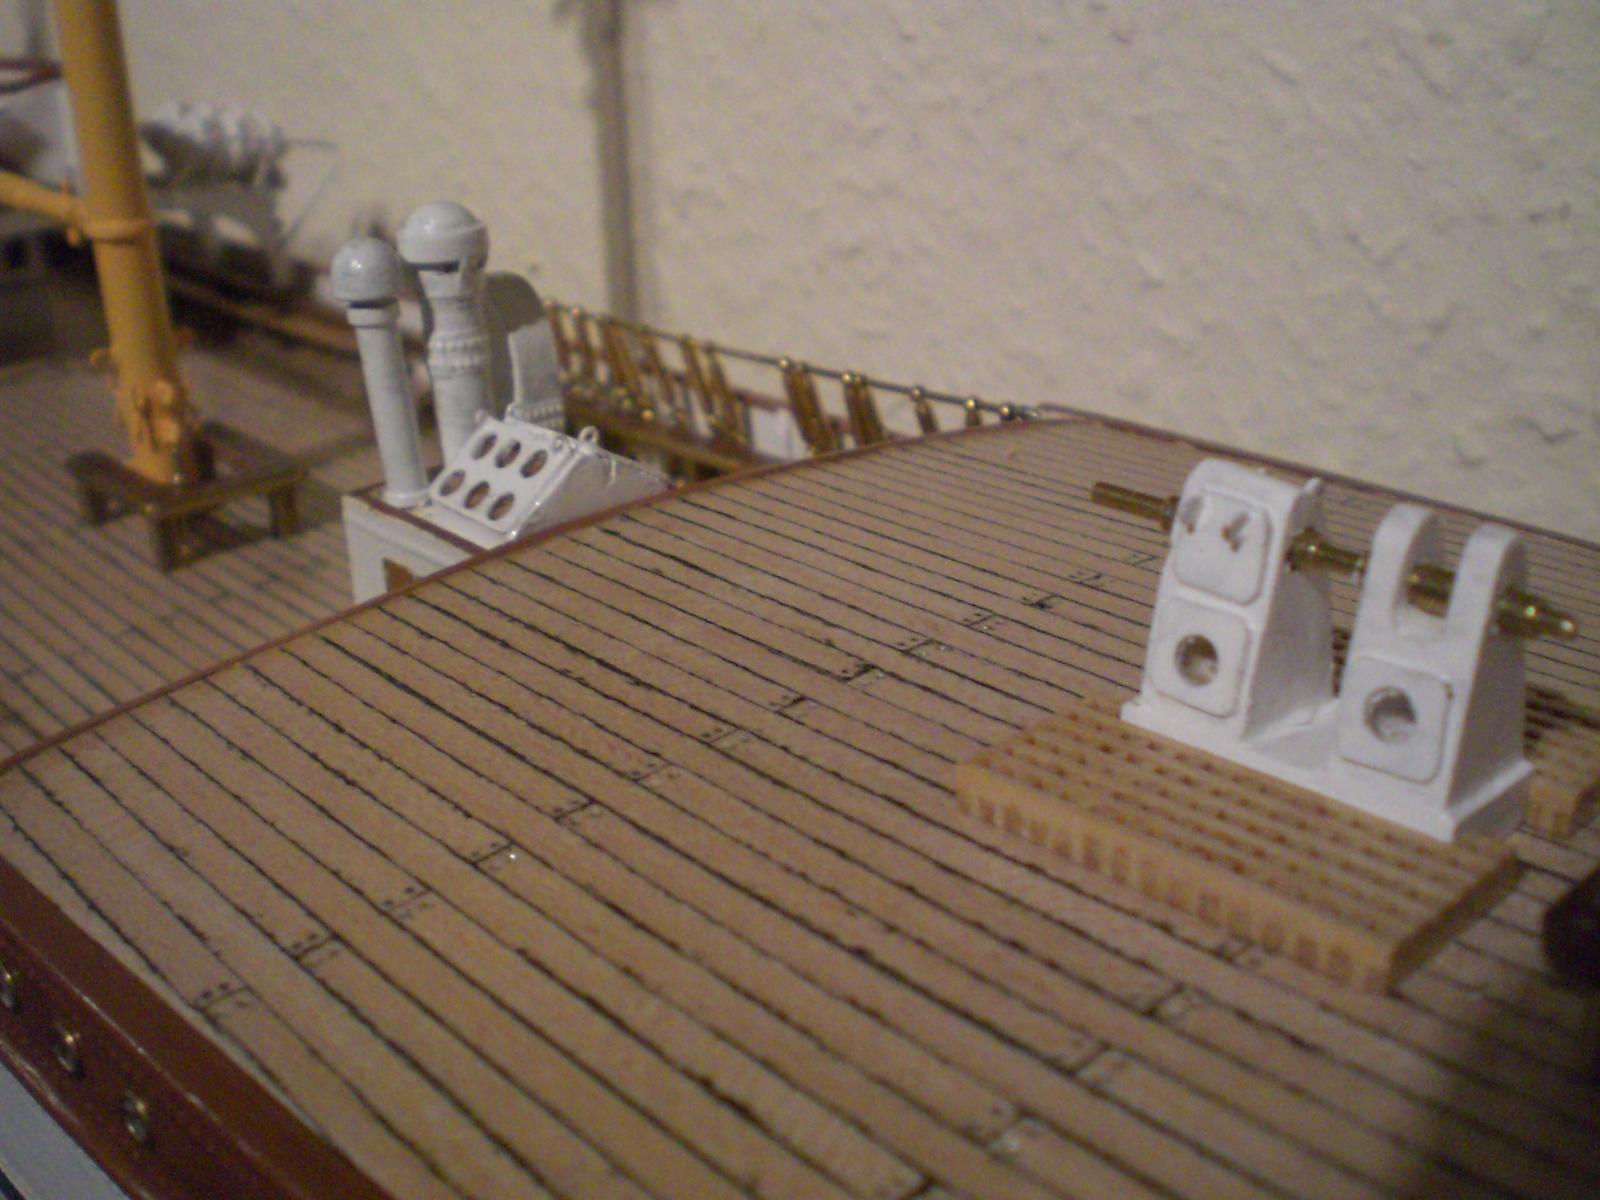
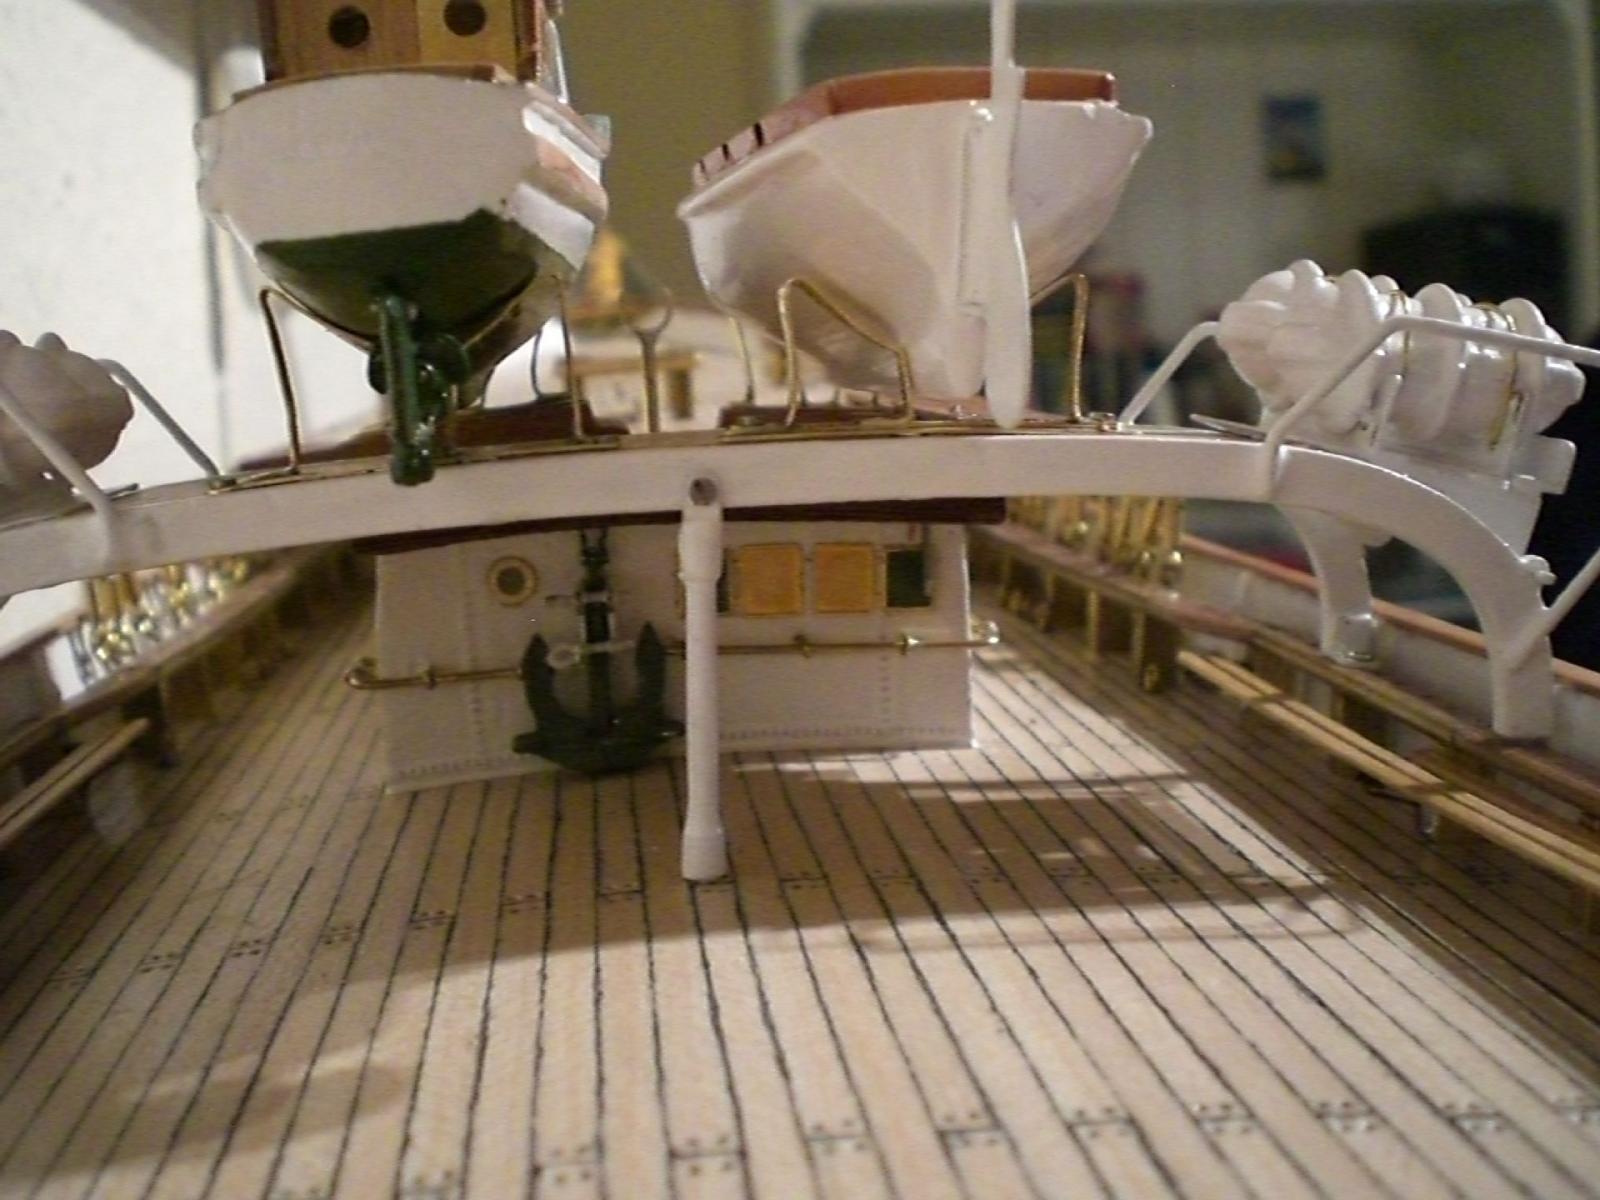
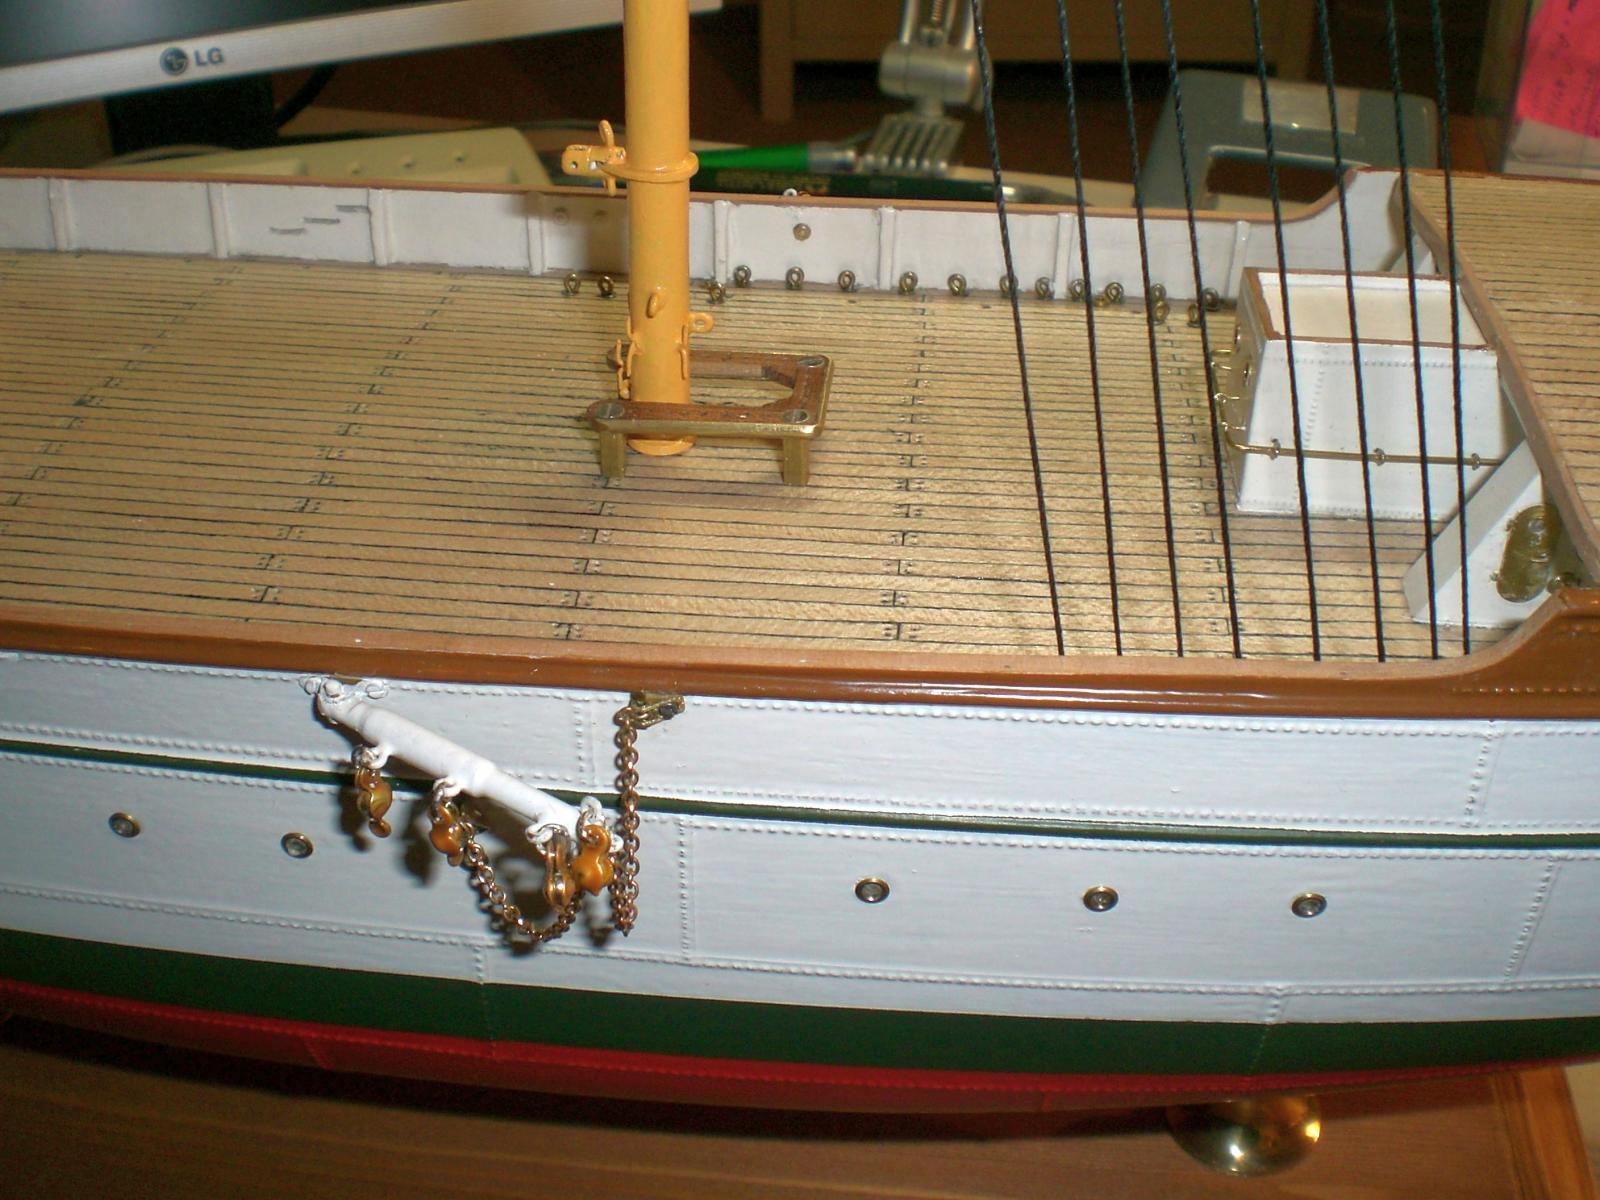
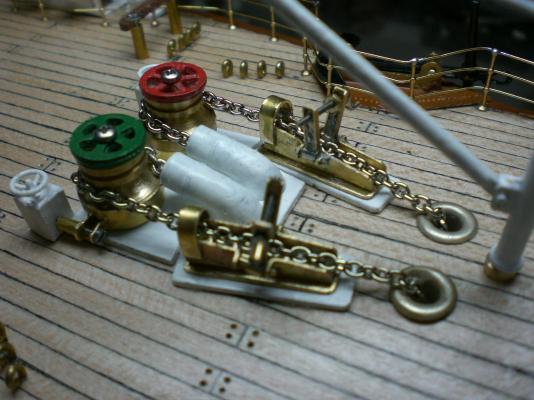
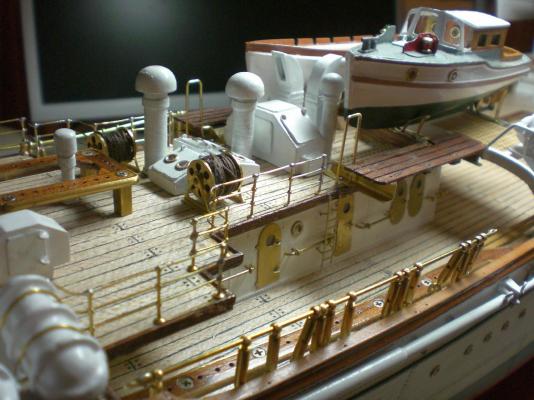
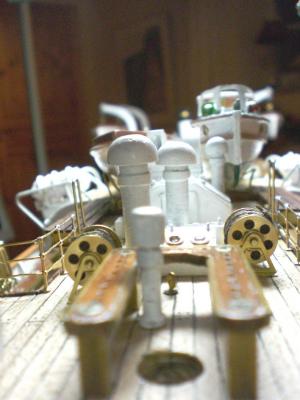
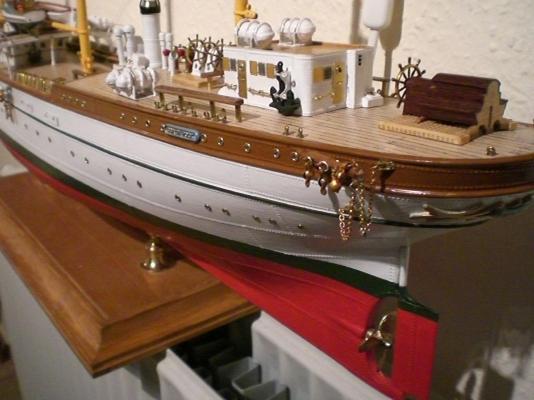
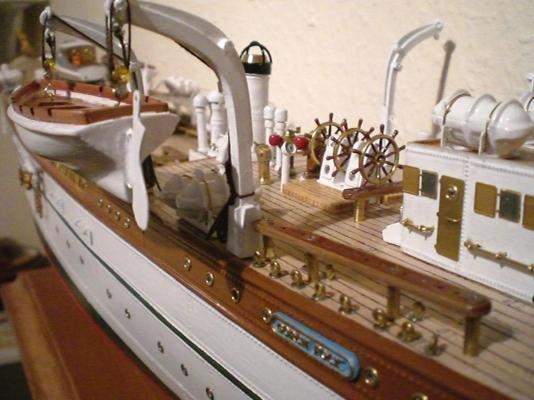
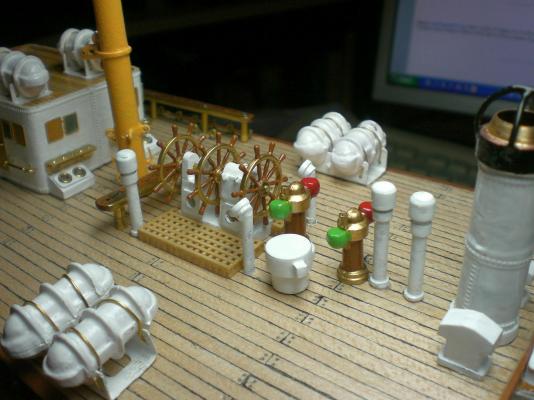
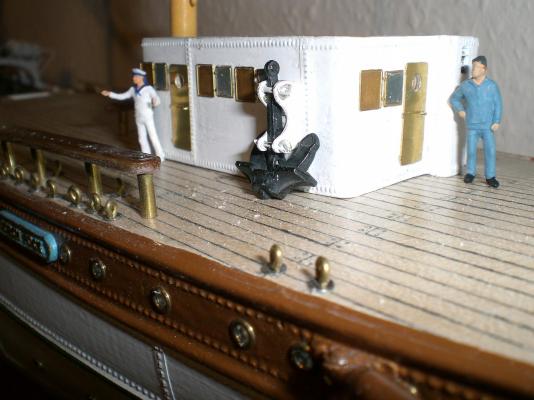
Build log part 31 aft deckhouse (command cabin and nav- and Chart-room) and spare aft anchor. the blue guy had always become too much Porridge as a Baby already and now has to leave the Crew for his size chest-cover to sit on, for the auilliary rudder mechanics, here still without wheel some brass pinrails to the deckhouse, and the main rudderstand saddle for the 3 steering wheels, this rudderstand (the wheels) is operated manualy if necessary by up to 6 men the Long boom outside starboard bulwark is swivible and required for fastening the boats in water (when rigged 90° square to the hull). The brass wire through the top spanner-eyelets is only preliminary and prevents the spanners from tilting down between bulwarks and inboard pinrails vents and Skylight added on top of the small well-deckhouse Build log part 32 to follow..... Nils


- 222 replies
-
- 14
-
-
- gorch fock
- barque
- (and 2 more)
-
very nice words David, makes me feel good this morning, thank you Nils
-
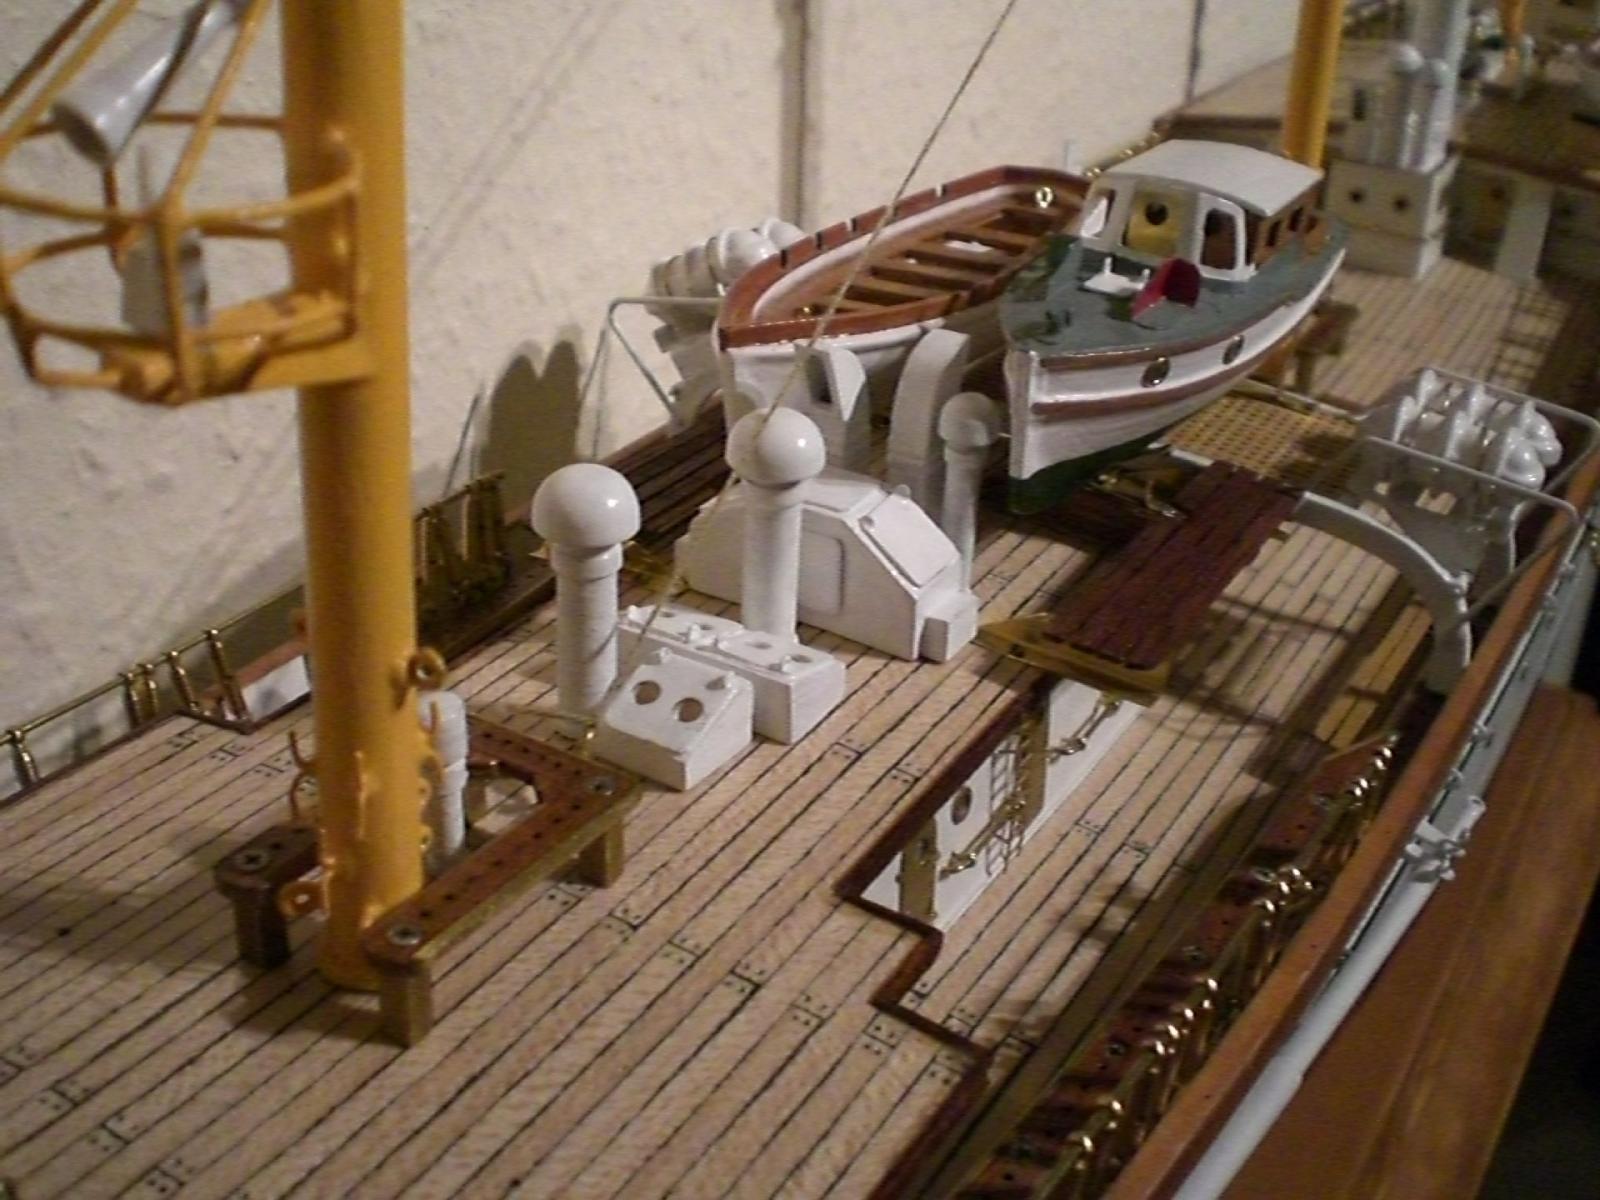
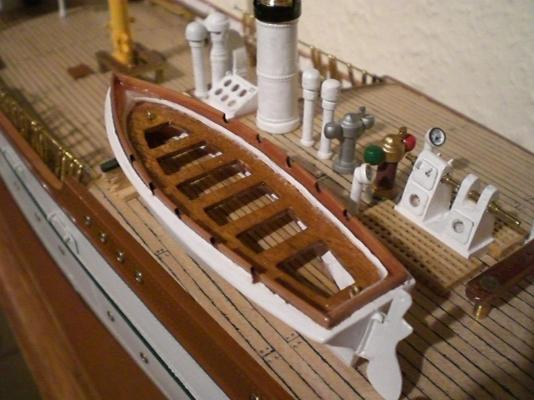
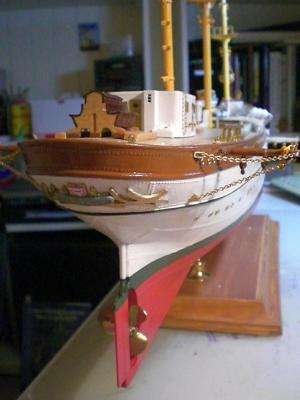
Build log part 30 check for cutter on the boats rack captain`s pinnace goes besides the cutter first deck Skylights.... Build log part 31 to follow.... Nils


- 222 replies
-
- 8
-
-
- gorch fock
- barque
- (and 2 more)
-
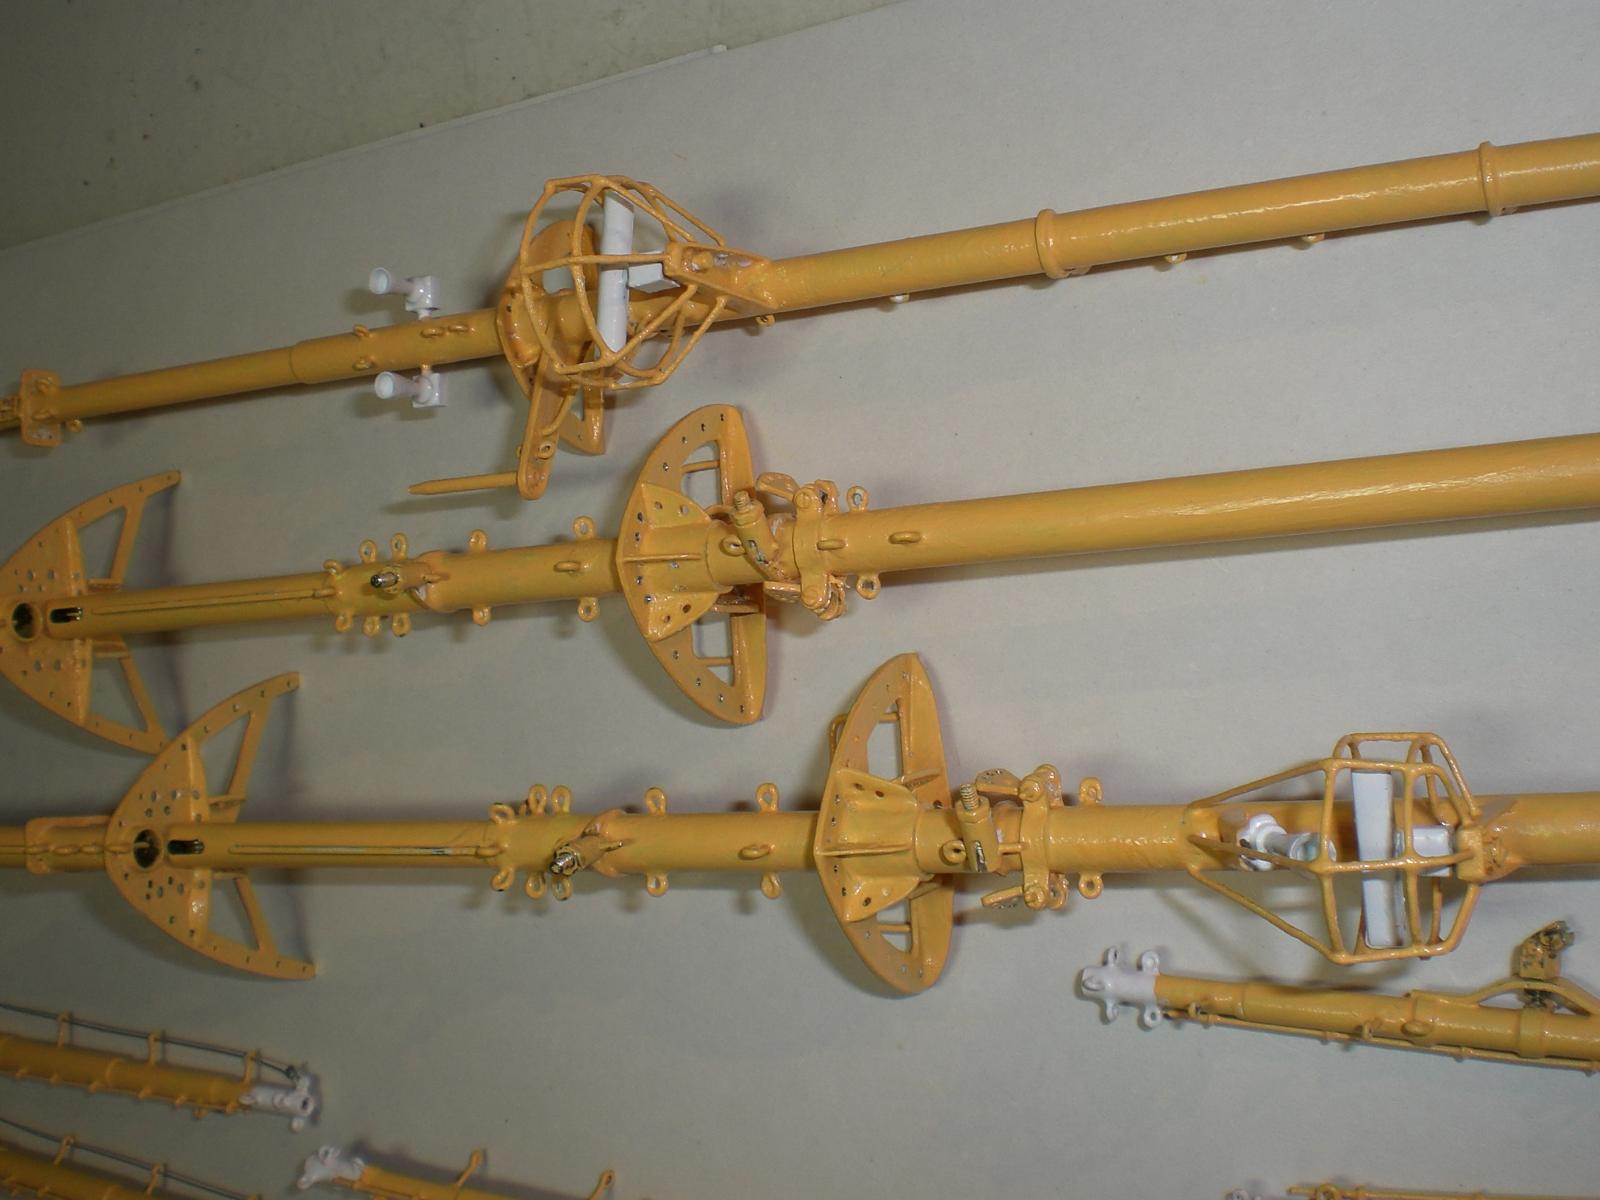
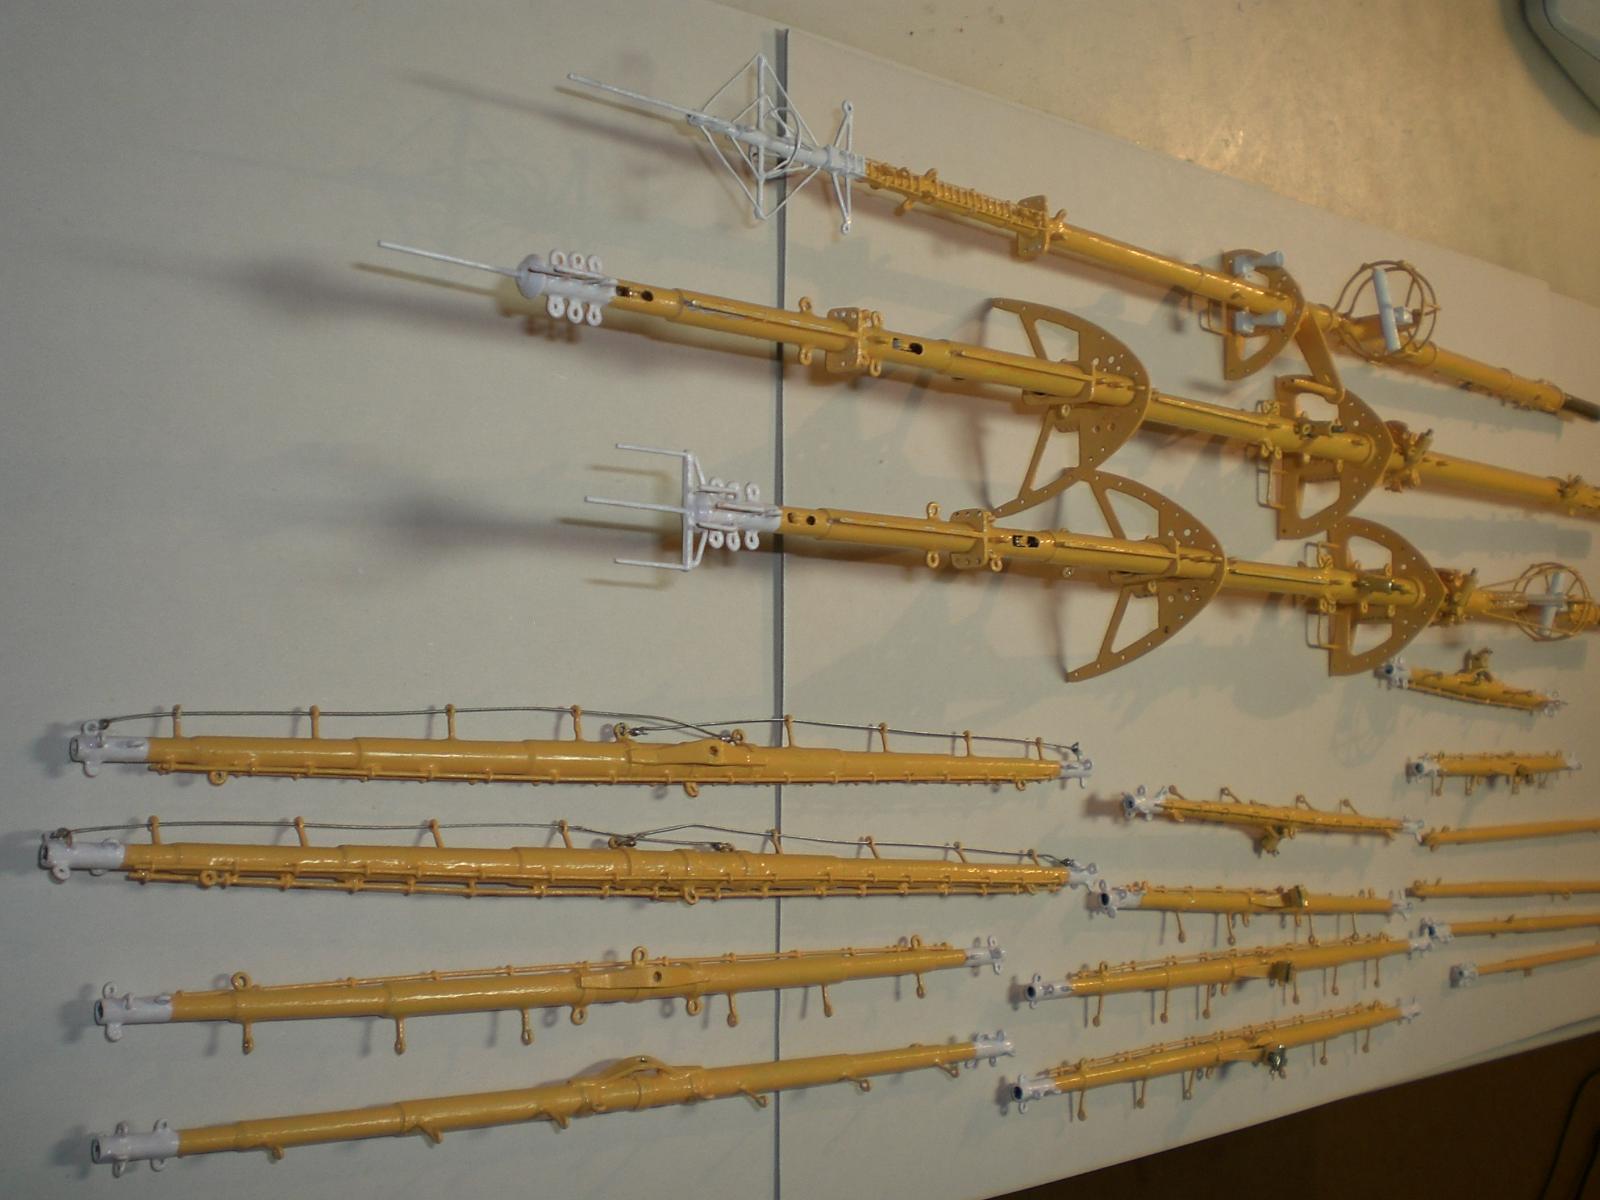
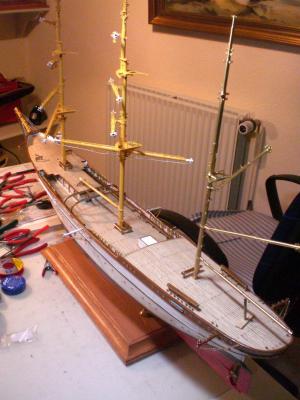
Build log part 29 decks ready for Fitting out Stern and bow of hull so far done checking backstays alignment with regular Cotton thread strings first set of masts and Yards painted Build log part 30 to follow.... Nils


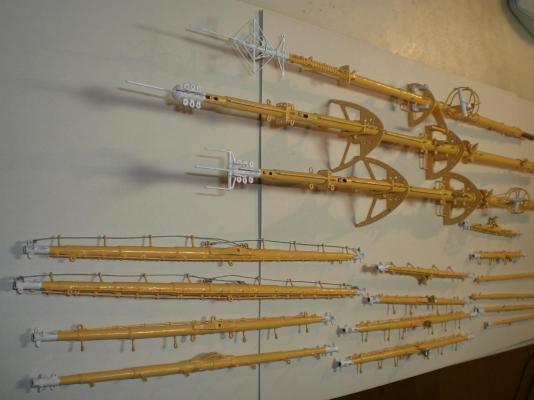
- 222 replies
-
- 6
-
-
- gorch fock
- barque
- (and 2 more)
-
Thanks Popeye, your comment is well appreciated Nils