HOLIDAY DONATION DRIVE - SUPPORT MSW - DO YOUR PART TO KEEP THIS GREAT FORUM GOING! (89 donations so far out of 49,000 members - C'mon guys!)
×


Mirabell61
-
Posts
7,409 -
Joined
-
Last visited
Content Type
Profiles
Forums
Gallery
Events
Everything posted by Mirabell61
-
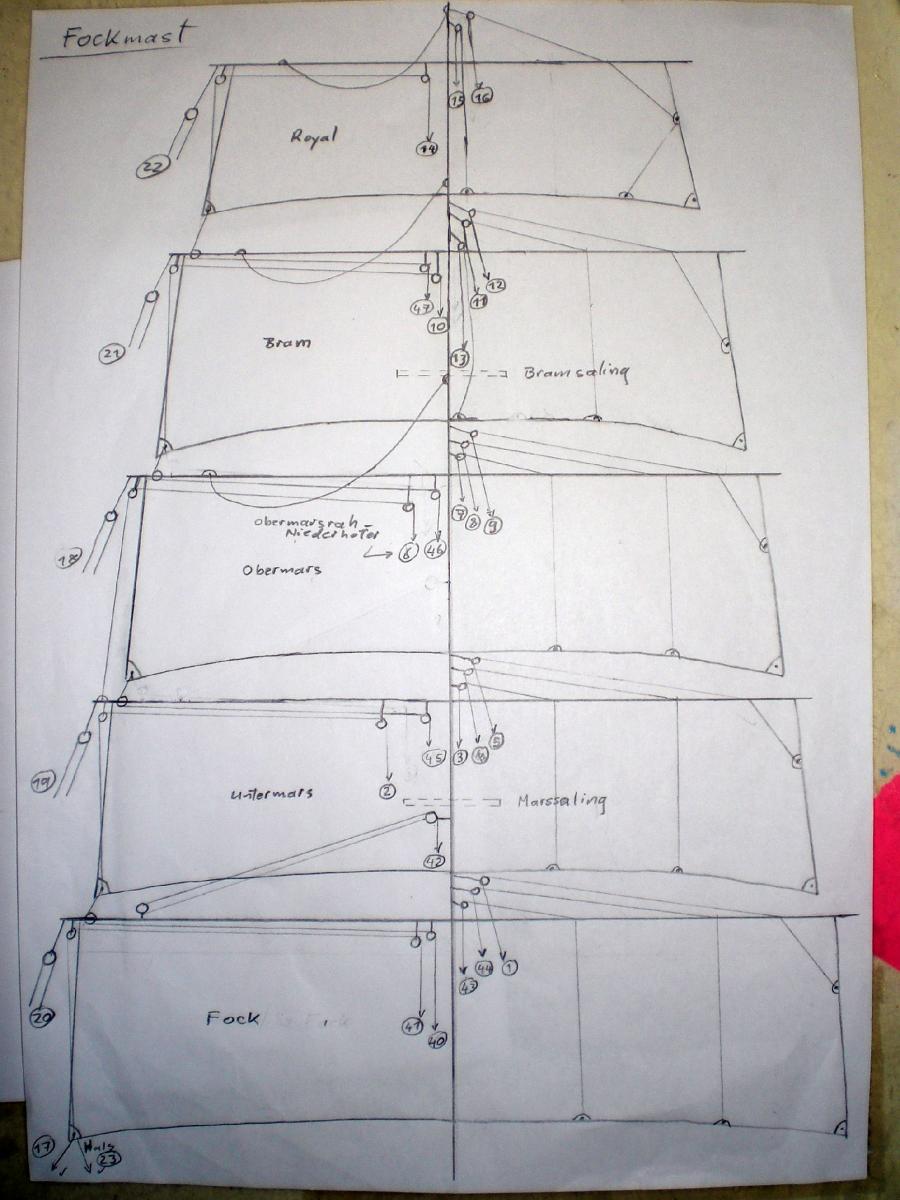
 Build log part 19 scetche for rigging mainmast and for foremast scetch for Yard (one of many) impressions for masts and Yards after painting Build log part 20 to follow.... Nils


- 222 replies
-
- 7
-

-
- gorch fock
- barque
- (and 2 more)
-
Lou, fortunately having a digital camera at Hand for some years already, it was possible to document the building sequences for three ships one by one, and this long before I knew of this MSW Forum. Now I am very happy to share my experience with others, before the pics lay idle in the files "drawers" of my PC. Nils
-
Hi Fabius, Looks like greater experimental toxic mixes you are composing. I can firmly feel the toxic vapours coming in my nose as I read your lines. But it Looks great. Trust you shall be using all necessary protection measures for your health and safety. The more I read and see about oxidizing the copper the more I am thinking about doing so on my Pegasus hull as well. It provides that nice dry dock hull apeal after serving several years in the salty ocean Nils
-
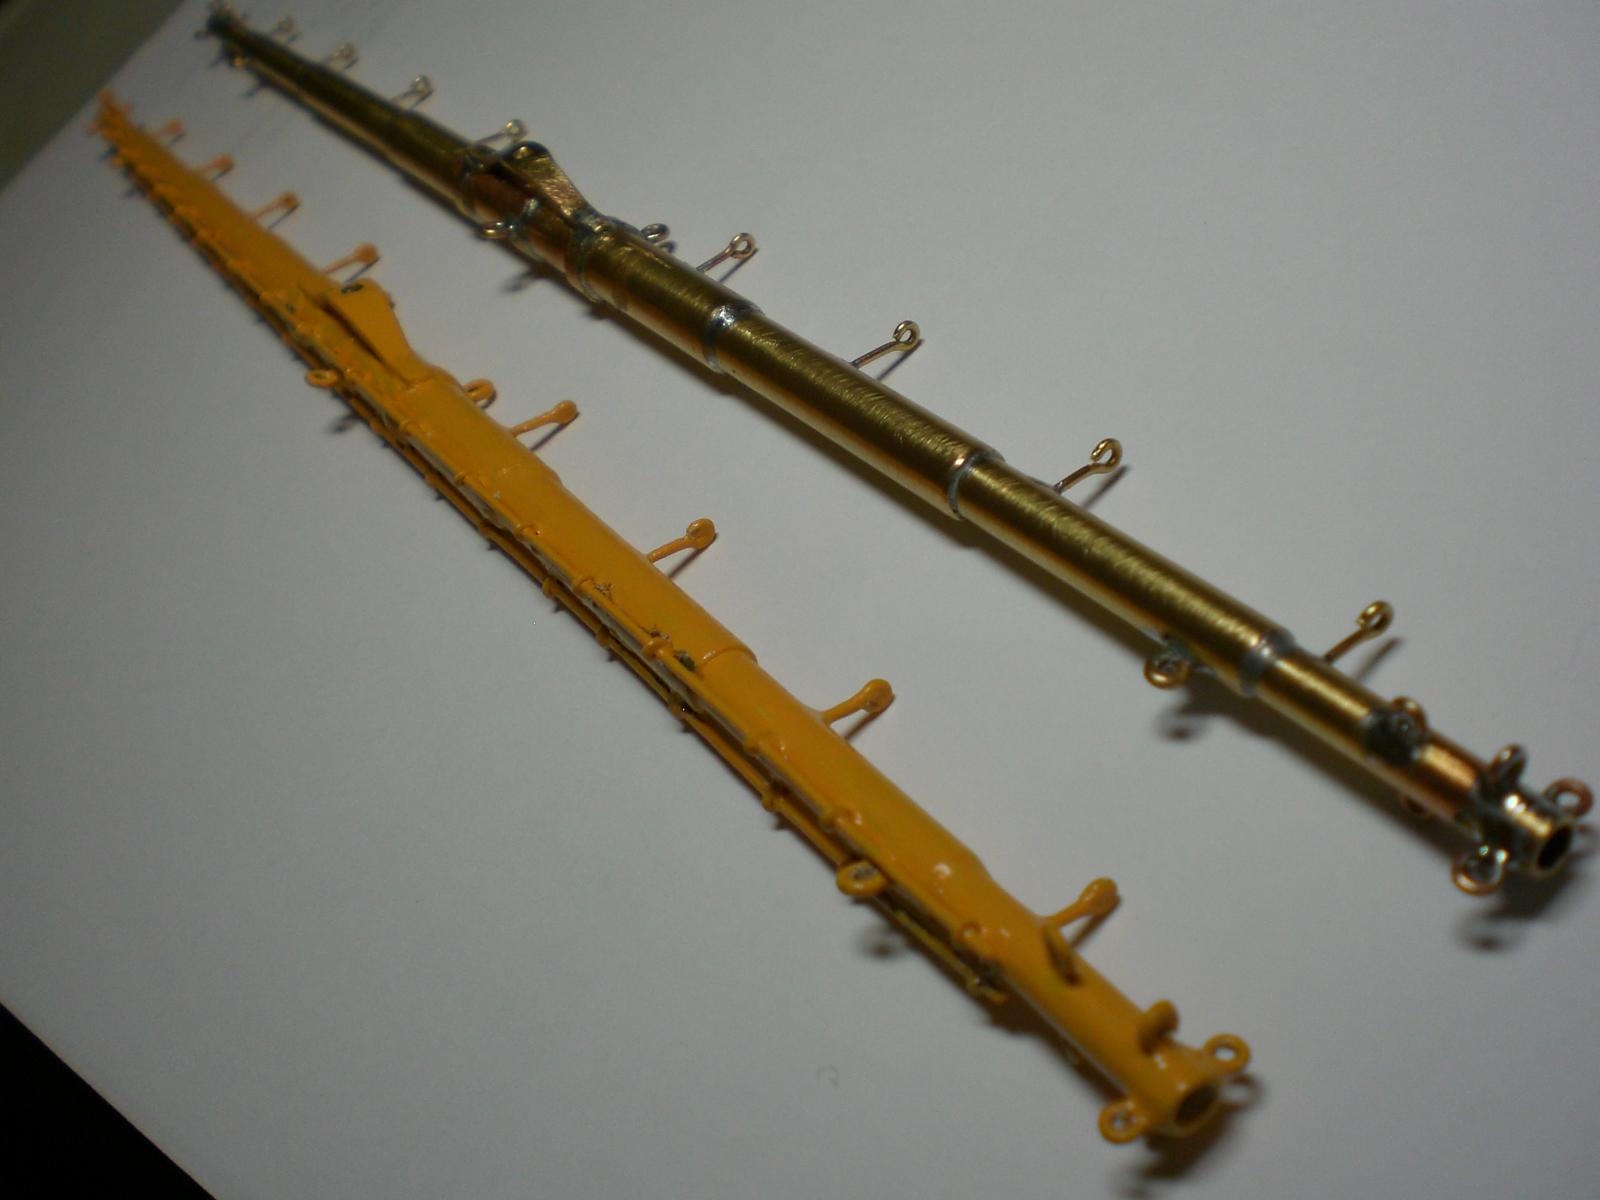
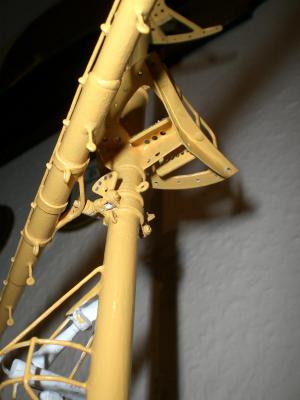
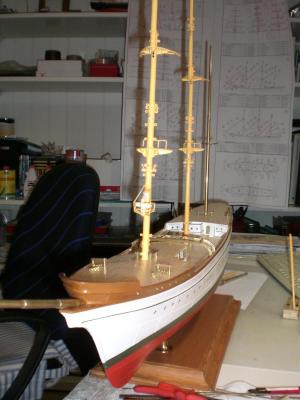
David, the masts,yards gaff booms, and jib boom after cleaning and primering are painted with water soluble acrylic Basis paint (Color RAL 1017 Safran yellow), the parts get White tipped Ends Nils
-
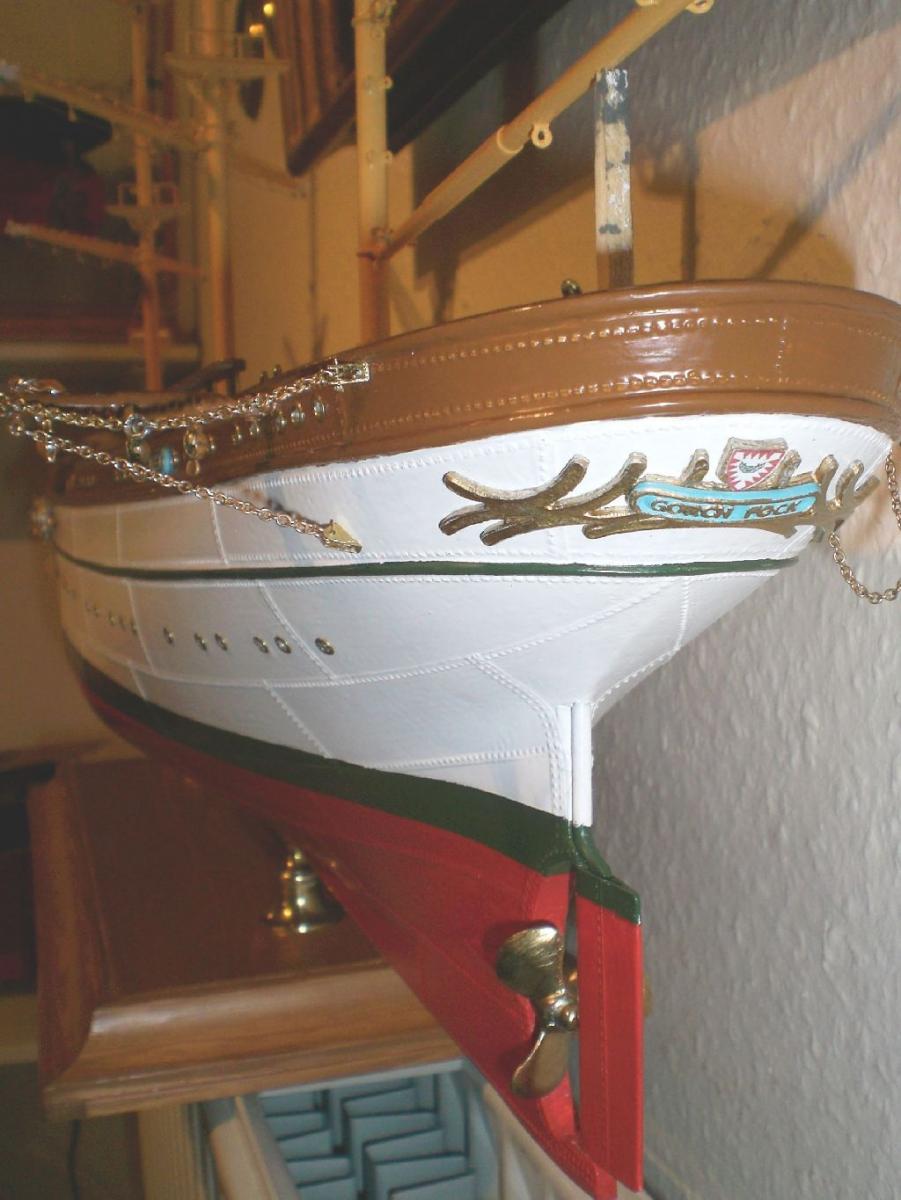
very nicely built ship Martin, I love your Detail to the rigging, Looks great. Hope that you have received your rudder pedestals by now, would like to see them mounted.... Nils
- 104 replies
-
- 1
-
-
- rattlesnake
- mamoli
- (and 1 more)
-
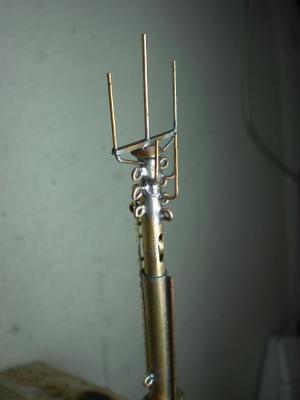
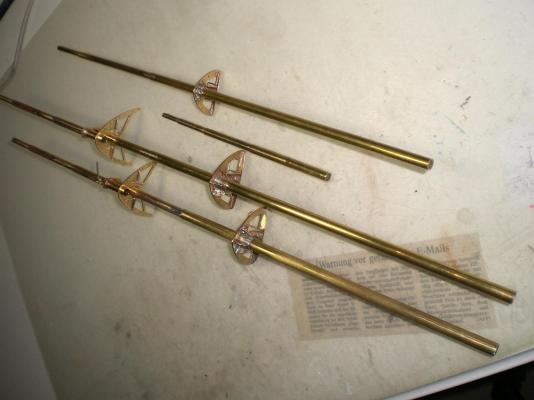
Build log part 18 foremast one of the two main lower Yards with twinjackstays attached Yard mounted to its place Stern decoration with nameplate, and hometown badge (Kiel) Build log part 19 to follow.... Nils


- 222 replies
-
- 10
-
-
- gorch fock
- barque
- (and 2 more)
-
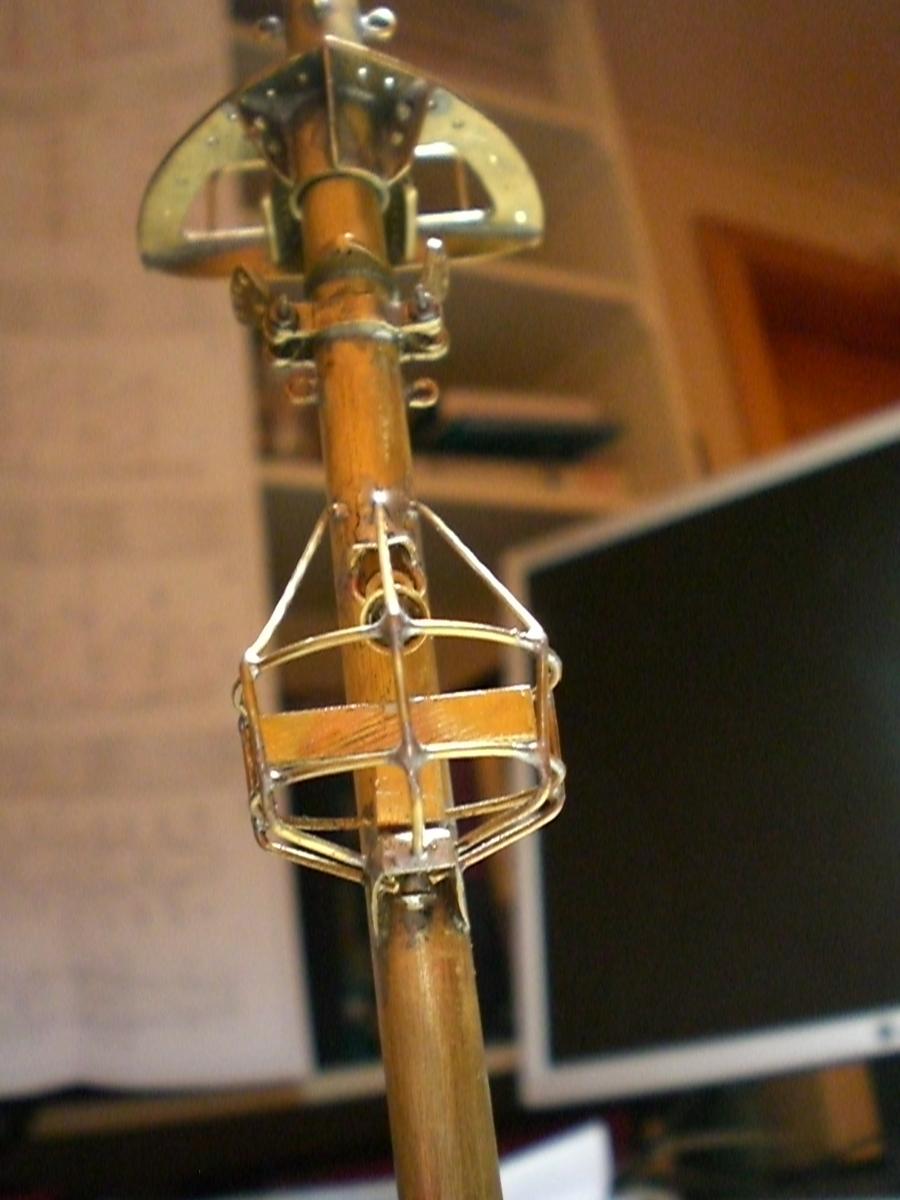
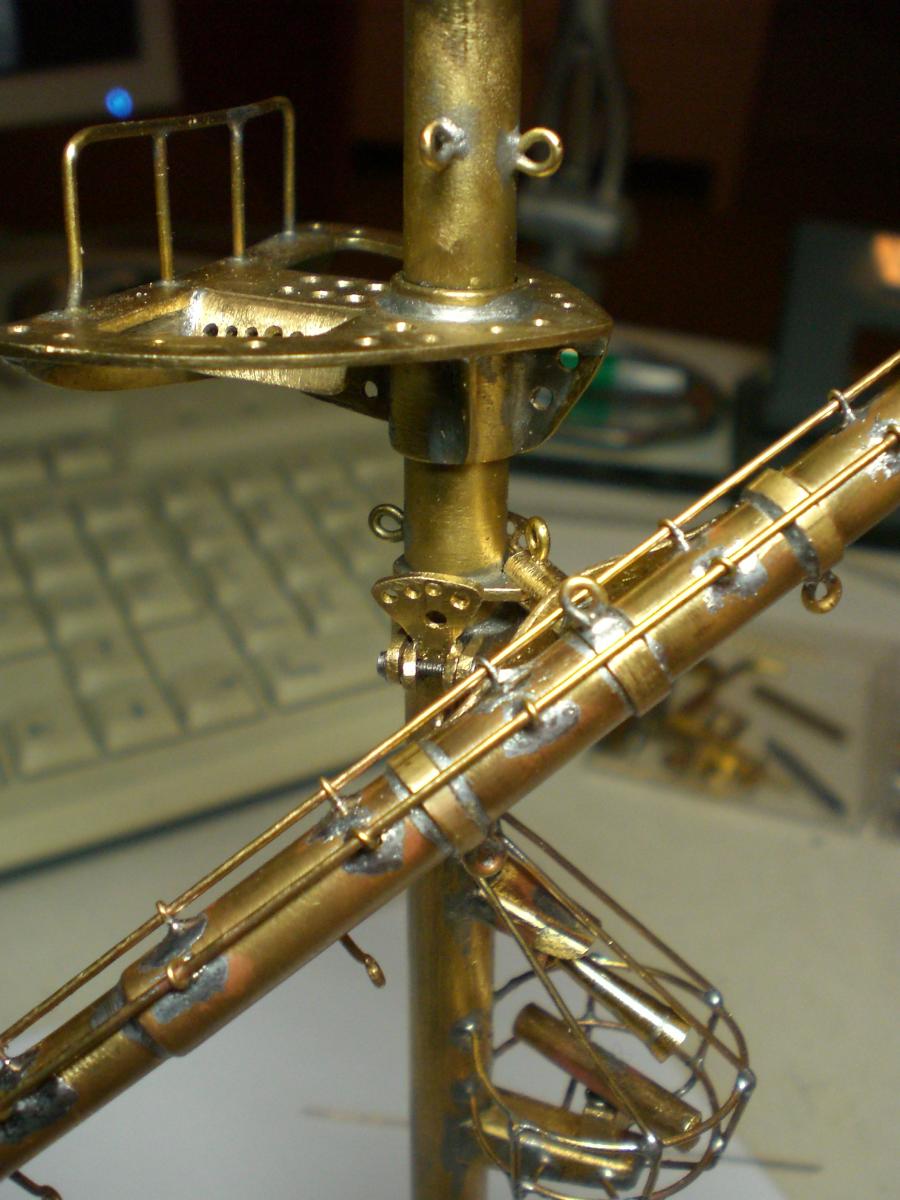
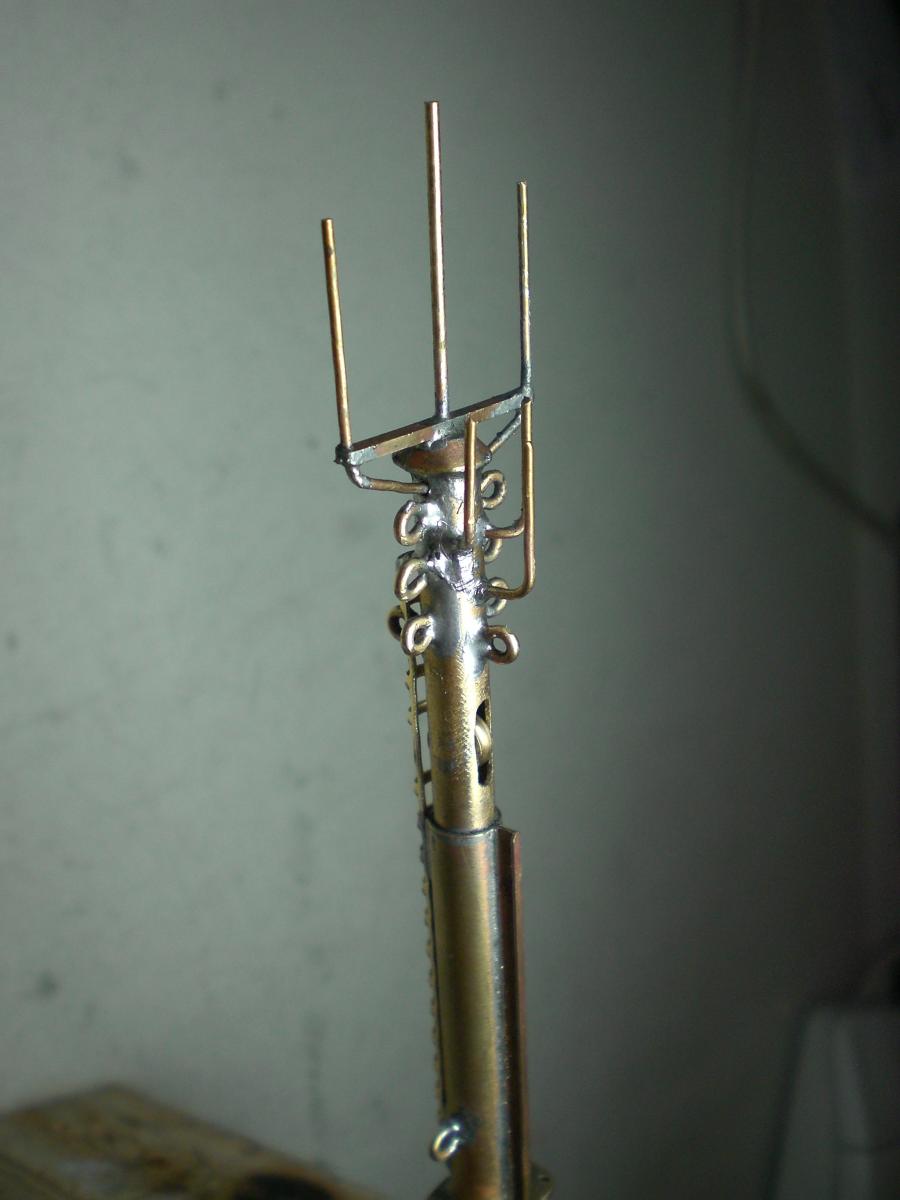
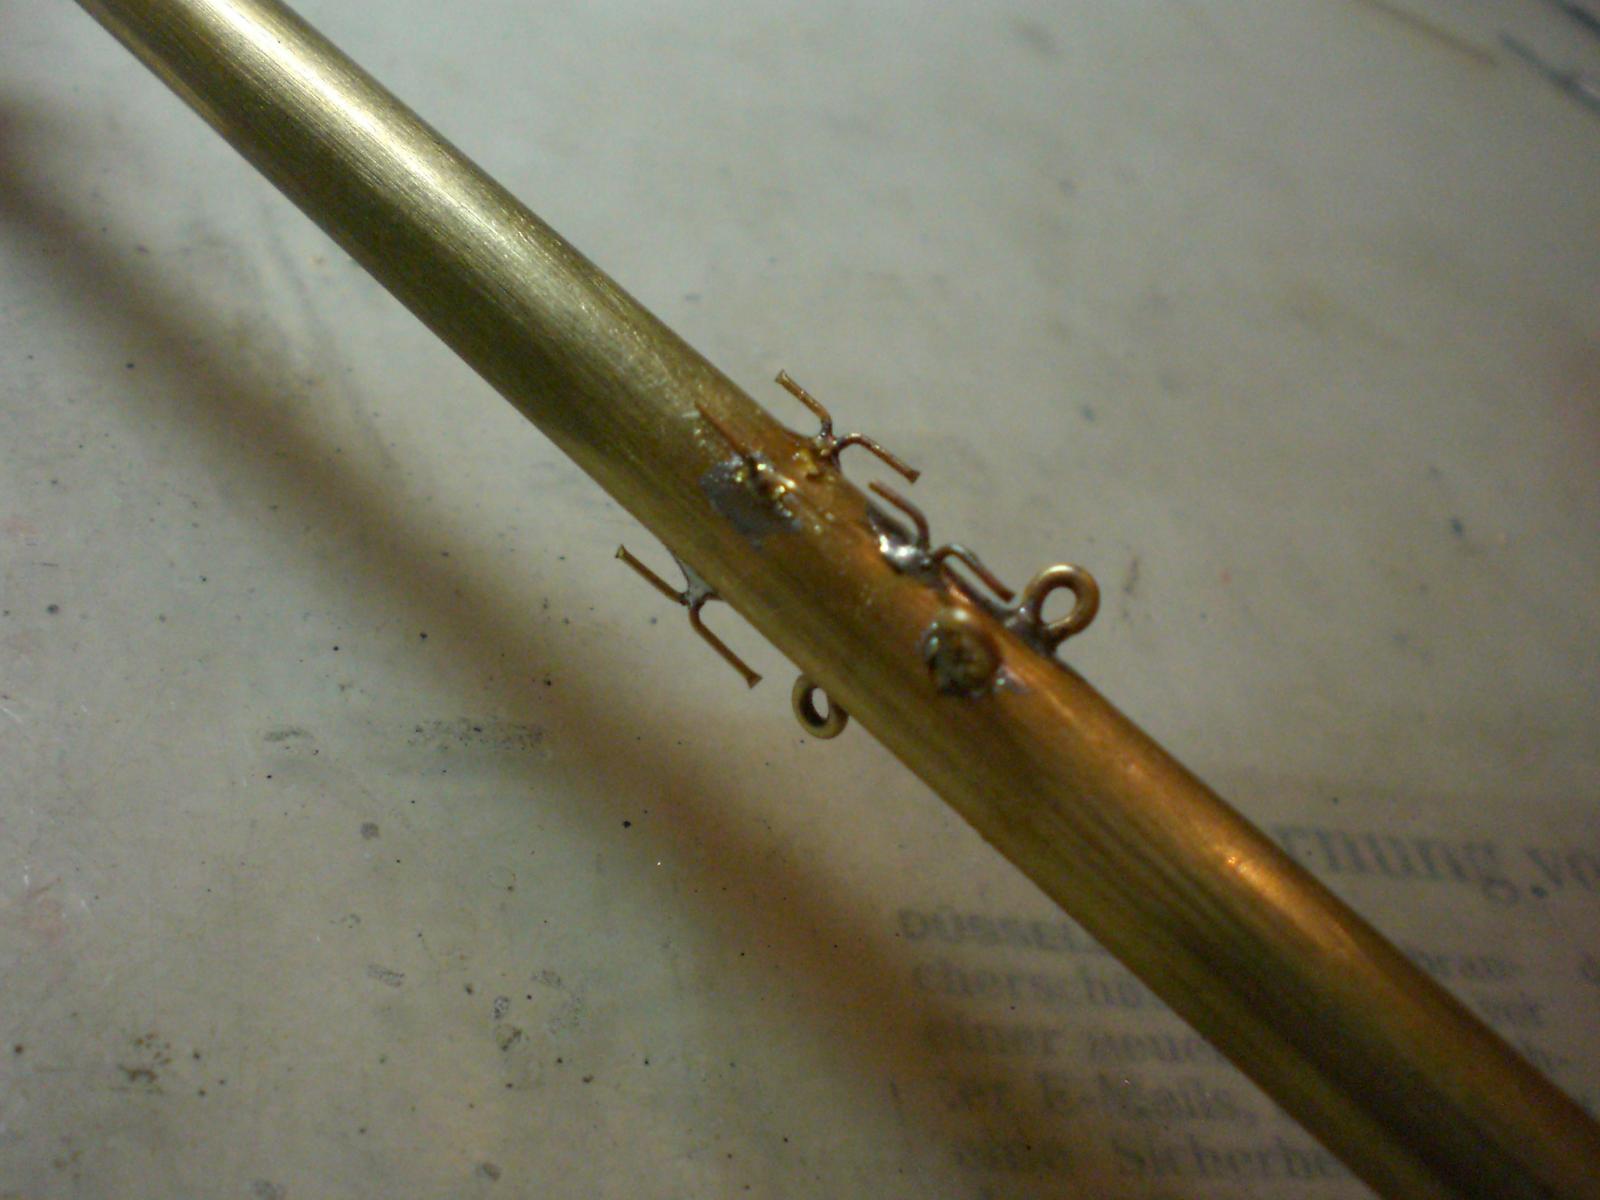
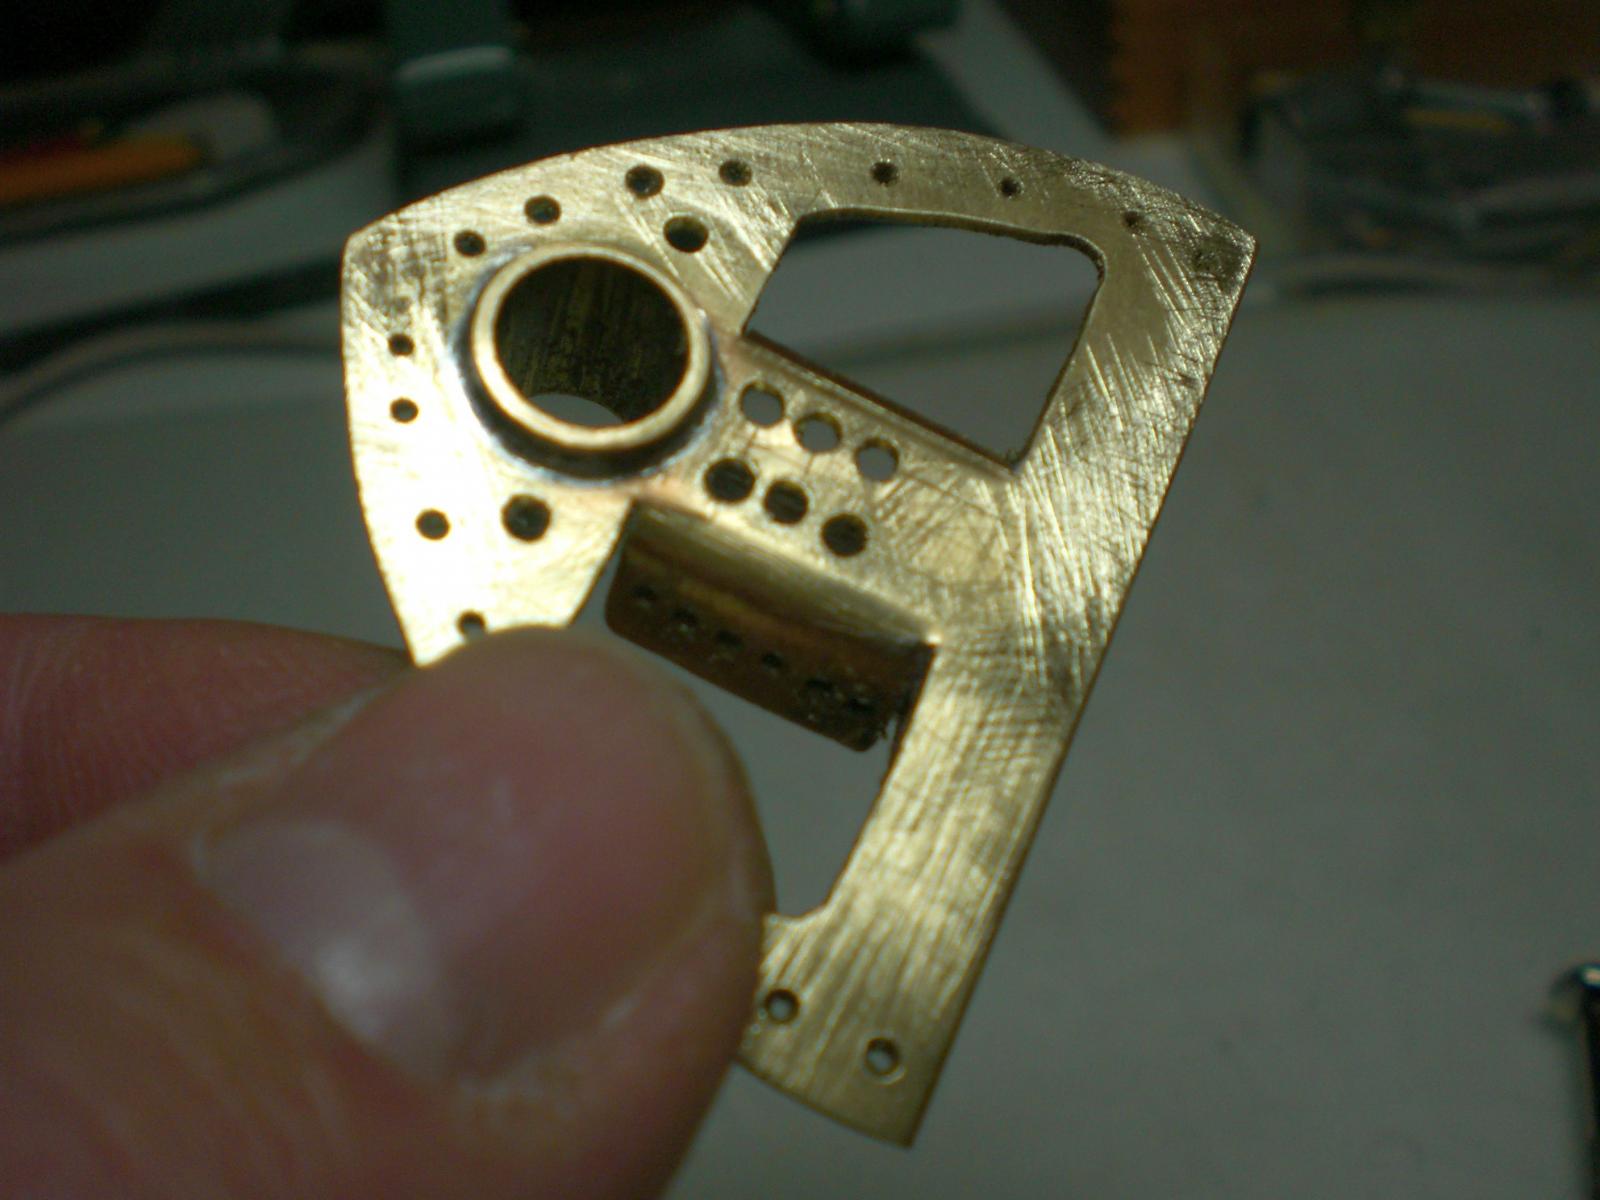
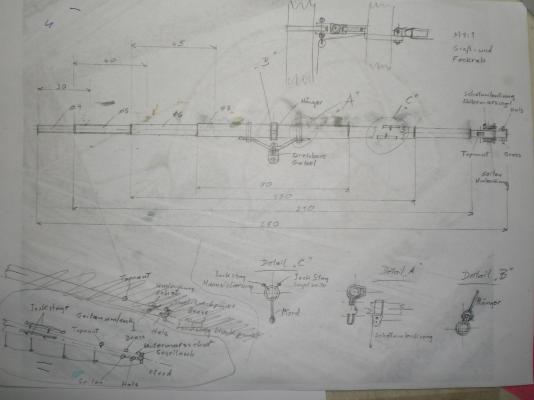
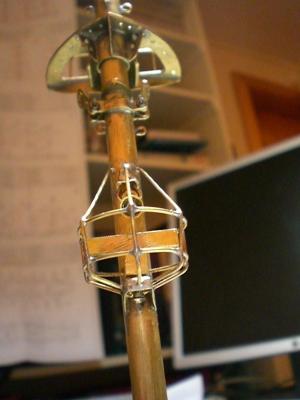
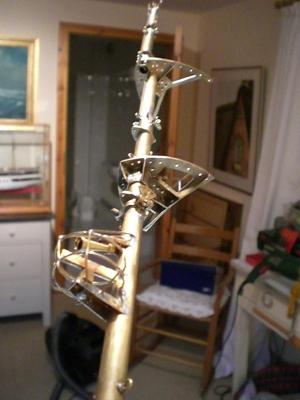
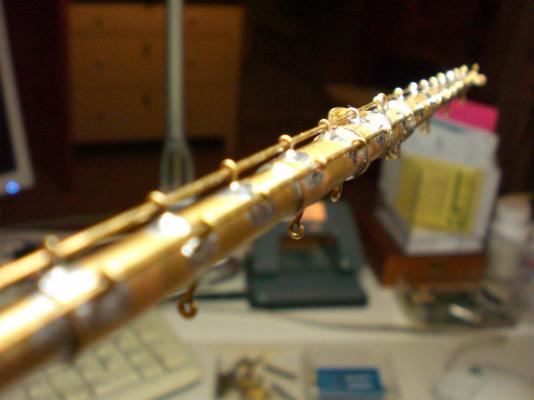
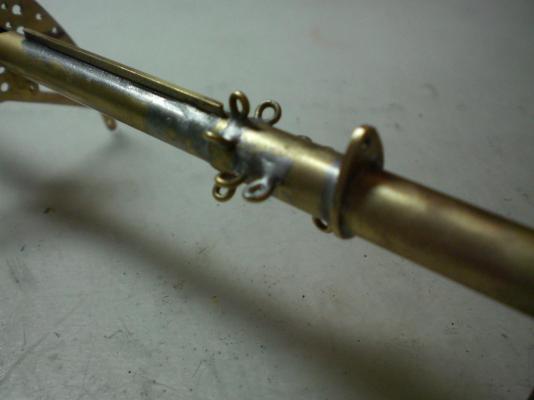
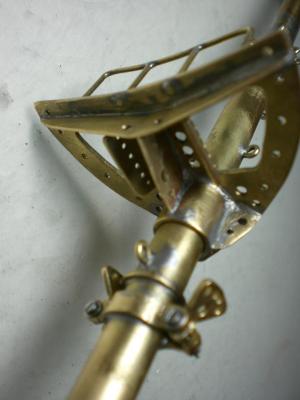
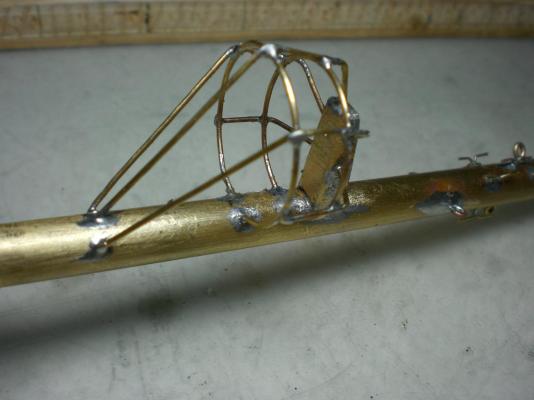
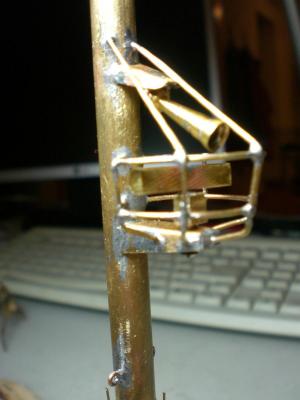
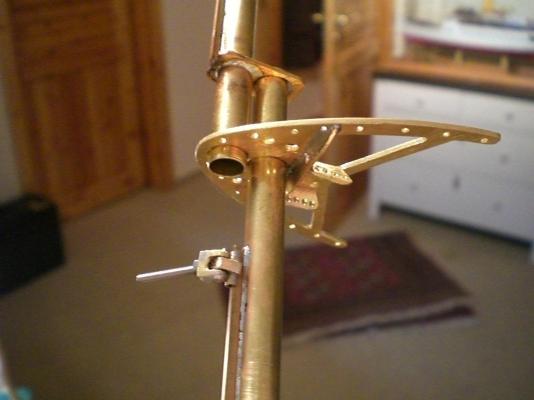
Build log part 17 getting all the eyelets soldered on stations for hight-fixed and vertical-moveable yards underside of topgallant platform masttop and slide rail for royal-yard underside of lower top platform Radar Station protection Cage on foremast fog horn within protection as well Build log part 18 to follow.... Nils


- 222 replies
-
- 9
-
-
- gorch fock
- barque
- (and 2 more)
-
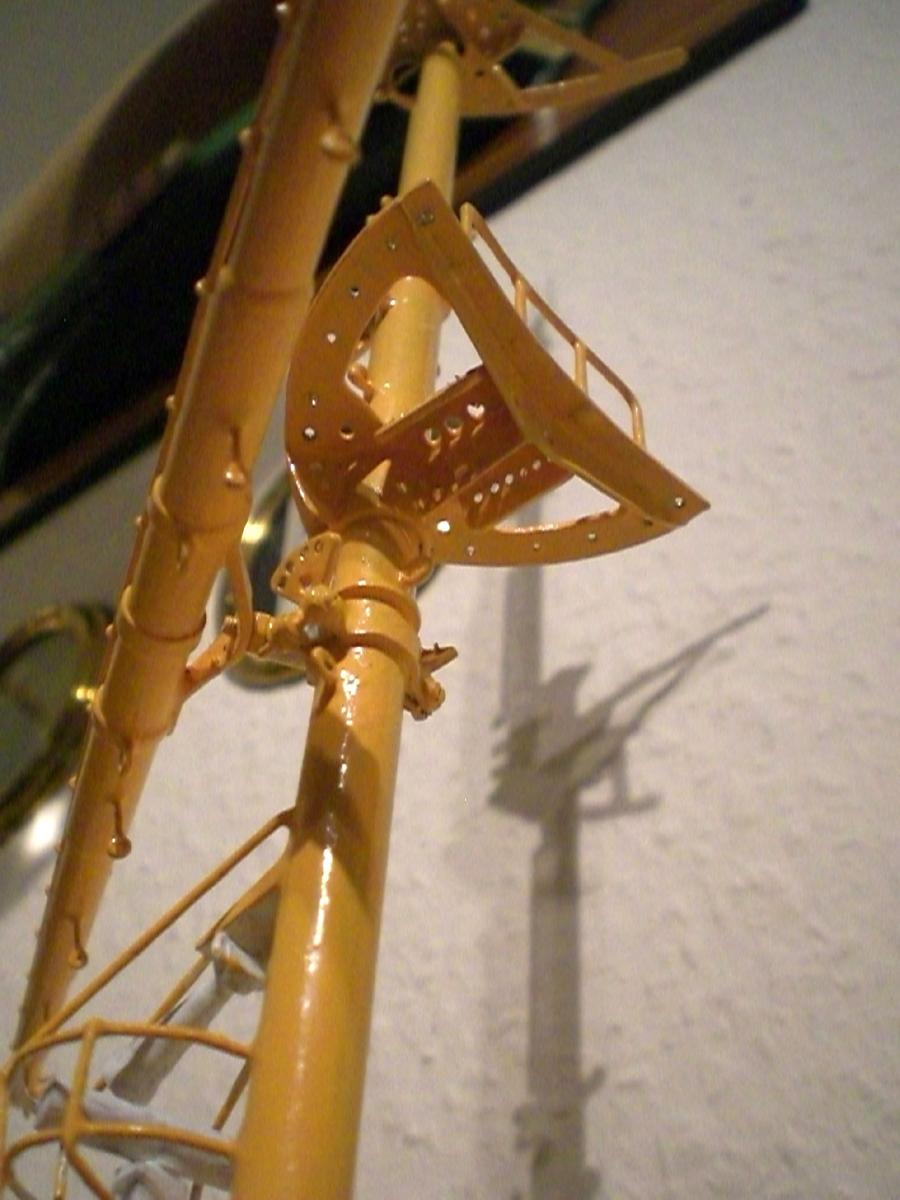
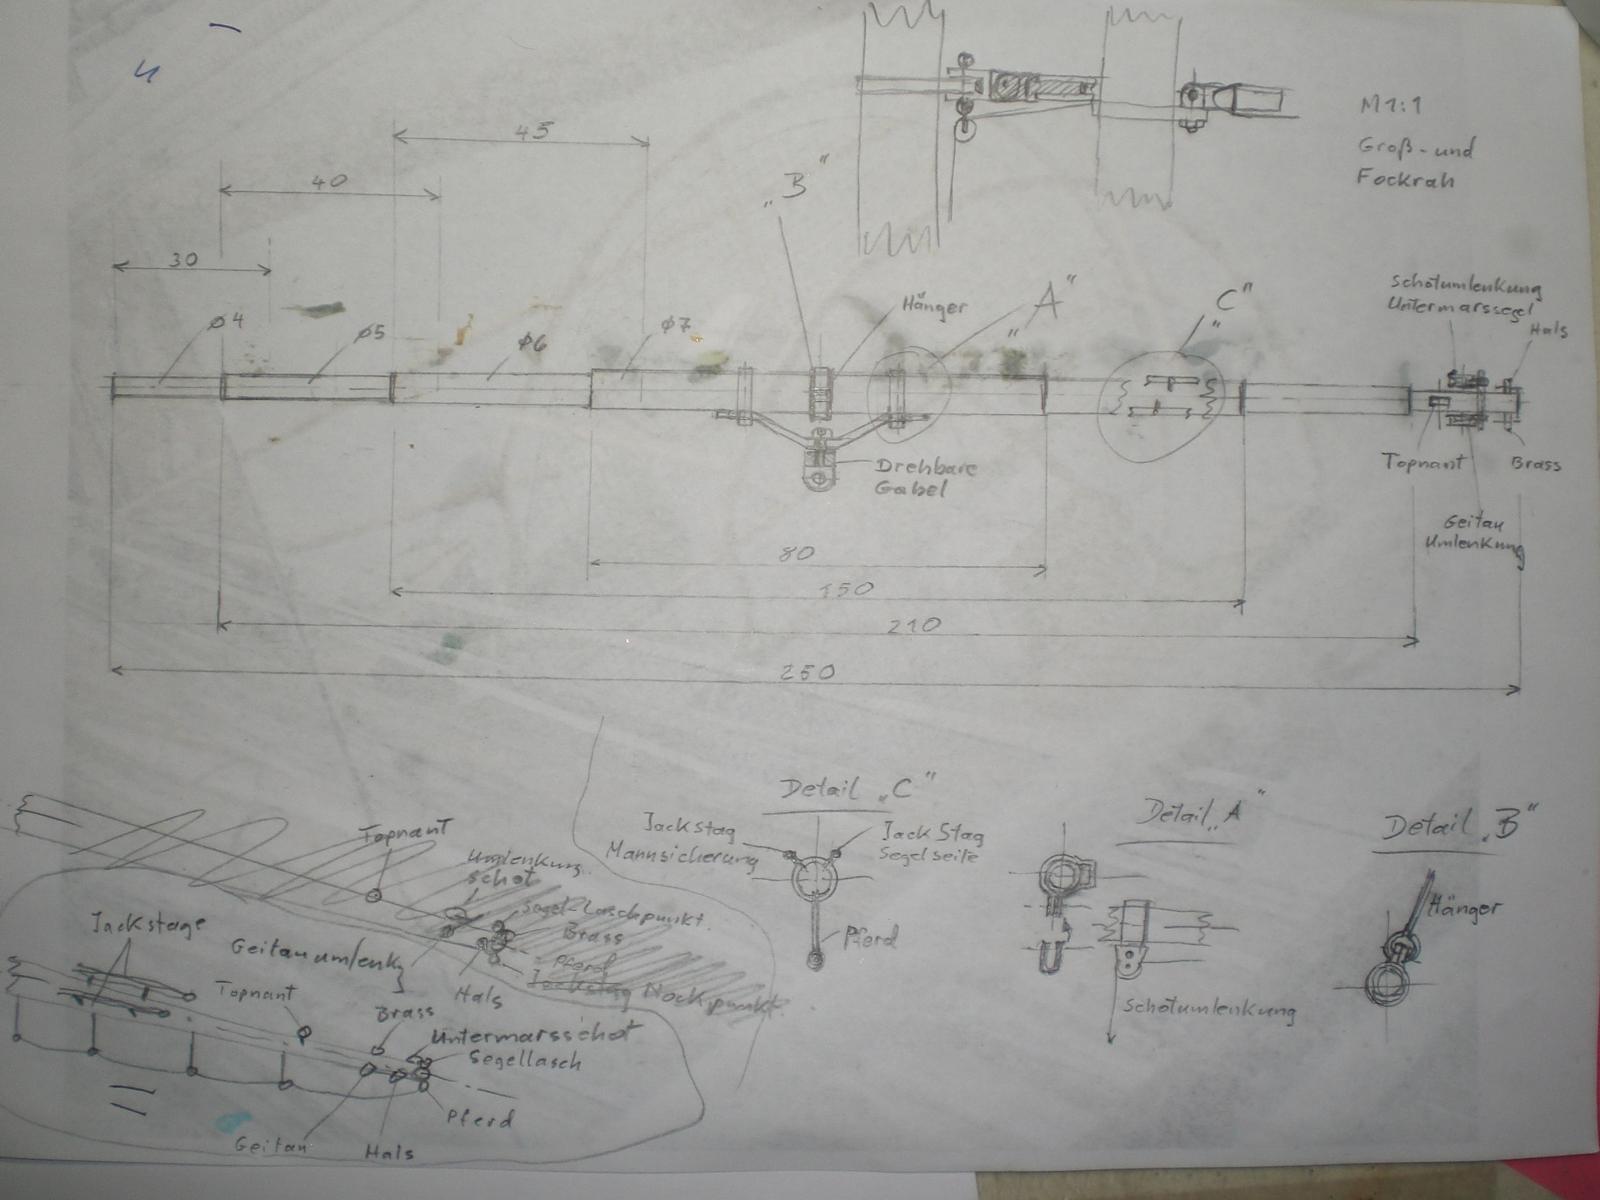
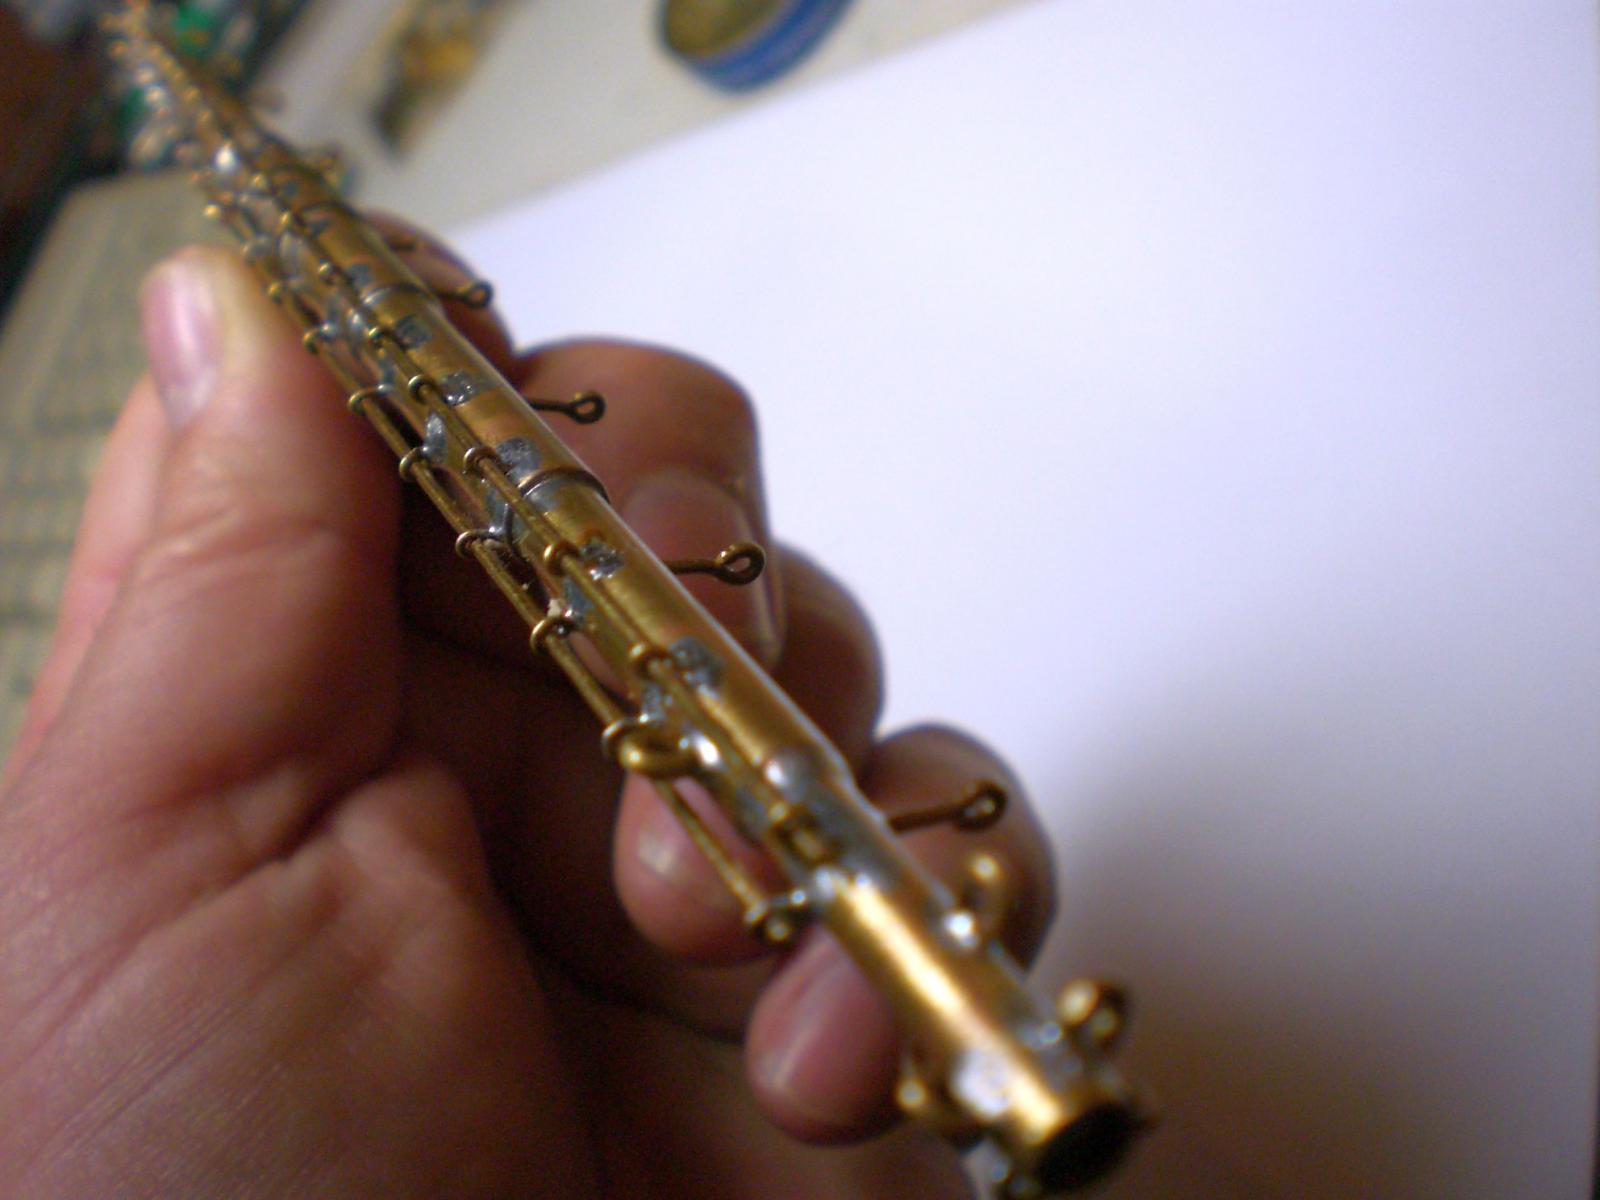
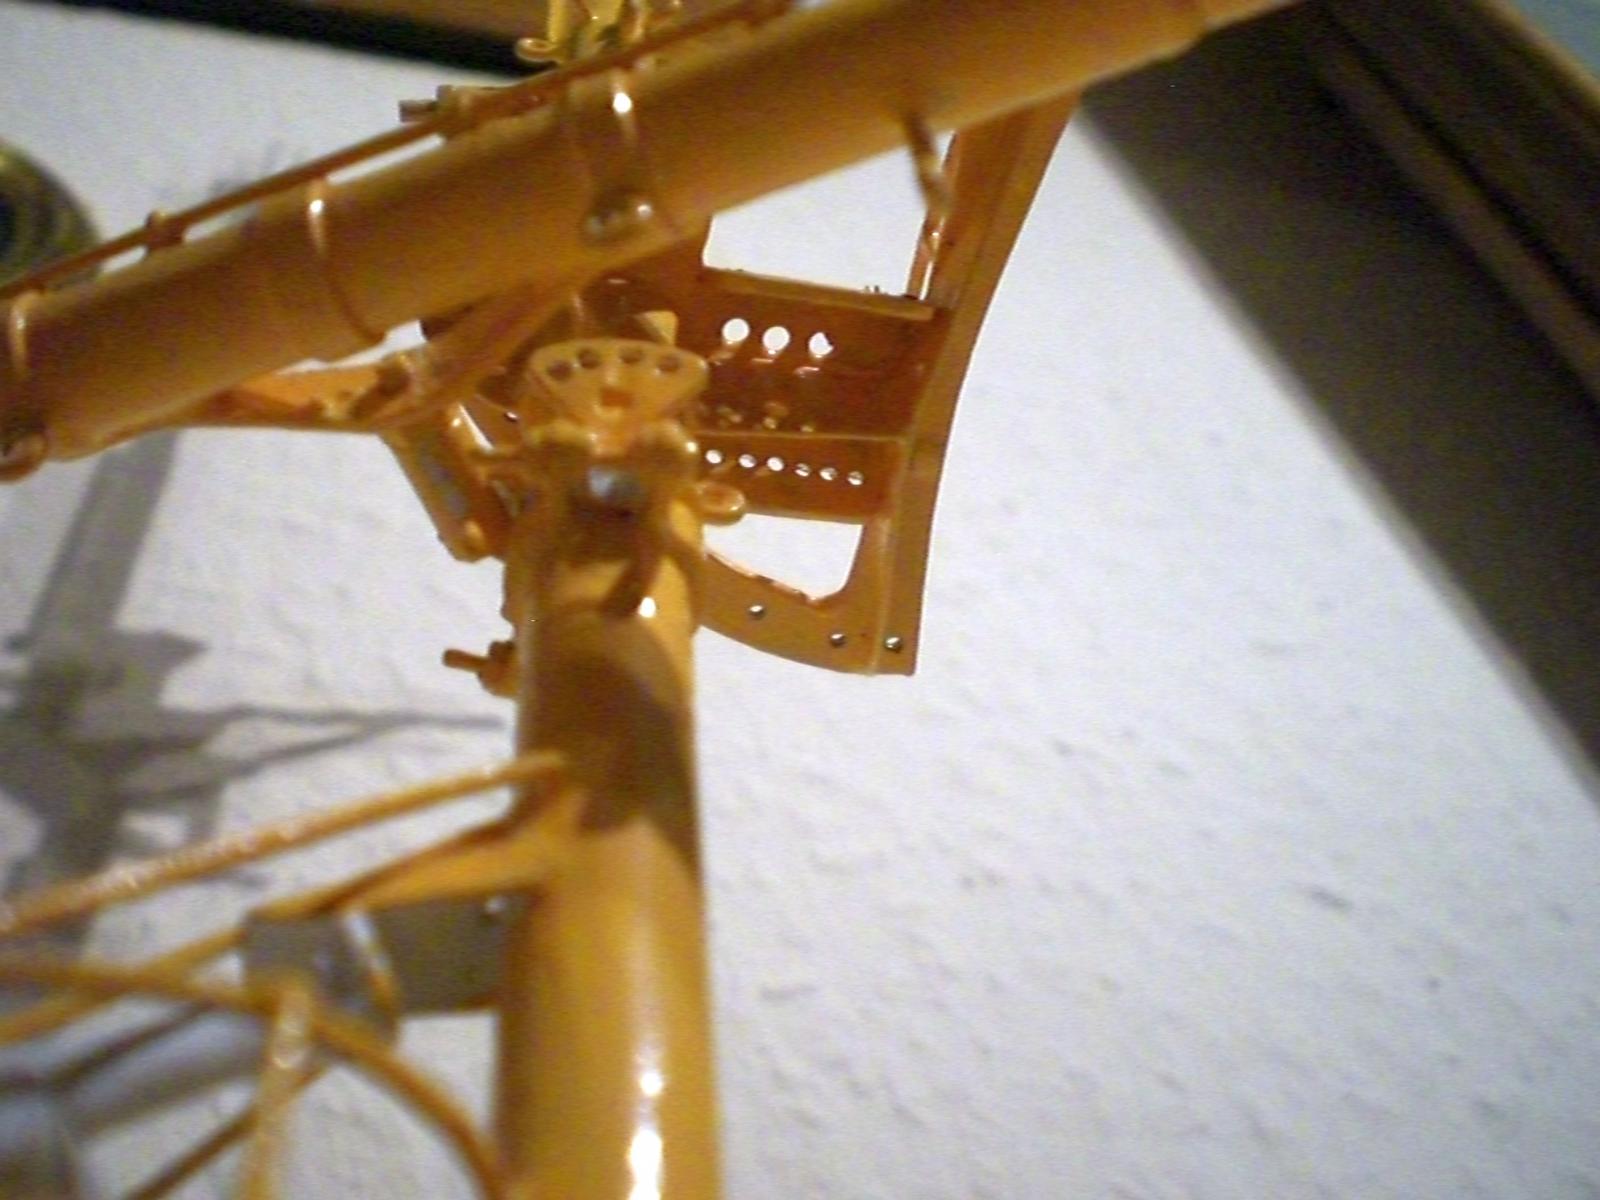
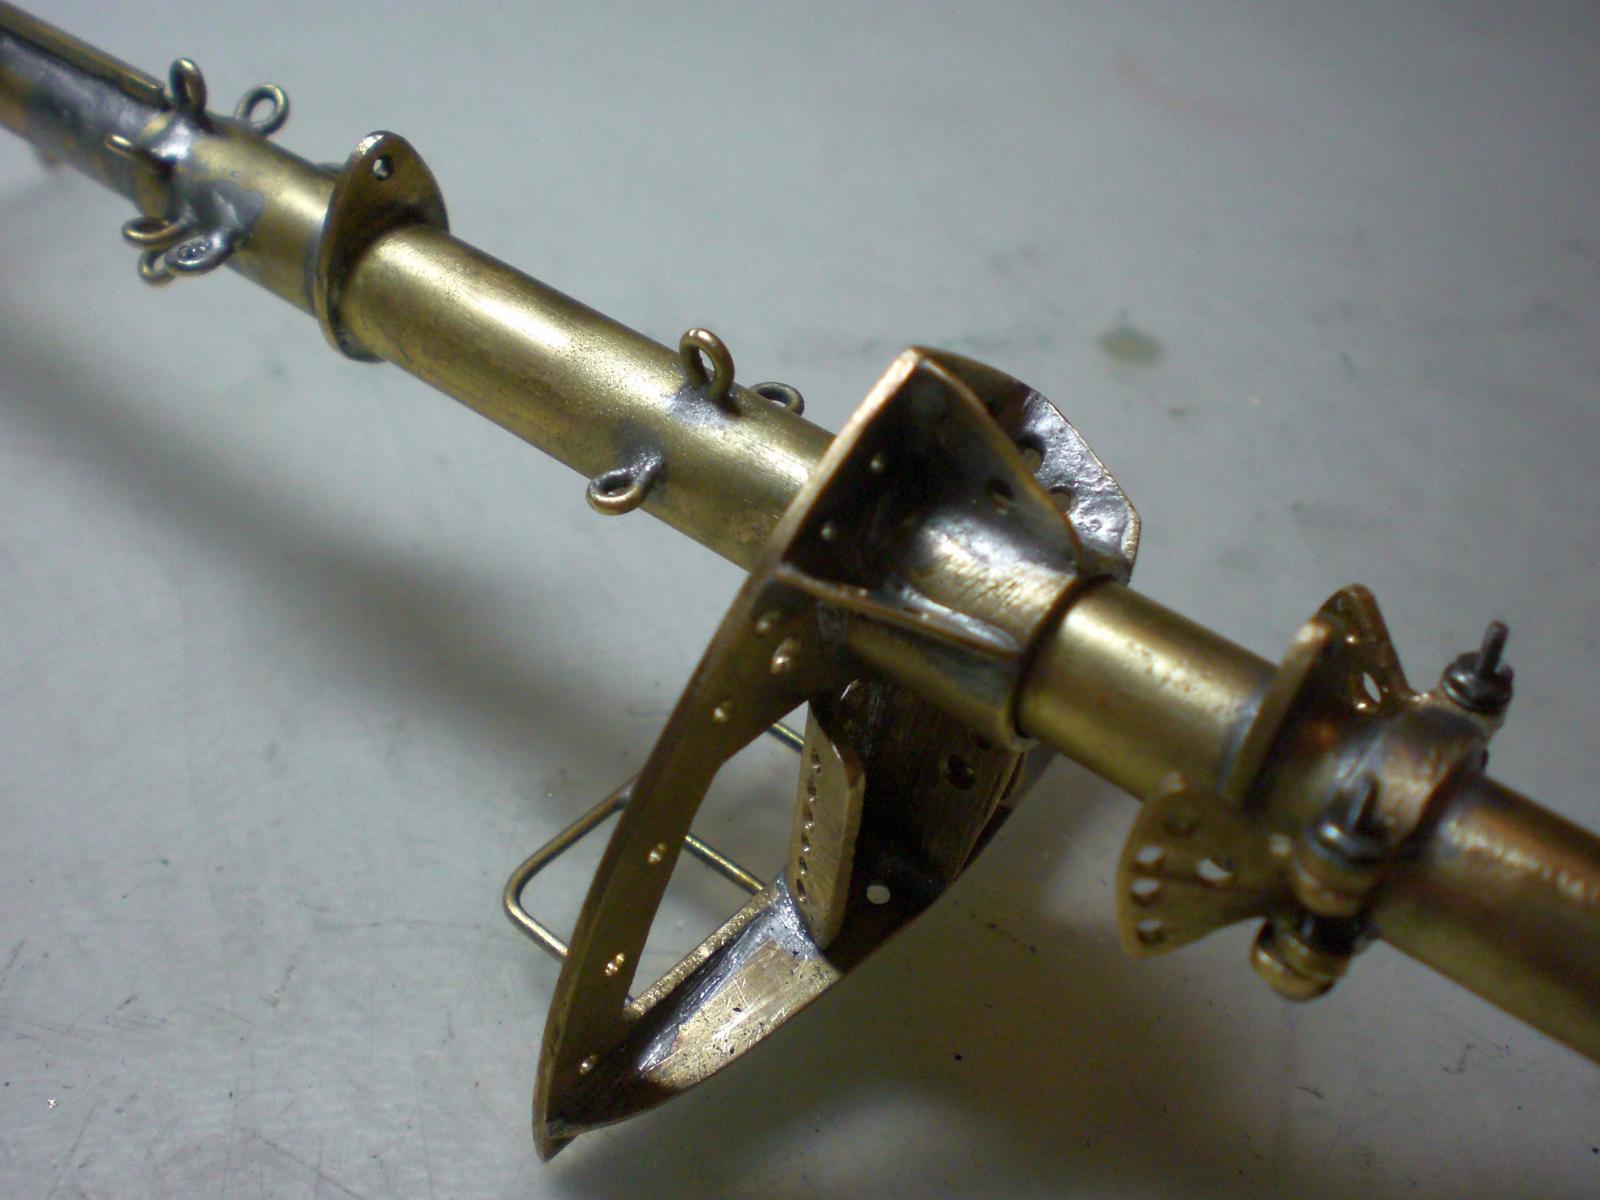
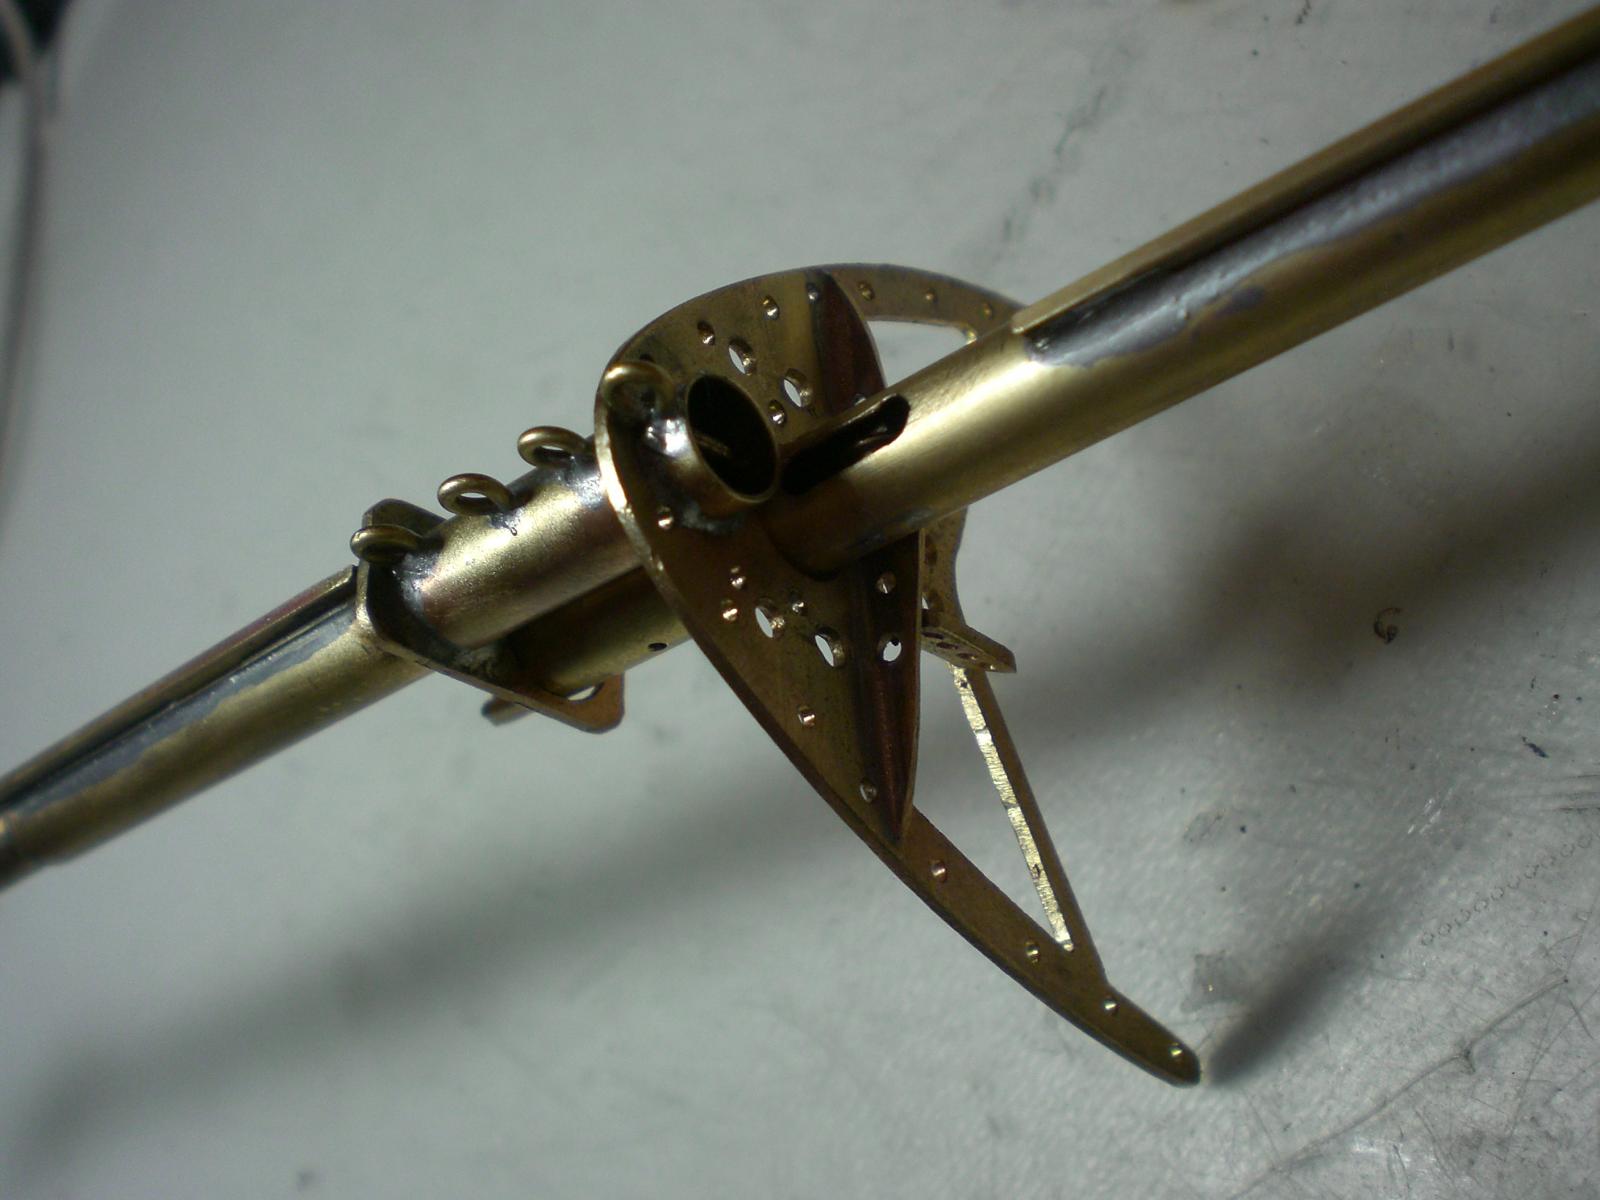
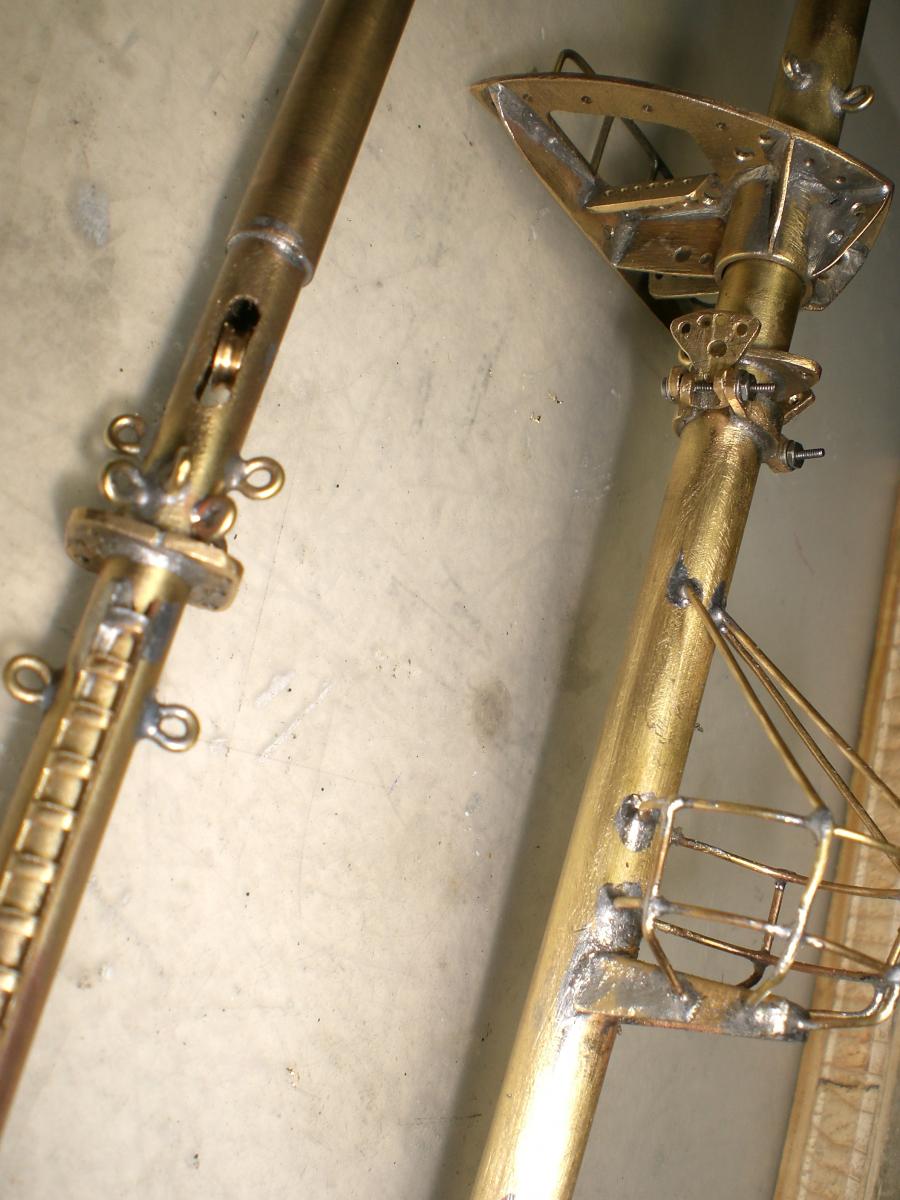
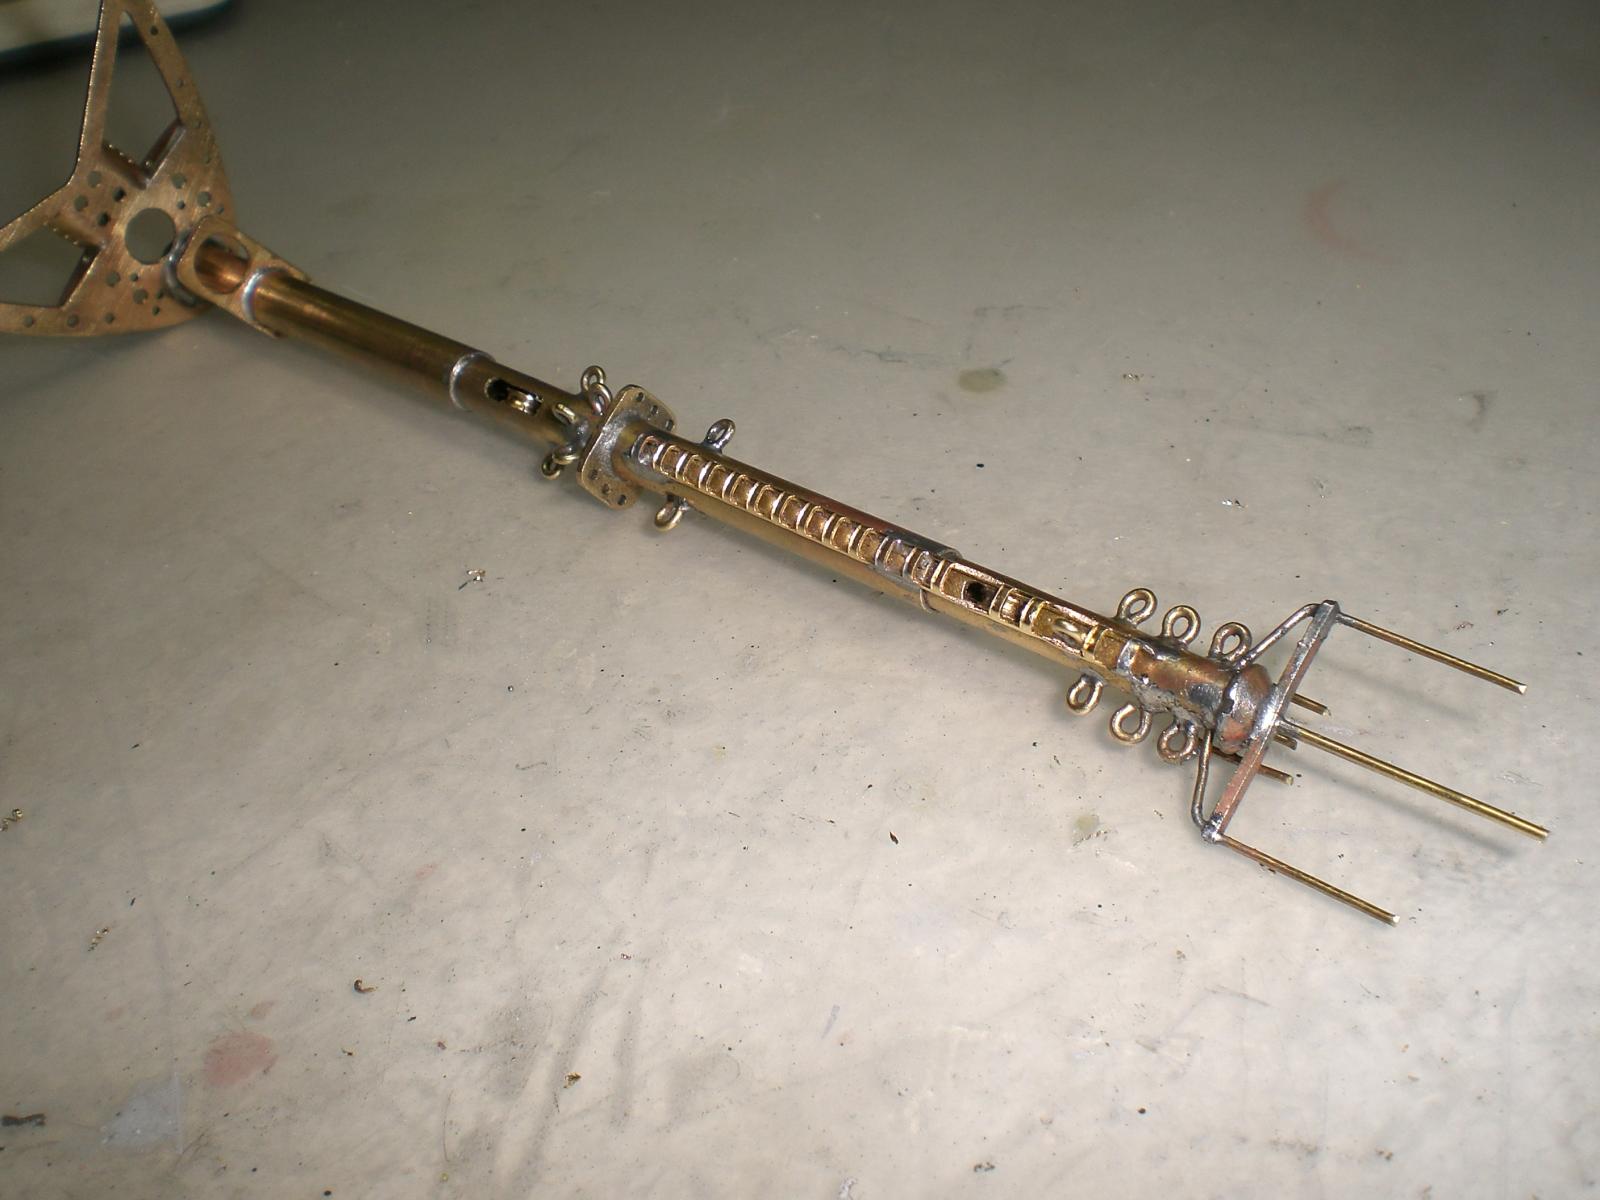
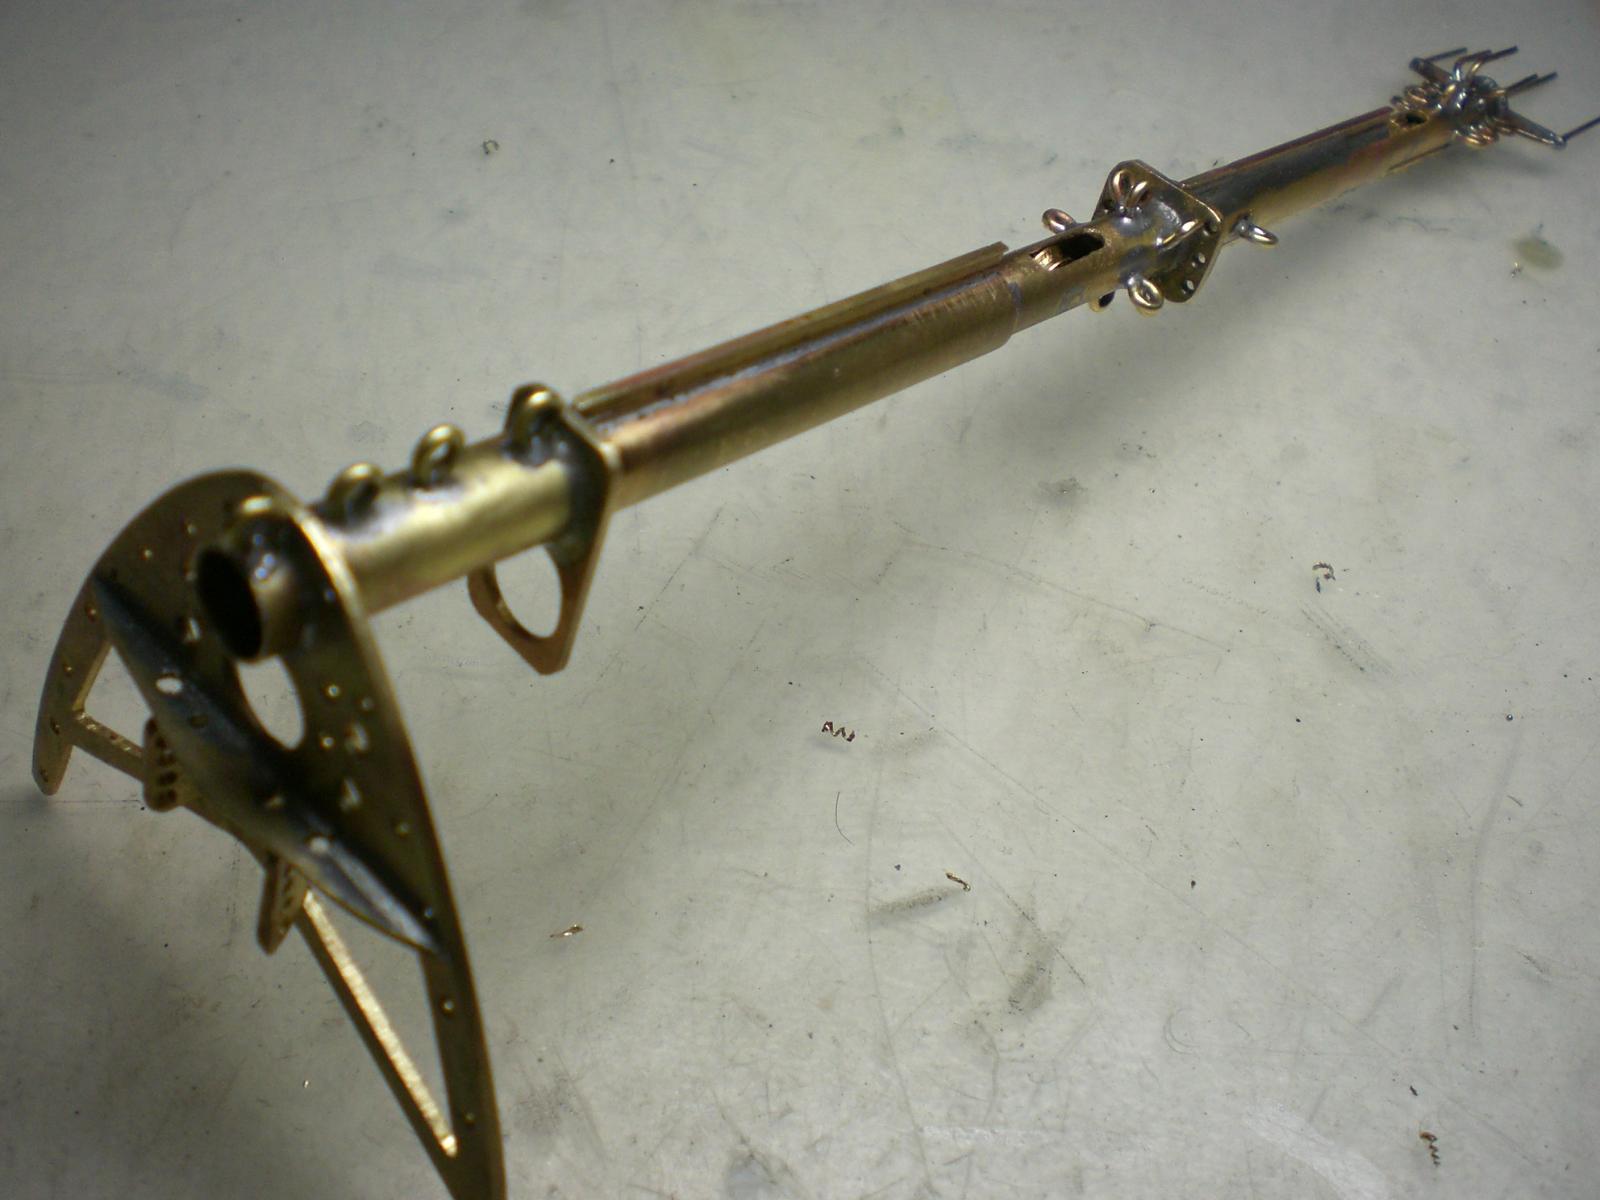
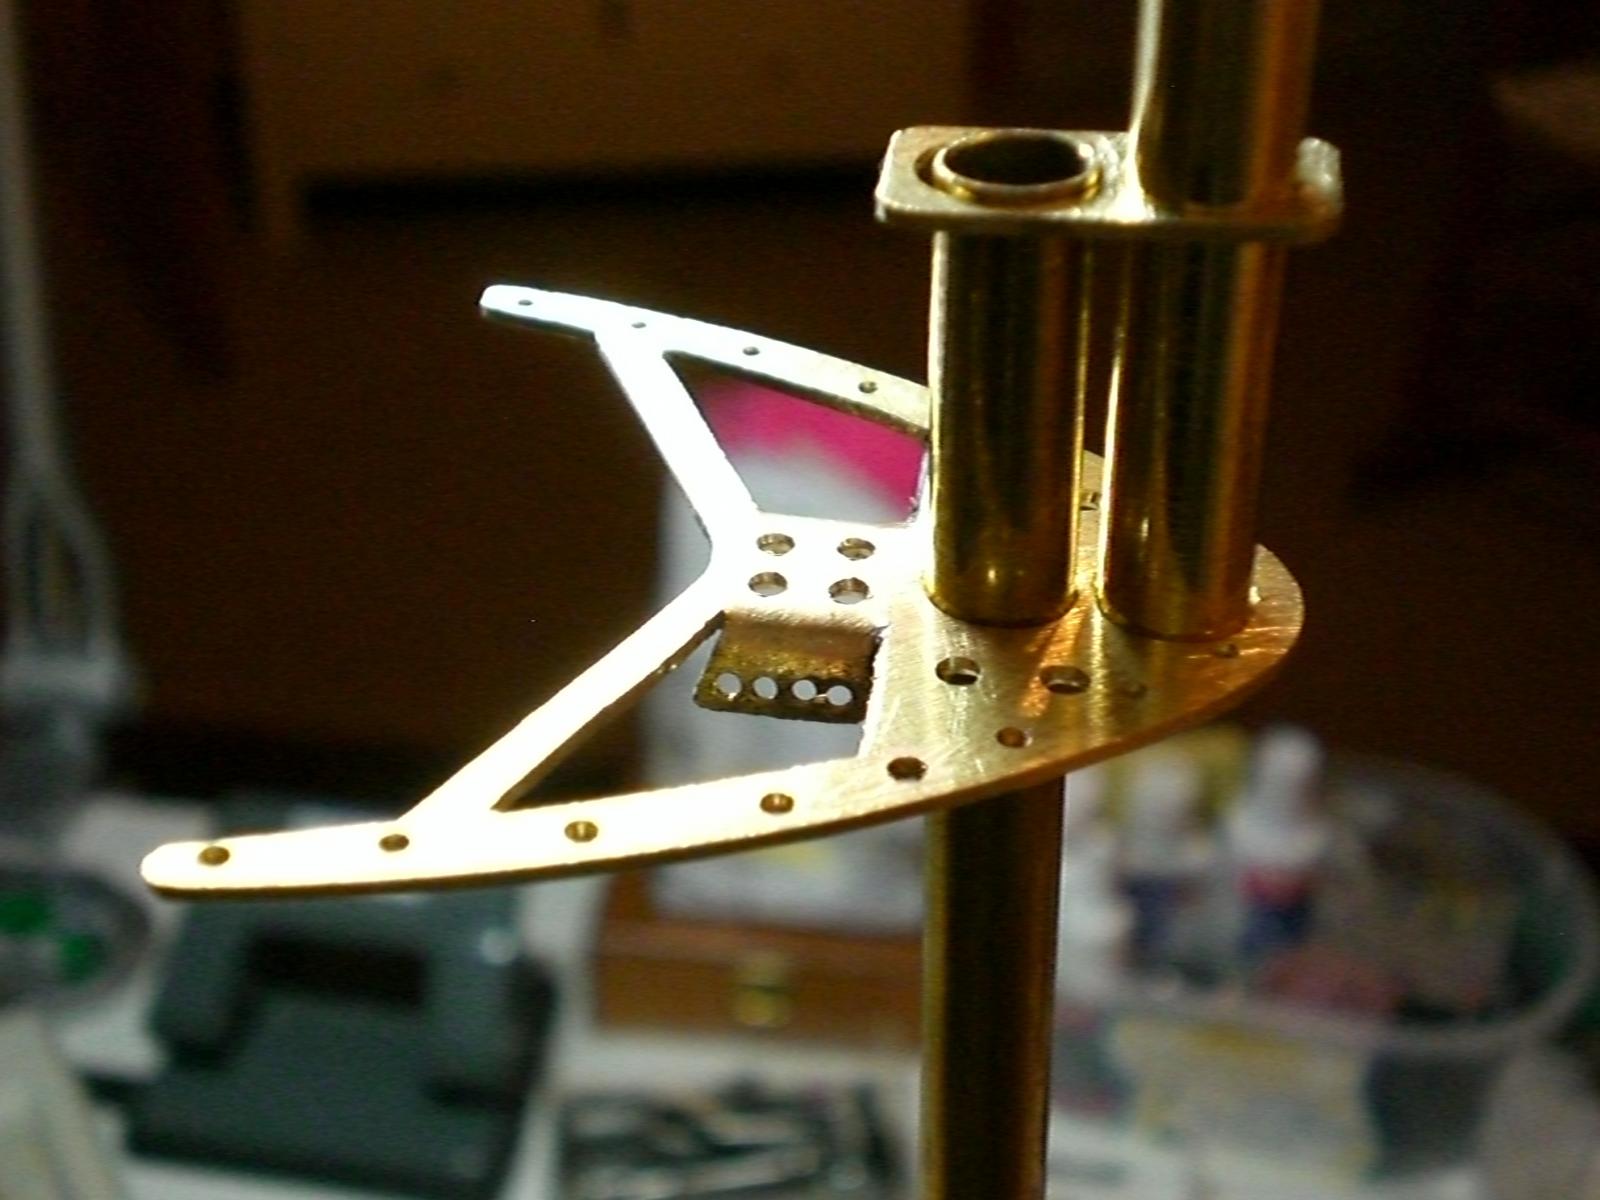
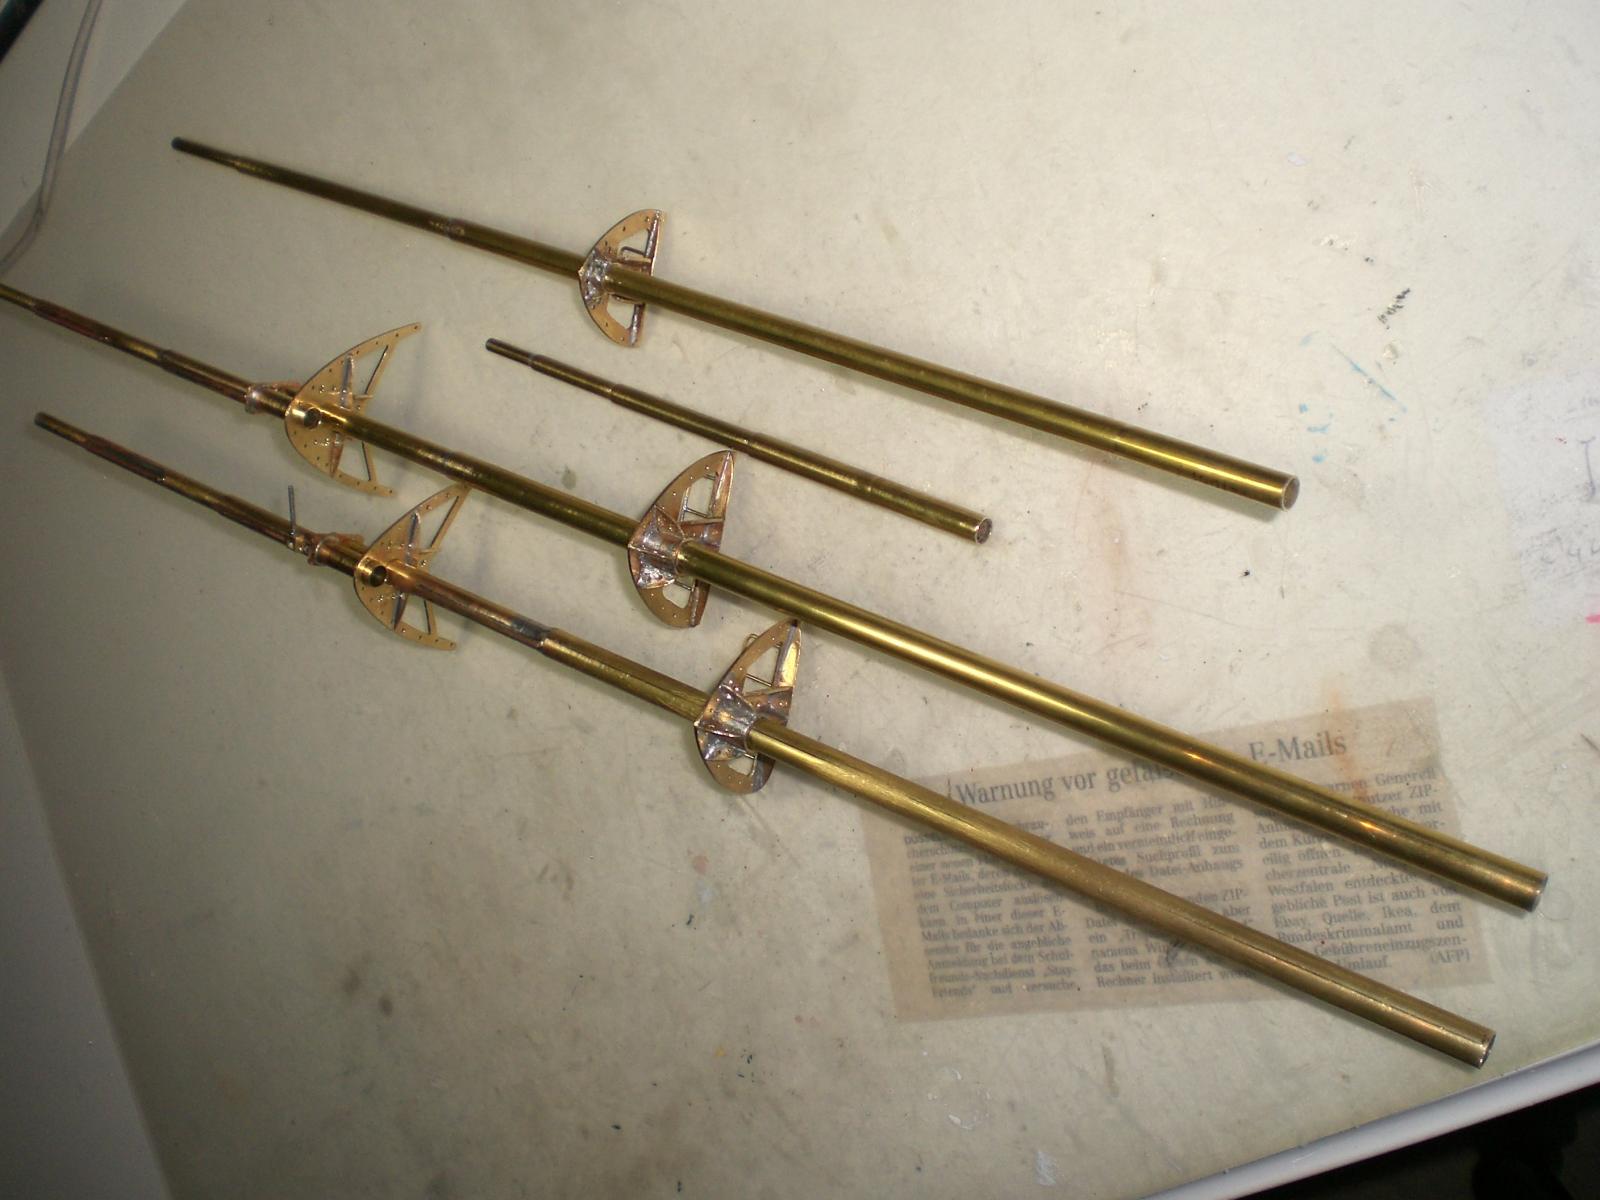
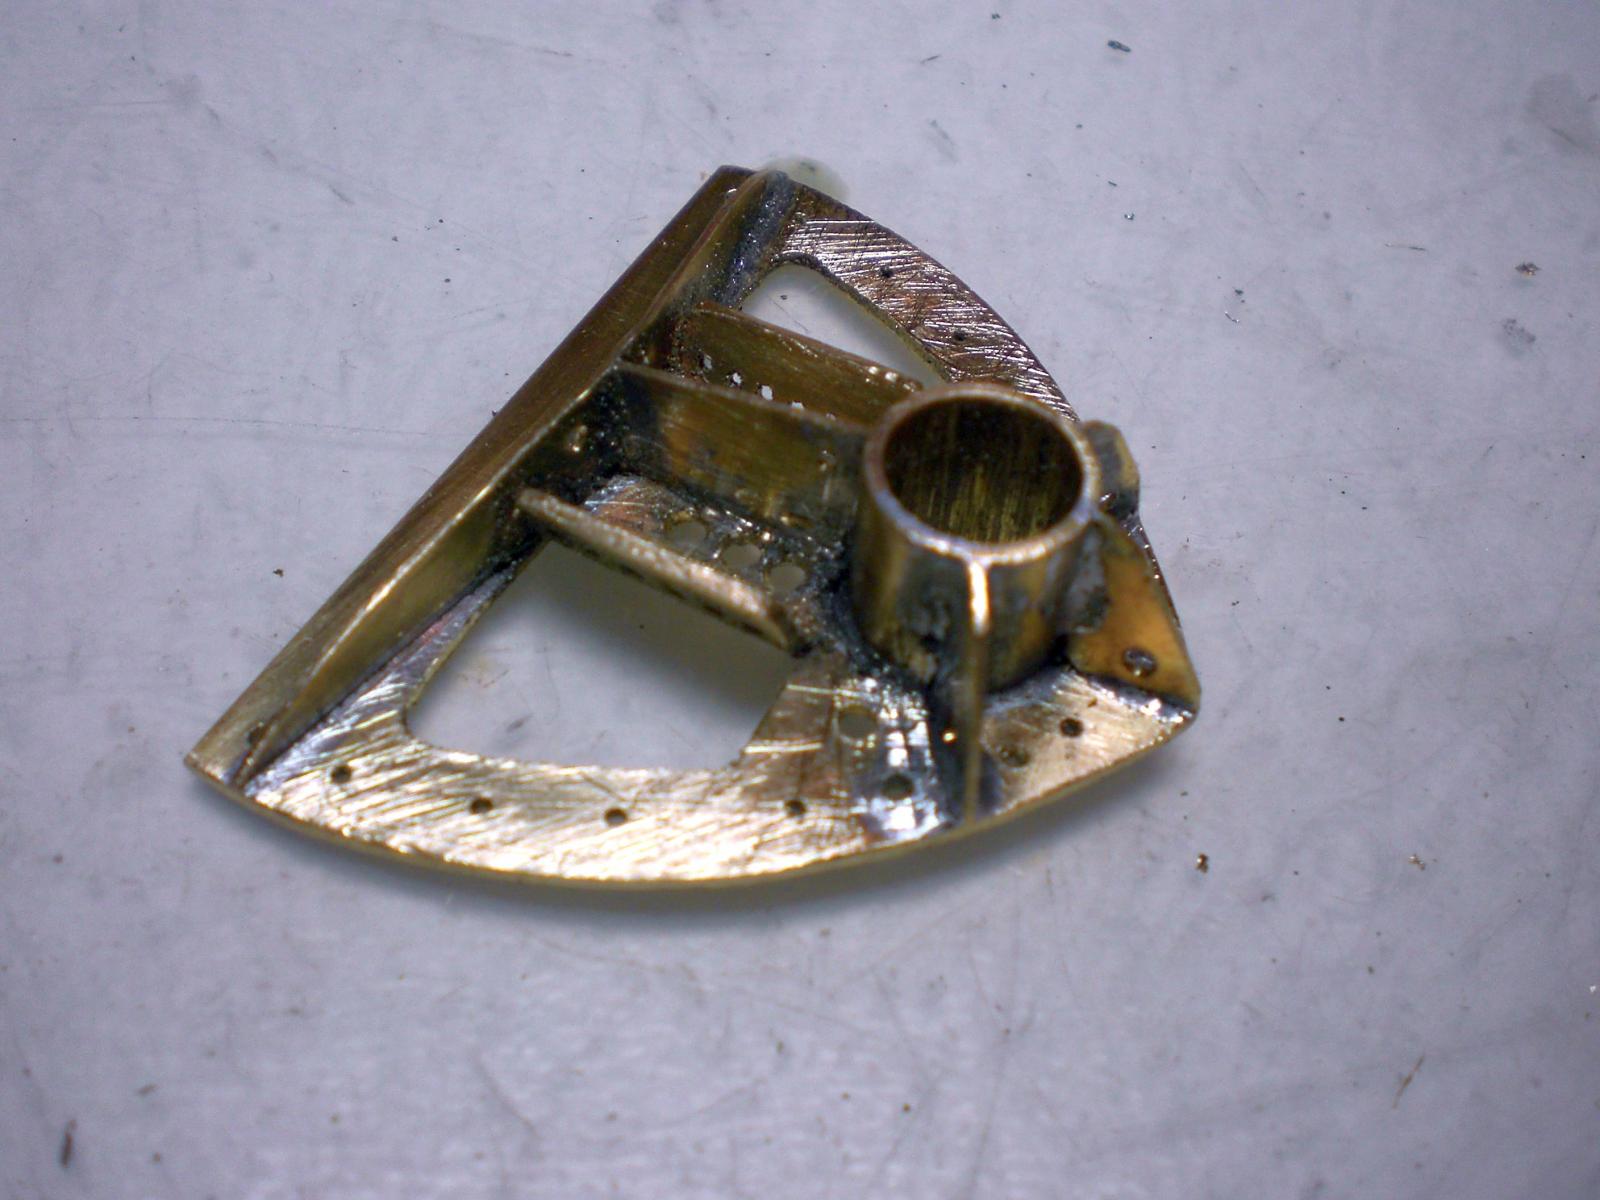
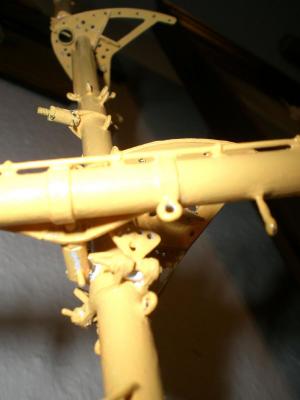
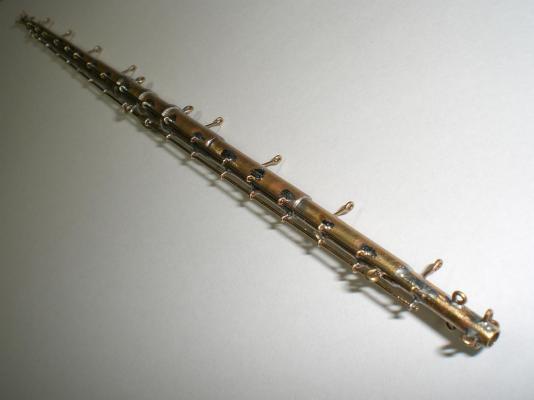
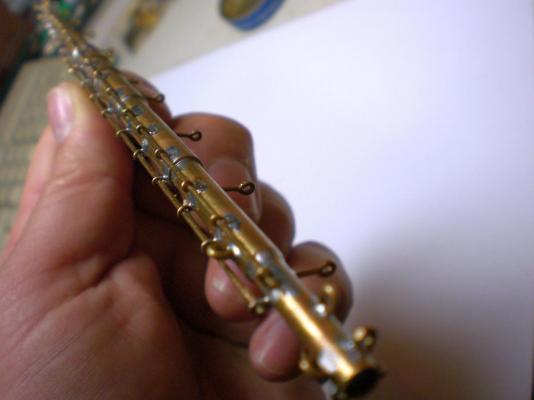
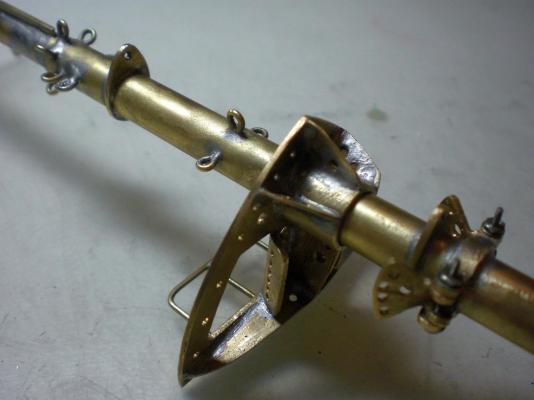
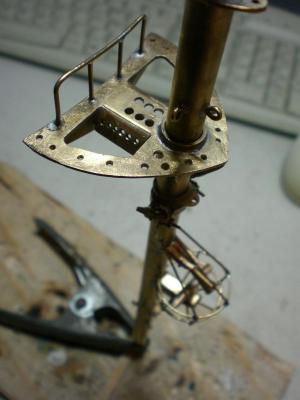
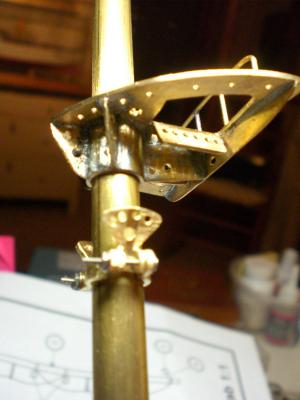
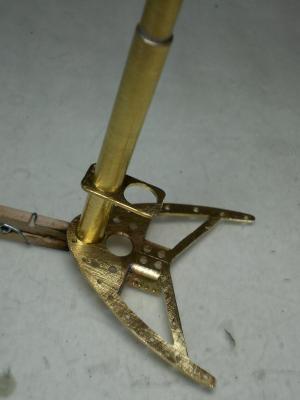
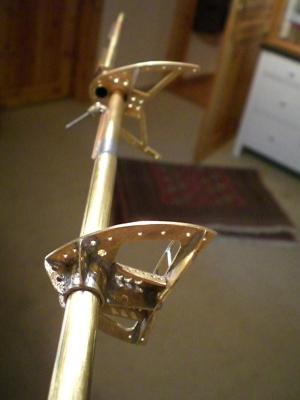
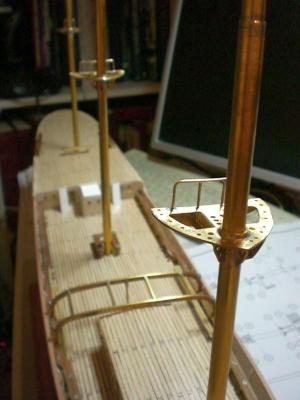
Build log part 16 roller for Yard hoisting / lowering chain (in mid mast) bulls eyes inserted checking mast angles and alignment Fitting for taking up the chainplate (anchoring for the lower top shrouds) top spars with access- ladder and devices for antenna and nav light attachments belaying Points in deck area Build log part 17 to follow.... Nils


- 222 replies
-
- 7
-
-
- gorch fock
- barque
- (and 2 more)
-
Very, very fine work Bob, I love the Details and the accuracy you put into your woodwork Nils
-
Thank you Bob I would`nt dare modeling my HMS Pegasus or any other 18th century ship with brass masts and -Yards.... Nils
-
Gatean, I love that build of yours, great skilled handcraft work ! Nils
-
Popeye, when I started using brass I took the following Advantages out of it... - tapering done by staggering appr. tube diam. (no endless taper-sanding etc.) - soldering provides stronger joining than wooden equivelant - to my experience with the rigging it is quicker than with Wooden parts - as I am using wire chord for the static rig, I can set shrouds, stays backstays, etc. well stiff without distorting the masts, when stays and backstays-stresses are equally balanced - a disadvantage would be the weight compared with wood, but that is not relevant for a stand model that is put on a stabil stand. I pay much Attention for securing the standbolts (removable but safely) to the model Nils
- 222 replies
-
- 1
-
-
- gorch fock
- barque
- (and 2 more)
-
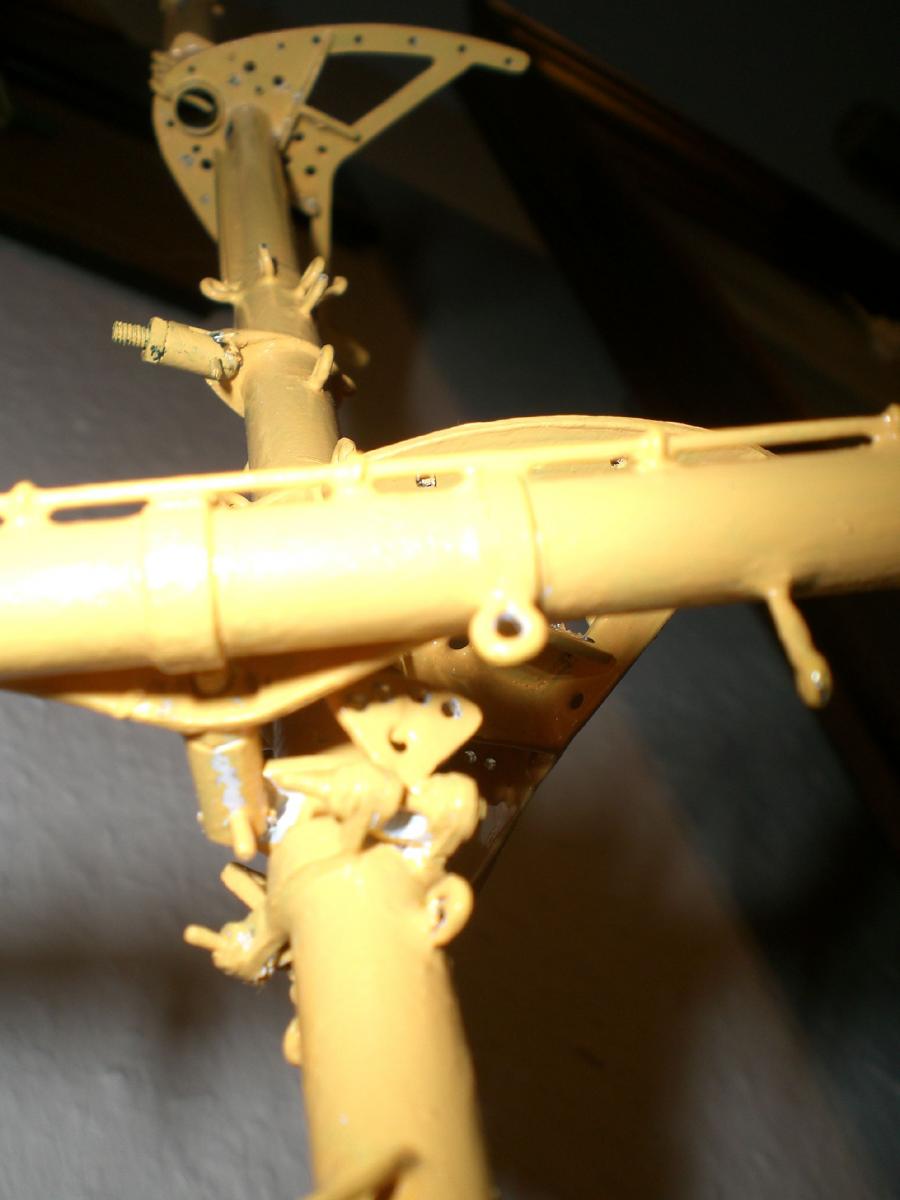
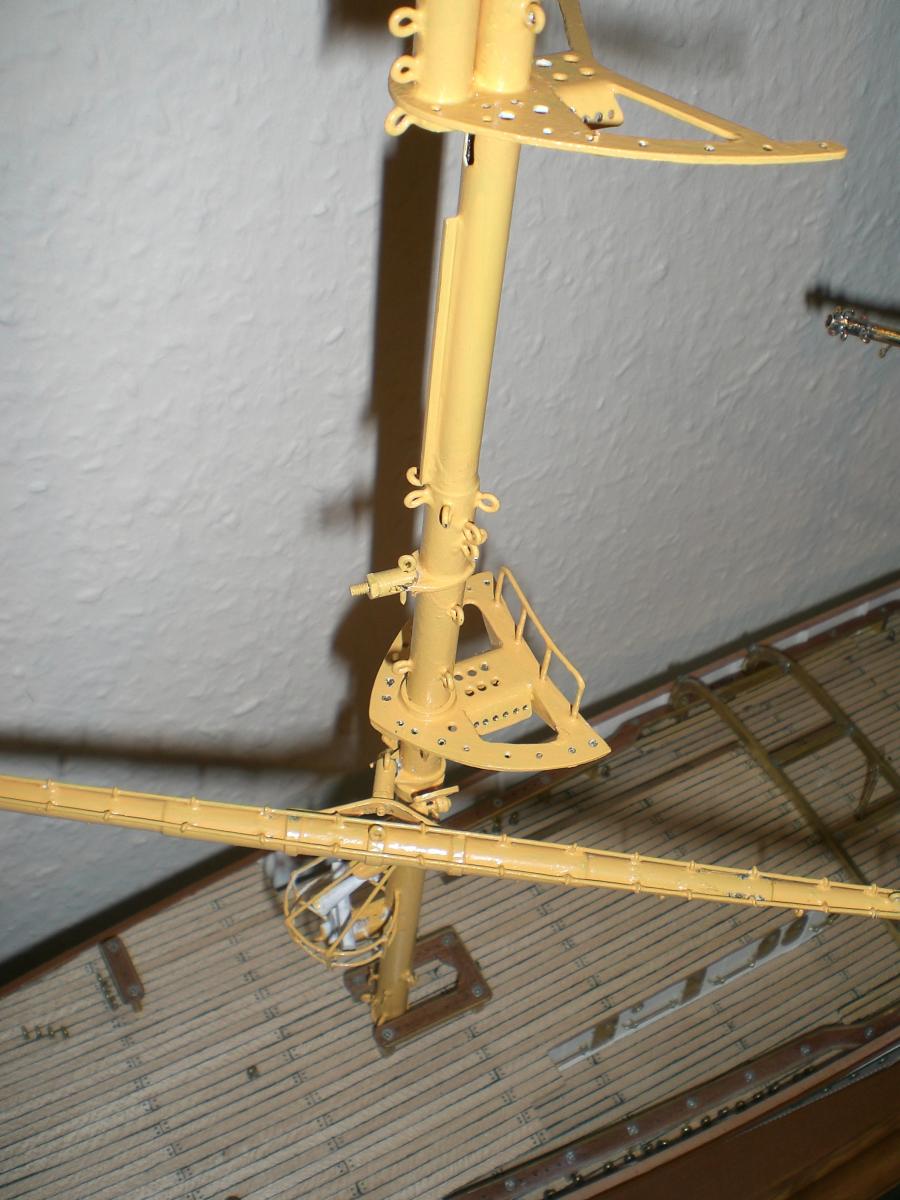
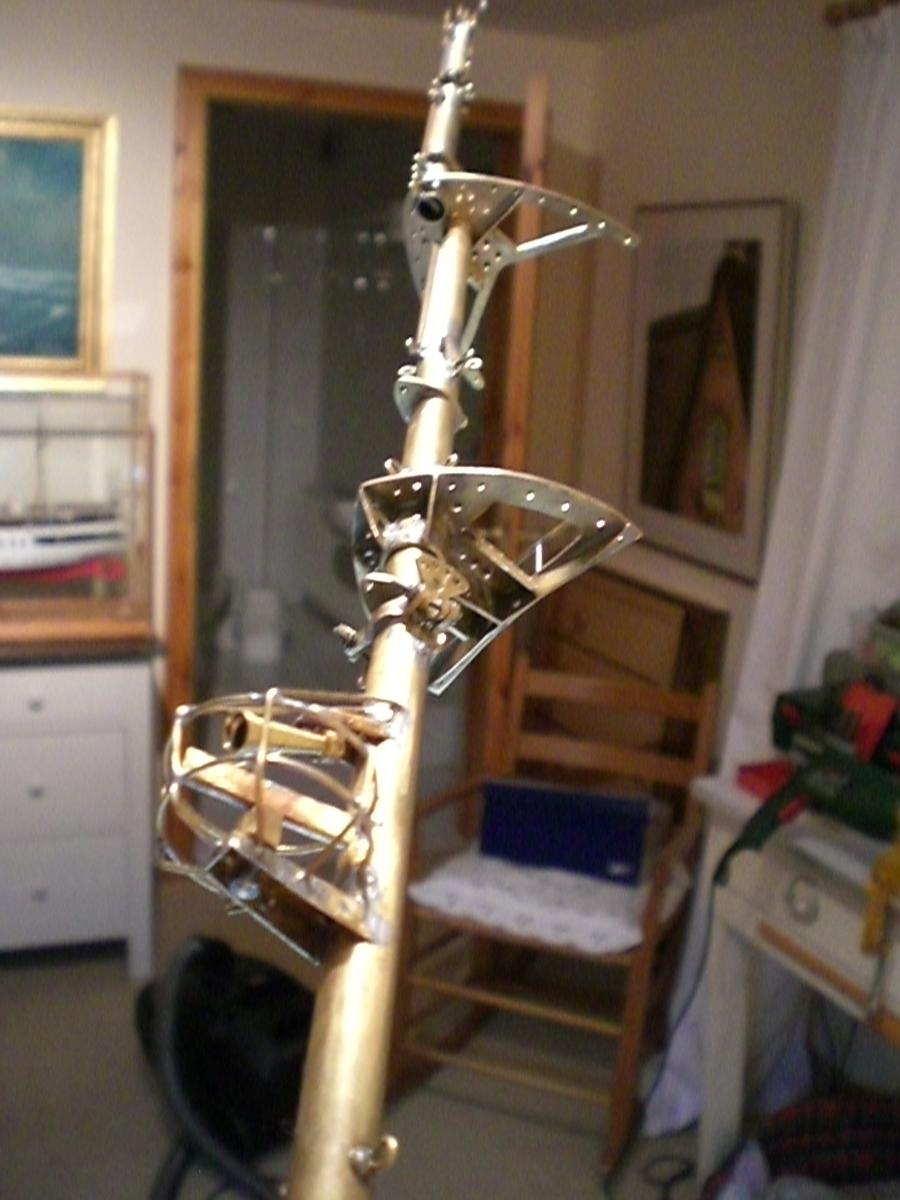
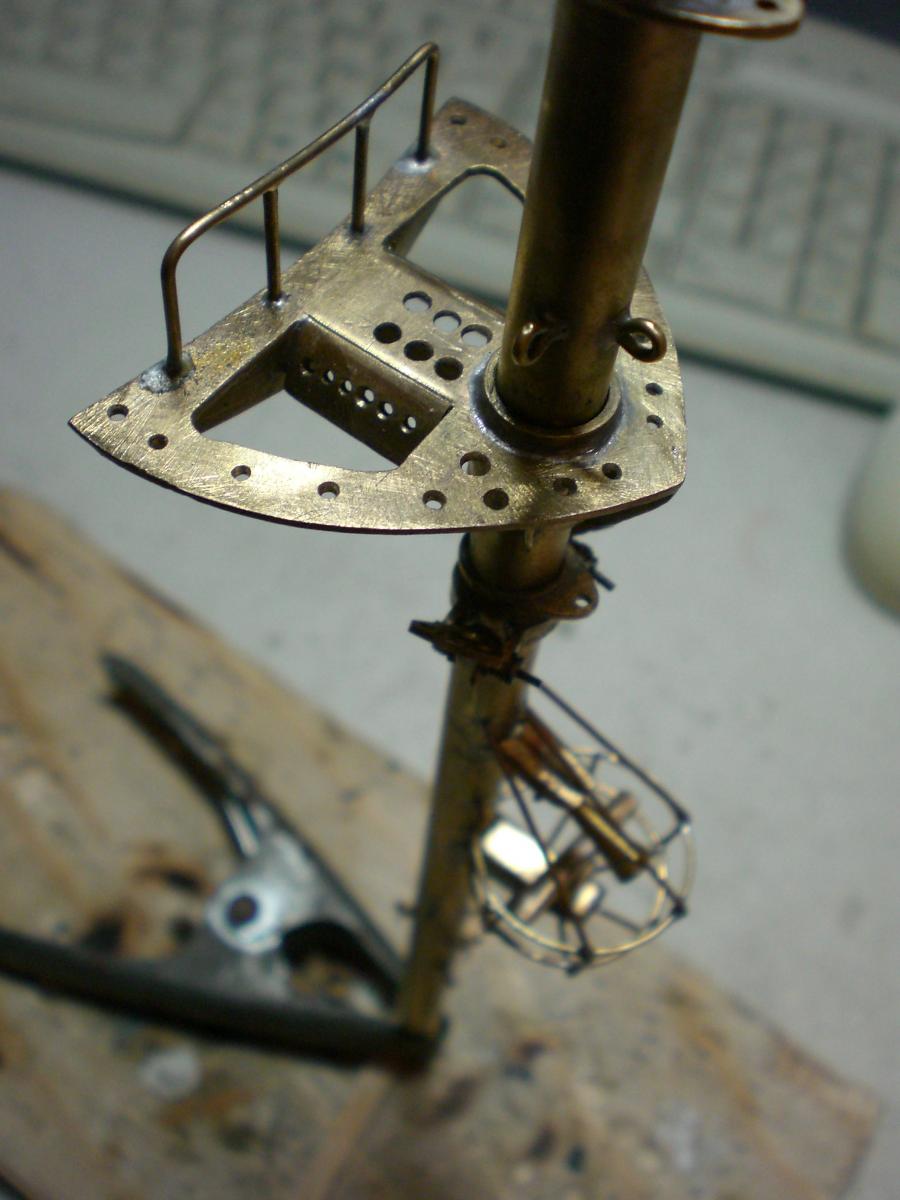
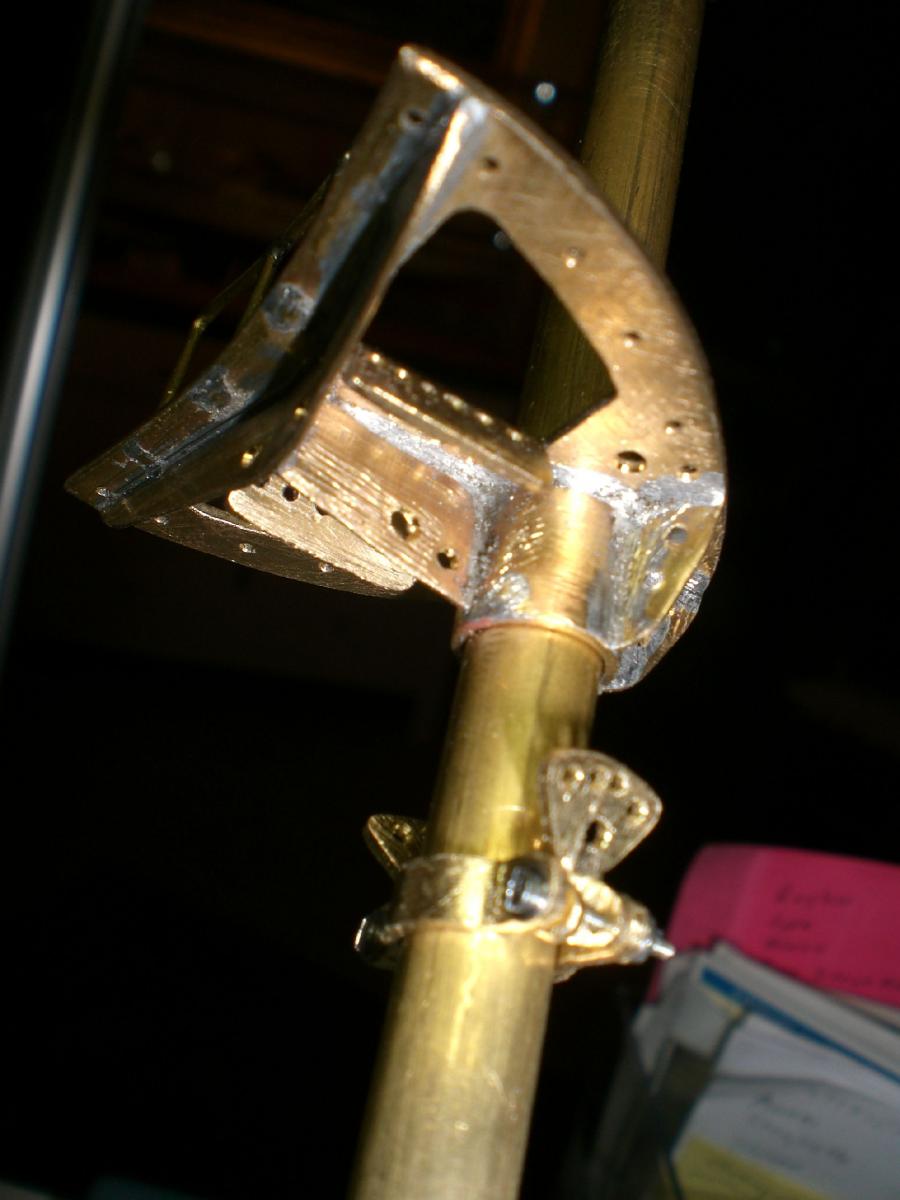
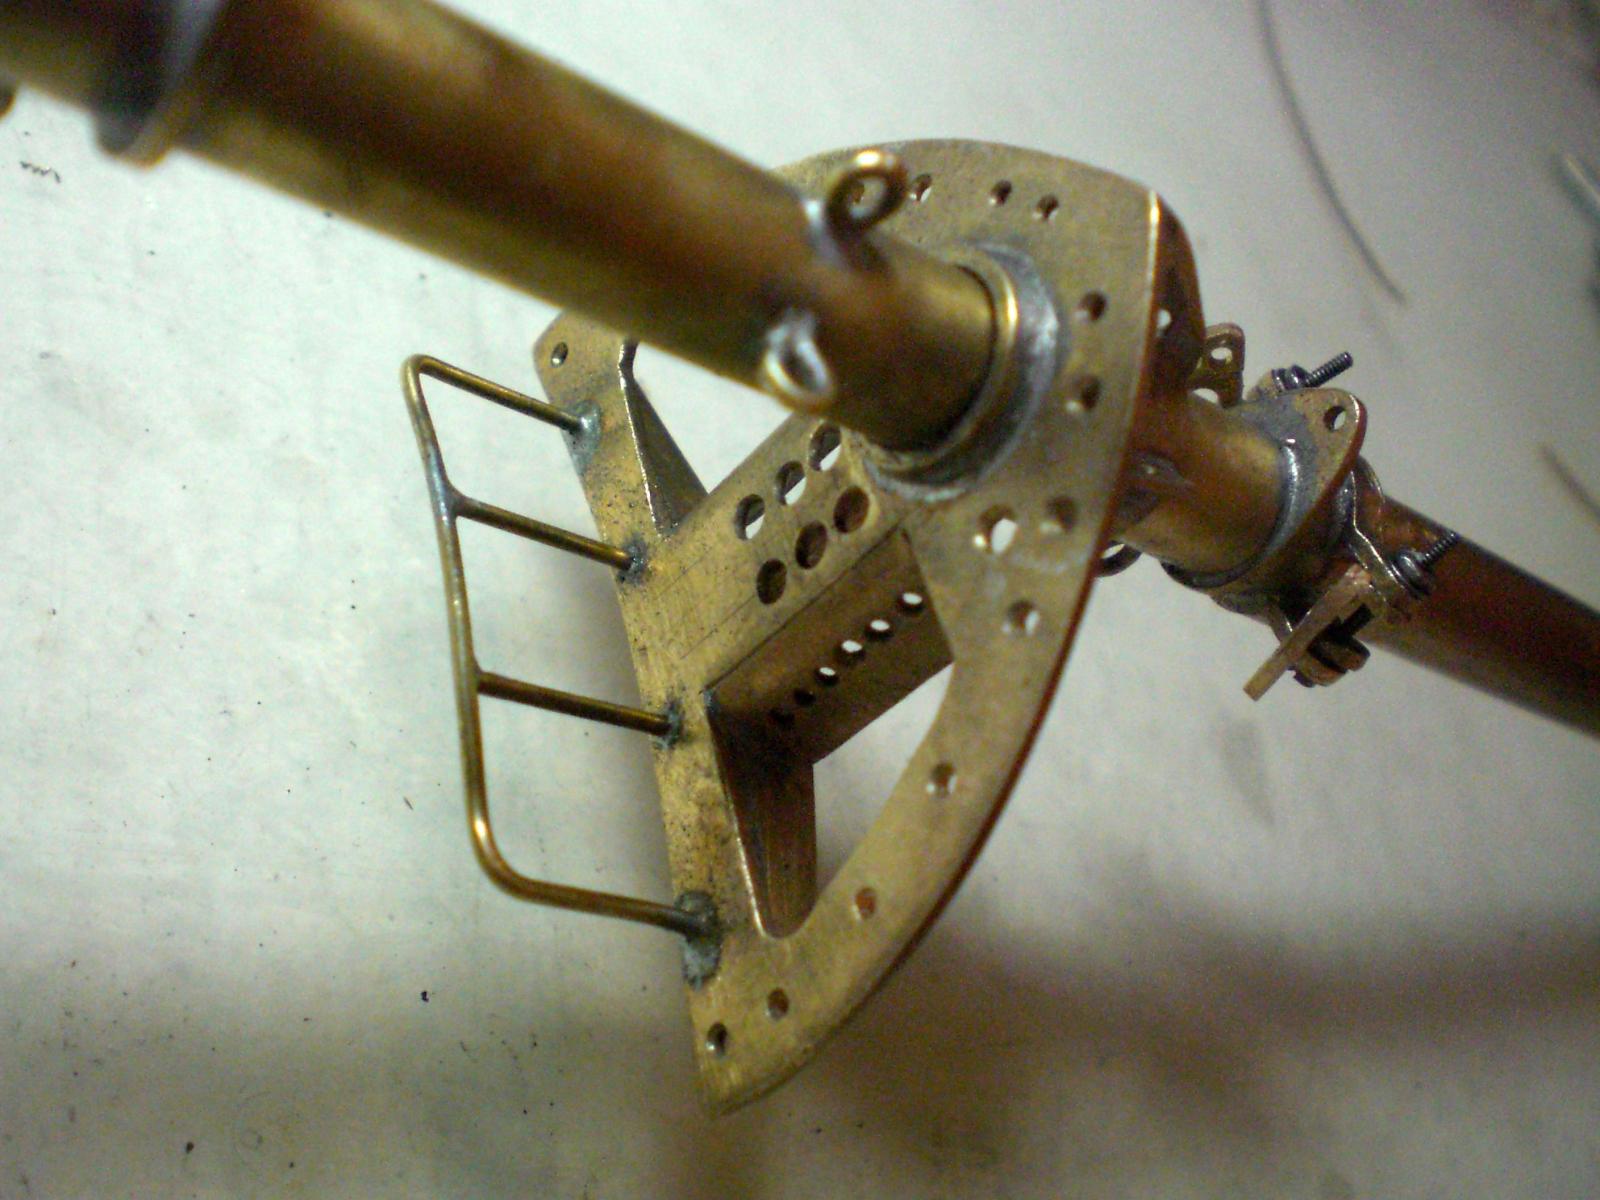
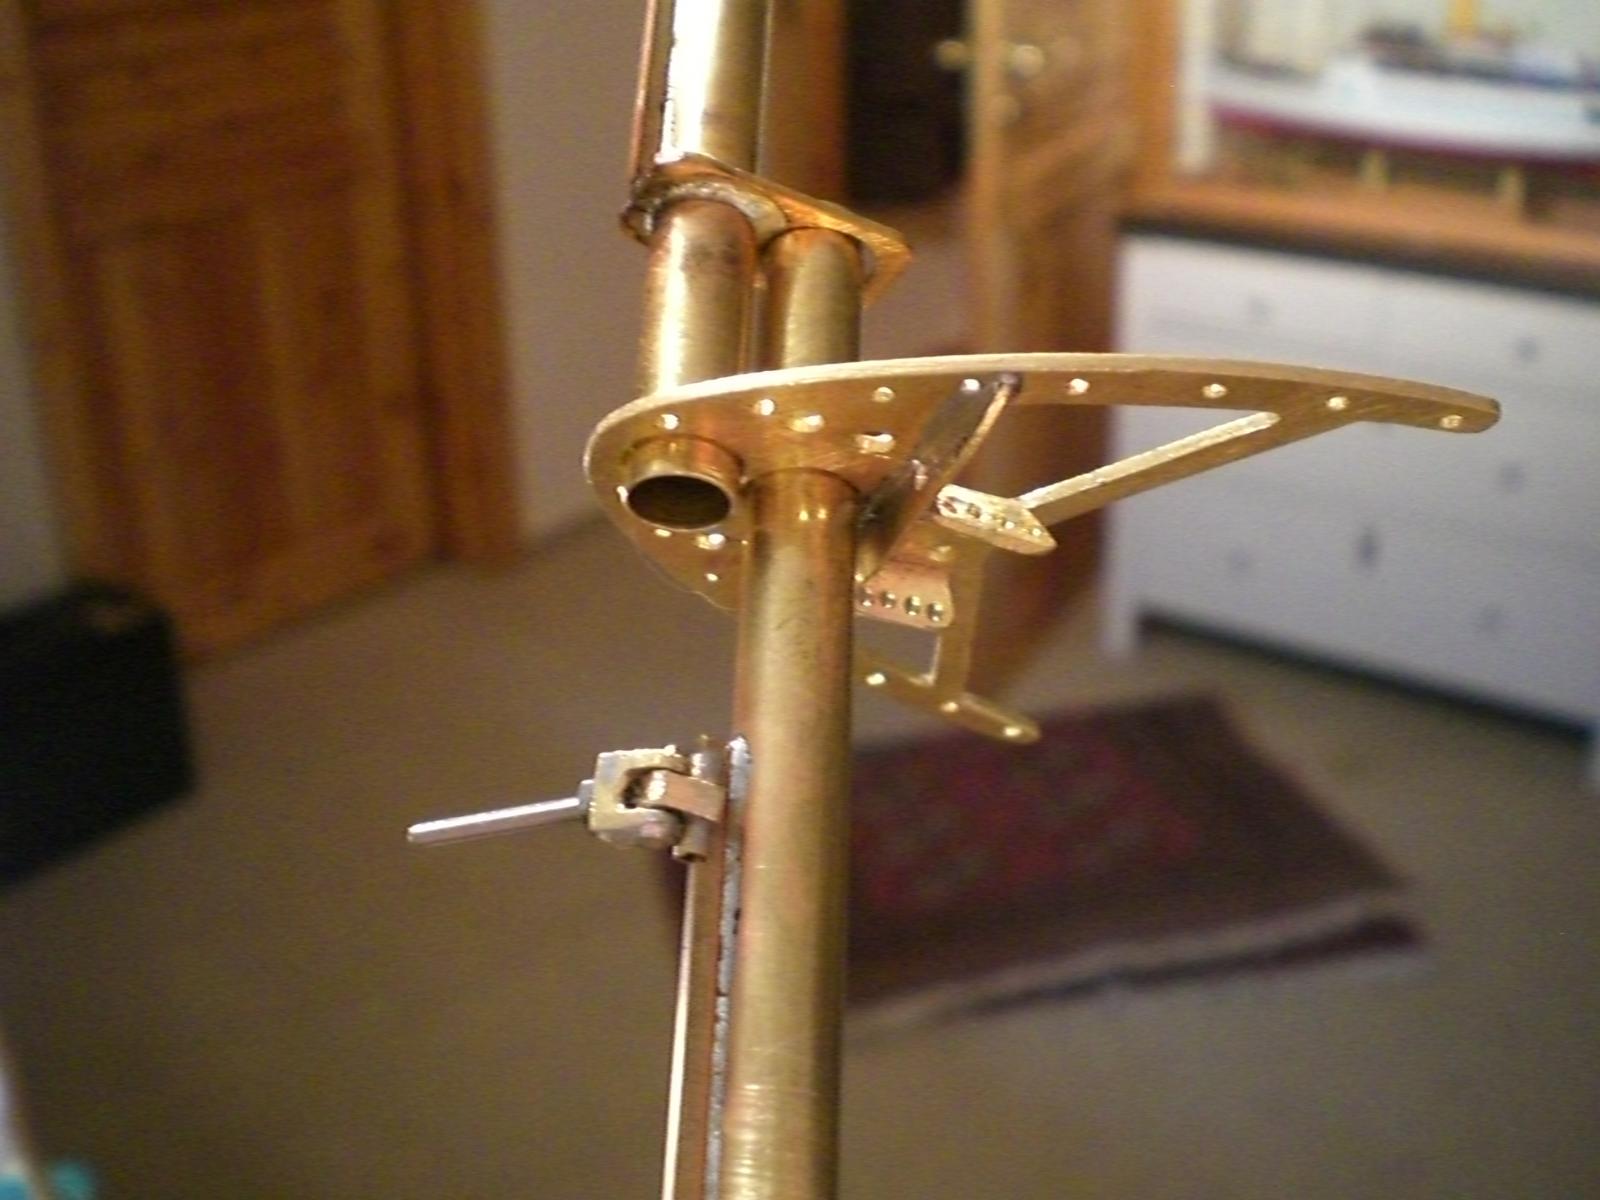
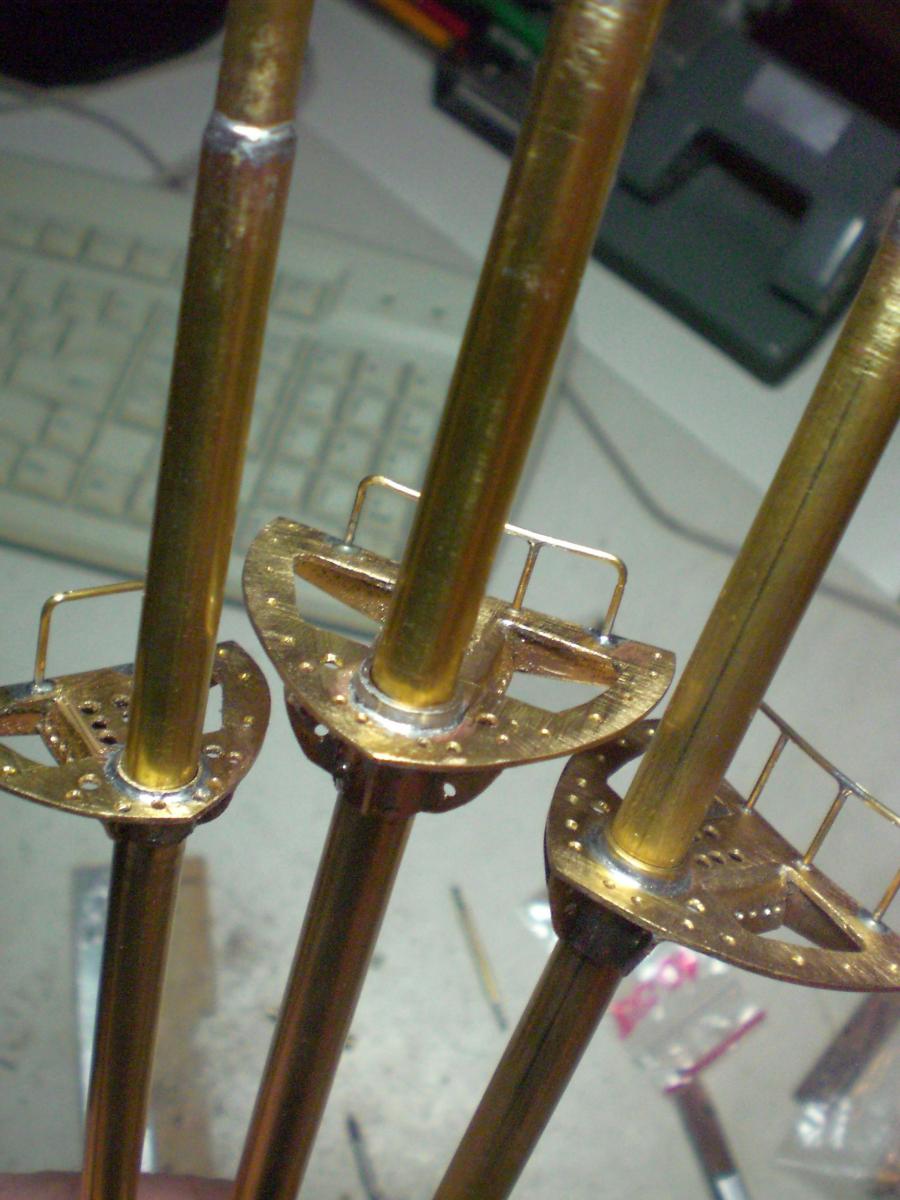
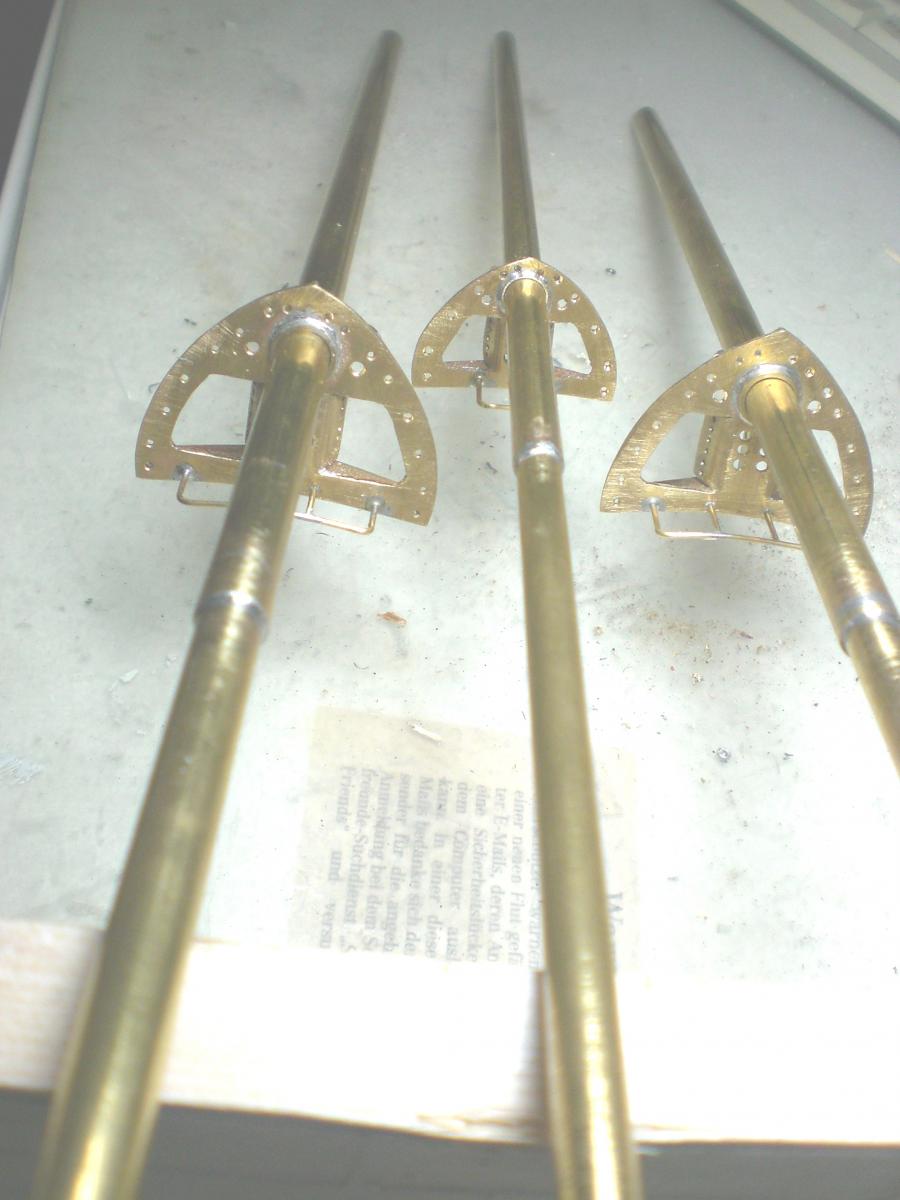
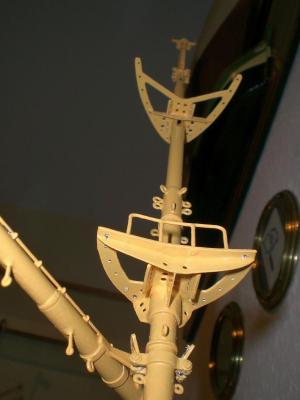
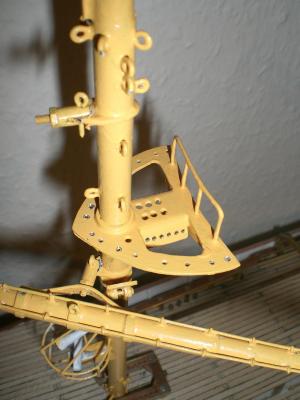
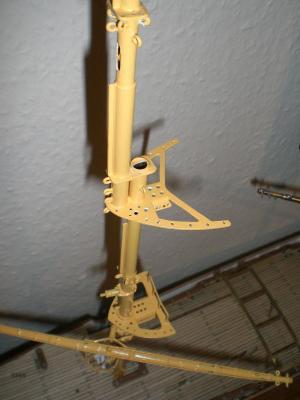
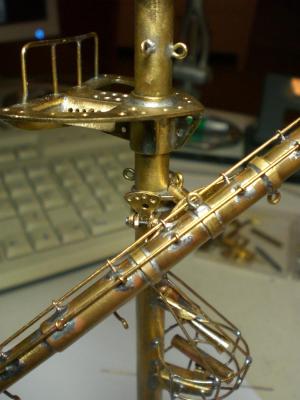
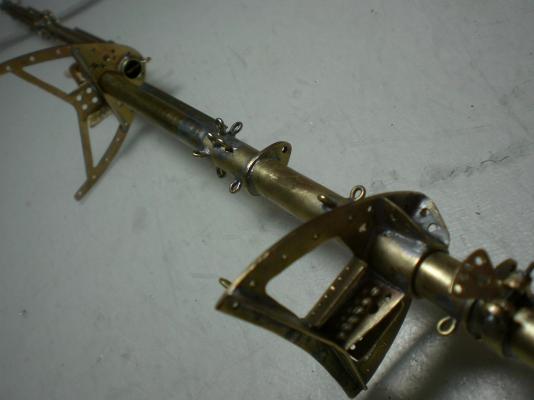
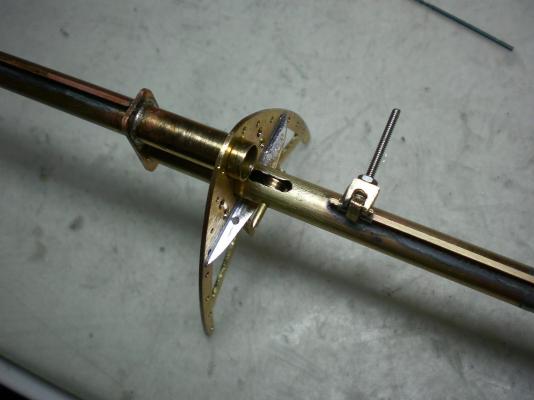
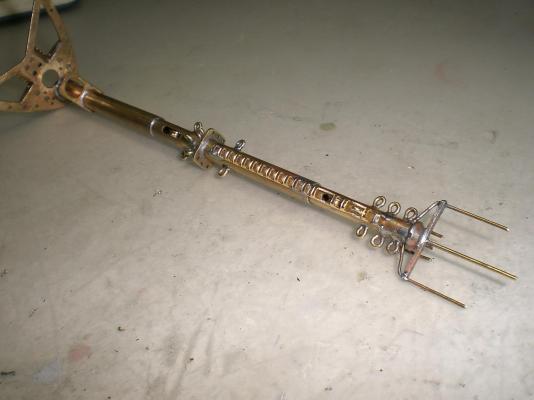
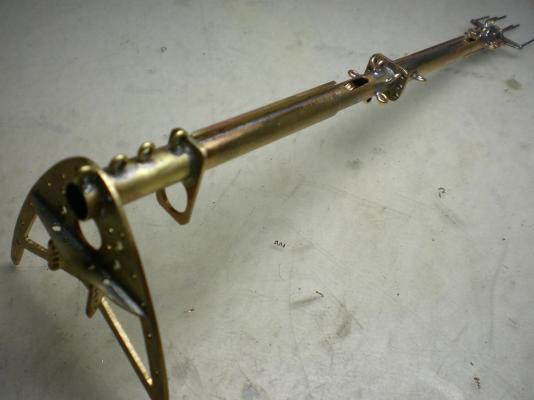
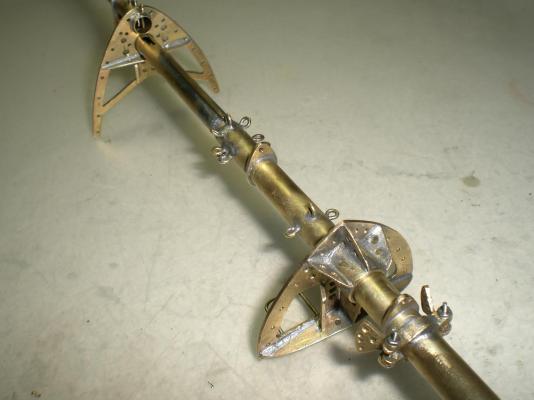
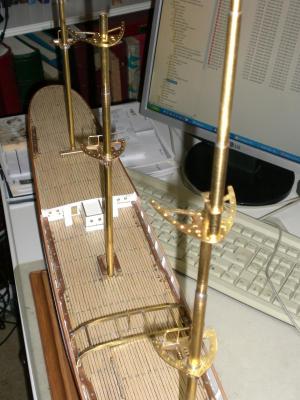
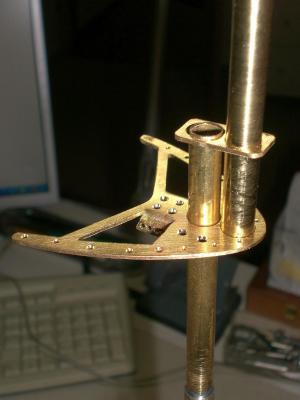
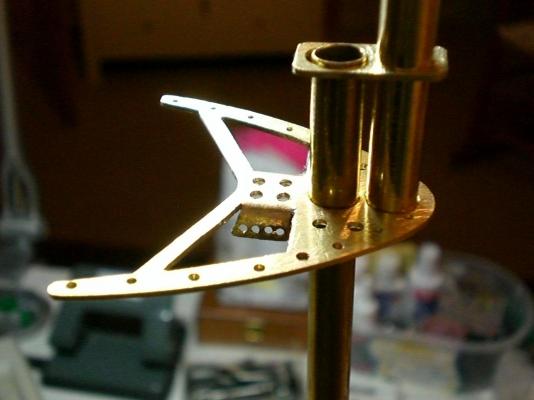
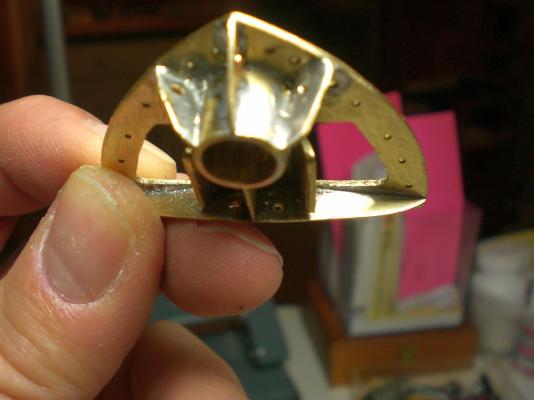
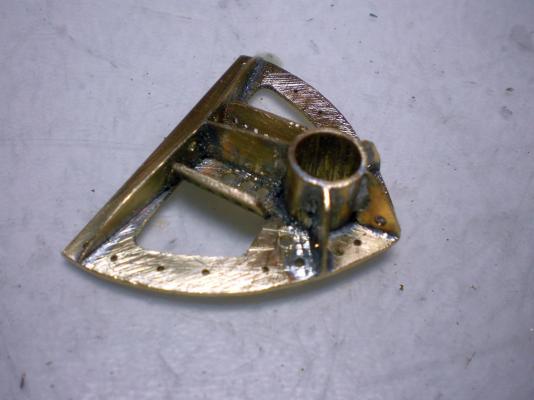
Build log part 15 togallant platforms Connection to cap and spars (on the two mainmasts) alignment checks before soldering parts together the lower top is moved to the correct Position, then secured with a pin to the mast Mast rail shoe that goes to the appropriate yardrack set of uncompleted masts and jib boom some paint touch ups done, now ready for inserting portholes (bulls eyes) Build log part 16 to follow.... Nils


- 222 replies
-
- 10
-
-
- gorch fock
- barque
- (and 2 more)
-
beautiful work Jan, a pleasure to see this model in Progress Well done ! Nils
-
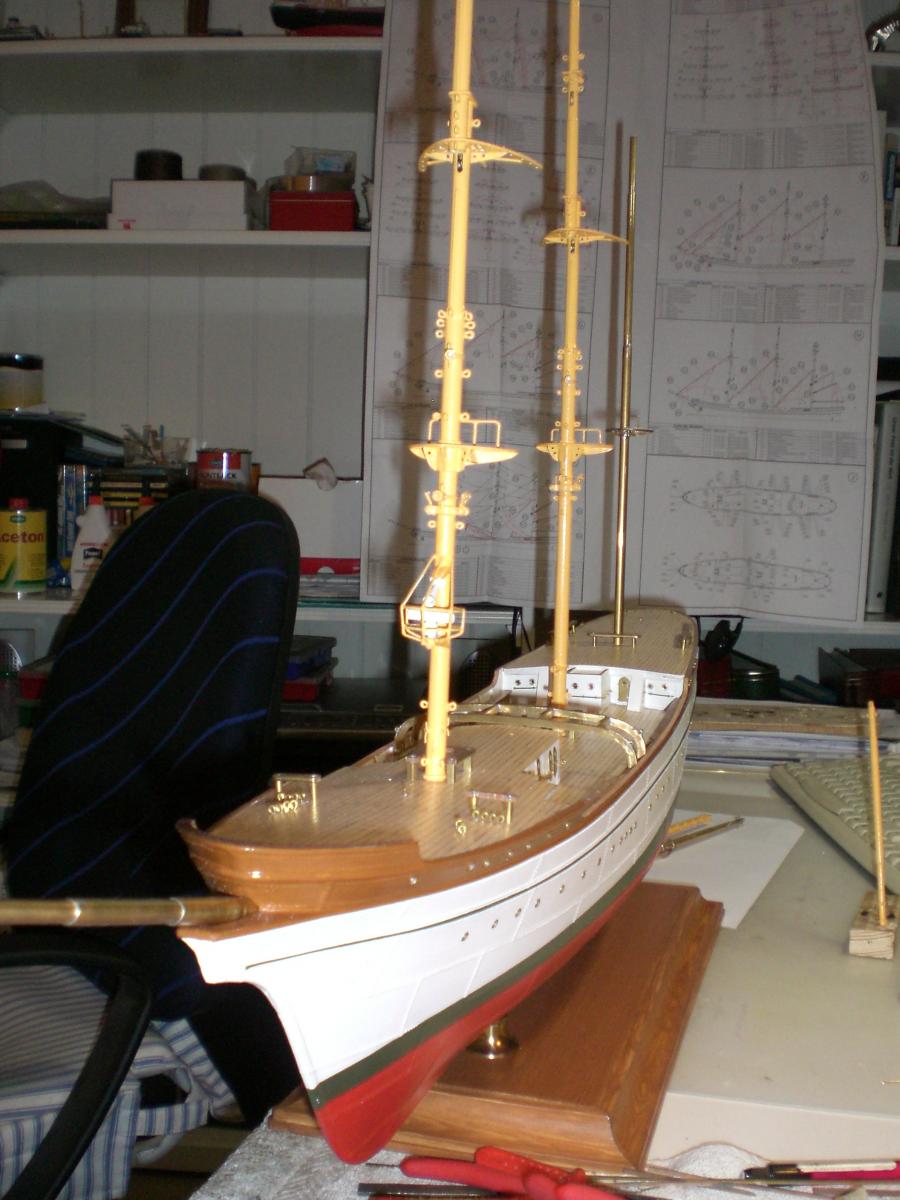
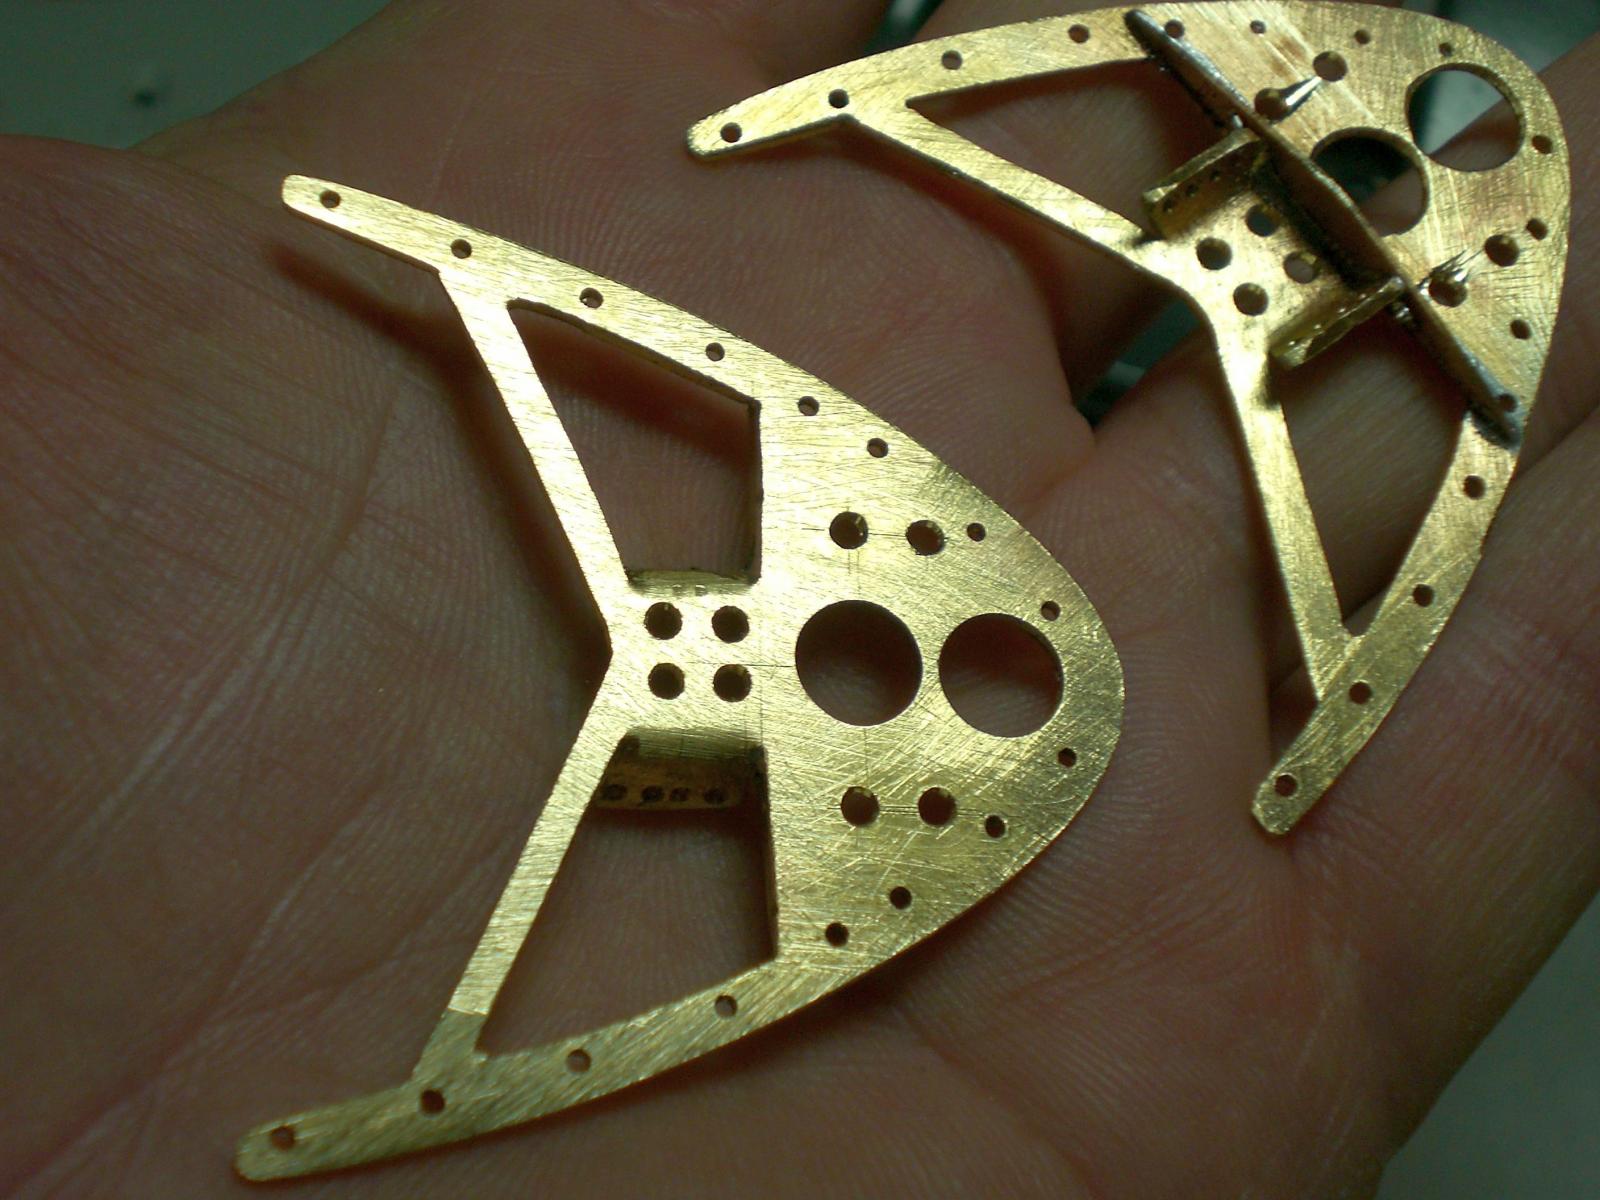
Build log part 14 Starting to do parts of the masts plattforms for the lower tops (multifold soldering Piece) These will be slipped on to the mast and later secured in Position by a pin handrails at rearside of plattforms chocolate Brown Color at poop and forecastle upper portions anchorchain portholes mounted other porthole openings drilled but no inserts yet White paint on... Build log part 15 to follow.... Nils


- 222 replies
-
- 10
-
-
- gorch fock
- barque
- (and 2 more)
-
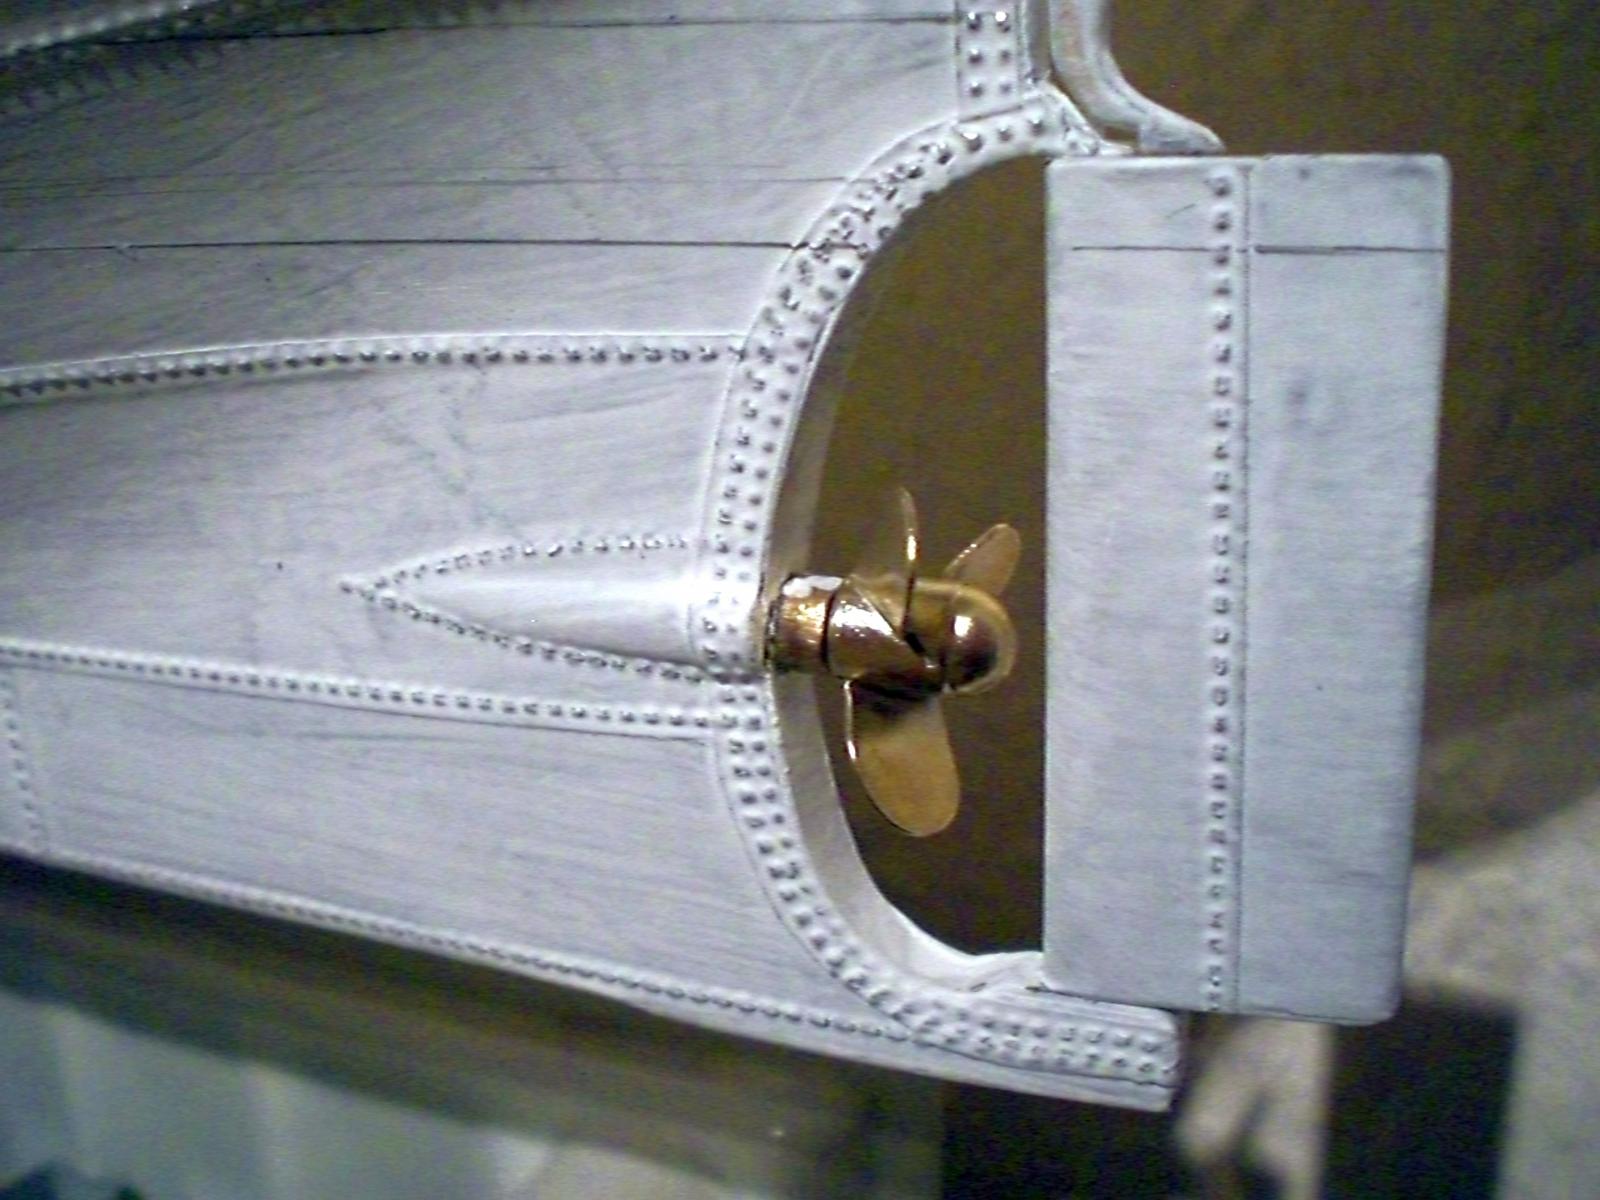
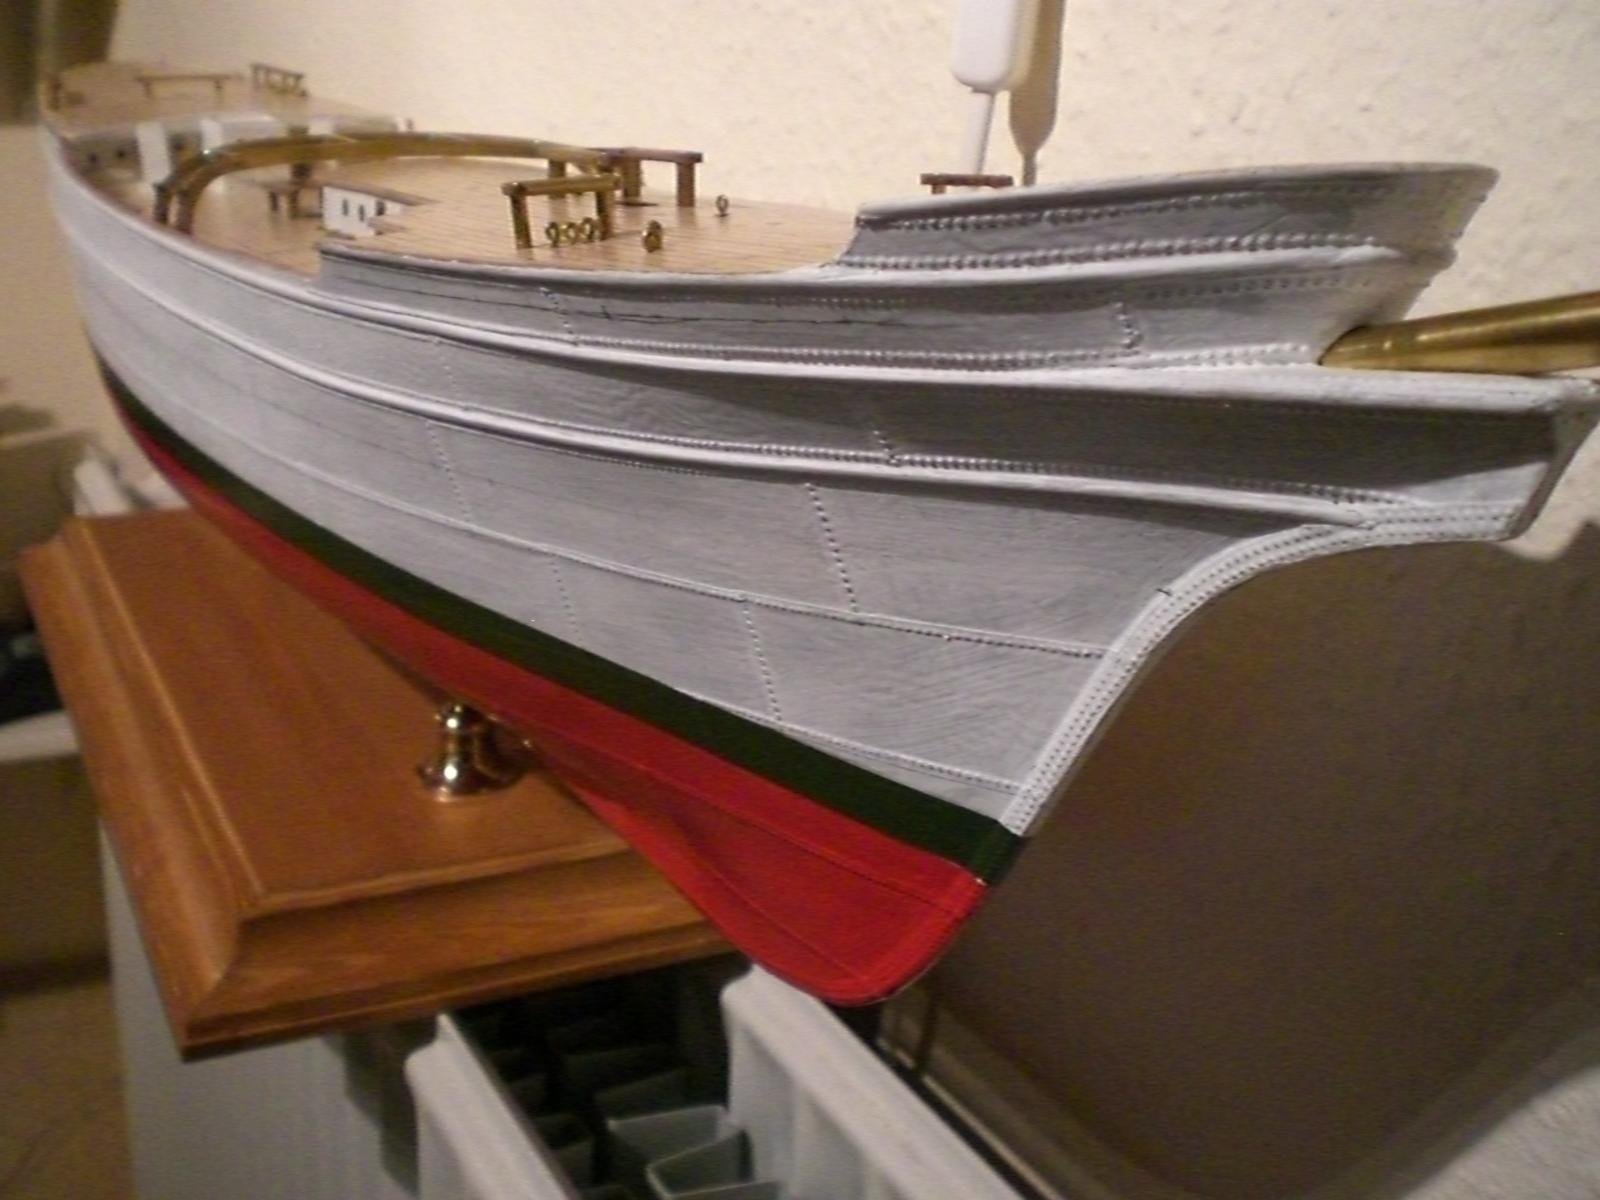
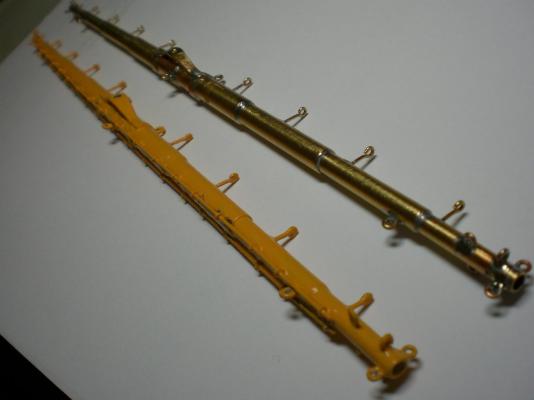
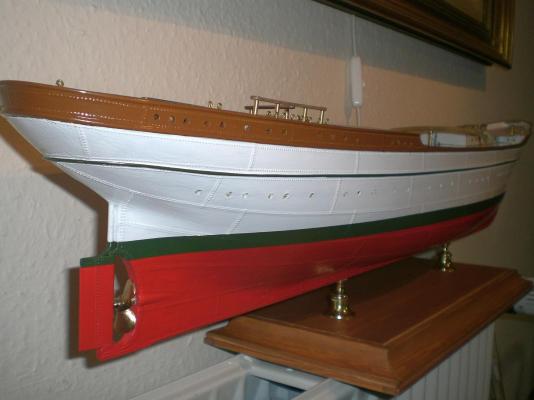
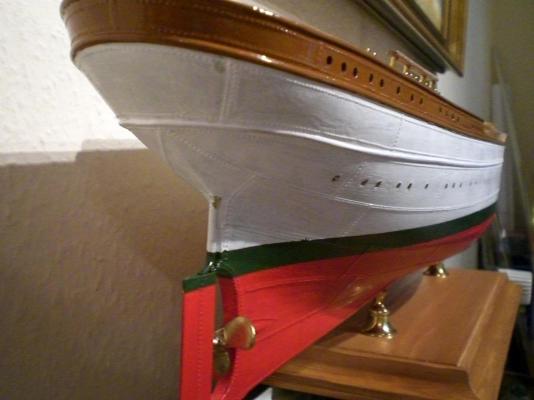
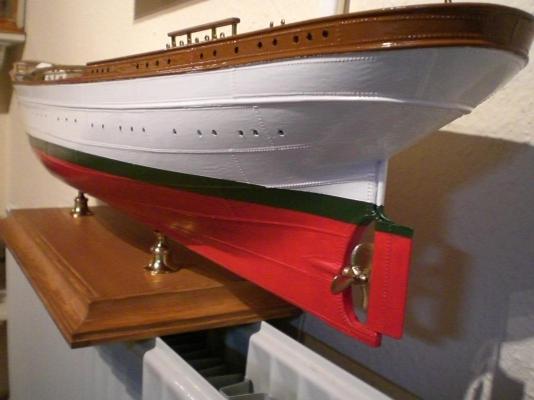
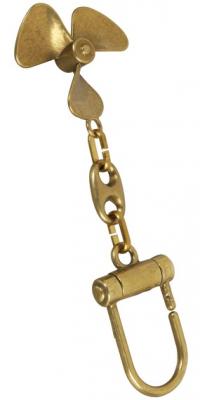
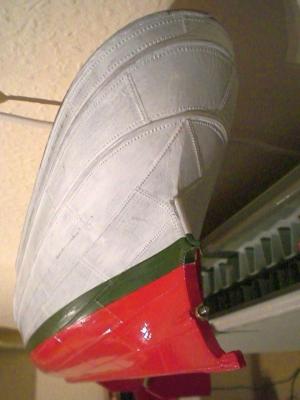
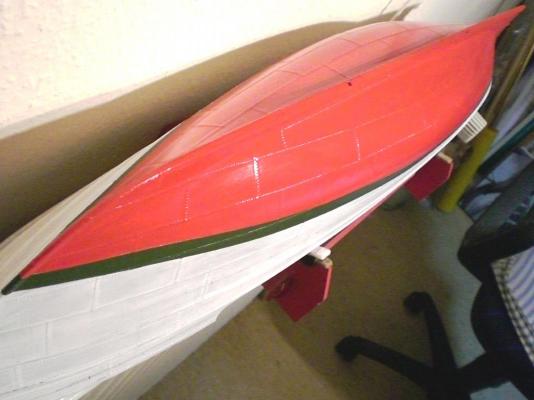
Build log part 13 Time to get primer and paint started... dull White resin based primer is brushed on the rudder has been plated as well, but the prop is too small in diam. found this one at a web-shop, and modified it a bit, cut off the eye and drill a M3 thread into the hub figure is 1:87 (H0) scale) here and the next pics the White Portion is only primered Build log part 14 to follow.... Nils


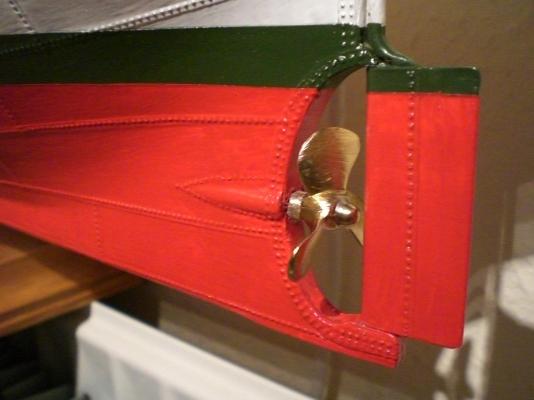
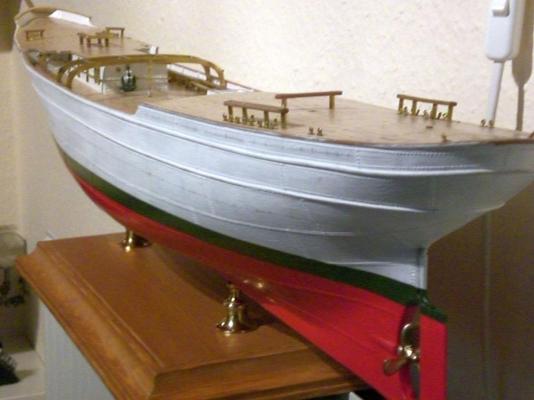

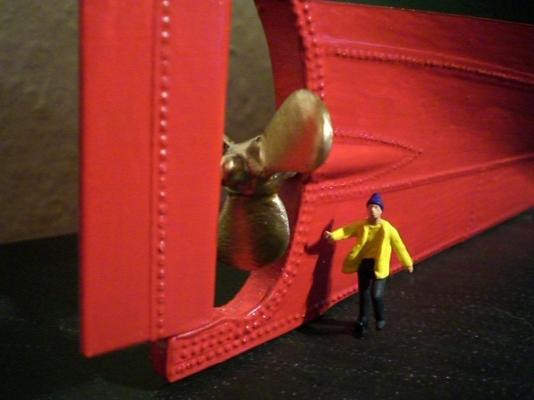
- 222 replies
-
- 9
-
-
- gorch fock
- barque
- (and 2 more)
-
Batavia by *Hans* - FINISHED
Mirabell61 replied to *Hans*'s topic in - Build logs for subjects built 1501 - 1750
Nice Project Hans, and yo layed down a good start, shall follow with interest.... Nils -
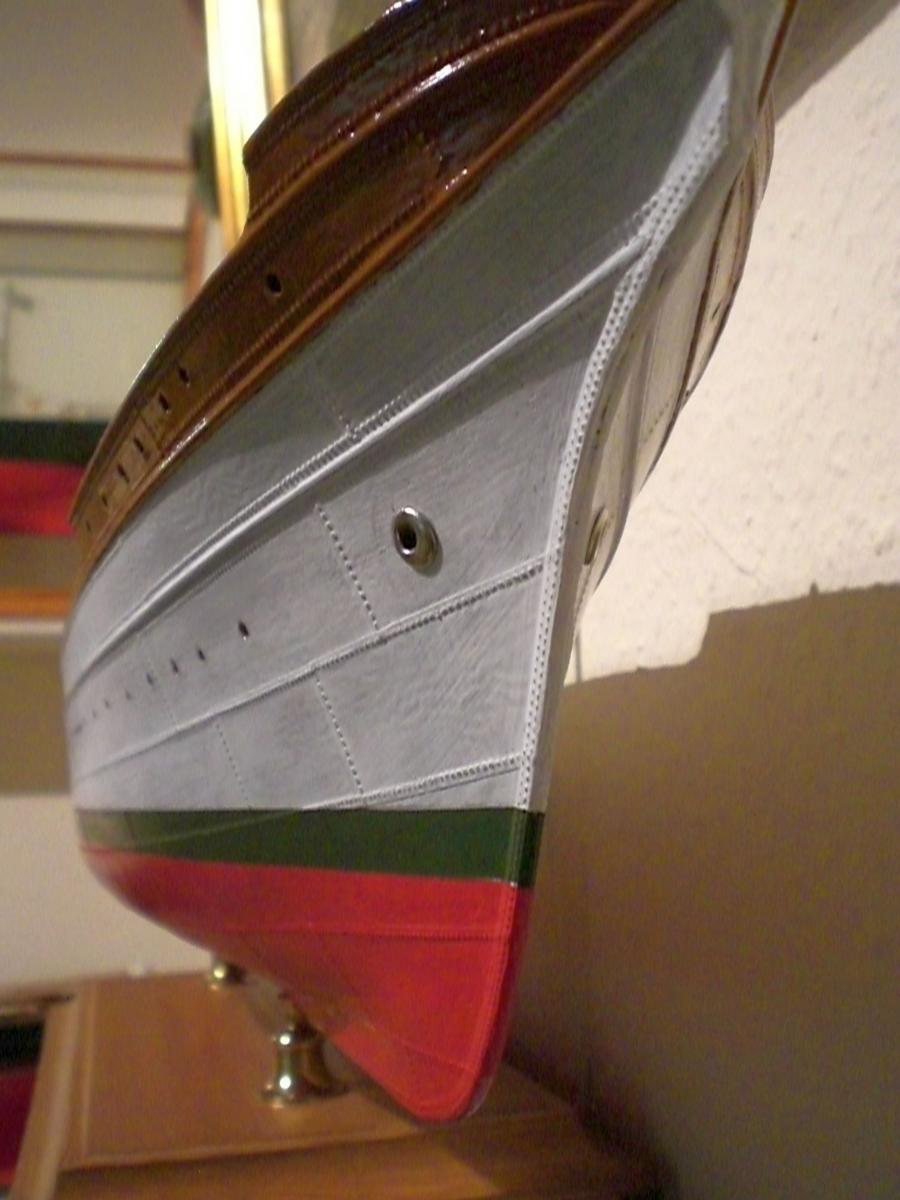
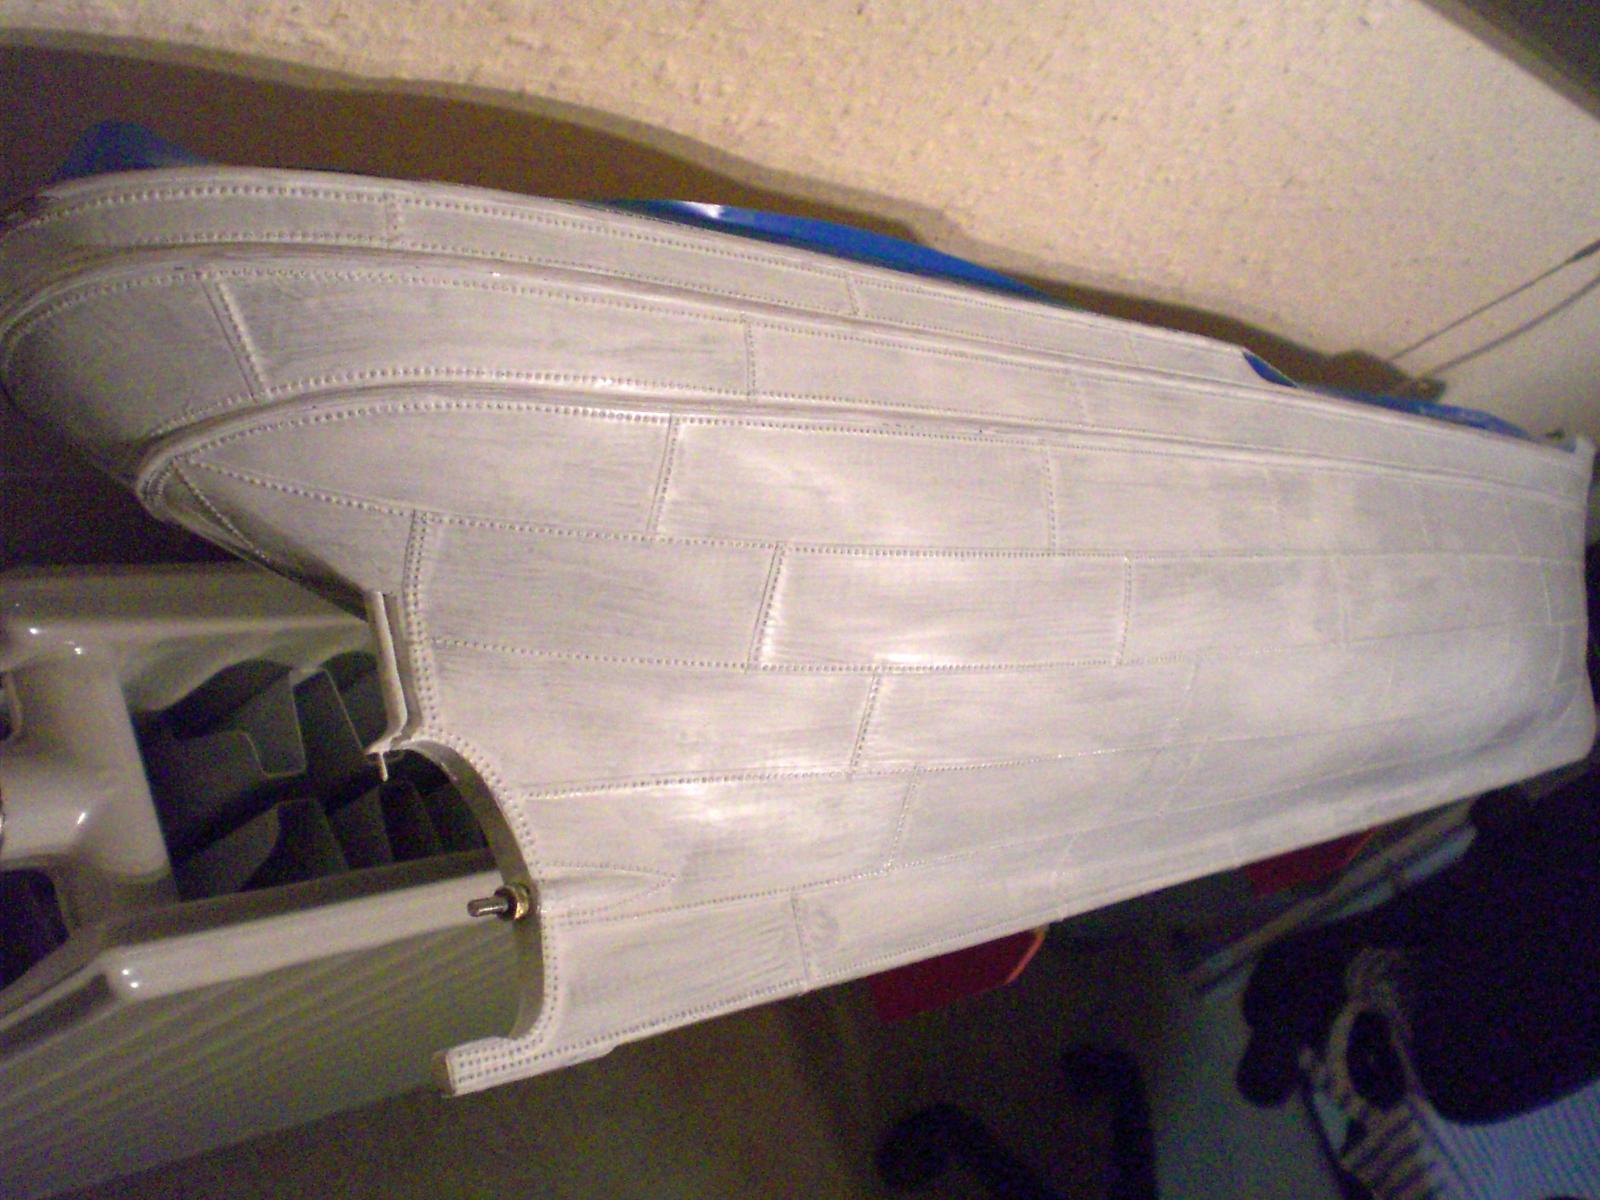
David, the plating I do (cut equal pieces)from a 100mm wide coil of 0,125mm thick alu-tape (self adhesive). The glue side is protected by a film that is pulled off from the rear side, just before the cut in shape and ponced plates are put in Position. The single plates are layed on a rubber plate with the shiny side down and then ponced from the rear side (without removing the glue protection film ) by using a handle with an spanned in toothwheel made of an old mantel clockwork. It depends on the width of the toothwheel how many toothrows can be arranged next to one another on the individual toothwheel ( 1 row riviting.... up to 3 row riviting, etc.) Nils
-
Thanks Popeye, thats very encouraging to get such nice comment.... Nils
-
Peter, for my behalf I`m not so far as you are right now, but if you would`nt mind, I shall be happy if I can contact you on the running rigging in due time. Meanwhile I shall study your Progress with great interest Nils
- 431 replies
-
- 1
-
-
- pegasus
- victory models
- (and 1 more)
-
Thank you Peter, I trust I shall have another Close look at the Amati plans Nils
-
Very impressing work Remco, those Details are real eyecandy, and it is a delight to watch your Fitting out... Nils
-
Nenad, as Long as there is no commercial use gained out of it, I have no objections with you passing photos on to your modeller freinds. Nils
-
David, (...to ceat...) thats a new word to me I can`t look up anywhere, do you have a synonyme for it ? Nils