Mirabell61
-
Posts
7,422 -
Joined
-
Last visited
Content Type
Profiles
Forums
Gallery
Events
Everything posted by Mirabell61
-
 Wonderful project Ilhan, super start on a good looking yacht, wish you good success all the way... Nils
 -
Hi Vic, lovely build, its a beautiful model... Nils
-
Pandora by marsalv - FINISHED - 1:52
Mirabell61 replied to marsalv's topic in - Build logs for subjects built 1751 - 1800
I like your rigging and sail making Marsalve, it looks very realistic ! Nils -
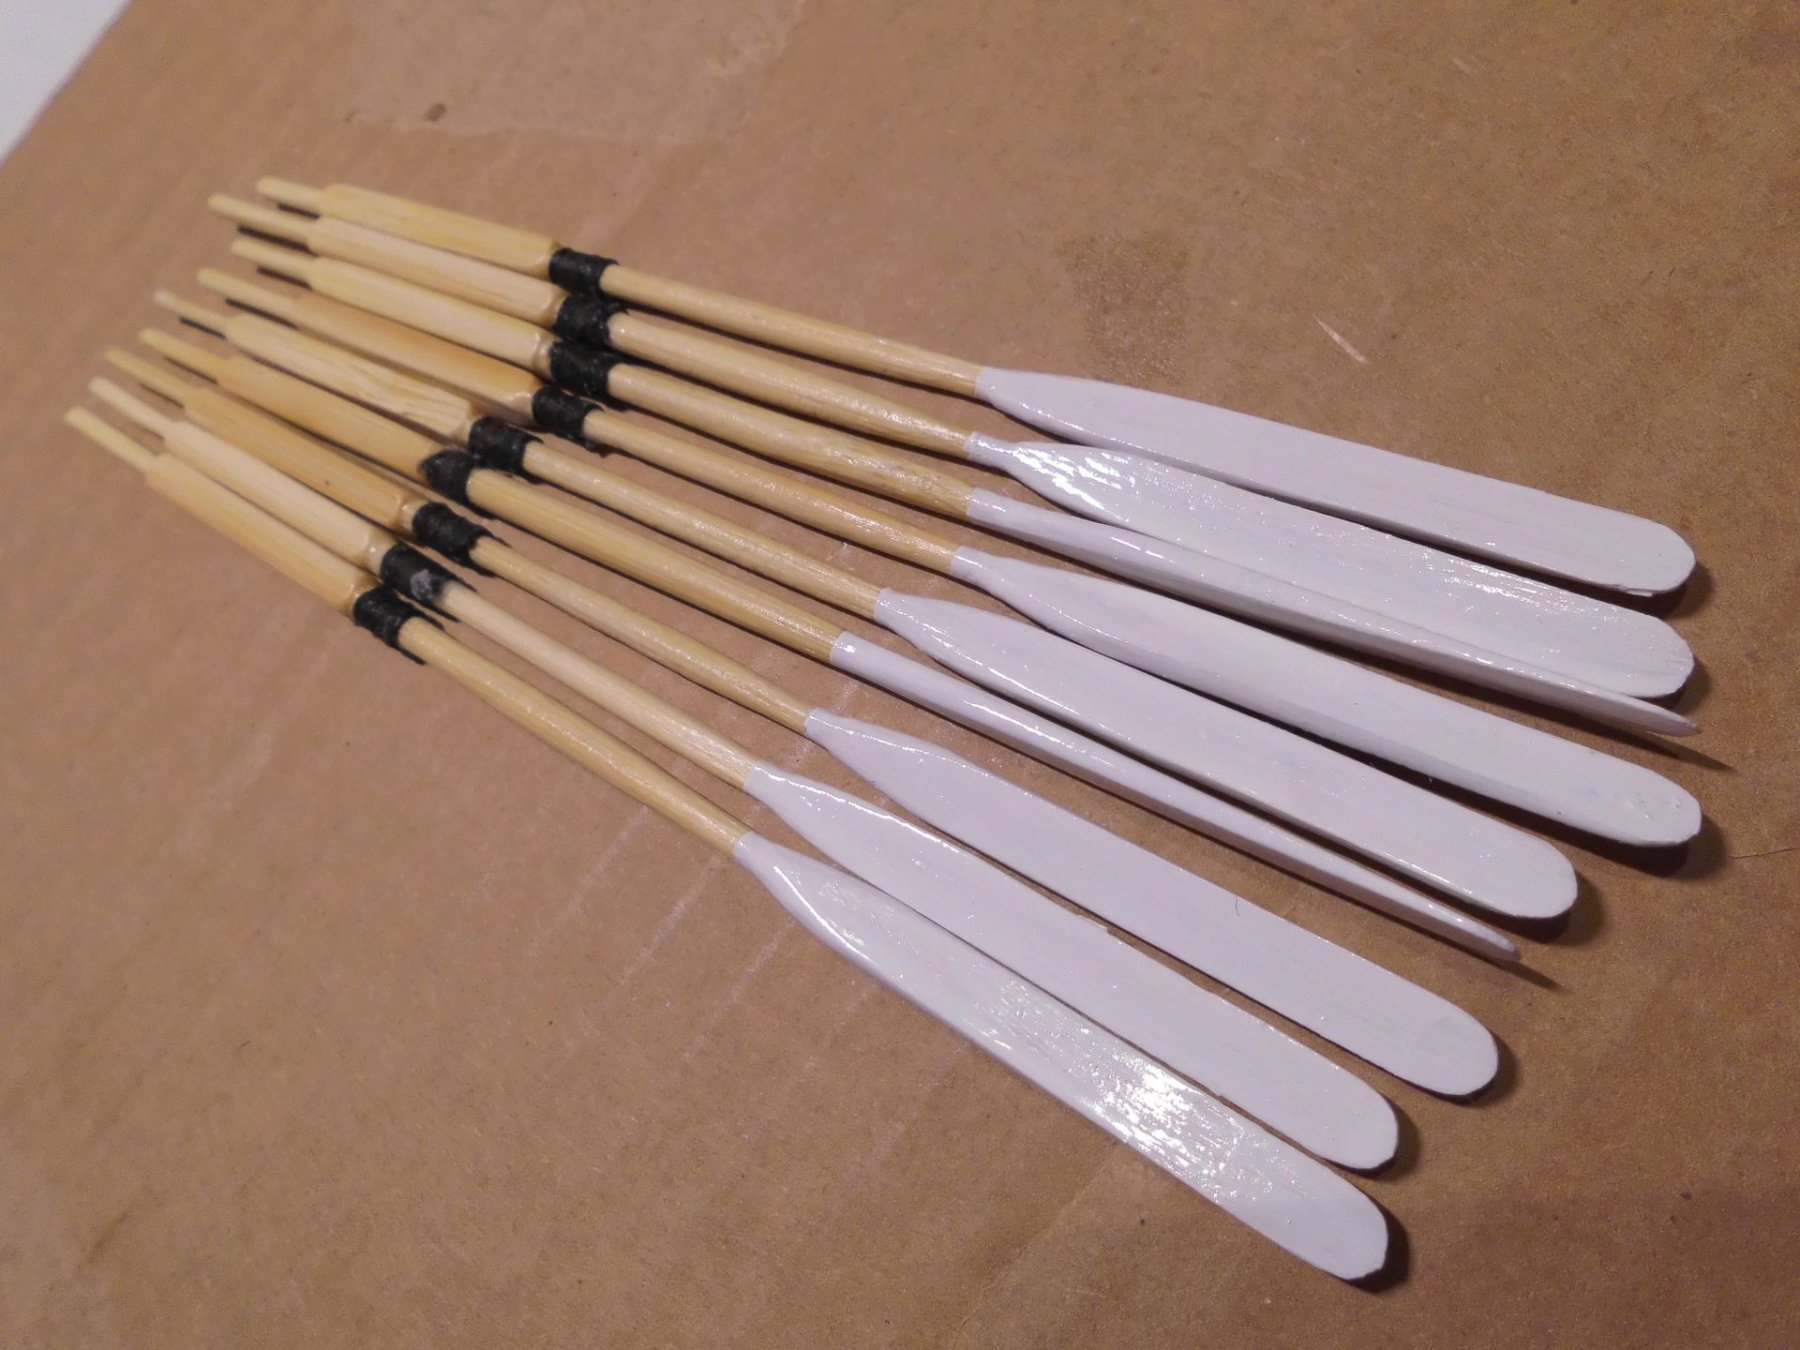
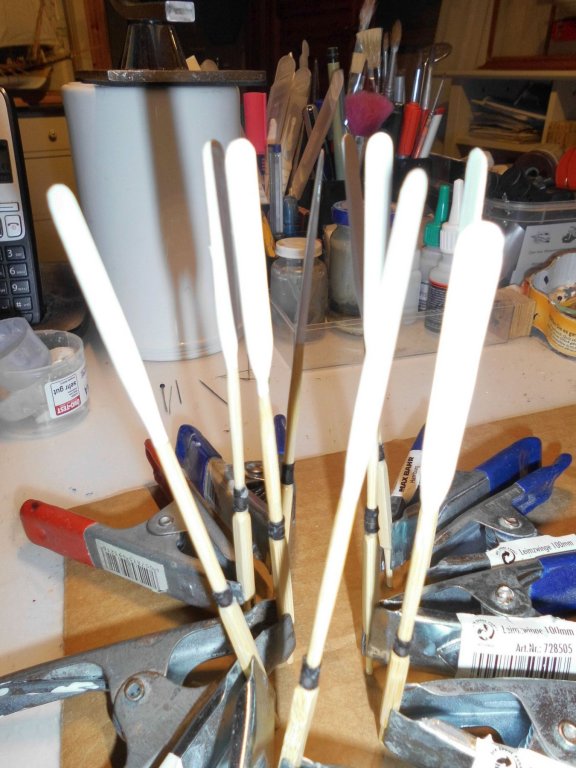
thank you very much Mark and Moxis, Mark, I`m pleased you like the crew and the penents at the top yard-ends... Moxis, Thanks for your words, I`m also not through with the garden yet, but the winter tires have been exchanged... Now the additional 9 sweeps are also completed... Nils here the work in different progress stages..
- 692 replies
-
- 12
-

-
- eagle of algier
- chebec
- (and 2 more)
-
Thanks for catching up Patrick, and so much for your kind compliment, it gives me a very much appreciated feed back on my work.... Nils
- 692 replies
-
- 4
-
-
- eagle of algier
- chebec
- (and 2 more)
-
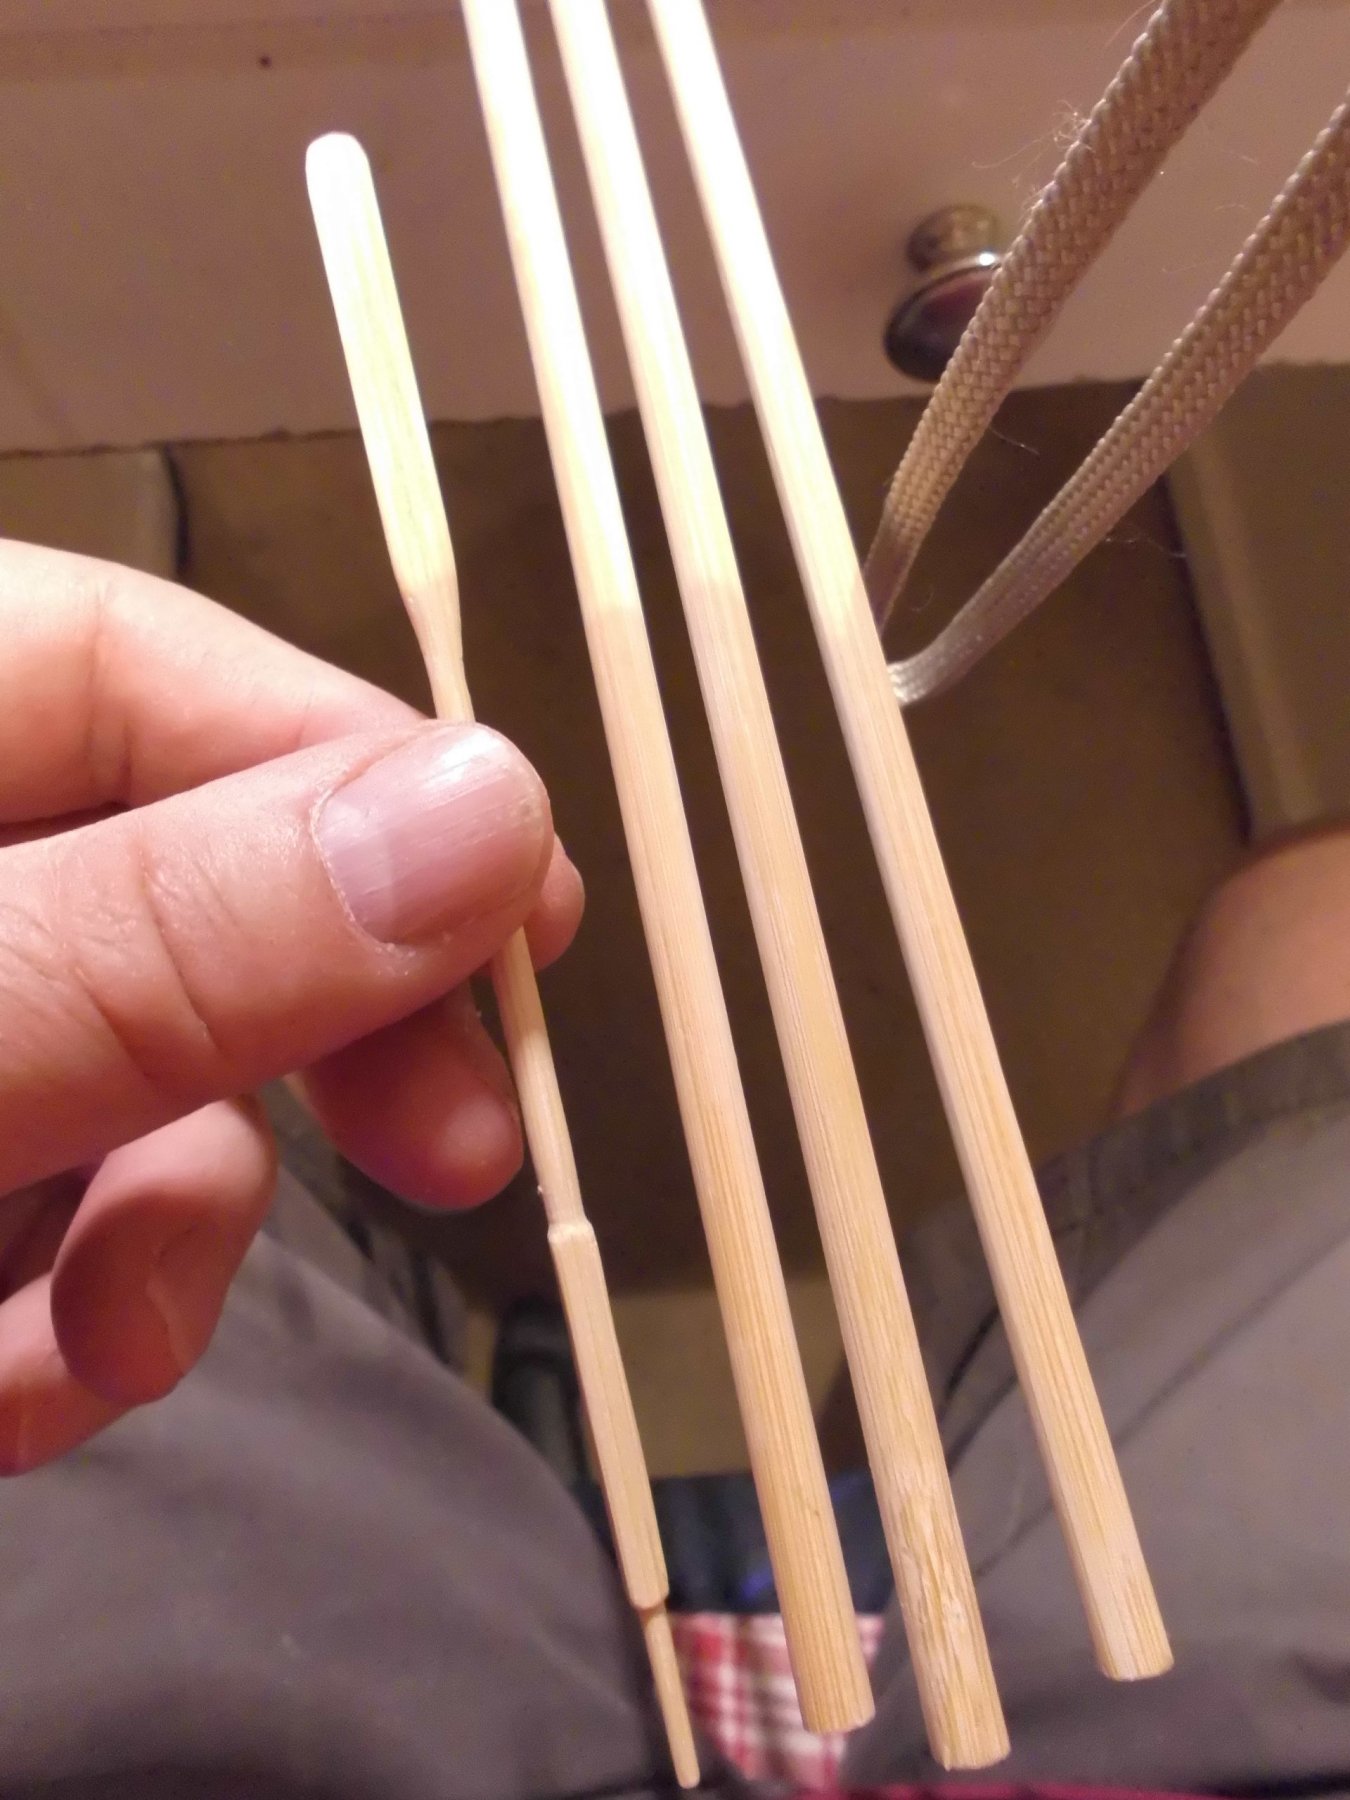
Many thanks Carl, yes the dowels (flower sticks) look a bit like Chinese chopsticks..... Nils
- 692 replies
-
- 3
-
-
- eagle of algier
- chebec
- (and 2 more)
-
ancre Chebece 1750 by Jeronimo - FINISHED
Mirabell61 replied to Jeronimo's topic in - Build logs for subjects built 1501 - 1750
Fantastic artwork Karl, beautiful carvings, a real treat for the eyes.... Nils -
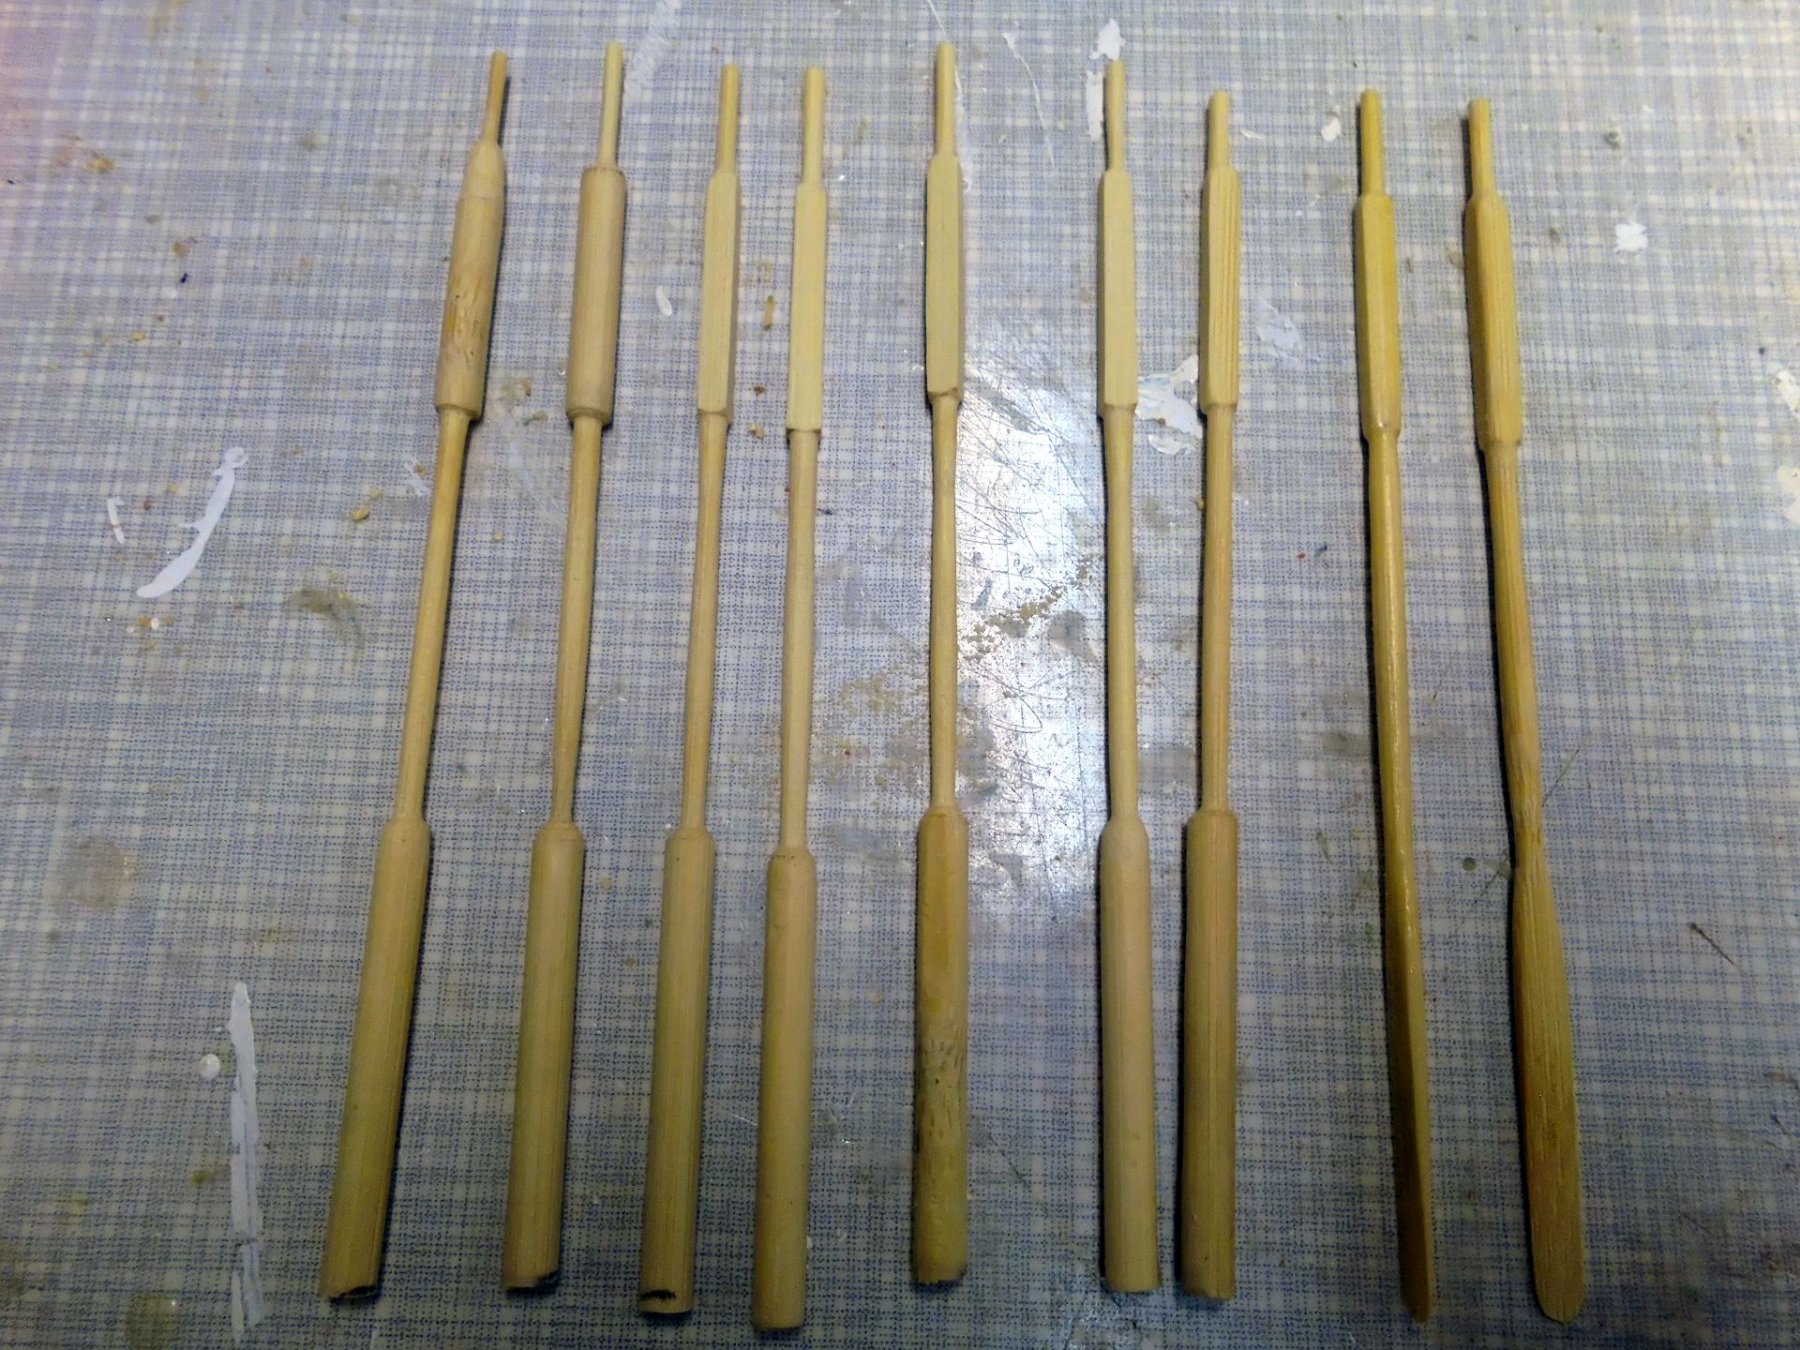
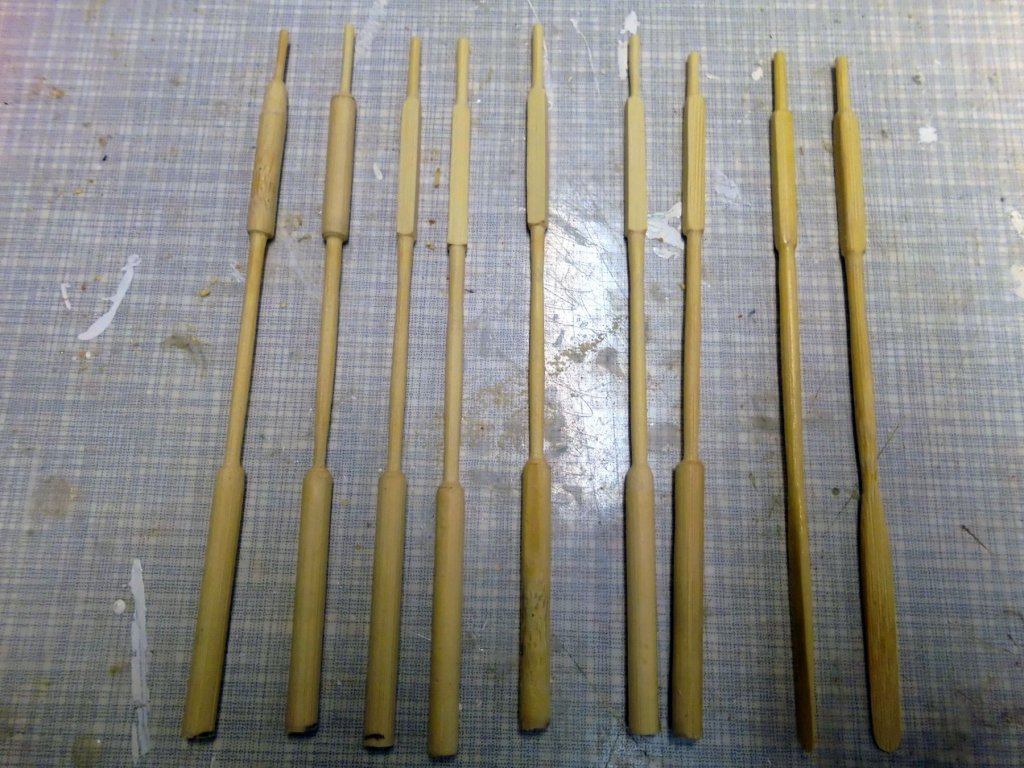
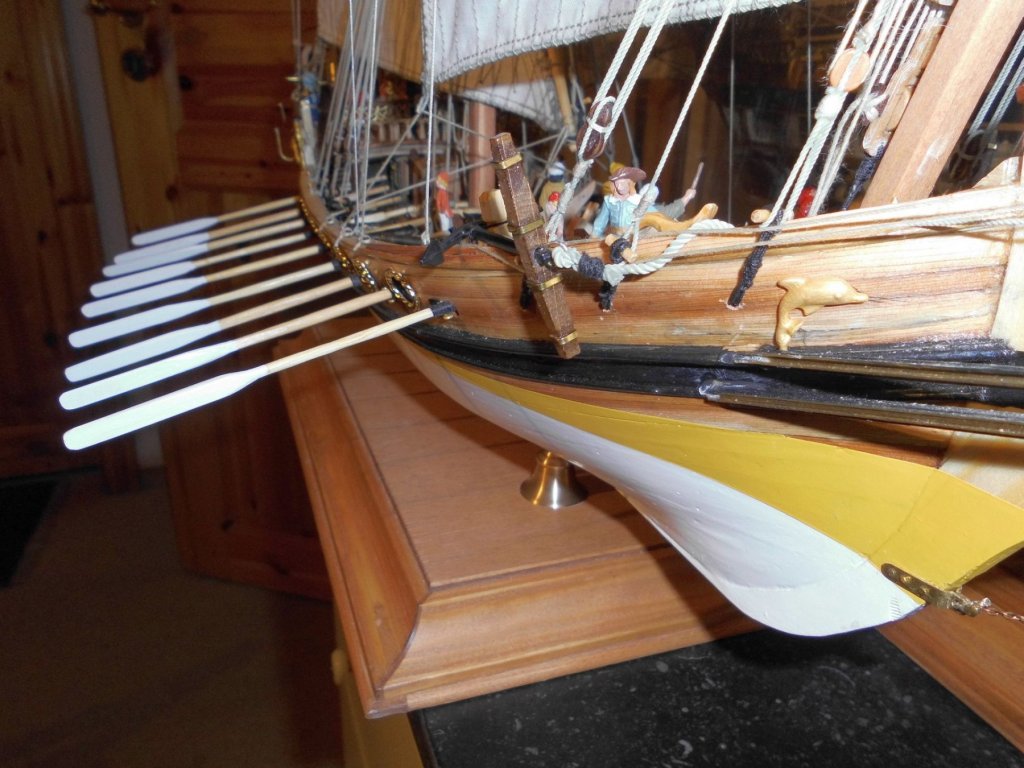
Thank you for your nice compliment Bob, for the sweeps "in the water" I used the 9 ones I already had, and am now making 9 additional ones for the QD lashing outside the port bulwark.... Here I use 5,5 mm diam bamboo flower sticks..... Nils the sweeps are made in one piece from 5,5 mm bamboo dowel...

- 692 replies
-
- 14
-
-
- eagle of algier
- chebec
- (and 2 more)
-
wonderful barrel making Patrick, Nils
-
thank you very much Jack, and for looking in, glad you like it.... Nils
- 692 replies
-
- 3
-
-
- eagle of algier
- chebec
- (and 2 more)
-
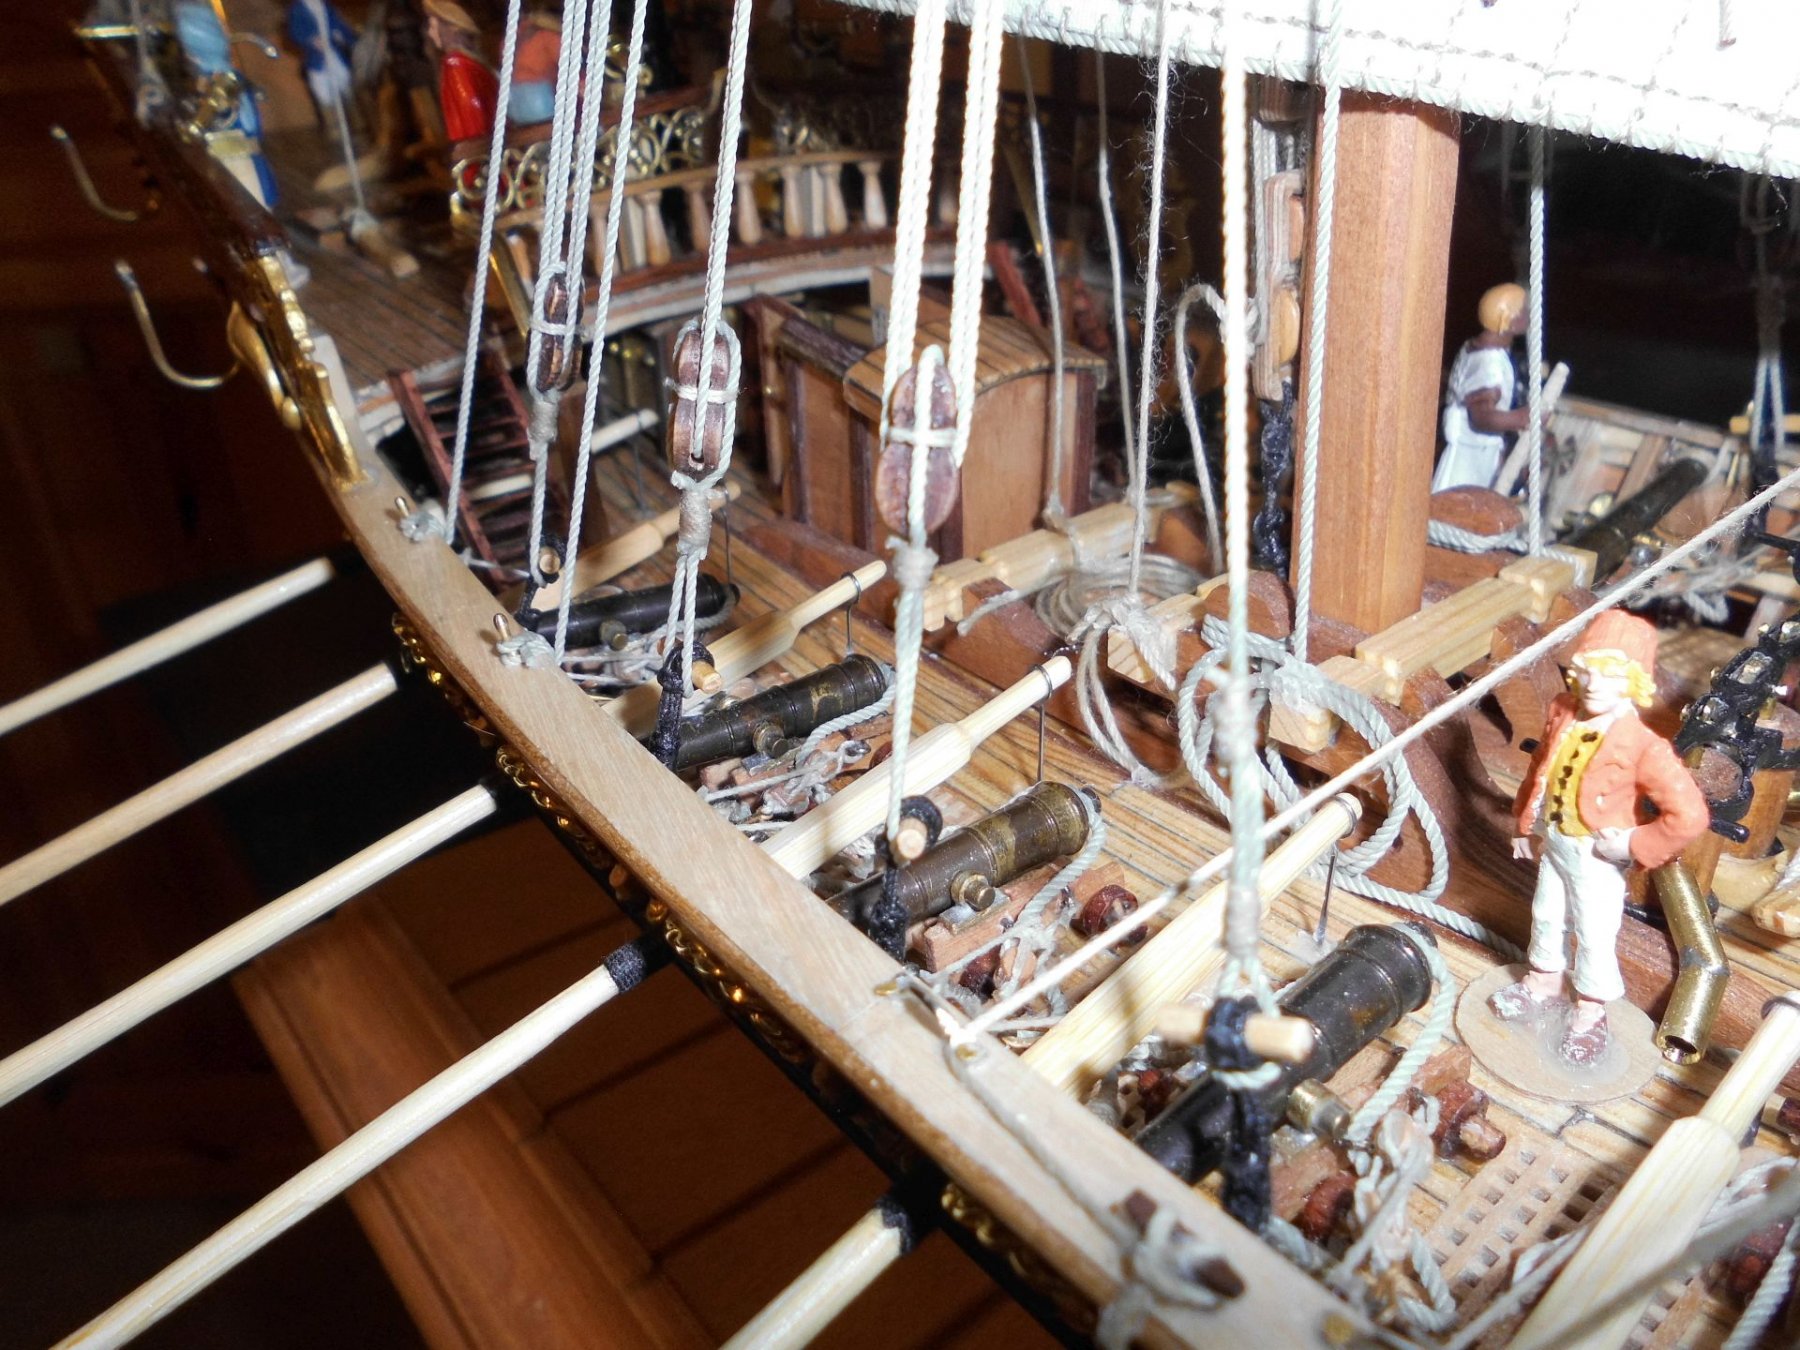
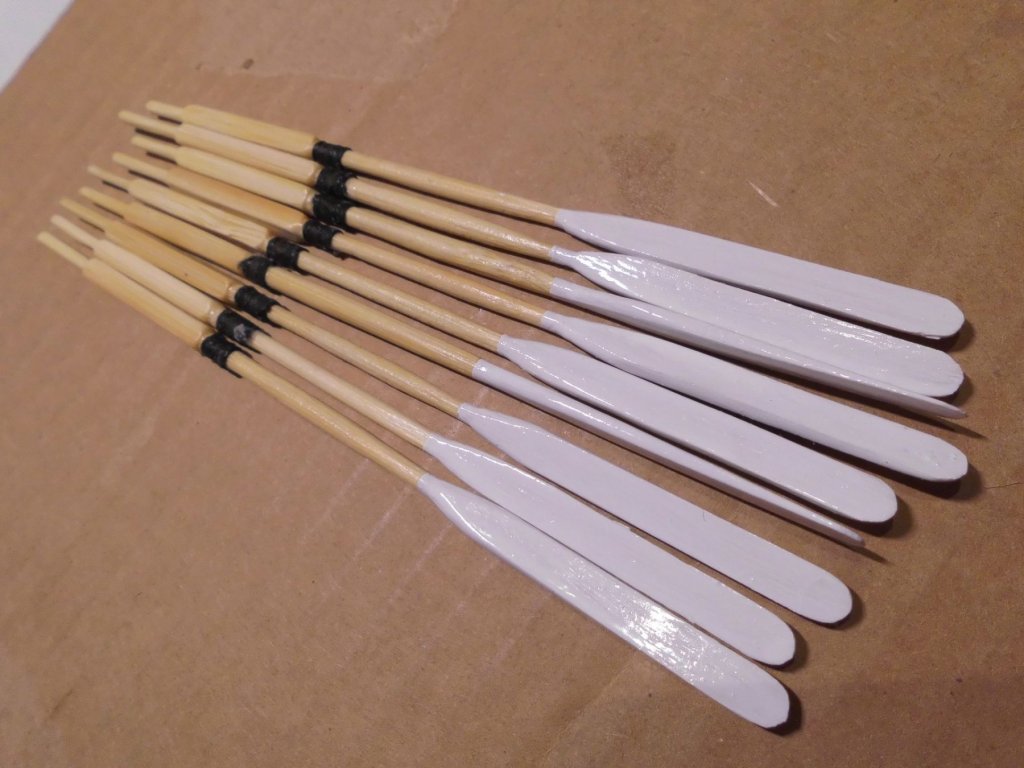
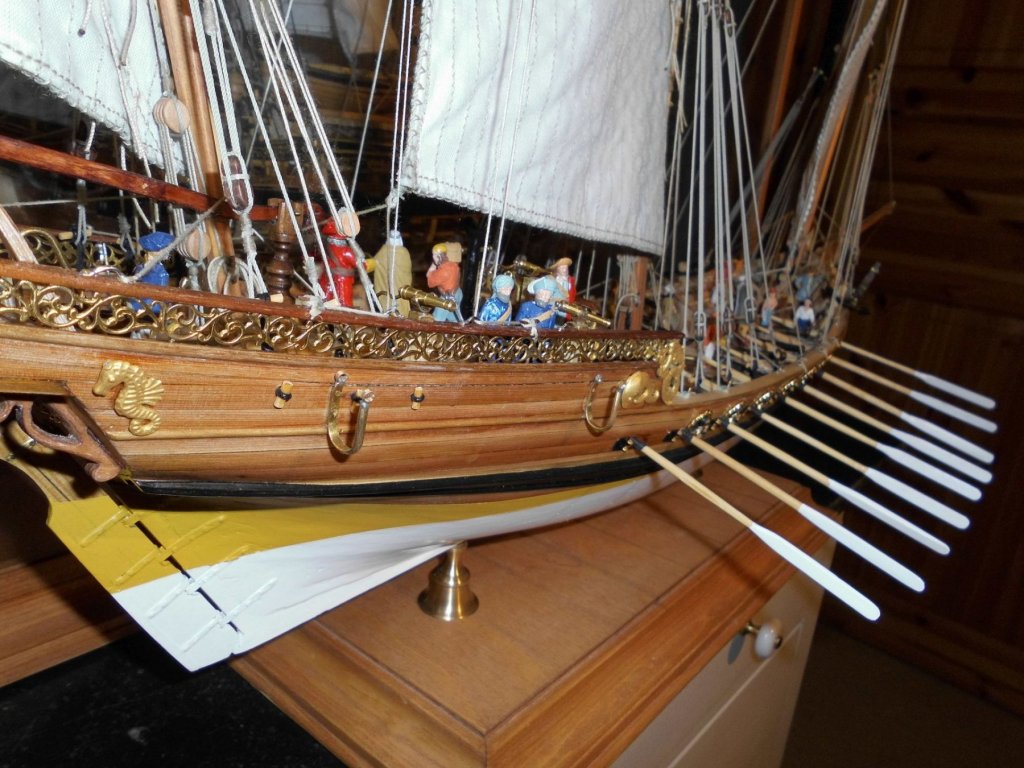
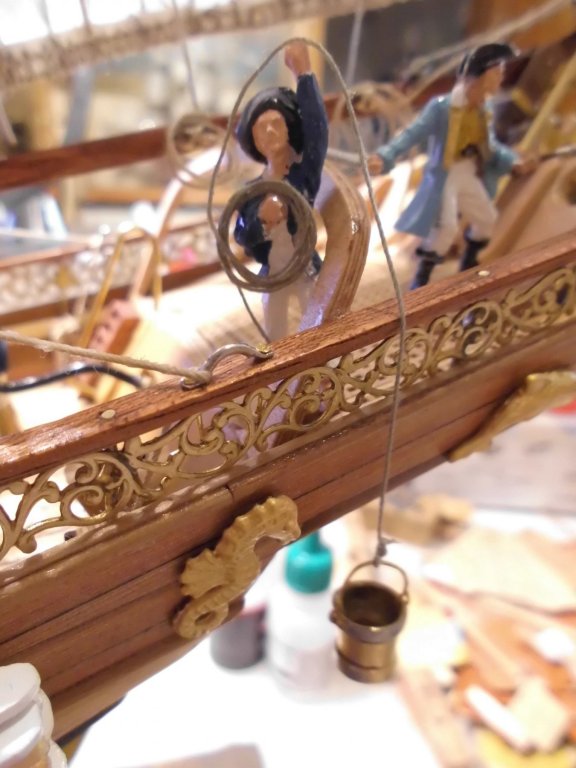
Update : the sweeps (9 per side) were used for maneuvering in wind calm zones for swift attacks / escapes Nils the ends of the sweeps are held in place with an auxilliary support made from thin spring wire...., the ends running through the bulwark bear a zeising to prevent chafing the oar surface


- 692 replies
-
- 18
-
-
- eagle of algier
- chebec
- (and 2 more)
-
Many thanks for your kind words and for looking in Ken, the painting sessions usualy are done, when I`ve gathered a number of figurines, but that mostly the time when I recognize that some of the small paint cans are dryed out and useless.... Nils
- 692 replies
-
- 4
-
-
- eagle of algier
- chebec
- (and 2 more)
-
Danny, love those stairways and rails, next to other accurate details, outstanding modeling in card !! Nils
-
ancre Chebece 1750 by Jeronimo - FINISHED
Mirabell61 replied to Jeronimo's topic in - Build logs for subjects built 1501 - 1750
A beautiful model Siggi, thanks for sharing these pics..... Do you remember if those openings in the quater deck are cut-outs for viewing into the hull ? Nils -
Excellent sail making and rigging Glenn, Your " Lètoile "under sails and the superb fitting out details are very well observed from the actual ship, well done.... Nils
- 101 replies
-
- 2
-
-
- L Toile
- Billing Boats
- (and 1 more)
-
ancre Chebece 1750 by Jeronimo - FINISHED
Mirabell61 replied to Jeronimo's topic in - Build logs for subjects built 1501 - 1750
Karl, those outstanding carvings are top quality work ! and look great. They are wonderfully matching the already assembled stern carvings. You mentioned earlier, that the carvings are commisioned work, congrats to you for having that very skilled source / freind... Nils -
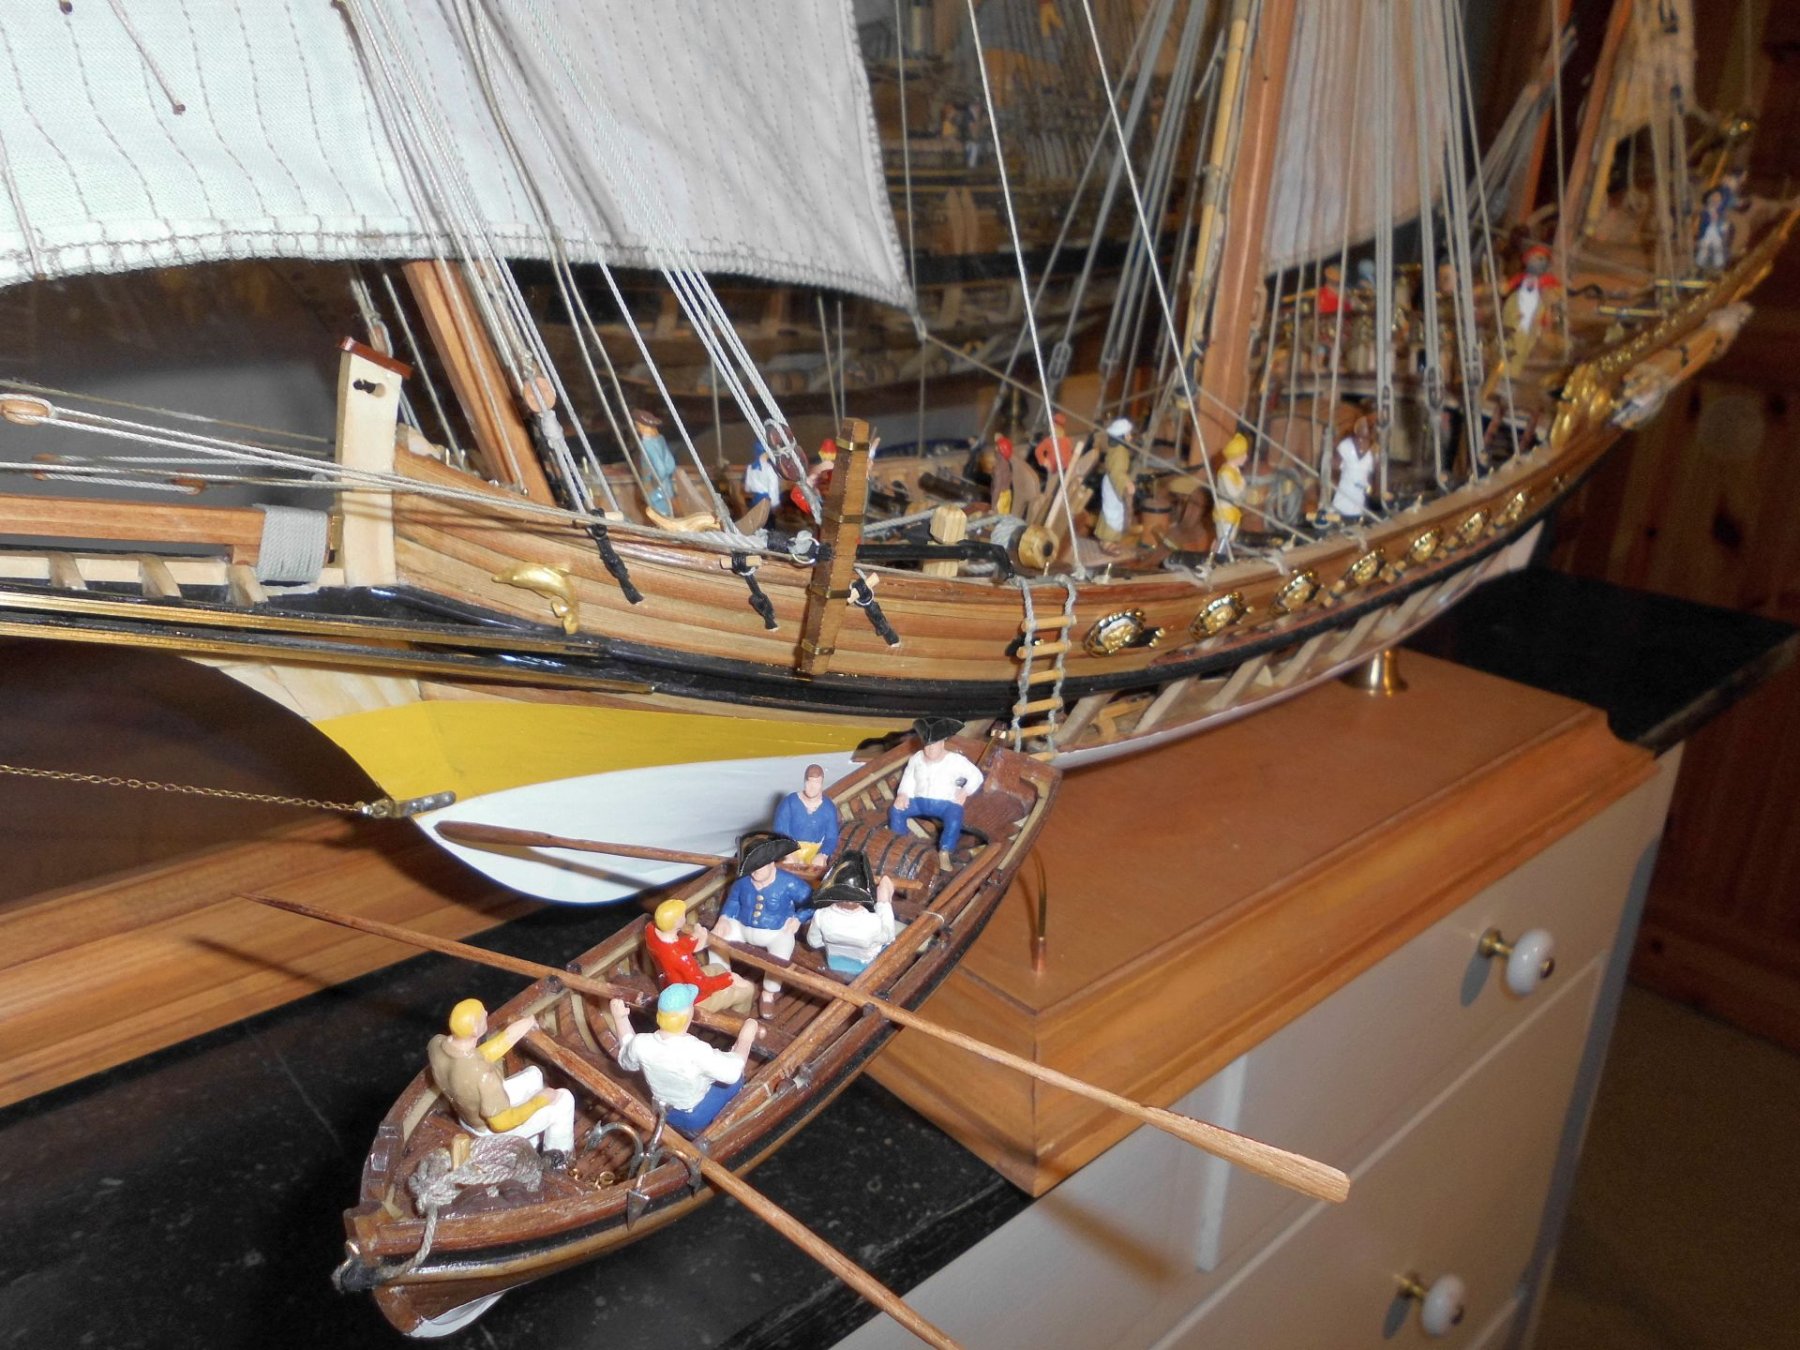
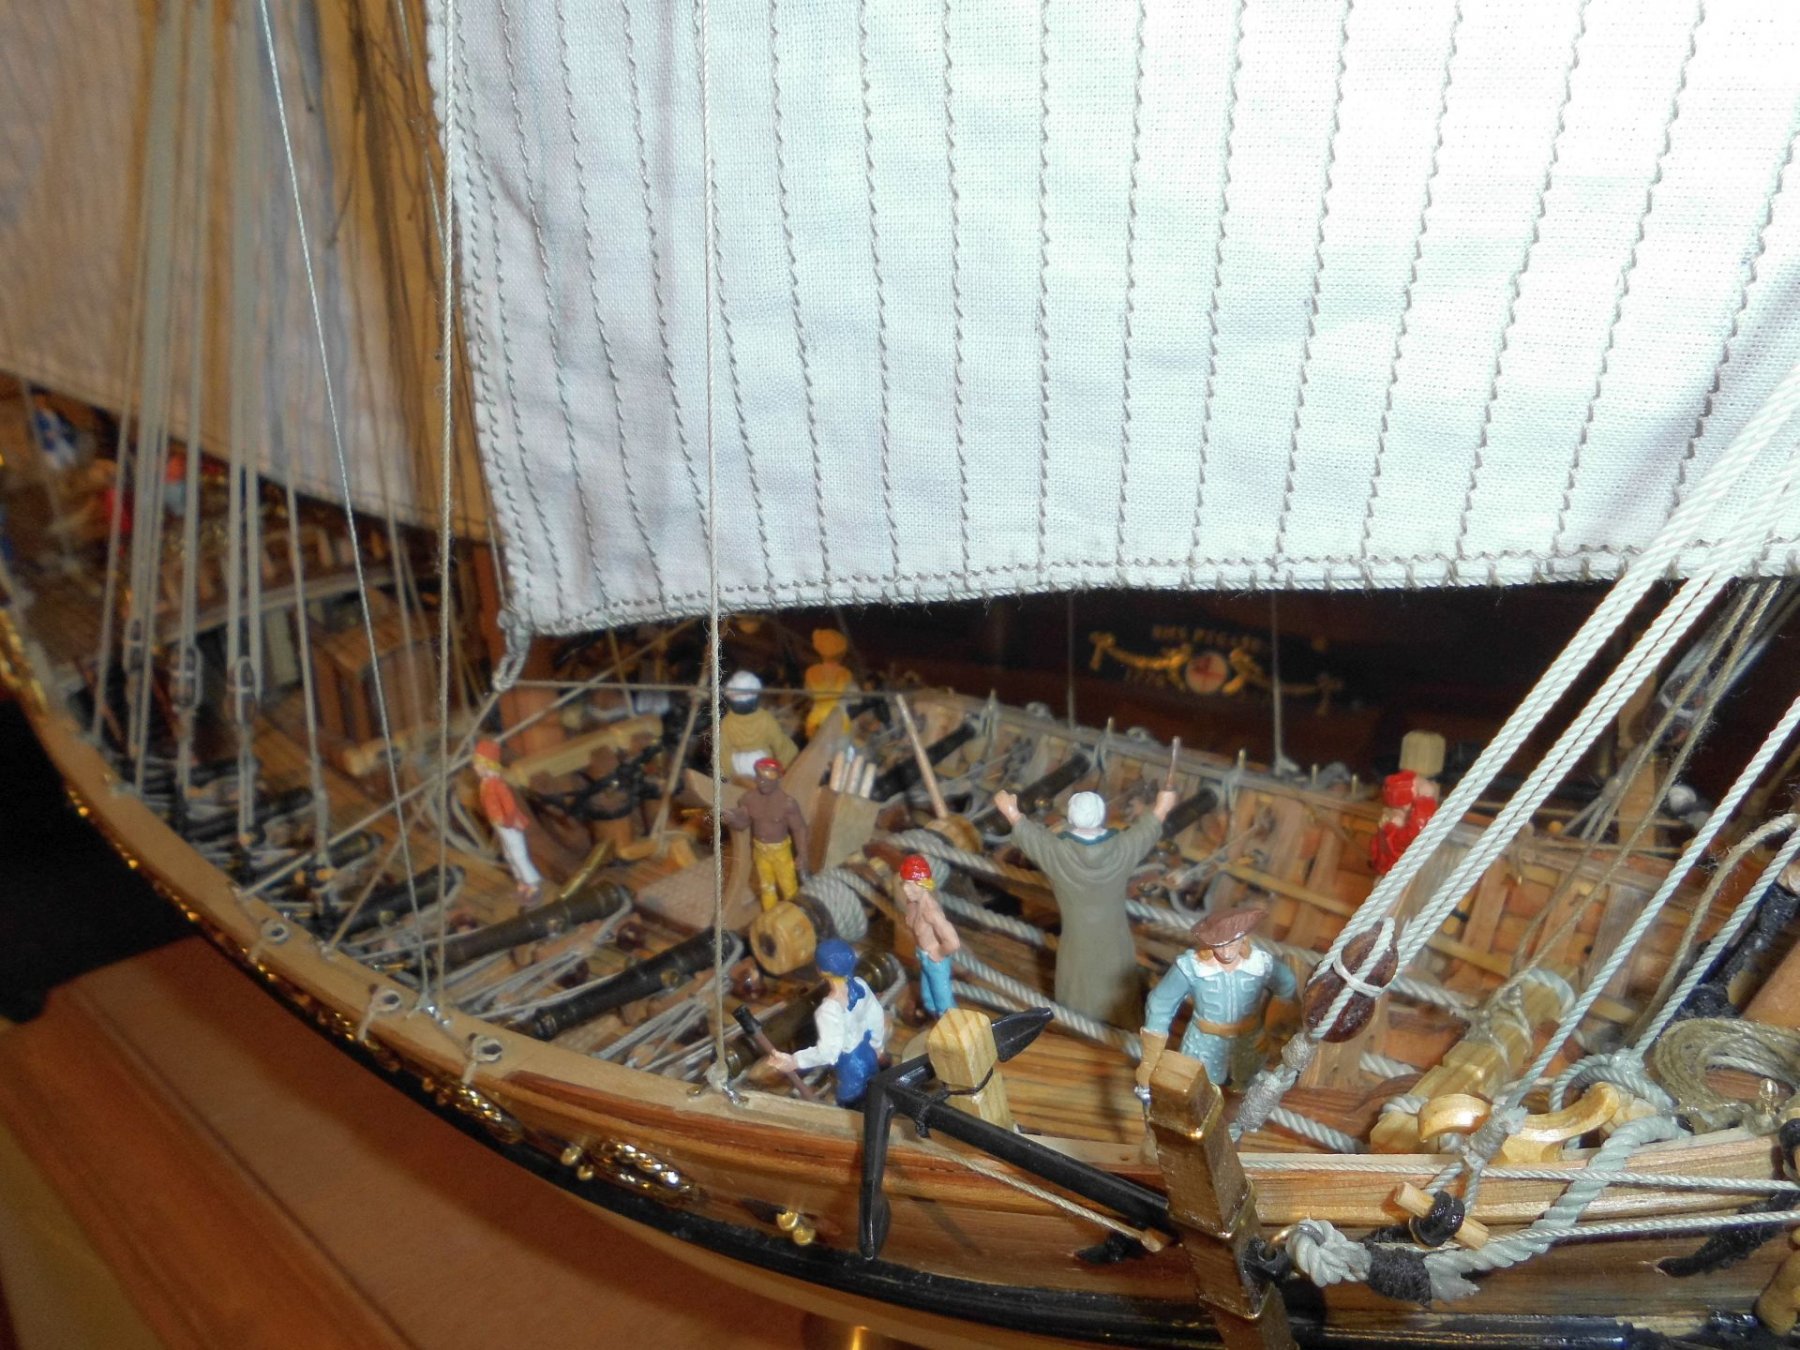
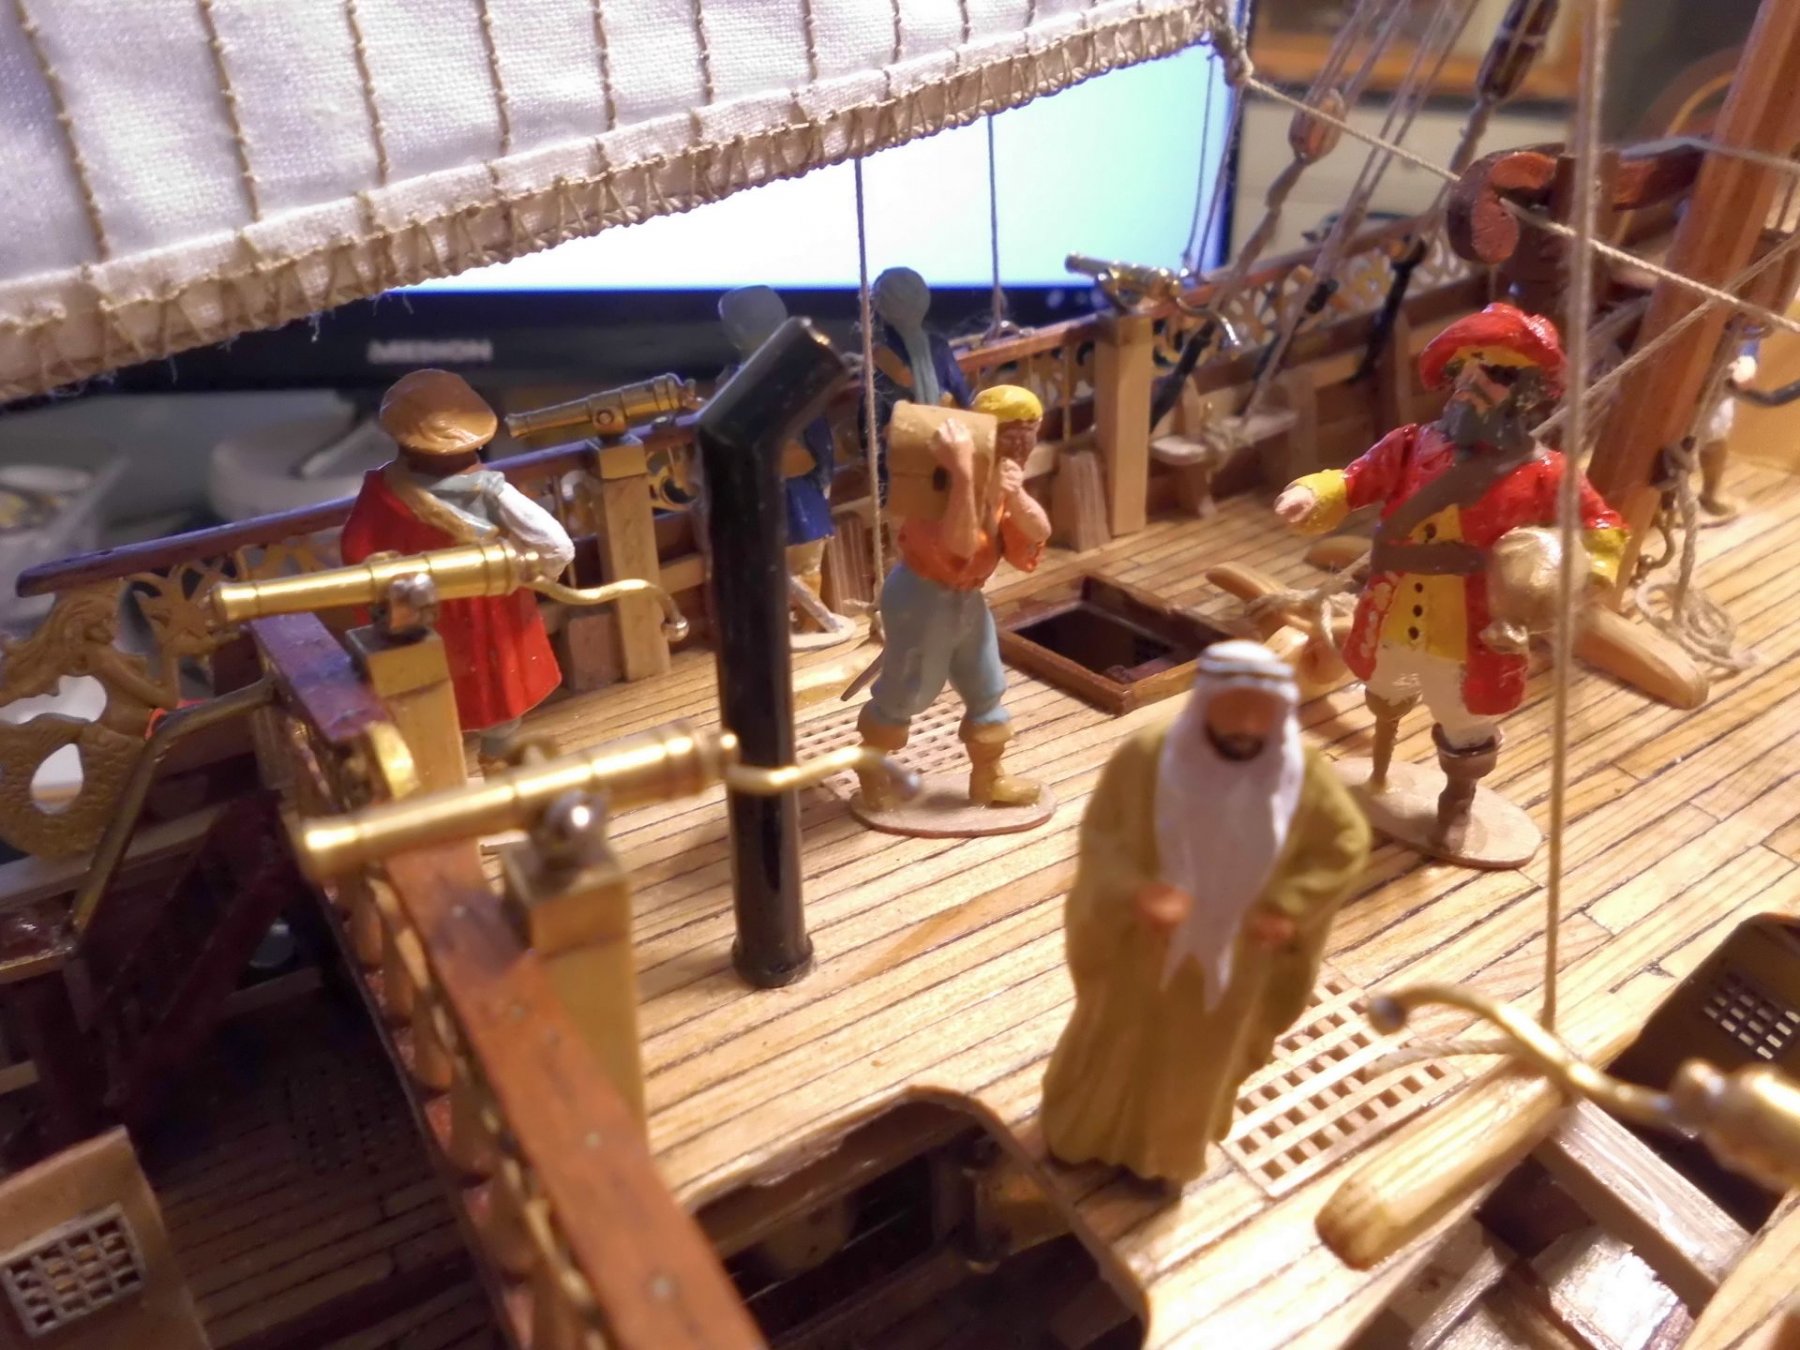
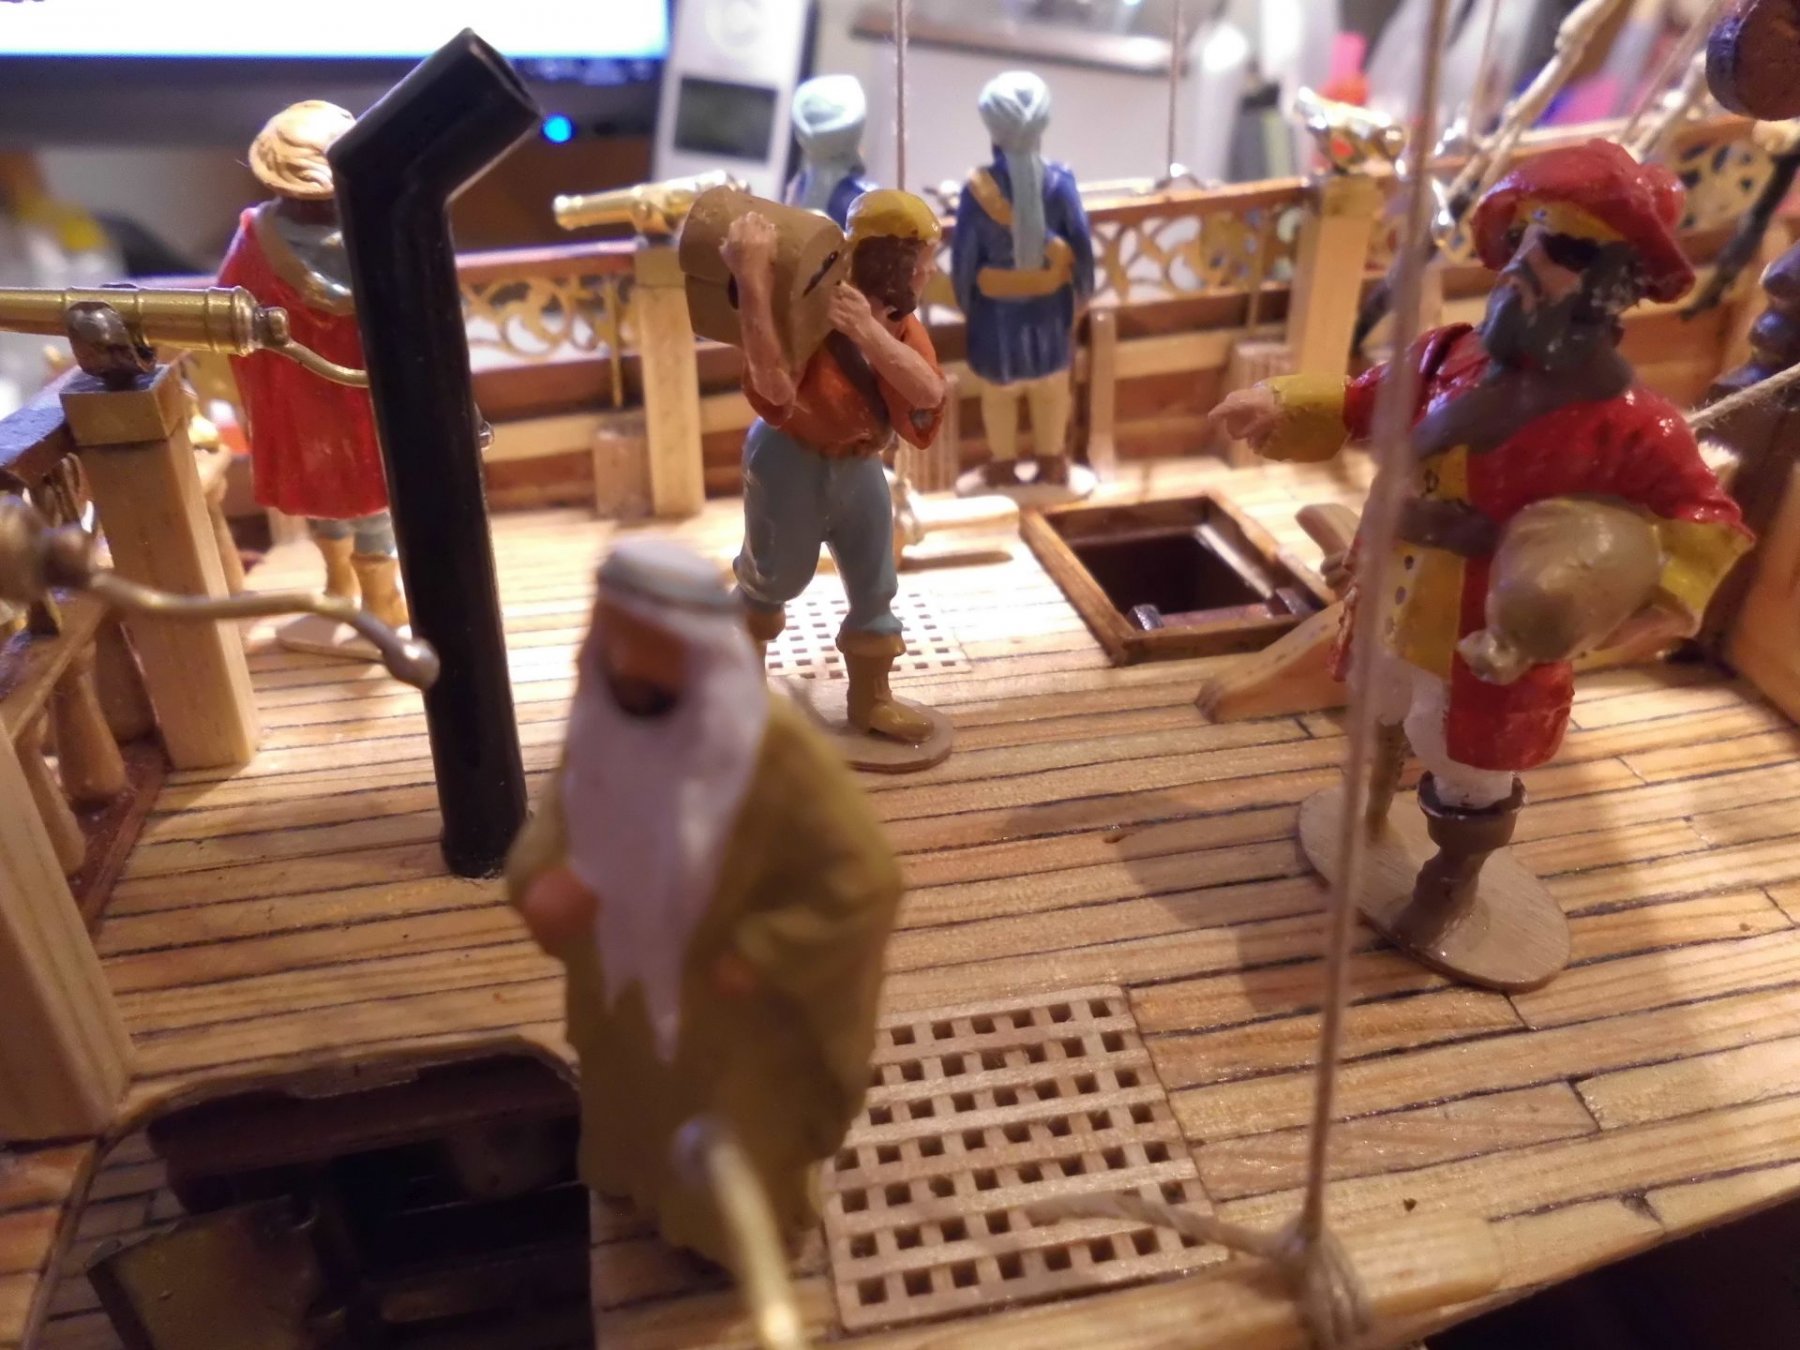
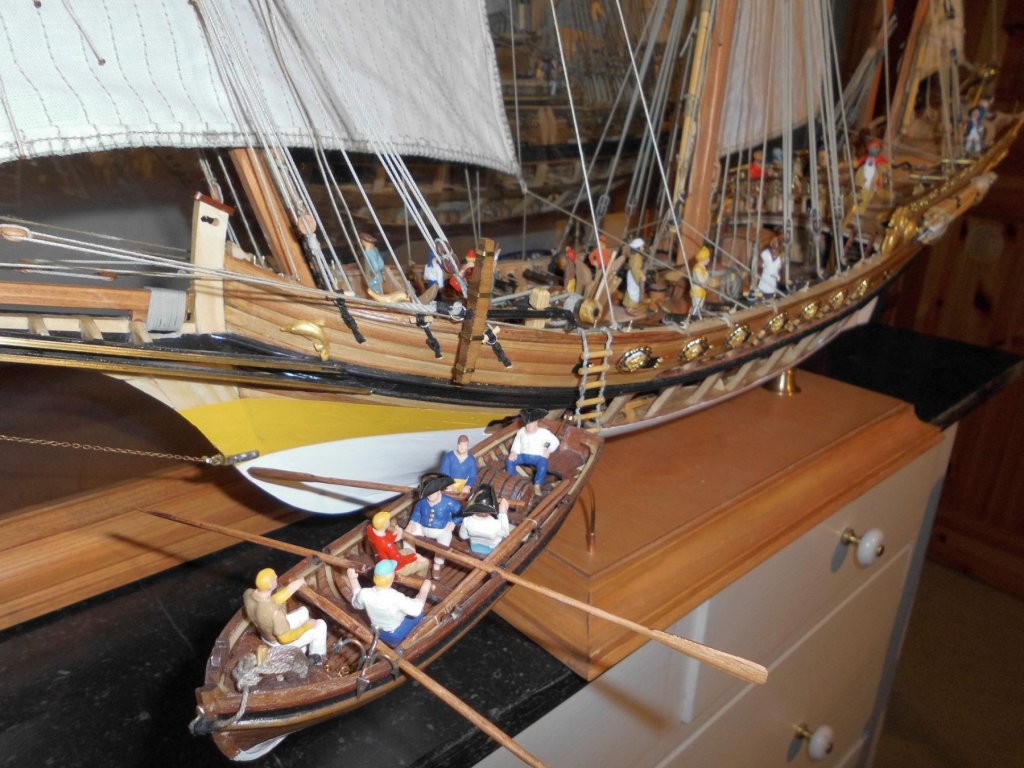
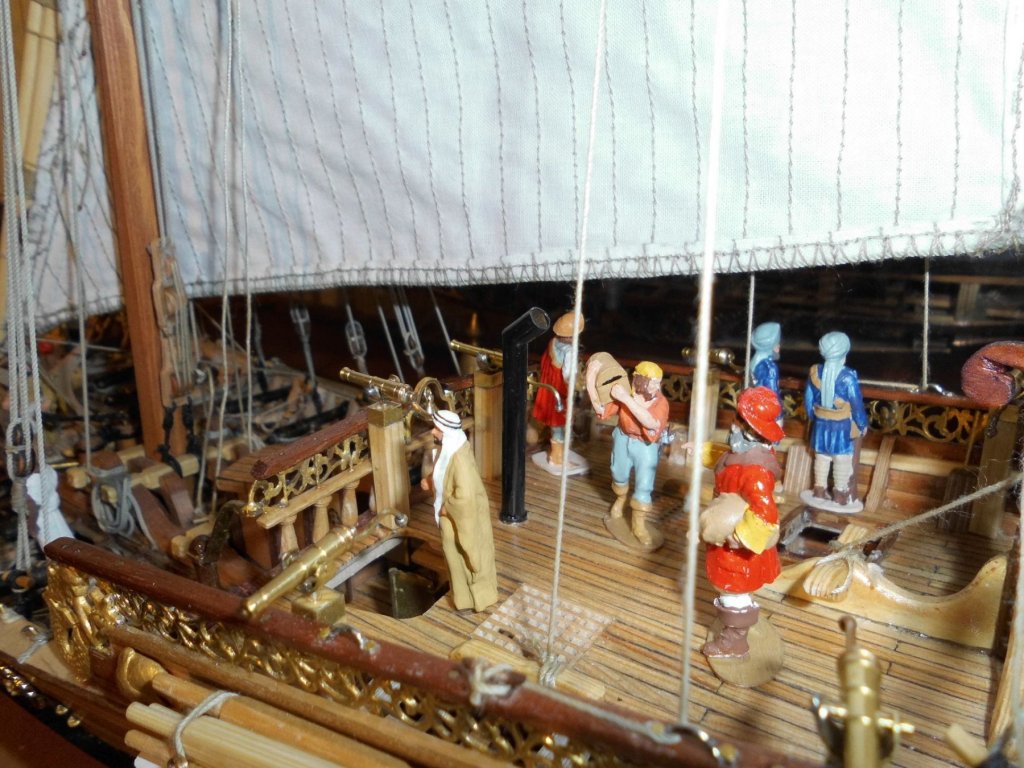
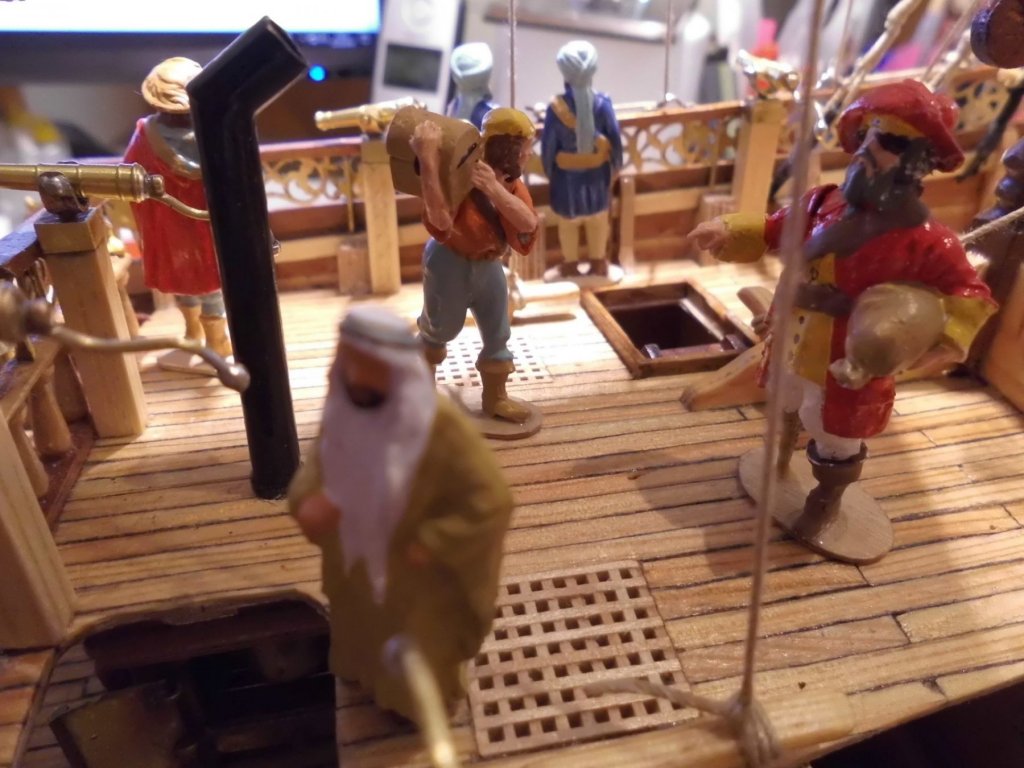
Thank you very much for your kind comments Denis, John, Dave and Jesse,.... also thanks to all the "likes" Denis, thanks for your words, the chap aft grating deck is somehow agressive today and the capt. odered him to get some fresh air, out of the business, where he could cool down and harm nobody... John, many thanks for your words, for displaying I`m planing to make a casing broad enough to enclose the sweeps on stb. and for the pinnace on port side.... Dave, Thanks for your words, much appreciated, I always wanted to do a "Hainan Junk" one day, so probably it will be the next project, but I will have to groove myself in a bit more on that one first...... Jesse, I`m very pleased you like the Chebec, and would love to see one of these in a suitable bottle one day, keep up that idea ... Nils
- 692 replies
-
- 5
-
-
- eagle of algier
- chebec
- (and 2 more)
-
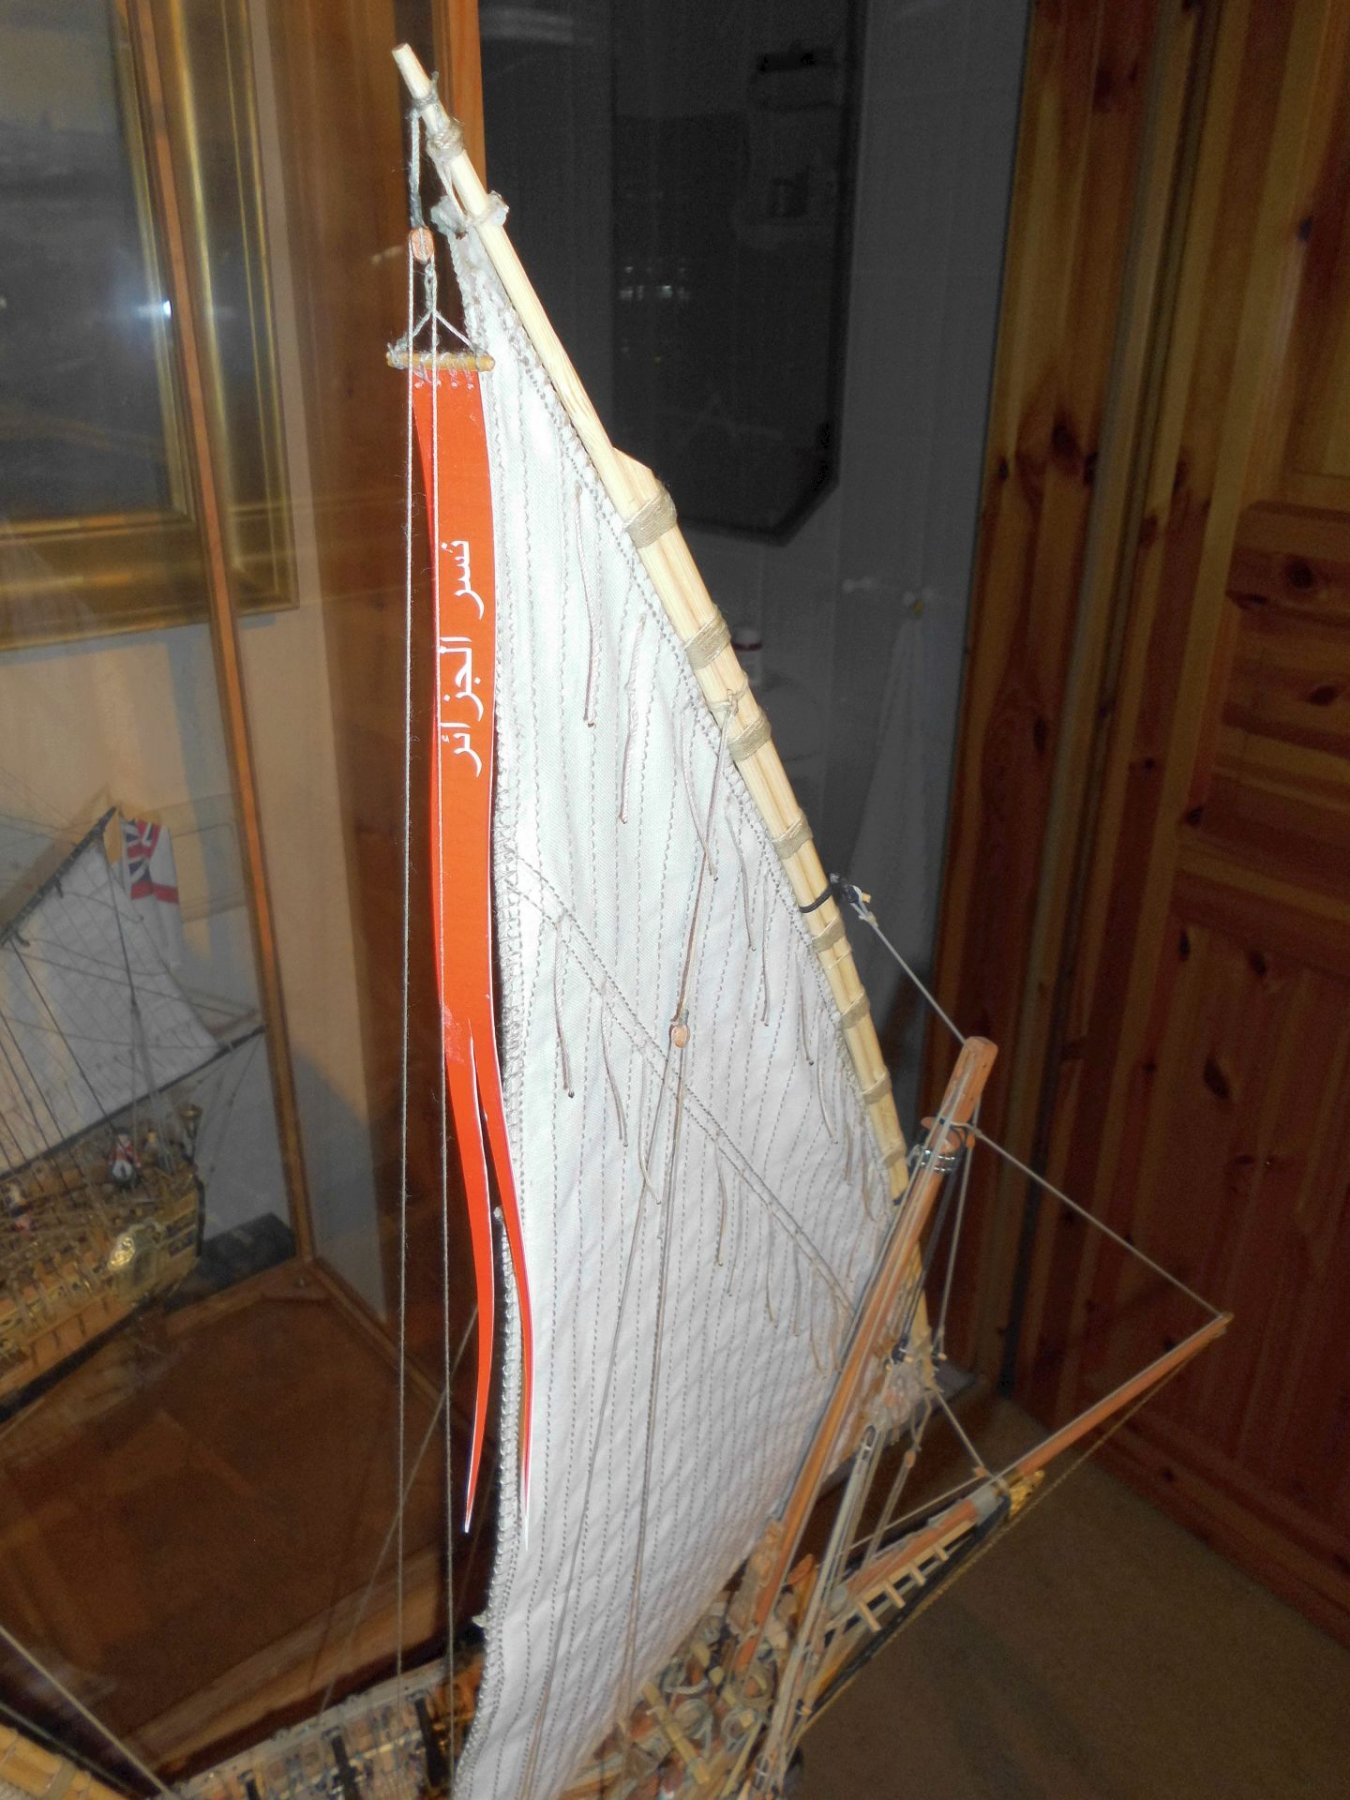
Thank you very much for your highly appreciated comments Piet, Christos, Carl and Antony..... Piet, I would appreciate if someone (an Arabic speaking) fellow builder could please confirm if the spelling is correct as shown and makes sense..... Christos, thanks so much for your kind words, am pleased you like it.... Some of the figures bases are extra made, but you`re right, I may perhaps consider to eliminate them again Carl, yes, it was real fun gathering those multi cultural ruffians... Antony, thanks for your words and for following from begin onwards... Nils
- 692 replies
-
- 4
-
-
- eagle of algier
- chebec
- (and 2 more)
-
Outstanding work Igor !! love that action around the old fisherman and his boat... Nils
- 131 replies
-
- 6
-
-
- bottle
- the old man and the sea
- (and 1 more)
-
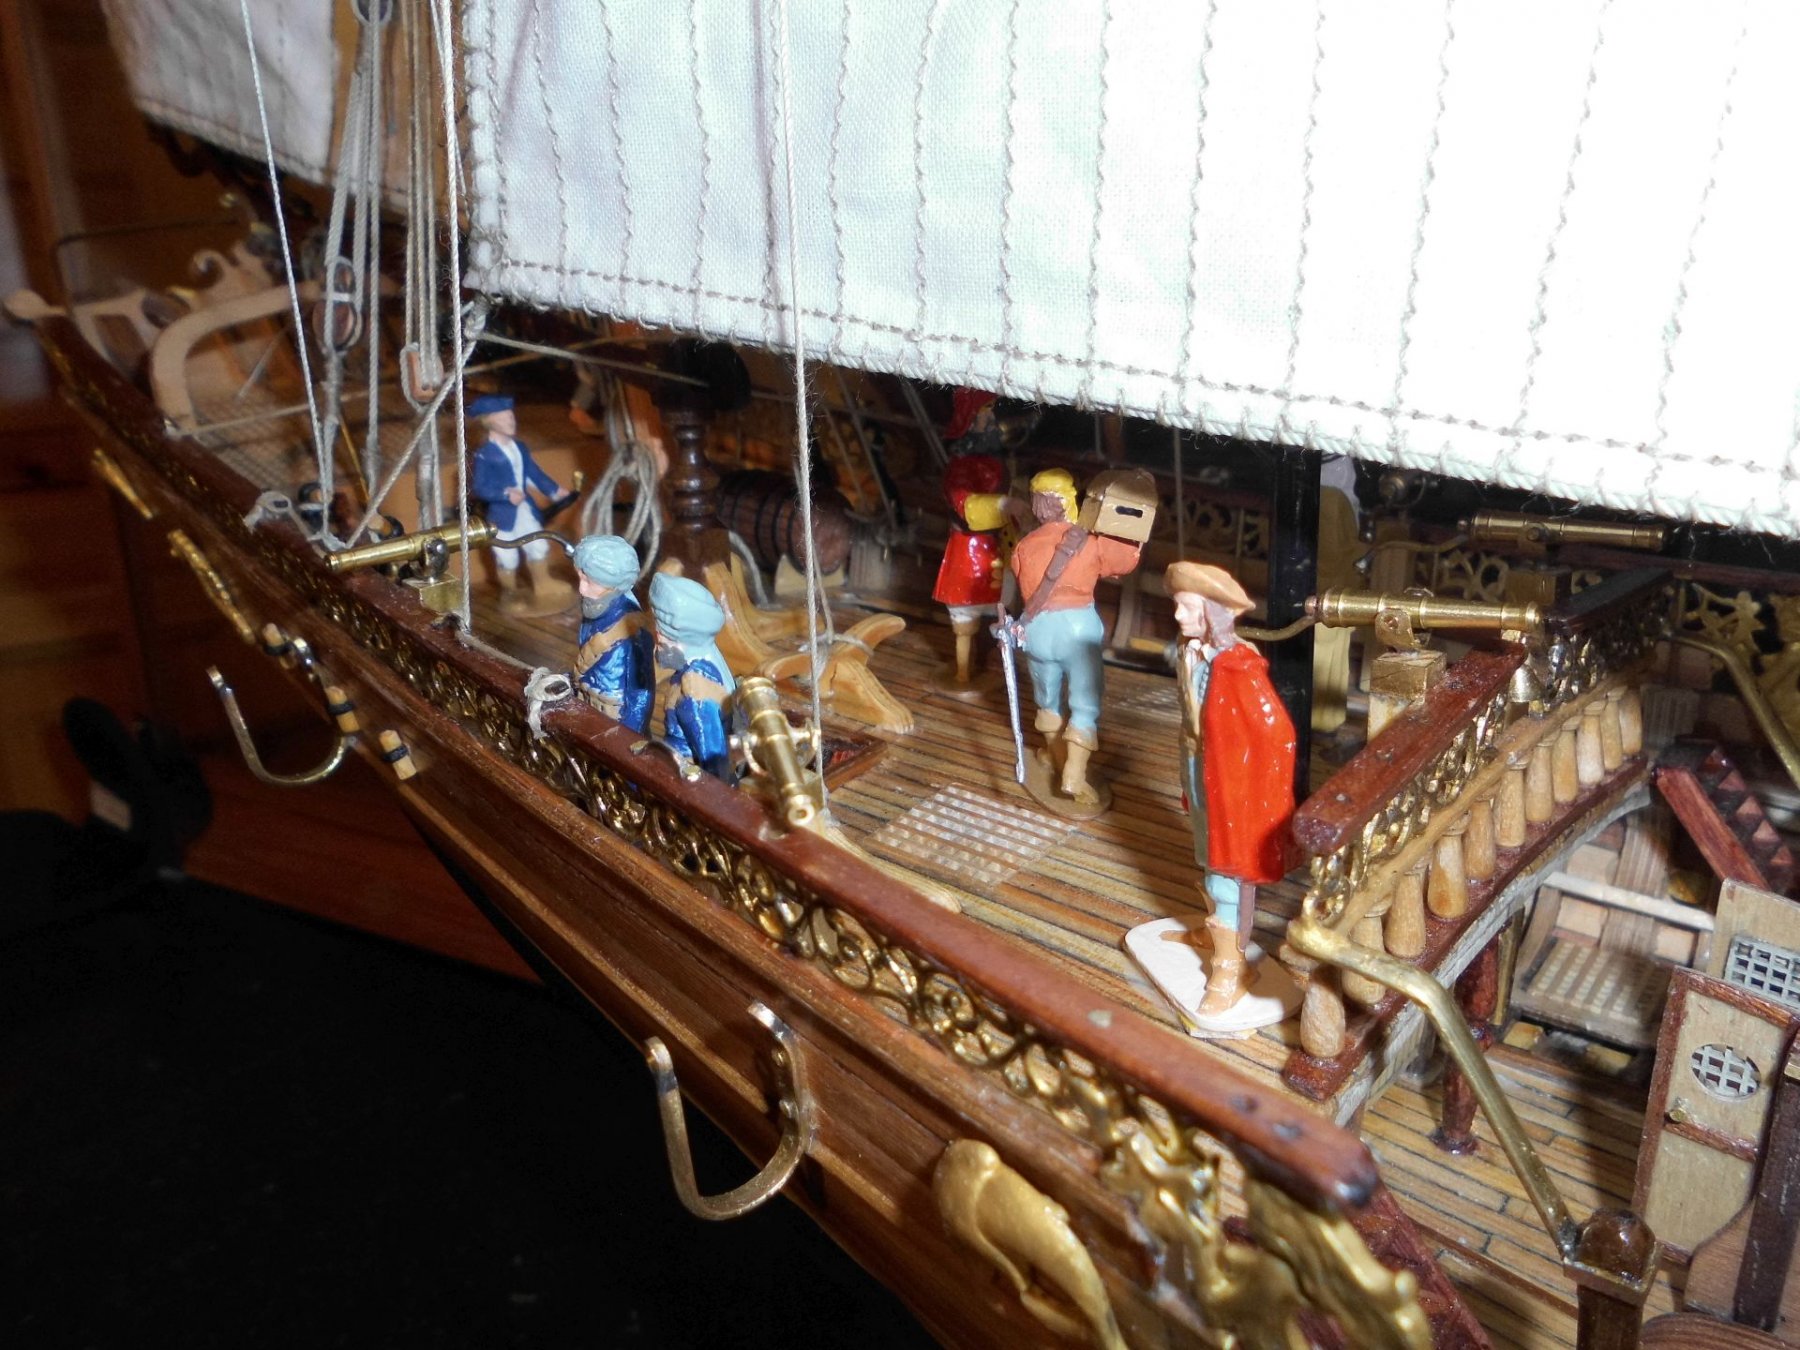
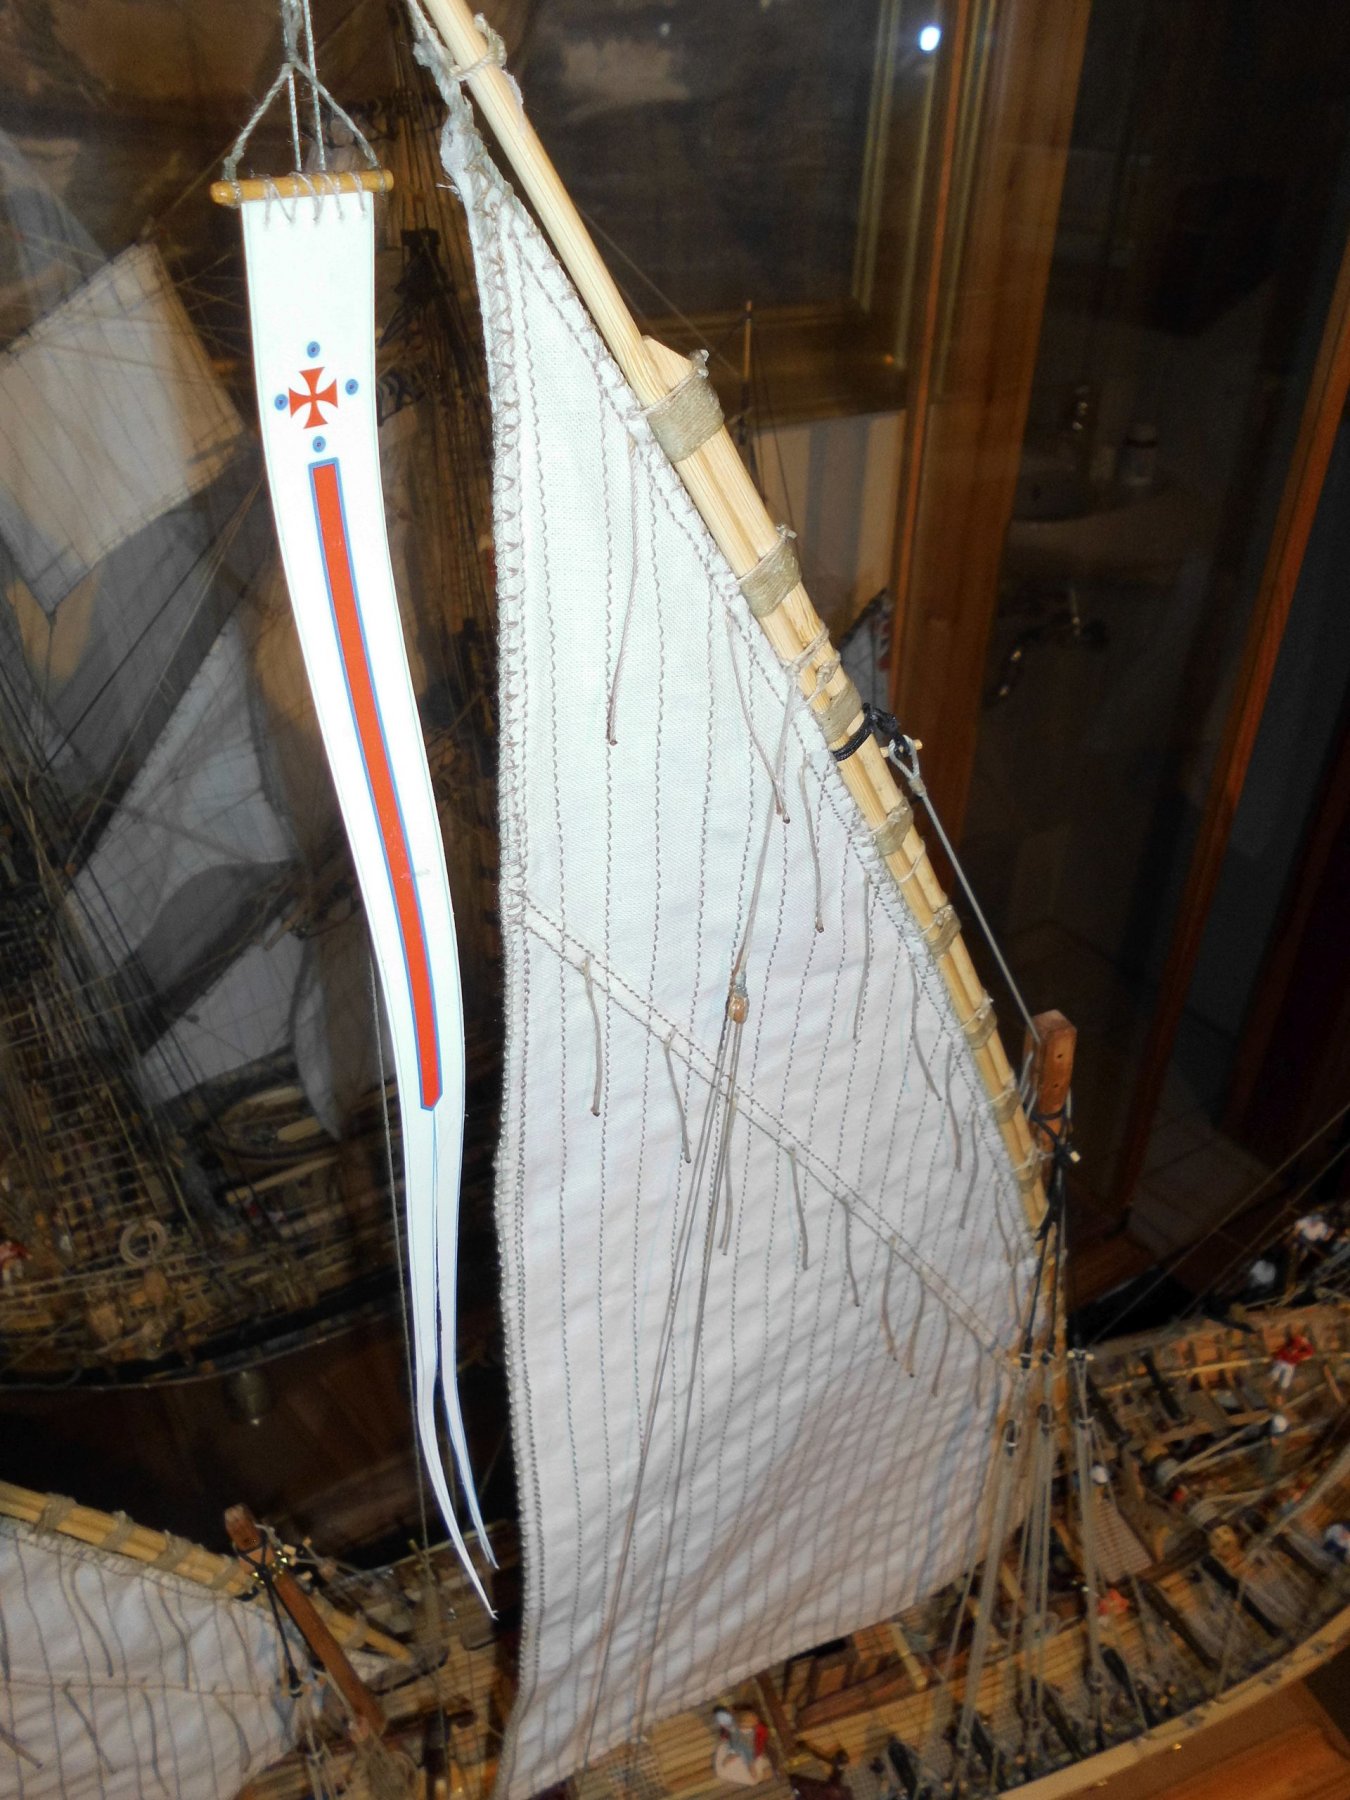
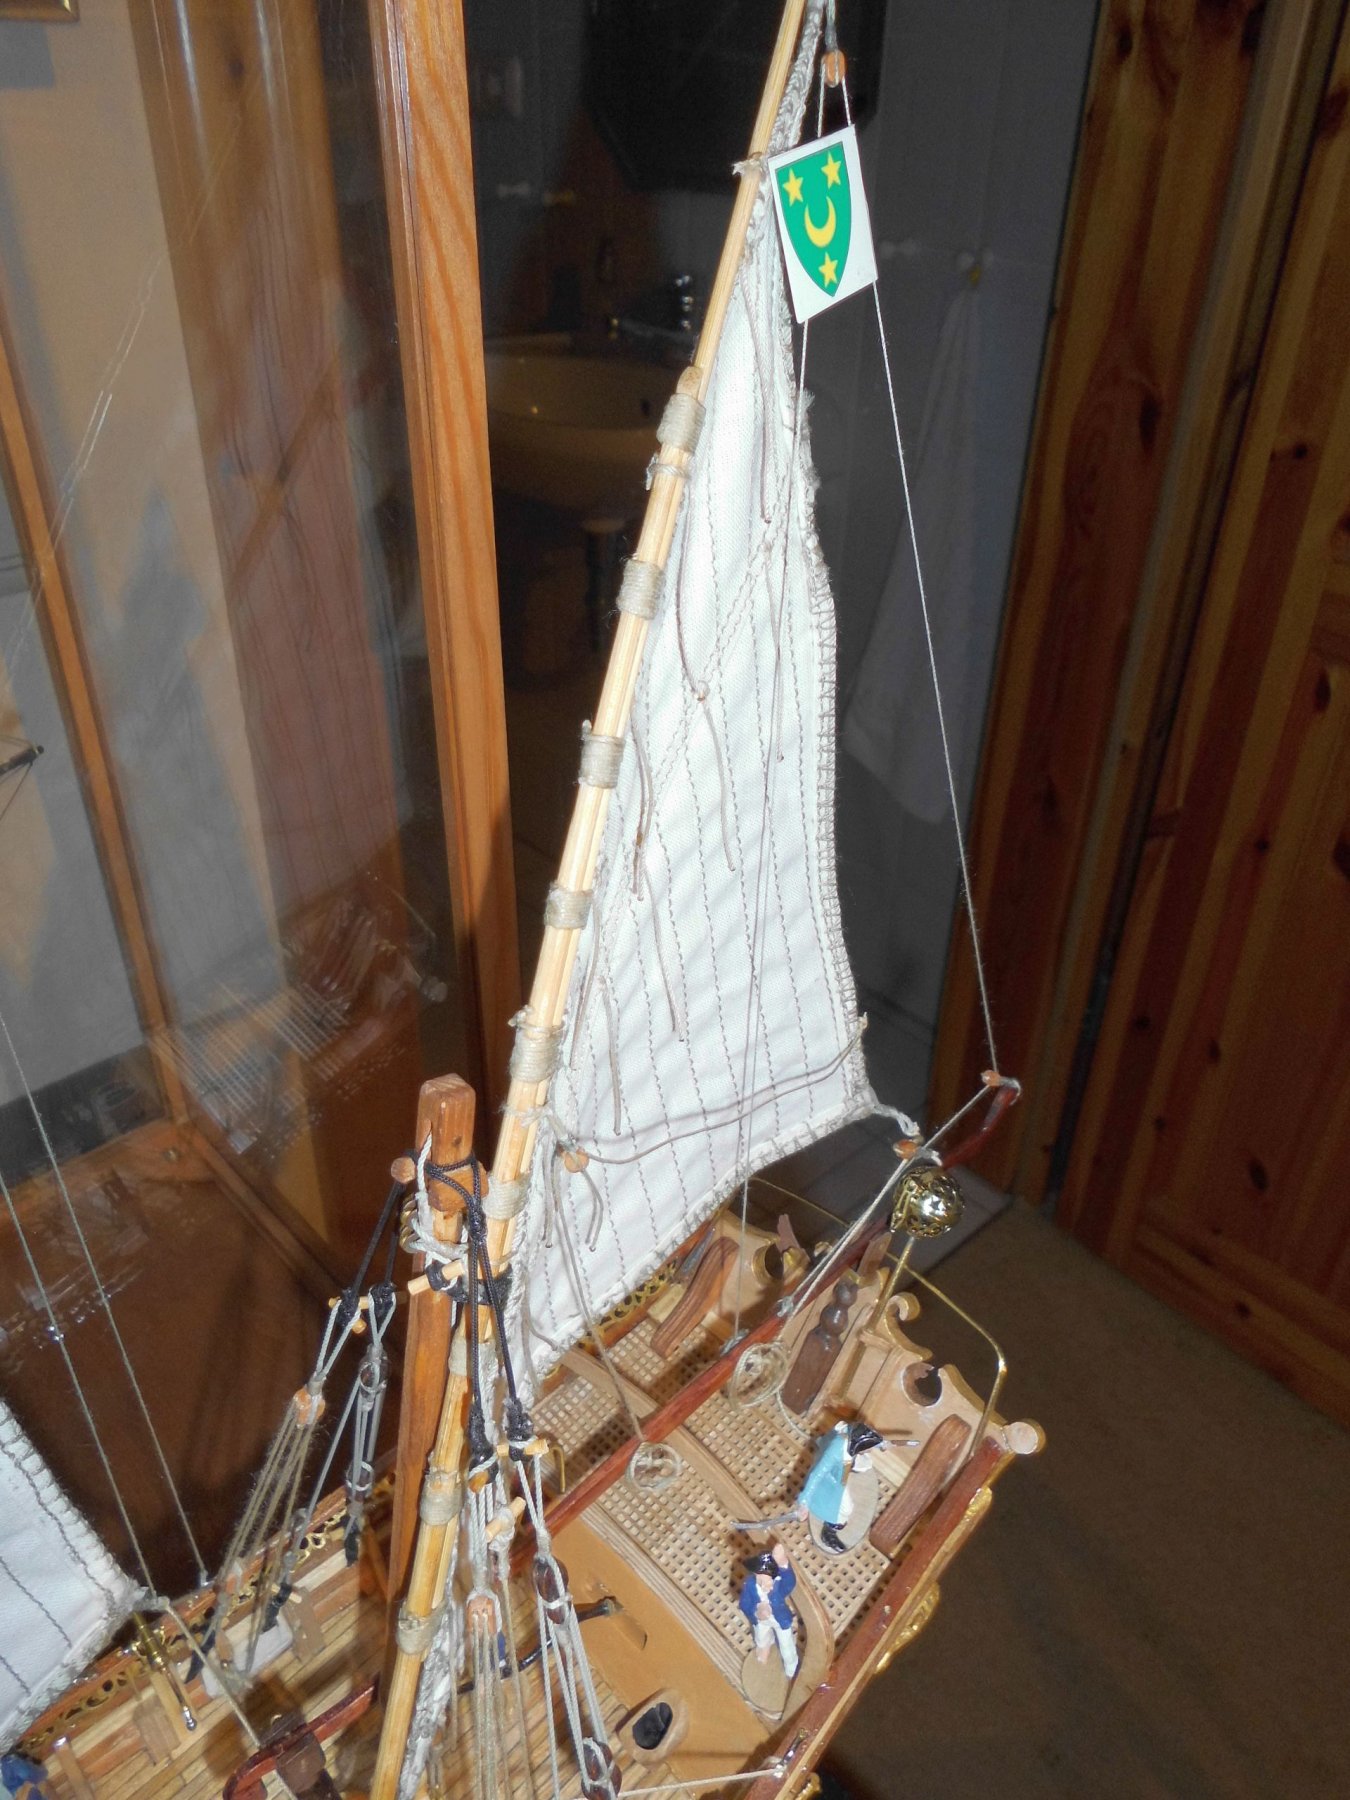
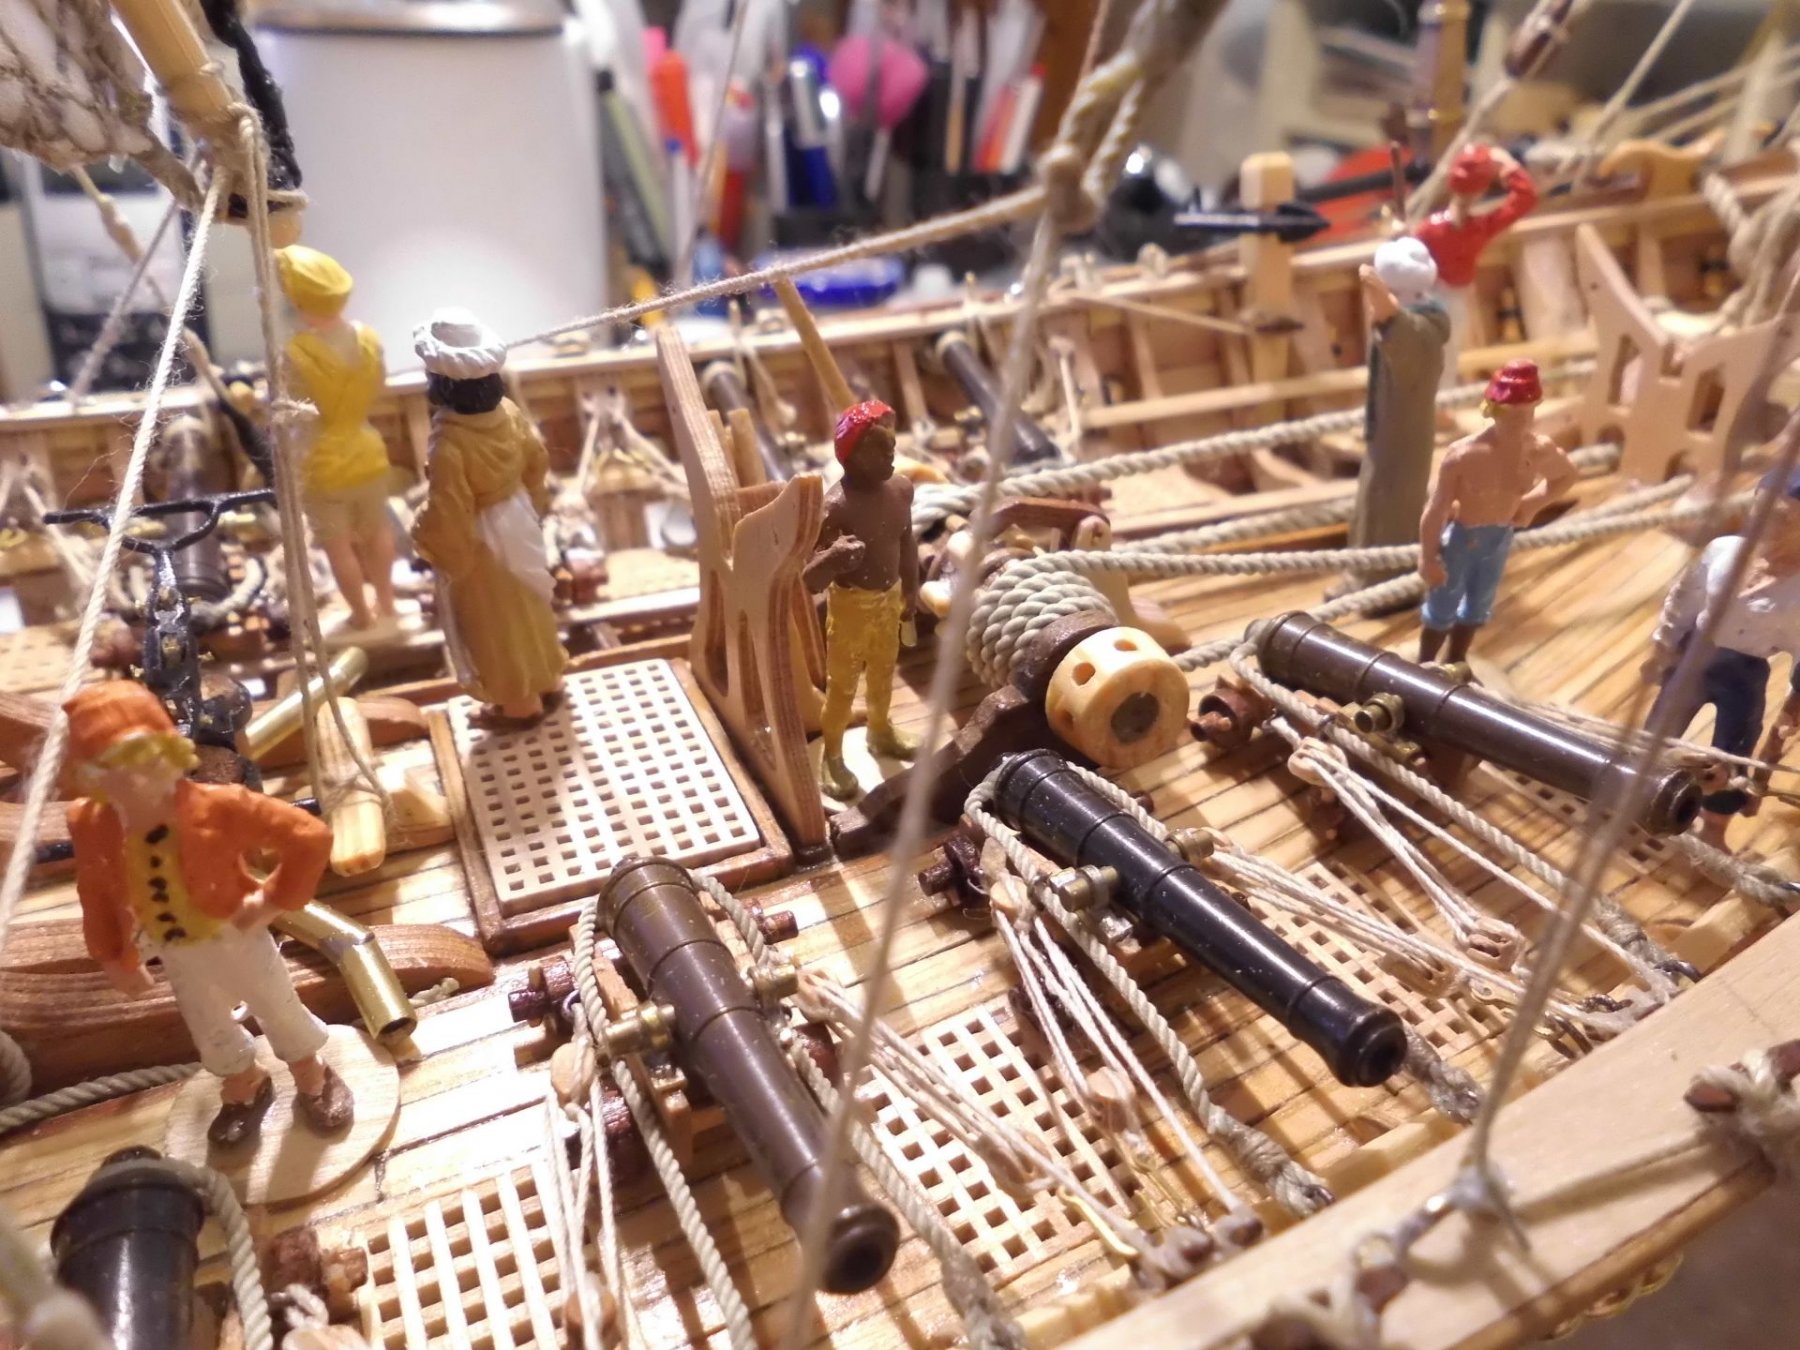
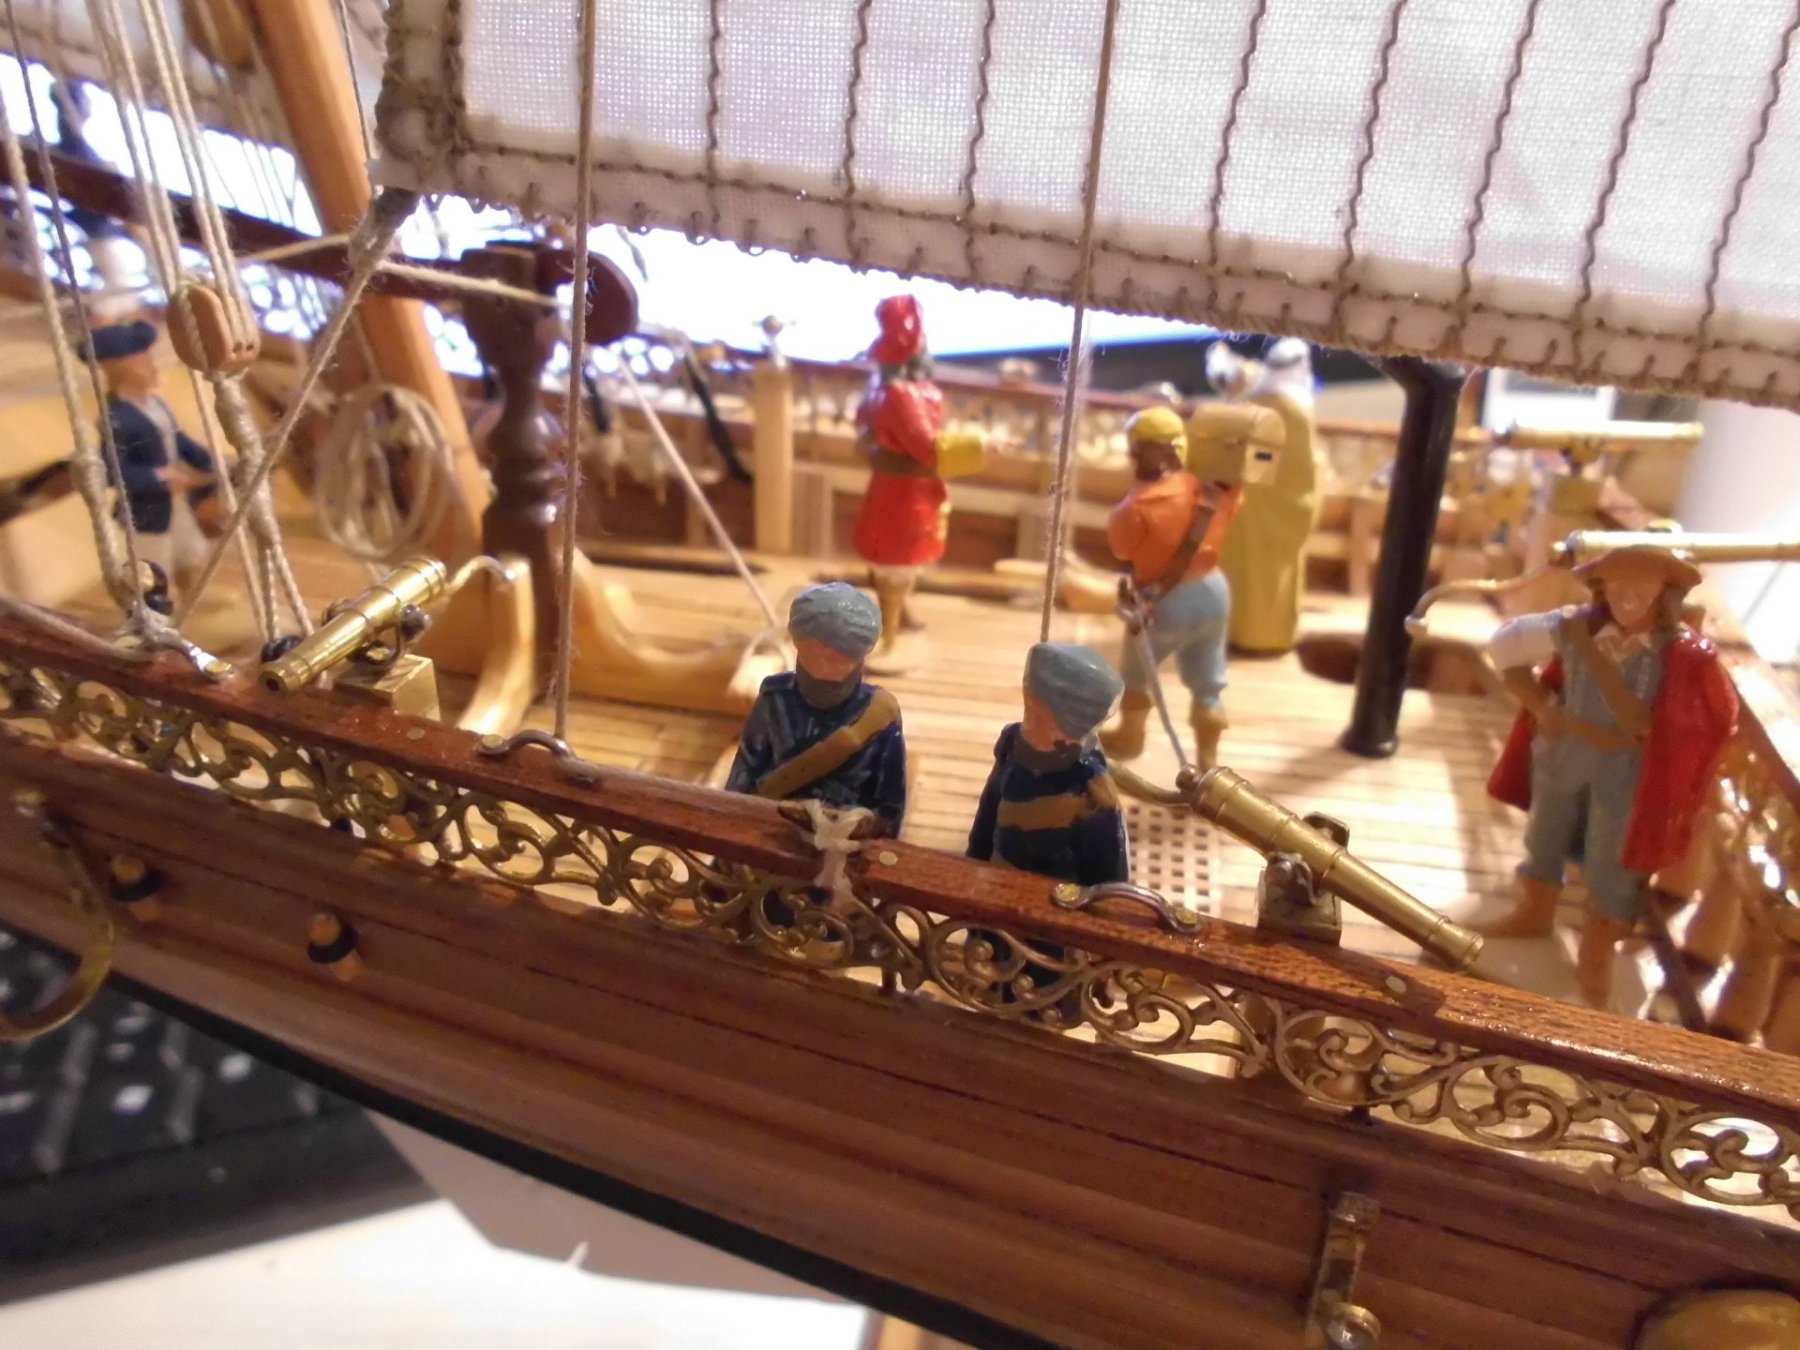
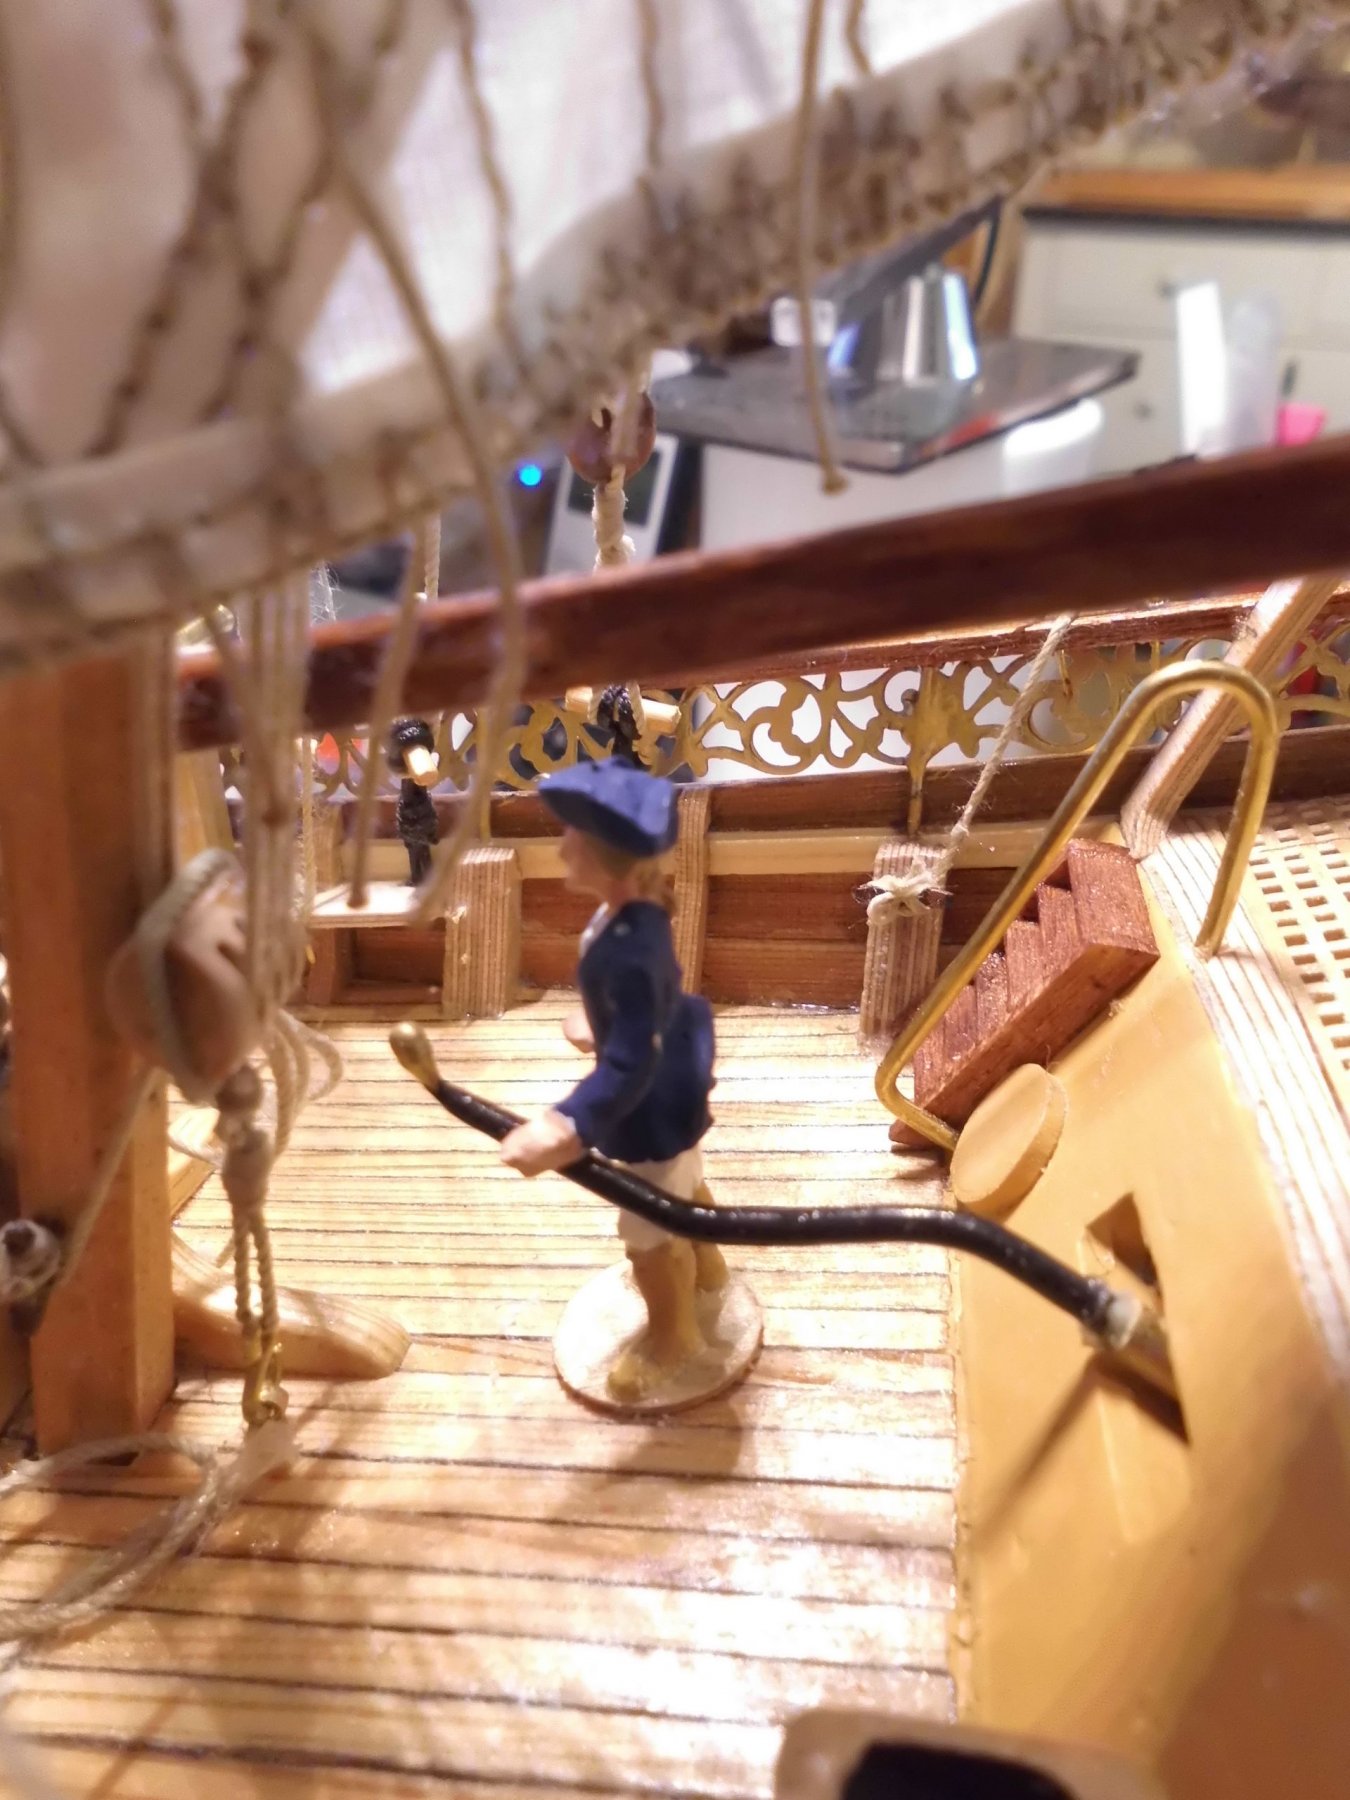
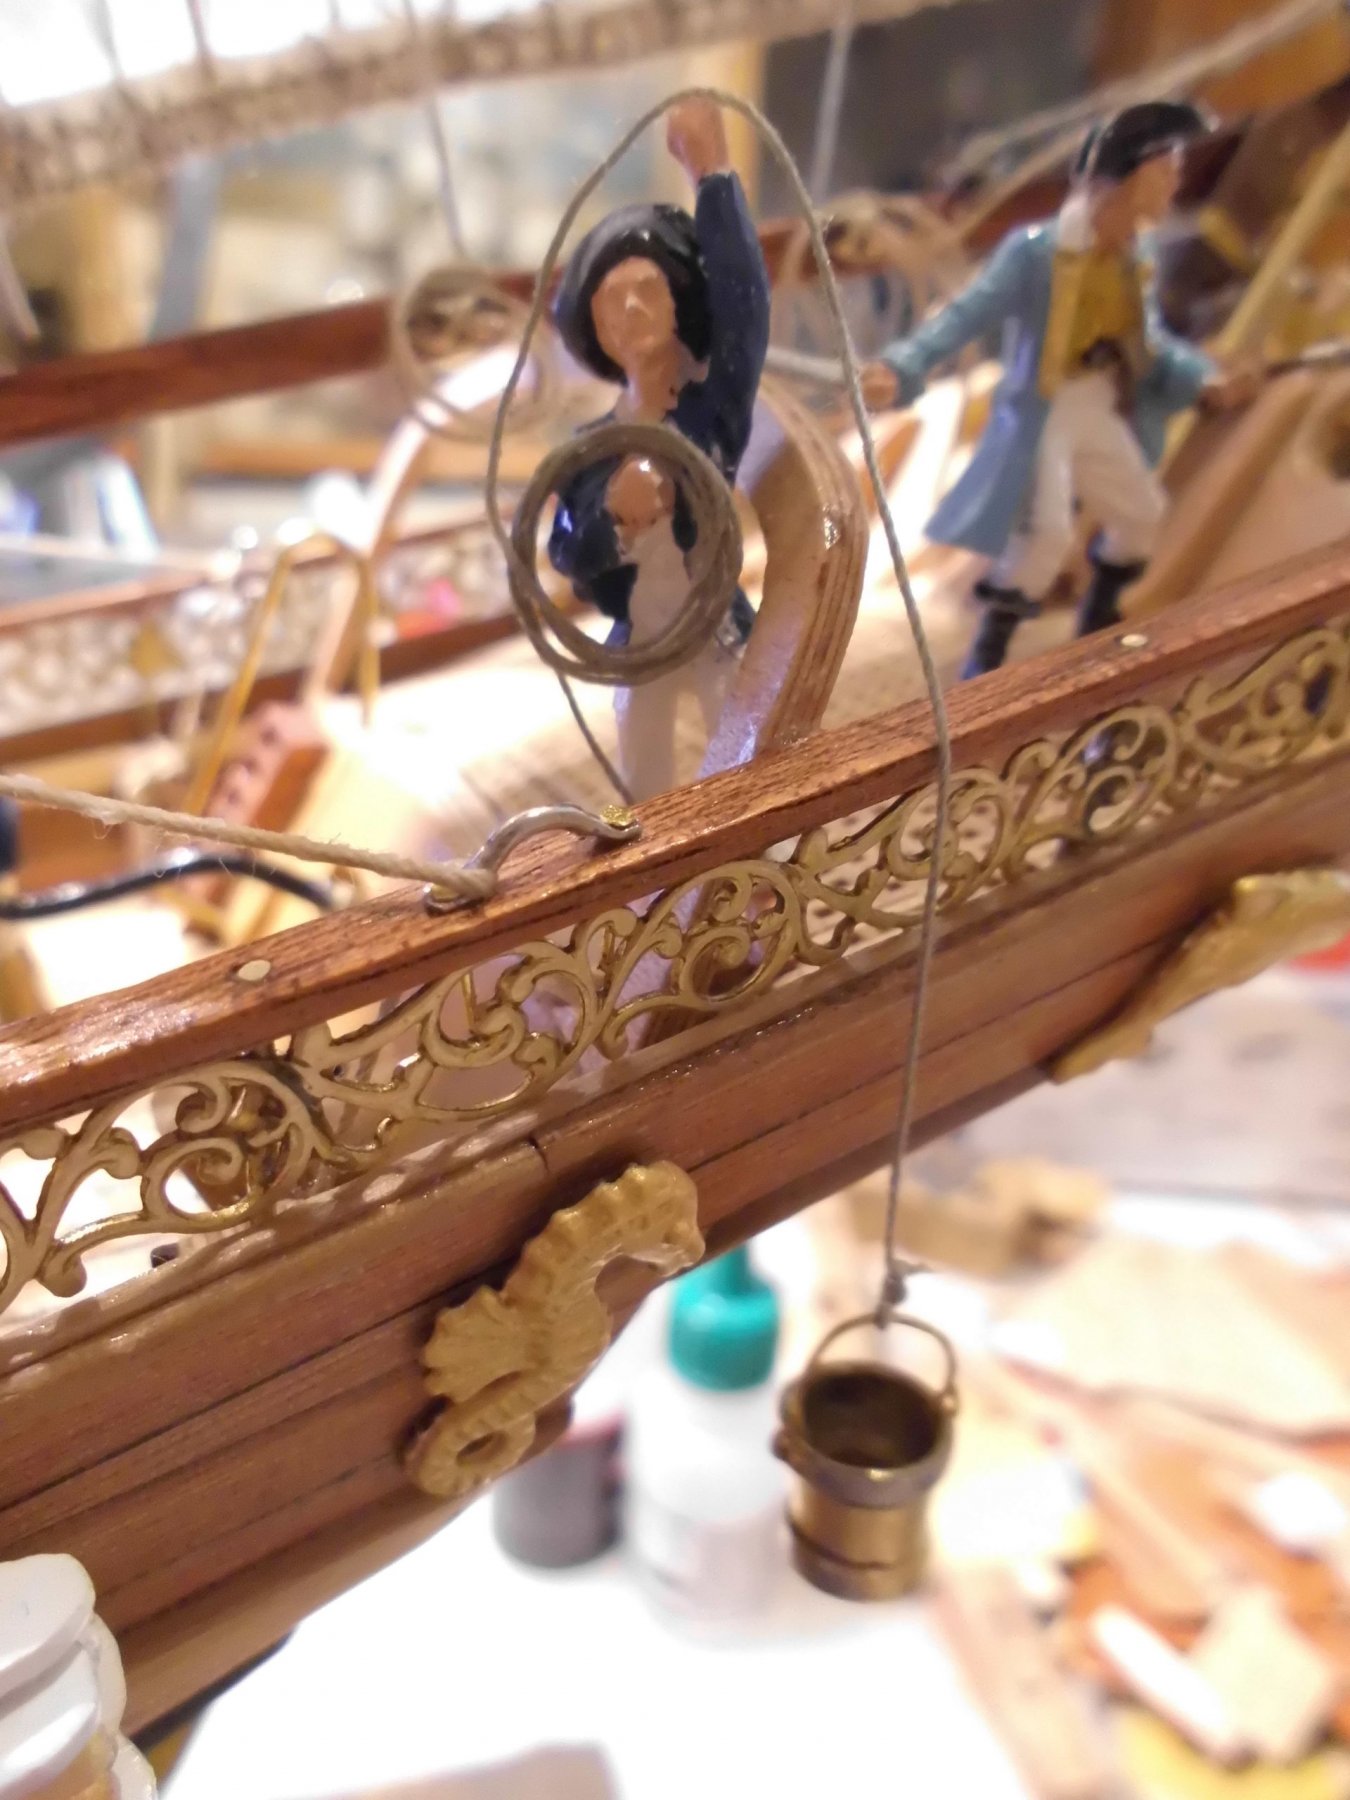
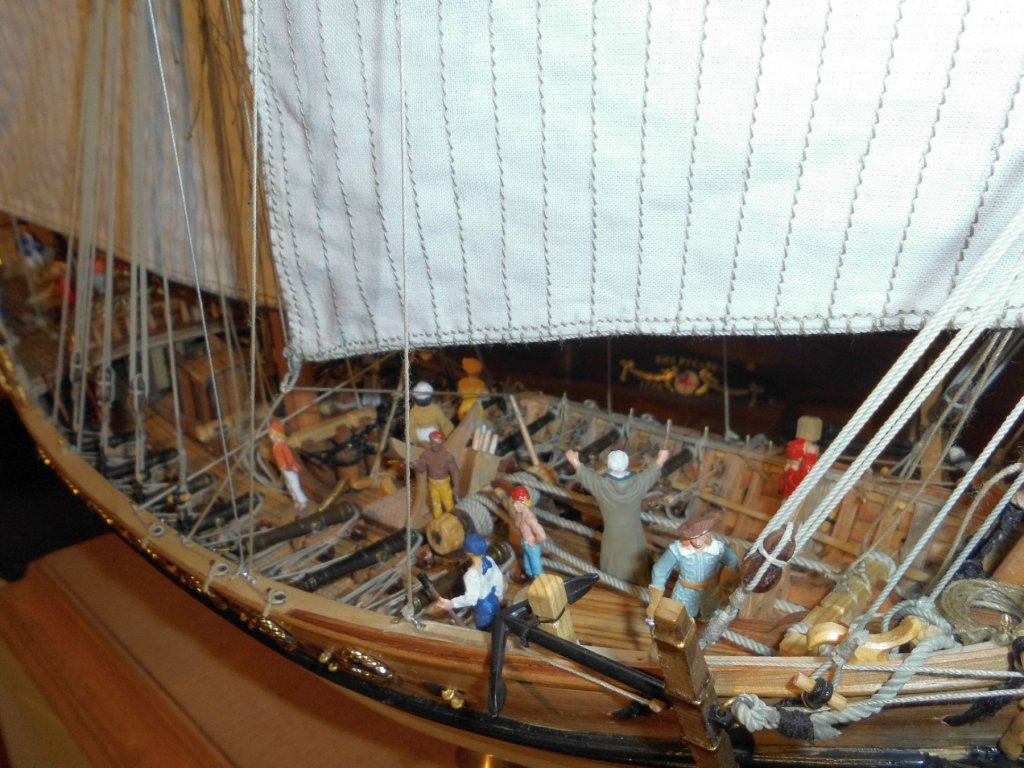
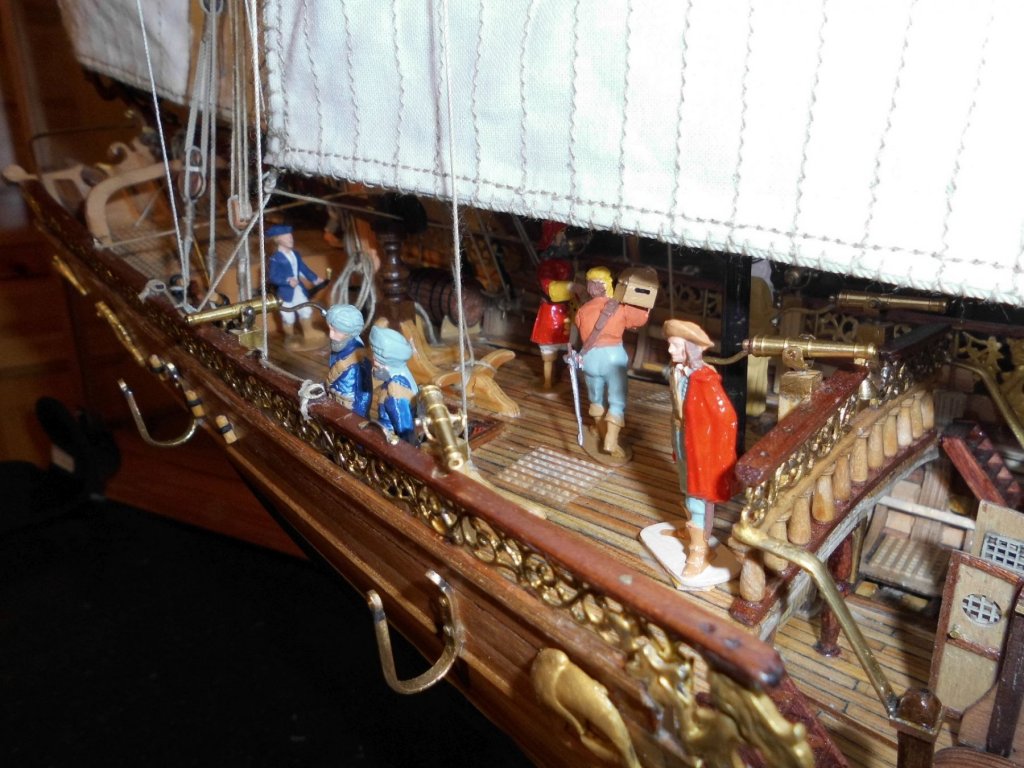
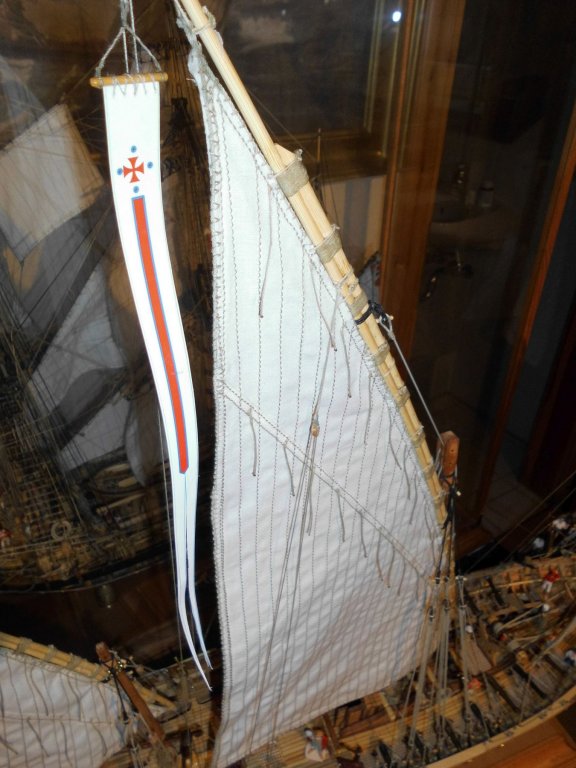
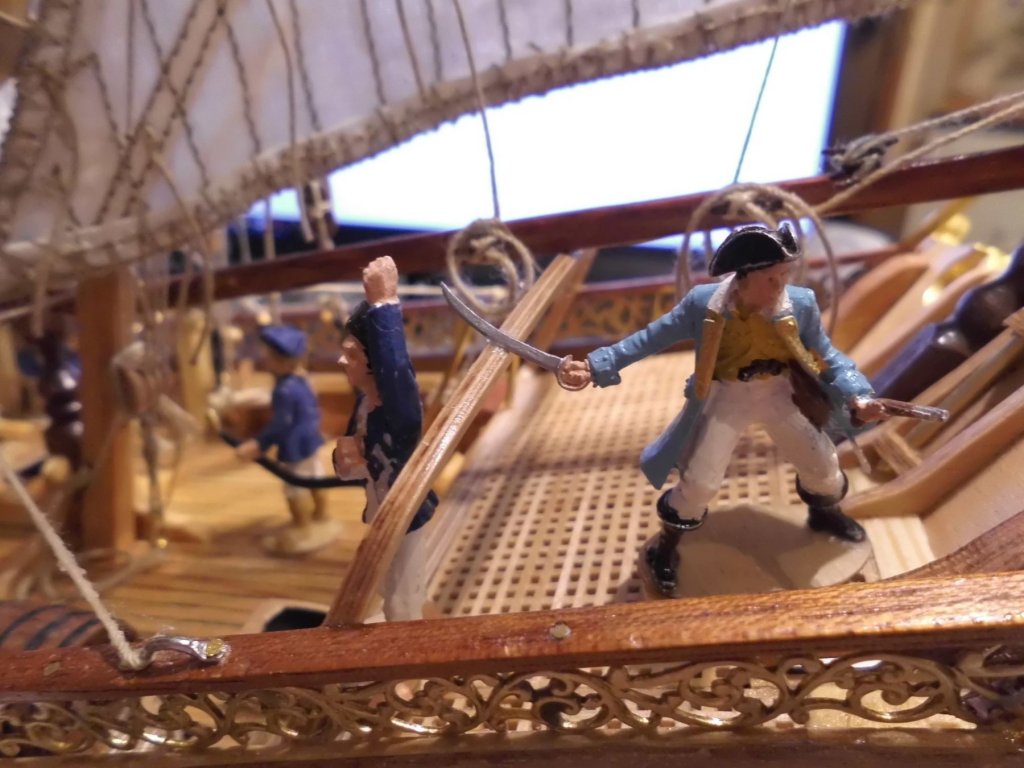
Hi Christos, upon your special request......., here comes the crew of the "Eagle of Algier"..., enjoy... The ship is now nearly complete, there are also some banners, and flag attached. On the stb. side I will be fitting 9 sweeps through the oarports Nils if my Google translator (into Arabien letters) worked correct, that should read "Eagle of Algier" the old flag of Algier Port the "blue pirate" is always a bit of a hot head the helmsman still requires a compass and perhaps a small binacle cabinet cleaning with seawater


- 692 replies
-
- 28
-
-
- eagle of algier
- chebec
- (and 2 more)
-
ancre Chebece 1750 by Jeronimo - FINISHED
Mirabell61 replied to Jeronimo's topic in - Build logs for subjects built 1501 - 1750
beautiful carvings Karl, it gives a lovely touch to the stern... Nils -
Many thanks to Jeff, Bob, and Kees, for your words.... and to all the "Likes".... Jeff, thanks for your words.... Bob, the Moment that something like that happens is a shock indeed, now afterwards it will be a lesson to have the model Standing safe on the bench... Kees, I was surprised my self, how fast the ripped off parts could be restored again, and that the dammage will not be seen any more... Nils
- 692 replies
-
- 4
-
-
- eagle of algier
- chebec
- (and 2 more)