
bolin
-
Posts
482 -
Joined
-
Last visited
Content Type
Profiles
Forums
Gallery
Events
Everything posted by bolin
-

Sloop from Roslagen by bolin - FINISHED - 1:50
bolin replied to bolin's topic in - Build logs for subjects built 1851 - 1900
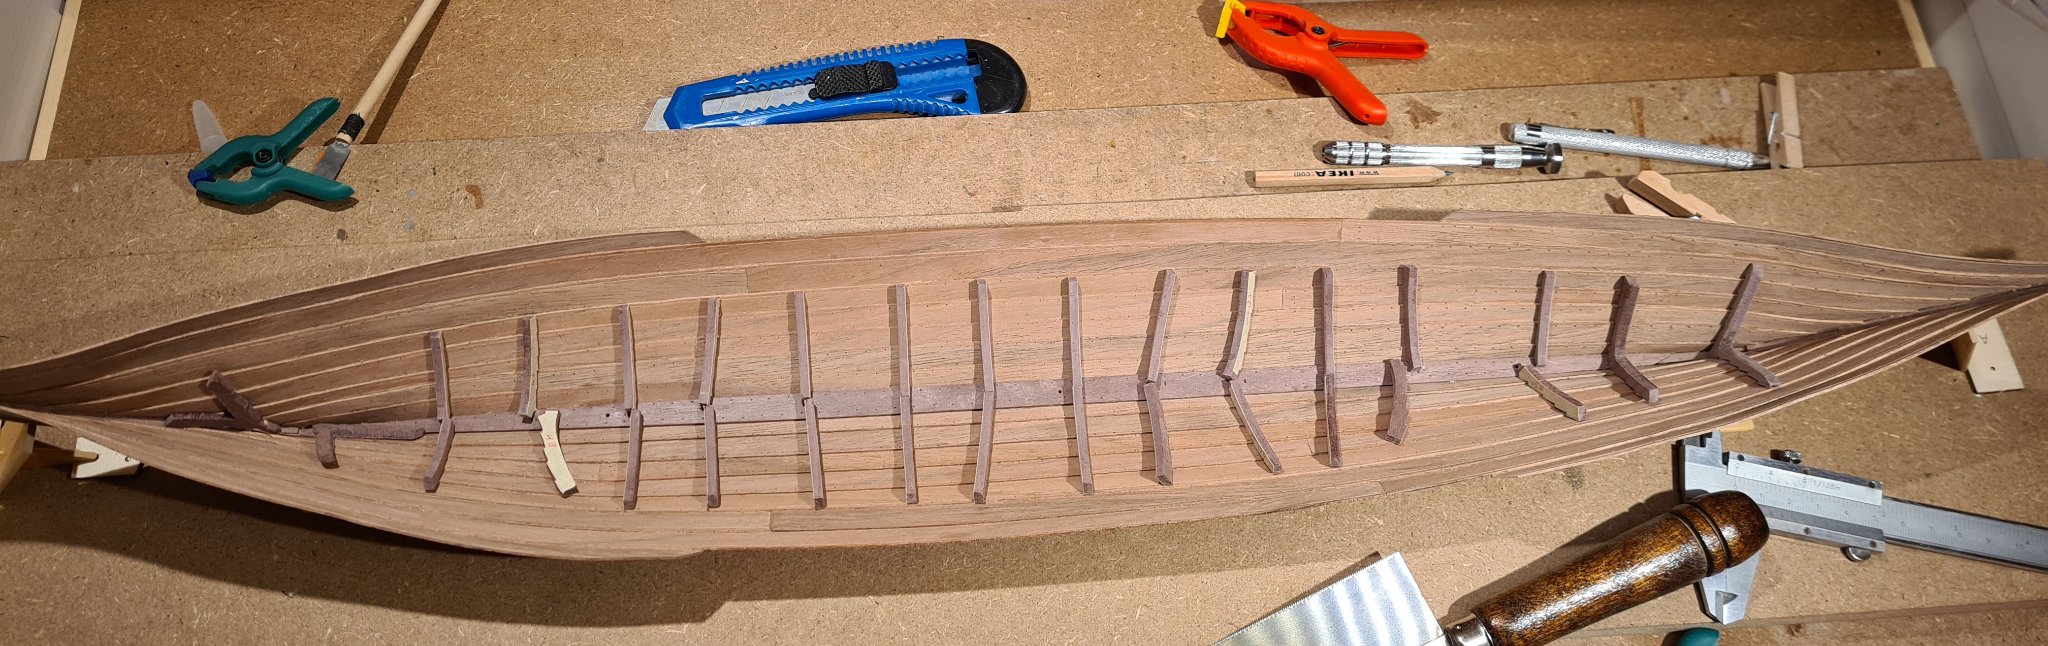
This build has been somewhat neglected lately in favor of my medieval long-ship. But today I found the inspiration to continue with fitting the frames. My method includes a lot of filing, checking the fit an file some more. It both helps and is a problem that I use Lime wood for this model. It is soft and filing goes quickly, but it is as quick when doing a mistake. Only the first an last frames are glued yet. I will wait with gluing the rest until I have them all and can check that they are spaced evenly.
-
A very interesting approach to finding the angles of the planks. The result looks good as well.
-
The method that @wefalck suggest works well when the planks are reasonably wide (above 5 mm or so). I used it on my medieval long ship. When the planks are narrower and more numerous its start to be hard, so on my sloop I am using a method similar to what @Wintergreen is showing, it is much less accurate.
-
Nice and clean work. Well done. Glues seem to be an never ending topic for discussion here. I’m not familiar with UHU sekundkleber, but I guess it’s a super glue (CA). That’s what I usually use for joining wood and metal. I only use epoxy when the bond needs to be extra strong.
-
I think it’s worth the effort to correct the frame placement. You could test how the planks would run with the current placement, but it’s probably better to follow the plans. When I built this model I remember that the angles between the planks and the placement of the frames where quite important.
- 25 replies
-
- 2
-

-
- Bluejacket Shipcrafters
- Swampscott dory
- (and 1 more)
-
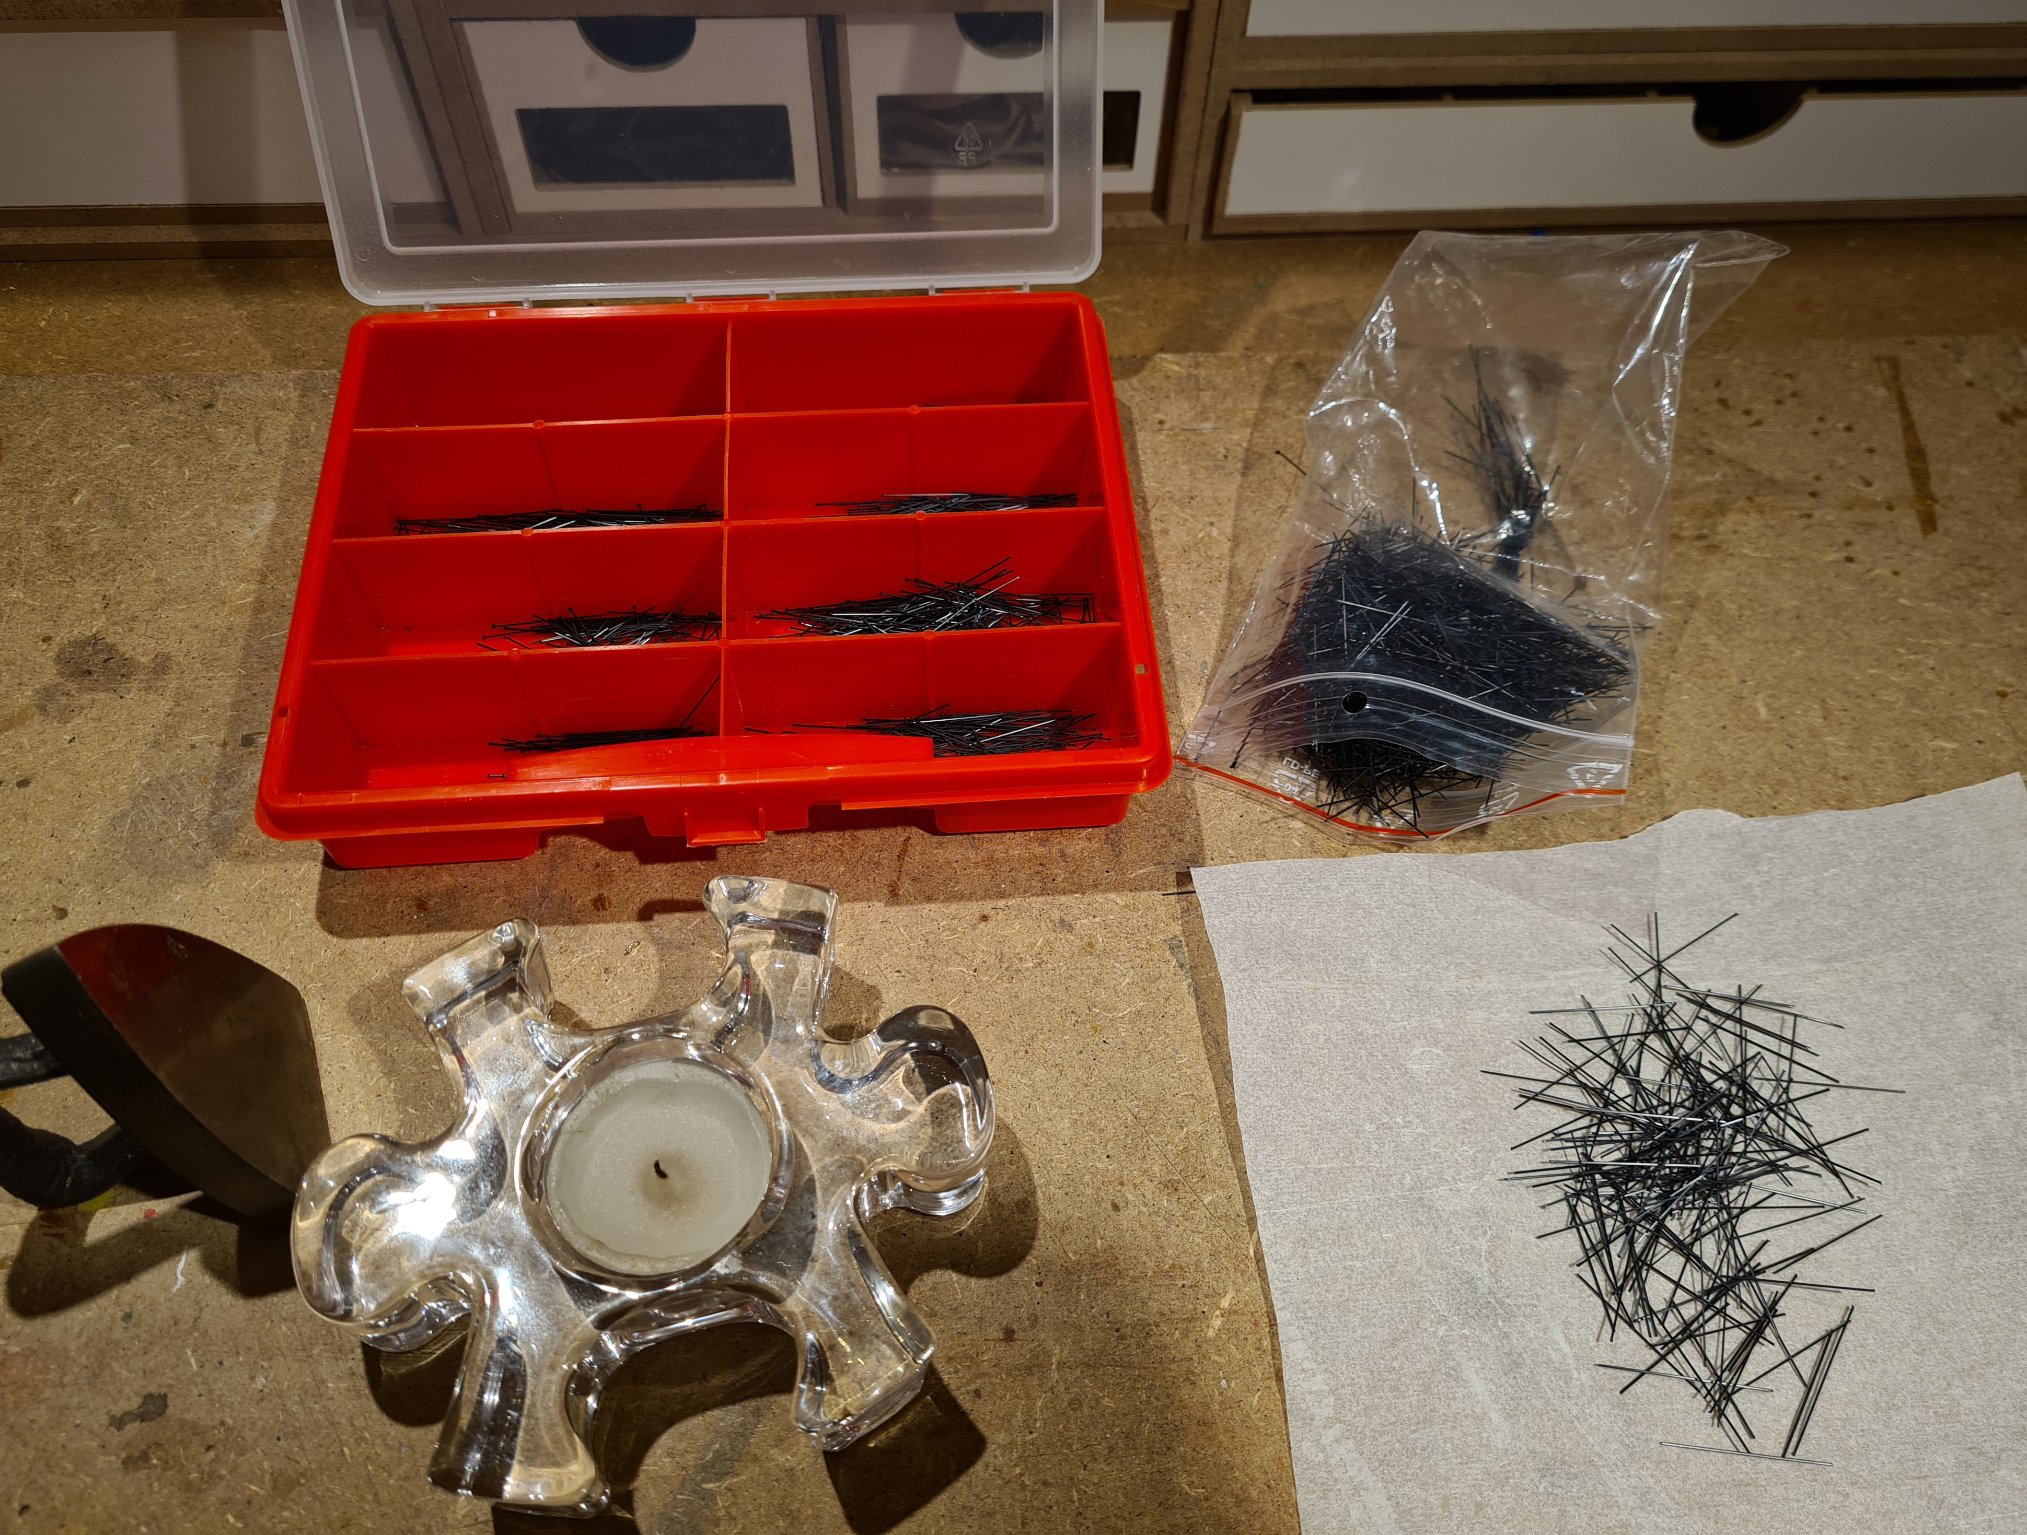
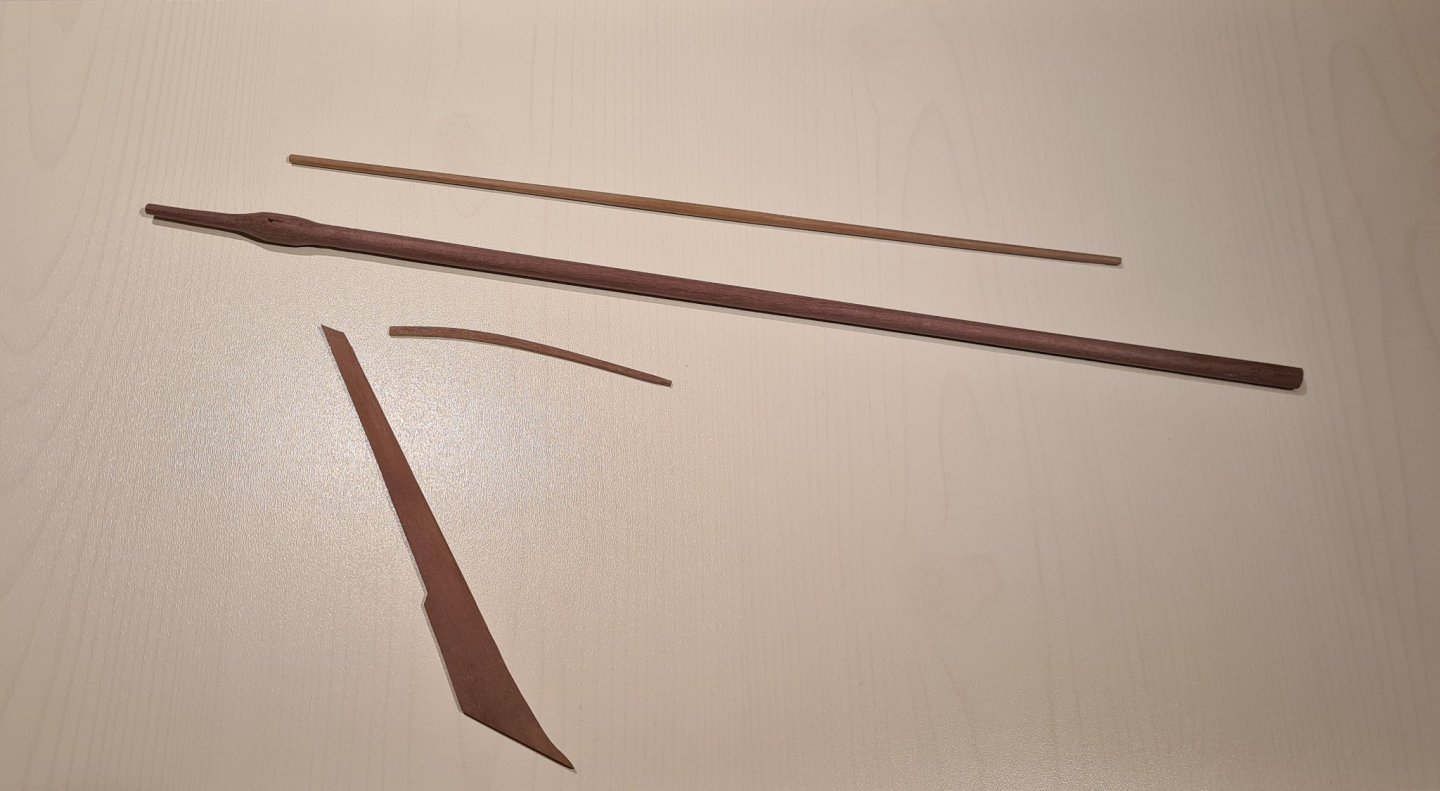
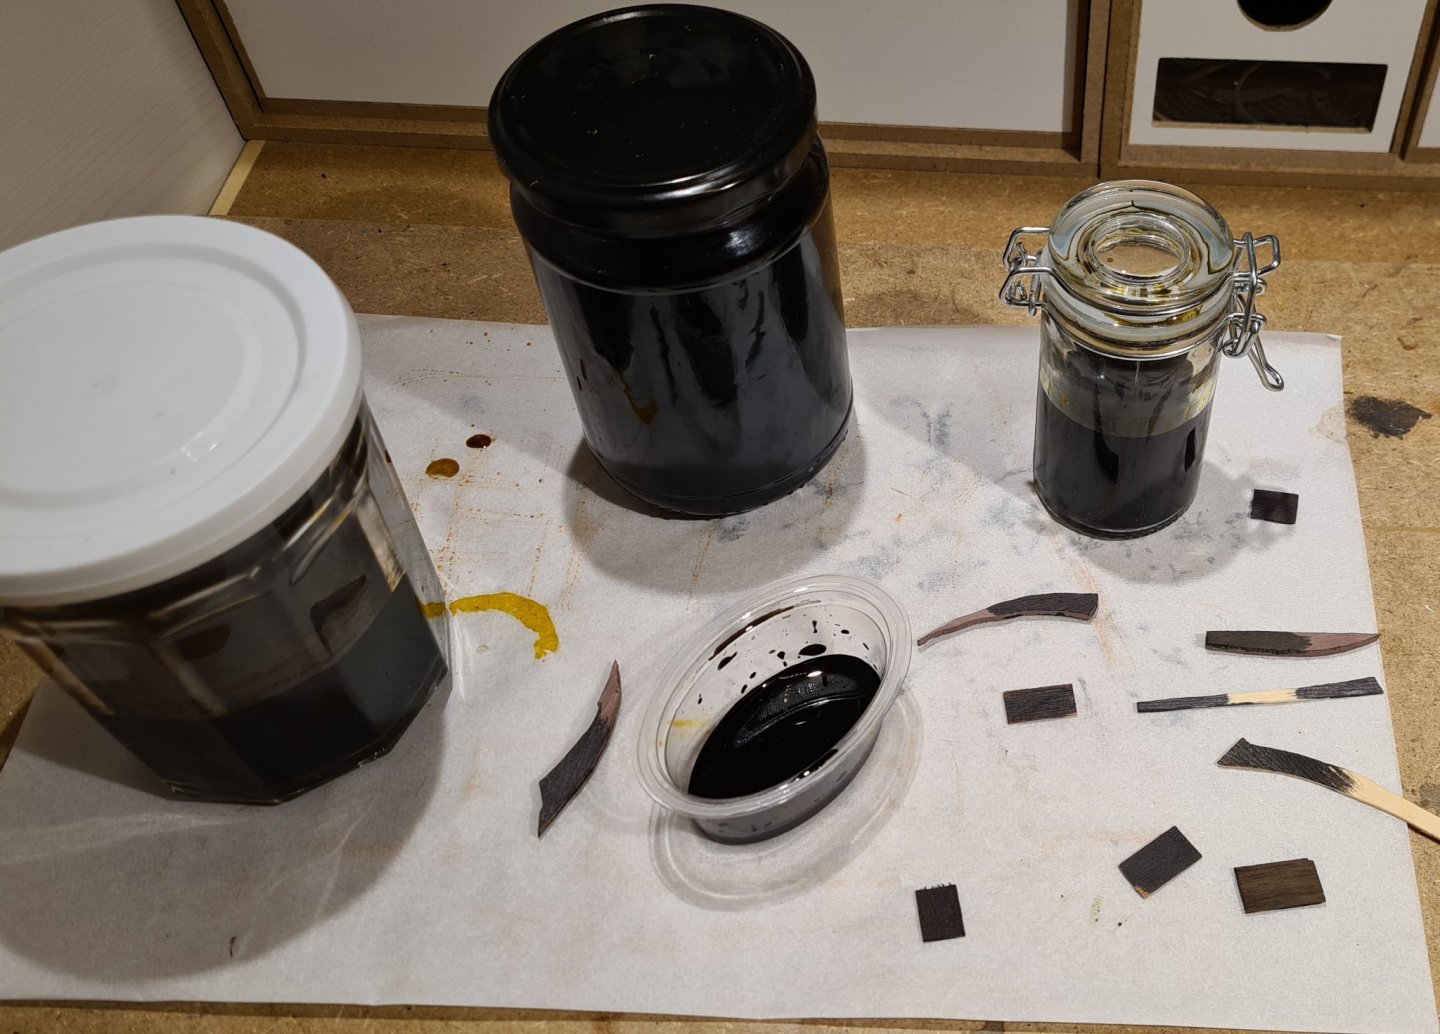
All the rivets are now ready for installation! In between the sessions with preparing them I have started on some other parts, to be installed later. That is rudder, tiller, mast and yard. The mast has a "bulge" around the hole for the halyard will be a stop for the shrouds. Yesterday I also received a package with some dark stains that might look like tar. I have experimented with some mixes and found that three parts light oak stain mixed with one part ebony stain and eight parts water starts to look OK. That is the lowest right piece in the picture below. The other pieces are to black to look realistic. Tar, when mixed with linseed oil, is not ink black, but rather very dark brown.
- 179 replies
-
- 11
-
-
- longship
- Helga Holm
- (and 1 more)
-
You are right Håkan, this is the easy part. Making and clenching the roves will be even more tedious.
- 179 replies
-
- 5
-
-
- longship
- Helga Holm
- (and 1 more)
-
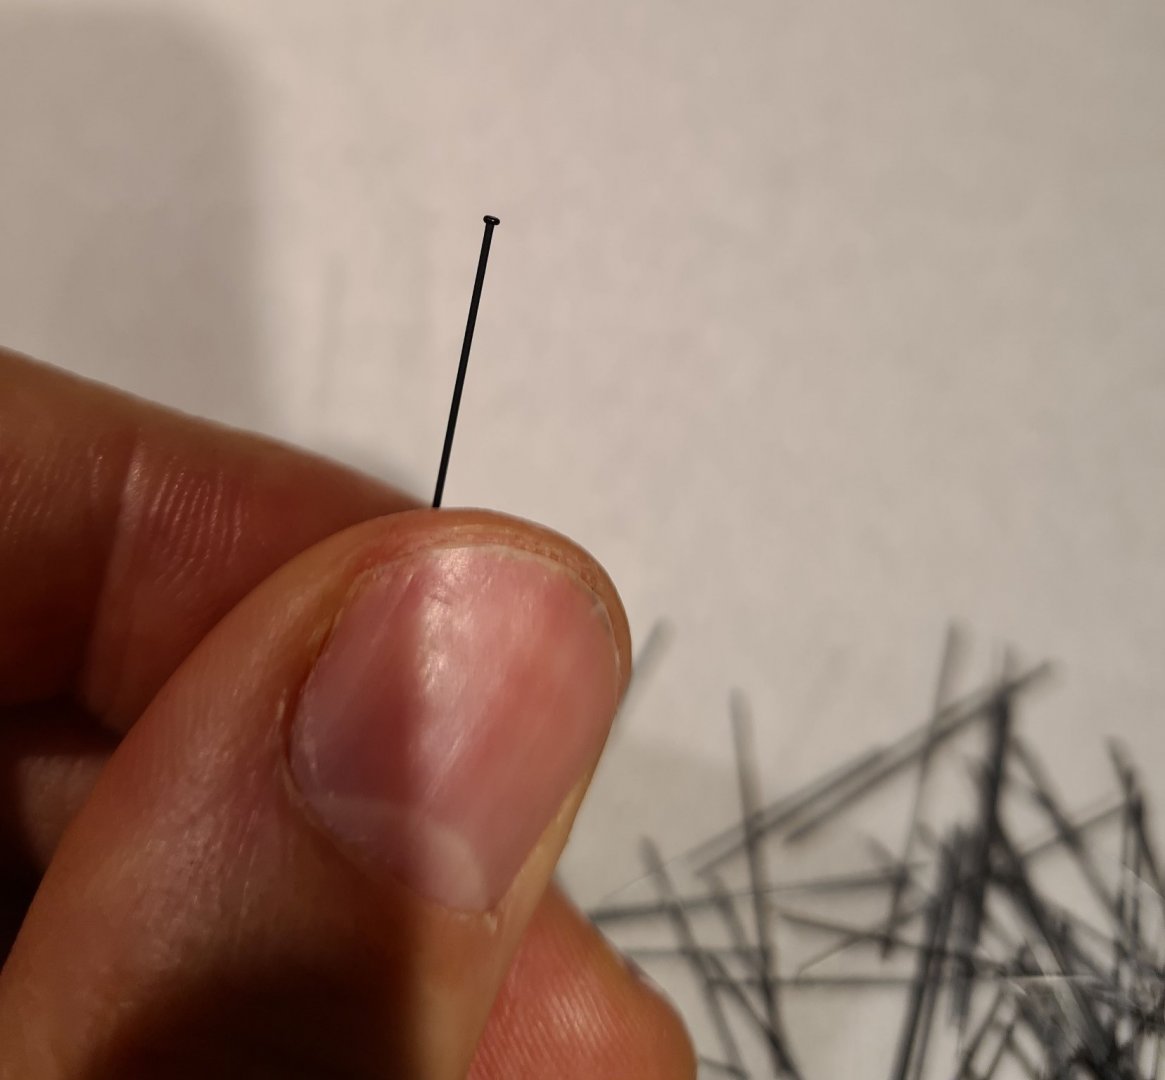
With all the frames fitted and trimmed down to size I have started with preparing the rivets. It's boring. Take a bristle. Hold it close to a flame (but not in it or it will burn) until it melts to a bead in the end. Then press the bead to a flat surface to get a flat head on the rivet. Repeat some 1500 times...

- 179 replies
-
- 13
-
-
- longship
- Helga Holm
- (and 1 more)
-
I actually read that yesterday on your Polotsk log😃 I don’t remember that we have met, but how knows maybe I have forgot. Next summer there might be some last chances to sail on her, before she will be donated to Sigtuna museum. It is no longer possible to maintain her as a sailing vessel, unless substantial (expensive) renovations are performed.
- 179 replies
-
- 4
-

-
-
- longship
- Helga Holm
- (and 1 more)
-
God luck! This was my first boat model, which I completed about a year ago.
- 25 replies
-
- 1
-
-
- Bluejacket Shipcrafters
- Swampscott dory
- (and 1 more)
-
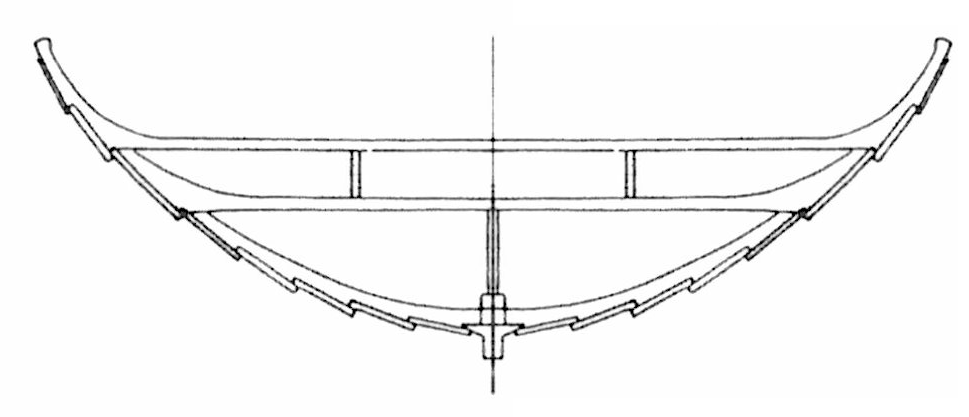
As I mentioned in response to @Wintergreen, in the real ship (both original and reconstruction) the frames are full. I think that it is important for the strength of the hull, especially when handling the forces of the mast and shrouds when taking the wind from the side. The shrouds are attached through holes in the upper strake. When the wind comes in hard from the side the shrouds will pull the side up, while the mast will push down on the keel. This will create a force that will try to break the hull along the keel. The frames are not really connected to the cross beams, so they will not help as much as one would think with preventing this. The full frames should help here though. If the frames where already cut in the middle, they’re would not be as strong.
- 179 replies
-
- 3
-
-
- longship
- Helga Holm
- (and 1 more)
-
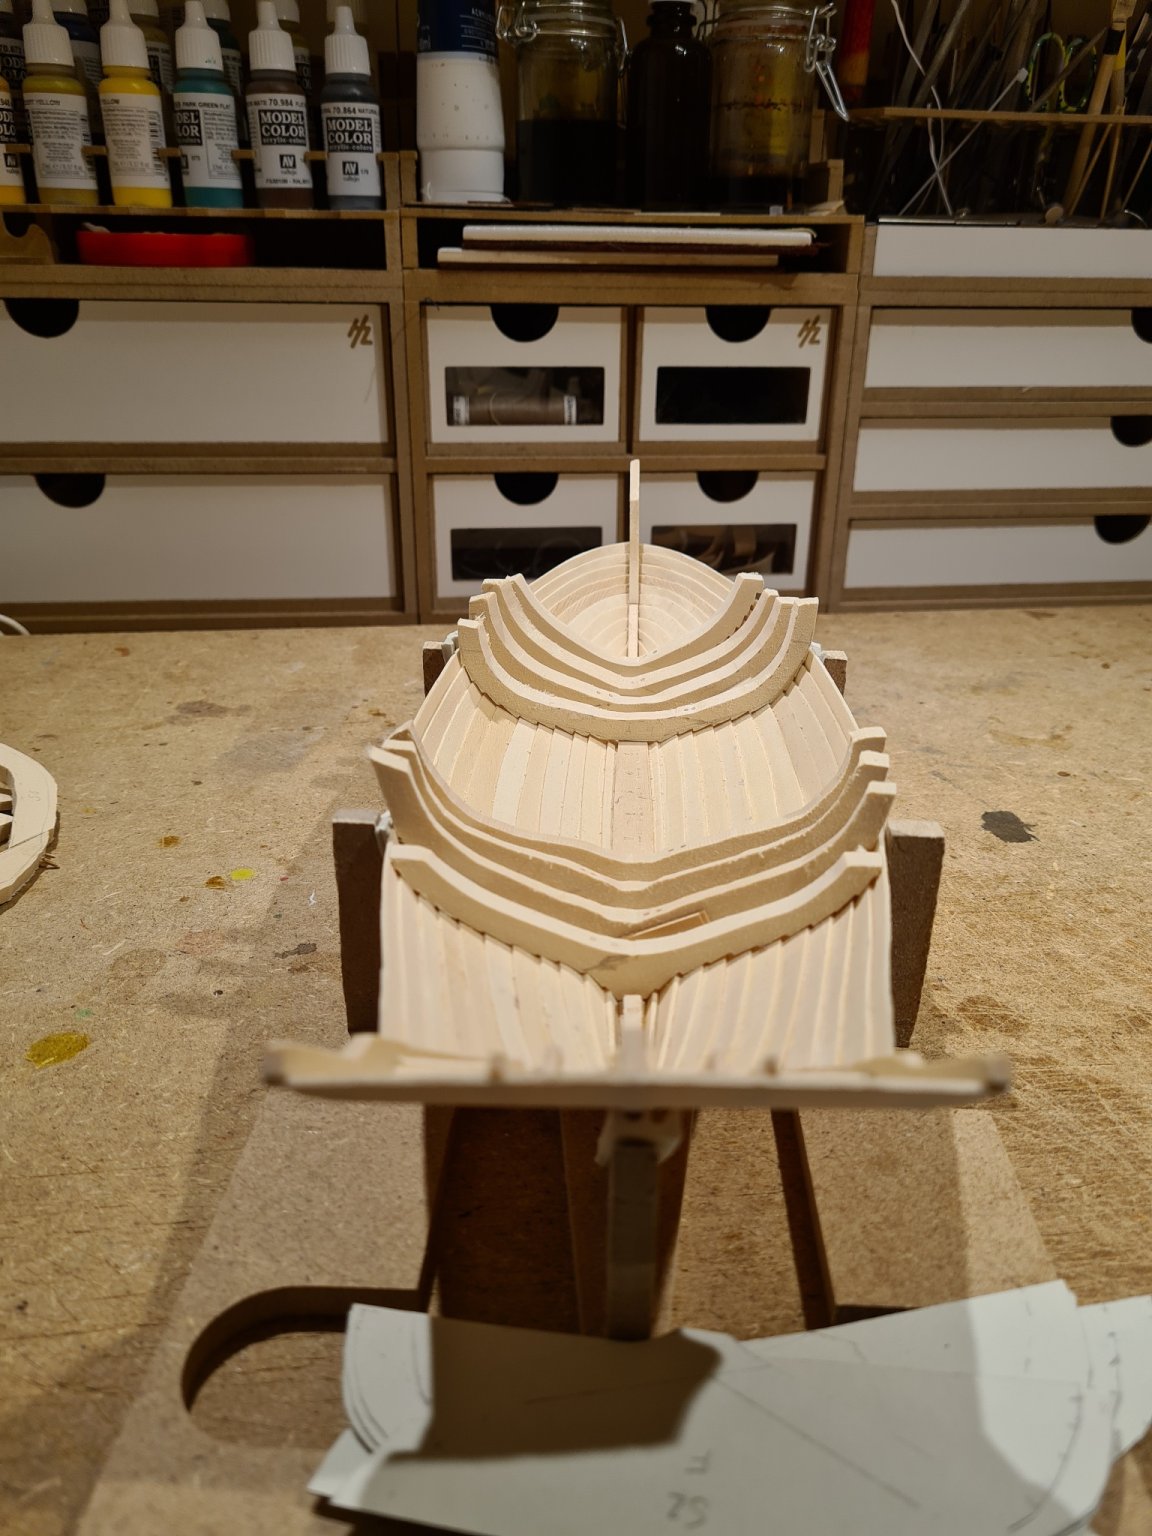
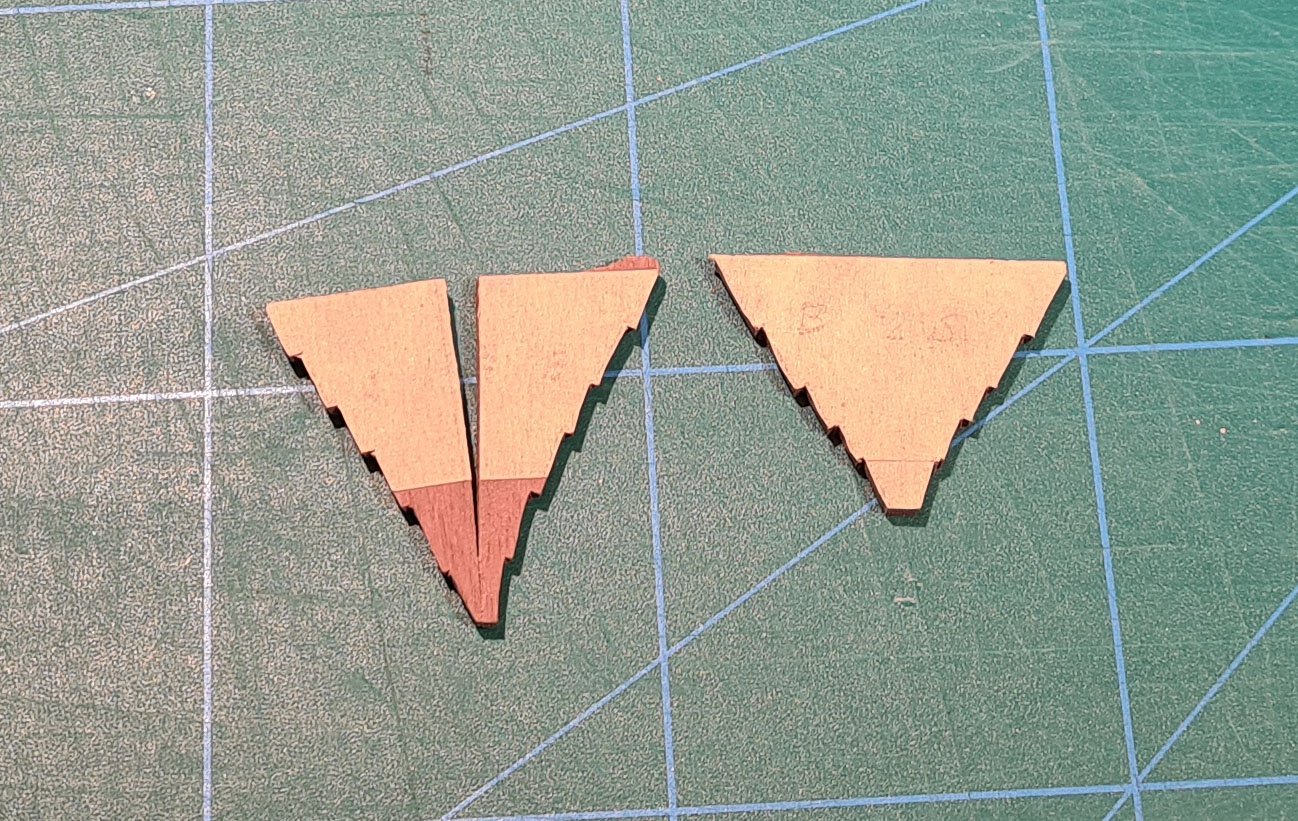
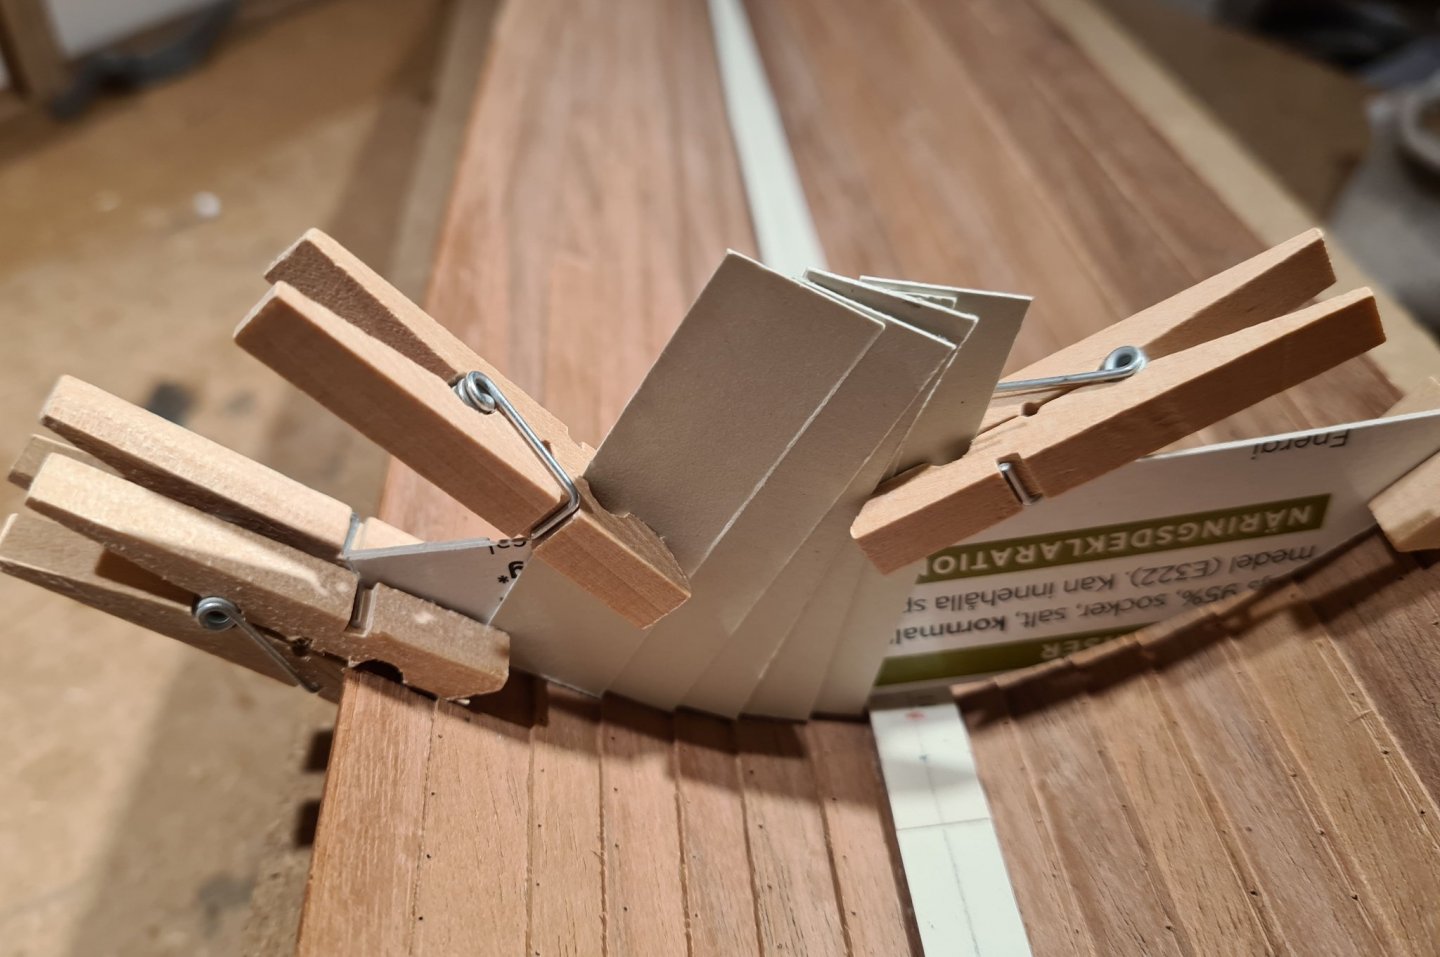
Now I have all the frames cut out and fitted to shape. What remains is to thin them down to about 2 mm thickness. I do that last now when I know that the shape is good in all other dimensions. In the end I cut the two first and two last frames from solid pieces. I determined the shape using the same method as for the other frames, that is using card and copying the angles of the planks to the frames. It worked OK, but since I could only fit the cards to one side at a time, I got the shape of two frame halves. The angle between the halves was a bit hard to get right. For one of the frames I ended up splitting it and gluing it back with the correct angel.

- 179 replies
-
- 8
-
-
- longship
- Helga Holm
- (and 1 more)
-
An interesting observation. I did check against my two current clinker hulls and the one that is best (the long-ship) shows the same symmetry. The sloop deviates slightly, but on that one I made some mistakes when determining the width of the strokes.
-
Thanks, I learned it on a ship model building course I attended for a few weeks in February and March (before it got canceled). I have also seen it used in some other build logs here. Unfortunately it is hard to use in smaller scales, like my Sloop from Roslagen.
- 179 replies
-
- 5
-
-
- longship
- Helga Holm
- (and 1 more)
-
Ah, I should have elaborated on this yesterday. In reality the frames should be full and made out of timber with a natural curve. I considered bending the frame timber before cutting them out, but went for the simpler option. Most of the frames will meet butt end. The joint will be covered by the keelson. The keelson only goes between the third and fifteen frames, so for the rest I will need to make full frames in some way.
- 179 replies
-
- 5
-
-
- longship
- Helga Holm
- (and 1 more)
-
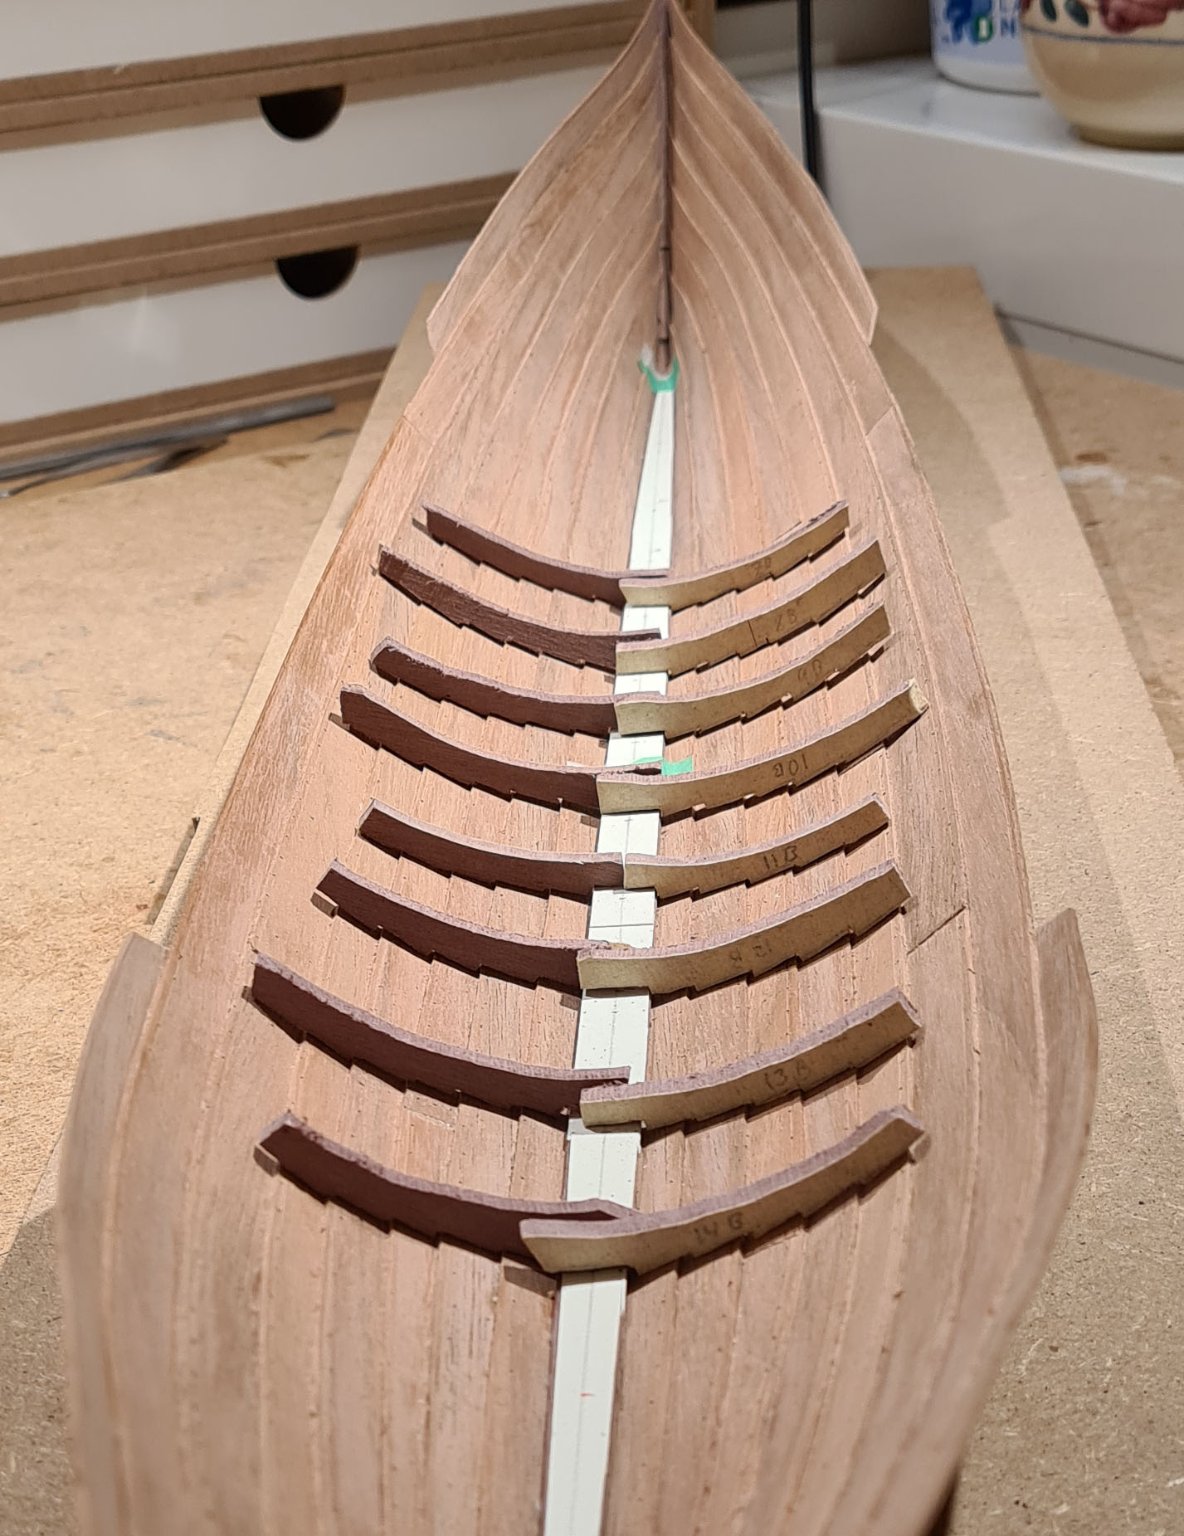
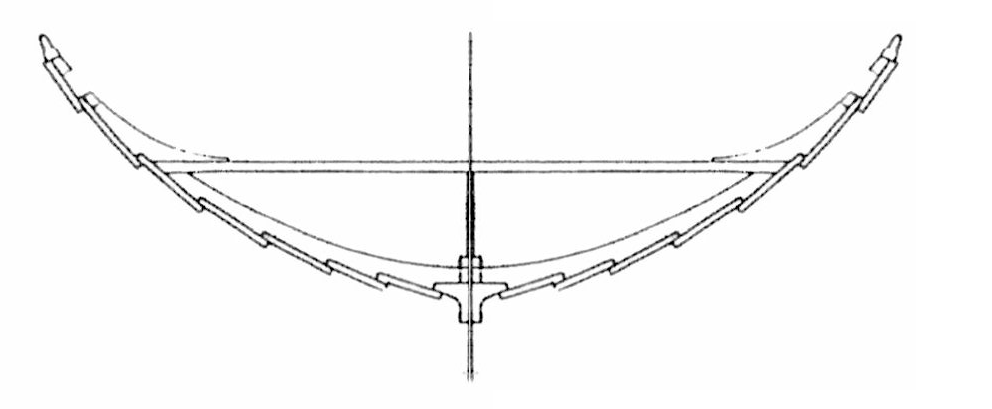
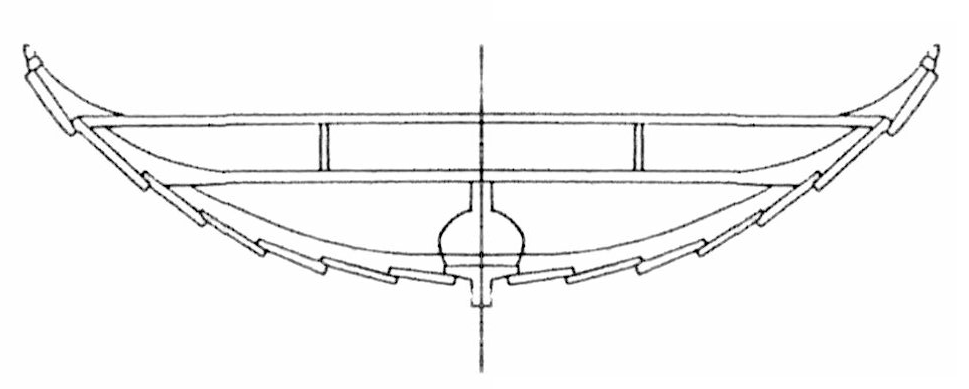
Regarding the building I have started sawing out the frames. To find the shape I use five cards and arrange them to find the angles. Most of the frames only go up to the fifth strake. Then there will be a beam across and a knee that supports the sixth strake. The seventh strake is for most of its length not supported by any knee or frame, instead there are two stringers on the inside as reinforcement. The first and last frames are more V-shaped and will not have a crossbeam. The fifth and fifteenth frame has two cross beams and has an additional knee which supports the seventh and eight strakes. The eight frame also has two crossbeams and sits just in front of the mast where there only are seven strakes. Thus far I have eight (of seventeen) frames roughly sawed out. They are still to long and to thick, and will require adjustment to fit right.

- 179 replies
-
- 17
-
-
- longship
- Helga Holm
- (and 1 more)
-
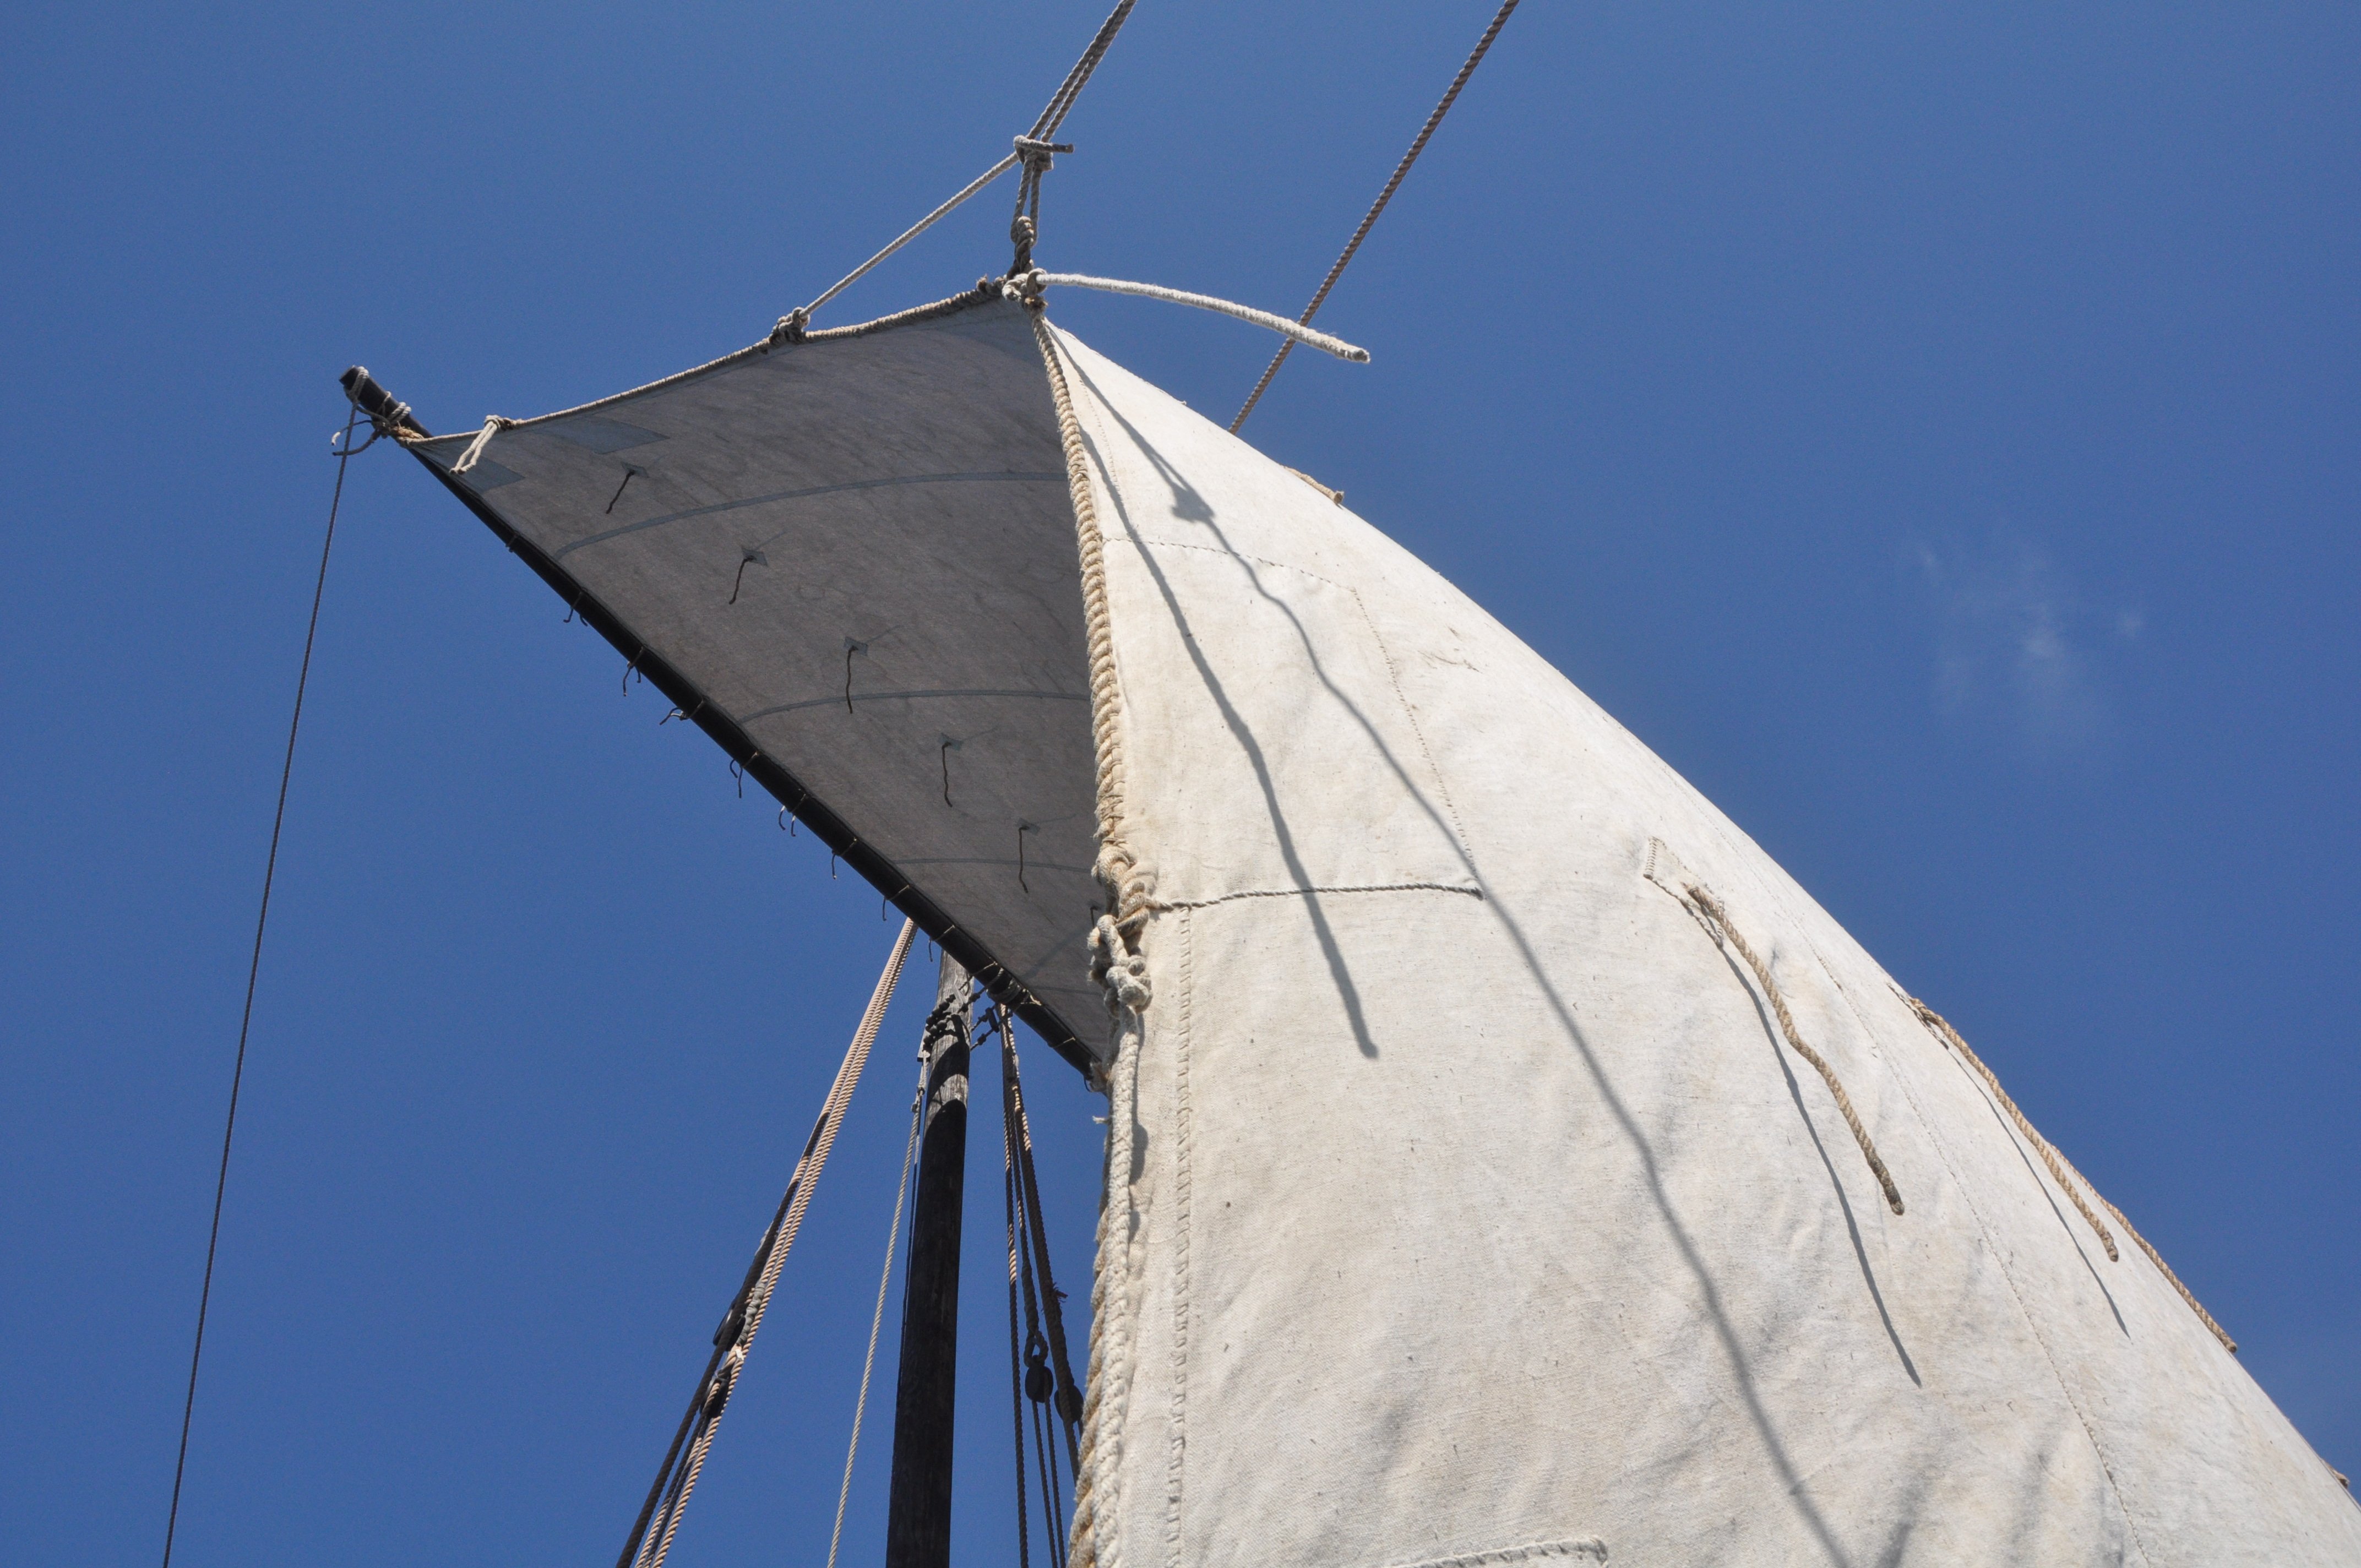
Yes the viking boat heritage is quite evident in many small / traditional crafts in Sweden and Norway. Maybe most evident in the "Nordlandsbåt" type from northern Norway, that not only maintained the clinker built hull but also the single mast square rig until mid/end 19th century. When the Helga Holm reconstruction was rigged it was from the still living tradition of how Nordlands boats are sailed (and rowed) that a lot of the terminology and experience was borrowed.
.jpg.722a8c9ed4ad70ca6846b0c3da7db5bf.jpg)
- 179 replies
-
- 10
-
-
- longship
- Helga Holm
- (and 1 more)
-
Nice to see you back at the yard. It looks nice and clean. Ready for many hours of joyful modeling. Looking forward for the continuation of Kågen!
-
Good work on the first planking. The gaps should be fixable with a few more stealers and filler. Take your time with the sanding. It can take several applications of filler before the surface is smooth and the lines of the hull looks good.
-
There is a recent thread with almost the same question:
-
The planning and need to figure out how to do things is one of the reasons why I will probably continue with scratch building rather than kits. Full freedom and full responsibility means that the feeling of accomplishment is higher. Btw, this model is not a viking ship. It’s at least 250 years to late. The most telling evidence is the stern rudder, rather than a steering oar. The hull shape clearly follows in the same tradition though. Form follows function; what was already perfected didn’t need to change.
- 179 replies
-
- 5
-
-
- longship
- Helga Holm
- (and 1 more)
-
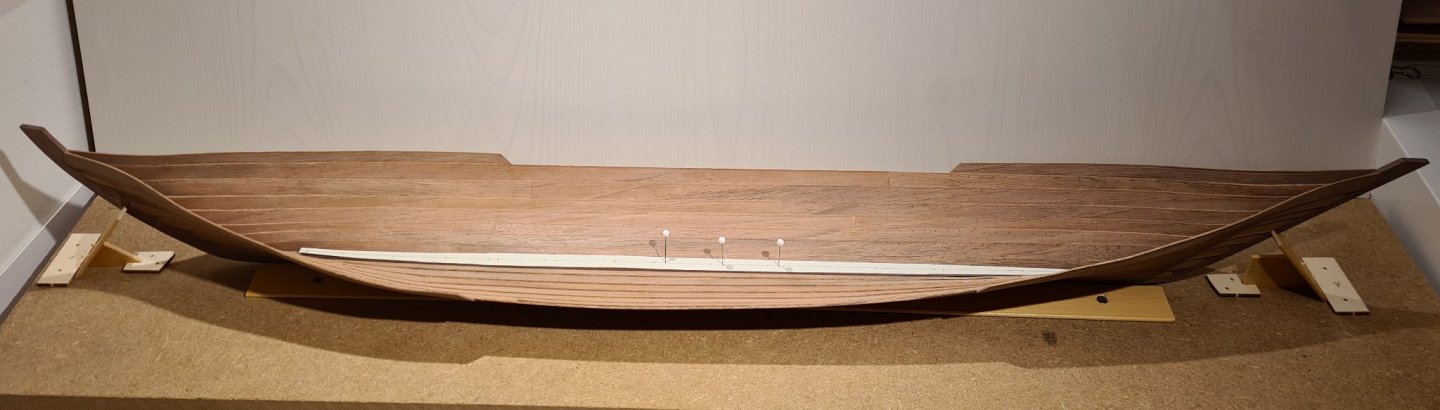
Visually there isn't much difference between this update and the last one, only a lot of small holes for the rivets. I will now cut out and fit in the frames, so I have started to measure out their positions. I could have proceeded with the rivets, but I think it will be easier to get the frames to fit if I do that while the inside is smooth.
- 179 replies
-
- 13
-
-
- longship
- Helga Holm
- (and 1 more)
-
I started with model ship building a year ago, and I got some of the same books as you have listed. Specifically I got the ones by Mastini, Roth and Julier. None of them has proven as useful as Underhills book though, and I haven’t even finished reading it yet... What I have read, extensively, though are build logs here at MSW. Together with actually getting experience by building models, the build logs have taught me a lot and showed many different ways of doing things.