
bolin
-
Posts
482 -
Joined
-
Last visited
Content Type
Profiles
Forums
Gallery
Events
Everything posted by bolin
-
Does anyone have experience with this type of Japanese knife? Kiridashi Kogatana - bevel on the right side Multi purpose and wood carving knife made of two layers of steel, black, forged surface. The tip is 20°, bevel on the right side. https://www.fine-tools.com/messer1.html
-
 It is really an interesting and unusual topic for your model. I very much enjoy following your research and solutions. Thank you for sharing.
 -
Nice! I think I will borrow your method with double sided tape for the floor boards I will make soon...
-
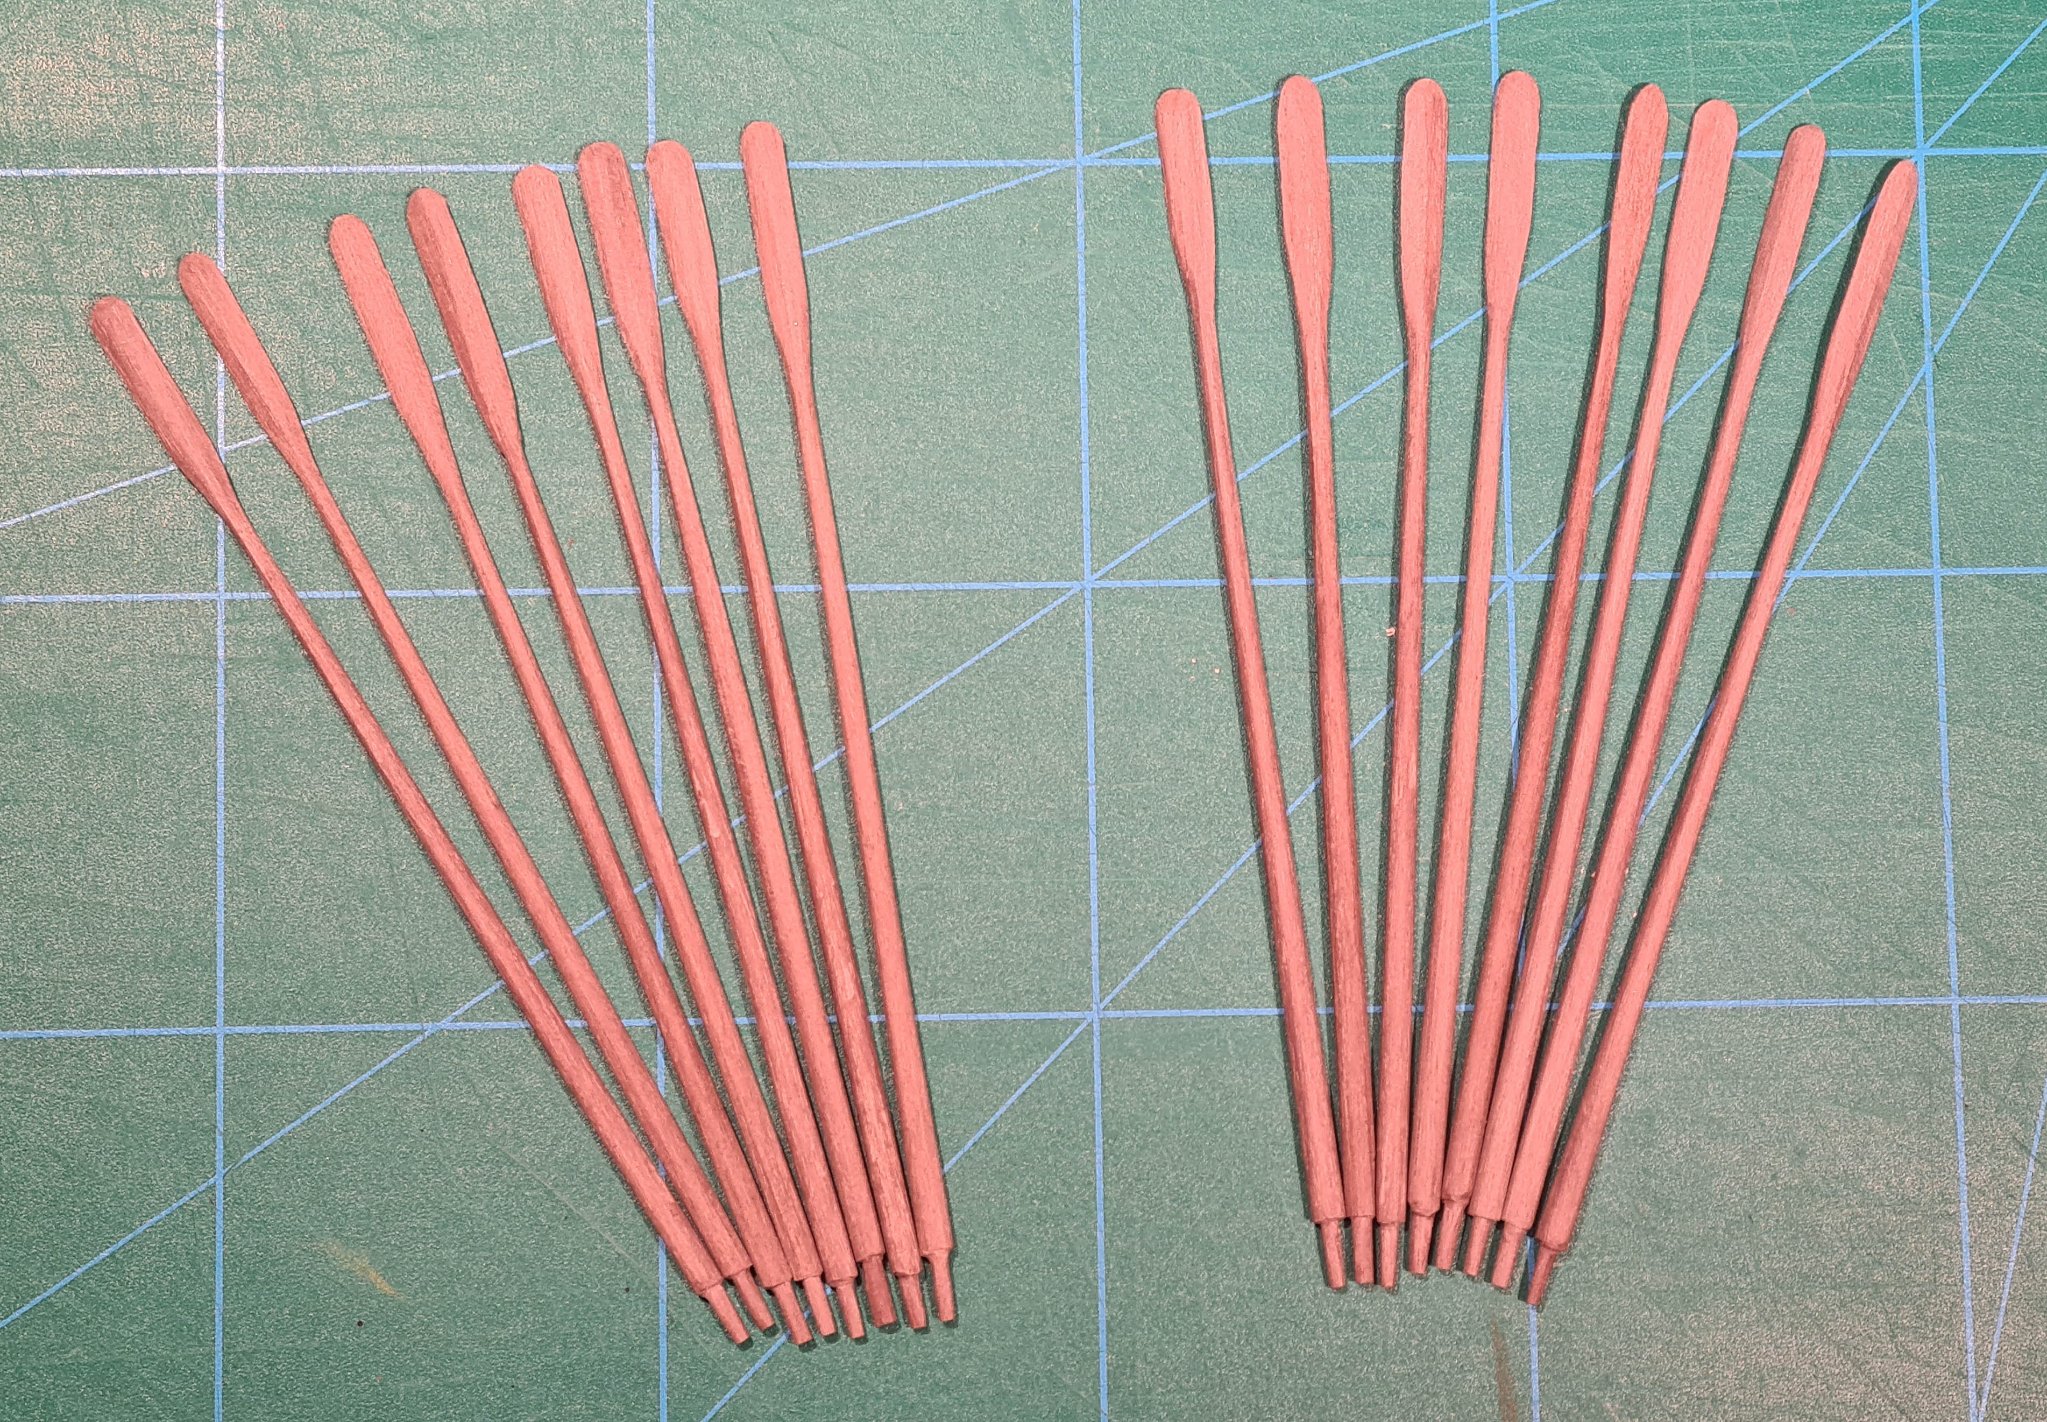
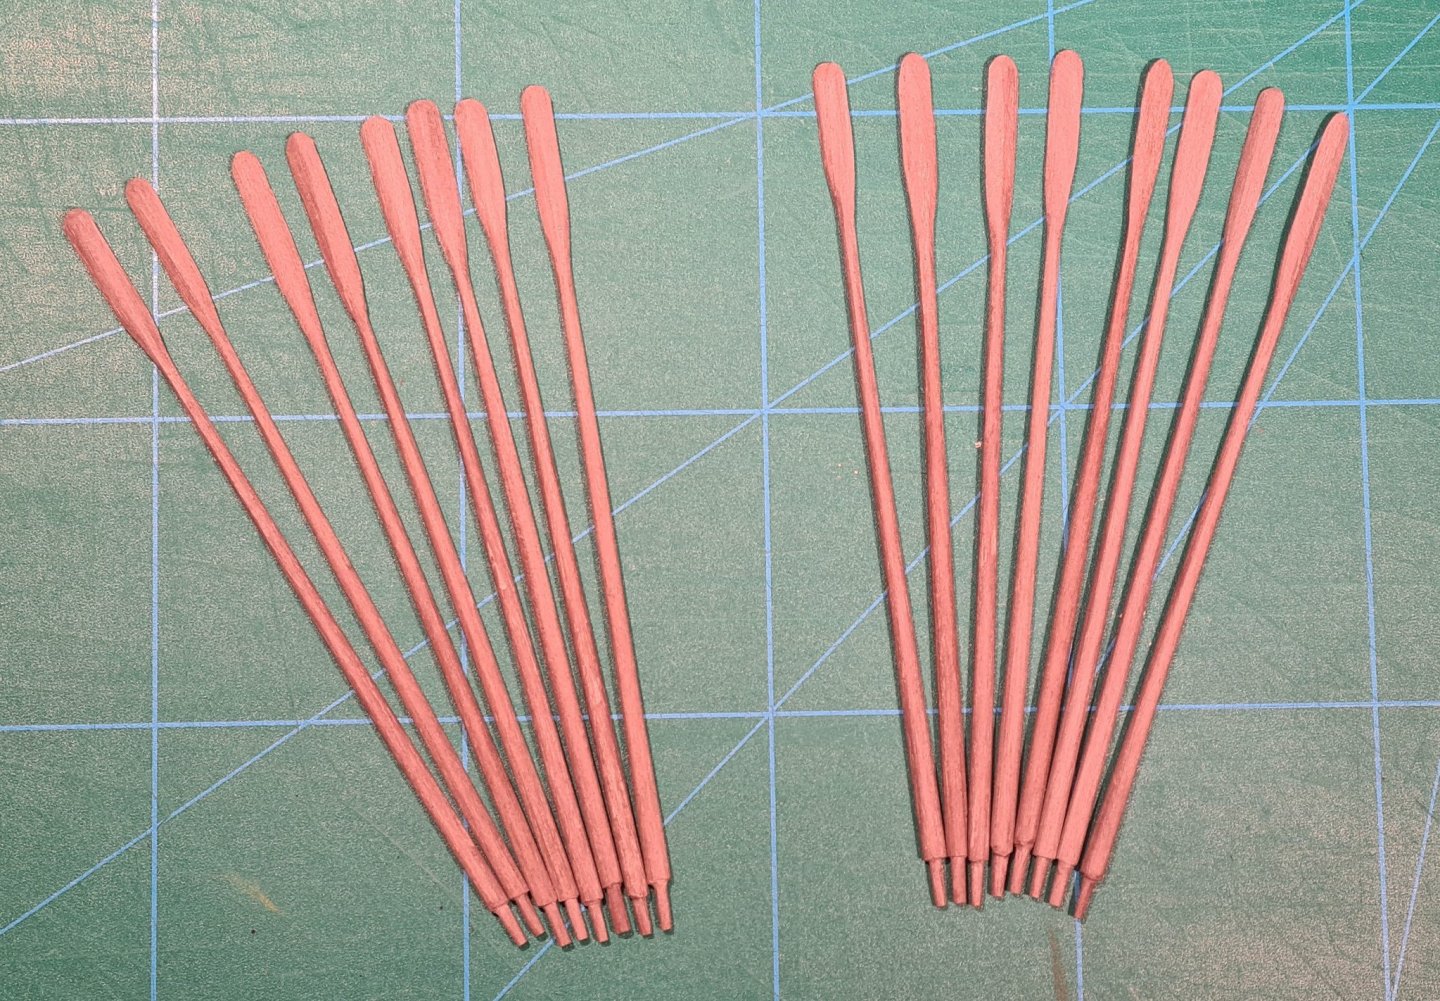
Another small update. In between the riveting and framing I have been whittling away at the oars. Now the full set of 16 is ready.
- 179 replies
-
- 8
-

-

-
- longship
- Helga Holm
- (and 1 more)
-
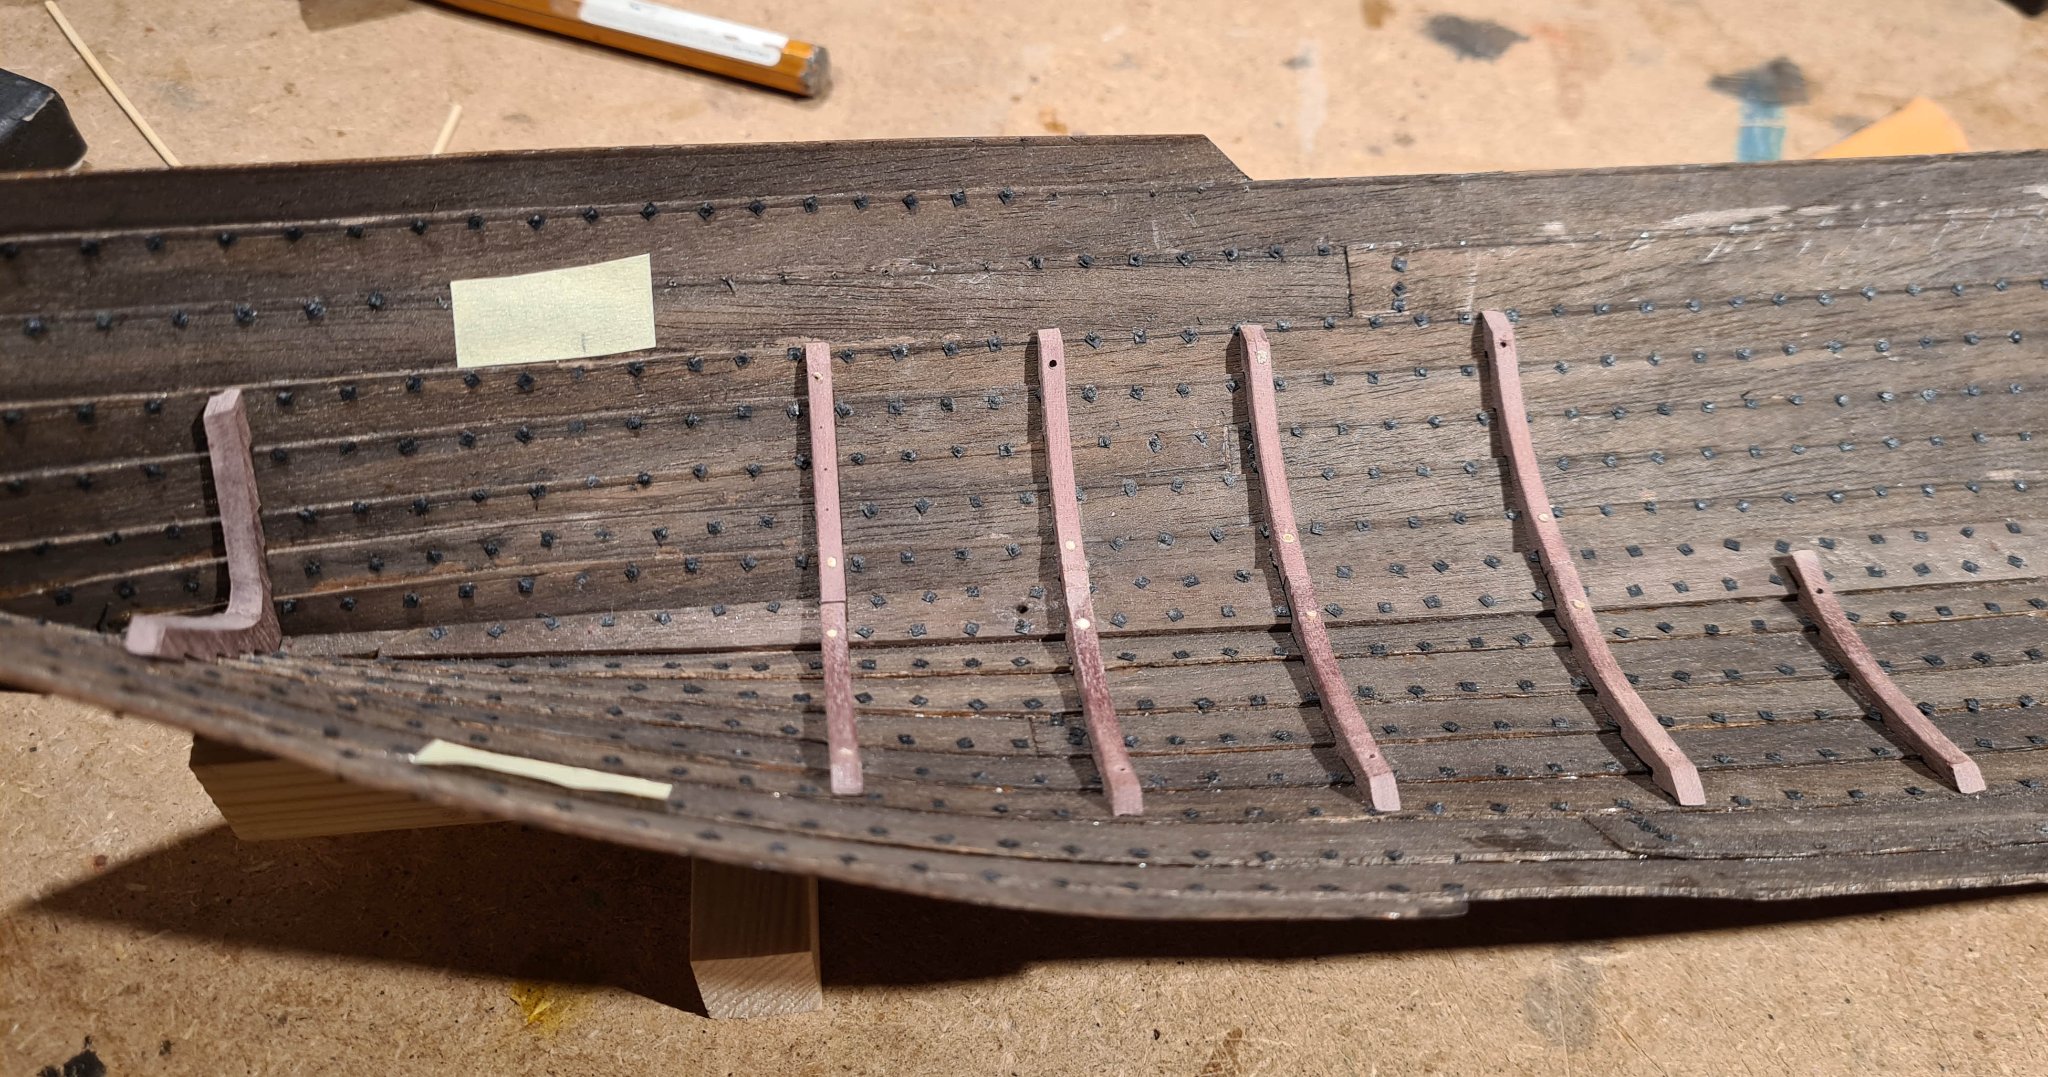
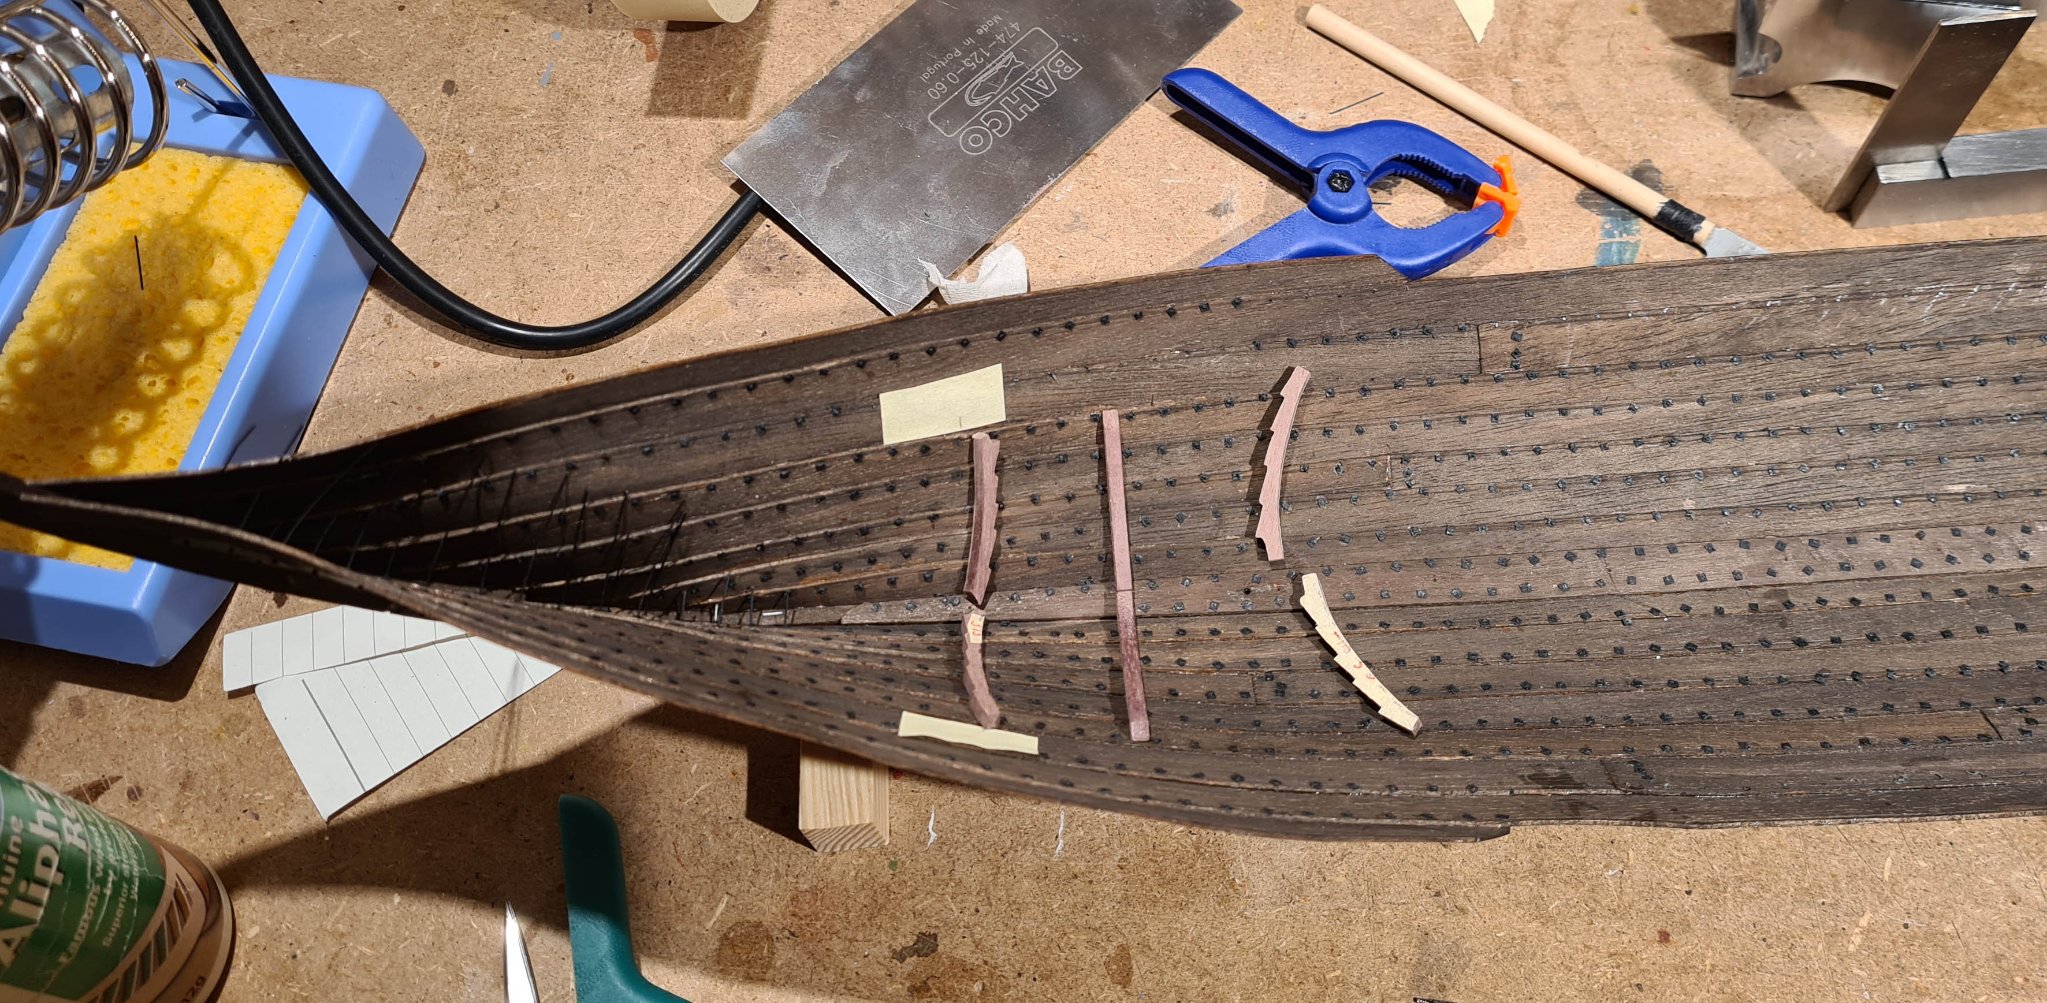
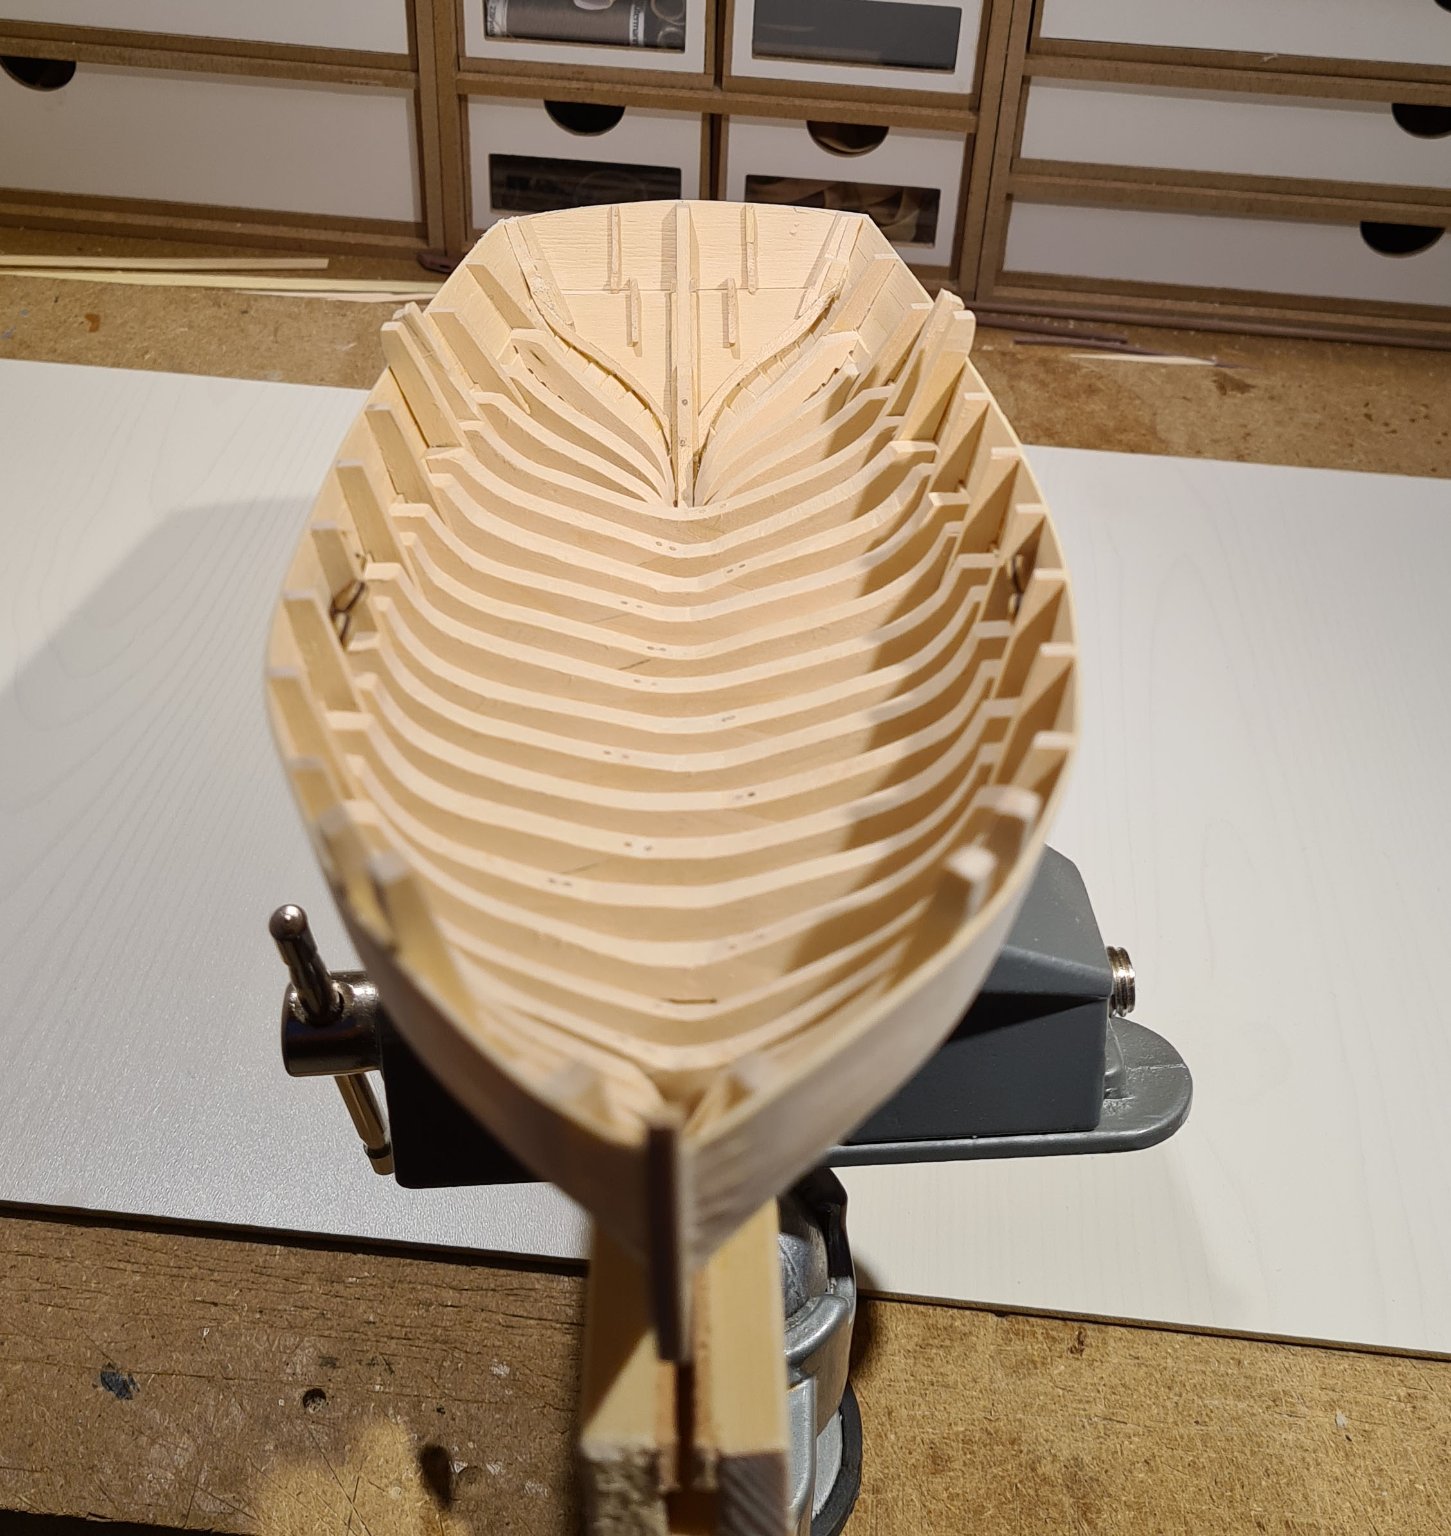
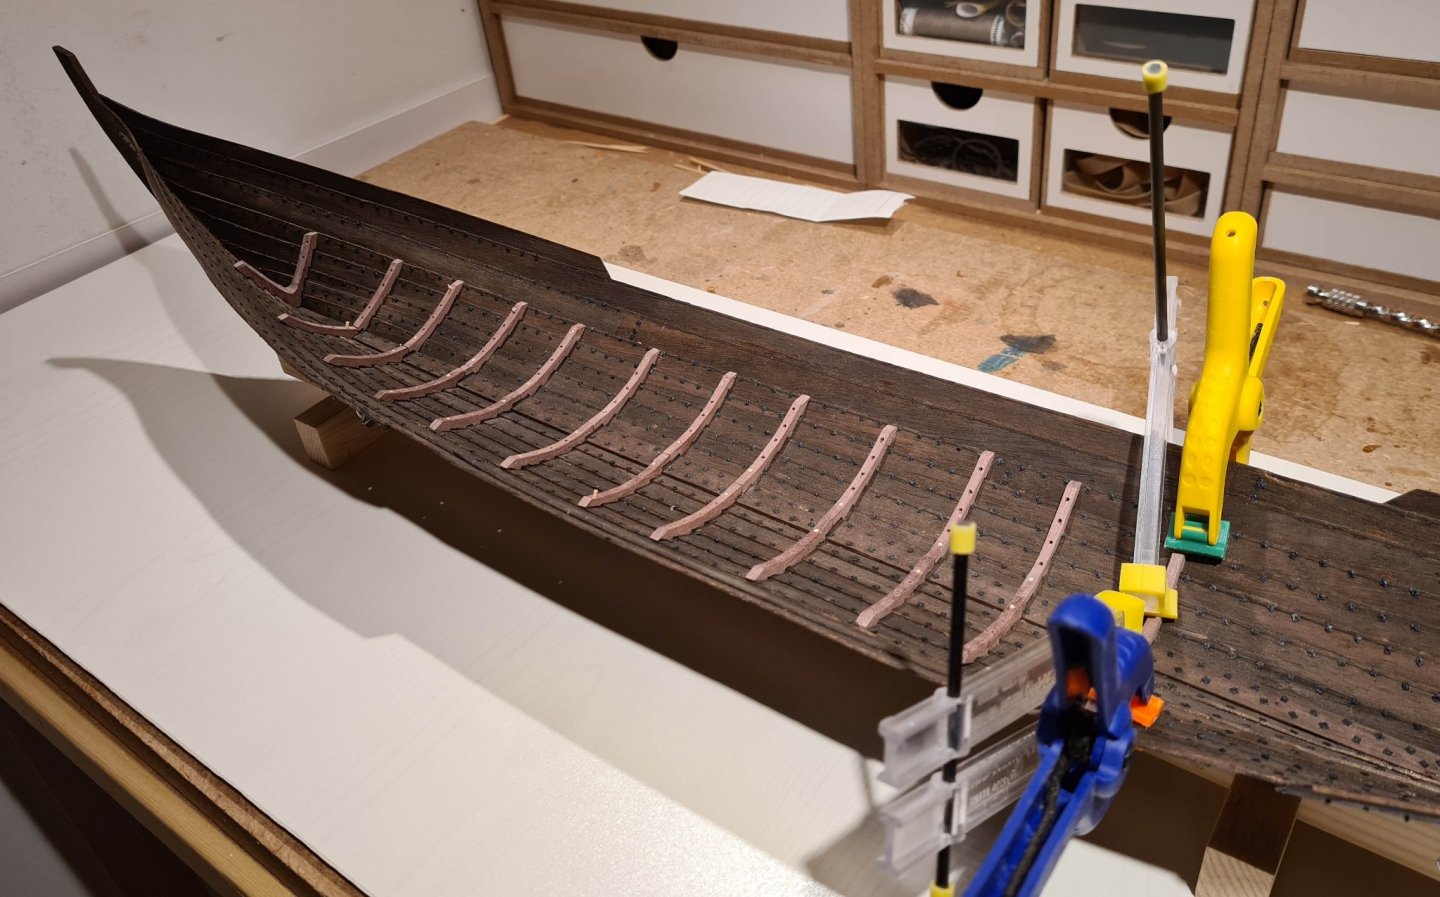
Thanks @druxey. I have continued with the frames, and have added at least one pair of tree nails to each of them to make sure that they stay in place.
- 179 replies
-
- 11
-
-
- longship
- Helga Holm
- (and 1 more)
-
Welcome to MSW, from across the keel.
-
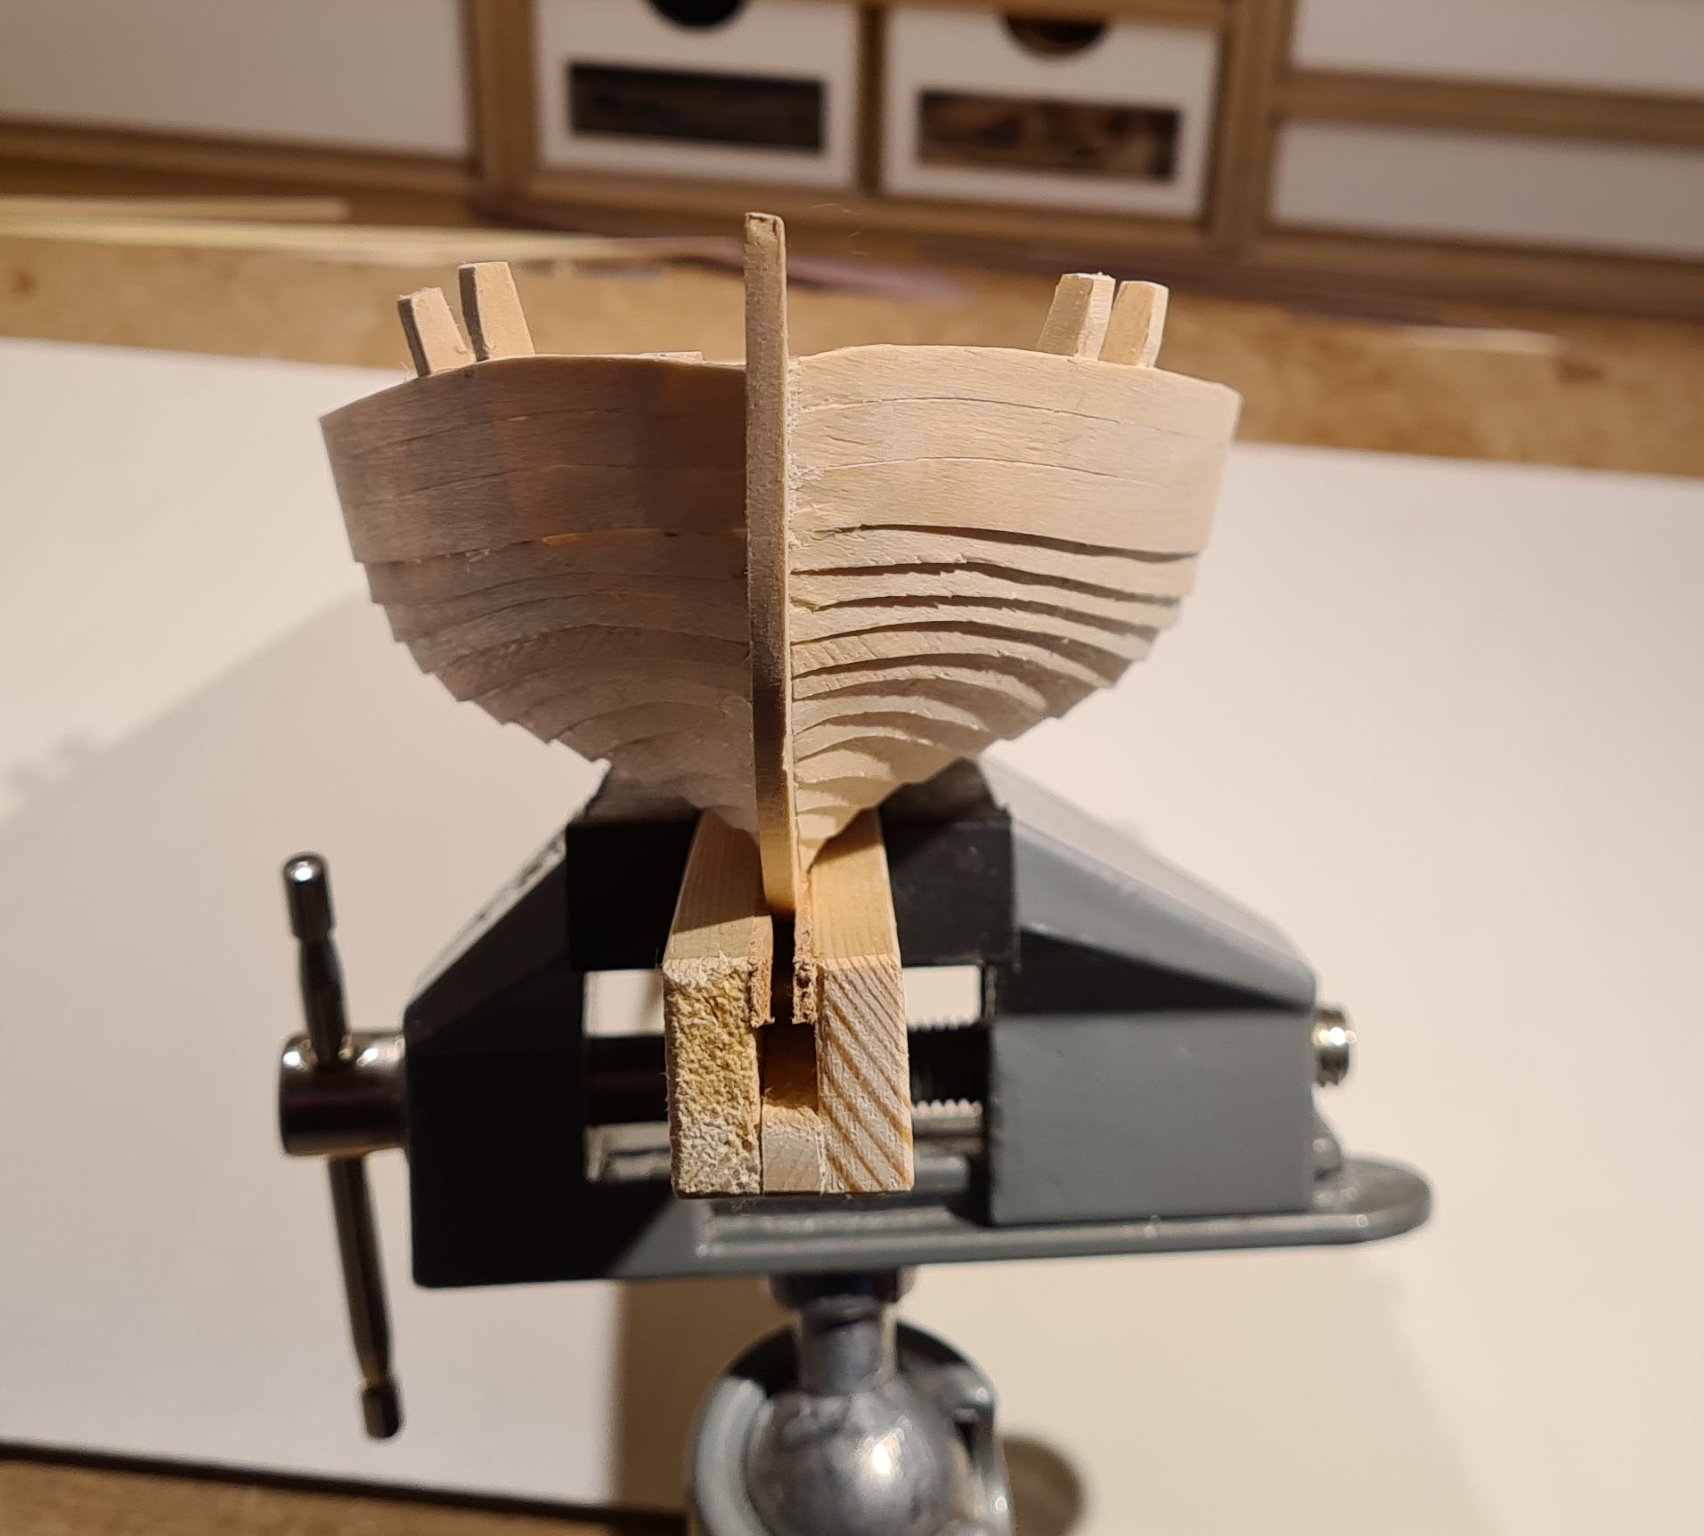
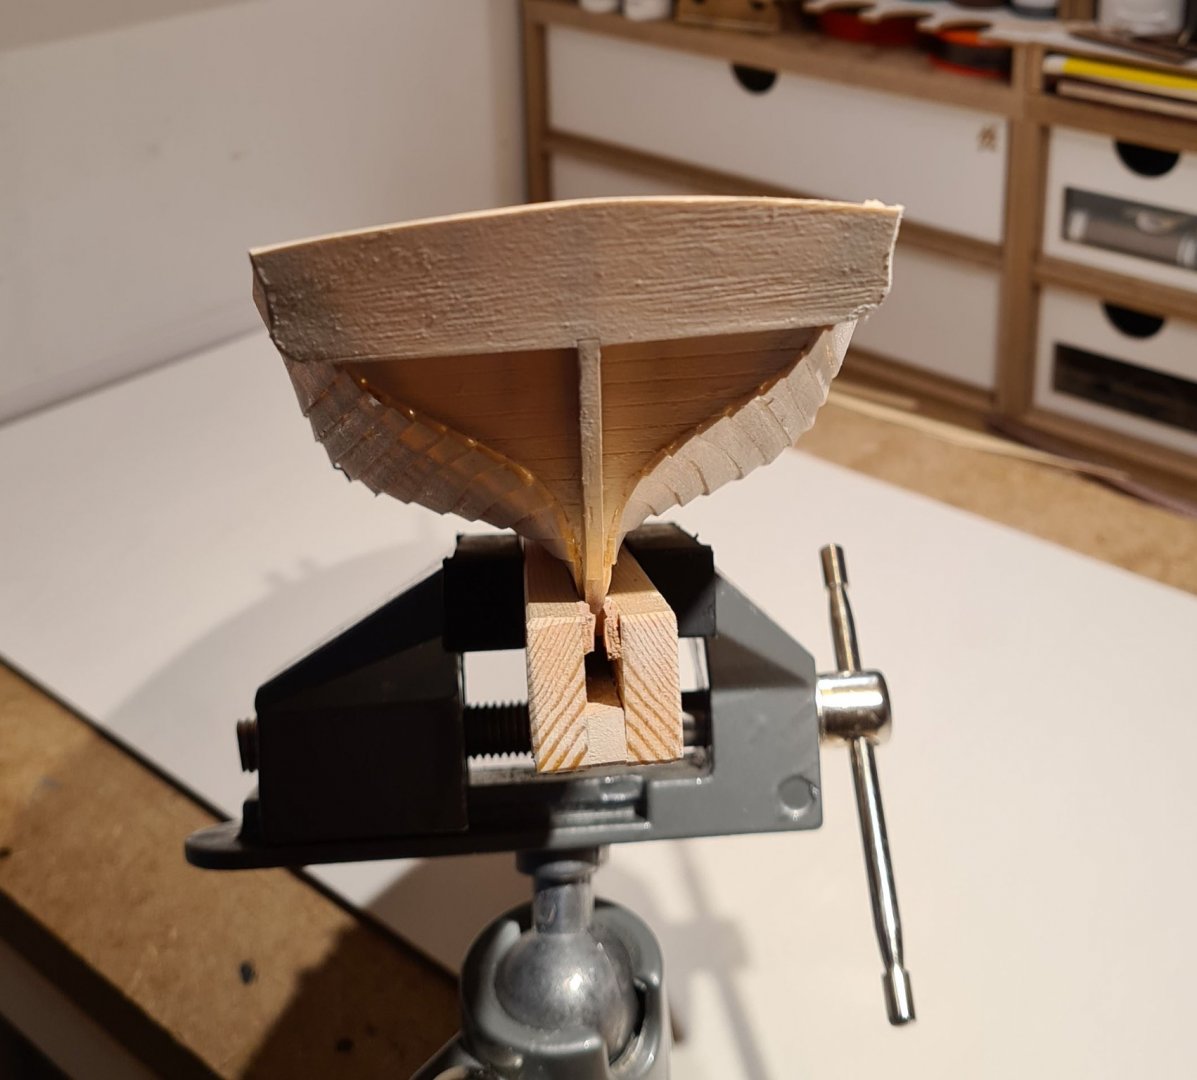
Yes I used the card trick. The frames where prepared before I started with the rivets. Now I actually need to press the hull to fit the frames. When I put on the stain, the hull shape shifted slightly.
- 179 replies
-
- 6
-
-
- longship
- Helga Holm
- (and 1 more)
-
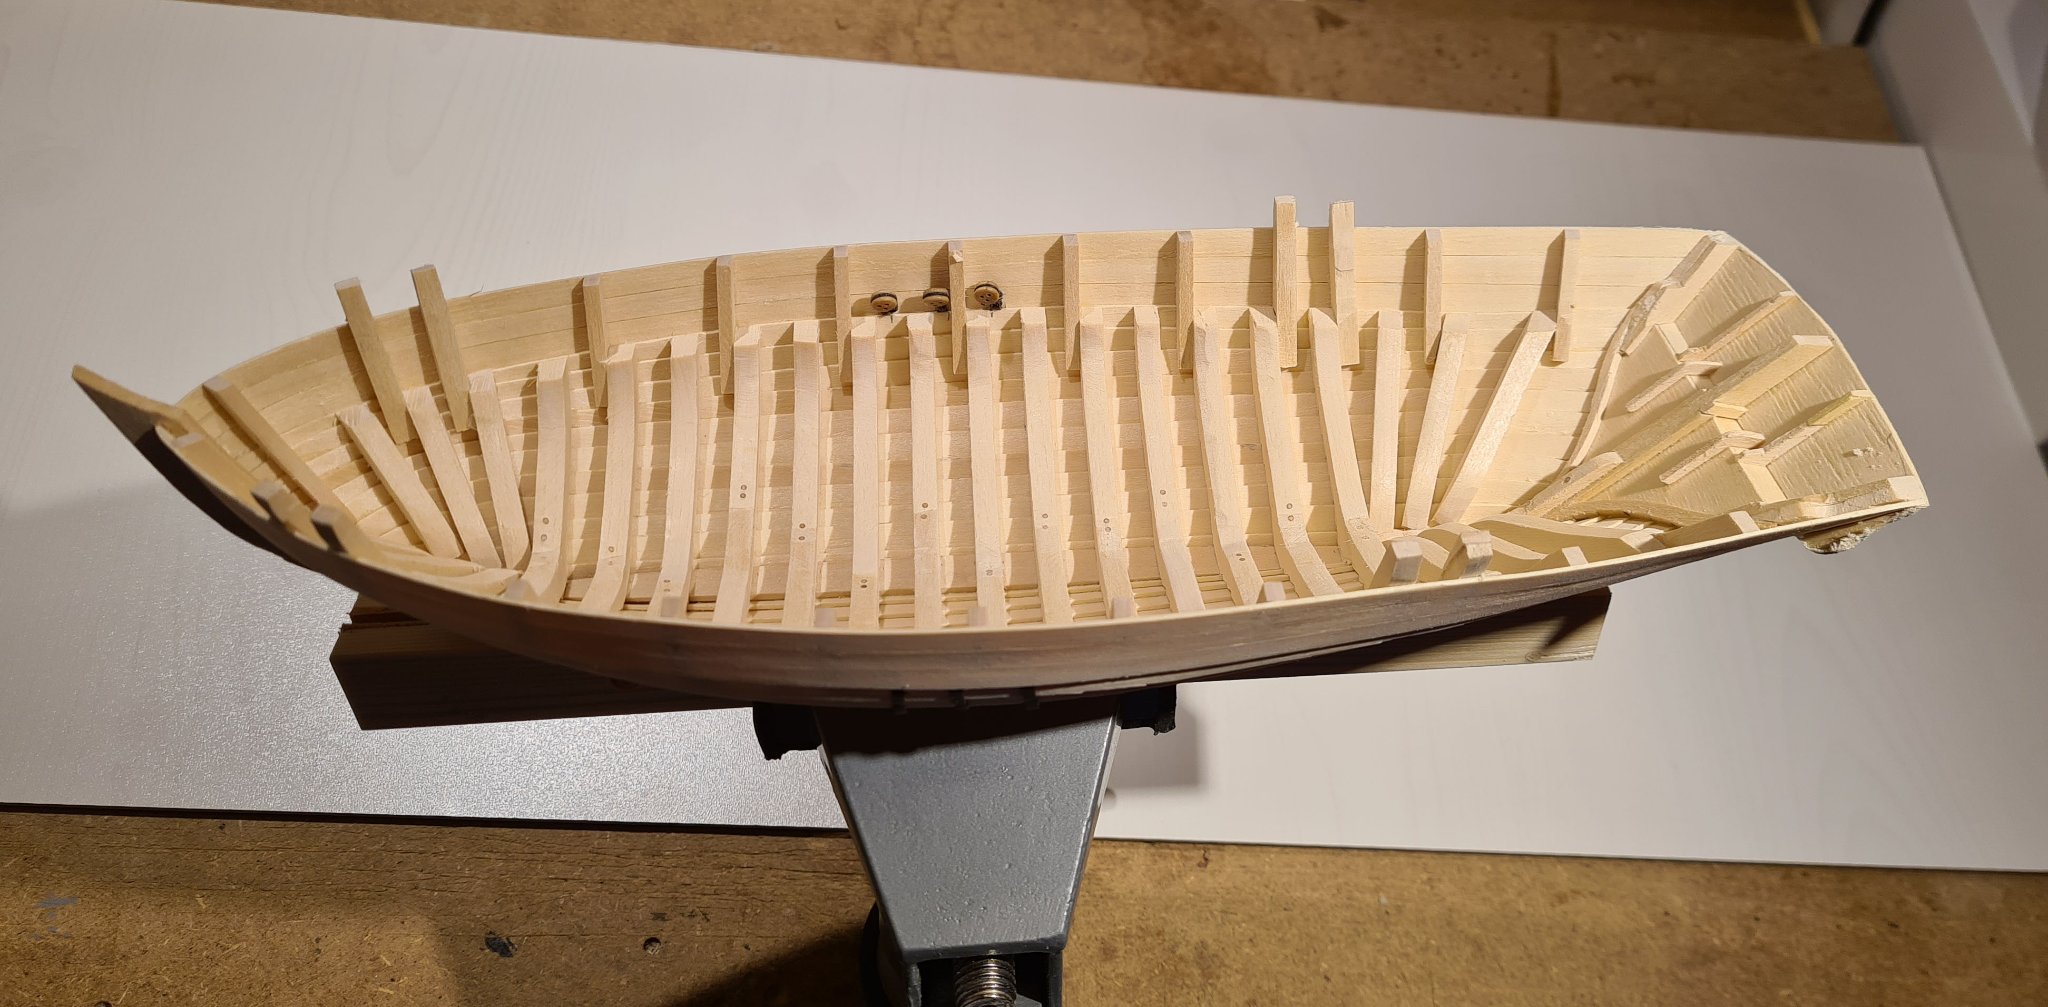
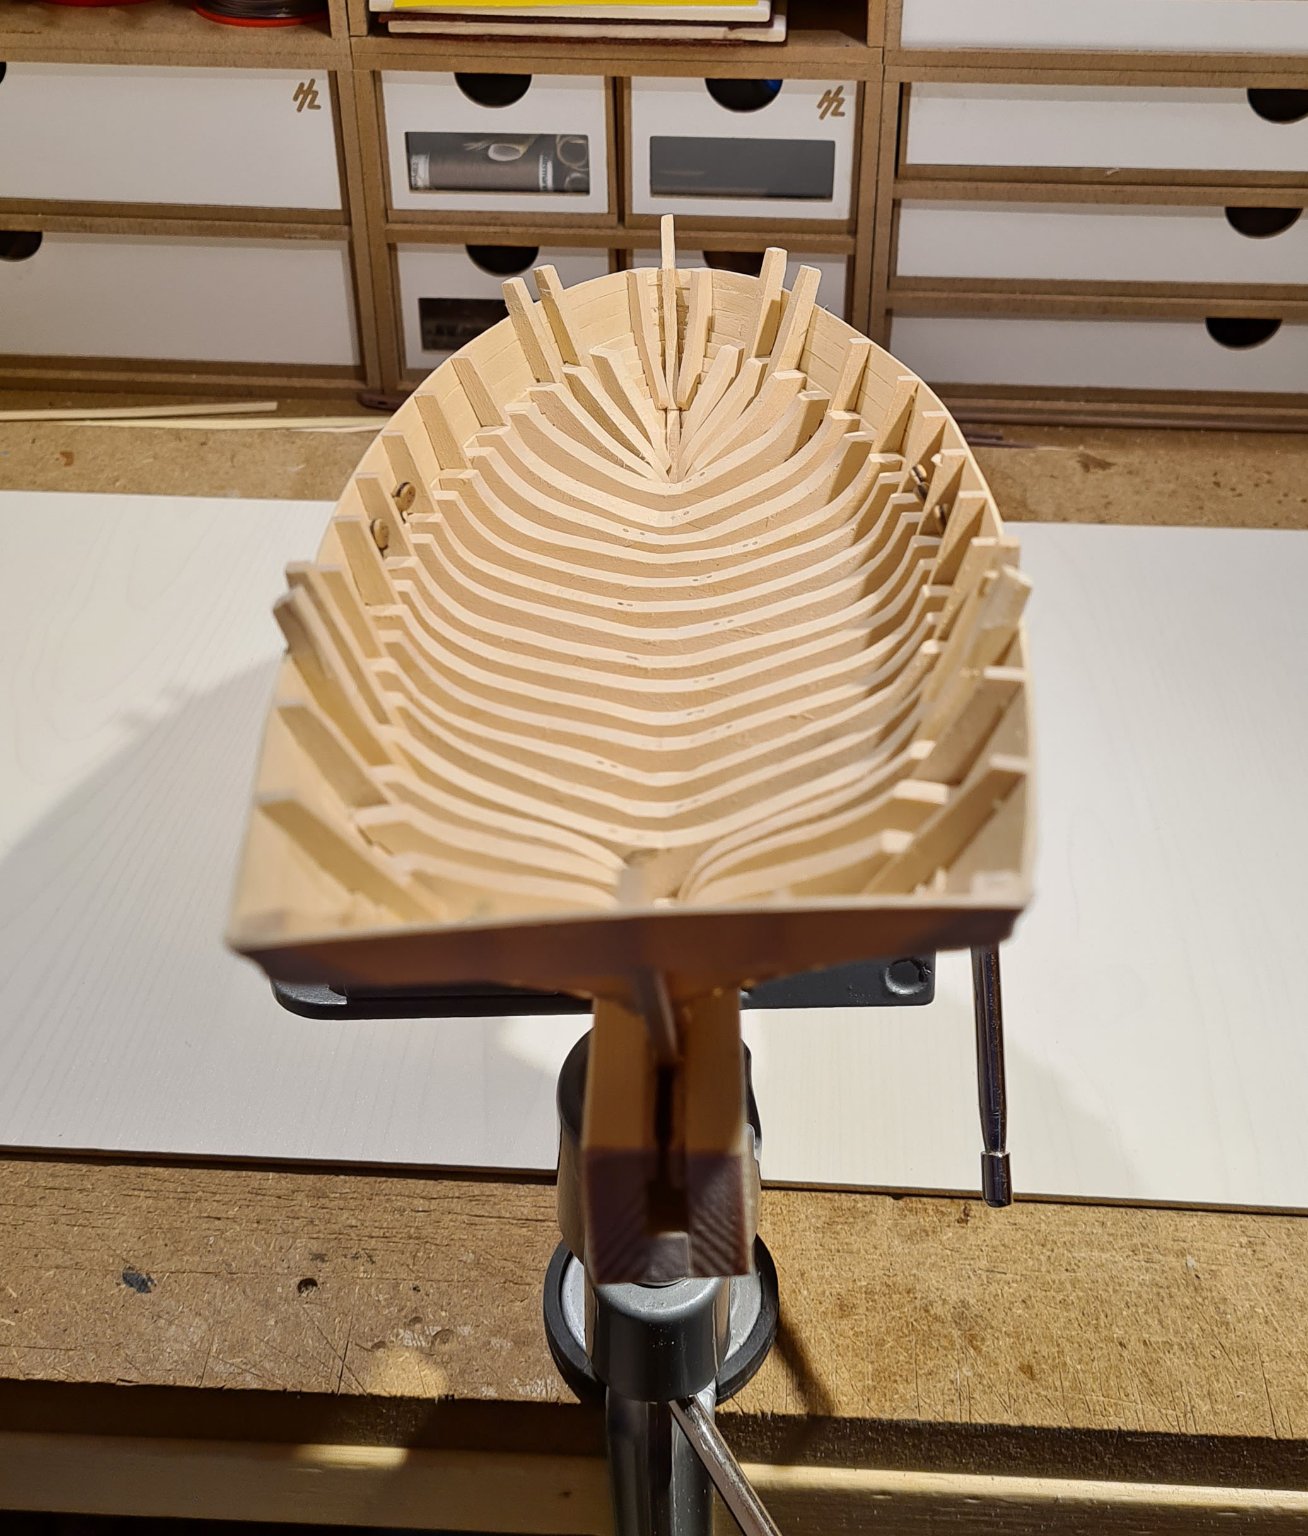
Thank you for your kind words. I look forward to your Sutton Hoo ship @Schrader. After your earlier projects it will certainly be well worth following. I have glued a few frames, and started to tree nail them. The hull, which is surprisingly stable even without the frame, quickly becomes much more rigid when the frames are fixed at just two points.

- 179 replies
-
- 9
-
-
- longship
- Helga Holm
- (and 1 more)
-
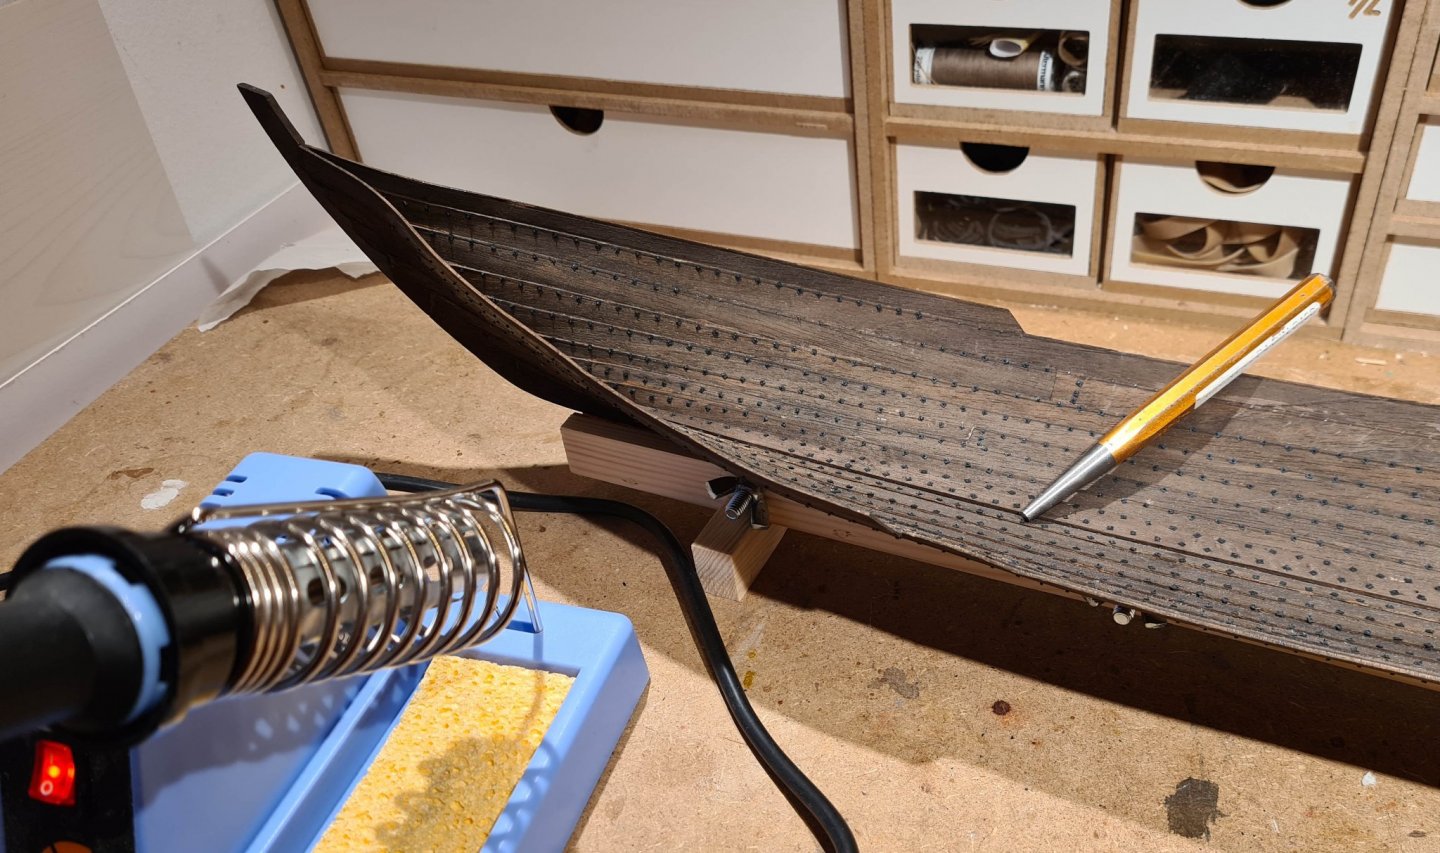
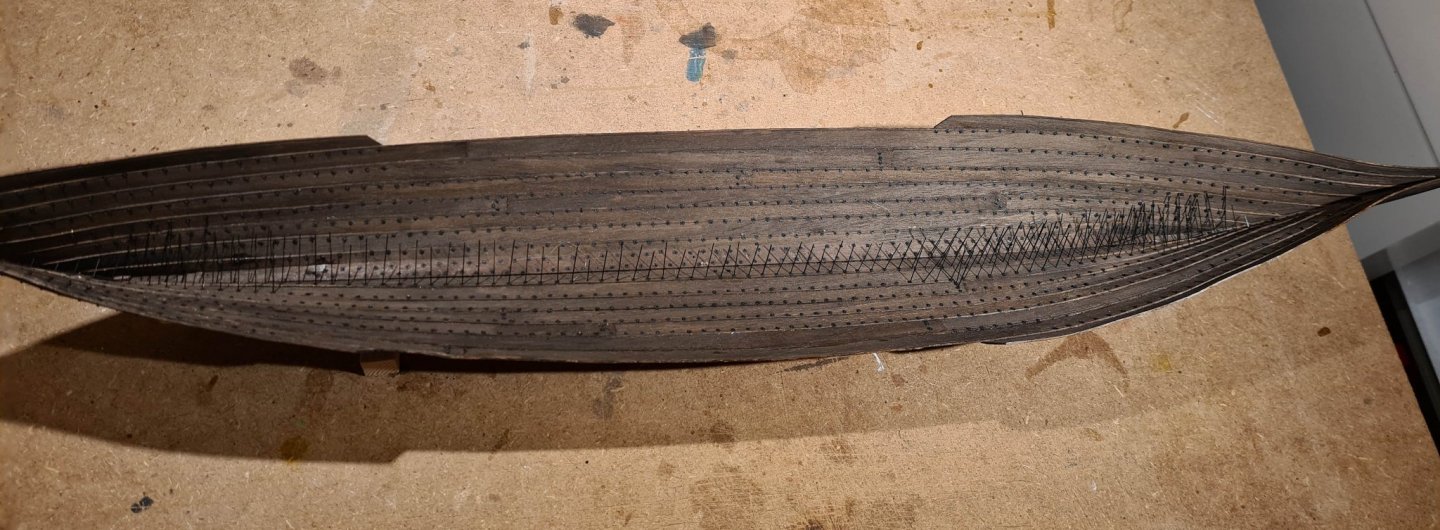
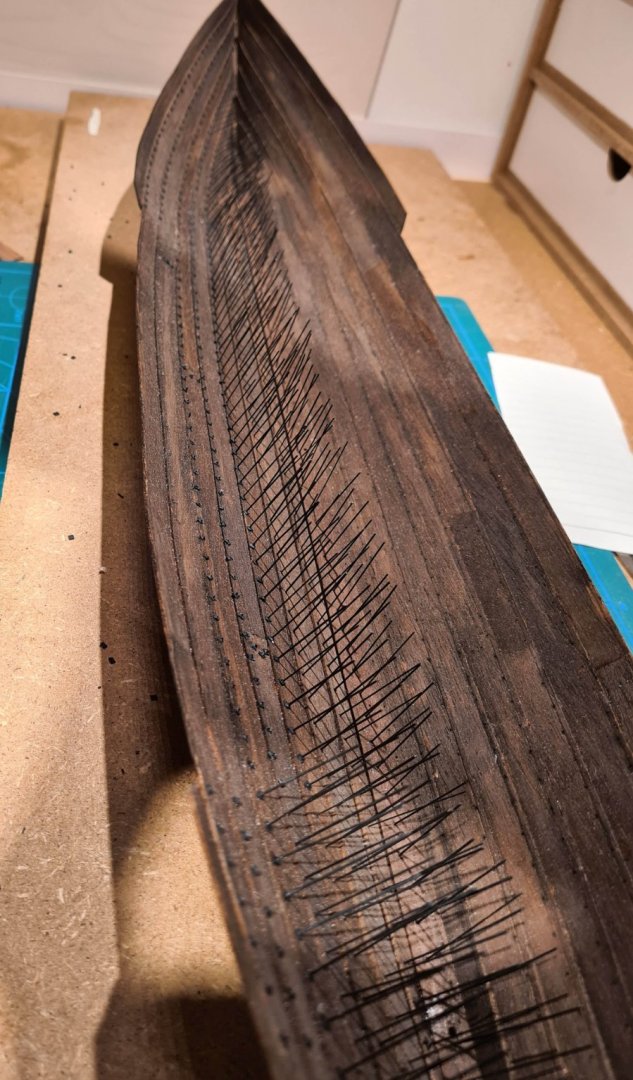
I might add that the this ship only has oarlocks in the middle of the ship, where the sides are somewhat parallel and the distance to the water is relatively even. The difference in angle to the water for the oars on the different position is in practice not that big. On another ship the situation might be different. I'm not sure that my experience can be generalized, but Cap'n Atli's experience seem to support it. In the build I have completed the majority of the riveting. Only a few hard to reach ones in the narrow parts of the fore and aft remains. I have cut the pins close to the washers with scissors. This leaves a small peg sticking up. To flatten it (and to mimic a real rivet) I melted the peg with a soldering iron and flattened it using flat steel rod (I think it's called a mandrel in English). With all the rivets done I have started with installing the frames. First I glue them, then I will drill holes and add tree nails. After some thought I think that it is easiest to wait with the stain on the frames until after the tree nails are installed (so that they can get the correct color as well). To the left some of the last rivets in the fore have just been installed and the washers have just been glued in place.

- 179 replies
-
- 12
-
-
- longship
- Helga Holm
- (and 1 more)
-
Thanks Steven, My own experience from rowing the reconstruction for a fair number of hours is that the length of the oars on different position has no effect. We have a rather wide variety of oars with different length and weight. It's much more important on how close to the side you sit, how strong and tall you are, what technique you have etc. It's not much left of the riveting now. Soon I can proceed with other, much more fun, stuff.
- 179 replies
-
- 8
-
-
- longship
- Helga Holm
- (and 1 more)
-
These boats where also important as they maintained how to sail single masted square rigged boats as a living tradition into the 20th century. As such they where significant when reconstructions of Viking ships has been built. I have been sailing with a reconstruction of a medieval long ship for several years, and we use a lot of terms and commands from Nordlands boats.
- 39 replies
-
- 7
-
-
- Billing Boats
- Finished
- (and 1 more)
-
Very interesting. Your method is something new to me, I will follow eagerly.
-
Yes, I don’t know exactly what evidence the researchers have found, but it has led the Vasa museum to paint their big model in that color. It seems likely that represents the best understanding that is currently available.
-
What I meant was that by 1980, the best understanding of the color was that it could have been blue. Landströms beautiful illustration helped popularize that interpretation. However, it turned out that better methods could later discover evidence that it was likely wrong. Many beautiful models have been made based on Landströms interpretations.
-
If the large model in the Vasa museum is anything to judge by, an I think it is, the inside of the bulwark was not painted. https://digitaltmuseum.se/021015510413/vasa-1-10-modellens-bemalning-07-08-19-maj-08-bemalad-och-klar-439-modellen I am a bit sad that the blue color did not turn out to be the correct one, it is more striking than the red.
-
I have just (half an hour ago) finished reading the book The Royal Warship Wasa by Björn Landström. It was originally published in 1980 (in Swedish) and may very well be the origin of the blue color scheme. His beautiful illustrations in the book definitely helps promote his conclusion that the painting was blue. According to his text this conclusion was based on the record from the shipyard which shows that indigo pigment (blue) was bought, not on any actual finds of blue color on the wreck. Swedish warships of later dates was also know to have used blue, so his conclusion must be considered reasonable at the time of the writing. However, Landströms early conclusions has later been disproved by better methods. I can highly recommend the book, even though some of the conclusions in it has later been corrected by further research, while other have been confirmed. Regarding the reason for why Wasa sank, she was highly unstable possibly due to the second gun deck that was ordered (by the king) after the building had already been started, and the shape of the underwater body had already been determined. In fact she could only list about 10 degrees before she would capsize, something she did in very light winds.
-
An interesting challenge you have put for yourself. I have recently started to read up on Vasa and have just today received a couple of used books, and a folder with modeling plans from the early eighties. I will follow your work with some interest and hopefully learn something more. Good luck!
-
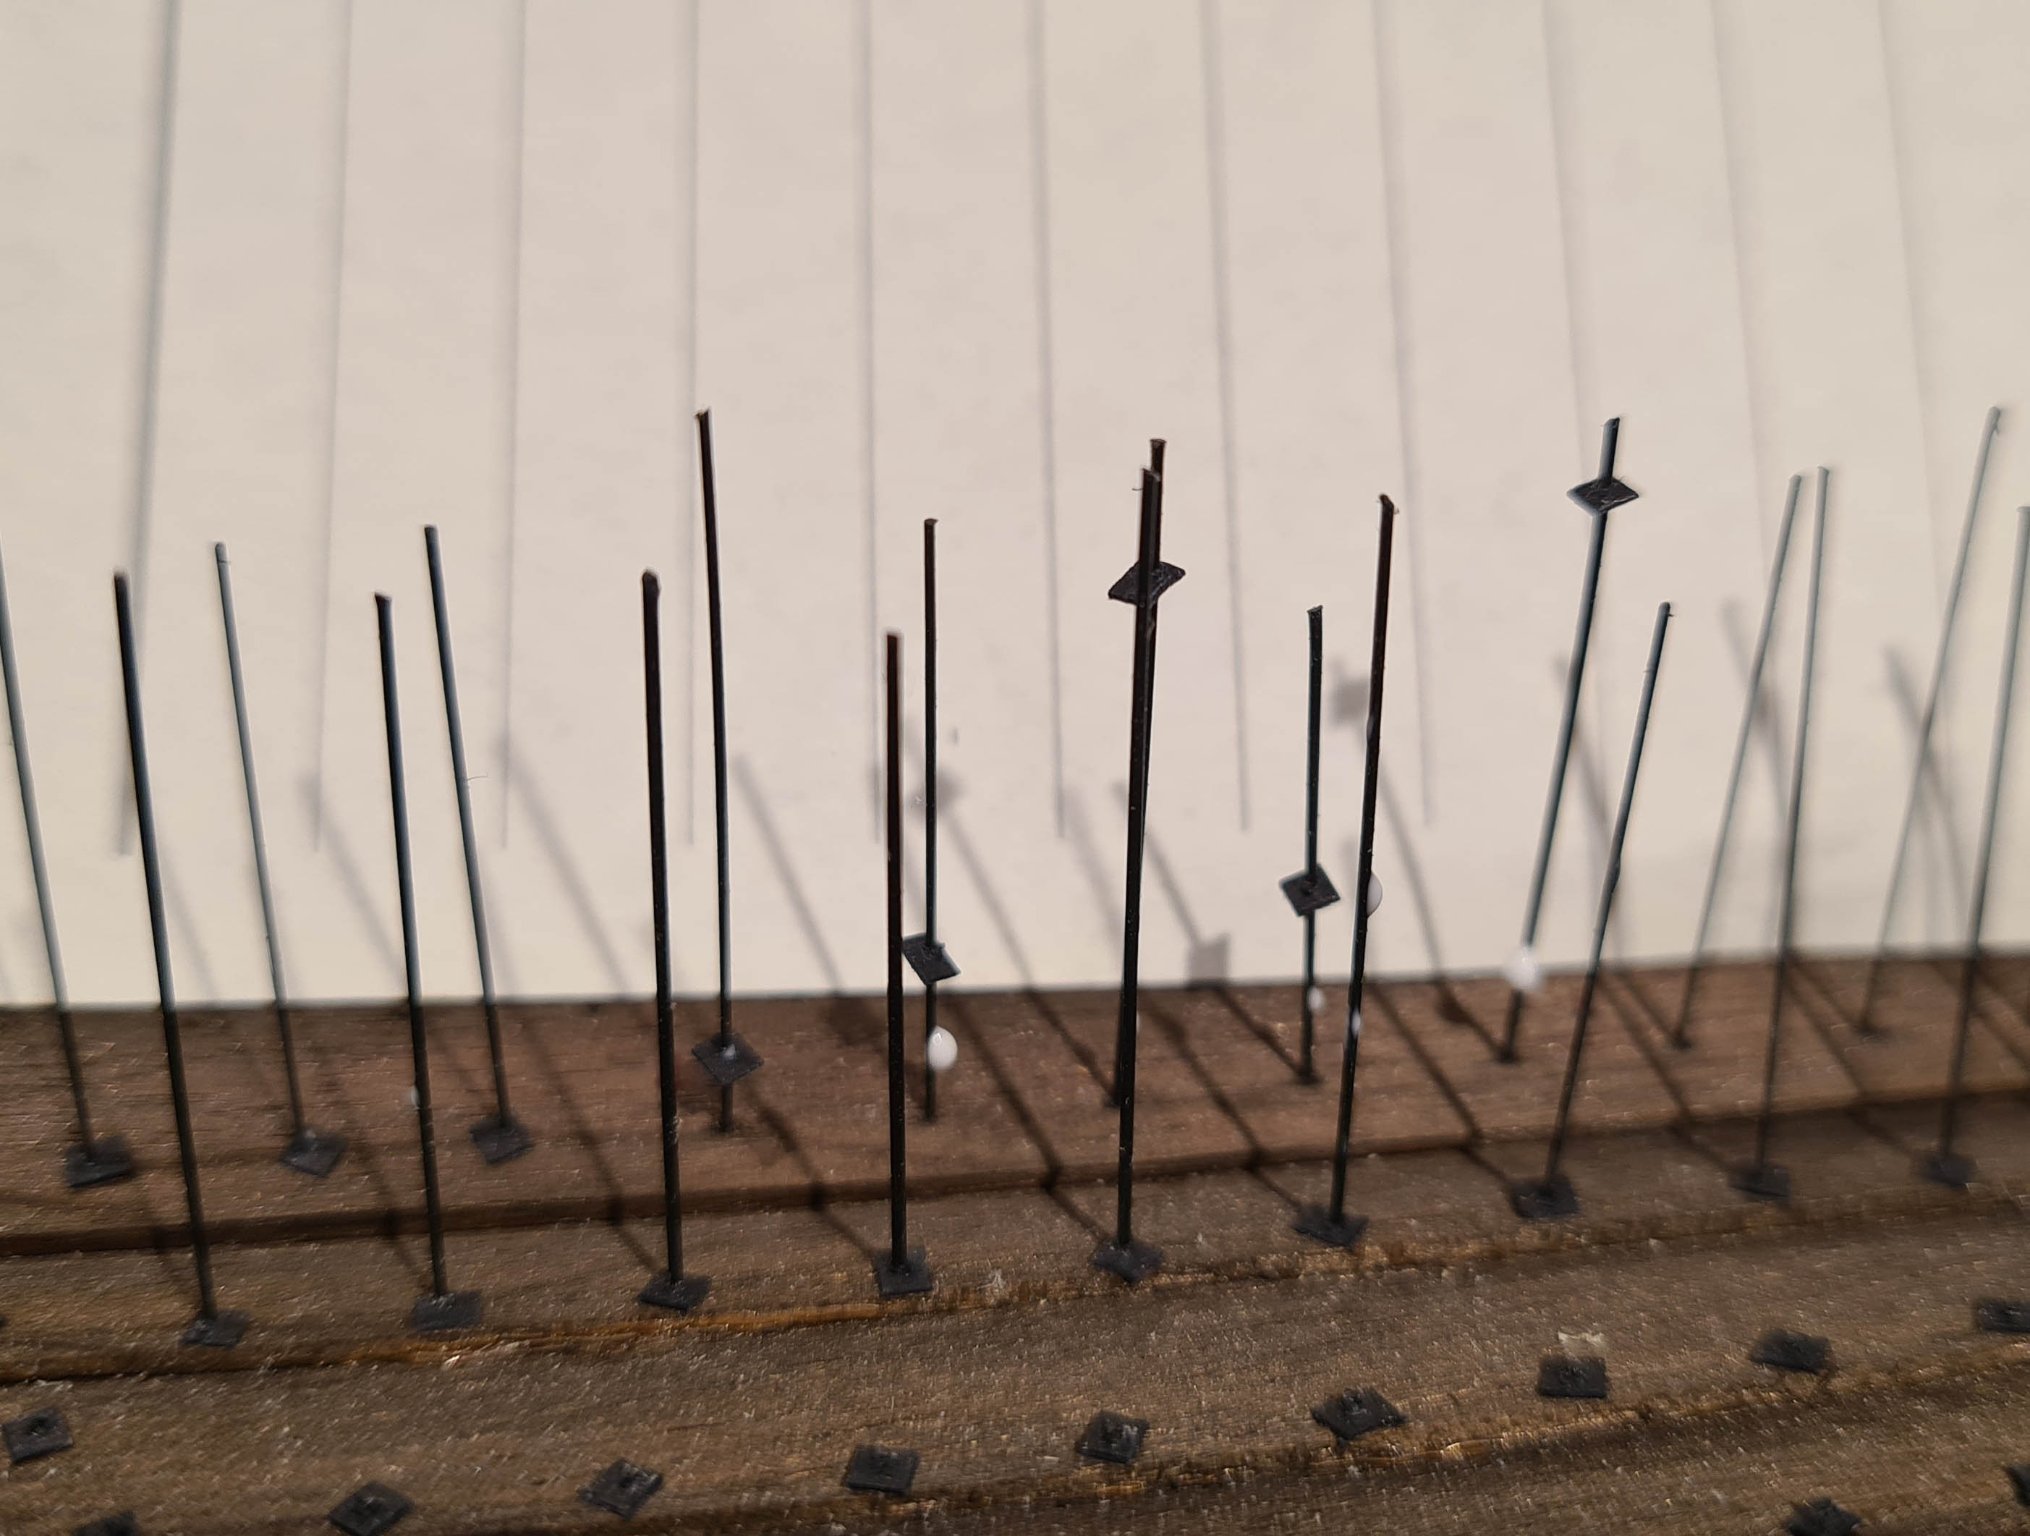
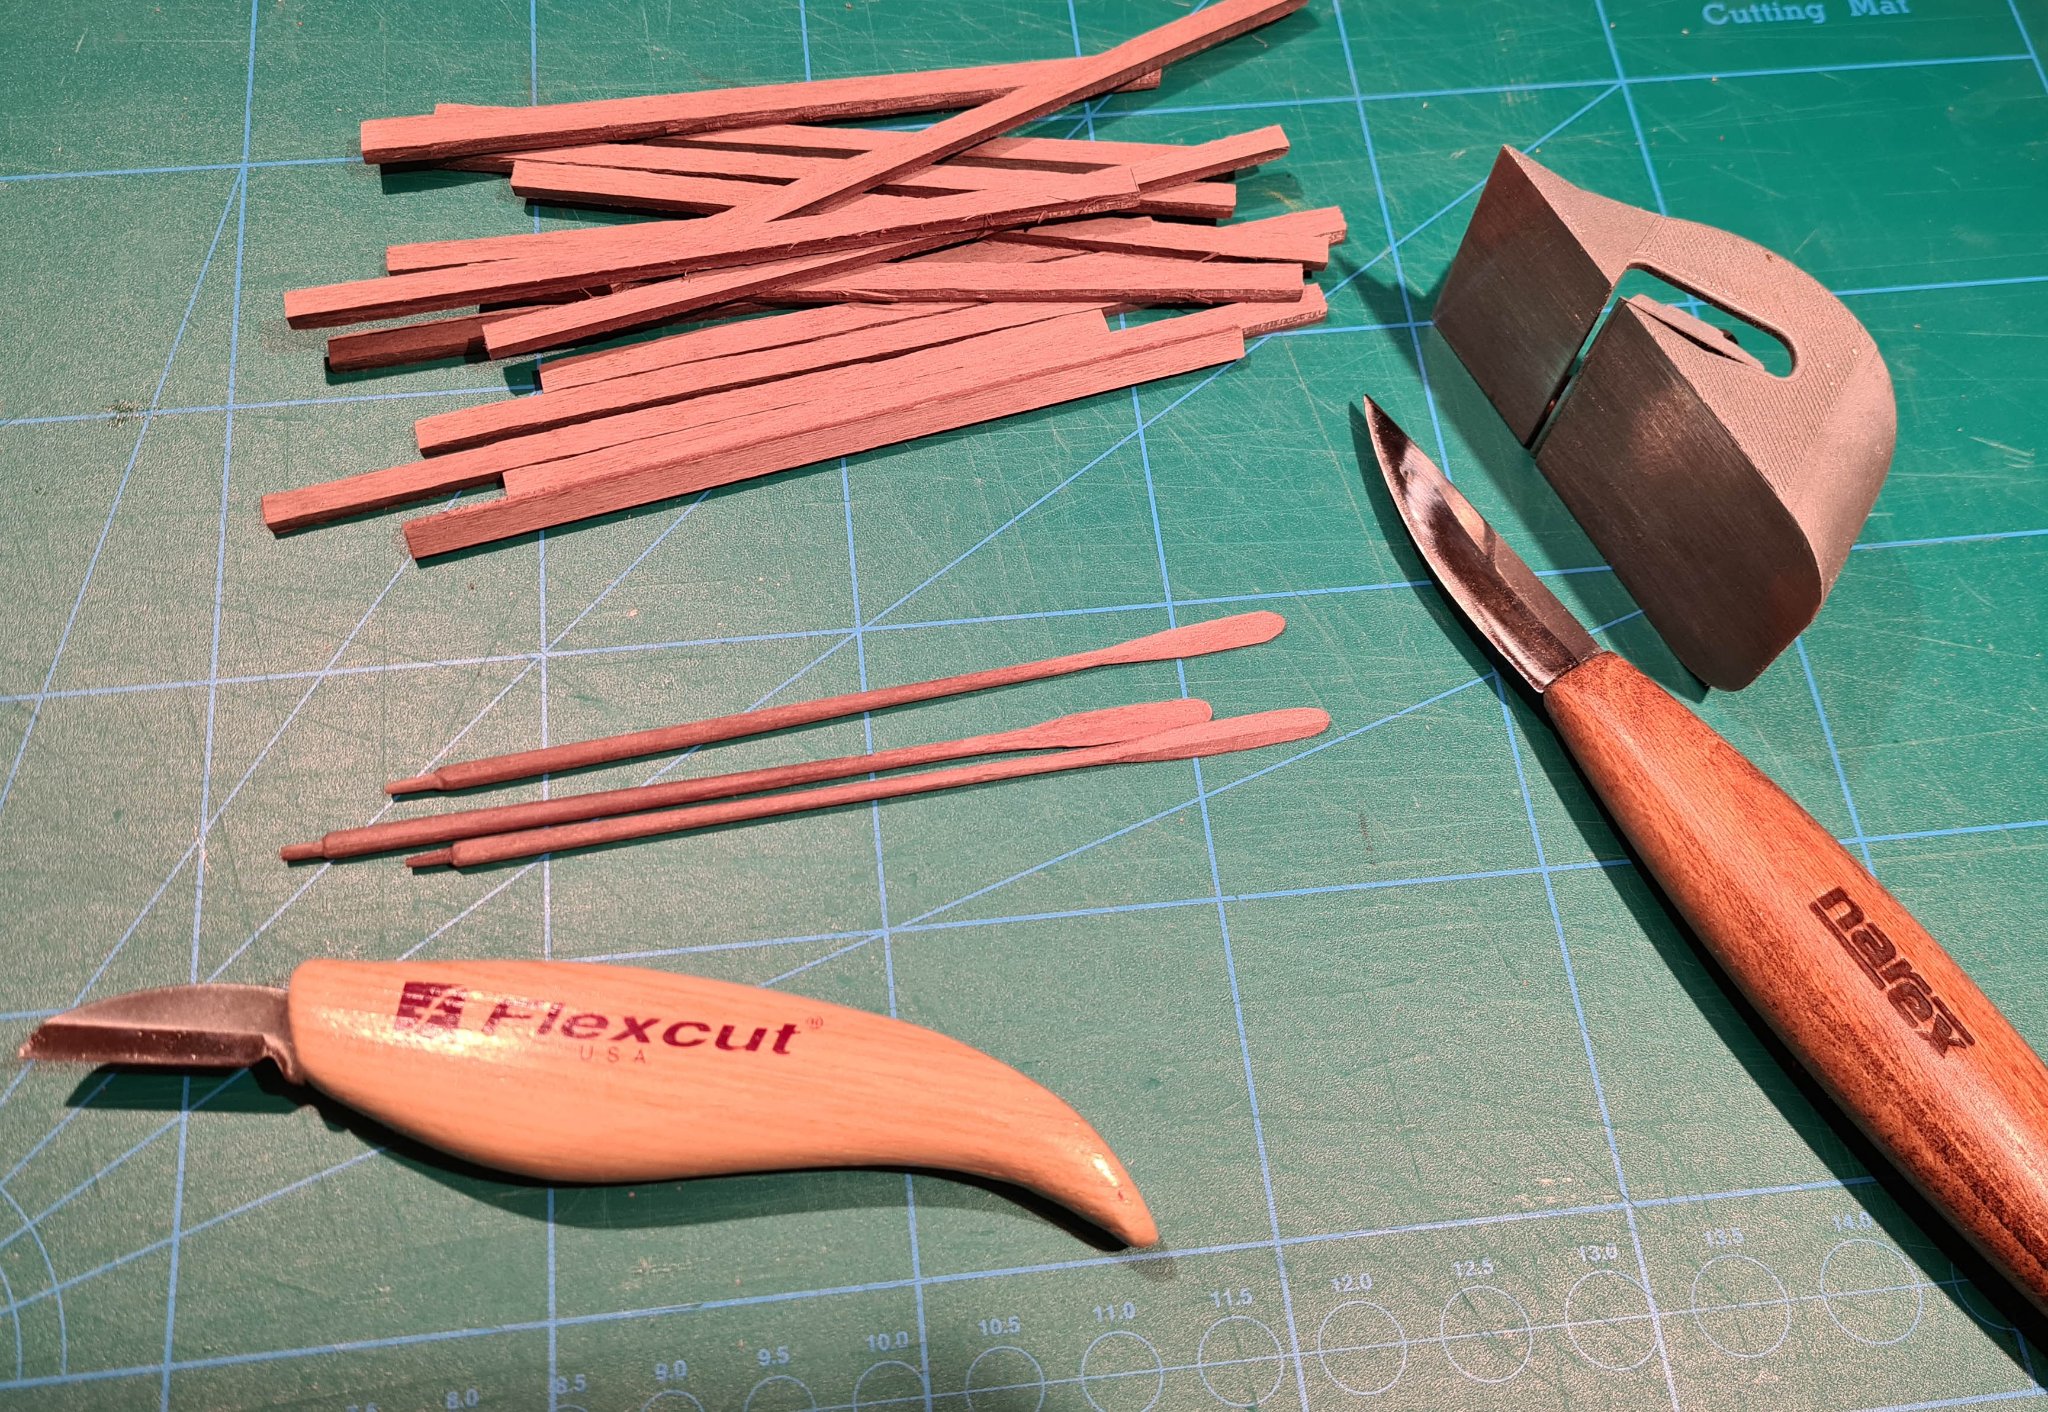
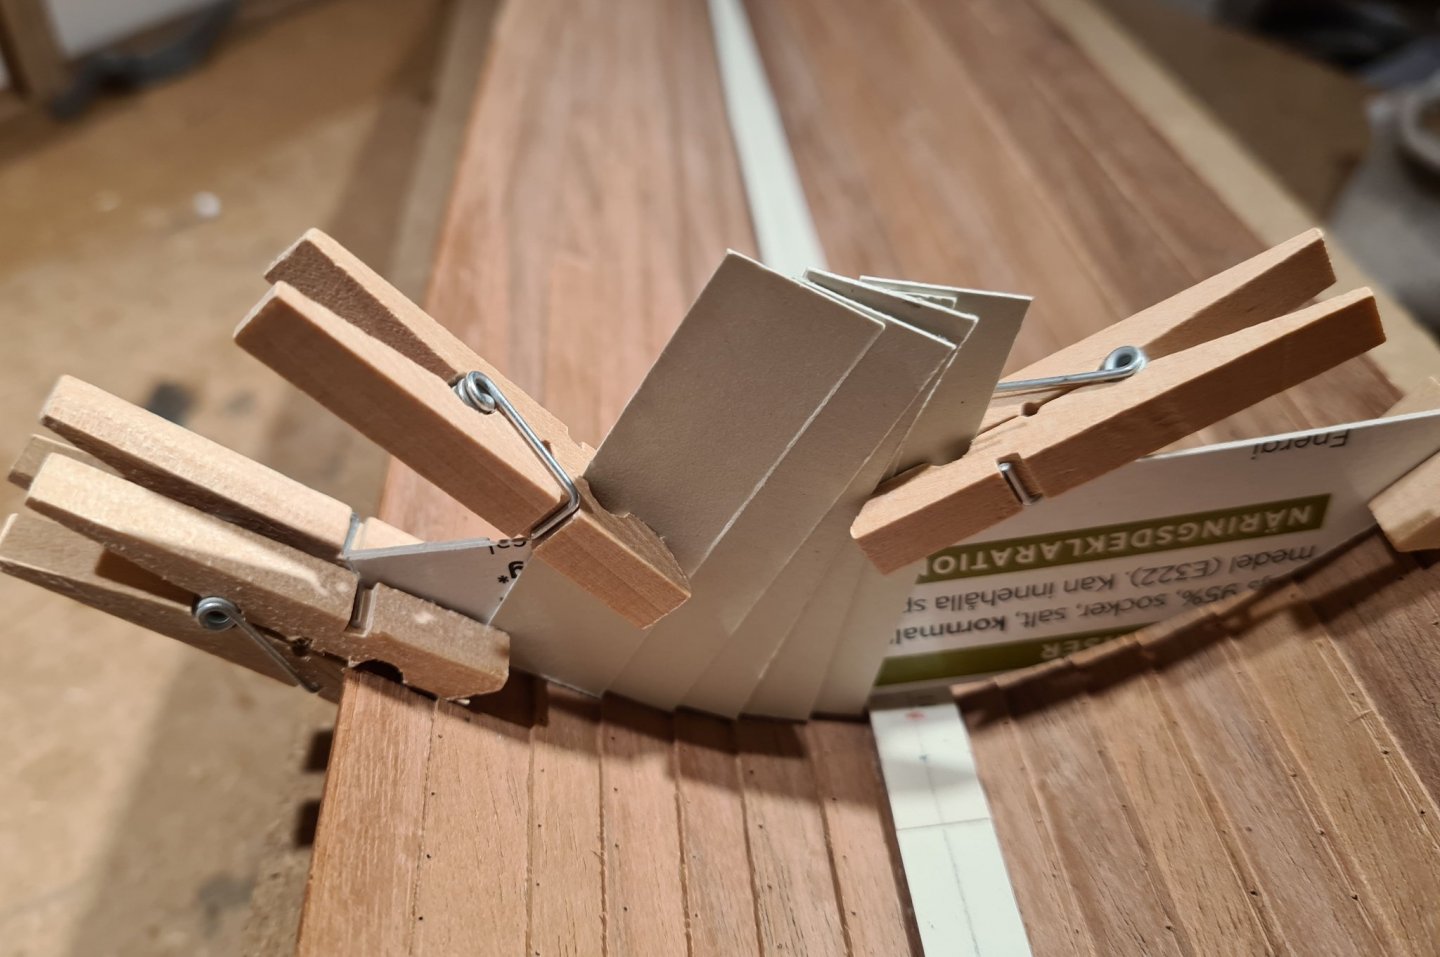
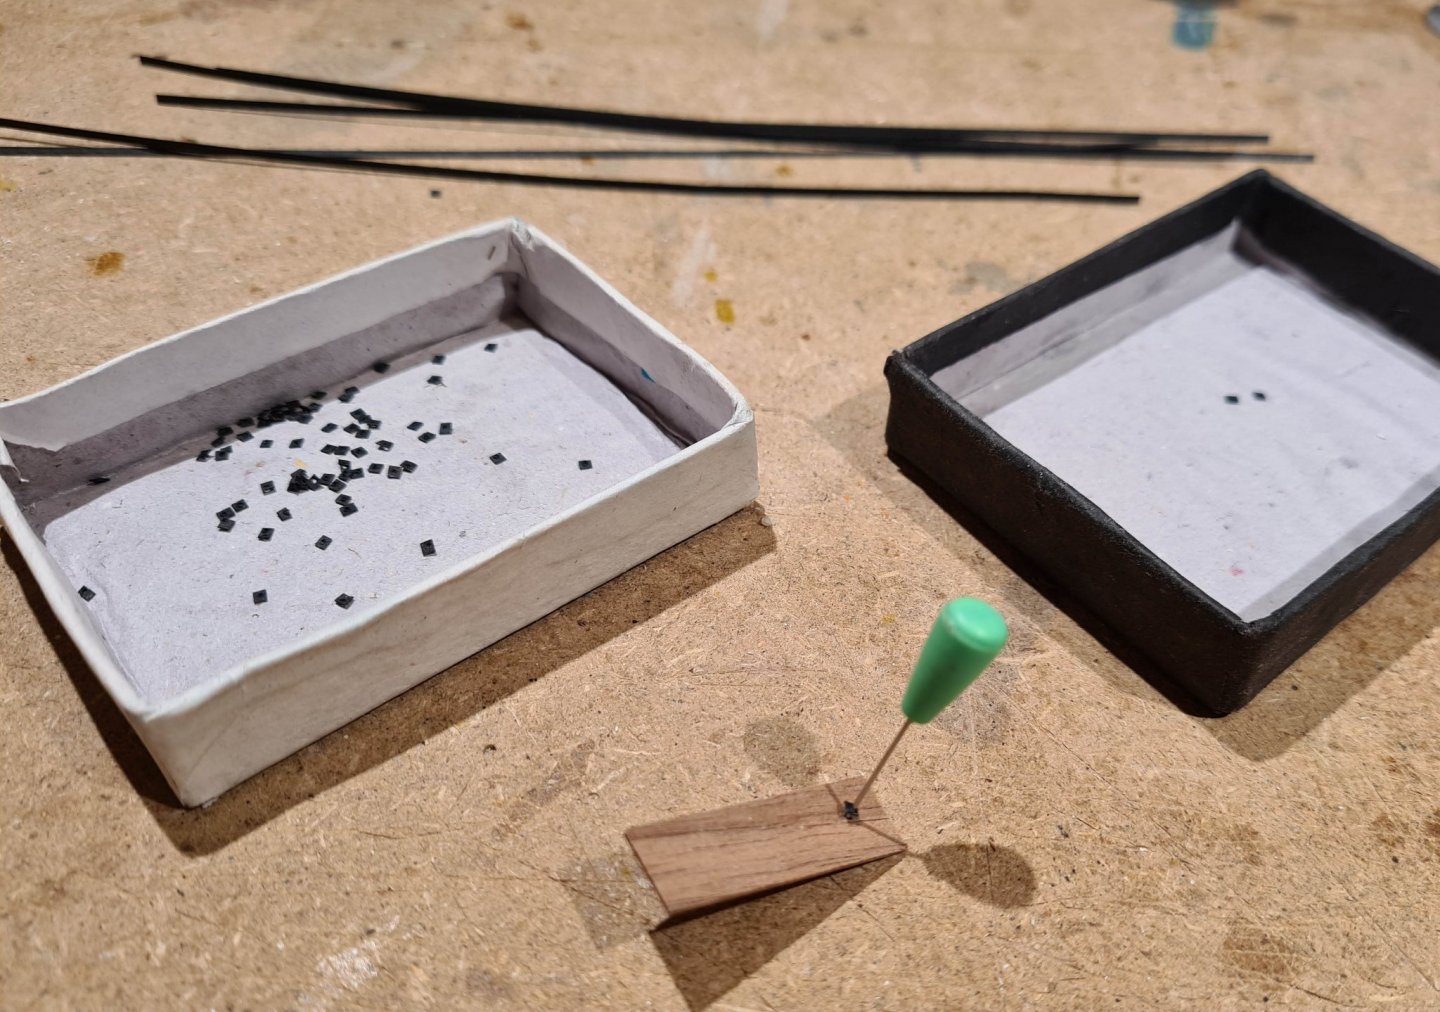
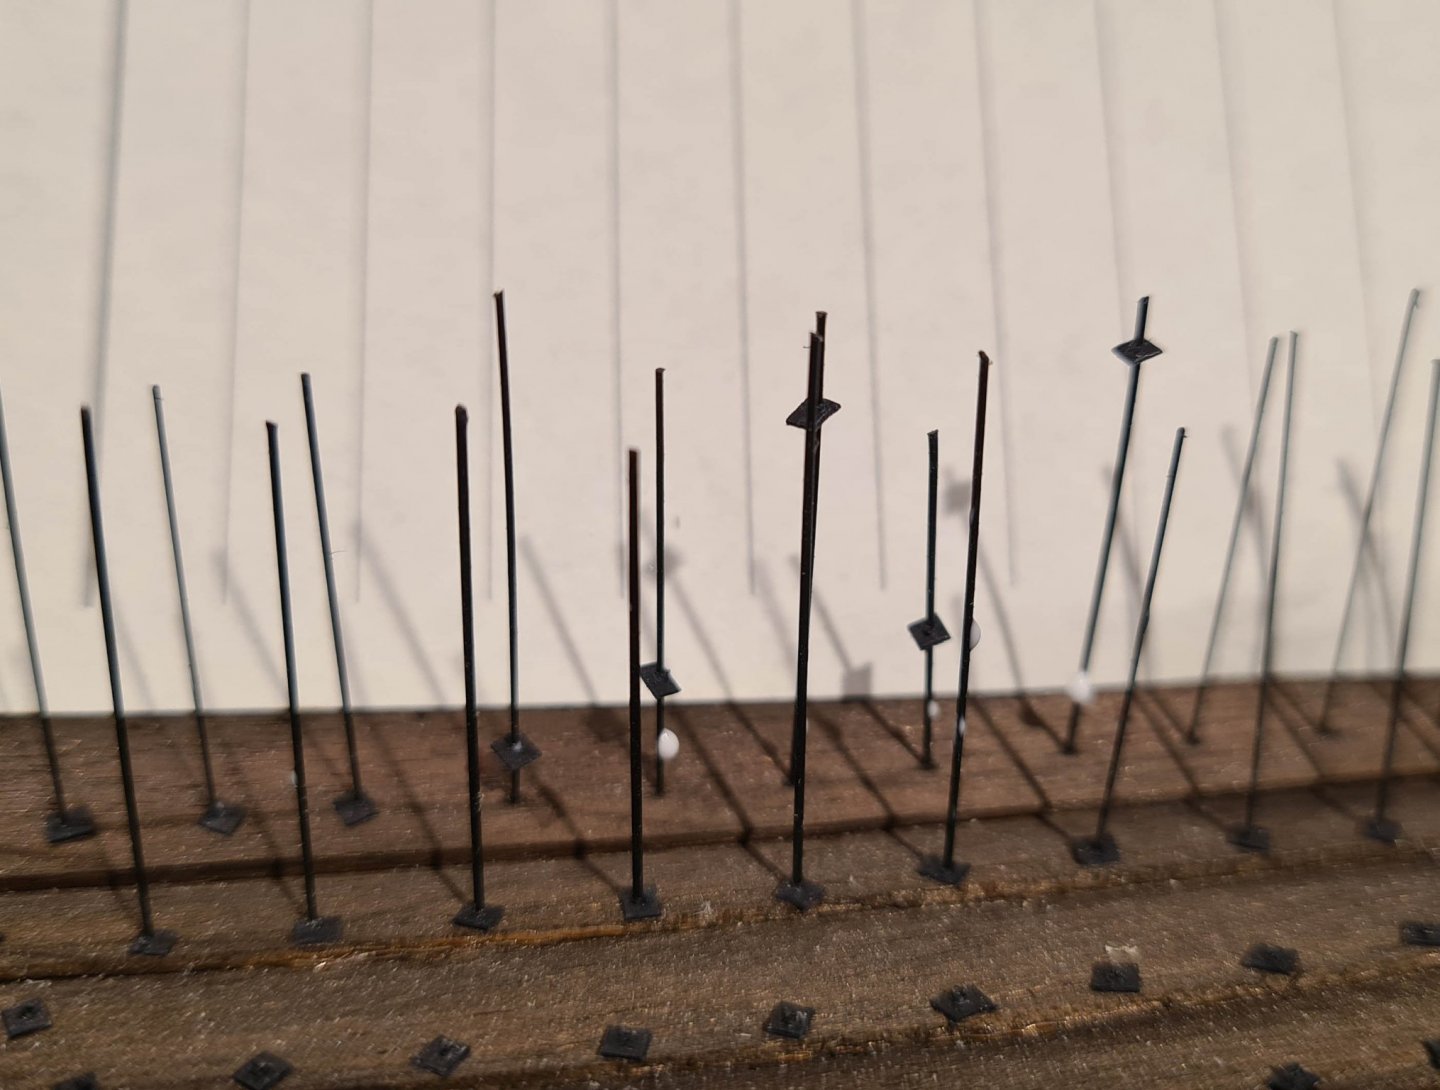
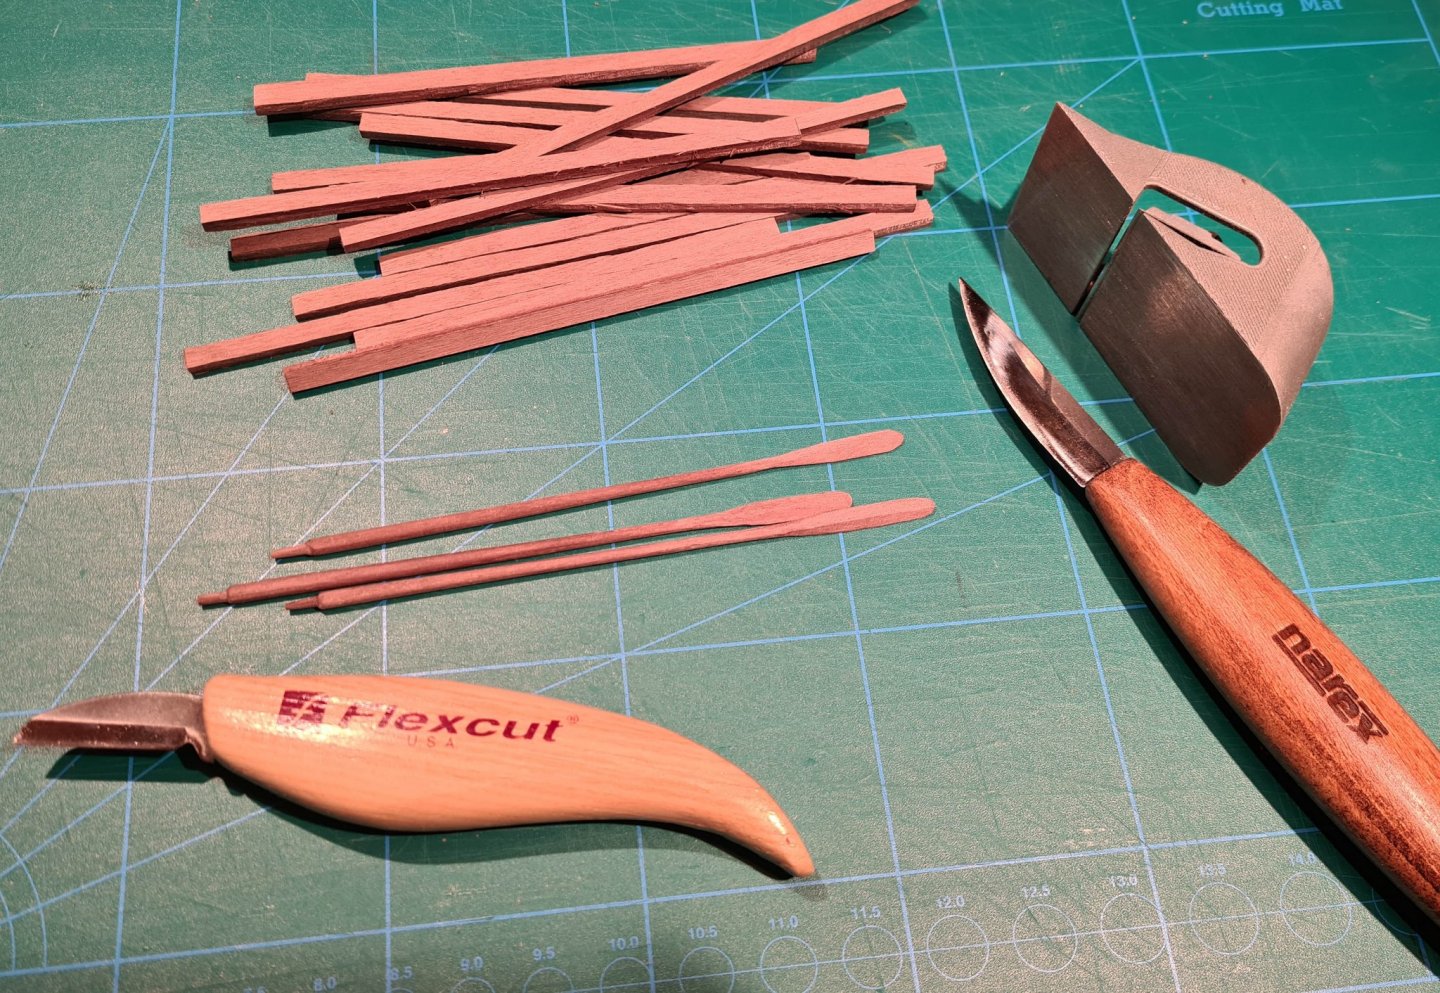
I have had a bit of flow the last couple of days, and have almost finished with the rivets on one side. I have found a method that is somewhat efficient. First I cut about 1 mm wide strips of black card stock. From the strips I cut small square washers. I use a pin to punch a 0.5 mm wide hole in the middle of the squares, and push the pin through a hole in a wood strip to widen the hole in the washer. The washers are threaded over the rivet pins and a drop of diluted PVA glue is put on the pin before i press the washer flush with the plank. In between the riveting I have started with the oars. I'm still experimenting a bit with the most efficient way to make all 16. I think I will end up proceeding with the way I have started, using my new whittling and cutting knifes. Regarding the form of the oars, especially the oar blades I don't have any definite sources. I have searched around a bit, and have opted for something similar to what the viking ship museum in Roskilde have used for their reconstructions. The length of the oars is the same as is used on the reconstruction.
- 179 replies
-
- 11
-
-
- longship
- Helga Holm
- (and 1 more)
-
I have taken a bit of a break from this model as I found more interest in continuing with my other build, the Sloop from Roslagen. I also was a bit tired of rivets after I had made all of them. Adding the washers is even more tedious, and requires more focus when threading the tiny holes over the pins. Anyhow, a bit of progress has been made.
- 179 replies
-
- 9
-
-
- longship
- Helga Holm
- (and 1 more)
-
Spectacular!
-
Sloop from Roslagen by bolin - FINISHED - 1:50
bolin replied to bolin's topic in - Build logs for subjects built 1851 - 1900
I have not come across this particular factoid. It is certainly true that the peasants in Sweden (and Finland) where subject to various laws and regulations regarding what wares they could transport and to and from what destinations. The term used in Swedish for this is Bondeseglation literally "Peasant sailing". As early as 1350 in king Magnus city law (stadslag) it was regulated that all trade should be directed to the towns. Despite this the peasants continued with their trade using their own small vessels. The rules where changed through the centuries, and it might very well be that there at some point where rules regarding the type and size of ship. If I where to guess it might be connected to certain privileges regarding trade in Stockholm. At one point the peasant traders did not have to pay custom for ordinary food and similar. It is likely that this was connected with some size regulation. But, I must say that the factoid you cite does not ring true to me. The Stockholm archipelago is quite shallow at places, so it makes sense that the boats was adjusted to this. It is also the case that every farmer in the archipelago needed a boat. The boats was a big investment, but also necessary for fishing, moving cattle between grazing, and selling produce on the market. The farmland was on the other hand meager, so the boat was essential for the livelihood. On the other hand, a too large boat would require a larger investment, better shipyard, more crew etc. To me this means that the size and type of boats was determined by the natural environment and economical needs, rather than the laws. The reason that they could live on so long, even after other types of transports was becoming wide spread, has likely more to do with that they found a niche market in transporting sand, gravel and fire wood. -
Sloop from Roslagen by bolin - FINISHED - 1:50
bolin replied to bolin's topic in - Build logs for subjects built 1851 - 1900
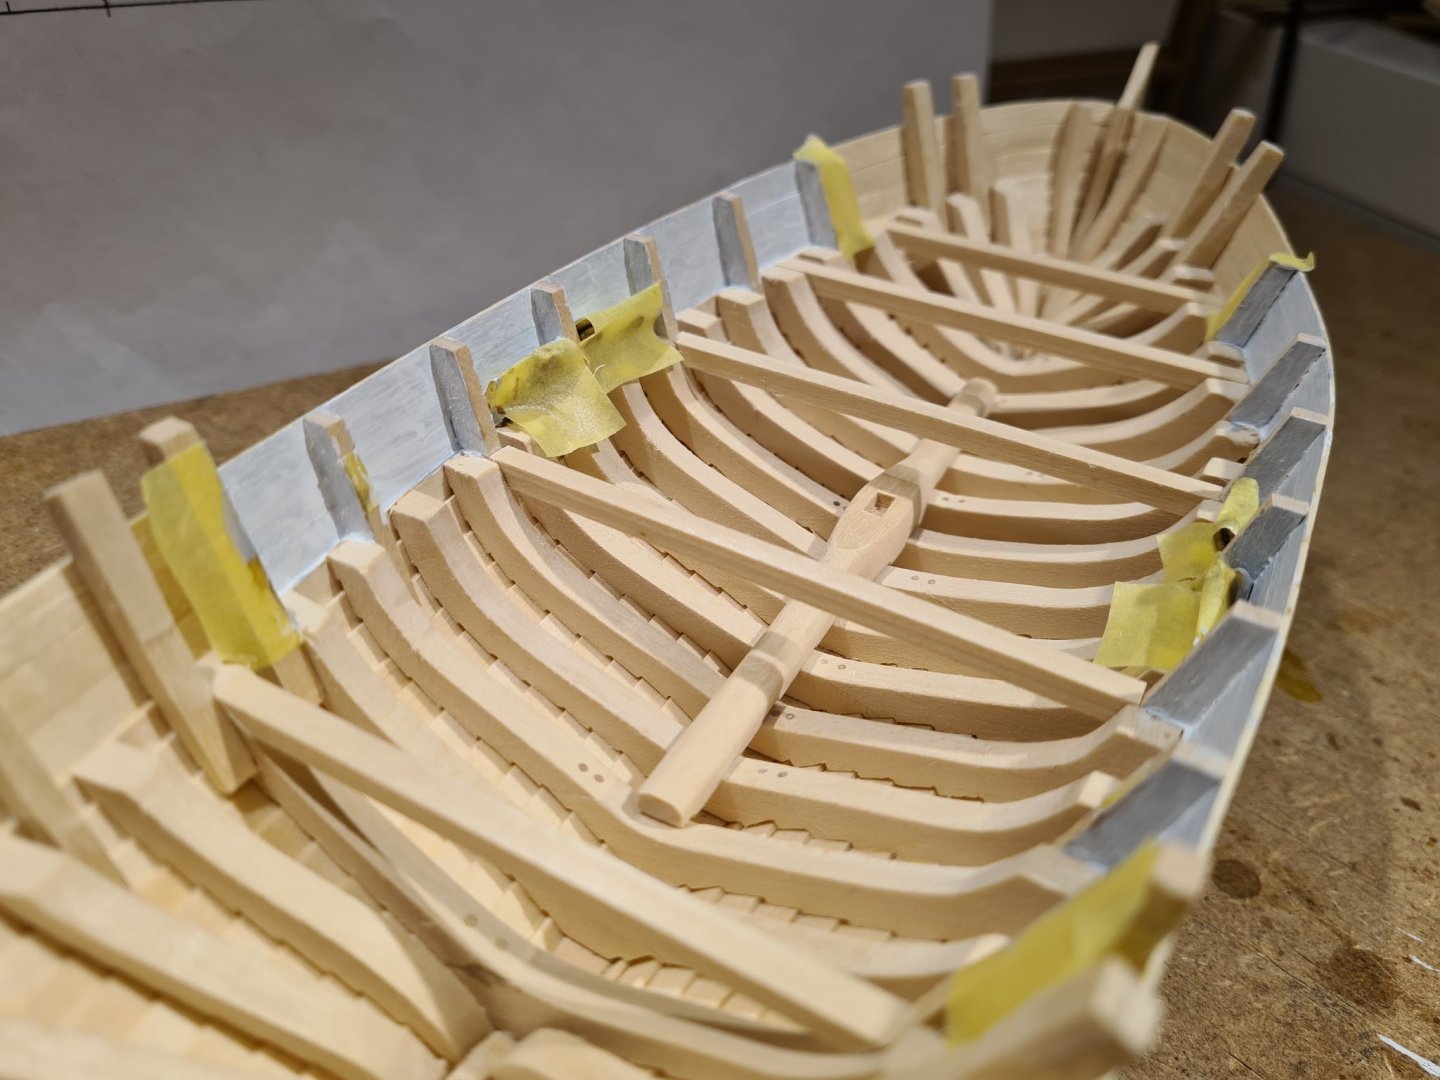
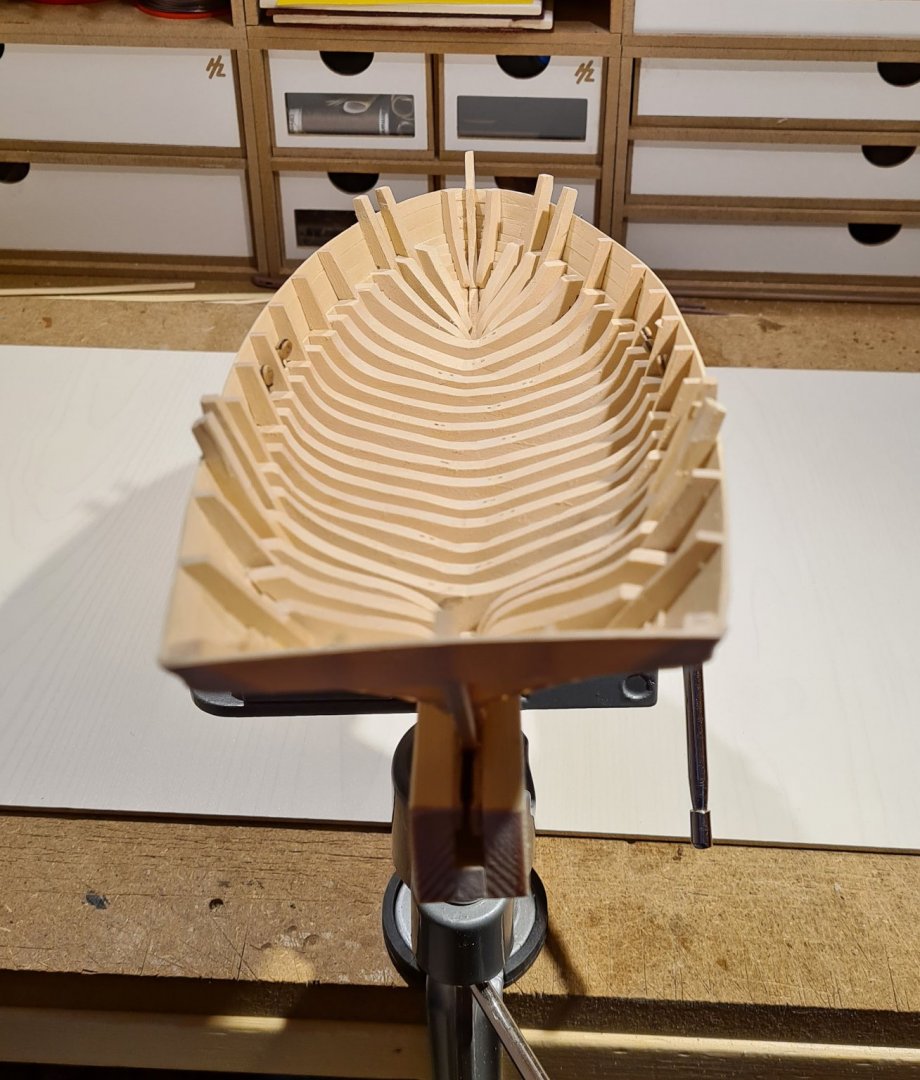
The progress is much more visible now when I have stared to work with the details inside the hull, and therefor feels quicker. Today I have cut out the keelson, started to paint the inside of the bulwarks and started to fit the cross beams. The bulwarks will have an inner layer of planking in the fore and aft, so its only the mid section that I need to paint now. When all beams are ready I will fit in a beam rider along the sides that will support them. Note that the beams are straight rather than curved as they would have been on a larger ship. The plans show a rather thick and wide keelson. I'm a bit uncertain about that interpretation, so I have checked other sources. They seem to show a longer keelson, so that is what I'm going for.
-
Sloop from Roslagen by bolin - FINISHED - 1:50
bolin replied to bolin's topic in - Build logs for subjects built 1851 - 1900
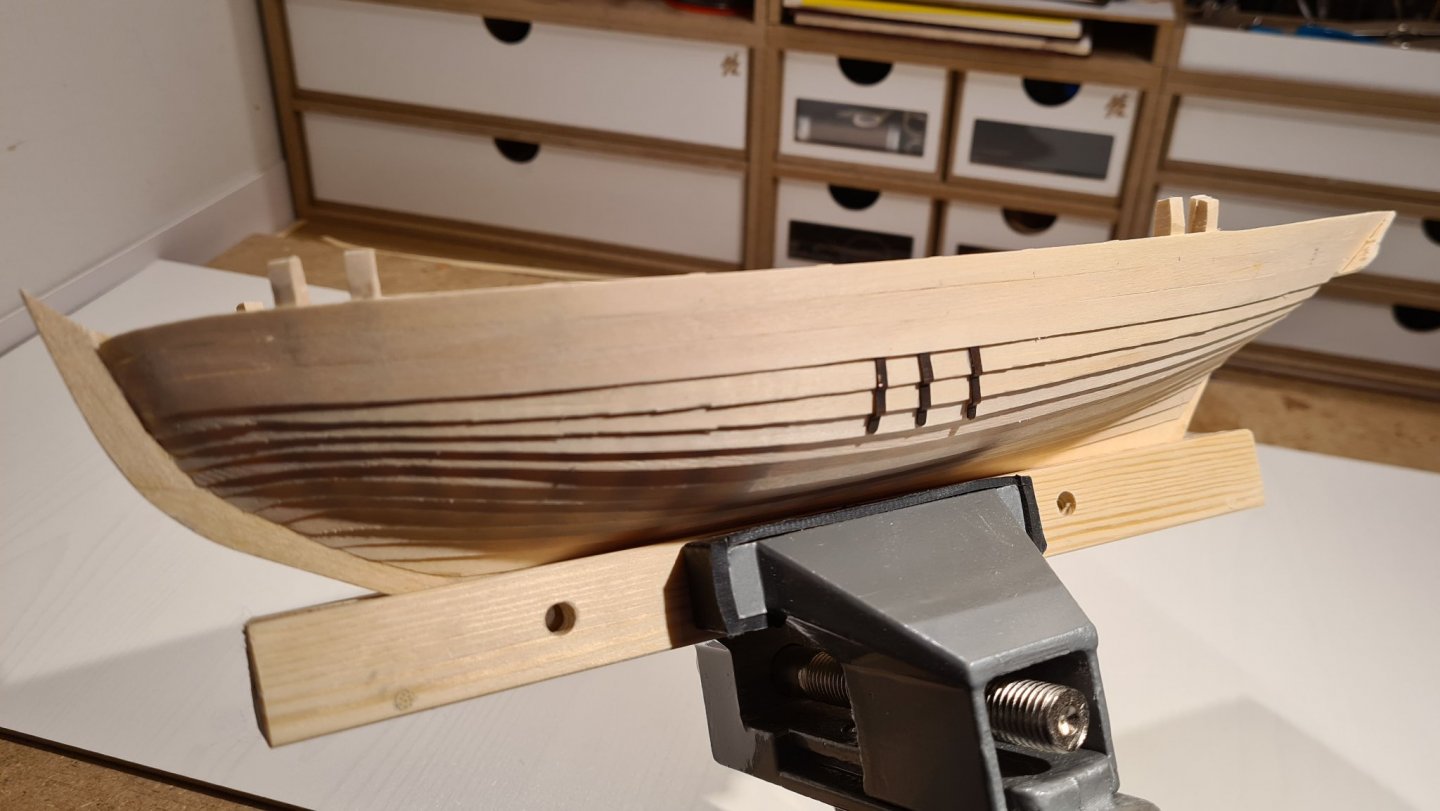
Yet another milestone was reached today, the hull is complete up to the bulwark. The stanchions has been cut down and the gaps that I missed in the planking has been filled with glue and wood flour.


- 112 replies
-
- 11
-