
bolin
-
Posts
482 -
Joined
-
Last visited
Content Type
Profiles
Forums
Gallery
Events
Everything posted by bolin
-
 😁 it sure does. You need to lean as far out as you can. Mostly, sharp turns are needed in calm seas and when rowing, so risks are low.
- 179 replies
-
- 2
-

-
- longship
- Helga Holm
- (and 1 more)
-
Nice, your persistence pays off. I really like the look of this method of making the sail panels.
-
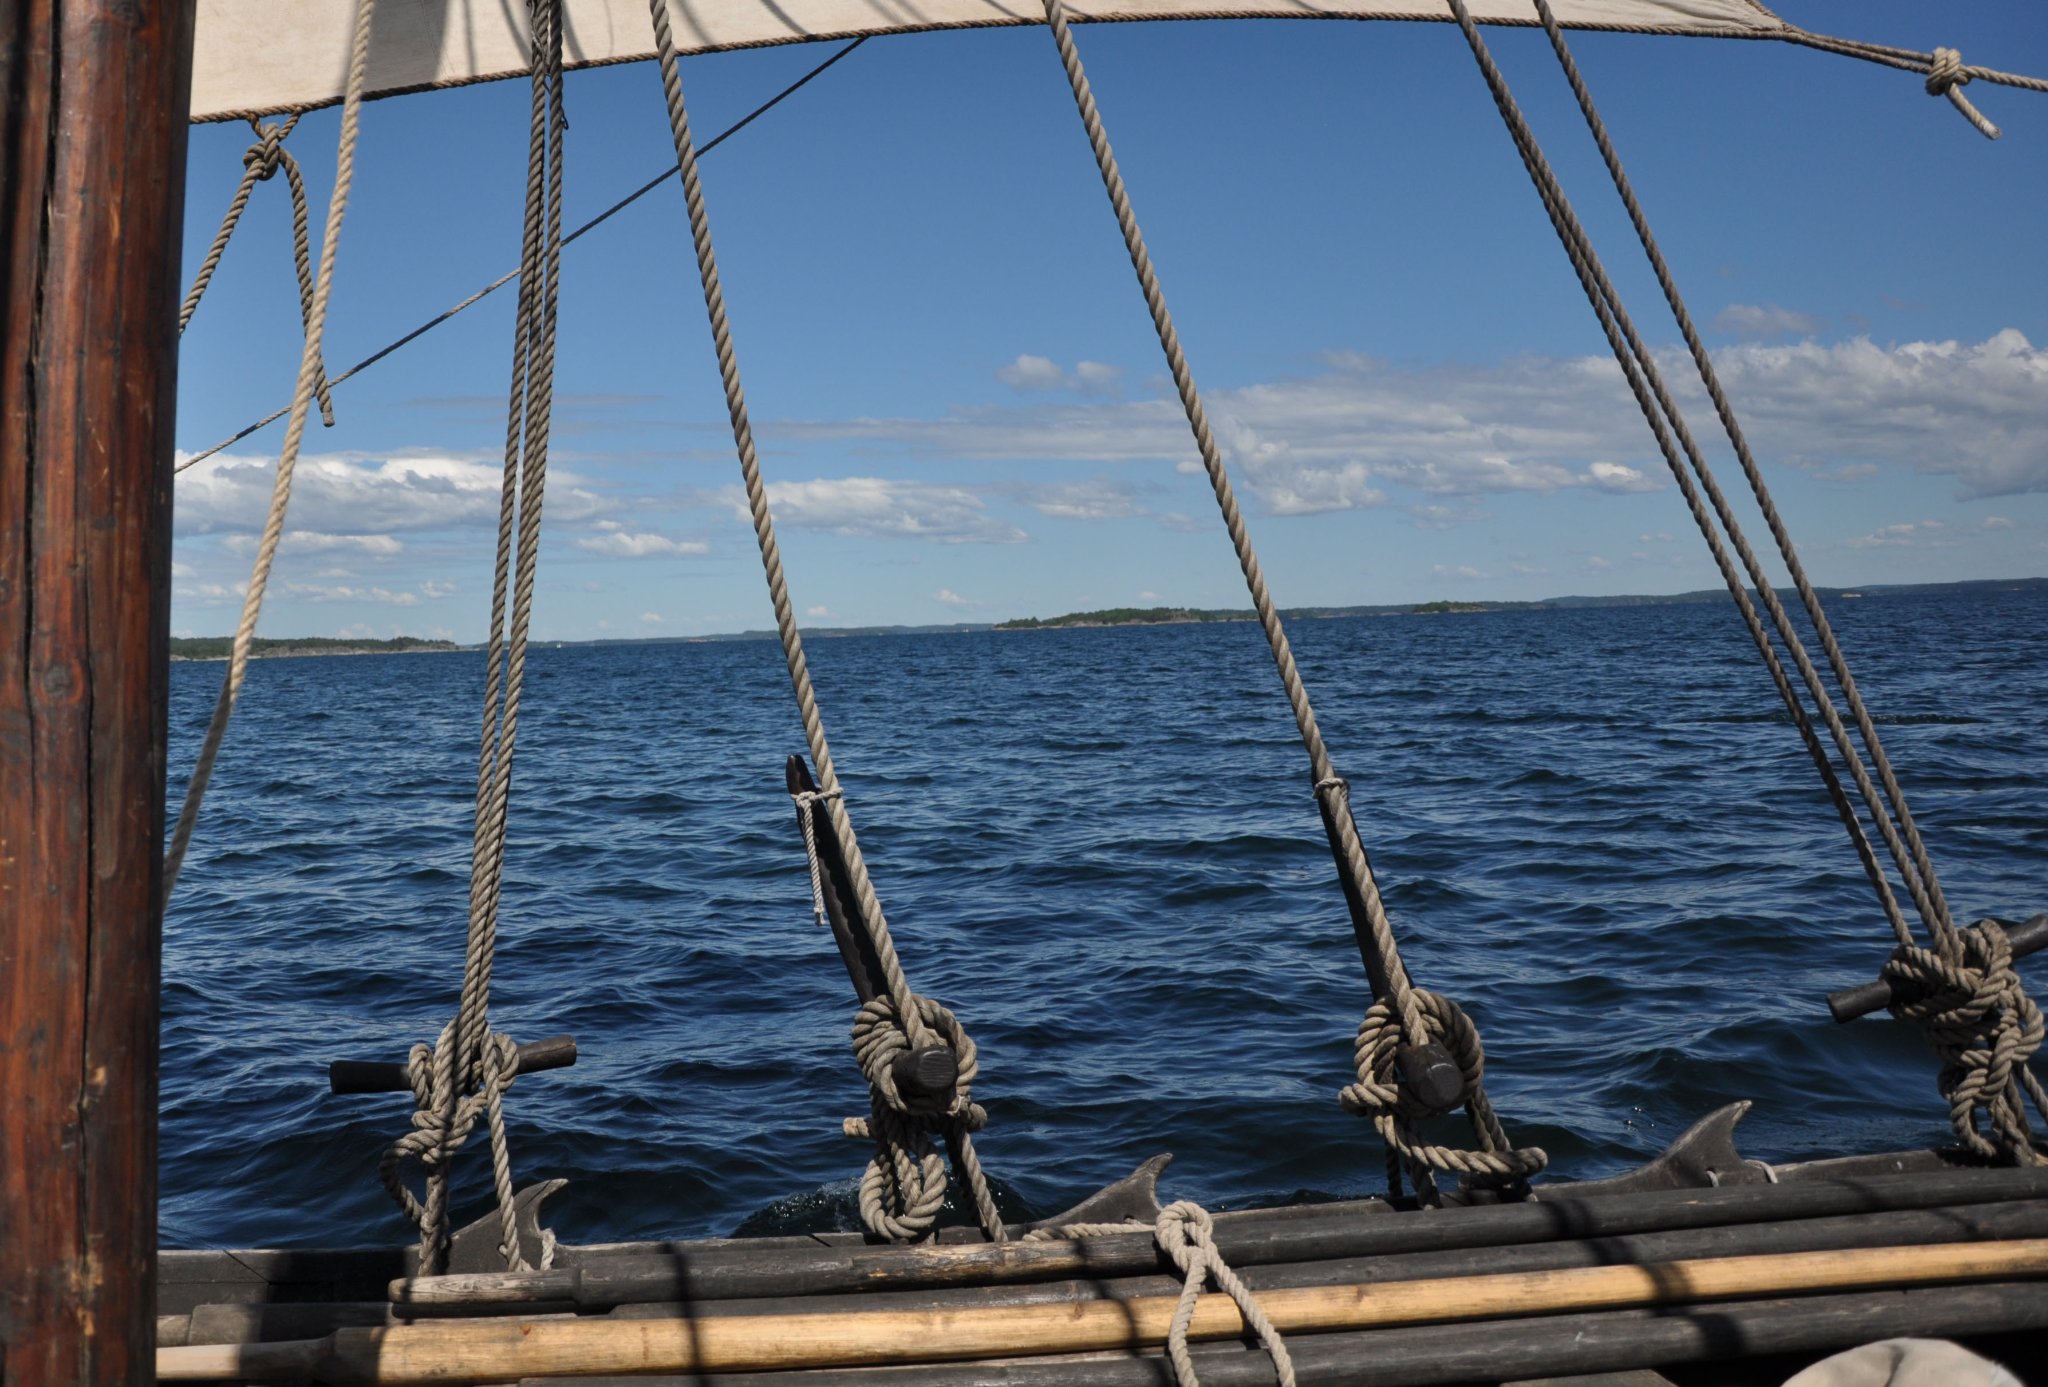
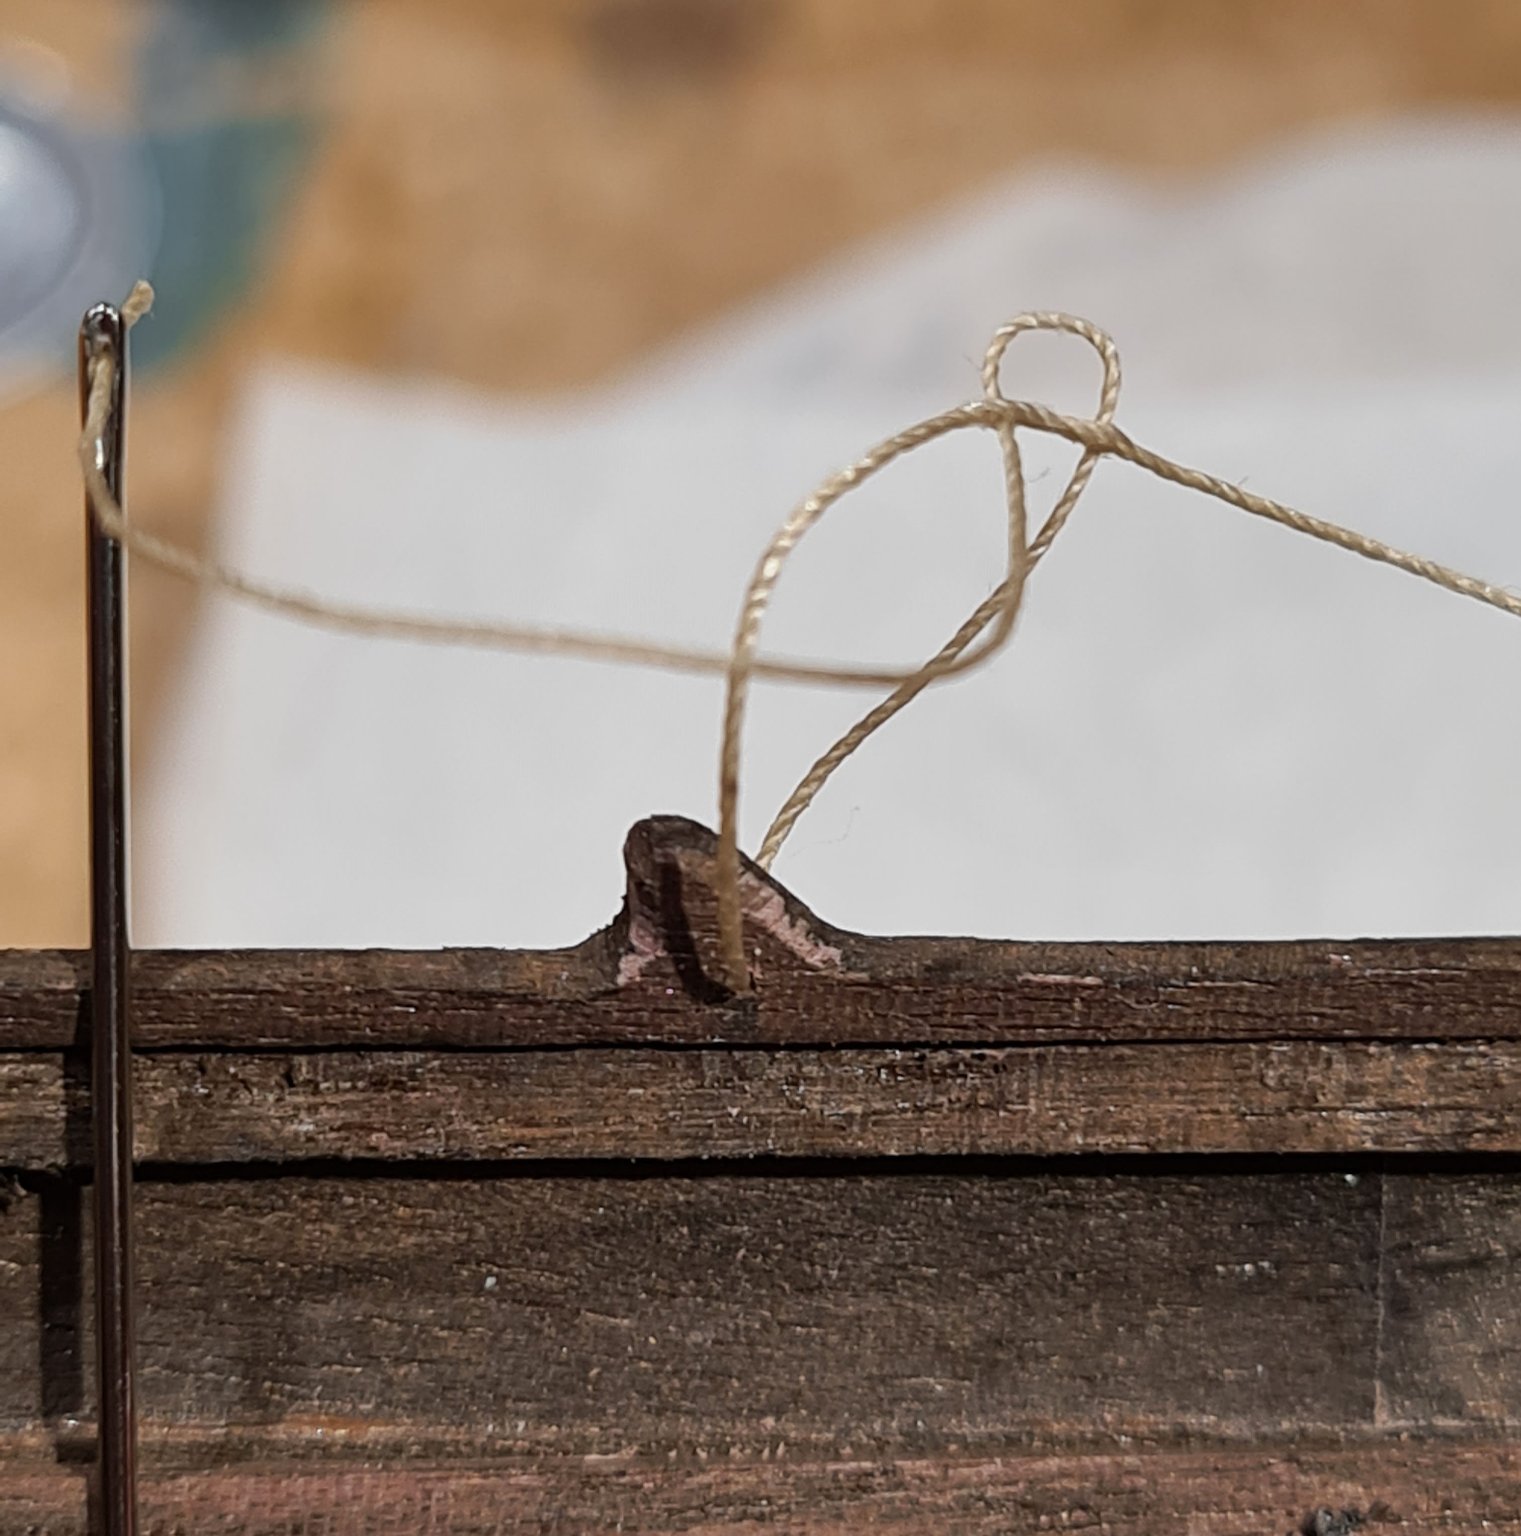
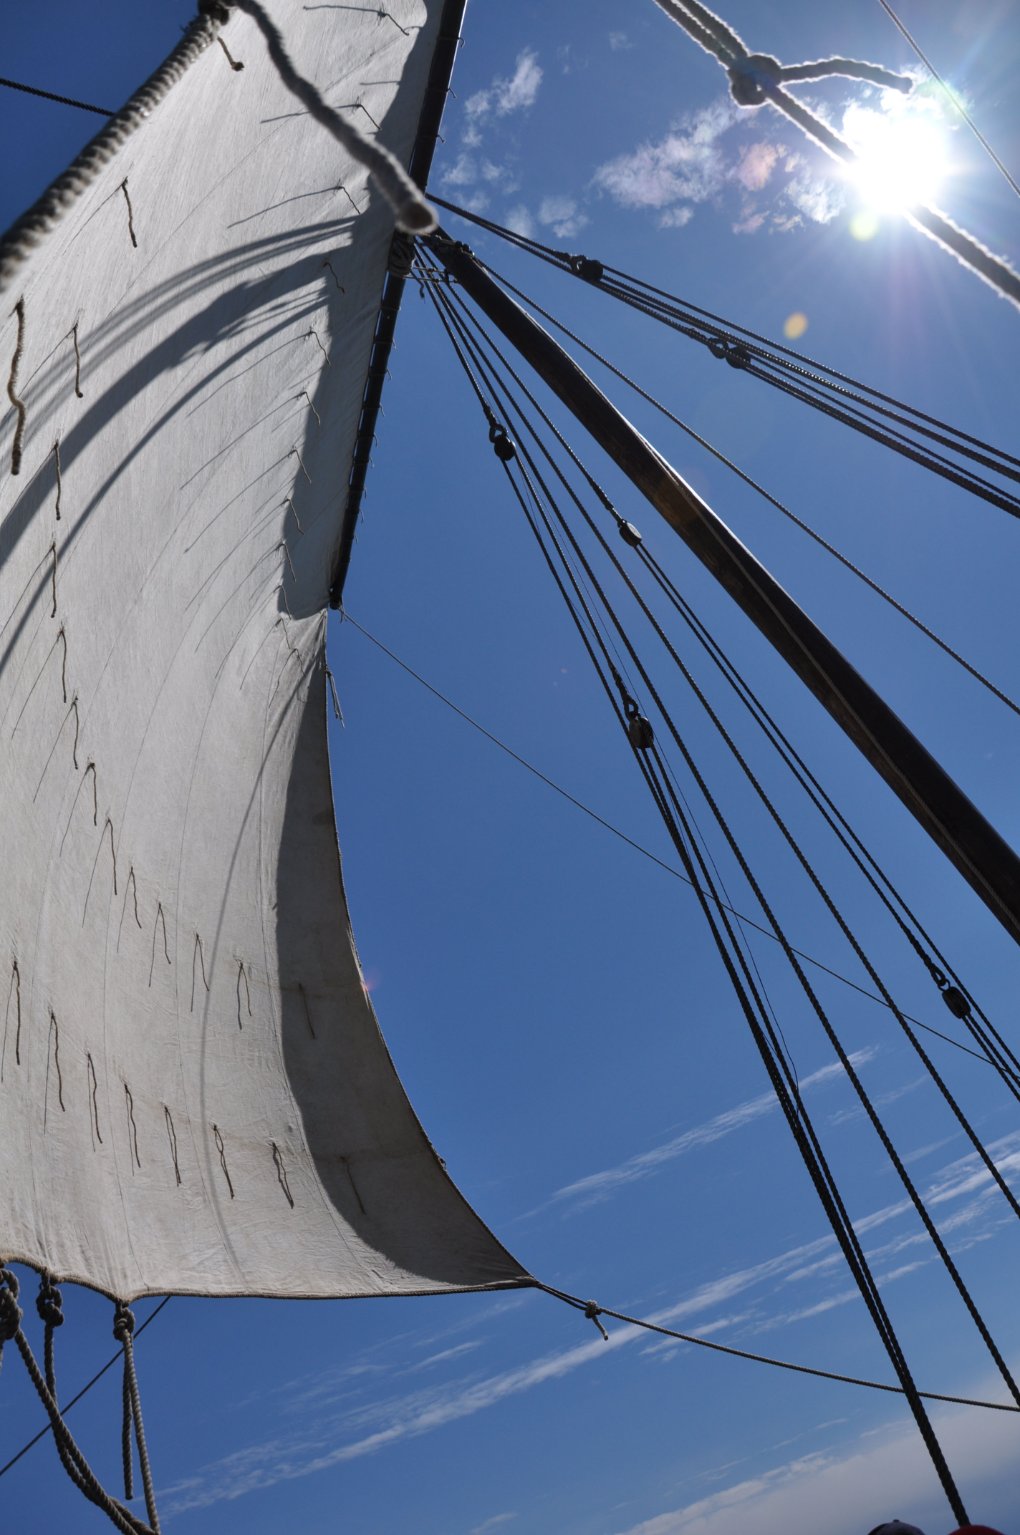
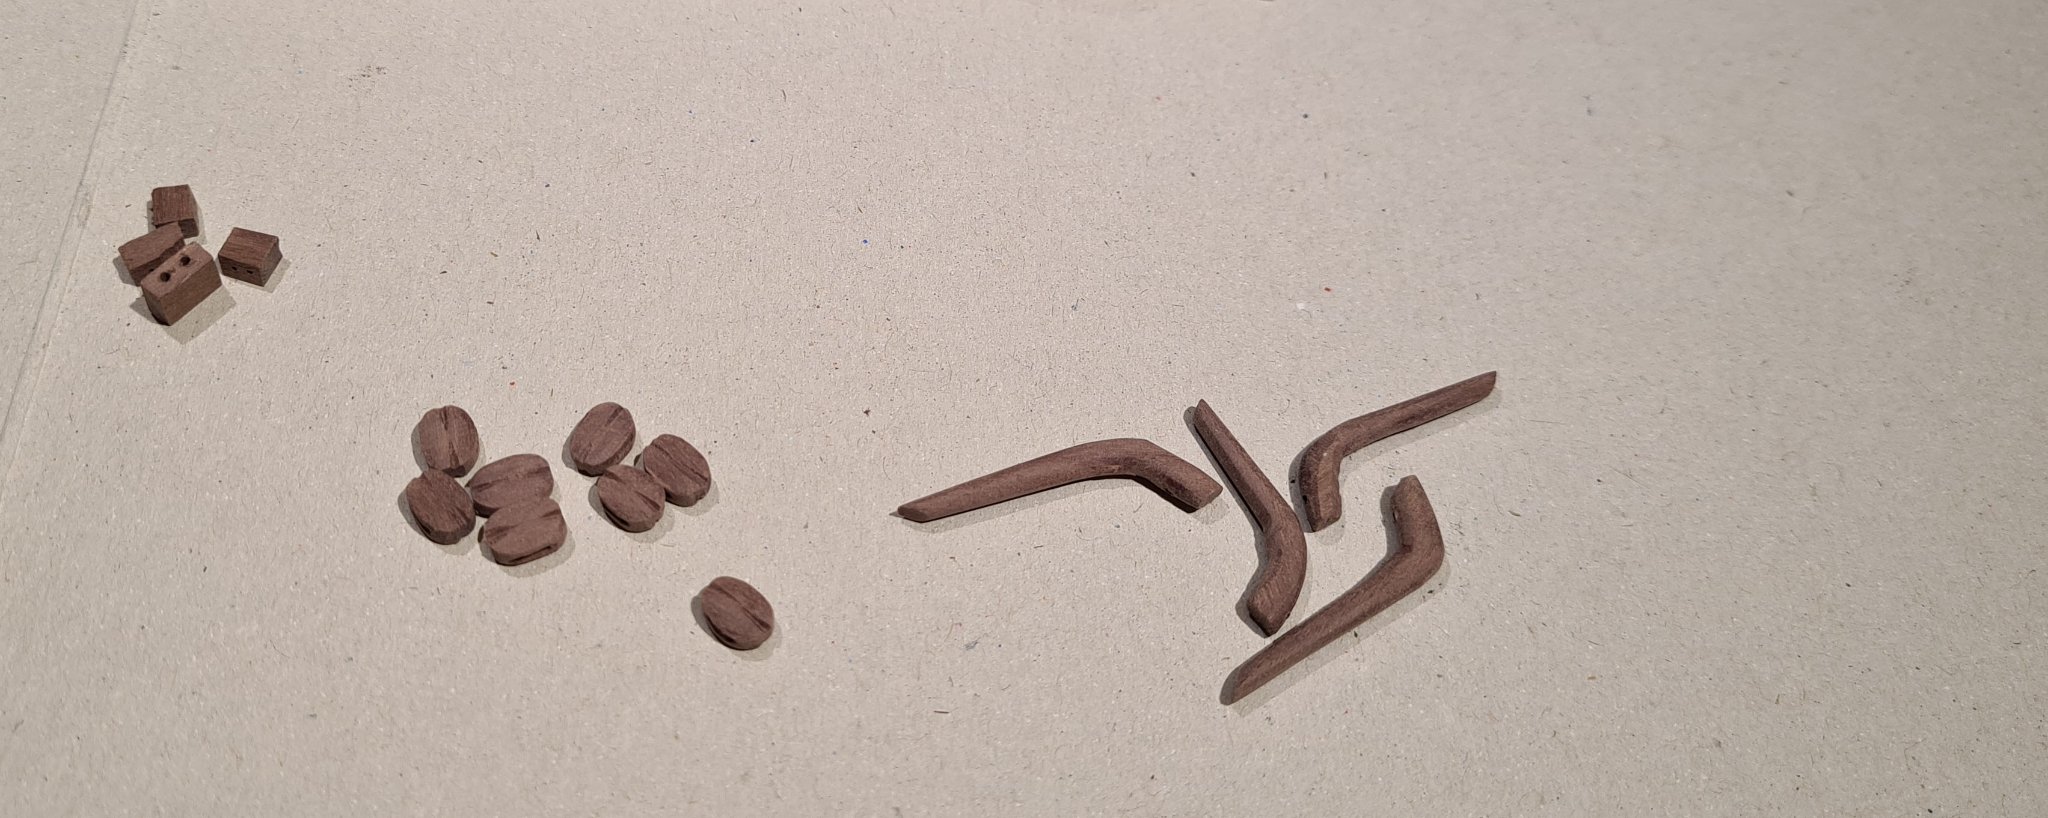
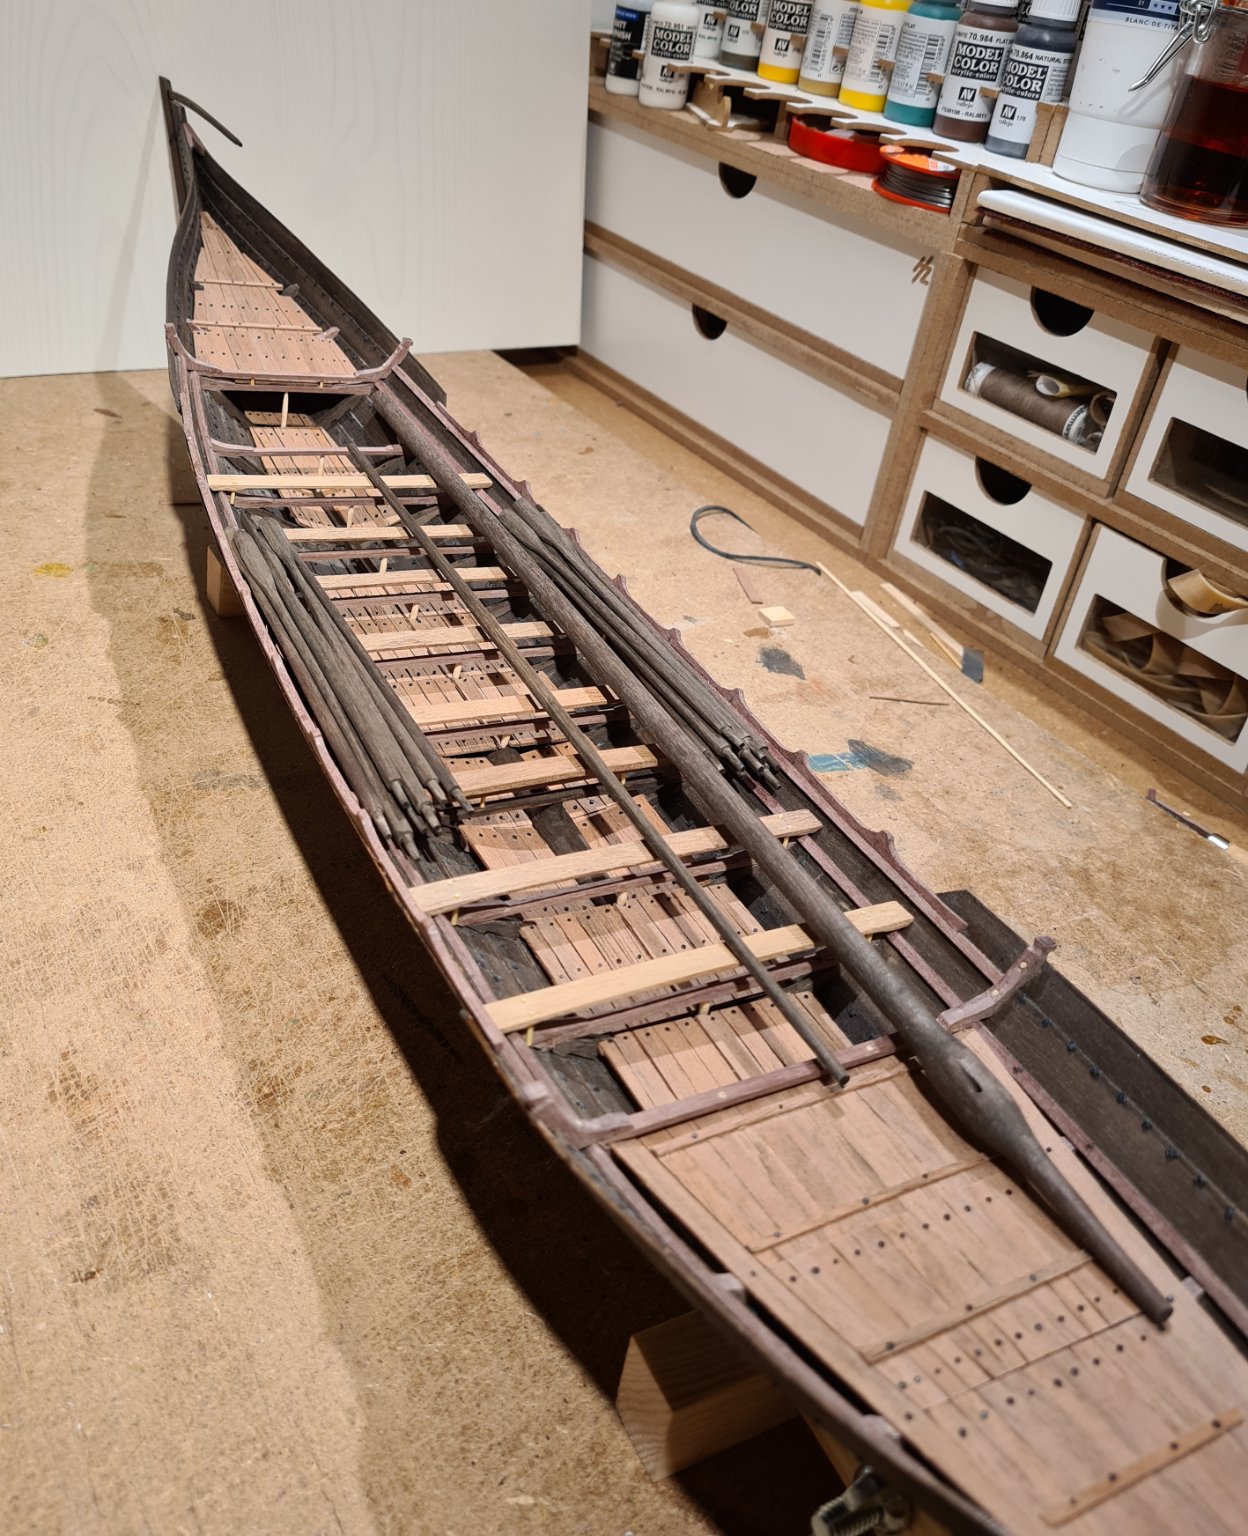
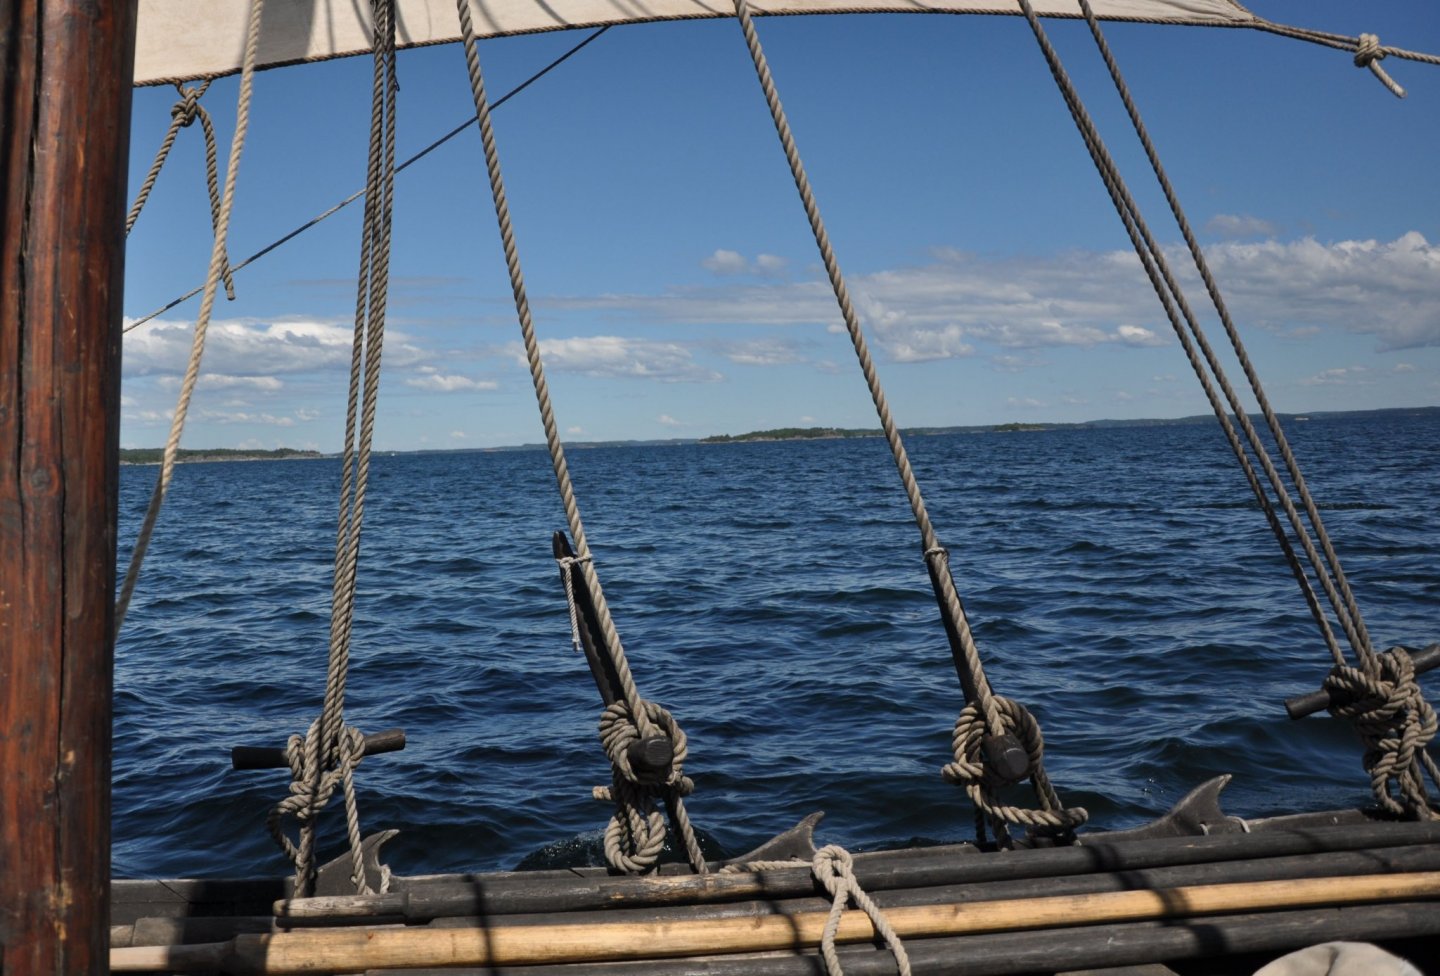
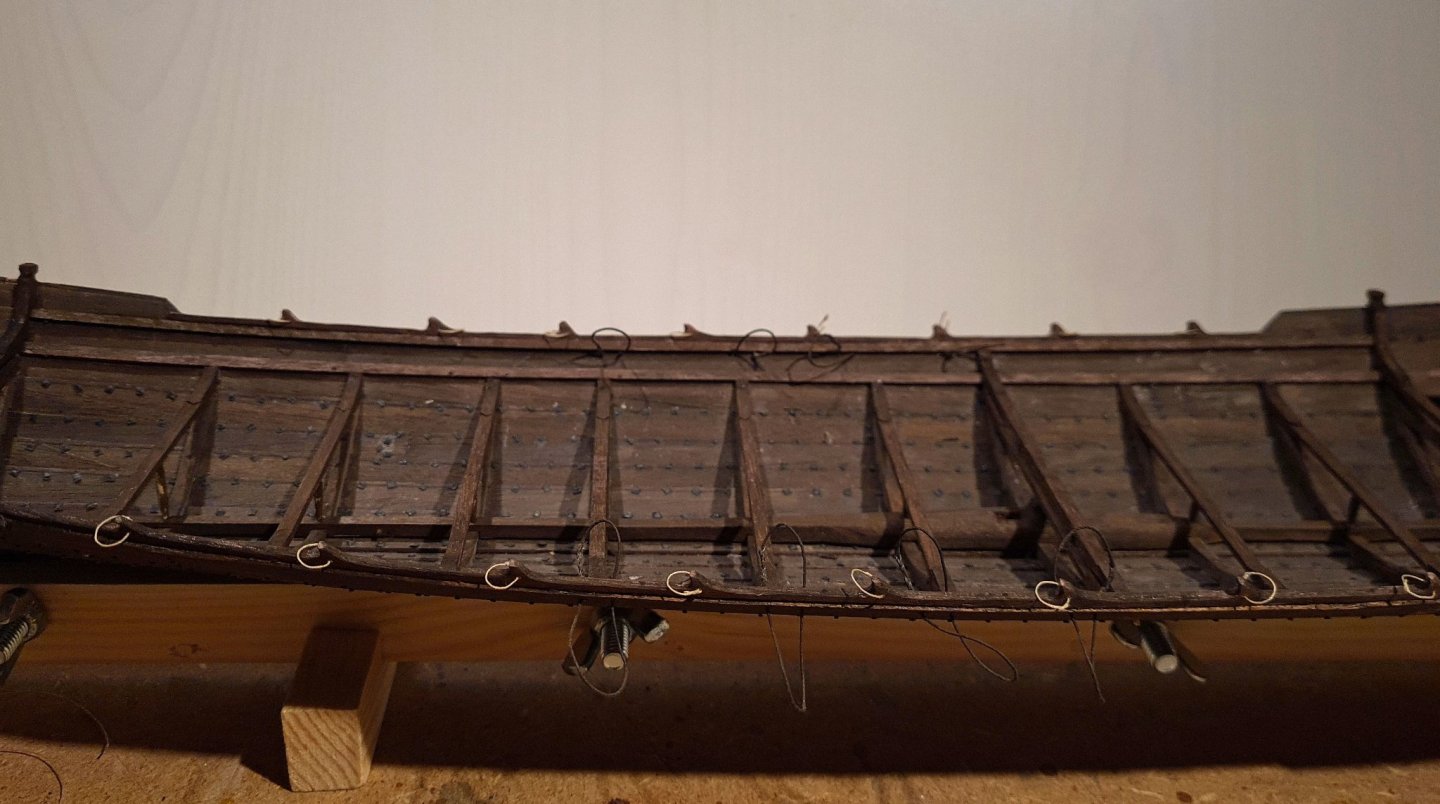
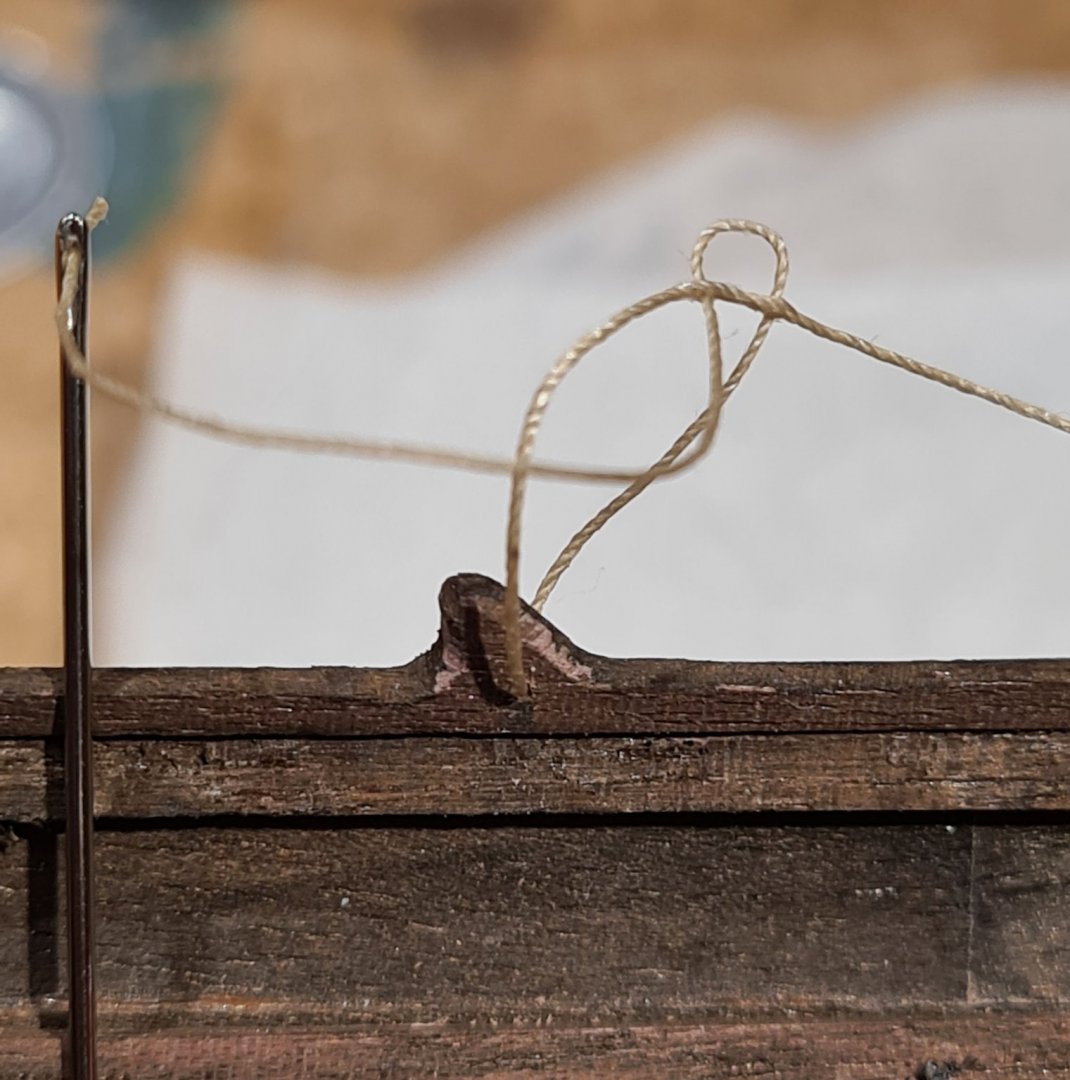
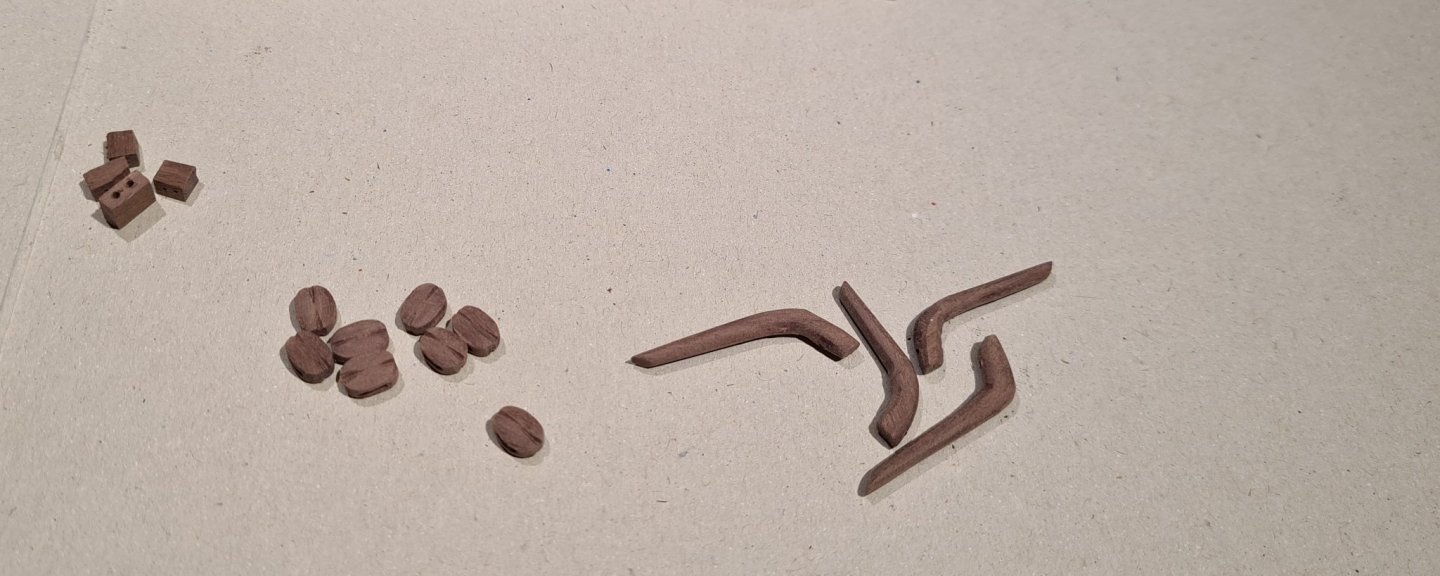
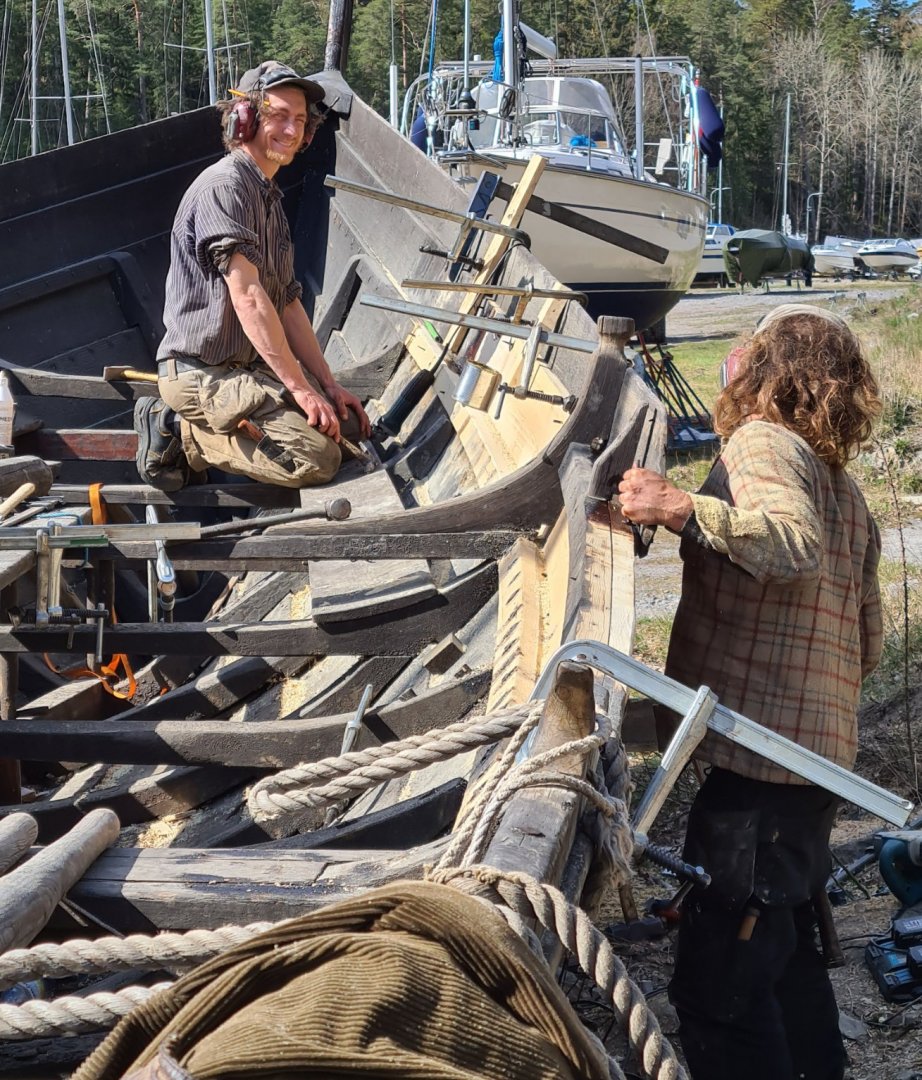
Today a call was made from the boat club where we have the reconstruction. "Your boat is sitting on the bottom!" 😟 I went out after lunch, and there she was: This is not the first time this happened. In the spring, before the wood has swollen the cracks shut, there is always leakage. Today the pumps had both stopped; one was clogged with sawdust from the ship builders, and one had fallen so that the switch deactivated it. A quick fix and when the pumps stared she started to rise from the bottom. In the smaller shipyard I have continued with preparing the rigging. In the find there are four pairs of holes below the stringer on the upmost plank. These has been interpreted as fastening for the shrouds, and is the basis on which the rig has been reconstructed. The rig reconstruction was made by experts from the viking ship museum in Roskilde Denmark, and the reconstruction report does not have so much details about sources etc. for it. Through each pair of holes there is a loop of rope. From this loop the shrouds are attached either using an L-shaped "shroud needle" (direct translation of the Swedish word) or a pin, see below. The foremost and aft shroud line goes through blocks so that it is easier to adjust the tension. This is the aspect of the rig reconstruction that I would like to have had the sources and motivations for. In practice, when the tension needs to be adjusted, you will change all four lines, not just the fore and aft one. I have started with the "shroud needles" and some blocks.

- 179 replies
-
- 8
-
-
- longship
- Helga Holm
- (and 1 more)
-
Yesterday we went out to the reconstruction to put her into the water after the winter storage on land. This is what we where met by: Last year we discovered some rotten planks in such a bad shape that we could not dare to sail at all. We had contracted these ship builders to make the basic renovation needed to keep her afloat. Unfortunately they had been delayed at another job, and where not finished at the scheduled day. A few rushed hours later we managed to get her into water: 20210501_124826.mp4
- 179 replies
-
- 9
-
-
- longship
- Helga Holm
- (and 1 more)
-
I must have been lucky. I happened to find this copy just a few weeks after it became available. So, sorry not available anymore. But I promise to make use of it in future models 🙂
-
Thanks Steven. Excellent research! Many good pictures to get inspiration from, this sure will help 😃
- 179 replies
-
- 2
-
-
- longship
- Helga Holm
- (and 1 more)
-
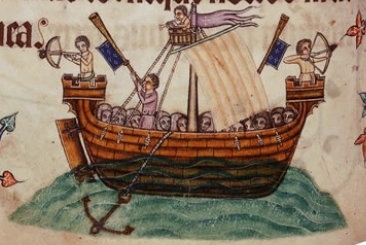
I have started to research a bit about what anchor that would be suitable. I cam across this excellent master thesis providing a typological description of anchors in Northern Europe 750 - 1300. Slightly before the time of the model, but close enough. The conclusion seem to be rather straight forward, anchors by the late middle ages had found their form. That is "Curved arms; large, triangular flukes welded onto arms; both wooden, fastened stocks and iron stocks running through shank; several metres long." One difference compared to later anchors seem to have been rings at both ends of the shank. See the picture below from the Luttrell psalter, dated at about 1325 to 1335. This anchor does not have a stock though. I have not decided on material for the anchor yet. Copper, wood, plastic, I have several options.
- 179 replies
-
- 3
-
-
- longship
- Helga Holm
- (and 1 more)
-
Yes it is easy to see how the long ships evolved from paddling, to rowing to sailing. This ship maybe represents a bit of a hybrid. The hull shape is long and narrow, like a ship for rowing. But the ends of the ship does not have place for rowers. For optimal speed more rowers would be needed.
- 179 replies
-
- 1
-
-
- longship
- Helga Holm
- (and 1 more)
-
Sloop from Roslagen by bolin - FINISHED - 1:50
bolin replied to bolin's topic in - Build logs for subjects built 1851 - 1900
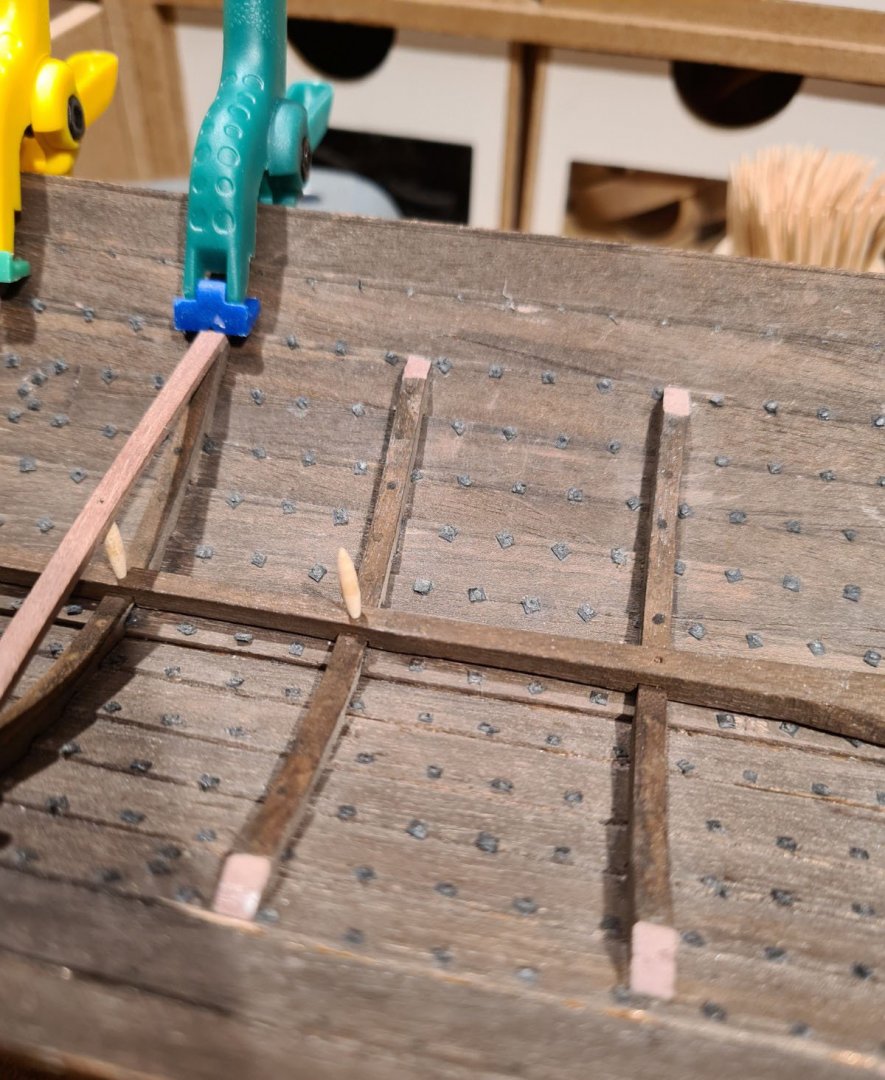
The next steps will be inside the hull. The first step was to stain the planks between the frames using the same oil based tar colored stain that I used on the outside. The top of the frames are left unstained for now, so that glue will stick. The keelson and the beam risers has been tree nailed to the frames.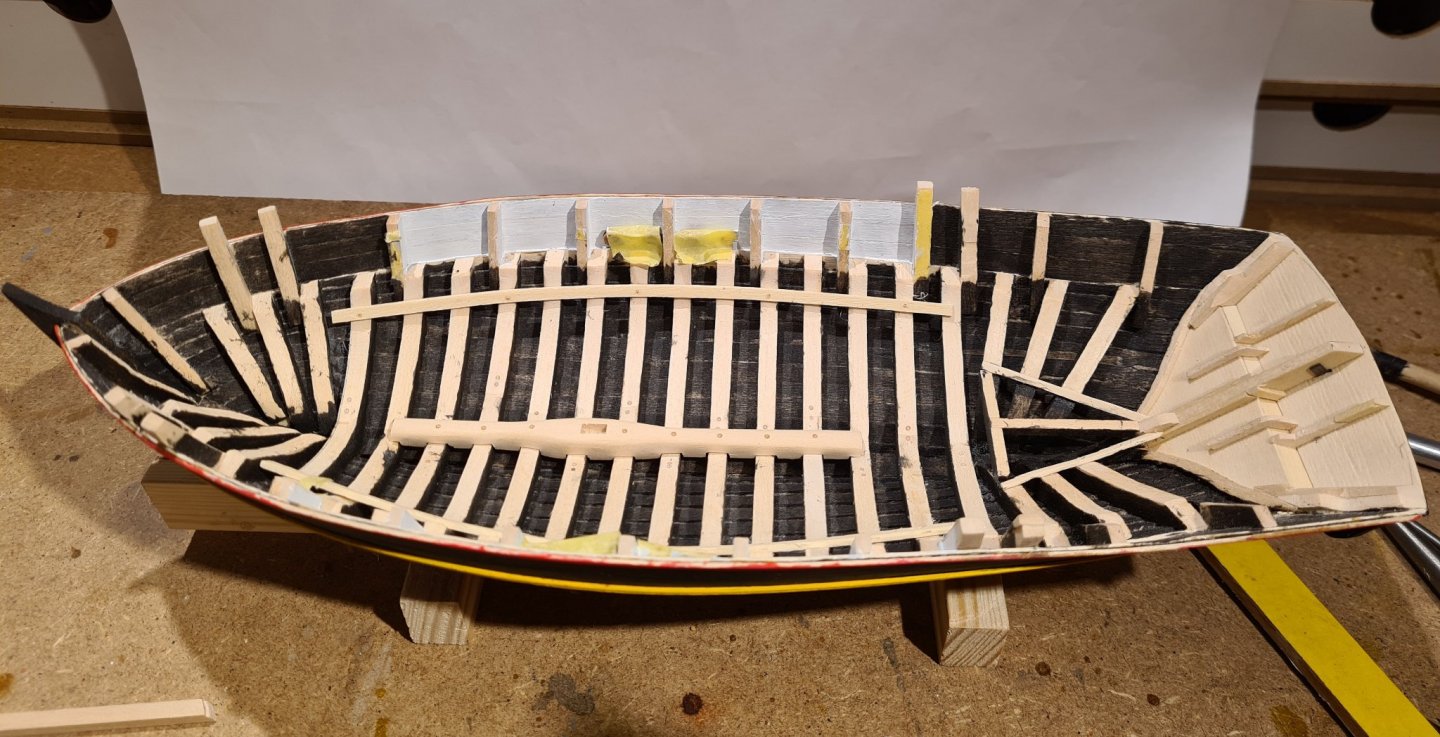
-
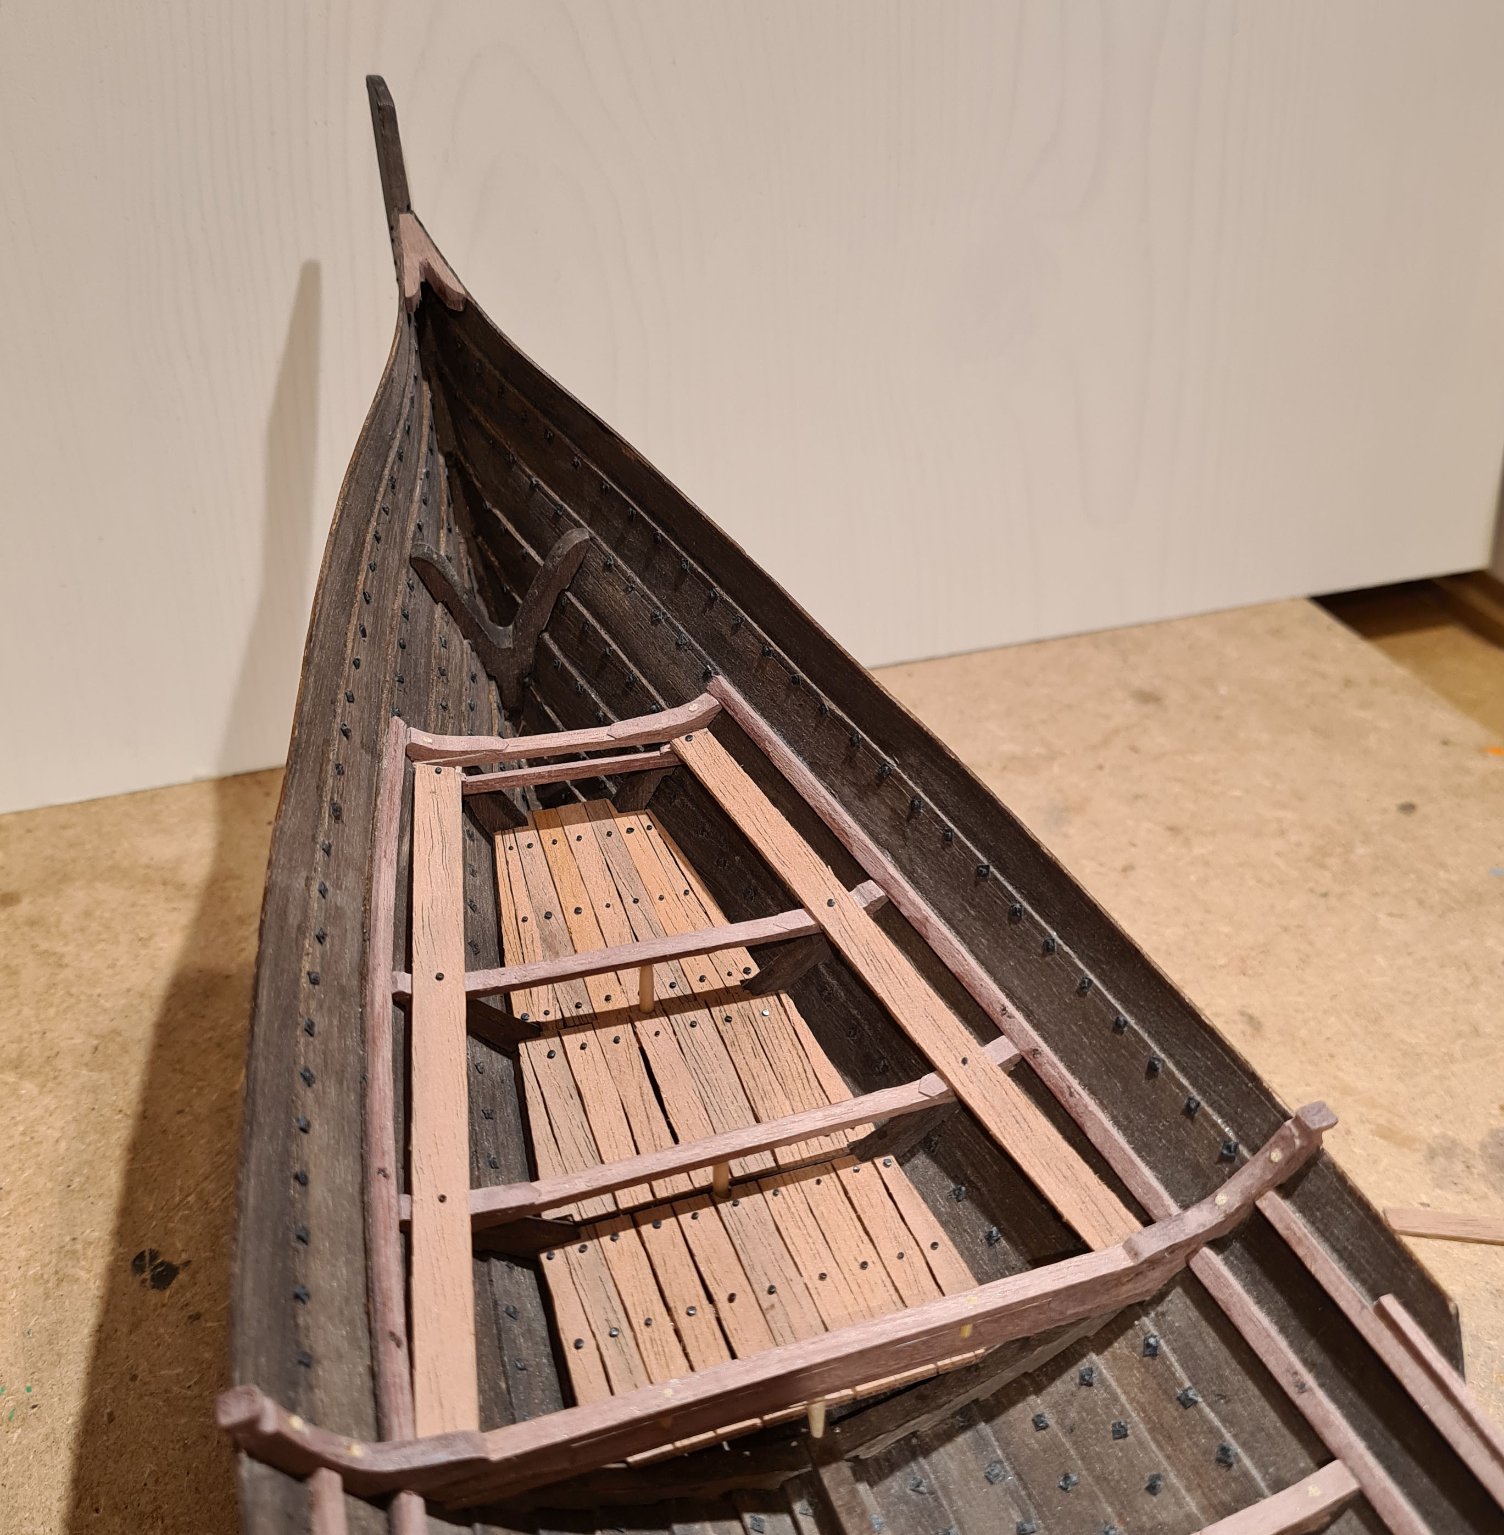
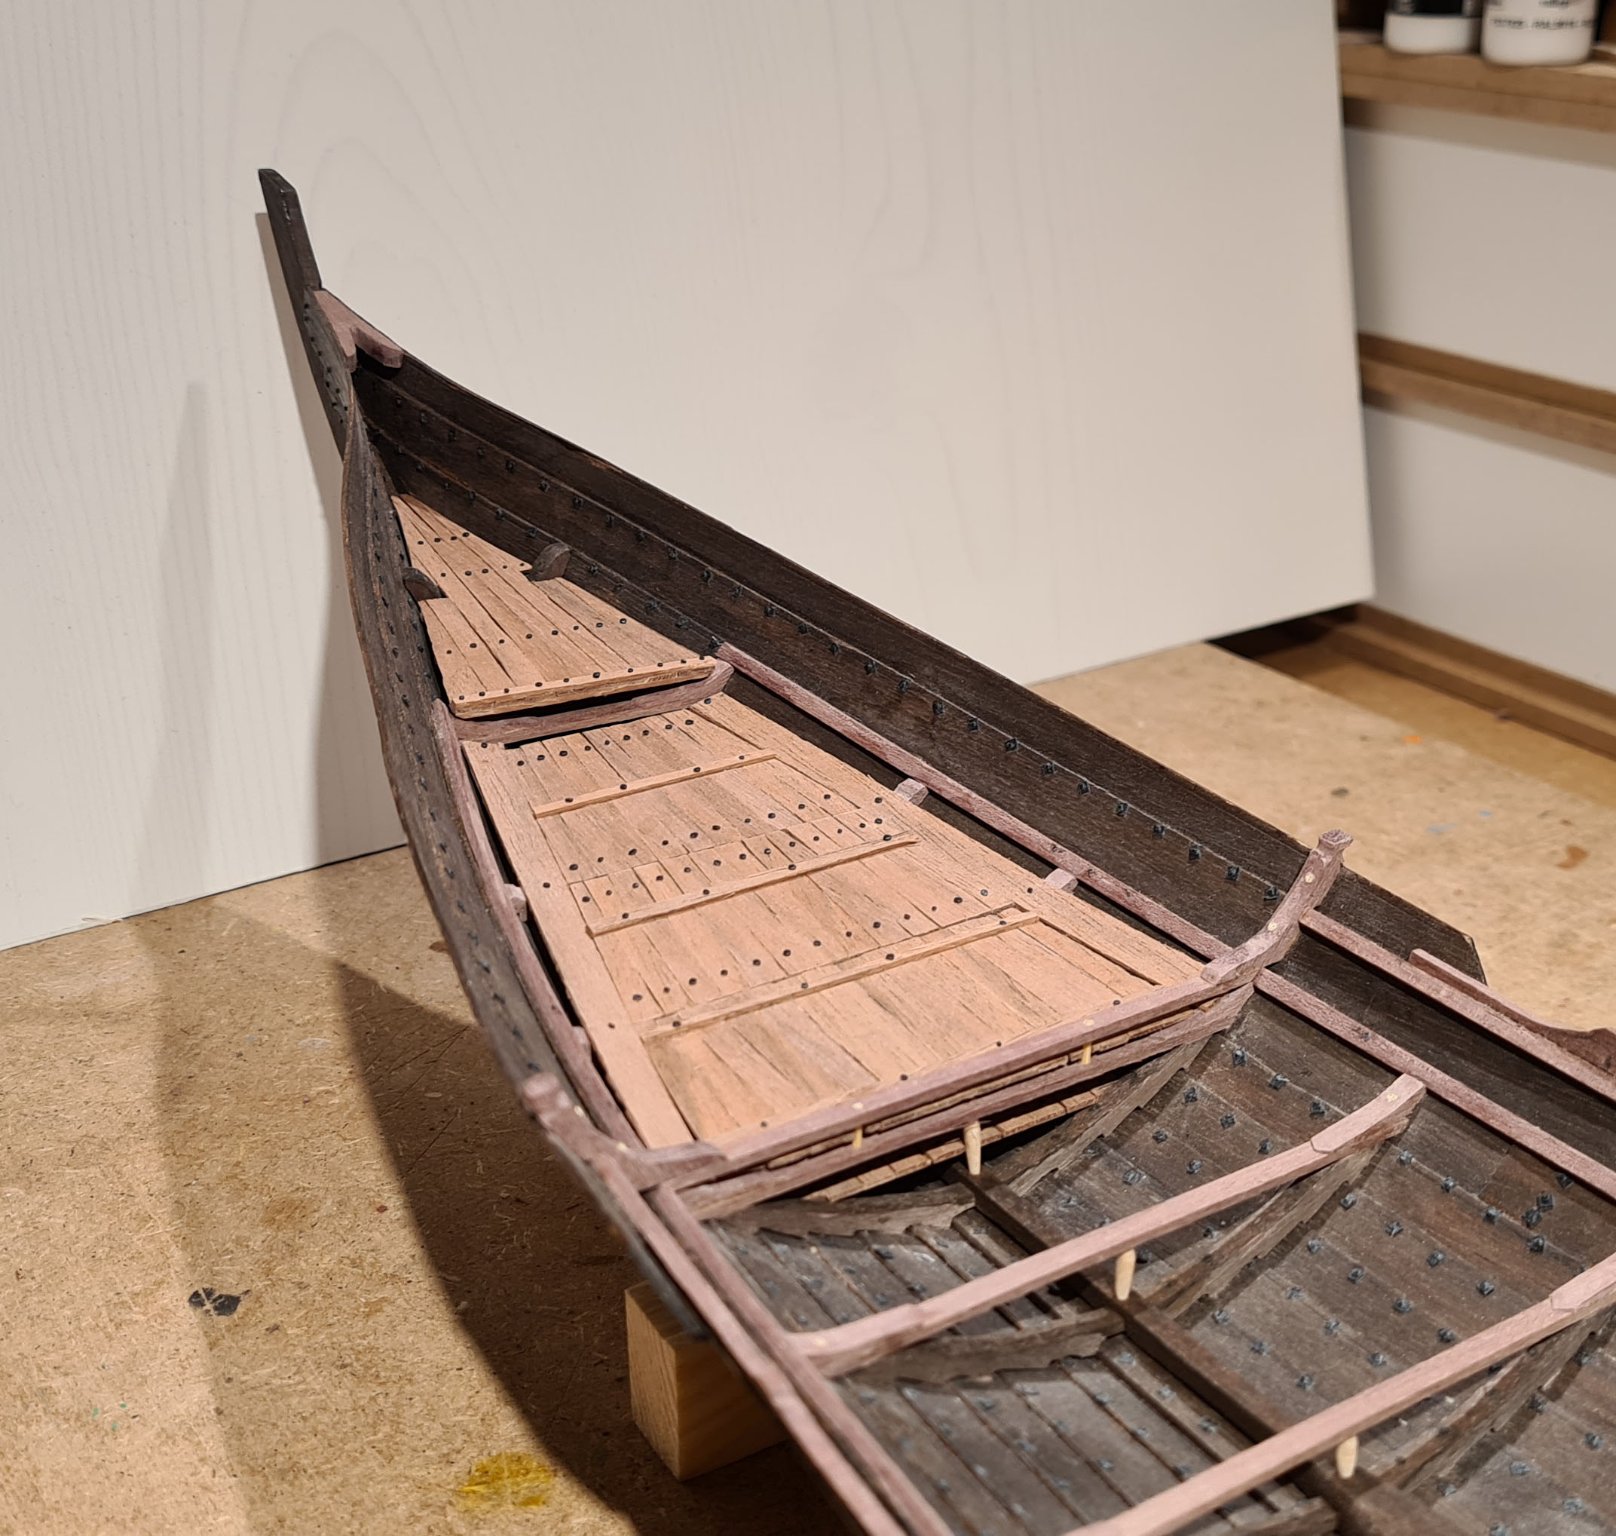
Today I mounted the last piece on the hull, the strip that will become the oarlocks. It is only roughly shaped before installed. The final shaping will continue when I have plugged it firmly with tree nails. They should be made in individual pieces, one for each oarlock. But I will skip this, and only indicate the joints between them. The shape to aim for is this: I have also finished the last footlings, and have added decks in the fore and aft. Here are some pictures before I put stain on the new parts. The footling under the fore deck. The fore deck. It is separated in two levels, otherwise the incline would have been to steep. There are no remains left of the decks in the archeological find, so the reconstruction work came up with a plausible construction. This is what I have included in my model. The mid section and aft deck (with rudder). And a last picture with the oars, mast and yard onboard.


- 179 replies
-
- 11
-
-

-
- longship
- Helga Holm
- (and 1 more)
-
That looks like a really sturdy mold. With the extra dowels as reinforcements it will probably stand for anything.
-
Thanks, I don’t think I have seen that term before. Now I have learned something new.
- 179 replies
-
- 1
-
-
- longship
- Helga Holm
- (and 1 more)
-
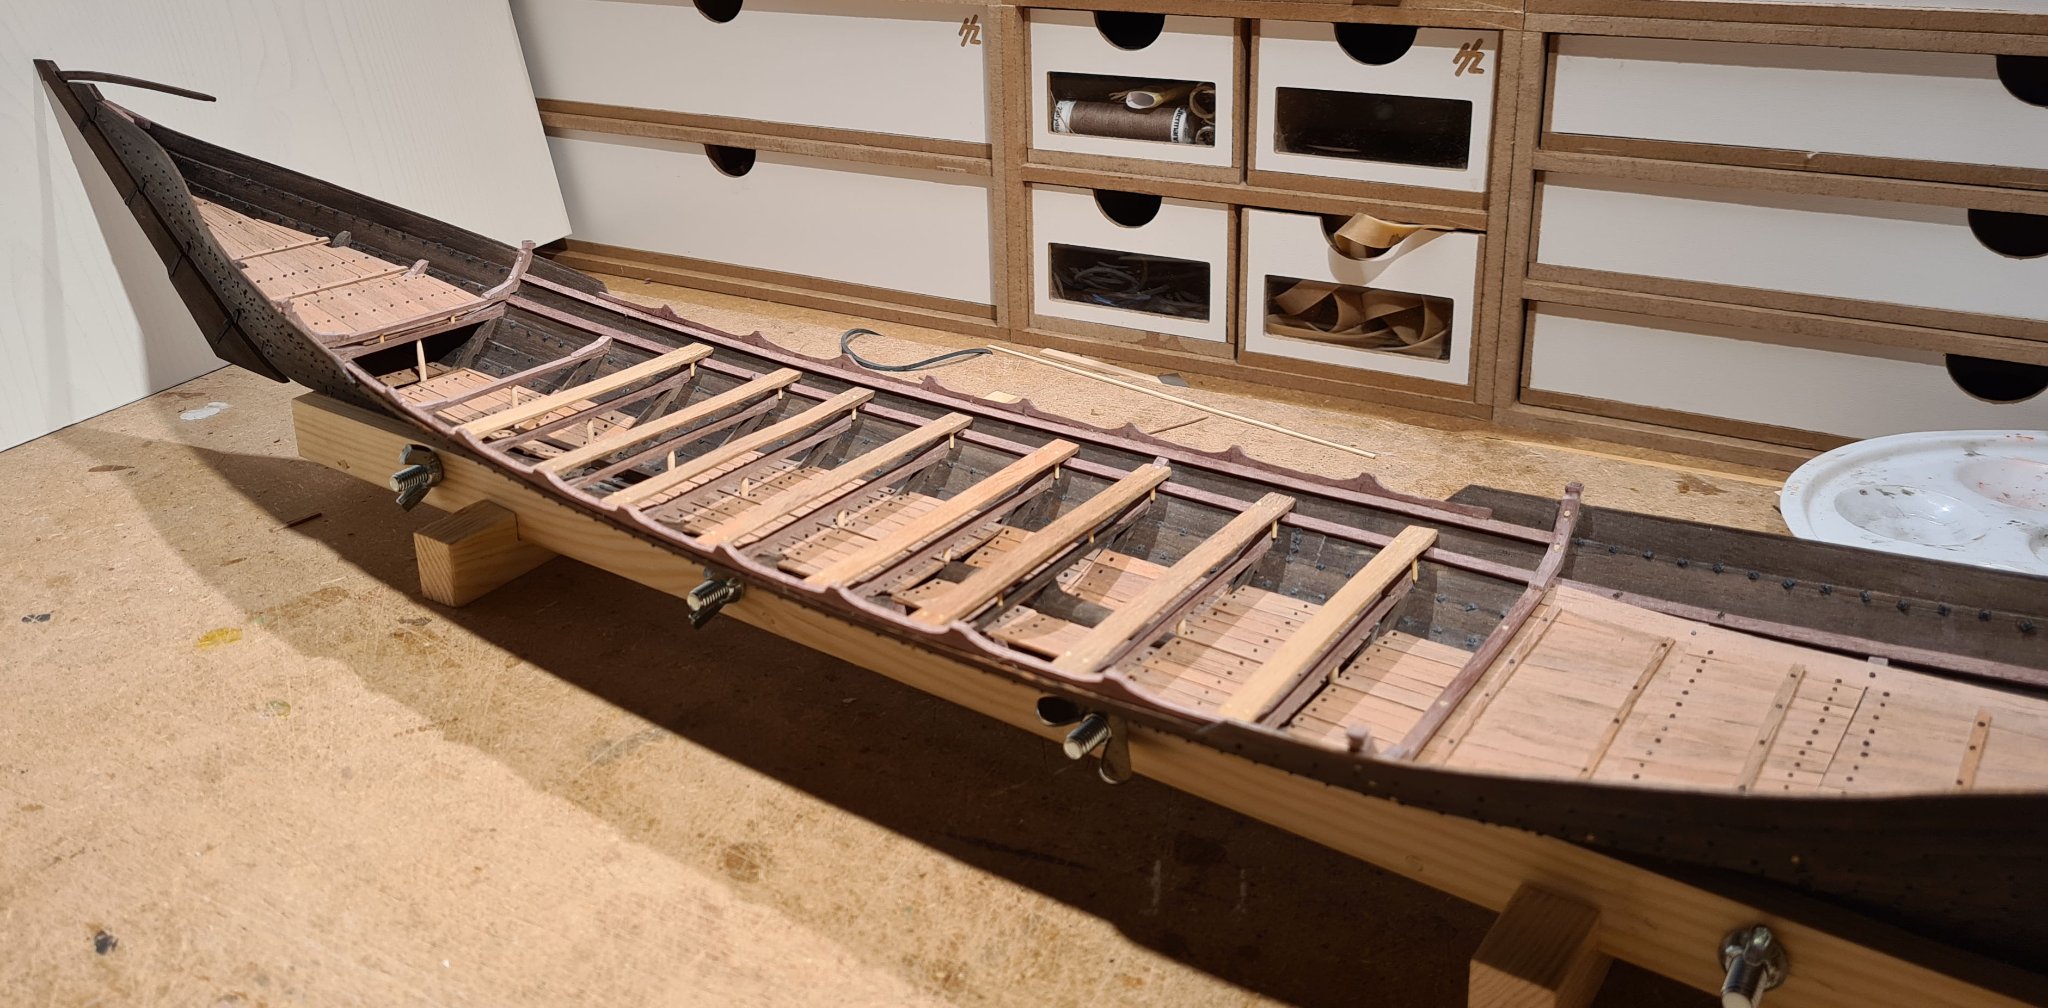
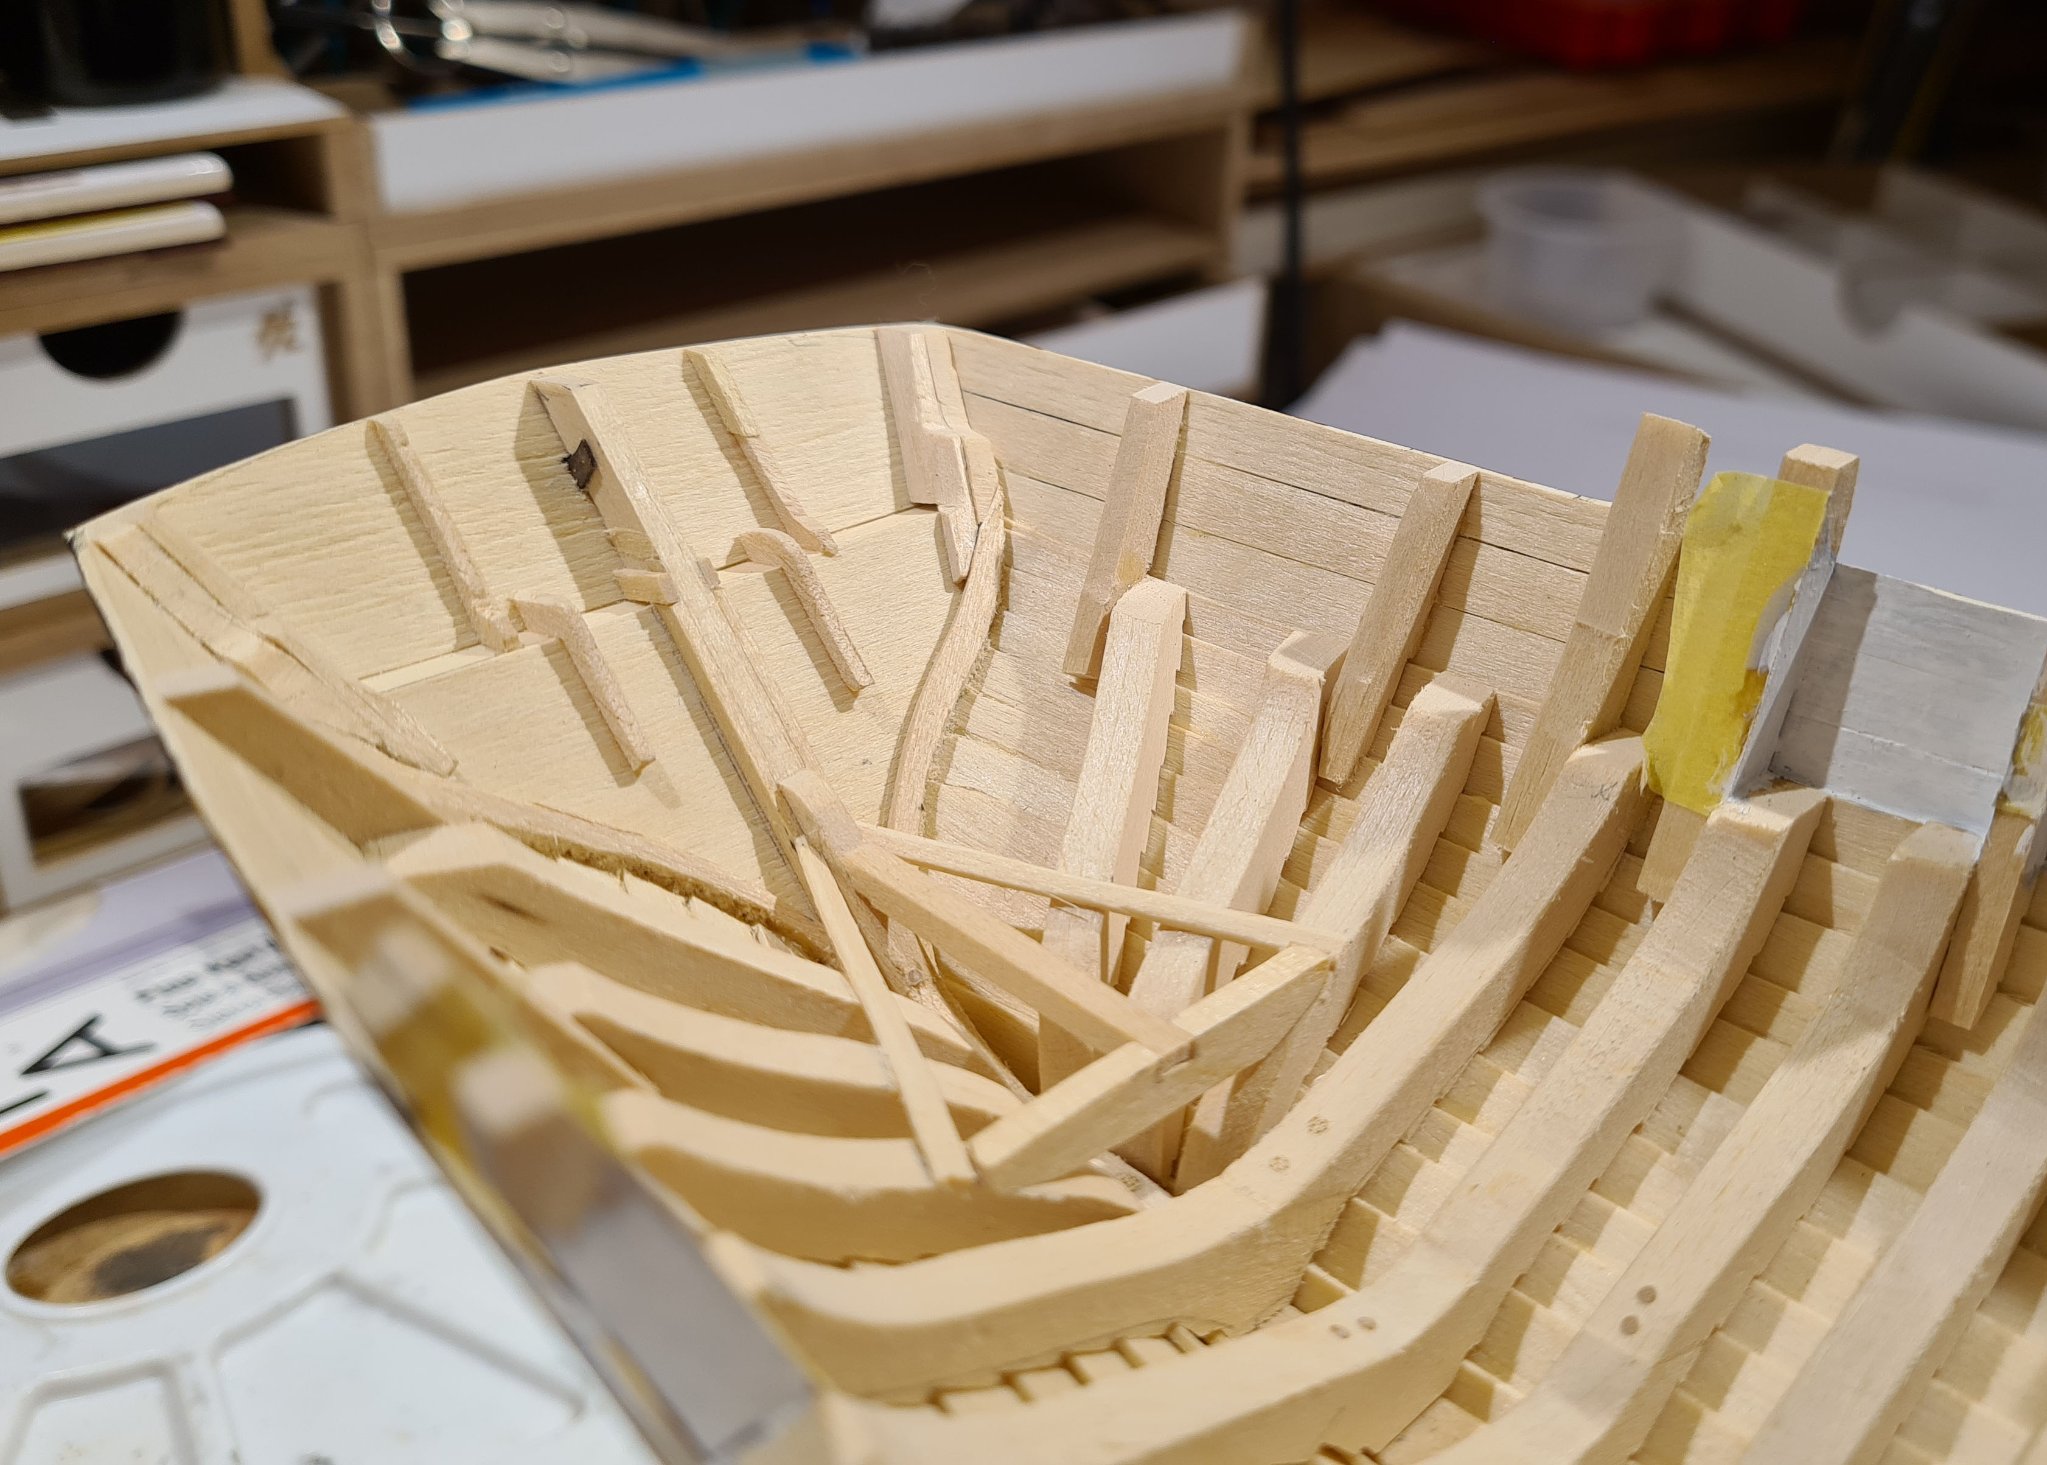
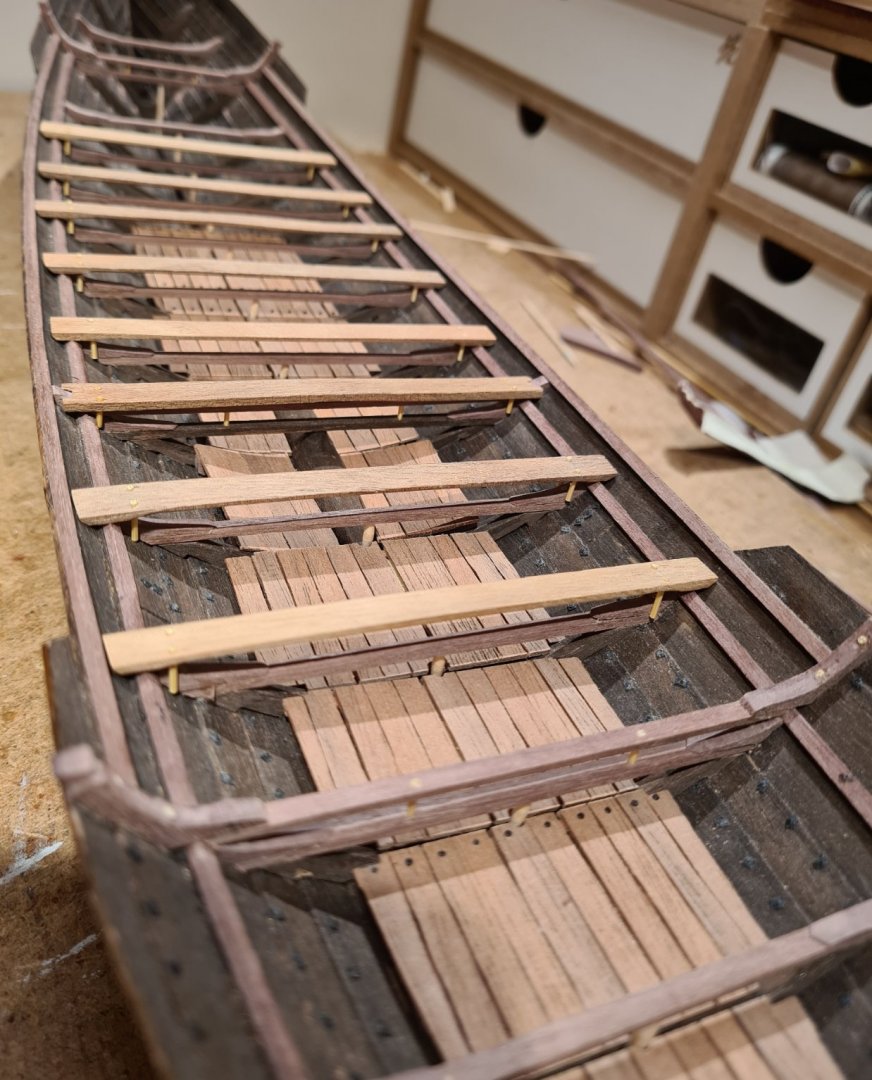
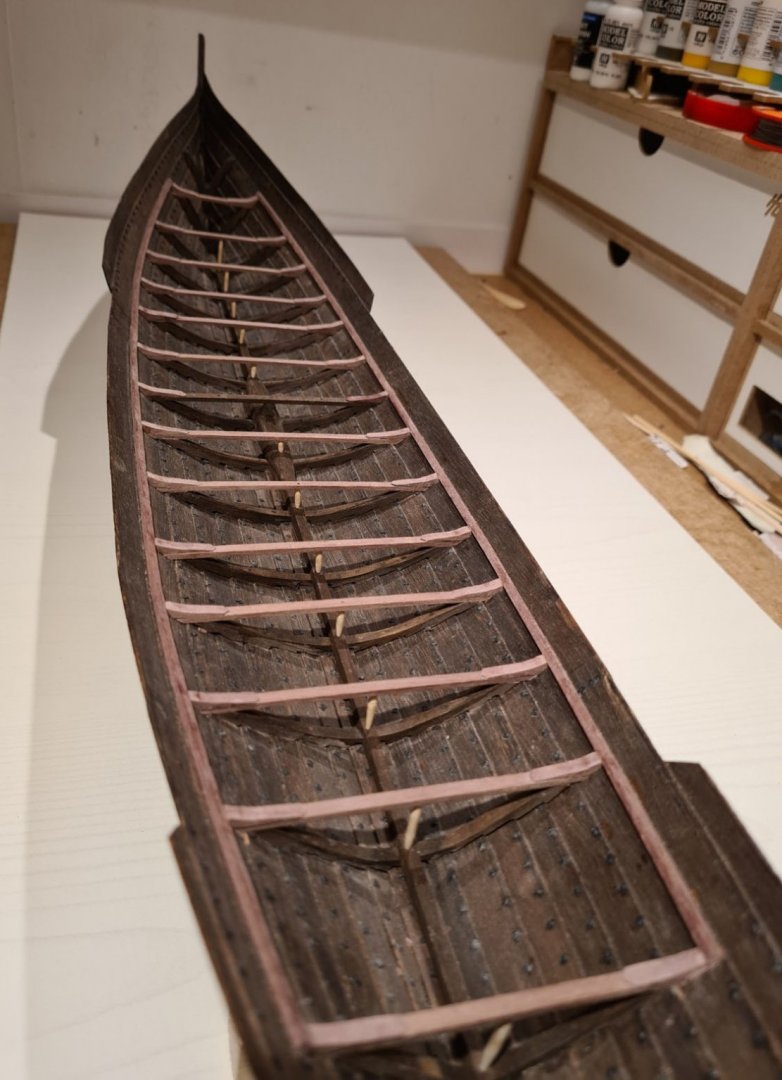
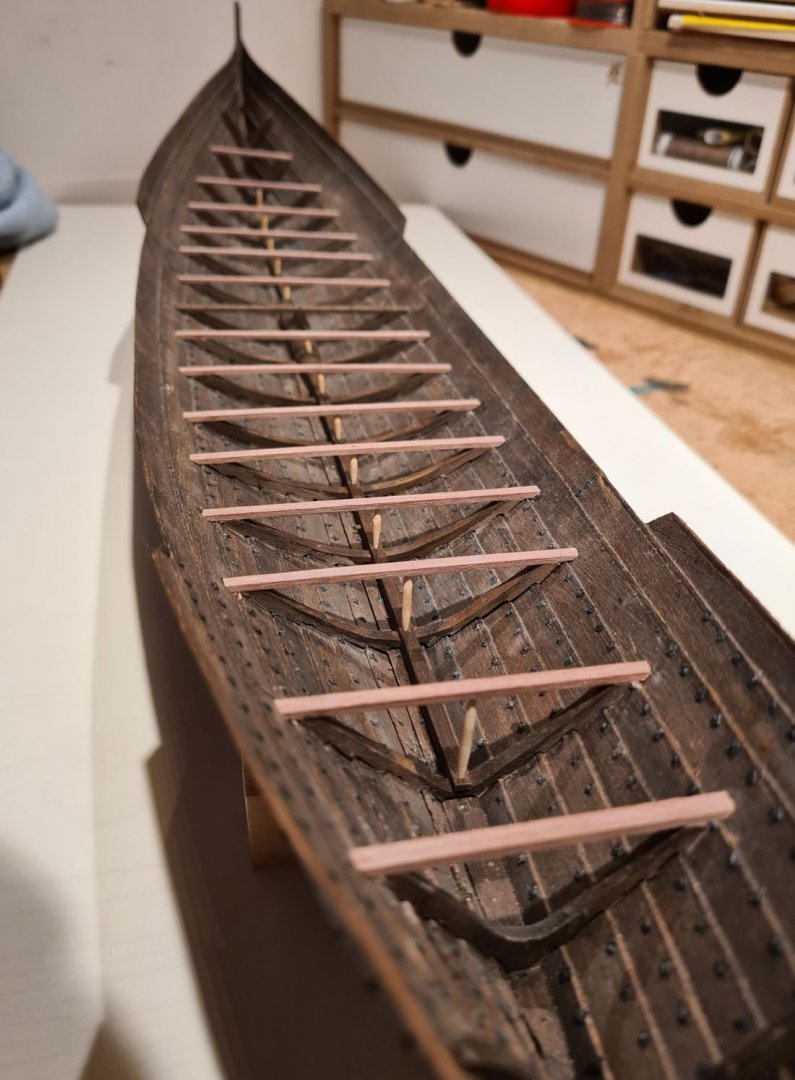
Thanks all for the appreciation. Now it looks even more busy when I have added the thwarts and adjusted the floor boards so that they have cutouts for the cross beam supports. The thwarts are just loose boards riding on the lower stringer. There was no indications in the find of how the thwarts where constructed or attached. Initially it was speculated that the rowers sat on the cross beams. However very simple test showed that the rowers would then sit too low and not be able to put any force into the strokes. The solution was to use loose boards, but with a pair of pins in each end that prevents them from moving back or forth. To get sufficient strength in the boards they are almost 5 cm thick, but to give a visual appearance of thinner dimensions the front and back edges are beveled on the underside. The picture above also shows that the floor boards will be riveted.
- 179 replies
-
- 9
-
-
-
- longship
- Helga Holm
- (and 1 more)
-
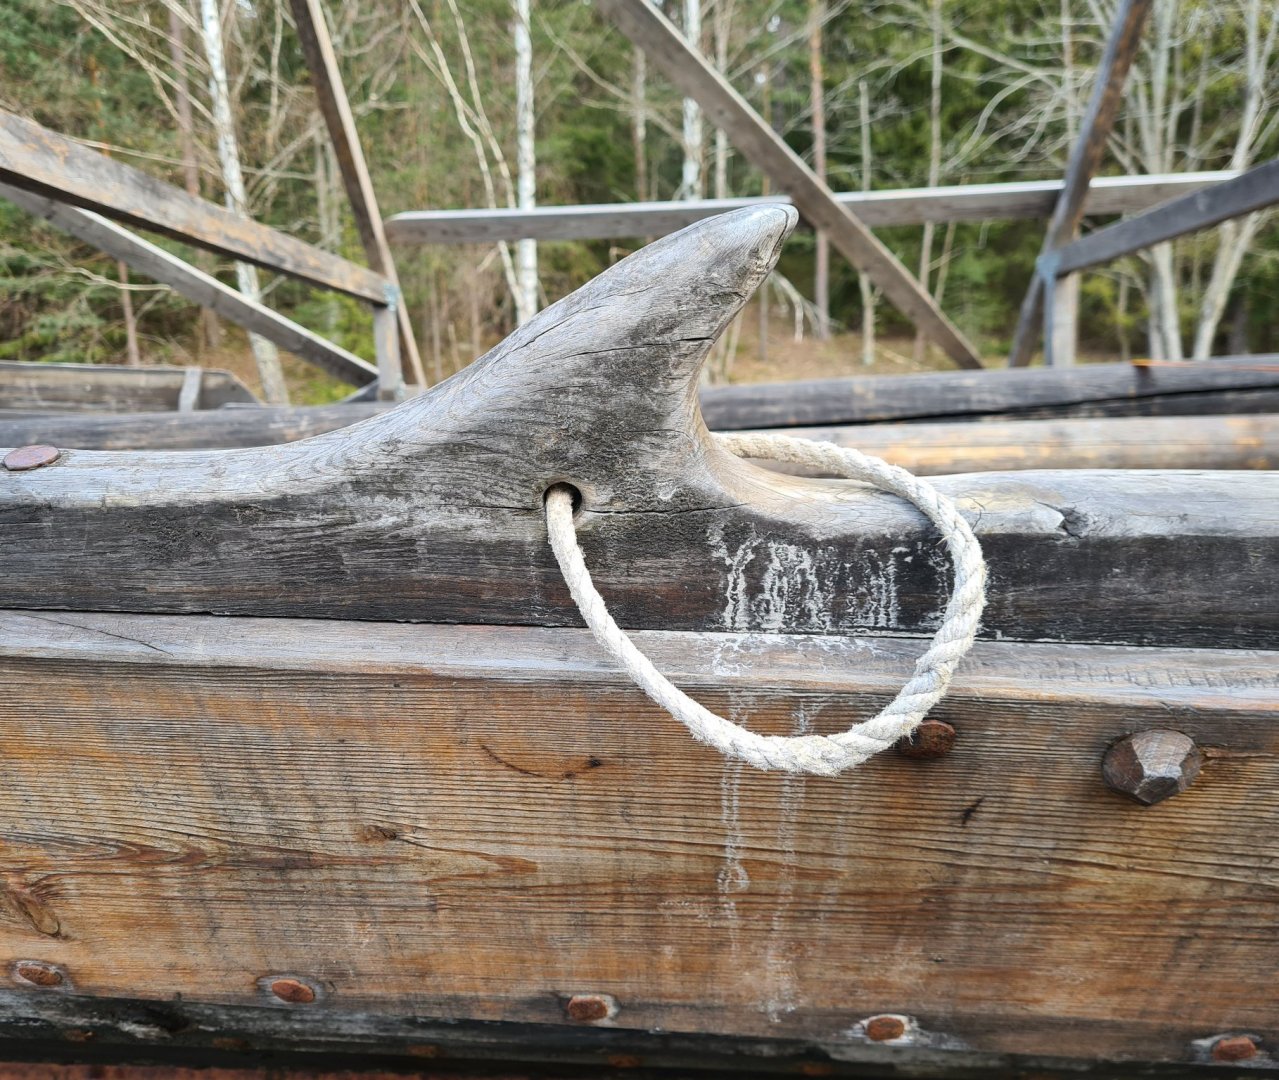
A small update. Three overlaying cross beams has been added, as well as a a second stringer and extra long knees ending in bollards. It's not so much more now until I can start with the rigging. Basically only the oarlocks, the decks in fore and aft and the rowing benches.

- 179 replies
-
- 10
-
-
-
- longship
- Helga Holm
- (and 1 more)
-
I remember a lot of the same challenges with interpreting the plans and figuring out how everything should go together. I remember turning the plans back and forth trying to figure what went where for quite long time. In the end most necessary information turned out to be there, but it took some time to figure out. I don’t remember missing any parts in my kit, but there might have been something that had a different dimension than specified. You have done nice work so far, I hope to see it completed. Best wishes on your journey.
-
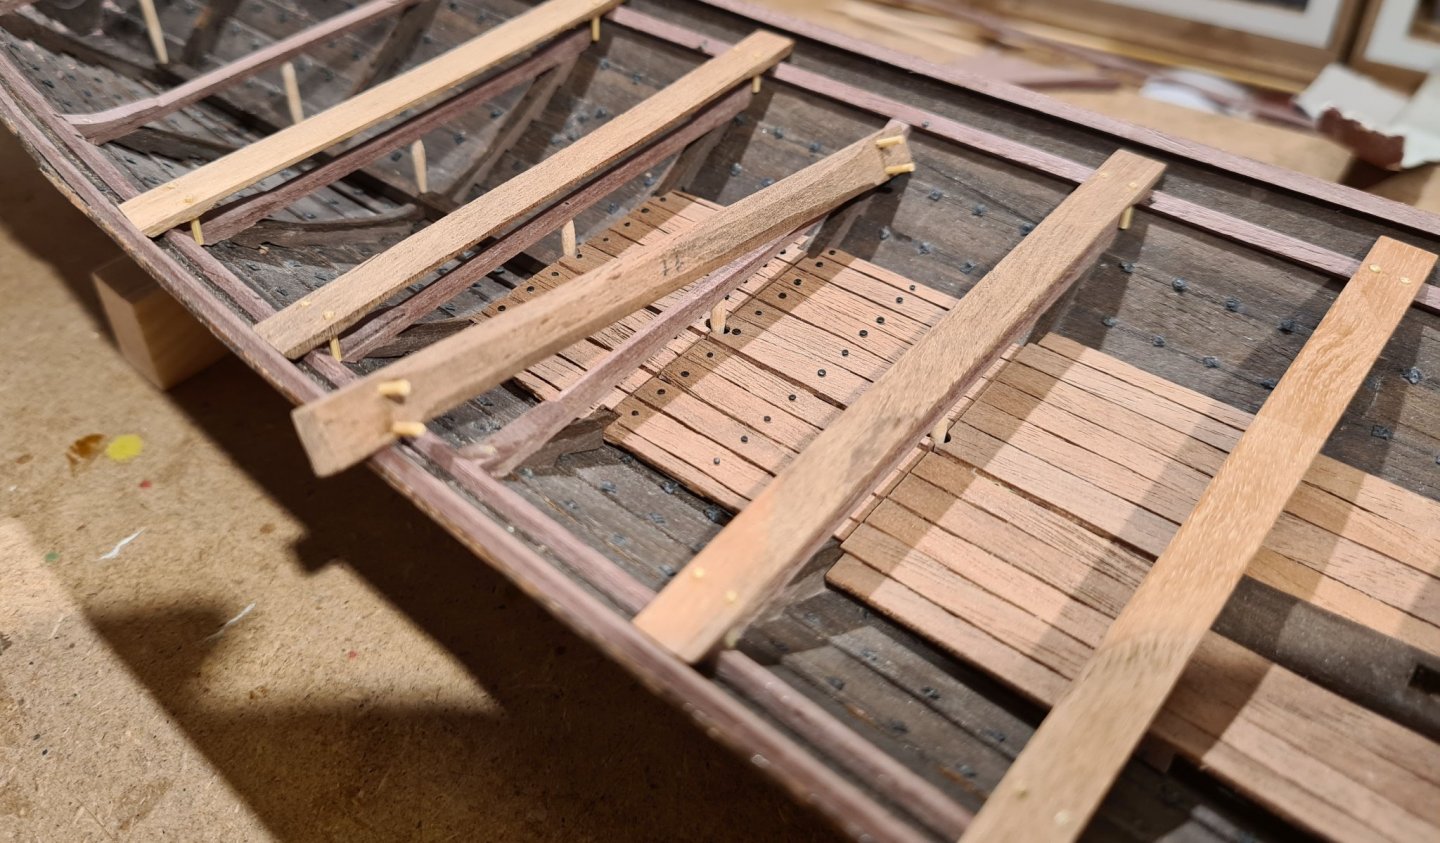
Since last update I have worked on the knees for the cross beams and the lower stringer on the inside. The knees are quite small and hard to hold, so I created a jig for shaping them all to the same form. I installed the stringer first, and fitted the knees after. In the real boat the knees has a wedge shaped "tongue" sticking up under the stringer and the stringer has a cut-out for each knee. This helps holding the knees in place, but is not visible to I skipped that detail. All knees installed. The next step will be to tree nail the knees to the plank.
- 179 replies
-
- 6
-
-
- longship
- Helga Holm
- (and 1 more)
-
Hi Mark, there are no remains of any floor boards or similar that could have been used to protect from ballast. However, that could not be interpreted as there was none. The find was not complete and damaged in many places. Any loose boards would likely have floated away, or recovered when she sank in the harbor. The archeologists doing the reconstruction was apparently pretty convinced that ballast was needed, their question seem to have been "how much". It was only after practical experience of about two seasons of sailing with ballast that it was abandoned. I don't know if the reconstruction used any additional protection then.
- 179 replies
-
- 2
-
-
- longship
- Helga Holm
- (and 1 more)
-
Congratulations for finishing your model! It has has been joy to follow. I especially like the crew, the cargo and all to other extra details you have included to add authenticity to the presentation.
-
This continues to be a very interesting and informative build. Well done so far.
-
Interesting to see your new build. The teaser you posted in the Kågen thread raised my curiosity. Your details regarding the CAD work is instructive. I hope to learn, and maybe practice in future builds.
-
Sloop from Roslagen by bolin - FINISHED - 1:50
bolin replied to bolin's topic in - Build logs for subjects built 1851 - 1900
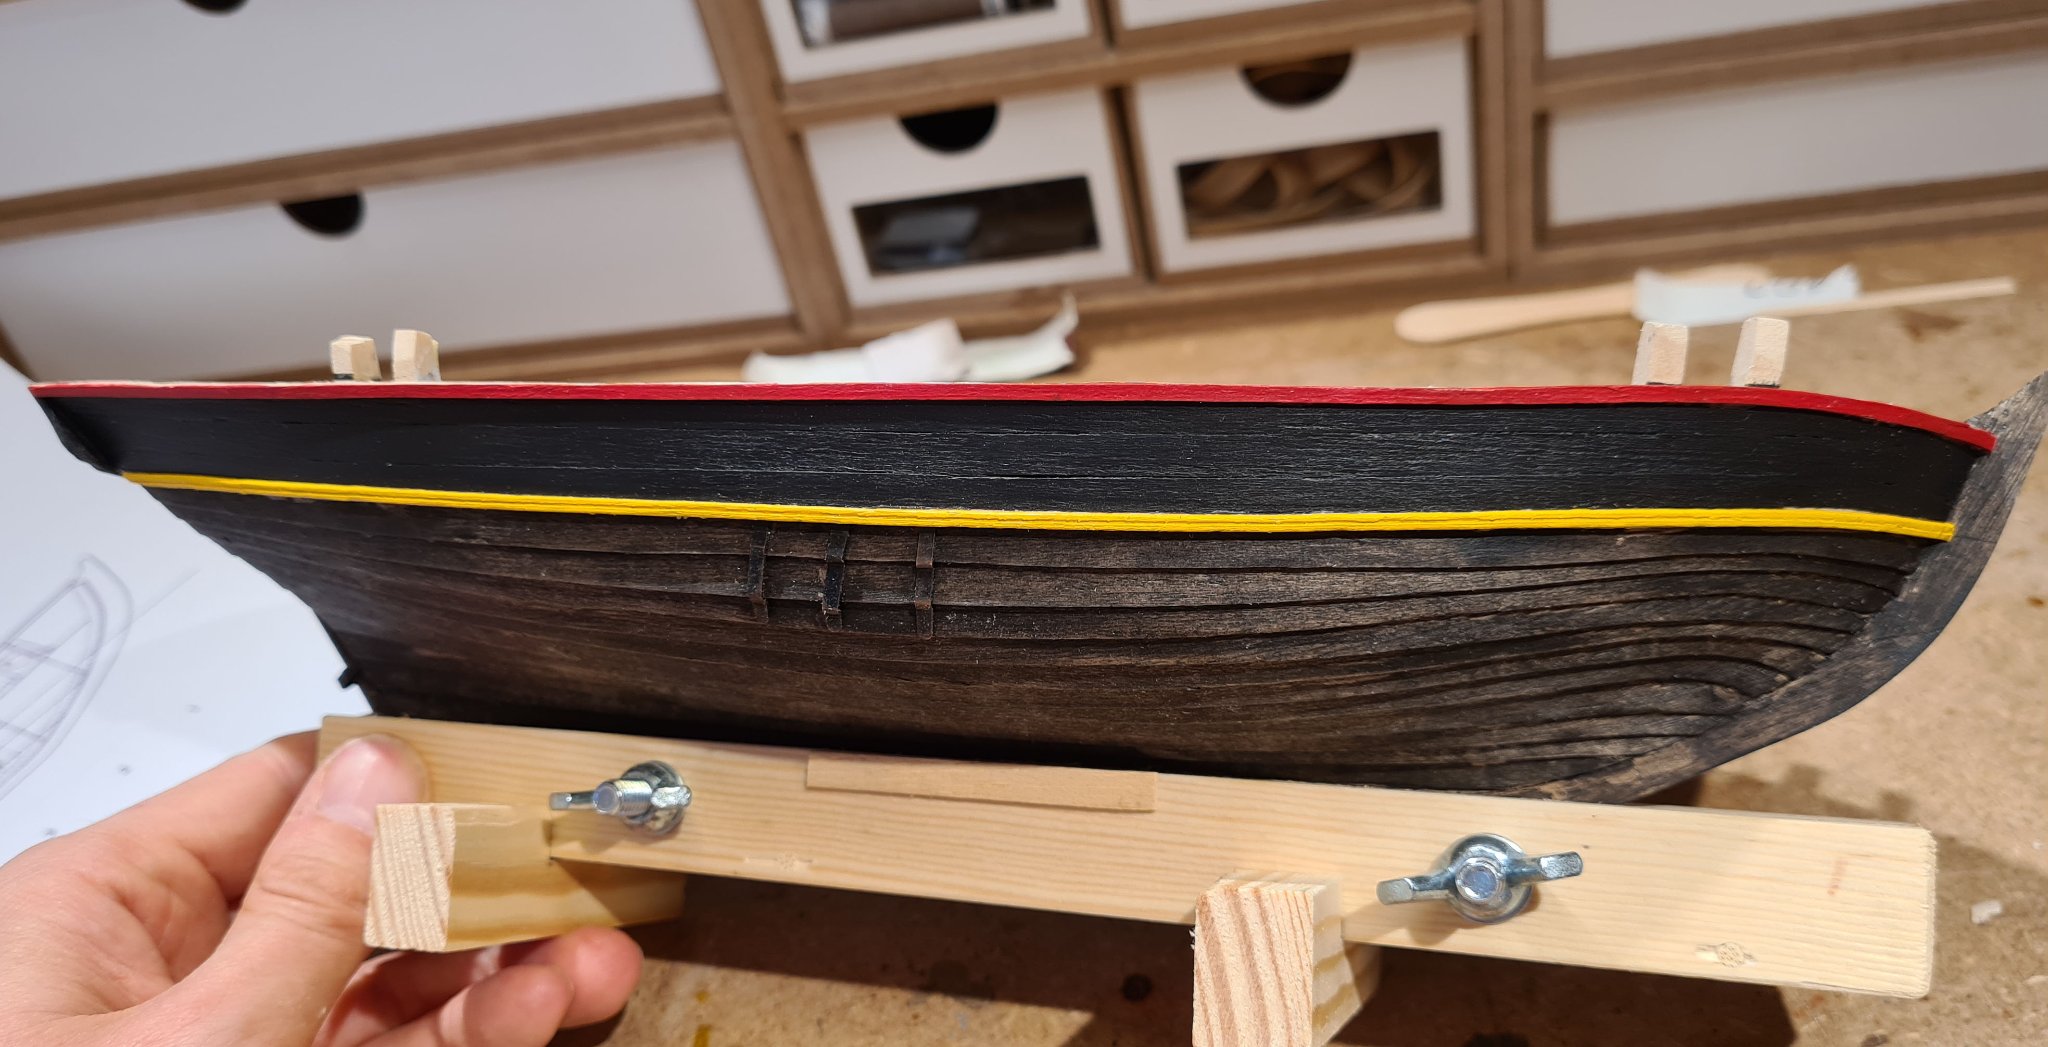
Painting of the outside of of the hull is complete. There was a practice of painting the strips on the side in different colors based on origin of the ship. The pattern I have chosen indicates that ship originates from Länna. I'm not sure how strictly such rules where applied and exactly during which period. It seem to have been common practice during the period when my subject would have been active.
-
Try to make a search here on the forum. I think I remember seeing some kit bash builds of the “black pearl”. I don’t think there is a kit. It is covered by copyright, and I think it would be very expensive, maybe even impossible to get a license to use it for a model kit.
-
Sloop from Roslagen by bolin - FINISHED - 1:50
bolin replied to bolin's topic in - Build logs for subjects built 1851 - 1900
I continued a bit with the inside by building a frame for the floor and bulkhead for the cabin. I have no source for this structure. I made something the I think could work. Before I go any further I will need to "tar" the inside of the hull. If I add anything more before I do that it will be hard to reach. First I thought I could skip painting parts of the inside that will not be visible. But I will leave some parts of the cabin roof and the ceiling in the hold exposed, but I have not decided exactly what parts, so I'm not sure which part I could skip painting.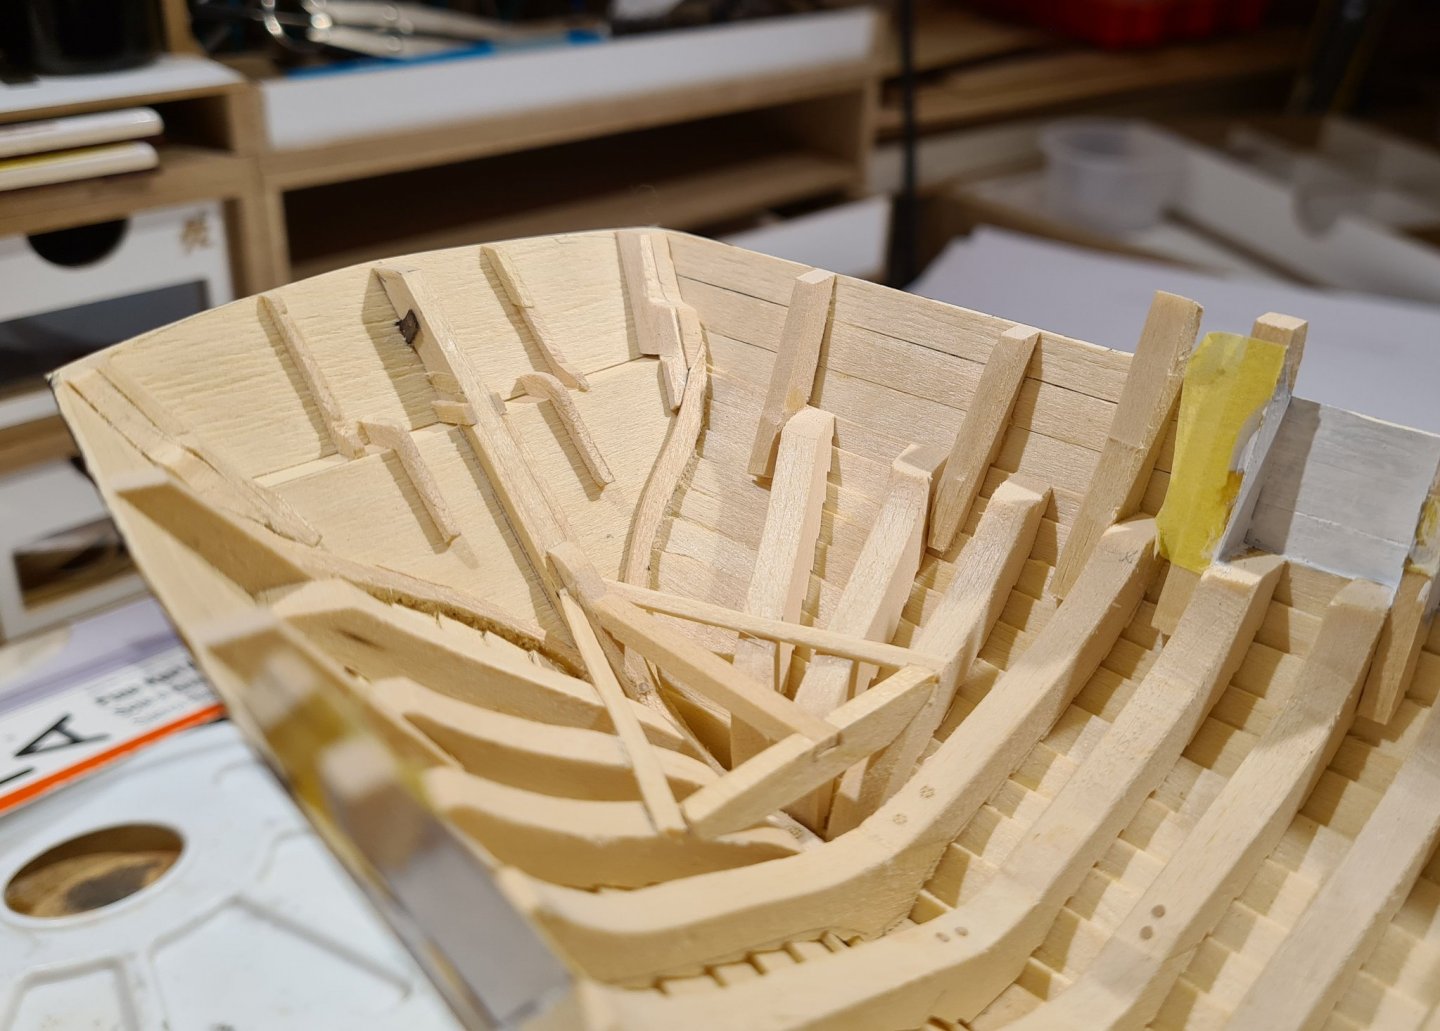
-
I agree that there is a nice contrast between the tarred hull and the thwarts. Only giving them a coat of oil might look nice. Regarding the use of tar it can be mixed with more linseed oil and thinner, and if it is applied in thin coats it will not be to sticky to sit at (at least after a few weeks in the sun).
-
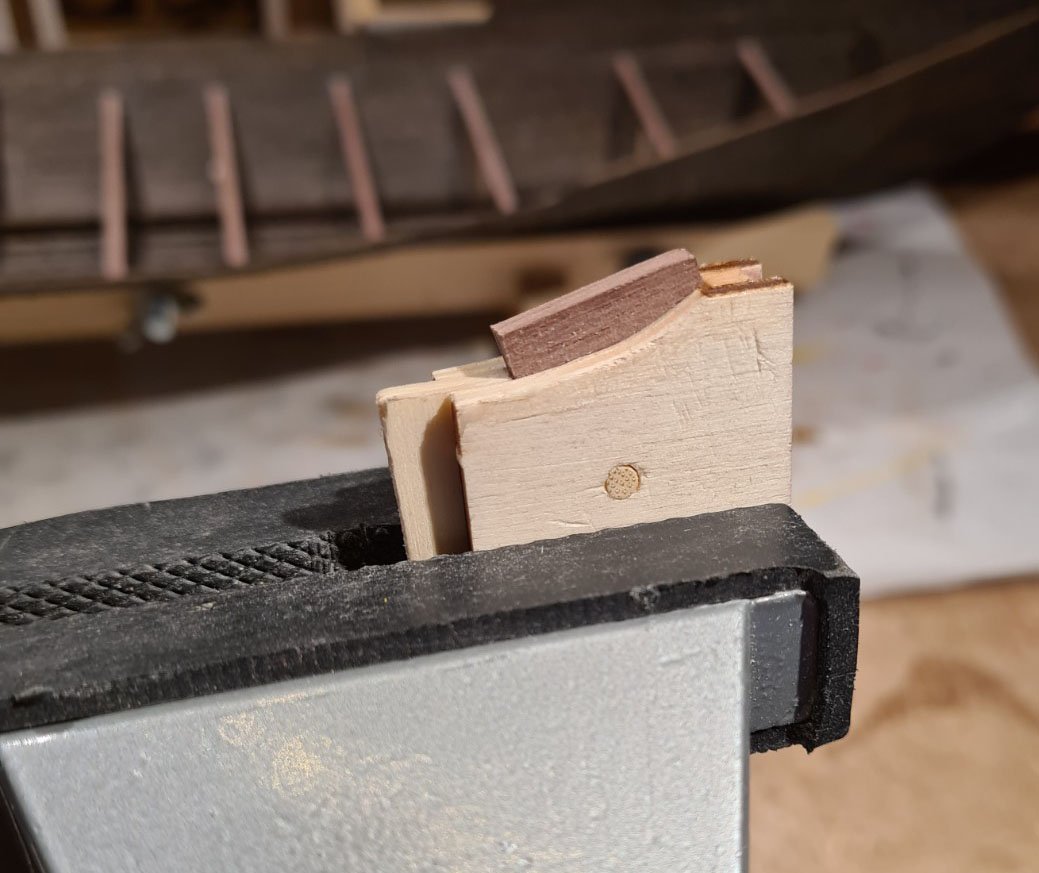
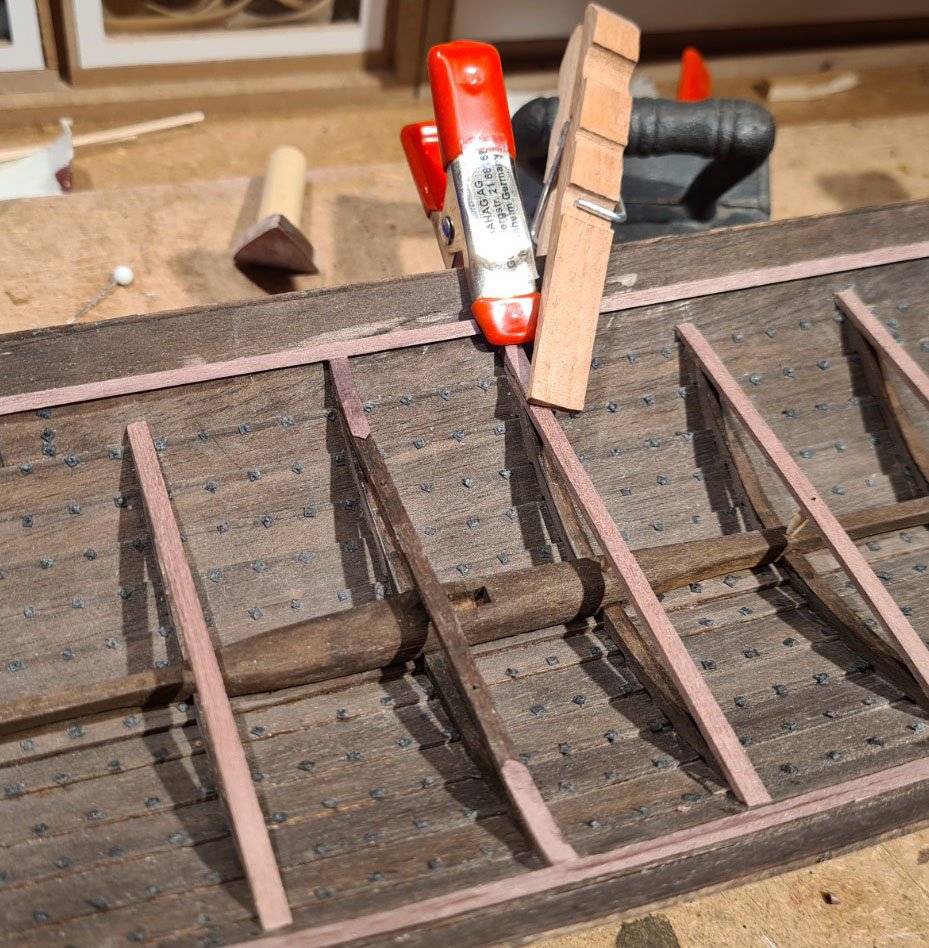
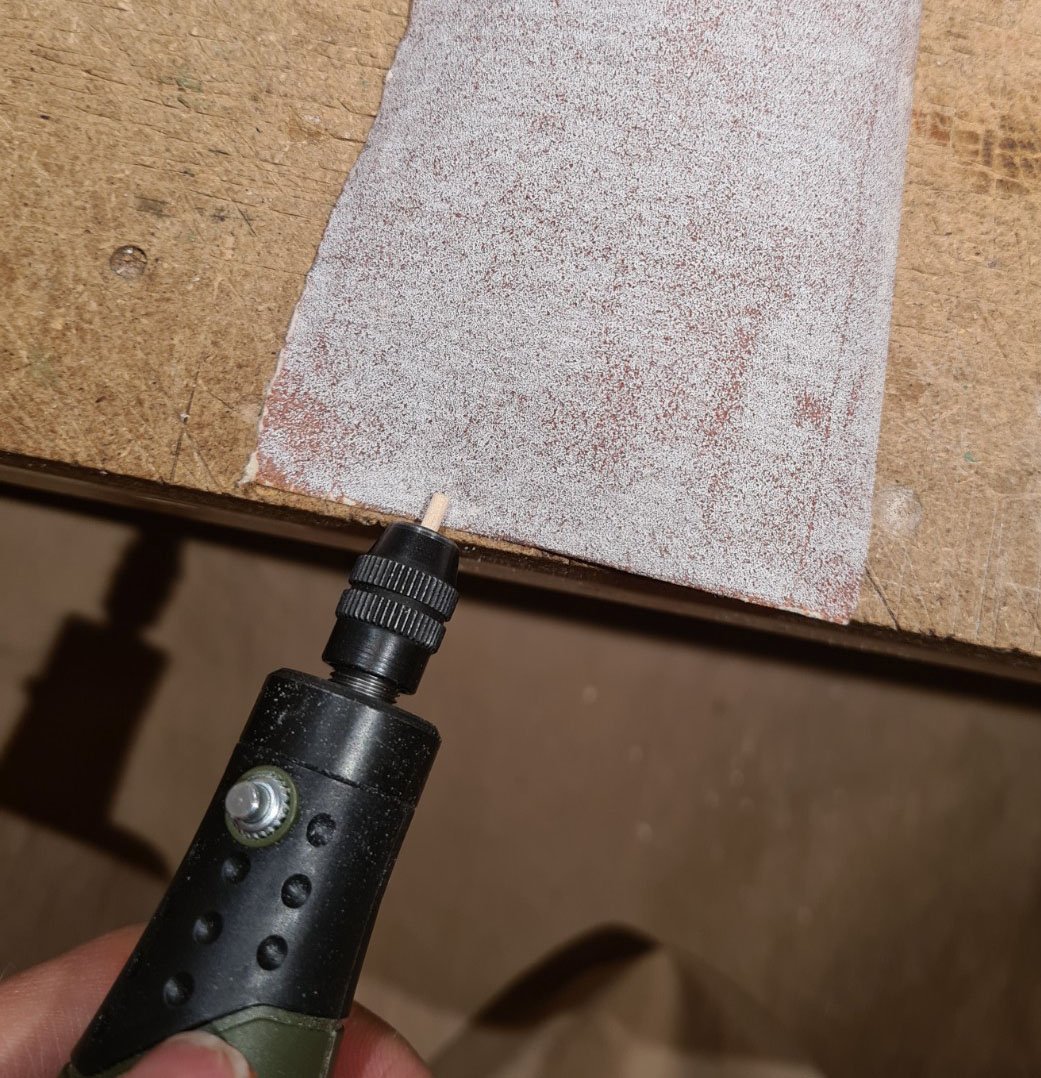
I have proceeded with gluing the cross beams in place. The cross beam are straight, and have a support that sits above the keelson. The cross beams are not well preserved in the find, so the reconstruction made some assumptions. No remains of the support exist, but holes exist which indicate that they would have existed. I have deviated from the find and the reconstruction in one major way. The cross beams will have knees that go up on the planks as support. In reality one of the knees should be from naturally grown wood (i.e. a branch), while the opposite end has a loose knee nailed to the cross beam. The naturally grown knee should be installed alternately on port and starboard. I have made the simplification to make both knees loose parts. The supports are tapered in both ends. In this i follow the boat builder that built the reconstruction. This detail is not documented in reconstruction report, but I think it looks nice. Tapering in simplest possible way by sticking a tooth pick into my Proxxon rotary tool and tapering against a sand paper. The finished result:
- 179 replies
-
- 11
-
-
-
- longship
- Helga Holm
- (and 1 more)