Rick310
-
Posts
388 -
Joined
-
Last visited
Content Type
Profiles
Forums
Gallery
Events
Everything posted by Rick310
-
What a beautiful model!!! coming along really well!!! Rick
- 600 replies
-
- 1
-

-
- Flying Fish
- Model Shipways
- (and 2 more)
-
Wow!!! I have spent some time looking at her at the museum. They only have the forefoot, l’m not sure where the rest of her is, I think I heard that the museum wasn’t able to take all that was recovered.
-
Thanks Rob and Snug Harbor Johnny for your kind words and encouragement. The last 2 pictures are of the clipper ship Snow Squall, 3/16 inch scale at the Maine Maritime Museum in Bath Maine.
-
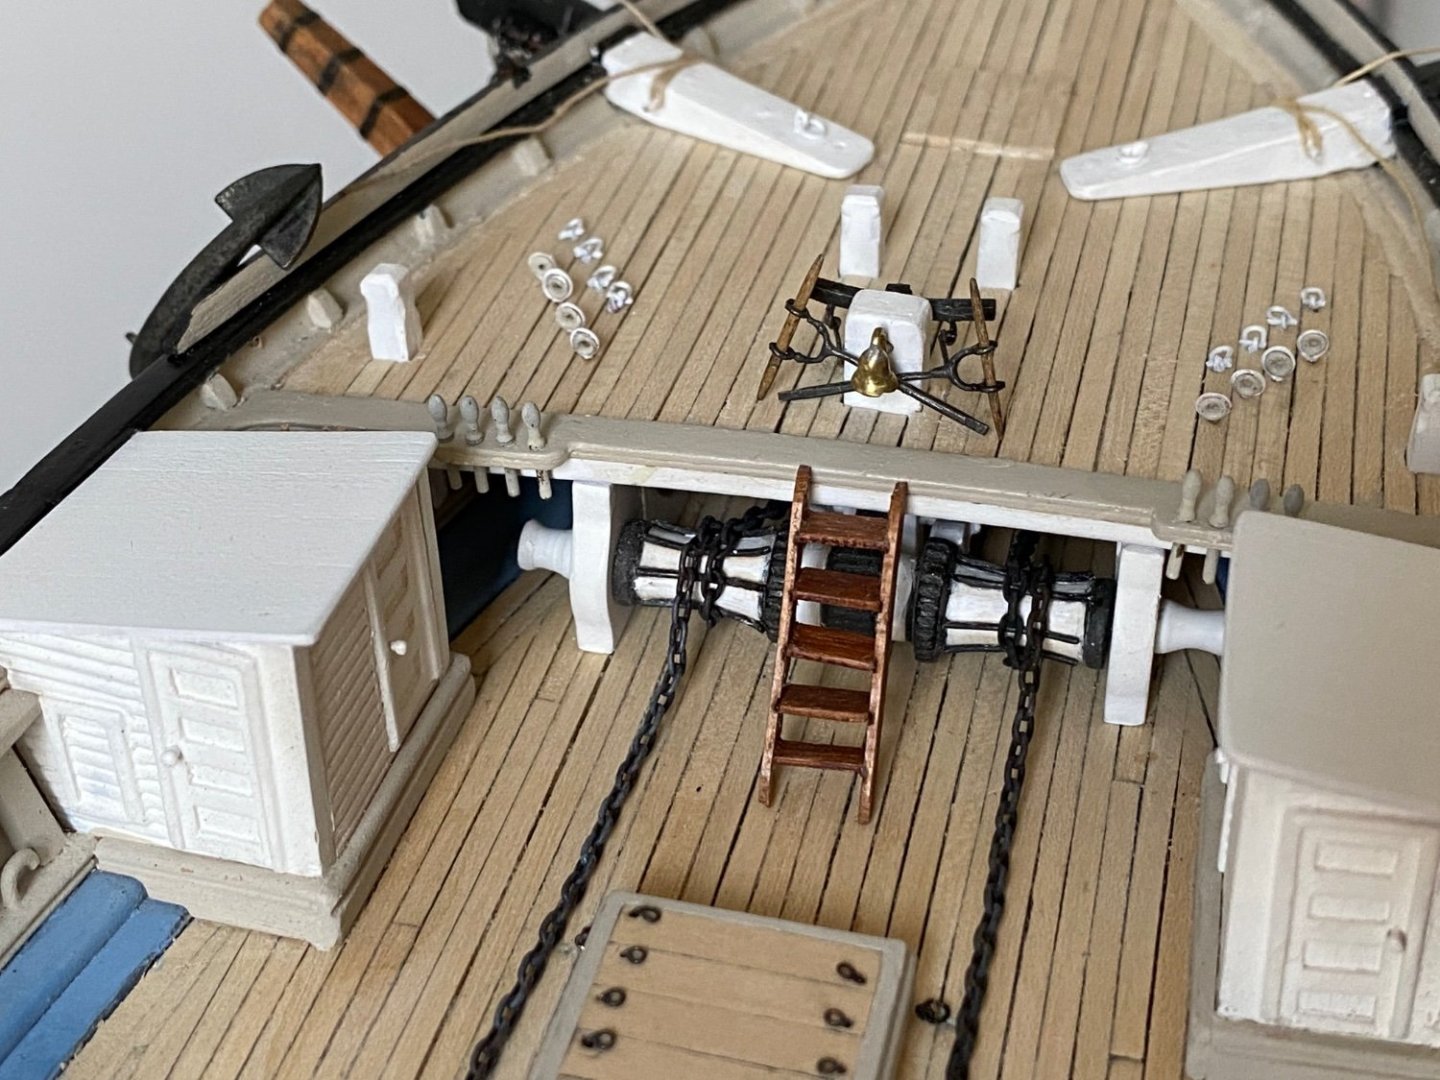
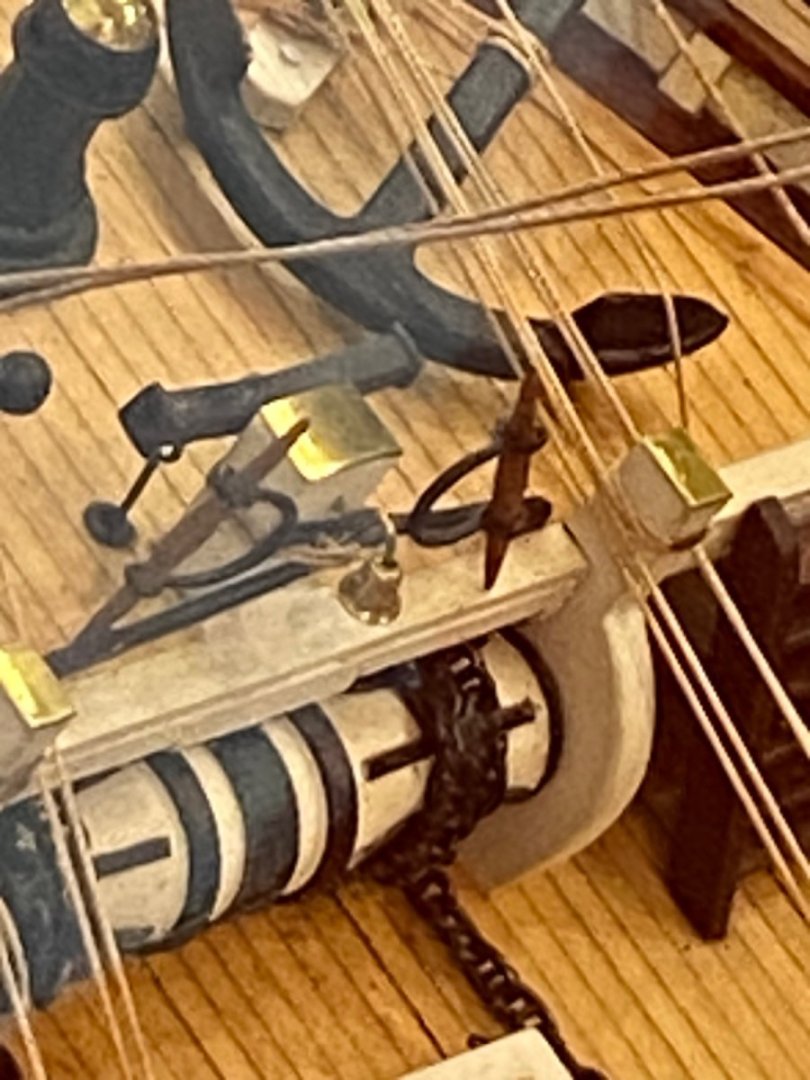
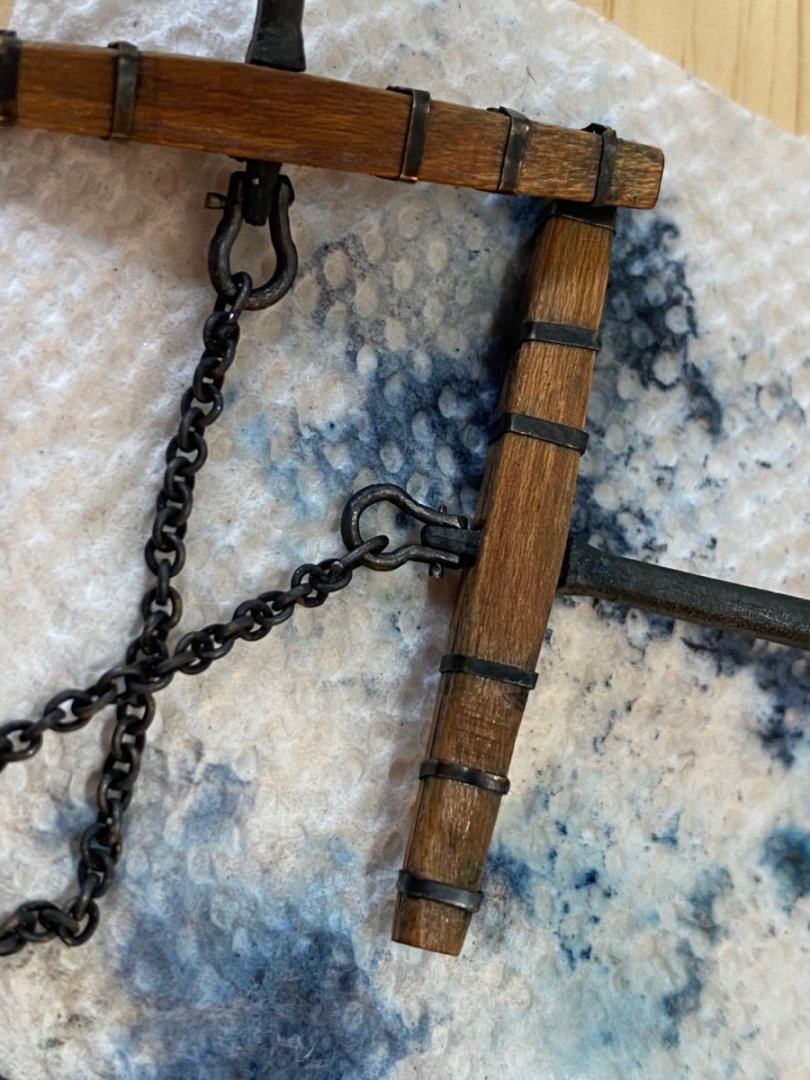
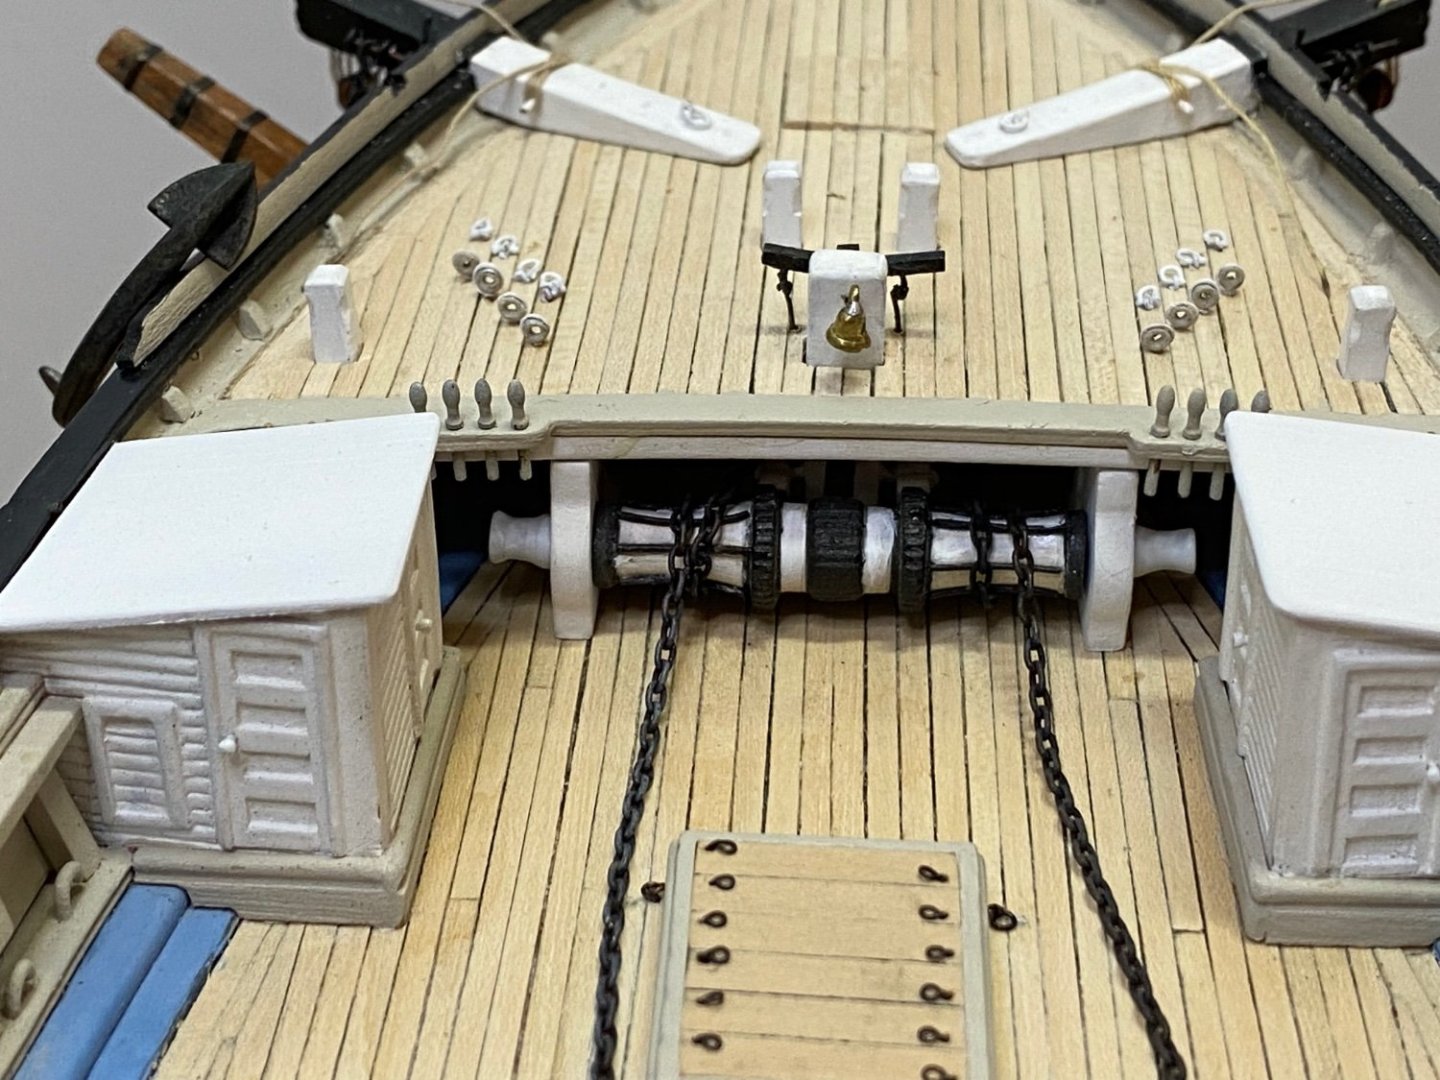
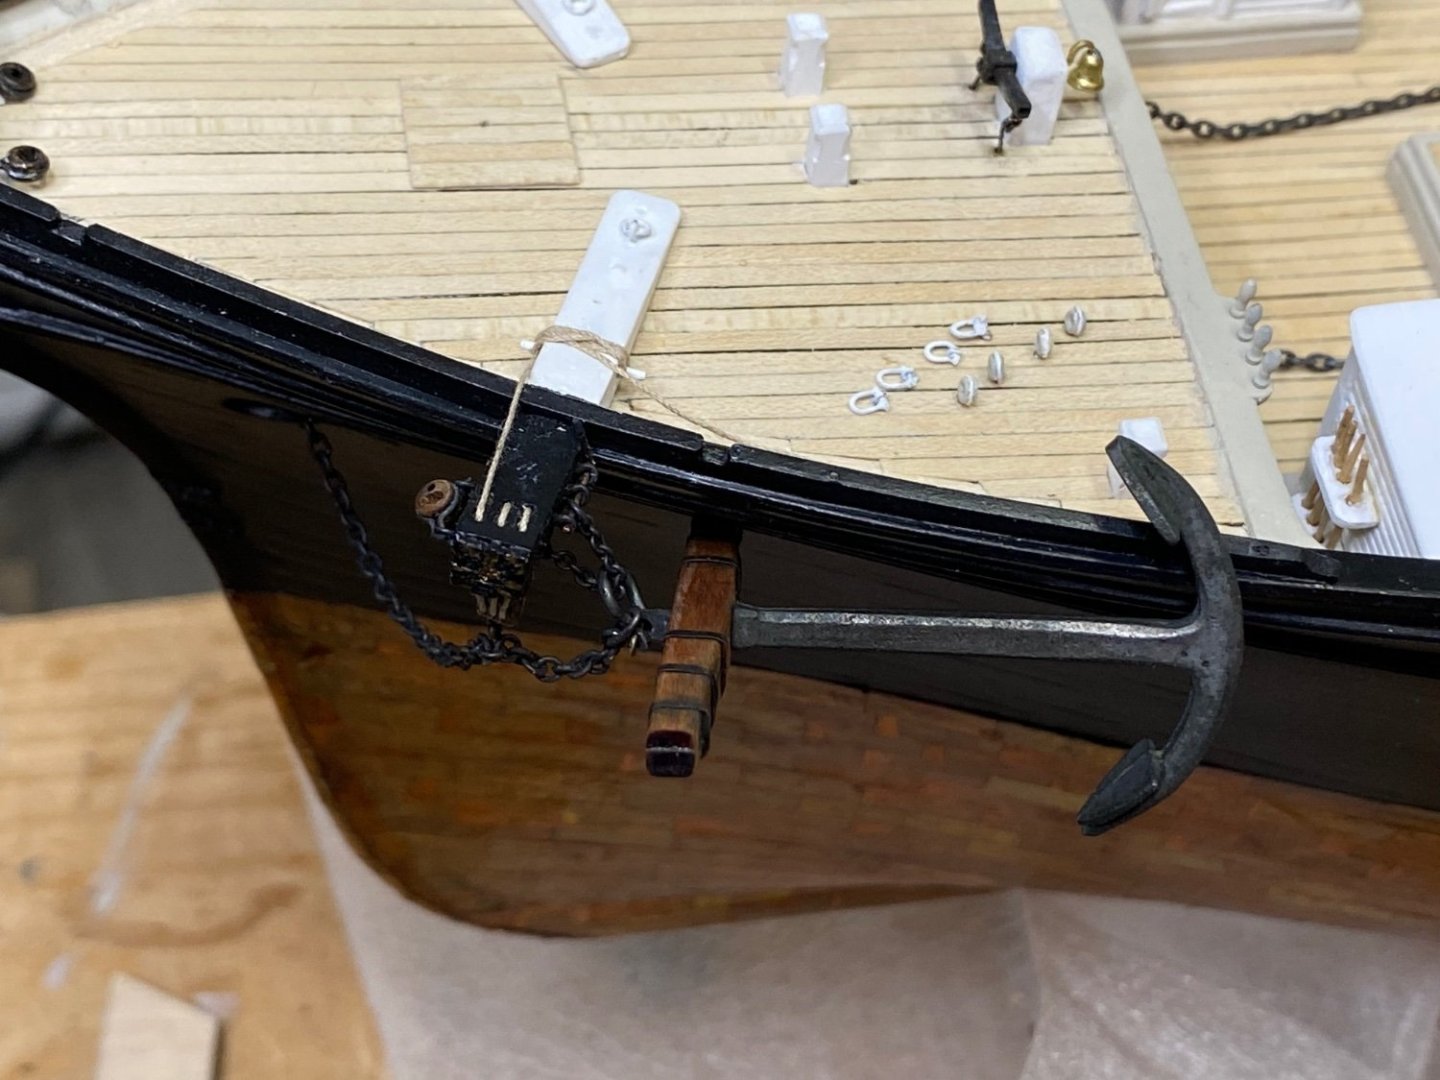
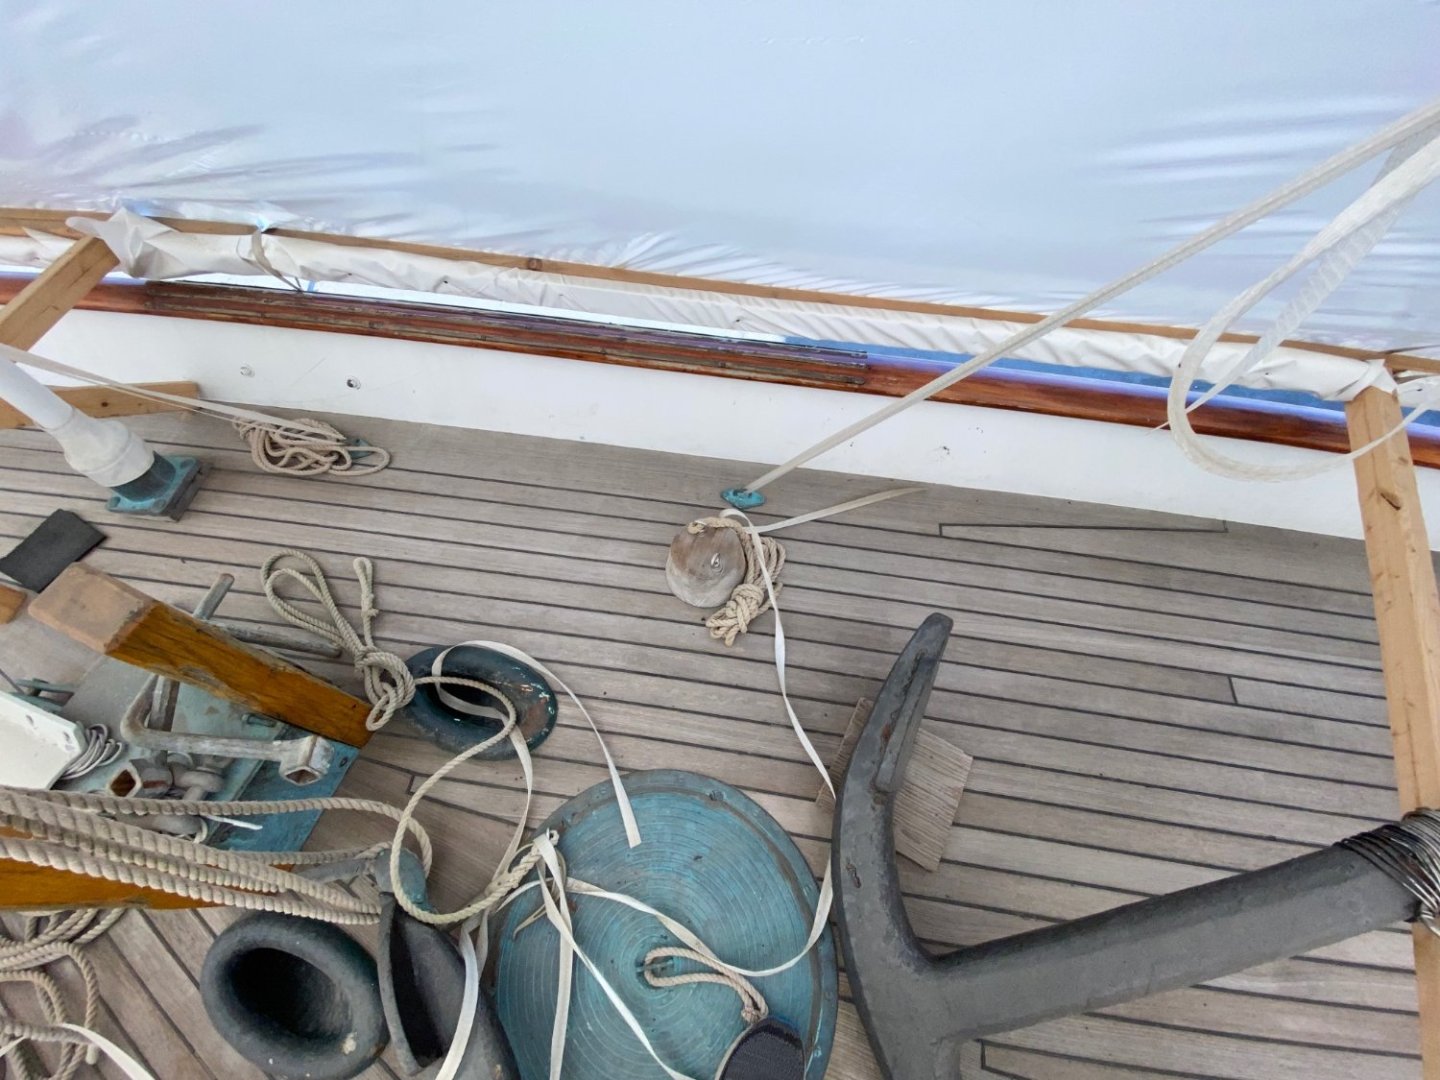
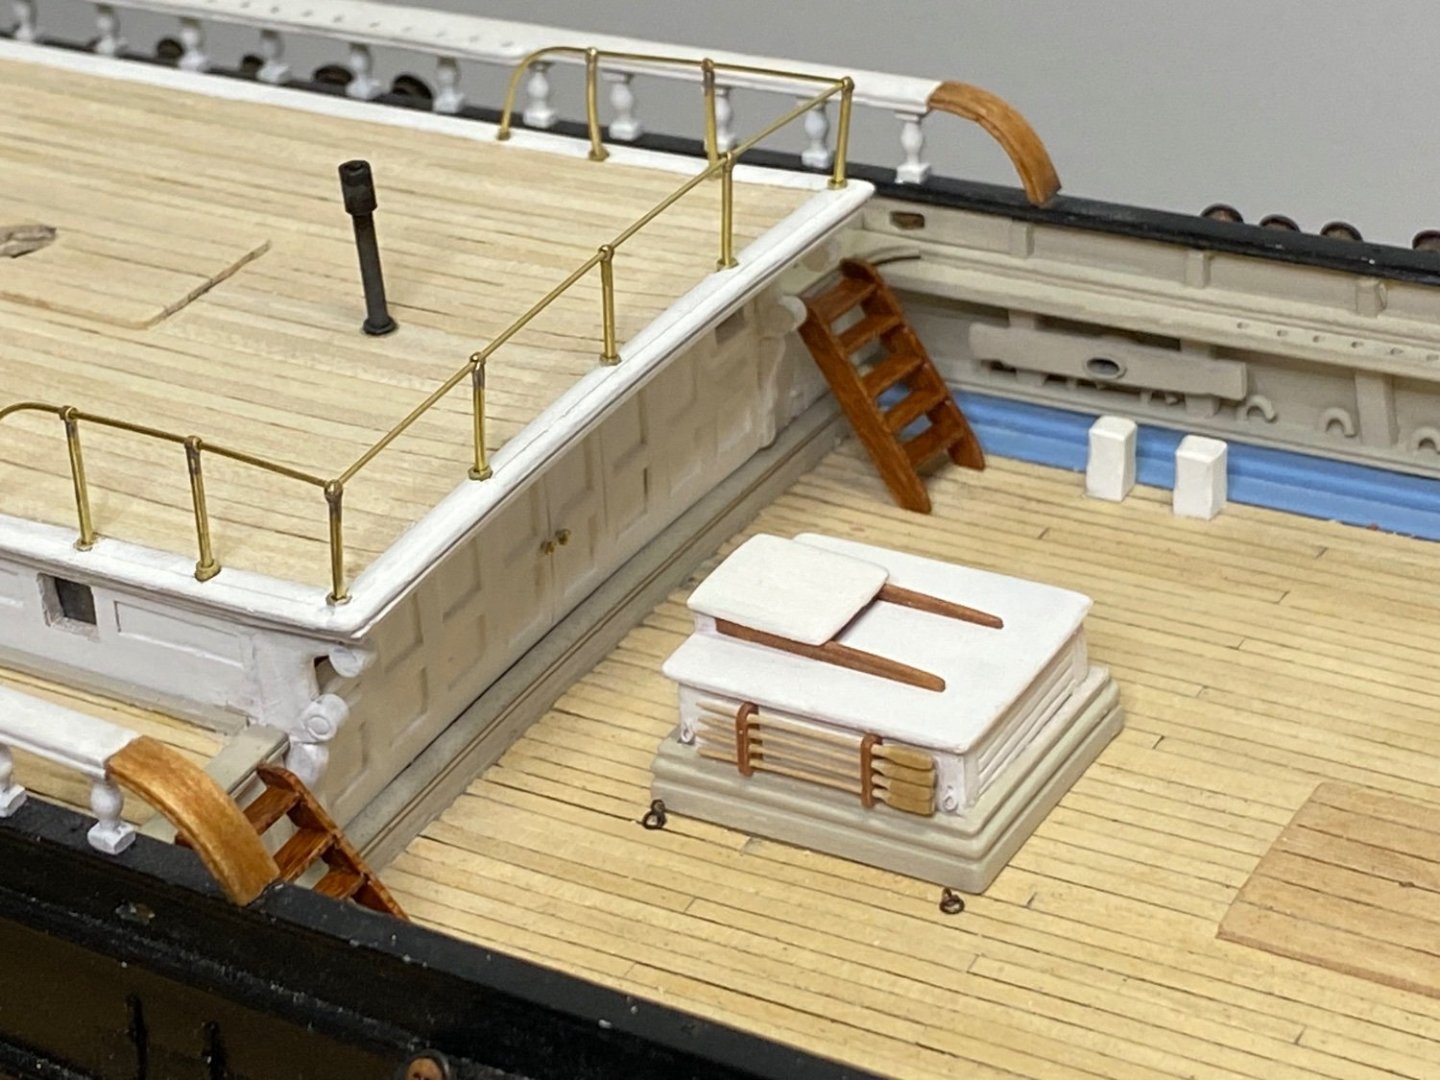
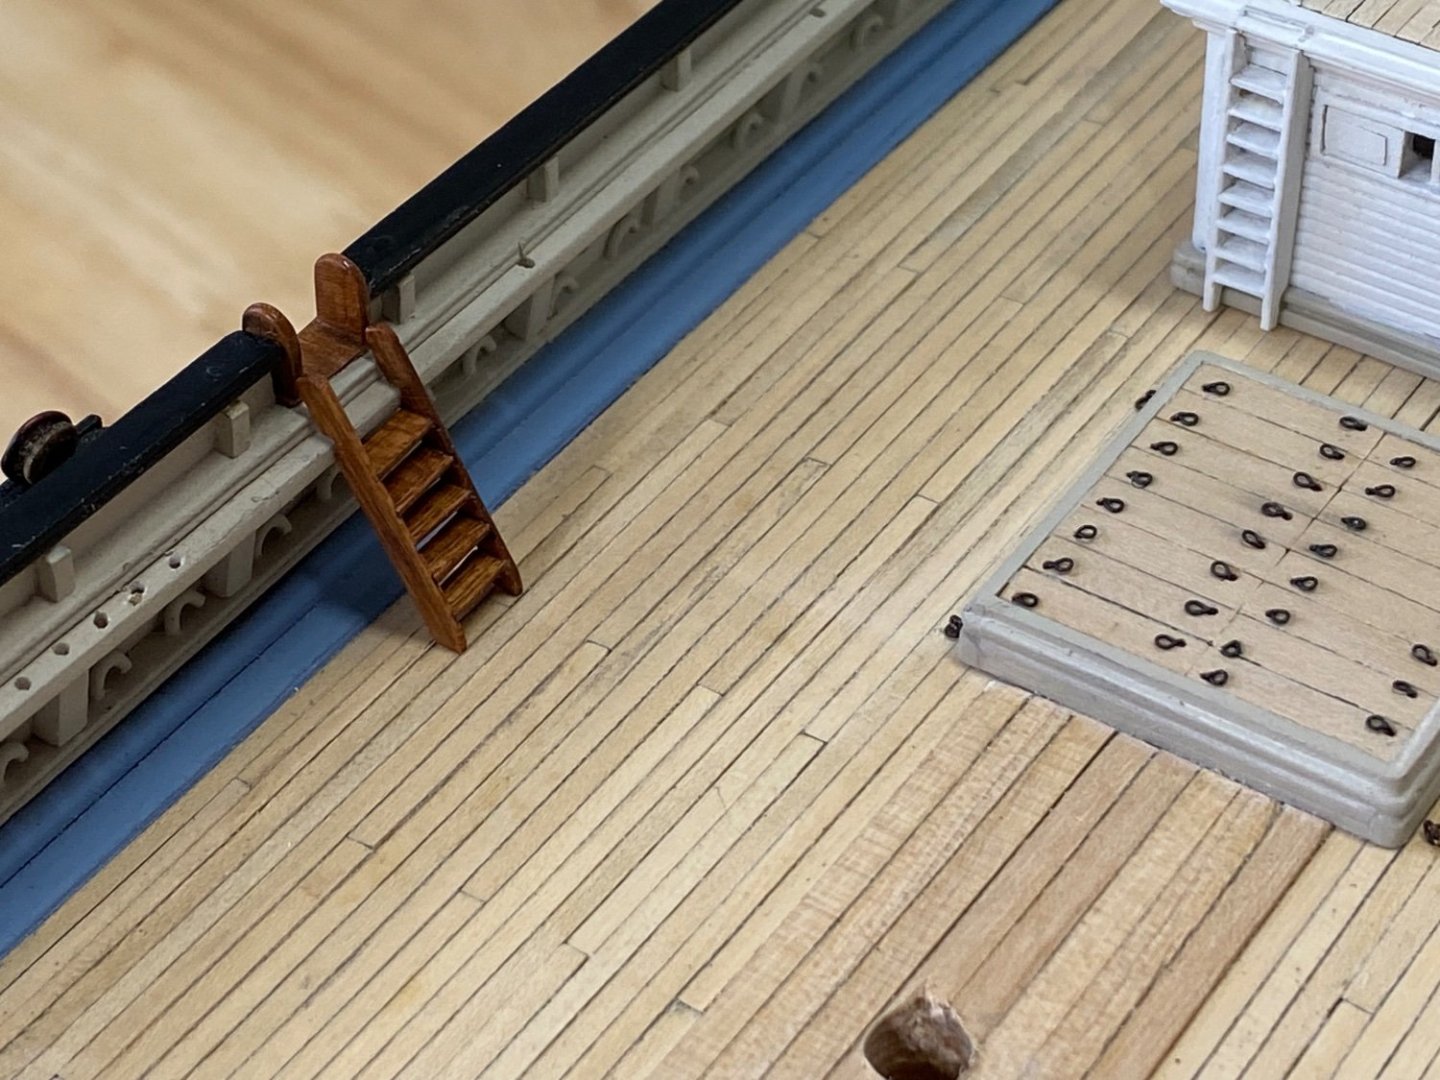
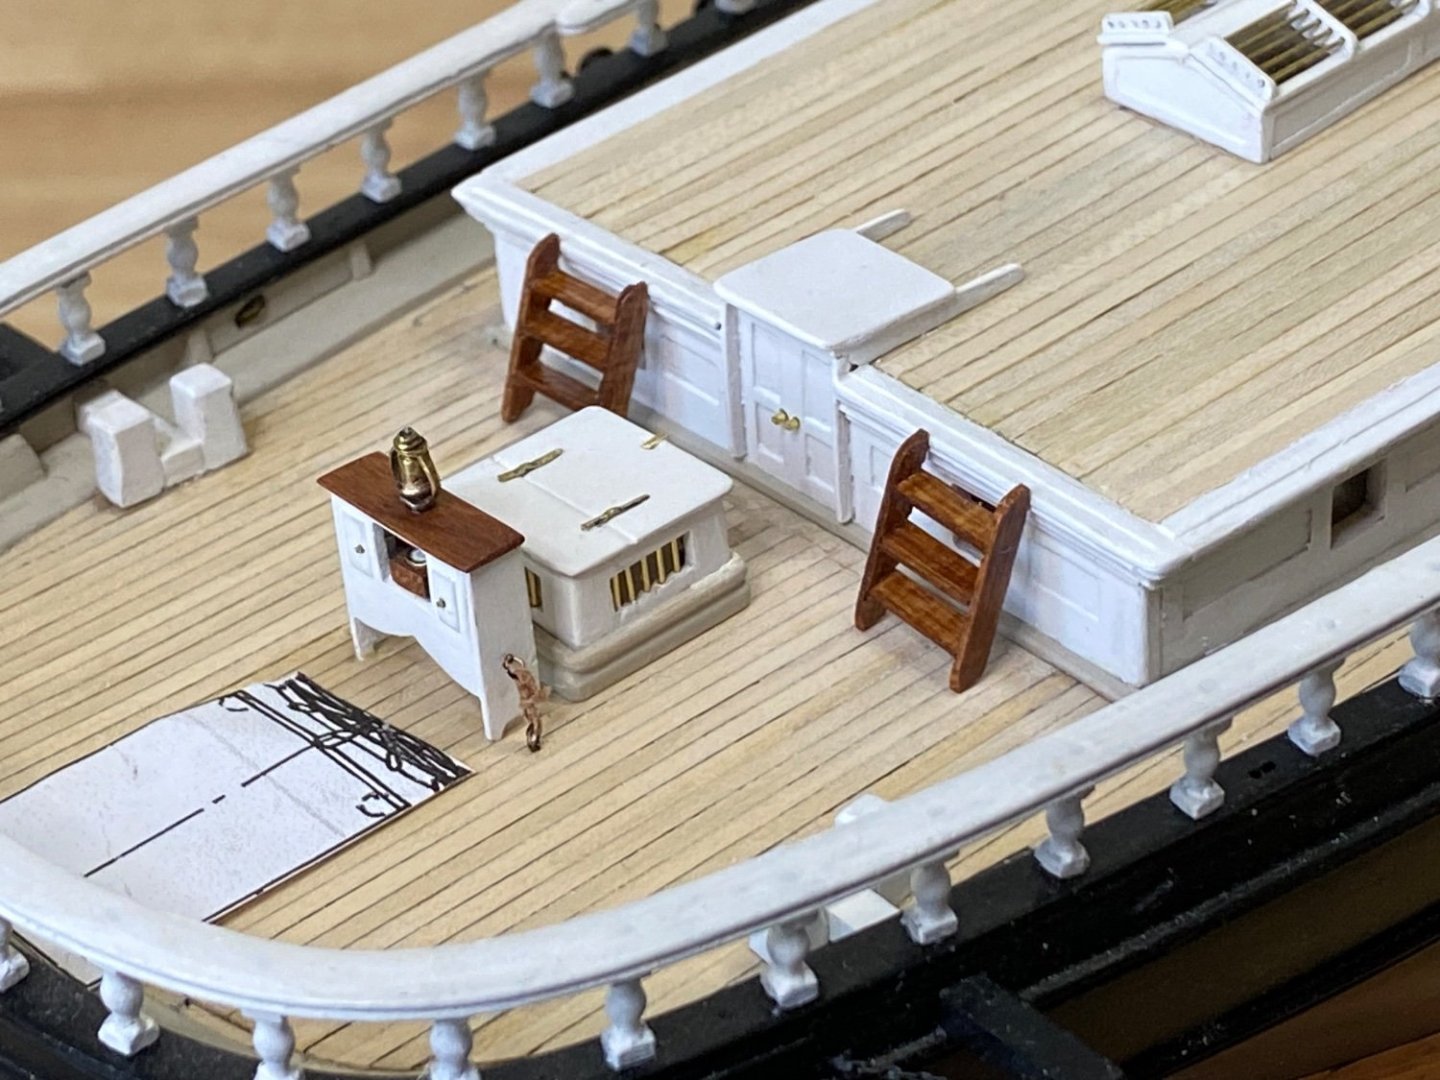
Quick update, shortened the anchor chain and placed the ends in the chain pipes. Finally got the anchor windlass handles out of storage and placed them against the Samson post per Snow Squall and the Cutty Sark. Also placed the ladder to the forecastle.


- 192 replies
-
- 2
-
-
- Flying Fish
- Model Shipways
- (and 1 more)
-
George, I think that as we progress with our models, minute errors creep in, which over time will affect the runs of the various lines. I expect to have the same problem and I intend to rig the forestay like you have it now. I think this is a small detail that few will notice ie the interference with the swing of the fore yard Rick
-
George, the China trade picture clearly shows the forestay going through the lubbers hole and not over the forward edge of the top. The Buttersworth painting seems to confirm this. I have seen on some models where there is a cleat on the aft side of the foremast that elevates the forestay above the shrouds. I don’t know if that causes a problem running the stay through the lubbers hole to the knightheads. For what it’s worth. the model looks great!! Can’t wait to get to where you are!! Rick
-
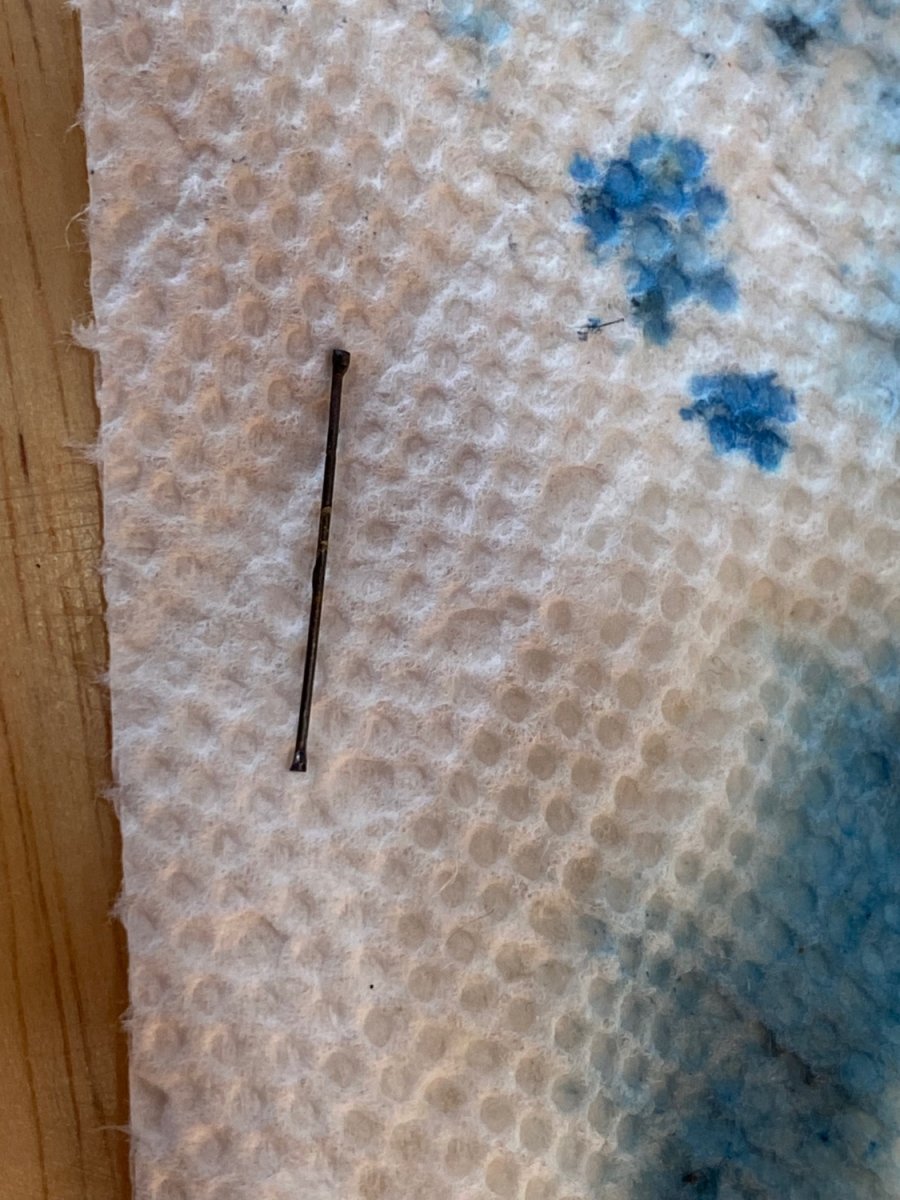
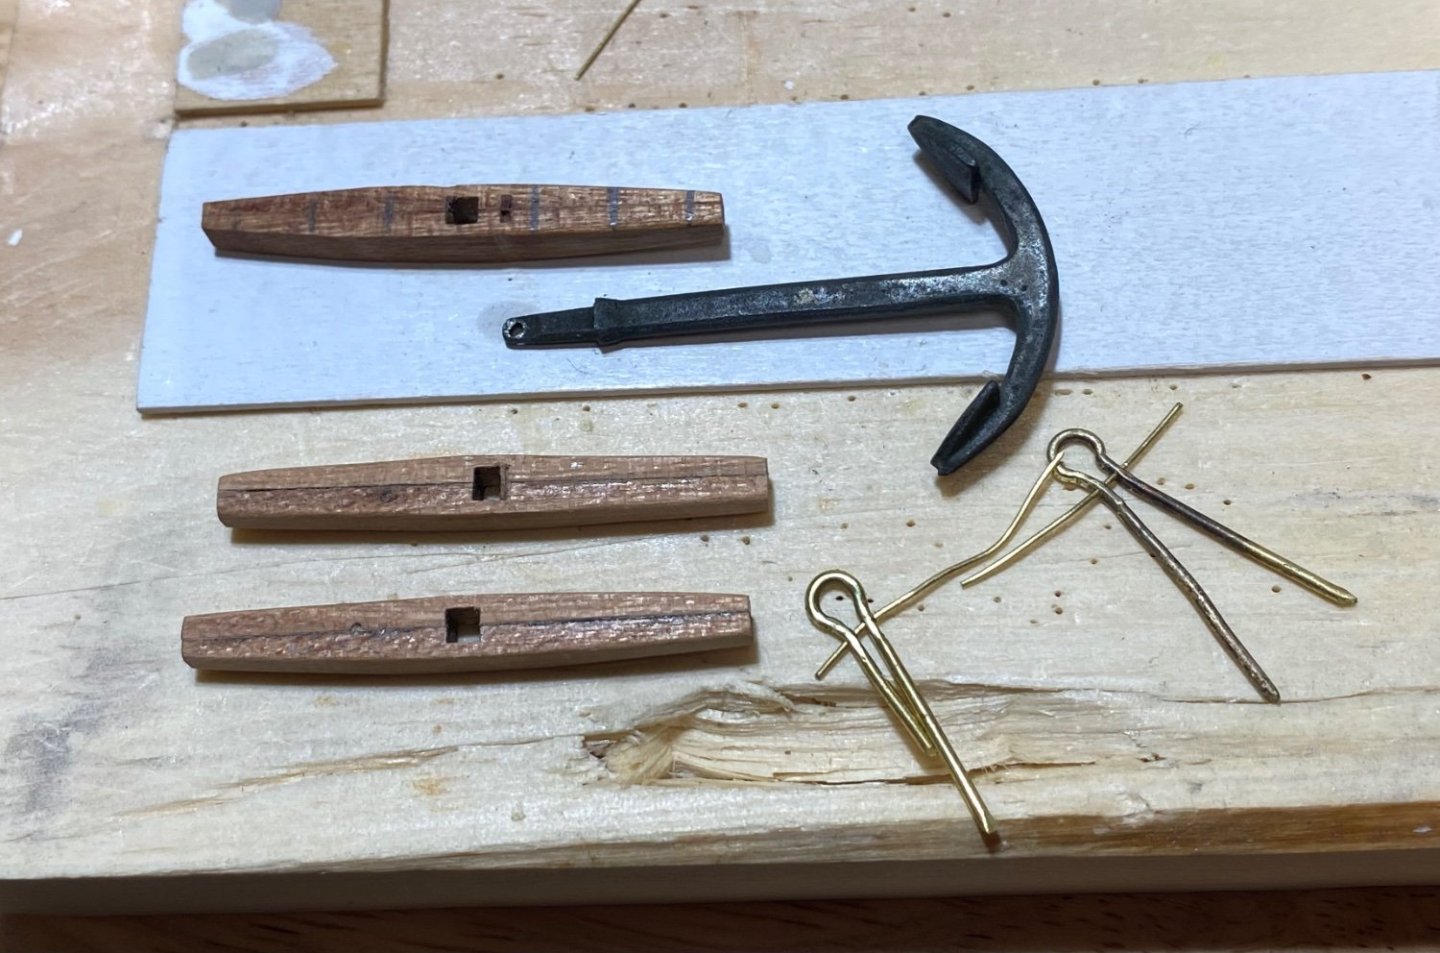
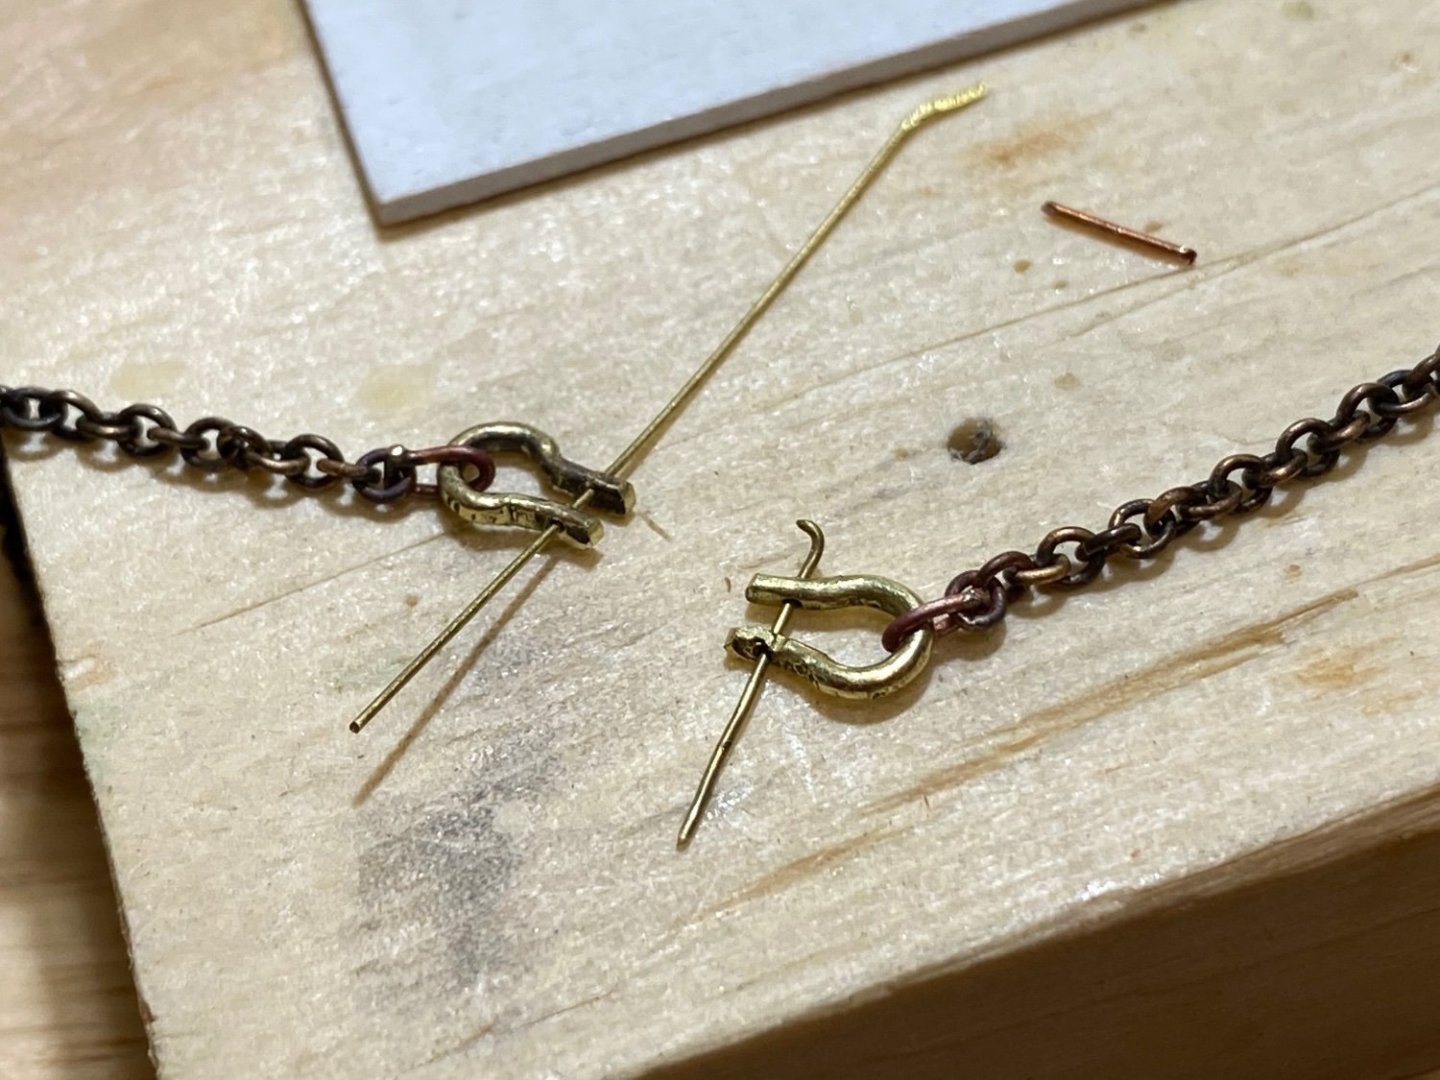
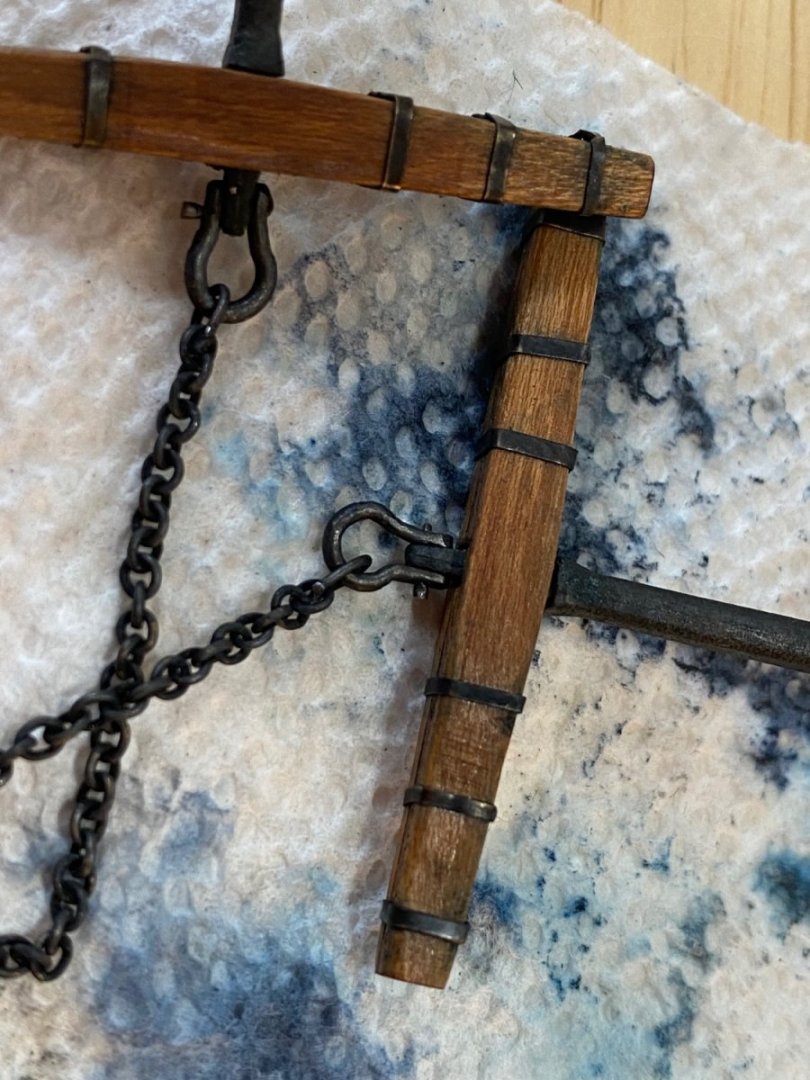
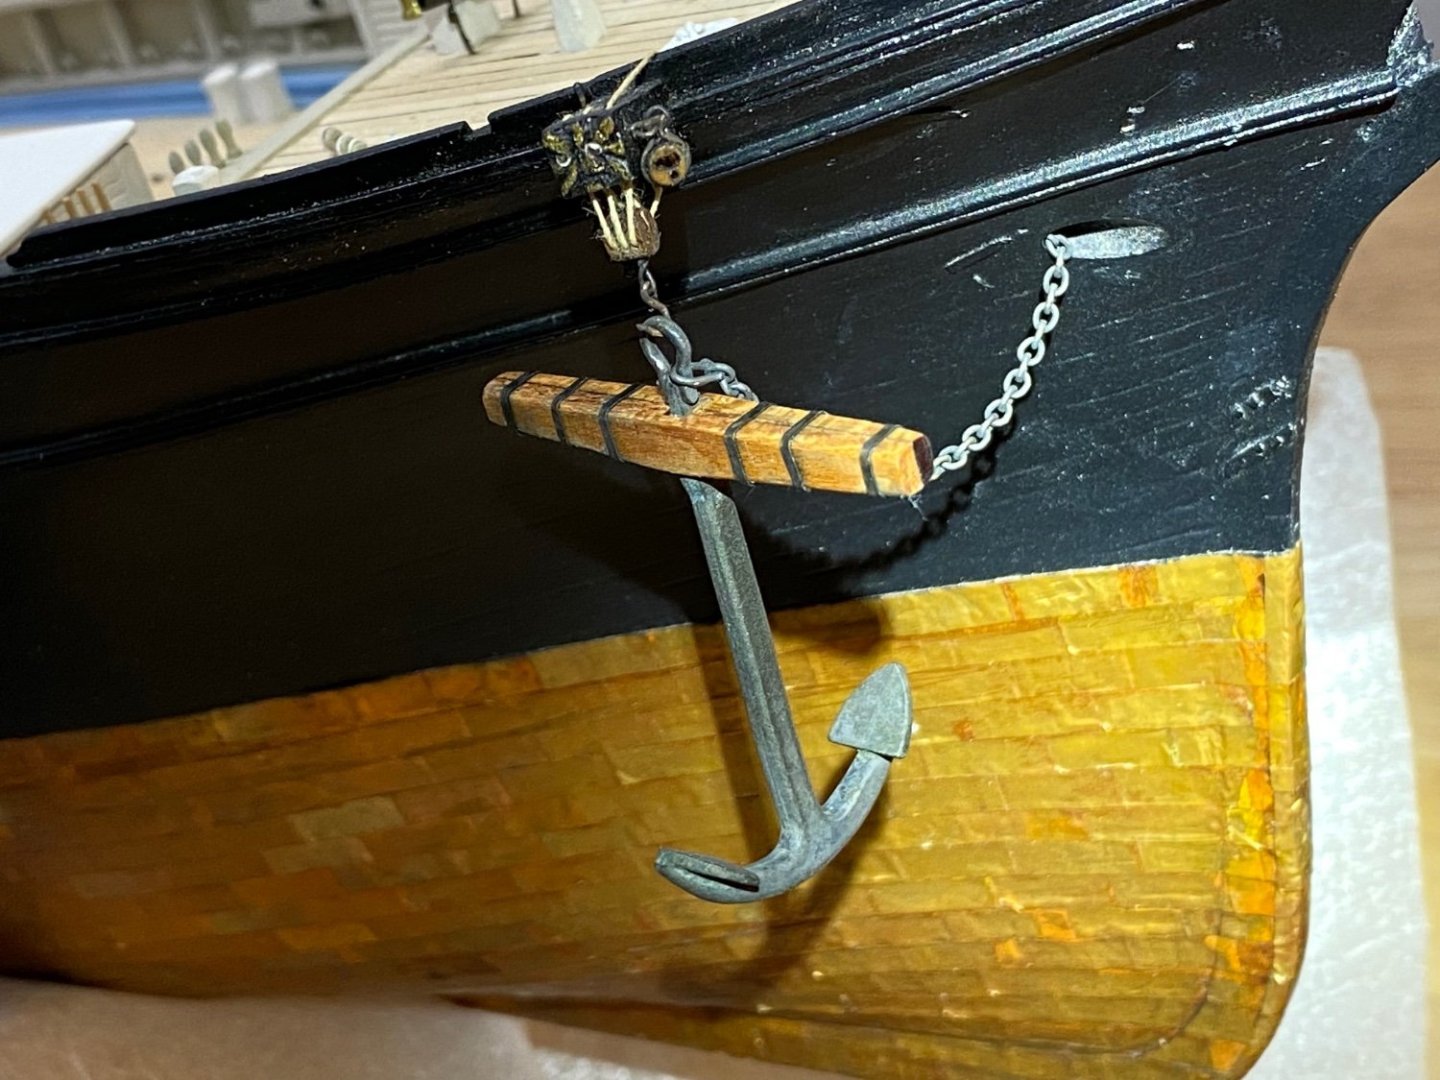
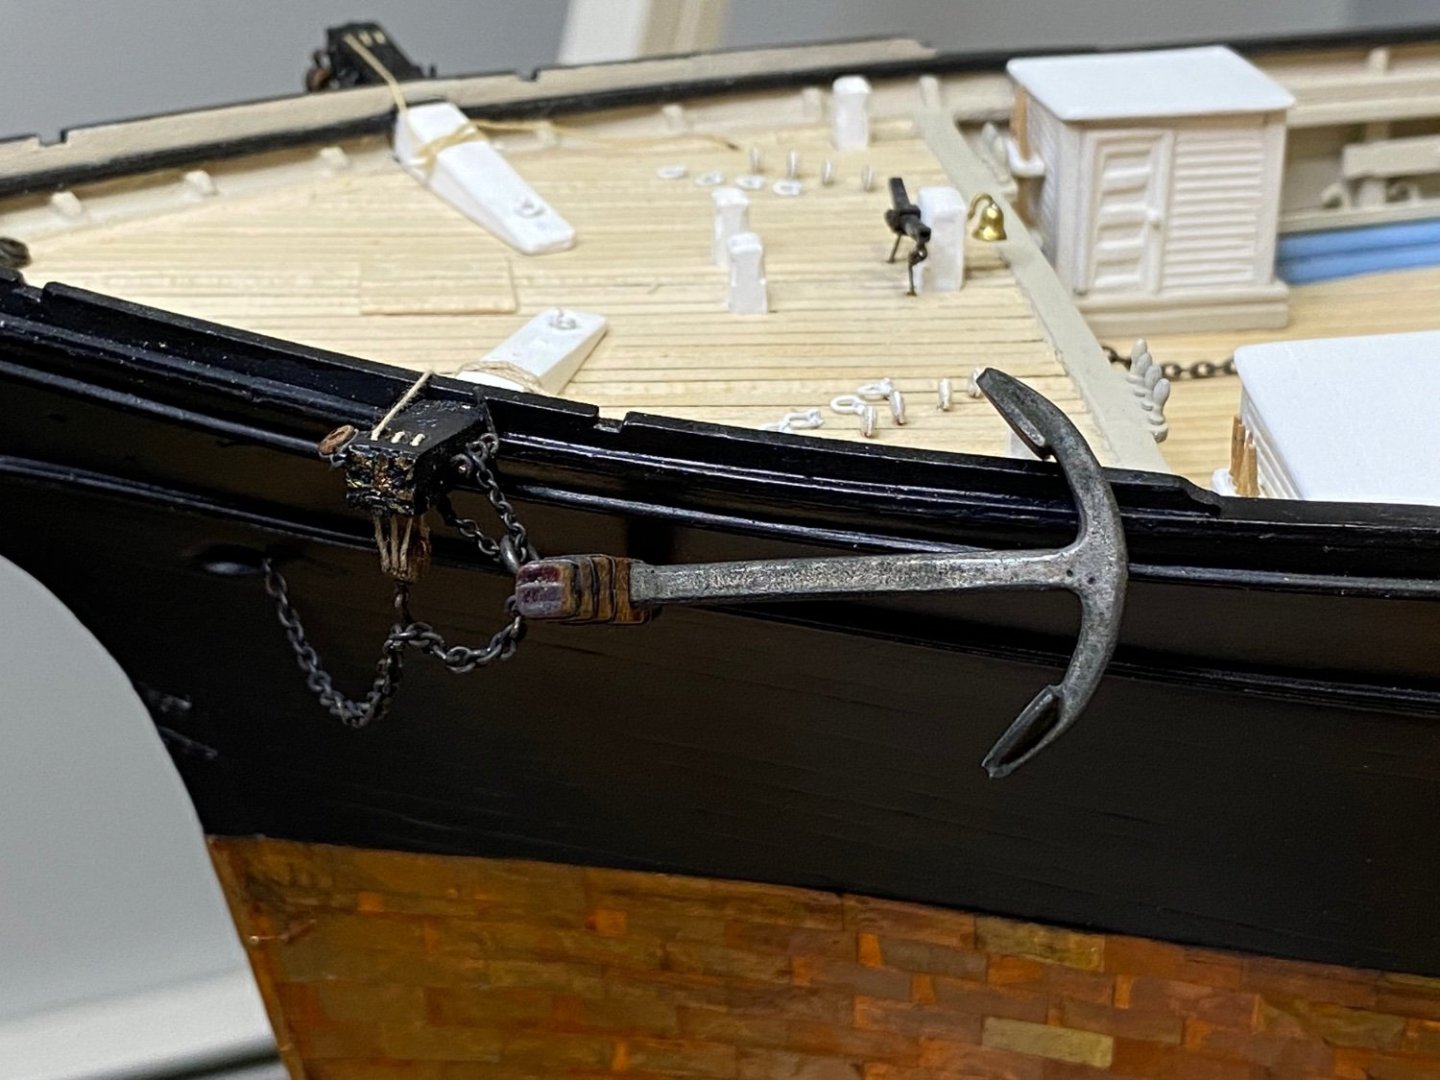
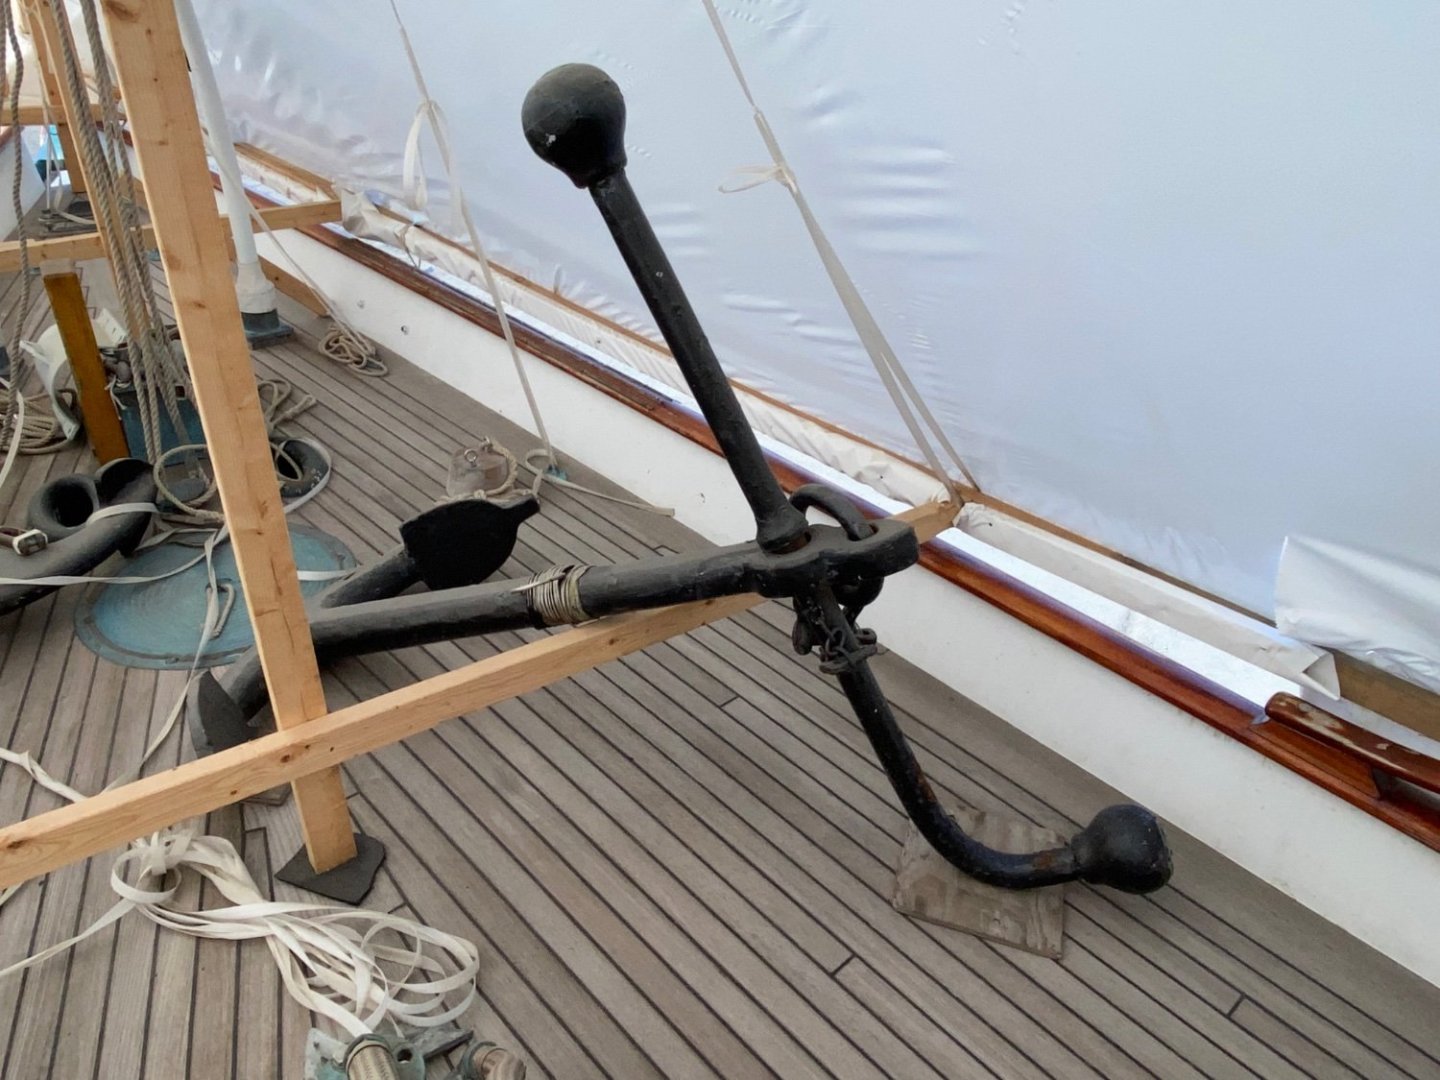
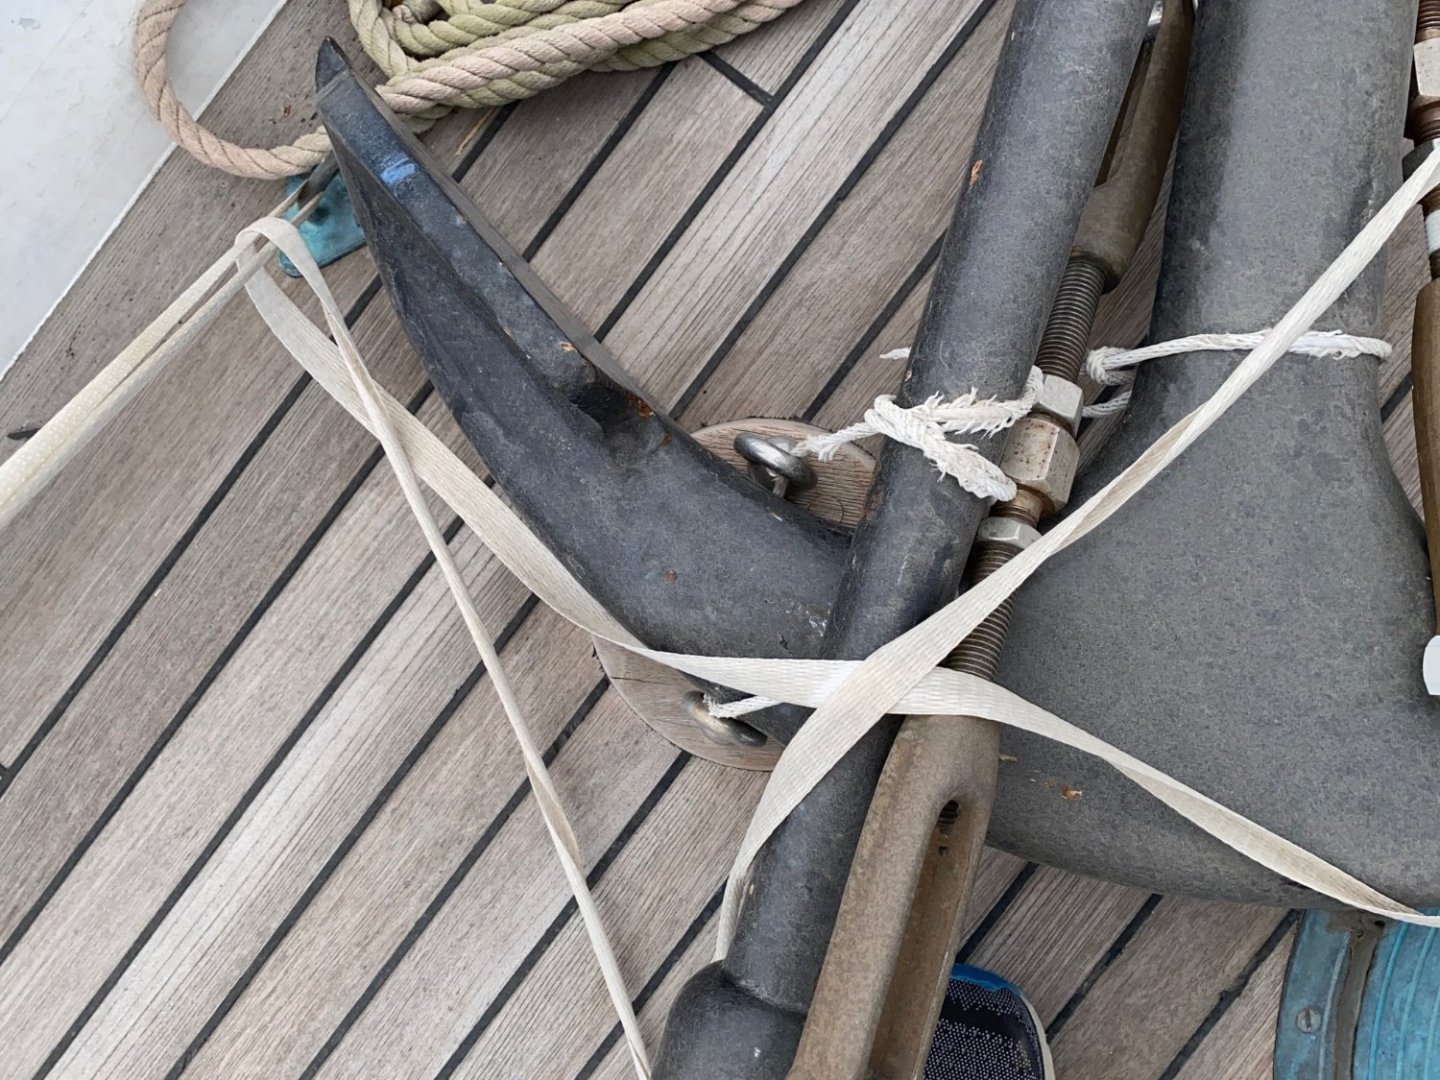
Completed the anchors which I purchased from Bluejacket. The stocks were made from cherry and given a coat of wood sealer. The bands on the stocks were made from.005 brass cut to 1/32 inches width. I wanted to use copper, but couldn’t find any sheets at .005 inches, either locally or on the internet. These were bent around the stocks, soldered and pushed into place, being held there by the tight fit. These and the anchor ( which had already been blackened), were blackened with brass black from Bluejacket. The shackles were made from 18 (?) gauge brass wire that came with the kit. The ends were hammered flat and drilled with a #75 drill bit. The bolts are .02 gauge brass rod that I soldered both ends and then filled to make the heads of the bolts. This was in lieu of using a tap and die which I don’t possess and have never used. These were also blackened and when the bolts were inserted through the shackles and the eye of the anchor, the others end (I had cut the bolt in half to get 2 bolts) was bent over and clipped off. The anchor chain was then threaded under the forecastle and around the anchor windlass per EdT and YA and taken to the chain pipes. The pipes were made from brass tubes, cut on the table saw and soldered together. I decided to paint the pipes pearl gray as opposed to blackening them. The chains still need to be shortened and glued into place. I mounted the starboard anchor on the cat block and the port anchor on the anchor release chain. It will be secured on the rail and lashed to the mooring bit. I have the cat block holding the anchor chain, which I saw somewhere on another model ship and I liked the look.


- 192 replies
-
- 5
-
-

-
- Flying Fish
- Model Shipways
- (and 1 more)
-
Keith,, those were all the photos. I know they are a bit confusing, I’ll try and explain as best I can if you have any questions. I was somewhat rushed as I was on board with the president of Front Street Shipyard and didn’t want to overstay my welcome, He was extremely generous with his time as he is very busy especially at this time of the year. Rick
-
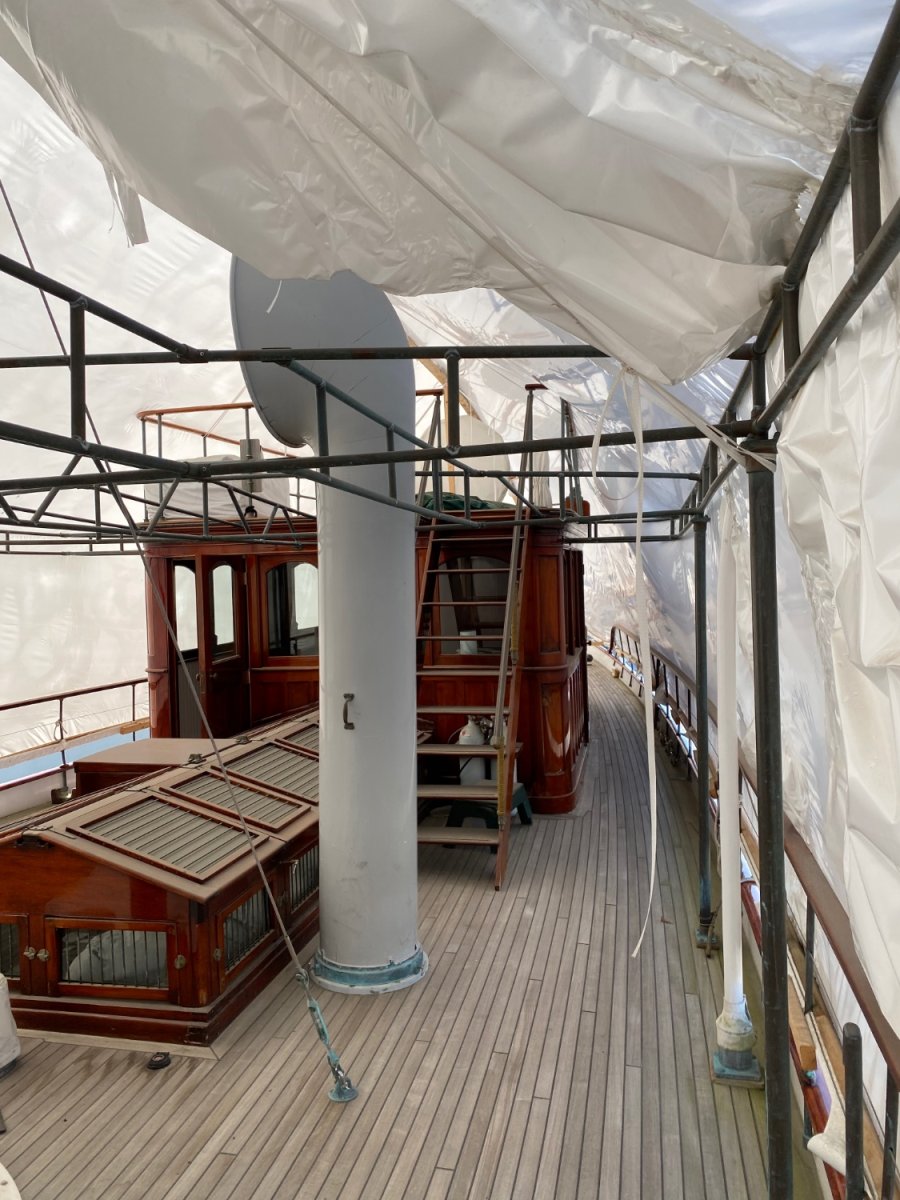
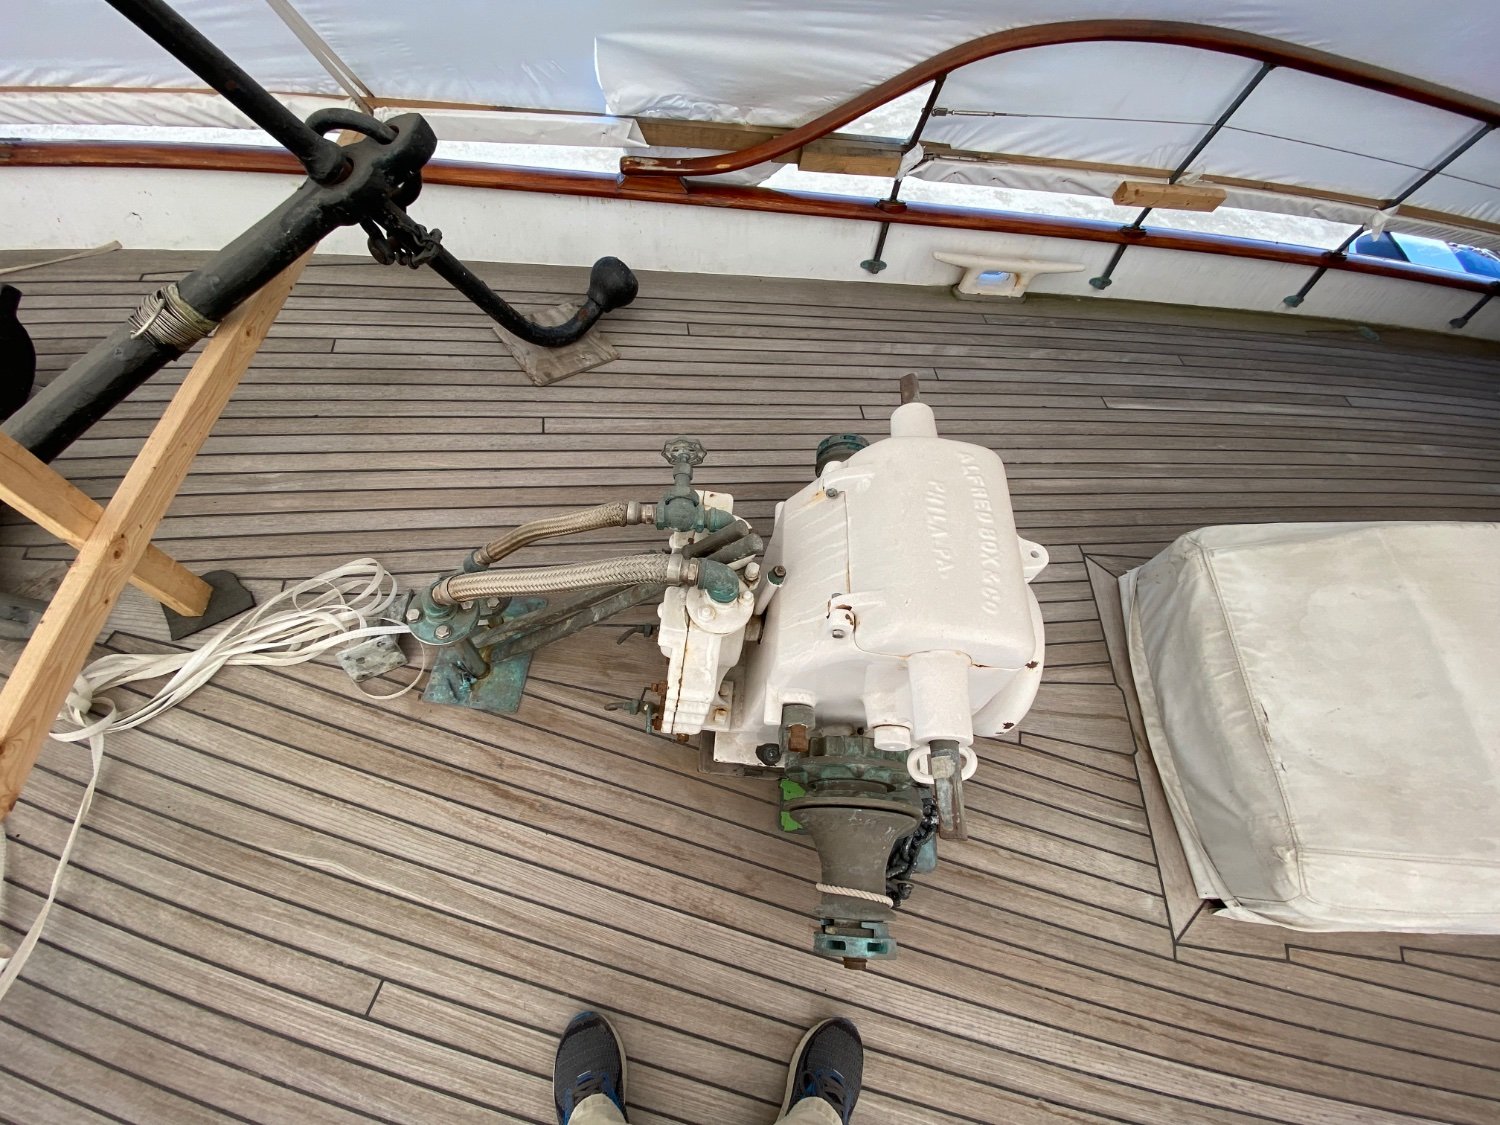
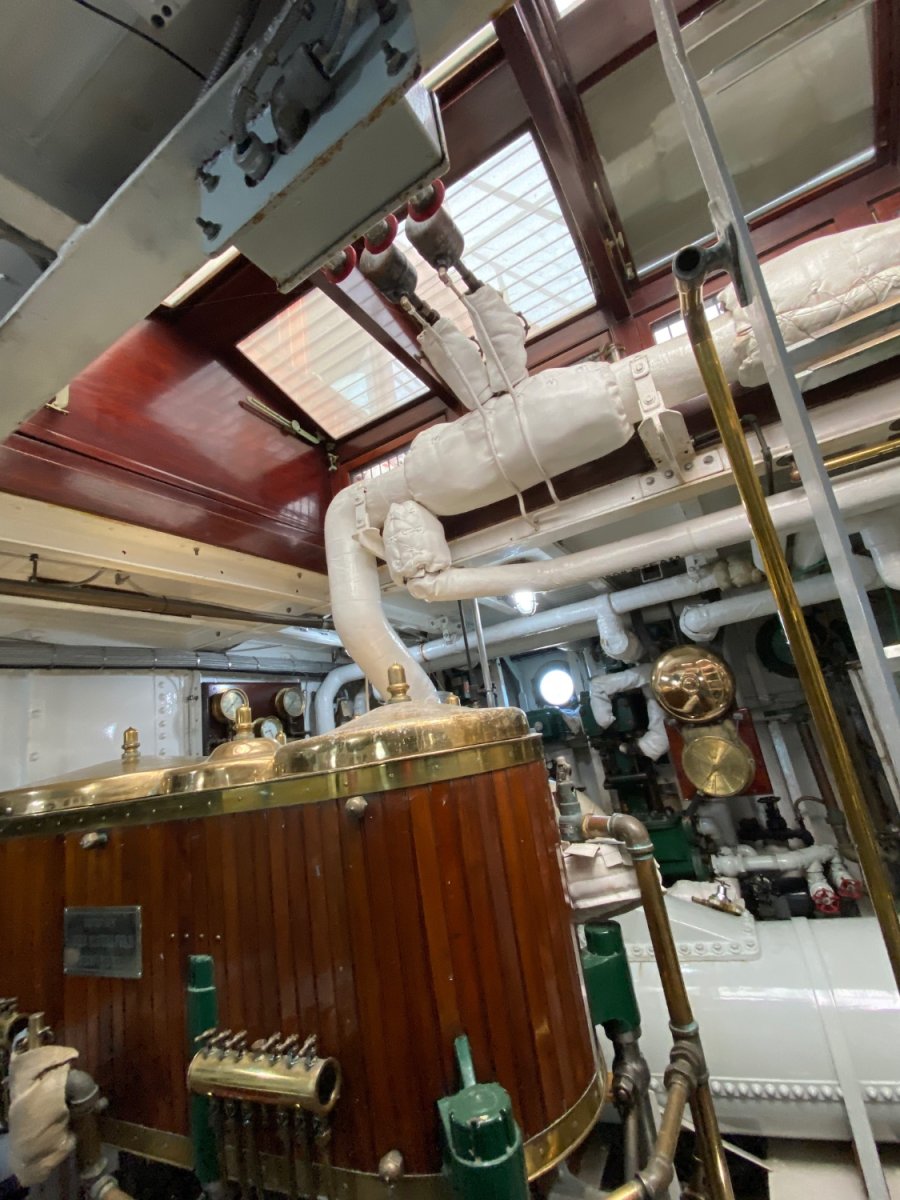
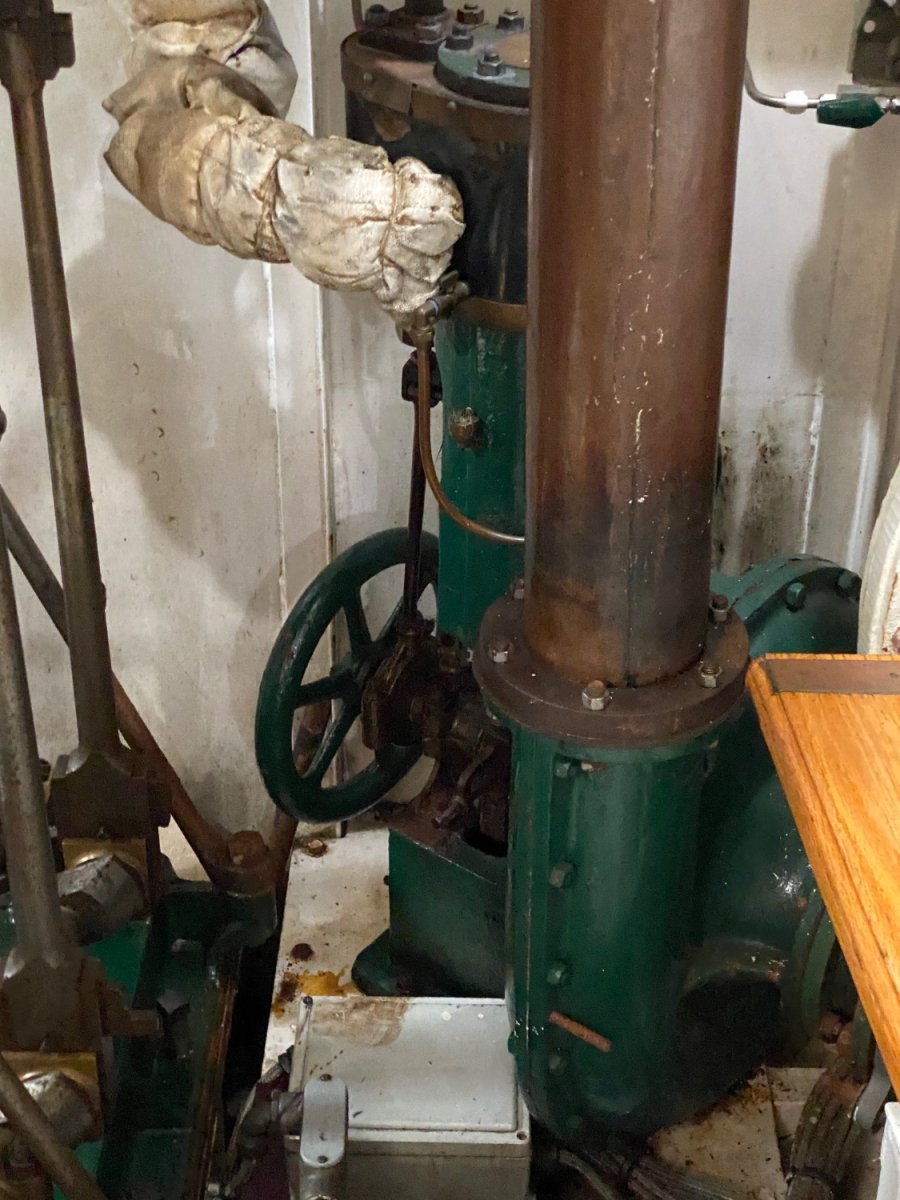
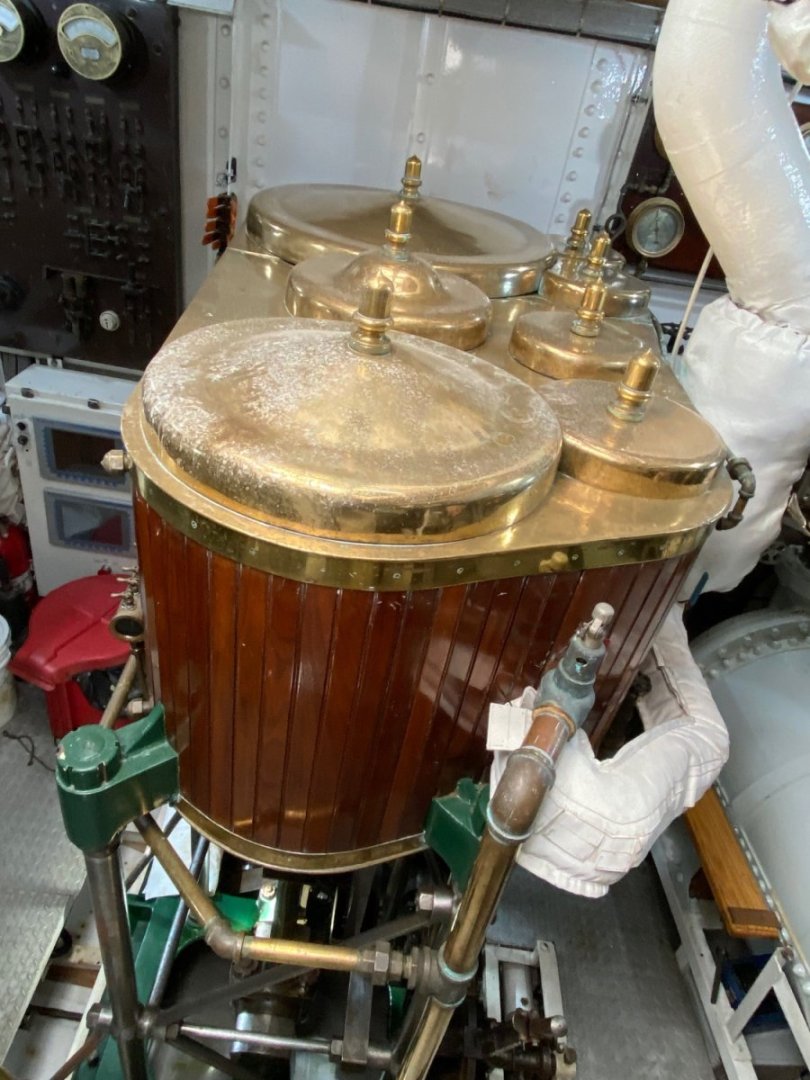
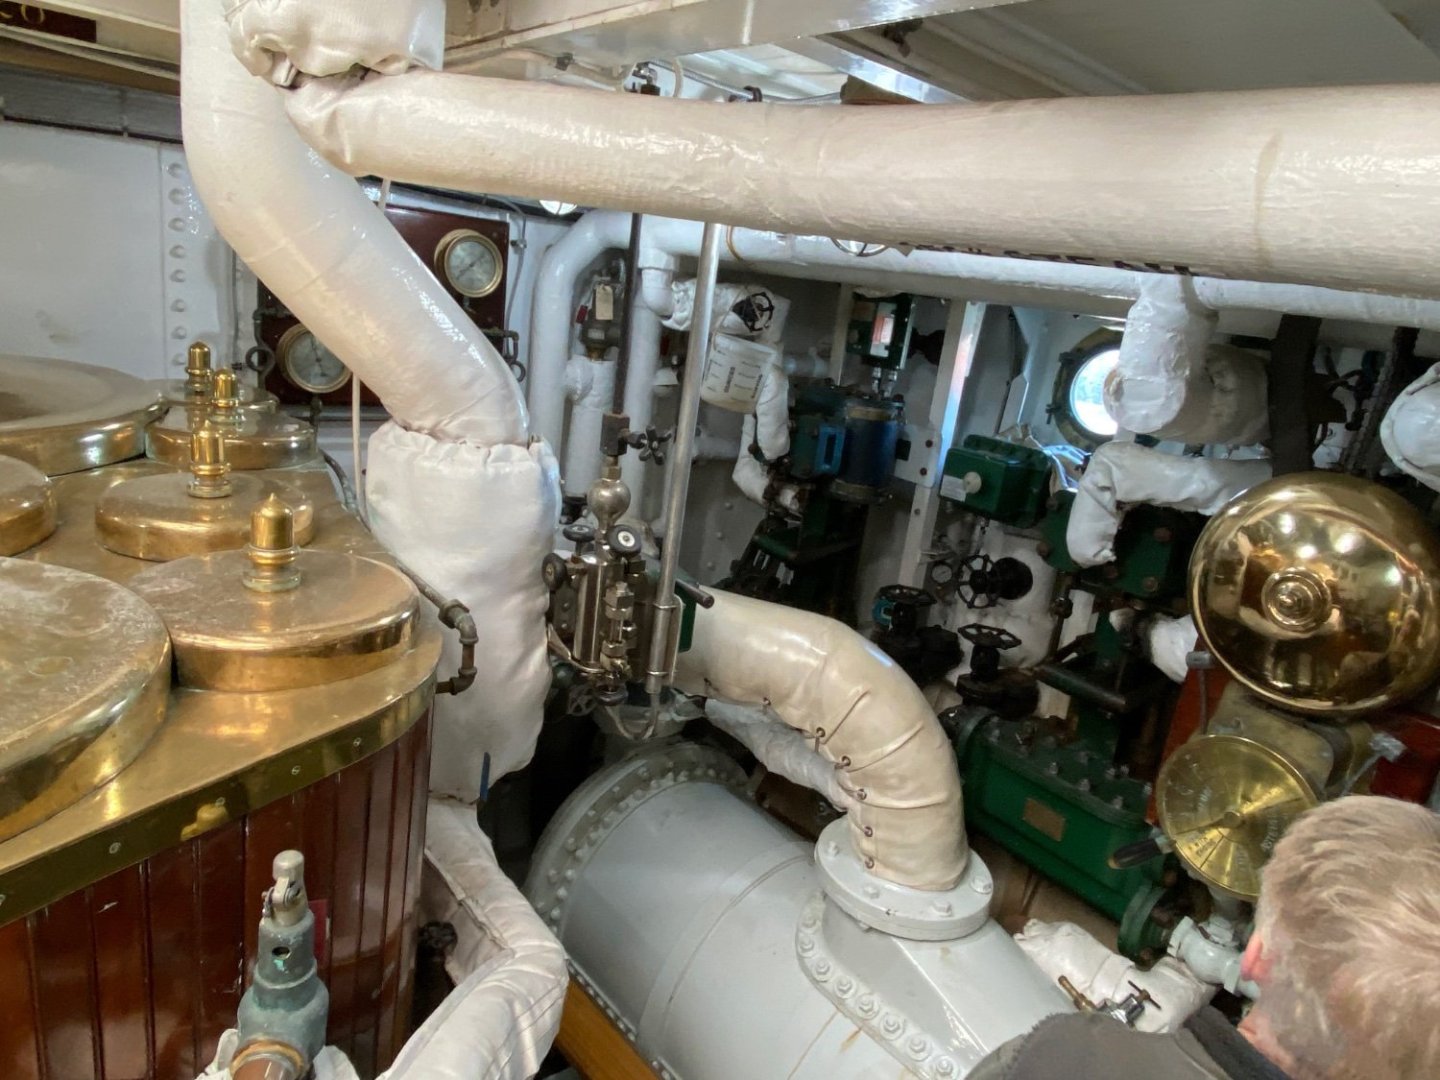
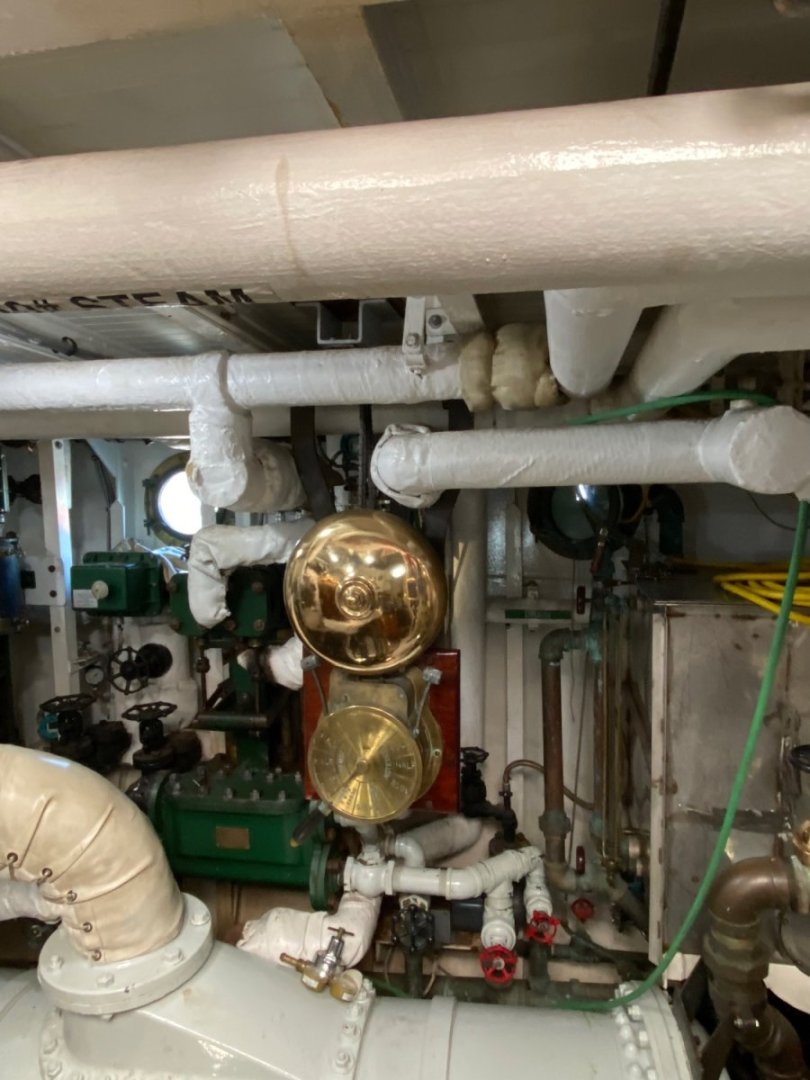
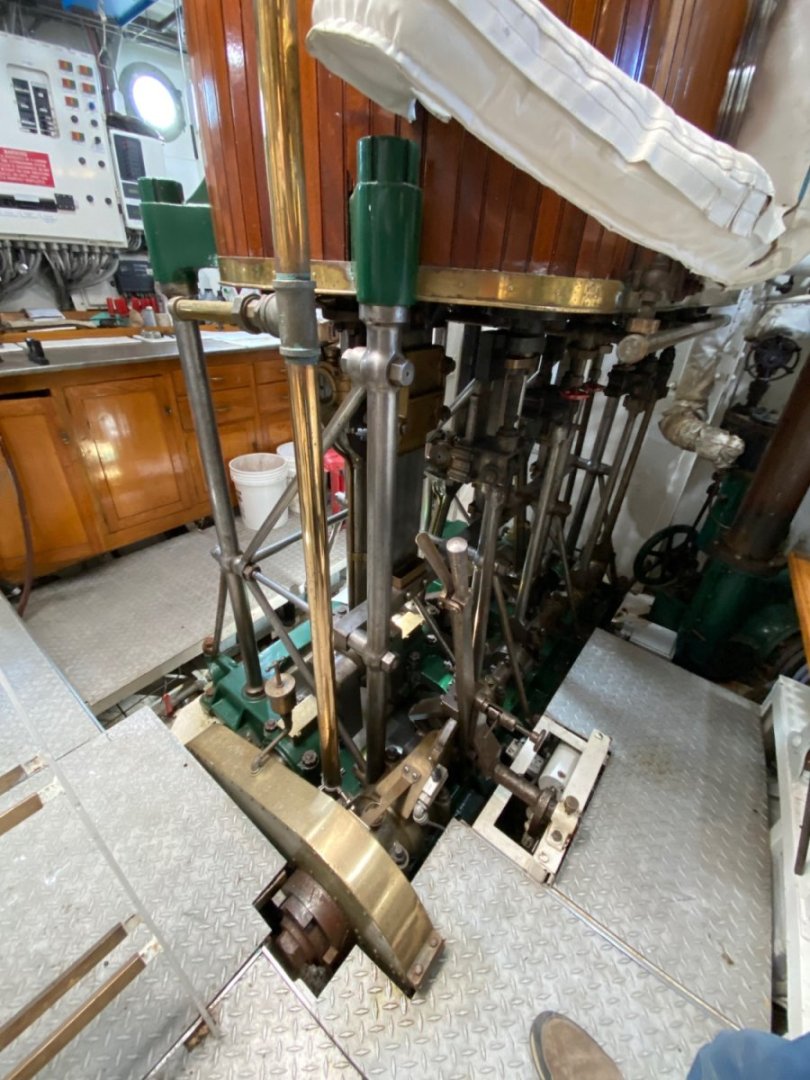
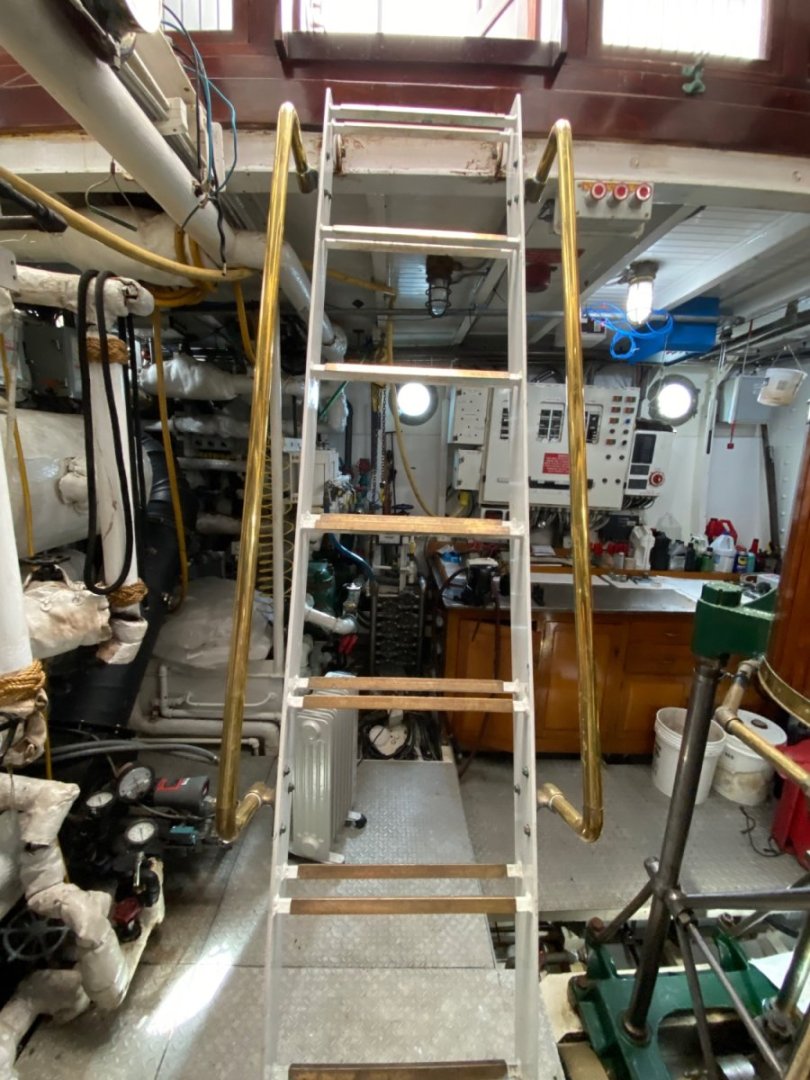
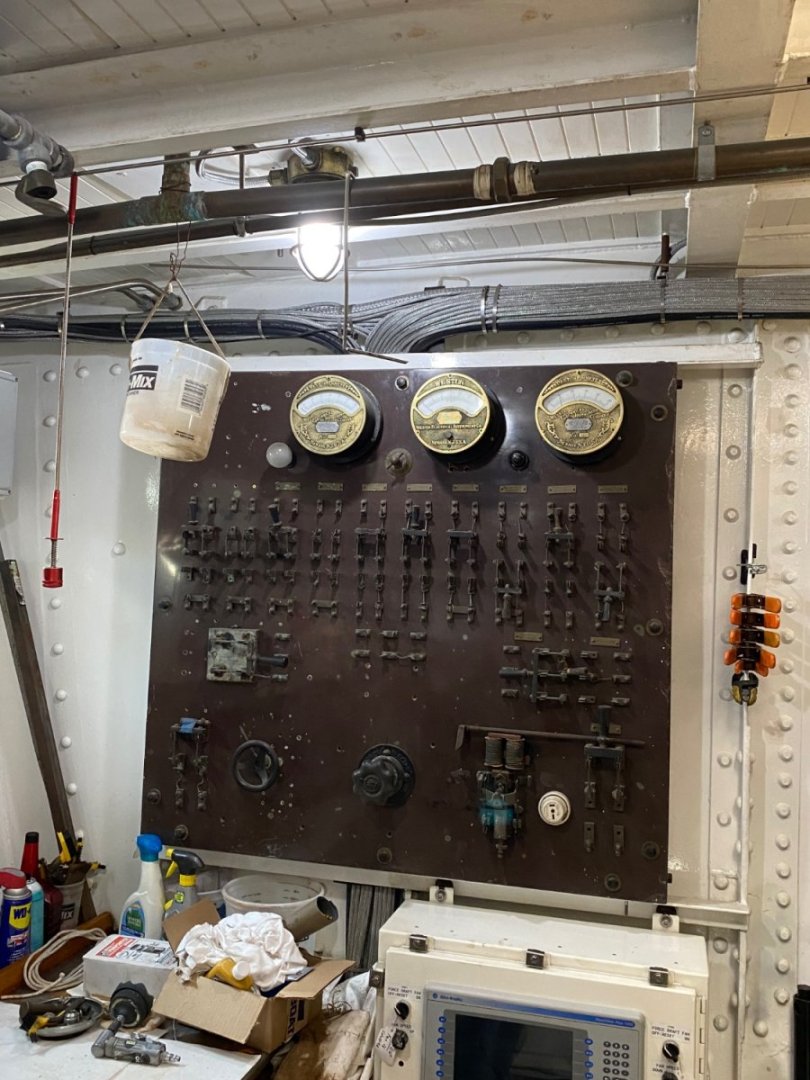
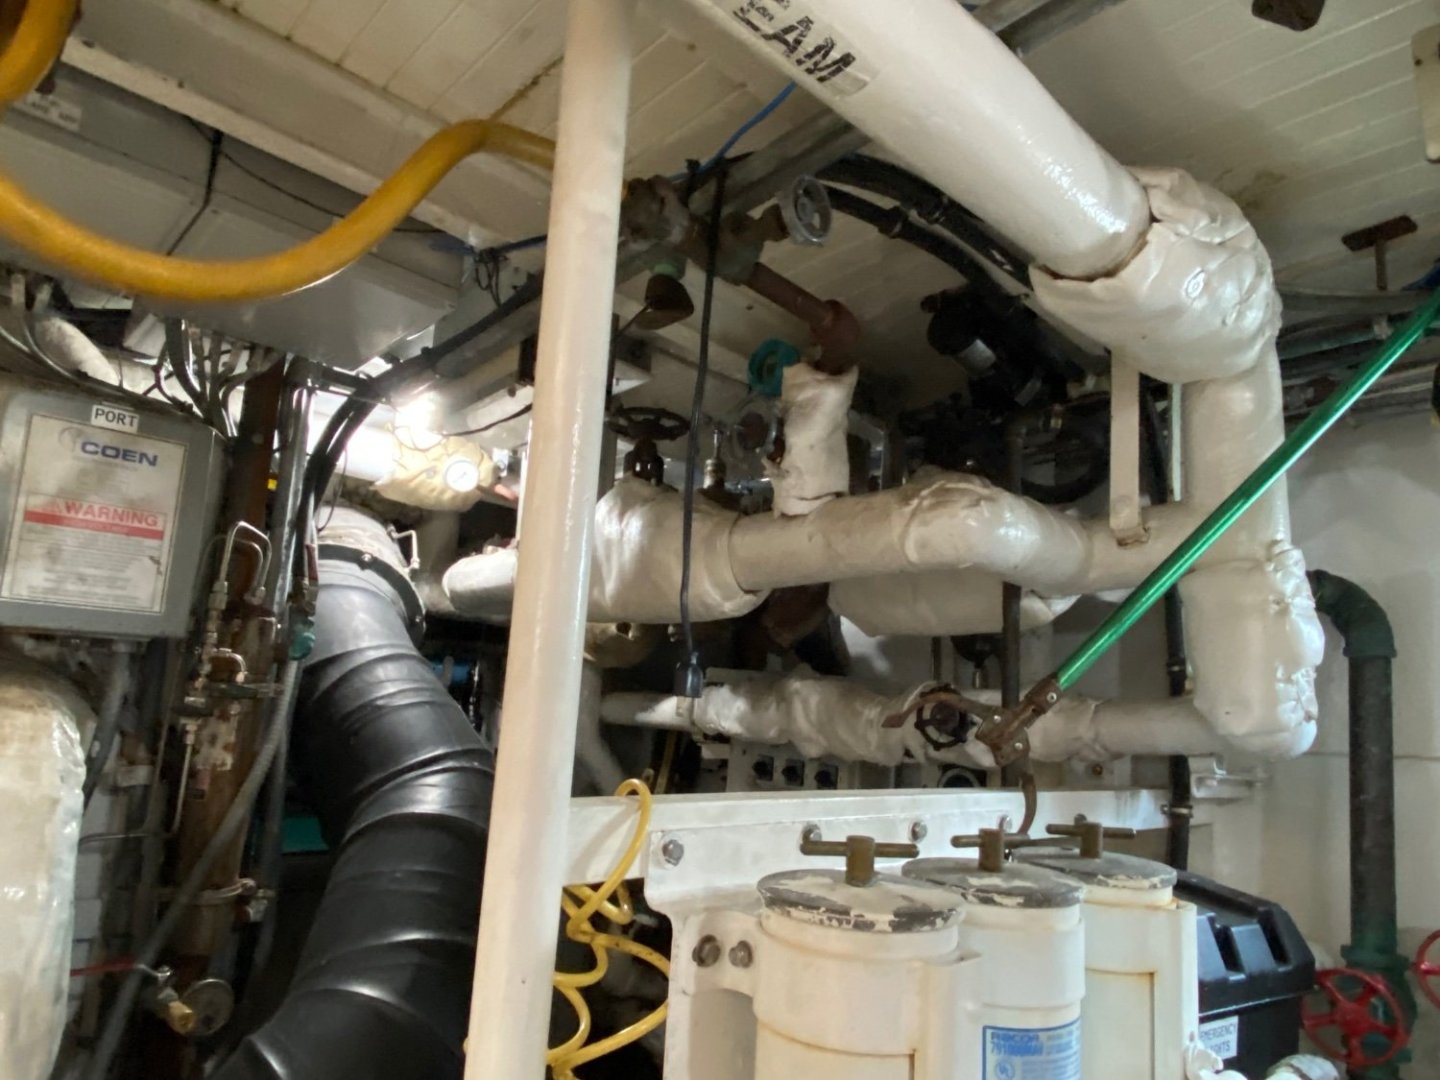
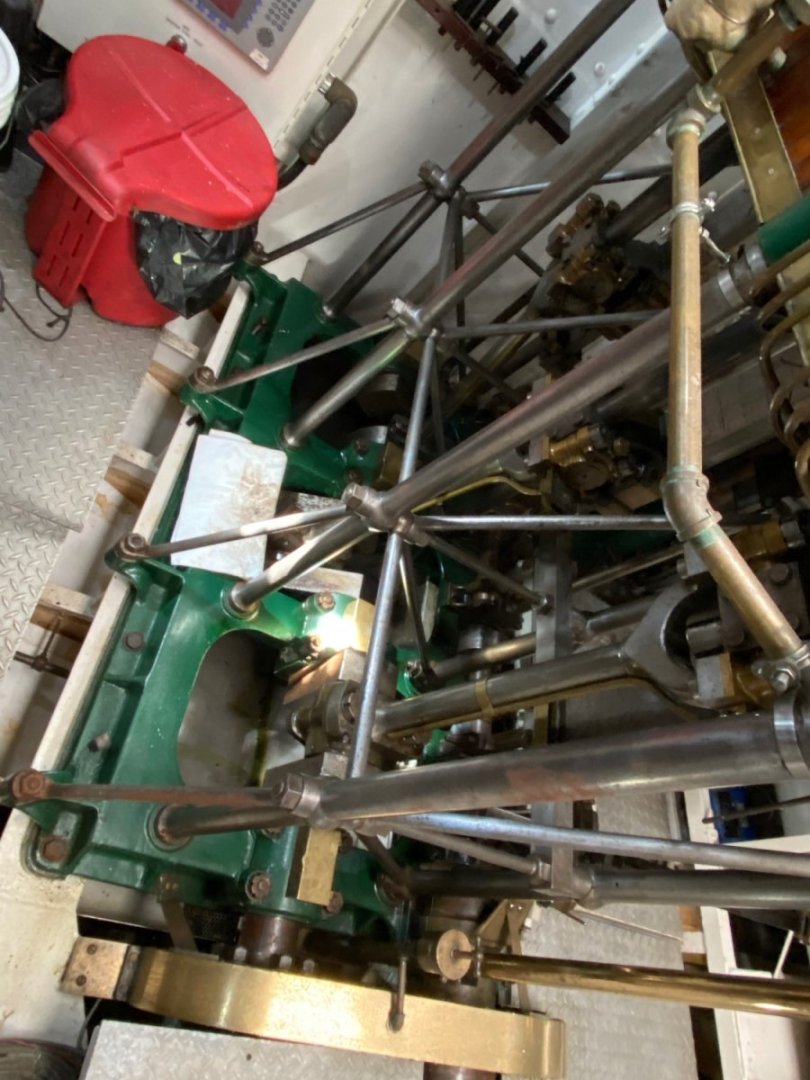
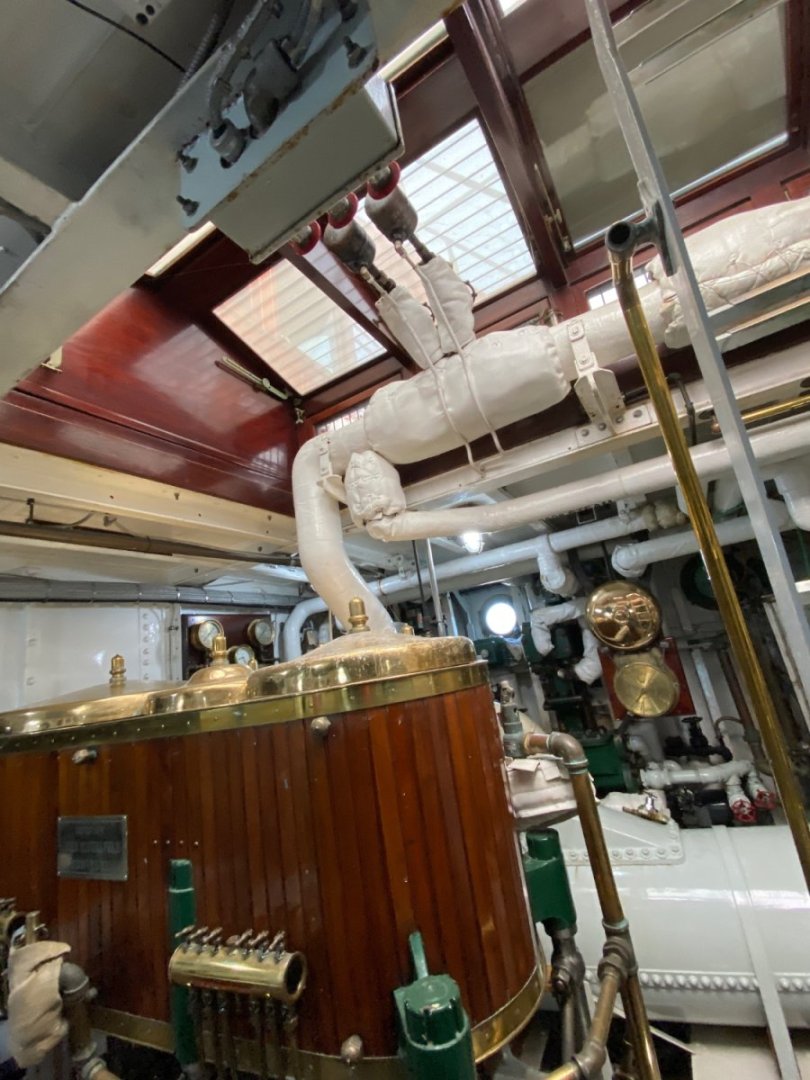
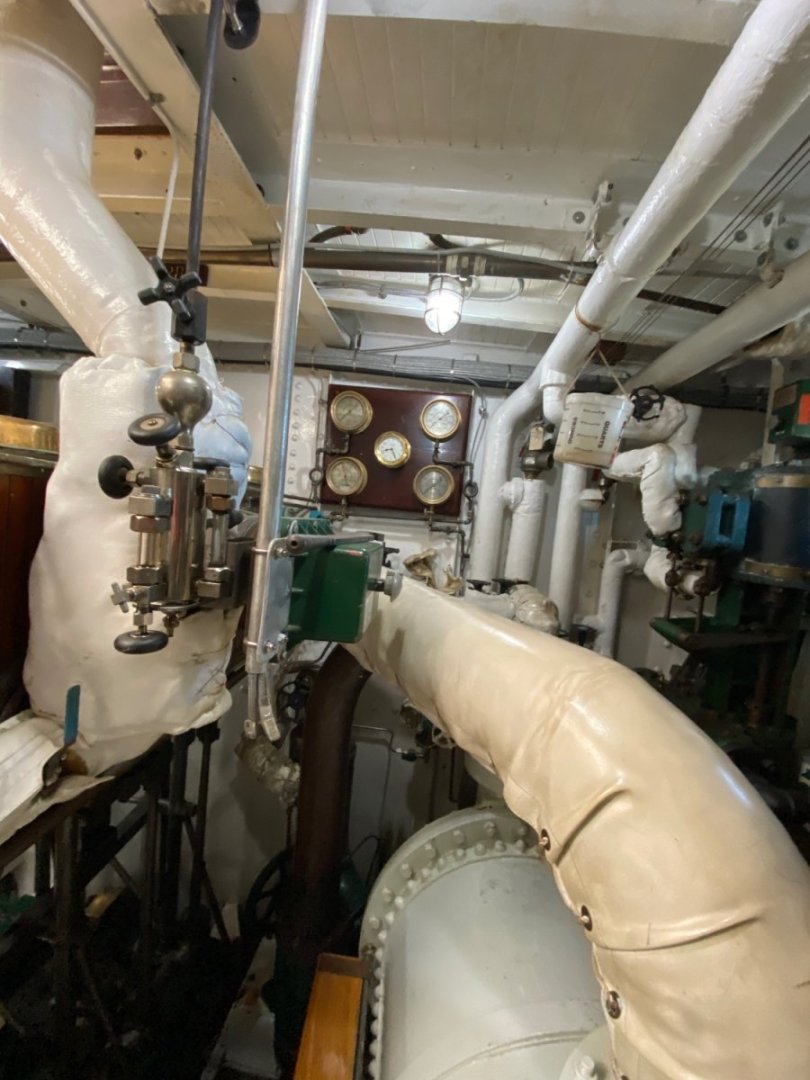
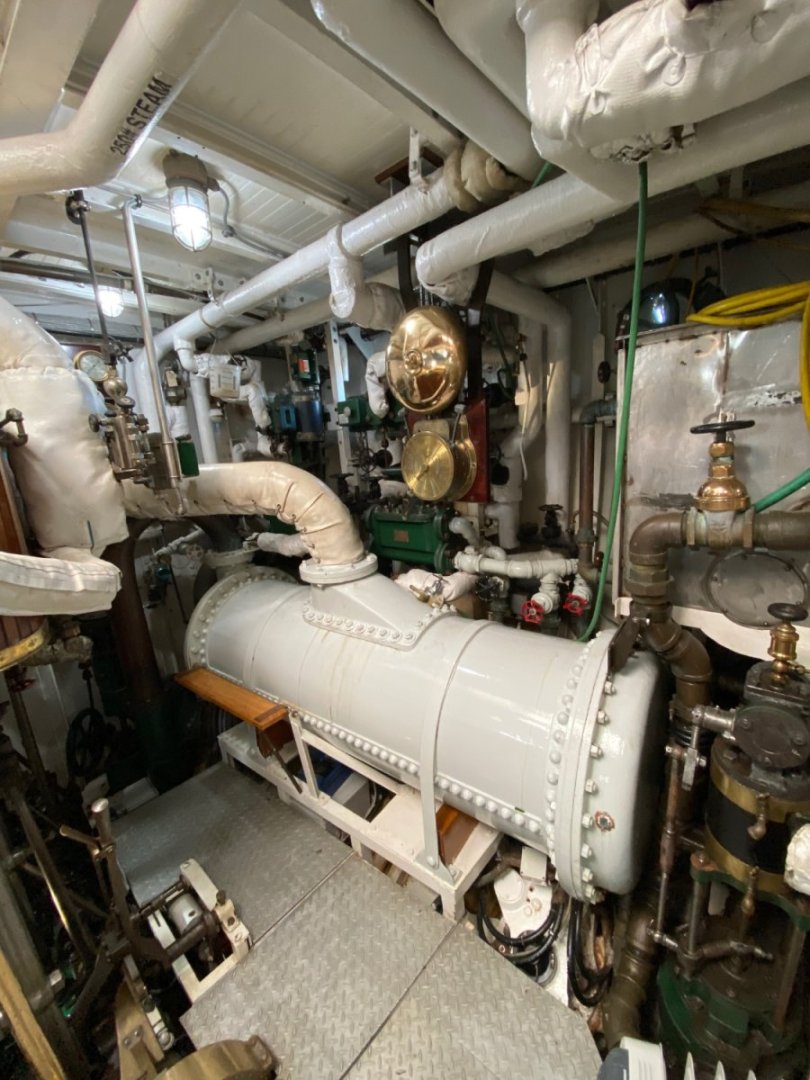
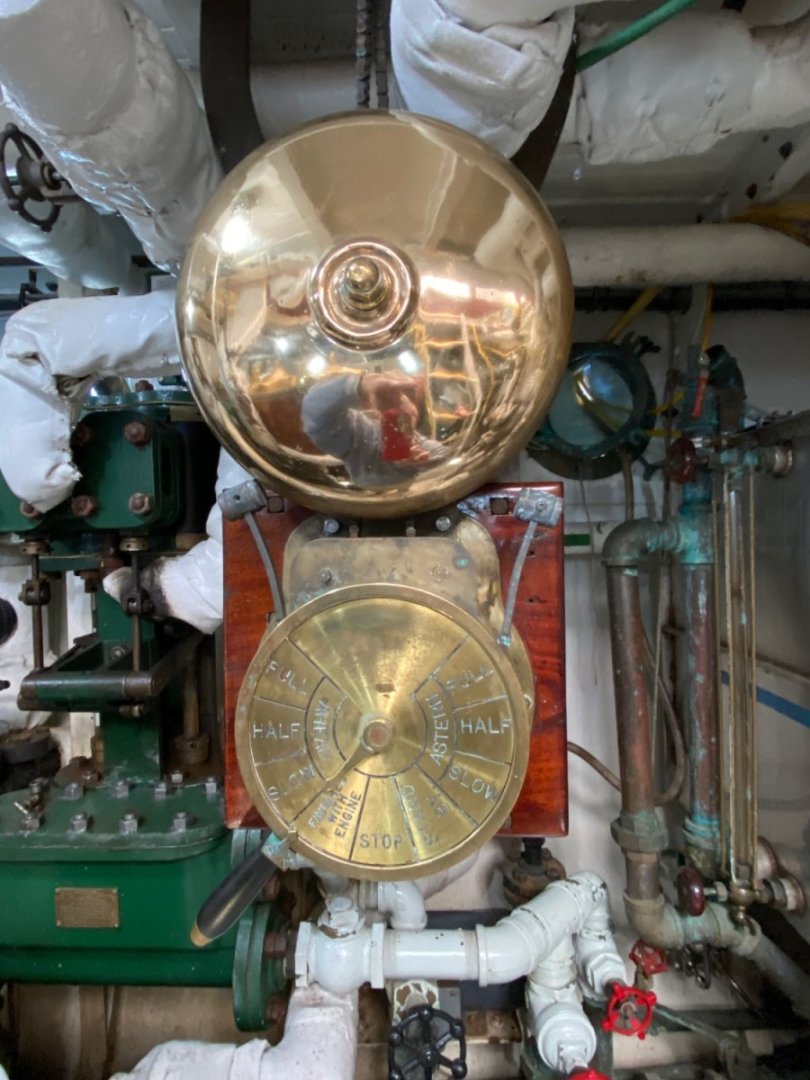
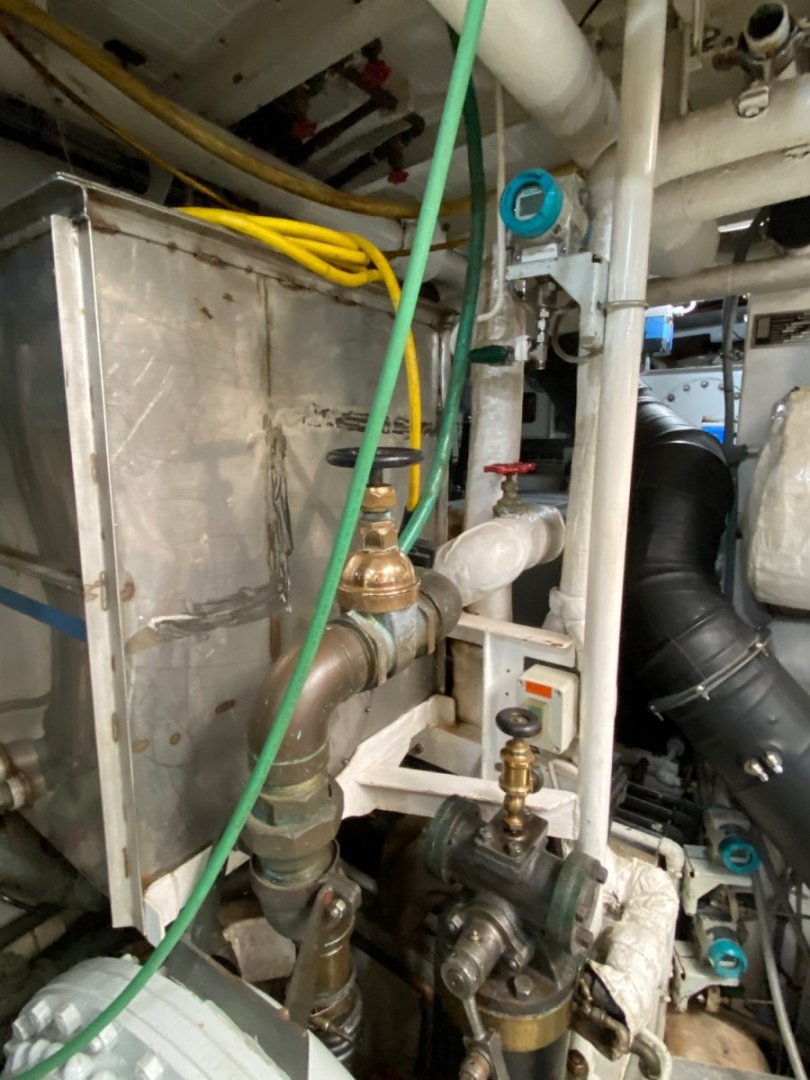
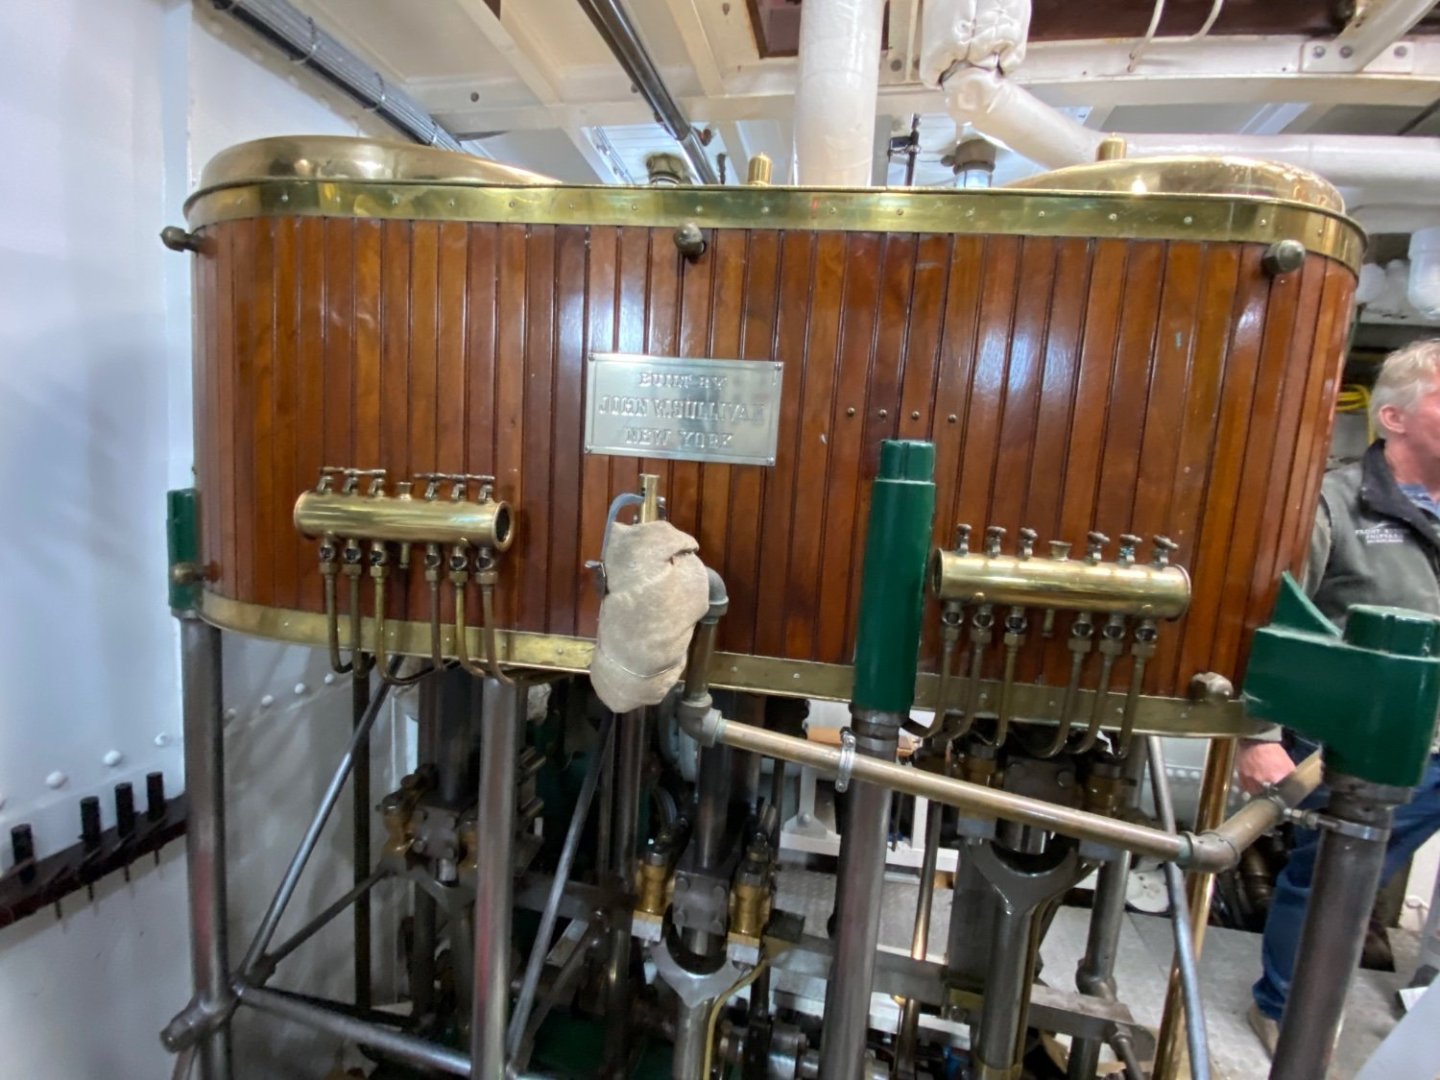
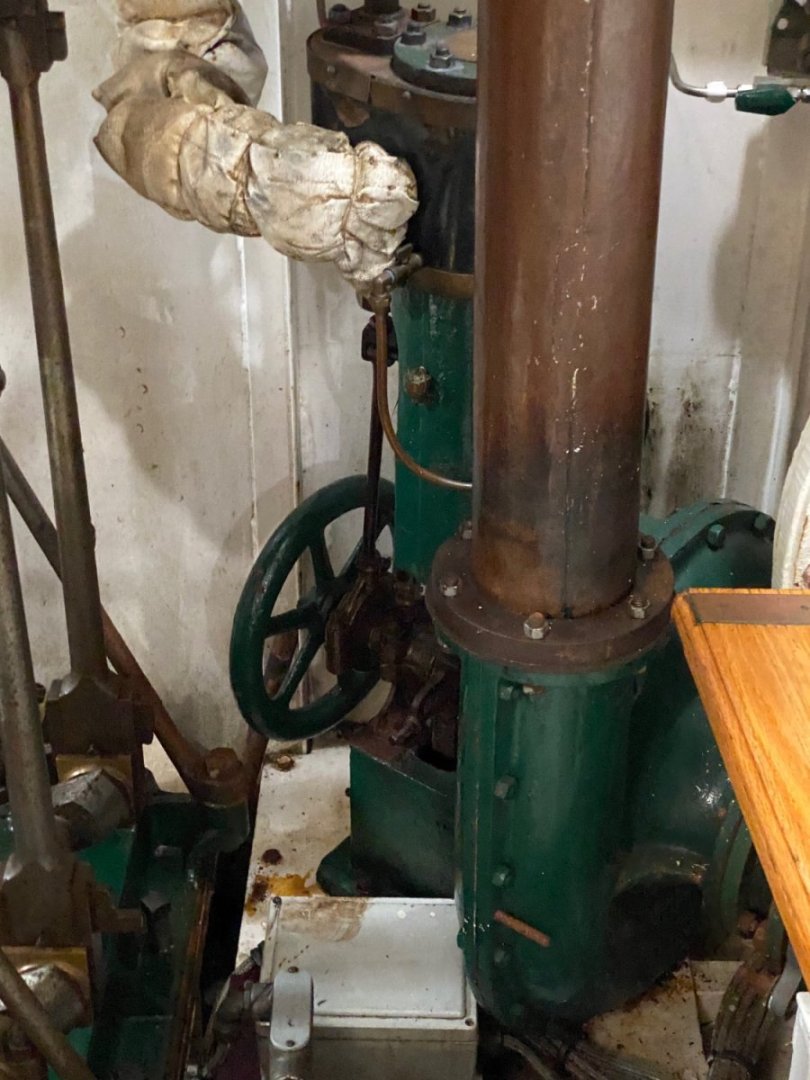
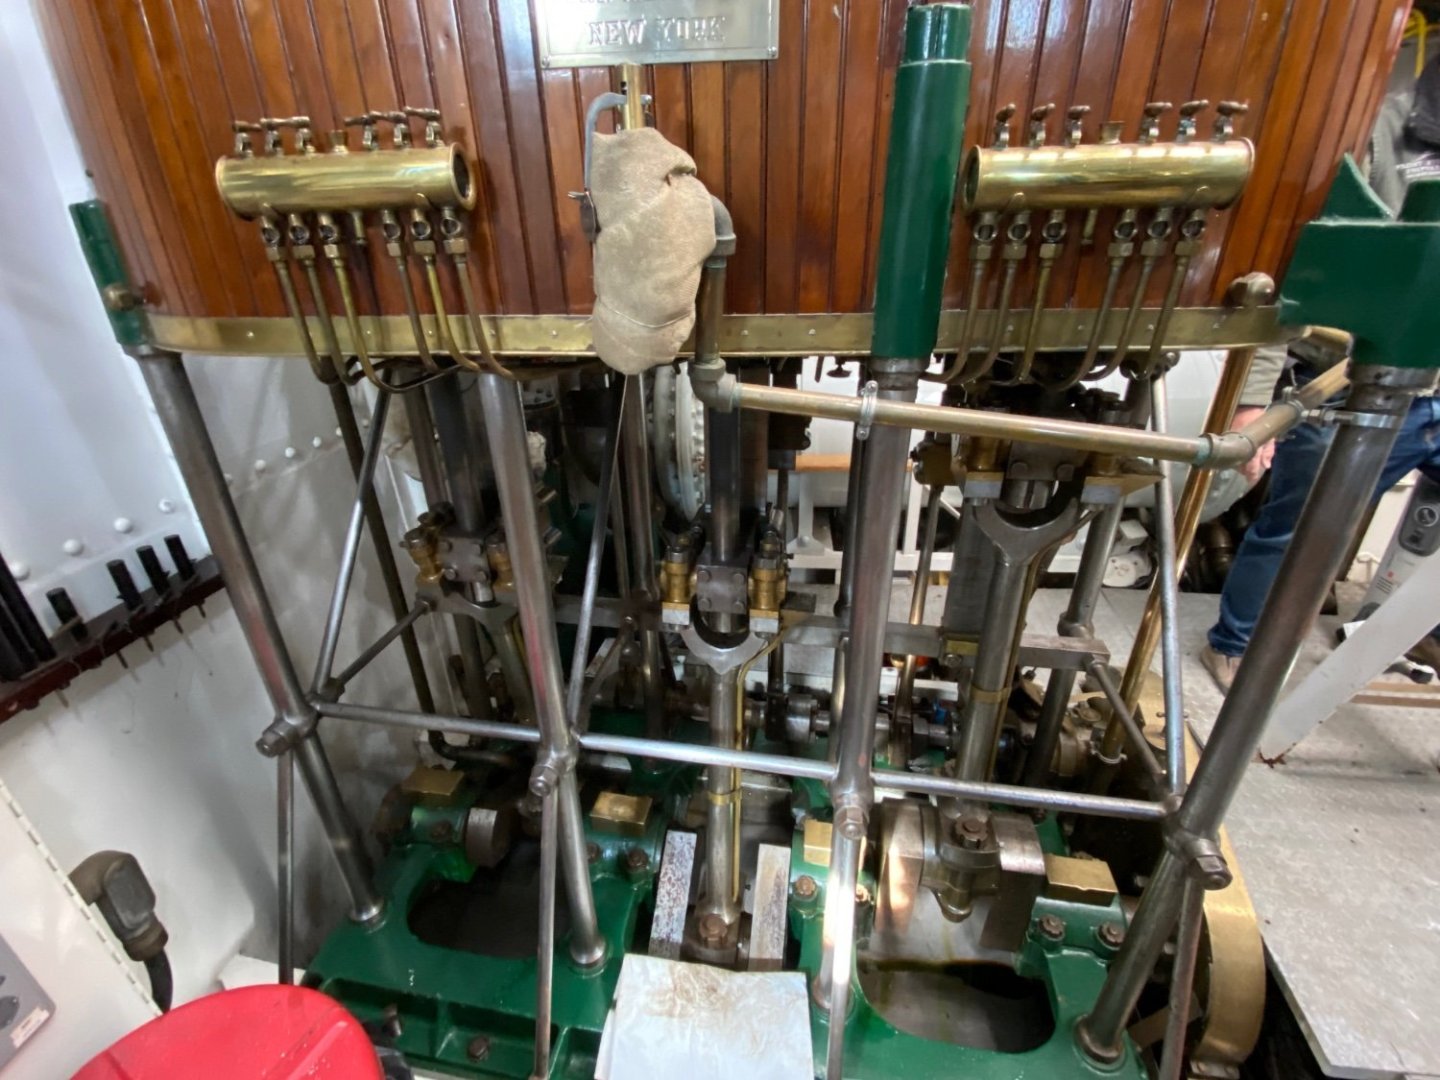
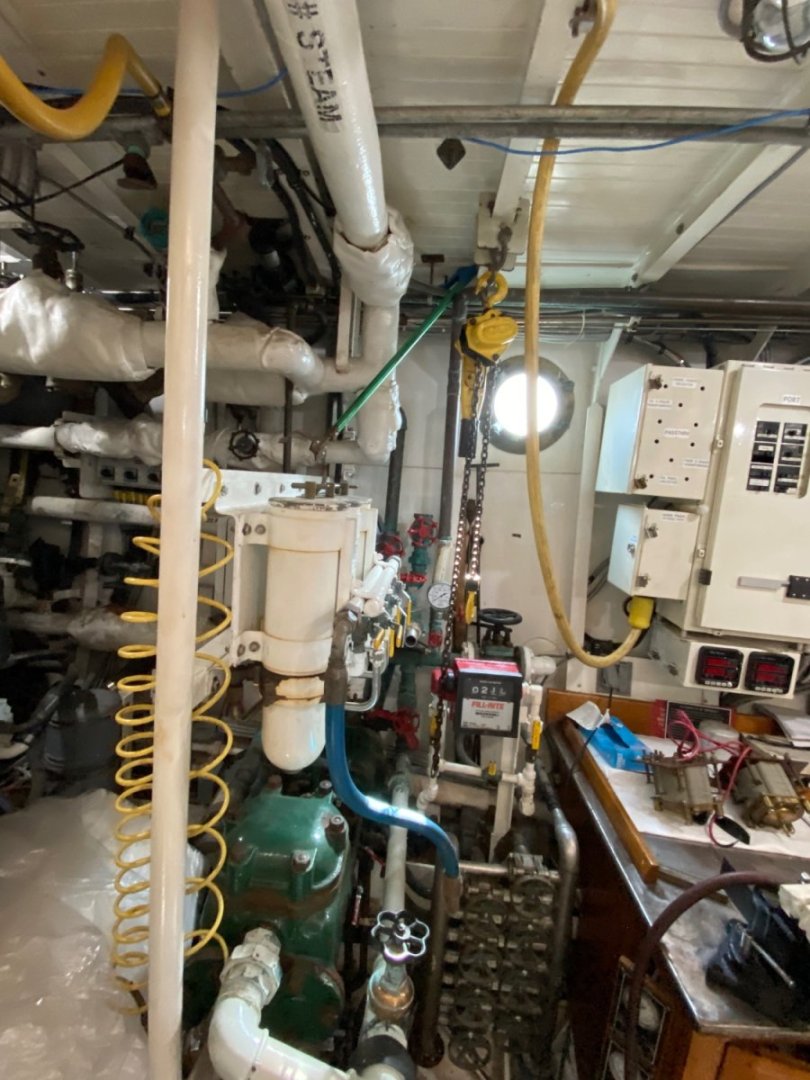
PS. There is a computer in the engine room for the engine, they left the old electrical (?) board in place for posterity.
-
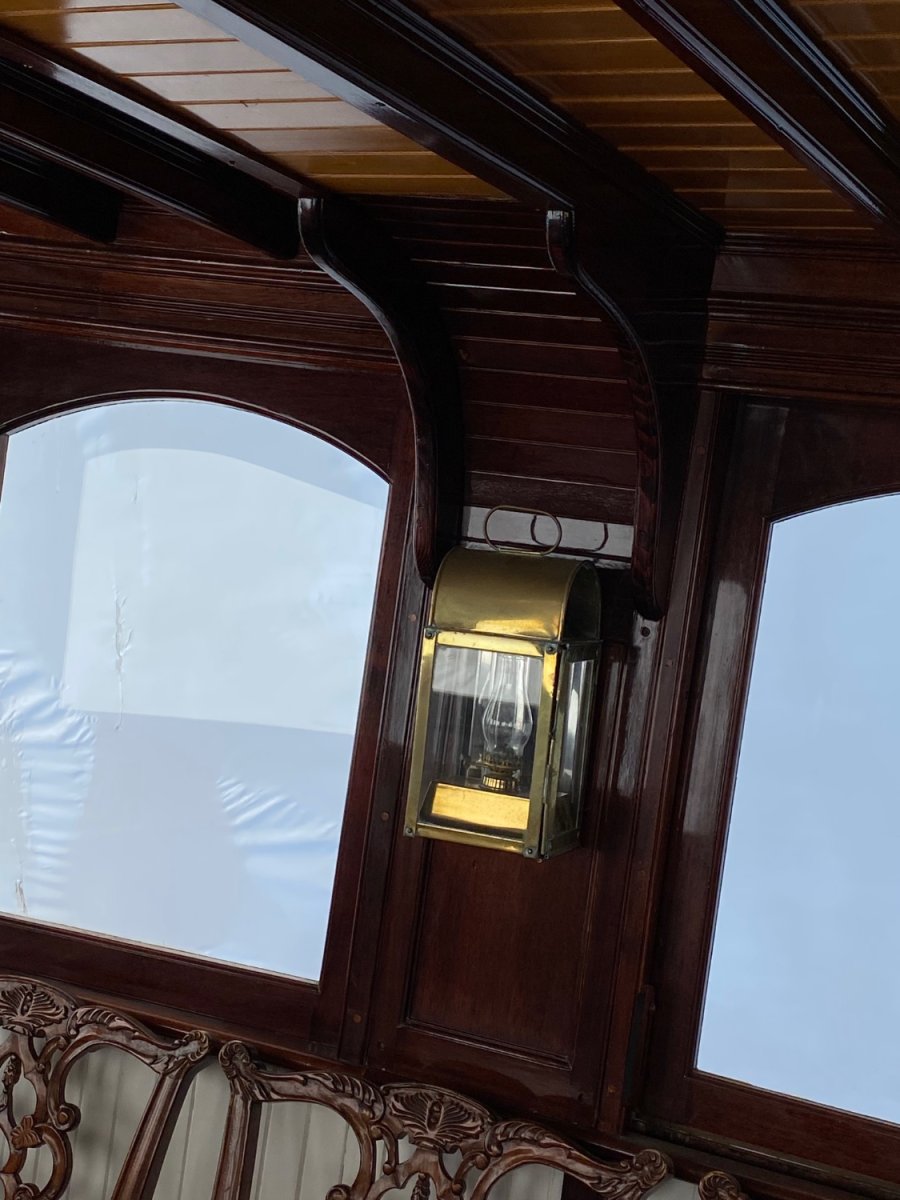
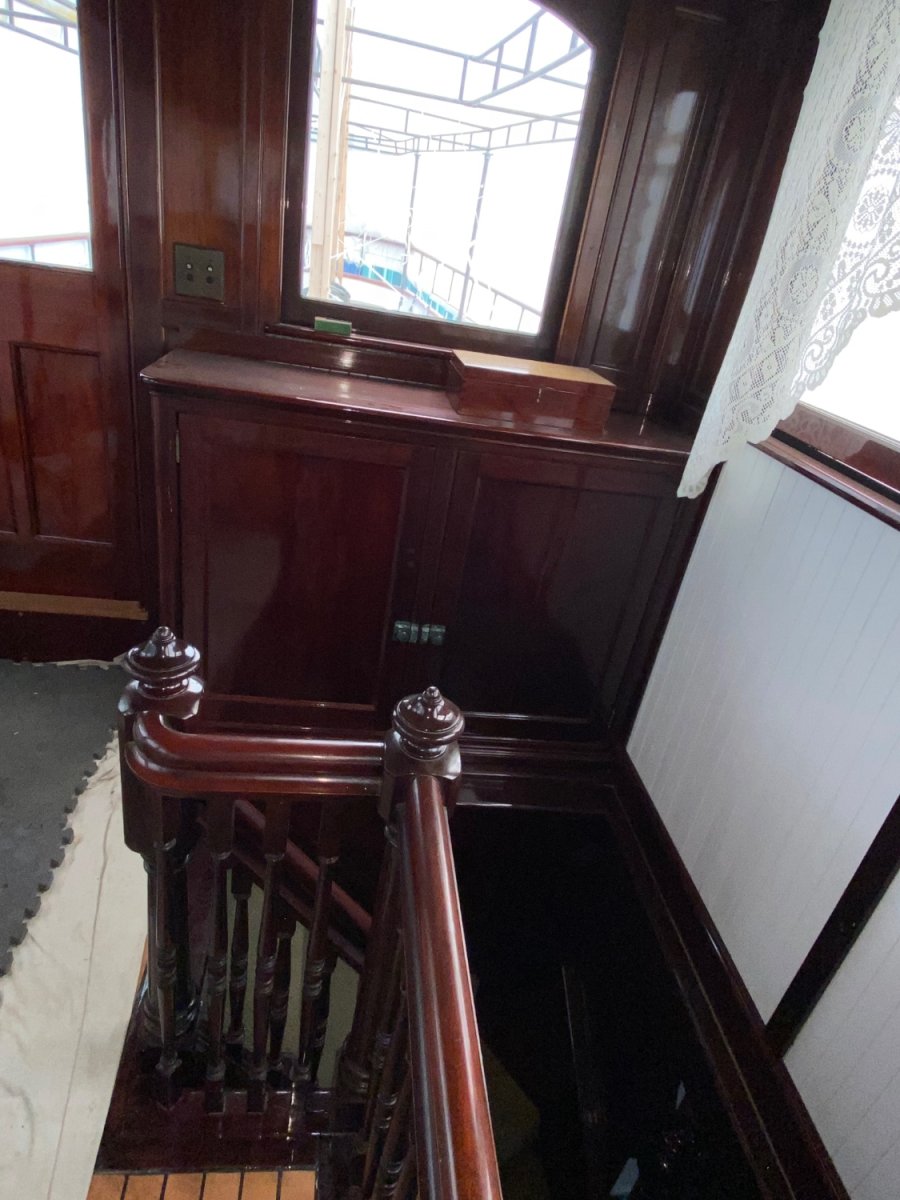
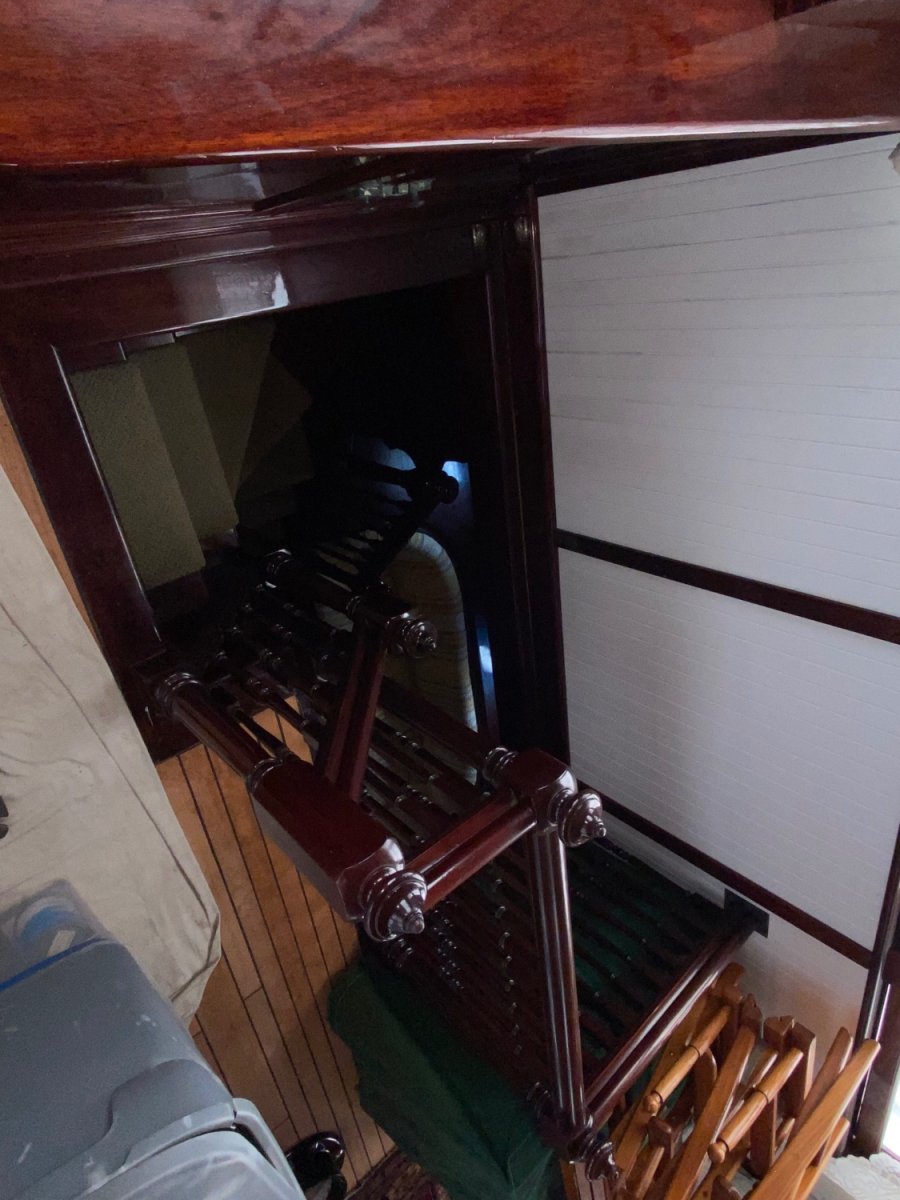
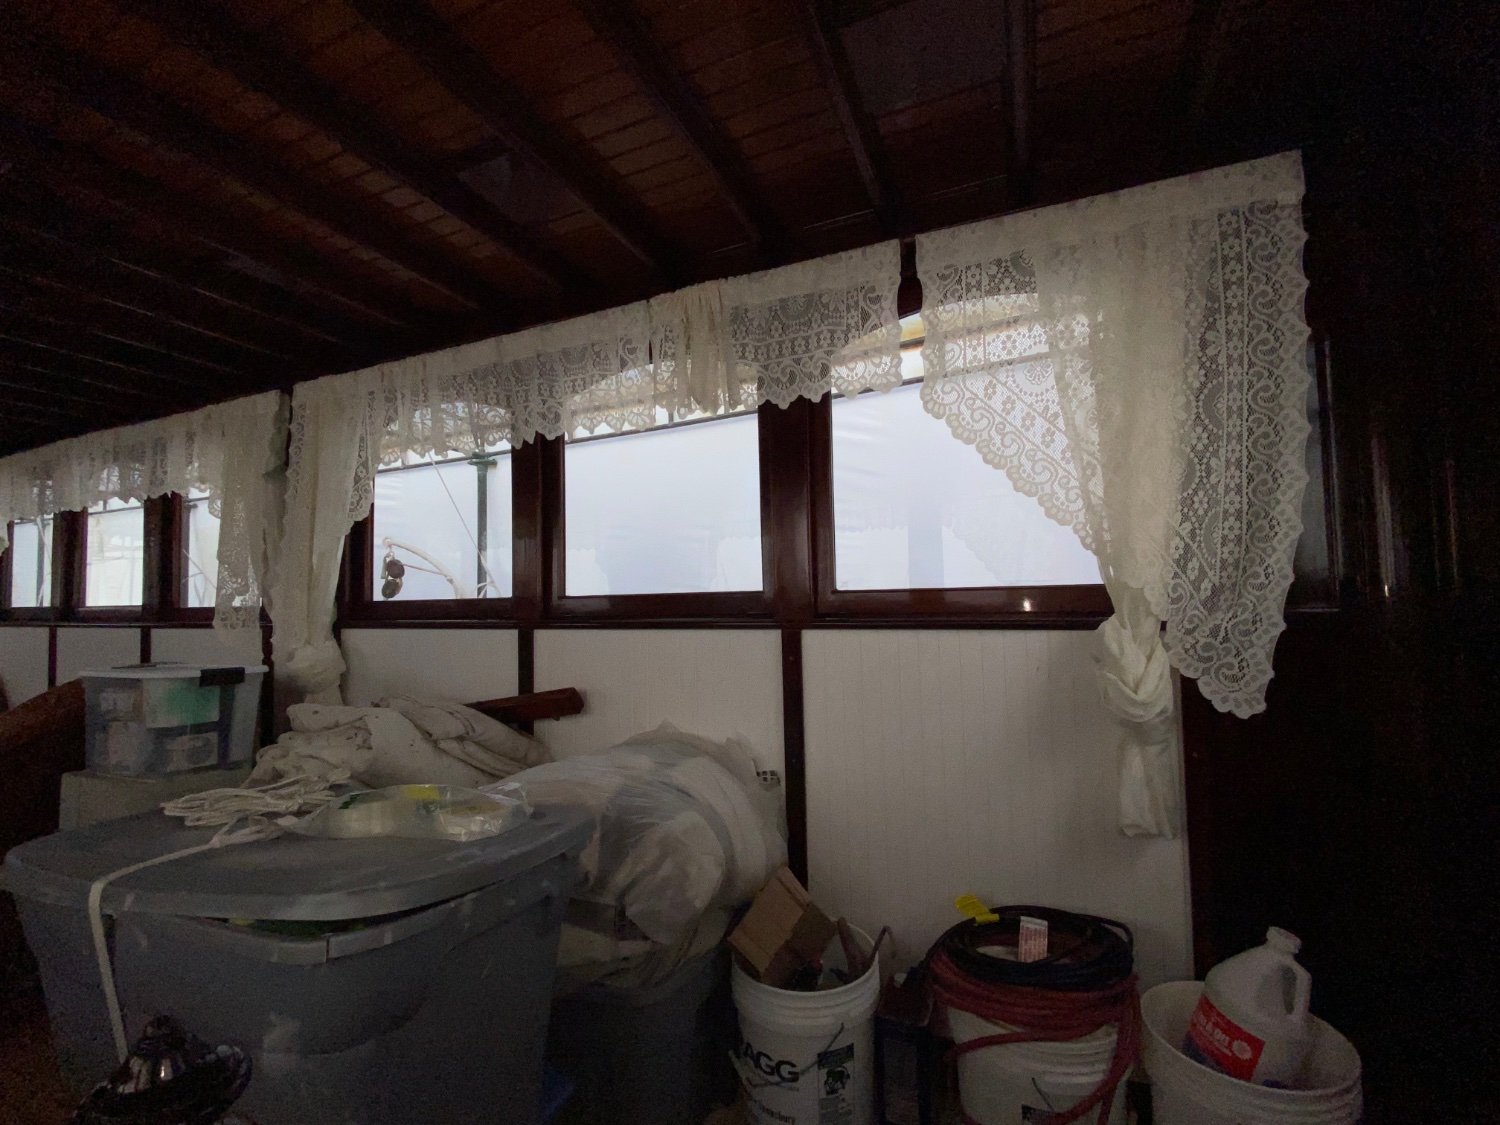
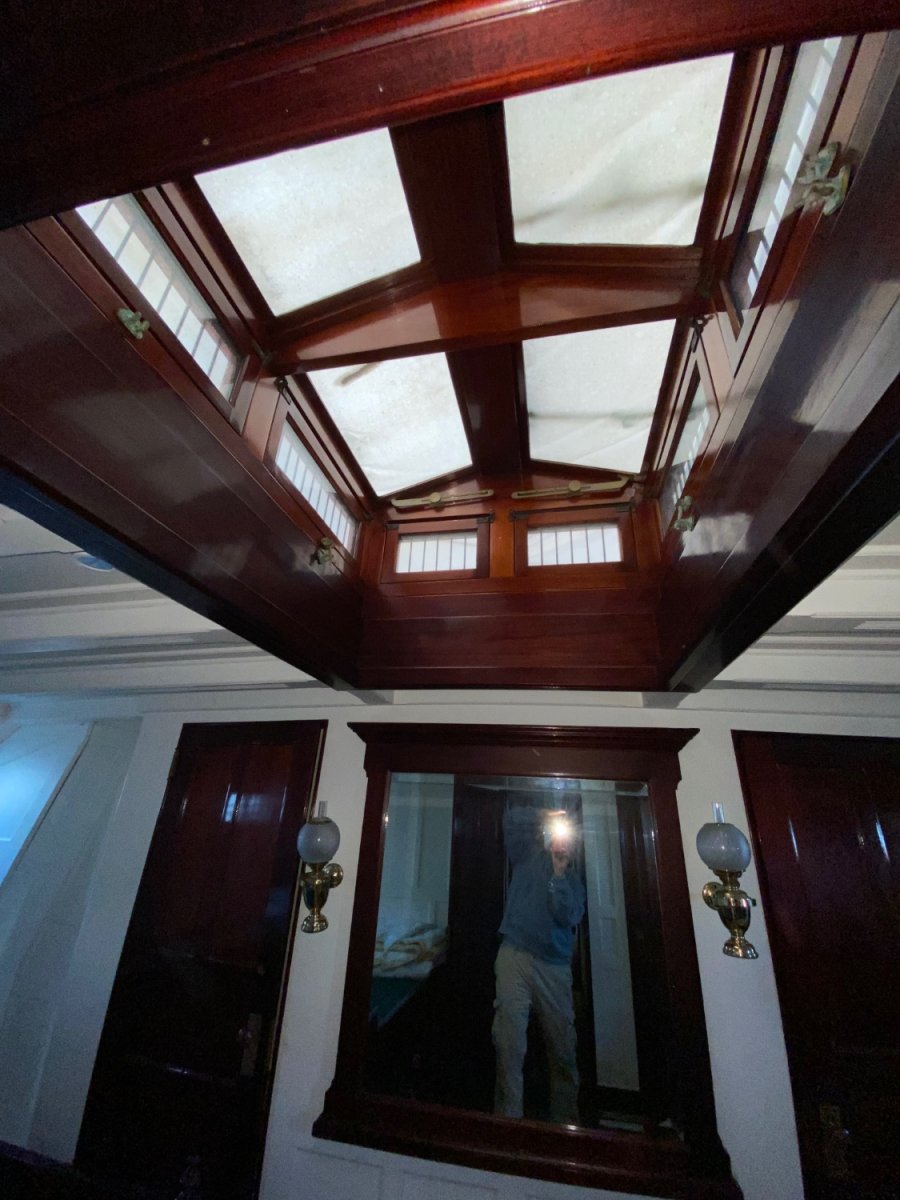
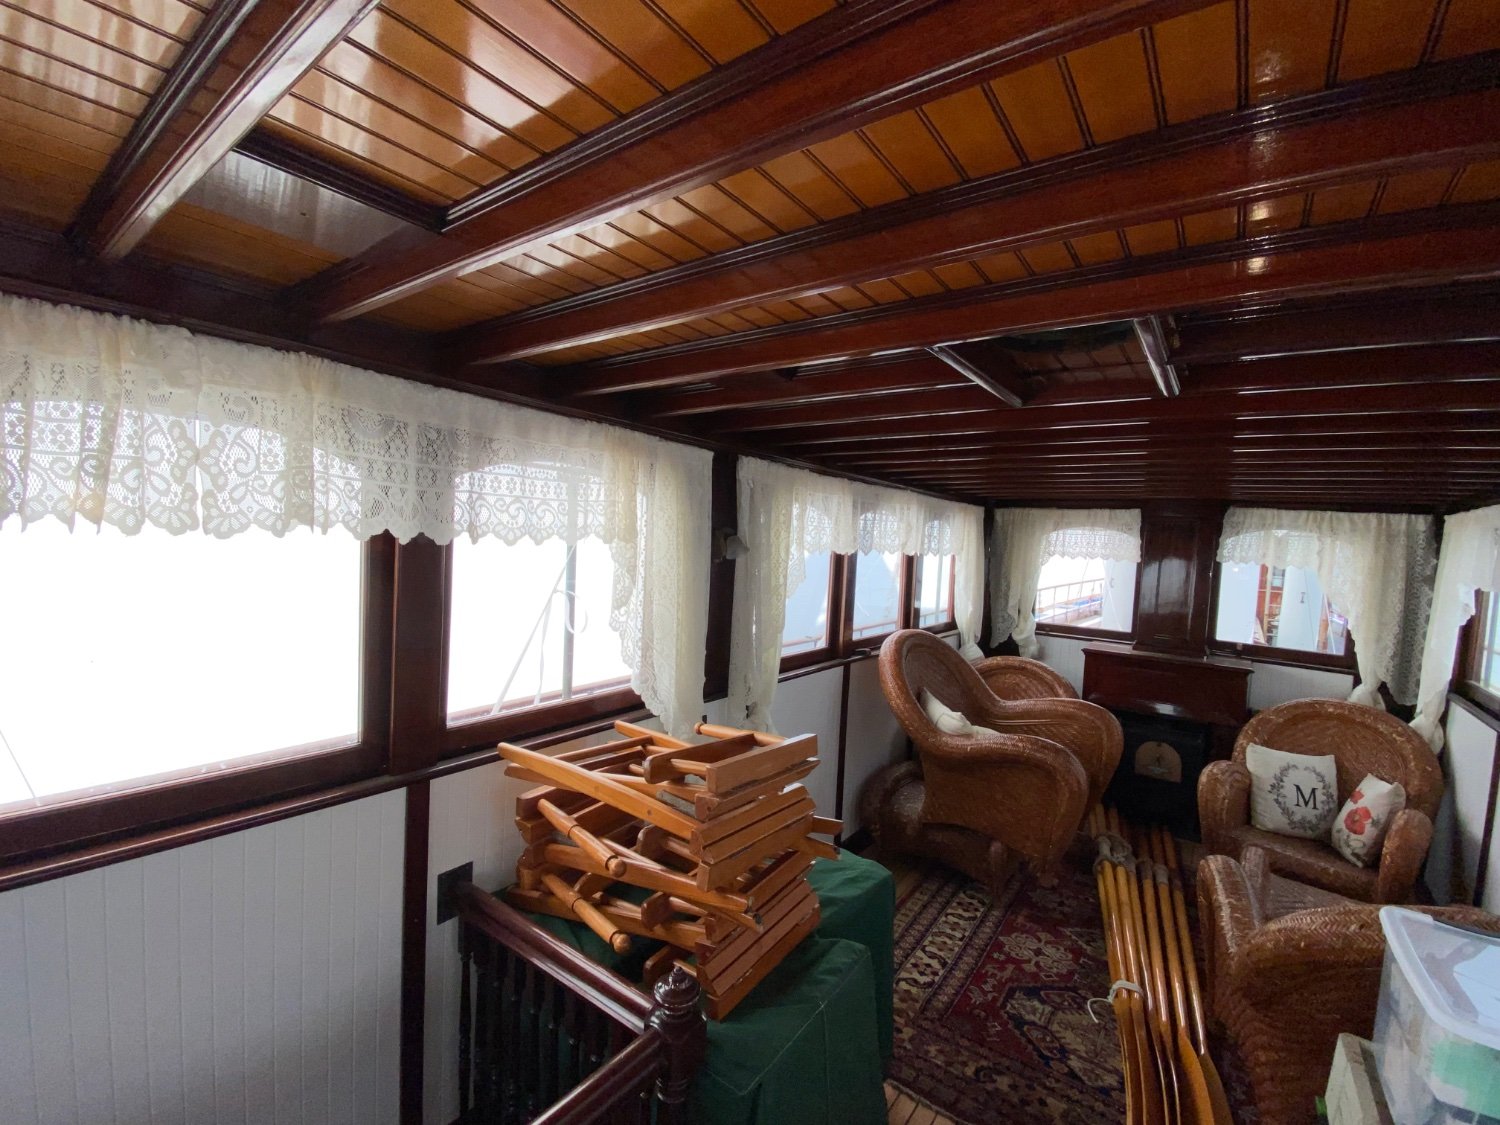
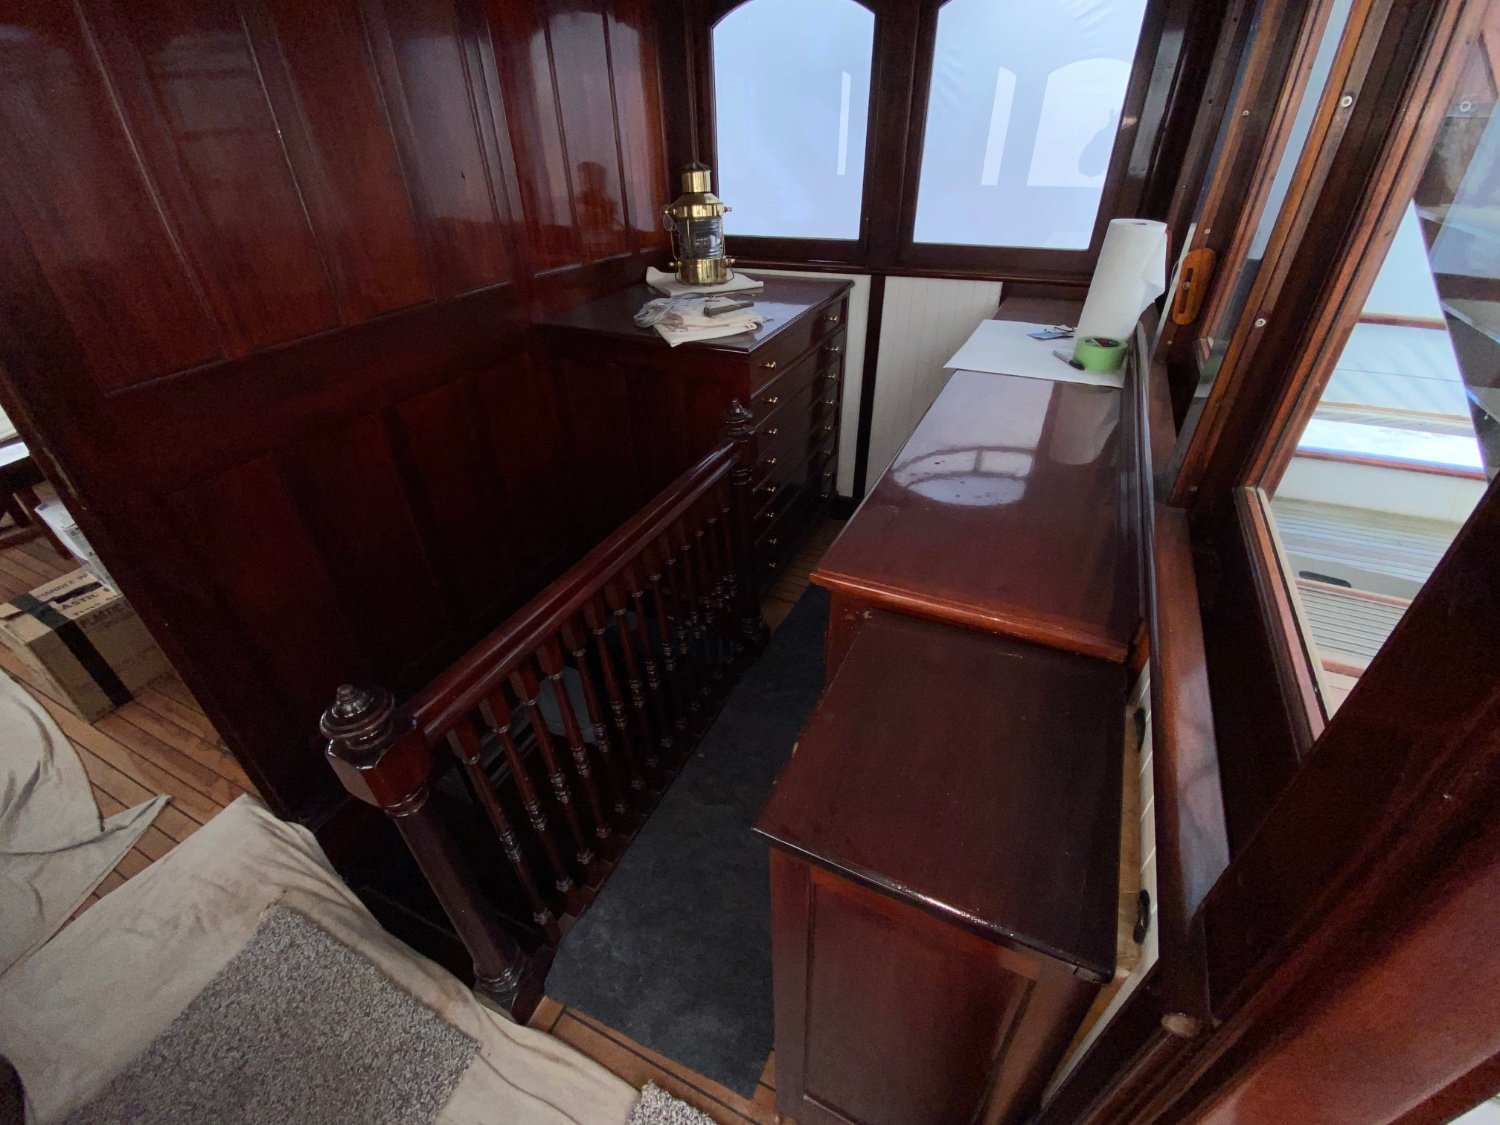
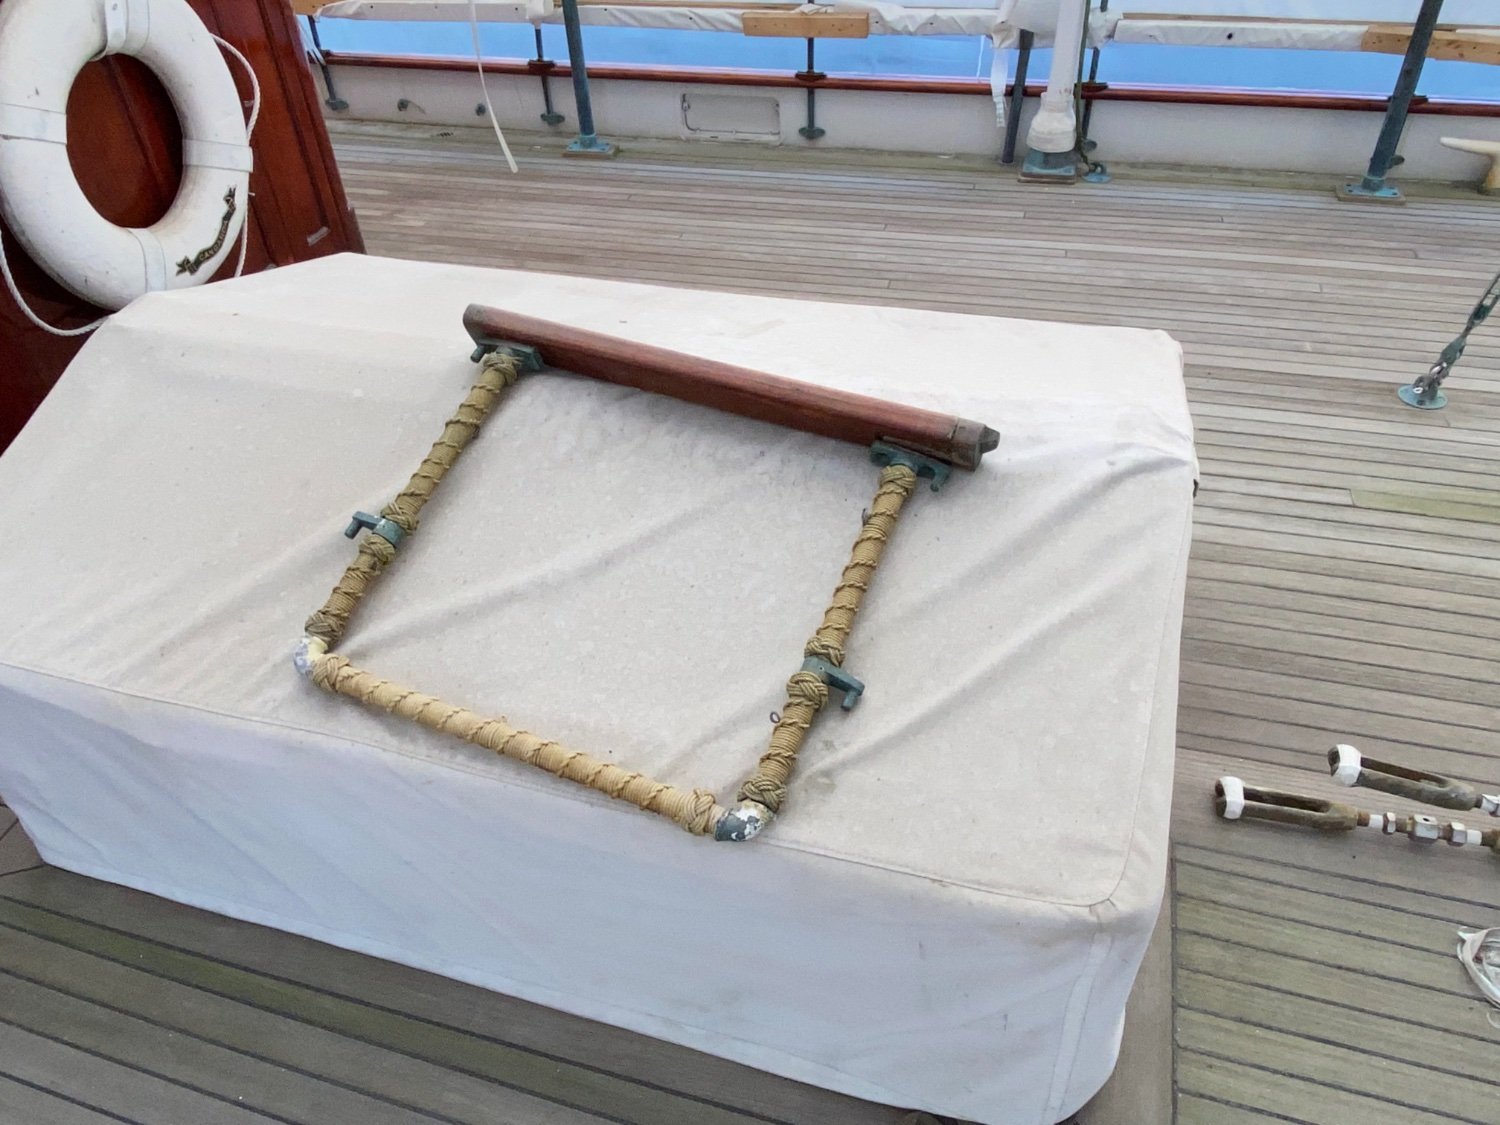
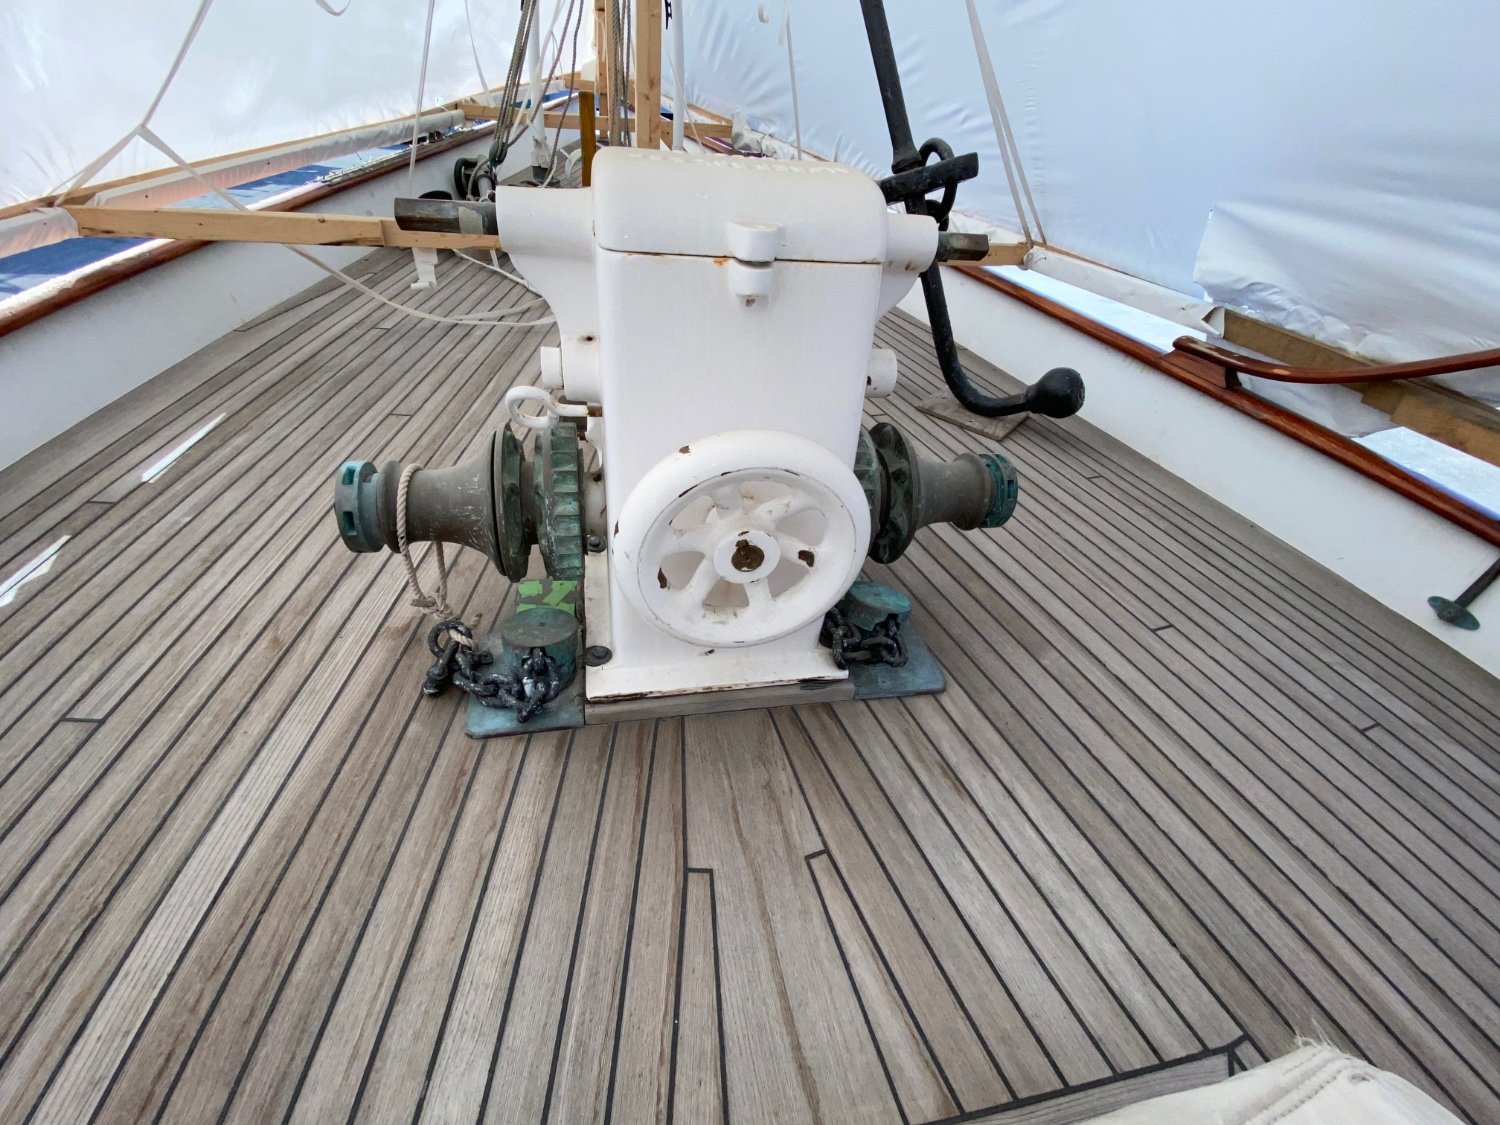
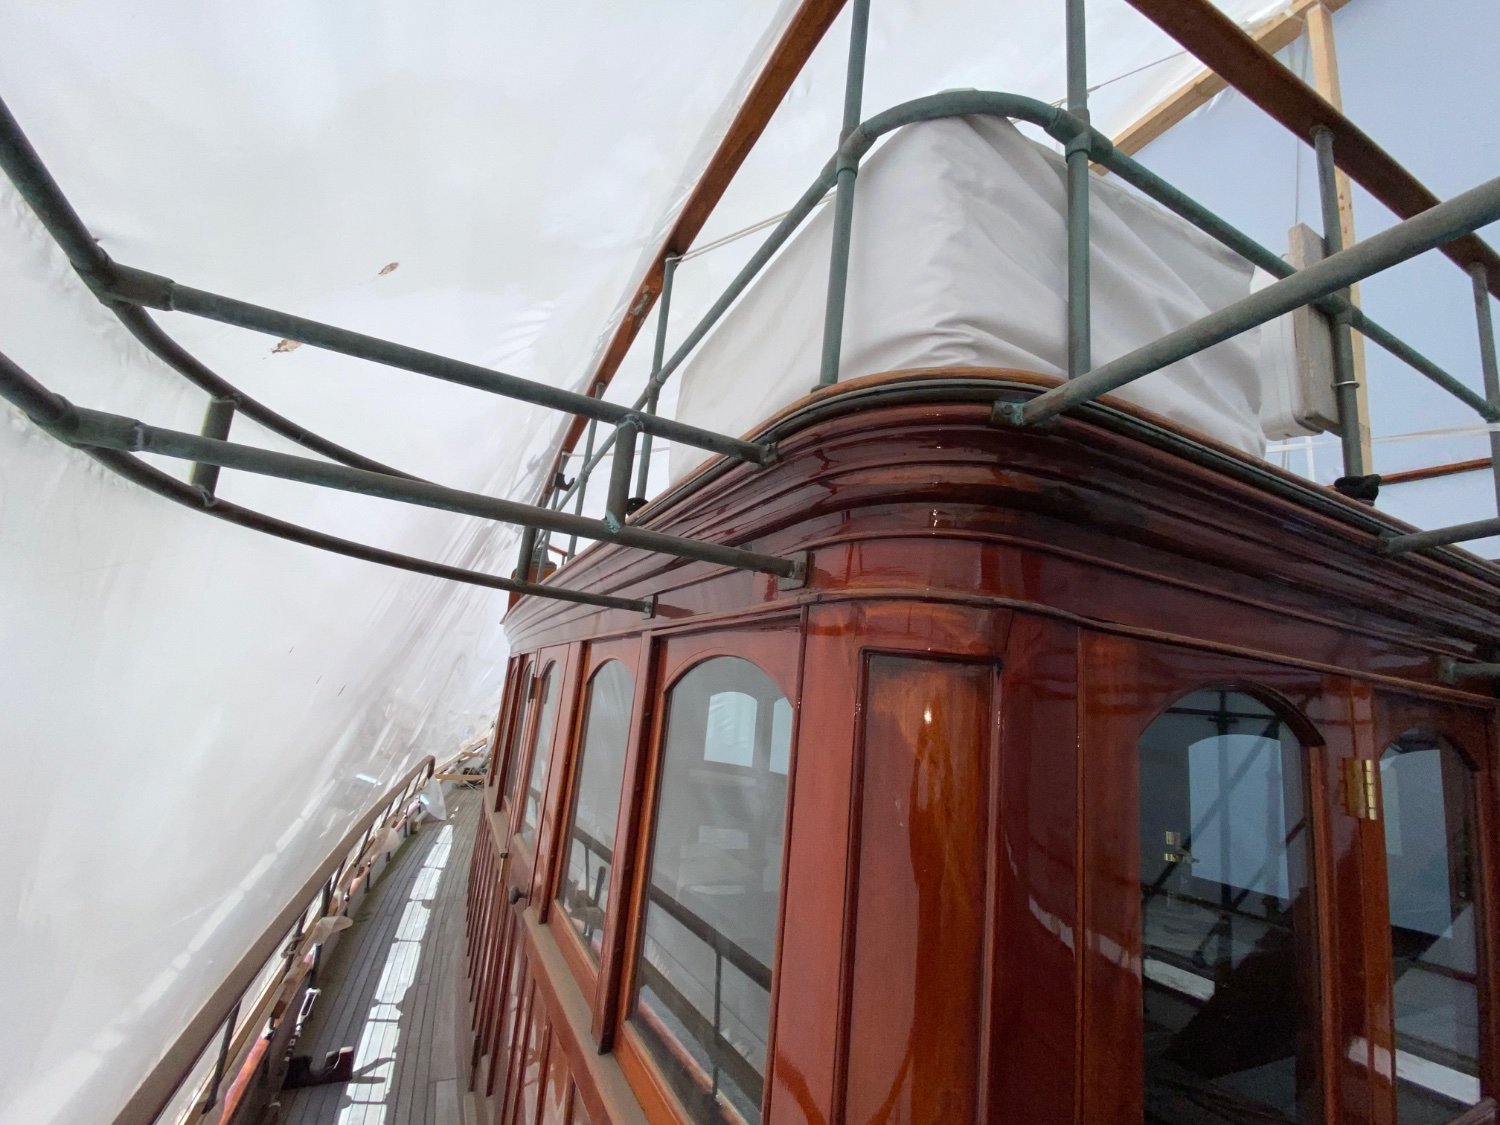
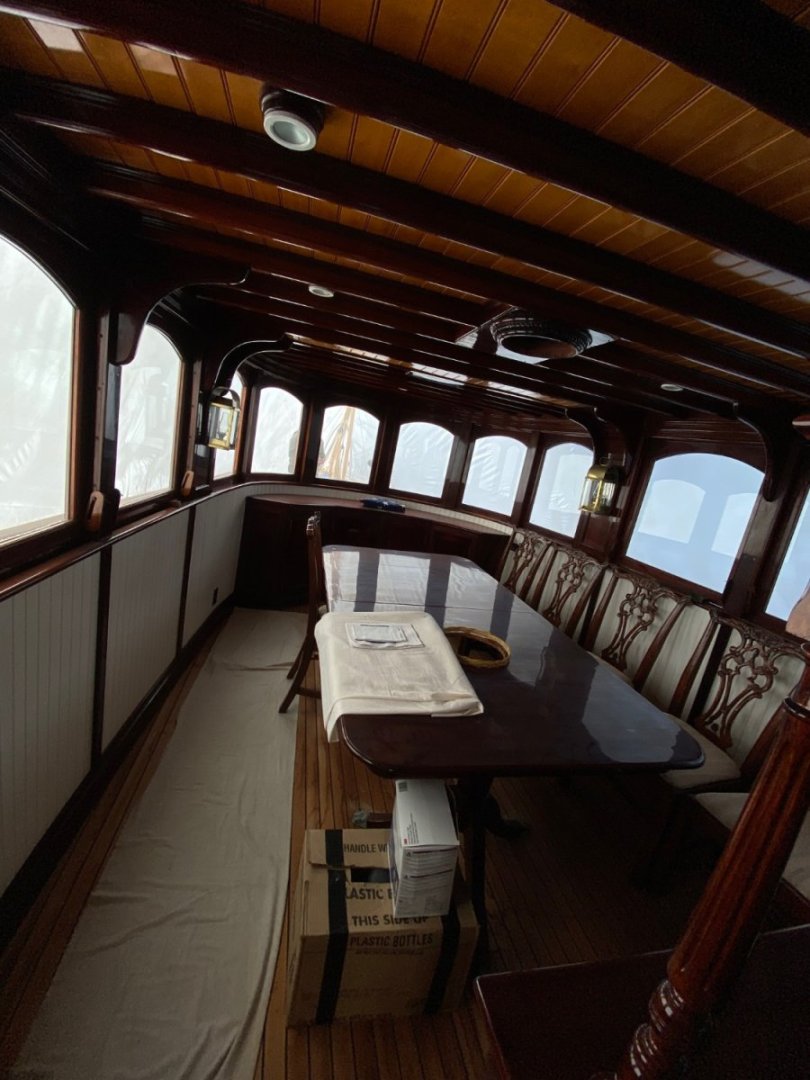
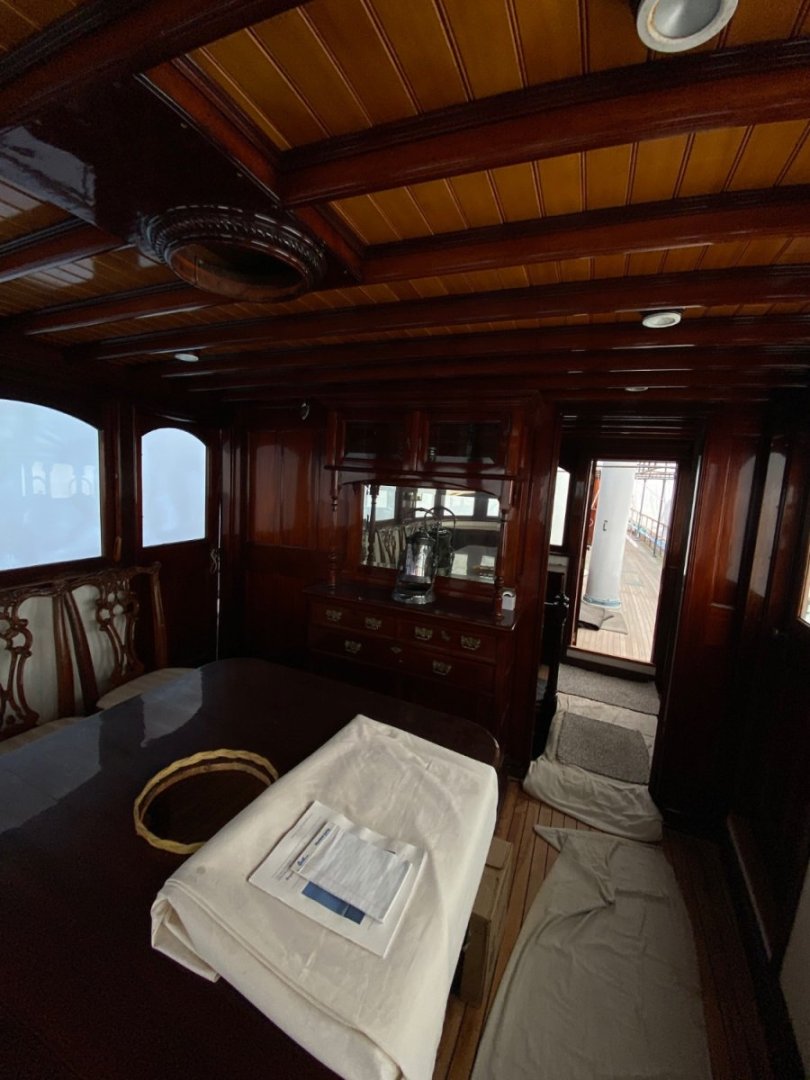
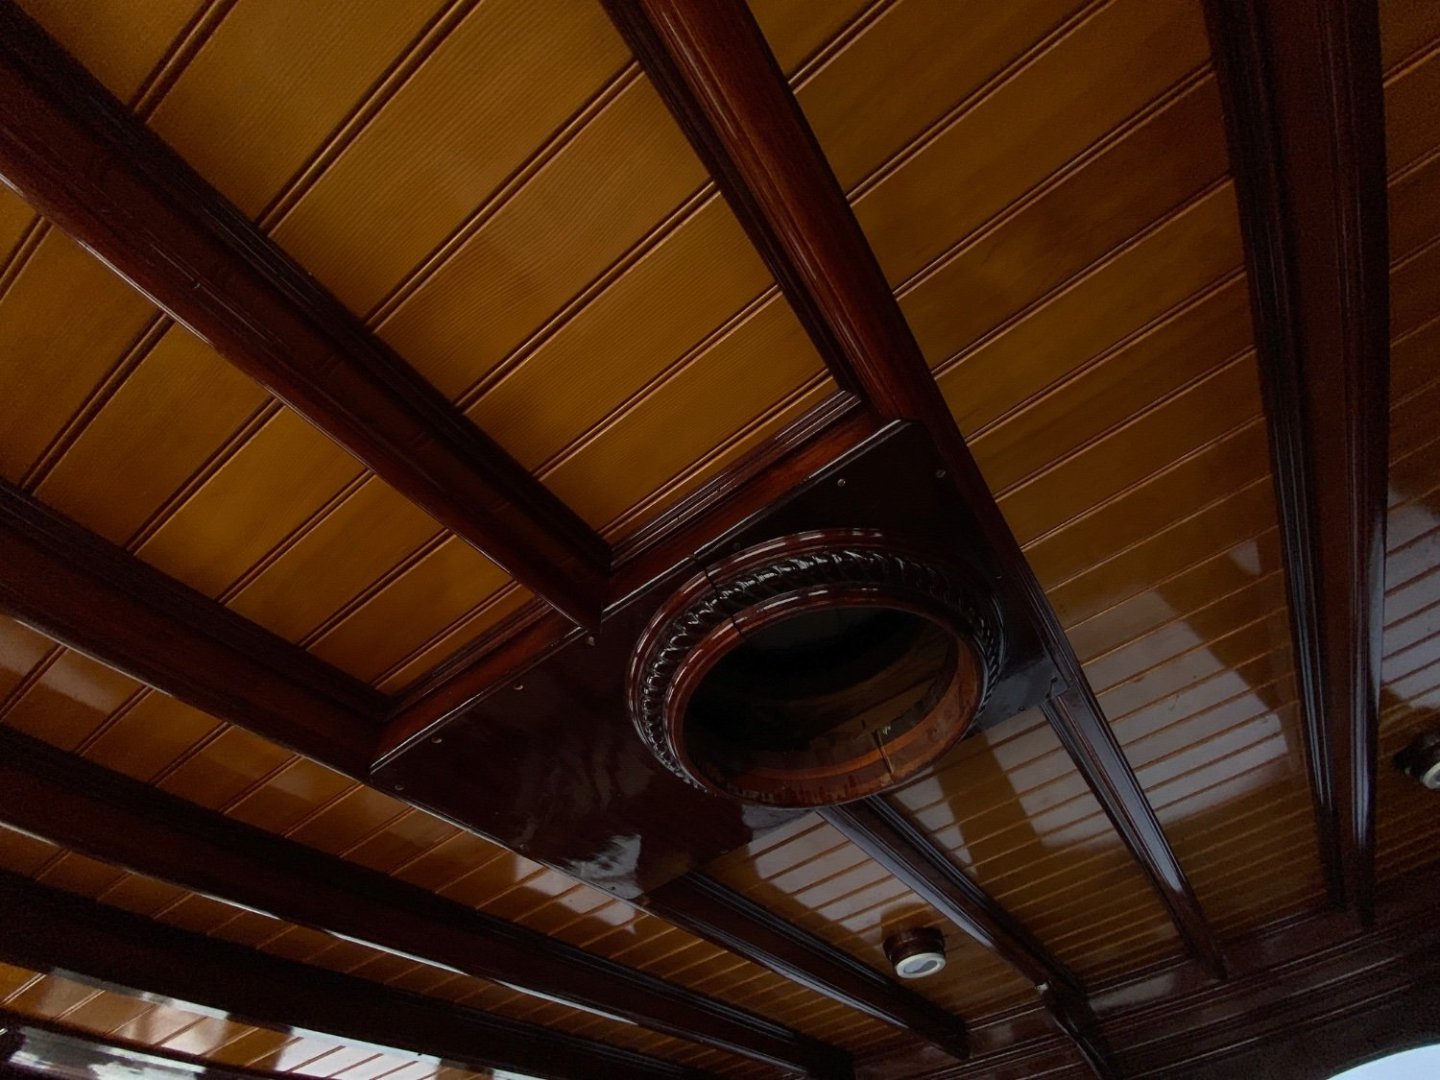
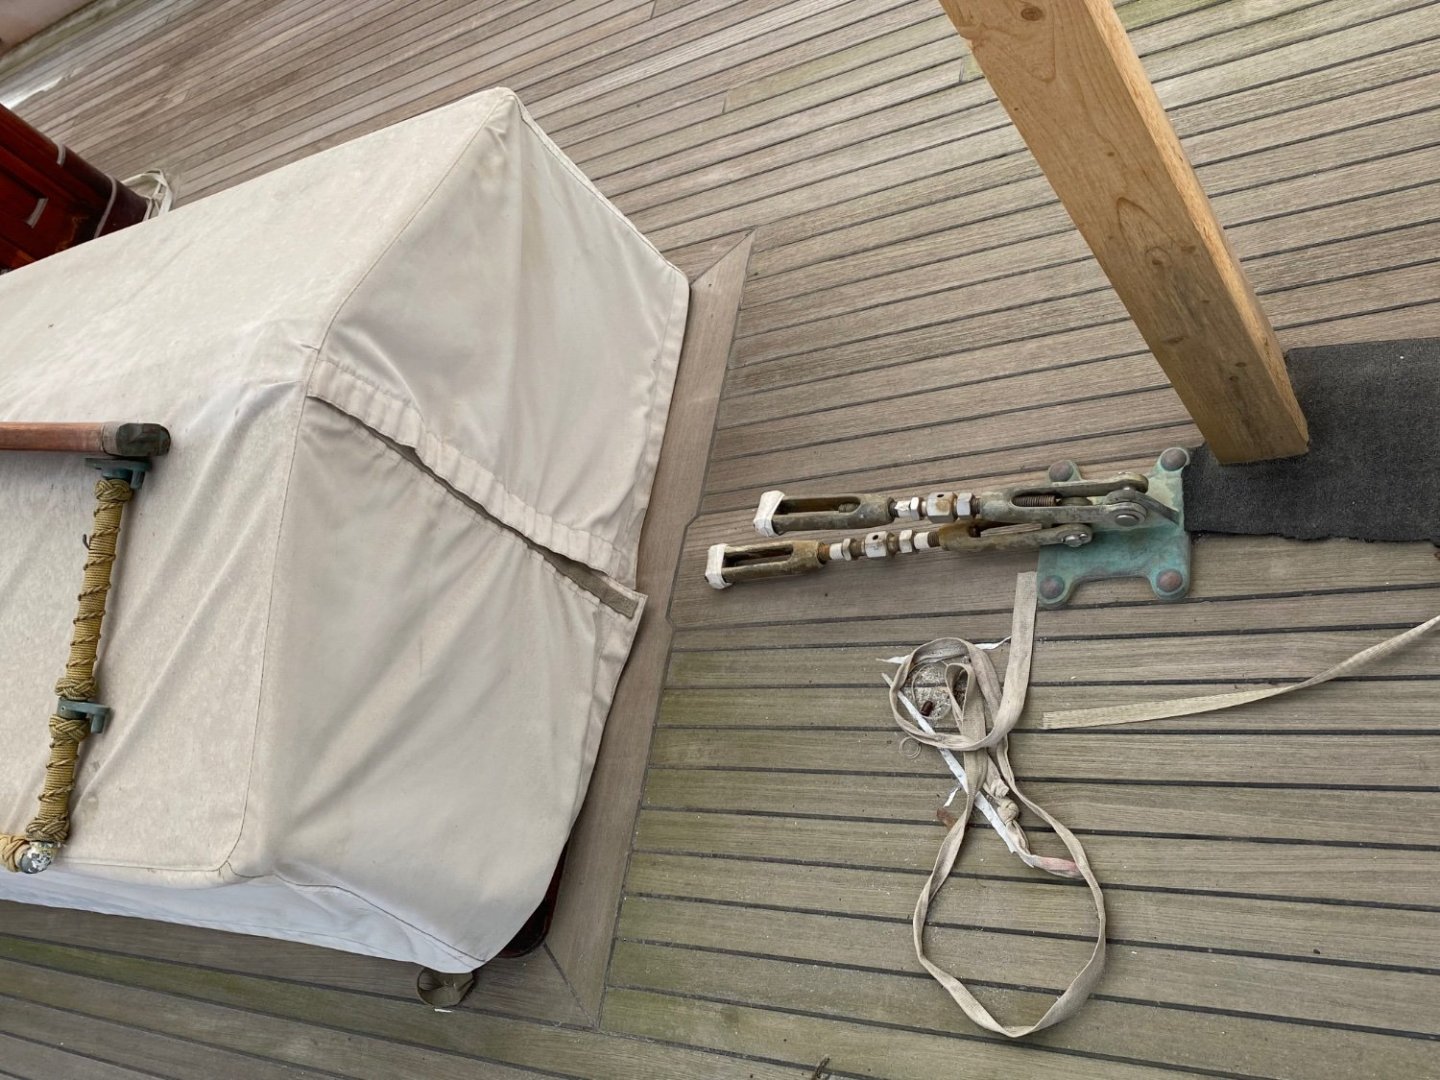
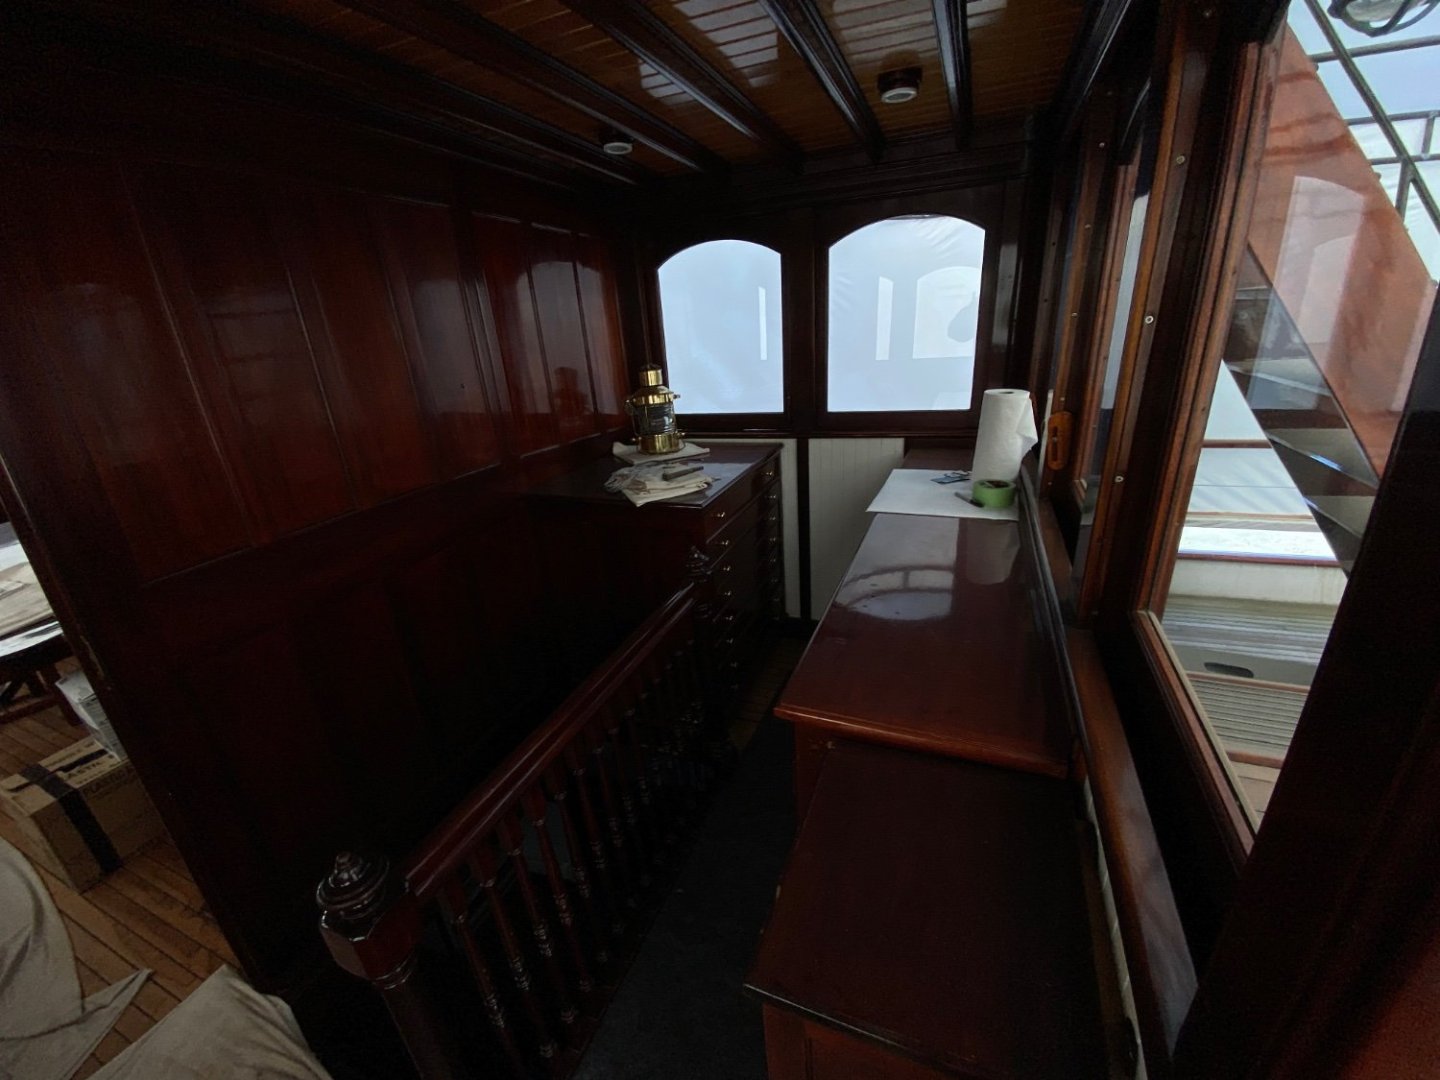
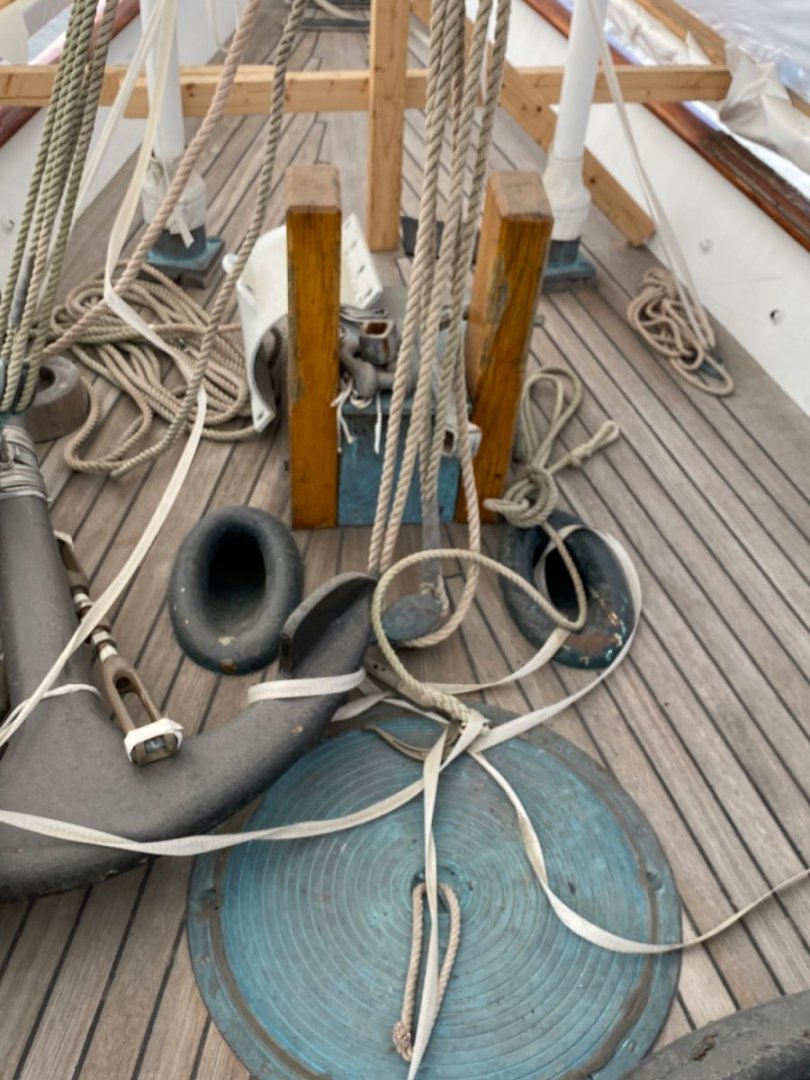
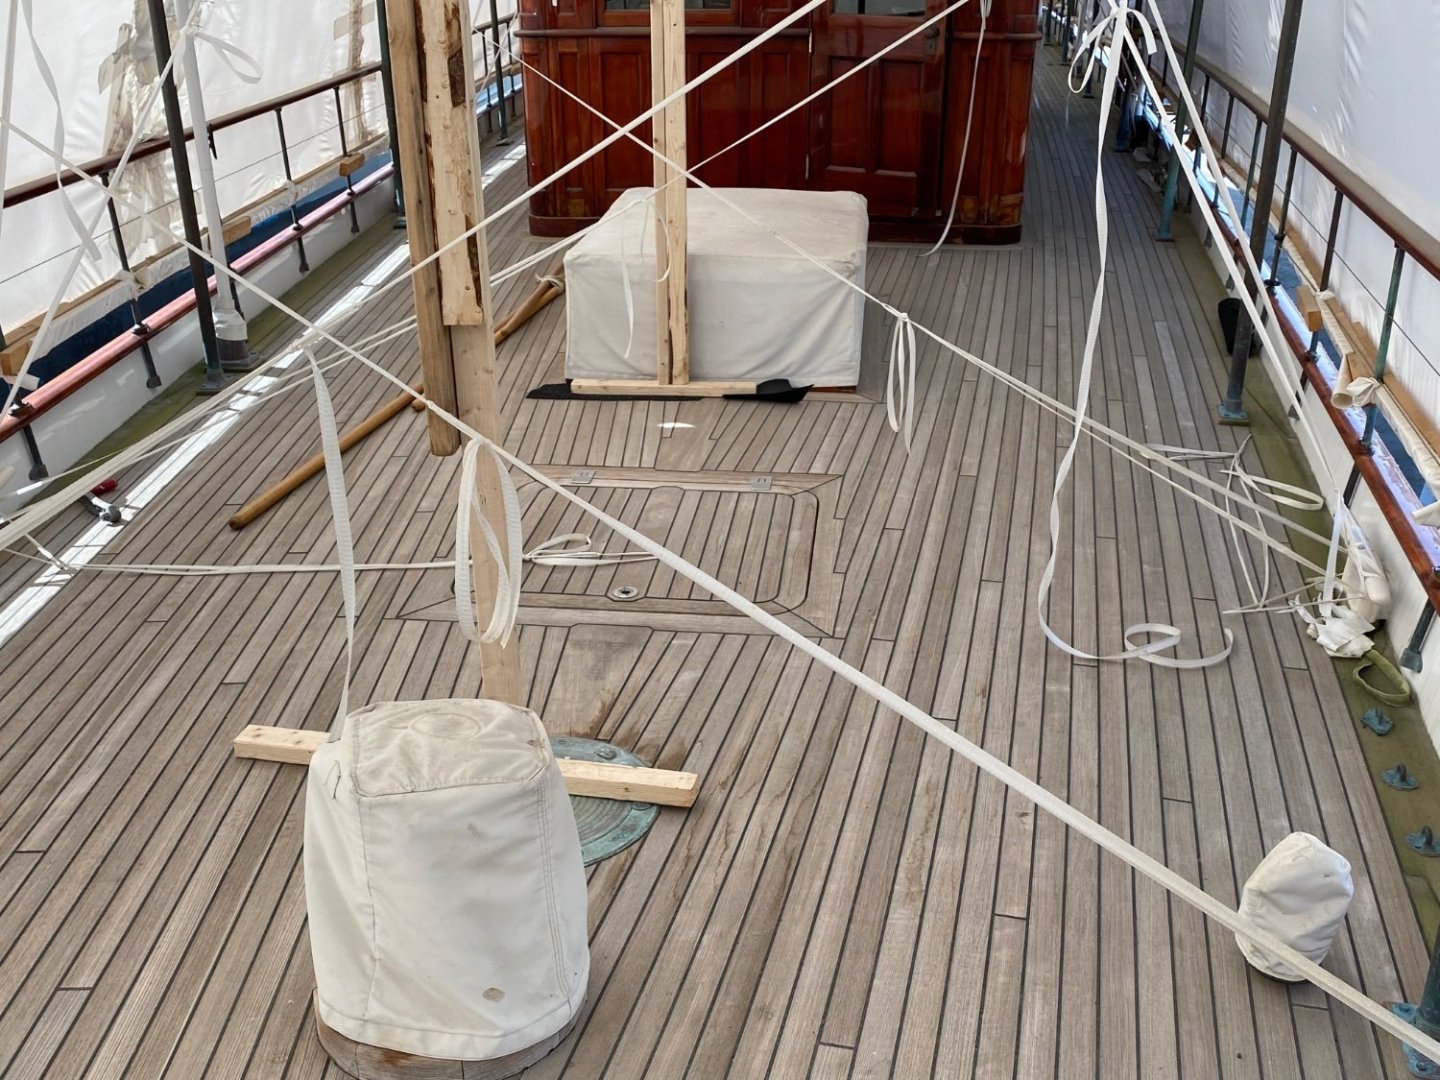
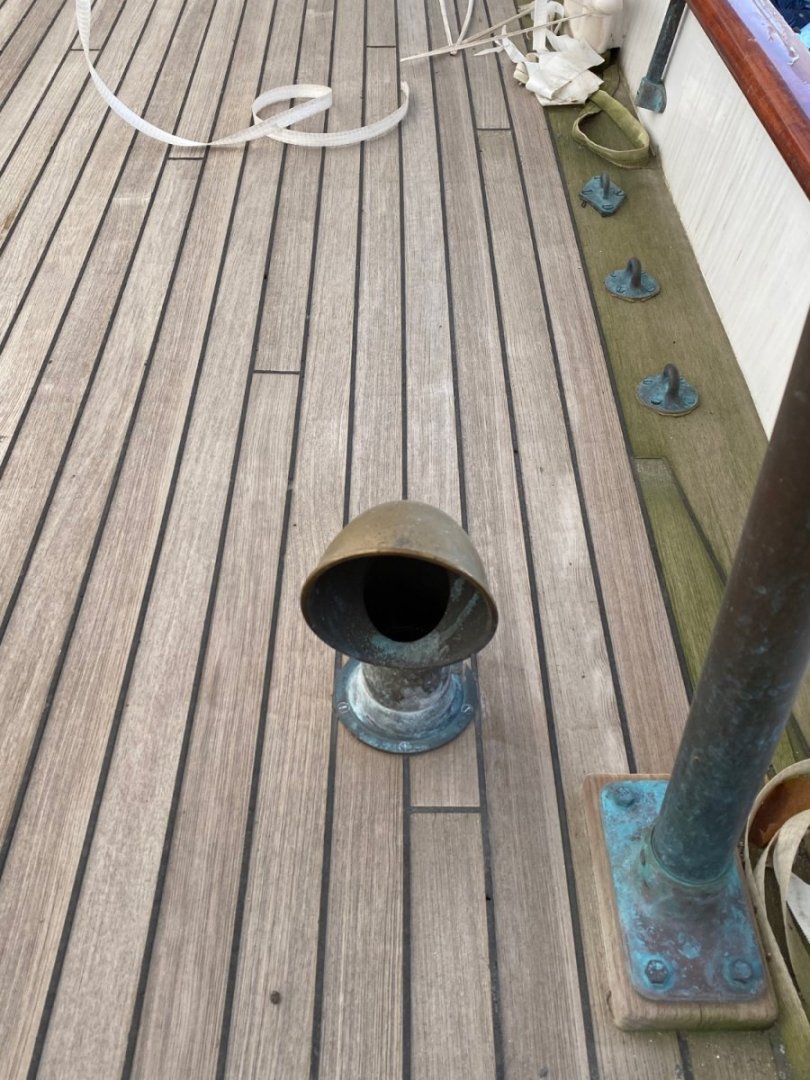
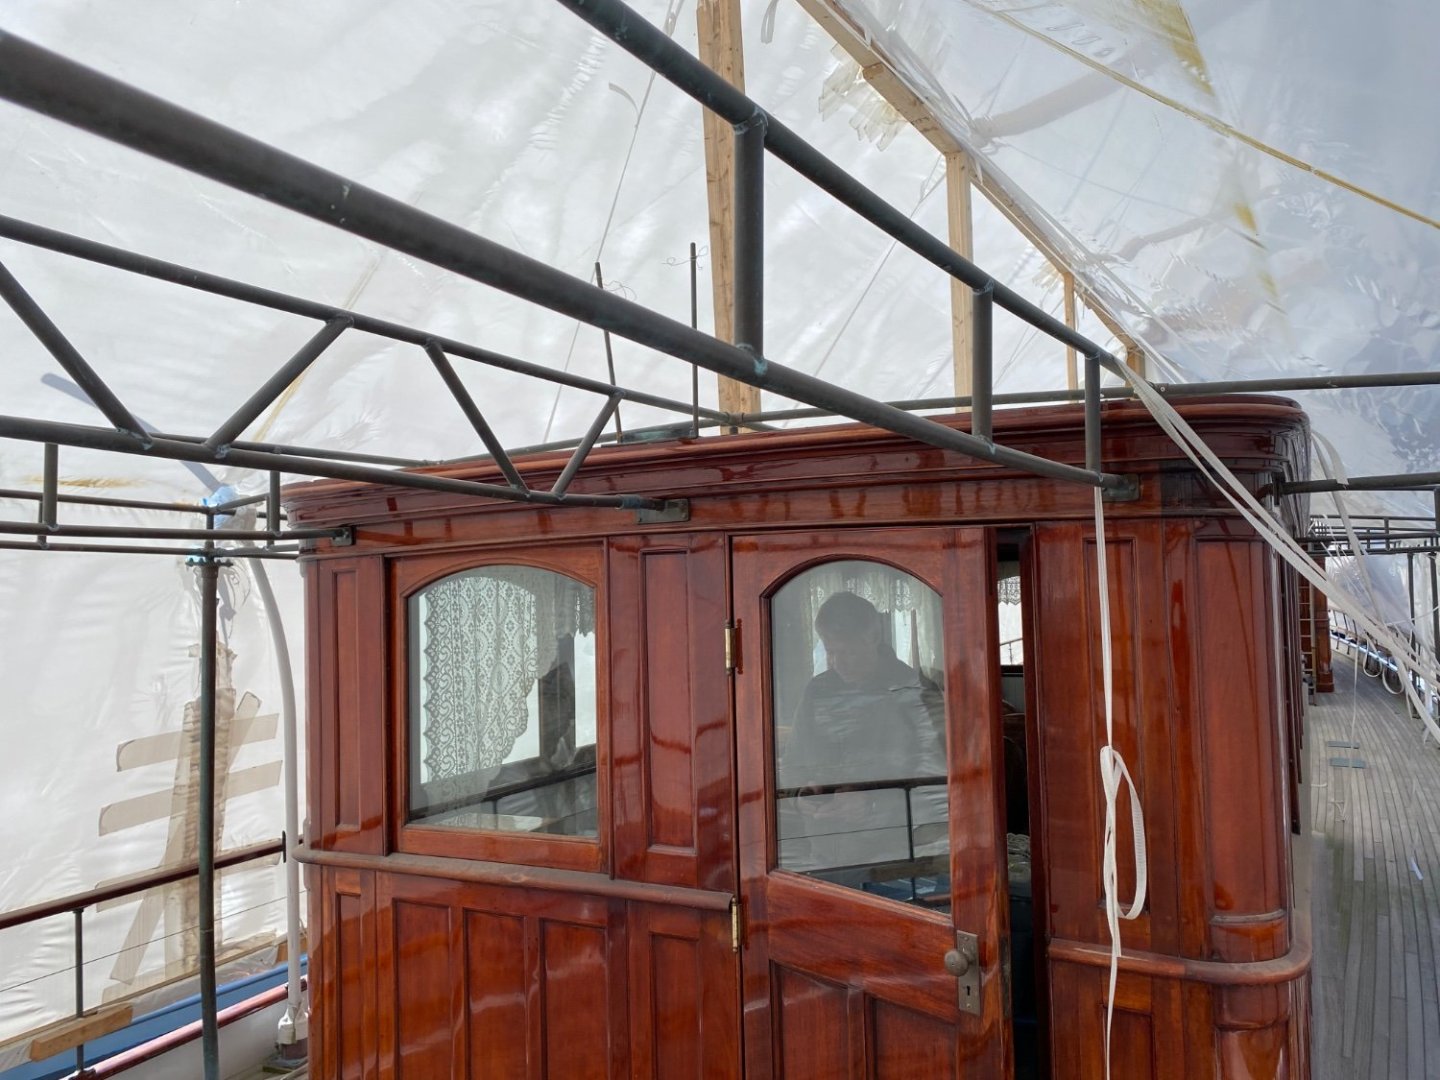
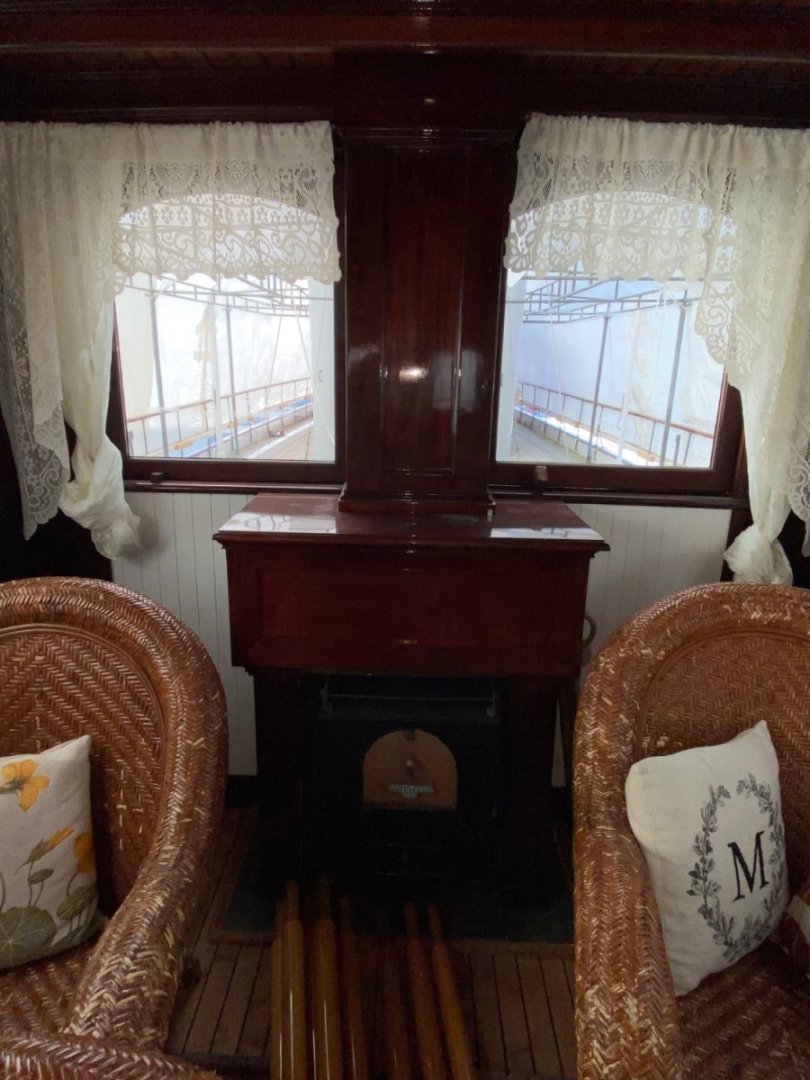
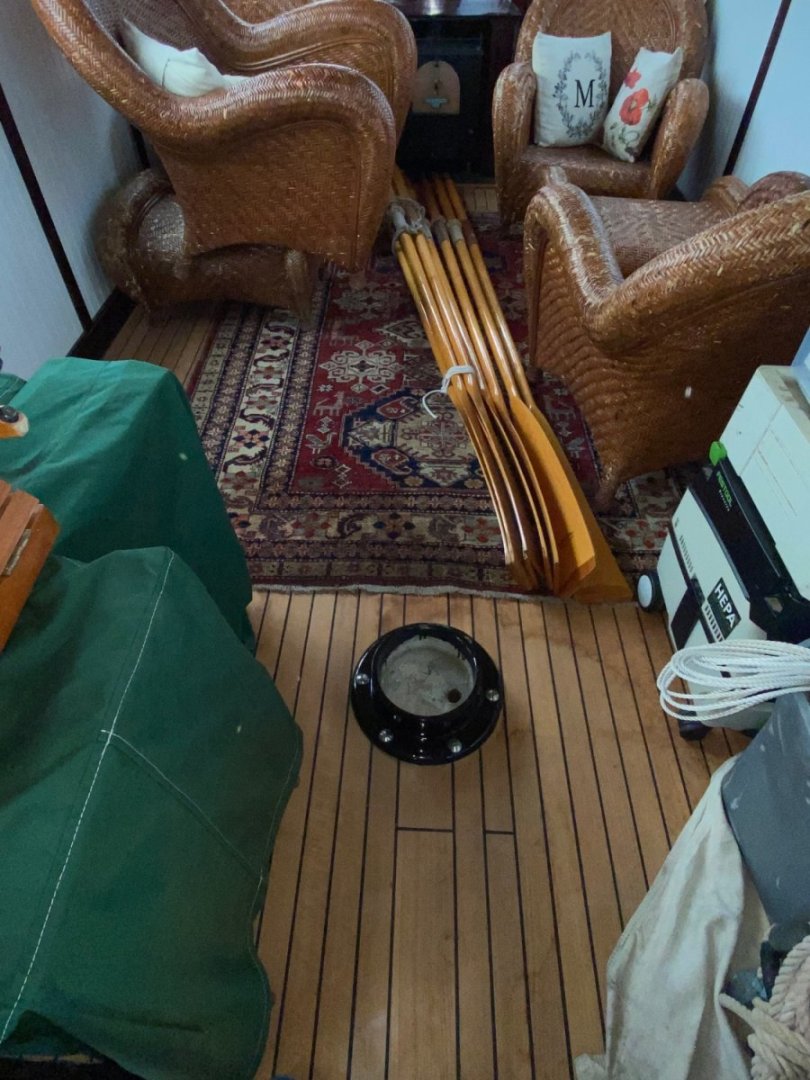
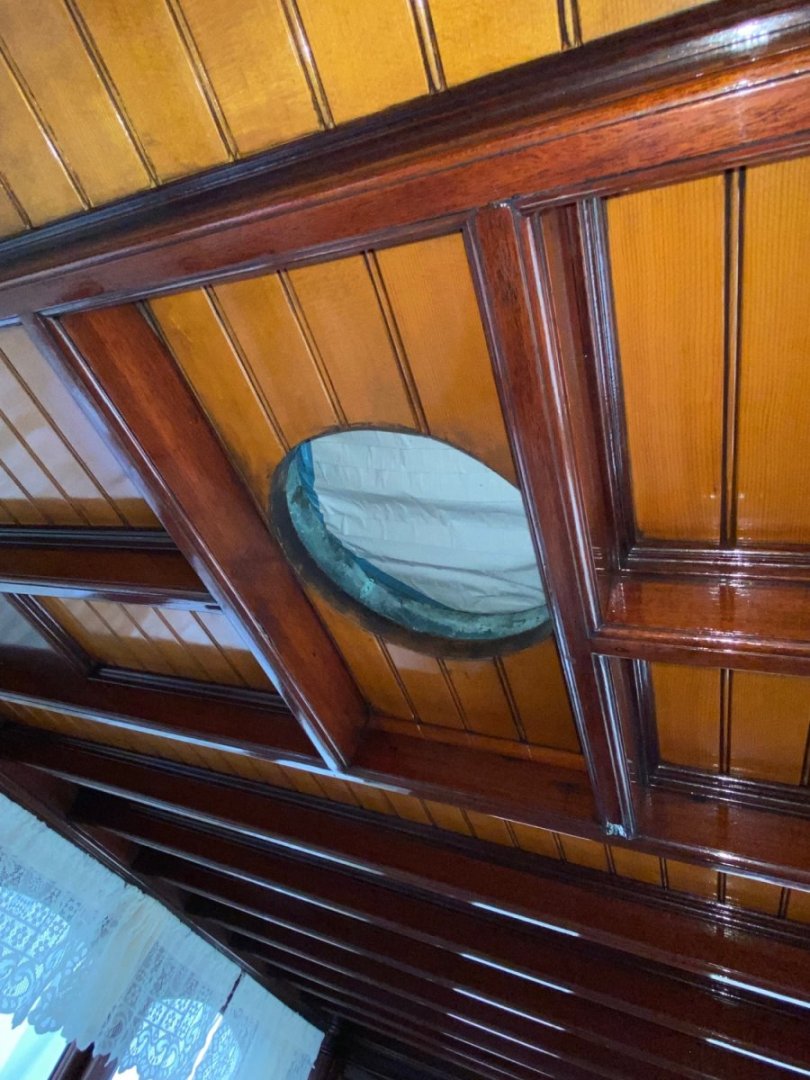
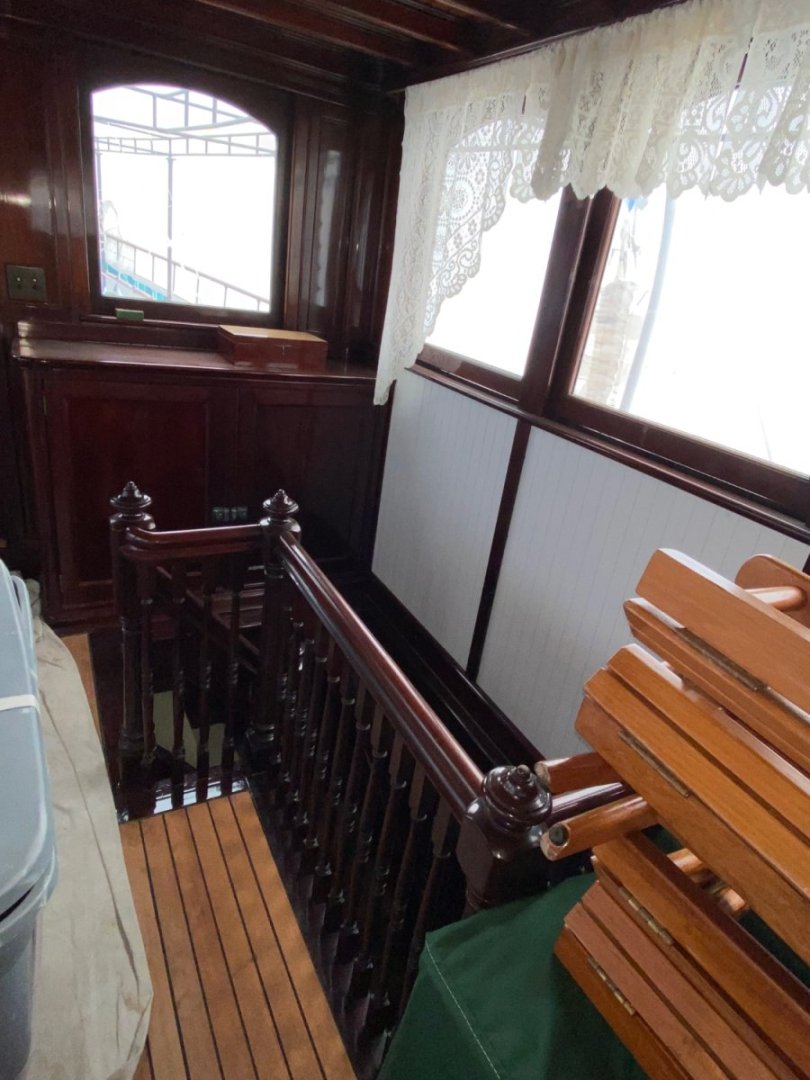
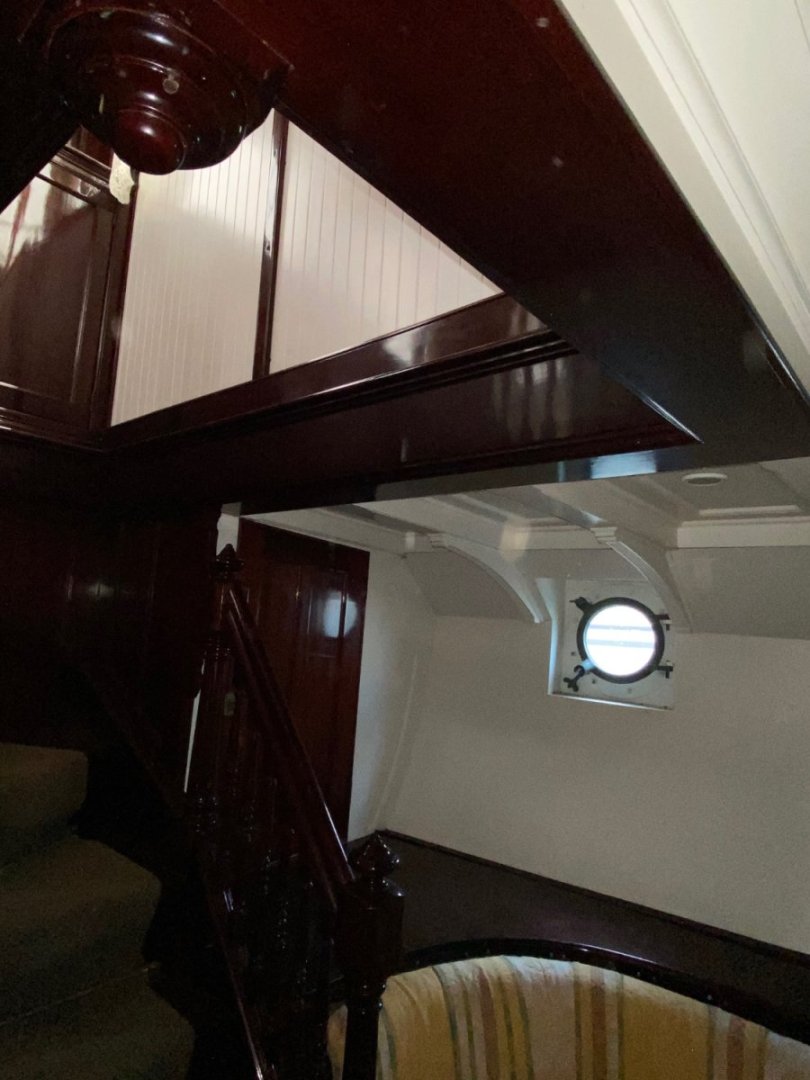
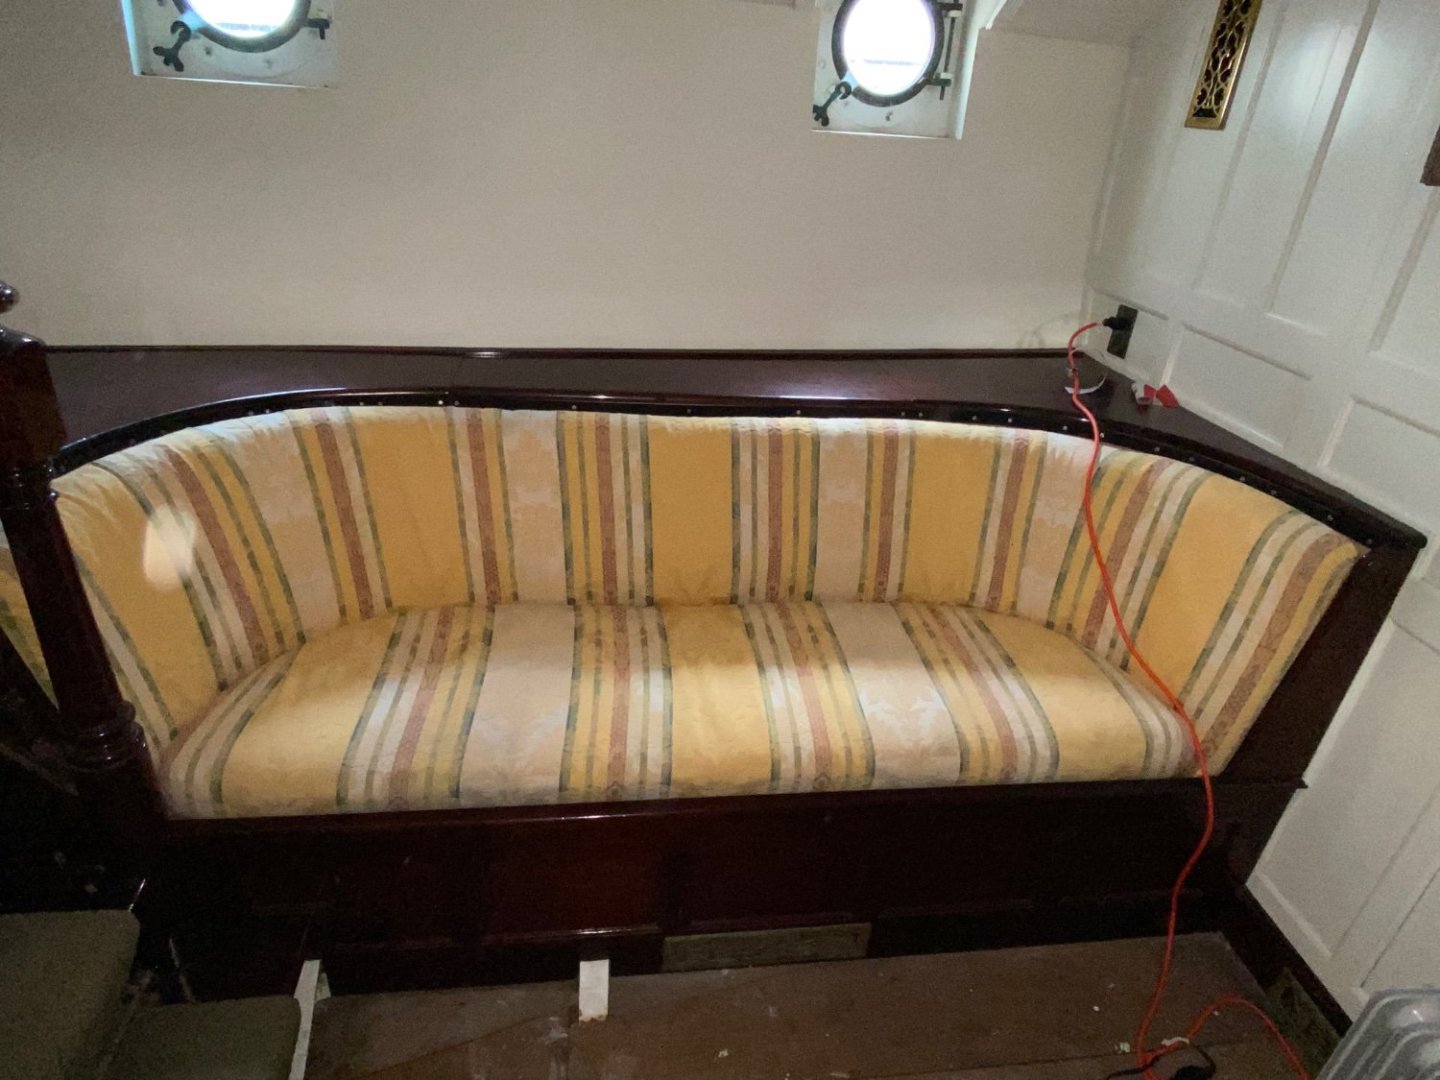
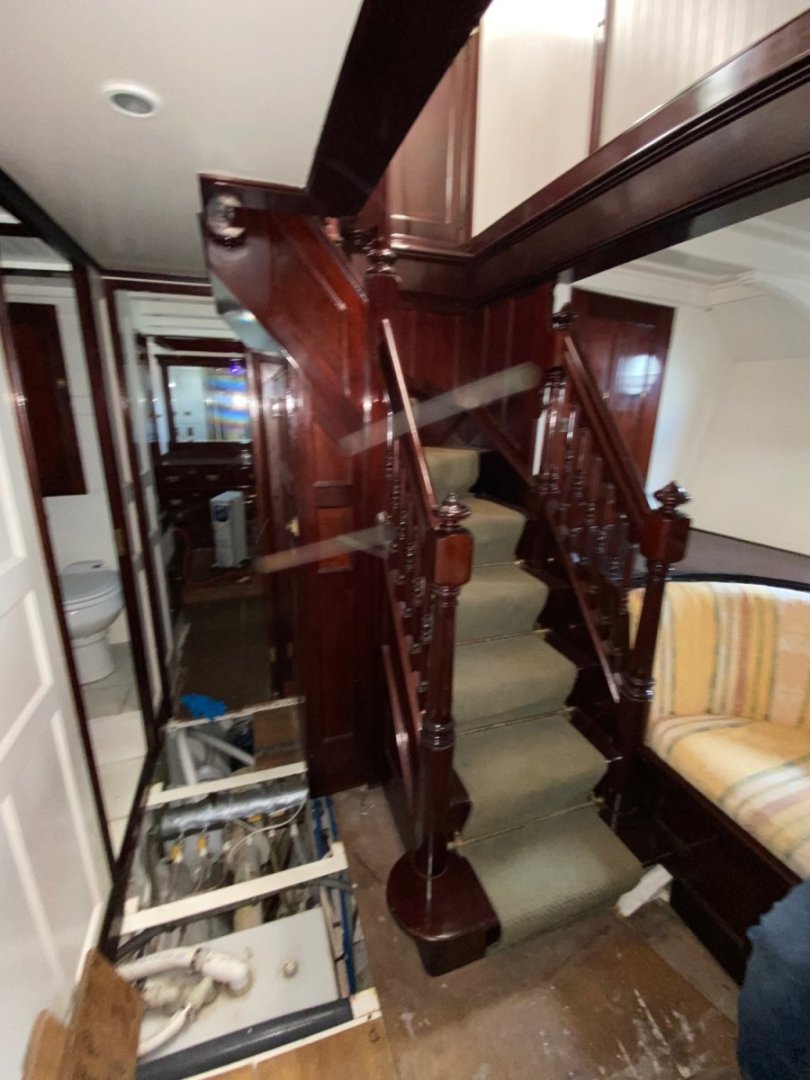
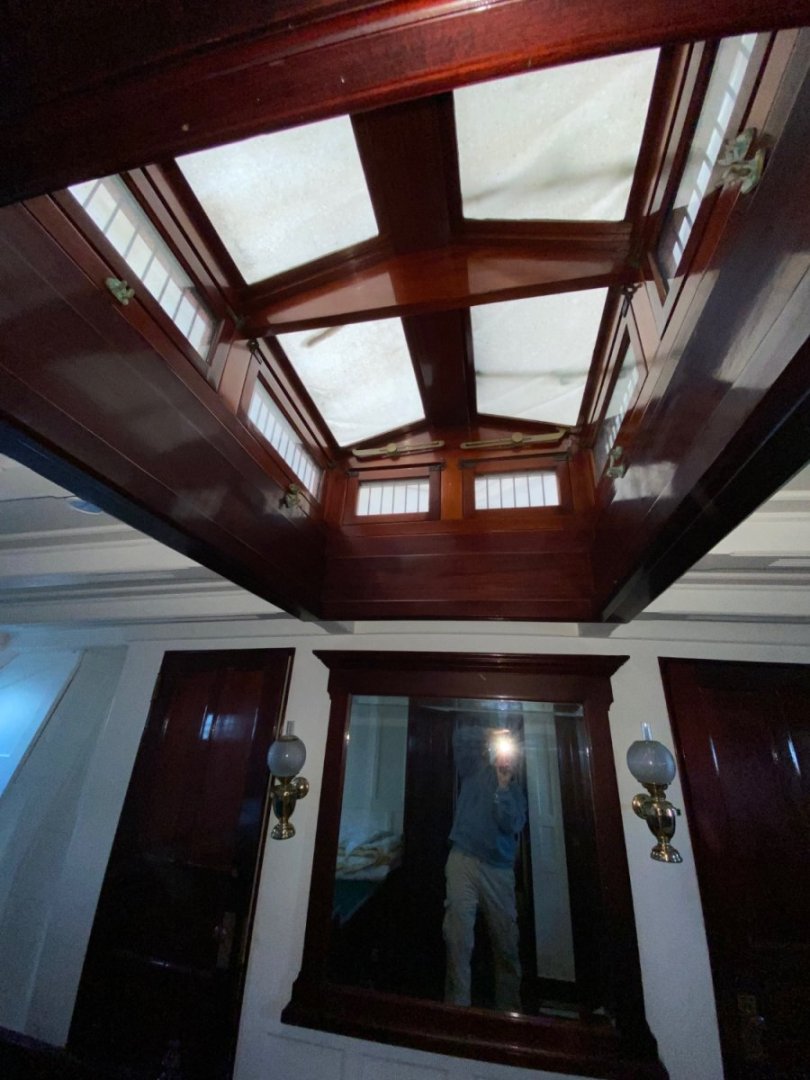
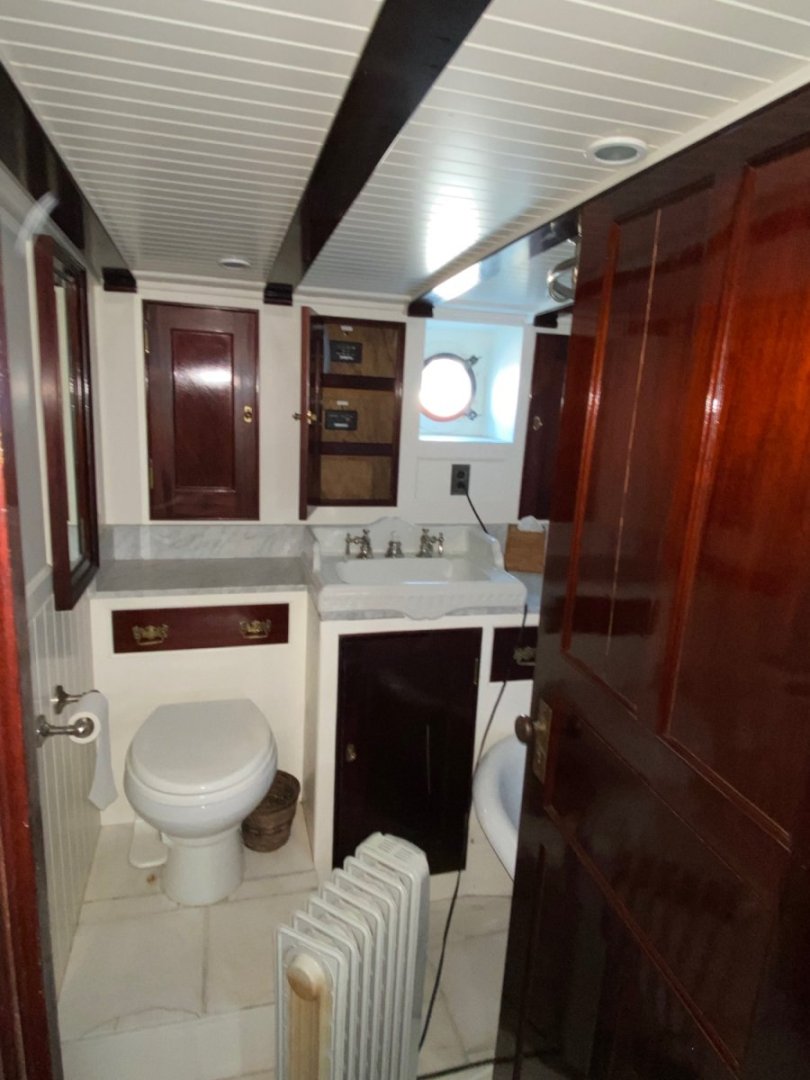
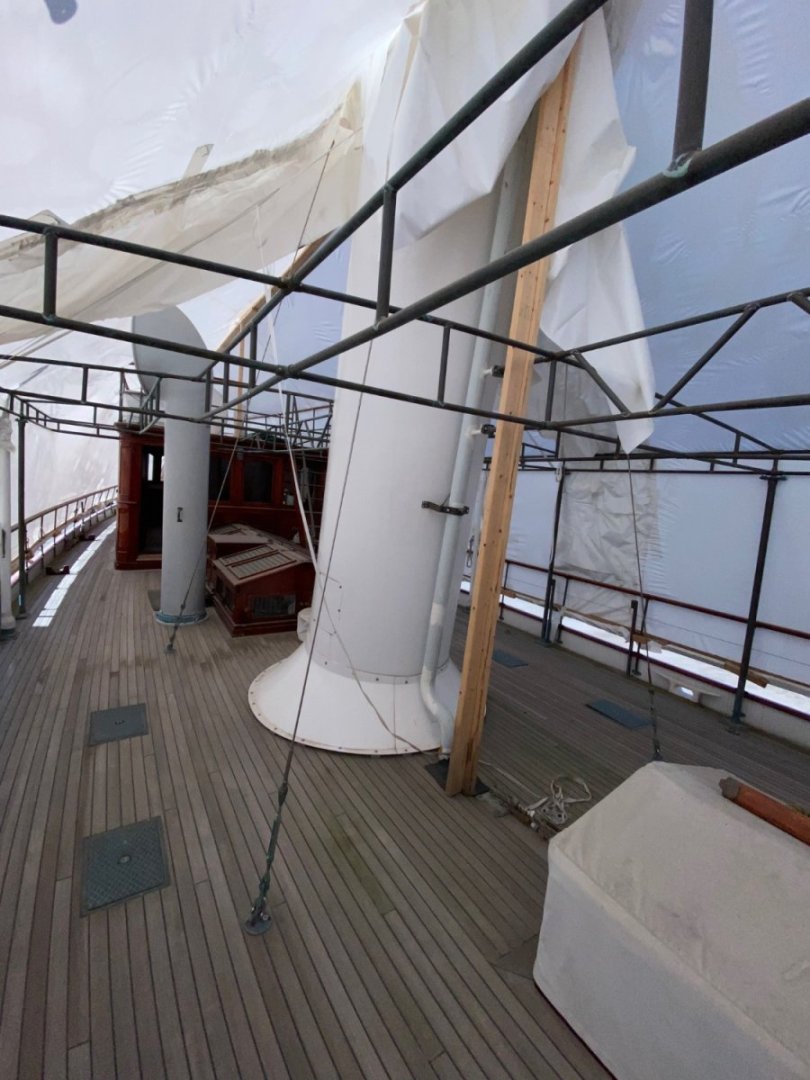
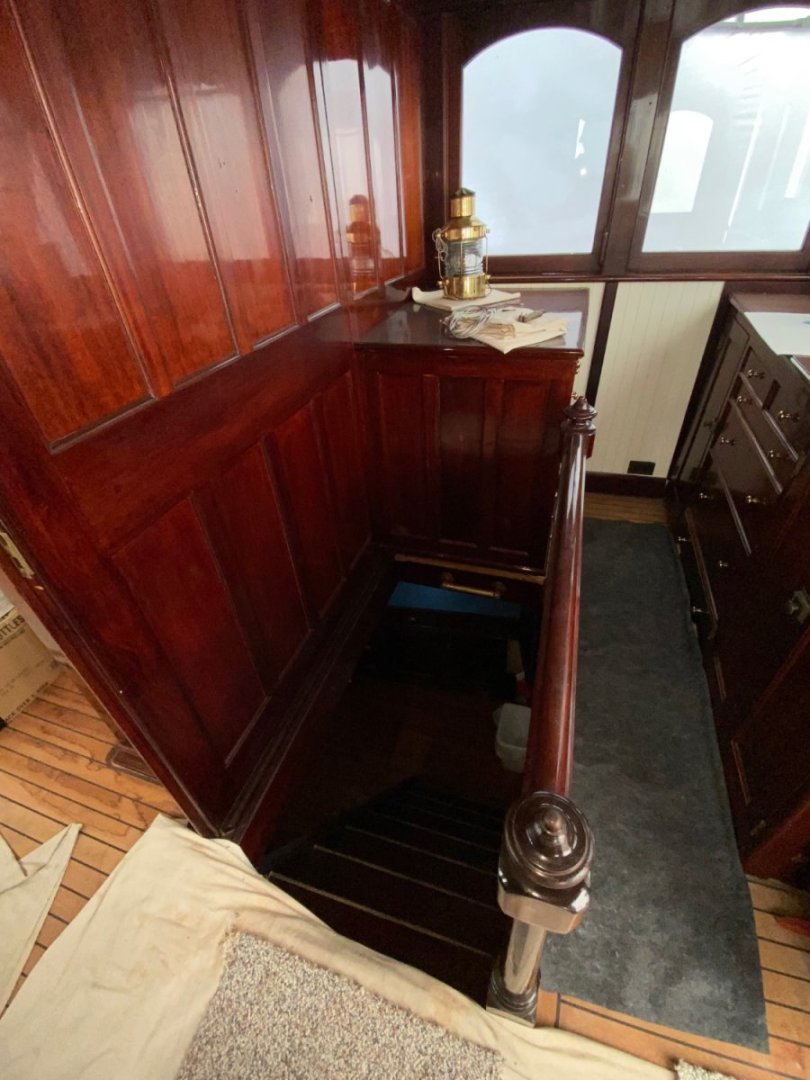
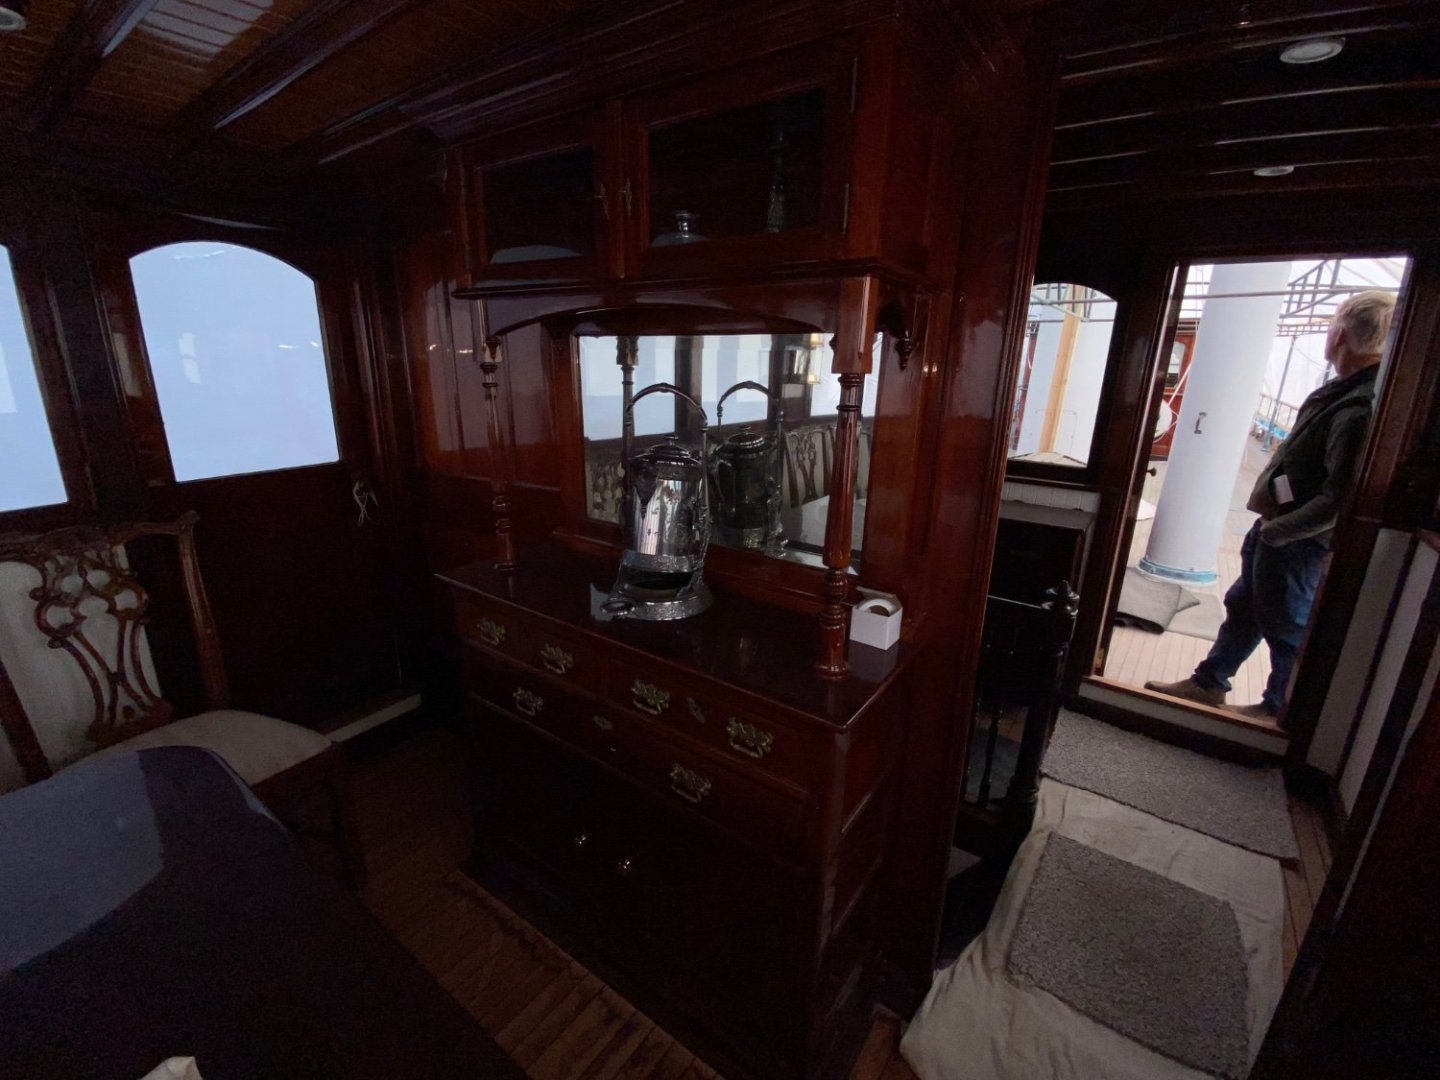
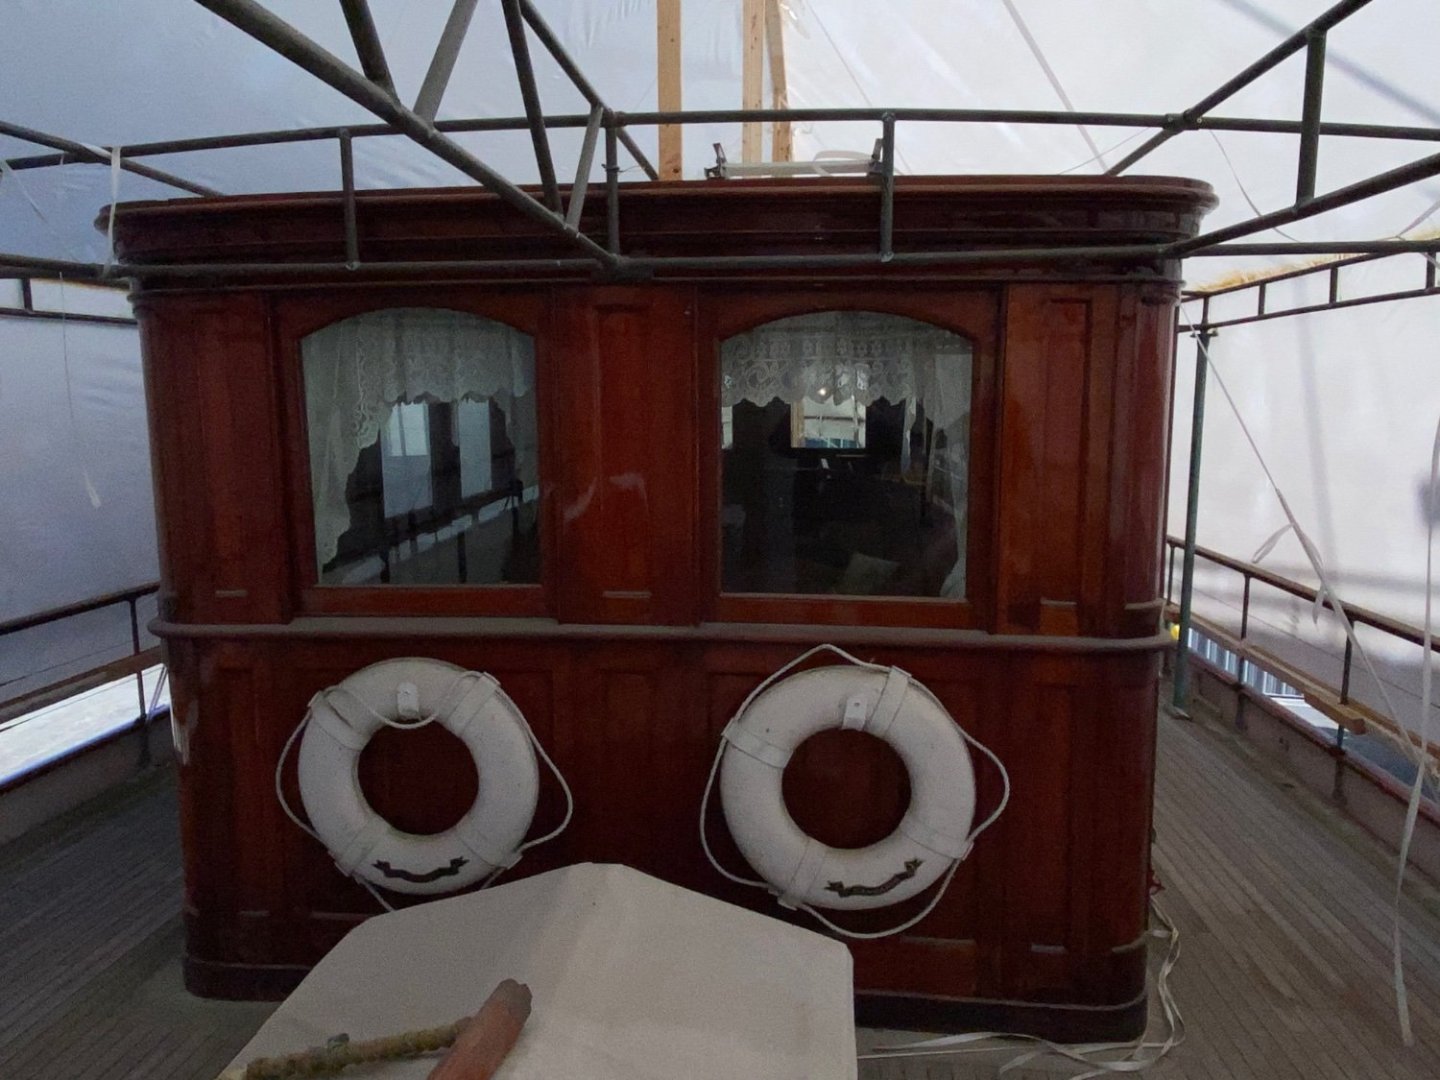
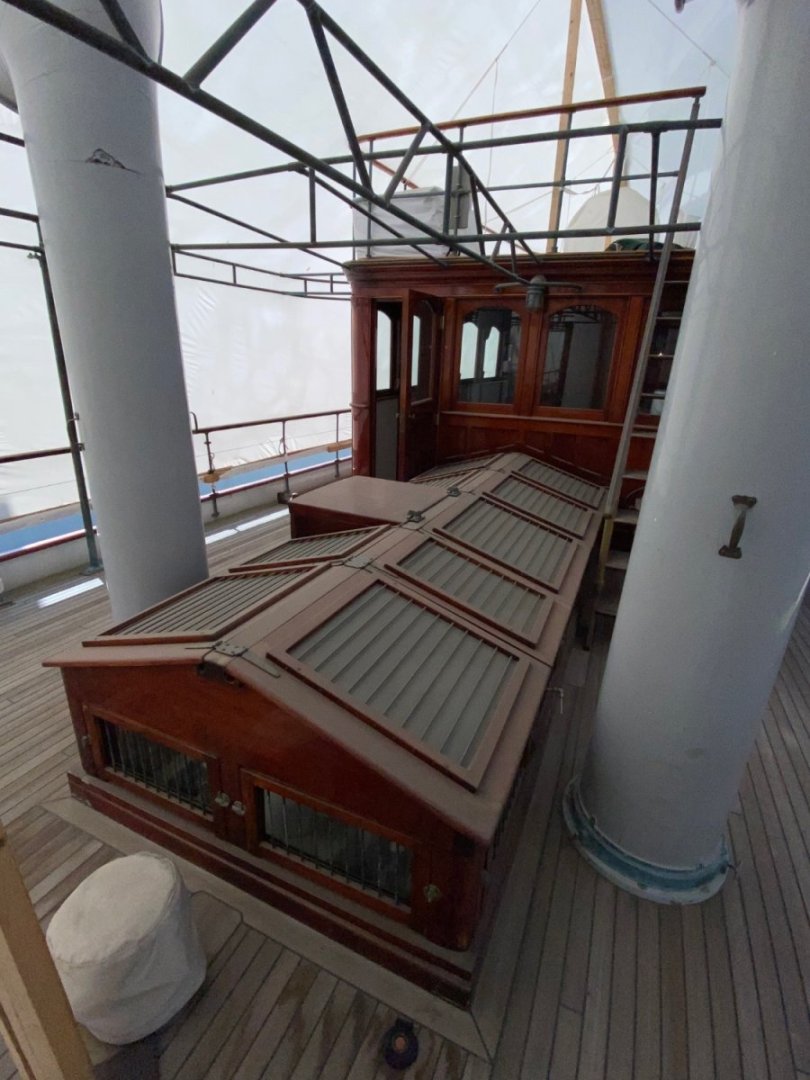
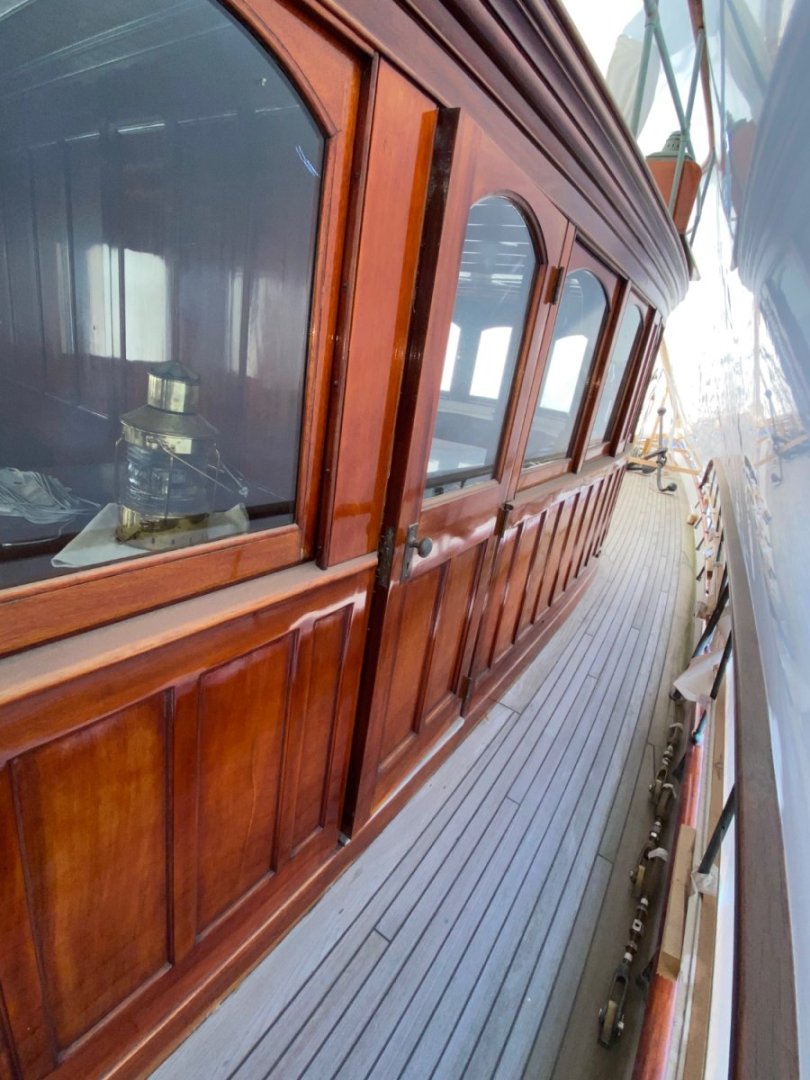
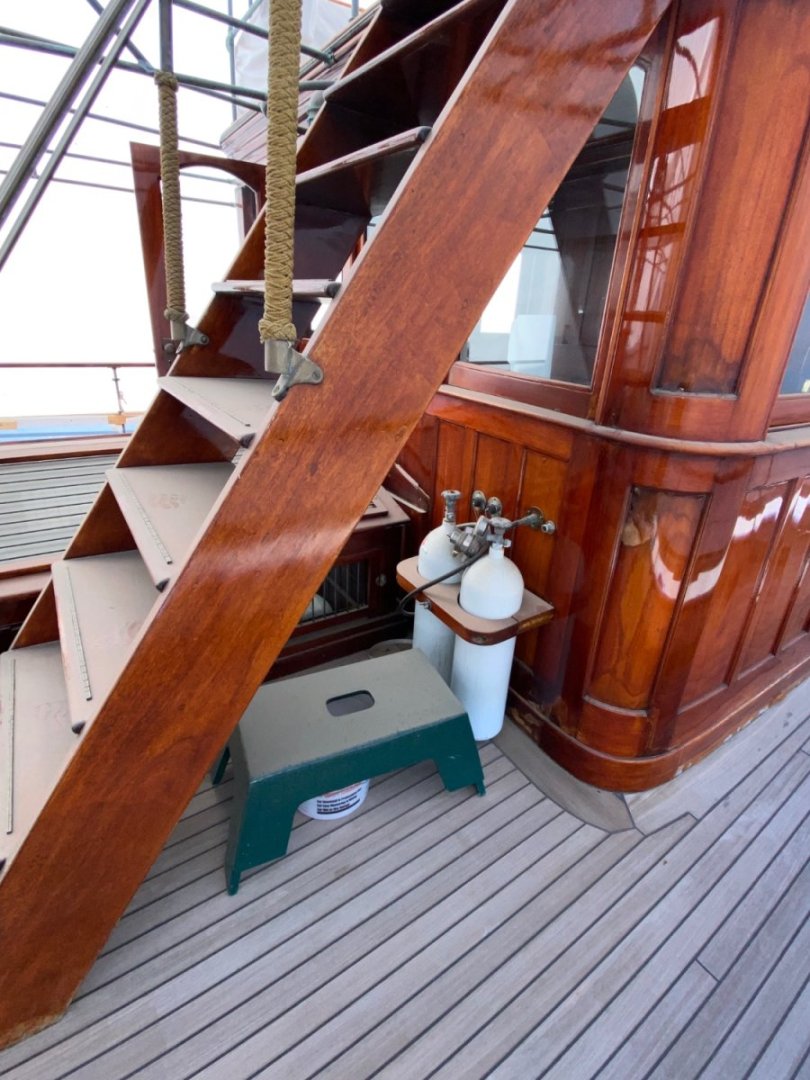
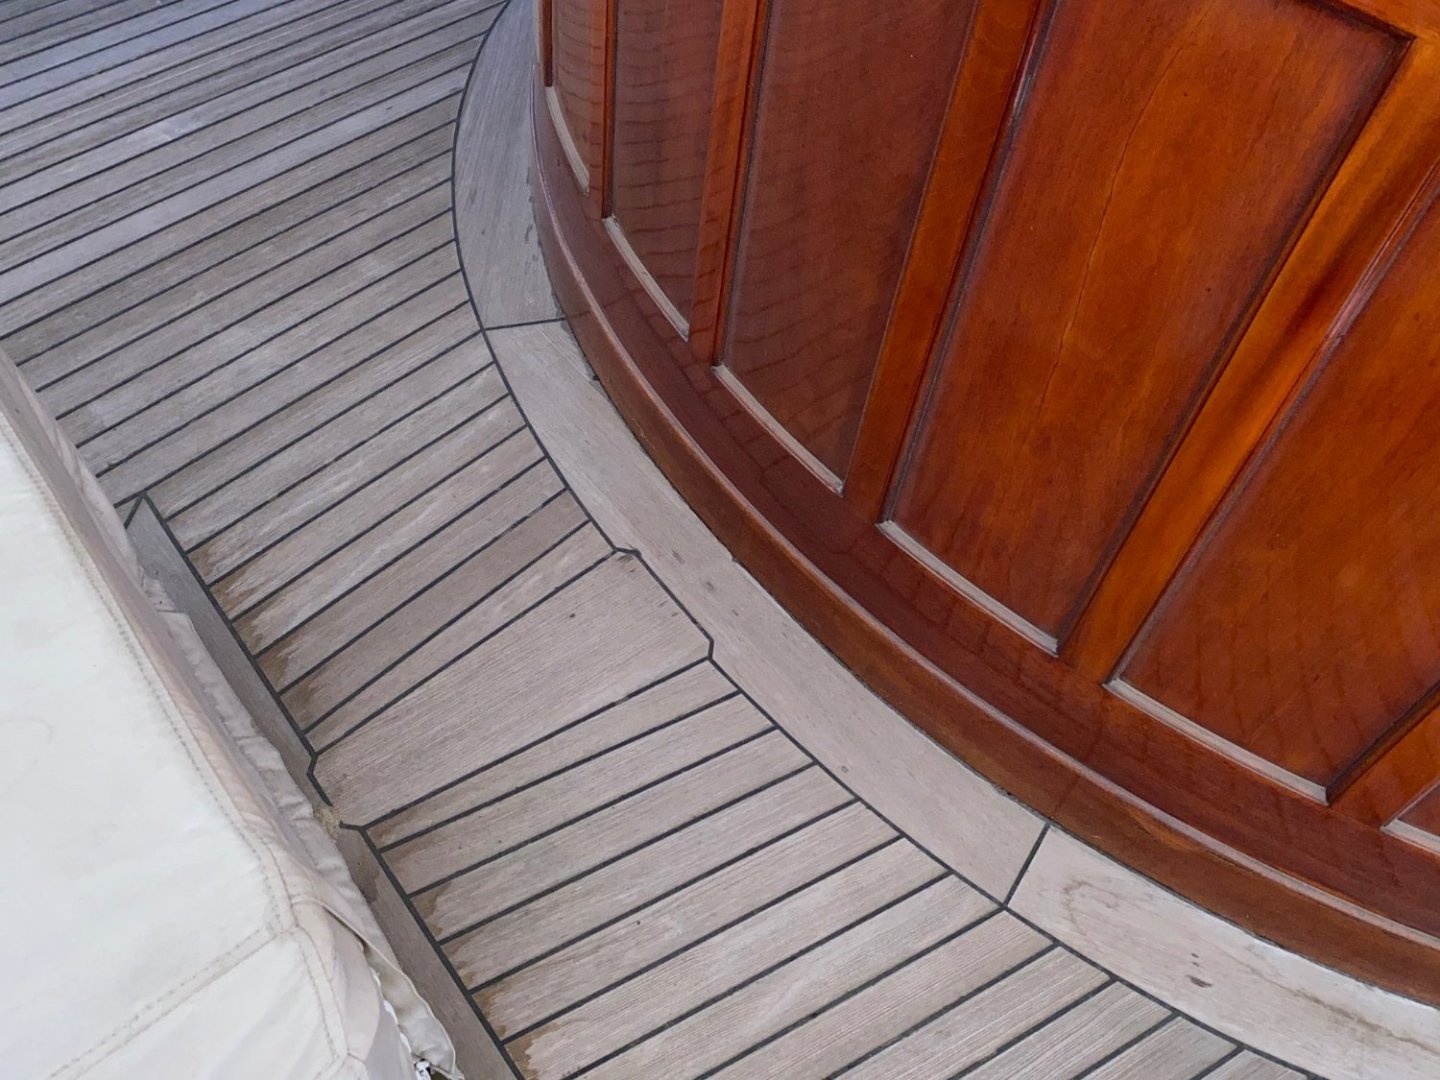
Note, stairs going down are at the aft ends of both cabins. Note round holes in table and above for masts. The 2 davits in the bow are for the anchors . access to the top of the forward cabin only, where the helm is located. Rick
-
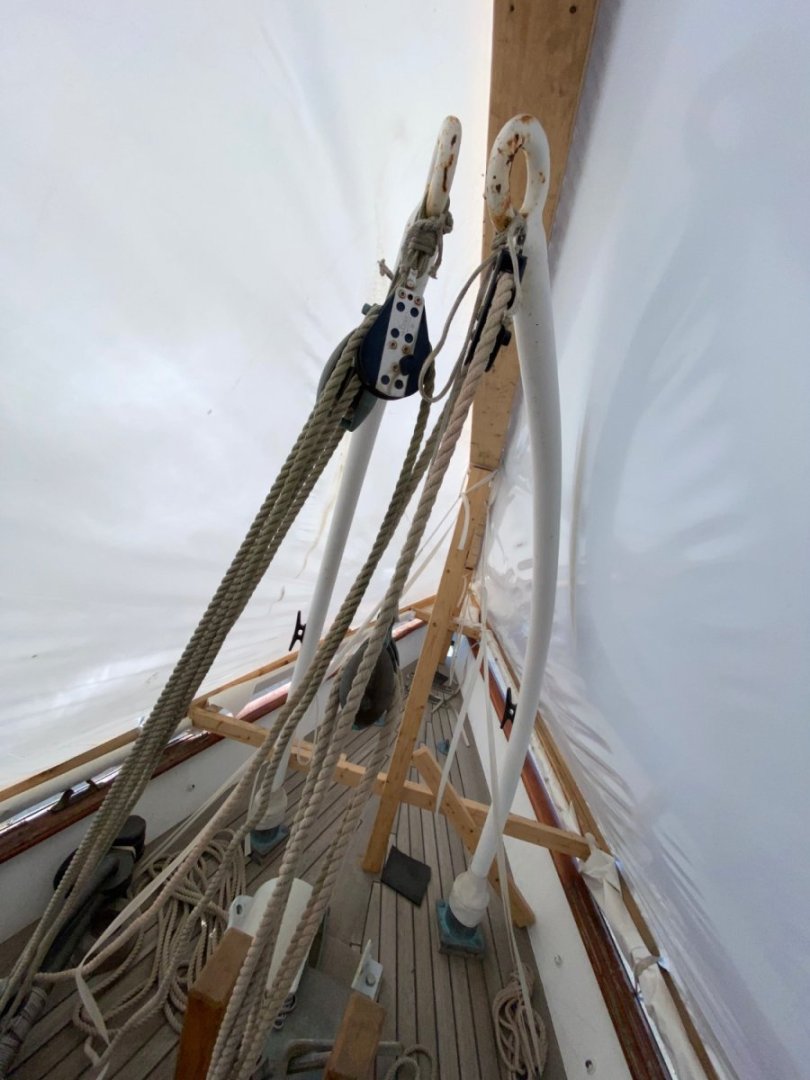
Those were photos of the engine room, pretty cramped. The rest are topside and in the cabins.


-
Here are some of the photos.


-
Really nice!! Great description of your technique!!
- 166 replies
-
- 4
-
-
- Maine
- BlueJacket Shipcrafters
- (and 1 more)
-
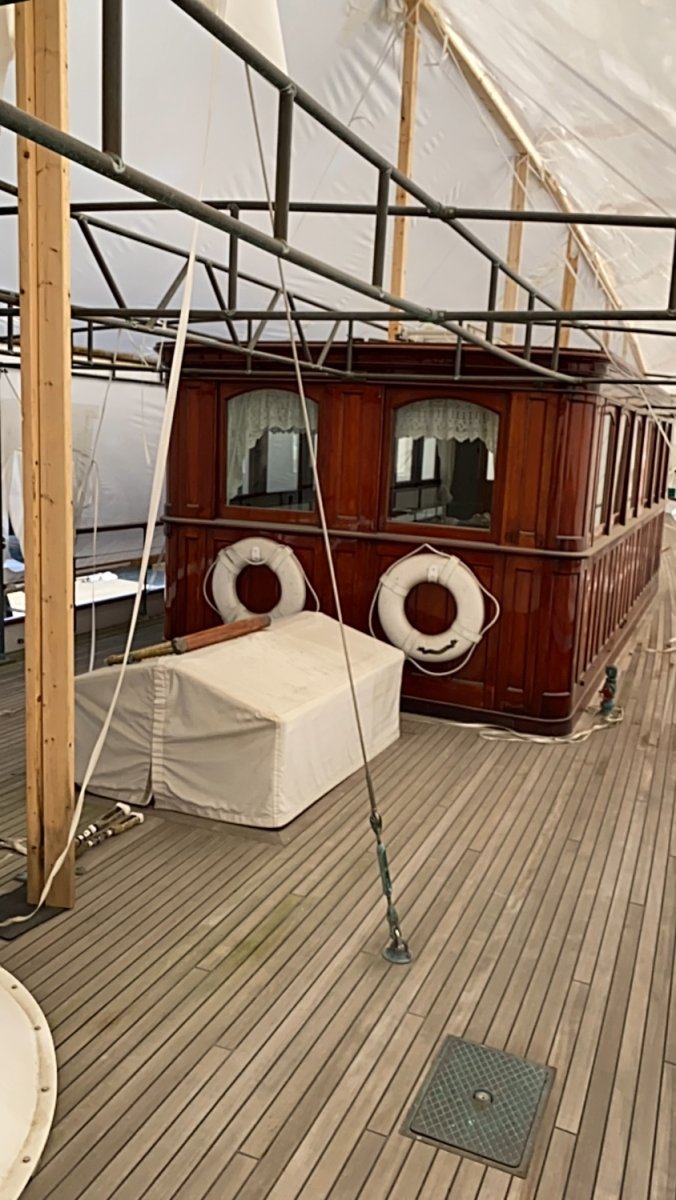
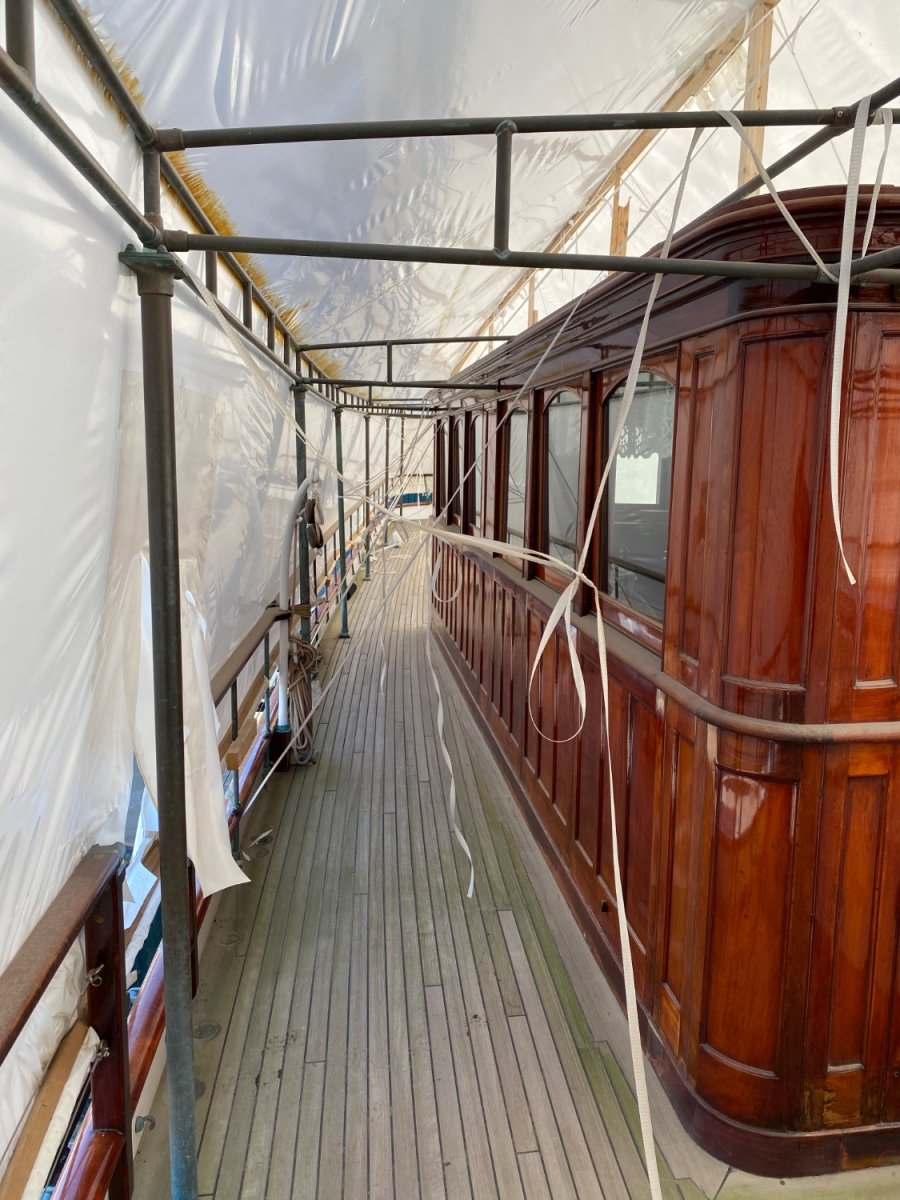
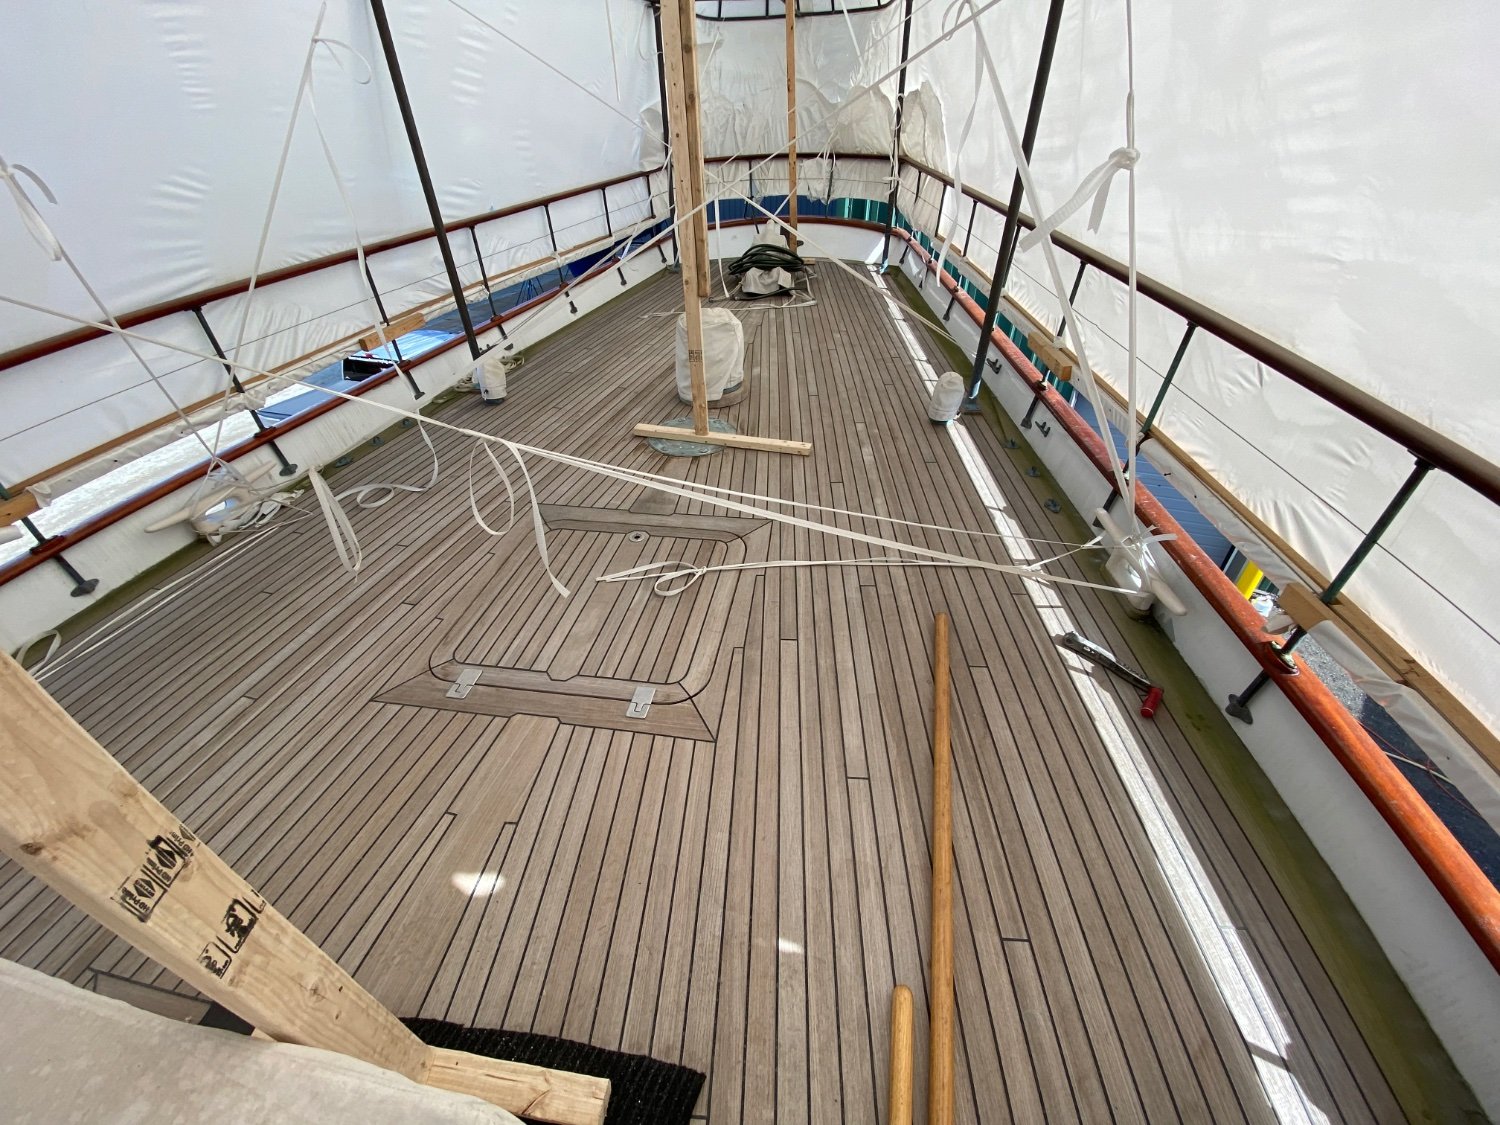
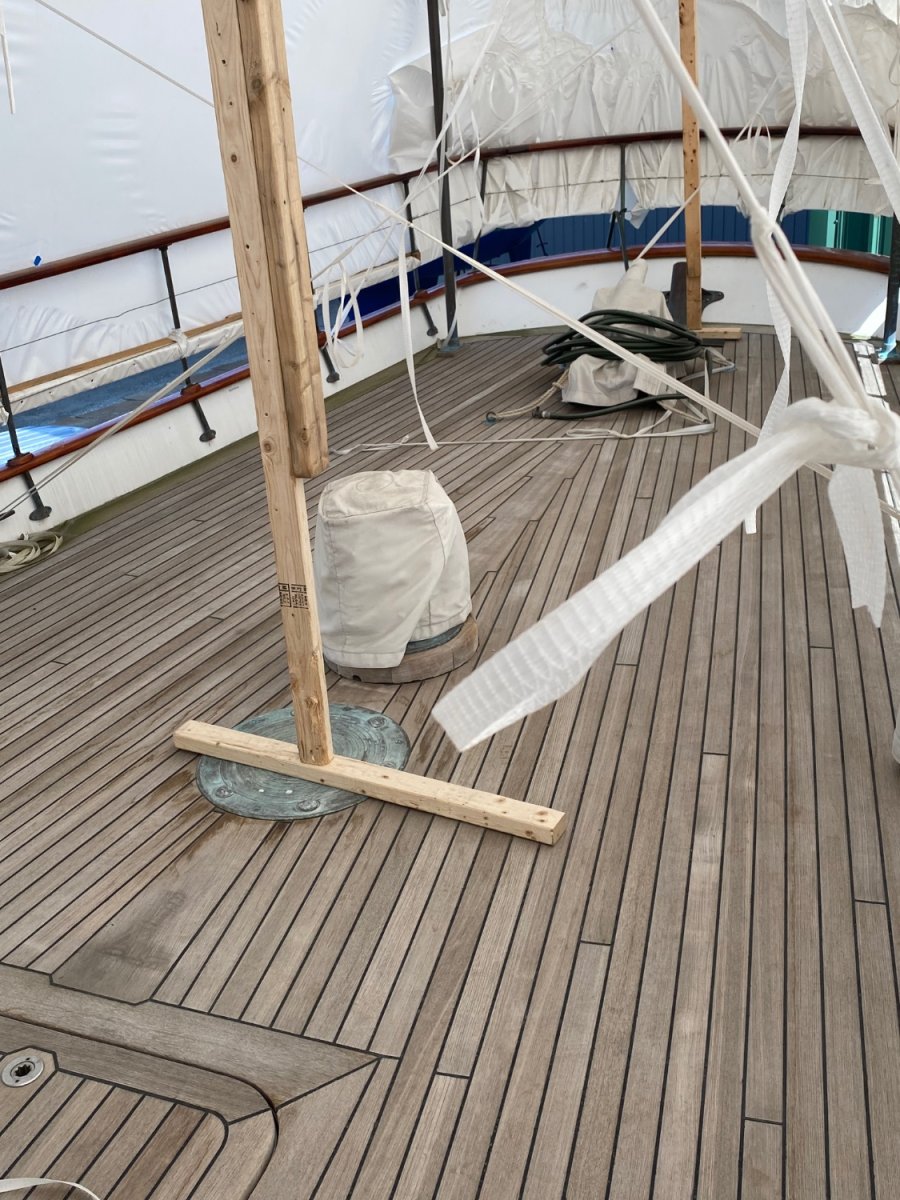
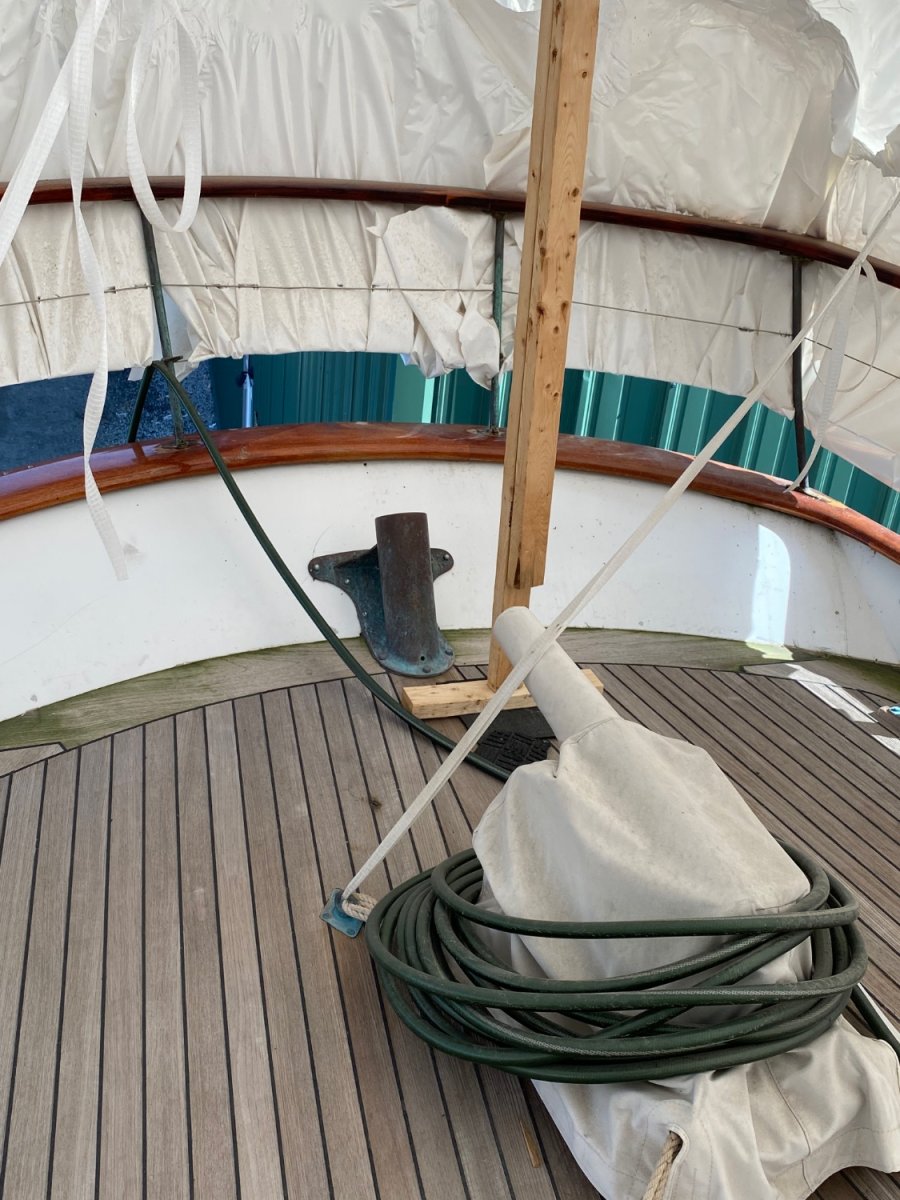
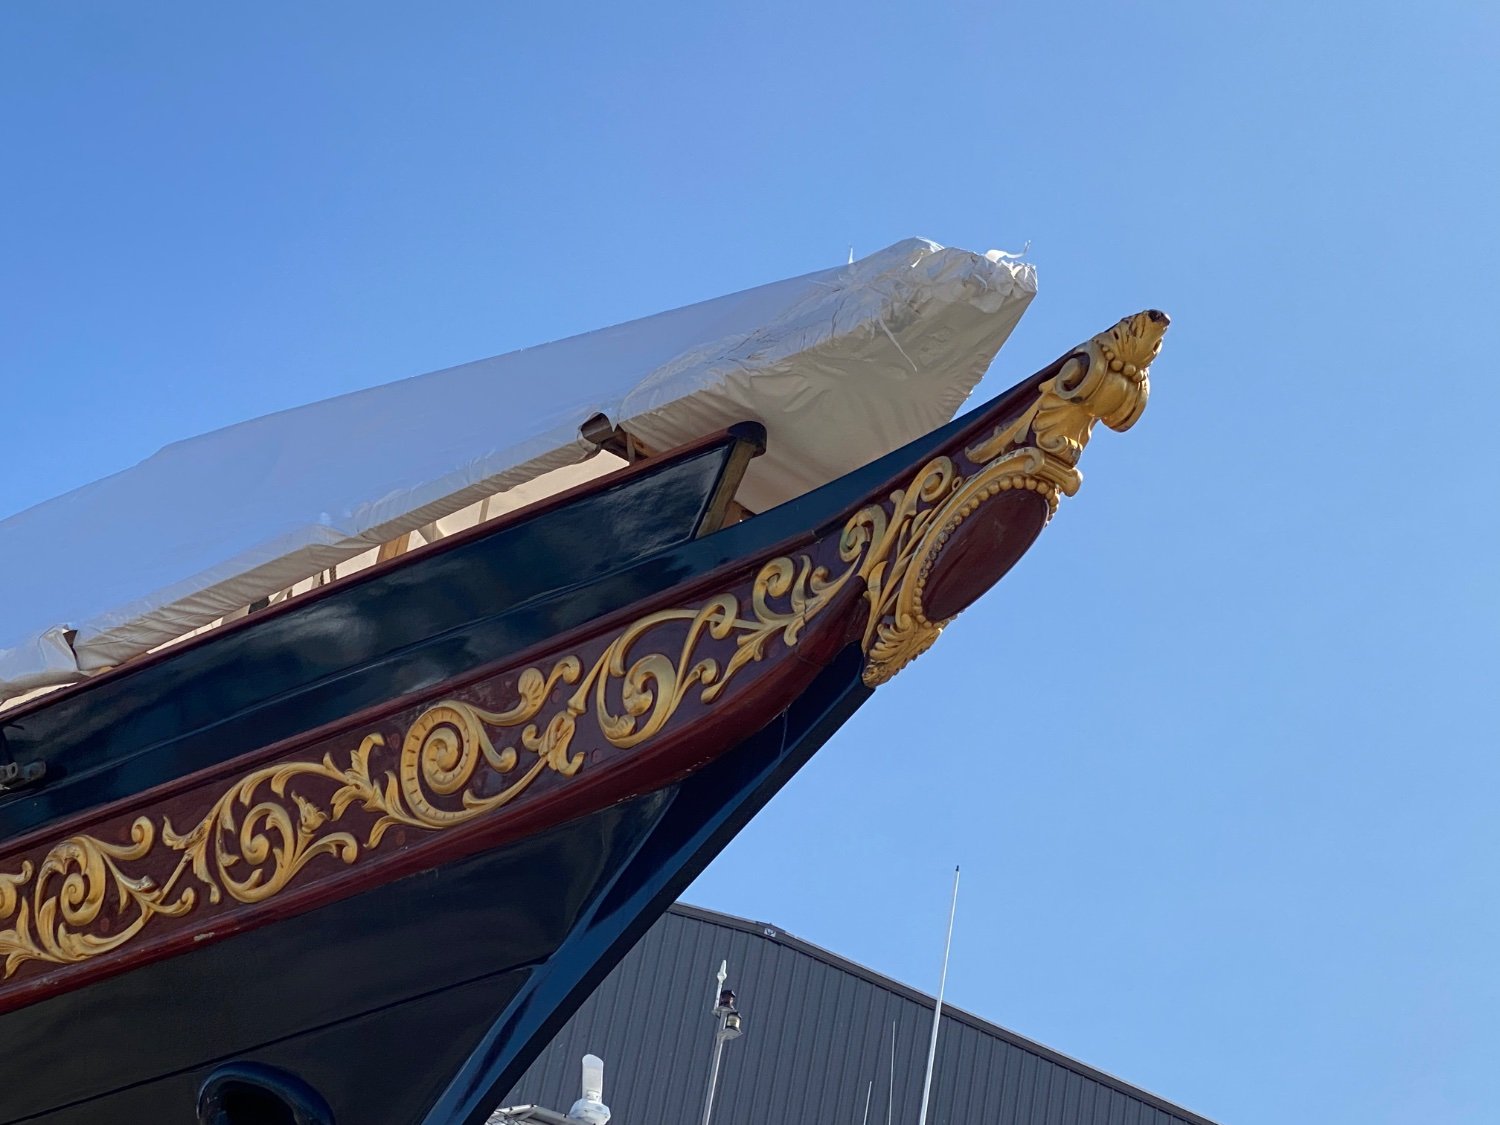
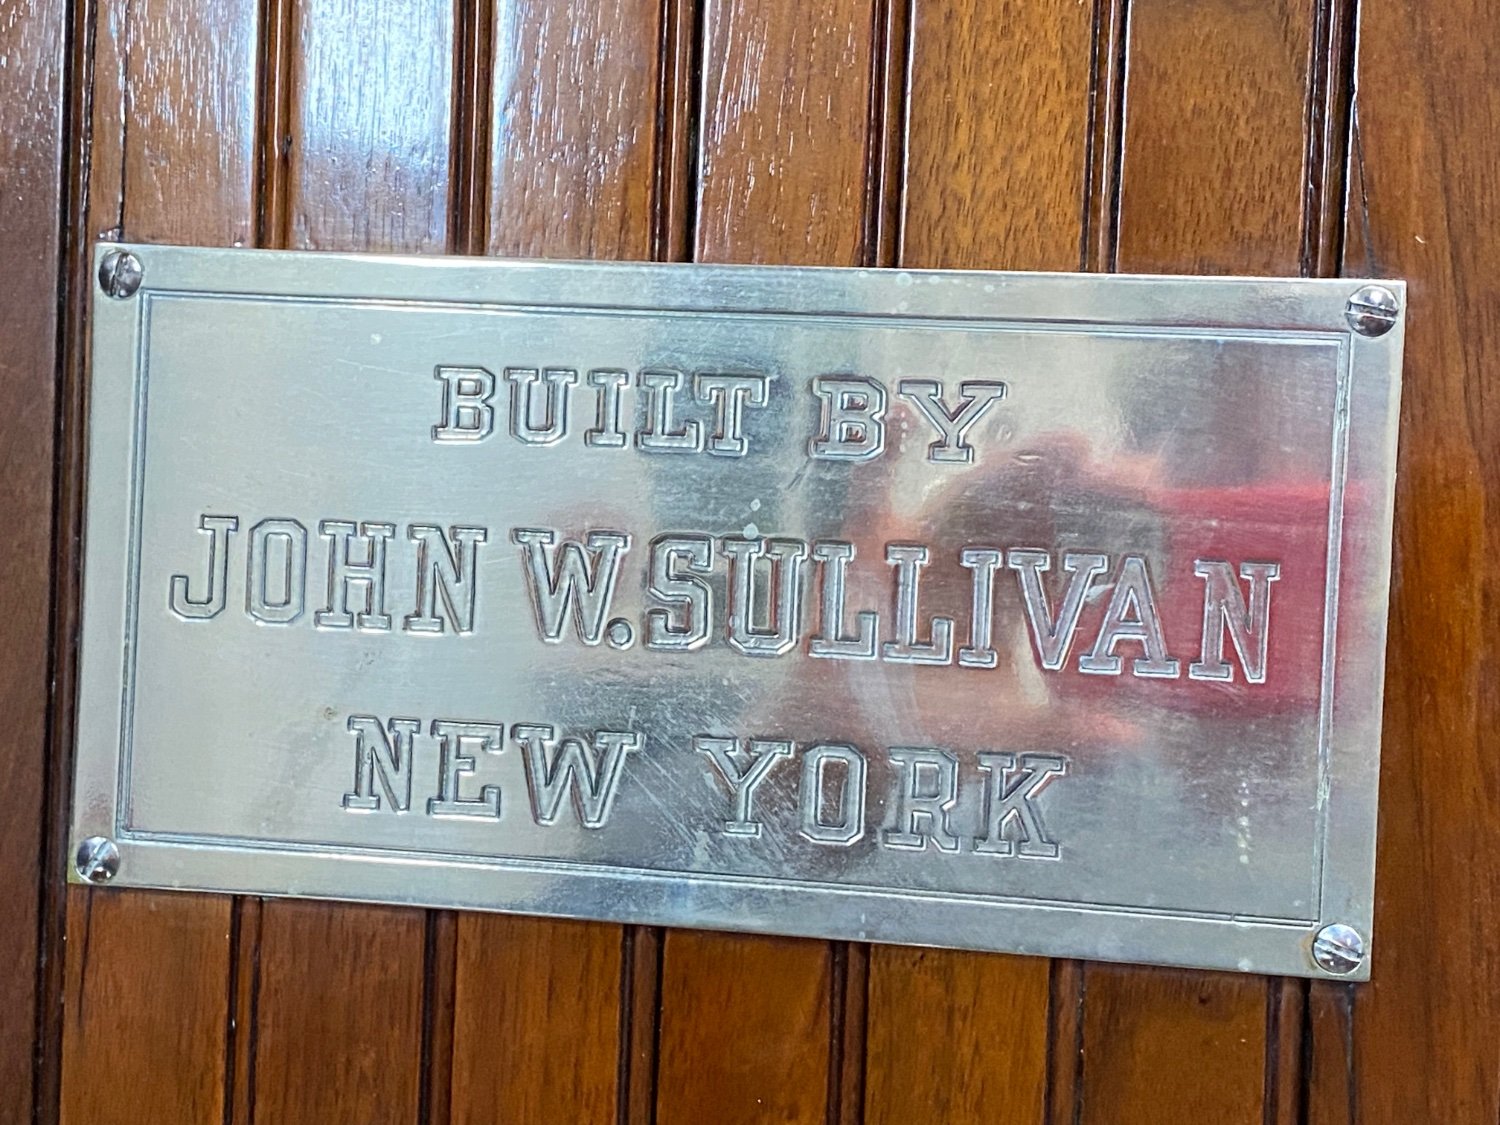
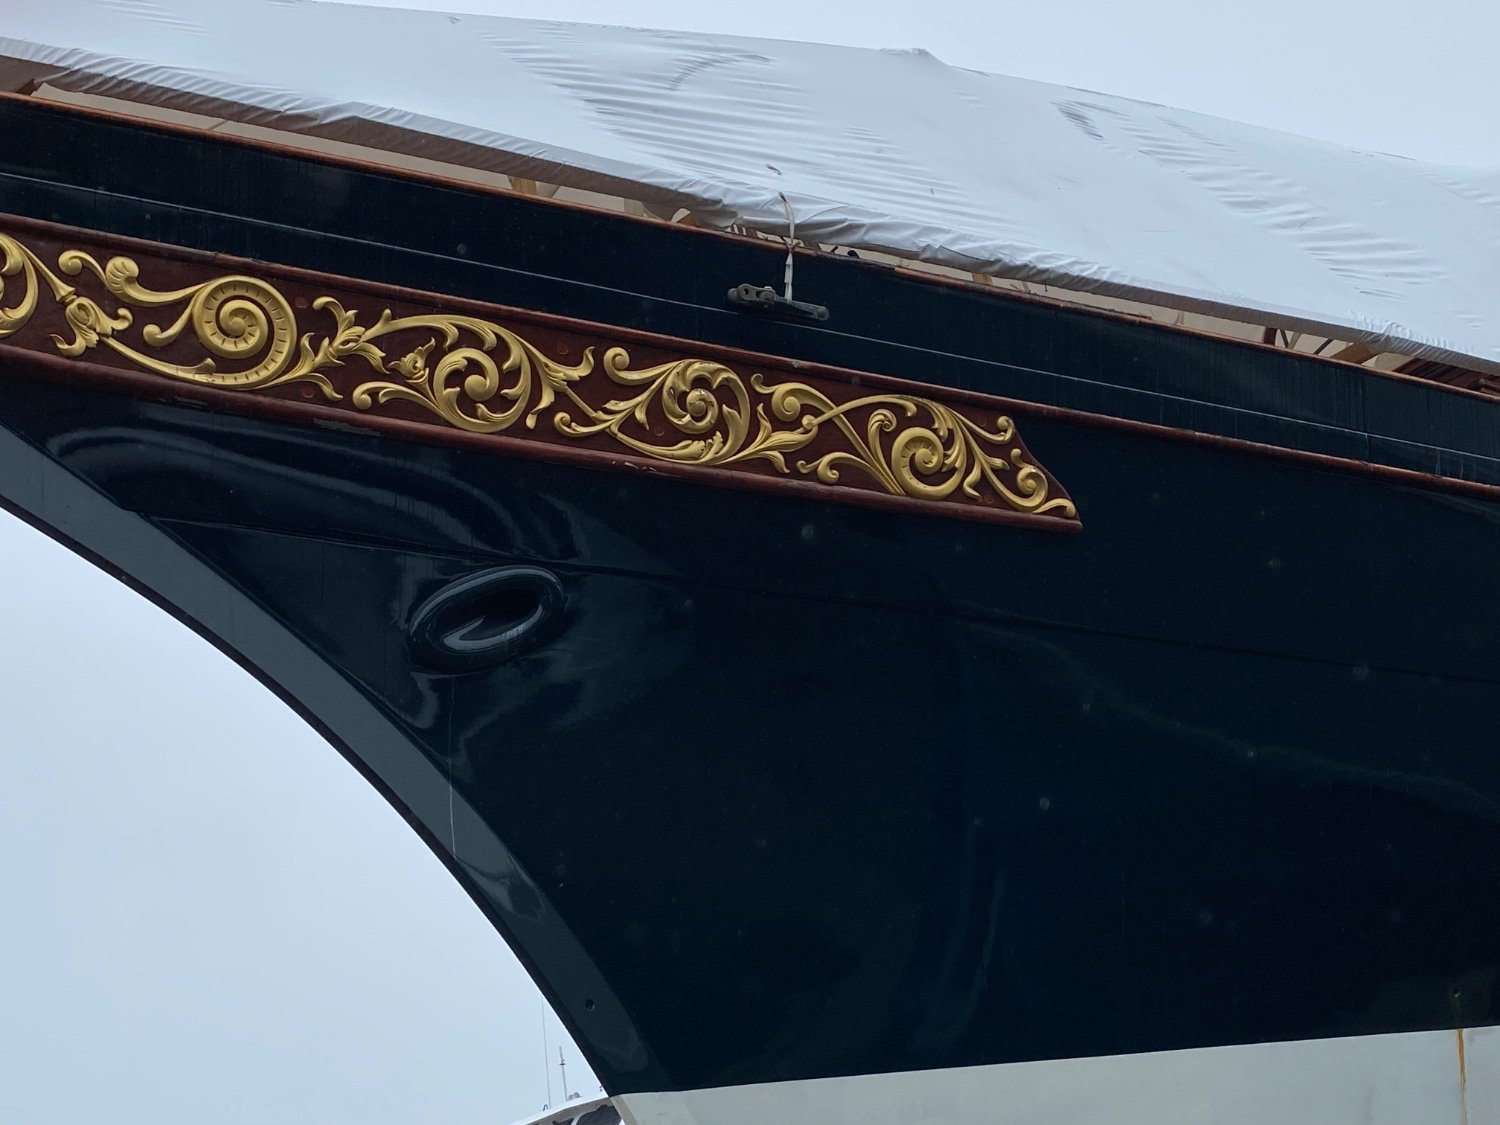
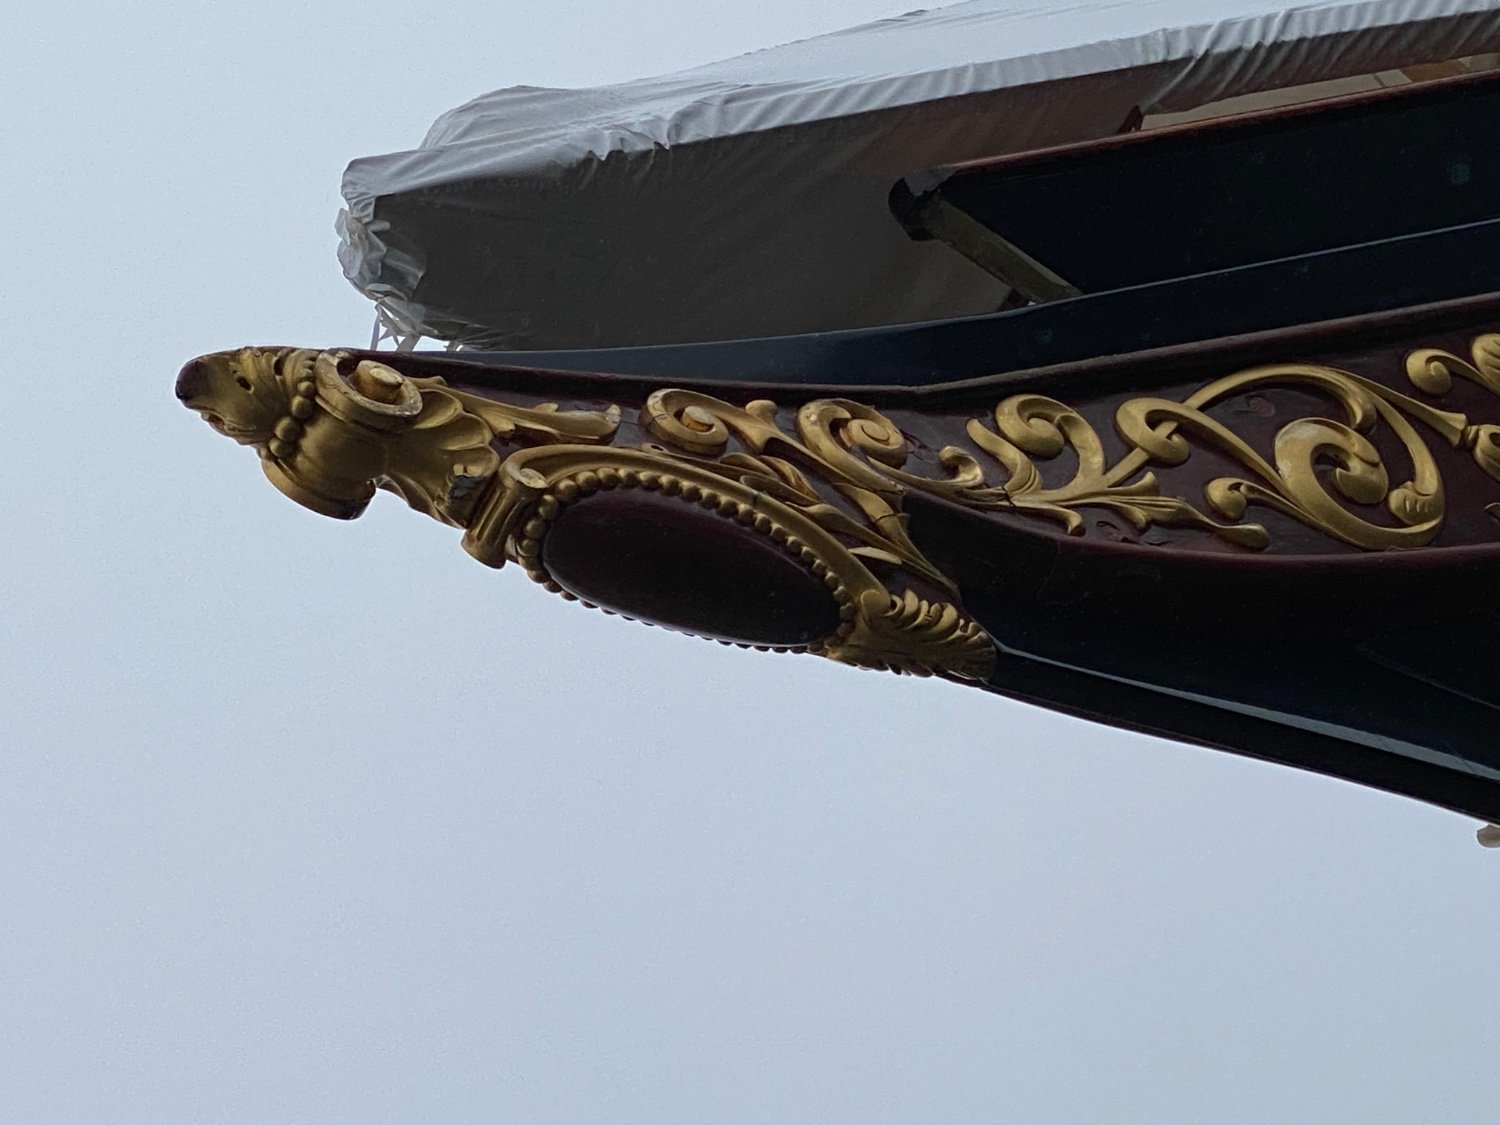
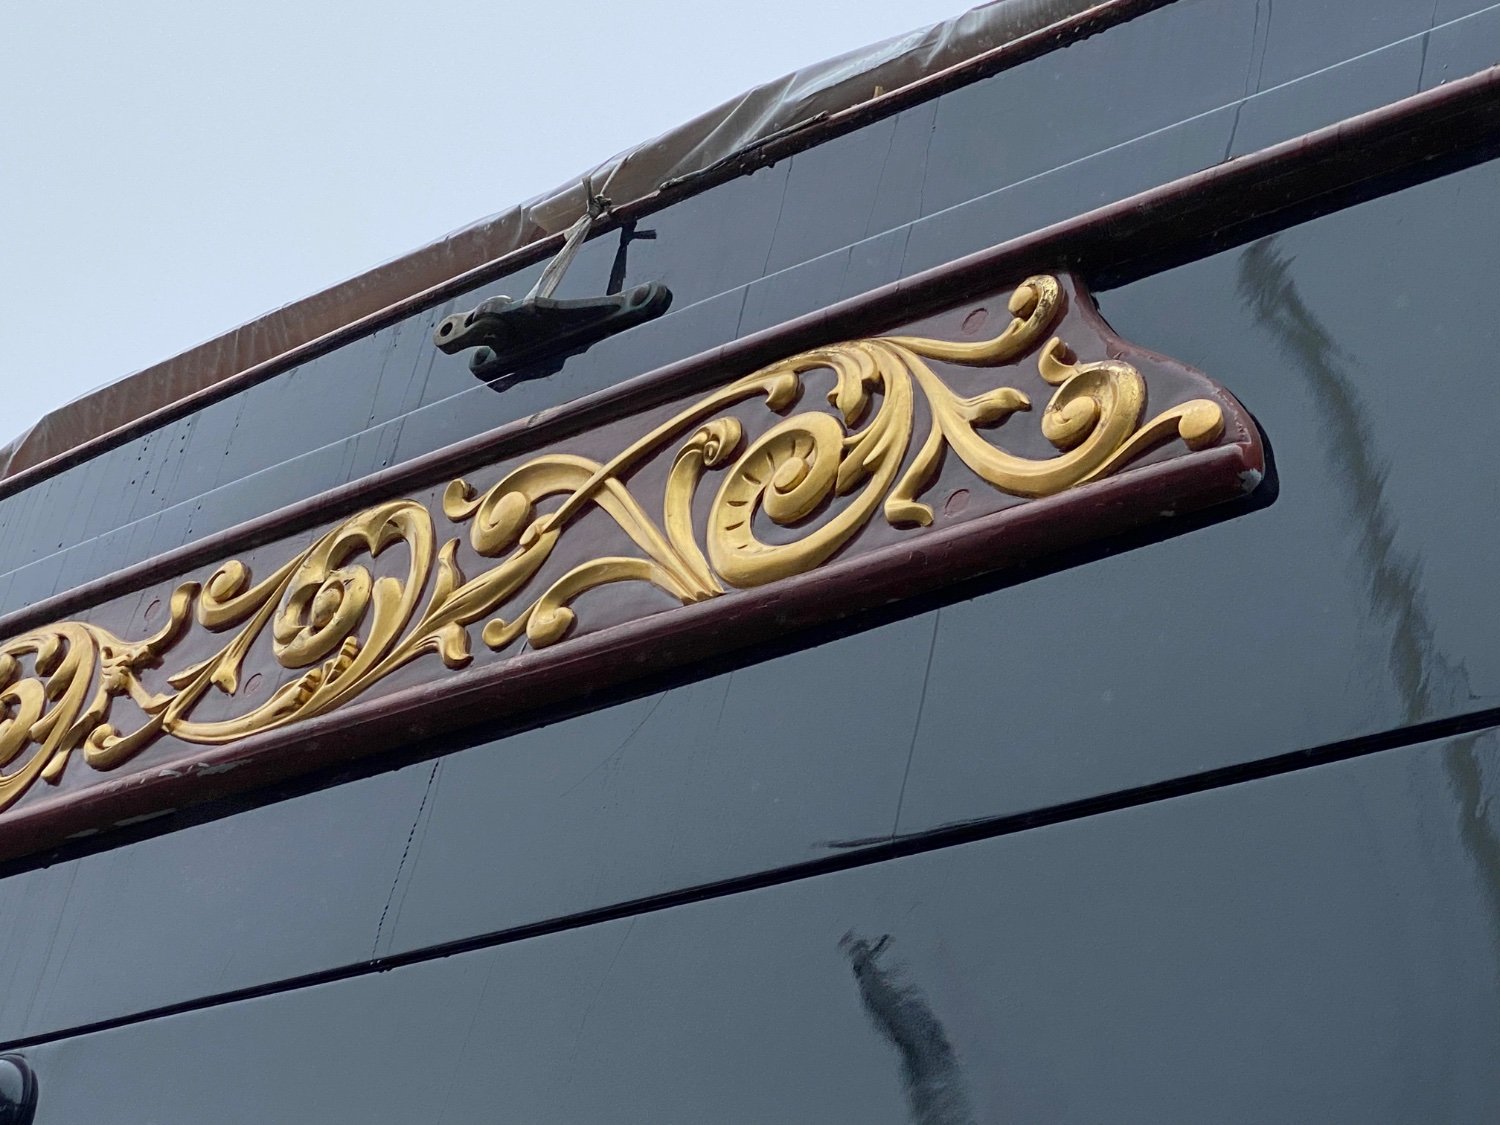
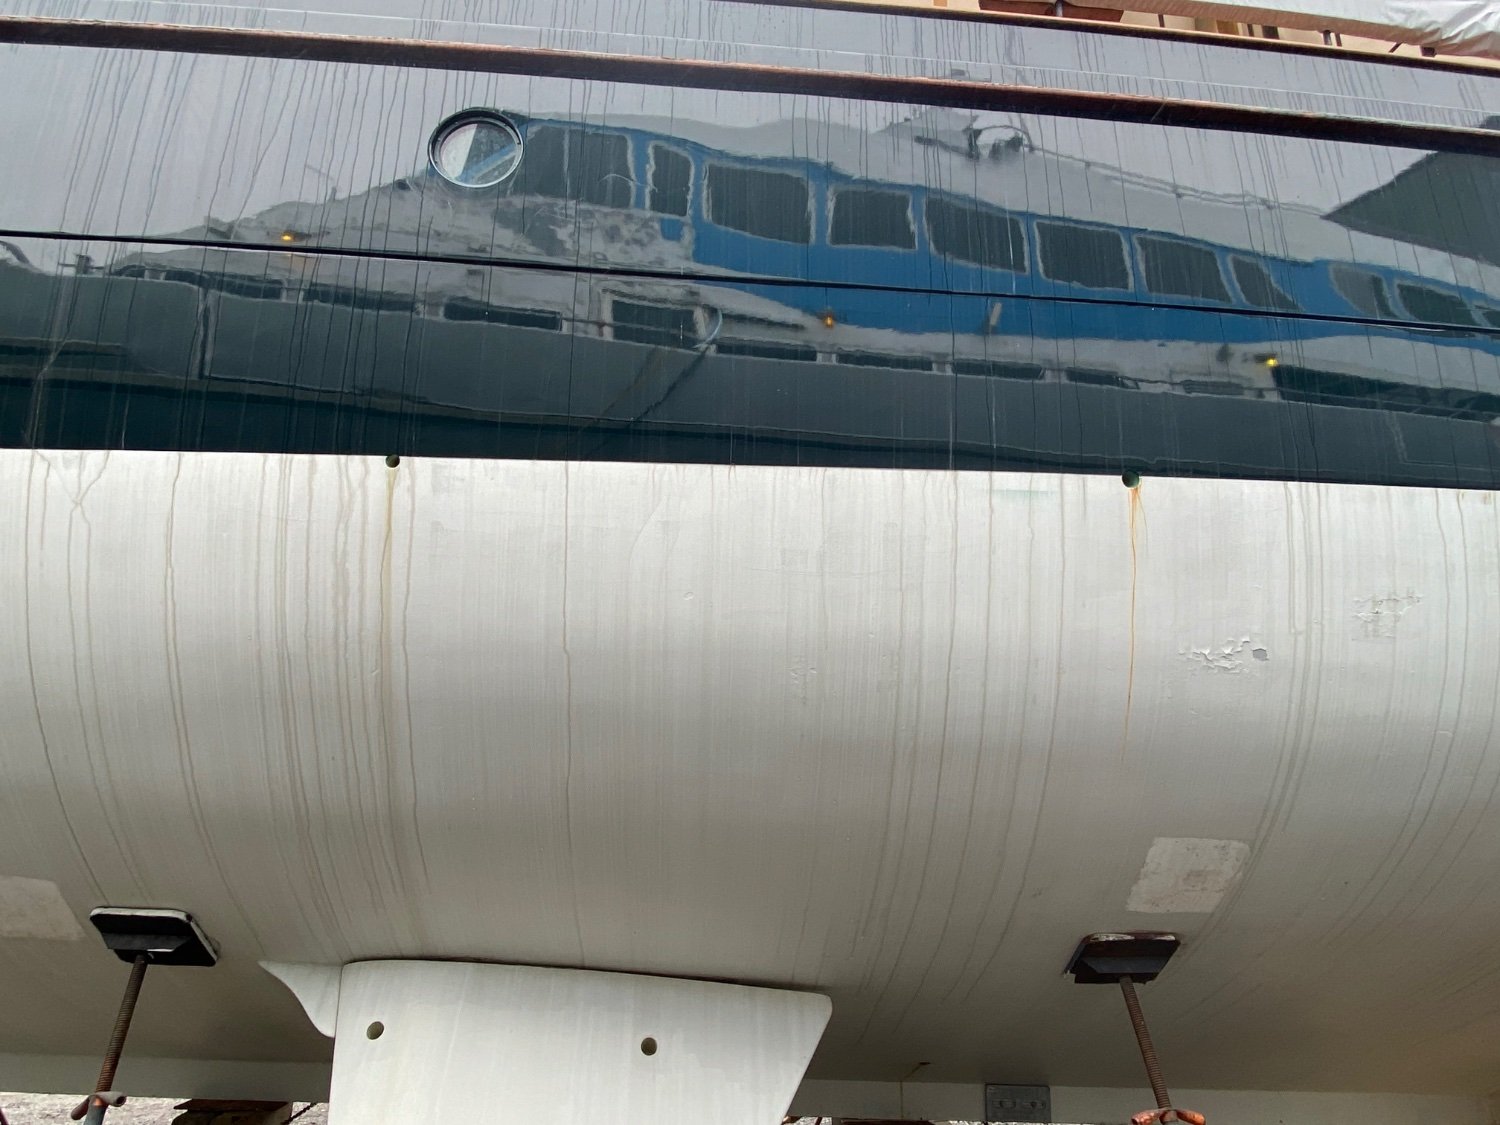
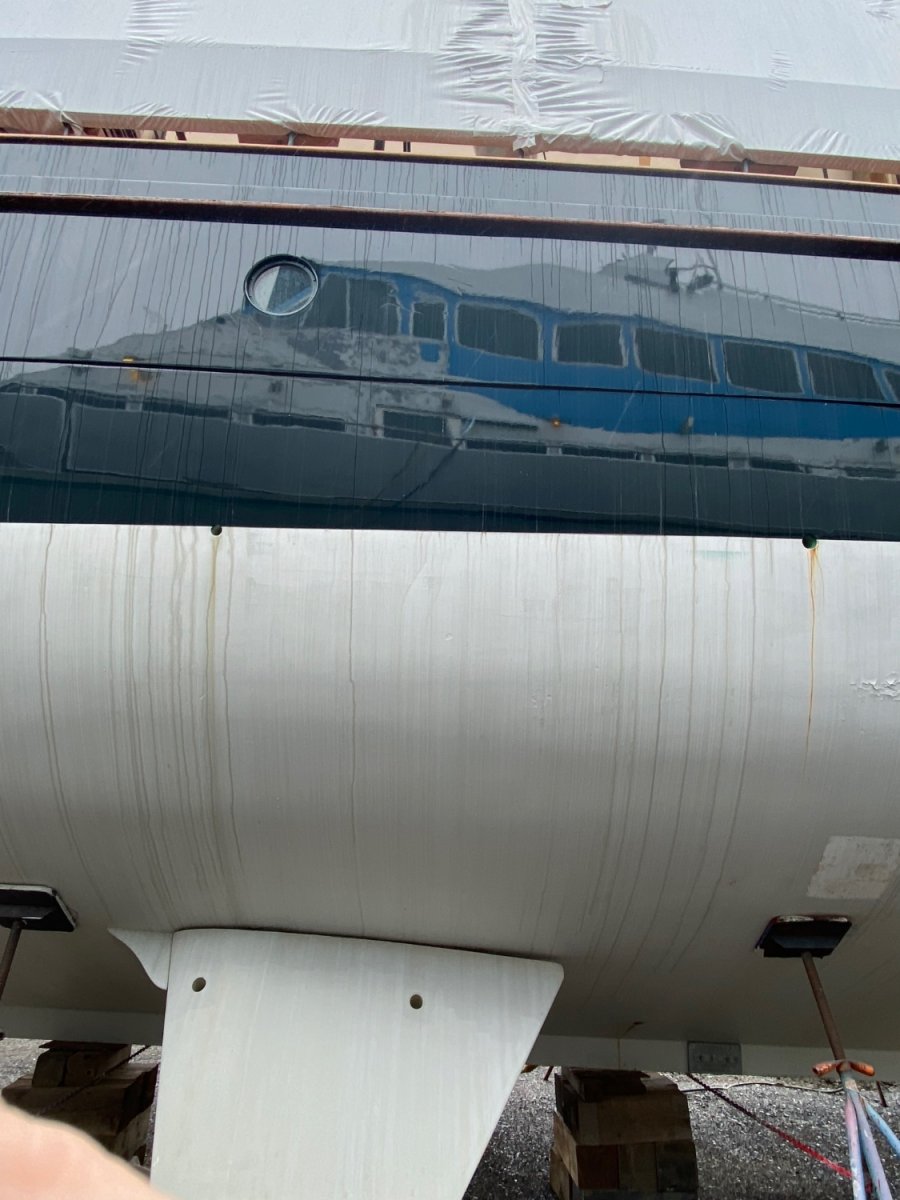
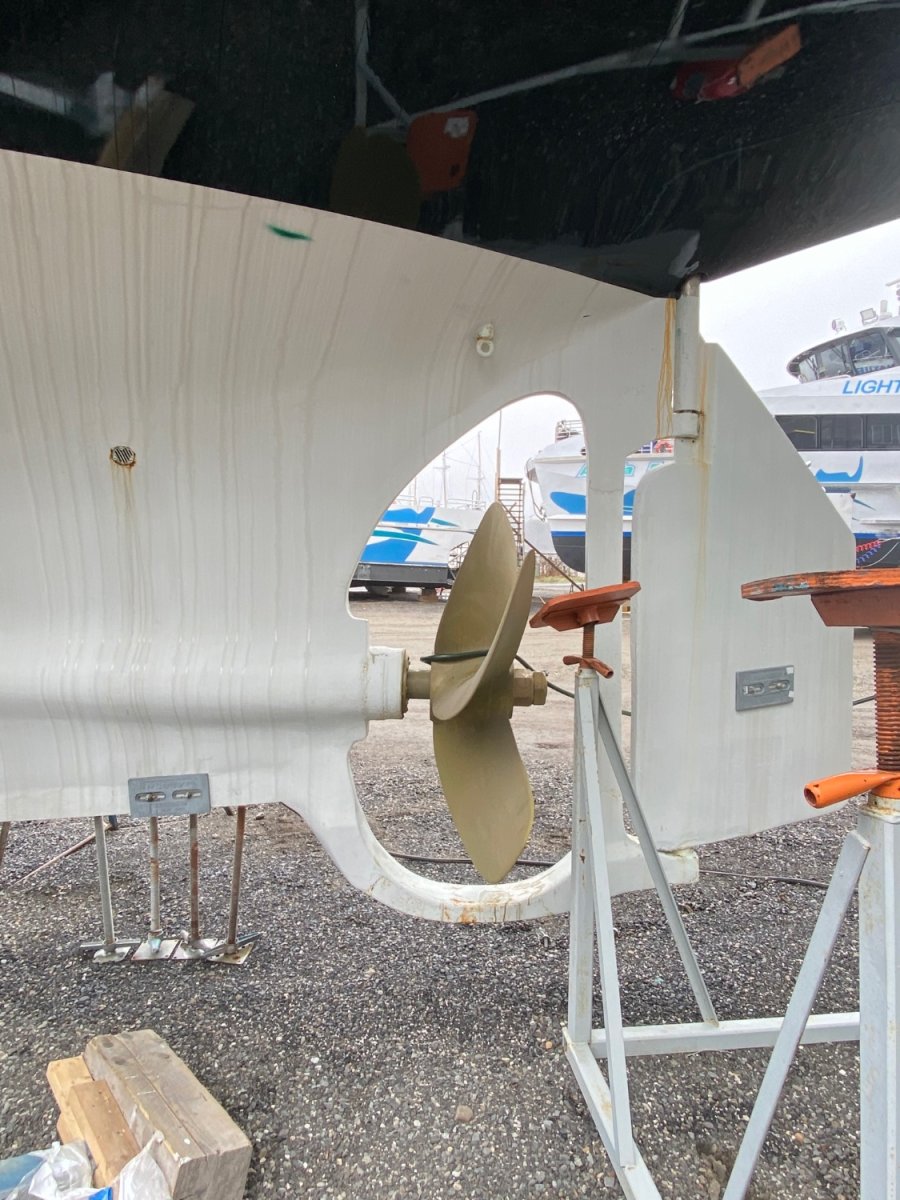
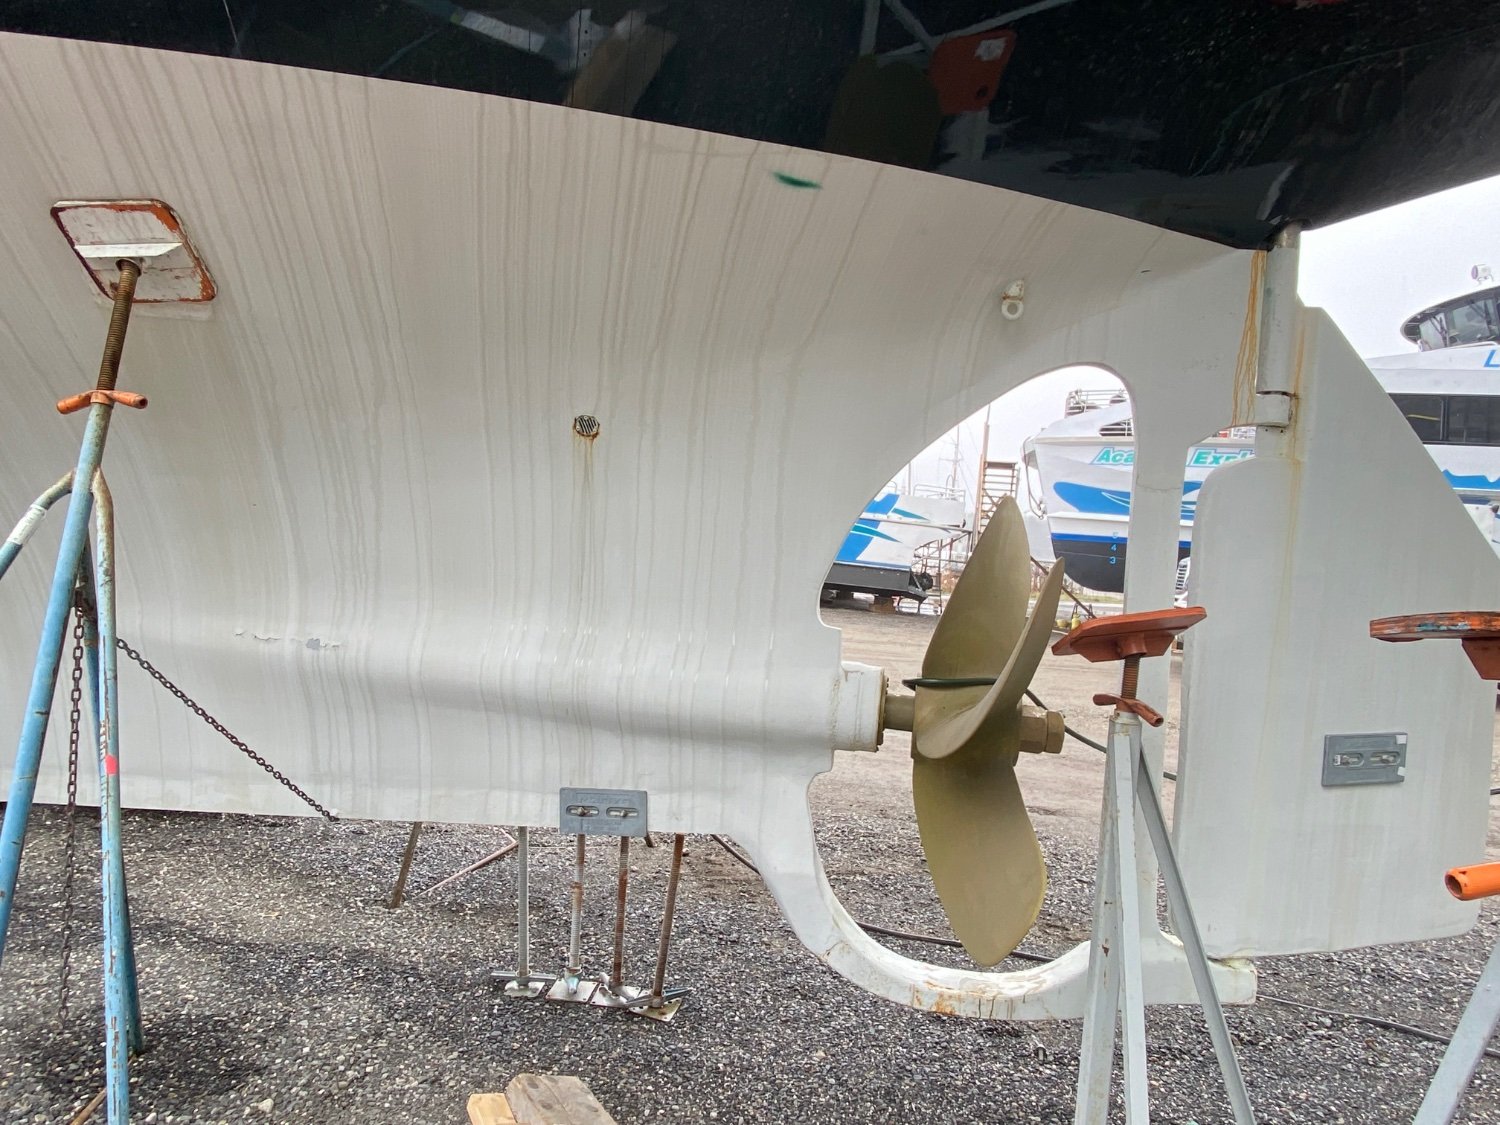
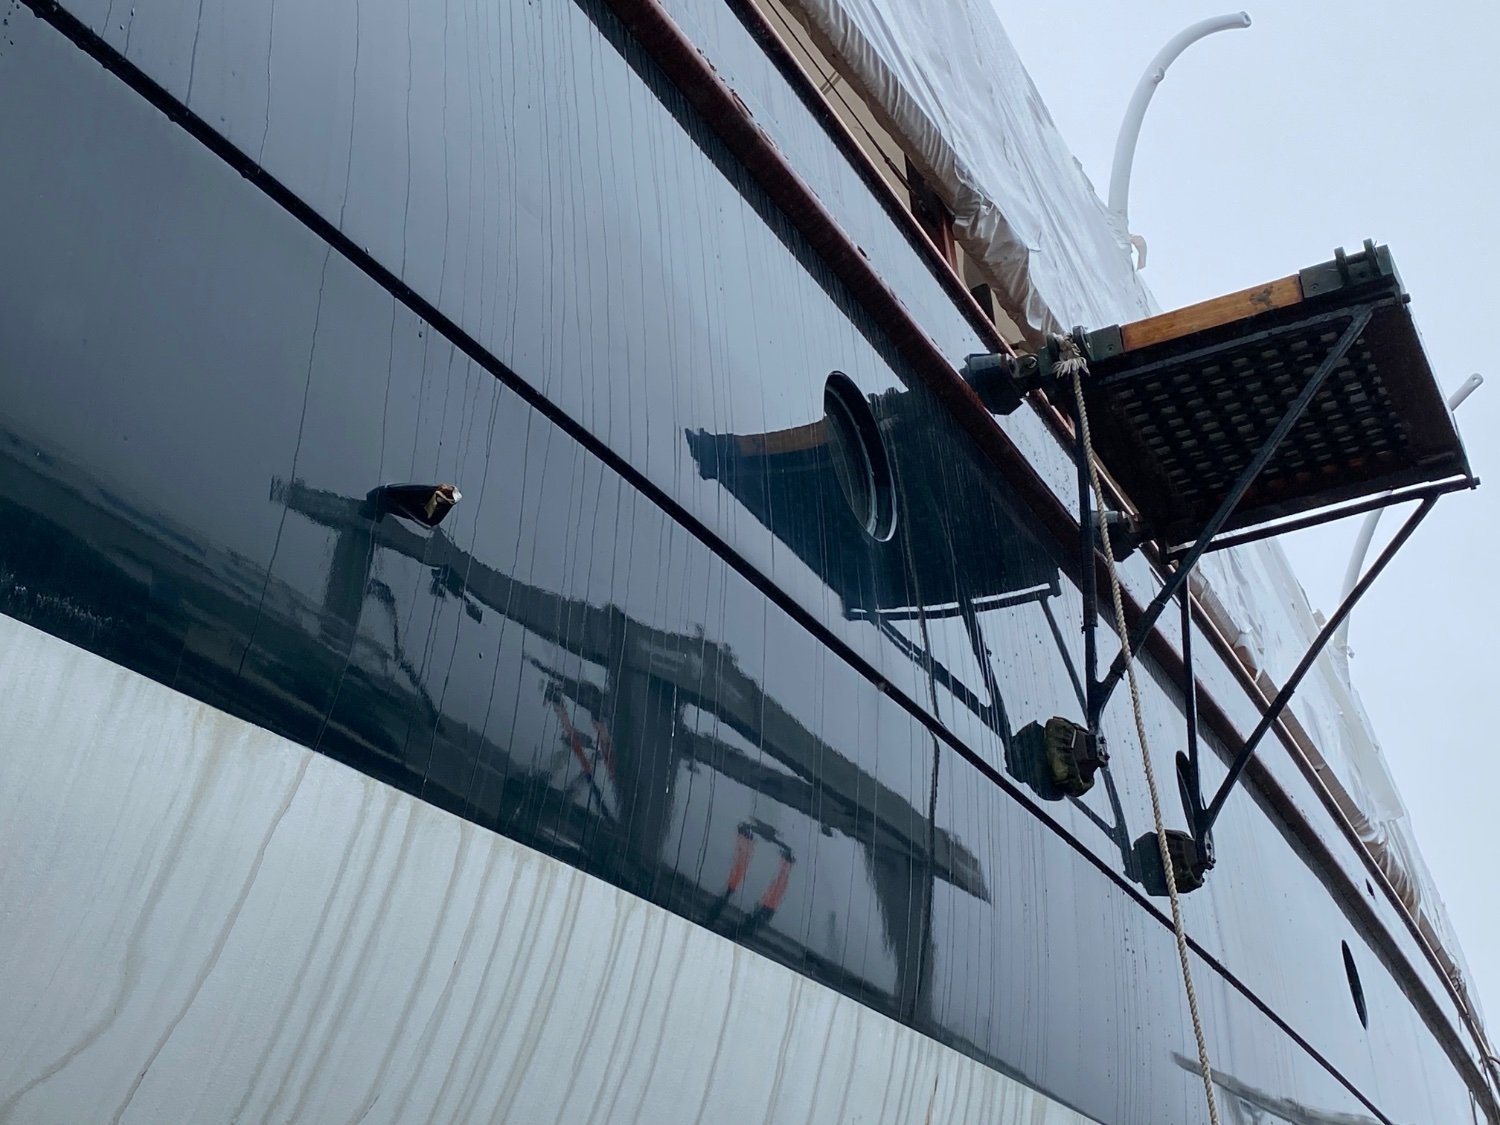
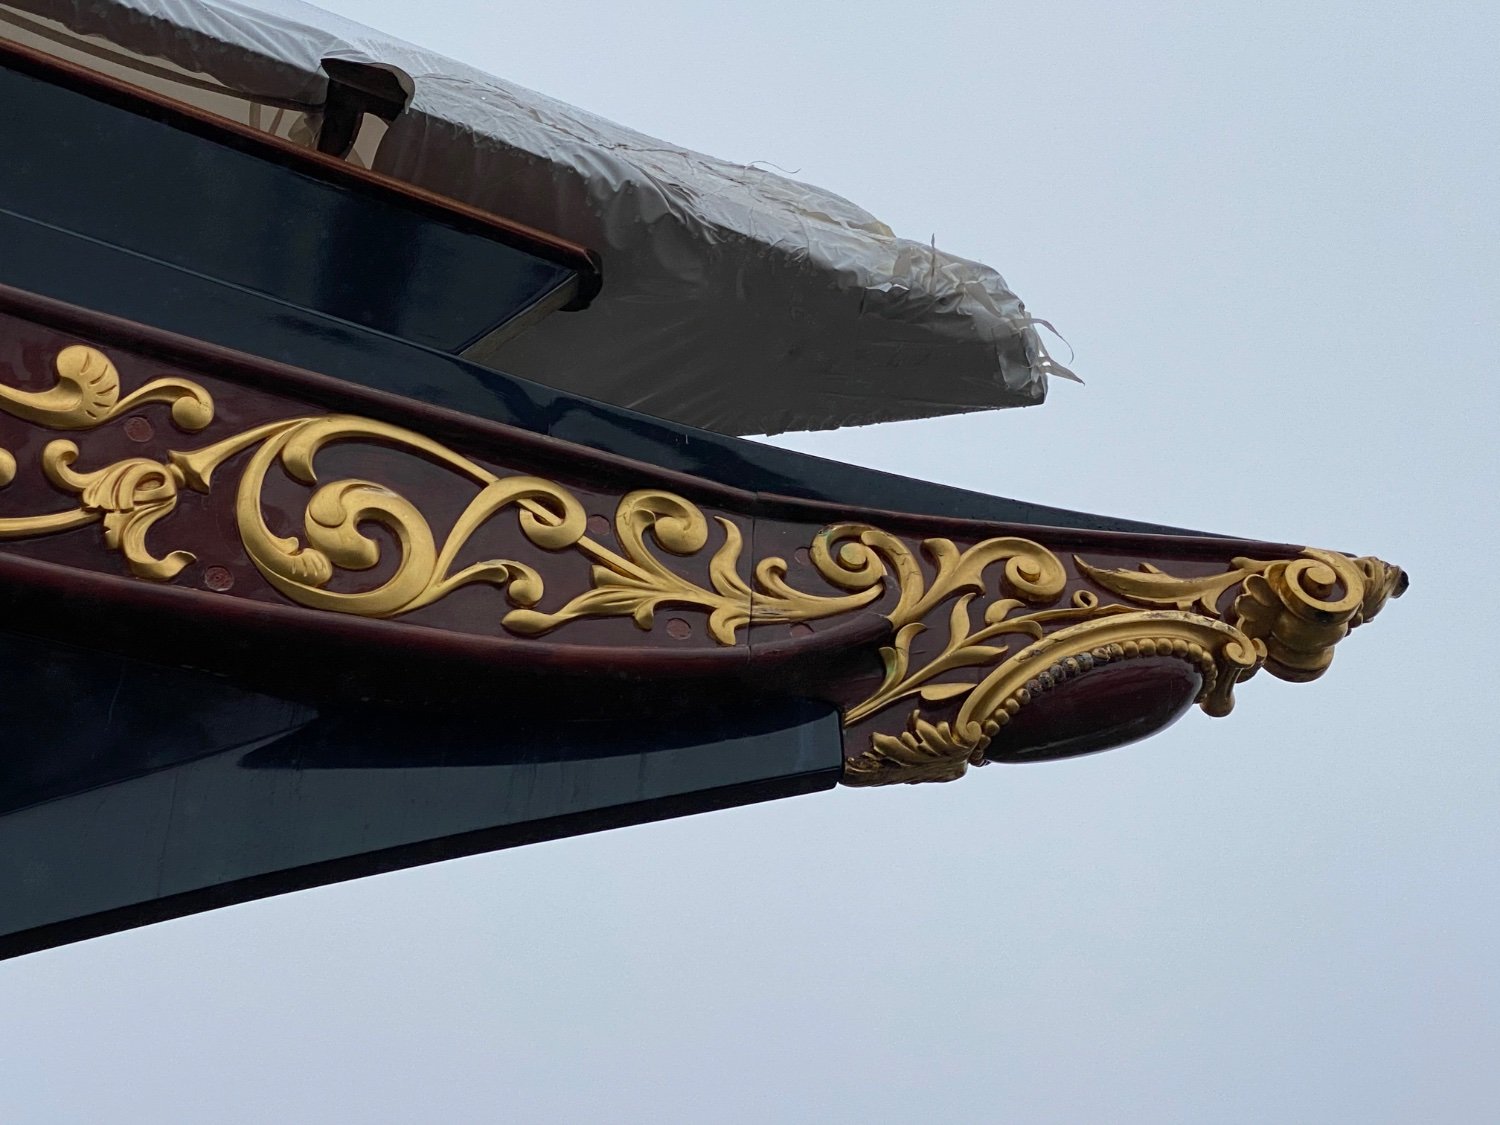
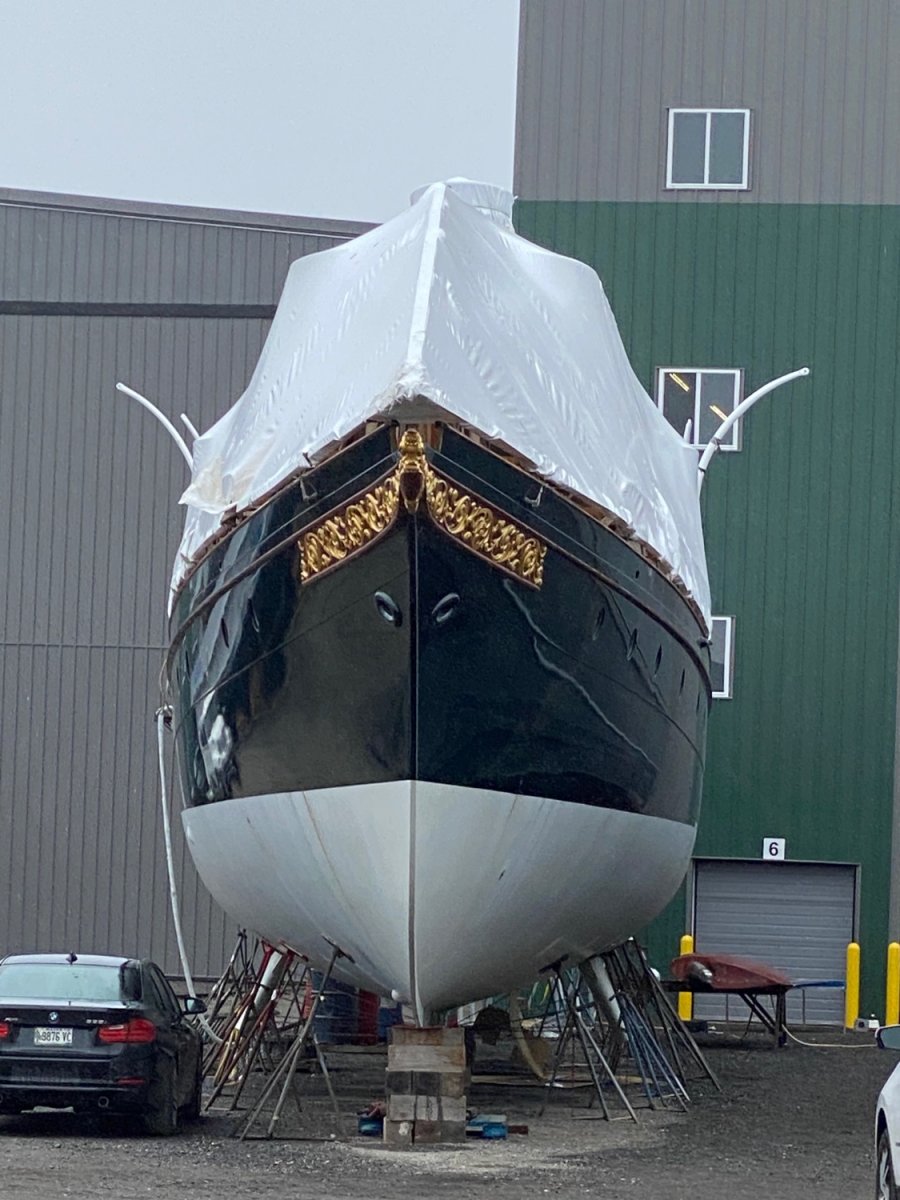
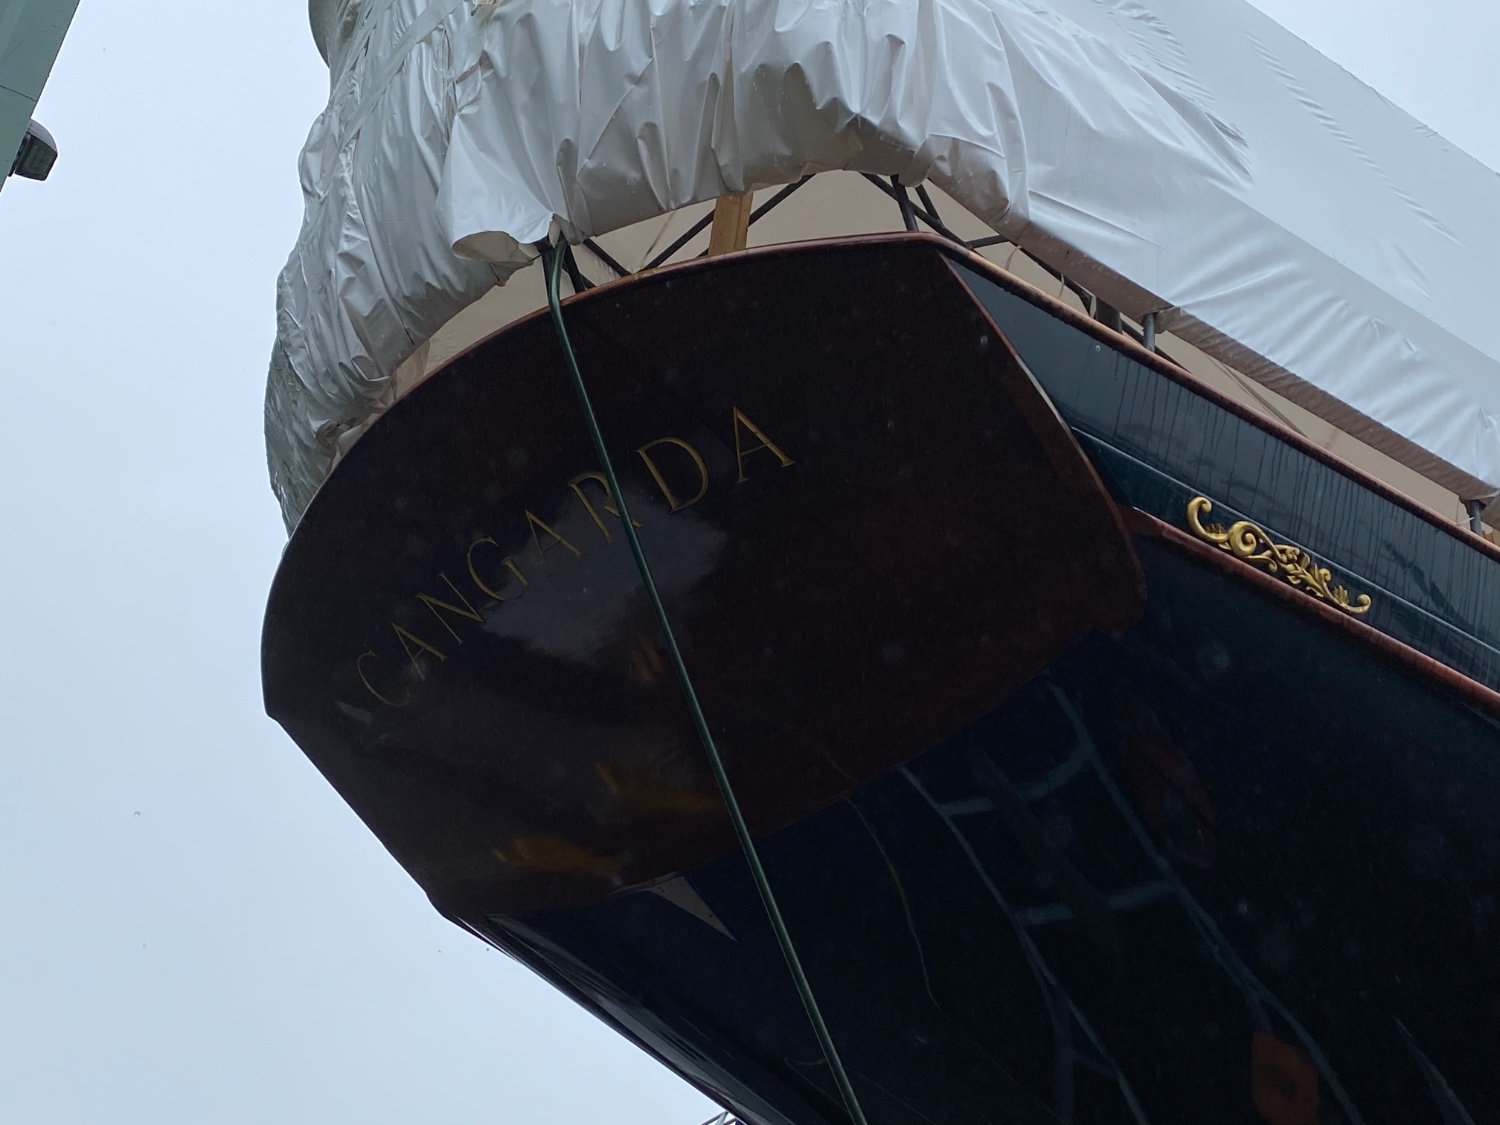
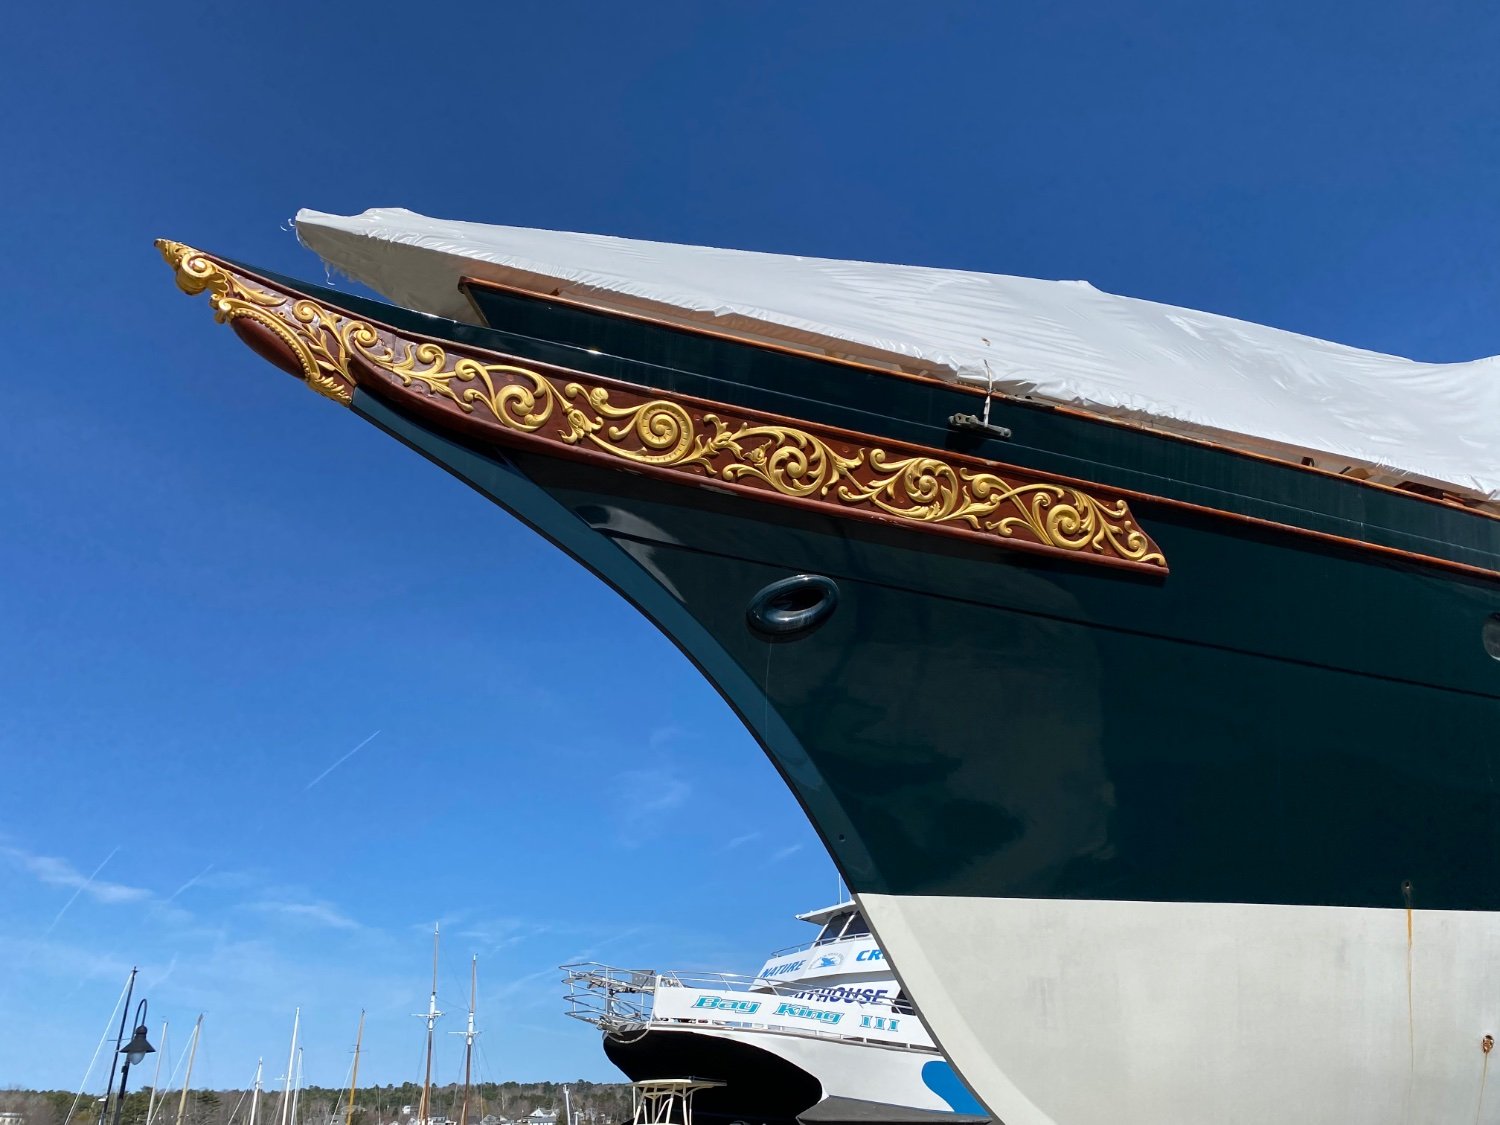
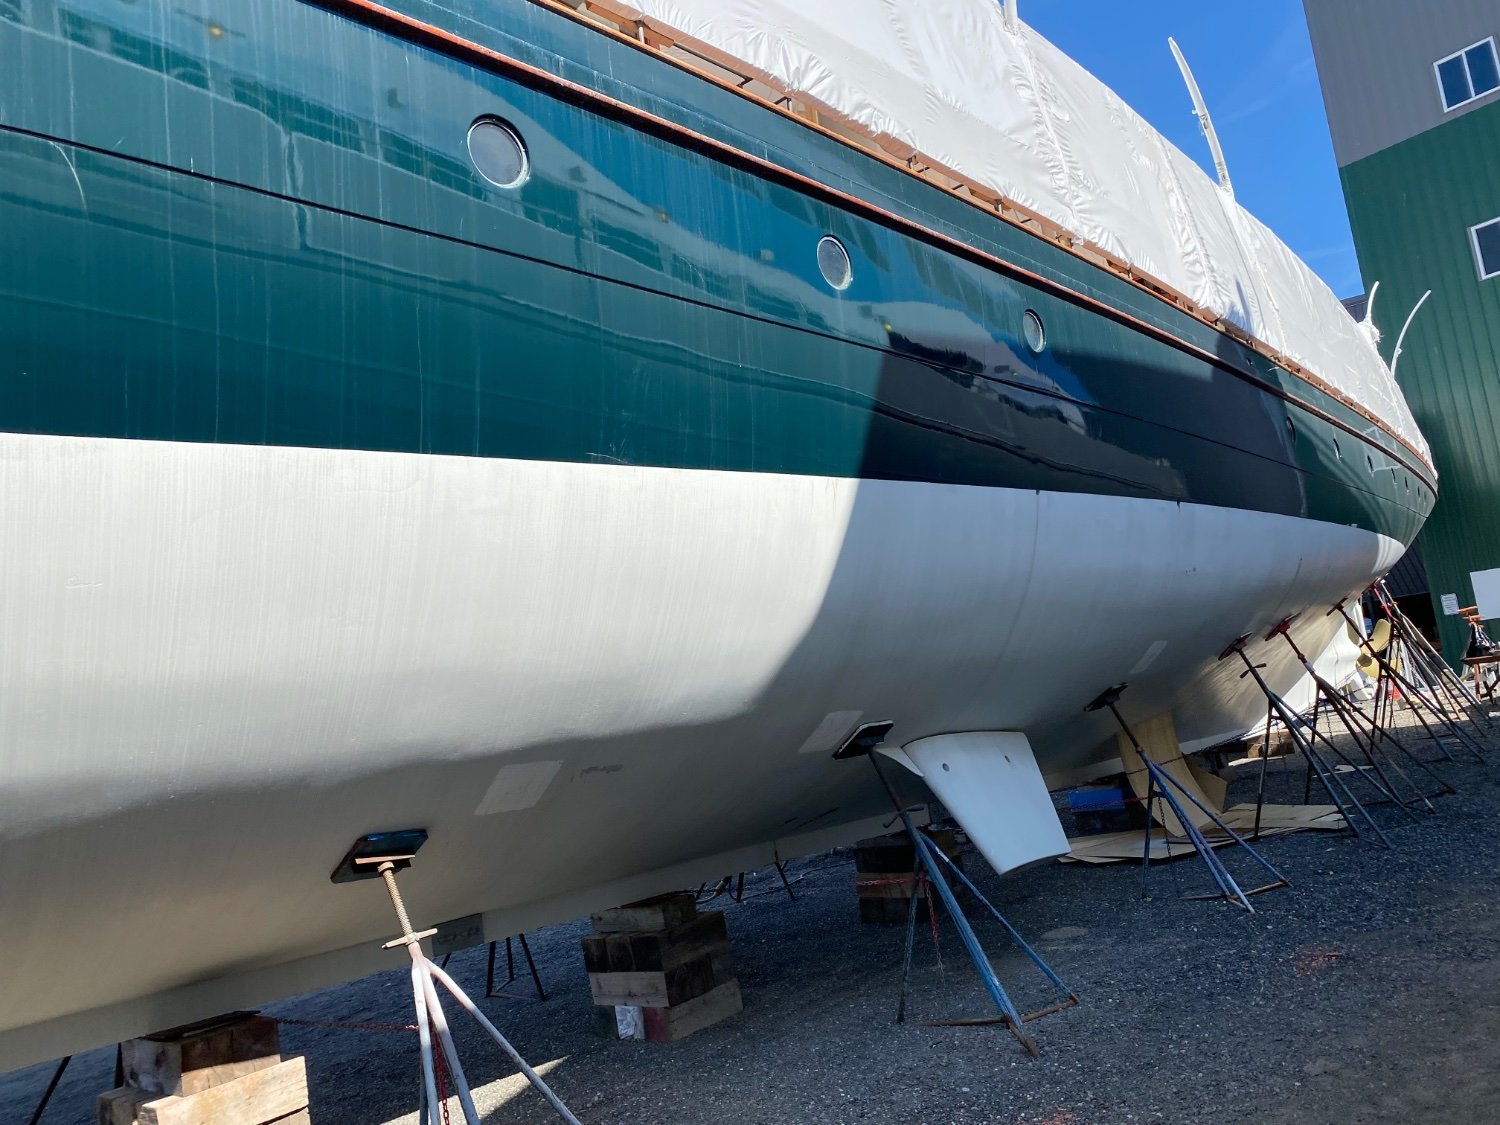
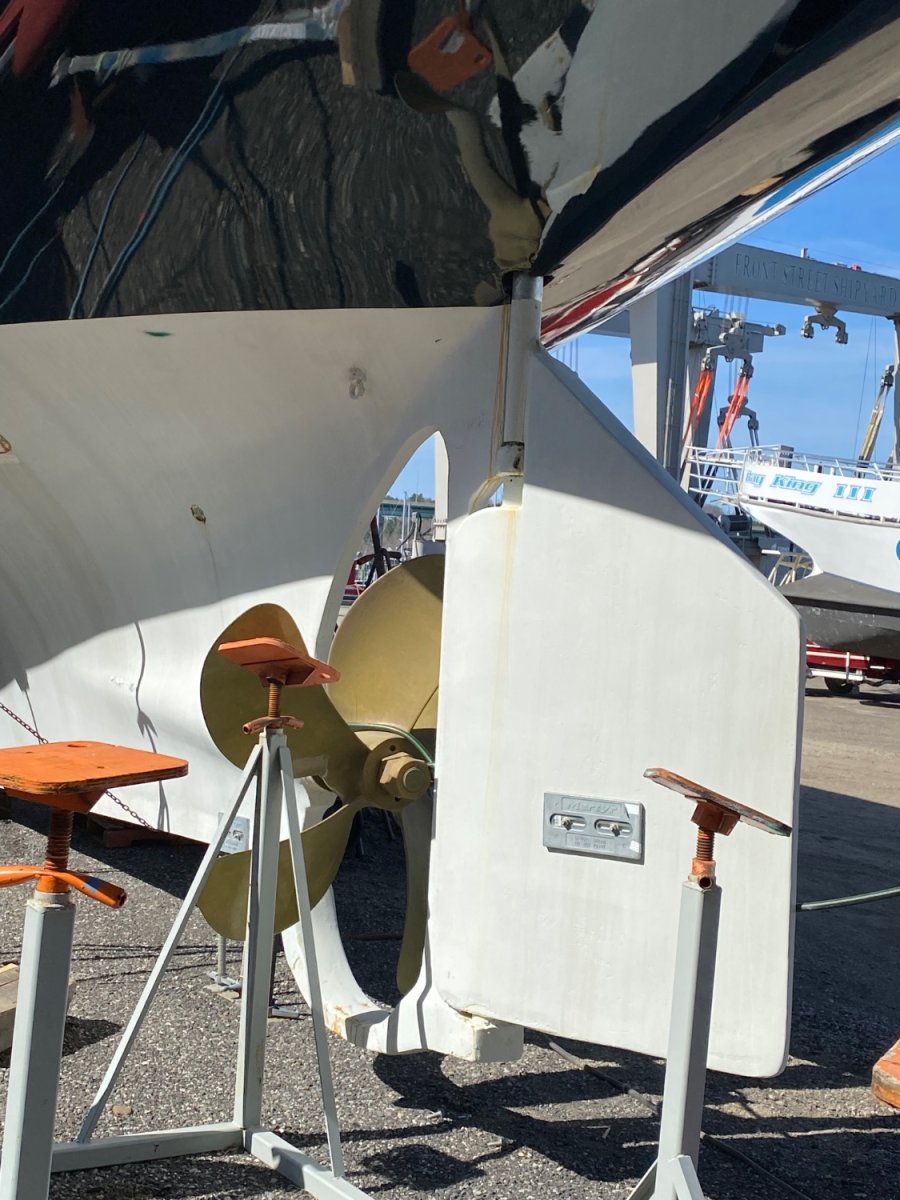
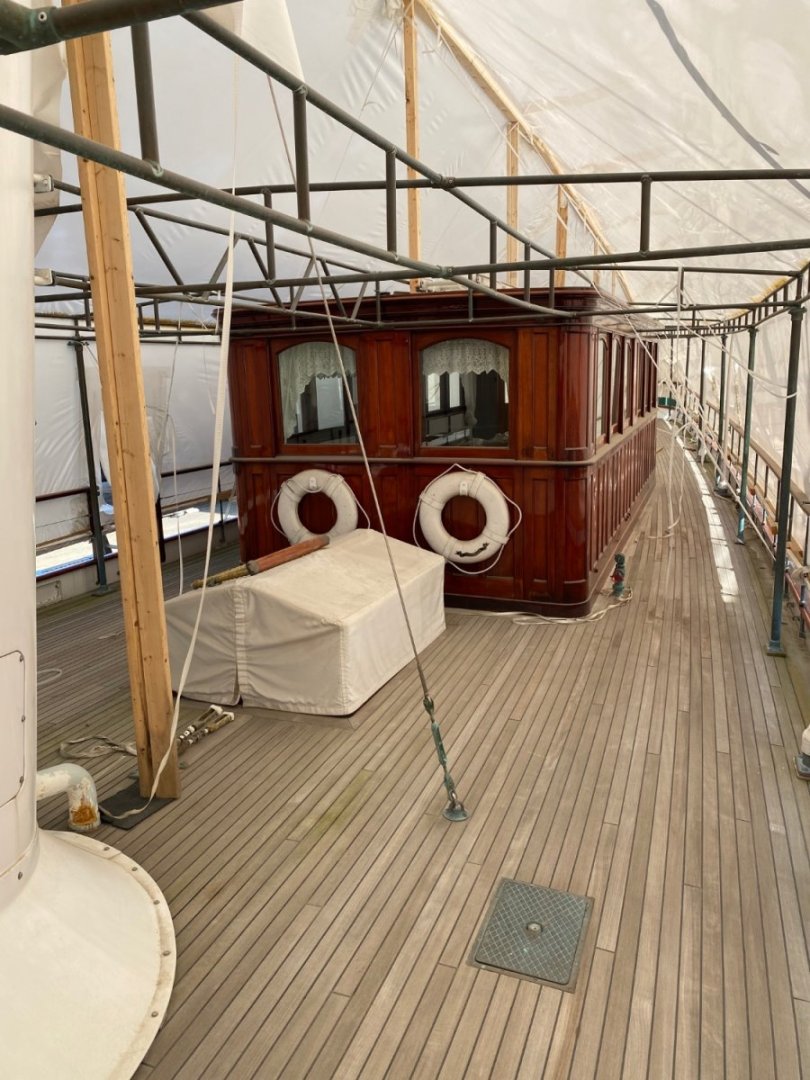
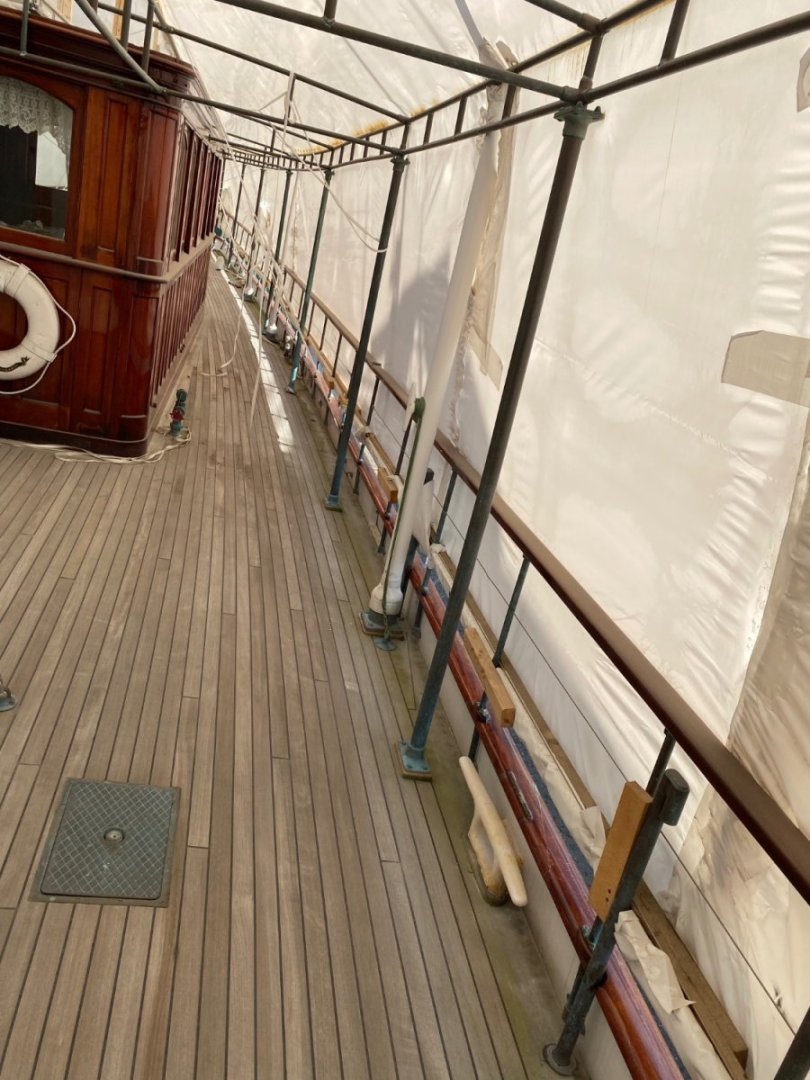
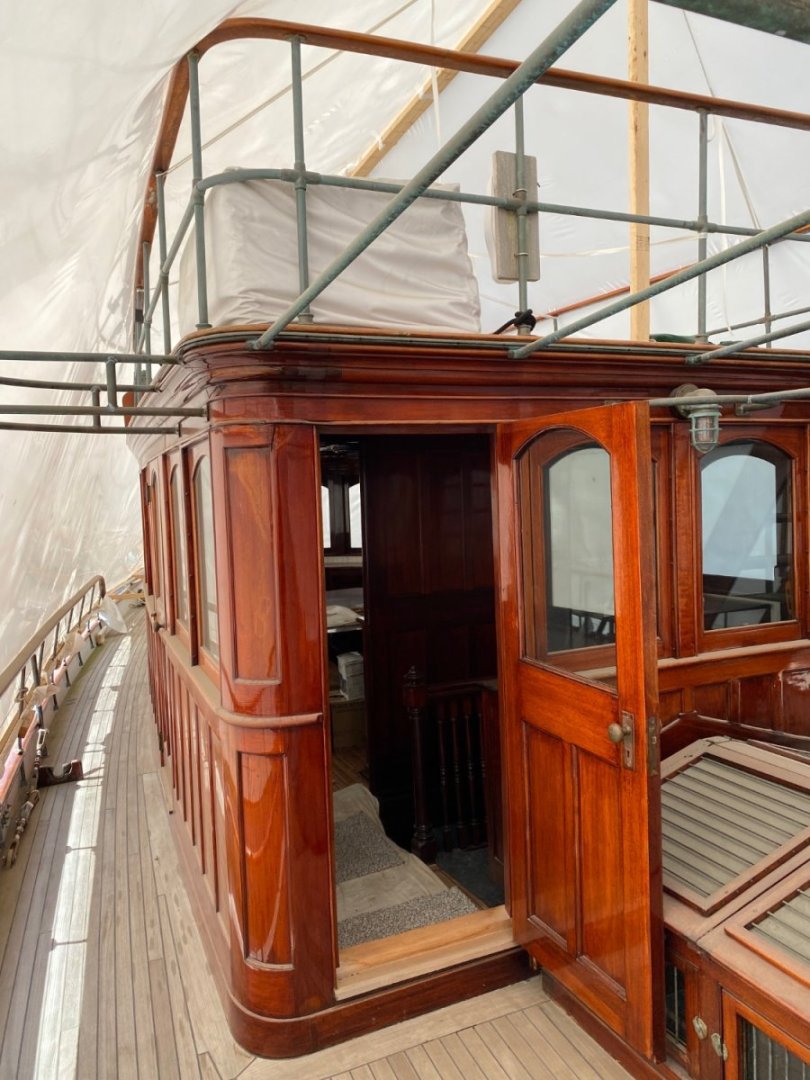
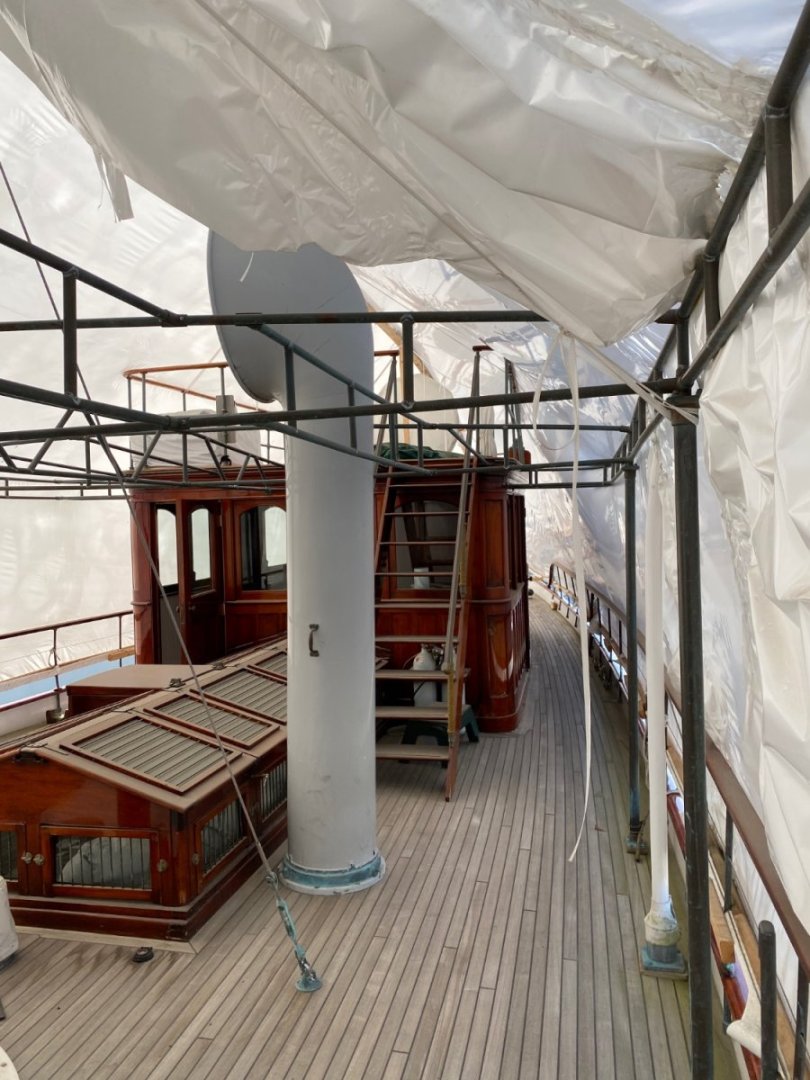
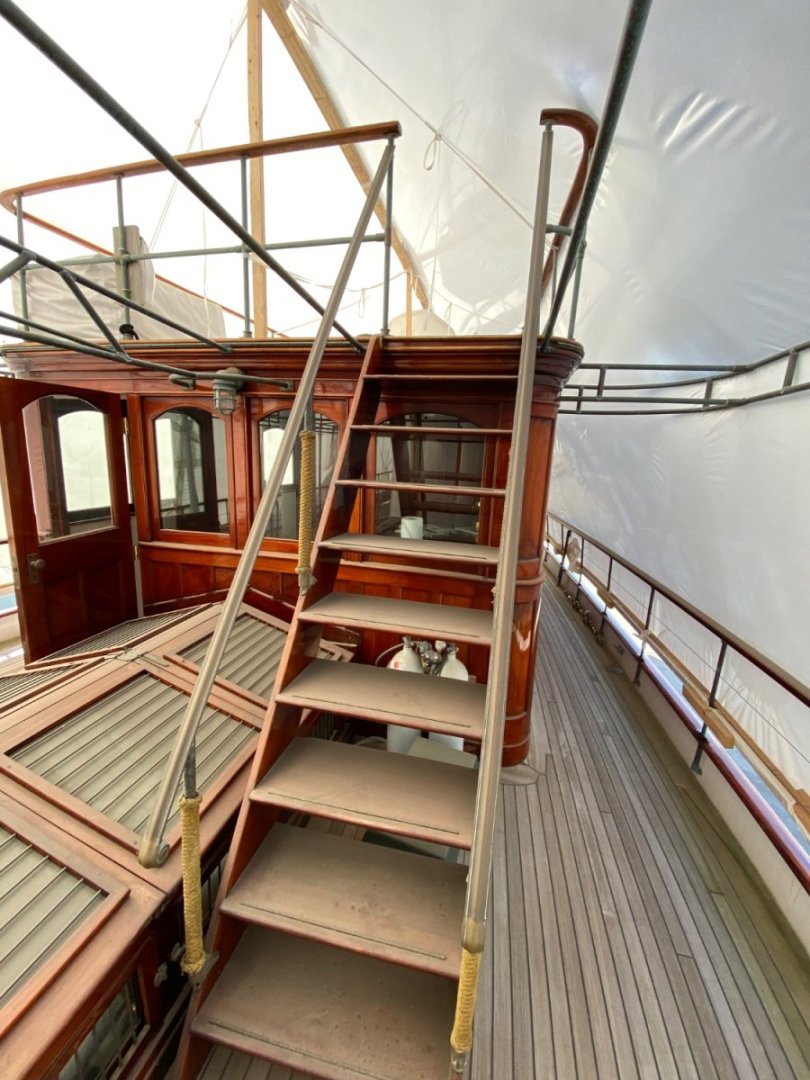
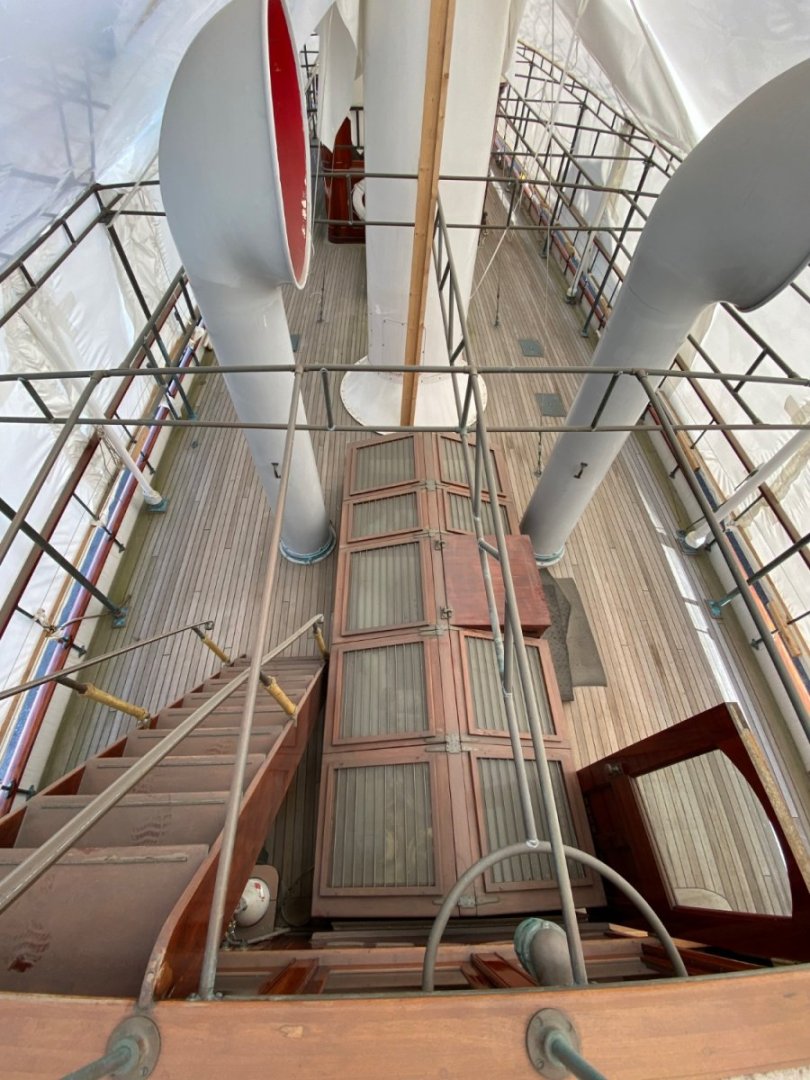
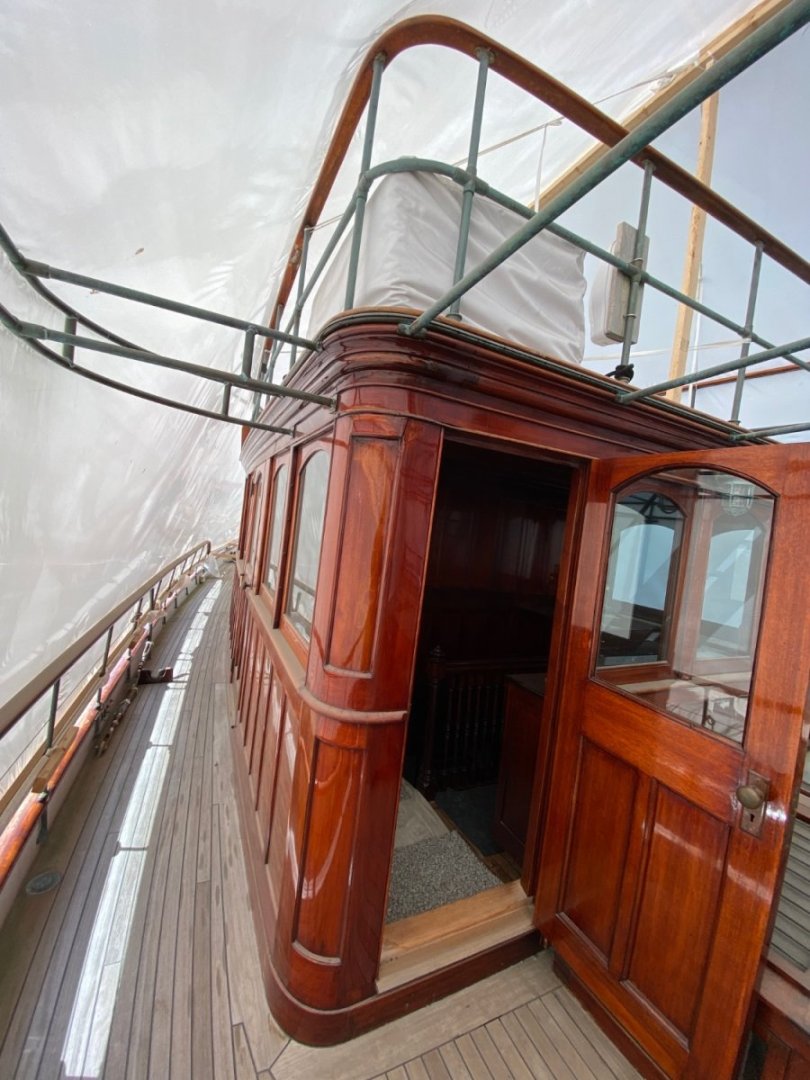
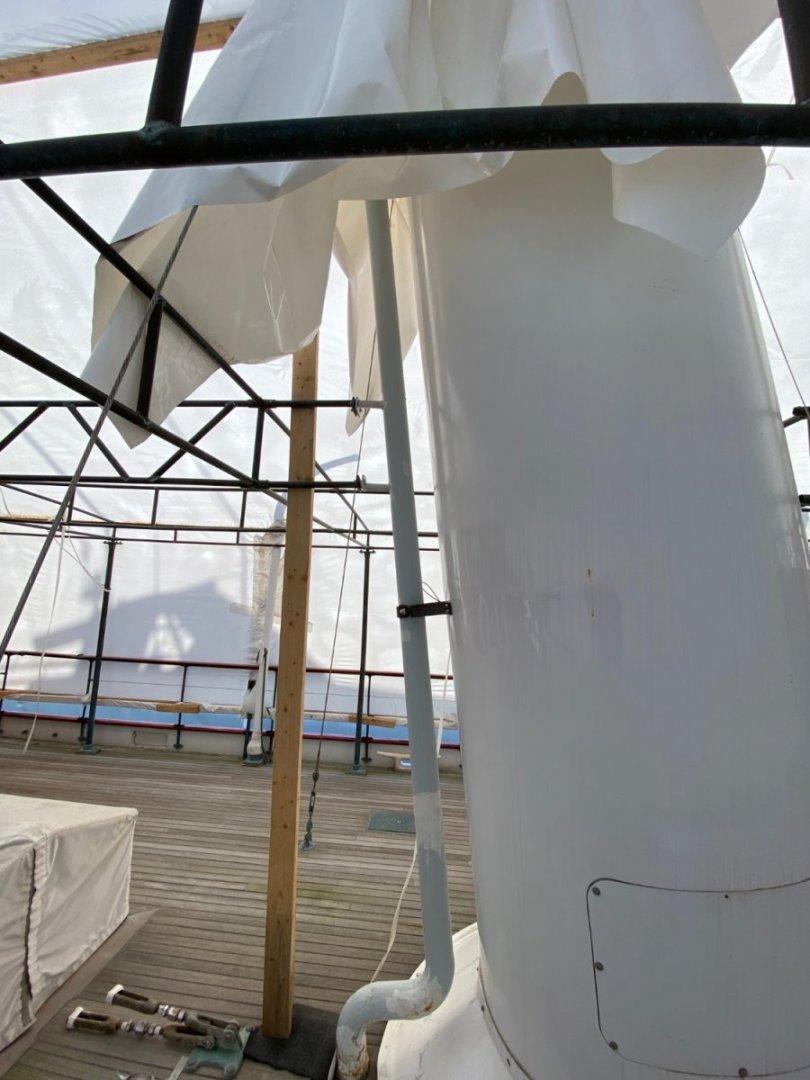
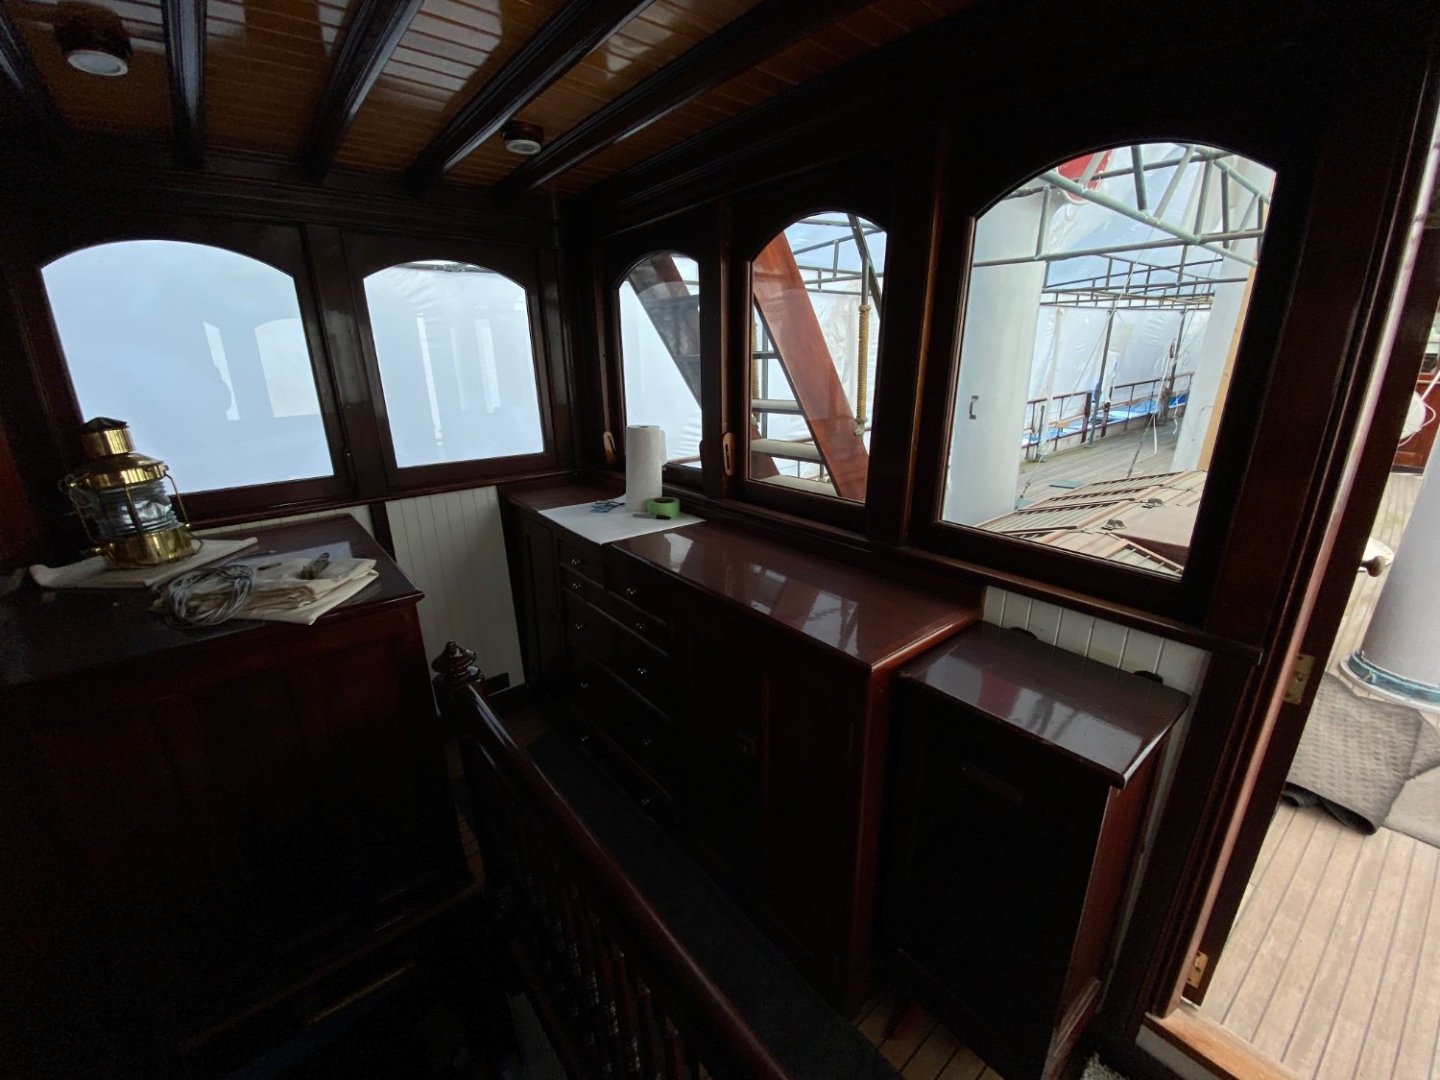
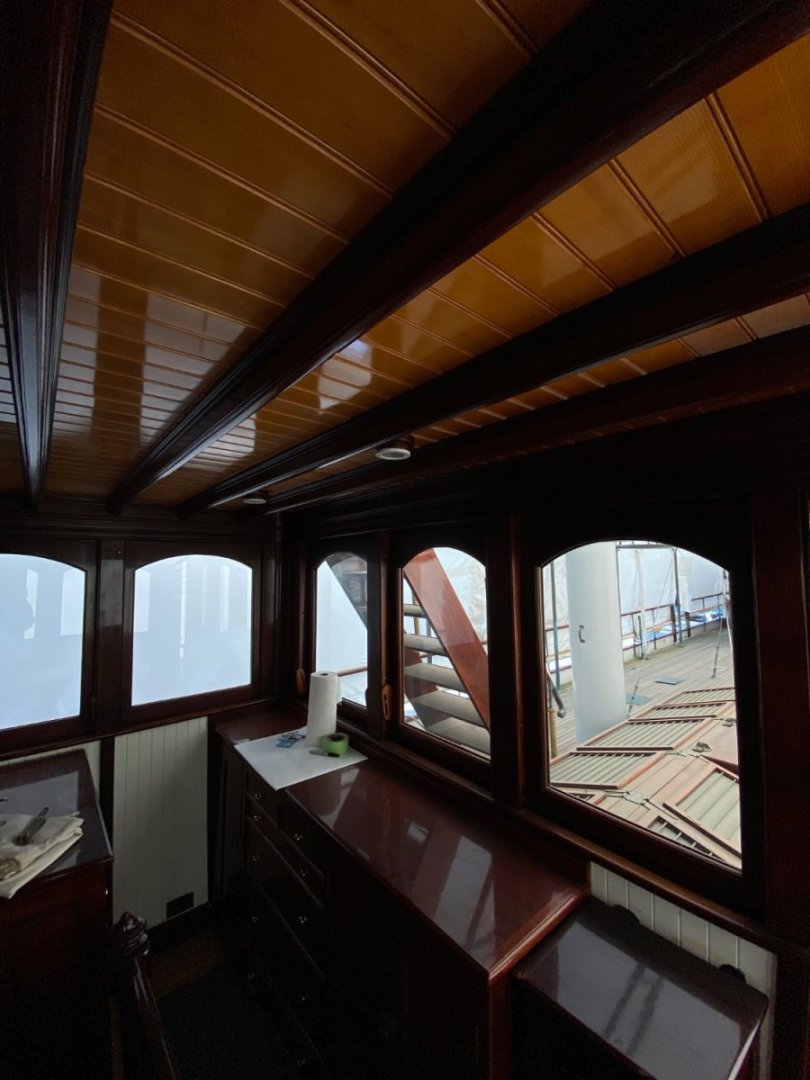
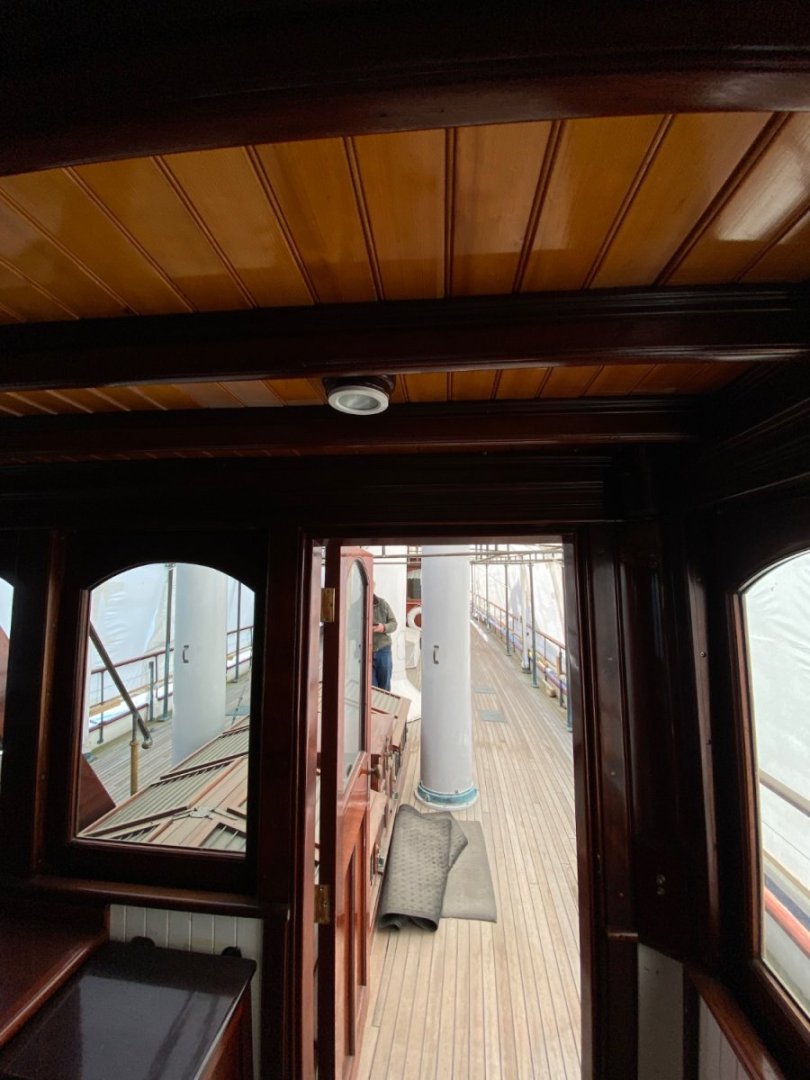
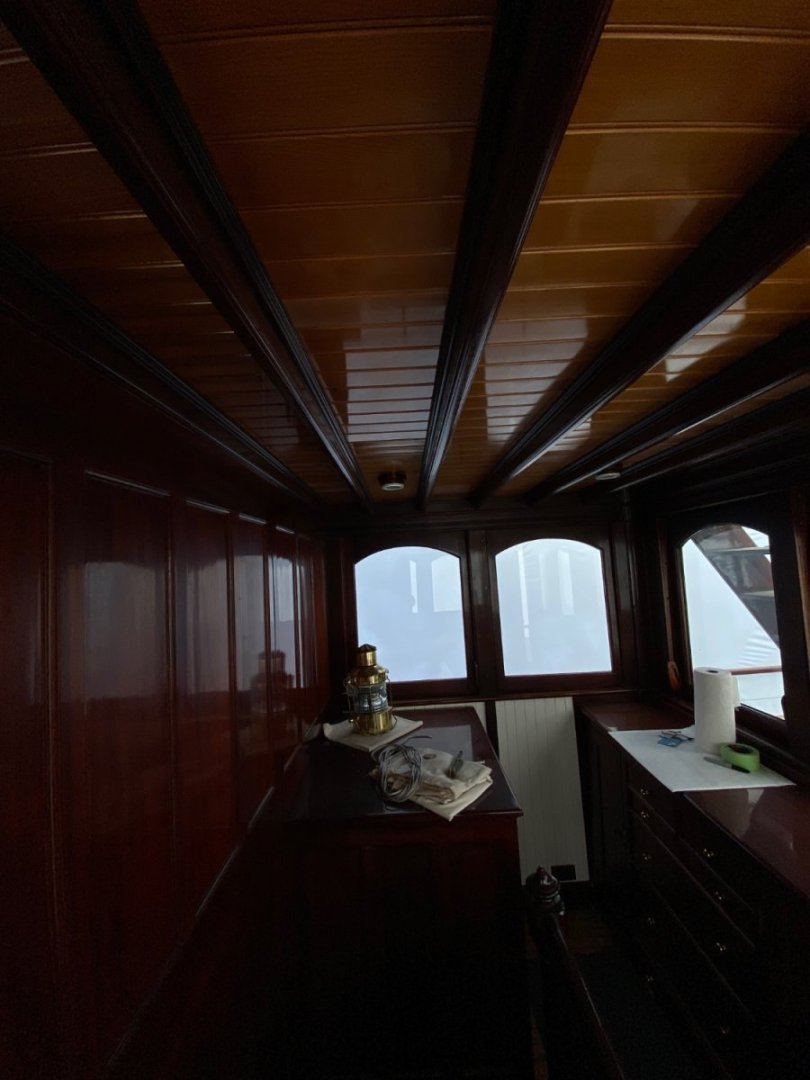
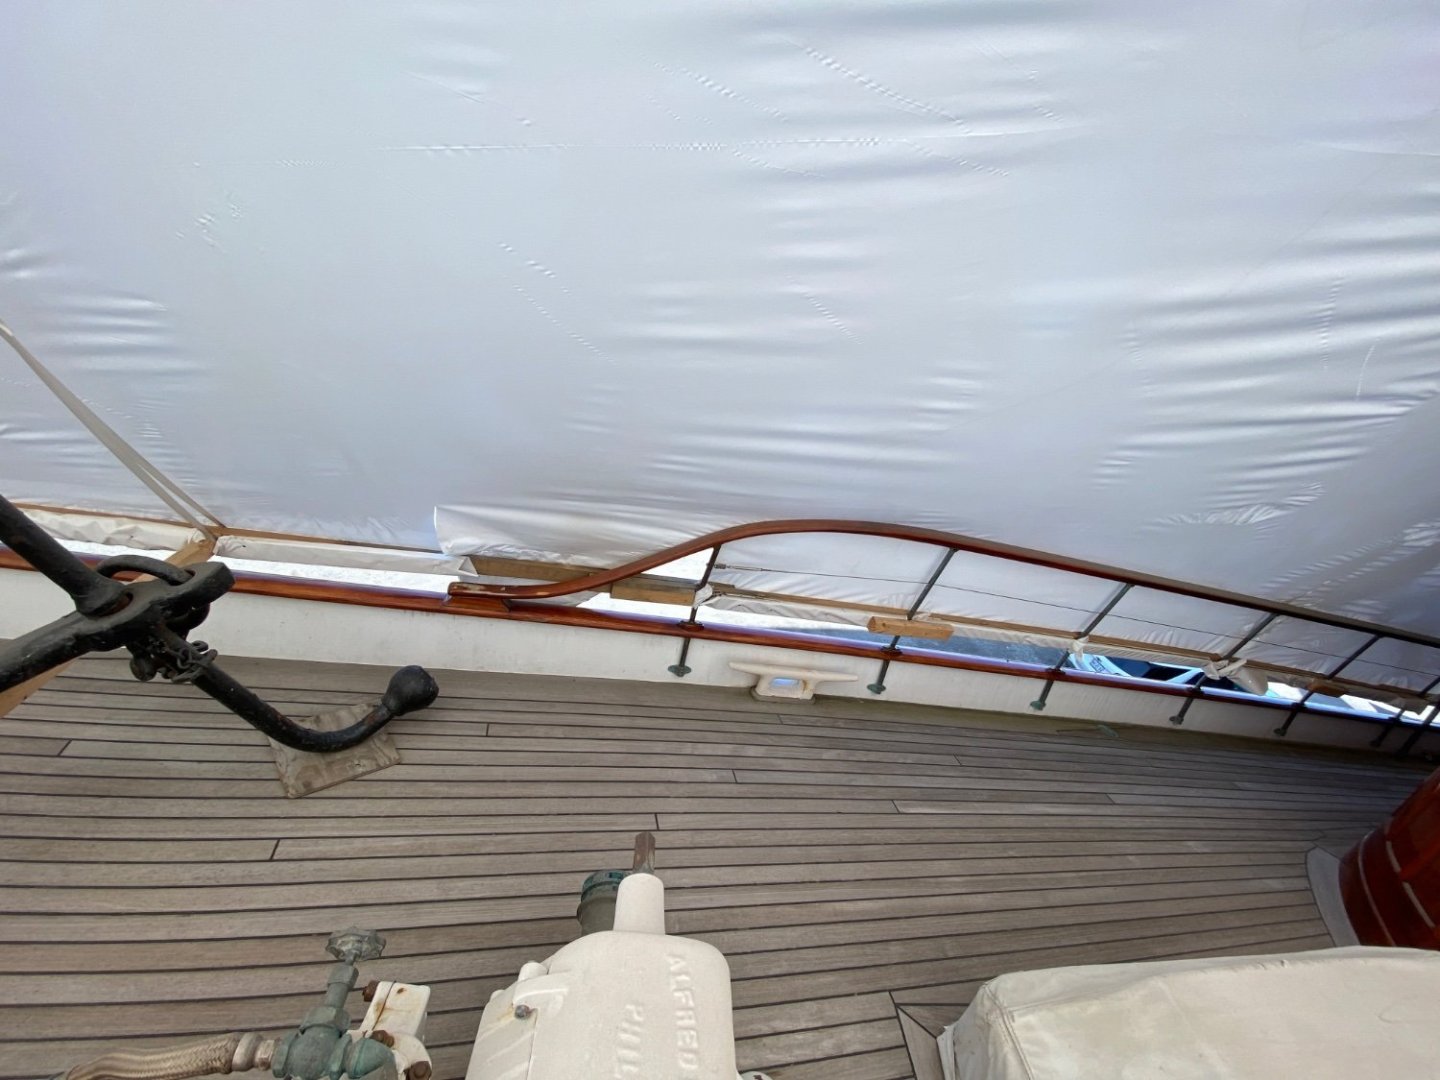
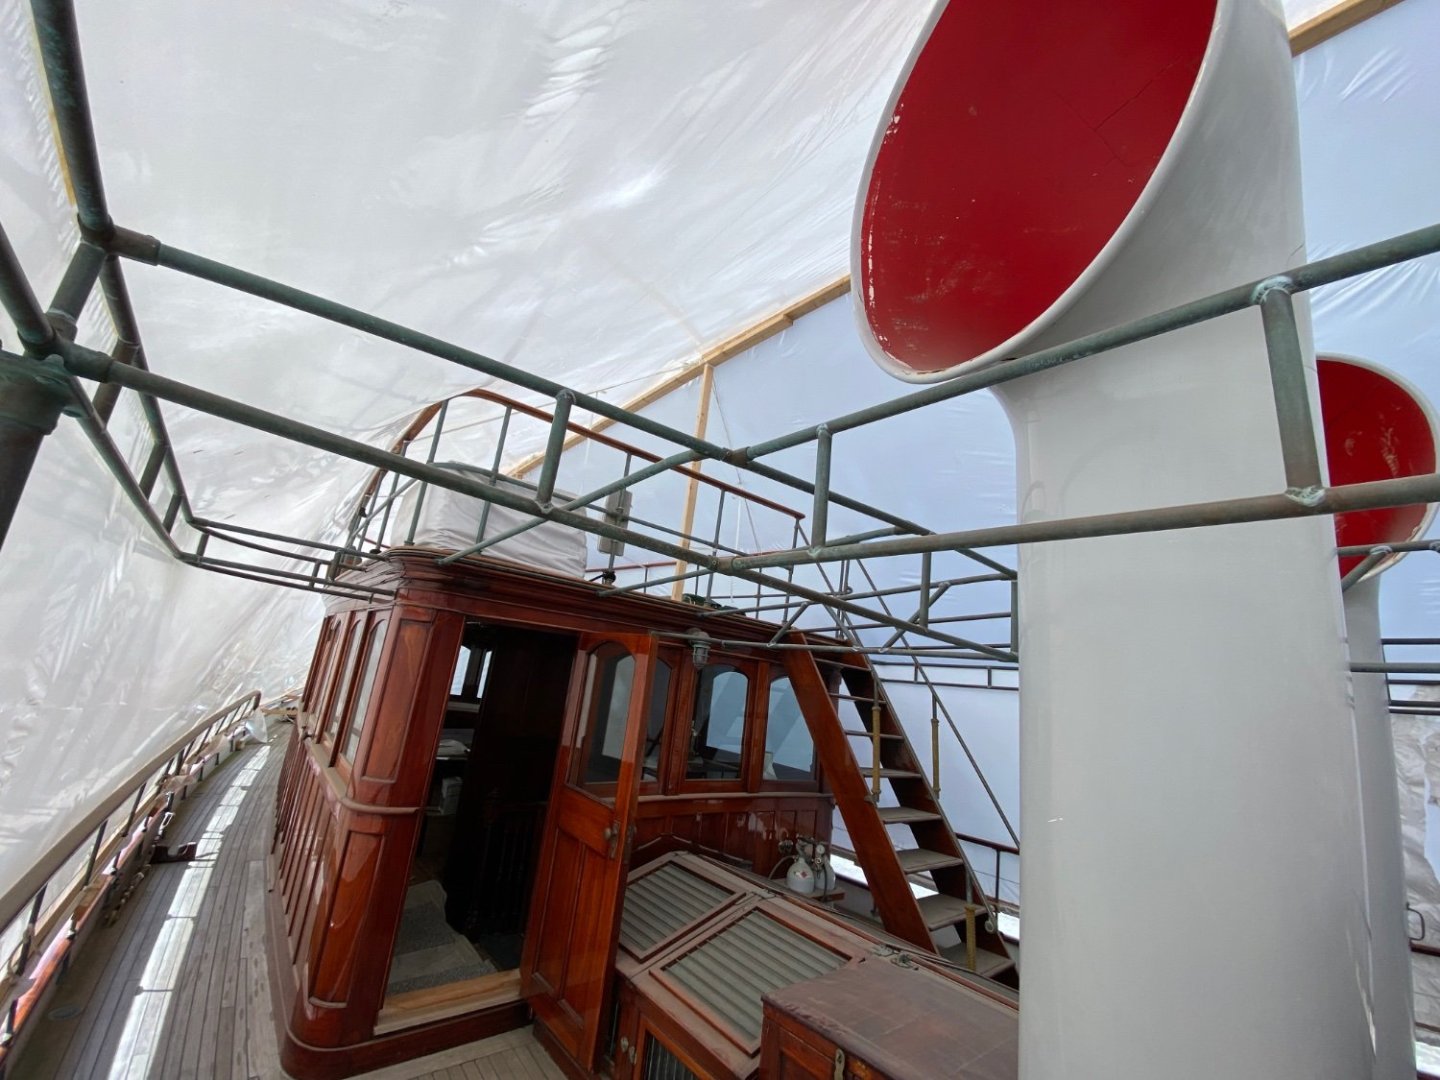
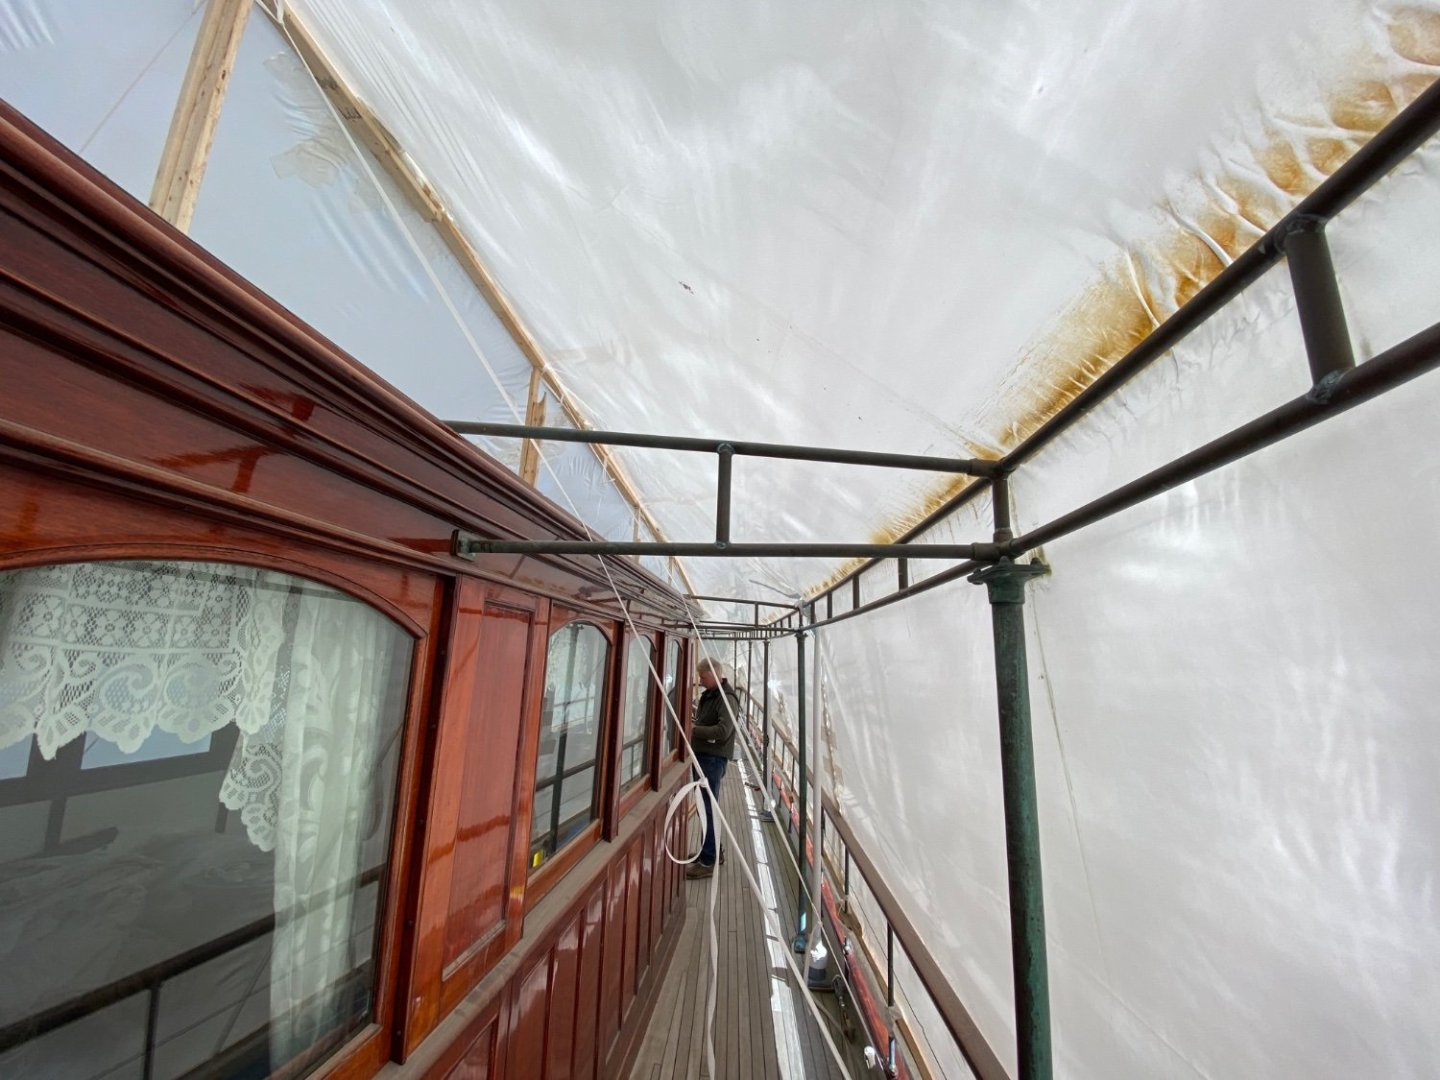
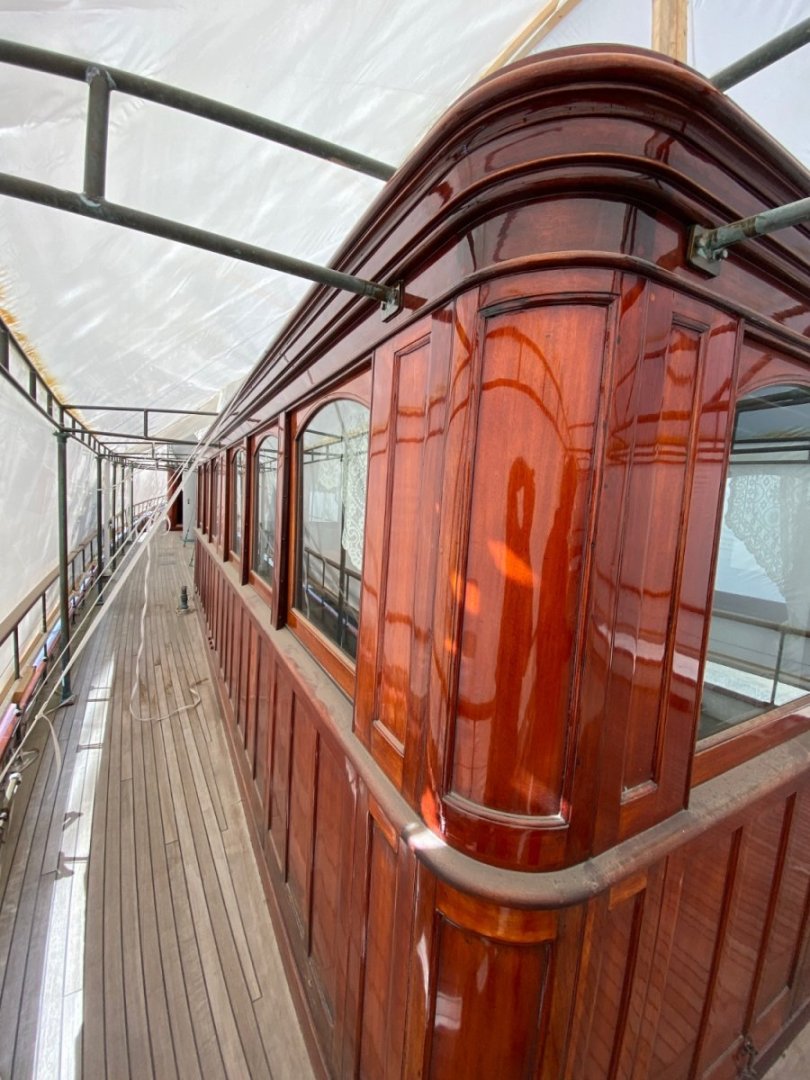
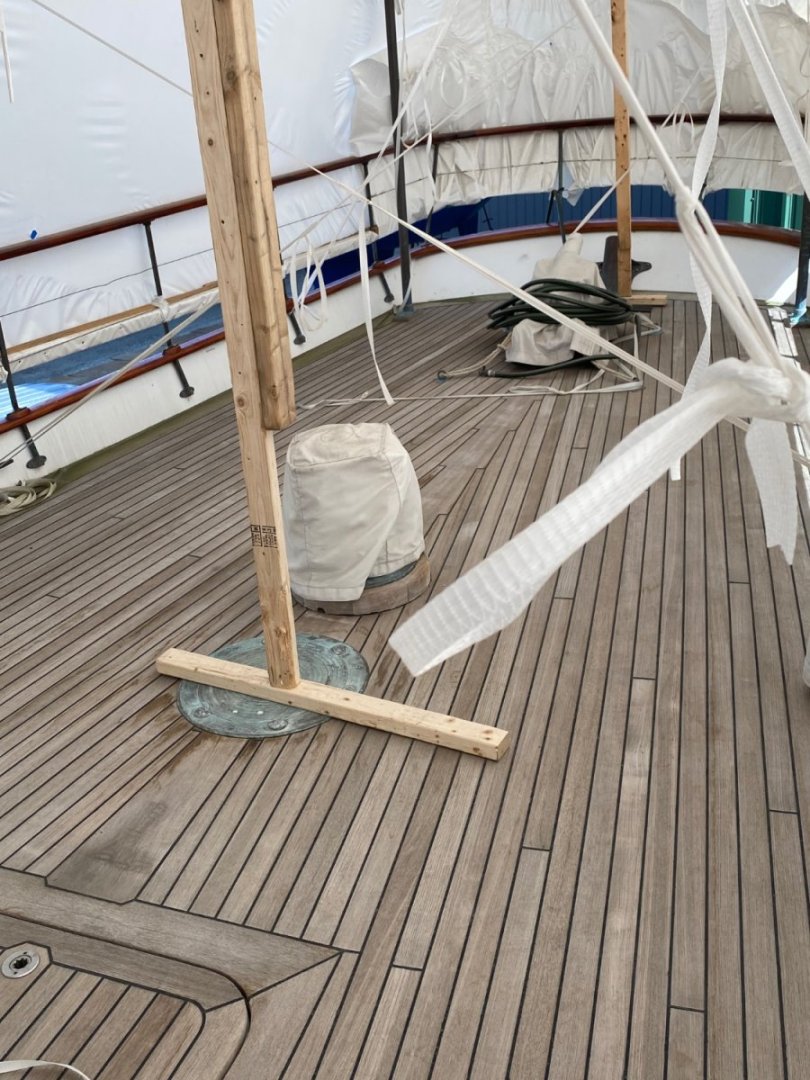
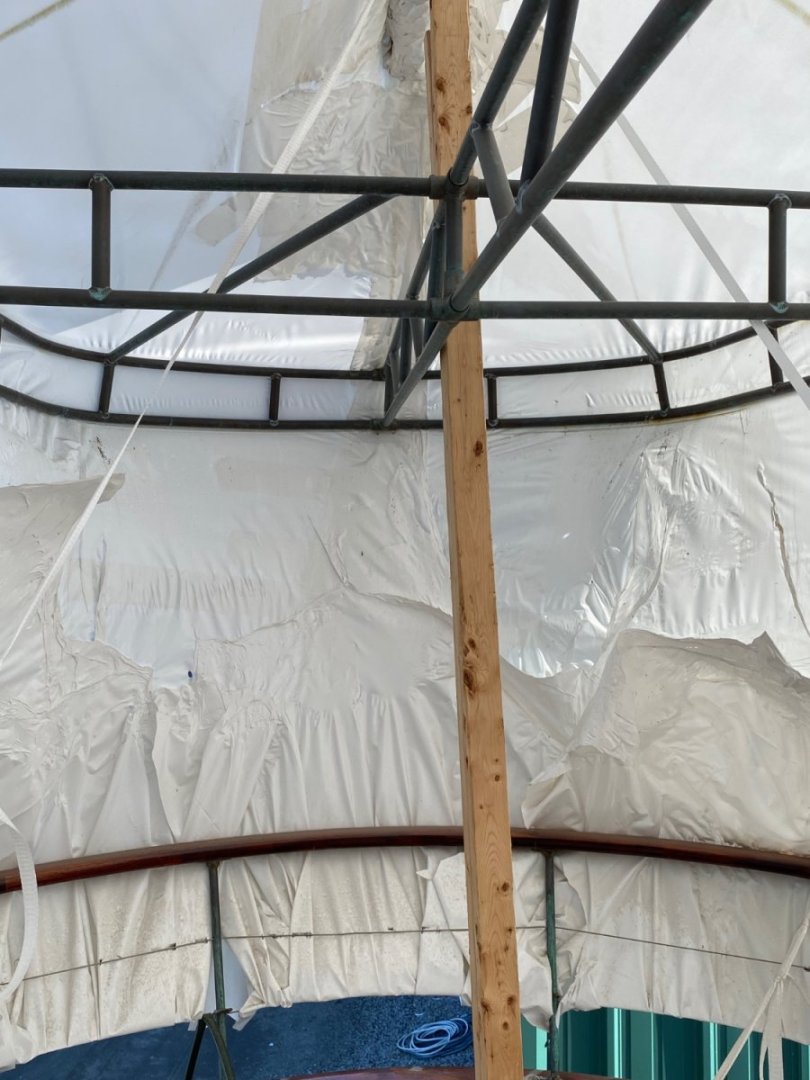
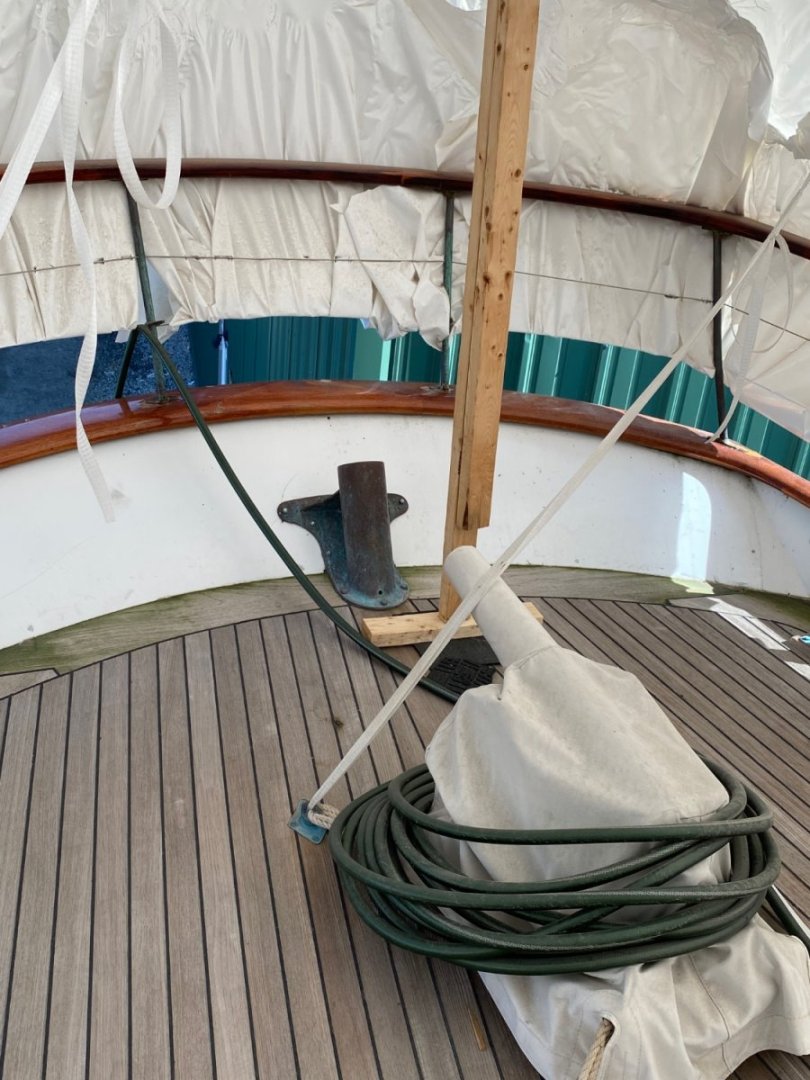
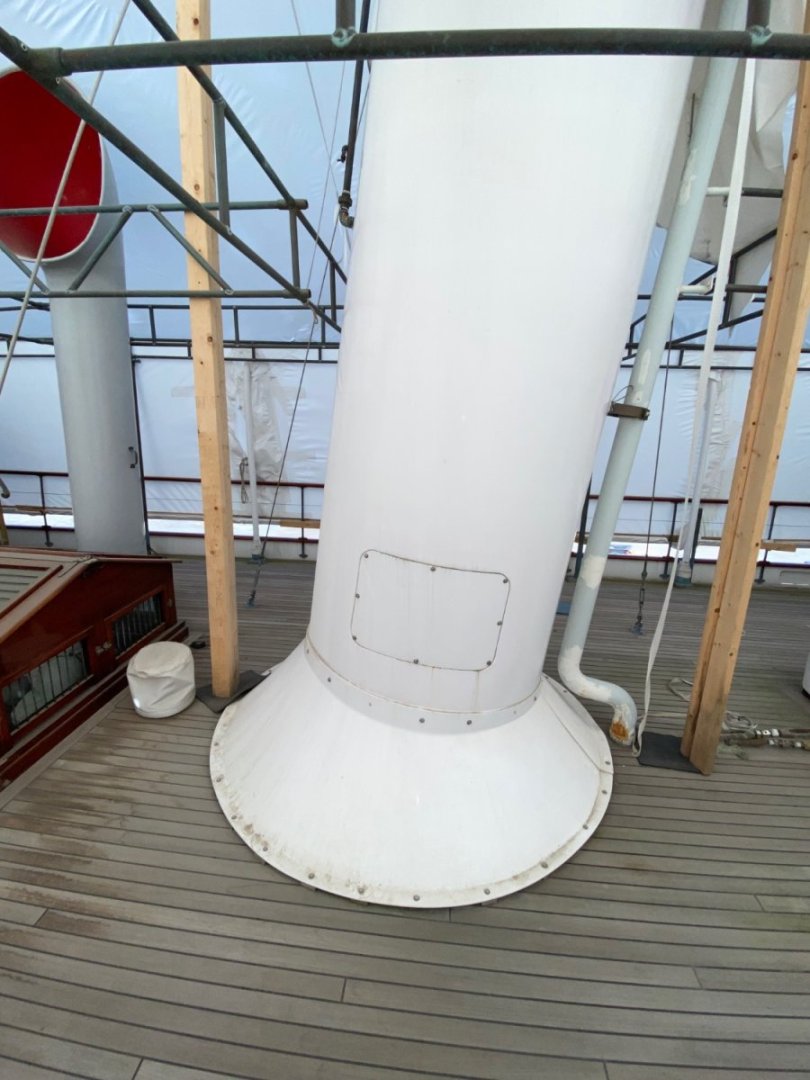
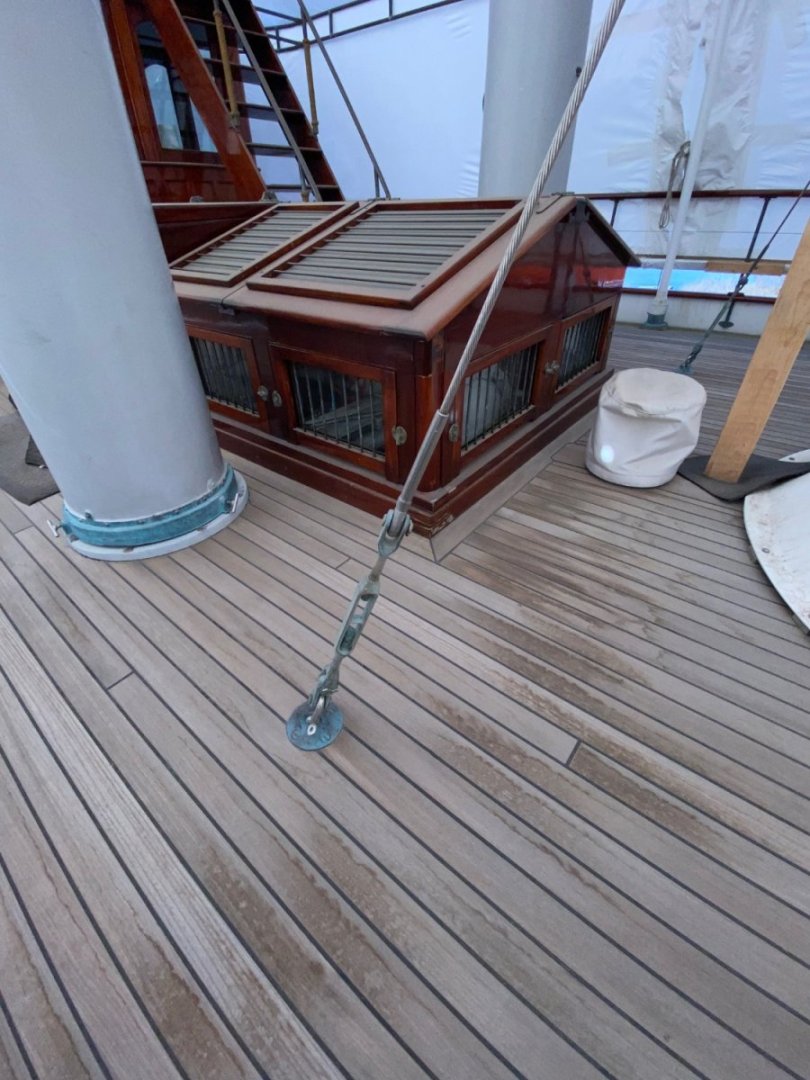
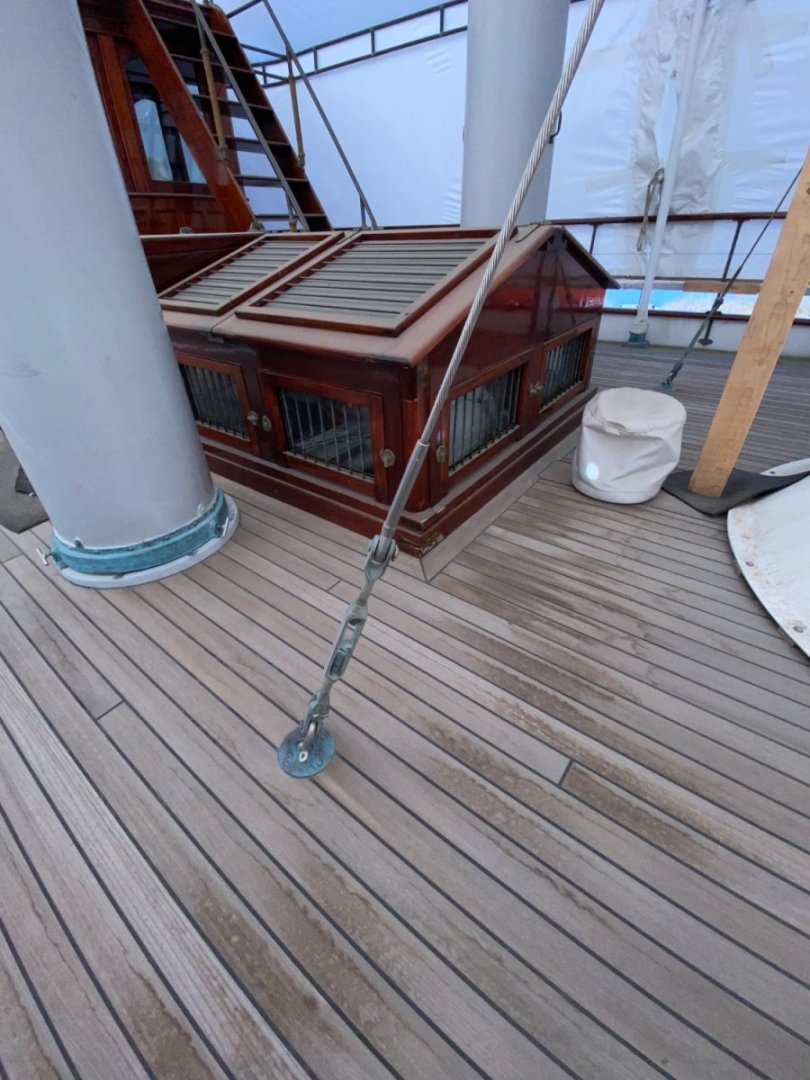
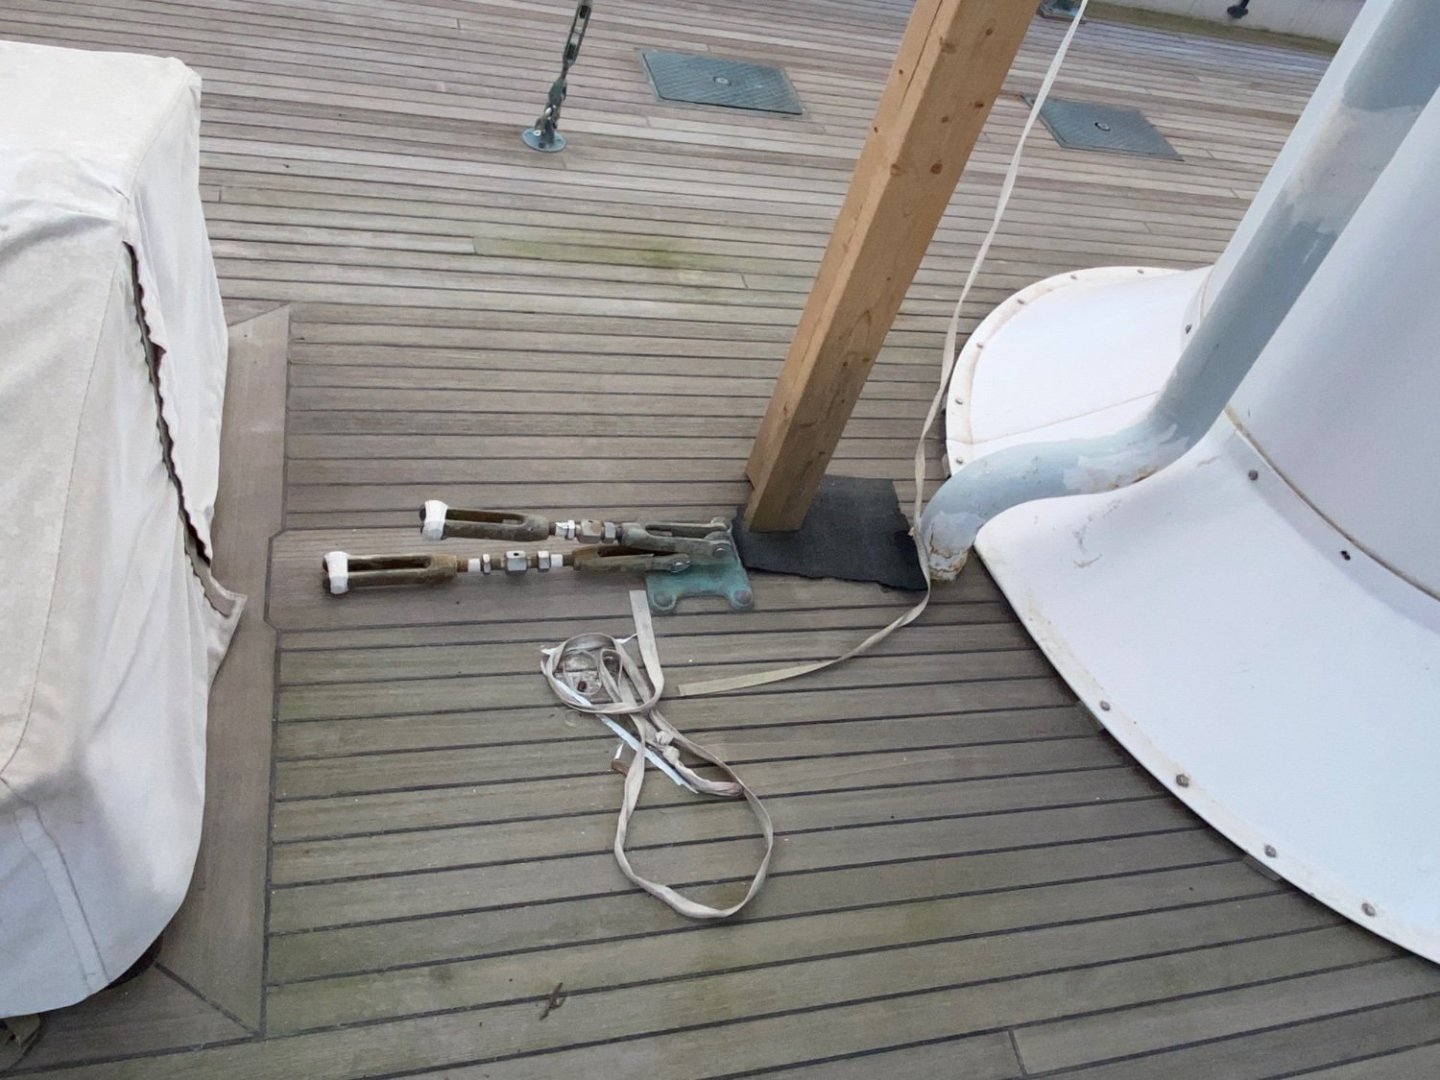
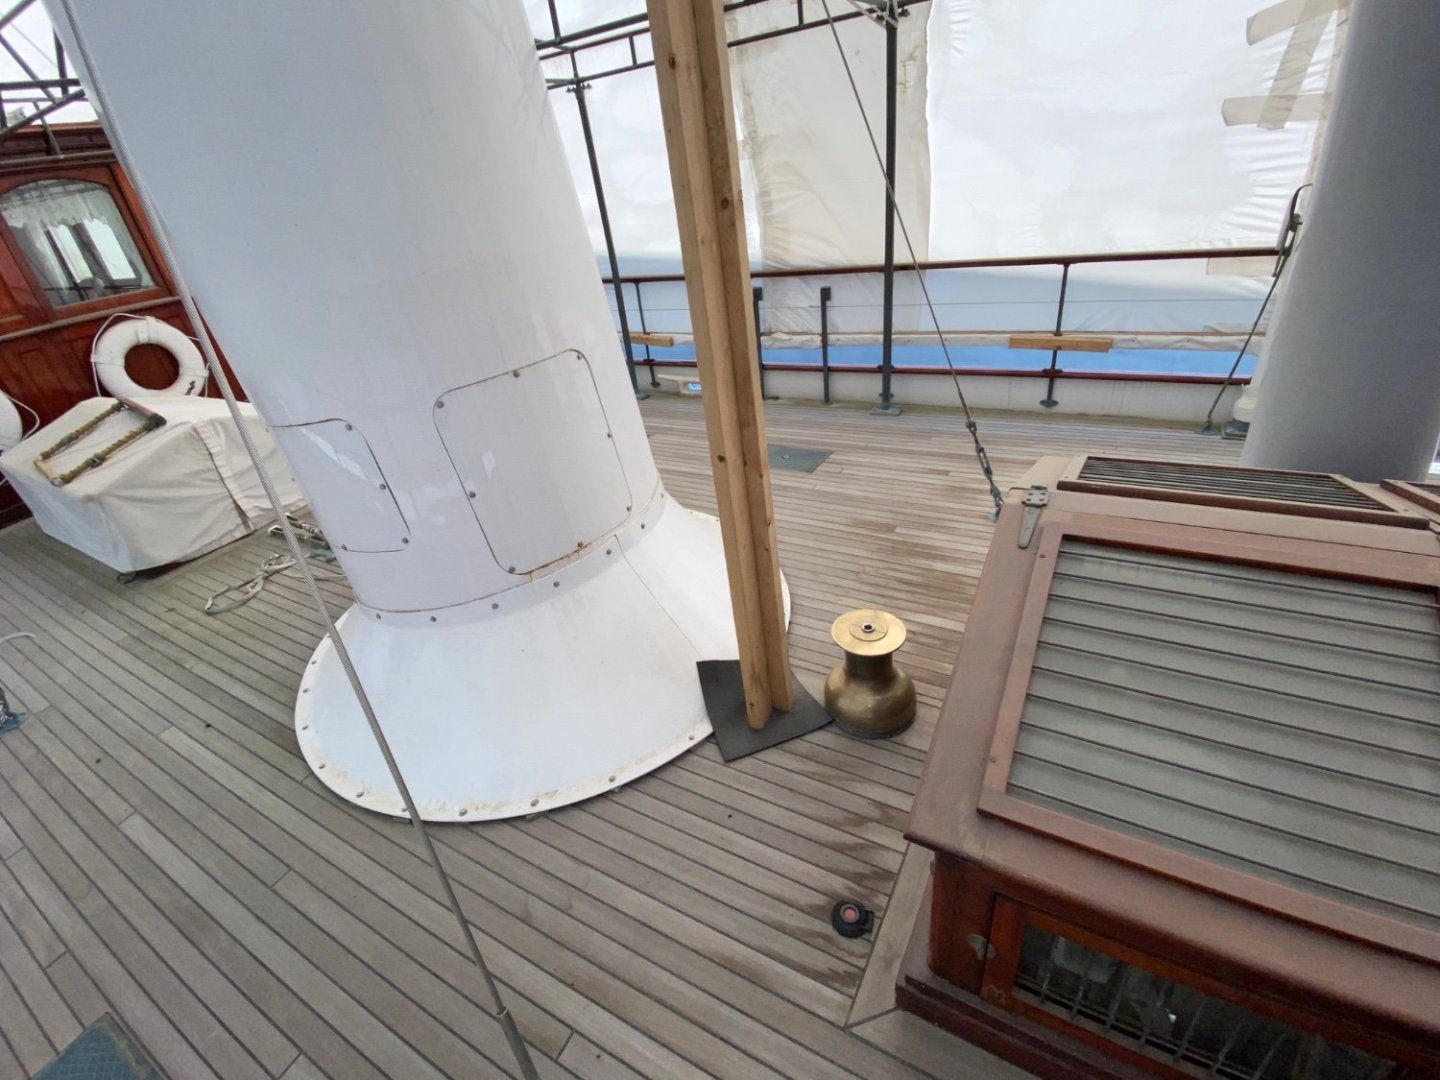
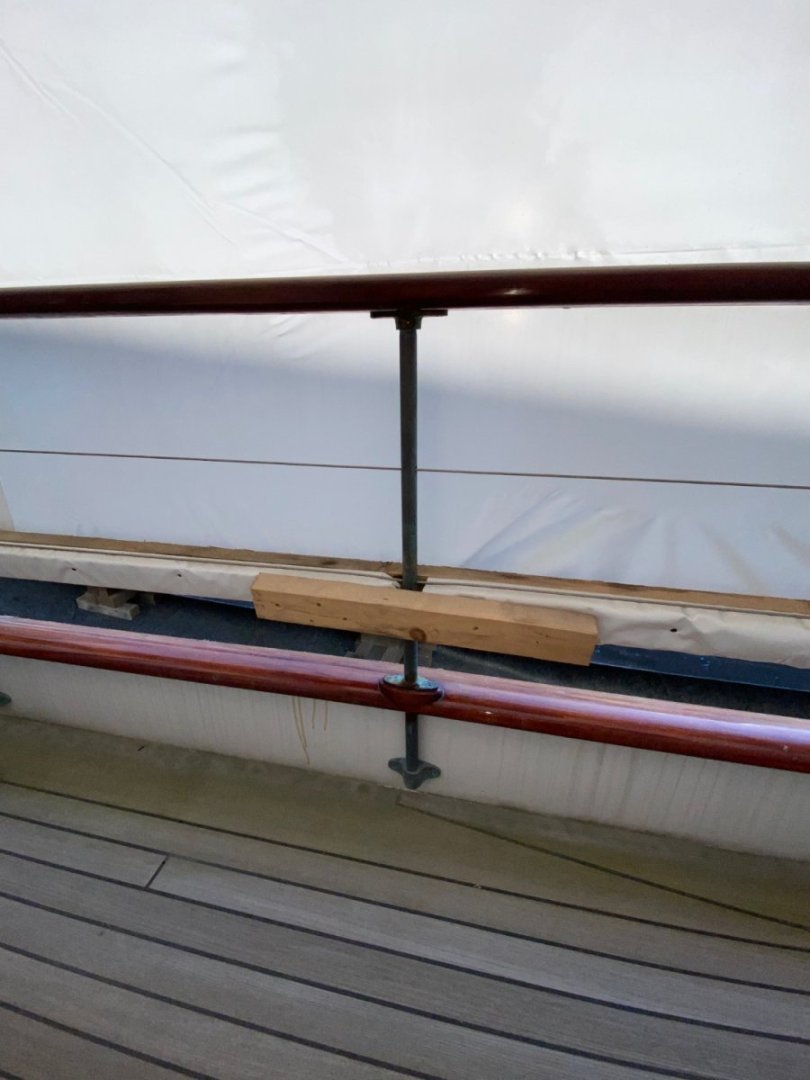
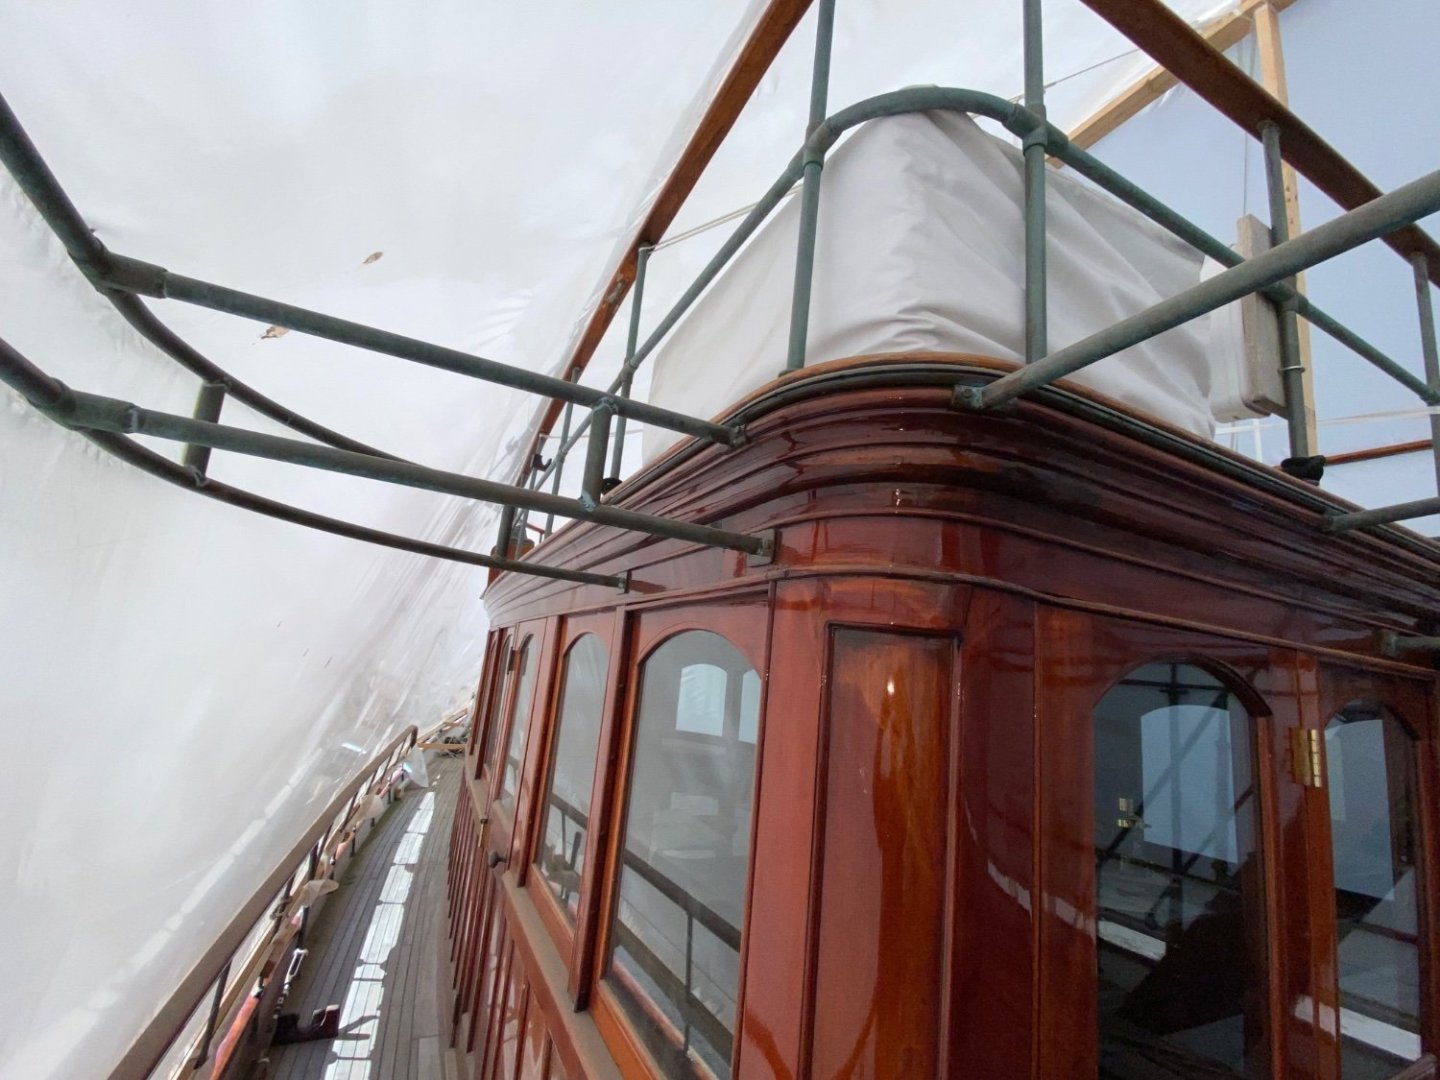
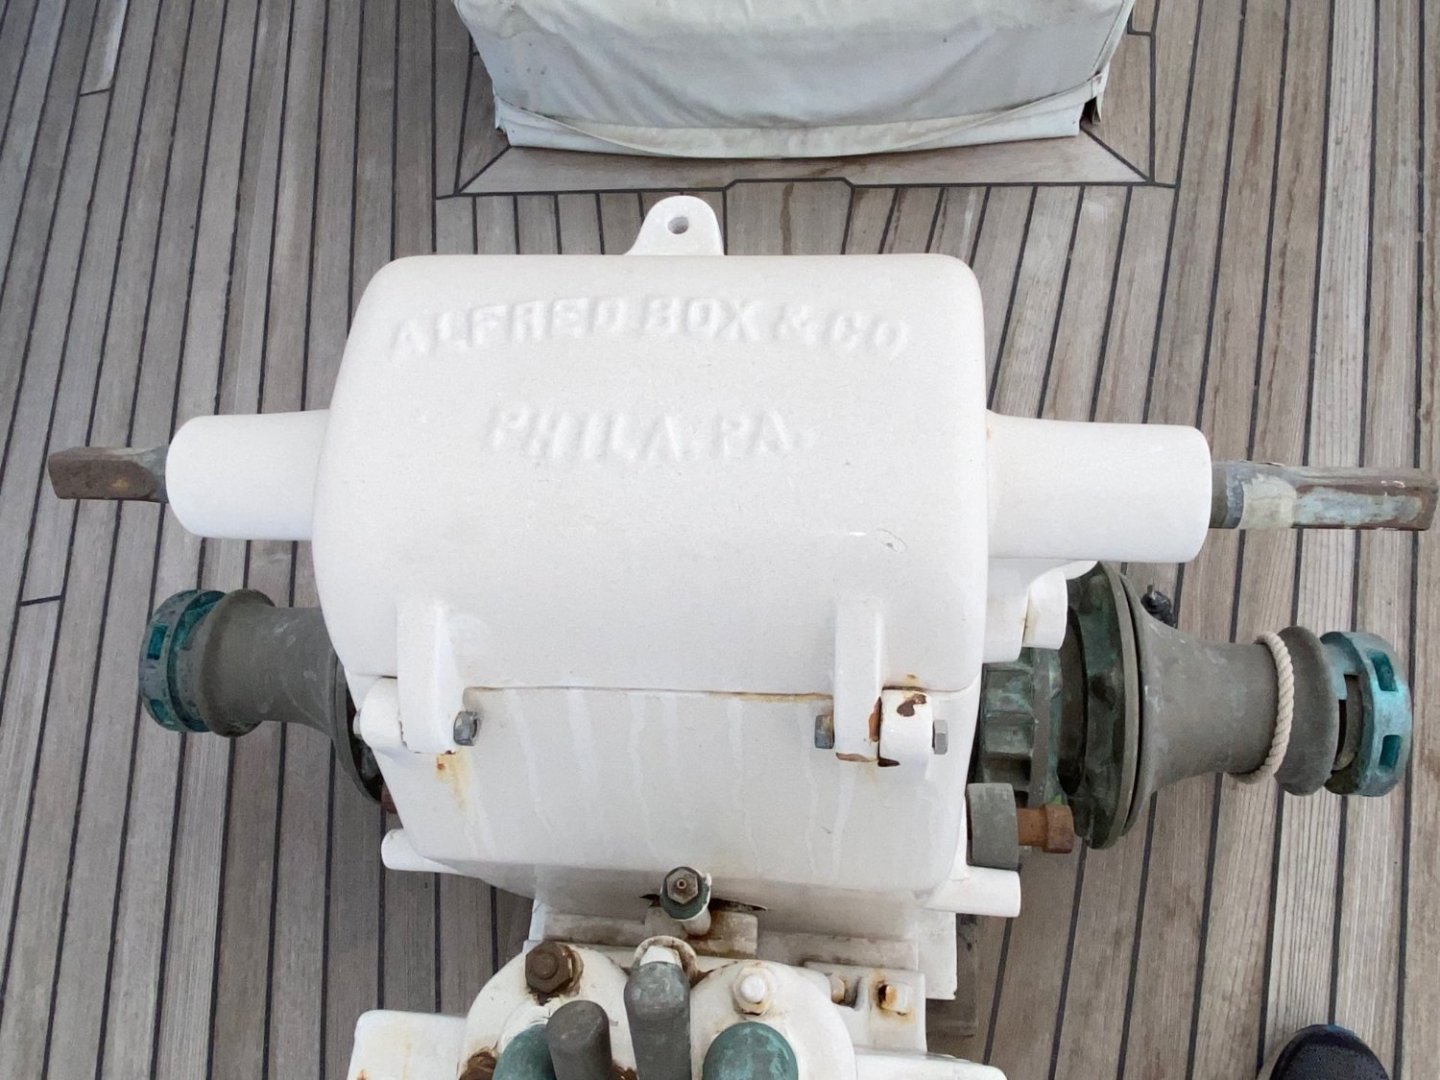
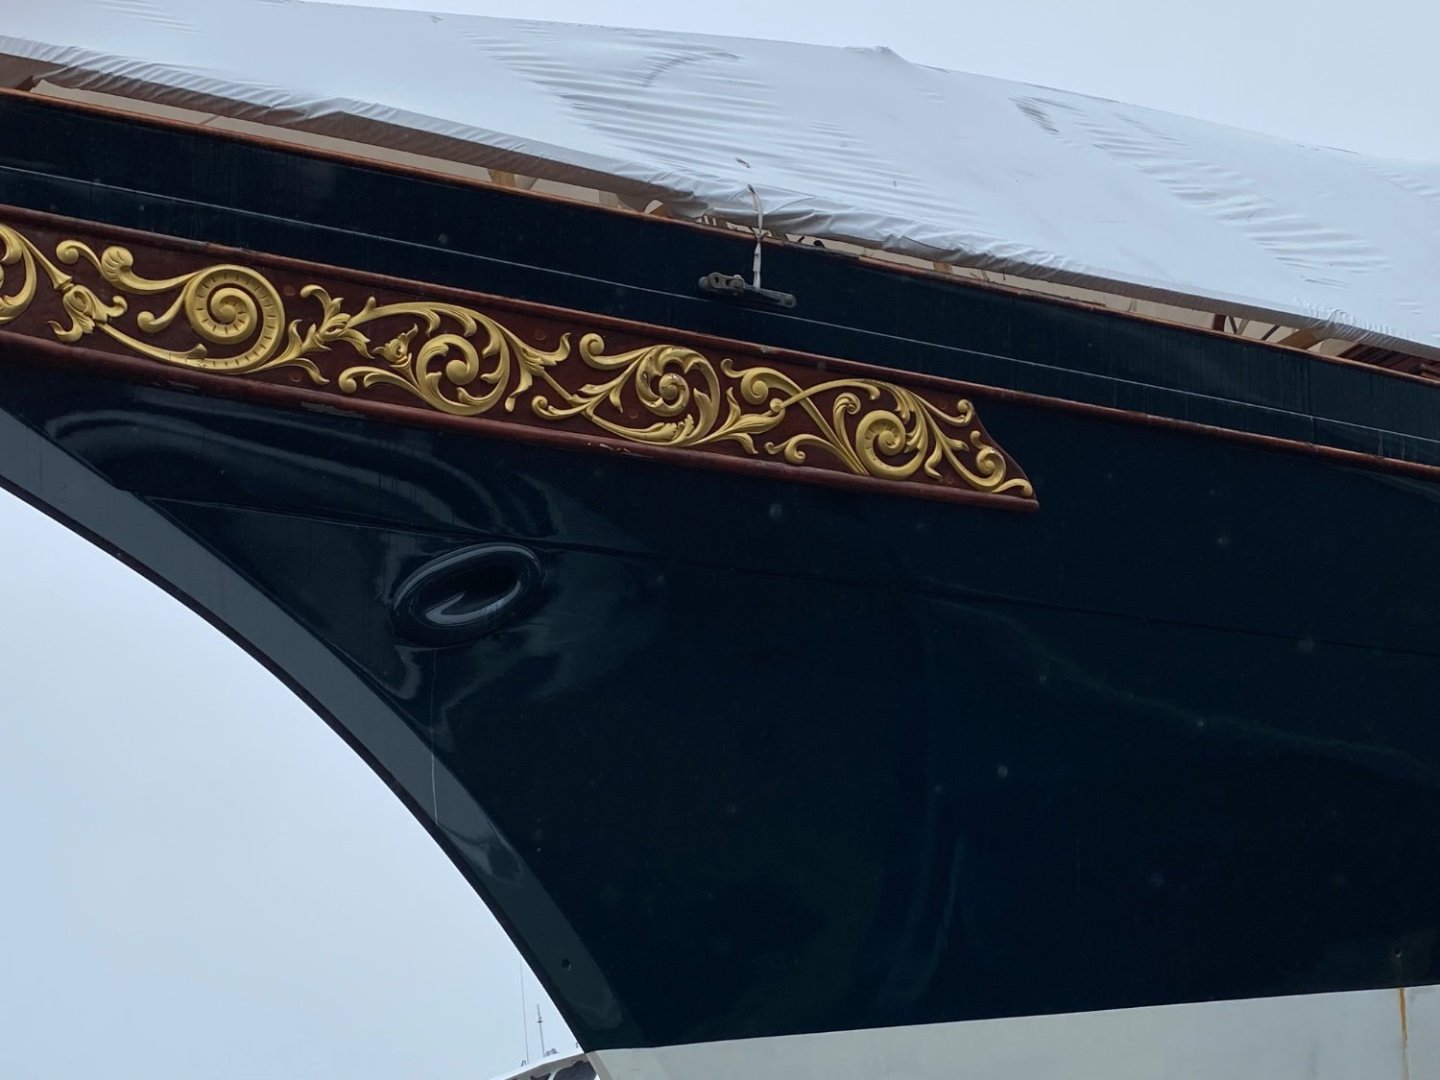
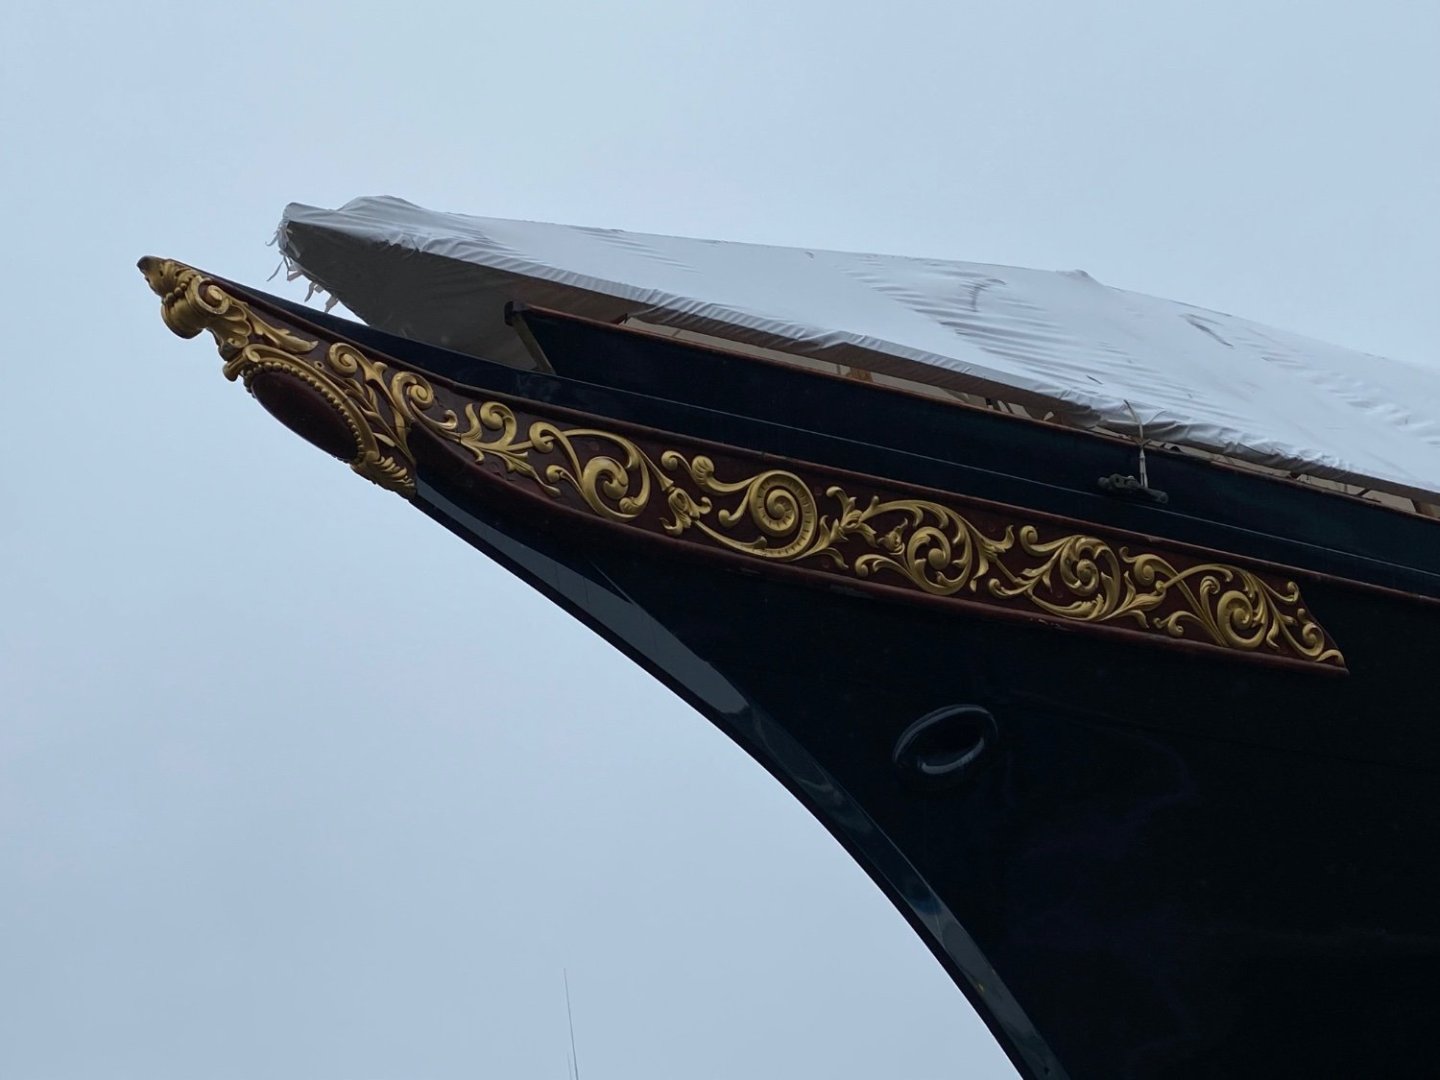
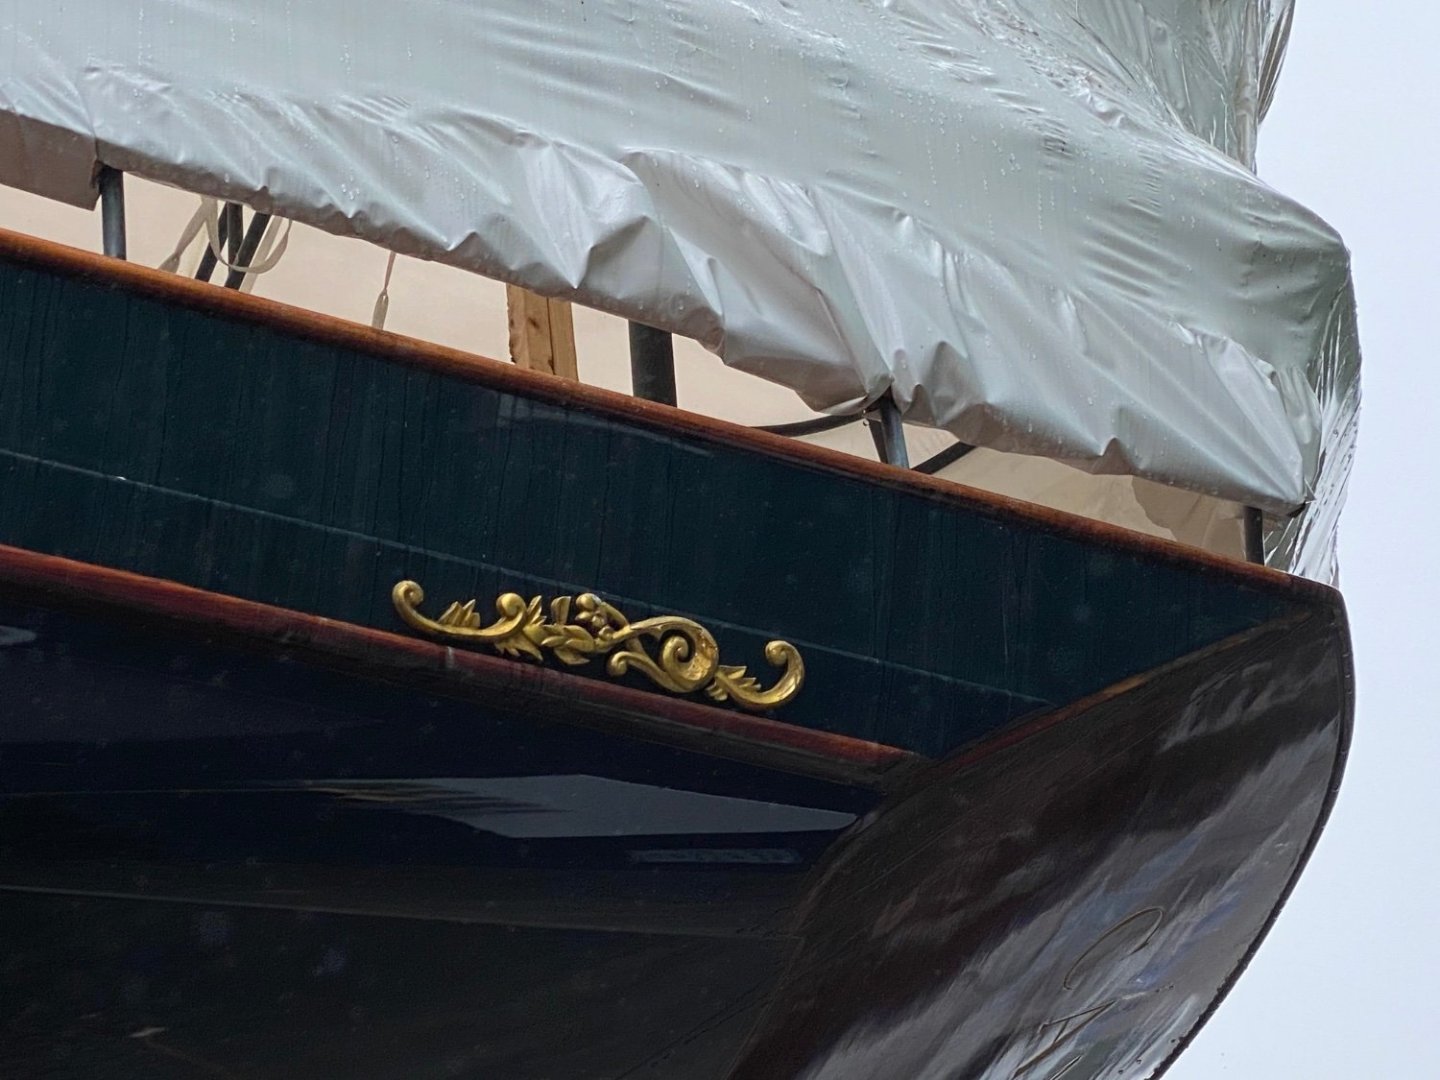
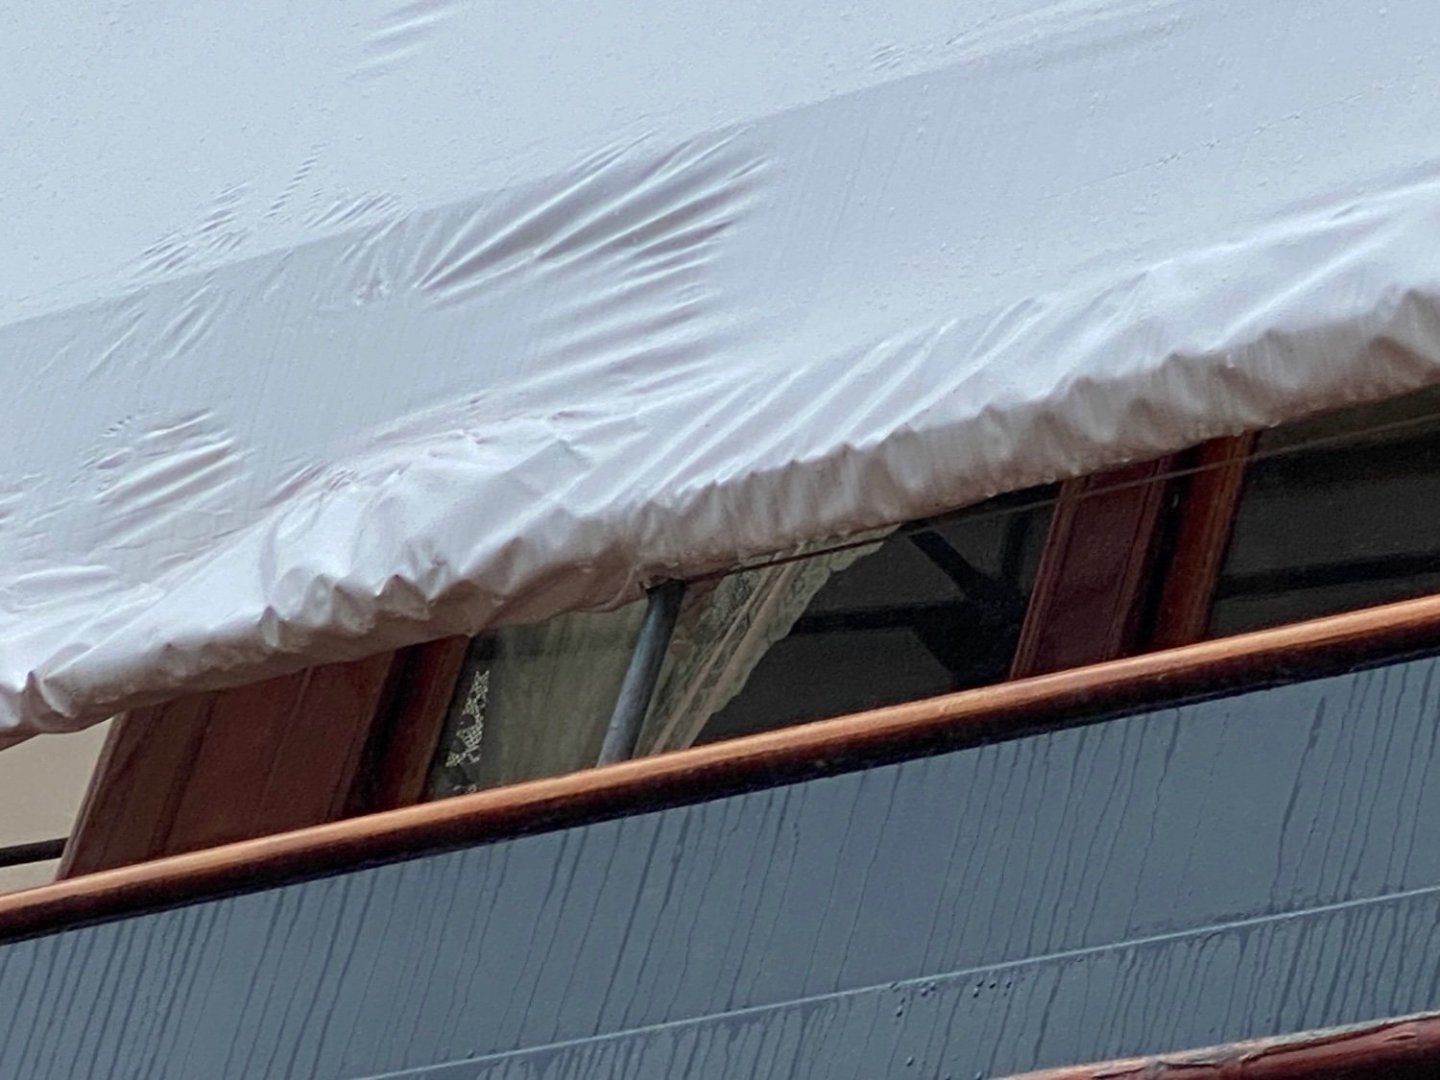
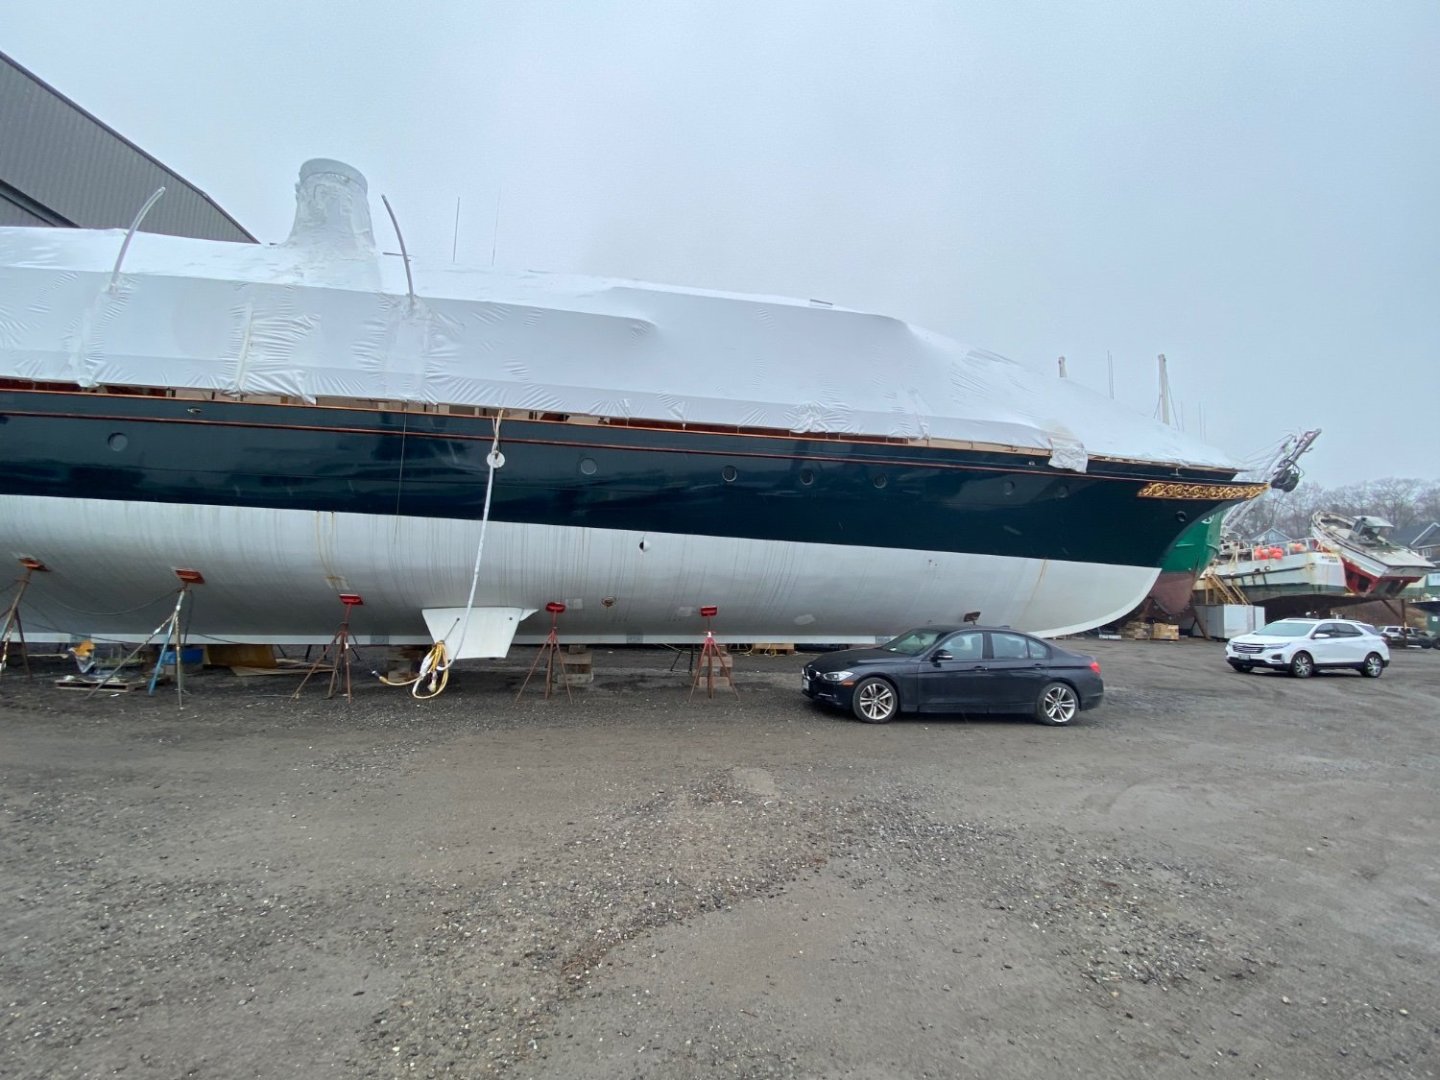
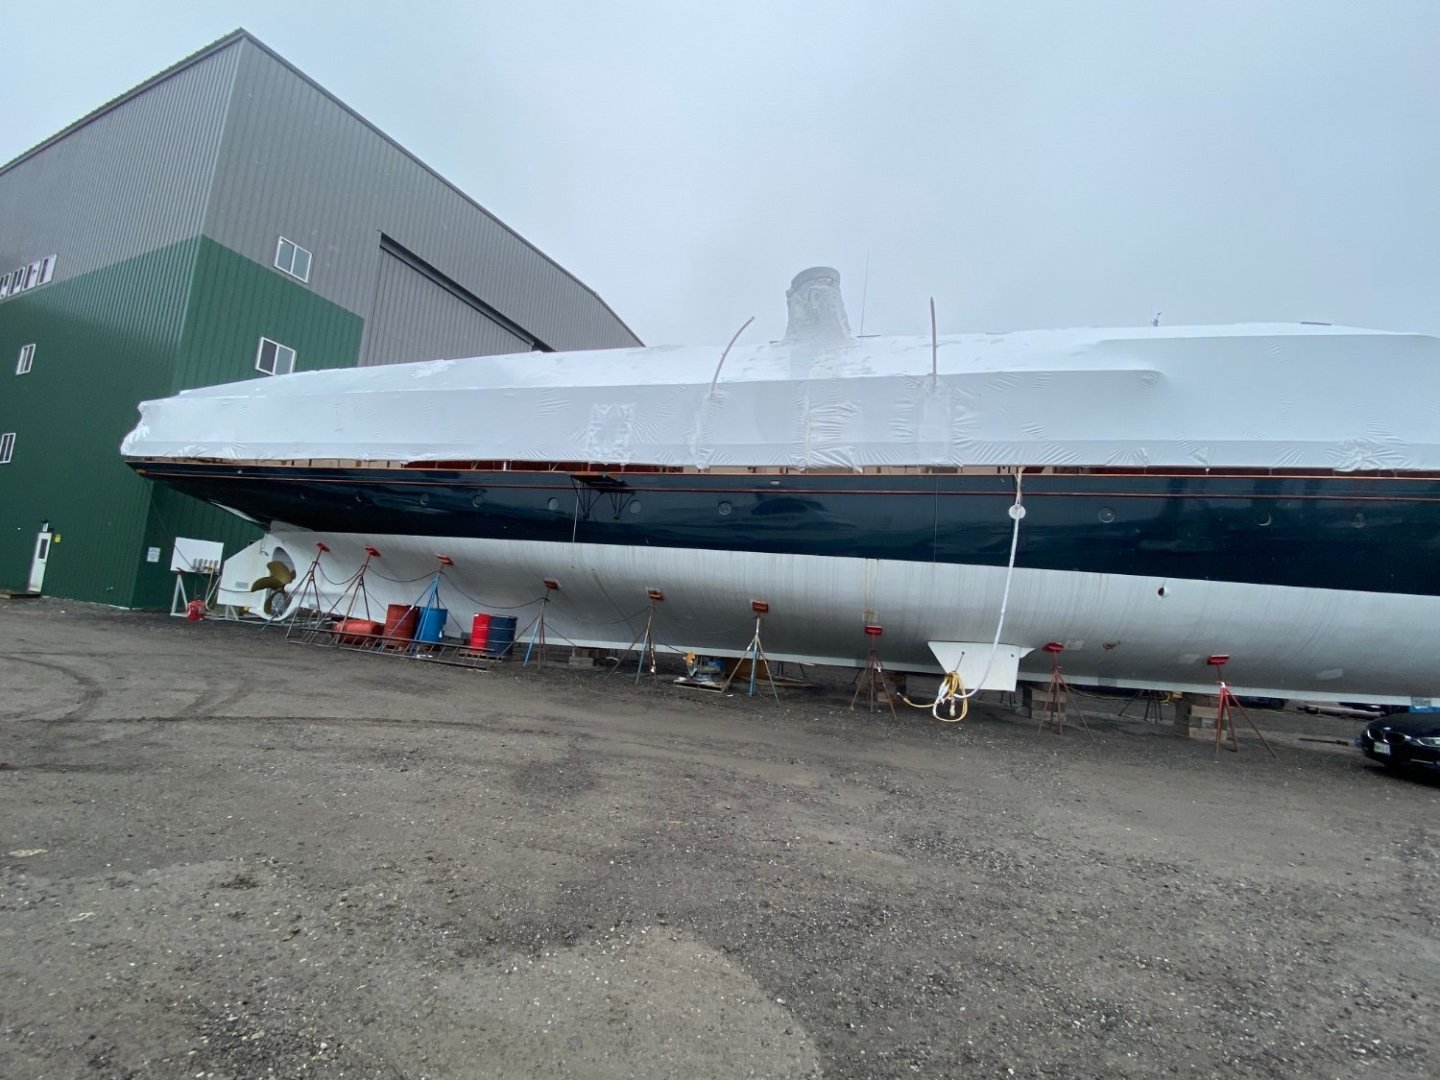
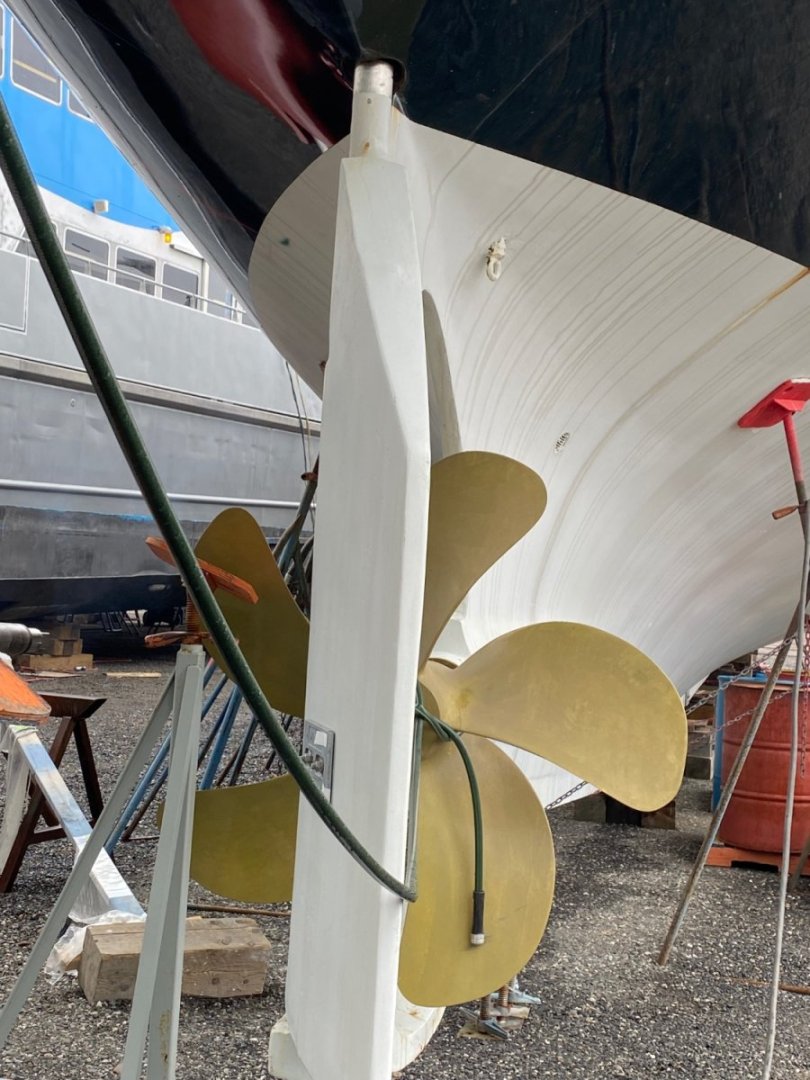
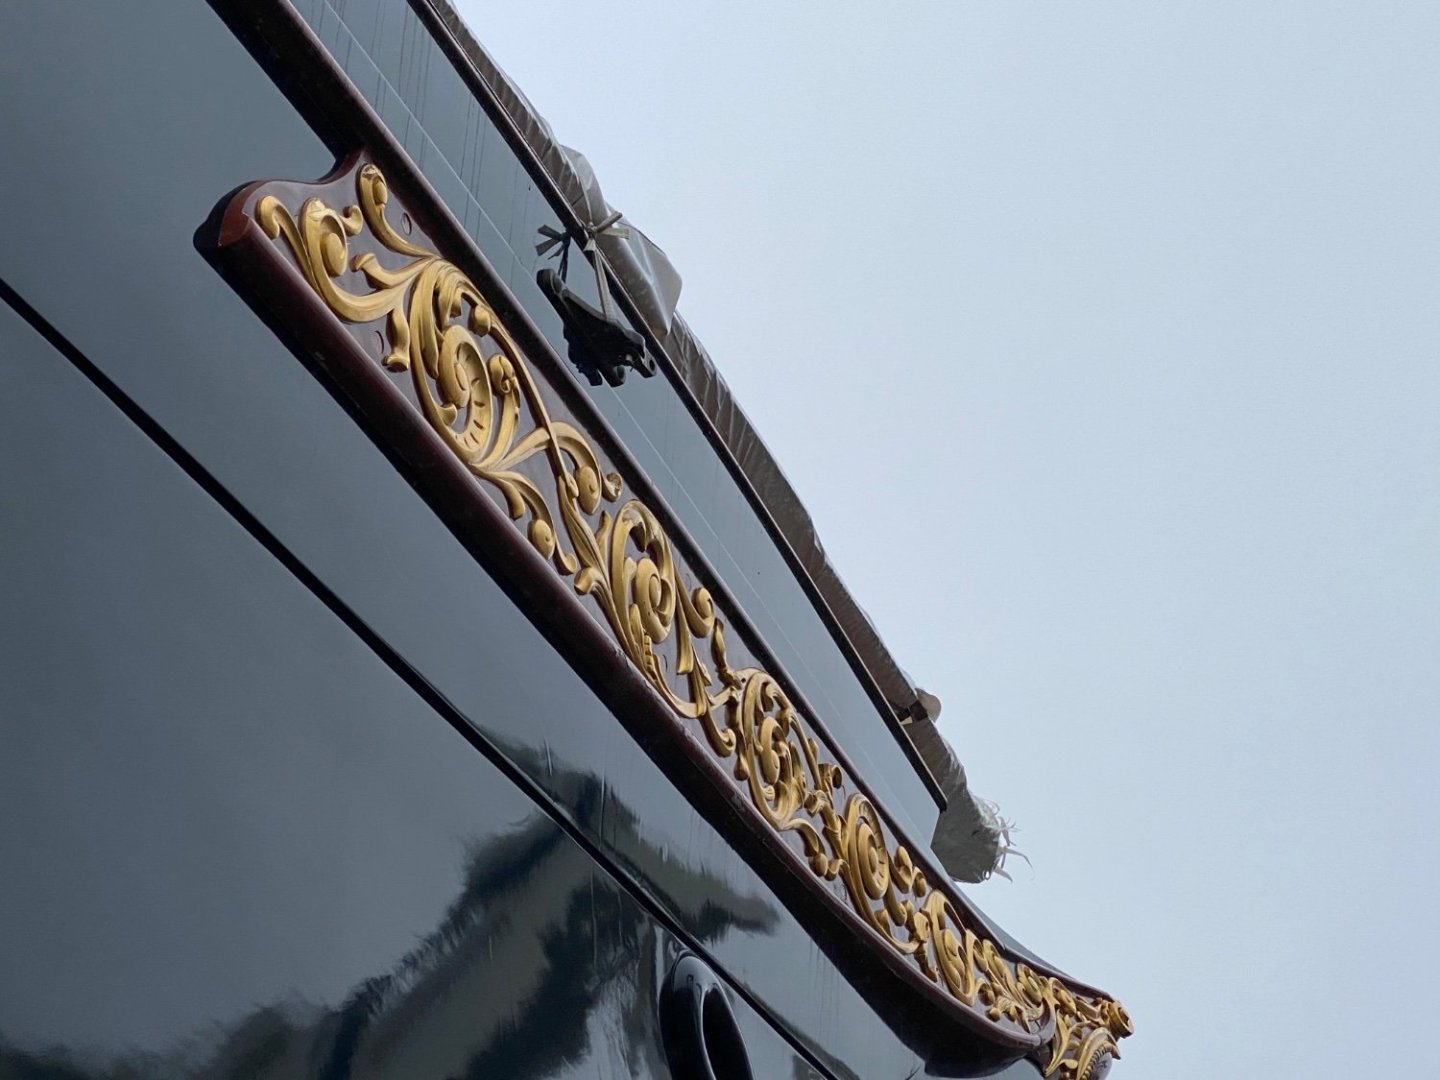
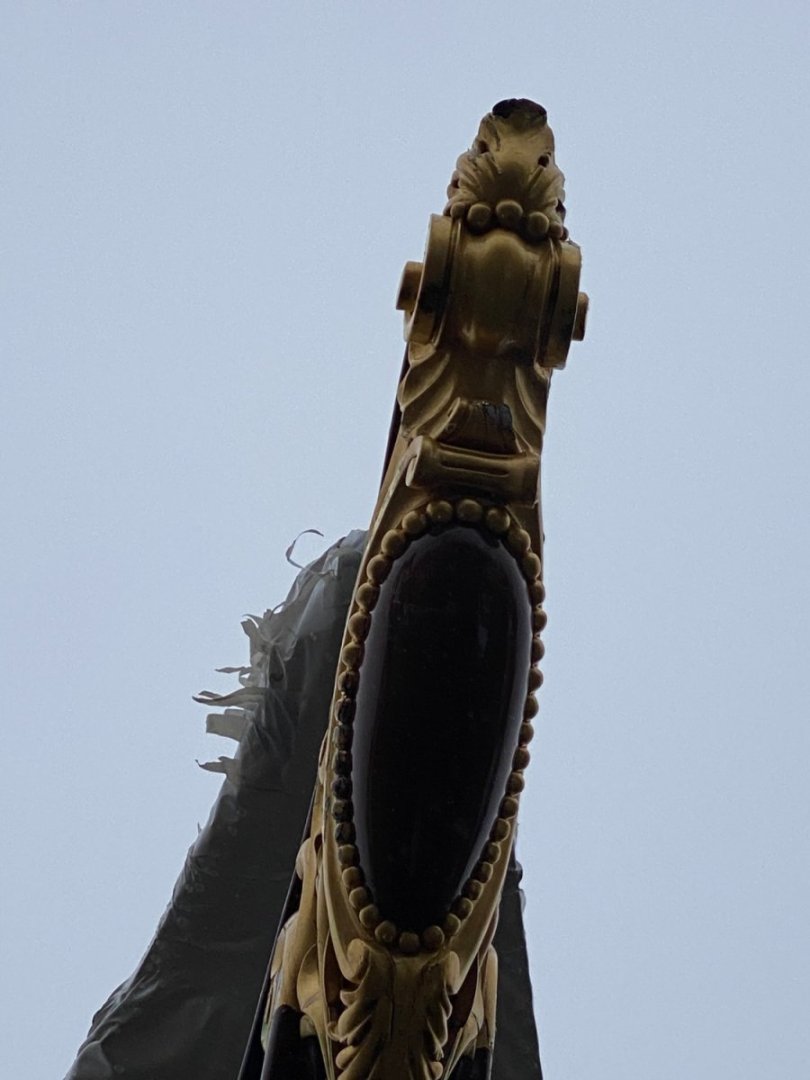
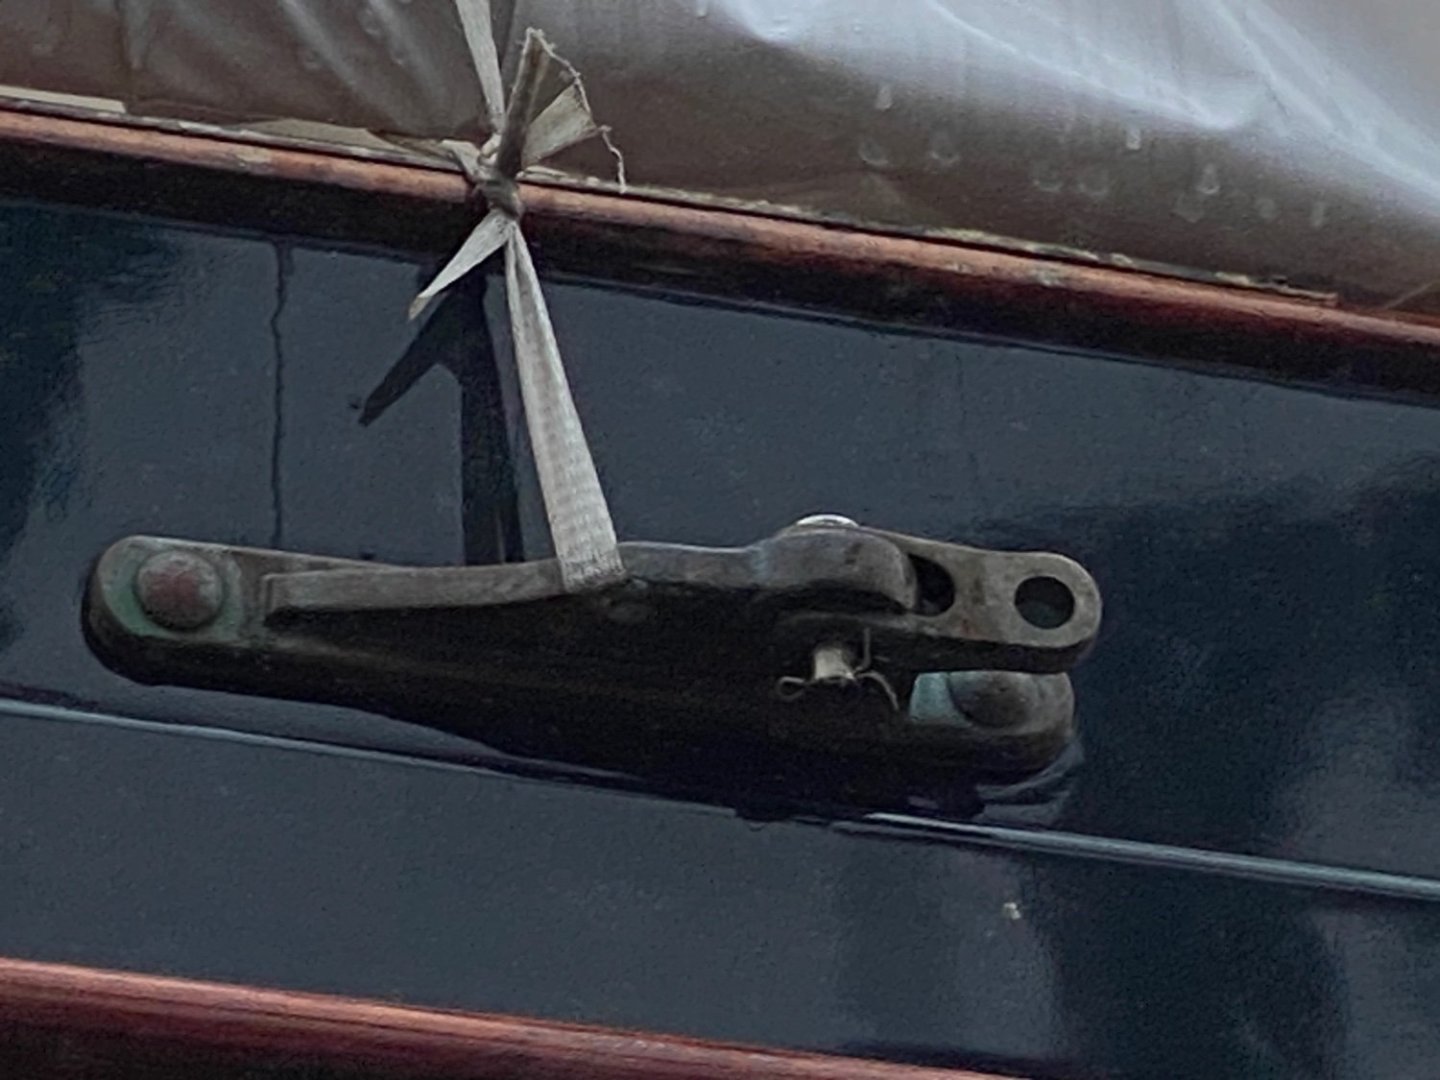
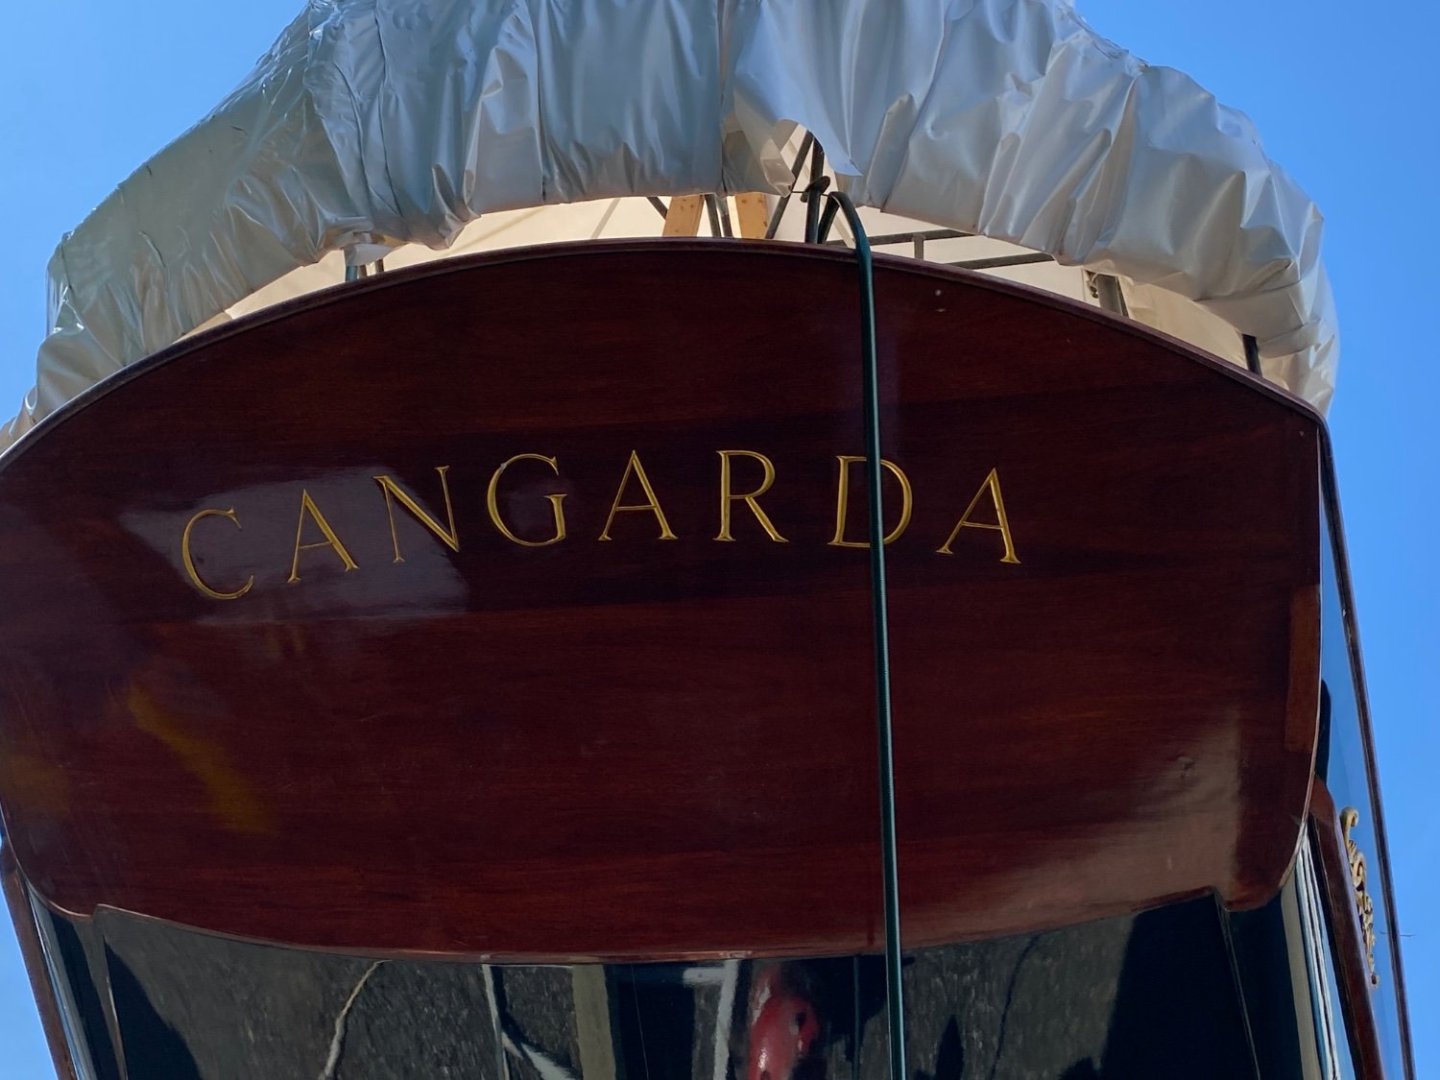
Keith, I was able to get aboard Cangarda today and took approximately 100 pictures. undoubtedly missed some important photos, but I hope these will help. She is still under wraps which made getting some photos difficult. How should I get these to you? I can post them if you like. Rick PS. I’m dedicating my model to my 5 year old granddaughter!!!
-
Looks good Nic!! Glad to see you’re stepping up!! Rick
- 121 replies
-
- 1
-
-
- Newsboy
- Model Shipways
- (and 2 more)
-
Just received the OK to go aboard and get pictures. I’ll try to get over there sometime this week as I work the next 2 days. Rick
-
Keith, just heard from Front Street Shipyard’s president, unfortunately they don’t want people on board as they are selling Cangard. J B said he would reach out to the executor of the estate and try to get permission to go aboard. He also told me that there are pictures of Cangarda on a brokerage website but he wasn’t sure which one. You can probably find it online. If I can get aboard, I’ll let you know. Regards, Rick
-
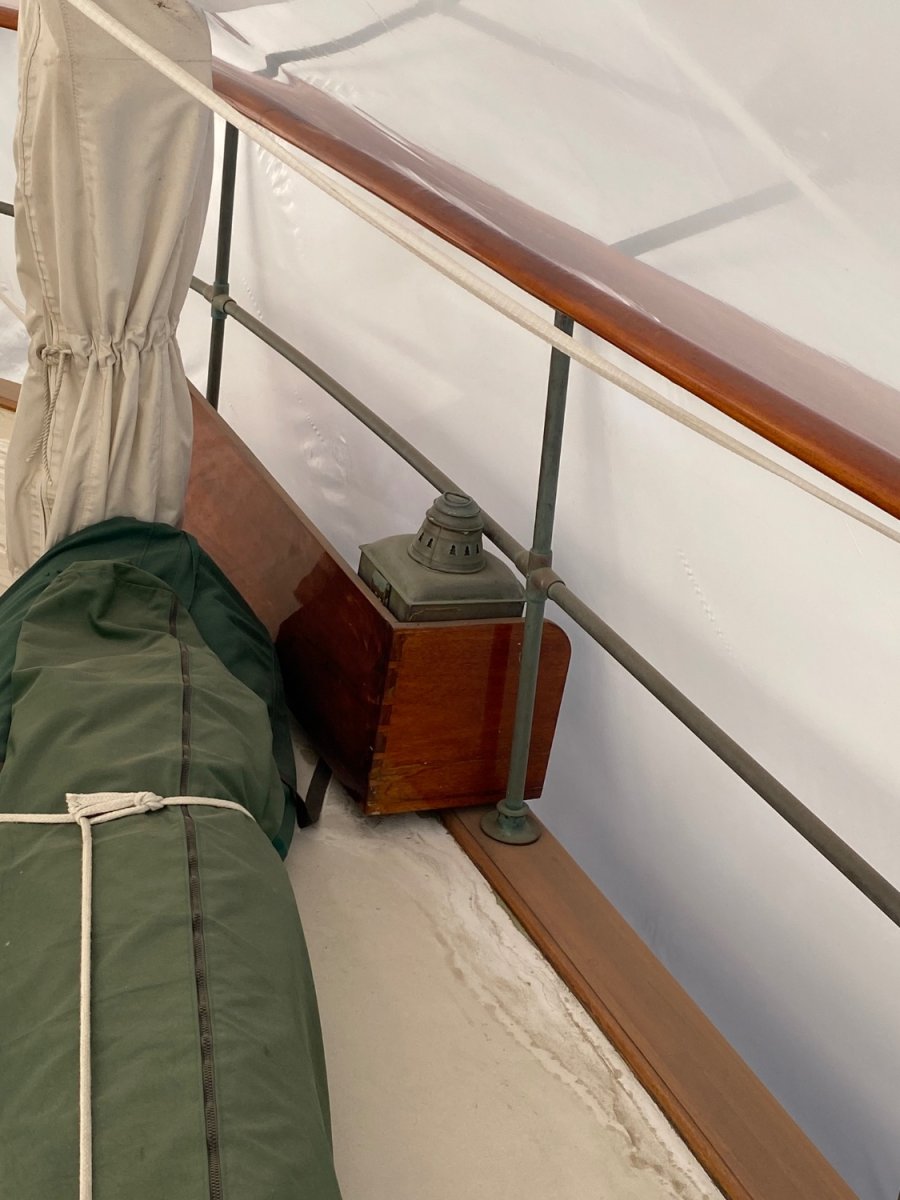
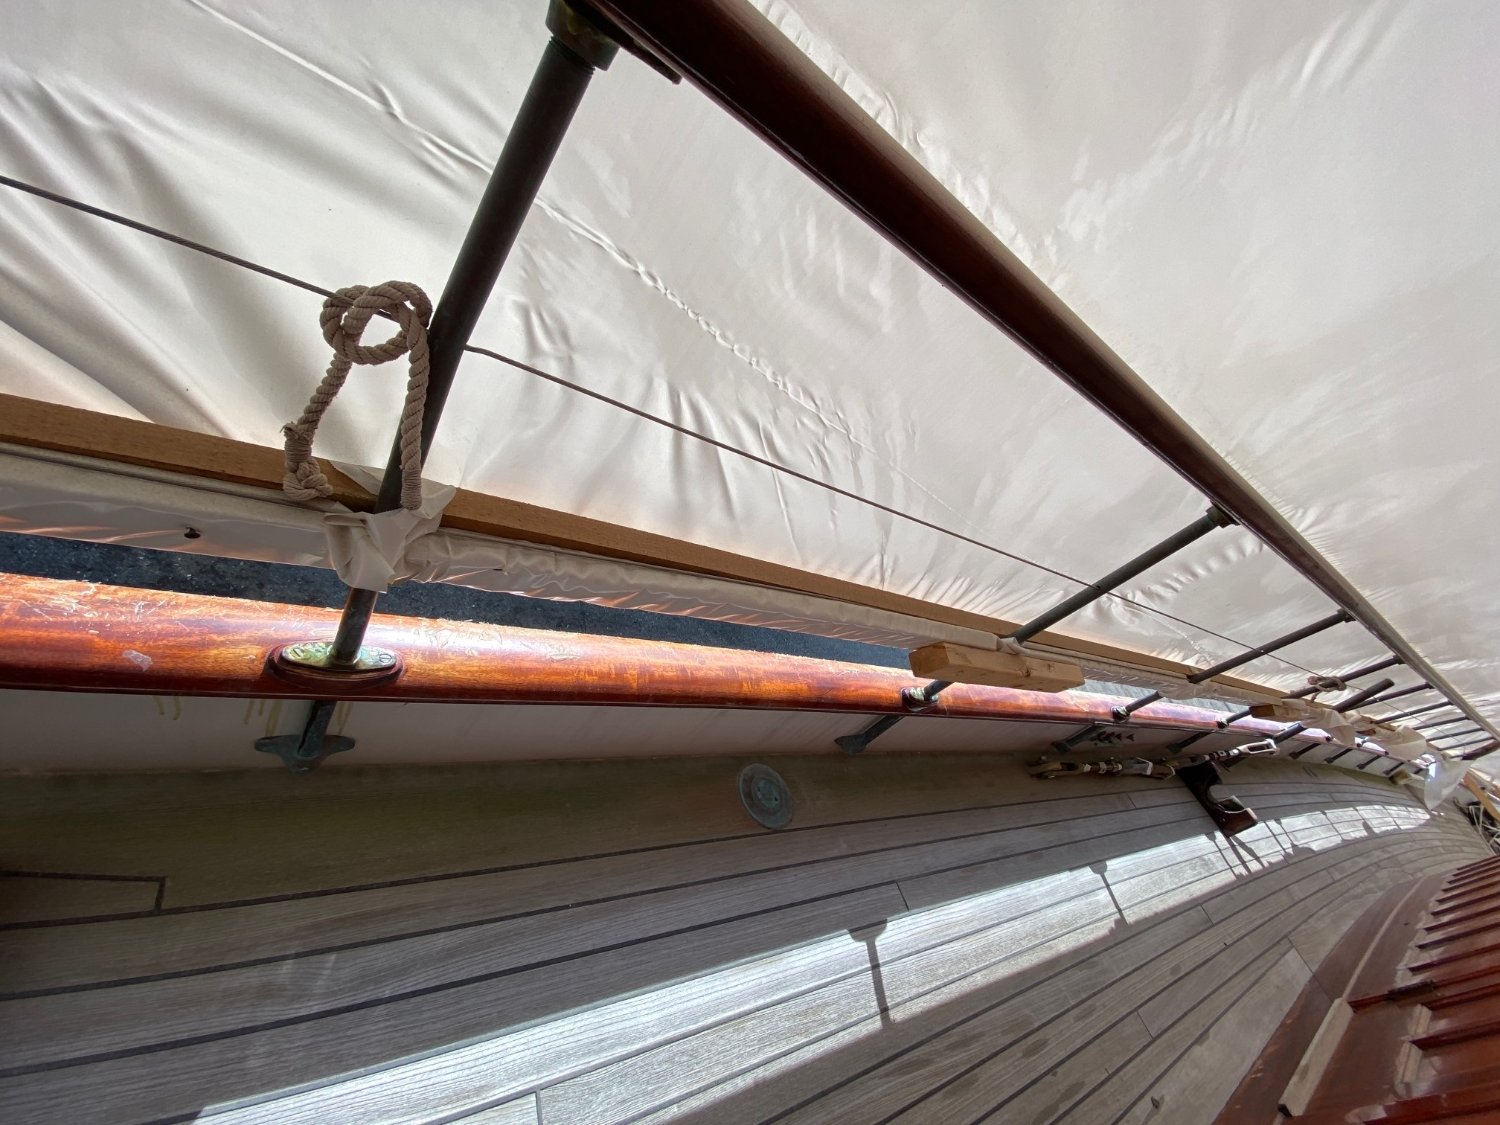
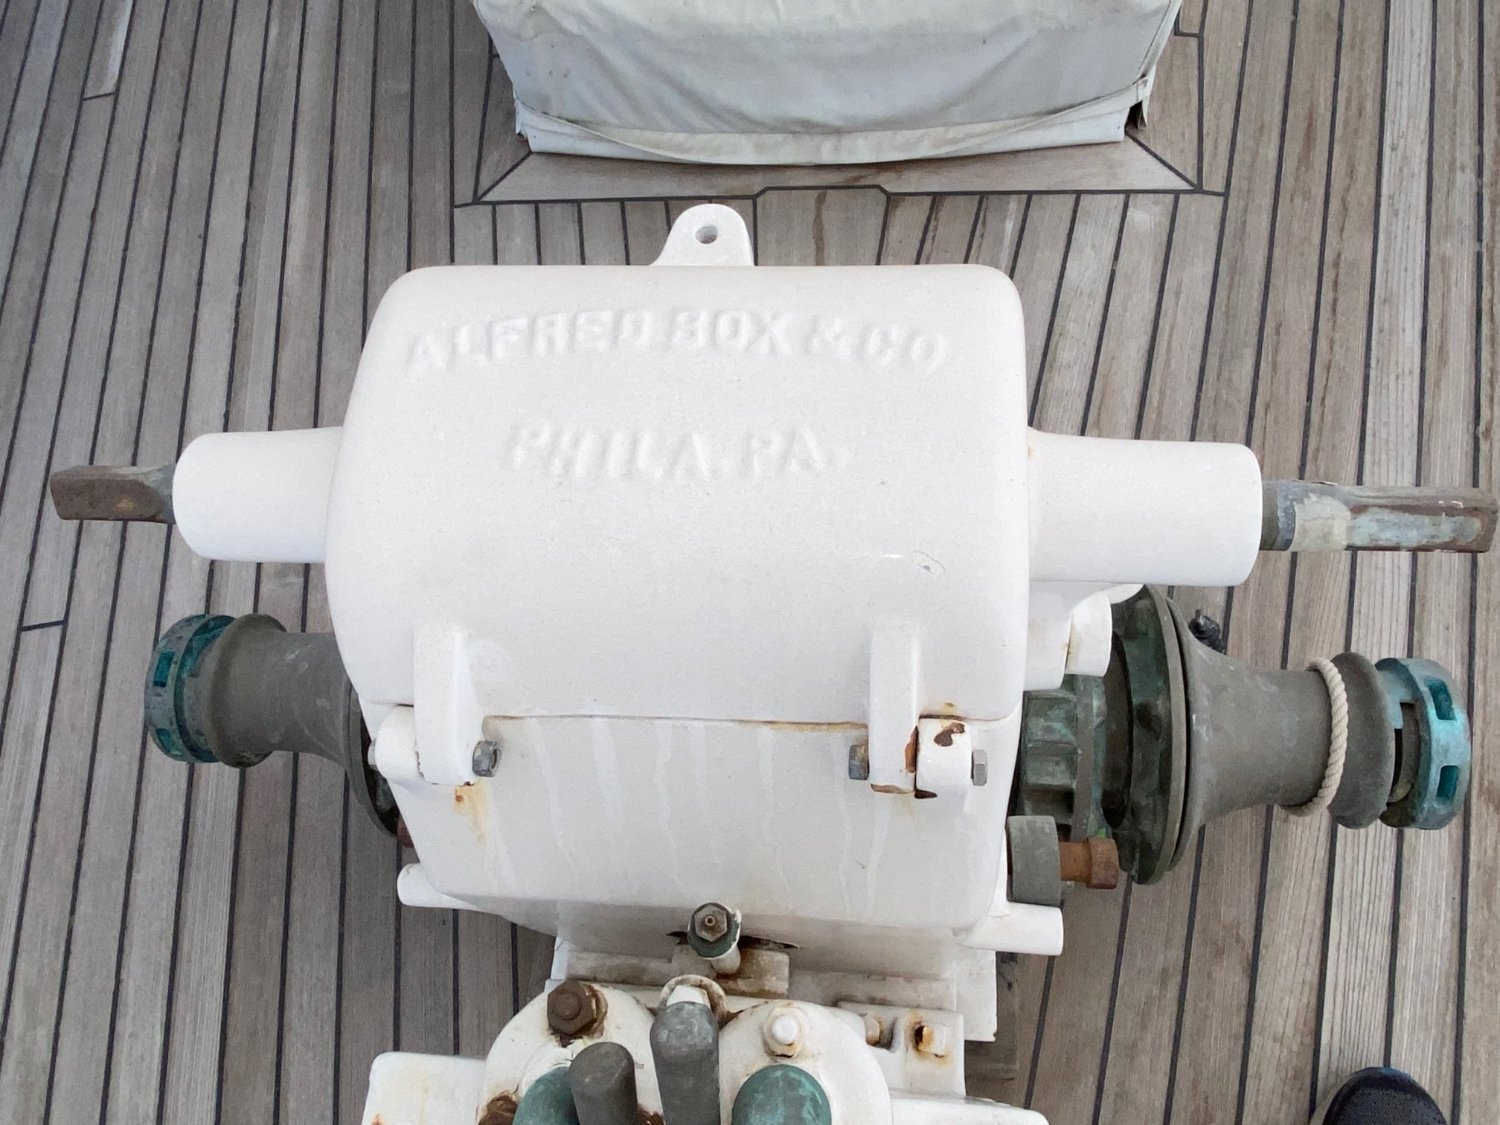
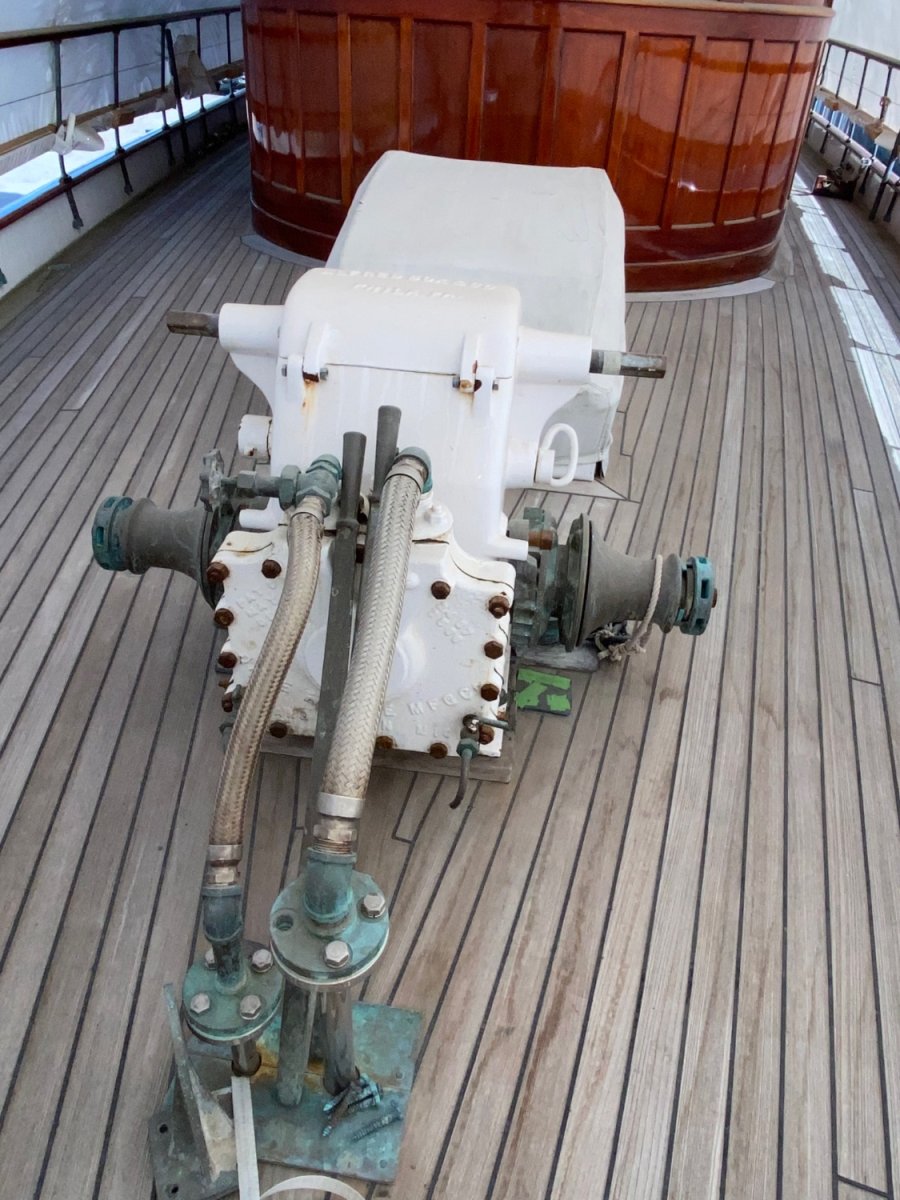
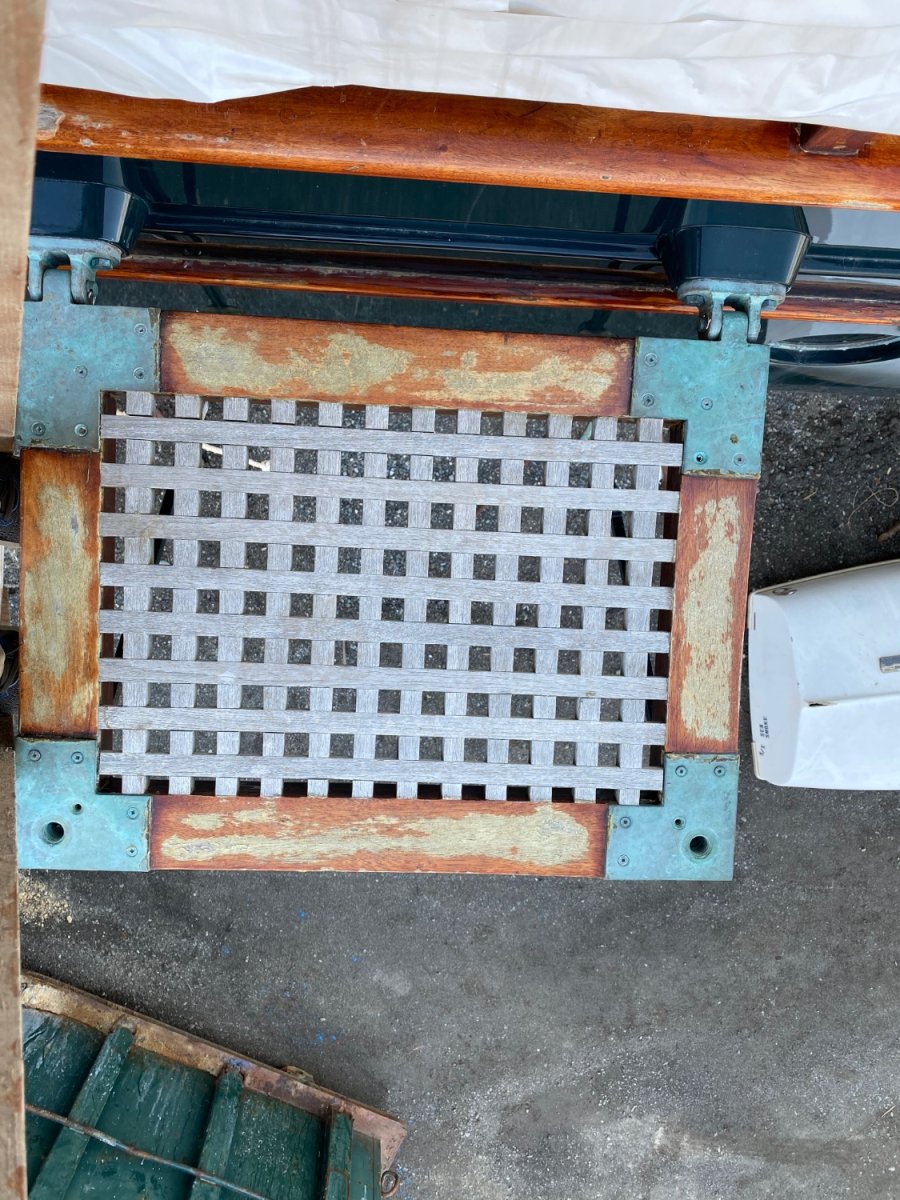
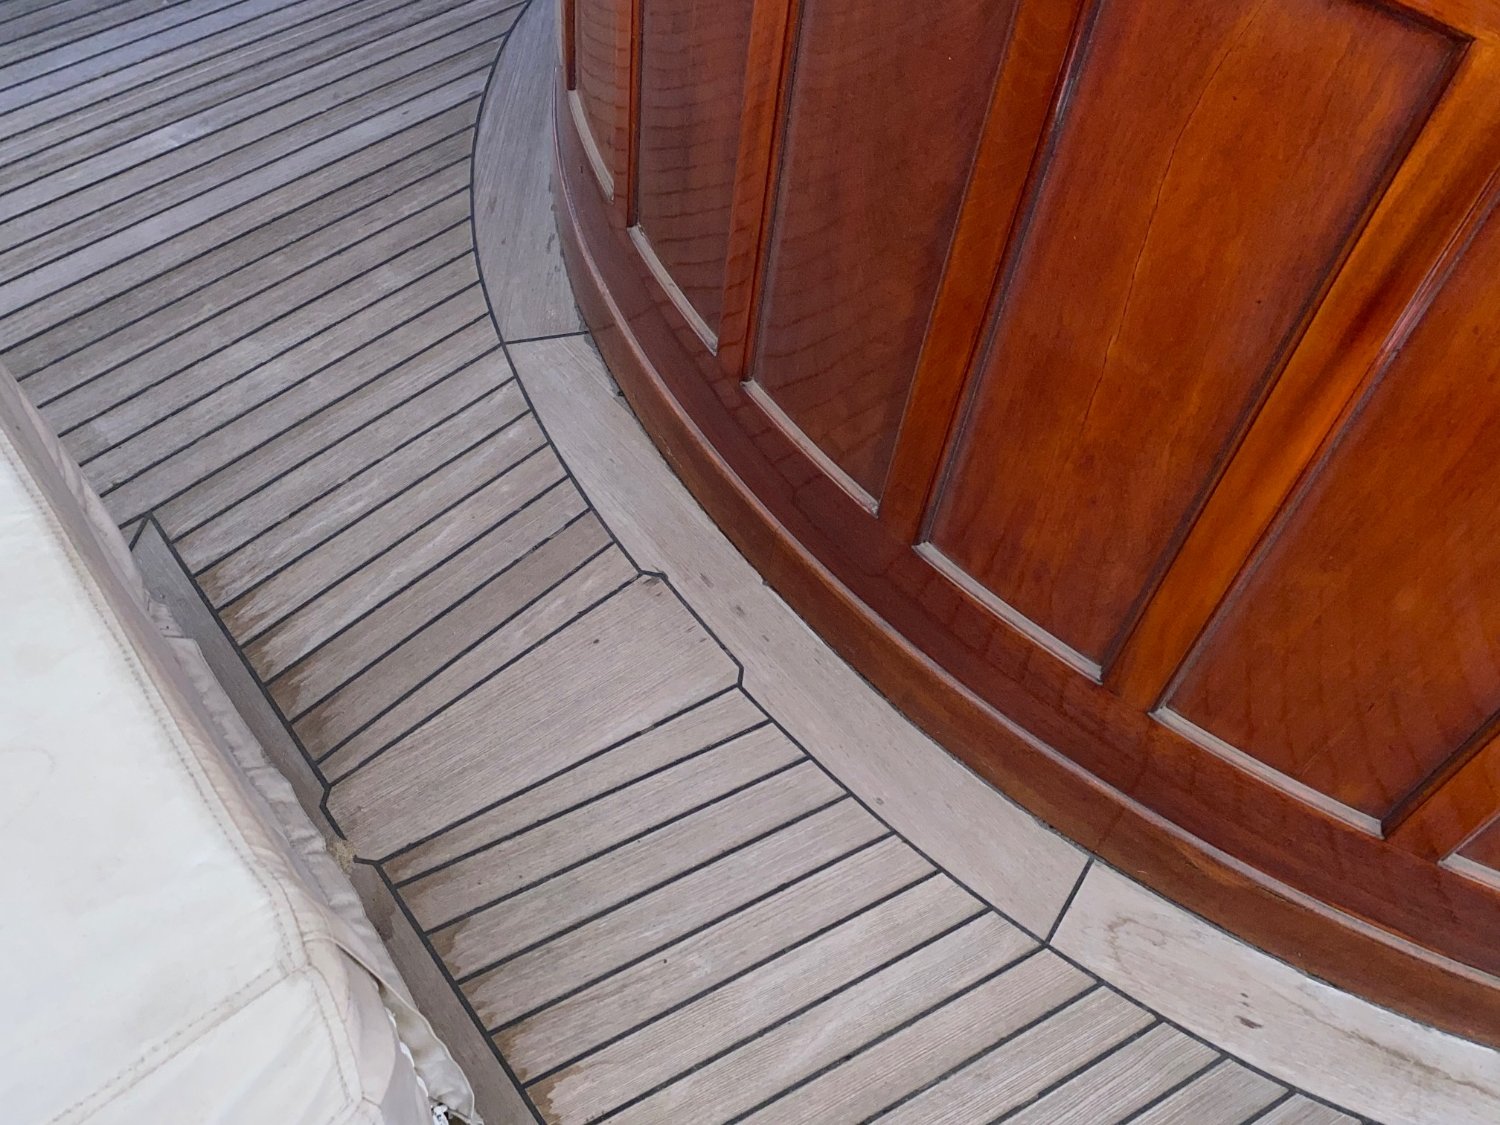
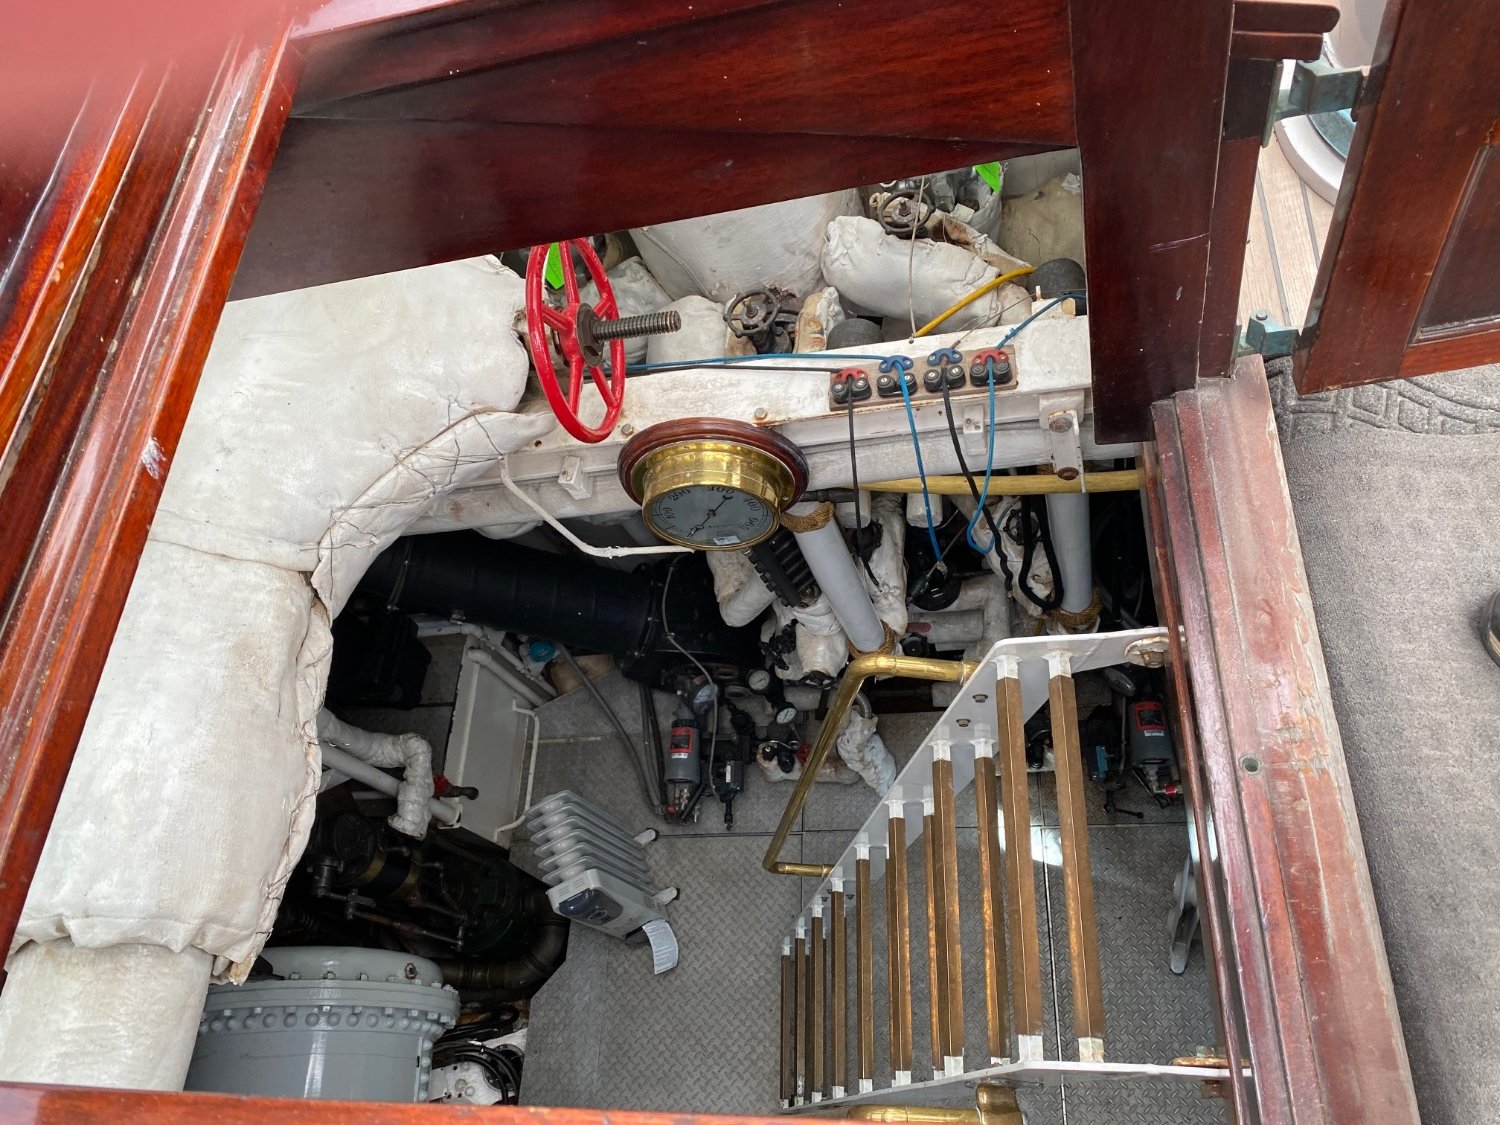
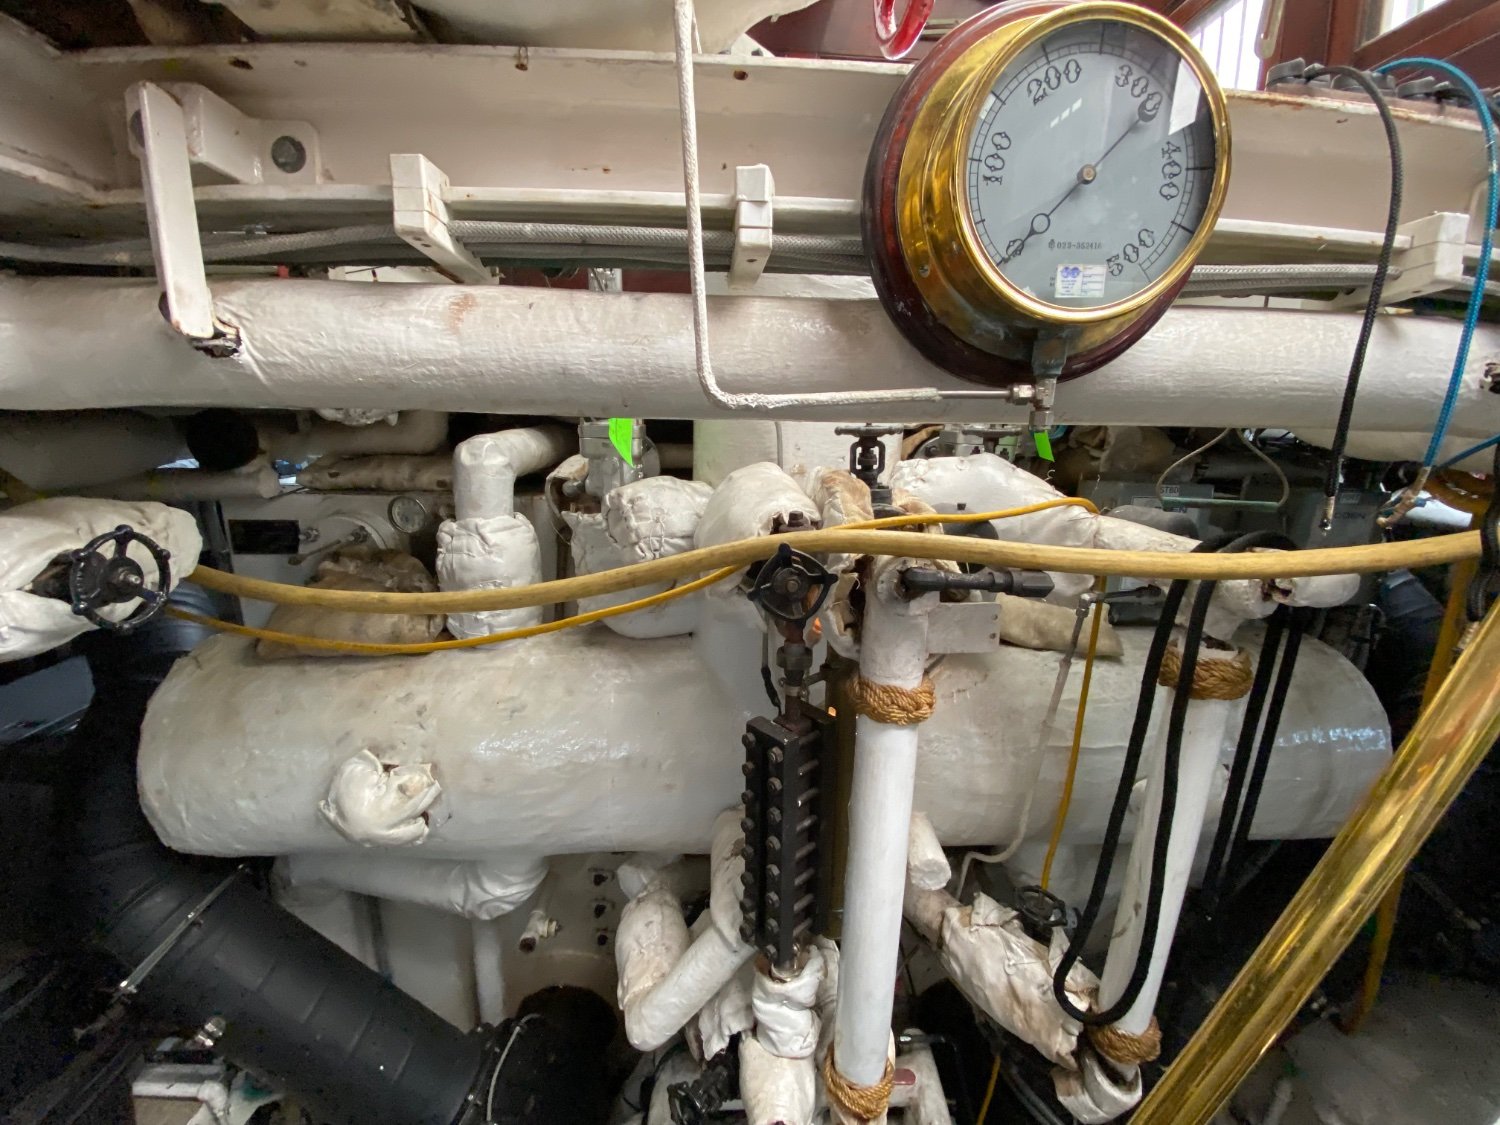
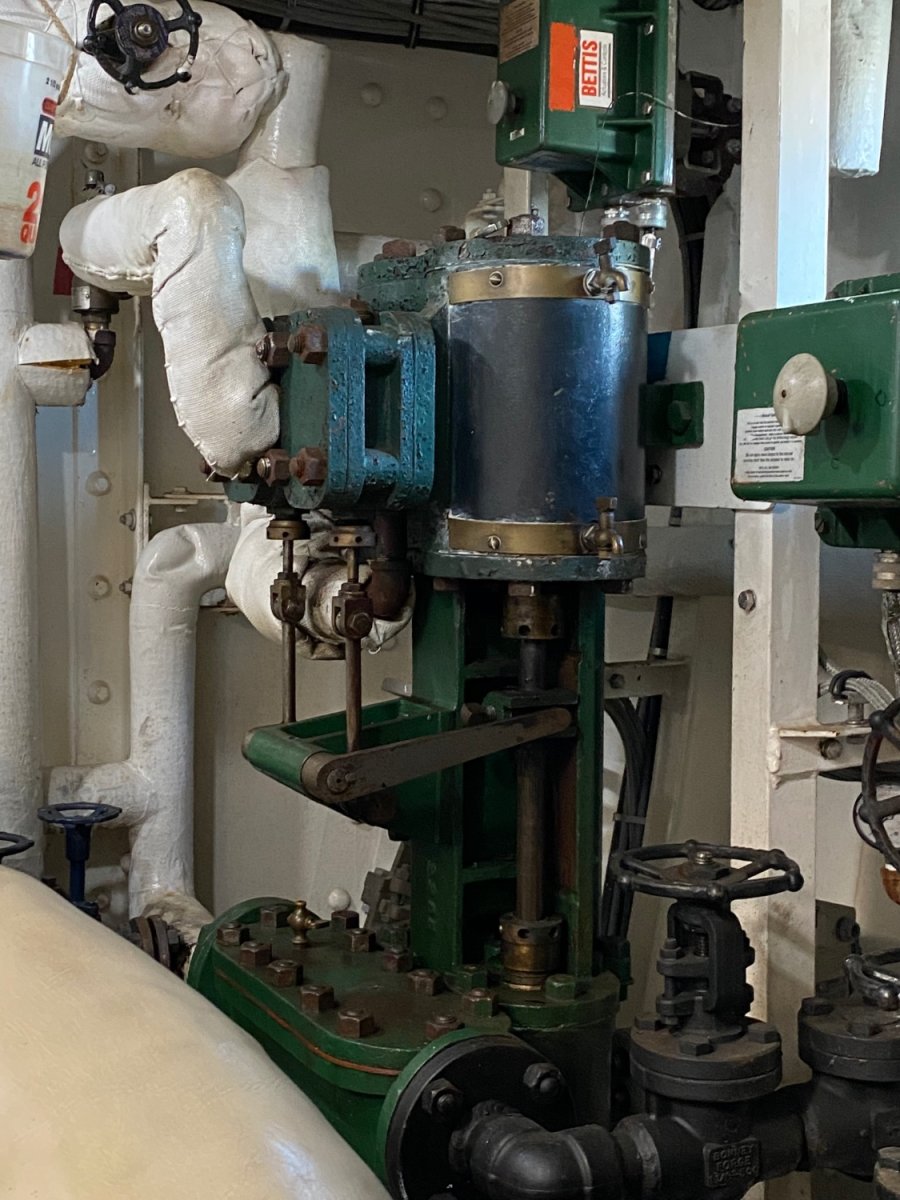
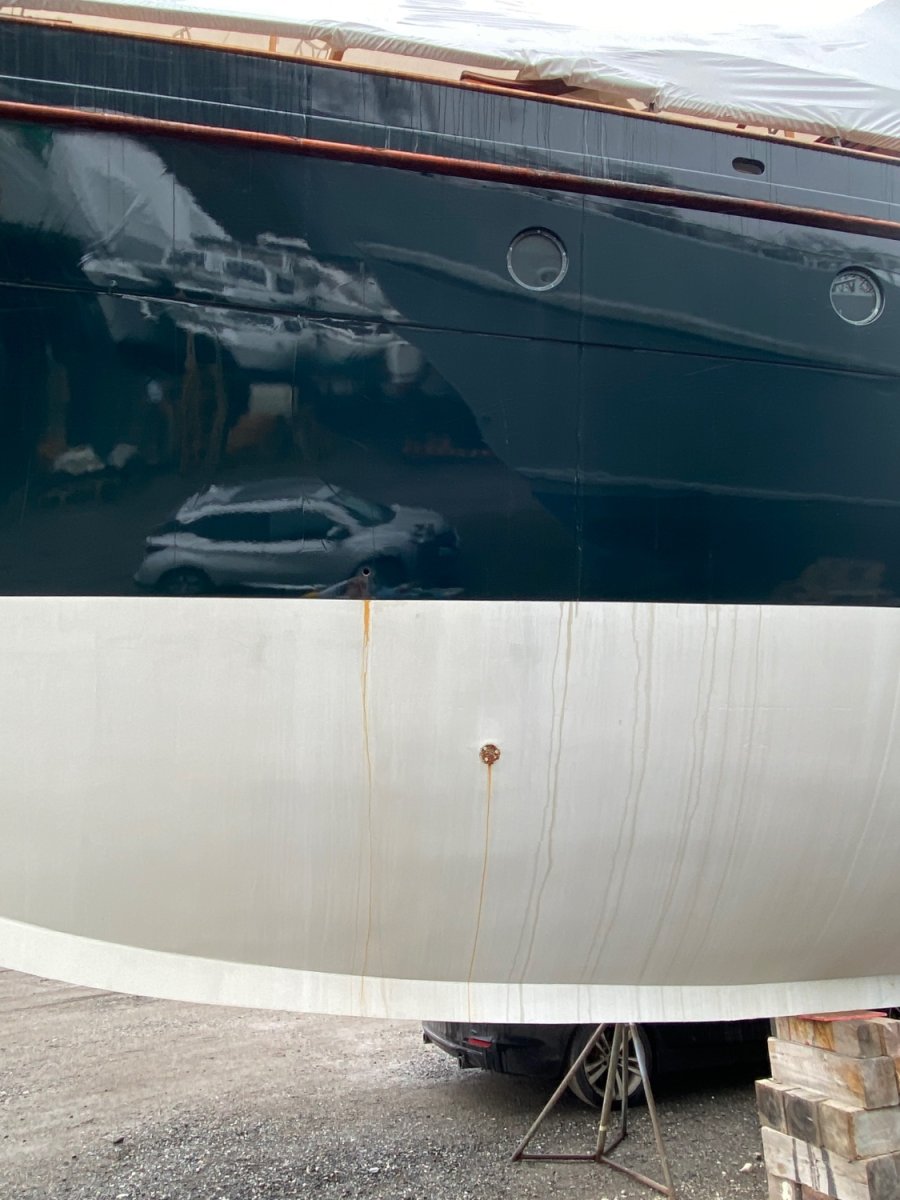
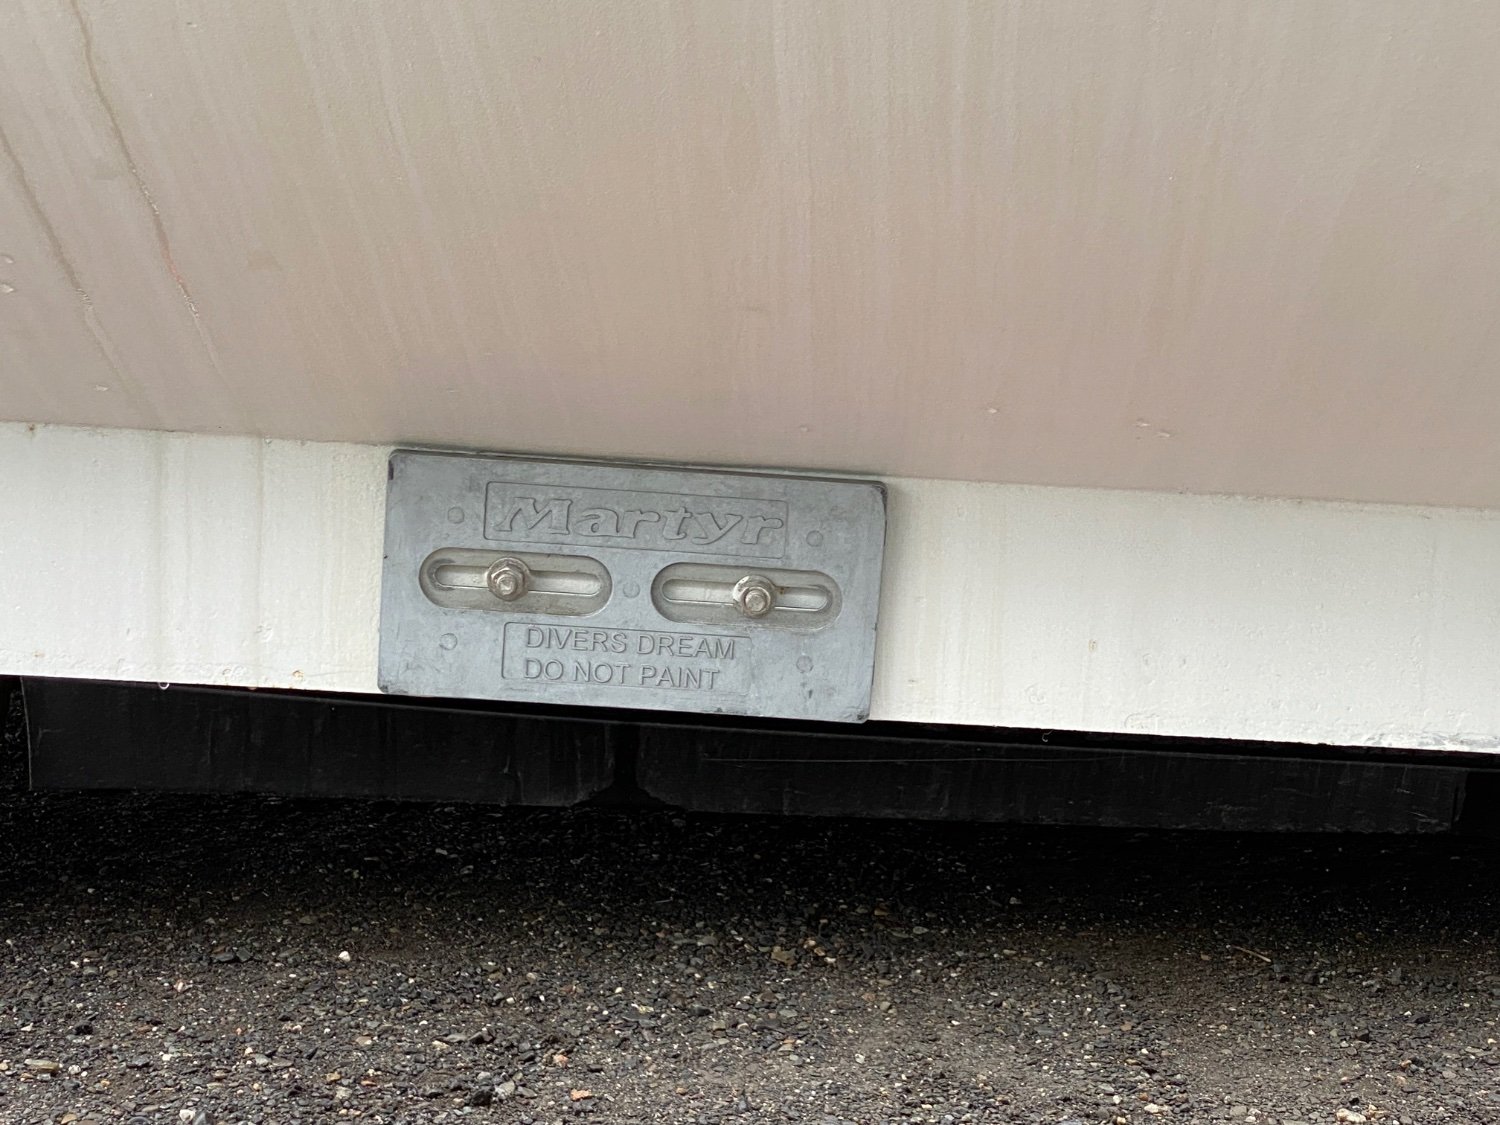
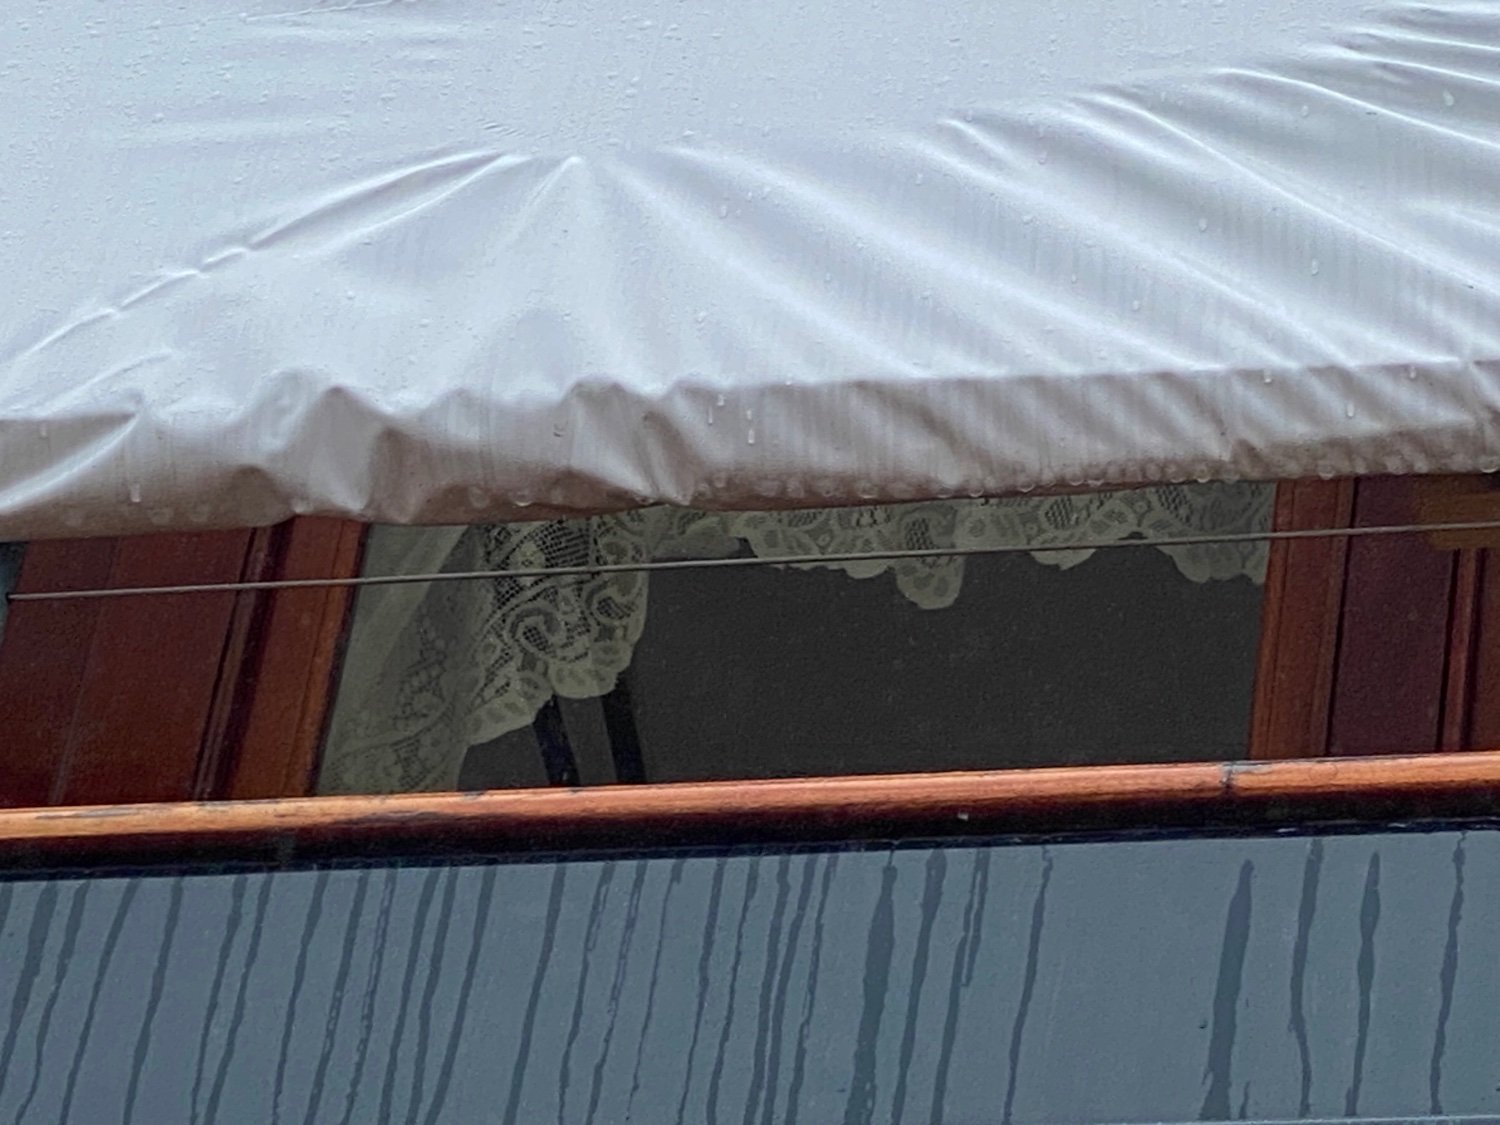
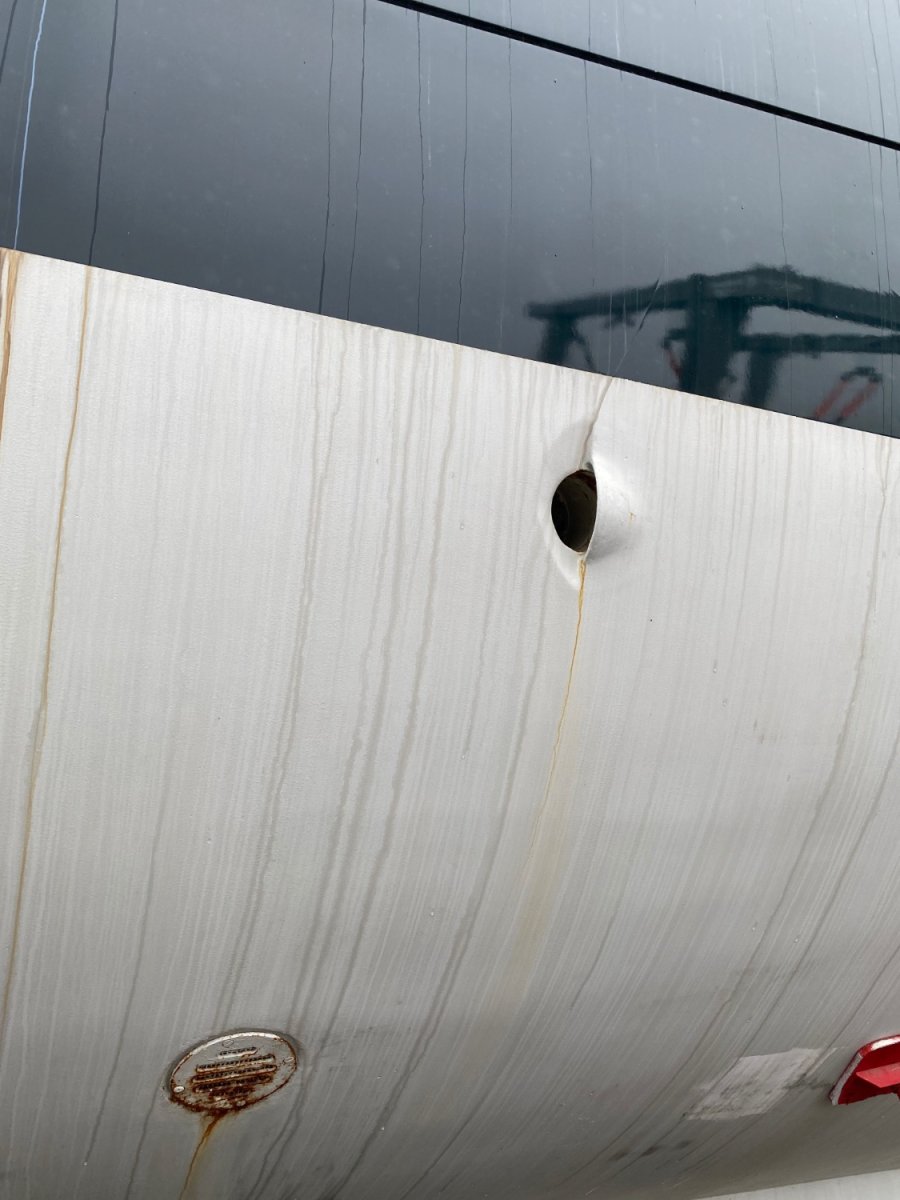
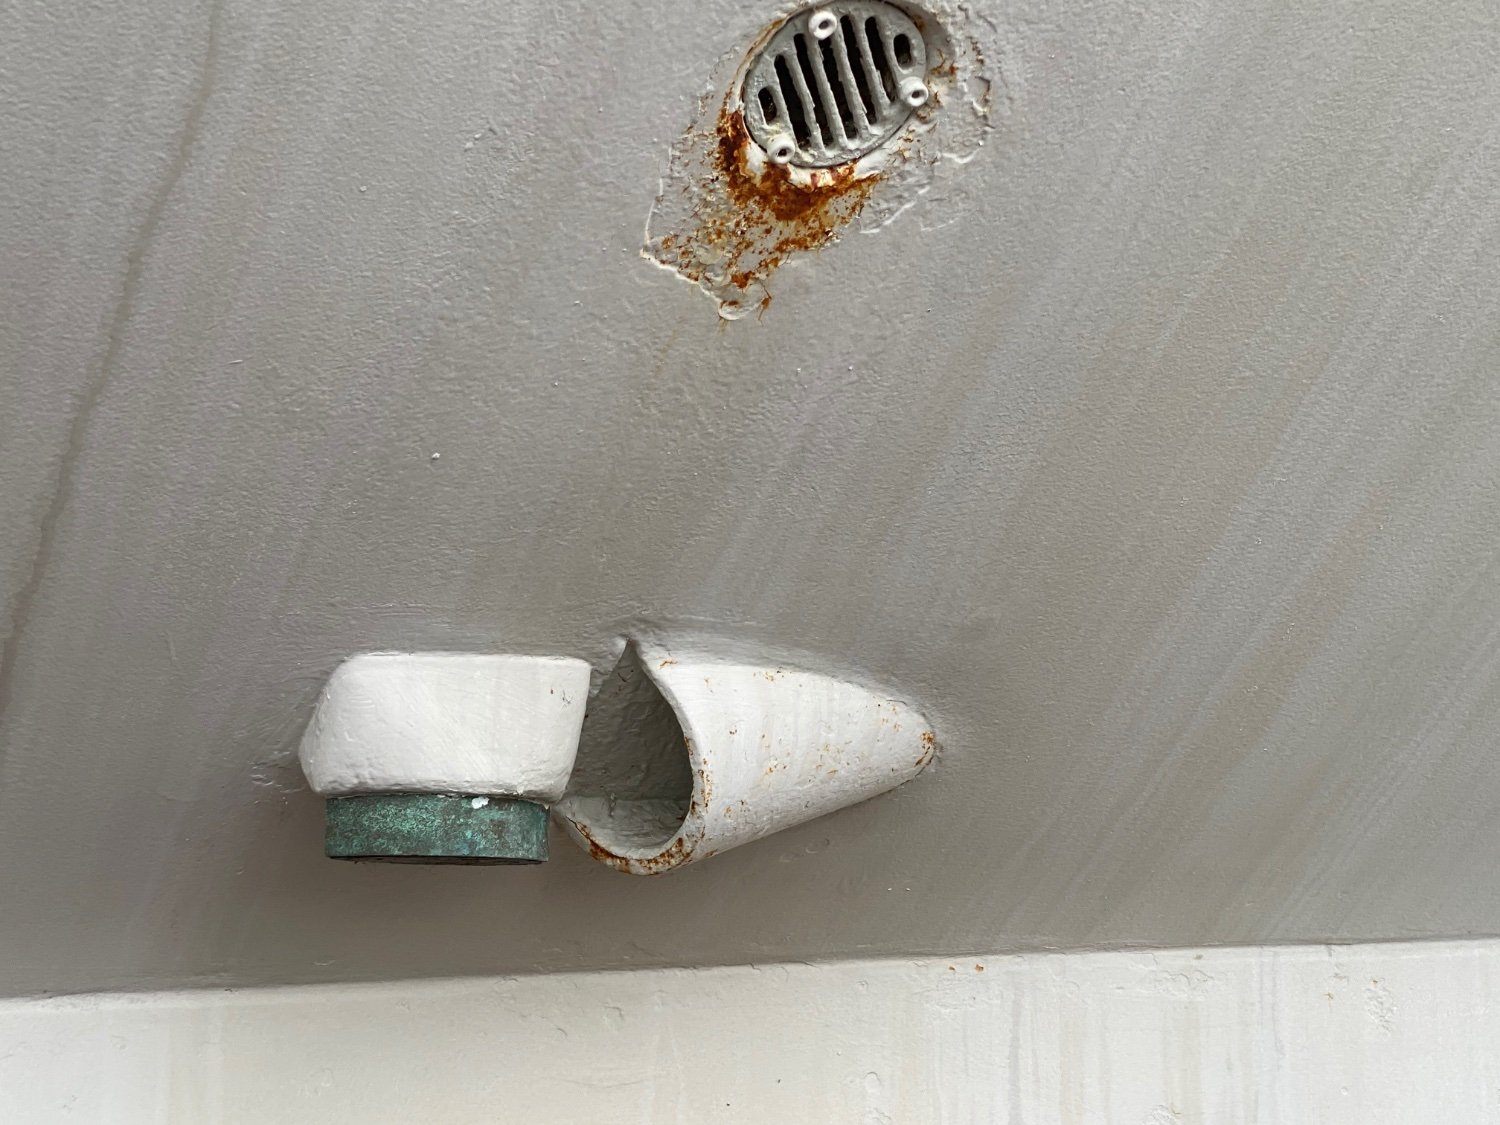
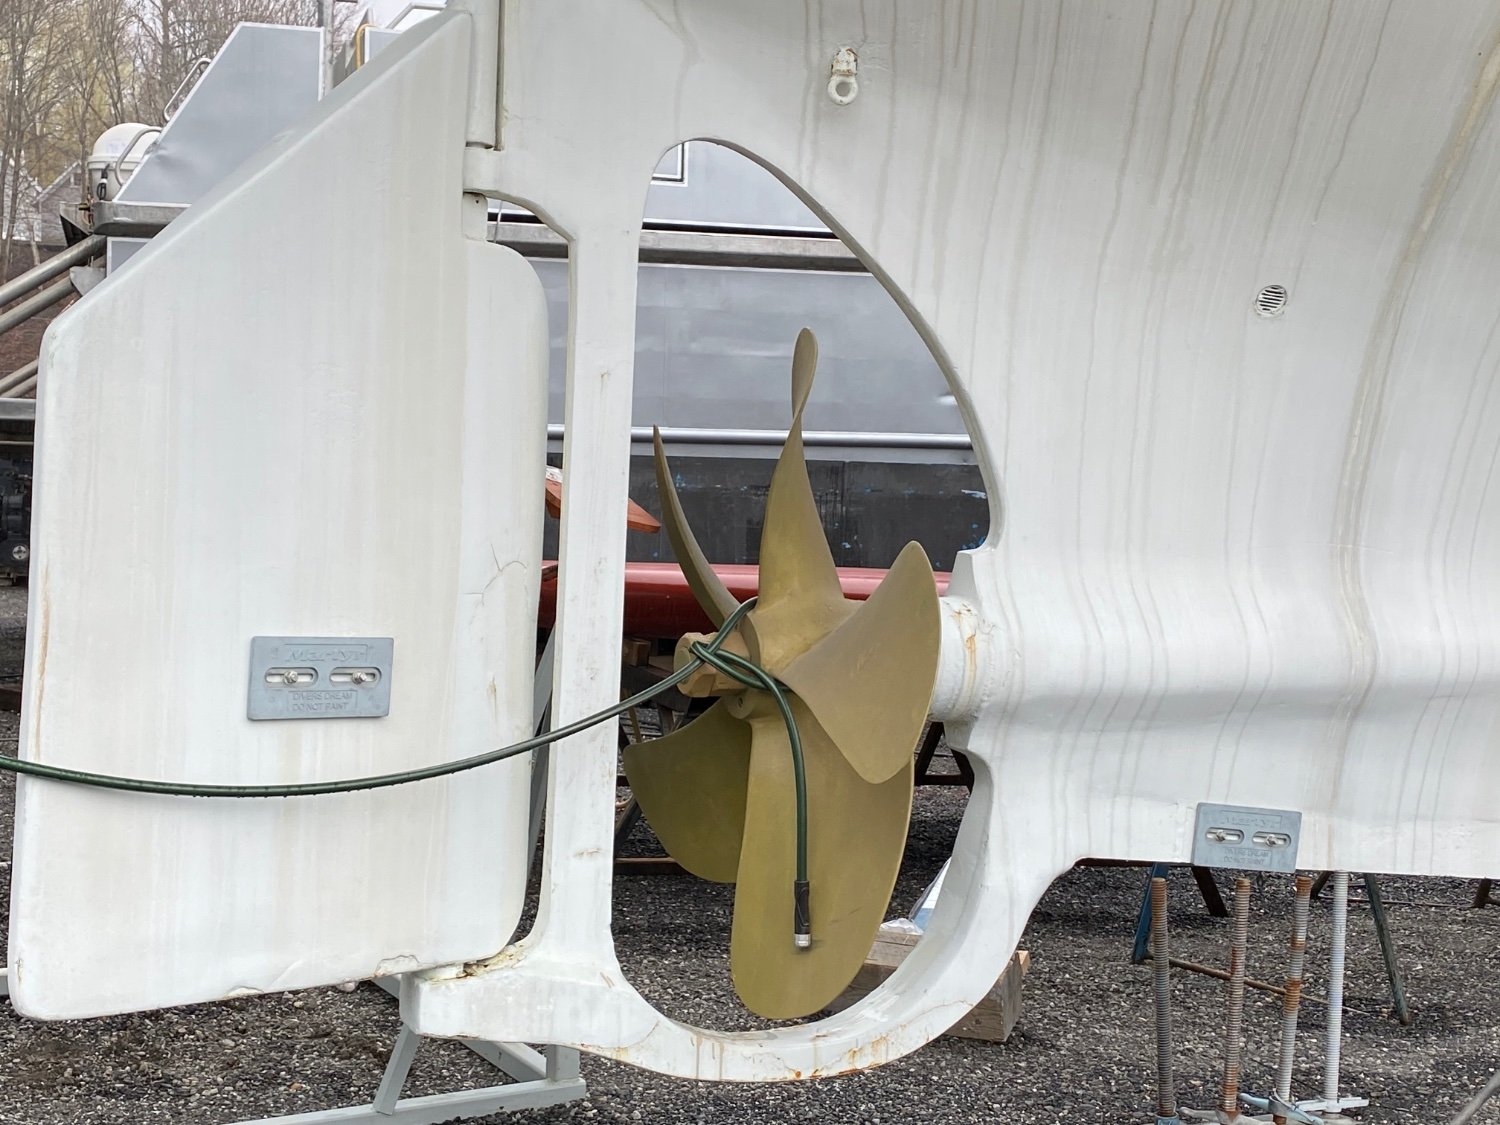
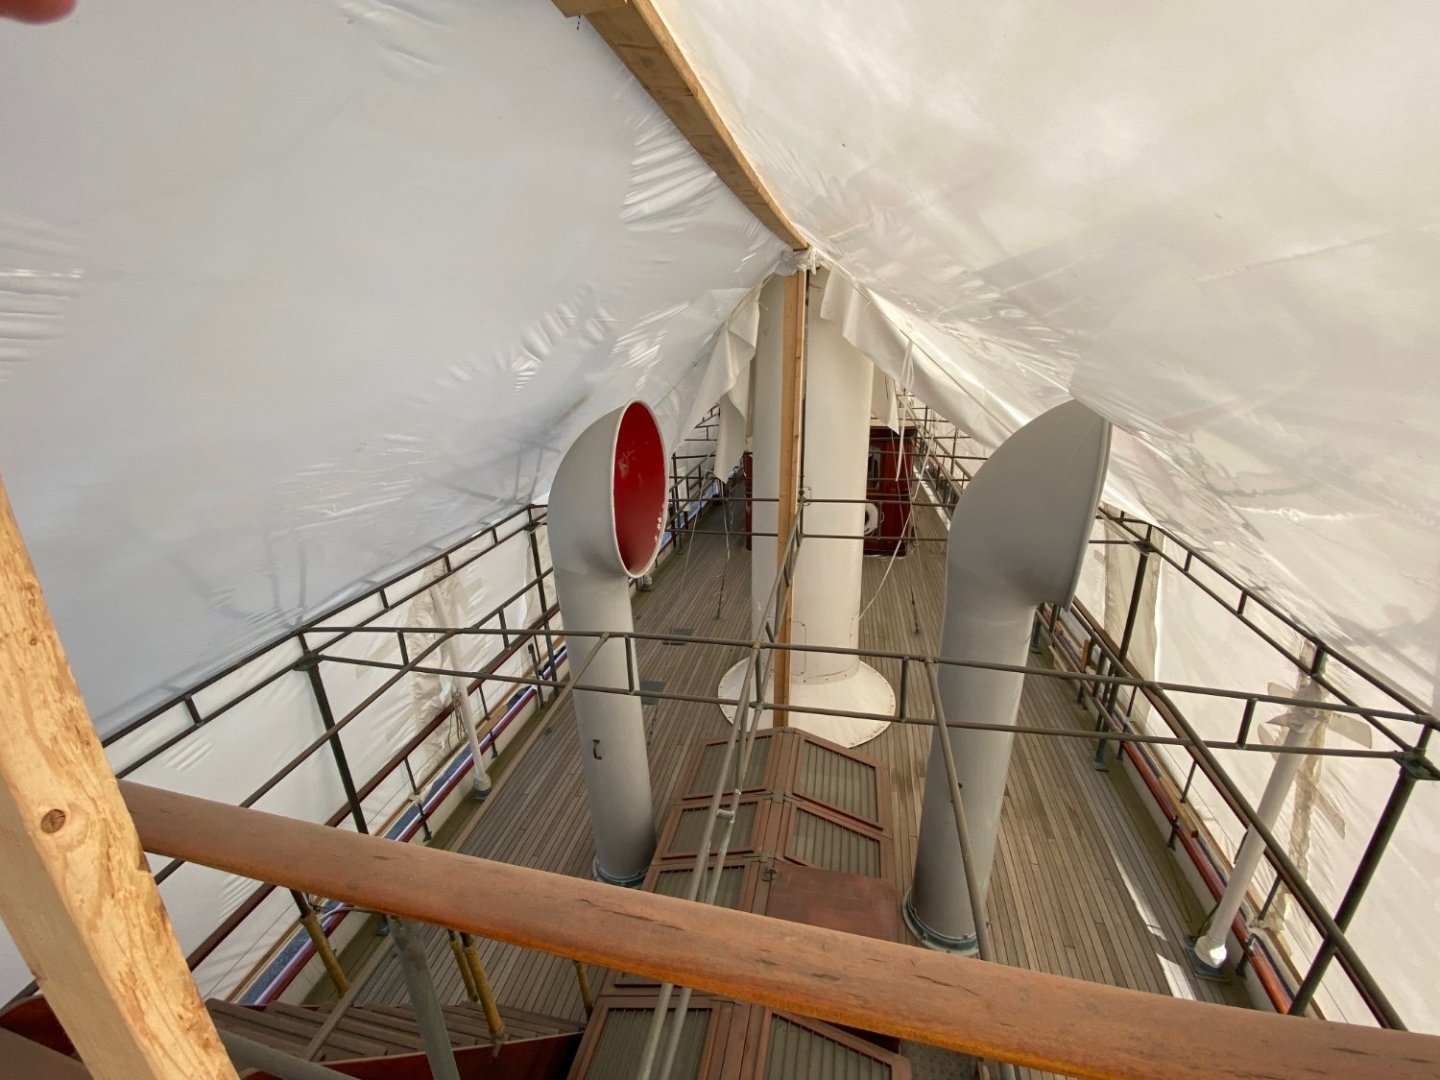
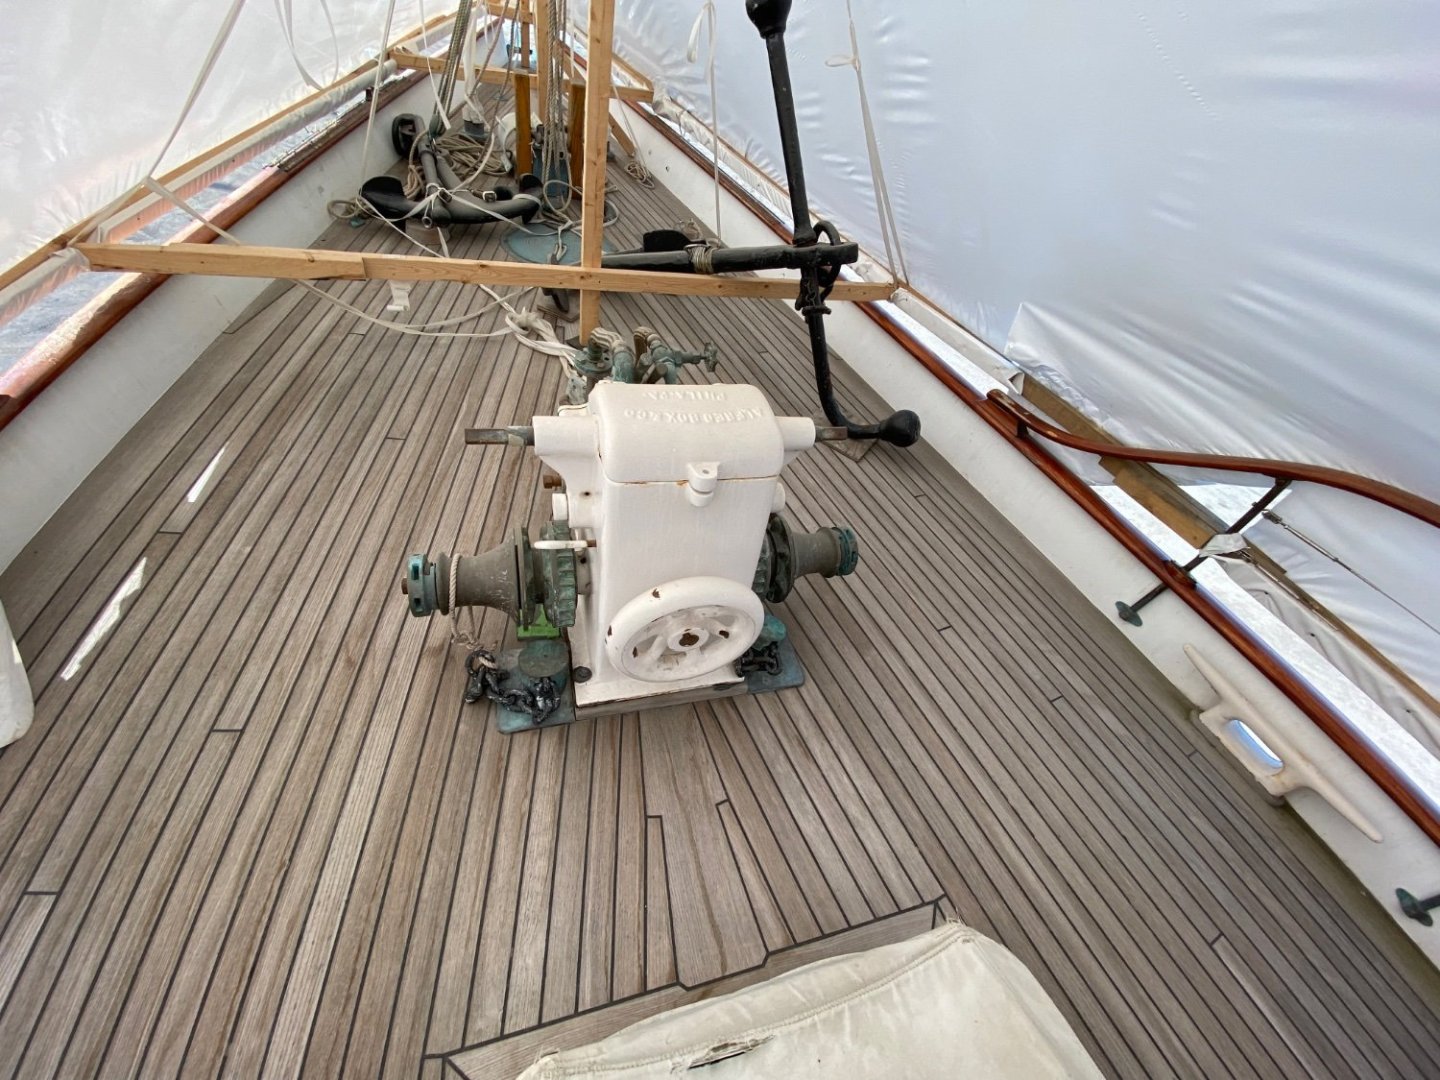
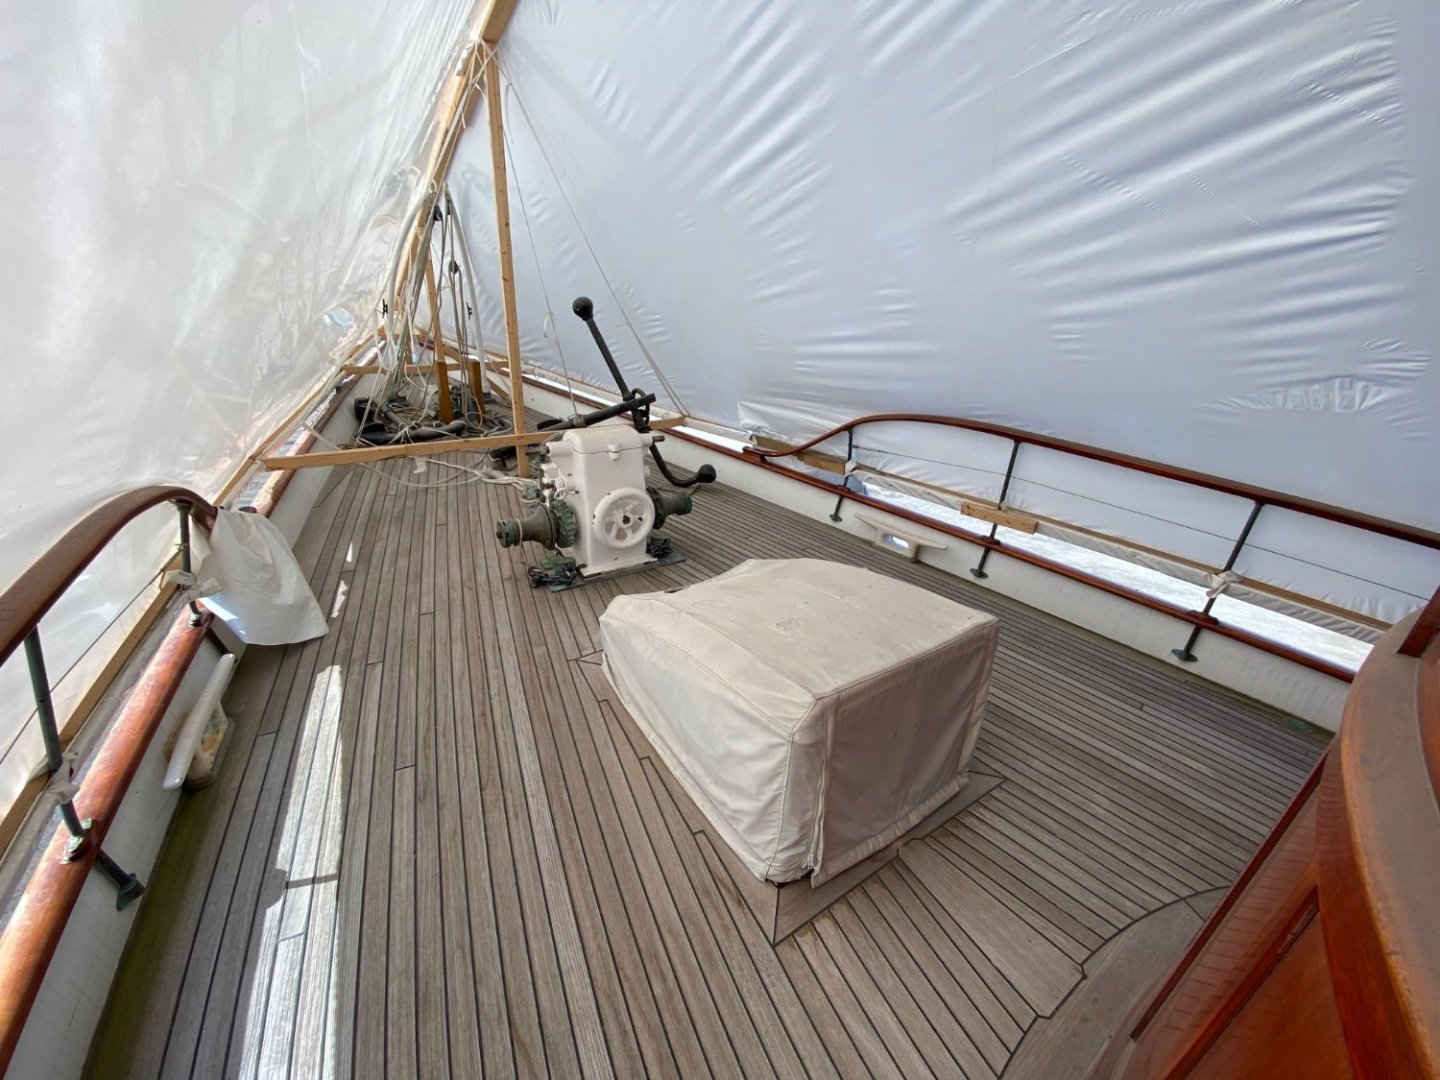
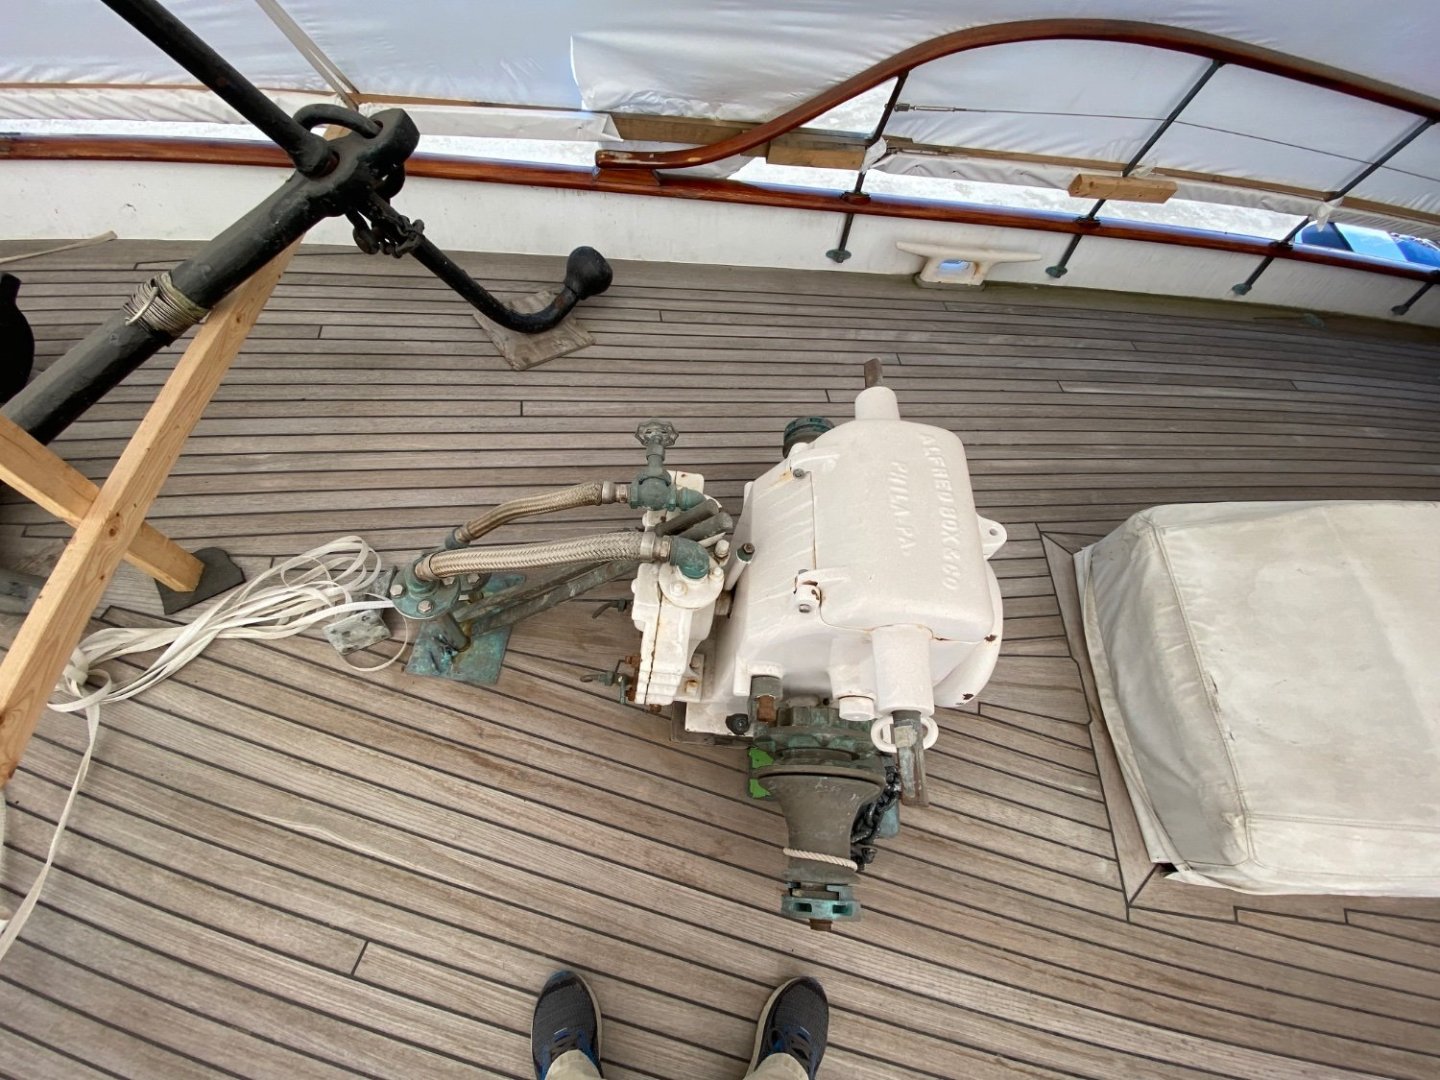
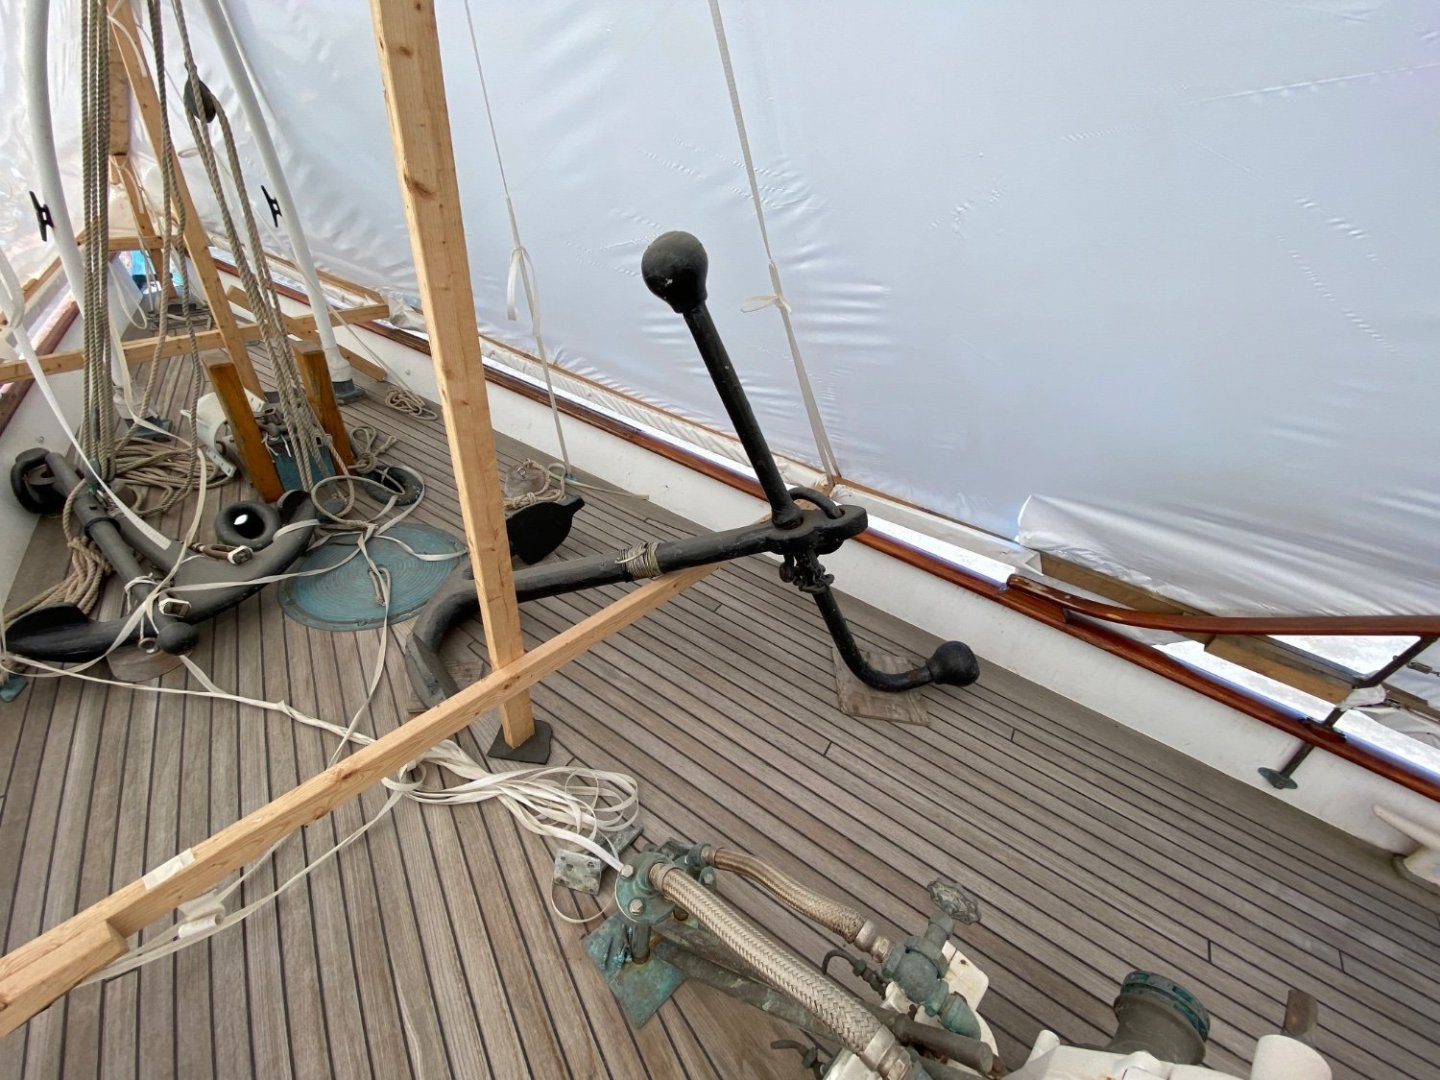
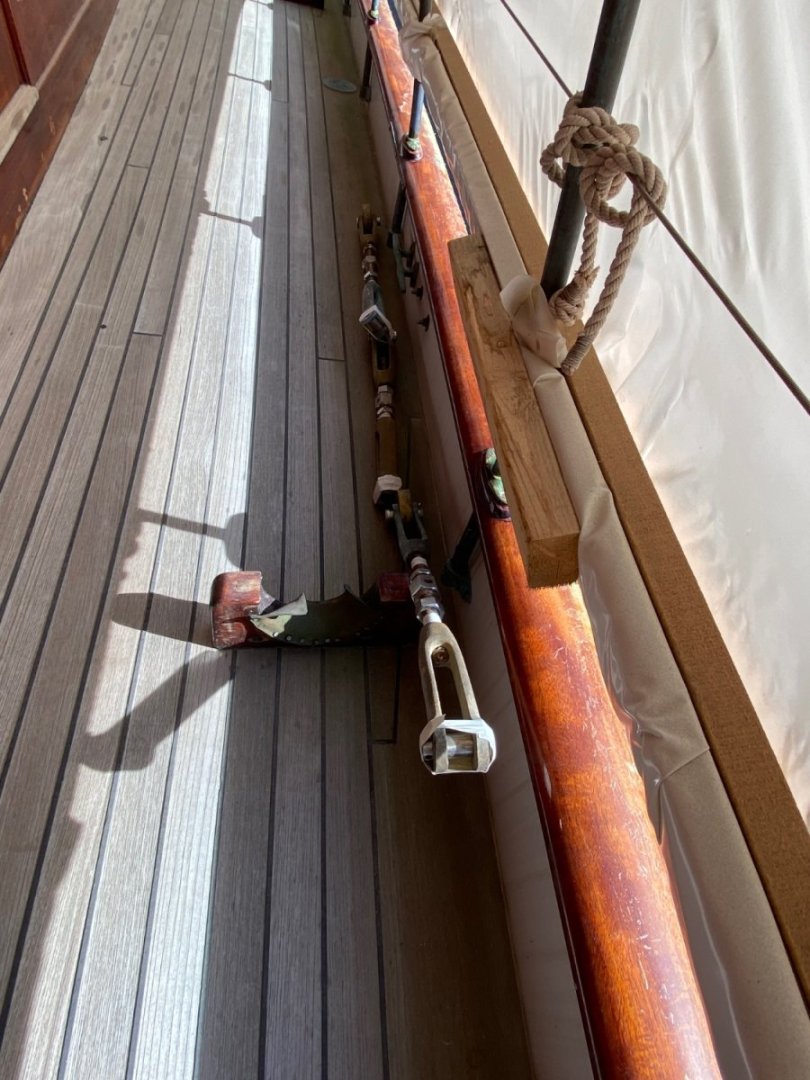
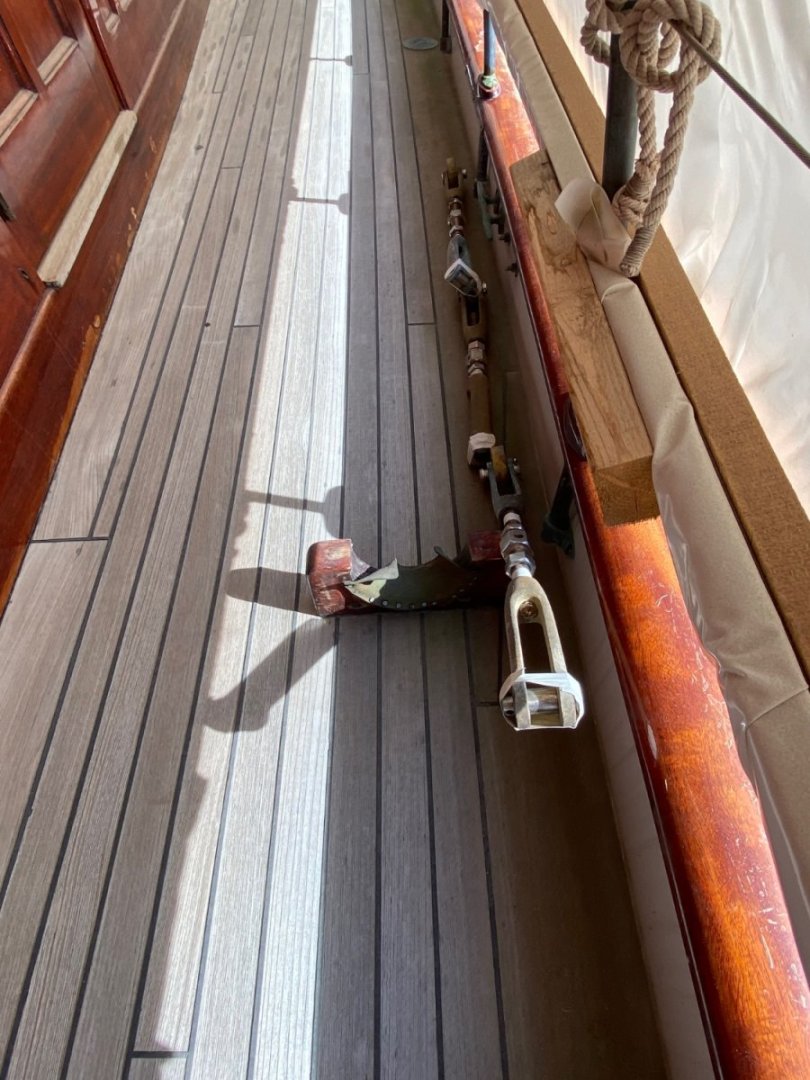
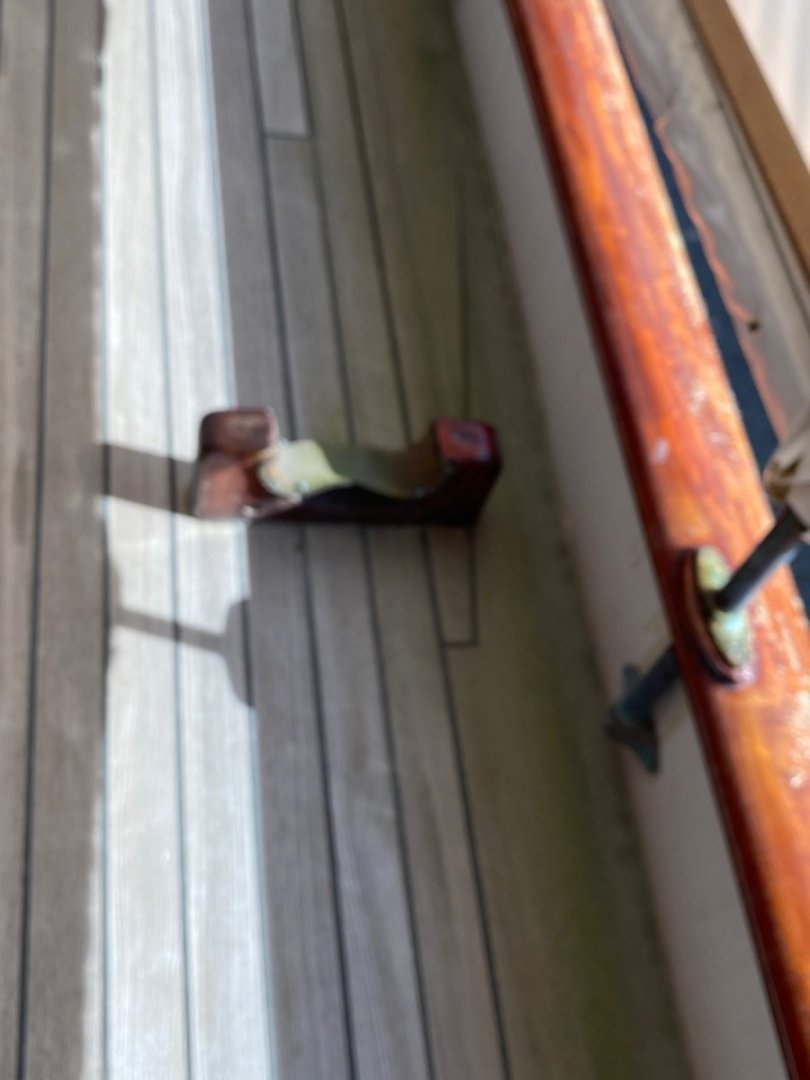
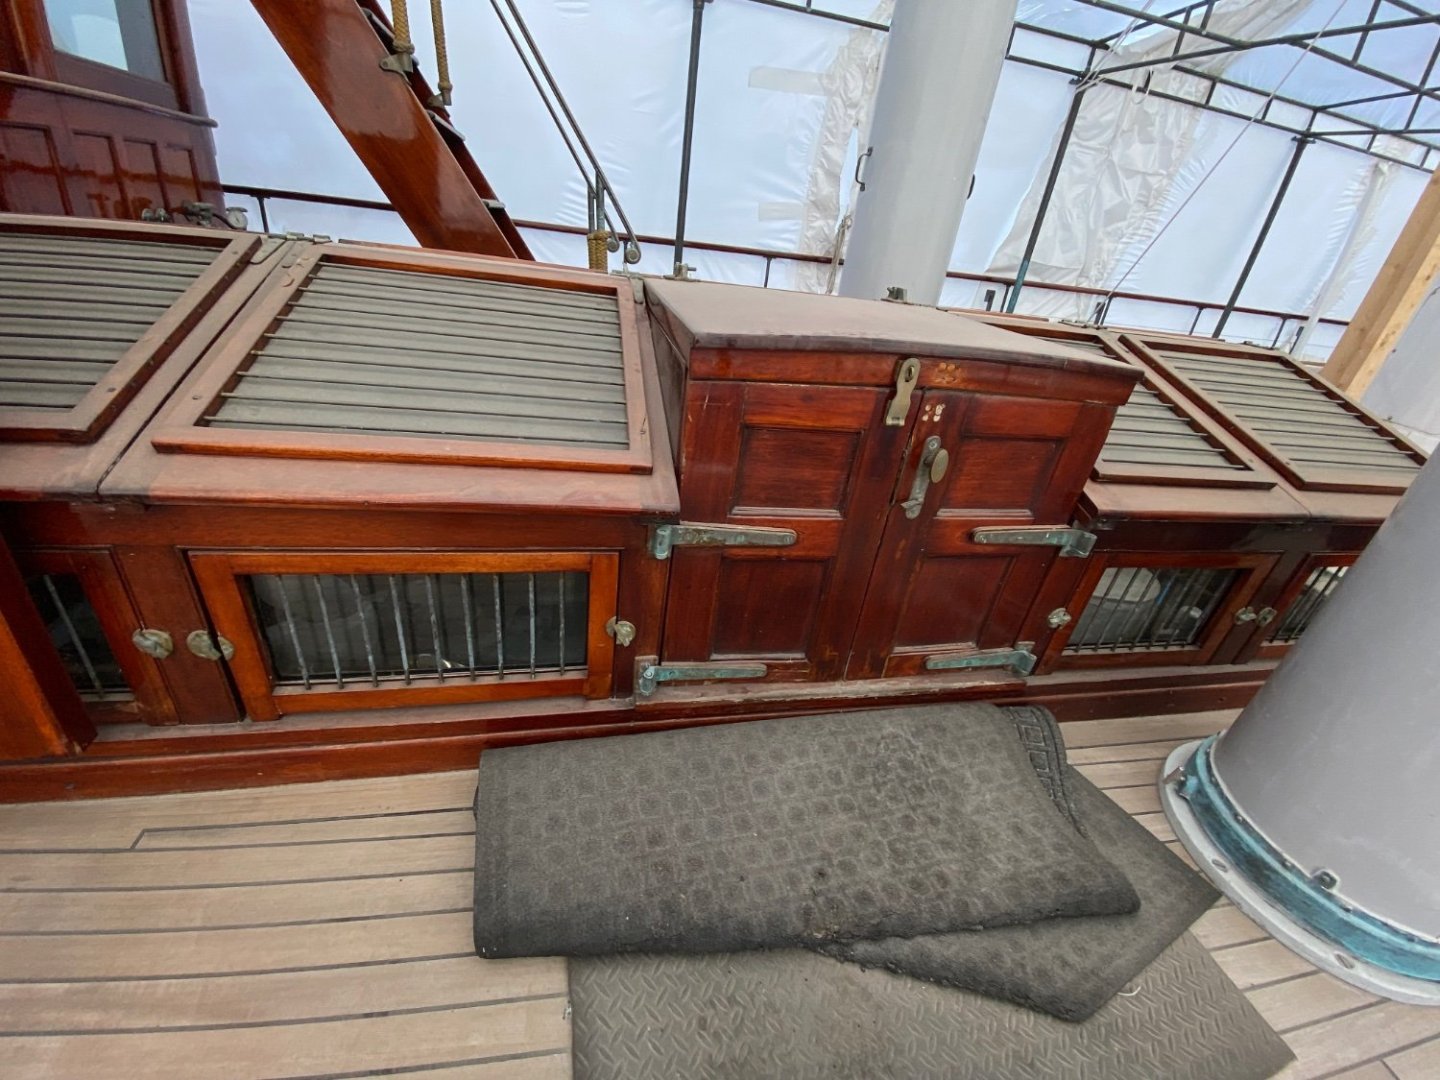
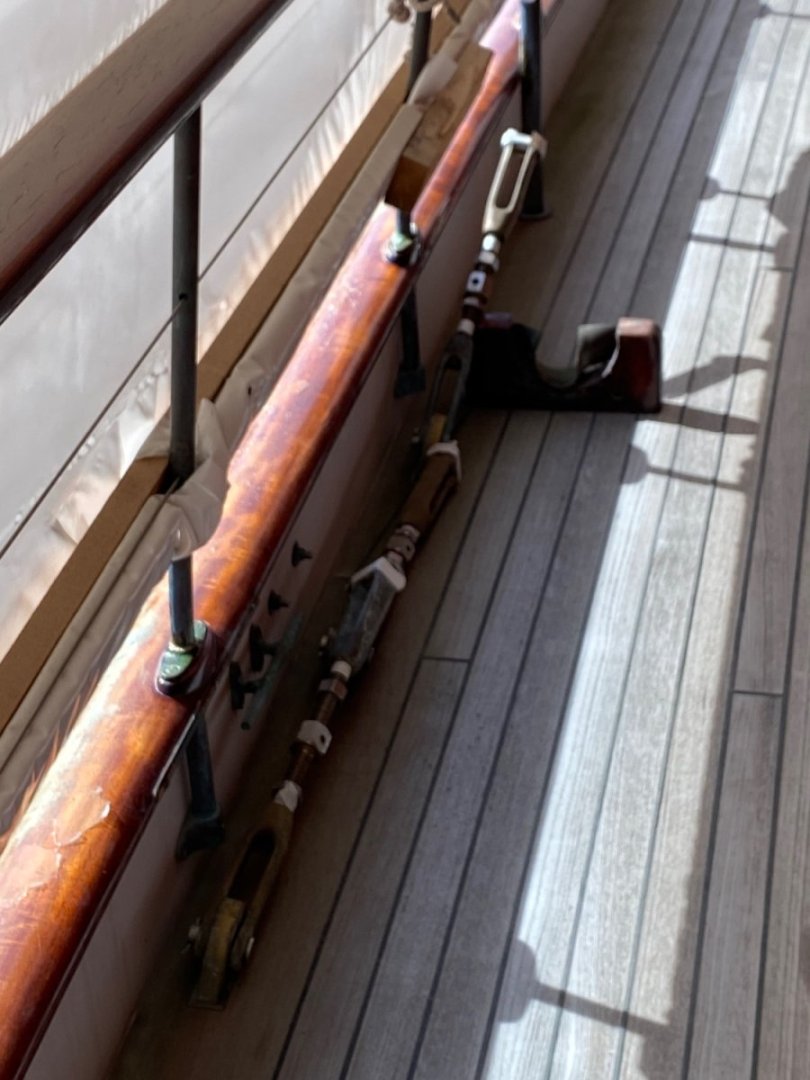
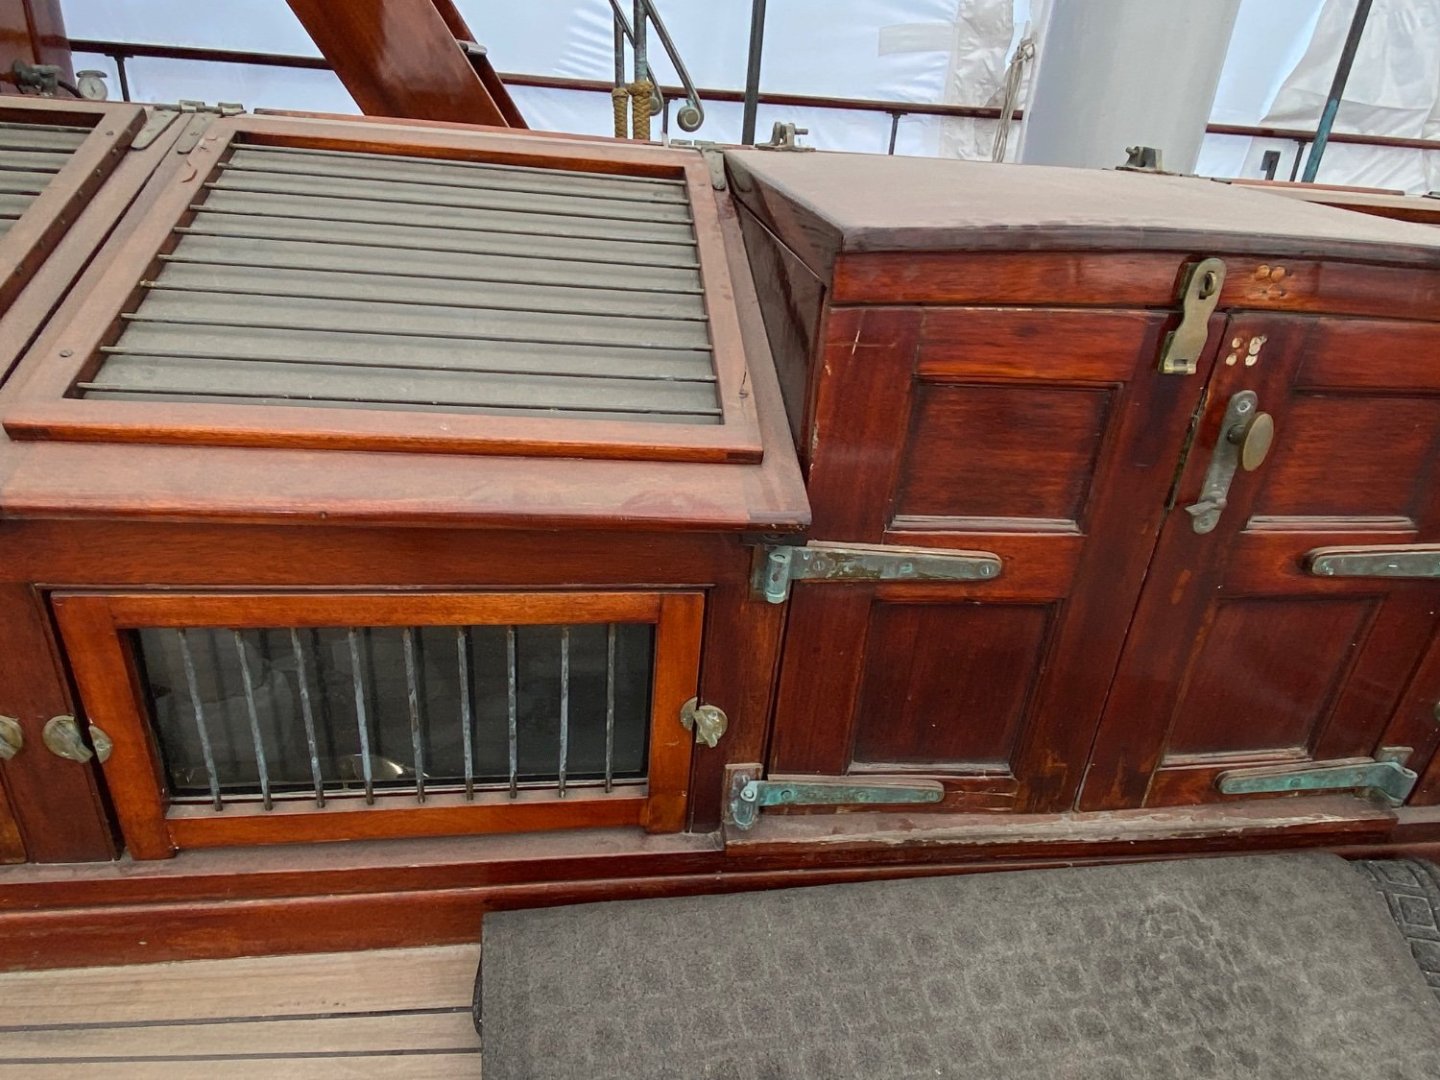
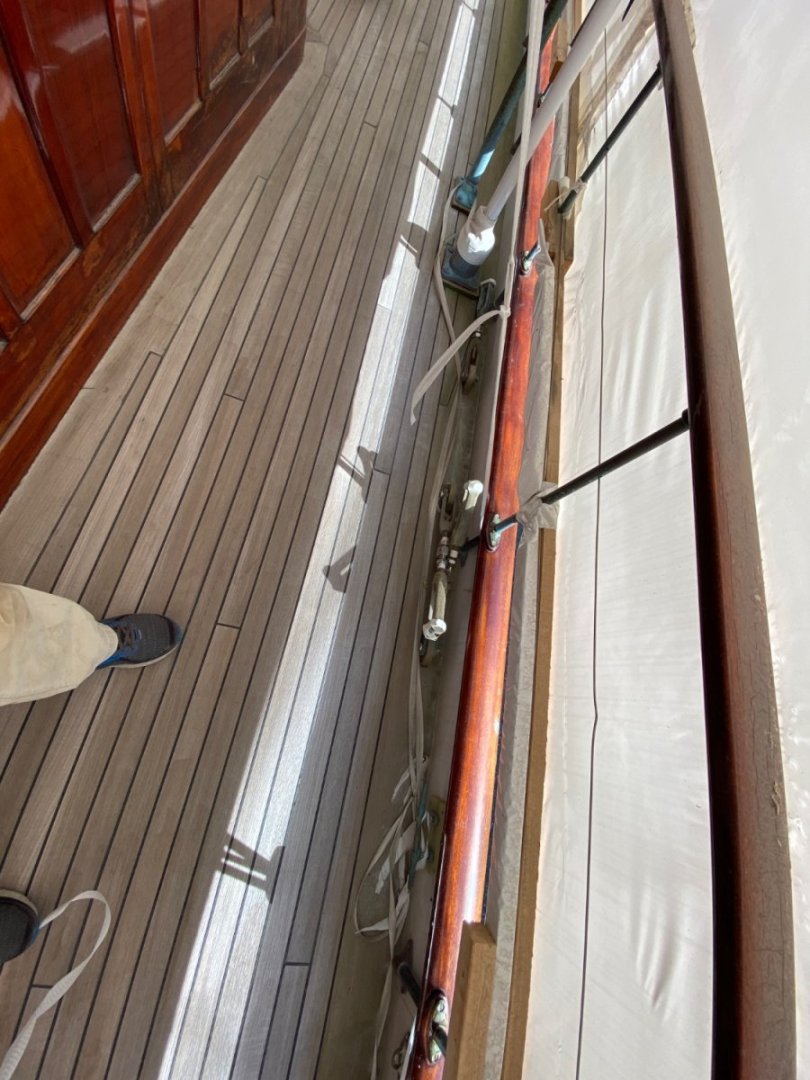
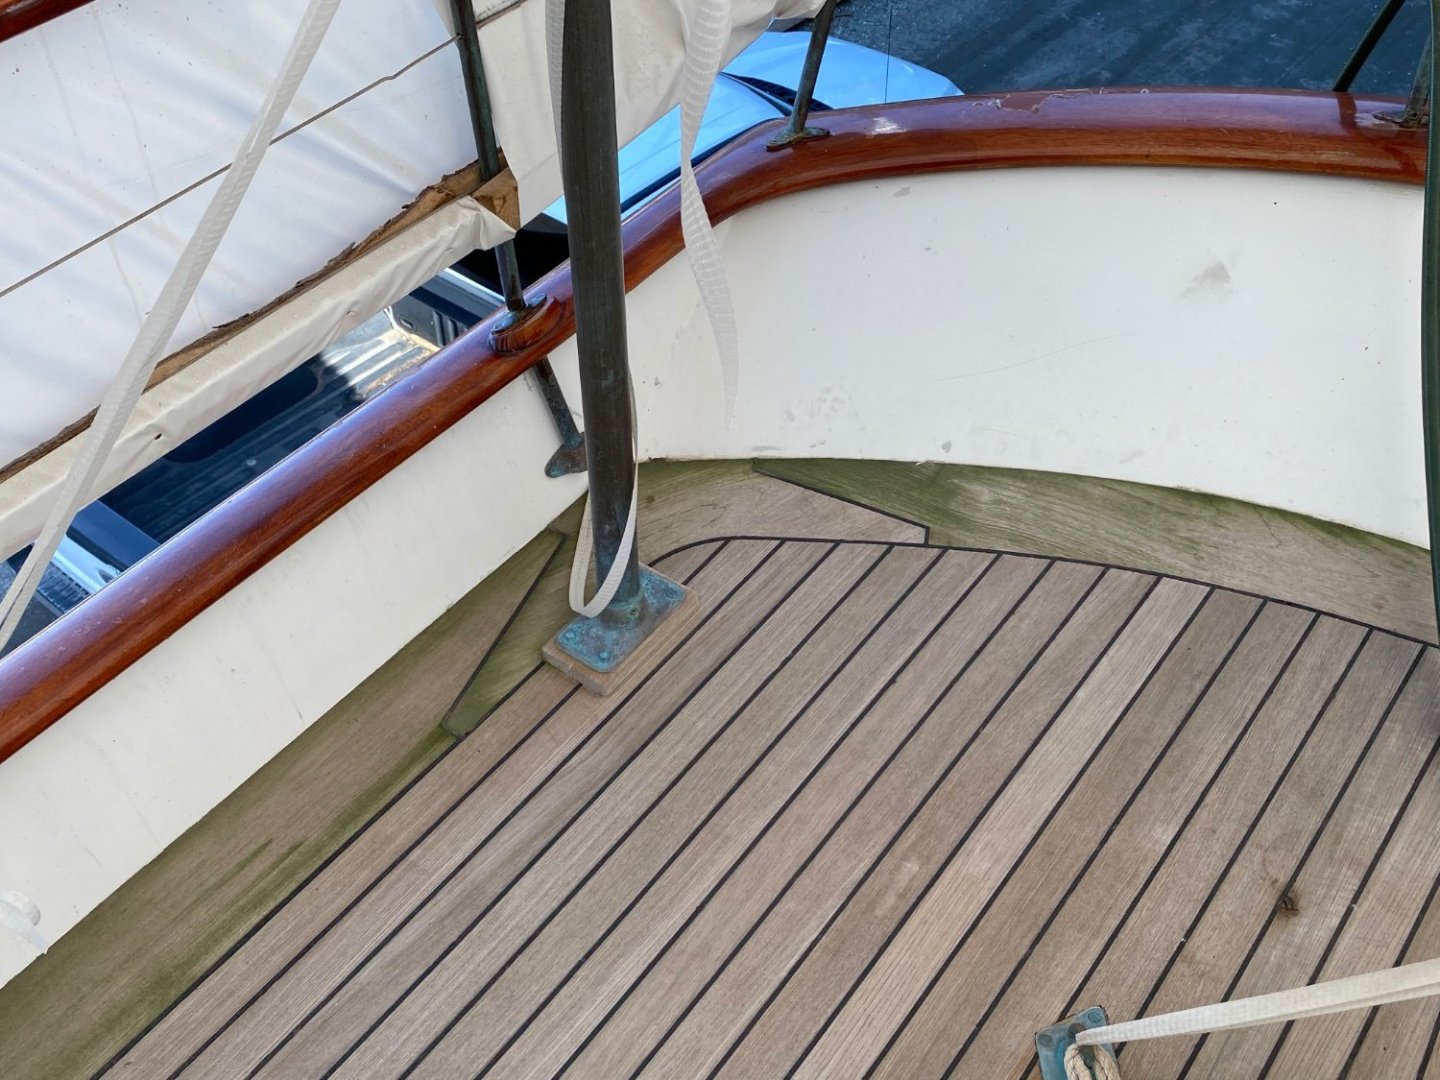
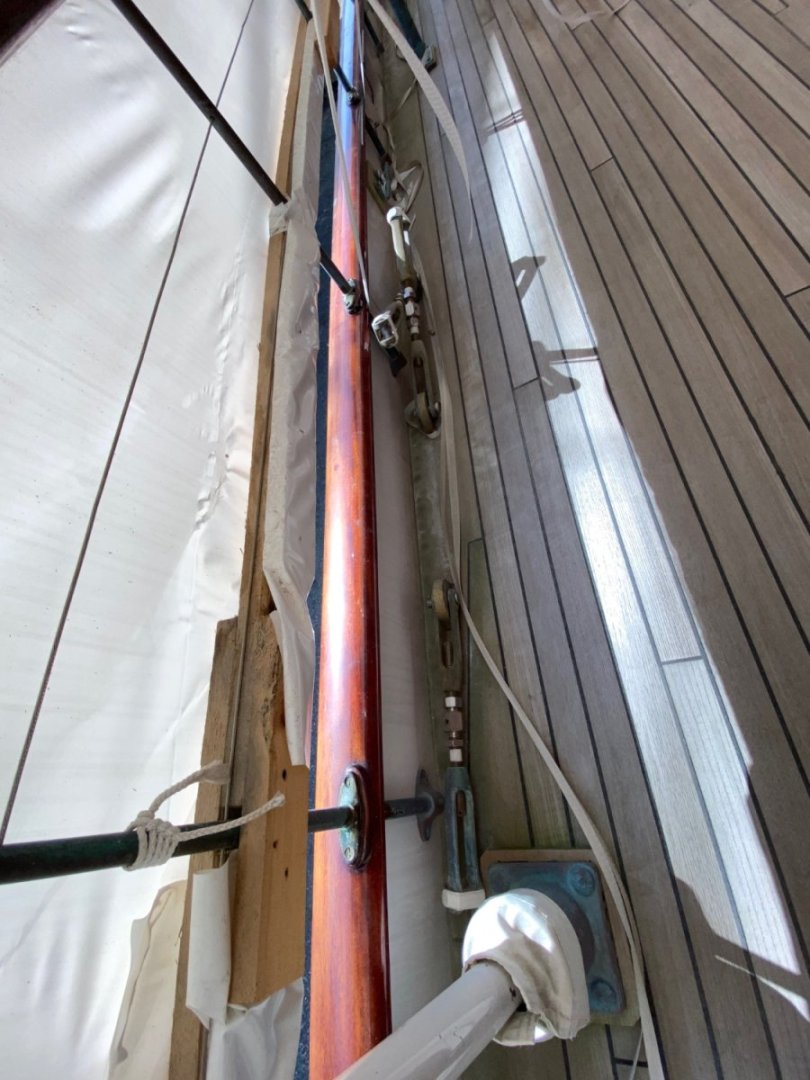
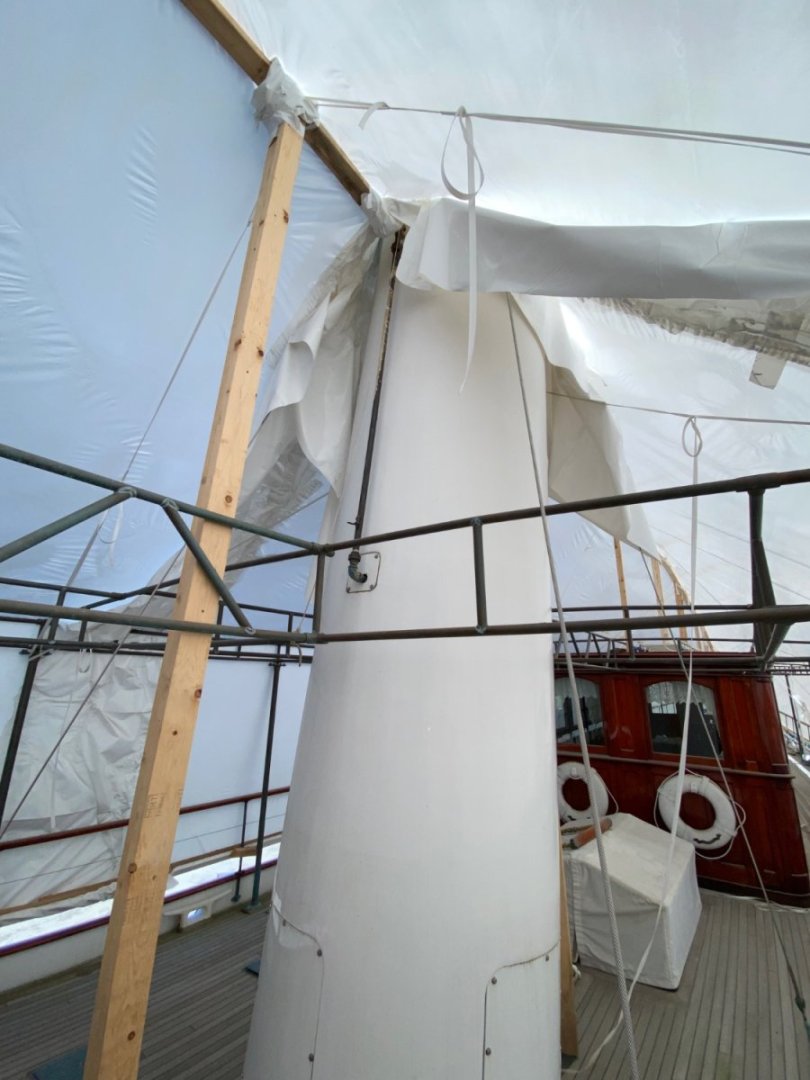
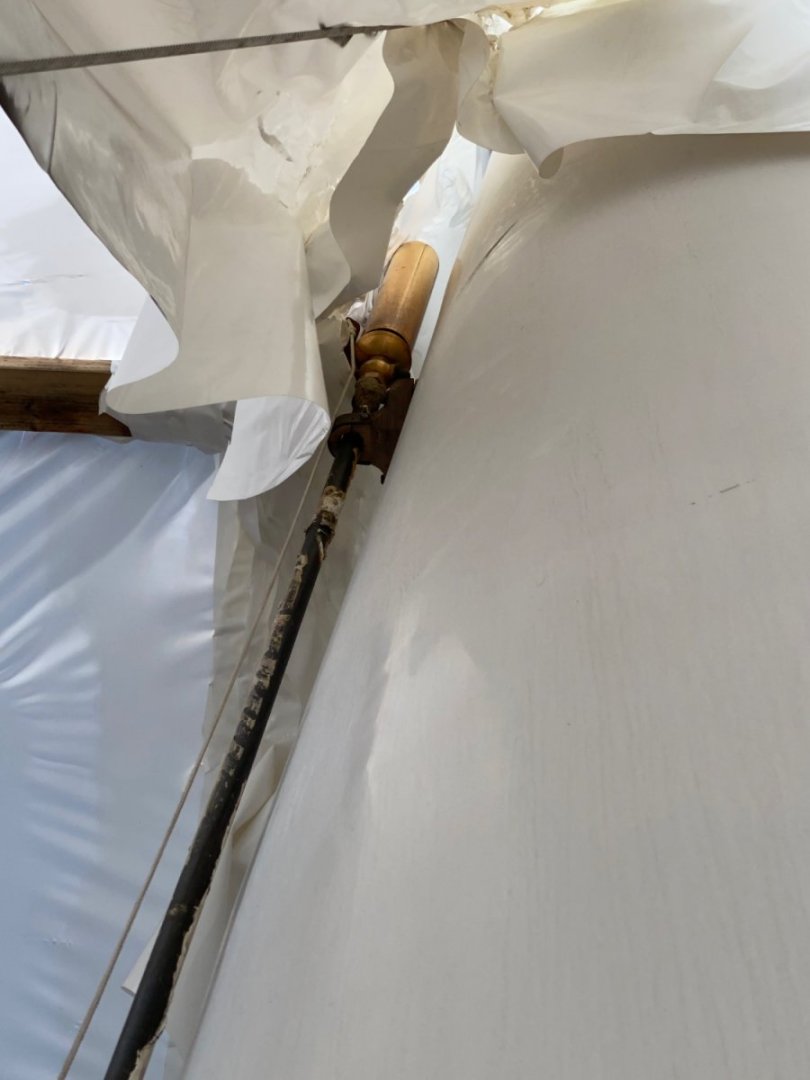
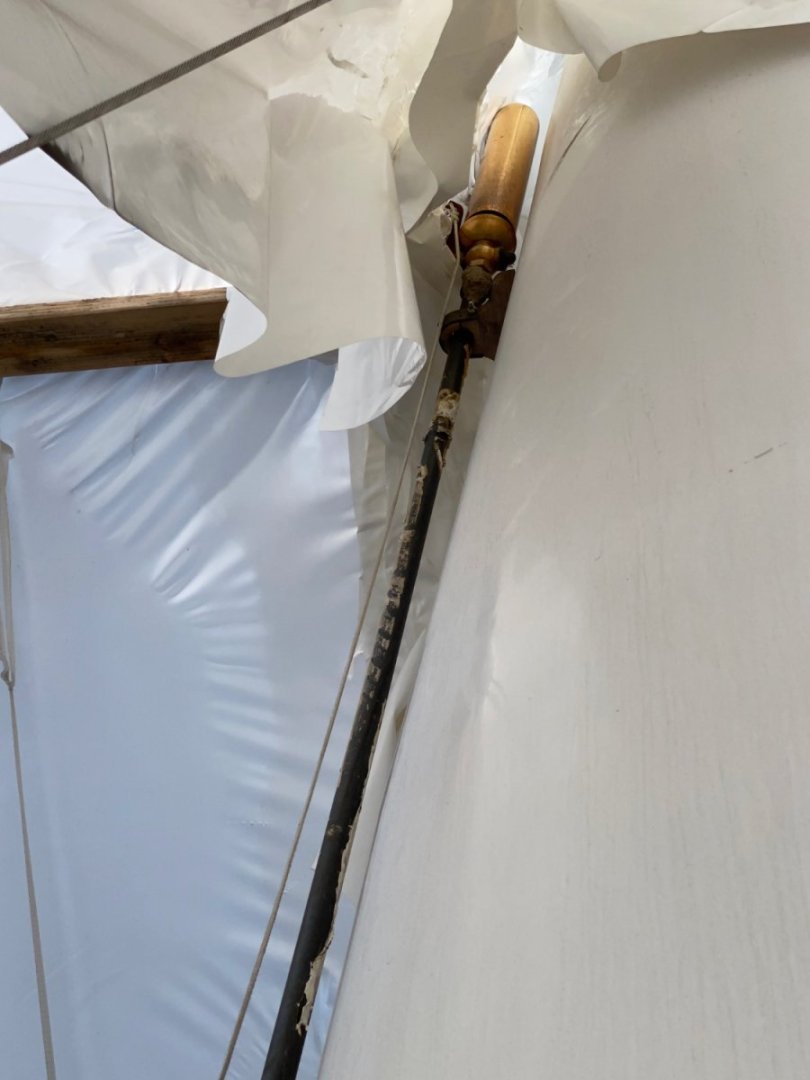
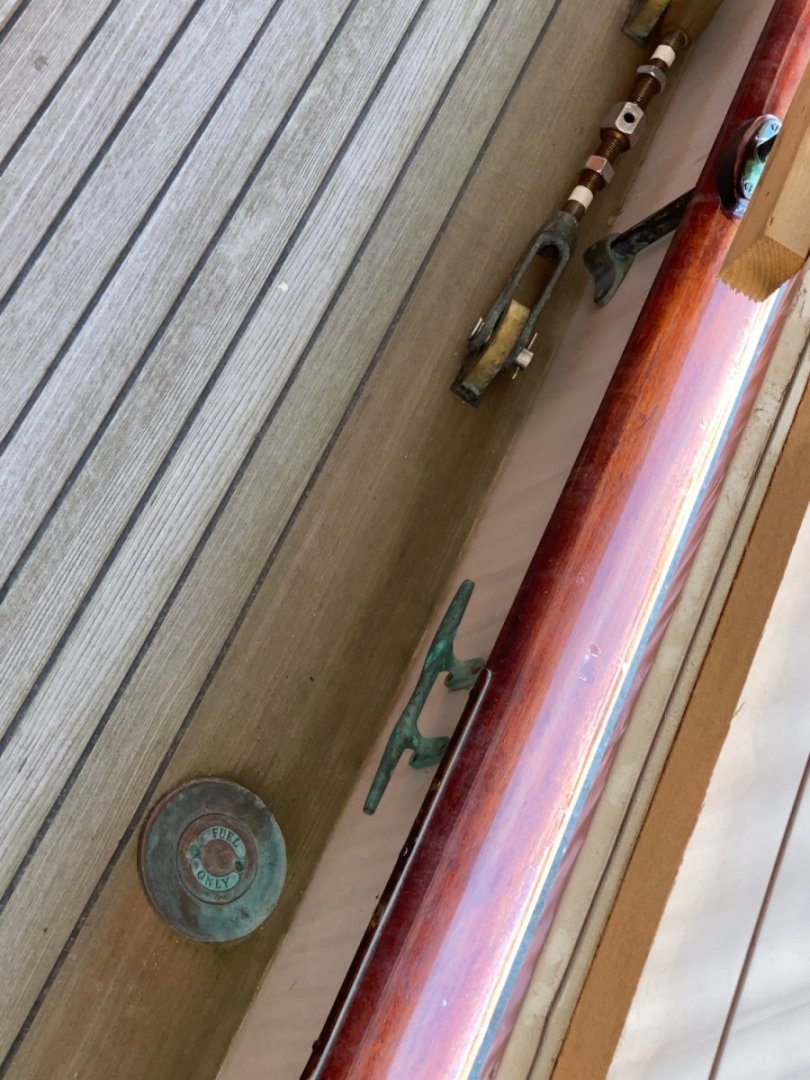
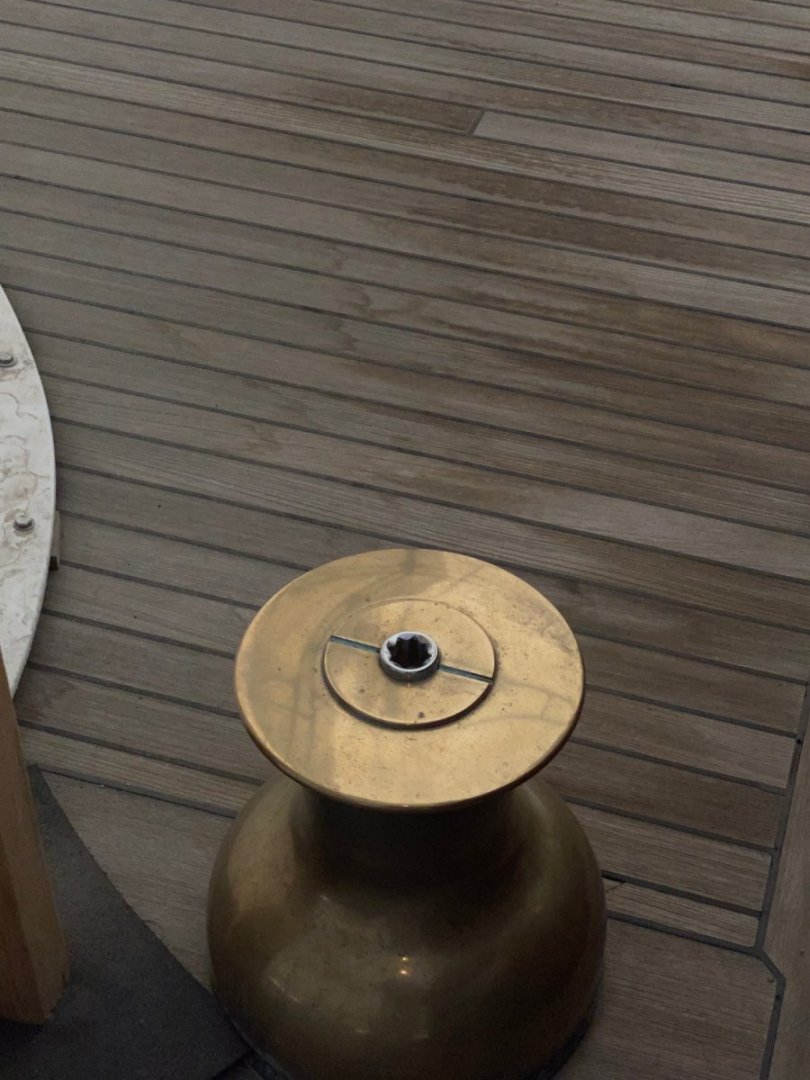
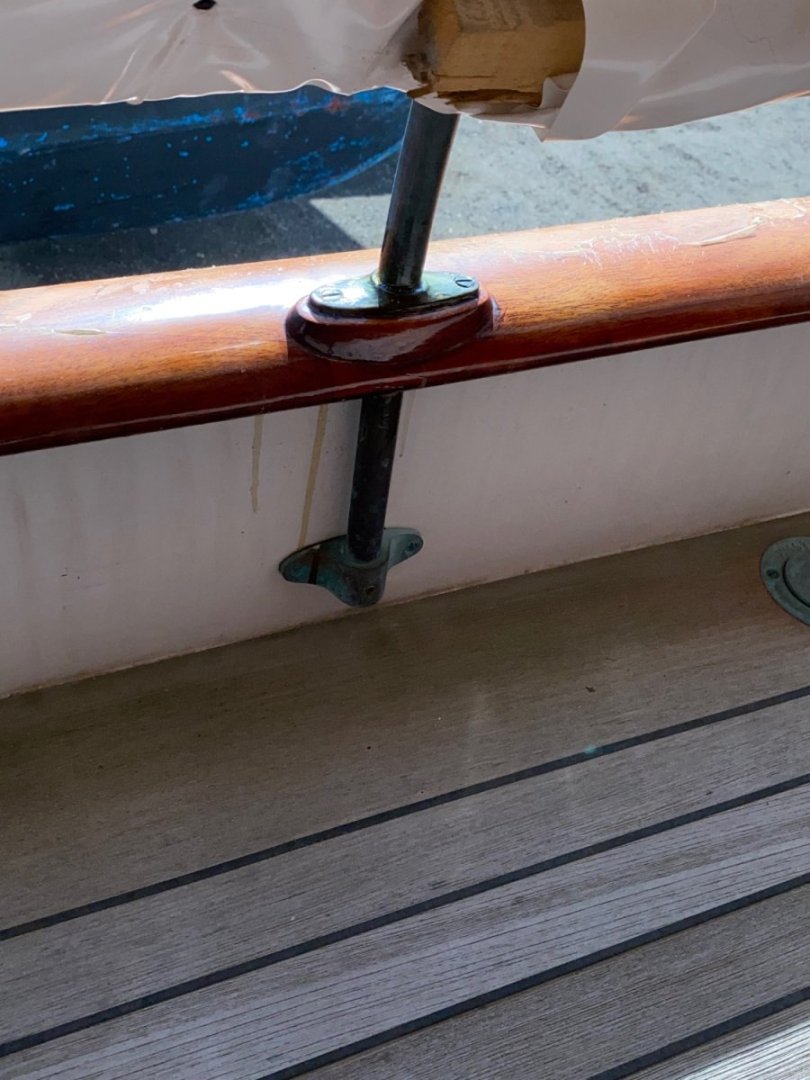
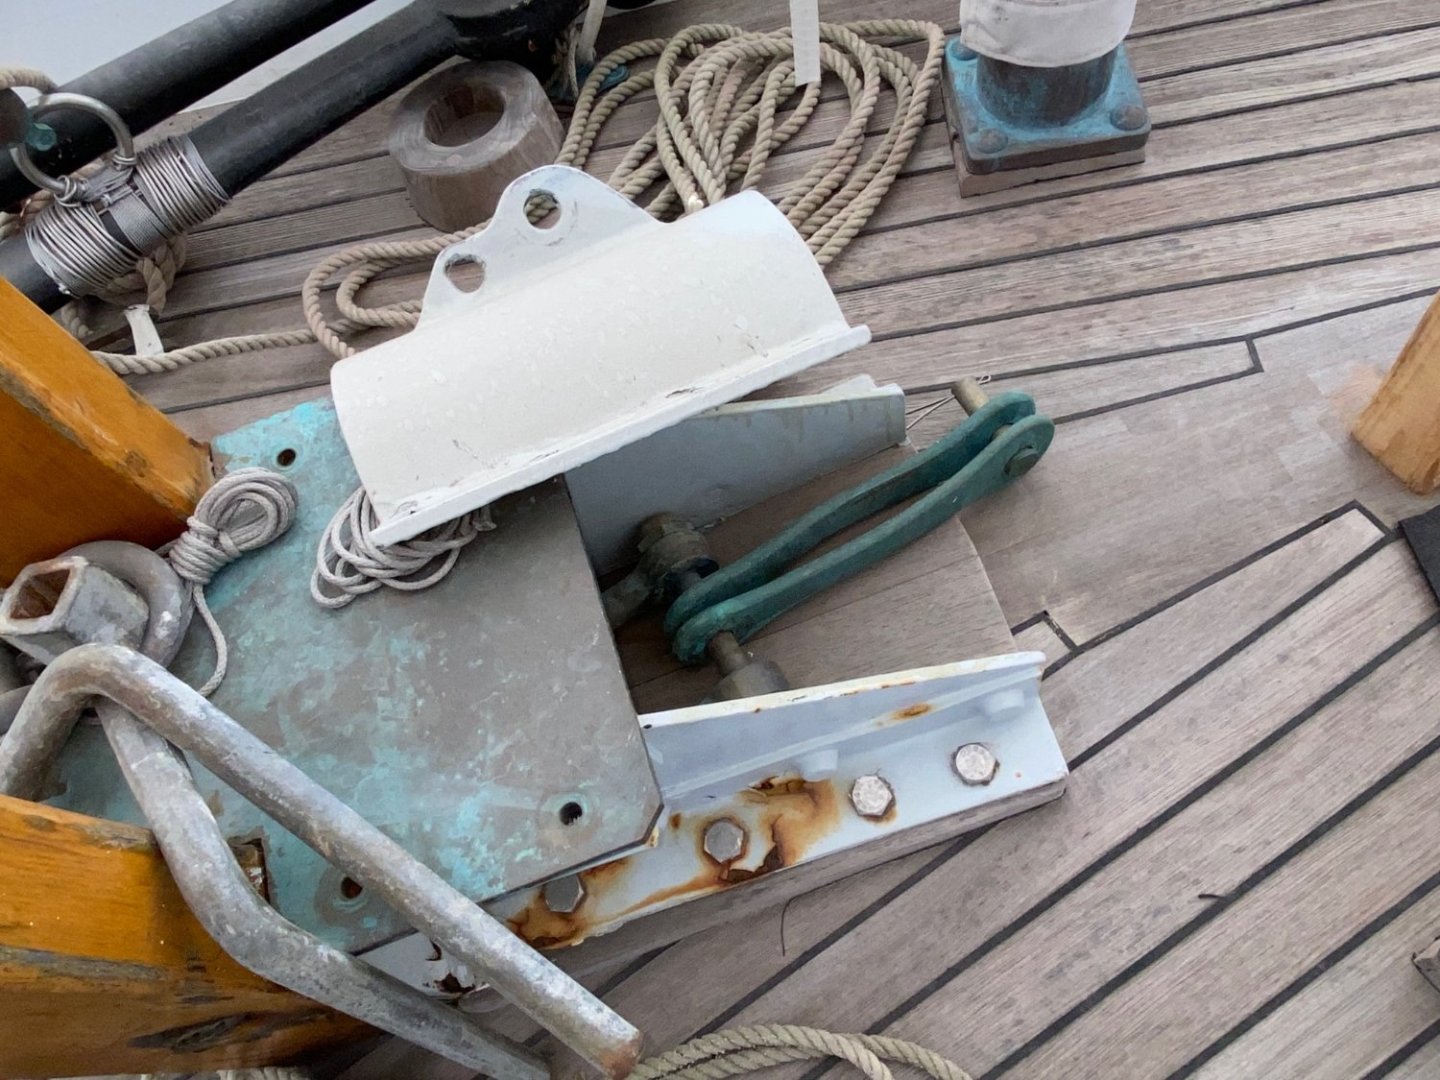
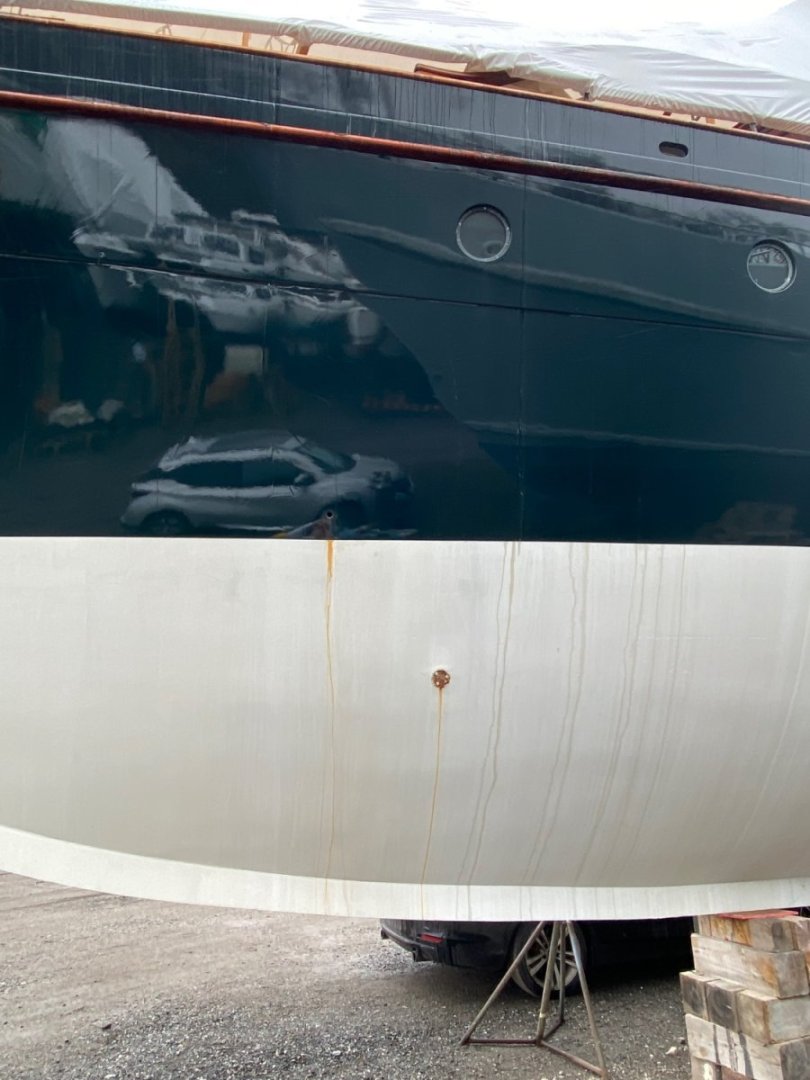
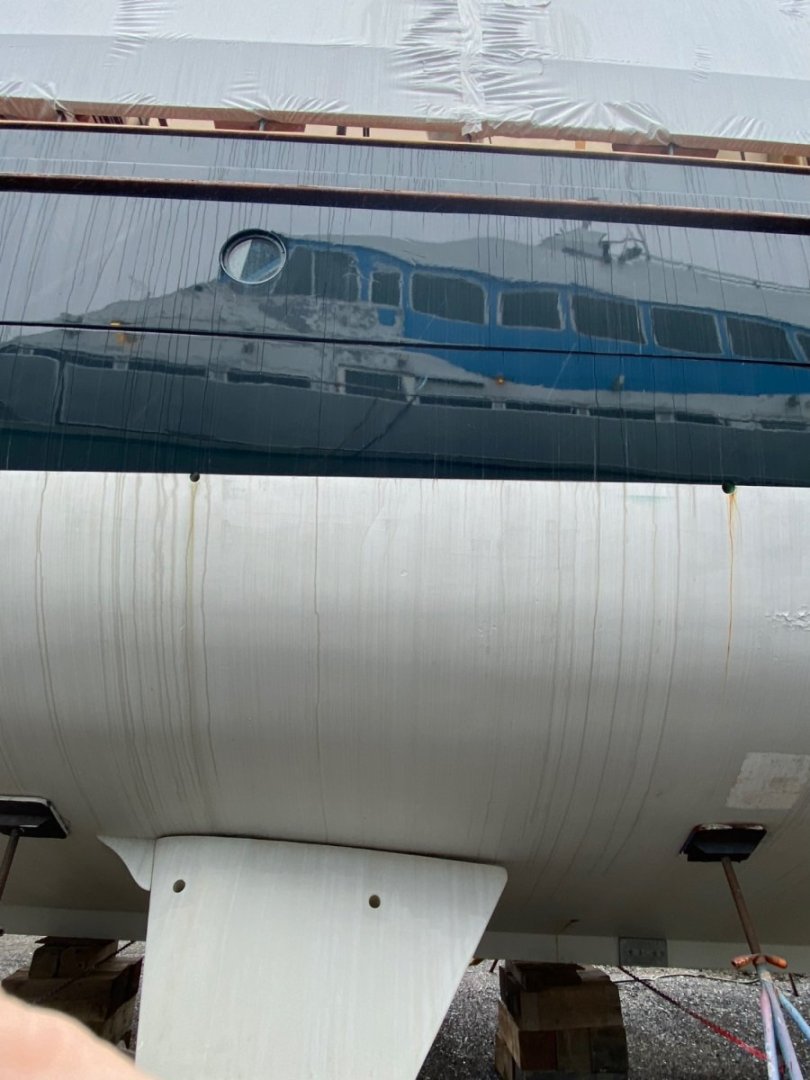
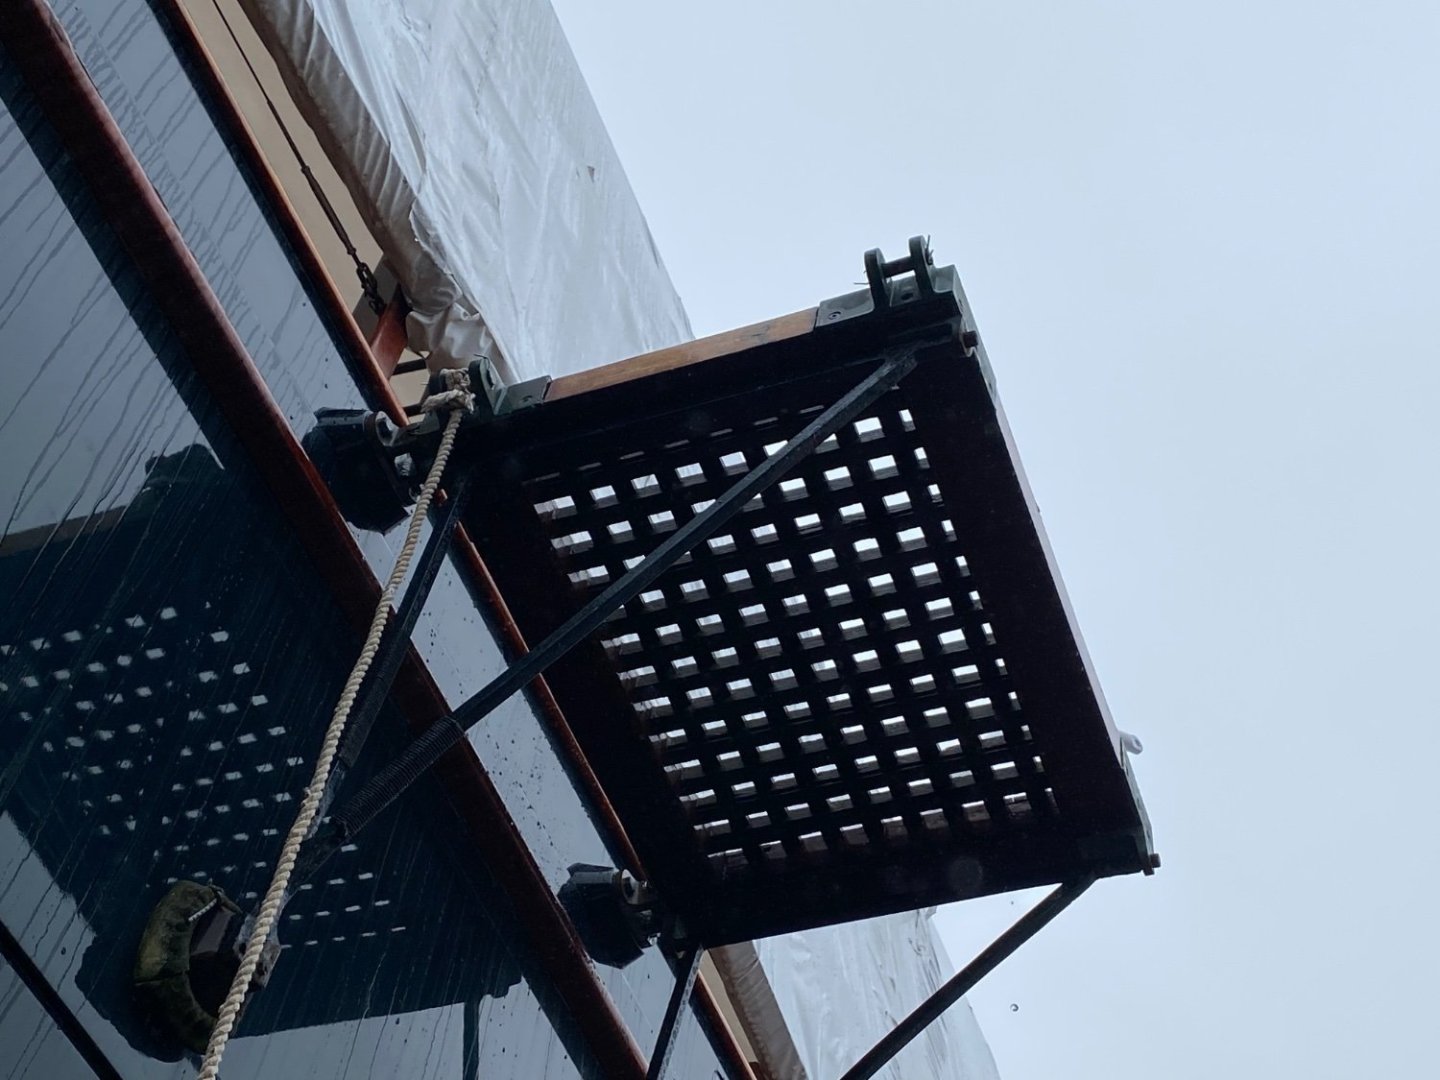
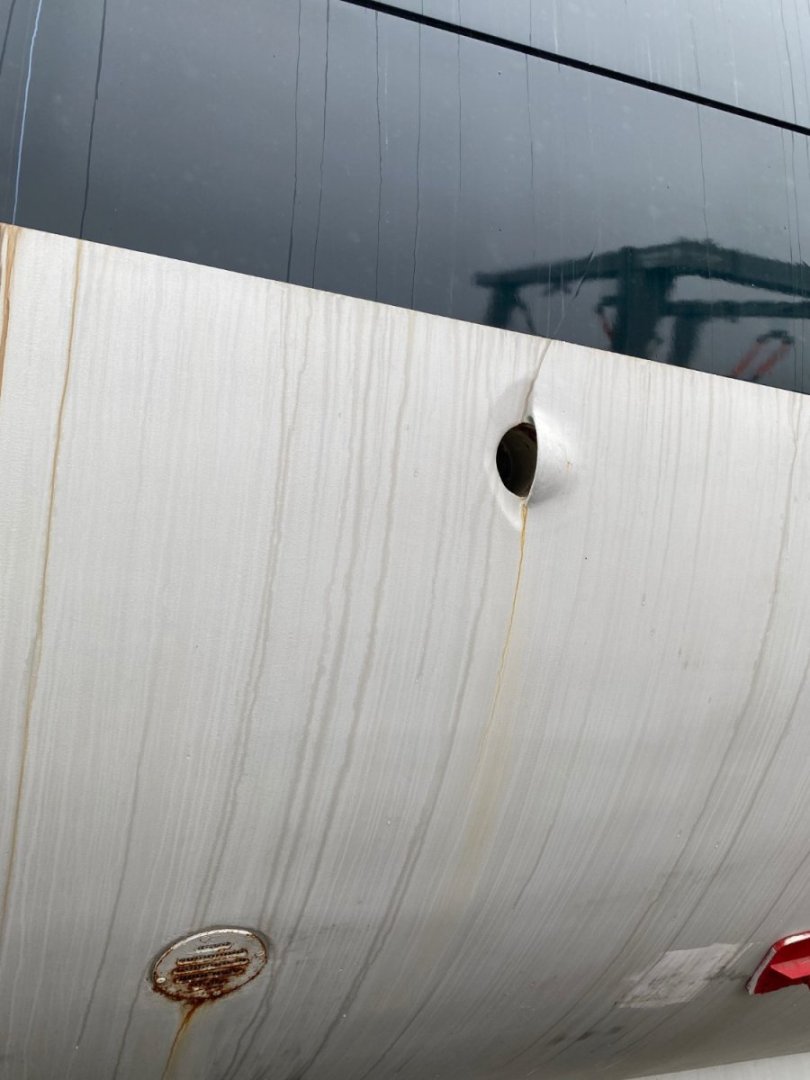
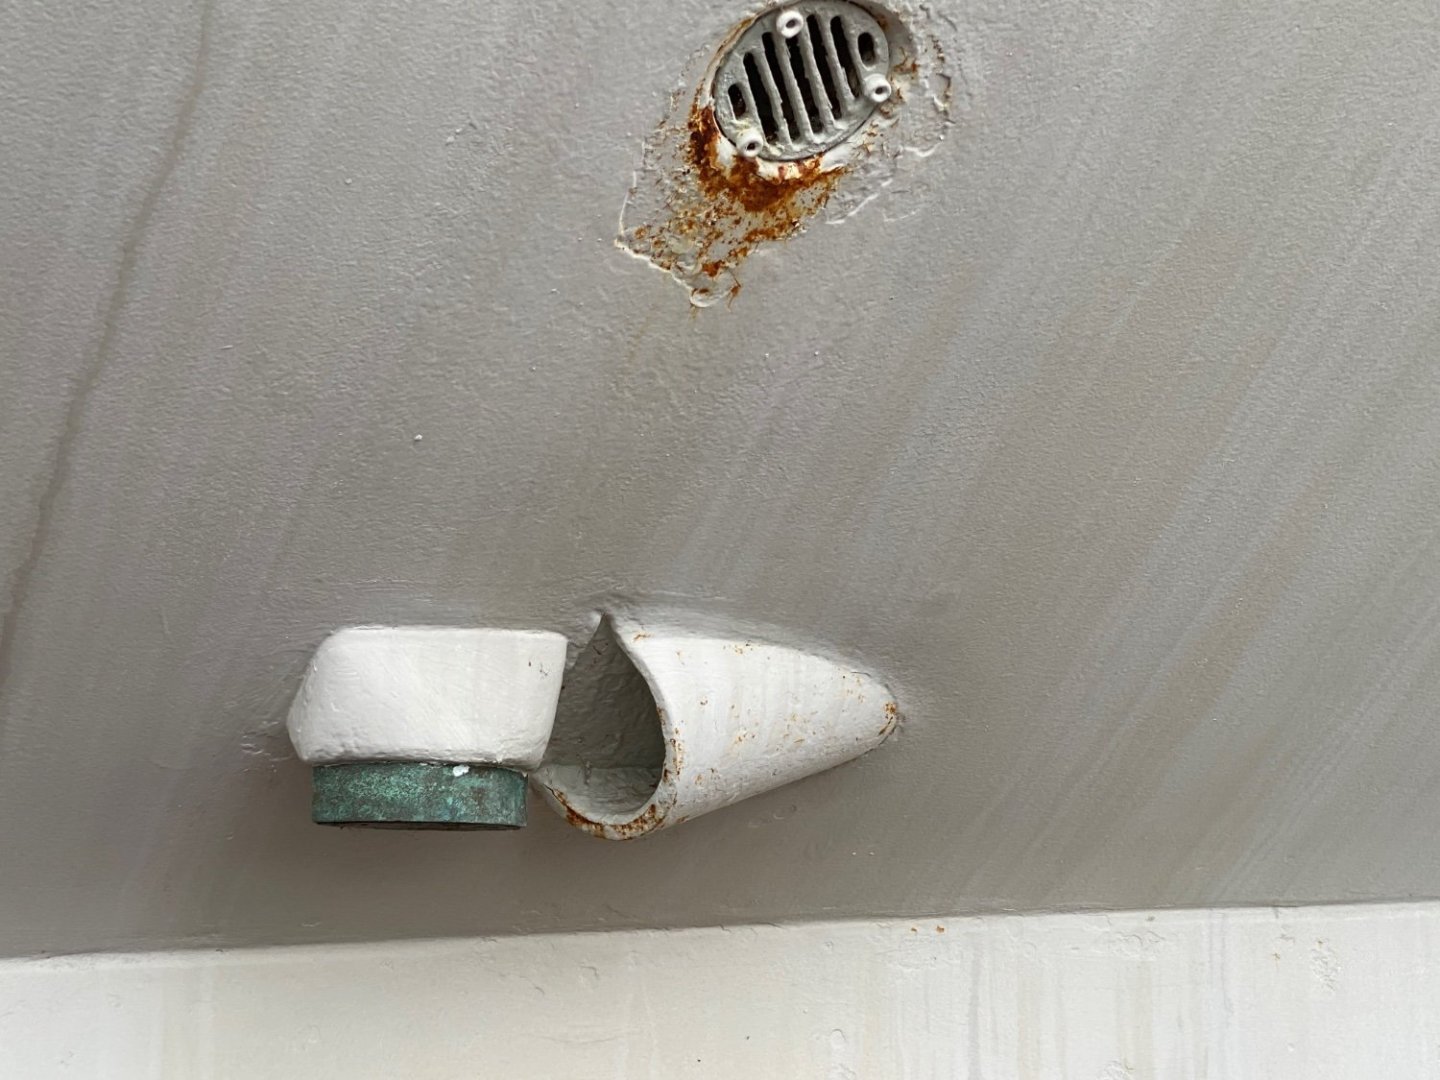
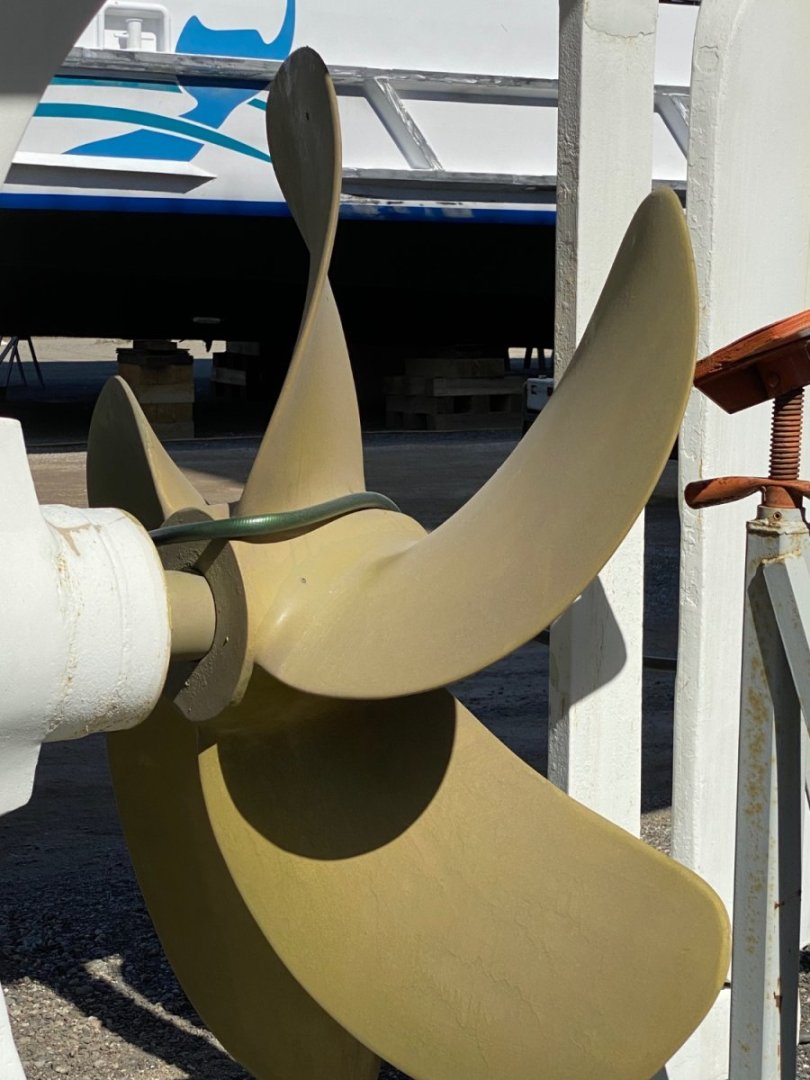
Keith, I got some more photos of Cangarda today. Slight rain and overcast. I put in a request to get aboard to take more photos, hope to hear back sometime today or tomorrow. Note that the discharge pipes are not symmetrical port to starboard.


-
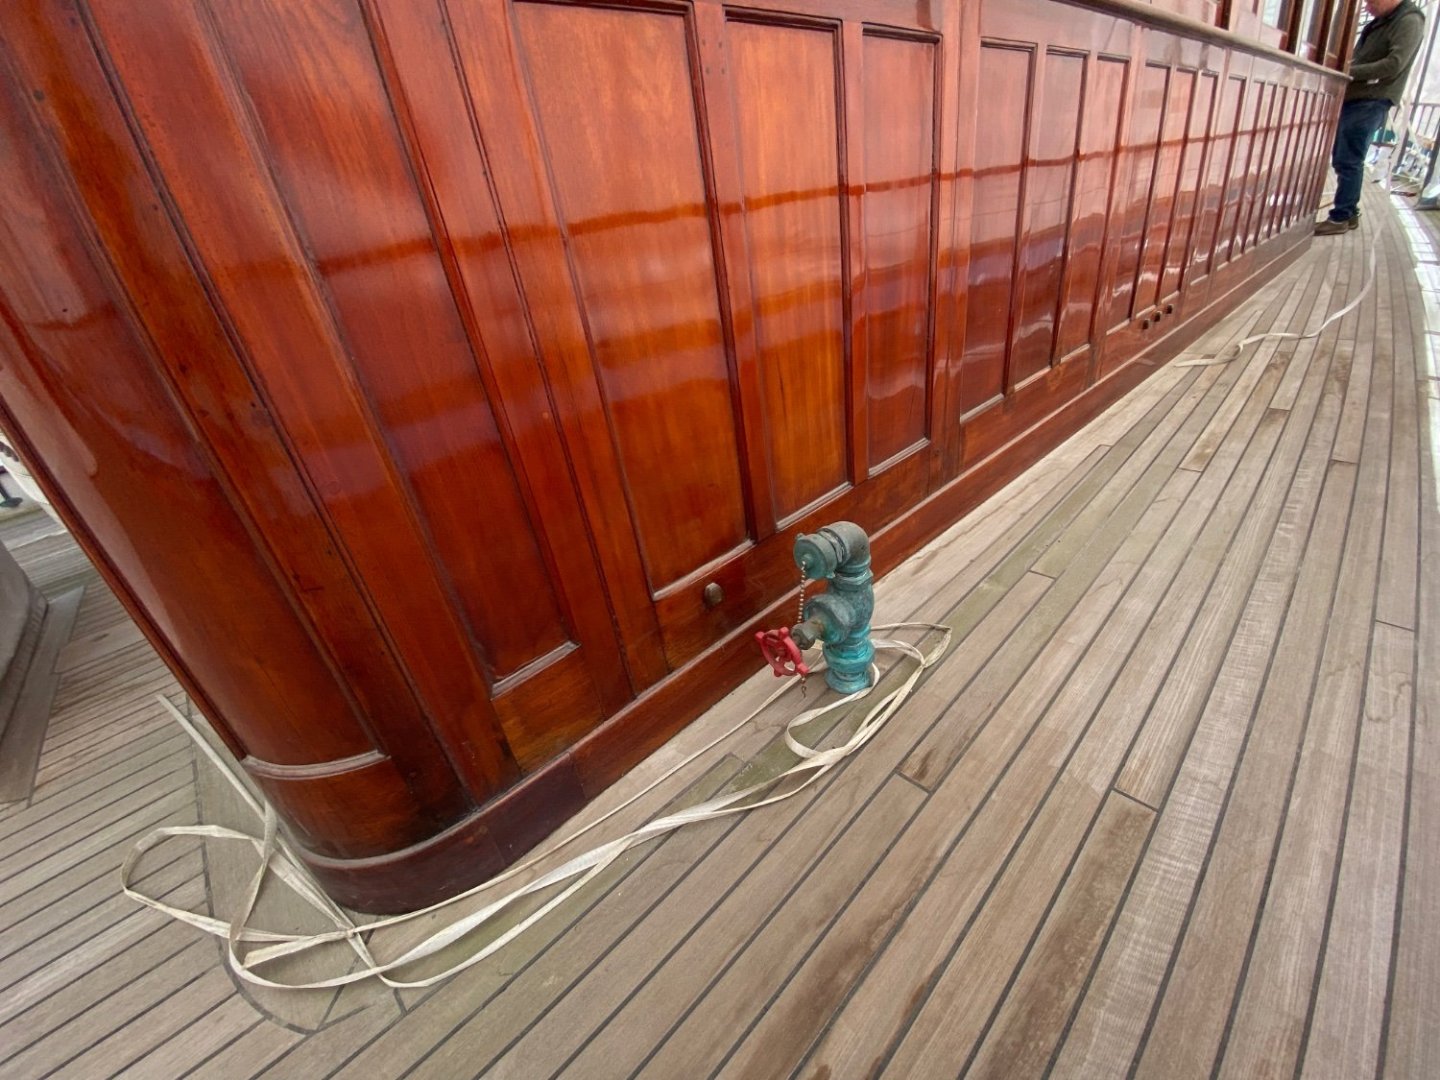
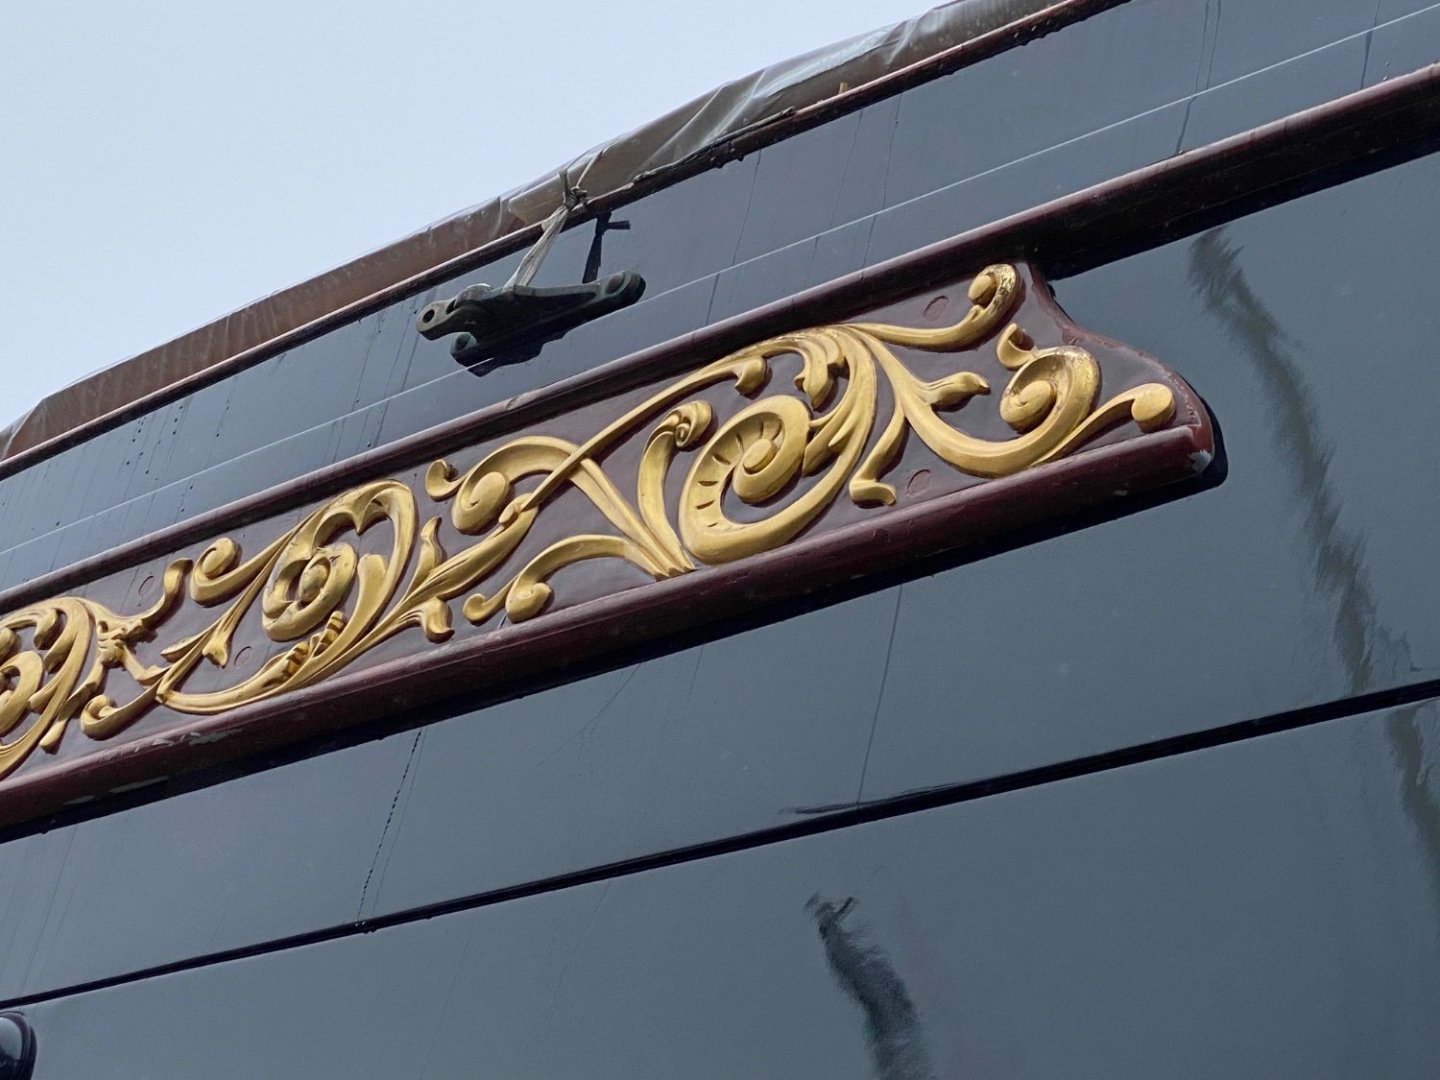
Yes, it appears to be a thicker plate(belt) that the portholes are in. I’ll get better pictures tomarrow or Monday. Rick
-
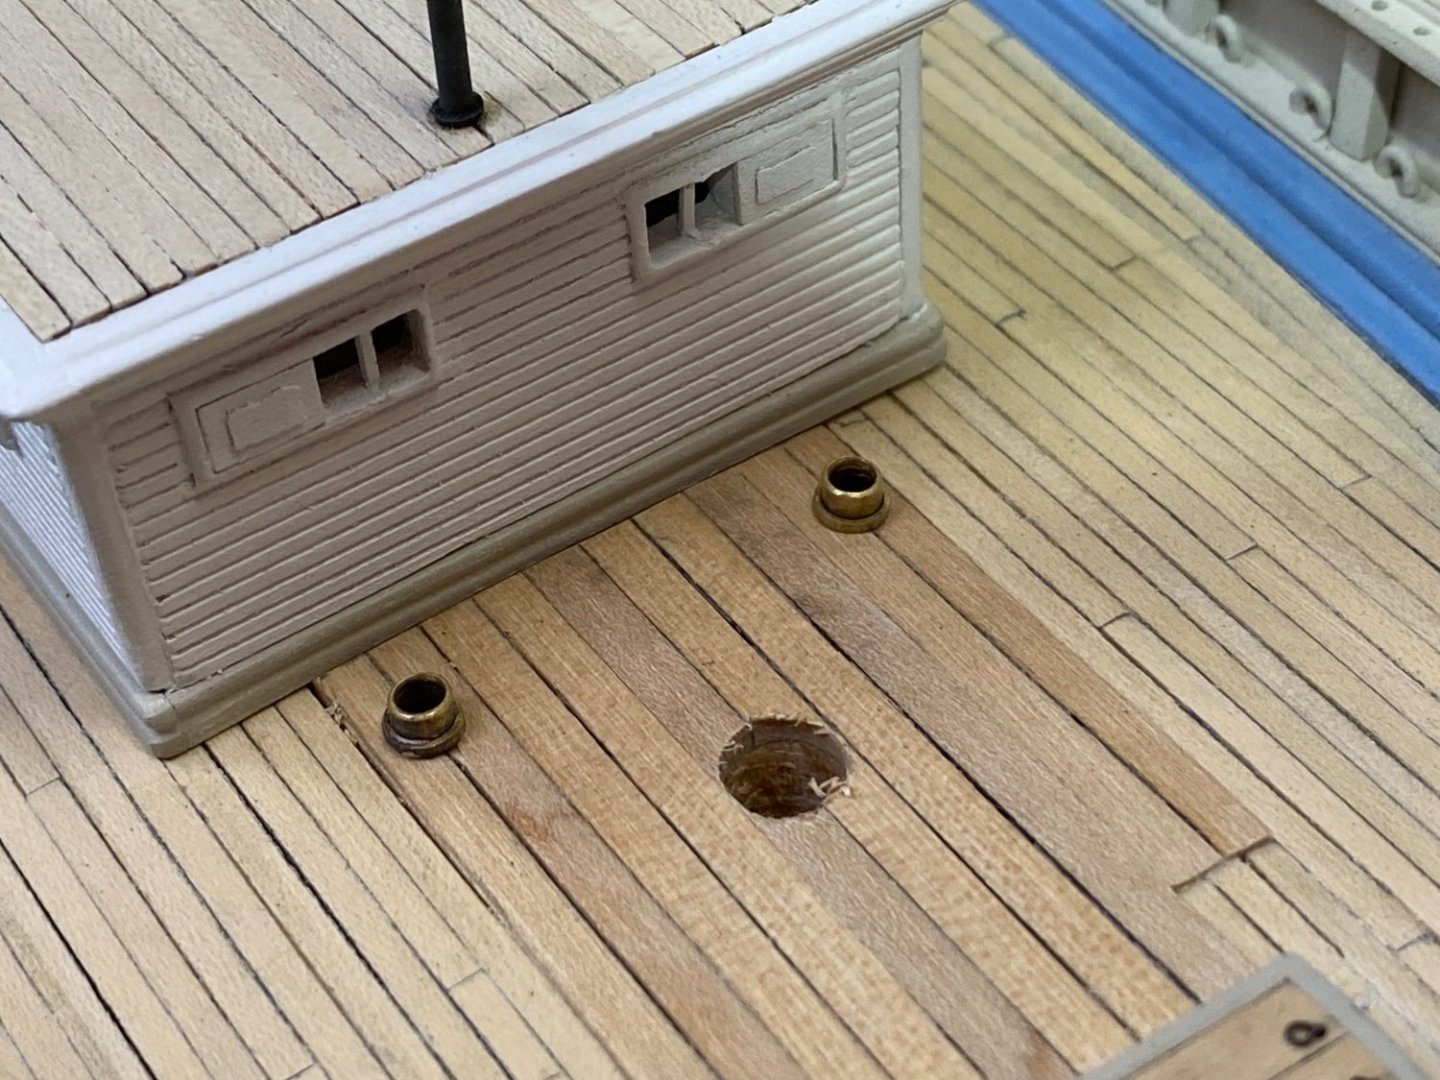
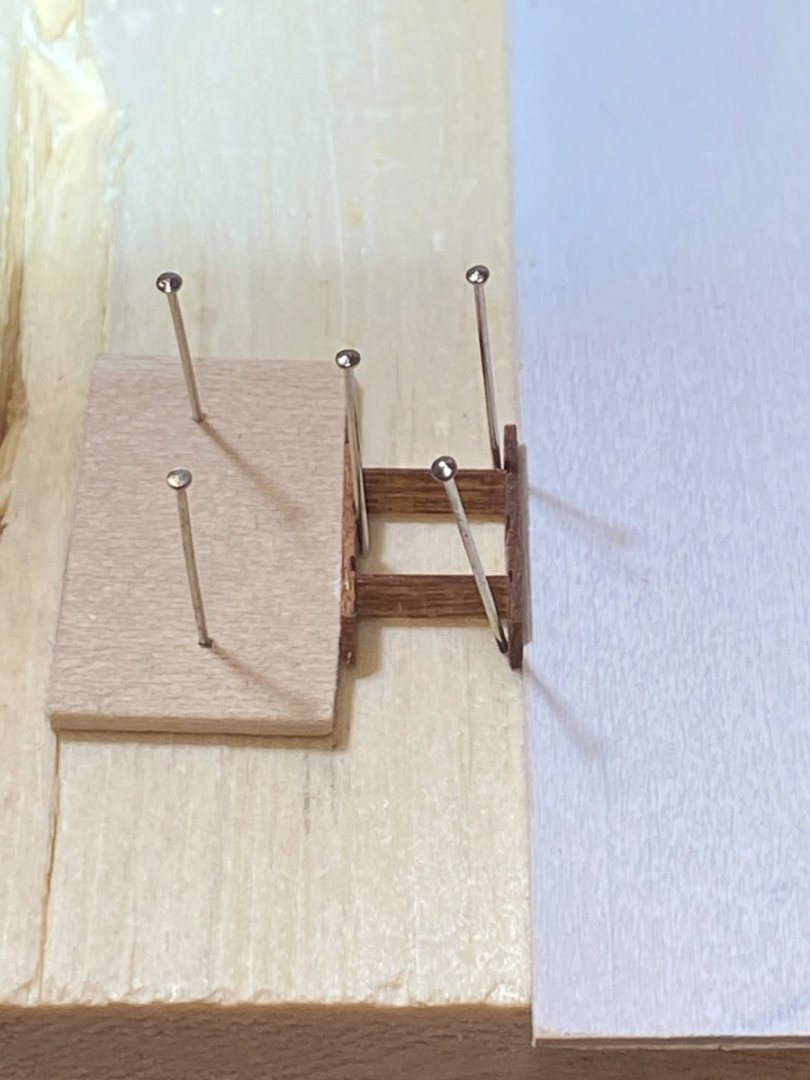
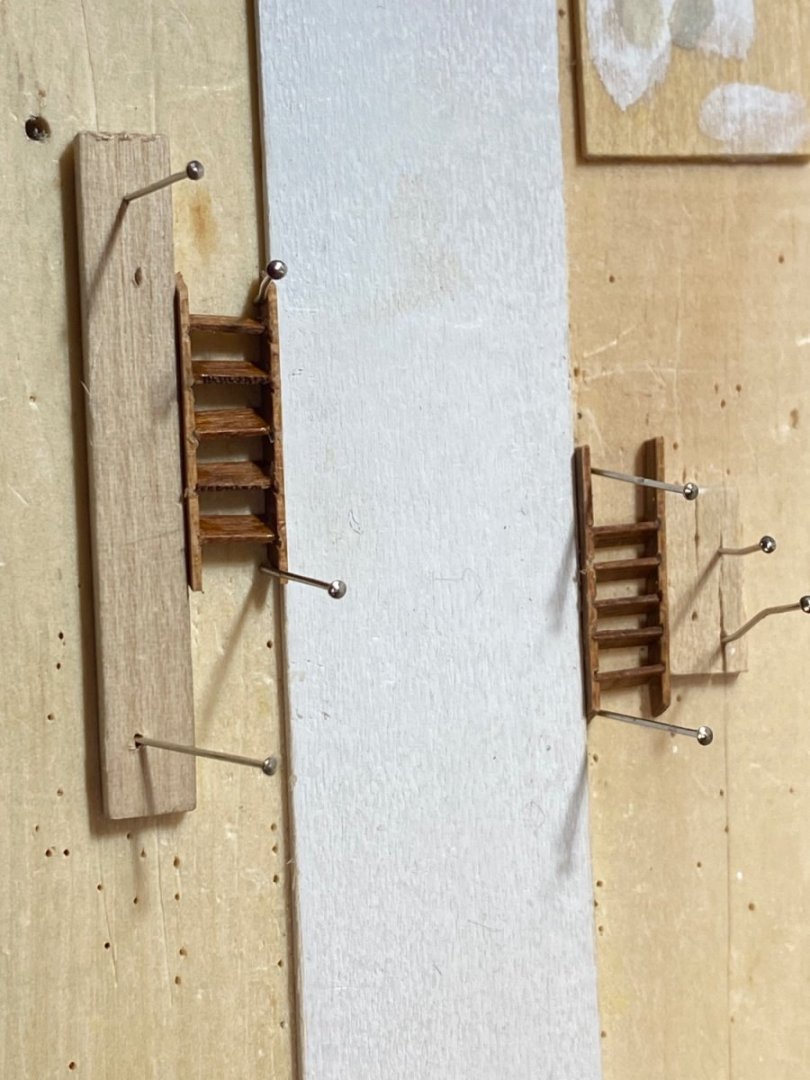
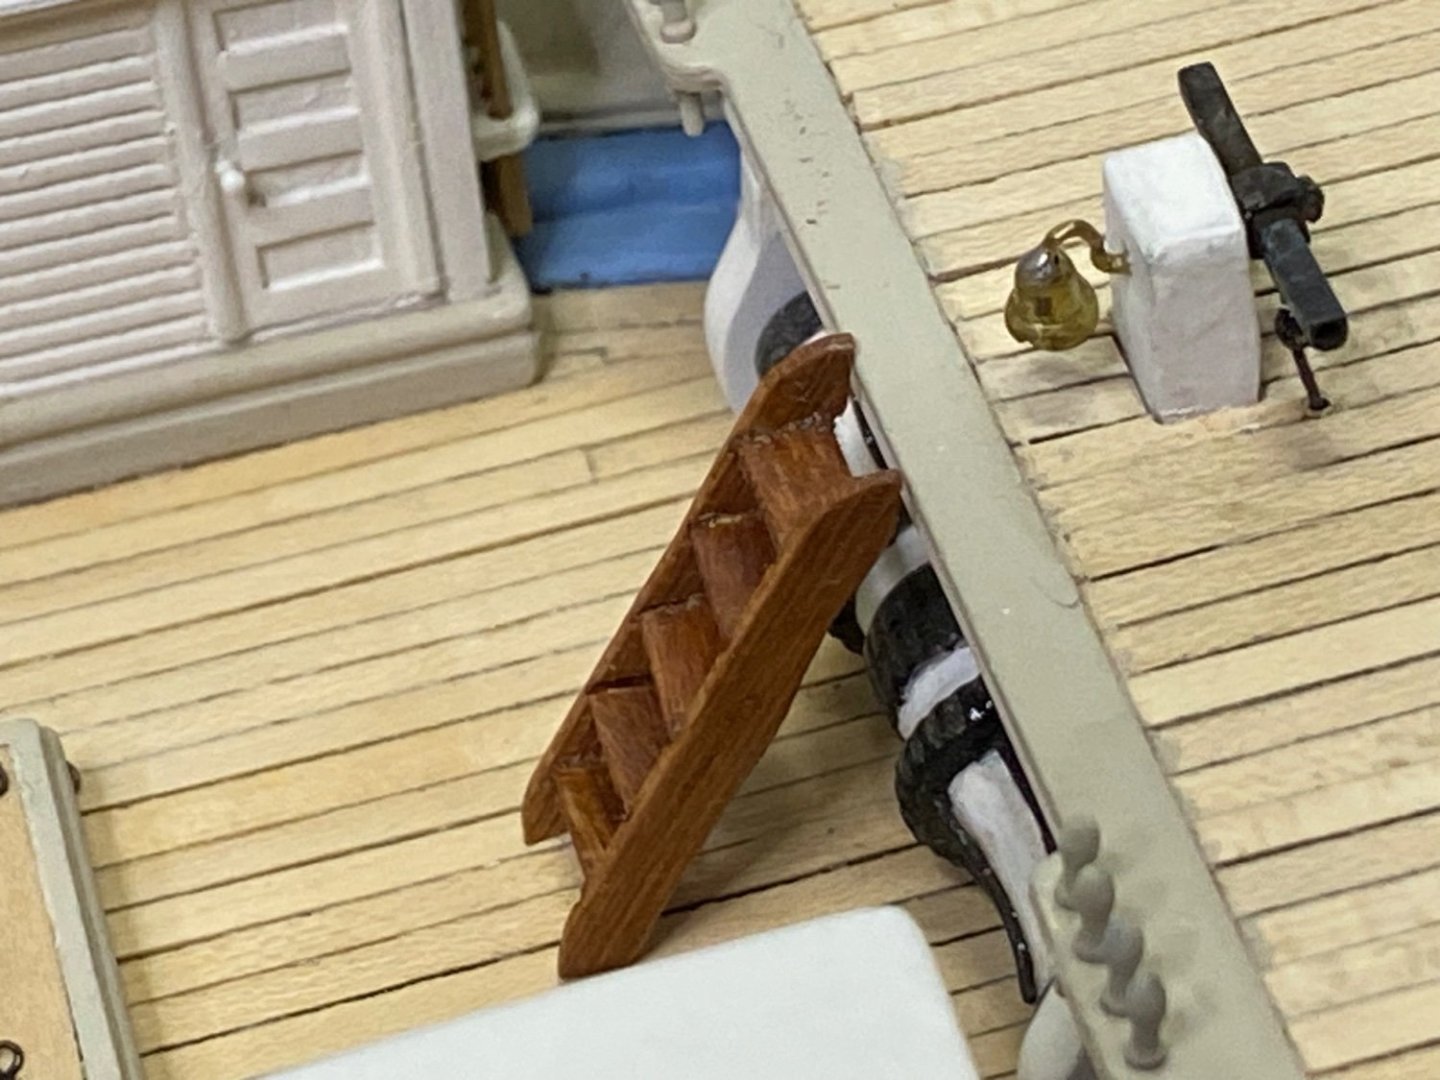
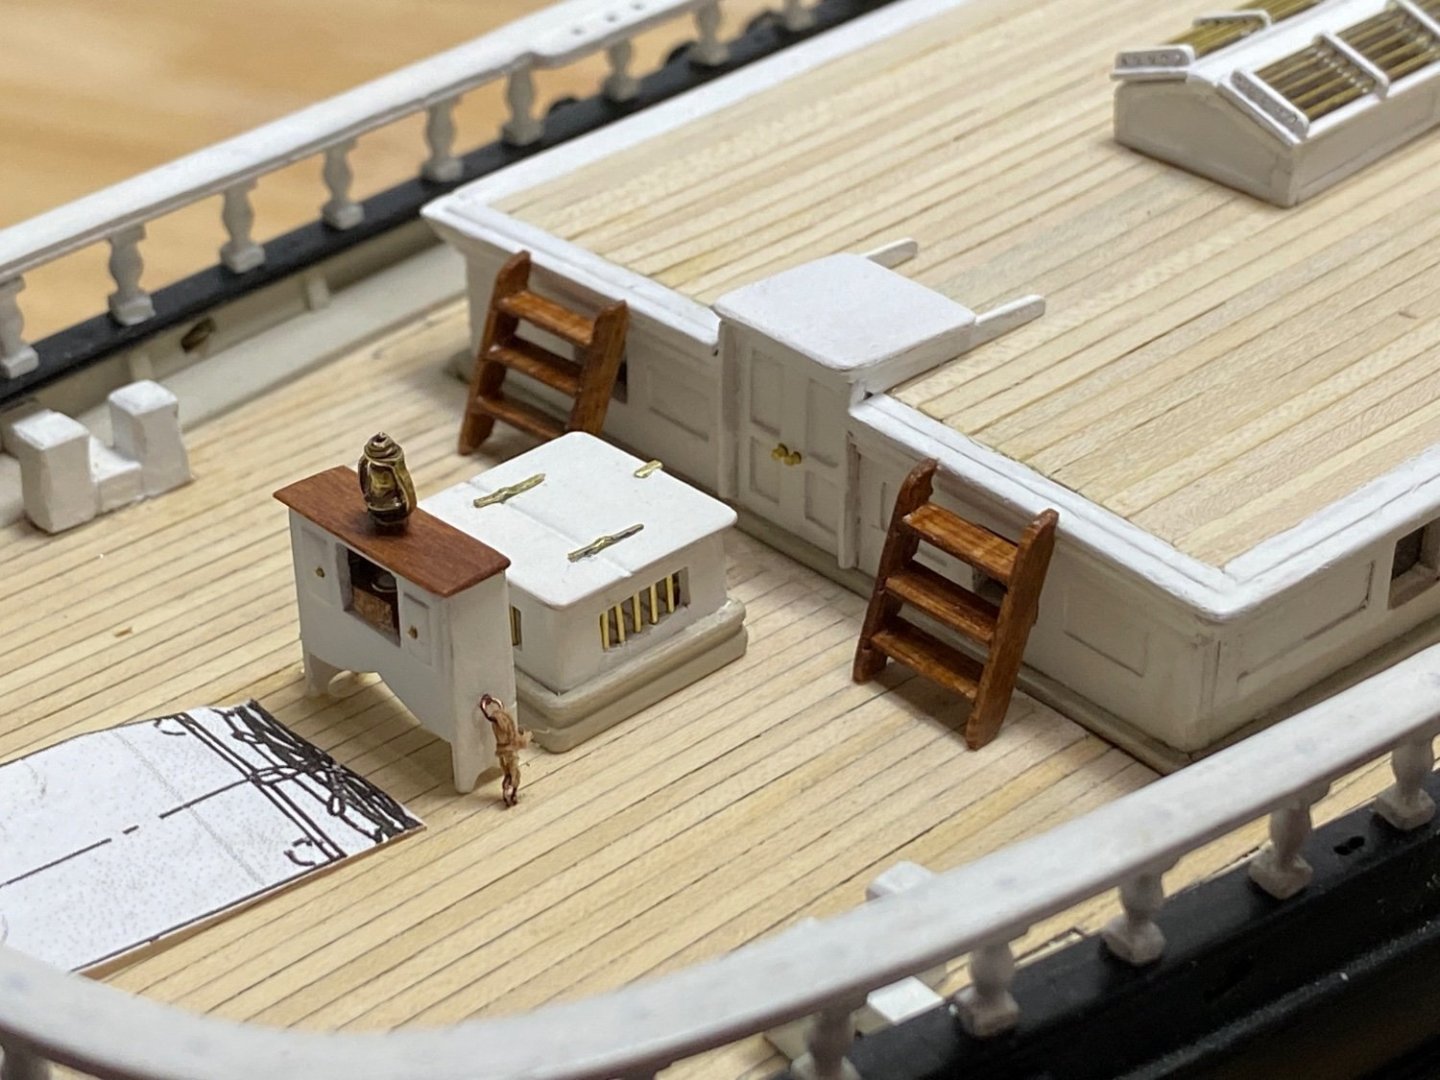
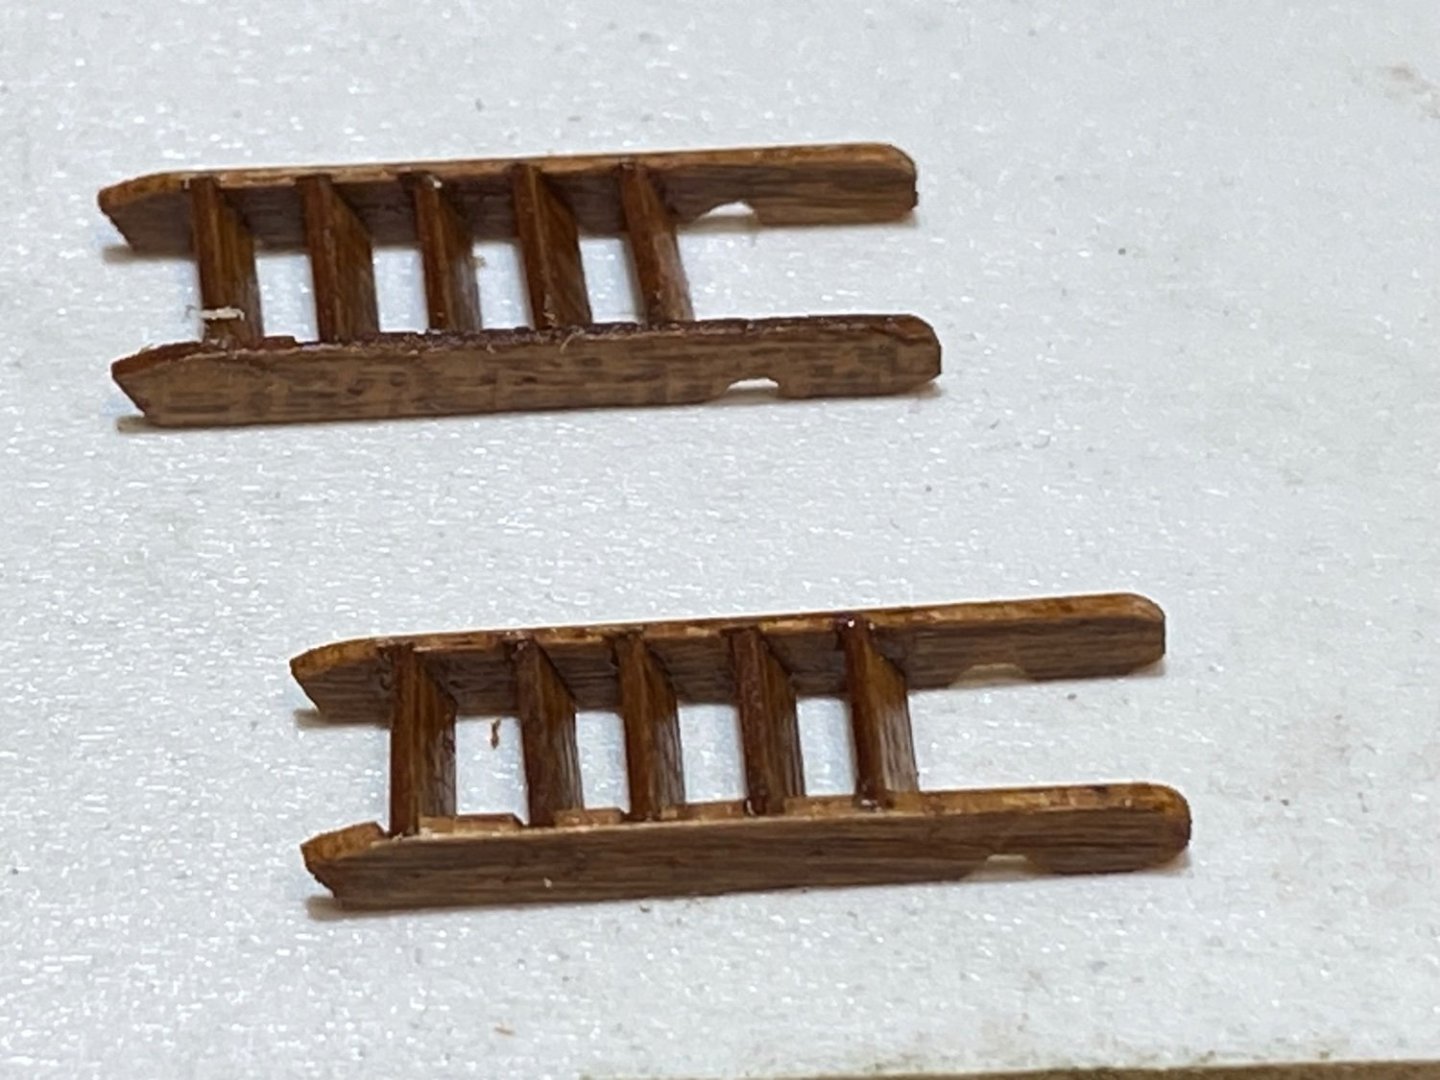
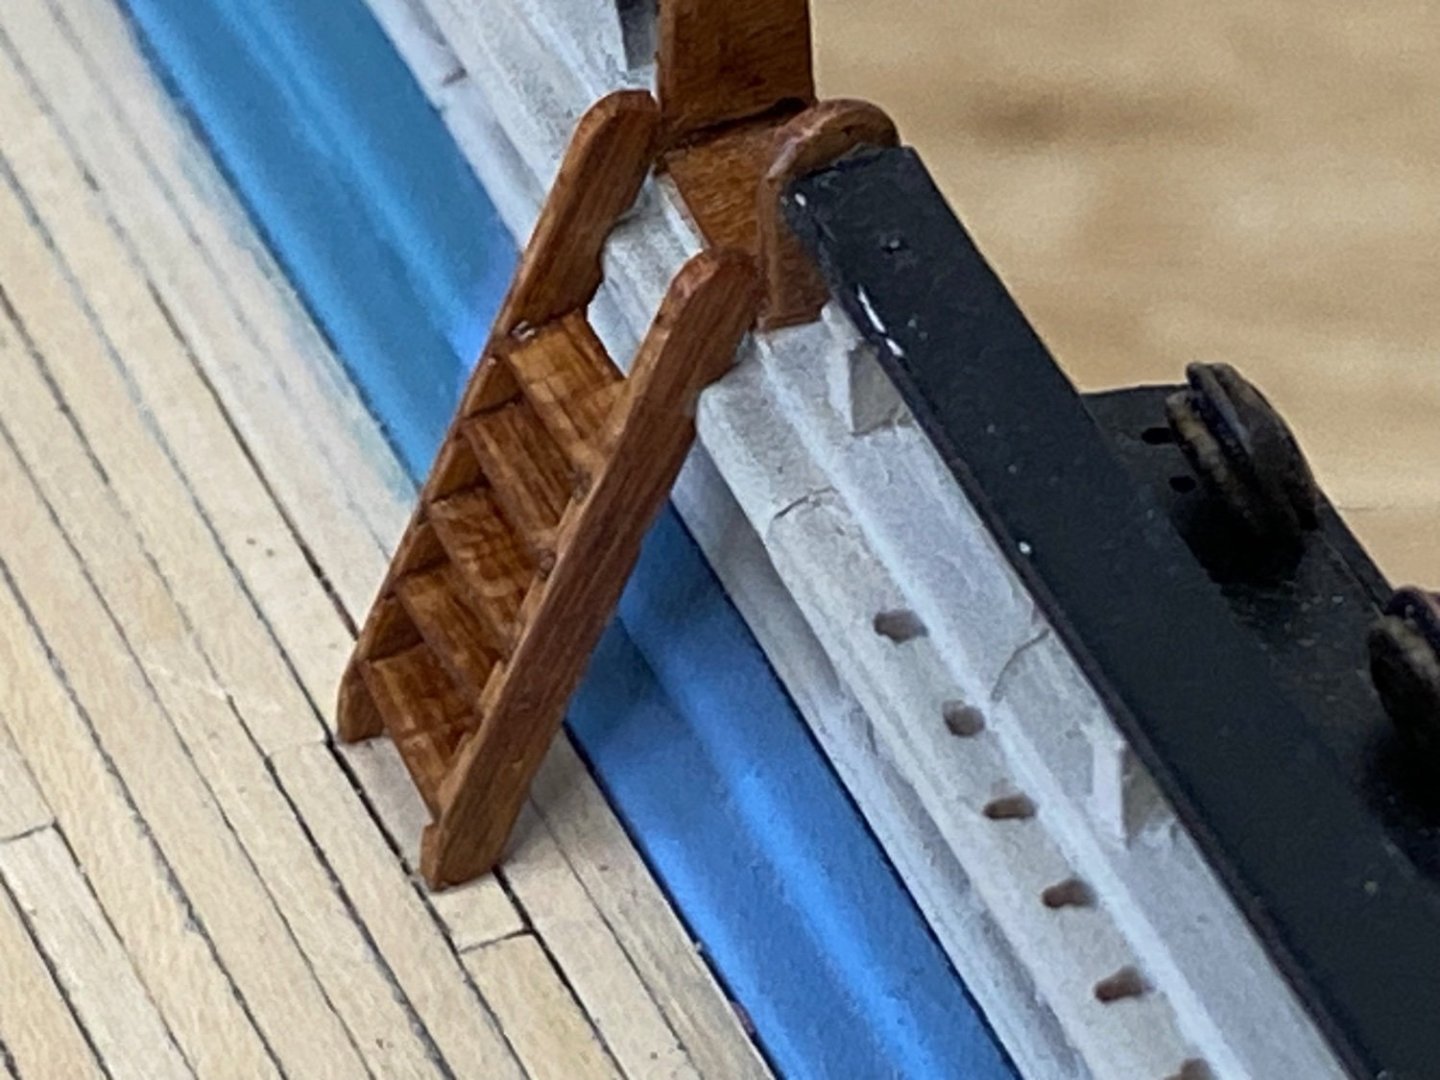
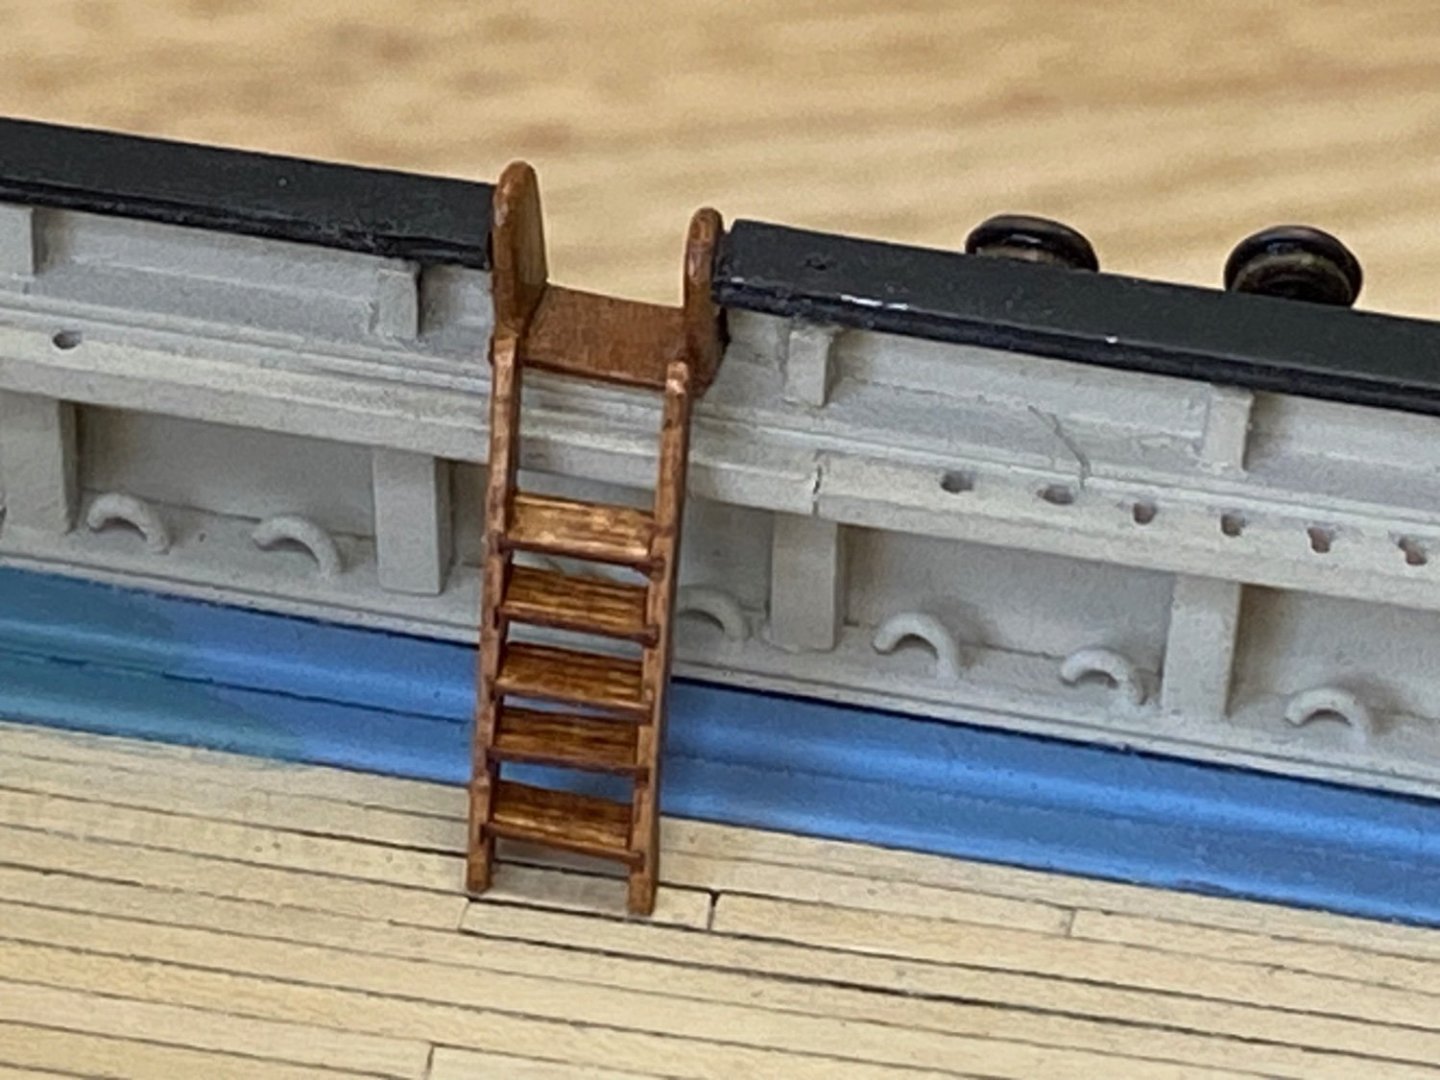
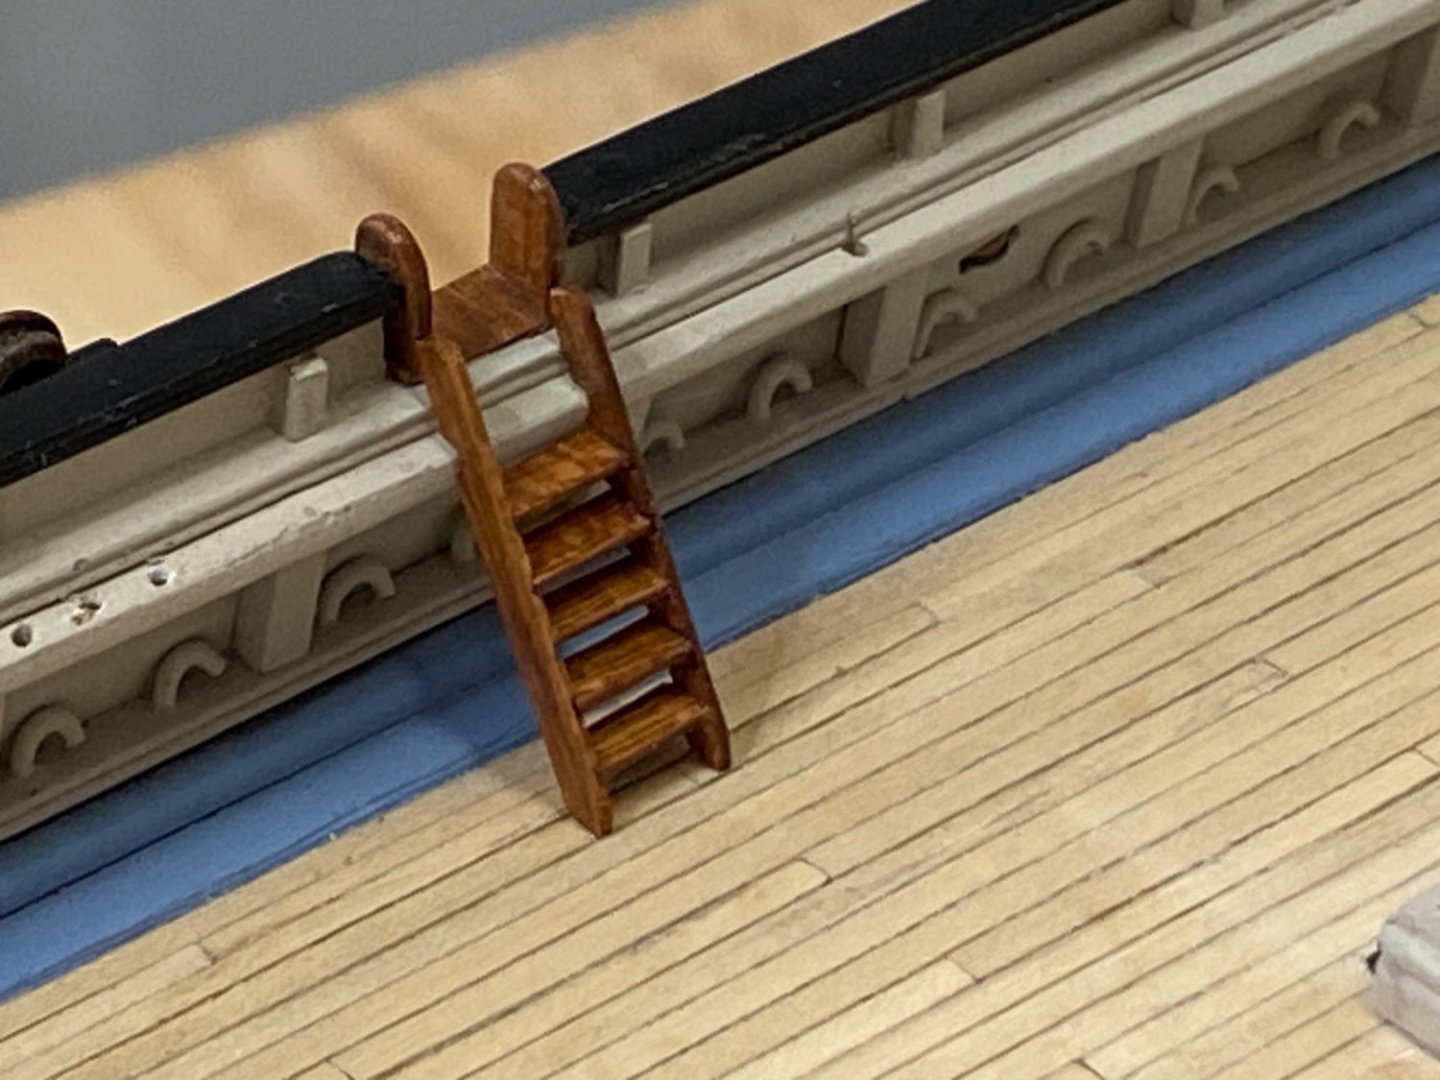
Ladders are finally done. I made them out of cherry, reduce to .03 inches thick for both the rails and the treads. I used 30 degrees for all ladders and the spacing for the treads was4/32 except for the ladders going to the poop deck that were spaced at 3/32 inches. The slots for the rails were done on the table saw while held in a jig to maintain the 30 degrees. The fence was then move the 4/32 or 3/32 for each slot using a .03 blade. Each ladder was individually fitted to the rail/waterway and stained with Ipswich pine stain. I glued the treads to the rails in a jig to hold everything in place. I made the mistake of staining the rails first which made it almost impossible to see the slots.I ended up marking the slots with pencil to make them more visible. I brushed on gloss polyurethane but was dissatisfied with the results, it looked too glossy so I brushed on a semigloss polyurethane which looks right. All the ladders are glued in place except for the forecastle which I will glue after the anchors and chain are in place. I chose not to cut out a notch in the pin rail for the boarding ladders, so I notched the ladders to fit against the pin rail. This seems more logical to me and the rail could serve as a step.
- 192 replies
-
- 3
-
-
- Flying Fish
- Model Shipways
- (and 1 more)
-
Keith, they just pulled a Cangarda out of the shed. It is still covered up. When they get some stairs and open her up, I’ll try to get some pictures inside. Rick


-
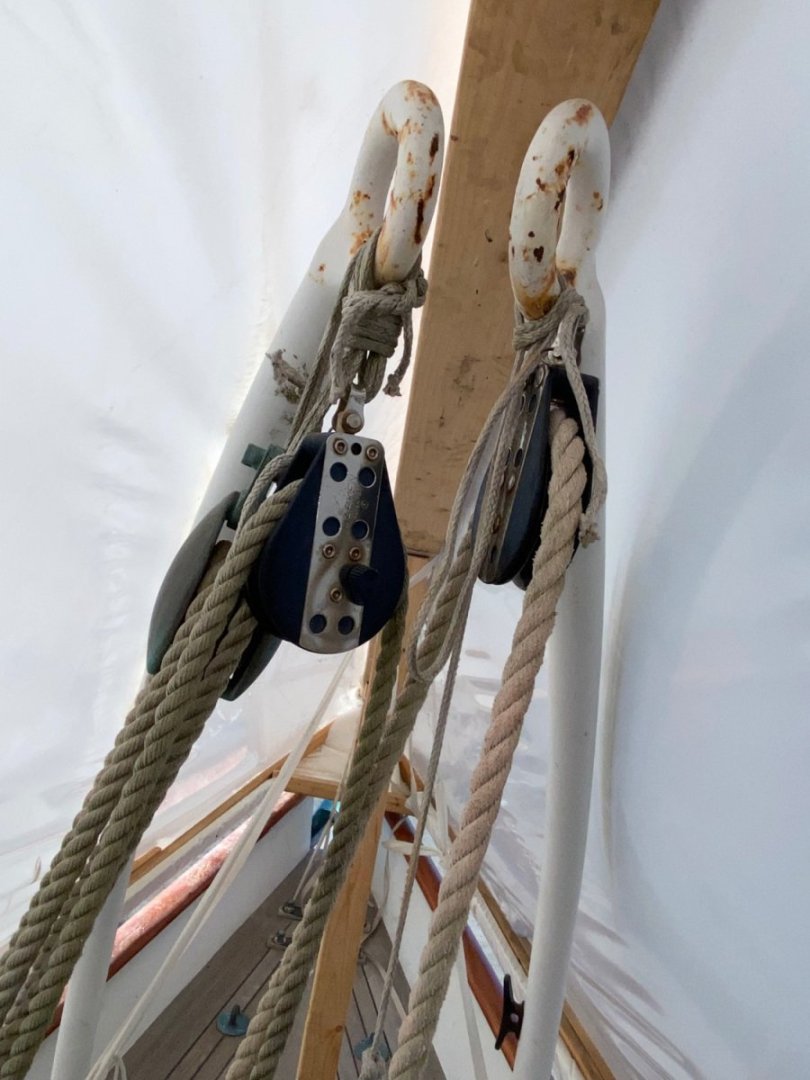
George. again, great job. !!As far as the sheets go, I’m guessing that the strain from the topsail and topgallant sheets would be tremendous and therefore the block on the deck would help relieve the strain on the fife rail. Rick
-
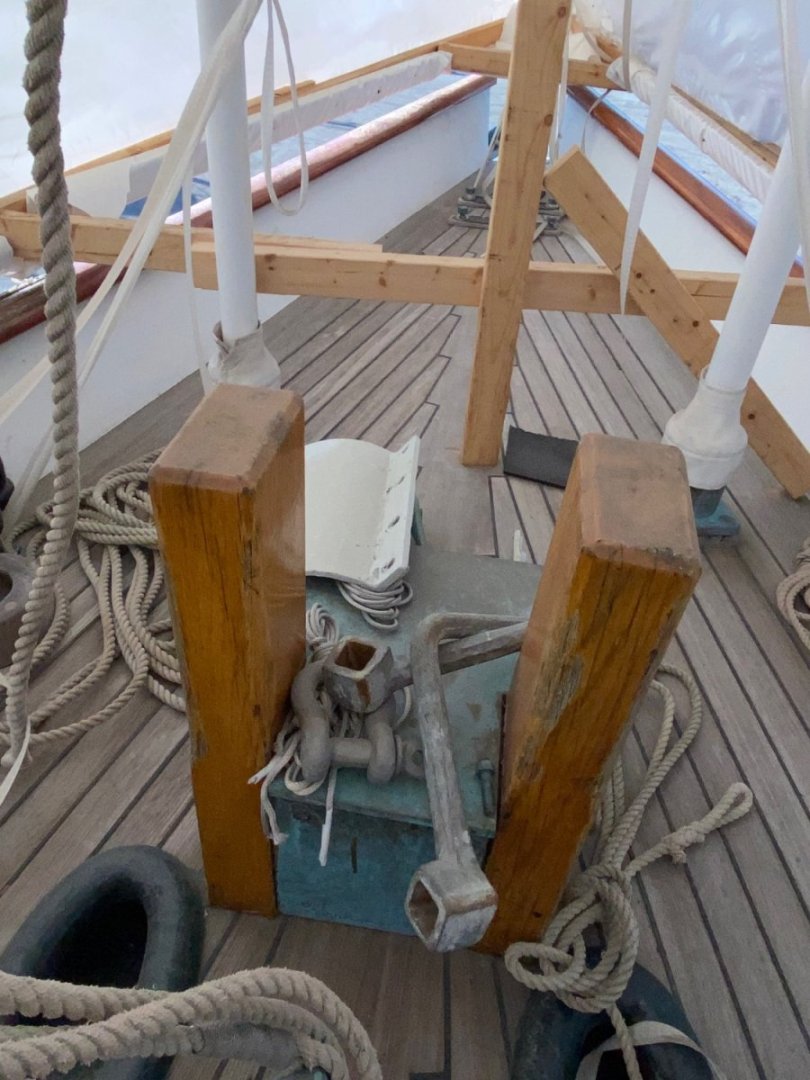
Again, just beautiful. Great job on the belaying pins!! Rick