John Ruy
-
Posts
1,585 -
Joined
-
Last visited
Content Type
Profiles
Forums
Gallery
Events
Everything posted by John Ruy
-
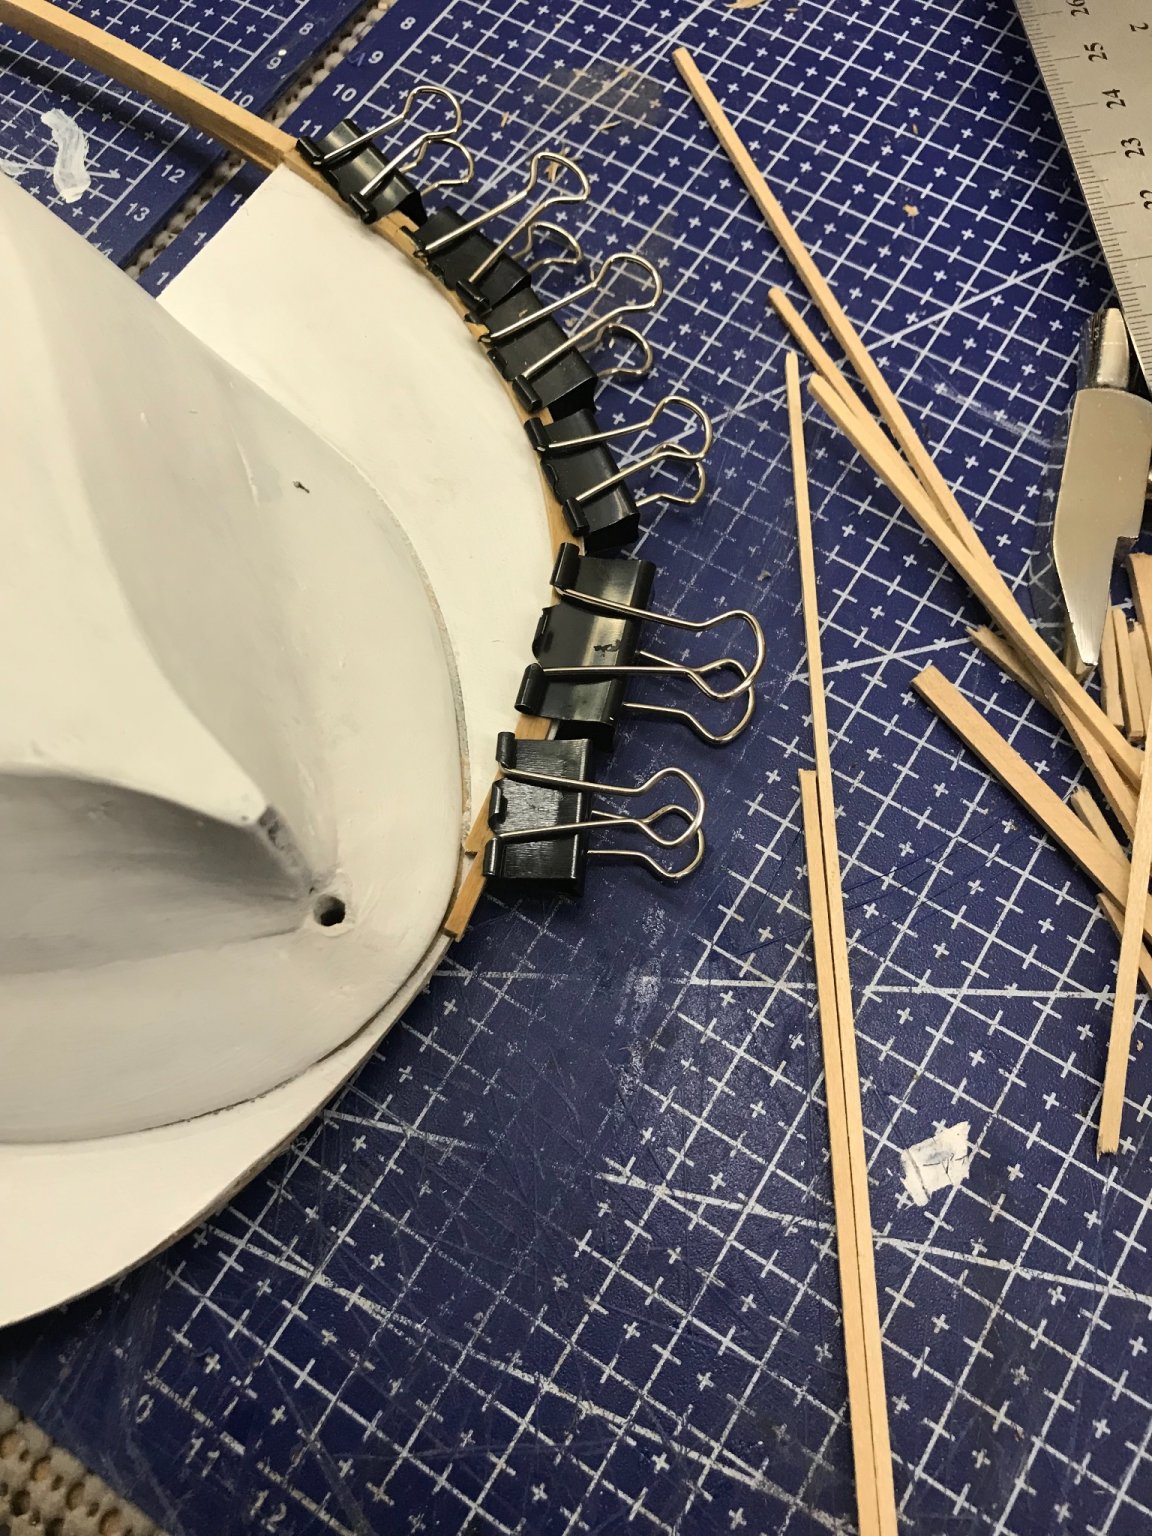
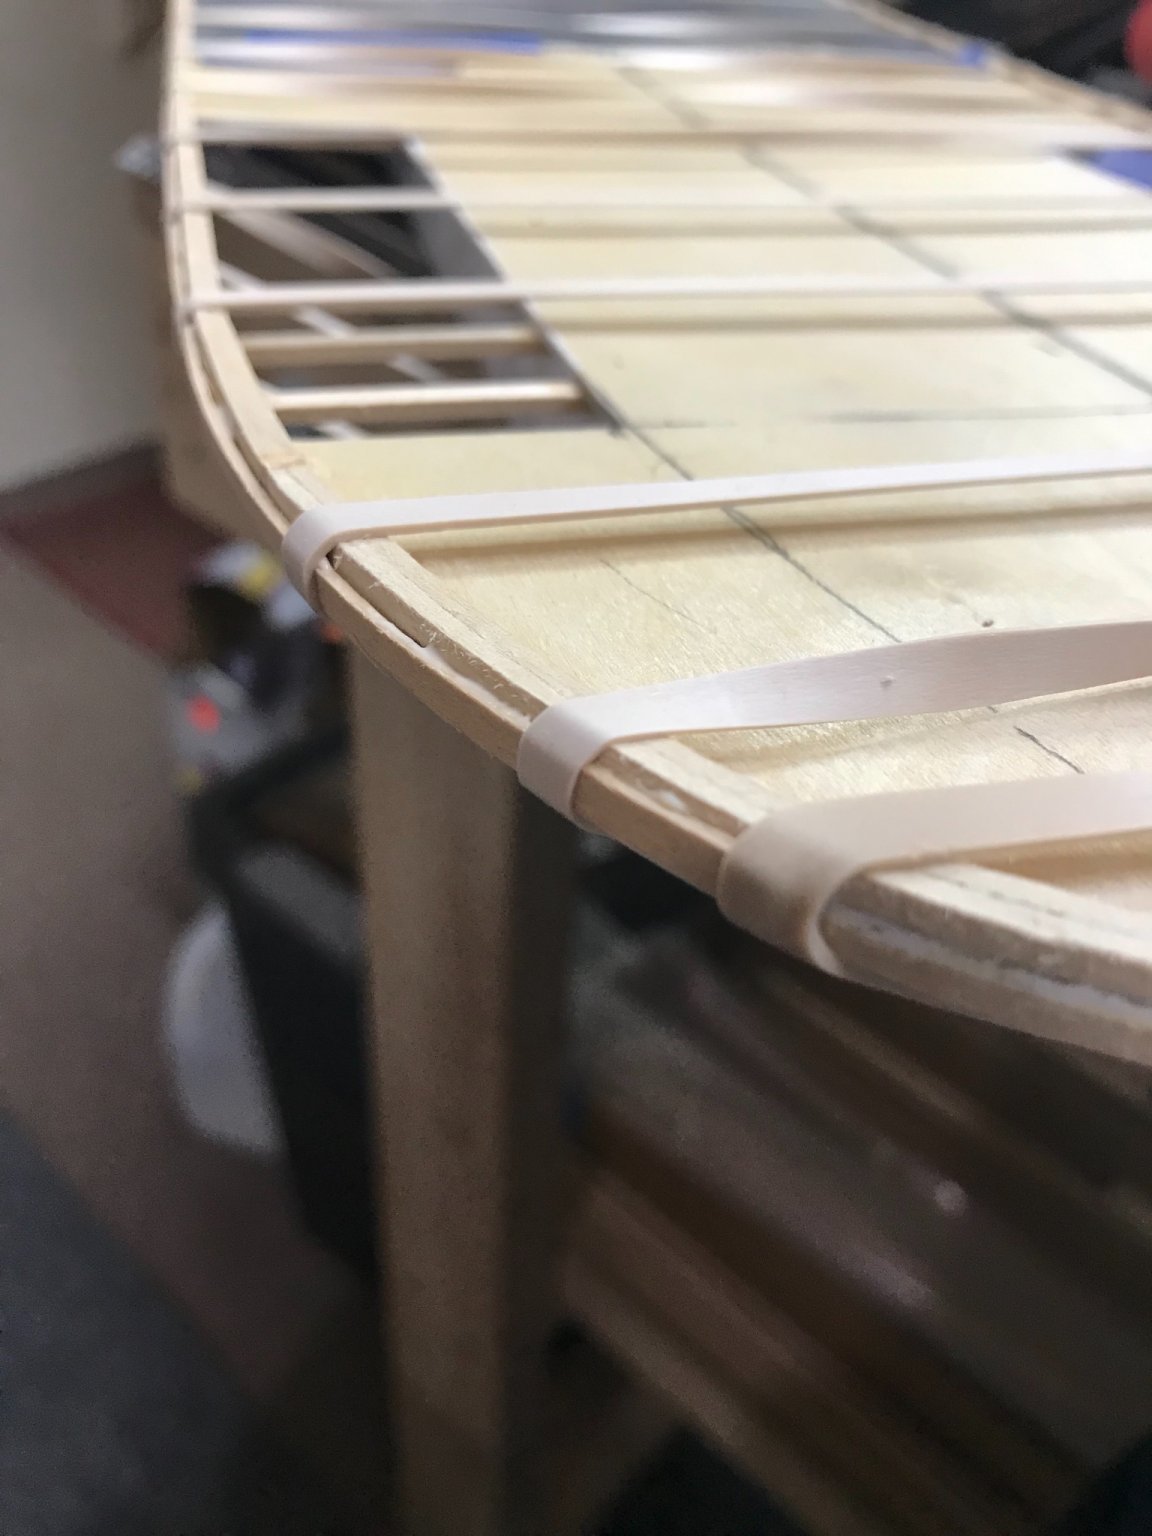
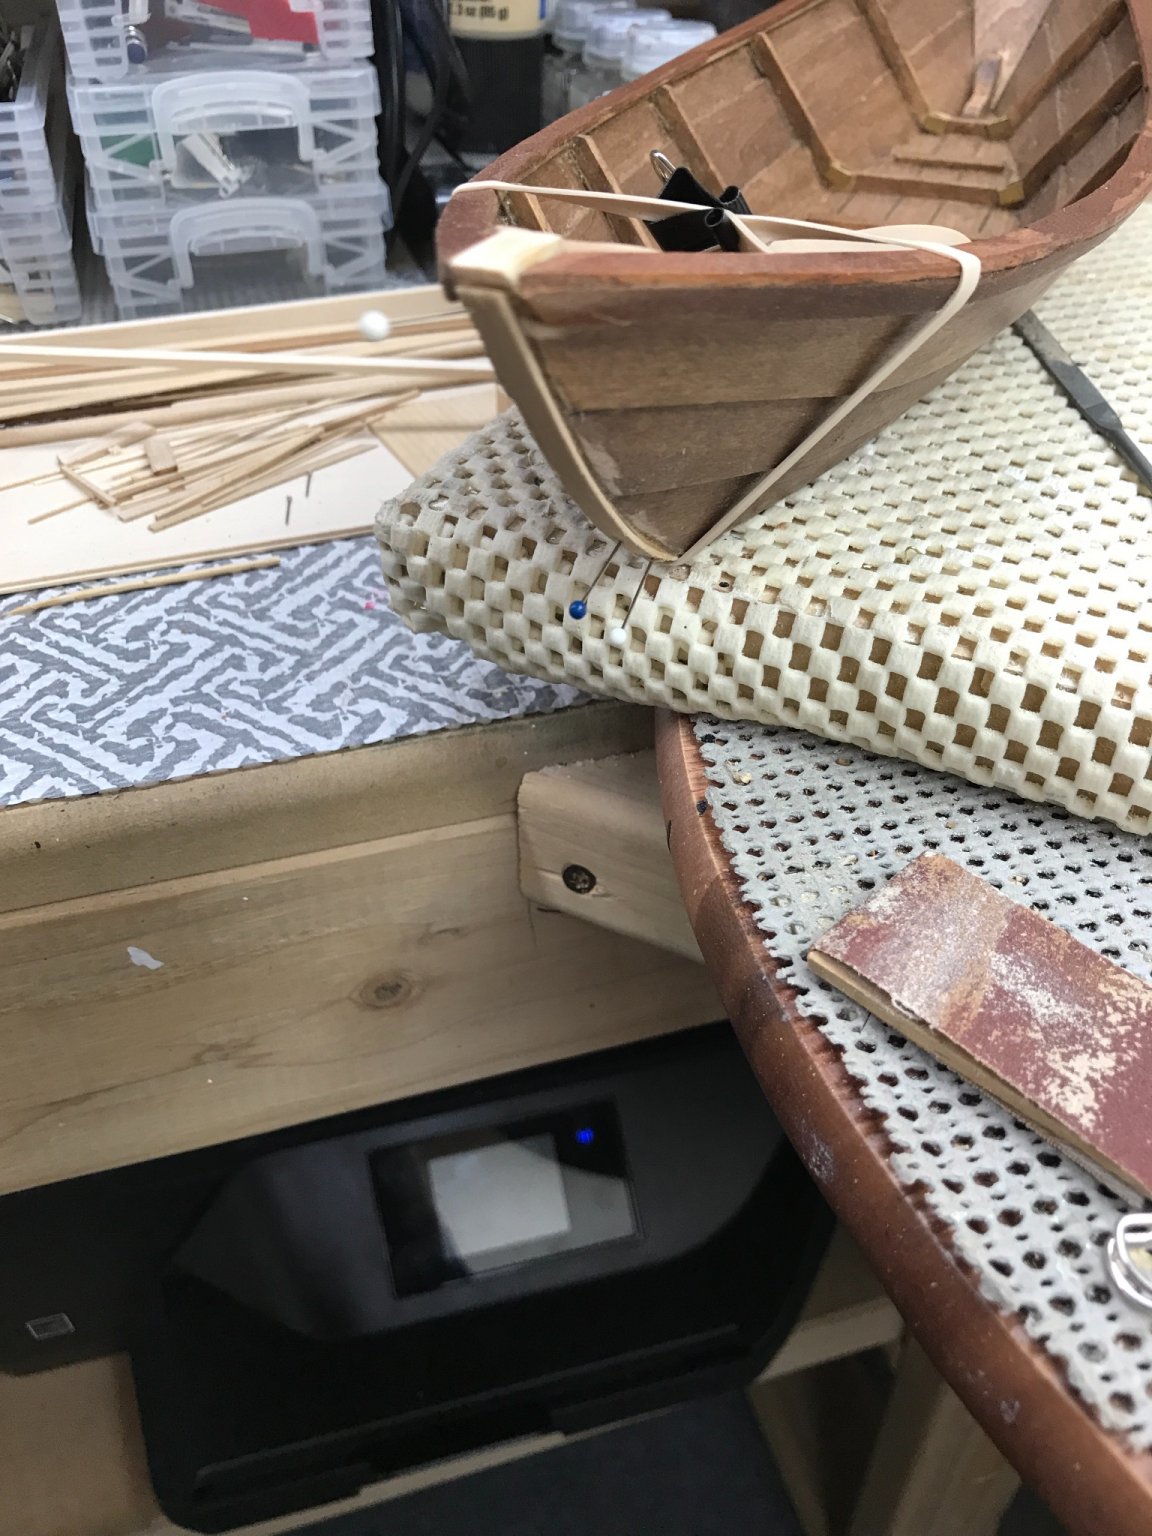
 Main Deck underside framing… Laminating the underside of the guard rail. Soaking the bow and stern tail pieces. Lots of clamping required to make the curves. Framing complete… Adding the Rudder… Molding added to the rail. Ready for the some fine sanding and paint. Can’t wait 😝 to turn this puppy over and start working on this floating grand hotel. Later… 🍻


- 238 replies
-
- 8
-

-
- Robert E Lee
- steamboat
- (and 3 more)
-
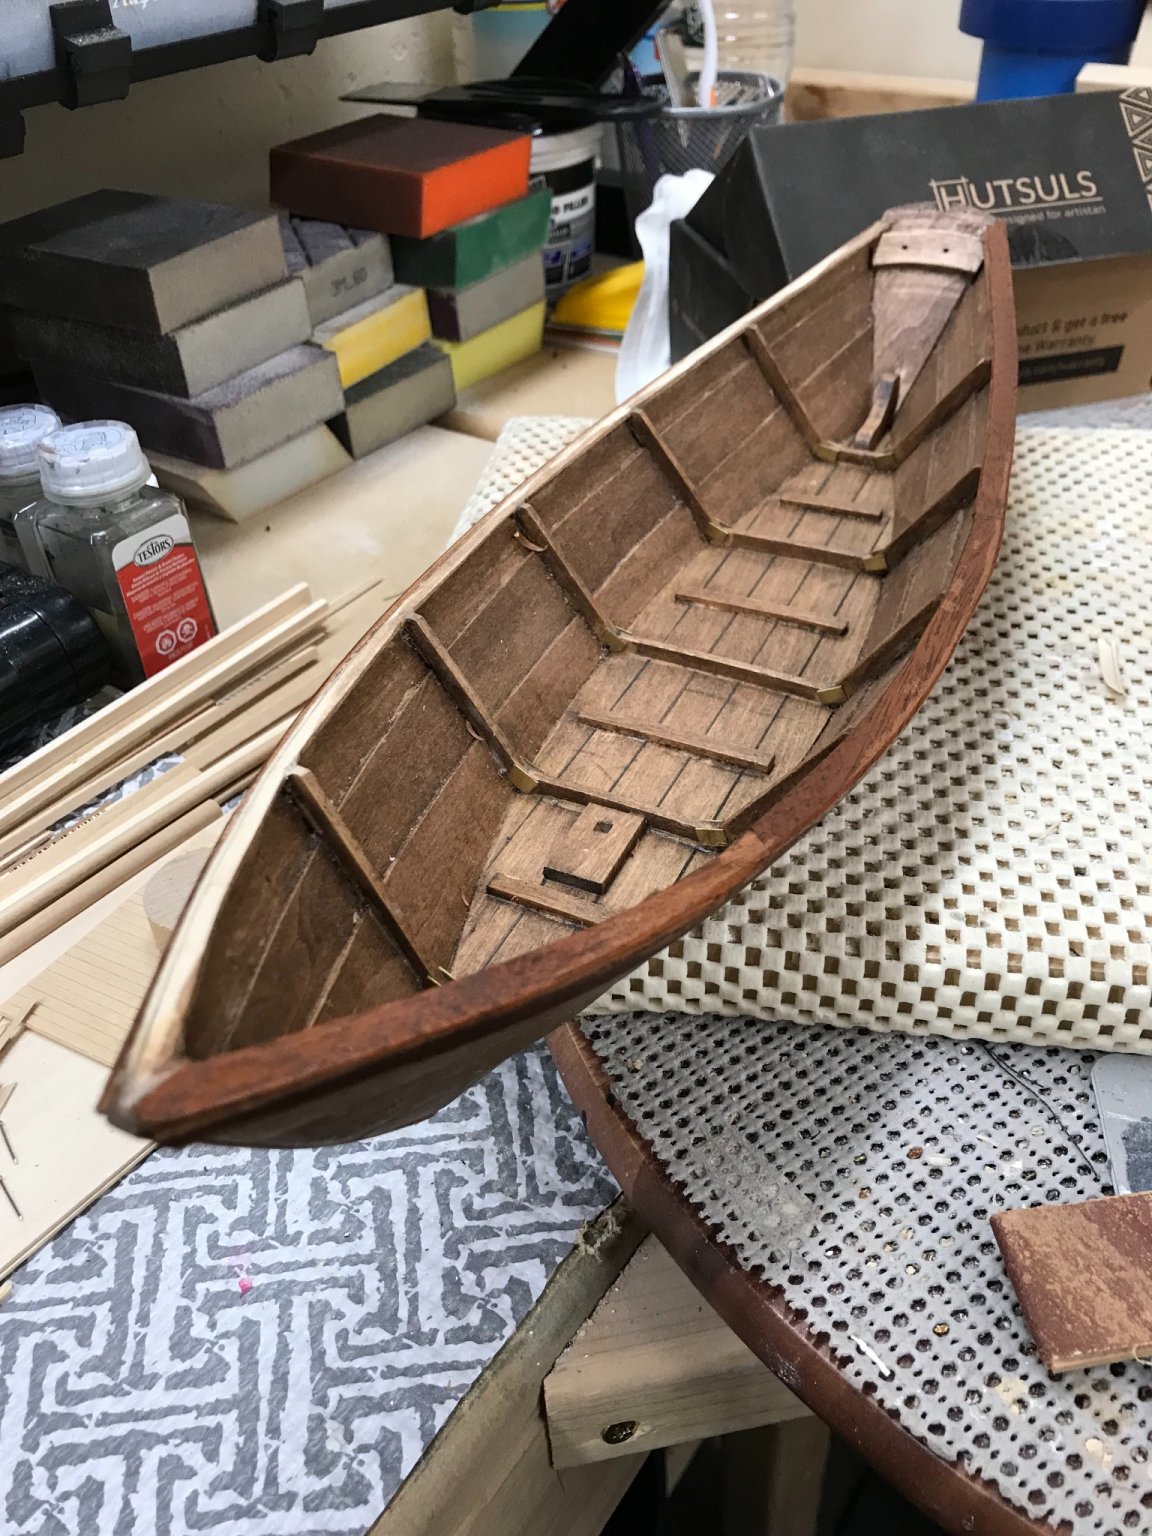
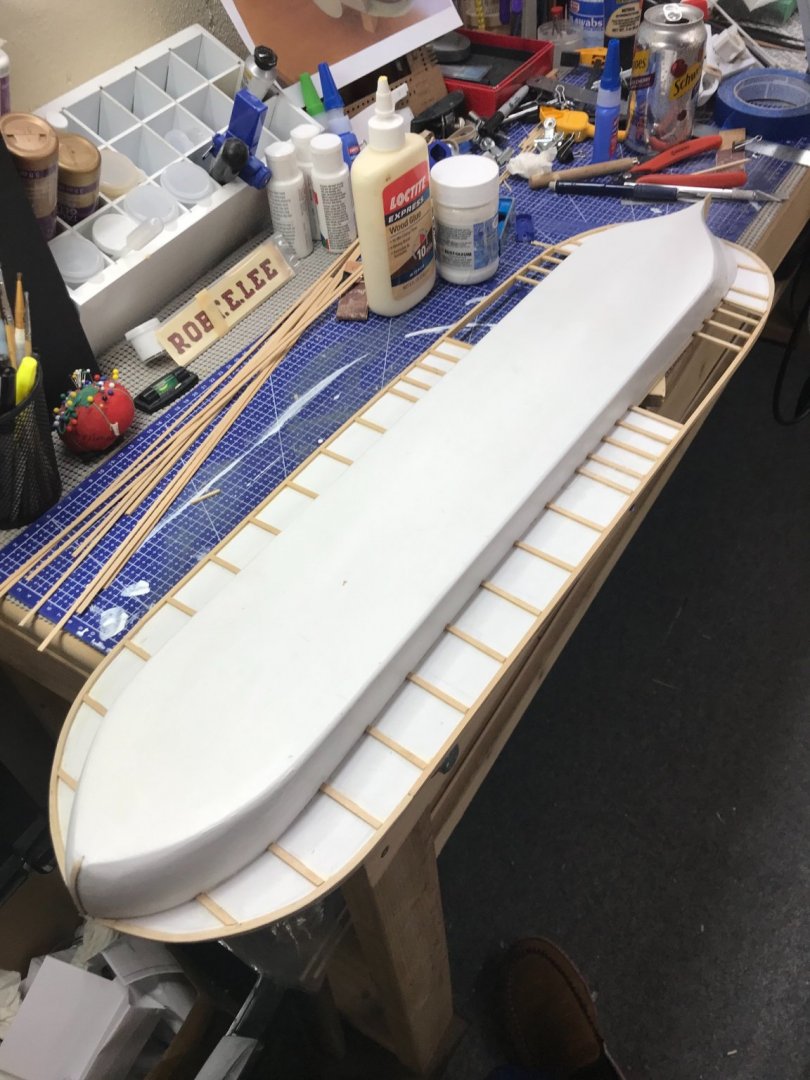
The Main Deck… Gluing and Nailing the Deck to the Hull. Marked the sub deck for furniture placement. I will be laying planking on this deck. Installing the guard on the deck edge. Soaked the timbers in ammonia/water to get them to follow the curve. Top side completed… Next up framing on the under side of the deck. Later… 😎

- 238 replies
-
- 7
-
-
- Robert E Lee
- steamboat
- (and 3 more)
-
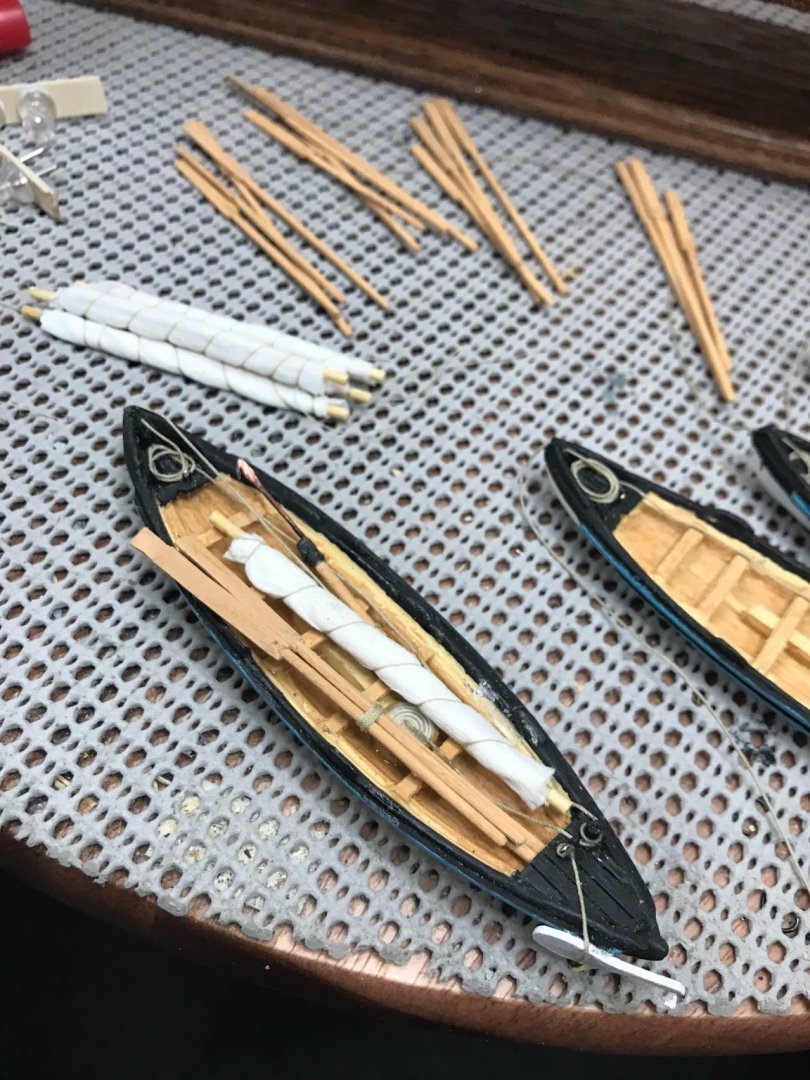
Ron, I mounted the boats on the davits ready to be launched. The rudder is pulled up on the side. This is how they would have been on the whaling grounds. Sorry about the rework, but I understand details are important. 👍
- 294 replies
-
- 3
-
-
- charles w morgan
- model shipways
- (and 1 more)
-
@Cathead I am thinking about building the steam engines, as long as they can be seen through the windows. Maybe add lighting in the engine room. 🤔 From your riverboat research do you think the engines in the Robert E Lee would have been similar to your Arabia? Thanks
-
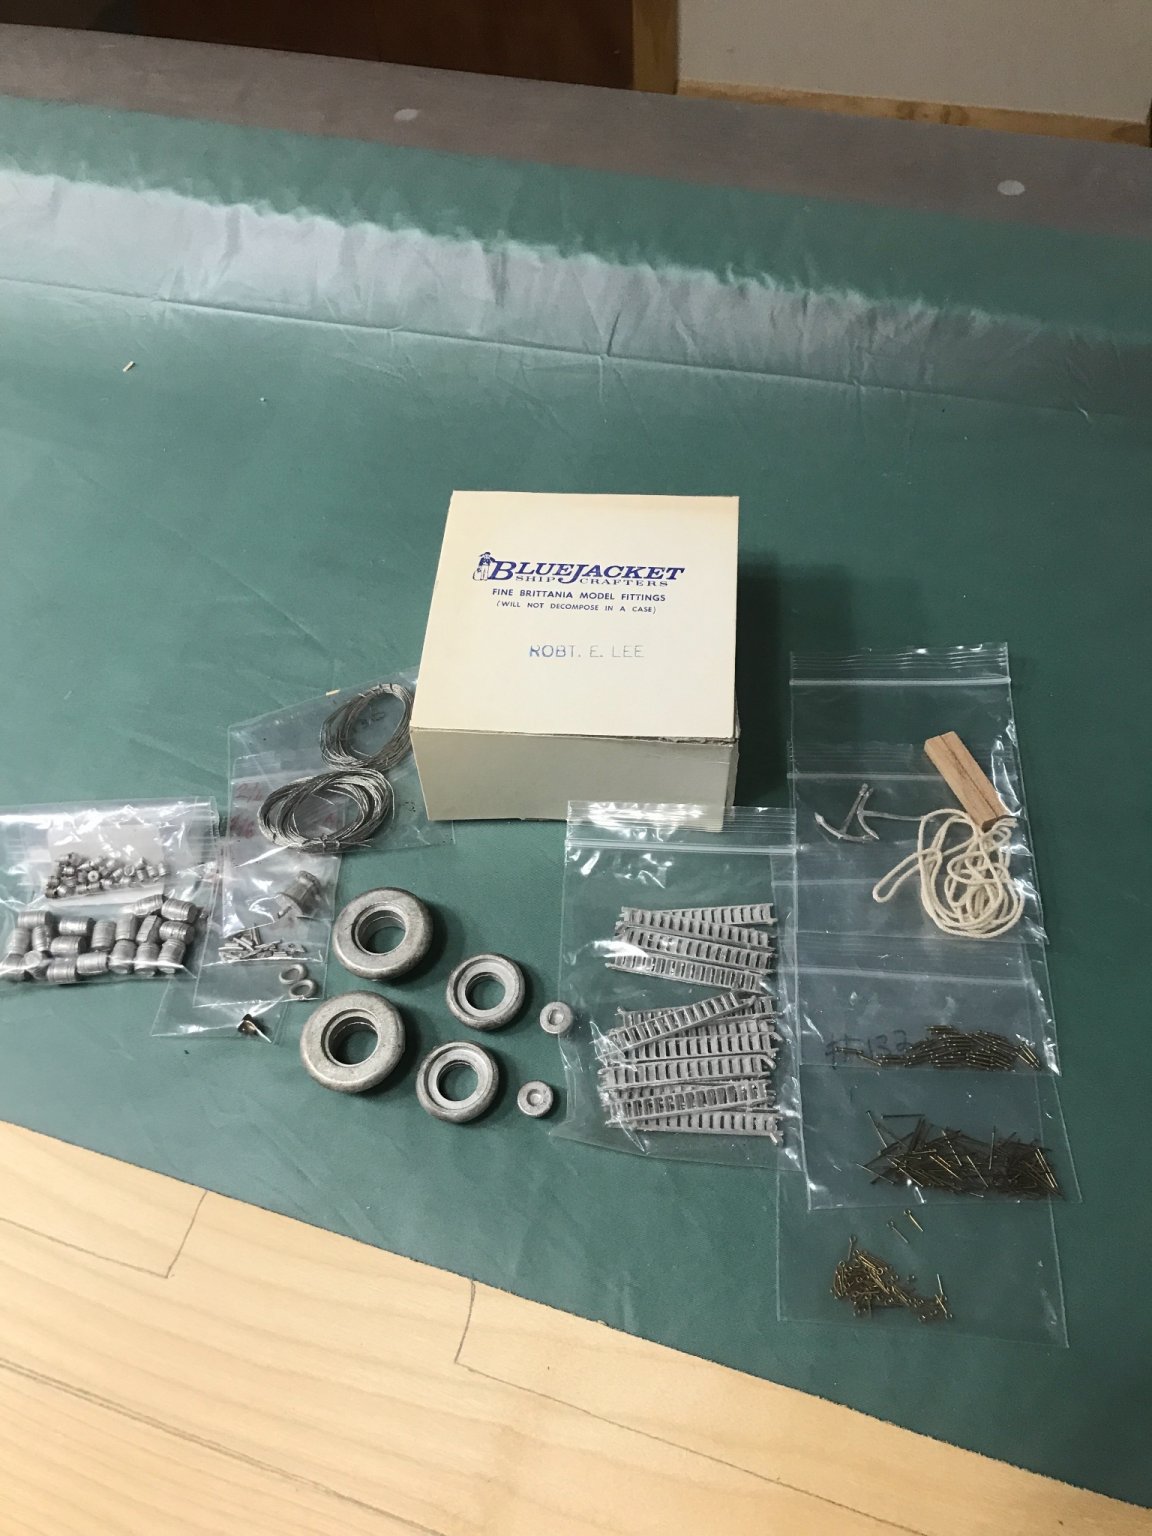
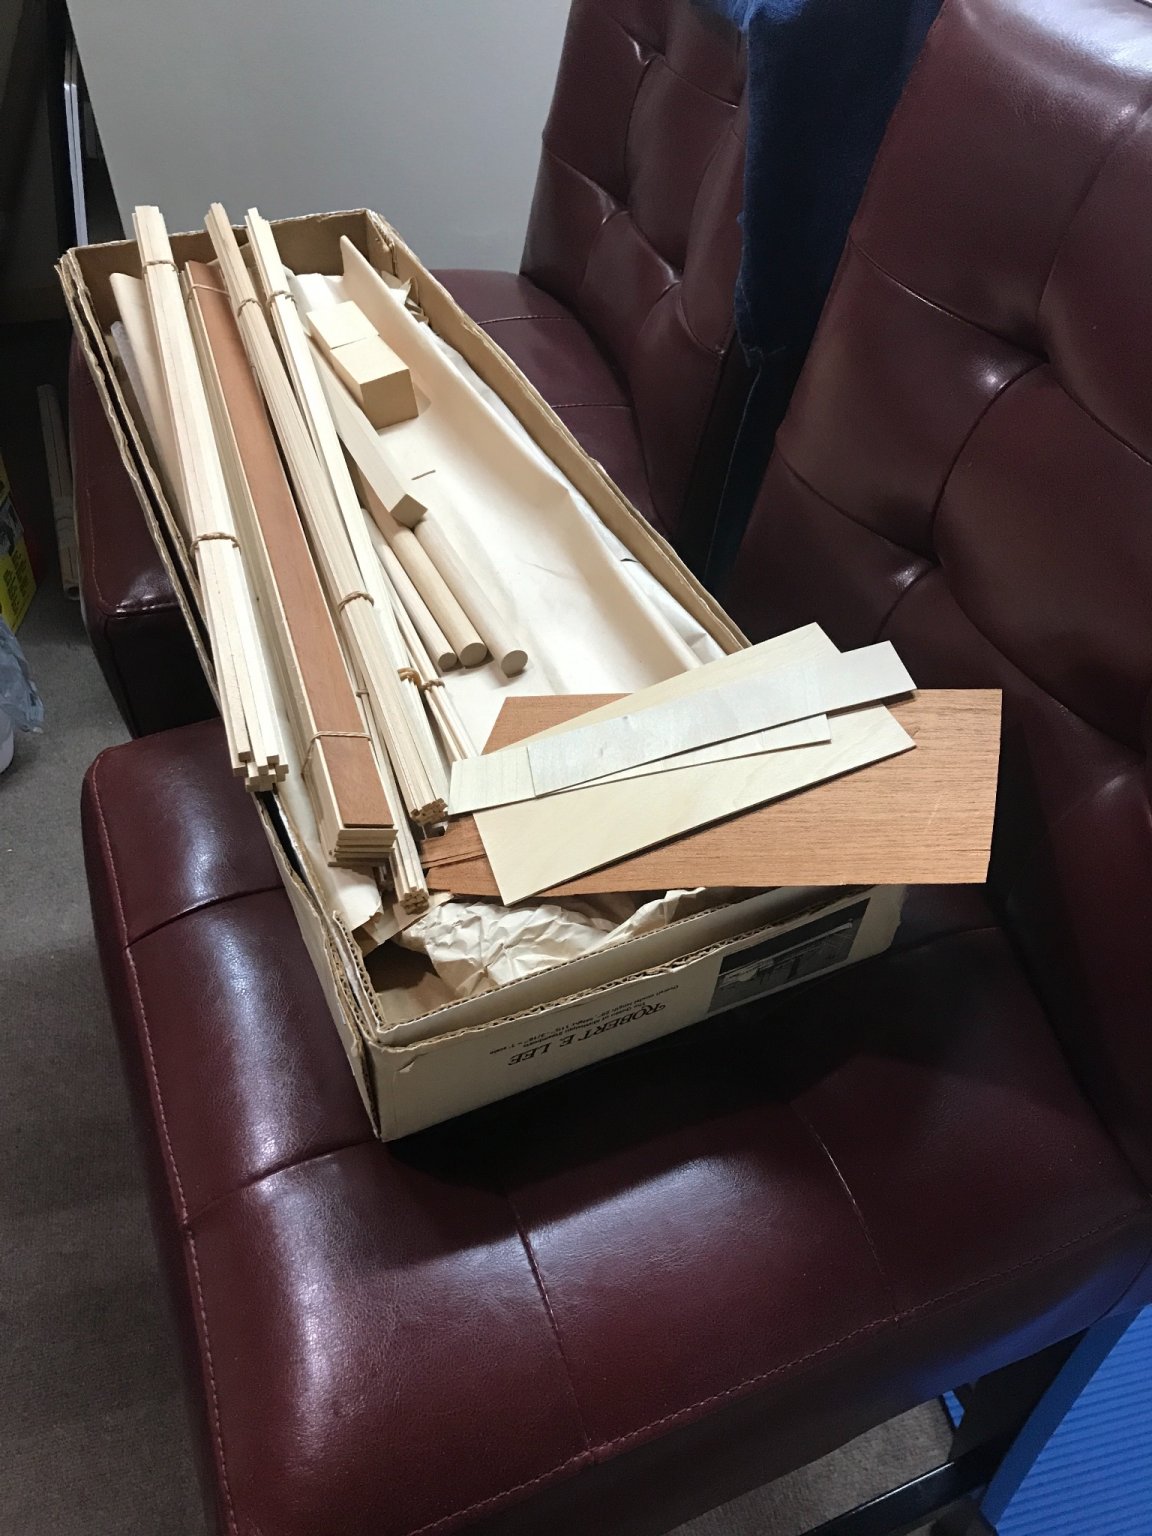
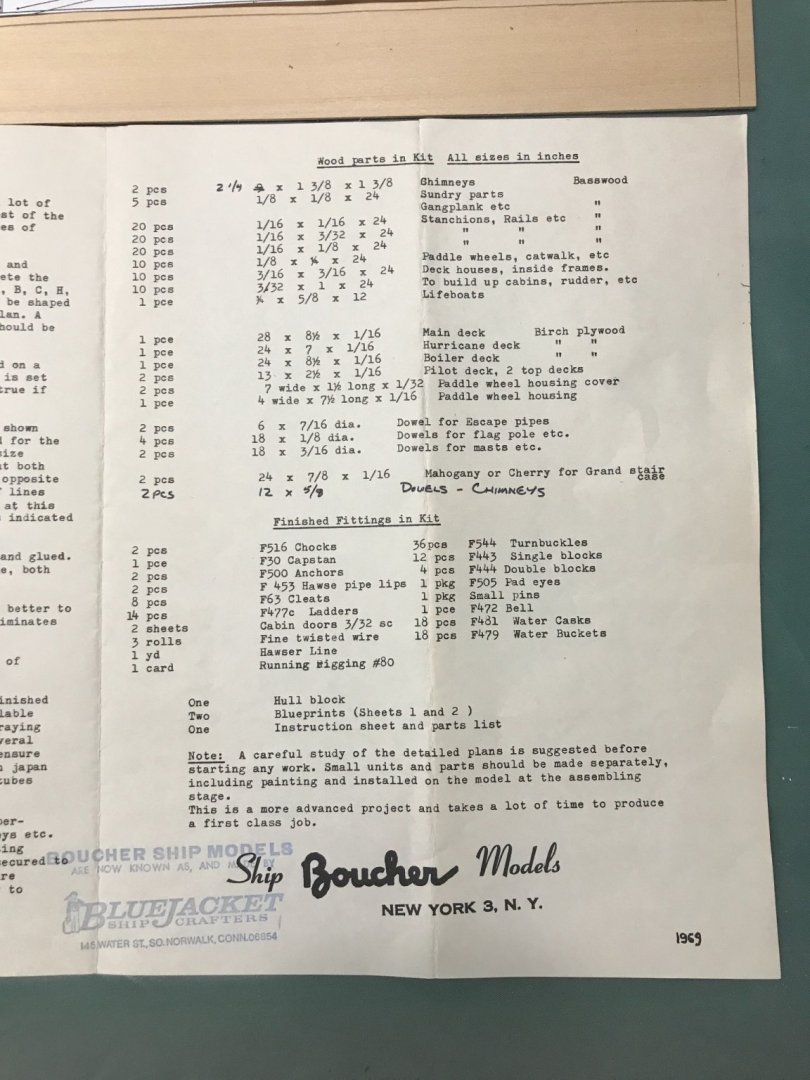
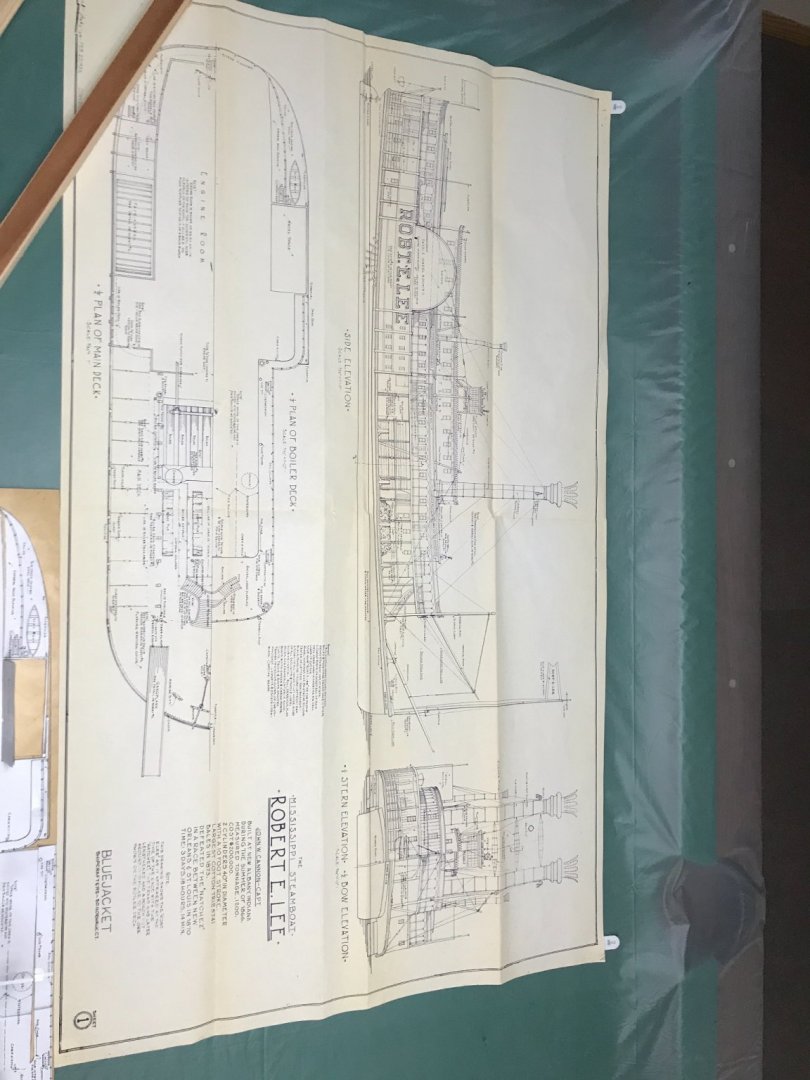
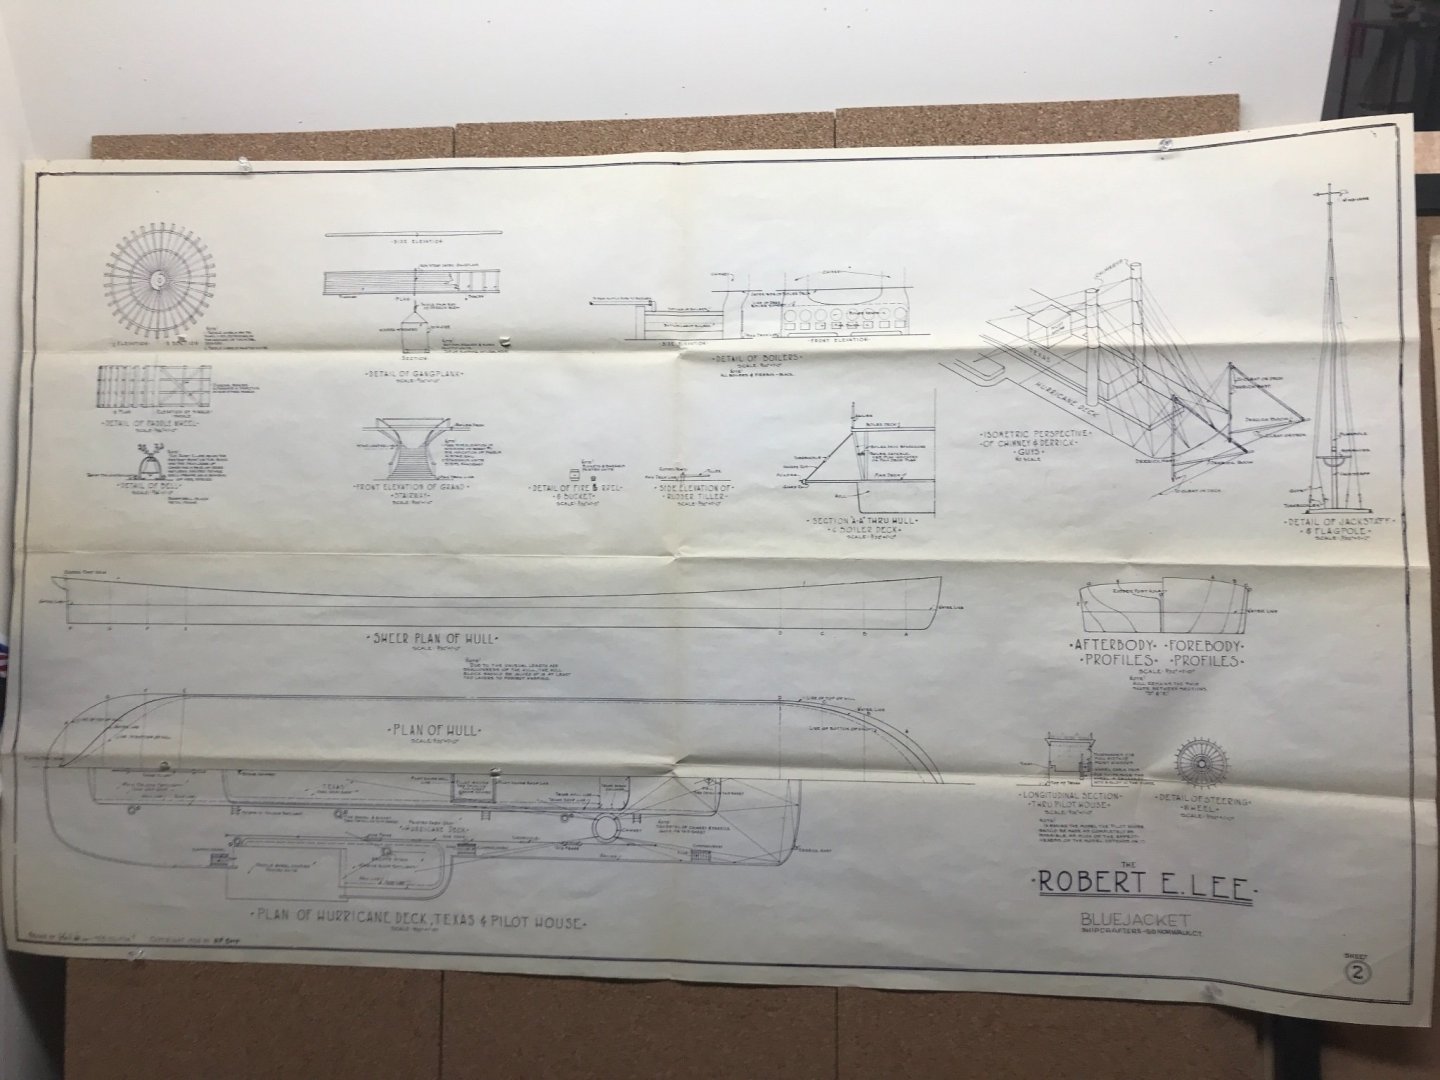
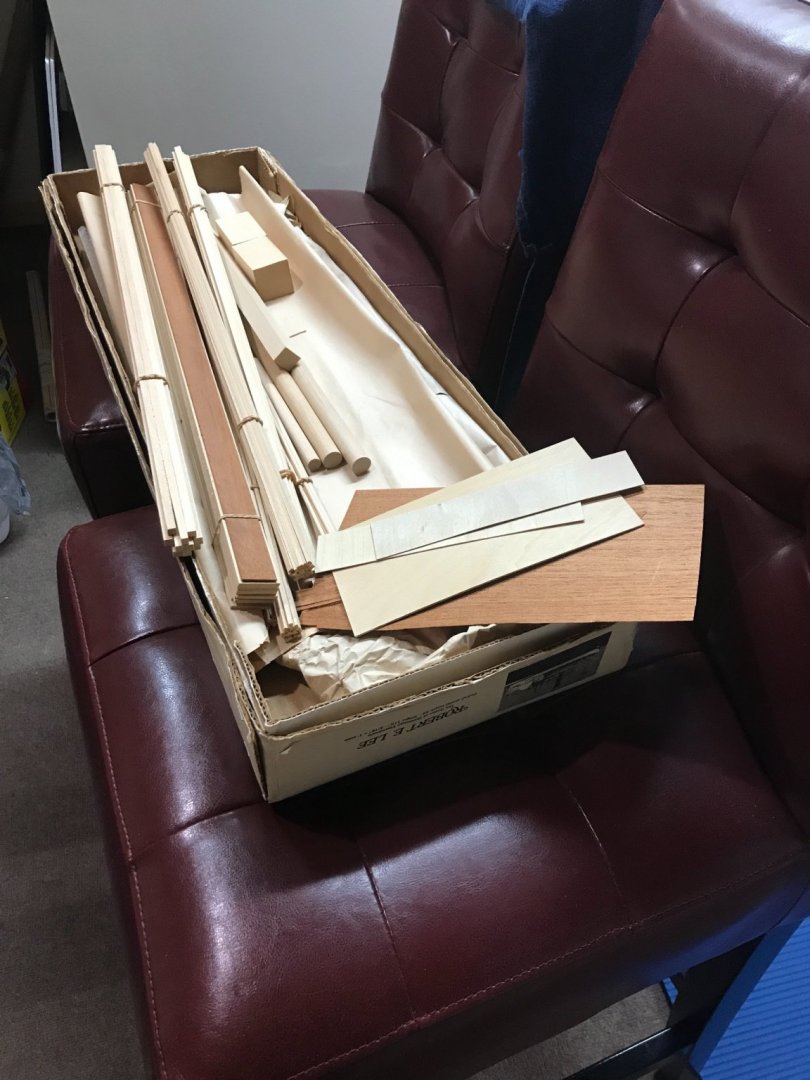
Yep… That’s it… probably why these kits keep circulating and pop up on eBay. I know my first purchase of a vintage bluejacket kit of the Constitution scared the heck out of me. It went rIght back up for sale on eBay. But I sank my teeth into Marine Model Company’s Charles W Morgan and developed a taste for scratch building a “kit”. I am not sure when this kit first sold but it was a Boucher Ship Model sold as Bluejacket Ship Crafters. The drawings are Copyrighted 1934 and the parts list is dated 1969. Maybe @MrBlueJacket knows how old this kit is. 🤔 The parts list does tell you what the parts are to be used for and it did come with some “Fine Brittanian Model Fittings. And of course a box full of wood 🪵 Paid 123.50 + shipping for this kit on auction. I do love these kits, as they can stretch my modeling skills. With some help from my friends. 😆 And that’s the pure definition of a “Fine Vintage” Kit. Onwards with the passion… 👍

- 238 replies
-
- 7
-
-
- Robert E Lee
- steamboat
- (and 3 more)
-
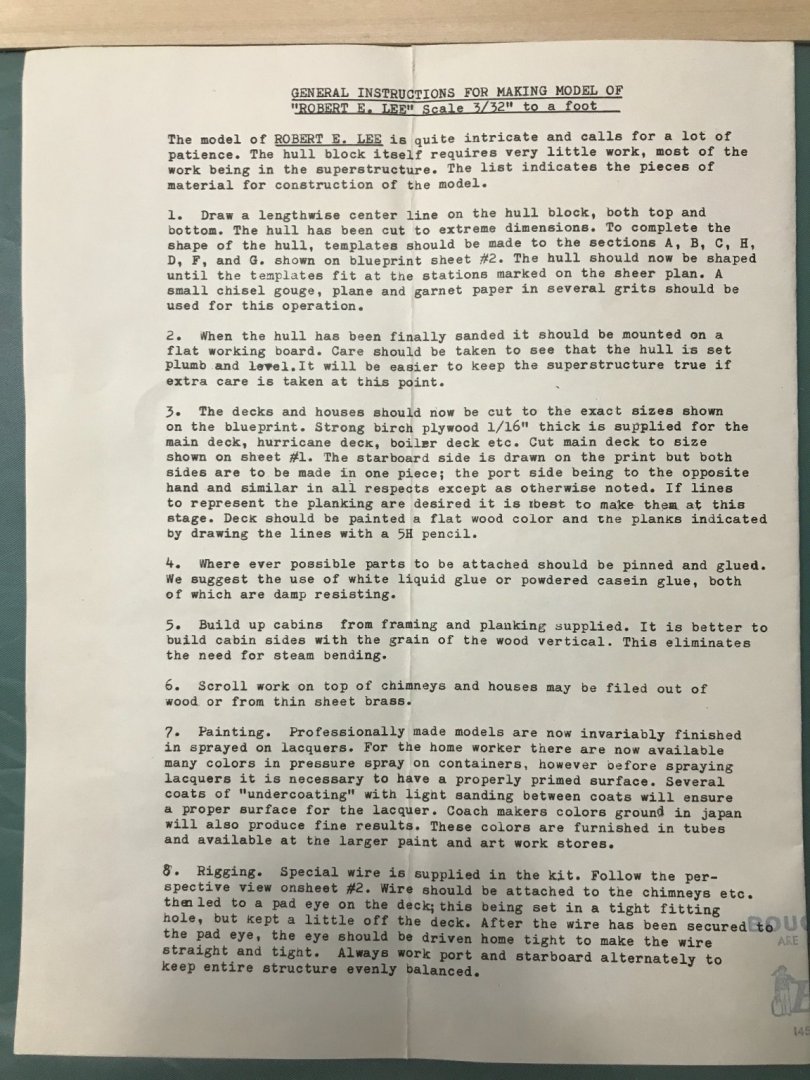
Thanks… I was hoping you would be tagging along on this build. I’m using your build of the Arabia to give me direction and some building ideas. These vintage kits leave a lot to desire for instruction. 😆 Almost a scratch build or kit bash, I’m not sure. 🤔 I’m looking forward to your input as I progress. I am making it up as I go, sounds like a plan. 😎 As they say, “Some Assembly Required”, but with a lot of creativity. LOL 😂 Here are the instructions included. Some help required. Thanks in advance. 👍
- 238 replies
-
- 2
-
-

-
- Robert E Lee
- steamboat
- (and 3 more)
-
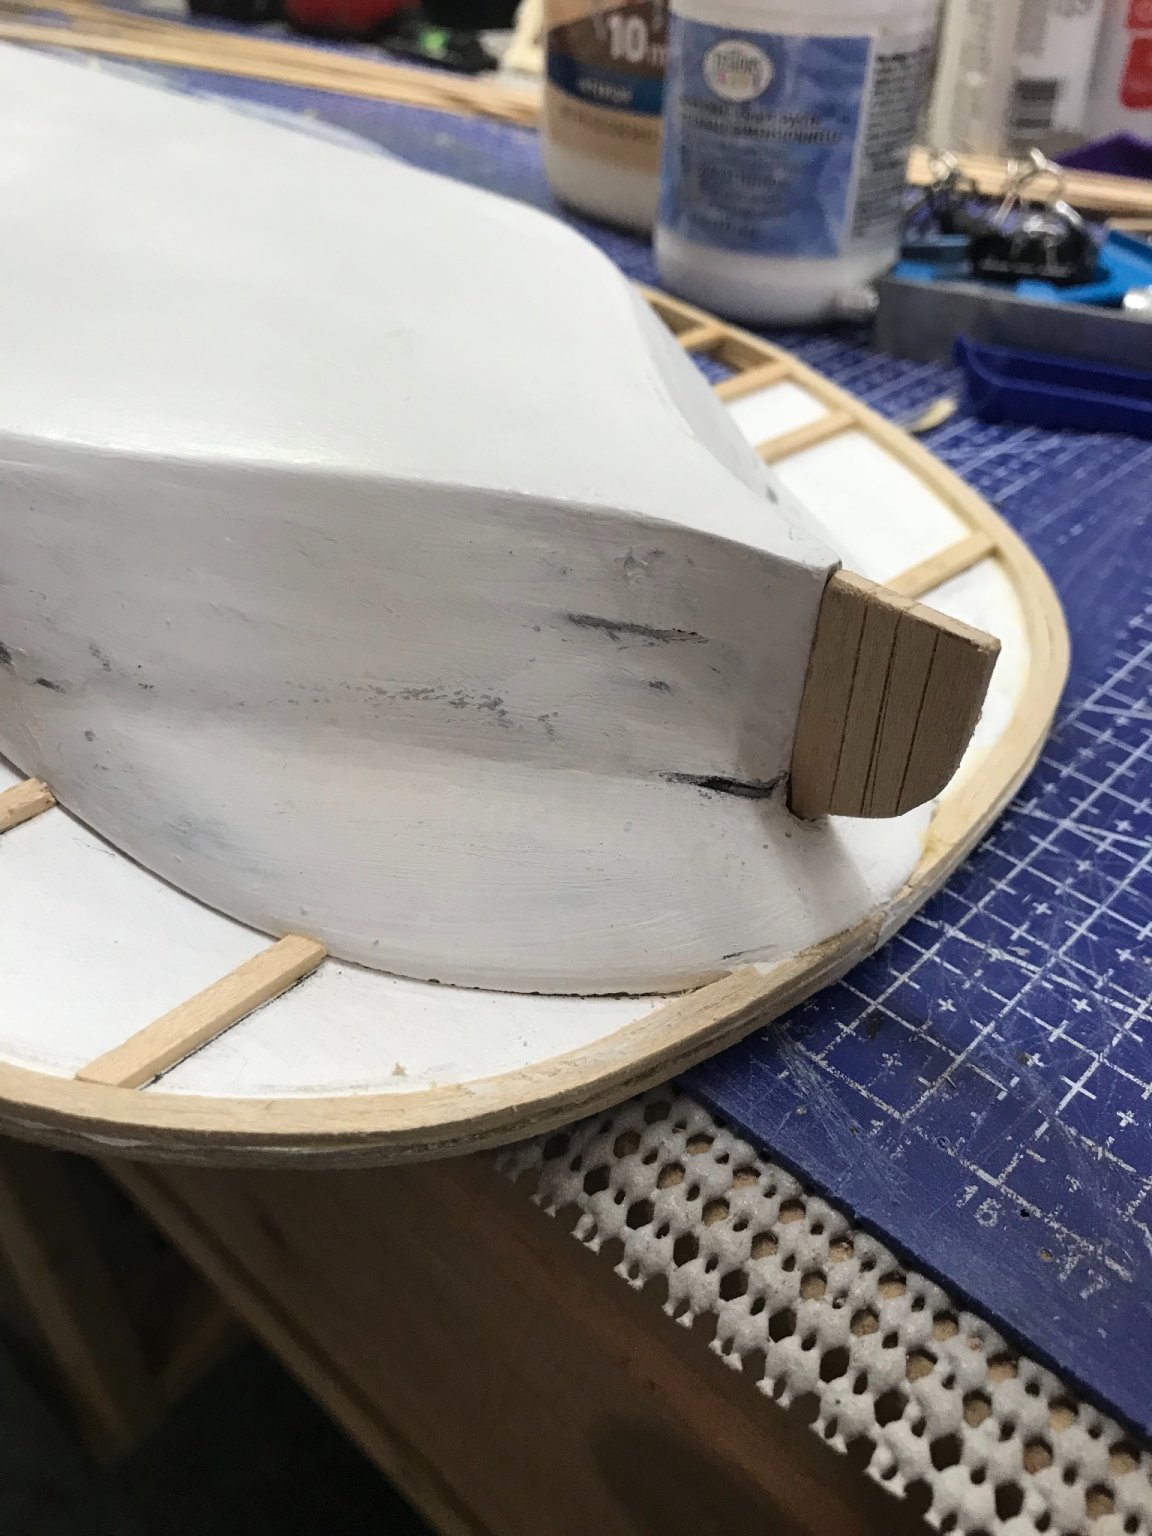
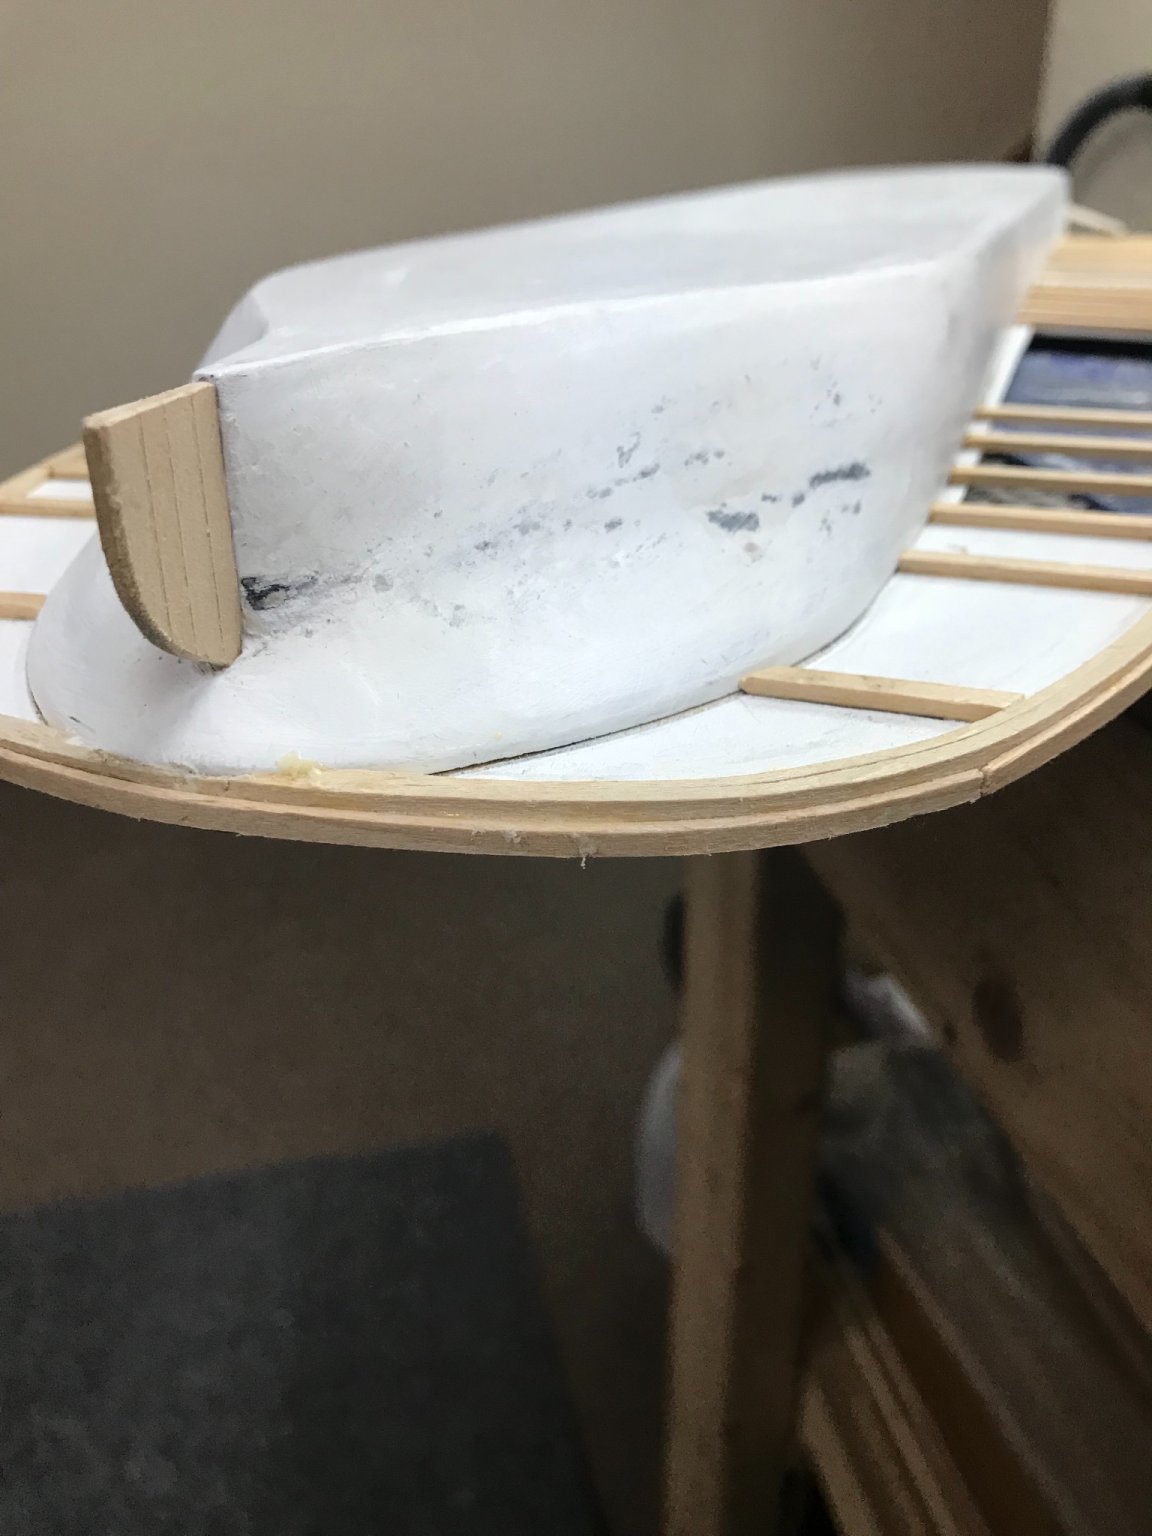
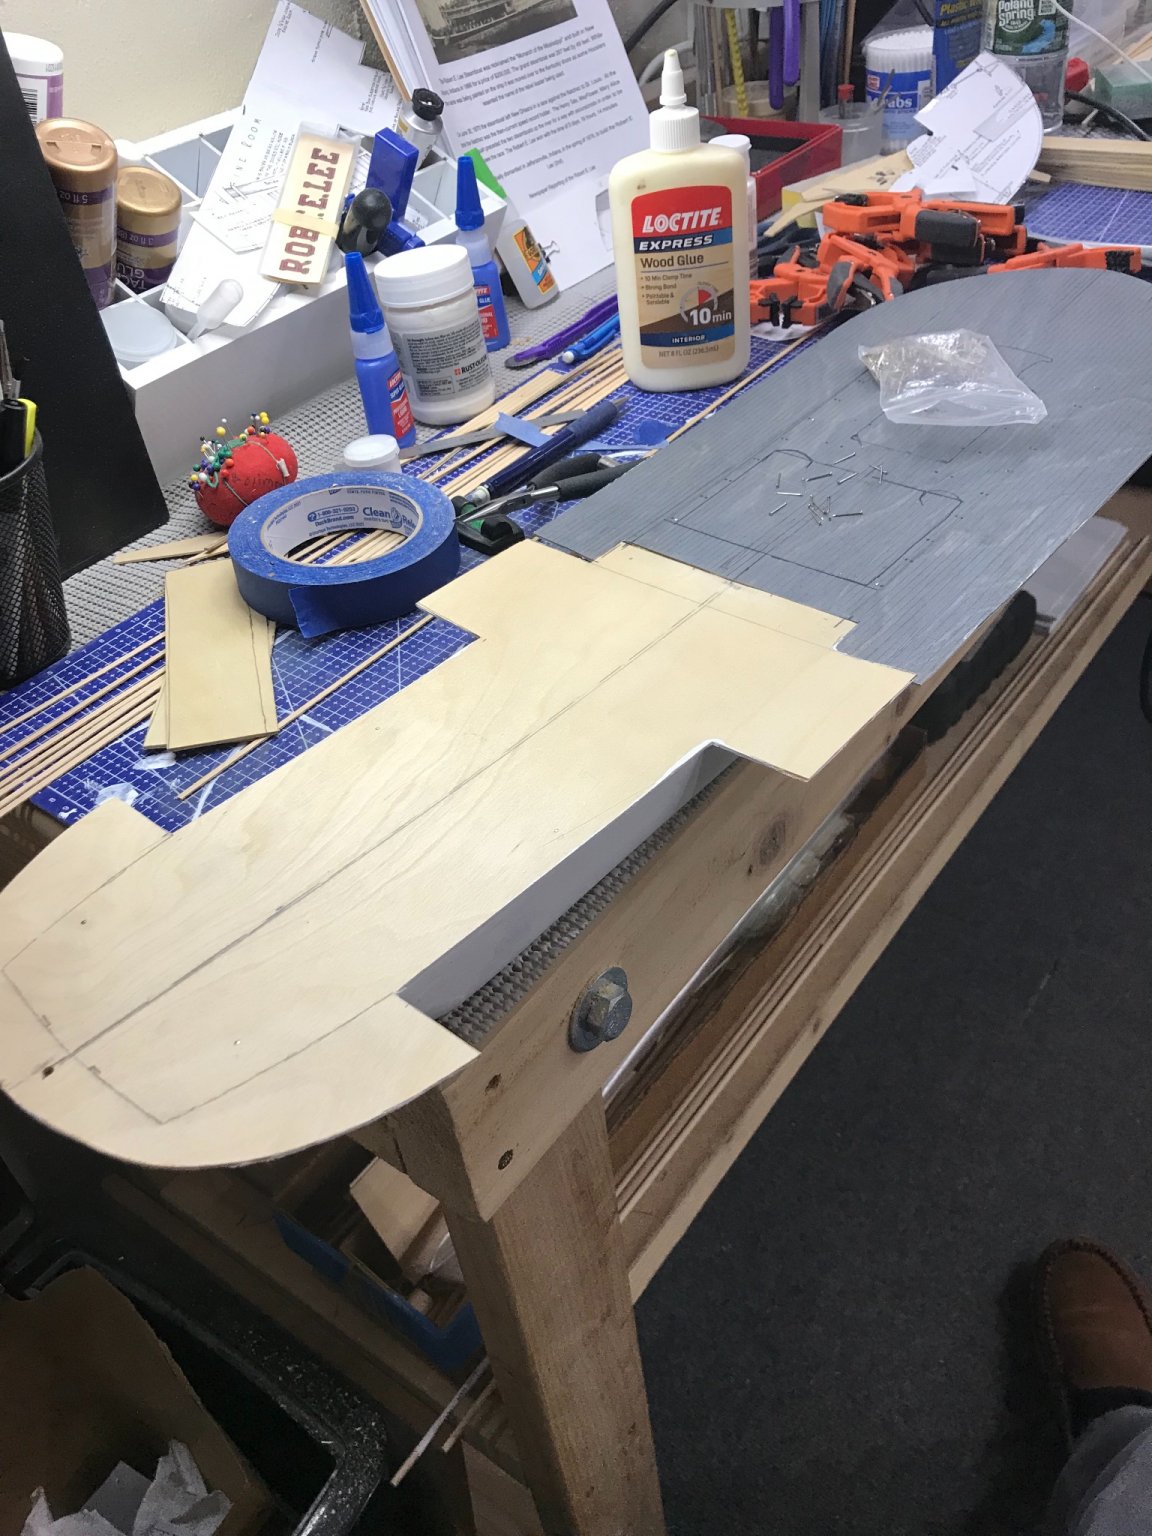
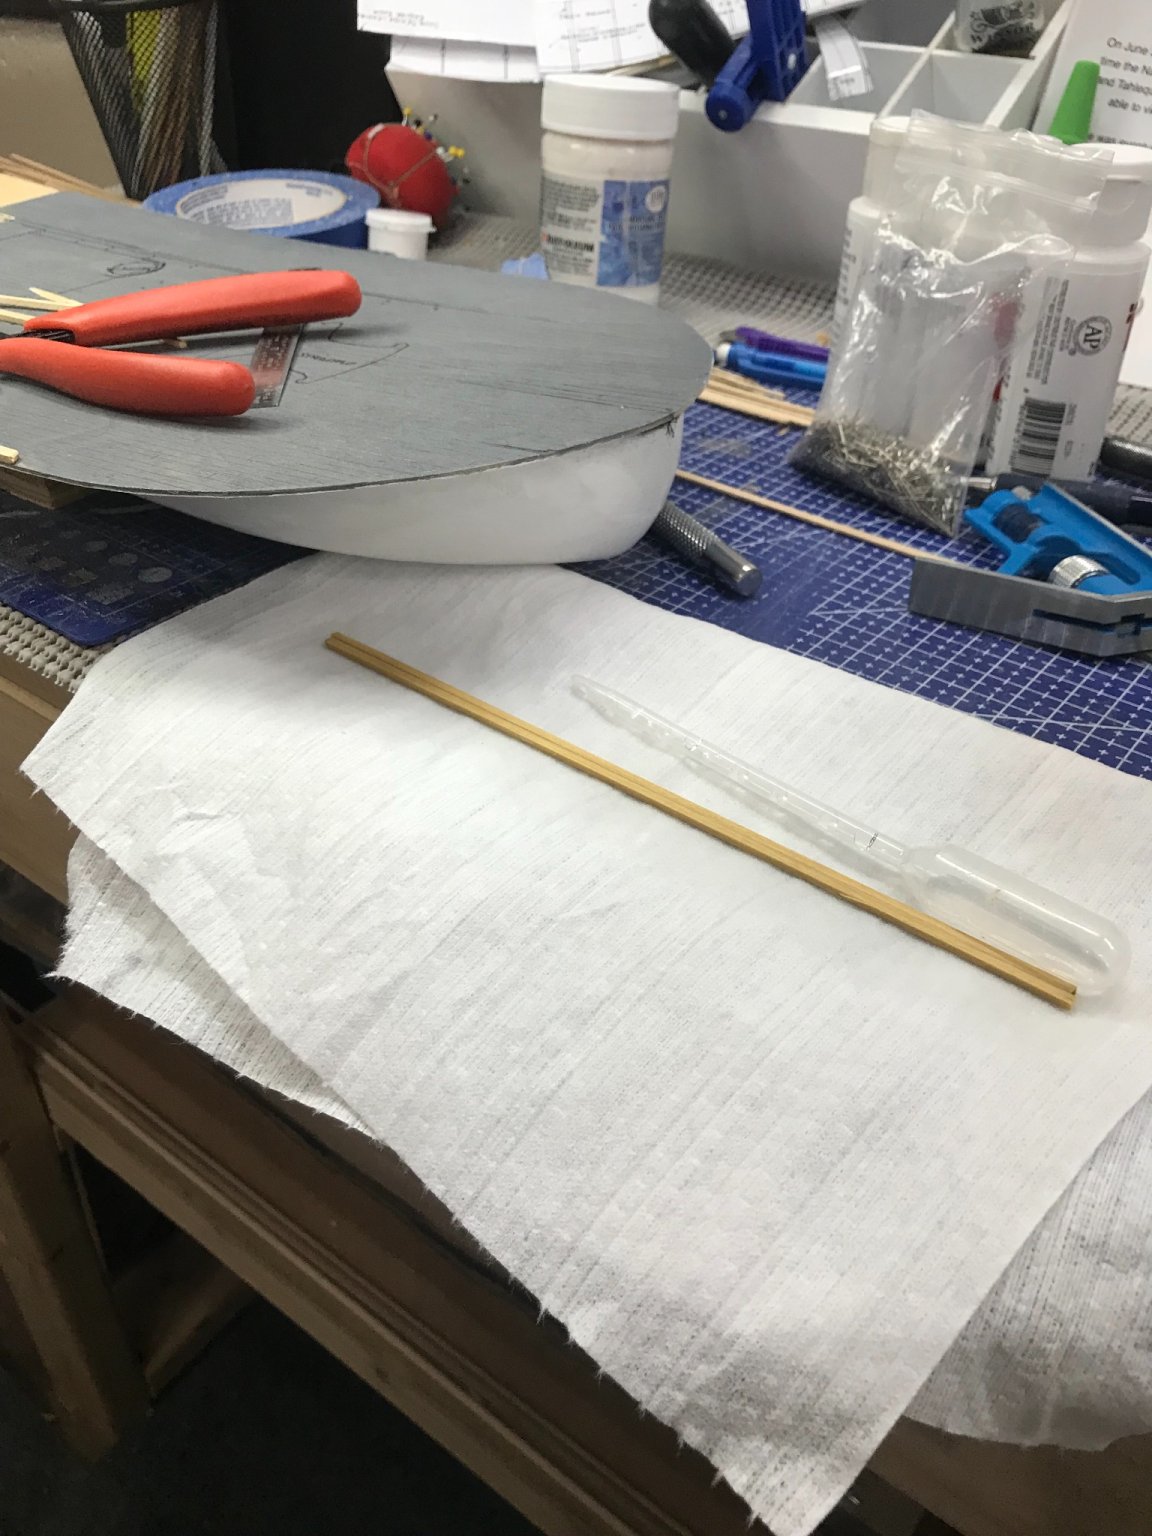
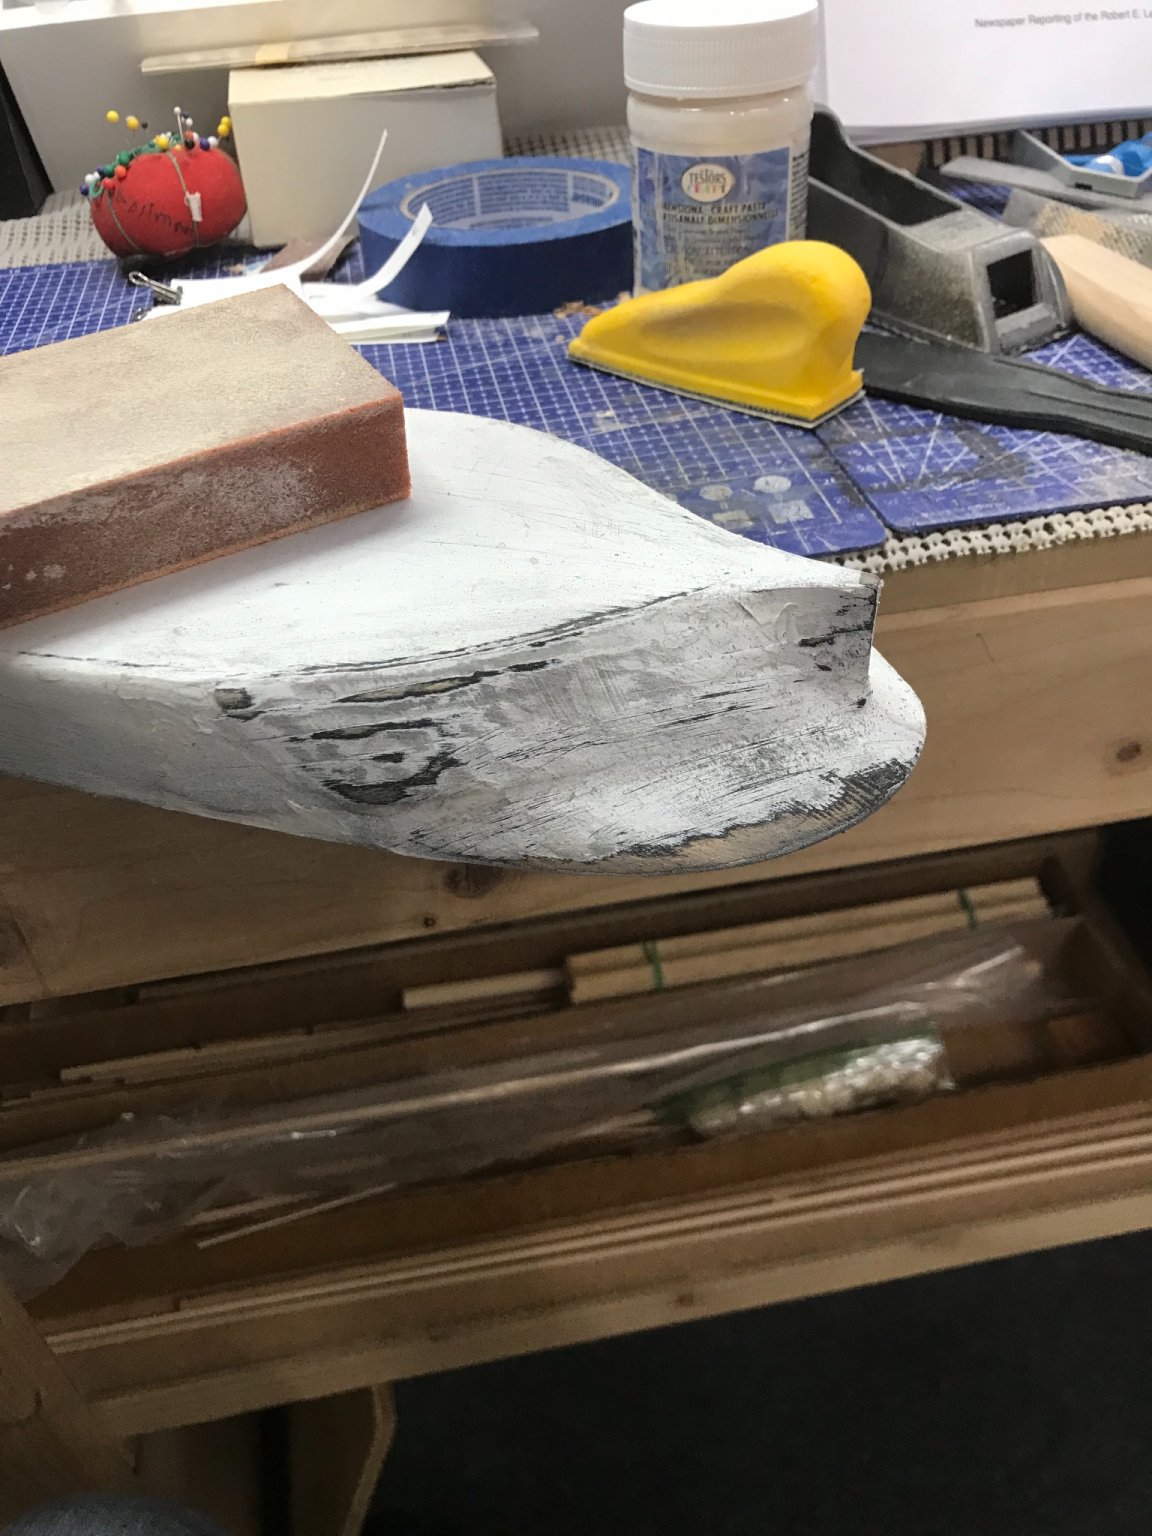
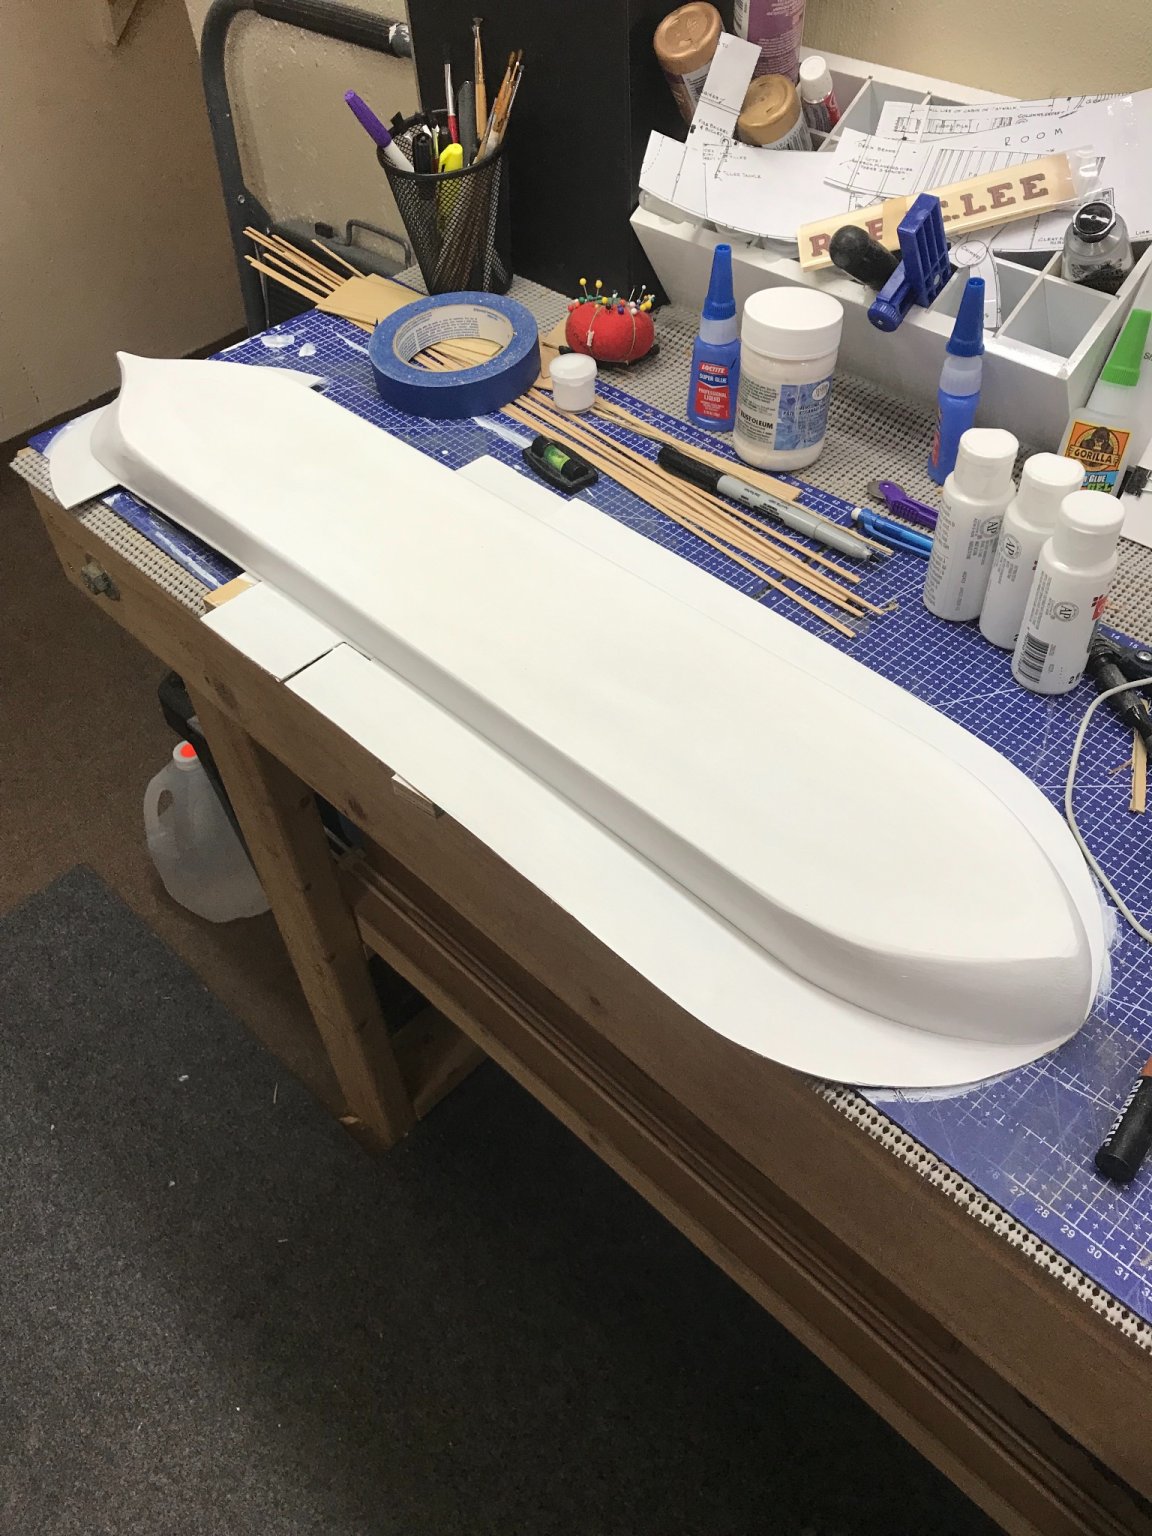
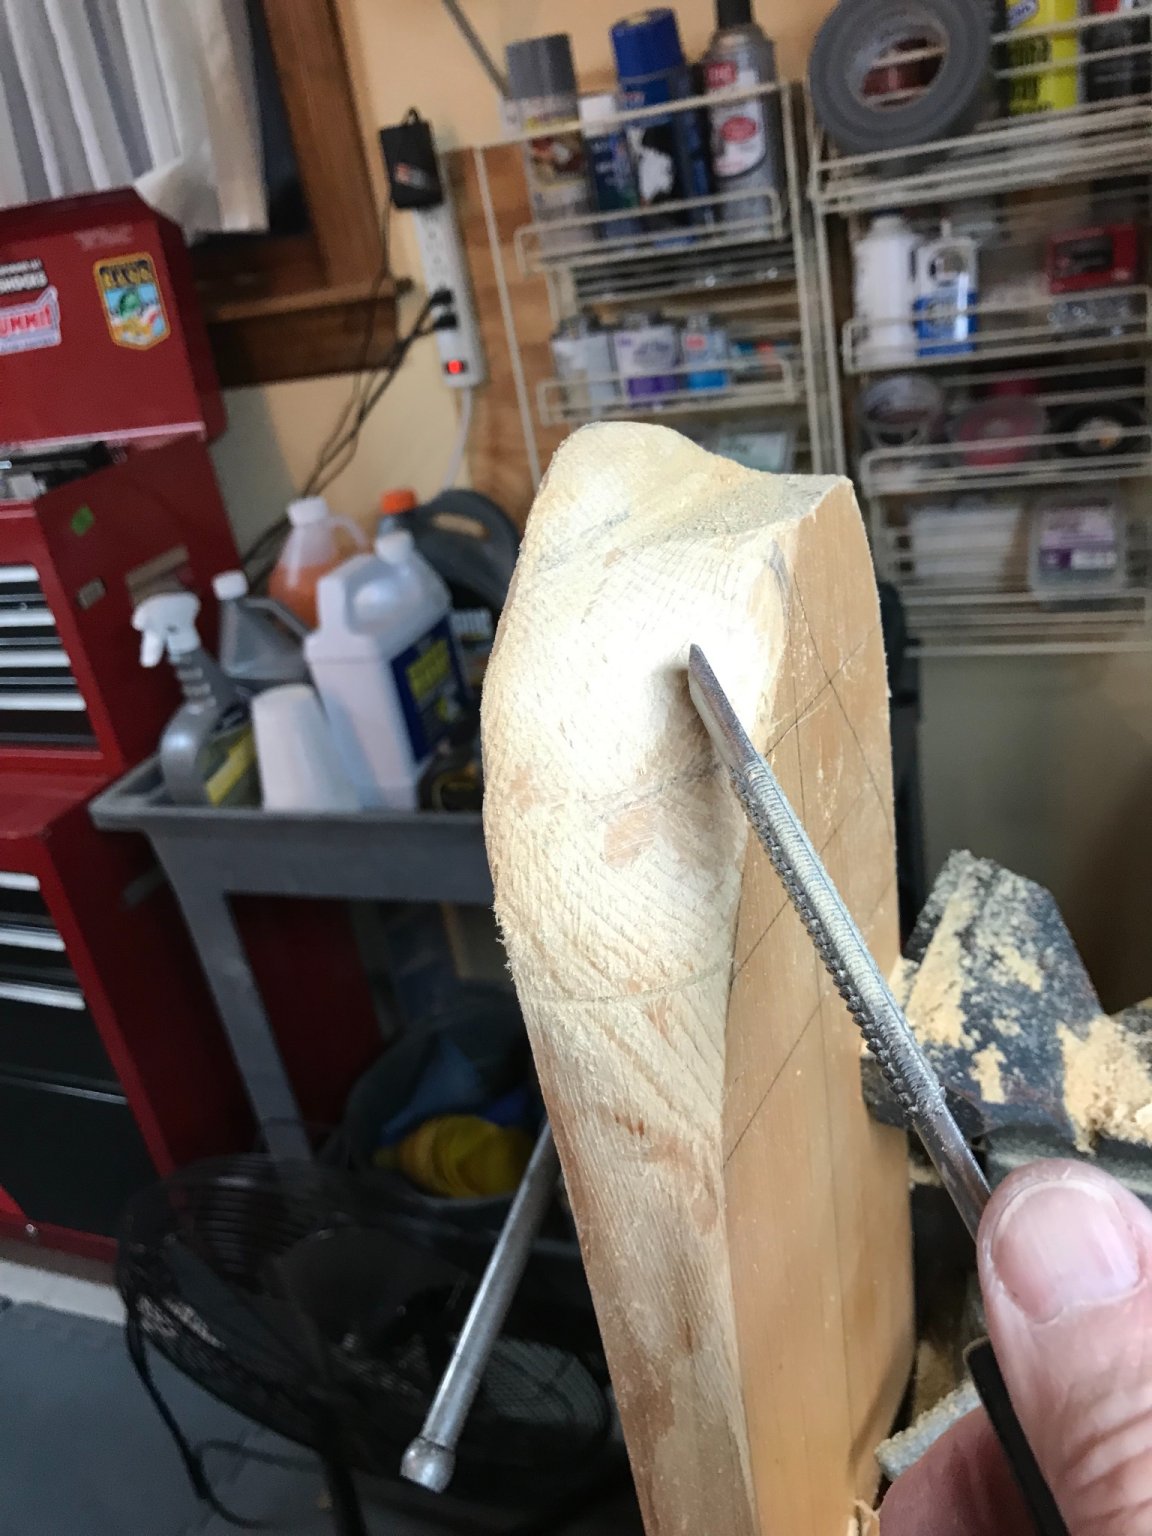
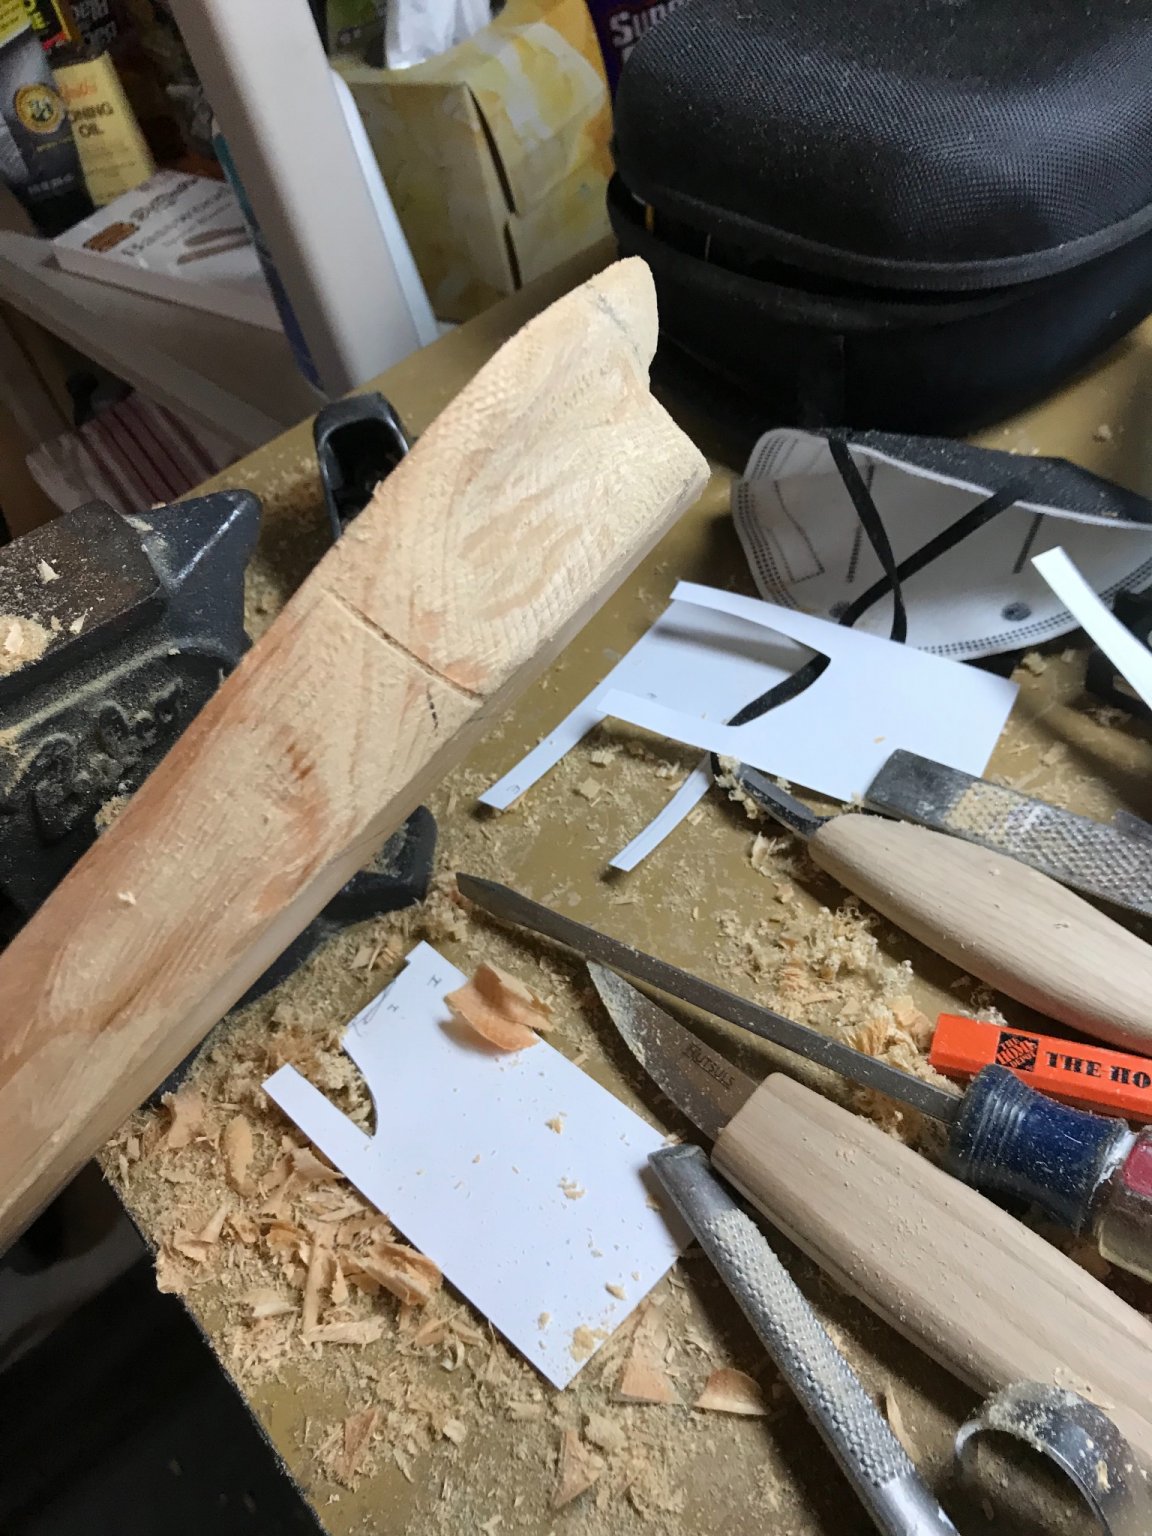
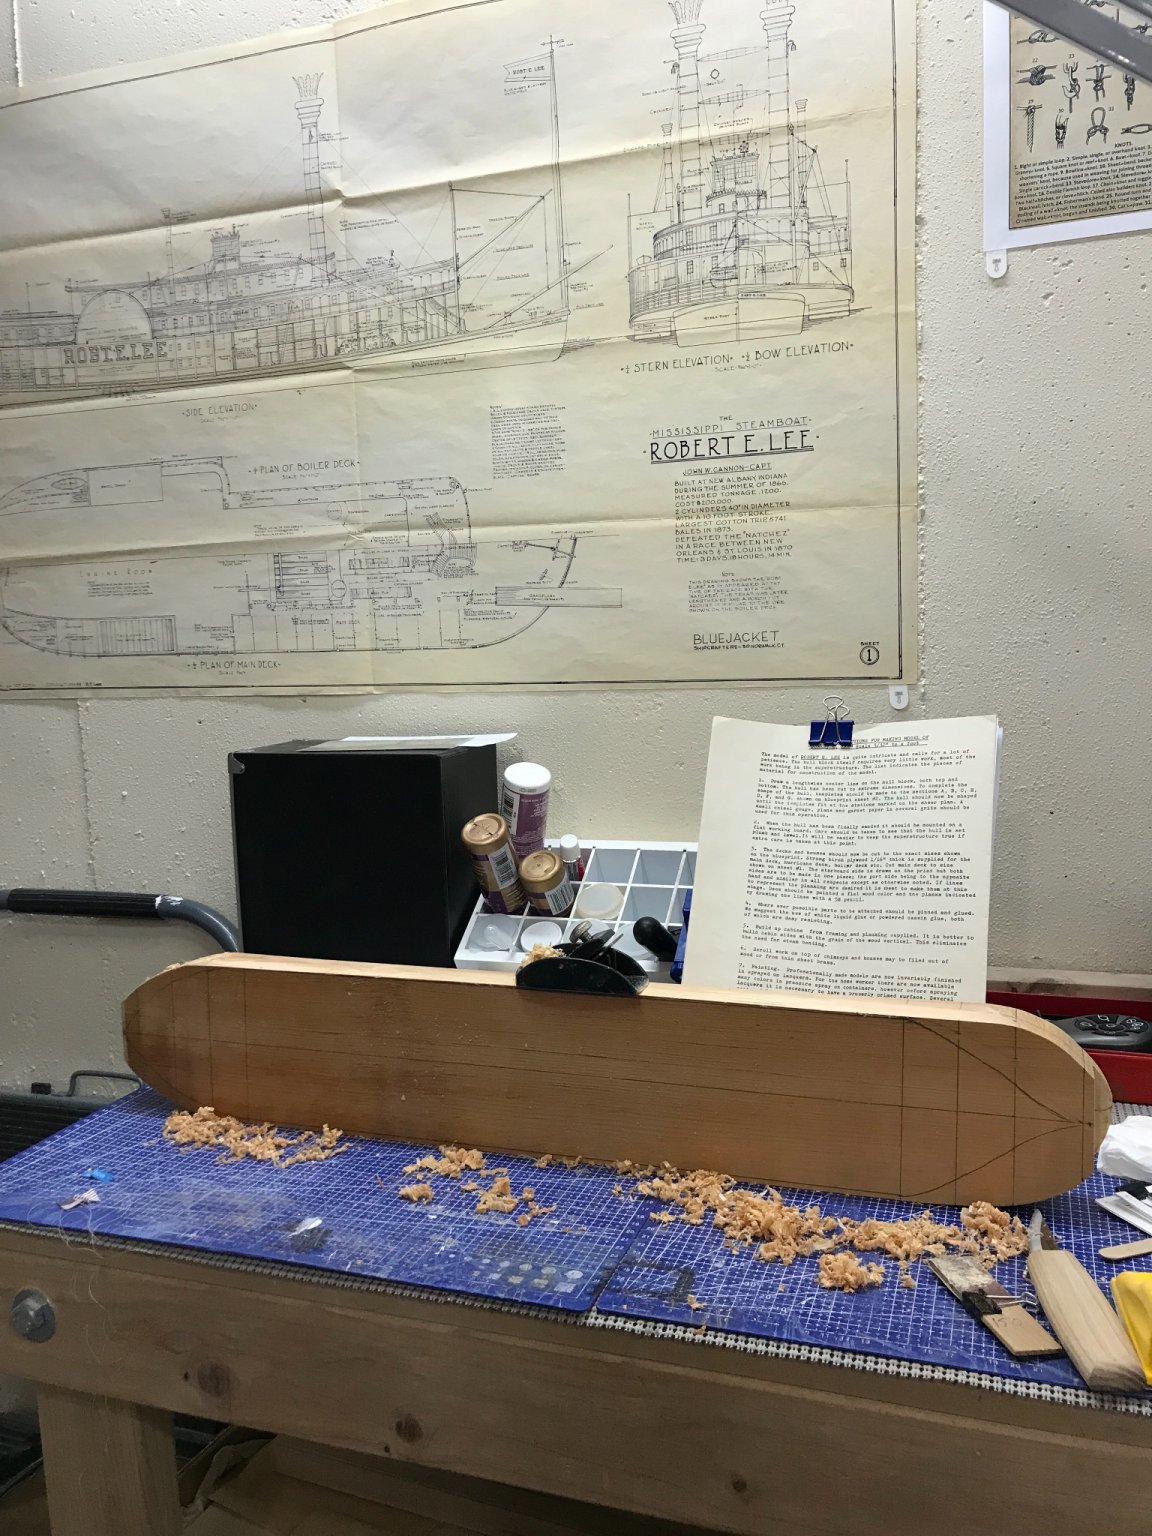
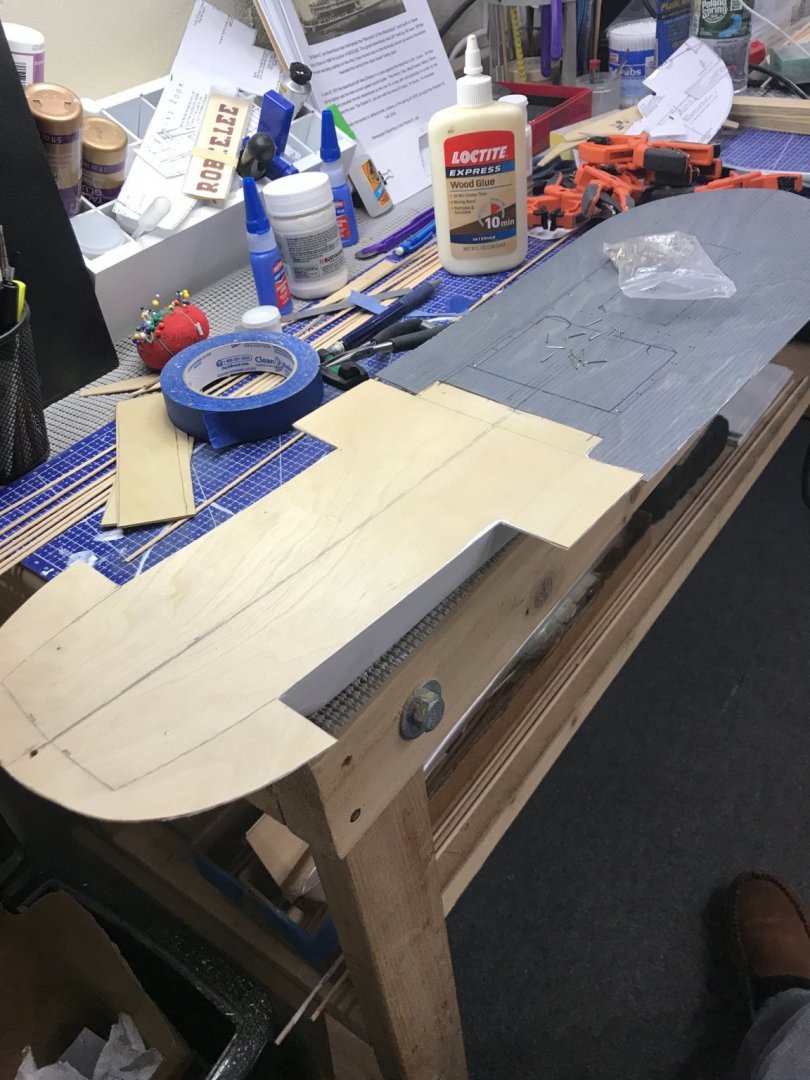
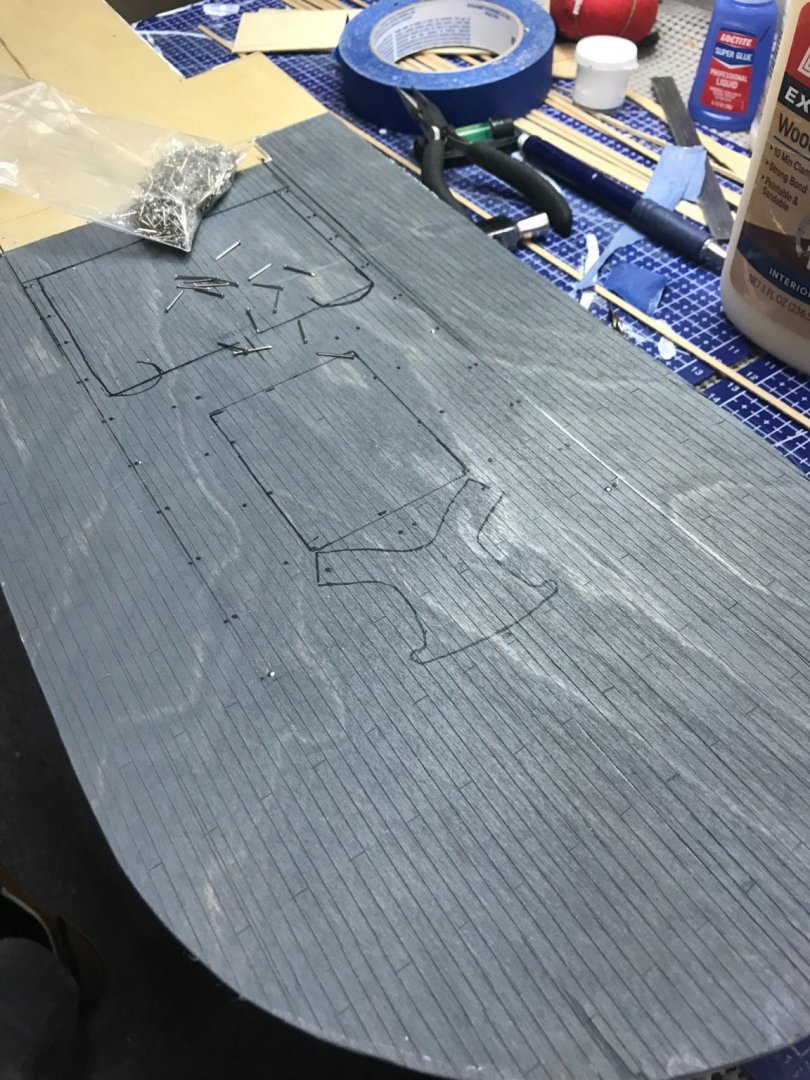
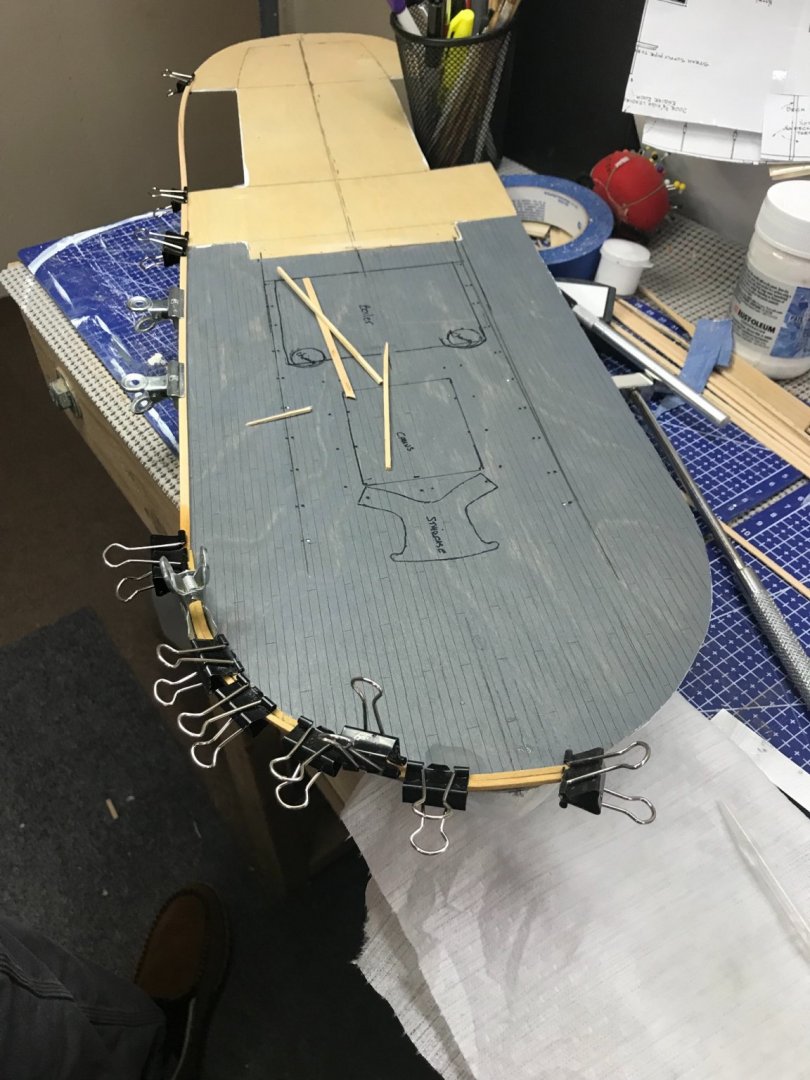
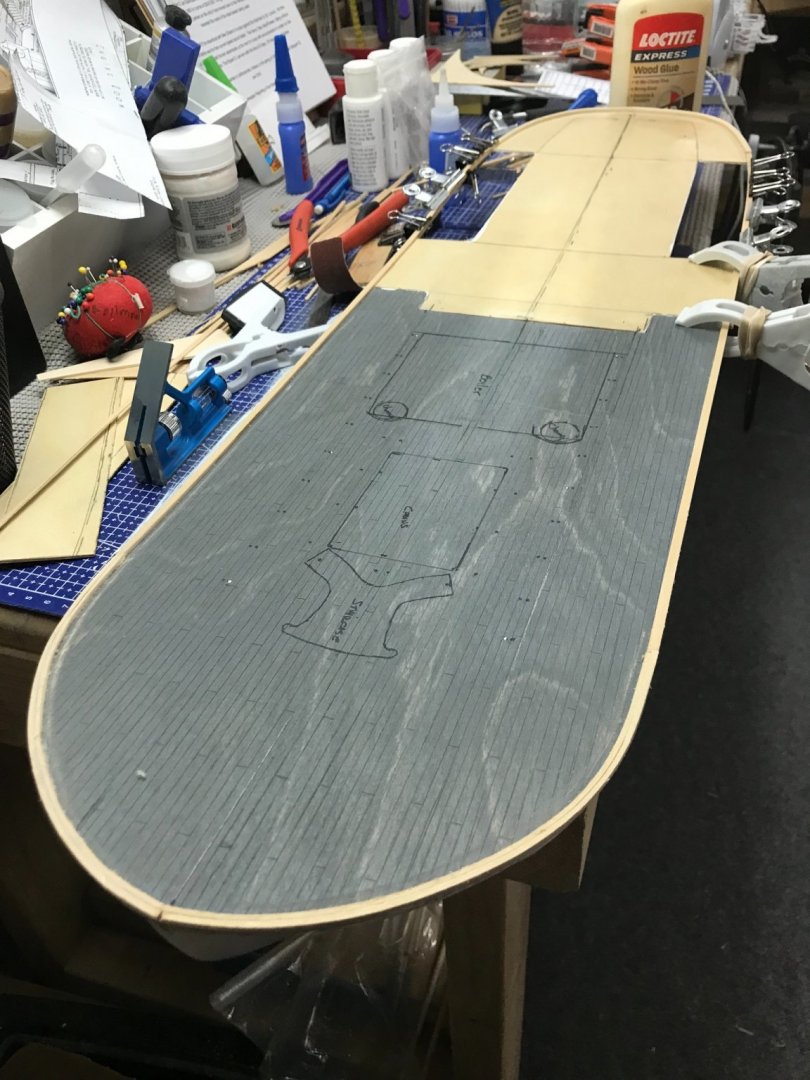
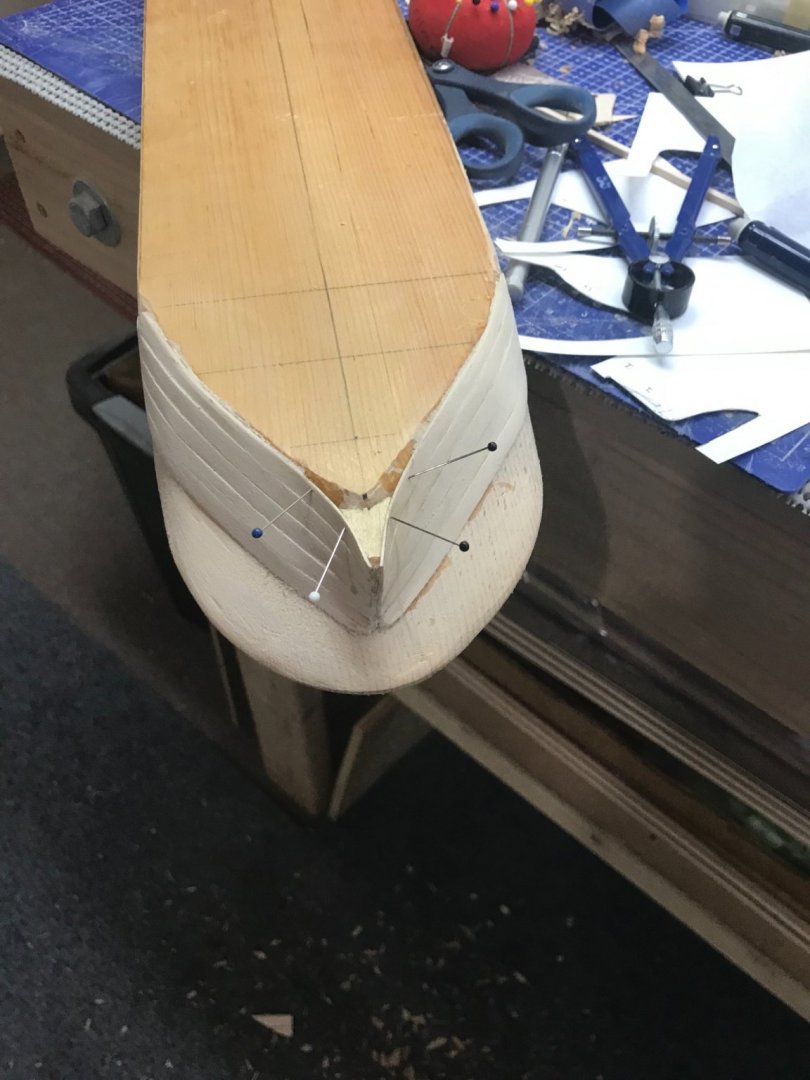
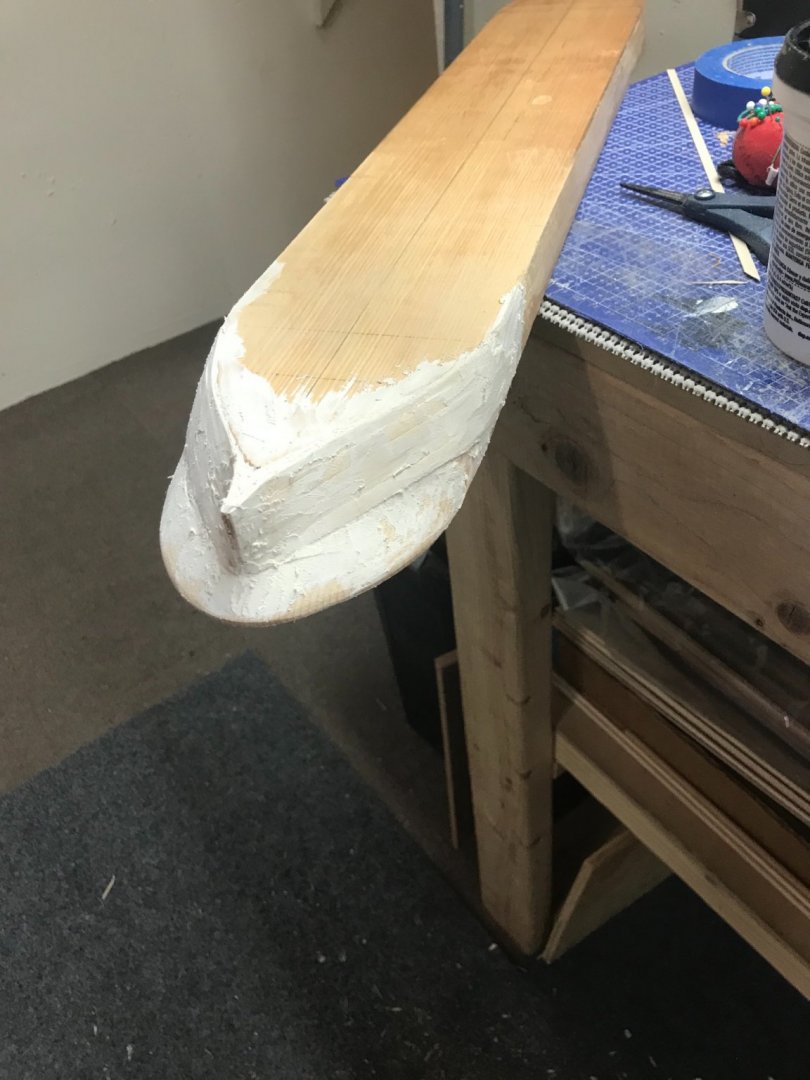
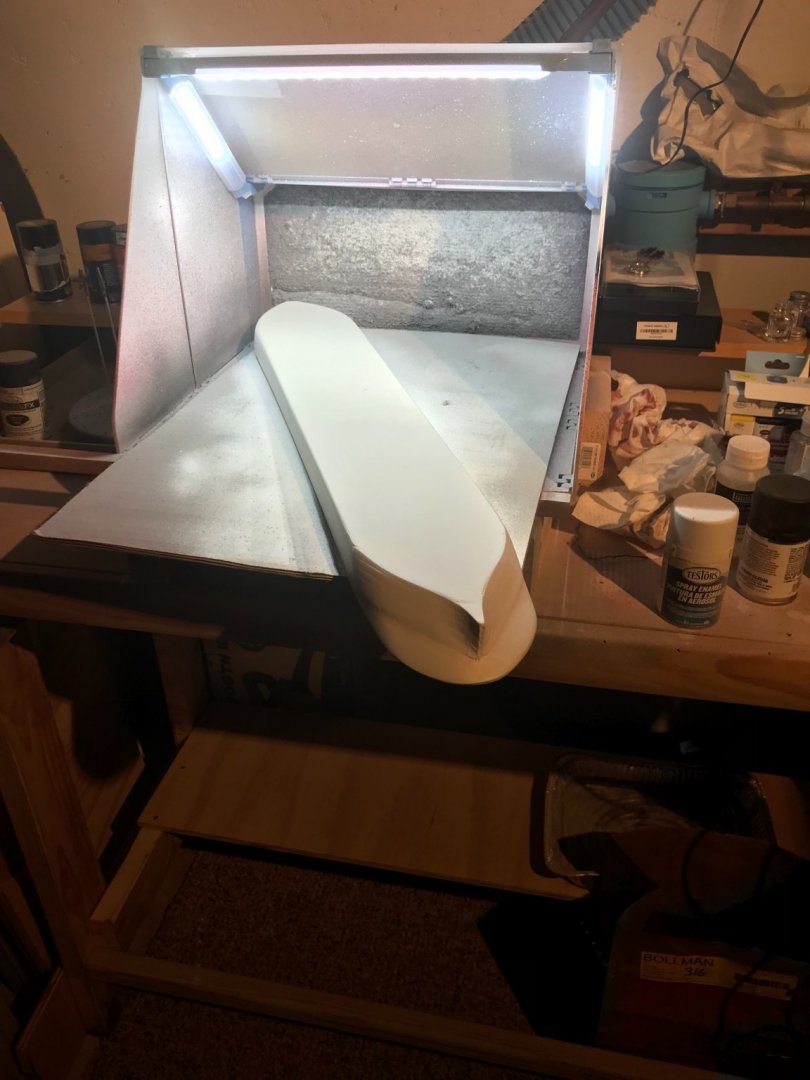
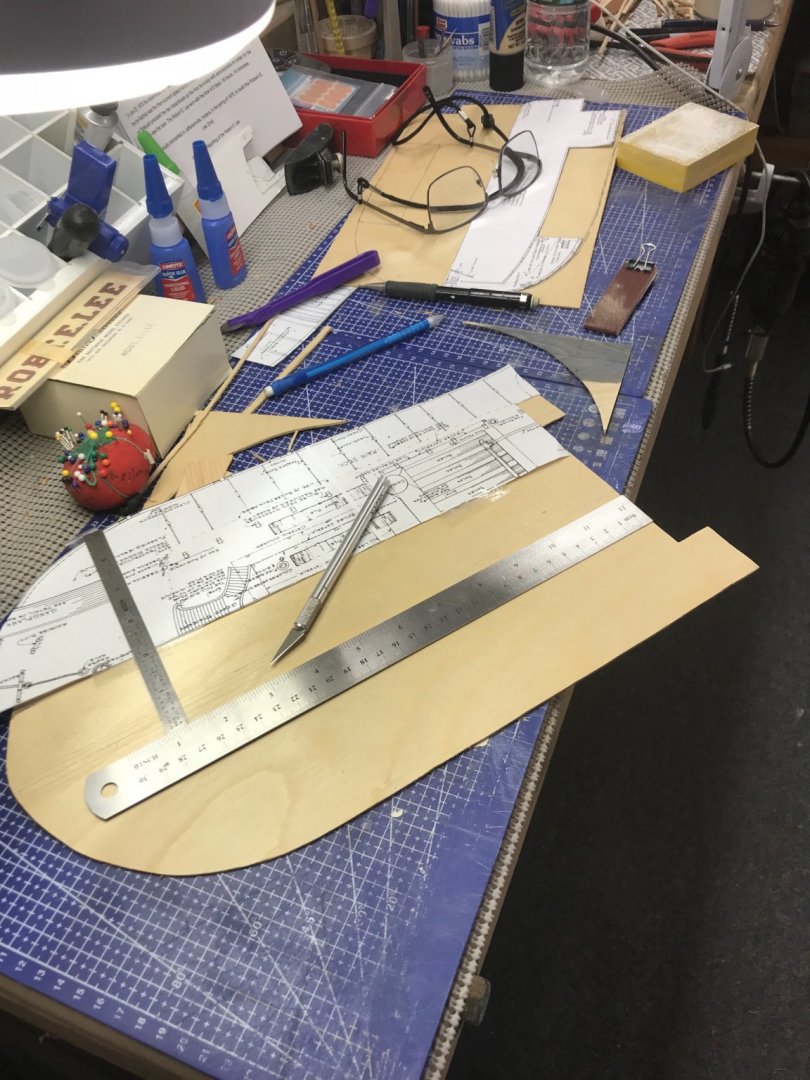
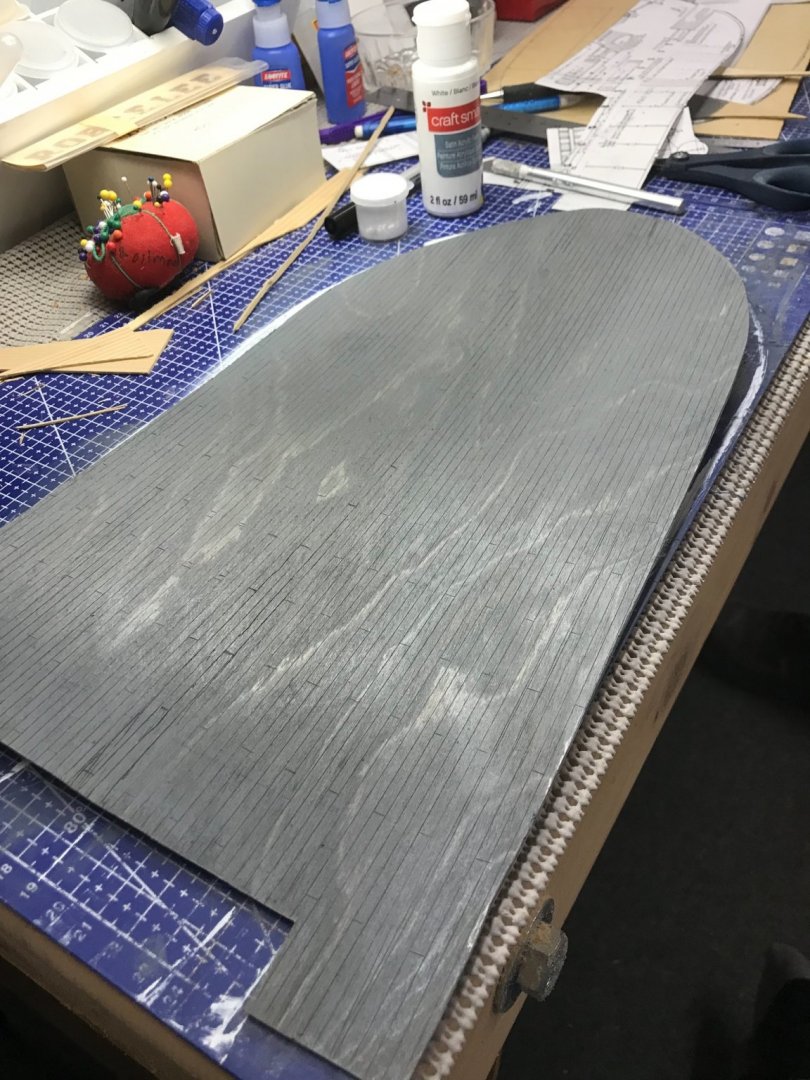
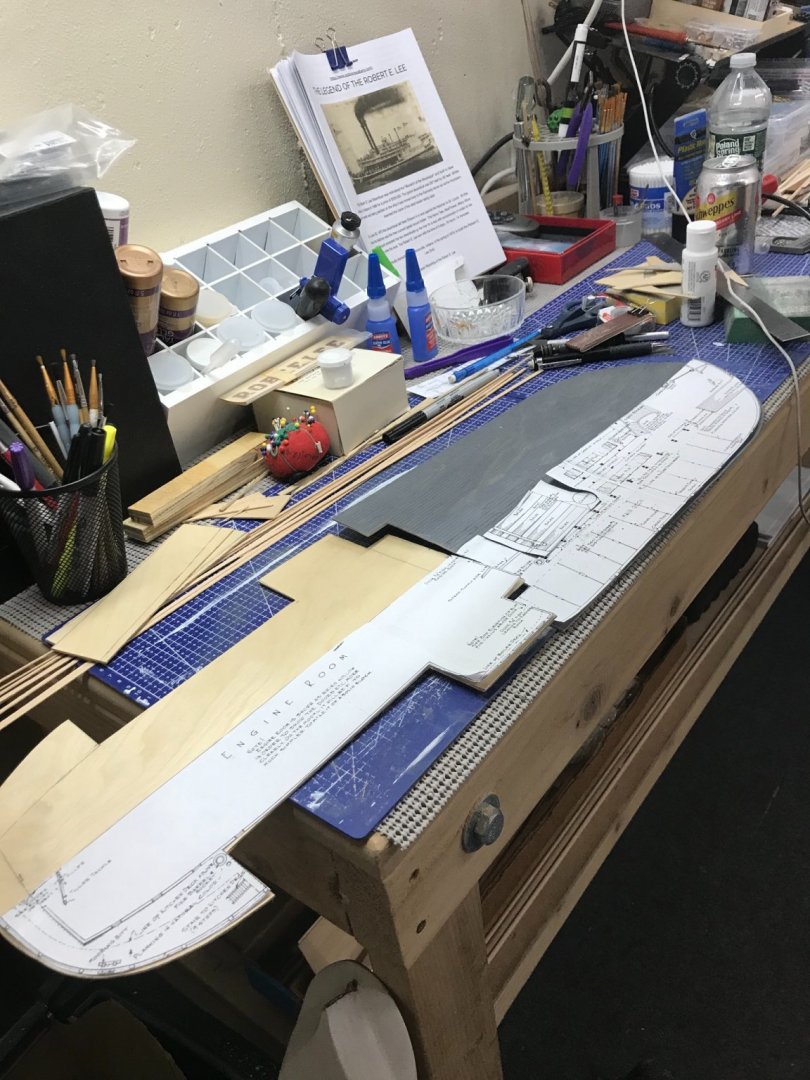
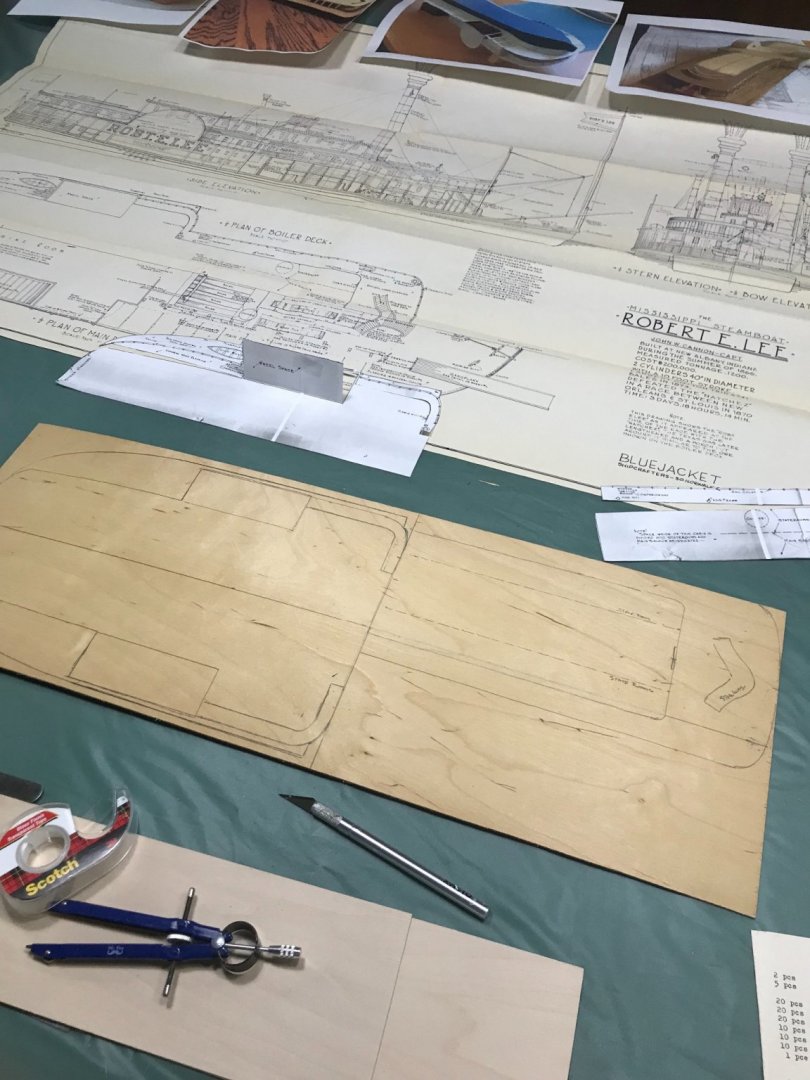
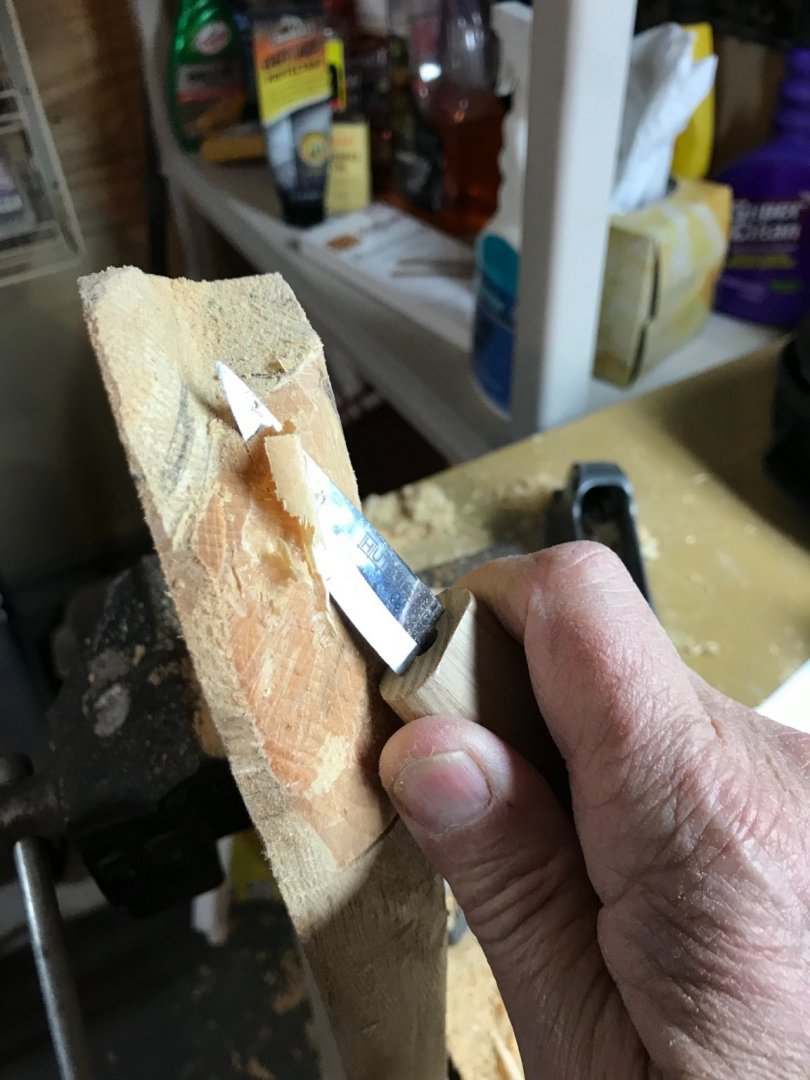
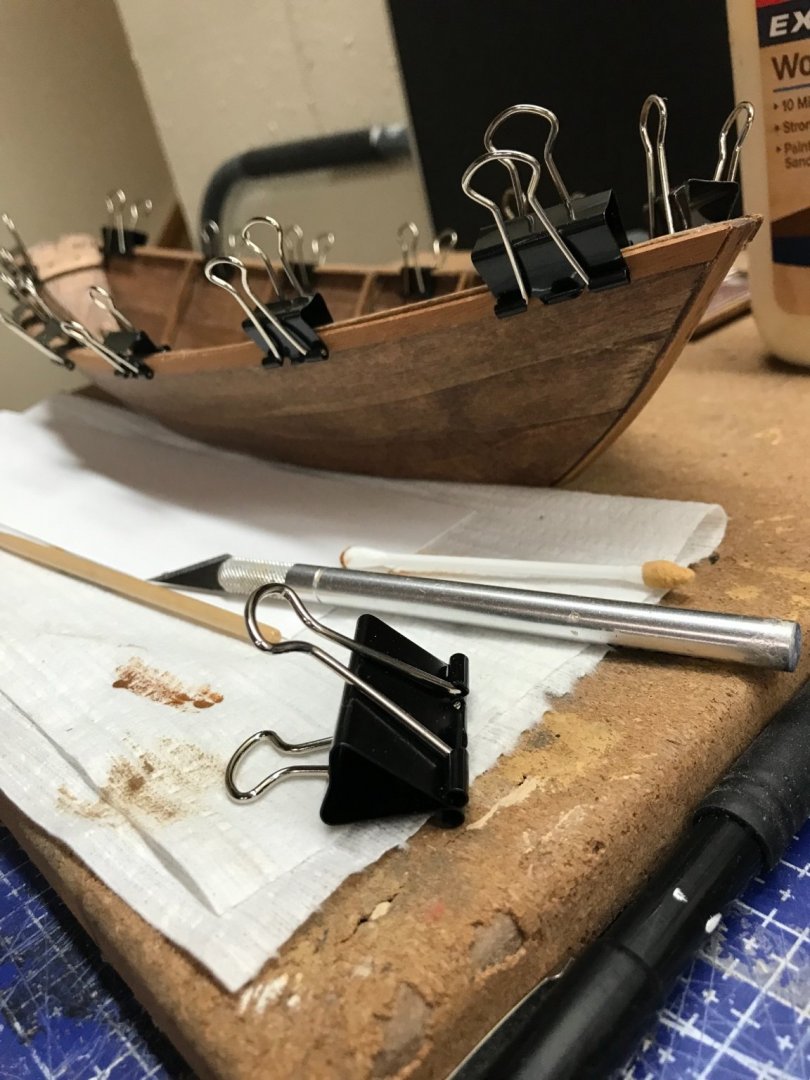
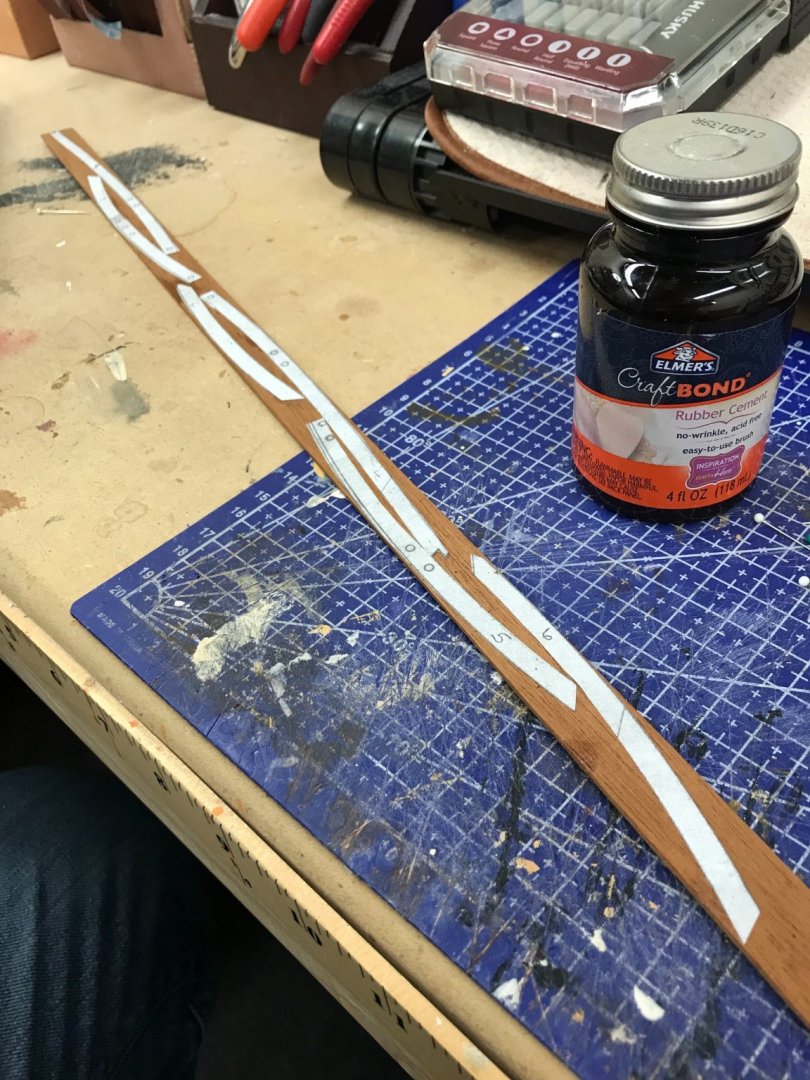
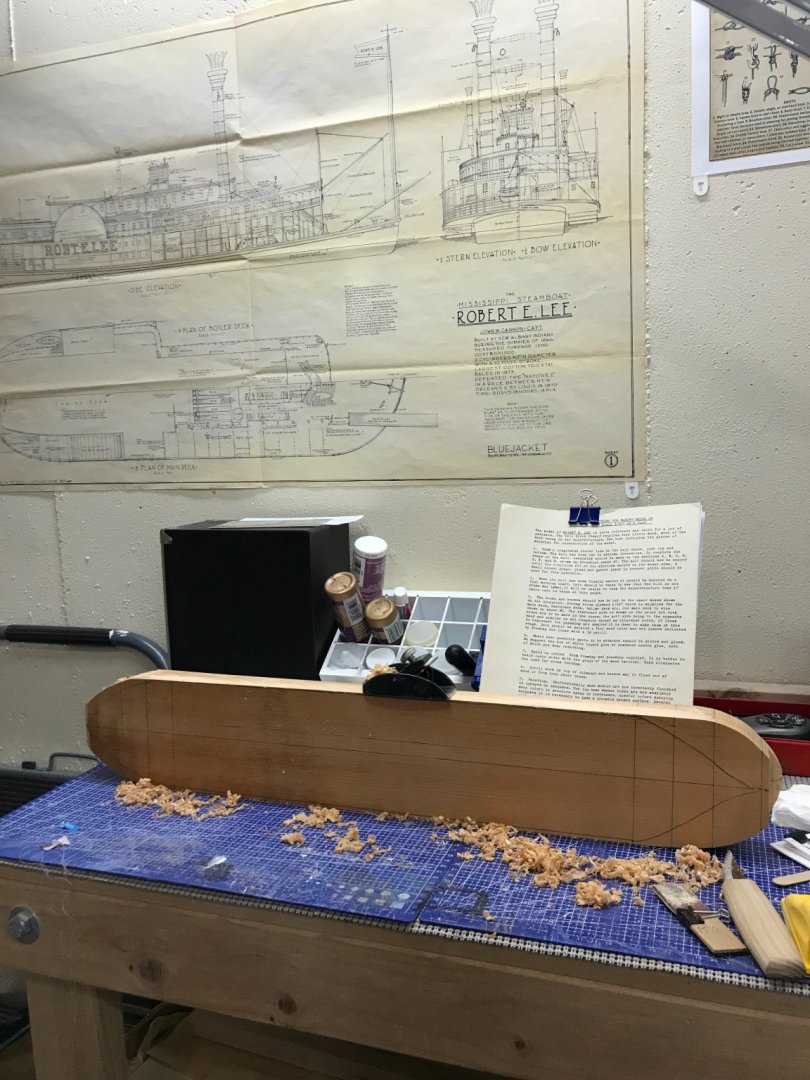
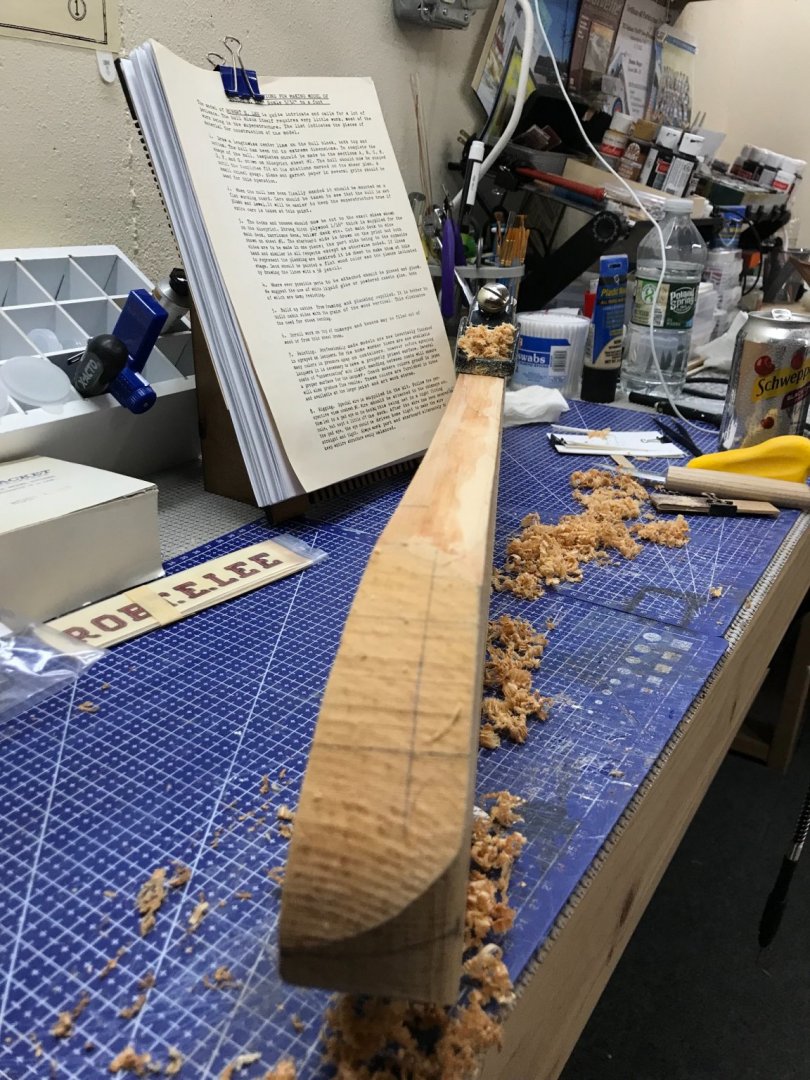
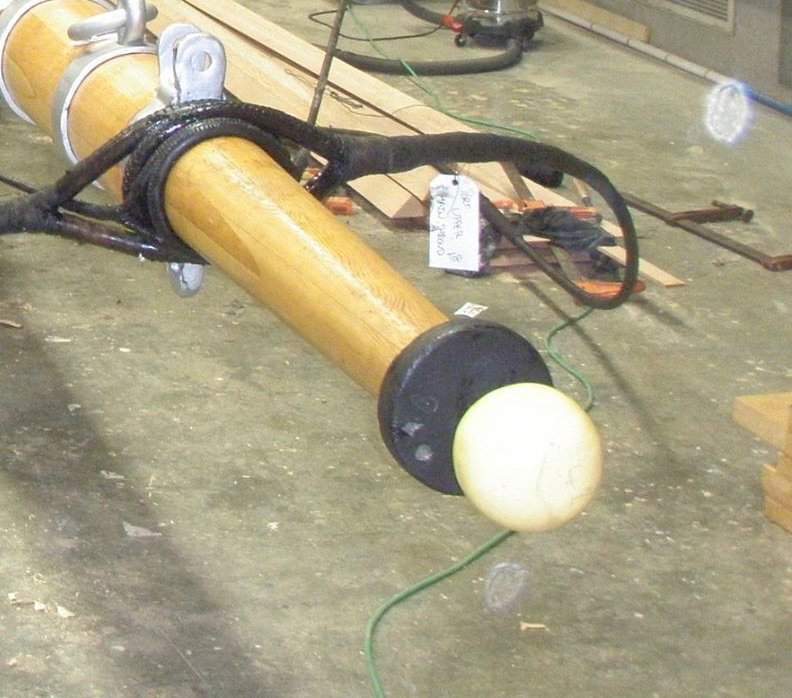
Reshaping the stern… I took a bit too much off the stern while carving. Looks like I get to do a bit of planking after all. 🤔 Finally got this hull in the paint booth. Now figuring out the next steps. Hand drawing and cutting out the Main Deck from 1/16” Ply. Scribing the planking into the deck. Scribing the planks worked but I’m not happy with the look of the plywood grain. 😝 I have ordered some 1/32” x 1/8” planking from model expo. Should be here in a week or so. Moving on… Cut out full main deck. 1/8” ply with an Exacto Knife is tough… Painted underside of the hull and main deck. Laying out the Boiler Deck. 😎 Moving on, I will need to study these drawings some more. Got to understand the structure better. This is really more like building architecture than ship modeling. These boats were quite the Grand Hotels on the Mississippi River. Cheers 🍻


- 238 replies
-
- 10
-
-
- Robert E Lee
- steamboat
- (and 3 more)
-
A bit too much carving for me, I prefer planking. Actually, I was inspired to find a Riverboat kit by your Riverboat build. You set the bar high on that one. 😎
- 238 replies
-
- 1
-
-
- Robert E Lee
- steamboat
- (and 3 more)
-
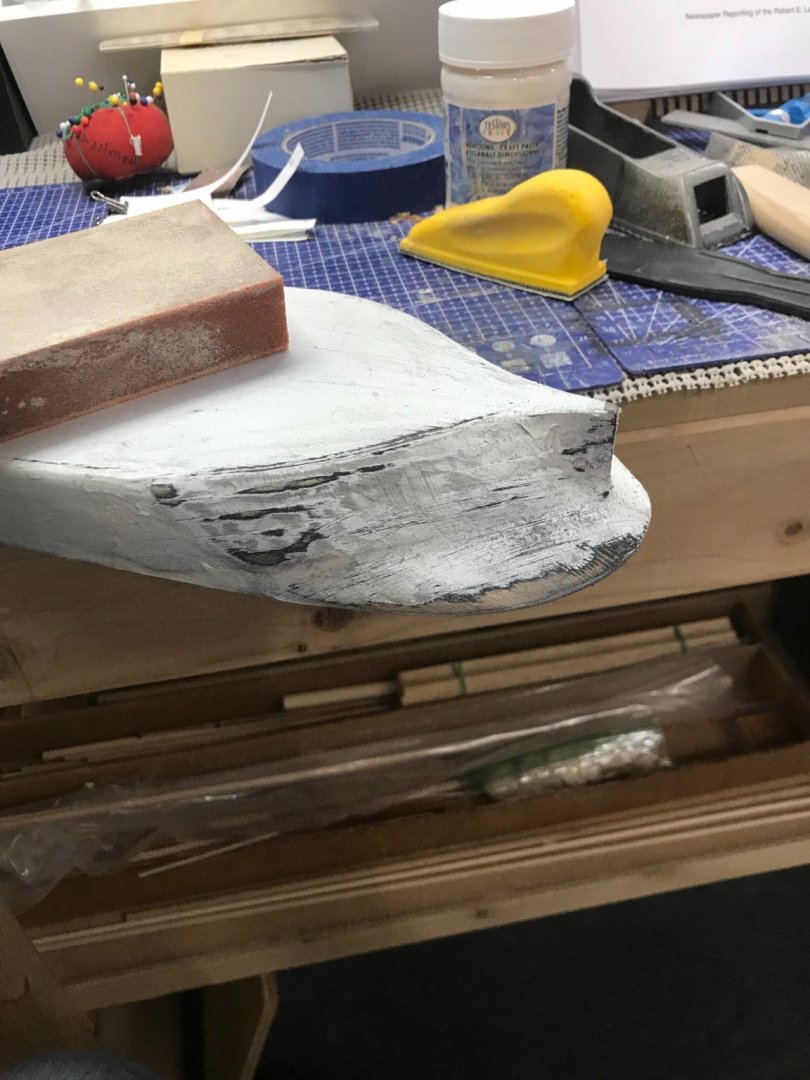
Shaping (carving) the stern… Adding sculpting to my skill sets… Onwards 🍻


- 238 replies
-
- 5
-
-
- Robert E Lee
- steamboat
- (and 3 more)
-
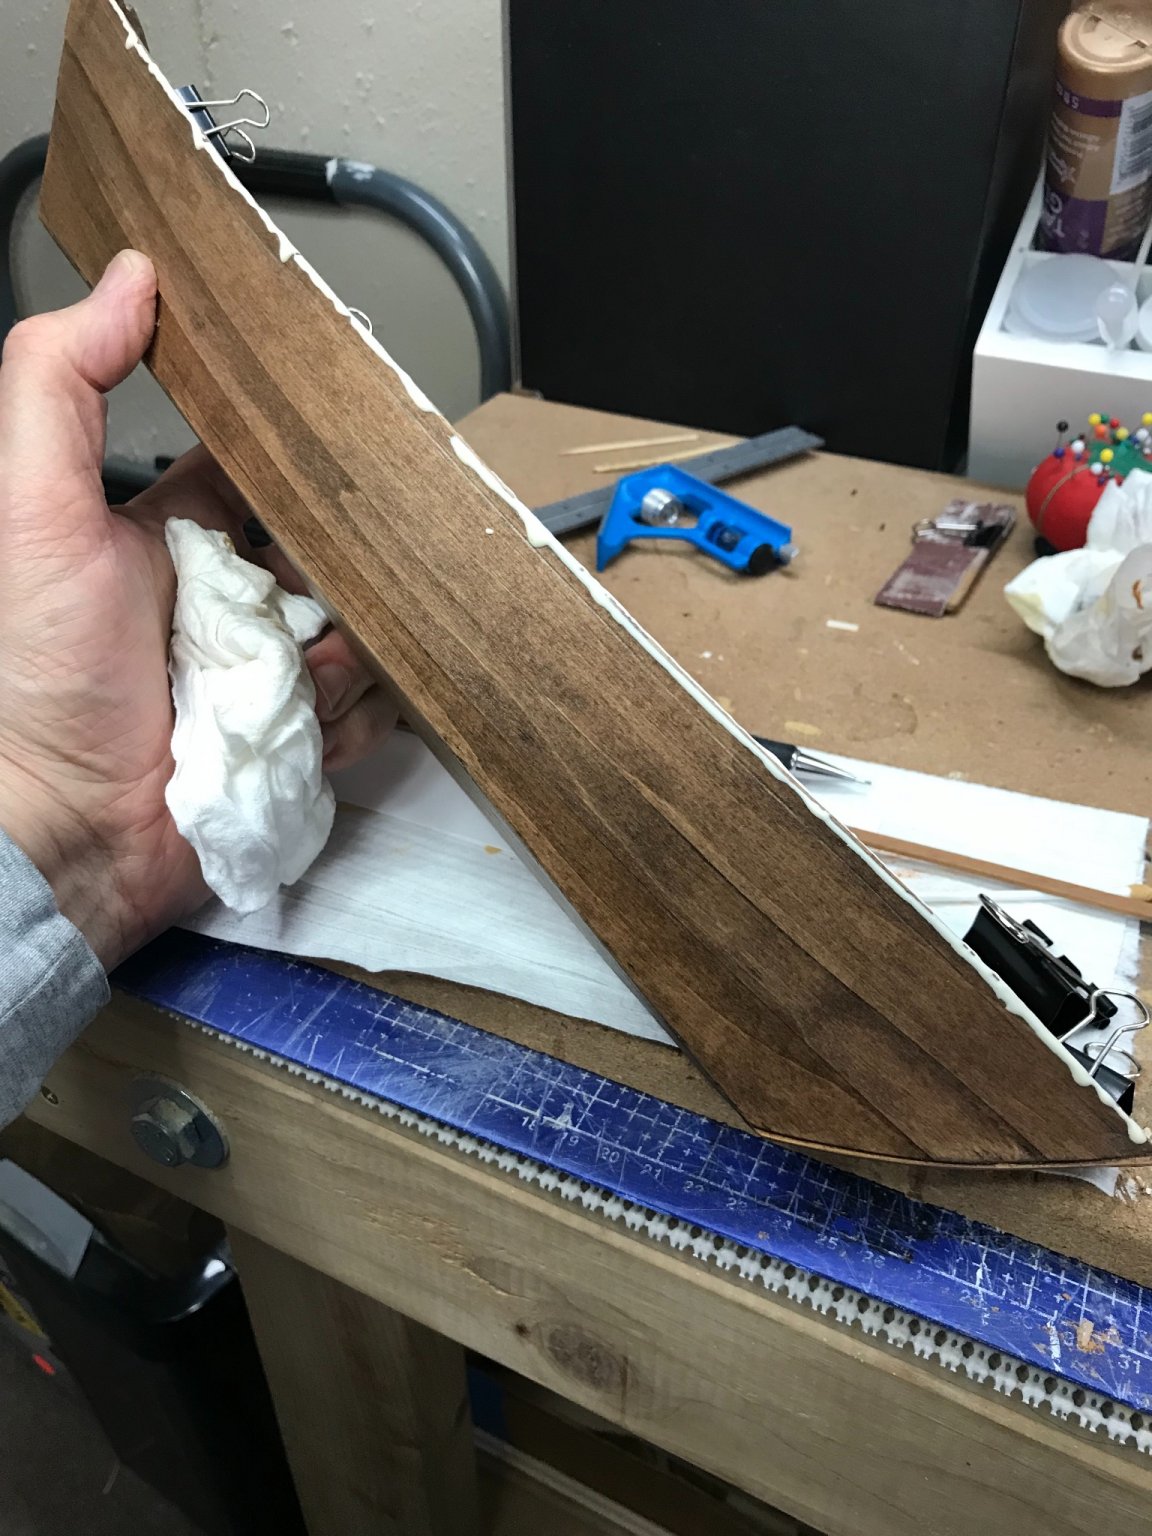
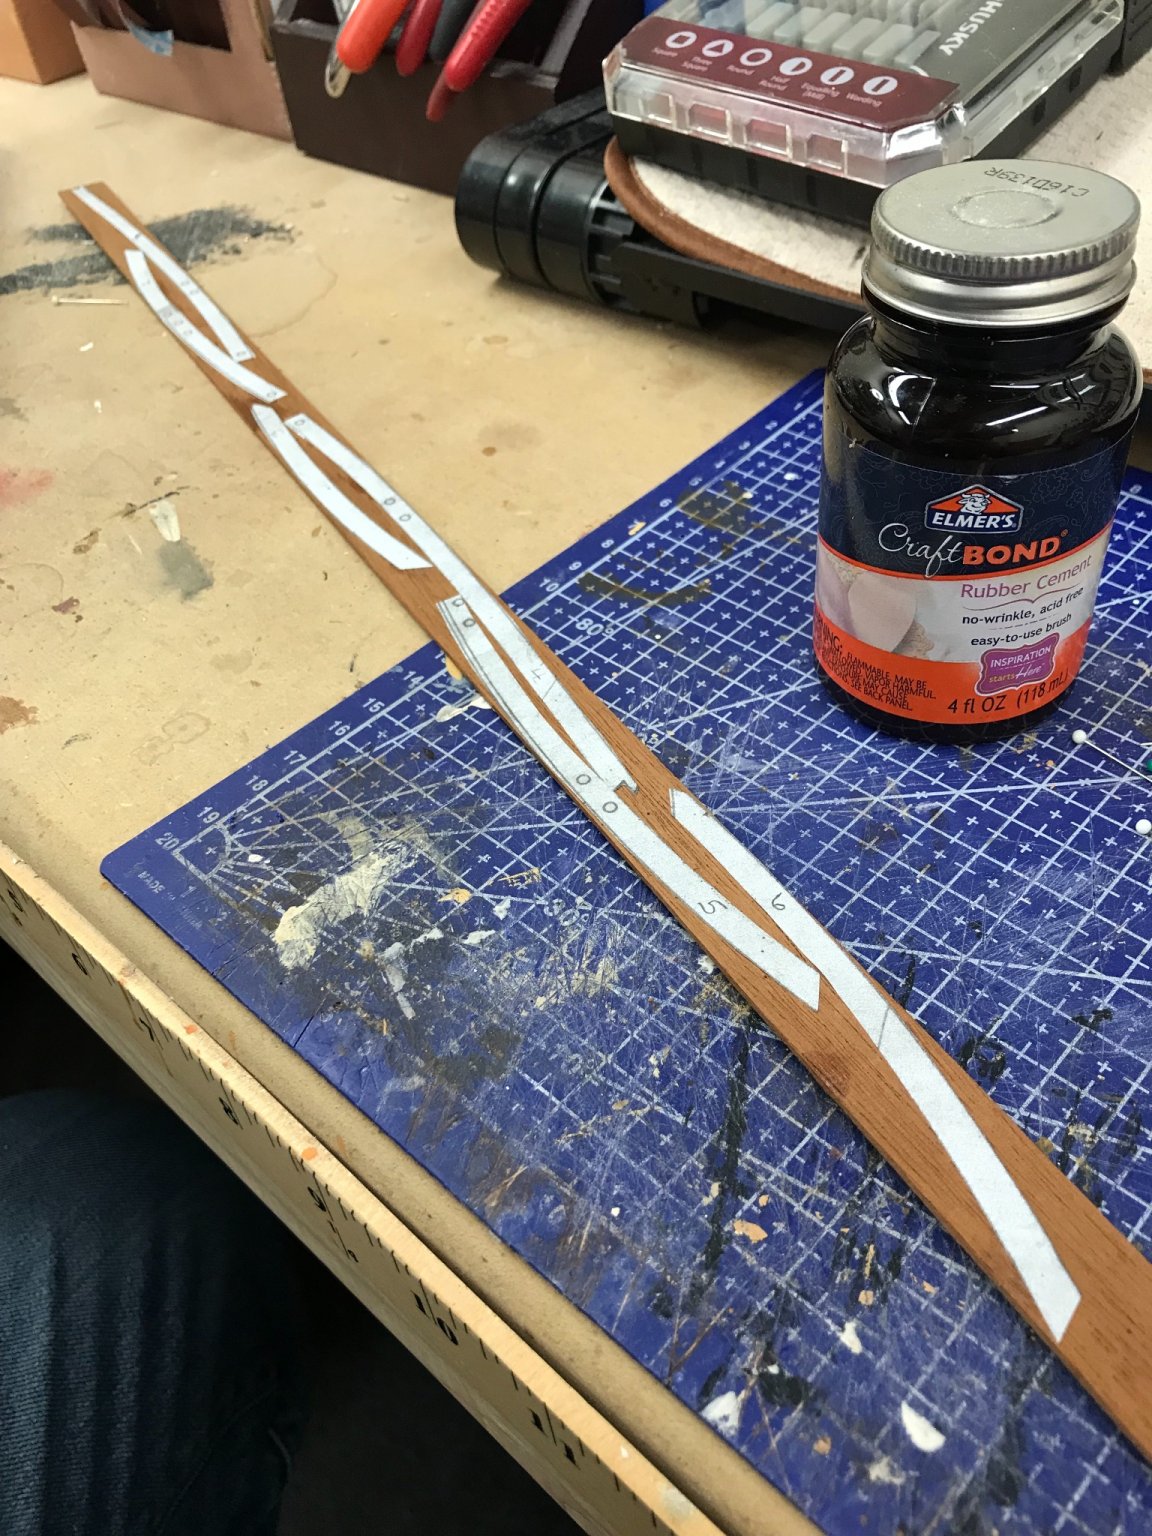
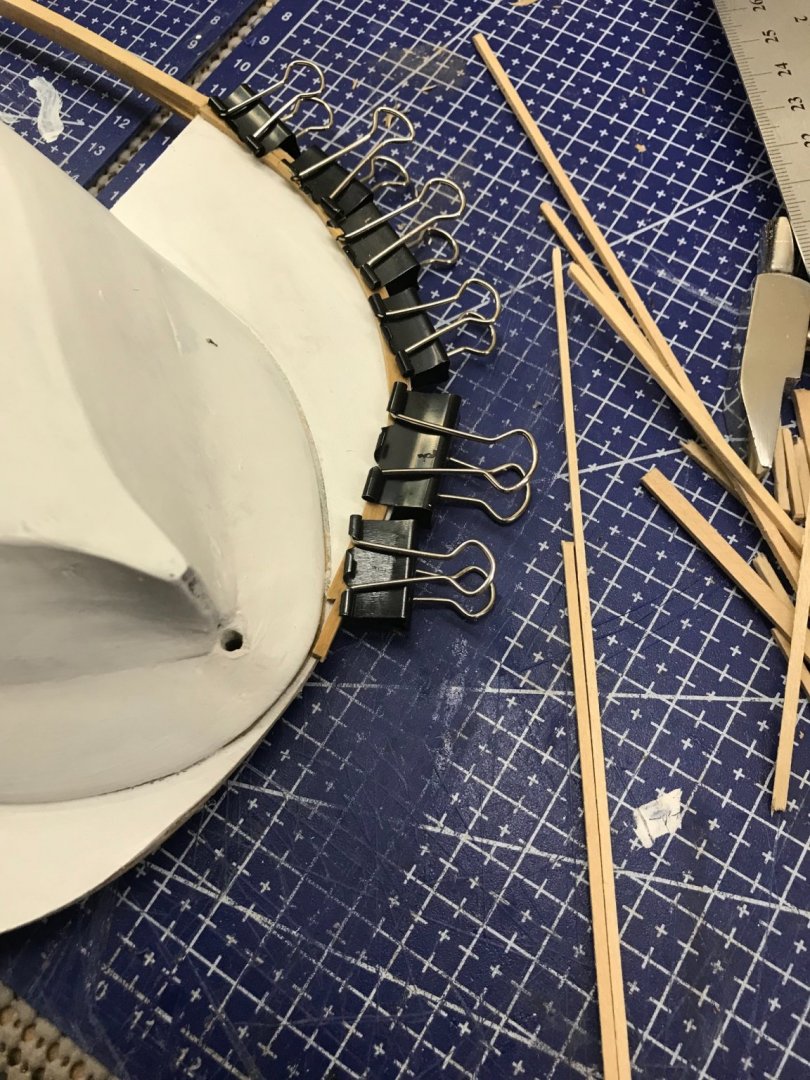
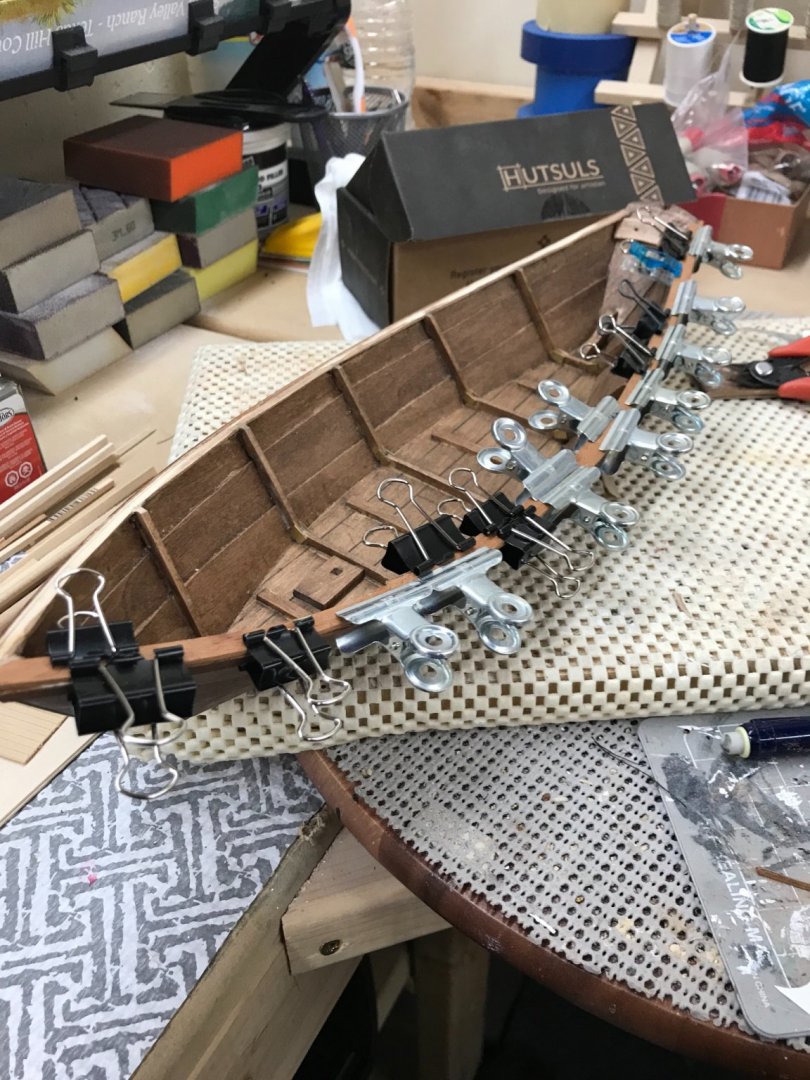
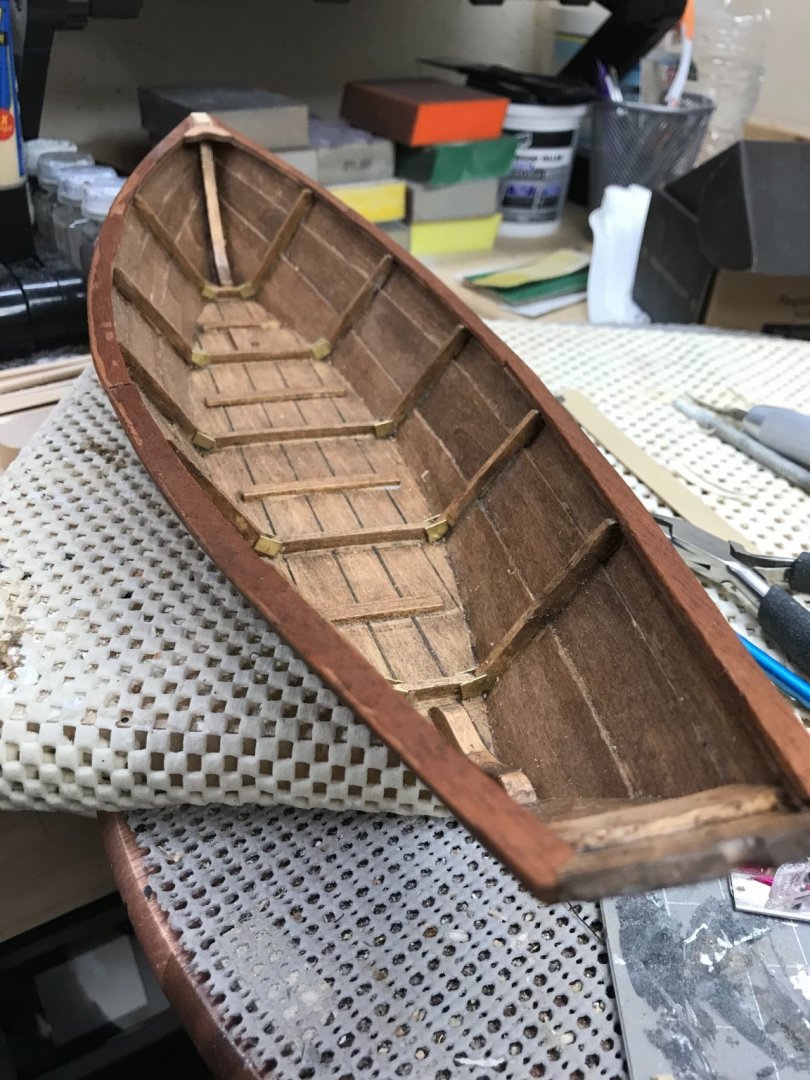
Mahogany Band and Cap Rail… Glued and clamped in place. Cap Rail pieces cut out… Glued and clamped in place Mahogany Cap Rails completed Breast Hook in place and reworking the bow. Working on that gripe again. Cheers 🍻


- 22 replies
-
- 6
-
-
- Laughing Whale
- Dory
- (and 1 more)
-
I have a Daughter who lives in Corydon, Indiana just minutes from New Albany. I grew up just North of St. Louis myself on the Mississippi River. Should be an interesting change from the age of sail and tall ships. Welcome aboard.
- 238 replies
-
- 1
-
-
- Robert E Lee
- steamboat
- (and 3 more)
-
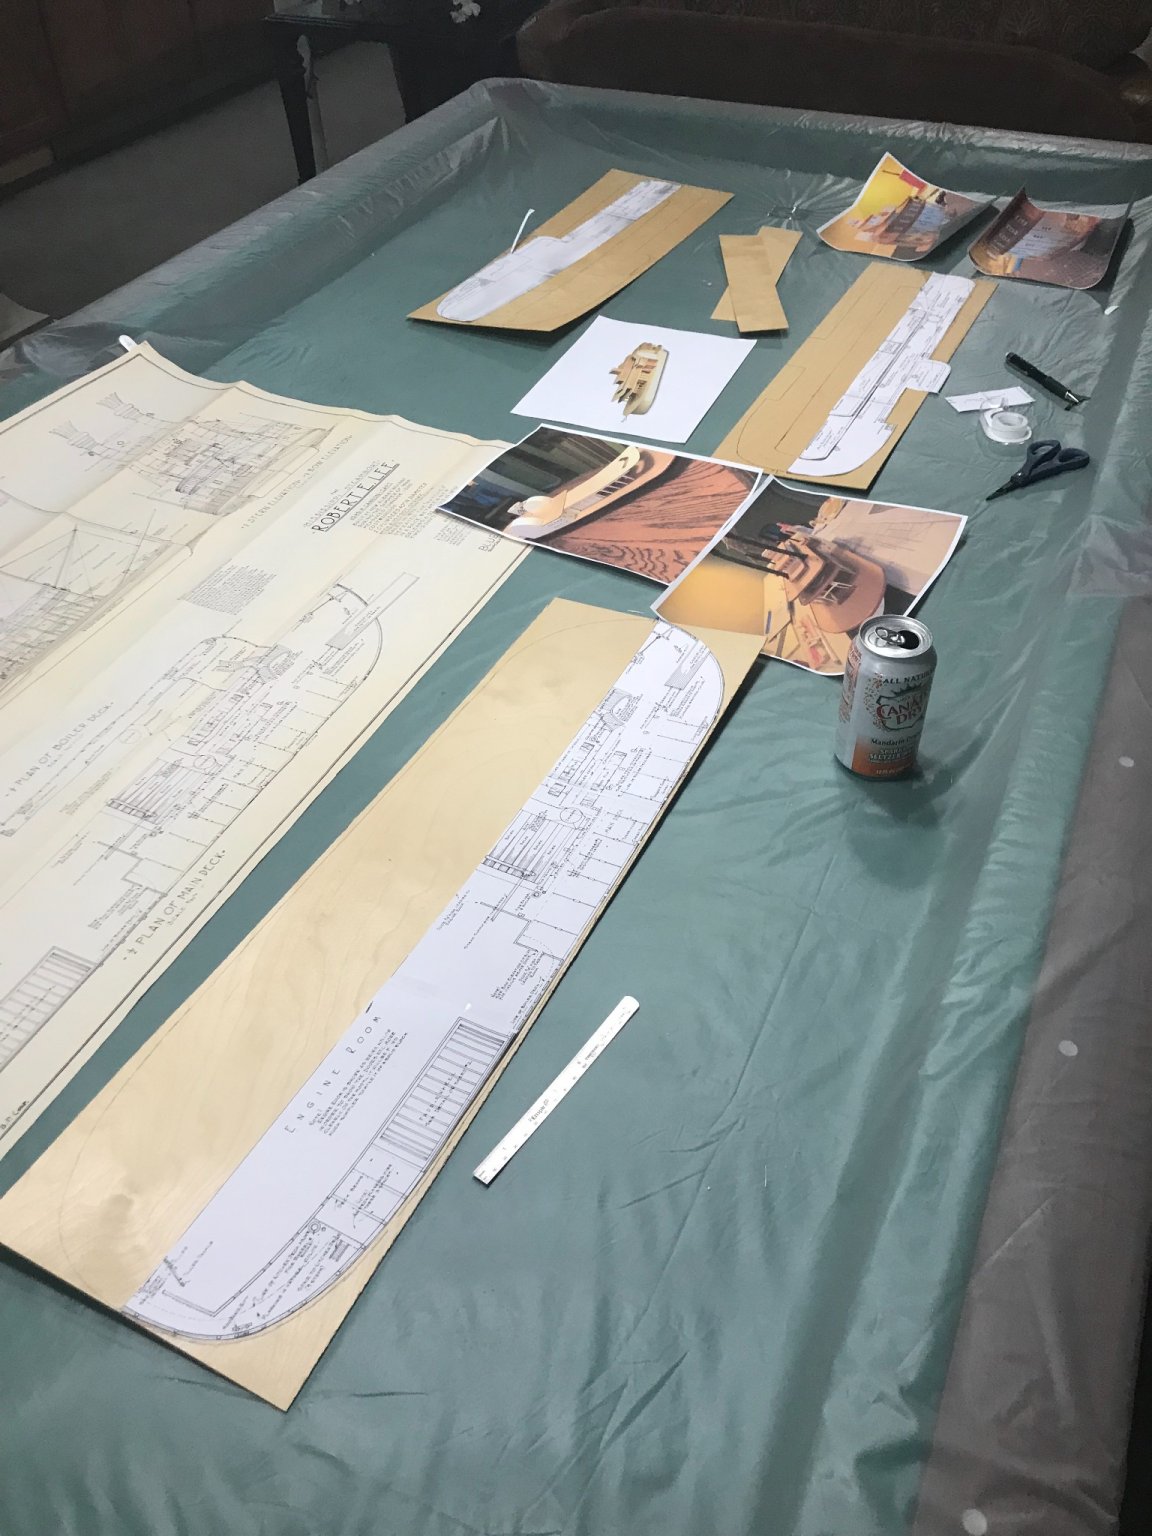
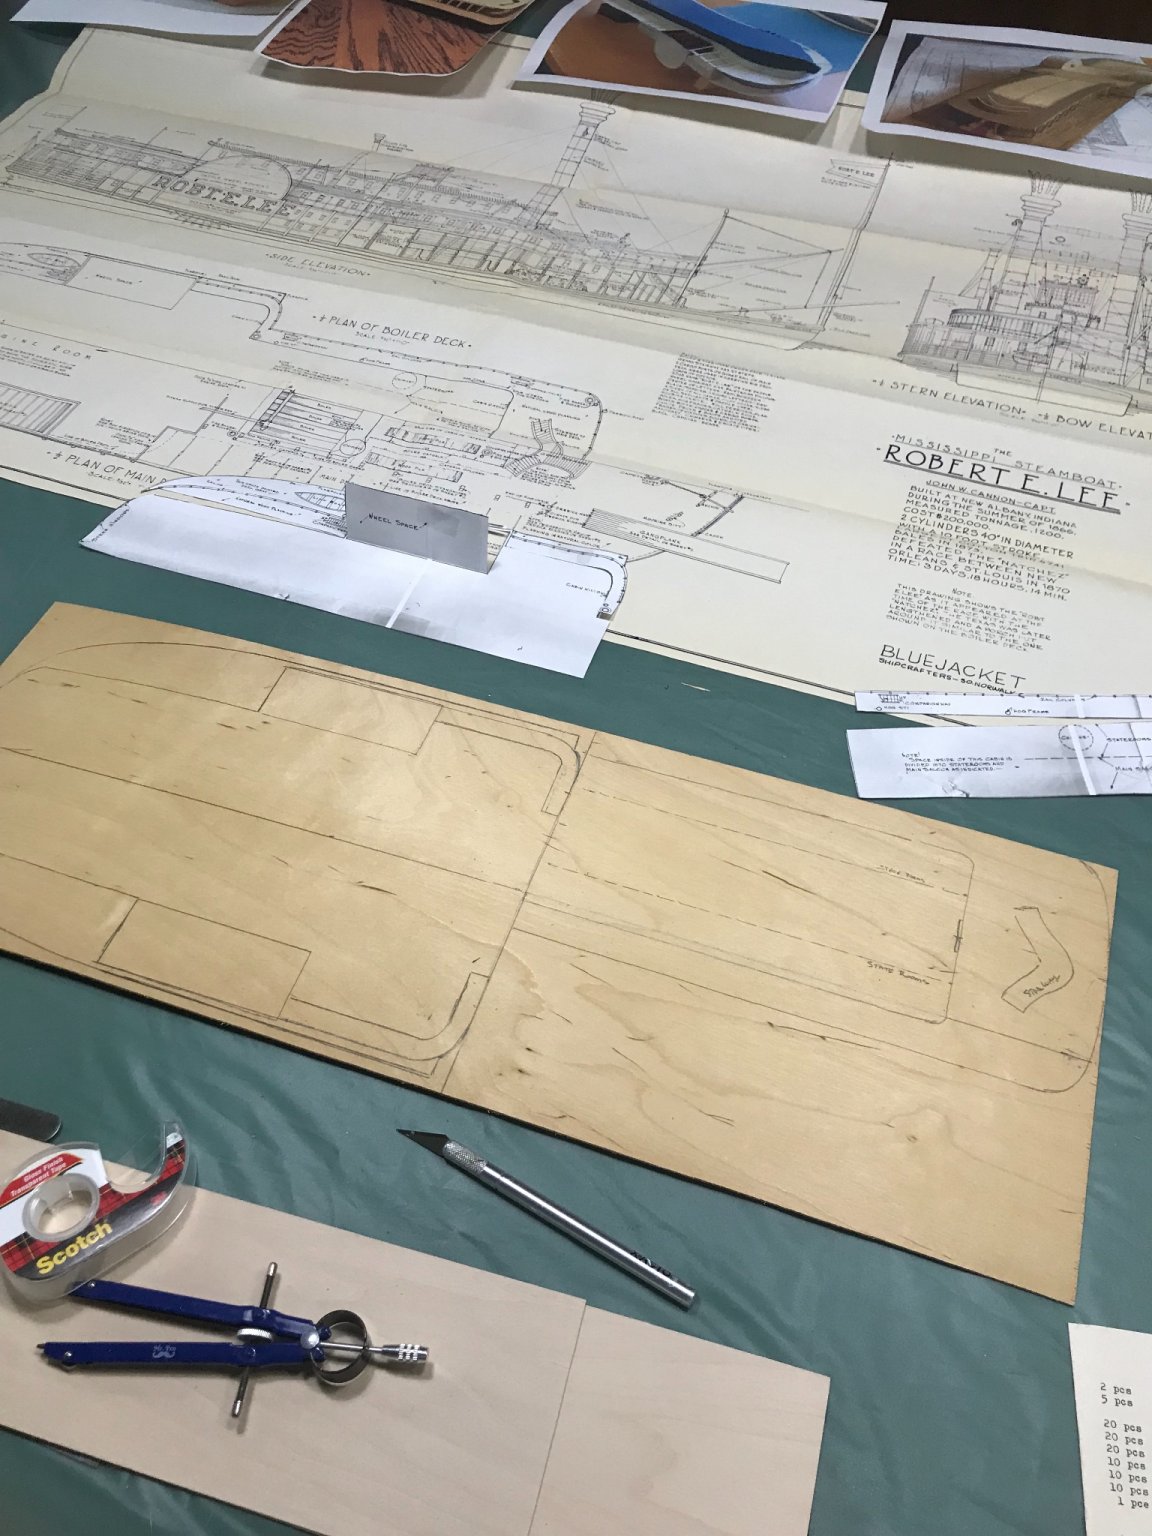
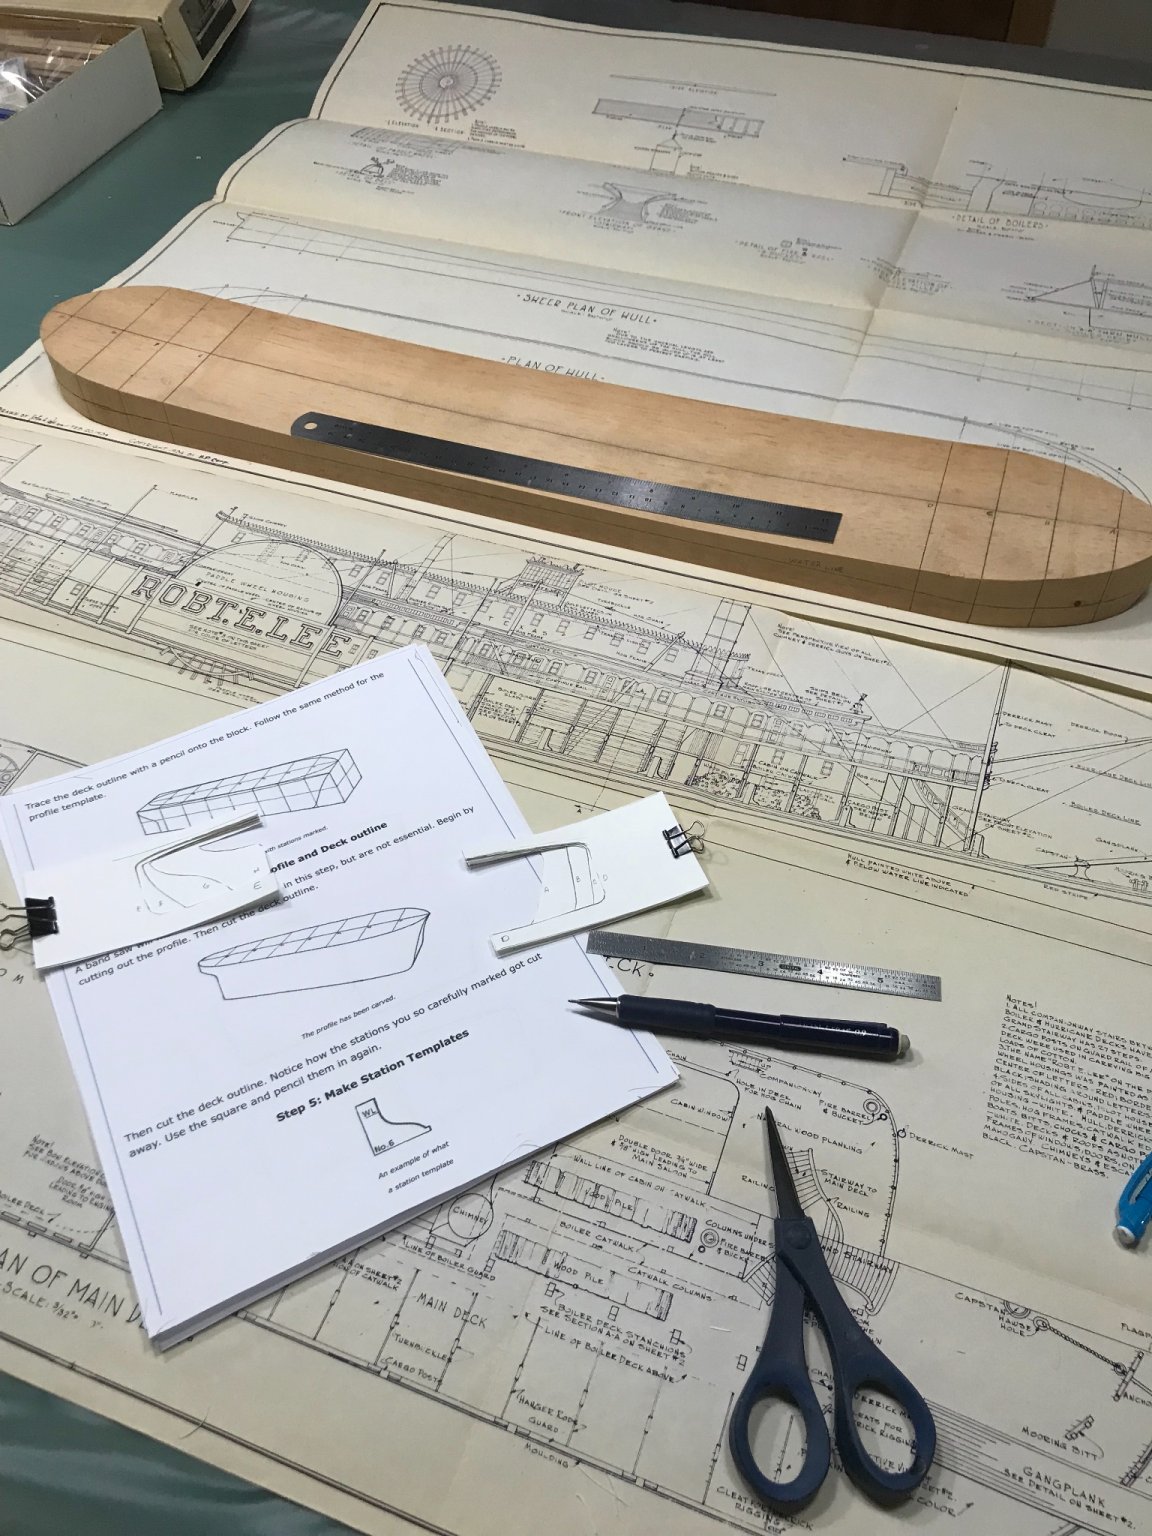
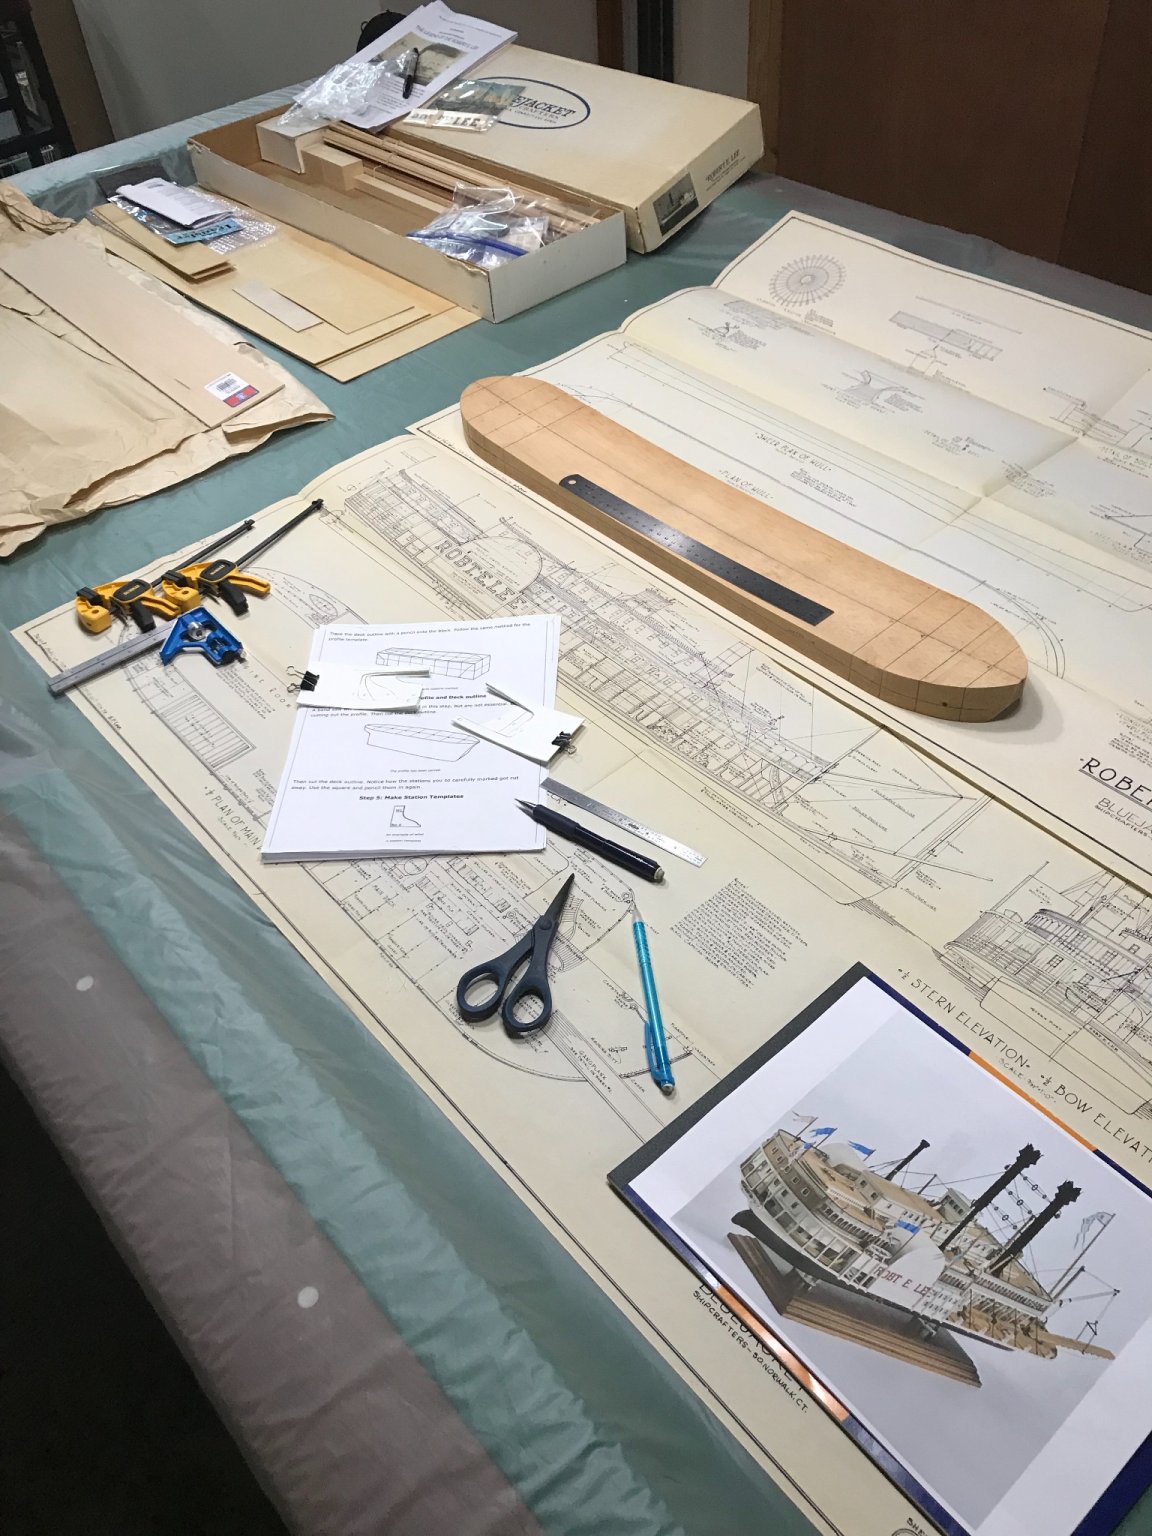
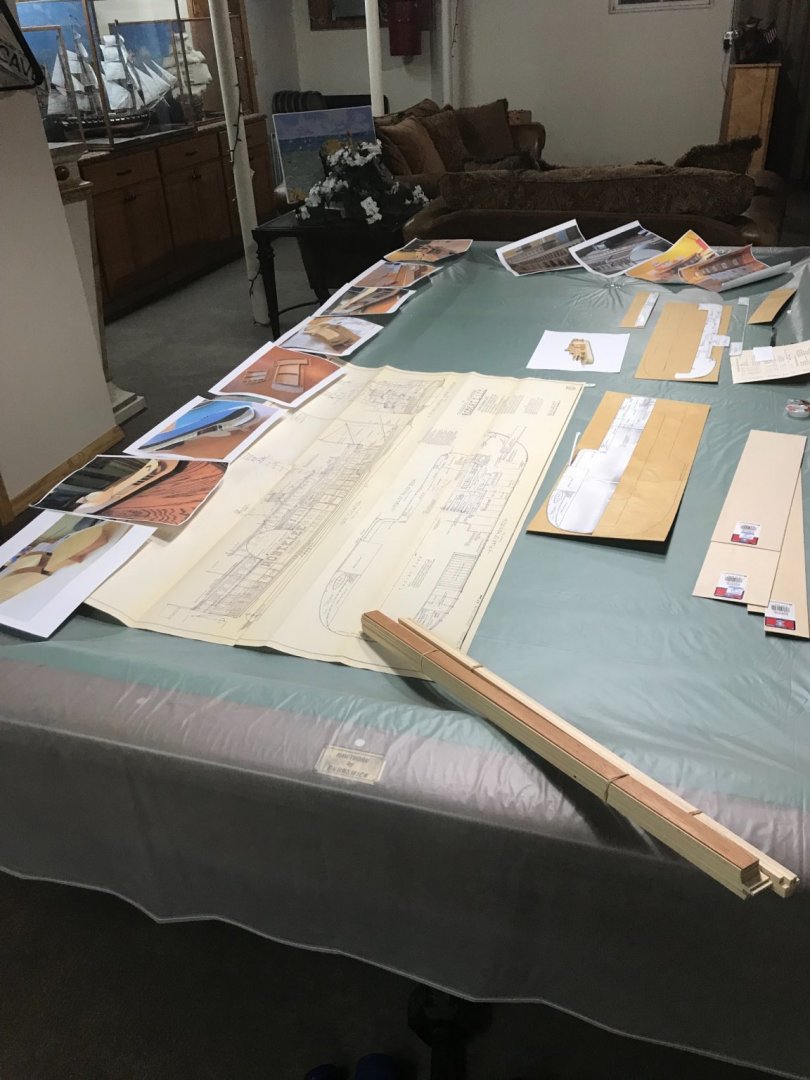
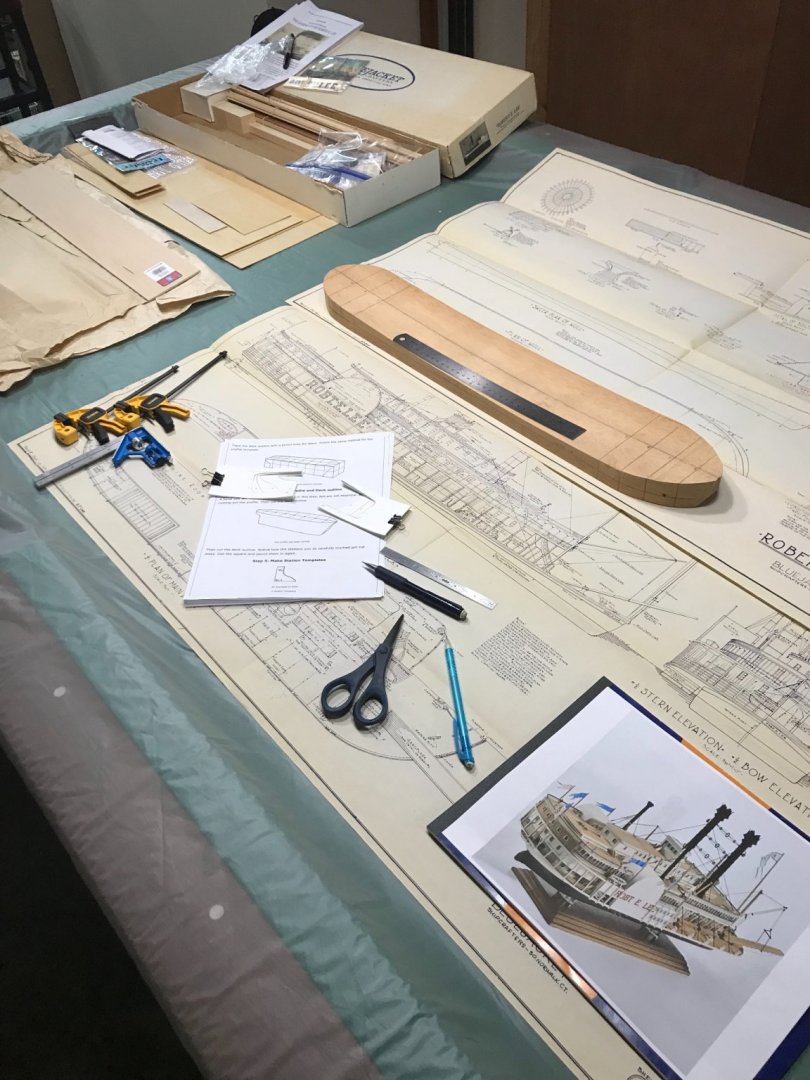
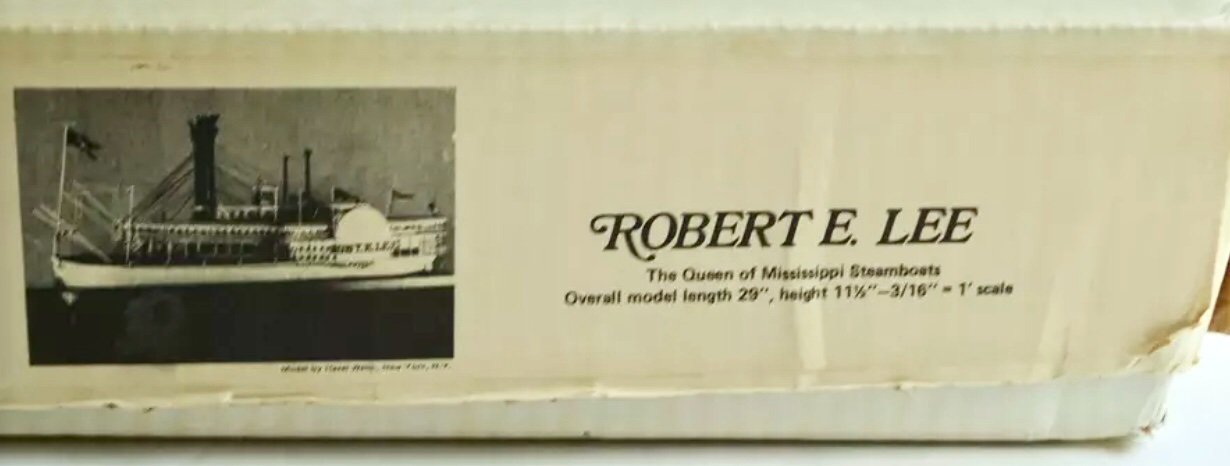
THE LEGEND OF THE ROBERT E. LEE The Robert E. Lee Steamboat was nicknamed the "Monarch of the Mississippi" and built in New Albany, Indiana in 1866 for a price of $200,000. The grand steamboat was 297 feet by 49 feet. While the name was being painted on the ship it was moved over to the Kentucky shore as some Hoosiers resented the name of the rebel leader being used. On June 30, 1870 the steamboat left New Orleans in a race against the Natchez to St. Louis. At the time the Natchez was the then-current speed record holder. The Henry Tate, MayFlower, Mary Alice and Tahlequah preceded the two steamboats up the river for a way with excursionists in order to be able to view the race. The Robert E. Lee won with the time of 3 days, 18 hours, 14 minutes. She was eventually dismantled in Jeffersonville, Indiana, in the spring of 1876, to build the Robert E. Lee (2nd). https://www.explorenewalbany.com/index.php/downtown-new-albany-history/new-albany-history/30-the-legend-of-the-robert-e-lee Another vintage kit rescue from eBay. This should be fun, but aren’t they all. 😆 Solid Hull shaping… Marking the solid wood hull and cutting out templates from profiles on sheet 2. Ready to start shaping. This is going take a bit of time. 😆 I will be back. 🍻

- 238 replies
-
- 10
-
-
- Robert E Lee
- steamboat
- (and 3 more)
-
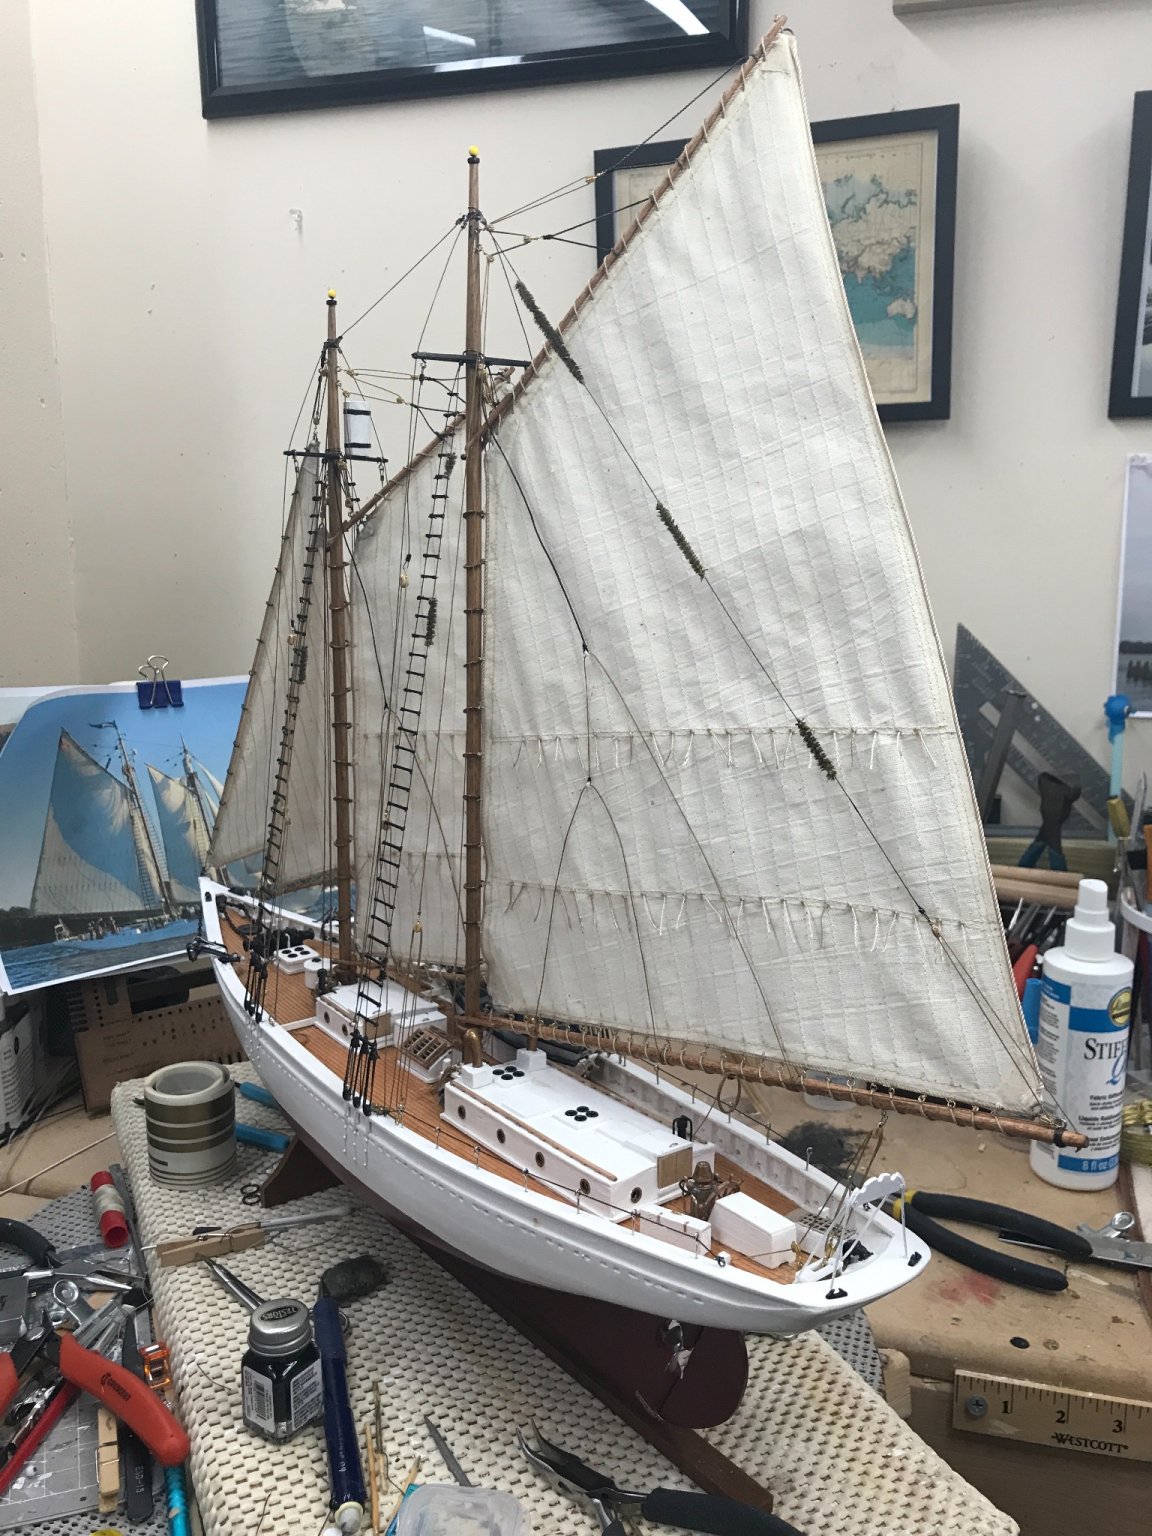
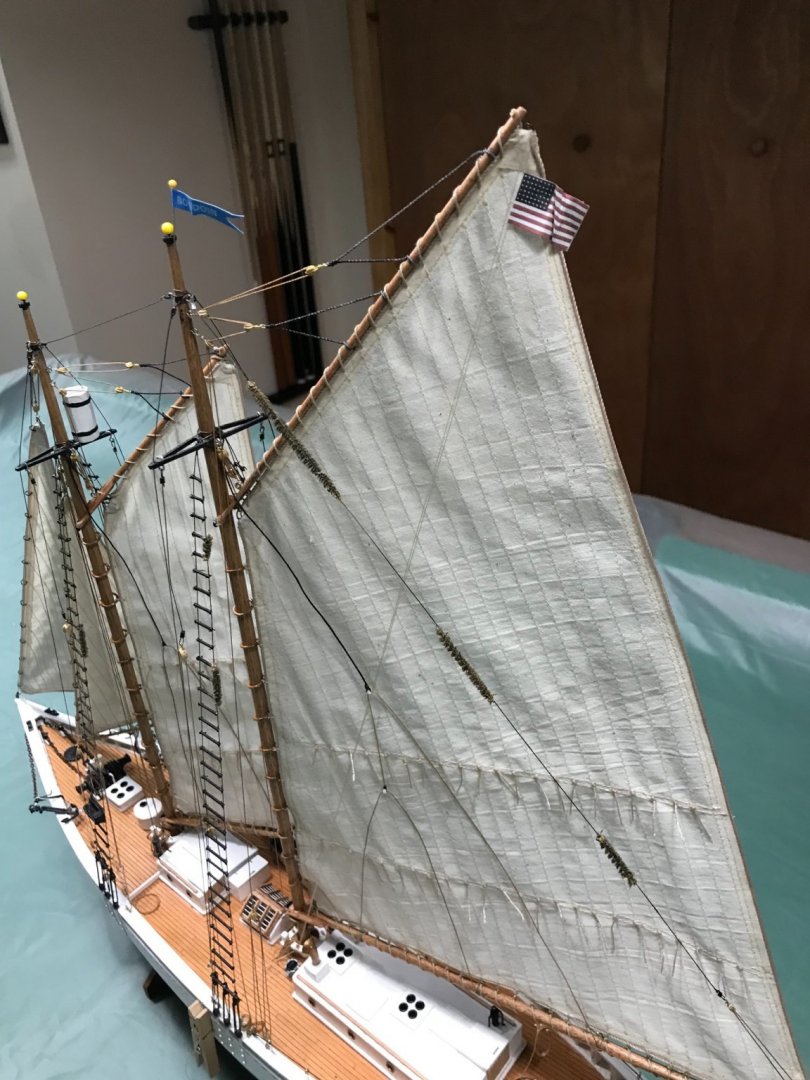
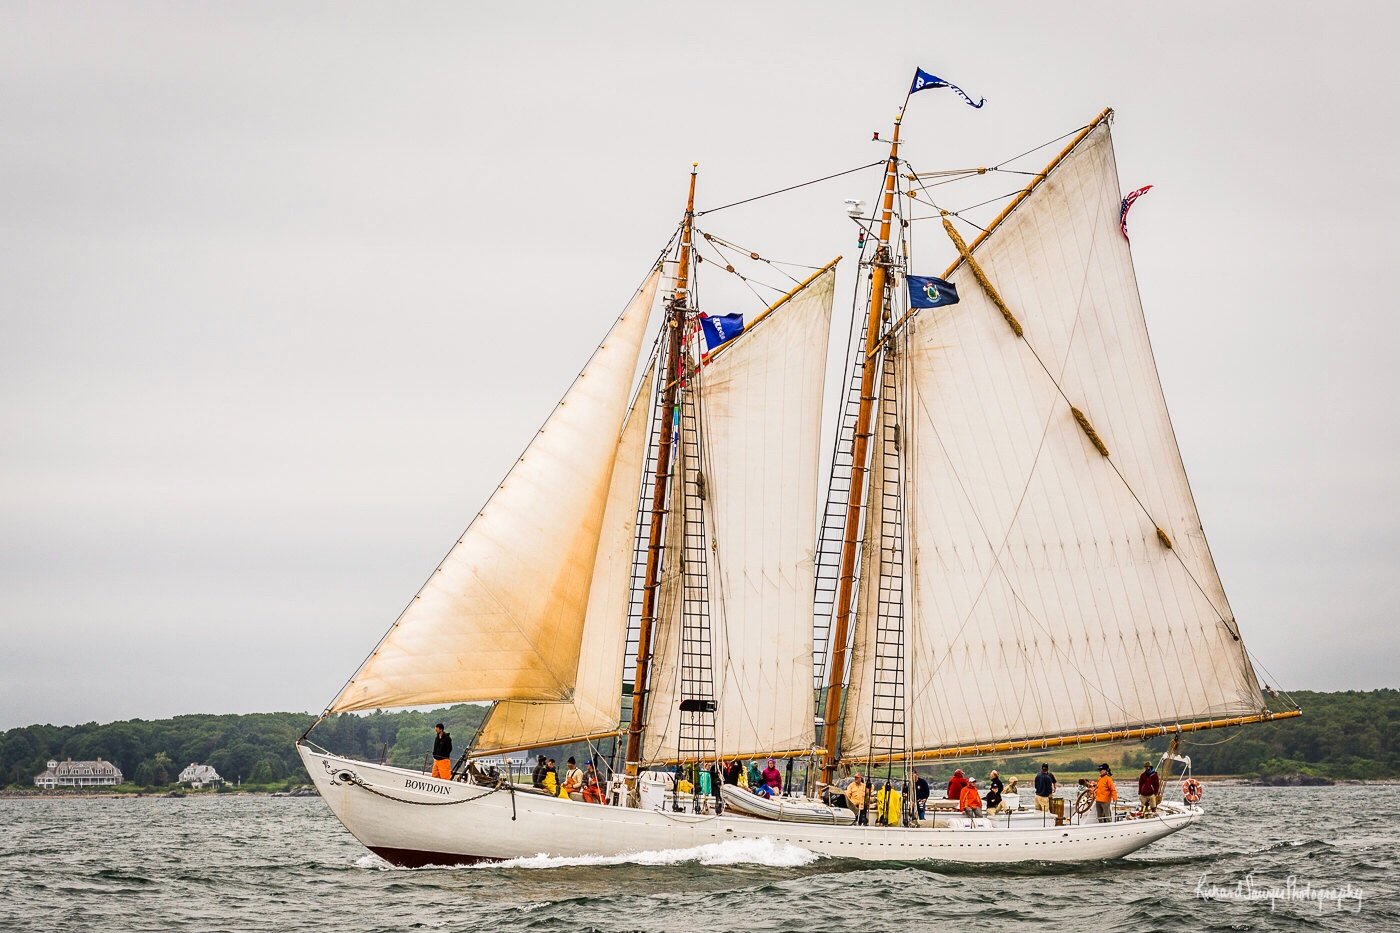
Flags… Placed the Bowdoin Pendant and an American Flag. Now she is complete. 😎
- 127 replies
-
- 10
-
-
- Bowdoin
- Arctic Exploration
- (and 3 more)
-
That makes a lot of sense and reminds me I still to put flag halyards and flags on her. The detailing never ends. Tanks
- 127 replies
-
- 2
-
-
- Bowdoin
- Arctic Exploration
- (and 3 more)
-
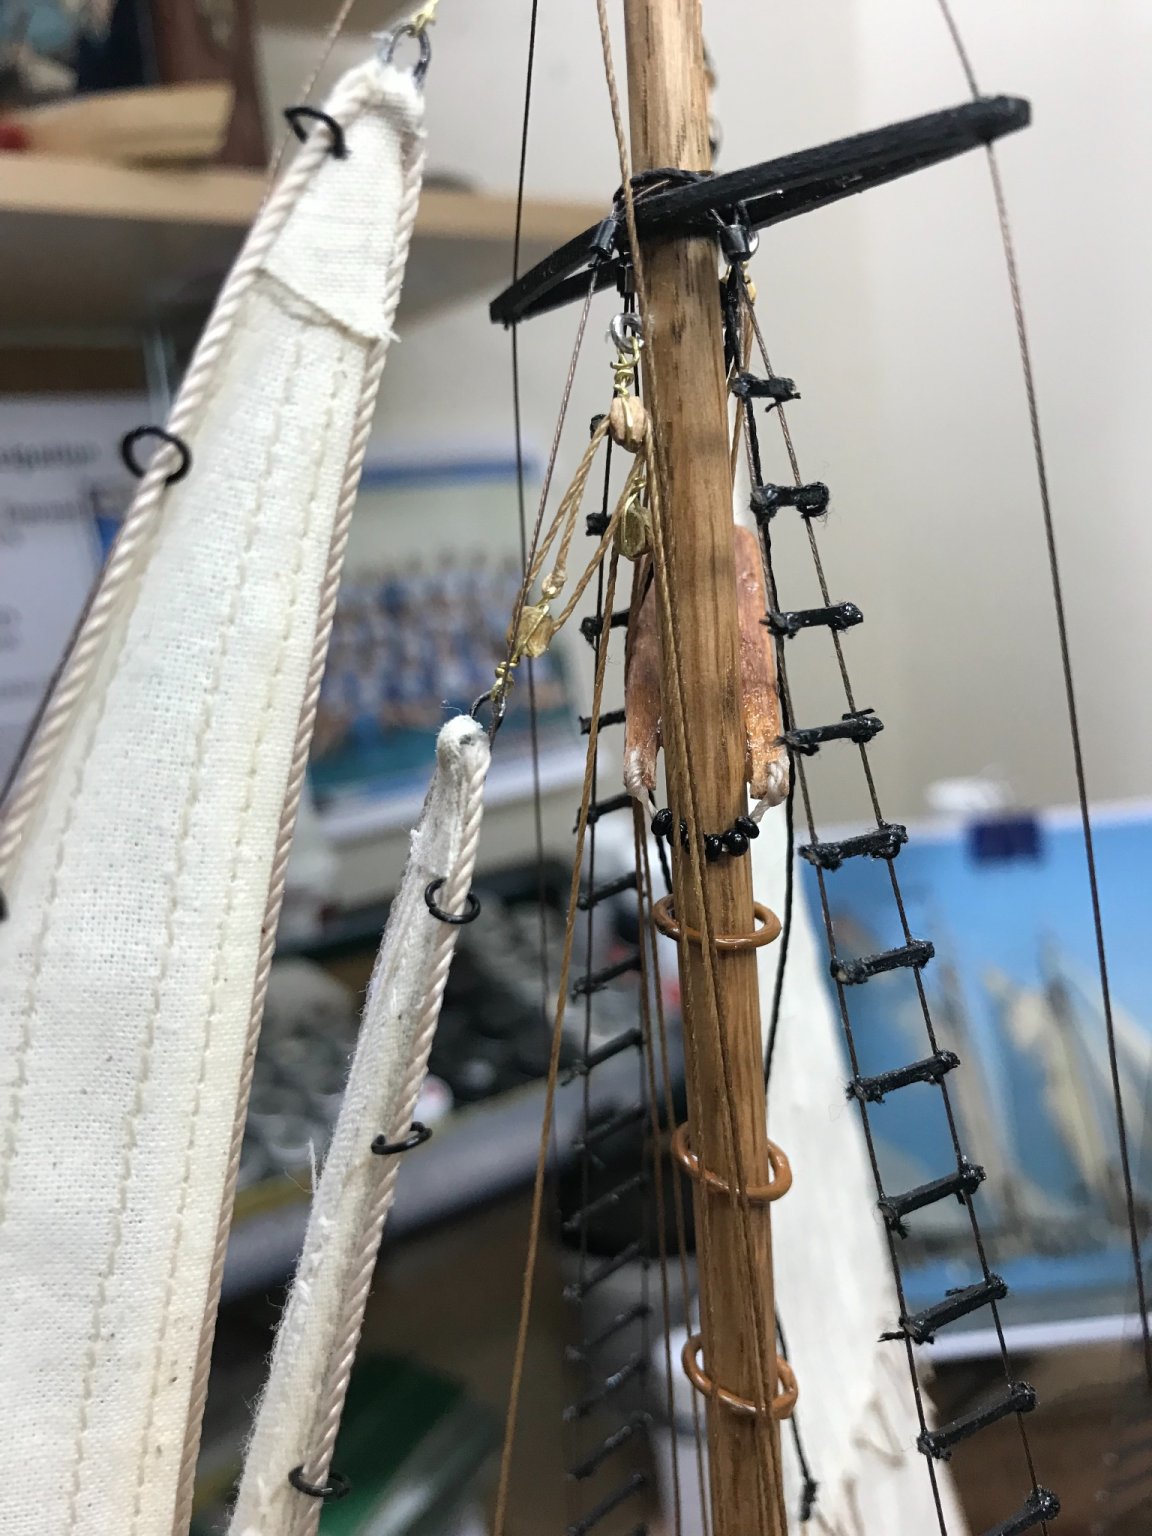
That was my thought, but I haven’t been able to verify that. Could just be Mast Caps the Seagulls can’t land on. 😆
- 127 replies
-
- 1
-

-
- Bowdoin
- Arctic Exploration
- (and 3 more)
-
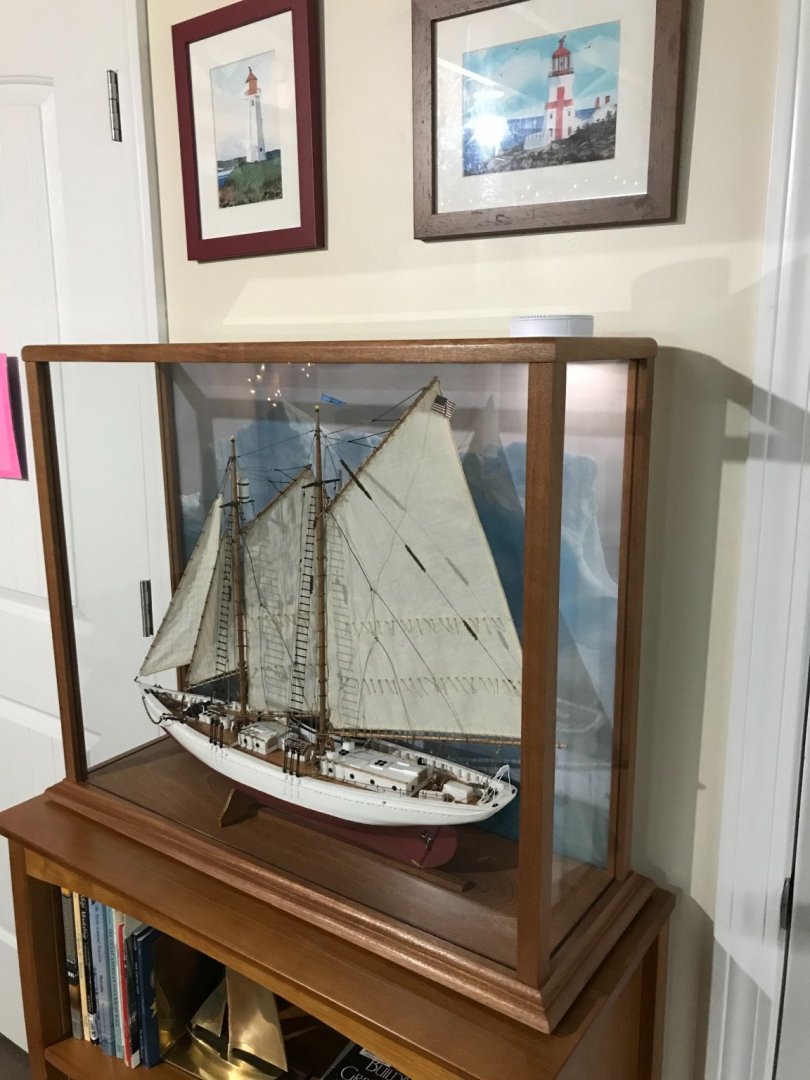
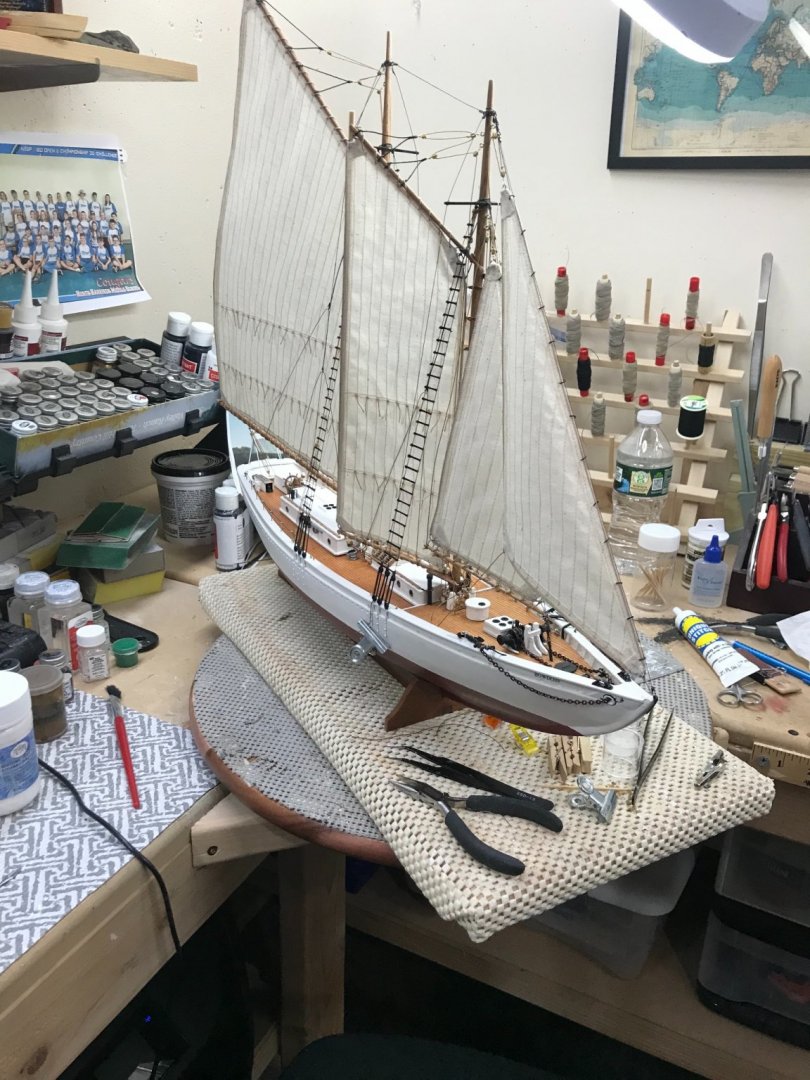
My Gallery Images Thanks for riding along… Here is a link to my Glamour Shots of her, she is a beauty. My wife says it’s beautiful and my best. I am getting better at this, but I think the Bowdoin is one beautiful schooner. My Gallery Images
- 127 replies
-
- 3
-
-
- Bowdoin
- Arctic Exploration
- (and 3 more)
-
Mast Caps and Ice Barrel… Still trying to find out what the yellow balls are all about. I am officially calling this model finished. 🍻 Thank you all for your comments, encouragement and 👍 along the way. It has been fun… See you all on the flip side. Onwards 😎
- 127 replies
-
- 10
-
-

-
- Bowdoin
- Arctic Exploration
- (and 3 more)
-
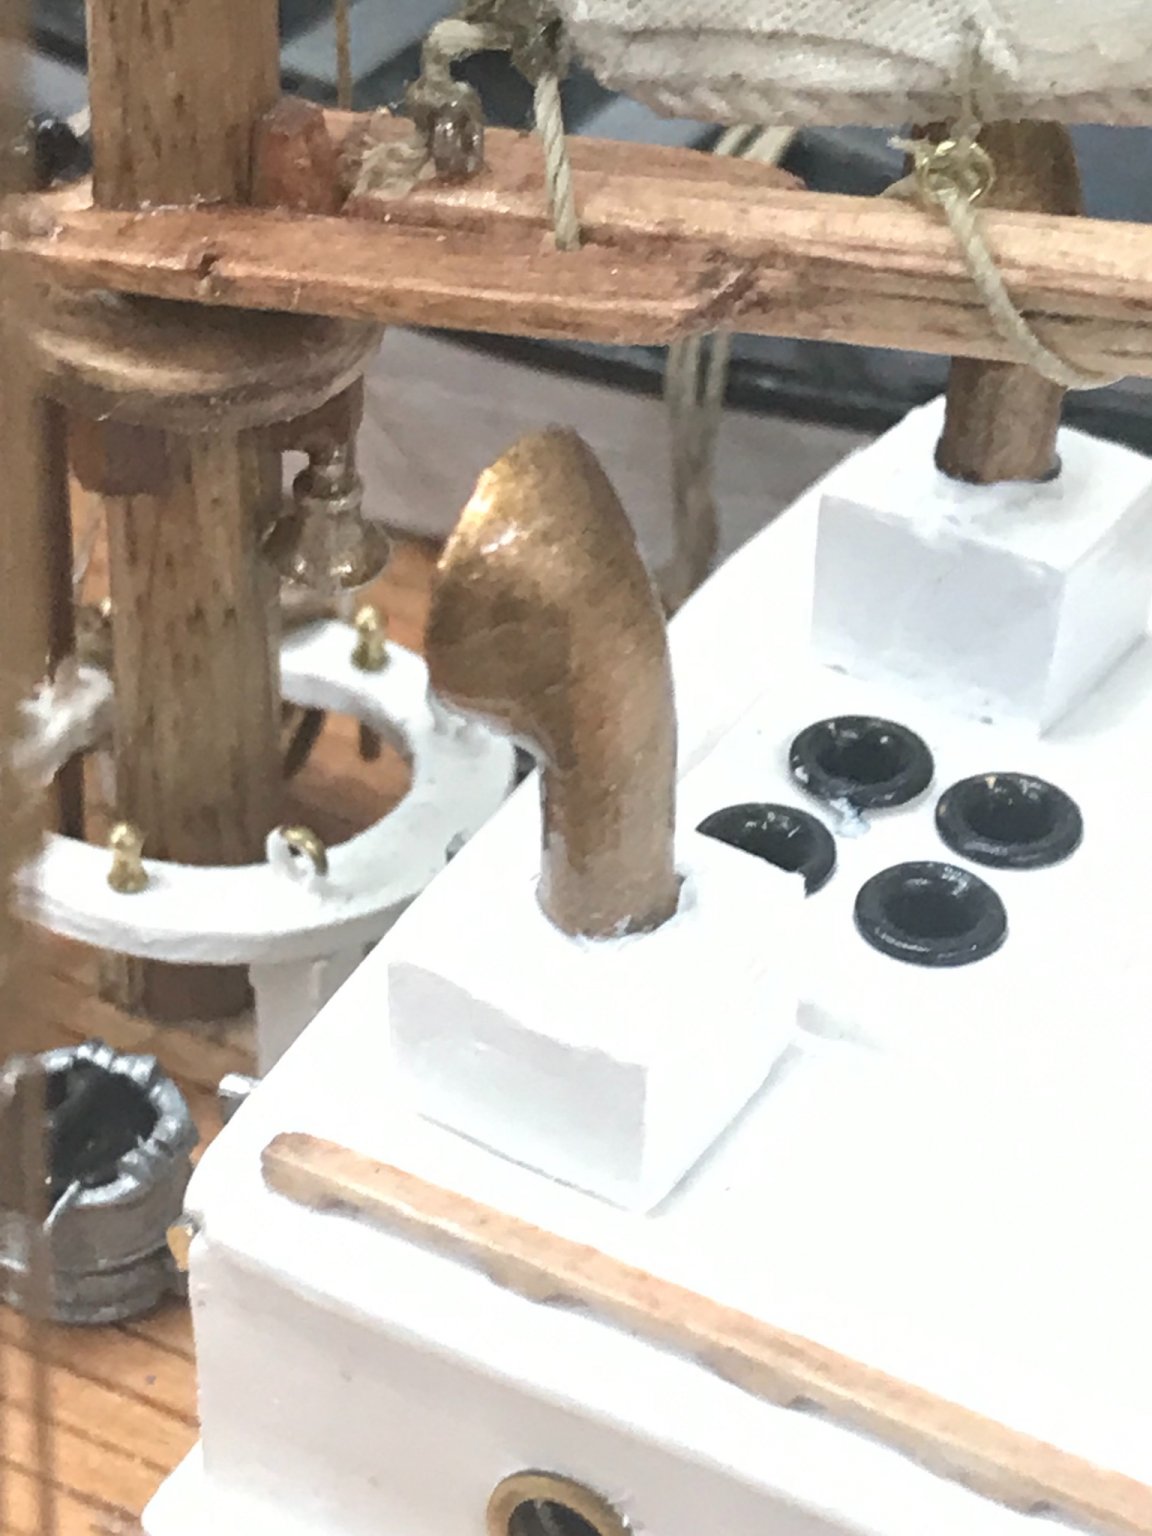
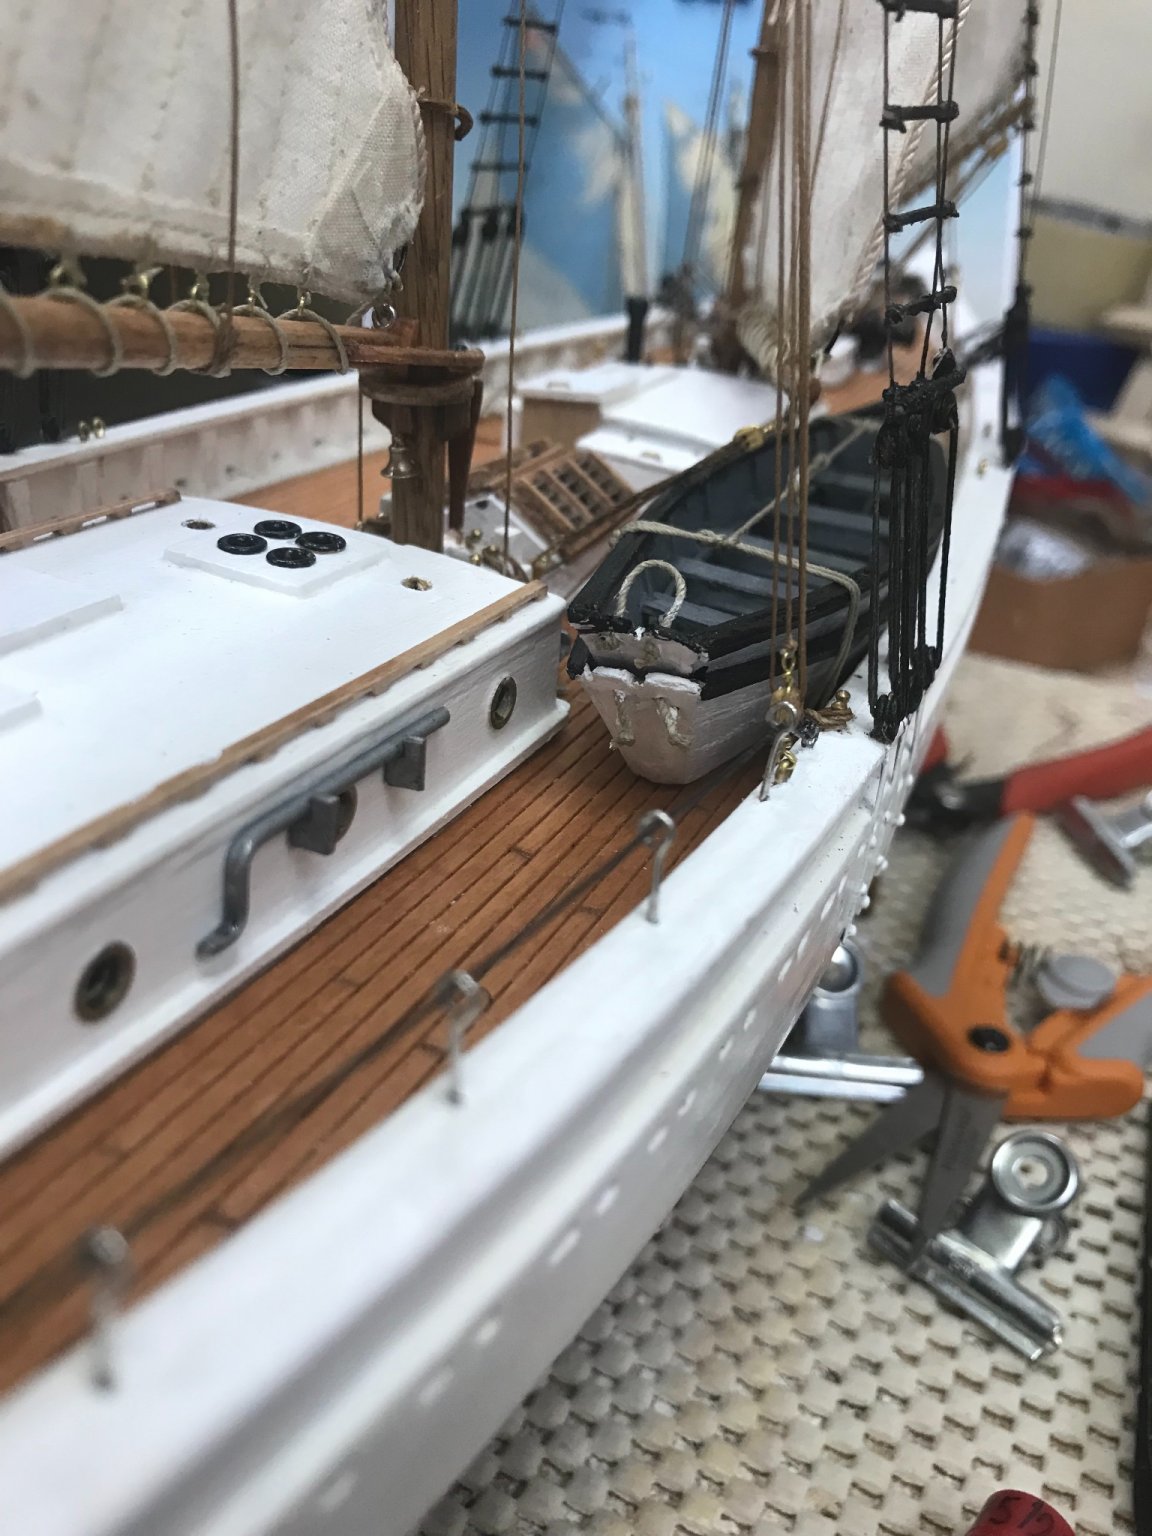
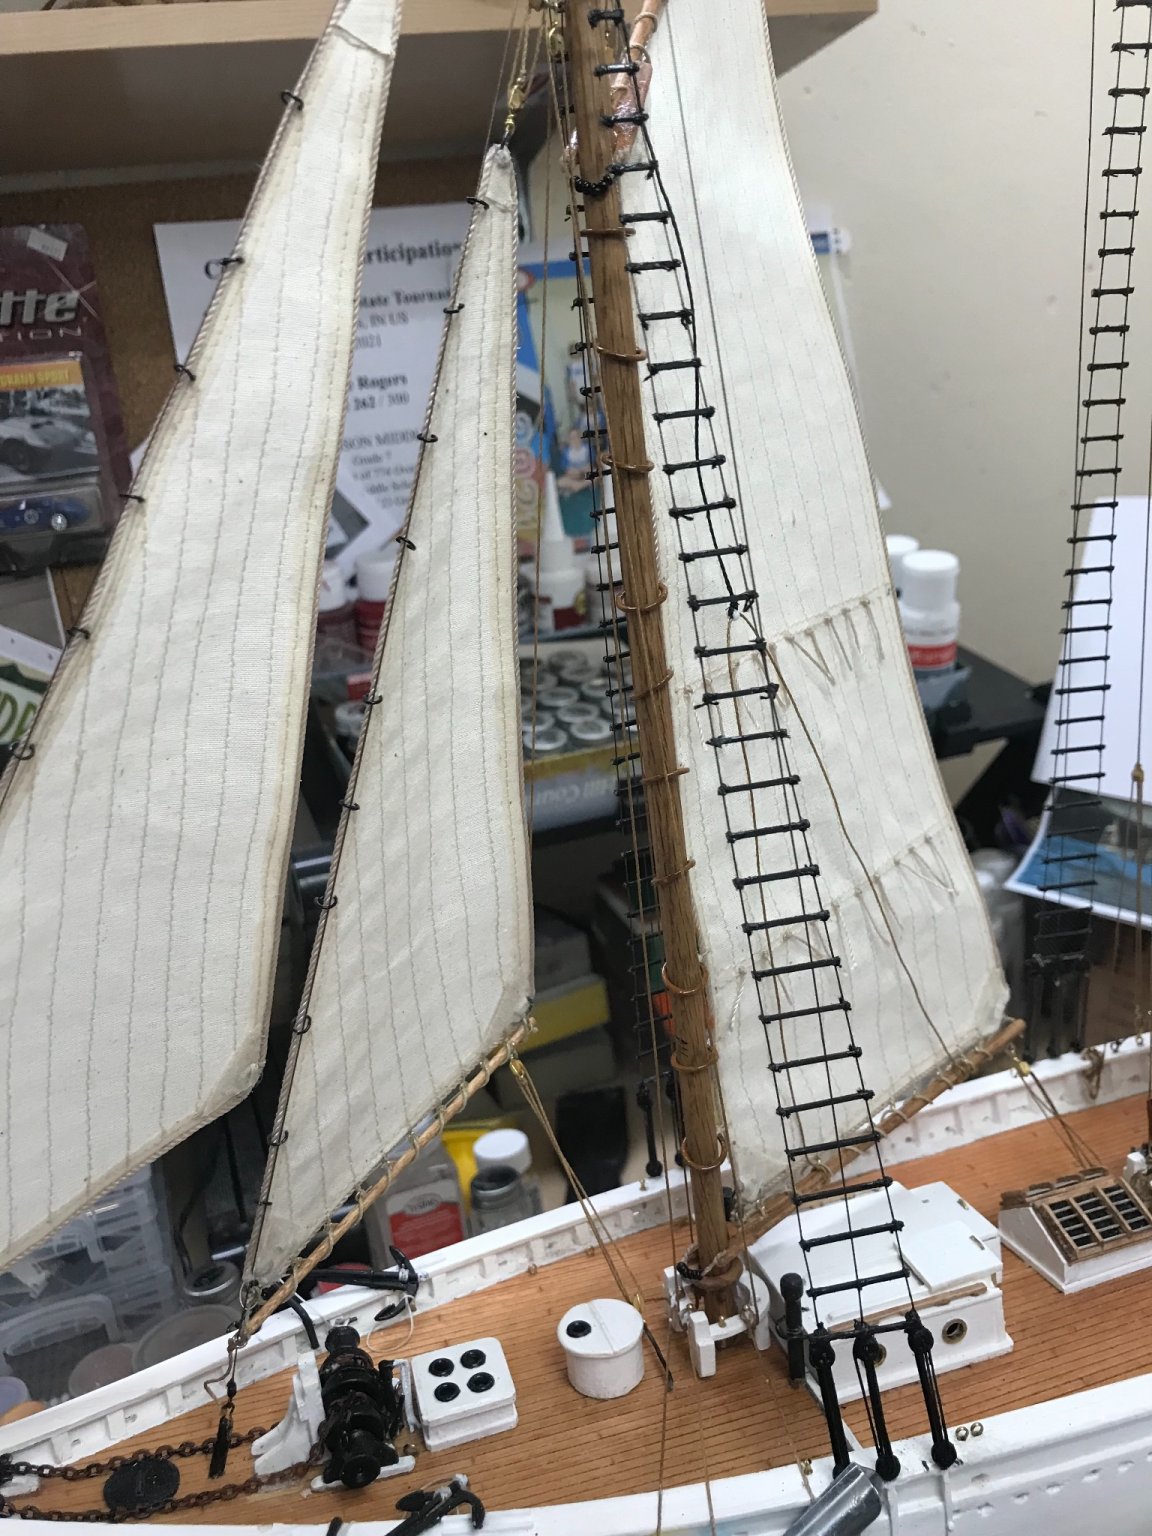
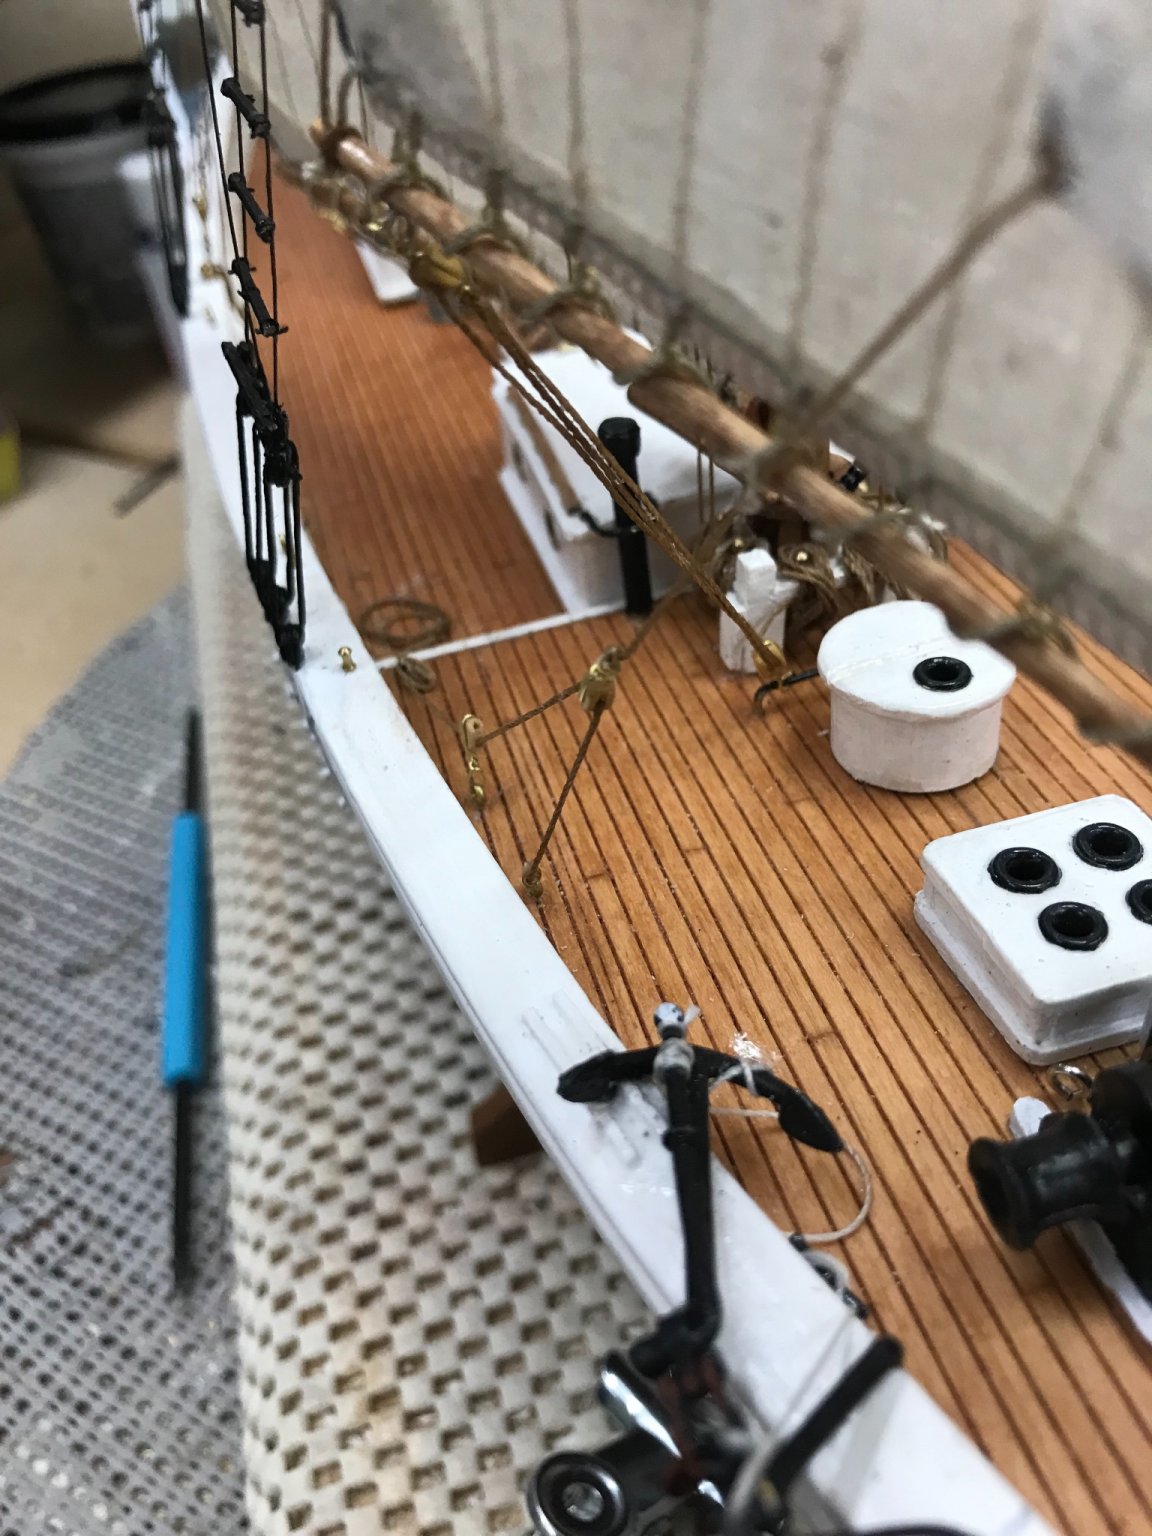
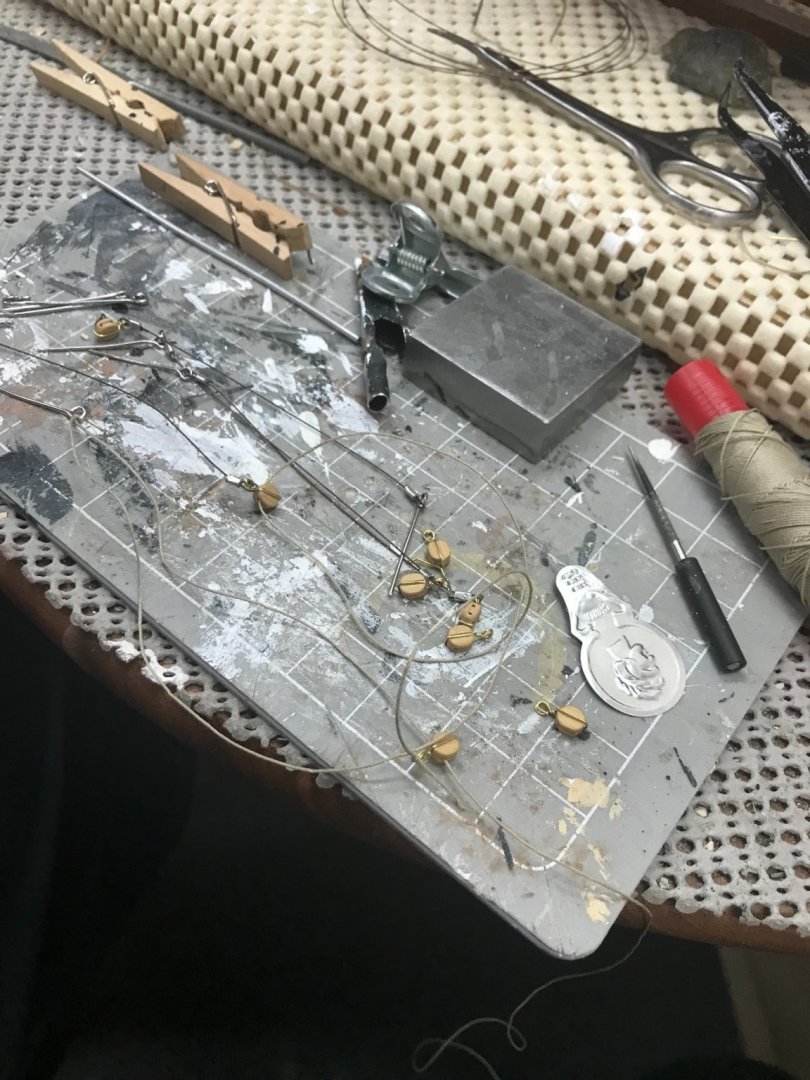
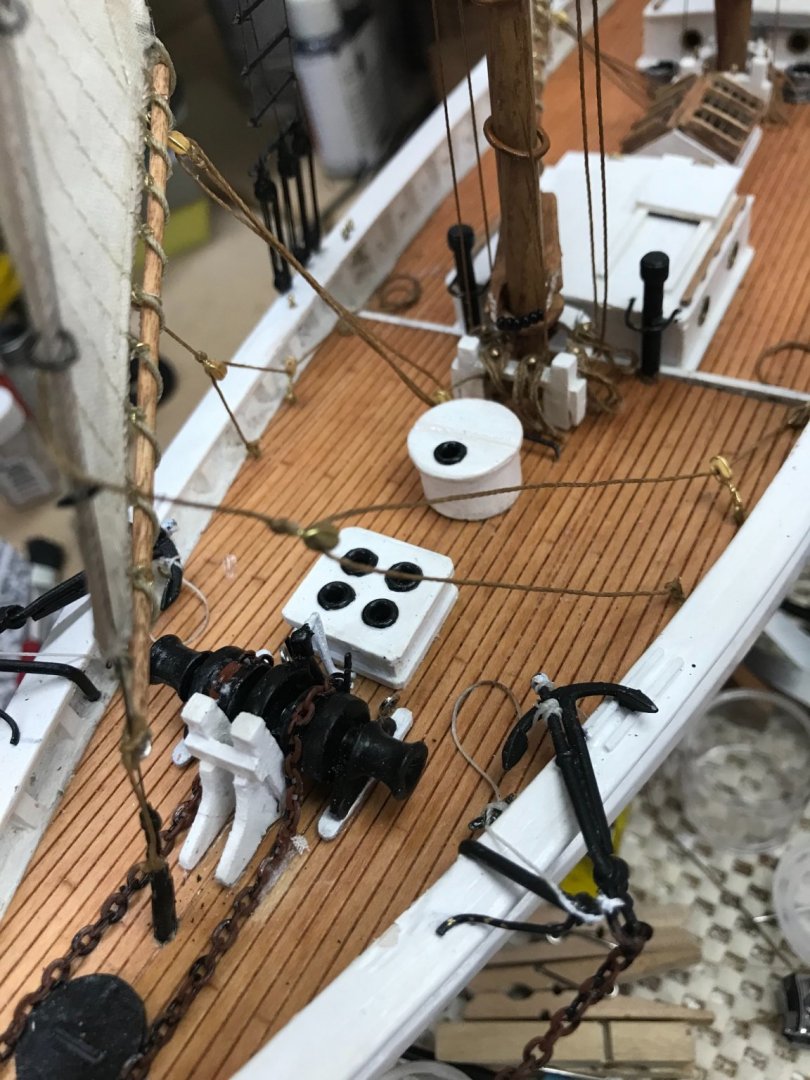
Dory Hooks… Dory Hook rigging tied off to stowed Dory on the Starboard side. Dory Hooks tied off to eyes on the Port Rail. Stowed Dorys tied down to the deck. General question… What purpose do these balls on top of the masts serve? I do know they are to be installed and that they were white before the last restoration and are now yellow. I cannot find anything regarding there function. I wouldn’t think they are decretive, everything on a ship should have a purpose. You would think. 🤔 I sent an email off to the Captain of the Bowdoin at the Academy, but I thought I would crowd source an answer and see if anyone is actually reading my build log. 😆 Thanks

- 127 replies
-
- 4
-
-
- Bowdoin
- Arctic Exploration
- (and 3 more)
-
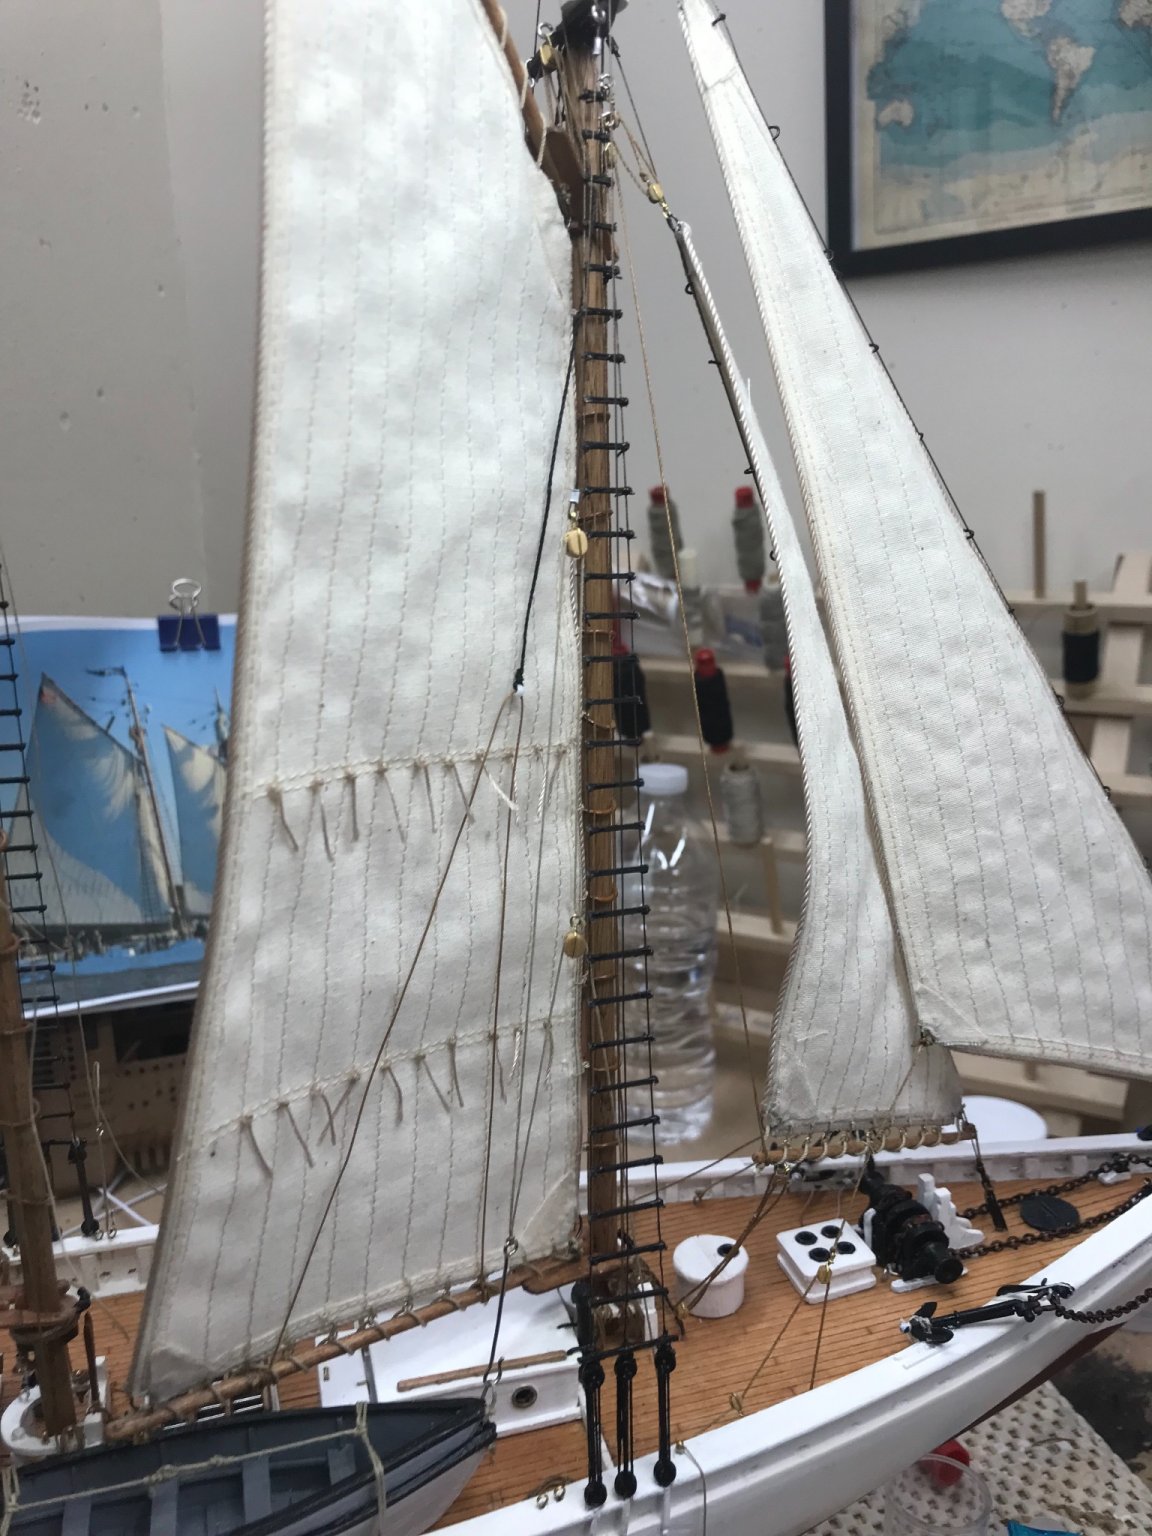
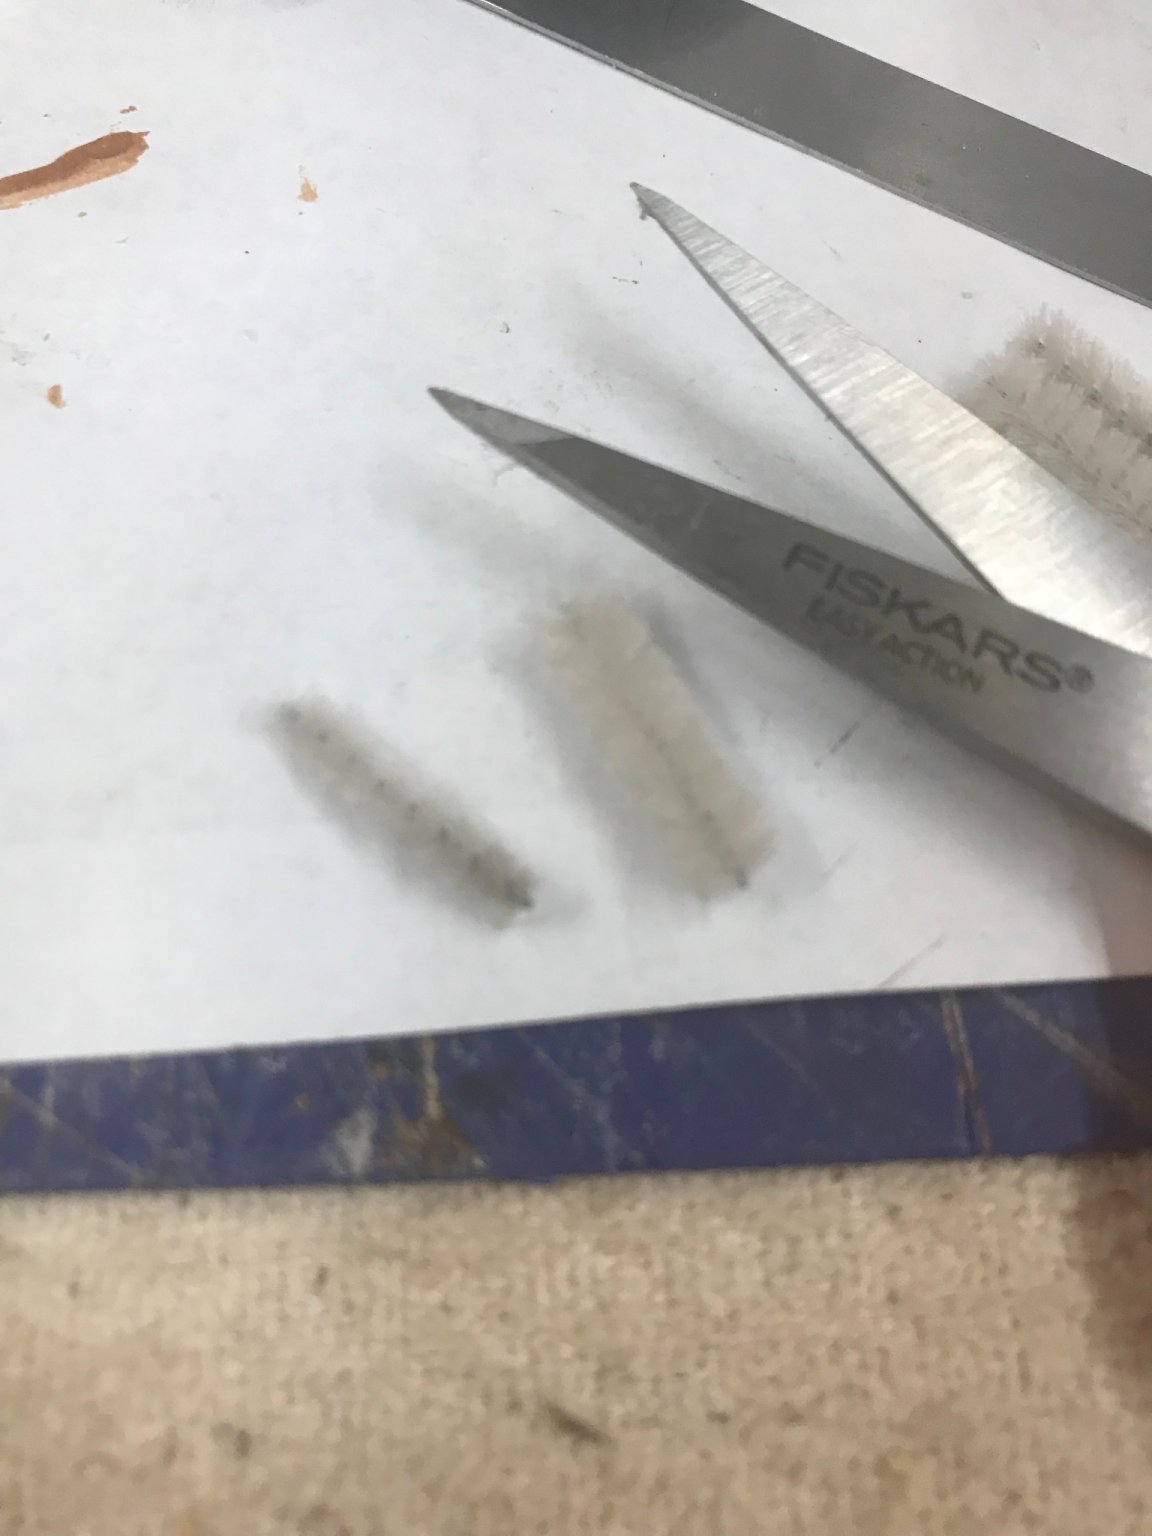
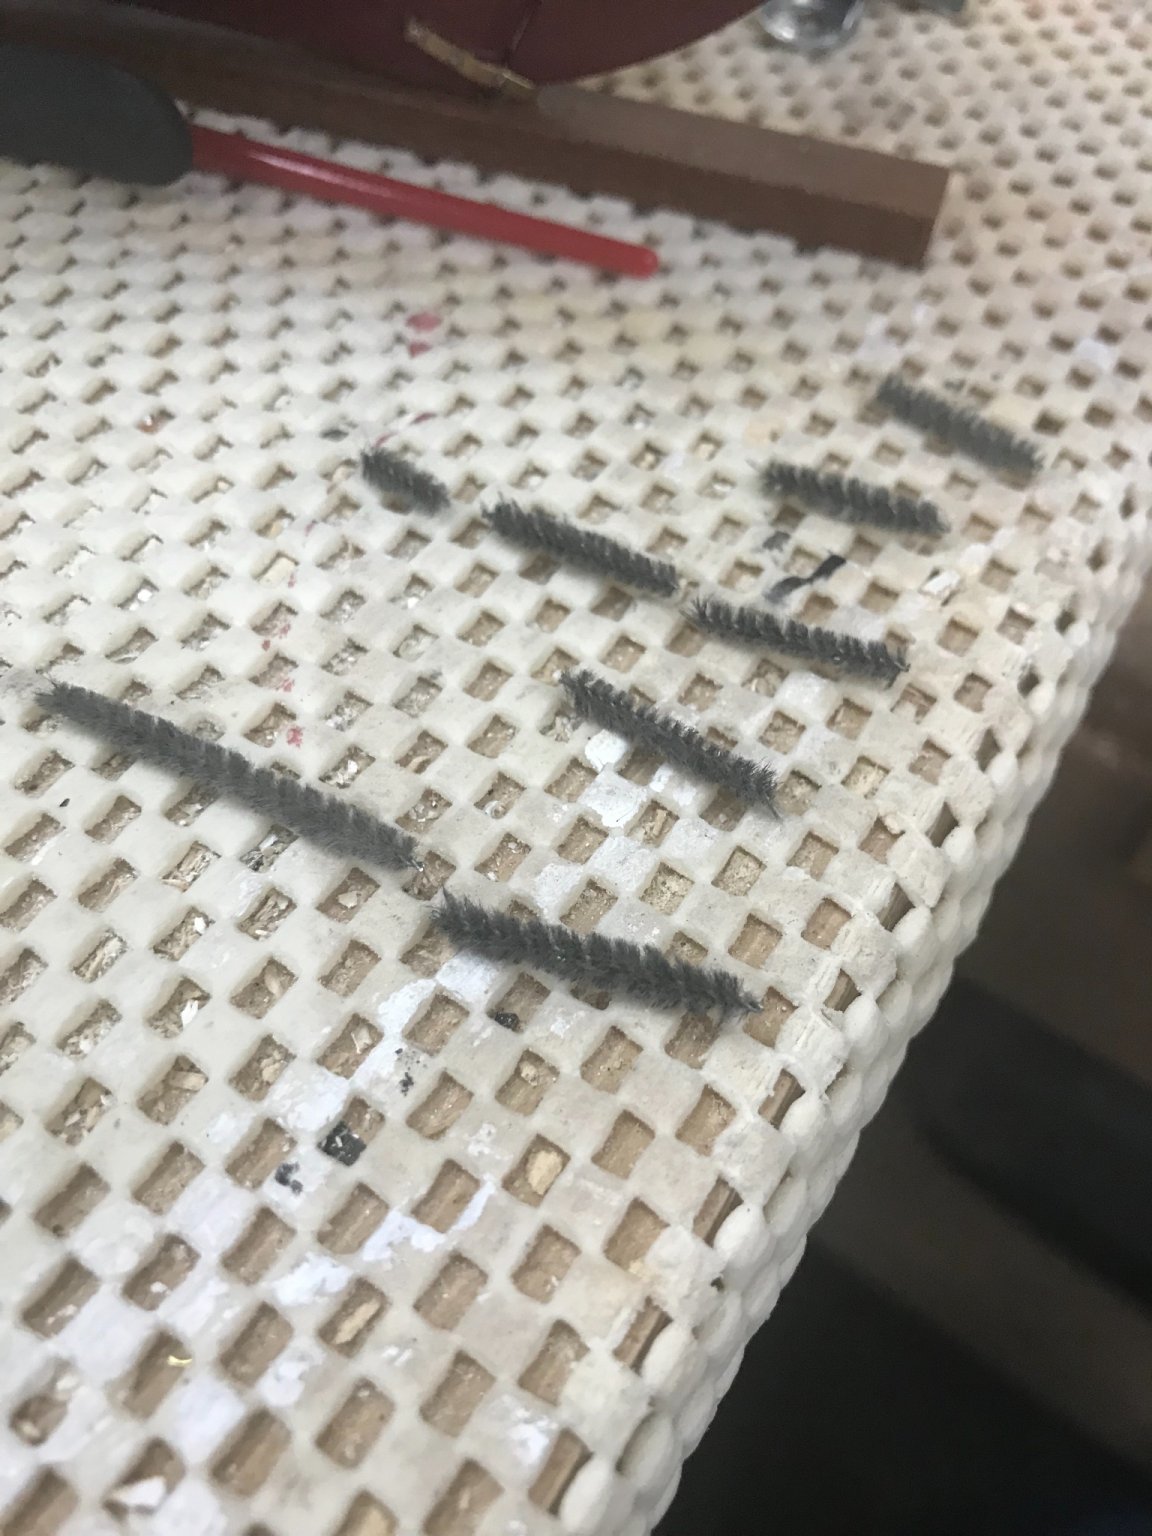
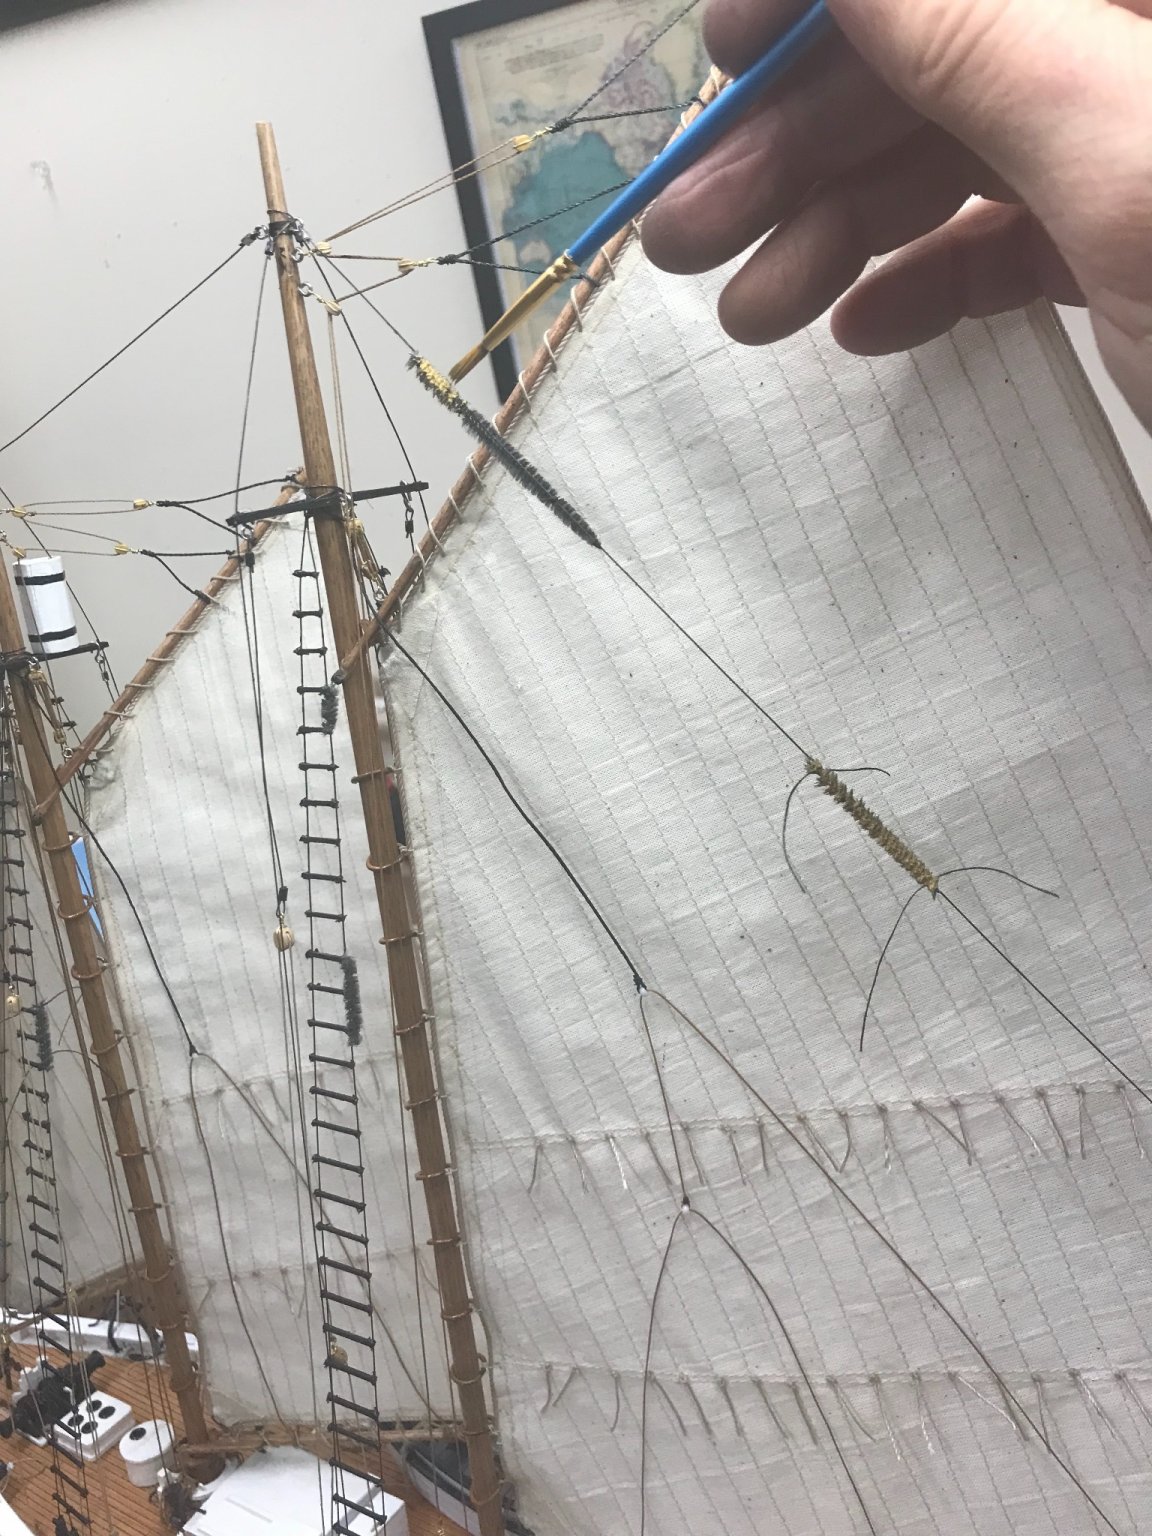
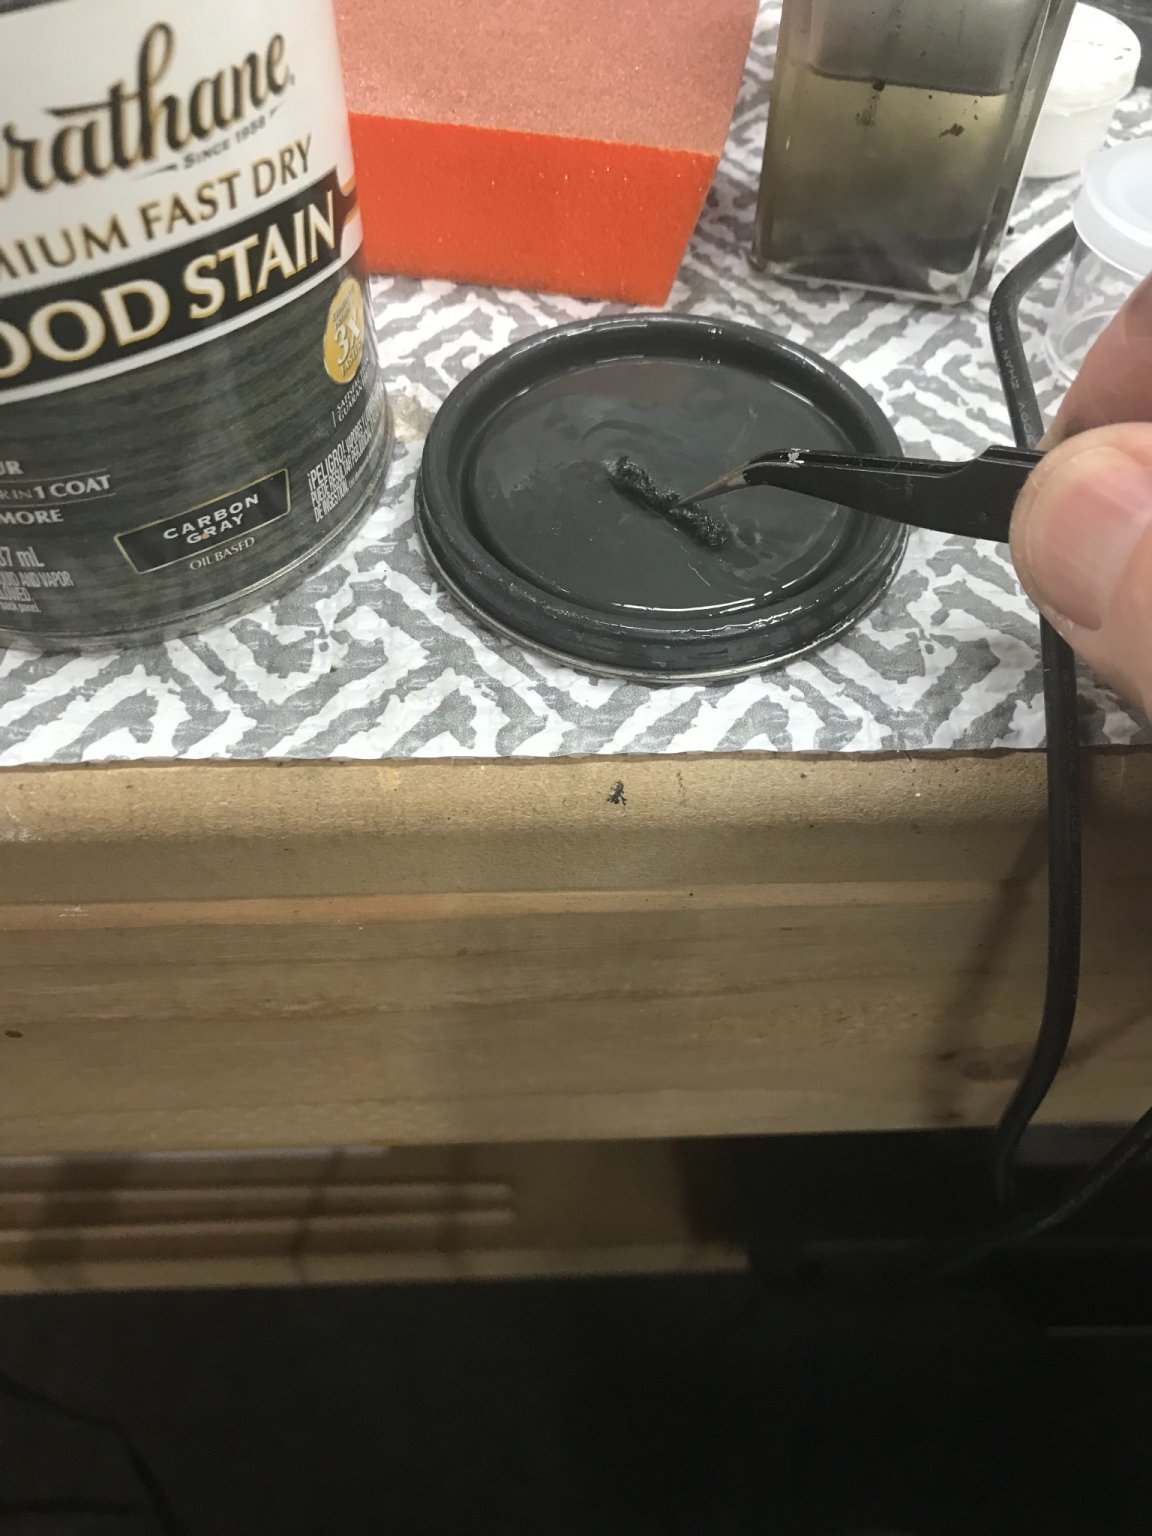
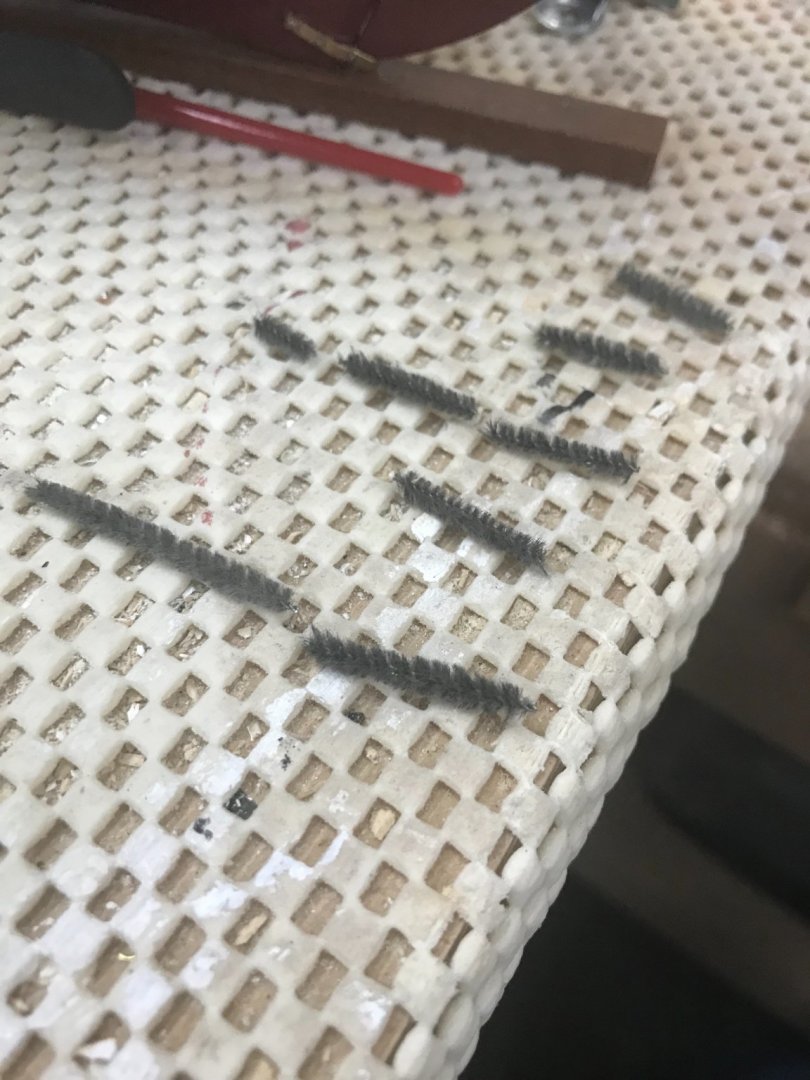
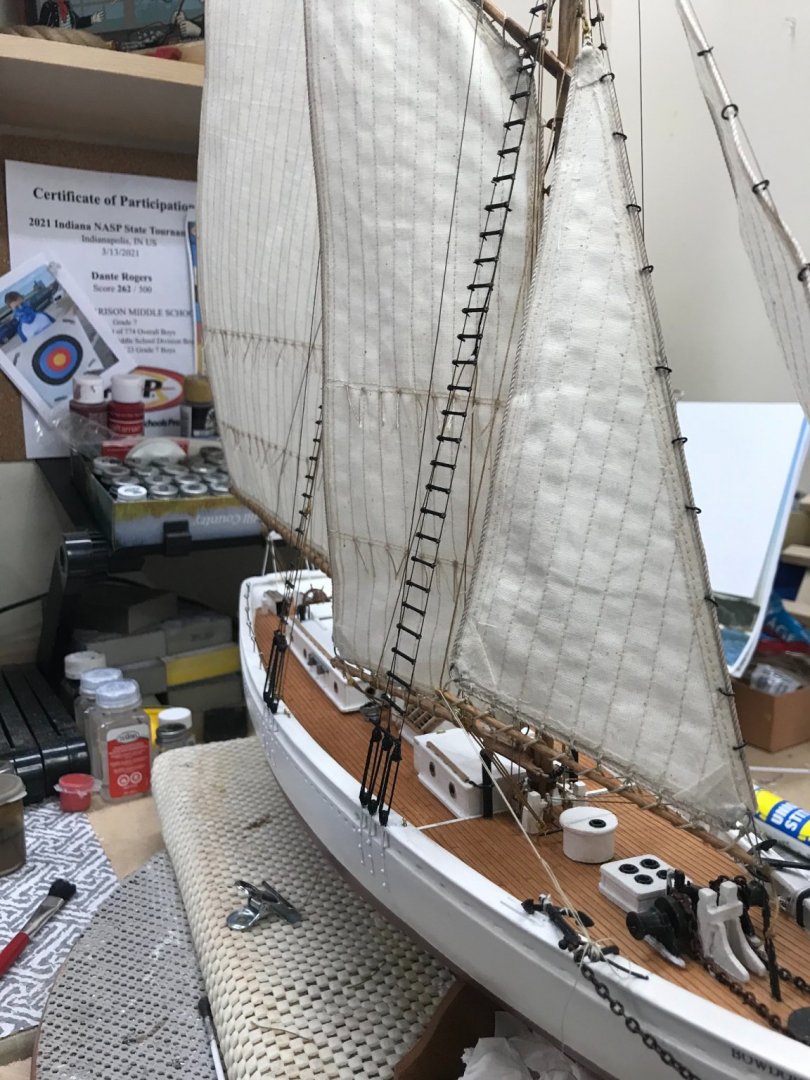
Dory Hooks… Four Dory Hooks rigged. Some more details… Ventilators and the Ships Bell installed. Baggywrinkles… Had to research this one. 🧐 I wondered what those fuzzy things were on the rigging. I found mention of the in @Jond diorama build log. Baggywrinkle is a soft covering for cables (or any other obstructions) to reduce sail chafe. There are many points in the rig of a large sailing ship where the sails come into contact with the standing rigging; unprotected sails would soon develop holes at the points of contact. Baggywrinkle provides a softer wearing surface for the sail. https://en.m.wikipedia.org/wiki/Baggywrinkle I have not seen them on any other build of the Bowdoin, other than jond’s. But then I haven’t seen Sails up full set, either. So, I had to find a way to make it right. 😆 Give a pipe cleaner a close cut. A quick dip in Carbon Gray stain… BaggyWrinkles… Tie them on with black thread a d paint then with Acrylic Yellow Ochre. More detailing coming up… 🤔


- 127 replies
-
- 8
-
-
- Bowdoin
- Arctic Exploration
- (and 3 more)
-
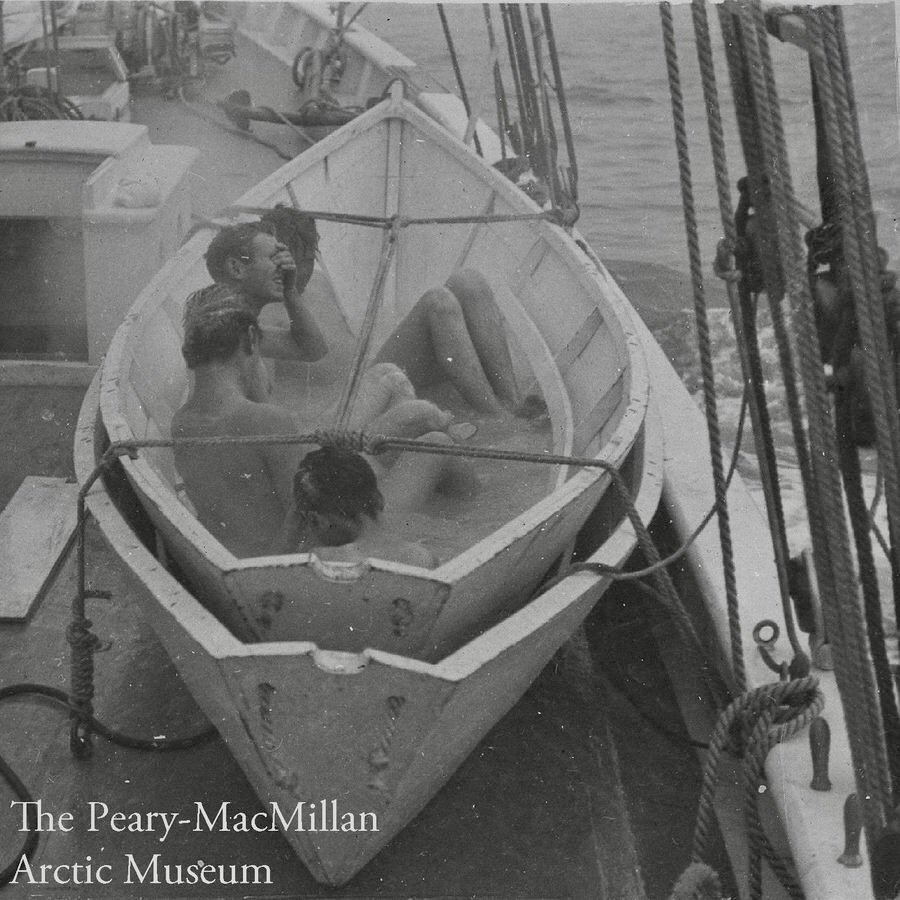
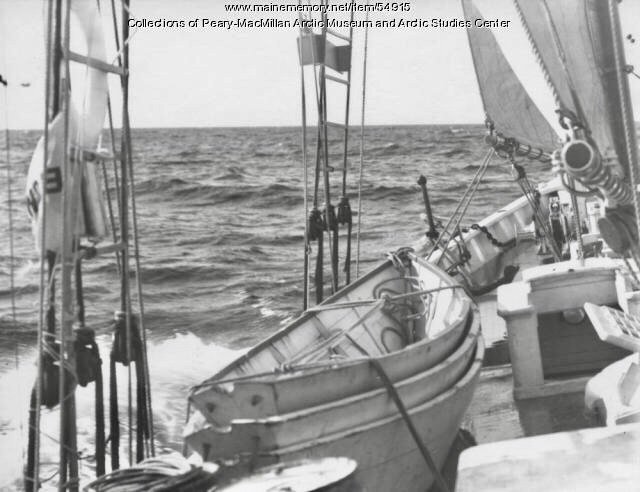
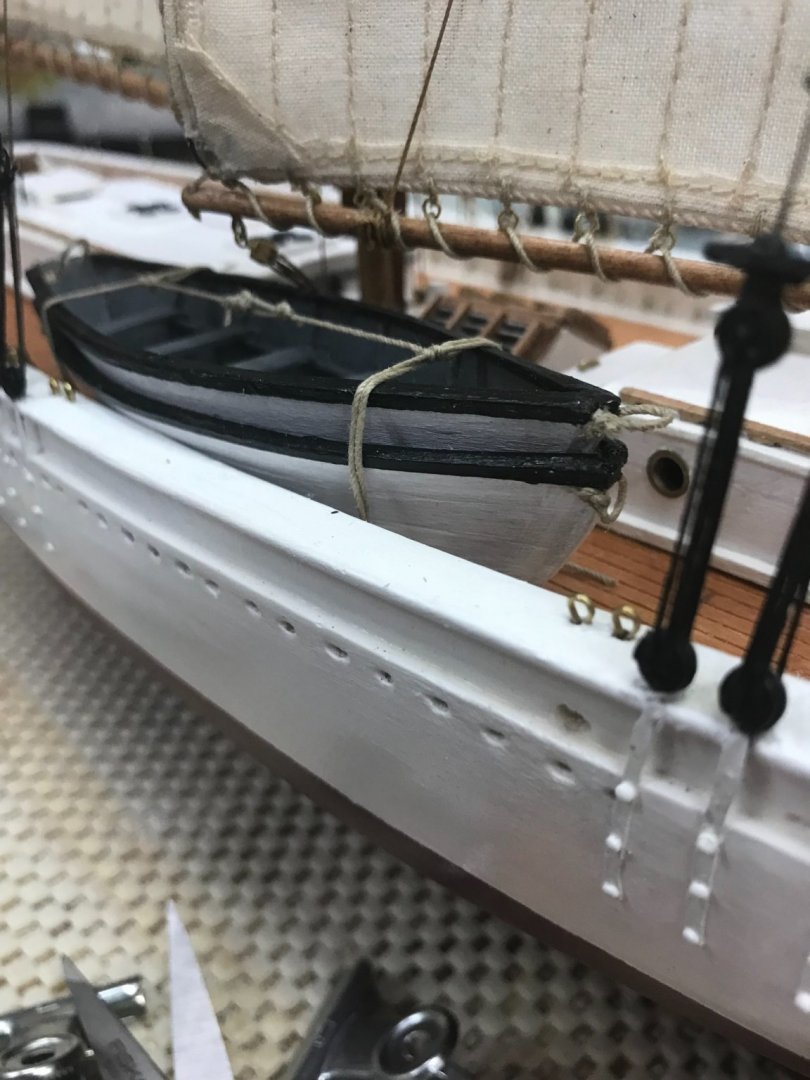
Dory’s stowed on deck… Researching Dory Stowage, yielded these photos from the Arctic Museum at Bowdoin College. Interesting, 1930 bathing while out to sea in the Arctic. Dorys now properly stowed on deck. Onwards. 🍻 Next up Dory Hooks…

- 127 replies
-
- 7
-
-
- Bowdoin
- Arctic Exploration
- (and 3 more)
-
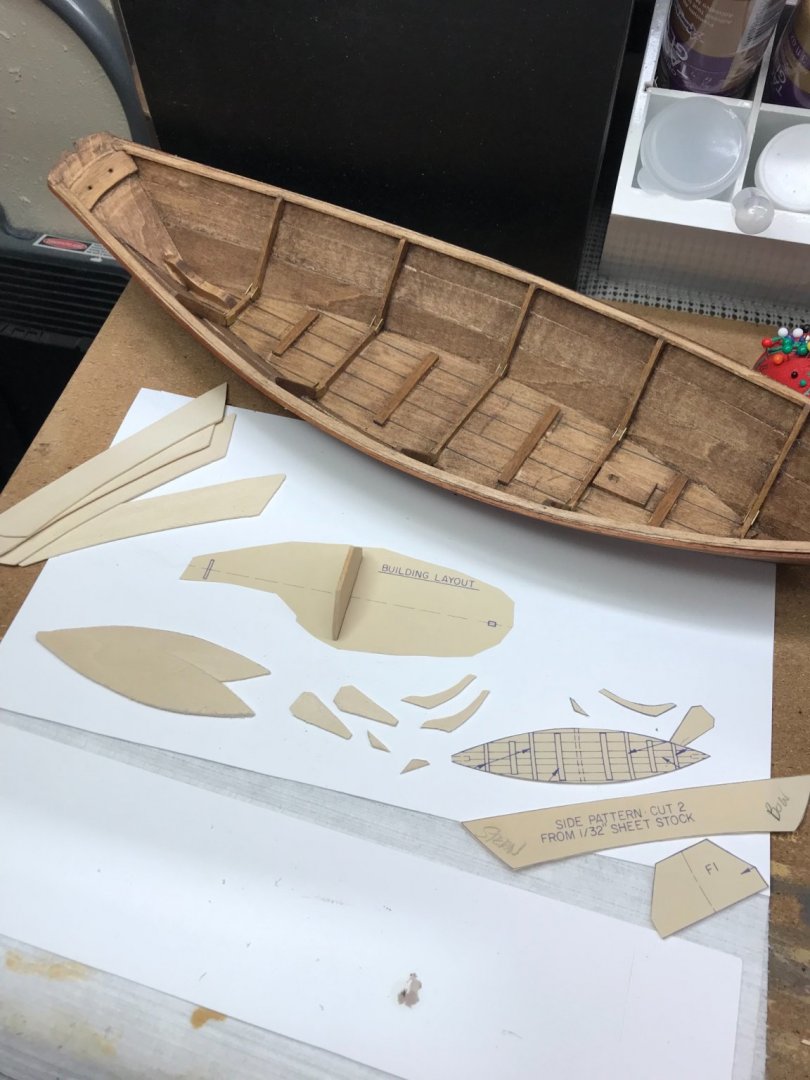
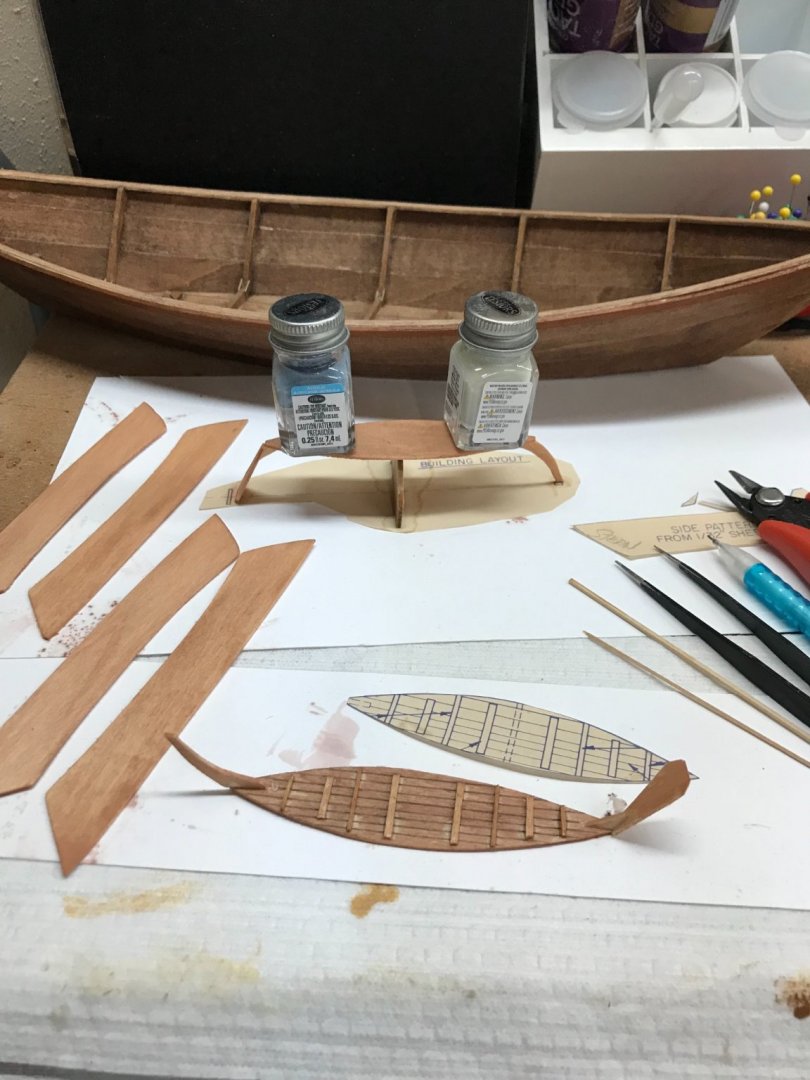
Dory’s continued… Two nested Dory Hulls, easier said than done. Micro Carpentry indeed. 😆 Nested Dory’s completed… 😎 On to the final details. Cheers 🍻
- 127 replies
-
- 6
-
-
- Bowdoin
- Arctic Exploration
- (and 3 more)
-
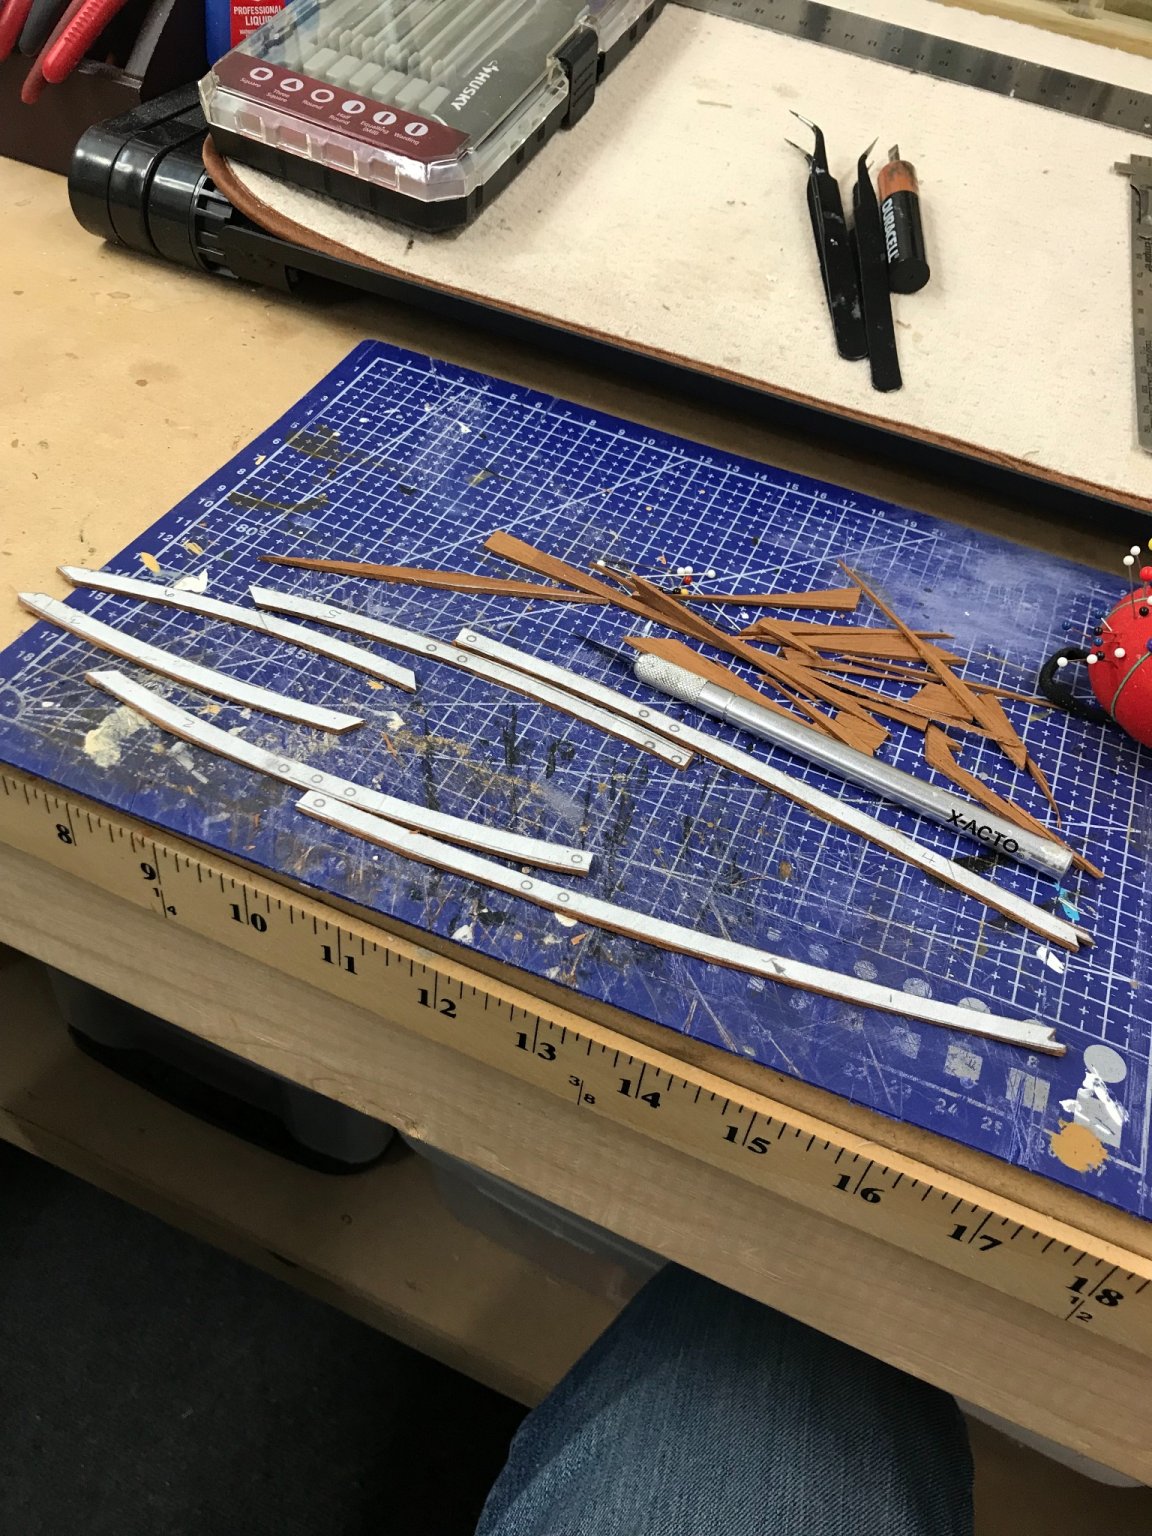
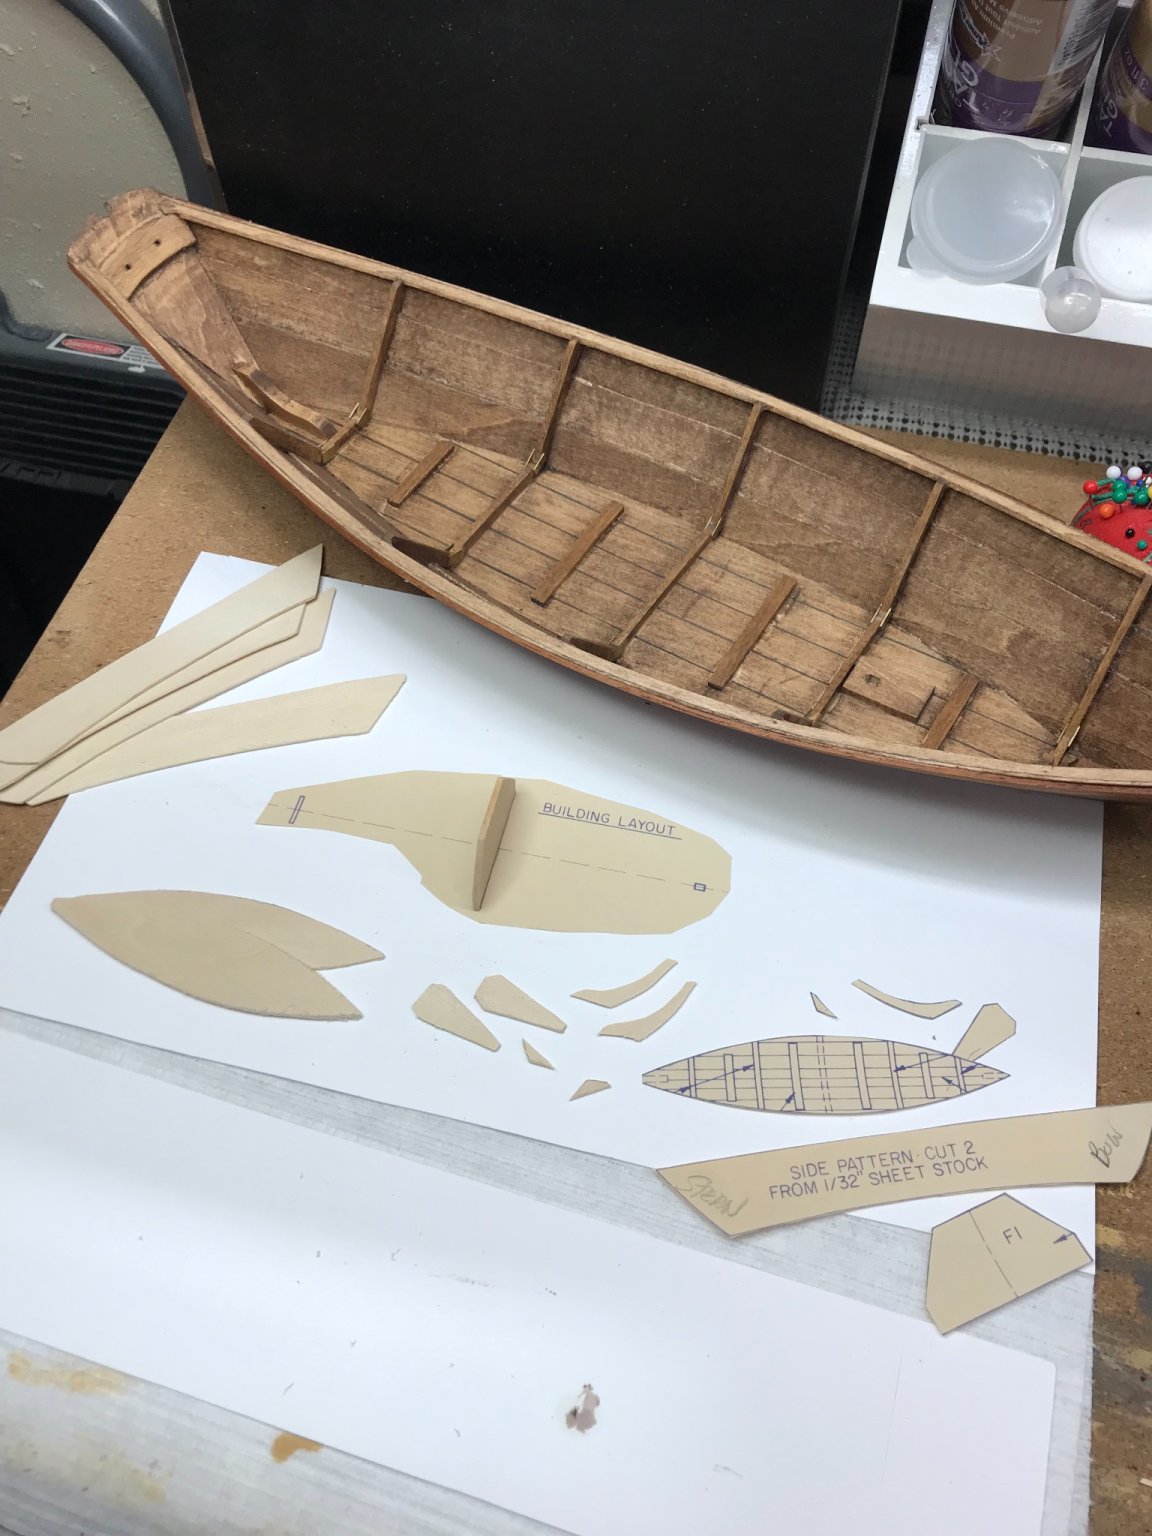
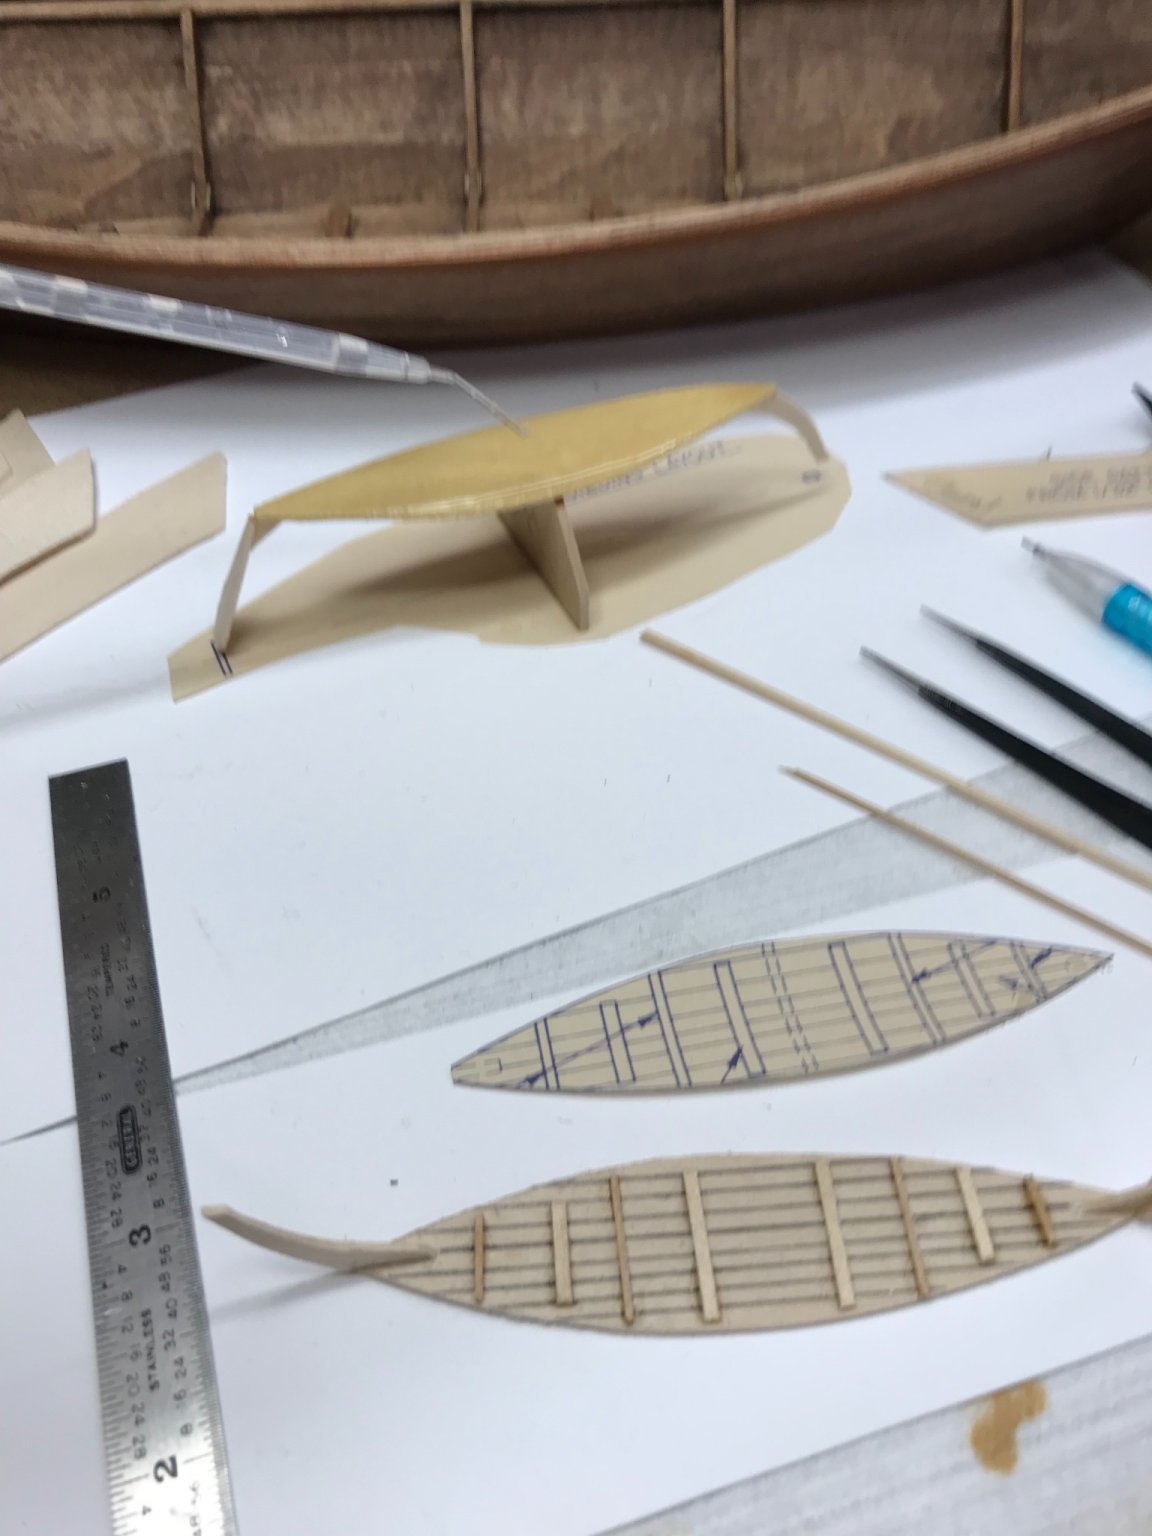
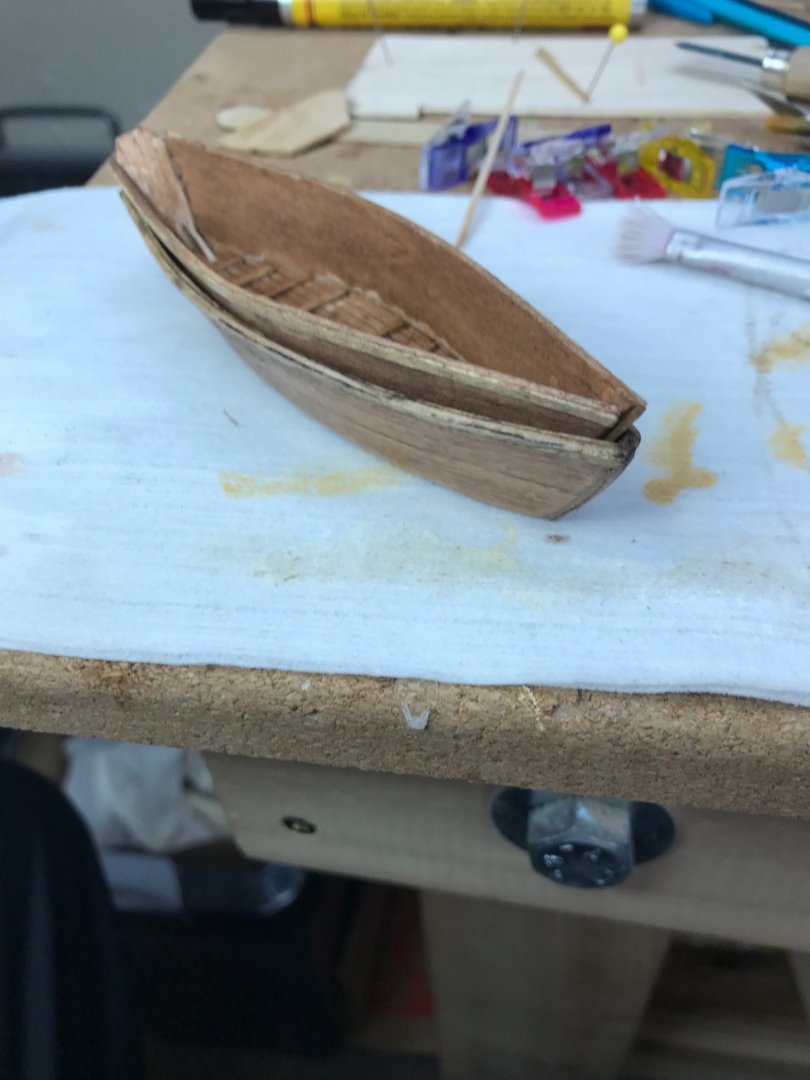
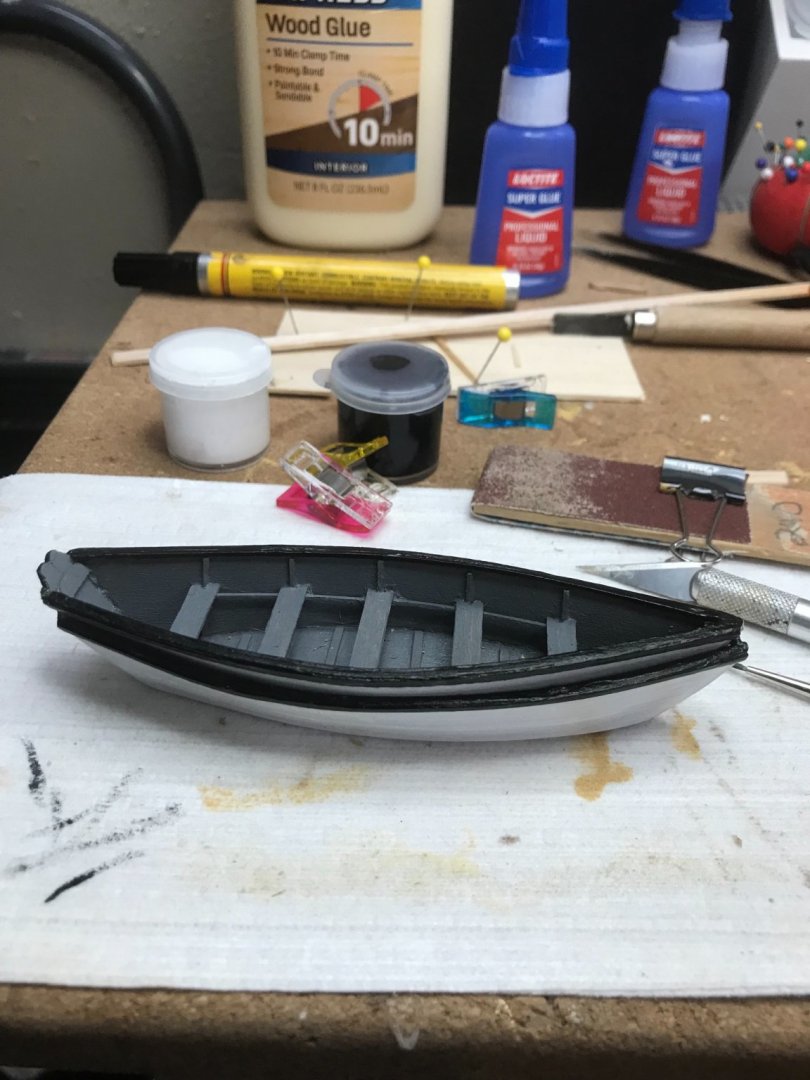
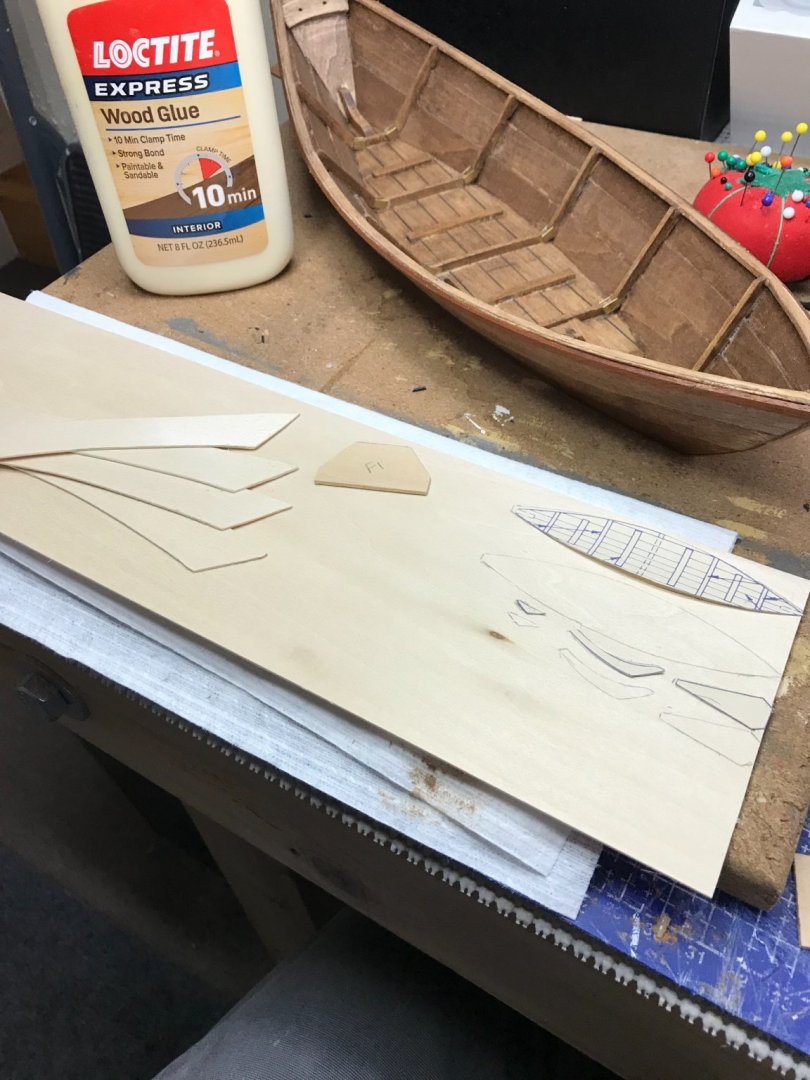
Dory’s… Building a couple of MiniMe 😆 Dory’s to nestle in on the deck of the Bowdoin. Cutting out pieces from 1/32” basswood stock. Using templates from instructions. Pieces ready for assembly. Wetting with Ammonia/Water… Staining of Dory pieces prior to assembly. I will only need to detail the top Dory of the two stacked on deck. Micro Carpentry, for sure. 😎

- 127 replies
-
- 7
-
-
- Bowdoin
- Arctic Exploration
- (and 3 more)
-
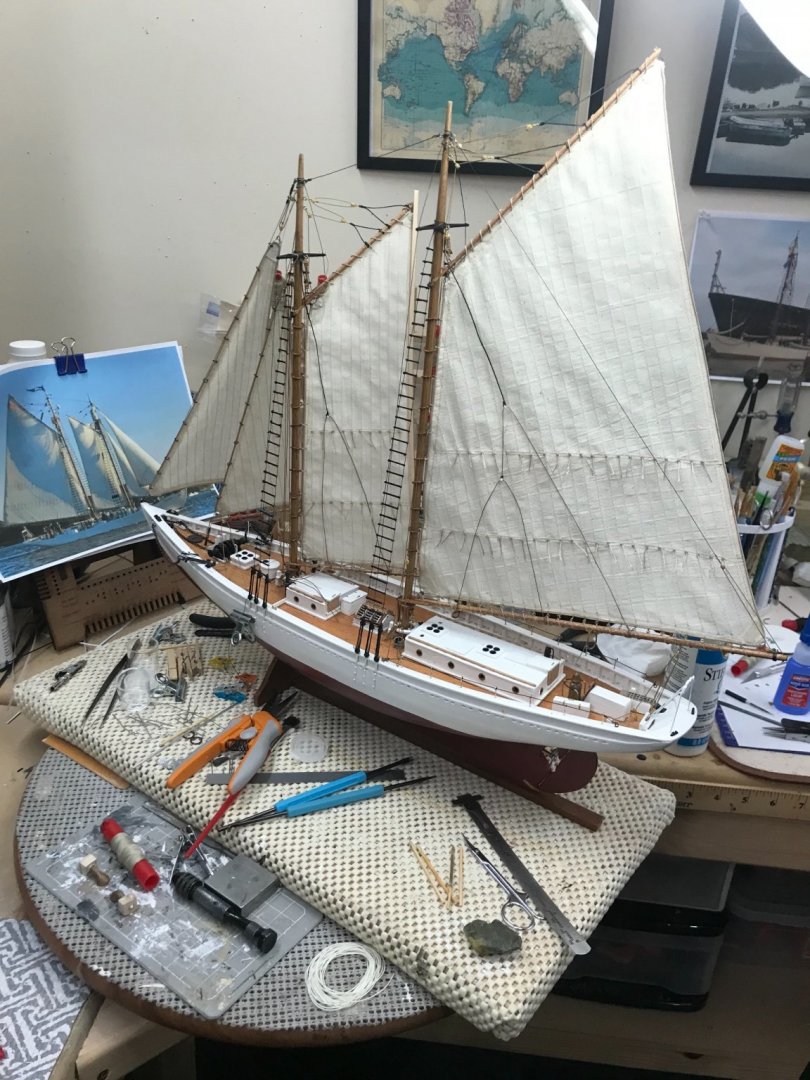
Sails now stiffened. I think she is looking pretty good. 👍 Still have have a few details to add. Almost there… 🧐
- 127 replies
-
- 13
-
-
- Bowdoin
- Arctic Exploration
- (and 3 more)
-
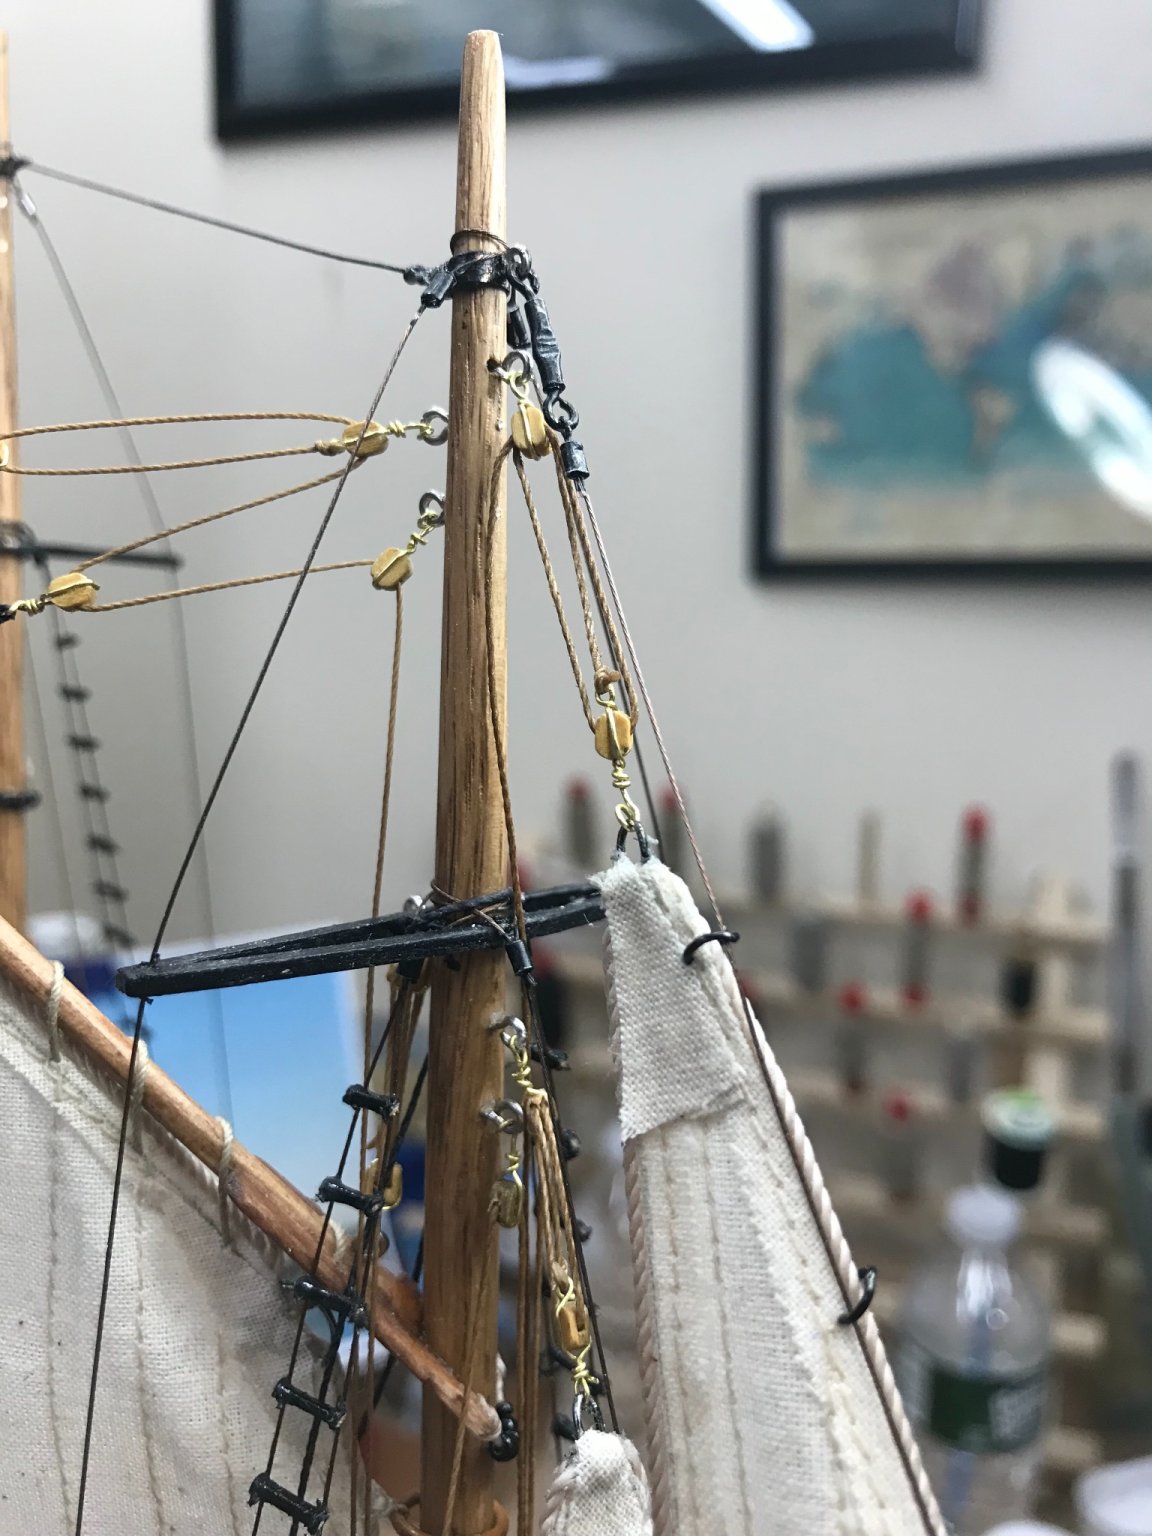
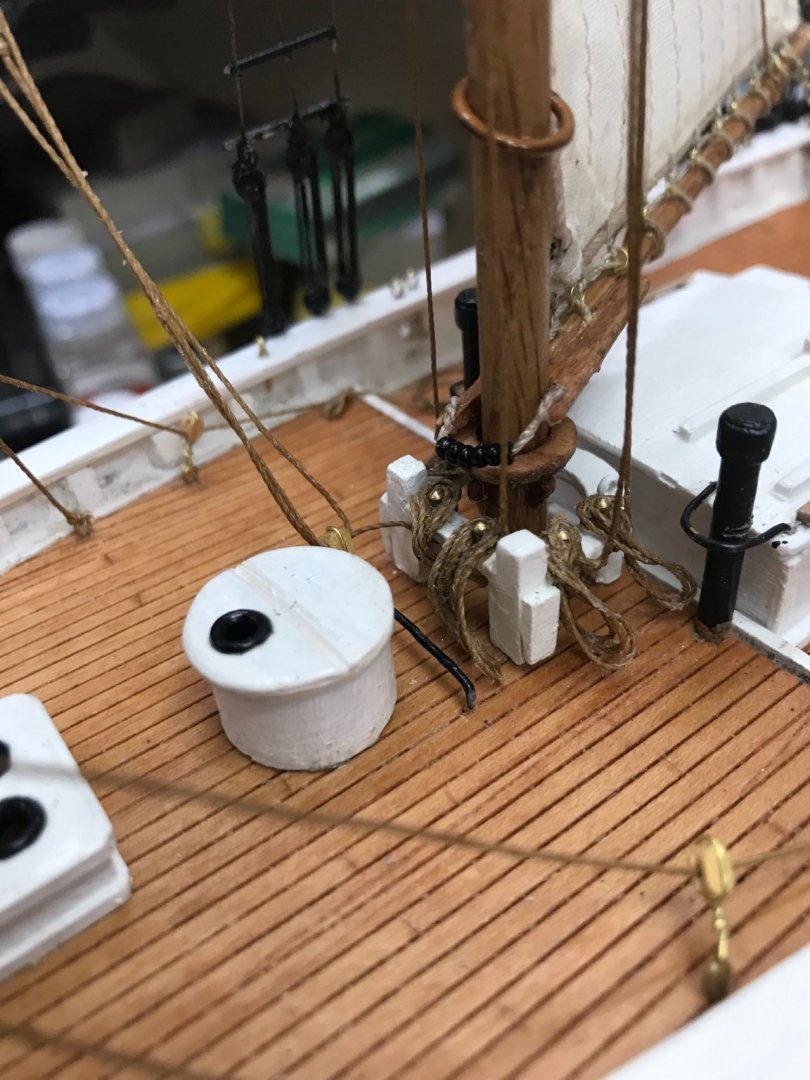
Stay Sail and Jib Rigging Stay Sail Sheet rigging on the traveler. Note: Temporary tie to hold the Boom out. Another view of the Sheet rigging. Stay Sail Halyard and Boom Lift in place. Jib Halyard in place… Jib Sheet lines completed and Lines Belayed on the Deck Cleats. Running Rigging Completed. 😎 Now, on to the final details.


- 127 replies
-
- 5
-
-
- Bowdoin
- Arctic Exploration
- (and 3 more)