HOLIDAY DONATION DRIVE - SUPPORT MSW - DO YOUR PART TO KEEP THIS GREAT FORUM GOING! (Only 24 donations so far out of 49,000 members - C'mon guys!)
×


Egilman
-
Posts
4,377 -
Joined
-
Last visited
Content Type
Profiles
Forums
Gallery
Events
Everything posted by Egilman
-
#1, not recommended for longer than two days, (according to Anycubic and several other brands) what happens is the resin starts settling out in the vat leaving a residue on the FEP that is difficult to get clean... (like a ultra fine powder suspended in the resin) #2 I have, didn't seem to hurt anything... but refer to #1 above... if your going to gone longer than a day, don't start a print would be my thoughts......
-
 Sometimes brother accuracy is left behind to production... and, Aftermarket PE generally follows the model, not the actual item.... But you are doing a bang up job of it, very impressive just making headway out of the mishmash of conflicting info..... Beautiful work, not just the assembly, the research also as well....
 -
I thought so... That's where the strength comes from.... in airplane engineering it is called semi-monocoque construction where the strength is derived from the skin attached to the formers That as opposed to monocoque construction where all the structural strength is in the skin....
-
Are they using a one piece wrap for the wing skins or is it cut up in separate pieces?
-
I'm glad the info helped get you to the good data my friend..... And it's an object lesson in relying on Nasa websites for data... Check your sources.... {chuckle}
-
Pz.Kpfw. IV Ausf. G/H by CDW - Ryefield - 1:35 - PLASTIC
Egilman replied to CDW's topic in Non-ship/categorised builds
That would work.... It's a nice kit too... Mine is the V2 on a Vidalwagen version, but the Strabokran is the same.... They used it a lot for depot level maintenance....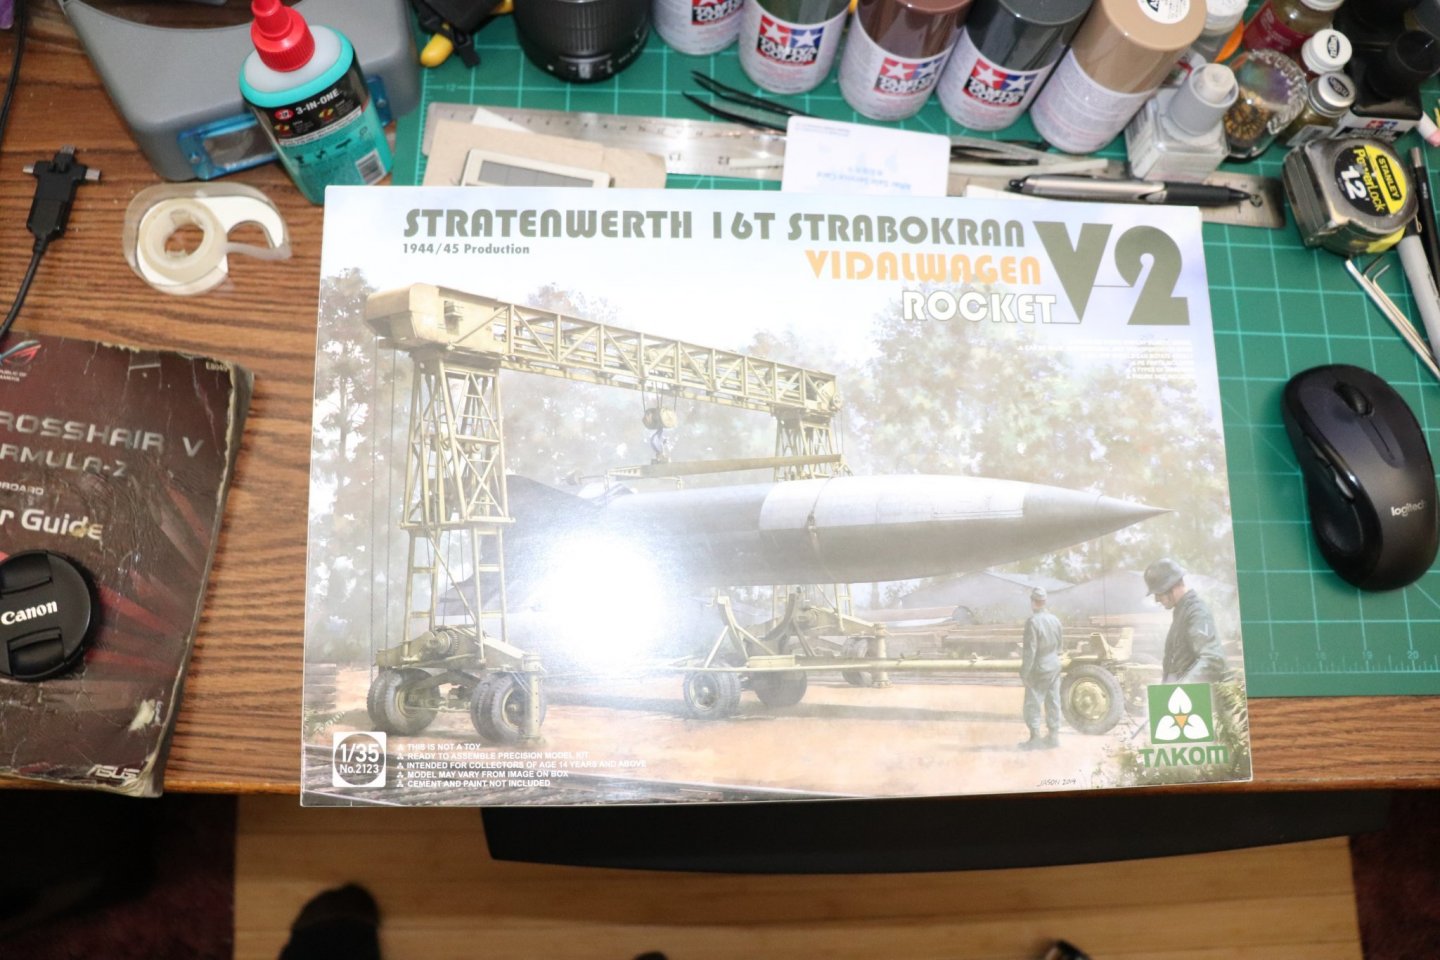
-
Pz.Kpfw. IV Ausf. G/H by CDW - Ryefield - 1:35 - PLASTIC
Egilman replied to CDW's topic in Non-ship/categorised builds
A cut-a-way is the best way, battle destroyed, (turret blown off) can be done very nicely as well but a lot of the detail will still be hidden... A maintenance scene like an engine swap is another... Then there is always do two, a cutaway to display the insides and a normal one for the outside.... Tanks are a toughie for displaying the inside work..... -
You mean 40K views right.... It's worth it my friend....
-
Pz.Kpfw. IV Ausf. G/H by CDW - Ryefield - 1:35 - PLASTIC
Egilman replied to CDW's topic in Non-ship/categorised builds
Same here, won a few, lost many..... For me it was too unrealistic.... But then again most capture the flag games don't do a lot for my interests.... (way too boring) Also I'm not into kill until your killed type stuff.... There has to be a clear path to a clear win no matter how difficult it is to get there.... -
Pz.Kpfw. IV Ausf. G/H by CDW - Ryefield - 1:35 - PLASTIC
Egilman replied to CDW's topic in Non-ship/categorised builds
I figured it must have been something like that.... I probably should have sent you a private note, but for some reason the PN system failed to open up for me right at that point... I apologize. -
Pz.Kpfw. IV Ausf. G/H by CDW - Ryefield - 1:35 - PLASTIC
Egilman replied to CDW's topic in Non-ship/categorised builds
Brother, I'm down/in for this one.... But a point.... Panzerkampfwagen IV Ausf. G/H means Ausfuhrung G/H... Or, (in English) Armored War Vehicle IV Model G/H... I know nit picking...... Sorry Brother.... -
Not something to rely on Mike... my experience is their estimate could be as much an an ounce off.....
-
Every kit ever made has one of those moments where we think it is a simple task, two days to a week later, we wonder how we got it done..... Call it character building, the manufacturers, in their zeal make it so easy...... {chuckle} But I see you made it through.... that what we do, solve problems....
-
It's our pleasure Grant, the interactions in a forum like this is where the art of modeling grows... it takes the place of the old time model shop where the owner has built everything that was ever molded/sold and knew just how to fix it.... I built a coach for a gent who wanted spinable wheels, so superglue was out... in sufficient quantities to hold securely, it freezes everything solid.... My solution was to use a brass collar just large enough to fit over the Britannia axel, had to shave one of the axels flash down to get it to slip over.... At time for assembly, using 5 min epoxy, I slip the wheel over the axel, cut a split washer of wax paper a hair smaller than the collar and place it over the collar against the wheel hub, then a dab of 5 minute into the hole in the wheel side of the collar.... (if you get a bit on the mating surface of the collar, that's what the wax paper is for) slip the collar over the axel, and as the epoxy sets up, spin the wheel... The wax paper ensures that little if any epoxy will get on the hub, and the rough surface of the axle ensures a solid joint.... added bonus you can wipe off any epoxy that comes out the collar hole before it cures..... When it's dry it looks just like a greasy hub nut on the end of an axle.... Perfect turning wheels that will never come off.... If the coach has exposed hub nuts then drill them out rather than use a collar to keep the hex detail.... When it's dry it looks just like a greasy hub nut on the end of an axle....
-
I wonder how long that is going to last until it gets all scraped up and you wind up having to sand it smooth again... Looks neat though and it's proof positive that they will be releasing the DLP sooner rather than later....
-
Flakpanzer T-34(r) by Backer - FINISHED - UM - 1/72 - PLASTIC
Egilman replied to Baker's topic in Non-ship/categorised builds
The Germans used EVERYTHING they could lay their hands on off the battlefield.... (but then so did the Russians) The US army was well known for using captured 88's as anti aircraft guns in the place of 90mm's when they had production shortages later in the war.... They had captured over a thousand 88's and a mountain of ammo... They even wrote their own tech and service manuals for them as foreign issue equipment.... (they even had 100's of AA crew prisoners willing to teach) In total war you make use of everything you can no matter where you get it from.... -
There were several planes they didn't acquire, mostly the late war US navy aircraft, but there is one interesting aircraft they never obtained a copy of good enough to make flyable again... the B-25 Mitchell...... And it flew throughout the war.. At least that is my understanding..... (could be wrong)
-
It won't Grant, the shafts will snap off.. Been there done that.... The answer is to drill a hole and insert a hard brass rod... I know modelers who didn't even mess with the soft cast axels, the cut them off and go straight to brass or steel rods.. when you screw the nut on it's trying to force form the threads, think for a second, a die will actually be digging in trying to cut the threads, even more torque applied to the axel as the teeth in the die start cutting..... This is the answer if you don't want to mess with switching the axels to rods.... (it's a solution I've used) and you have hubcaps to cover the glue spot.... You'll want to use epoxy for this gluing as well, CA just won't hold....
-
I hope I wasn't the cause of this.... I'm not a rivet or plank counter by any stretch, modeling is a series of compromises and no one will ever get to perfection, especially me... Nasa 3D itself has four voyager models for download from four different designers... they are all different as well..... I apologize if I caused any misgivings my friend, that was not my intent.... I think whatever you build will be downright gorgeous..... I will follow with great interest, and keep my overrunning fingers (and commentary) to myself.... EG
-
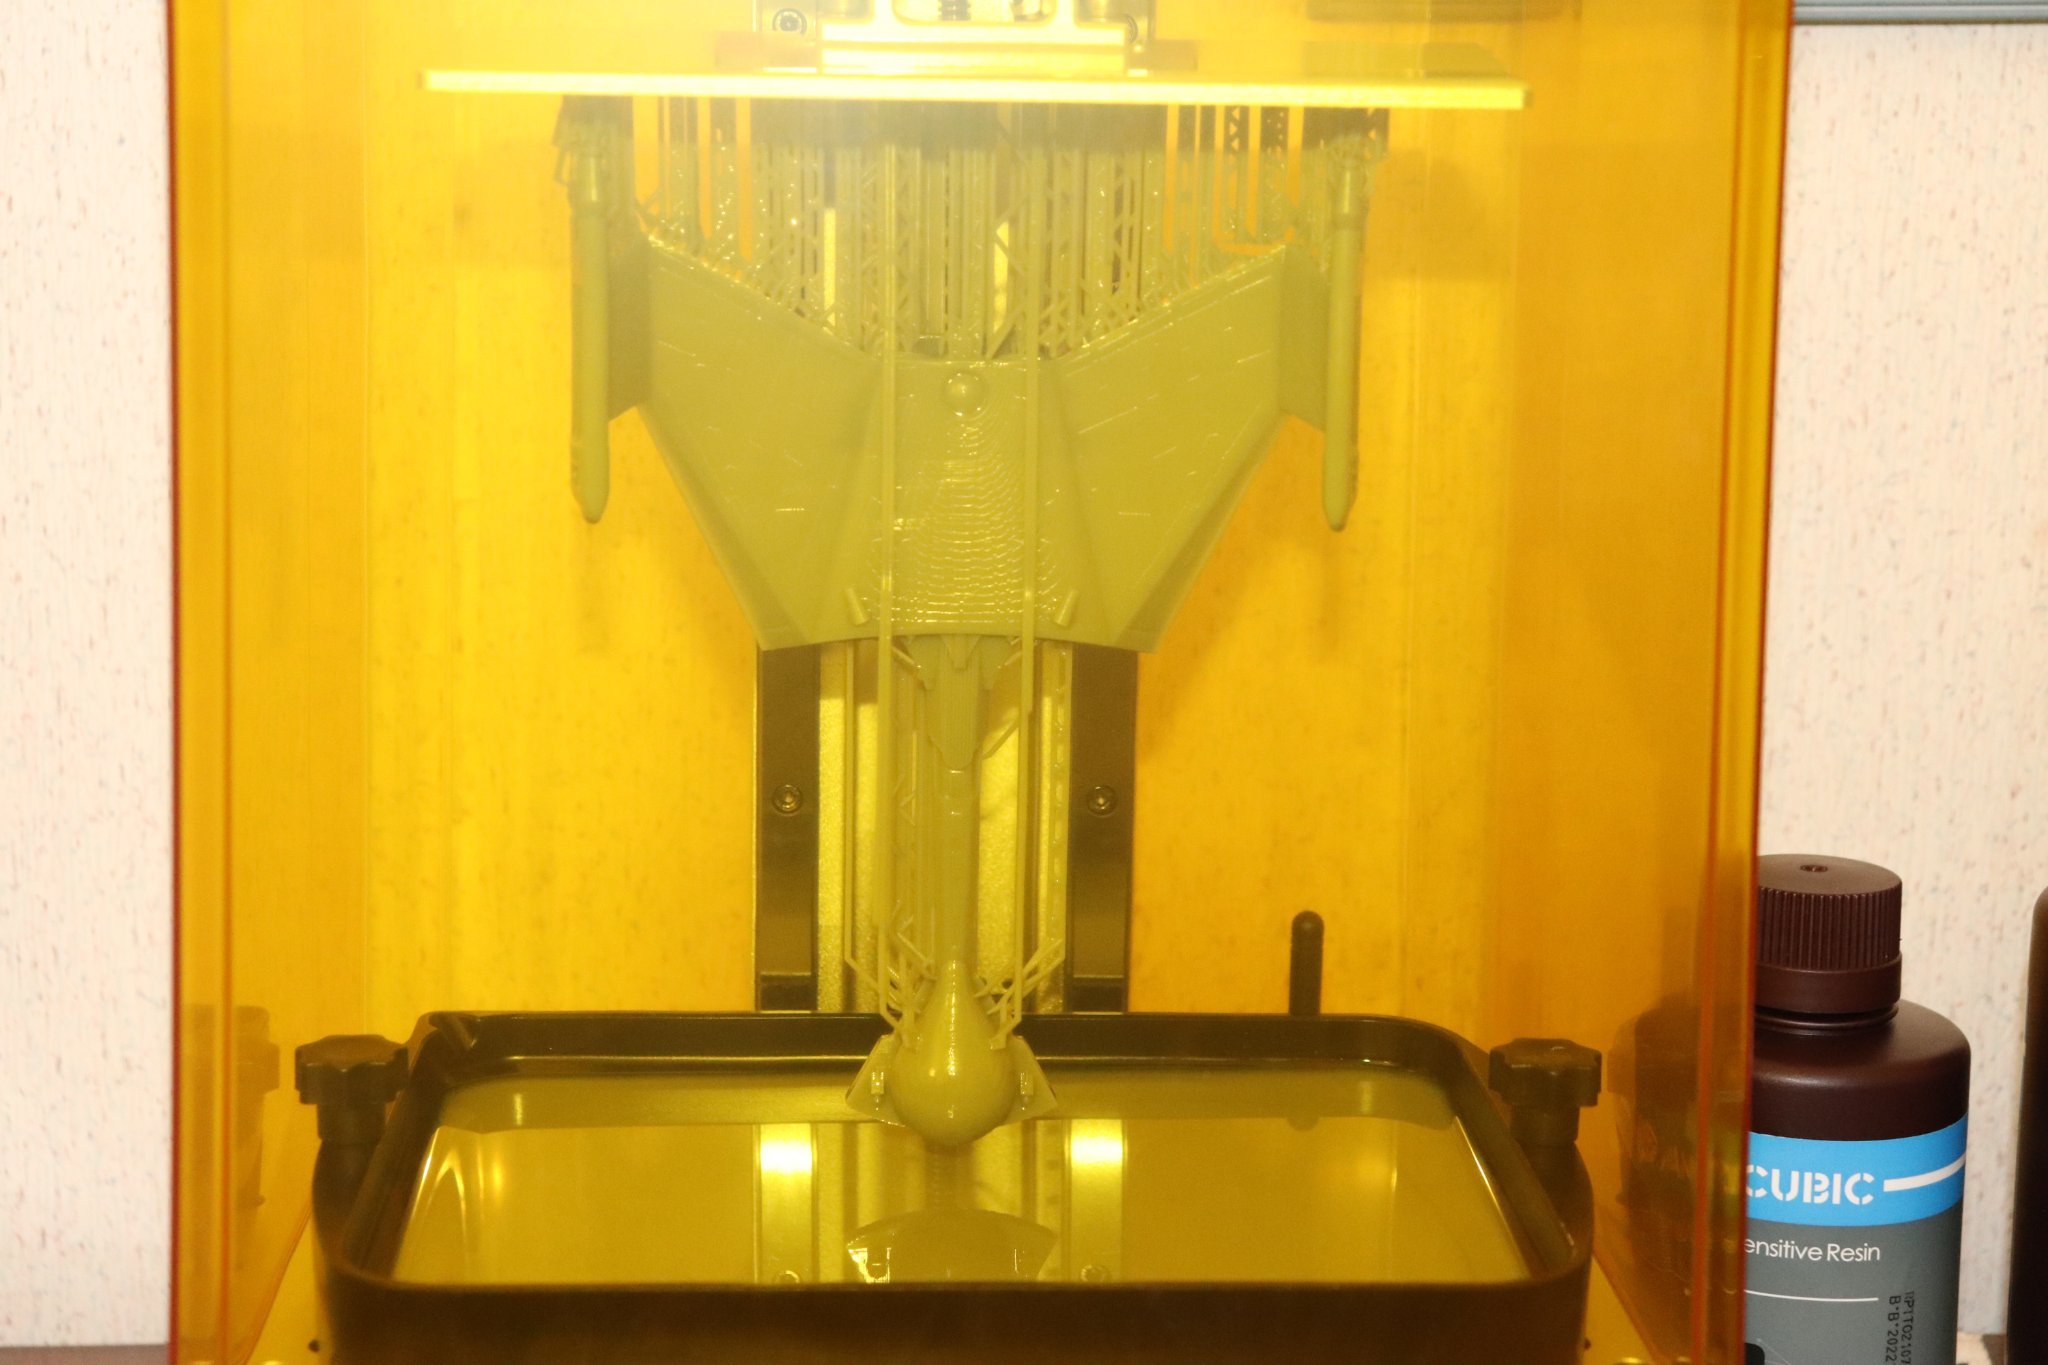
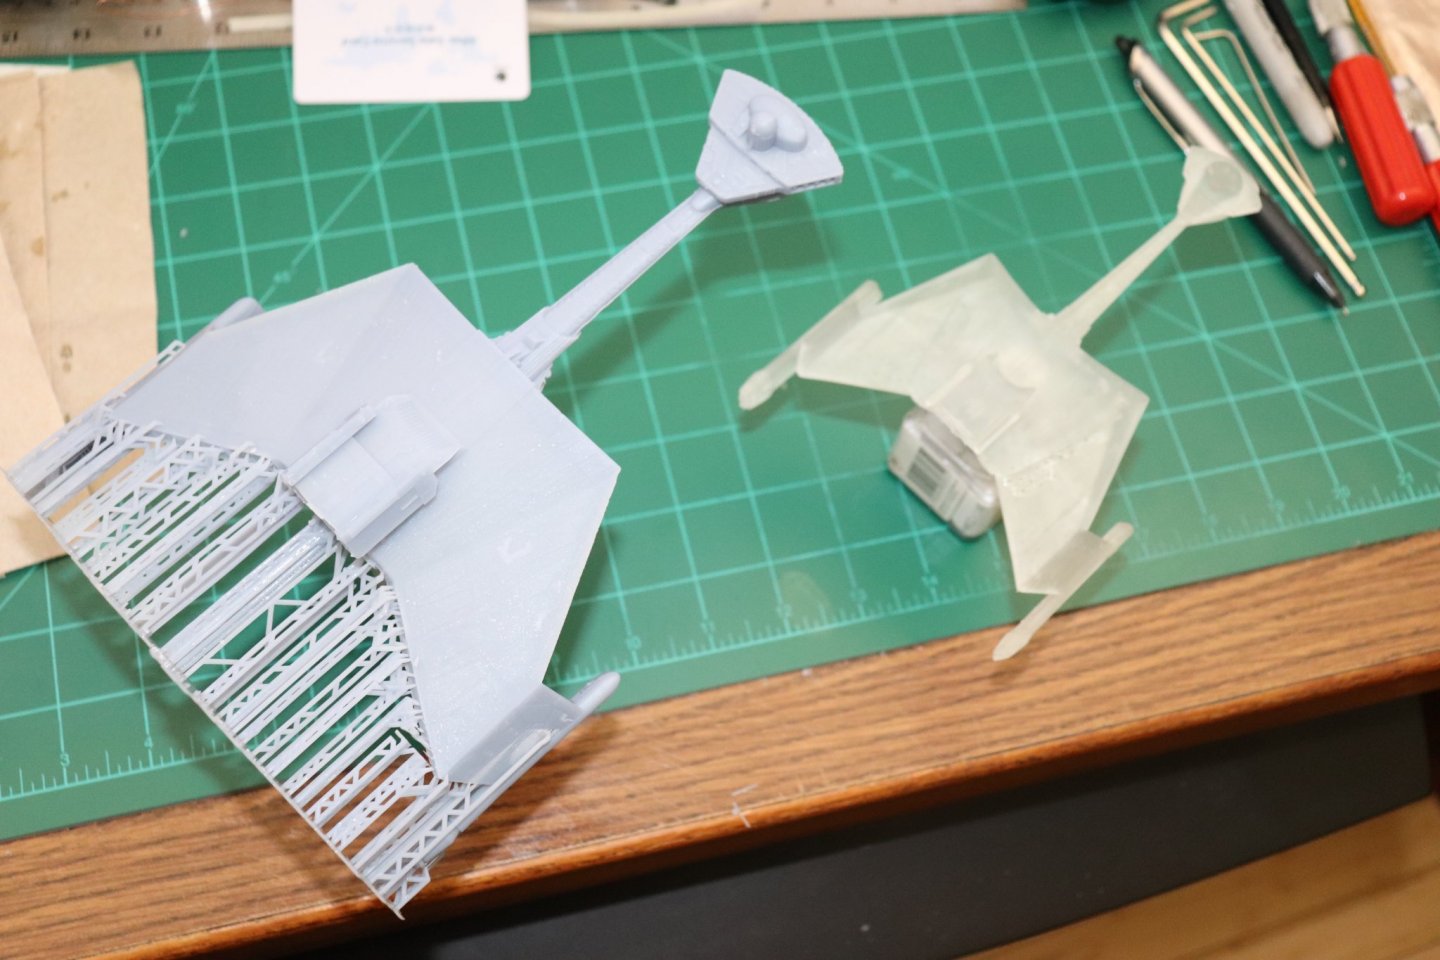
Ok out of the wash, not cured yet..... (shown next to the earlier print) Still needs curing and cleaning, then finishing.. I've left the raft on the bottom to facilitate curing in the machine.....
-
That's very true, and there is no way of knowing until the part does clear the resin level in the vat.... What I do is lift the model off the build plate 10 mm and use a raft with an 8mm plate lift, this way I minimize the resin usage and know that it has separated before I get deeply into the model and use a lot of resin.... At that point it's easy cleanup and restart after adjusting the model.... Another thing I'm doing is to hollow the model to 1mm wall thickness, that's as small as Lychee will go, it's still pretty strong and use 20% infill structure for added interior support.... It also give you the absolute minimum FEP contact.... Still kinda working the parameters out myself....
-
Amen Brother... There is no better reference than build/integration pics or actual pad pics.... When combined with the available technical documentation they make for some stunning models... and yes, each spacecraft is unique in it's own separate way, even the three L-UT's for Apollo, all of them were different in little ways. Not that the average watcher would notice, each shuttle was just a bit different on each launch, basically each one was the same spacecraft, but depending on the mission there were differences even between missions for the same shuttle.... Real Space Modeling is in many ways like wooden ship modeling, we are always learning something new every time we build one.... And there are some fantastic modelers solely devoted to modeling real space just like those devoted to wooden ship building.... It's a genre all it's own..... With M_M on this one, and his talents, it's going to be spectacular.....
-
I love the varied subjects shown here, and the great skills on display..... Beautiful work brother.....
-
I've thought about a CNC router, but my workshop is already full of equipment and I just don't know where I would put it... (along with the laser cutter and automatic paper cutter etc., etc) Probably going to have to down size some of it...... {chuckle}
-
Well, a 21 hour print, it wouldn't have finished if I hadn't refilled the vat during the print.... SUCCESS! Now for cleaning and curing..... Yea Team!!! Next up, an Enterprise Refit or Enterprise A in the same scale, it will have to be multipart cause at 1/1000 scale it won't fit in the printer in one piece.....