HOLIDAY DONATION DRIVE - SUPPORT MSW - DO YOUR PART TO KEEP THIS GREAT FORUM GOING! (Only 24 donations so far out of 49,000 members - C'mon guys!)
×


Egilman
-
Posts
4,377 -
Joined
-
Last visited
Content Type
Profiles
Forums
Gallery
Events
Everything posted by Egilman
-
 Welcome aboard Craig, hopefully we both learn something... {chuckle}
 -
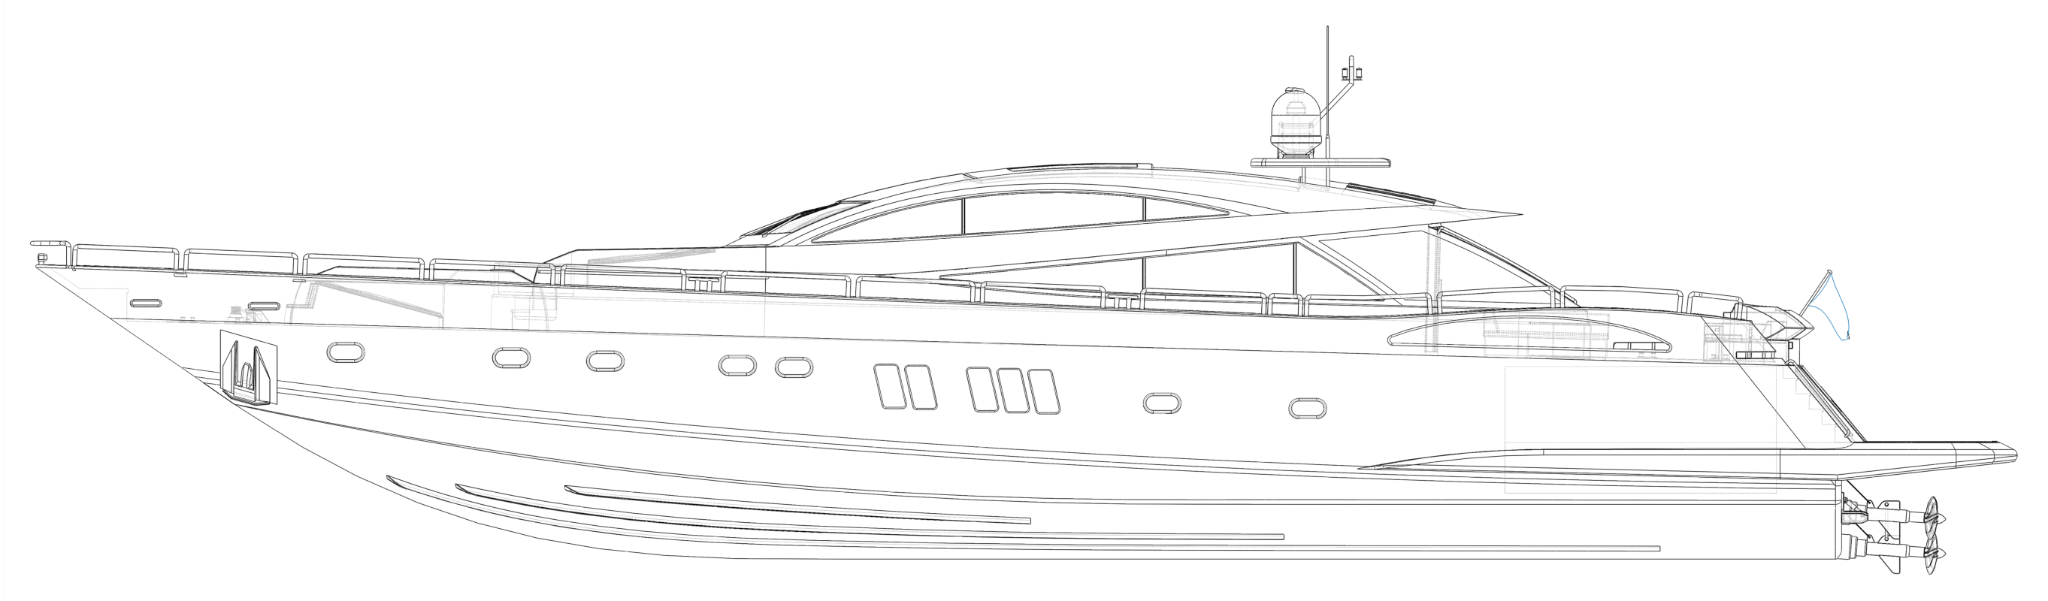
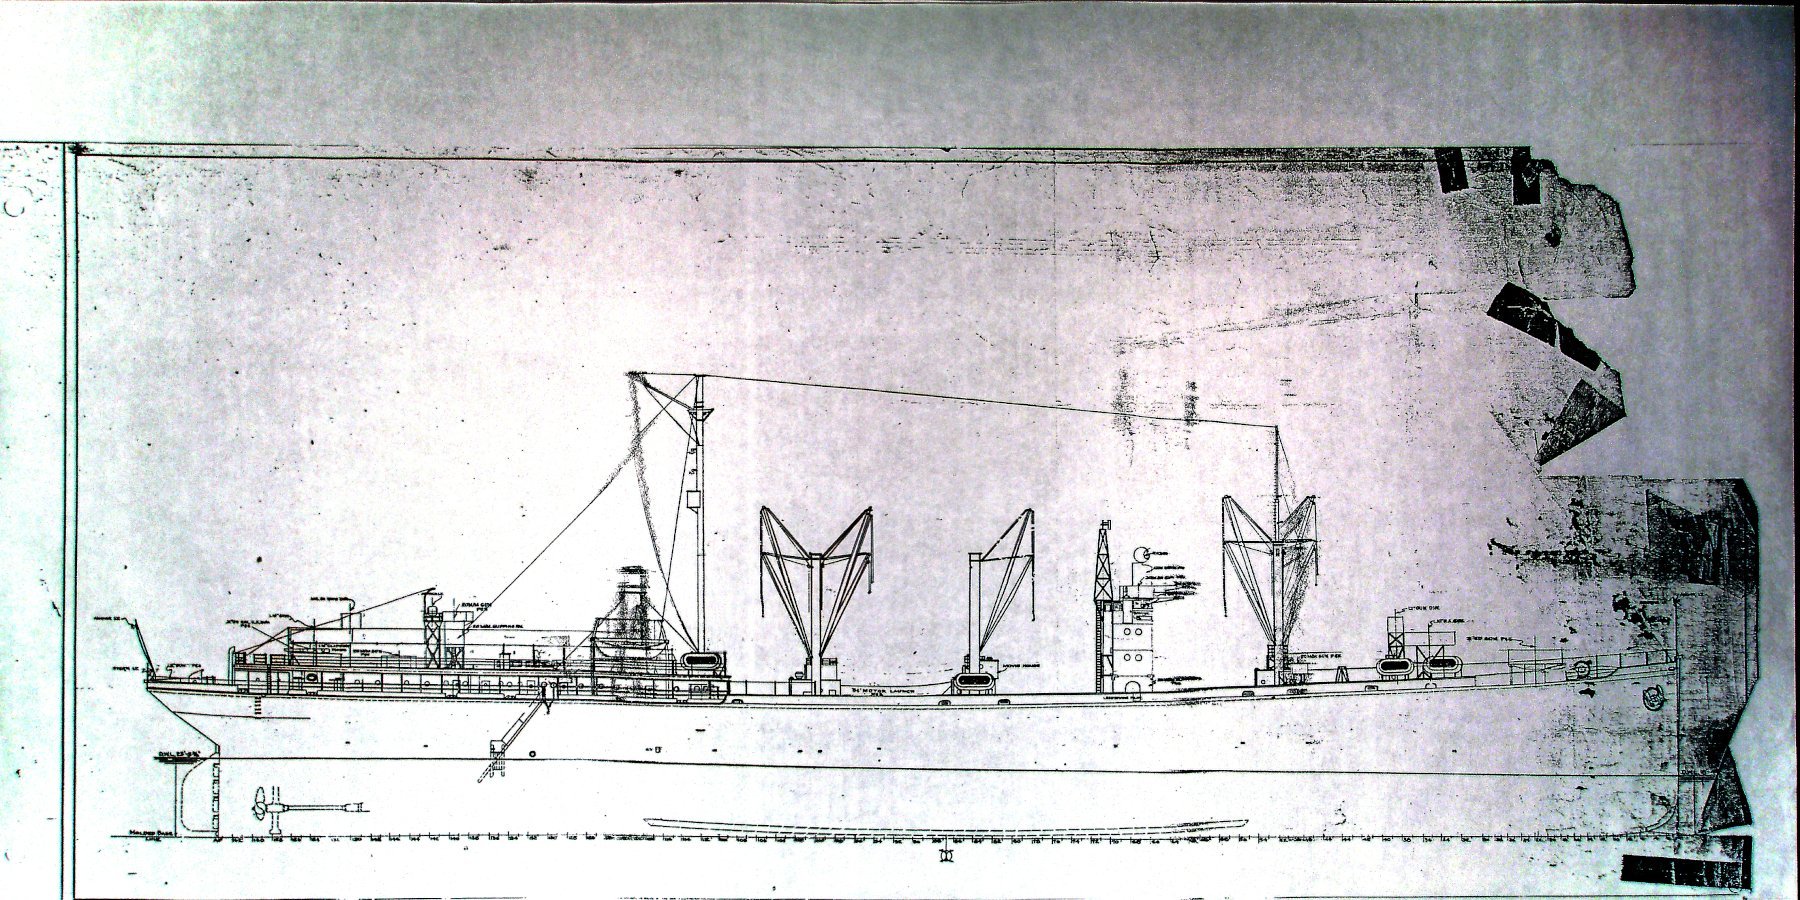
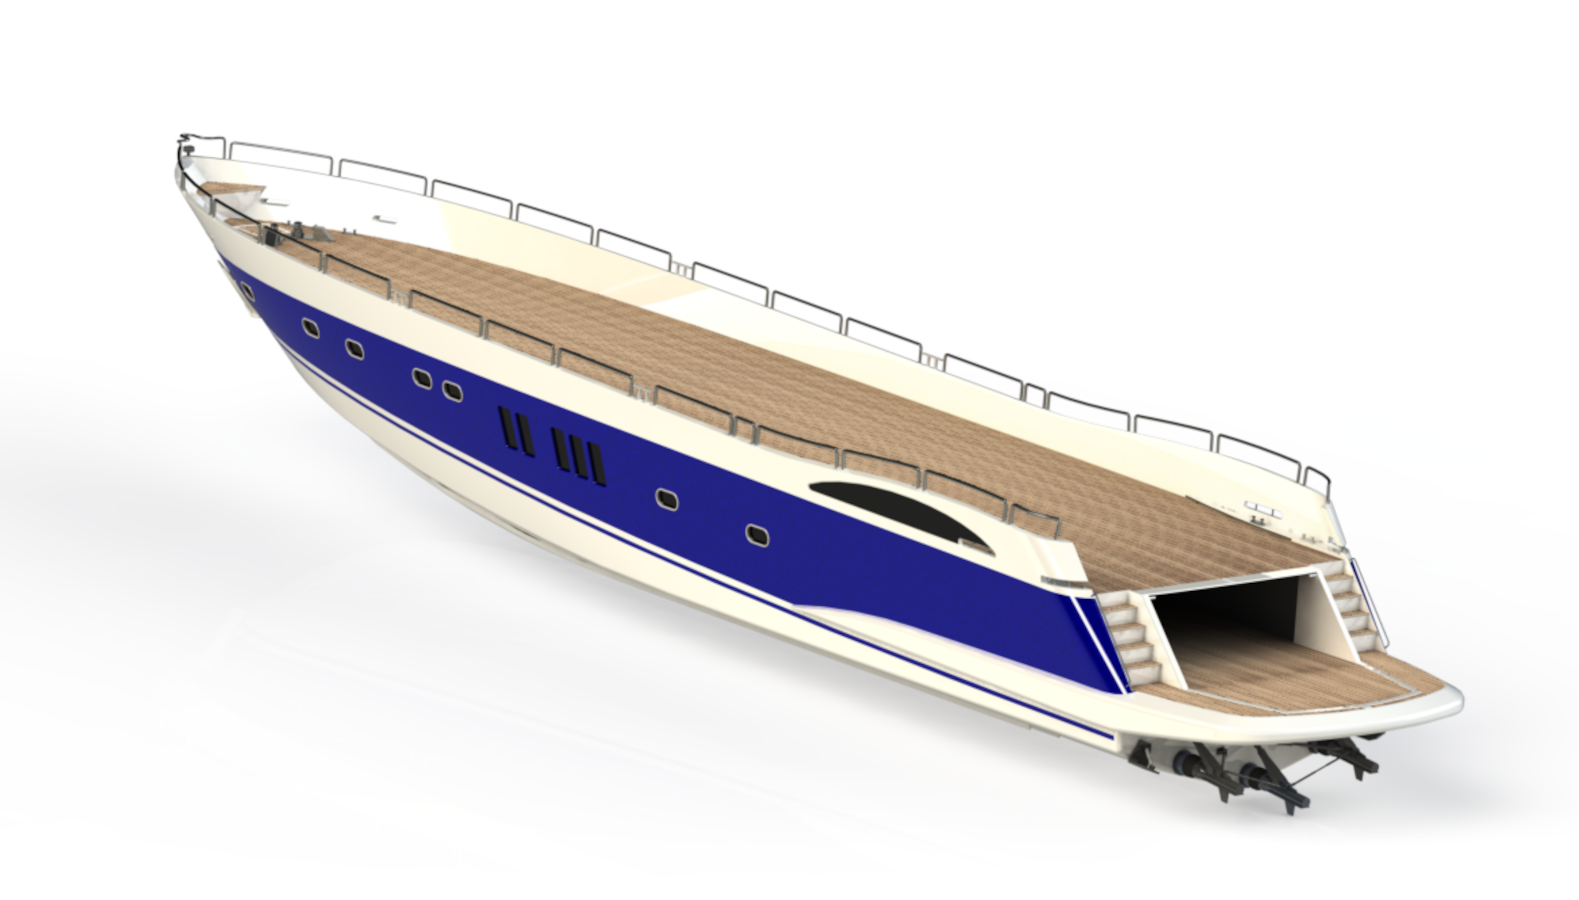
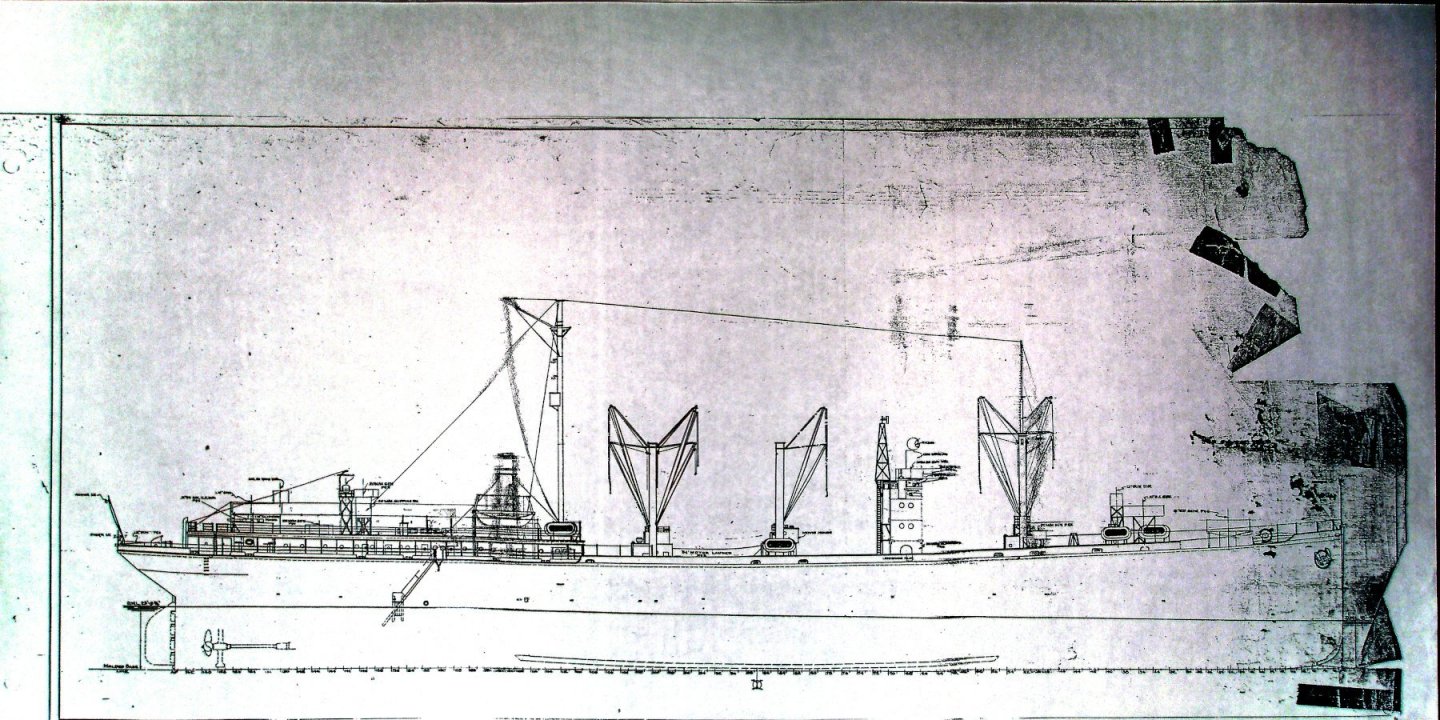
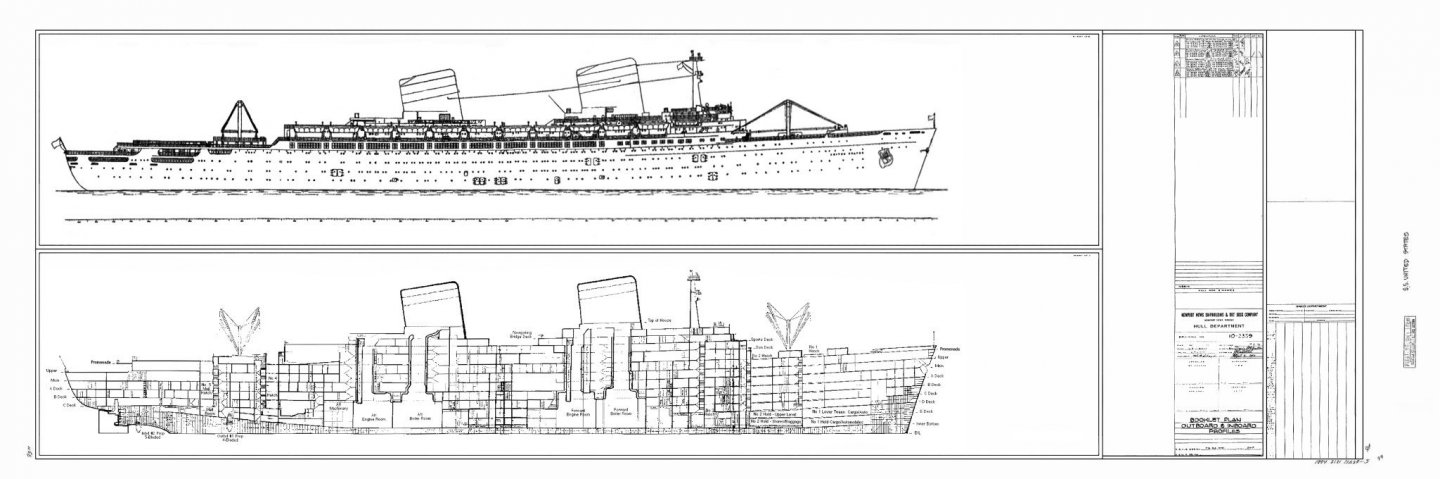
Hi all, I've been familiarizing myself with three different software packages.... Inventor, Fusion 360 and Solidworks.... I do general modeling on almost any subject that strikes my fancy, ships being one of them.... and since I just acquired a 3D printer I thought is would be nice if I really learned how to use it.... So what I'm going to do is attempt to build several ship hulls using different software packages.... The first will be a Yacht, a Sunseeker Predator 108 in Solidworks... a 108 foot luxury yacht which has already had a plastic model produced commercially.... (Revell Germany) and a 3D model released... I do not have either one of those models and will be attempting to design it using nothing but drawings.... (I've already done it, just going to show the process) I haven't decided on the second yet, but I'm thinking about the USS Nitro AE-2 a WWII ammunition ship using nothing but it's official US Navy BoGP dated 1945.... (poor condition but complete) This one hasn't been done in either plastic nor 3D yet.... (but you can buy it commercially from SD modelmakers) The third is going to be the SS United States, This ship exists as both a plastic model by several companies, (Revell & Glenco) has been scratchbuilt innumerable times both static and RC, and has been 3D modeled.... but I am going to try my own interpretation from nothing but a low quality BoGP and online images..... This will probably be a long term exercise cause I'm still learning the software, so plan on enduring my mistakes and all advice and experience will be welcome... The point of this thread is to open up the subject of hull building in common solid modeling 3-D design software... (and to sharpen my skills and hopefully everyone elses) So a few examples of the images I will be working with.... Sunseeker Predator 108.... AE-2 USS Nitro.... The SS United States.... The Predator is a simple Deep "V" hull design, the USS Nitro is a typical turn of the century commercial hull design, the SS United States is a mid century large, (990 foot) fast hull design.... If I can design any one of these hulls and produce a workable set of plans for them, then it makes it easier for the modeler to do the same.... Thanks for looking..... EG


-
My understanding was that the black dividing line was painted by hand in the field to delineate them from the American tanks which used the same pattern as delivered to them.... The tri-color camo was painted at the factory... Looks good to me.... Well done
-
Ok an FM-1 Wildcat, mid war, off an escort carrier in the Atlantic.... you would be hit or miss on the interior painting.... Prewar, the bulkheads were white or very light grey and the hangar deck was dark deck grey.... They remained that way up to late '42 when the orders came down to remove all flammable materials below decks not consistent with operational needs... And another thing to note, that order was specifically directed to the Pacific fleet, not the Atlantic fleet, (at least not initially) Admiral King didn't make it a fleet wide order till the middle of '43... so if you were building a plane on a Pac. Flt ship I would say yes, bare metal would be appropriate, but your markings indicate an Atlantic fleet squadron flying from an escort carrier on convoy duty.... (late '42 early '43 based upon the aircraft markings) Deck grey would be appropriate and the most likely scenario.... Your images show both believe it or not... and the color shot shows a deck grey floor, light grey bulkheads, light grey overhead.... The aircraft is also in the same color scheme, (pattern) as yours is with similar markings... Prewar aircraft grey period, ('38-'41) it would in general be a typical hanger deck prewar.... (and for the Atlantic Fleet throughout the early war period) Just my opinion brother.... she's looking beautiful....
-
Well, I imagine your going to put it on a deck grey hanger deck undergoing some sort of maintenance.... When they had those covers off, they were usually placed on the deck, face up, behind the gear under the fuselage...... Nice to see you working on her again my friend....
-
The Redcoats are coming! The Redcoats are coming!.... Mean lookin dudes as well! Nicely done brother....
-
Nice work....
-
Thank you, being a newbe myself I was afraid I would get it wrong.... Agreed, scans of blueprints/drawings are notoriously distorted.... Working with scanned or microfilmed BoGP's I soon realize they are only as good as the skills of the original photographer.... Then there is the automatic issue of lens distortion, then age deterioration... Lots of issues to deal with to convert them into useable drawings... Back when I started out with 3D in Maya then Blender, there was a tutorial I found on prepping drawings for use in 3D design software... There is a lot of issues to fix especially in scanned naval drawings, given their size they are difficult to scan accurately.... But that is how I was introduced to Gimp and how to fix and correct drawings which is a huge rabbit hole itself... (no time for that here, too big a subject) Most of the time coming up with perpendicular or parallel lines is impossible.... The most accurate line we have is the keel line.... My method of getting a straight scale loa measurement in fusion 360's calibrate function is to use the edit canvas feature to move my first point I want to measure from to the origin, then close and move the canvass to match the vertical origin line to the left side of the screen... Then I activate the calibration function and measure horizontally from the point I want to calibrate to, to the edge of the screen... you can get awful close to horizontal this way.. (within a very small window of deviation) Once calibrated to size/length, you then open the edit routine again and move the calibrated drawing to where ever you want it... It even works for drawings where the stern is inches higher than the stem..... Use the edge of the screen for your base ruler and move the point you want to measure from to it.... Then you can make the first calibration point anywhere along that line vertically.... it's like drawing a vertical baseline except it's a virtual one... Or you can add a vertical line to the drawing in PS or Gimp to use as a base line... There are several different ways to do it my friend...
-
Yeah I'm kinda wrapping my head around this as well... The order of features you add can have a dramatic effect on workflow for just a single component... And the more complex the component the the more complicated it becomes.... As far as a note feature for sketching? there is none, and there is a request in their support forums to add it... But it's not getting a lot of traction....
-
Pz.Kpfw. IV Ausf. G/H by CDW - Ryefield - 1:35 - PLASTIC
Egilman replied to CDW's topic in Non-ship/categorised builds
That's the thing that made it stand out for me, a Pz III could be easily disassembled with a simple derrick or boom truck, it didn't need a Strabo Crane to do any lifts.... I wish I had captured it.... It was easily repairable in the field with common hand tools.... I can't conceive why they would be lifting one end of it... -
HO trains and layouts by popeye the sailor
Egilman replied to popeye the sailor's topic in Non-ship/categorised builds
You need one of these to go with it..... BR-52 -
And they say you can't teach an old dog new tricks..... Nice addition to the tool box.....
-
You only need to remove it from the rolling surface and inner flange, the rest of the black should make a good primer for the very dark oxidized rust coloring.... My suggestion would be to use a sharp blade and cut it off along the rolling surface edges then use a rubber eraser to remove it from them, it should peel right off
-
Pz.Kpfw. IV Ausf. G/H by CDW - Ryefield - 1:35 - PLASTIC
Egilman replied to CDW's topic in Non-ship/categorised builds
Gun lifts and Turret lifts are always nice, you don't see too many of them and the images are mostly Panther turrets with a few Tiger's thrown in.... Engine lifts are good as well but they generally didn't use a Strabo for an engine lift.... There was one shot I saw a decade or so ago where a strabo was lifting the whole front end of a Pz. III but for the life of me I can't find it again... -
That's the understatement of the year! It's curved in like four different directions all at once..... You know the obvious way is to fill it with putty then shape it, another way is to paper mache it... Multi layers of thin, hourglass shaped strips soaked in watery paste glue, once dry, light sanding should handle the edges.... Saw that done on one of those German forums....
-
I know I'm kinda late to the party here HG, but for future reference.... One of the dimensions of a ship is very important to describing the shape of the hull, it's a basic dimension and is usually synonymous with Waterline Length, but not always... LBP, Length between perpendiculars. It can be calculated or, it's usually marked on the profile drawings... When inserting a drawing as a canvas in Fusion 360 it installs it on the plane you selected, once done you close it and it shows up in your design tree on the left side of the screen. there will be a folder labeled "Canvasses" open it and right click on the drawing you just installed and it brings up a menu, one of the selections is "Calibrate" what that does is put your canvass in a mode that will scale it to whatever length you want it at keeping the aspect ratio constant... You mark one point on the drawing, then another point on the drawing at the end of a known dimension... Fusion 360 enlarges/scales the drawing for you to the dimension you specify... Once that is done, you again right click on the drawing in the Canvas folder and select edit, you can then move it to line up whatever index point on the document you wish to use with the origin.... The point of this little operation is you now have a drawing in accurate scale on a known dimension, you can take dimensions directly off the canvass within Fusion 360 cause your drawing is now indexed.... everything you draw or sketch out will be in scale with the blueprint.... A big huge timesaver to having to constantly do the math.... Let the blueprint be more than just a guide for overdrawing/tracing, let it do the job it was drawn for, convey the actual data.... EG
-
Probably, but we are modelers, so what ever works is good as well.... {chuckle}
-
The problem with the 1/32nd AM corsair cockpits for the trumpy kit is they replicate the fuselage walls along with all the bits for the cockpit itself...., you have to removes the details in the kit fuselage halves and thin the resulting cockpit sides to make it work.... I actually read about a gent that cut off the cockpit section of the halves then glued the AM between the remaining forward and aft sections of the fuselage... he finished it off by building up the outer fuselage surface to match the two sections and rescribed the detail.... A lot of work.... personally when I do mine I'm going to try the Black Box cockpit designed specifically for the Revell bird.... It's actually more accurate and fits beautifully without any complex surgery..... This conversion will work I"ve seen it done, just use your modelers patience and common sense brother, (you have them in spades) and you'll make it work.... it looks so much better than the kit offering.... Your very close now, it won't take much more.... Looking good, very impressive skills being shown....
-
We went thru this same situation with Craig's ALF pumper hoses.... I don't know what he did to resolve that one, but here is the link to the suggestion I made.... Scale hose problem.... There were several suggestions made from several brothers....
-
I was given a piece of advice, (and a demonstration of it) back in my tech school days that has always served me well.... My instructor, a retired toolmaker, told me that it isn't the tool that the craftsman uses, it's how he uses it.... Then, he took a 4 inch dia. bar of 4130 and cut a perfect #2 morse taper on it.. The lathe he used was a 150 year old South Bend that was converted from overhead belt drive.... It had 1/8" of lash in the cross slide lead screw.... What he said after the demonstration was it isn't the tool it's the operators knowledge of the tool and his skill in using it... The 3D Printer is a tool, the software is a tool.... WE need to learn how to use them correctly....
-
Absolutely sir! Cad is cad, just like sculpting is sculpting, but in sculpting, the material your working with can be very different, from solid stone to soft clay so the tools and techniques are different... Cad for machine parts is vastly different than cad for geomapping... They are both cad, but they work with different subjects so have a different workflow and process.... That's exactly the point I'm making, 3D software is 3D software, some of them are optimized for 3D imagery others lean towards the physical cad side... There are quite a few well developed programs for 3d imagery, while software for physical 3D printing design is still working on a way forward.... The main problem is figuring out what works best for you... Eventually as best practices and methods to accomplish a creation develop, they will all start becoming similar, with the same functions and processes like the basic cad and 3D imagery software has become... We aren't there yet....
-
As far as 3D design software goes I've learned that they are all the same, they all do the same thing, they just do it "differently".... Sufficiently different to make one totally feel and operate like it was from the other side of the planet compared to the next one.... I started with Maya from back when it wasn't owned by Autodesk, found that I couldn't afford it and eventually switched to Blender 1.9... It was a real issue trying to find anything out there for learning it though, everything was run through user groups and forums.... It's much better now along those lines but the learning curve is still like trying to climb an overhanging cliff with out a rope.. {chuckle} Me I'm an drafting dude, engineering type, the artist organic thing just doesn't work for me... So realizing what side of the design spectrum you fall on is the first step.... The software's for 3D also fall into the same spectrum, they are designed to make you inner engineer or inner artist come to the surface.... The one thing I have learned is 3D printing, (software model to print) works best using solid modeling software... The end result from your software has to be a solid object if there is any holes or detached edges or overlapping surfaces it may print but your chance of a print failure rises geometrically the more errors there are in the model.... Currently there is NO software out there specifically designed for 3D printing.... (although they all tout their abilities towards it) The second thing you learn is general 3D modeling and modeling for 3D printing are not the same.... There are necessary mechanics involved in 3D printing that just plain don't matter in general 3D like Animation, Gaming, CGI, Photogrammetry and Photorealistic Rendering... You are creating something that has physical properties like size, mass, volume, weight and other real world issues that the rest of the 3D applications don't need to deal with.... Call it the difference between what a draughtsman and artist does, An artist only needs his minds eye vision and a knowledge of the tools and practiced experience... A draughtsman needs all that plus an understanding of real world items, the materials they are made of and the properties of them in the environment they are going to live for the job they are going to do.... The tools are different to effect the end.... On one side is the artsy world of 3D and on the other is the hard, real world side of 3D.... 3D is mature enough to start showing this issue... But it's not so well developed that there is one go too tool for accomplishing this.... So be prepared to take a second trip down the rabbit hole when you consider software to design 3D objects... 3D printing is a process, one that is in it's infancy still... It is plain that FDM is a tool for actual engineering purposes, Resin printing for the arts and crafts type.. (modelers fall into the arts and crafts genre) In the CGI world, it doesn't matter to the employers what software you know, it's do you understand the process, if you do, you can learn the software the company uses... We are not at this point in 3D printing yet... Especially with resin printing.... Understanding the process is what we are exploring here... When the software thread is posted, I'll be there.... Please pardon this long excursion into the philosophy cum history of 3D... But it is the world we are delving into... EG
-
That's pretty much been my experience traveling this road as well.... I think the PFTE lube helps and I'm going to go back to Anycubic's setting for the resin.... A little thump is ok a lot of thump is not.... I haven't tried any washable resin yet, but I think, in the long run, a little more cost for the resin will outpace a lot more cost for the IPA on the savings side.... And the Wash & Cure will work with water as well as IPA... Anycubic recently reduced their prices on the Mono X making it comparable to the Elegoo Saturn pricewise... Physically and mechanically there is no difference I can find between the two.... They both do the same thing to the same standards... Still need to get the extra vat and the steel handled screw clamps for mine, but I've decided to pass on the mag plate Currently I'm doing a bit of training in 3D software, cause my experience downloading models and attempting to print them has been less that optimal, besides I intend to go my own way and print what I want, so needing to learn how to create the objects to print becomes a necessity.... I haven't decided yet which software I'm going to settle on, Solidworks, Inventor or Fusion 360.... They all have their advantages and a few disadvantages.... I've found a few outstanding models I'm going to take a shot at printing in the near future, one with over 500 parts! there is some wonderful stuff out there you will never see from a model company.... Keep posting brother... it's the way we learn....
-
It's really not that bad, the resin under normal light cures very, very slowly... I left some sitting out in a cup for three days in normal room light, no curing evidence at all... (it actually starts getting gummy around five days, direct sunlight would probably cure it faster) The real issue is pigments settling out of the resin and spillage on anything making a mess... With careful handling resin is easy to work with....