


Egilman
-
Posts
4,385 -
Joined
-
Last visited
Content Type
Profiles
Forums
Gallery
Events
Everything posted by Egilman
-
 Brother, since you've already painted both colors, the foam or stipple brush is the best technique to use, blu-tack masking will only screw it up at this point..... And I"m sure your aware, dark over light works better in this situation..... also I personally think it would improve the look if you dropped the transition a bit down the sides of the fuselage, personal preference I know, but I feel like it would work better if it was a bit lower.... The sponge/stipple technique using grey over white is the easiest way to do it...... Nice work my friend, your going to have another museum class aircraft when done...
 -
Any of the non residue leaving stickum putty's will work..... it's kinda an art on how high to make the beads of putty, higher give a more diffuse blend of overspray, lower give a sharper line with a less diffuse edge.... Getting this right will take a bit of practice, but try it on a scrap of plastic with a straight edge piece of cardstock to get the feel of what angle to shoot the paint can at... Once you get that down, doing a pattern is just applying the technique to a curved piece of card... What I do is find a three-view pic of the camo pattern I wish to duplicate, say like the grey, brown, green midwar british pattern on a spit or hurricane.... I use gimp to scale it to match the model, then print three copies... In that pattern I would paint the grey overall first, then lay down your putty beads to mask off the grey pattern by cutting out all the grey patterns on the pic and attach them to the model using the putty beads in their respective positions, those areas you want to remain grey... Then spray the brown overall staying away from direct spraying at the lifted mask edge..... Next step is the same as the first, cut out the masks incorporating both the grey and brown areas and apply it to the model the same way after the brown has dried.... No need to remove the grey masks just add putty beads to the brown areas leaving the green areas uncovered.... Then spray the green areas using the same spray angles as you did for the brown areas.... When dry remove all the masks.... Practice first on a throwaway model...... Once you try it a few times and figure it out, it's easy to duplicate a specific pattern on a specific aircraft.... EG
-
Building a Medieval fortress - by Waitoa - Del Prado 1/87
Egilman replied to Waitoa's topic in Non-ship/categorised builds
I guess the brewski's are on the house when they are done, Correct? {chuckle} -
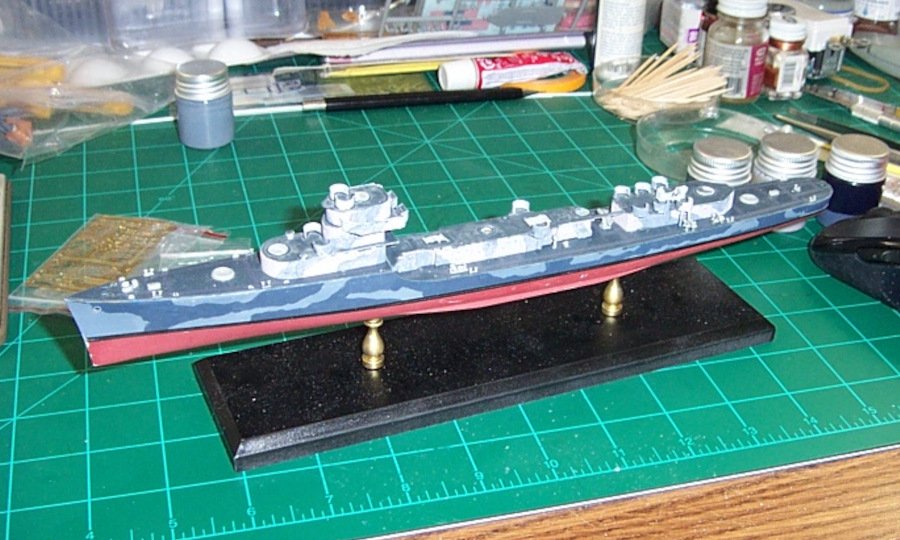
Thank's brother... I've a few new pics after the second coat of 5-O and a coat of 20B on the upper decks and gunhouse tops... Will be posting them in a bit....
-
Yeah, the hulls could if they had a long period between yard availabilities.... For example.... https://fb.watch/3FYXWQWb7j/ You see CV-9 the USS Essex up front after 14 months at sea, behind it is CV-10 the USS Yorktown another Essex class carrier four months out of the yard and behind her CV-6 the USS Enterprise fresh out of the yard gives a good comparison of the wear and tear they took in service.... All are in Ms. 21 overall navy blue scheme.... (the video is from Majuro anchorage about March '44) The condition of the Essex's paint is highly unusual, (she was too desperately needed for operations during early '43) She will shortly go back for her first yard availability and will receive her Measure 32 "Dazzle" camo... When operational needs dictated they could get to looking pretty razzy, (at least the hull) But as you can see from the two carriers in the background, they weren't allowed to get that bad as a general rule....
-
I agree with Craig, coat first in very light coats, and rig after it's all cured and fully dry.....
- 179 replies
-
- 7
-

-
- hatsuzakura
- pit road
- (and 2 more)
-
Making card masks and using thin strips of bluetack to hold the mask a few mm's away from the surface.... Spraying rattlecan in various directions off the mask will produce a feathered edge.... With an airbrush you just paint it directly....
-
Look up sponge or stipple painting technique..... it's my go to without masks for rattlecan or an airbrush..... Very fine closed cell foam, Autoparts store, Maguires polishing pads is fine enough, or at Michael's or Hobby Lobby, sells what is called the "Spouncer"! Four cellulose sponges on wooden dowels.
-
Lamborghini Veneno by CDW - Fujimi - 1:24 Scale - PLASTIC
Egilman replied to CDW's topic in Non-ship/categorised builds
Very true, looks like some japanese cartoon brought to life..... Don't get me wrong it's very nice, but it represents more commercial video game than car to me.... -
Lamborghini Veneno by CDW - Fujimi - 1:24 Scale - PLASTIC
Egilman replied to CDW's topic in Non-ship/categorised builds
I keep telling the admiral we have a lambo in the driveway, but she understands it's nothing but a studebaker in drag..... -
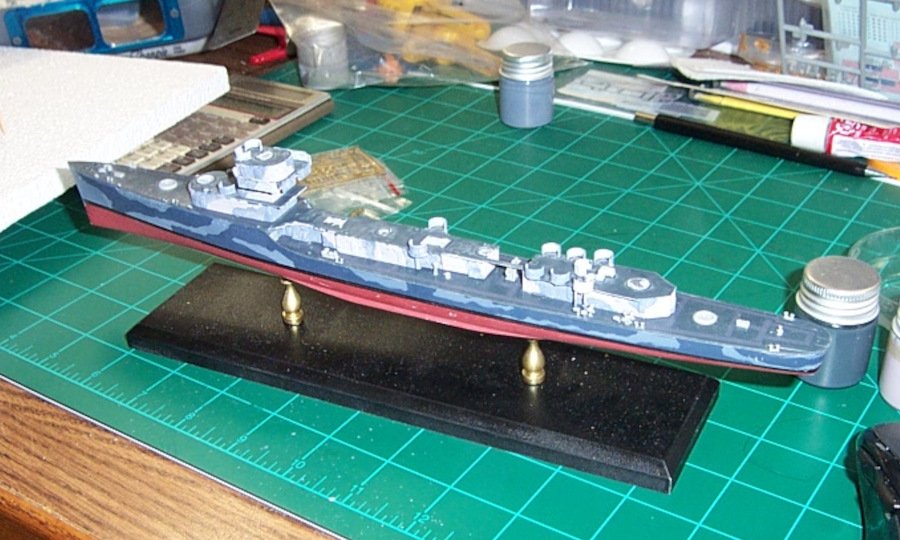
Ok, a tad bit of eye candy..... Like I said not done with the paint yet, but this is the look I'm kinda shooting for.....

- 285 replies
-
- 10
-
-
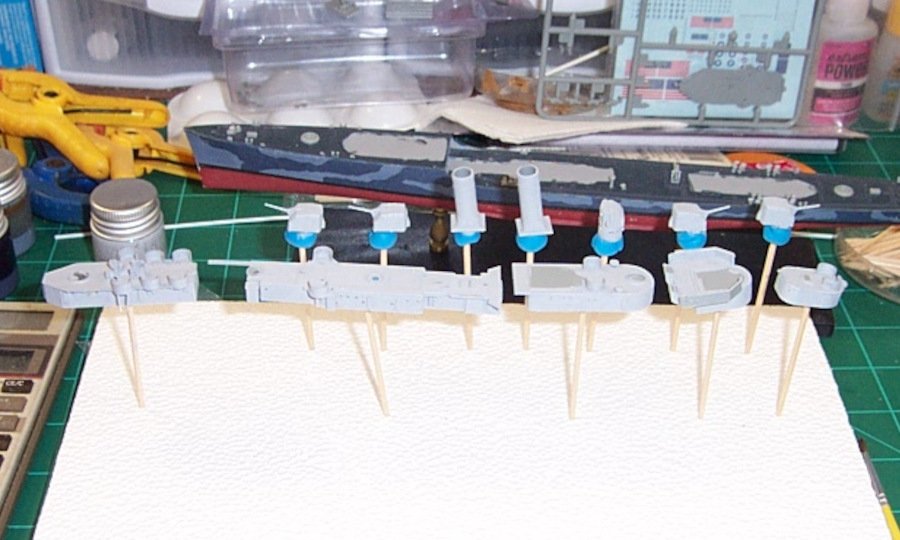
Thanks OC, That's just the primer brother, ultra thin, I expected it to go down smooth.... The camo that goes over it will take at least two coats given the process I'm using.... Examples below.... The 5-H Haze Grey blows out under the flash and looks almost white, while the first coat of the 5-O Ocean Grey isn't yet thick enough to completely cover the lighter stuff underneath yet.... And the 20B deck needs another thin coat as well... Letting it dry now hence I"m not trying to take a nice picture yet... Just showing the process.... Still gots a ways to go....
-
Yep, first piece had to go on early because of the priming and initial camo.... I assure you more will be coming brother....
-
And, the first of many Photoetch parts..... Support bracket for the port side torpedo crane....
-
That is a very busy ship..... If I do this long enough, I might get as good as you.... If I live long enough that is..... Nice work.....
-
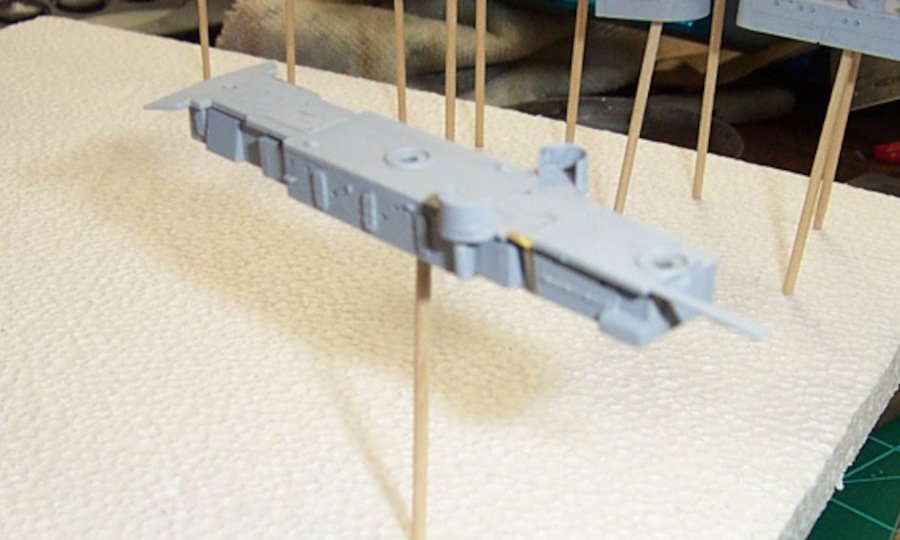
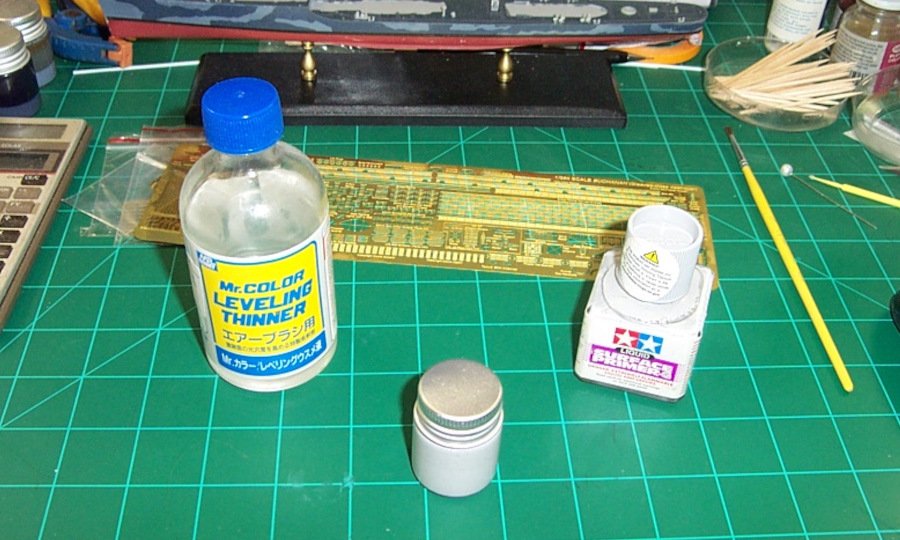
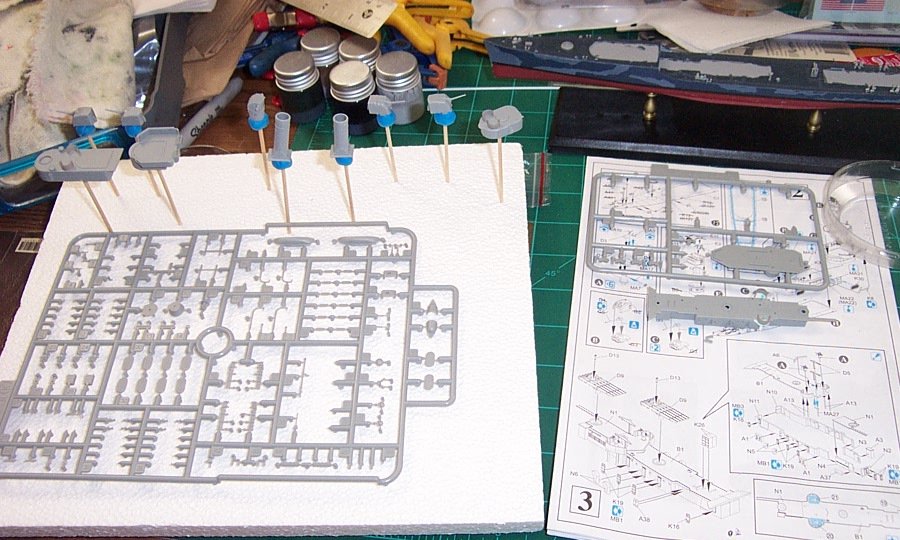
Small update again... Since this is a brush painted model my build sequence sometimes will take a turn... this is one of those times..... Almost to the PE stage, and I still need to add some plastic, but now, given the almost impossible to follow build sequence of the kit, is time for some primer..... Tamiya surface primer, 2cc and Mr Color leveling thinner 2cc... yep thinned 50% for brushing.... Actually it covers well.... the reason to prime at this point is there is so much detail that goes over other detail we need to paint the under surfaces first, otherwise there is no way to get to them with a brush..... As well as the decks that need their dark color and there is no brush small enough to get around everything without spreading paint over all the vertical surfaces.... So here we go, one brush on primer coat.... That looks very very close to 5-H Haze Grey to be honest... I will paint a nondescript area first if there is a discernible difference between the primer and the True North 5-H once the rest of the details are on it will get another coat, otherwise if they are the same, then it will be finish detailing and touch ups before the 5-O Ocean Grey Camo goes on..... I've already glued together enough parts to have finished a ship model from 40 years ago and I'm not even half done yet with the details.... The tech is just out of this world..... Anyway more laters, making progress... Thanks for the likes, they are appreciated.... EG
-
And thank you Dennis, My builds are sometimes unconventional as I'm only a plastic hacker, but I am inspired by the true artists here and those that follow what I'm doing, If it wasn't for you guys, I probably wouldn't be building much less researching.... A heartfelt THANK YOU!!!!
-
Thank YOU, for liking and following my sometime unconventional and weird thinking..... I've always found that when studying and researching history building a replica of what I'm studying always keeps the motivation/ interest high.... (helps towards completion as well) I've always liked history and this way is much better than sitting at a class desk reading a book....
-
Well, whatever your doing brother, keep strokin' that fur..... {chuckle}
-
For a first ship model, a very difficult subject as well, with a PE set that goes to extremes, then setting it on a perfectly sculpted base..... Utterly outstanding!!! blue ribbon material my friend..... I could drool at this kind of art all day long...... Very, VERY well done.....
- 211 replies
-
- 5
-
-
- prince of wales
- tamiya
- (and 2 more)
-
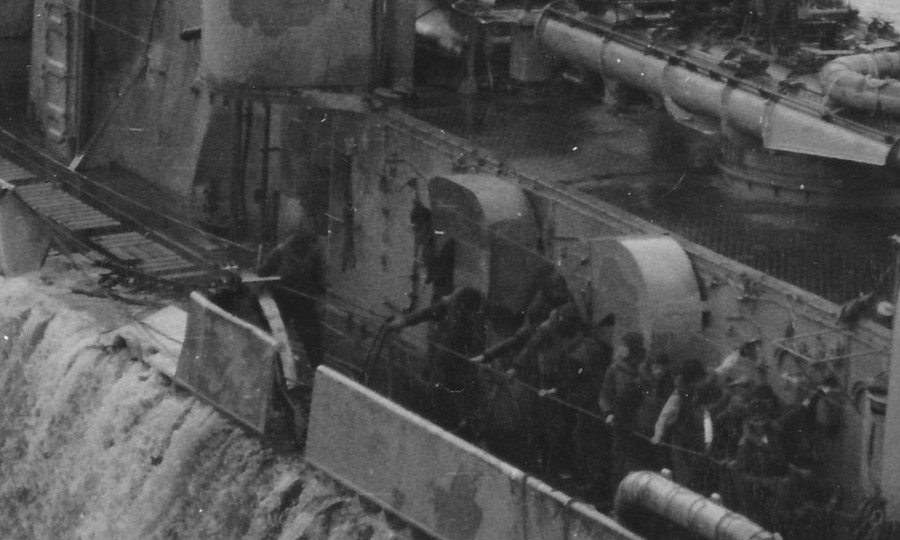
Another update... About half way adding all the myriad tiny plastic details, currently working on the midships deckhouse.... 10 tiny doors need to be mounted, they will be closed, the ship was in condition ZED when the pic was taken and all the doors would be closed & dogged, a good thing given the weather they were enduring... After that I get to do the boiler room air intakes.... The Livermore had a certain style, of course the Gwin has a different style... USS Woolsey (had the same style as the USS Livermore... USS Gwin.... I checked her sisters as well, they had a similar style without the hoods and angled back towards the stern.... so the Gwin was unique in this detail.... No PE for this so I have to scratch or modify the kit's intakes... Still plugging along.......

-
M29 Weasel family 1/72 (scratch) by Backer Finished
Egilman replied to Baker's topic in Non-ship/categorised builds
Yep I'll be watching... My Father said they were deathtraps without the fore and aft sponsons, and they would barely throw a wake.... But, once you got them ashore, they would drive over almost anything.... He much preferred DUKW's..... -
Well he has matched his career winning percentage in superbowls, 7 of 10.... I figured today was going to go his way....
-
The few times I've done an epoxy finish I've used the same technique as I've done many times for a urethane finish on furniture.... Very thin coats scuffed in between...... Yes it is time consuming and get to be a real bore, but the finish comes out mirror smooth and perfectly clear.... The only difference between epoxy and urethane is wipe it down after scuffing to remove the sanding residue.... And don't try to do the whole thing all at once work in sections.... The point of multiple thin coats is to perfectly smooth the finish..... And sand your sections in long strokes, your knocking down the high spots and building up the low spots..... It's up to you on how much you want to do, but more coats equals a deeper, more polished finish......
-
To most out here in Washington that's a major snowstorm, heck two feet here just about paralyzes the community.....

