


Egilman
-
Posts
4,385 -
Joined
-
Last visited
Content Type
Profiles
Forums
Gallery
Events
Everything posted by Egilman
-

McLaren M8B by CDW - Accurate Miniatures - 1:24 Scale
Egilman replied to CDW's topic in Non-ship/categorised builds
Kindred spirits brother.... (as a young man living in Vermont at the time) Yep McLaren's and Lola's settin' the pace... The last of the seat of the pants racers.... It's was a drivers series in the truest sense of the ideal... Much much more that Formula 1 ever thought of being.... I'm in.... McLaren's always looked nicer than the Lola's in my opinion, doing away with the high wings took something away from the looks of the car.... If we could only turn back the clock, Bruce's loss really set back racing.... More than Miles loss did.... -
L'audace, l'audace, toujours l'audace.......
-
Well we still have Emil up there in Renton.... The last true model shop in this part of the country..... but it's the other side of Seattle for you..... What's left is game figure type stores, even RC has gone away down here, trains, as little as five years ago we had three shops, they all closed within 30 days of each other.... Online is the wave of the future as soon as they get the delivery methods sorted..... The old social ways of the hobby are dying, aside from IPMS, all the independent clubs have died off as well. All about making the quick buck..... Cheaper, (relatively) more profitable, and less work for them.... The world is changing around us my friends....
-
Building a Medieval fortress - by Waitoa - Del Prado 1/87
Egilman replied to Waitoa's topic in Non-ship/categorised builds
Well, ya found it... If I knew you were having difficulty making windows I would have recommended it..... But then there is being reliant on yourself as well, Good Job! -
Yeah, but you will be happier in the end....
-
VW samba bus conversion by kpnuts - Revell - 1/16 - PLASTIC
Egilman replied to kpnuts's topic in Non-ship/categorised builds
That's a pretty hefty stretch your putting into it there brother.... about doubling it's wheelbase? Interesting.... -
Looks nice, the wheels look fantastic, but she could use a trip to Les Schwab to trade in the RV tires.... I know, you bought her that way..... {chuckle}
-
That exactly fits the measurements given in the Britmodeler thread they should be about 5.5 cm long.....
-
My pleasure brother, I hate it what the muse is stopped by others (trumpeters in this case) incompetence..... The last option is a hail mary and it's asking Airfix if they will sell you the merlins apart from the kit..... I've managed to get replacements and parts for several kits that way....
-
I always liked the looks of a deep "V" planing hull, they look like they are moving even when sitting still..... Those hulls were amazing, easily handle 20 kts in ten foot seas.... (and do it all day long)
-
Someone aught to post a review on them and inform people about the size discrepancy....... It's amazing on what eventually becomes usable over time.... Does anyone make an accurate one? I wonder if these will be better... https://www.wonderlandmodels.com/products/trumpeter-1350-eh-101-merlin/ Not available yet though not even pre-order.... There is another option.... https://us.airfix.com/products/type-45-destroyer-a12203 It has a Merlin with it, and from this article on Brit Modeler it's in scale.... (but then it would give you another 1/350 ship to build)
-
Brother, Trumpeter does do a 1/350 Merlin.... 1/350 AW-101 Merlin/EH-101 (3 aircrafts) (if you happen to like BNAModelworld, it's available on evil bay and several other sources as well as well) The more modern aircraft does look better IMHO......
-
Excellent example of using paper masks to get the diffuse edge effect on the pattern.... Well Done...
-
Well then it's a not well known feature of the kit apparently, looks pretty straightforward, the wings break right on the dihedral chine and rotate straight up.... his method of supporting the outer wing panels without putting a strain on the hinge mechanism is very well done and should be easily repeatable.... Gonna be another home run.....
-
Ok as promised, a little more paint.... Starboard side.... Port Side.... Port side bow & stern.... And two overheads from slightly different angles..... Still need a bit of Navy Blue on the bottom of the forward stack, but she is looking like she is supposed to...... More to come....
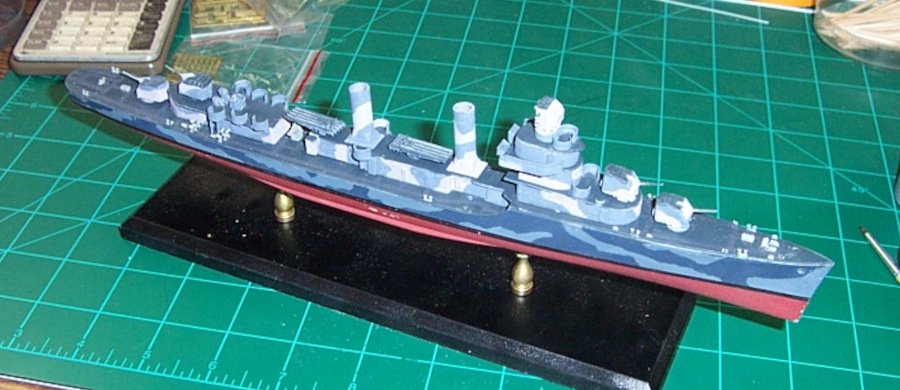
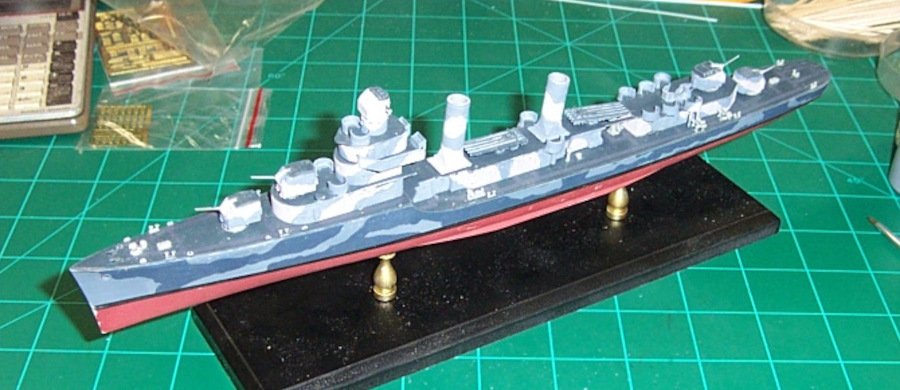
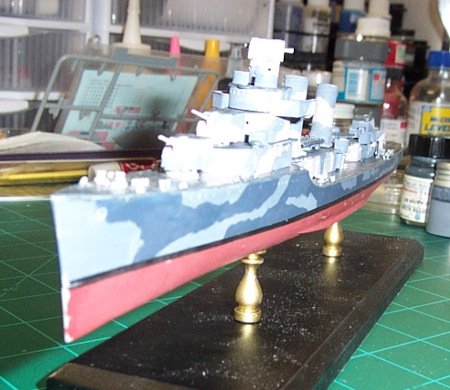
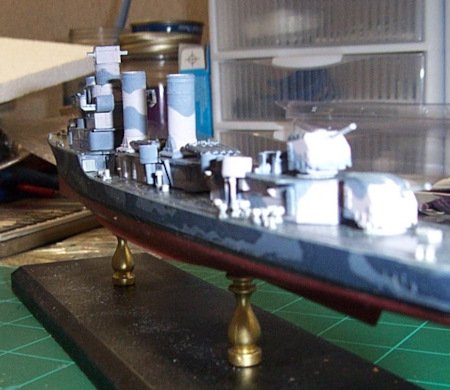
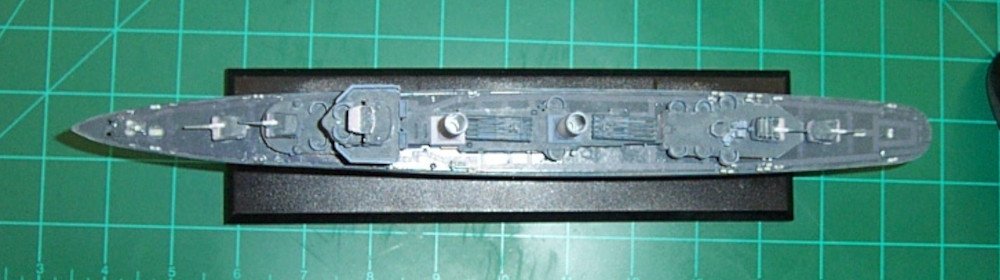
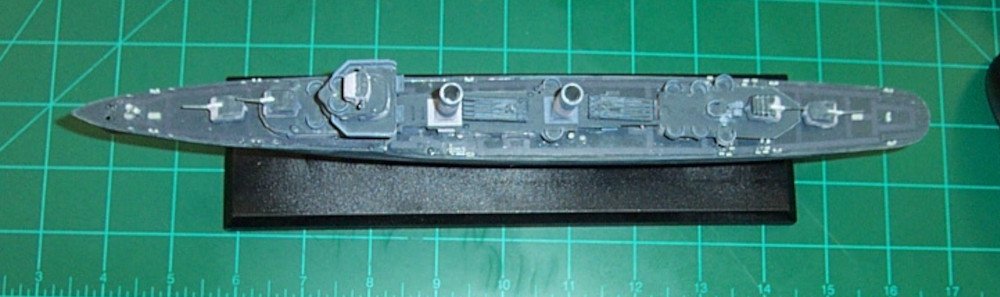
- 285 replies
-
- 11
-

-
Looks good brother, what I would do is glue a flat piece of metal to the underside of the breech where it wouldn't be seen, sufficient to balance the larger barrel.... It's won't take much at all....
-
Scalemates It's the 2015 rebox, but the instructions should be the same.... (link to download the instruction in PDF are on the scalemates page)
-
Lamborghini Veneno by CDW - Fujimi - 1:24 Scale - PLASTIC
Egilman replied to CDW's topic in Non-ship/categorised builds
Absolutely great for creating a family..... {chuckle} Not so great for keeping one..... -
That's a gorgeous kit brother, and as originally released there is no provision for folded wings... The wing parts are one piece lower and port and starboard upper wing panels..... The several reviews of it out there all say no wing fold, and a couple say they wish they had aftermarket for a wing fold..... Scalemates shows no aftermarket for a wing fold in their collection of links..... Are the wings already split for the fold? that means they would have had to cut the inner wing spar as well.... Well the wings folded straightforward on the Vindicator, straight up with the tips meeting at the top over the cockpit, inverted "V" is how they looked...... Another thing about the instructions, the painting is accurate for a pre-war vindicator, the Neutrality patrol aircraft were grey over grey.... The instructions try to claim that the yellowbirds were painted that way especially for the patrol.... {chuckle} They don't always get it right.... Anyway it's a gorgeous model looking forward to your rendition.... And for others wishing to follow, Academy has released this kit for the last three years, but in different markings.... I'm there brother, whenever you get started....
-
It's called Lifus-Interruptus and it afflicts us all from time to time.....
-
I've got both of those in my future brother, to go along with my Infini .50 cals..... any early war US Navy ship could be equipped with any of them or in some cases, all three.... Certain member of the Brooklyn class cruisers had four, those three, plus 20mm's... (didn't have them for long but they did have them in the run up to war)
- 179 replies
-
- 7
-
-
- hatsuzakura
- pit road
- (and 2 more)
-
Lamborghini Veneno by CDW - Fujimi - 1:24 Scale - PLASTIC
Egilman replied to CDW's topic in Non-ship/categorised builds
The Ford GT 40 is still being manufactured, only not by Ford.... And yes, the classic Ford GT40 the same ones running and winning at LeMans, were street legal..... (and yes Ford was selling them to the public, the well heeled public that is) Lemans, Daytona and Sebring's rules require that the car be a production car sold to the public..... you could uptune them yes, but they had to be legal to run on the roads everyday...... The current car built by Superformance, is a continuation car, fully licensed by Safir industries with continuation serial numbers, Safir holds the manufacturing rights to the Ford mk I thru IV series and is the main supplier of original repair parts and kitcar parts...... Superformance is the only licensed builder... the current GT40 is of course updated to today's standards with some added creature comforts of course, but most of the parts will bolt directly to an original GT-40.... And of course you can still buy them with 427-8 cu engines..... If you think you can afford one that is.... -
Tell you what, just like the Helicopter and Hellfire, (now hellfire II) put paid to the idea of massed tank assaults, the automatic remote drone is going to do for tanks what the dive bomber did for battleships....... Make them worthless on the battlefield....
-
In your figurations brother, make sure to balance the barrel against the breech mechanism, the same weight on both sides of the trunnion point, this way the barrel won't droop down when on display.... Without the balance, eventually the barrel will fall, there is nothing you can do for it, it's inevitable...... Beautiful kitbash my friend.....
-
Honorable Master, does your construction guild take on apprentices? Inquiring minds want to know.... If your guild doesn't take on apprentices, you might want to reconsider..... Yours would be famous worldwide.... on the square and level my brother....


