
Model Mariner
-
Posts
95 -
Joined
-
Last visited
Content Type
Profiles
Forums
Gallery
Events
Posts posted by Model Mariner
-
-
Thanks for the comments and likes!
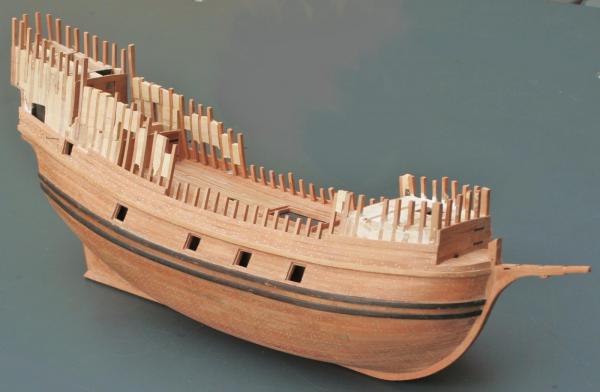
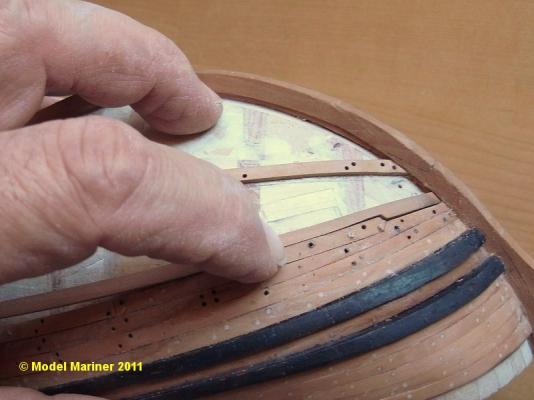
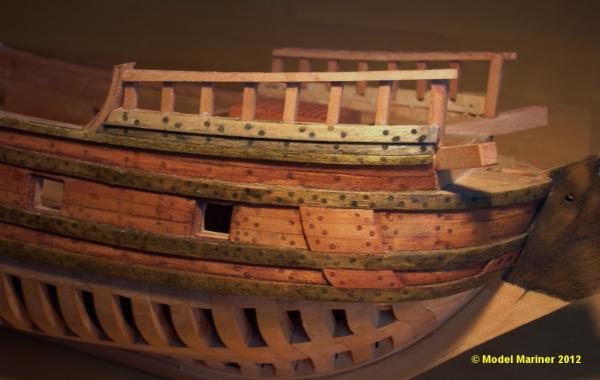
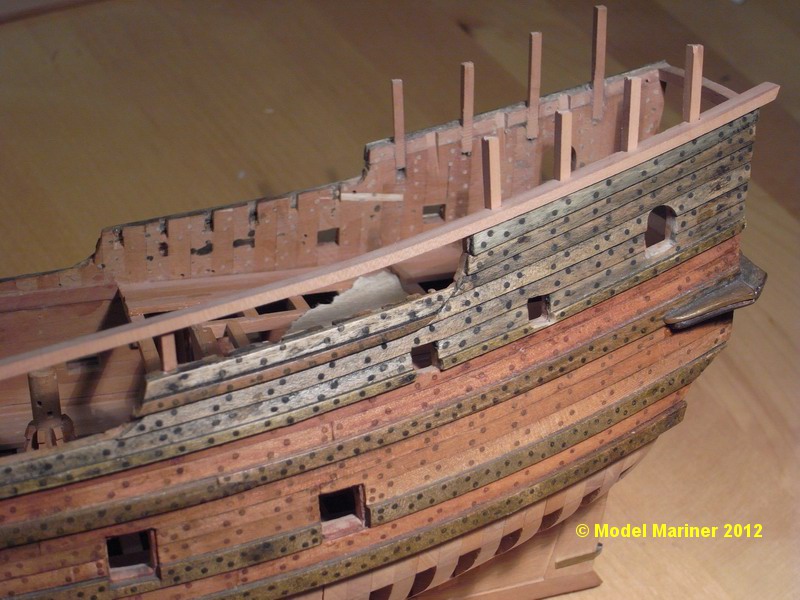
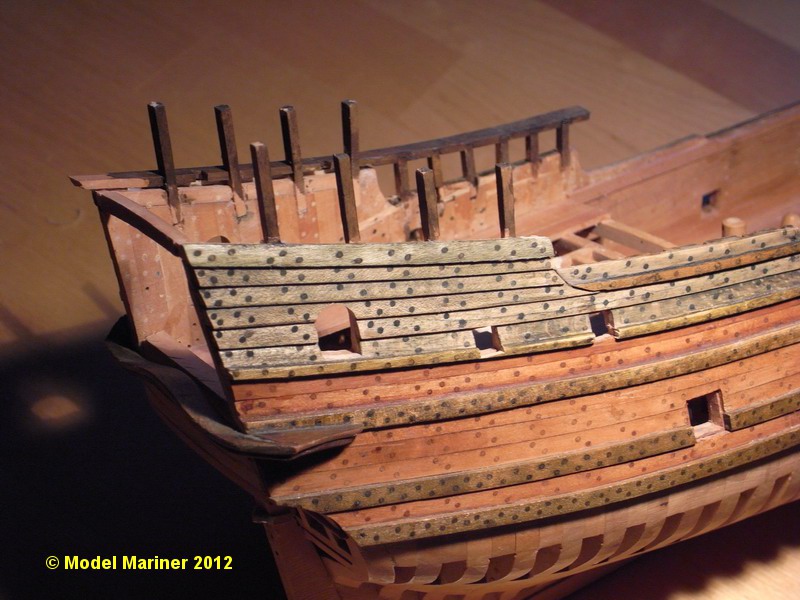
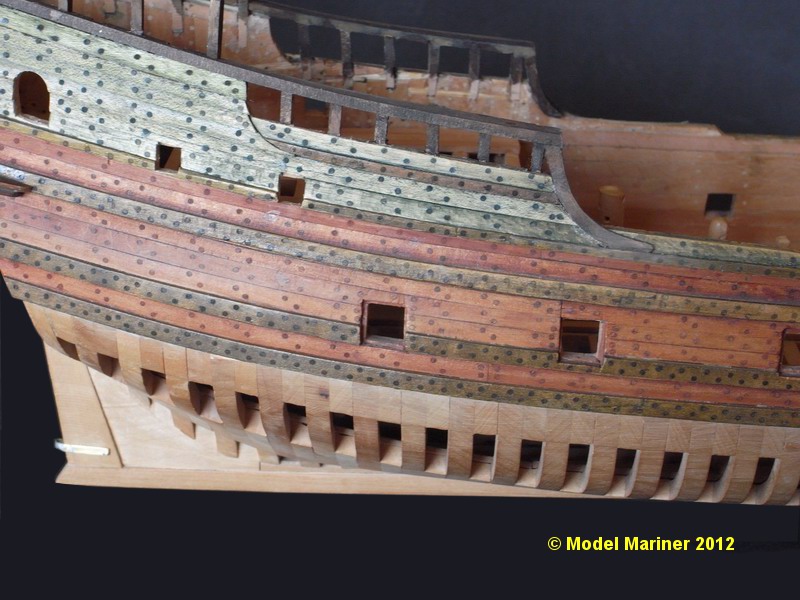
The next three planks are now on and have been stained red (the red does not look as bright as in the pictures):

I made a draft of the envisaged frieze on a strip of paper of the size of the three planks. Since I did not know a better way to transfer the design to the planks I drew it on to a strip of cardboard and cut away the upper part. The lower part (black in the next picture) was used as a jig to trace at least the central wavy line slightly with pencil onto the red planks.
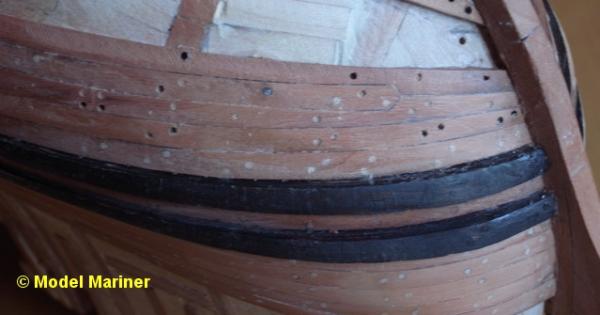
The frieze was then painted with yellow acrylic paint freehand onto the planks.
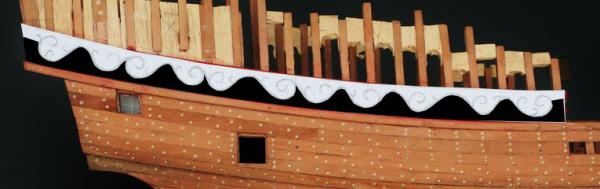
 The wet yellow paint dissolved the red wood stain a little bit and mixed up with the yellow, so this resulted in an orange hue. At first I thought I would paint once more over the dry acrylic paint to achieve the envisaged yellow but decided in the end against it, I like the dull orange actually more than a bright yellow.
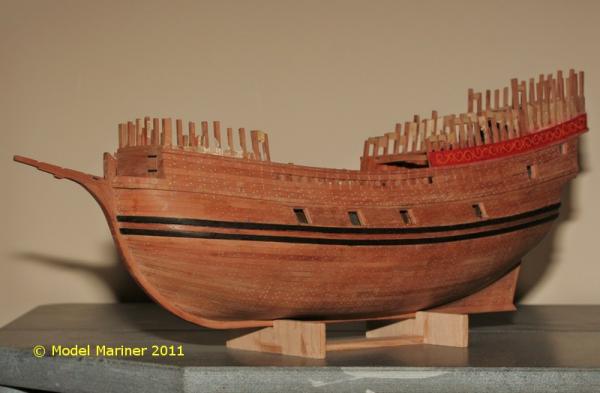


Klaus
-
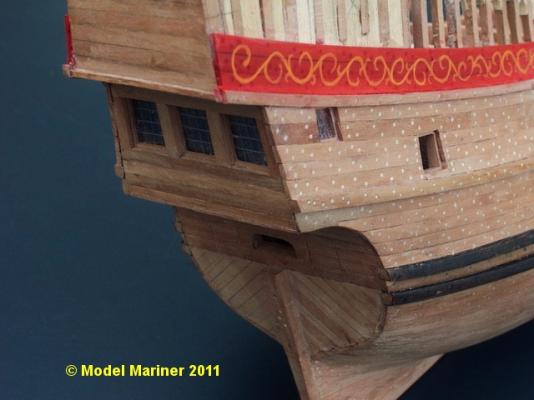
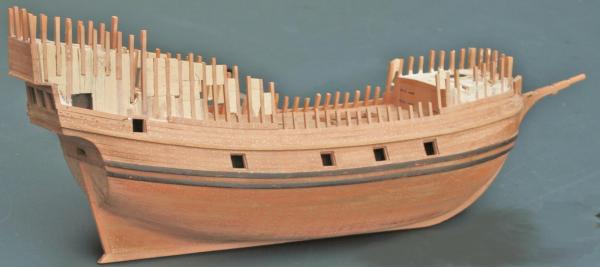
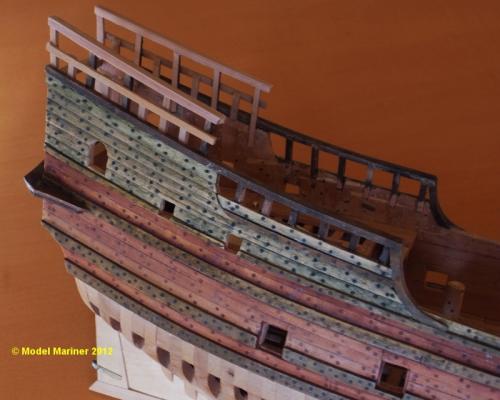
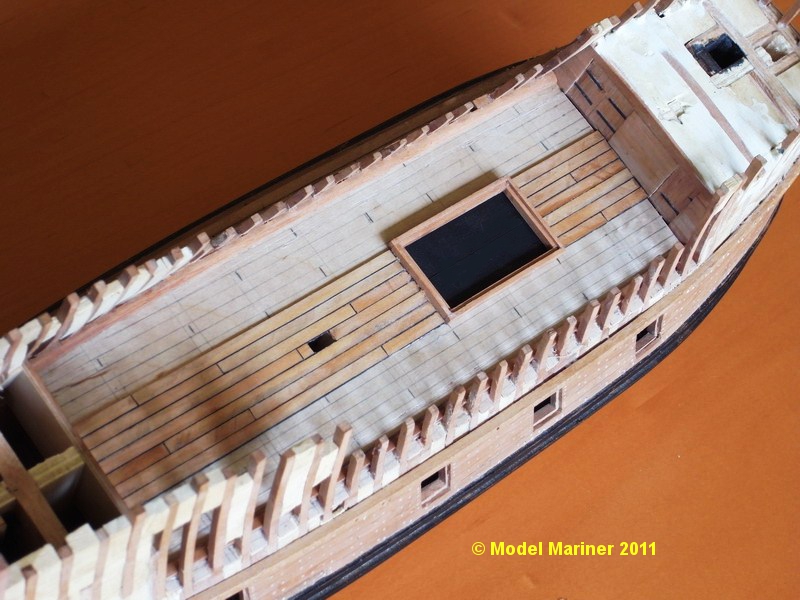
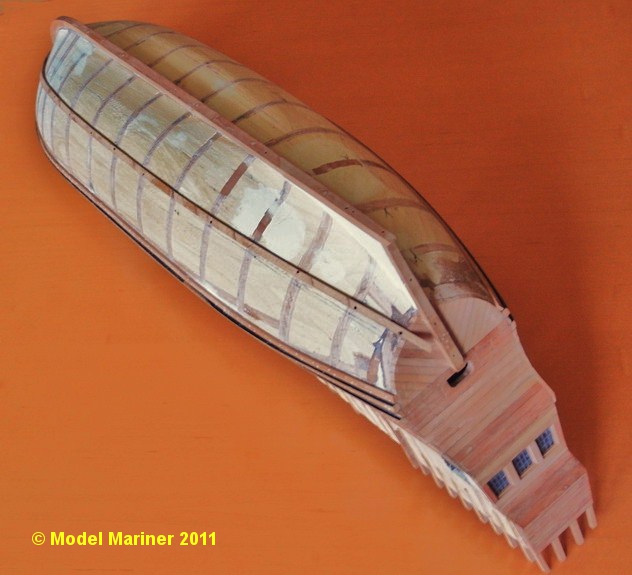
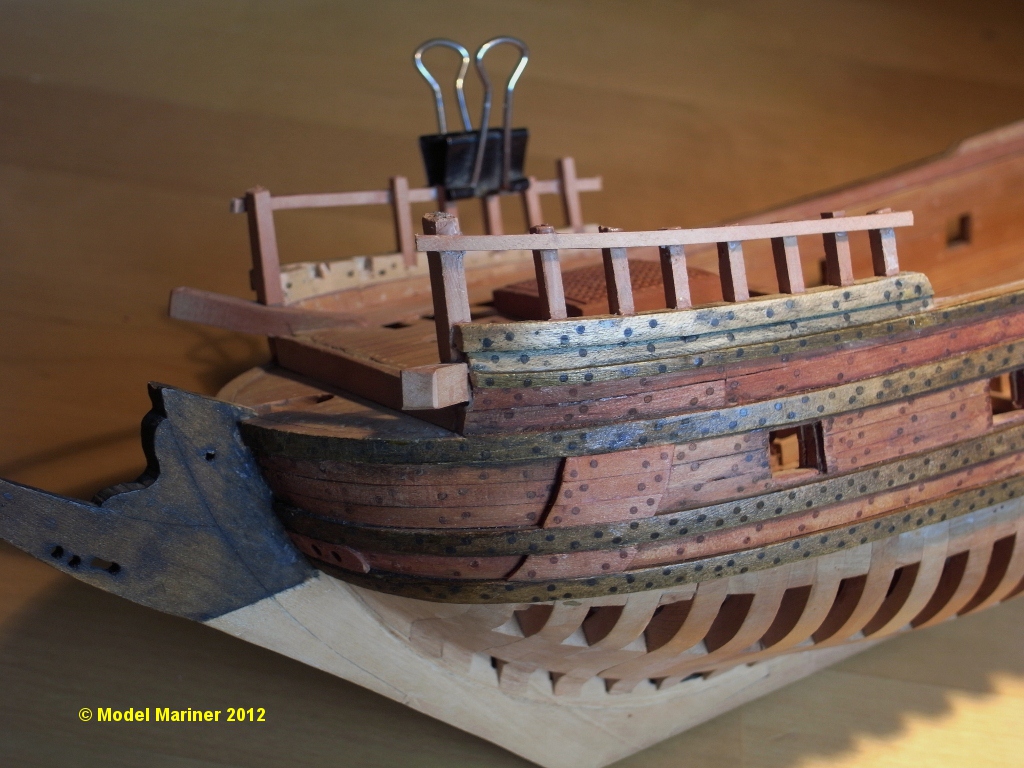
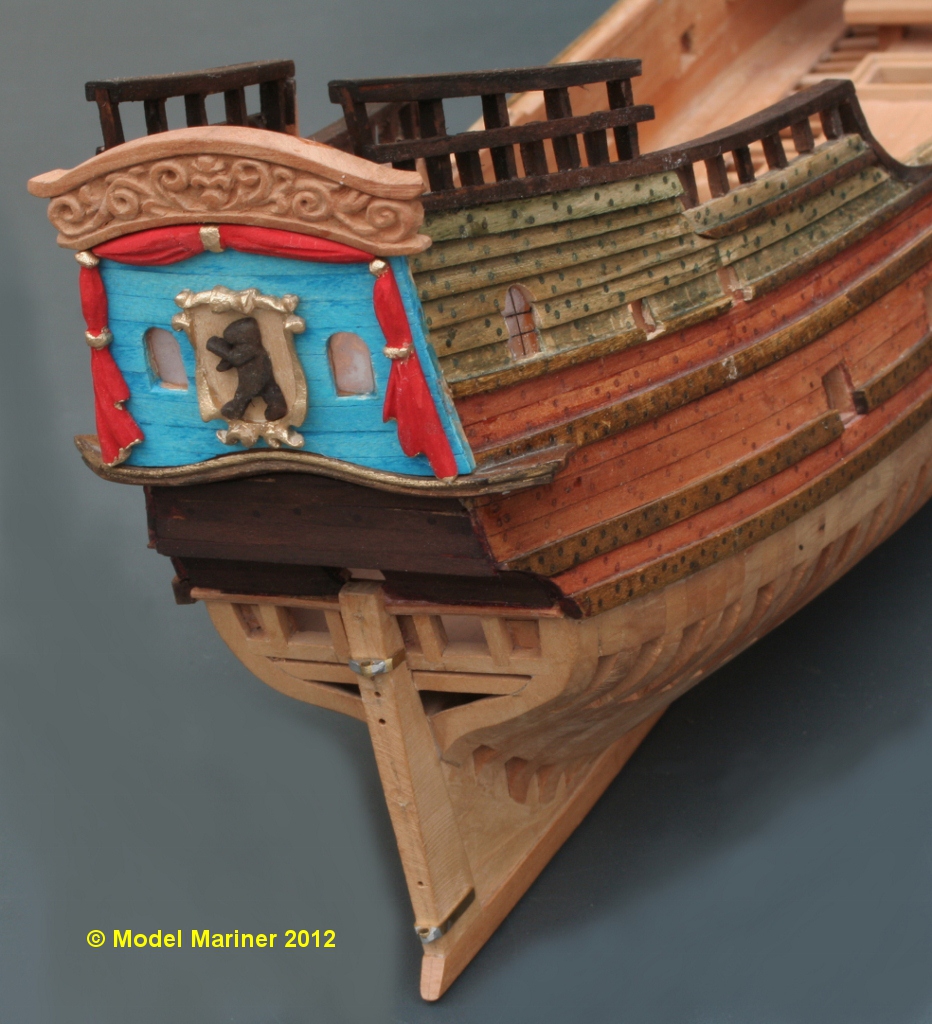
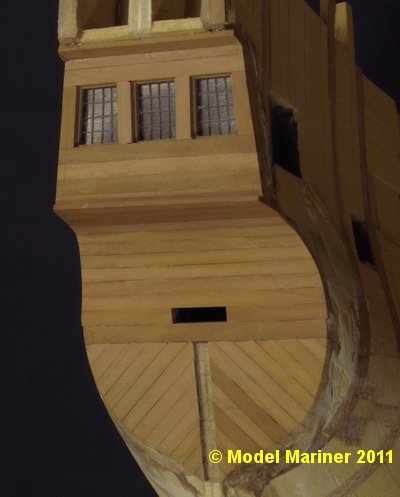
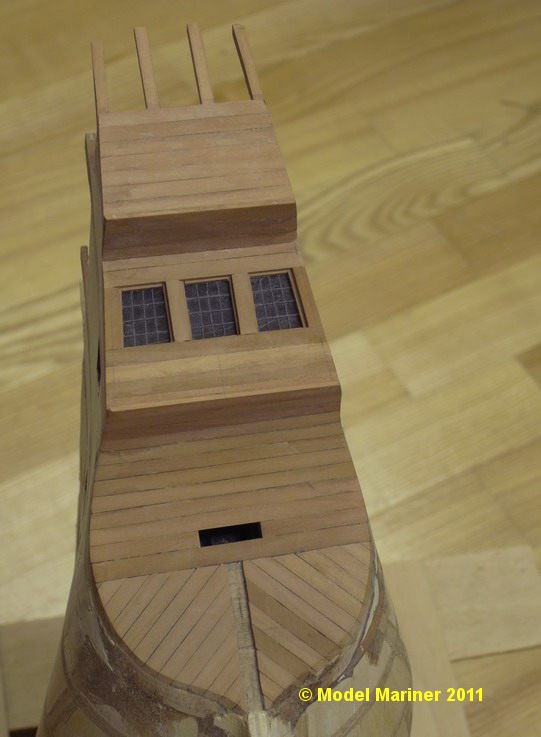
To be able to continue the upper part of the planking the windows at the great cabin had to be built in (they are made up in about the same way as the stern windows described earlier):
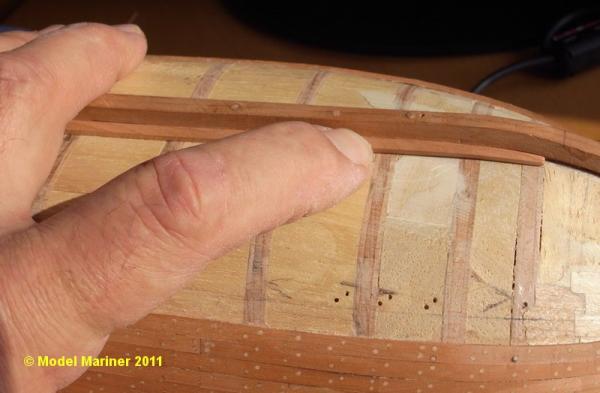
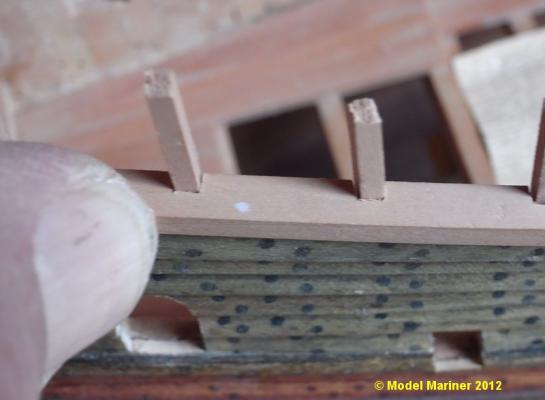
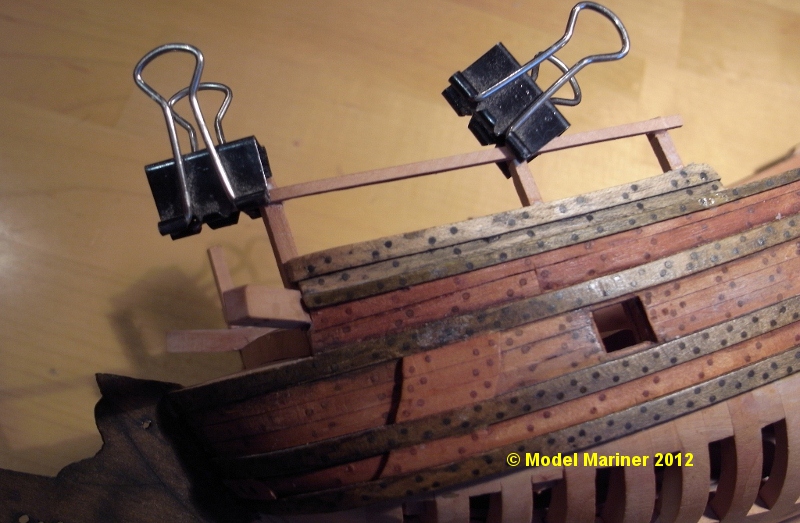
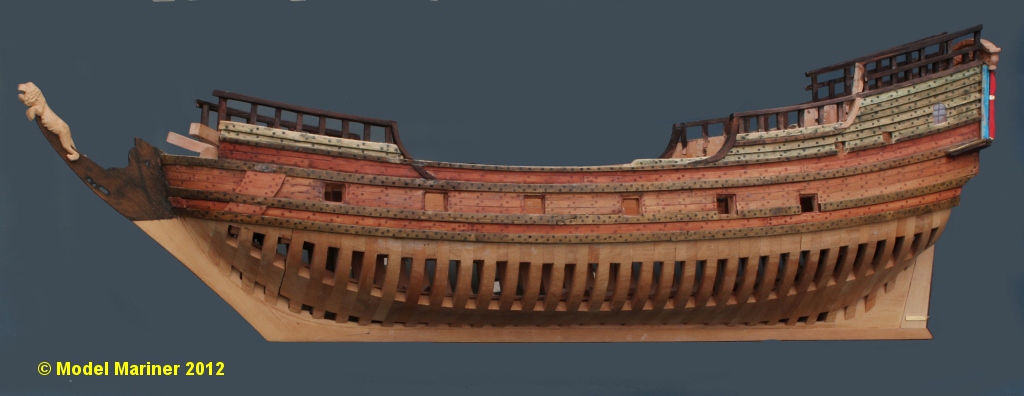
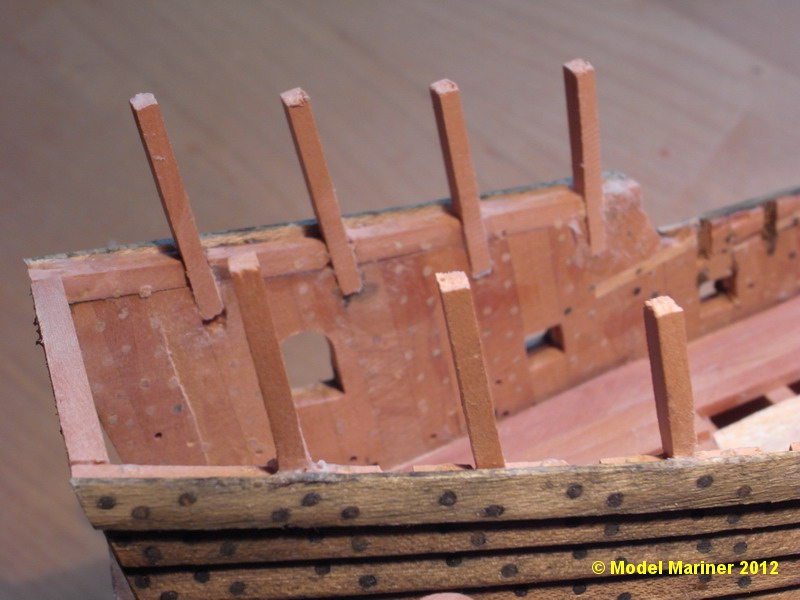
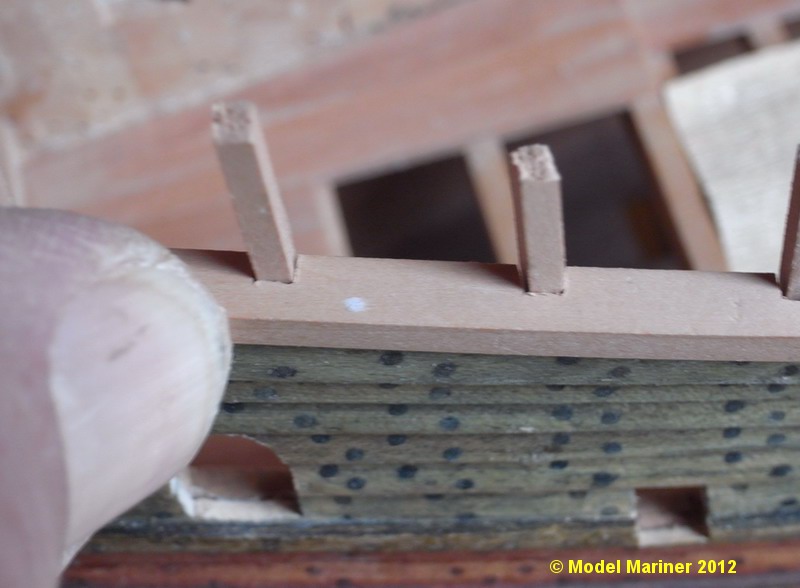
Midships I have reached now the part where the planks are glued and treenailed only at the relatively thin toptimbers. At midships this is the final height, so at least in this area there is no more danger of breaking the toptimbers:
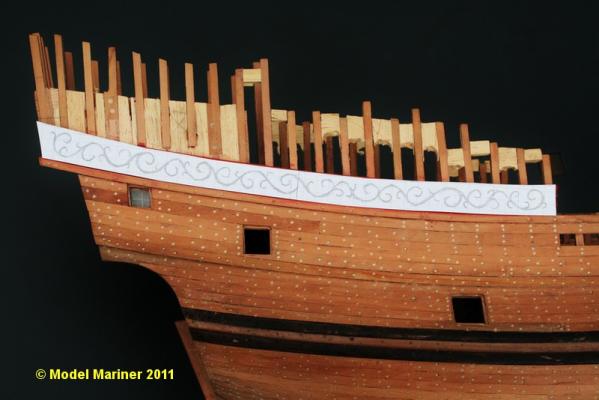
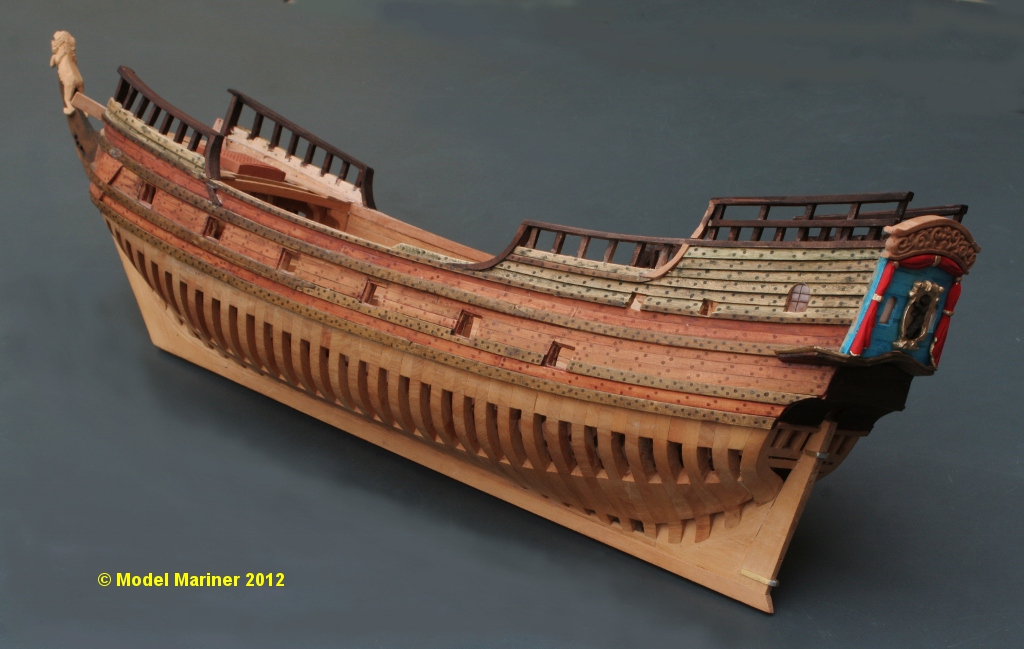
For a considerable time I was not sure if I should leave the upper works naturally of if I should paint it. In the end I decided to paint some parts. The geometrical patterns consisting of triangles of different colors which are often shown on Mayflower models are obvioulsy derived from the drawings of Matthew Baker, but were outdated already at the time of the Mayflower. My idea is to stain the upper strakes in red and then paint some yelow friezes onto the stained planks.
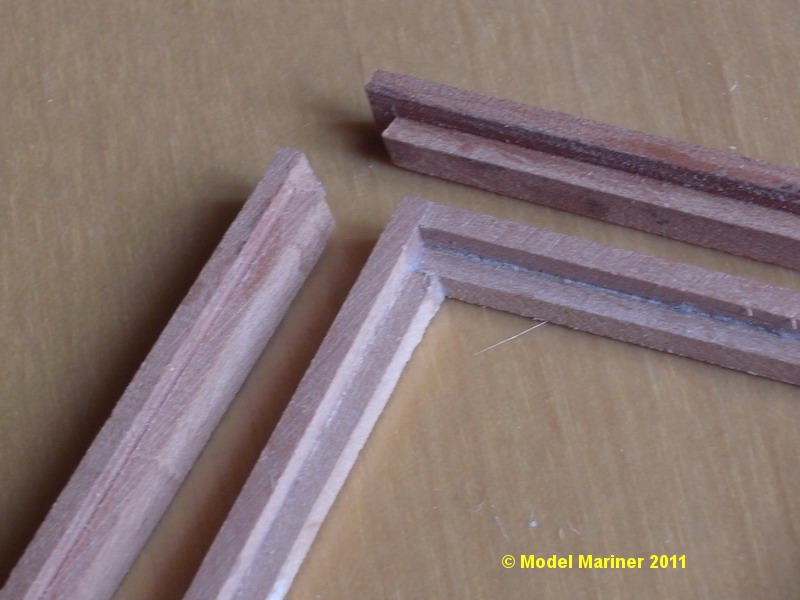
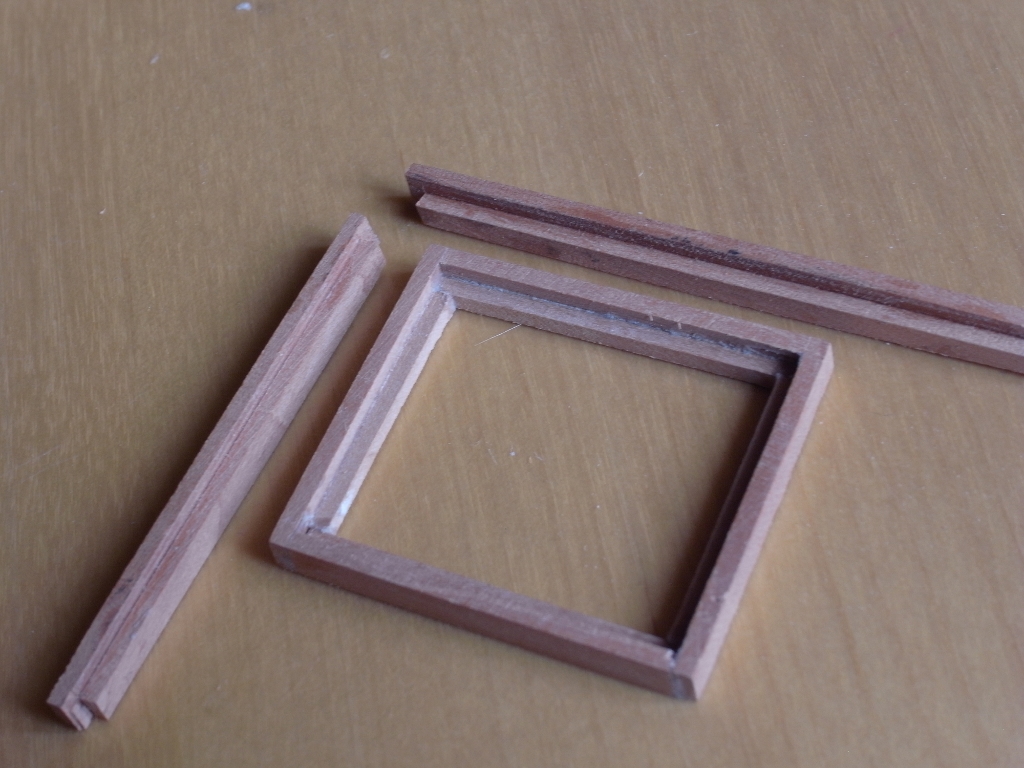
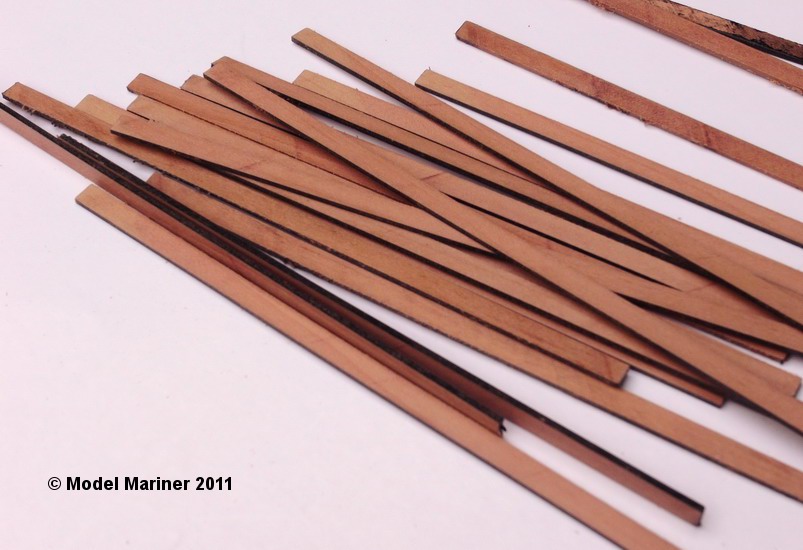
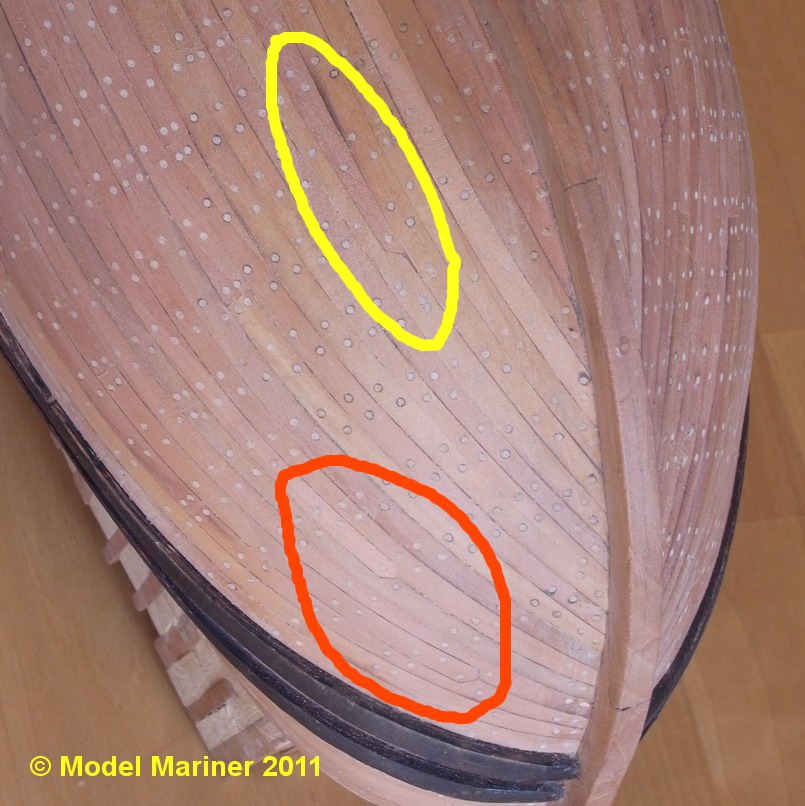
Since paint and I are not very good friends (I always fear to spoil my models when I have to apply paint) I tested this at first on a few planks (which are not glued onto the model) to see what it looks like: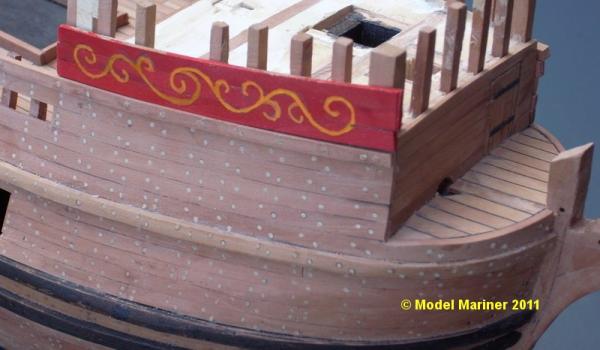
Since this did not look too bad (at least from a distance of several feet) I decided to follow this route (note: no risk - no fun).
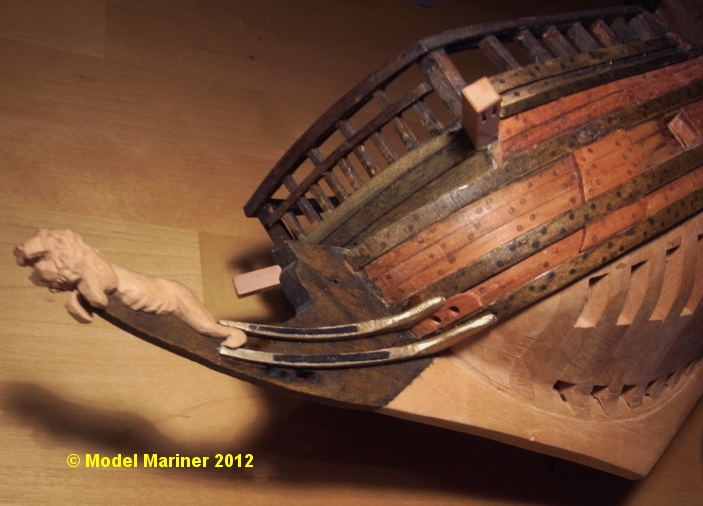
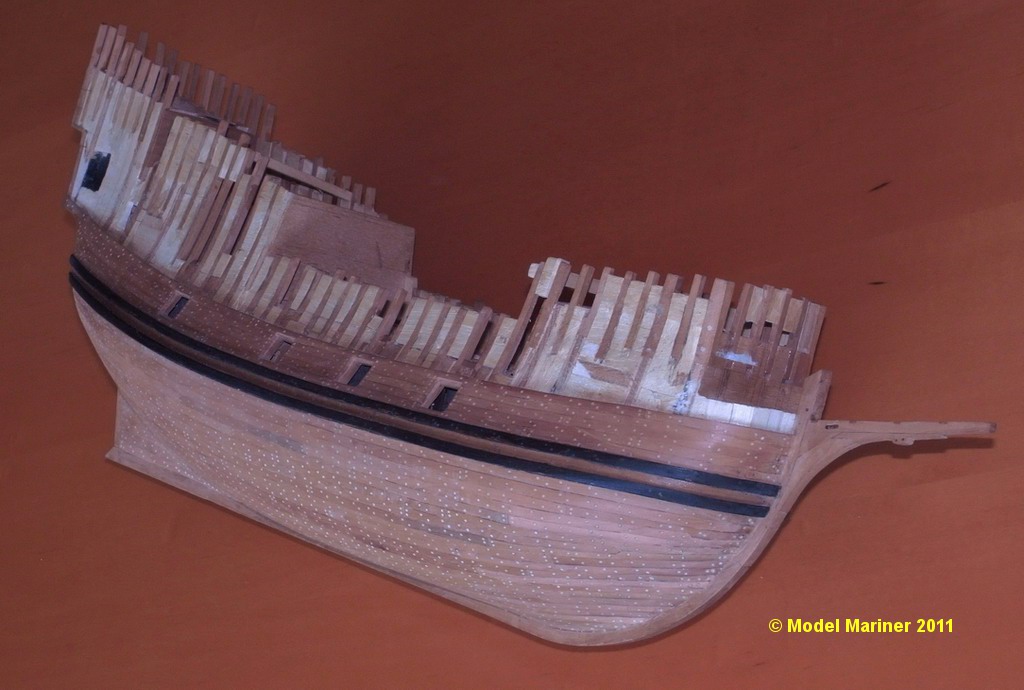
The next picture gives an idea how the planned decoration would look on the model (at the aft part the decoration is painted onto a piece of cardboard - not yet the model):
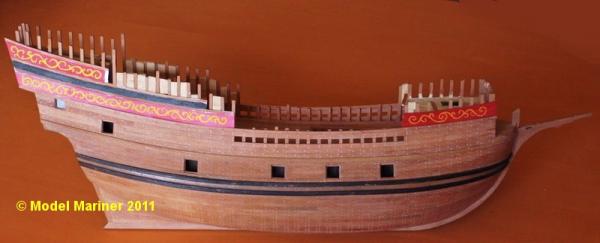
For the red I intend to use wood stain, for the black strip Chinese ink (which penetrates the wood better than wood stain) and for the yellow acrylic paint)
Klaus
-
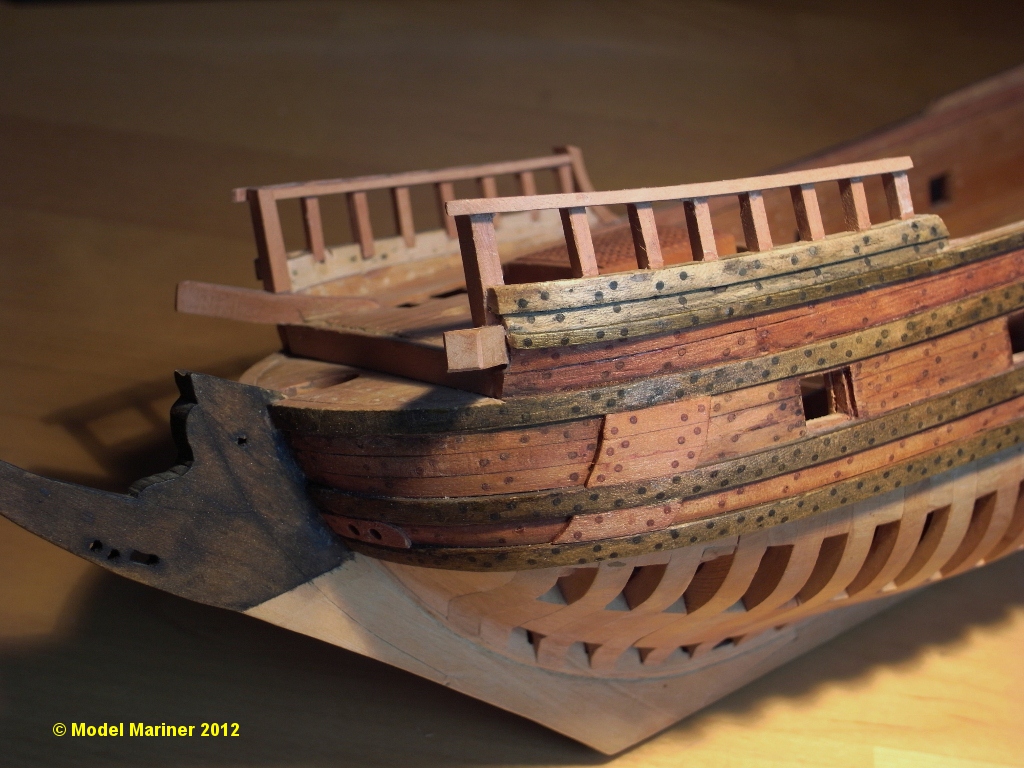
Planking of the upper works:
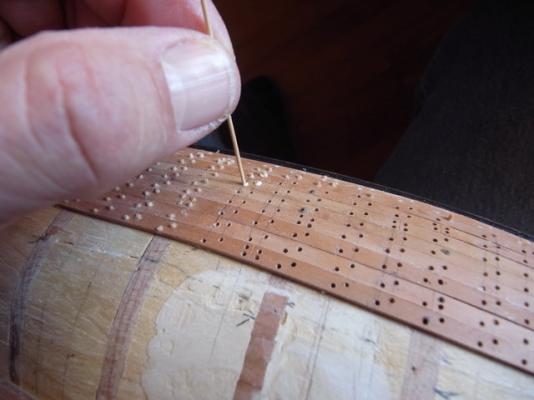
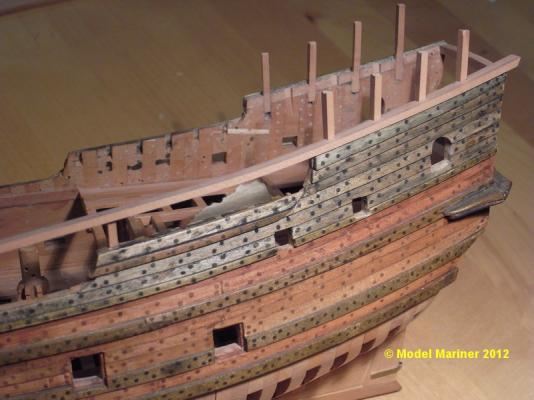
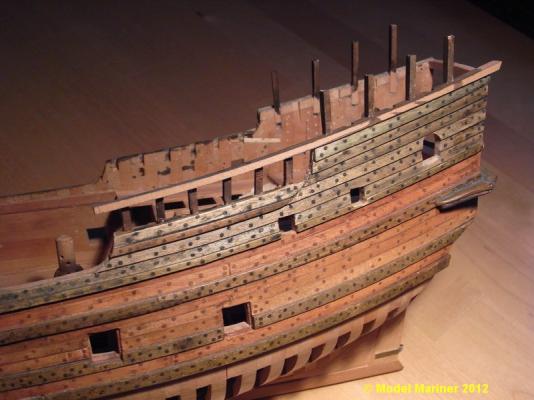
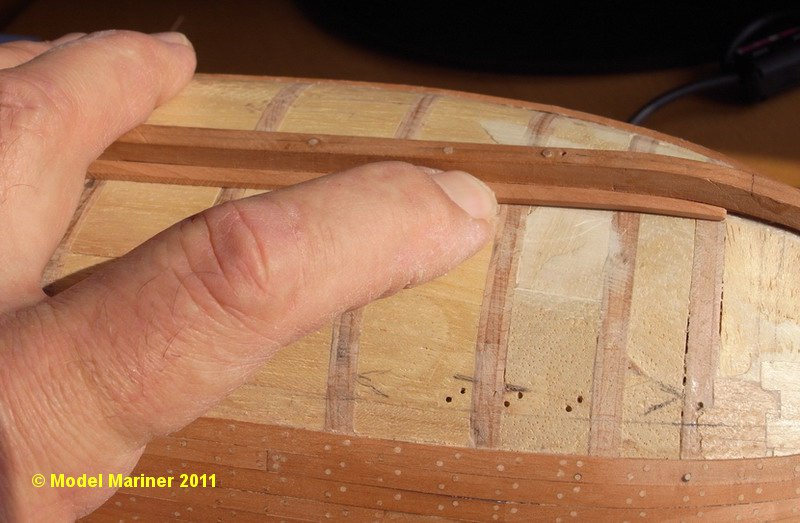
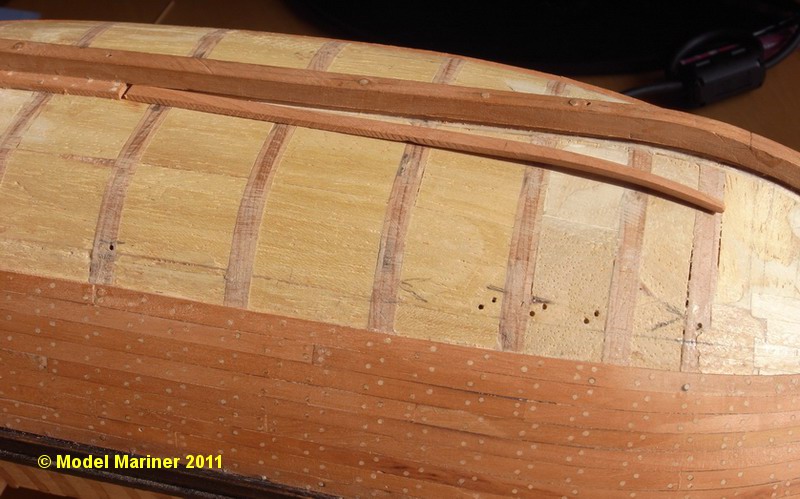
A few more strakes of planking have been added and drilled for treenailing:

the same on the starboard side with treenails put in:
Klaus
- Piet, Elmer Cornish, mtaylor and 2 others
-
 5
5
-
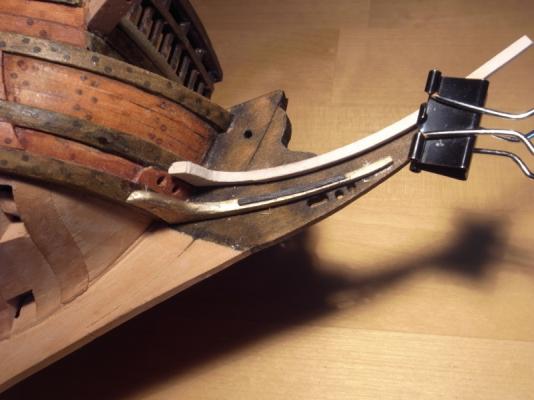
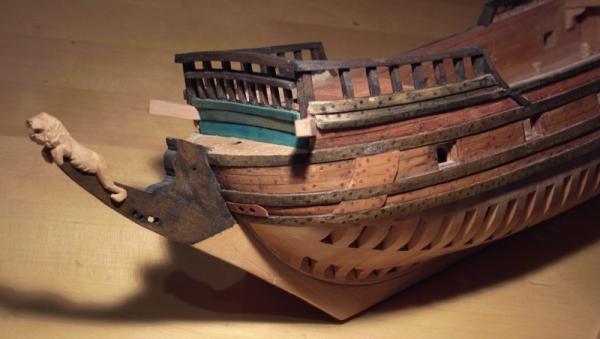
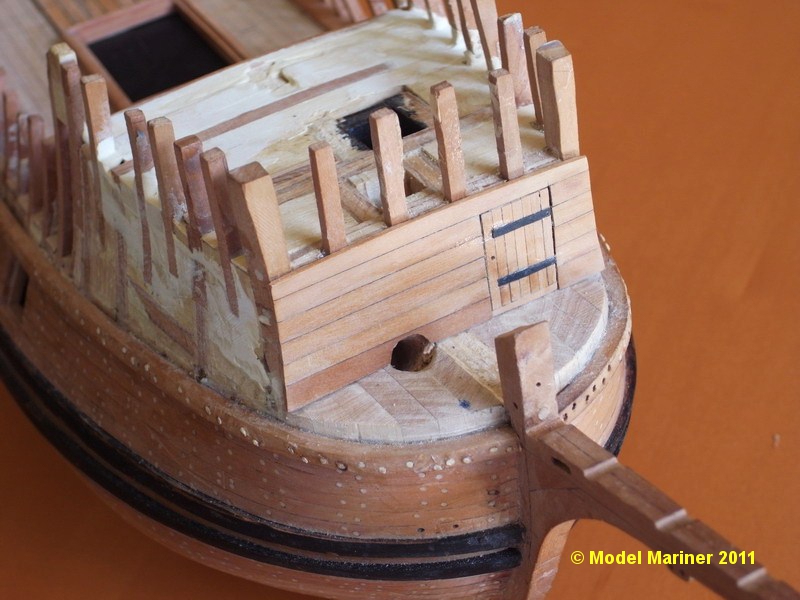
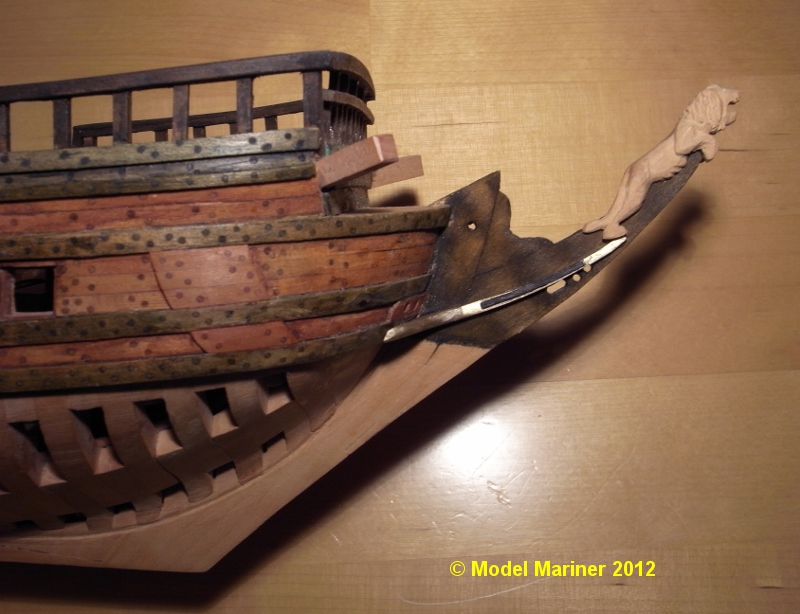
The head (continued):
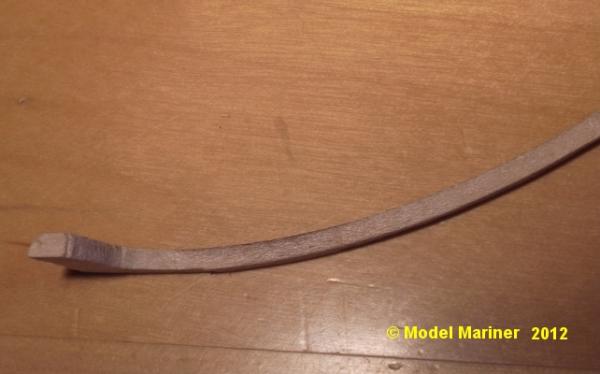
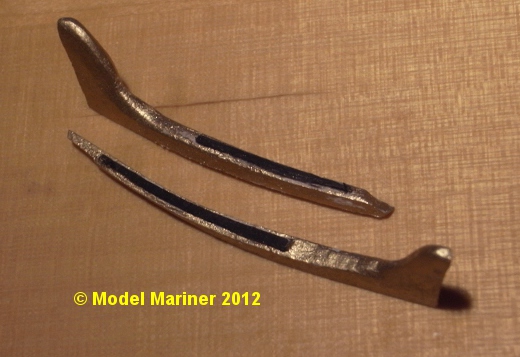
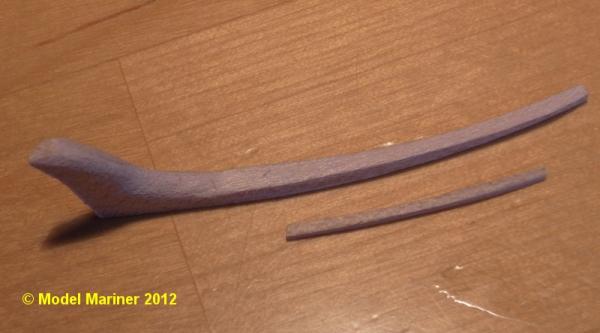
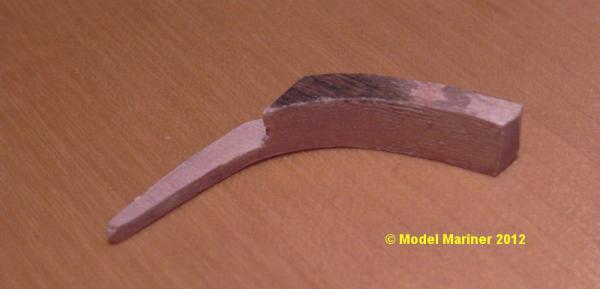
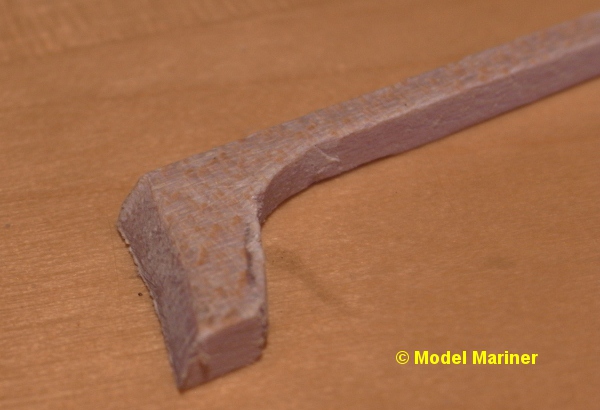
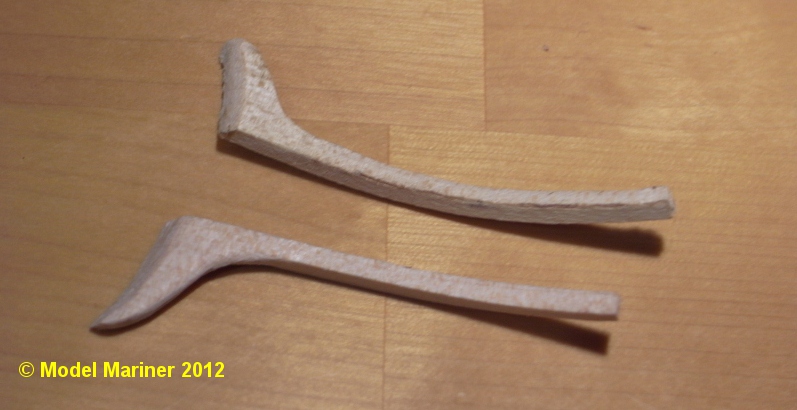
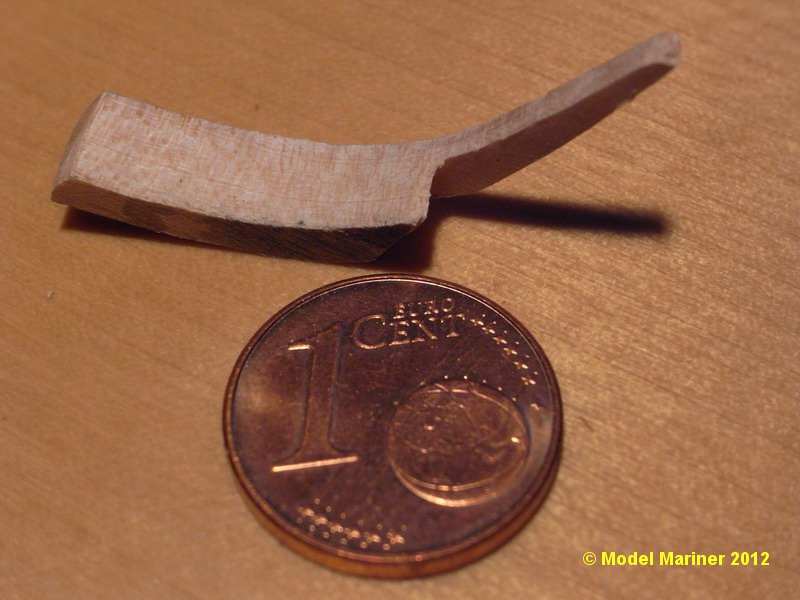
Making of the upper cheeks is more or less a repetition of the last job:
cutting out the cheeks (a little bit larger than required), bending and sanding to shape: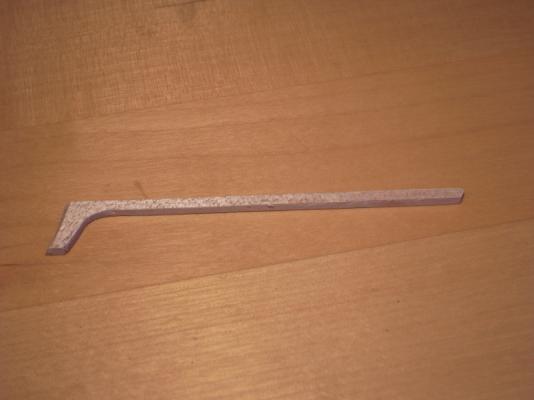
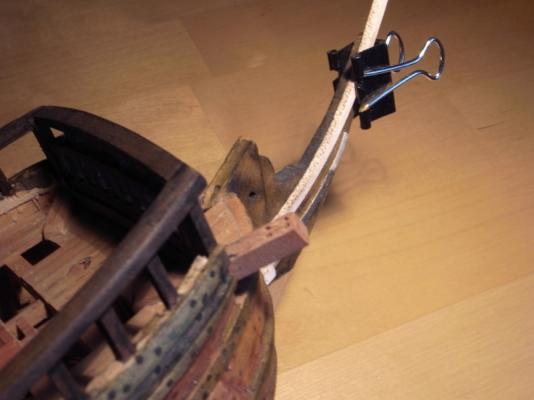

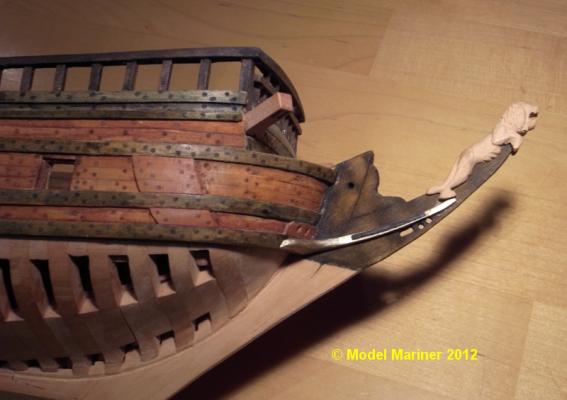
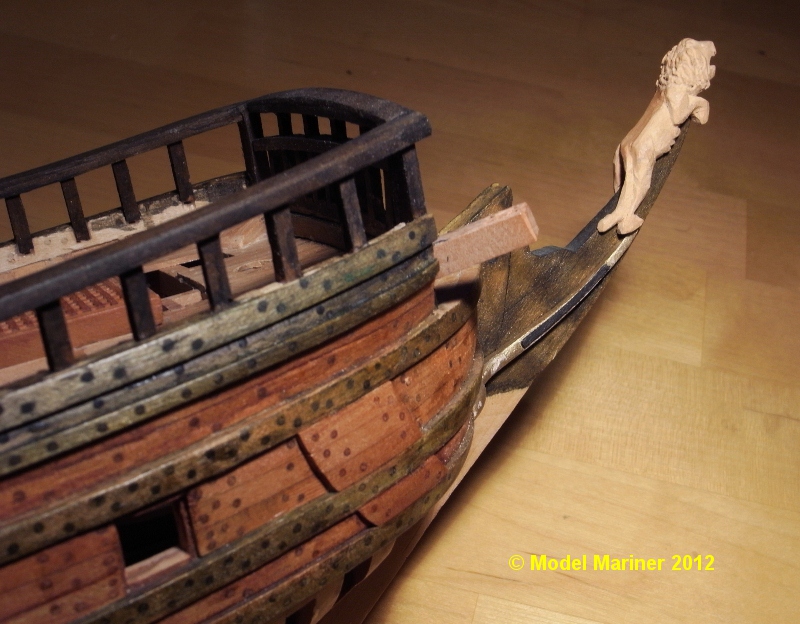
After painting the cheeks are glued on to the head:
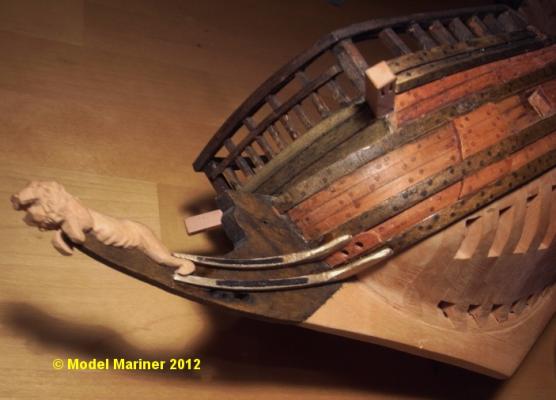

Klaus
-
Hi Klaus.... I cannot tell you how delighted I am to find your wonderful Mayflower build log. Not only, is it a pleasure to see your fine craftsmanship, but also extremely educational. Following your build is certainly going to help me improve my own attempt to build her as well (actually, I am working on two Mayflowers of different scales).
So glad to see your walnut hull tree nailed, as I was not sure if I was going to tree nail the larger of my two builds....now I am sure I will.
Dave
Thanks for the kind words, Dave. It's always nice to hear (read) that others find one's log educational as you wrote.
My Mayflower hull by the way is not made from walnut, with a few exceptions I use only pear.
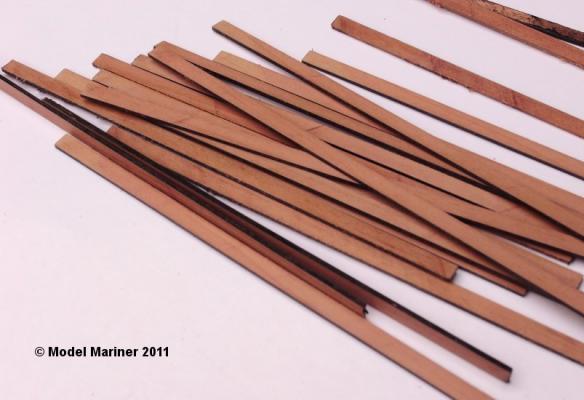
For the treenails I have tried different kinds of wood. Pear is extremely difficult to draw, so I made most of them from maple but I have tried also other kinds of wood.
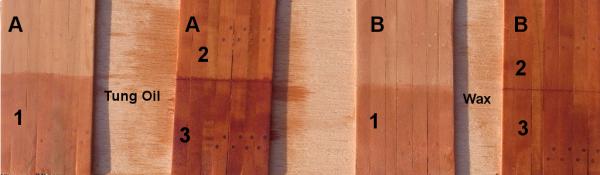
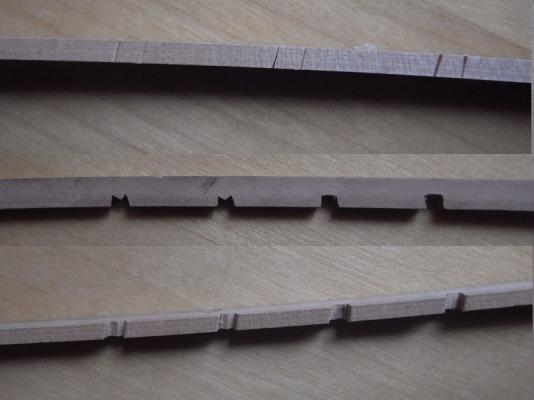
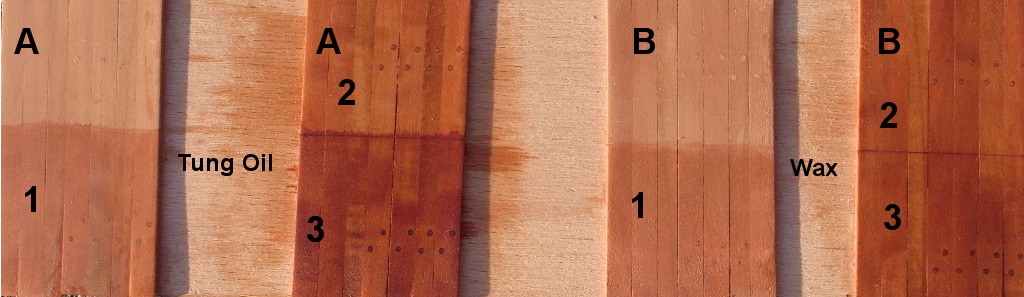
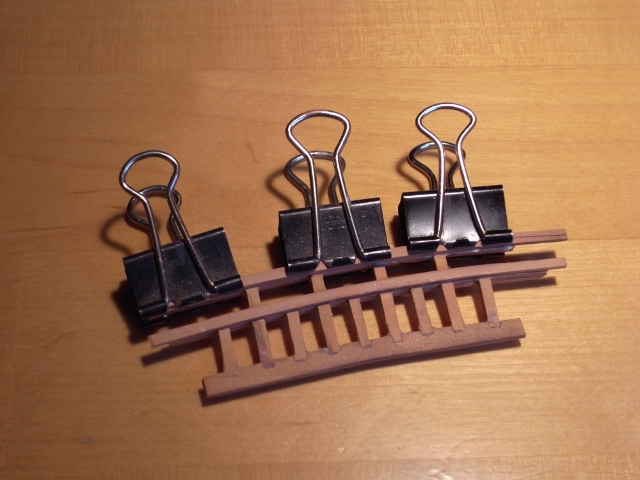
I do not like the treenails looking brighter than the planks as they look now on my model. But I made some tests and found out that after applying a finish (no matter if oil or wax is used) the oil or wax penetrates the wood of the treenails (since their exposed surface is cut across the grain) much more than the planks and then even maple treenails look actually darker than the pear planks.
The following picture shows a piece of ply onto which I have glued some pear planks into which I put some treenails made from maple. On the left hand side (strips marked A) I have applied then one, two and three coats of tung oil, and on the strips marked B one, two and three coats of wax. The parts without numbers show the planks and treenails without any finish applied. As you can see even with only one coat of oil or wax the treenails look alredy darker than the planks.
Regarding your own Mayflowers: I certainly would recommend treenailing them. It is a tedious job but in end the result is worth the effort.
Klaus
- Piet, SawdustDave, Elmer Cornish and 1 other
-
4
-
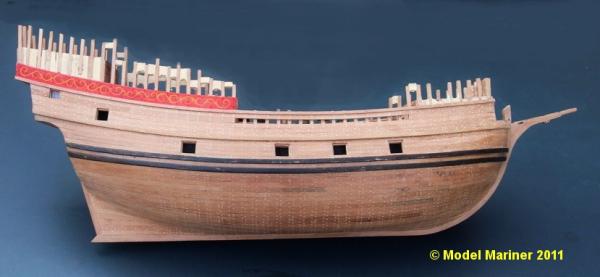
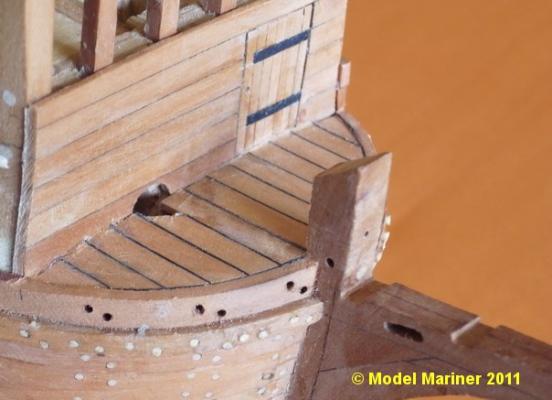
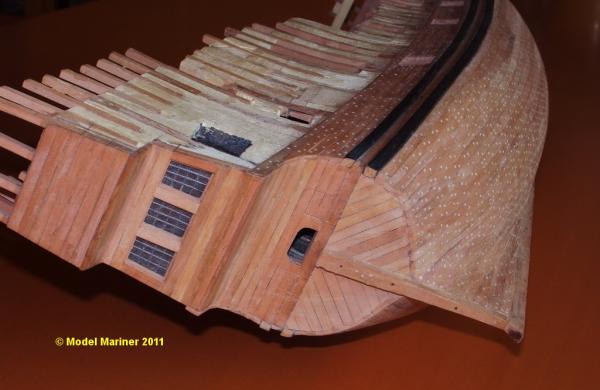
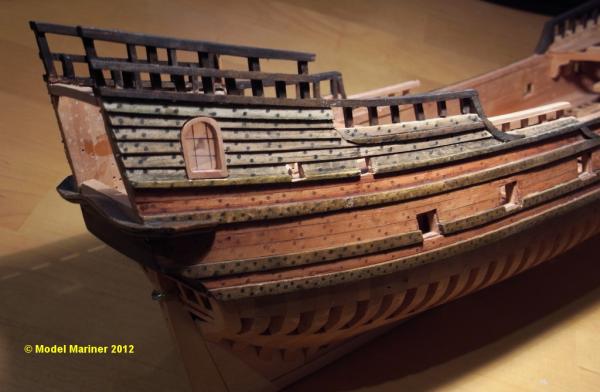
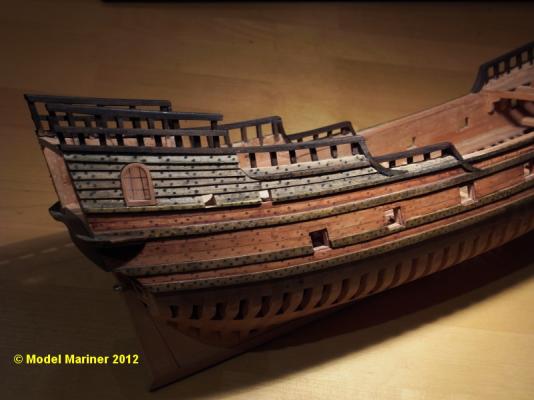
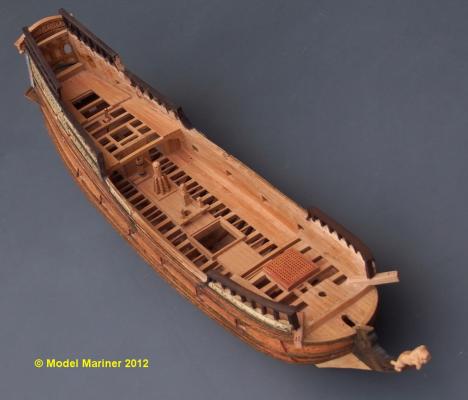
Planking of beakhead bulkhead and main deck:
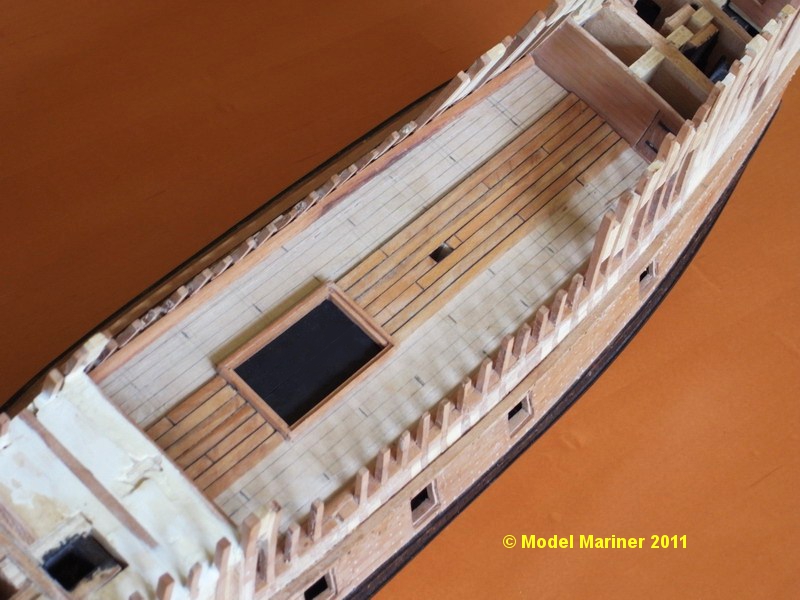
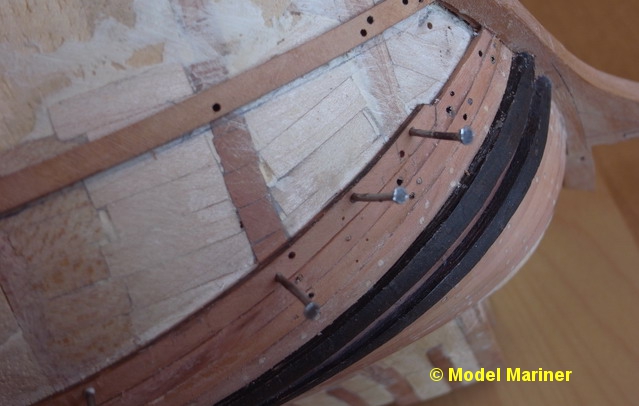
at first the waterway is installed on both sides, most of the temporary fillers between the toptimbers have been cut out, the upper wale has been added:
preparation of the the main hatch coaming:

strips of balck paper have been glued onto the deck planks as caulking:
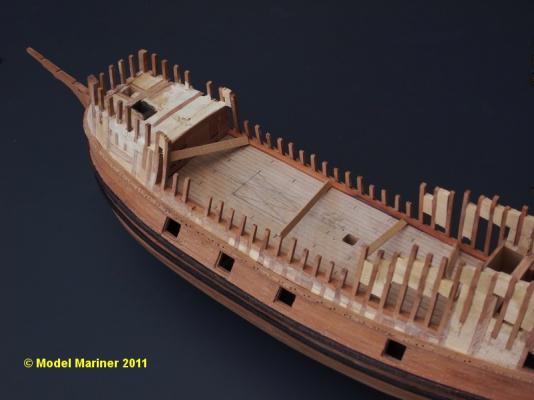
The coaming of the hatch is glued on, the "opening" of the hatch is painted black and will be covered by a grating later, the first 7 strakes of deck planking are glued on:

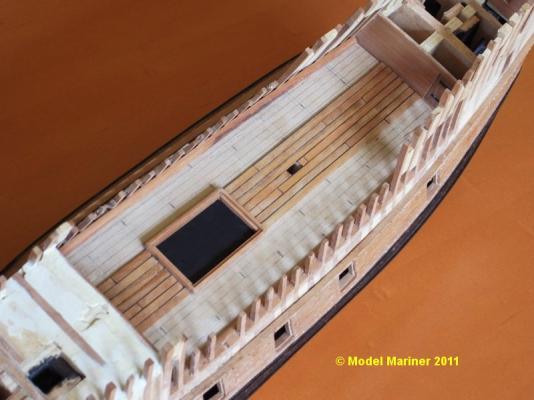
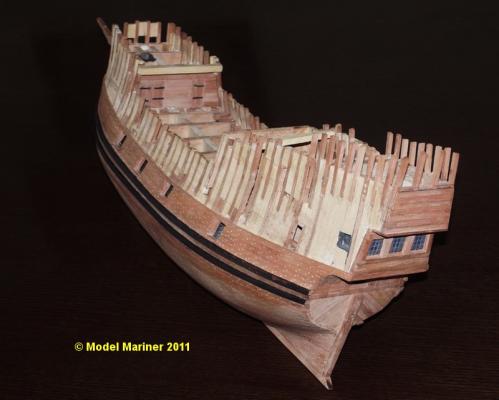
planking of main deck is finished:

the beakhead bulkhead is planked
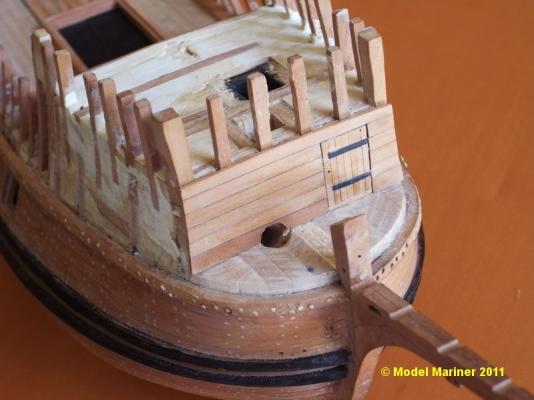
planking of the beakhead deck and one strake of planking over the wale has been added:
Klaus
-
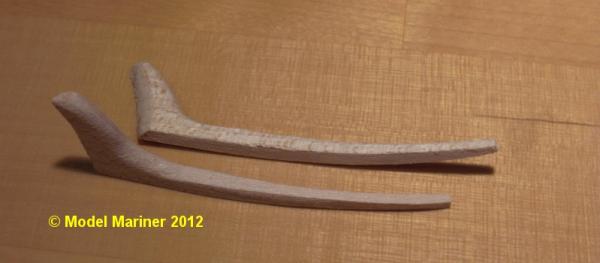
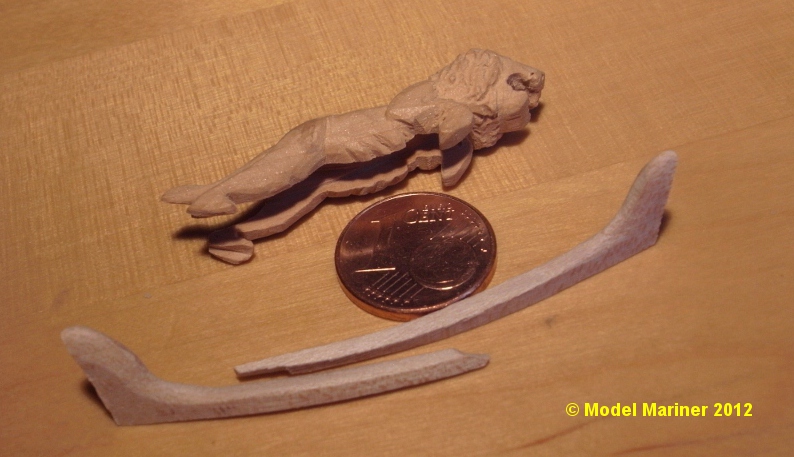
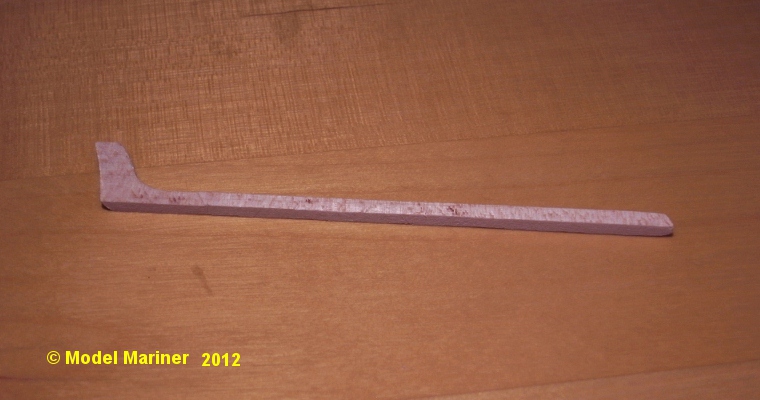
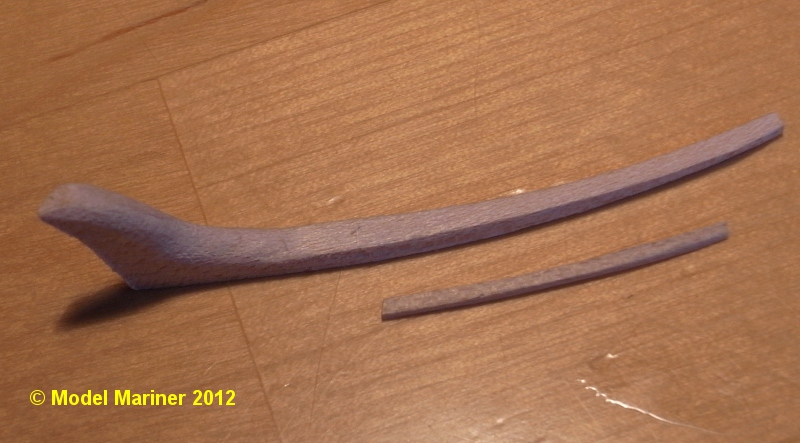
The head:
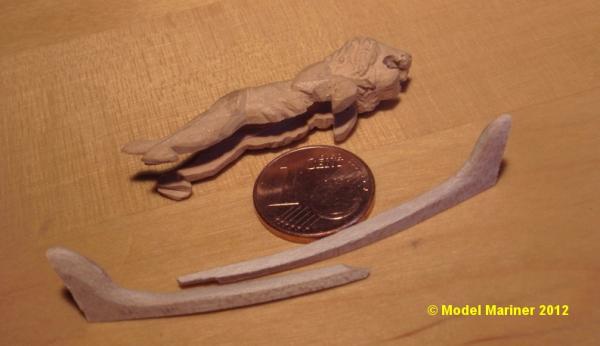
I started building of the head with the lower cheeks: these were cut out from a piece of maple (with a little bit extra flesh)
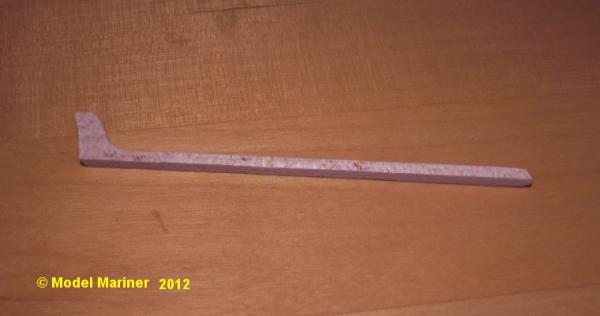
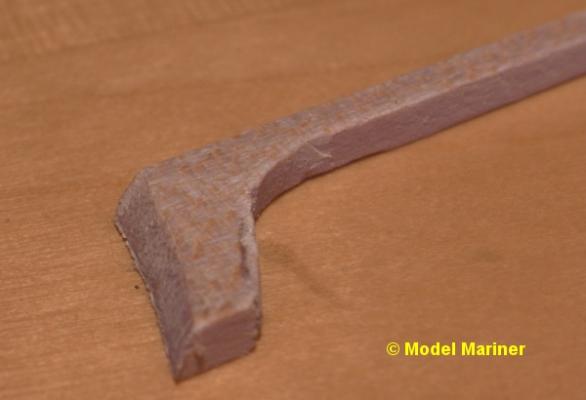
bent to the correct shape and then sanded to the required dimension and shape:

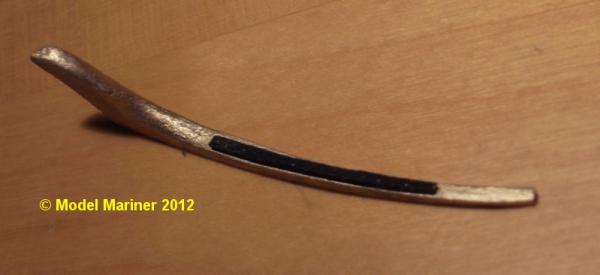
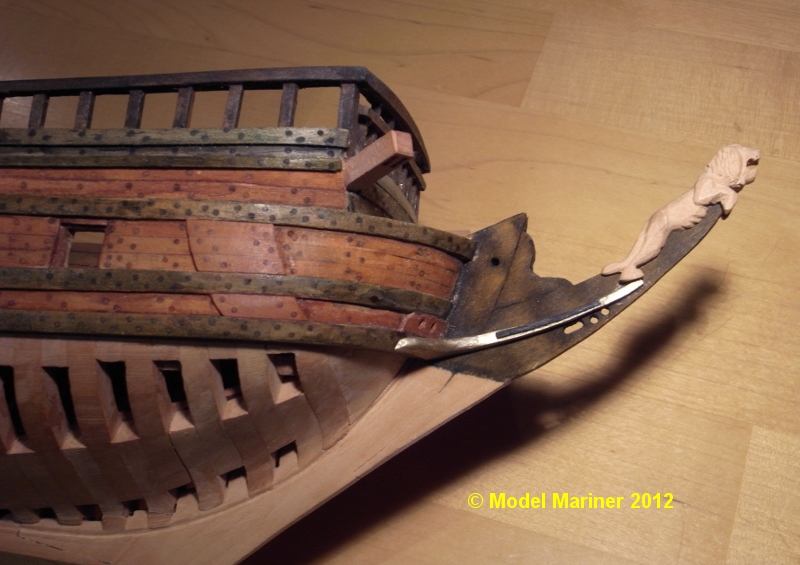
After painting the cheeks with gold paint I glued on a thin black strip:
Cheeks glued in place:


Klaus
- GrandpaPhil, Farbror Fartyg, Dubz and 3 others
-
6
-
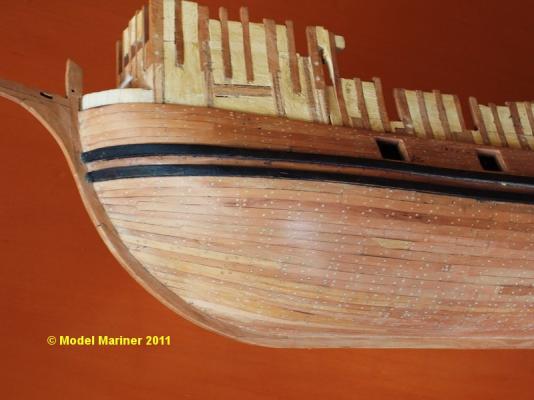
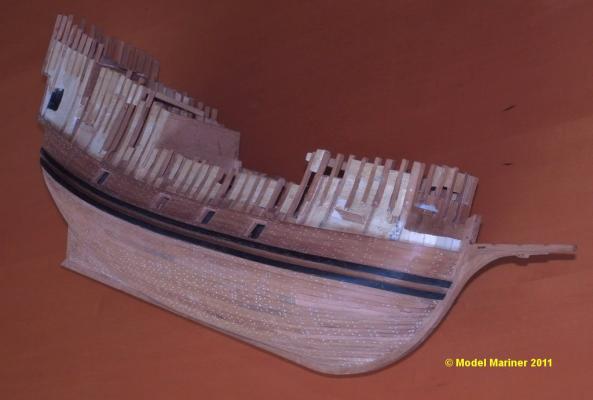
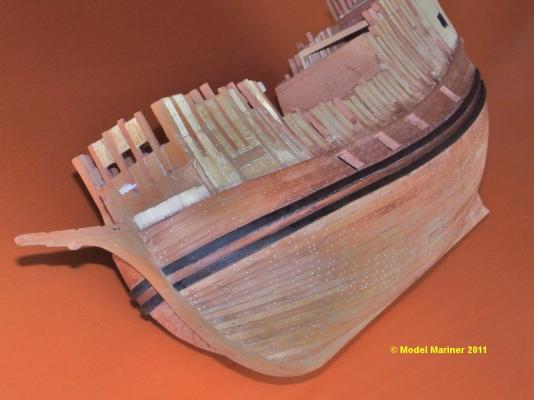
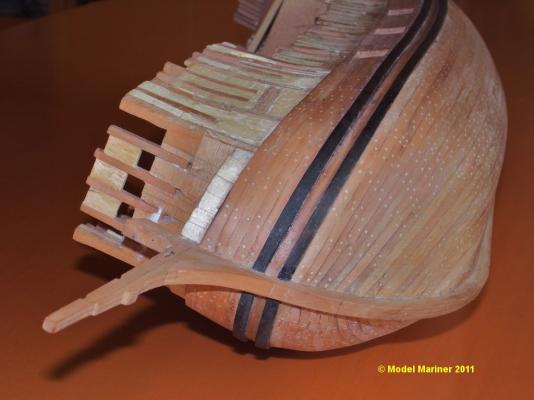
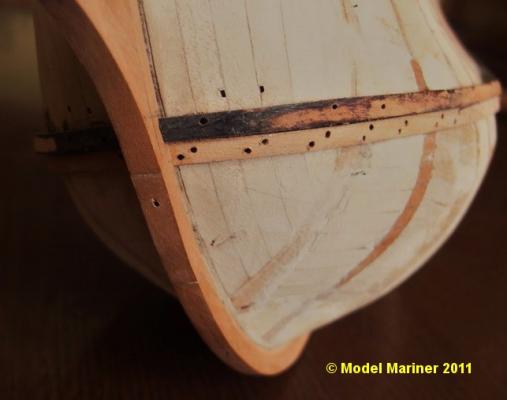
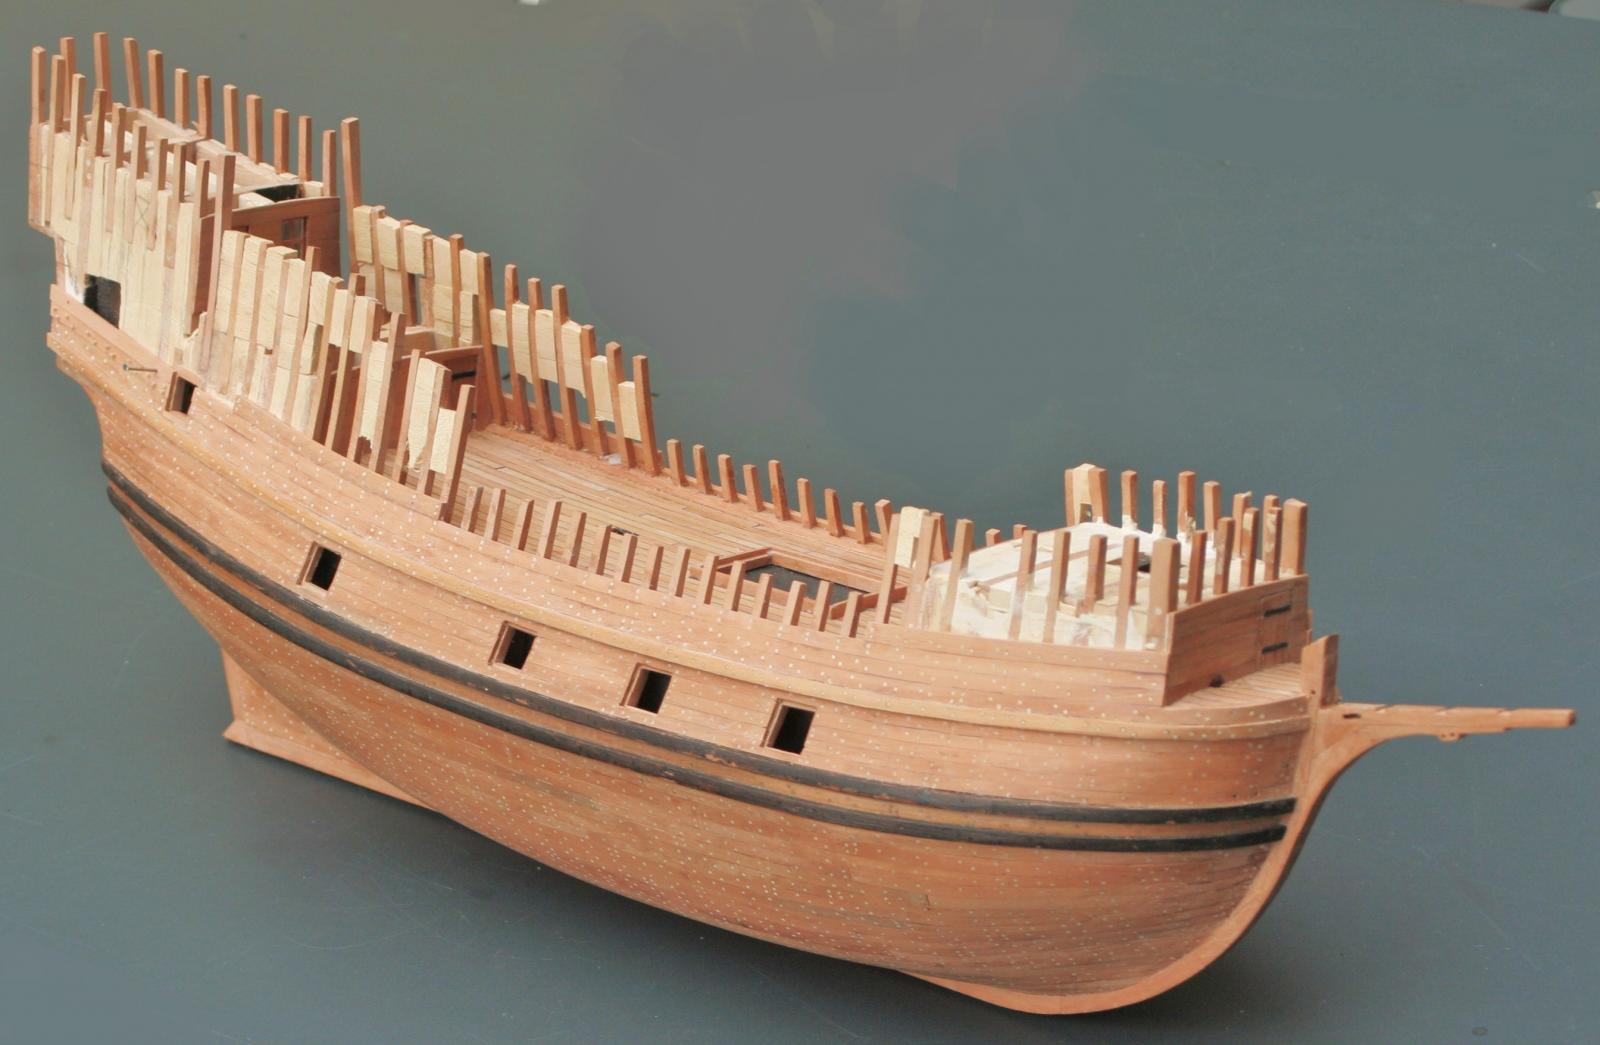
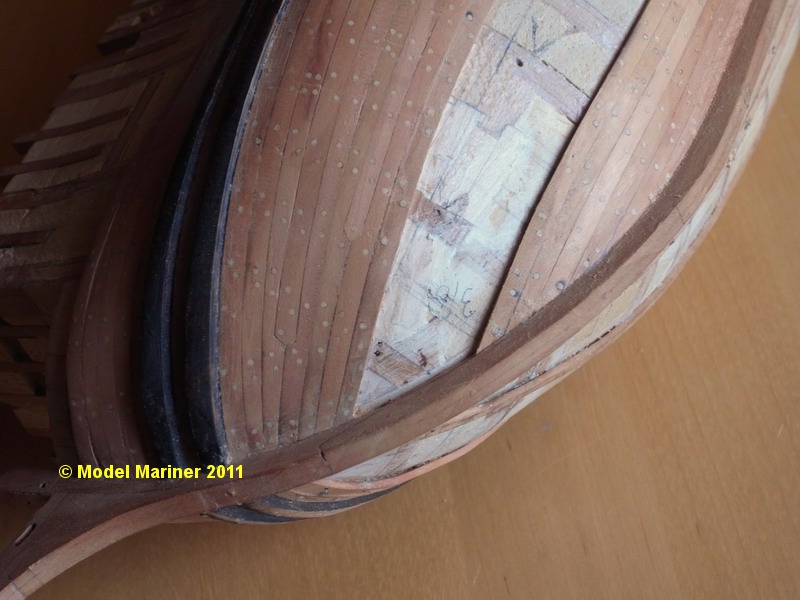
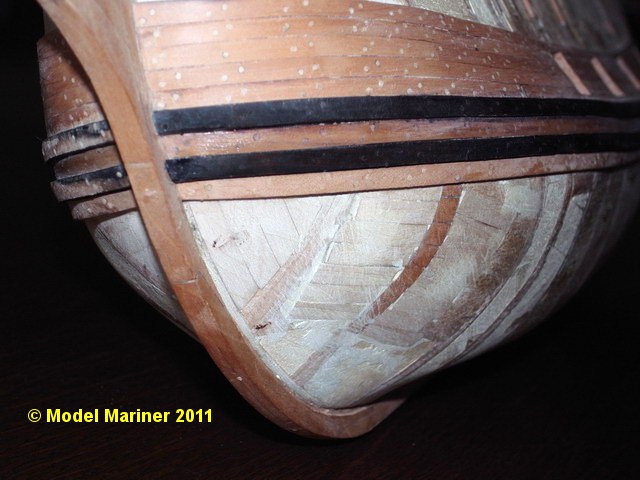
Planking of the underwater hull:
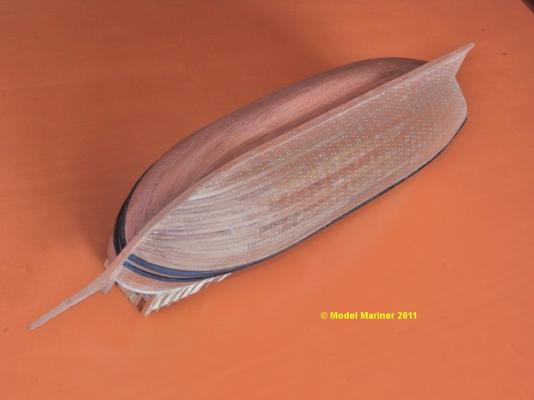
At first I installed one plank (which served more or less as a guiding batton) between the keel and the main wale in a way that it was approx. in the middle between keel and main wale at each frames station and taking care that it followed a fair curve.
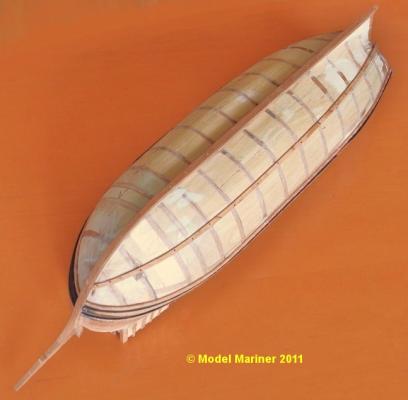

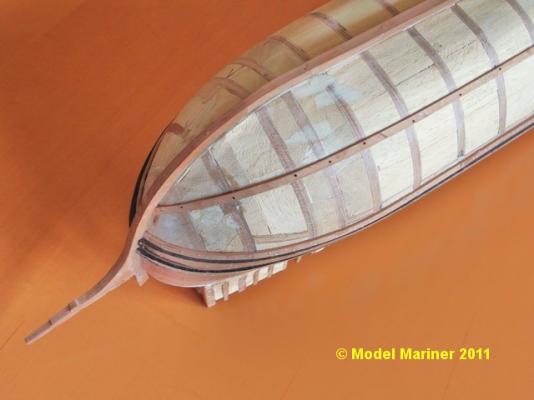
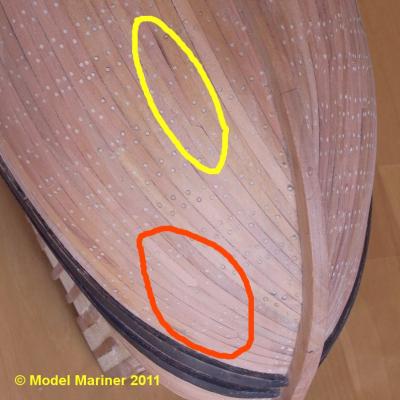
Then I worked from the lower wale down to this plank and then from the keel upwards. Towards the bow the planks have to be reduced in widths and the number of planks has also to be reduced. Some stealers are required to achive this, the first stealer is shown in the follwing pictures:


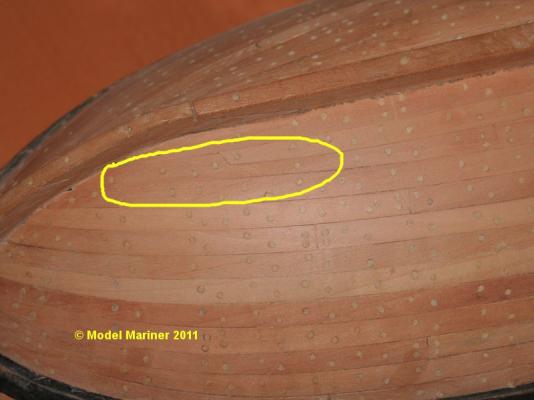
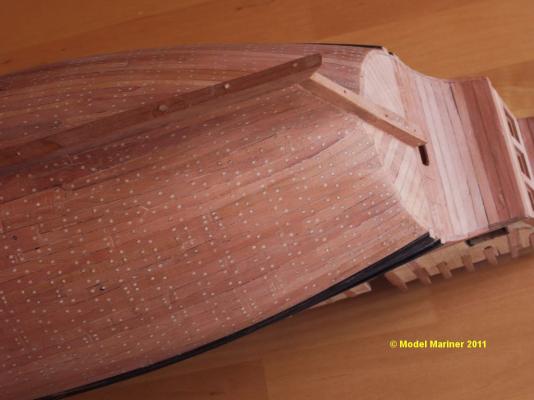
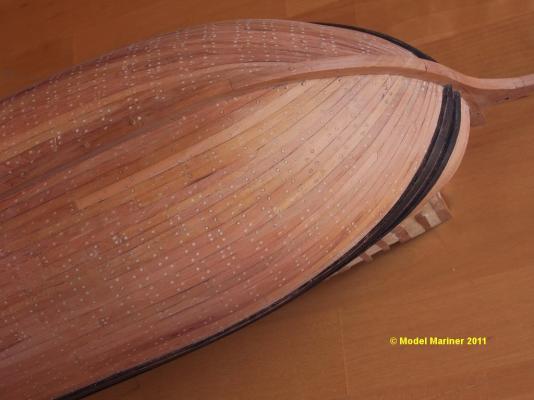
Each plank is treenailed twice at each frame position:

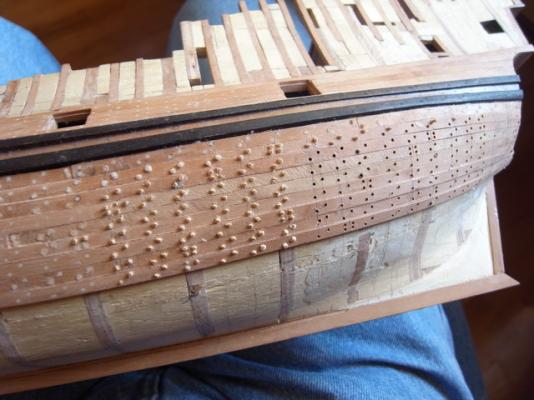
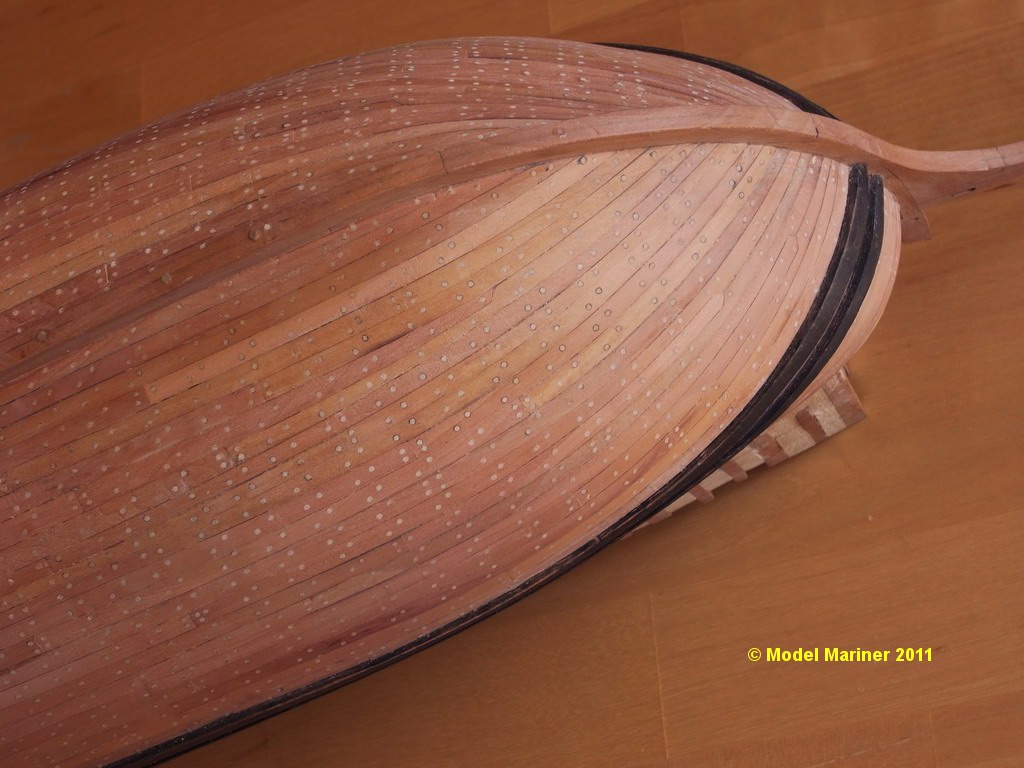
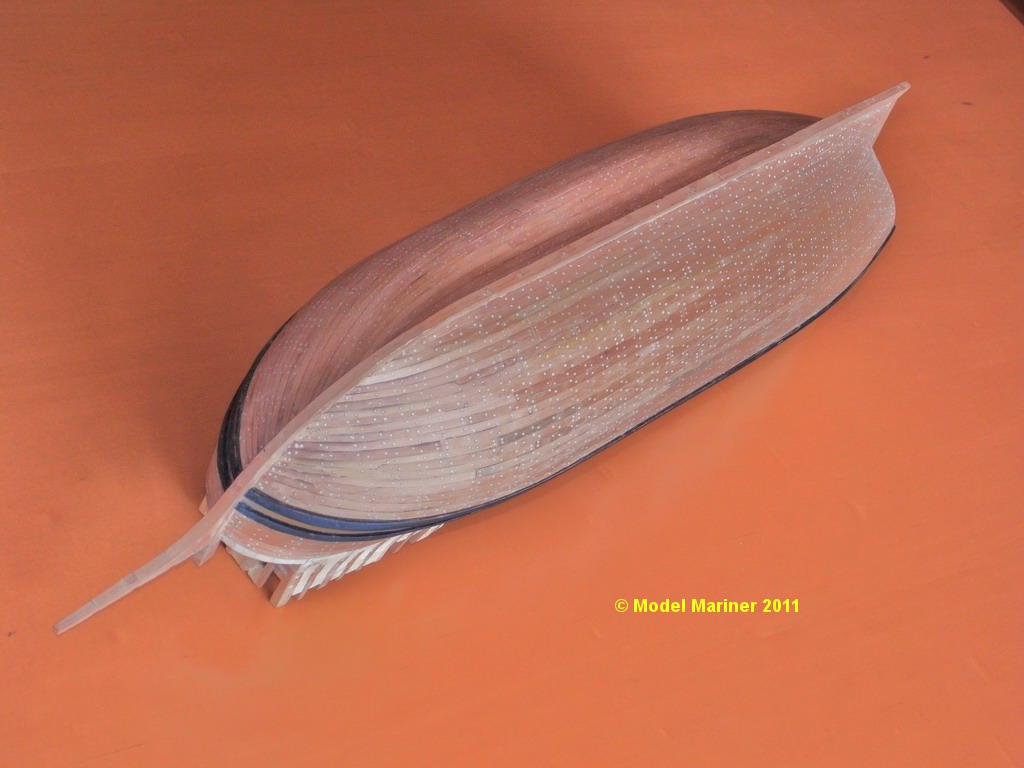
Planking of the underwater hull is finished, I needed 3 stealers in the bow area: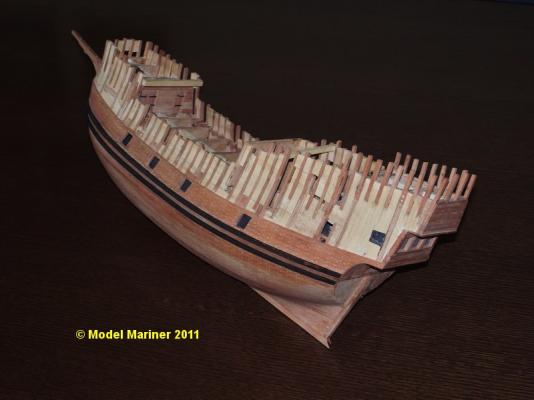
Klaus
-
-
Good start, keep the pictures coming
Klaus
-
Well done so far!
Klaus
-
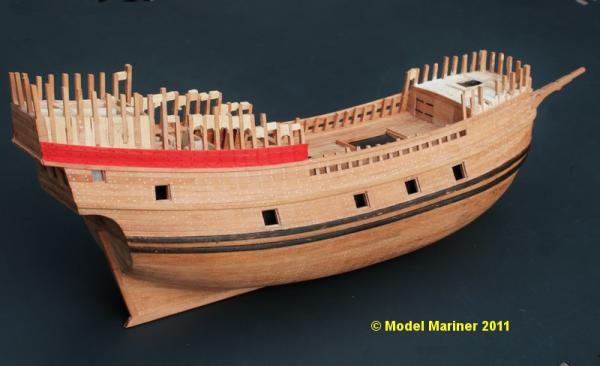
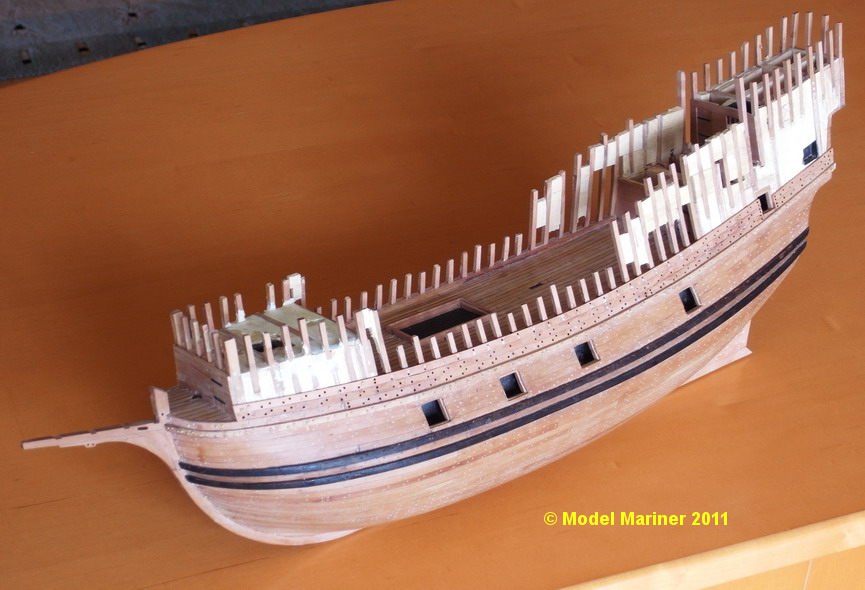
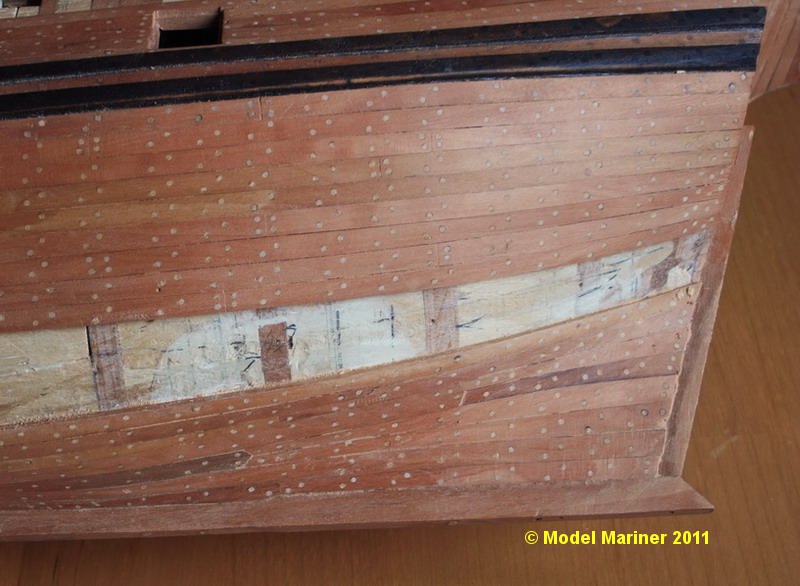
Planking of the hull:
the strakes over the main wale are a relaltively simple job: here the first 5 strakes over and one strake below the wales are glued on and treenailed:


Klaus
- yvesvidal, mtaylor and Elmer Cornish
-
3
-
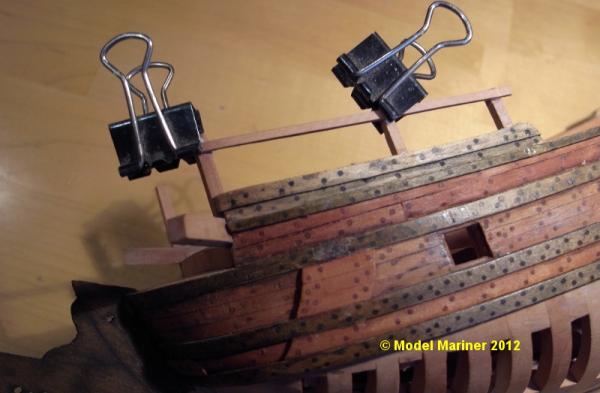
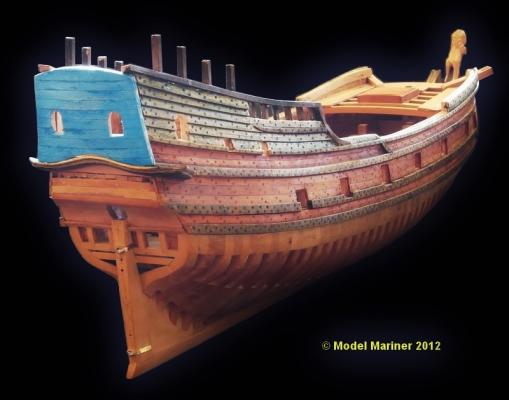
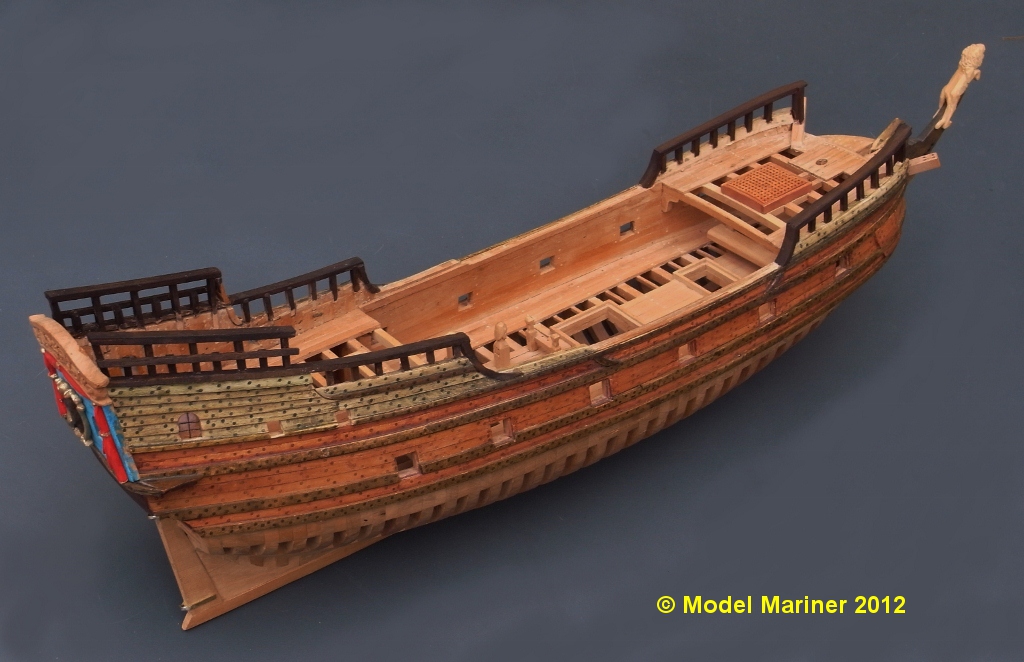
In the last post I stated that the railings were finished, this was a mistake. there was still another railing to be done at the aft end of the waist, which is shown in the next picture (not yet stained).
I was also not content with the windows in the great cabin, so I cut them out and set in new ones, the railings at the ships side are now all done:

And now the last railing is the one at the front of the forecastle:
Klaus
-
are you planning to fully rig the model ? Beautiful work.
Thanks Brian. I have not decided yet.
I have made already the lower masts and the bowsprit and put them in store for later. I will in any case rig my Mayflower http://modelshipworld.com/index.php?/topic/514-mayflower-by-model-mariner-pob-scale-1-64-own-reconstruction/
on which I work in parallel, maybe I will rig Berlin also in parallel, maybe not.
So even if I decide not to rig the Berlin model immediately after finishing the hull I have the option to do so later.
Klaus
-
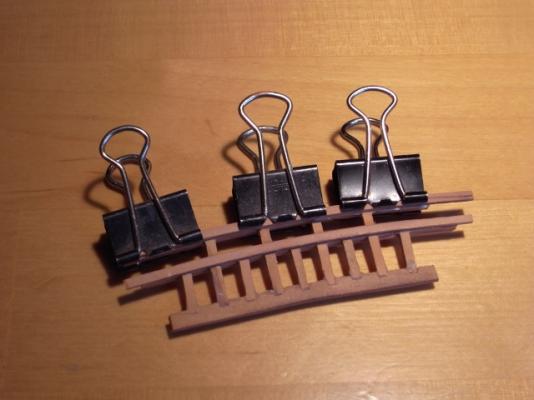
Railings continued:
Railings on poop deck finished (except staining):
Railings on forecastle:


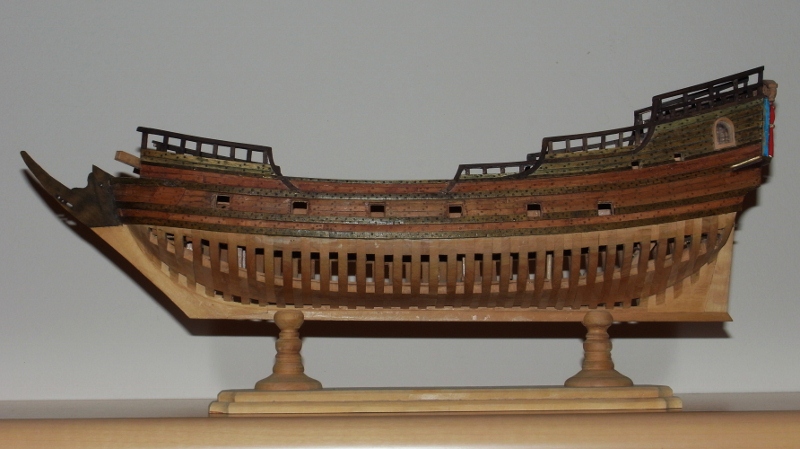
All railings finished. The stern is glued on only temporarily:


Klaus
- Dubz, Elmer Cornish, GrandpaPhil and 8 others
-
11
-
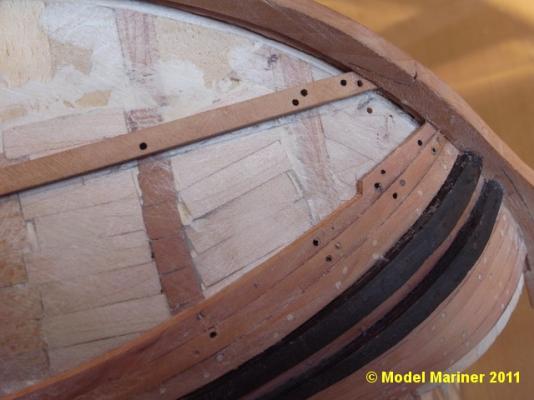
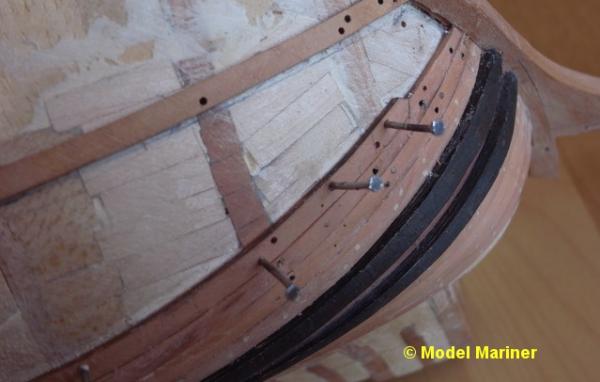
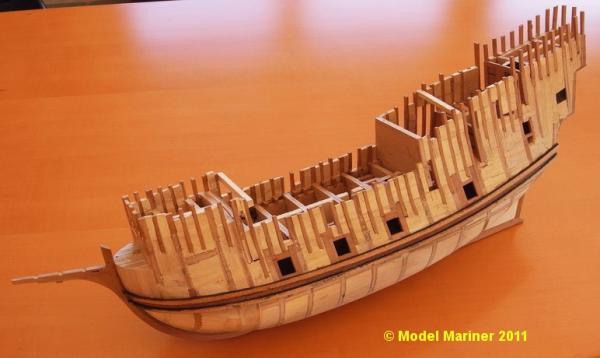
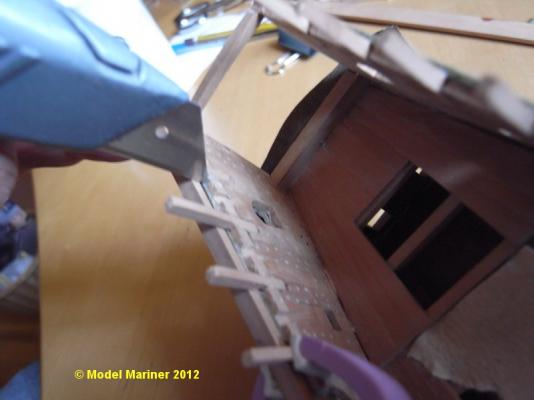
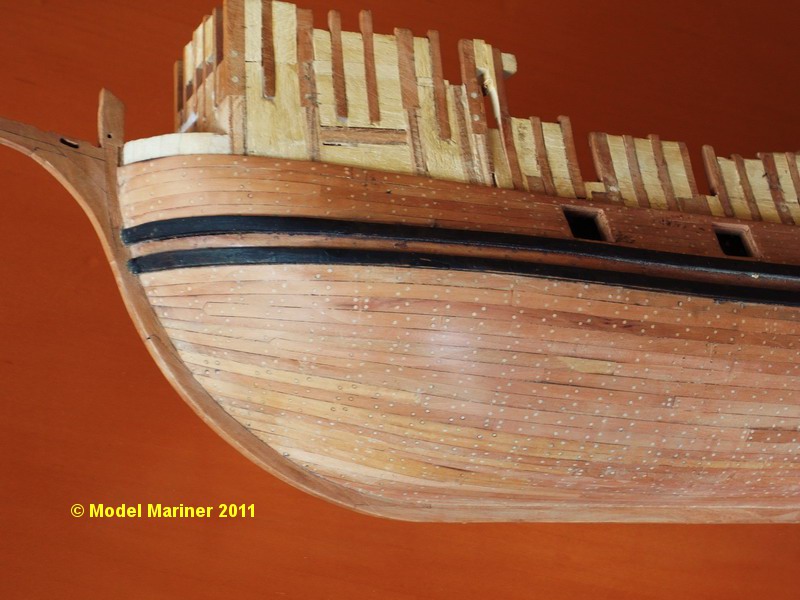
Wales:
The run of the planks is determined by the mainwales, so as first step the position of the wales needs to be marked on the hull. I have made a template for each of the bulkhead positions onto which I have indicated the heigth positions of the wales which I have then transferred to the hull:
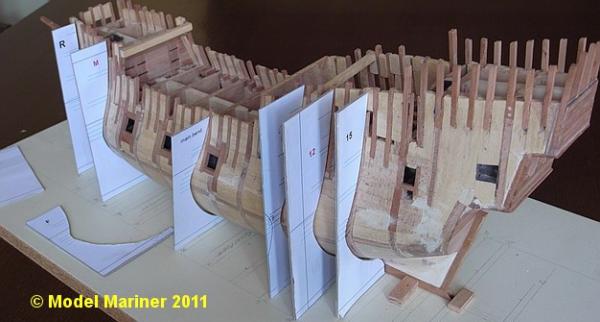
At first I have put on the upper main wale. The main wales are not only bent in two directions but are also twisted considerably over the lengths of the hull. A further difficulty is that the upper und lower surface are (at least with English ships) always horizontal, while the outer and inner surface have of course the angle according to their position on the hull surface.
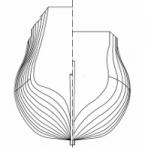
The following picture shows the approximate cross section of the upper wale at different frame positions:
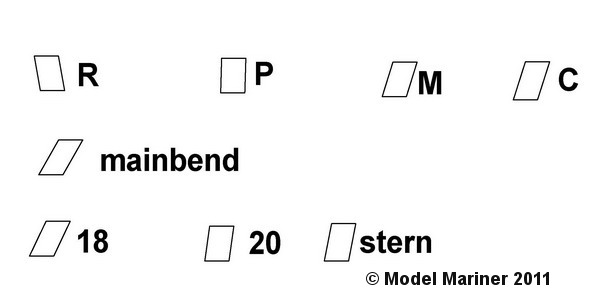
I made the wales from strips of pear with approx. 4 x 4.5 mm (final thickness is 3mm instead of the 4,5 mm). After bending these to the required shape the inner surface was sanded to the required angle to achieve the correct fit to the hull surface.
The upper and lower surface were stained black before the wale was glued to the hull, the outer surface will be stained later when the wale has been sanded to the correct thickness.
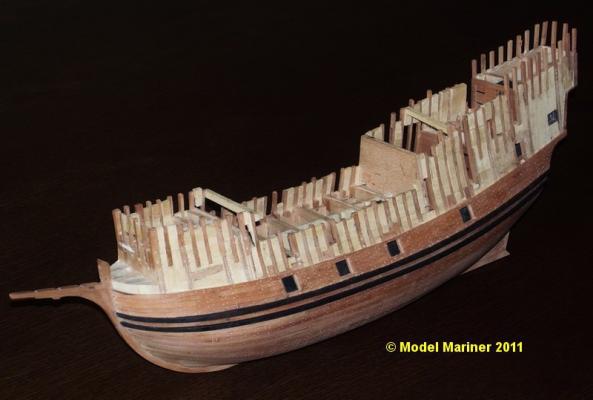
The upper wale is glued on but not yet treenailed:

The plank between the main wales is on:

Lower main wale added, wales and the plank between the wales have been treenailed, approx. 550 treenails for these three strakes:
Klaus
-
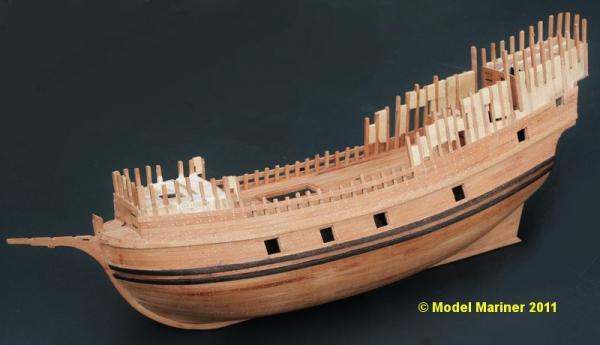
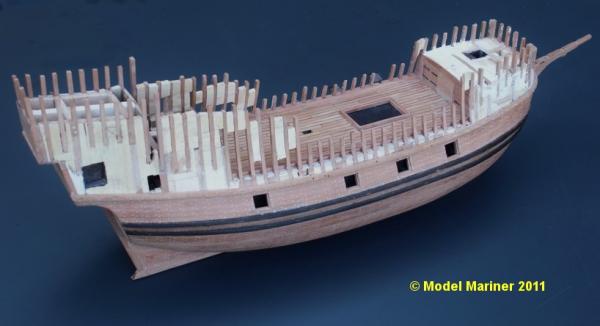
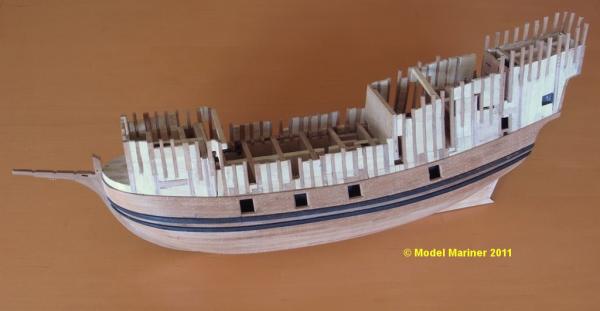
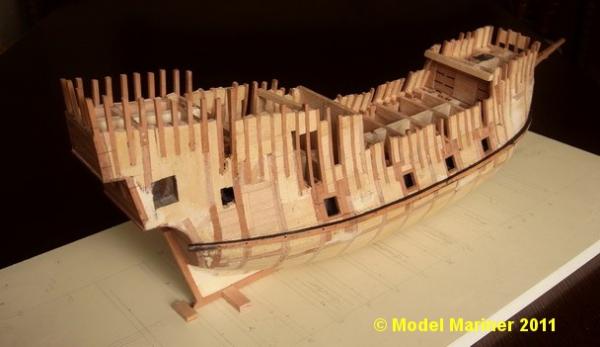
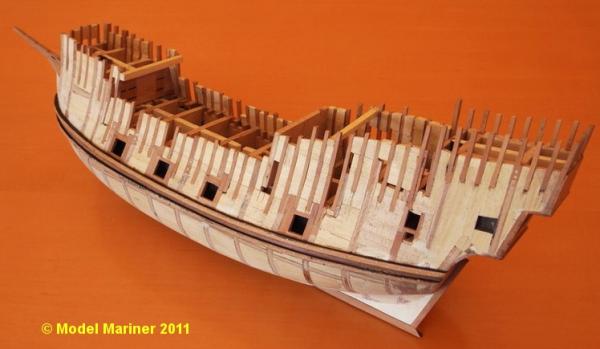
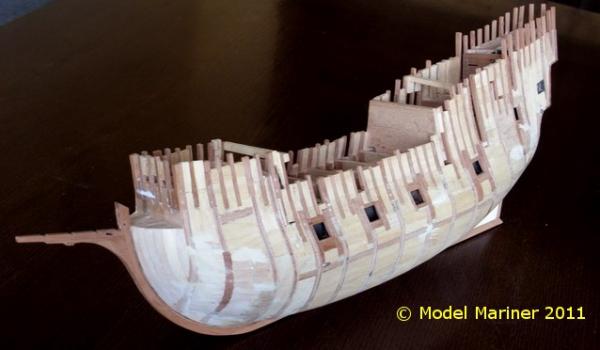
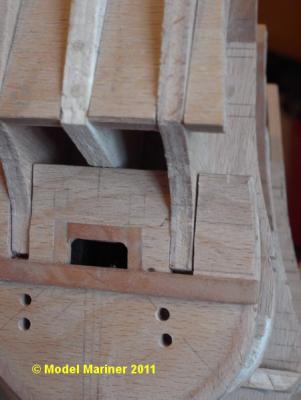
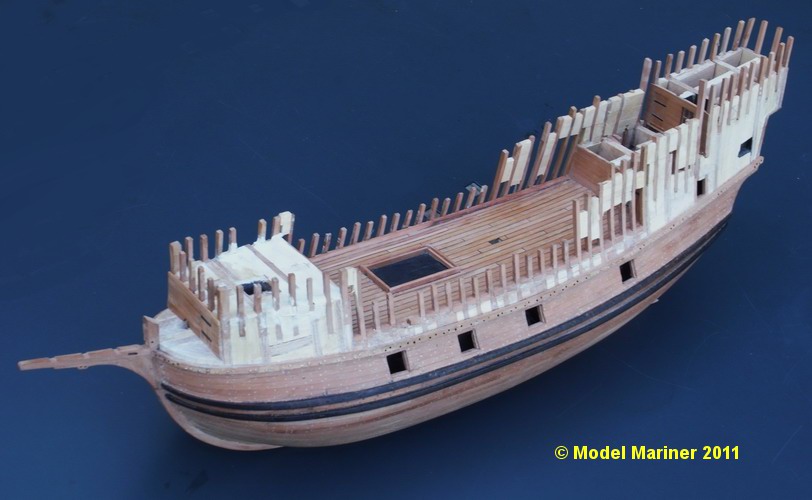
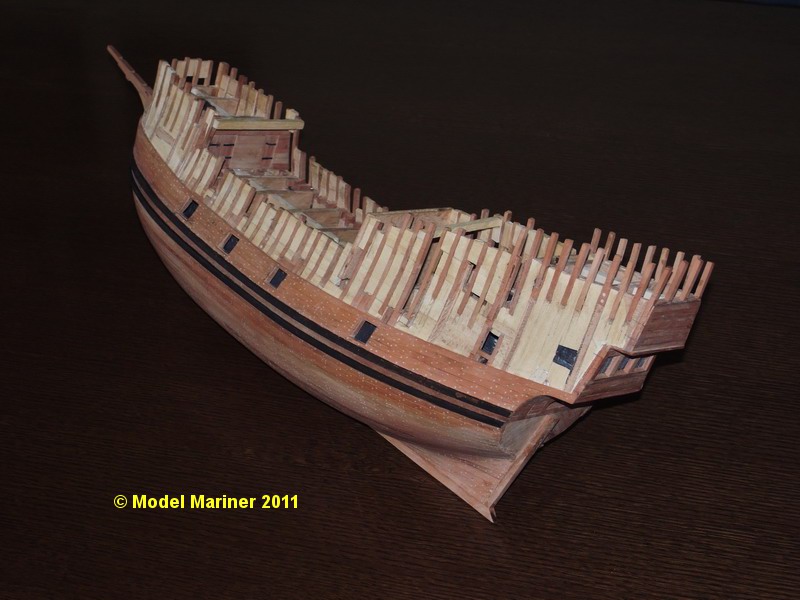
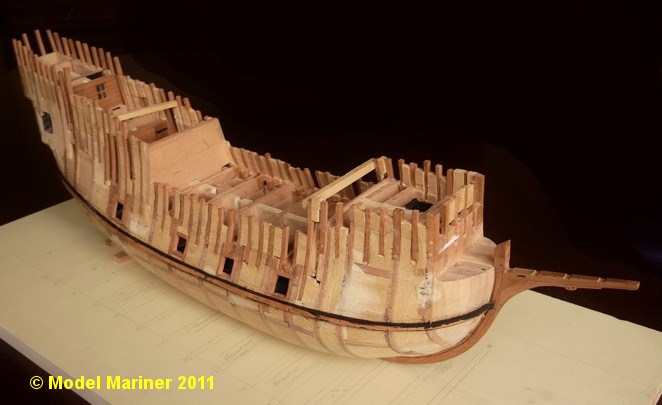
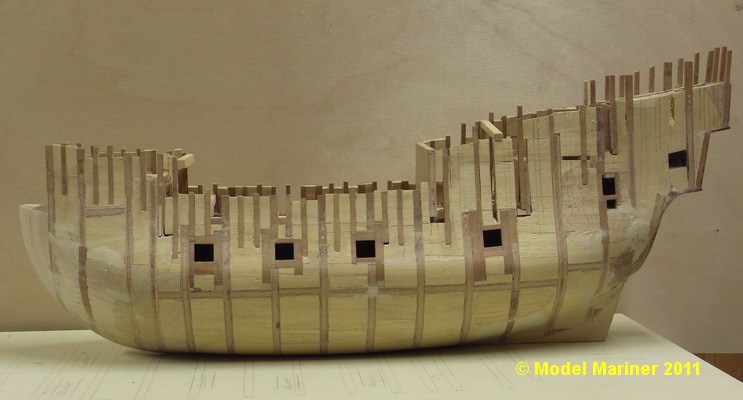
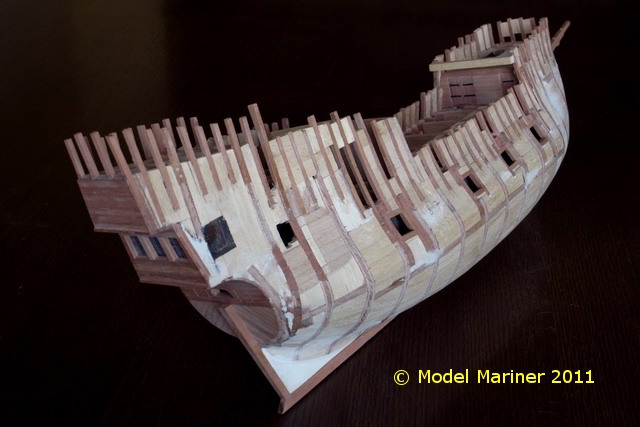
Toptimbers:
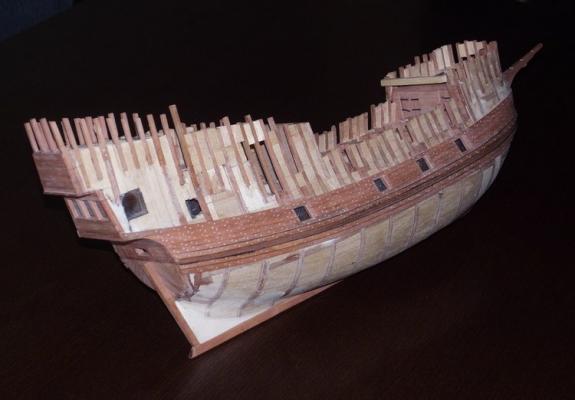
Since the inner side of the bulwarks will not be planked, I need to add toptimbers between the ones already treenailed to the bulkheads. Since these are quite thin (approx. 2.5 x 2.5 mm or 1/10") there is always the danger of breaking some of them when working on the hull. To avoid this I have glued pieces of Obeche between them as stiffener, which will be cut out again later: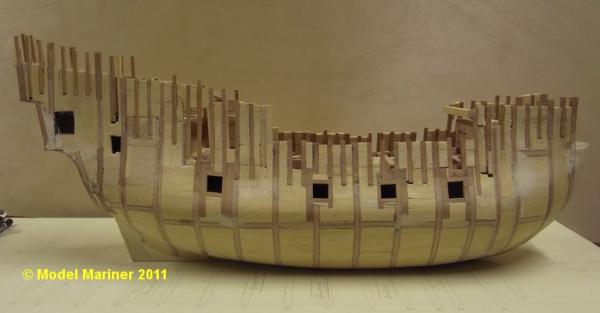

All toptimbers are glued in, the next step is to make the keel, stem and sternson before planking can be started.
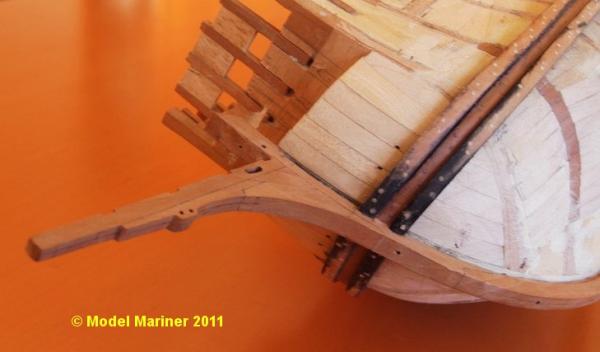
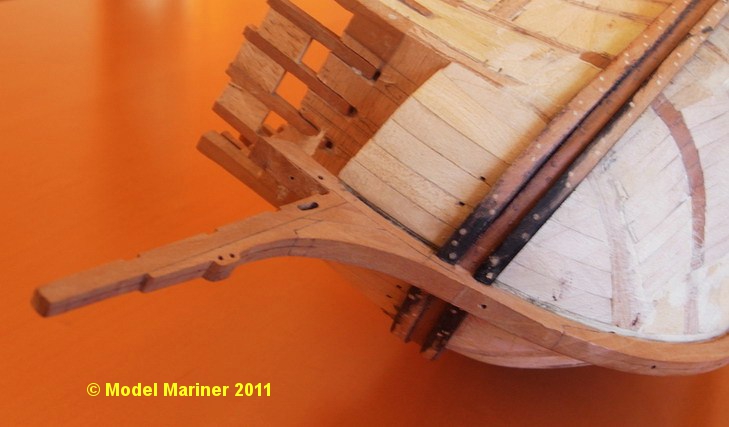
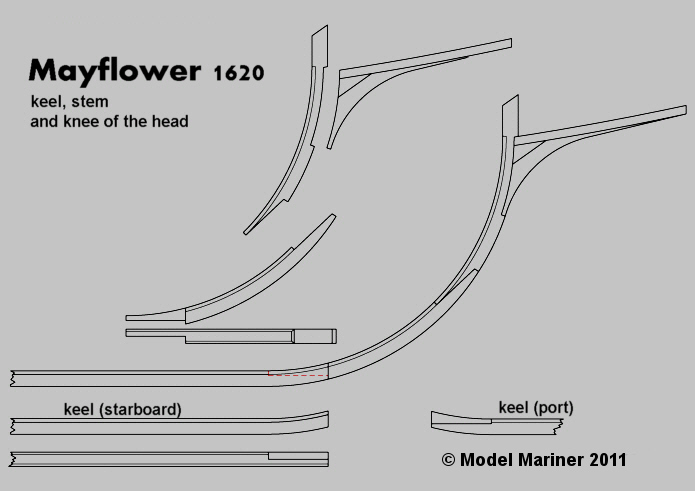
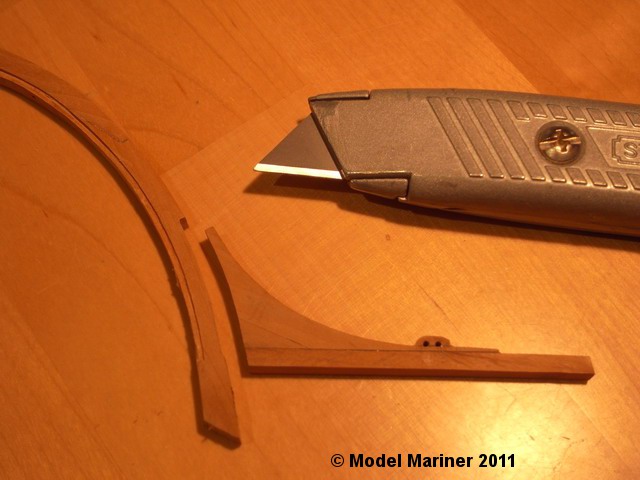
Keel, stem and sternson, knee of the head:

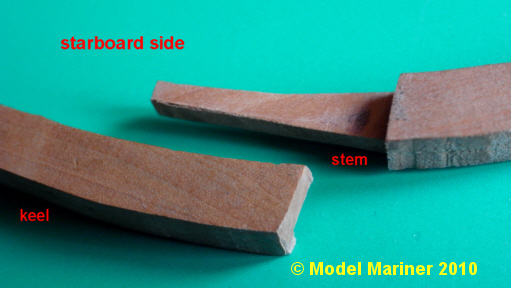
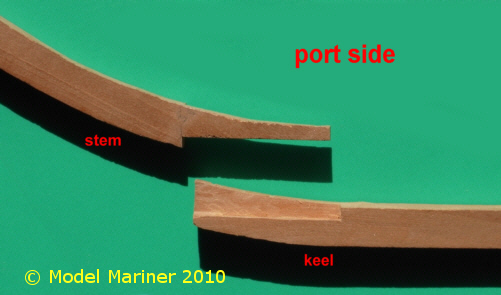
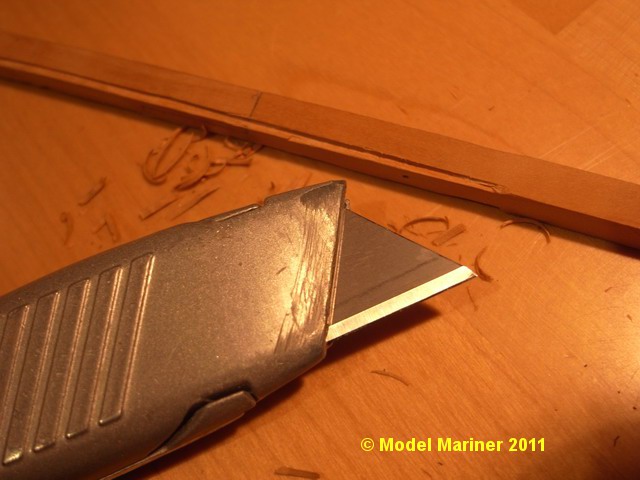
The rabbet in the keel and stem has been cut manually by means of a Stanley knife:
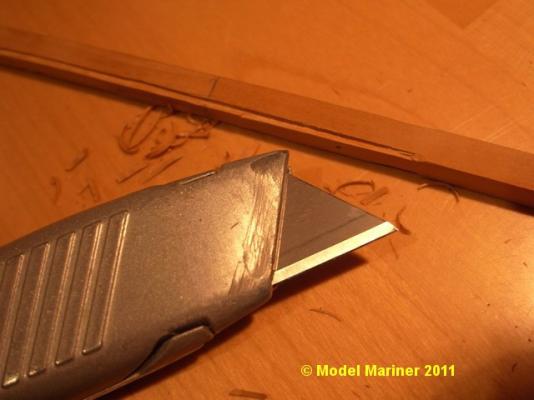


Keel, stem (with knee of the head) and sternson are glued onto the model:

The hull is now ready for planking
Klaus
- yvesvidal, SawdustDave, mtaylor and 6 others
-
9
-
-
-
Thanks Rudolf.
 Your assumption is correct.
Railings at quarterdeck and poop:
I suppose the following pics are self explaining and don't need much words:


- mtaylor, druxey, Elmer Cornish and 7 others
-
10
-
Outstanding work!
Klaus
-
This model is always a delight to see!
Klaus
- PeteB and aviaamator
-
2
-
-
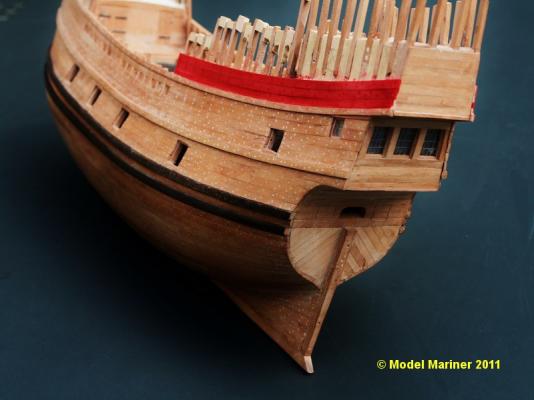
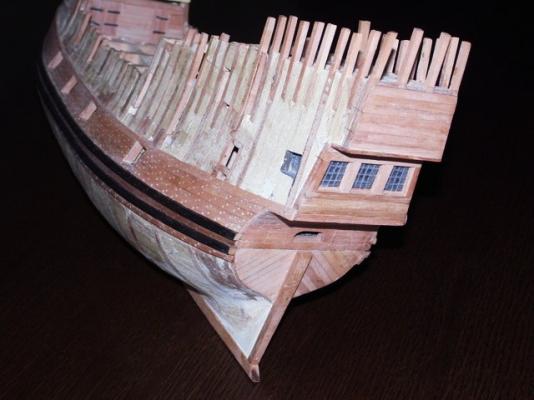
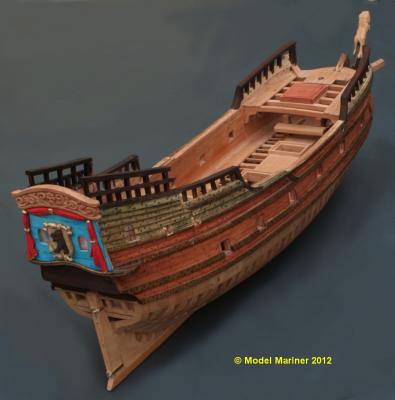
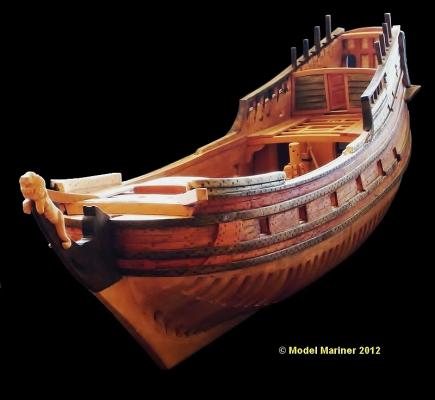
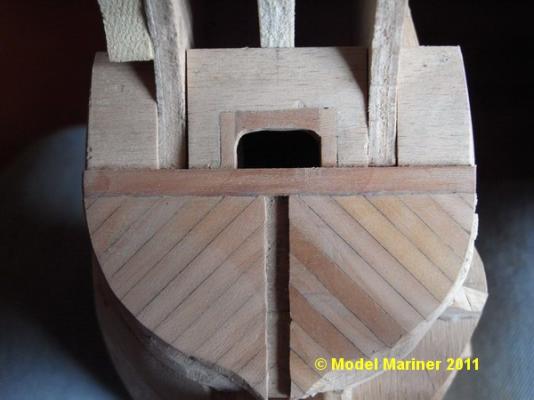
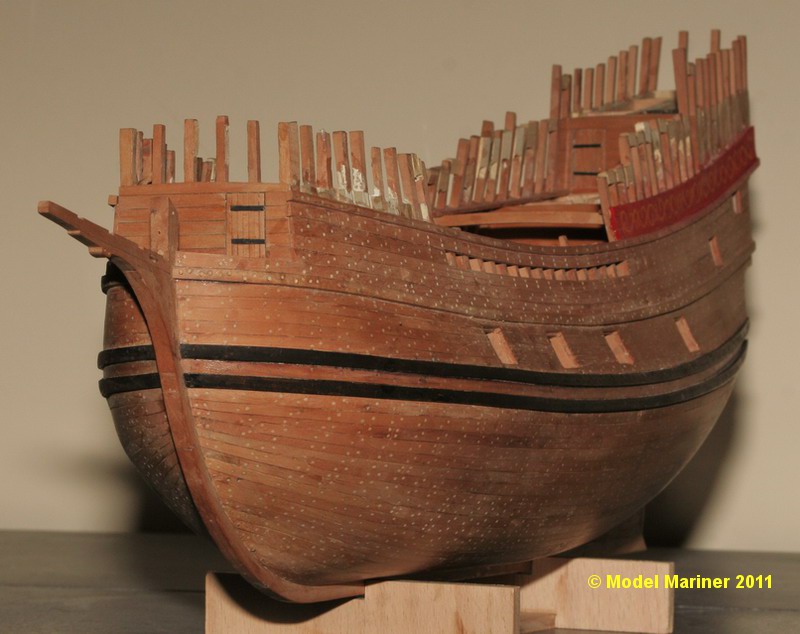
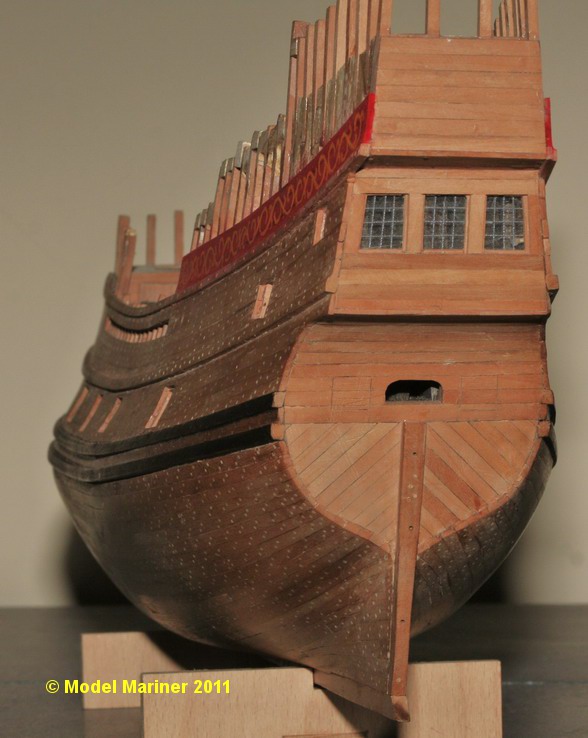
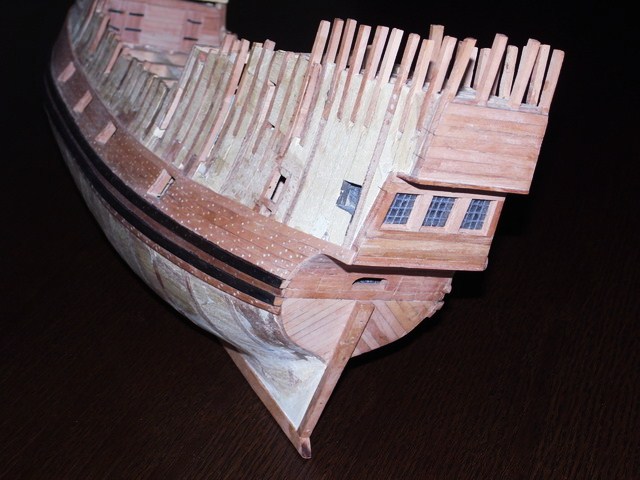
Planking of stern:
Planking of the model starts with the stern for the simple reason that the planking of the ships side overlaps the planking of the square tuck and the stern.
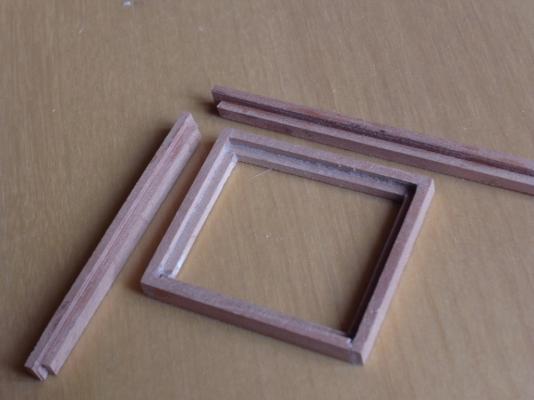
Since the bulkhead of the tuck is made from ply I put in a frame of pear wood for the port of the tiller and below this a fake transom (also pear)
The tuck is planked except a 4 mm strip in the center into which the sternson will be glued later:
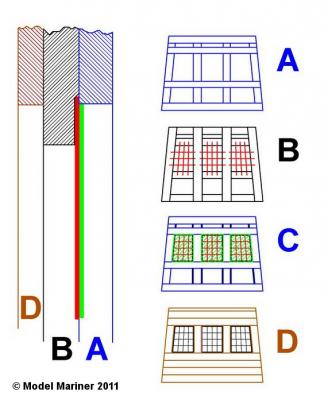
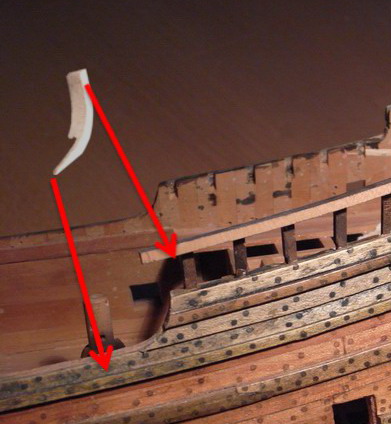
The lower part of the stern consists of 2 frames made from several strips (A and B in following drawing) which were planked on the outside (D) after glueing them together. The window openings in the inner part (A) into which I have glued window panes (clear plastic - green in the drawing) are a little bit bigger then these in the outer part (B).
C shows A and B glued together viewed from the inside.
D shows the completet assembly from the outer (aft) side
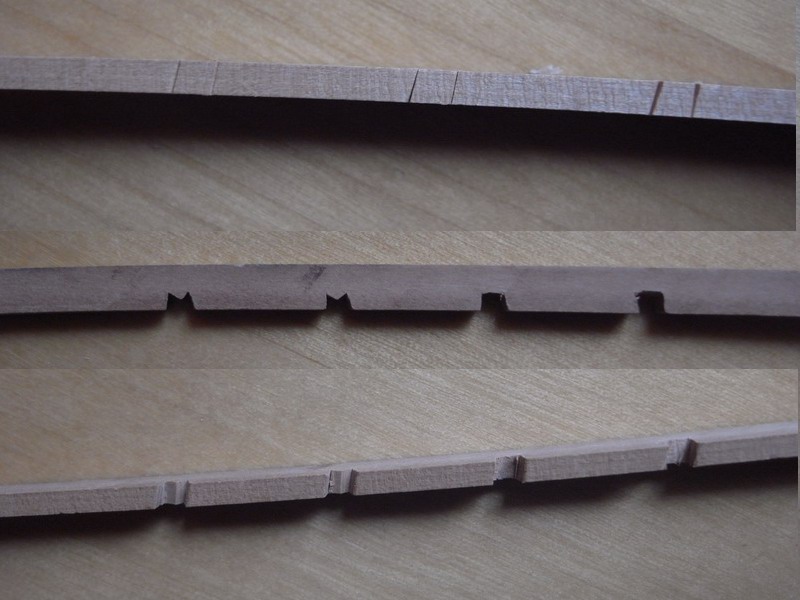
The window grids are made from thin gray thread which is glued into notched in the backside of B.
A section through the upper part of the window opening is shown on the left hand side of the drawing. The ply wood behing the windows has been stained black and is not visible any more throughthe windows, the cabin looks dark.
The next 2 pictures show the finished stern:

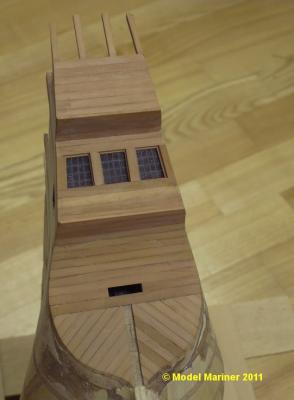
Klaus


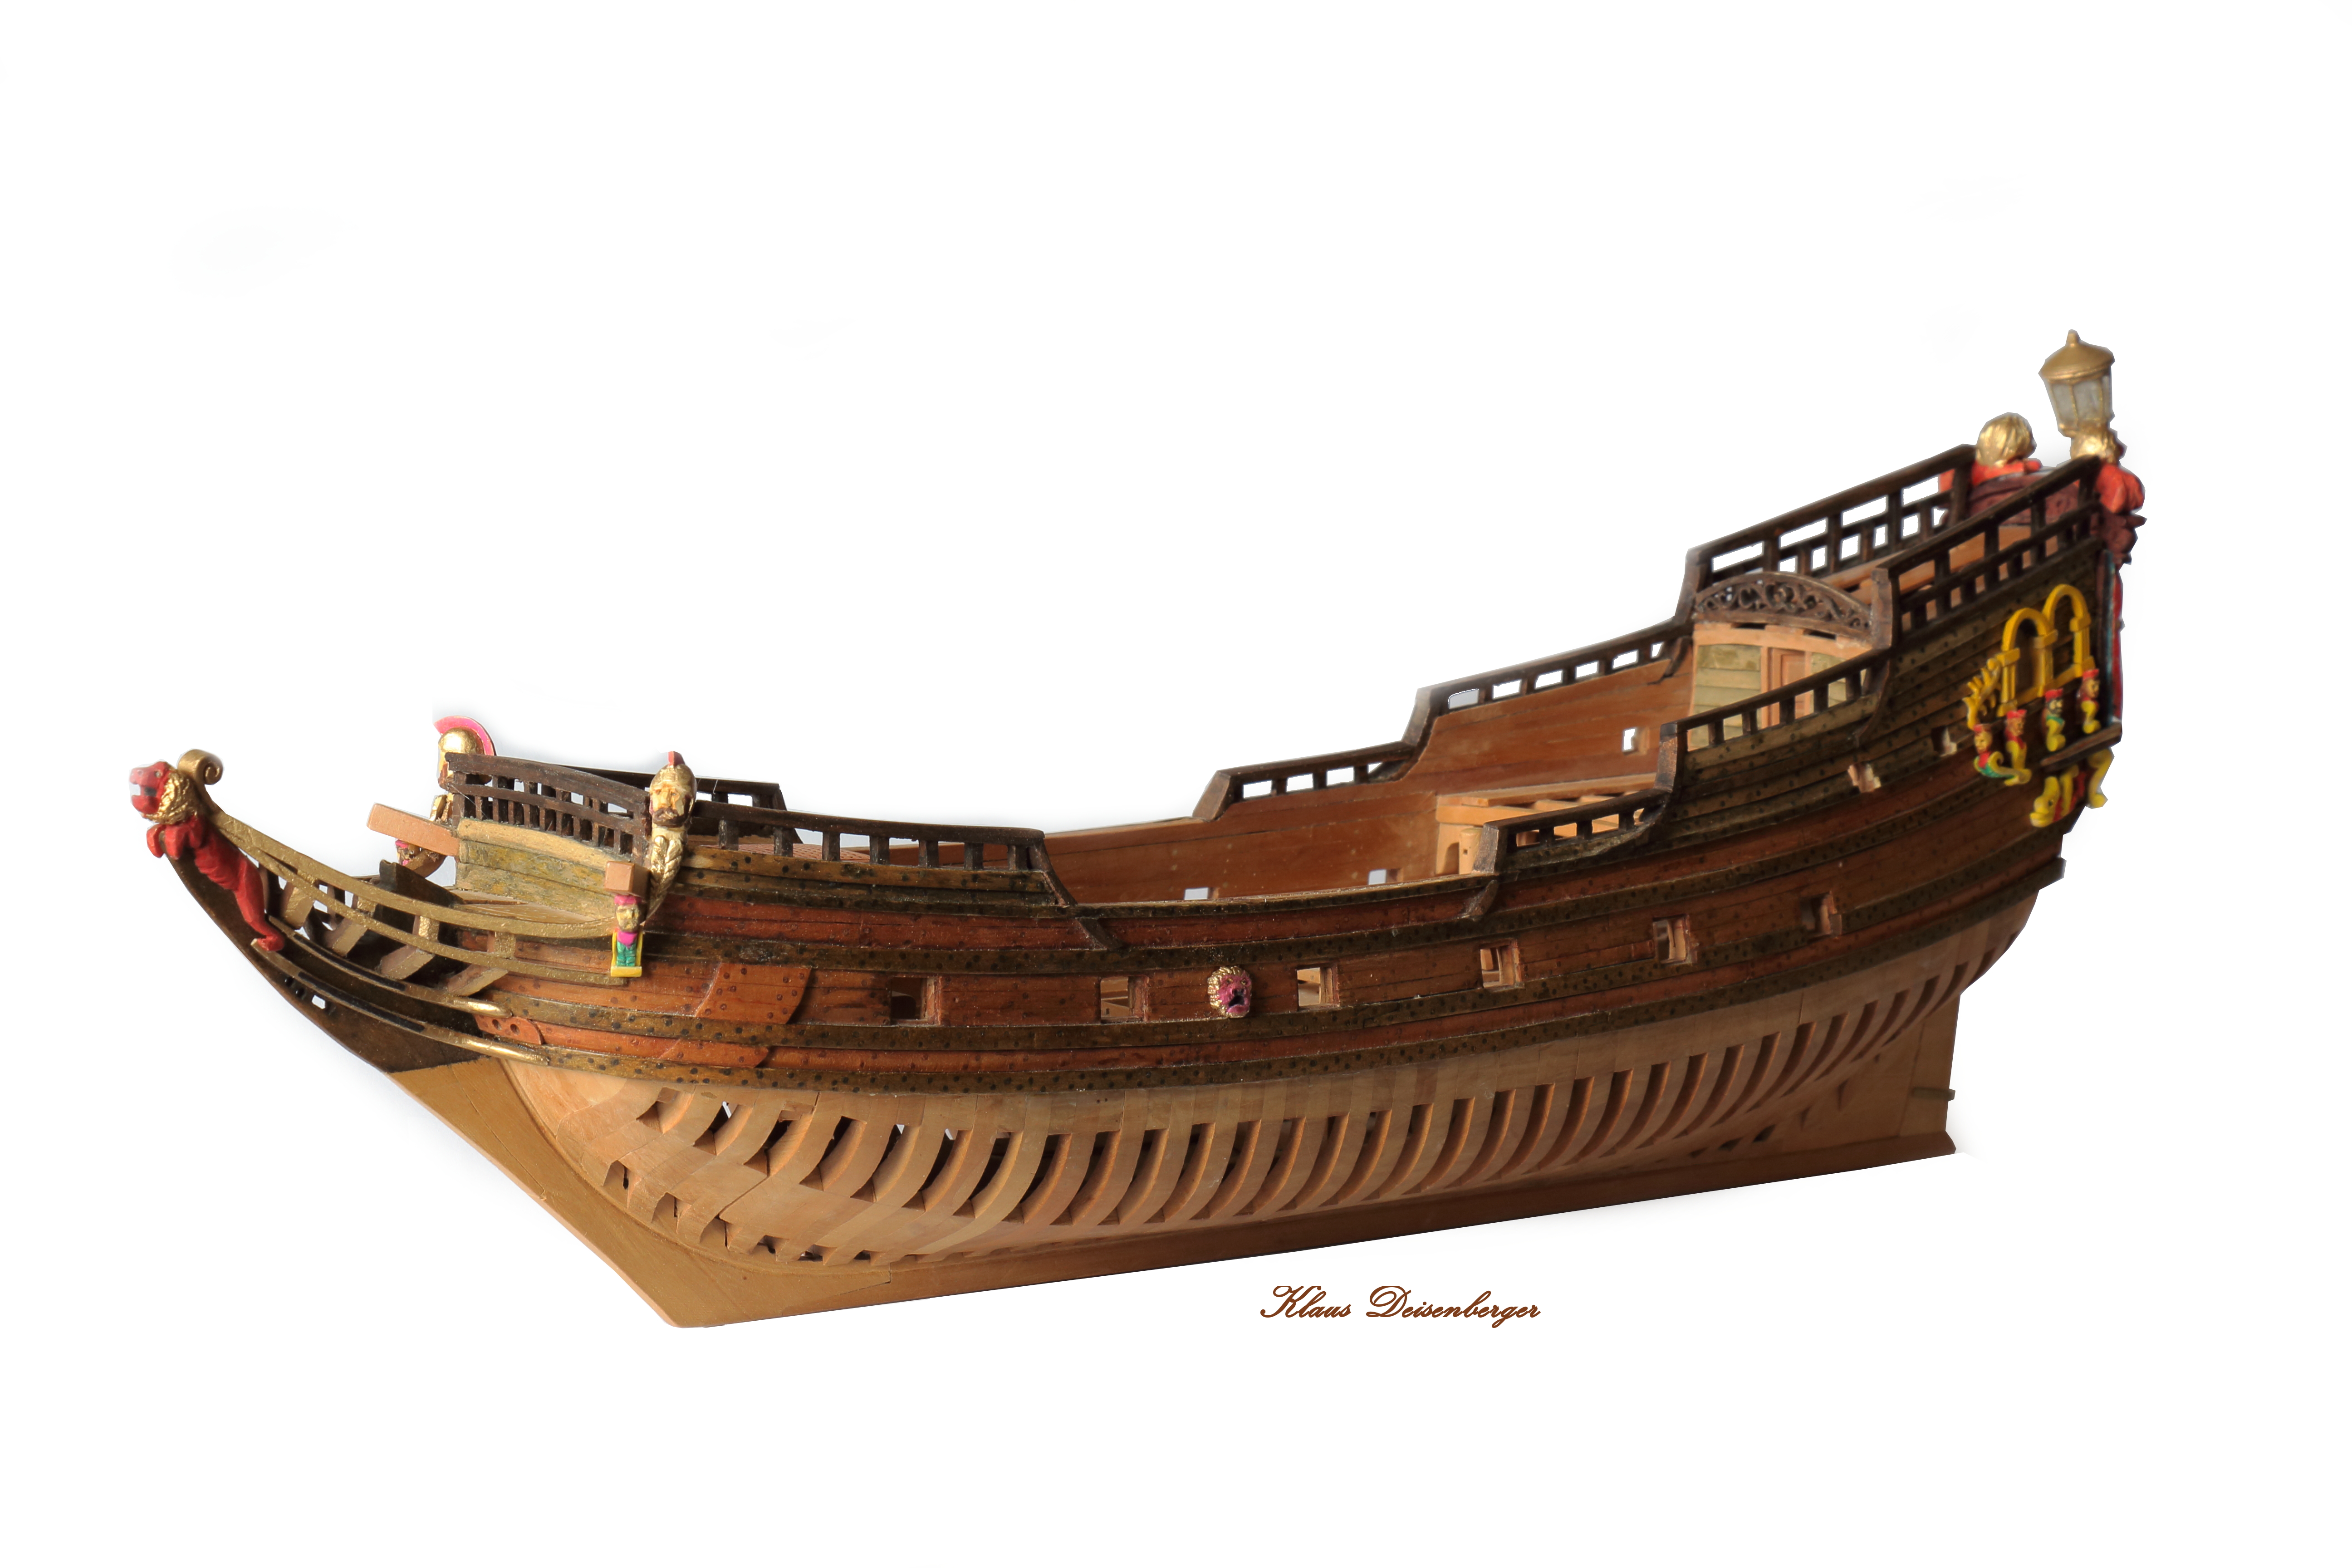
Mayflower by Model Mariner - scale 1:64 - POB - own reconstruction
in - Build logs for subjects built 1501 - 1750
Posted
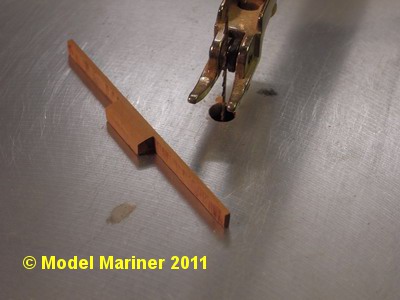
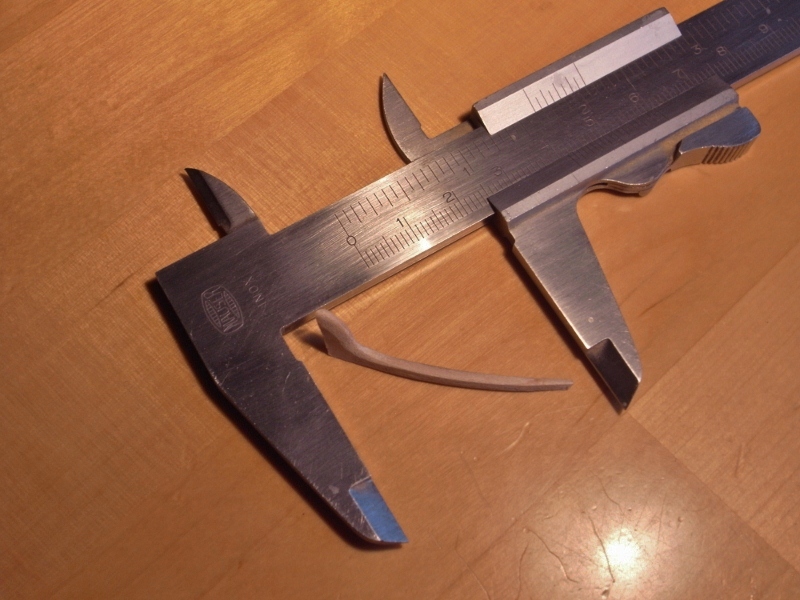
Pintle braces, gudgeons and rudder:
I used brass strips 0.2 x 2 mm and a brass tupe with an inner diameter of 1 mm to make the pinle braces and gudgeons.
The tube has been soldered to the outside of the bent brass strips.
I made a simple jig to be able to fix the tube and brass strips in the correct position for soldering:
Five pairs of pintle braces and gudgeons of different widths are required (since stem respectively rudder are tapered from keel to transom):
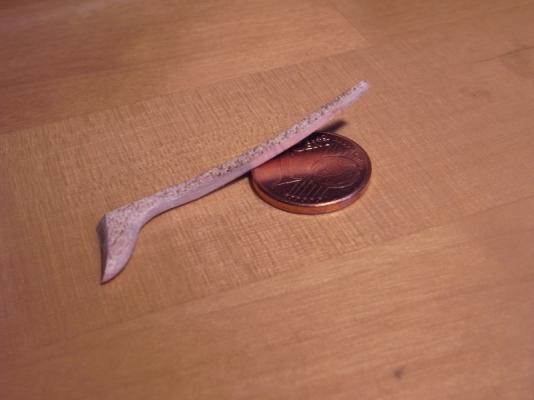
To be able to position the gudgeons correctly at the stem the rudder has to be made.
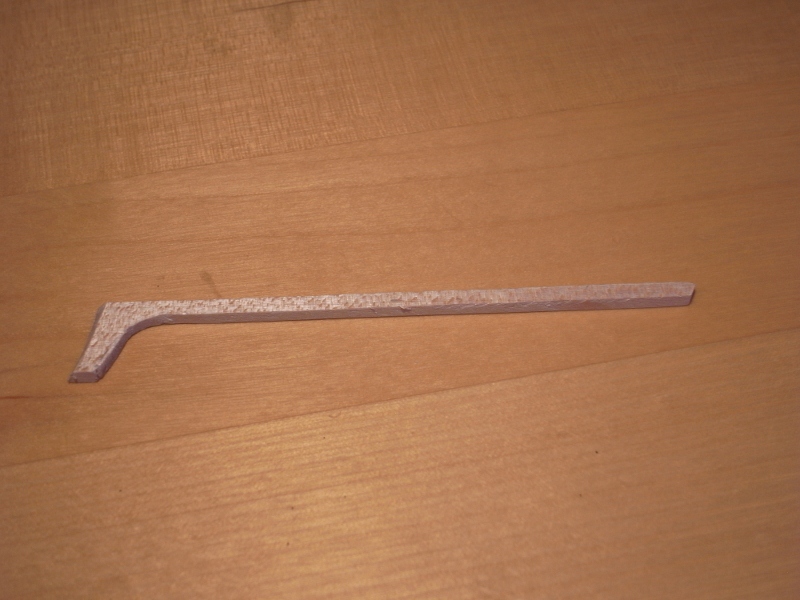
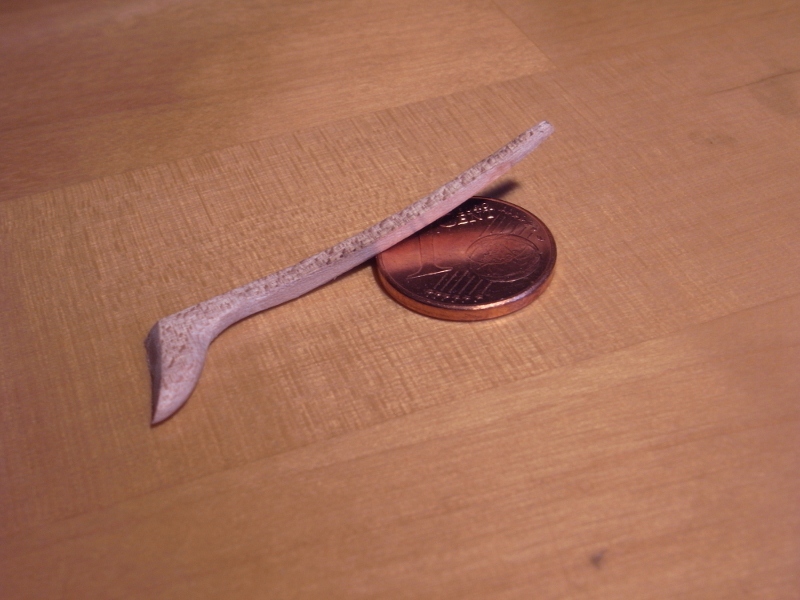
The rudder is made from 3 parts bolted together (glued and treenailed in the model):
The tiller is shortened since the inner part it is not visible when the rudder is mounted on the model.
Klaus