
HOLIDAY DONATION DRIVE - SUPPORT MSW - DO YOUR PART TO KEEP THIS GREAT FORUM GOING! (Only 13 donations so far - C'mon guys!)
×
.jpg.8f8939eb11584d346cdeb2a7ec4e1e42.jpg)
Kusawa2000
-
Posts
381 -
Joined
-
Last visited
Content Type
Profiles
Forums
Gallery
Events
Everything posted by Kusawa2000
-
 Hey Gary: Yup.. I have been working on the Agamemnon way too long but I can say Im close to the finish line.. thank god.. the last few months have been a slog. Adding sails to her was a not my brightest of moves.. but I do like how she looks. I have been getting all of the Winnies chapters and parts installments collected and keen on starting but I do need to get the Agamemnon finished. I have some flags to make, anchors to rig, and some stern lanterns to install. And I do need to get the woodshed filled for next winter as well. Its nice cutting firewood in the summer with the long days rather than being in a rush in the fall while its threatening to snow. But I do agree Chuck has done a amazing job on this project and I cant wait to get started. I agree the installments did help keep the sting out of it. I will definitely keep a eye out for your build and I will be posting my Agamemnon when she is completed and also when I start the Winnie. Take care and good to hear from you Mike Draper
 -
Hey Gary: Glad to see you are getting on board with this project. Its on my "next to do" after I finish the million little things that need to be done on the Agamemnon before I say that project is done. I am stoked on getting it started and look forward to a fresh, new project later this summer. i will be keen on seeing your progress. Mike Draper
-
Yves: Thanks for the response. I have looked at the decals and wondered if they were water transfer or some other process. Never thought to use Future floor policy as a sealer. Mike Draper
-
Yves: So, the decals arent water transfer decals? I still cant get my head around how you apply them to the hull. Mike Draper
-
Robert: Wow.. Couldn't asked for a better pot of information. I will definitely start looking for the material in clothing and drapery stores. Having your pictures in my pocket will definitely help. And I really appreciate your sketch work on how you applied it. I totally agree with you on having a good material for the hammock netting is crucial. I havent found any yet that works for me and as a result I have gone without with my models. Now I have something to look for.. Thanks again! Mike Draper Whitehorse, Yukon
- 527 replies
-
- 2
-

-
- caldercraft
- victory
- (and 1 more)
-
Robert: I stumbled on your pics of your hammock netting for you Victory and I have to let you know its the best hammock netting I have seen. I have struggled over the years in finding the best material for hammock netting and it appears you have hit the mark. Could you pass along what did you use for Hammock netting and what was your process of weaving them into the brackets. I checked all of your posts and didnt find any information so I hope you can pass along any information. Thanks ahead of time! Mike Draper
-
Chuck: Good news that the launch/pinnace is still in the picture.. While I know that will be a slow, detailed project it will be a neat addition to the Winnie.. I see some neat work ahead of me with the Winnie! Mike Draper
- 1,784 replies
-
- 1
-
-
- winchelsea
- Syren Ship Model Company
- (and 1 more)
-
Stuntflyer: Most definitely I will be providing a build log! Looking forward to getting into this new experience! I have been keen on getting started on Winnie since the project has been started by Chuck but I decided to finish the Agamemnon project I have been working on by fully rigging her with sails (silly me...). Its been a long process but the end of its getting close and it will be good to her on the "done" pile. Stay tuned.. Mike Draper
- 1,784 replies
-
- 1
-
-
- winchelsea
- Syren Ship Model Company
- (and 1 more)
-
Chuck: Wasnt there talk about you putting together a separate kit/project for a pinnace/launch for the Winnie? Just trying to keep this all organized in my brain. Mike Draper PS. just finished the rigging on the Agamemnon.. have some rope coils, flags and stern lanterns and she is done.. Winnie is next!
- 1,784 replies
-
- 1
-
-
- winchelsea
- Syren Ship Model Company
- (and 1 more)
-
Hamilton: Try it on a few test plates first to see if you like how it dries and looks first. I suspect humidity isn't a factor but I live in a dry climate and the plates looked great after it dried but I dont know if there is a different result in a humid climate. And dont overdue it.. just enough to act as a sealer. Let me know how it turns out! Mike Draper
-
Hamilton: What I did with the copper tape on my Model Shipways Constitution is to seal it with a wipe on poly (Matt). Just enough to cover it. It helped it to adhere to the hull. Mike Draper
-
Chuck: I assume the 1 9/16 cannon you have referenced are available in your 'Ship model Cannon" section of your webpage? Mike Draper
- 1,784 replies
-
- 2
-
-
- winchelsea
- Syren Ship Model Company
- (and 1 more)
-
Yves: Glad to see you are using copper tape. While it would have made life a lot easier if plates were provided, the copper tape allows you to tailor those plates to what you want. I have used copper tape before and had great success. Keep the great pics coming! Mike Draper
-
Craig: You can also buy the sessions all together (which a friend of mine just did) or in batches (session 1,2 session 3,4 and then session 5) or separately. The shipping is cheaper if you buy all of the sessions at once.
-
Henrik; Two things.. dont get stressed out about the overlapping of the plates.. the thickness of the plates that Caldercraft supplies its not possible. If you were using copper foil like from a stained glass shop it would work but not with the plates that come with the kit. Do make sure they are snug with each other so that the wood underneath doesnt show.. as far as the dimbles in the copper plates.. they are a bit more pronounced than they need to be. But I think they work for the Agamemnon. In the future if you feel they are too much you can substitute the copper plates with stained glass tape or take the existing plates and hammer the nails in a bit with a hobby hammer on a flat hard surface. it does make a difference. Good luck with your Aggy.. looking good! If you are in for more work you should add sails I have with my Agamemnon. 🙂 Mike Draper
-
jim: Yes.. they are the upper and lower lines of the main wale. And.. the two lines that are located where the chainplates meet is the upper wale. MIKE
-
Yves: That is good news about the 1:1 blueprint of the model being in session #4. That will be a useful to have especially with the size and complexity of the hull construction. I noticed that was missing in session #1 and 2 when I opened up and inspected what I have received. MIKE
-
Yves; Thanks for the reply and detailing what is in Session 5. When I received session 2 I was surprised by the size of the gun carriages. The gun must be massive! I didnt appreciate how big this kit is. Having the spar deck 12 inches wide at the widest spot was mind boggling. Judging from your post the stern ornamentation and figurehead on the bow is also plastic? Keep up the great build log! Mike Draper
-
Yves: Is Session 5 now available? CAF models website still has it not available. If its available how do you purchase it? Mike Draper
-
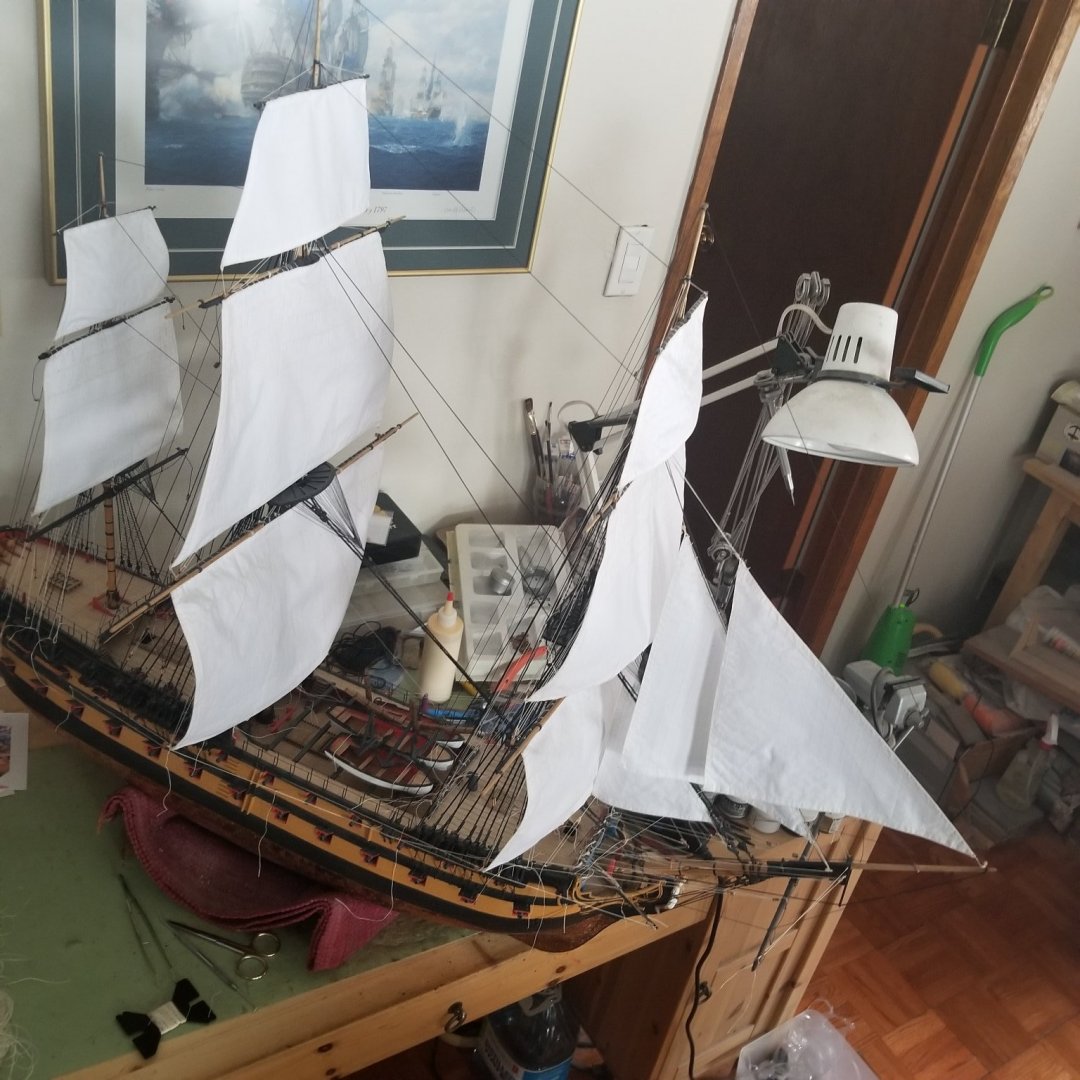
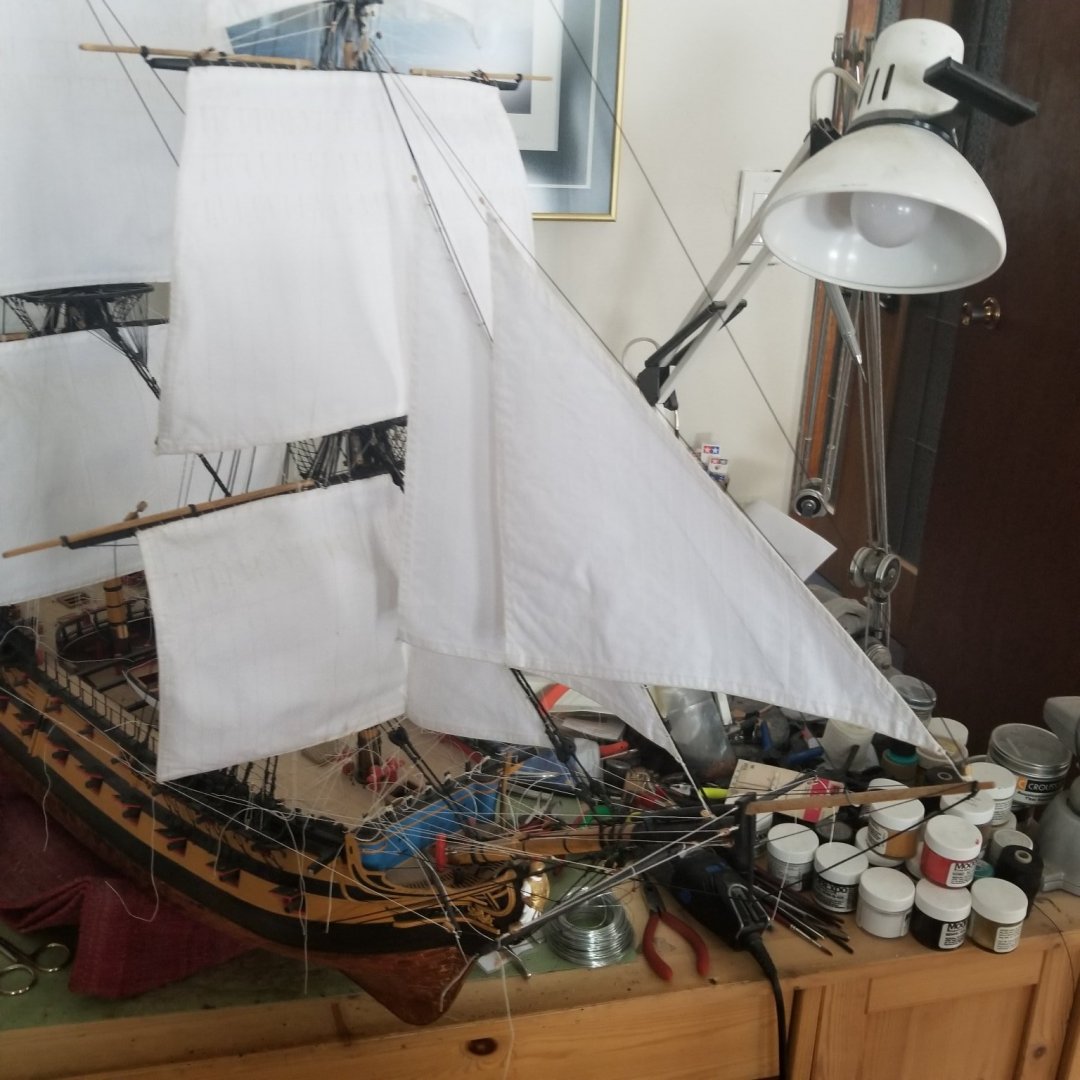
Everyone: Just a quick update on getting the sails on my Agamemnon. The deck is a mess but Im slowly getting to the final stretch. The square sails are up and now working on the jib sails.. More to come.. making that final push to the finish line! 🙂 Mike Draper
- 150 replies
-
- 11
-
-
- agamemnon
- caldercraft
- (and 1 more)
-
Yves: Thanks for doing the homework on this as I was wondering about the size of the copper plates. And that width of plate you can get in Copper tape from a stained glass store... Around $20 Canadian. MIKE
-
Yves: I agree with your approach on the wales.. just make sure you measure.. measure and measure.. the location of the wales need to be exact as everything else is affected including channels. 🙂 Also,, if you want a alternative for copper plates supplied.. go to a stained glass store and buy their copper tape.. its in different sizes and it works great for copper plated. You will need a ponce wheel for simulating nails and you will need to cut them into individual plates which can be a tad tedious... Keep up the good work MIKE


