Bill97
-
Posts
2,717 -
Joined
-
Last visited
Content Type
Profiles
Forums
Gallery
Events
Everything posted by Bill97
-
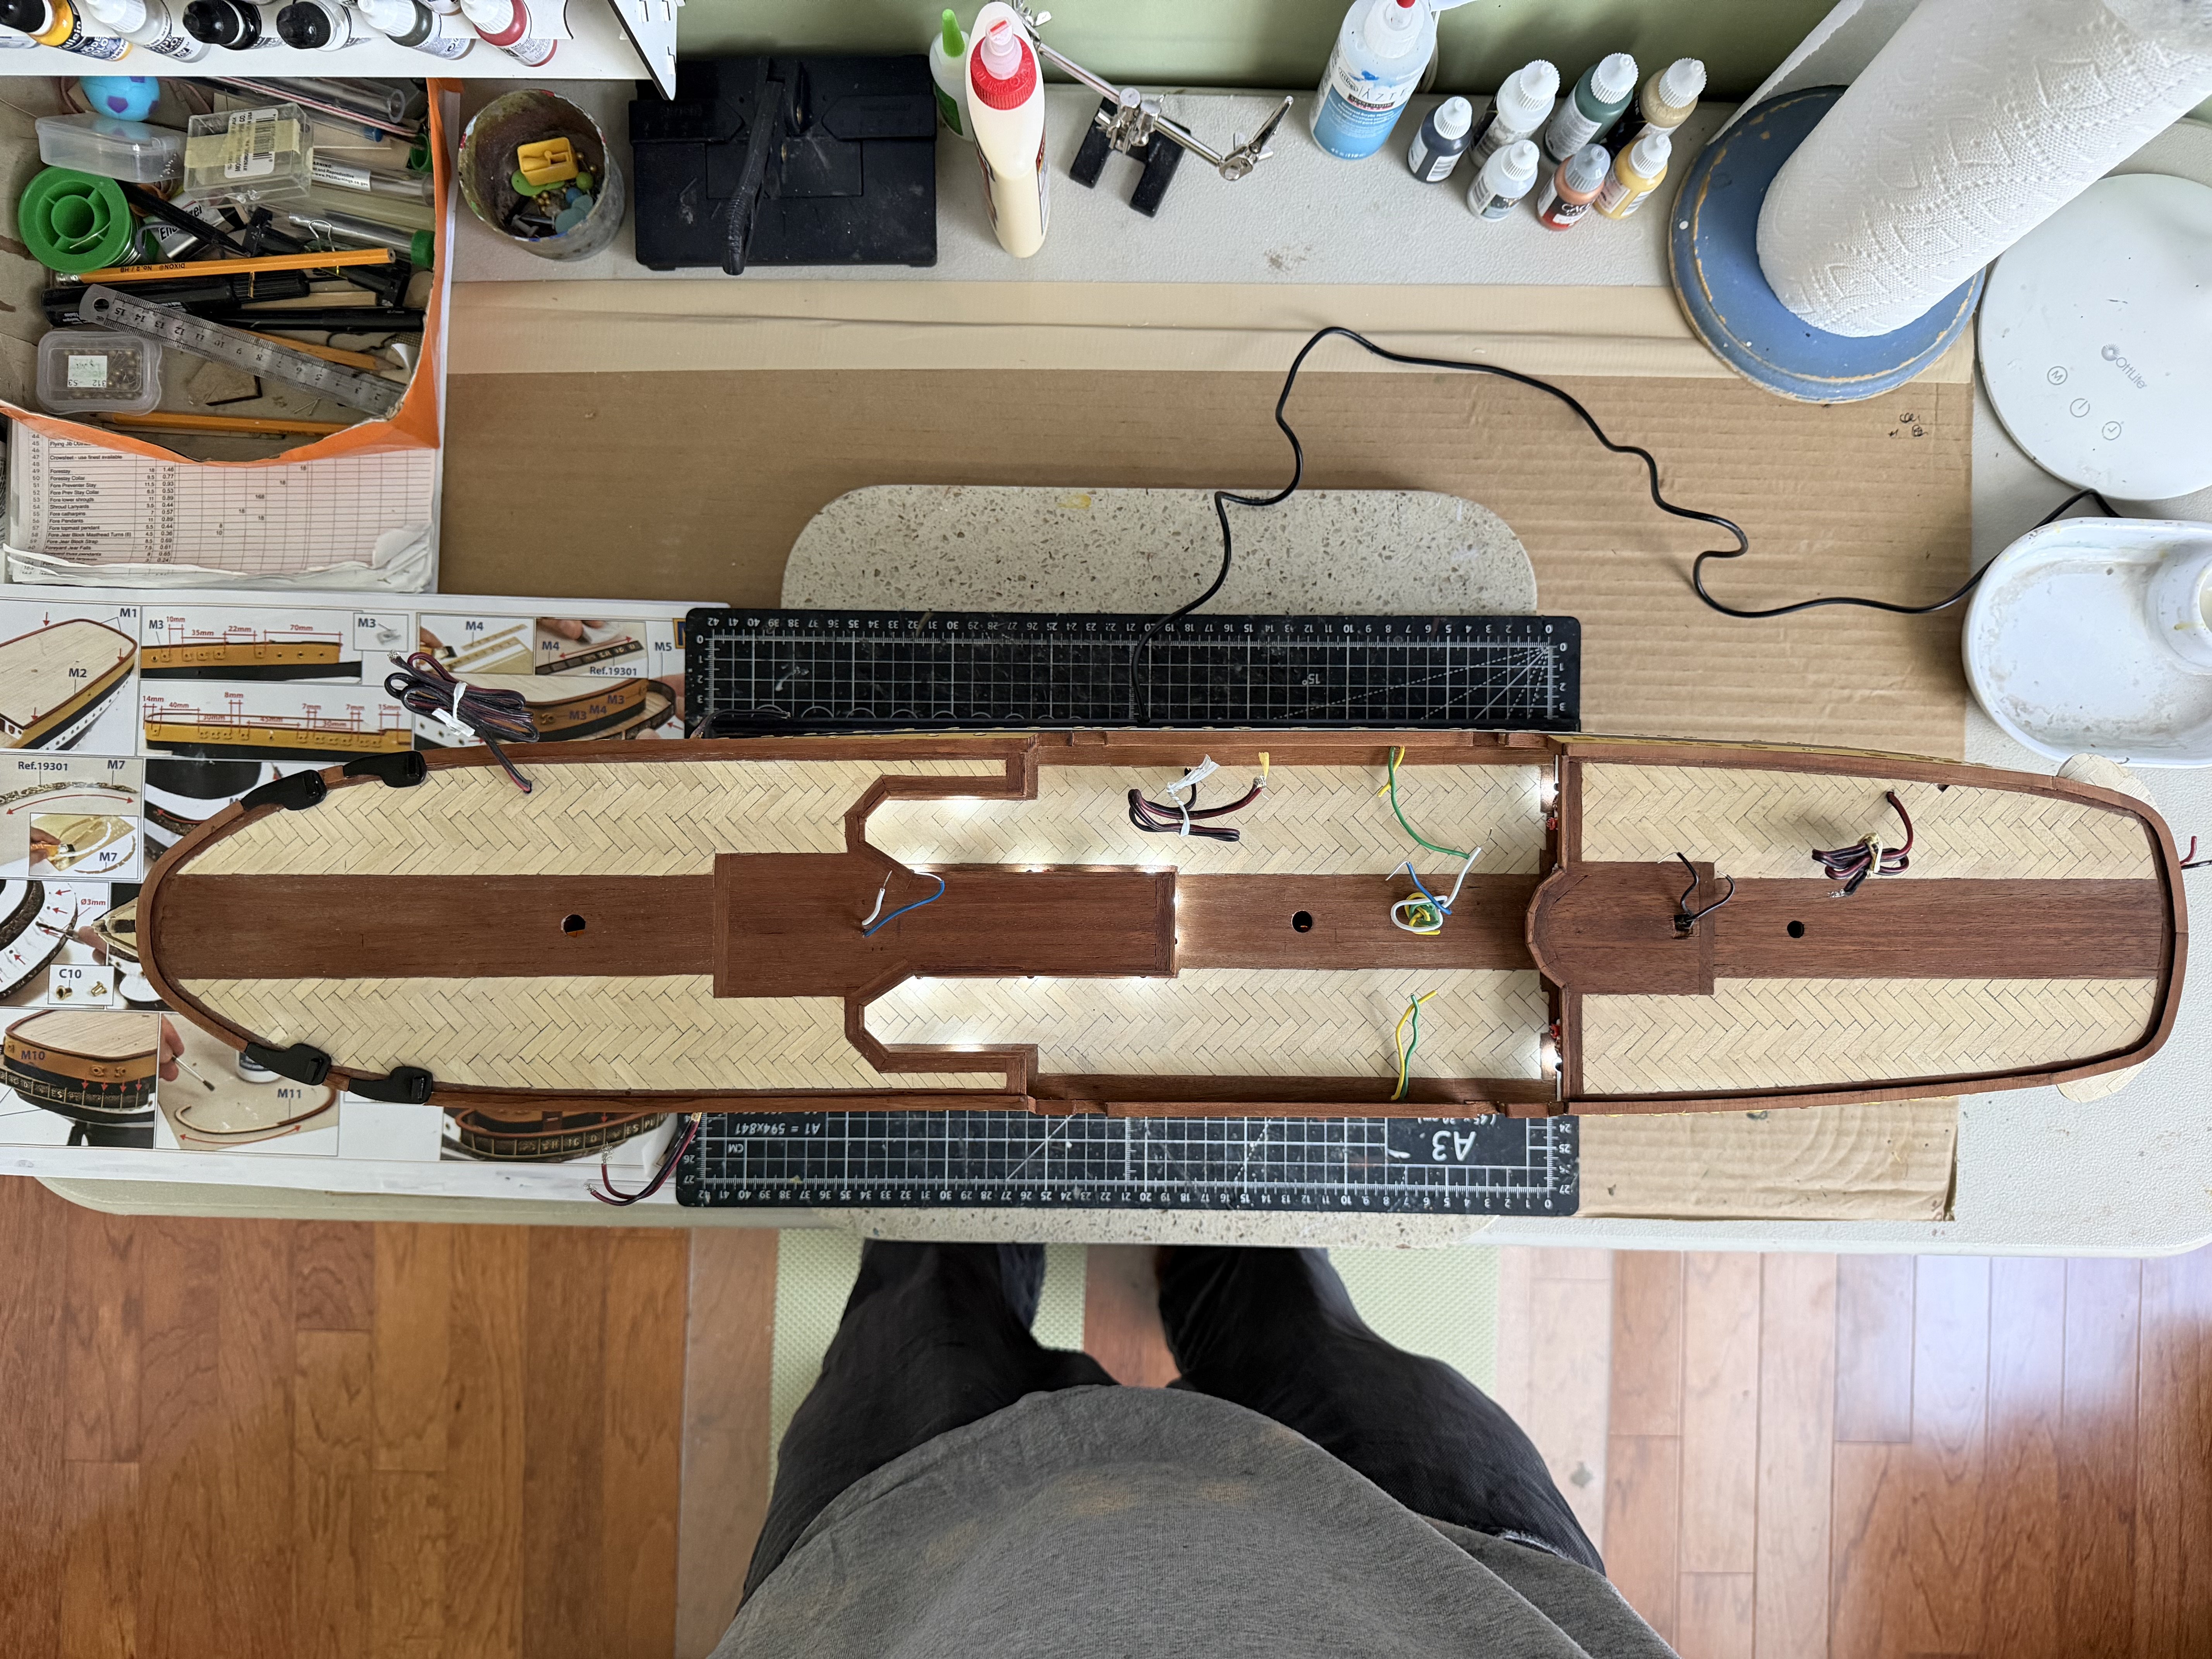
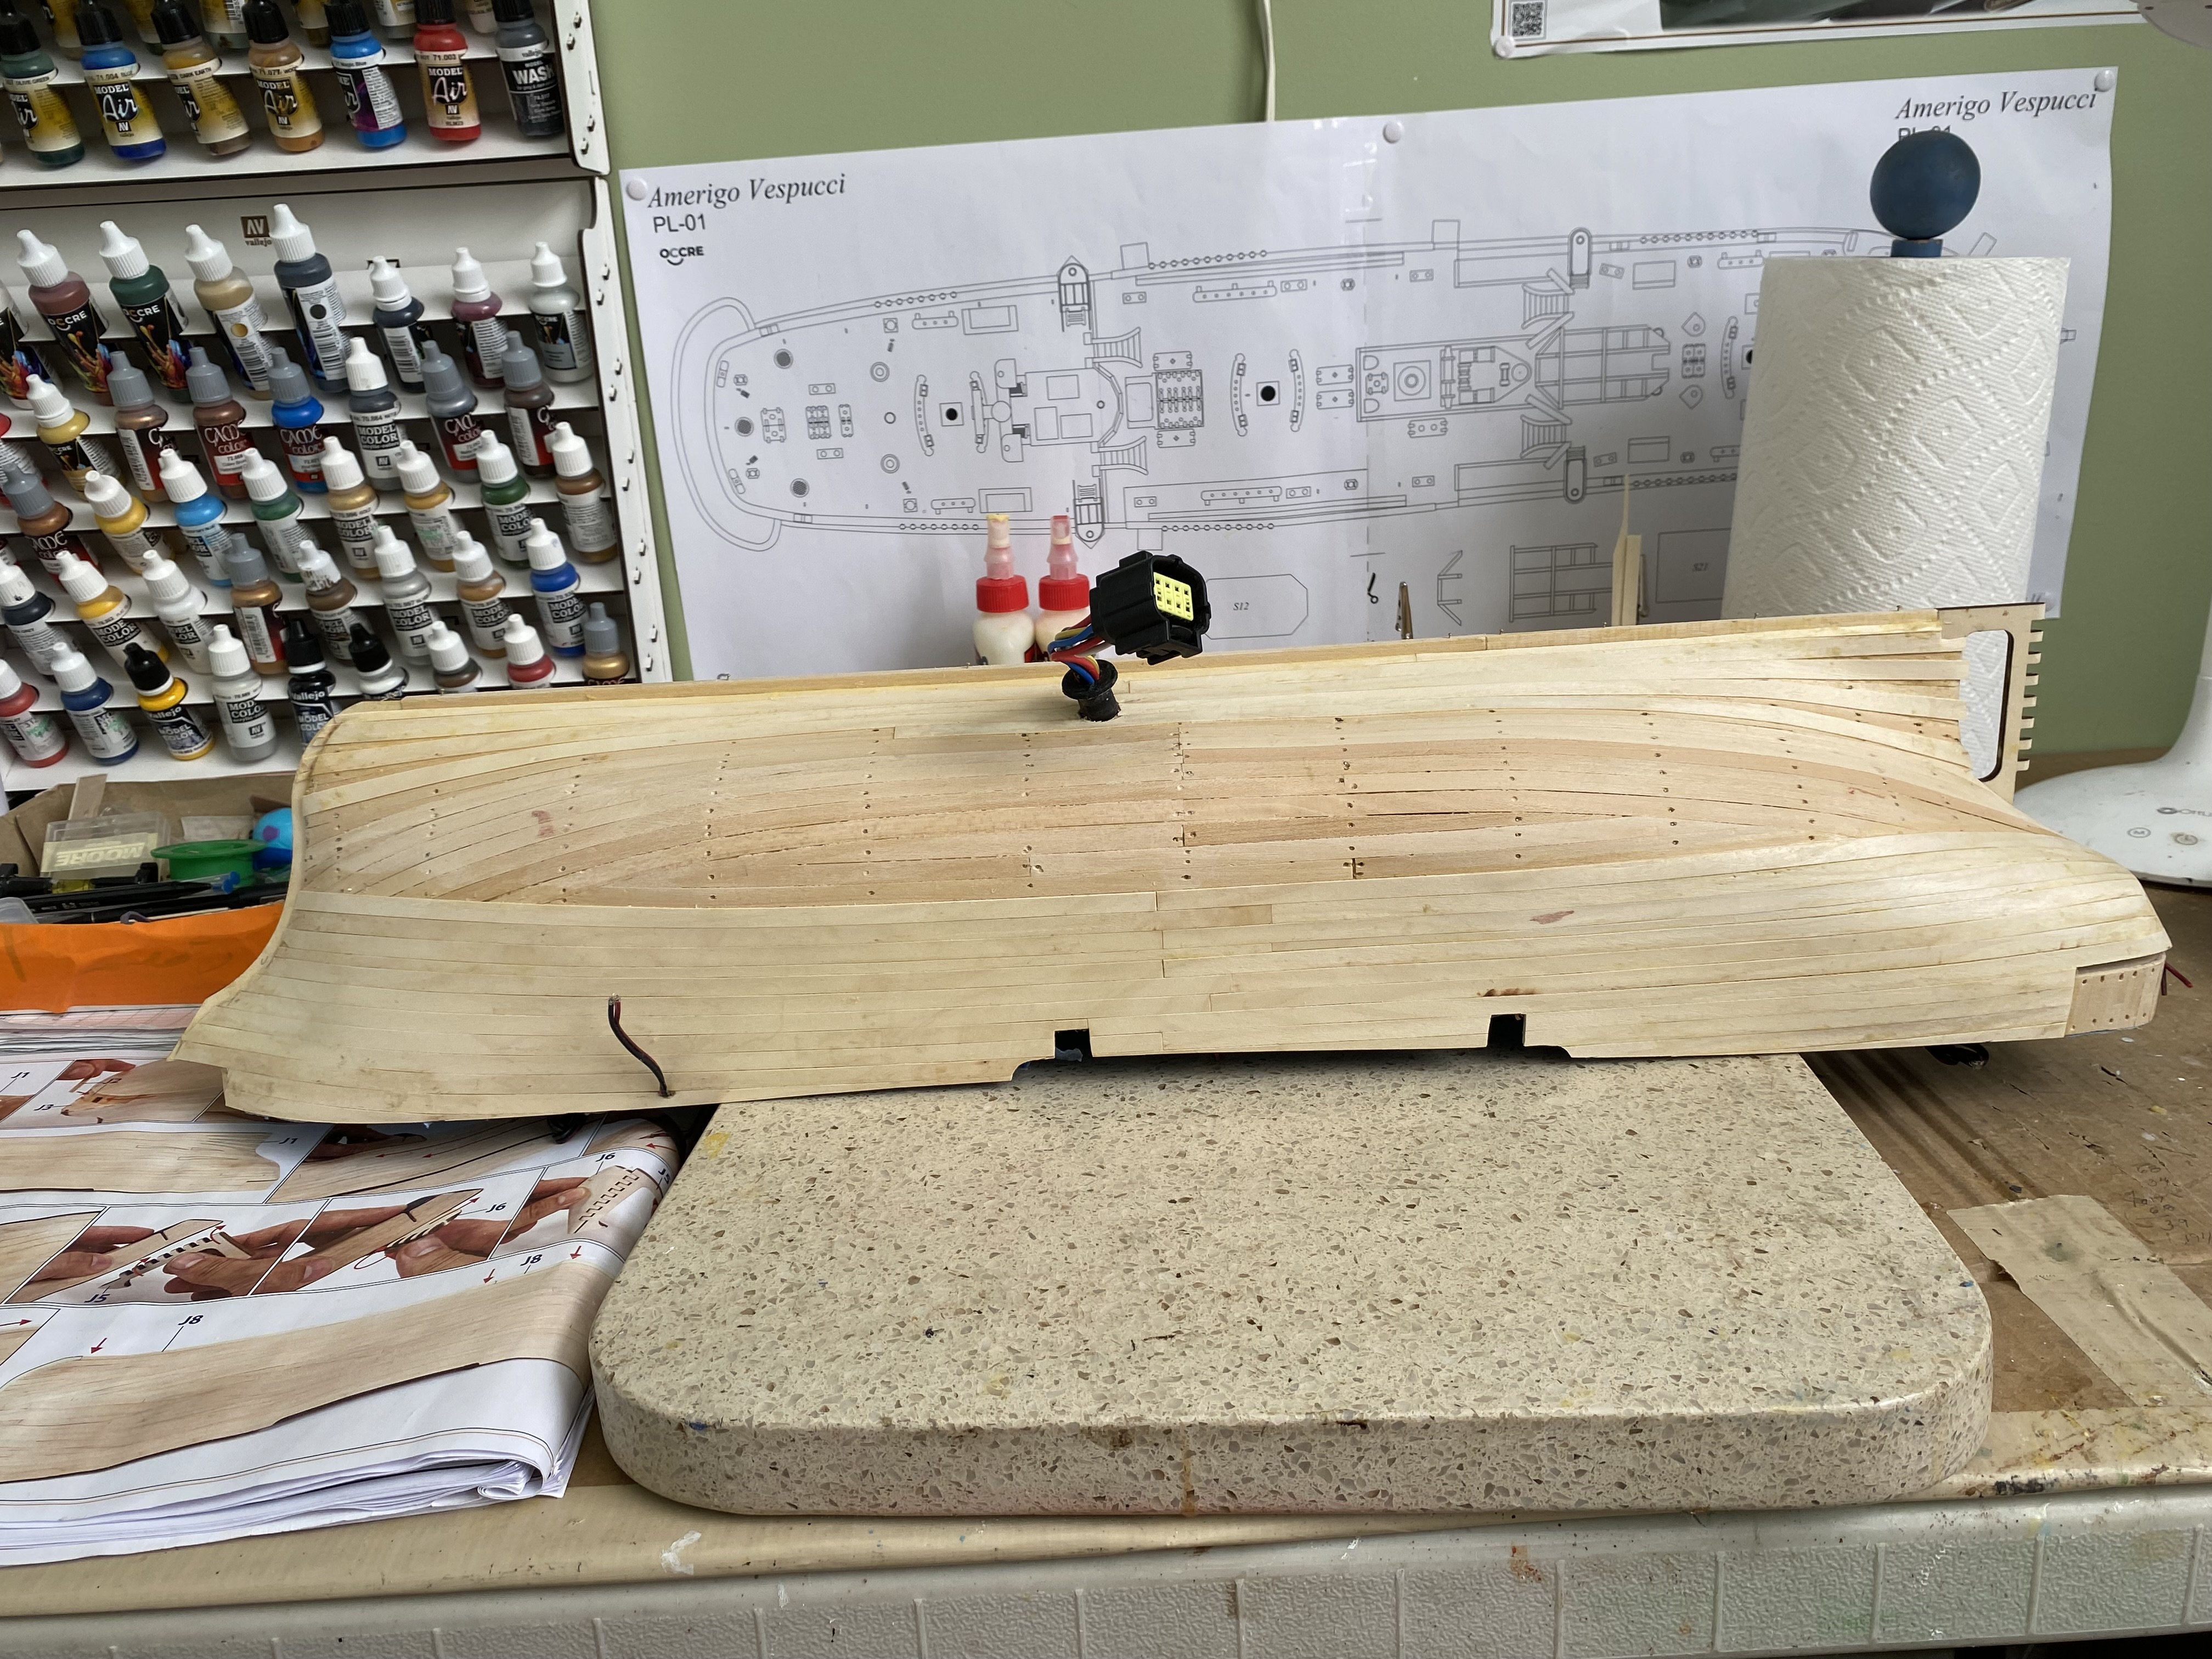
Unfortunately as you can see in my photo I have the 3 wires coming up through the deck. One at each mast. So in my case I guess I will just include a resistor in each little box with the LED. I still need to come up with the size and design for the 18 (6 each mast) little boxes.
-
Thanks Daniel. I know what they are and why you have them. I am again wanting to follow your lead. I am/was just curious if you purchased something or made them. Trying to come up with a design and size to accommodate a 3 or 5 mm LED and resistor.
-
Daniel I have been studying your progress photos, as I do a lot. I am currently looking at the little boxes you have for the lights that will shine up to the mast. The green, white, and red. It looks as if you have 6 for each color. Did you make these are find something on line?
-
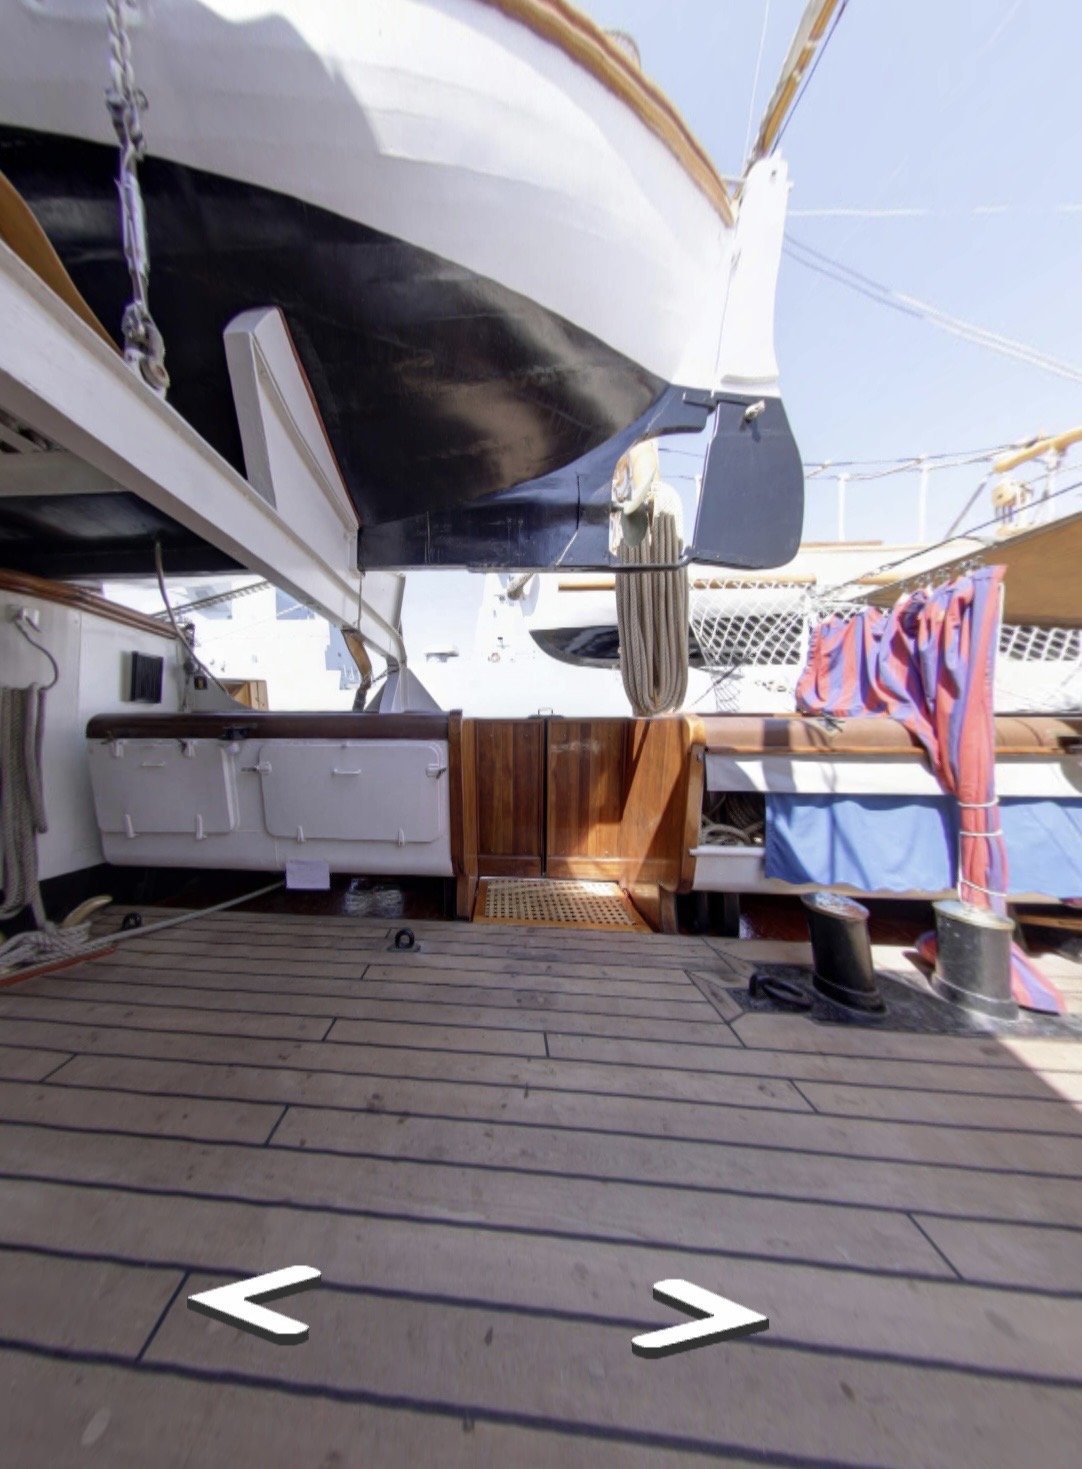
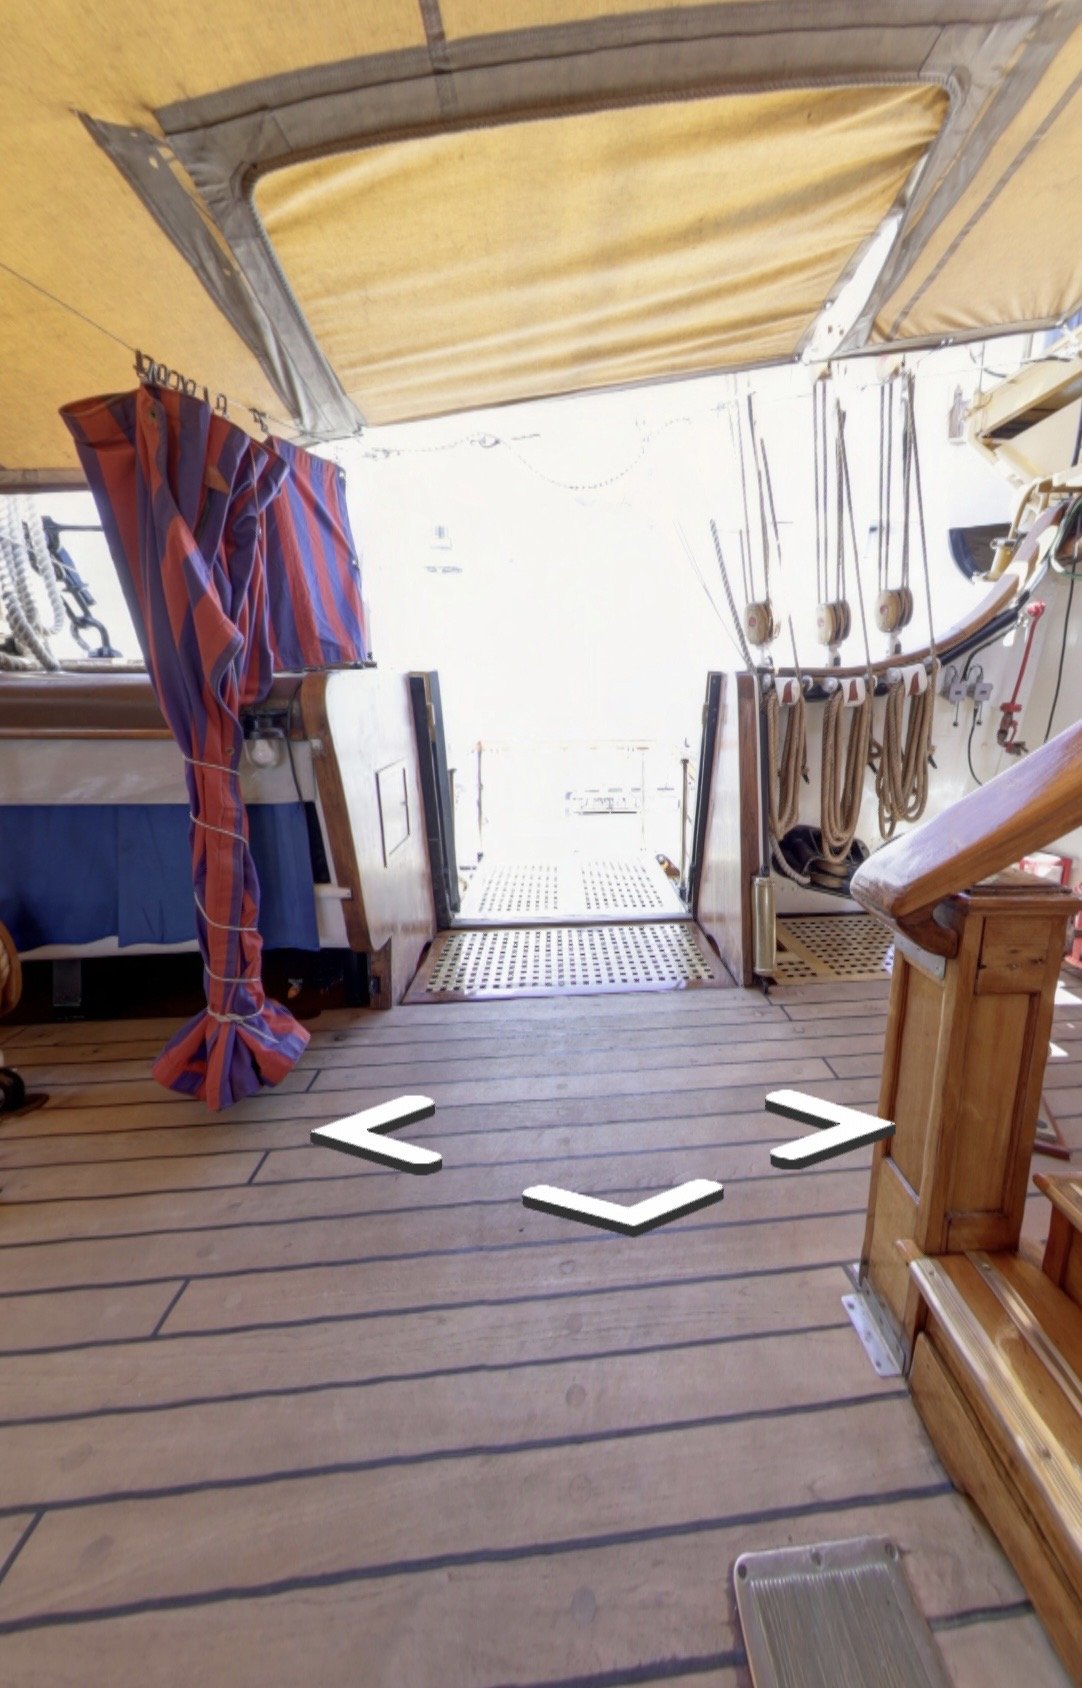
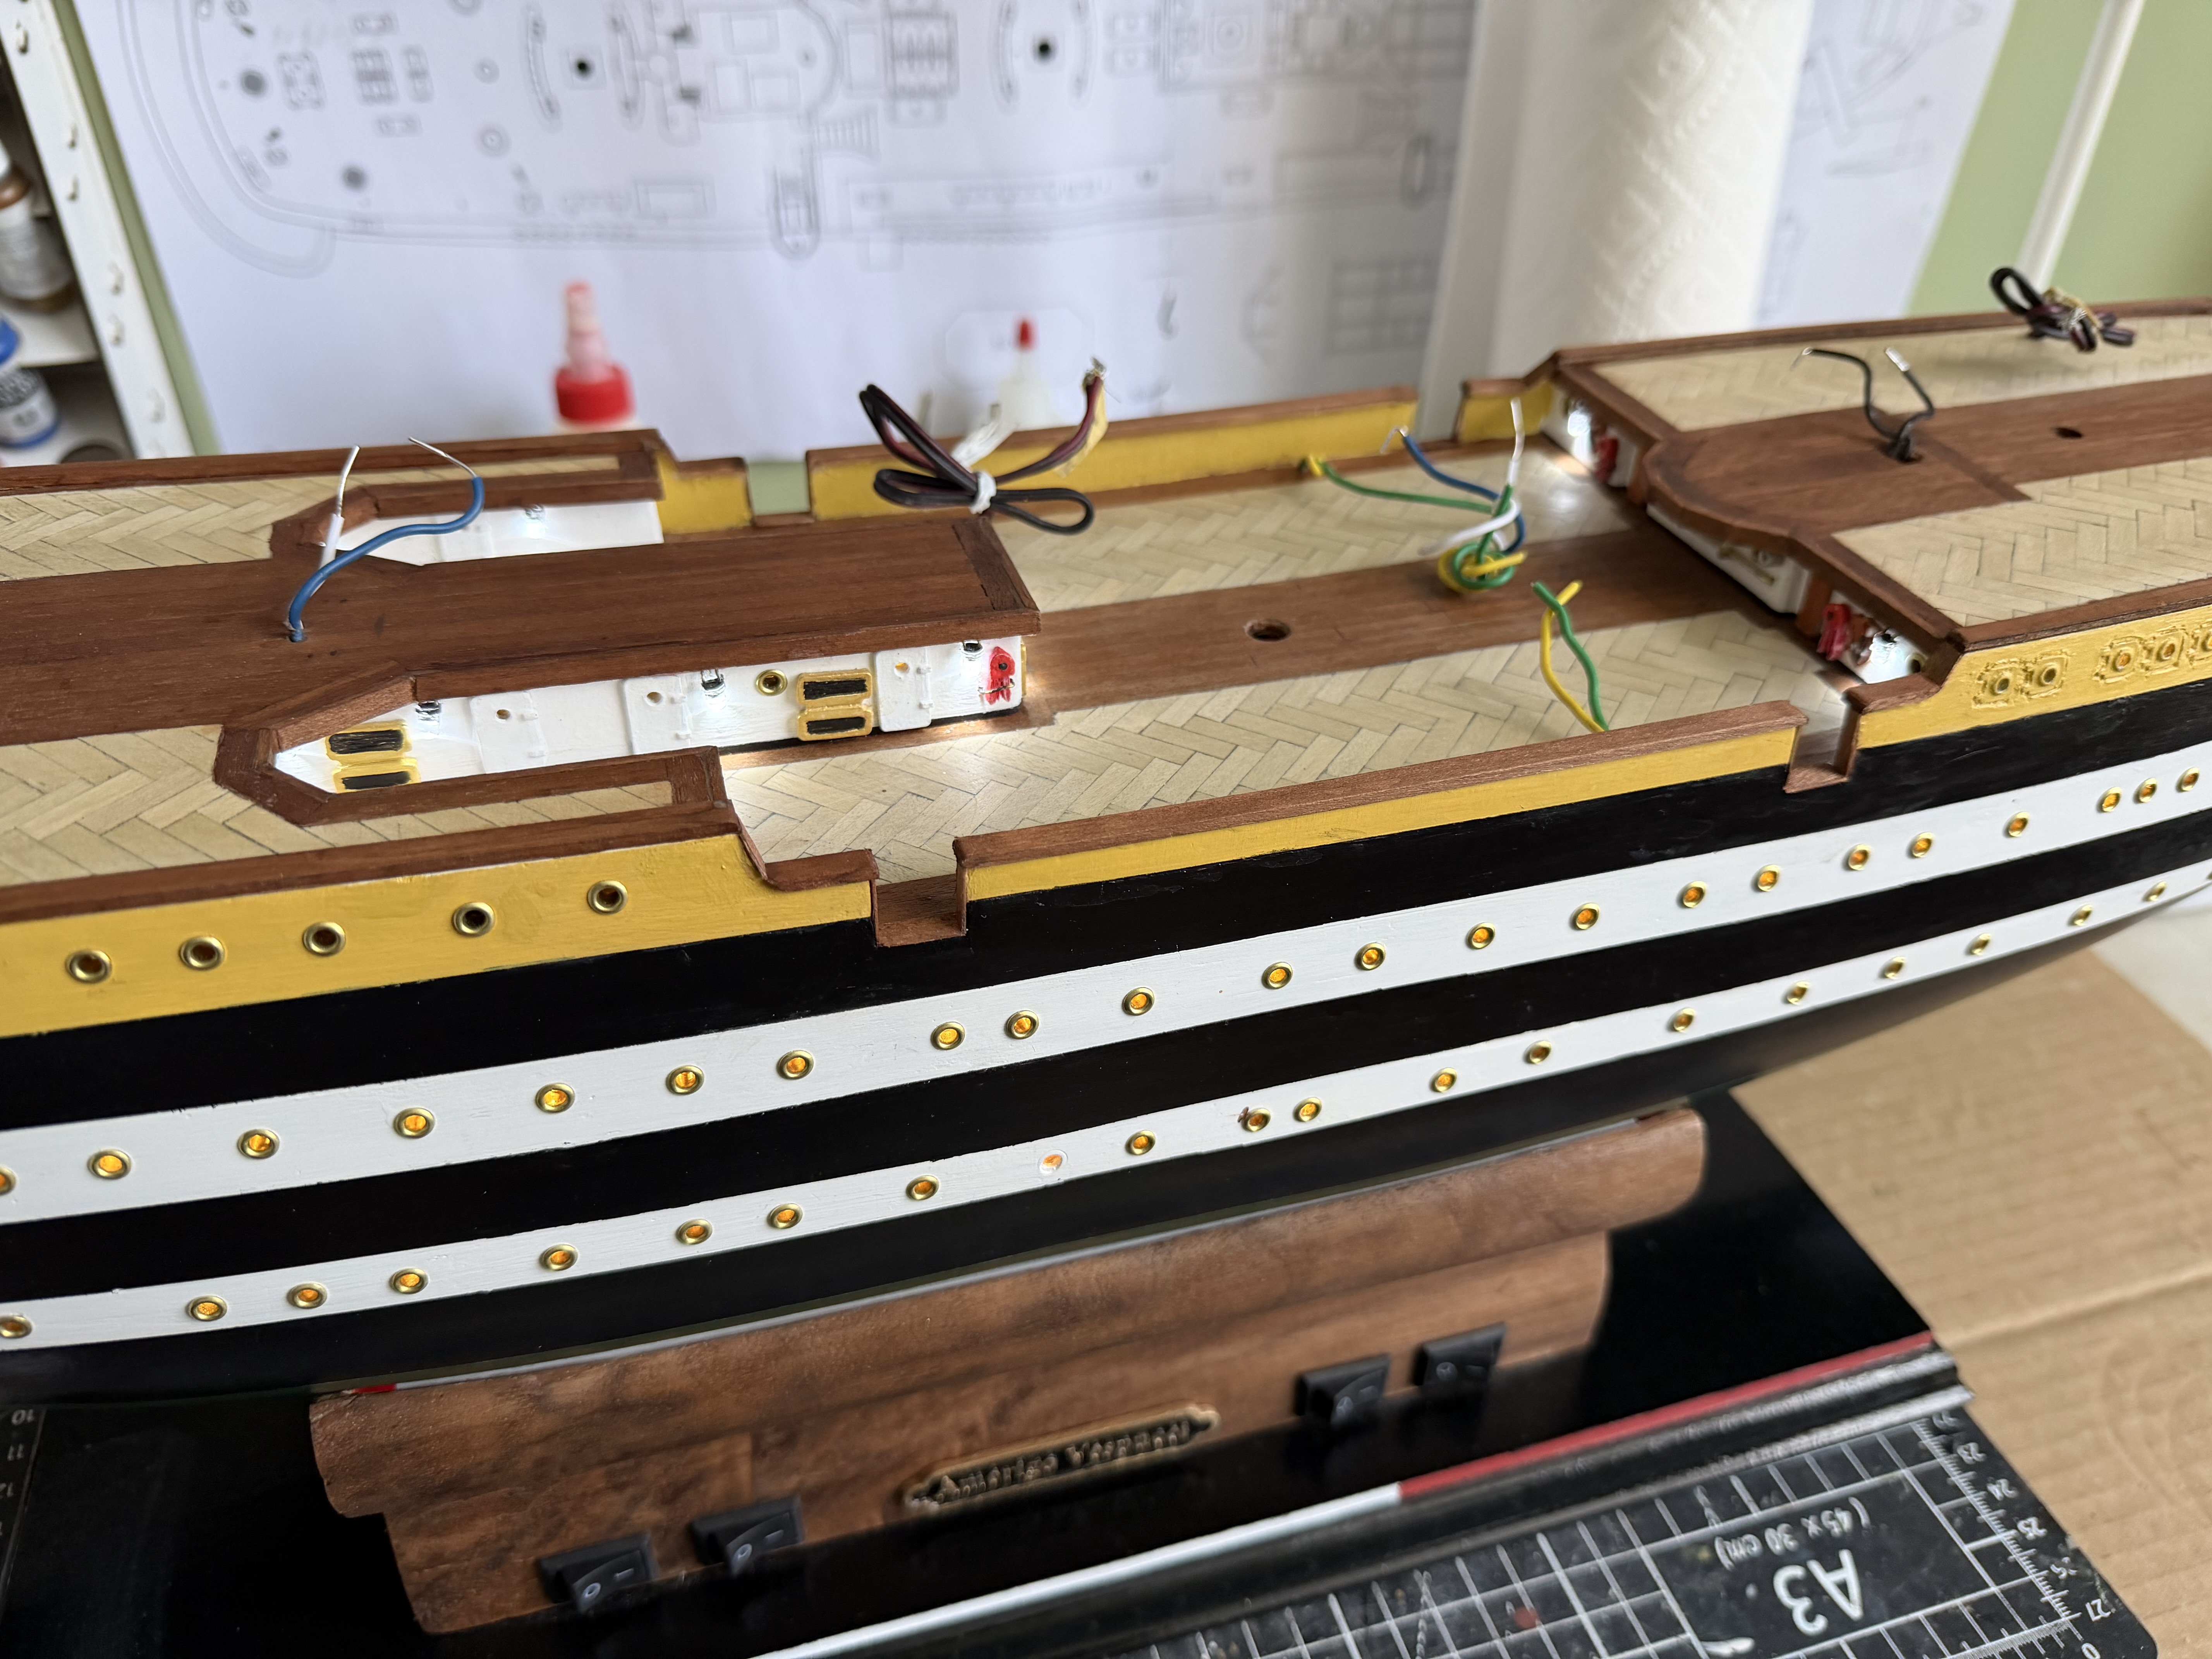
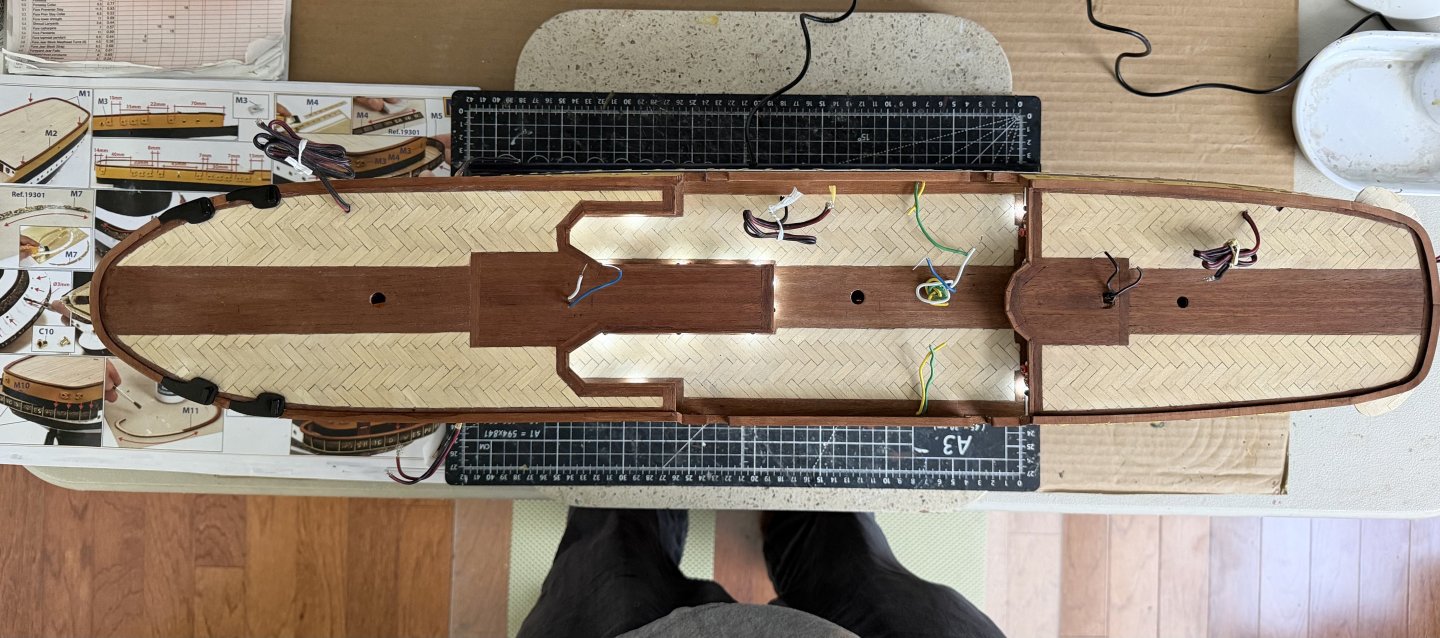
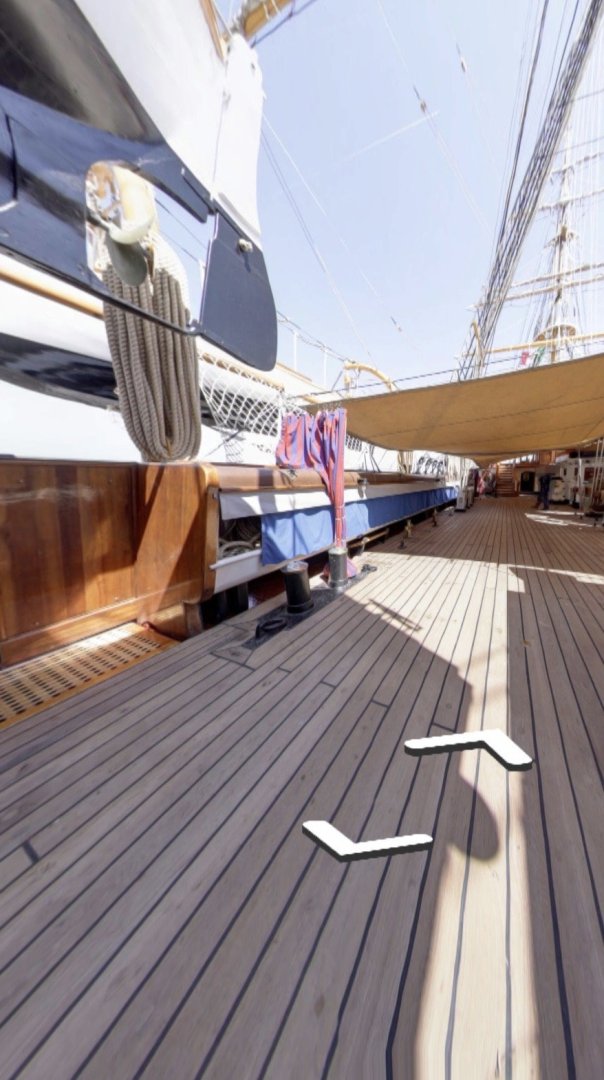
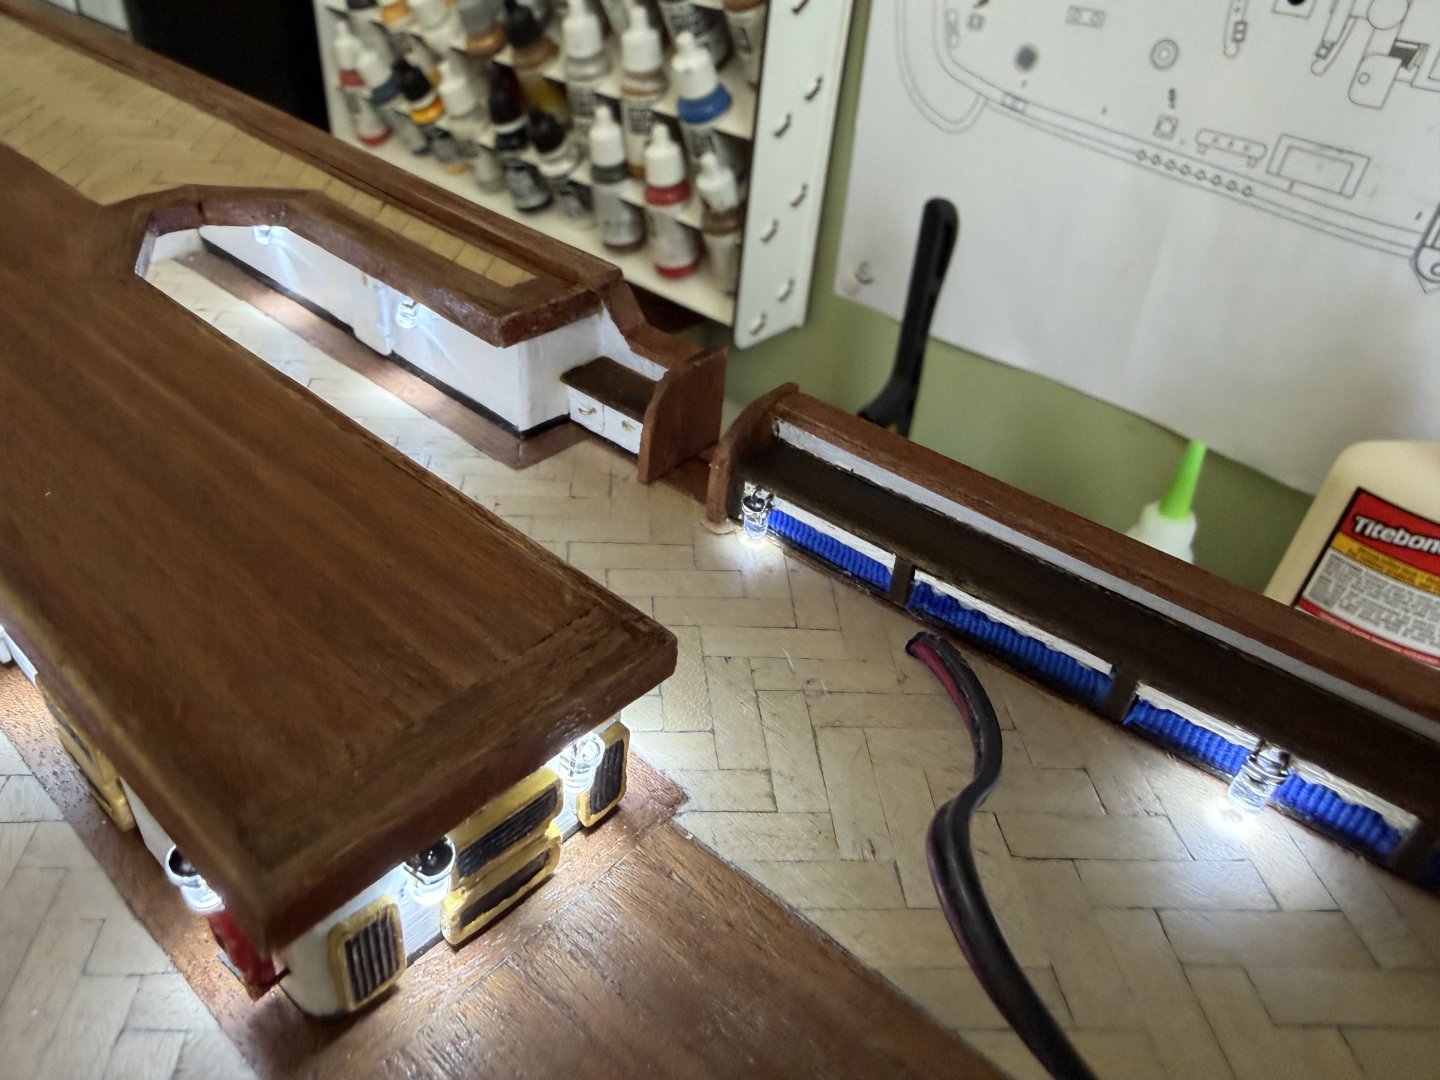
Spent most of my shipyard time since my last update working on the starboard side of the main deck. I opened up two entrance ways similar to the actual ship. Added the blue curtains over the storage lockers and the storage cabinet at the end. This is an upgrade of sorts from what OcCre has if you follow the instructions. The photos show the same area on the actual ship and what I did.


-
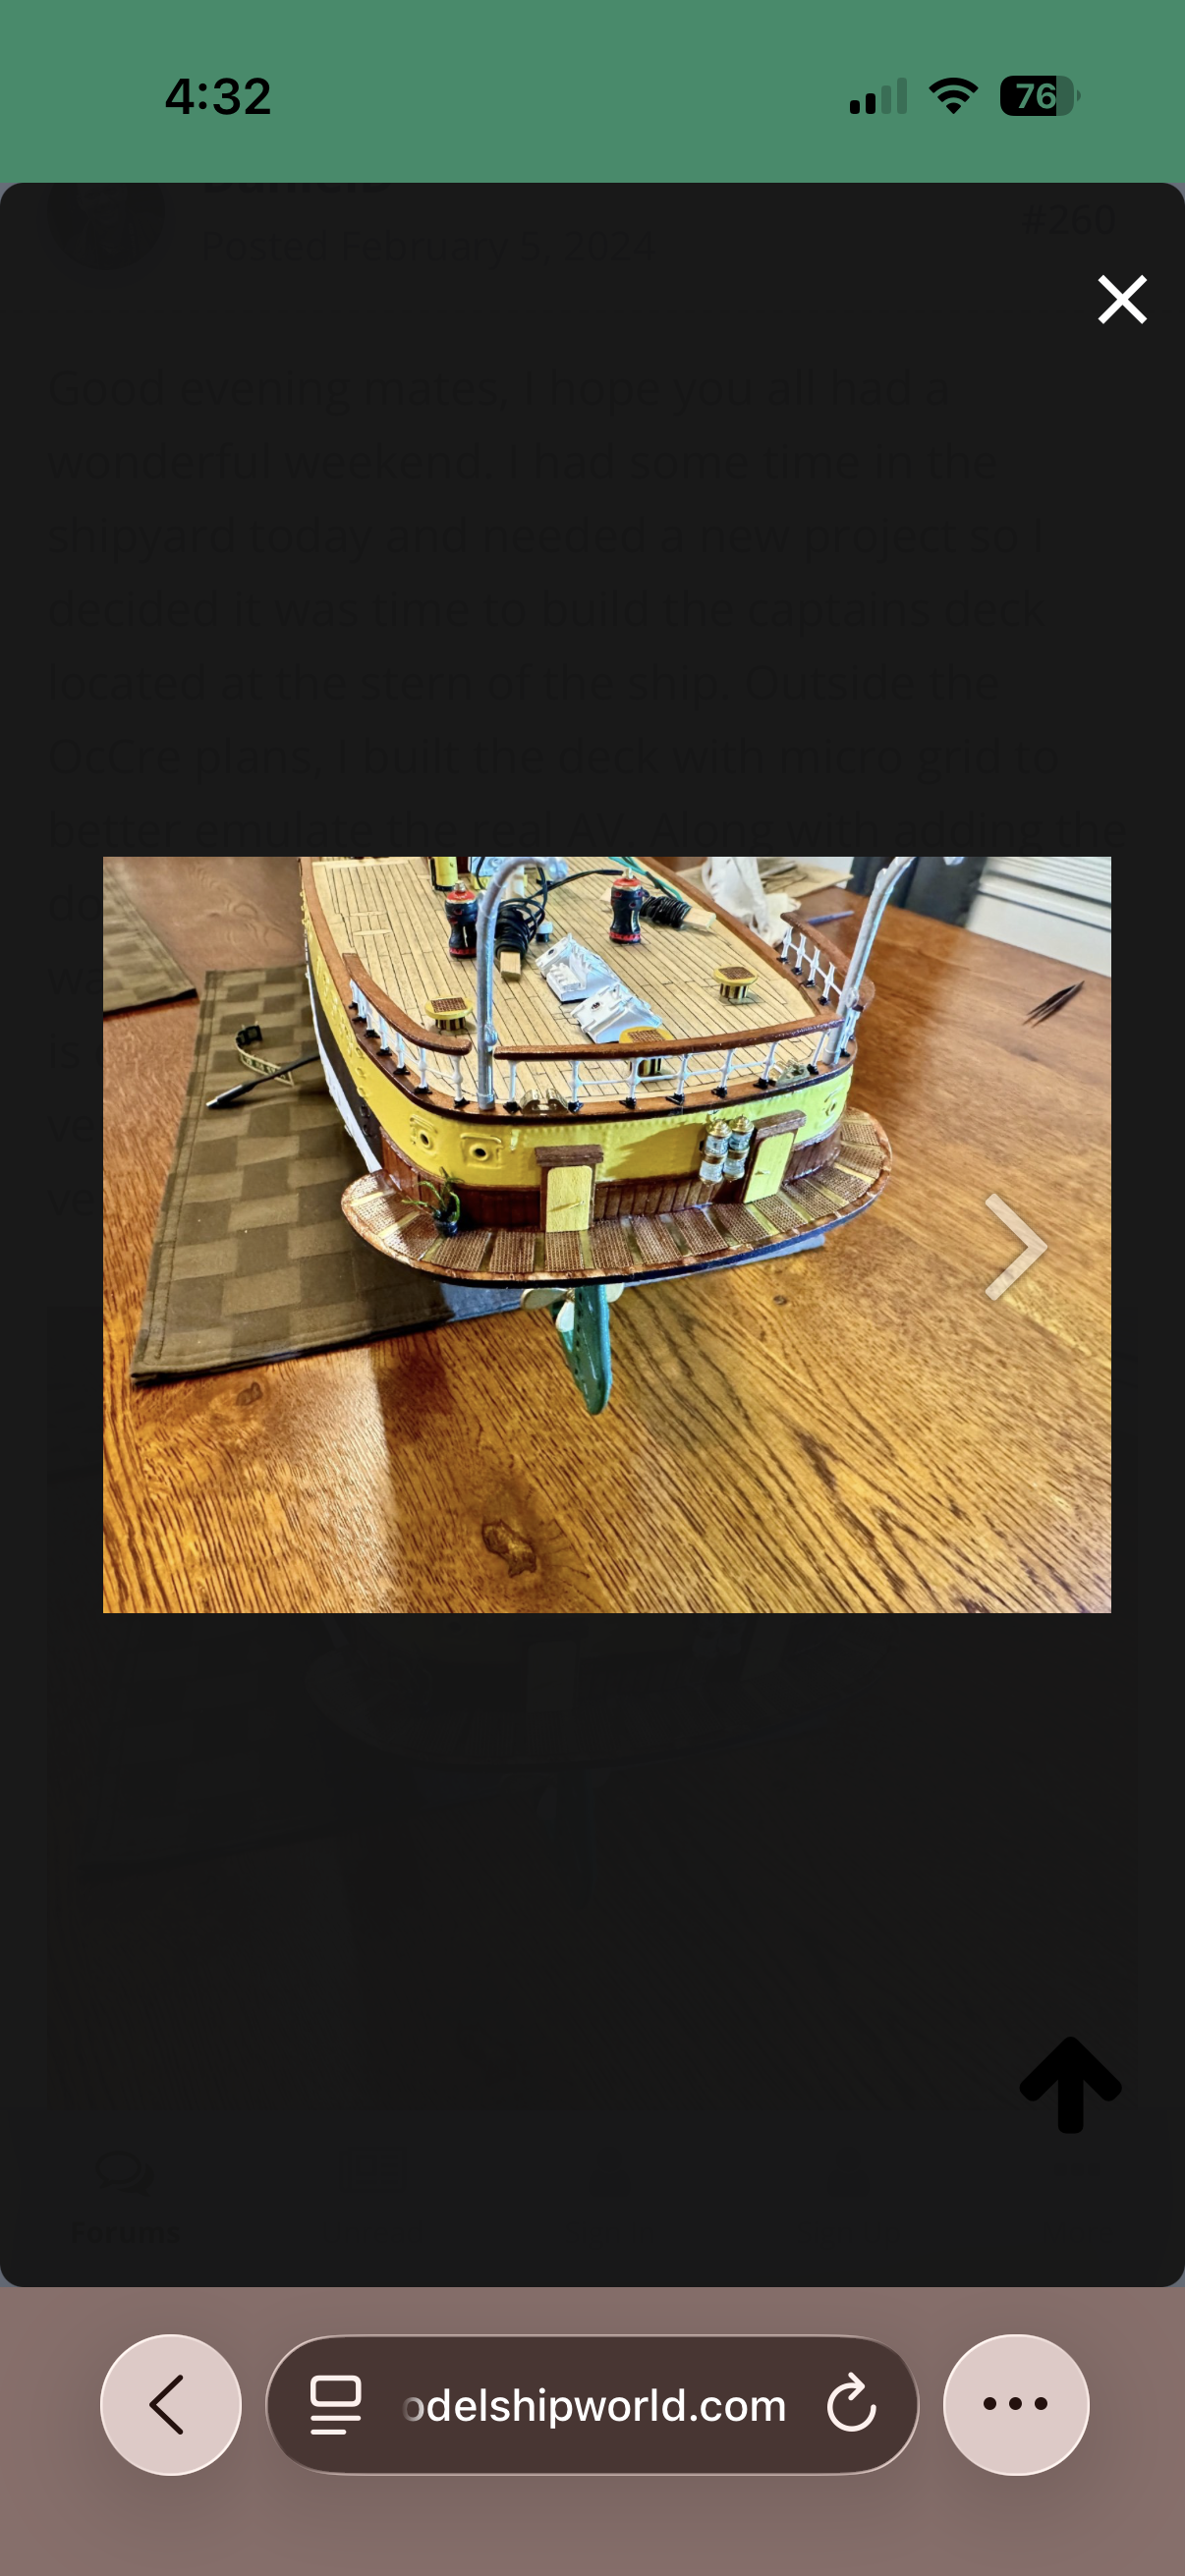
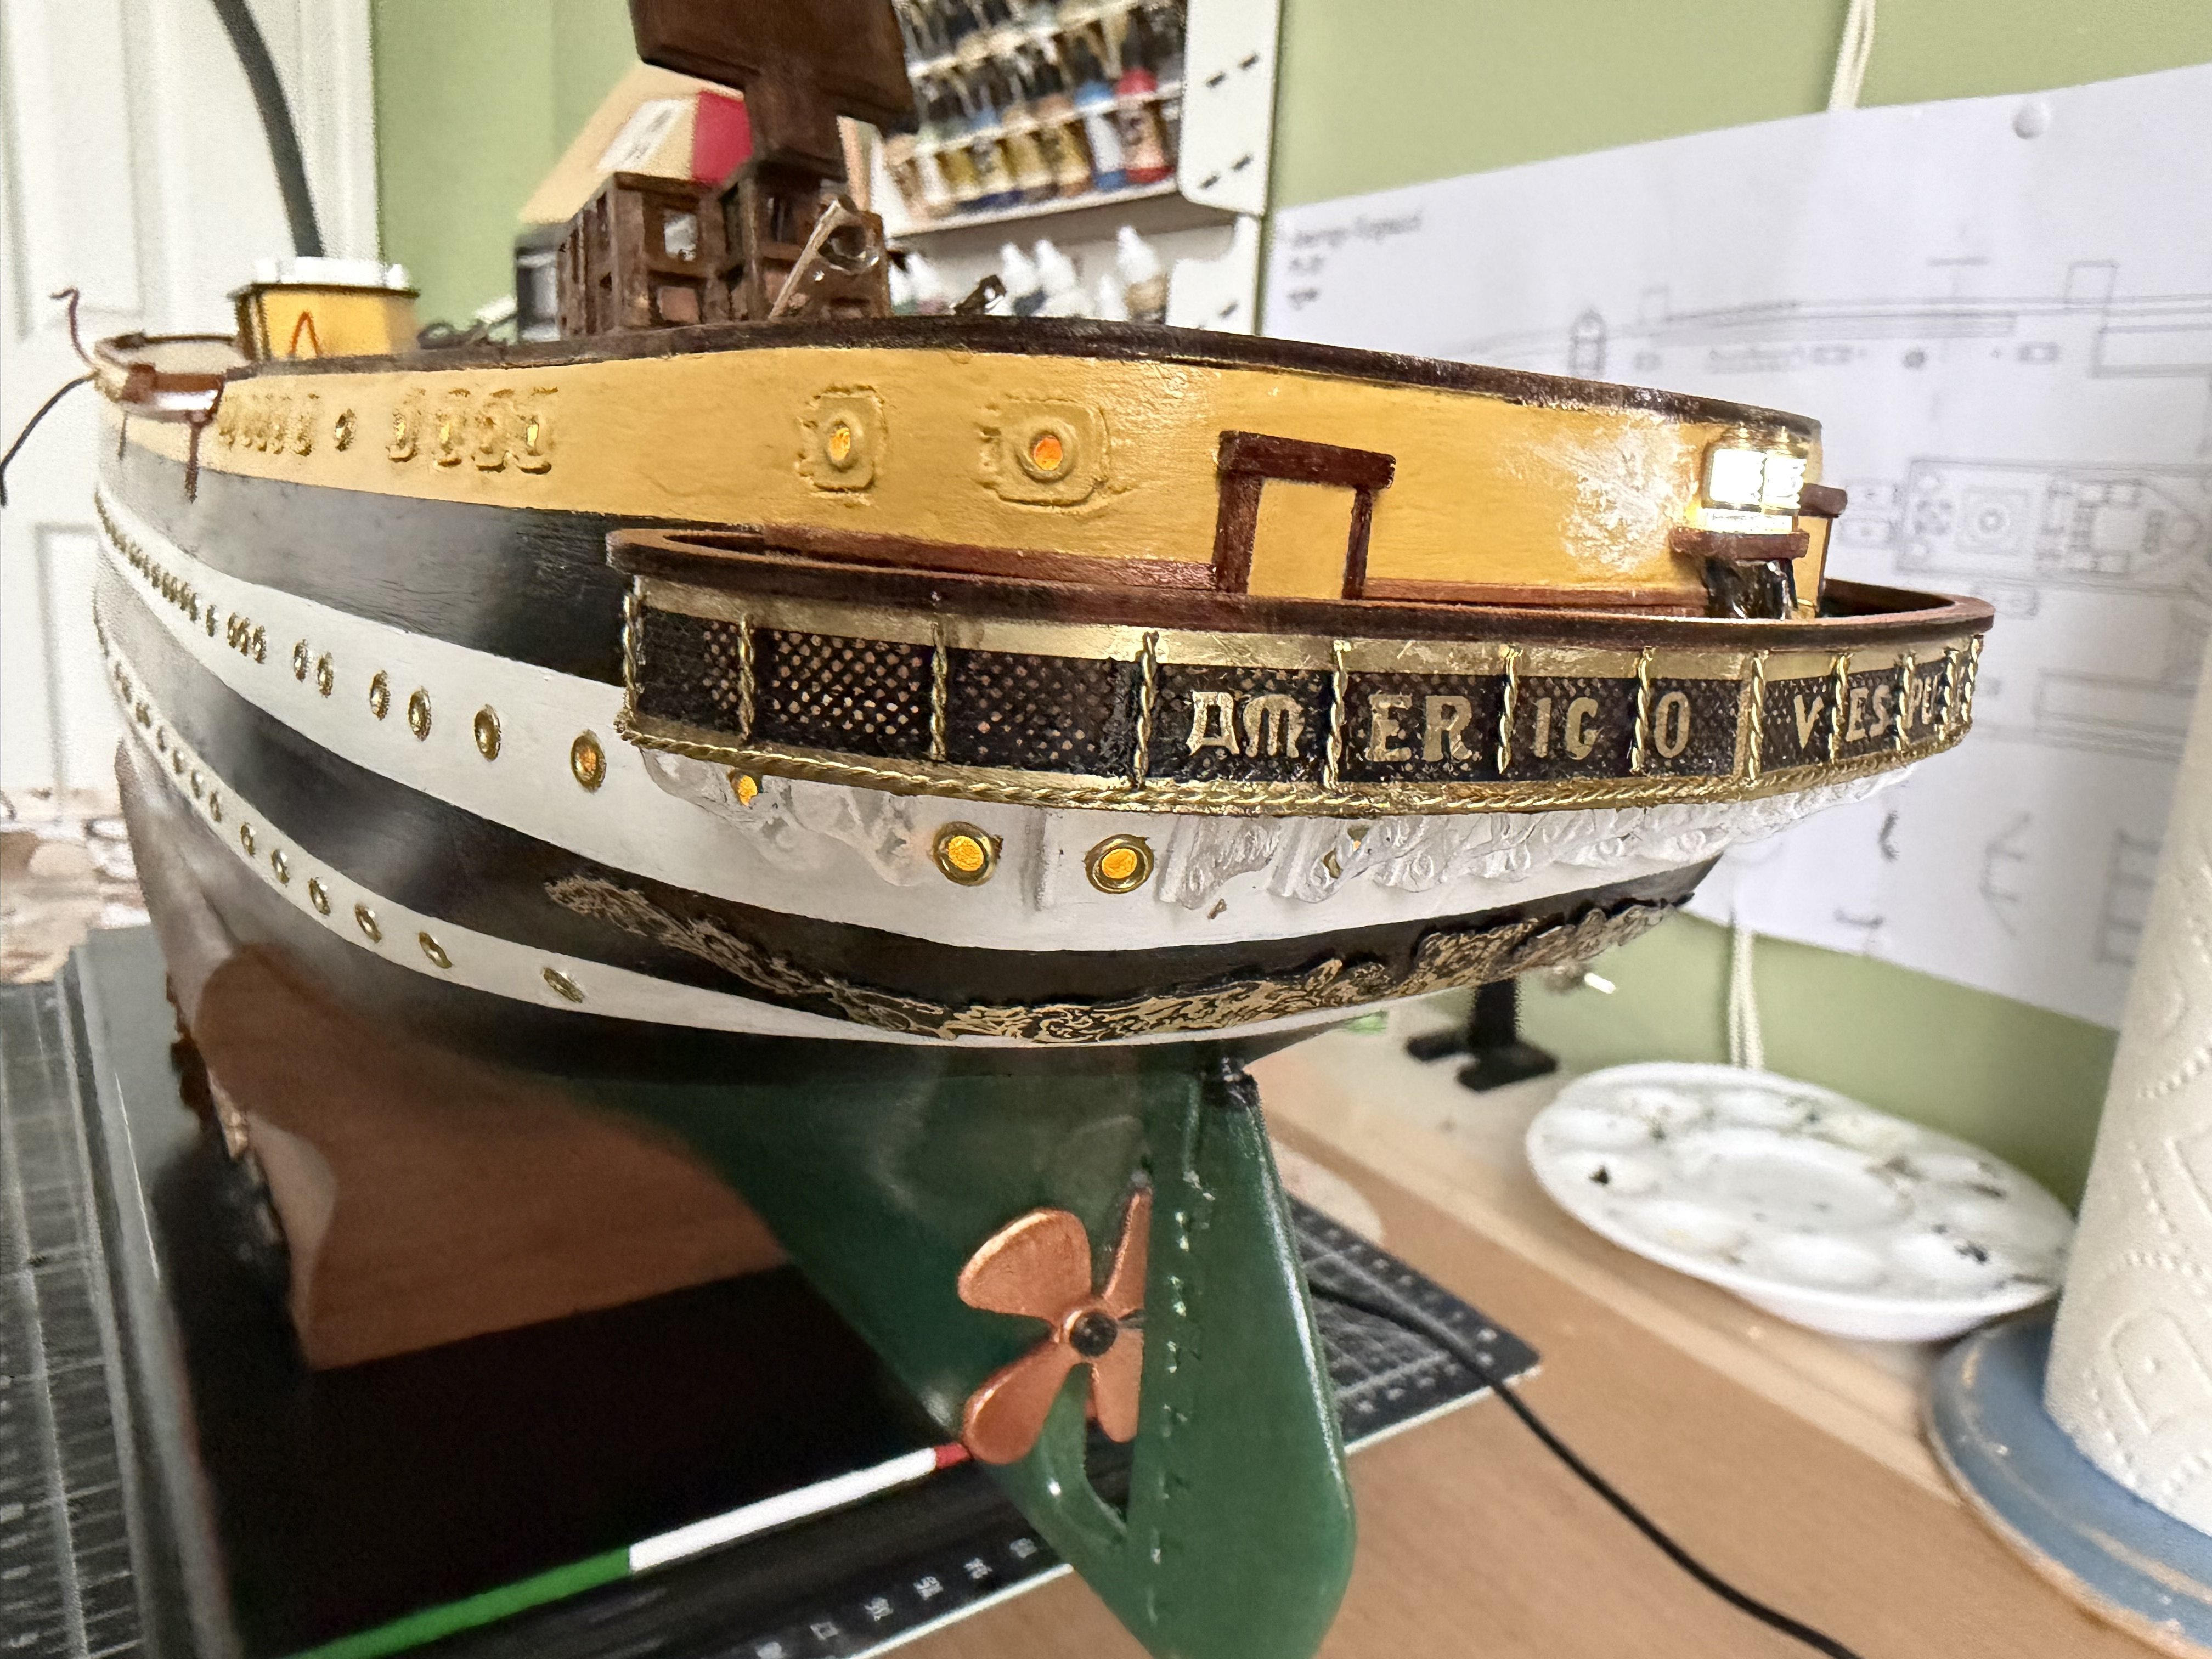
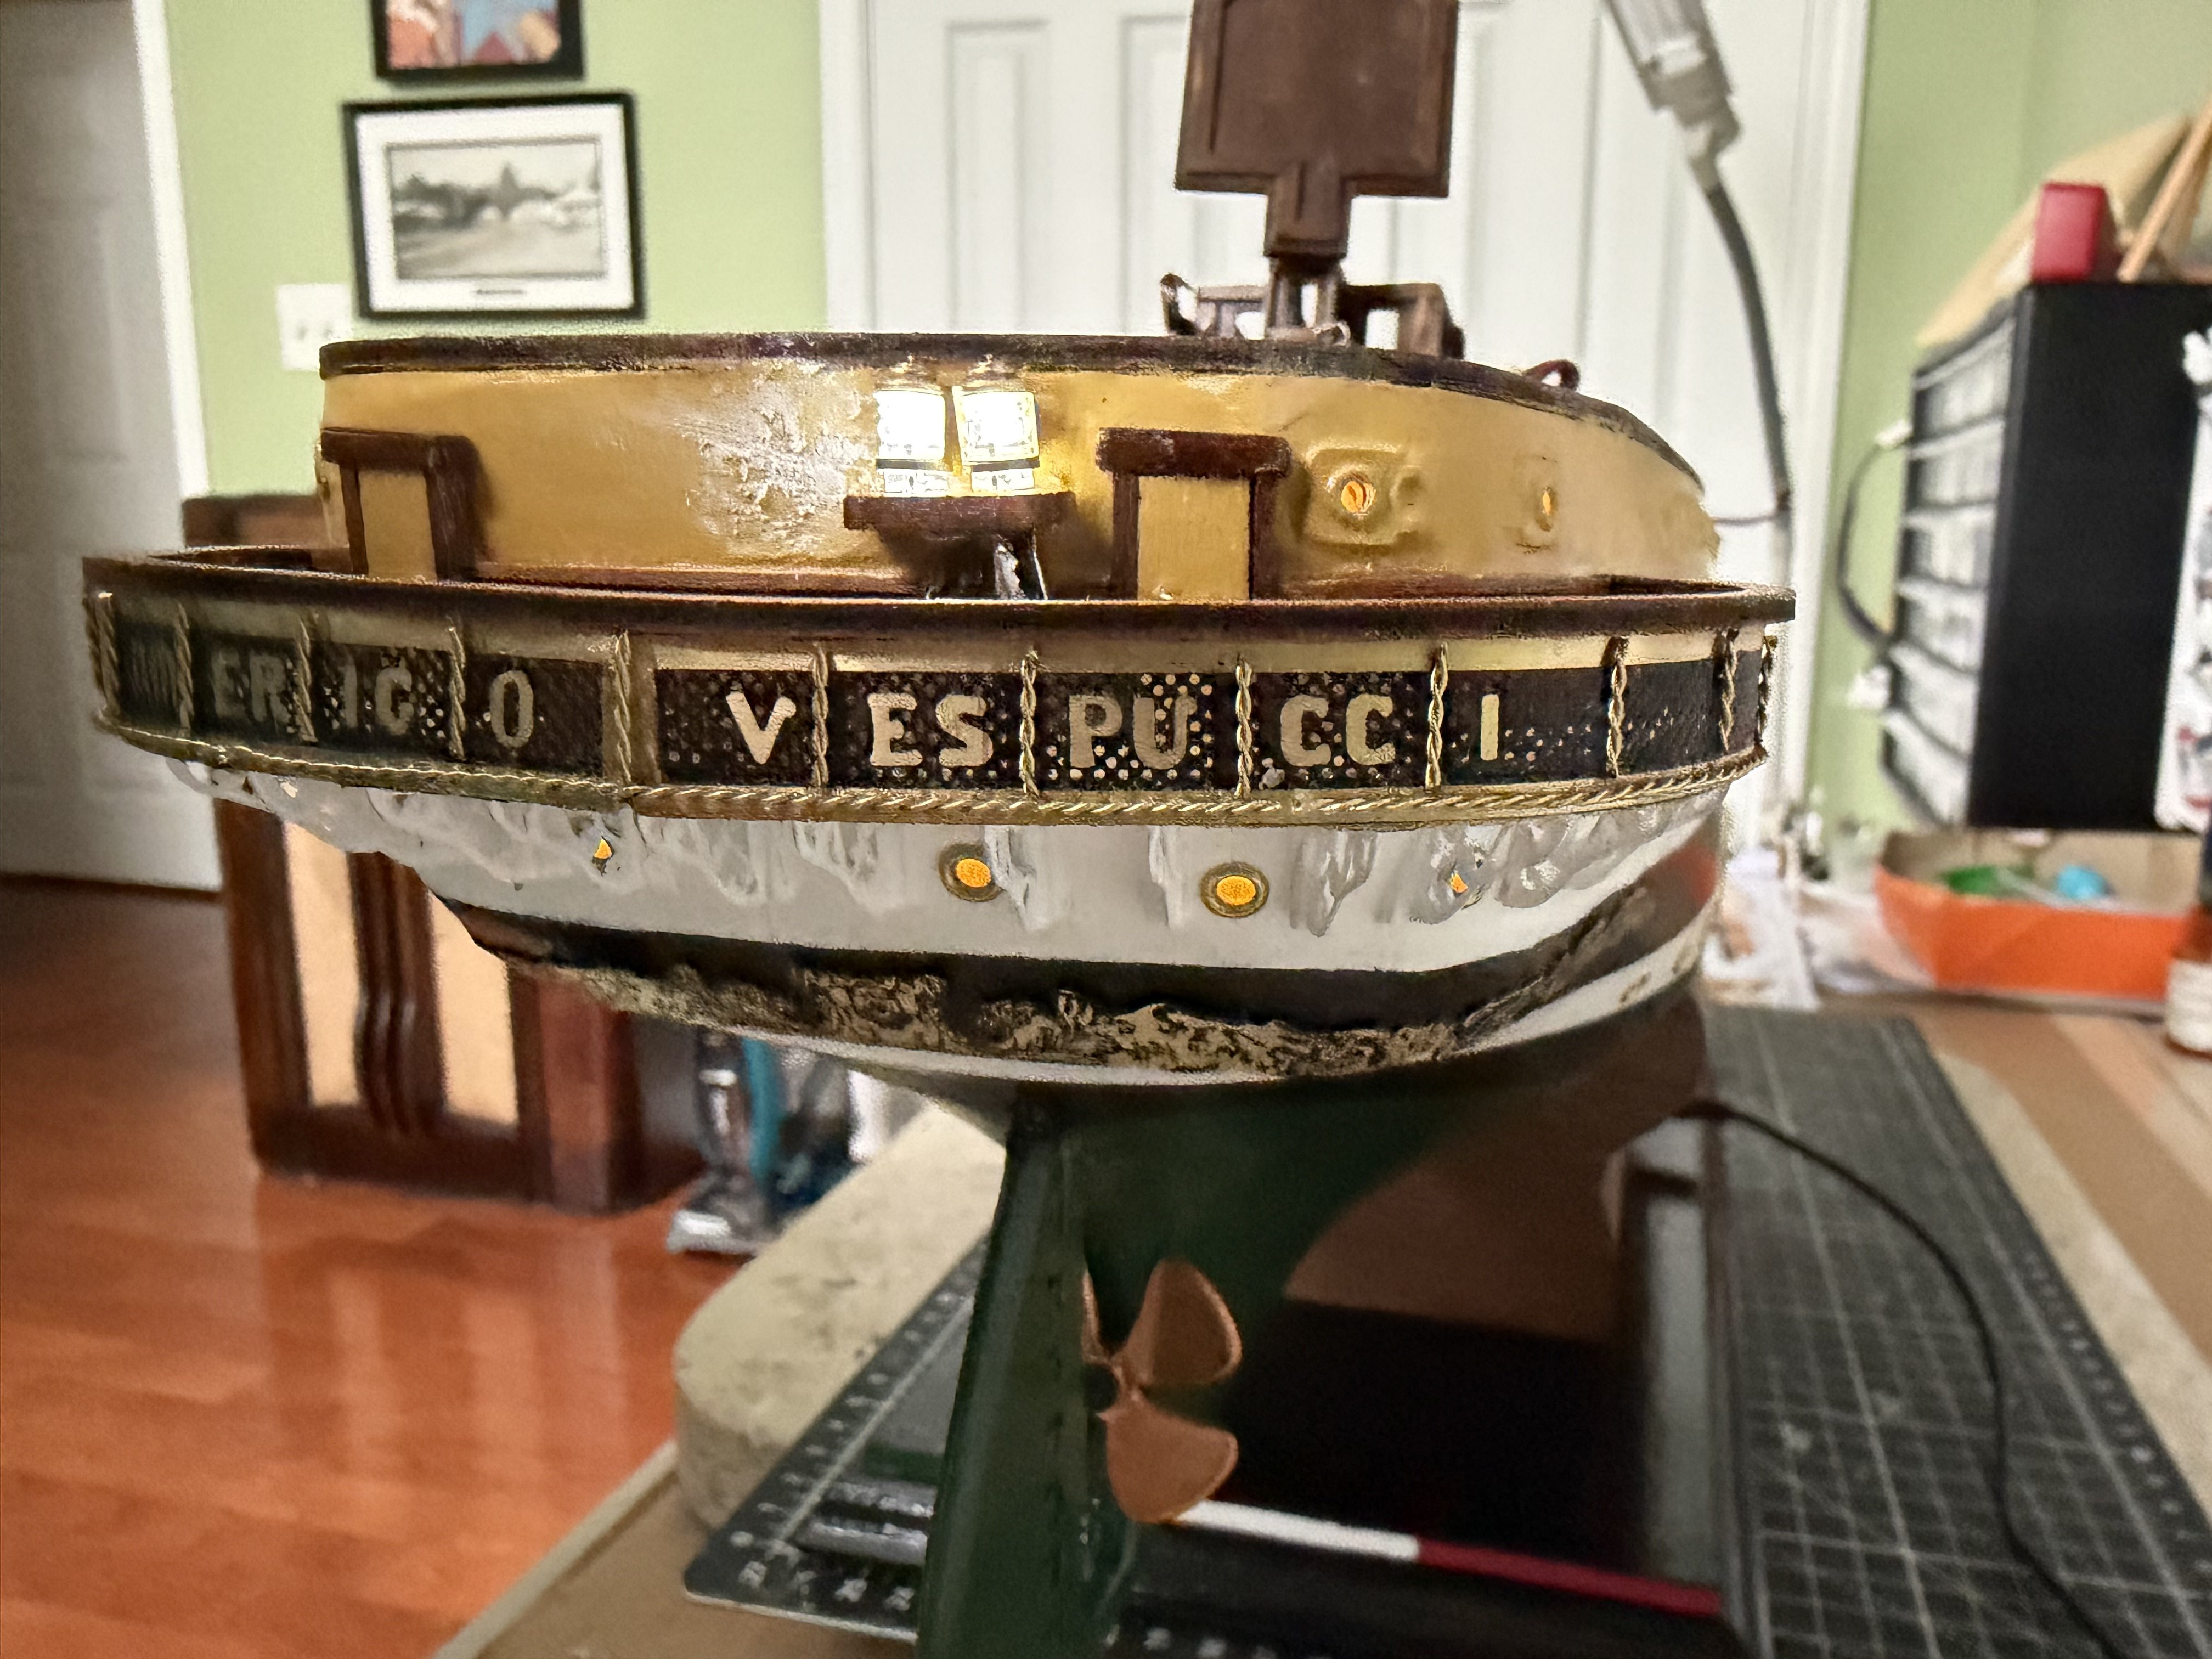
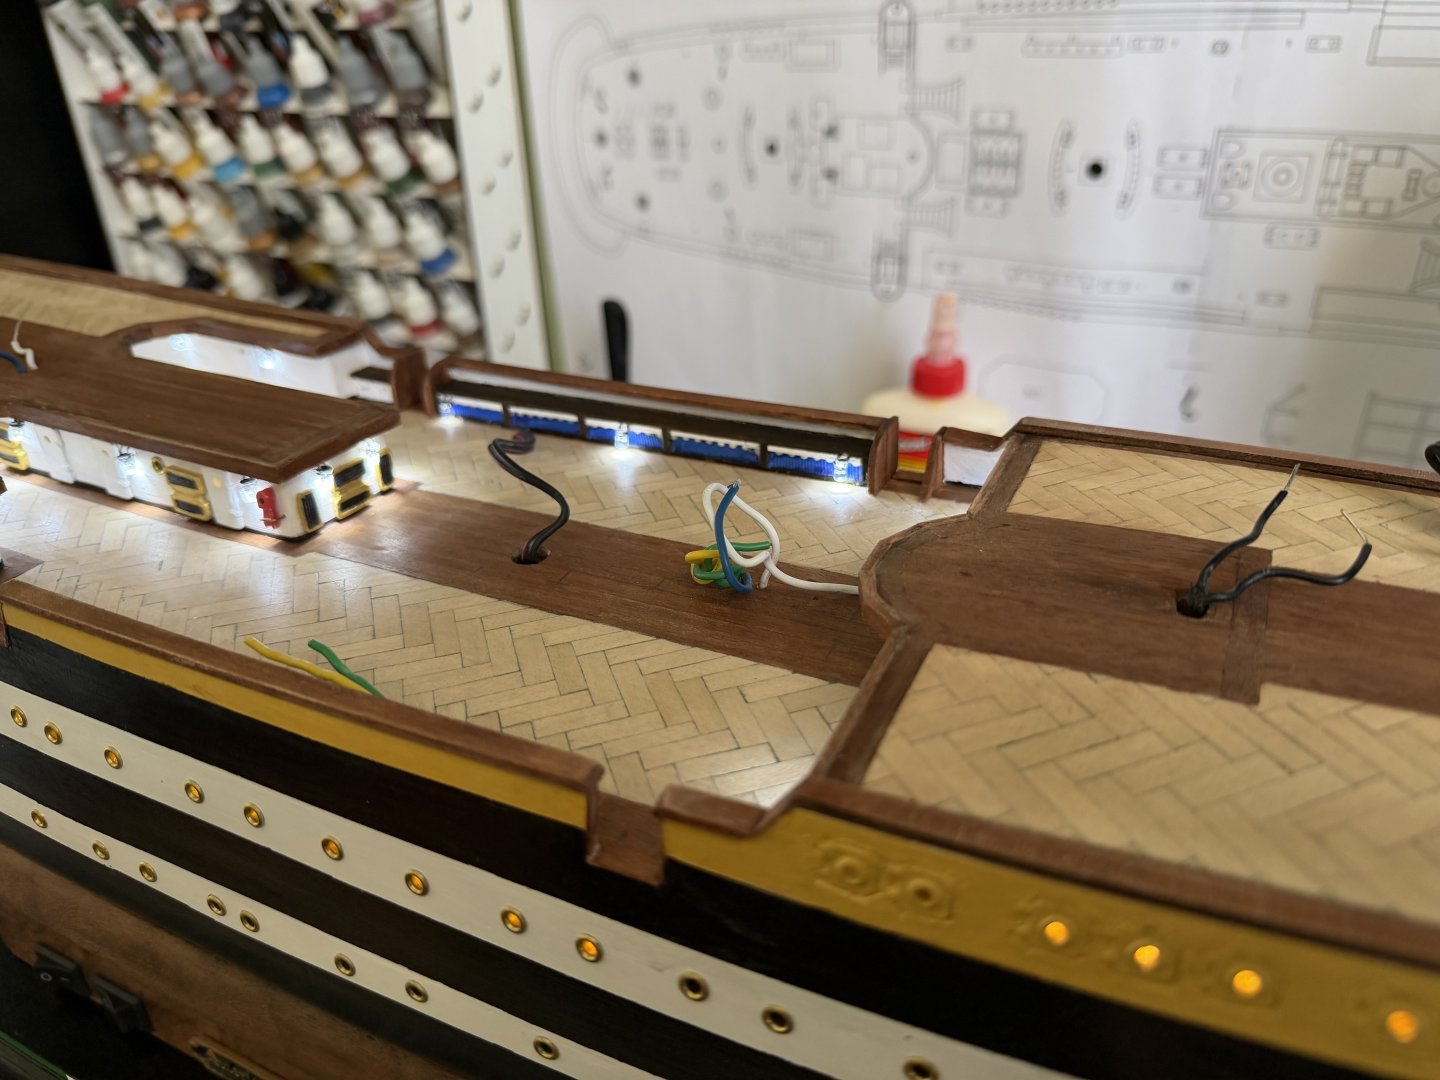
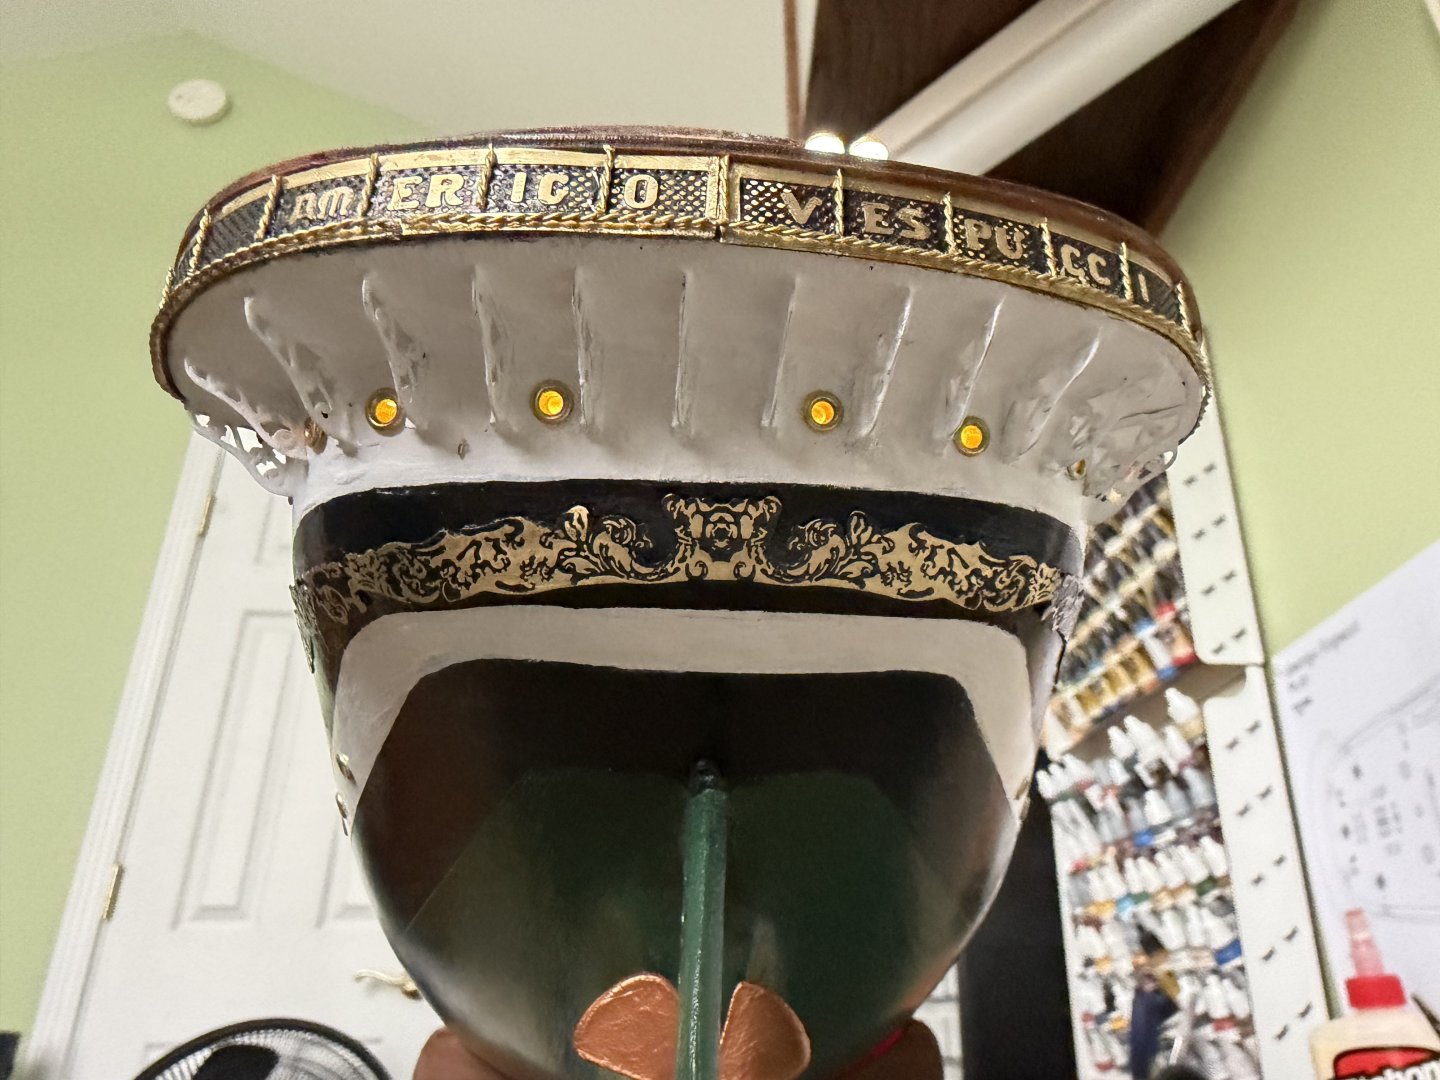
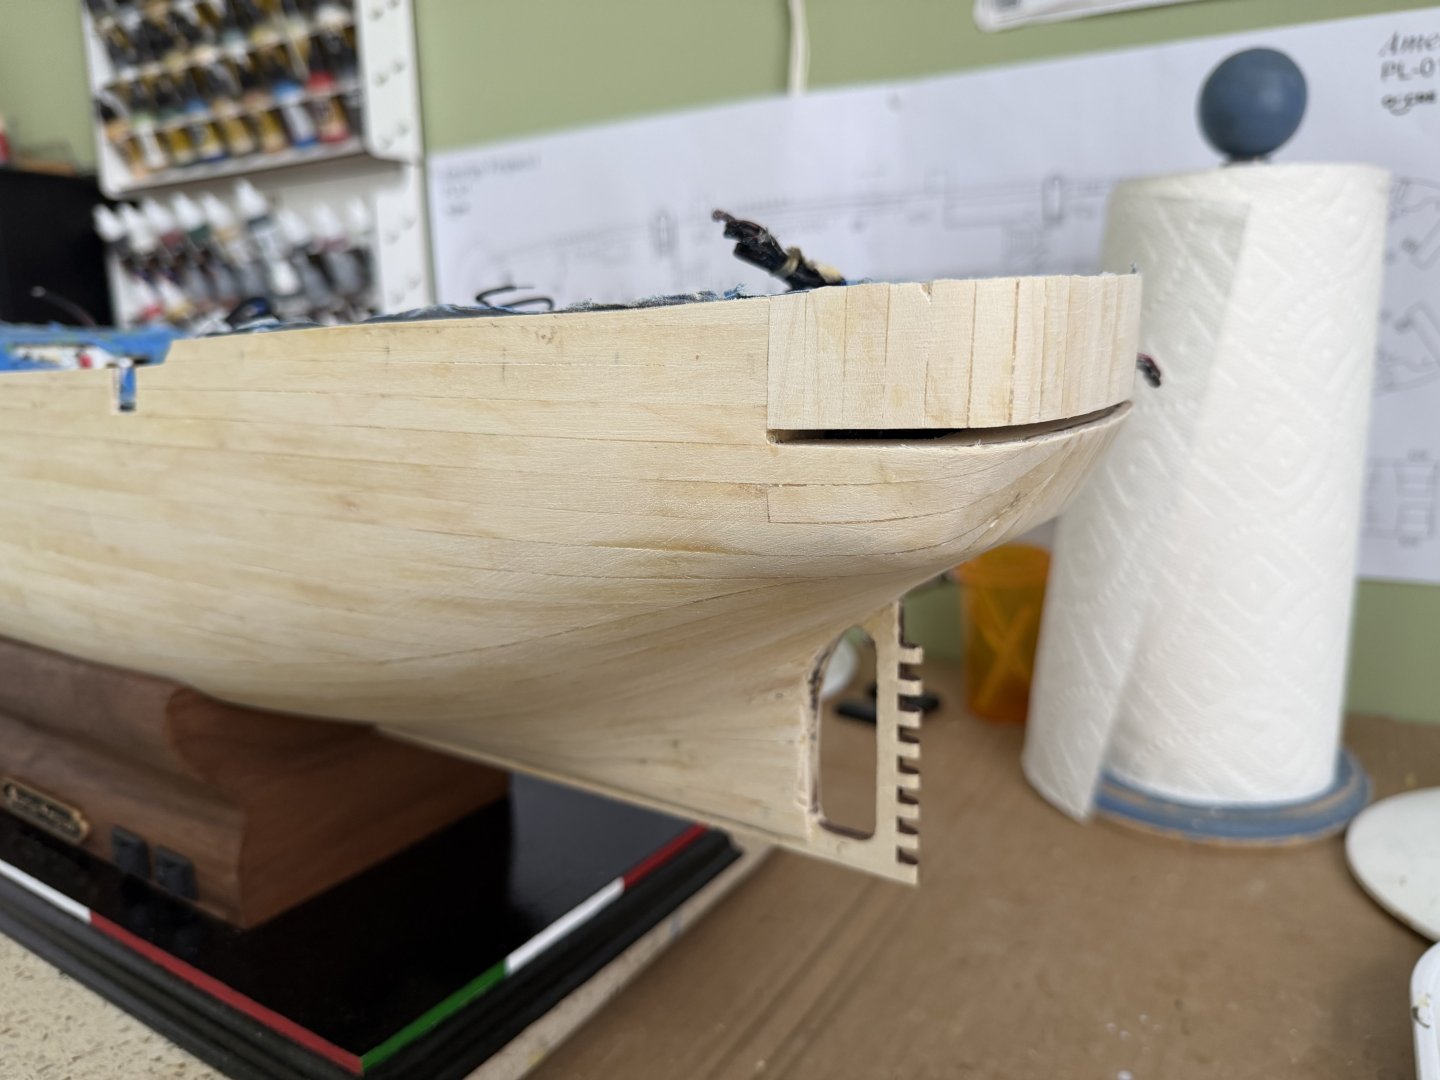
Spent the time since my last update working at the stern. I added the captains balcony, the supports under the balcony, doors, the navigation lights, the decorative balcony rail including the Amerigo Vespucci name, and the lower stern decorations.


-
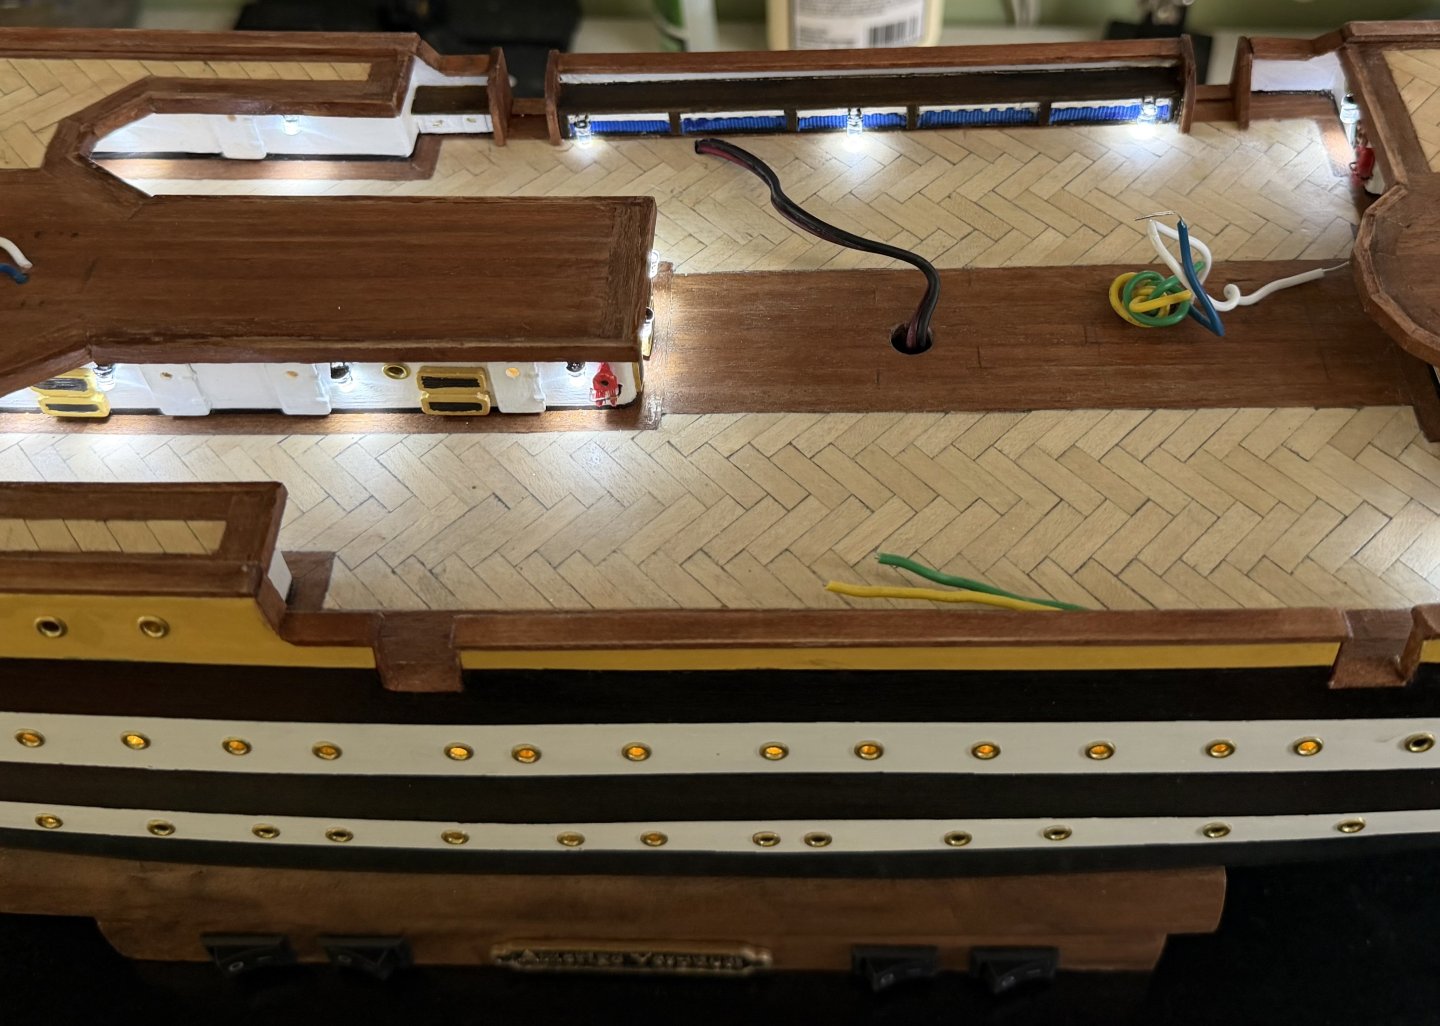
Added the trim along the top of the deck and touched up some paint here and there.


-
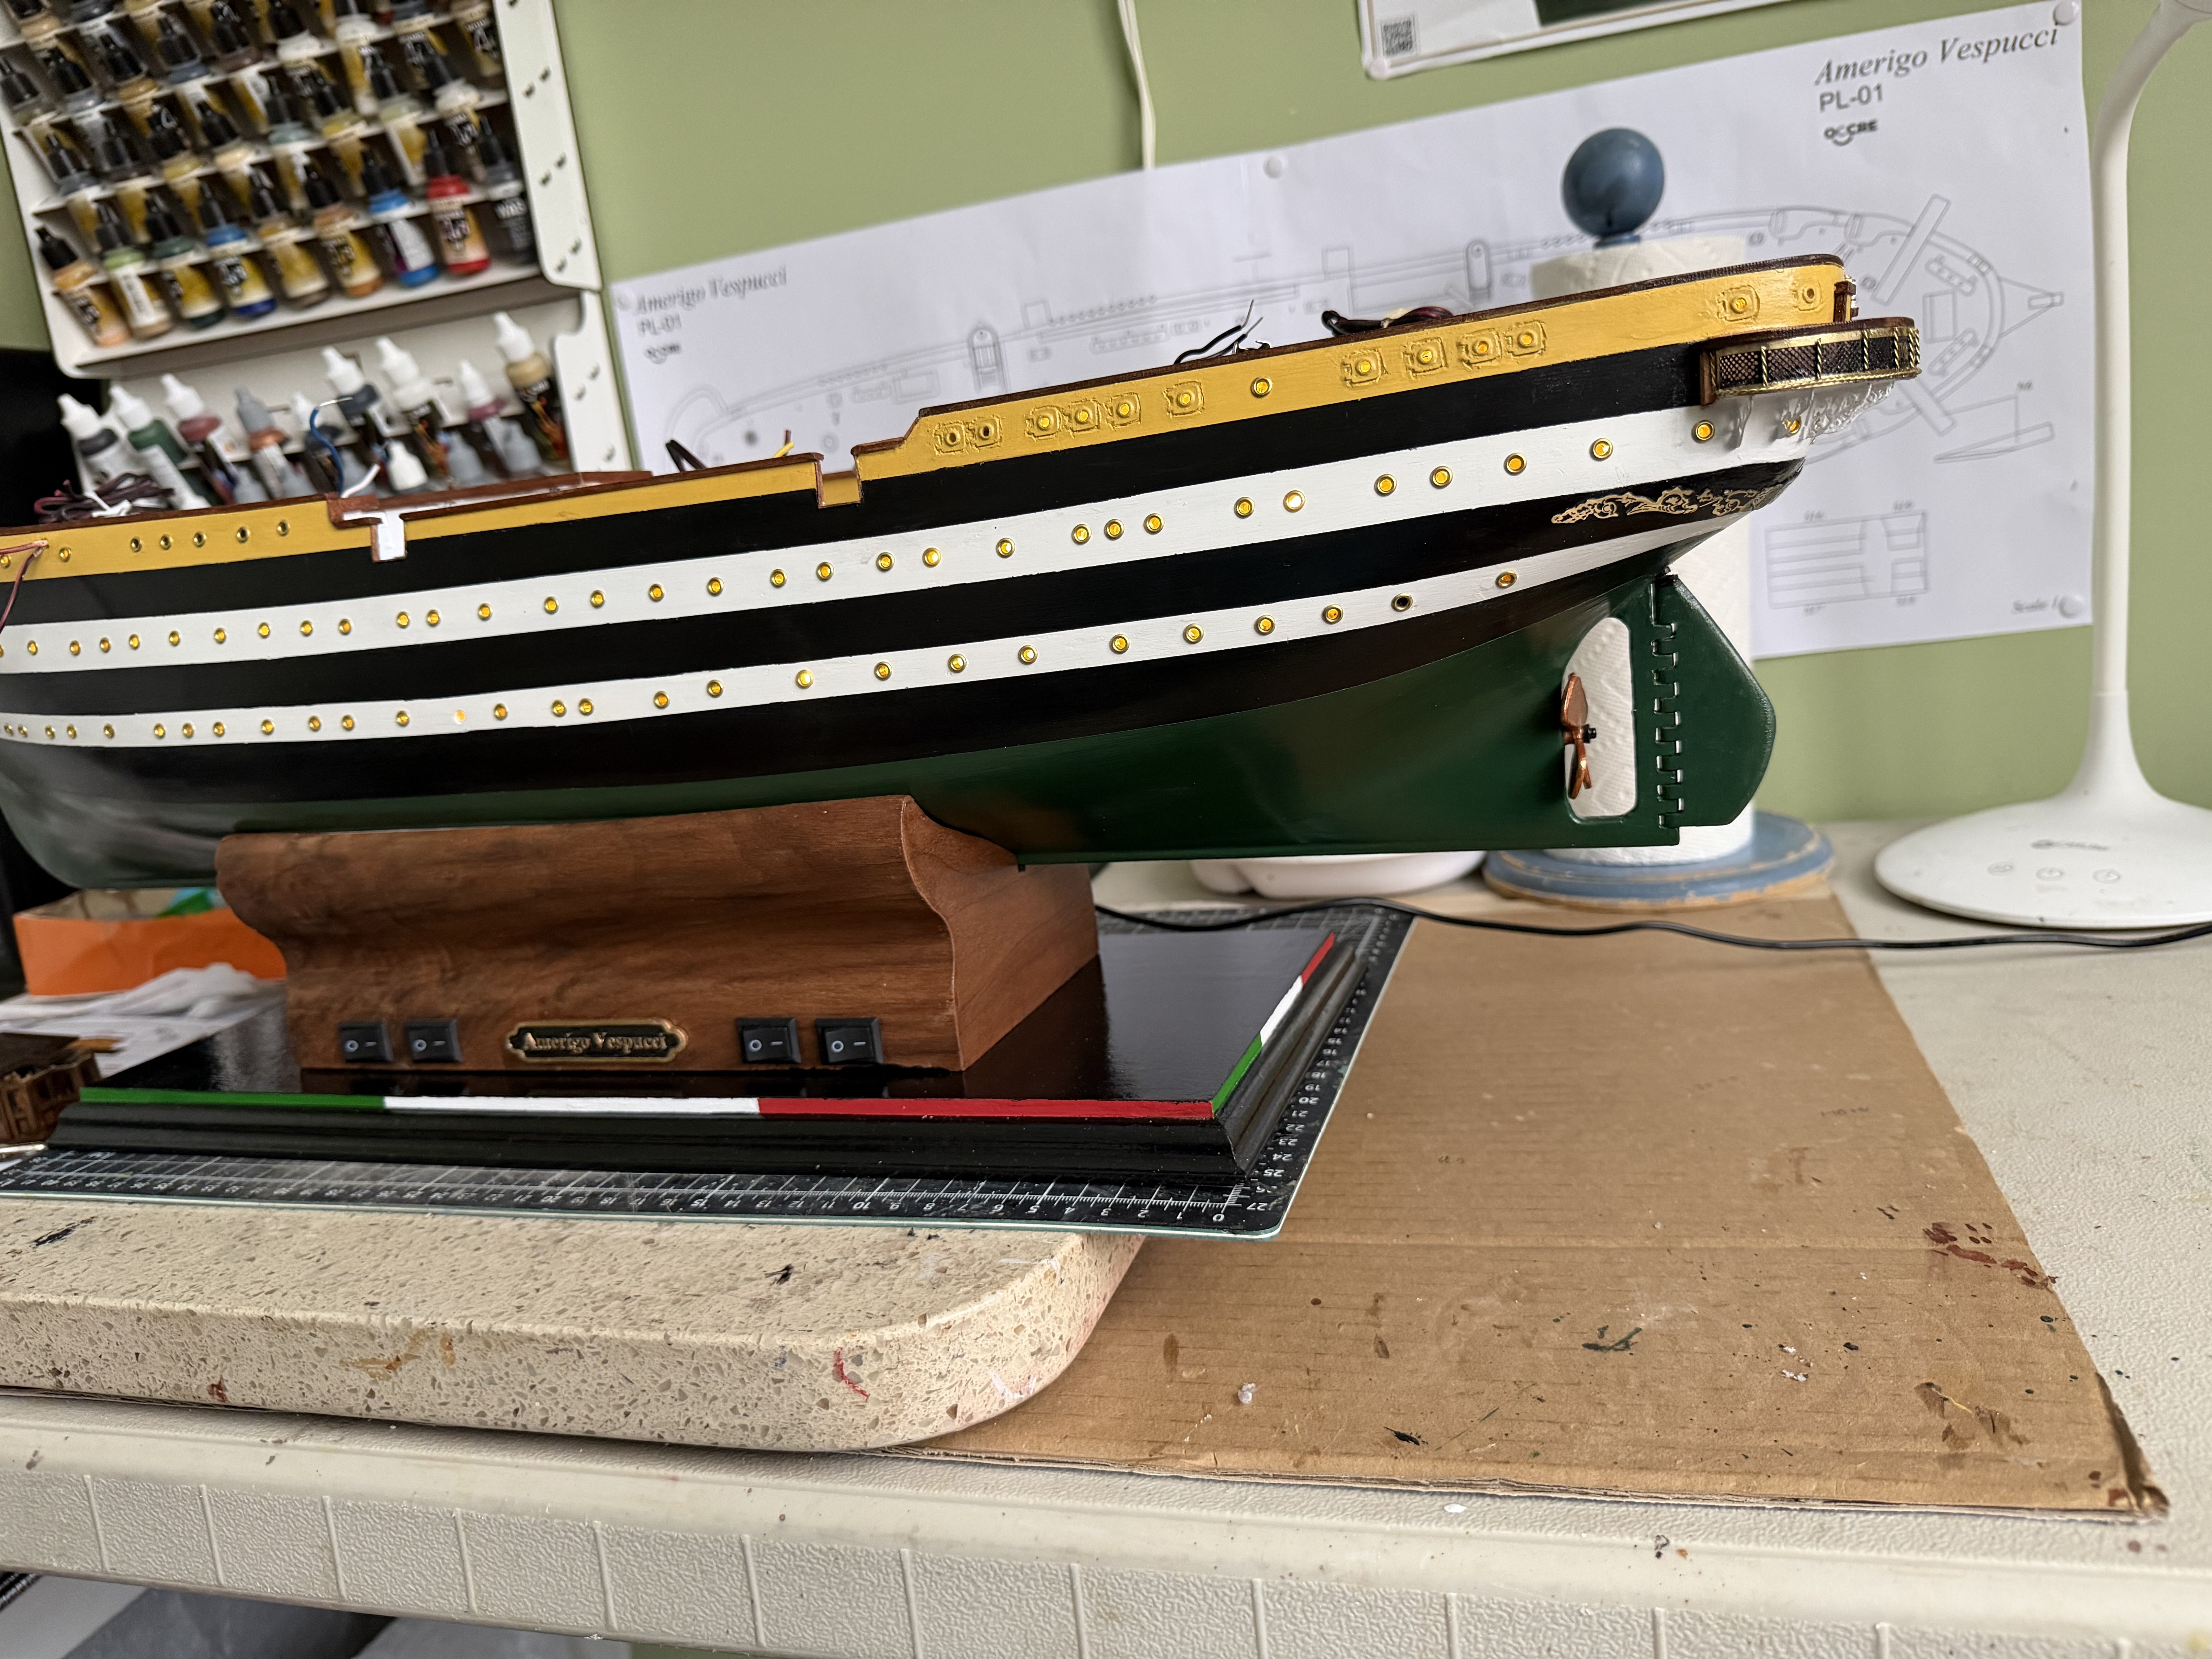
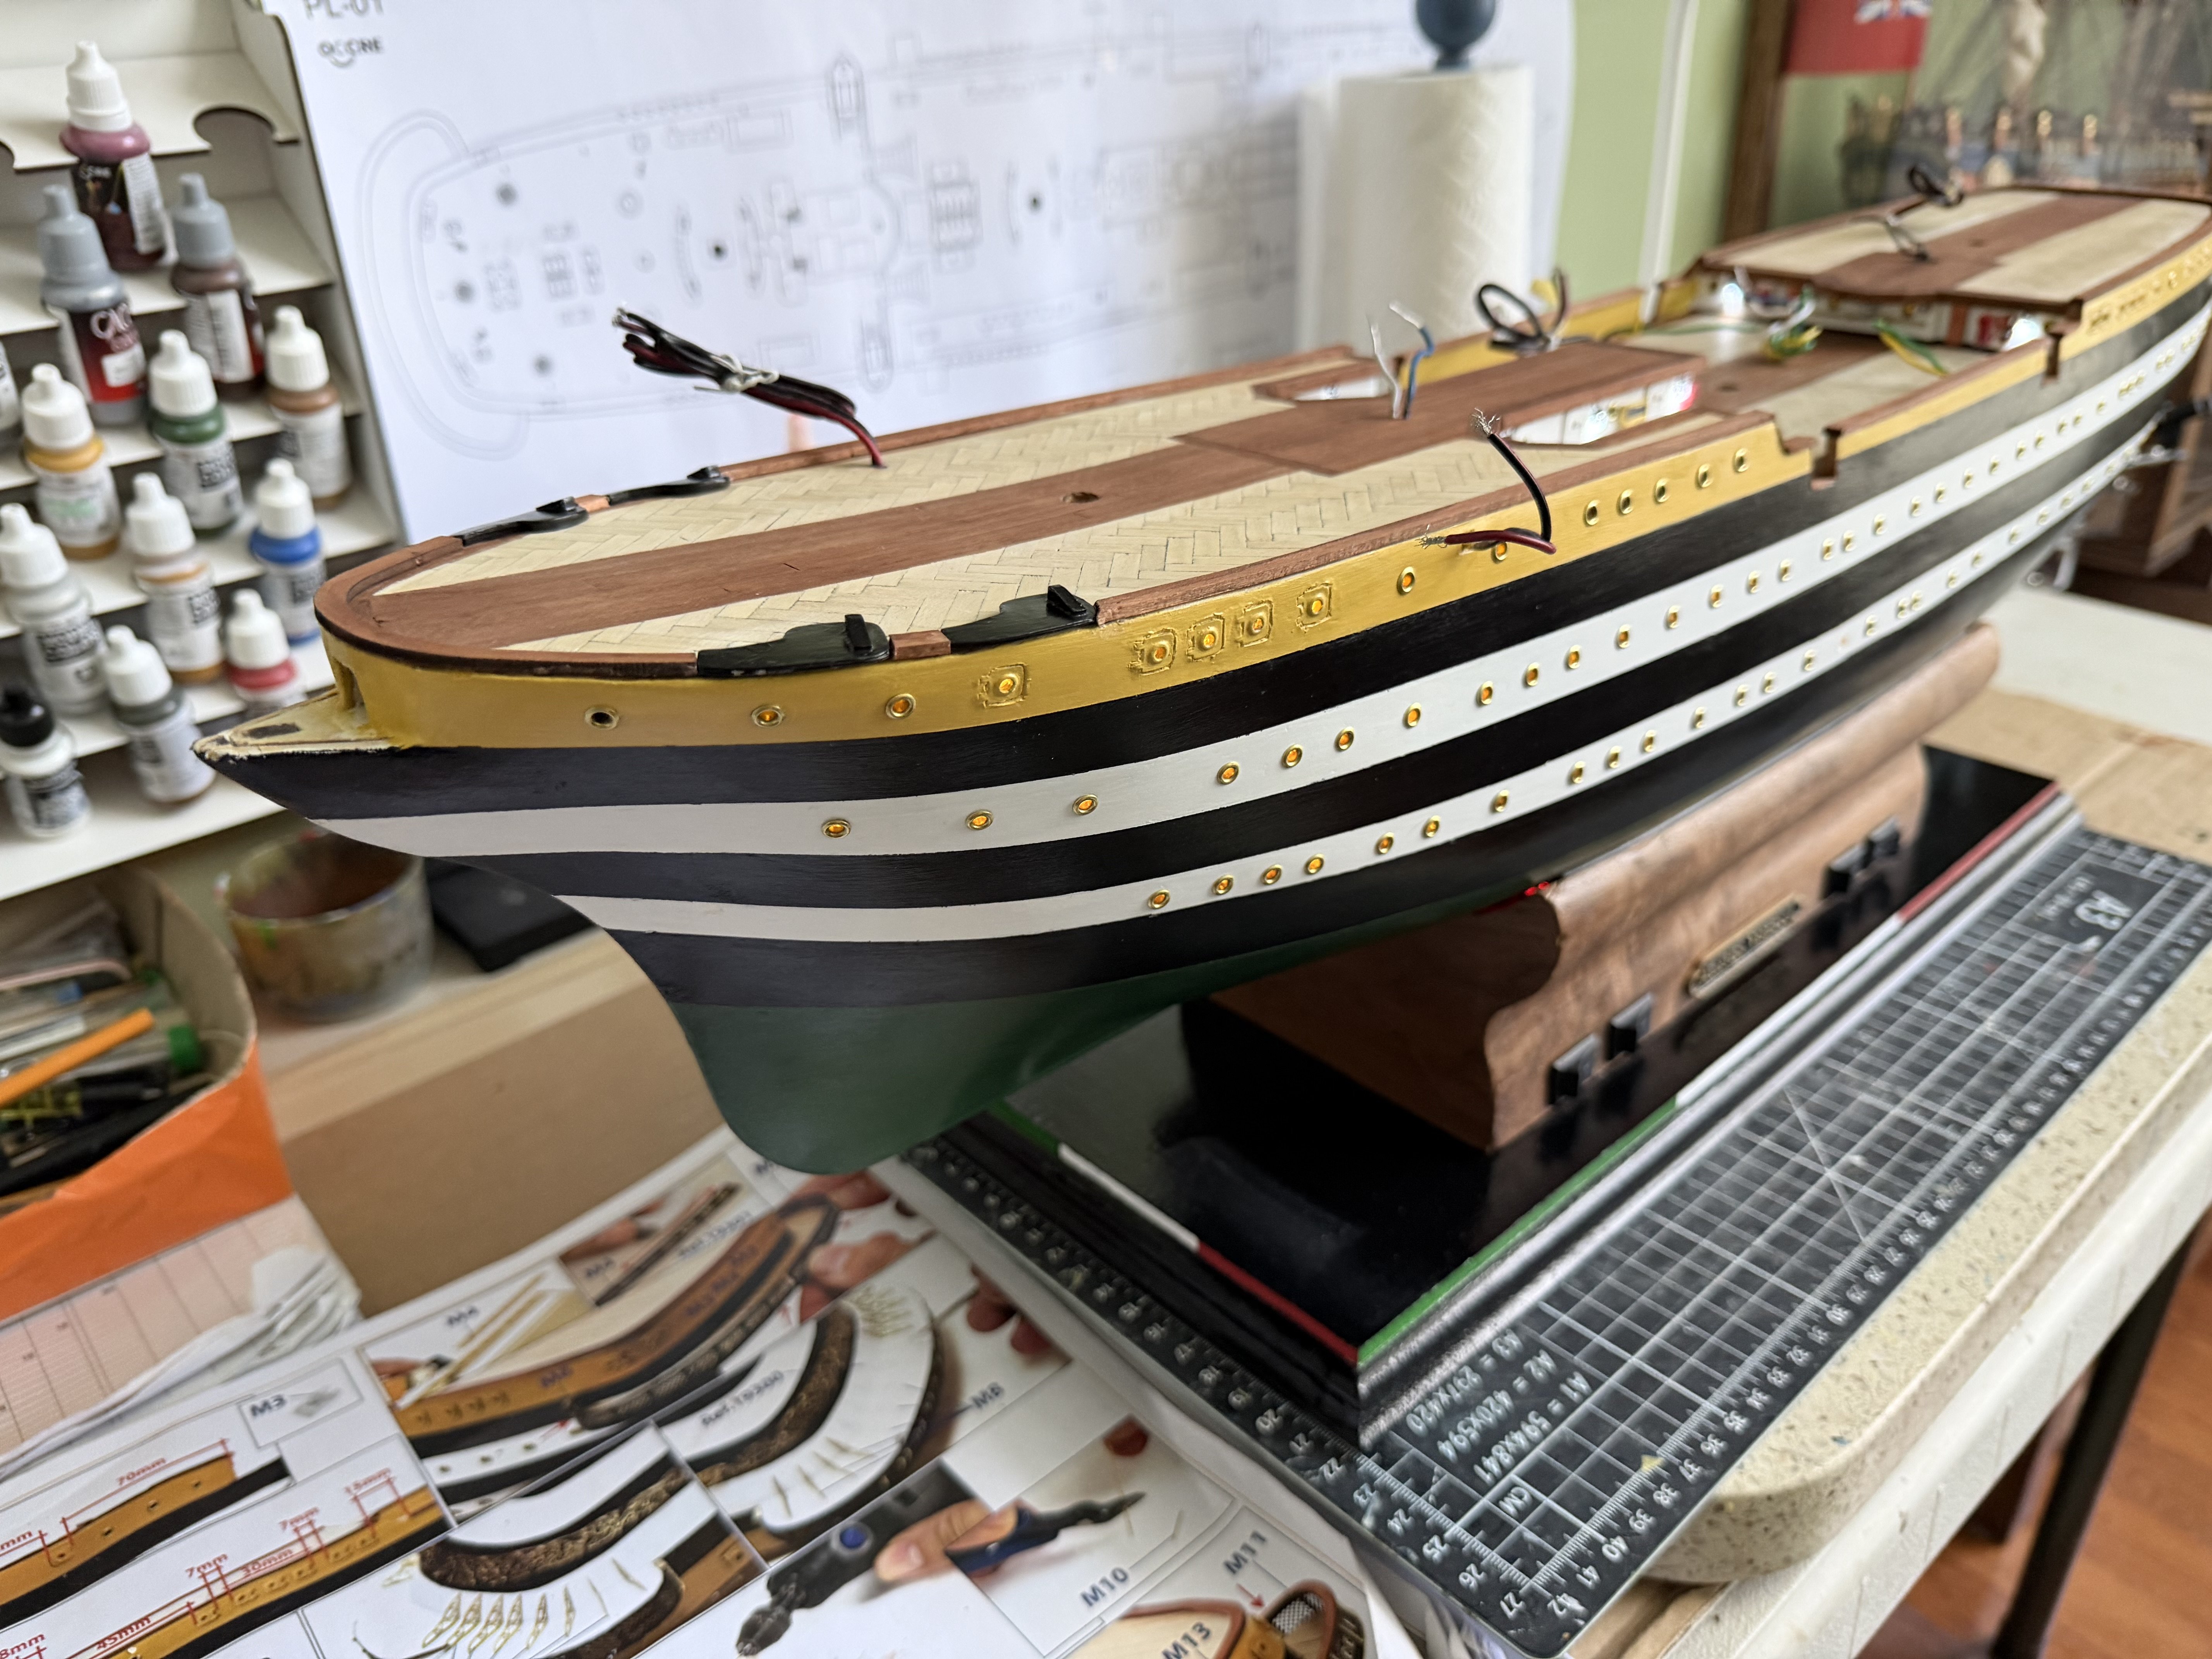
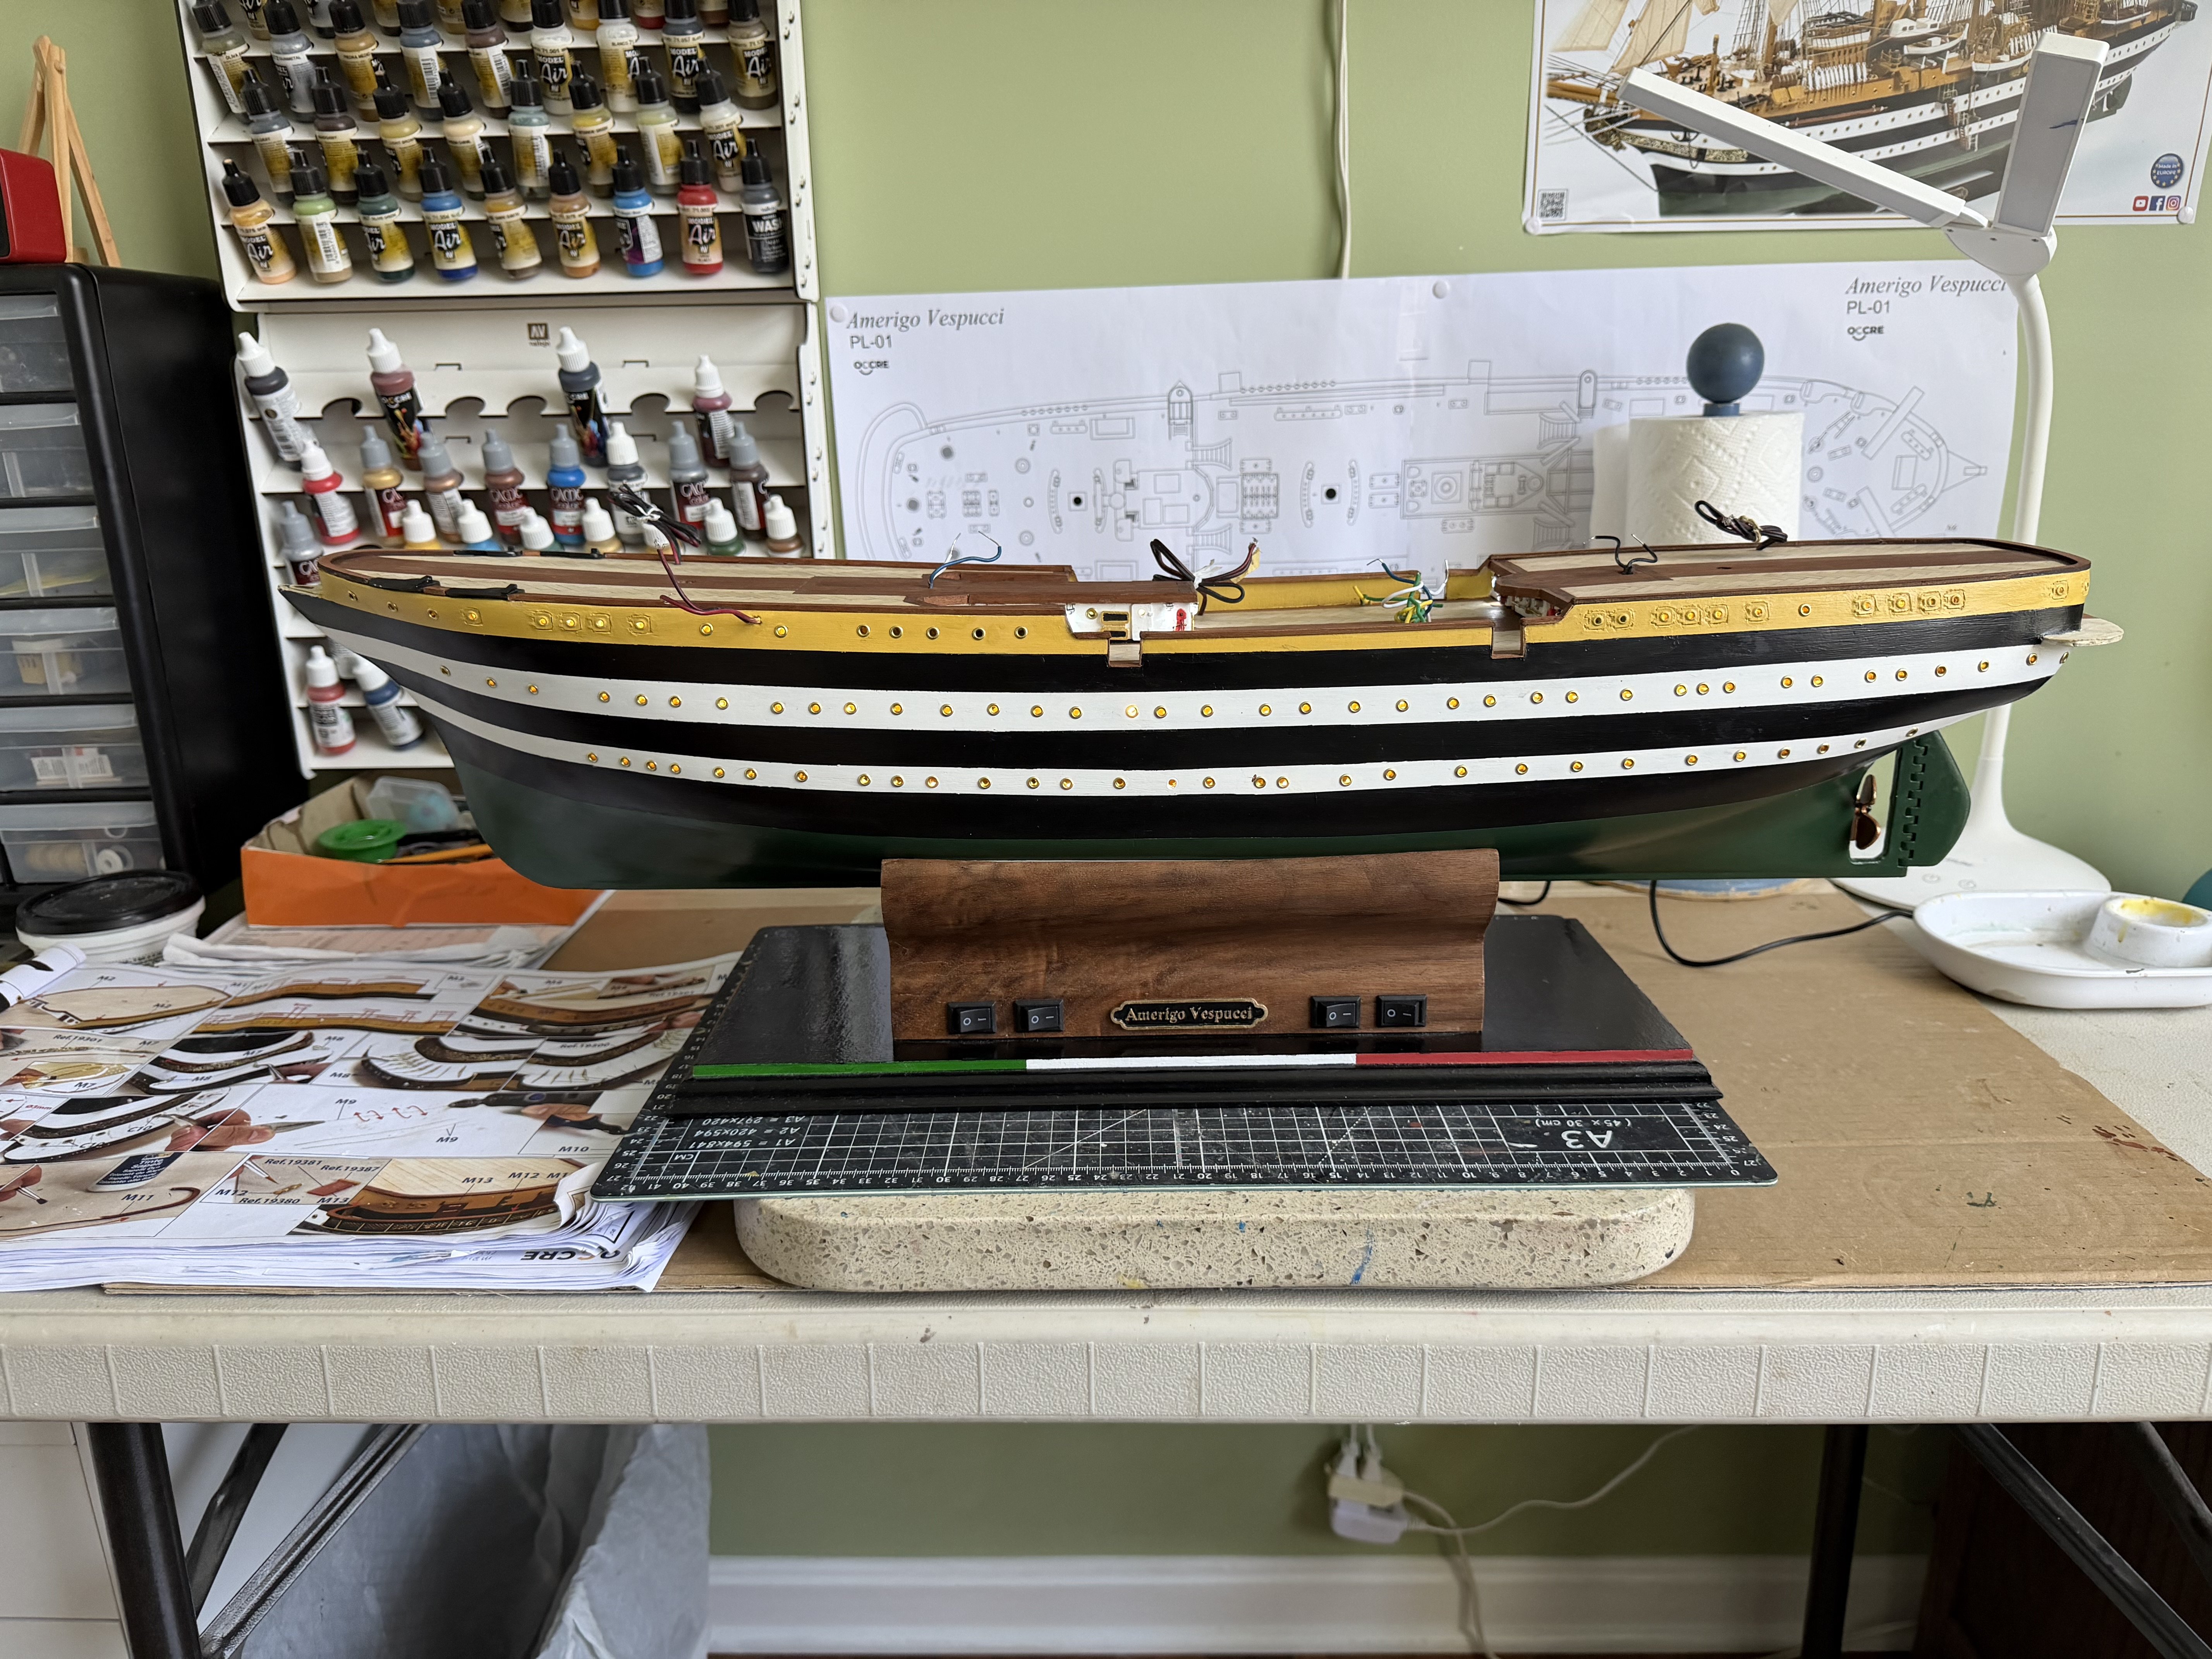
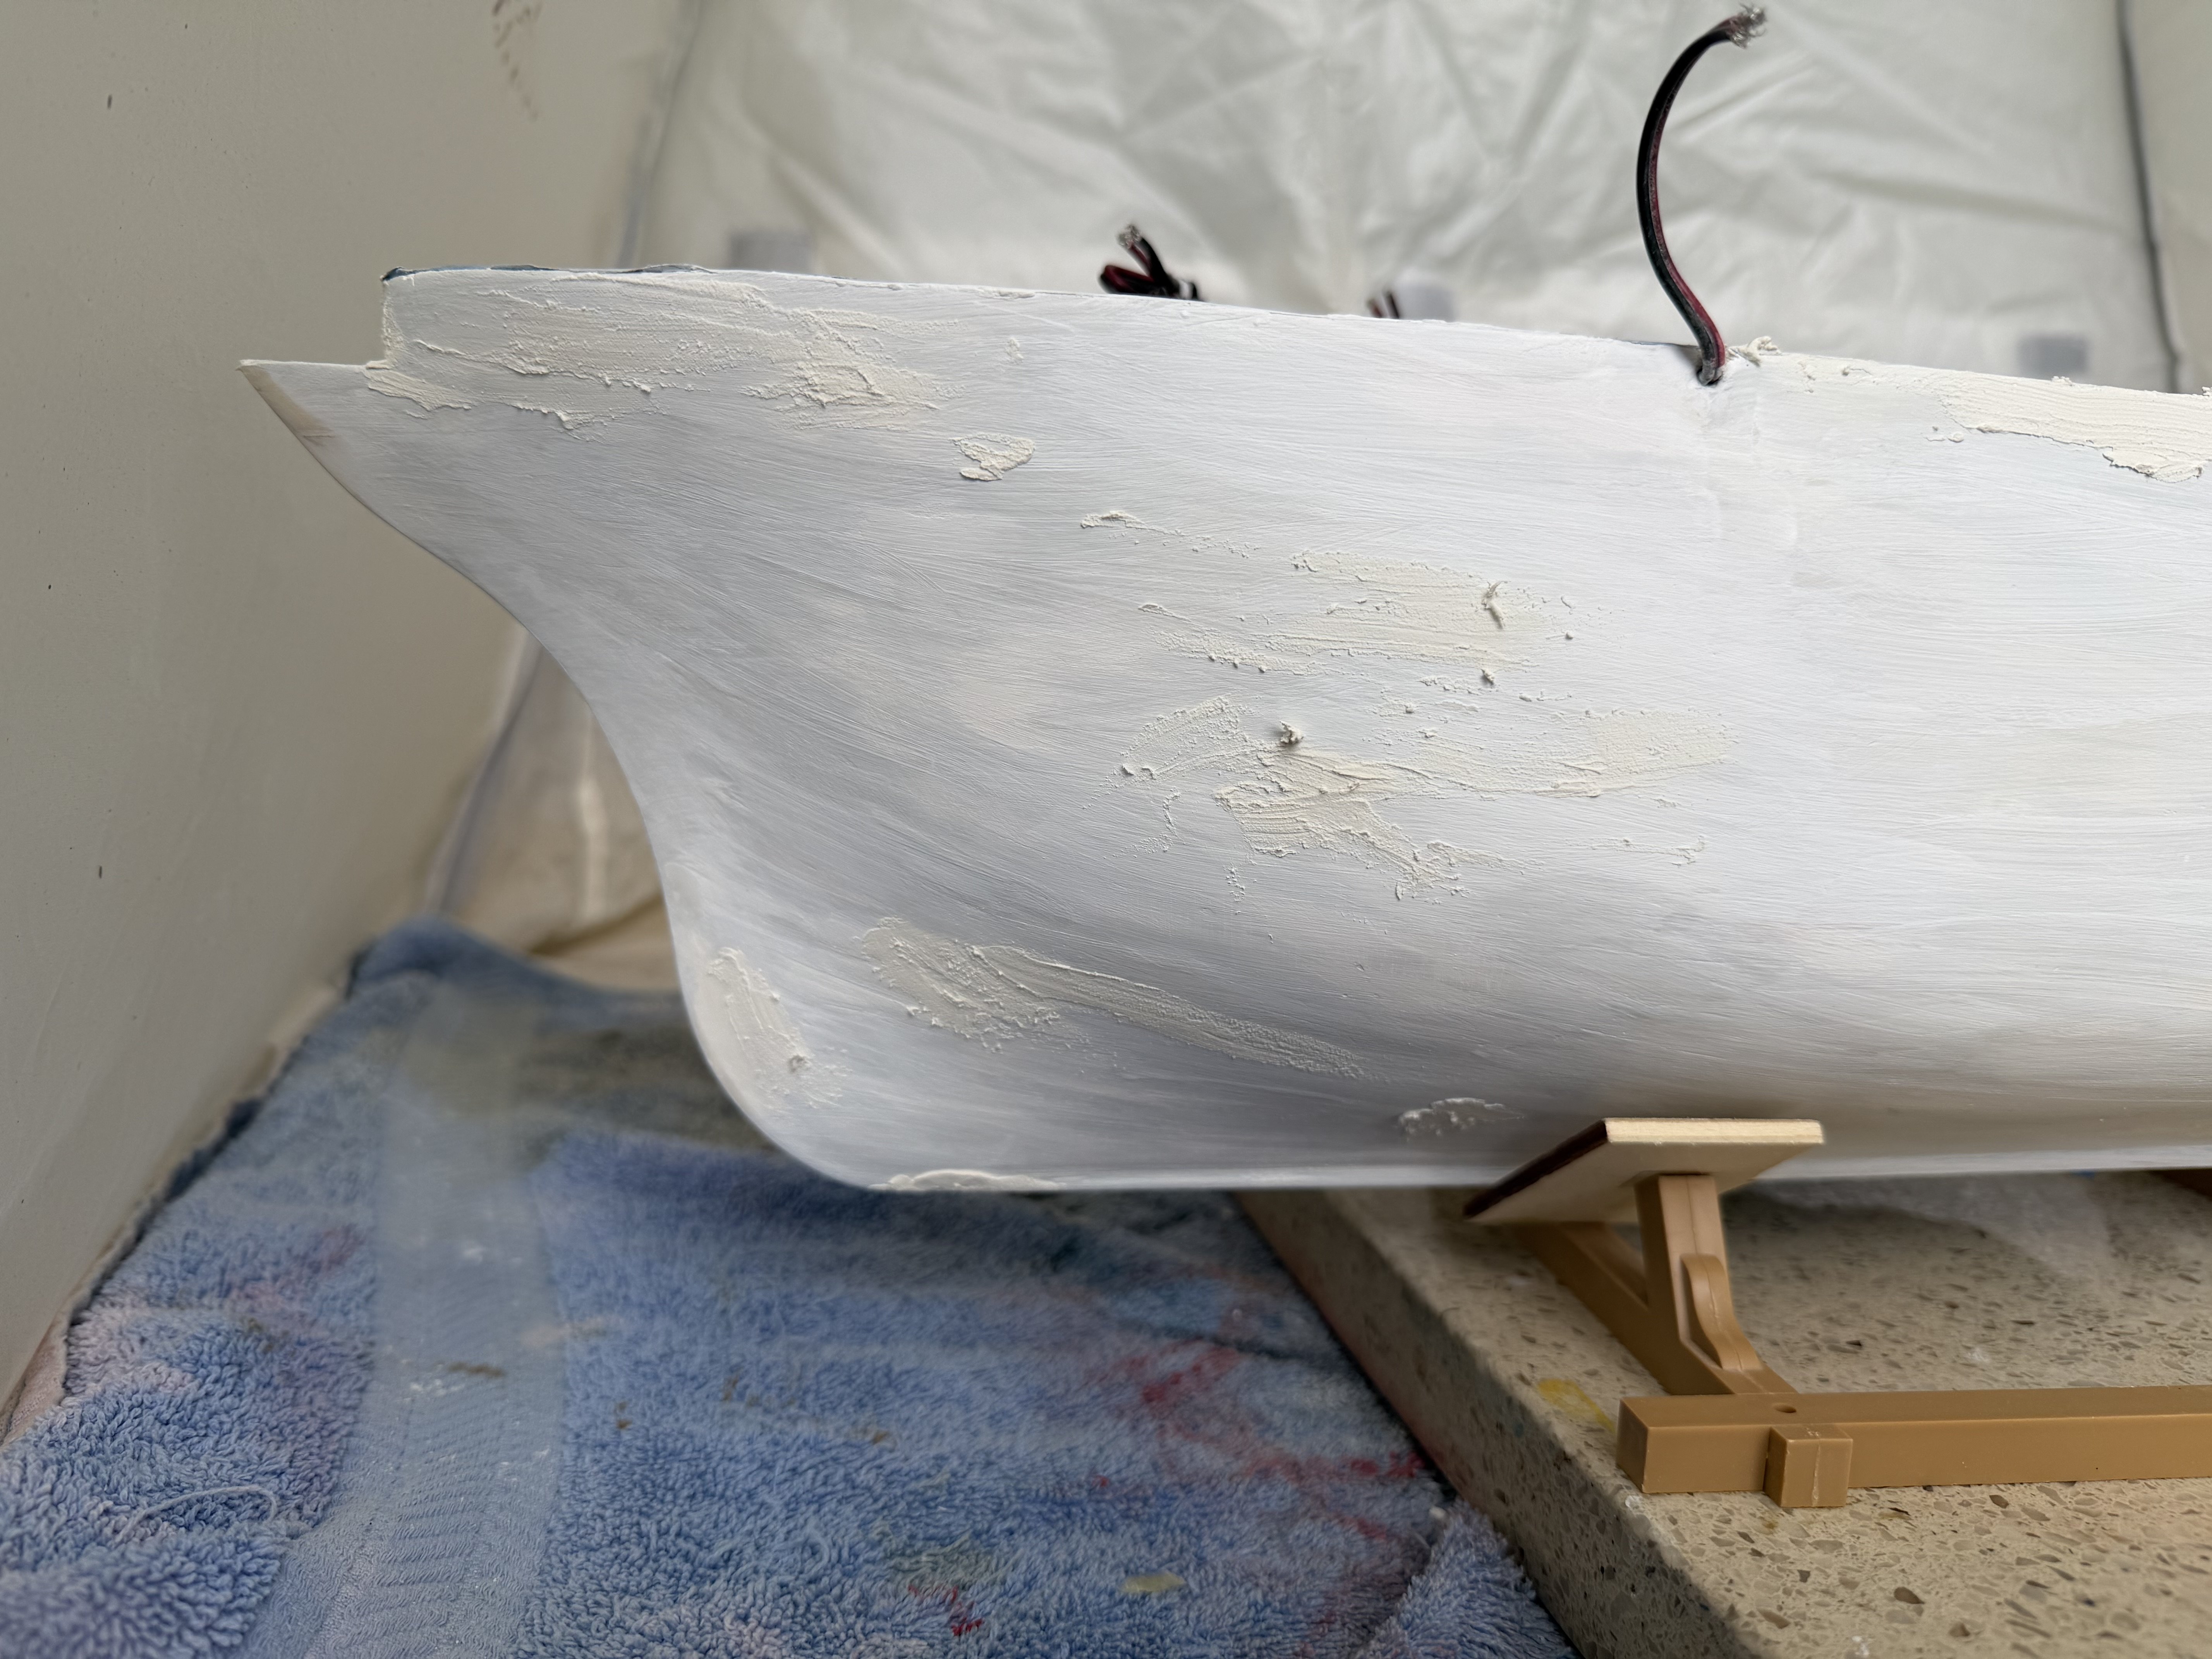
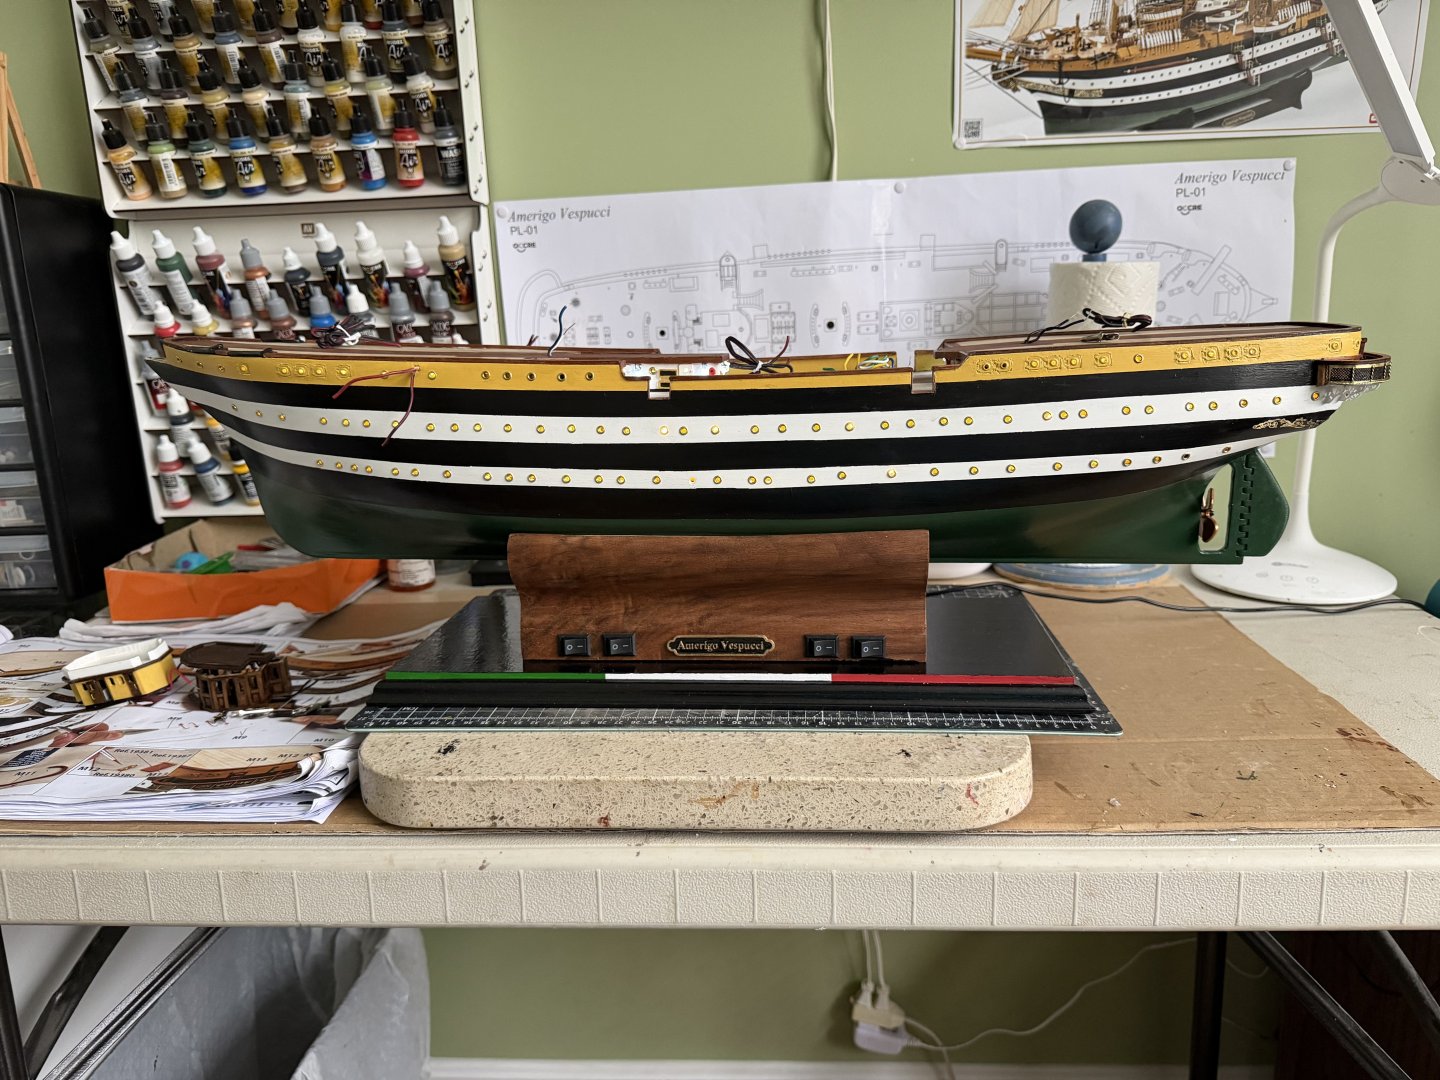
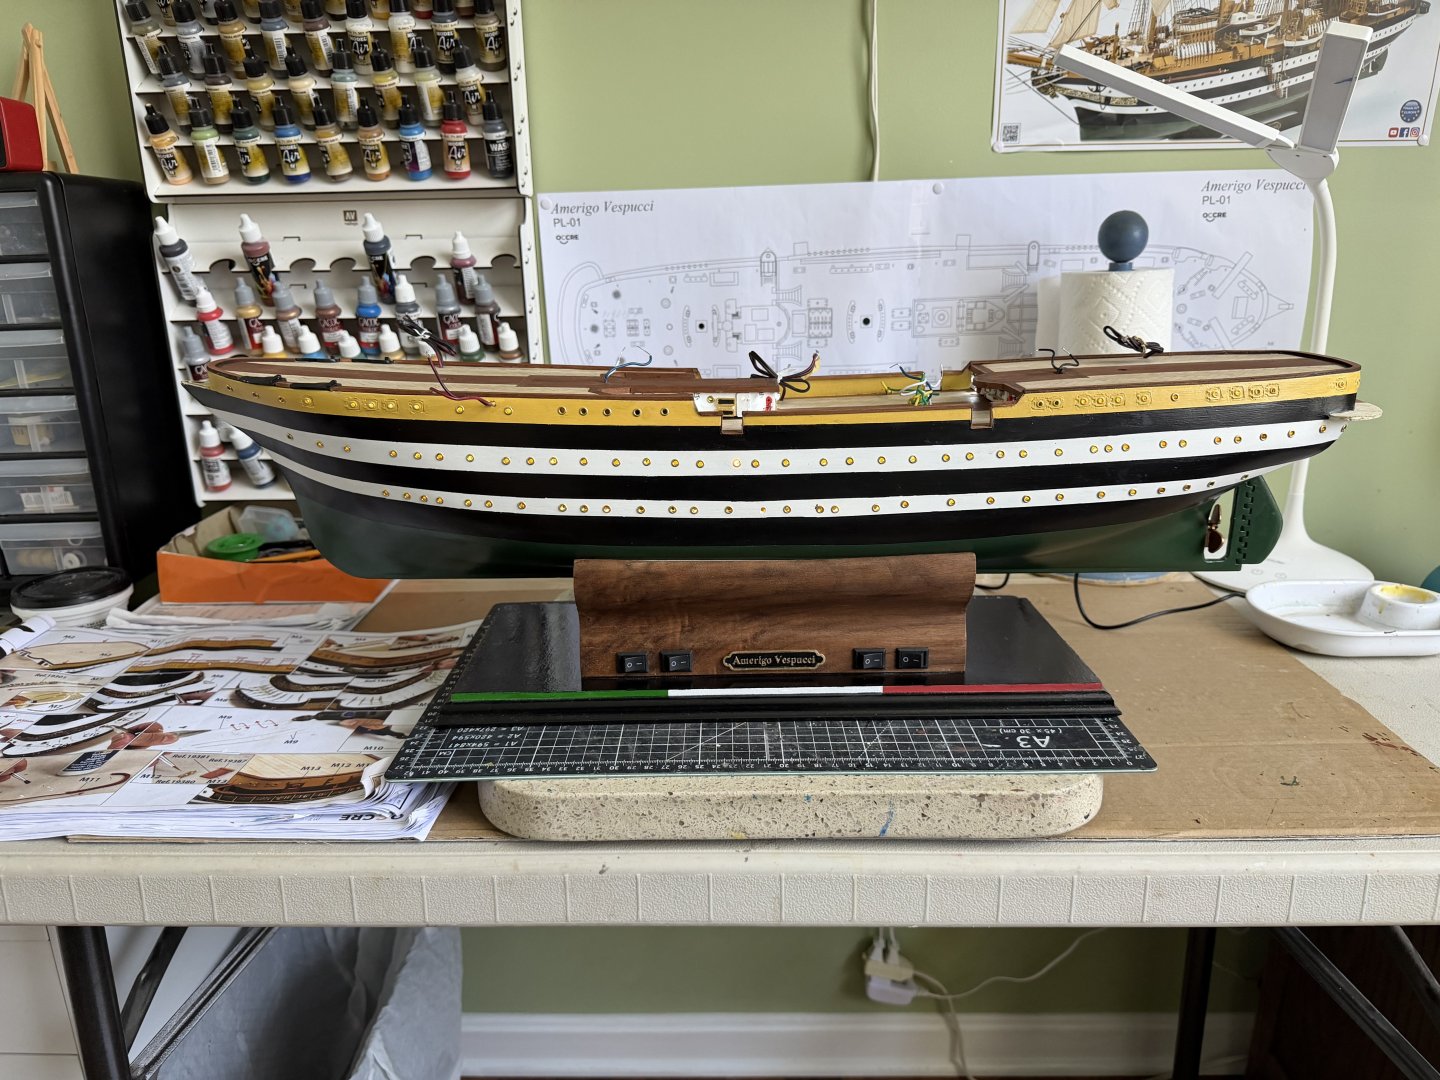
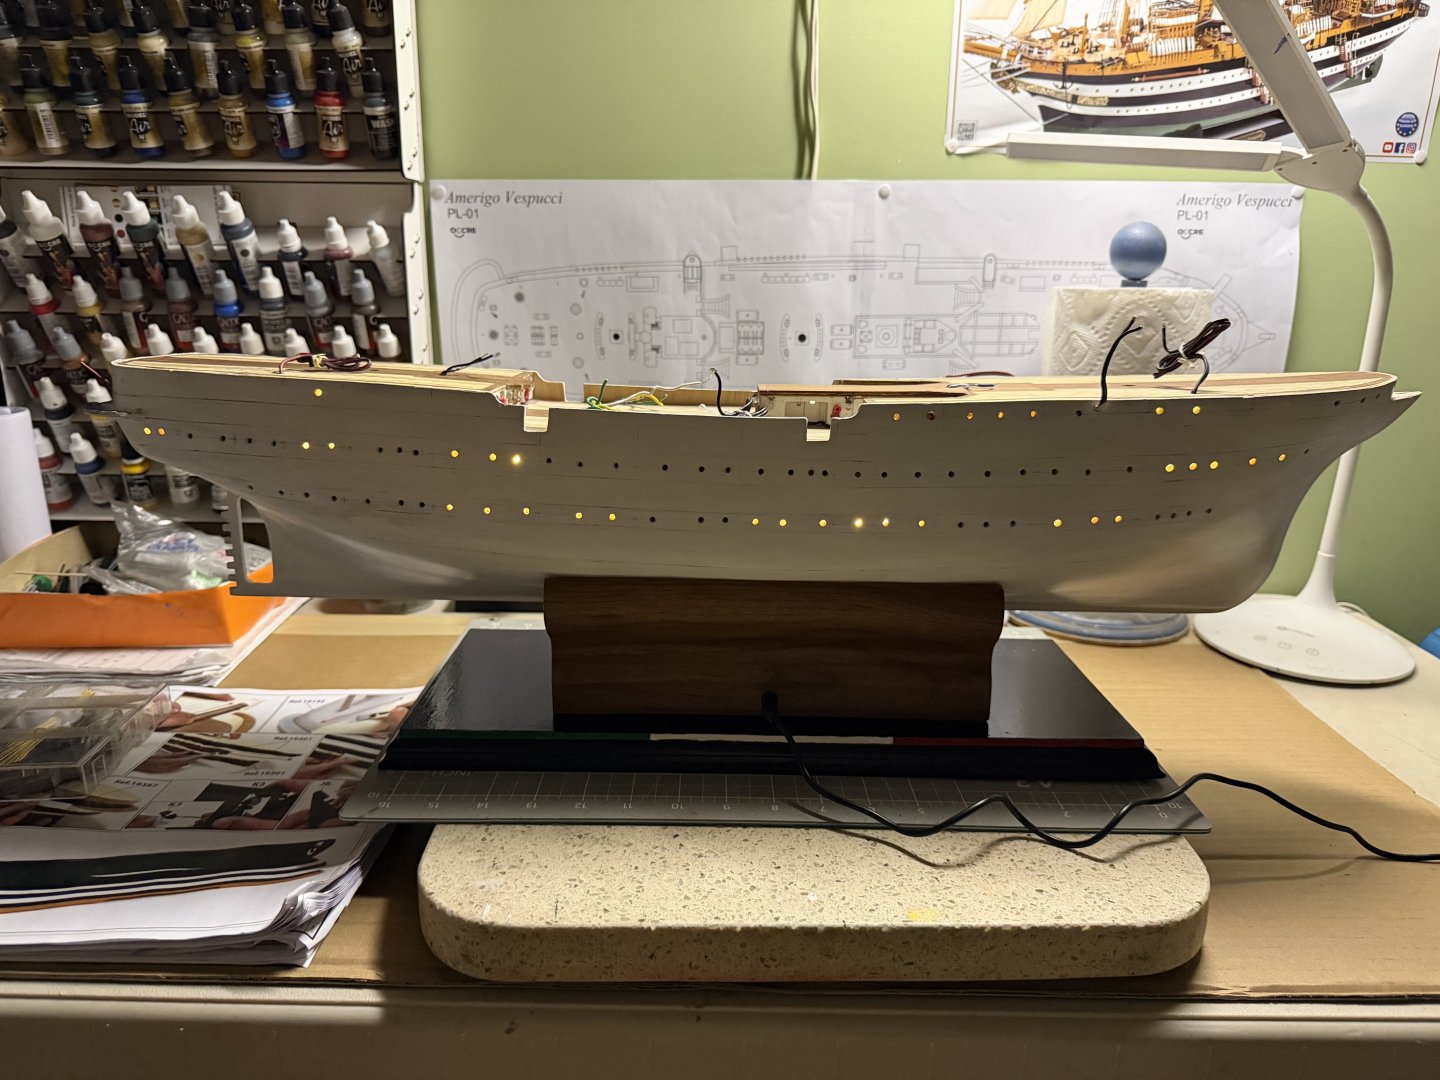
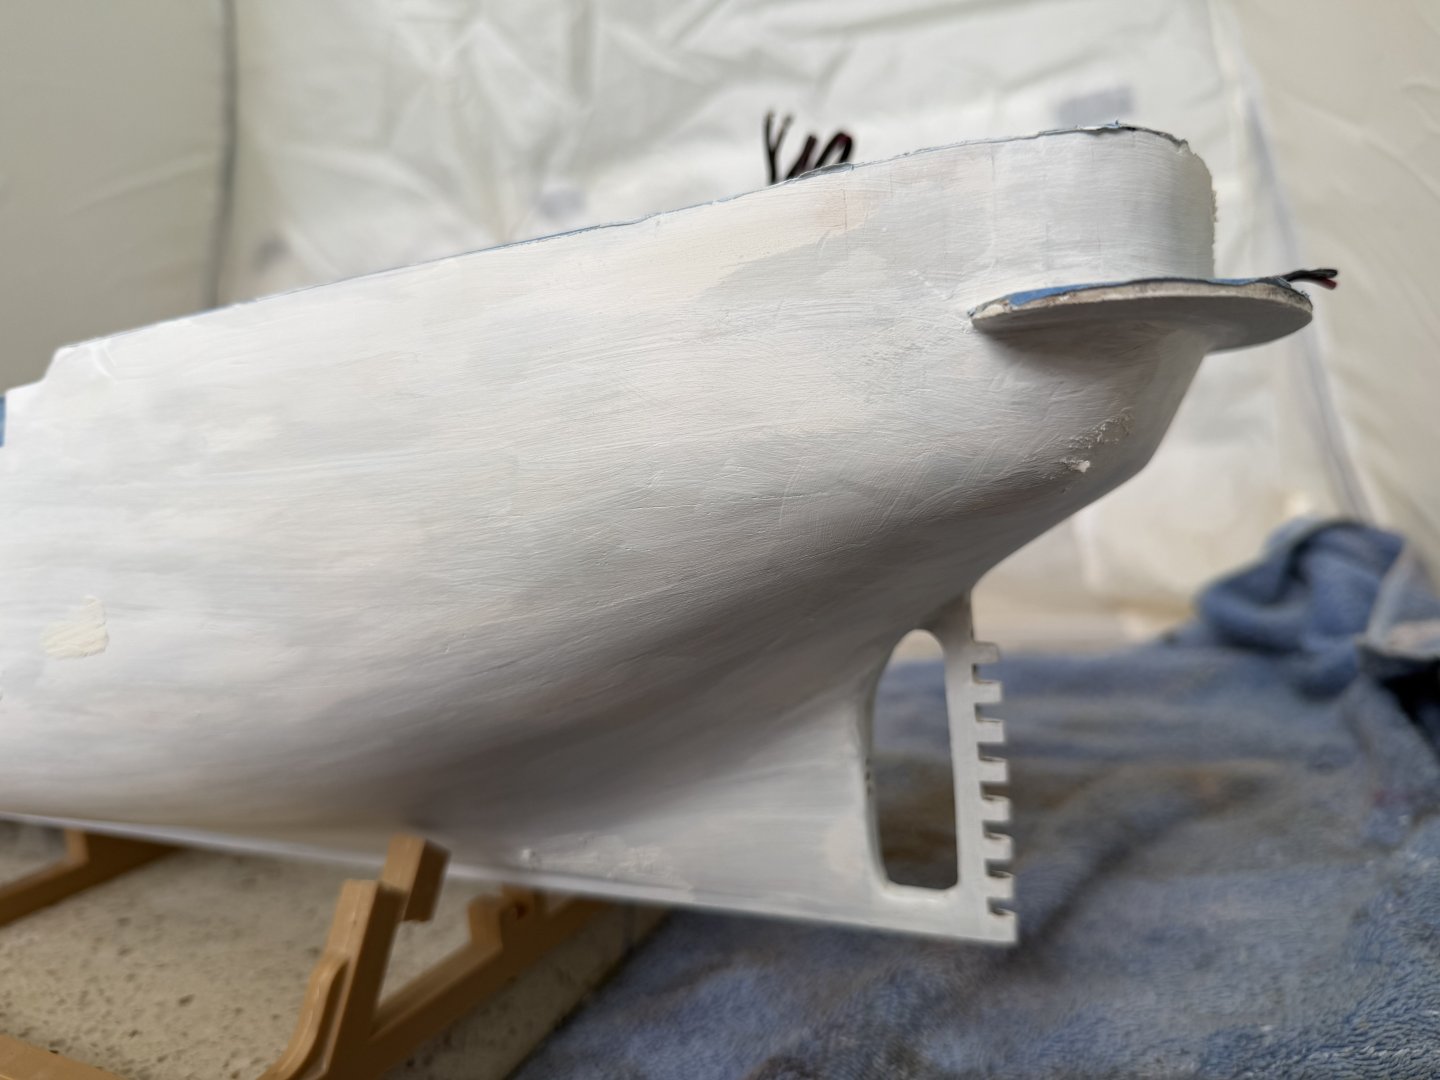
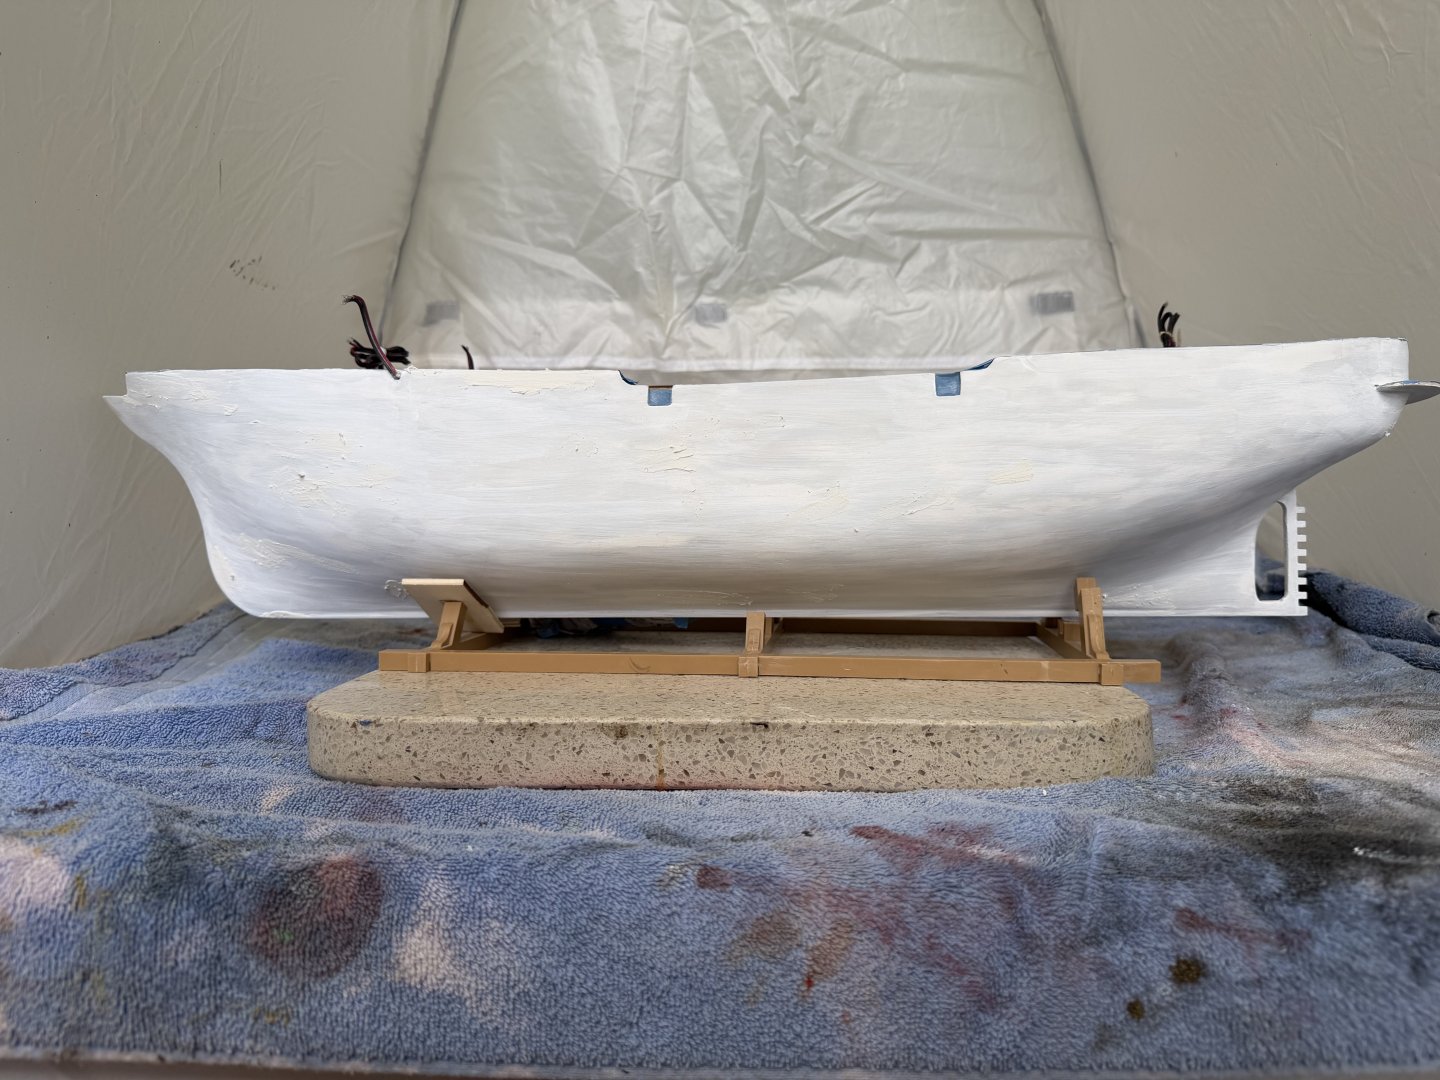
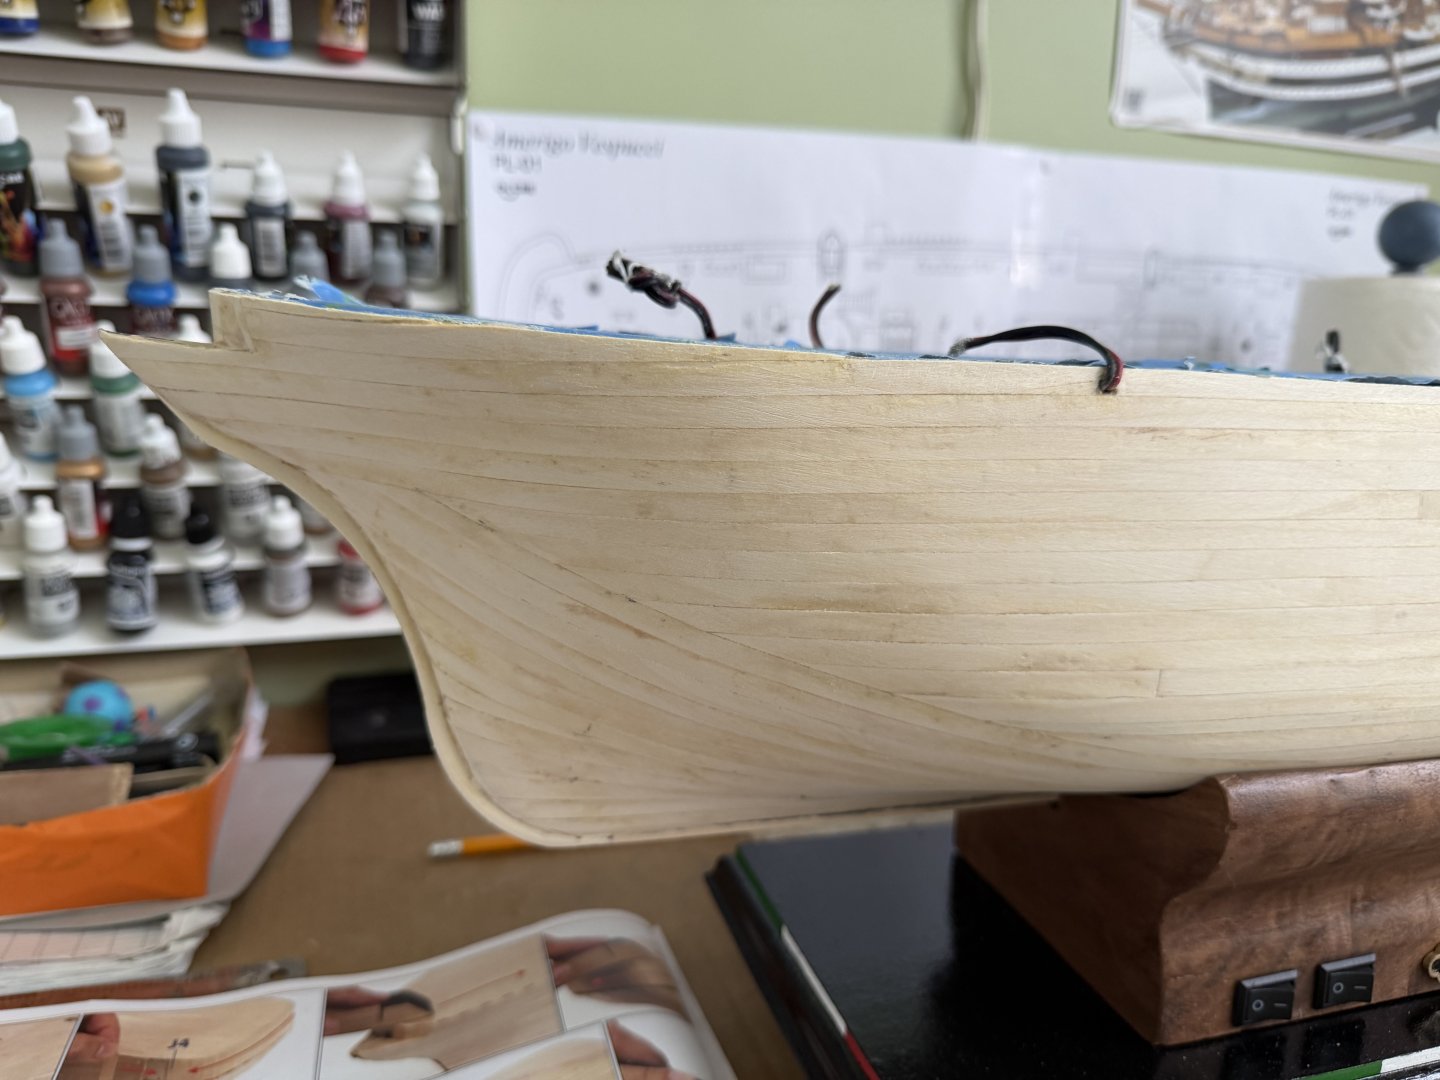
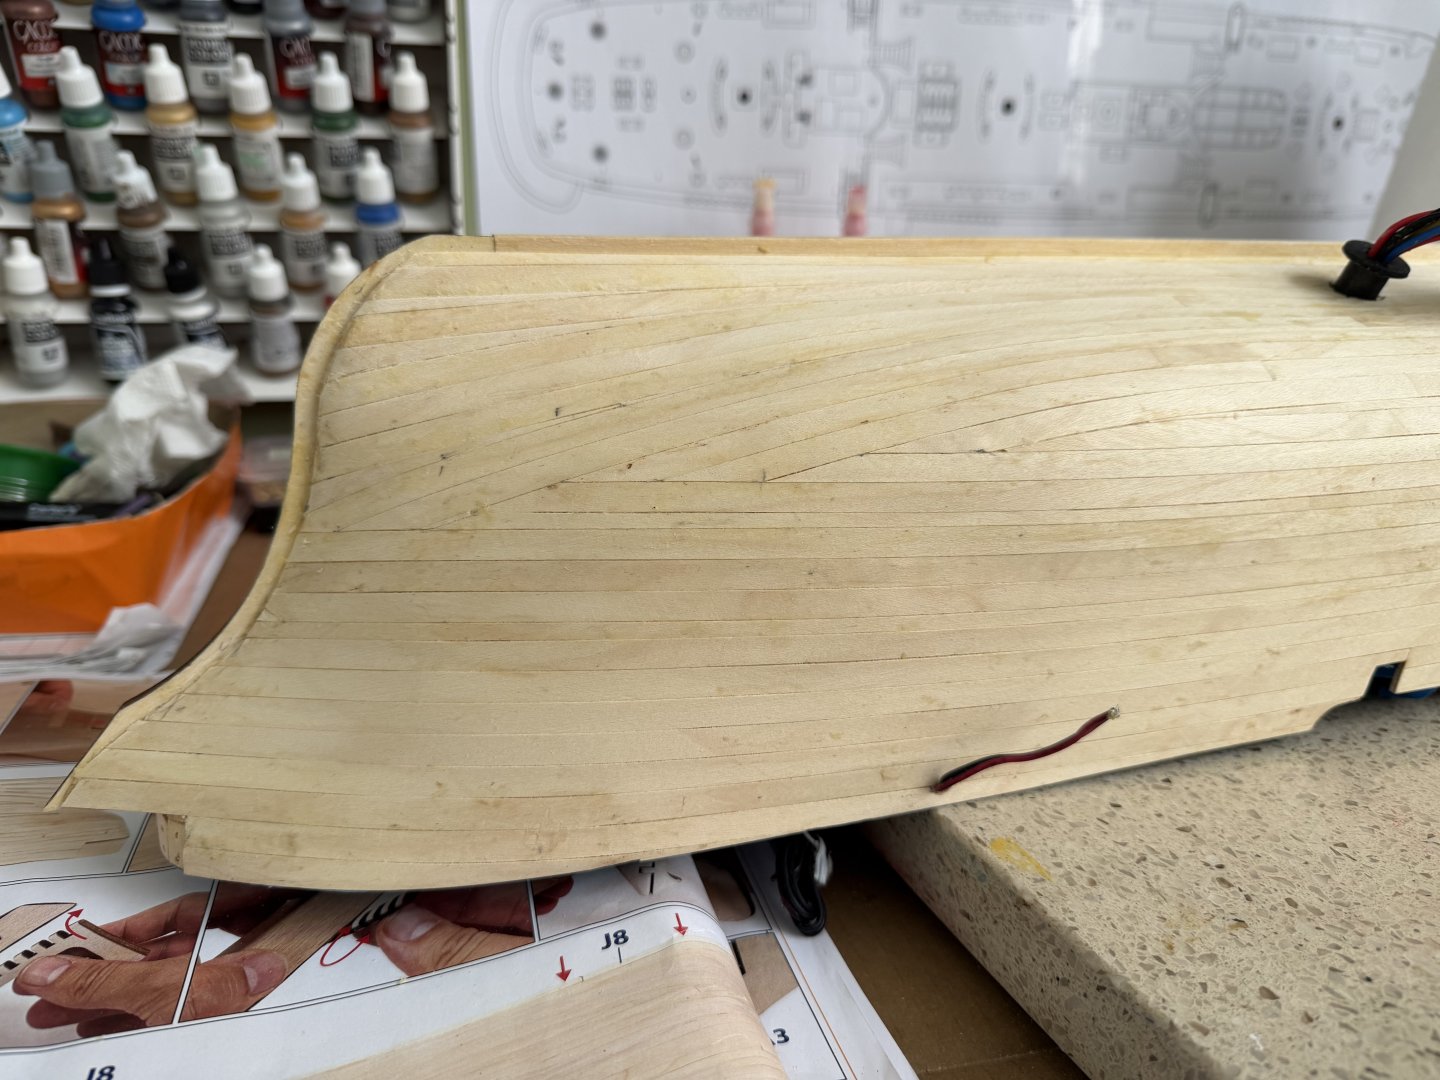
Ok my friends it has been a bit since my last update. Some big advancements since then. One problem I encountered, just like Daniel, when installing the “square” portholes is getting them to sit flush with the side of the ship. On the actual ship these portholes are flush but the kit supplied metal pieces are to be just glued to the side. I wanted them to light up along with the other portholes as well so have the holes drilled out. I ended up carving out the depth of the square port holes and set the pieces into the side of the hull. I then began the process of painting the four distinctive colors on the hull. A lot of masking and painting, masking and painting. I initially planned to airbrush the colors but eventually settled for using a brush. I added the brass port hole inserts. The actual ship has these painted the same as the stripe but I left them brass. I still have the OcCre green to add to the bottom of the hull and a bit of touch up to sharpen a few places on my lines. I also want to fine tune some of the painted square port holes to make them a bit more distinctive.


-
Marc reading your updates go great with my morning coffee next to the fireplace. They also give me inspiration for when I go into my shipyard. Incredible work my friend

- 2,699 replies
-
- 3
-

-

-
- heller
- soleil royal
- (and 9 more)
-
Yeah I followed your advice to do that from reading your build. I must not have gotten a good coat on that back inch or two on the stern deck area. I thought about overlaying the deck planks with another layer in that section but think it might show that slight edge difference. Will decide if it matters to me that much.
-
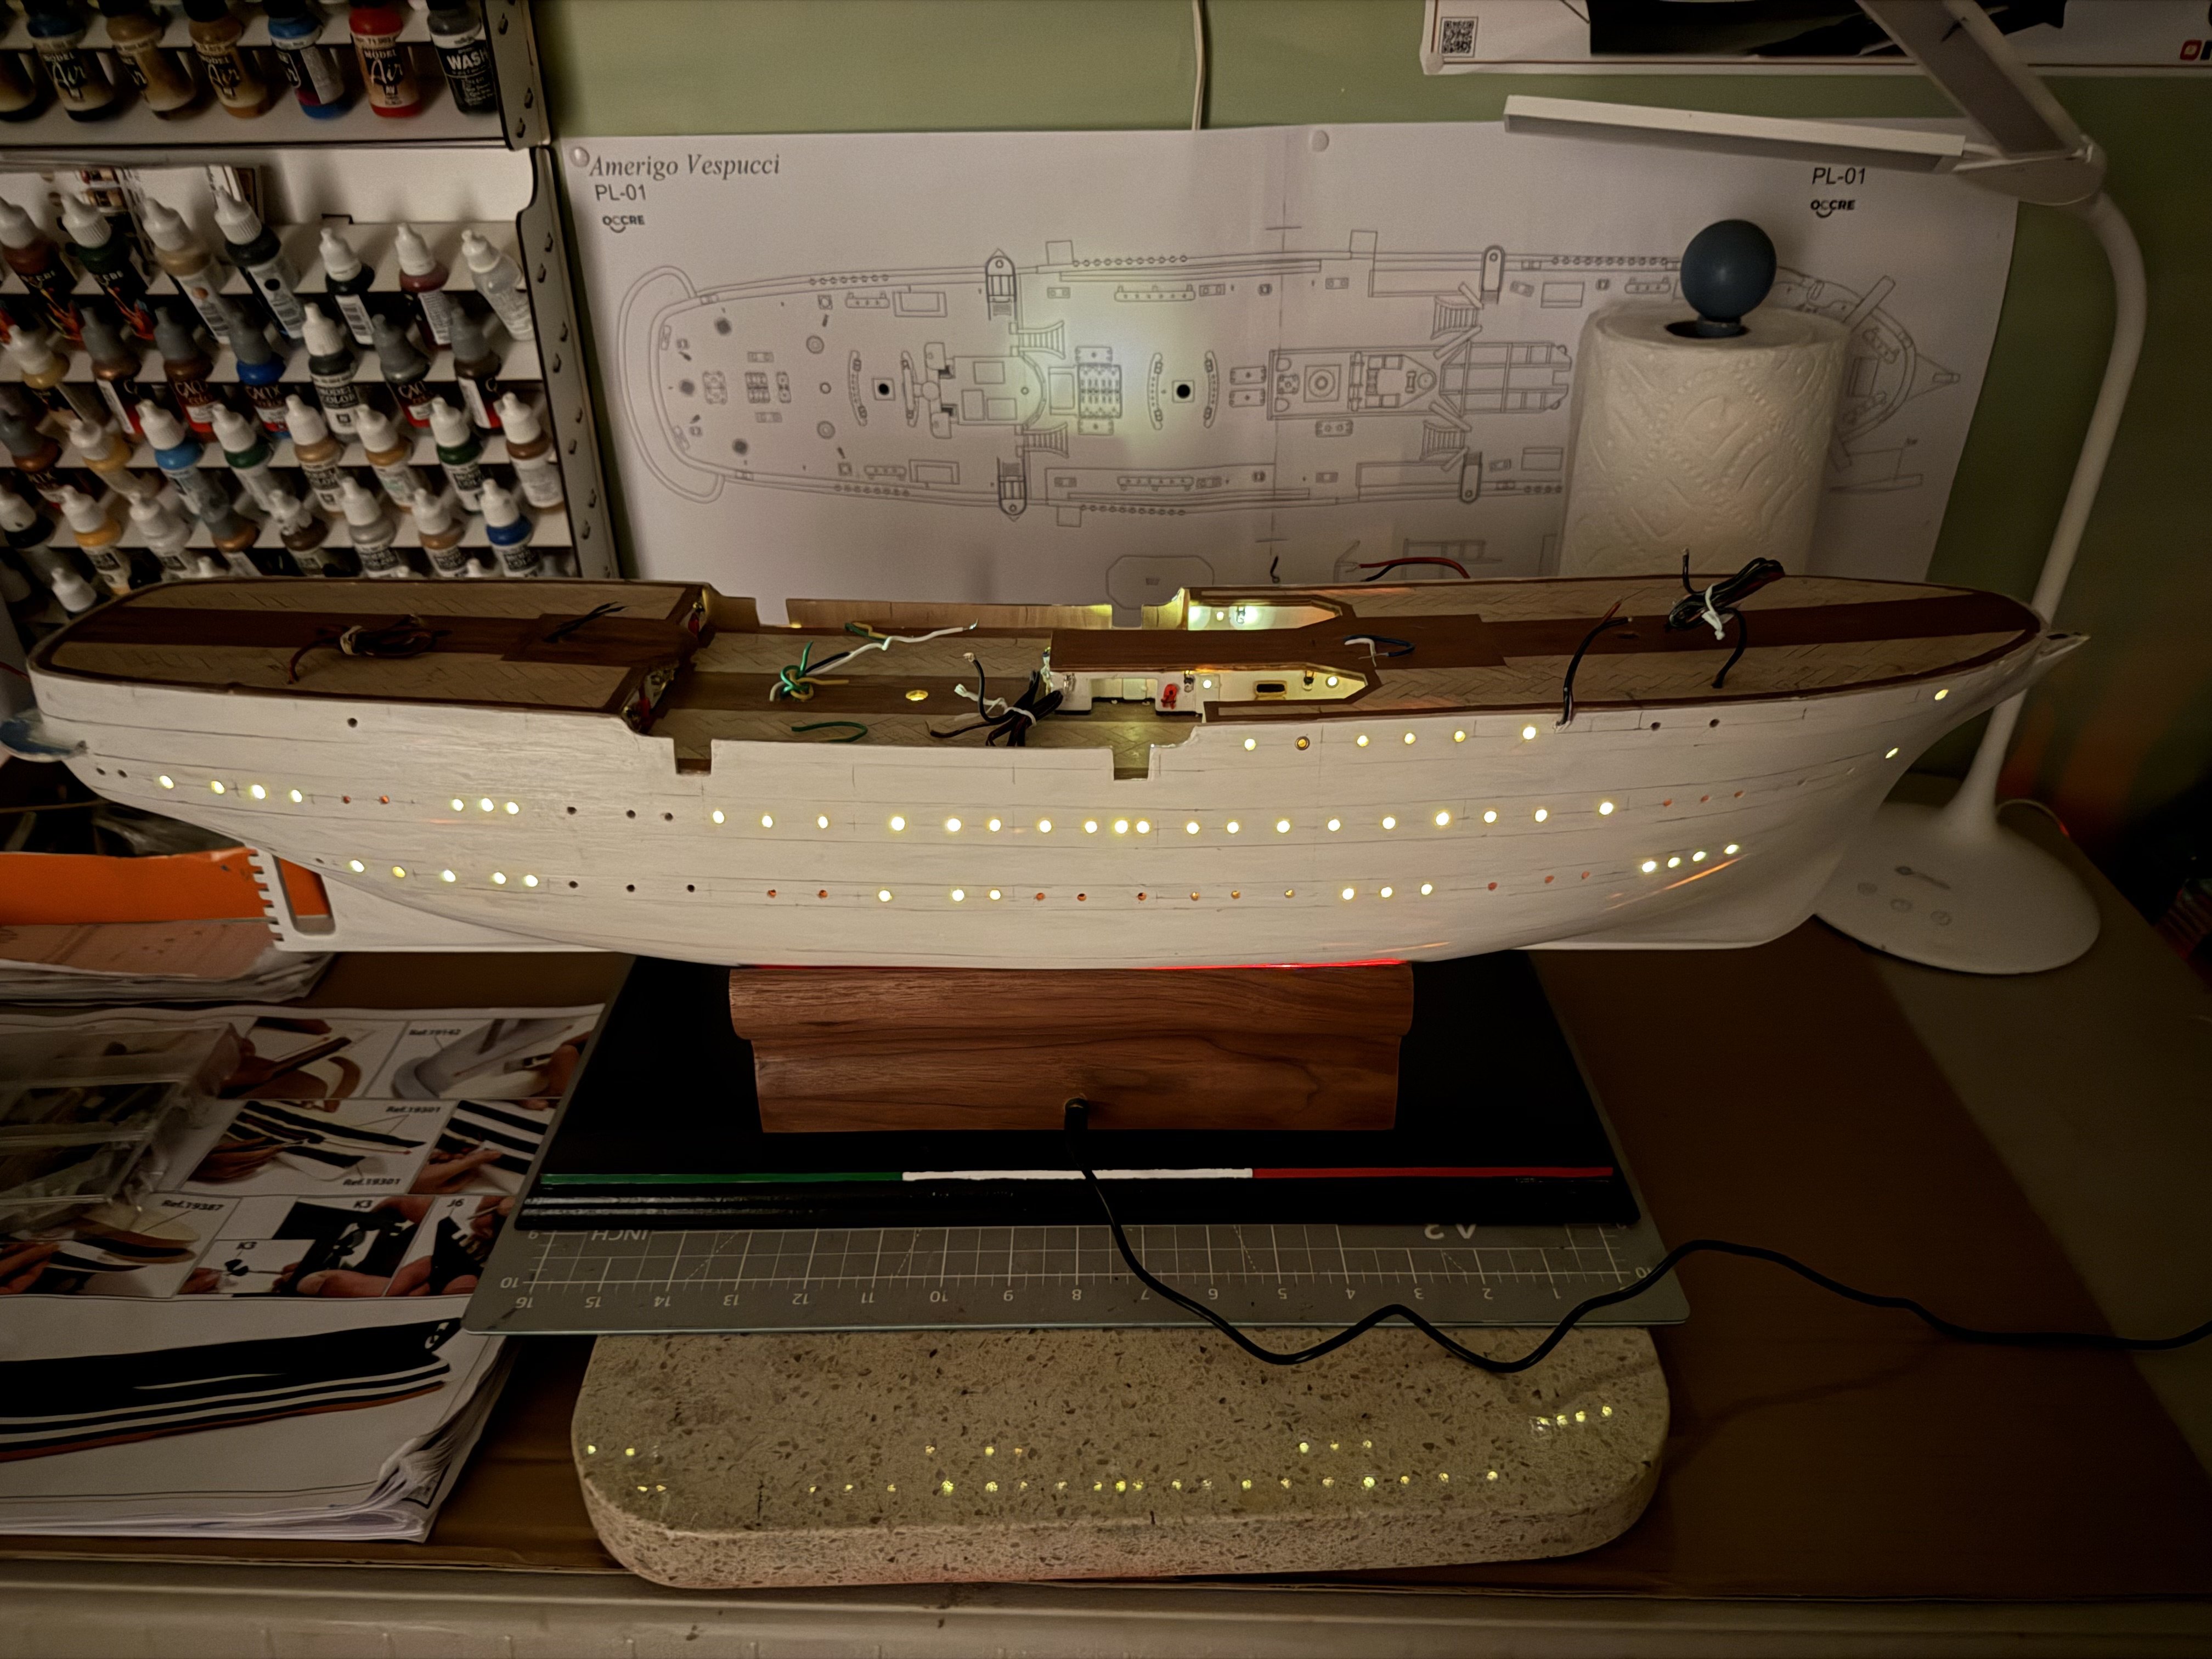
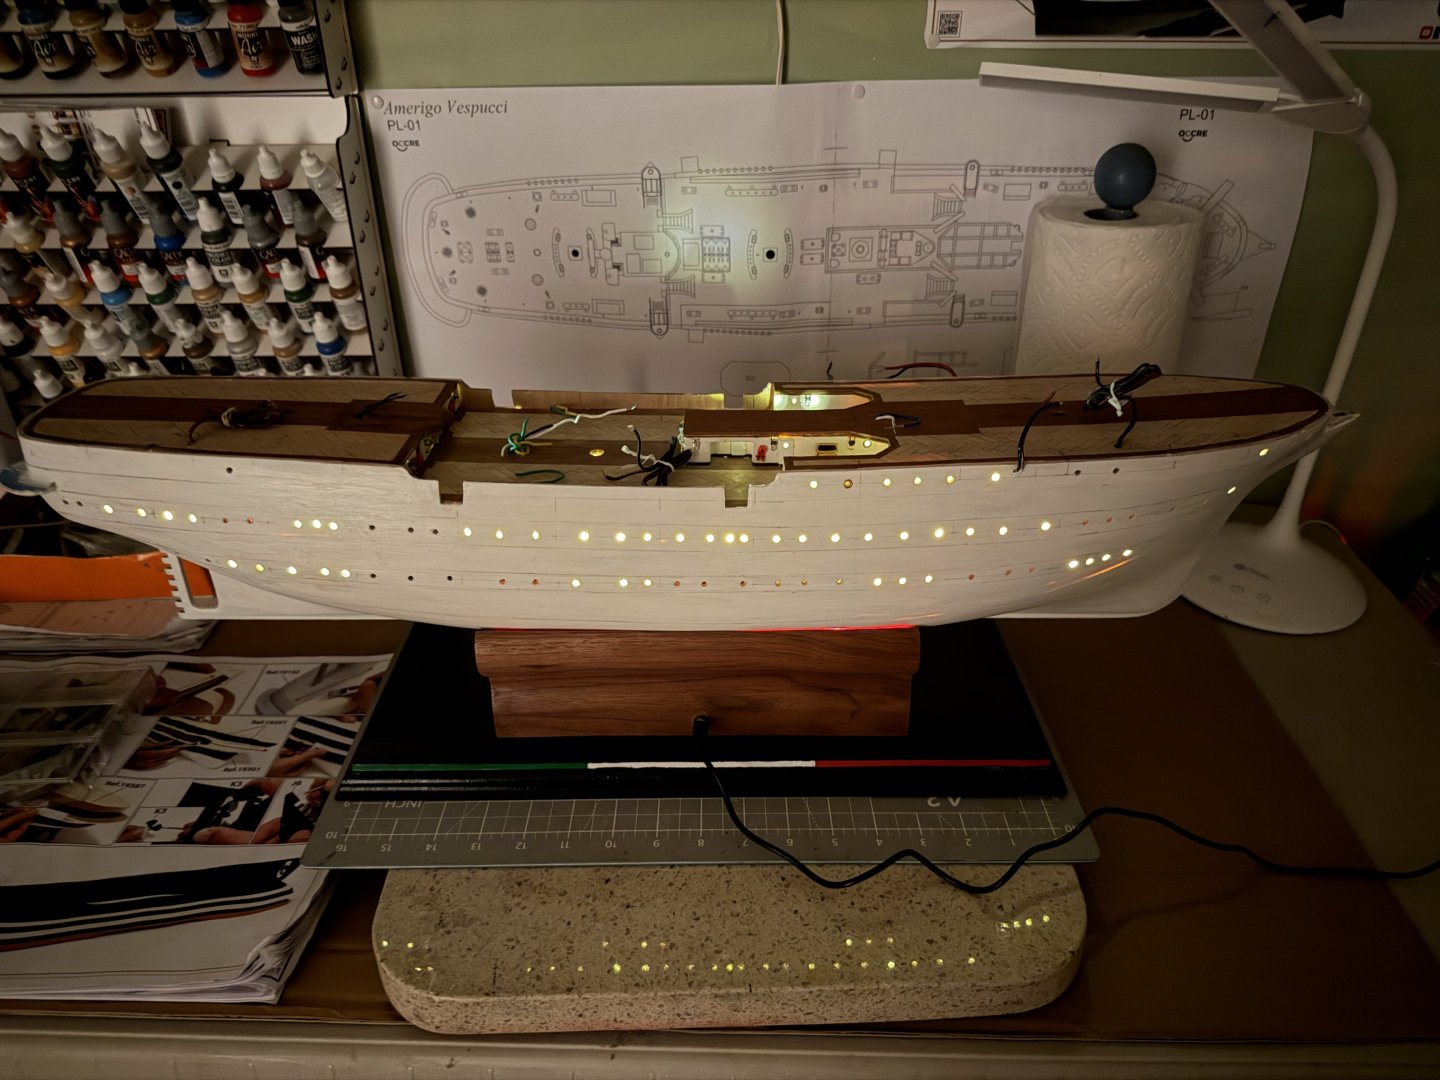
Well Daniel I have looked back through your build for a comment you made about your build somewhere but can’t find it. Even with all the precautions I took I still ended up getting some light bleed through an area of the deck right above the stern caused by the LEDs I put in to shine out the stern port holes. I also have some light bleed into a couple areas from one section of port hole lights into an adjacent section. I seem to remember you having a similar issue. I think you said there was pretty much nothing you could do about it. That is my thought as well. Maybe turn down the voltage regulator to reduce the LED brightness is all I can think of.
-
Thanks gentlemen. Had cataract surgury on my left eye Wednesday a week ago (11 days ago). Right eye scheduled for this Wednesday. Been sorta working with one eye and winking the other 😊.
-
What do you think Professor Daniel? Your instruction got me this far. I put some of the little port hole metal pieces in some of the holes to show my wife how it will eventually look. I told her the plan was to paint them as on the actual ship (as you did). She said she really likes them brass instead of me painting them. She likes a little bling. I guess that is the way I will eventually go.
-
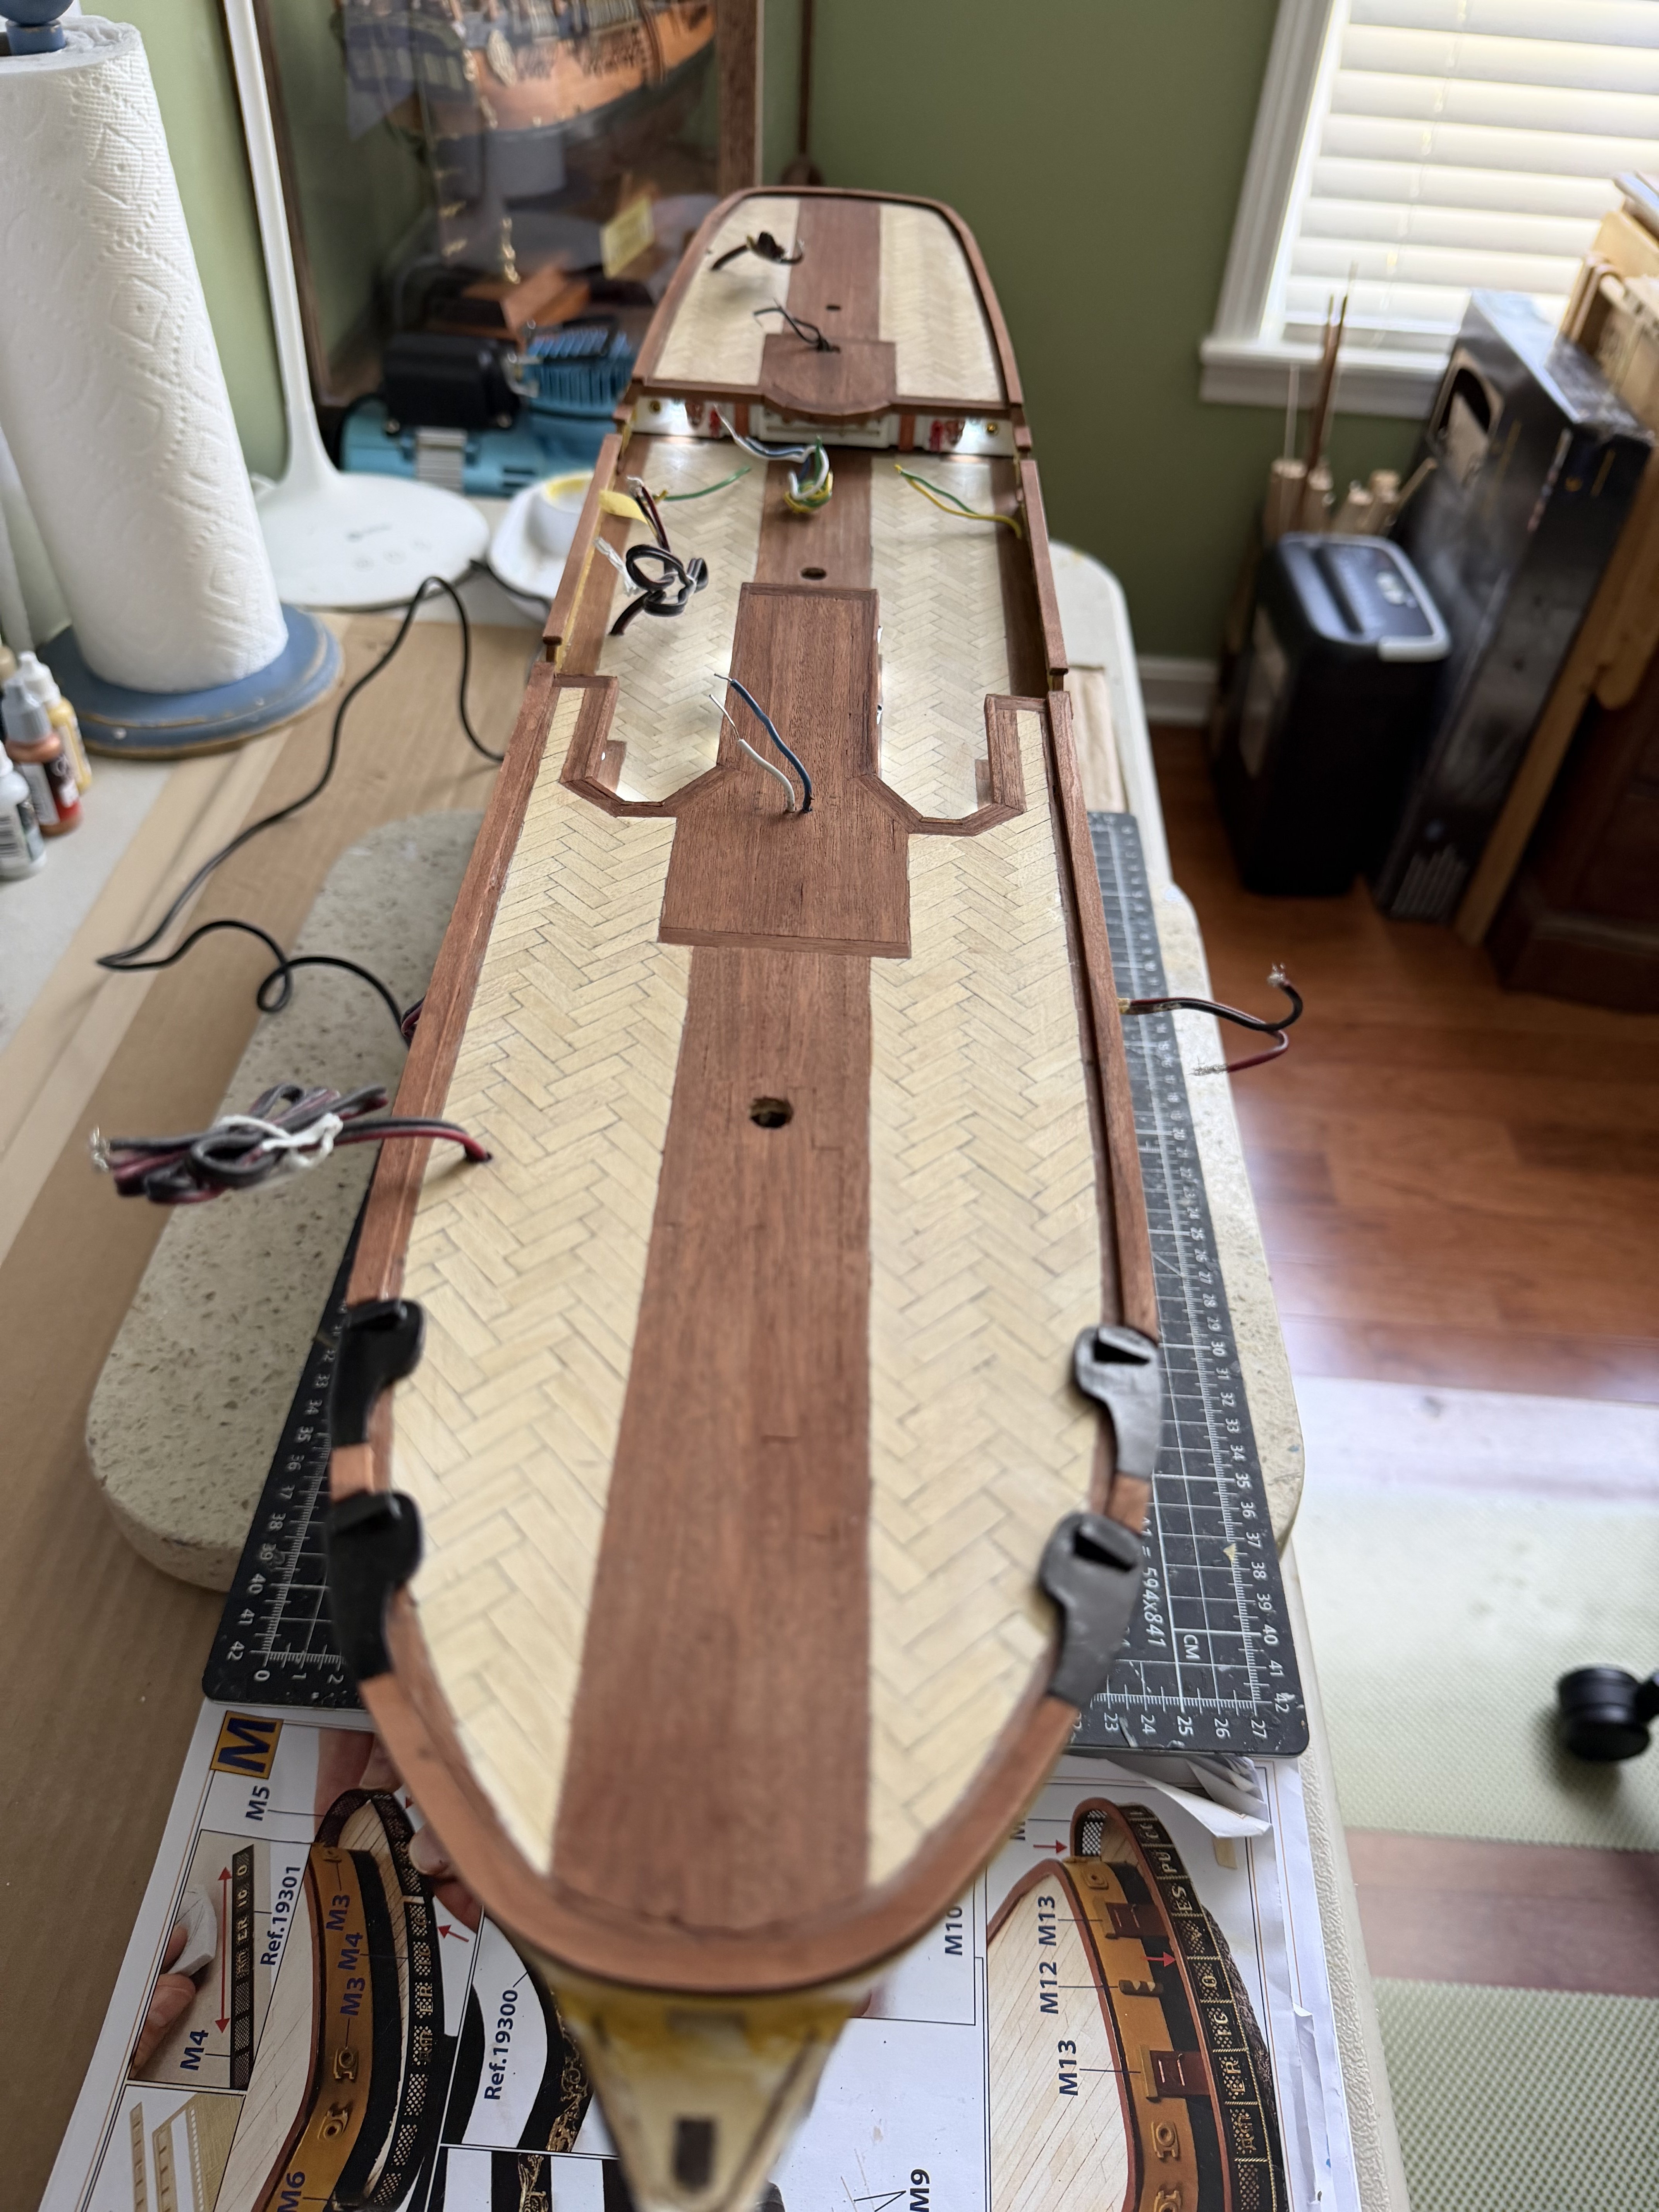
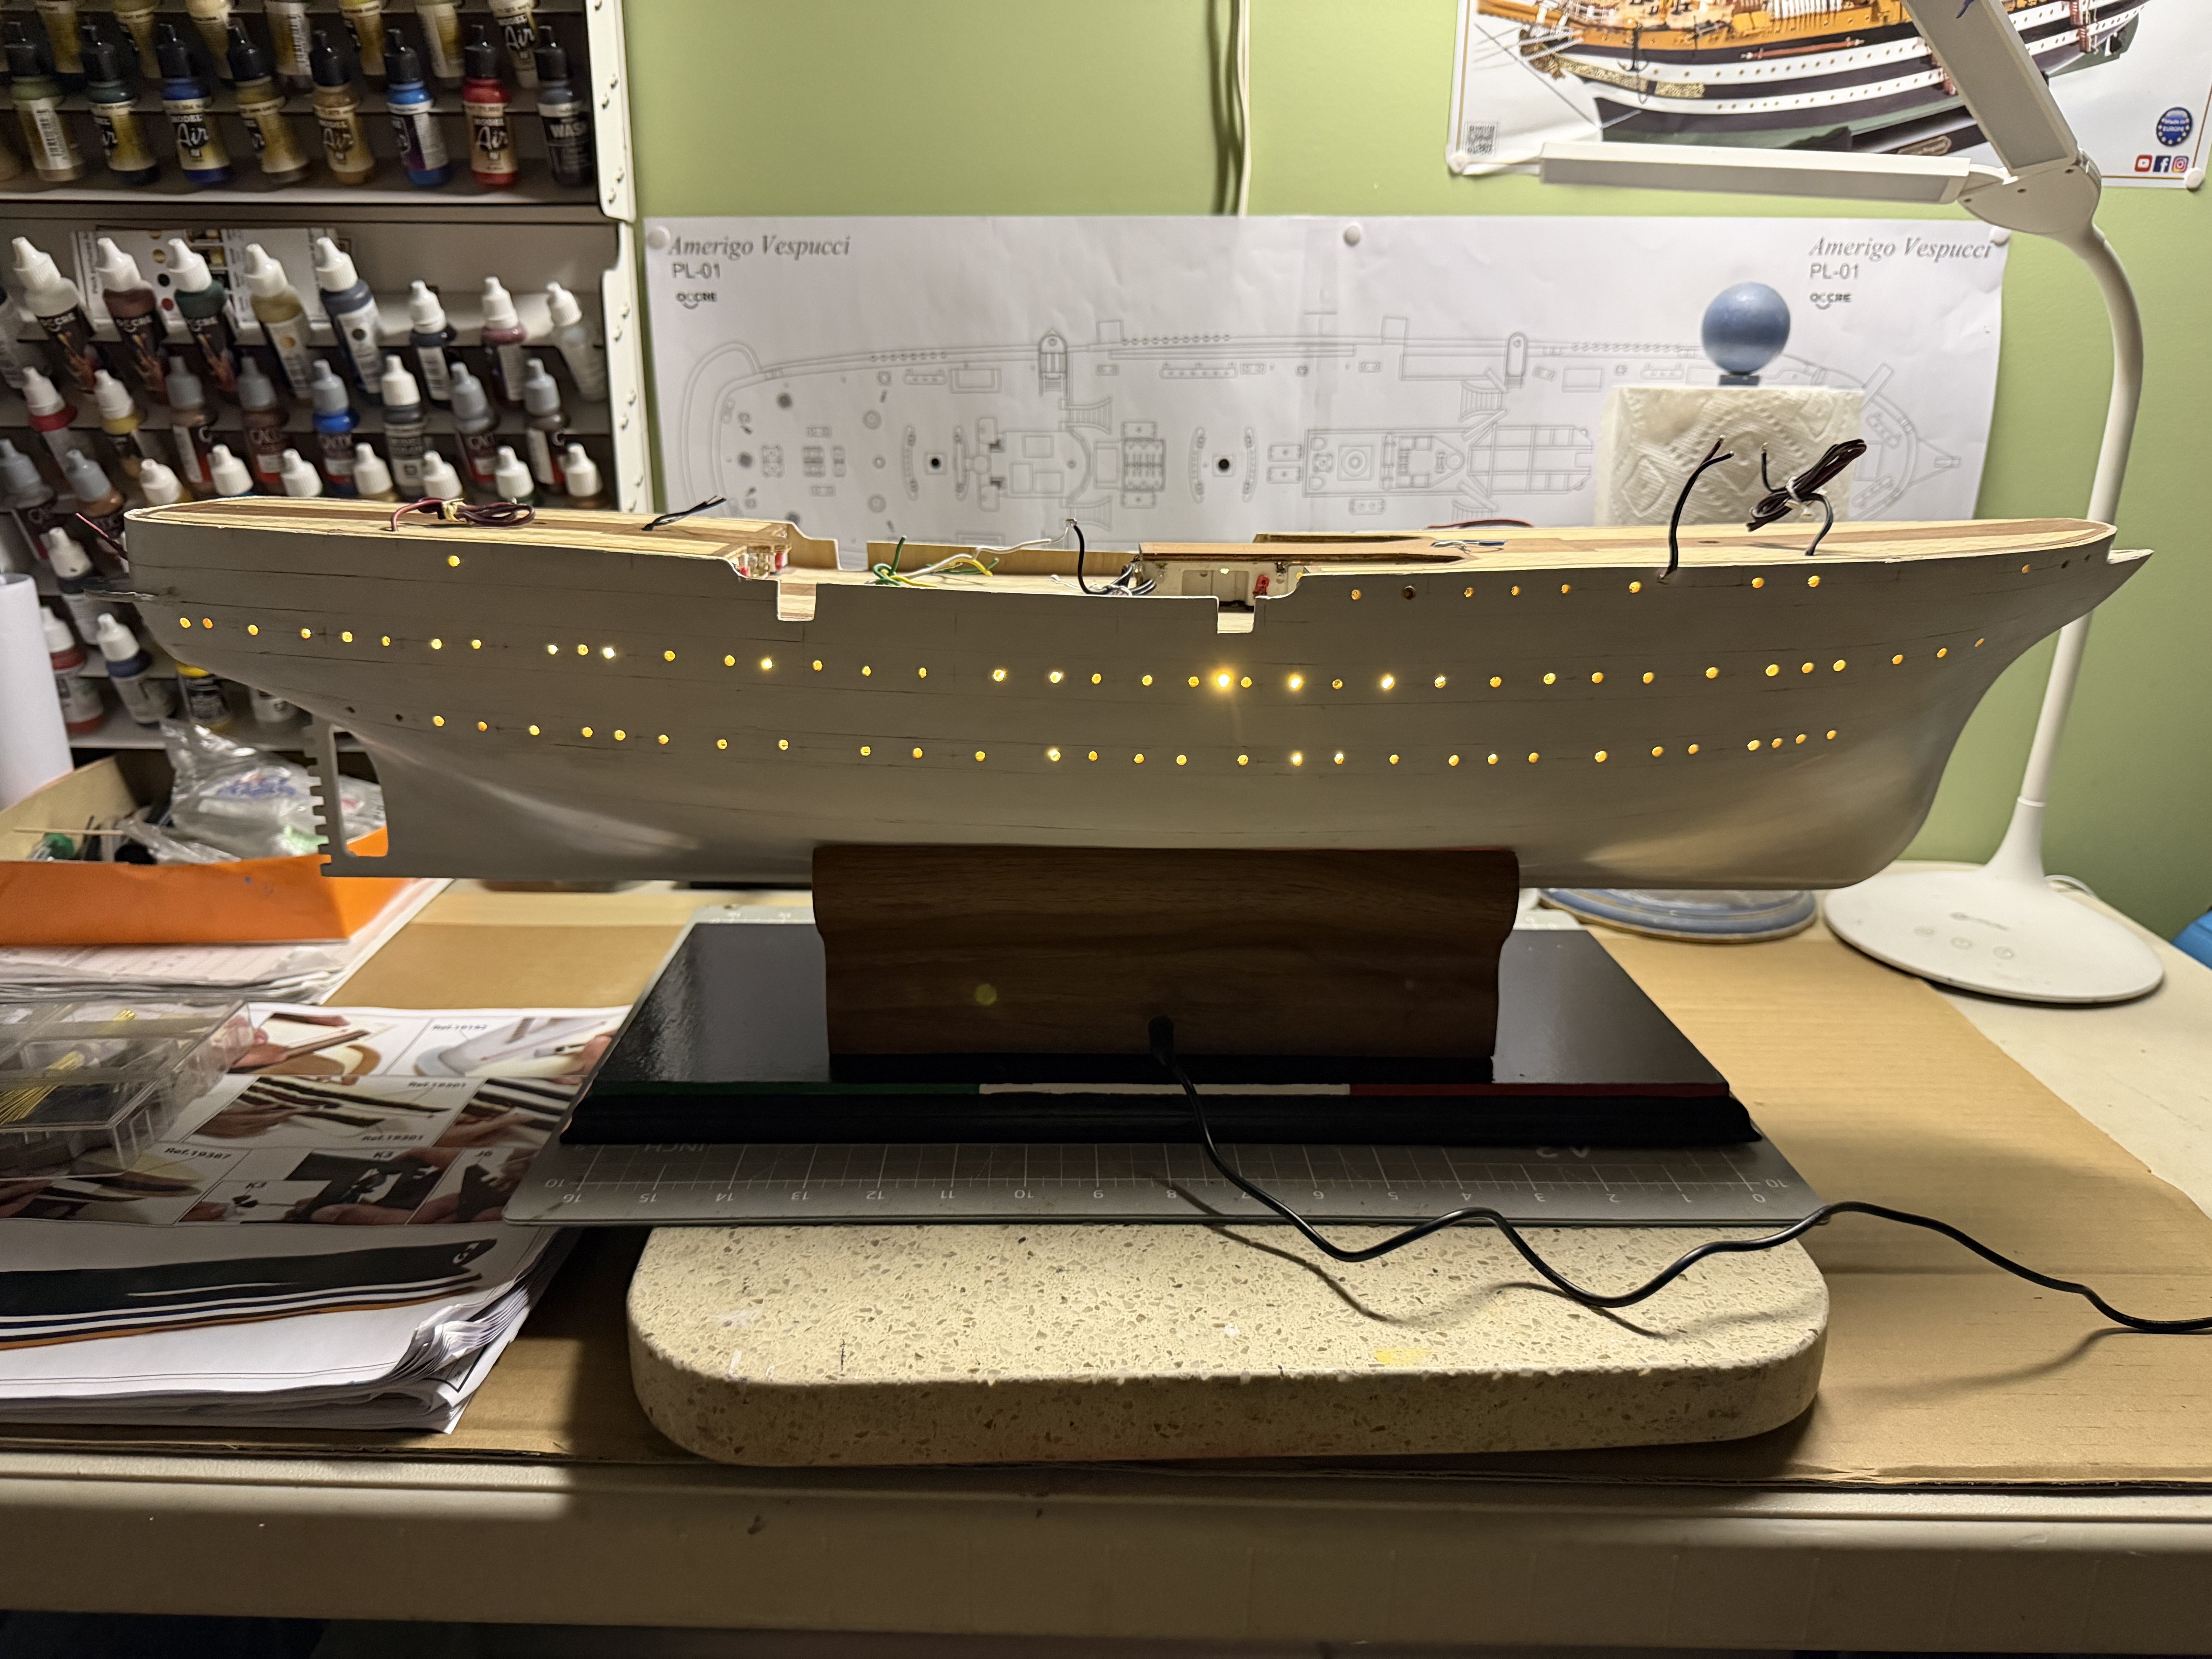
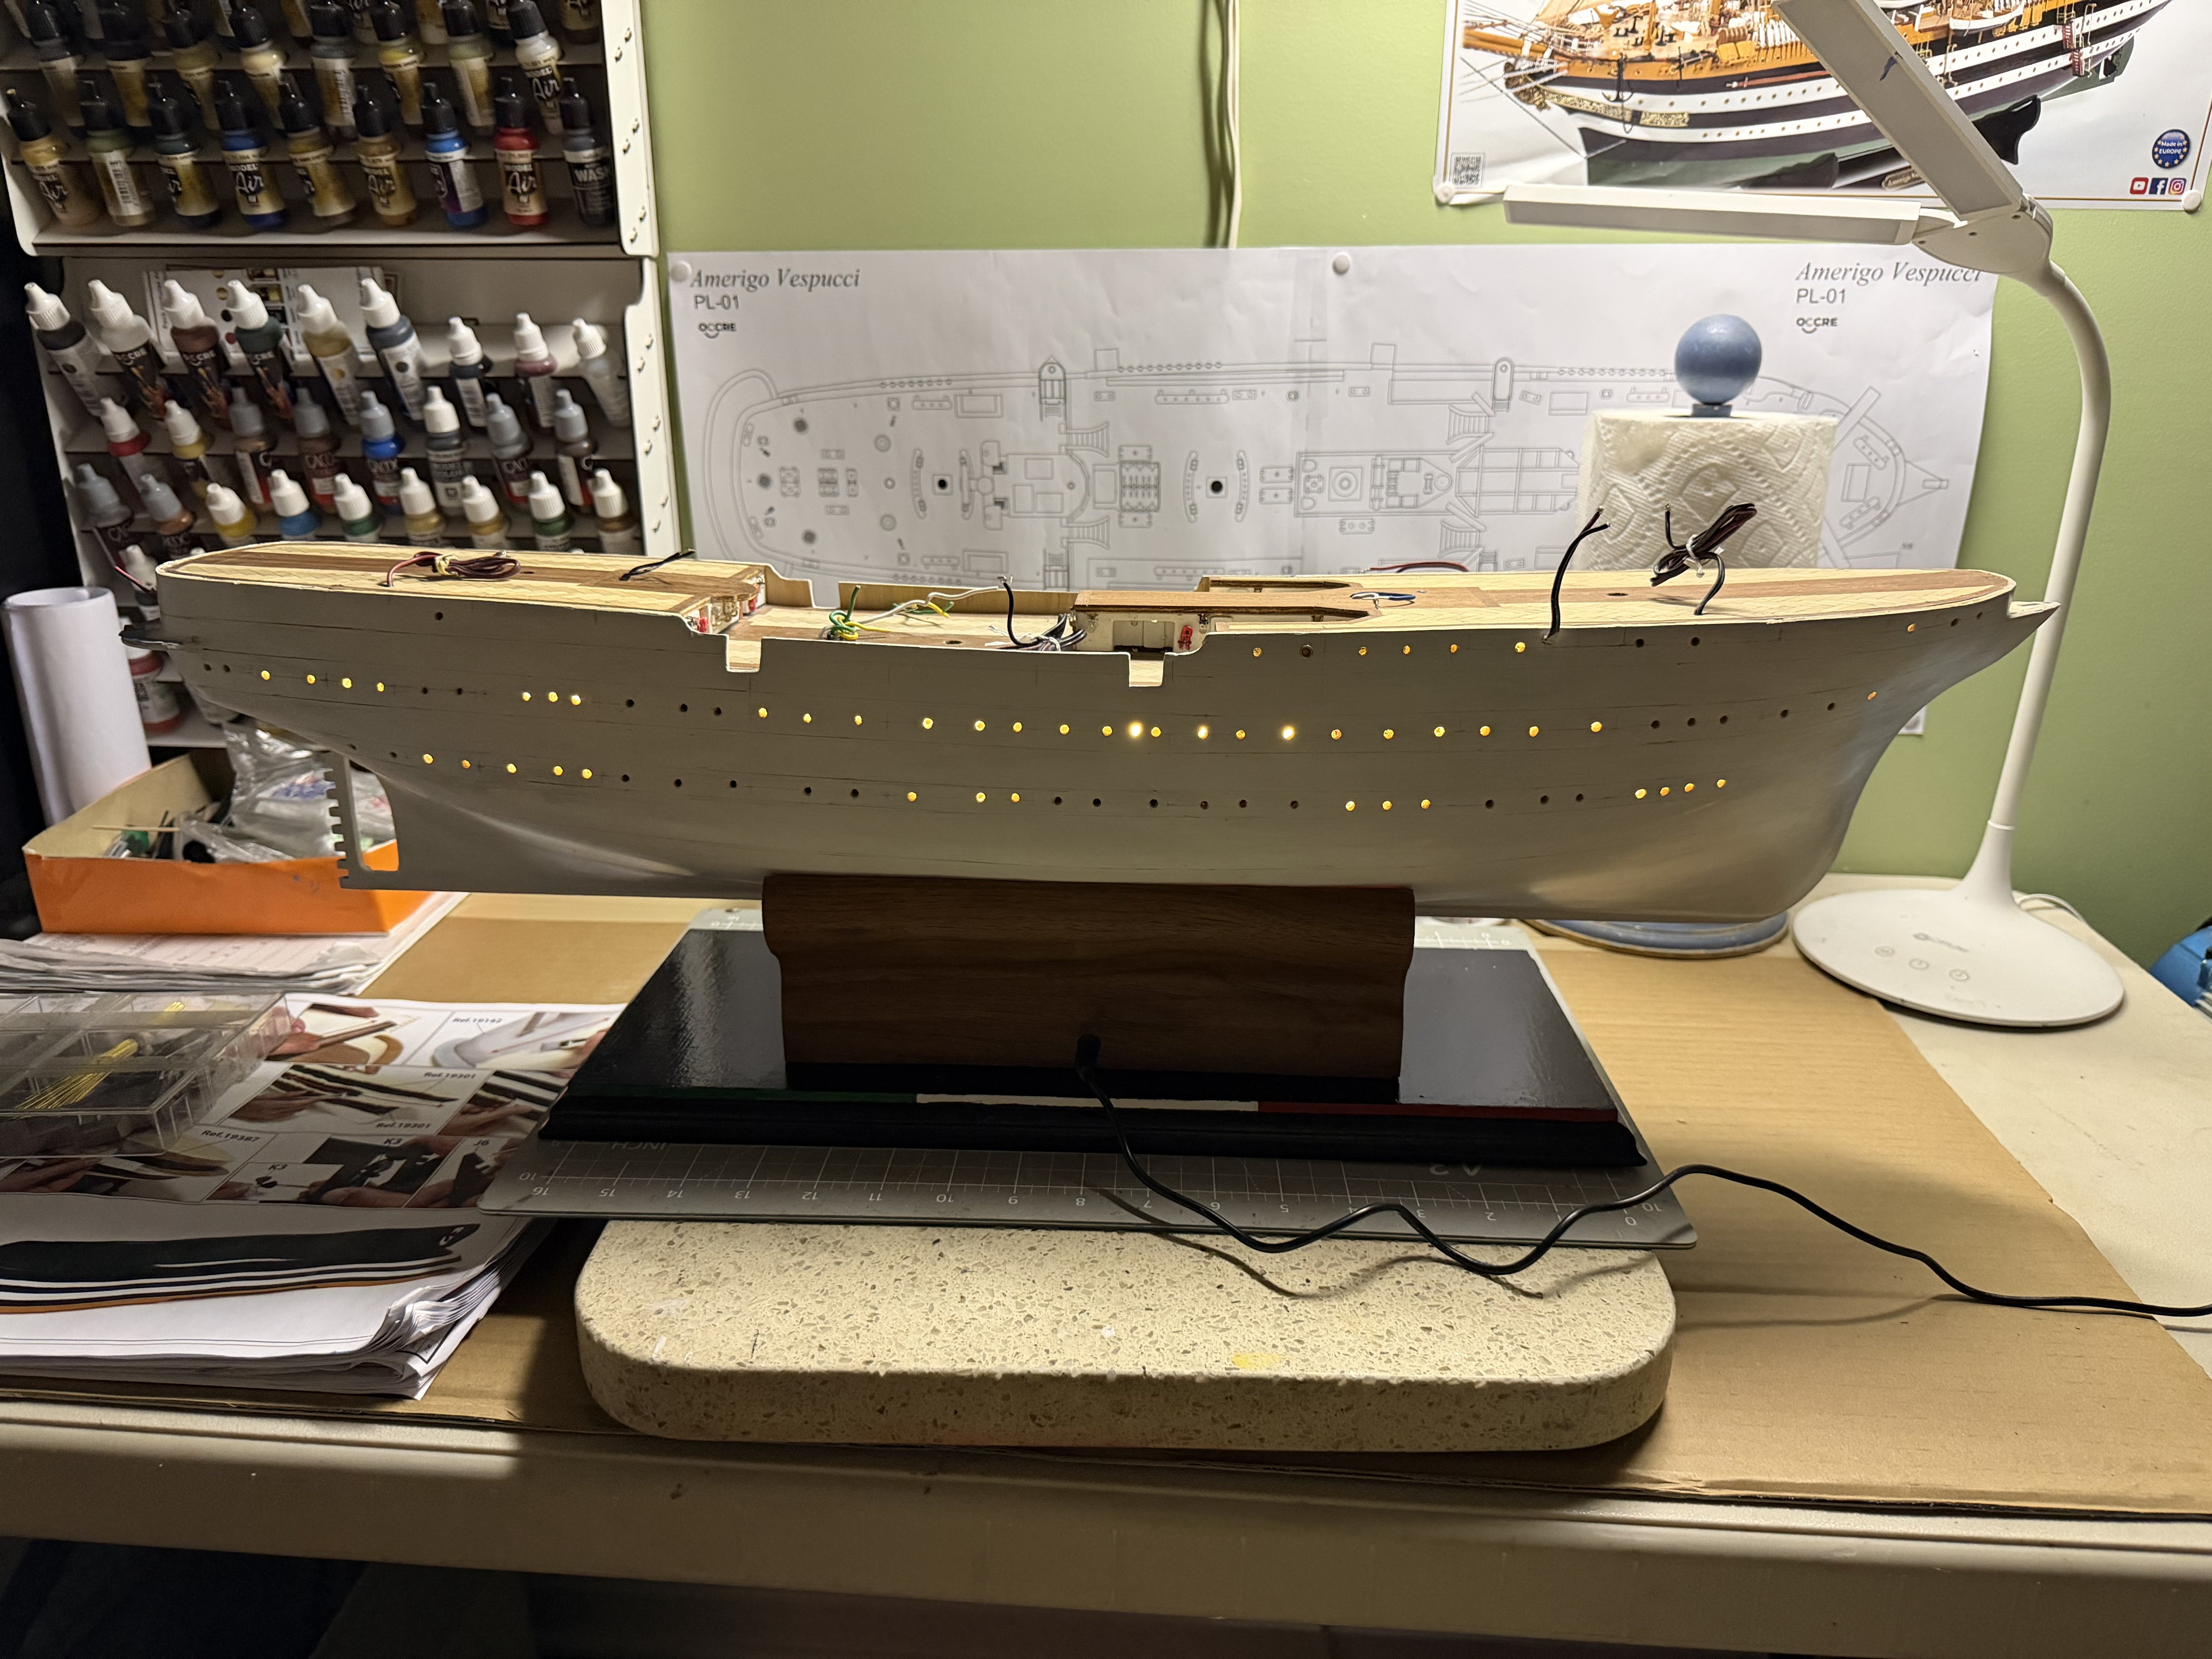
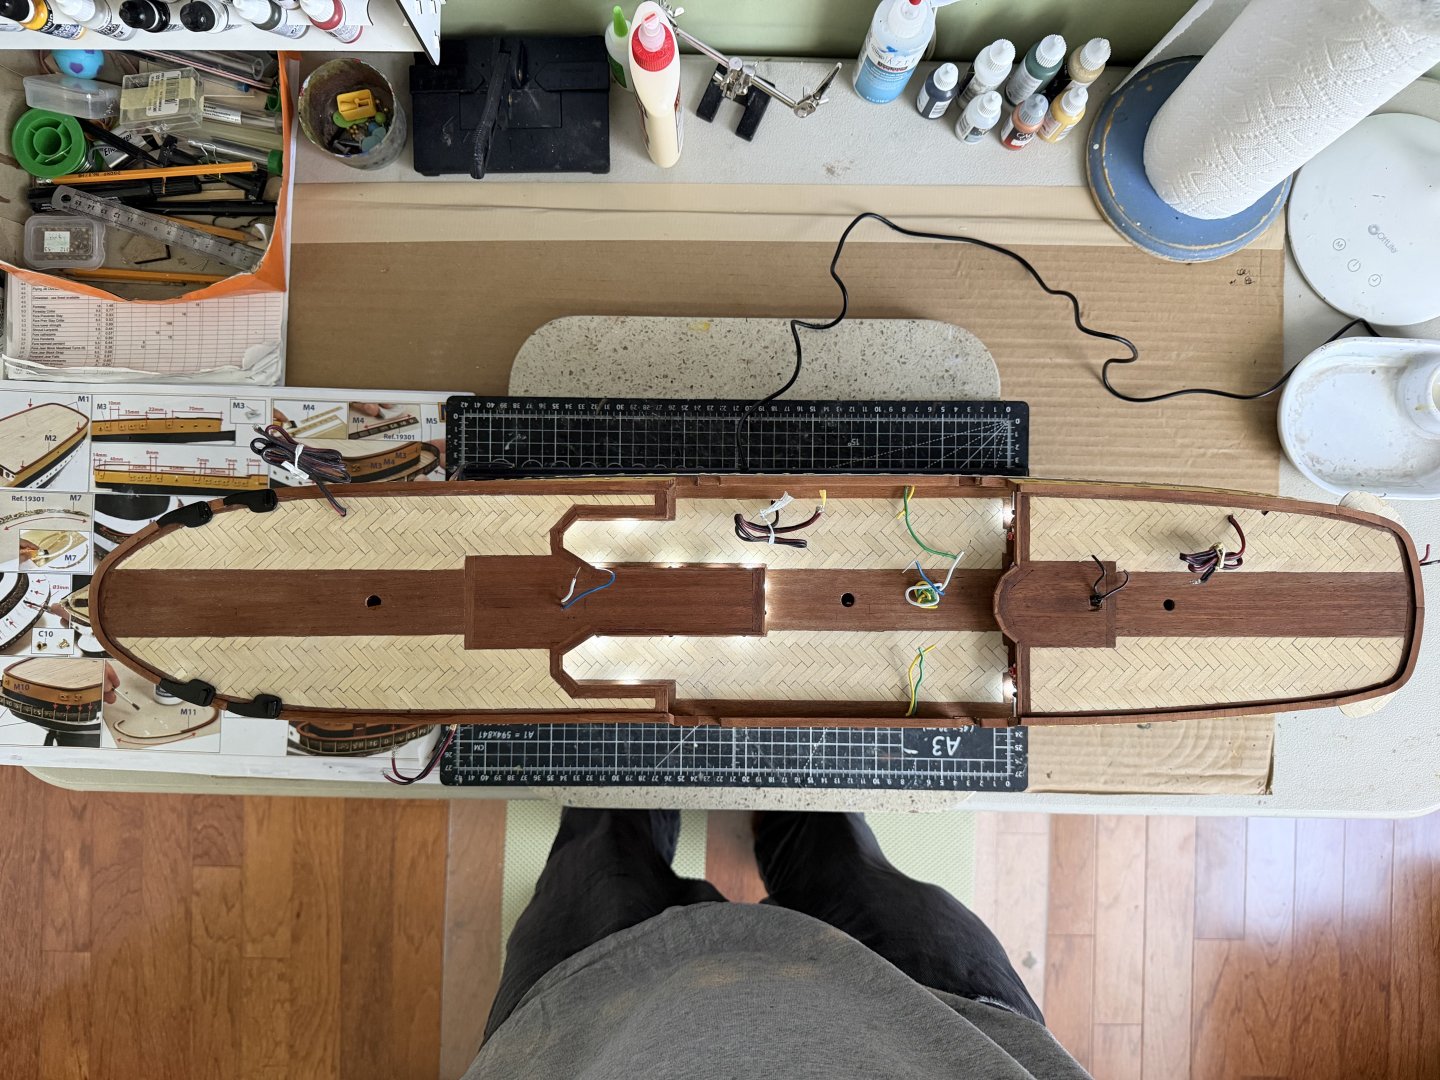
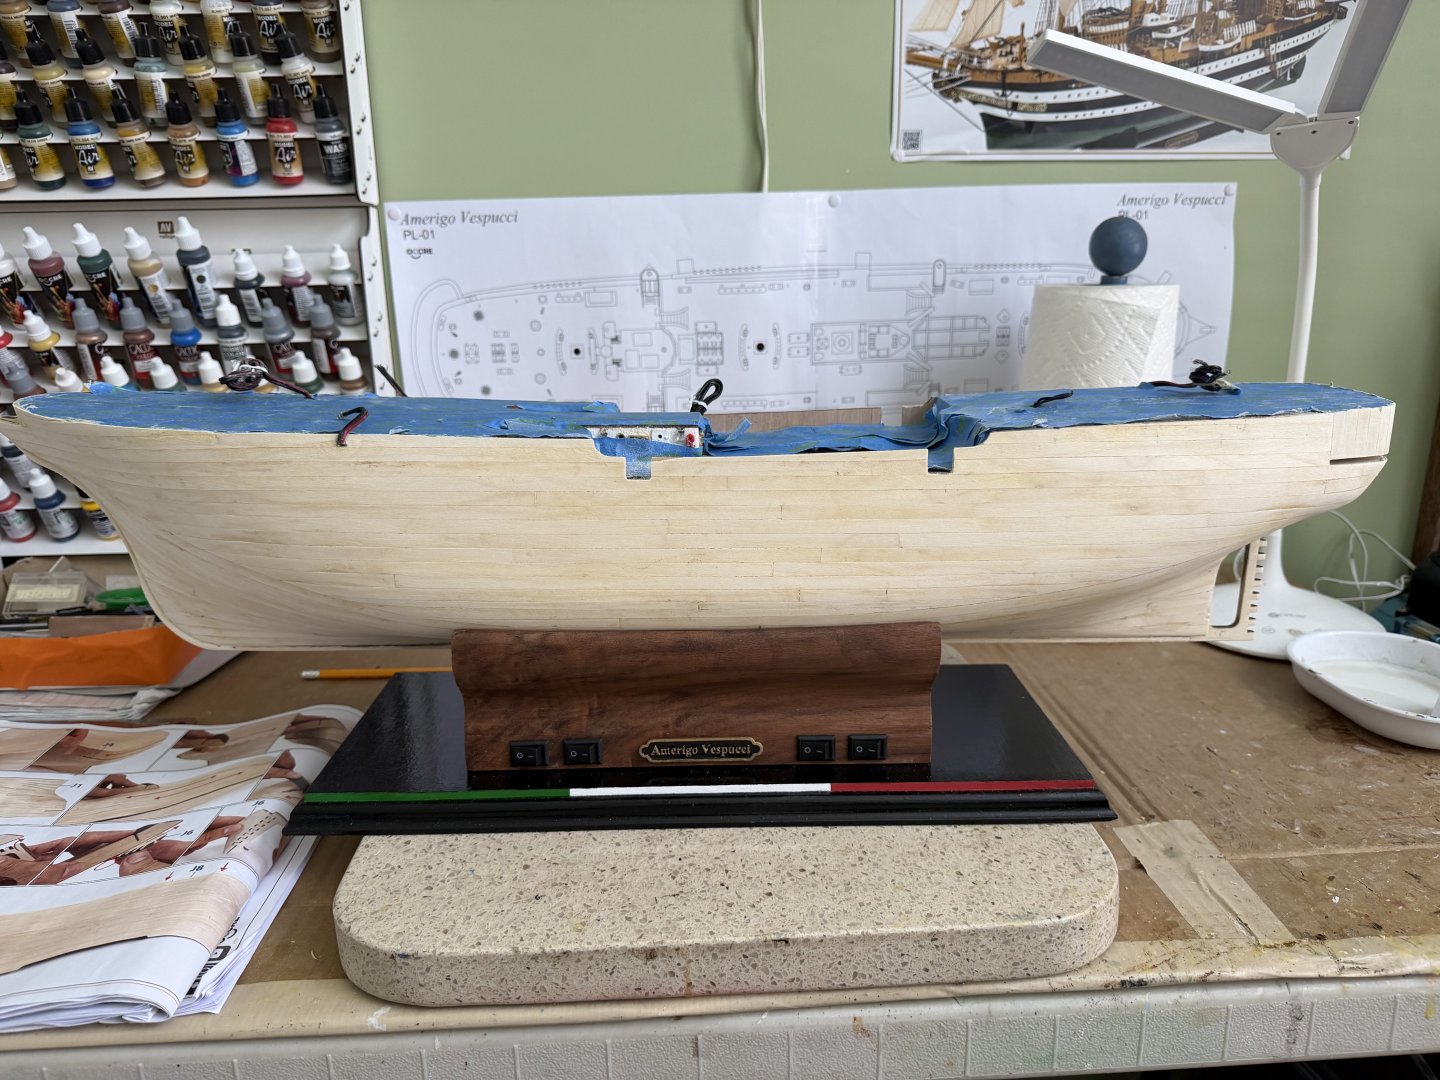
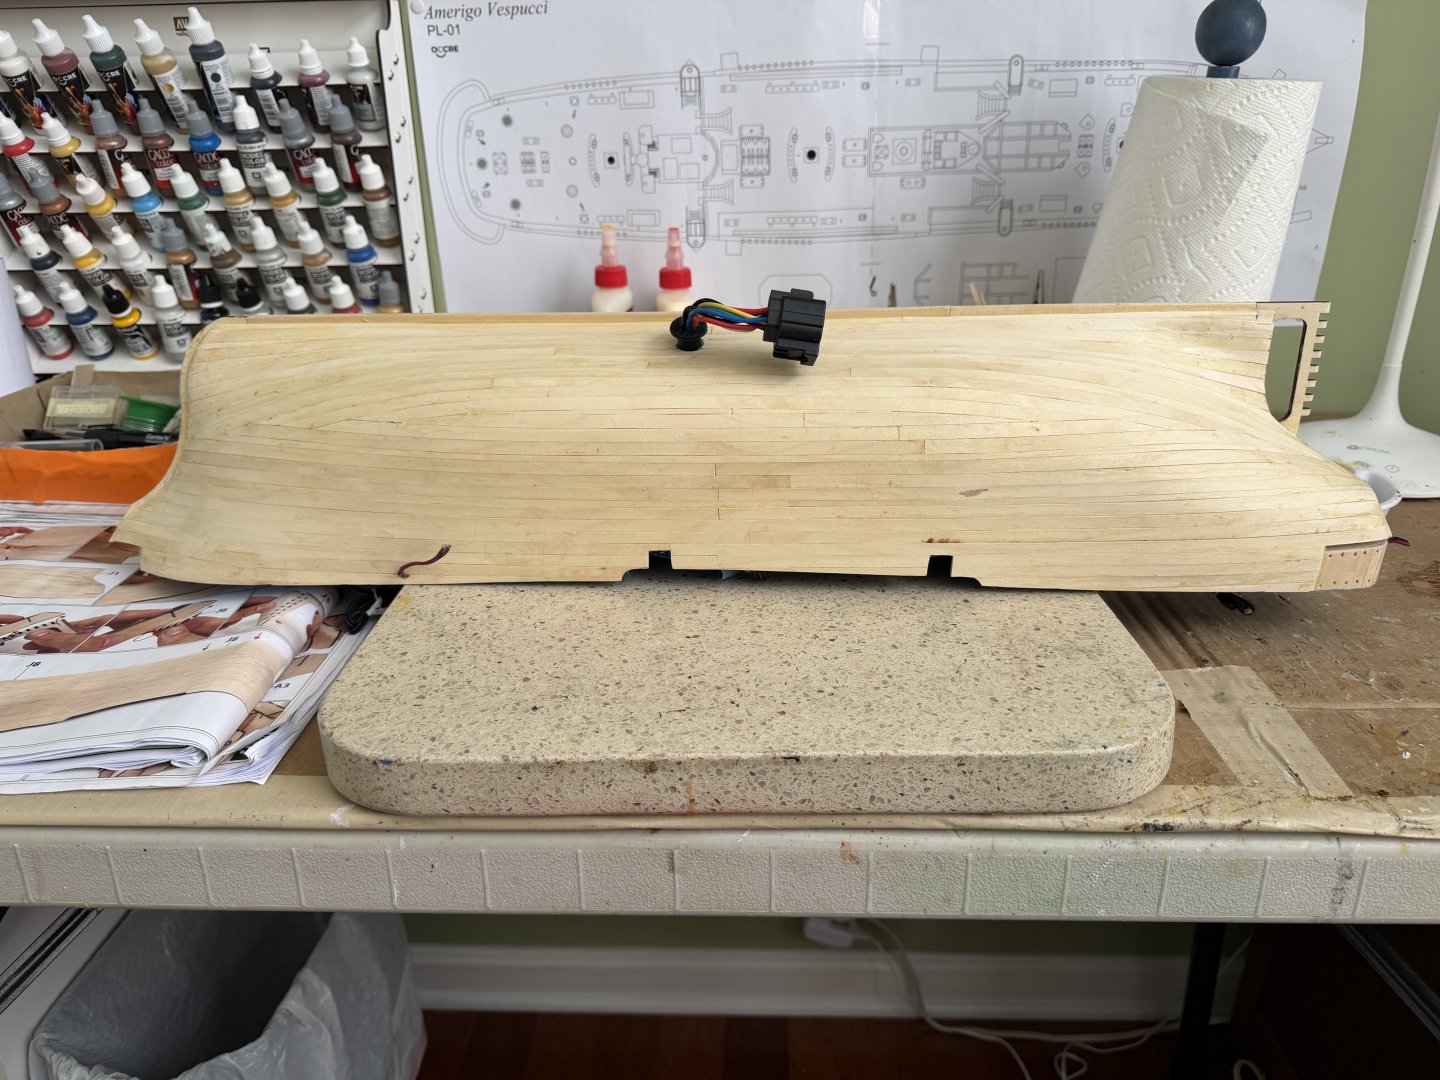
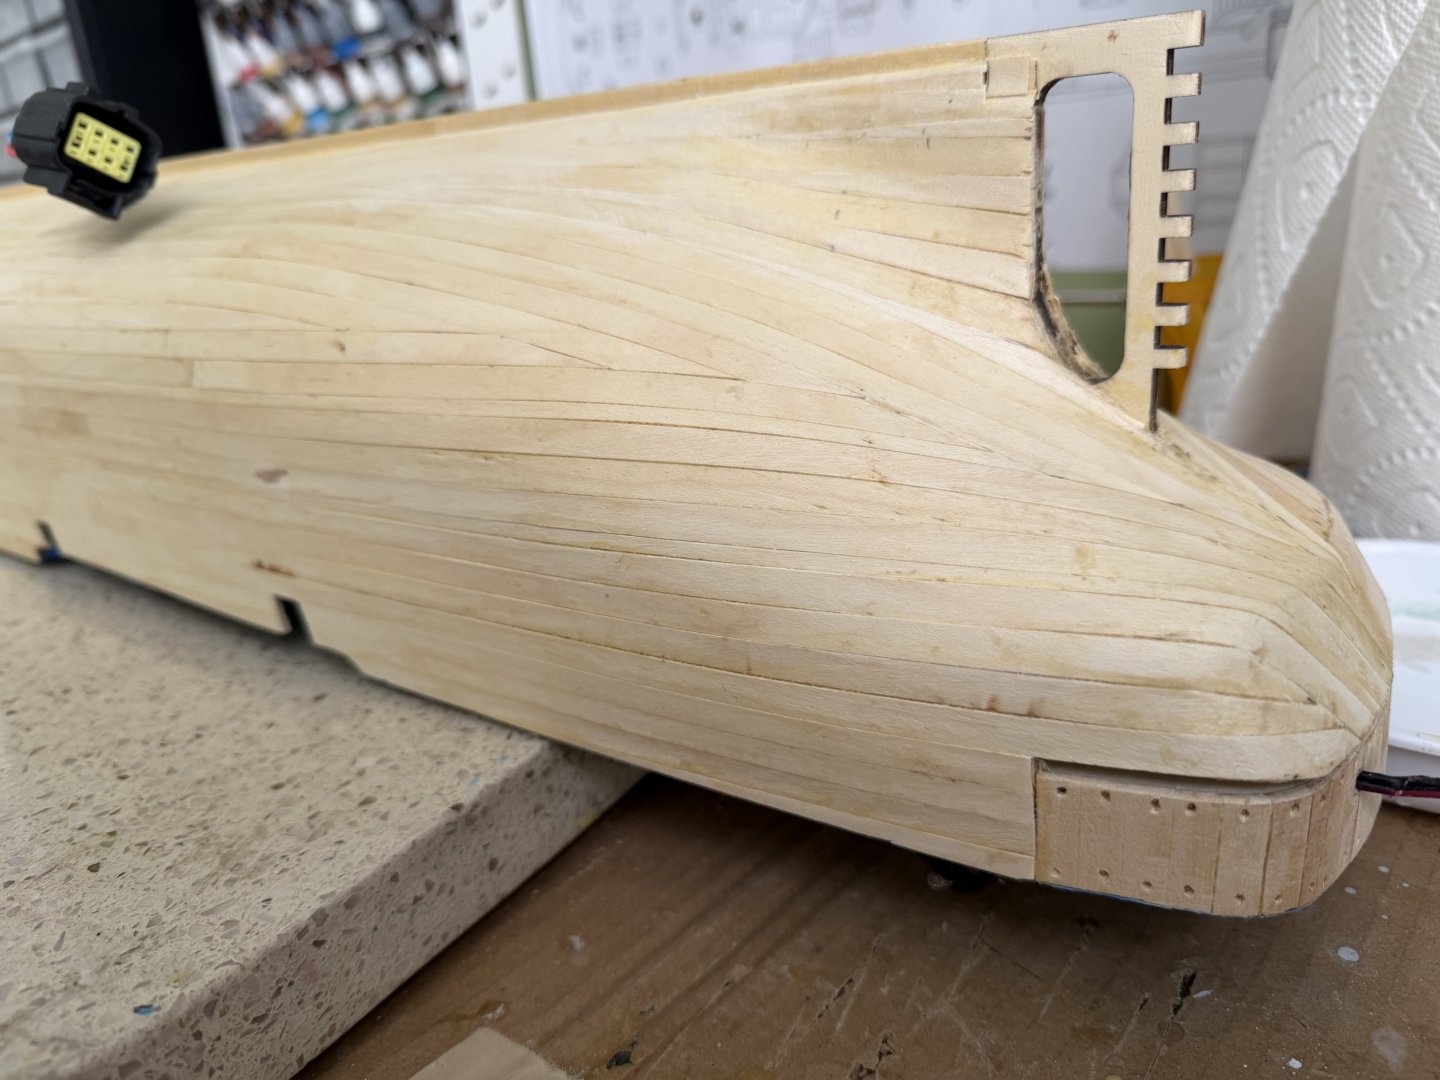
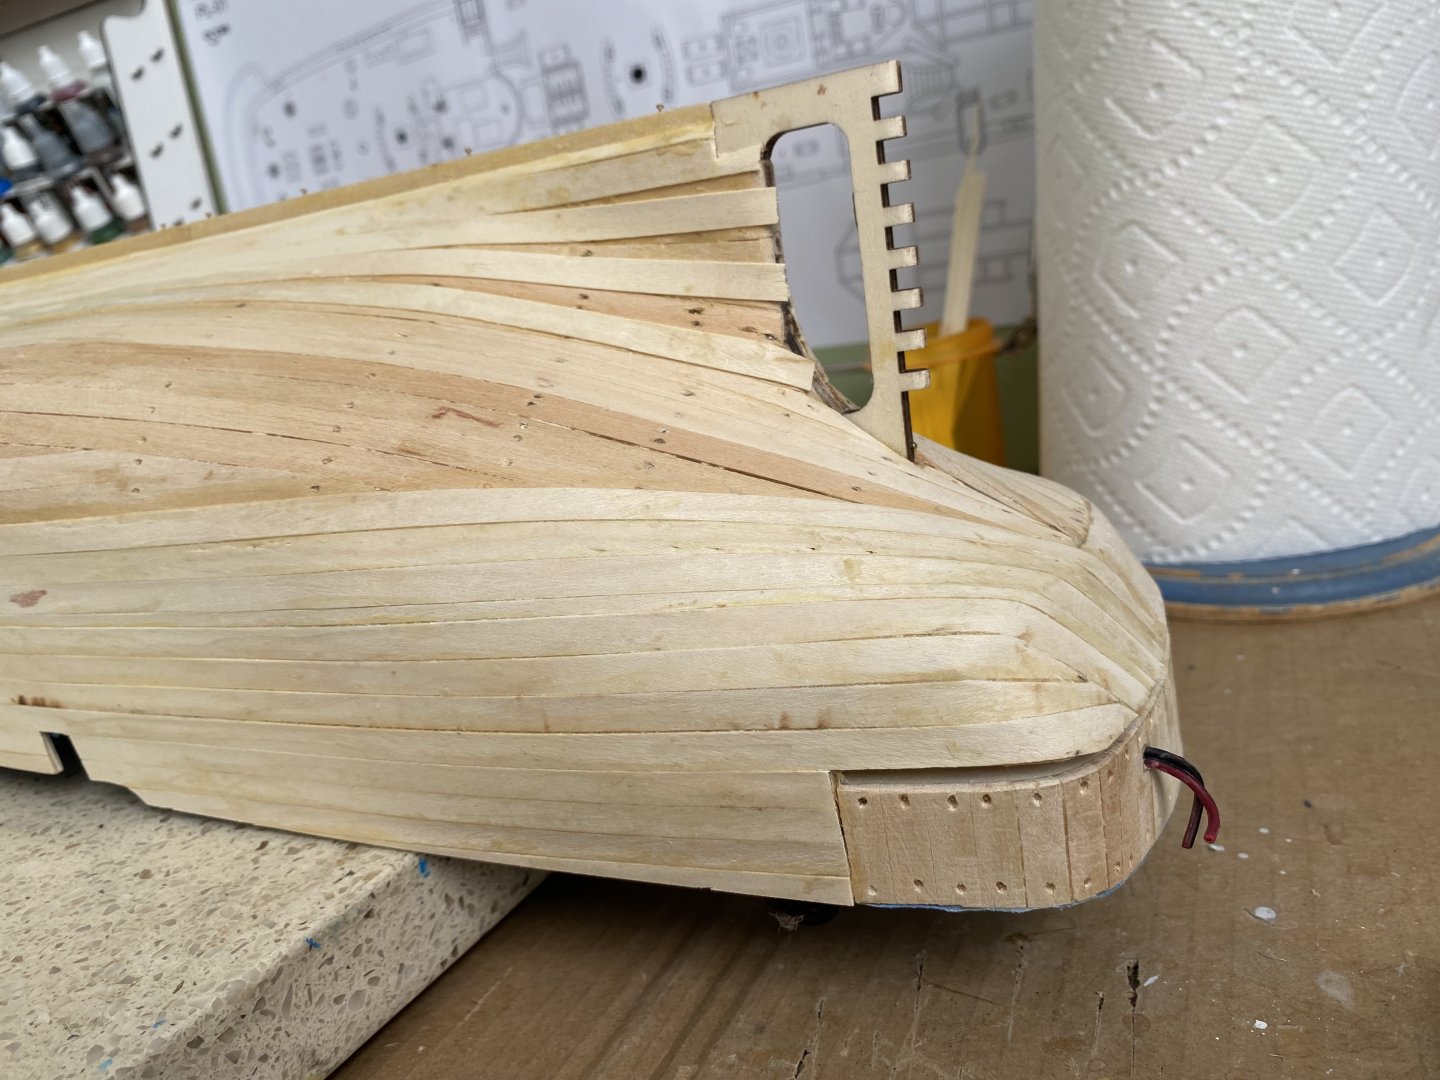
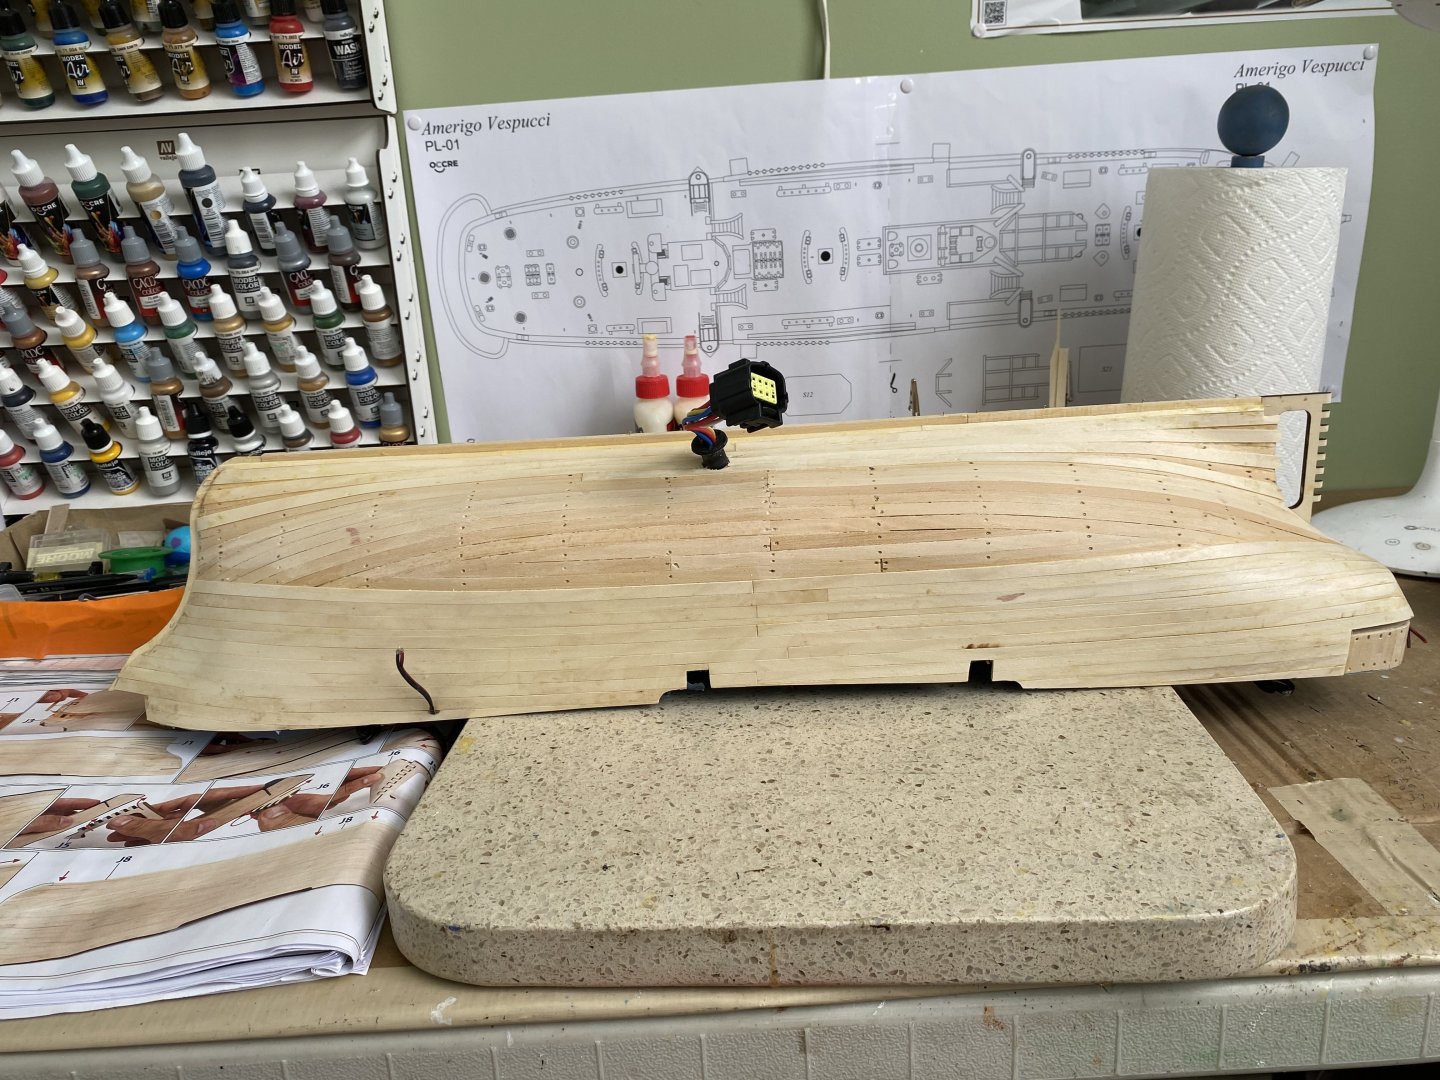
After all the double planking, sanding, priming, and drilling out the port holes it is great to see that all my electronics worked. After drilling the holes in accordance with the OcCre diagram i was really happy to see all my interior lights shine. No broken wires or bulbs. As i mentioned before I have two separate circuits for the port holes lights. One circuit has some of the lights on as the actual ship might look at night. The other circuit has the opposite lights on. So i can show either set or all the lights.


-
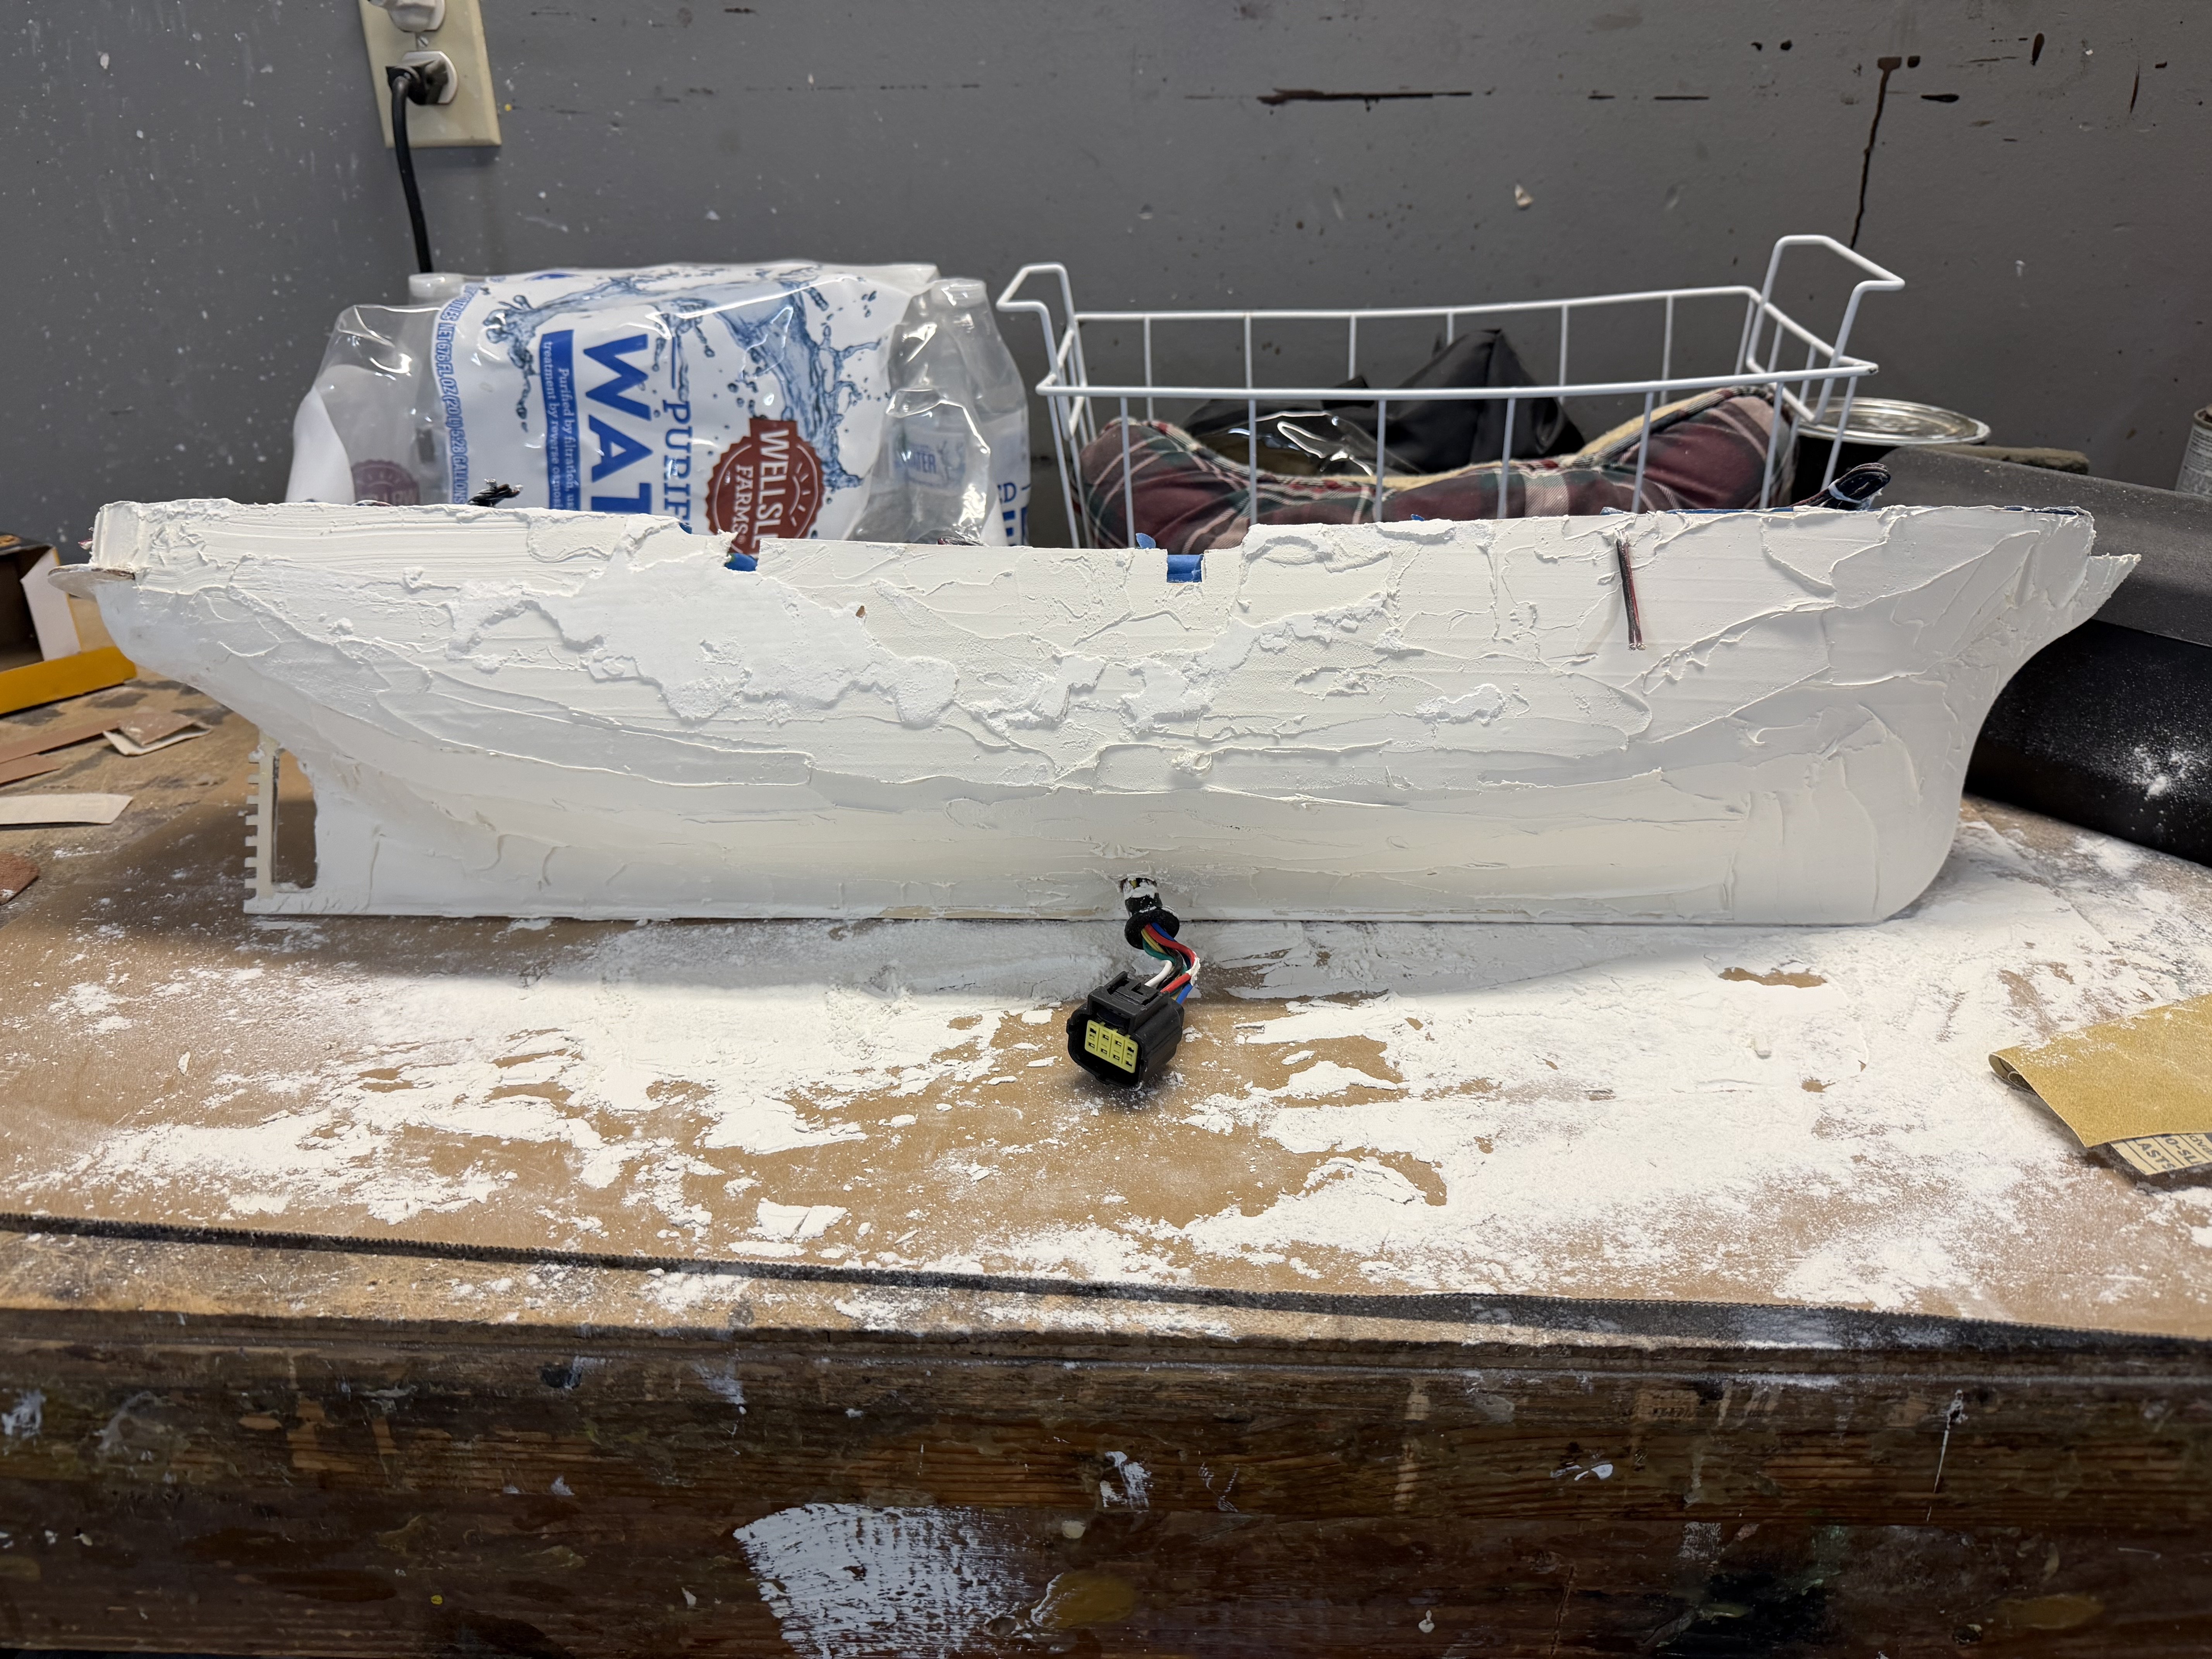
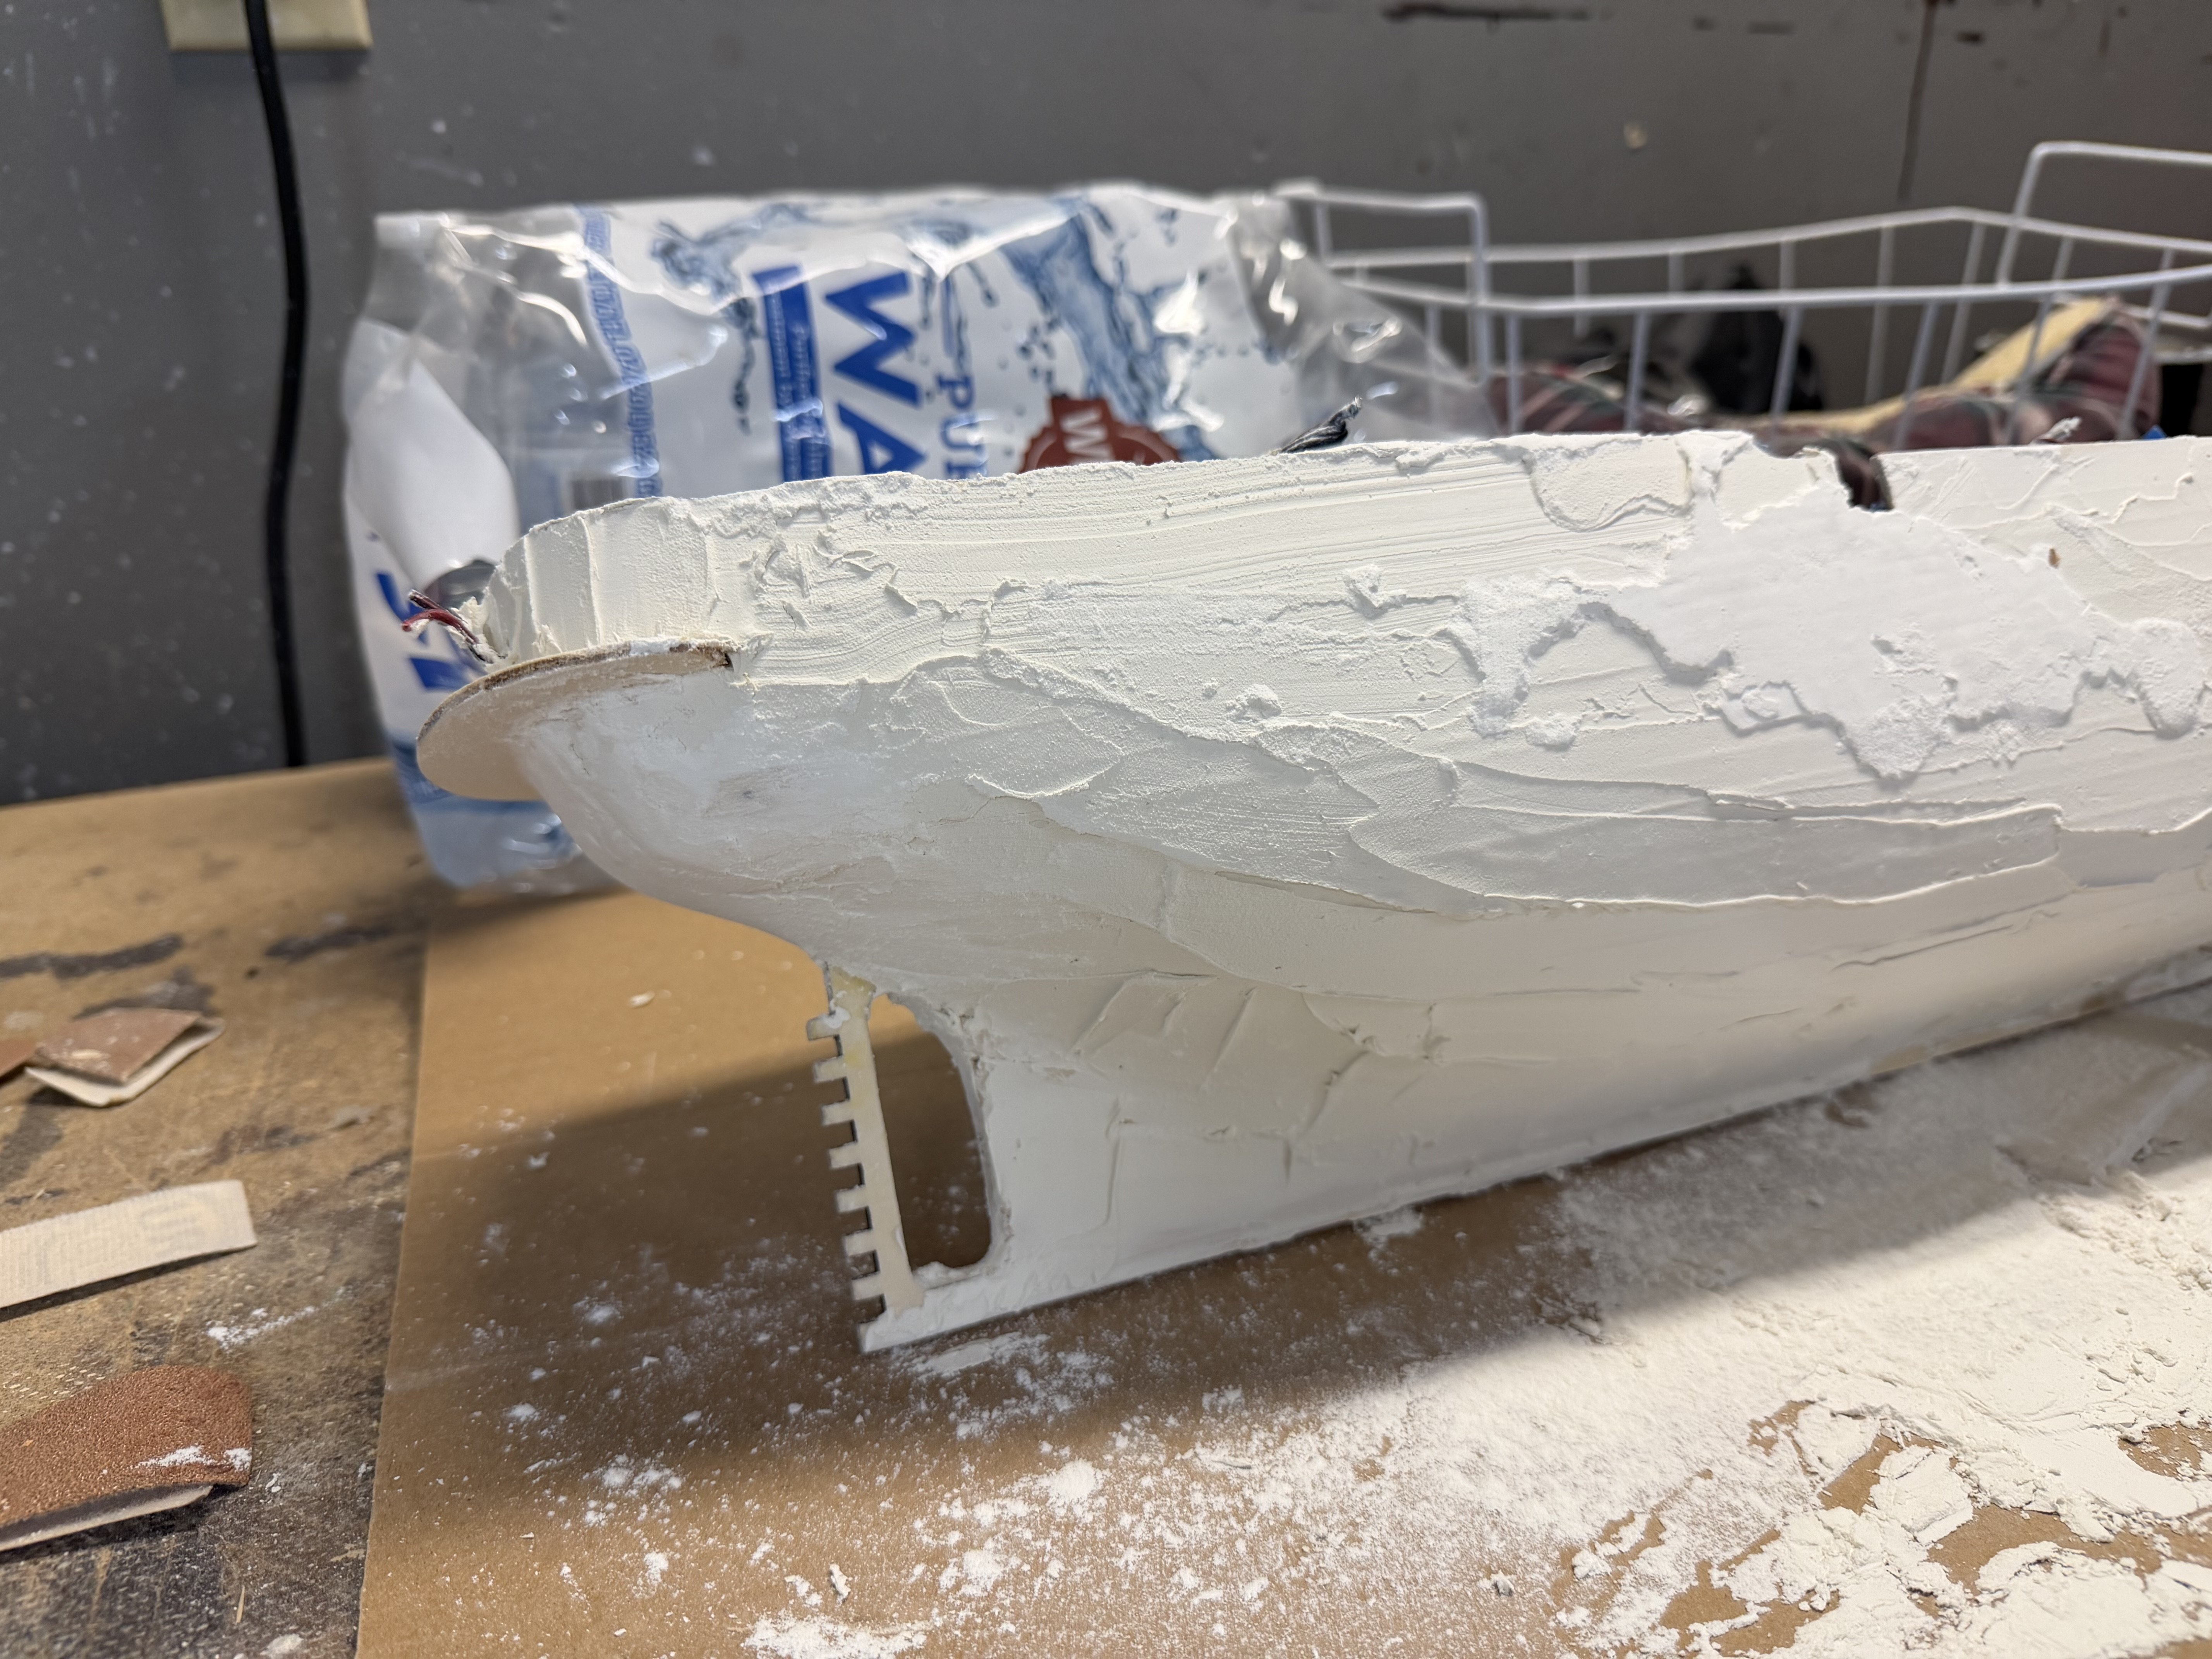
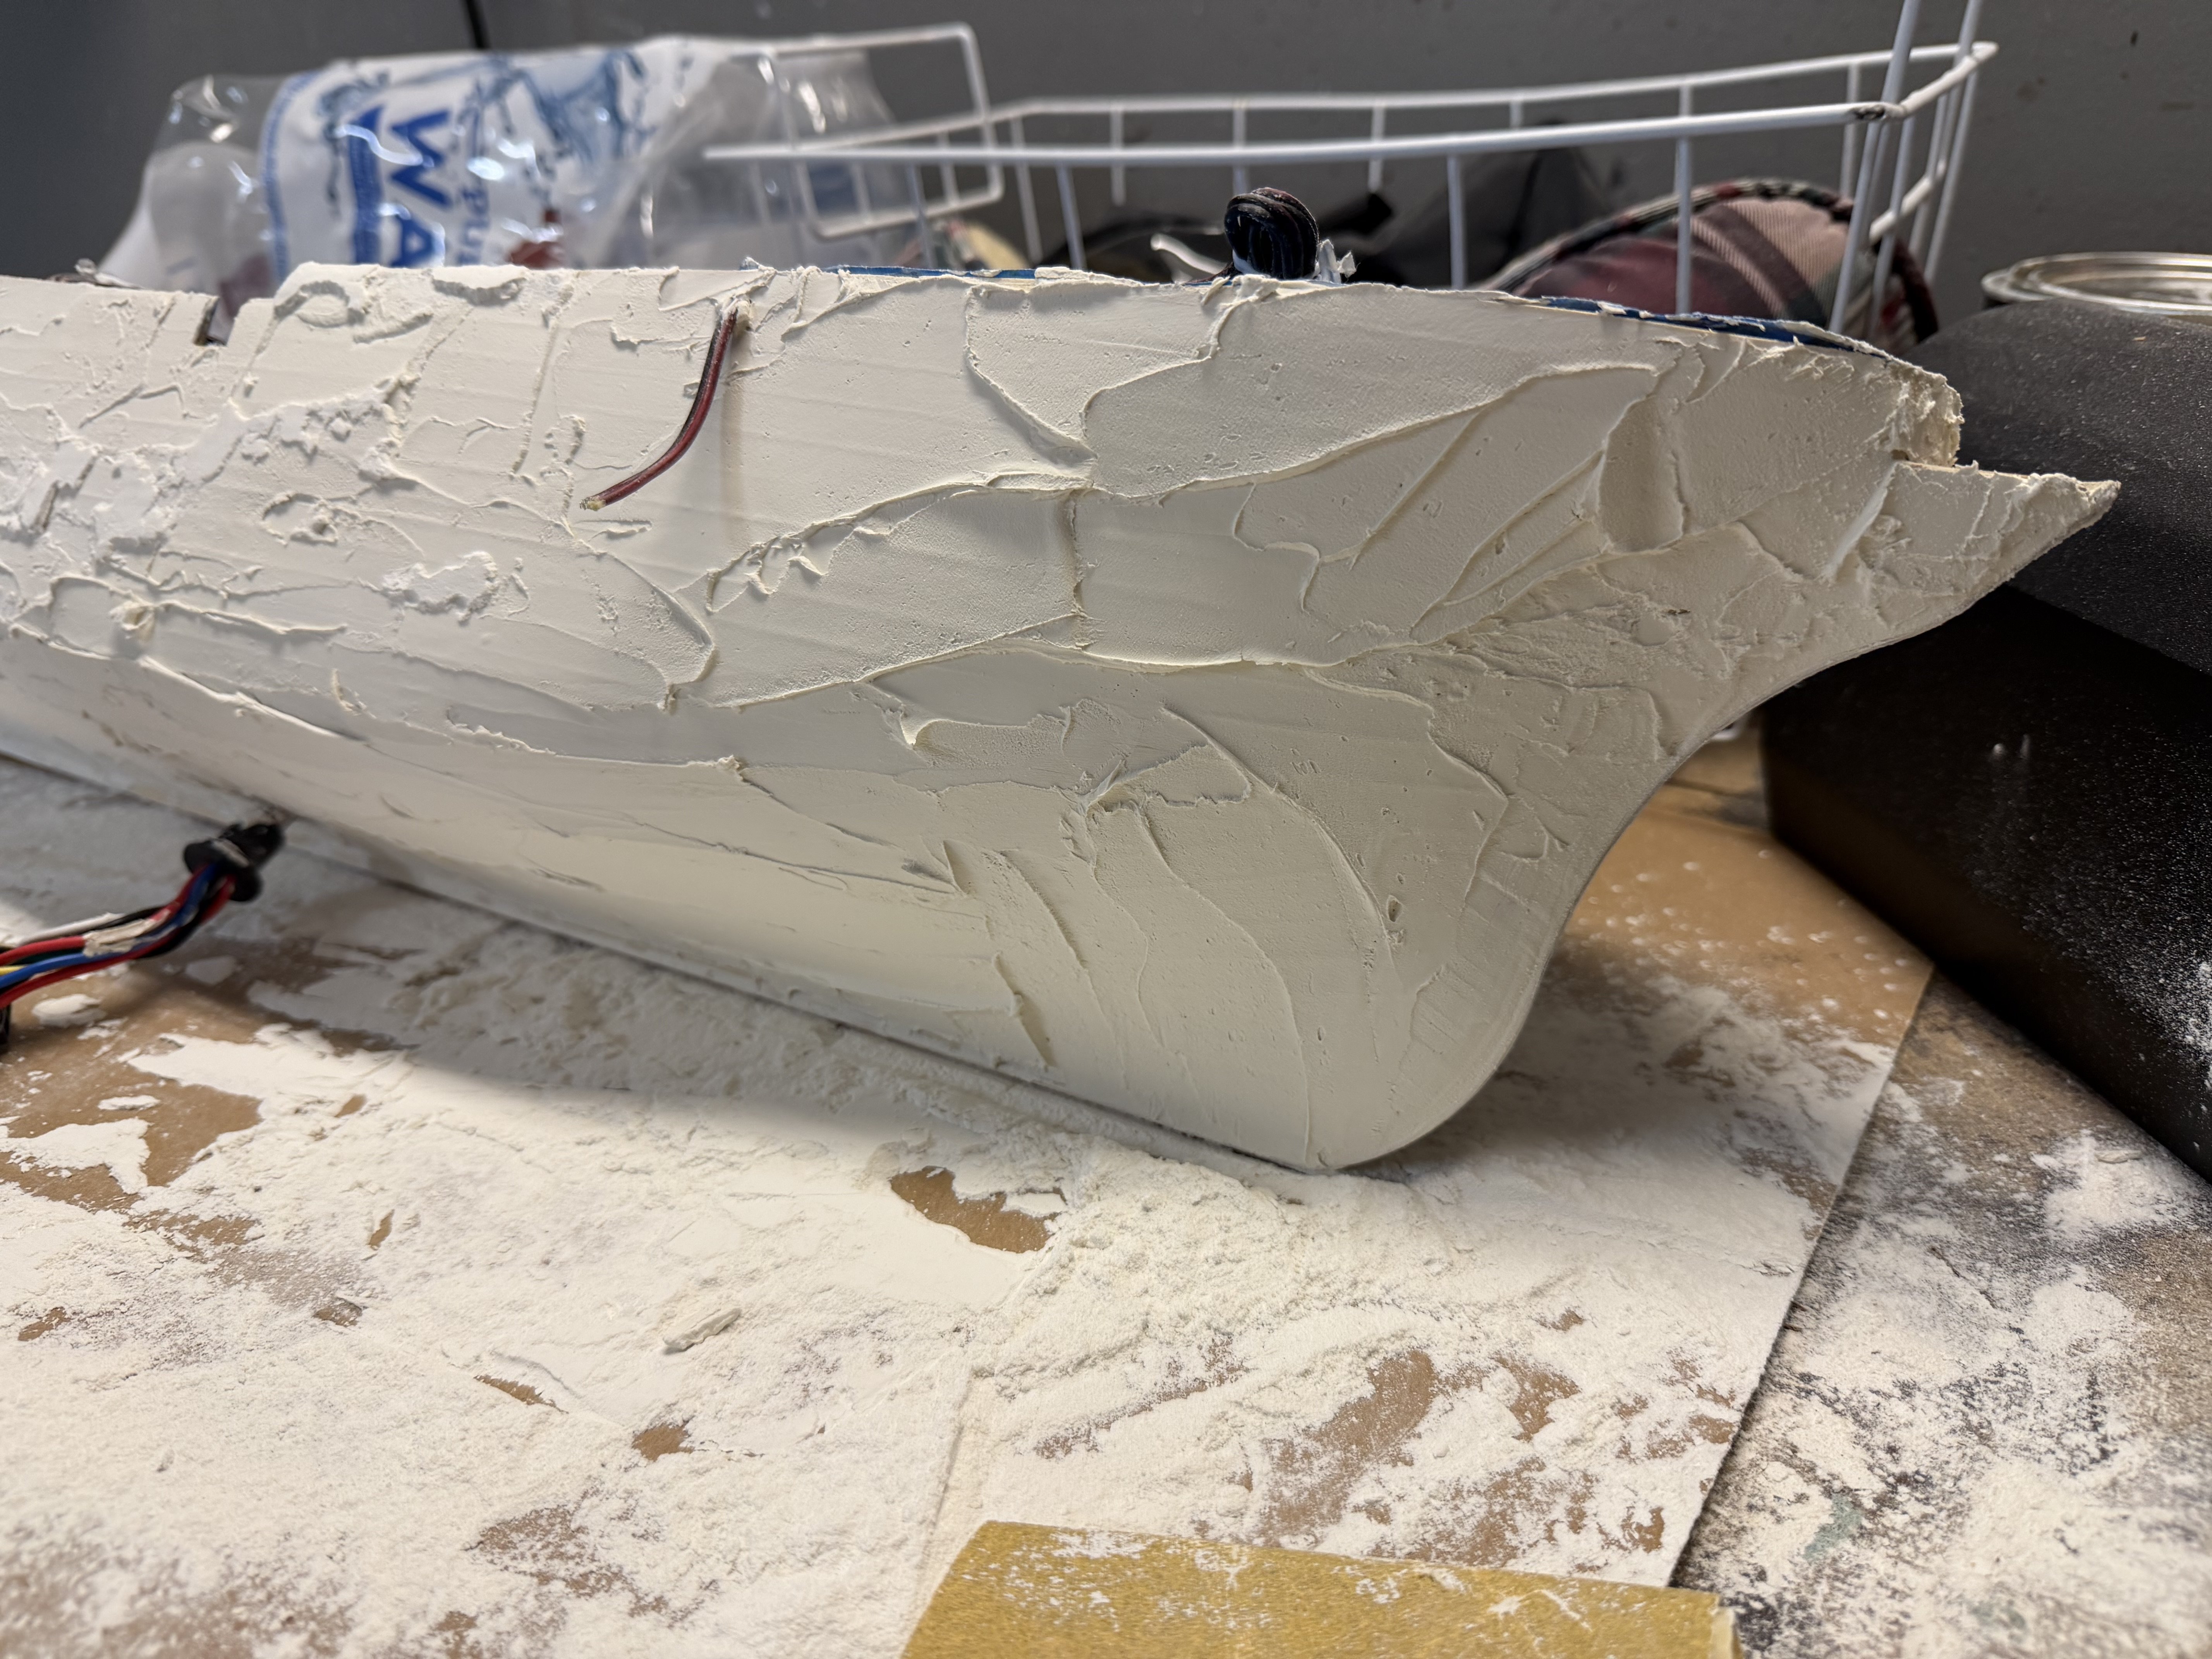
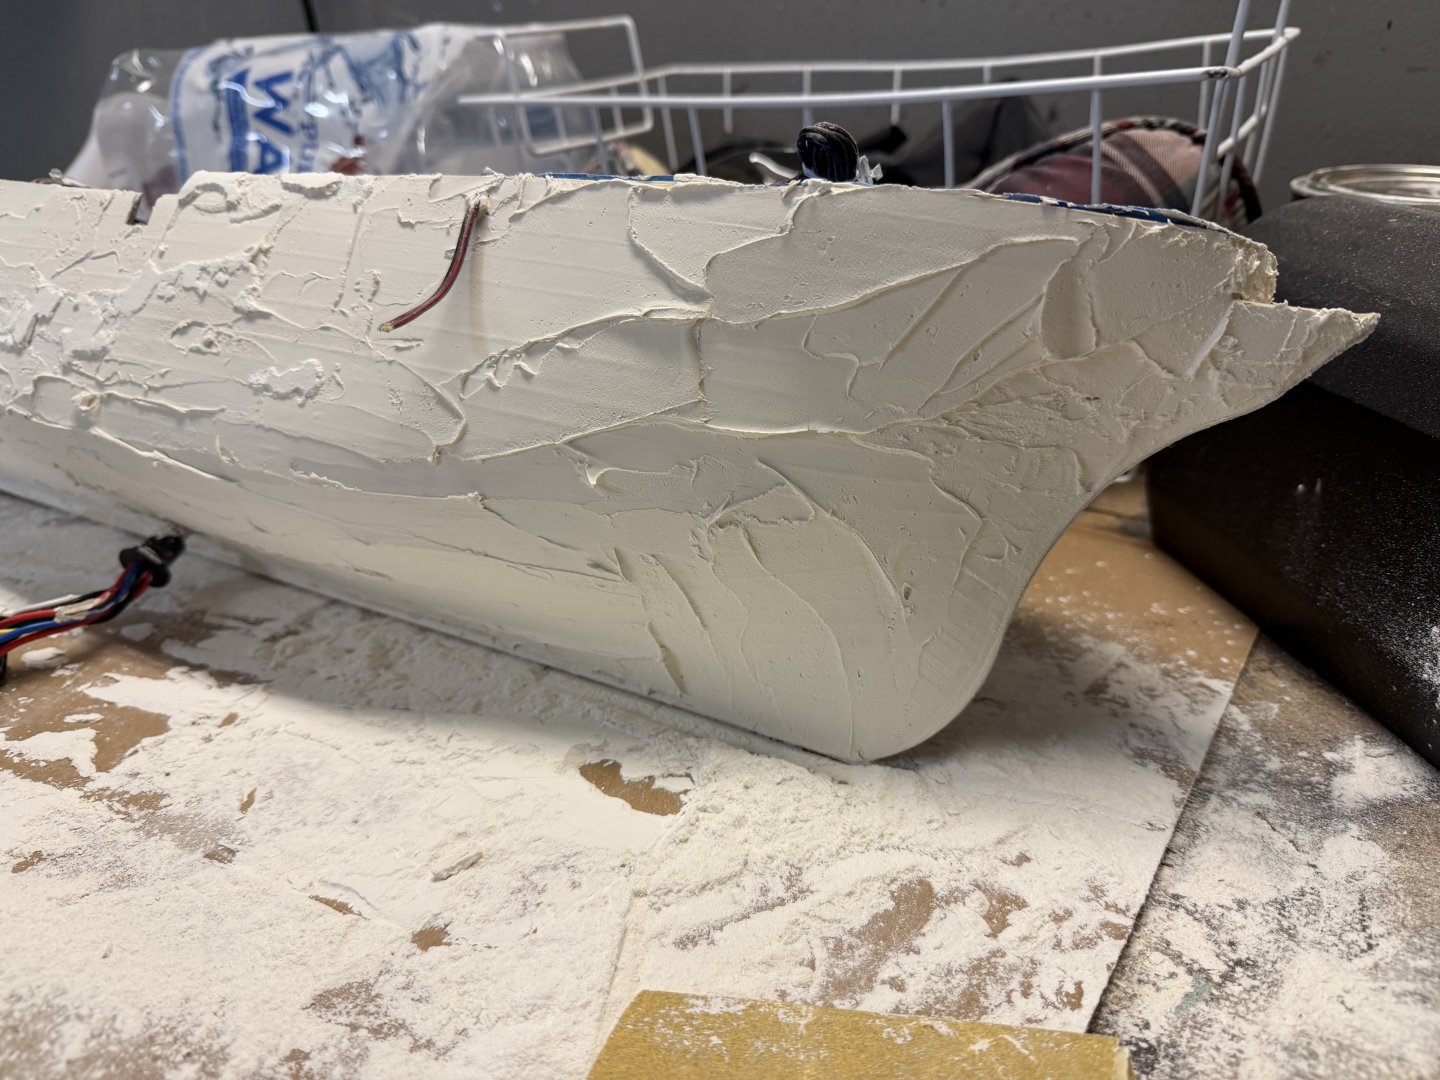
On my 3rd time through sanding, wood filler, sanding, primer, wood filler in shadow areas, sanding, primer, etc, etc, etc . Will eventually get that smooth blemish free surface over the entire hull.

-
So let the sanding of the wood filler begin!


-
Well thank you Ian. I just saw this. I will except the honorary ring even if it is Canadian. Second planking finished and sanded smooth. Now ready to cover all this beautiful woodwork wood putty! 😢 Oh the horror of it all.


-
Yes Daniel that helps a lot. I looked back and saw the little rain gutters. So just spray the hull at an angle to the port holes will solve that problem. Great idea. Thanks Bill
-
Daniel I have another curiosity. I looked back to see if I previously asked you this. Seems like we already covered this but maybe not. I looked back in your build to the area where you did your second planking and primer. I was pleasantly surprised to see you did in fact drill out the port holes before painting the hull colors. This is opposite to what the OcCre directions show. I like this for a number of reasons. My curiosity is did you spray the colors are use a brush? How did you avoid paint going through the port holes (if you sprayed) and getting on the LED’s? I see that you painted the port hole inserts instead of leaving them brass.
-
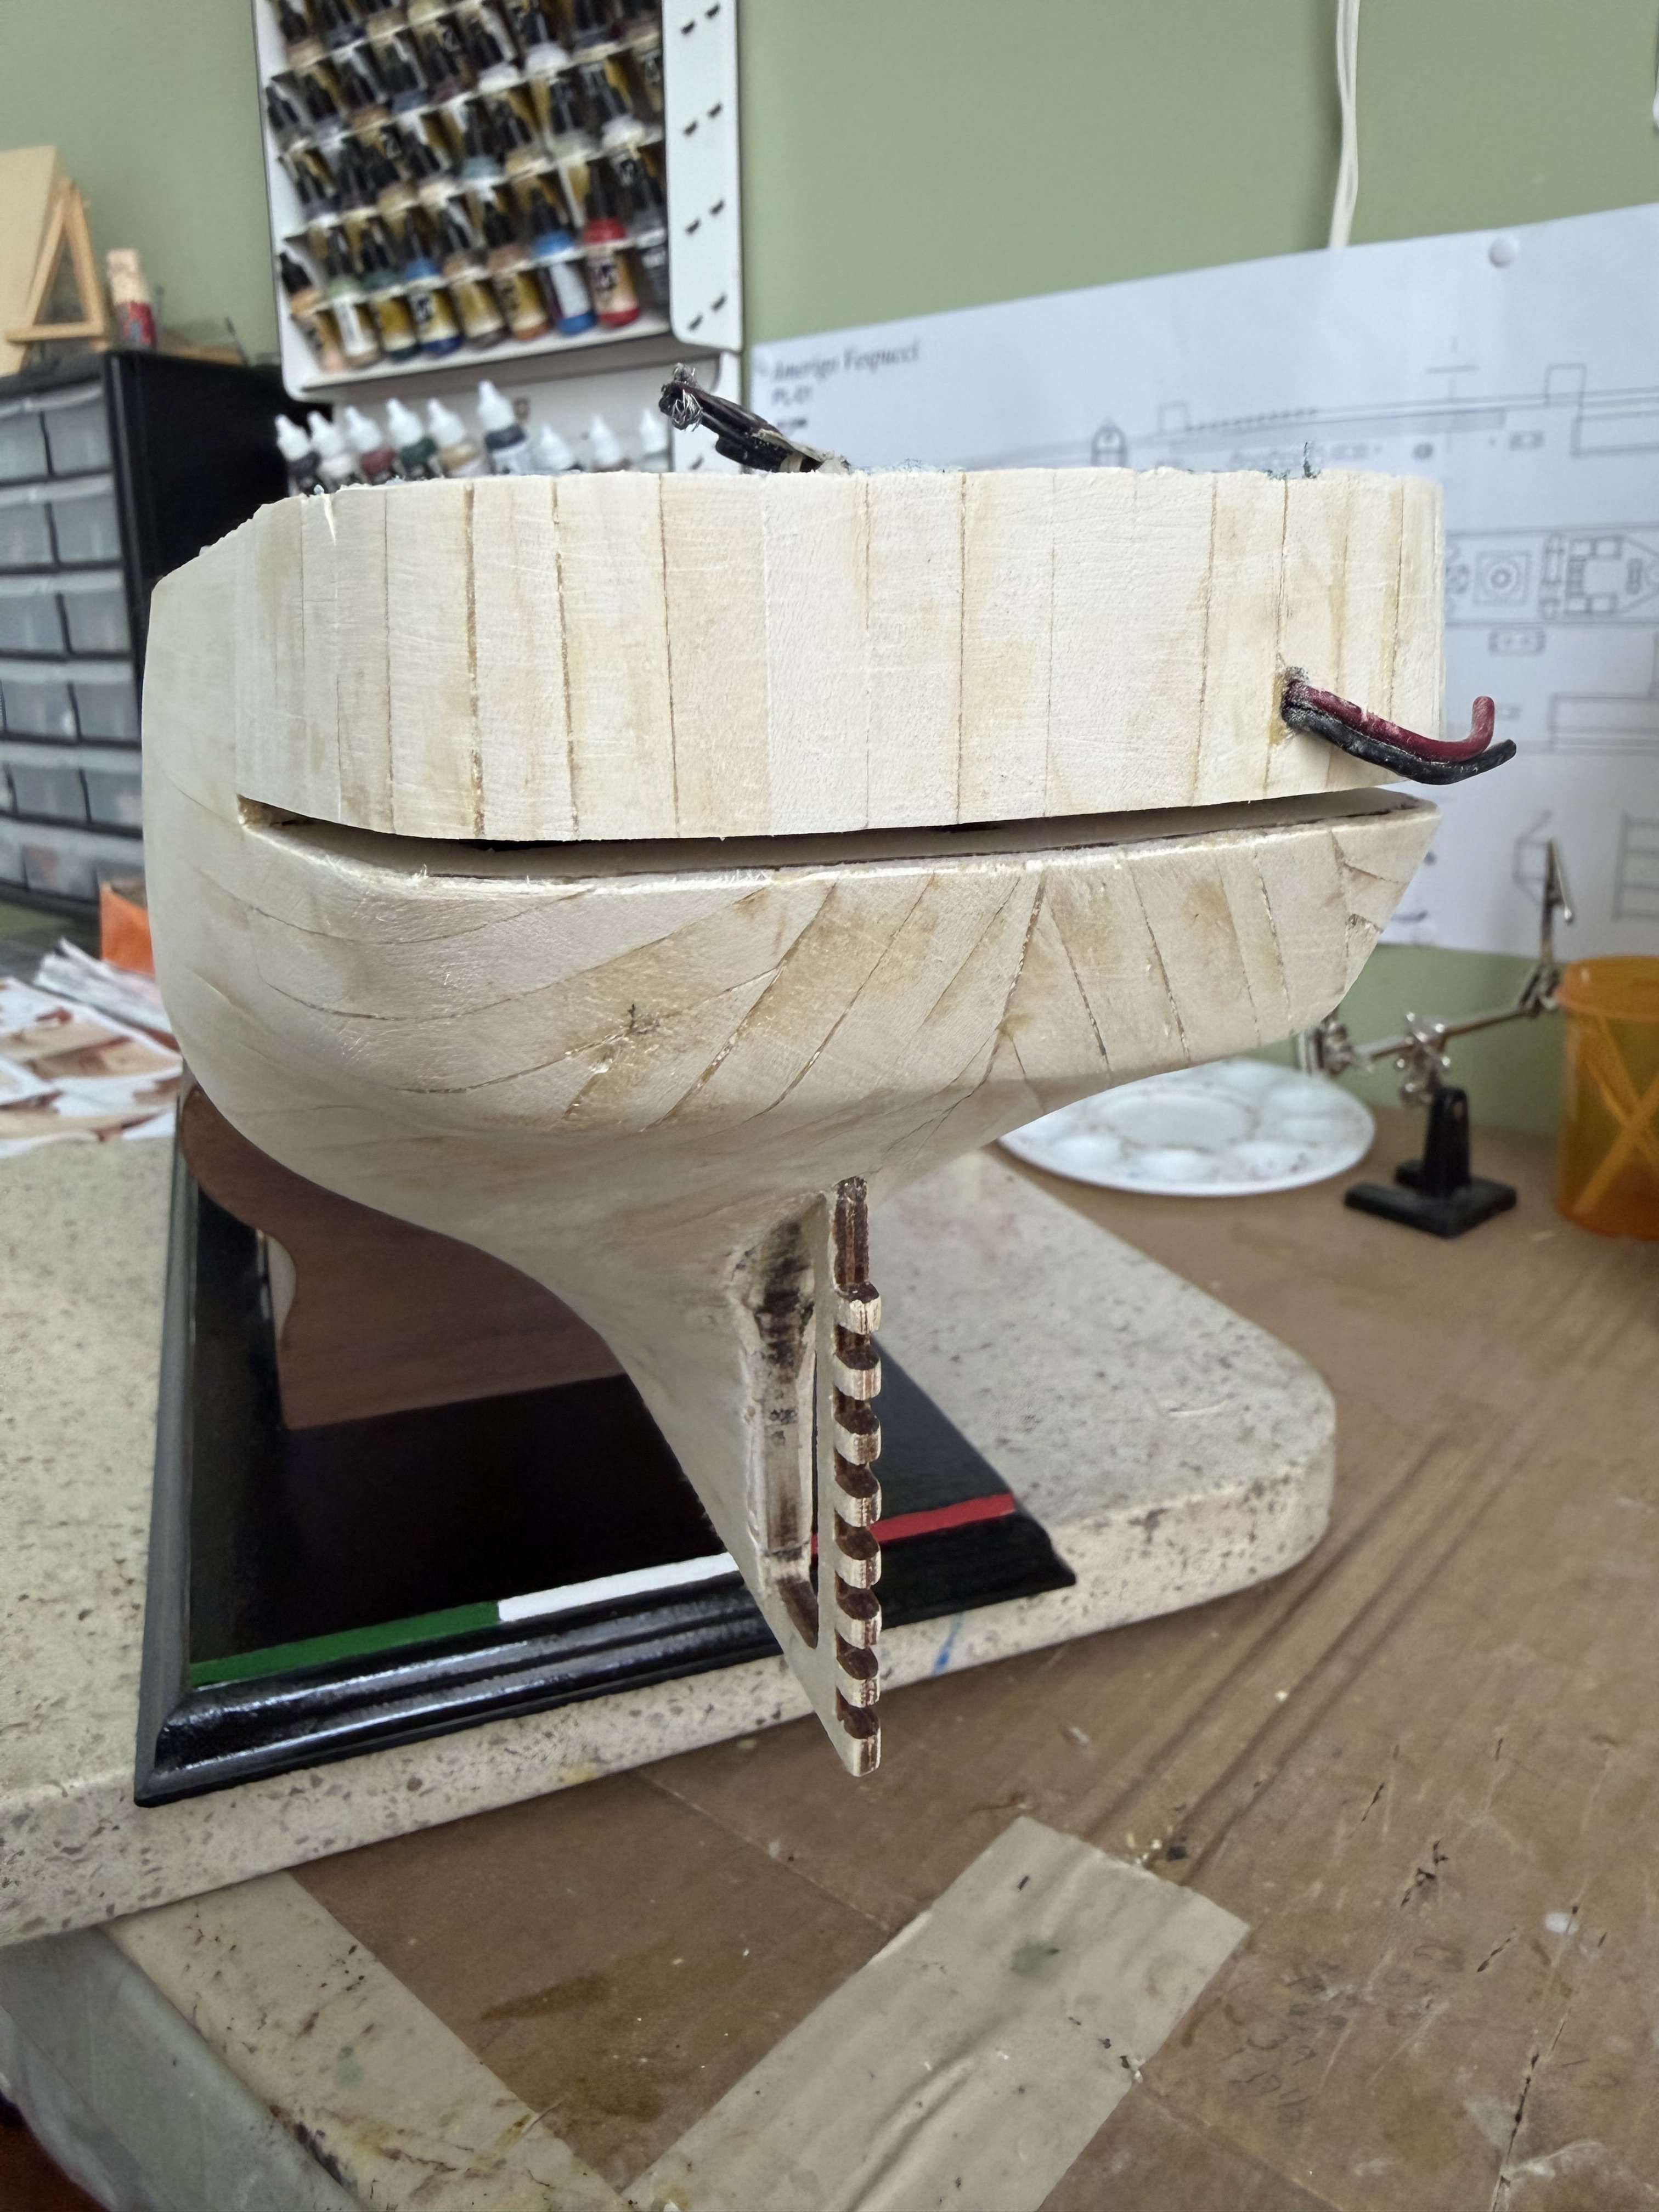
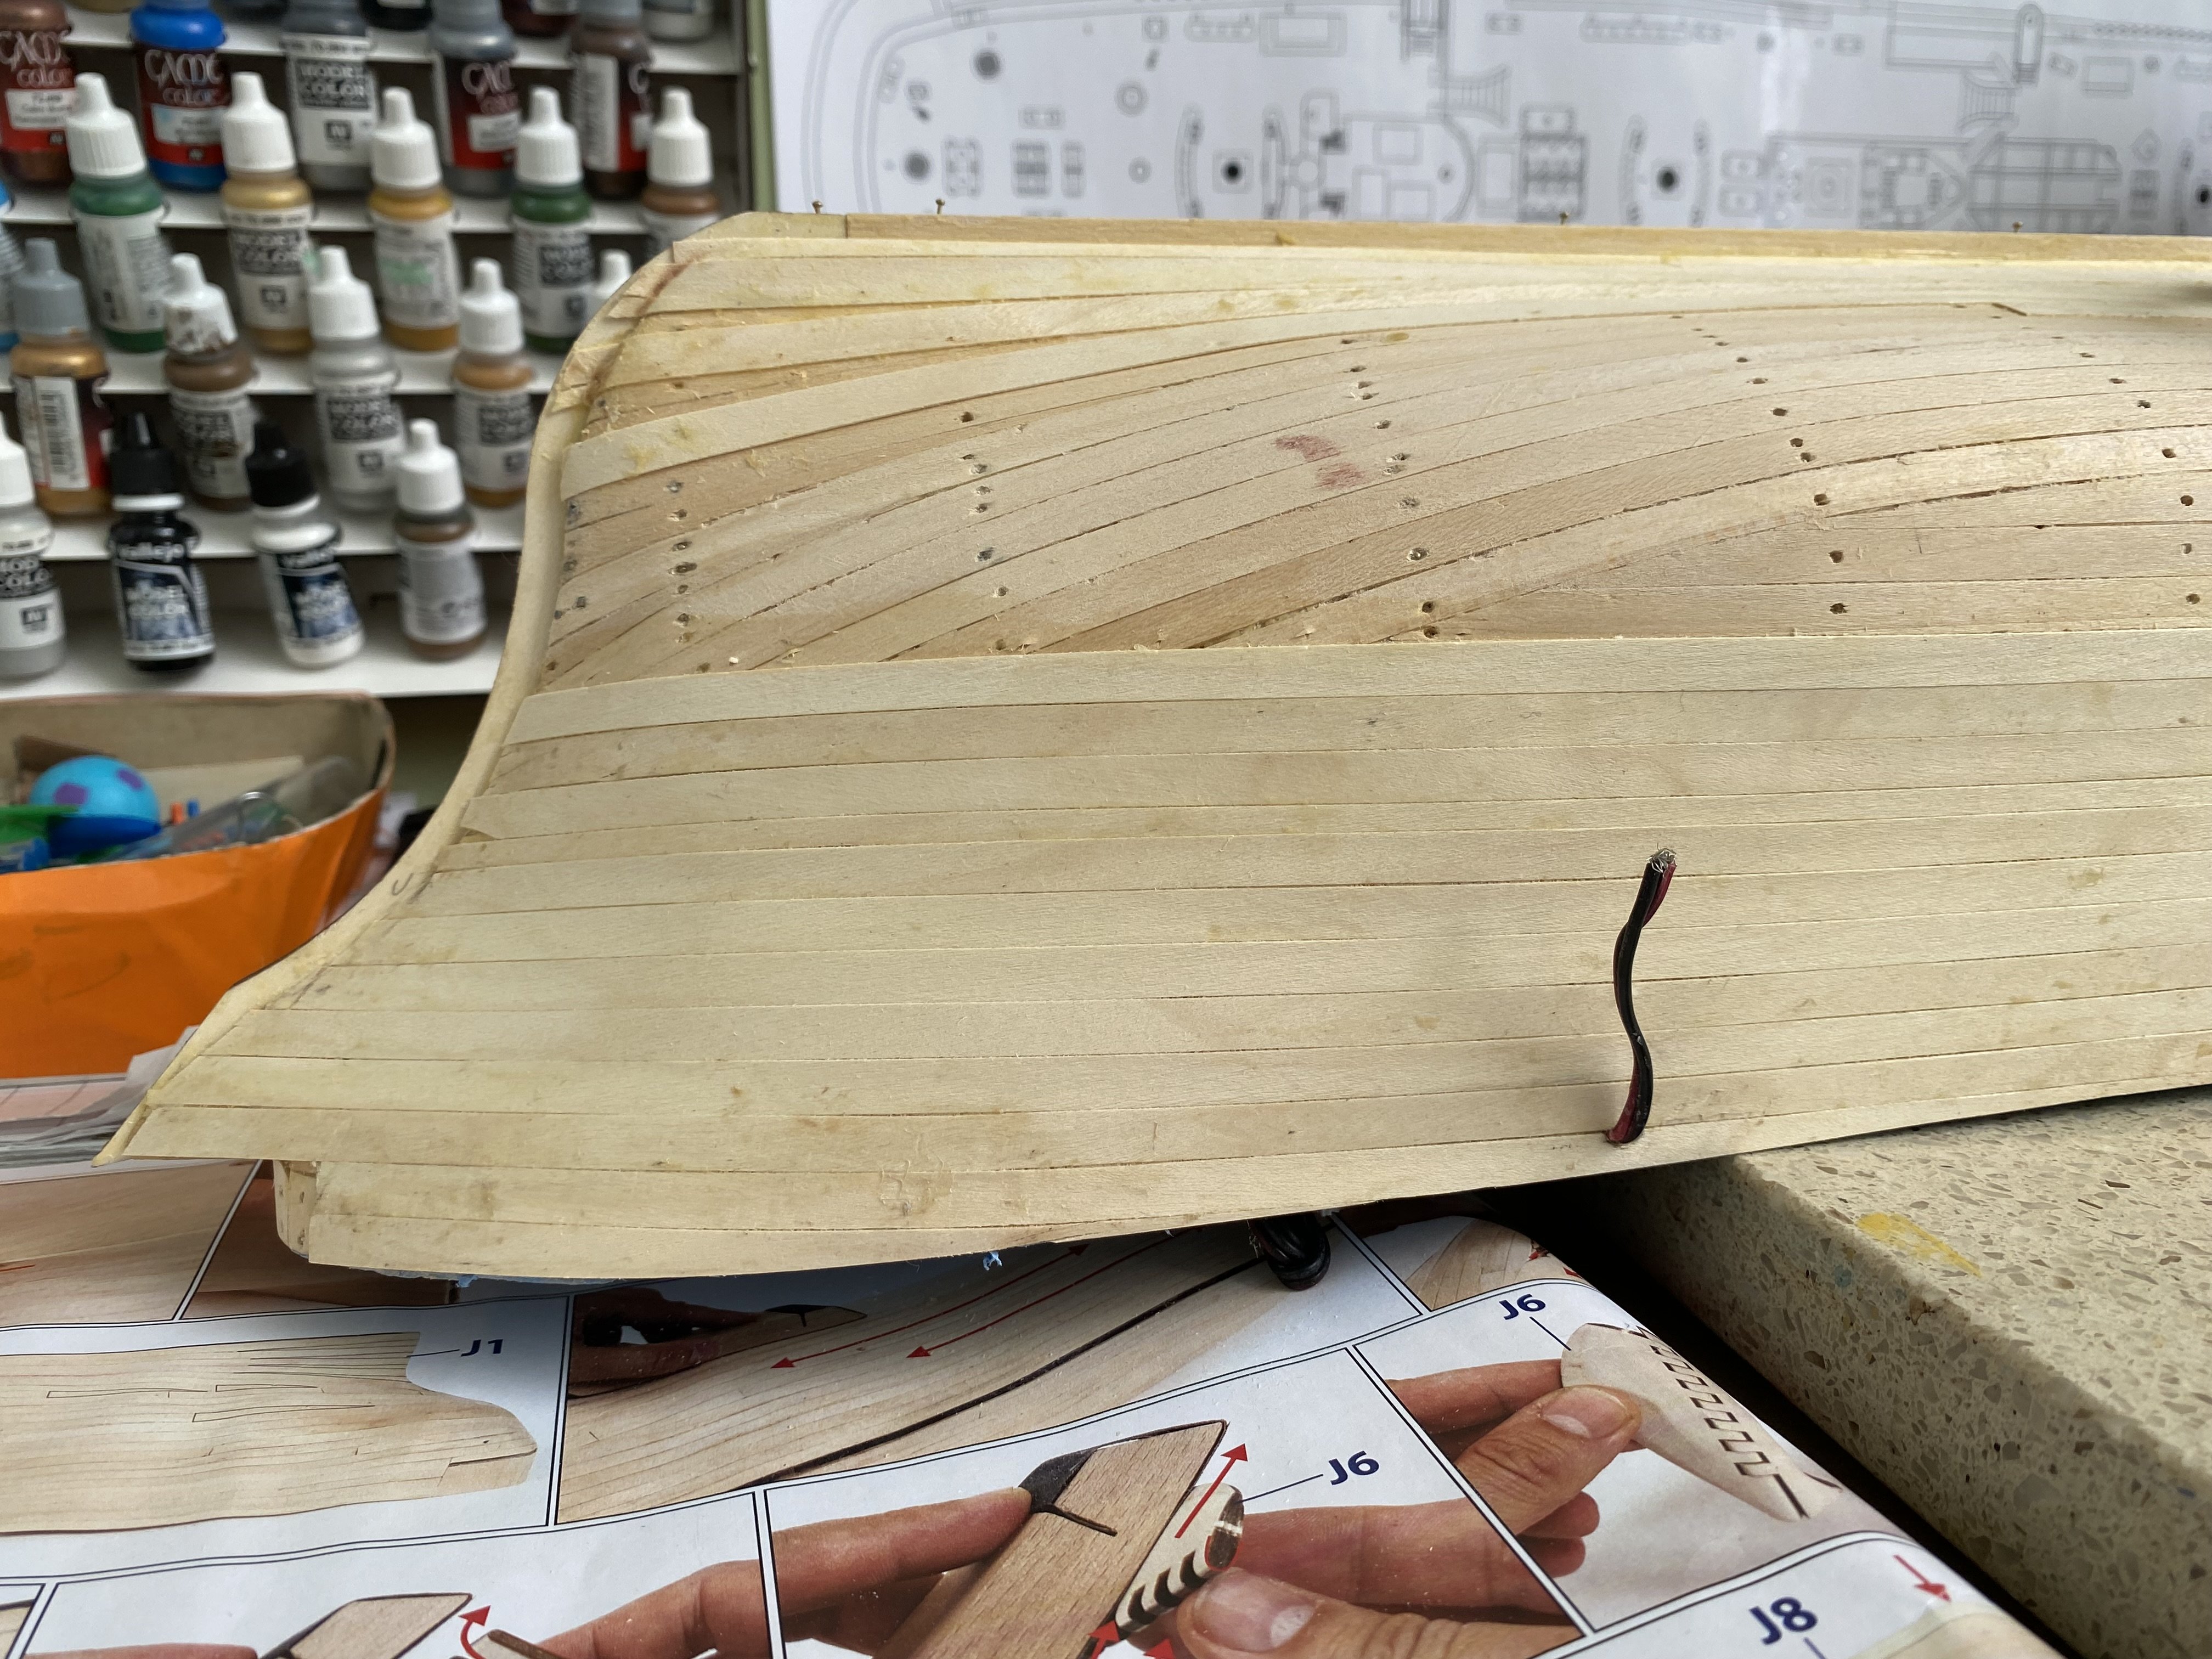
Second planking finished on starboard side. Now beginning the port side.
-
Second planking underway. Slow but steady.

-
Same here my friend. Impressed with what you are doing with your’s.
- 2,699 replies
-
- 1
-
-
- heller
- soleil royal
- (and 9 more)
-
Marc have you seen the new limited edition wooden ship OcCre is about to release? It is Soleli Royal. Looks impressive. A bit outside my budget. You could do a beautiful job with it.
- 2,699 replies
-
- 1
-
-
- heller
- soleil royal
- (and 9 more)
-
Planking disaster
Bill97 replied to sgrez's topic in Building, Framing, Planking and plating a ships hull and deck
Rather than file down or pull the nails I just use a nail head set tool to tap the heads down into the first planking.
-
Daniel I Googled Elmer’s Rubber Contact Cement but don’t find it. I find Elmer’s Rubber Cement but not a contact cement. The Elmer’s Rubber Cement does not read as if it is what you described. Hummmm🤔